Tag Archives: Kaywoodie Pipes

Resuscitating a Kaywoodie Fine Line


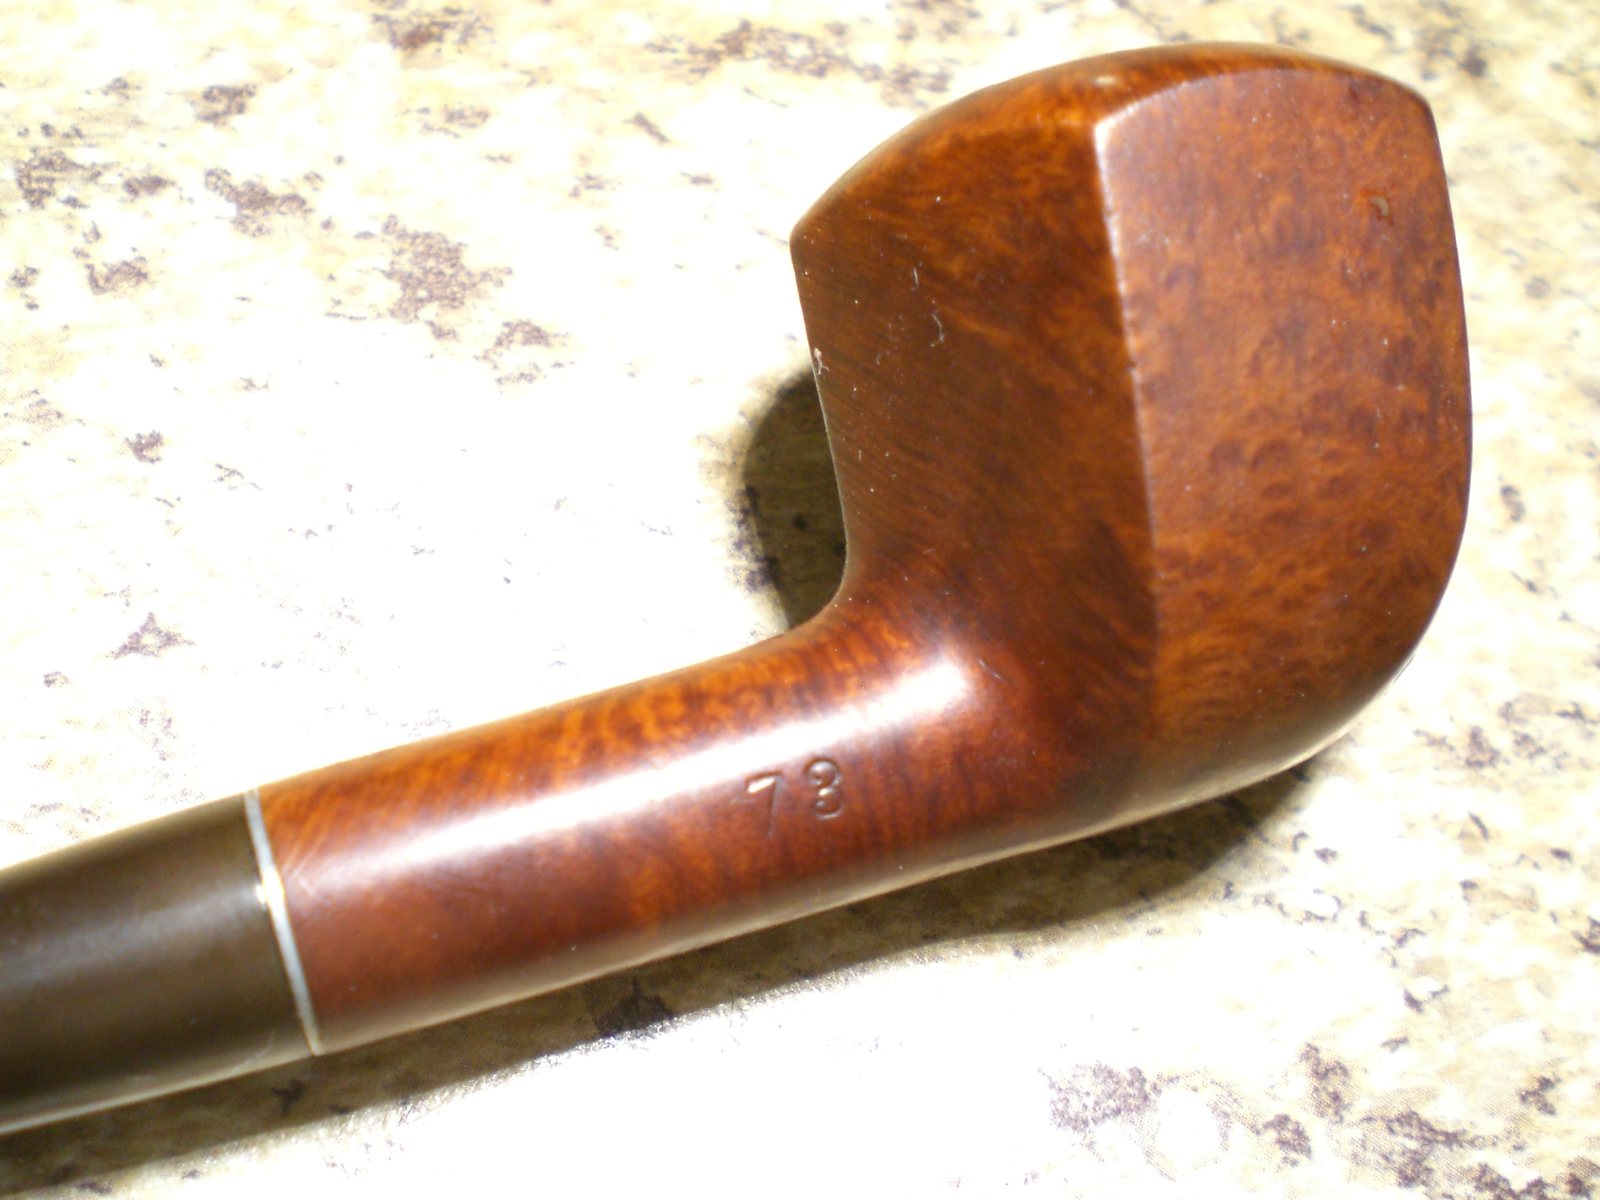
Blog by Andrew Selking

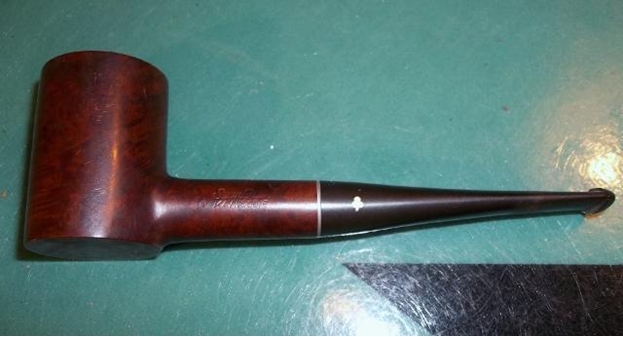
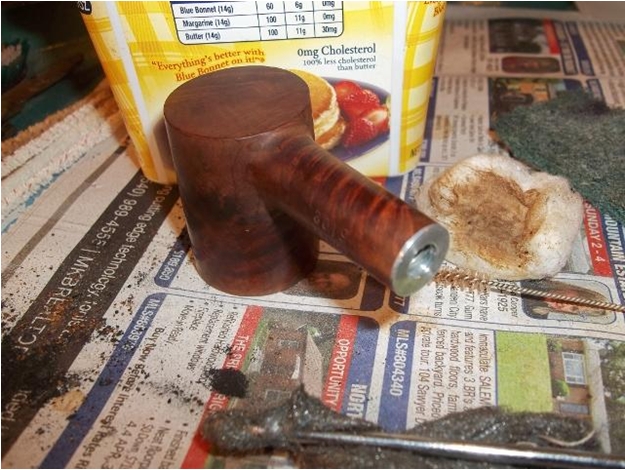
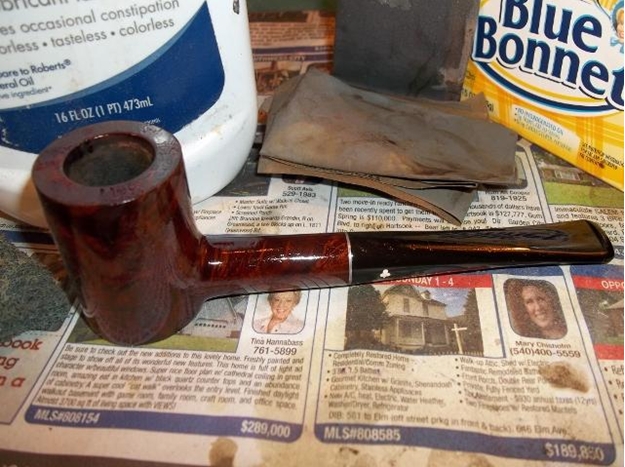
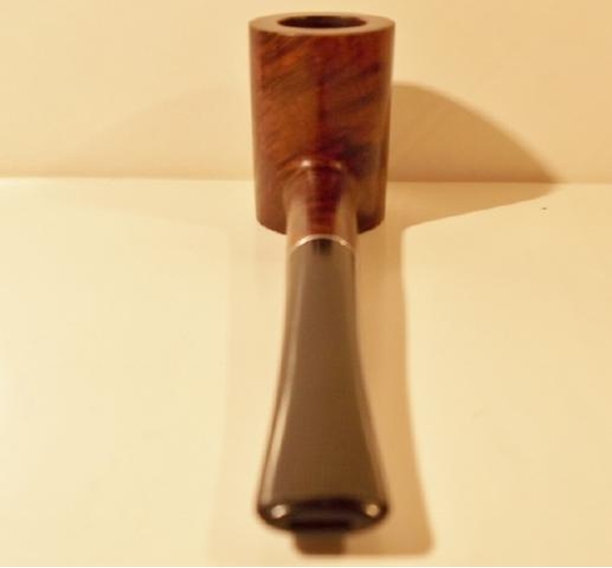
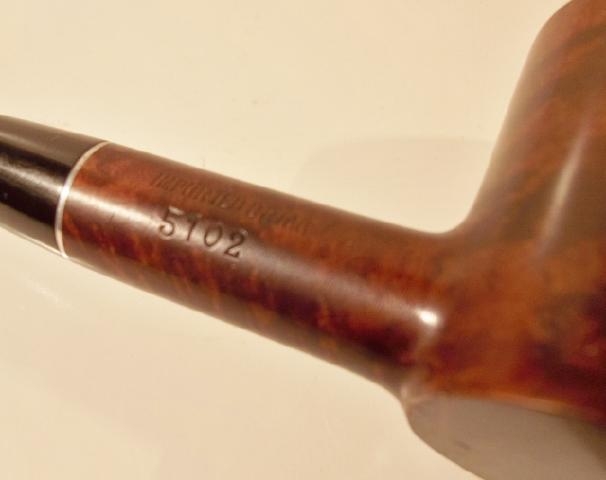
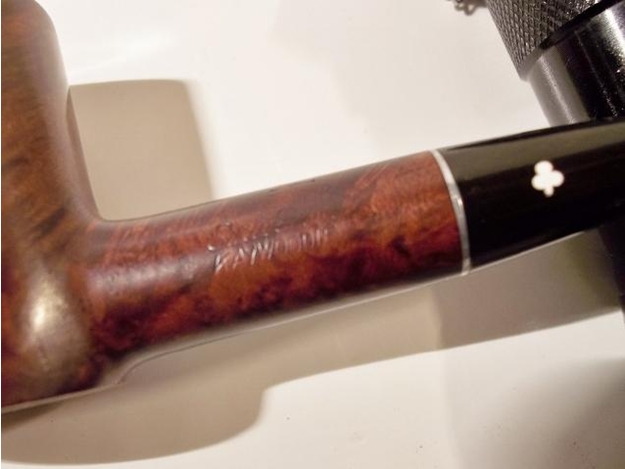
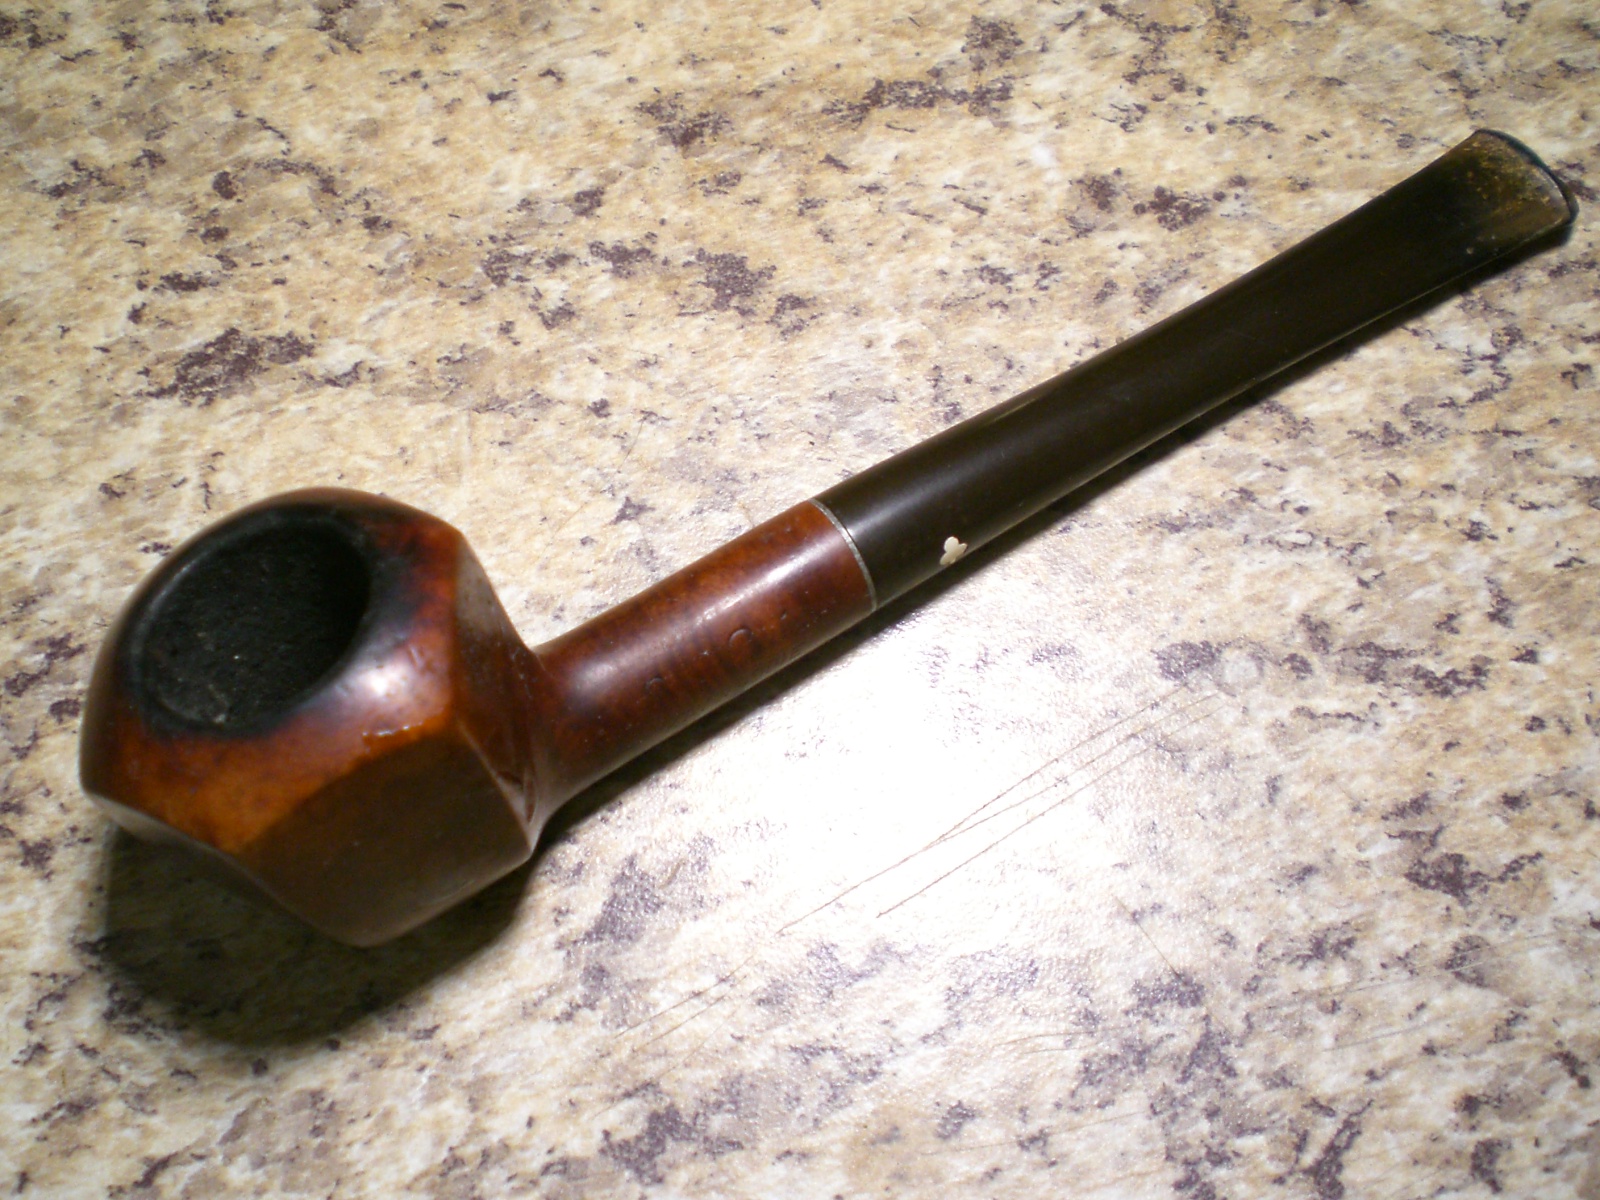
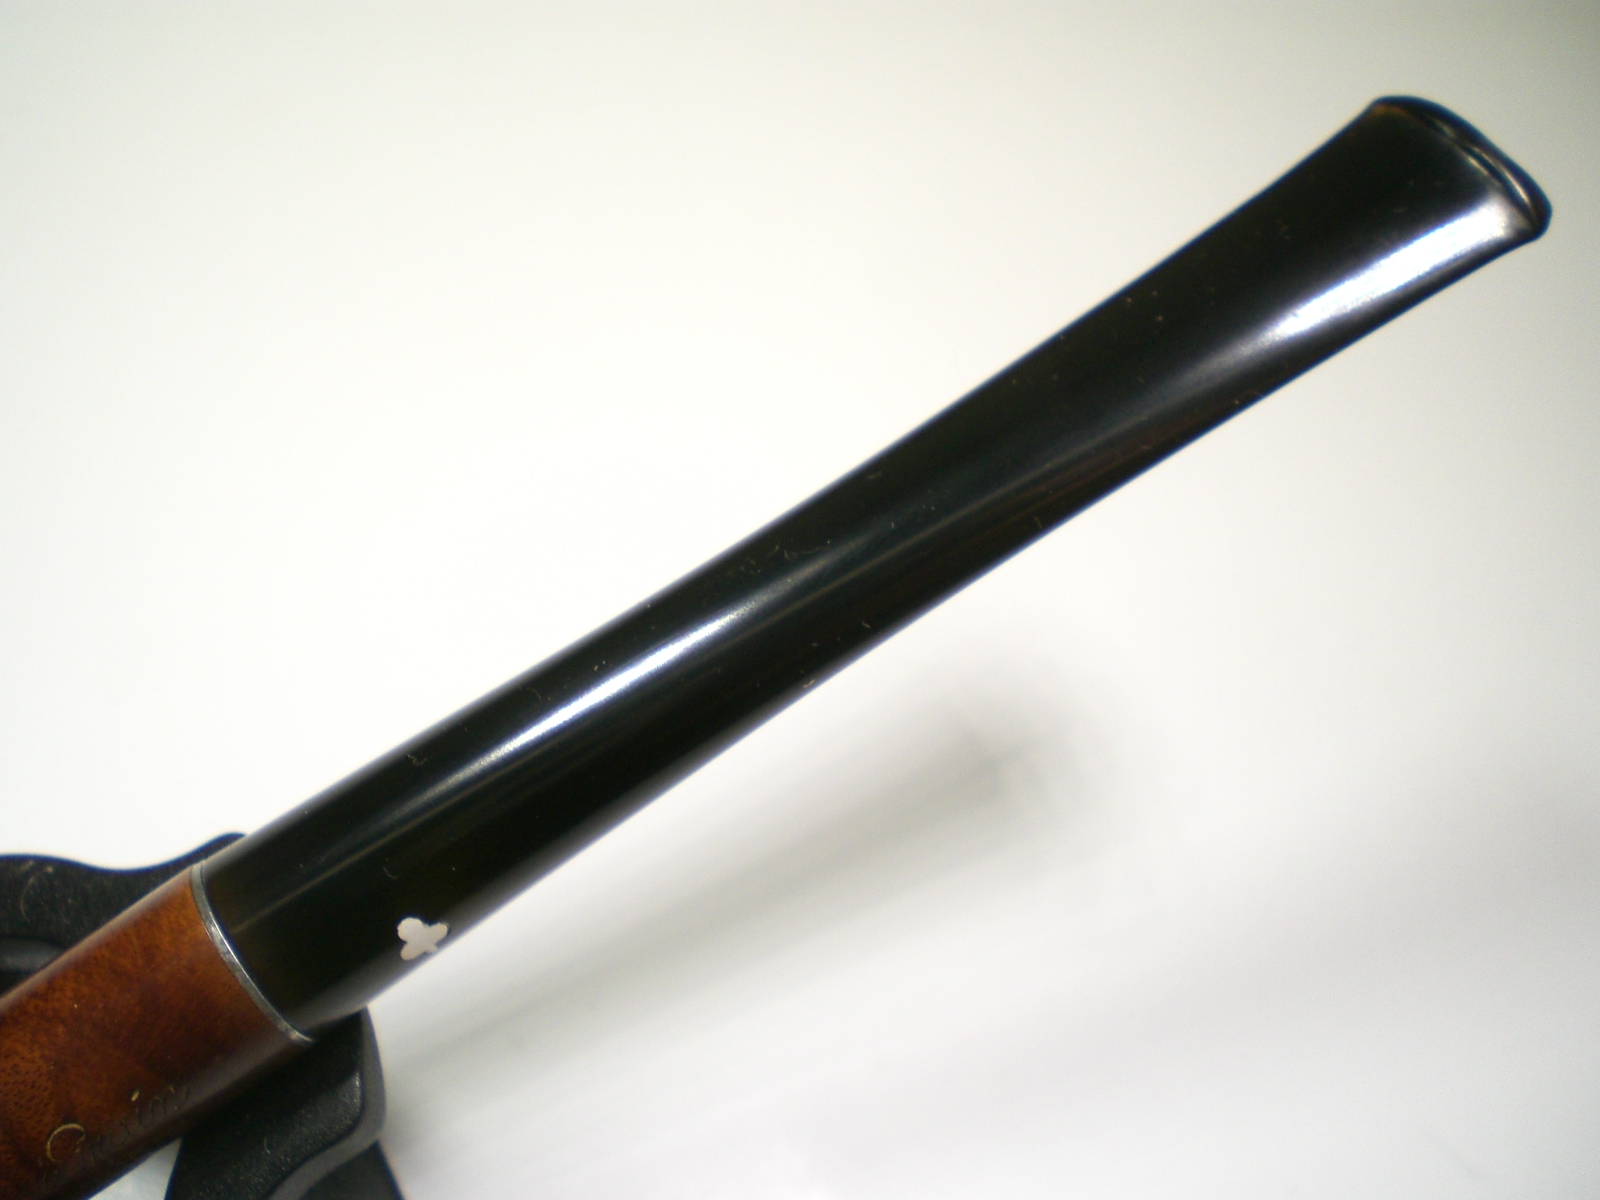
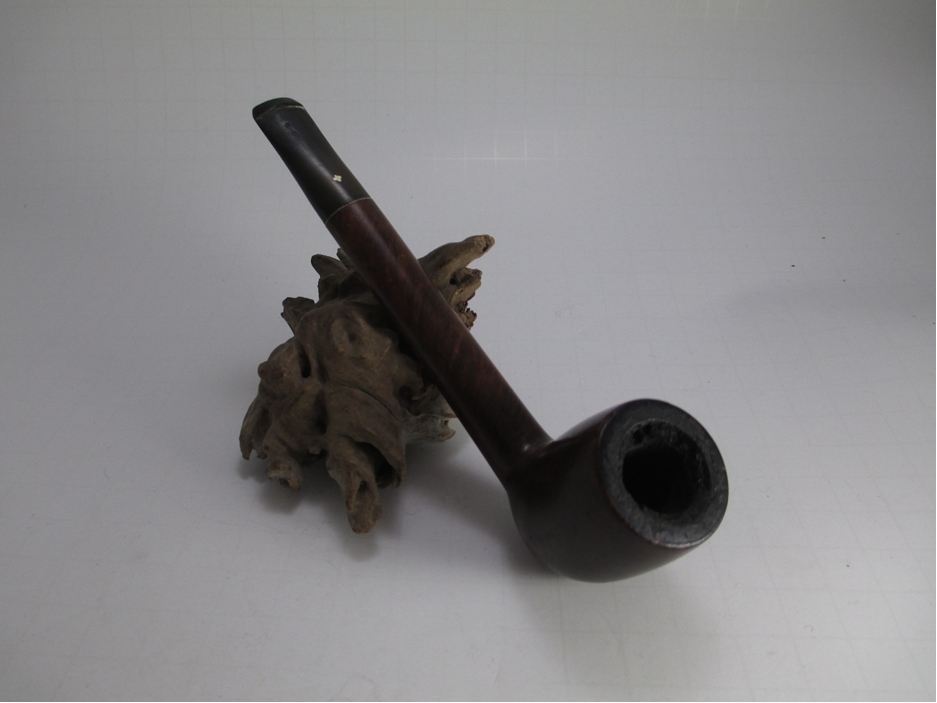
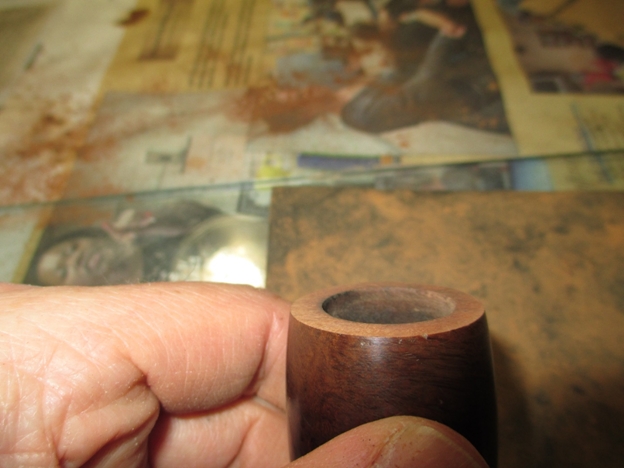
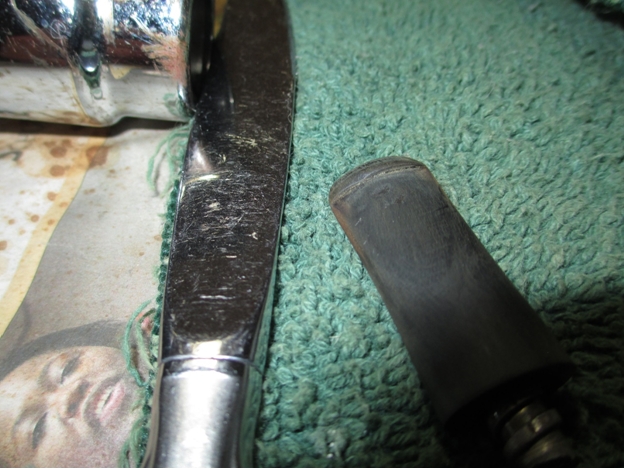
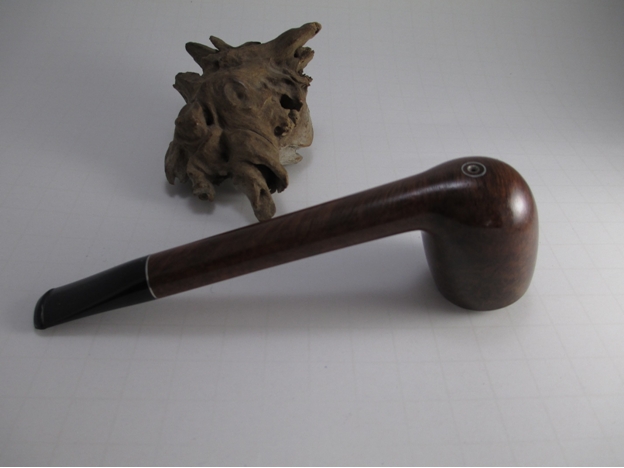
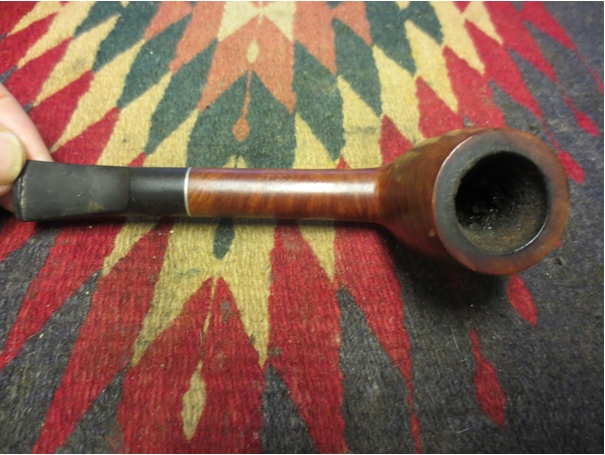
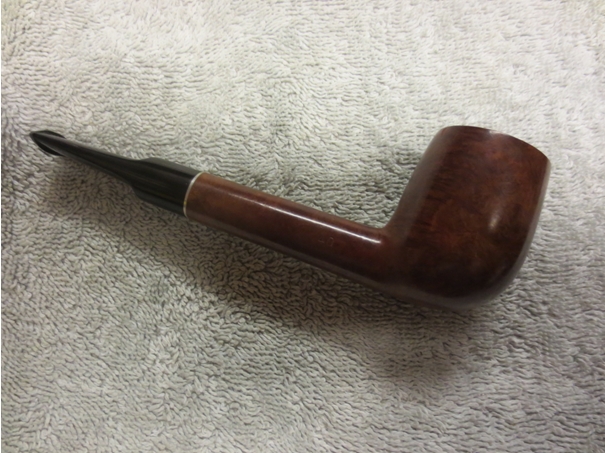
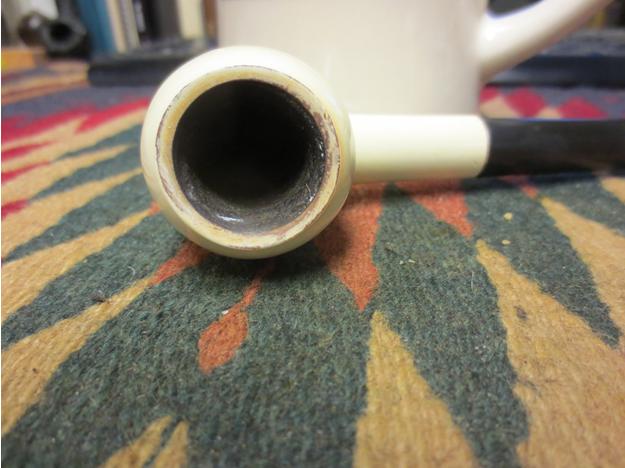
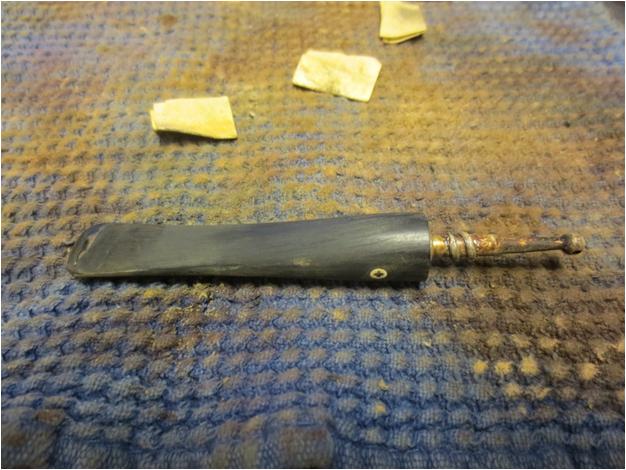
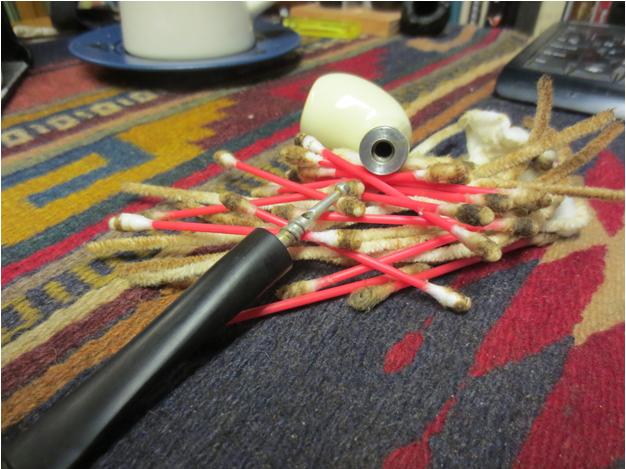
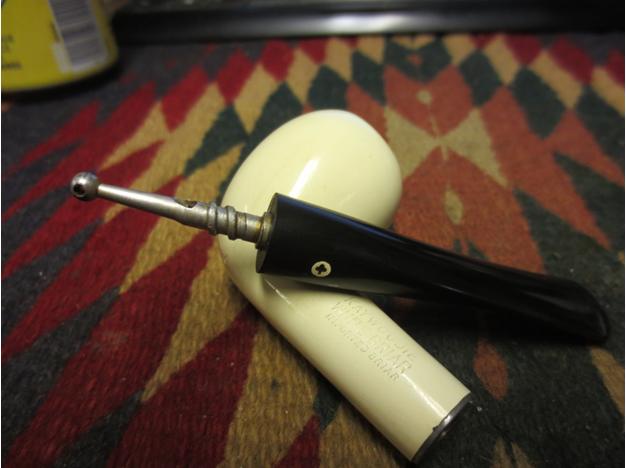
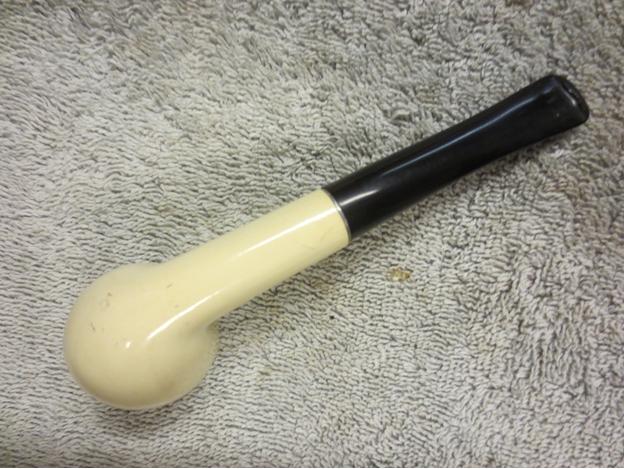
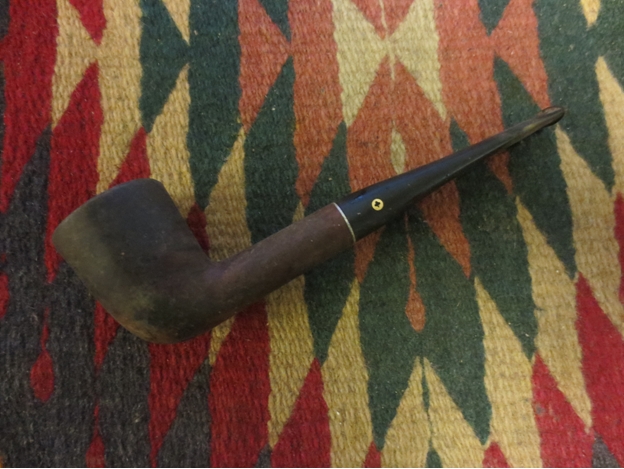
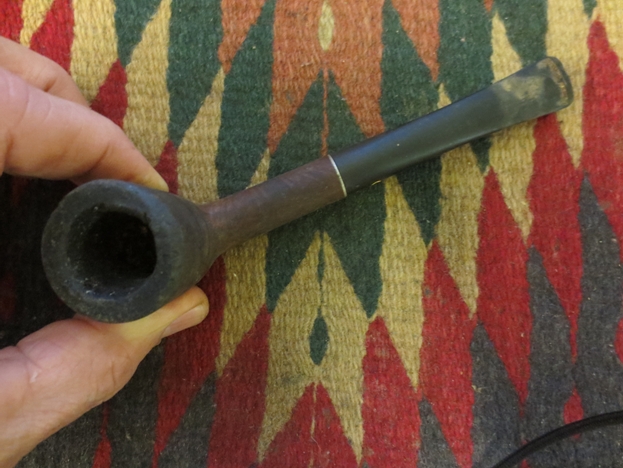
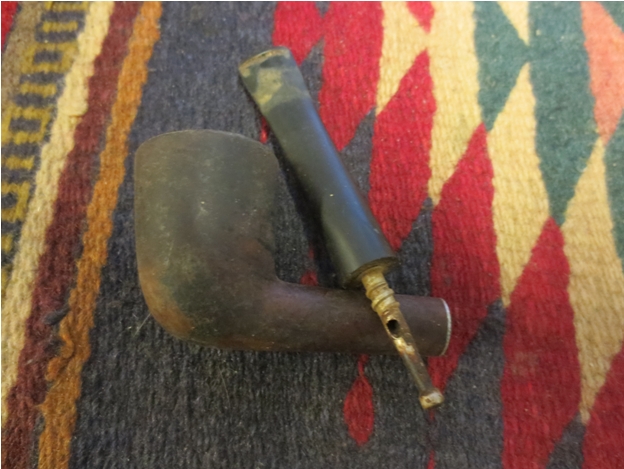
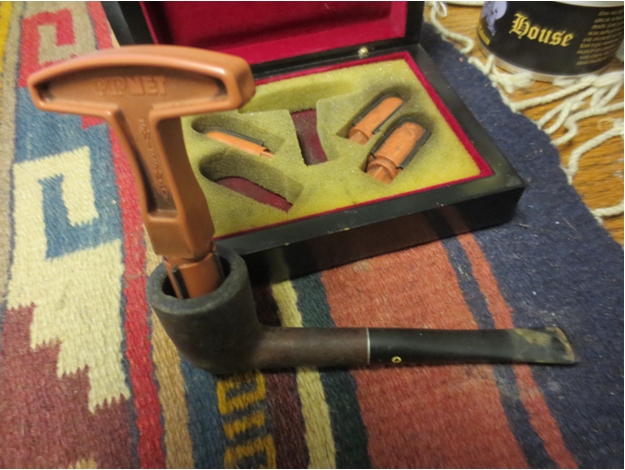
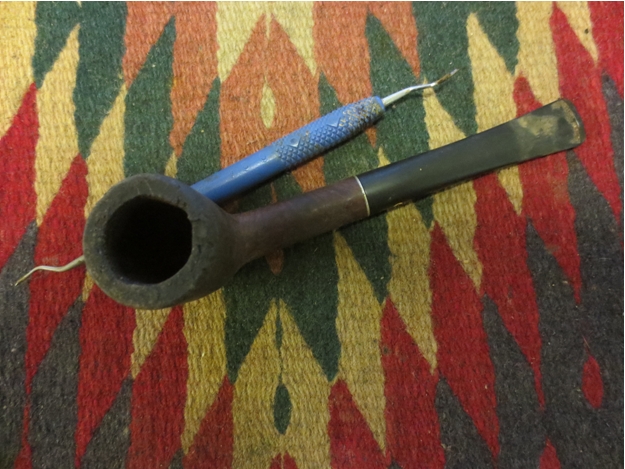
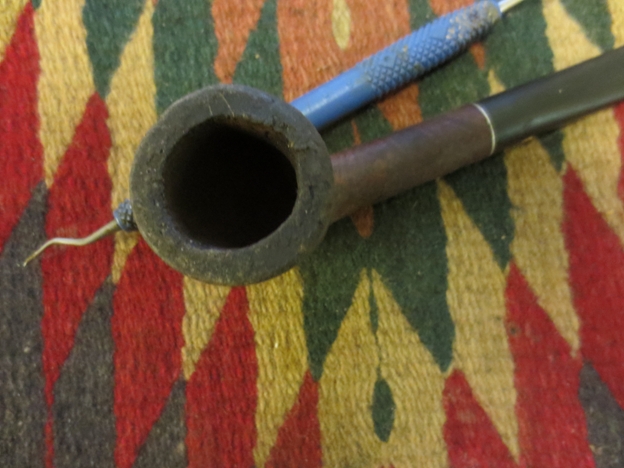
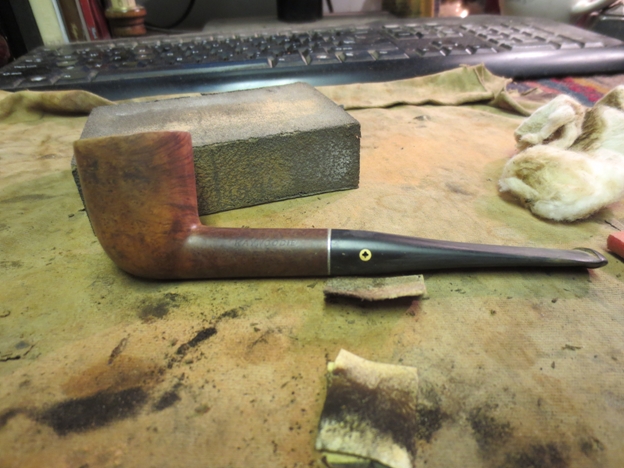
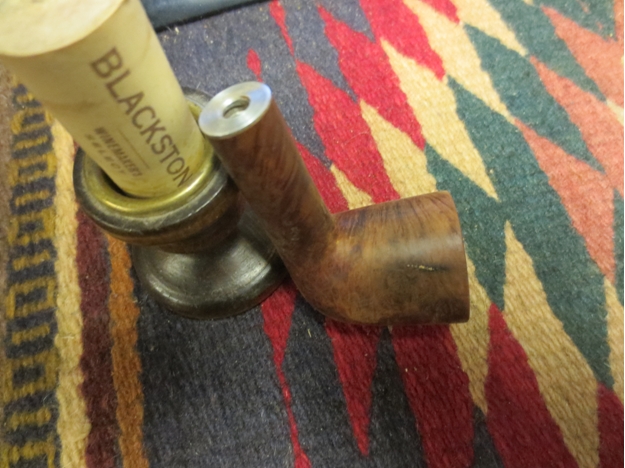
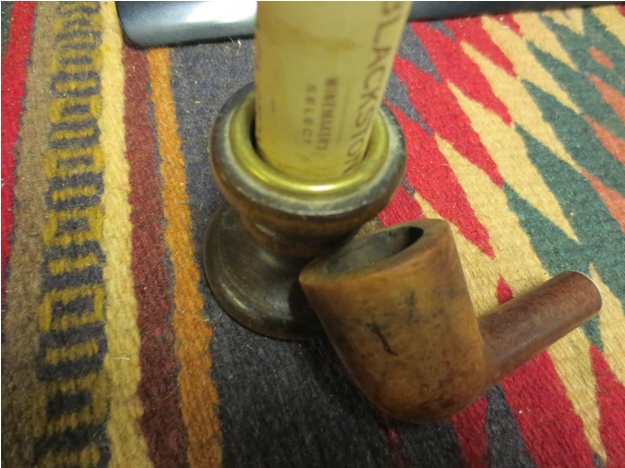
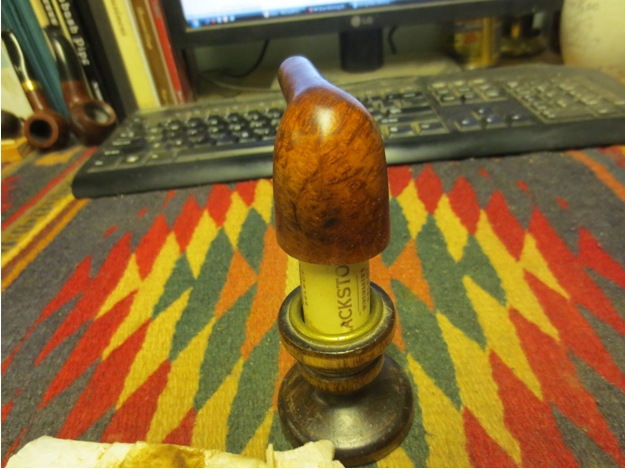
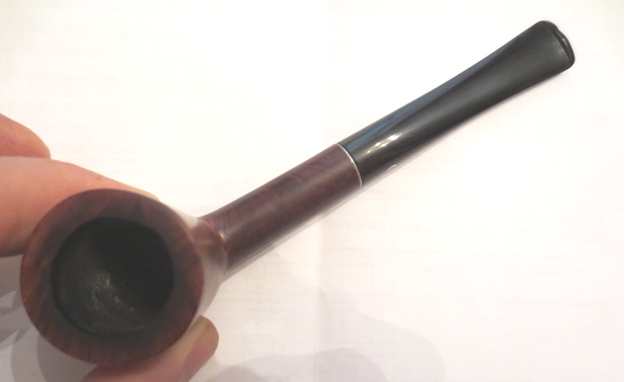
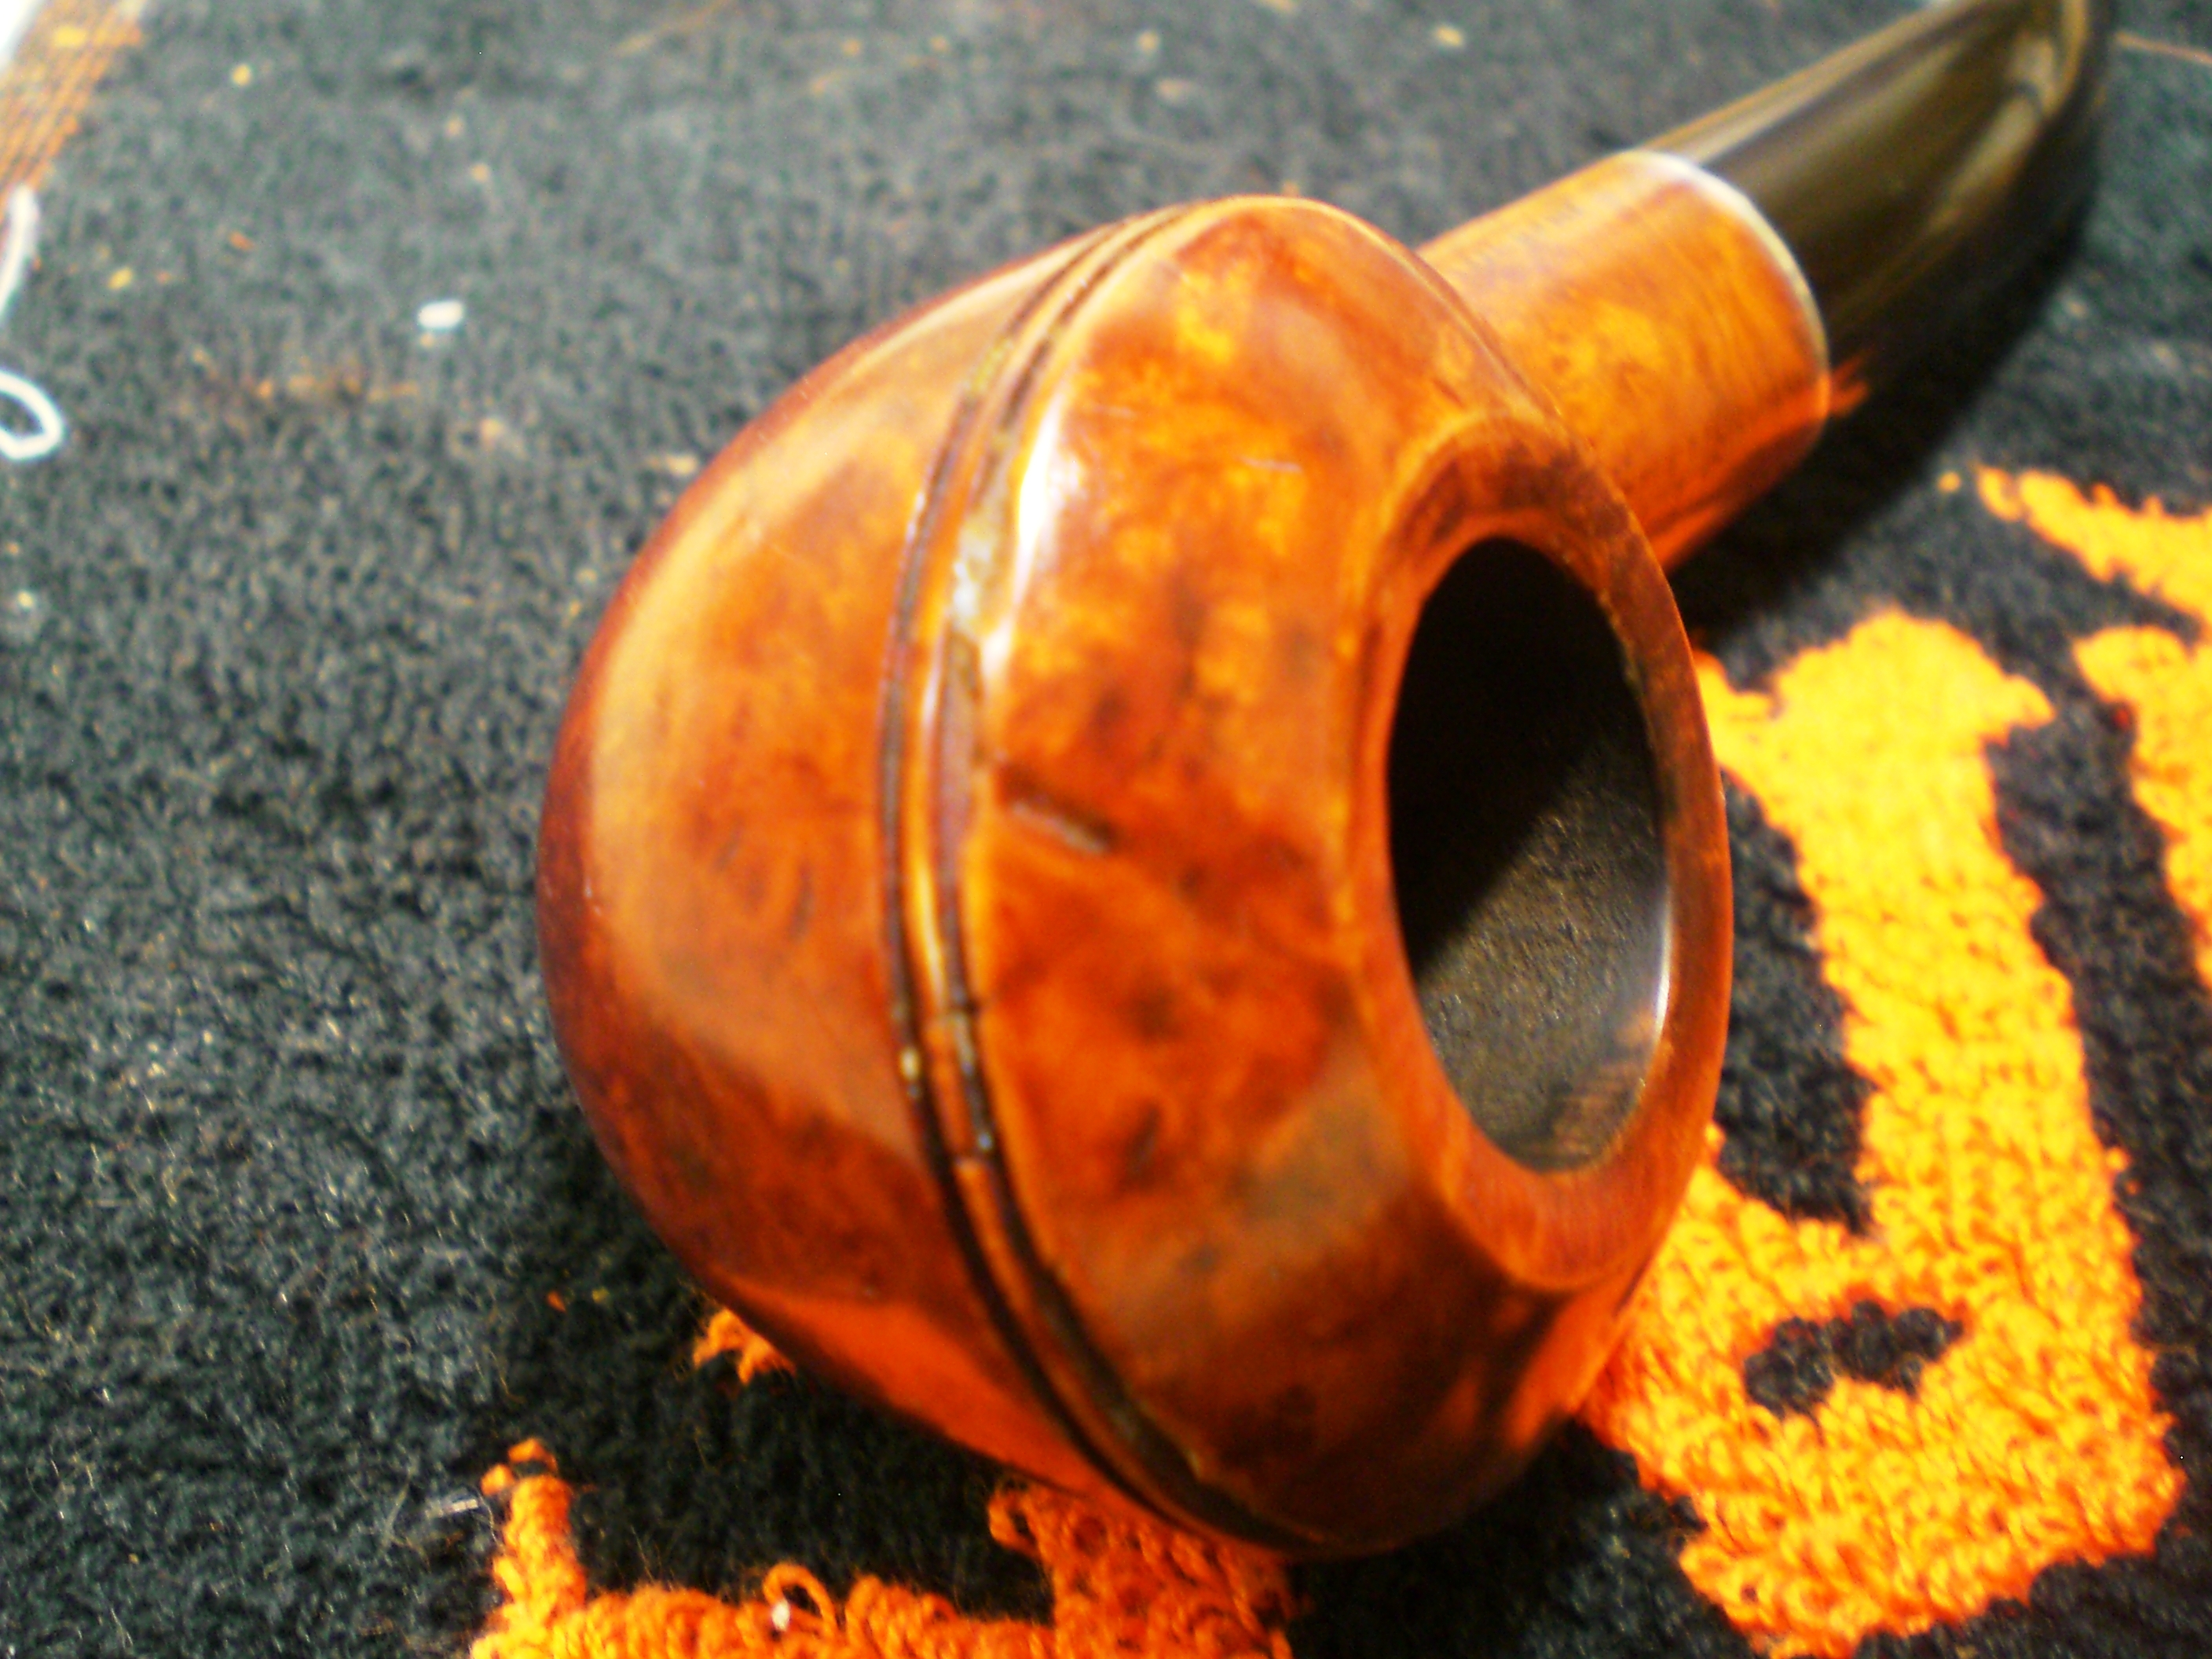
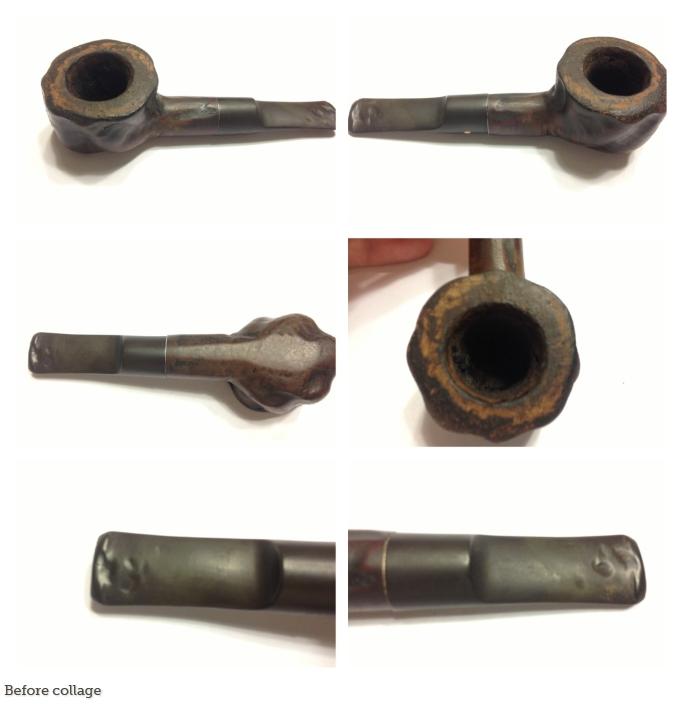
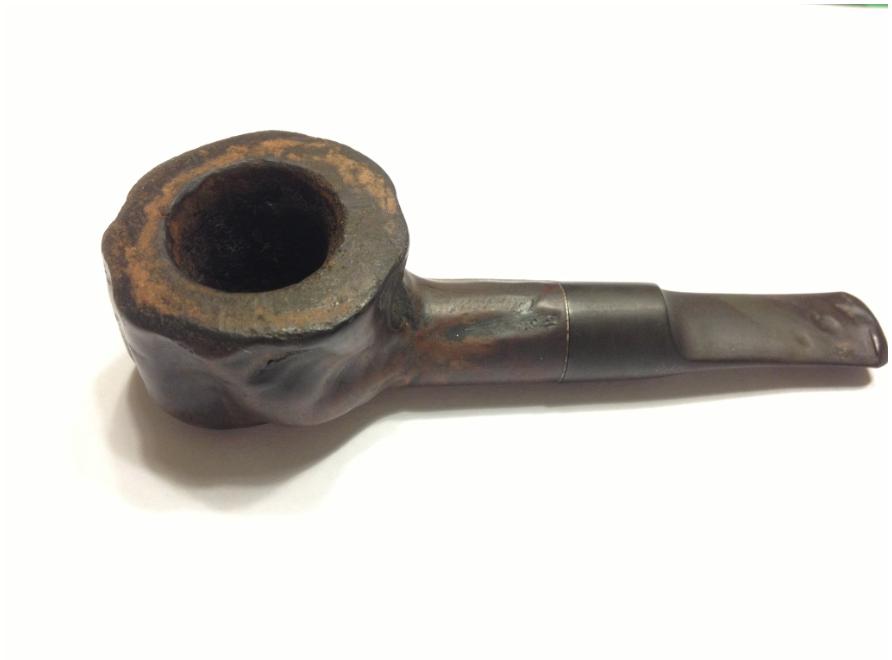
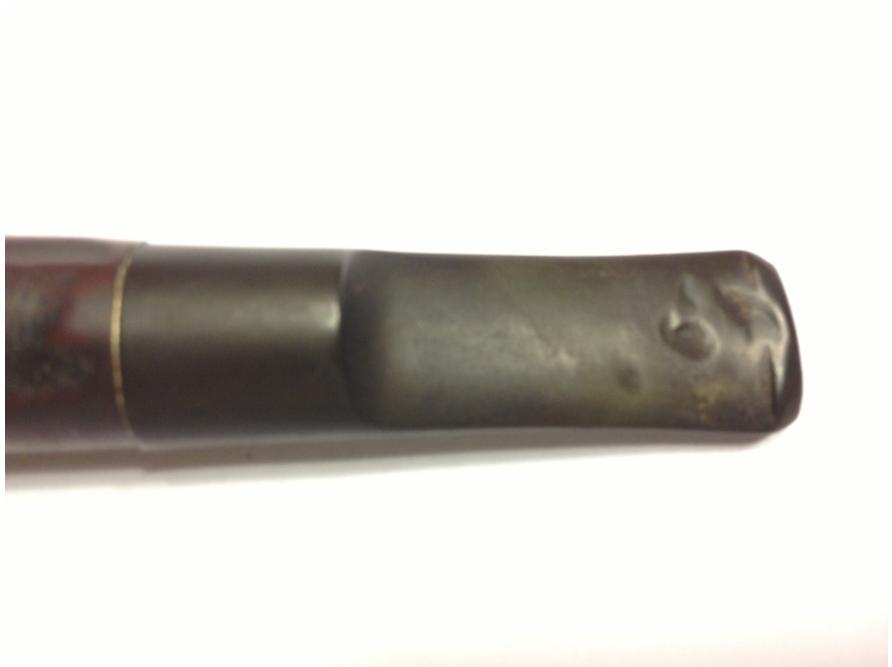
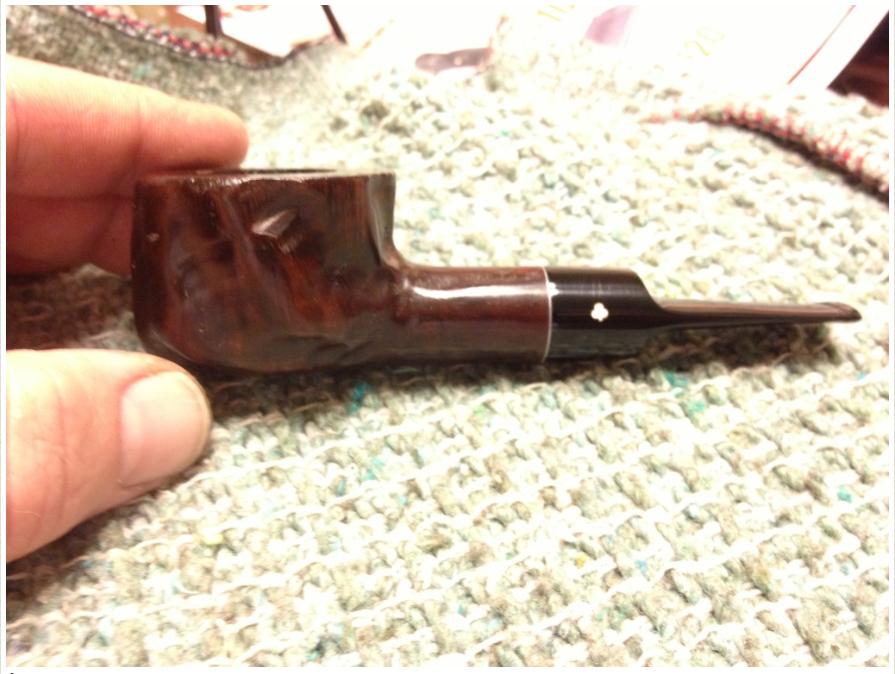
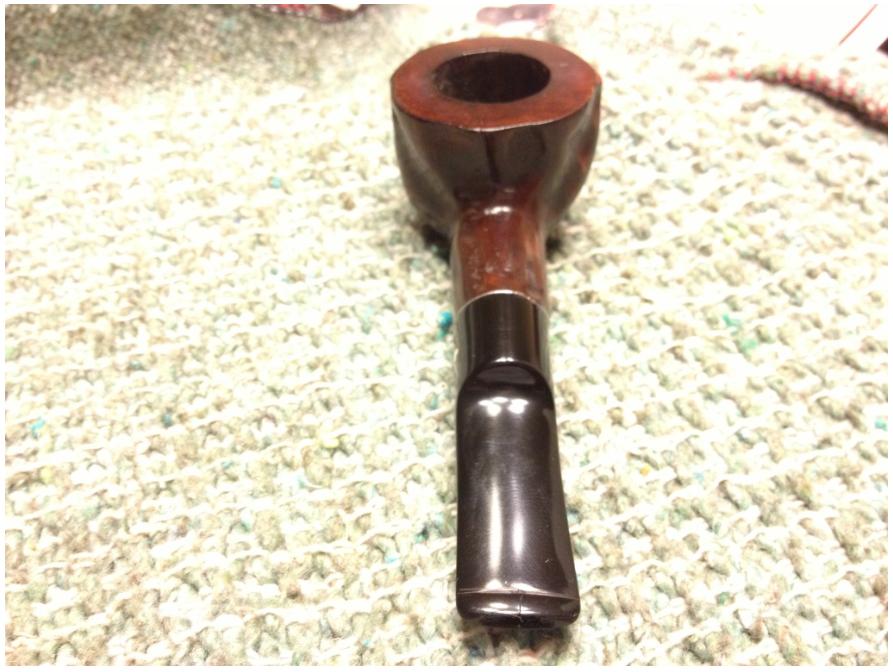
I remember back in basic training my Drill Sergeant always used to say, “Men, ugly women need love too”. That was my initial thought when I first saw this Kaywoodie Fine Line pot. The stem was under-clocked, the varnished finish was uneven, the rim had some damage, and it just looked kind of dull. On the plus side, the stem was in decent shape and my fondness for Kaywoodies provided the motivation to help it live up to its potential.KWA1 As you can see, the stem was noticeably under-clocked.KWA2 
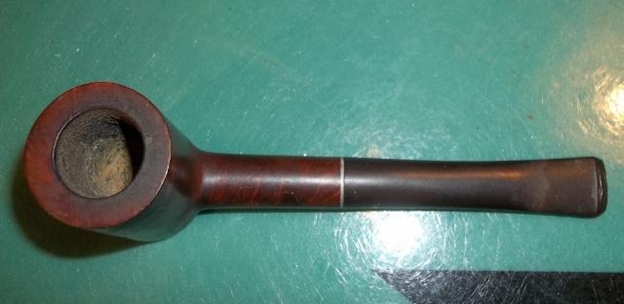
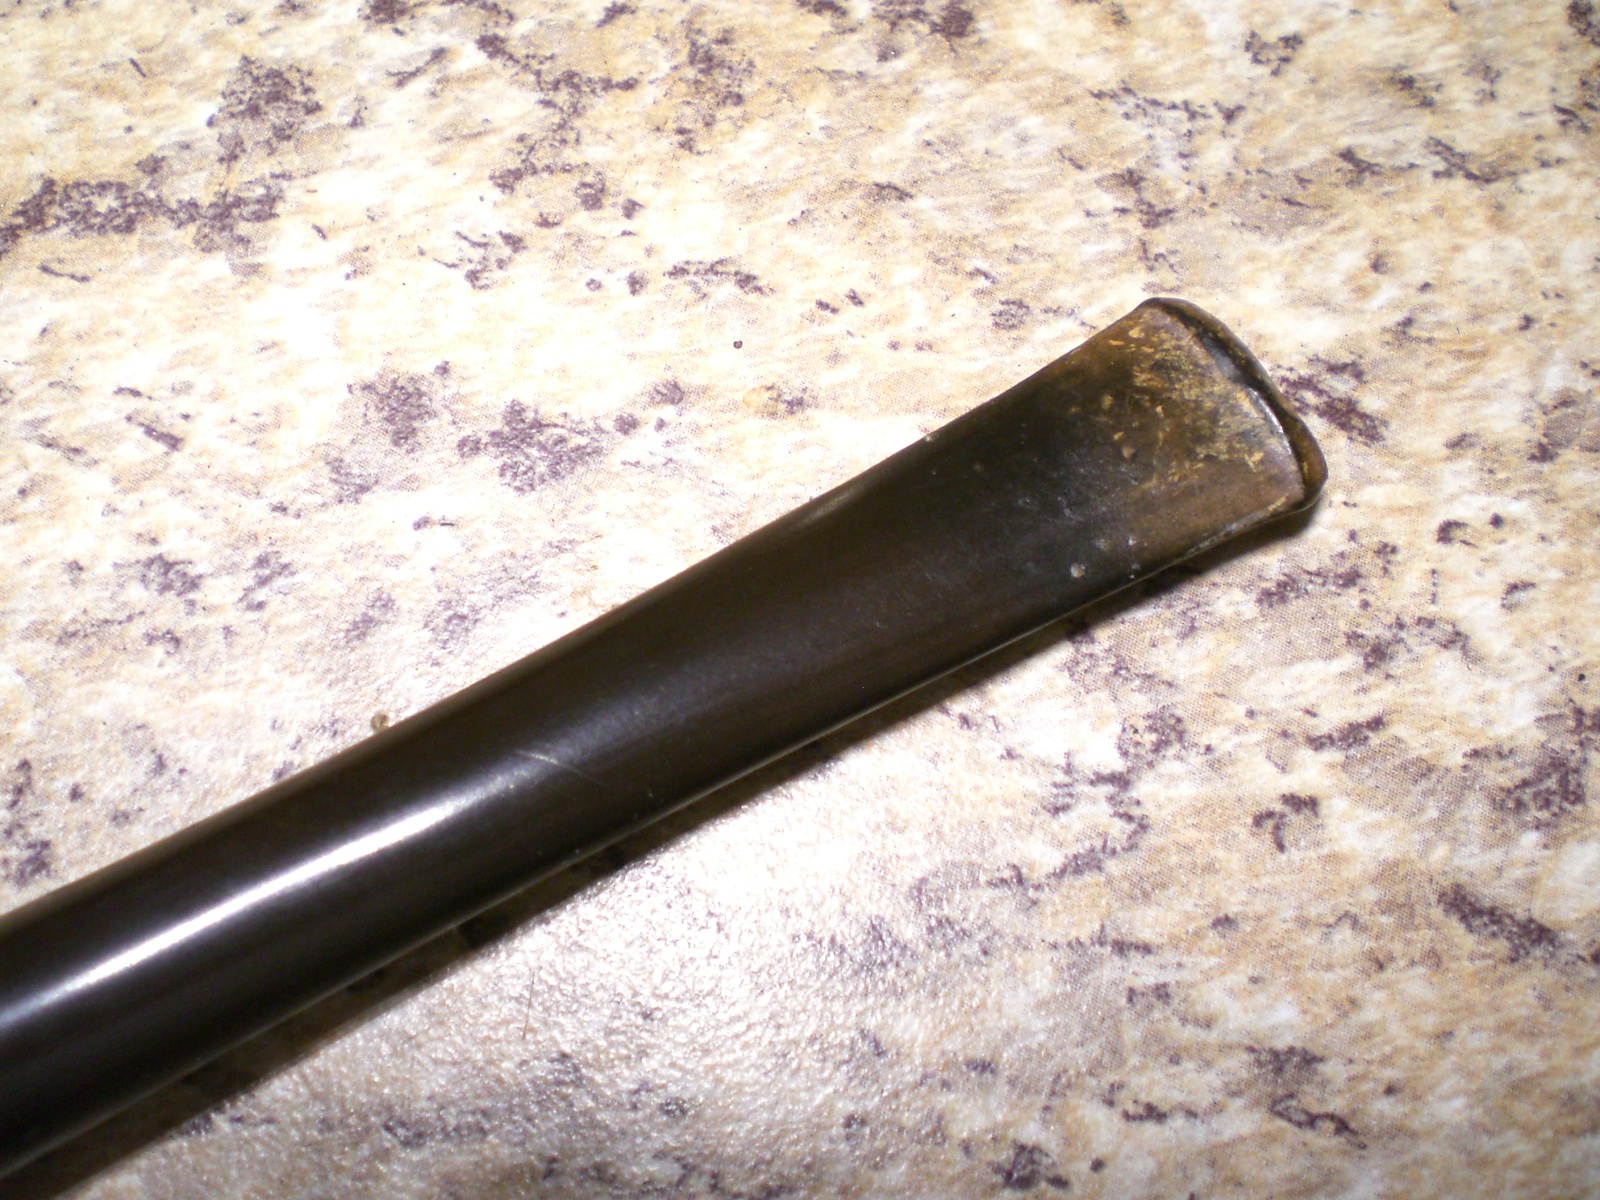
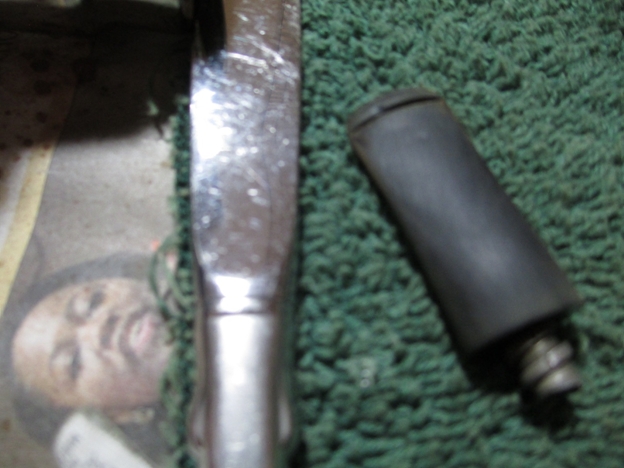
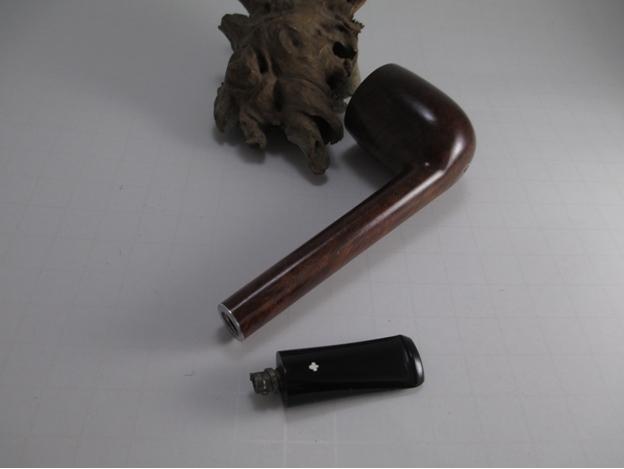
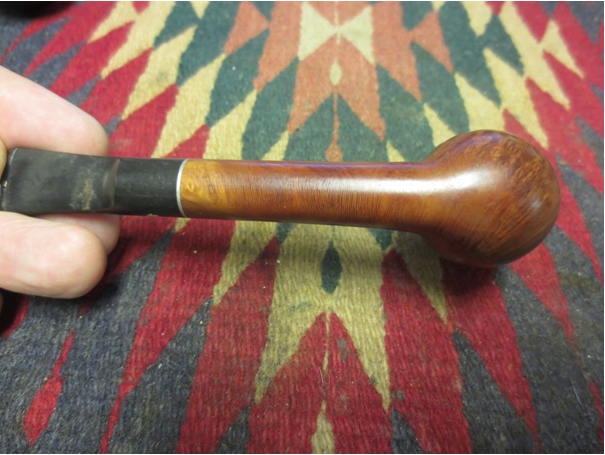
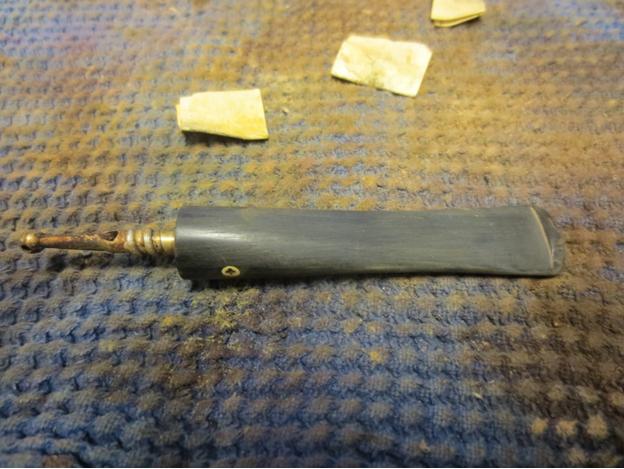
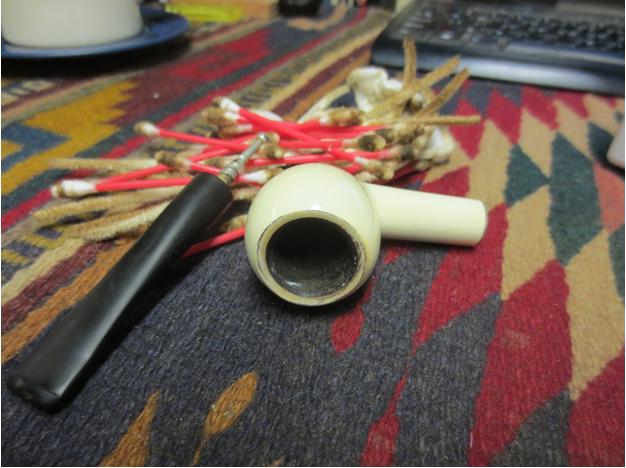
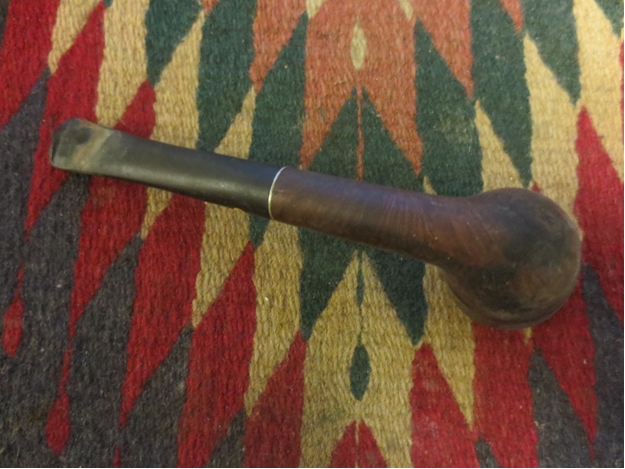
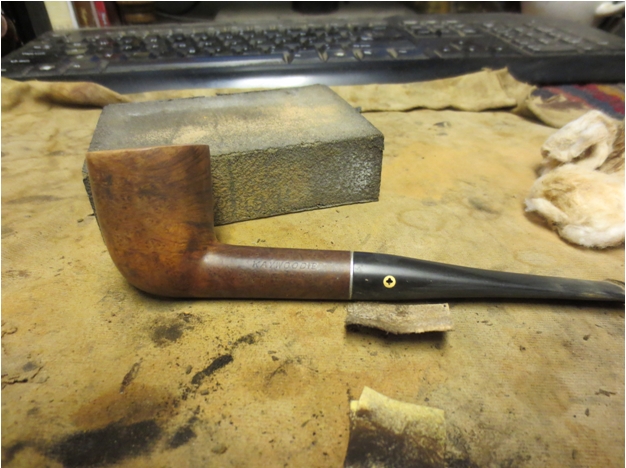
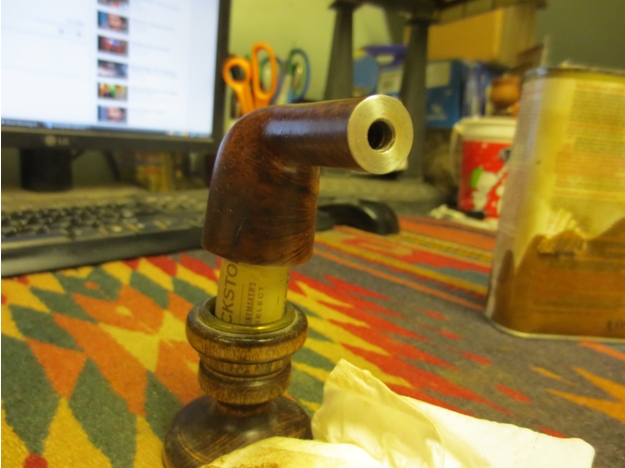
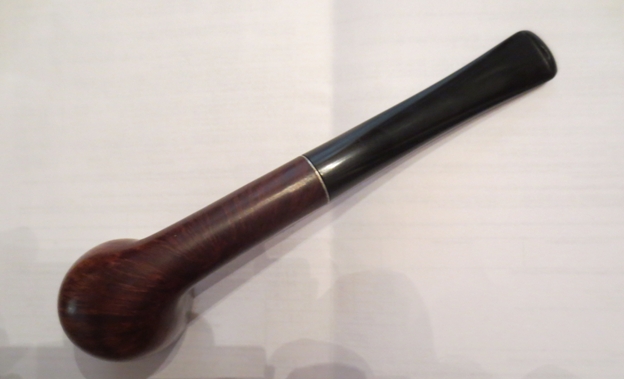
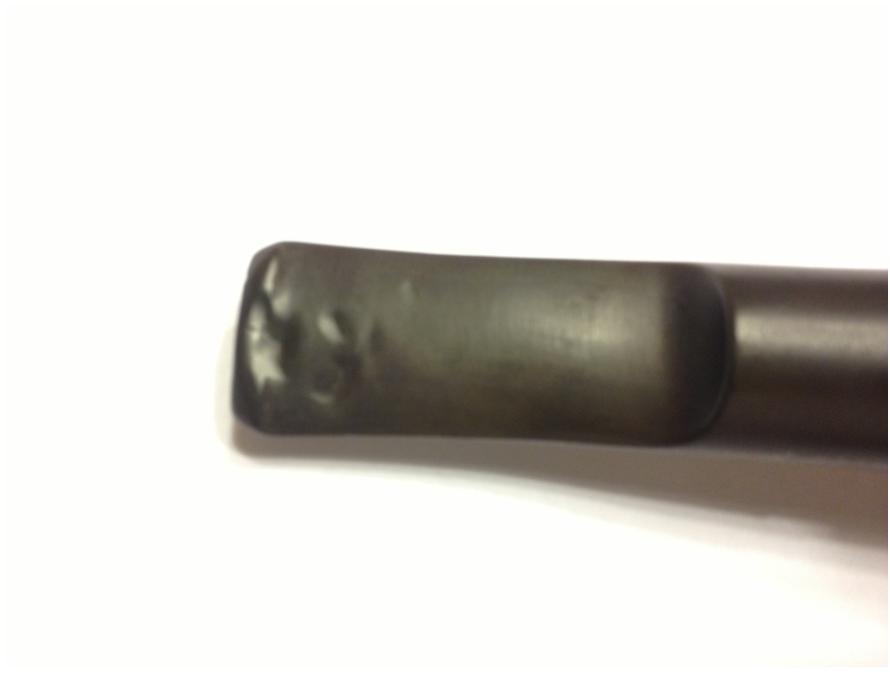
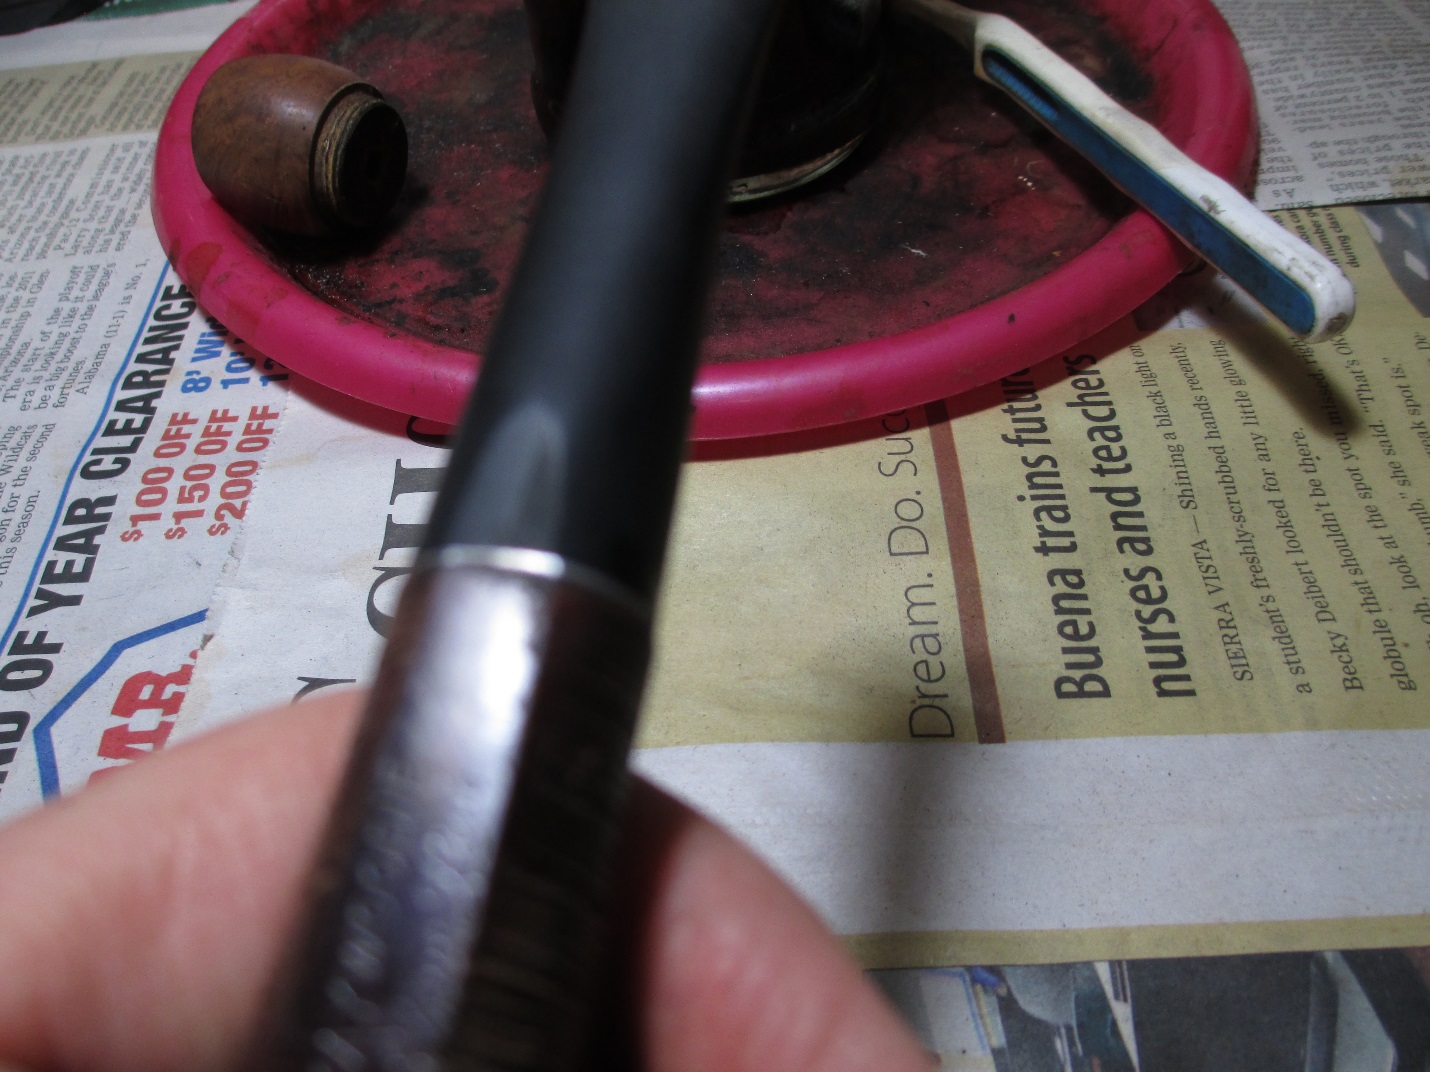
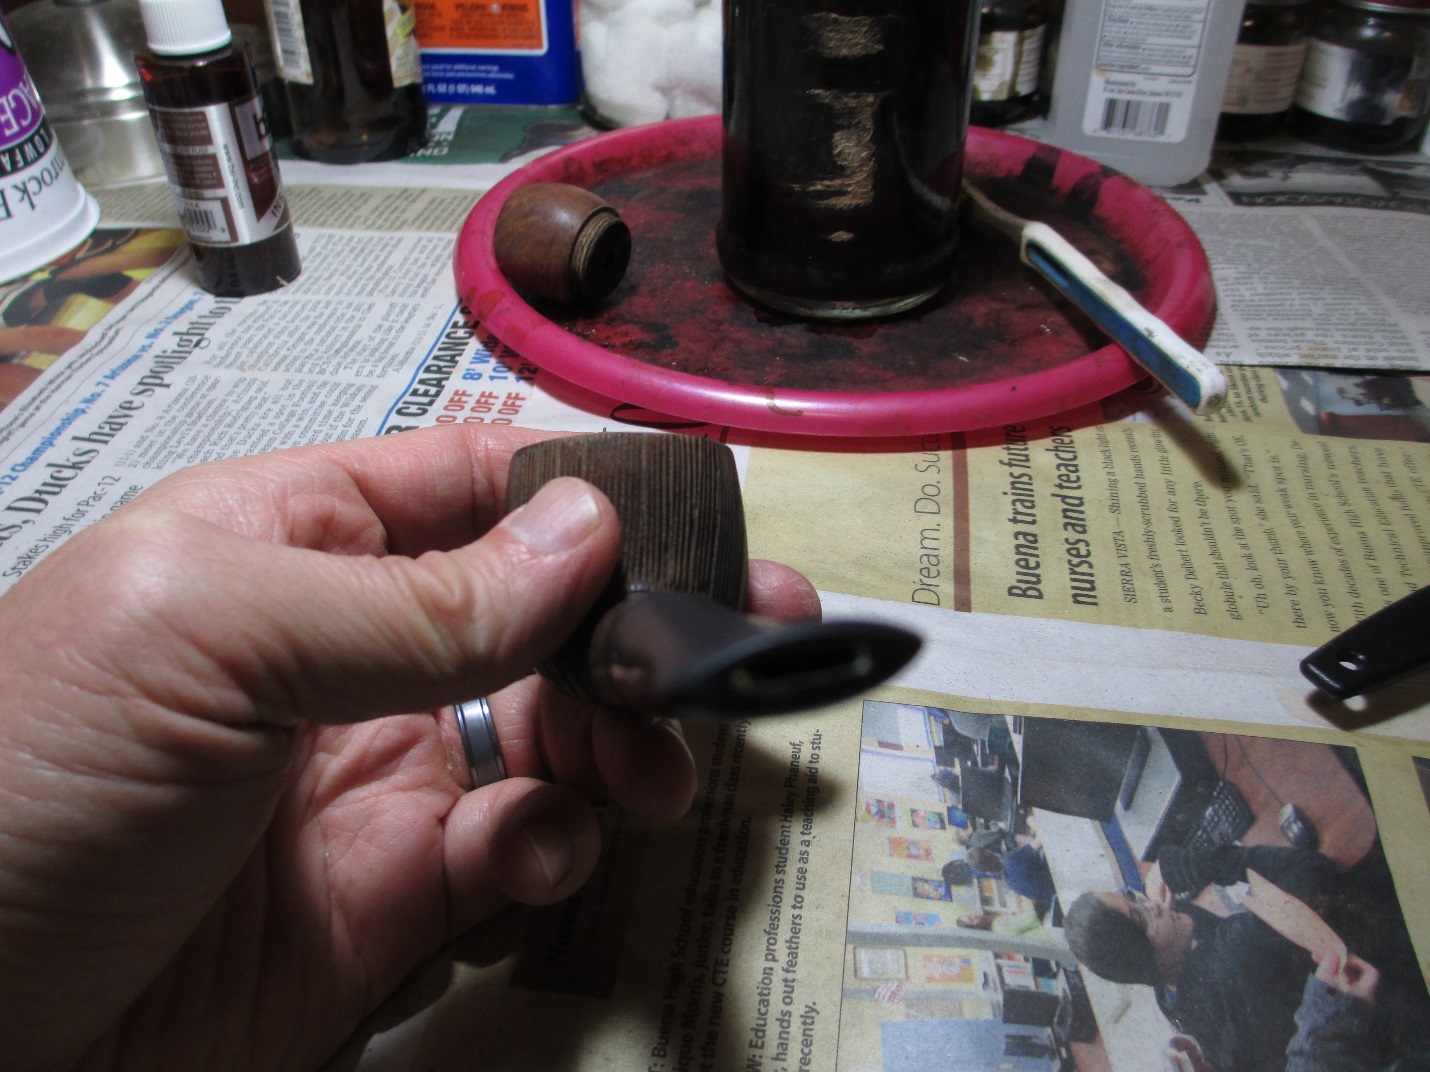
Fortunately I have a tool for that.KWA3 
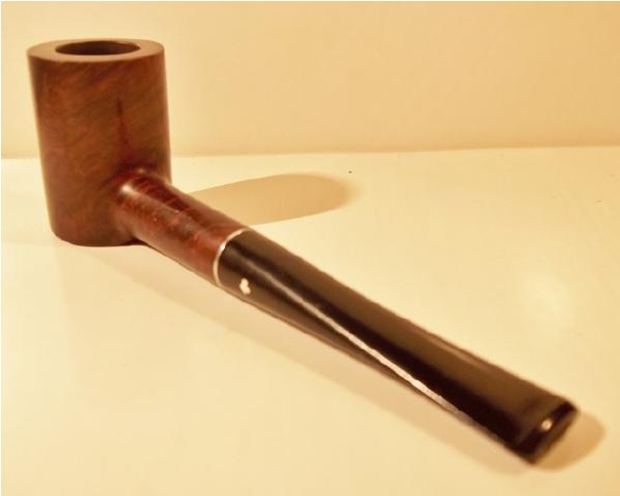
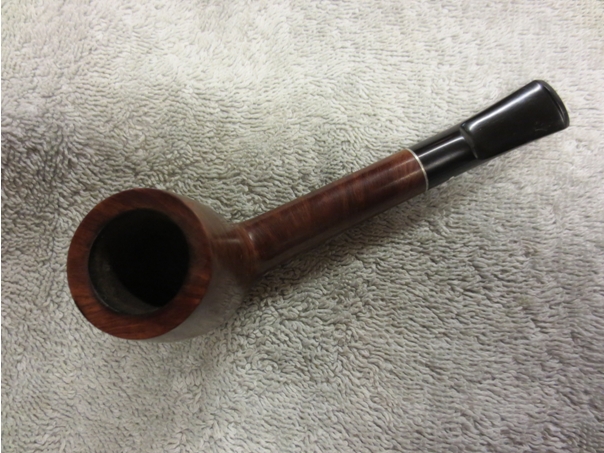
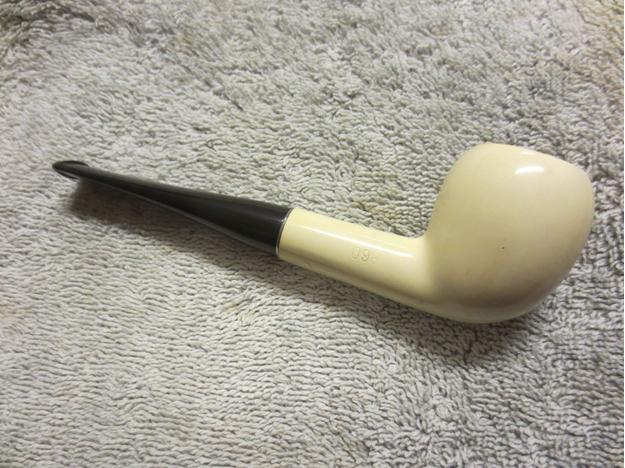
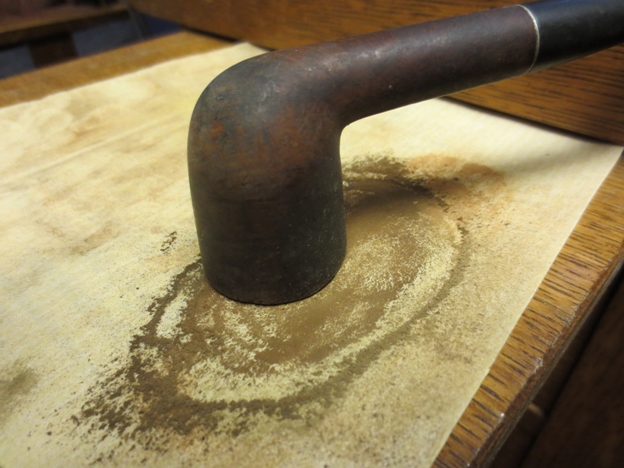
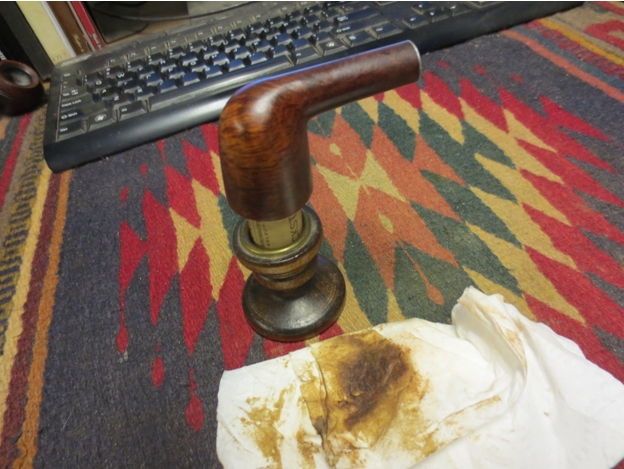
After directly heating the stinger with my heat gun, I gently turned it back to its original position and set it by running the end of the stem under cold water. This was the result.KWA4

KWA5 
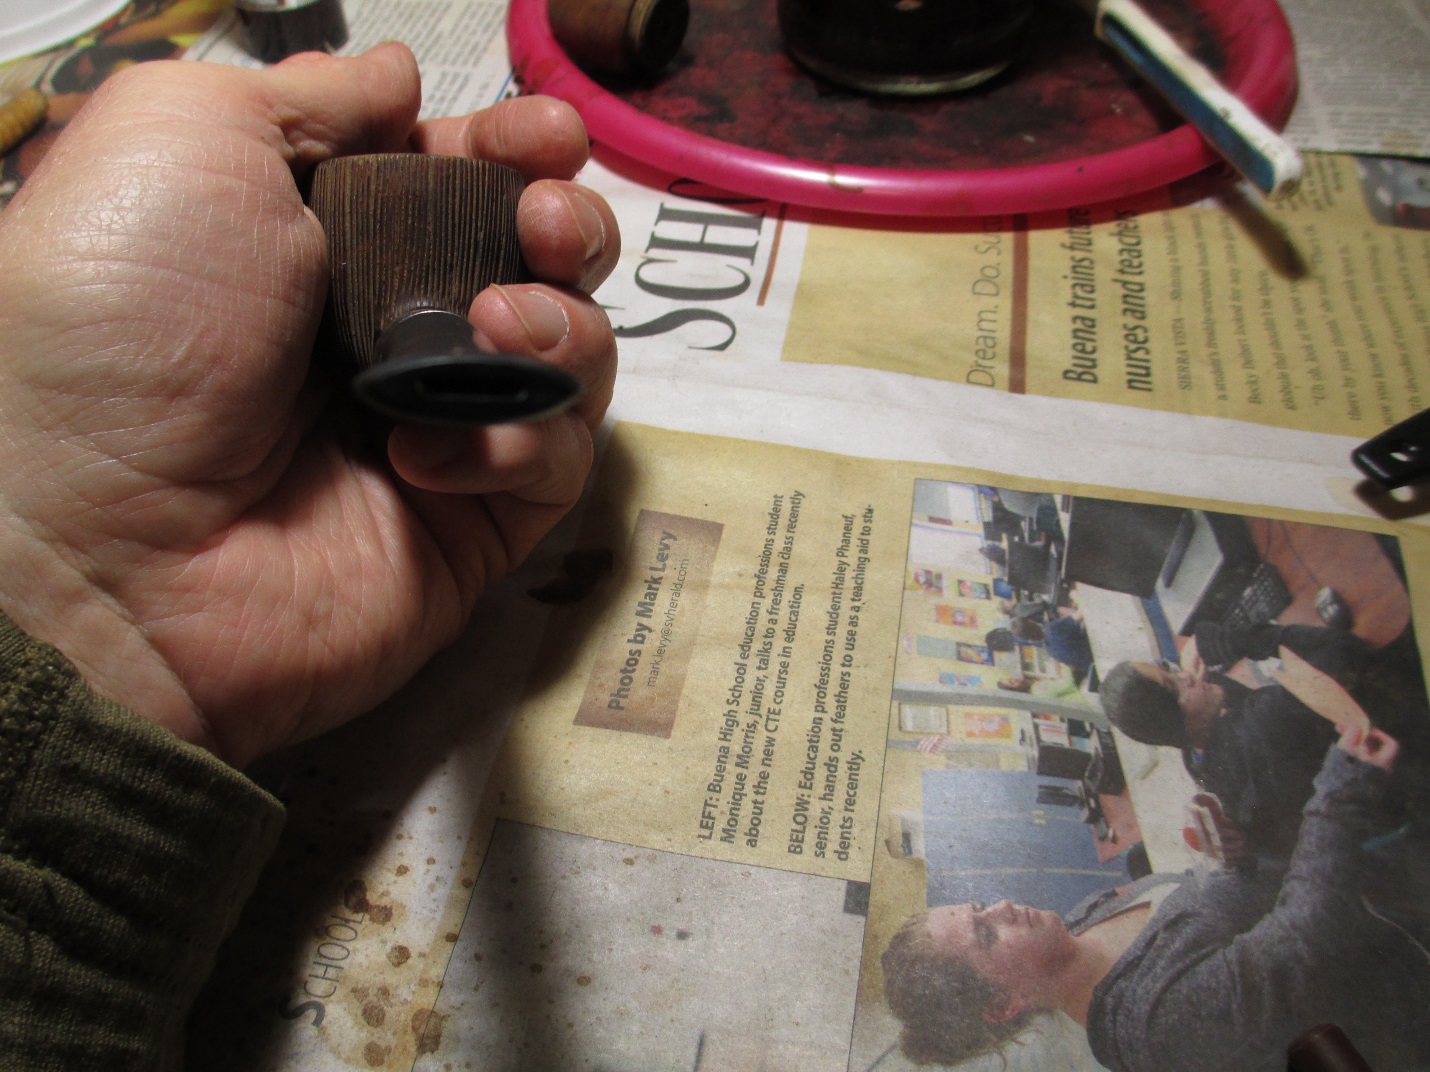
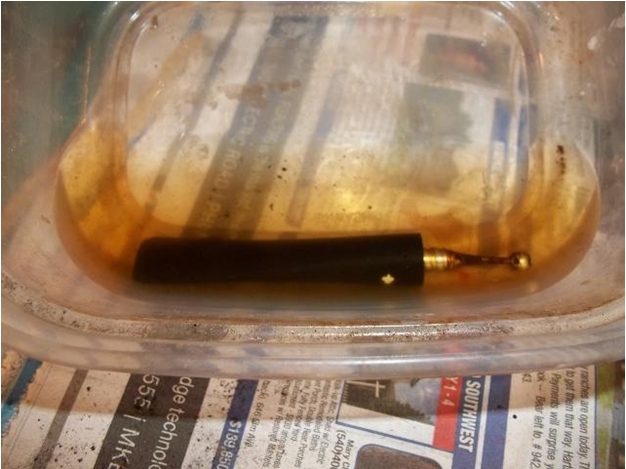
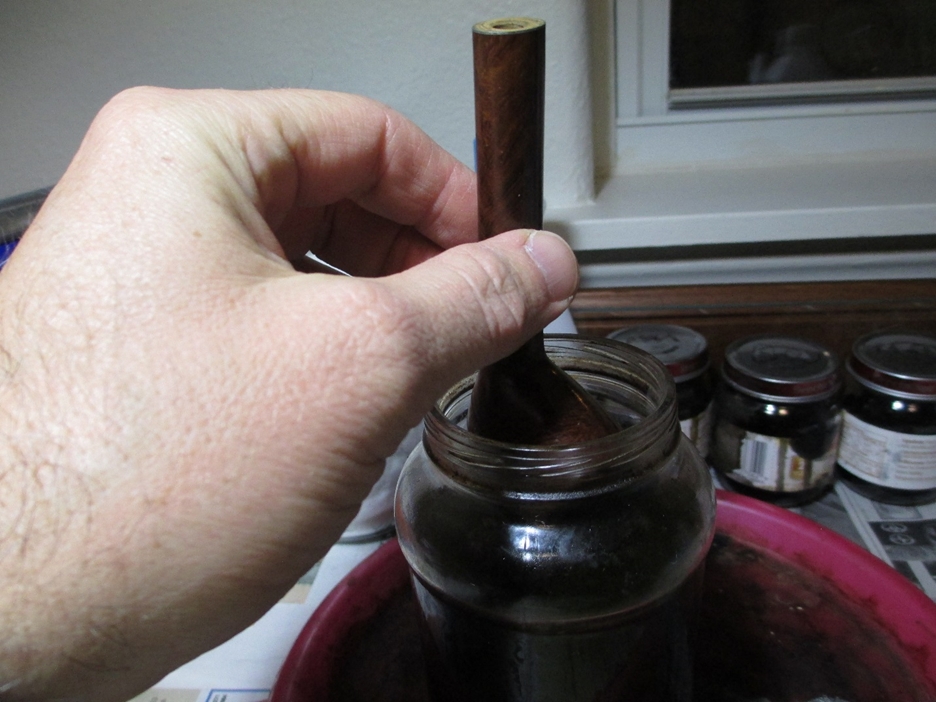
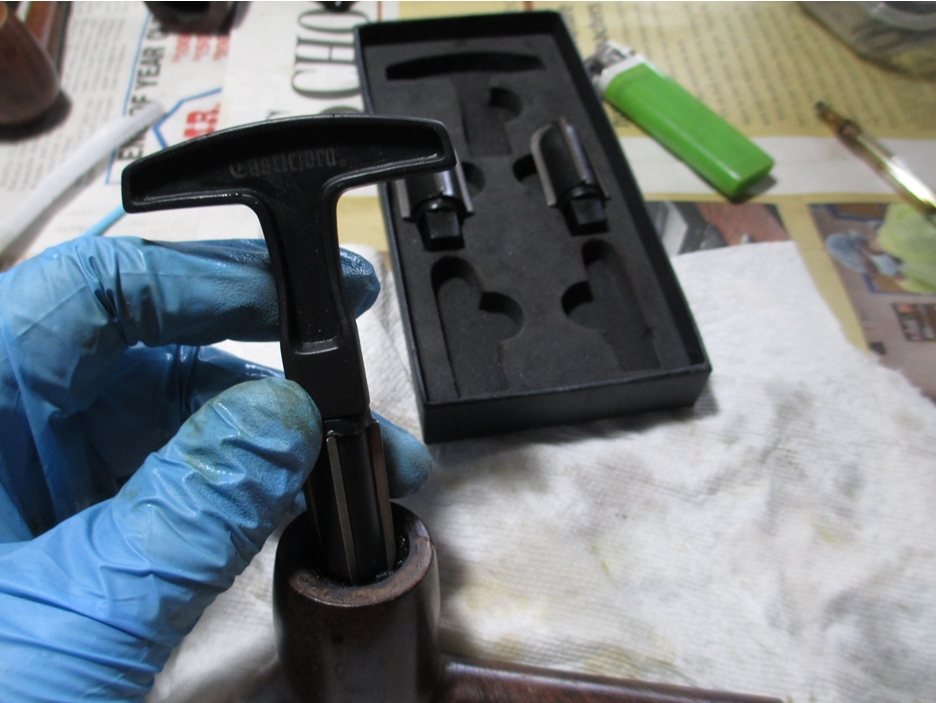
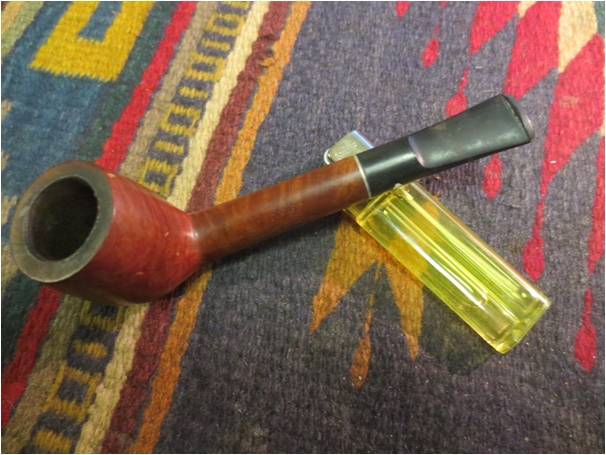
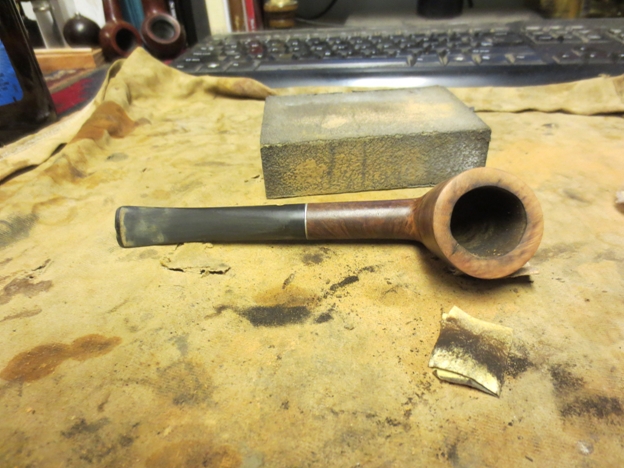
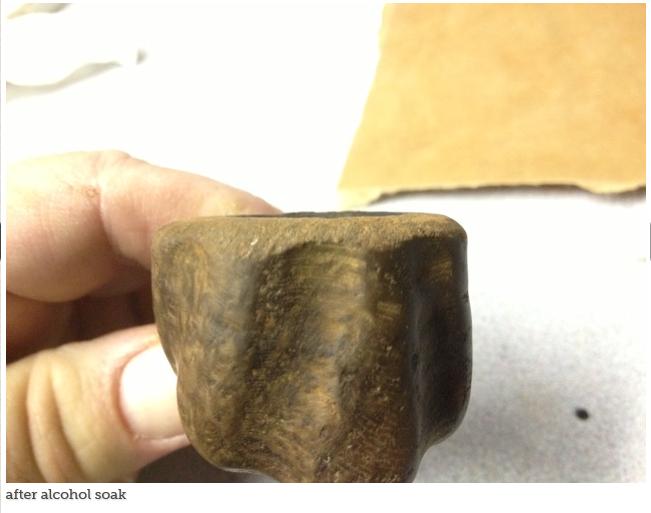
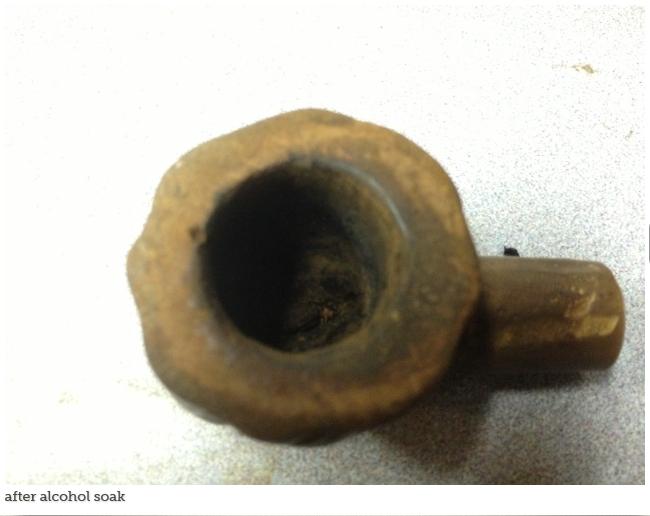
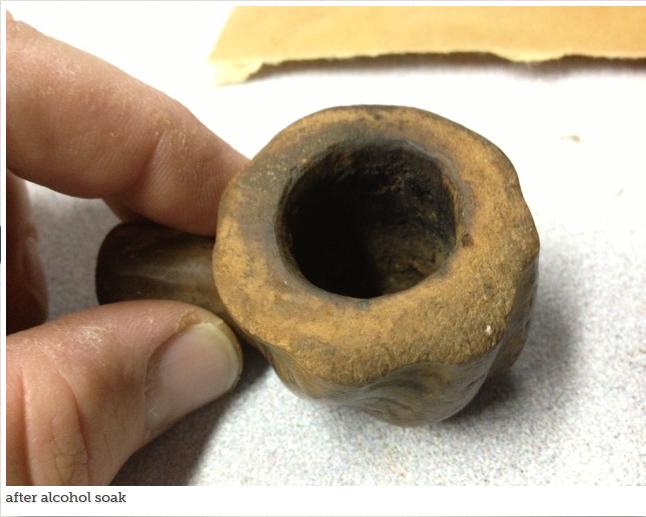
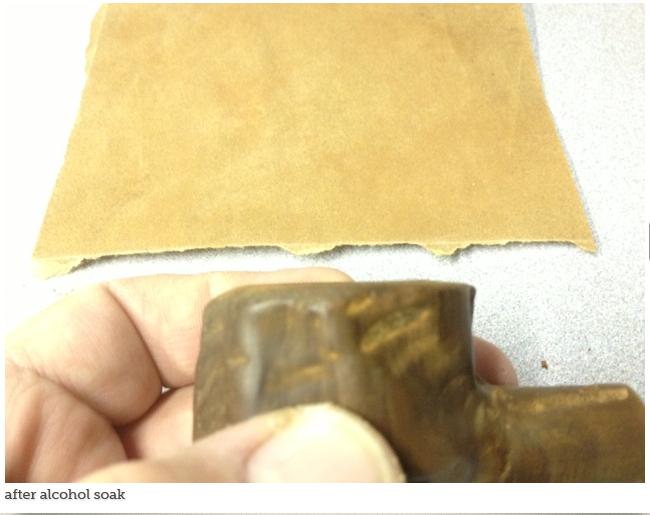
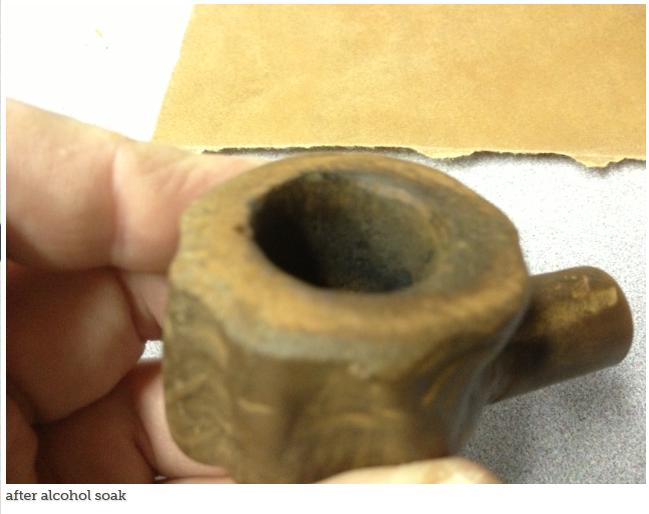
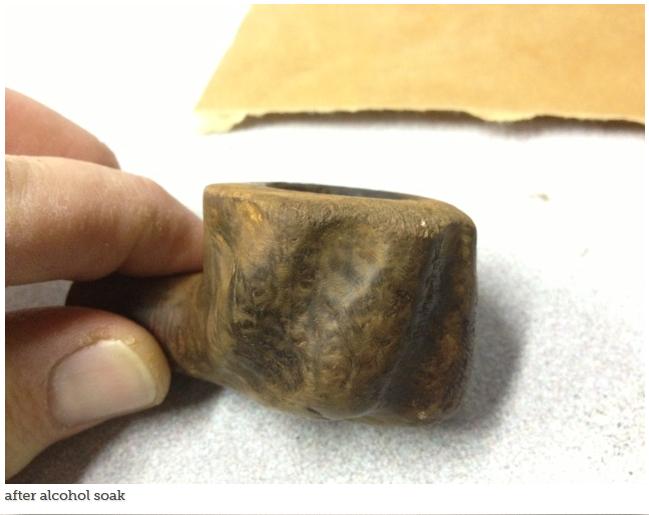
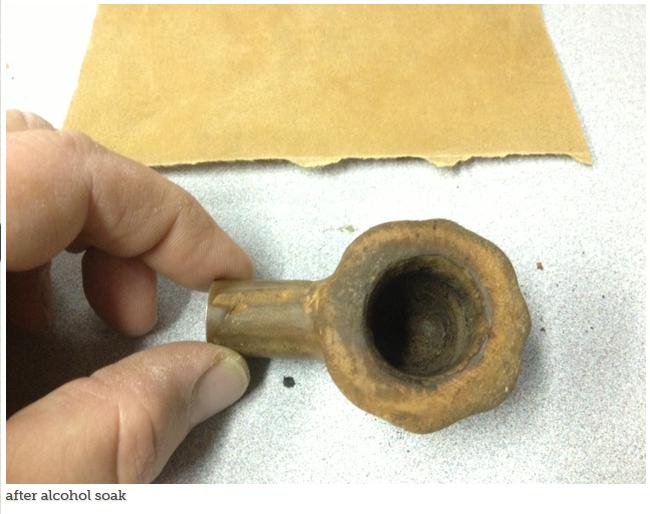
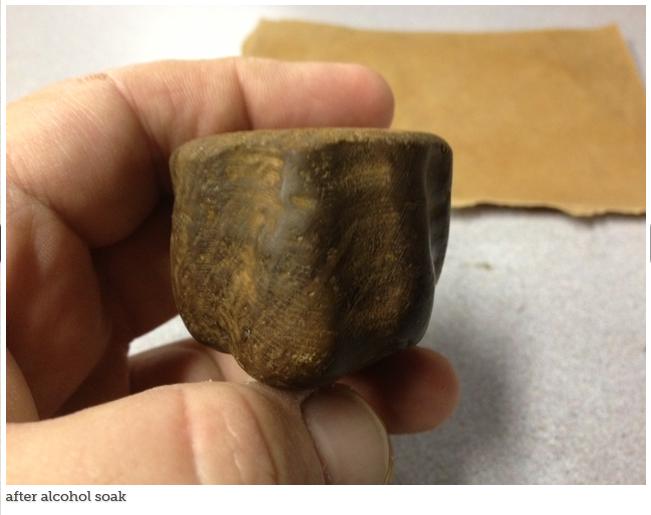
I soaked the bowl overnight in the alcohol bath then reamed it with my Castleford reamer.KWA6 
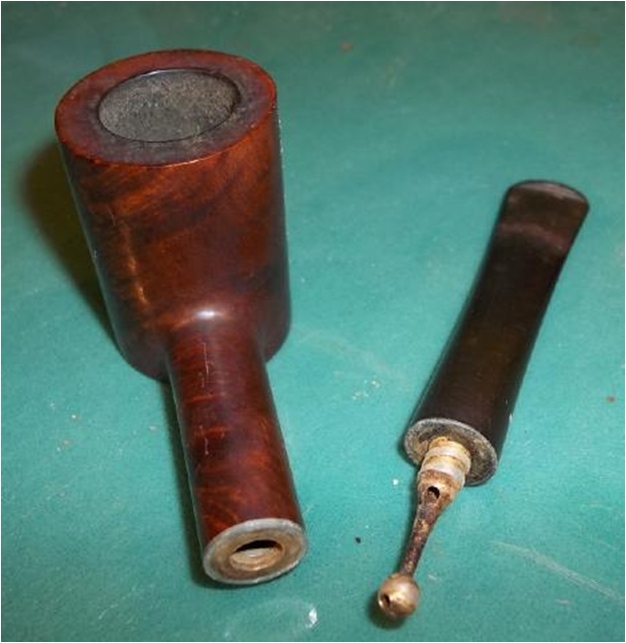
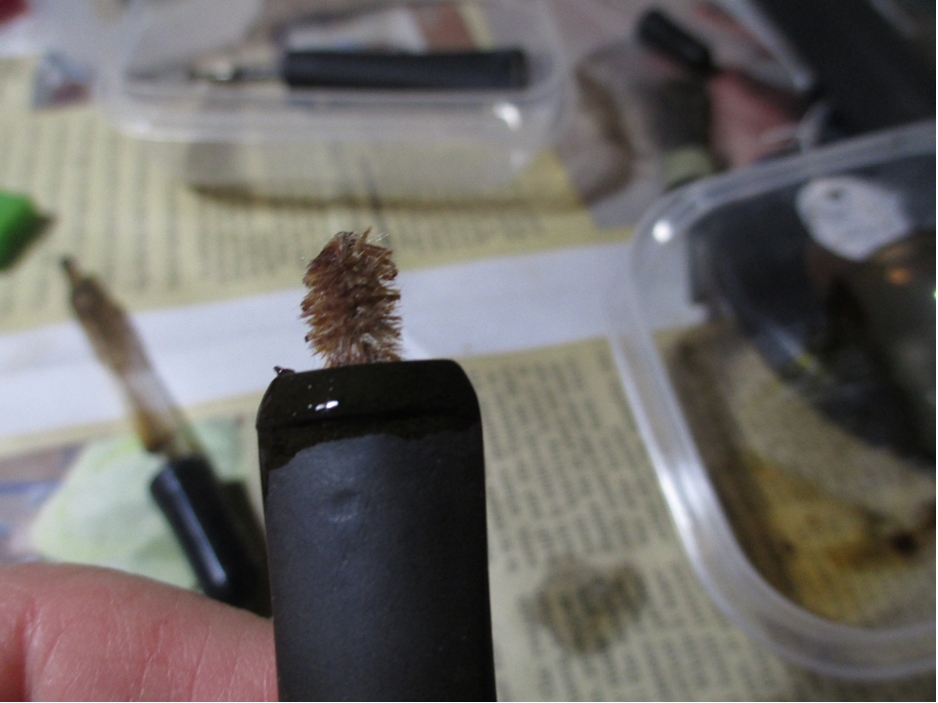
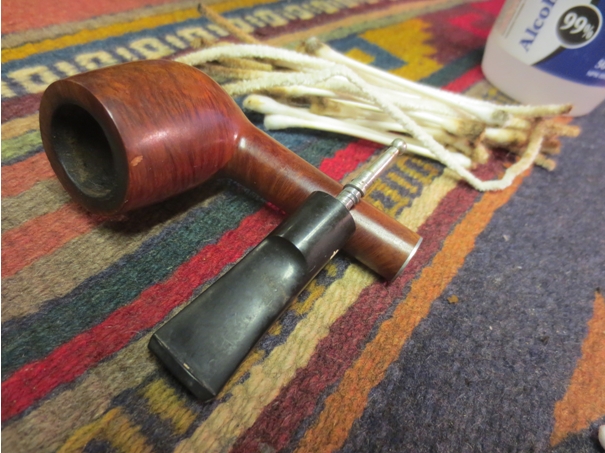
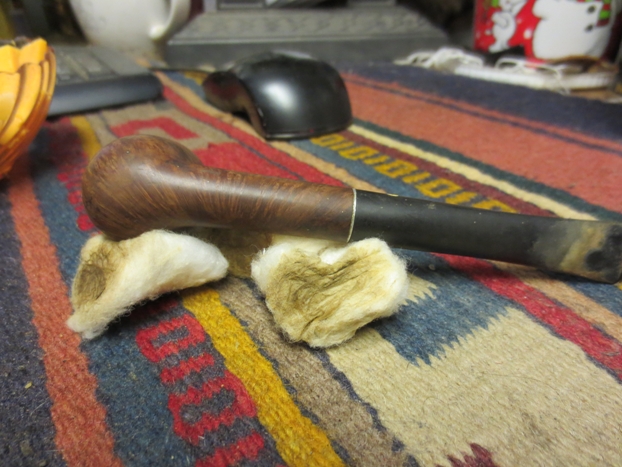
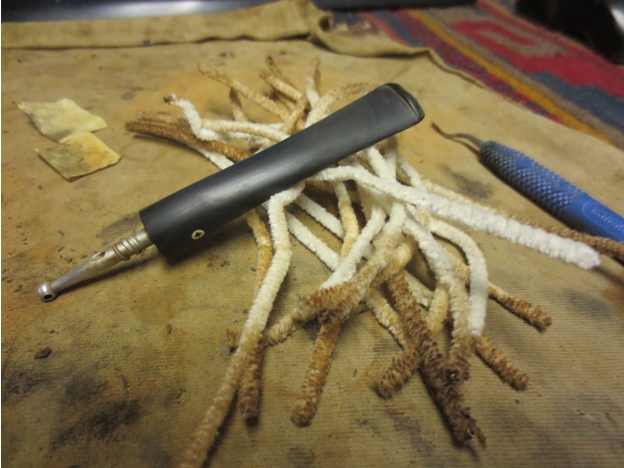
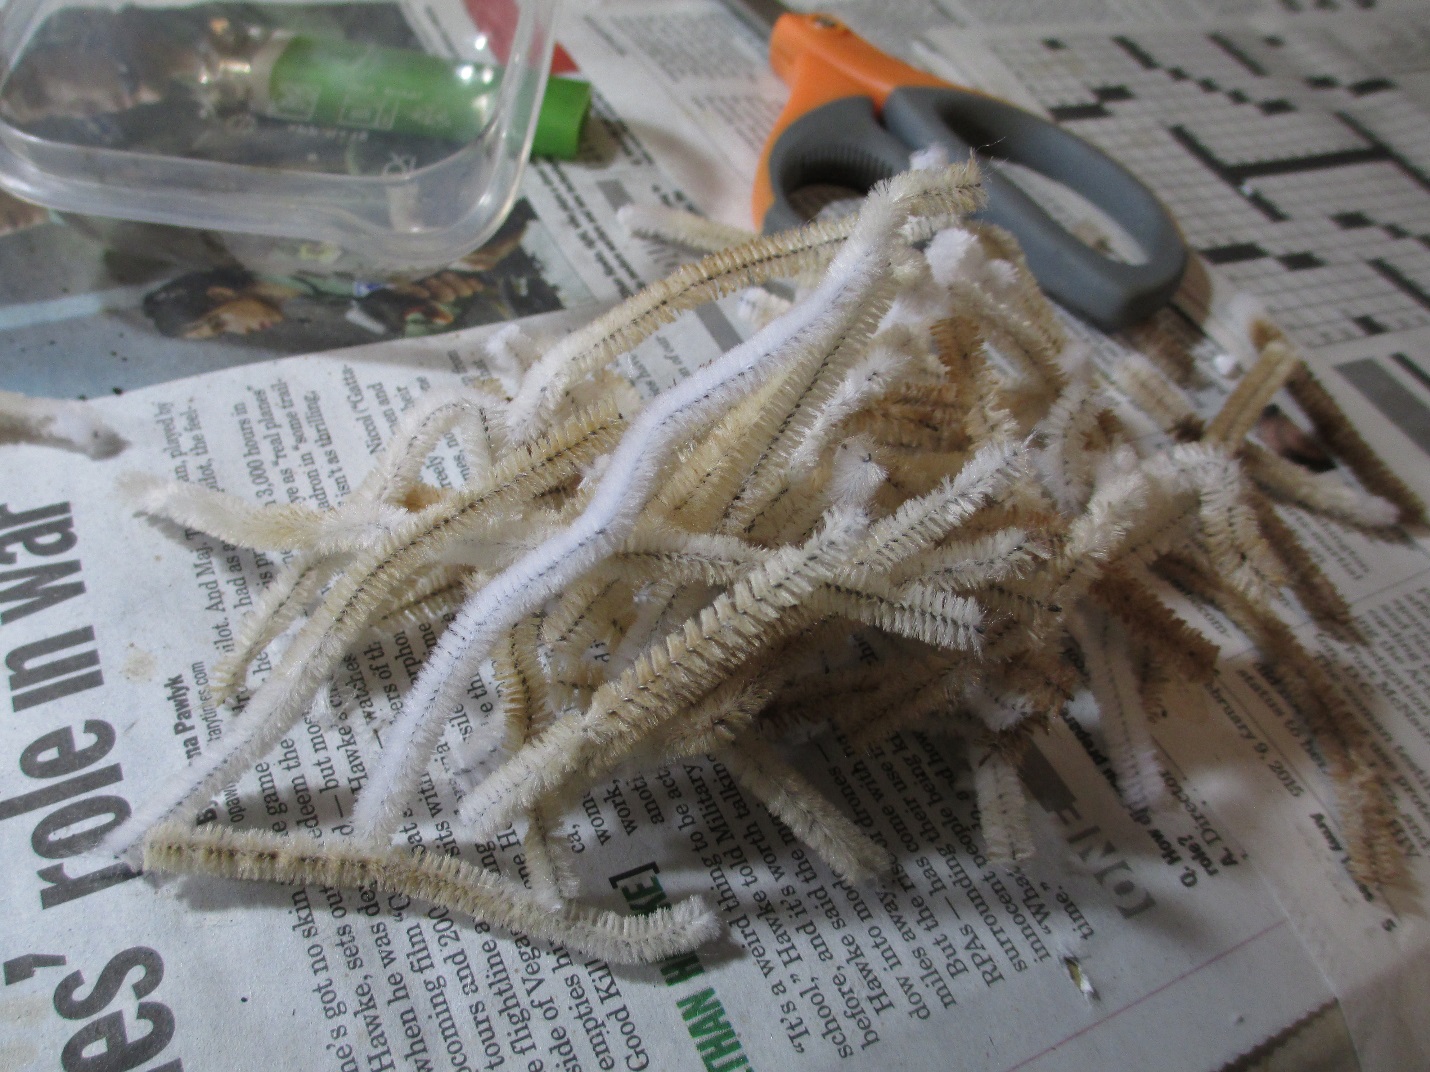
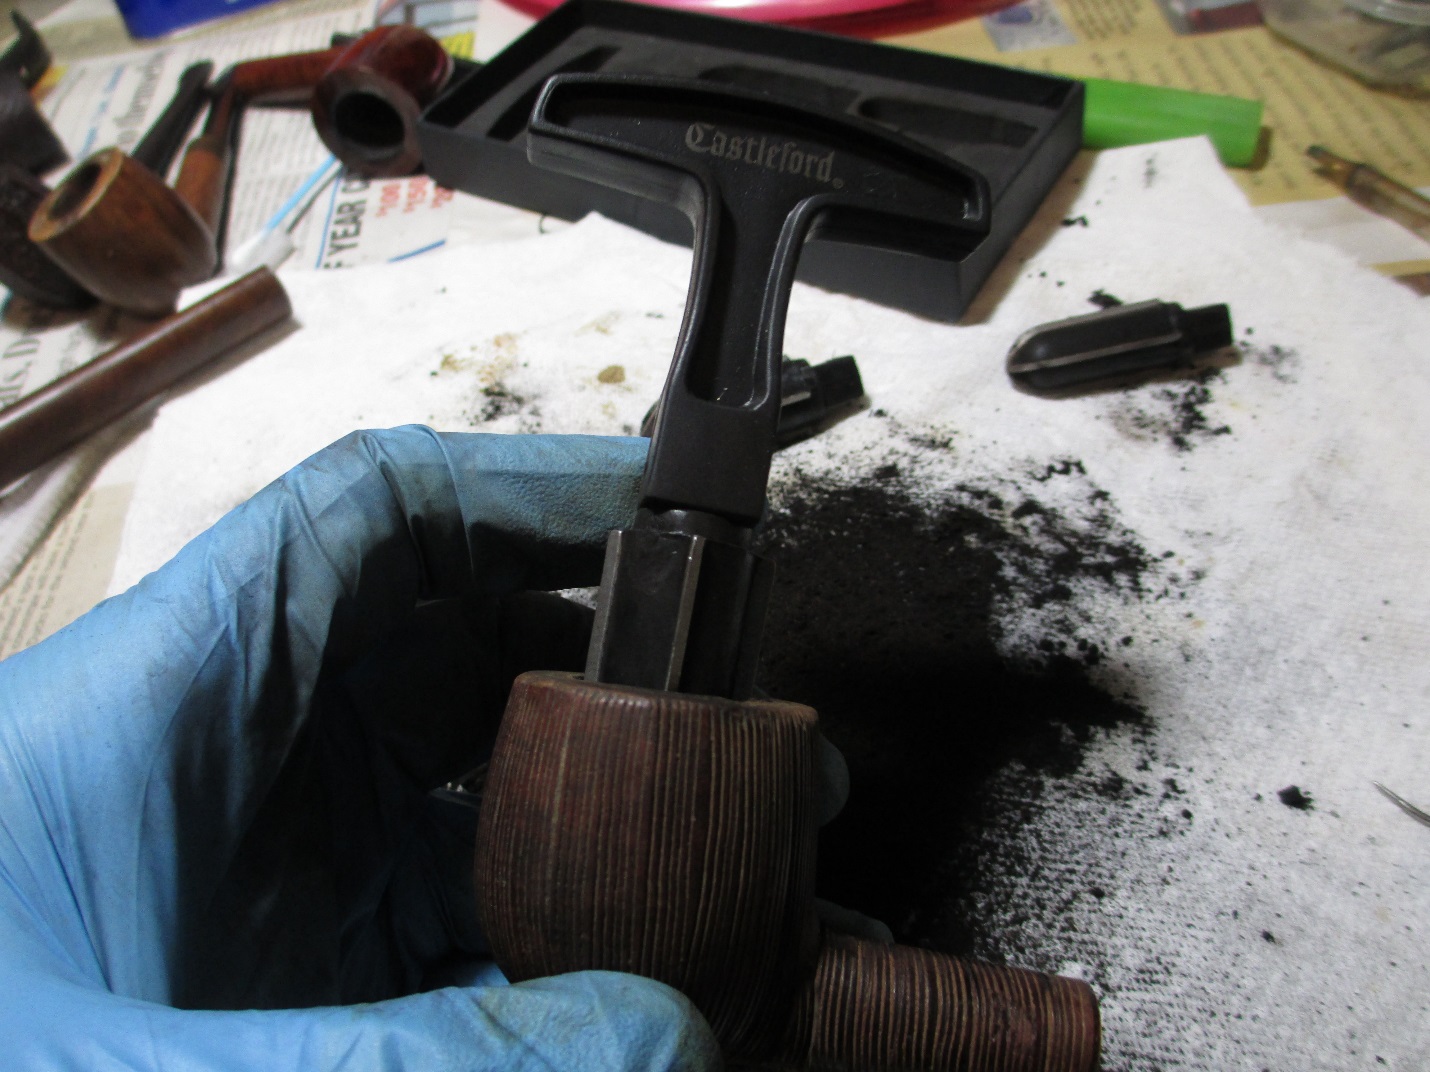
While the bowl soaked, I gave the stem a bath in Oxyclean. I make it a practice to use the Oxyclean and a fuzzy stick (that’s the politically correct term for a pipe cleaner intended for crafts rather than cleaning pipes) to get as much gunk out while it’s still soft. This is what the fuzzy stick looked like after the first pass.KWA7 
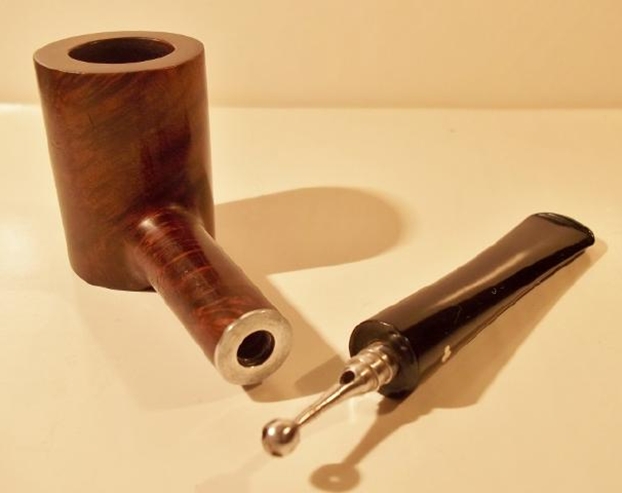
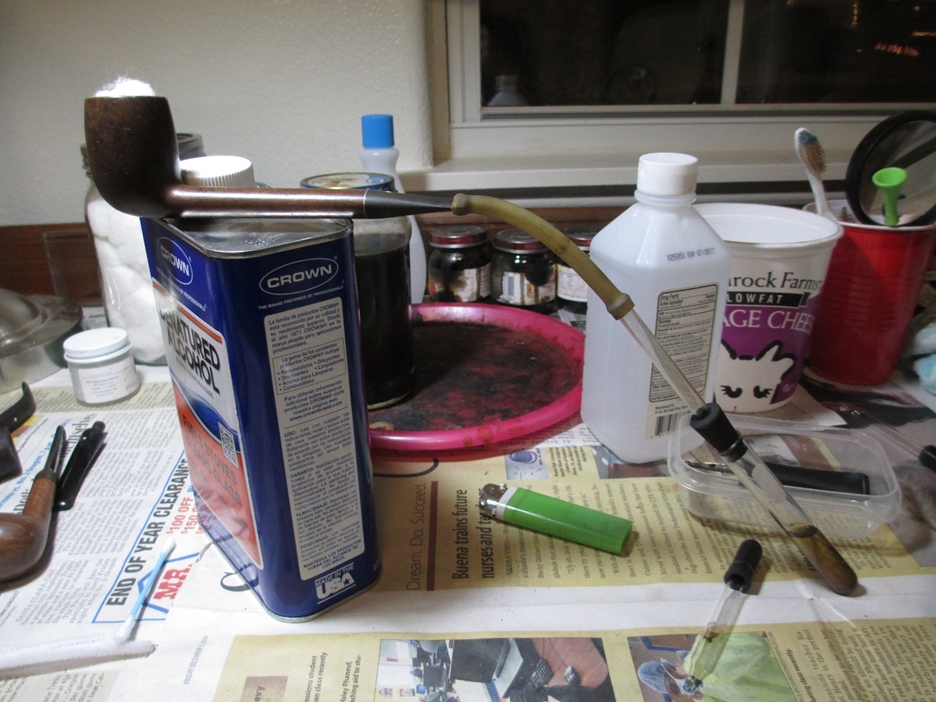
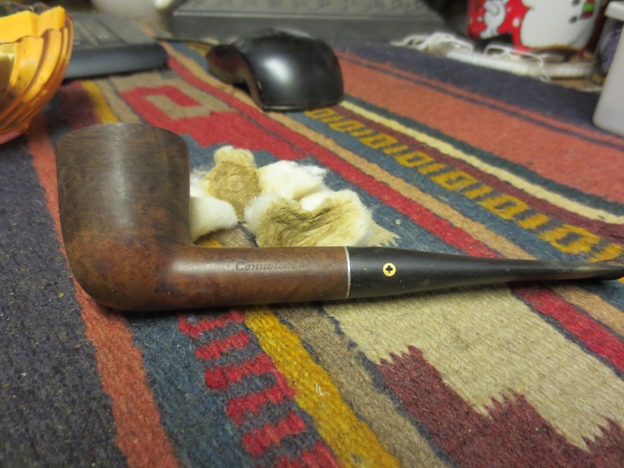
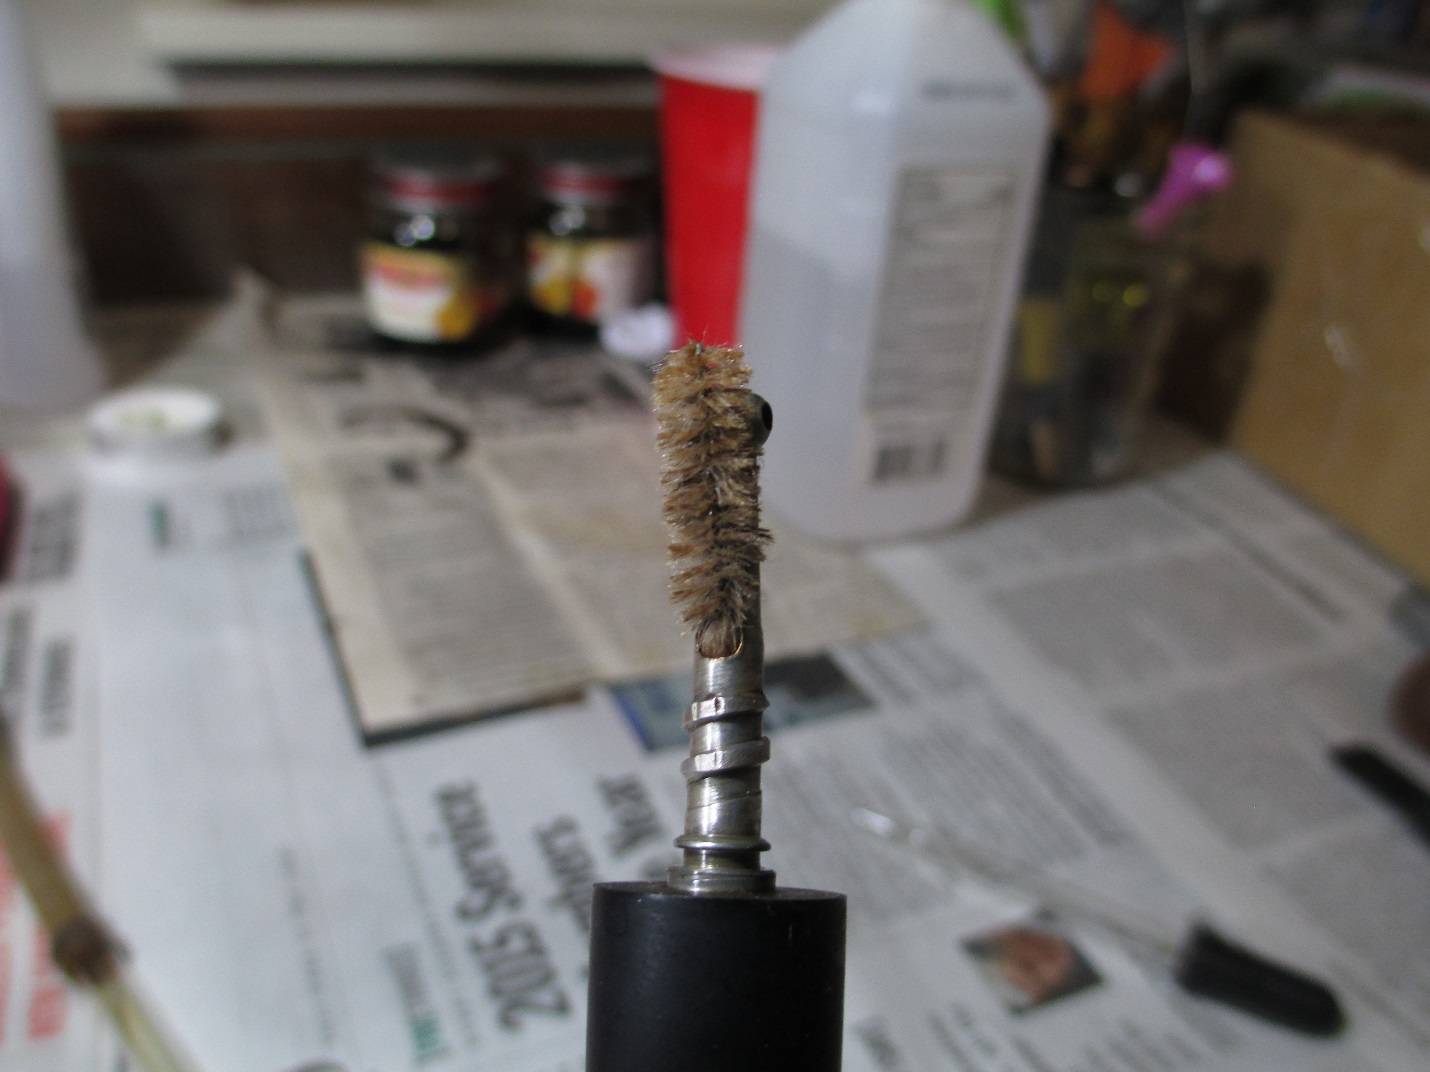
Normally a fuzzy stick without a lot of tar and tobacco is cause for celebration, but I suspected the stinger merely kept the gunk in the shank. When cleaning Kaywoodies I have to deviate from my normal process of retorting the stem and bowl separately, since the rubber tube doesn’t fit inside the shank very well. Here is the pipe ready for retort.KWA8 
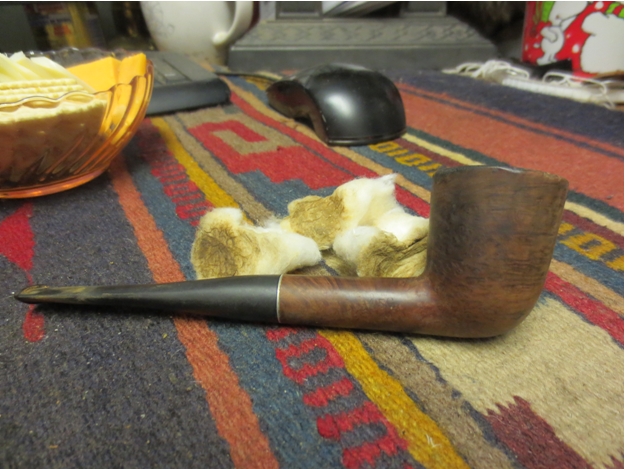
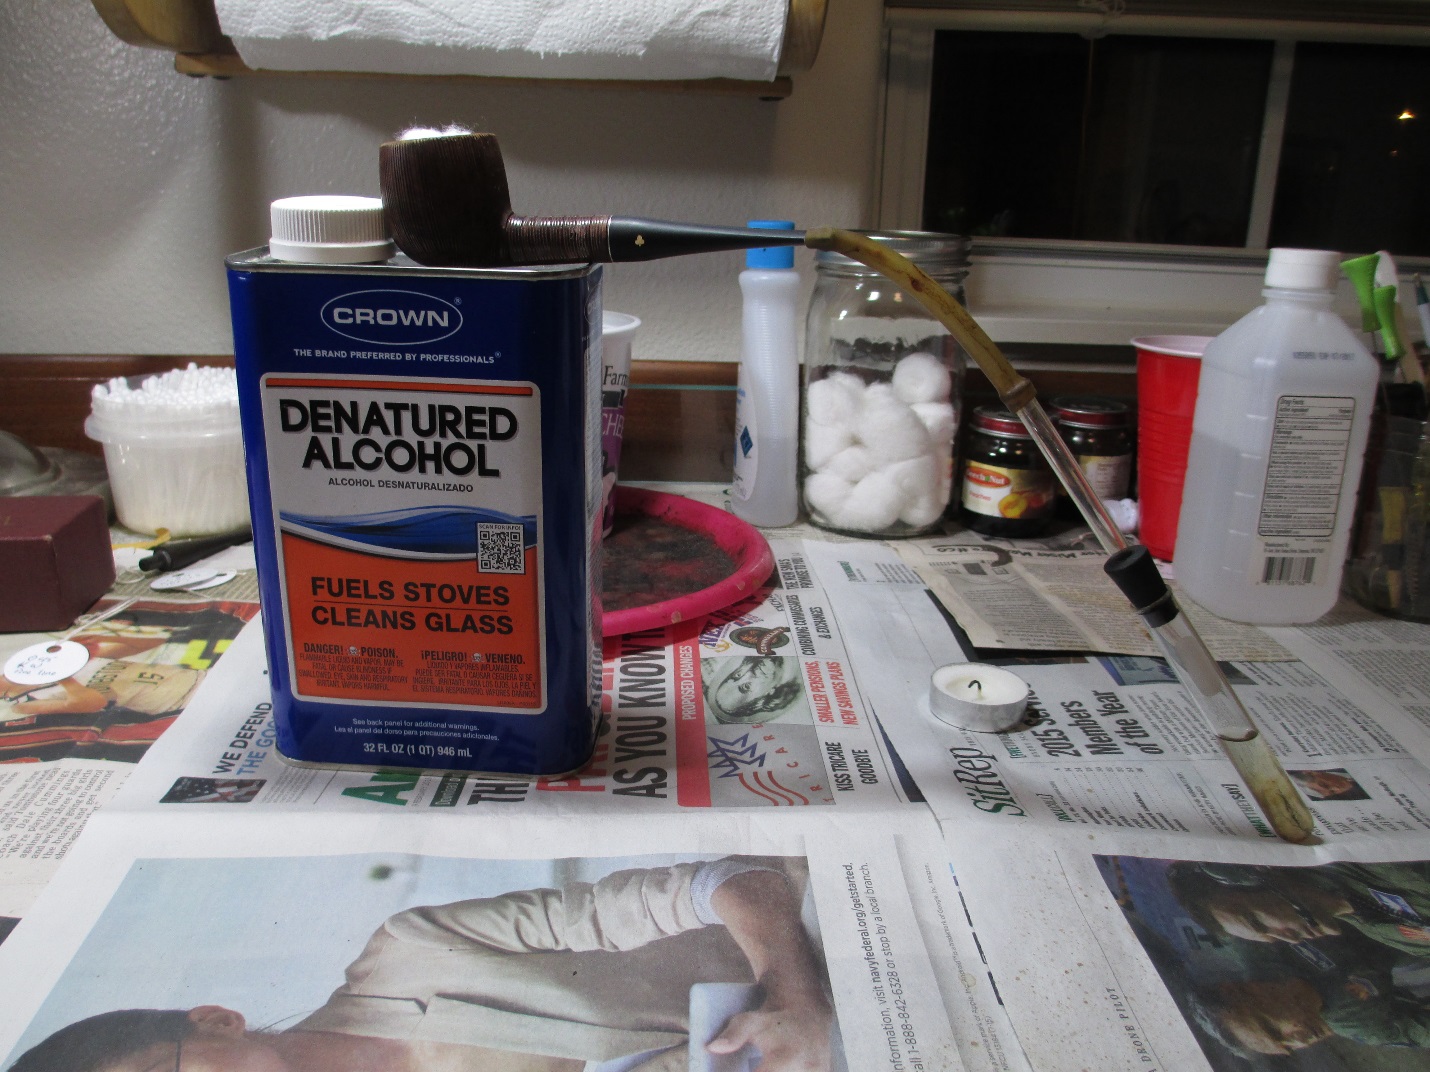
After the first retort.KWA9
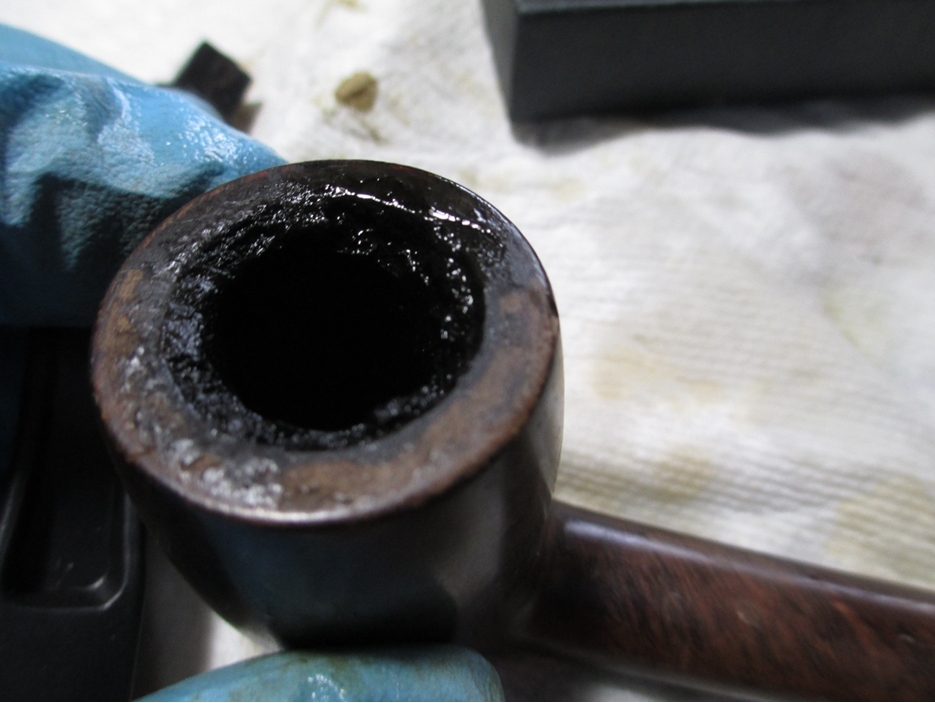
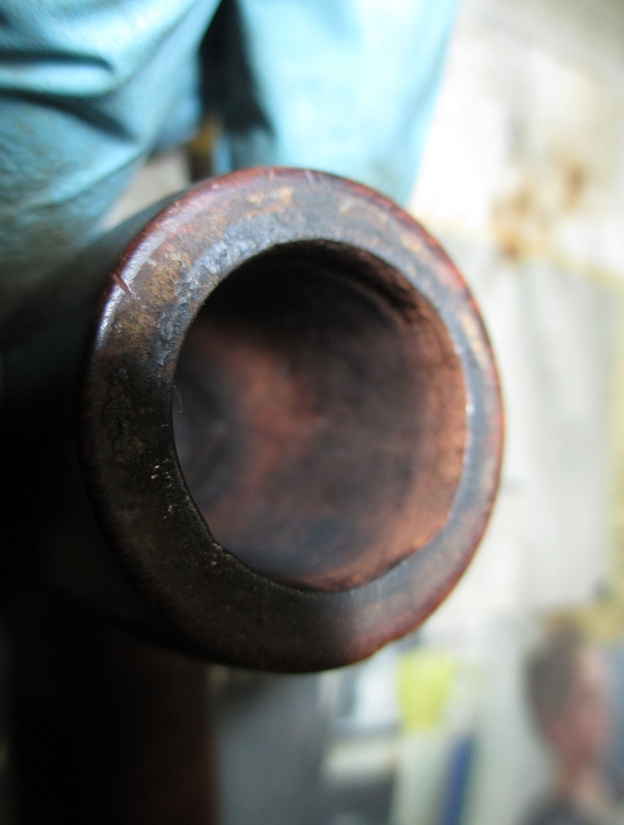
I did the retort two more times. This is what was hiding inside the shank.KWA10 
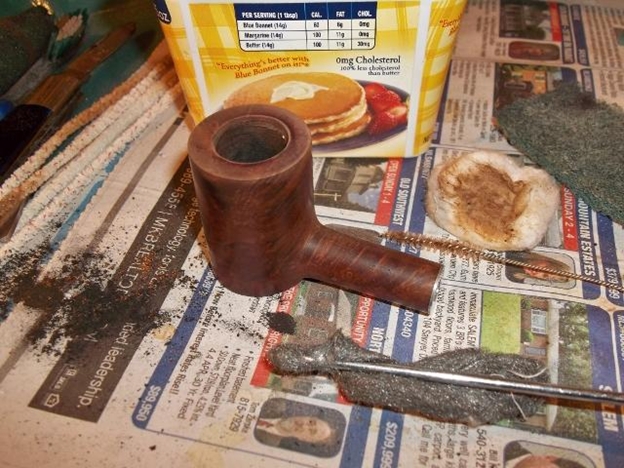
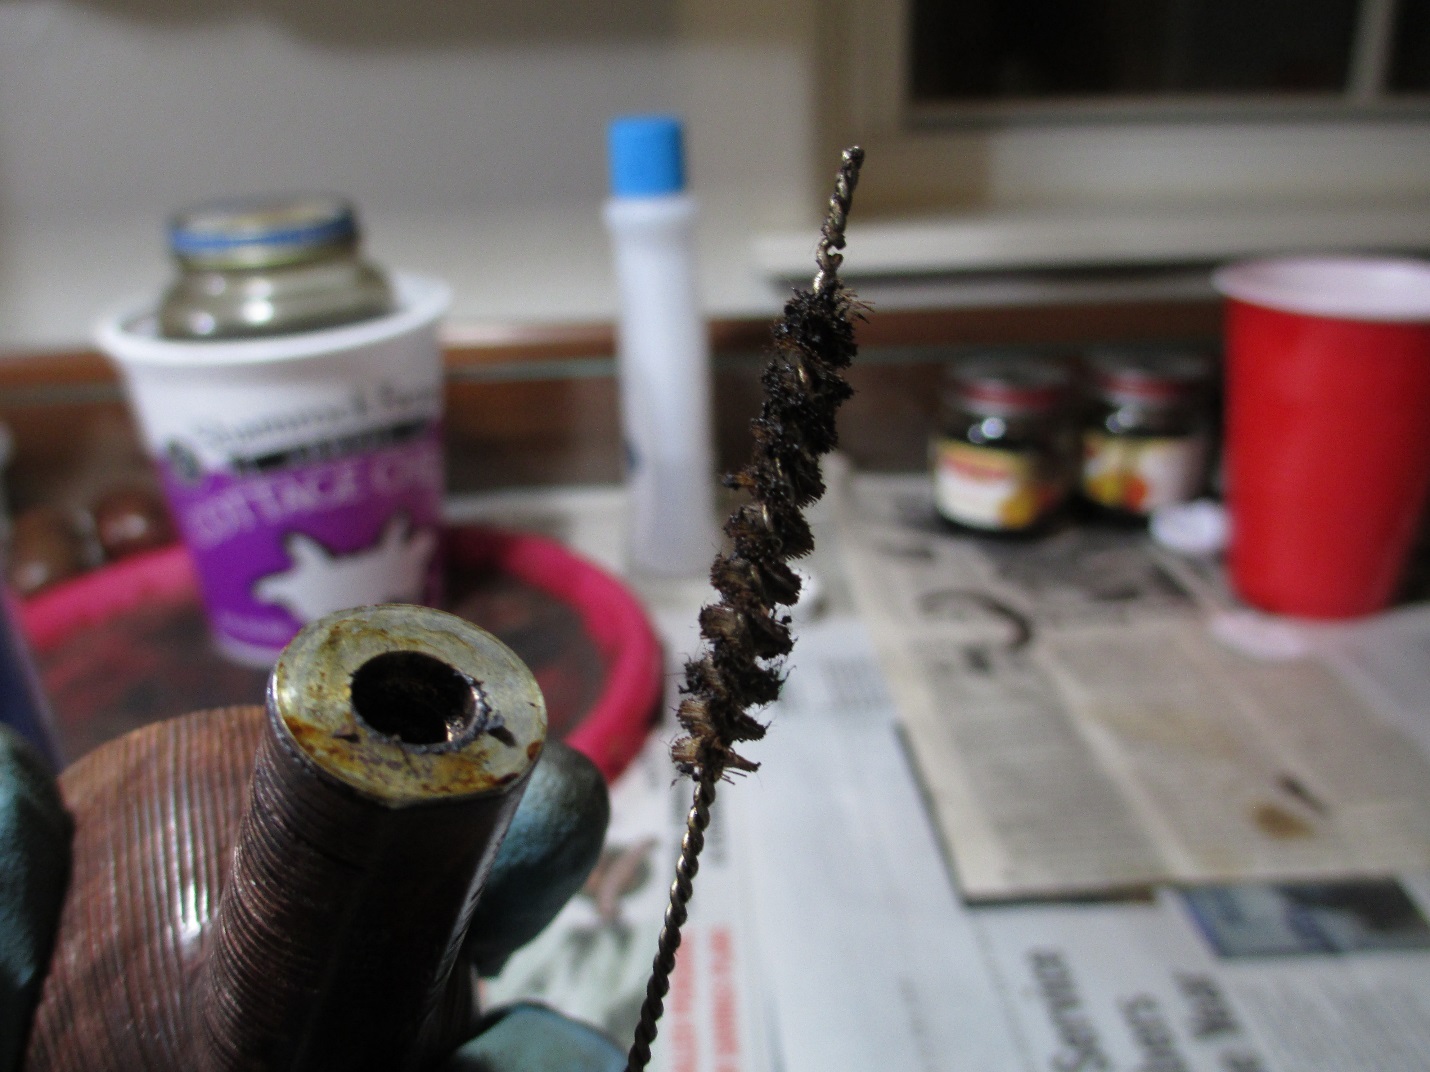
After scrubbing the solids out with a brush dipped in alcohol, I switched to q-tips dipped in alcohol. As you can see, it took a good amount to get it clean.KWA11 
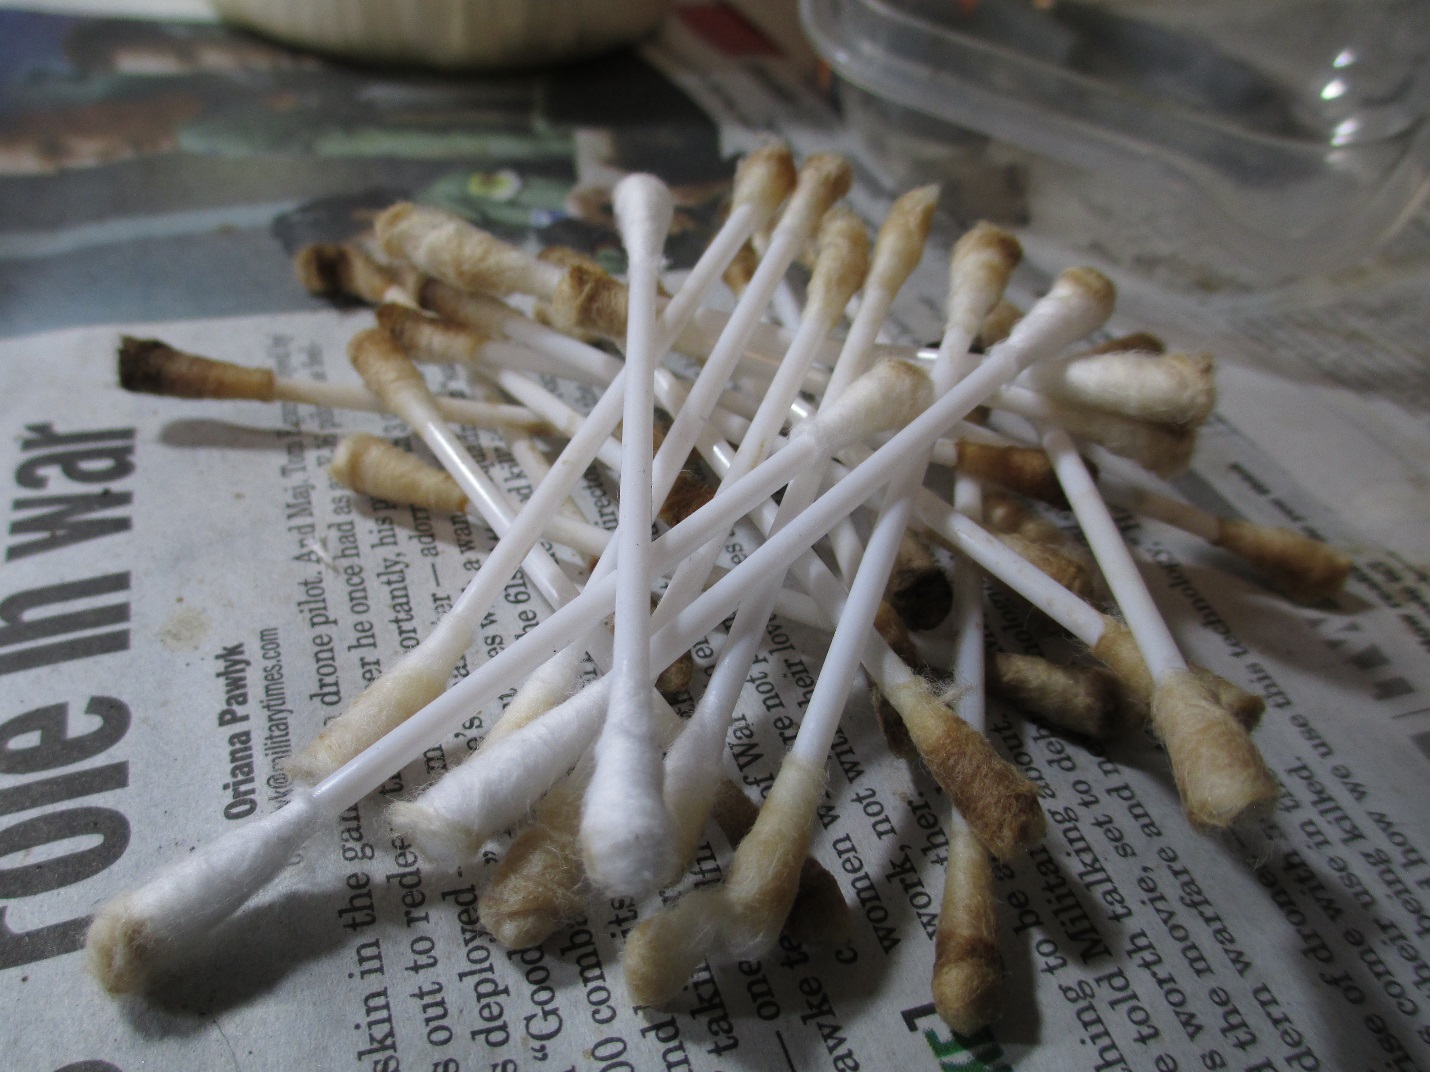
The boiling alcohol loosened up the tar in the stem. It turned out my original guess was correct, the stinger kept the stem relatively clean.KWA12

KWA13 
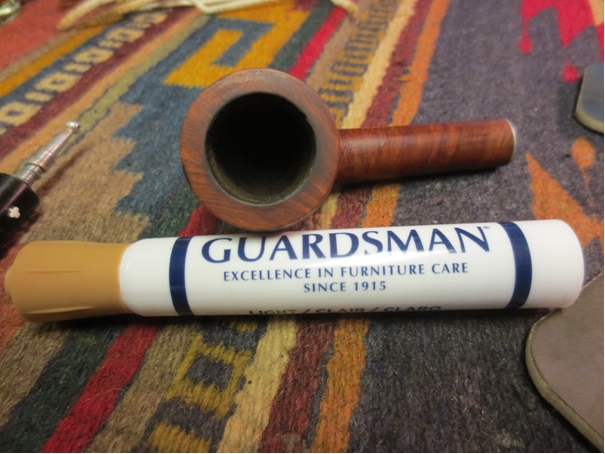
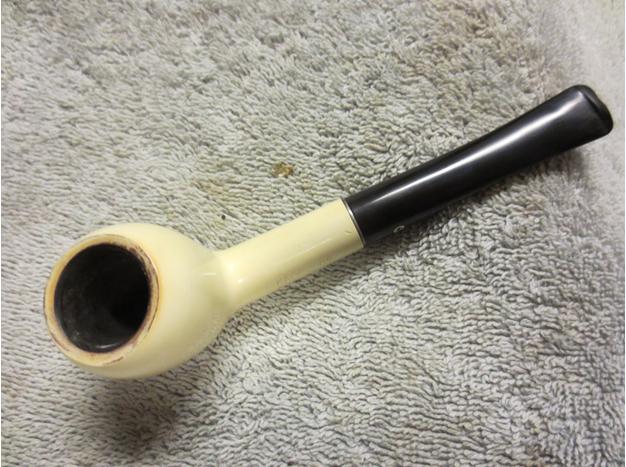
With the inside of the pipe clean, I turned my attention to the outside of the pipe. The first thing I wanted to do was get rid of the remaining varnish. I used acetone and 0000 steel wool.KWA14 
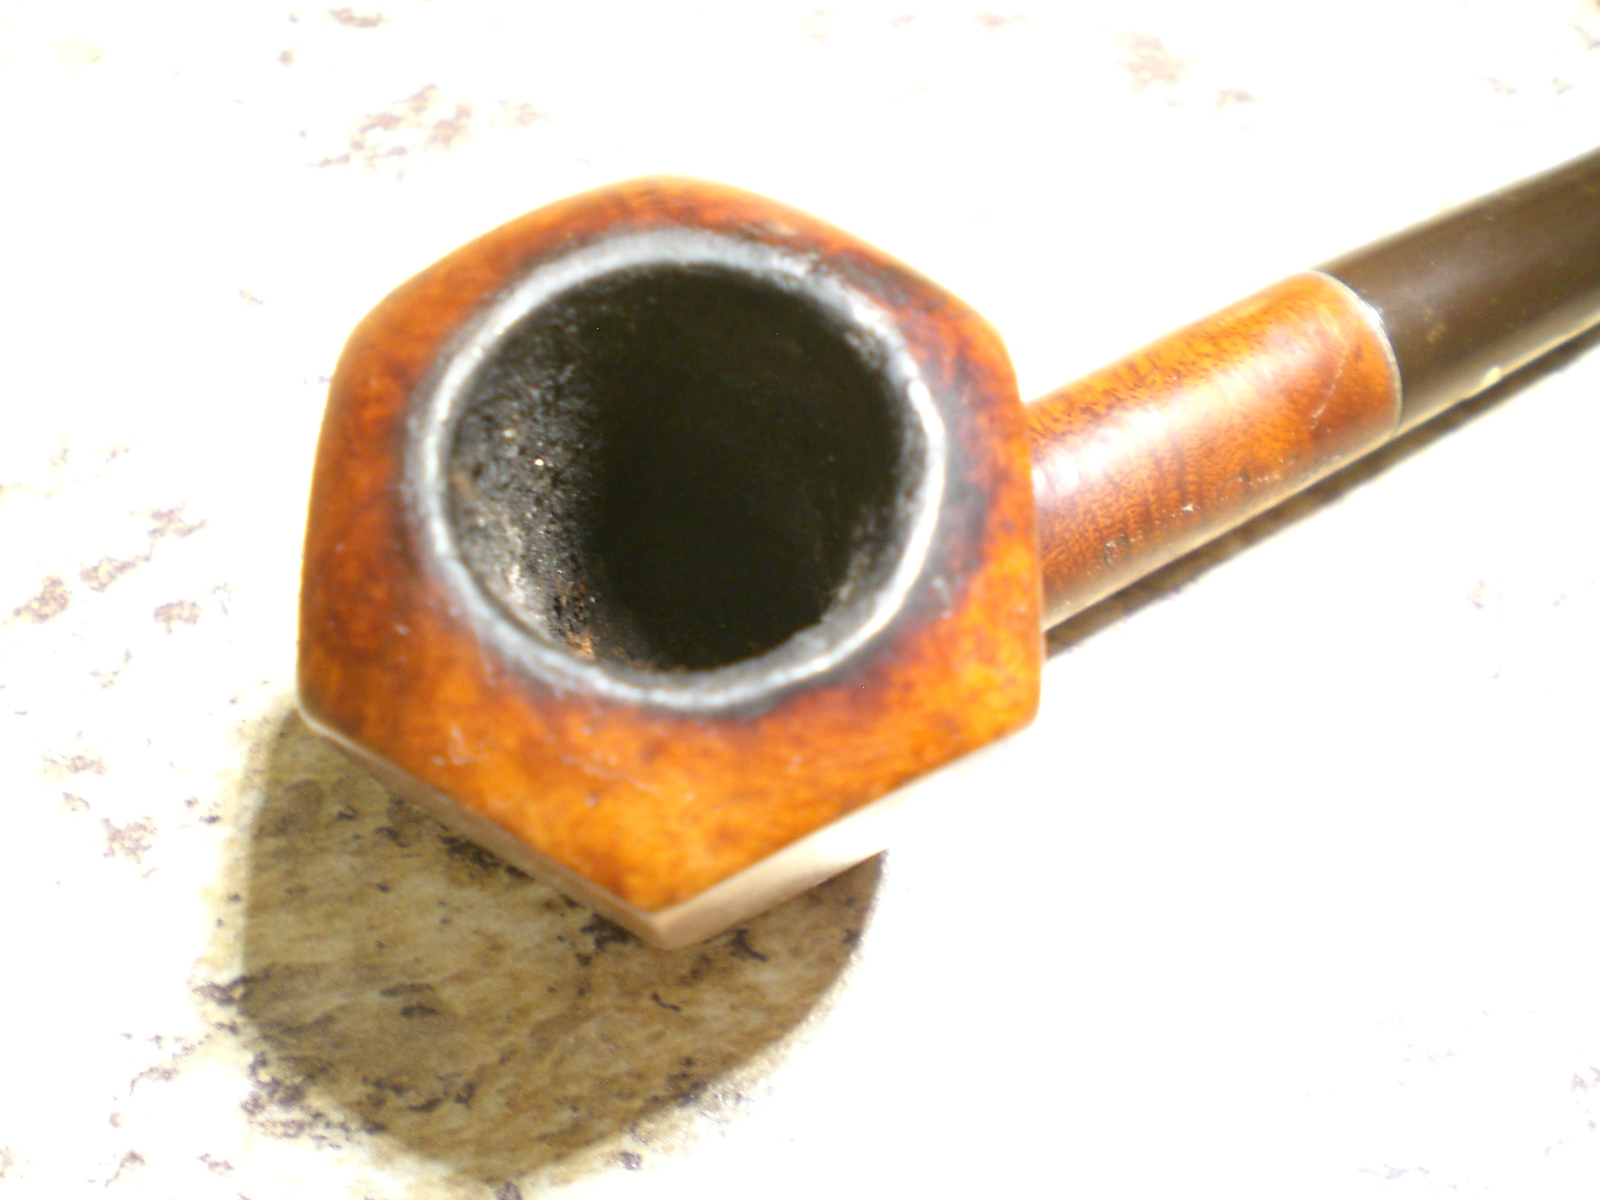
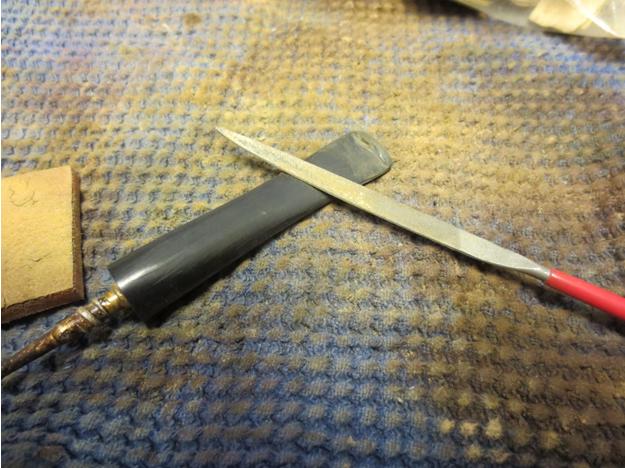
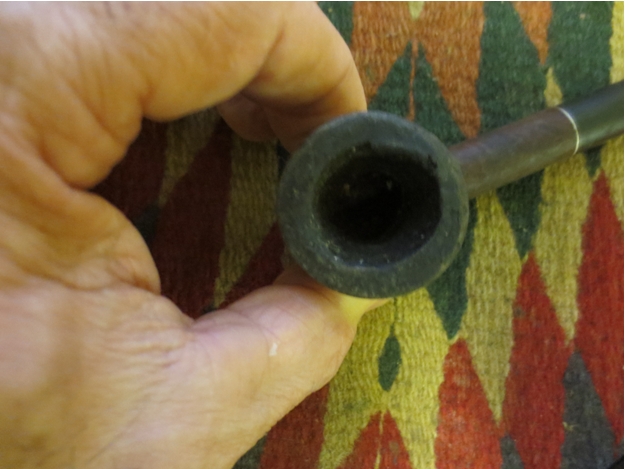
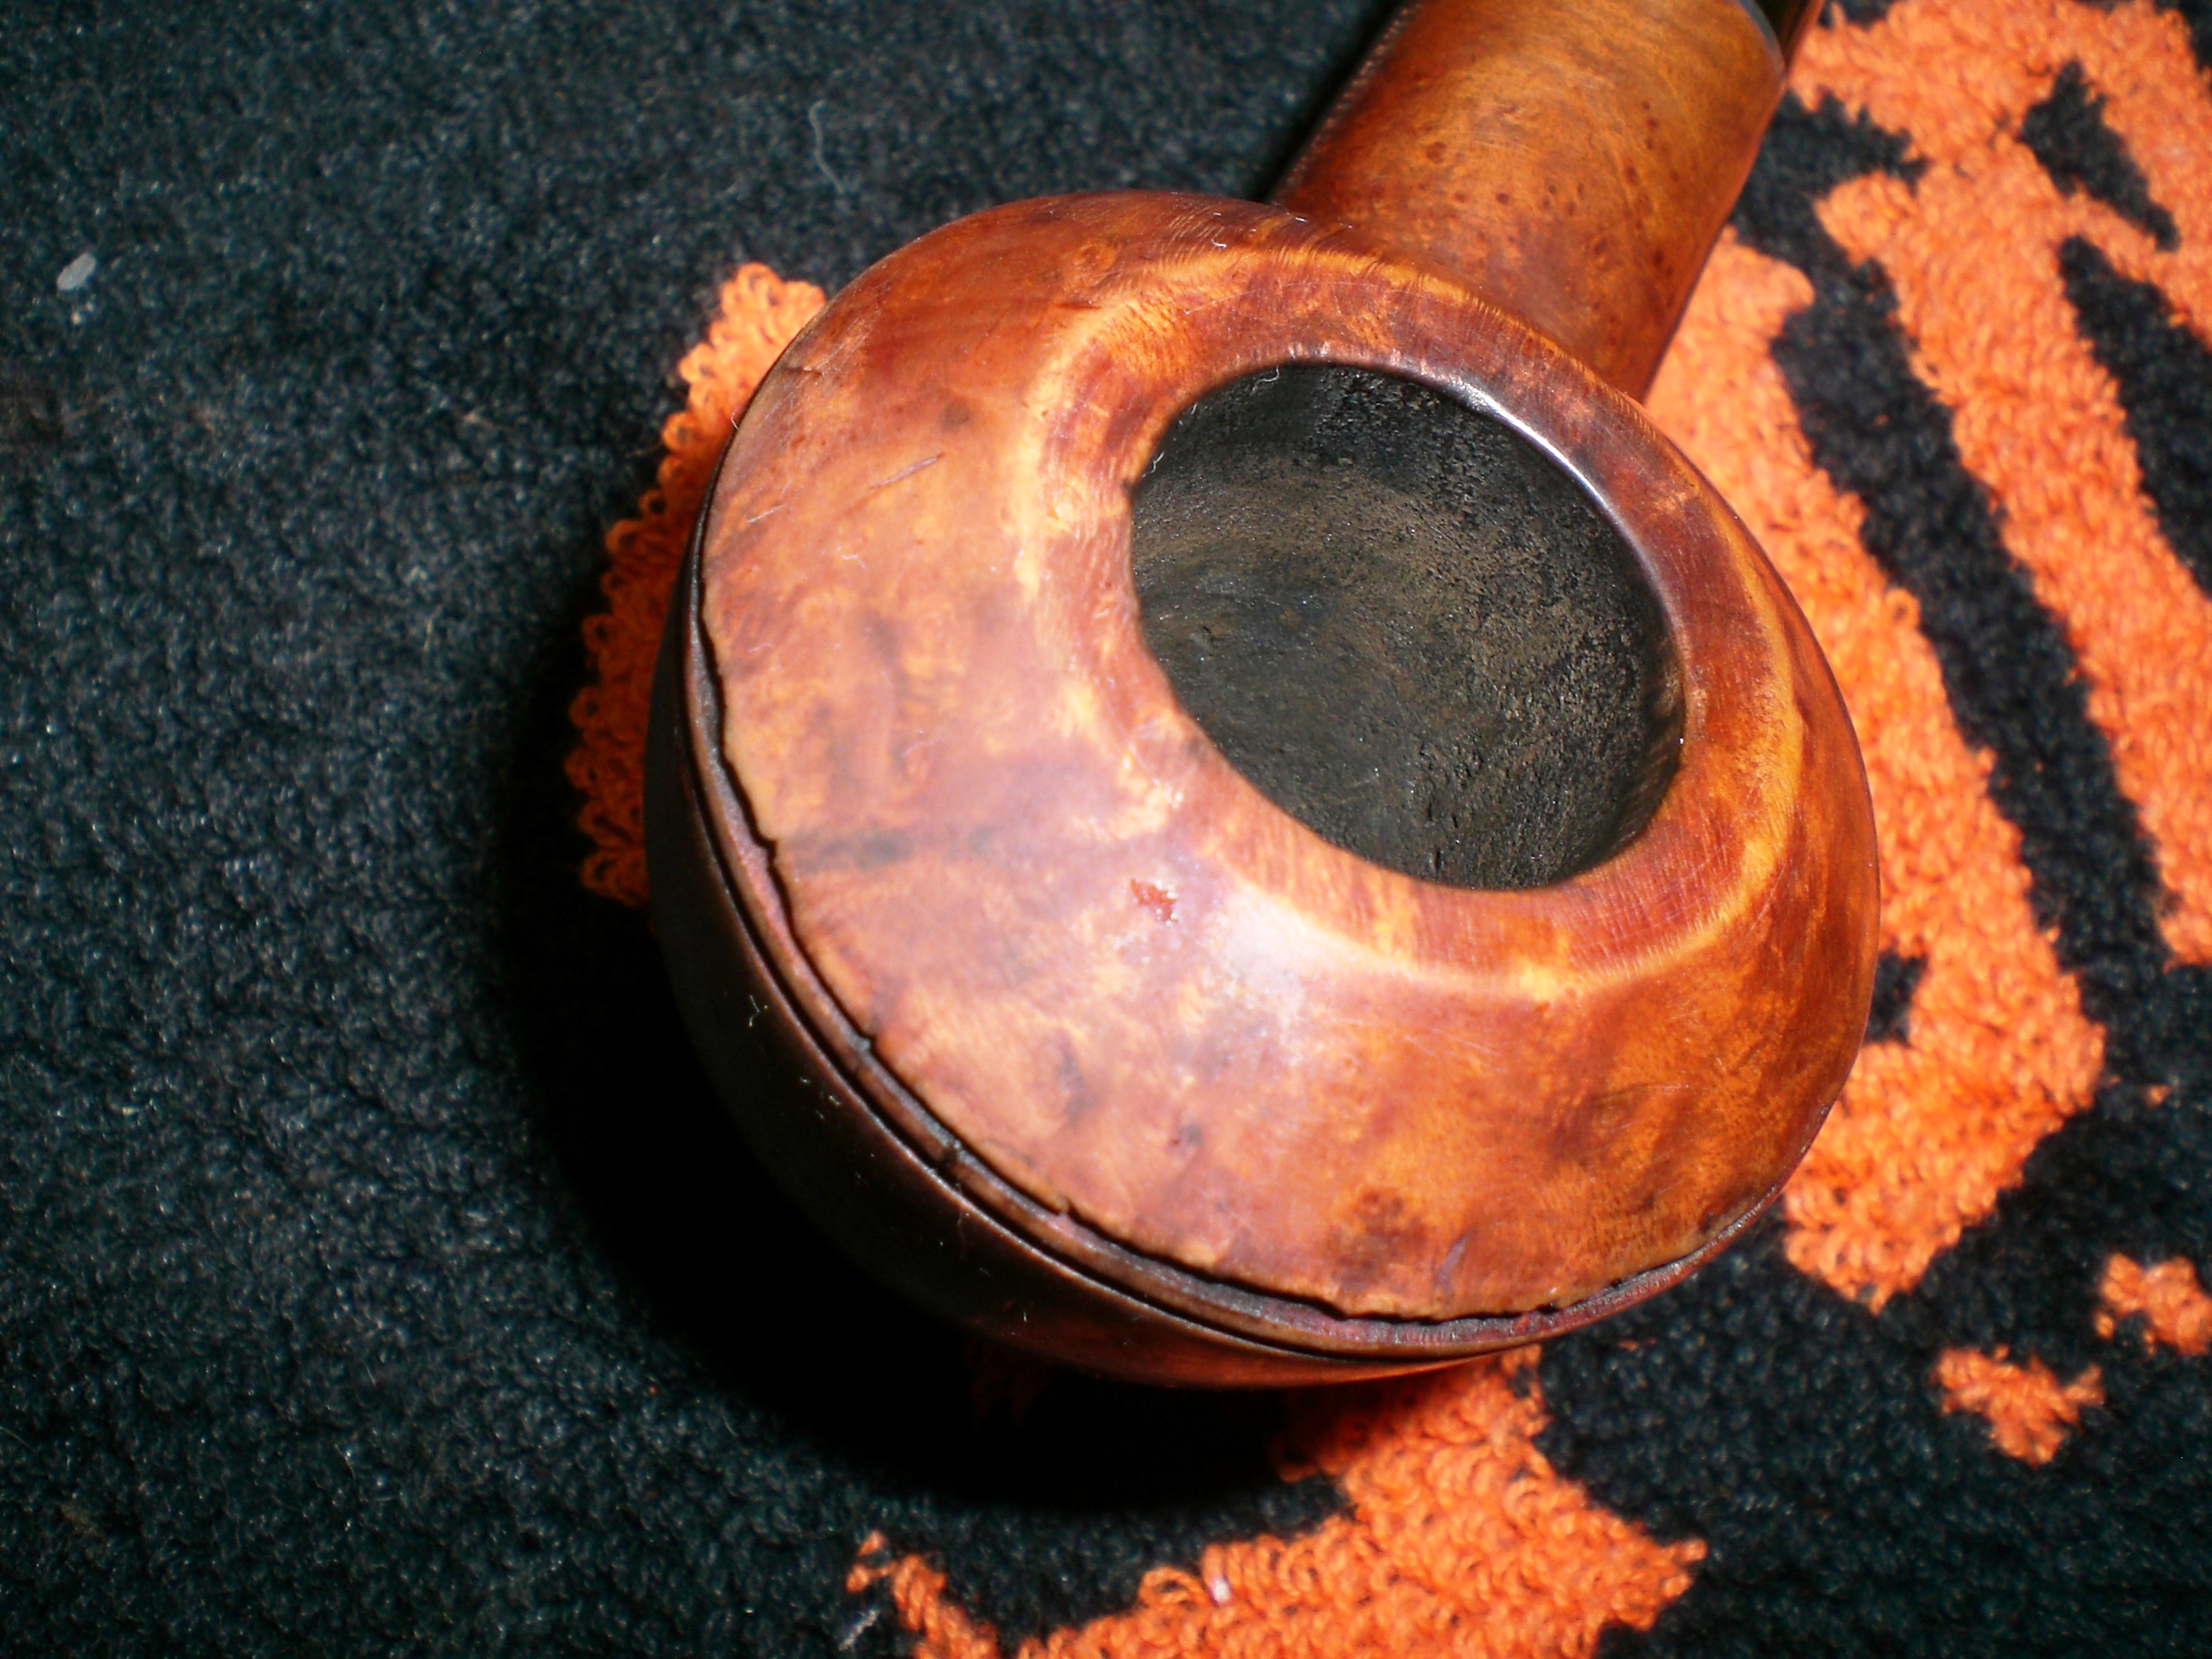
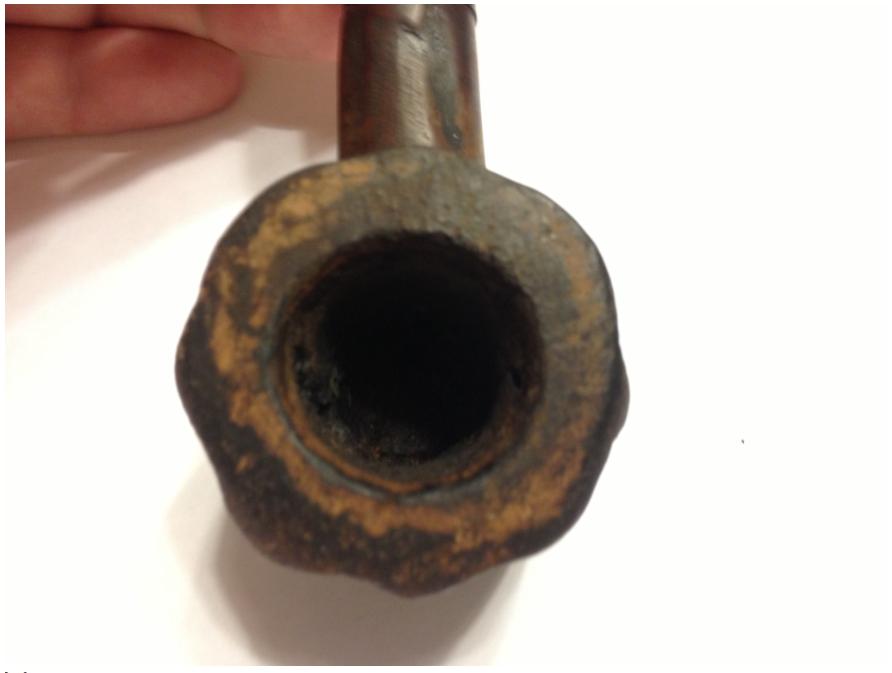
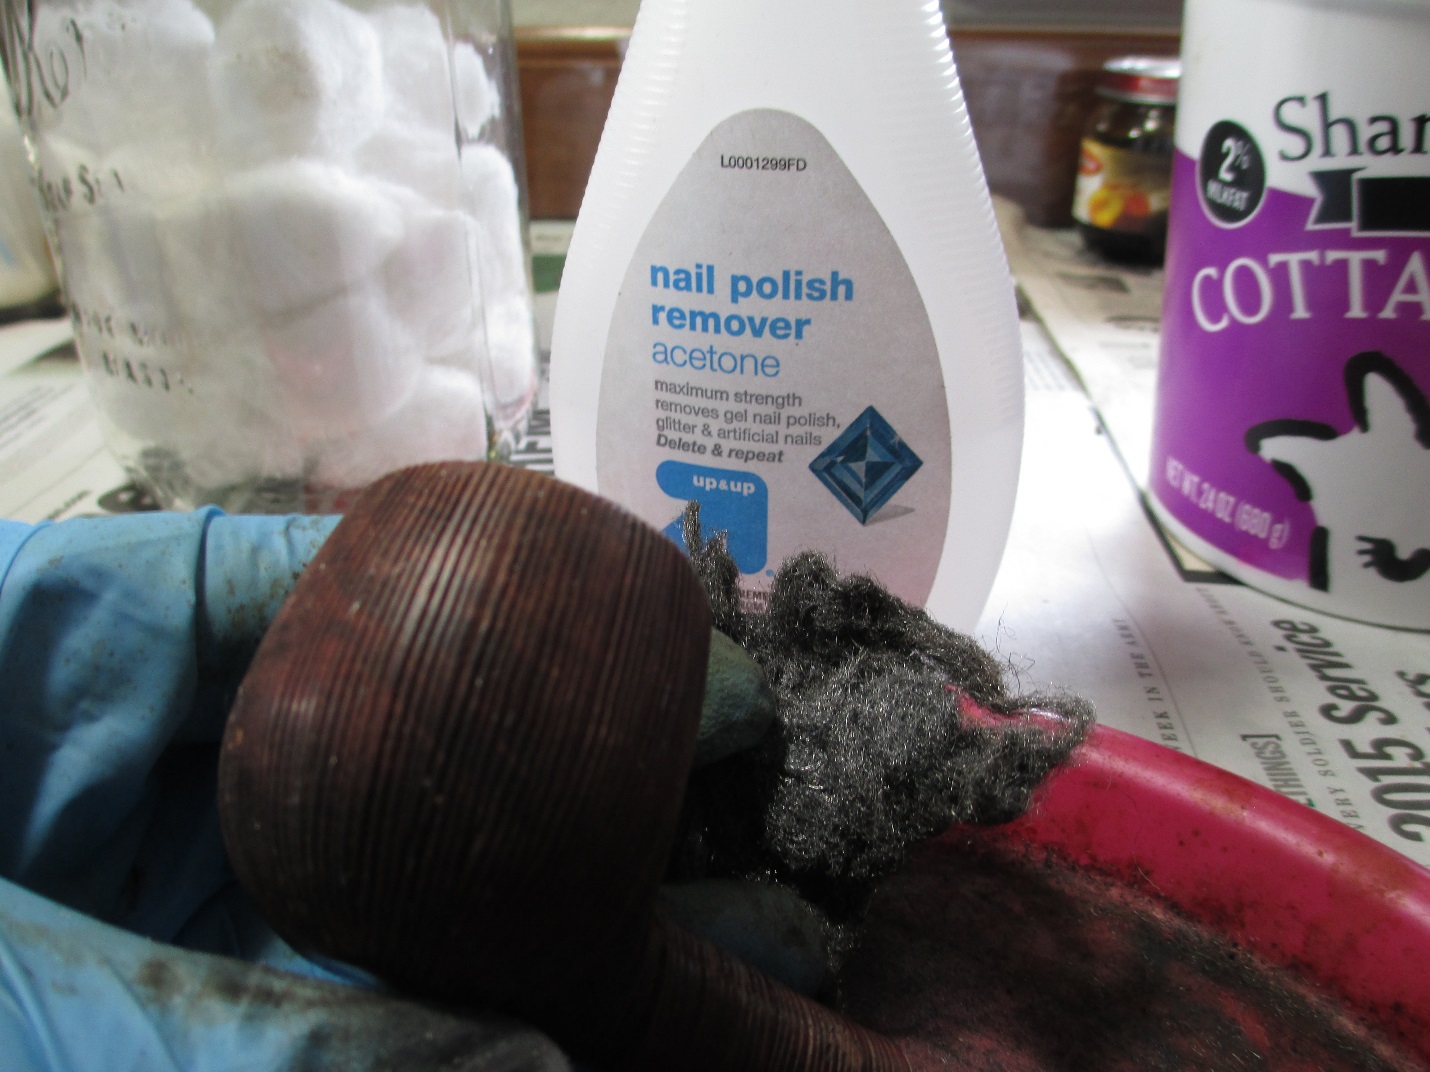
Next I topped the bowl to eliminate the rim damage. I used a piece of glass with 400 grit sand paper.KWA15 
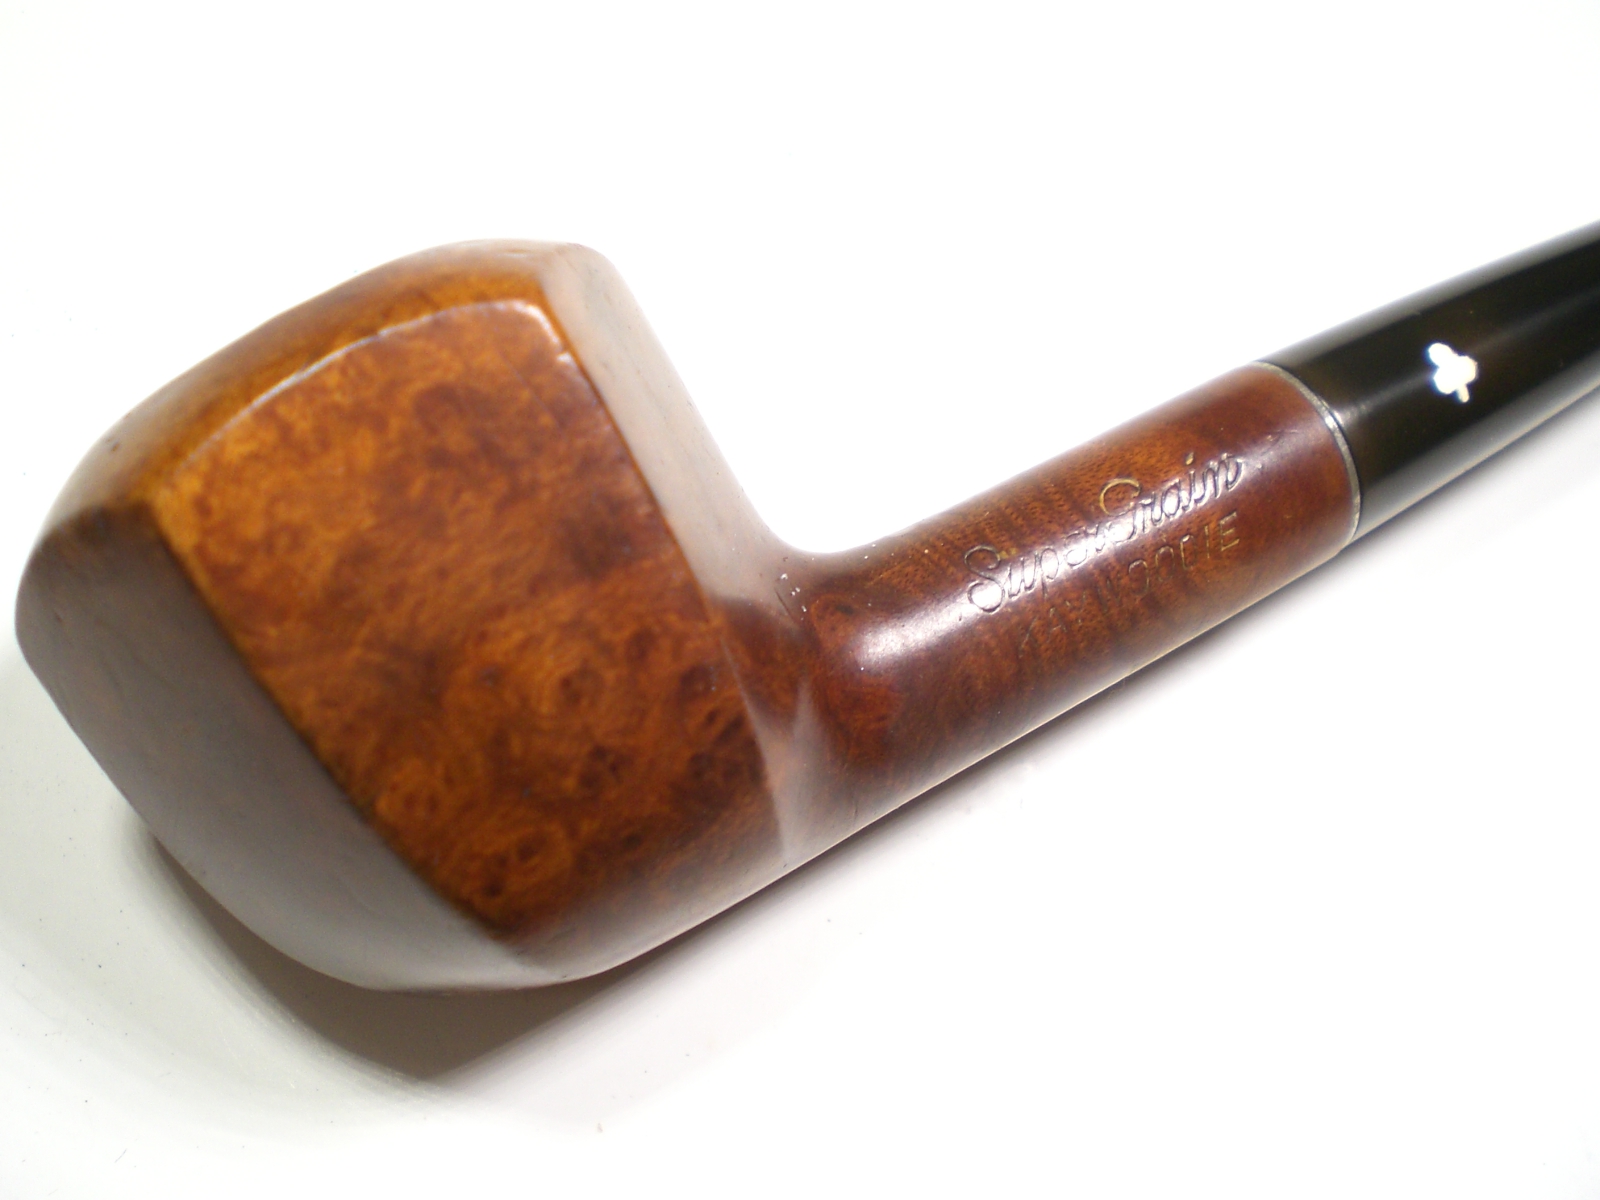
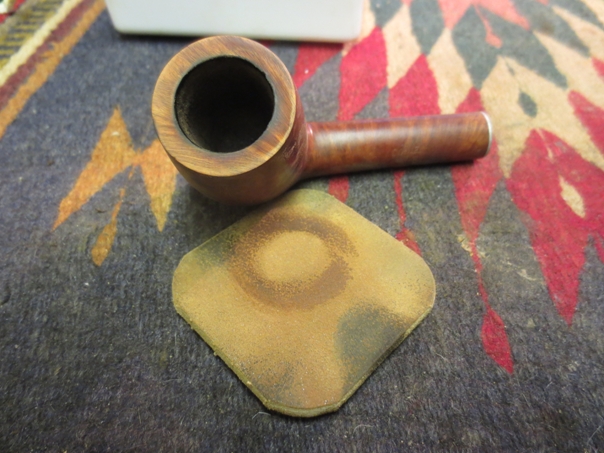
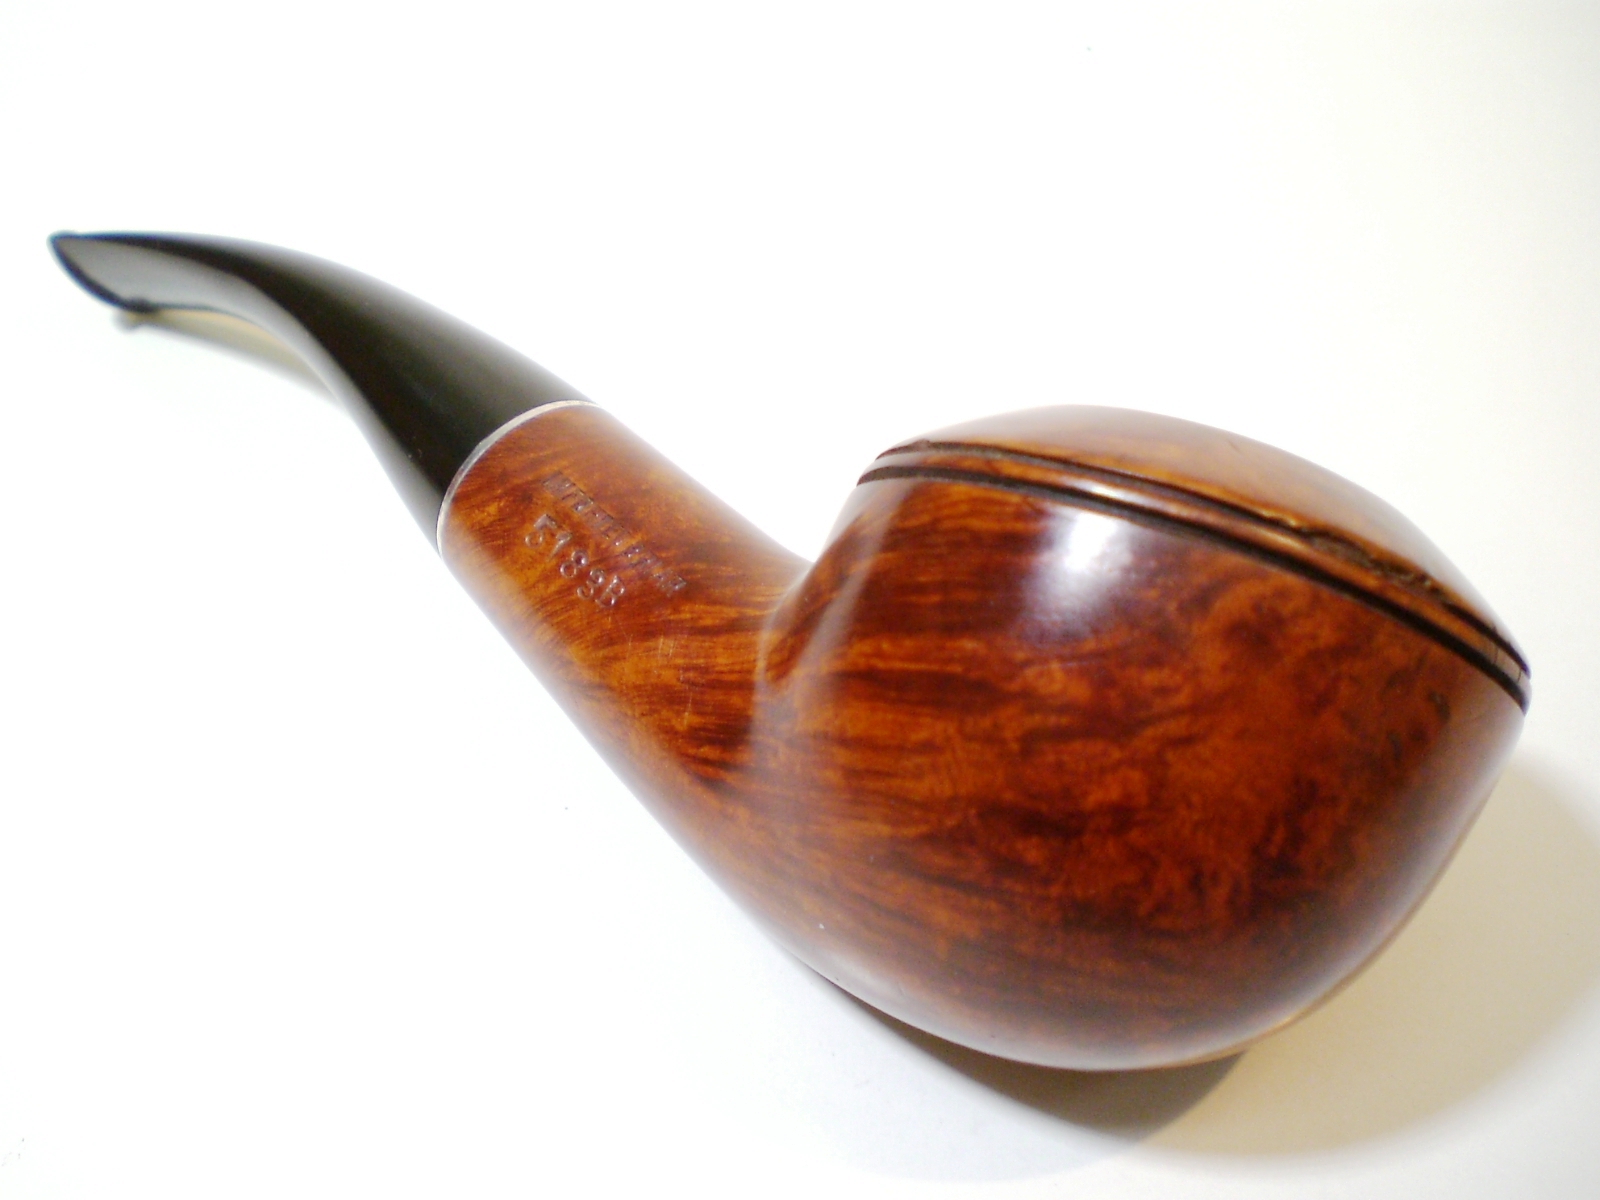
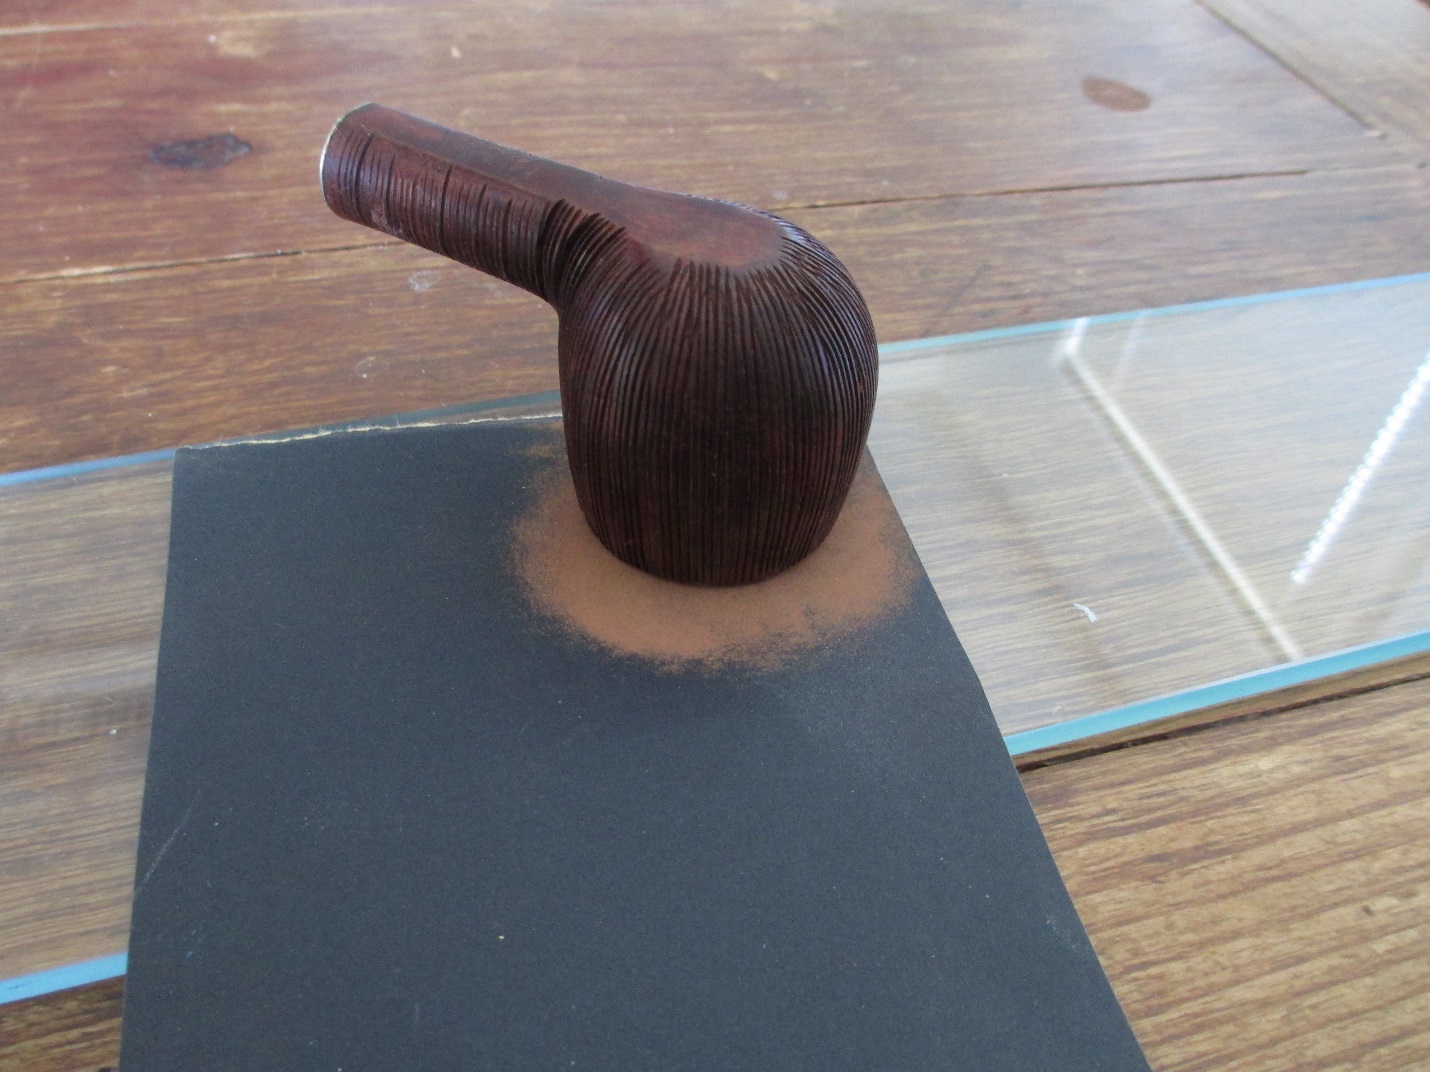
After topping the bowl I used Pimo Pipe Supply medium walnut stain to cover up the couple of fills.KWA16 
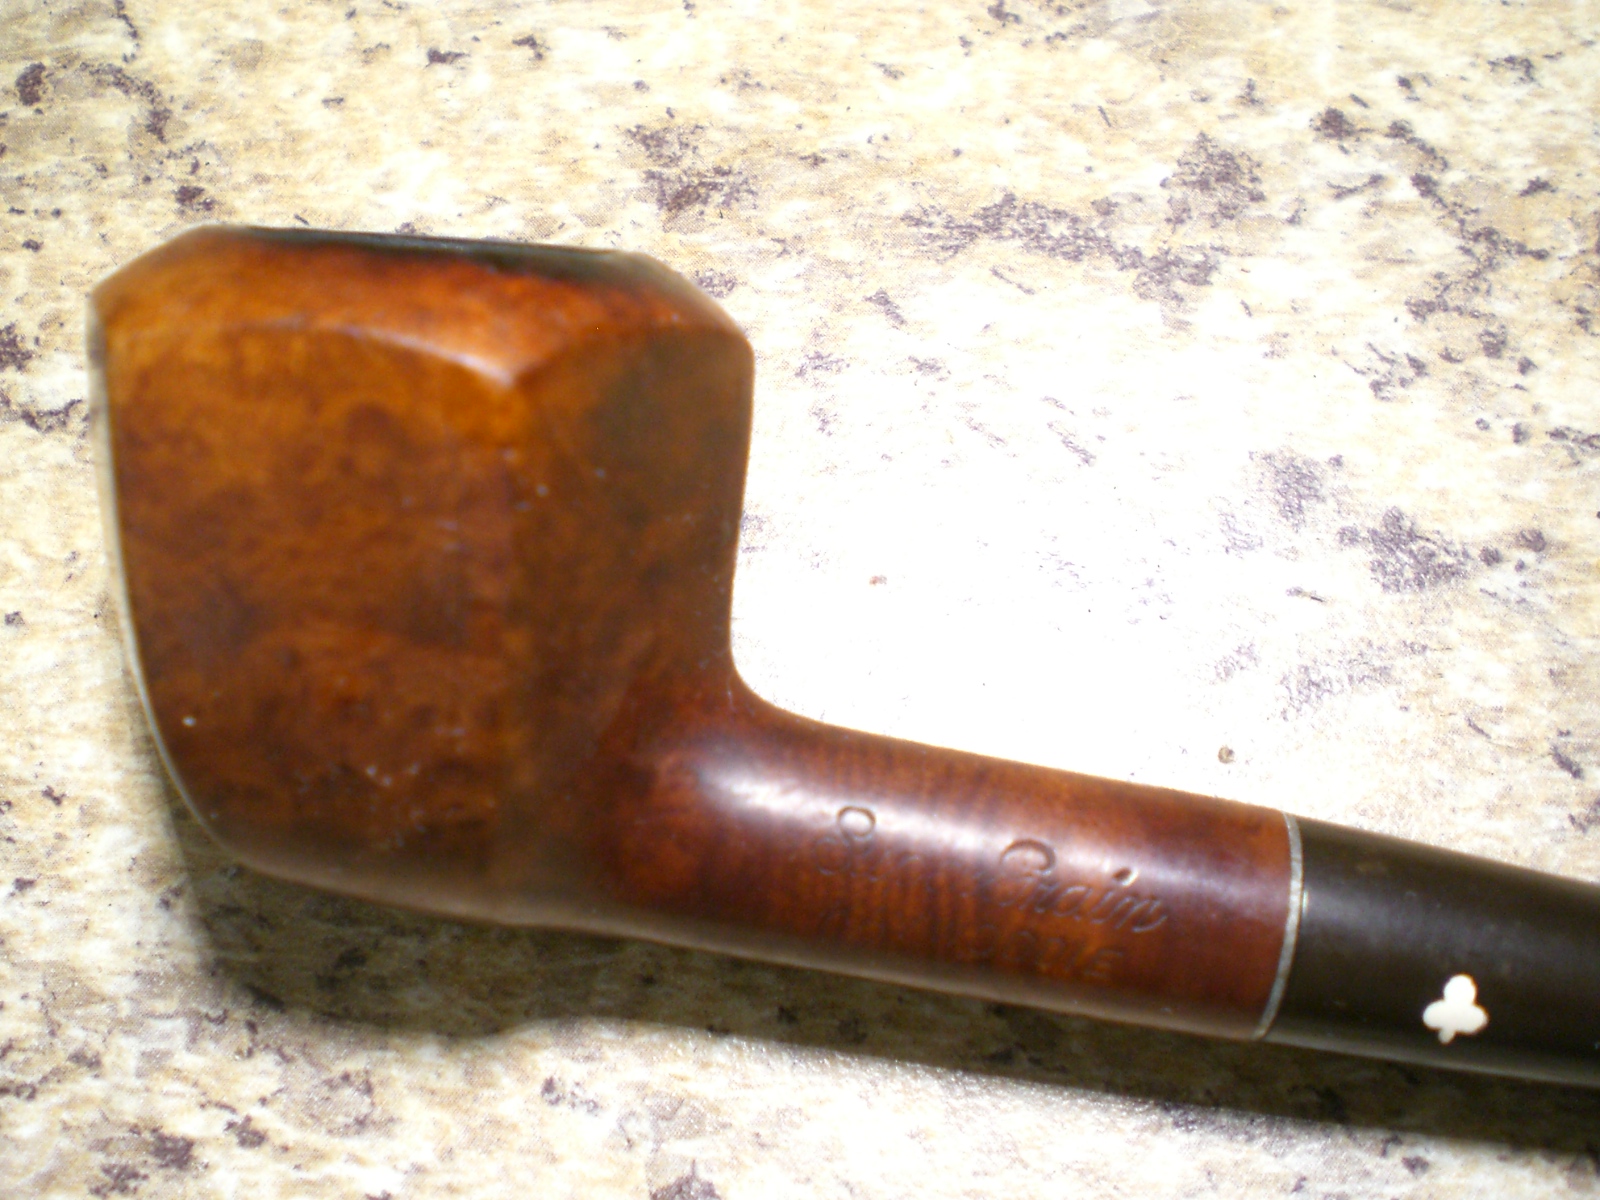
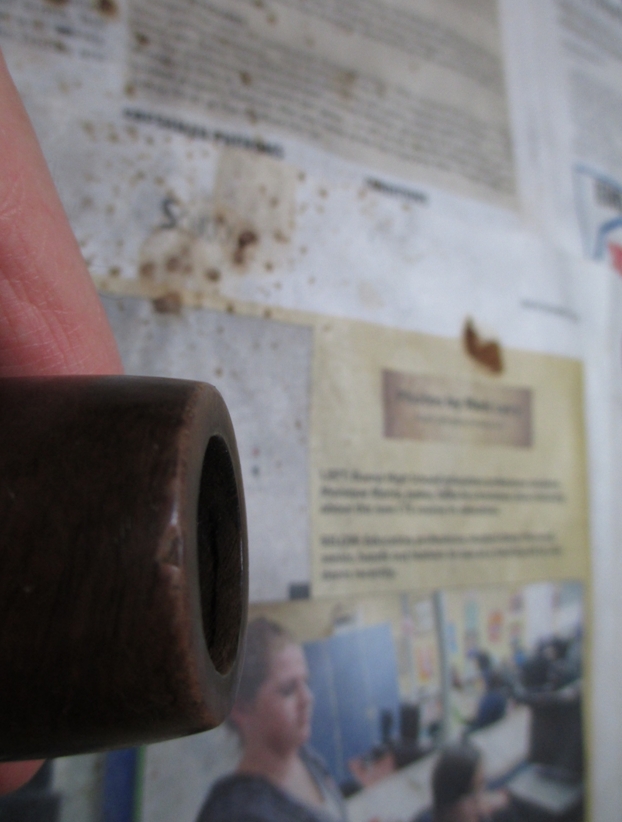
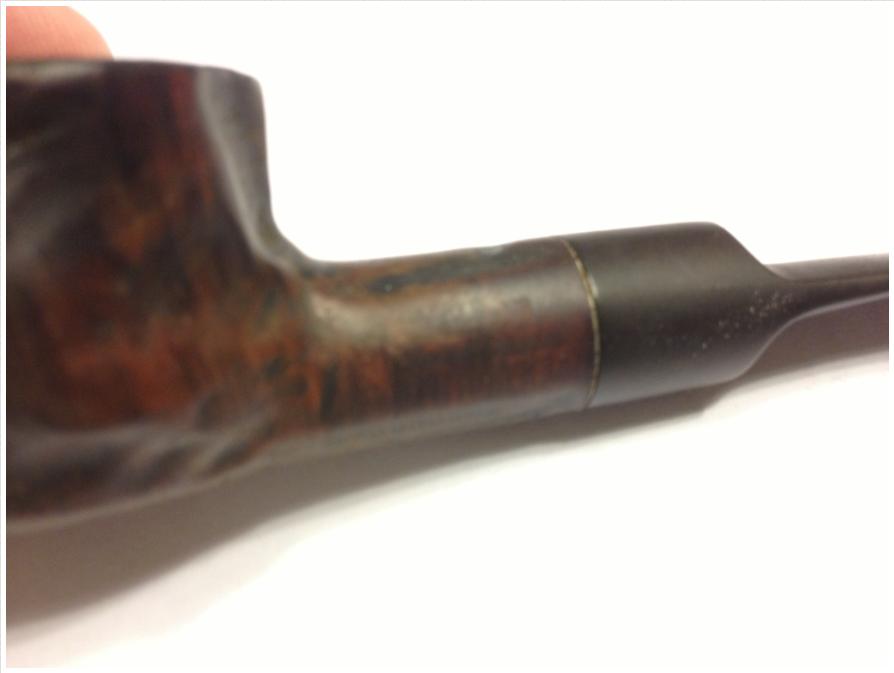
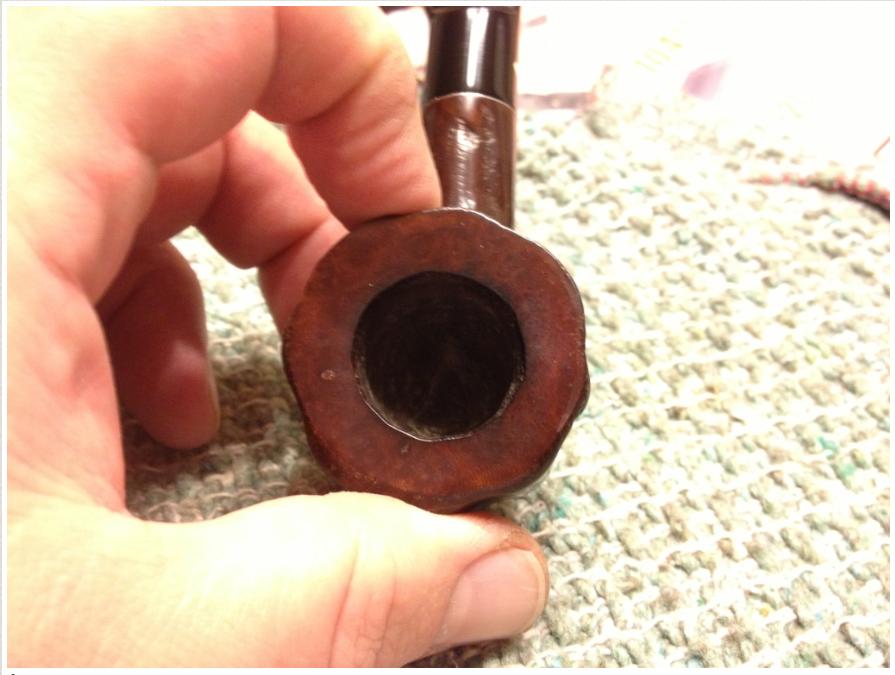
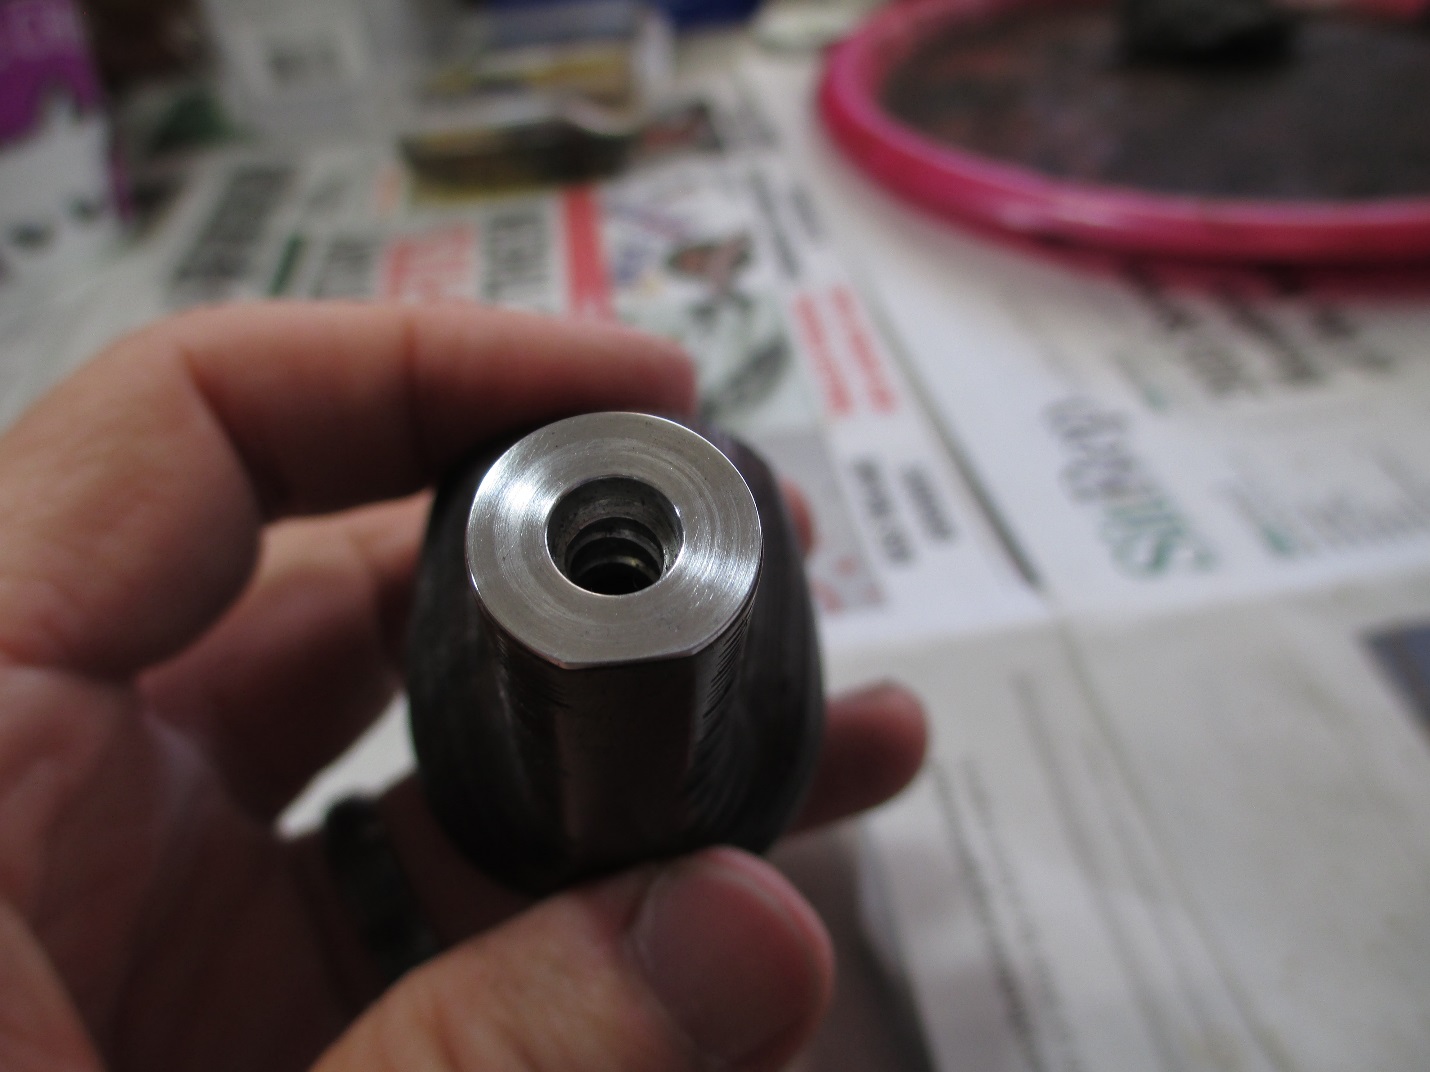
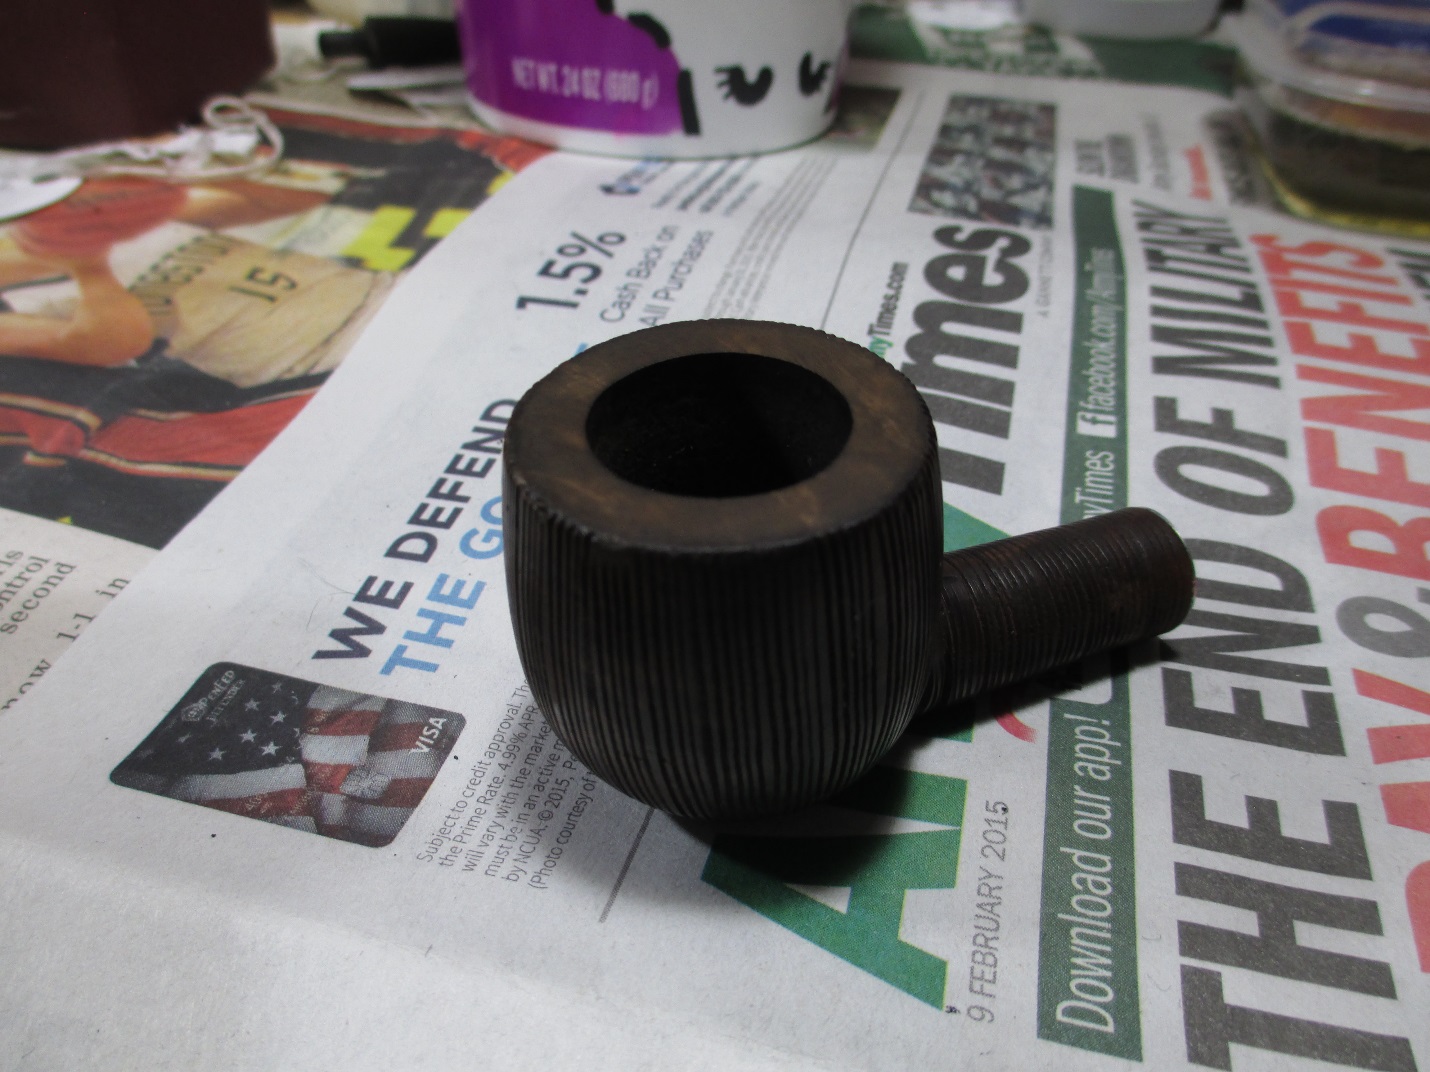
While I was at it, I polished the aluminum insert in the shank with 0000 steel wool.KWA17

KWA18 
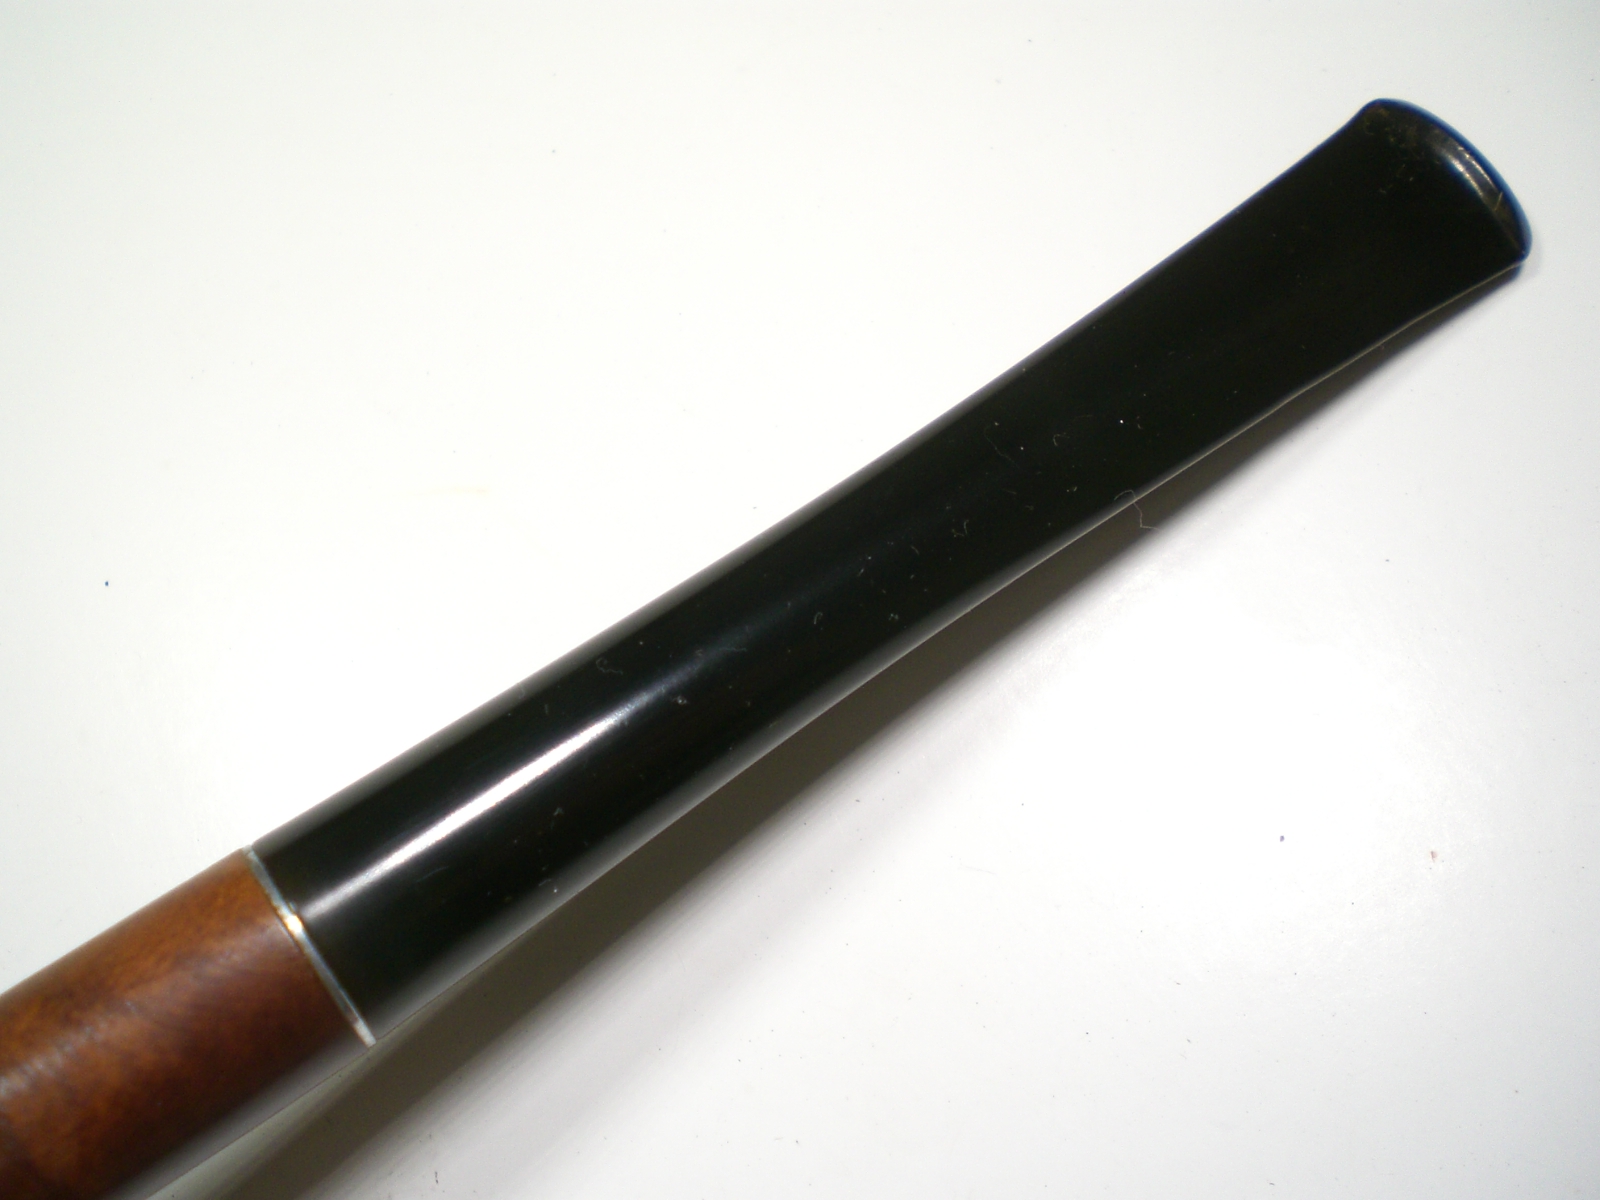
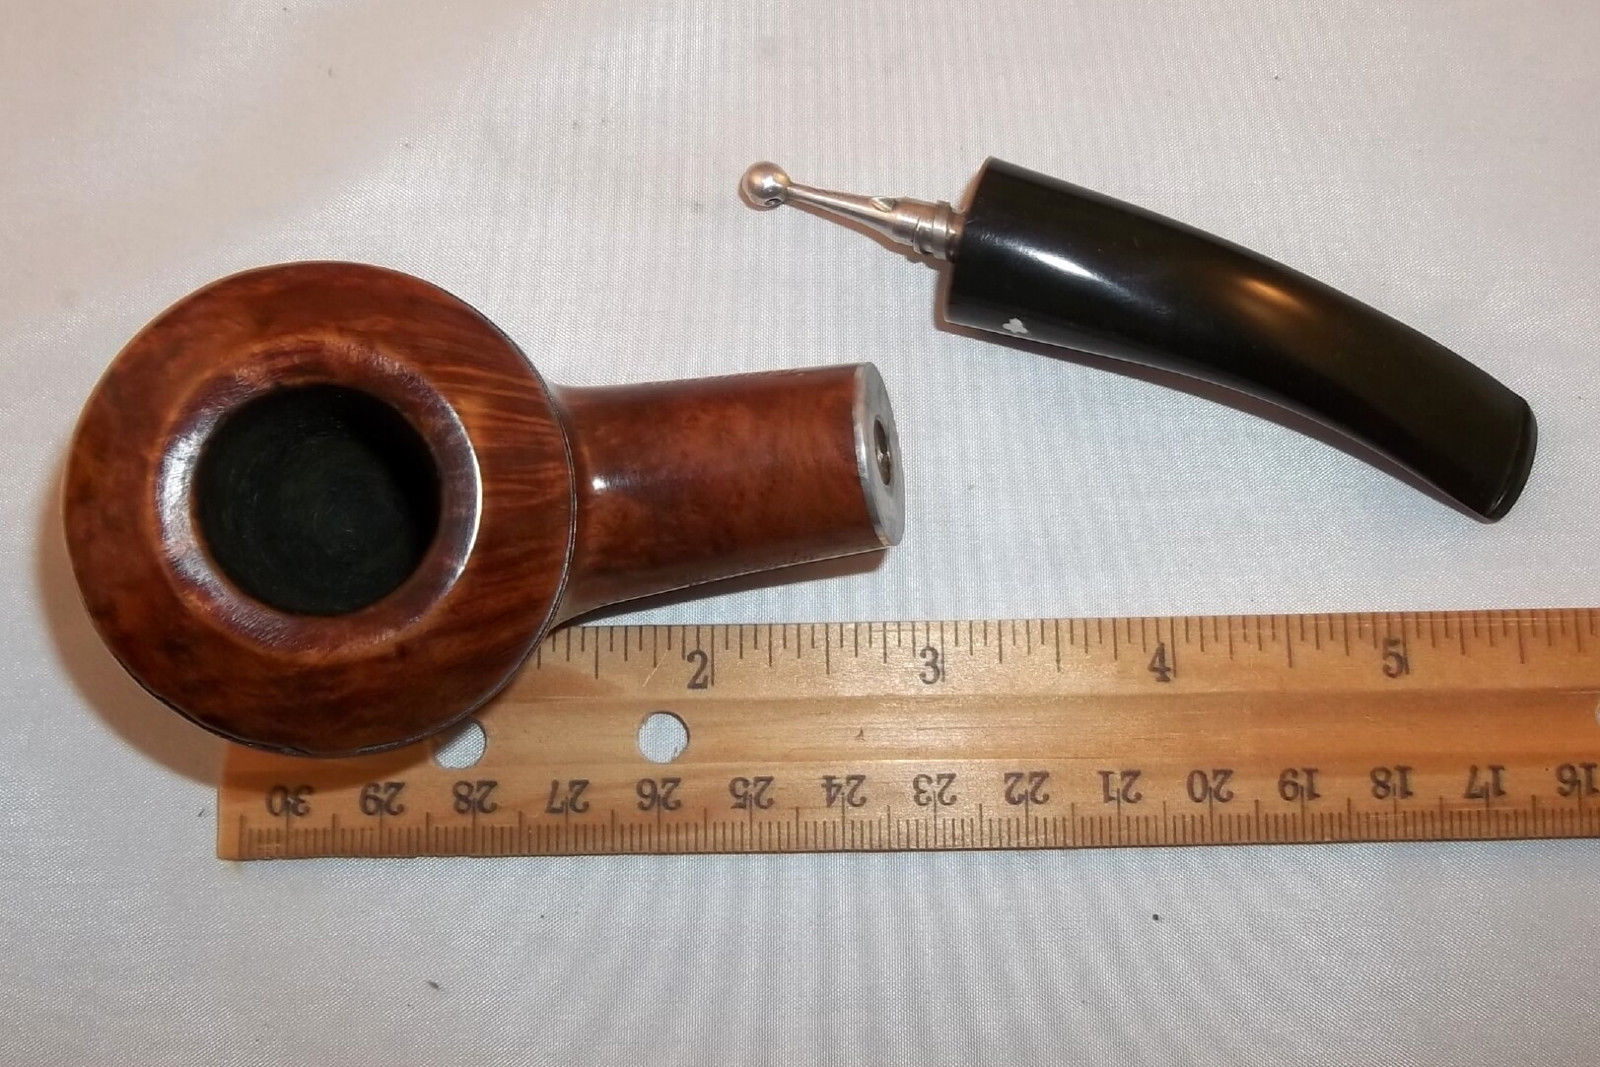
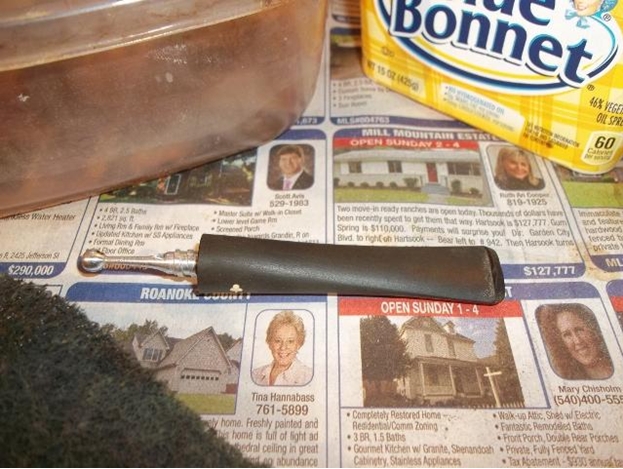
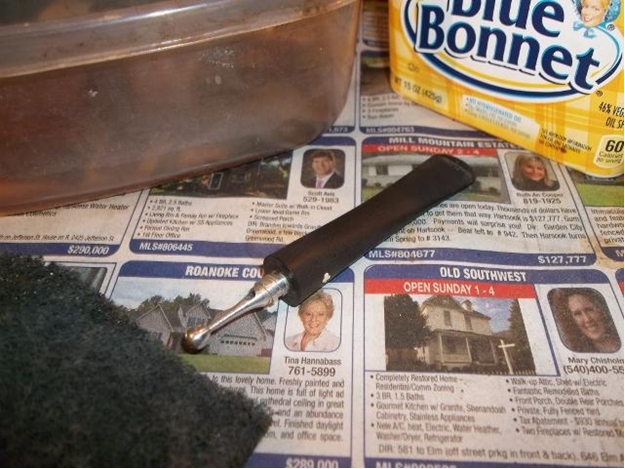
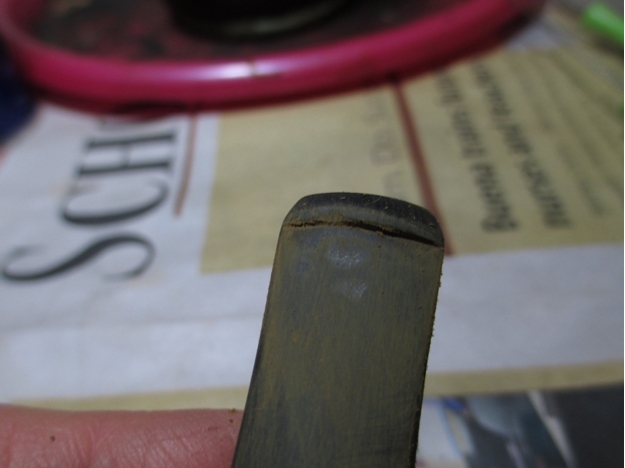
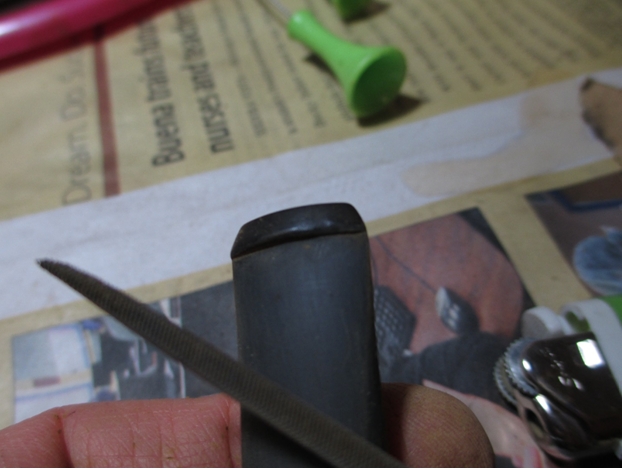
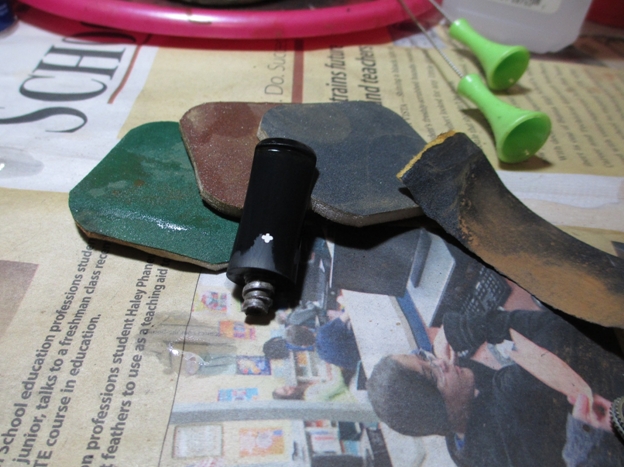
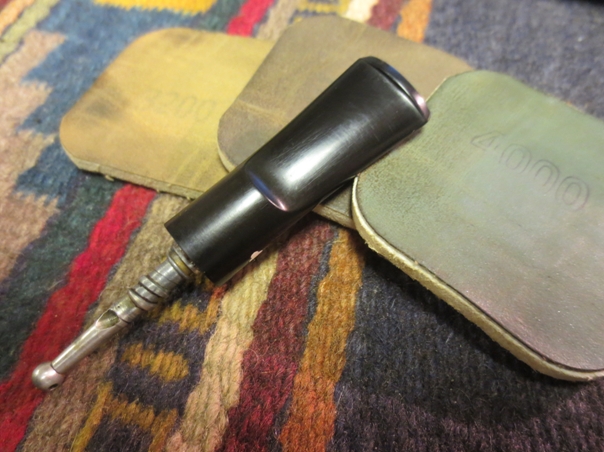
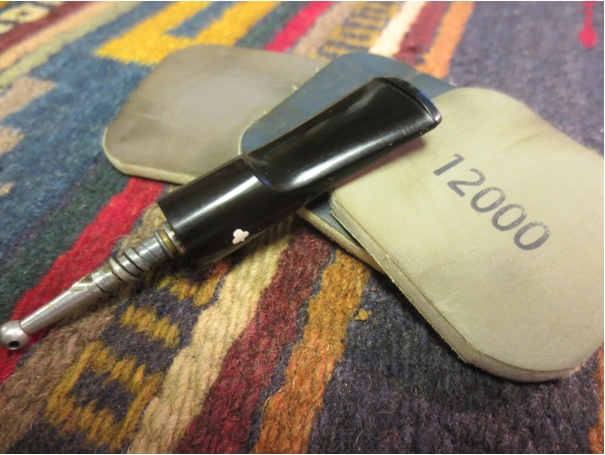
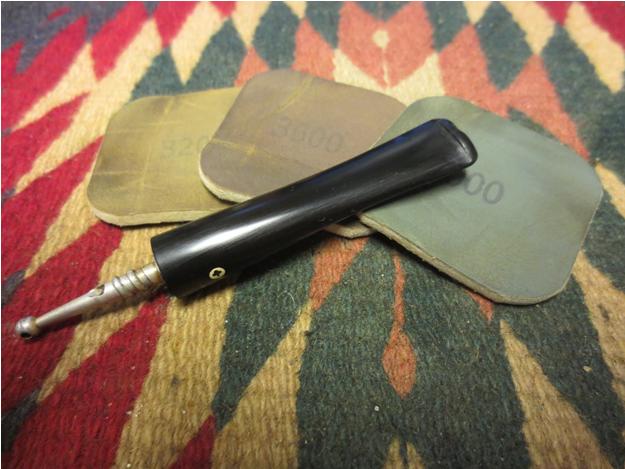
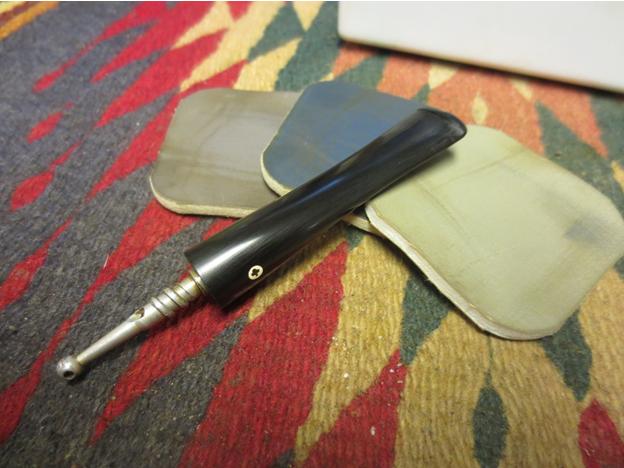
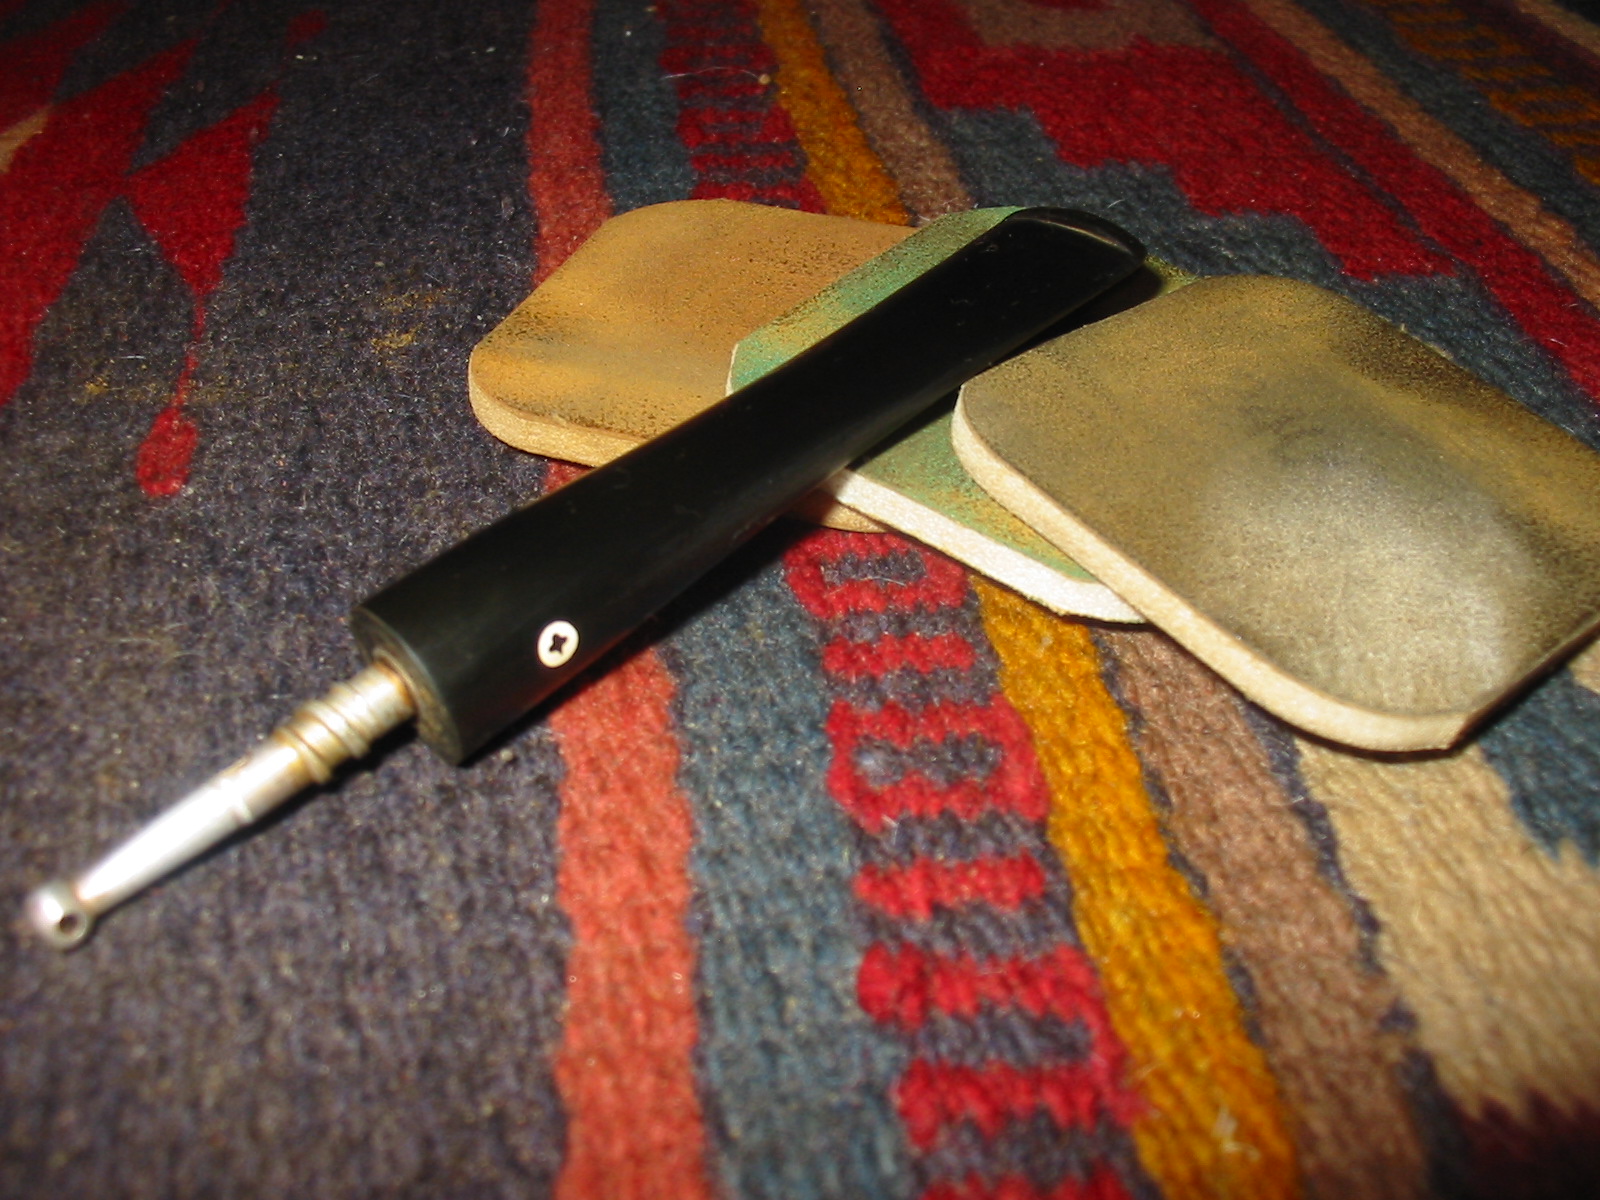
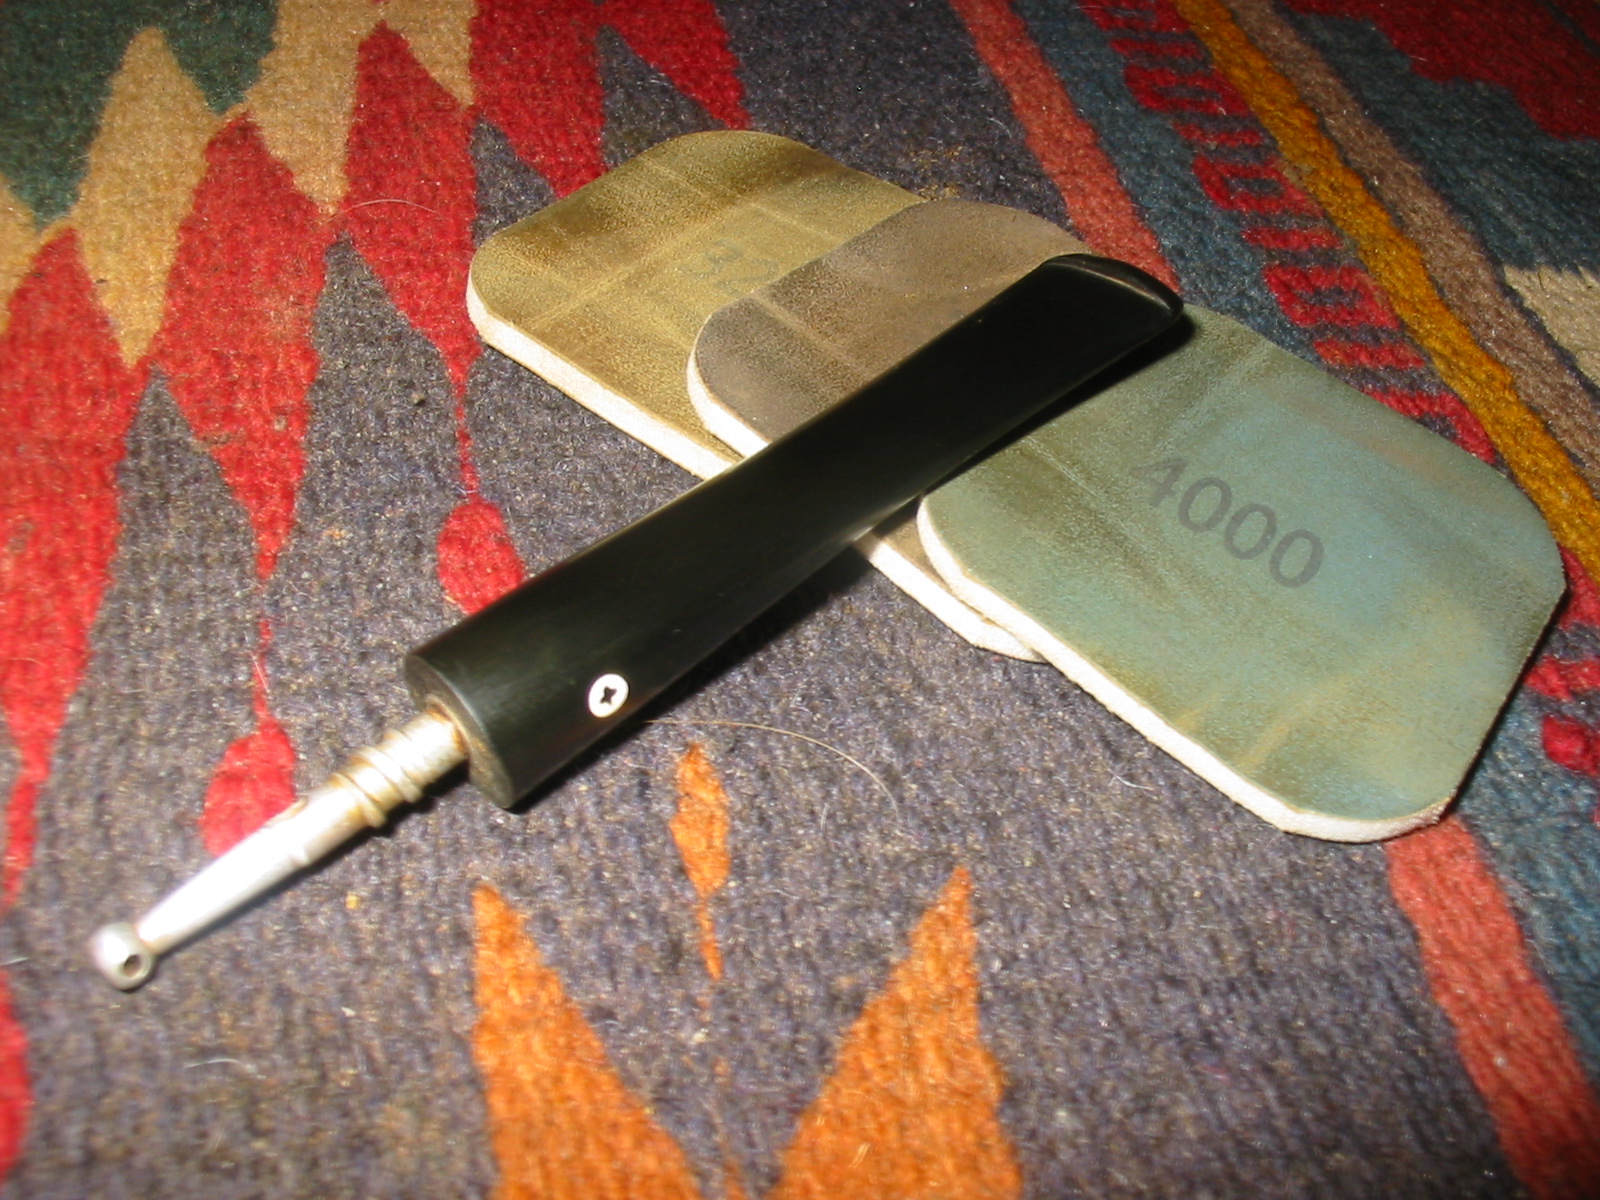
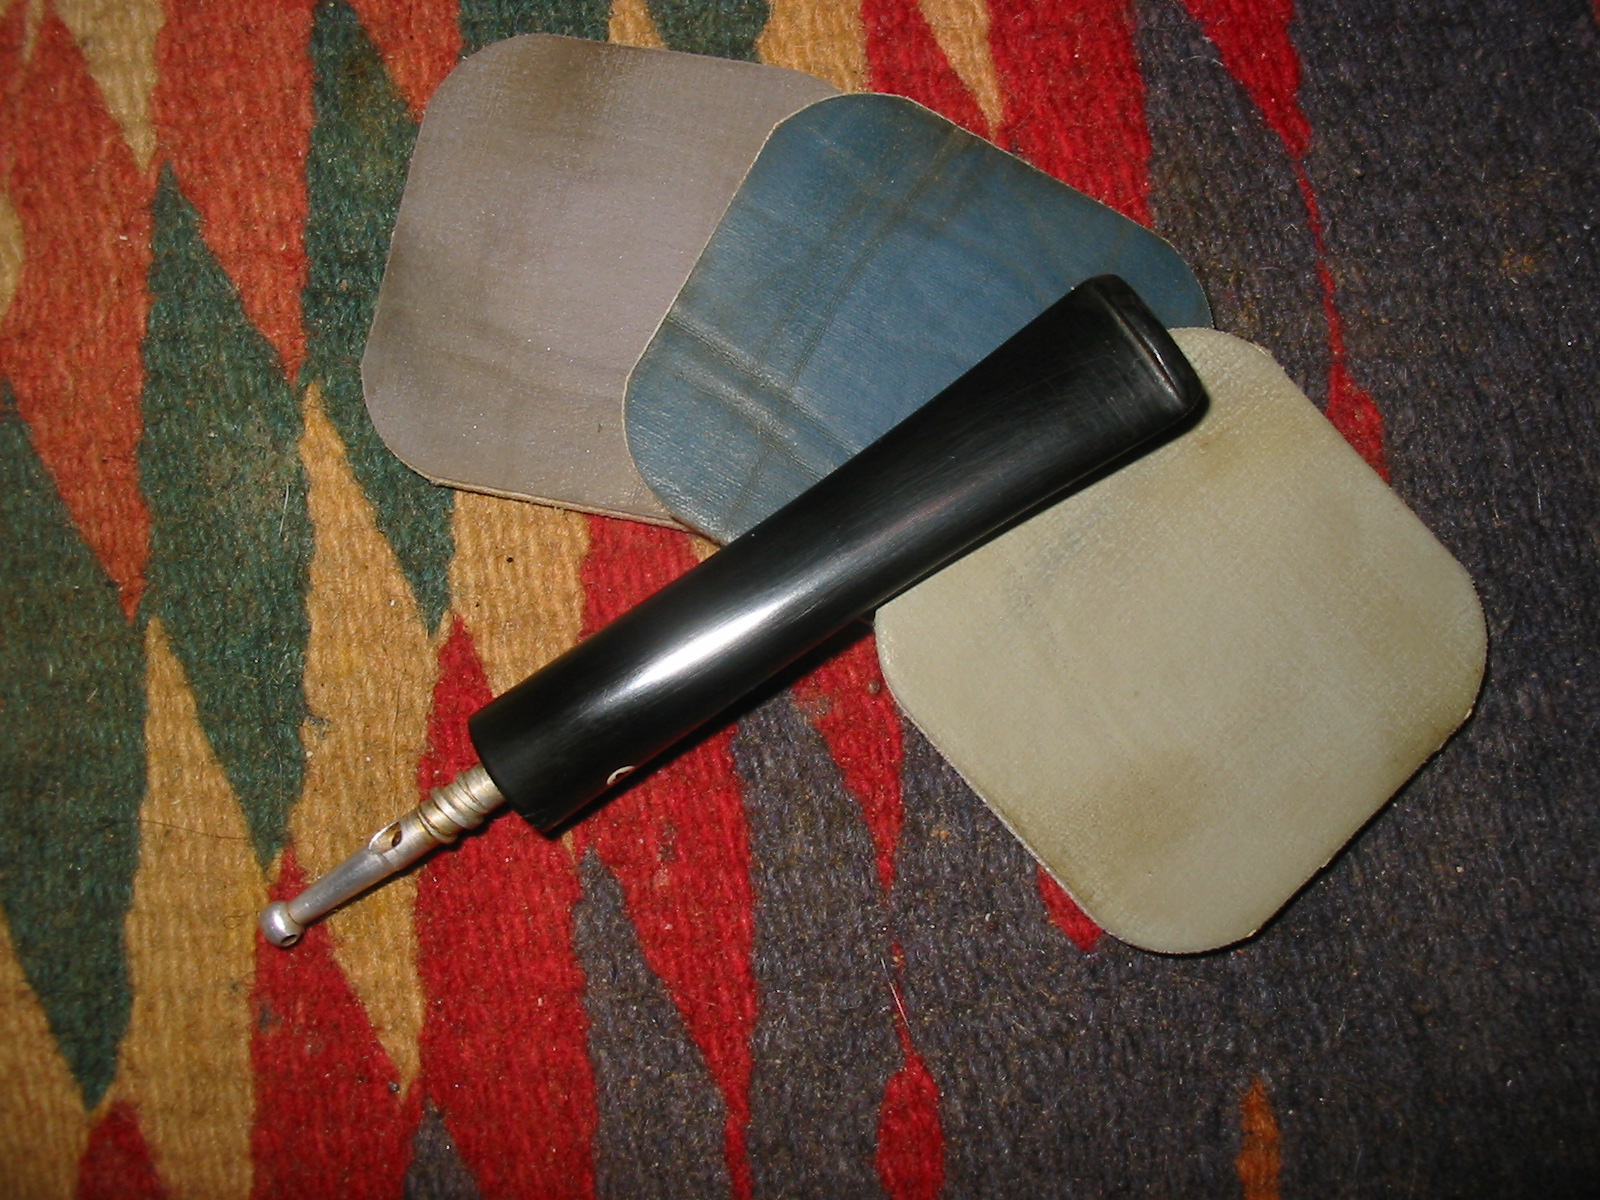
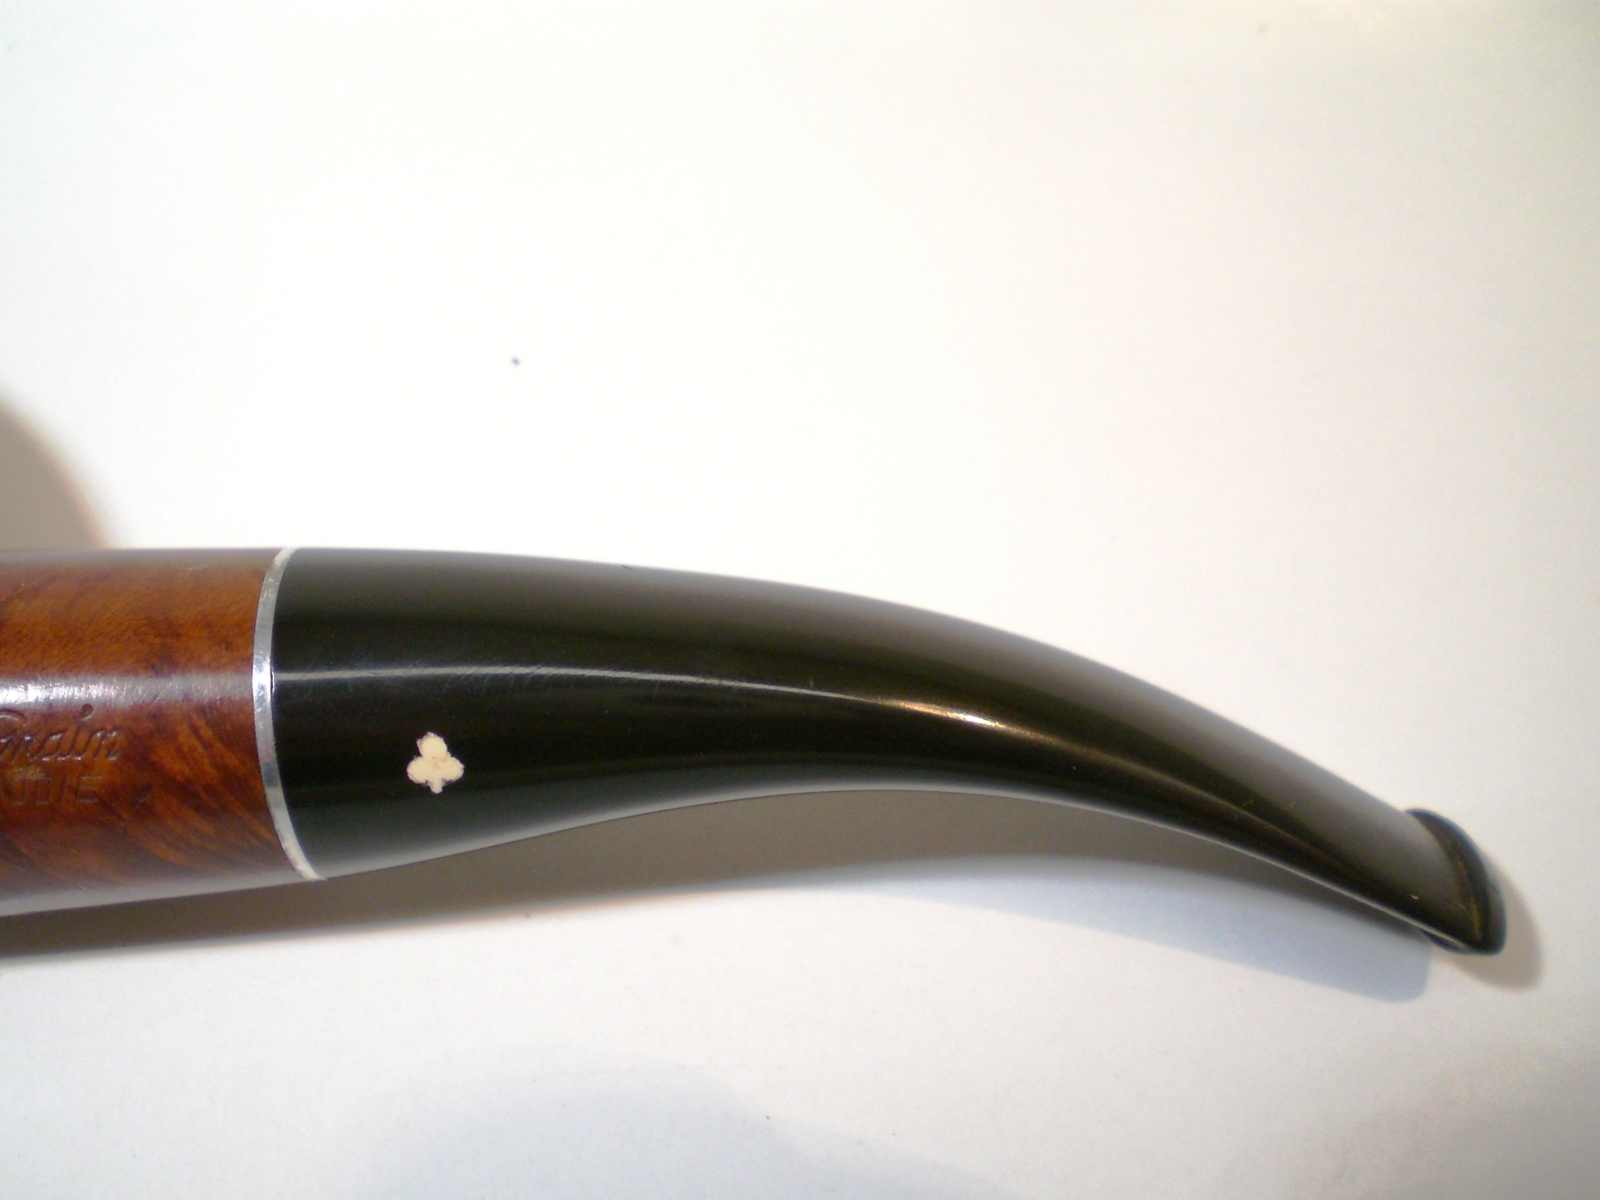
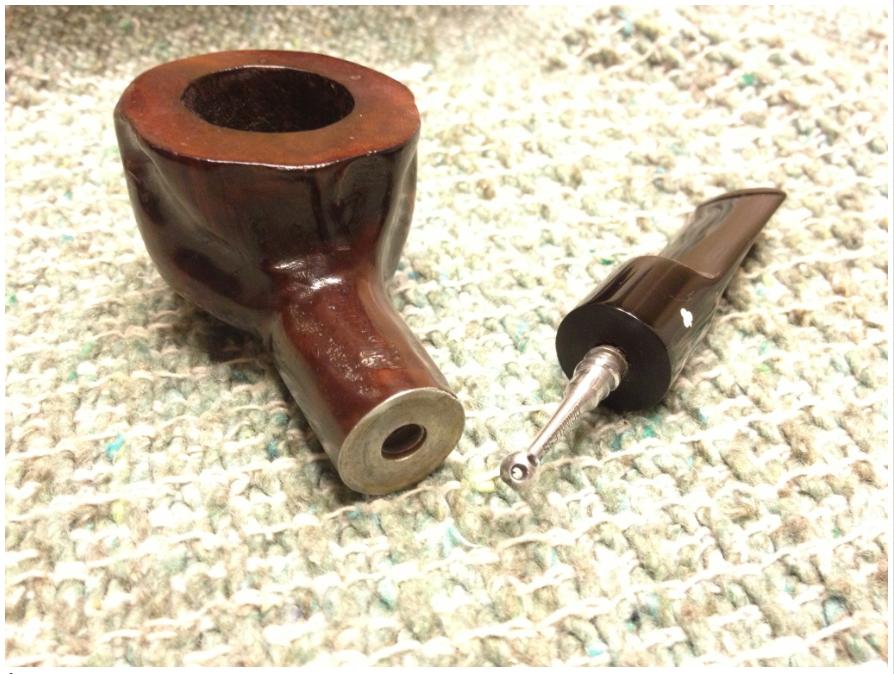
With the bowl in good shape, I started work on the stem. I used 400 grit wet/dry sand paper with water to remove the minor tooth marks and oxidation. I then used 1500-2400 grit micro mesh pads with water. Next I re-assembled the pipe with a rubber washer between the stem and shank to prevent rounding the end of the stem. I finished the stem with micro mesh pads, 3200-12,000 grit, followed by white diamond and carnauba wax using the rotary tool on low speed. KWA19 
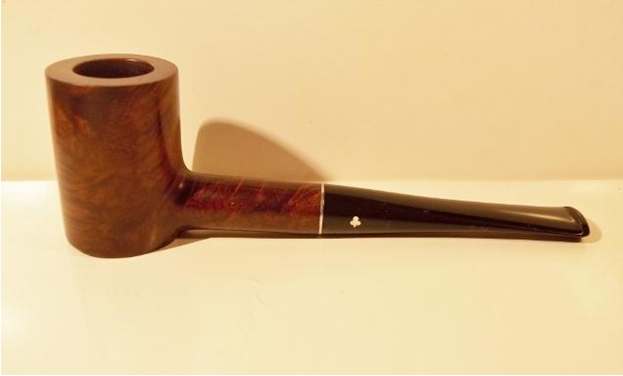
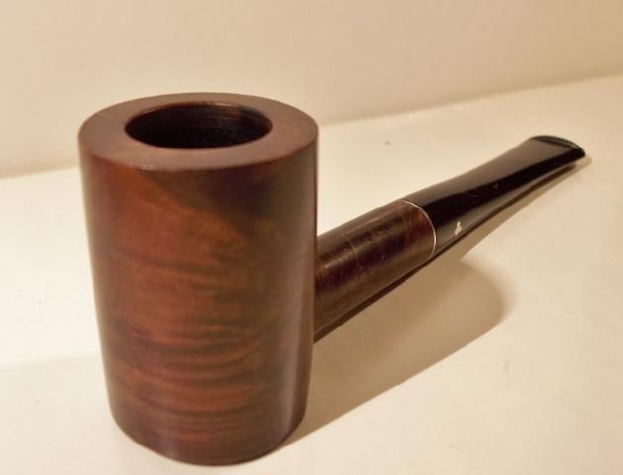
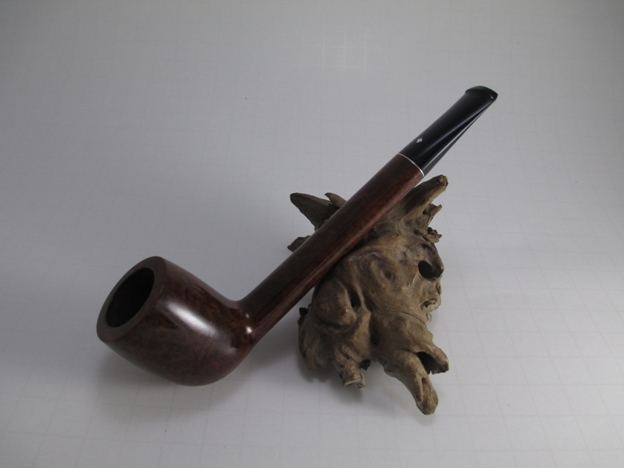
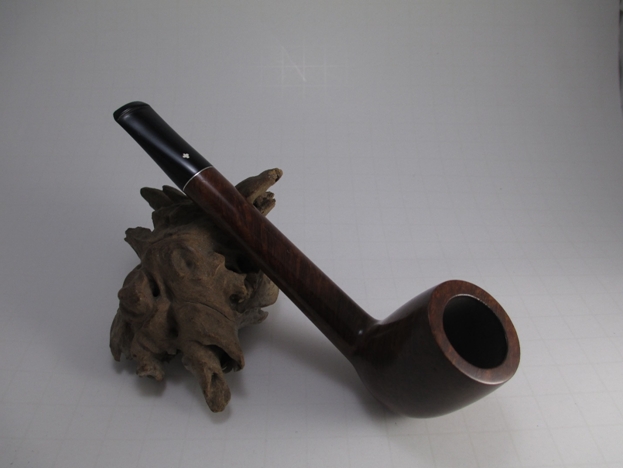
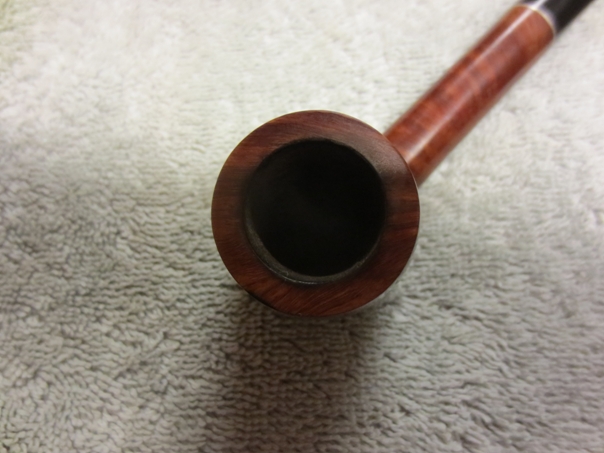
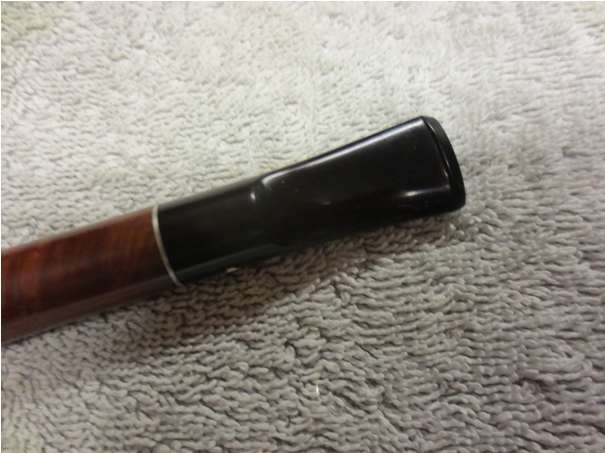
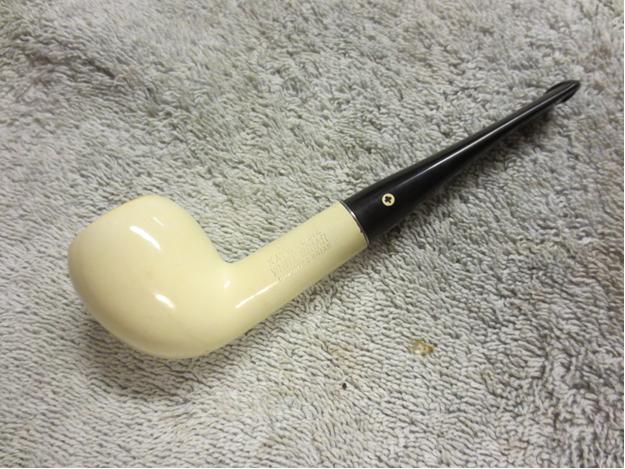
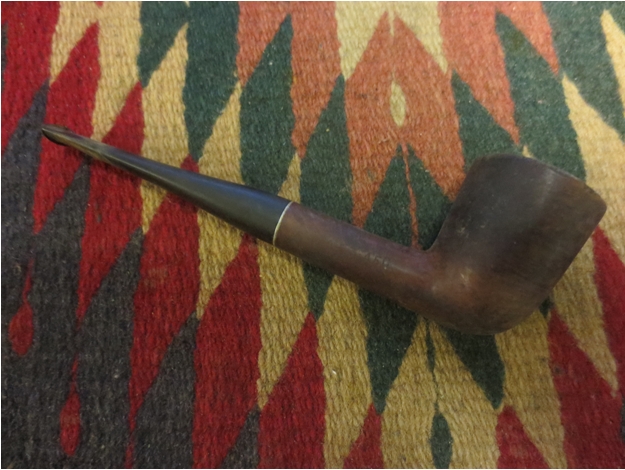
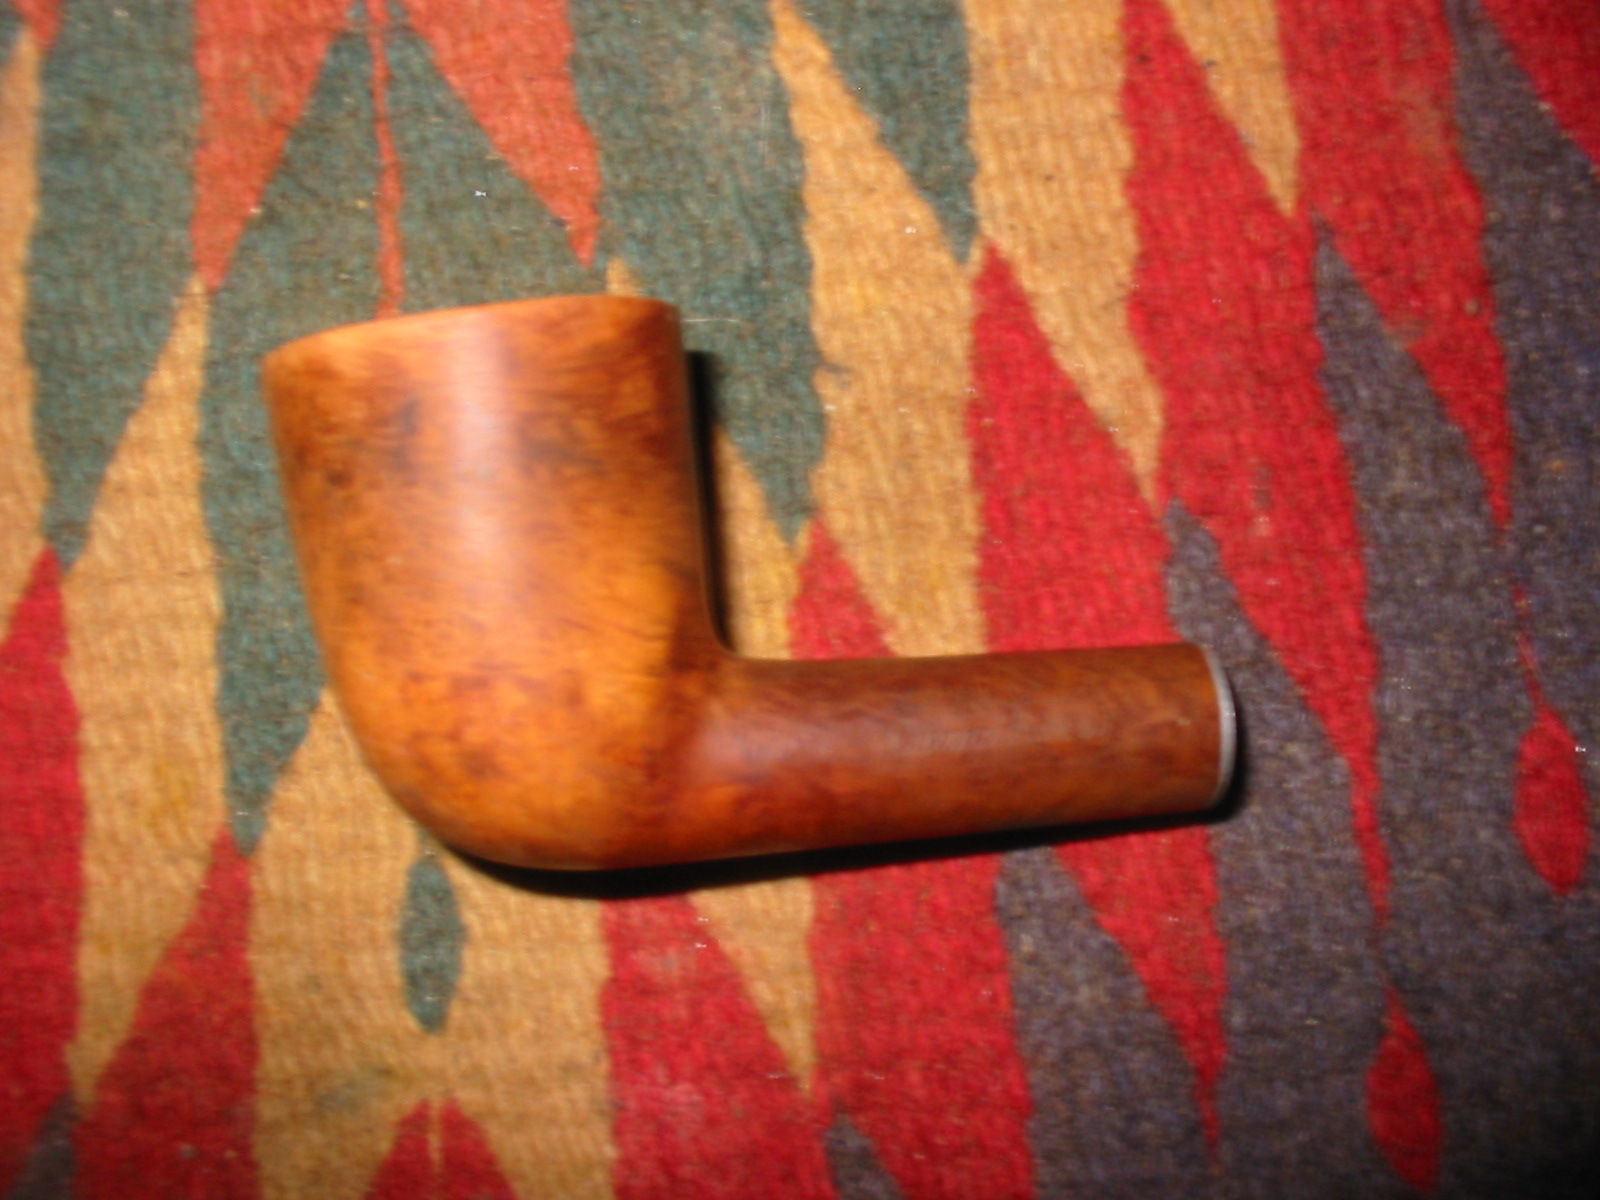
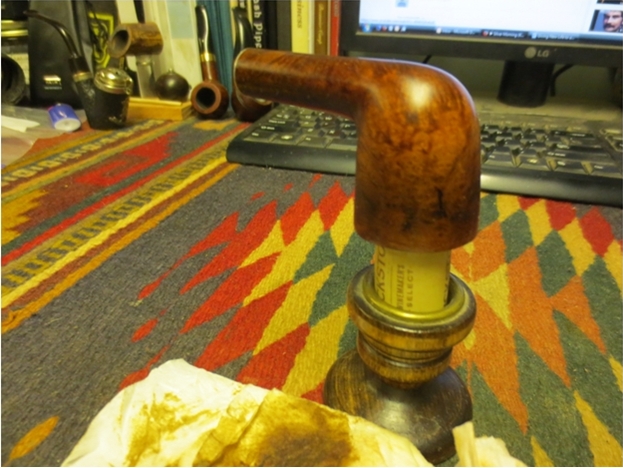
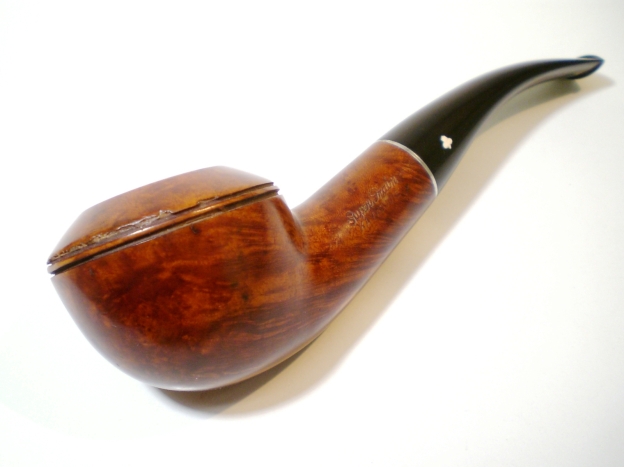
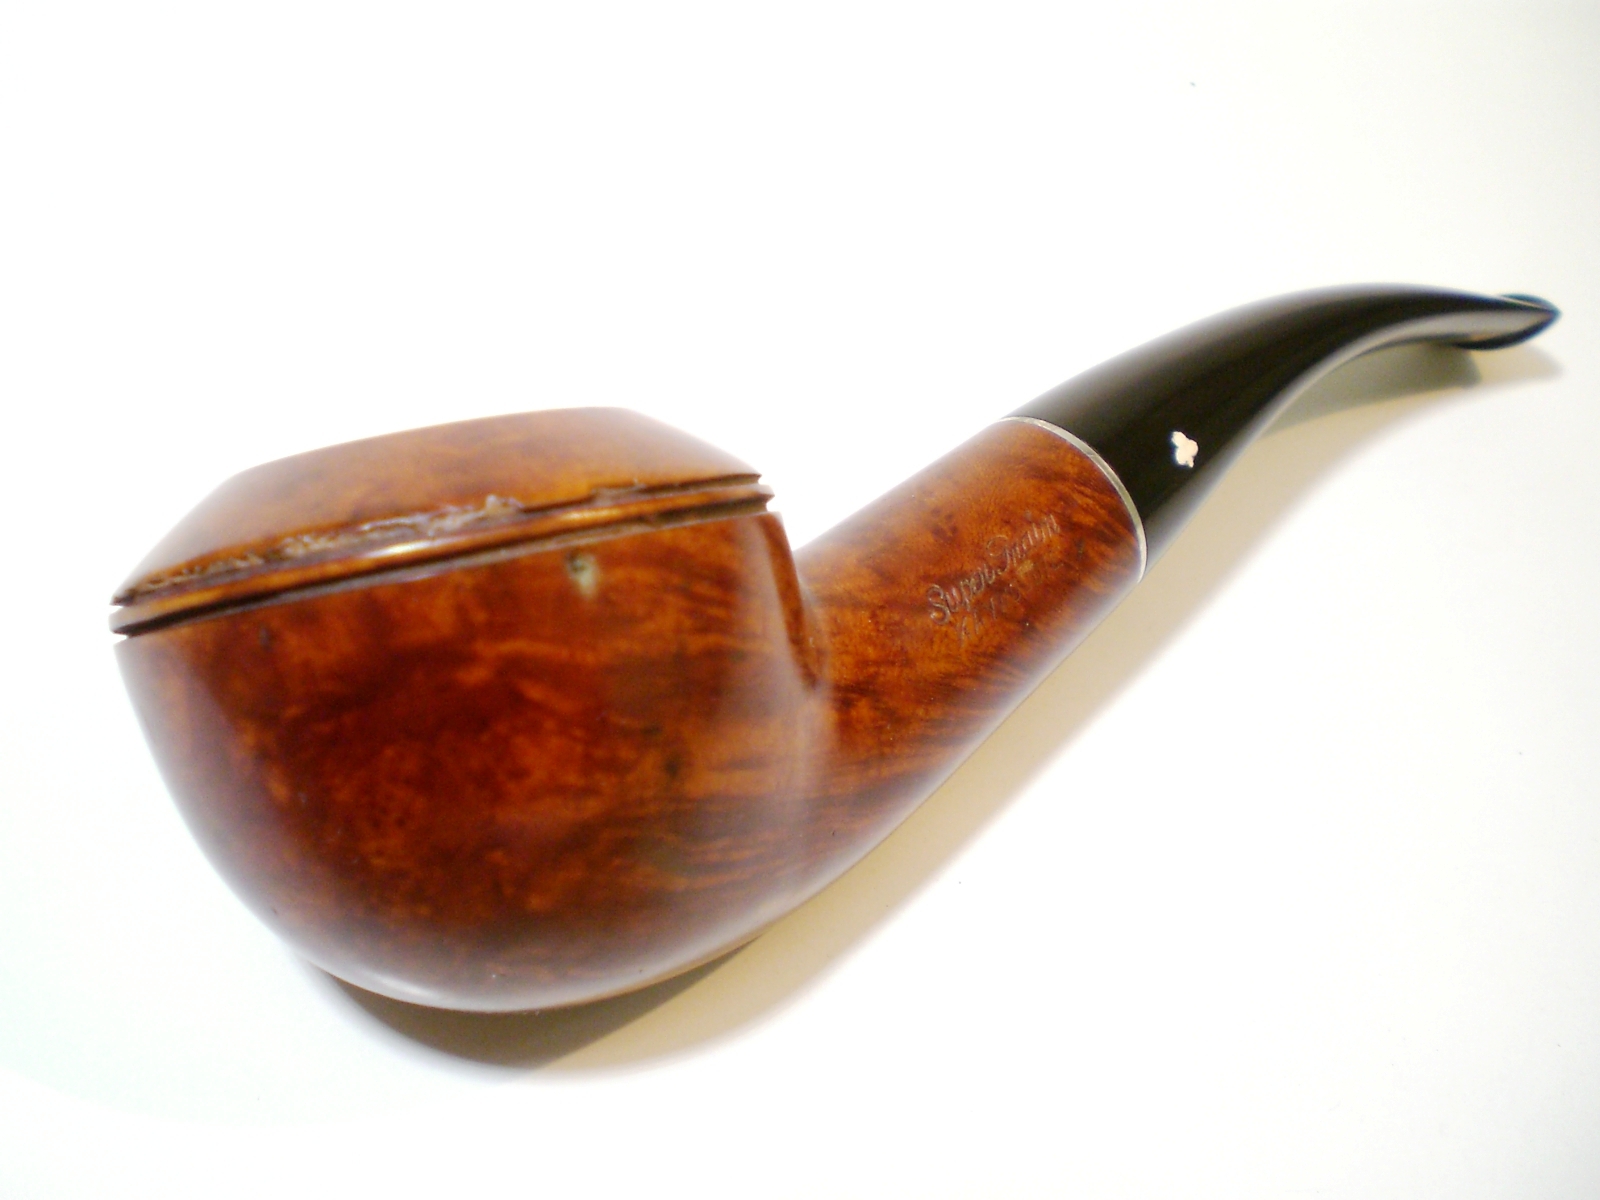
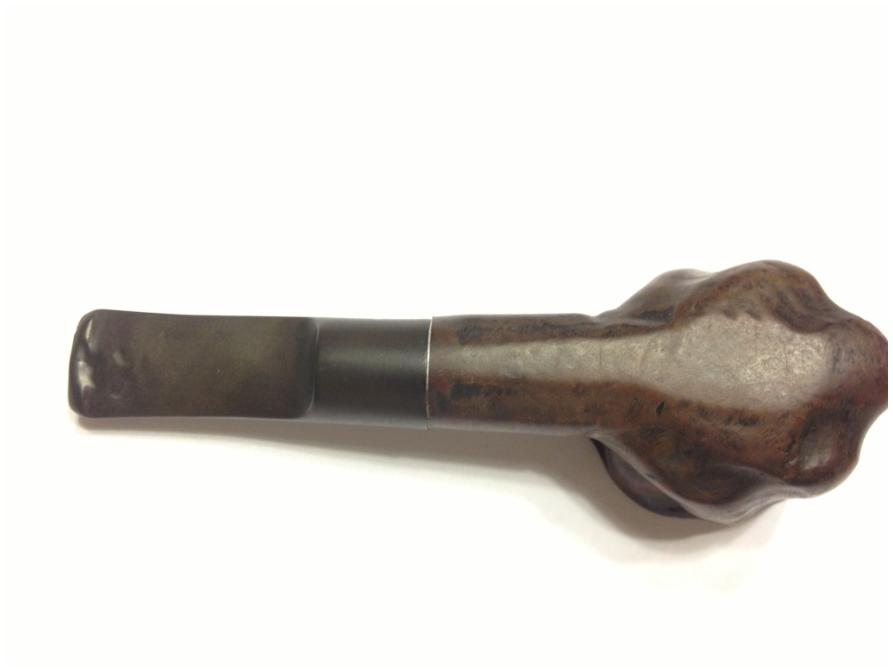
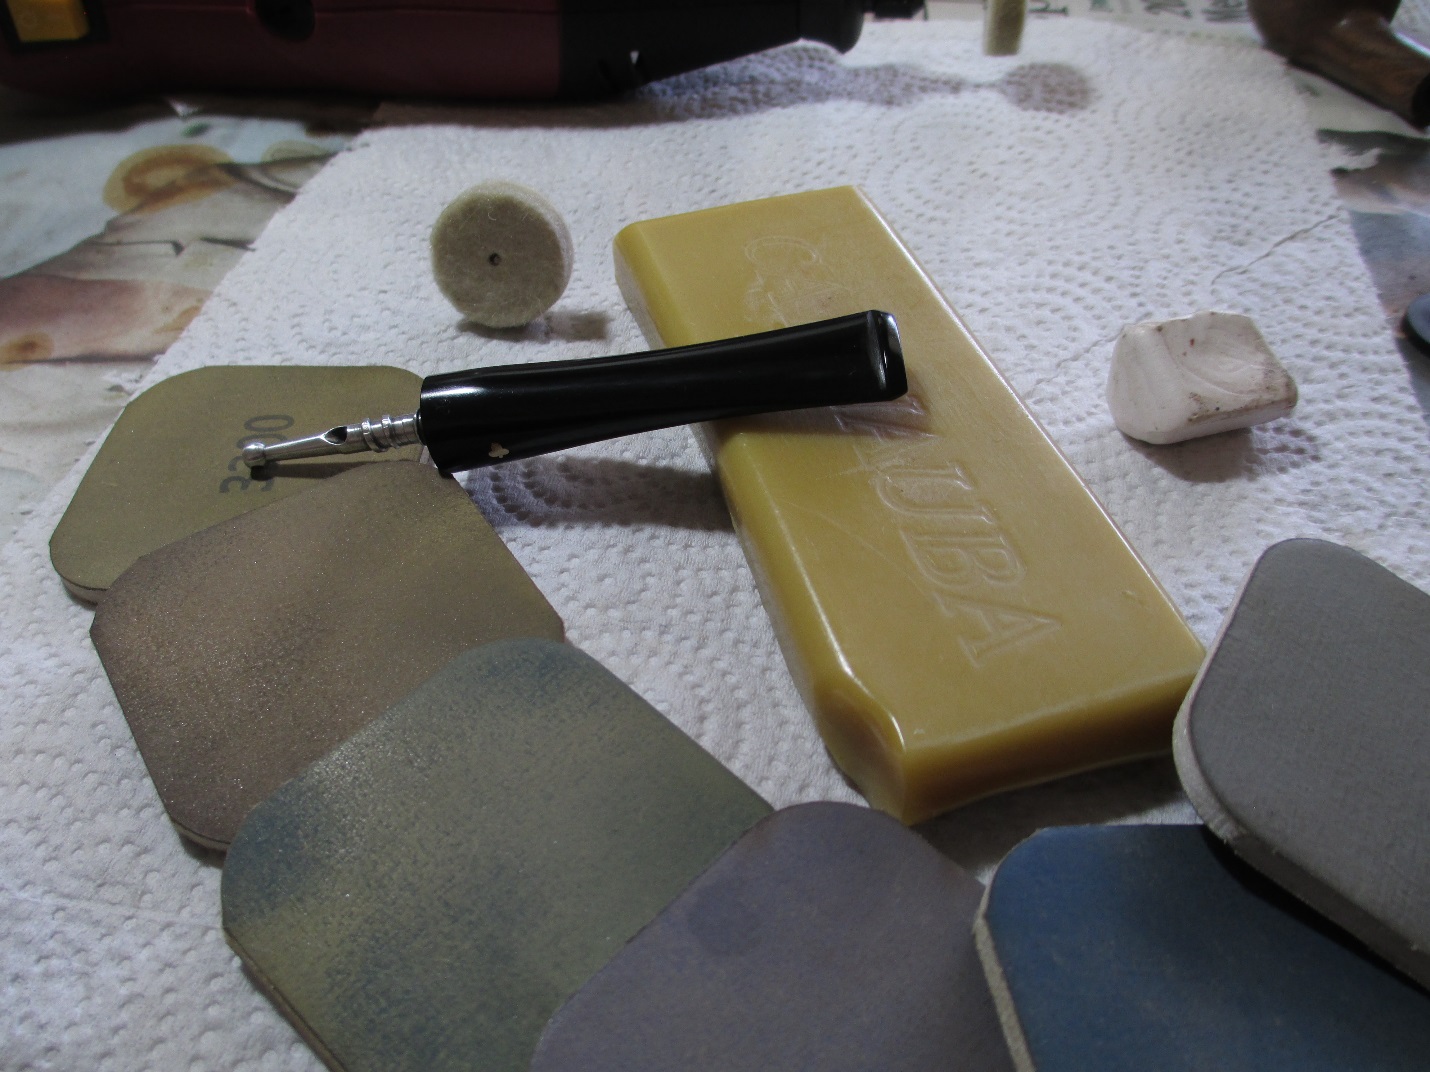
A light coat of Halcyon II on the bowl and here’s the result.KWA20

KWA21

KWA22

KWA23

KWA24 
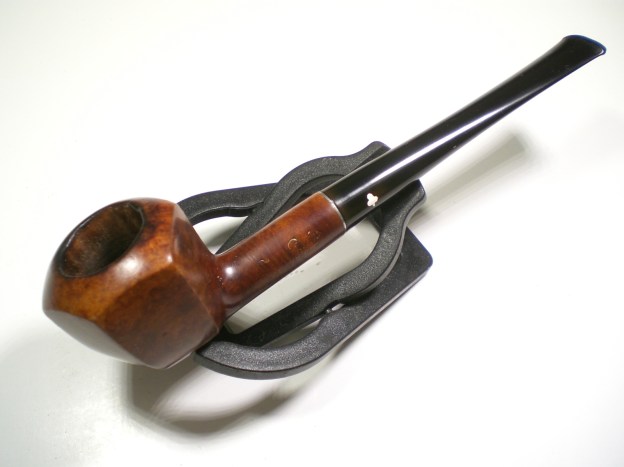
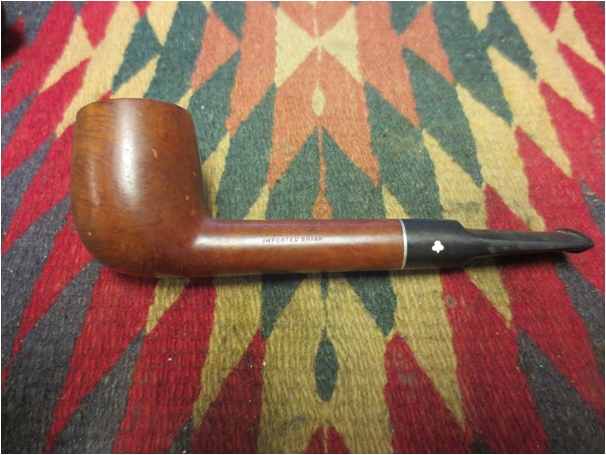
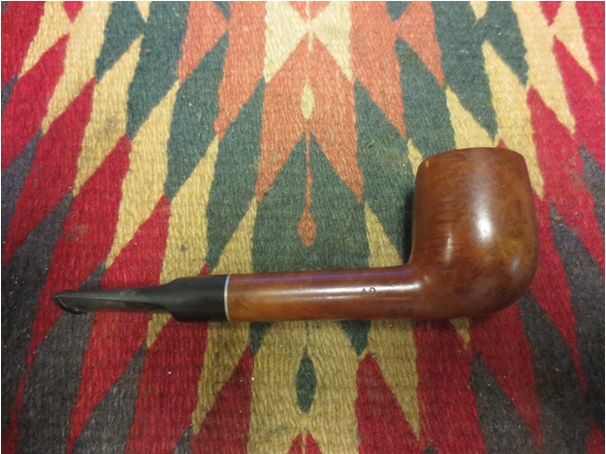
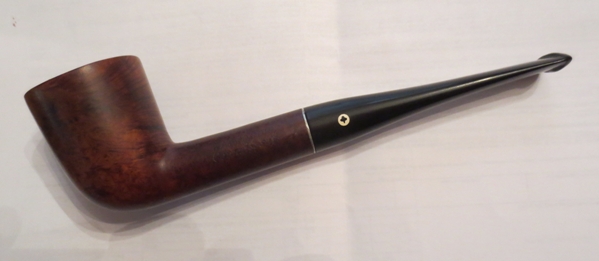
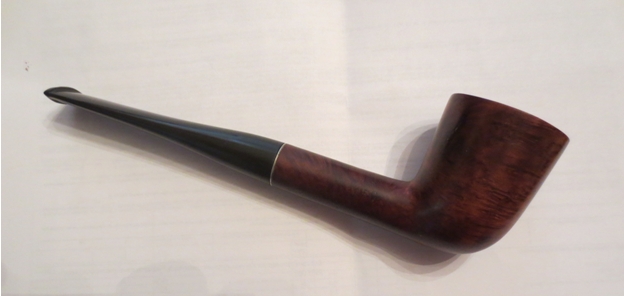
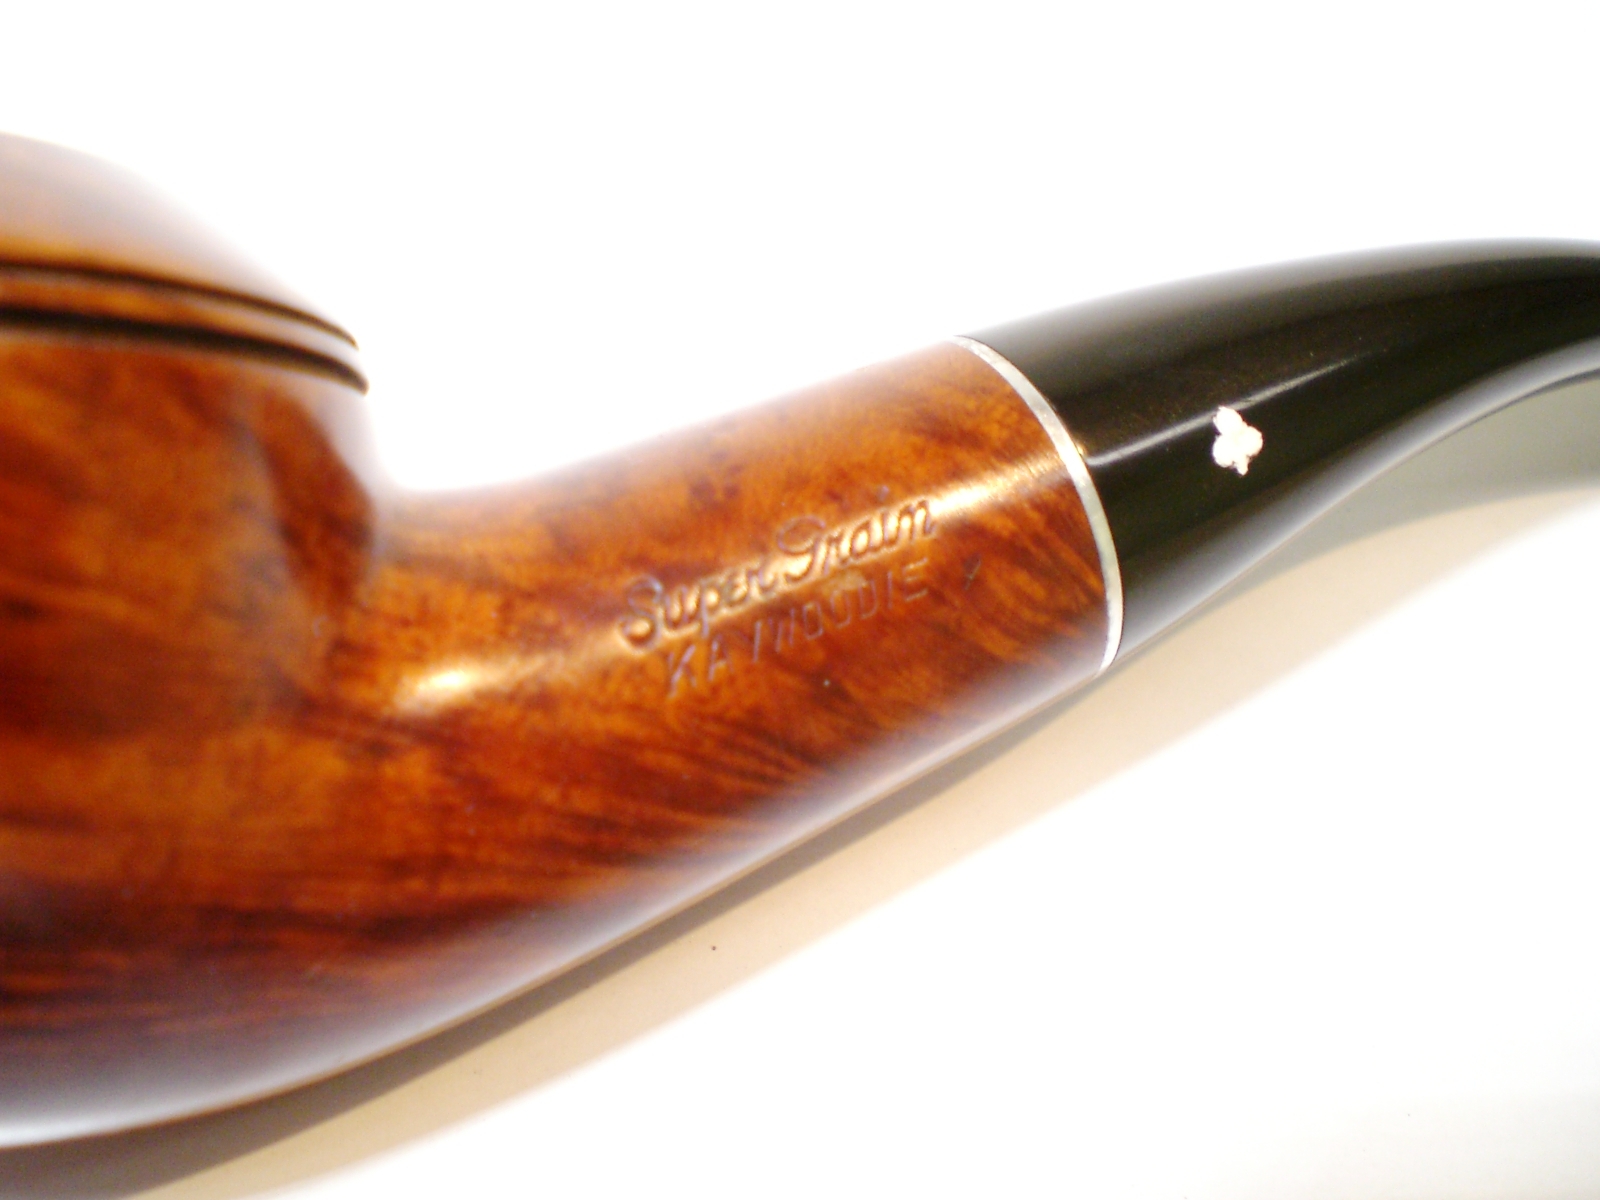
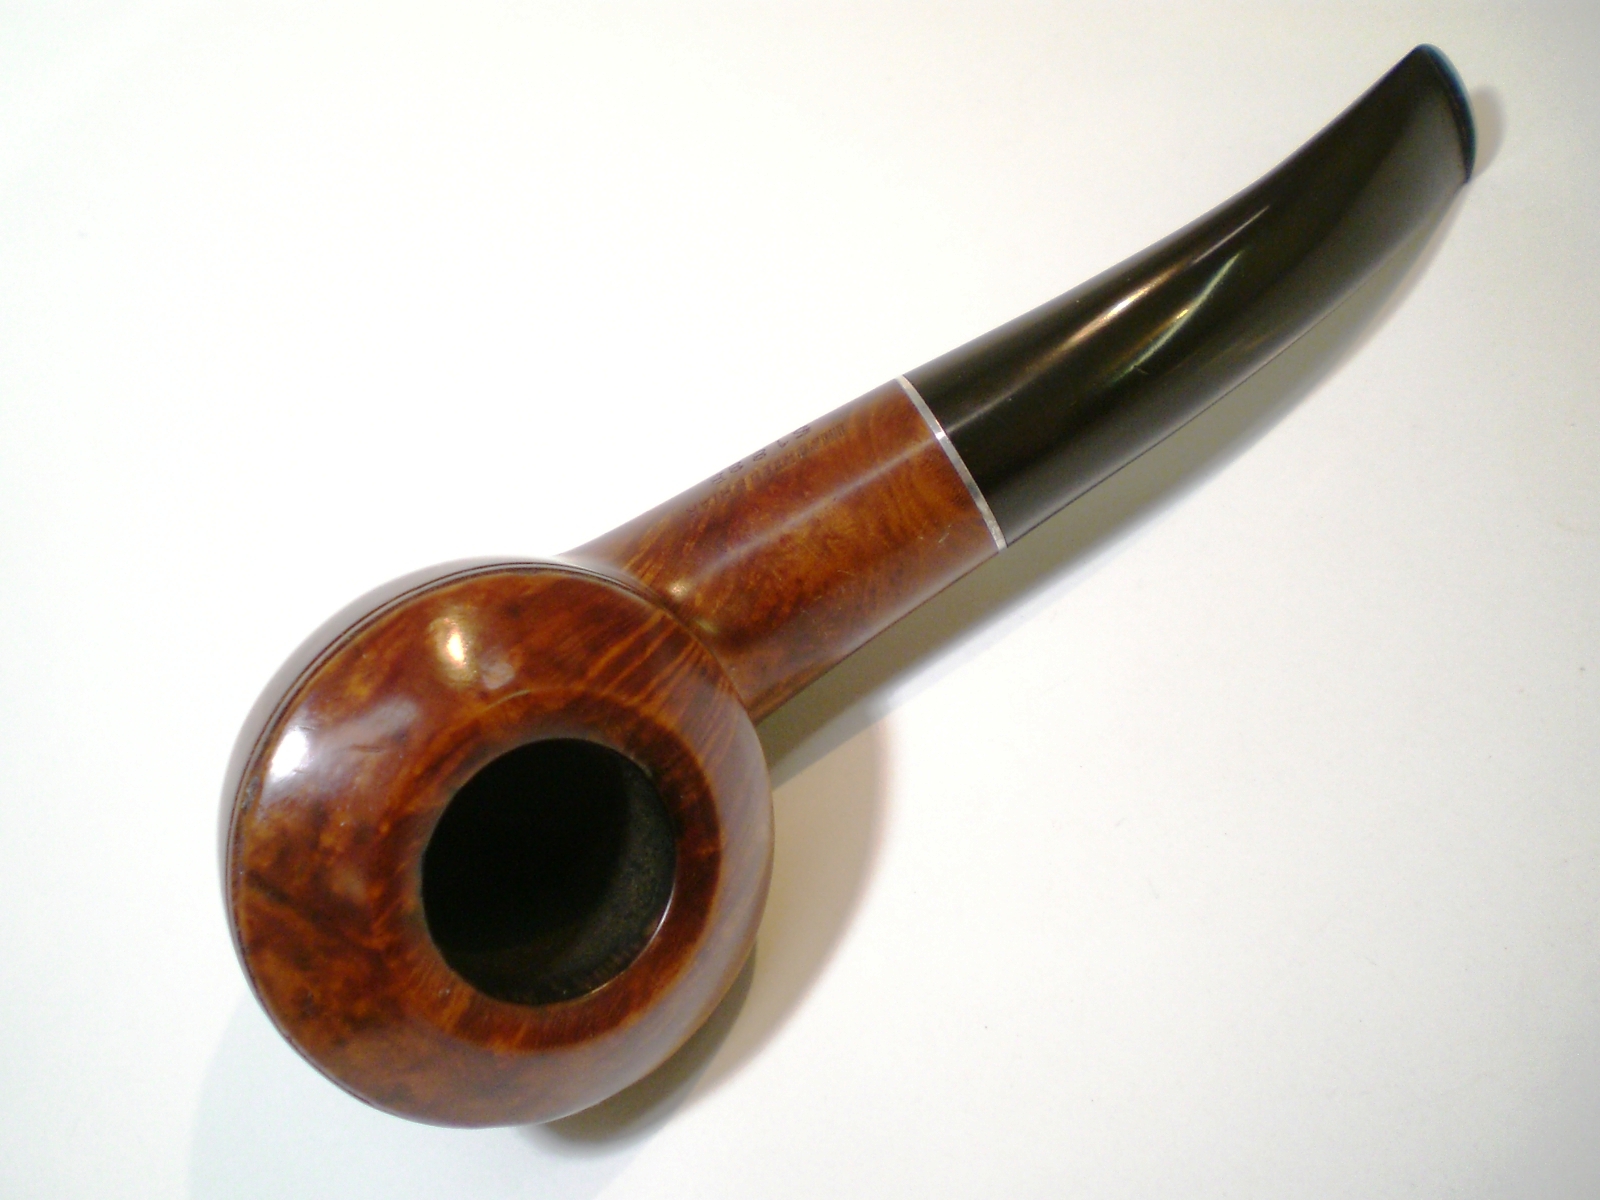
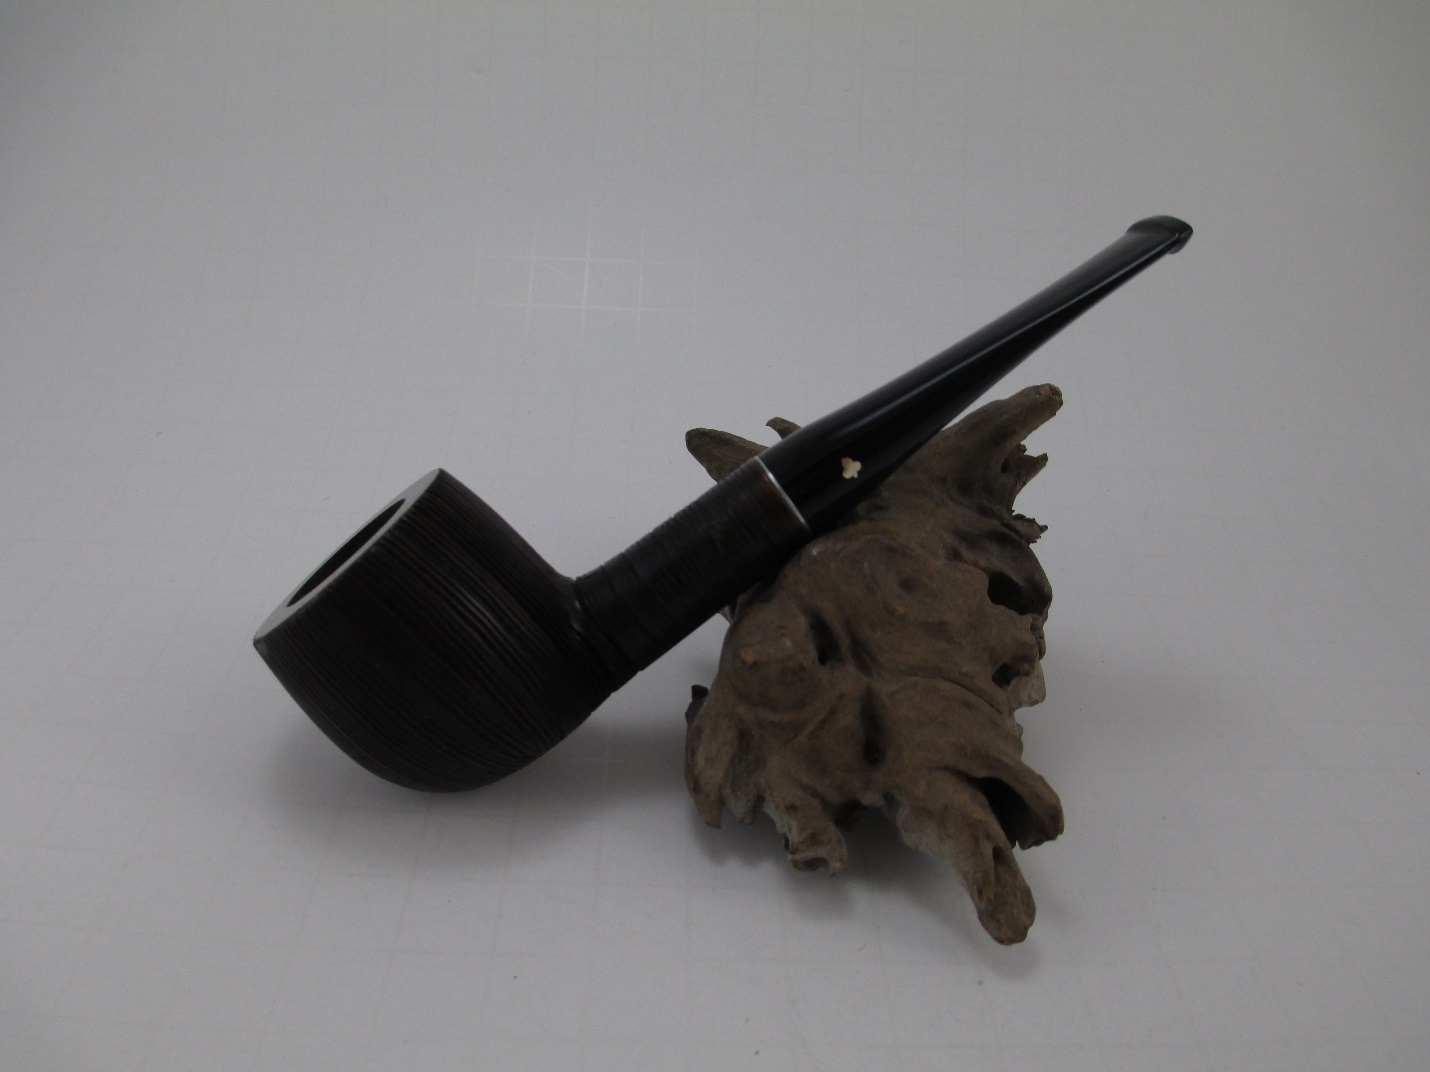
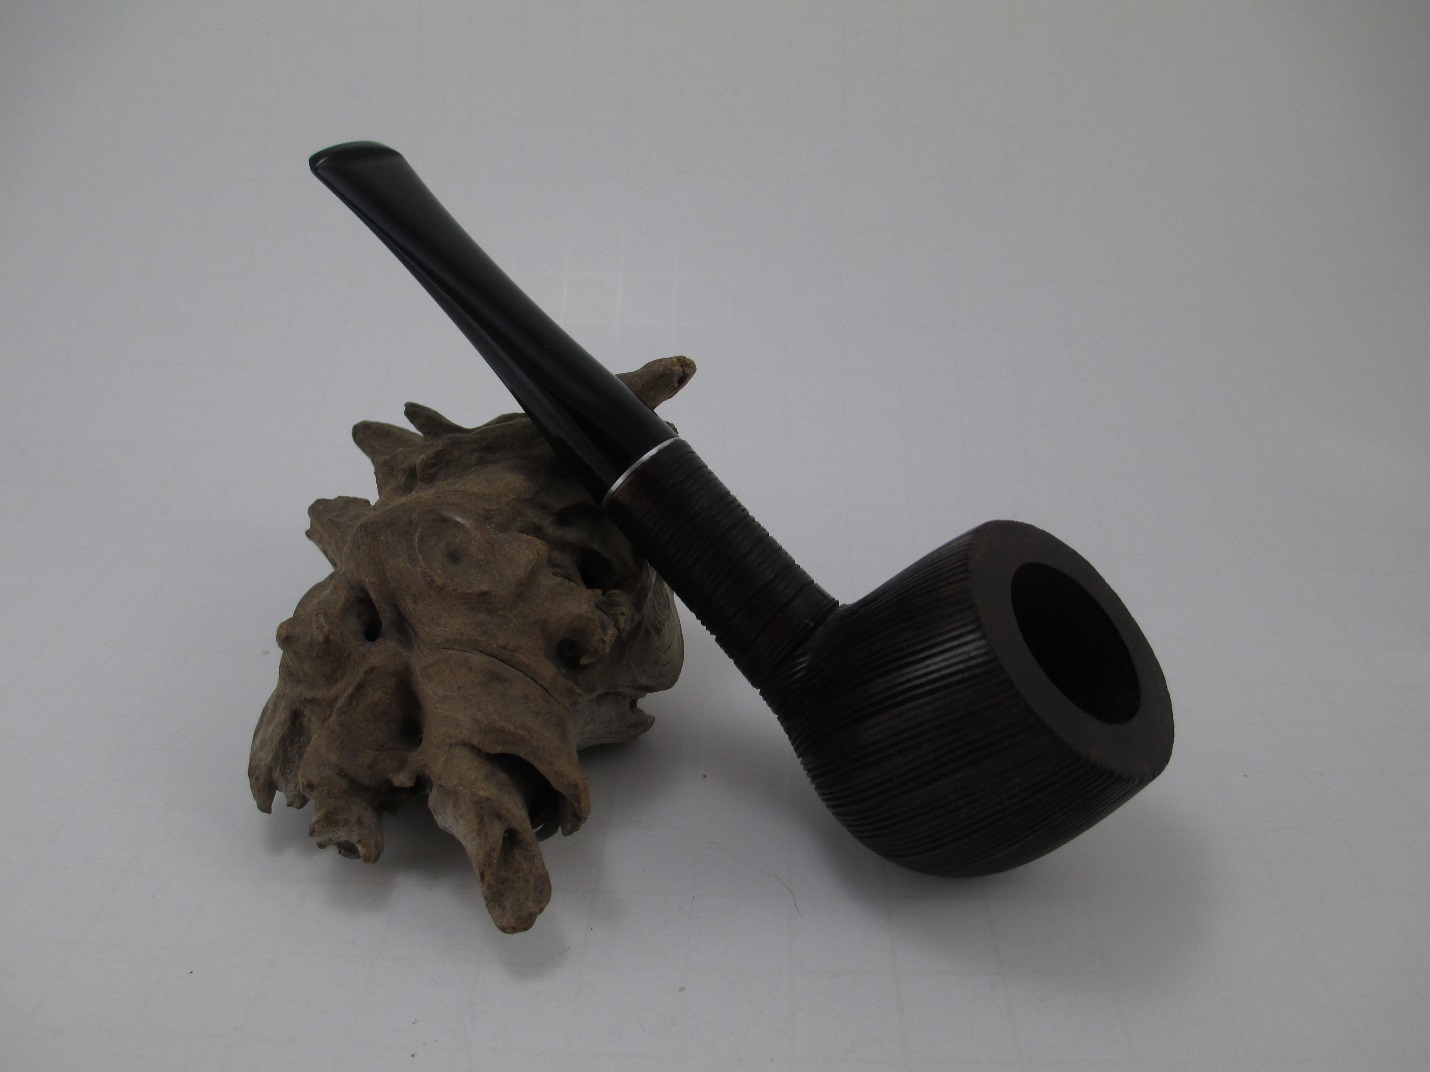
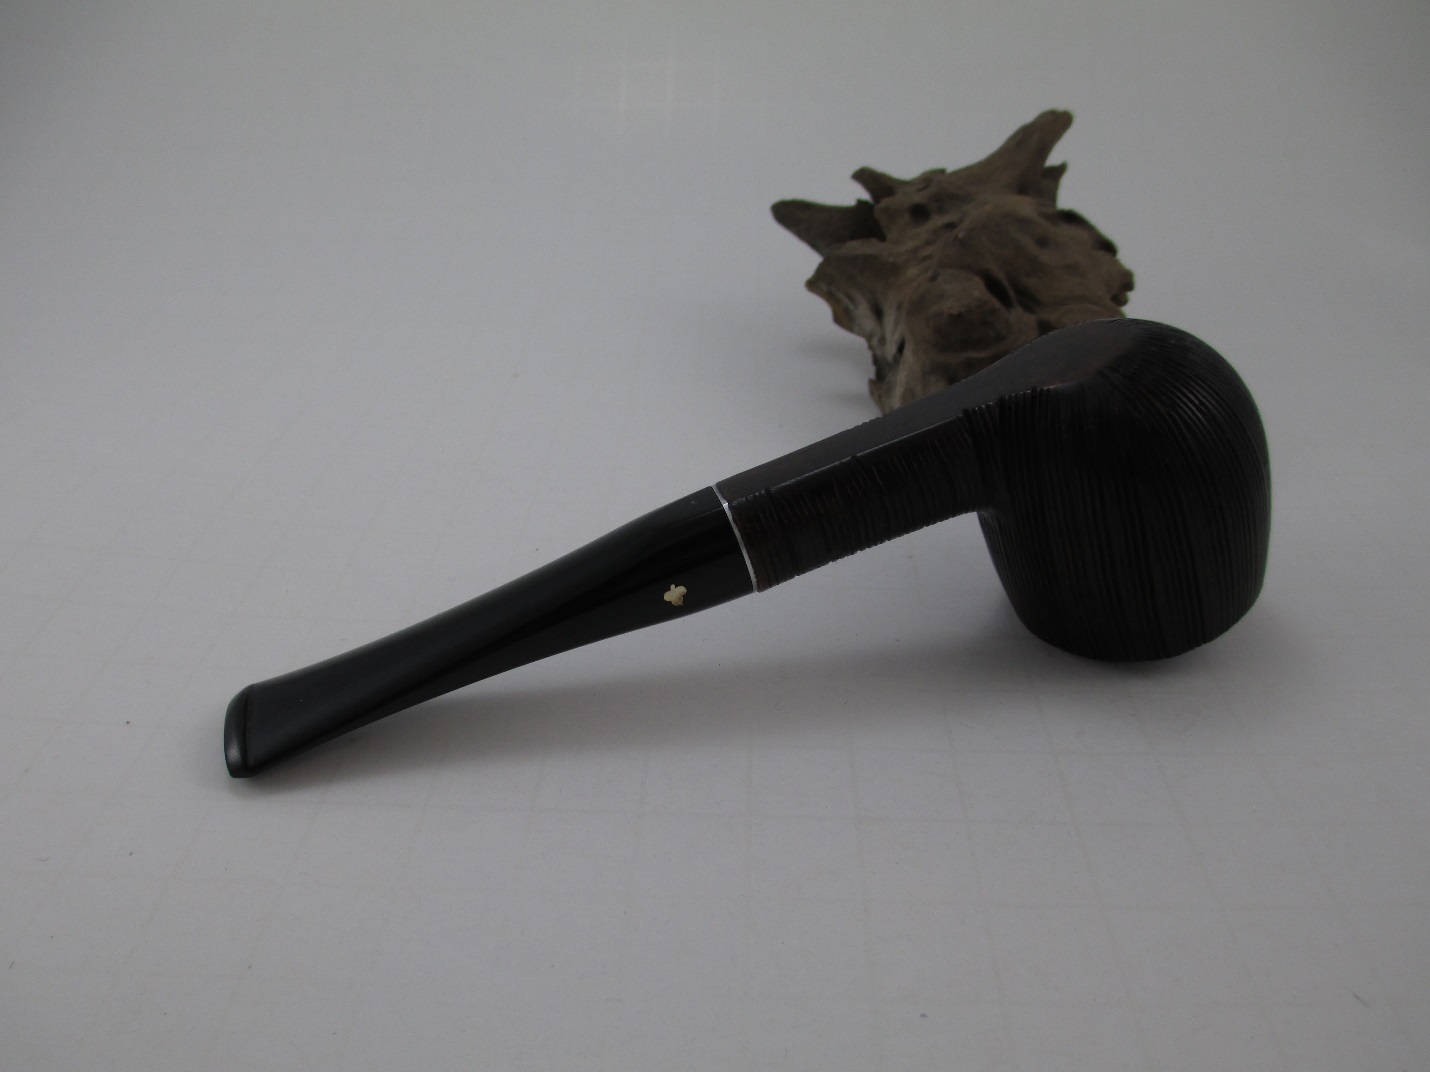
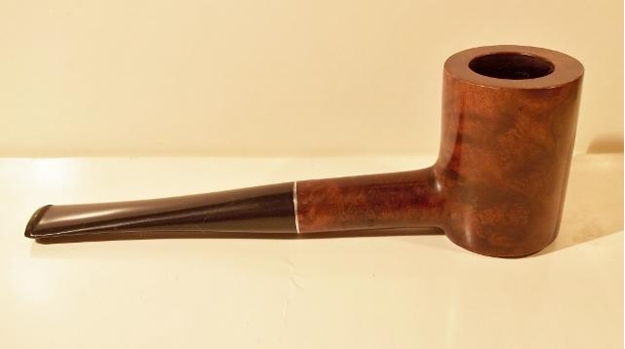
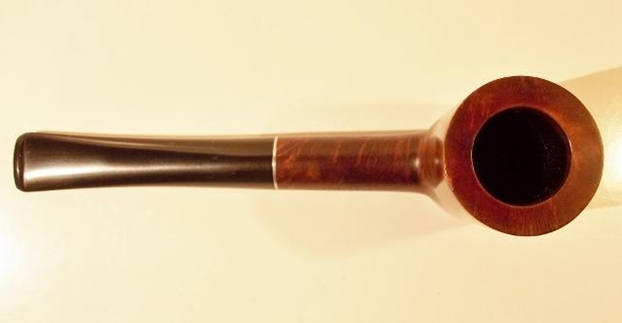
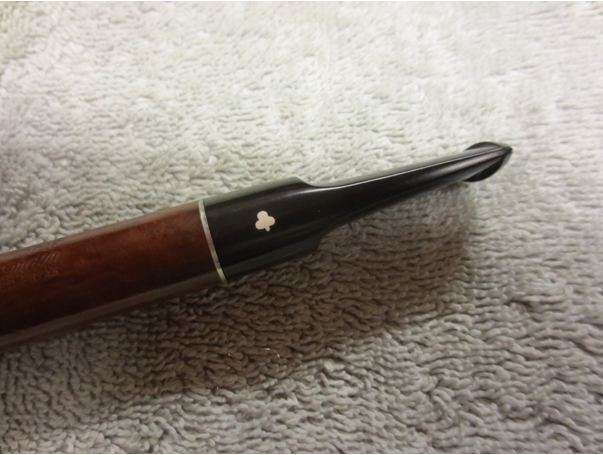
I think the old girl cleaned up nicely. She may not be a shiny pipe, but she is a sturdy pipe. Thanks for looking.

A Kaywoodie Supergrain 5102 Poker Clean Up


Blog by Troy Wilburn

I got this pipe in a lot of pipes I received from a friend on Facebook. It’s a pre 1936 four digit (5102) stamped poker with the 4 hole stinger. It was in terrific shape, so being at least 78 years old I wanted to keep it as original as possible. I basically just gave it a good cleaning with little else needed.

Here is the pipe before:KW1

KW2

KW3 I scraped out old cake (which there wasn’t much of) and gave the shank a good cleaning. I cleaned off all the old grime with a cotton ball and a small amount of Oxy Clean mixed with warm water. I cleaned the rim with isopropyl alcohol on a cotton swab followed by scrubbing it with oxy/water with a Scotch Brite pad. Mineral oil will bring the color back out.KW4

KW5 I soaked the stem and stinger in isopropyl alcohol for about 45 minutes to loosen up the stuff on the stinger.KW6 I cleaned stinger and inside stem with steel wool and isopropyl alcohol. Once finished with the scrubbing it was ready for wet sanding.KW7

KW8 I had to file out some very minor tooth marks on the top and bottom of the stem next to the button.KW9 With the bowl cleaned and stem wet sanded I put the pipe back together for inspection.KW10 I wiped down the pipe and stem with mineral oil to condition wood, bring color back out and then did some final inspecting before buffing.KW11 Once the oil absorbed into the wood and vulcanite it was ready for a little buffing.

Here is what the pipe looked like after I was finished.KW12

KW13

KW14

KW15

KW16

KW17

KW18

KW19

KW20

KW21

KW22

KW23

KW24

Restoring a Kaywoodie Prime Grain 40 Saddle Stem Billiard??


Blog by Steve Laug

In my gift box of pipes to refurbish there was a small Kaywoodie pipe that I would have called a Lovat but as I learned in looking up the line and shape number I would find that Kaywoodie called it something different. The red arrow points to the KW shape 40. KW

It is stamped on the left side of the shank Kaywoodie over Prime Grain over Imported Briar. On the right side of the shank it is stamped with the shape number. The stem was a short saddle stem. The pipe is in decent shape – certainly restorable. The finish was gone but there was some great grain on the back, front and sides of the bowl. The rim was a mess – out of round, scratches and knocked about enough to lose its sharp profile and edges. The bowl looked as if it had been reamed with a pocket knife. There was an oddly formed cake due to the scraping with the knife. The stem was clean but the button was misshapen with a large part of the top edge missing. The inside of the shank was dirty and the threaded tenon was black with a tarry build-up.KW1

KW2

KW3

KW4 Holding the pipe in hand I would call it a Lovat. Look at the pictures above and see if you would not agree to the shape designation. The problem is I turned to the Kaywoodie shape and line chart below and found that pipe shape #40 is designated as a saddle stem billiard. The first red arrow in the first shape chart below highlights the description on the catalogue picture. The second red arrow points out the line – Prime Grain – a mid-priced pipe in the KW line. So it looks like the pipe is a saddle stem billiard – even though personally I would still call it a Lovat.KW5 The next photo is a close of the state of the rim. You can see the knife damage on the inner edge of the rim and the scratches, dents, rounding that has been done to the top and outer edge of the bowl. The rim really was the part of this pipe that was in the worst condition.KW6 The next photo shows the rounded outer edges of the rim and the state of the KW thread stinger apparatus. It is a three hole stinger even though the inlaid black cloverleaf in white seems to point to an early era KW pipe.KW7 To begin work on repairing the rim edges I needed to ream the bowl. I used a PipNet reamer to take the bowl back to bare wood. I find that doing that gives me a clean surface to work on with the inner rim edge. The second photo below shows the freshly reamed bowl.KW8

KW9 With the bowl reamed it was time to top the bowl. This would be a fairly serious topping job – not a light one. There was a lot of damage to remove and it would take a fair bit of sanding to bring the top back to flat with sharp outer edges. I used my normal topping board and 220 grit sandpaper to top the bowl. I sand it in a clockwise circular motion.KW10 I checked my progress quite often as I topped the bowl. I sanded until the damage to the top of the rim and outer edge were gone. The process also cleaned up much of the damage to the inner edge of the rim as well.KW11 I wiped the stinger and the bowl down with acetone on cotton pads to clean up the aluminum stinger and to remove the remaining finish on the bowl and shank.KW12 The stem was overclocked about a ¼ turn. I used a lighter to heat the stinger until the glue was warm in the stem and then turned it back into the mortise and realigned the stem.KW13

KW14 The bowl had some deep, sharply edged dents in the briar. I cleaned them out and then used clear super glue and briar dust collected from topping the bowl to fill the dents.KW15

KW16

KW17 I sanded the patches with 220 grit sandpaper and then with medium and fine grit sanding sponges to remove the excess and blend them into the surface of the briar.KW18

KW19

KW20 I built up the top of the button with black super glue until it was close to the original thickness. I would sand and reshape it once it had cured.KW21 I stained the bowl with a dark brown aniline stain thinned 3 parts to 1 part alcohol. I flamed it and restained until the finish had an even coverage.KW22

KW23 I hand buffed the bowl and shank with a cotton cloth that served to give it a light polish and also smoothed out the stain on the surface of the bowl, rim and shank.KW24

KW25

KW26

KW27 The stain was still too opaque to my liking and hid the grain on the pipe so I wiped it down with isopropyl alcohol on cotton pads to remove some of it and allow the grain to show through the finish.KW28

KW29

KW30

KW31 The photo below shows the pipe when I had finished wiping it down with alcohol. The finish is exactly what I was aiming for. I wanted it to be a warm brown that hid the repairs to the dings in the finish. It worked well.KW32 I sharpened the edge of the button with a needle file and then sanded the stem with 220 grit sandpaper and a medium and fine grit sanding sponge.KW33

KW34

KW35 I continued to sand with micromesh sanding pads – wet sanding with 1500-2400 grit pads and dry sanding with 3200-12,000 grit pads. Between each set of three pads I rubbed the stem down with Obsidian Oil and then continued with the next set. When I had finished sanding with the 12,000 grit pad I rubbed it down a final time and then buffed it with White Diamond on the buffing wheel.KW36

KW37

KW38

KW39

KW40 I buffed the bowl and stem with White Diamond, cautiously around the stamping on the shank. I gave it multiple coats of carnauba wax and lightly buffed the pipe with a soft flannel buff. The finished pipe is shown below.KW41

KW42

KW43

KW44 In the process of repairing the inner edge of the rim I used a folded piece of sandpaper to bevel the inner edge to bring it back to round and to deal with the divot out of the left side of the edge. The finished rim is shown in the close up photo below. The inner edge is better than it was when I started and looks close to round. I have included a variety of photos of the rim and the stem for your viewing. This should be a great smoking old Kaywoodie.KW45

KW46

KW47

Kaywoodie 73 Supergrain Restoration


Blog by Al Jones

This Kaywoodie Supergrain belongs to a Brian, a friend of mine in my local pipe club, based located in Frederick, MD.  I had some brought some restored Kaywoodies to a previous meeting so he asked if I could could tackle this one.  The pipe wasn’t in bad shape.  It had light oxidation and teeth chatter on the stem and some scorching on the rim.    The pipe is a two-digit shape number, but has a “Drinkless” stamped, 4-hole stinger.  I estimate it was made in the early 1950’s as the 4-hole stinger was no longer used after the mid-50’s.

Kaywoodie_73_Supergrain_Before Kaywoodie_73_Supergrain_Before (2) Kaywoodie_73_Supergrain_Before (5) Kaywoodie_73_Supergrain_Before (1) Kaywoodie_73_Supergrain_Before (4)

I used some worn, 8000 grade micromesh to remove the scorching from the top of the bowl.  The briar was then polished with White Diamond and several coats of Carnuba wax.

I polished the stem starting with 800 grit wet paper, moving thru the 1500 and 2000 grades.  Next was 8000 and 12000 grade micromesh sheets followed by a polish with White Diamond on the buffer.

Our pipe club meeting is this week, so Brian will get his Supergrain back.  An relatively easy restoration on an elegant little pipe.

Kaywoodie_73_Supergrain_Finished Kaywoodie_73_Supergrain_Finished (1) Kaywoodie_73_Supergrain_Finished (3) Kaywoodie_73_Supergrain_Finished (4) Kaywoodie_73_Supergrain_Finished (5) Kaywoodie_73_Supergrain_Finished (6)


Restoring a Four-Digit Kaywoodie Canadian


Blog by Andew Selking

I have a weakness for Kaywoodies, especially those from the 1940’s or earlier; the briar is just amazing. I read somewhere that Kaywoodie was the largest pipe maker prior to WWII and used 100-year-old briar. I don’t know if that’s true or not, but this pipe was one of their mid-range pipes, yet it doesn’t have a single fill. Additionally, it weighs exactly the same as my Heritage Heirloom with the same shape number. (As an aside, the Heritage pipes were made in the 1960’s to compete with Dunhill. According to their brochures, only one pipe out of 300 made the cut.)

Here is a picture of the pipe when I received it. It had some heavy cake, tar build up on the rim, and a few dents in the stem. Cake doesn’t scare me, my reamer makes quick work of it, and tar build up often protects the rim from damage. The only problem from a collector’s standpoint was the stinger had been cut. I think pipes smoke better without the stinger, so that wasn’t a huge issue for me.KW1 One of the things that I do to make reaming heavy cake easier is soak the bowl in alcohol. Here’s the bowl getting dropped into the bath.KW2 After a good long soak, it was time to remove the cake.KW3 My Castleford reamer effortlessly removed the cake.KW4 I like to multi-task, so while the bowl was working, I soaked the stem in Oxyclean. I used a fuzzy stick and Oxyclean solution to get the worst of the gunk out of the stem. Here is the first pass.KW5 Although I usually retort the shank and stem separately, the screw in stem prevented that. I ended up retorting the whole pipe.KW6 The inside of the shank and stem were nasty.KW7 Next I turned my attention to the rim. It had some scars that necessitated topping.KW8

KW9 I used 150 grit sandpaper on a piece of glass to remove the damaged section.KW10 To fix the dents in the stem, I used a three-pronged approach. First I used steam to raise the dents as much as possible. I have an old kitchen knife that I heated with my heat gun. I placed a wet cloth over the area and pressed the hot knife blade onto the stem. It raised it a little bit.KW11 This is after the application of steam.KW12 Next I used 400 grit sand paper.KW13 The underside of the button was kind of messed up, so I dressed it with a file.KW14 I still had a small dent, so I filled it with clear super glue and applied a drop of accelerator. The accelerator comes in a spray bottle, which I find makes a mess. My solution is to take the sprayer out and use the end as an applicator. I also use a thumb tack to apply a small amount of glue. I’m not very neat when using glue straight from the bottle and using a thumb tack gives me more control (it also means less material to sand after the glue dries).KW15 Once I had the stem sorted out, I used 400 grit wet/dry with water followed by 1500-2400 grit micro mesh with water.KW16 I used a progression of 1500-12000 micro mesh on the bowl. Next I used Pimo Pipe Supply medium walnut stain, cut with 50% de-natured alcohol, to make the rim match the bowl.

After an uneventful spin on the buffer (anyone who ever used a buffer to shine pipes understands the drama that can occur when the pipe gets away from you) this is the result.KW17

KW18

KW19

KW20

KW21

Restoring a Kaywoodie Super Grain 40 Lovat


Blog by Steve Laug

My son-in-law and I went pipe hunting a few weeks ago and this was one of the finds that day. I picked it up in an antique shop in Bellingham, Washington. I think I paid $15 for it. The stem was slightly overturned and would need to be fixed. The stem was clean of bite marks or tooth chatter. The stinger was intact and was a three-hole one so the pipe was newer rather than older. The finish was not ruined. The rim was caked with tars and oils. The buildup was only back side and went to the left side of the rim. The briar had quite a few fills on the sides and back of the bowl. The stamping on the left side was clean and easily read – Kaywoodie over Super Grain over Imported Briar. On the right side of the shank was stamped the shape number 40.KW1 KW2 The inside of the bowl had a light cake that was soft and crumbling. It would need to be reamed back to the bare wood in order to build a hard carbon cake.KW3 KW4 I reamed the bowl with a PipNet reamer and used the smallest cutting head first and then the second cutting head to finish the job.KW5 I removed the stem from the shank so that I could heat the stinger apparatus with a lighter. The black buildup of tars and oils on the stinger was hardened and not easily removed. Once I heated the stinger with the lighter I was able to wipe down the surface with a cotton pad and alcohol. I heated the stinger until the glue in the stem softened and then screwed the stem back into the shank and turned it until the stem lined up with the bowl.KW6 I cleaned the inside of the shank and stem with pipe cleaners, cotton swabs and isopropyl alcohol. The shank behind the metal insert was very dirty. I used the cotton swabs to clear out that area. I scrubbed it out until it was clean. I also cleaned out the airway in the stem the same way until it was clean.KW7 I scrubbed the top of the bowl with isopropyl alcohol on cotton pads to remove the buildup. It was thick so it took quite a bit of scrubbing. To finish removing it I used 1500 grit micromesh sanding pad and water. I was able to get the rim clean and then used a staining pen to touch up the rim.KW8 KW9 KW10 The lightest colour staining pen matched the finish of the bowl perfectly. I gave the bowl and rim a quick buff with White Diamond and then gave it multiple coats of carnauba wax and buffed it to a shine.KW11 I was fortunate that the stem was not damaged with bite marks or tooth chatter. I use micromesh sanding pads to clean up the stem. I wet sanded with 1500-2400 grit pads and dry sanded with 3200-12,000 grit pads until the finish of the stem was smooth. I buffed it with White Diamond to finish the process and then gave it a coat of carnauba.KW12 KW13 KW14 I put the stem back on the shank and then buffed the entire pipe with White Diamond a final time. I gave the stem and bowl multiple coats of carnauba wax and buffed it with a soft flannel buffing pad to raise the shine.KW15 KW16 I touched up the fills with the stain pen and then buffed the pipe bowl with White Diamond yet again. The results were acceptable. I gave the pipe several more coats of carnauba wax and buffed it with a soft flannel buffing pad. The finished pipe is shown in the next series of photos. It is ready to be loaded and smoked – clean and waiting for the next pipe man who will carry the trust to the next generation of pipe smokers.KW17 KW18 KW19 KW20

Reclaiming a Kaywoodie White Briar Medium Pear 09B


Blog by Steve Laug

The last pipe in my box is now finished! It is a Kaywoodie White Briar pipe. Among the many White Briar pipes I have found this one has the distinction of actually being in pretty decent shape. All of the others I have found had many chips in the paint and the paint itself was dull and worn through. Not this one. The finish was in pretty decent shape with only a few nicks on the bottom of the bowl and some that might show up under the thick tars on the rim. It is stamped Kaywoodie over White Briar over Imported Briar on the left side of the shank and 09B on the right side. Looking up the shape number I found that the shape is known as a medium pear which was available on the market from 1936-1972. I have no idea when this one was made as the stem that is shown below came from my can of stems. It fits perfectly and it is an old four hole stinger stem. It was worn and oxidized by the fit was correct. It has some calcification that would need to be cleaned and it was clogged. The bowl had a thick cake that I reamed out with a PipNet reamer. The shank was dirty and the aluminum face plate on the end of the shank was oxidized.IMG_2512 IMG_2513 IMG_2514 IMG_2515I scrubbed the rim with spit and cotton pads and then used Meguiar’s Scratch X2.0 on cotton pads to remove the tars and oils on the top of the rim. The worn spots shown in the photo below are actually spots where the tars still remain. More scrubbing removed most of them.IMG_2516I sanded the stem with 220 grit sandpaper to remove the oxidation, calcification, and tooth chatter that was near the button on the top and bottom of the stem.IMG_2517 IMG_2518I used a needle file to sharpen the crease of the button and then sanded the repair with 220 grit sandpaper to remove the file marks. I sanded the stem with medium and fine grit sanding sponges to minimize the scratching left behind by the sandpaper.IMG_2519I cleaned out the shank and the stem with alcohol and cotton swabs and pipe cleaners until they came out clean. I used cotton pads and alcohol and a brass bristle brush to clean up the stinger apparatus and polish it. I gave the aluminum shank end a quick sand with a 1500 grit micromesh sanding pad to polish it up. I scrubbed the surface of the bowl with Scratch X2.0 on cotton pads to remove the grime and polish the painted surface of the bowl.IMG_2520 IMG_2521I sanded the stem with micromesh sanding pads – wet sanding with 1500-2400 grit pads and dry sanding with 3200-12,000 grit pads. As has become my habit, I rubbed down the stem with Obsidian Oil between each set of three sanding pads and then gave it a light buff with White Diamond before rubbing on a final coat of oil.IMG_2522 IMG_2523 IMG_2524The photo below shows the cleaned up internals of the pipe and stinger. The aluminum took on a shine once it was clean.IMG_2529The finished pipe is shown in the photos below. It is cleaned and ready to smoke. The White Briar KWs were never favourites of mine but this one turned out very well. I am sure that it will make a great rack mate to someone who collects KW pipes and wants to add a shape 09B. Feel free to contact me if you would like to have this one. We can certainly work something out. I am sure it will smoke great and last for many more years to come.IMG_2525 IMG_2526 IMG_2527 IMG_2528

Giving New Life to a Kaywoodie Connoissuer Dublin Shape 45C


This is the third old-timer I received in my gift box from Jim. It is stamped Kaywoodie over Connoissuer on the left side of the shank and 45C on the right side near the bowl. It was in rough shape. The finish was gone and the bowl was almost black with grit and grime. There were places on the sides and bottom of the bowl that had black spots of a sticky, oily substance. The rim was heavily caked and damaged as well. There were rough outer edges on the rim on the back right side and the front as well. The bowl was badly caked and appeared to be out of round from reaming with a knife. The stem was in pretty decent shape however. There was a buildup of calcium on the end of the stem about ½ inch from the button forward but there was only minimal tooth chatter and no deep bite marks. The stem even fit correctly and was not over turned in the shank.IMG_1710 IMG_1711 IMG_1712 IMG_1713 IMG_1714 I looked up an old Kaywoodie shape chart to make sure the shape number 45C was indeed a Dublin, in fact a Large Dublin. I found it in the second column, third entry down that column in the chart below. I think that the name is quite relative as the size is not that large and would easily be a group 3 sized bowl in Dunhill terms. I also found that the Connoisseur line was the top of the line (at least in this chart of pipes). Read the notes on the bottom of the page, the last line that shows a price of $27.50 – the highest priced KW on this chart. Kaywoodie_shapes70_71 When I removed the stem the stinger was black with buildup but was not damaged. It only had two holes in it, a flattened head rather than a ball and a space on the top of the stinger where the air went through. This was obviously a pre-Drinkless stinger. IMG_1715 I reamed the bowl with a PipNet pipe reamer and used a dental pick to clean out some of the scale around the edges of the airway. IMG_1716 IMG_1717 I started with the smallest reaming head and worked up to one approximately the size of the bowl. I wanted to try to minimize the rim damage and bring the bowl back to as close to round as possible with the reamer. IMG_1718 The amount of damage to the edges of the outer rim and the broken spots on the inner rim required that I top the bowl. I set up a topping board and 220 grit sandpaper and sanded the top of the bowl. I press the bowl into the sandpaper, taking care to keep the rim flat against the board so as not to slant the top of the bowl. I worked it until the top was clean and the outer edge was sharp once again. The second photo shows the topped rim and the damage down to the roundness of the bowl inner edge. It was going to take some work to work this back to round as much as possible. IMG_1719 IMG_1720 I sanded the inner edge with a folded piece of 220 grit sandpaper to even it out and give it more of a round shape once again. I wiped the bowl down with acetone on cotton balls to remove the grime on the finish. I decided against using the oil soap this time around as the finish was basically gone any way so the acetone would make short work of removing the finish. I scrubbed it longer and harder than I expected to remove the grime. The next series of photos show the bowl after scrubbing. There was some nice grain under the blackness. IMG_1721 IMG_1722 IMG_1723 I sanded the bowl and the stem with 220 grit sandpaper and also with a medium and fine grit sanding sponge and fine grit sanding block to further clean things up on the surface of the bowl and stem. IMG_1724 IMG_1725 IMG_1726 The photo below shows the bowl after the work on the inner edge of the rim. It certainly has come a long way from the beat up inner edge pictured above. IMG_1727 IMG_1728 I dropped the bowl into the alcohol bath to soak out some more of the grime from the briar. I turned my attention to the stem. I cleaned up the stinger with alcohol, pipe cleaners and cotton balls until the aluminum shined once again. I continued to sand the stem with the medium and fine grit sanding sponges to remove the surface scratching. I cleaned out the area around the slot with a dental pick and finally after many pipe cleaners was satisfied with the cleanness of the internals of the stem. IMG_1729 I sanded the stems with micromesh sanding pads – wet sanding with 1500-2400 grit pads and dry sanding with 3200-12,000 grit pads. I rubbed the stems down with Obsidian Oil between each set of three pads. I buffed the stem with White Diamond and polished it with a coat of carnauba wax to raise a shine. IMG_8249 IMG_8250 IMG_8252 I took the bowl out of the alcohol bath and dried it off with a cotton cloth. I sanded it lightly with a fine grit sanding sponge to remove the last of the grit and grime softened by the bath. The bowl is shown in the photo below. It is cleaned and ready for staining. IMG_8253 There were two areas that were dark on the bowl – the left side midbowl toward the front and the right side midbowl toward the back. I cleaned and stained the bowl with some Danish Oil and walnut stain and in the dark spots two small minor cracks showed up. At this point the cracks are not visible in the inside walls of the bowl. They may well be there and not seen in the darkening of the interior walls. Once the oil dried I exposed the two cracks with a dental pick to make them accessible. I then used superglue and briar dust to repair the cracks. I overfilled them with the glue and briar dust to ensure that the repair is solid and would have no pits in the surface once I sanded them. I sanded the repairs with a well used piece of 220 grit sandpaper and followed that with a fine grit sanding sponge and 1500-2400 micromesh sanding pads.IMG_1730 IMG_1731 I wiped the sanded bowl down and then gave it a coat of Danish Oil with Walnut stain to touch up the repairs and the entire bowl. IMG_1732 IMG_1733 IMG_1735 IMG_1734
When the pipe was dry I buffed it with White Diamond and polished the bowl and stem. I gave it multiple coats of carnauba wax to protect and give it a shine. I buffed it with a soft flannel buff. The pipe is finished. It has come a long way from the pipe that I started with when I took it from the box. The repairs, though visible look pretty good. I expect them to hold for a long time and provide a quality smoke in an old Kaywoodie for whoever ends up with this old pipe. It is cleaned and ready for the next pipeman. IMG_1741 IMG_1742 IMG_1743 IMG_1744

Kaywoodie 5183B – 75 Year Old Briar


By Al Jones

I love the tapered Rhodesian shape and have been keeping an eye out for a Kaywoodie 5183B. The four digit Kaywoodies with “Drinkless” stamped stingers were made in the 1930’s.

I found this one on Ebay last week. It was sold by Dave Whitney. Dave is the contributor to “The Pipe Collector” (NASPC newsletter) and has written a book on estate pipe restoration called “Old Briar”.

Dave has this pipe listed as being made in 1938. From my research, and comments from other collectors, it seems a 1937-1938 is correct. The pipe is stamped “Imported Briar”.

The pipe was in overall excellent condition. Dave tells he found it in a box lot and the tobacco chamber was completely with cake build-up. The screw-in stem has the four-hole stinger intact. The beading on the bowl is degraded somewhat. There was one dent on the bowl top, which had colored darker than the rest of the briar. I was able to steam that dent out. I heat the tip of an old kitchen knife (OK, don’t tell my wife, it’s not that old..) with a propane torch and use a wet piece of cotton cloth. I double the cloth over as not to scorch the wood. The steam generated by the wet cloth causes the wood to rise to its original position. After the wood has been steamed, I buff the area with white diamond to bring back the shine and then with several coats of carnuba wax to protect it.

Kaywoodie_5138B (3)

Kaywoodie_5138B (2)

Here are some other pictures of the pipe. This is my first vintage Kaywoodie (I have a 2005 POY Rhodesian) and only “stinger” pipe in my collection. I smoked it today and found it smokes quite well. The bowl requires a light pack and the draw doesn’t feel restricted in any way. It does seem to like a slow puffing cadence. This is a rather large pipe, weighing approximately 60 grams and very close in size to the GBD 9438

Kaywoodie_5138B (4)

Kaywoodie_5138B (7)

Kaywoodie_5138B (6)

Kaywoodie_5138B (5)

Kaywoodie_5138B (8)

Kaywoodie_5183B_Ebay4

A Kaywoodie Handmade Brought Back to Life – Greg Wolford


Blog by Greg Wolford

Greg is one of the blog’s readers and comments often on various posts. He contacted me about writing an article for the blog. He sent me the following article. I want to thank Greg for documenting his work on this old Kaywoodie Handmade. It is great to be able to read and see what others are doing as they work on restoring old pipes to their former glory. Here is a brief biography of Greg that he has written. (I invite others who have been reading the blog to do the same. Send us pictures and documentation of the work you have done and are doing.)

In June of last year I saw a bunch of old pipes, filthy and dirty, wasting away in an antique store. Thoughts of my former hobby of working with wood flooded my brain, as did the romantic idea of bringing new life to these old relics. I purchased the whole lot of 25-30 pipes and pieces and began to research how one goes about restoring these wonderful pipes to at least enjoyable and useable condition, if not to their total and complete former glory. Much help and advice has been shared with me in this short period of time; I have learned a tremendous amount from this blog, its founder and contributors. I am honored to have the opportunity to share some of my work here and to, hopefully, repay some of the kindness shown to me when I began and as I continue to learn this restoration-side of our pipe hobby.

I picked up this old Kaywoodie last month at an antique mall. It was in poor, filthy shape when I found it but I knew her potential. The stamping is not very strong but identifies it as a Kaywoodie Handmade, which I’ve seen and owned before. But this is one of the oversize models, a style that I’ve not yet had.

ImageImageImageImageImageImage

I began with an overnight alcohol soak and allowed a few hours dry time before I began working in the briar. She had a few scratches and a bit of whitish “mold” that I wanted to get rid of.

ImageImageImage

The previous owner must have had the dreadful habit of knocking the rim of the bowl to empty the pipe on a hard surface; the front was beaten down by probably 1/8th of inch, give or take a bit, giving it a terrible “frontal slope” (visible in the photos above and below). This seemed like the best place to start working on the briar. Before starting, I put the stem in a warm OxyClean soak so it would be ready when I was. 

ImageImageImageImageImage

It took a lot of steaming and some topping to get the bowl back to even. I alternated steaming and topping until I was happy with the shape. The only thing I was unhappy with was finding a sand pit in the new top of the rim; I filled it with briar dust and dropped a little Super Glue into it to make a fill. The fill is somewhat visible but should fade with use as patina develops (I hope). 

ImageImage

For the scratches and left over “mold”, I lightly sanded with 400 grit wet dry paper. It didn’t take too long on the scratches since they weren’t deep. The carved areas where the whitish substance was took more time but came off fairly easily.  I then stained it with Fiebing’s Dark Brown leather dye, cut about 50/50 with 91% isopropyl alcohol. I applied, flamed, buffed with an old t-shirt by hand and repeated. Then I took the pipe to the buffer for a treatment with Tripoli, white diamond, and finally a few coats of carnauba wax. For the final buffing I used my cordless drill with a “mushroom” buffer attachment. I find the shape of the mushroom allows me to get into every crevice with relative ease. Lastly, I cleaned with stinger by buffing it with blue rouge several times, bringing it back up to a nice, new shine. I then set the bowl aside to work on the stem. 

ImageImage

When I took stem out of its bath I rinsed it well and used a Miracle Eraser to remove some of the loosened oxidation. To my surprise I found that the bit was cracked under all the crud, something I had not dealt with before. I then took a fluffy pipe cleaner and dipped the first 1.5 inches or so into Vaseline and then inserted it into the stem.  I dripped some Super Glue into the crack and let it sit a while until it had hardened through. (This was my first time fixing a crack with super glue and was happy with the outcome and learning curve.) The stem was really deeply marked dents and scratches and took a lot of time and work. I began with some heat from a candle to raise what I could of the dents. Then I used various needle files, wet/dry sand paper in grits from 220-800, micro mesh 1500-4000, plastic polish and carnauba wax on it. I actually started over twice, at different points, to get it as nice as possible.

Here are photos of the finished pipe.ImageImageImageImageImageImage