Blog by Dal Stanton
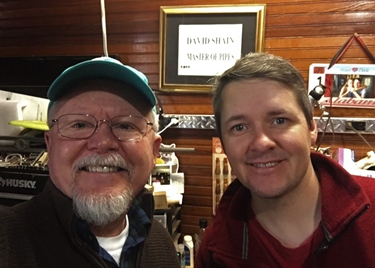 This Rossi of Italy, along with several other pipes, were donated to The Pipe Steward from a good friend and pipe man, Dave Shain, who I worked with in Ukraine several years ago. Dave also restores pipes and has a great website, http://www.ThePipery.com and regularly produces live podcasts opining the latest tobaccos, pipes and also critiques on cigars he’s tried out. In 2017, Dave won the Master of Pipes award from the Chicago Pipe Collectors Club for his restoration work and charitable activities through The Free Pipe Project where Dave spearheads a program to send quality restored pipes to servicemen serving their country. A few years ago, I visited Dave where he lives near Atlanta, Georgia, and we had a great time renewing our relationship. He showed me his workshop, pipes and tobacco collection, and of course, we settled down in the ‘Barn’ flanked by a vintage Ford pickup – his Man Cave, to share a bowl or two. It was a great reunion! I left with a tin of his aged Escudo which continues to age today and several pipes he wanted me to restore for the Daughters of Bulgaria, which I was more than happy to do. Thanks again, Dave!
The pipe now on my Christmas Vacation mobile worktable in Port St. Lucie, Florida, is a Fratelli Rossi. Chris, a pipe man from Argo, Alabama, saw some of my other restorations posted on a popular FB Group, Pipe Lifestyle, and decided to take a look at the For “Pipe Dreamers” Only! collection. He reached out to me with 4 contenders that he desired to commission. In the end, he commissioned the Rossi now on the table and a Cadogan era GBD London Made – Made in London England C789 Pot. Without a doubt, Chris has learned the meaning of patience that I ask of all commissioners when they commission pipes! He commissioned them before my wife and I moved from Sofia, Bulgaria, to Golden, Colorado, and so he’s been waiting a while for his pipes to work up the queue to the worktable. Thanks, Chris!
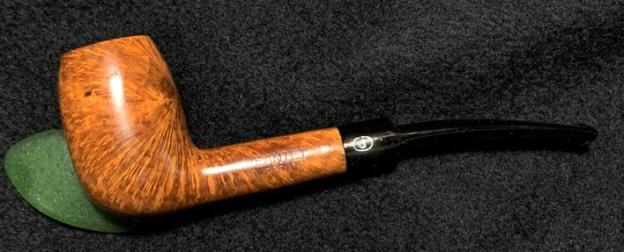
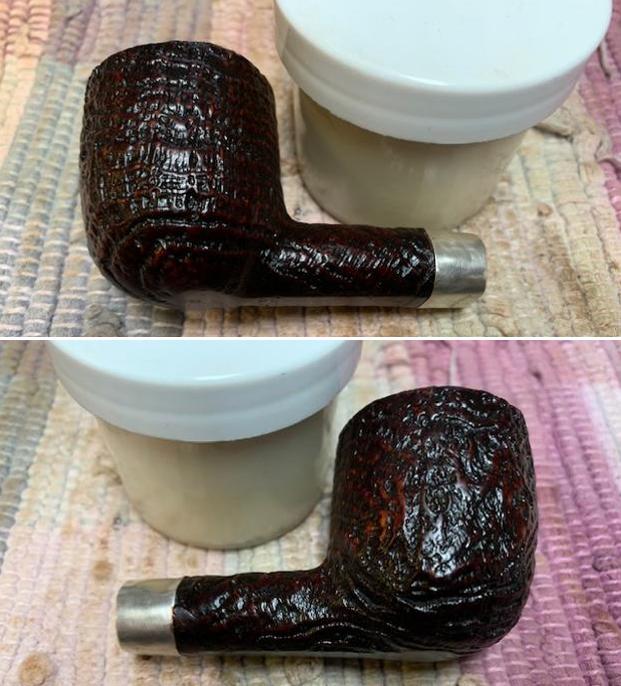
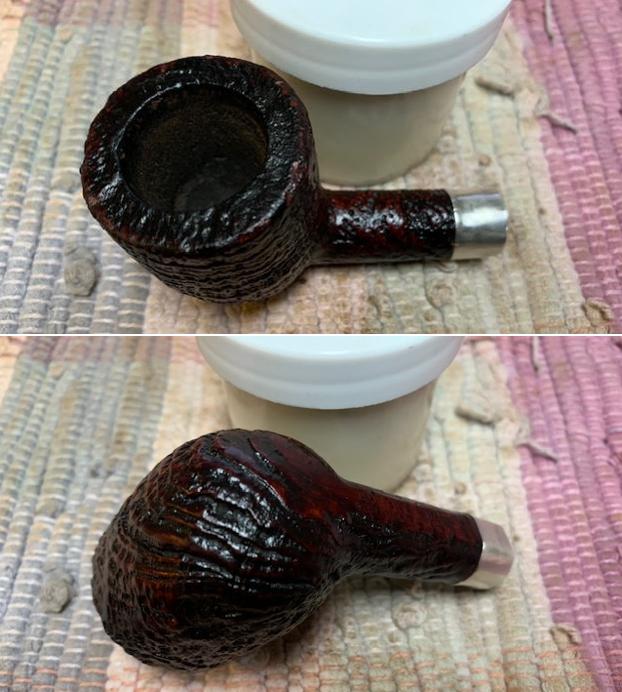
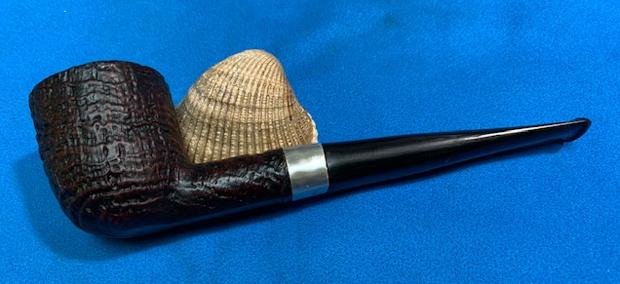
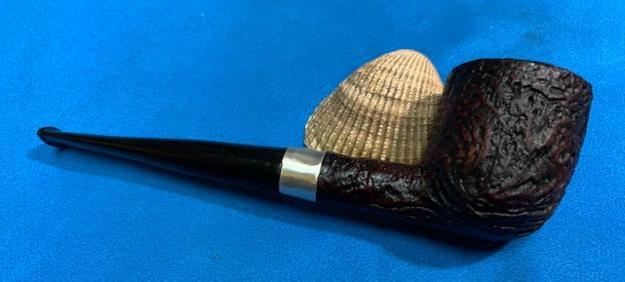
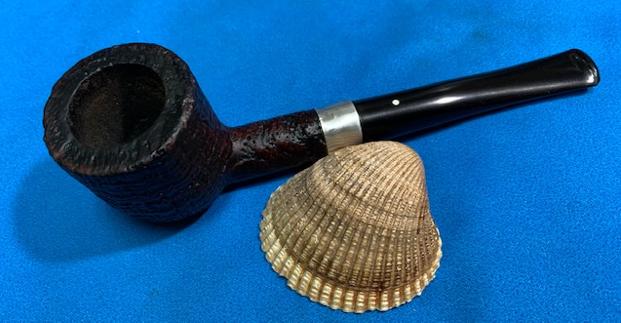
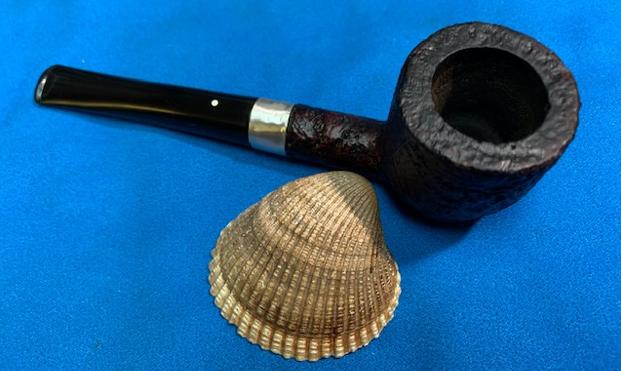
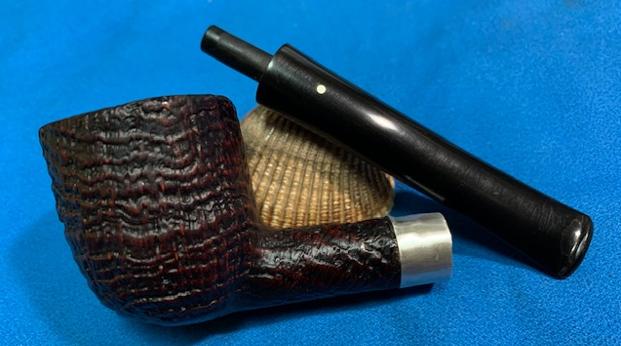
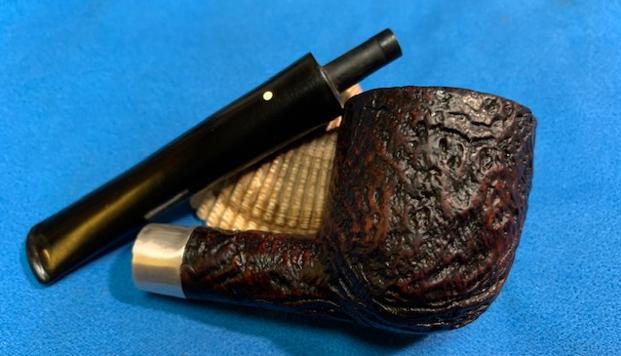
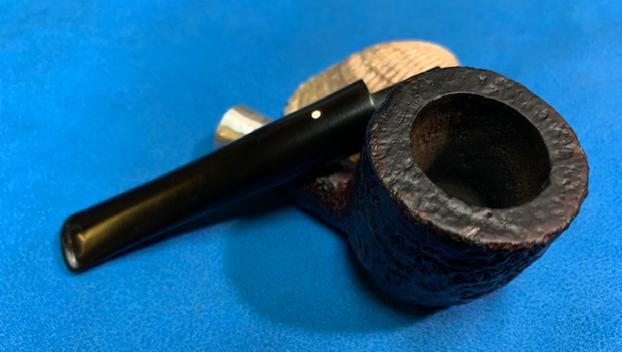
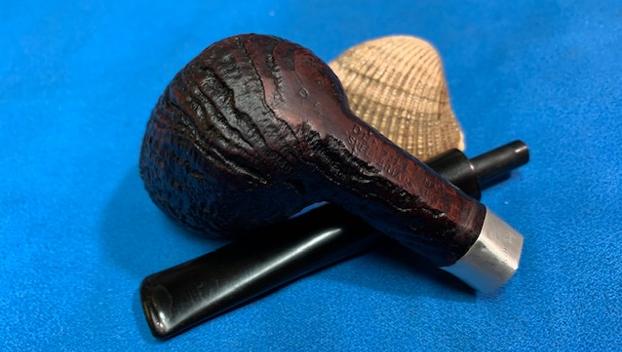
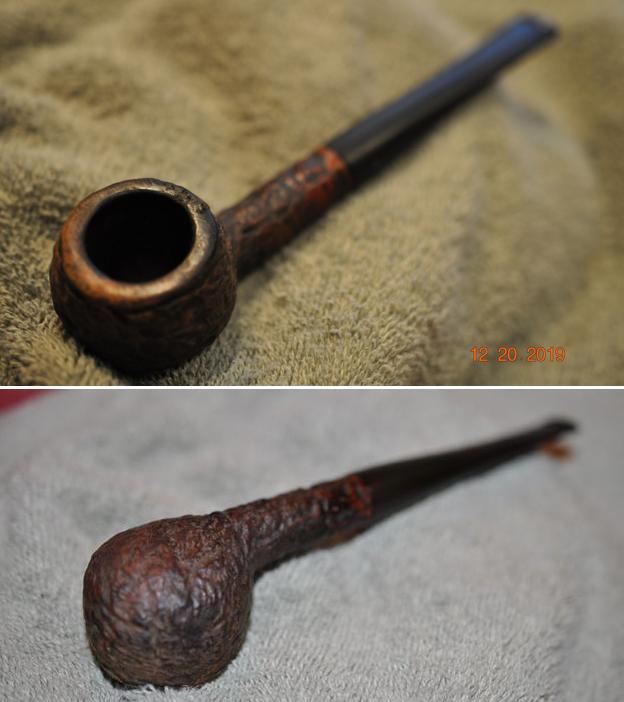
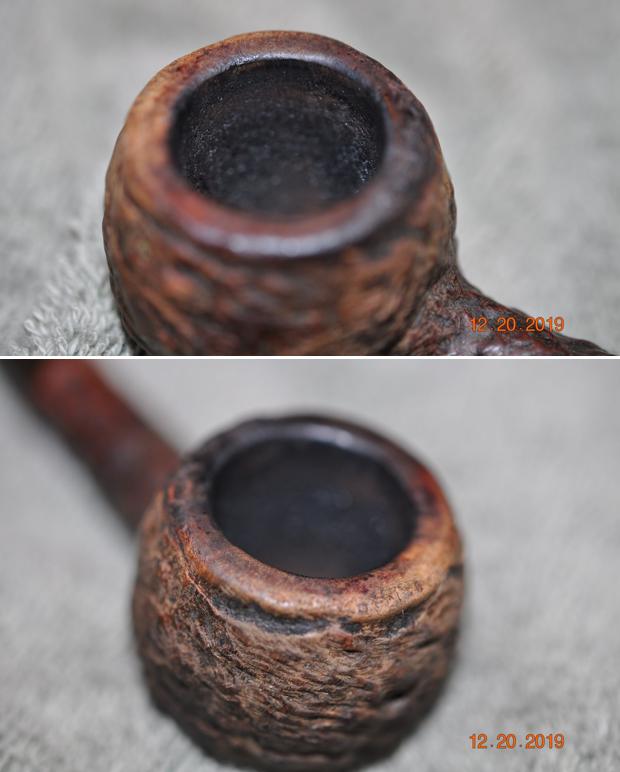
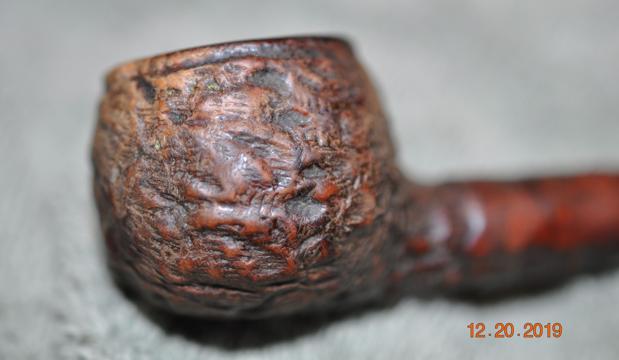
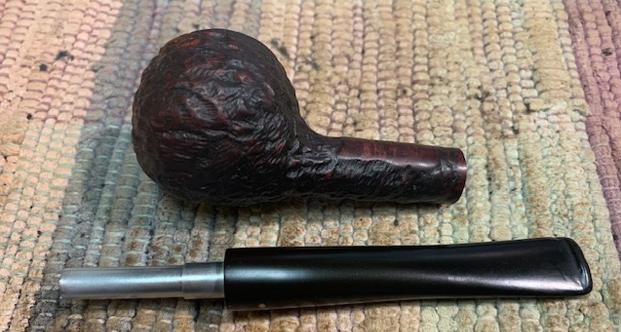
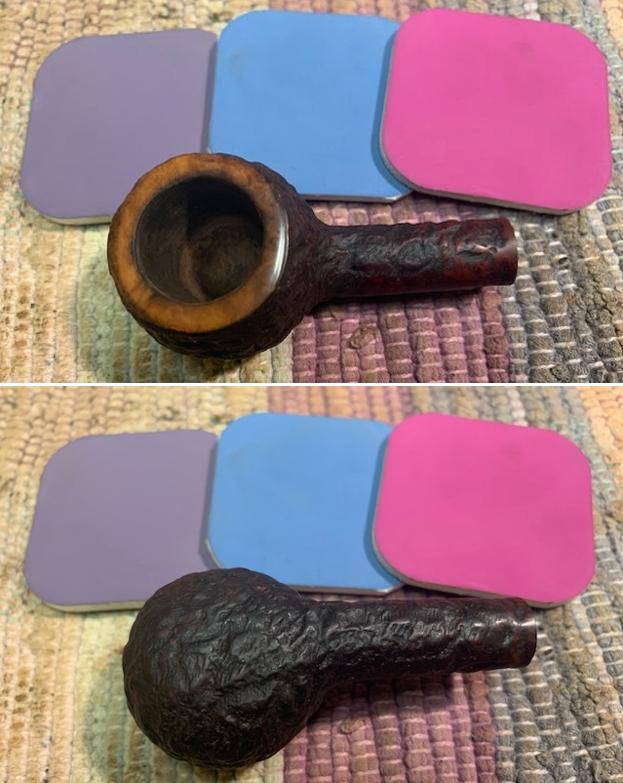
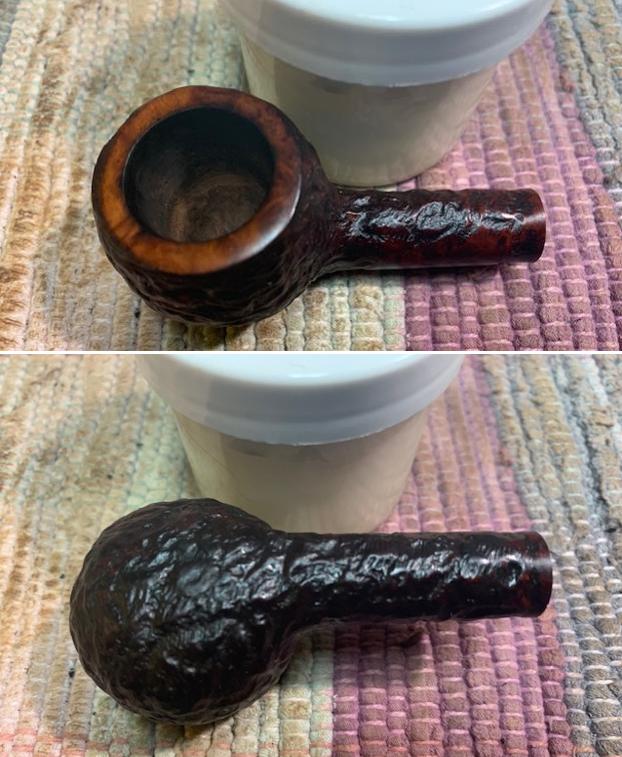
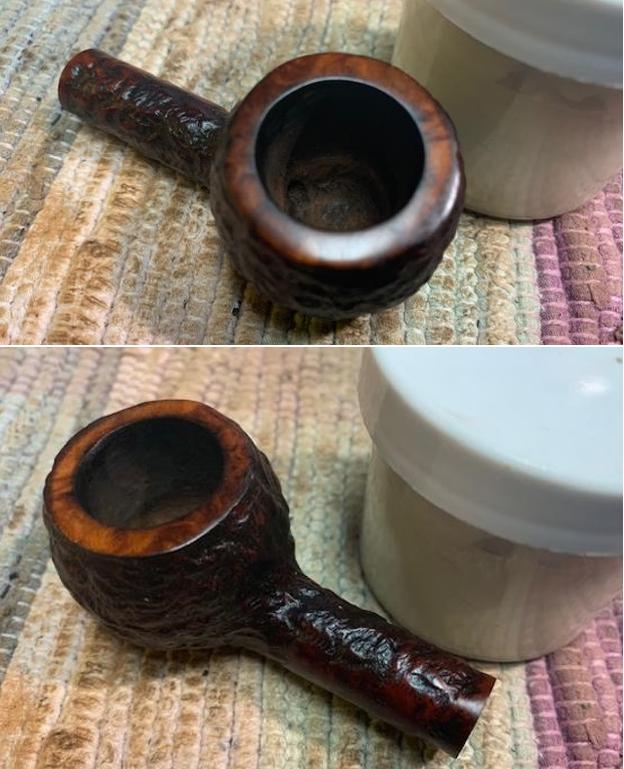
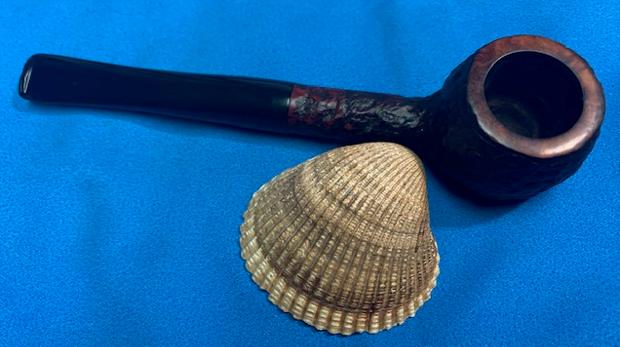
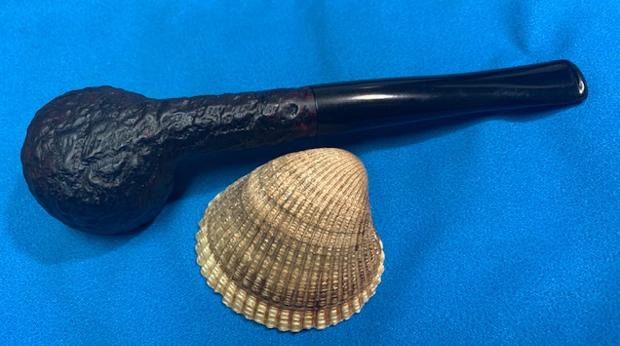
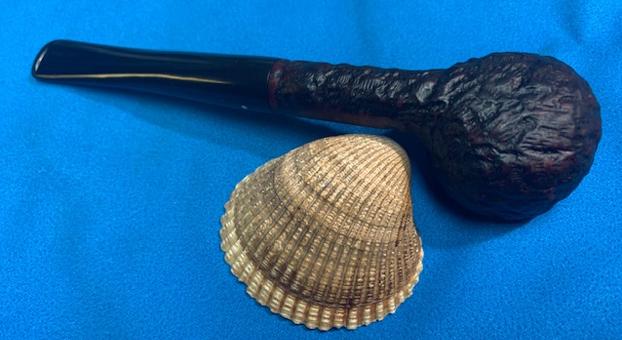
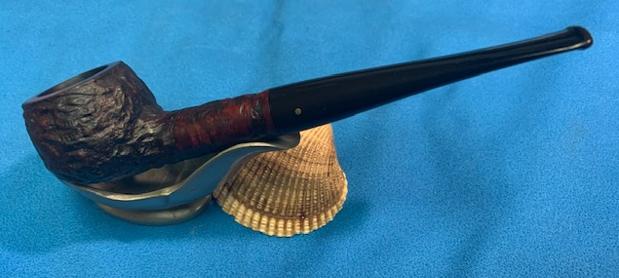
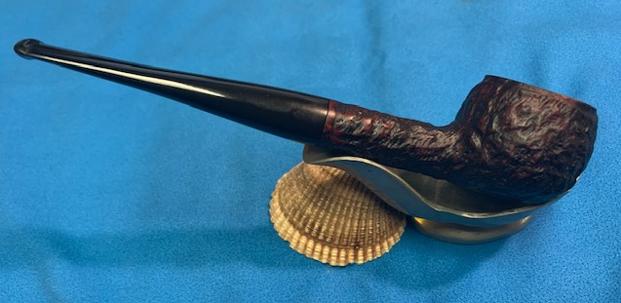
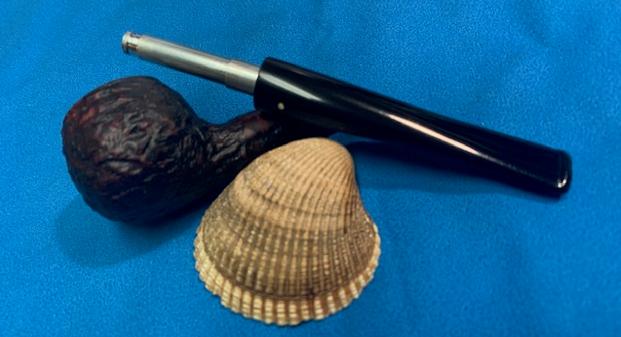
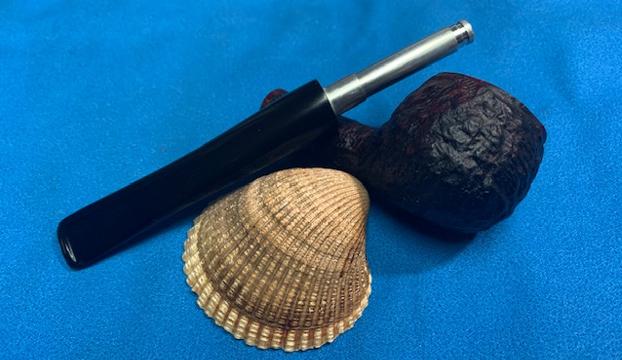
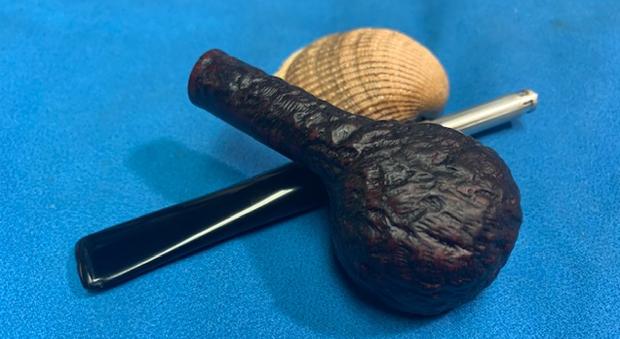
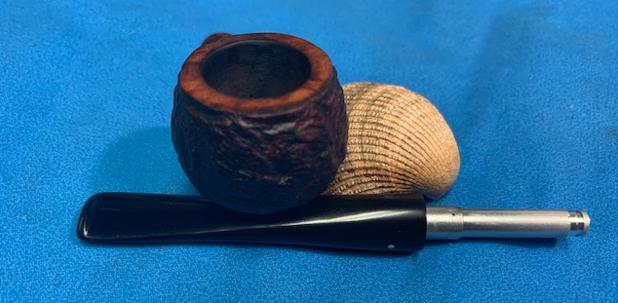
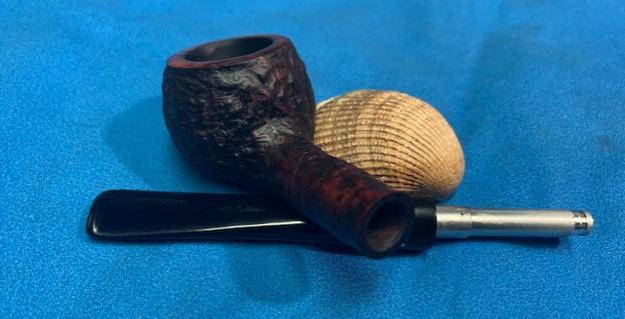
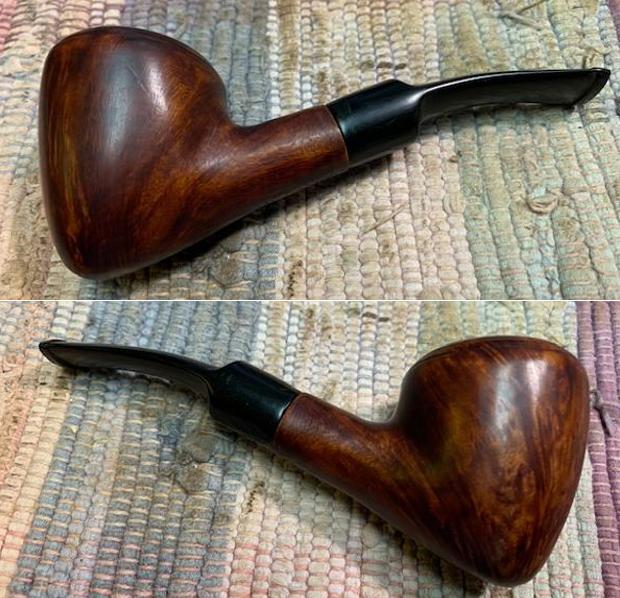
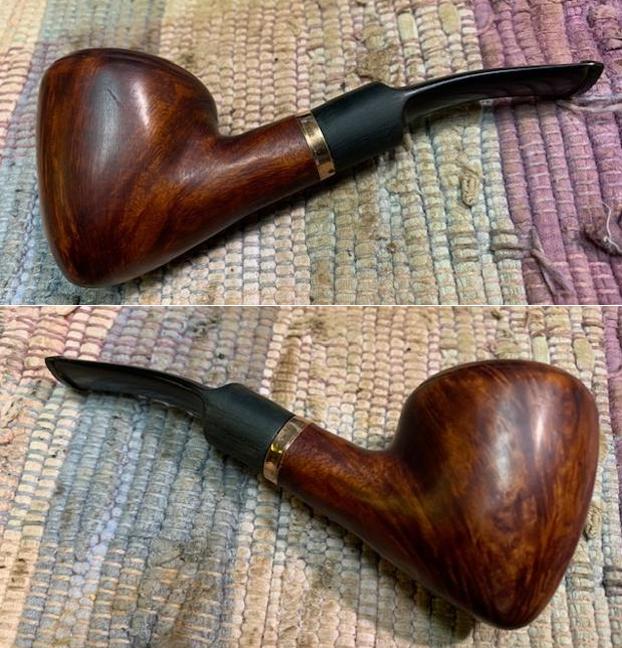
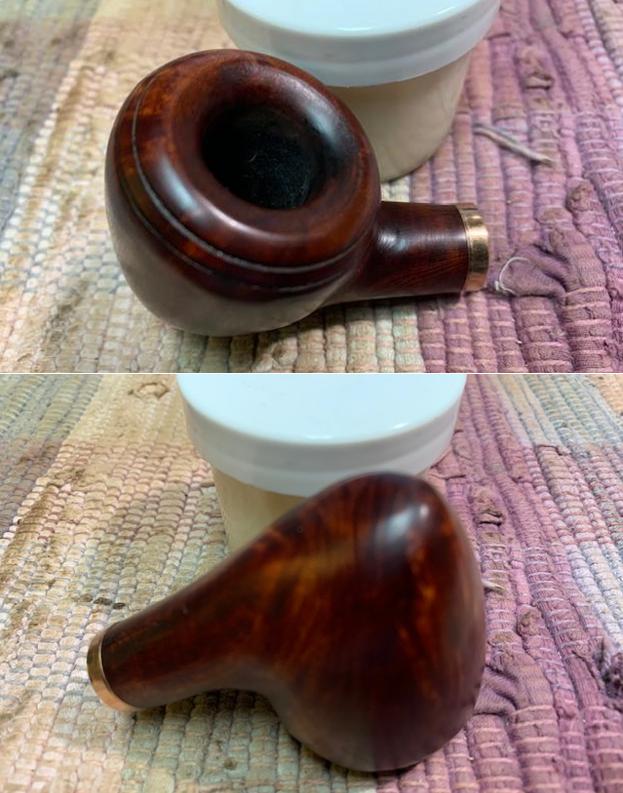
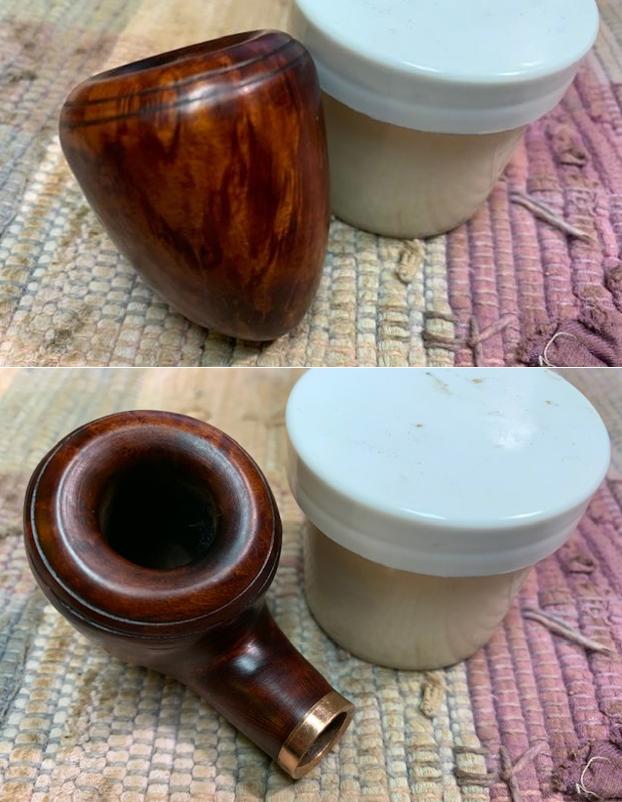
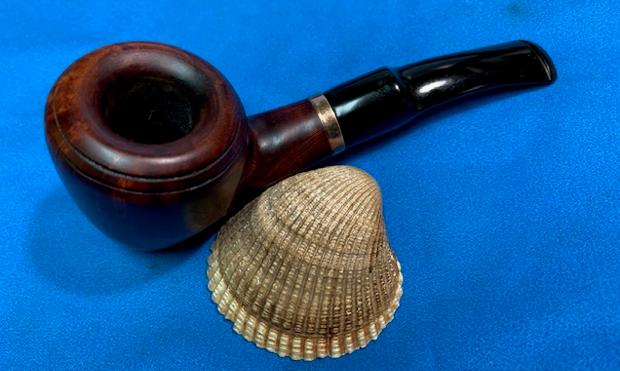
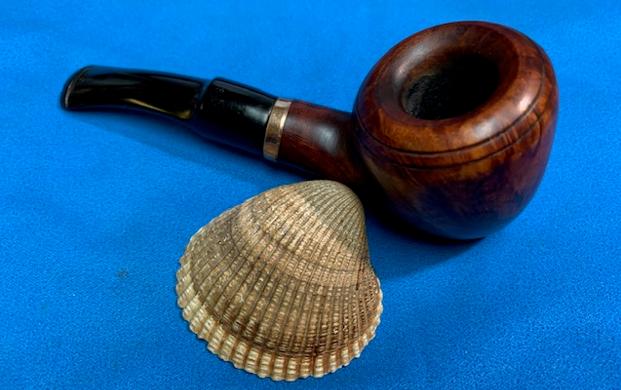
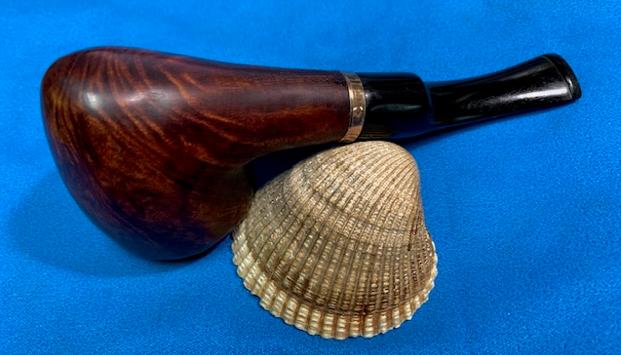
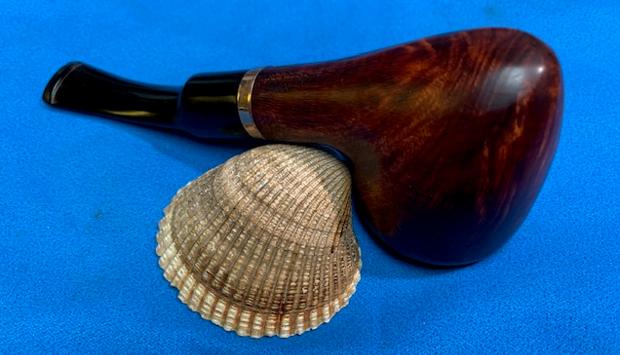
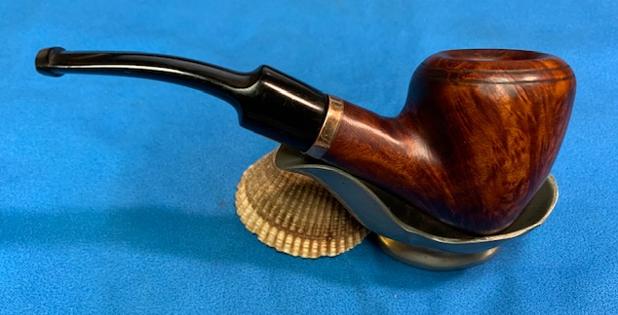
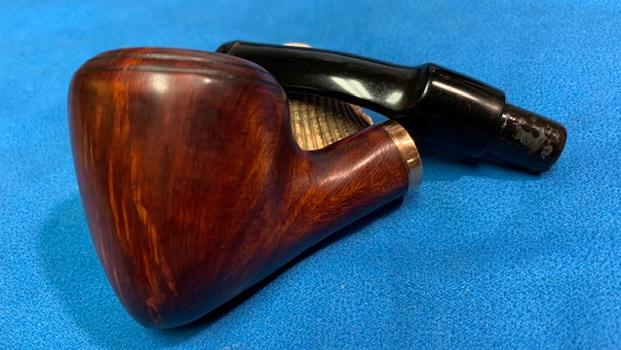
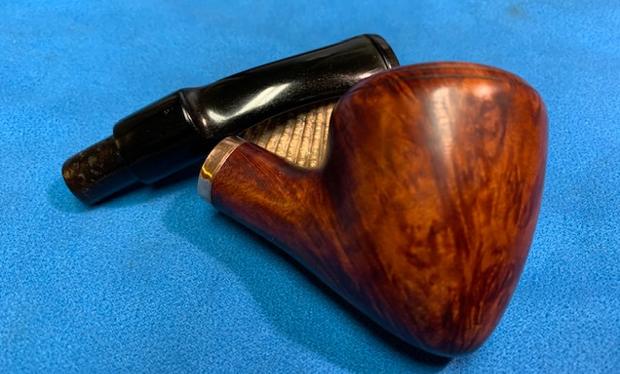
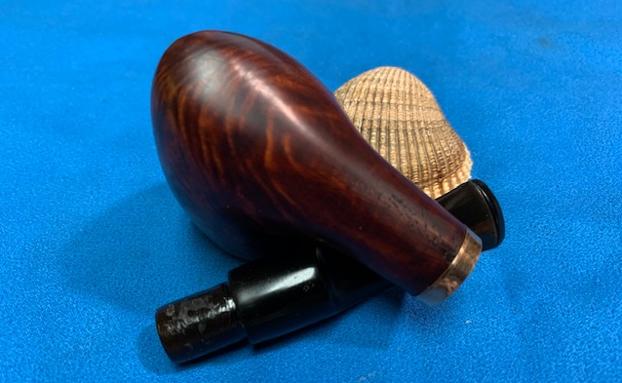
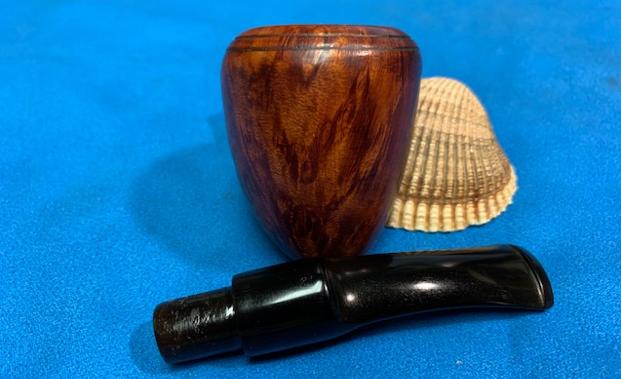
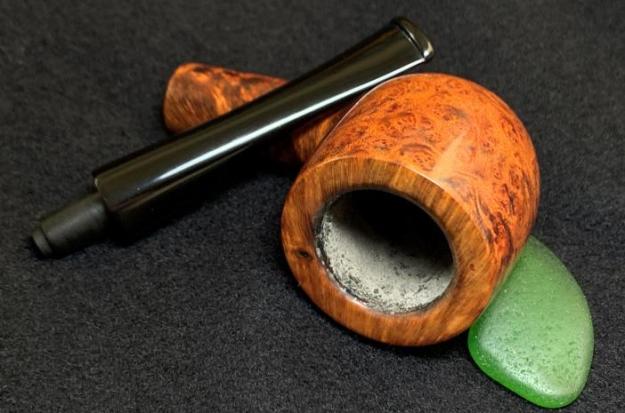
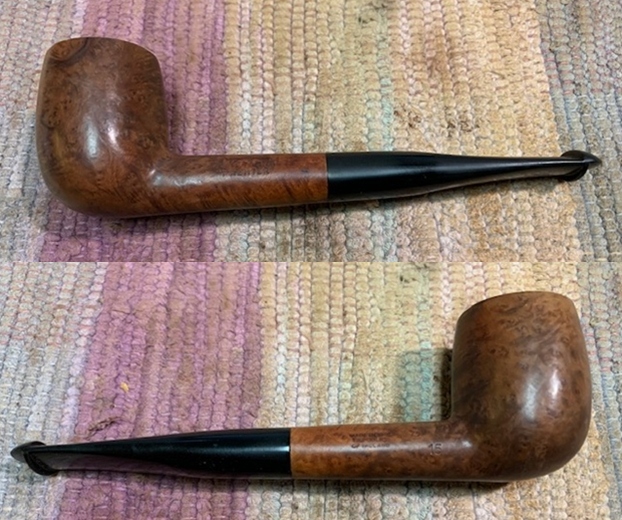
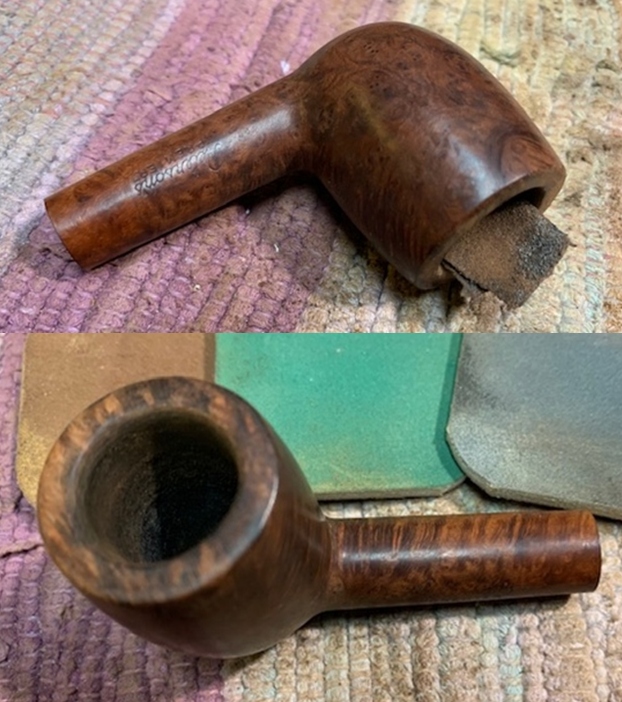
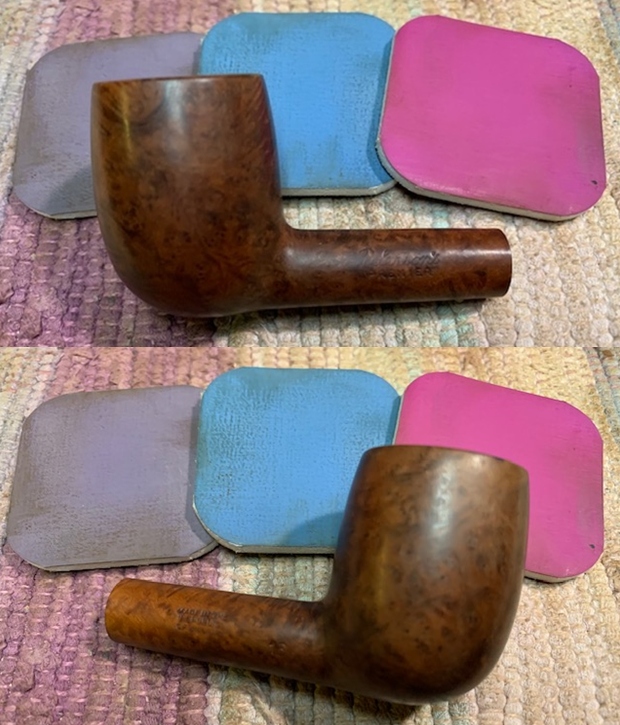
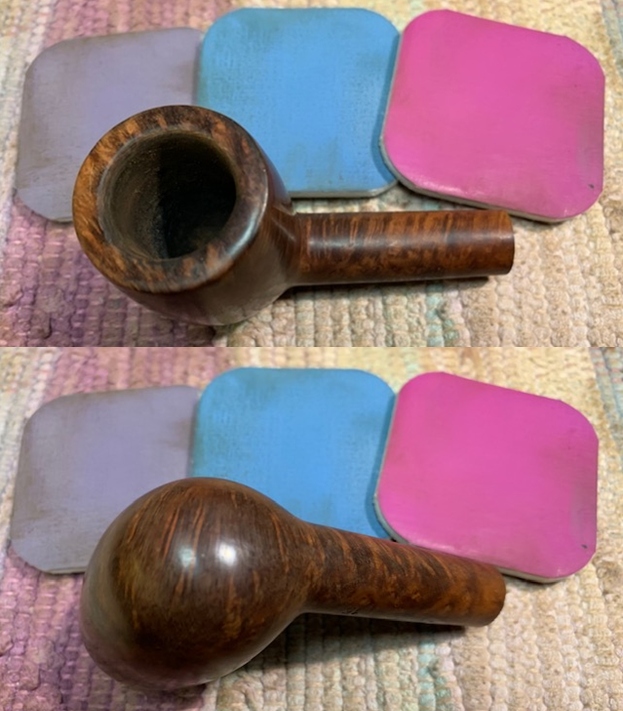
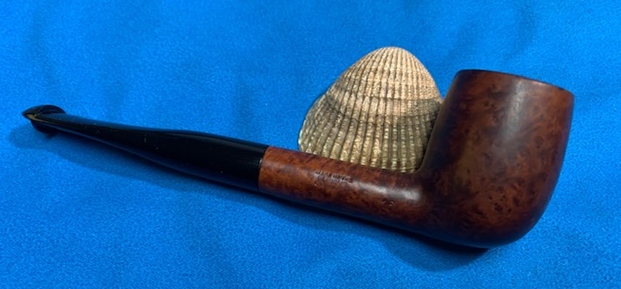
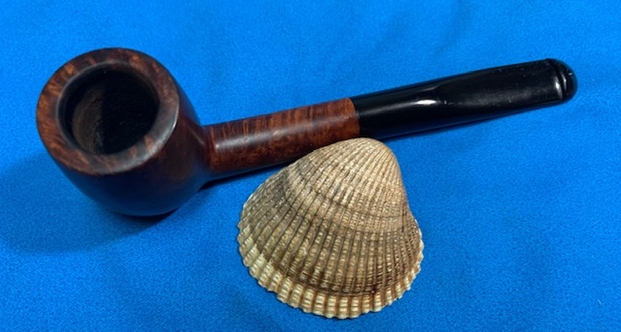
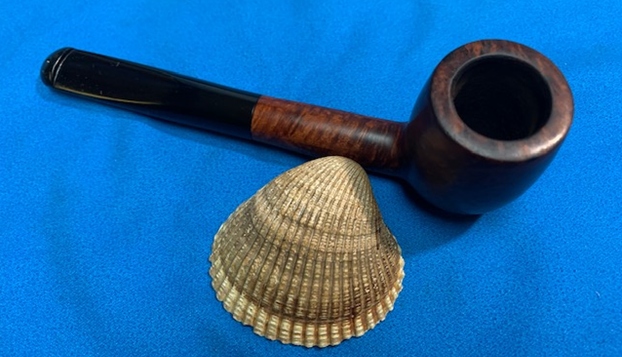
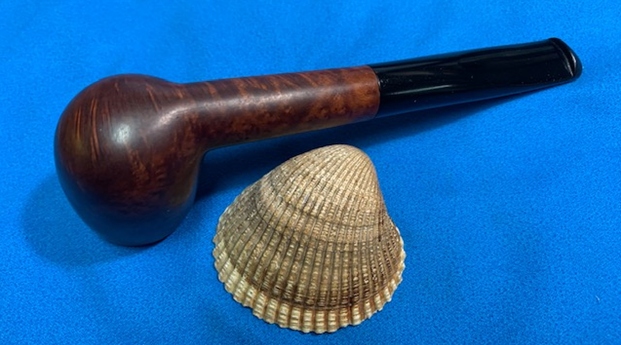
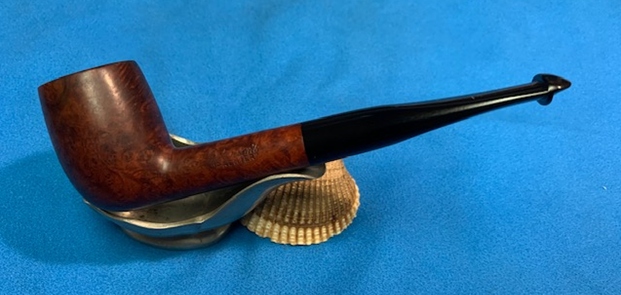
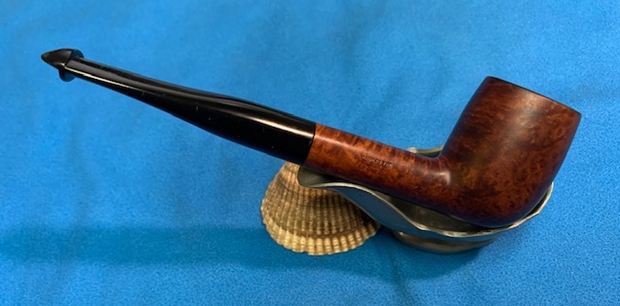
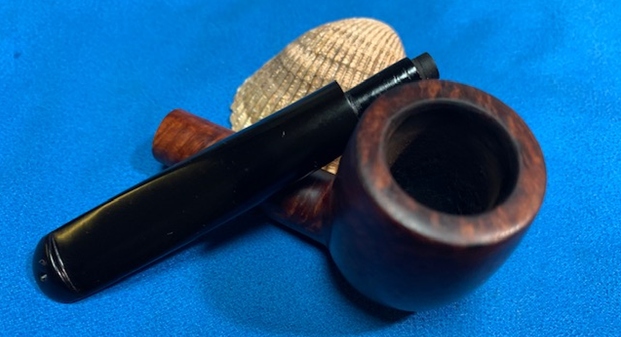
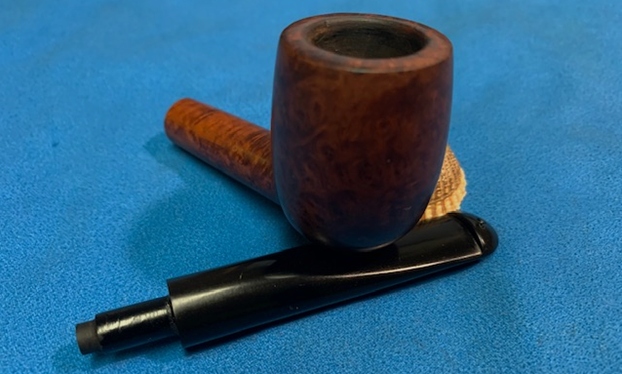
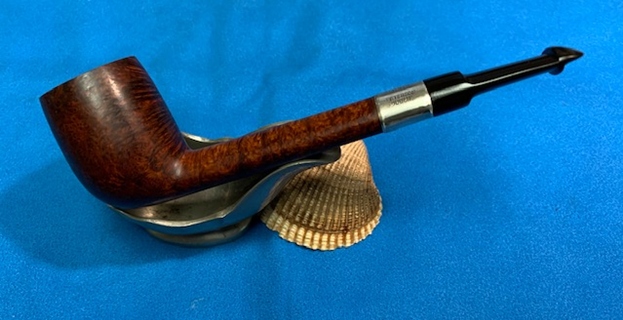
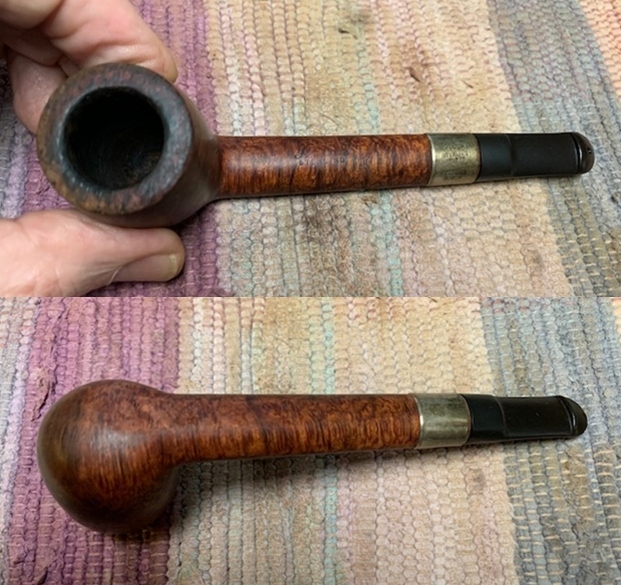
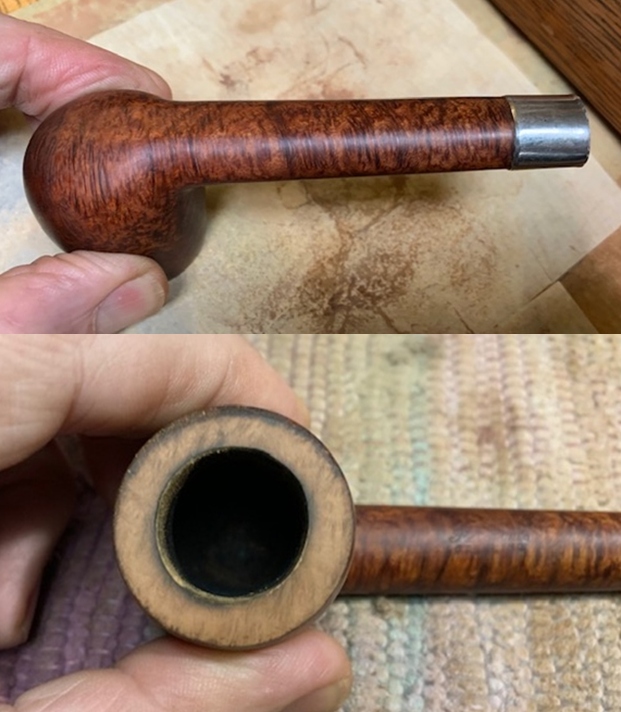
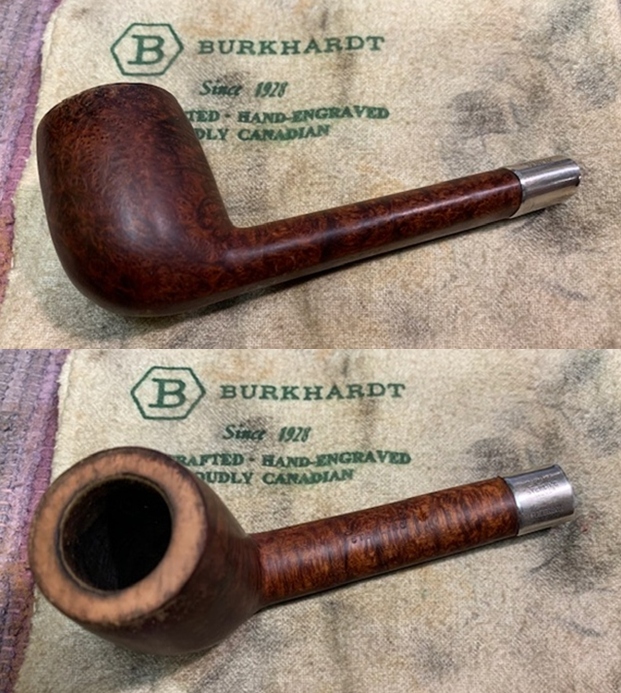
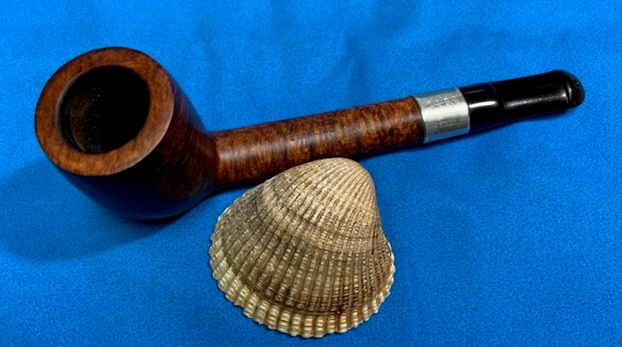
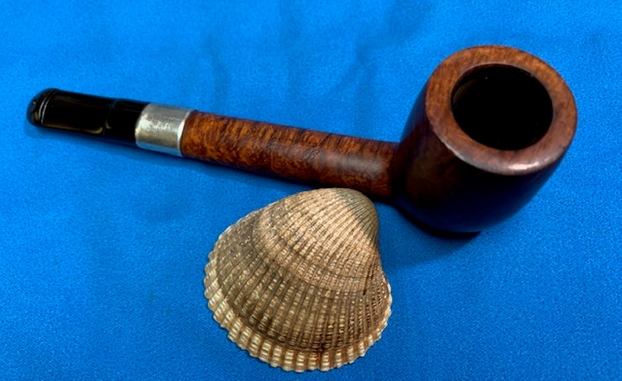
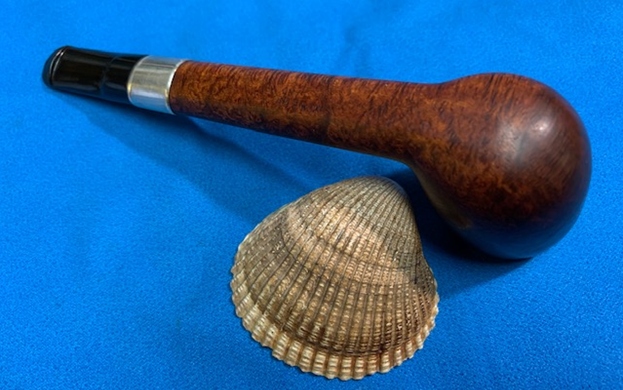
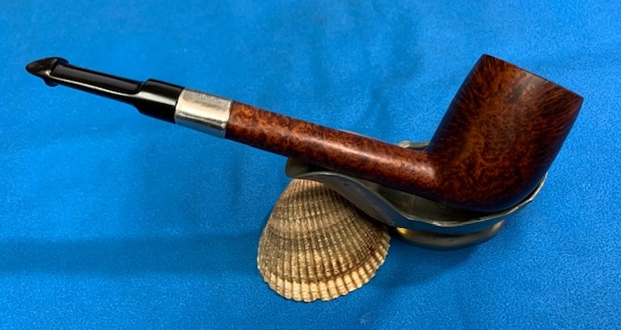
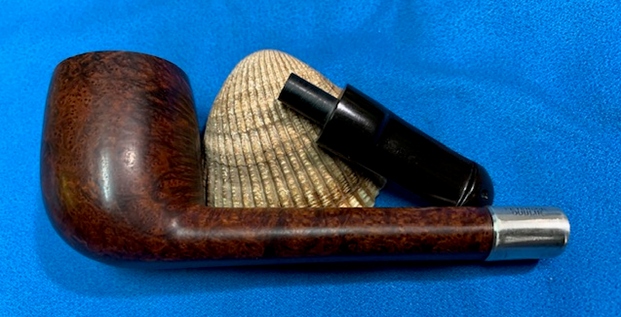
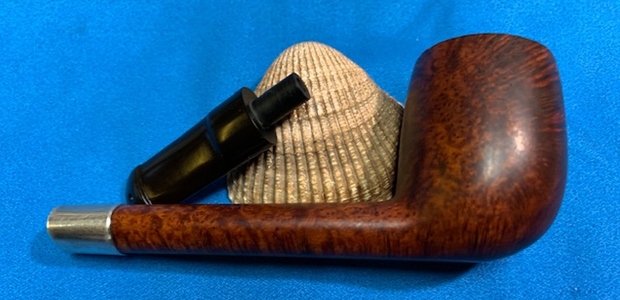
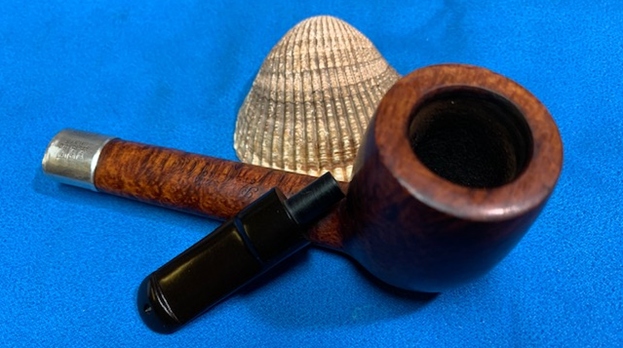
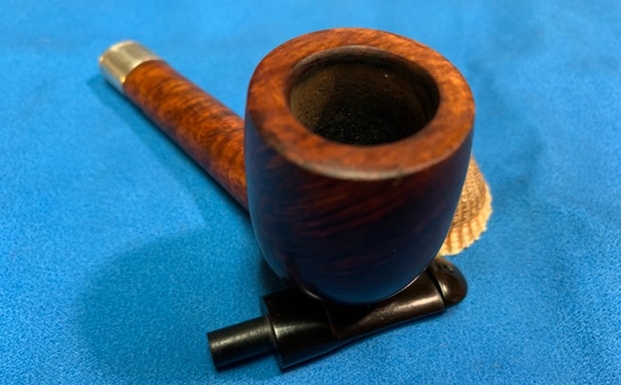
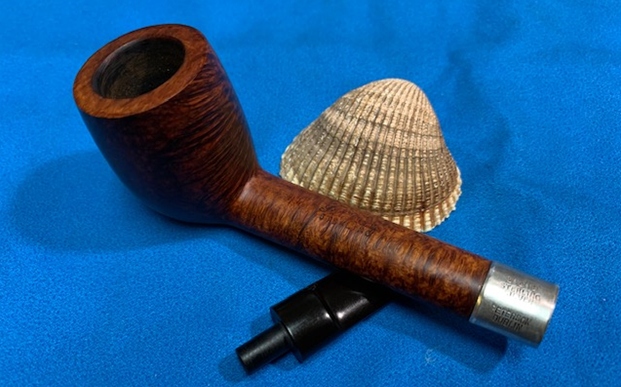
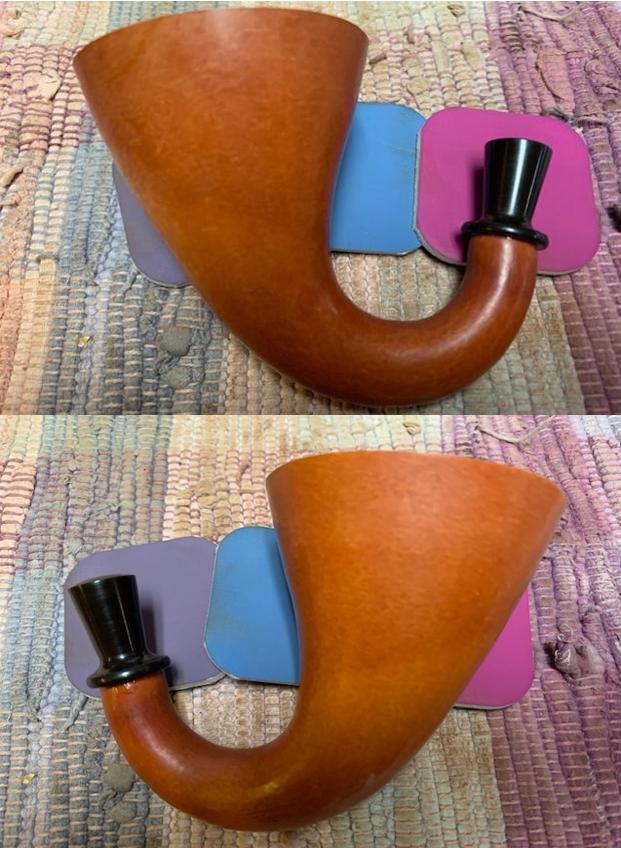
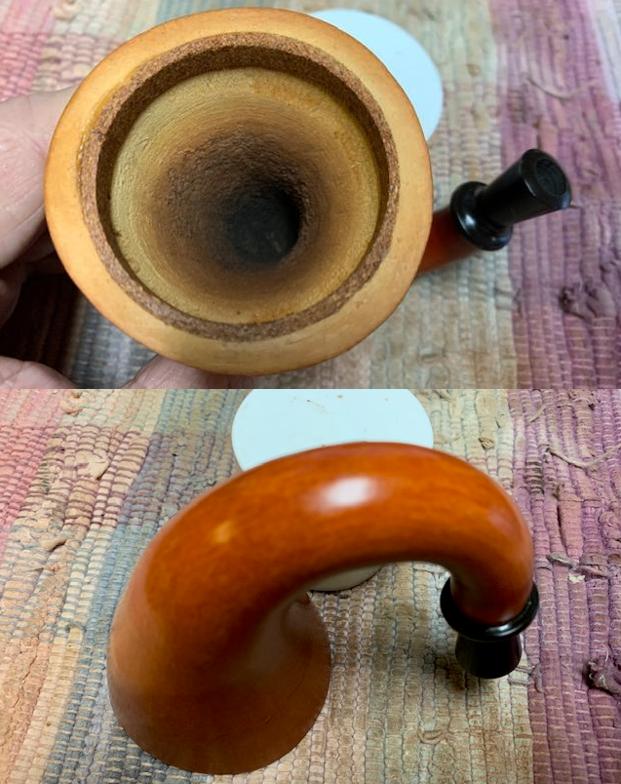
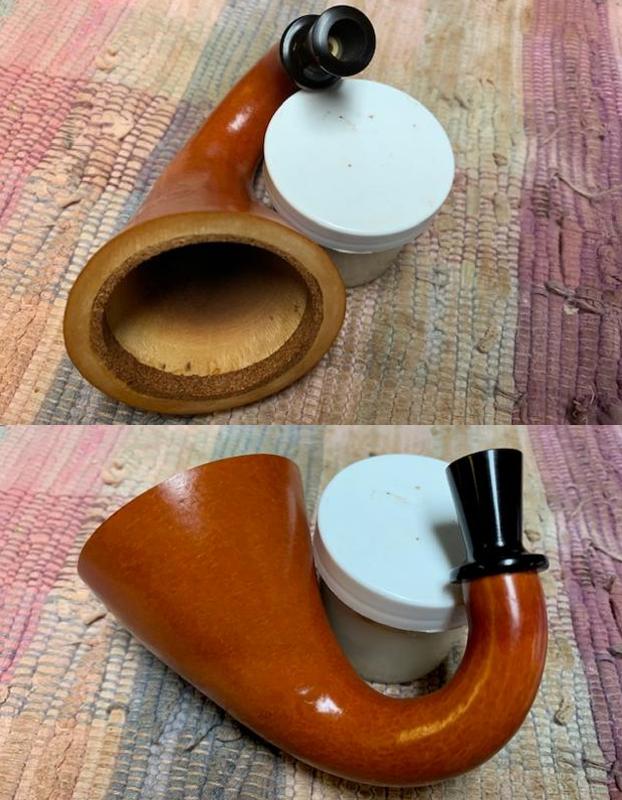
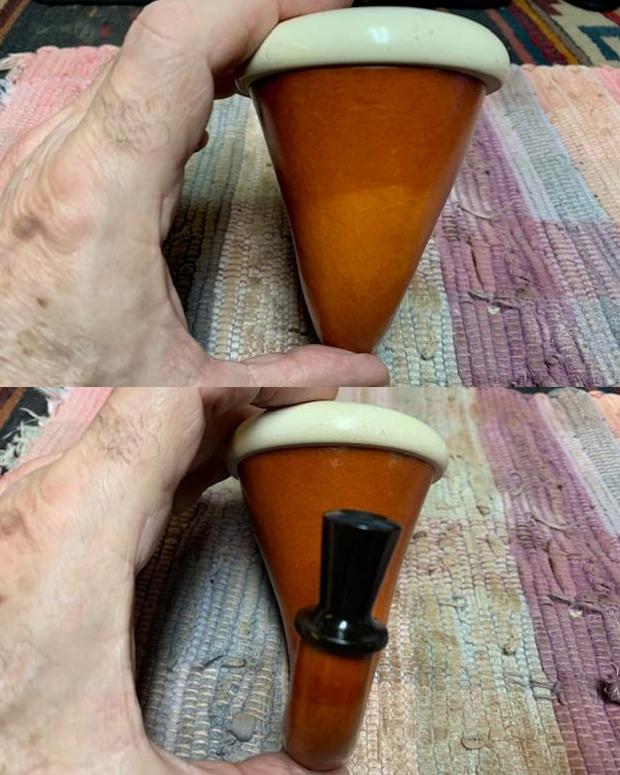
When I first received this lot of pipes from Dave during that visit to the Atlanta, Georgia, area, I took pictures of each. Here are the pictures of an attractive Fratelli Rossi Billiard now on the table with a make-shift rustic cardboard backing! 

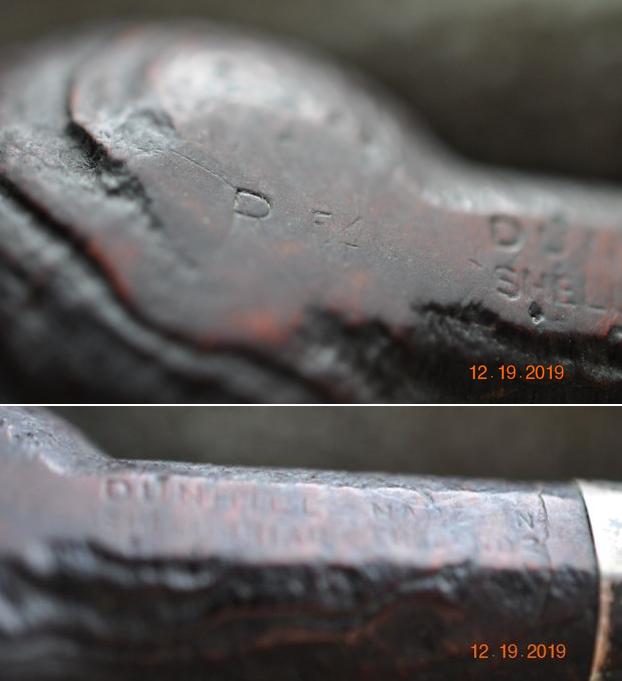
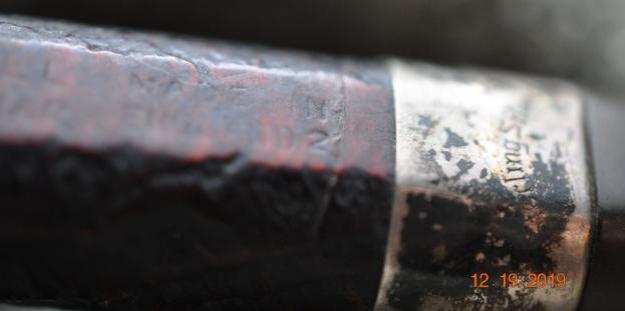
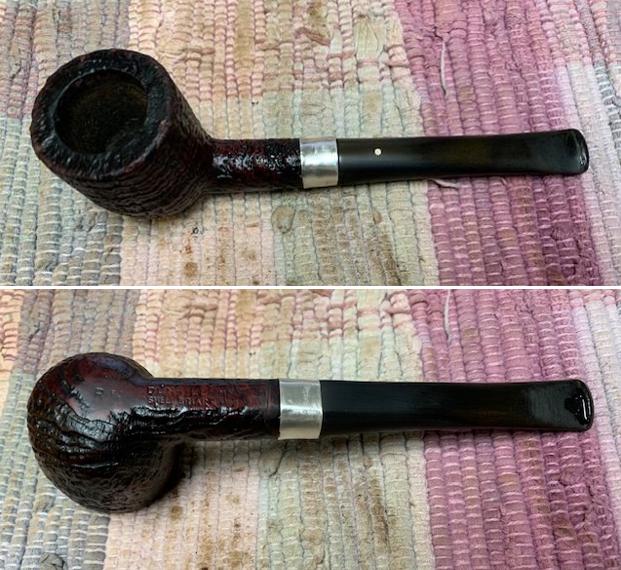
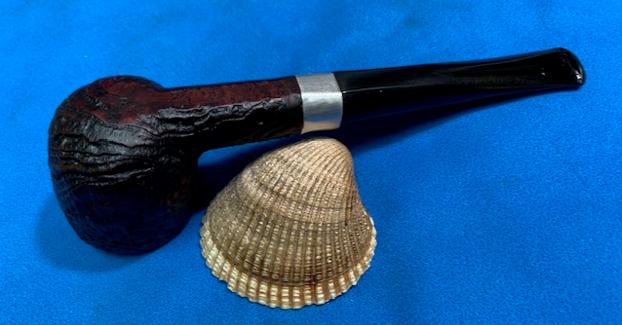
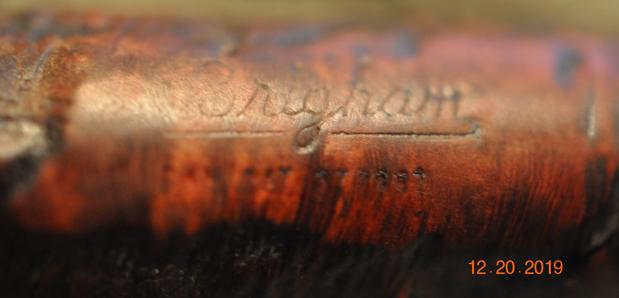
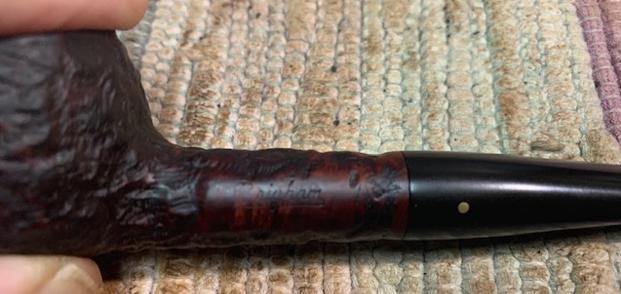
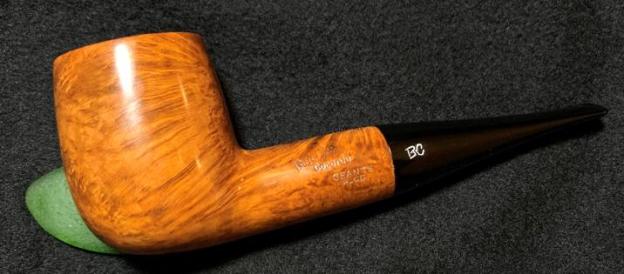
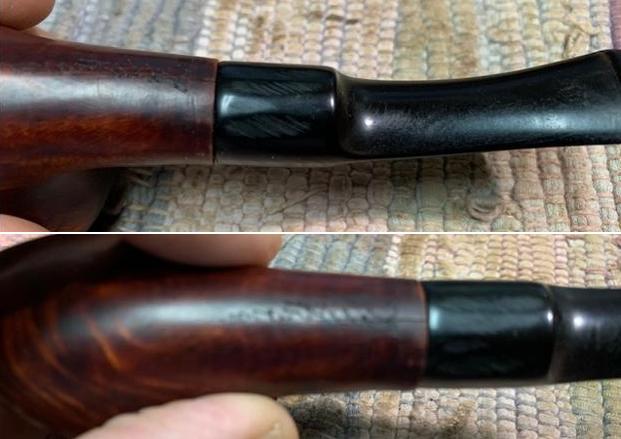
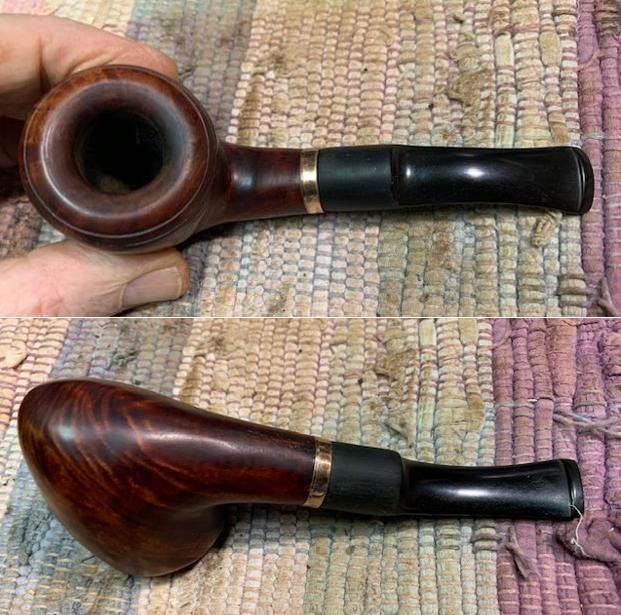
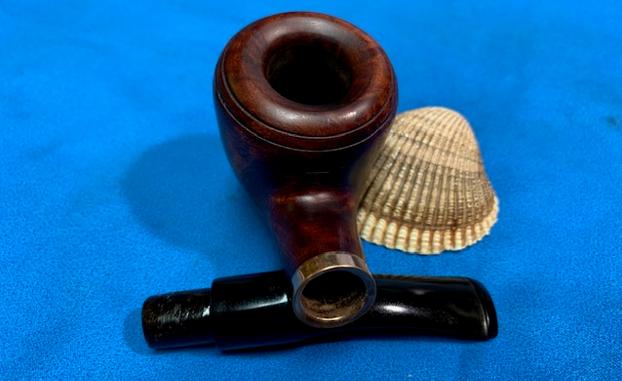
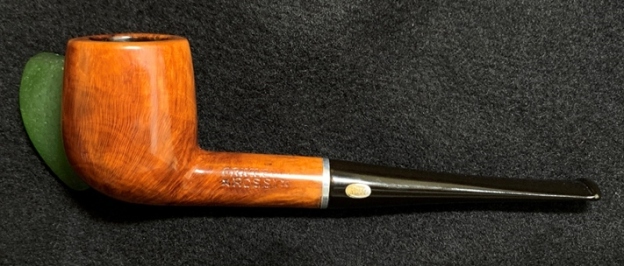
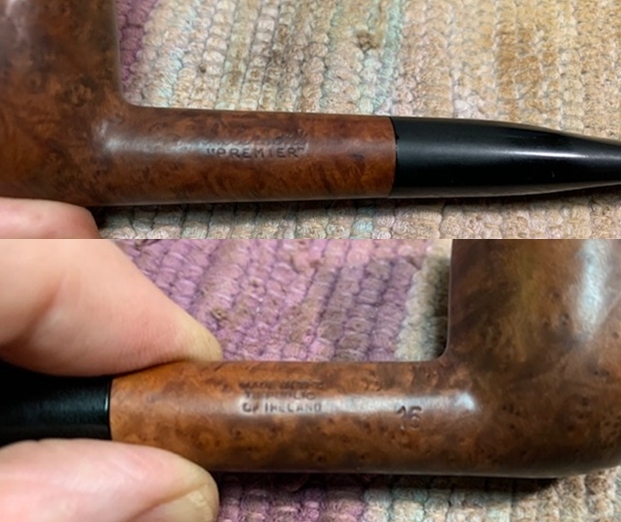
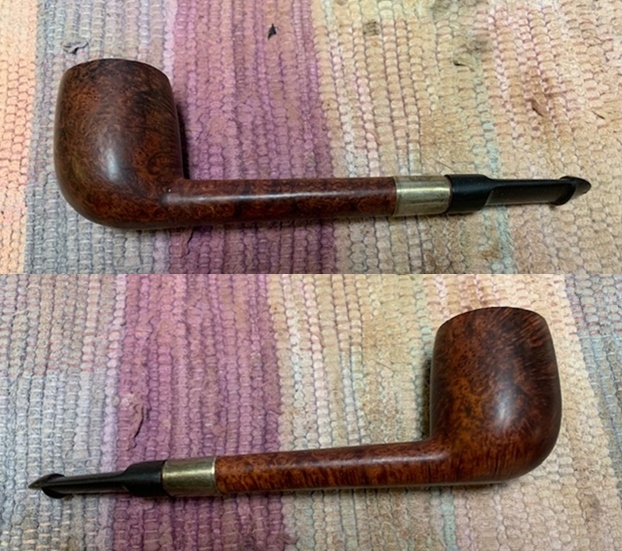
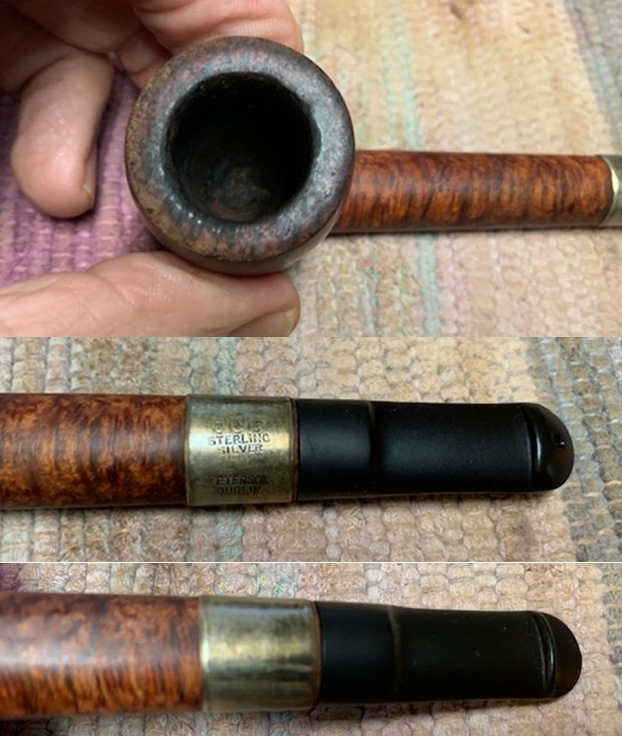
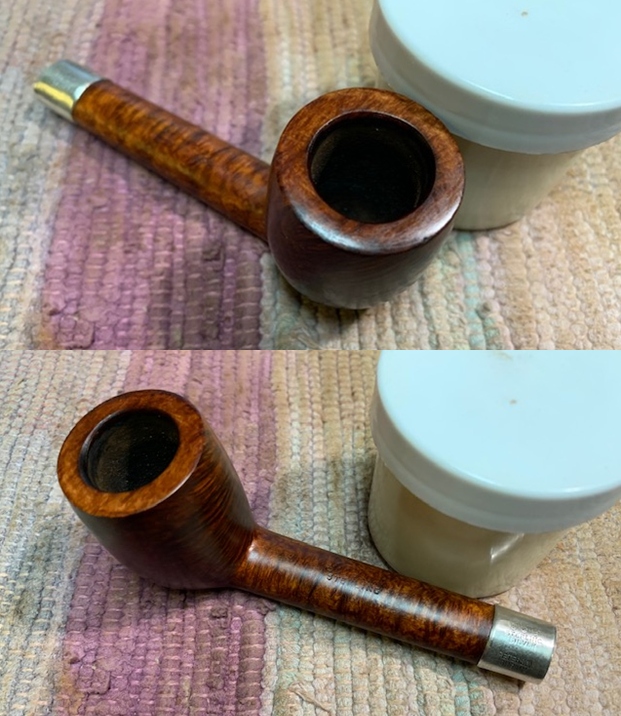
 The nomenclature is crisp and clear on the shank. On the left is stamped FRATELLI [over] *ROSSI*. The text is old world print and stars flank both sides of Rossi. The inlaid ‘Rossi’ brass stem rondel is reminiscent of GBD’s pre-Cadogan era rondels.
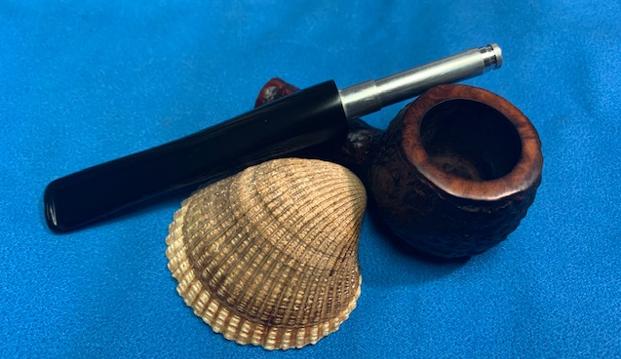
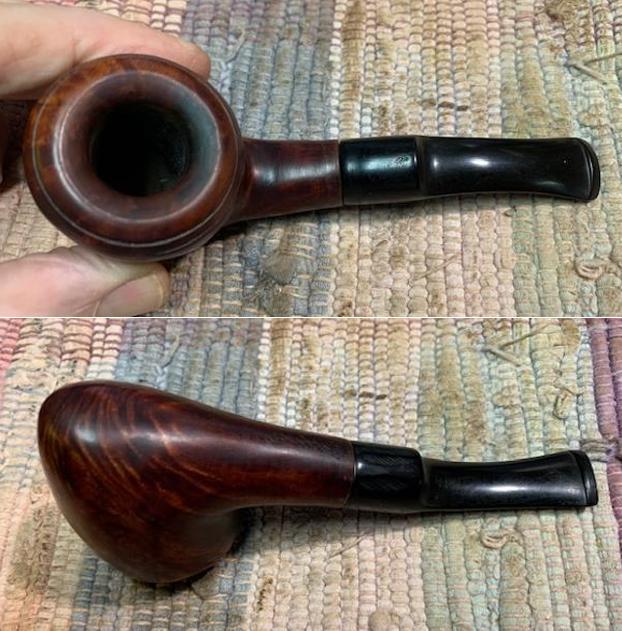
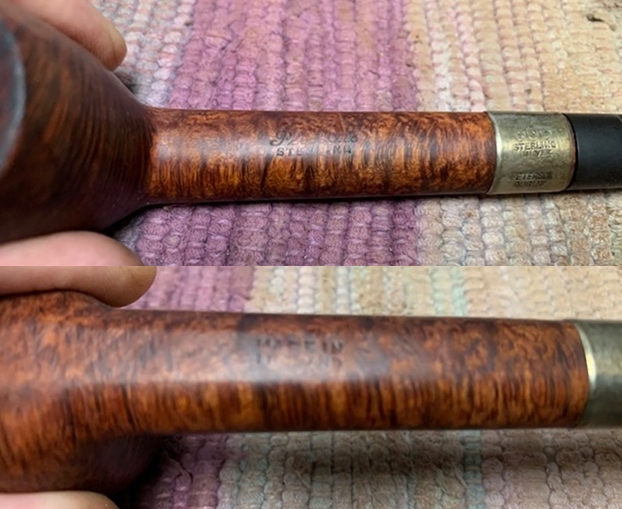
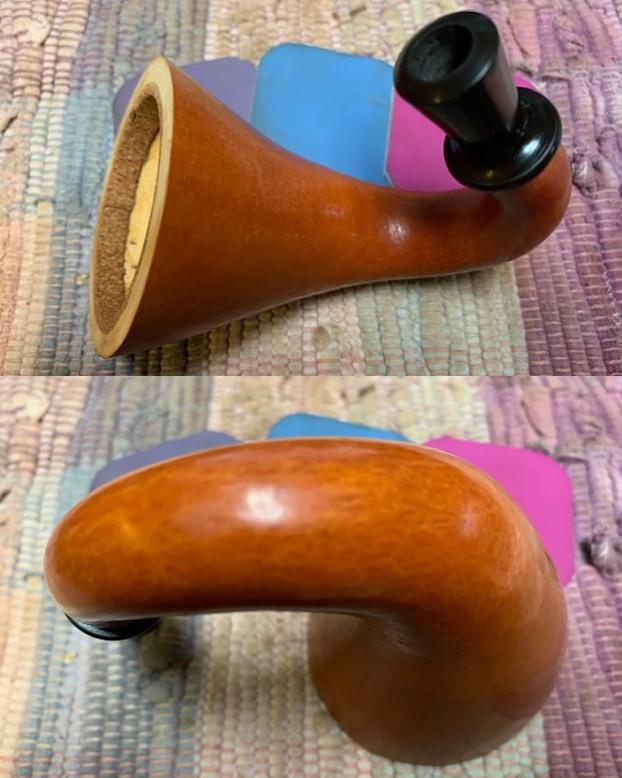
  The right flank of the shank is stamped, CENTURY OLD BRIAR [over] ITALY. The pipe itself is an attractive pipe with distinctive briar grain. It is a medium sized classic Billiard shape with the dimensions: Length: 5 1/2 inches, Height: 1 11/16 inches, Rim width: 1 3/16 inches, Chamber width: 3/4 inches, and a Chamber depth: 1 1/2 inches. When I read this part of the nomenclature after the pipe finally made it to the worktable, I did a double-take. It reminded me of another pipe that made a similar claim on the nomenclature and my first response was to write it off as hype. That pipe turned out to be a diamond in the rough – a Gasparini M.G.M. Rock Italy Briar 1912 – 25 Freehand.
  The claim was that the briar on this Gasparini was harvested in 1912 which turned out not to be hype, but the reality. The Rossi claim is similar, the briar being used to fashion this pipe, at whatever point it was manufactured by Rossi, was from briar that was in the curing process for at least 100 years. That is not only a great claim that points to a nice piece of briar but increases the collectibility value of this Billiard.
With the question of the “claim” of Century Old Briar, I turn my focus to finding out more about the Rossi name and hope that I can find out more about the claim. This is the first Rossi that I’ve worked on so doing some research on the origins of the name deepens my appreciation for the pipe on my worktable. It doesn’t take much effort to uncover a plethora of information about the Rossi name. I am fascinated by the story and I decide to repeat the somewhat lengthy but interesting and thorough historical focused Pipedia Rossi article here:
 In the years around 1870 and still later the bulk of Italian pipes was made by time taking and laboriously manual work. Mainly based on families who sold their pipes to travelling purchasers handing them on to some wholesaler. Most pipes were still made of box or olive wood.
Ferdinando Rossi from Milan was one of the most important wholesalers for tobacco related goods of northern Italy. When he attended one of his pipe suppliers in Saint-Claude in 1880 he got hooked on the idea to establish this manner of industrialized briar pipe production in Italy as well. Rossi went abroad several times to buy the hardware here and there because the special features of machines for pipe making were secrets – well kept by the French in those days. Many machines and tools had to be modified on Rossi’s defaults.
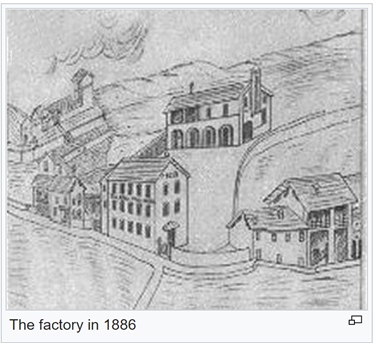
He acquired a large area of land in Barasso in the province of Varese and founded the Fabbrica di Pipe di Radica Rossi in 1886. For sure there was no lack of skilled workers and Rossi personally recruited 30 craftsmen of different occupations from the environment to get started. After a few years the enterprise had developed well and entered into export trades. In 1892 e.g. the ledgers registered the first pipes shipped to Brazil.
One reason of success was the ultramodern conception of the factory and its equipment at the given time. To give an example: a system of canals invented by Rossi drove water to turbines propelling downstream generators, which supplied the entire machinery with electricity. Also lighting and heating were already electrically operated.
In the first years after 1900 Rossi grew steadily and became one of the ten biggest pipe manufacturers of the world. Rossi’s rapid ascent produced further foundations of pipemaking firms in the area around the Lake of Varese.
- 1897 Gerolamo Ceresa (starting as
 subcontractor for Rossi) in Cassano Magnano
- 1900 Fratelli Lana in Gallarate (bought by Tagliabue in 1922)
- 1910 Stefano Santambrogio (working with Lana and with Rossi before) in Groppello di Gavirate
- 1911 Federico, Carlo, Cornelio and Francesco Rovera (all working for Rossi before) even there.
So, the province of Varese became the most important center of Italy’s pipemaking industry after the turn of the century. Still going strong today along with the brands in the provinces of Como and of Pesaro.
From 1918 on Leonida Rossi supported his father in the management of the company. Later he was designated as chairman and joined by his brothers. Rossi now firmed as Fratelli Rossi Barasso shortly FRB.
Between the world wars Rossi finally promoted to be the biggest pipe factory in the entire world. Next to the domestic market in Italy the United States were the most important client.
The factory was systematically and consequently modernized and extended. The briar was stored in 18 sheds, which were arranged six by six in three rows. There was a power plant, a sawing mill, a department for ebonite mouthpieces as well as a department for horn mouthpieces, a department for filter tubes and one for fittings made of metal etc. Taken for its size practically any of these individual departments outmatched any other complete pipe factory in Italy! At the end of the production line stood a warehouse for the finished pipes featuring the dimensions of a big a department store.
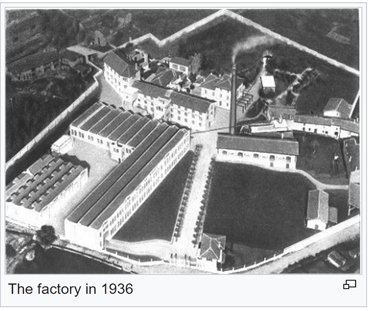 The absolute peak of production was reached in 1936, the year of Rossi’s 50th anniversary. Rossi employed 860 persons – 95% of them were women – who turned out more than 50,000 pipes per day. Per day!
(Remember, those were the days when good restaurants offered a free pipe to the gentleman to end a fine meal with a fine smoke!) These numbers were never reached by any other manufacturer. Even not approximately.
Rossi is also credited with exemplary social features. The company maintained a well equipped hospital ward, the employees enjoyed large dining rooms and showers after work. There were shops where they could buy the products of some Rossi owned farms from the environment at subsidized prices. For the youngest children there was a kindergarten and the elder ones could spend their school vacations in a holiday camp named after the founder’s wife Marisa.
From appr. 1946 up to the end Ferdinando Rossi II, a grandchild of the founder, headed the company. But after World War II the world of the pipe changed dramatically. Especially in Italy, where those big pipe factories mainly turned out pipes for the lower priced segments of the international mass markets. The demand for these pipes shrunk considerably as more and more smokers turned to cigarettes. Rossi got into this vortex as well. Little by little the number of pipes produced sank. This evolution was accelerated by the upcoming fame of pipes from Denmark. As well, new Italian brands established after the war like Castello, Brebbia or little later Savinelli operated cleverer and thus were more successful.
So, the decline went on through the 1960’s and 1970’s, even though Rossi offered more than 800 possible shapes in dozens of lines and uncounted finishes. Besides the completely machine-made pipes there were also some lines of semi-freehands and even quite considerable freehands were made. But all these efforts could not stop the fall anyway. Due to increasing financial difficulties Rossi closed down in 1985, just one year before the 100th anniversary.
“Ferdinando Rossi was one of the pioneers in bringing the production of briar pipes to Italy, a contemporary of Achille Savinelli. And though the two were competitors in business, in their private lives they enjoyed a close friendship. So it came to be that, just shy of a century after its founding, the Rossi family’s marque came into the caretaking of Savinelli, after the former found itself unable to adapt to the changes in the post-WWII tobacciana market. This same old friendship is also one of the reasons why Savinelli has been keen to give the Rossi name new life, as Rossi by Savinelli, focusing on quality, affordable Italian pipes.” Courtesy, smokingpipes.com
The heights to which the Italian pipe manufacturing enterprise of Rossi reached in 1936, of a workforce of 860 and a production pace of 50,000 pipes per day is astounding. The decline of the company, especially in the 60s and 70s, is in stark contrast to the earlier entrepreneurial vision of Ferdinando Rossi who built the company into an empire. The last paragraph above is important. It references from Smokingpipes.com, what seems like the epitaph of the Rossi Company that closed its doors in 1985 – “unable to adapt to the changes in the post-WWII tobacciana market”. The Rossi name was taken over by Savinelli because of the friendship of the founders of these two competing Italian enterprises and Savinelli’s respect for Rossi motivated the continued production of pipes with the Rossi name. I find this factoid not only to be interesting but quite remarkable.
The same Pipedia article concludes with a section on the dating of Rossi pipes which draws my attention with the focus on the Fratelli Rossi ‘Century Old Briar’ on my table. I include what is described in Pipedia only the later periods of the Rossi evolution:
From, approximately, Seventies, until 1985, Rossi pipes were marked with “ROSSI”, into an oval (sometimes there was also “ITALY” on the shank); on the stem, there was “ROSSI”. In these years, appeared the signature “Nino Rossi” (in cursive font): he was the last heir of the factory.
When Savinelli took back the production, it is said that first pipes had a twinbore mouthpiece, with “ROSSI” on the stem, and they were marked with “ROSSI” on the shank. Today most of them had 6 mm or 9 mm adapter (also, for the most part, the stem was made by methacrylate, always with “Rossi” on the side).
The lack of a twinbore mouthpiece and what appears to be an older tenon/stinger setup would suggest that the pipe on my table is pre-Savinelli – pre-1985. There is no mention of a period when ‘Fratelli Rossi’ was used as the nomenclature marking by either Rossi or Savinelli. In the history above, ‘Fratelli Rossi’ was a son of the founder, Ferdinando Rossi, who in 1918 joined the company with his brother, ‘Leonida’, at which time the new labeling became ‘Fratelli Rossi Barasso’ or abbreviated as, FRB.
Looking to Pipephil.eu’s information about Rossi, it is added that ‘Ferdinando Rossi Junior’ (Nino), was also among the brothers of 1918 and headed the company from 1946 until its closing in 1985. Pipephil.eu’s panel below shows the evolution or uses of several differing stamping styles and stem displays over the years and 1000s of different lines that were offered 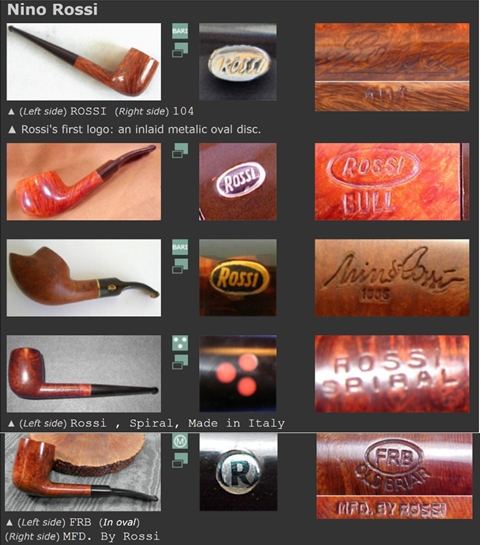 by Rossi. Of interest is the very first example. The pipe is very similar to the Rossi on the worktable, but the nomenclature is different. Yet, what is exact is the brass rondel on the stem with ‘Rossi’ in a cursive-like text. The comment beneath says, “Rossi’s first logo: an inlaid metallic oval disc.”
It’s difficult without more direct information to place a date on the Fratelli Rossi Century Old Briar. My efforts to find more than anecdotal information about the ‘Century Old Briar’ were unsuccessful. I found a few Rossi pipes marked ‘Century Old Briar’ for sale on different platforms such as Etsy and eBay. Much of the ‘info’ given about the pipe on the block was incorrect and someone guessing. One seller placed the pipe in the 1960s and described the ‘Century Old Briar’ as coming from the warehouse of the famous Savinelli company… Savinelli didn’t come into the Rossi picture until the mid-1980s.
I looked through old catalog listings and searched but found very little information about this specific Rossi nomenclature. With no more than an informed guess, I would say that the pipe comes from the 60s or 70s based upon the stem’s nickel screw in tenon/stinger. It predates Savinelli’s involvement it would seem to me. The information that the brass rondel was the ‘first’ model, doesn’t provide a definite dating, but would confirm a pre-Savinelli dating. Yet, the overall ‘feel’ of the pipe is that it wasn’t manufactured during or before WW2. The claim to have been produced with ‘Century Old Briar’, I’m inclined to believe based upon the integrity and history of the Rossi name. So, my sense is that this pipe was produced during the declining years of the Rossi name – 60s, 70s, and perhaps the early 80s before Rossi closed its factory, but was perhaps a special line of high quality briar that included the ‘Fratelli’ name with Rossi and the claim of ‘Century Old Briar’.
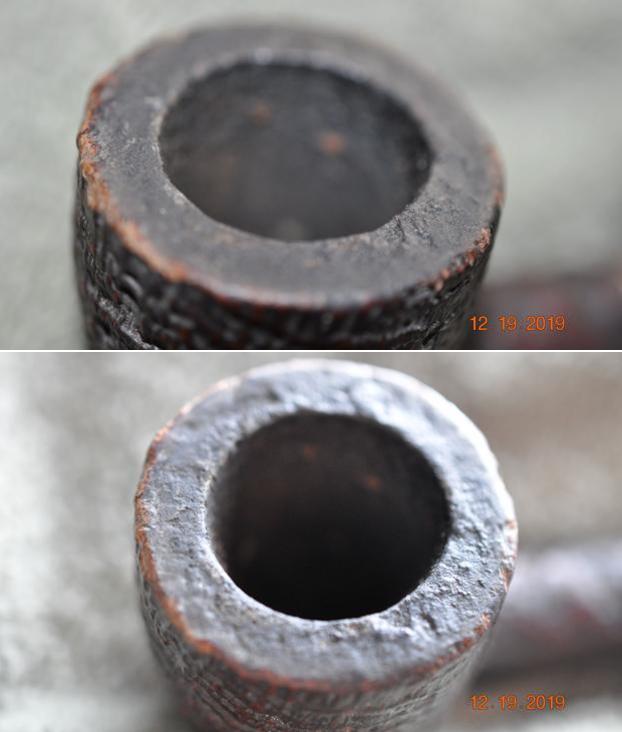
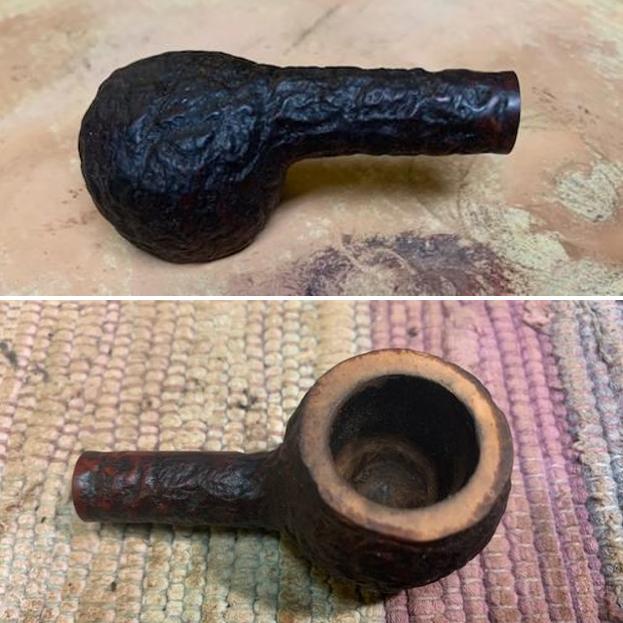
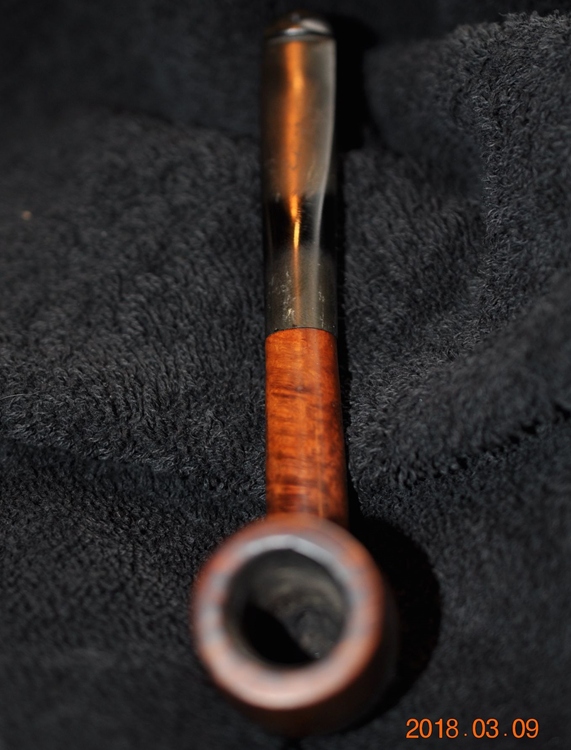
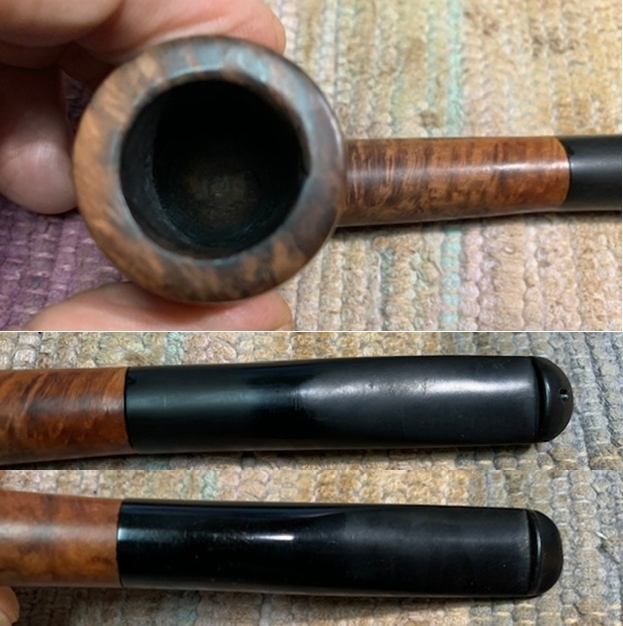
With a deeper appreciation for the history of the Rossi name and the heritage that this Fratelli Rossi brings to my table, I take a closer look at what is needed to recommission this pipe for Chris. The pipe is in good condition. The stummel shows no fills or major issues. The only issue I see is what looks like an acrylic-candy apple finish that needs to be removed. The chamber has moderate cake buildup, and the stem is rough and with moderate oxidation. I start with the stem. I take a couple additional pictures of the upper and lower stem to show the fuzzy haze of oxidation and wear and tear. The bit has minor tooth chatter and some marks on the button.  I start by cleaning the airway using pipe cleaners and the smaller diameter shank brushes to clean the airway. Using isopropyl 99% the airway is cleaned as well as the tight quarters of the nickel screw in stinger. After a bit of effort, the airway is cleaned up.
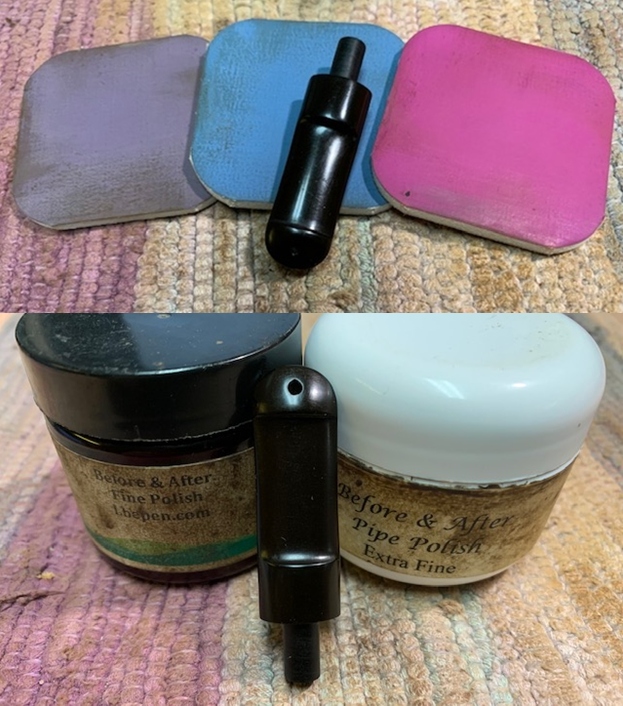
 Next, to address the oxidation in the stem, the Rossi stem joins other pipes in the queue for a soak in Mark Hoover’s Before & After Deoxidizer (www.lbepen.com). I leave the stem in the soak for several hours to achieve the full benefit of the Deoxidizer.
 With the stem in the soak, I now address the cake buildup in the chamber. I take a starting picture showing the moderate cake buildup.
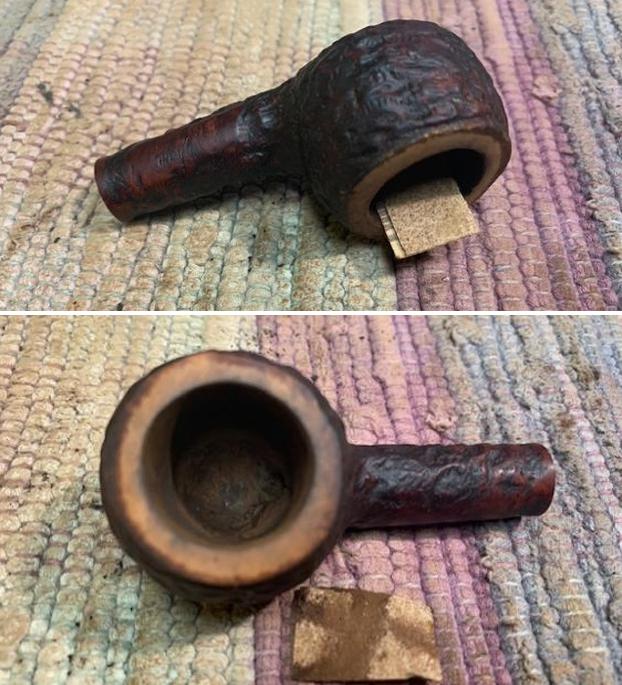
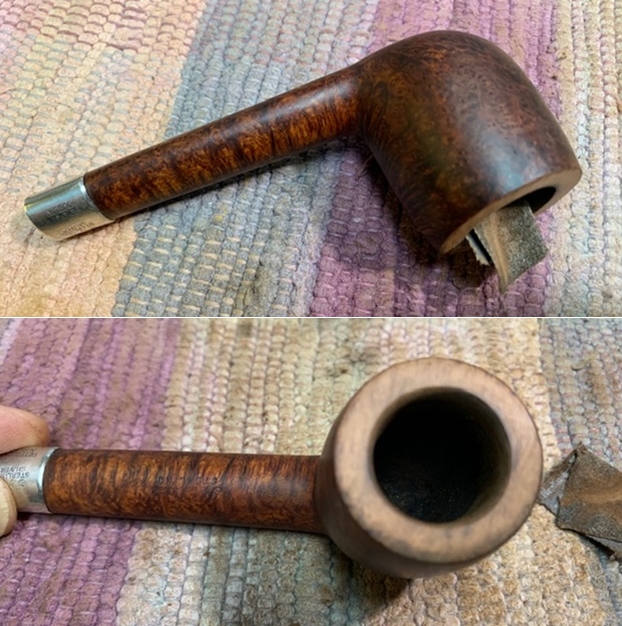
 The chamber is cleared of the carbon buildup first using 2 of the 4 blade heads of the Pipnet Reaming Kit. This is followed first by scraping the chamber walls with the Savinelli Fitsall Tool which does a great job cleaning the angles of the chamber floor. Next, the chamber is sanded with 220 grade sanding paper wrapped around a Sharpie Pen. This gives more leverage and pressure as I sand away the remaining vestiges of carbon.
 After wiping the bowl with a cotton pad, an inspection of the chamber reveals no problems – all looks great.
 With the chamber cleared, I use undiluted Murphy’s Oil Soap to clean the external briar. I’m hopeful that the cleaning will possibly make a dent in the sheen of the candy apple finish.
 Murphy’s does a good job cleaning the grunge off the surface, but the sheen remains. I transition the stummel to the sink and continue the cleaning with shank brushes to work on the internal mortise. With liquid anti-oil dishwashing soap on the brushes, warm water is used to scrub.
 After thoroughly rinsing the stummel, I go back to the worktable and take these additional pictures to get a closer look.
 The glossy sheen is now clean, but the sheen continues unabated. The cleaning does show some thinning in the finish where the raw briar is peeking through. The first picture shows a gap in the finish on the heel of the bowl and the next pictures show the finish wearing away on the shank.
 The rim lip also shows a bit of roughness that should be rectified through minor sanding.
 My next step is to address the ‘cotton candy’ finish. It needs to be stripped so that the finish is even and revealing the natural briar underneath the shell. My personal preference regarding finishes on pipes that create the high glossy shell is that the gloss is fake. It is not the natural briar showing off but a shell of sorts which does protect the briar, but the sacrifice is an artificial gloss. My goal is to remove the gloss and hopefully retain the patina of the ‘Century Old Briar’ which can stand on its own. It is a beautiful block of wood! I first attempt, which I’m not hopeful of from the outset, is simply to wipe the bowl surface with a cotton pad wetted with isopropyl 99%. This does not phase the finish.
 The next step is to place the stummel in a soak of isopropyl 99%. My experience is that this will also not do the job, but I do not have on hand acetone in the supplies of my mobile Christmas worktable in Port St. Lucie. Acetone will probably be the only thing that will break down the finish. I decide to soak the stummel overnight in isopropyl 99% to see if it does the job, but I plan to go to the store tomorrow morning to pick up acetone.
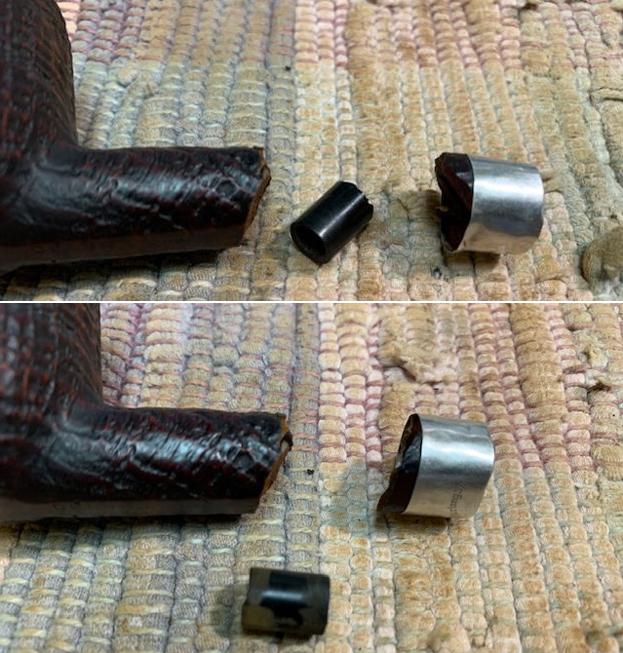
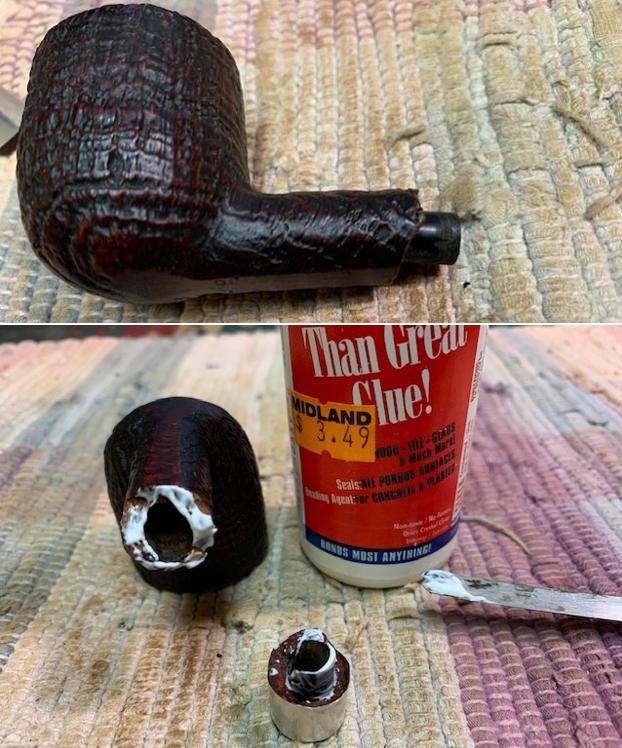
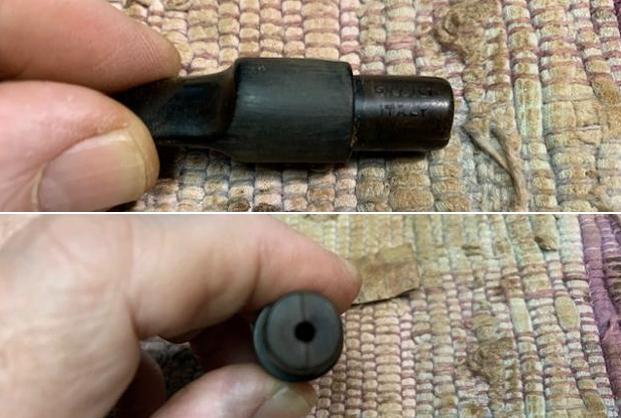
 The stem has been soaking in Before & After Deoxidizer now for several hours. After fishing out the stem and letting it drain off – using my fingers to squeegee the remaining Deoxidizer, I use pipe cleaners wetted with isopropyl 99% to clear the airway of Deoxidizer. While the stem was draining, I noticed for the first time that the nickel stinger was in fact inserted into the metal barrel and not one piece! After wrapping the stinger with paper towel, I gently gripped the stinger with needle nosed pliers and coaxed the stinger out! What a wonder and thankfulness for small things. With the airway now clear of the stinger, the cleaning of the airway is more productive and easier! I also wipe off the stem with cotton pads and alcohol to clear away the raised oxidation.
 I wasn’t satisfied with the results of the deoxidation process after a closer look. There remains deep oxidation that I can see with the eye and only visible with the aperture open on the camera.
 After just perusing Steve’s latest posting of a very nice blasted No Name Danish, (See: The Sandblast on this No Name Hand Made in Denmark Freehand is Incredible) I noticed that Steve used Soft Scrub with cotton pads to address the oxidation with the fancy stem he was working on. Taking his cue, I did the same and I like the results. It took some intensive scrubbing, but the results are better.
 I finish the stem clean up by applying paraffin oil to the vulcanite to rejuvenate and condition it.
 The next morning, the brownish hue floating in the alcohol indicates that some progress has happened through the night soak.
 After fishing out the stummel and inspecting, with the sheen still shining and with patches of bare briar still silhouetted against old finish, I grab the keys and head to the store to purchase acetone.
 Having the right tools and supplies is key to any job – not just pipe restoration! When arriving home, I open the acetone and place a small amount on 0000 grade steel wool. I then gently apply the acetone-wetted steel wool over the stummel with the hope that the shiny shell will break down allowing the unadorned briar patina to be exposed.
 I was able to observe immediately the removal of the finish as the wood dulled. I apply the steel wool over the entire stem removing the shell as I go. I complete the project by wiping the stummel with a cotton pad wetted with acetone. I’m pleased with the results. The basic hue of the briar’s patina remains intact. Sometimes, after using acetone, the briar seems bleached which probably indicates that the stummel was colored with a dye. This stummel looks like it received a hot oil treatment and was then covered with the shellac-like shell to protect it.
  A quick picture of my Christmas Vacation worktable on the balcony of my mother’s condo in Florida, with a bit of Plum Cake in the bowl is very enjoyable!
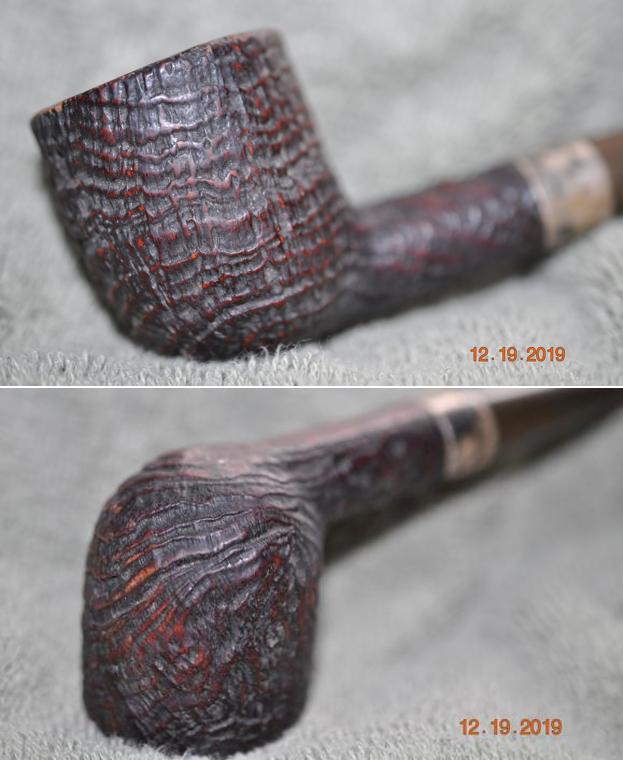
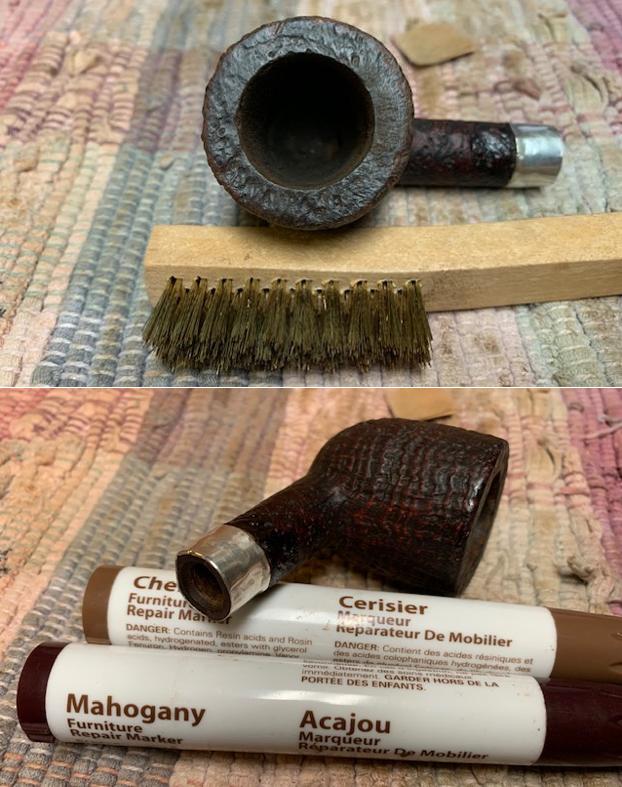
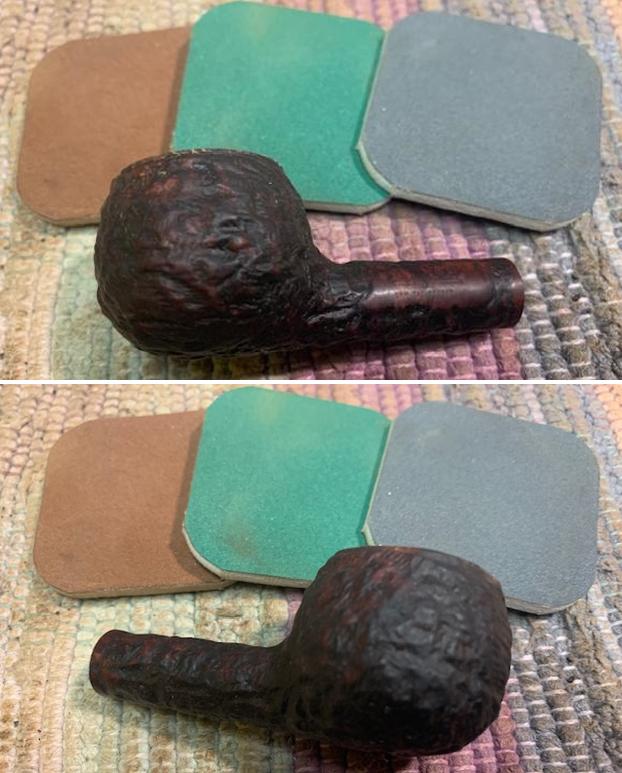
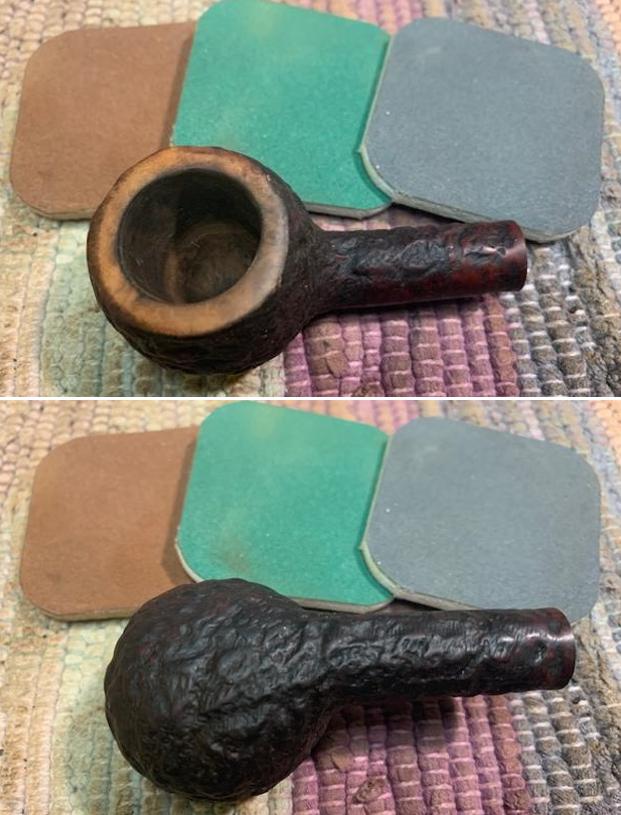
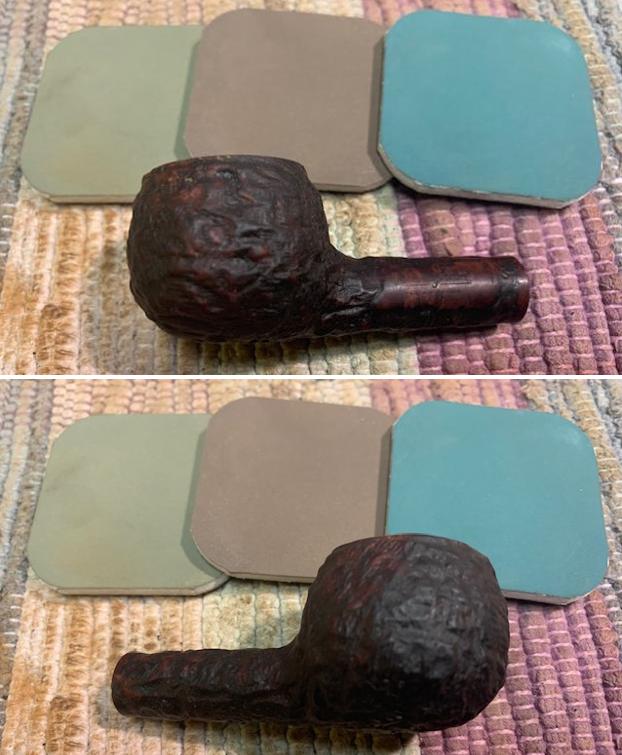
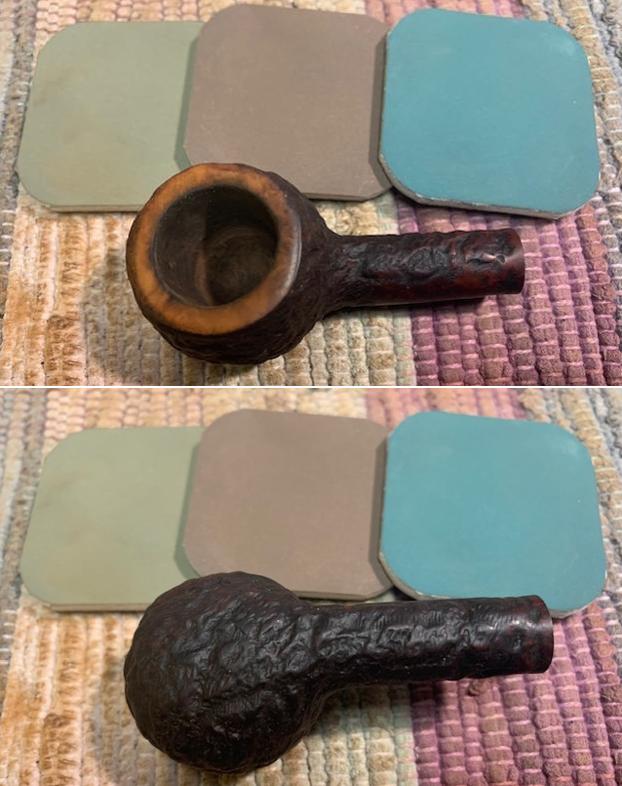
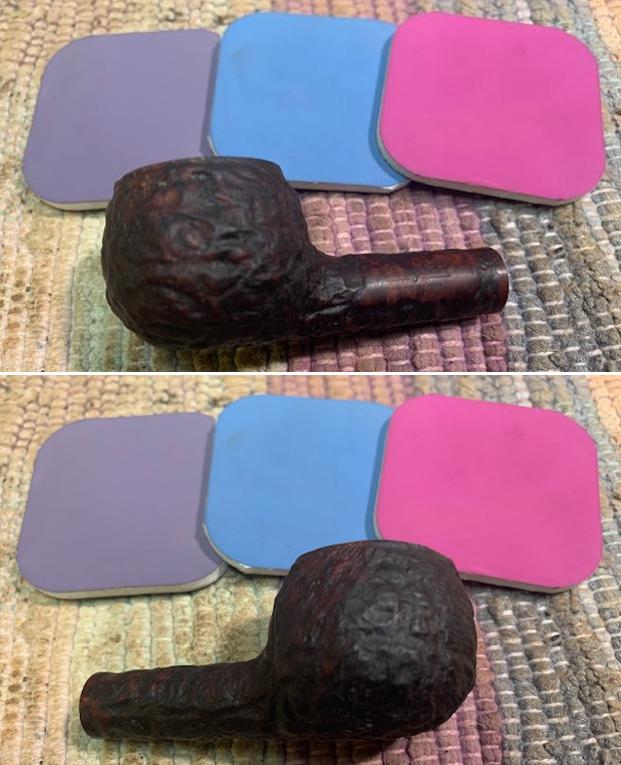
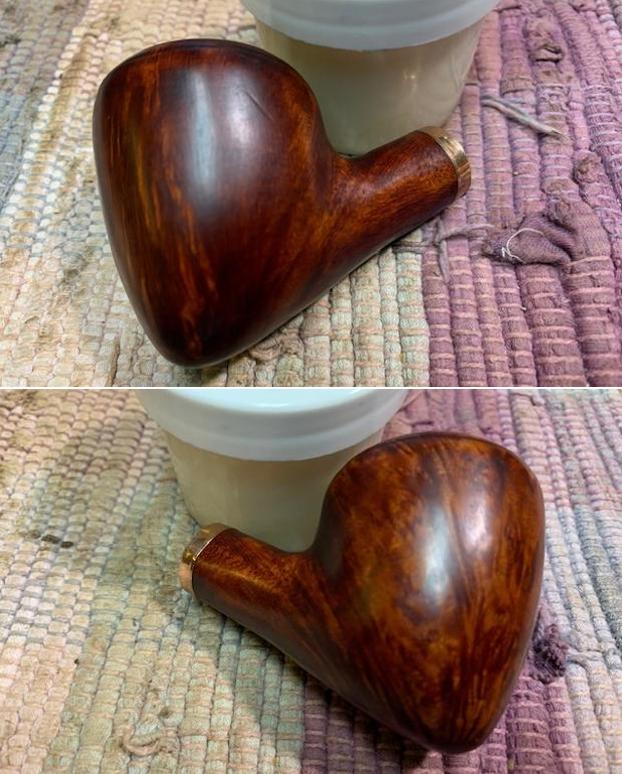
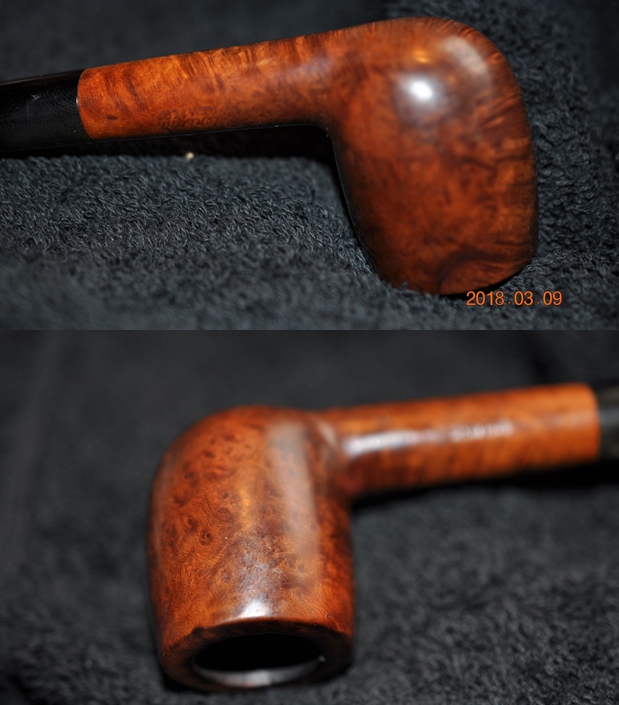
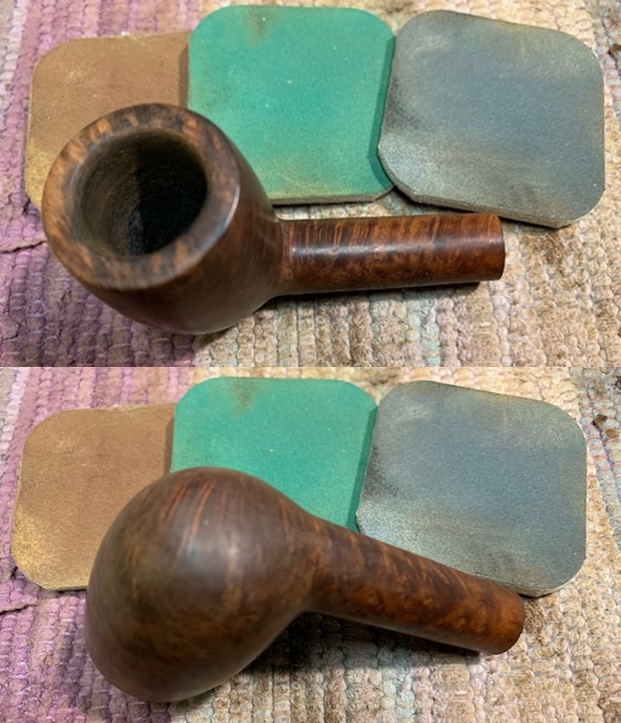
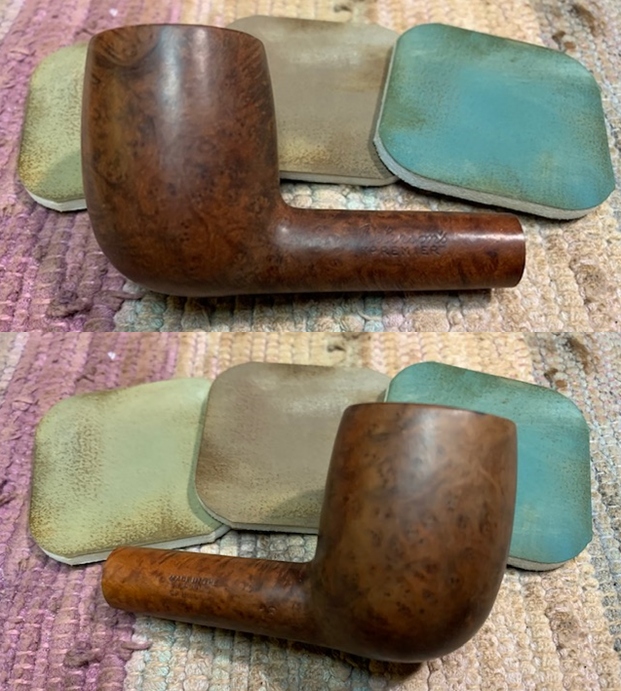
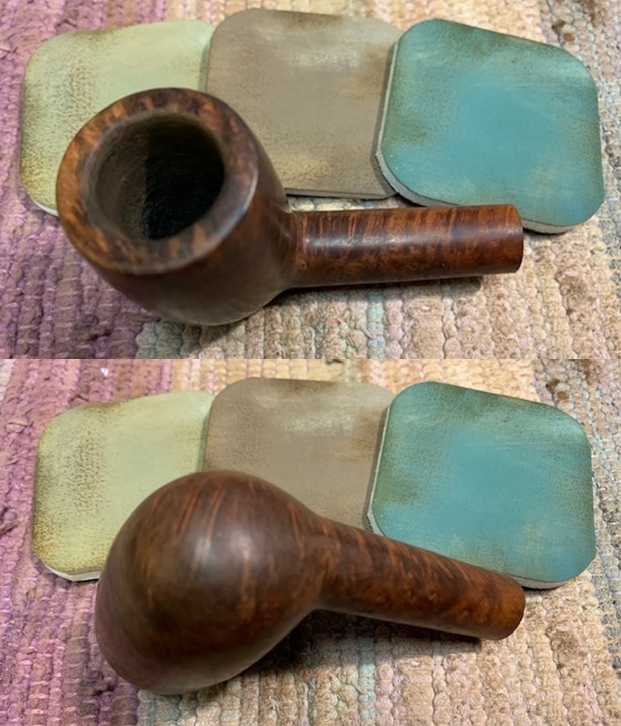
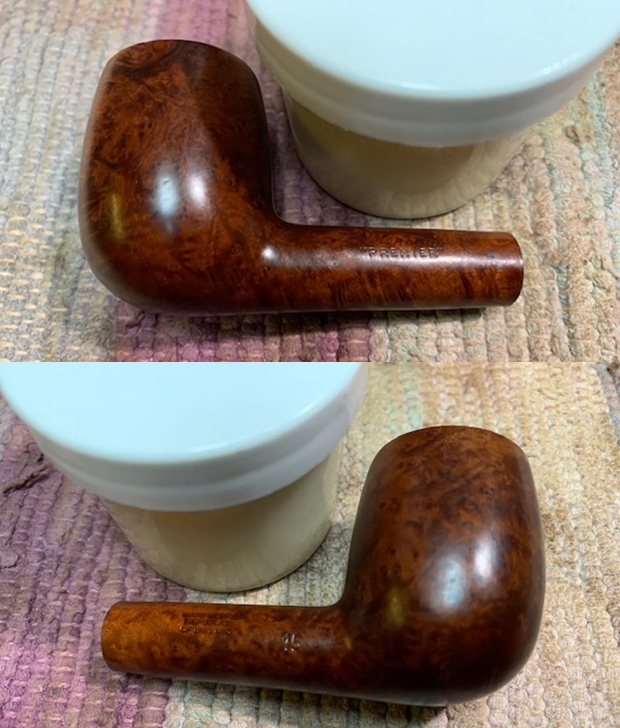
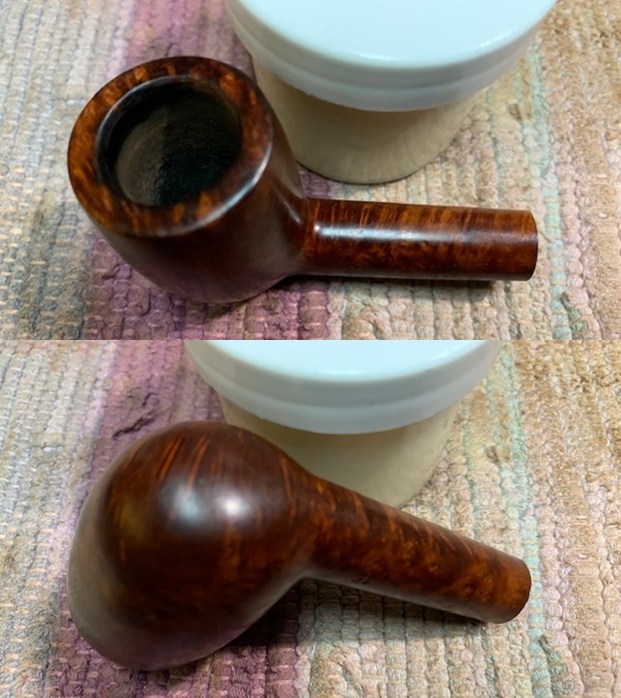
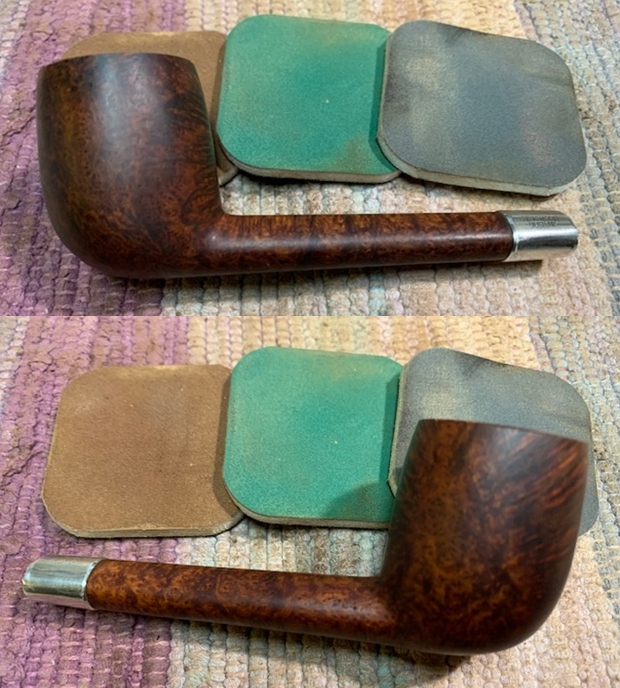
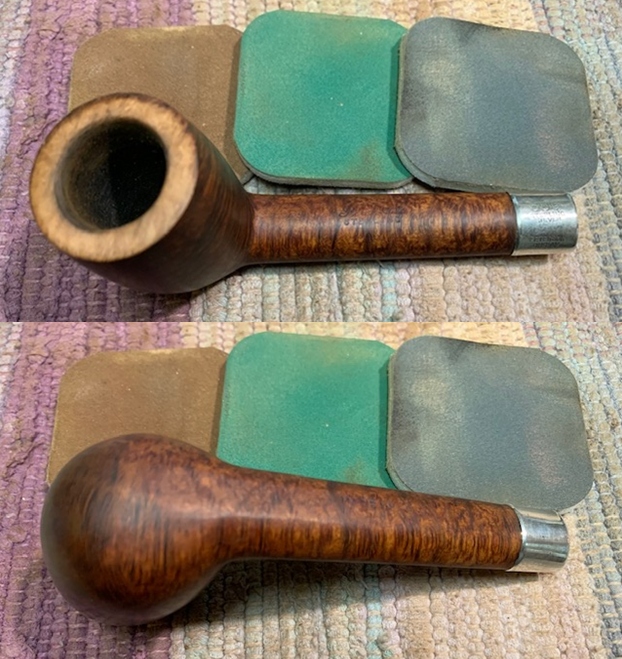
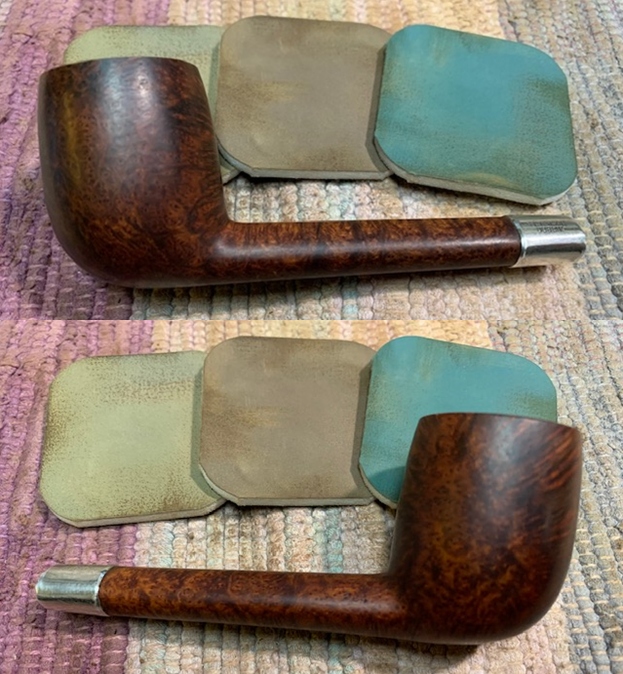
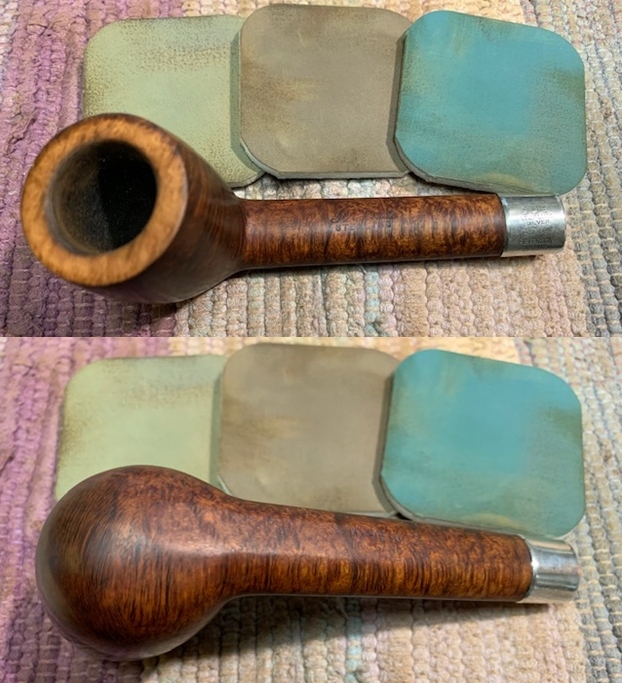
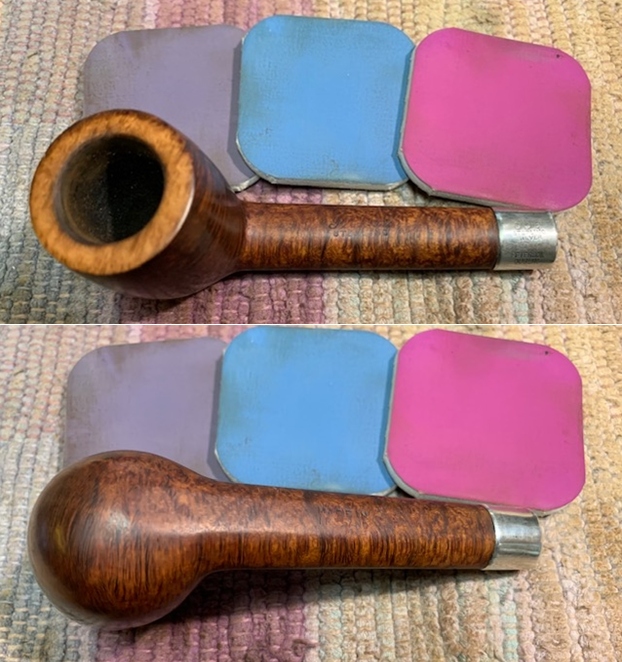
 Continuing with the Fratelli Rossi stummel. It’s time to let the grain make an appearance. Using the full regimen of micromesh pads, I begin by wet sanding with pads 1500 to 2400. Following this, dry sanding is done with pads 3200 to 4000 and 6000 to 12000. With each 3-set picture, the briar is teased out and without doubt, this is an exquisite piece of briar. It appears to be a very high-grade briar with absolutely no fills and displaying beautiful vertical flame grain and bird’s eye on the heel of the stummel as one would expect.
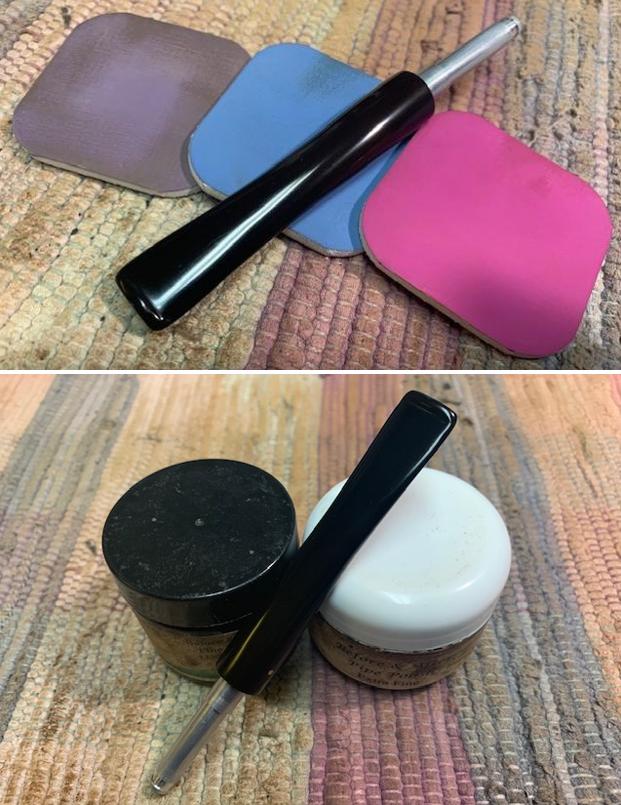
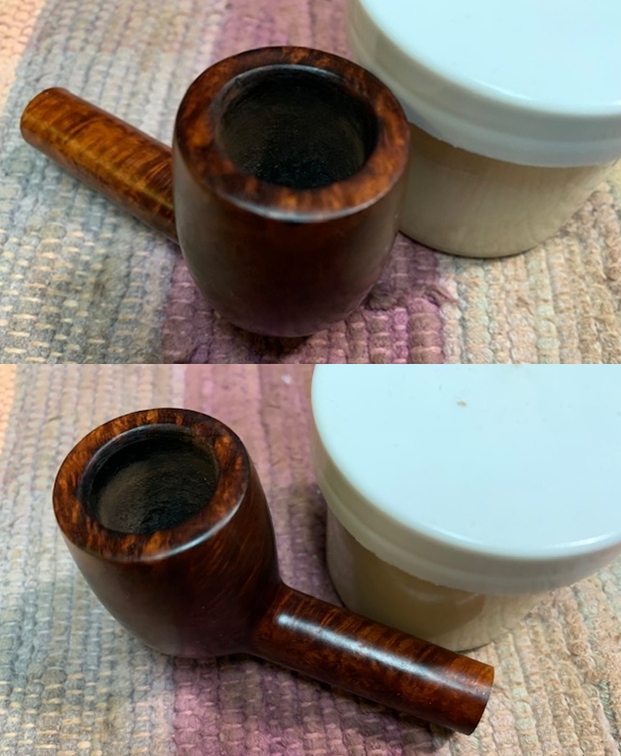
 The next step, before again turning to the stem, is to apply Before & After Restoration Balm to the stummel. Mark Hoover’s product (www.lbepen.com) does a great job bringing out the natural hues of the briar. After putting a small amount on my finger, the Balm is worked into the briar surface. The initial viscosity of the Balm is cream-like, and it gradually thickens as the Balm is worked. After applied, I place it aside for about 20 minutes.
 After 20 minutes, a microfiber cloth is used to wipe off the excess Balm and to buff the surface. I’m loving the quality of this Rossi stummel.
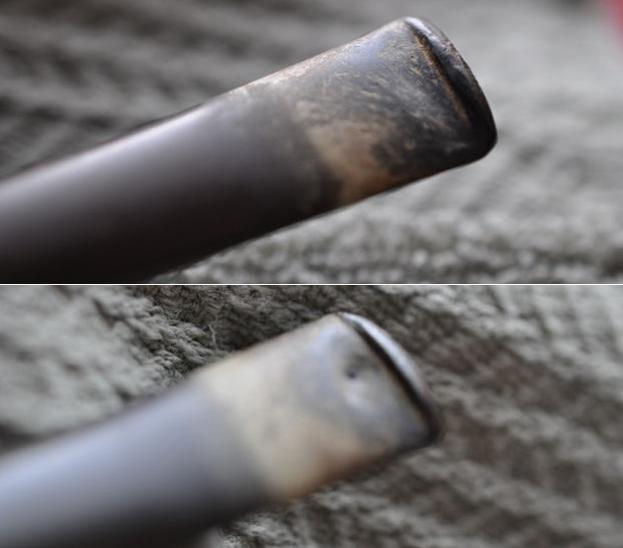
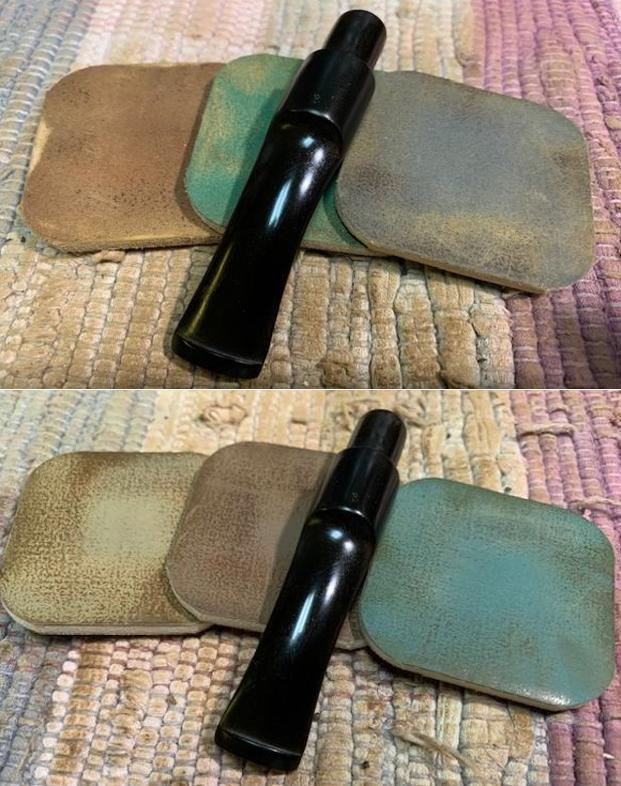
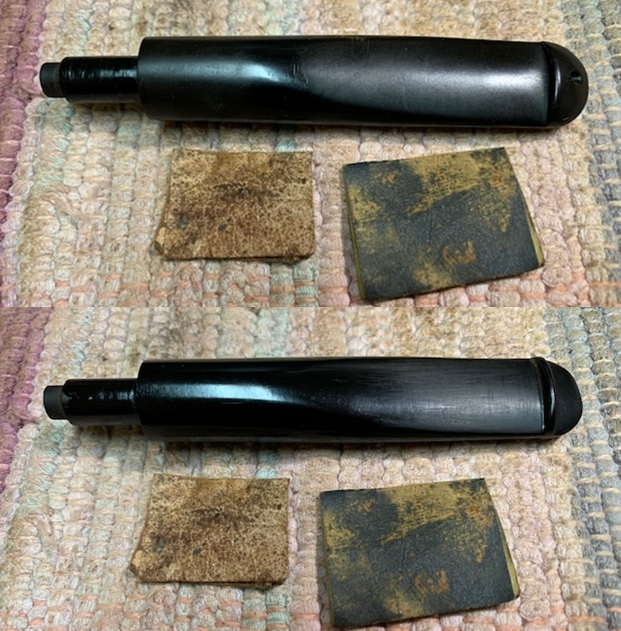
 With the stummel on the sideline, the stem is ready to catch up. I take a few pictures looking closely at the bit. There is little in the way of tooth chatter, but the vulcanite is rough.
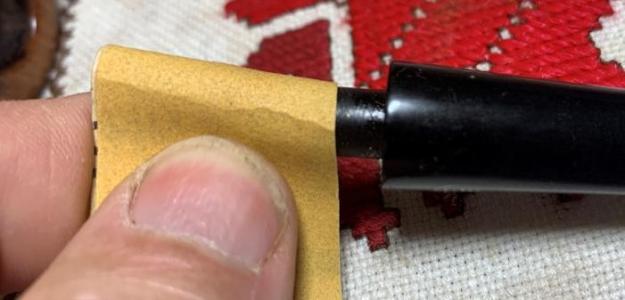
  I begin by doing a quick sanding using 240 sanding paper and refreshing the button with the flat needle file. The button lips over time have rounded. I like a crisp lip to allow the free hang function of the button to work. A plastic disc I fabricated is used to guard against shouldering the edge of the stem facing during the 240 sanding.
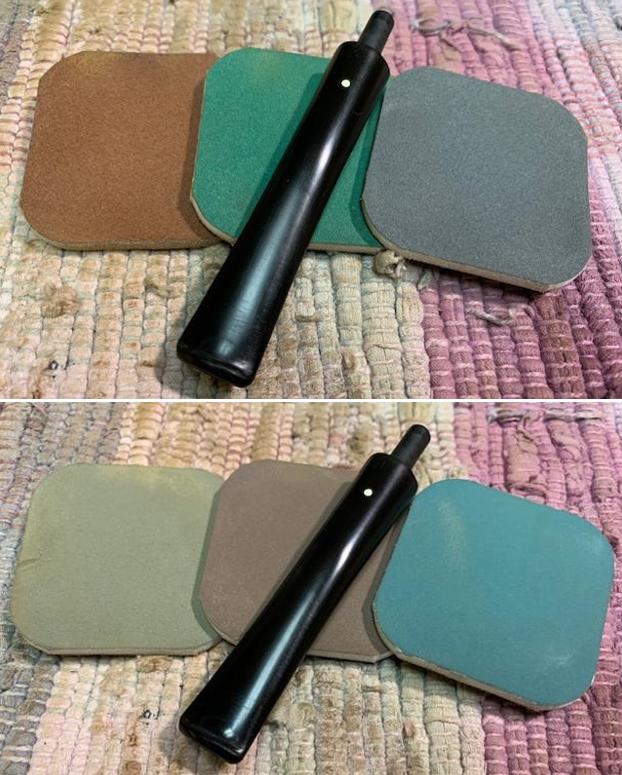
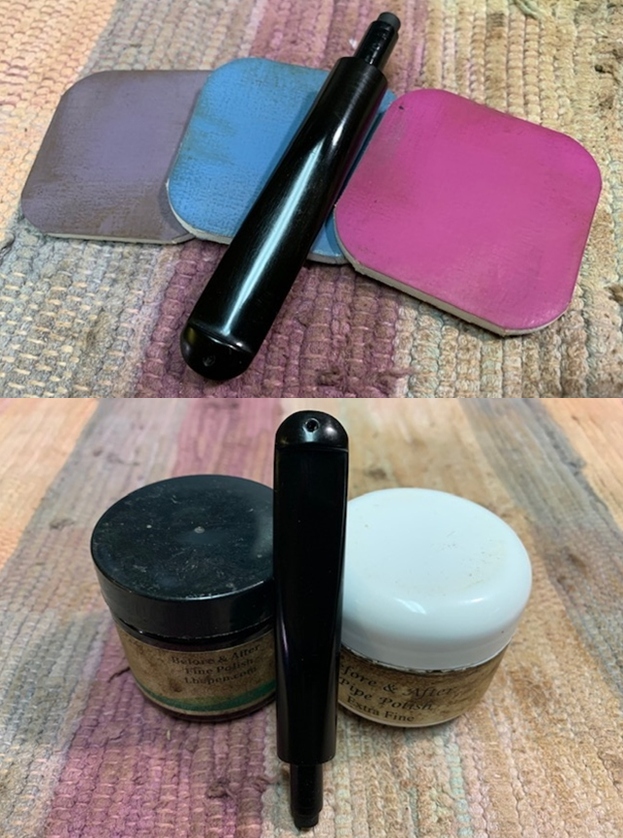
 The 240 sanding is followed by first wet sanding with 600 grade paper and then applying 0000 grade steel wool to the entire stem.
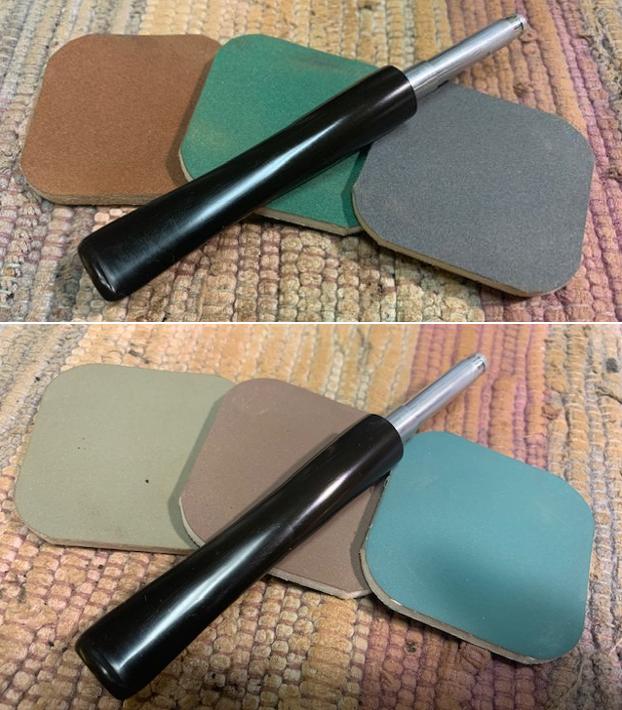
  With the heavier duty sanding completed, the stem is sanded with micromesh pads. From pads 1500 to 2400 the stem is wet sanded and then dry sanded with pads 3200 to 4000 and 6000 to 120000. Between each set of 3 pads, Obsidian Oil is applied to guard against future oxidation and to rejuvenate the stem. I love the newly micromeshed ‘pop’ that emerges with this Rossi stem.
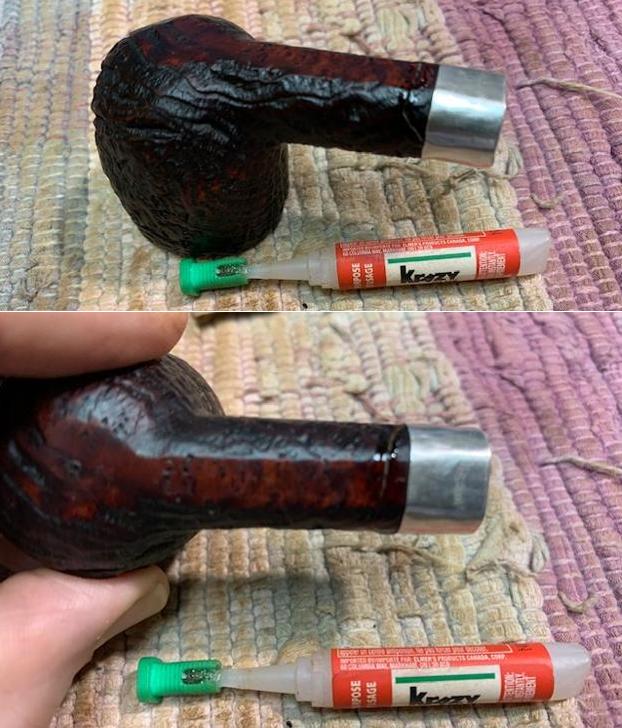
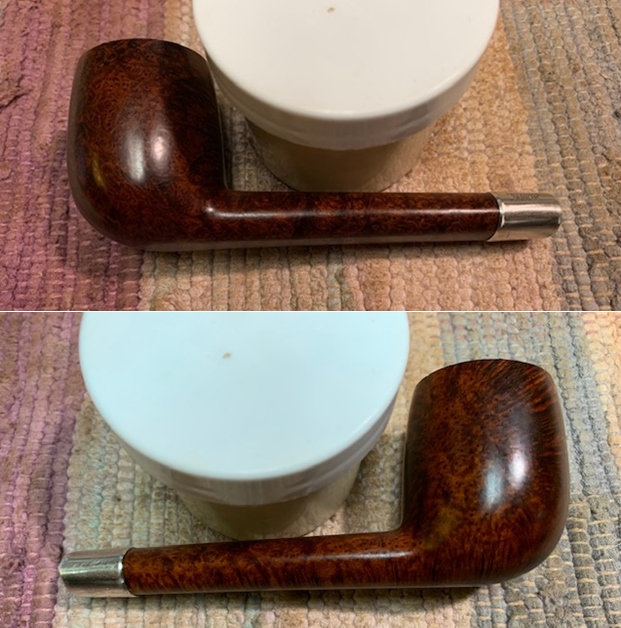
 Now, in the home stretch. The Fratelli Rossi stem and stummel are reunited to see how things are going. I find that through the cleaning that the stem is now somewhat overclocked. I take a picture to show the few degrees out of alignment it is.
  To remedy this, I use a Bic lighter to heat the nickel screw in tenon which in turn, heats the vulcanite in which it is seated. As the metal heats, gradually the vulcanite loosens its grip on the tenon. When this happens, the stem is rejoined with the stummel and as it screws in, I continue to rotate the stem after the tenon tightens with its threads. I continue to rotate the now loosened stem around the fixed tenon almost 360 degrees until it is aligned properly with the stummel. The heat and rotate method works like a charm!
  Next, Blue Diamond compound is applied to the entire pipe (minus nickel shank facing) with a cotton cloth buffing wheel mounted on the rotary tool at about 40% full power.
 After the compound is applied, a felt cloth is used to buff the pipe removing vestiges of compound residue left behind. I do this to prepare for the next step, application of the wax.
 Another cotton cloth wheel dedicated to application of carnauba wax is mounted onto the rotary tool maintaining 40% full power. The wax application I treat as frosting on the cake after the primary shining process results from the sanding processes – papers, steel wool, micromesh pads and compound.
 After application of the wax over the entire pipe, the pipe receives a vigorous hand buffing with a microfiber cloth not only to raise the shine, but to remove excess wax that was not absorbed.
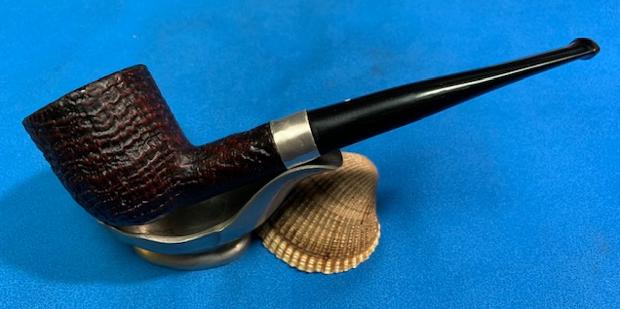
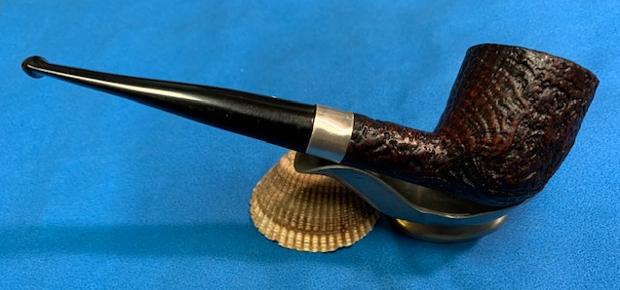
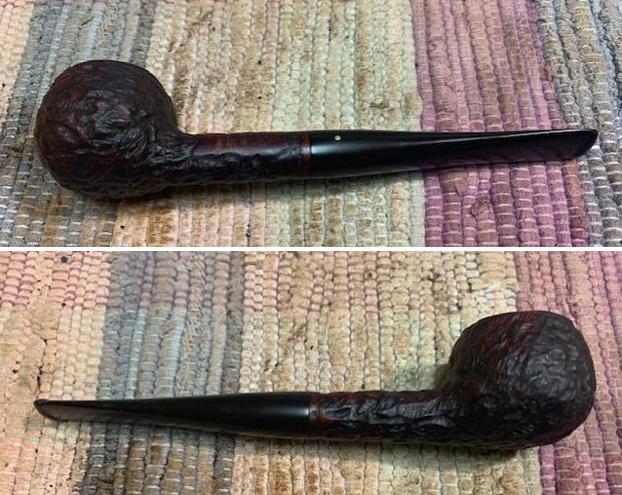
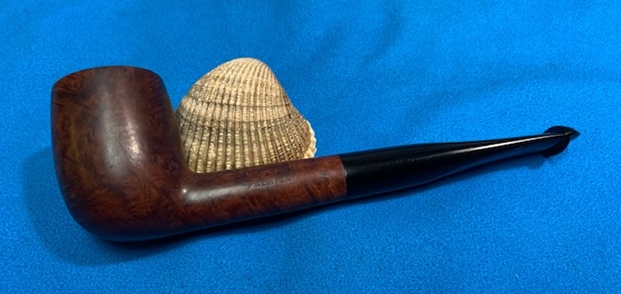
The grain on this Fratelli Rossi is, as I described before, exquisite. The classic lines of this medium sized Billiard are timeless and will serve his next steward well. The exact dating of the pipe remains obscure and the claim of ‘Century Old Briar’ is not to be doubted as I look at the pipe’s overall presentation. Chris had the vision to commission this Rossi and will have the first opportunity to claim him from The Pipe Steward Store benefitting the Daughters of Bulgaria – helping women and girls who have been trafficked and sexually exploited. Thanks for joining me!


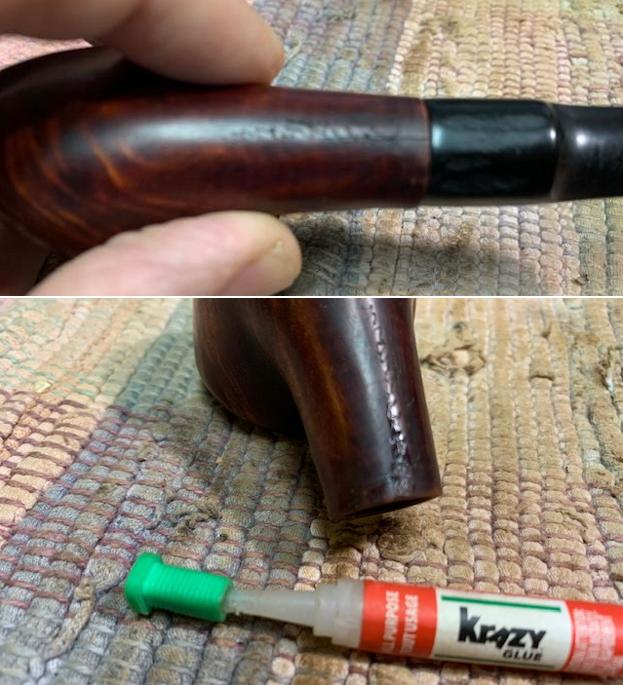
 I glued the shank extension in the end of the calabash and set it aside to cure. Once the glue was set the shank extension was ready for the new stem.
 I used some Vaseline Petroleum Jelly to rejuvenate the cork gasket in the bowl. I worked it into the cork with my finger tips to soften the gasket. Once it had absorbed a bit it would be soft and hold the meerschaum bowl in the gourd easily.
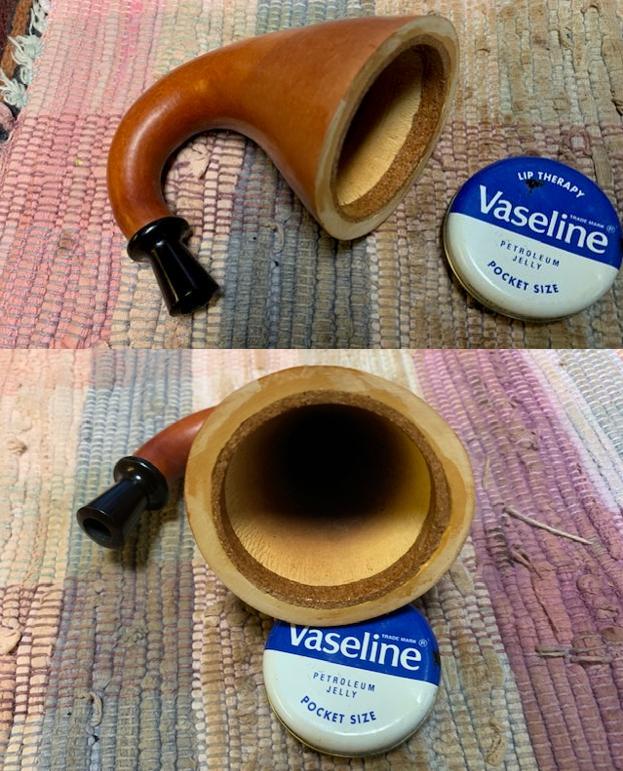 I put the meerschaum bowl in the gourd and put the stem in the shank extension and took photos of the newly constructed calabash.
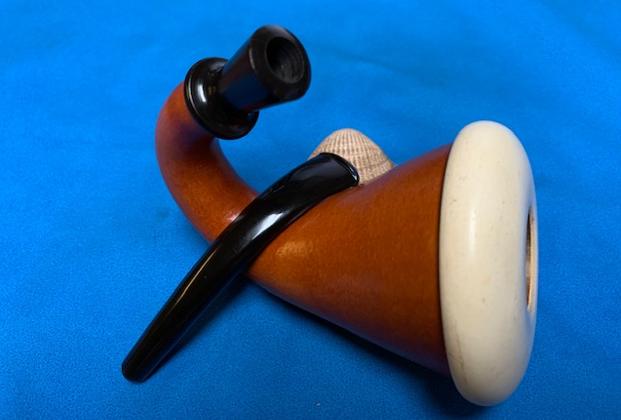
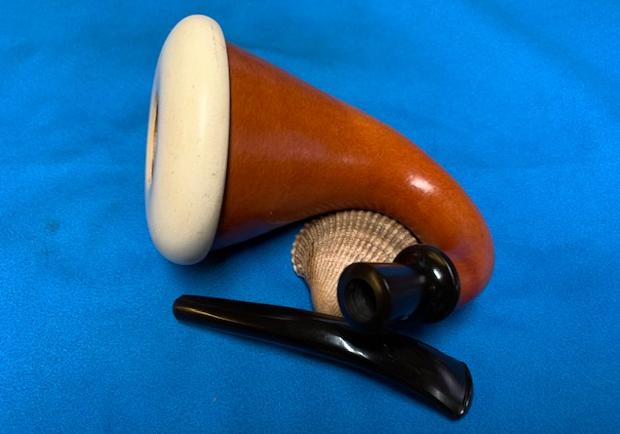
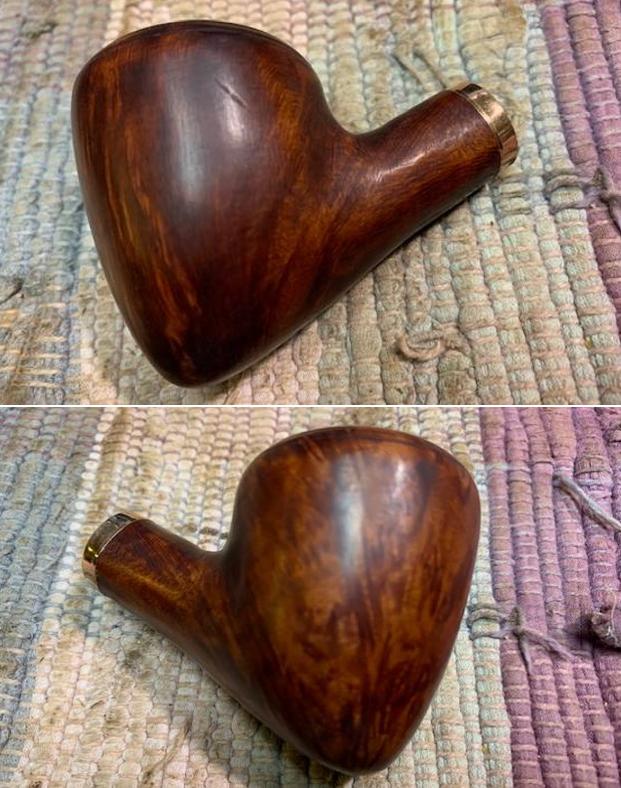
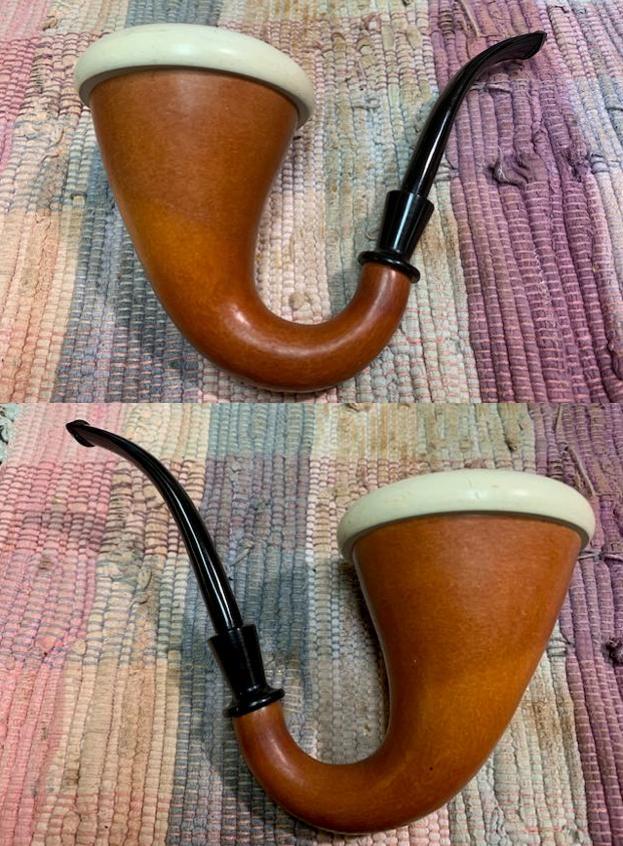
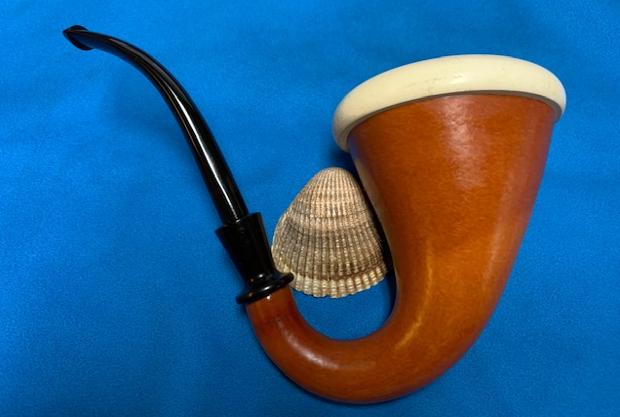
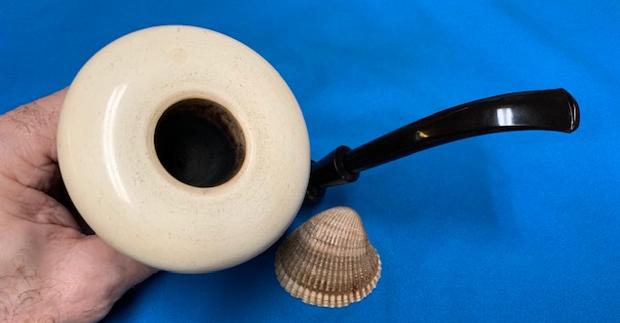
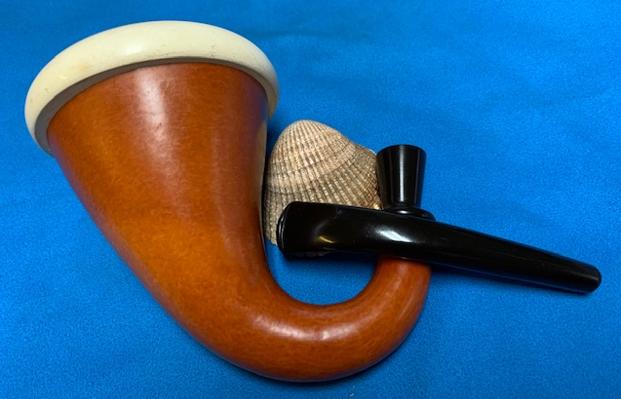
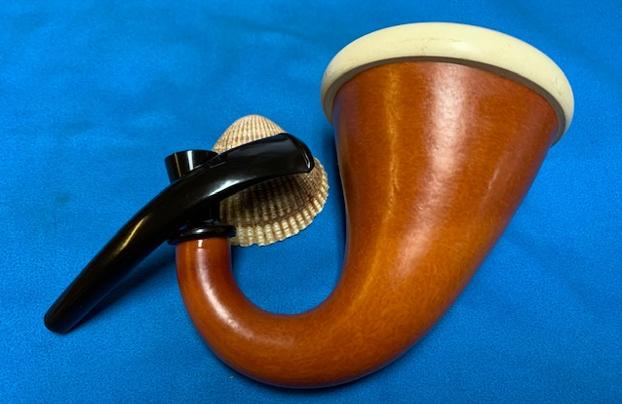
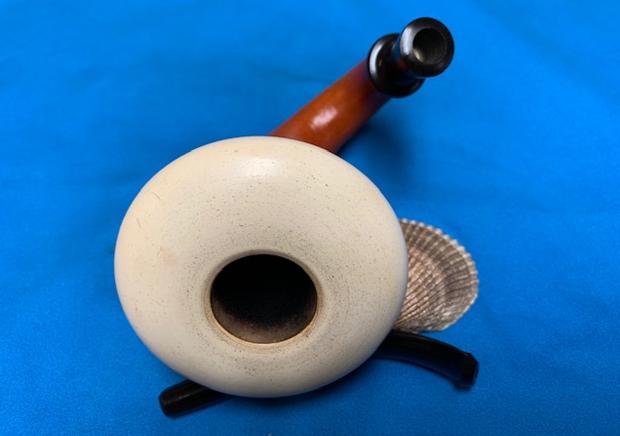
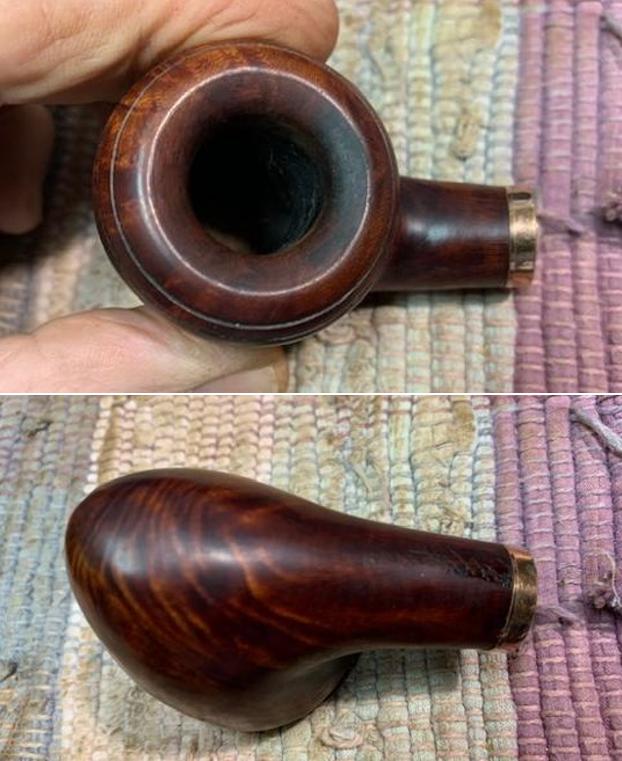
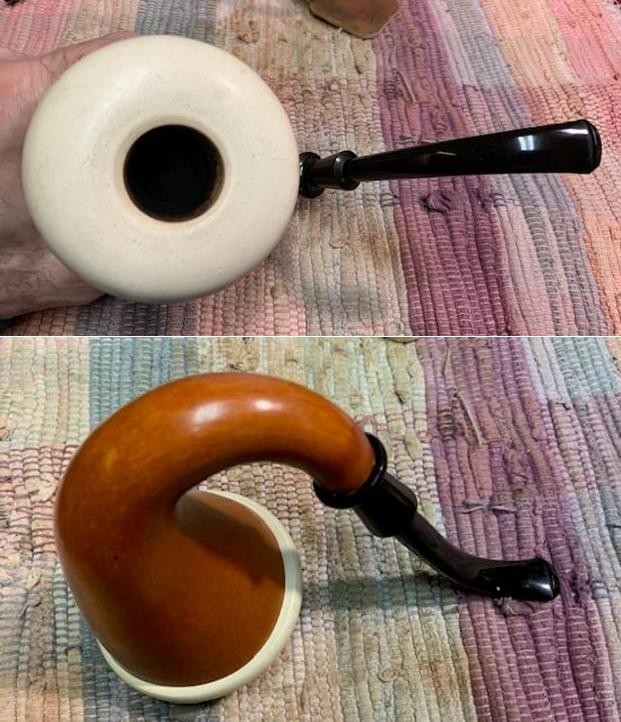 I took a photo of the meerschaum cup from the top to show the general condition. It was in decent condition with some scratching and staining around the top surface. The inside of the bowl was in excellent condition. The edges of the bowl and chamber were in excellent condition. The stem was virtually unused with no tooth marks or chatter on either side.
 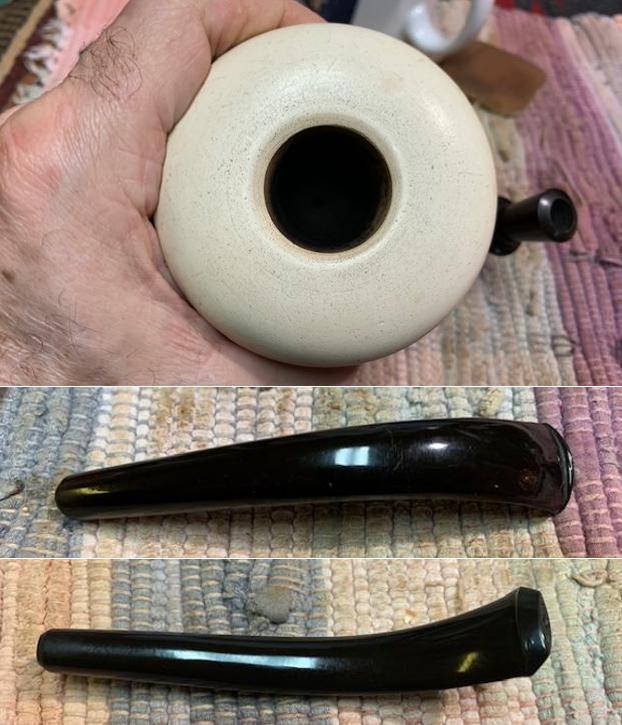 I took a photo of the bowl and stem from the side to give a sense of proportion. It is a great looking pipe.
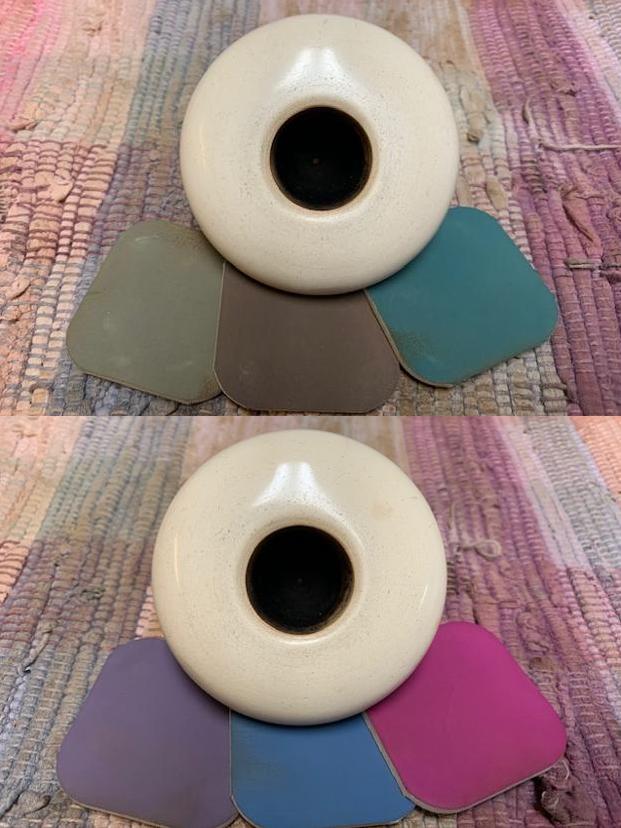
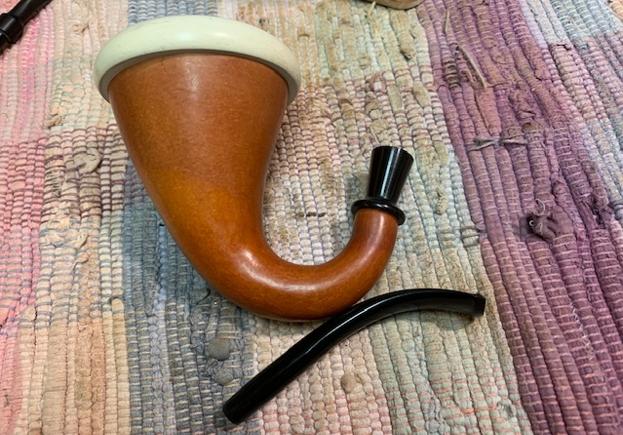 I started my work on the bowl by polishing the meerschaum bowl with micromesh sanding pads – polishing with 1500-12000 grit pads and wiping them down with a damp cloth after each pad.
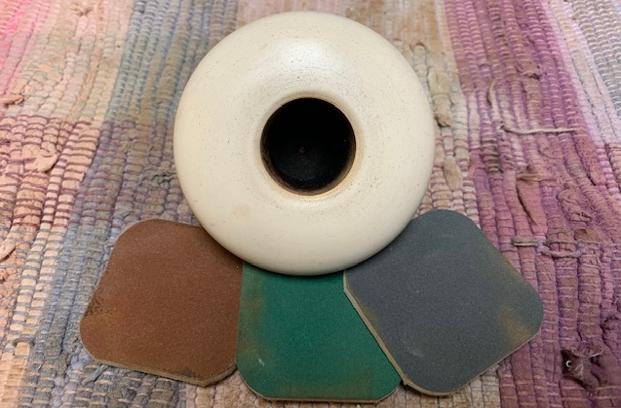
 I waxed the meerschaum bowl with Clapham’s Beeswax Polish. I rubbed it into the meerschaum with my finger tips and once it had dried I buffed it out with a soft cotton cloth.
 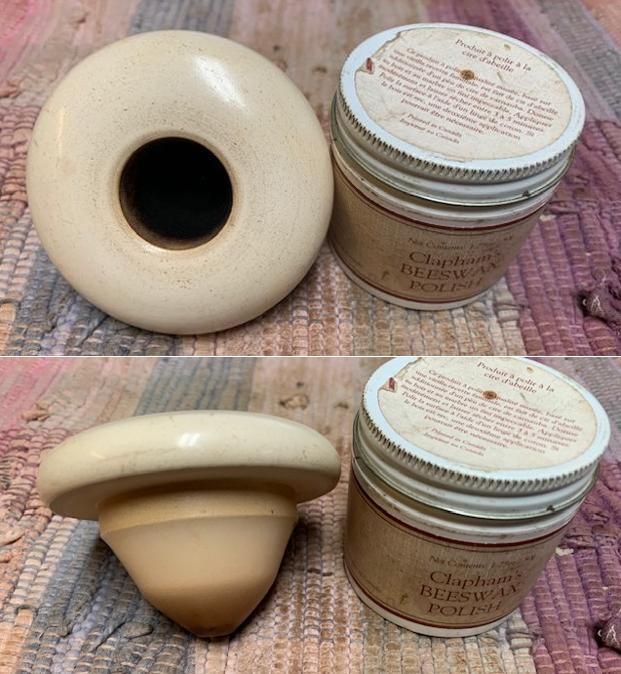 I polished the gourd down with 1500-12000 grit micromesh sanding pads. The gourd had taken on a great shine.
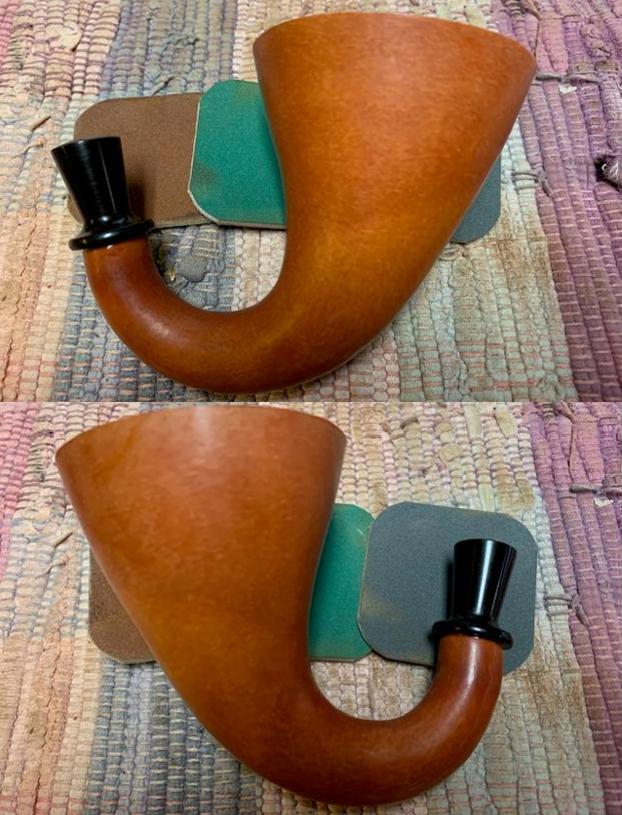
 I rubbed the gourd down with Before and After Restoration Balm to clean and rejuvenate the gourd and give the calabash and briar a fresh look.
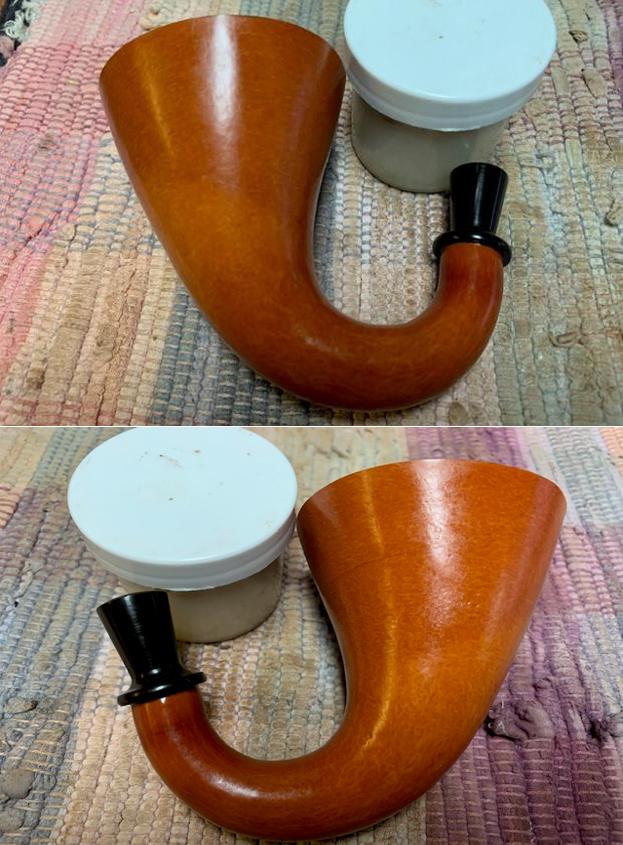
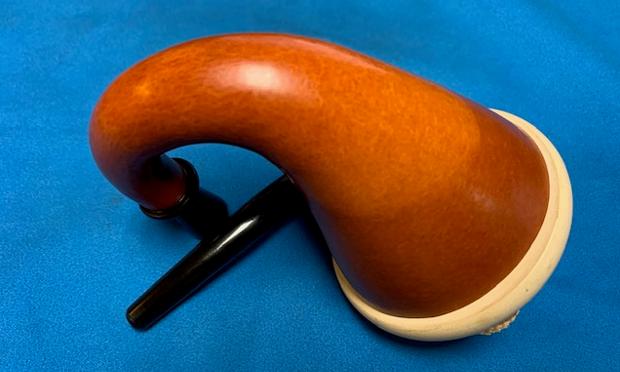
 I put the meerschaum cup in the gourd calabash bowl and took photos of this portion of the restoration of this pipe.
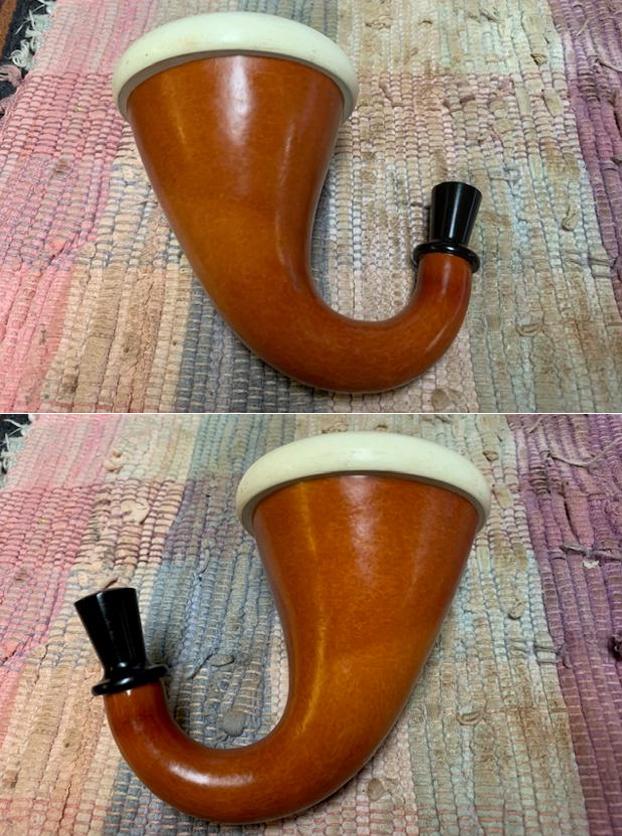

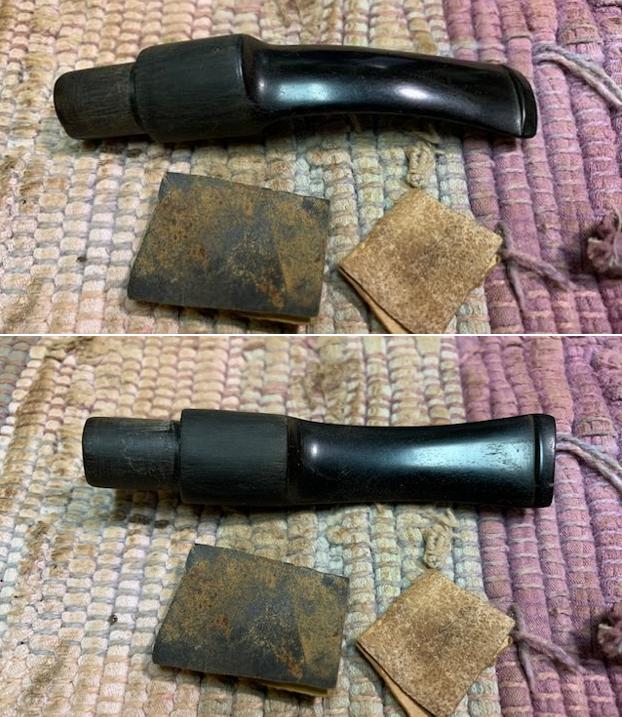
 I set aside the bowl and turned my attention to the stem. I polished the stem with micromesh sanding pads – wet sanding it with 1500-12000 grit pads. I polished it further with Before & After Pipe Stem Polish – both fine and extra fine.
 I really enjoyed putting this pipe together and restoring it because I love the final touches that make it sing. I put the Gourd Calabash back together and lightly buffed the bowl with Blue Diamond on the buffing wheel. I gave the gourd and stem multiple coats of carnauba wax. I buffed the pipe with a clean buffing pad to raise the shine. I hand buffed it with a microfiber cloth to deepen the shine. It is fun to see what the polished meerschaum bowl looks like with the smooth finished gourd and the black vulcanite stem. This richly finished Gourd Calabash is light weight and ready for you to load up a tobacco of preference and enjoy smoking it. Have a look at it in the photos below. The dimensions are Length: 7 inches, Height: 4 inches, Outside diameter of the bowl: 3 ¼ inches, Chamber diameter: 1 inch. The weight of the pipe is 142grams/5.04oz. This is one that will go on the Meerschaum Pipemakers section of the rebornpipes online store shortly. Thanks to each of you who are reading this blog. Remember we are not pipe owners; we are pipemen and women who hold our pipes in trust until they pass on into the trust of the next generation.