by Steve Laug
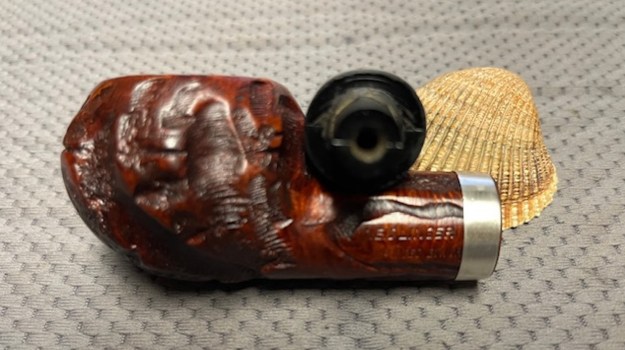
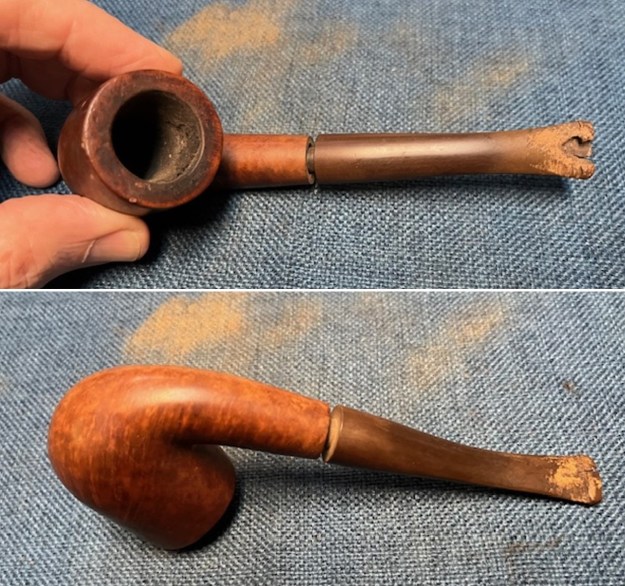
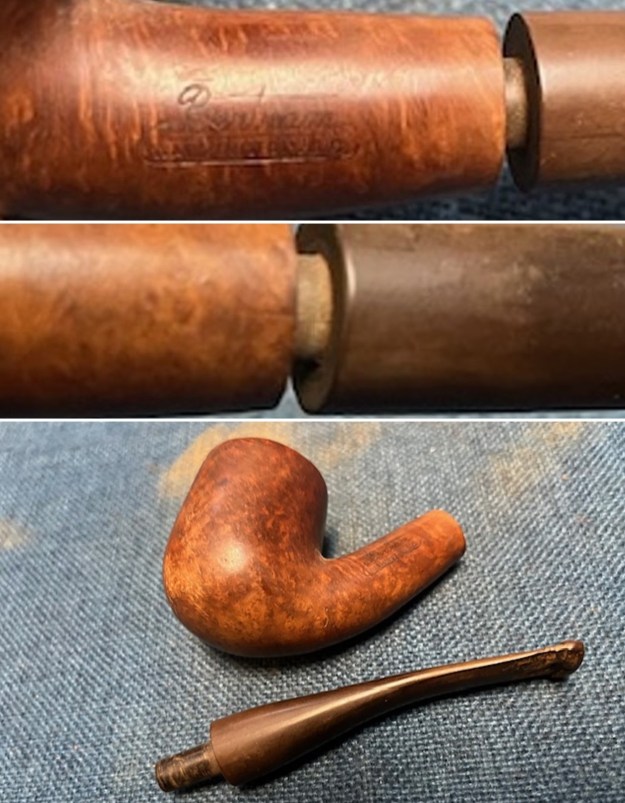
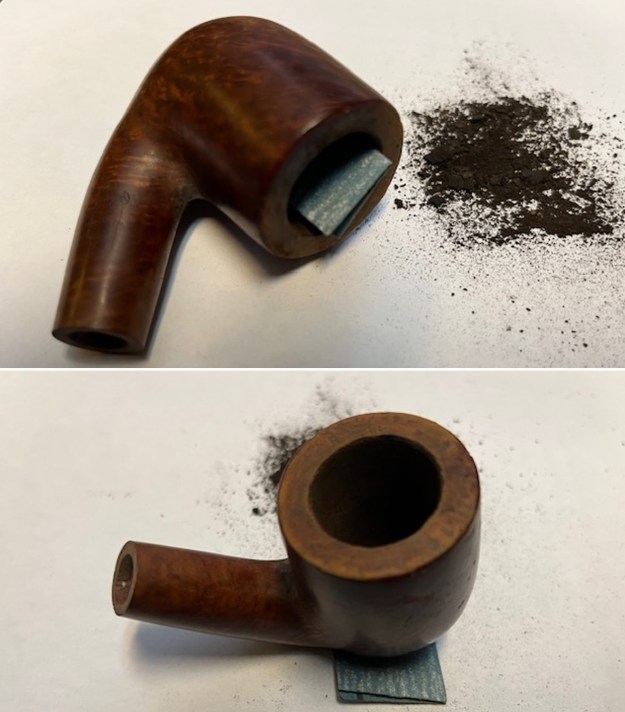
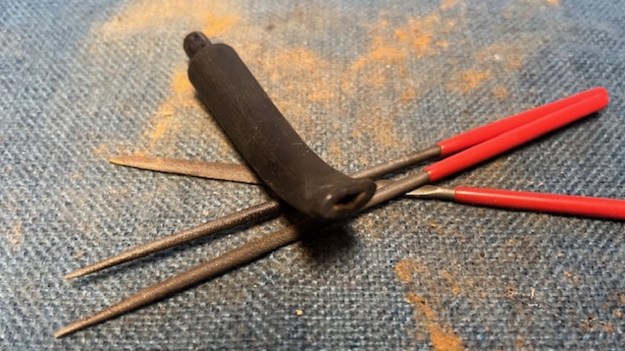
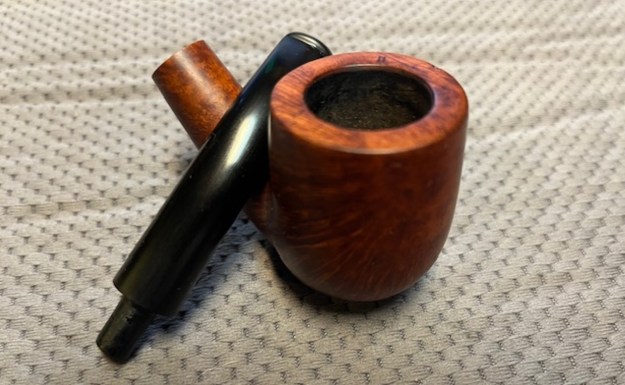
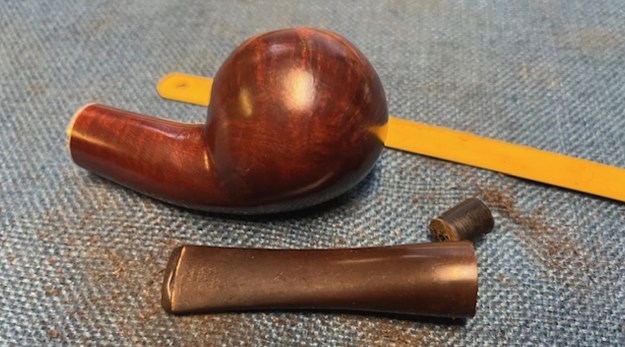
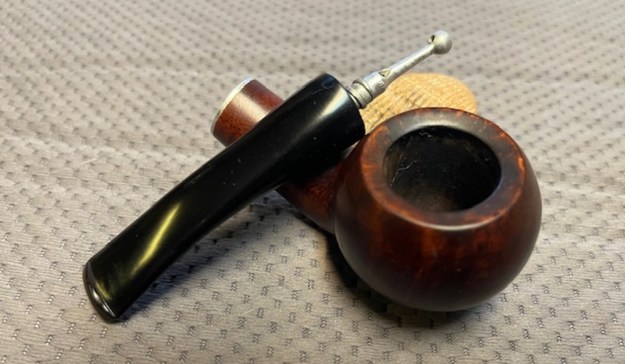
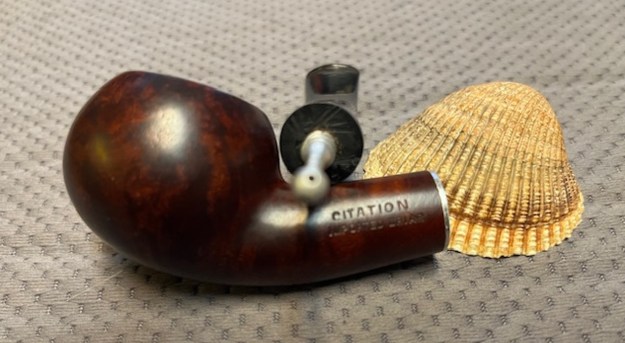
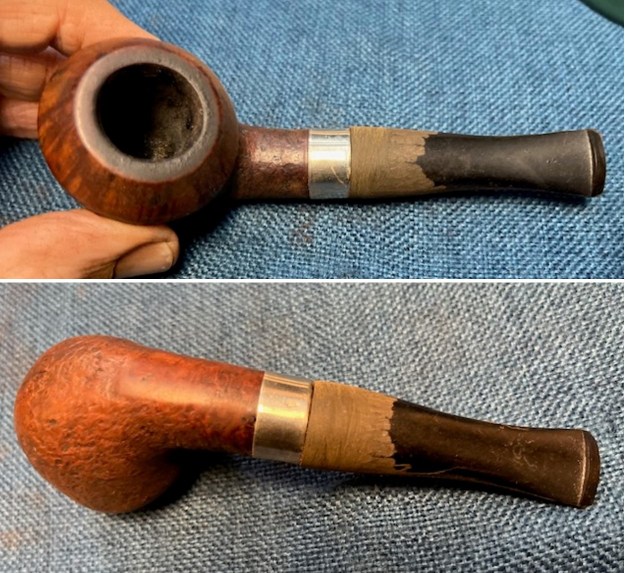
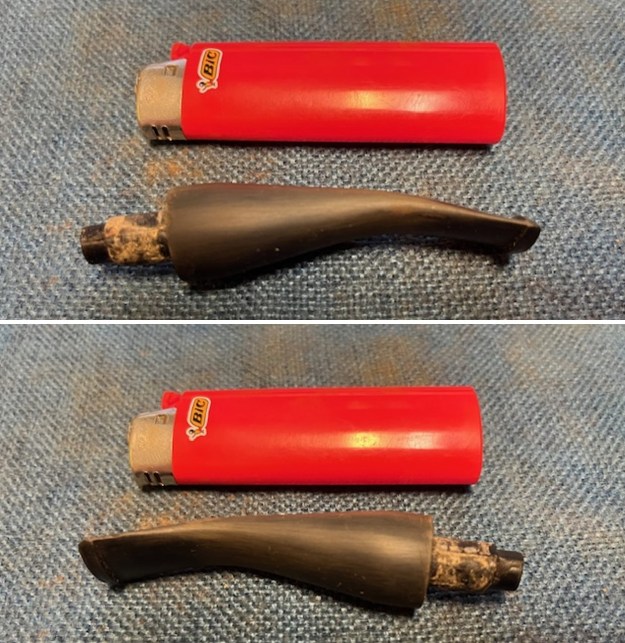
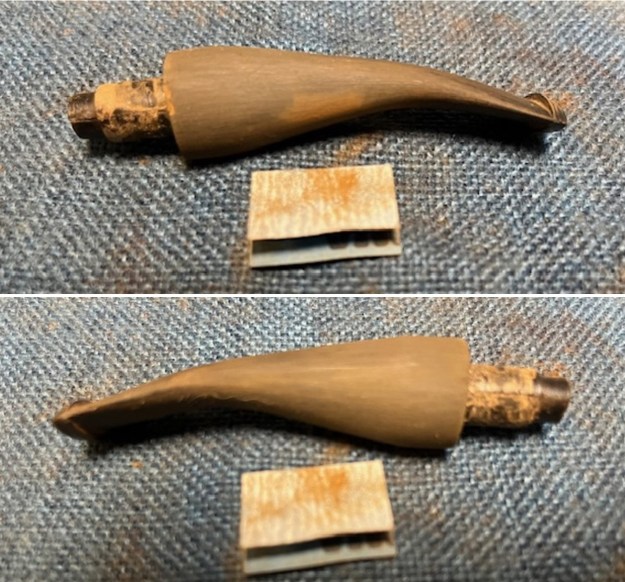
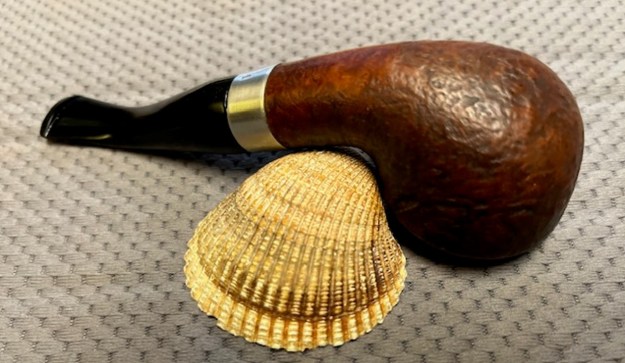
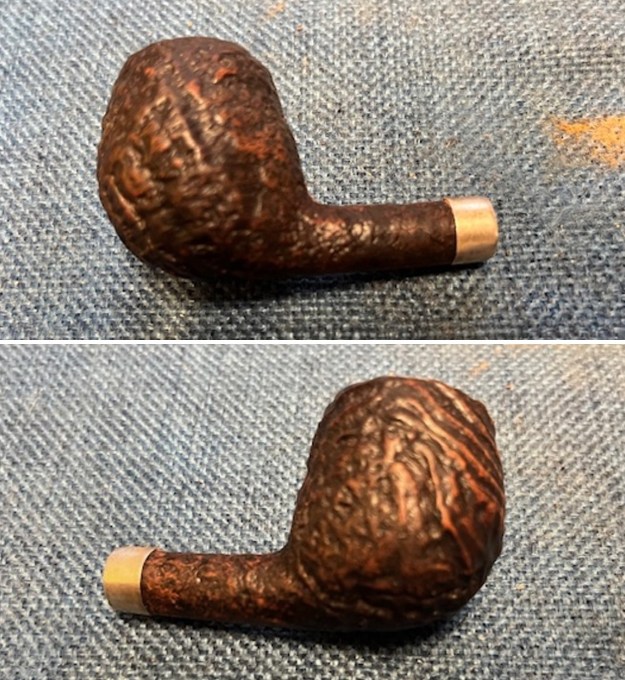
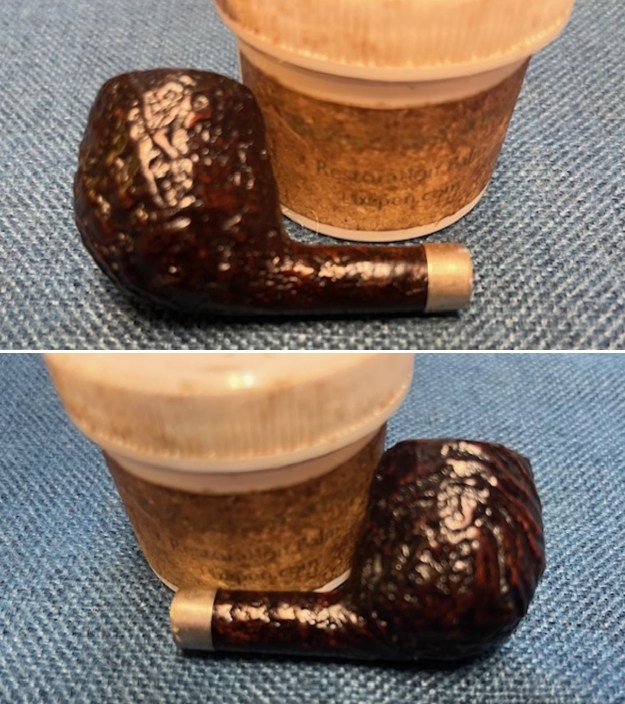
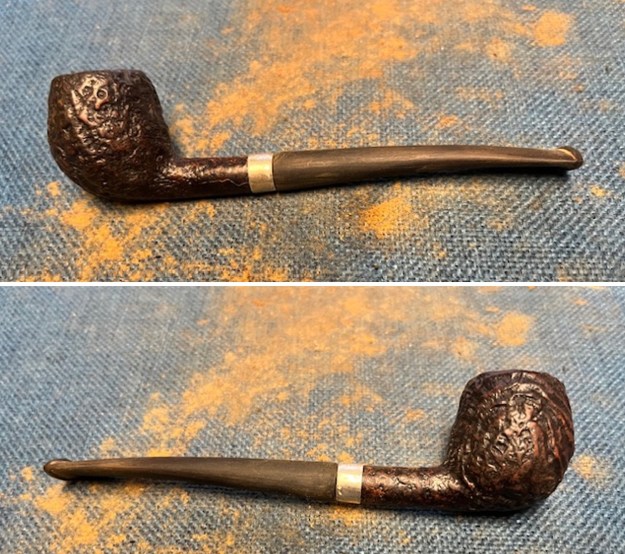
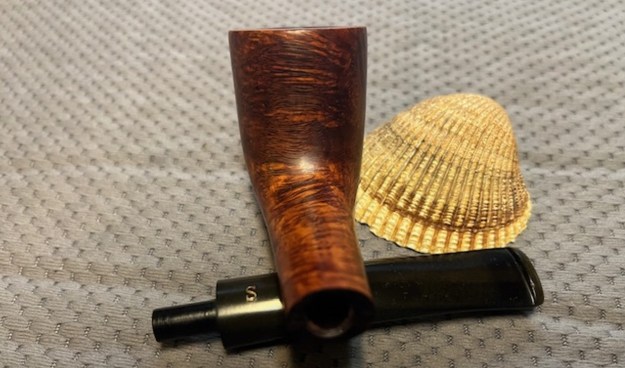
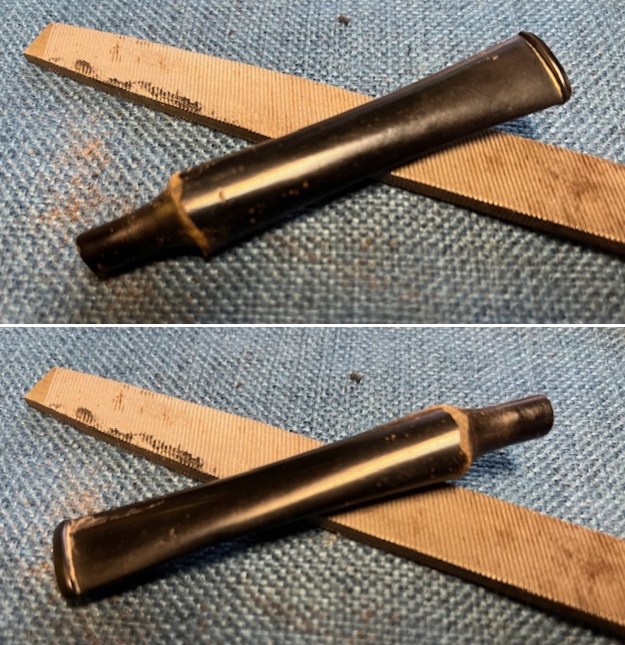
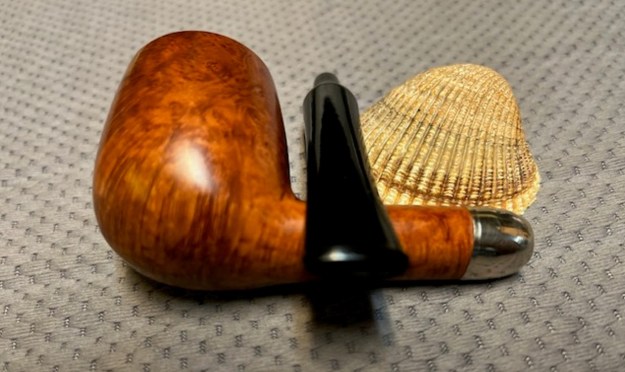
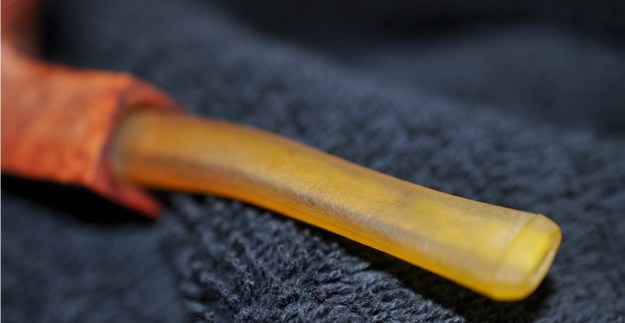
I decided to restem another bowl that I had here in the box. Jeff and I purchased on 10/17/2017 from am antique shop in Pocatello, Idaho, USA. It is a nicely grained bowl that came with some odd stem stuck in the shank. It was obviously the wrong one so it would have to go. The left side of the shank is stamped and reads Rogers [over] Rarity in an oval. The right side is stamped Imported [arched over] the shape number 310 and underneath was arched Bruyere. The bowl had a thick cake and lava overflow on the rim top and inner edge. The briar is oily and dirty with some lava coming down the outer edge of the rim top onto the bullcap. There was some great grain hidden by the grime. Jeff took some photos of the pipe before he started his work on cleaning it up. He included photos of the stem that came on it when we purchased it.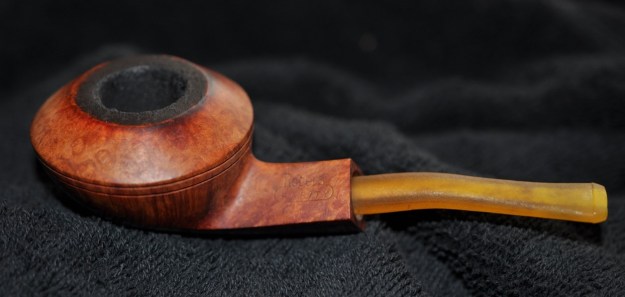 He captured the cake in the bowl and the thick eruption of lava on the rim top and edges exceptionally well in the next photo. It was very clear that the pipe had not been seriously cleaned in a very long time. But it is also very clear that it was an exceptional smoker! The incorrect stem is oxidized and dull with tooth marks and chatter on both sides ahead of the button. It was going to be replaced but I always find it interesting to see what pipesmokers do to make a pipe remain usable.
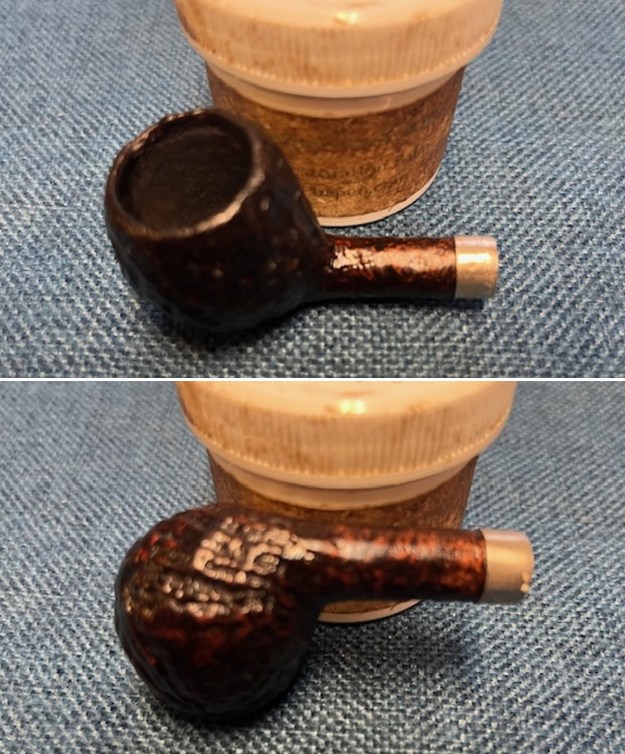
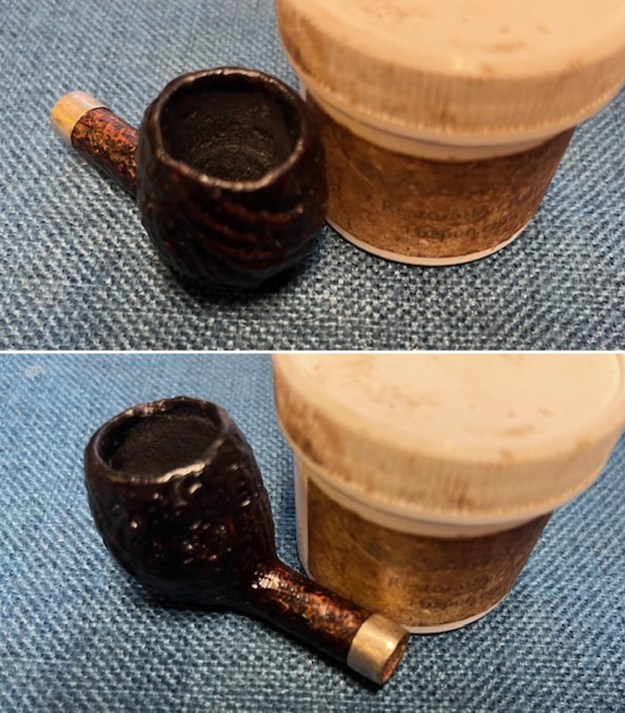
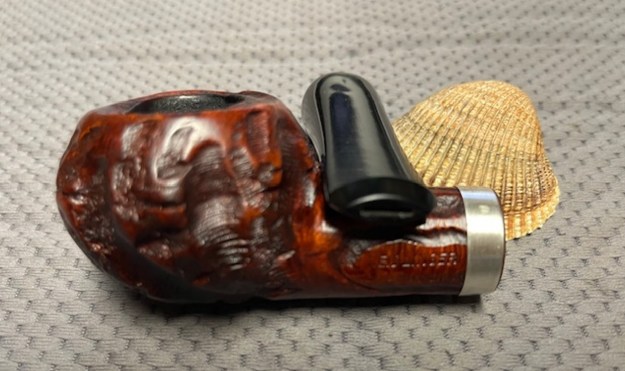
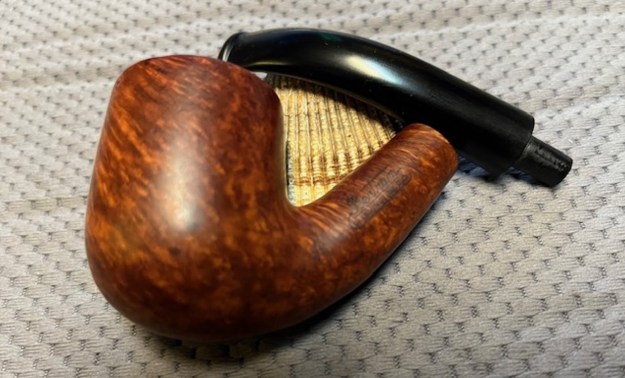
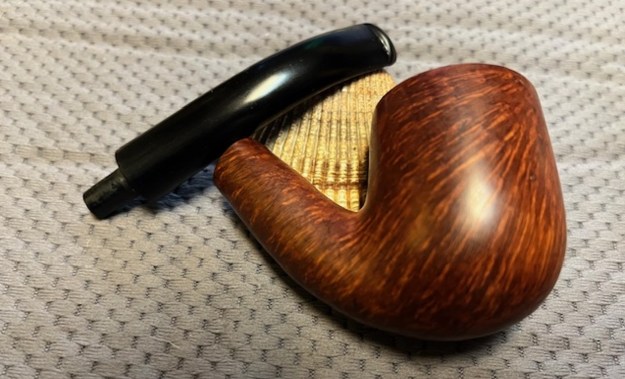
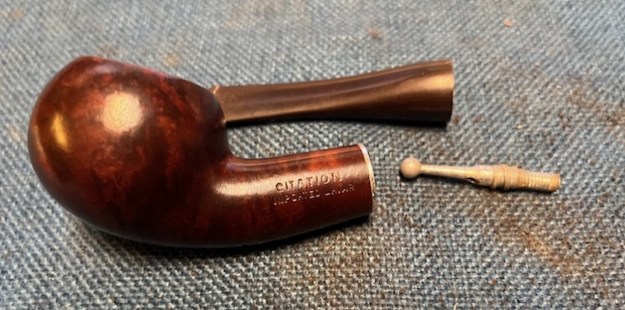
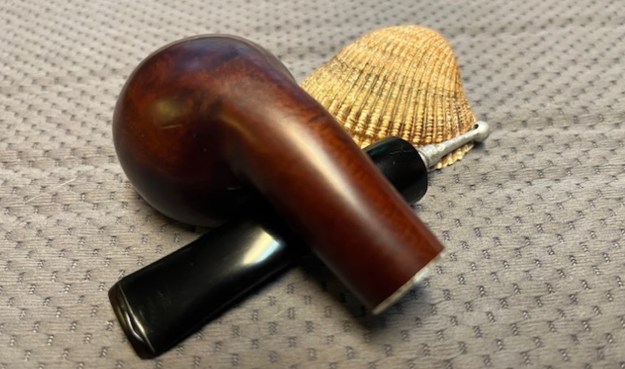
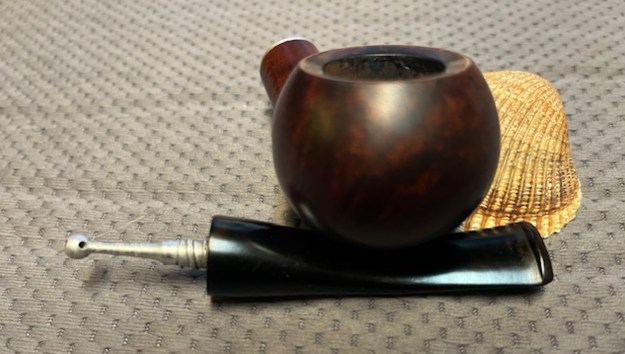
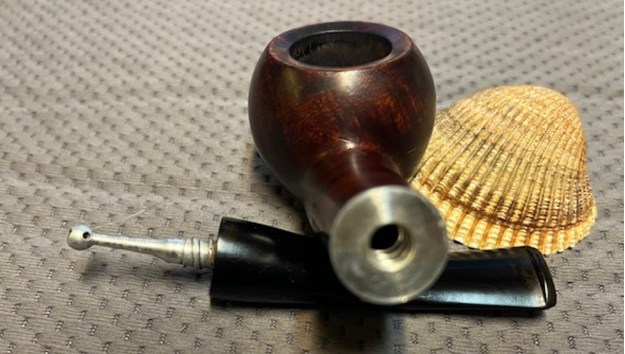
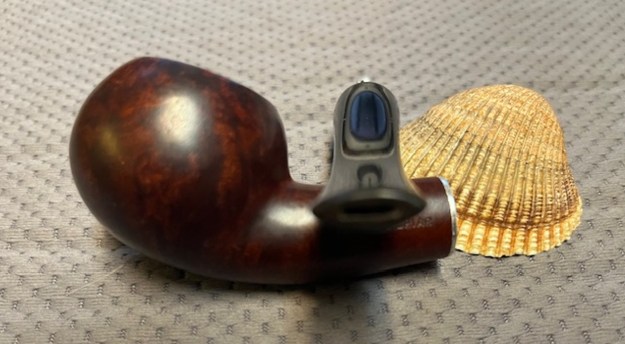
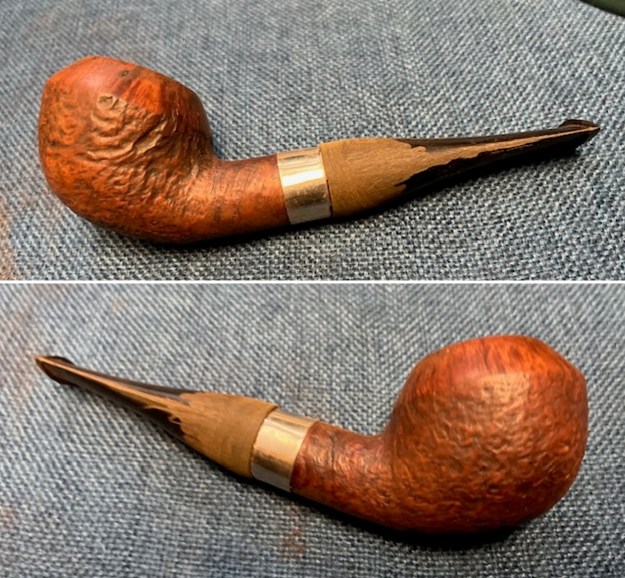
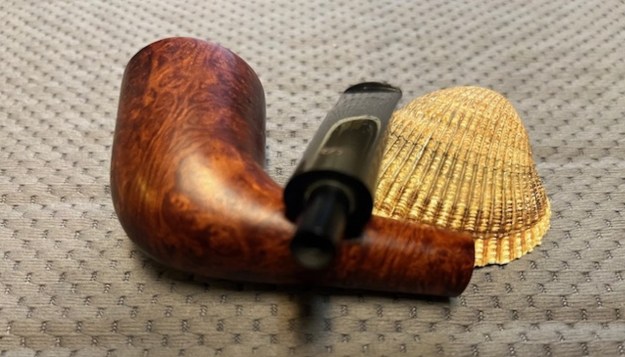
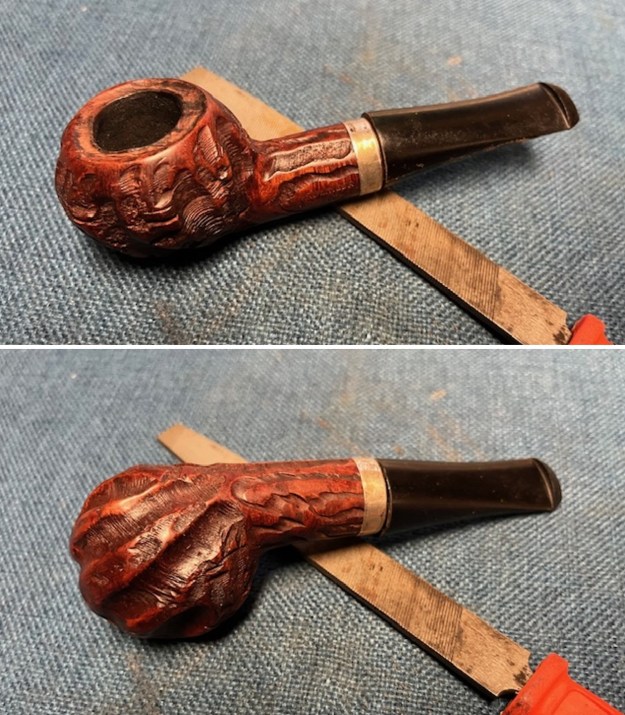
 Jeff somehow captured some of the beauty of the shape and the grain in the next photos. You can certainly see what lies beneath the grime on the briar. You can also see a few small fills in the bowl and along the twin rings of the bullcap.
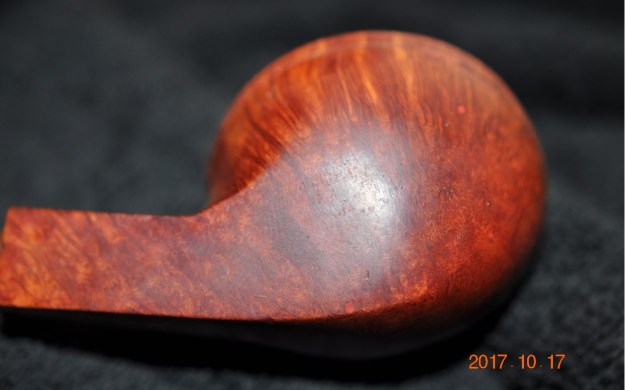
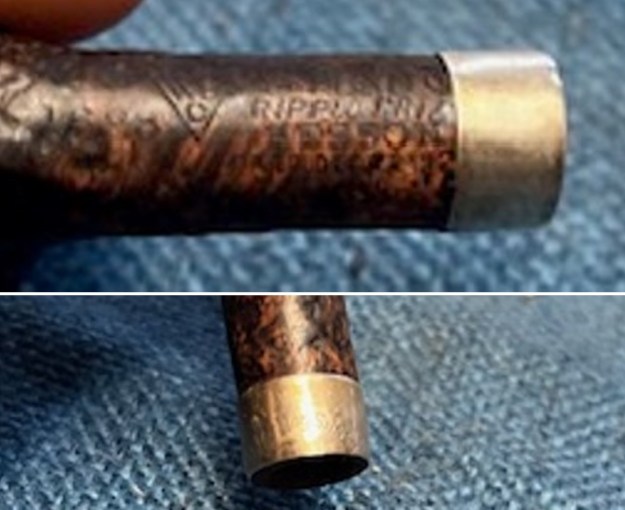
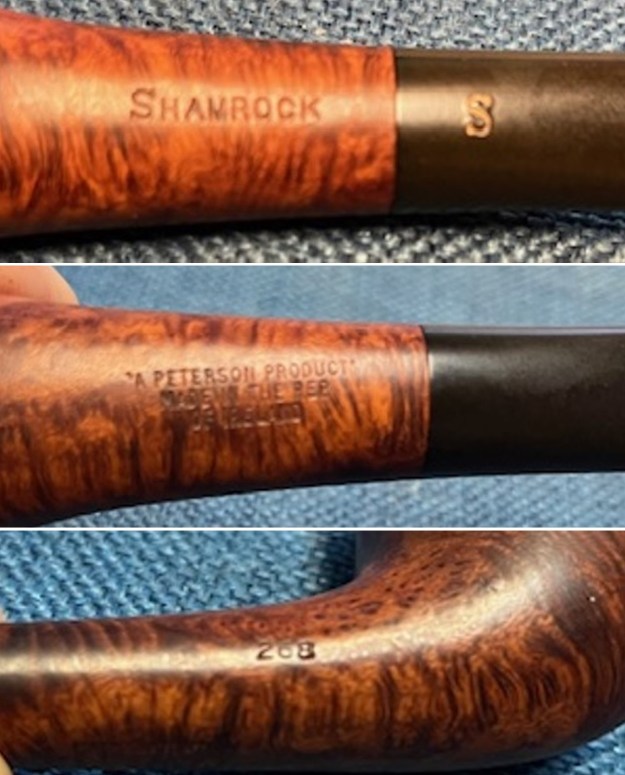
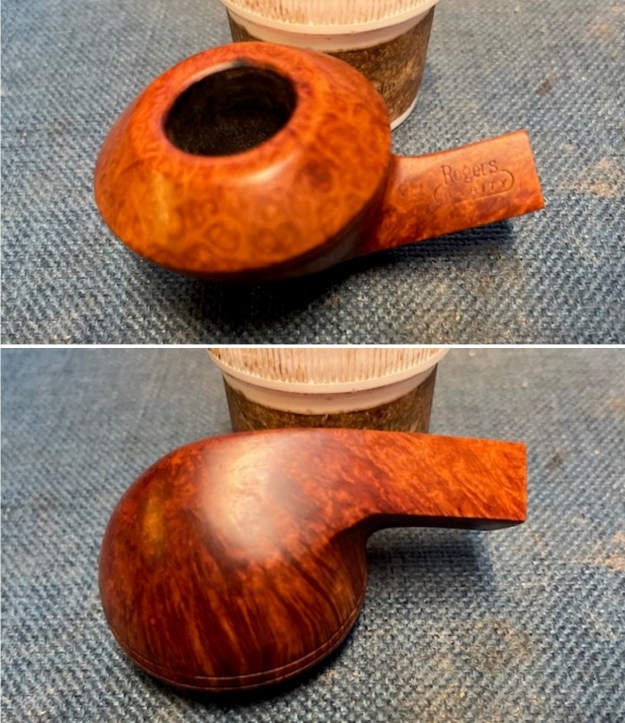
 He took photos of the stamping on the top left and right of the shank. It is clear and readable as noted above.
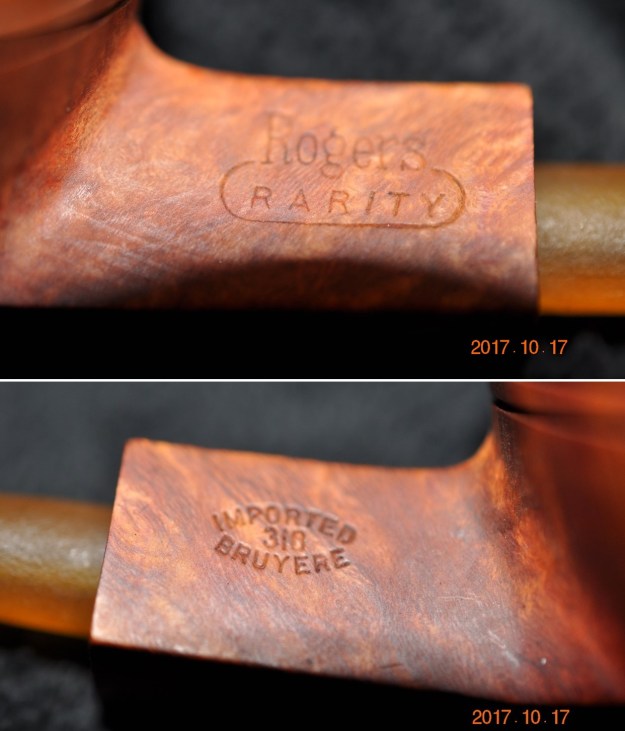 From reading Bill Unger’s book on Custom-Bilt Pipes I remember “Rogers Rarity” was made by the same company as one of its non-sculptured or rusticated pipes. I did a Google search to see if I could confirm that online. I found a pipe labeled Rogers Rarity for sale on Worthpoint, an online sales site (https://www.worthpoint.com/worthopedia/rogers-rarity-custombilt-large-briar-1821532853). In the description they made the link to Custombilt. I quote:
Rogers Rarity briar pipes were made by Custombilt, and show all the beauty and originality of the brand.
I searched further and found a conversation asking about the brand on Pipesmagazine online forum. There was a great conversation about the brand.
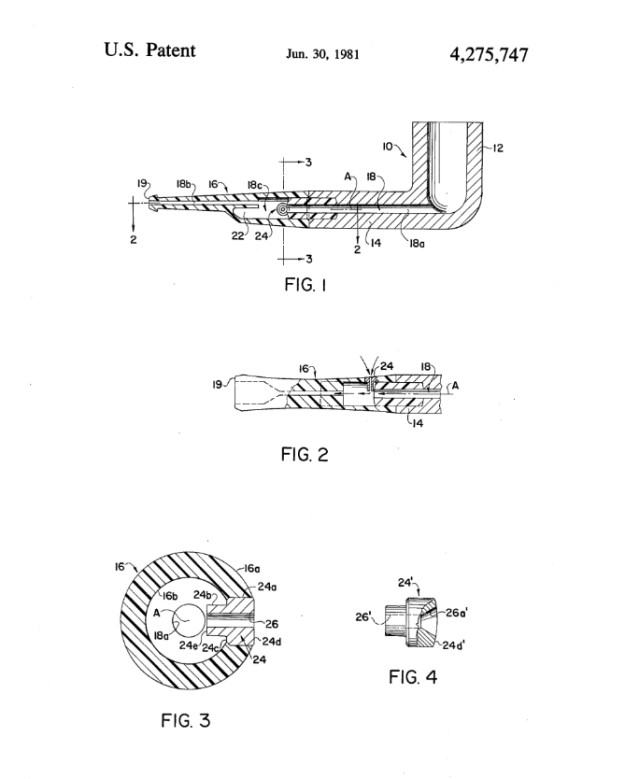
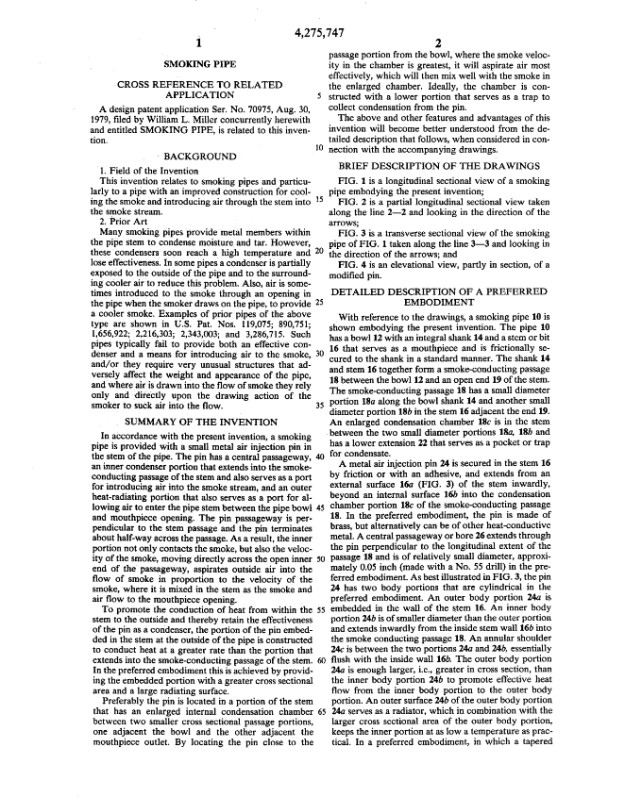
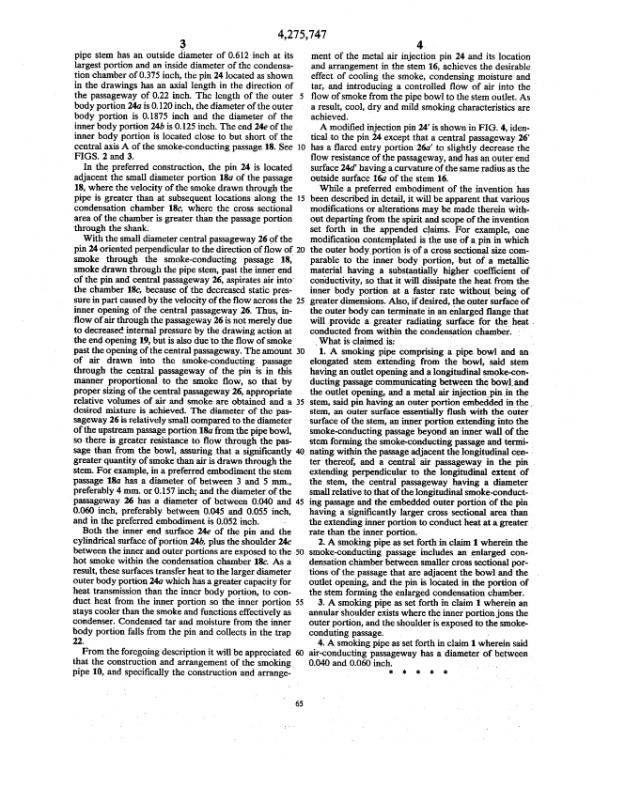
(https://pipesmagazine.com/forums/threads/help-with-dating-a-pipe.62314/). I found a particular response by Jon Guss of the Seattle Pipe Club particularly helpful. I quote from Jon in full.
First, “Rodgers” is a misspelling; it was always spelled “Rogers”. Three generations of the Rogers family ran one of the leading importers of pipes (including Petersons for a number of years) and resellers of pipes and smokers articles; they also did a bit of manufacturing. The name of the company was Rogers Imports, Inc.
Second, for several reasons I also believe that Rogers Rarity pipes were made for Rogers Imports by CustomBilt.
The Rogers Rarity line was introduced by the company in late 1945. The advertising copy from the spring of 1946 described Rogers Rarity pipes as “The height of pipe luxury and enjoyment”, and claimed that they were “Carved by hand of Algerian bruyere over 150 years old”. Was it true? I would guess not, but age fabrication regarding the briar from which pipes were made was a kind of industry trope for generations. While most of the Rarity pipes apparently sold for $5, the listed price range stated various models cost from $5-25. The $5 pipes were available in natural and grain finishes; there was also a $10 version called the Rogers Rarity Deluxe that was sterling banded and meerschaum lined.
I can’t be sure when the line ceased production, but believe it was by the end of 1949. Certainly Rogers Rarity pipes are no longer listed in the RTDA Almanac from 1950 on, and mentions of the pipe in advertisements to consumers become thin on the ground. More tellingly newspaper ads from 1951 show the pipe heavily discounted, suggesting that excess inventory of an obsolete line was being flushed through the channel…
Now I knew that my memory was correct. The pipe was made by CustomBilt for Rogers Imports. I also knew that it was made between 1945-1949 when the line was no longer made. It was a bit of an old timer… Now it was time to work on the pipe.
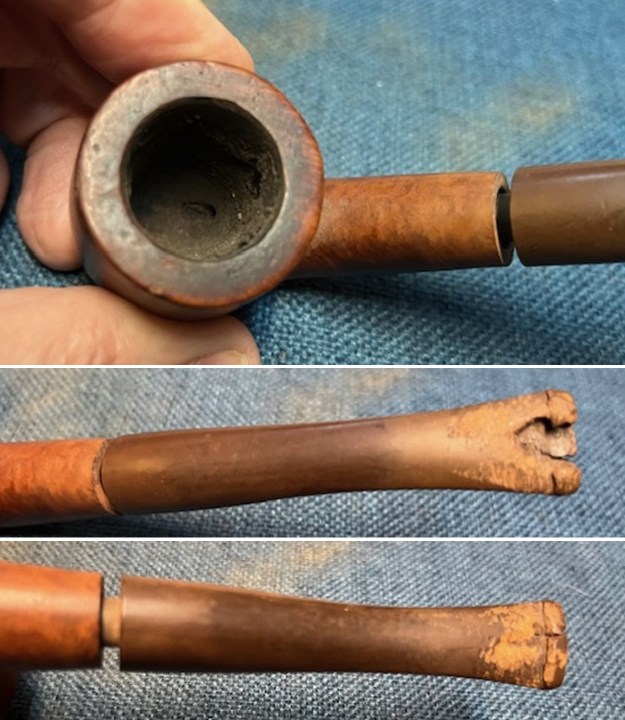
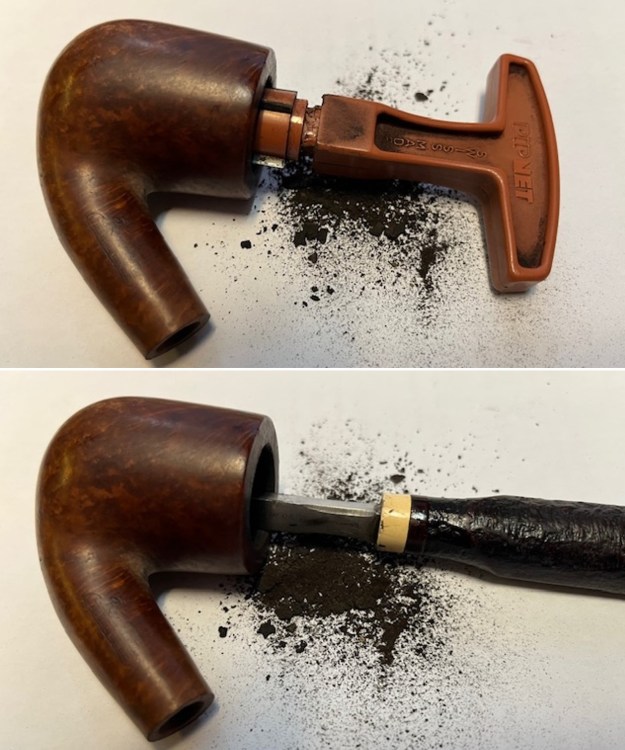
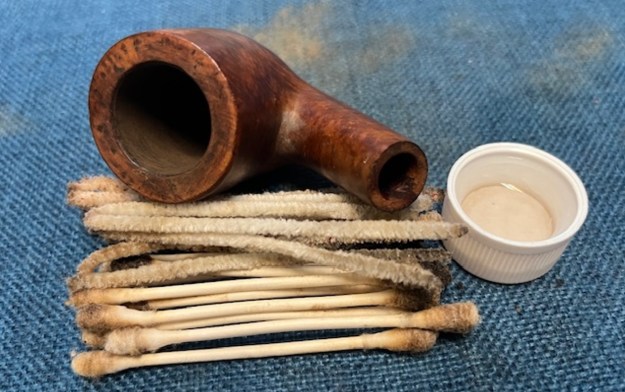
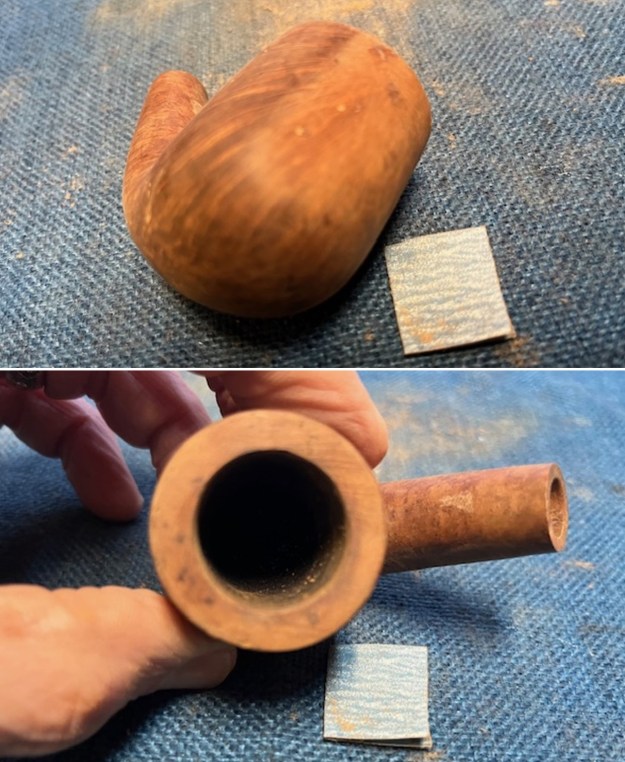
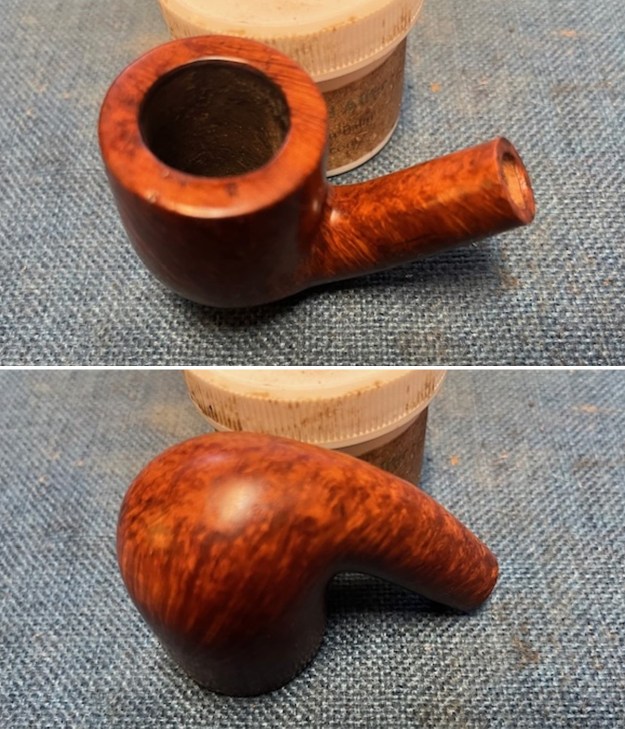
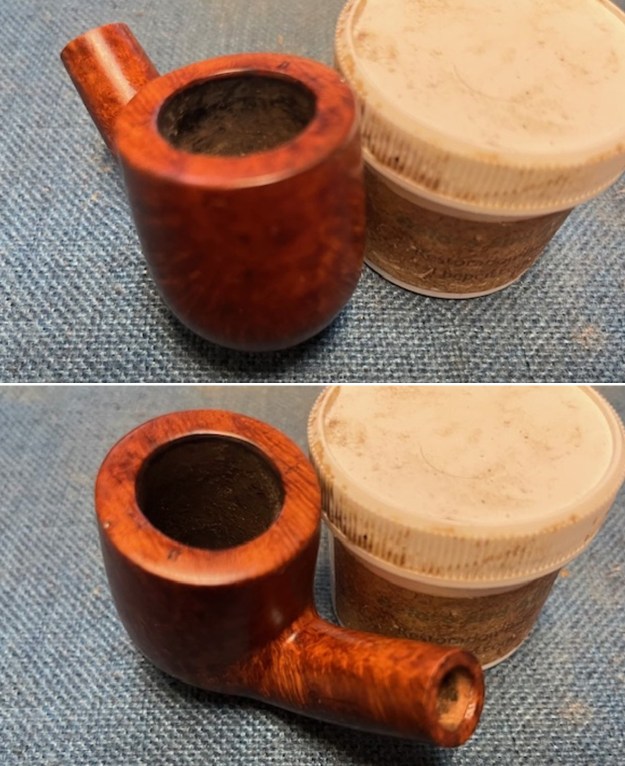
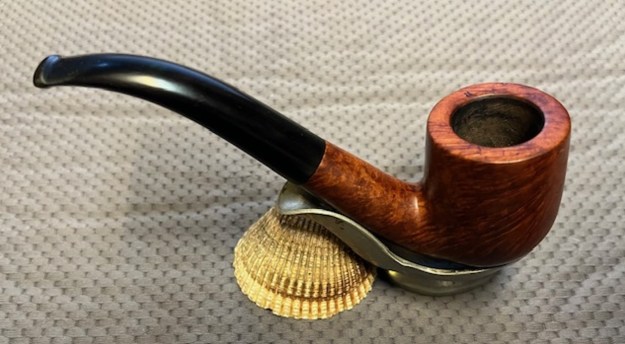
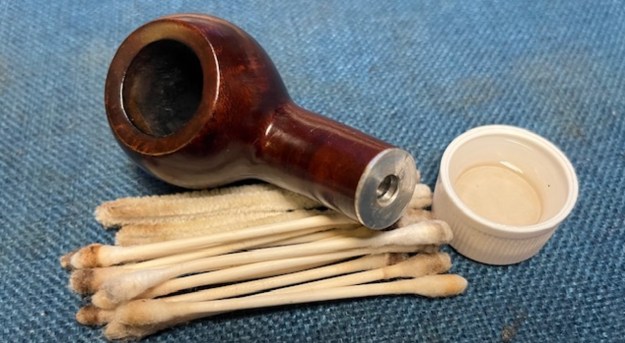
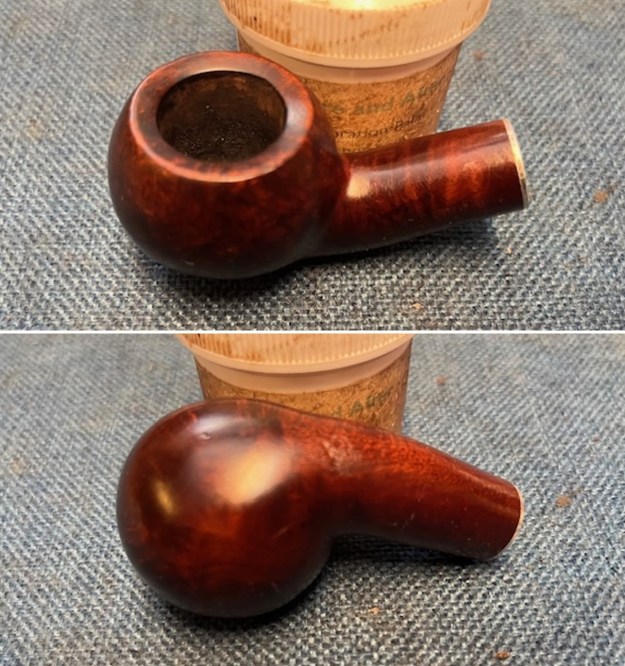
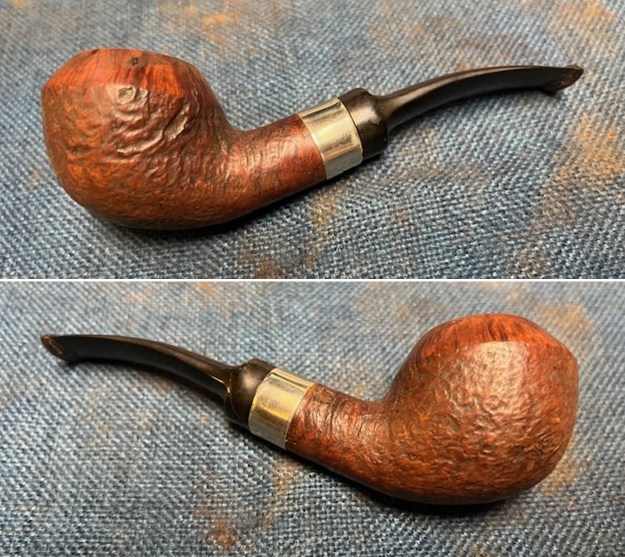
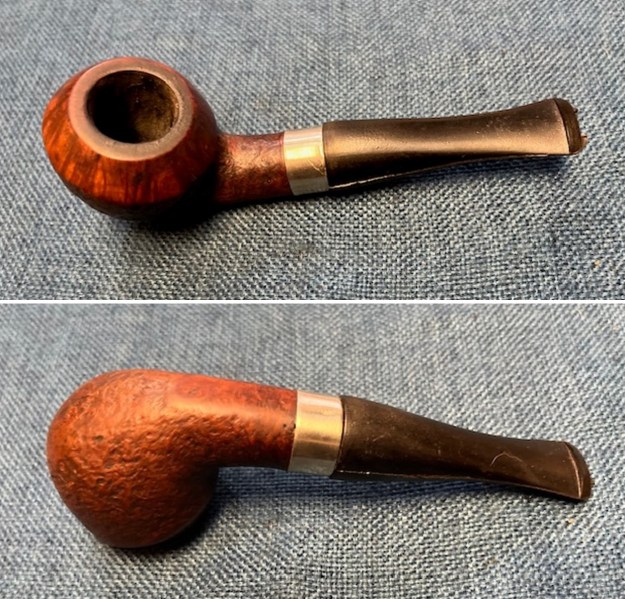
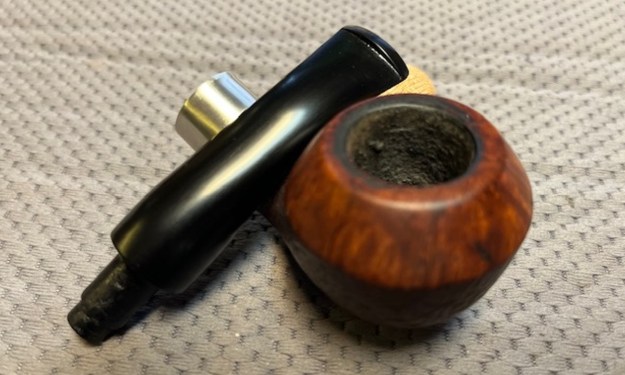
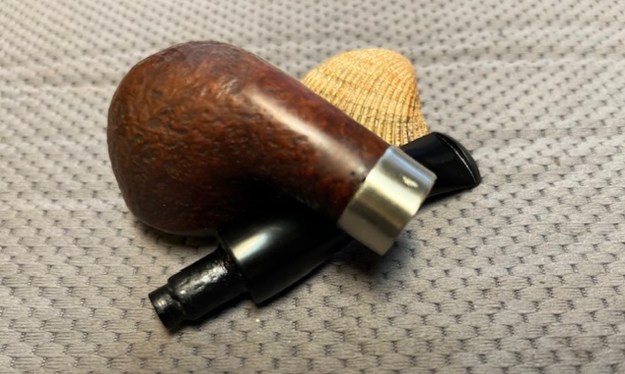
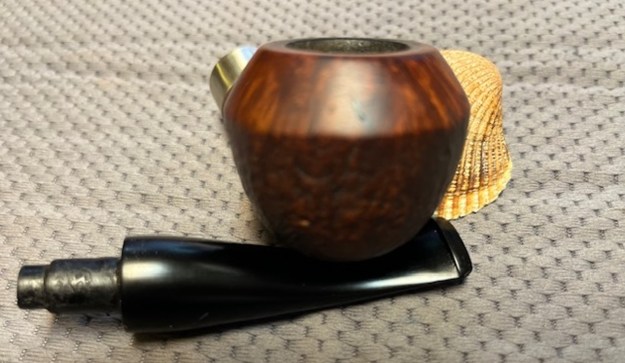
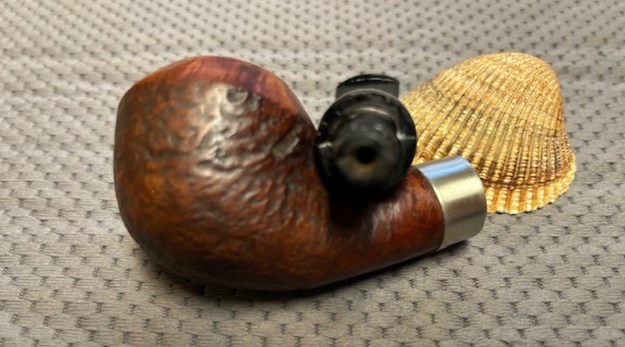
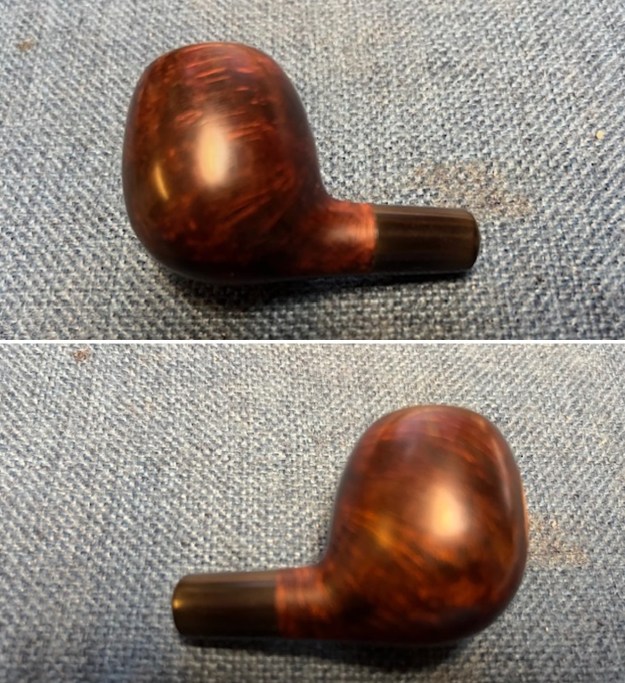
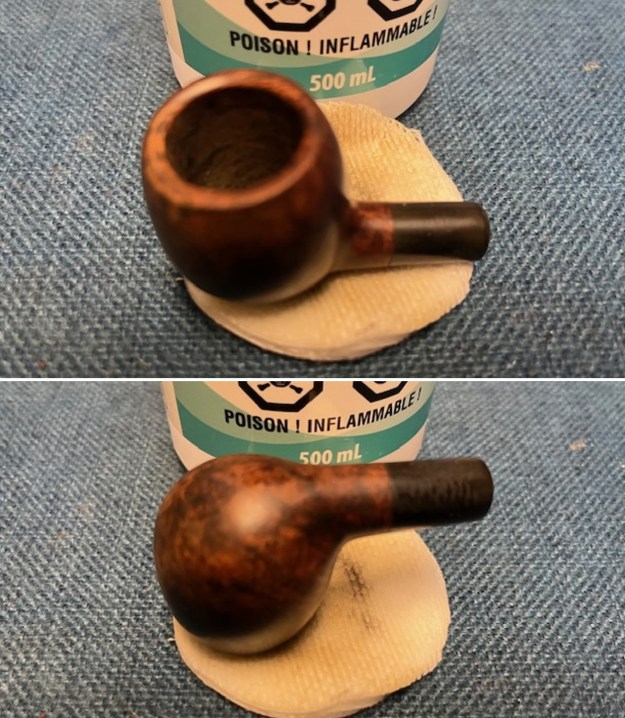
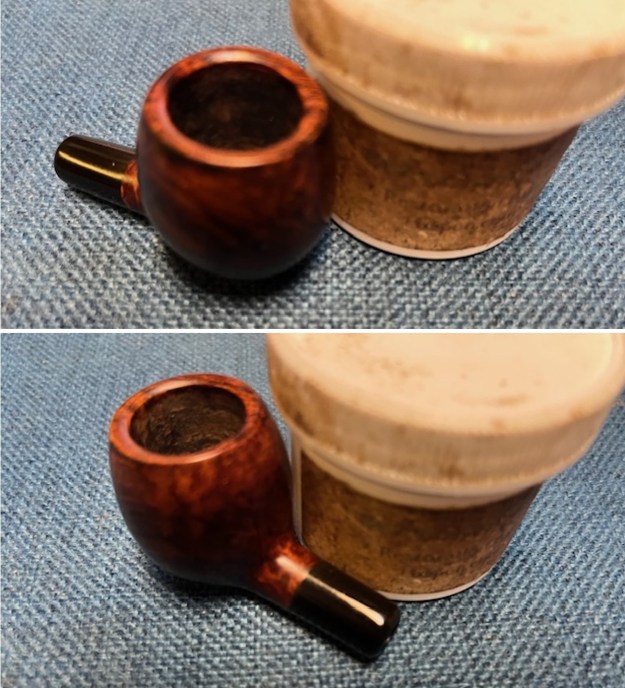
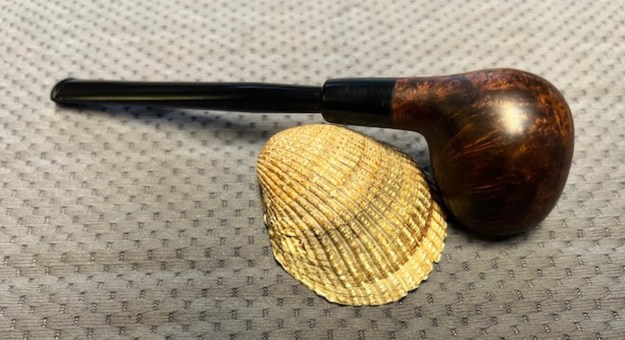
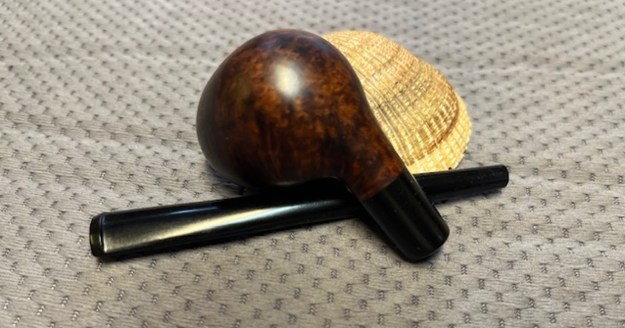
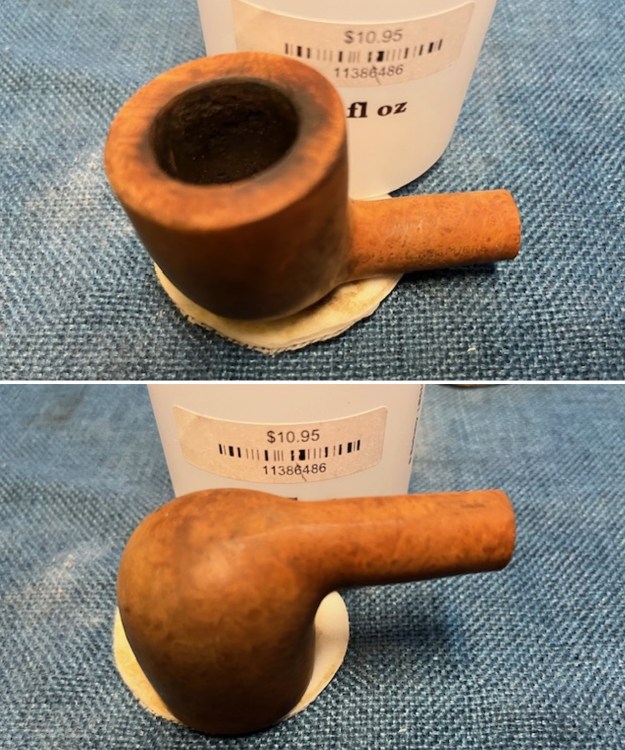
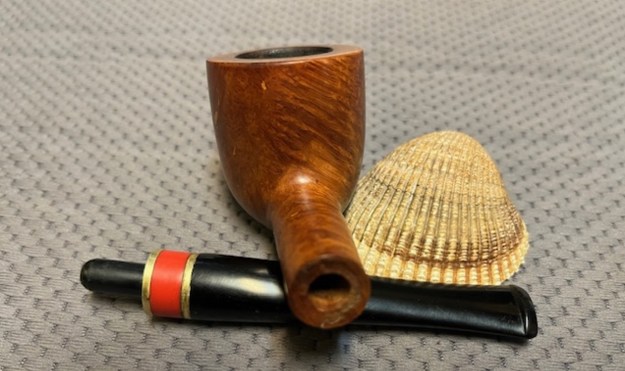
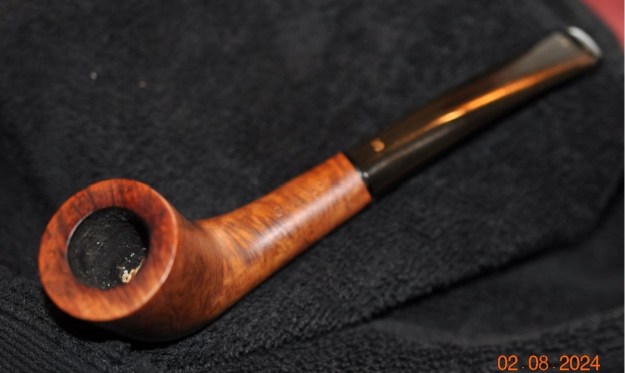
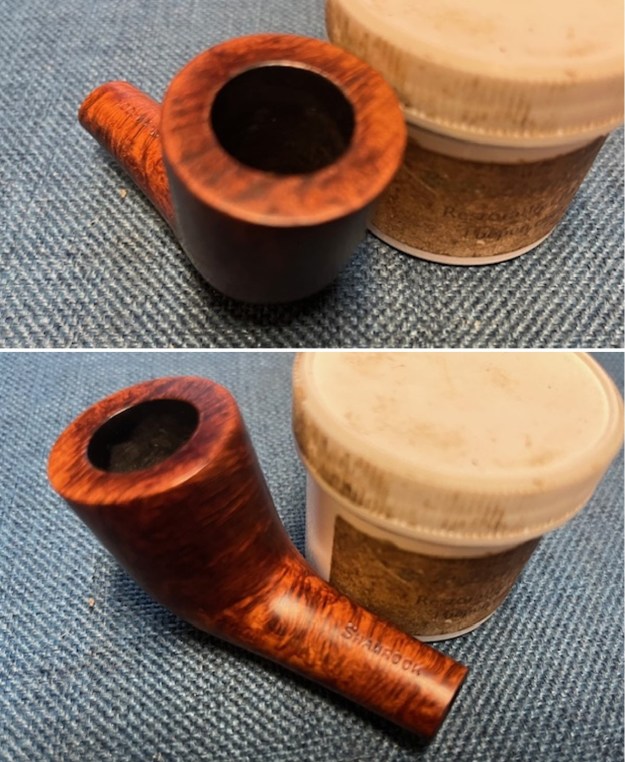
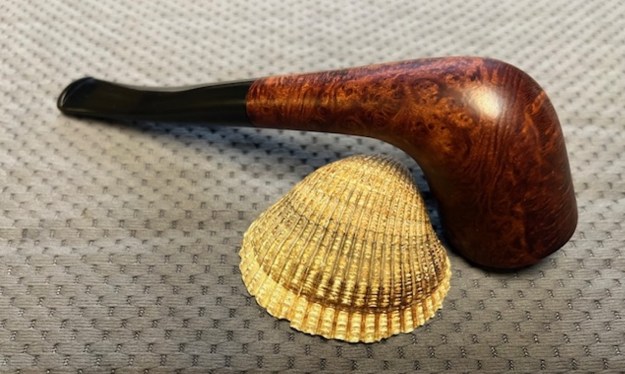
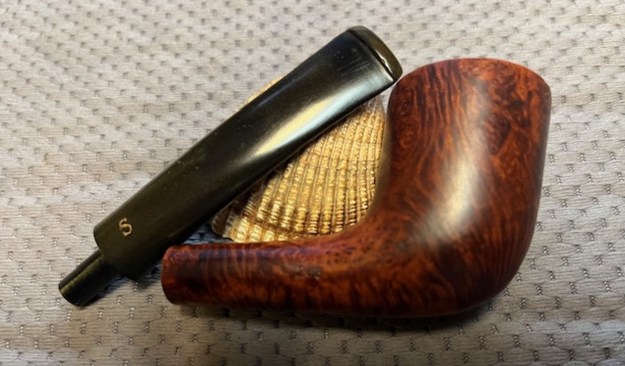
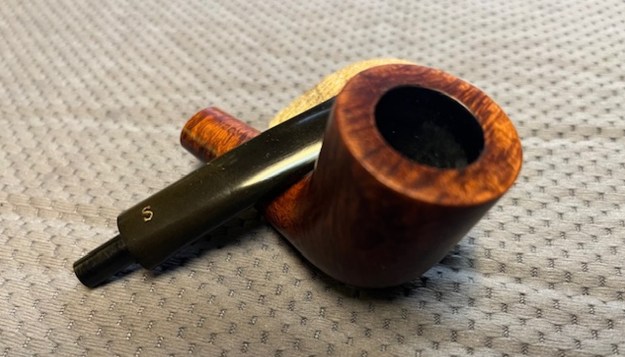
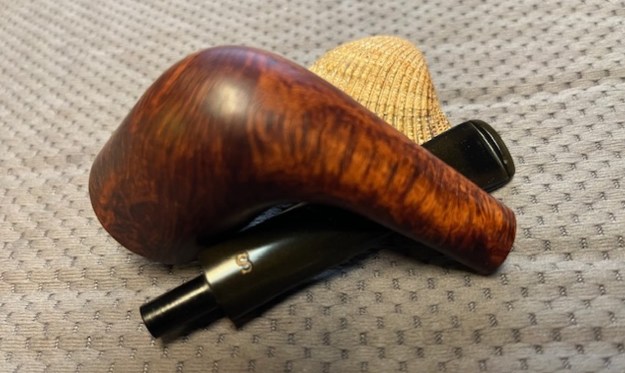
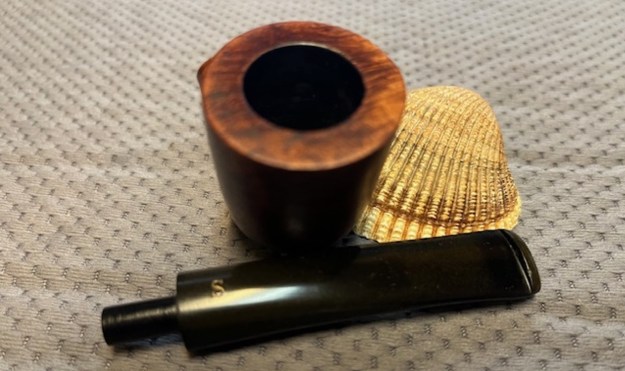
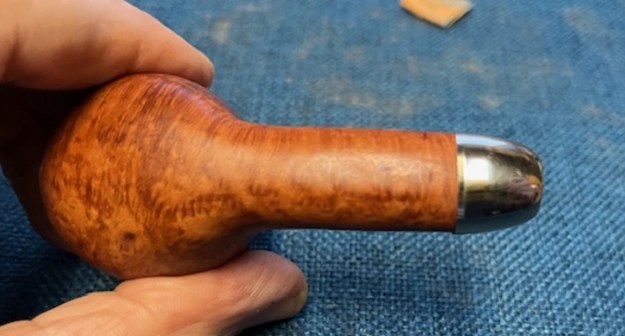
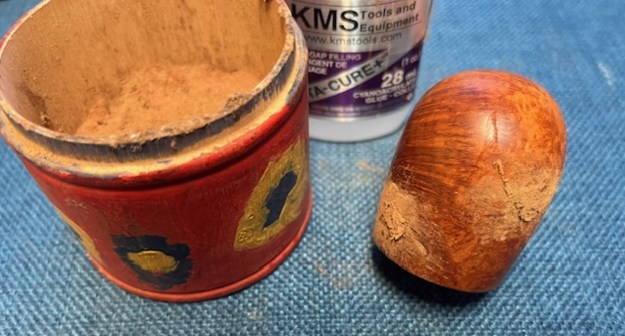
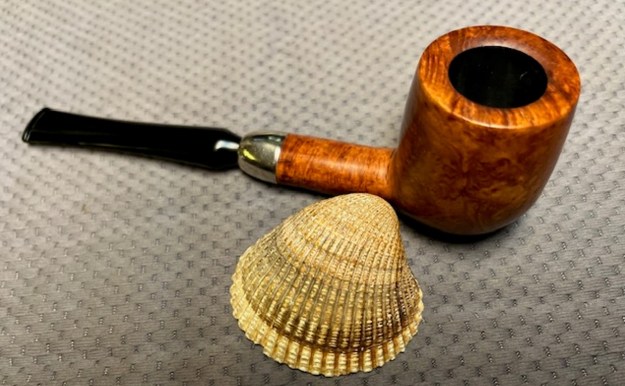
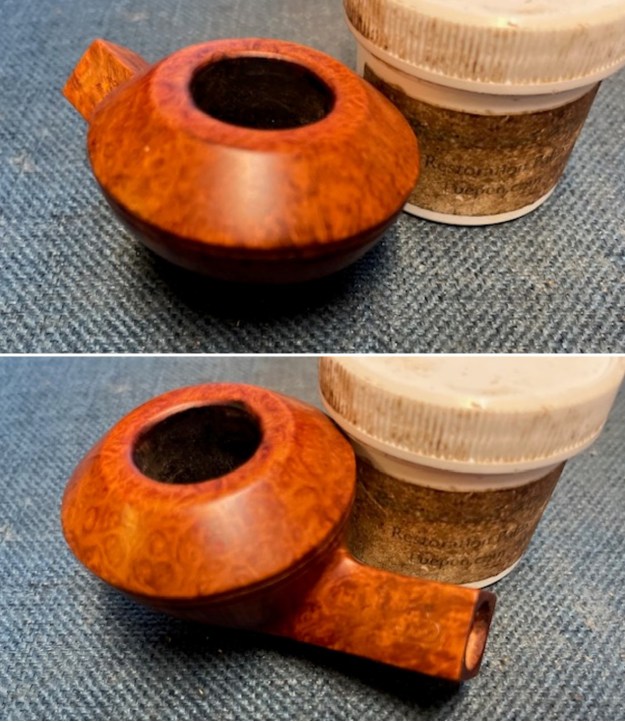
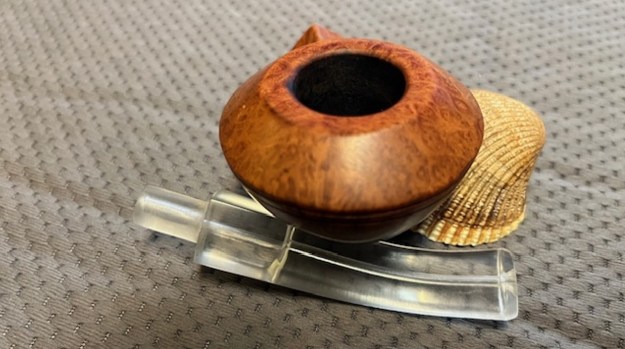
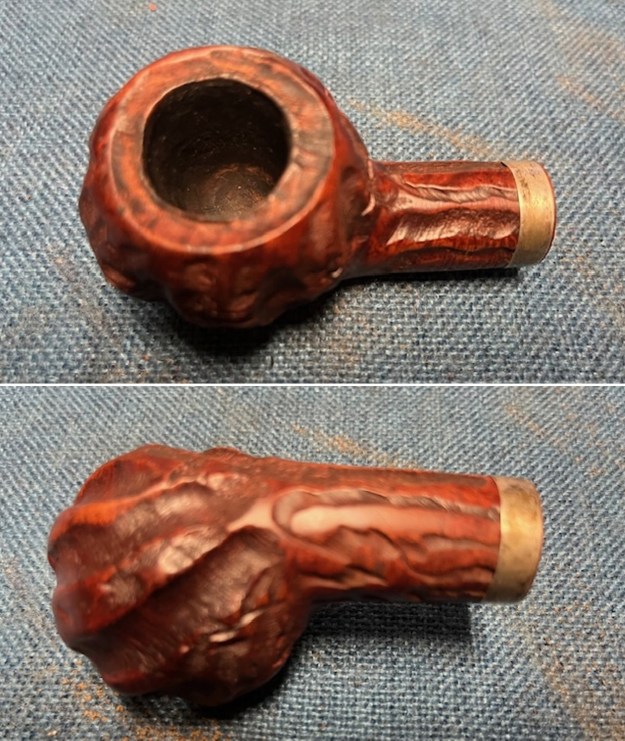
I was amazed at how clean and new the pipe looked when I took it out of the box. It is really a beautiful piece. Jeff had done a great cleanup on the pipe. He reamed the bowl with a PipNet pipe reamer and followed up with a Savinelli Fitsall pipe knife to remove the cake. He scrubbed out the mortise and the airway in the shank and the stem with alcohol, cotton swabs and pipe cleaners. He scrubbed the bowl exterior with a tooth brush and Murphy’s Oil Soap to remove the grime on the finish of the bowl and the lava from the rim top. He rinsed it under running water. One of the benefits of this scrub is that it also tends to lift some of the scratches and nicks in the surface of the briar. He dried it off with a soft cloth. We put the stem in our stem can. I took photos of the pipe bowl as I saw it when I put it on the table.
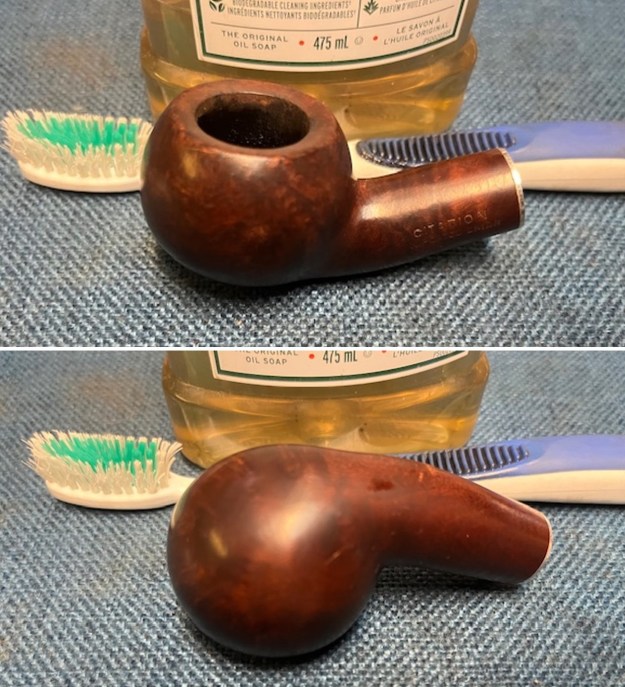
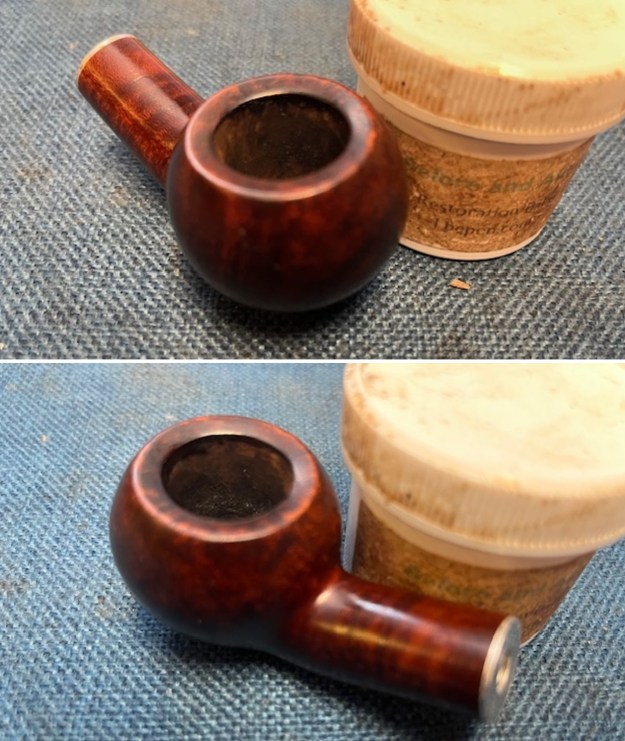
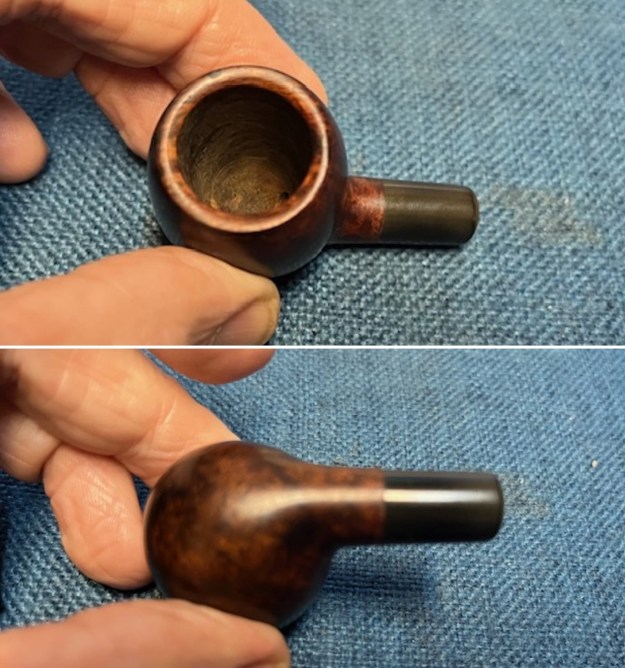
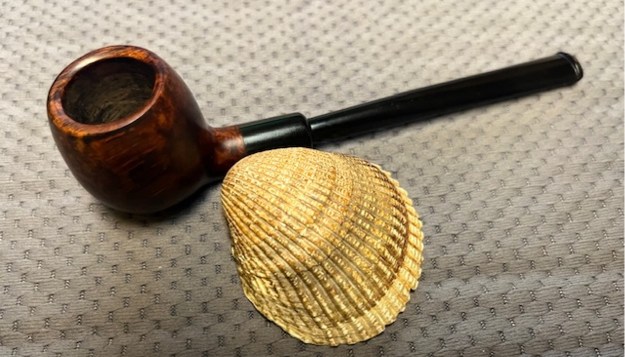
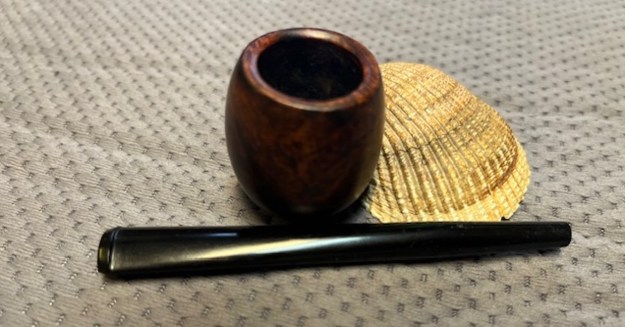
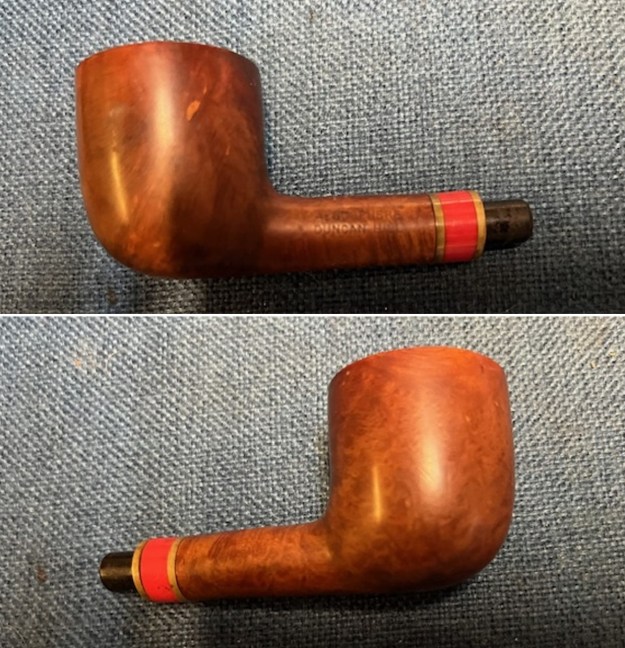
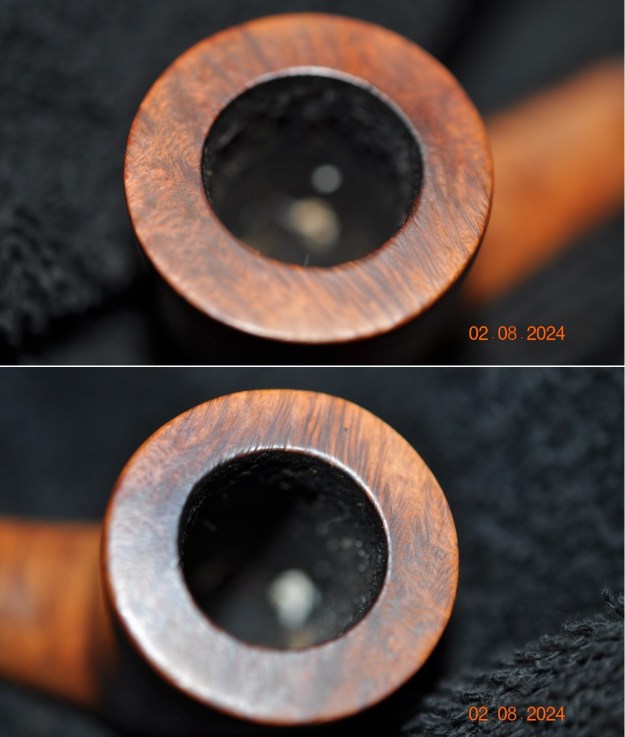
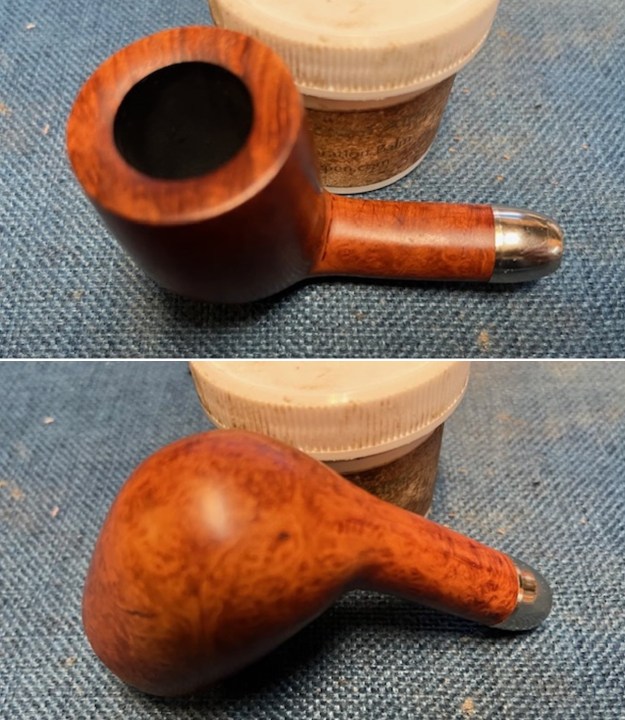
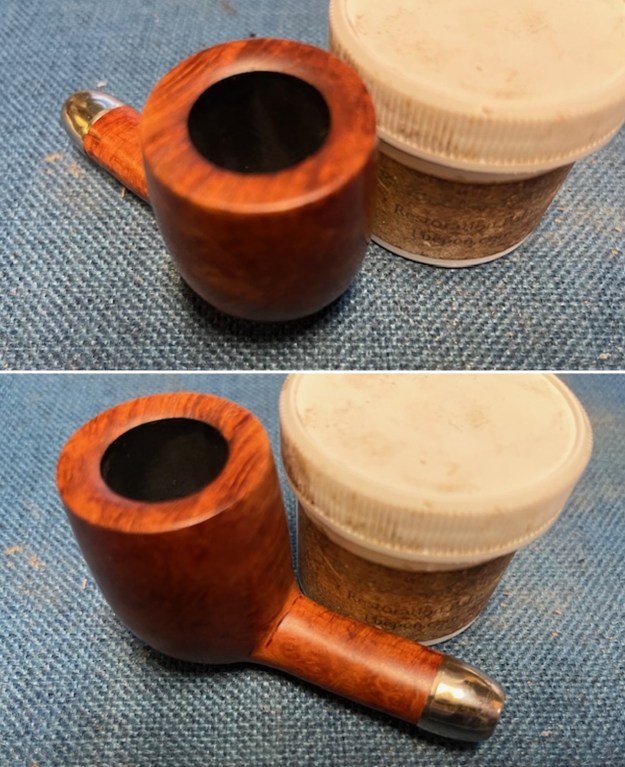
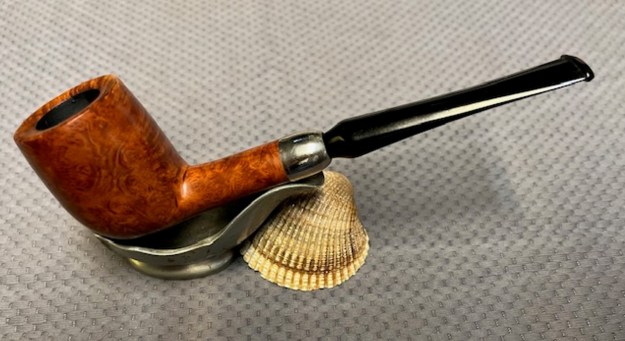
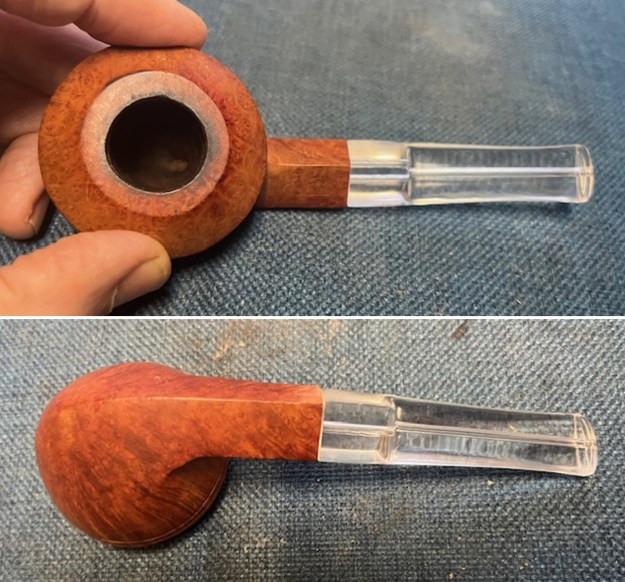
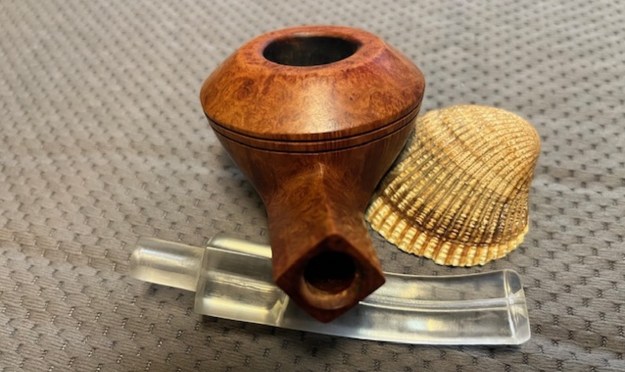
 I took photos of the rim top to show the condition. The rim top had some darkening on the top and outer edge but did not look deeply damaged. The inner edge of the bowl showed some damage and was slightly out of round.
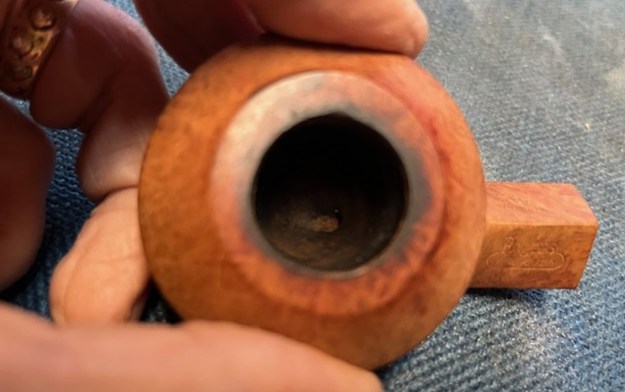 The stamping on the top left and right sides of the diamond shaped shank are clear and readable as noted above.
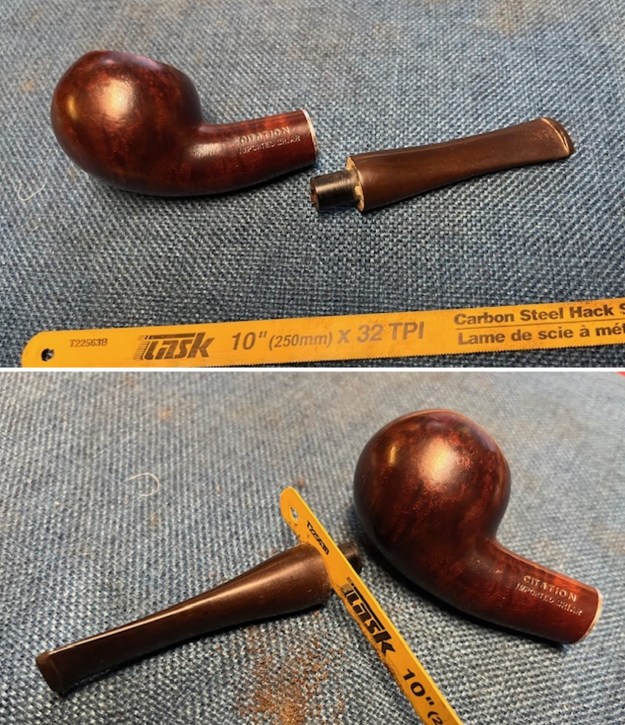
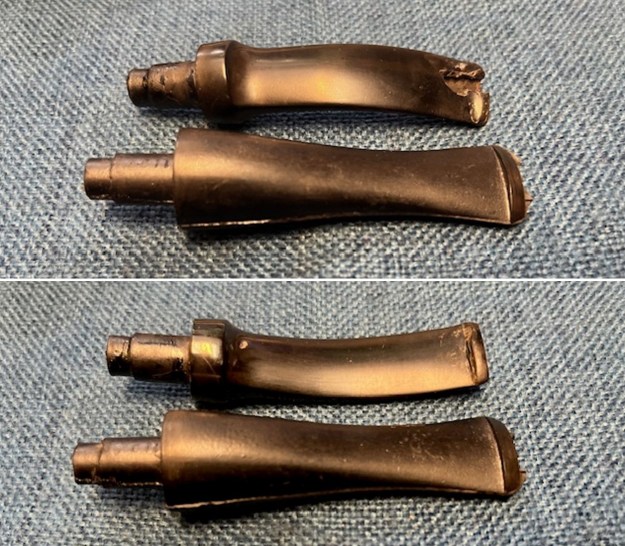
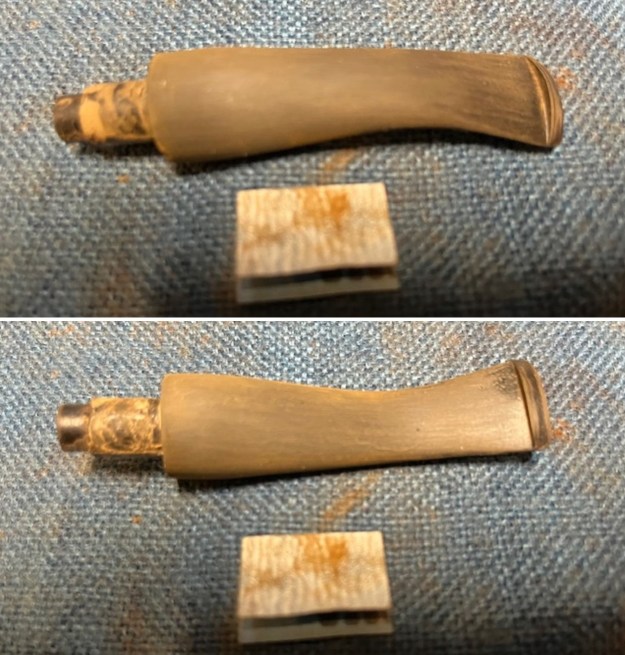
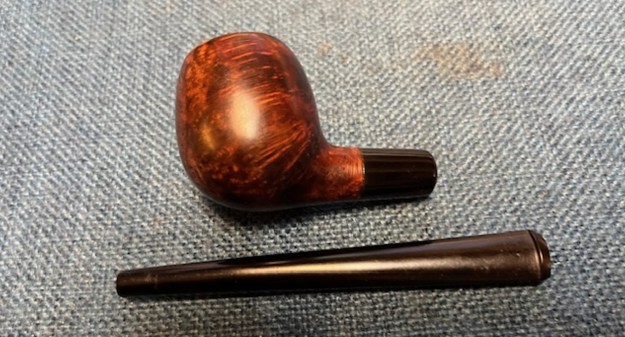
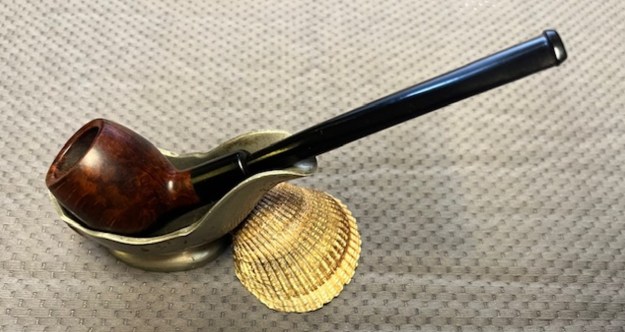
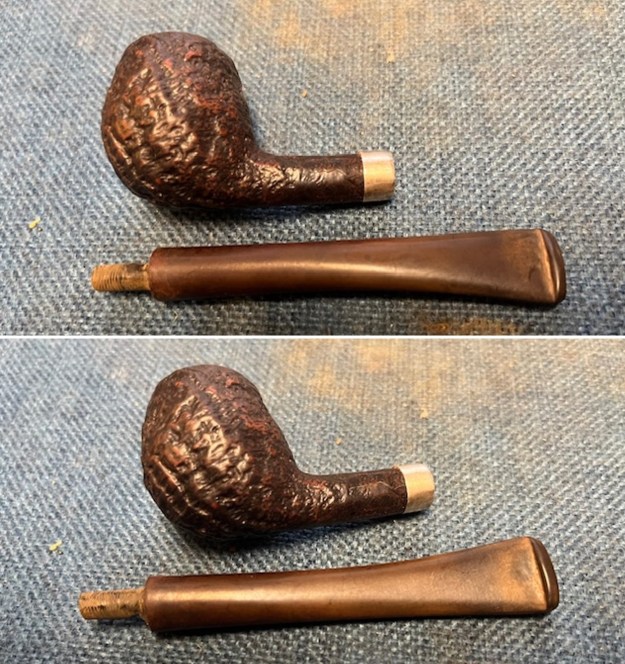
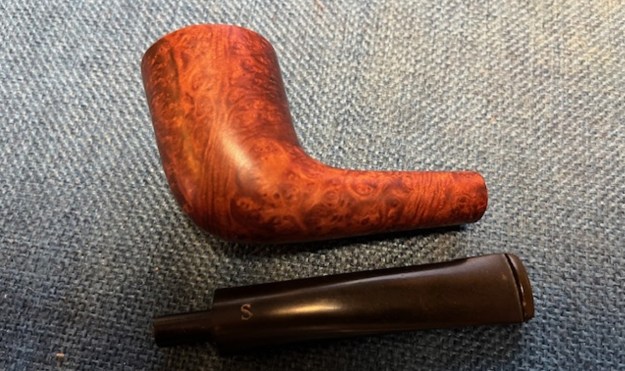
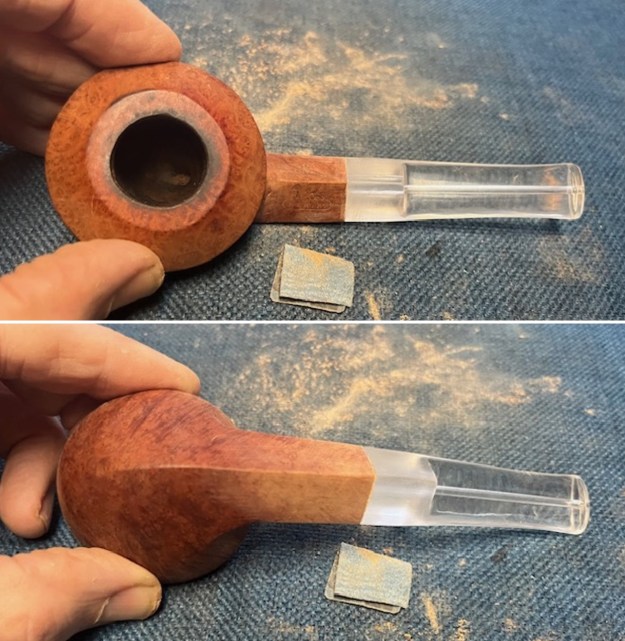
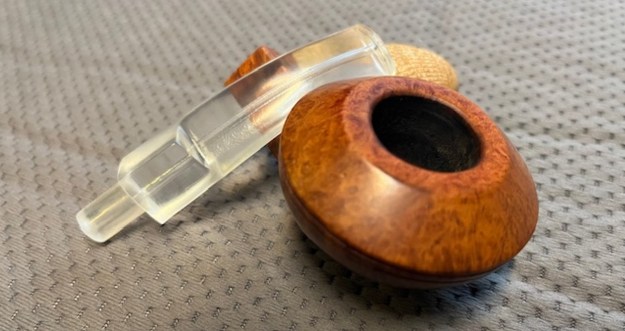
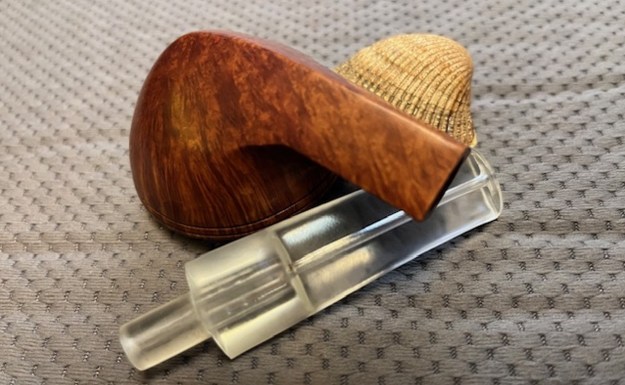
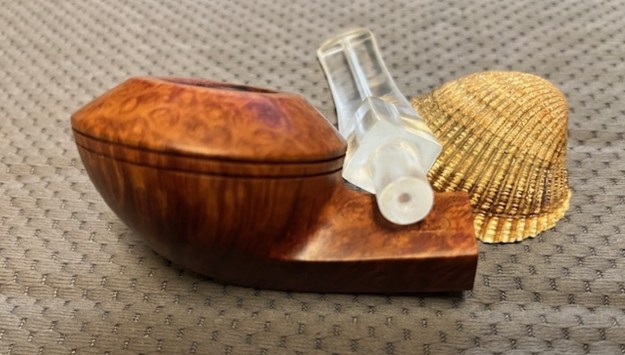
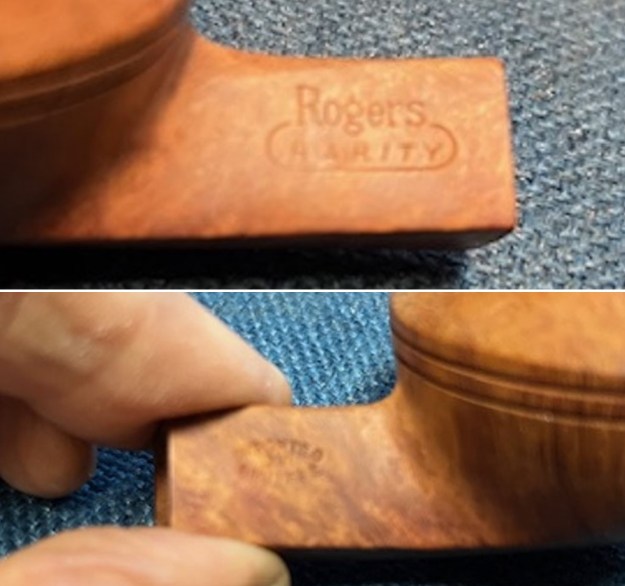 I started my work on this pipe by fitting a new stem to the shank. Once I had that done I would move on to cleaning up the bowl. I had a stem picked out that was a clear/Perspex style acrylic that would look great on this pipe.
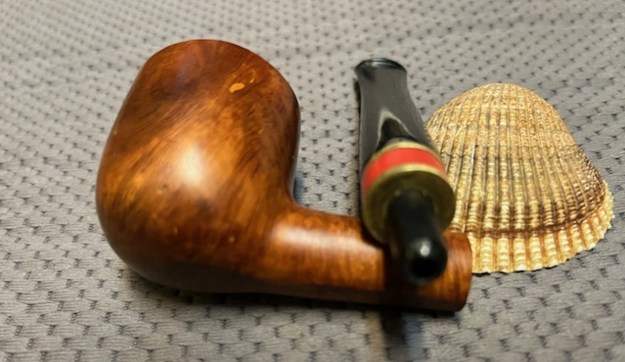
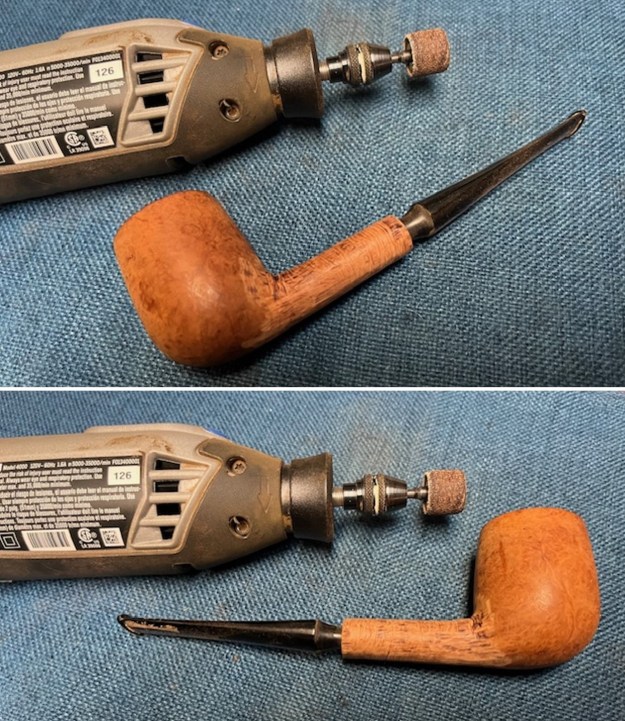
 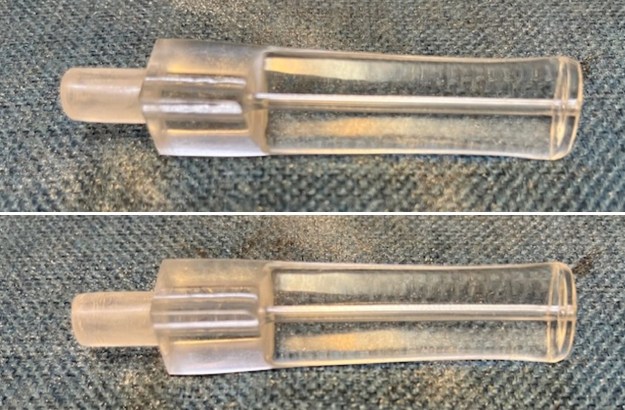 I first adjusted the fit of the tenon to the shank with my Dremel, files and sandpaper. Once I had a fit I took some photos. I think the stem would work very well with this pipe.
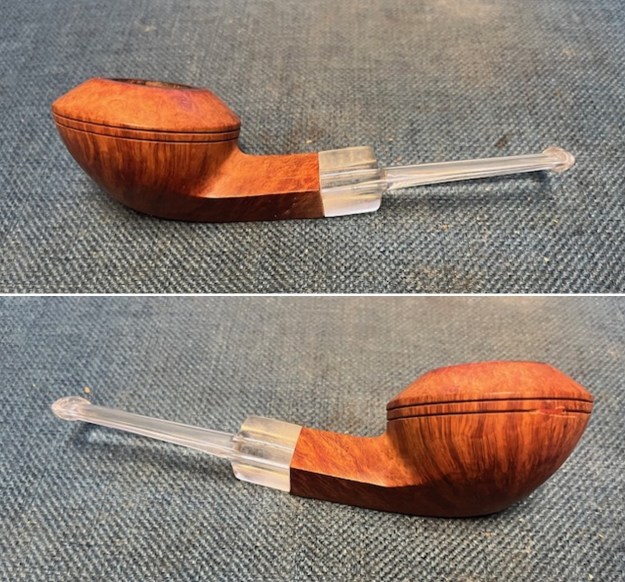
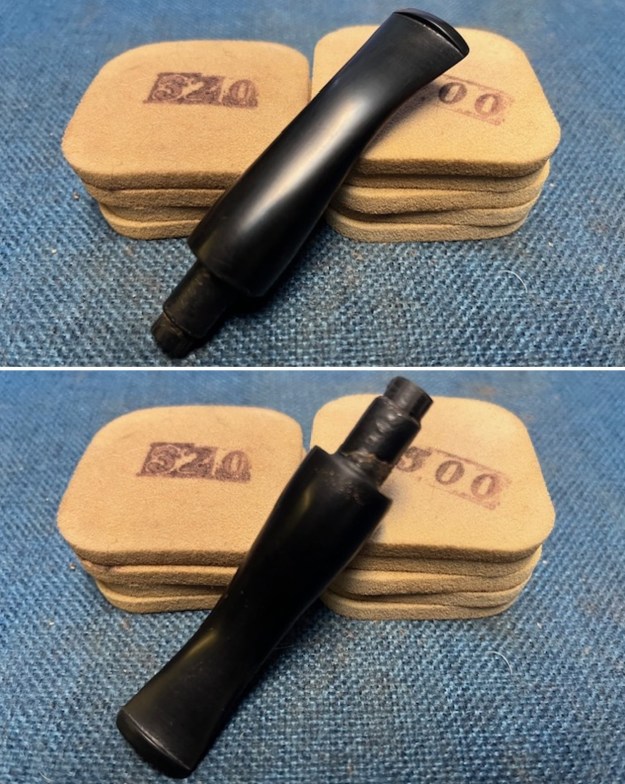
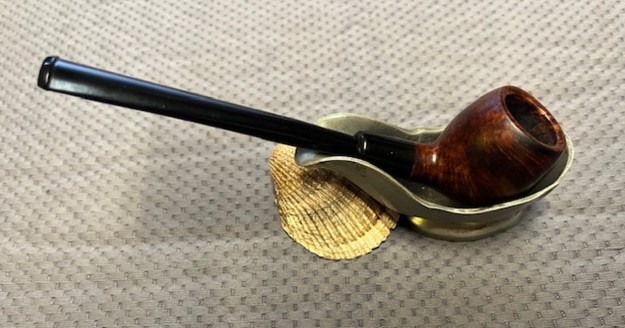
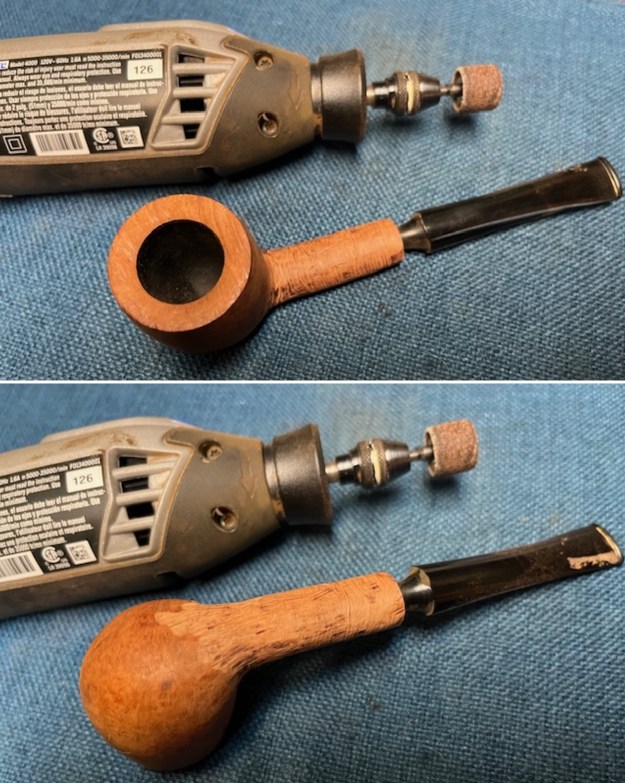
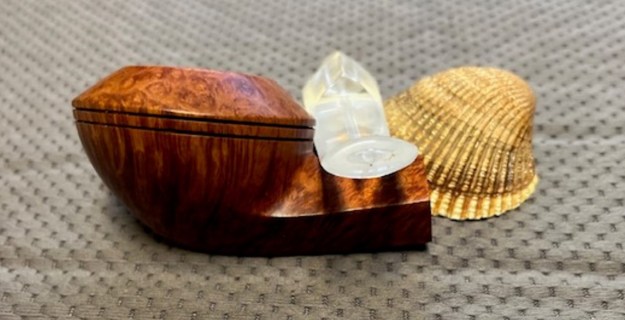
 As is usual with pipes the shank was not a true diamond and I needed to adjust the facets of the diamond shank to properly match those of the shank. I did this by hand using a folded piece of 220 grit sandpaper. I was fortunate that the top facets lined up well so I could avoid the stamping on them.
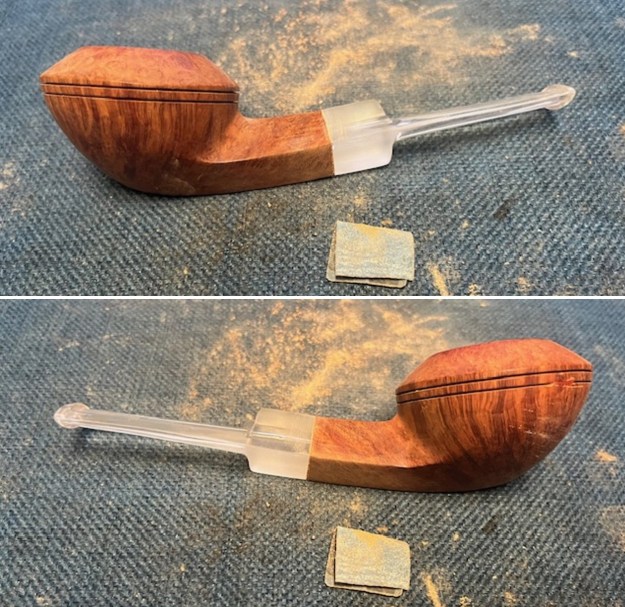
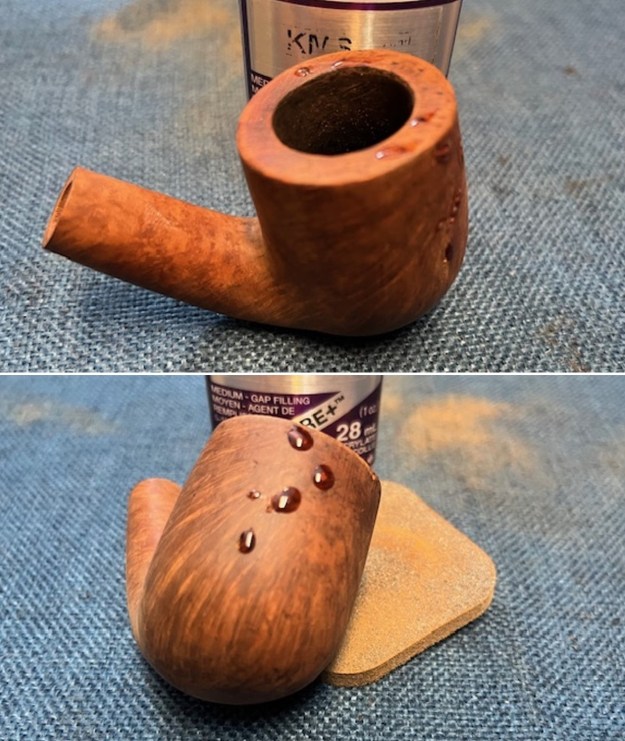
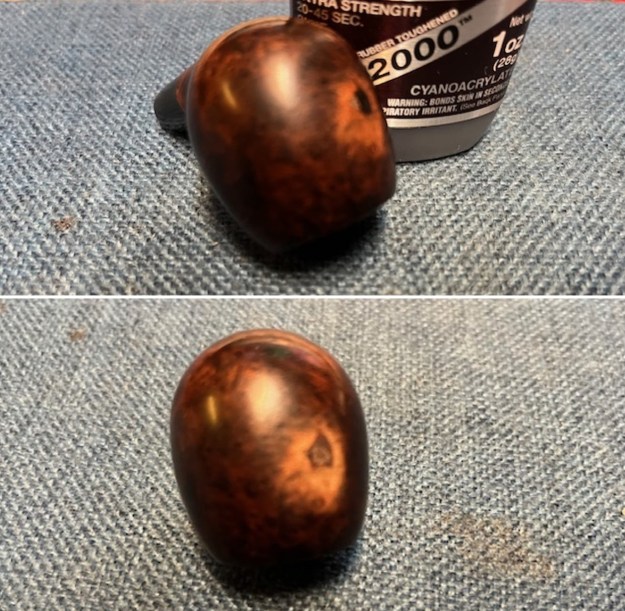
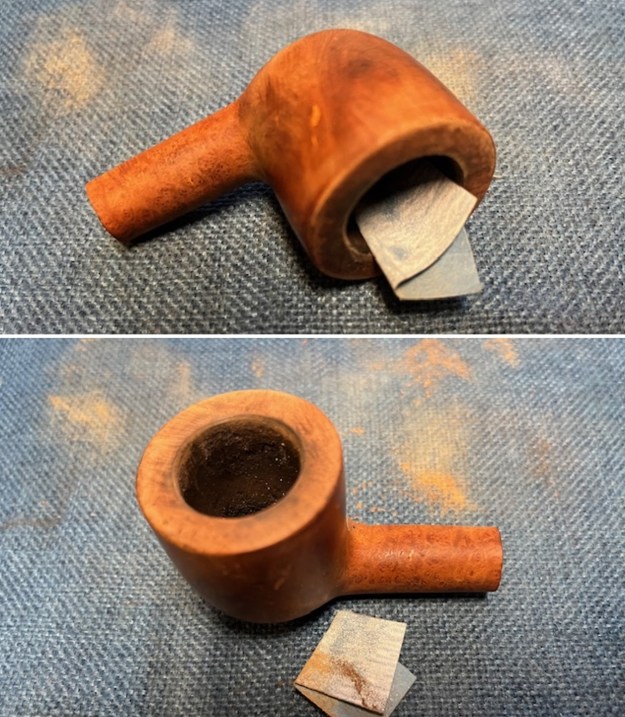
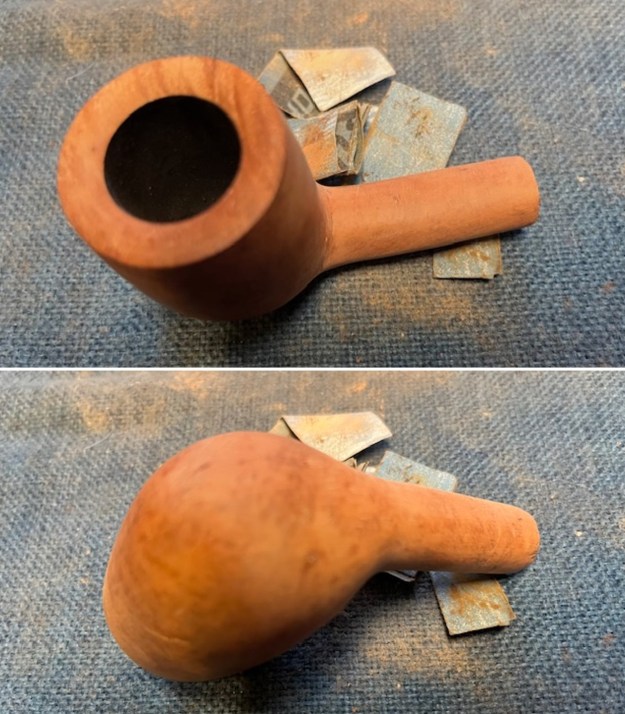
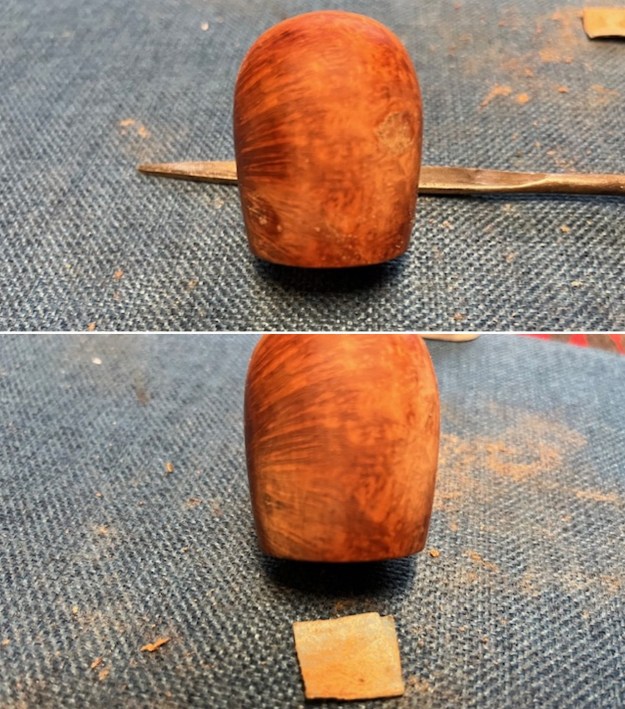
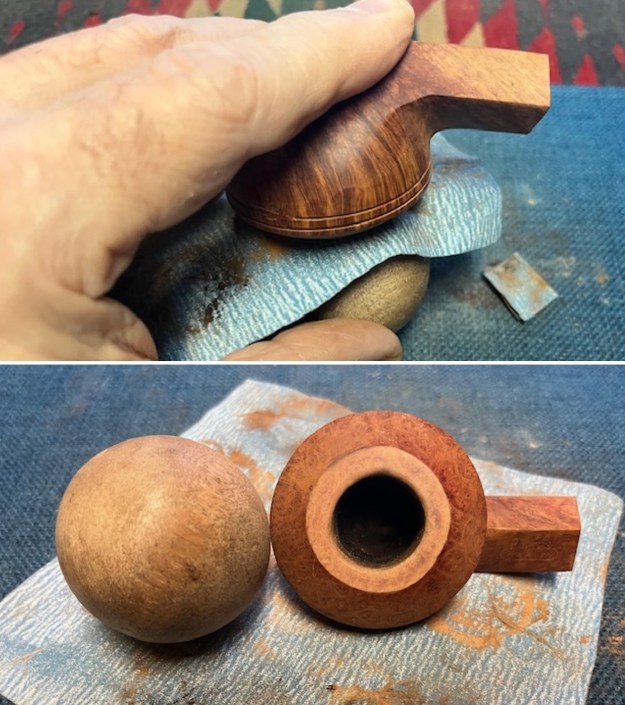
 I set the stem aside and dealt with the damage to the inner edge of the bowl. I used a folded piece of 220 grit sandpaper to smooth out the inner edge and give it form once again. It worked quite well. Then I used a wooden sphere and a piece of 220 grit sandpaper to lightly bevel the inner edge of the rim to remove the burn damage. The result was actually quite good.
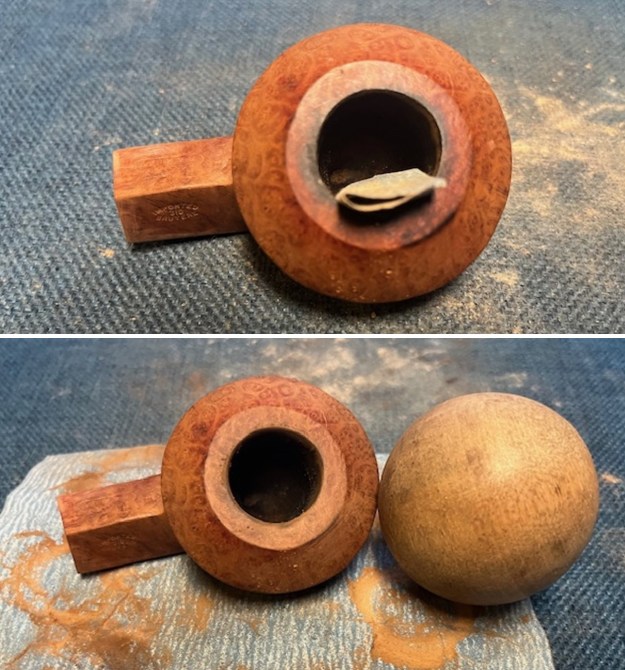
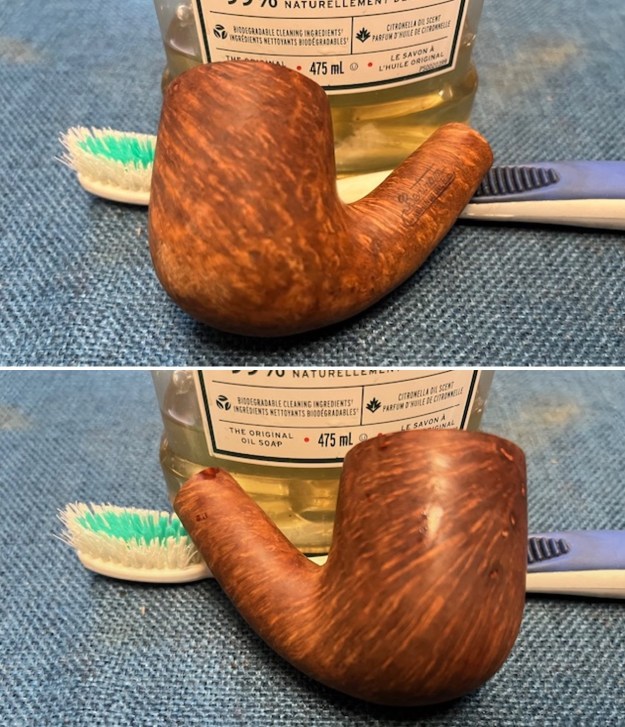
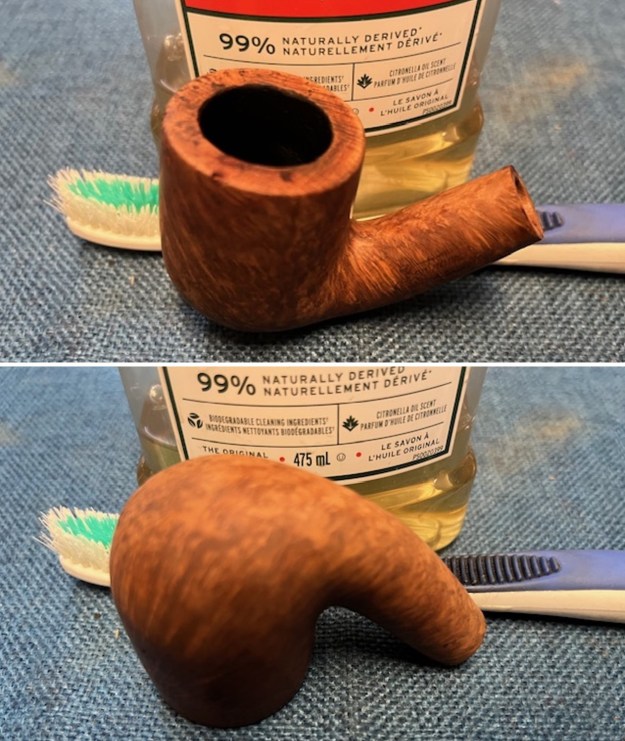
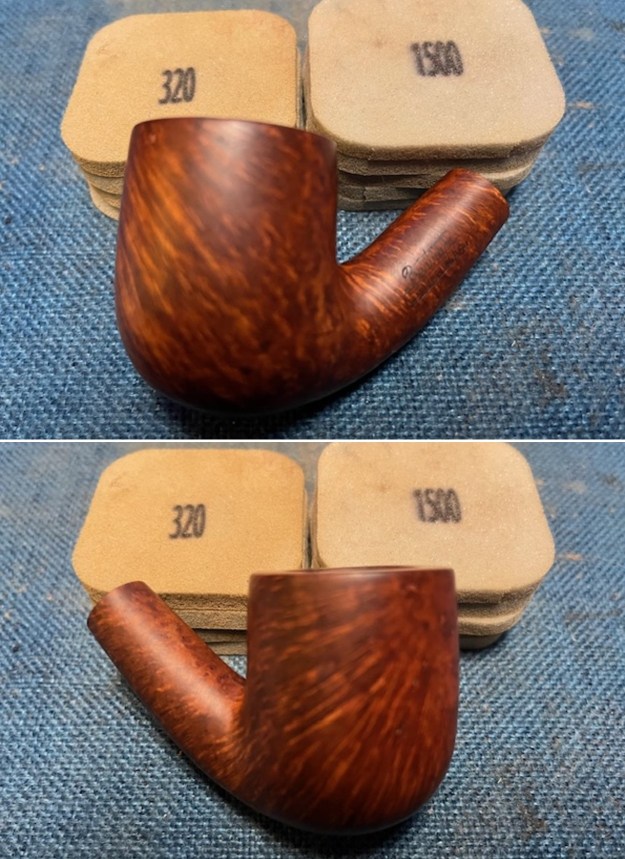
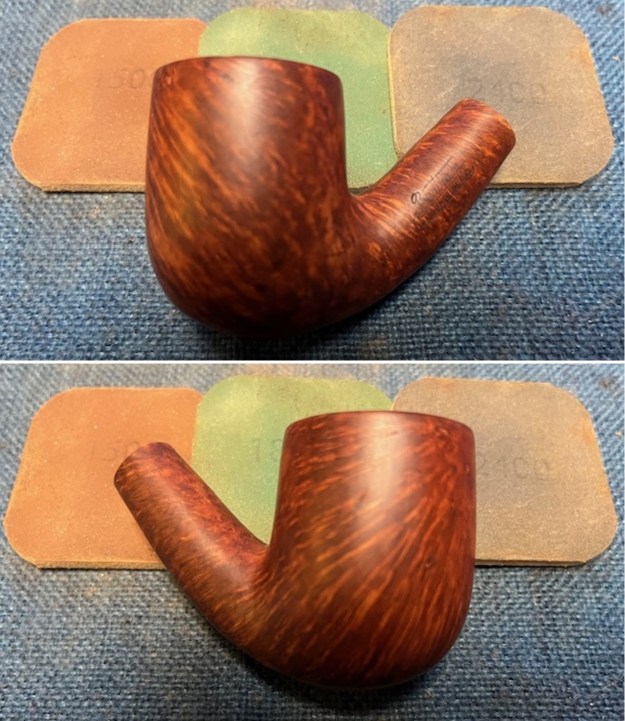
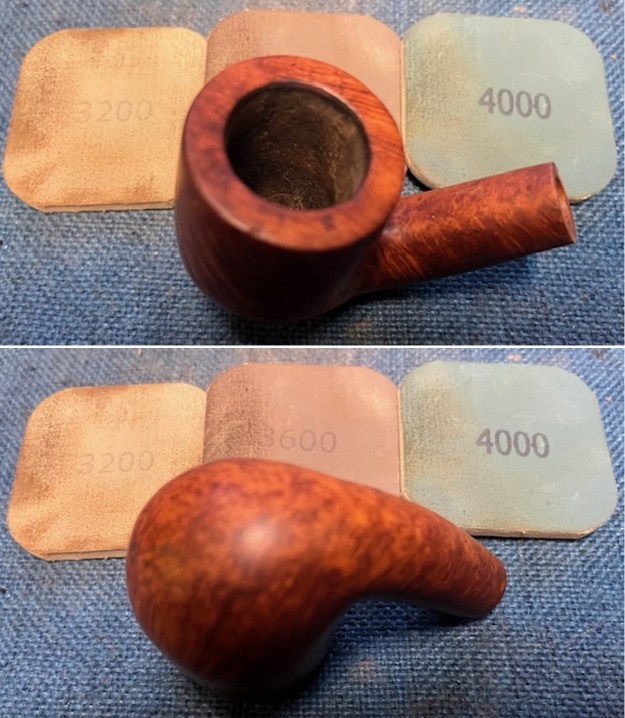
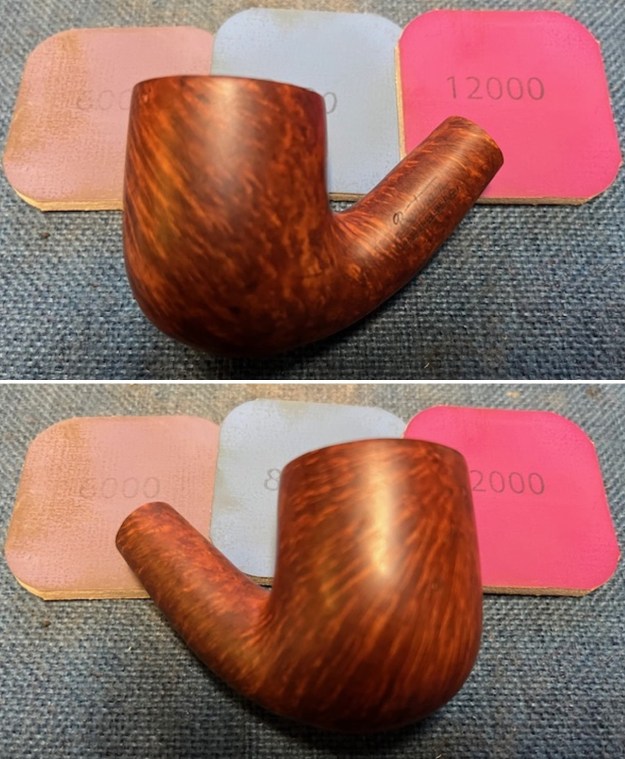
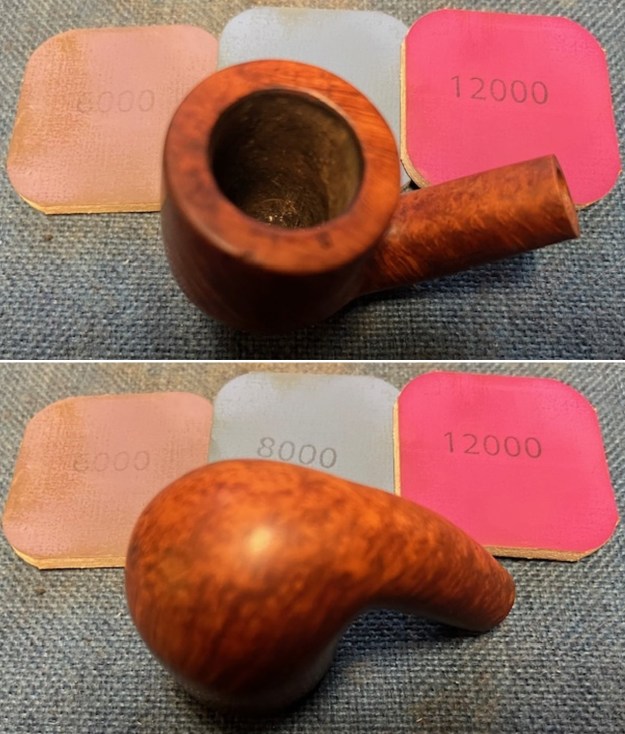
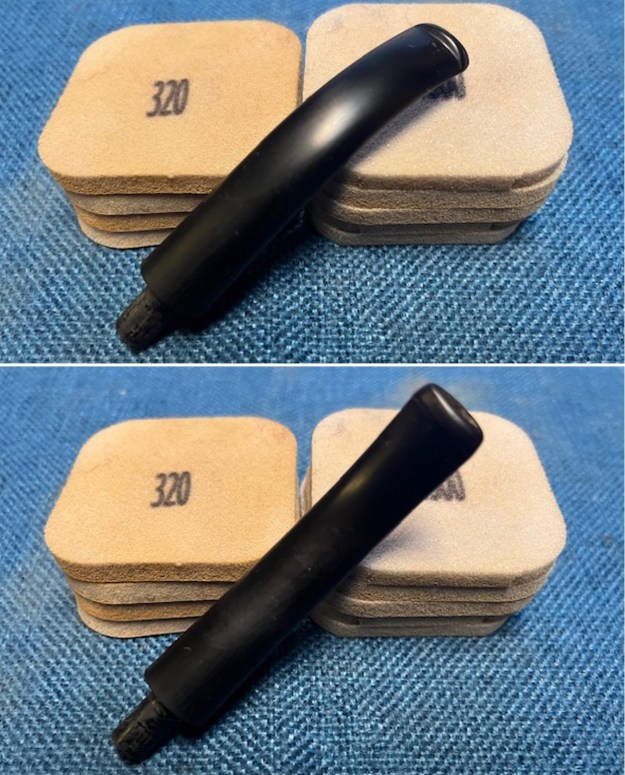
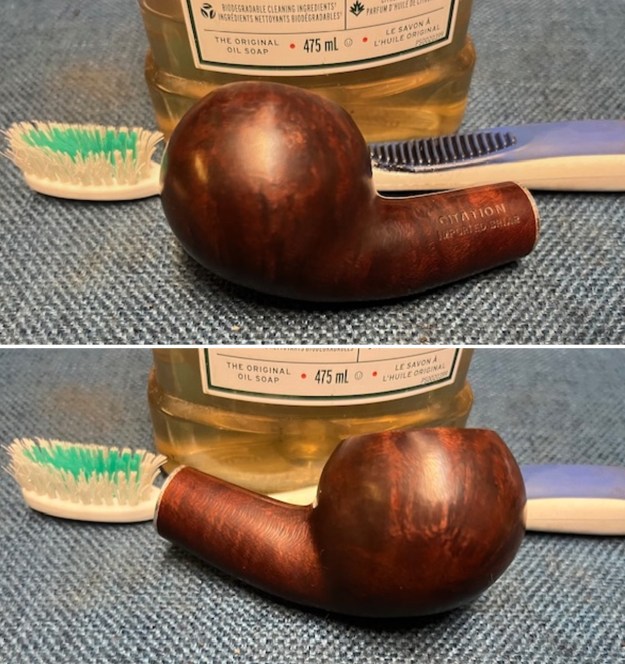
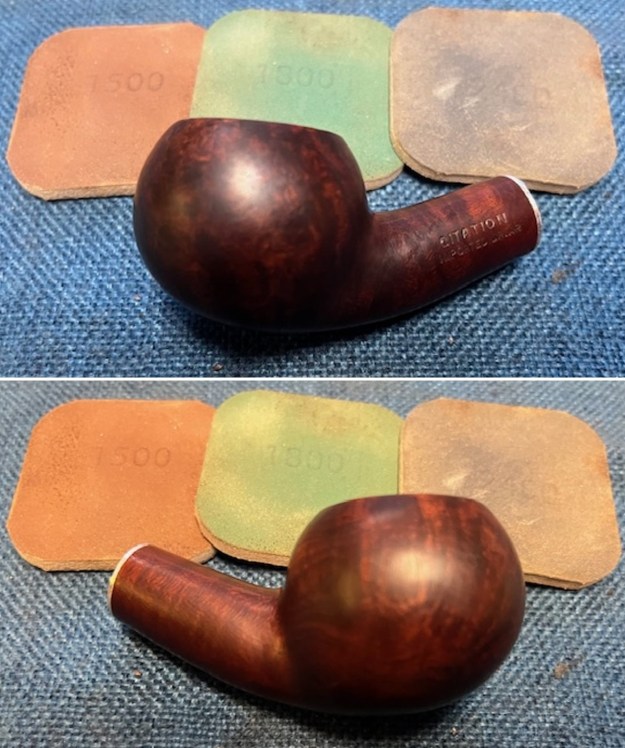
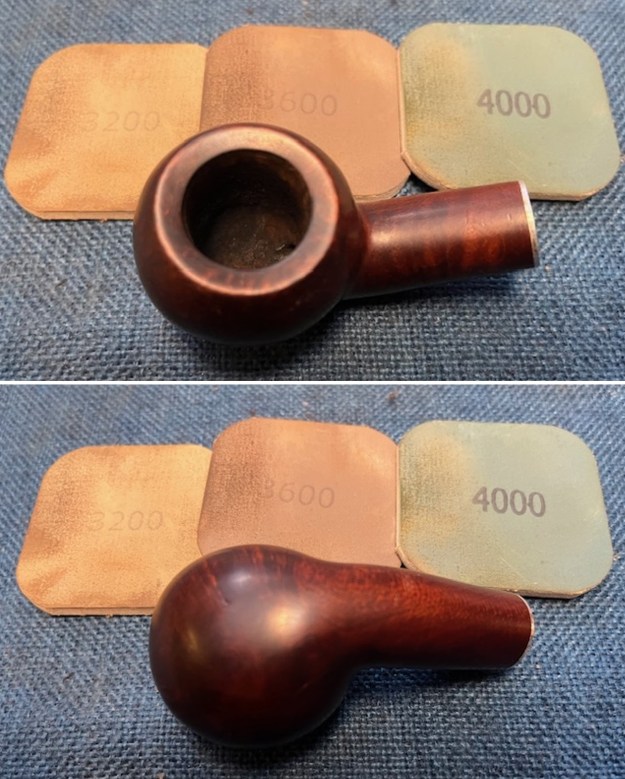
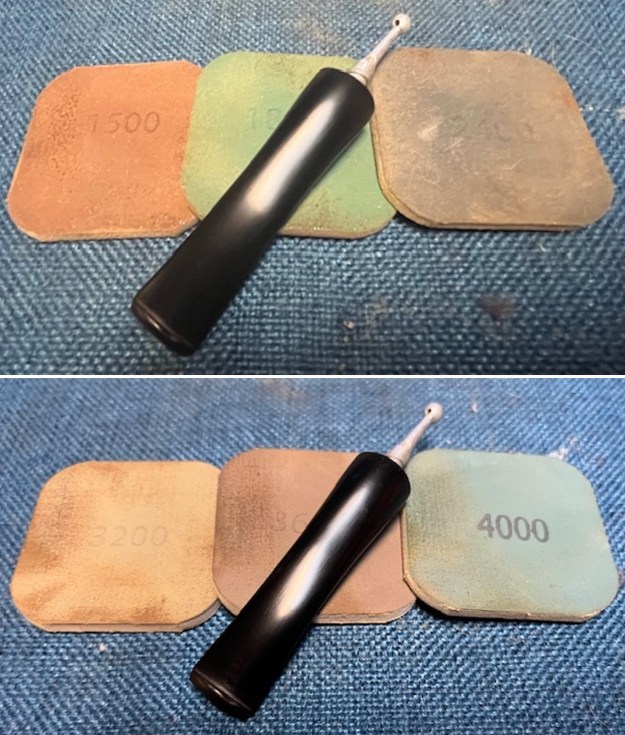
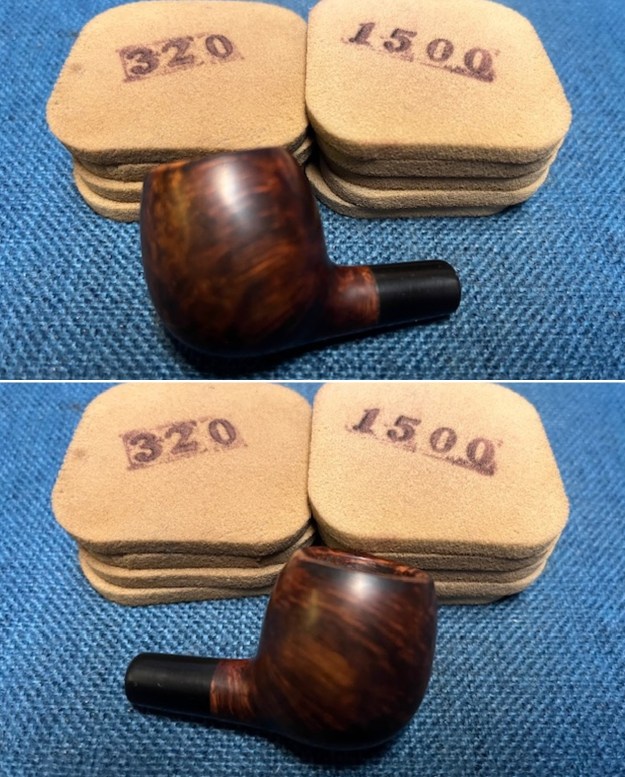
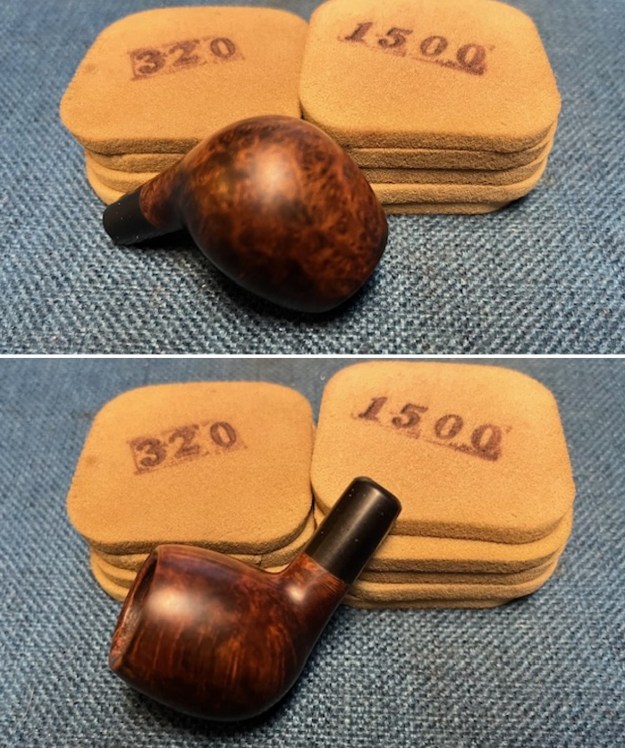
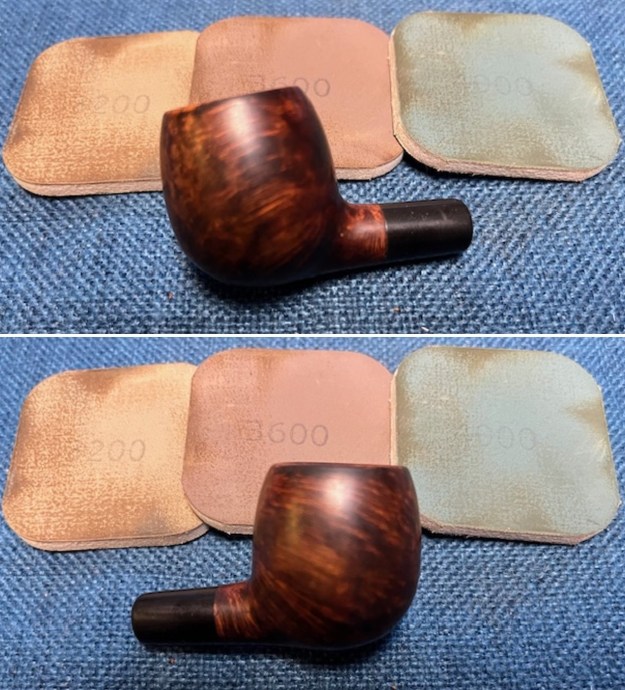
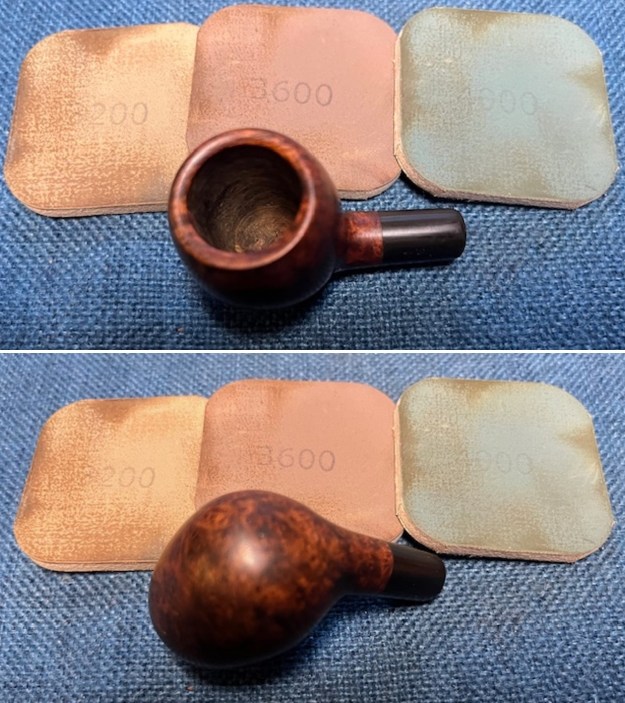
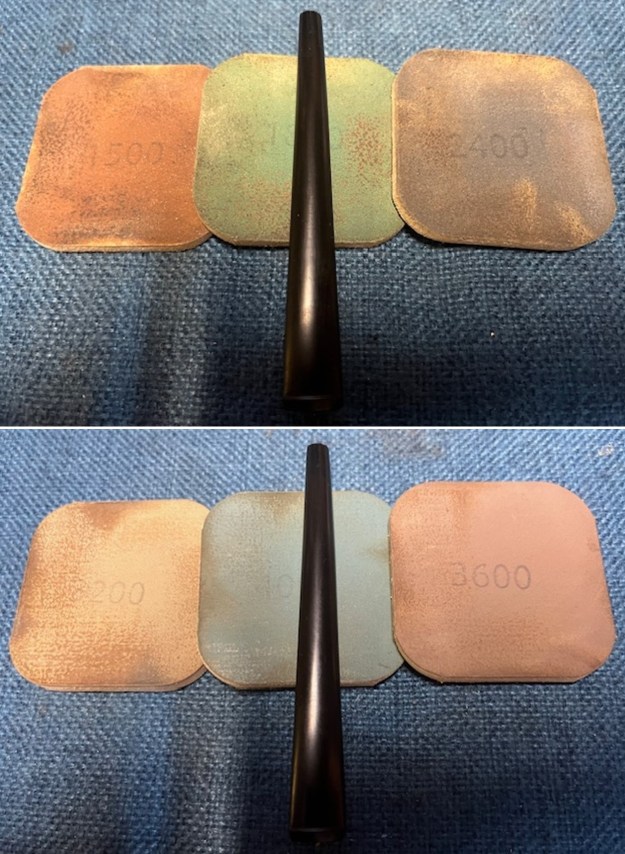
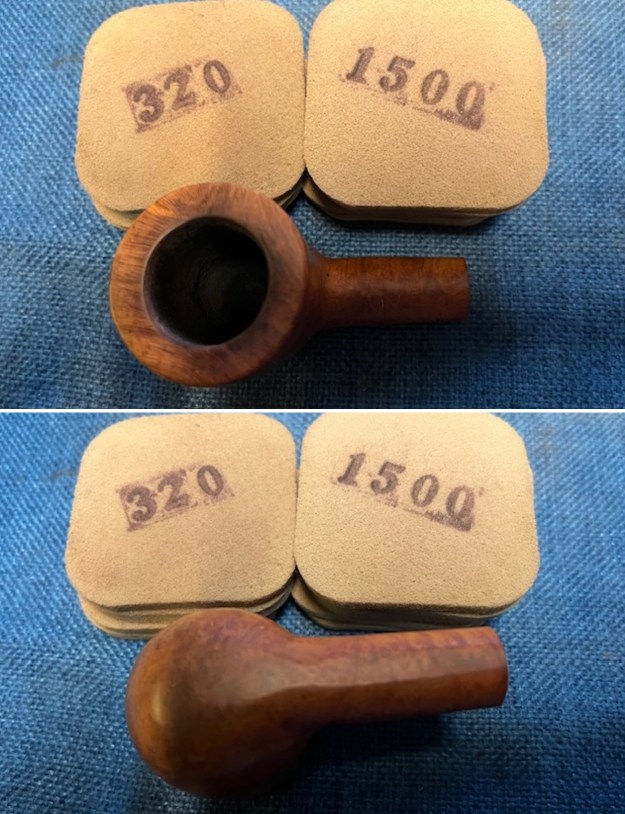
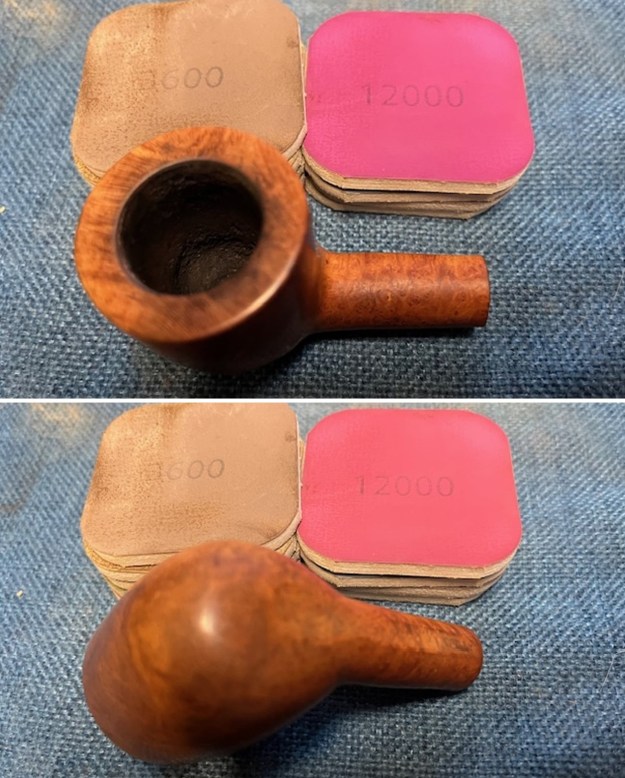
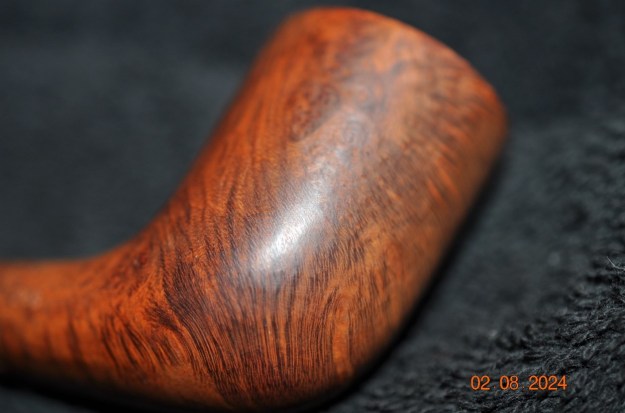
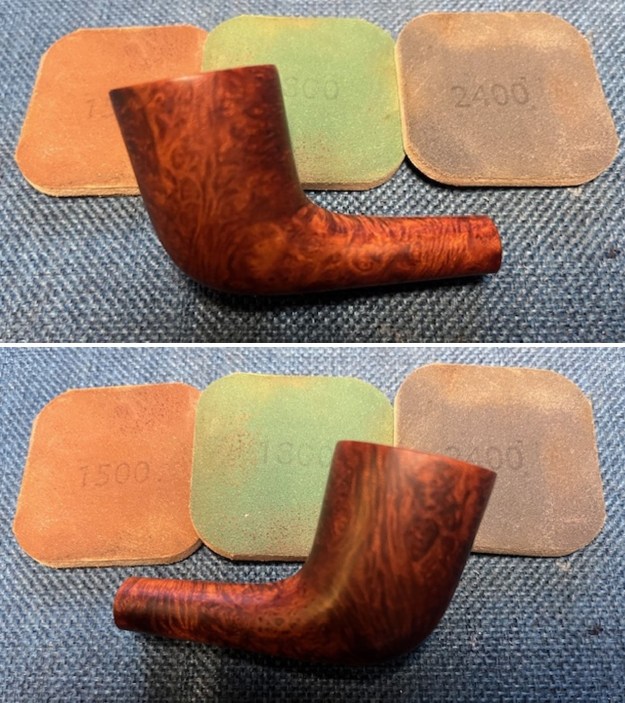
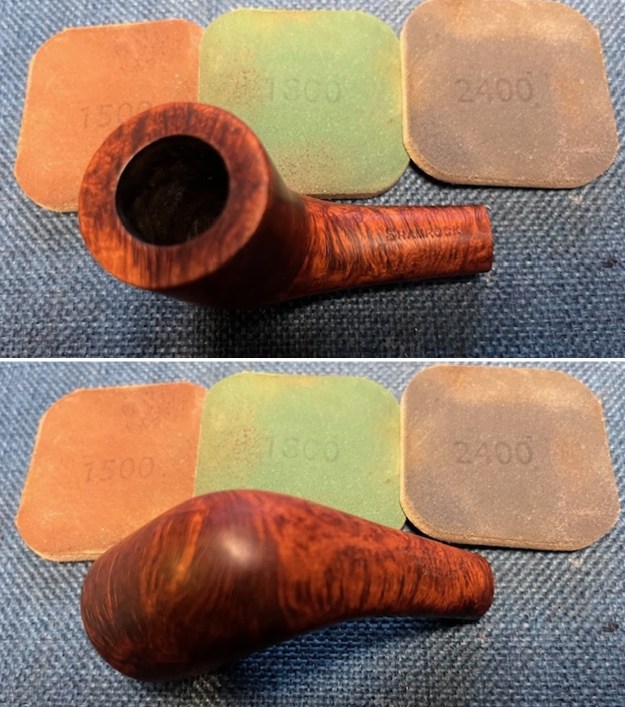
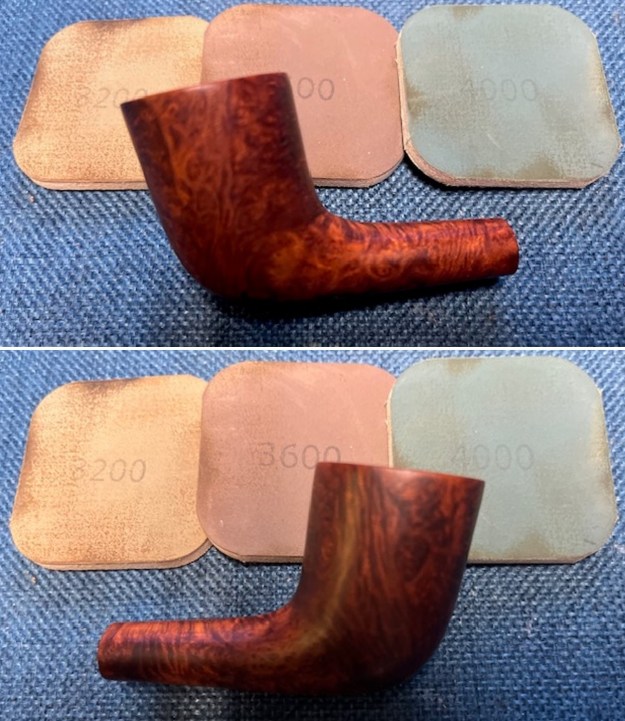
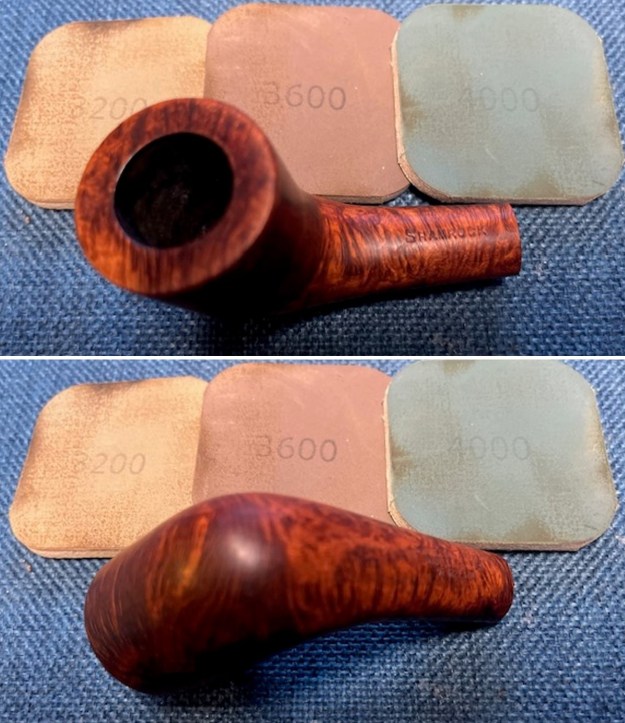
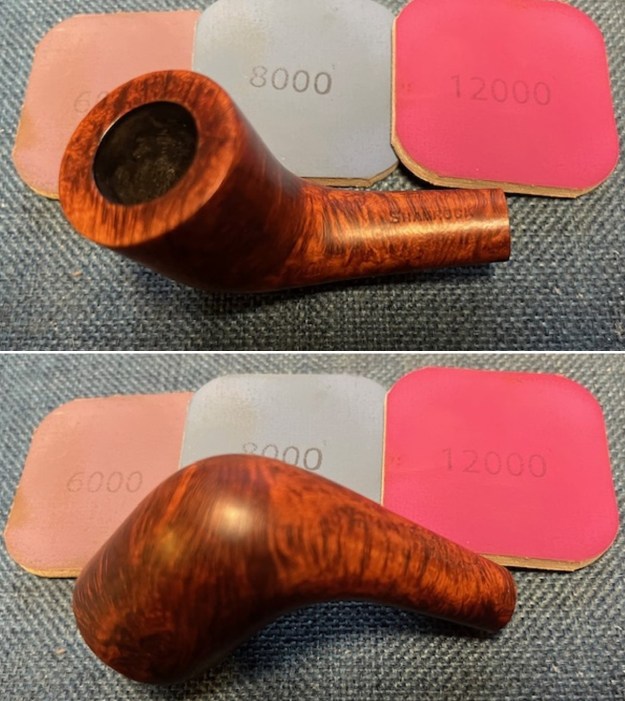
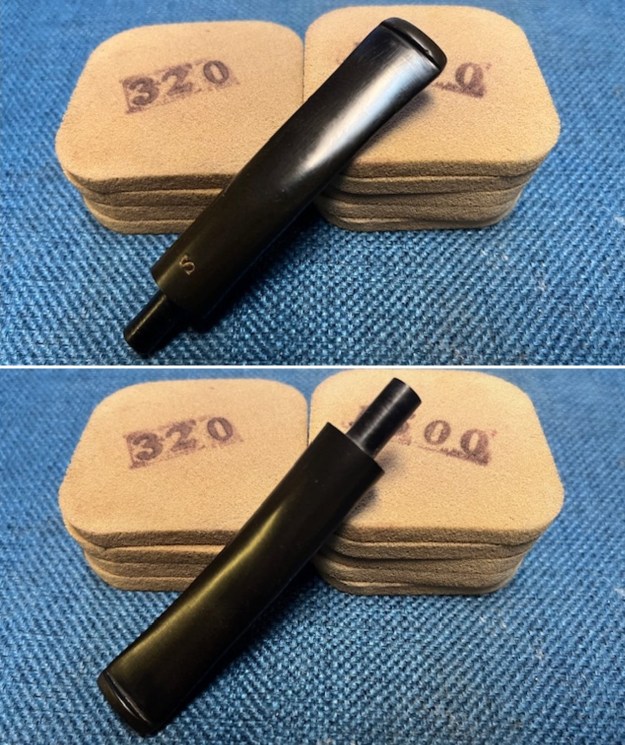
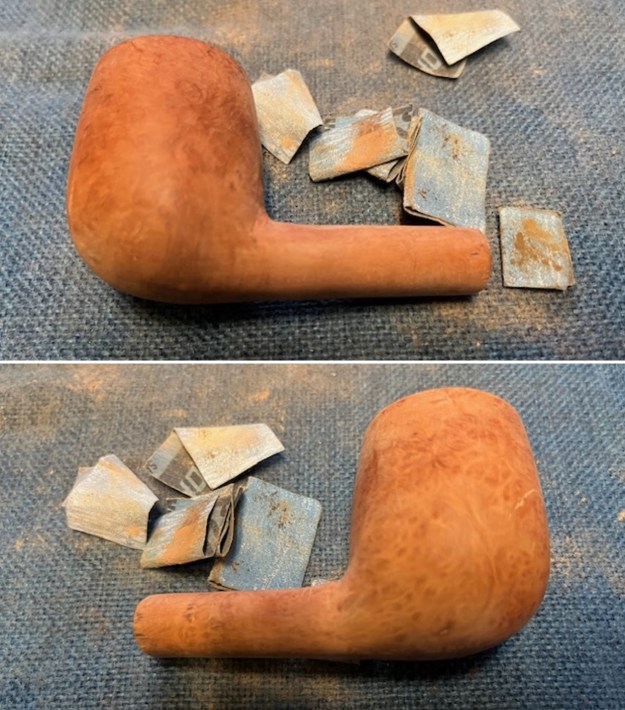
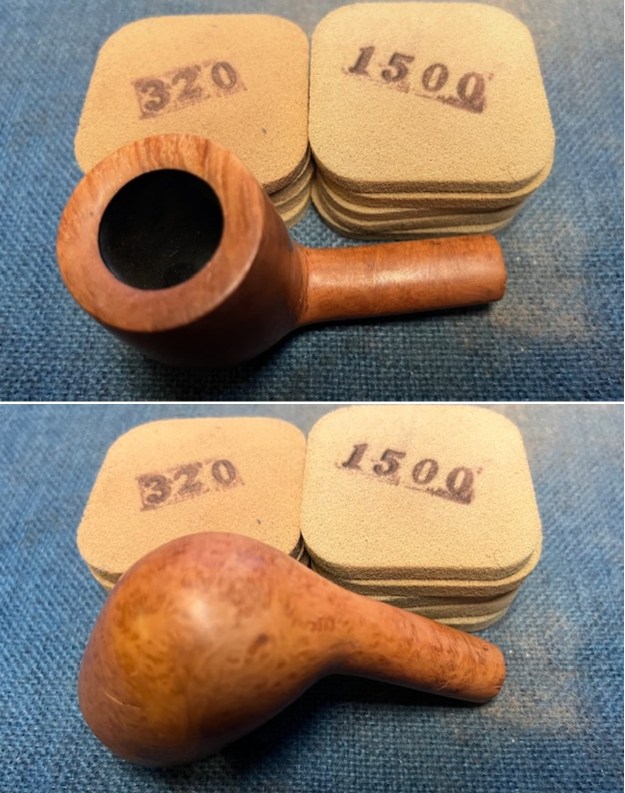
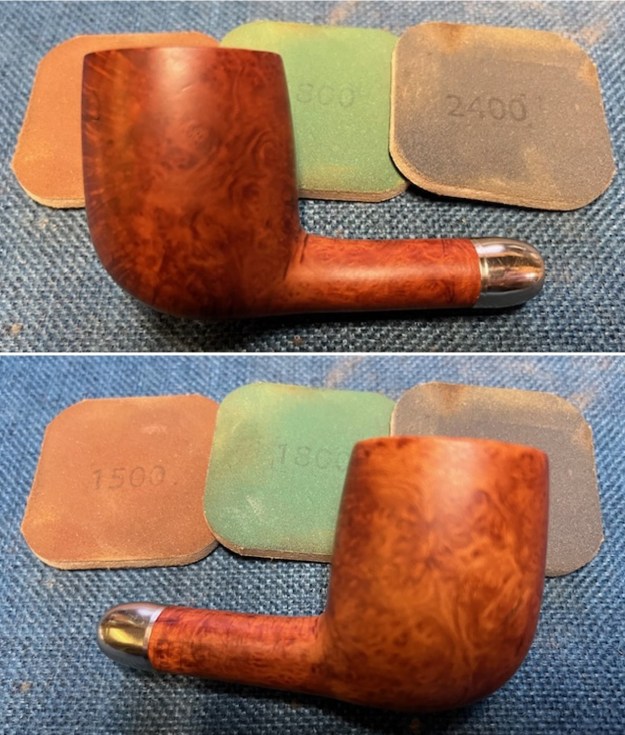
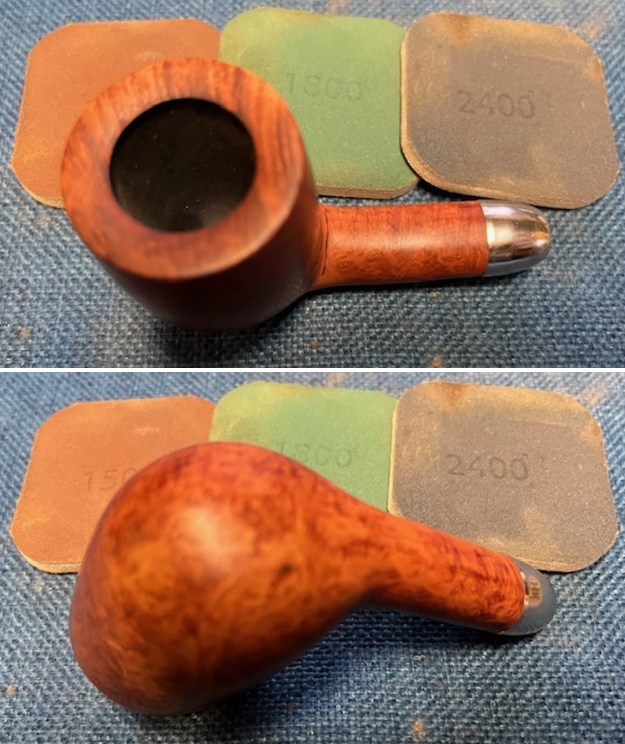
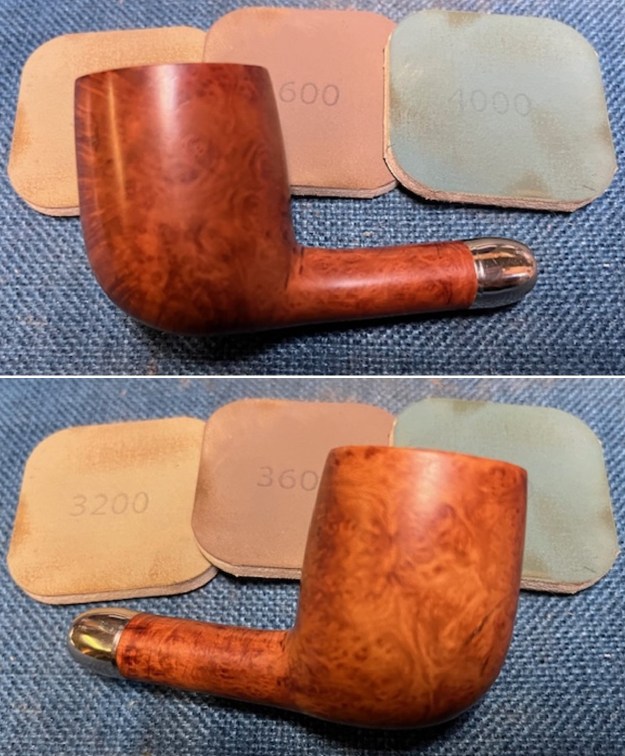
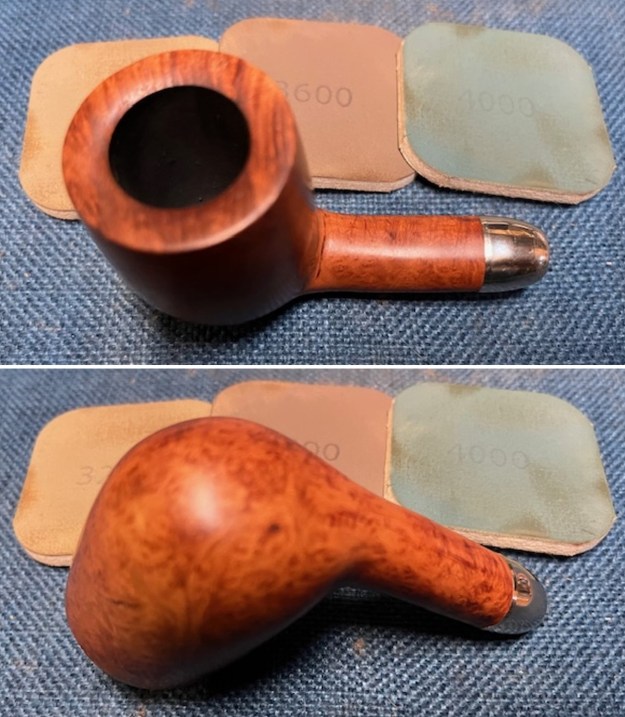
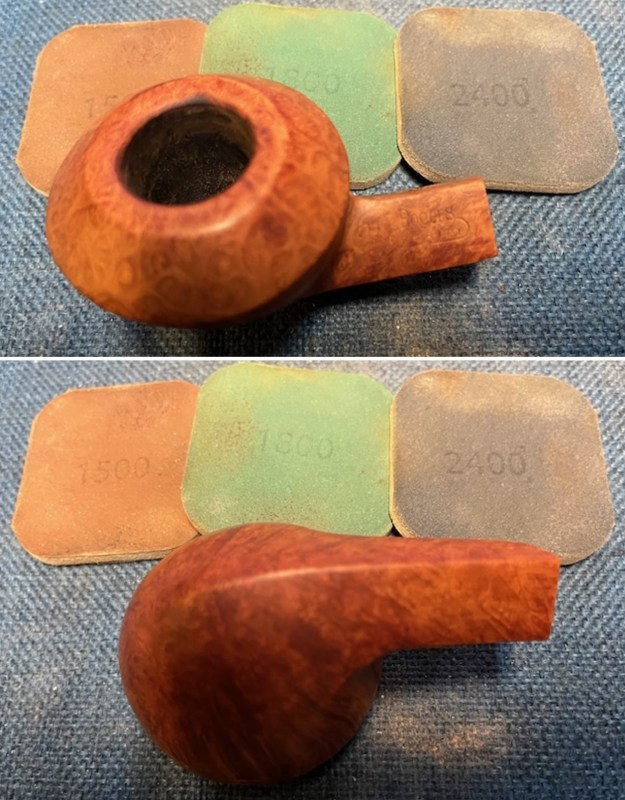
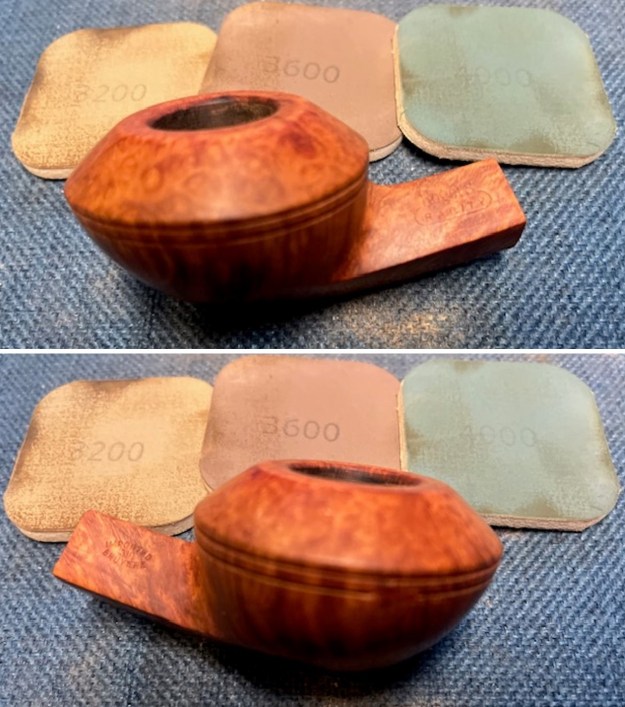
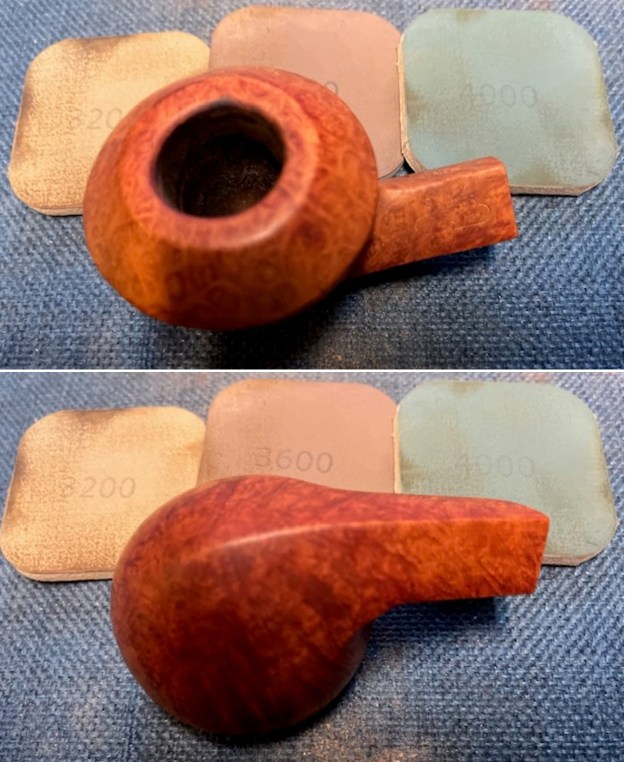
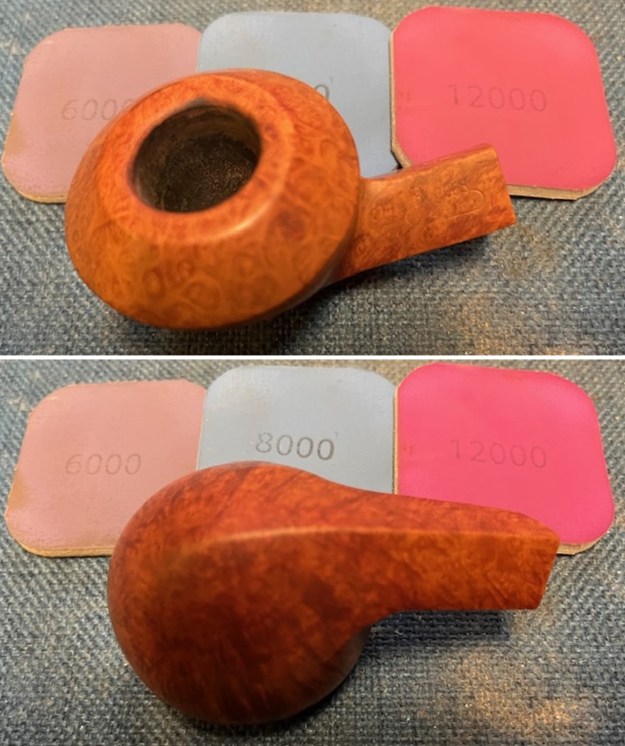
 I sanded the bowl with 320-3500 grit sanding pads. I worked over the rim top, bowl sides, shank (carefully avoiding the stamping). I wiped it down with a damp cloth after each sanding pad. The briar began to look very good and the grain richly shone.
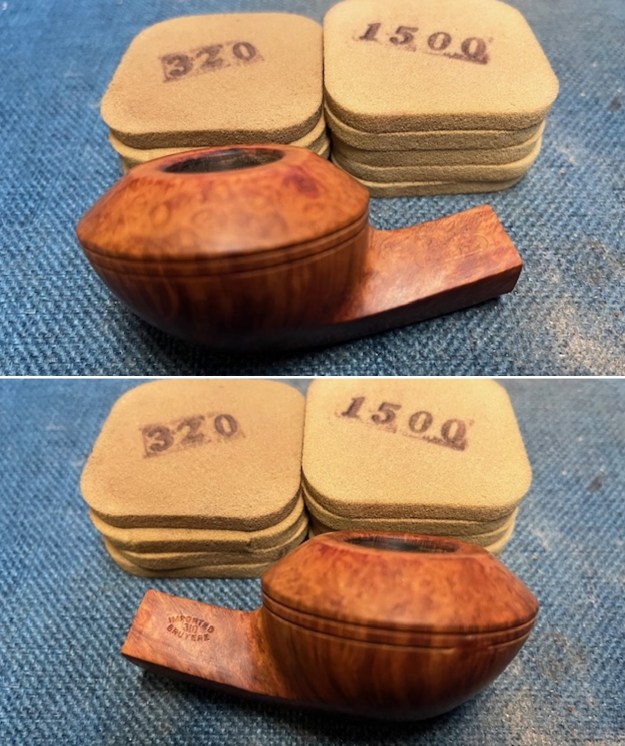
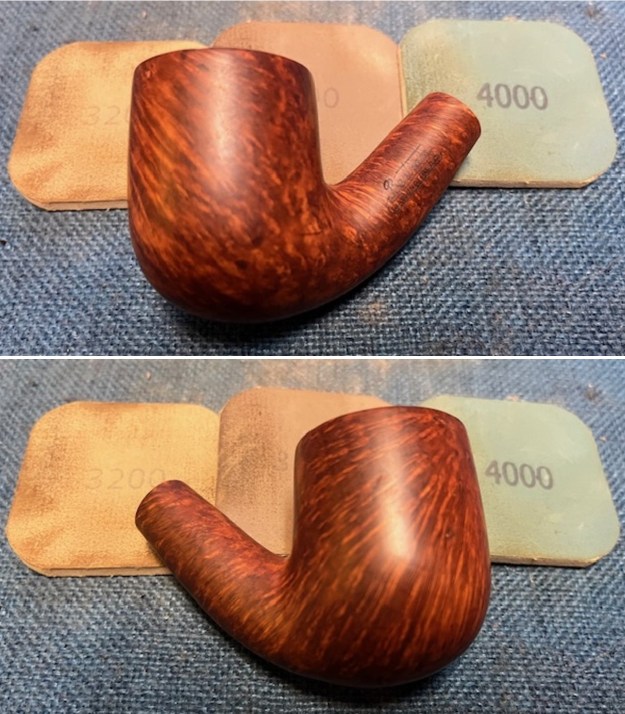
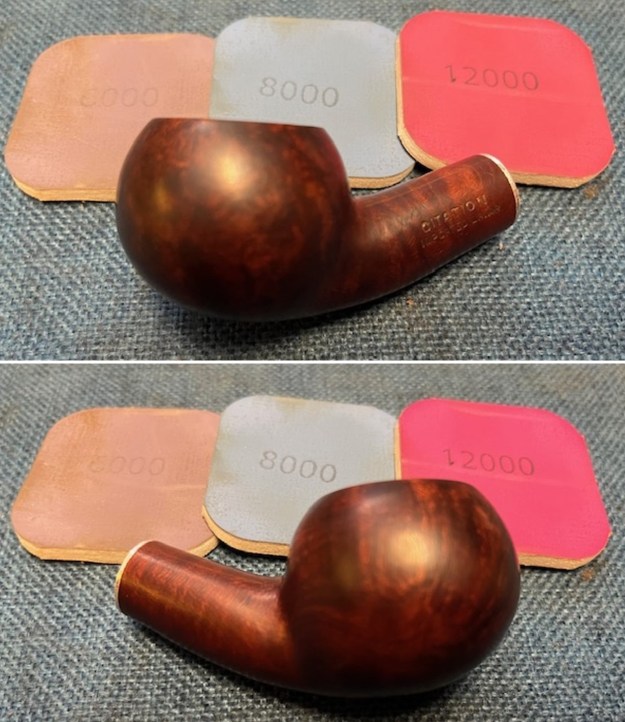
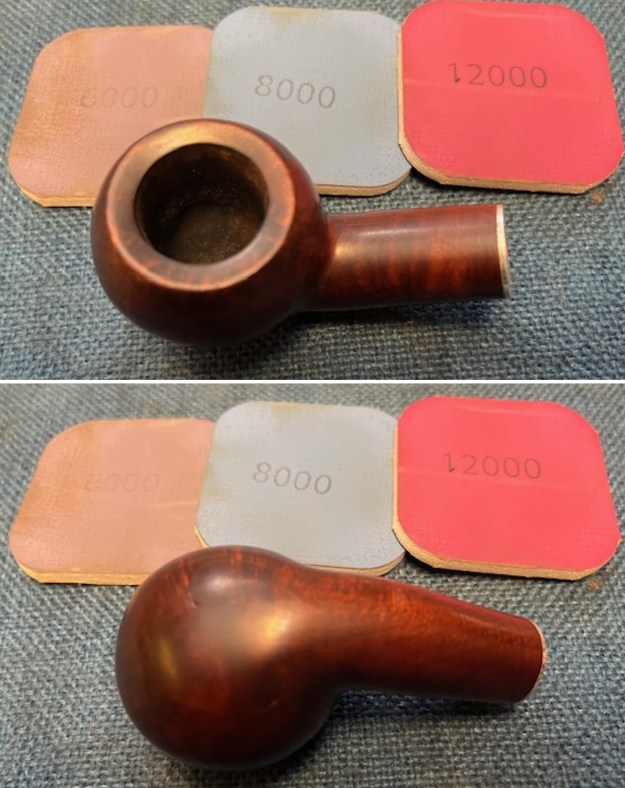
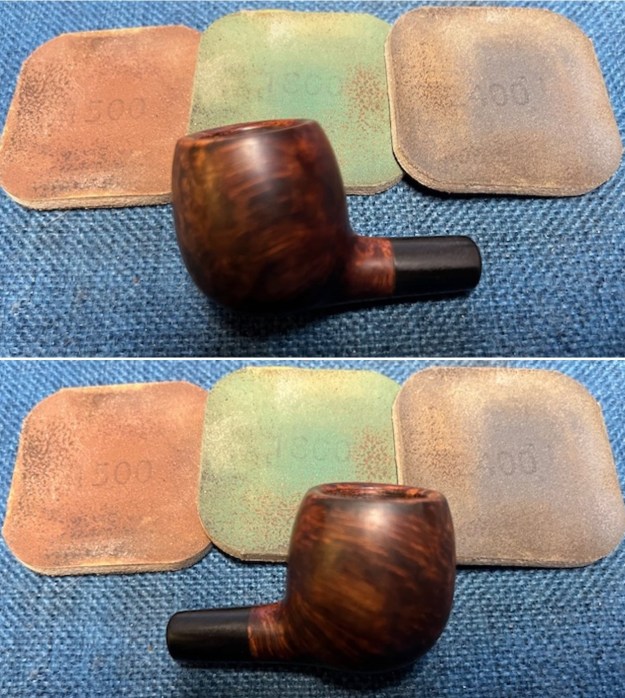
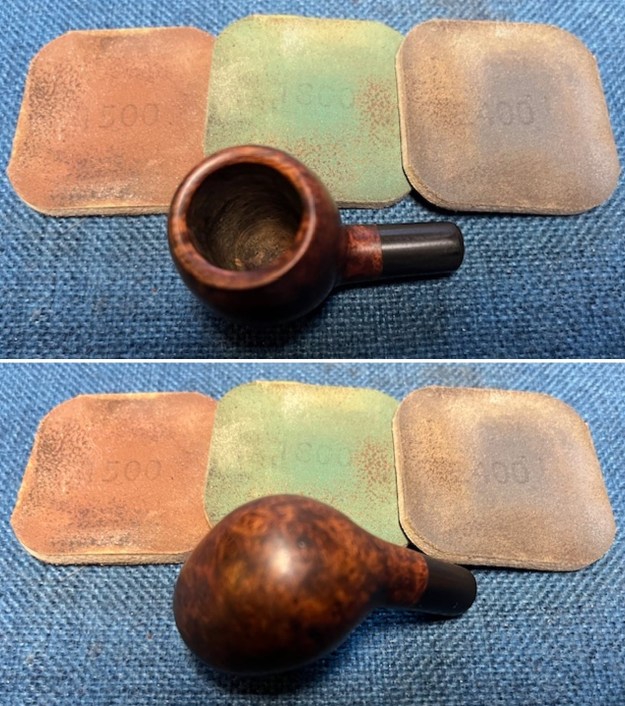
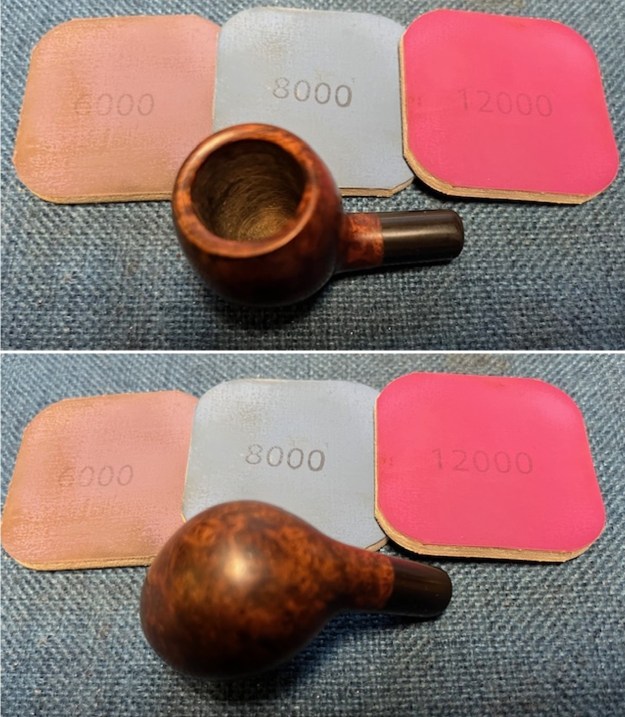
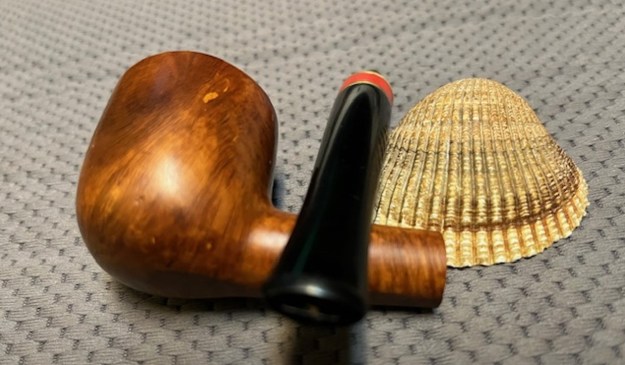
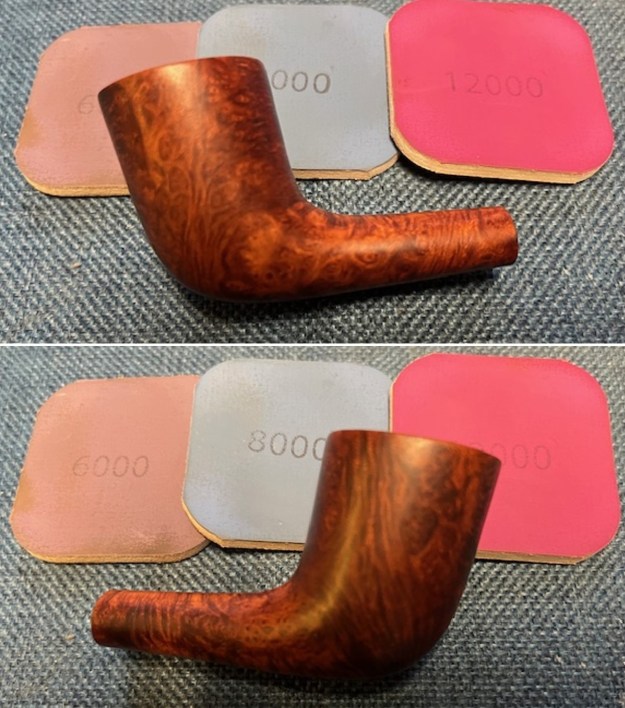
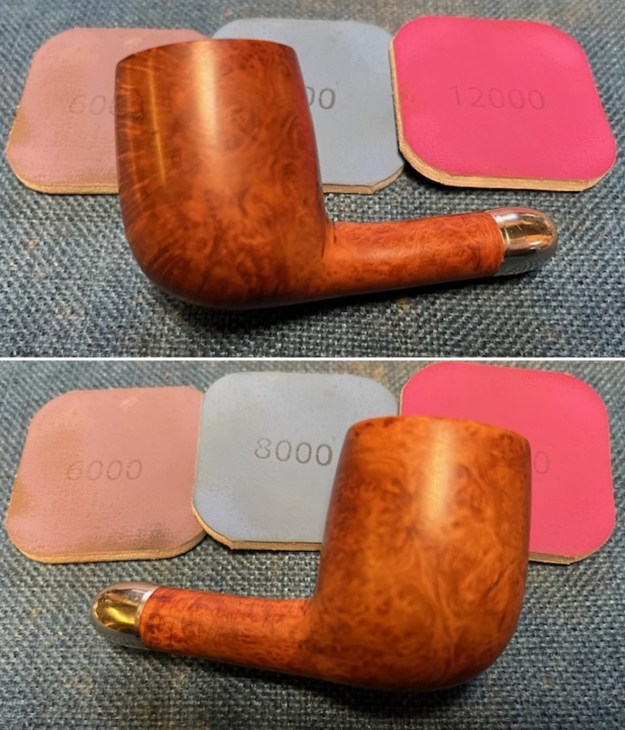
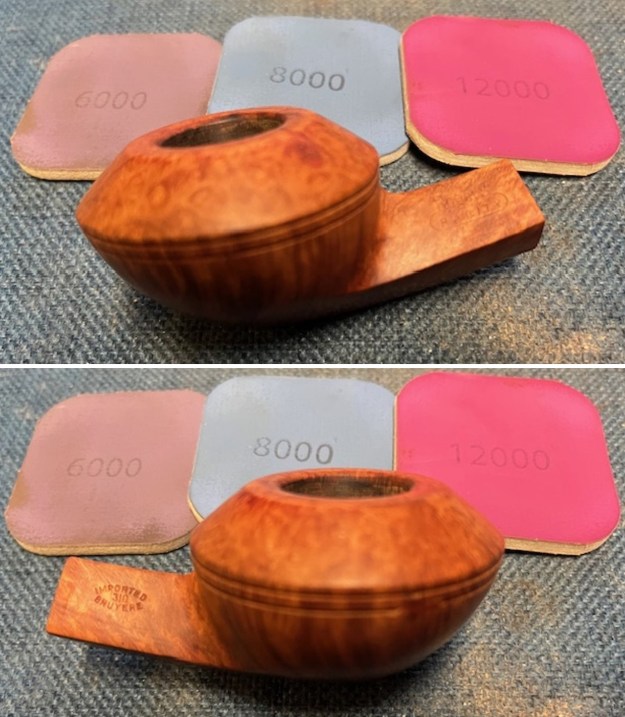
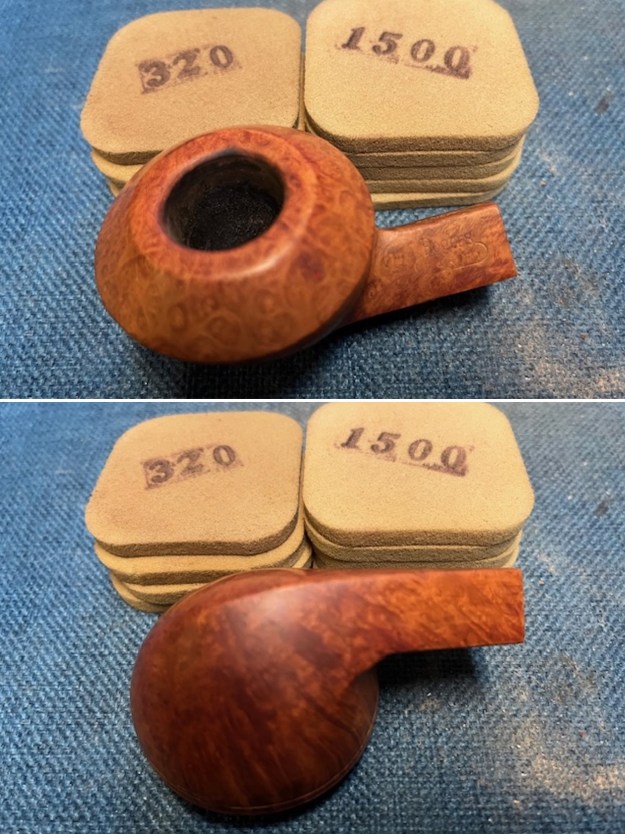 I polished the briar with 1200-1500 micromesh sanding pads and wiping it down with damp cloth after each sanding pad. As I worked through the cycle of pads the shine developed with each change of pad. The pipe looks very good.
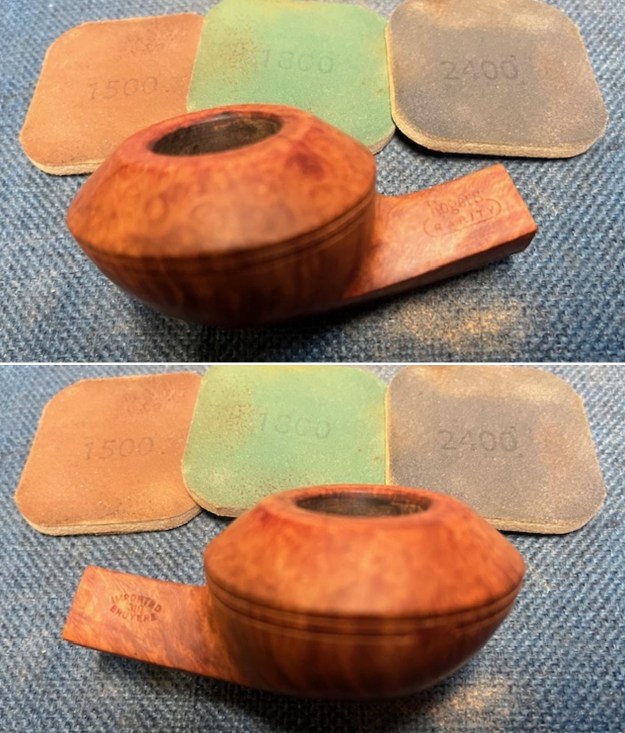
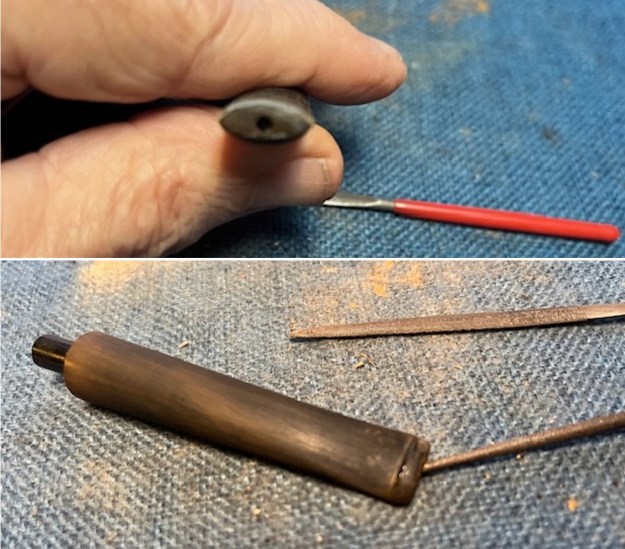
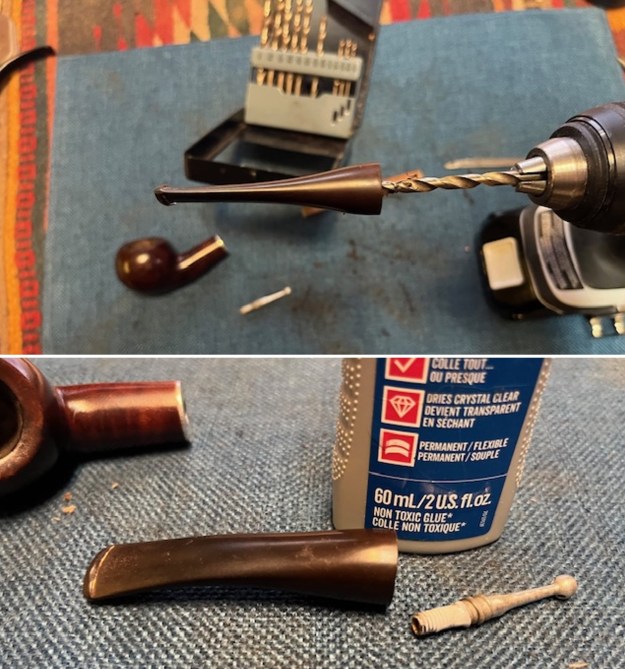
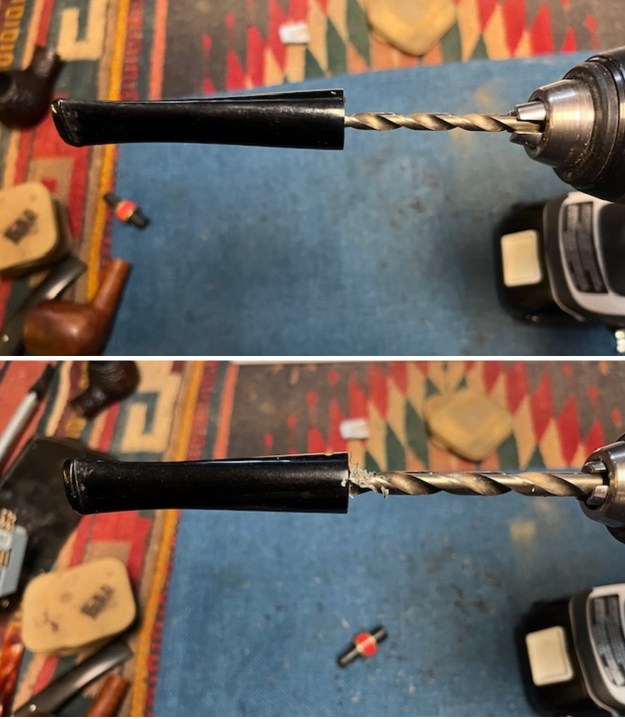
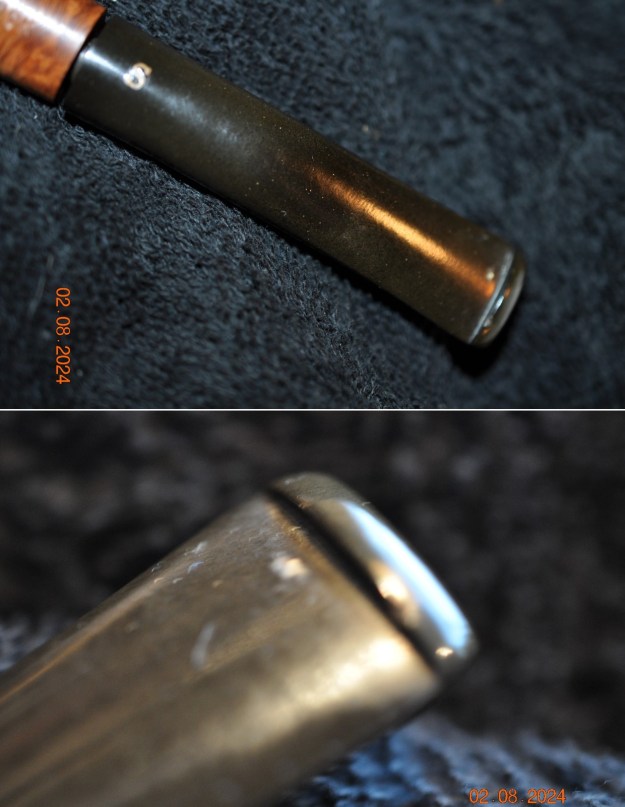
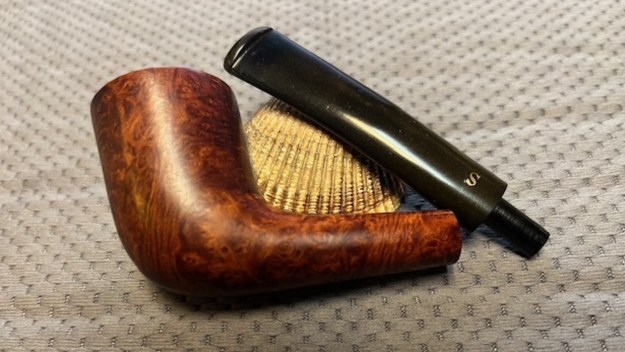
 Now it was time to bend the stem. I have had better luck bending acrylic/Perspex stems with boiling water than a heat gun. I boiled some water in the microwave and put the stem in the hot water. I repeated it several times to soften the acrylic. I bent it over a pill bottle to give it a correct bend. I set the bend with cool water. I put it partially in the shank to check the bend. I and happy with the way it turned out. It had a nice smooth bend.
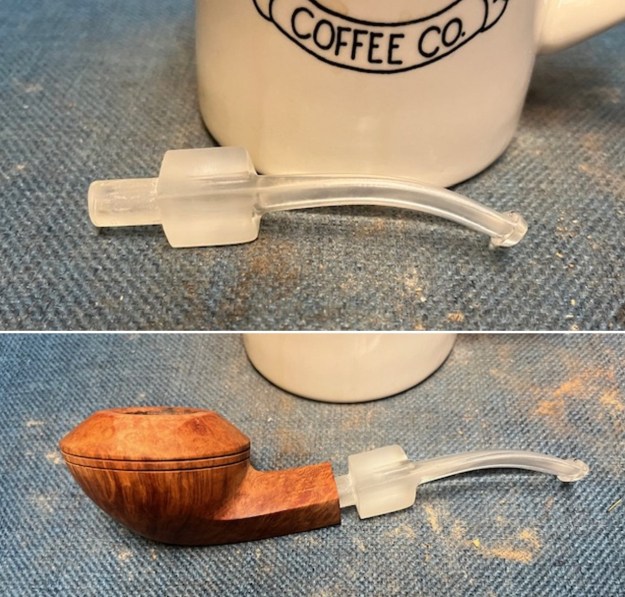 The button had a small round opening. I used a slot saw and three different files to shape an oval slot in the shank. It was a well-shaped slot that I smoothed out. With the bend in the stem and new slot it was very workable.
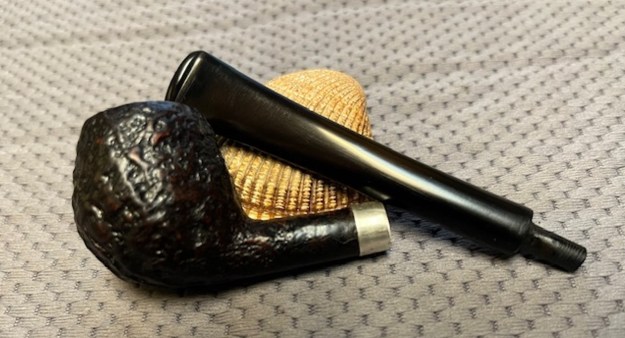
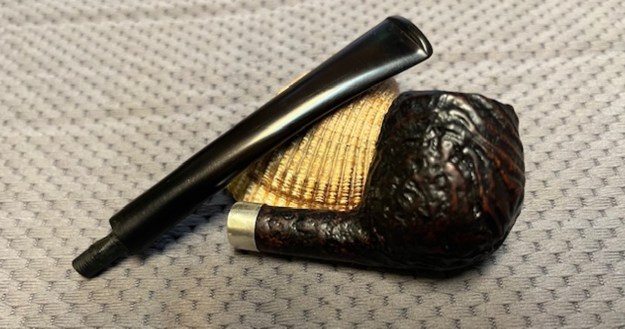
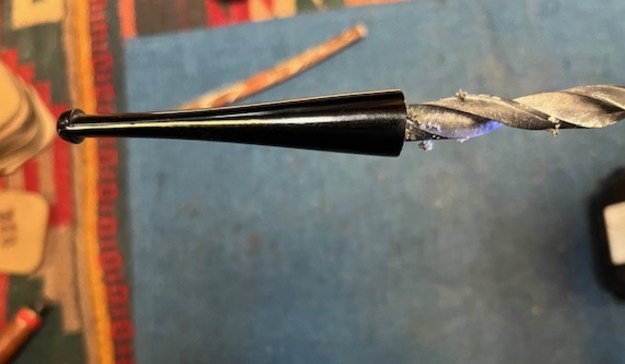
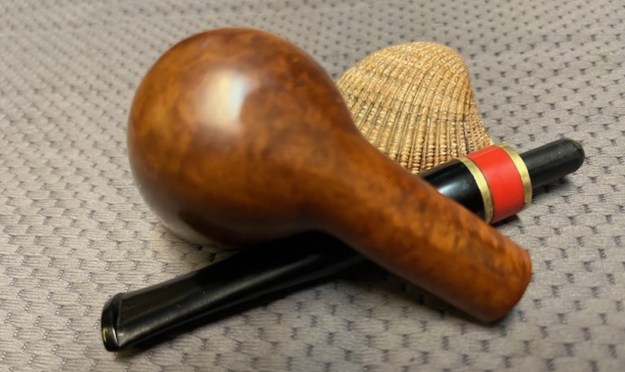
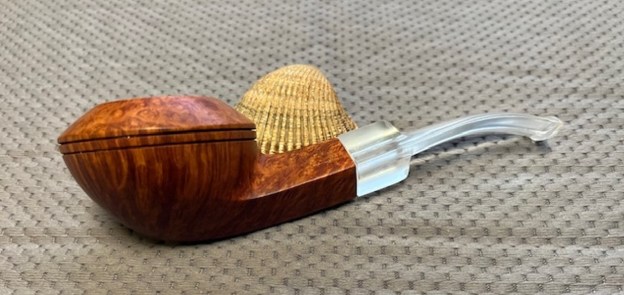
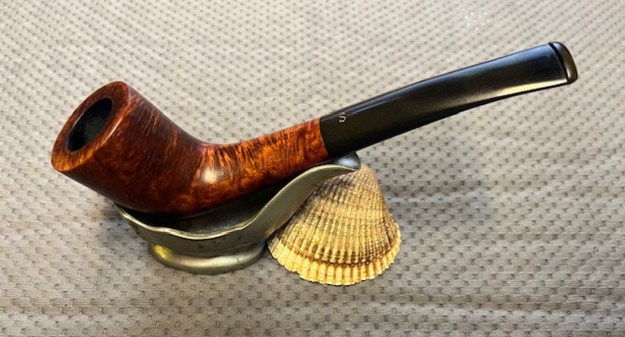
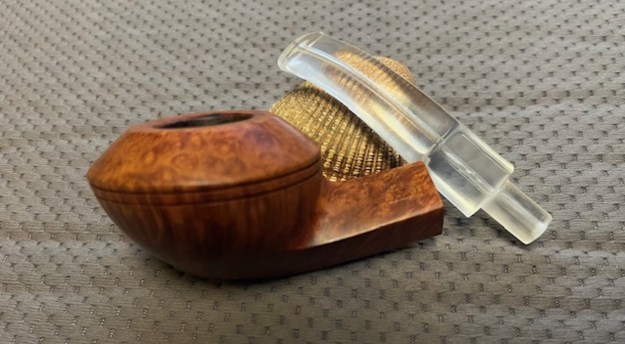
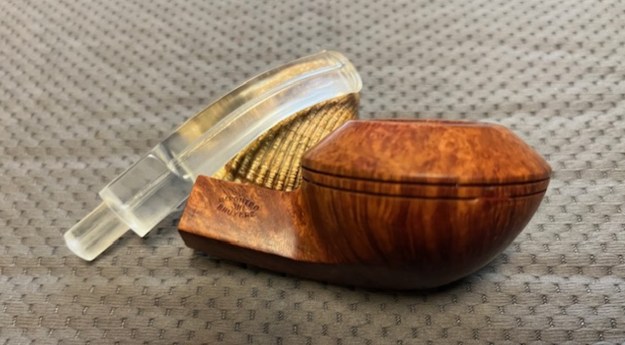
 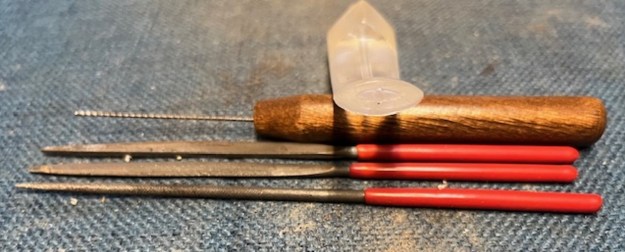 I fit the stem in shank and took photos of the new look to the slightly bent bulldog. The Perspex stem fit well and looked very good.
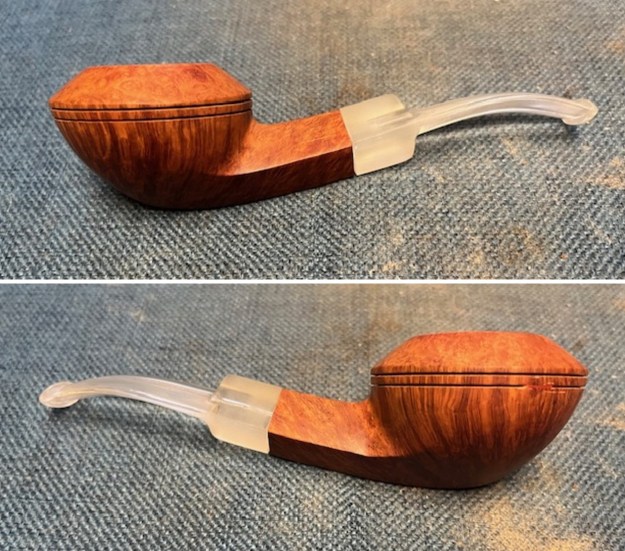
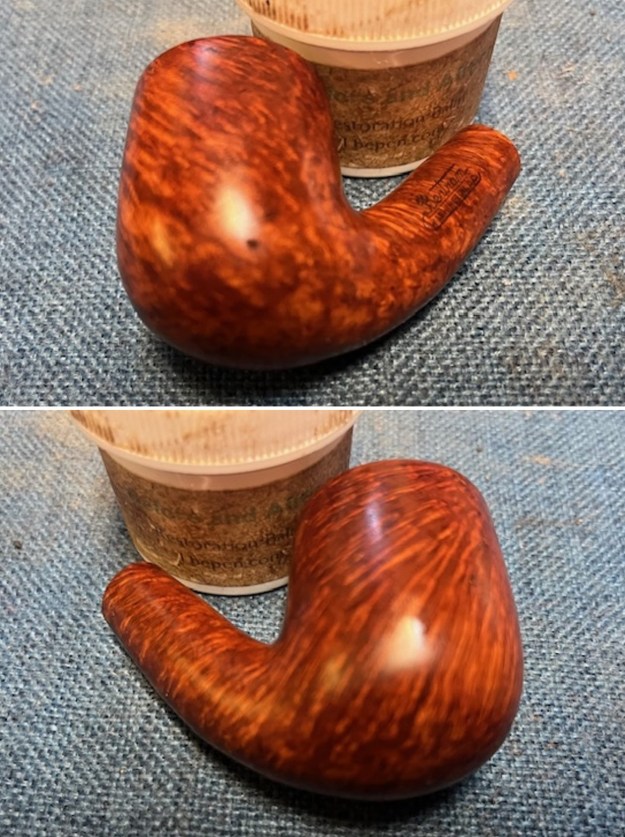
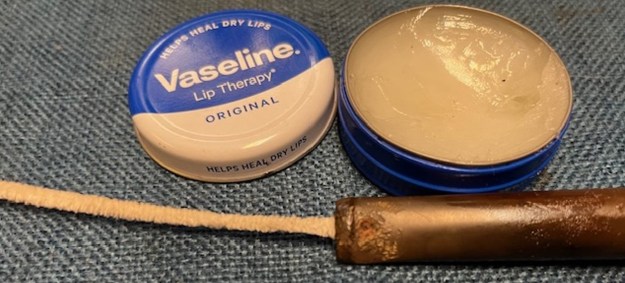
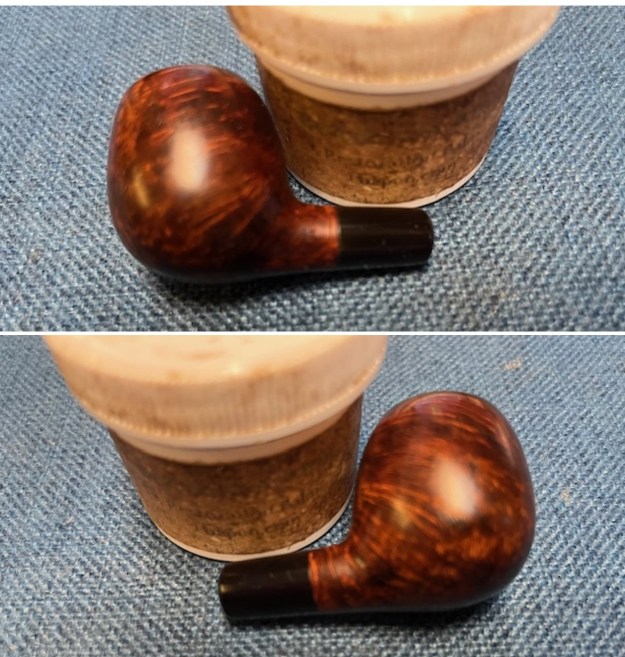
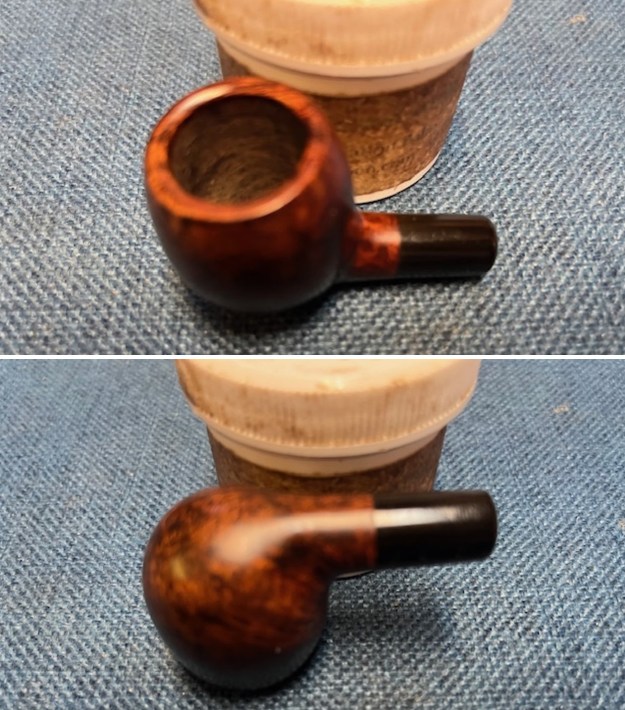
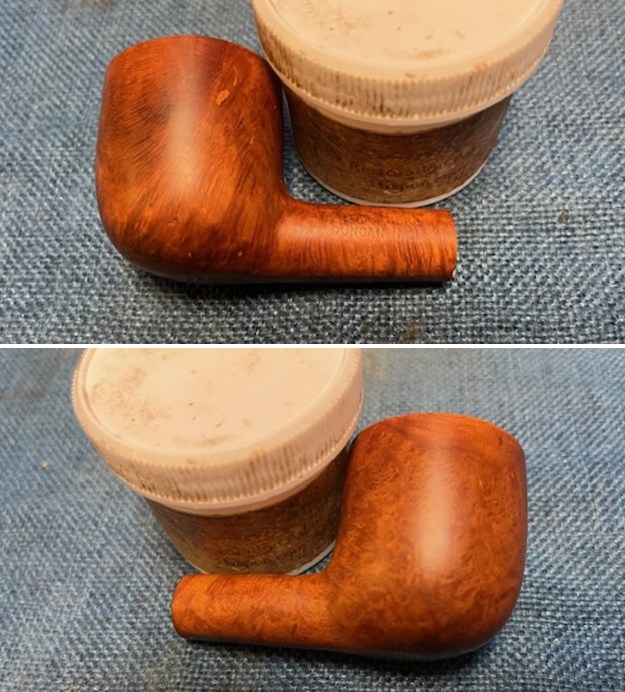
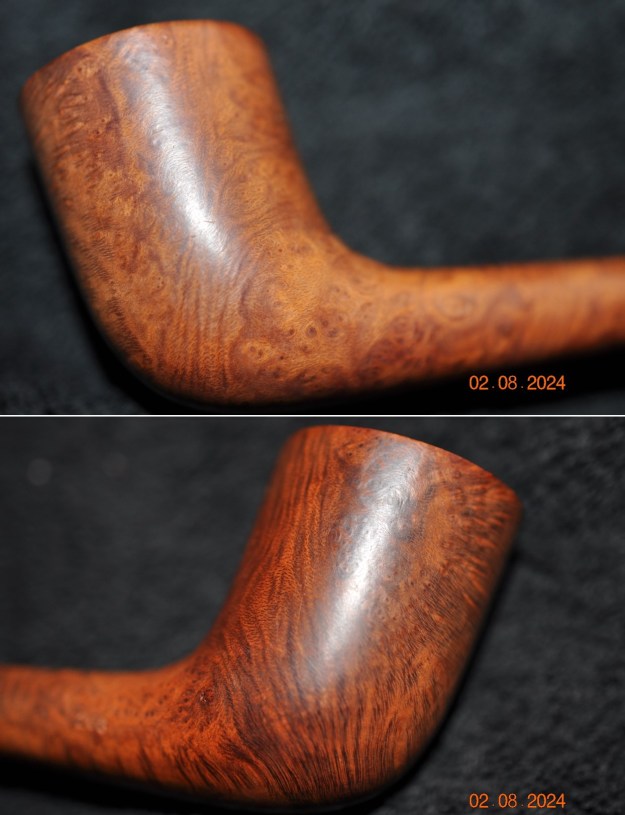
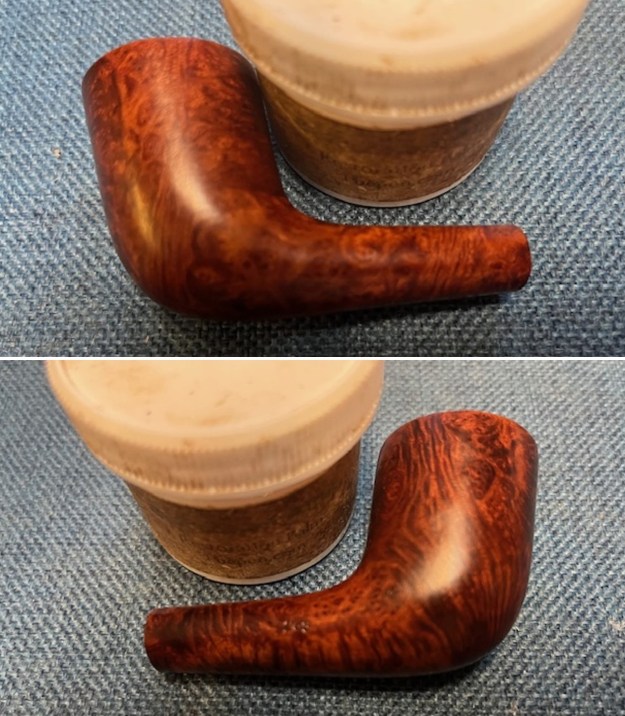
 I removed the stem and rubbed the bowl and shank down with Before & After Restoration Balm. I worked it into the surface of the bowl sides and shank with my fingertips to clean, enliven and protect the briar. I let the balm sit for 10 minutes, then buffed with a cotton cloth to raise the shine. The Balm did its magic and the grain stood out on the briar.
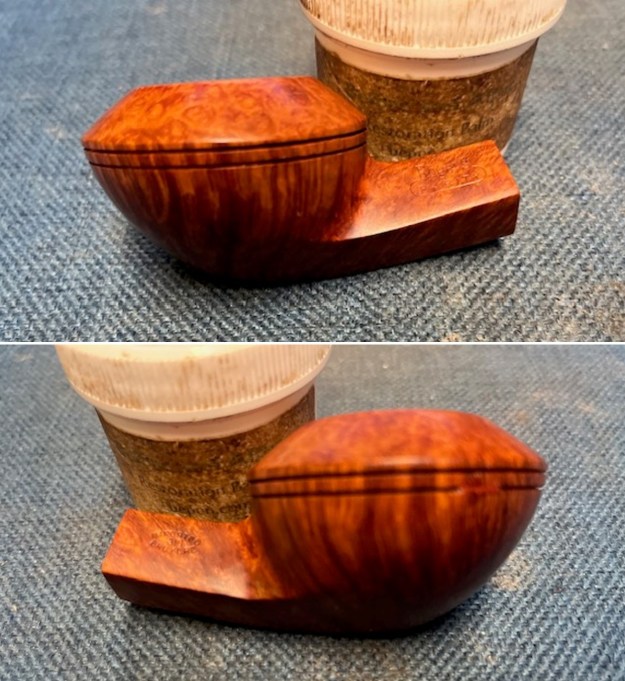
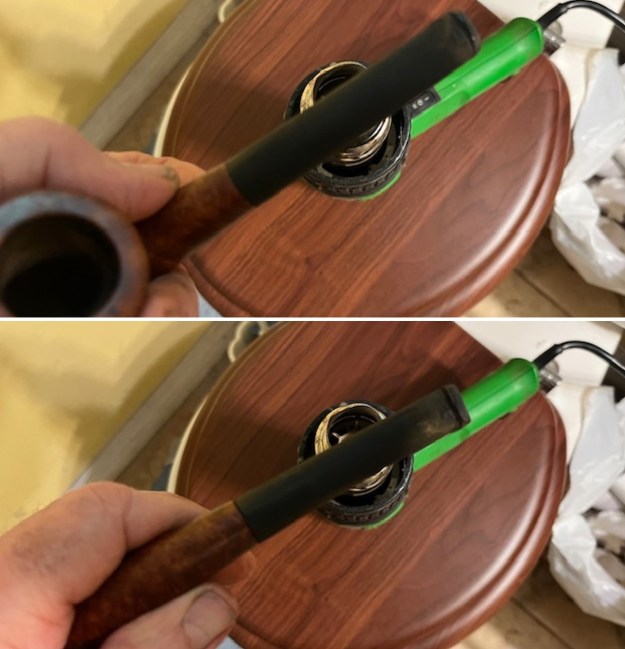
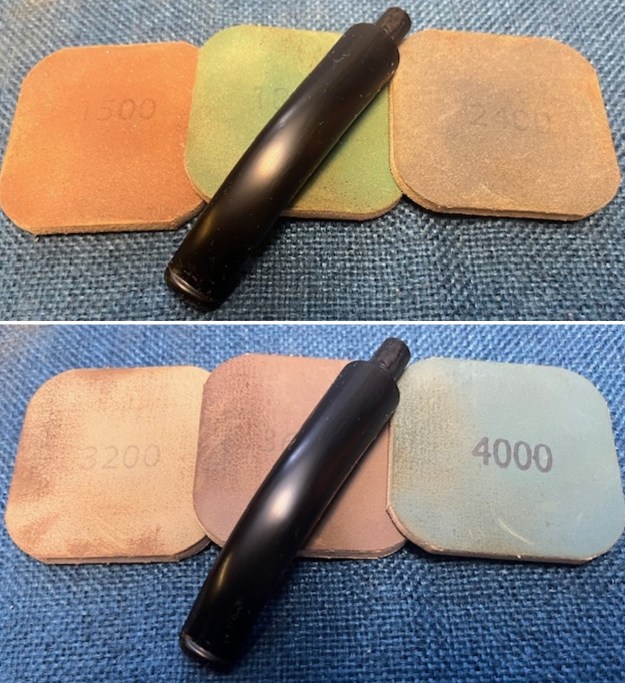
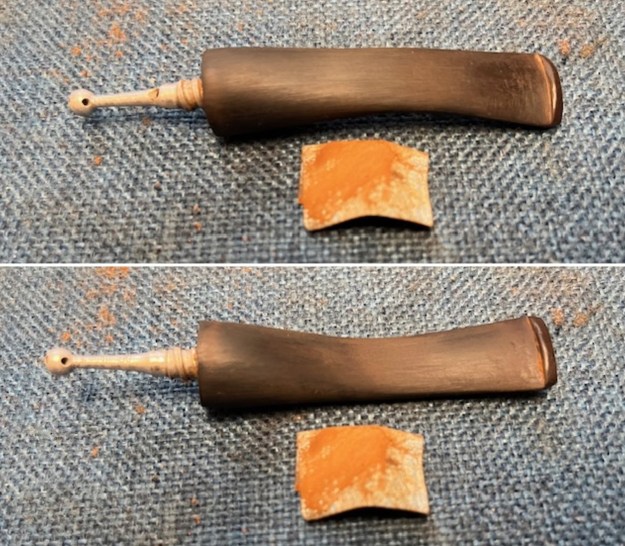
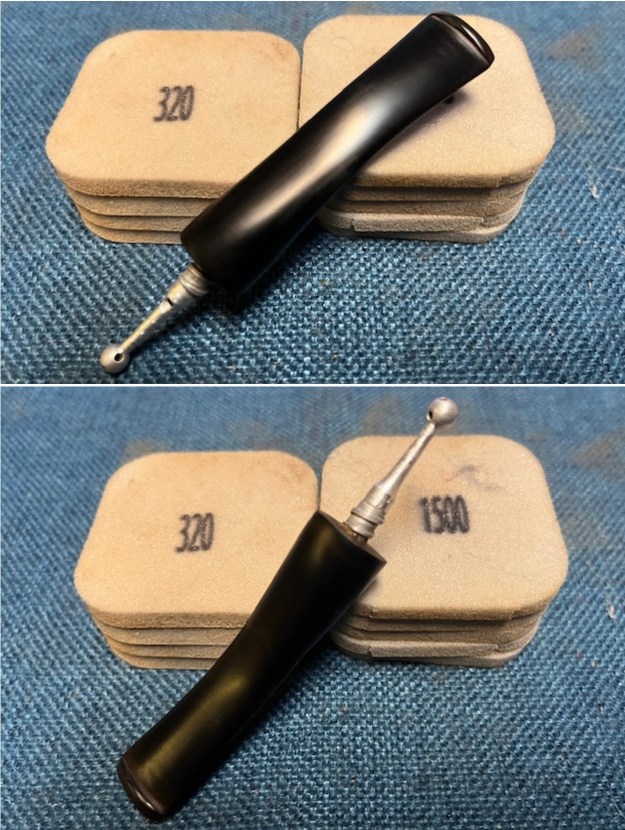
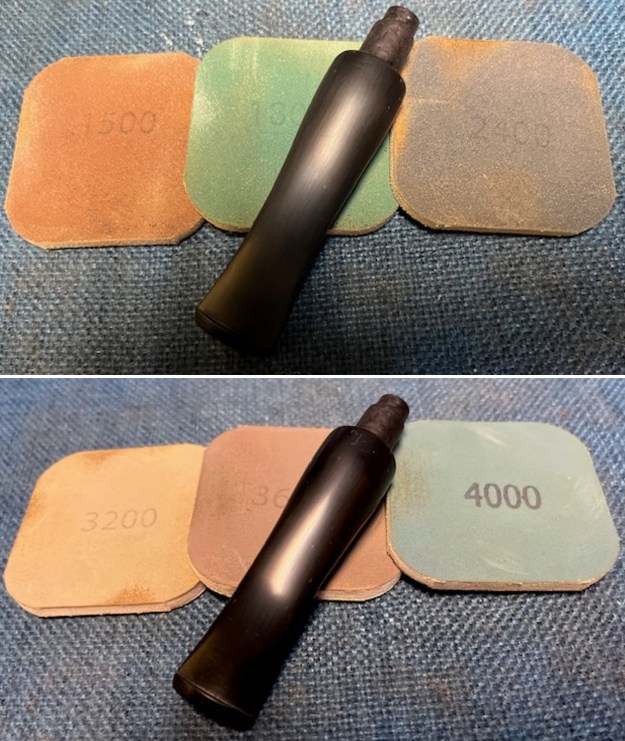
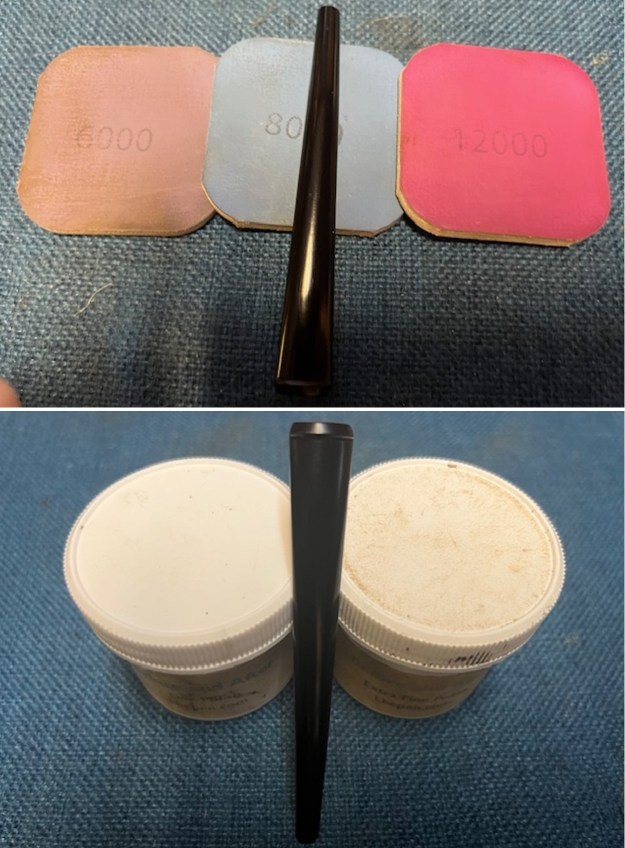
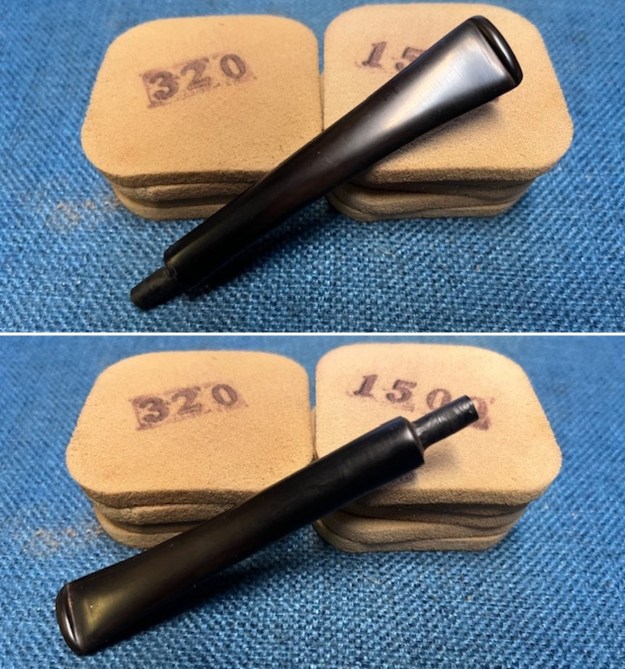
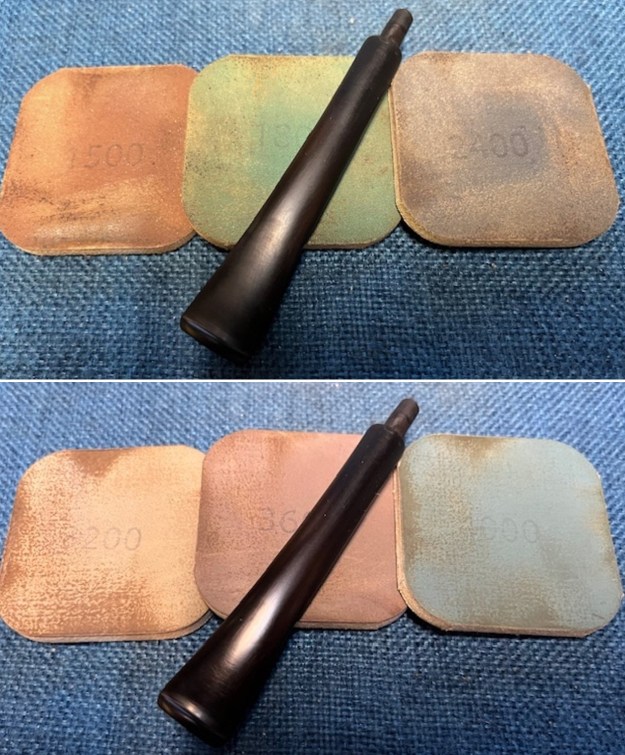
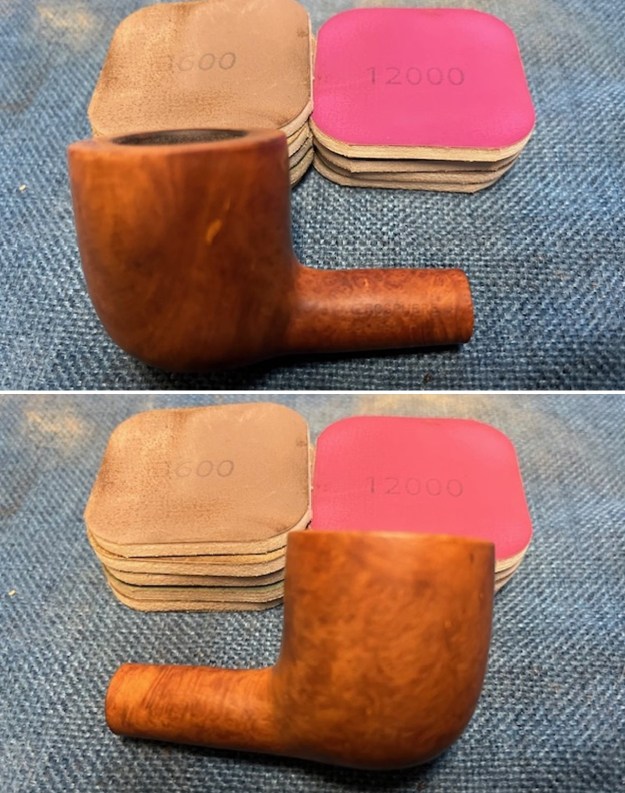
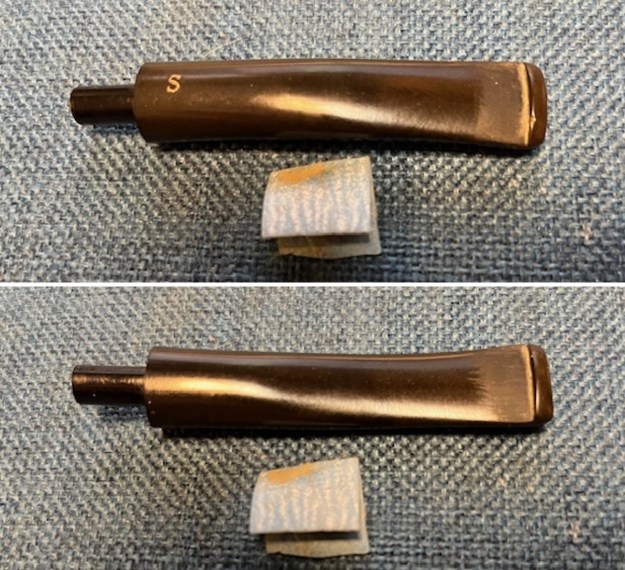
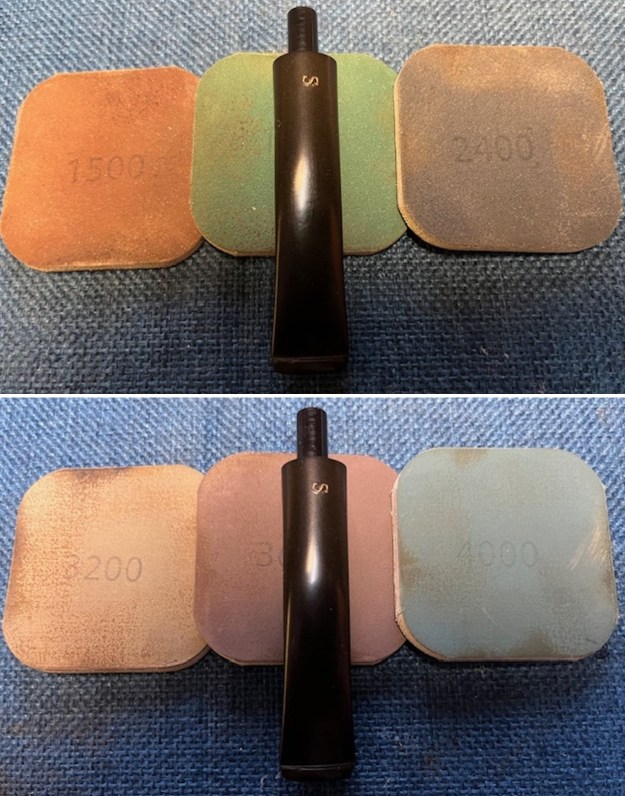
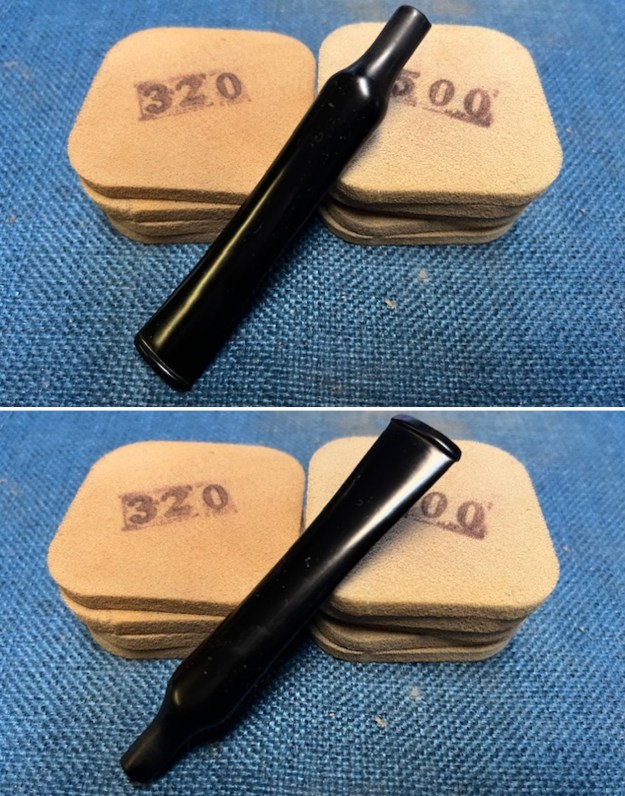
 I set the bowl aside and turned my attention to polishing the stem. I sanded it with 320-3500 grit sanding pads. I wiped it down between pads with a Obsidian Oil impregnated cloth. It was looking much better.
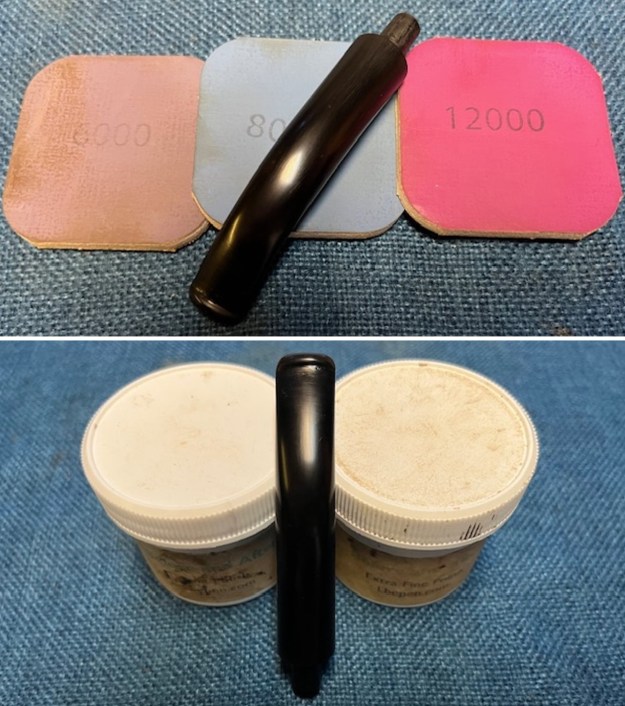
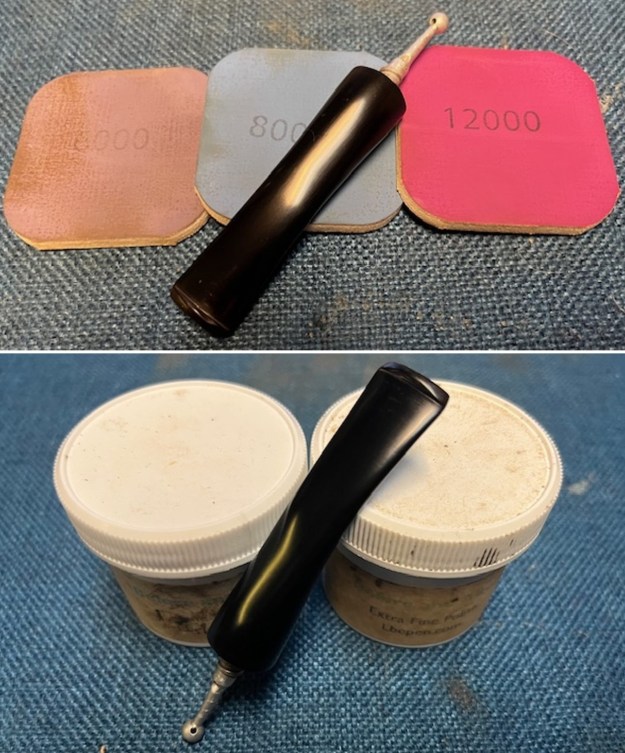
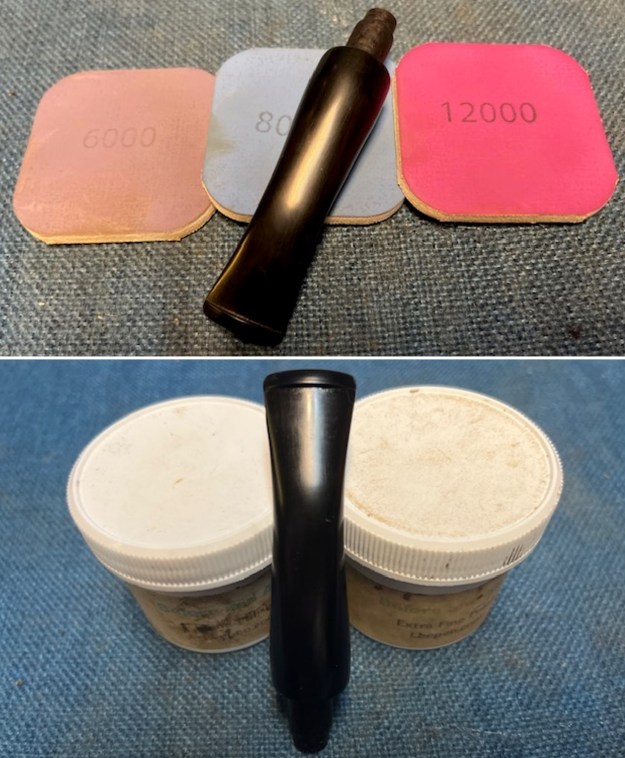
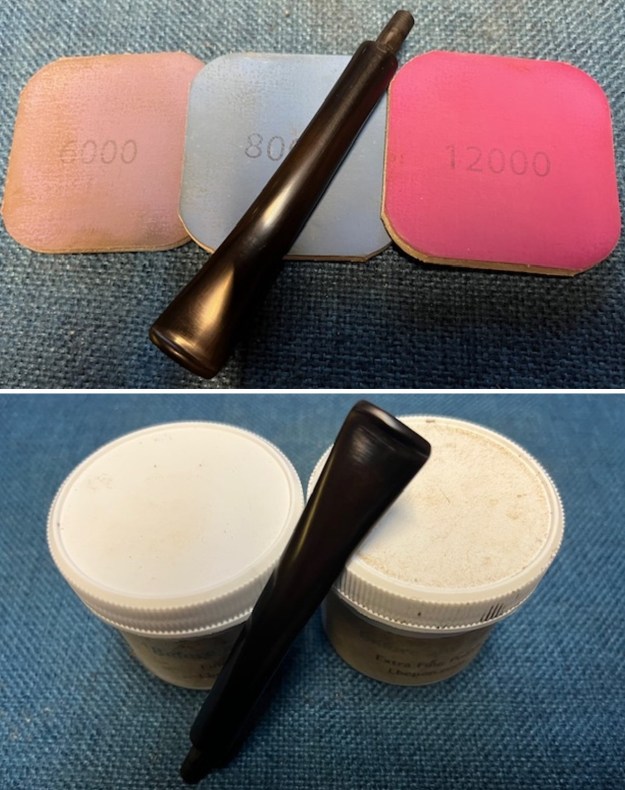
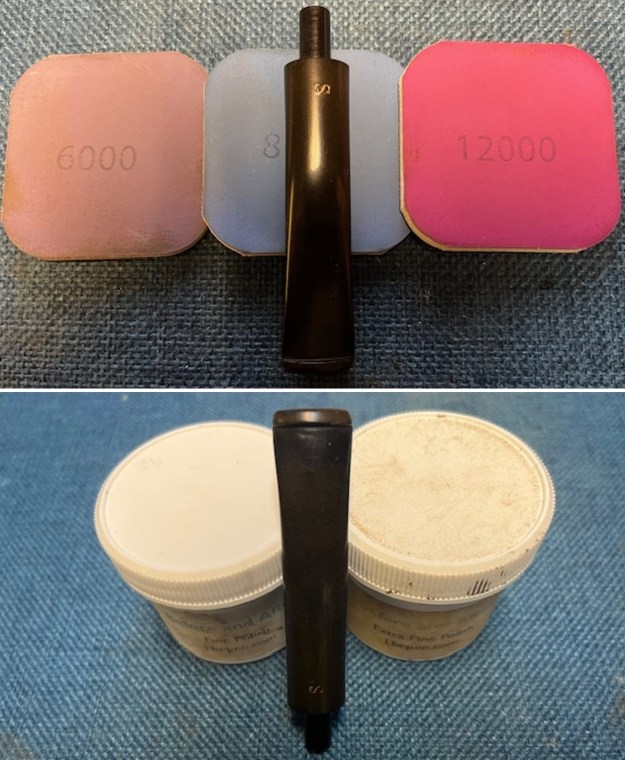
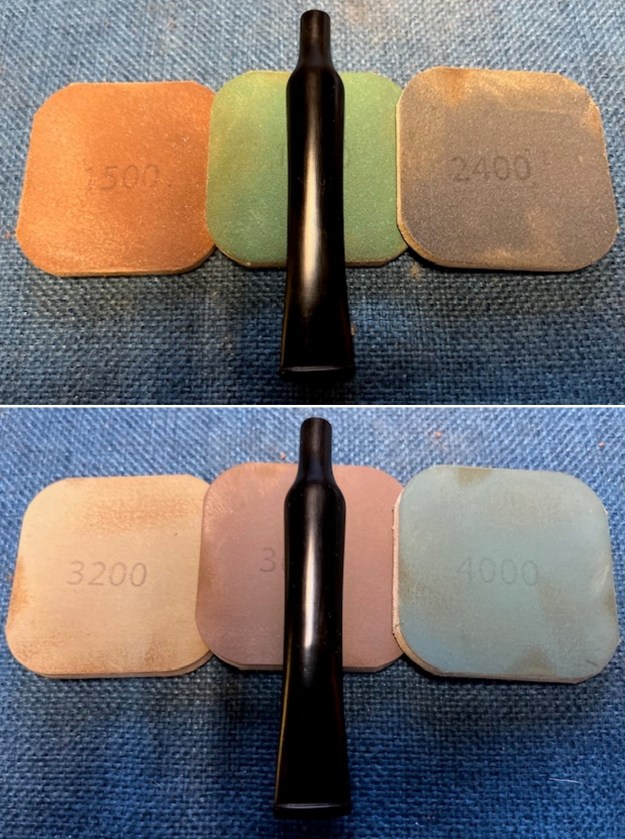
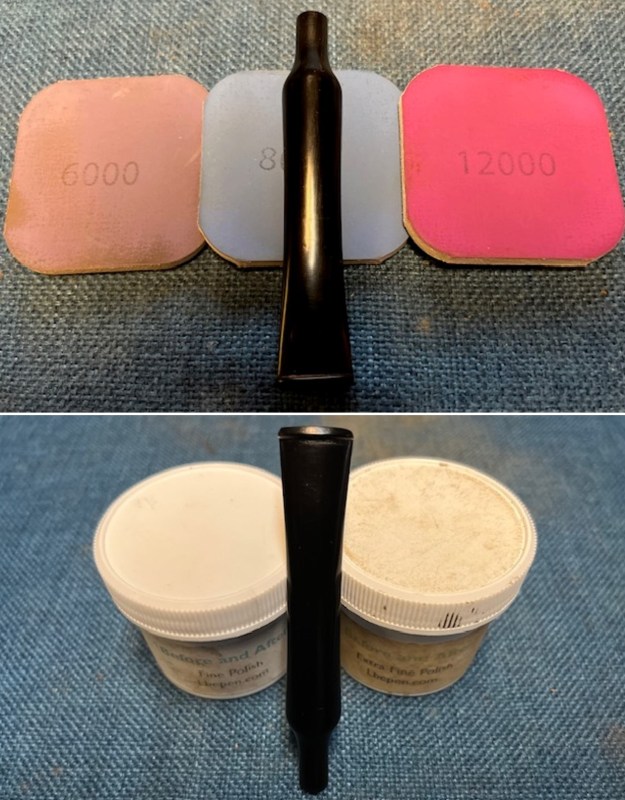
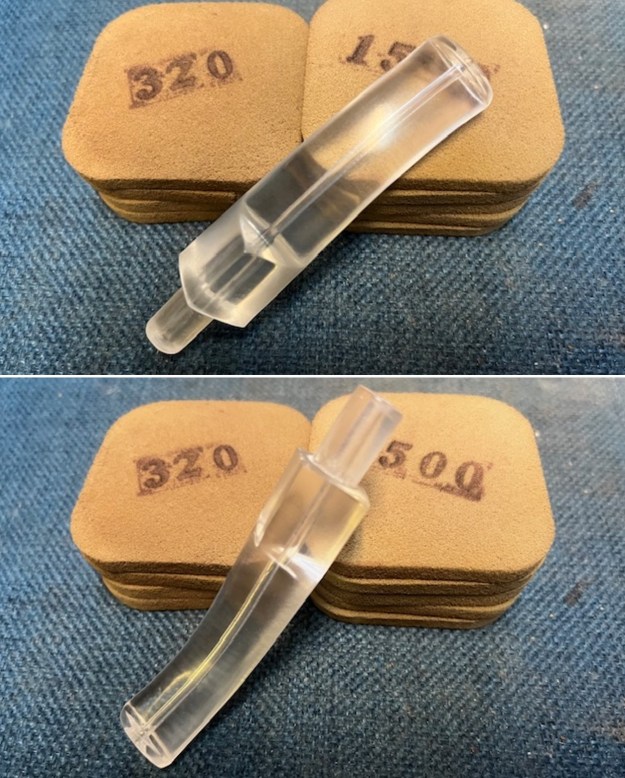 I polished the stem with micromesh sanding pads – dry sanding with 1500-12000 grit sanding pads. I wiped it down after each sanding pad with Obsidian Oil. I polished it with Before & After Pipe Stem Polish – both Fine and Extra Fine. I wiped down again with Obsidian Oil and set it aside while I worked on the stem.
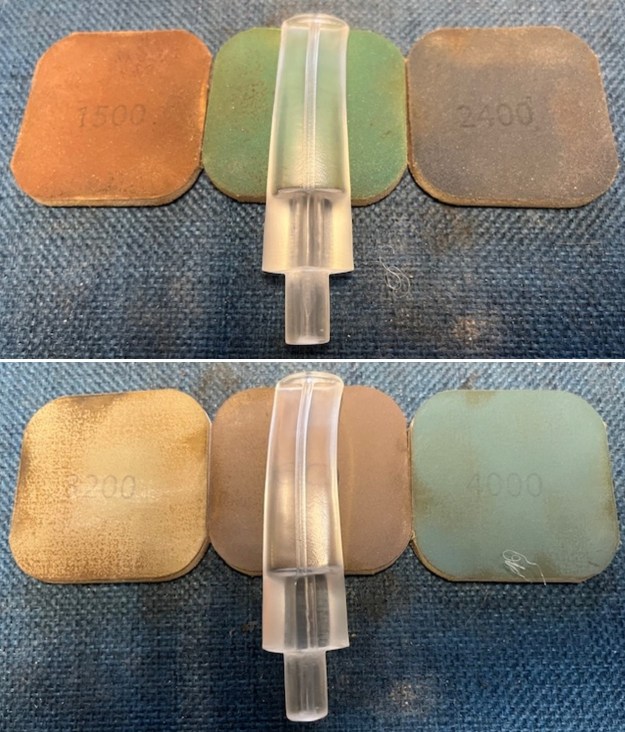
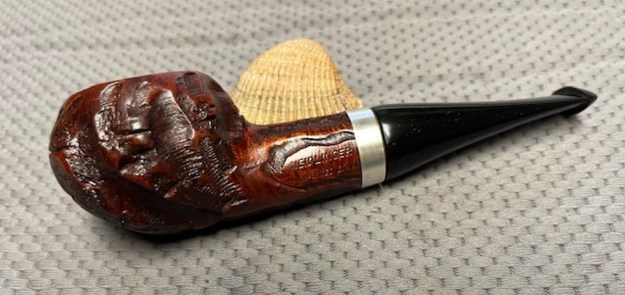
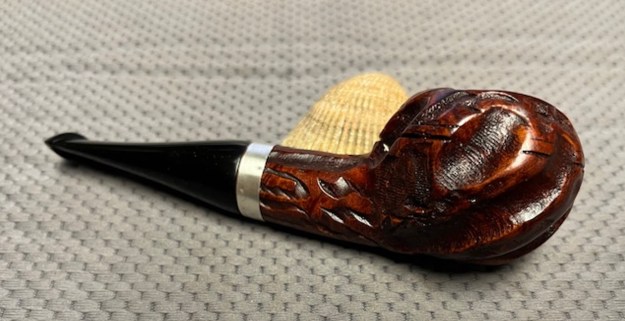
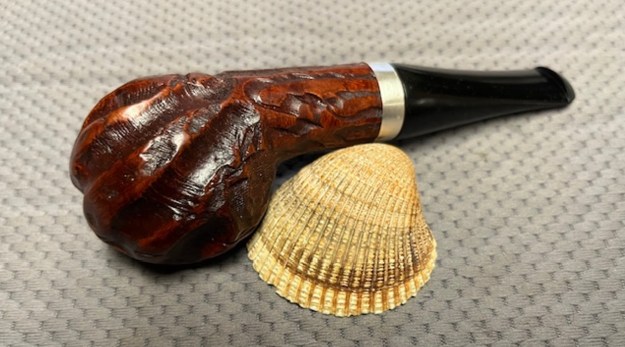
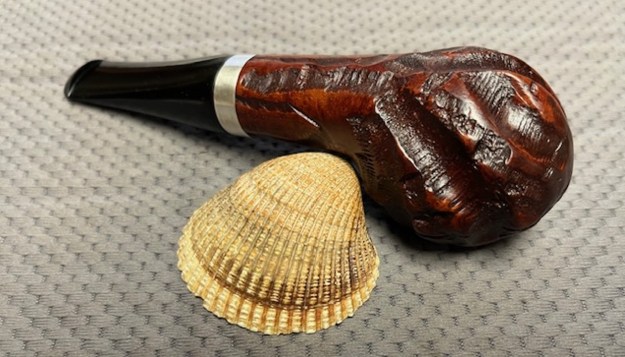
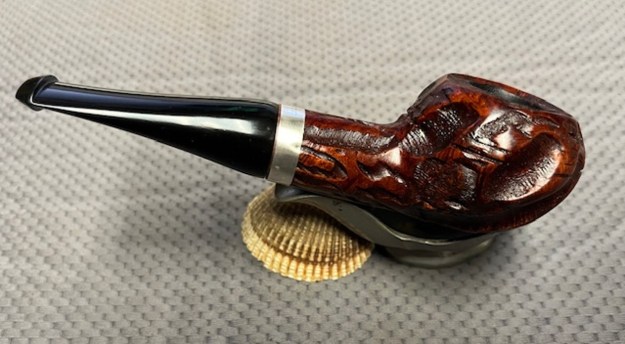
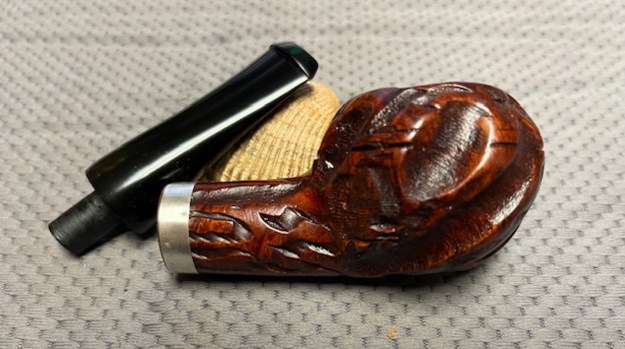
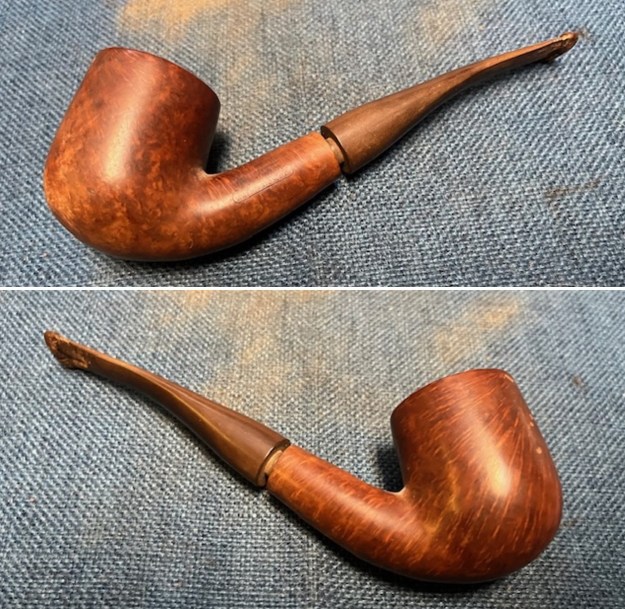
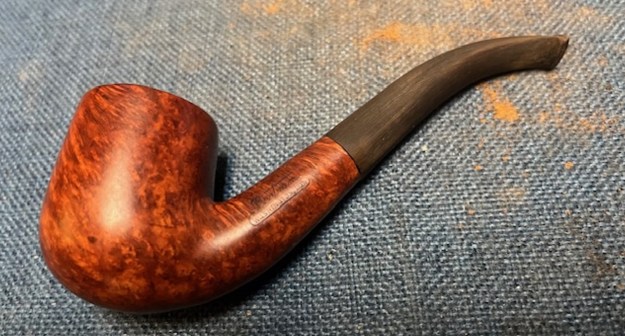
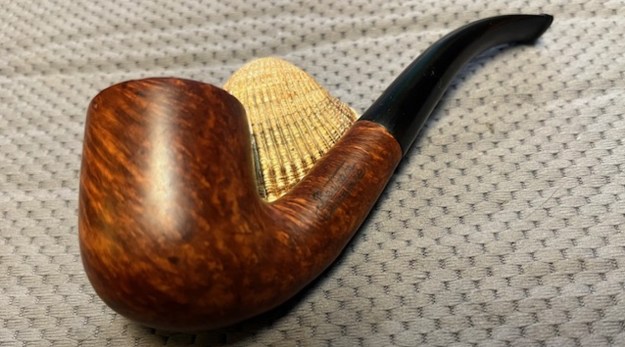
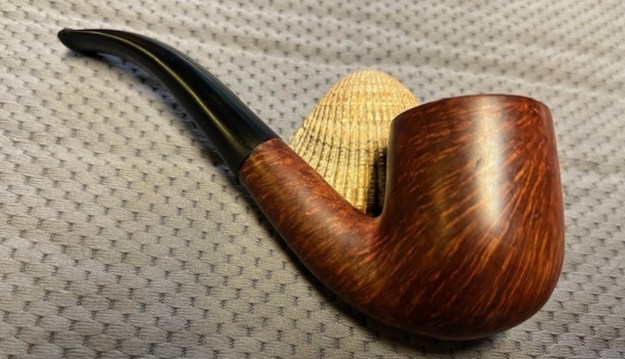
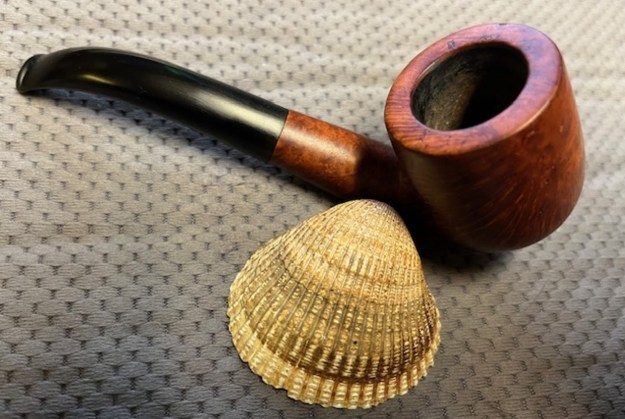
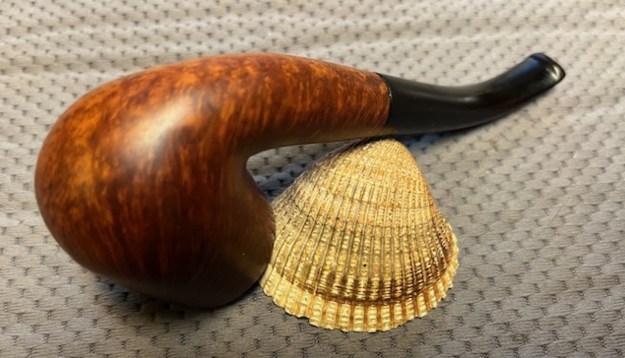
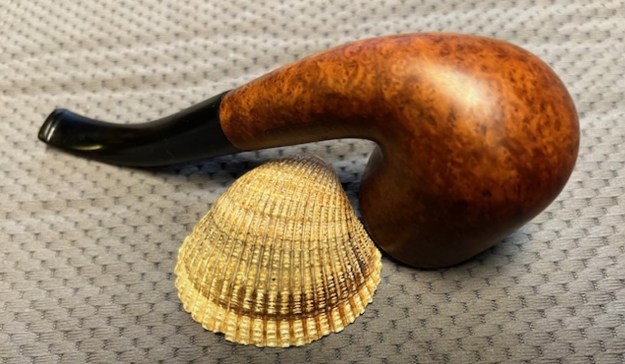
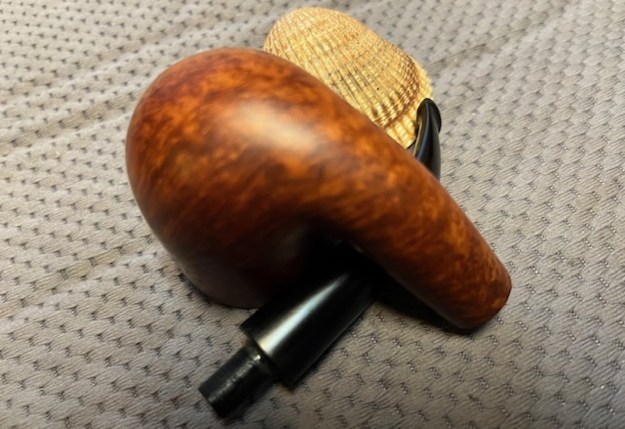
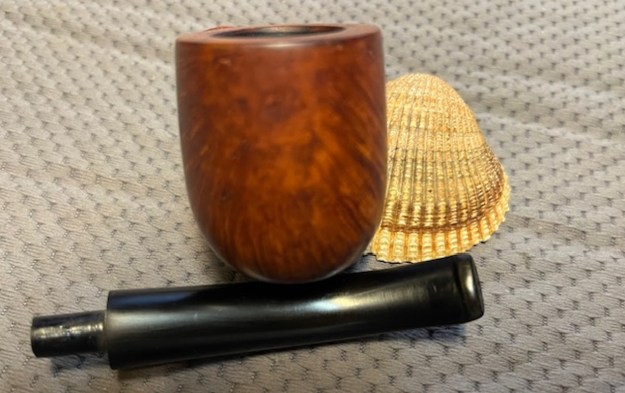
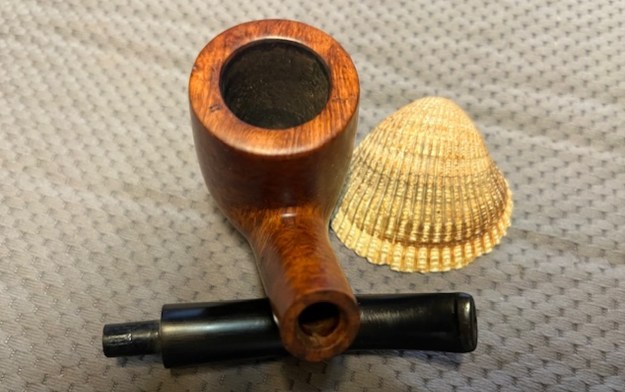
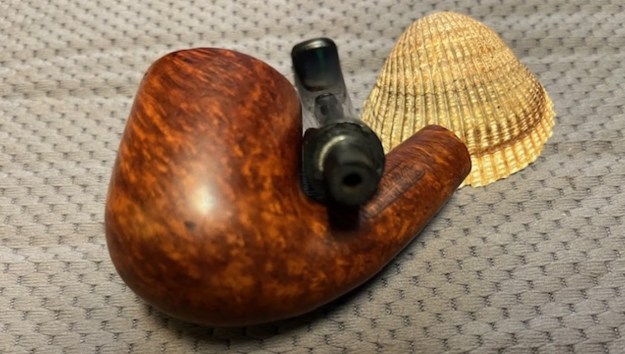
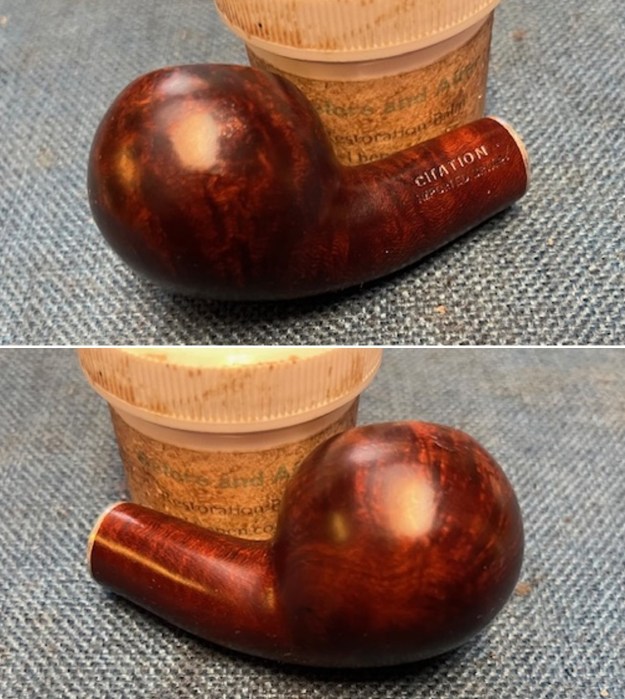
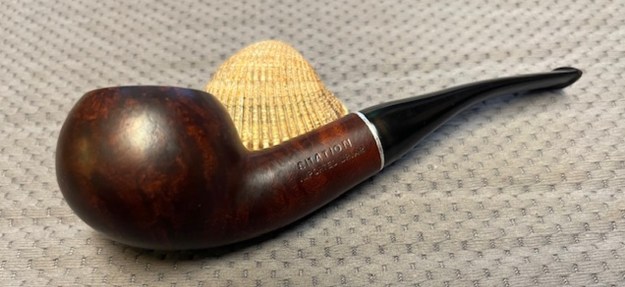
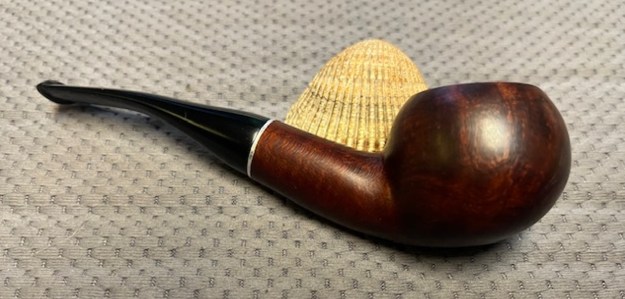
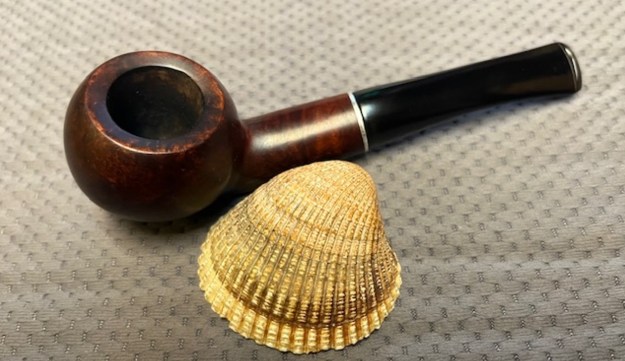
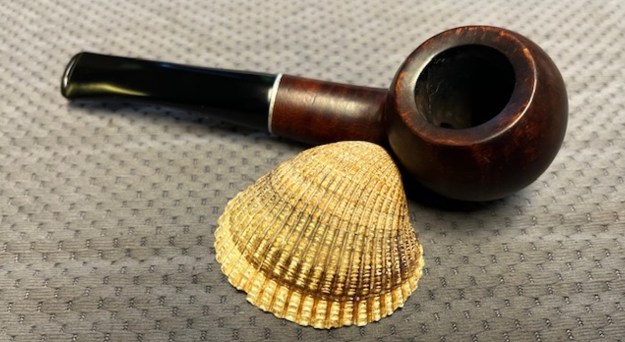
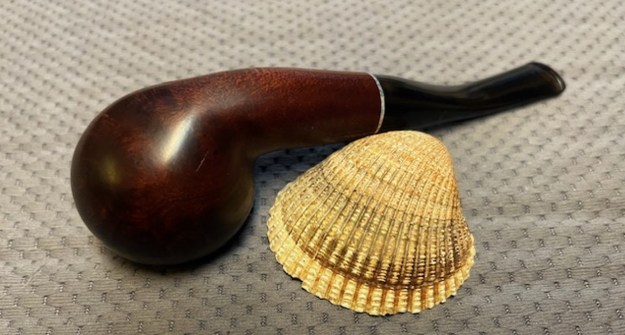
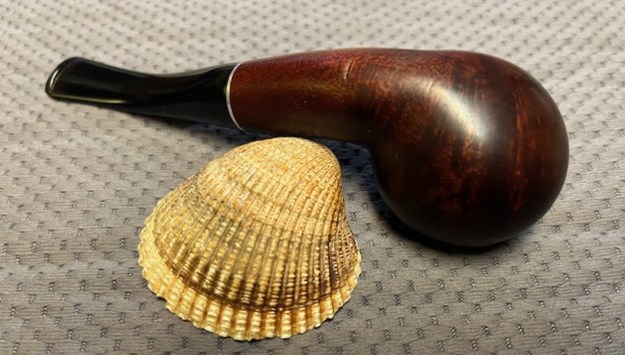
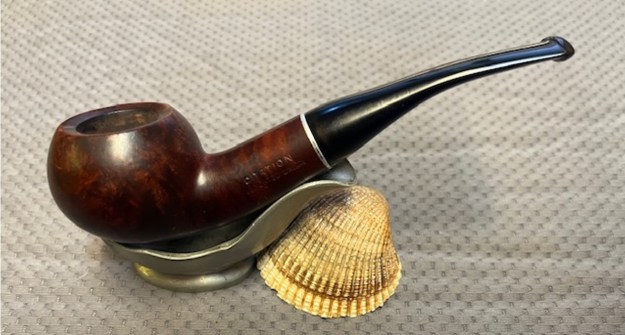
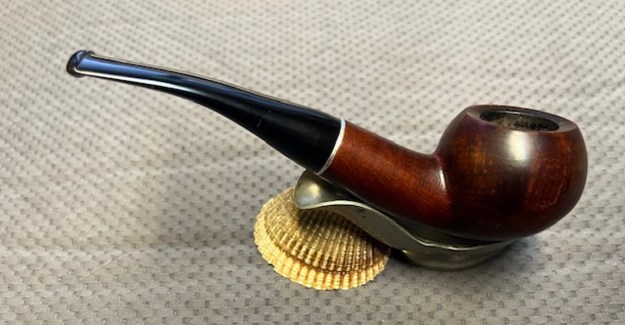
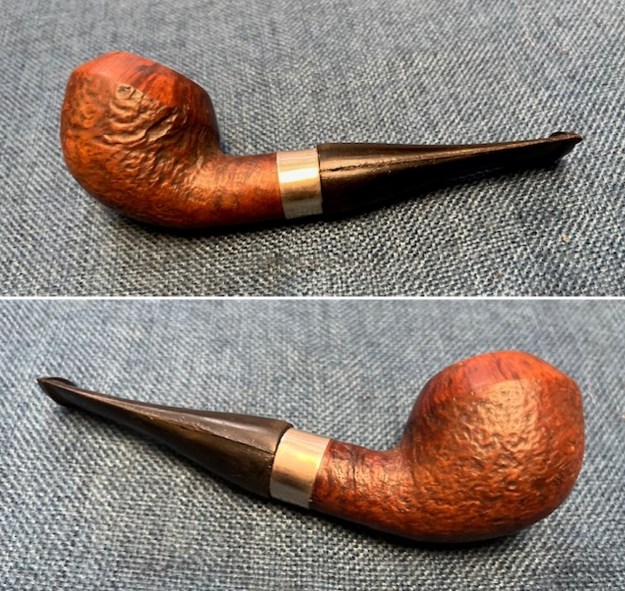
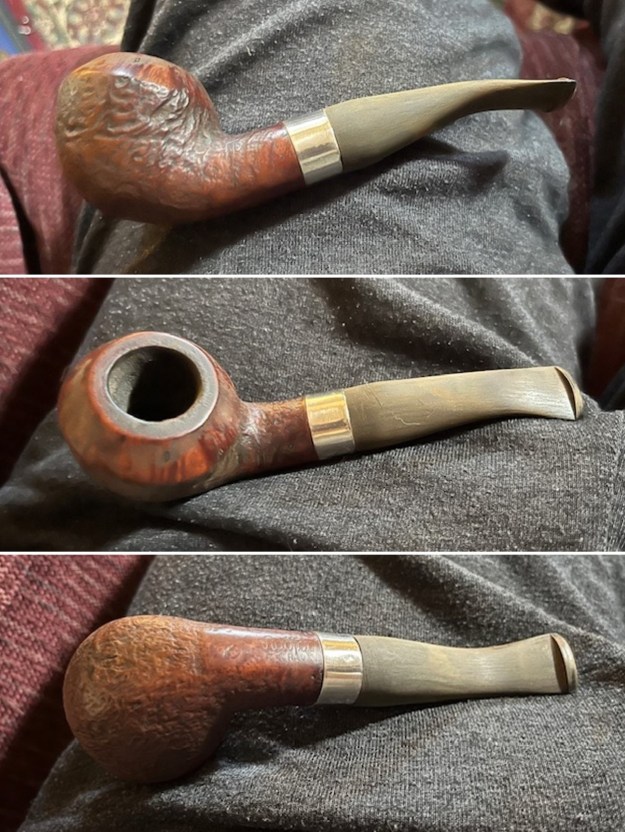
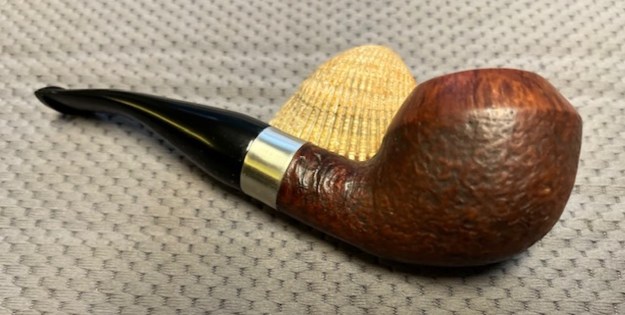
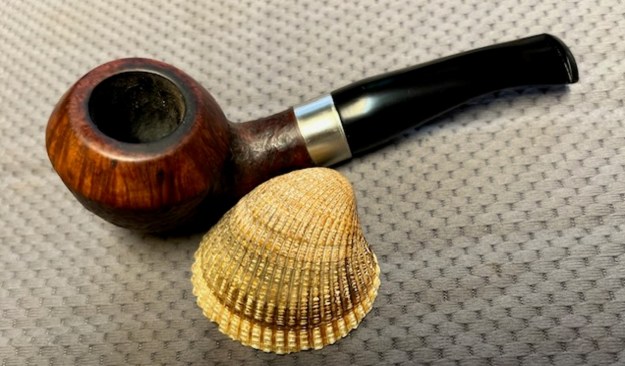
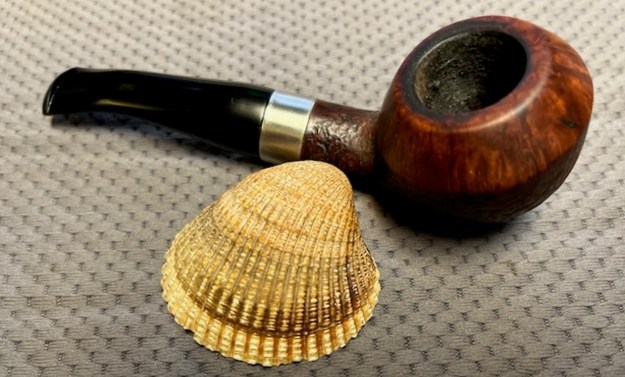
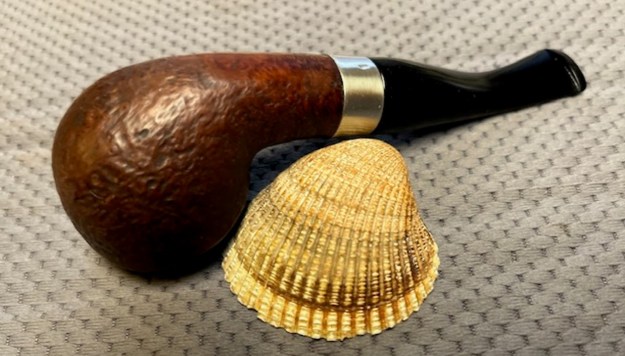
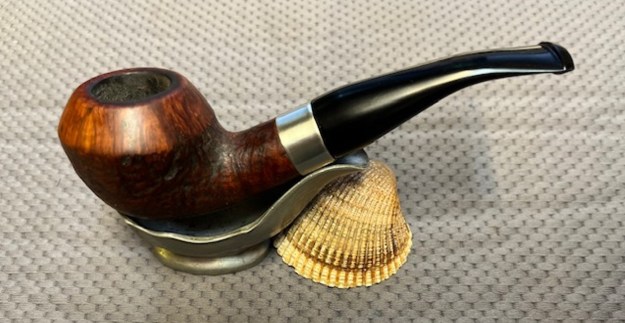
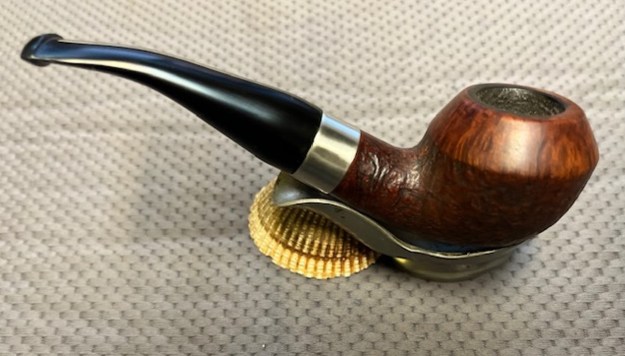
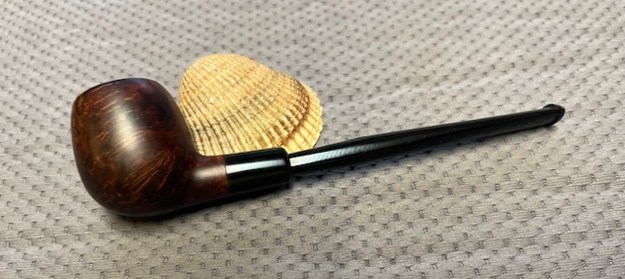
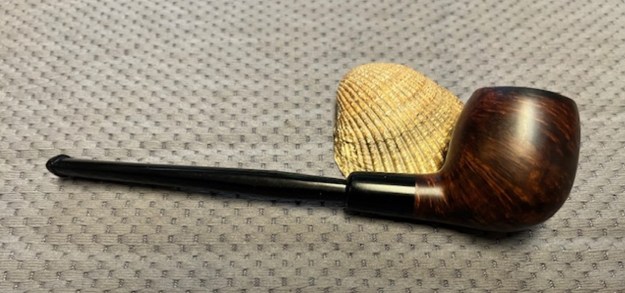
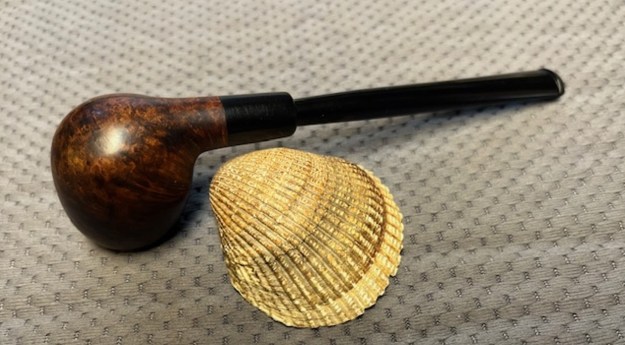
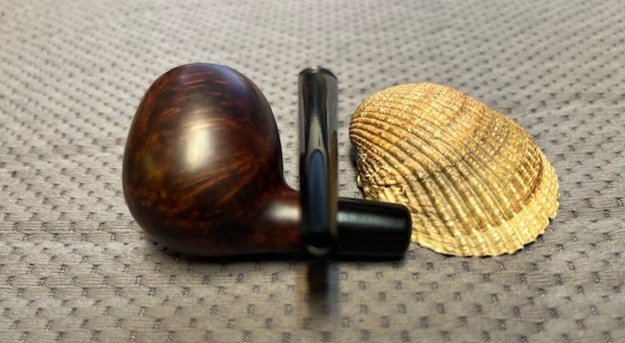
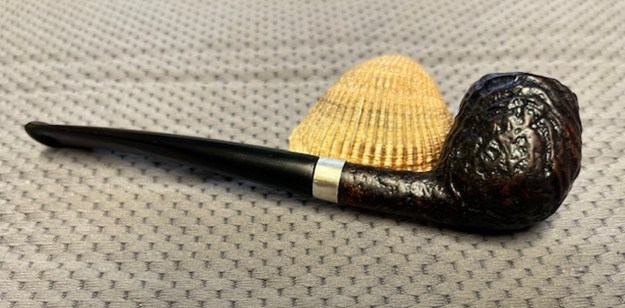
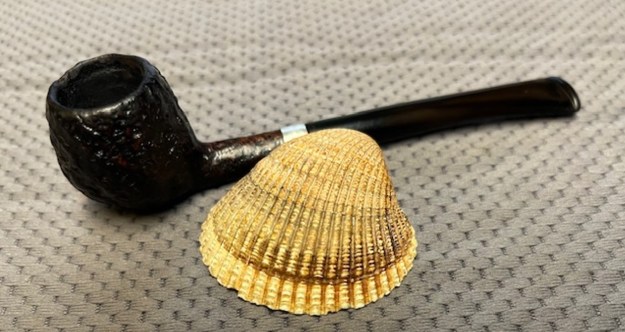
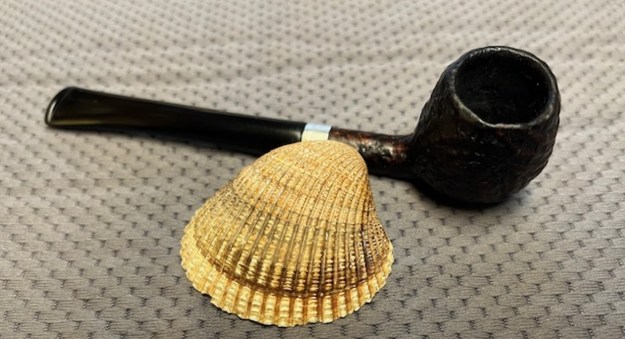
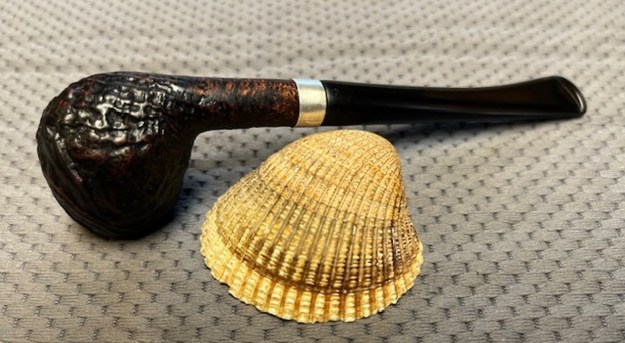
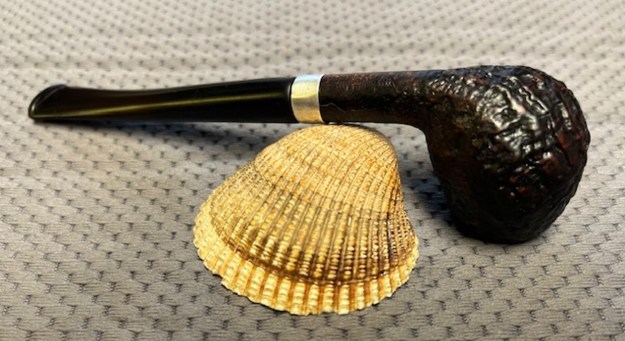
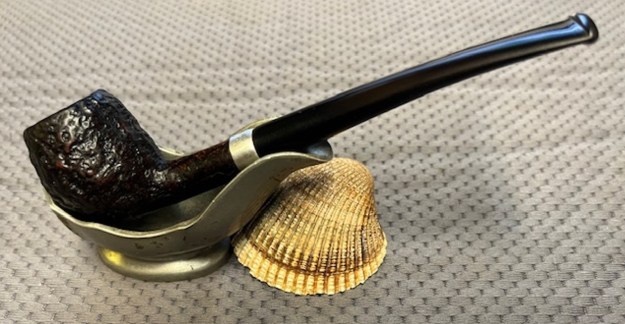
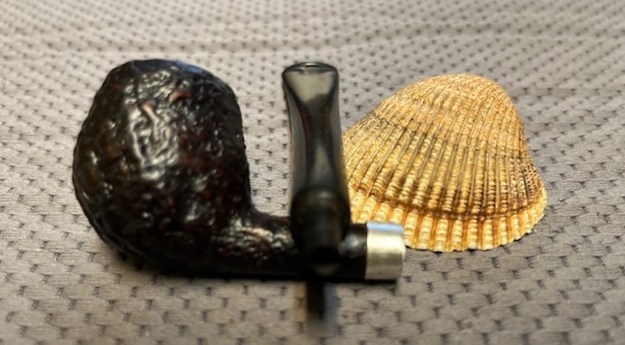
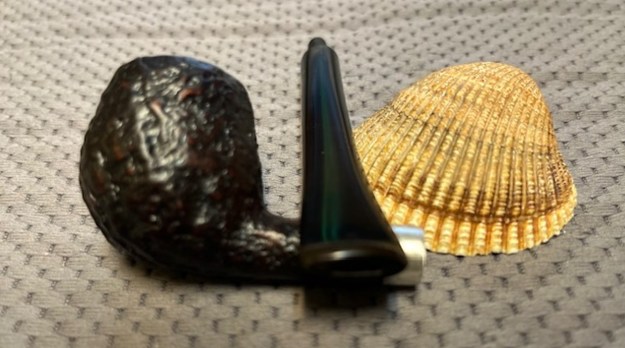
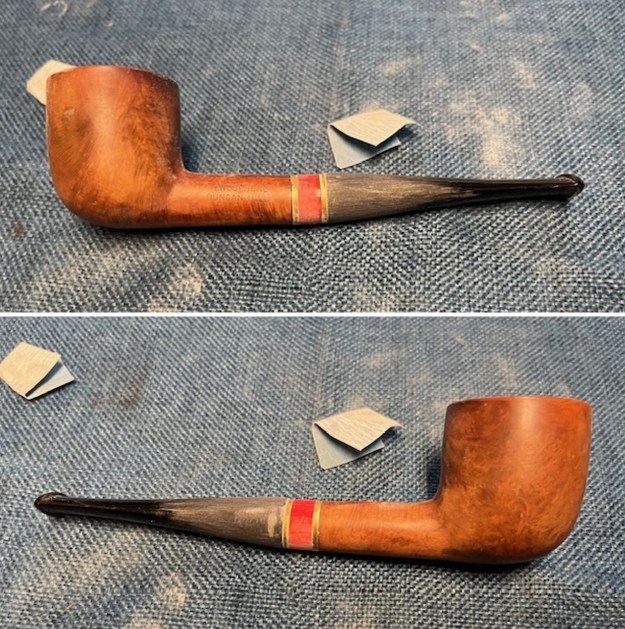
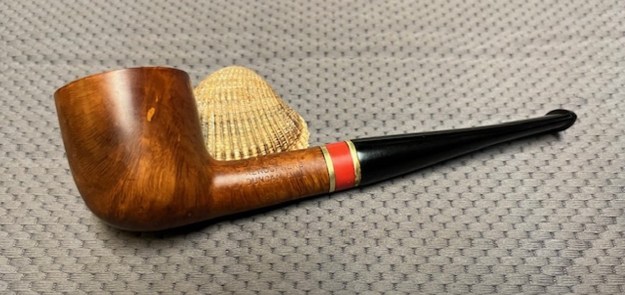
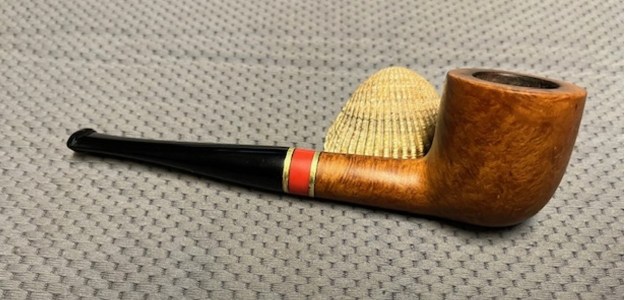
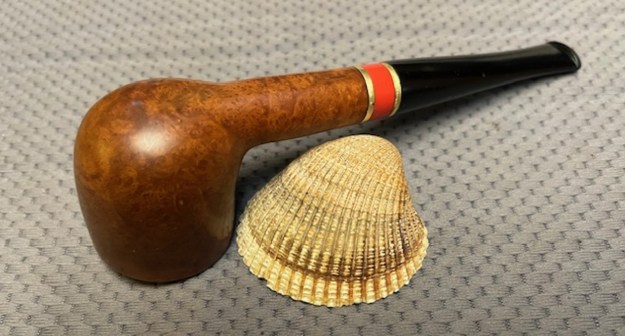
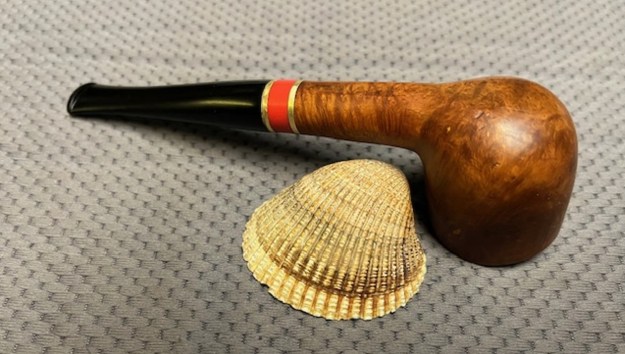
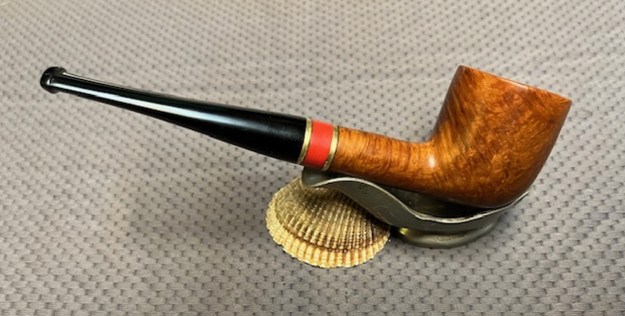
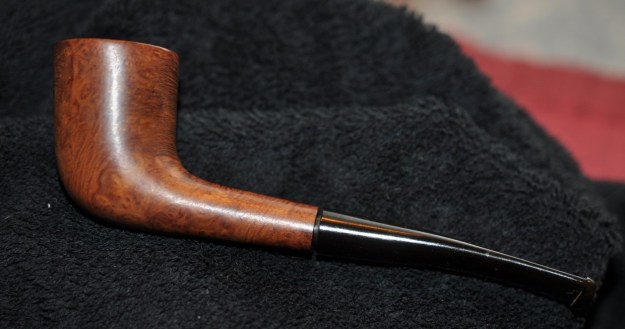
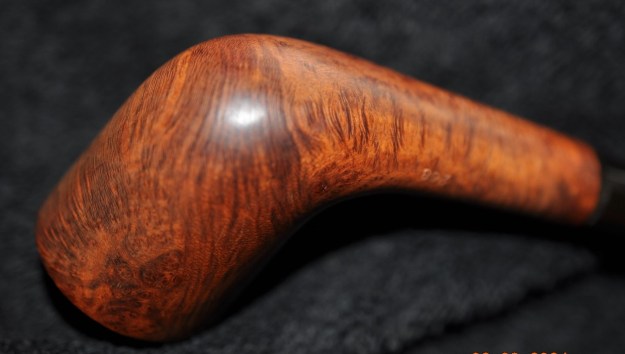
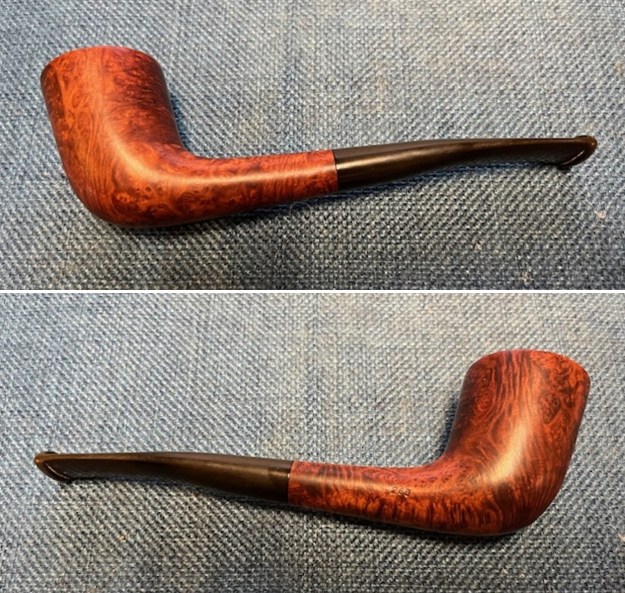
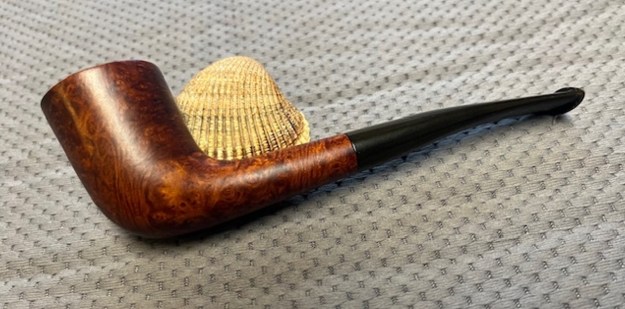
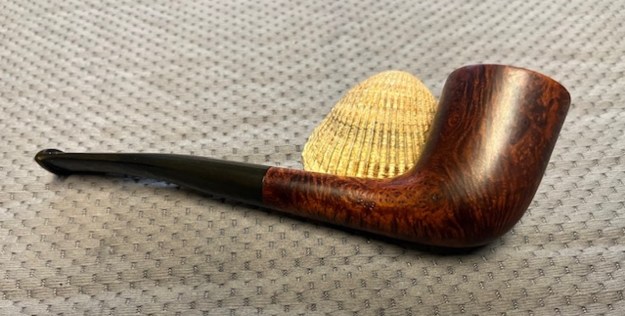
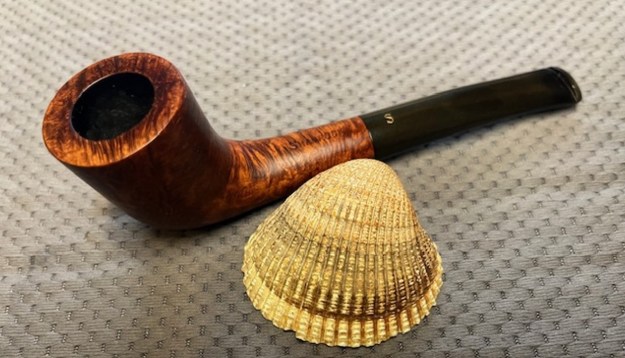
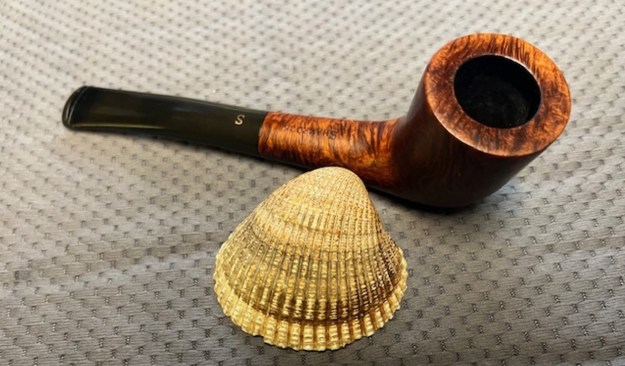
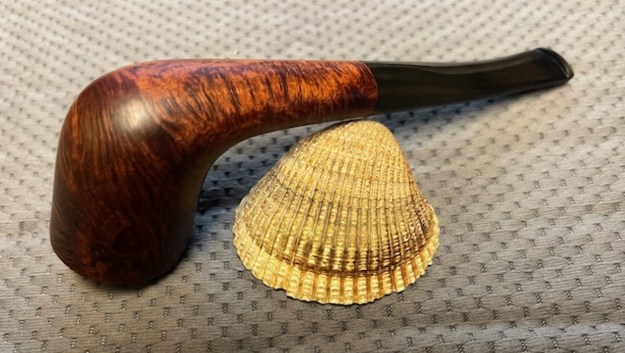
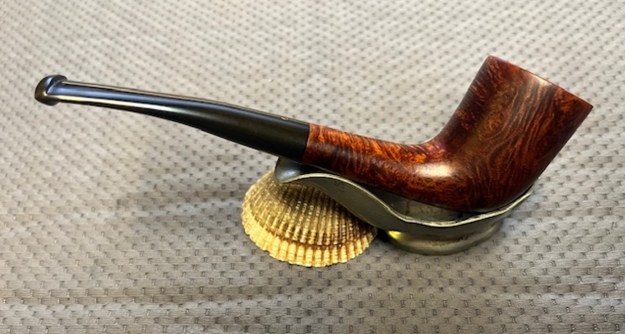
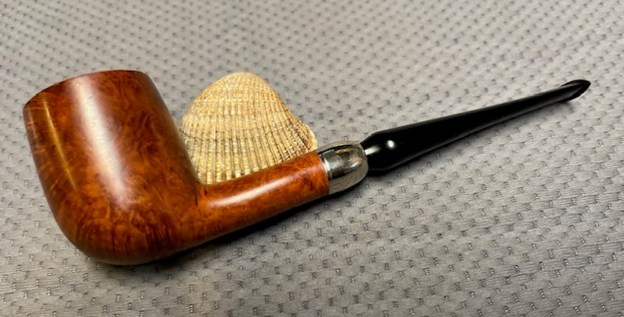
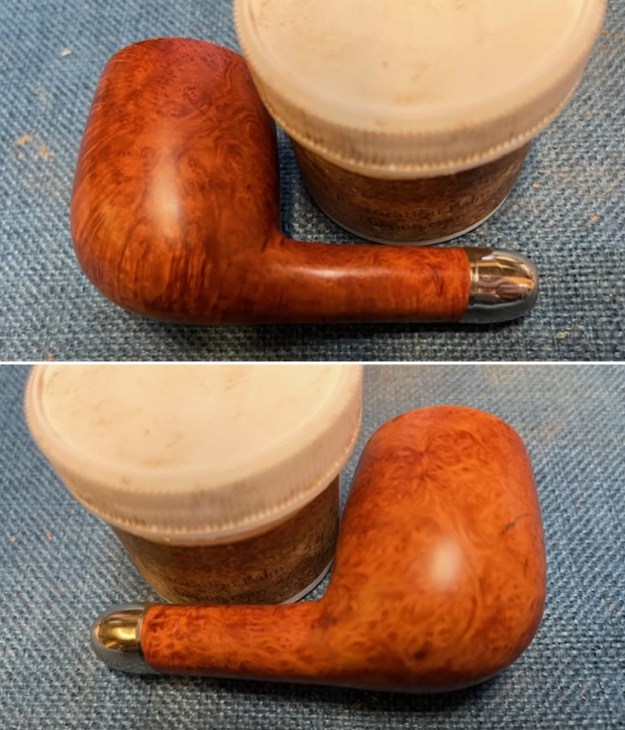
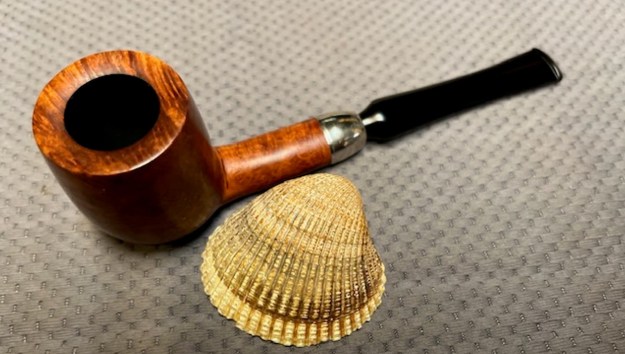
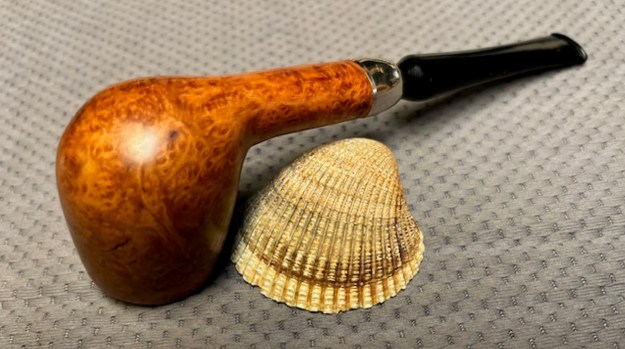
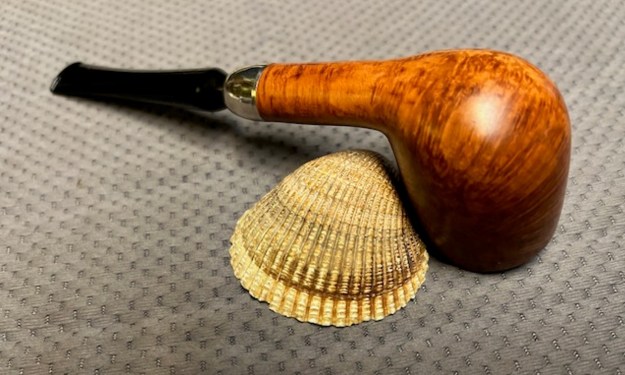
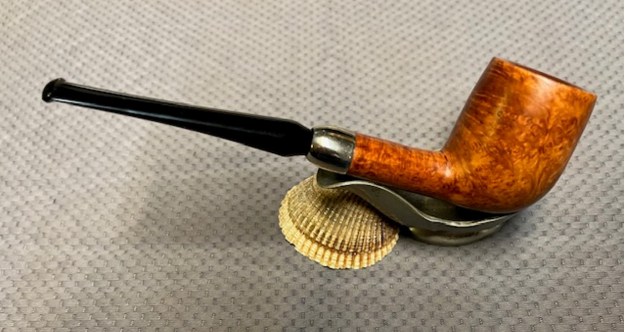
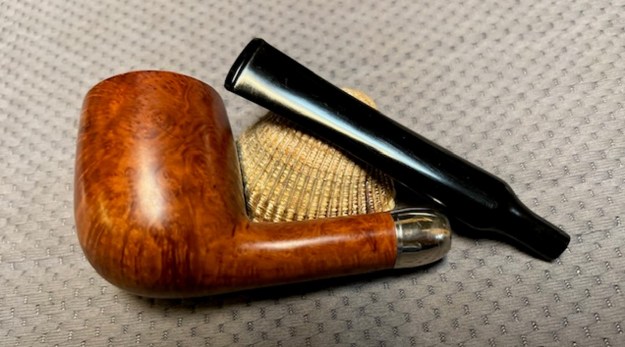
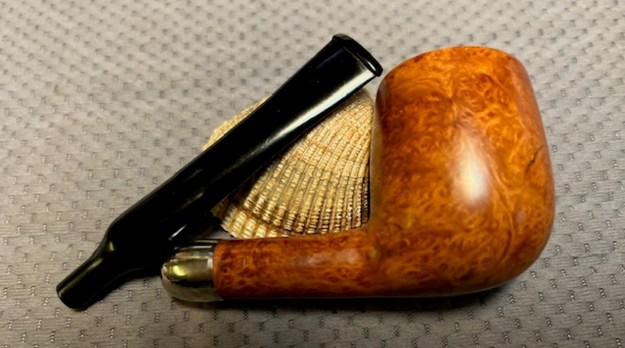
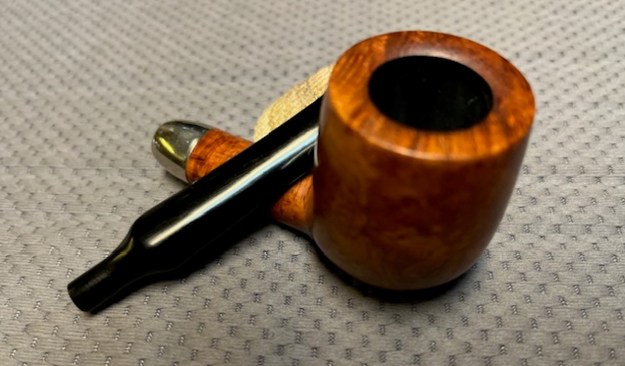
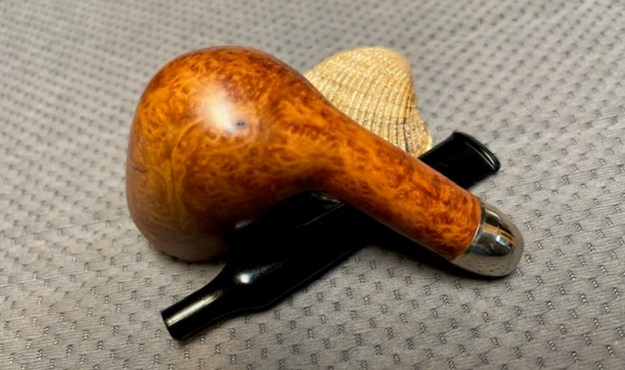
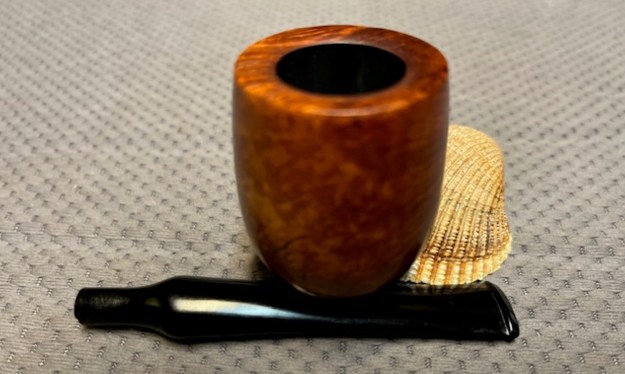
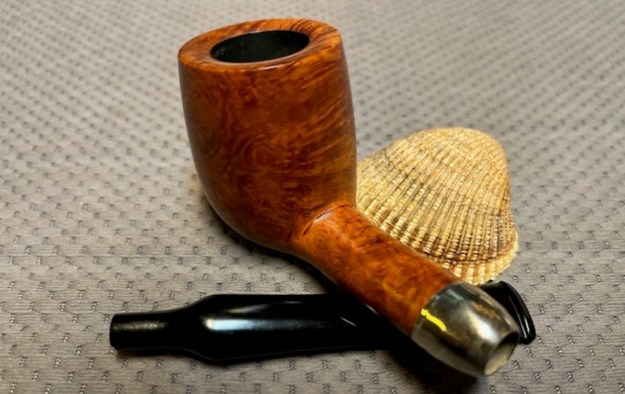
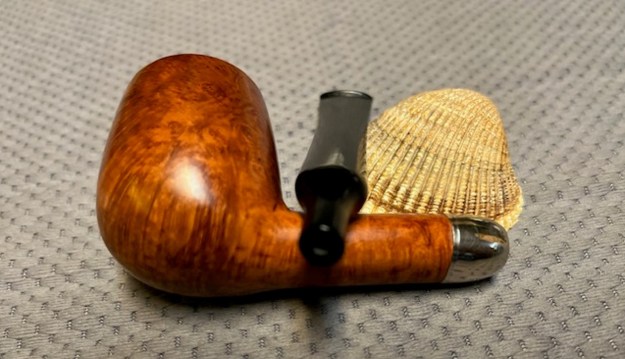
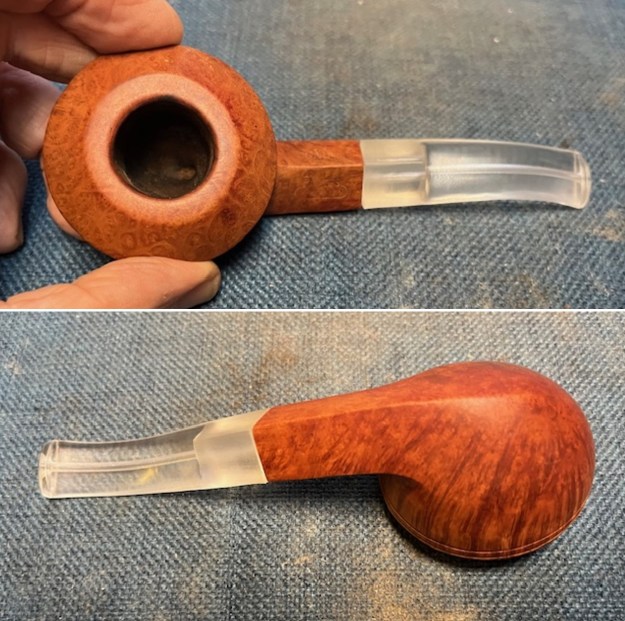
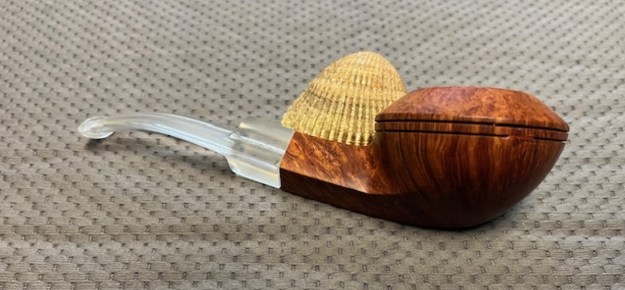
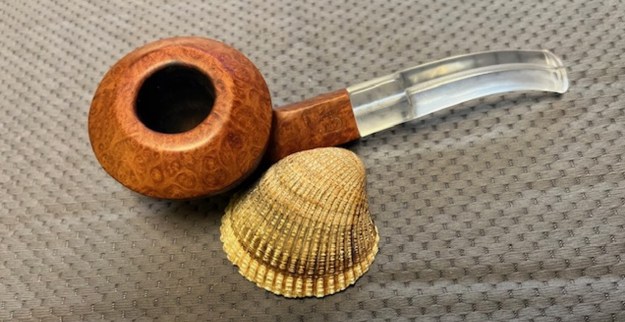
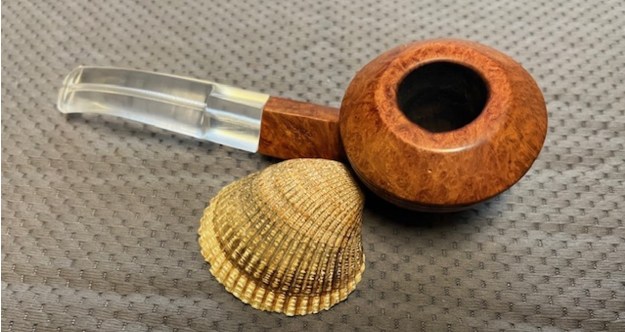
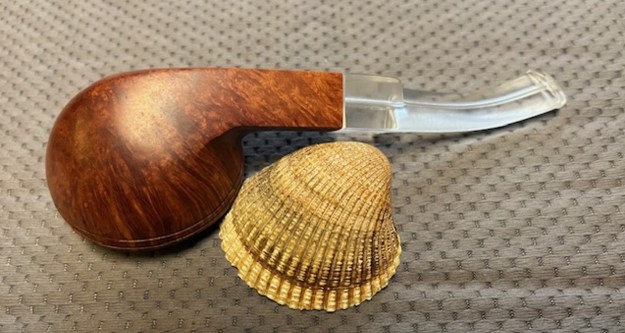
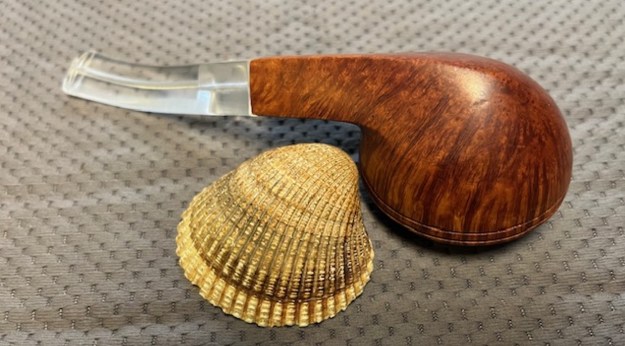
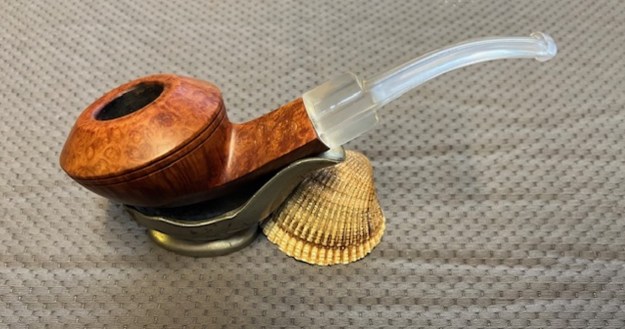
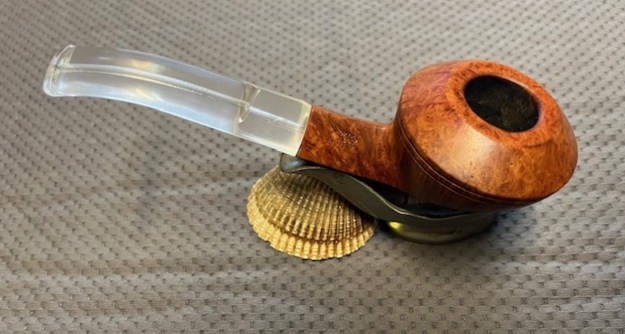
 This Chubby 1945-49 Rogers Rarity 310 Bent Bulldog with an Acrylic/Perspex saddle stem is a well grained pipe with a flowing shape that looks great. The rich browns of the darkened natural finish make the grain come alive with the polishing and waxing. I put the stem back on the bowl and carefully buffed the pipe with Blue Diamond on the buffing wheel using a light touch on the briar. I gave the bowl and the stem multiple coats of carnauba wax on the buffing wheel and followed that by buffing the entire pipe with a clean buffing pad. I hand buffed the pipe with a microfiber cloth to deepen the shine. The finished Rogers Rarity Bent Bulldog really is a beauty and fits nicely in the hand and looks very good. Give the finished pipe a look in the photos below. The dimensions of the pipe are Length: 6 inches, Height: 1 ¾ inches, Outside diameter of the bowl: 2 ¼ inches, Chamber diameter: ¾ of an inch. The weight of the pipe is 1.90 ounces/54 grams. This old timer will soon be on the American Pipe Makers Section of the rebornpipes store if you would like to add it to your collection. Thanks for reading this blog and my reflections on the pipe while I worked on it.
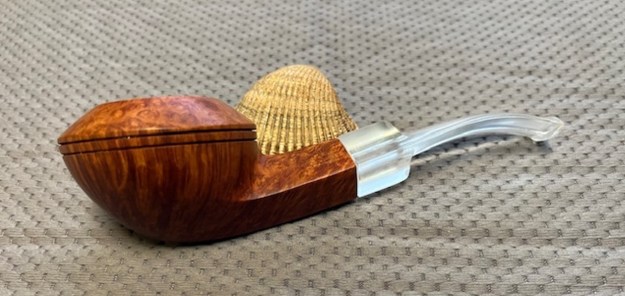
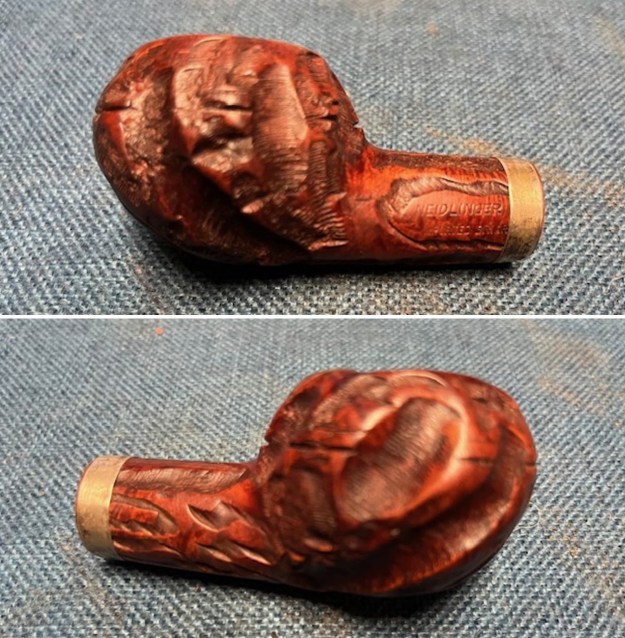
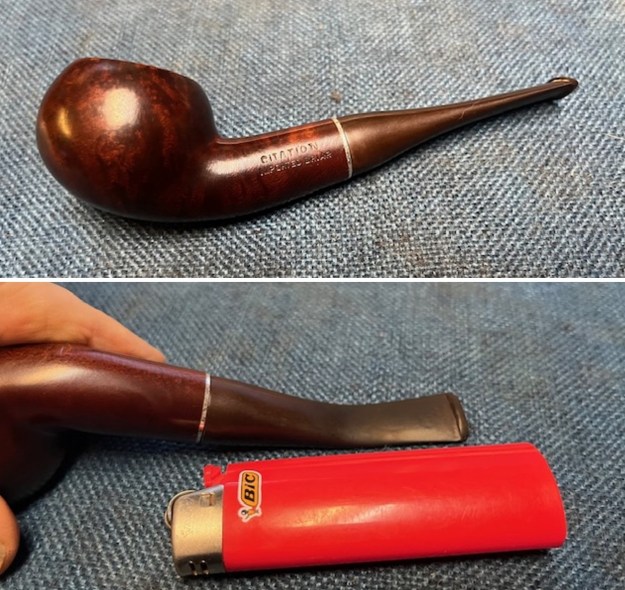
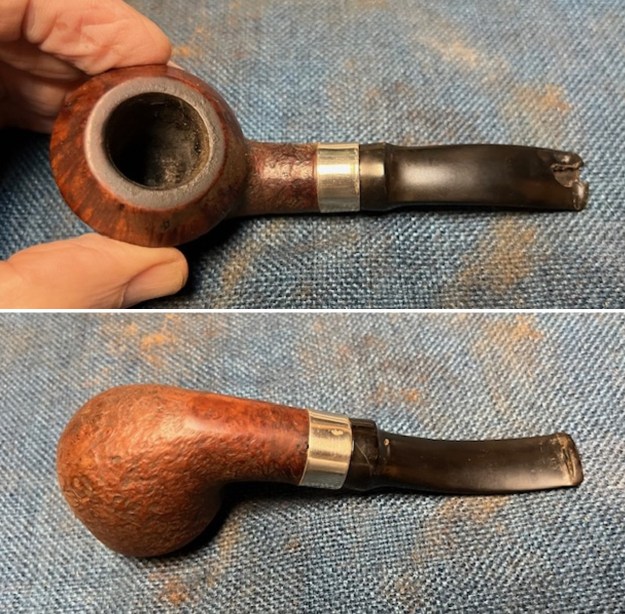
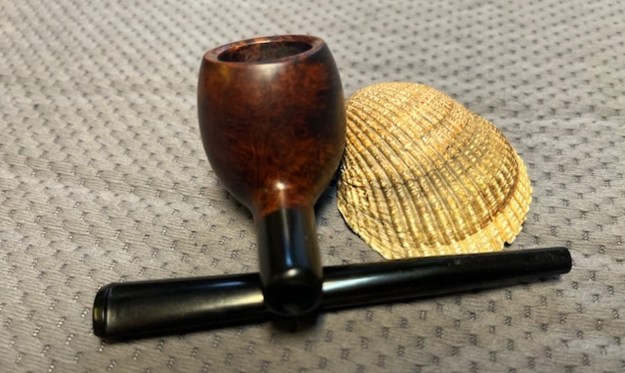
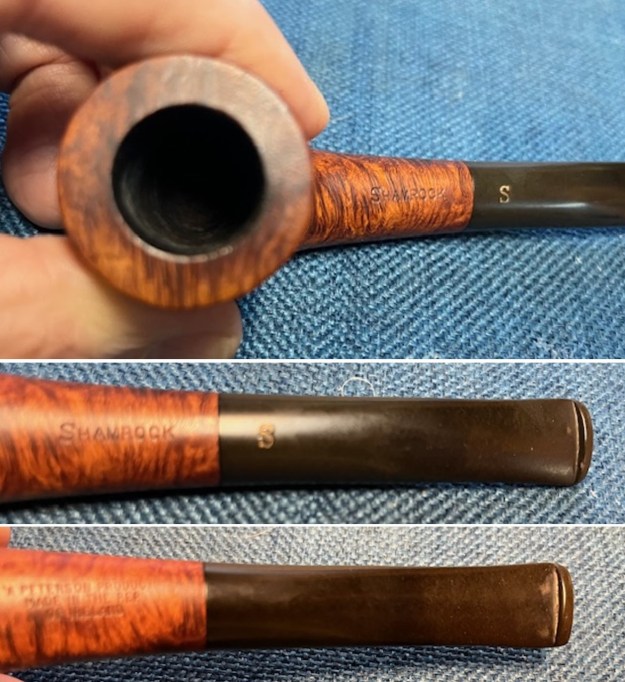
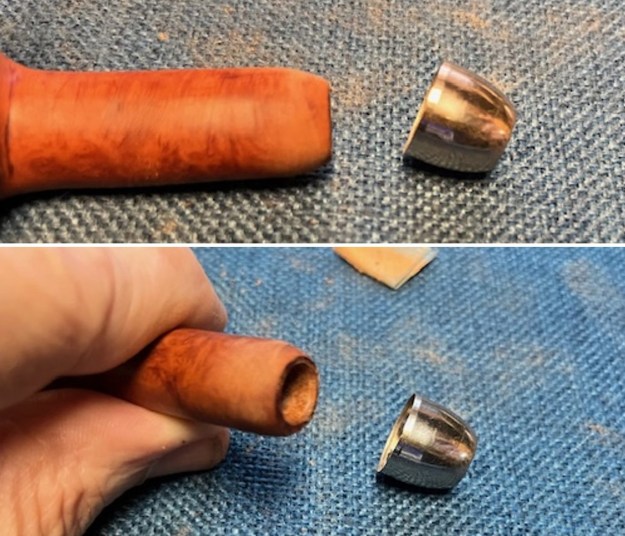
 I took a photo of the stamping on the shank side. It was clear and readable as noted above.
 I went through my can of stems and found one that that was close to the diameter I needed and the tenon would need a slight adjustment for it to fit in the shank.
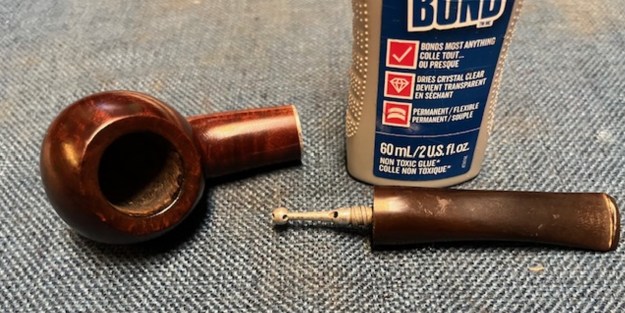
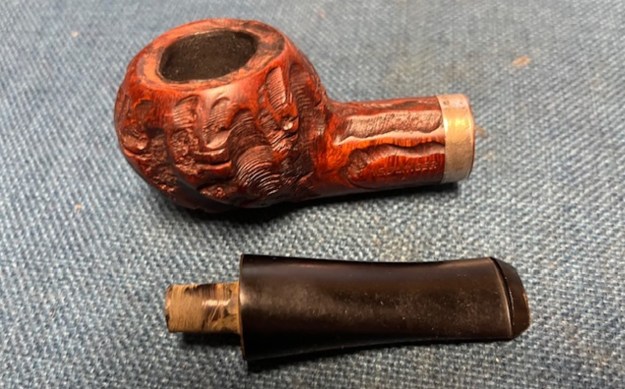
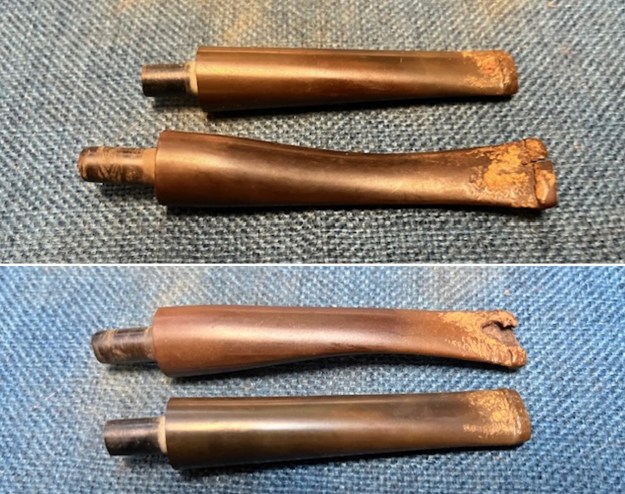
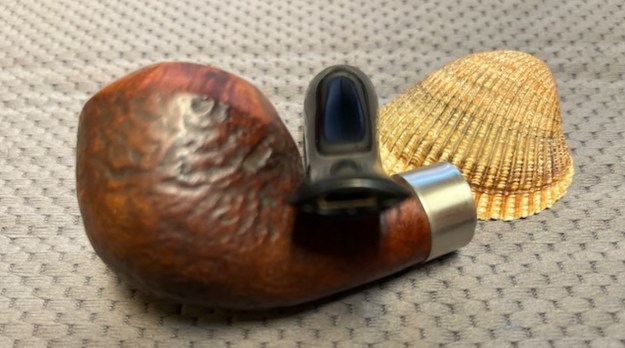
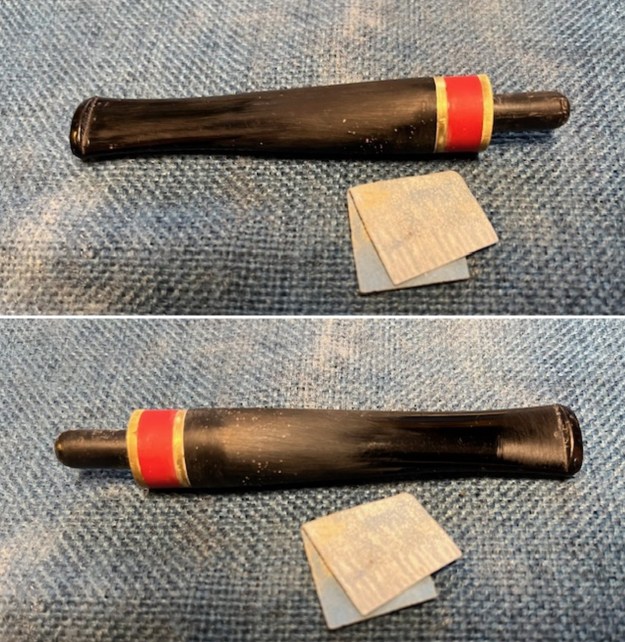
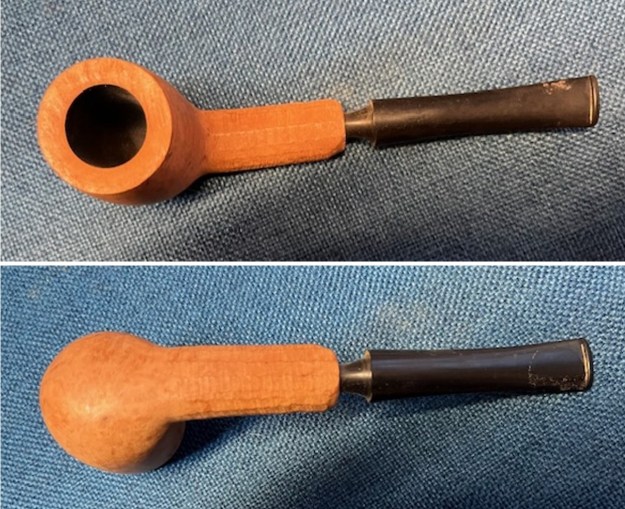
 I used a file to reduce the diameter of the tenon. I cleaned up the tenon diameter with my Dremel and a sanding drum. It did not take much for the stem to fit well in the shank. I put it in place and took photos. You can see in the photos that the stem diameter will need to be adjusted as the shank is not round and the stem is.
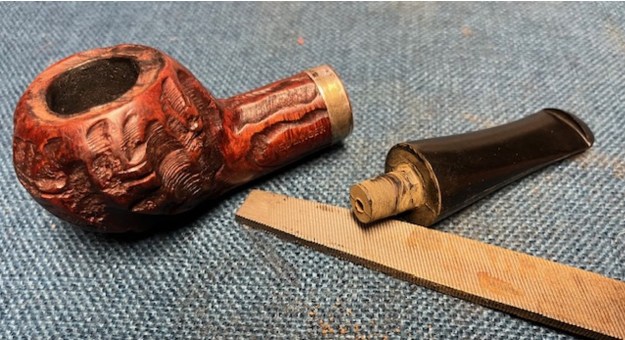
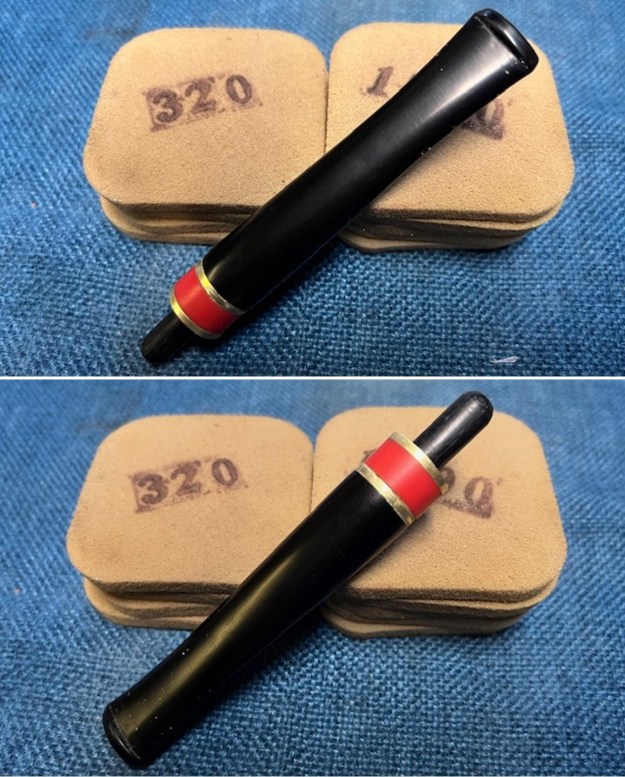
 I worked on the adjustment of the outside diameter of the stem with my Dremel and a sanding drum. I took off the majority of the excess vulcanite that way. The rest would need to be done with files and sanding pads.
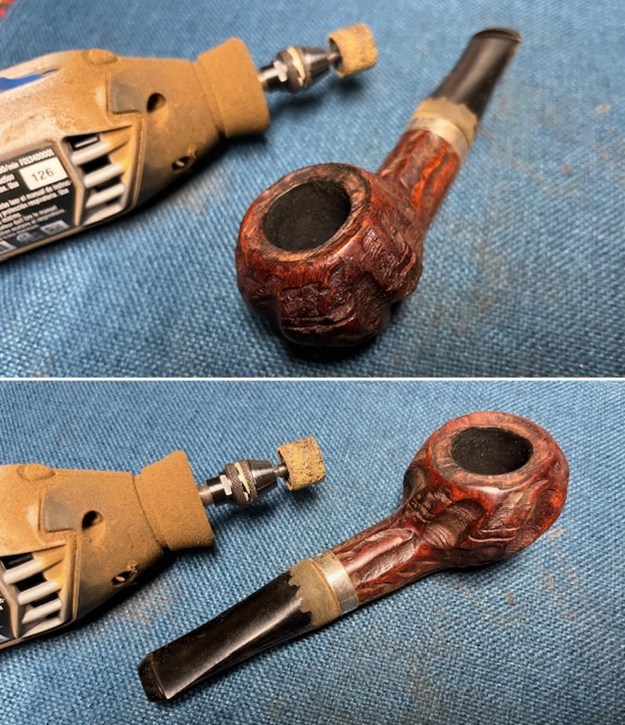
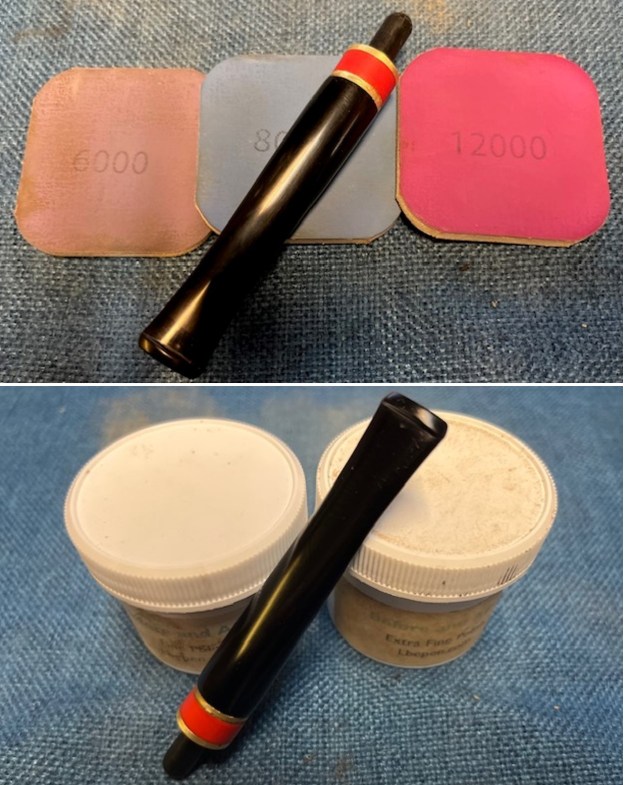
 I sanded the stem with 220 grit sandpaper to smooth out the marks from the Dremel. I followed that by sanding it with 320-3500 grit sanding pads to further blend down the sanding areas. I wiped the stem down between pads with an Obsidian Oil cloth to remove the sanding debris from the stem.
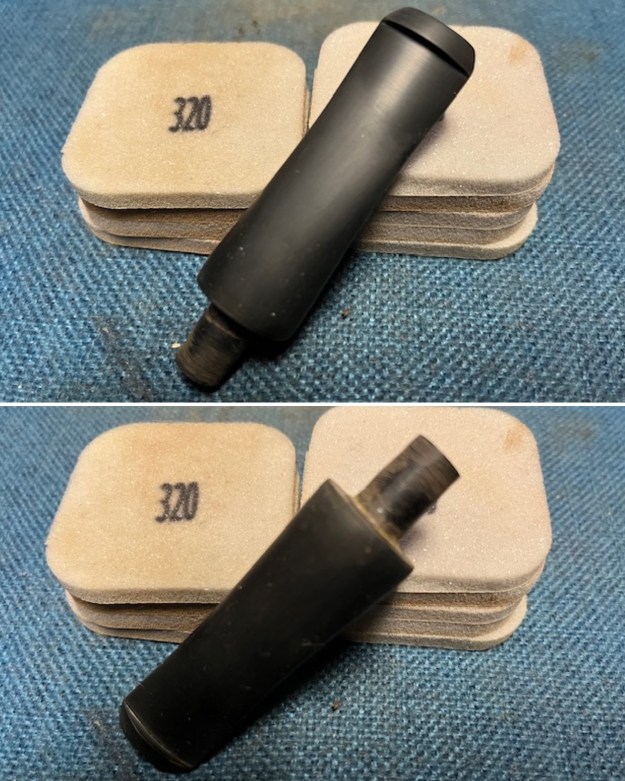 I polished the stem with micromesh sanding pads – dry sanding with 1500-12000 grit sanding pads. I wiped it down after each sanding pad with Obsidian Oil. I polished it with Before & After Pipe Stem Polish – both Fine and Extra Fine.
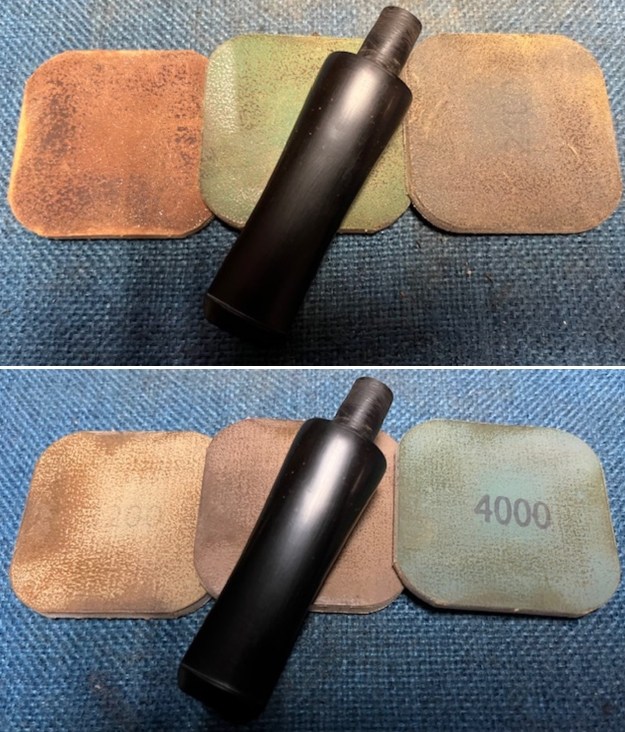
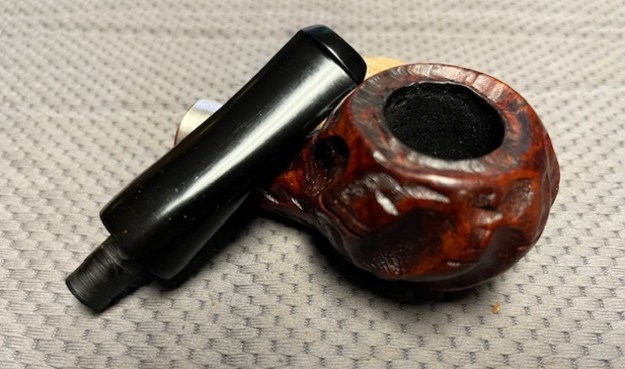
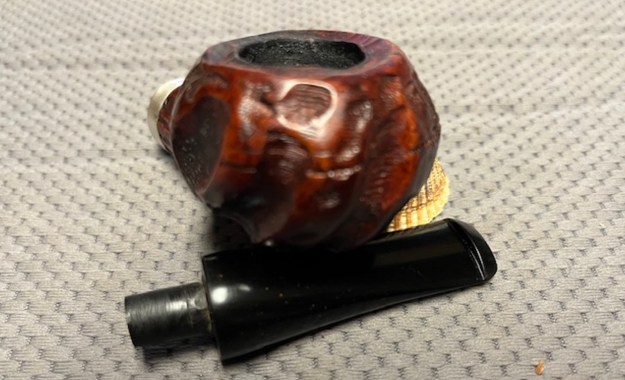
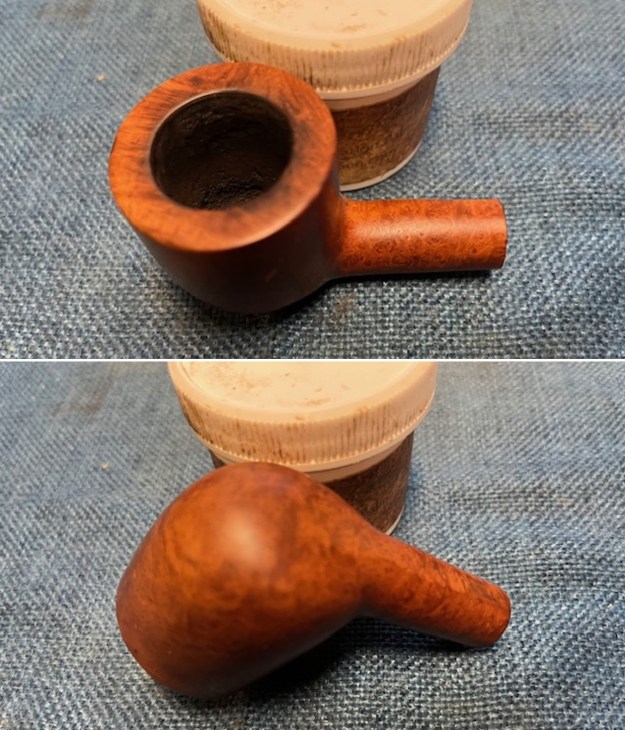
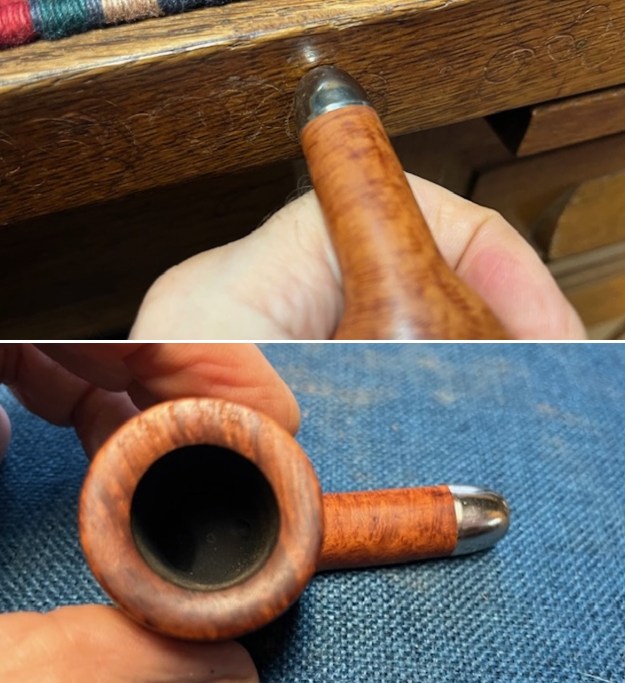
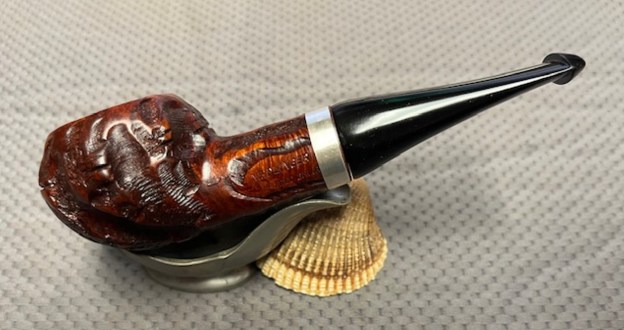
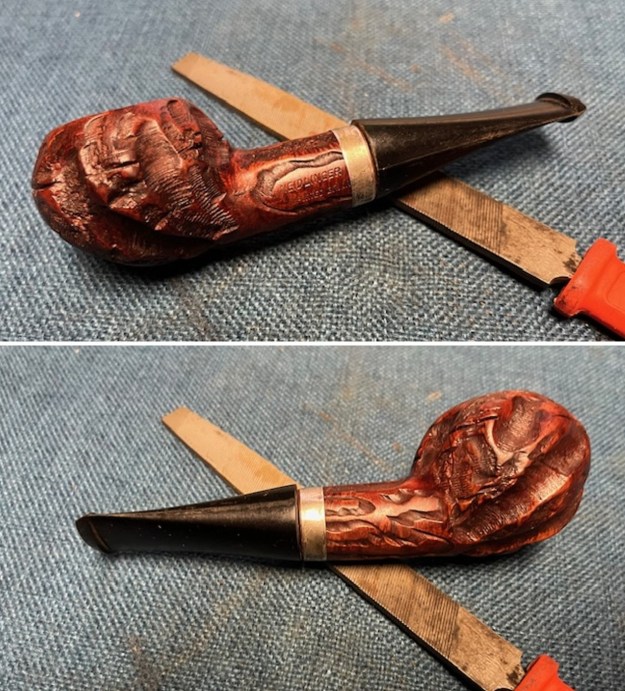
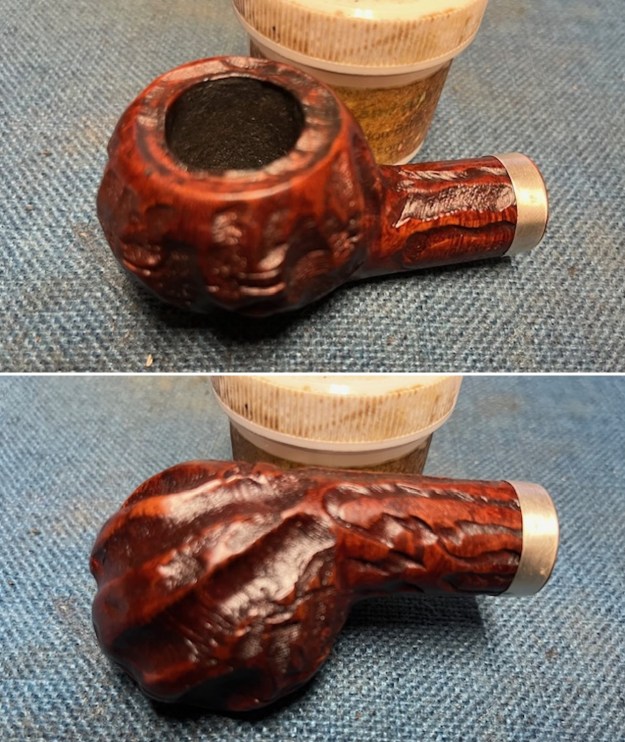
 I set the stem down and turned my attention to the clean bowl. I used a brass bristle wire brush to work over the rim top and remove the debris in the carving. It looked cleaner.
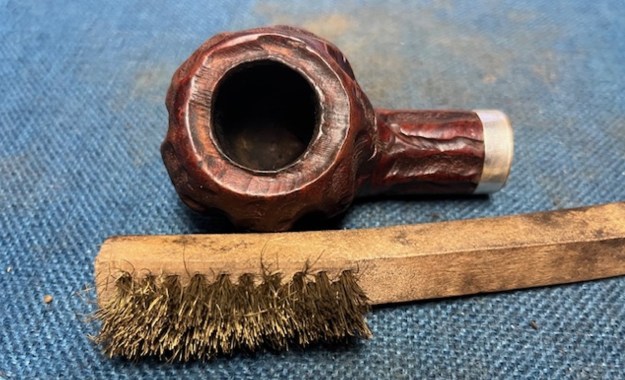 I polished the silver band with 1500-3000 grit micromesh sanding pads and then finished with a jeweller’s cloth to raise the shine and protect it from further oxidation.
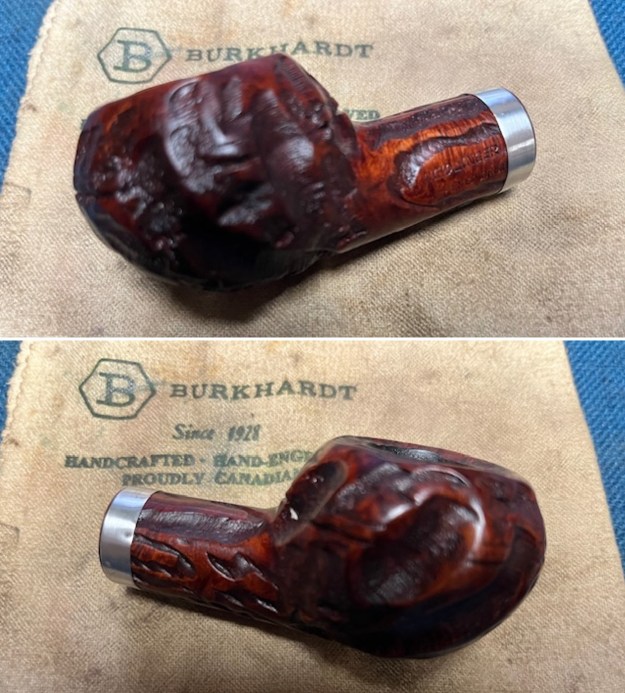
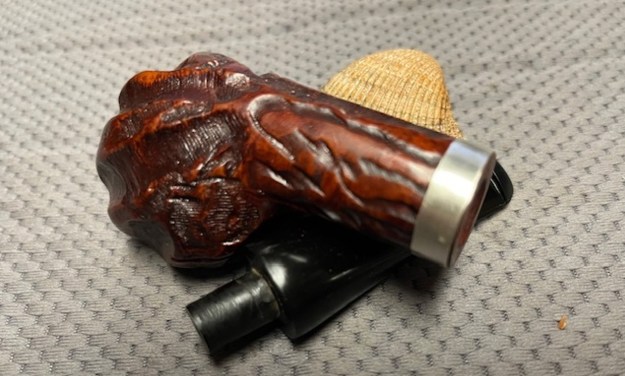
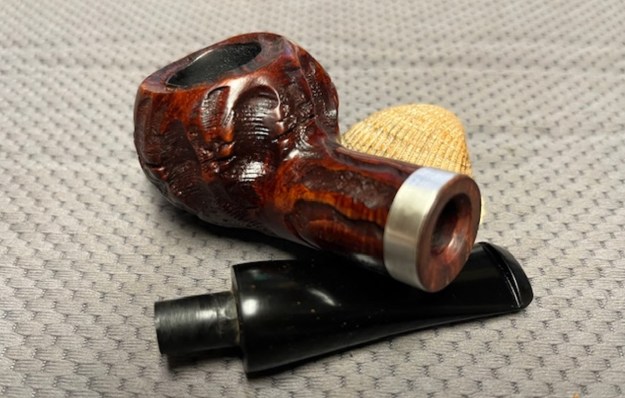
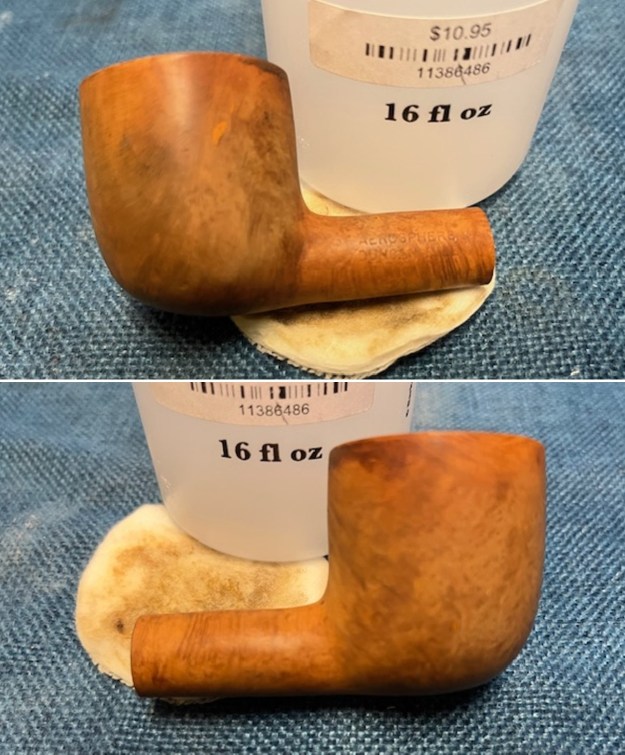
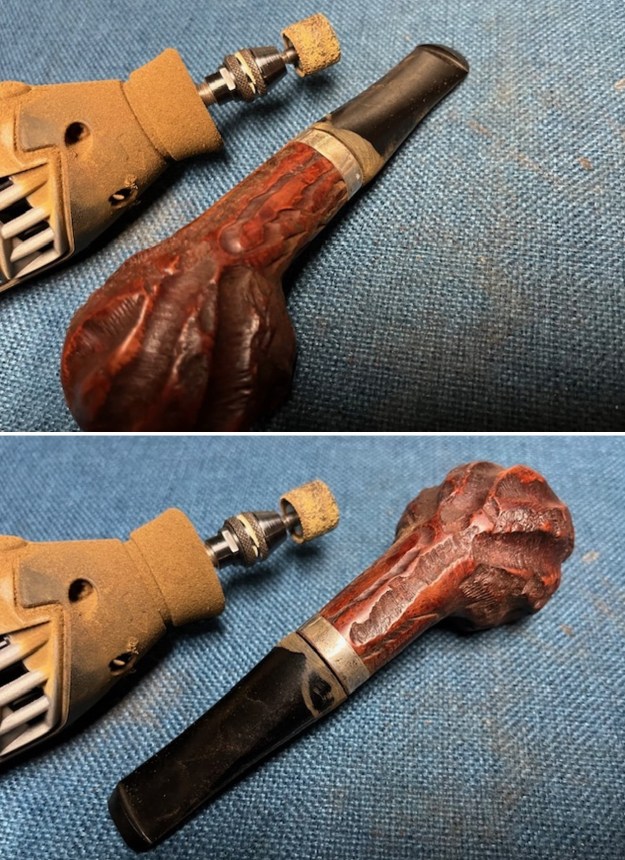
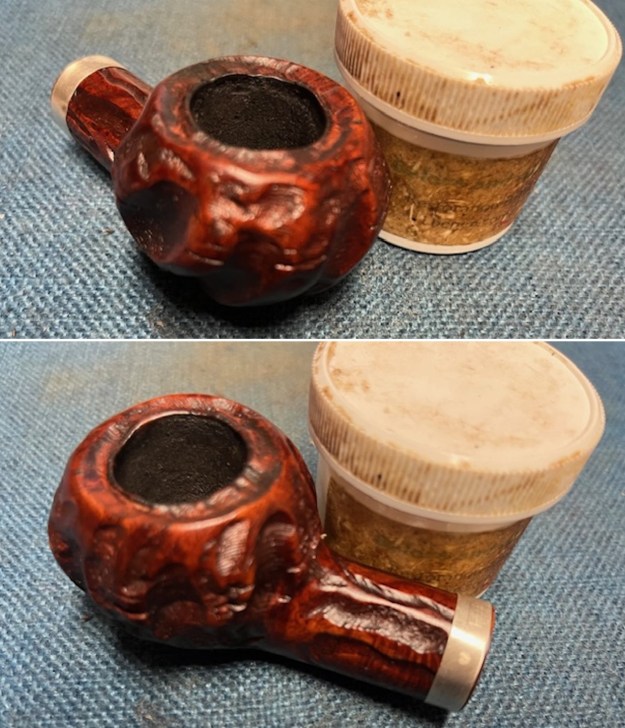
 I worked some Before & After Restoration Balm into the surface of the briar with my finger tips and a shoe brush to get into the carving on the bowl and shank. The product works to clean, enliven and protect the briar. I let the balm sit for 15 minutes and then buffed with a cotton cloth to raise the shine. The photos show the bowl at this point in the restoration process.
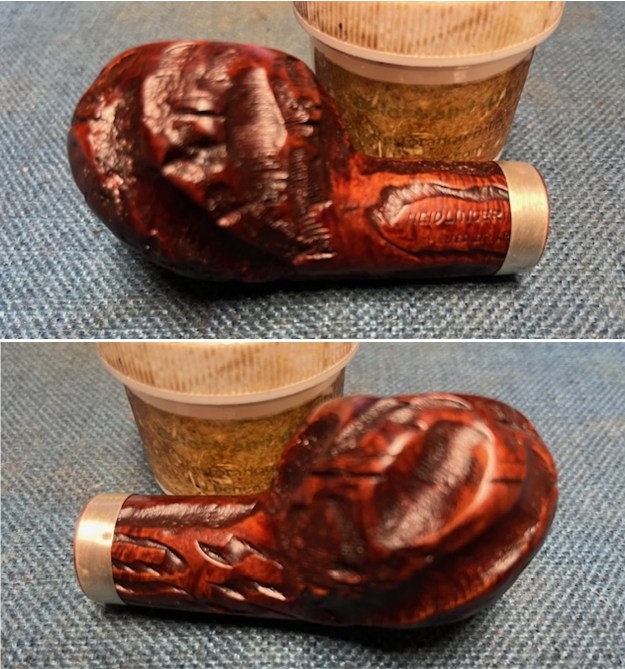
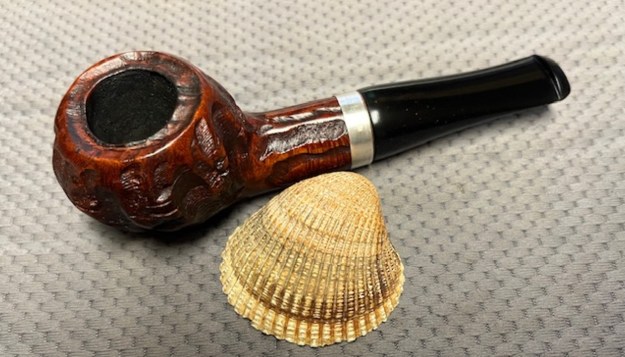
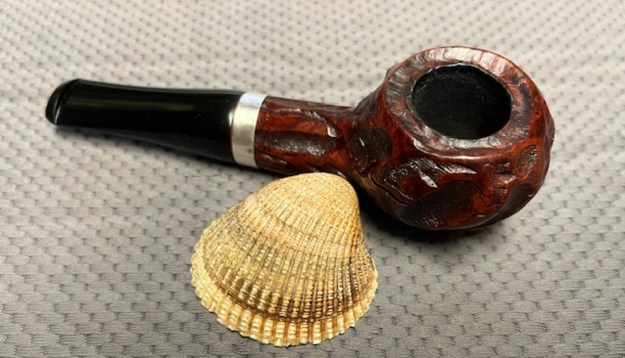
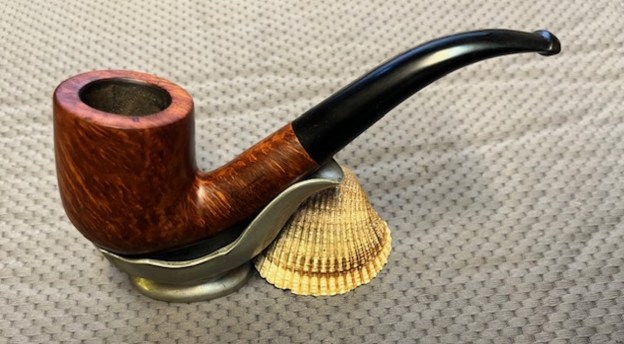
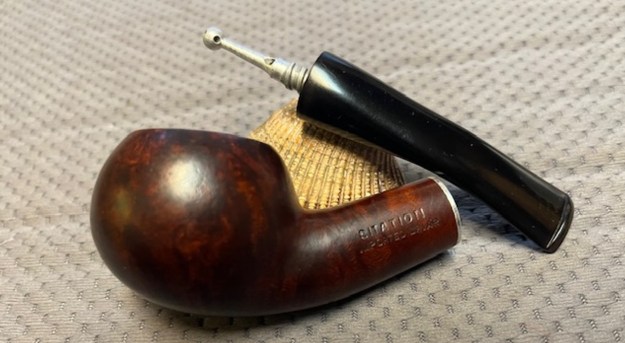
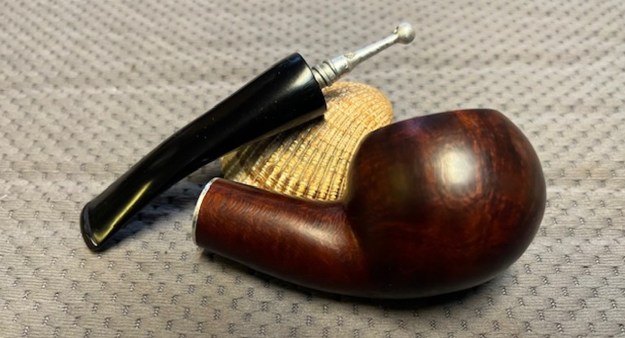
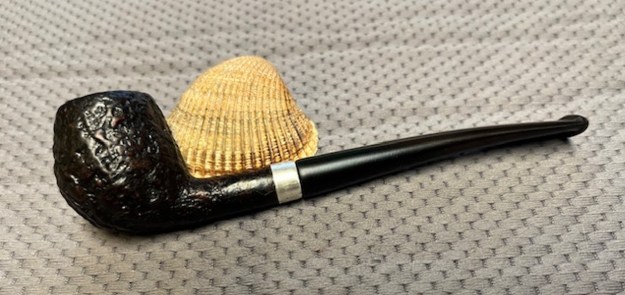
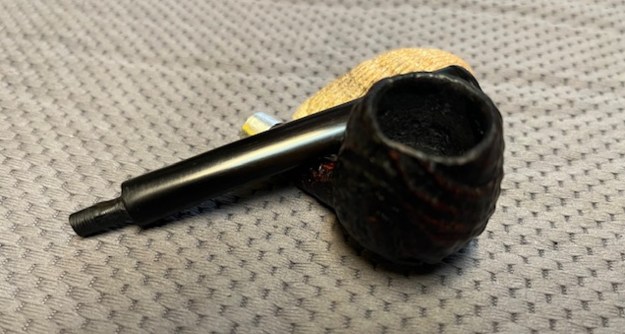
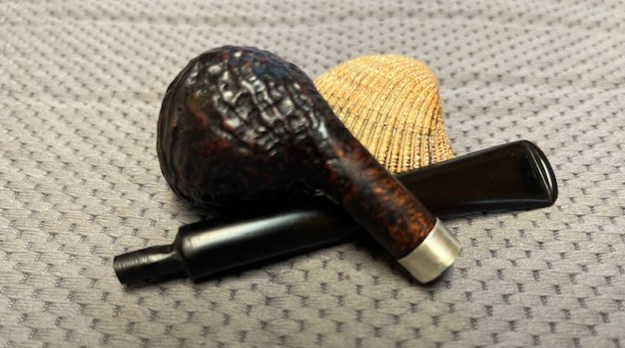
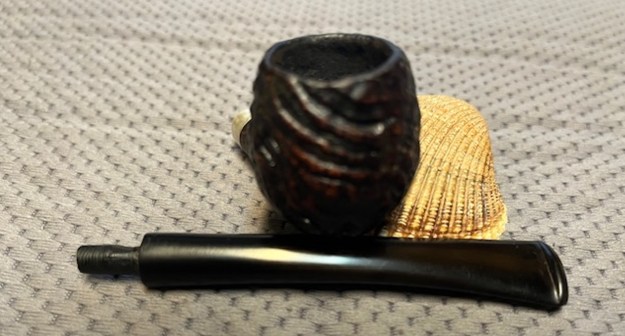
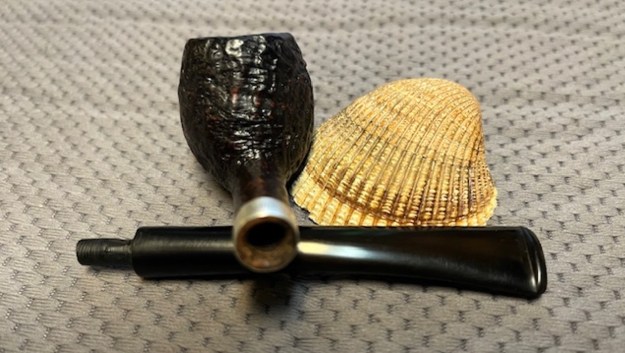
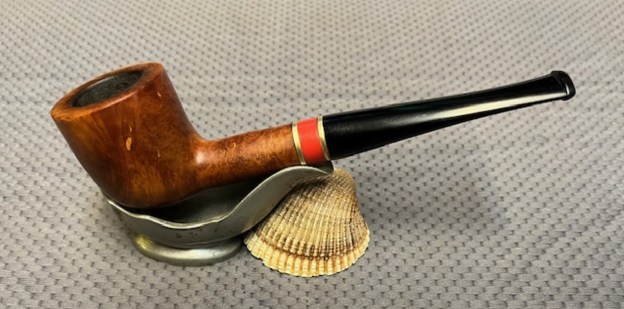
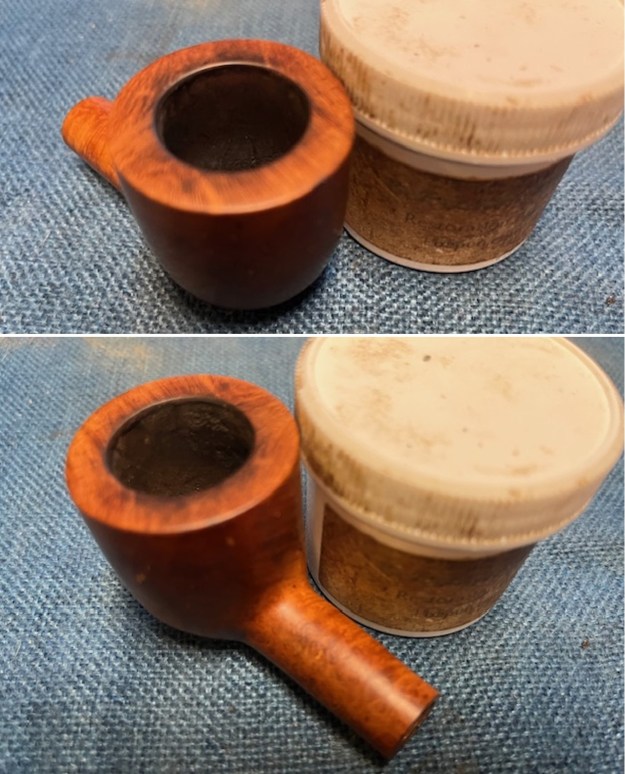
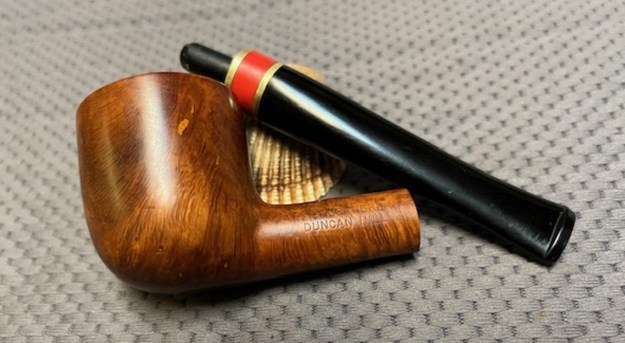
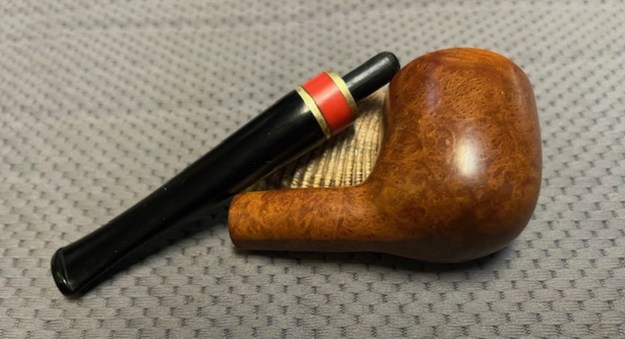
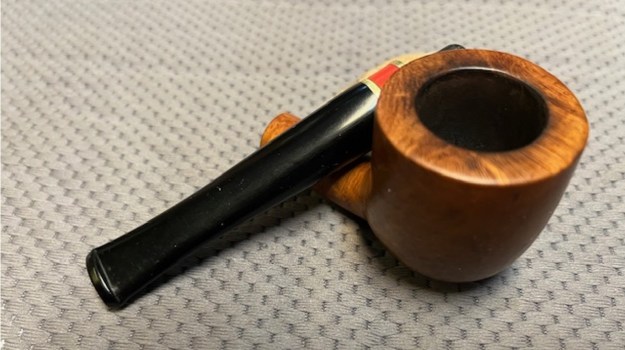
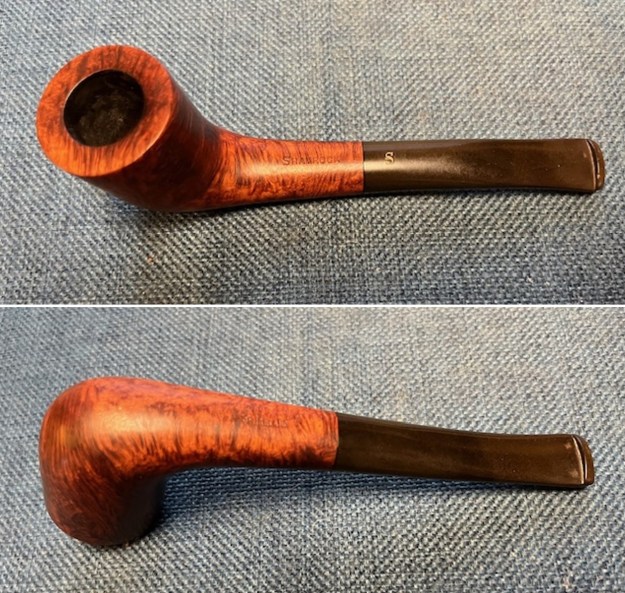
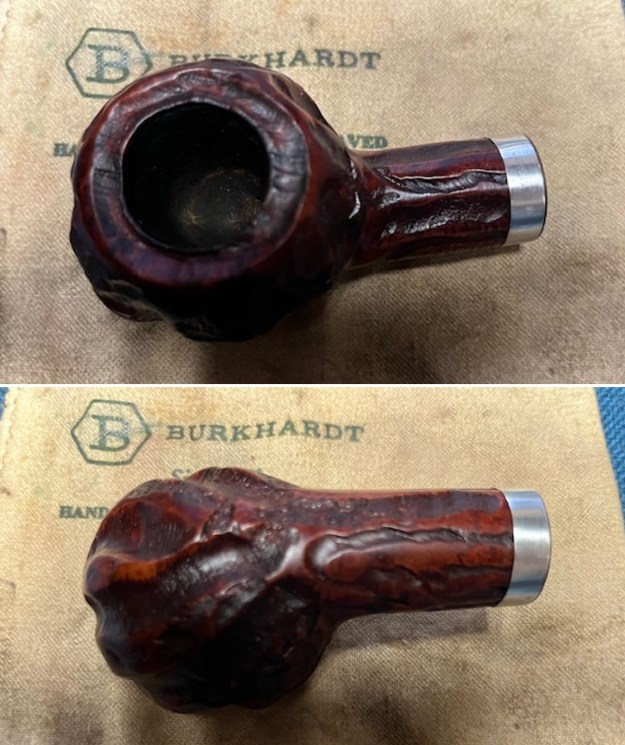
 This Rusticated Neidlinger Imported Briar Rhodesian is a great looking pipe now that it has been restored and restemmed. The rich finish gives the shape an elegant look. The flow of the bowl and stem are well done make for a great hand feel. I put the stem back on the bowl and carefully buffed the pipe with Blue Diamond on the buffing wheel using a light touch on the briar. I gave the bowl and the stem multiple coats of carnauba wax on the buffing wheel. I buffed the entire pipe with a clean buffing pad. I hand buffed the pipe with a microfiber cloth to deepen the shine. The finished Neidlinger Rhodesian fits nicely in the hand and feels great. Give the finished pipe a look in the photos below. The dimensions of the pipe are Length: 6 inches, Height: 1 ¾ inches, Outside diameter of the bowl: 1 ½ inches, Chamber diameter: 7/8 of an inch. The weight of the pipe is 64 grams/2.26 ounces. It is a great looking and light weight pipe. I will be putting it on the rebornpipes store shortly. If you are interested in adding this pipe to your collection send me a message or an email. Thanks for reading this blog and my reflections on the pipe while I worked on it.