Blog by Steve Laug
If you have followed rebornpipes for long you will know that I am a sucker for older pipes and that if I have restored pipes for you in the past I will definitely be available to you for future restorations. The post just previous to this one on an old 1902 LKL Cutty was an example of both of those these maladies of mine. This post speaks to the second one – if I have worked on a pipe for you in the past I will be available as best I can for future restorations. Some of you will recognize Henry Ramirez name as he was a long time contributor to rebornpipes with his innovative restorations. Henry is a dentist who retired not long ago and got rid of his restoration tools. He wrote to see if I could help him out with the restoration of a small Dunhill he had. He wrote the following email:
Hi Steve, long time no talk. I recently moved again to San Francisco and upon opening an empty tin of vintage Dunhill tobacco found the small Dunhill that I’d thought was lost. I’ve gotten rid of my pipe cleaning supplies since moving to an apartment and was hoping you could clean this pipe up for me. You seem to be very busy and in the middle of large restorations. Let me know if you can help. Best, Henry
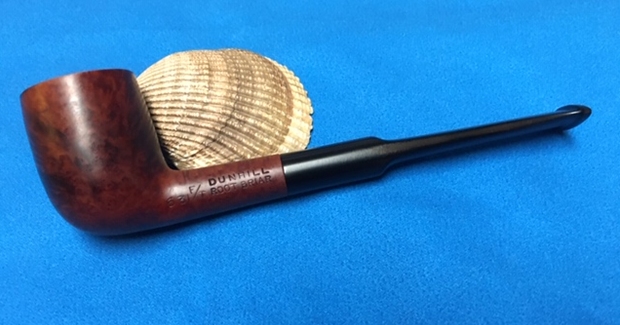
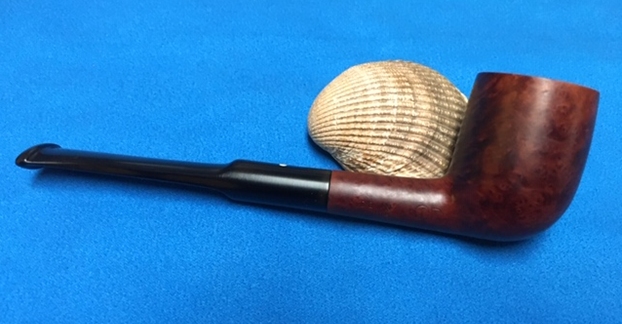
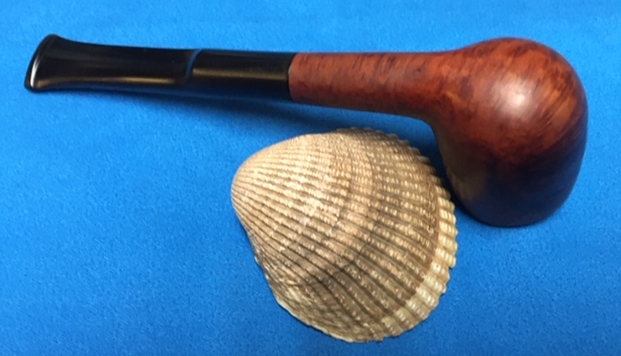
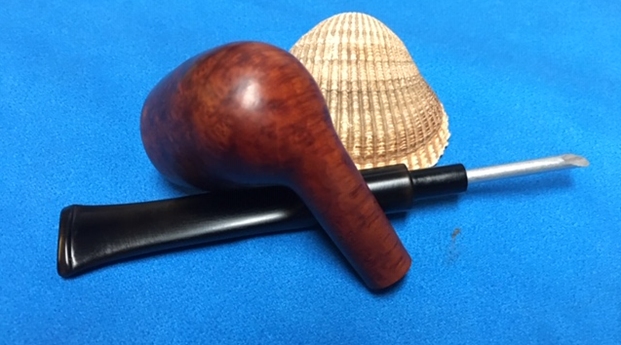
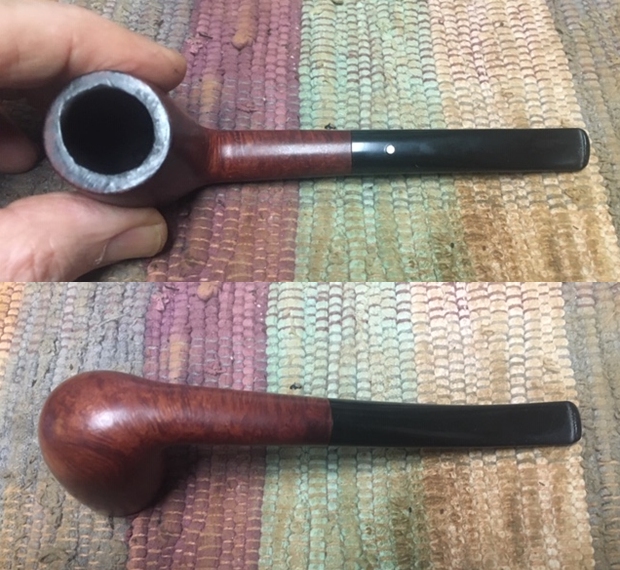
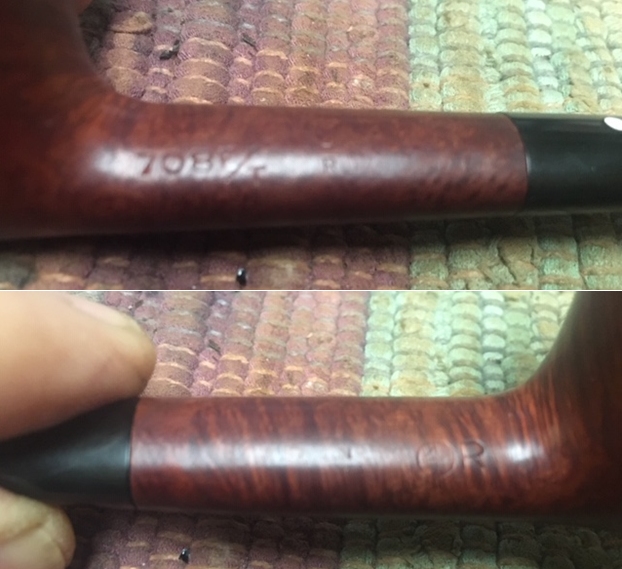
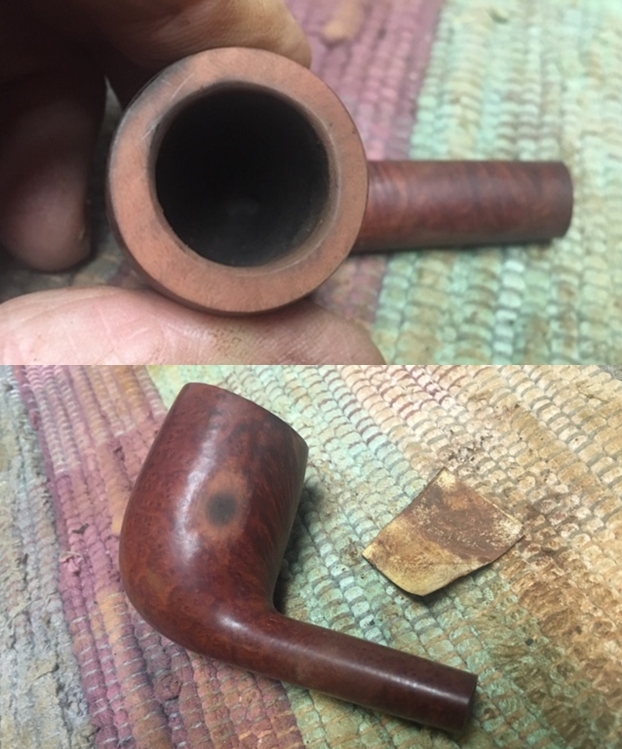
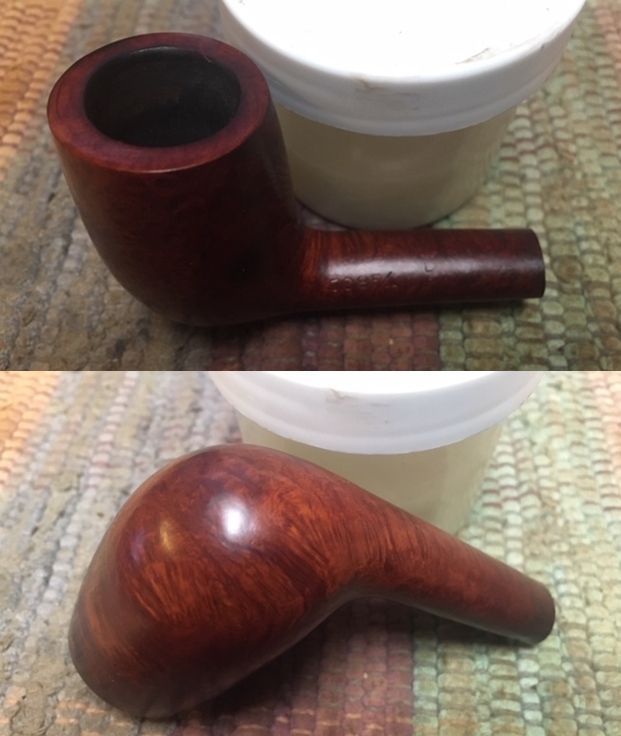
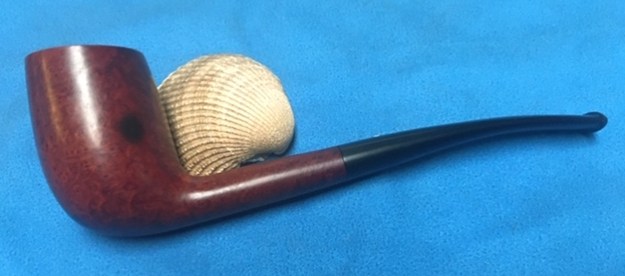
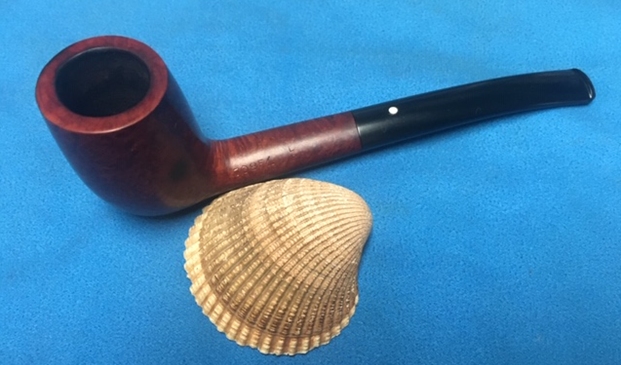
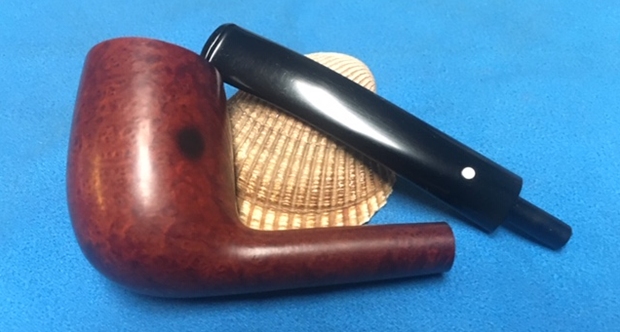
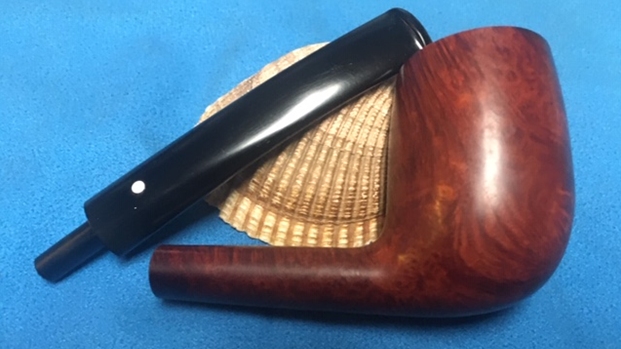
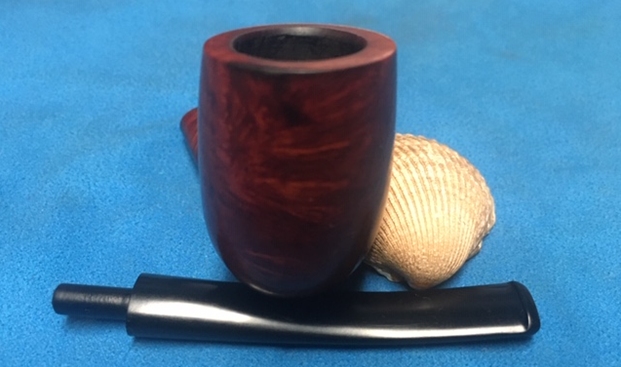
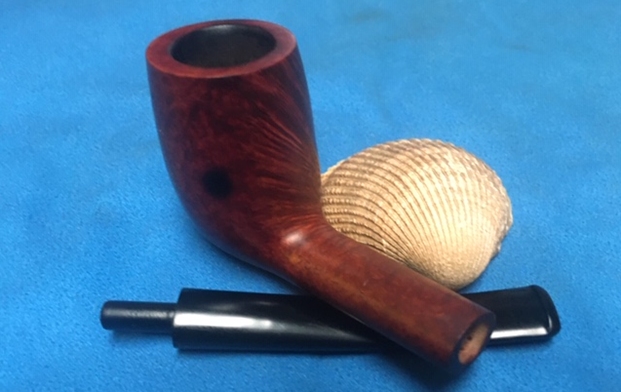
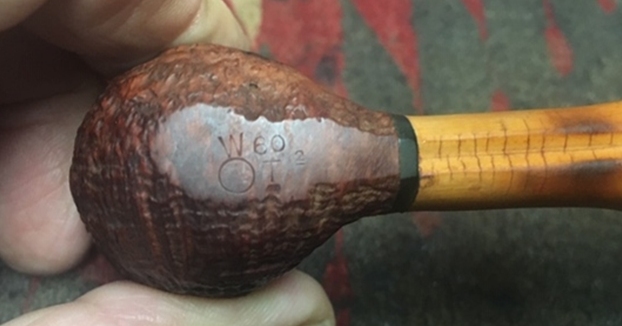
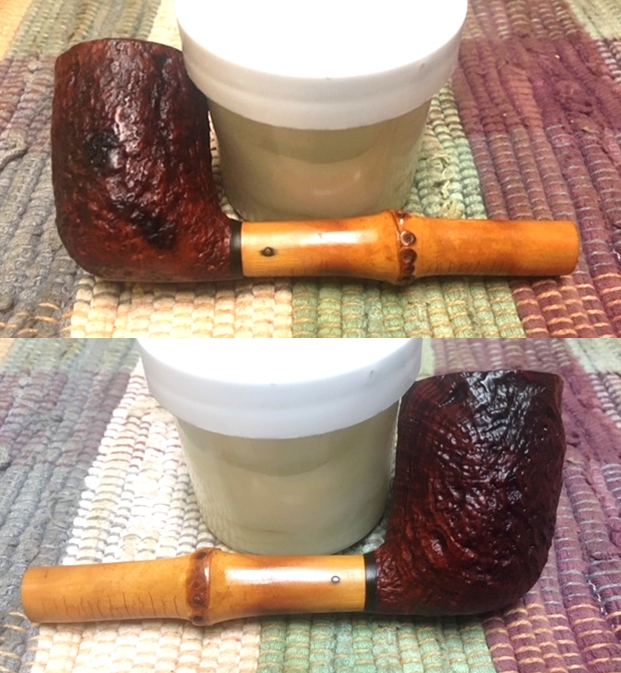
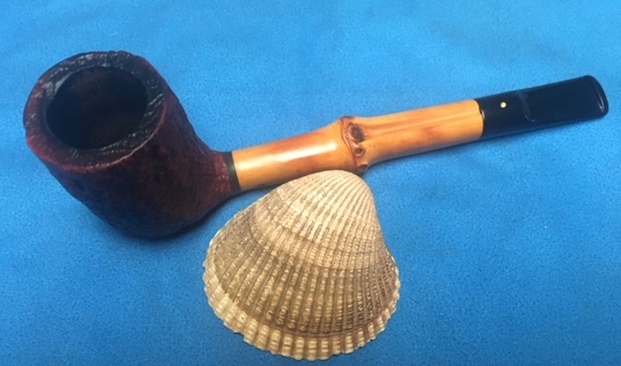
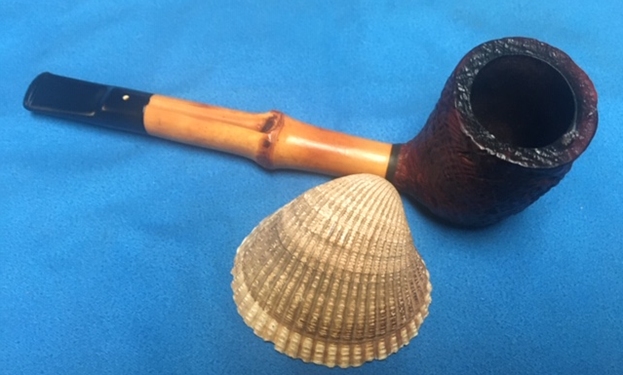
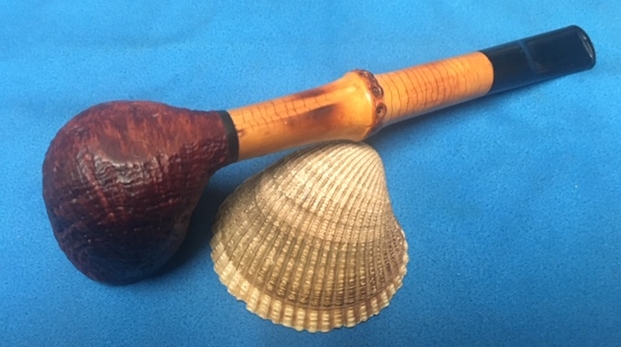
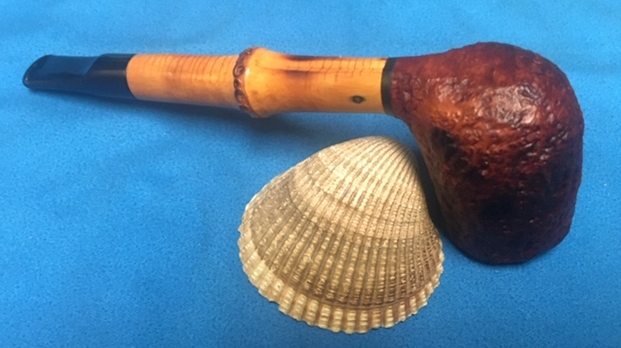
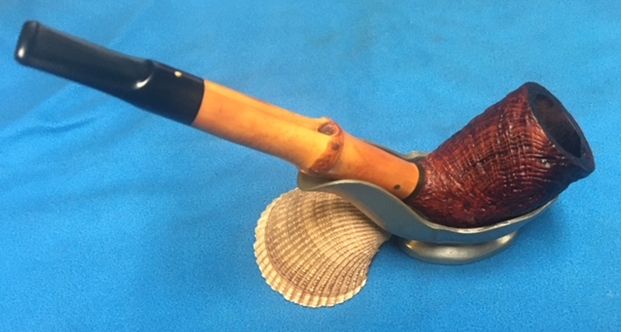
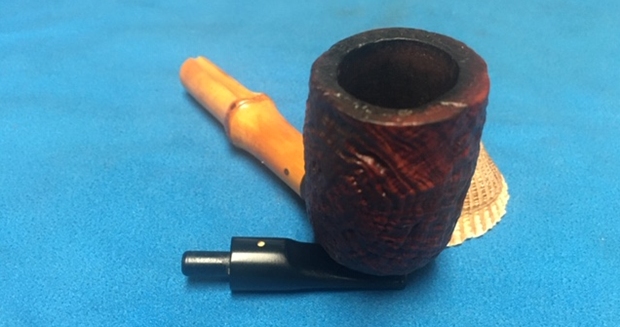
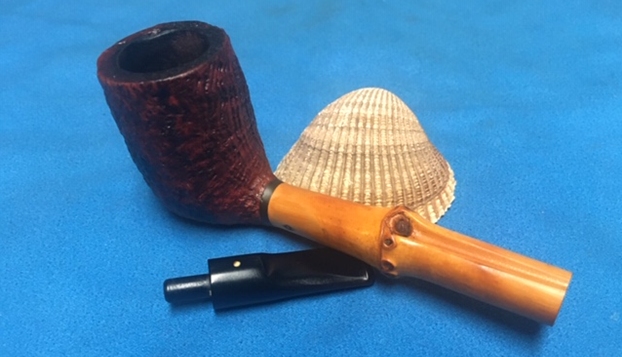
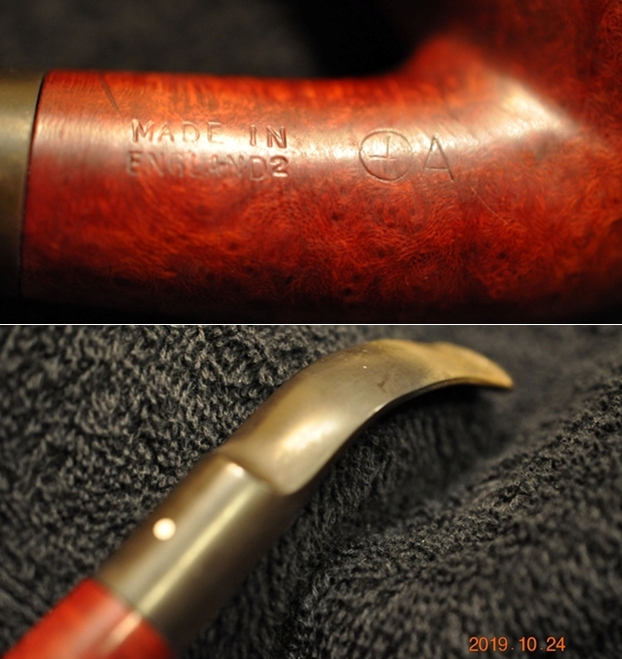
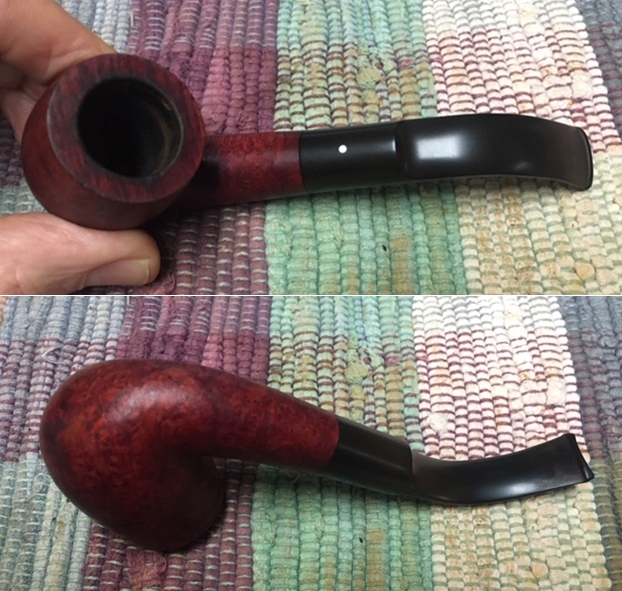
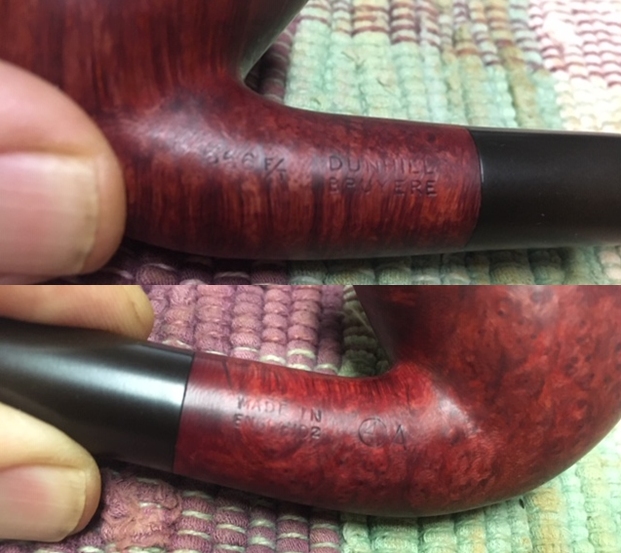
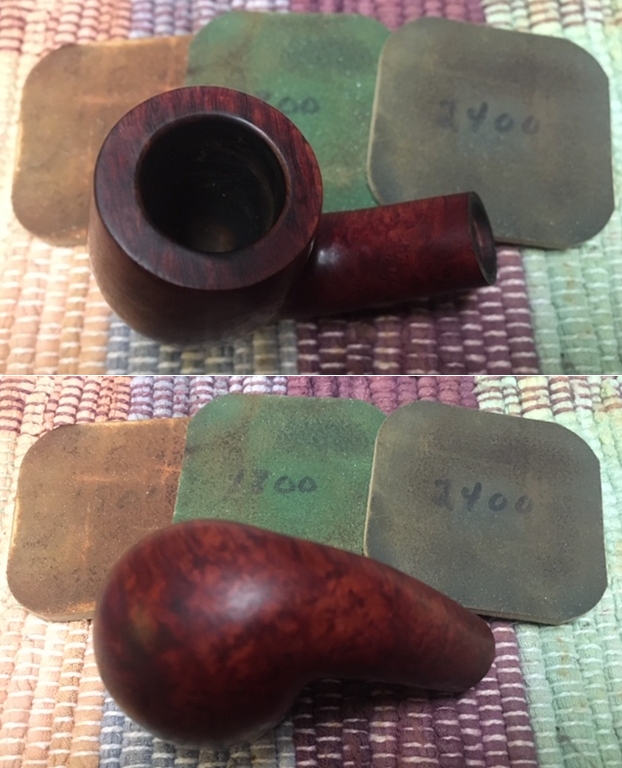
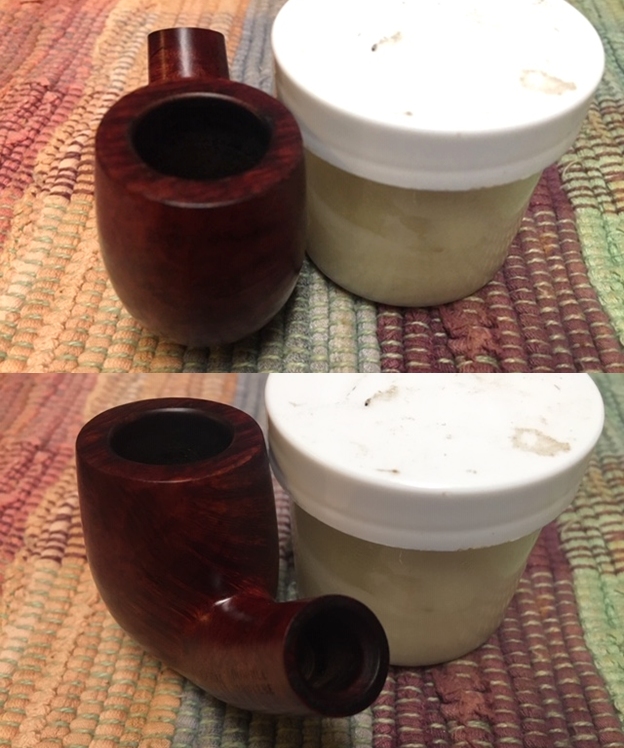
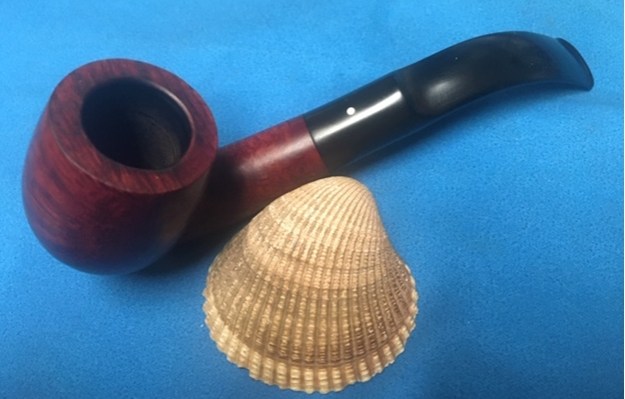
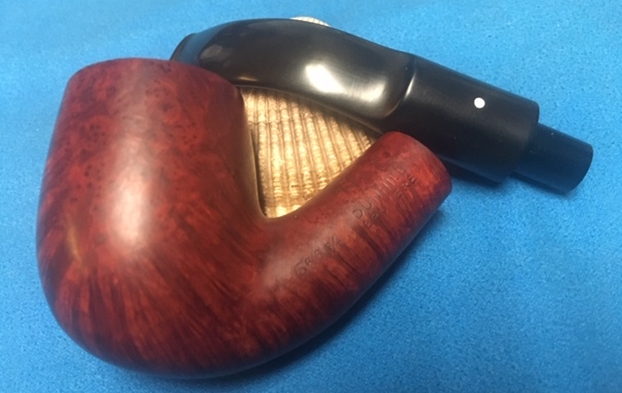
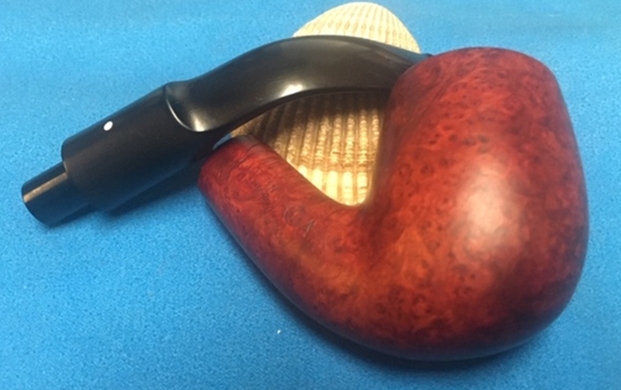
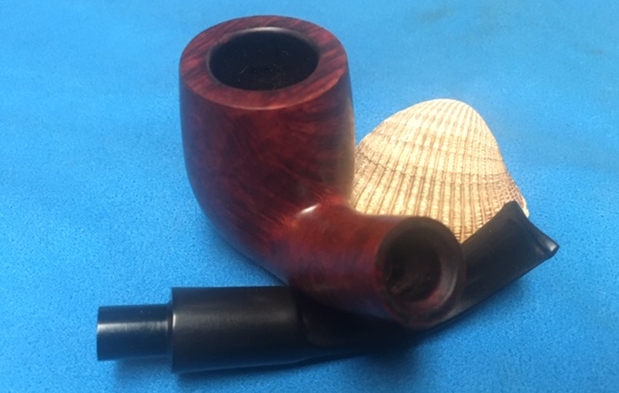
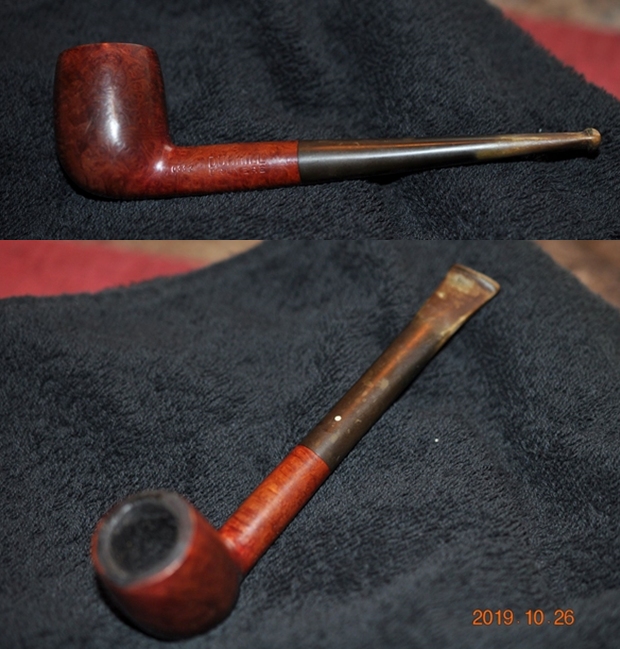
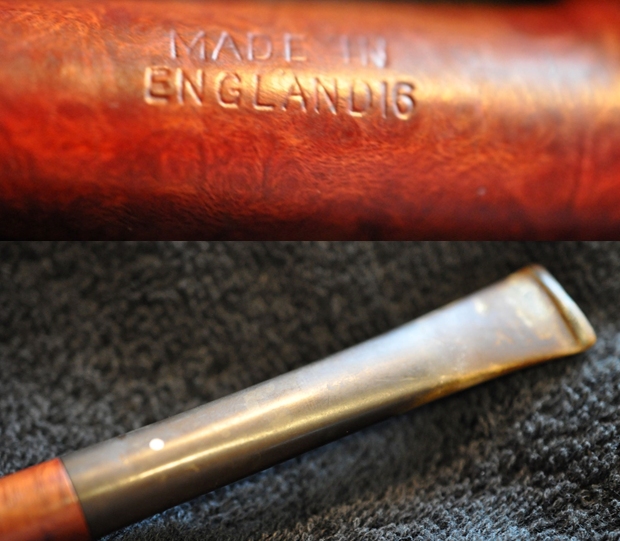
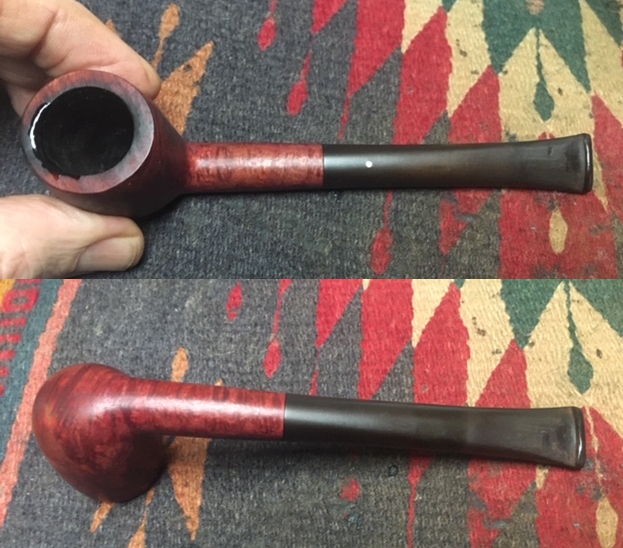
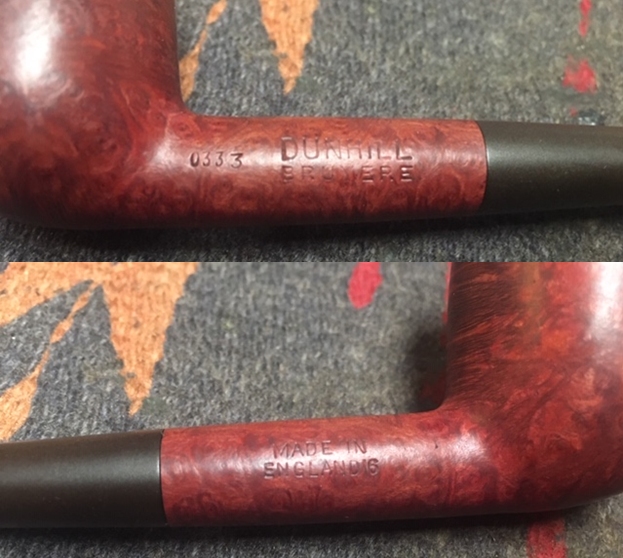
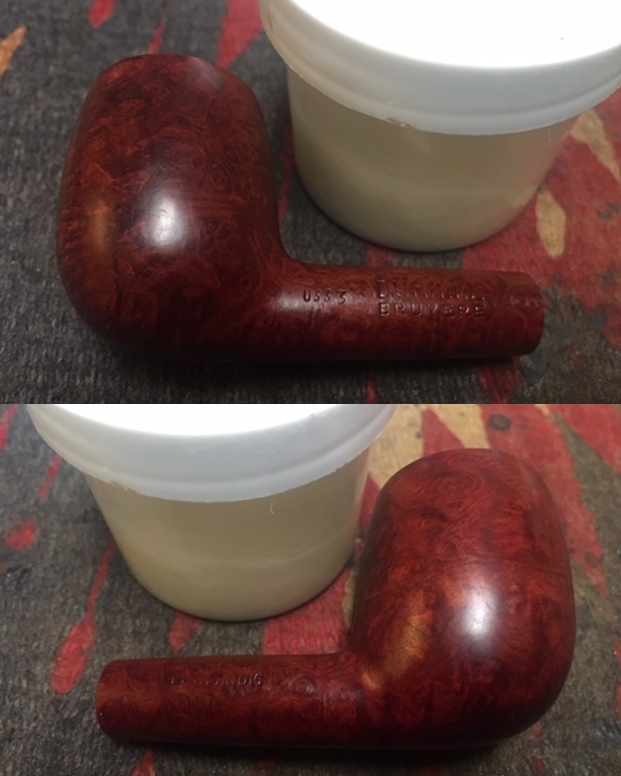
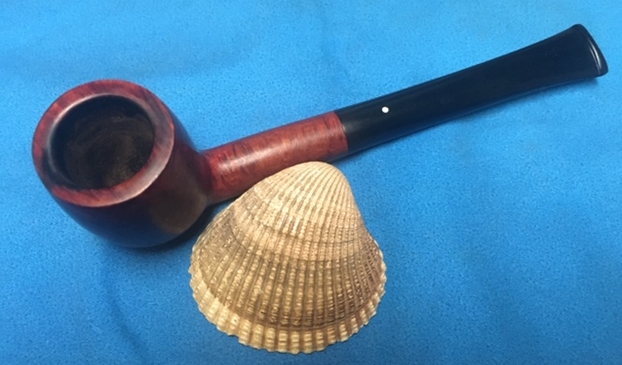
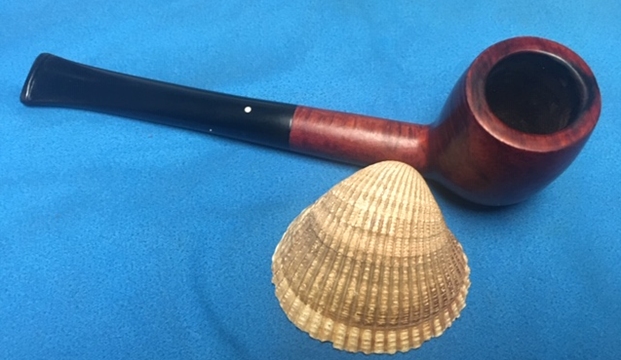
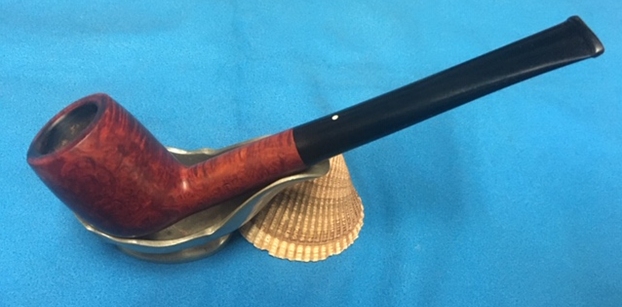
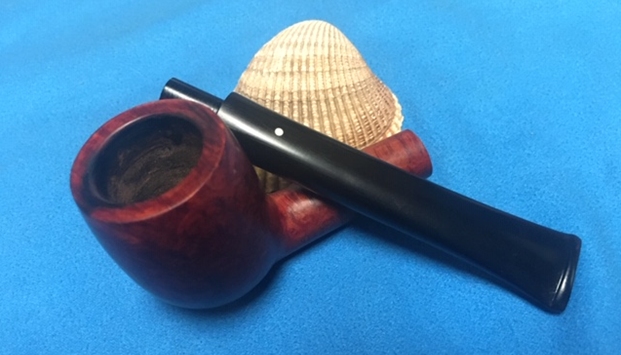
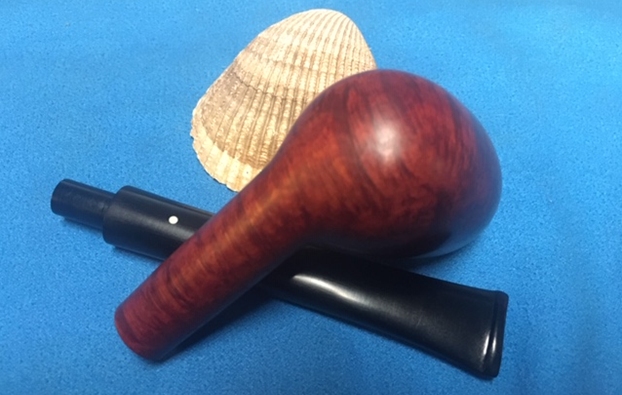
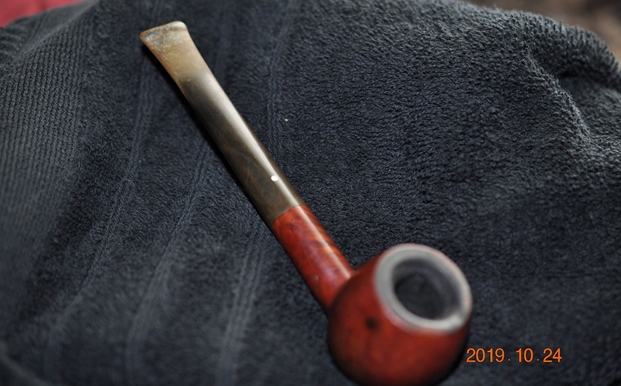
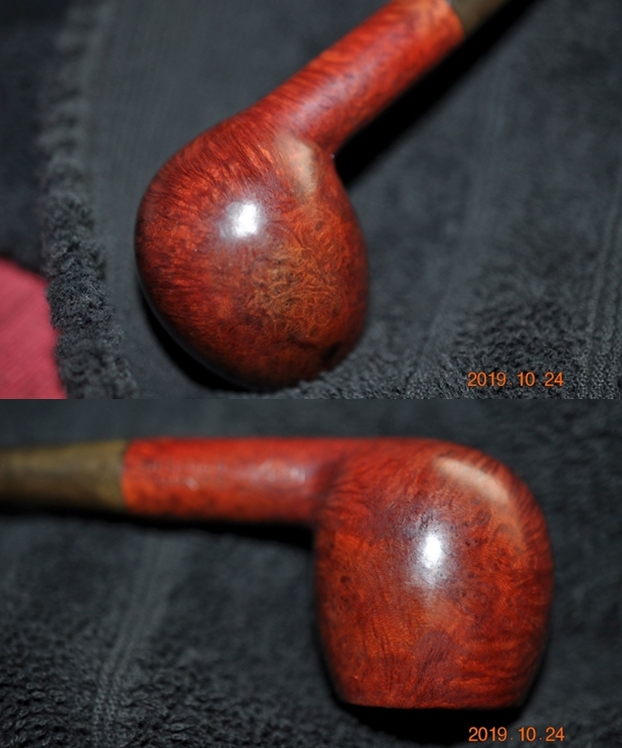
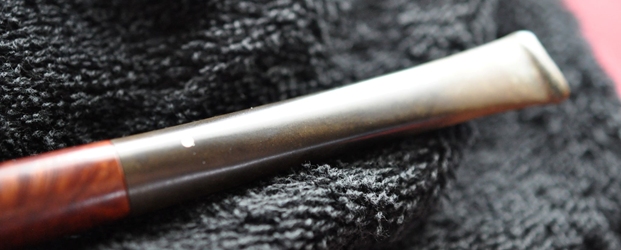
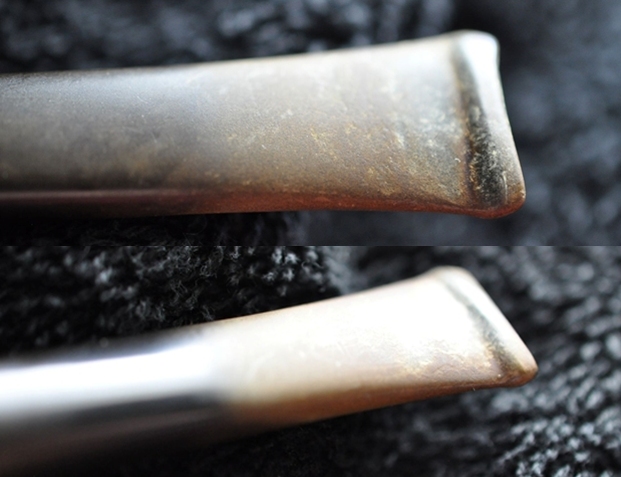
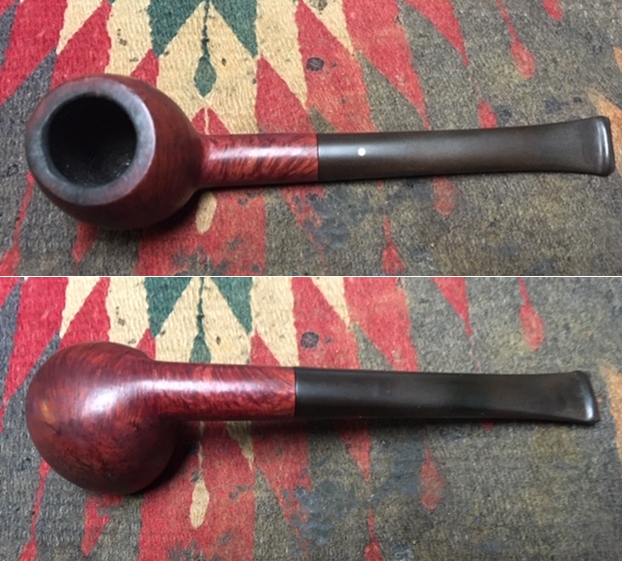
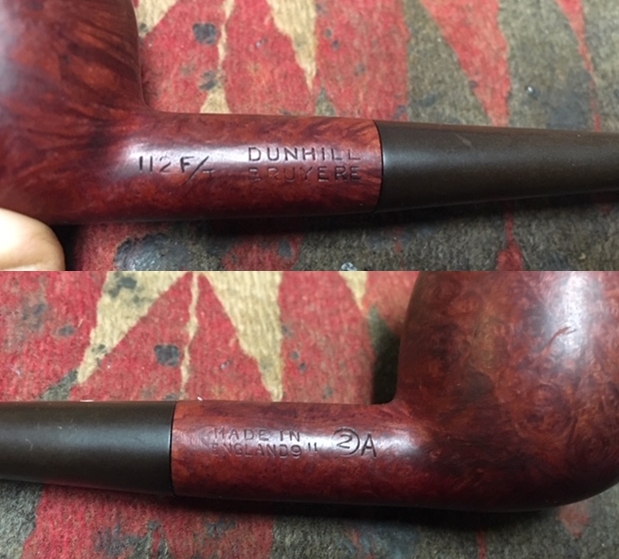
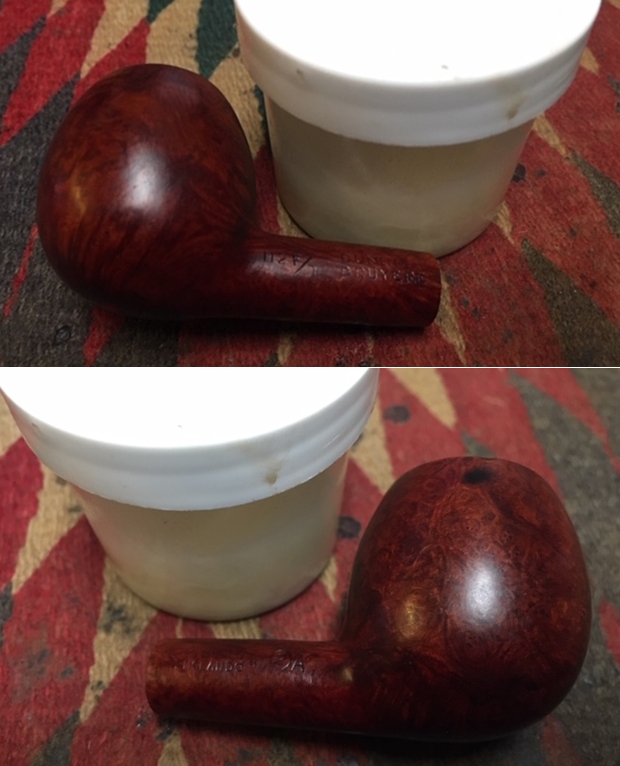
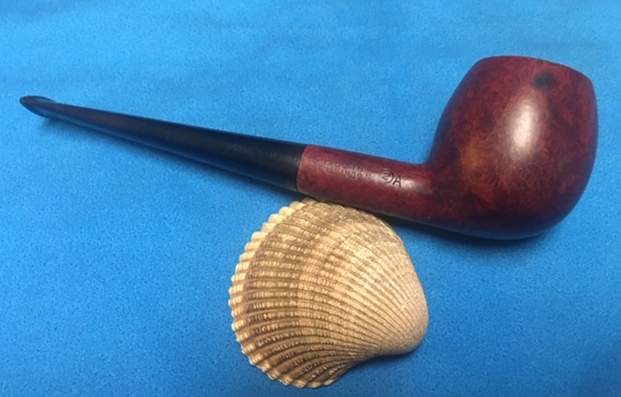
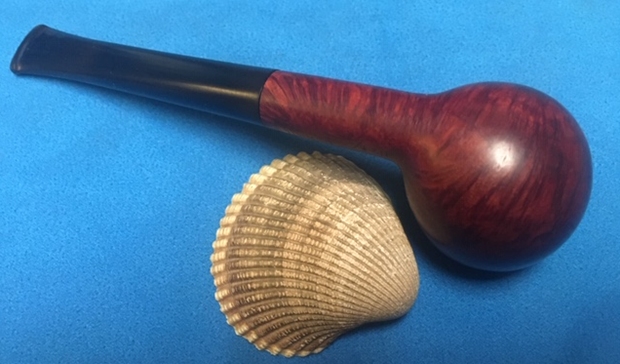
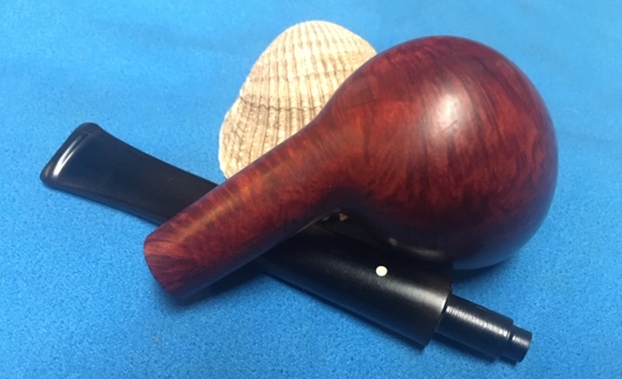
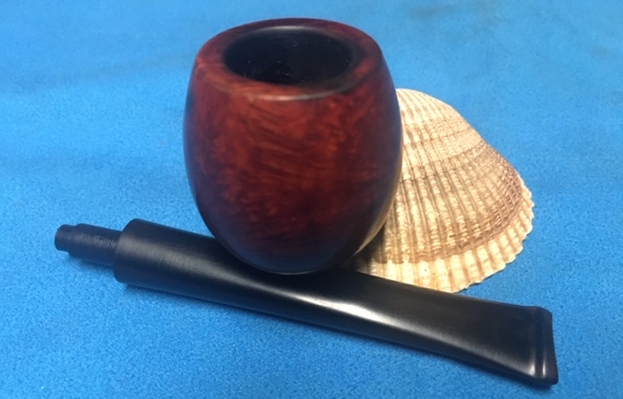
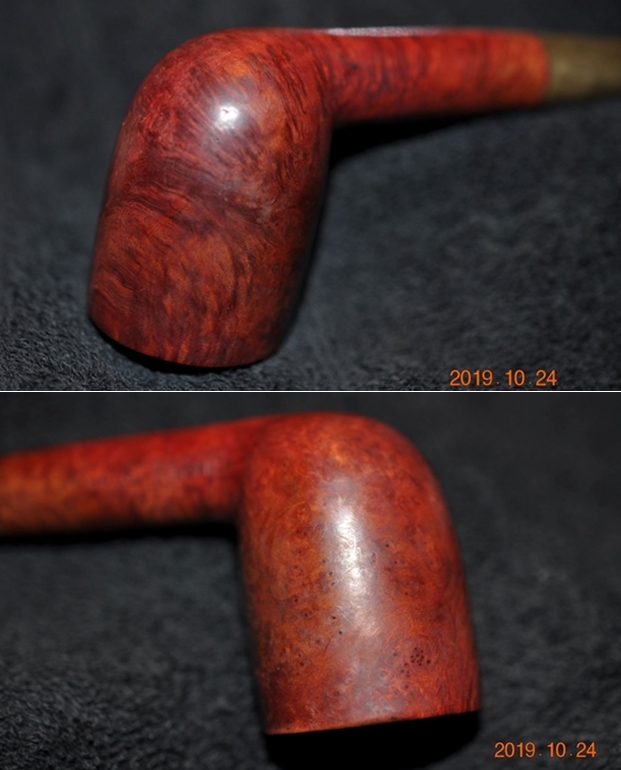
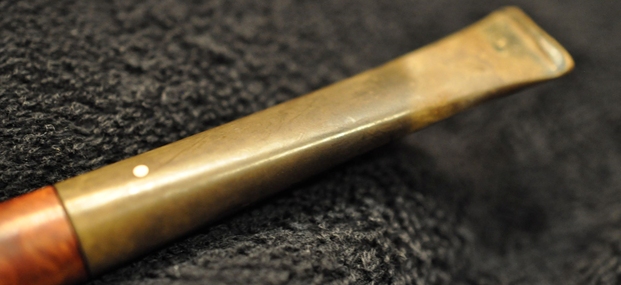
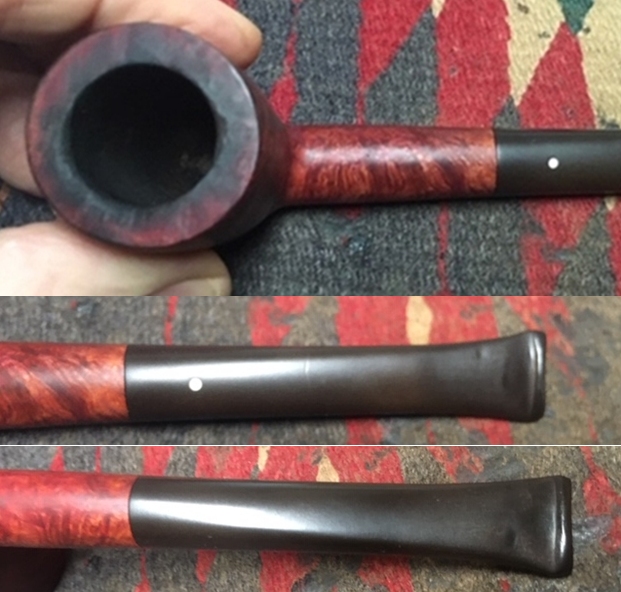
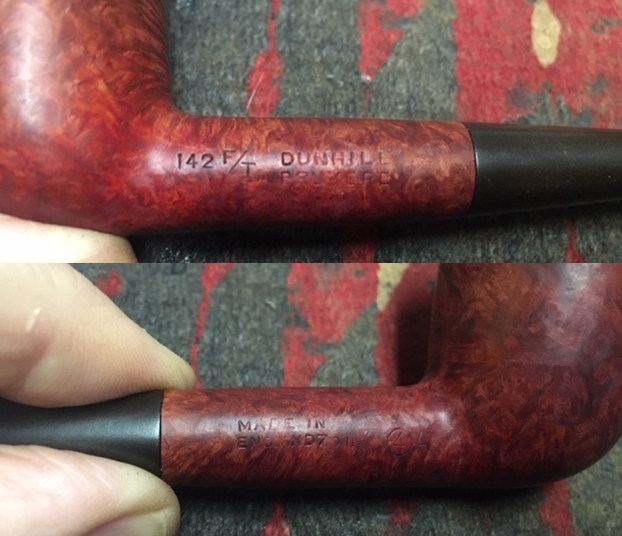
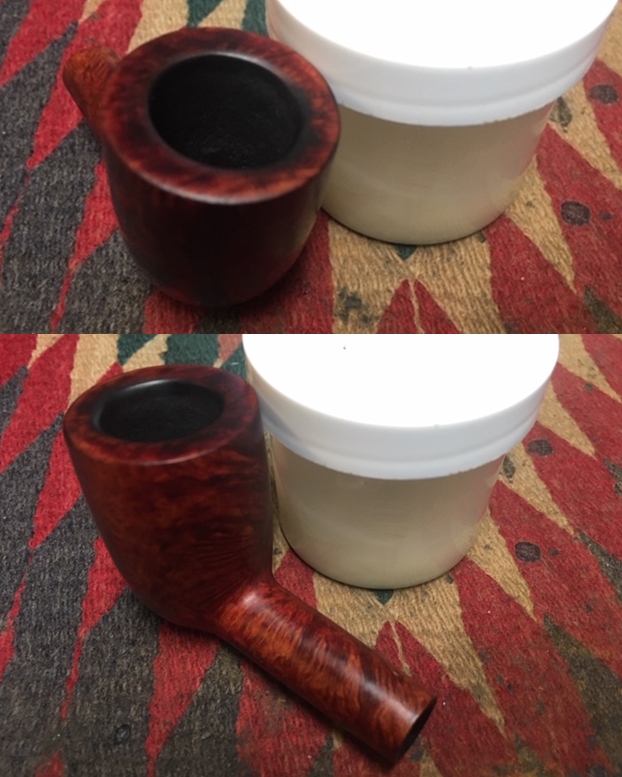
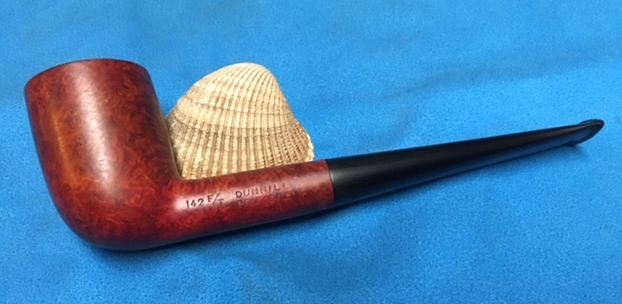
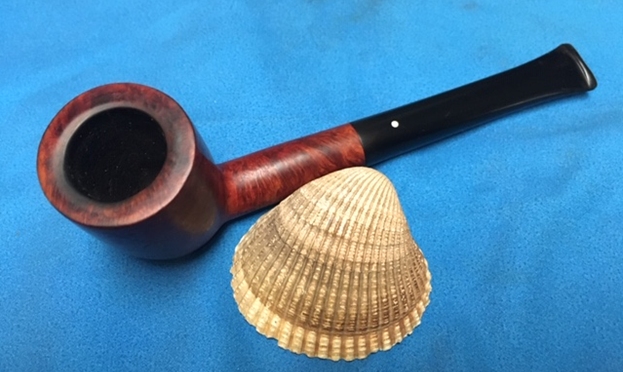
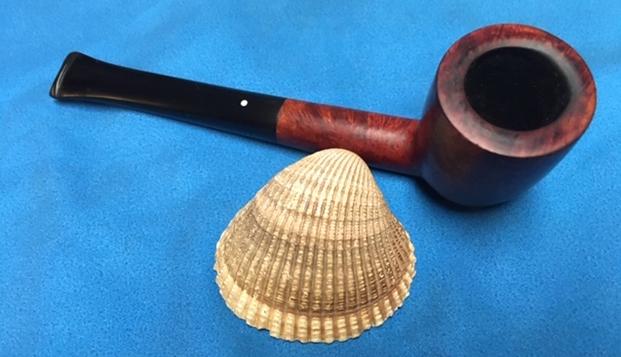
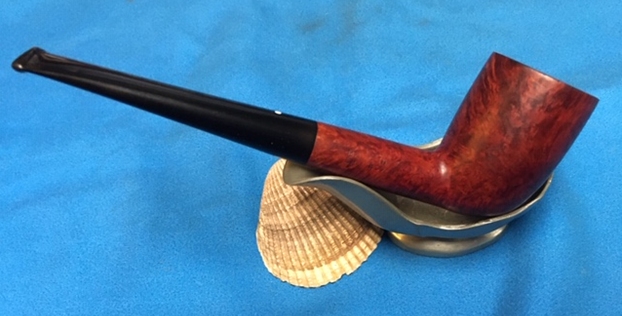
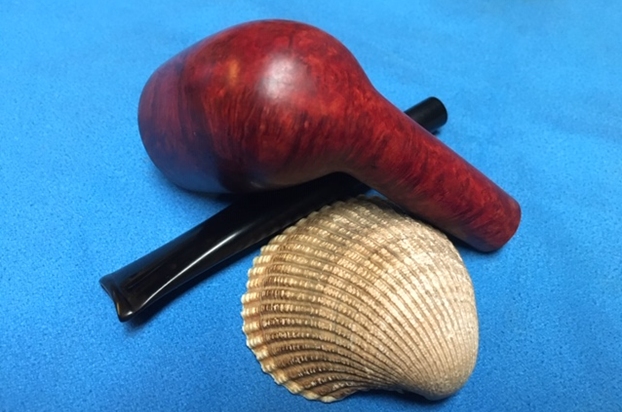
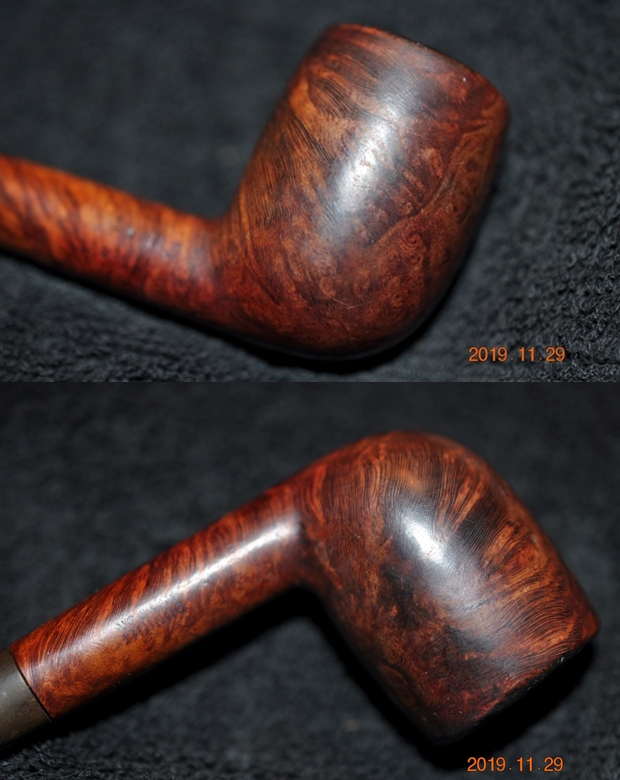
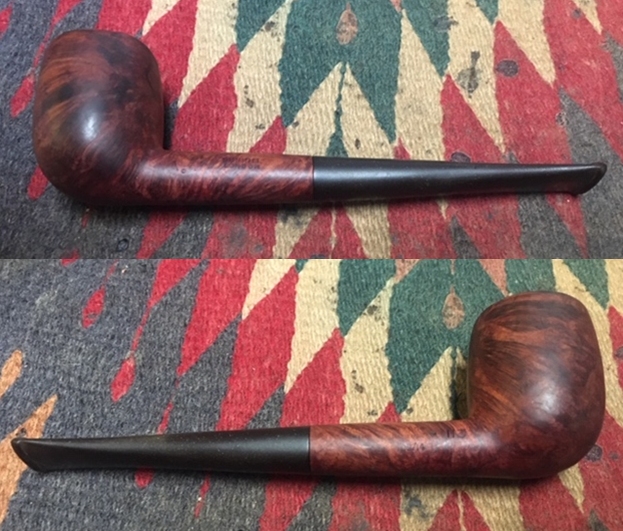
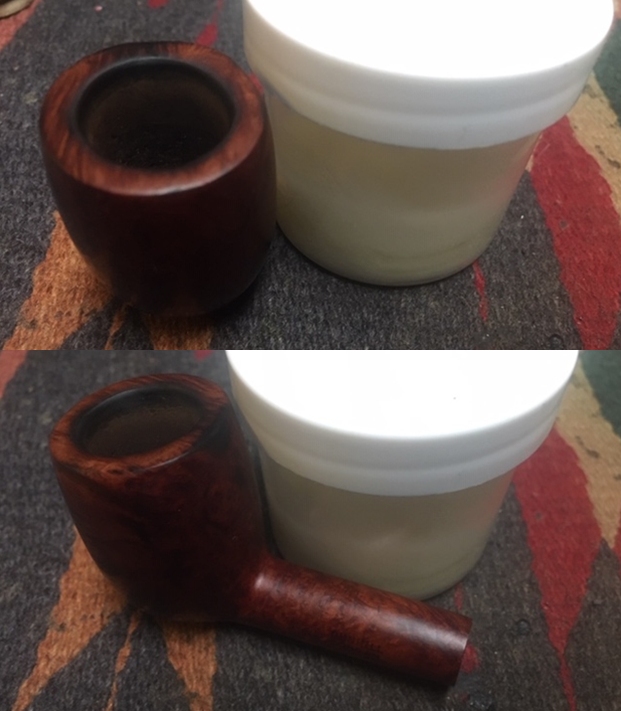
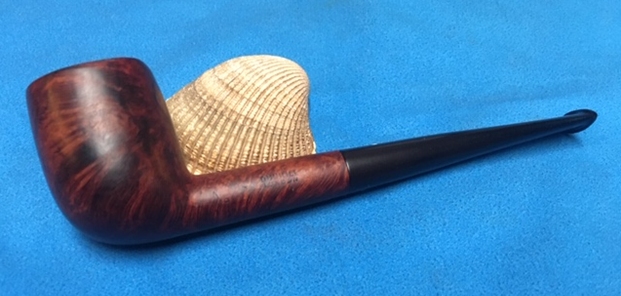
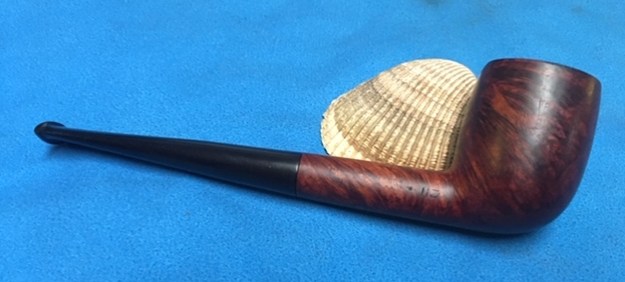
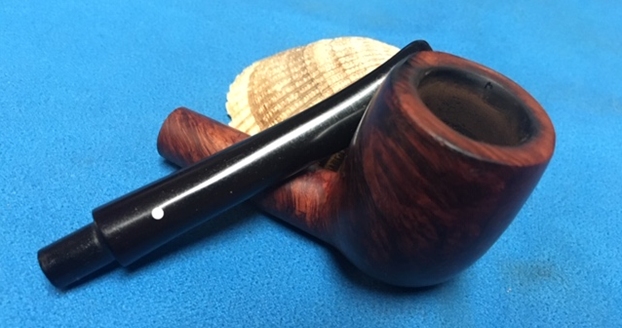
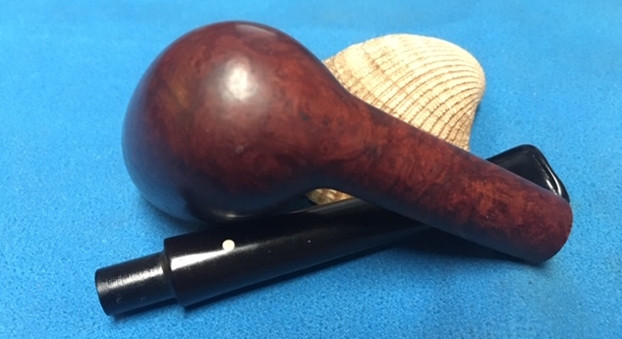
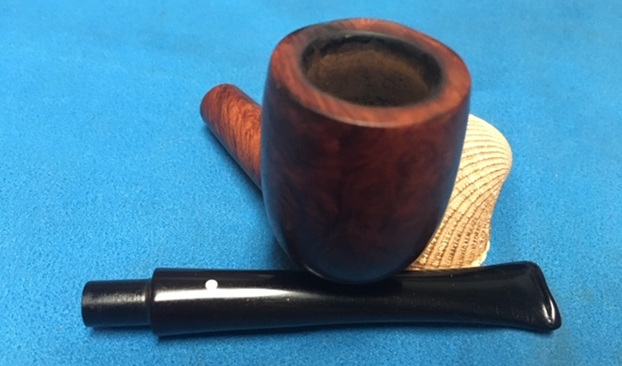
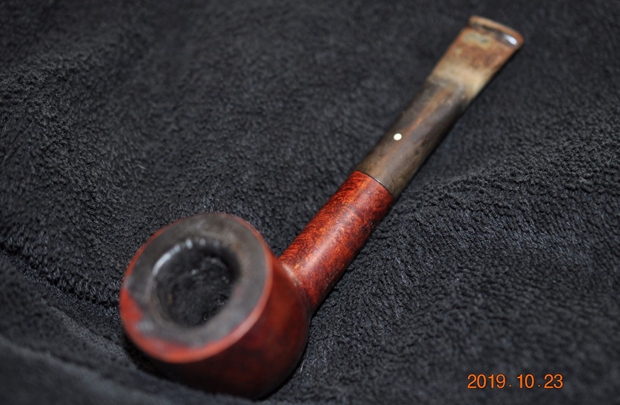
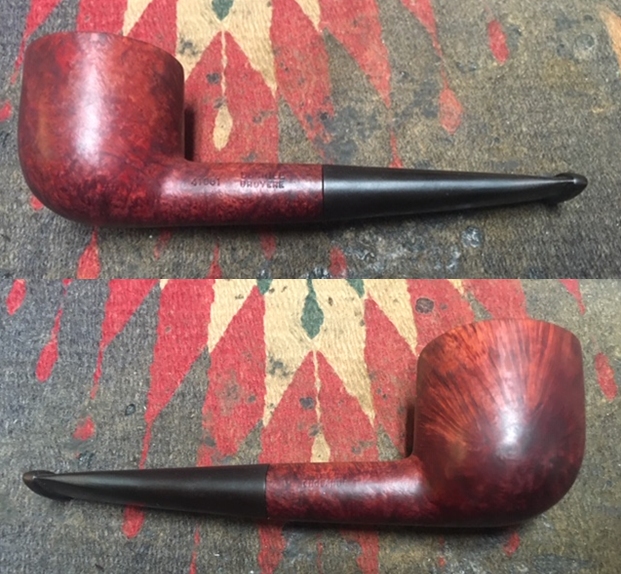
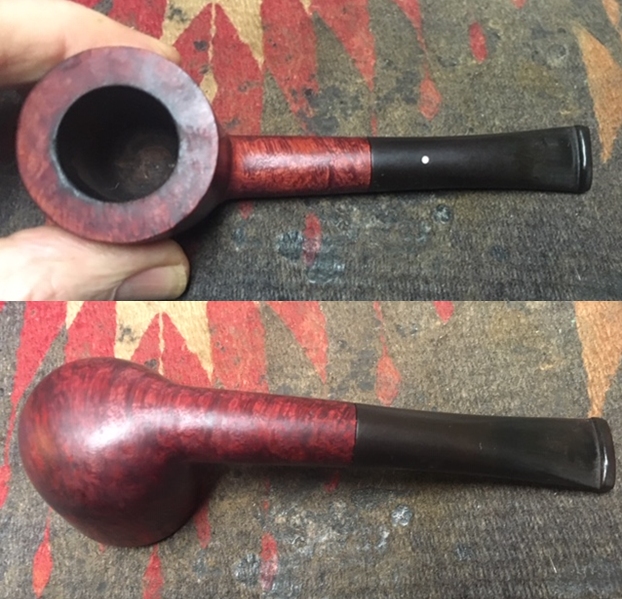
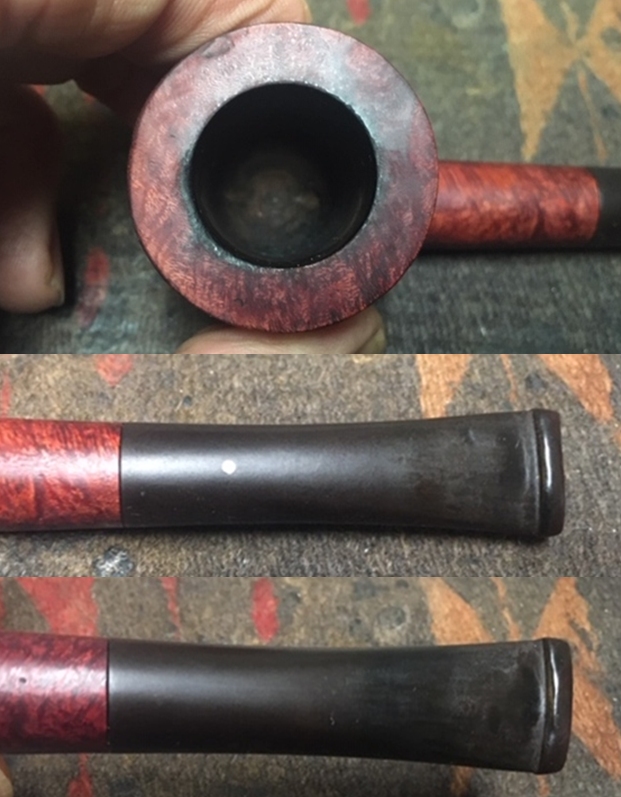
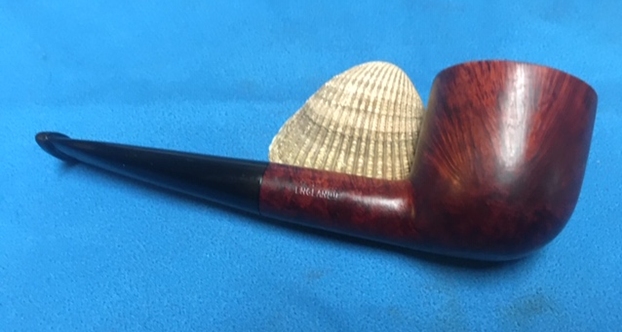
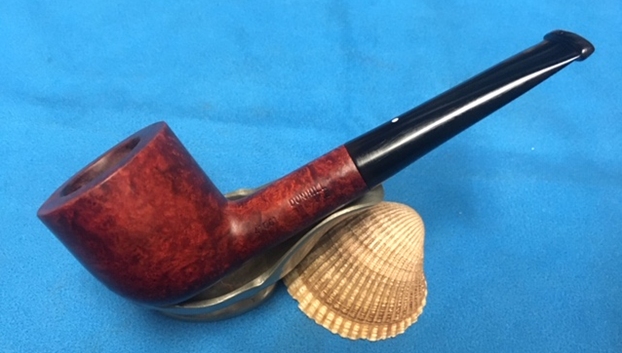
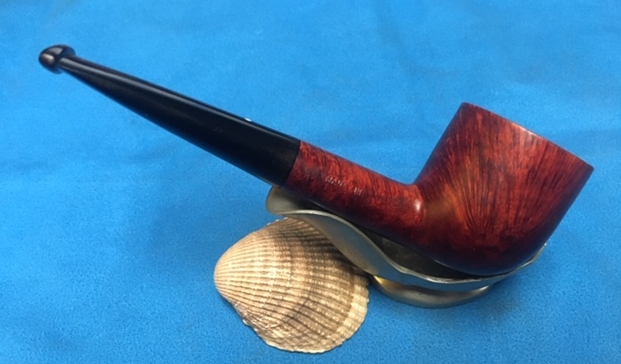
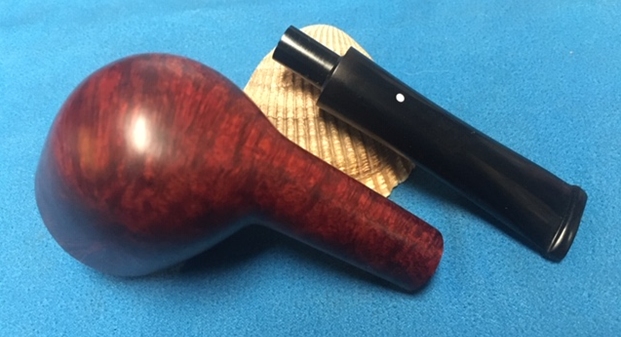
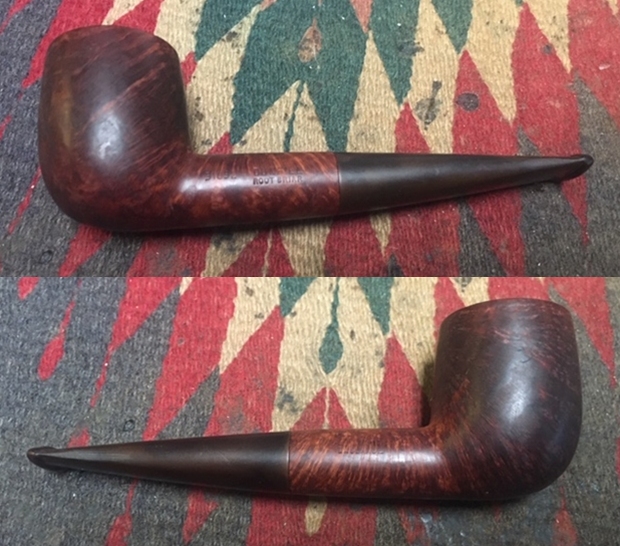
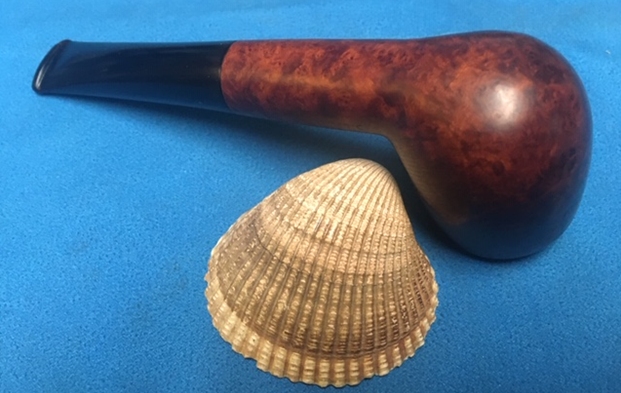
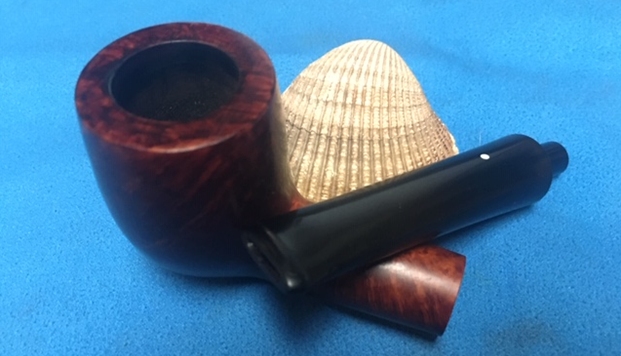
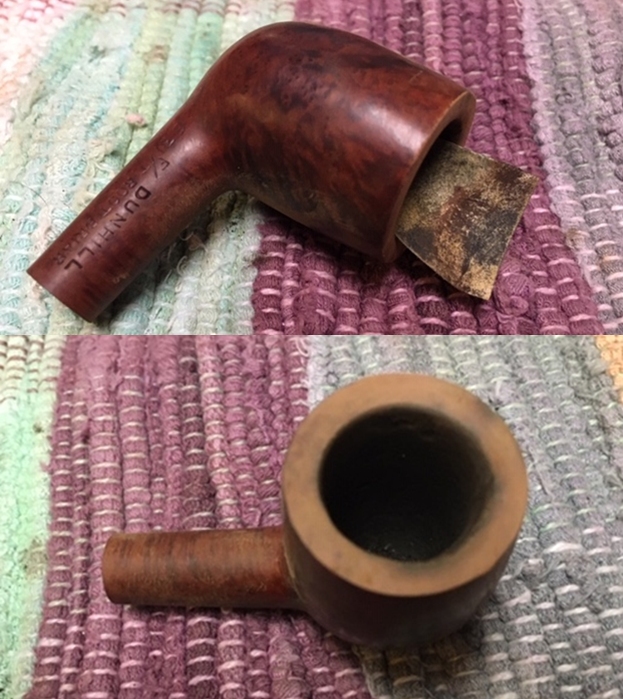
What could I say to such a request from a fellow pipe restorer? I sent him an email and said I would take on his pipe. He packed it up and sent it to me in Vancouver. It arrived here a couple of weeks ago. Today, I took a break from the large estates and the other repairs I have going to work on Henry’s pipe. It is a small Dunhill saddle stem billiard. It is stamped on the left side of the shank 631F/T next to the bowl shank junction. The 631 is the shape number and the F/T is the designation for a Fish Tail stem. That is followed by Dunhill over Root Briar. On the right side of the shank it is stamped with a circle 1 R next to the bowl shank junction designating the group size of the pipe – a 1 and R which says it is a Root Briar. To the left of that it is stamped Made in England5 which tells me that the pipe was made in 1965. The finish on the bowl was dirty and spotty. The bowl had a thick cake in it and the lava overflowed onto the rim top. The inner edge of the bowl was damaged on the right side with both carving from a knife and a burned area. There was some darkening on the outer rim edge at the front of the bowl. It was in rough condition. The stem was not too bad. It was heavily oxidized but other than tooth chatter was in good condition. I took photos of the pipe before I started the restoration work to document the progress that way Henry can vicariously work on this pipe.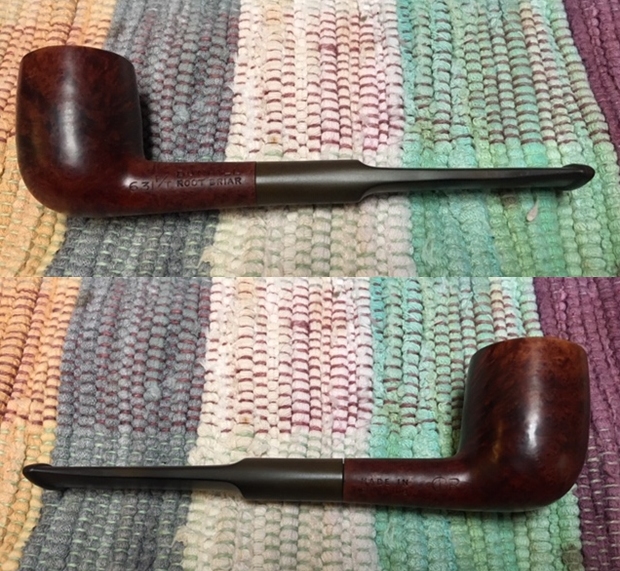
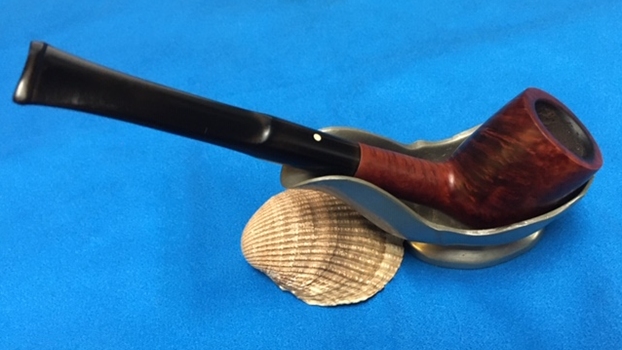
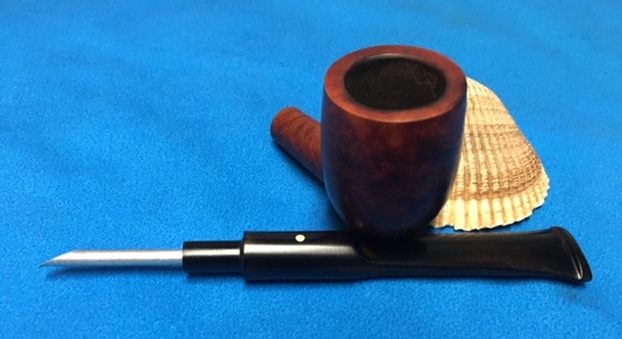
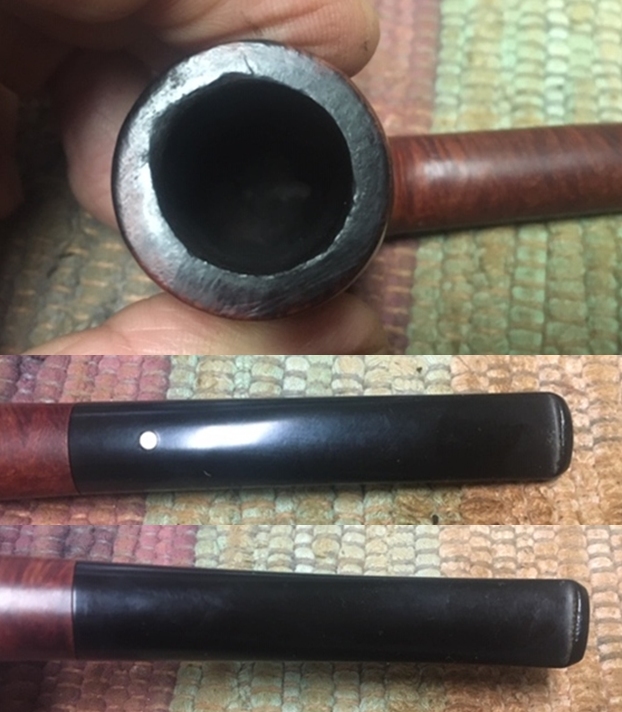
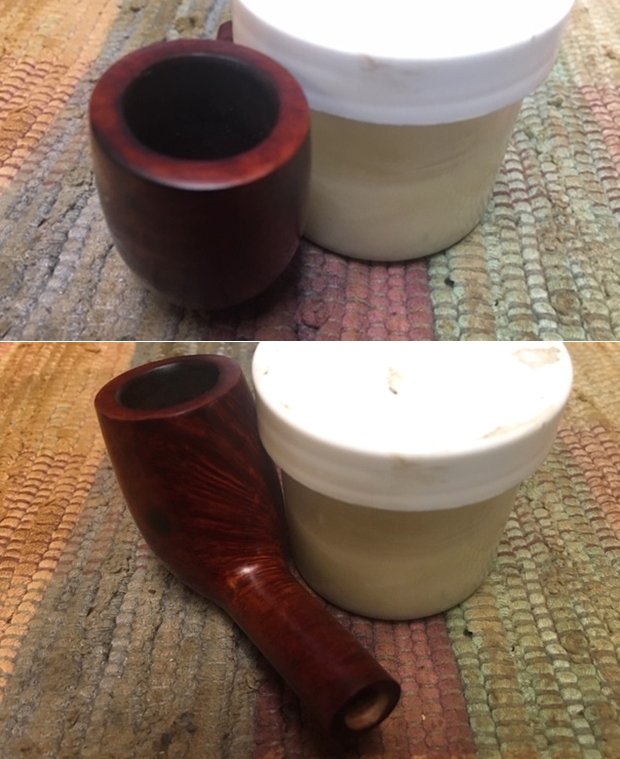
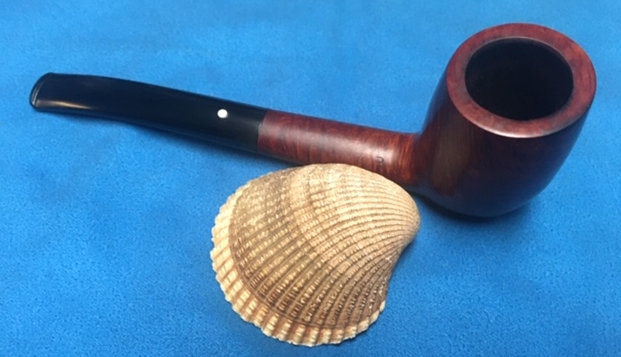
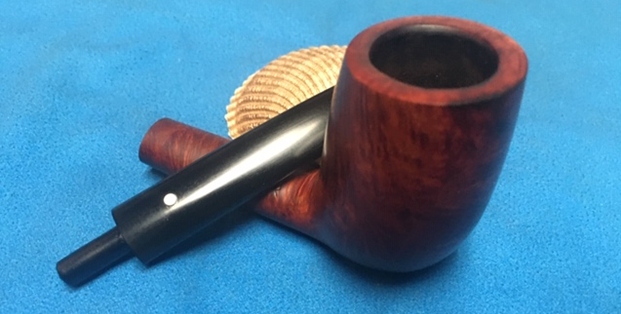
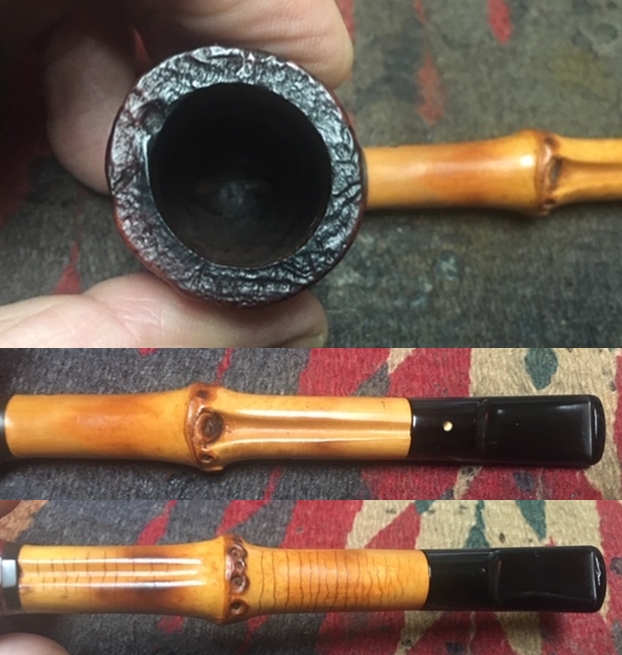
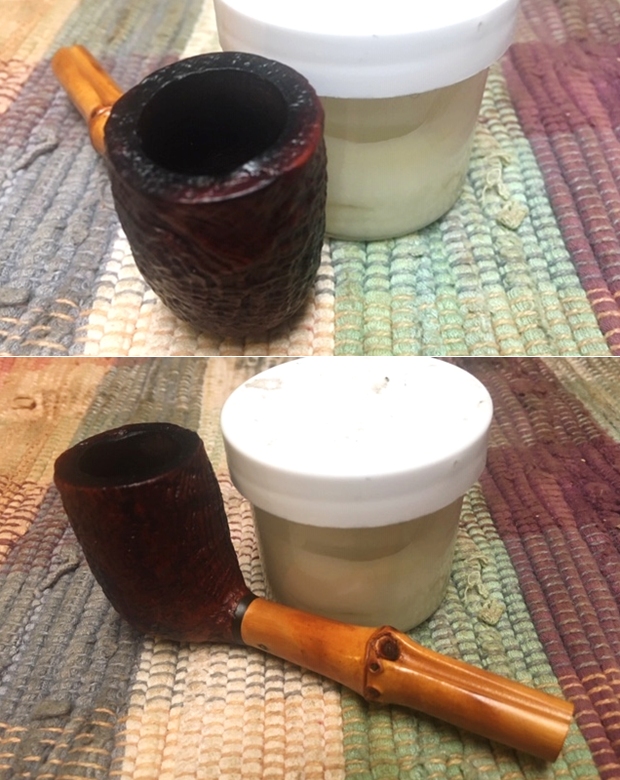
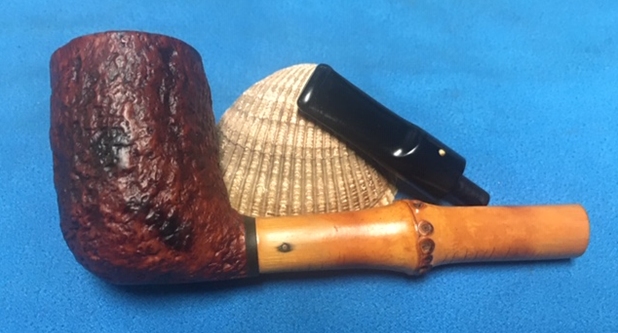
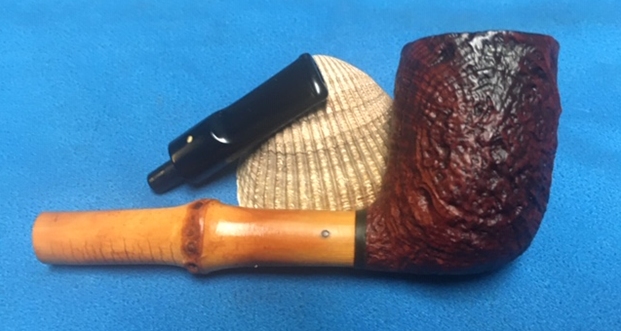
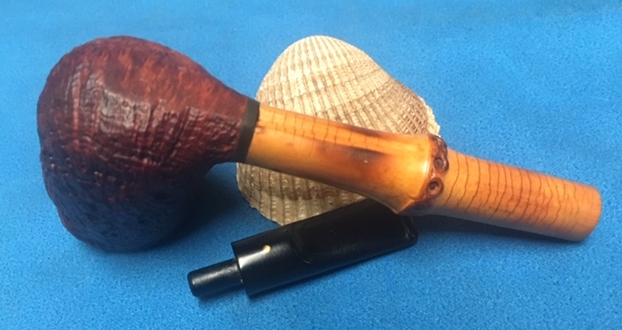
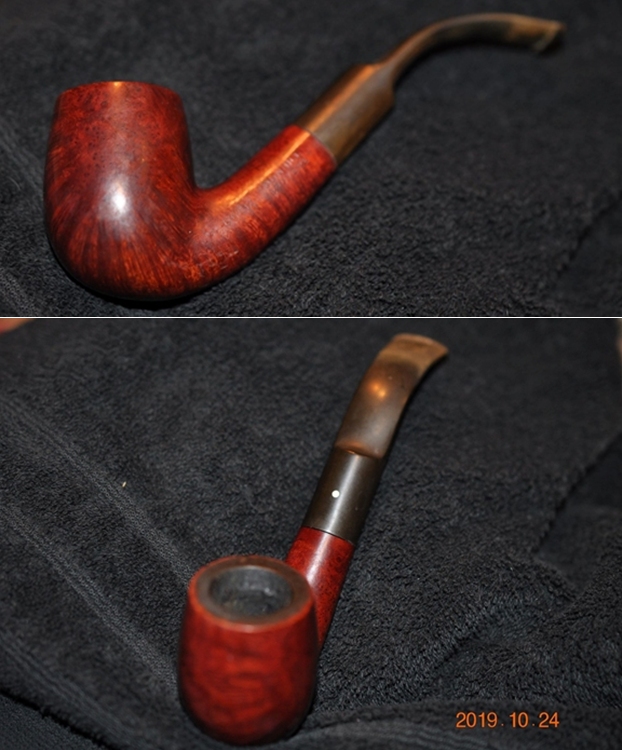
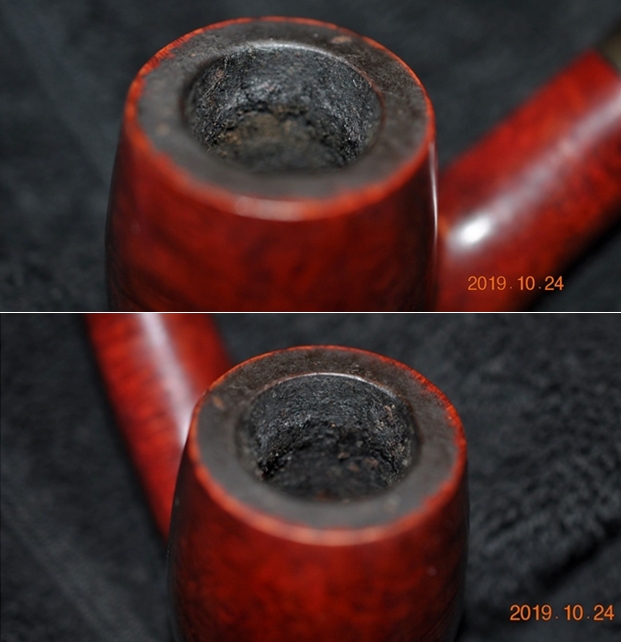
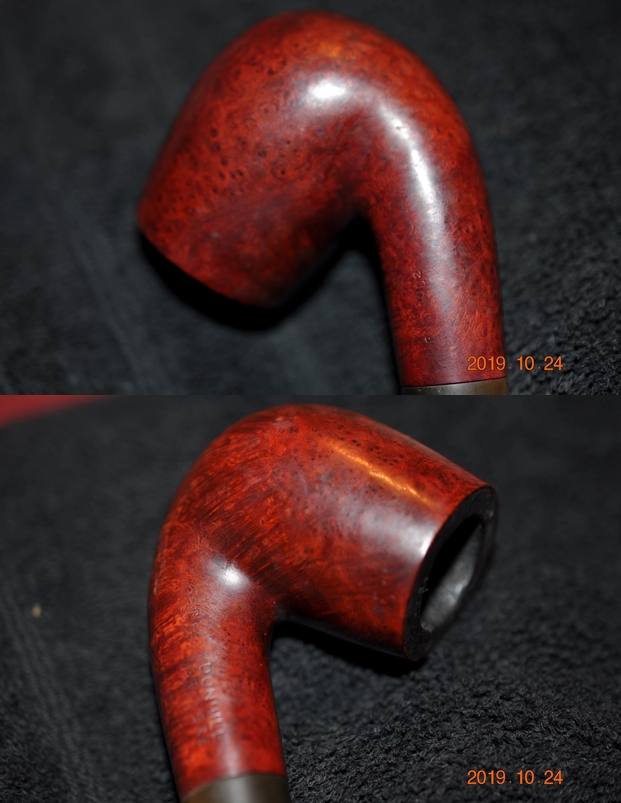
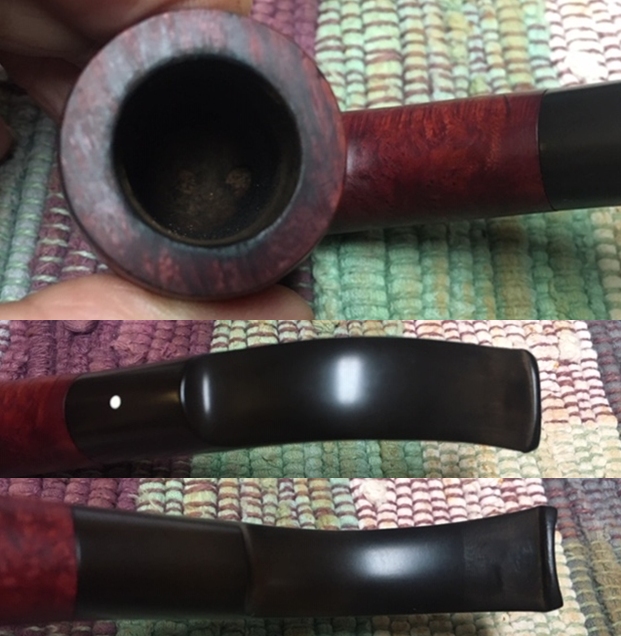
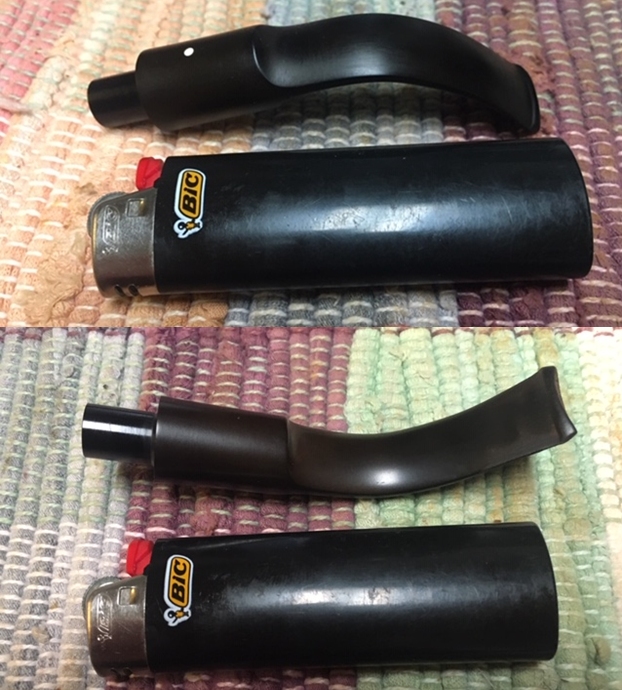
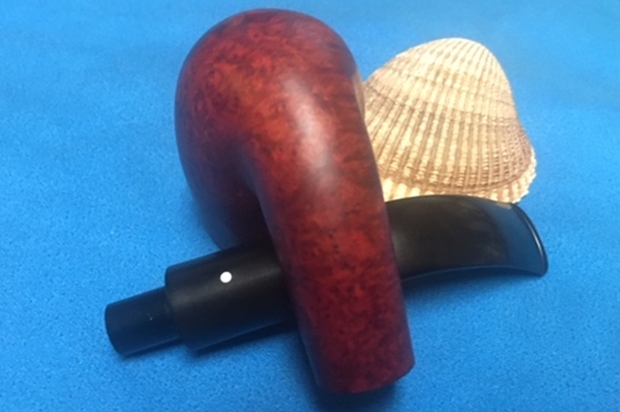
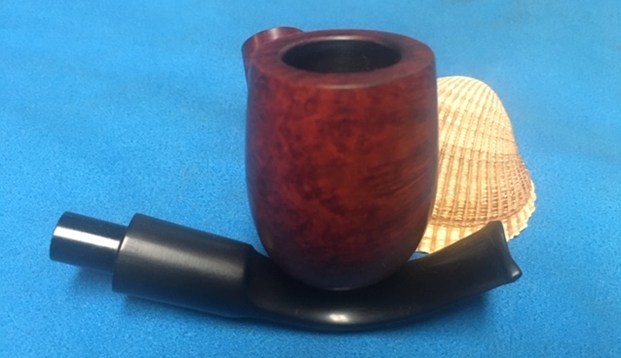
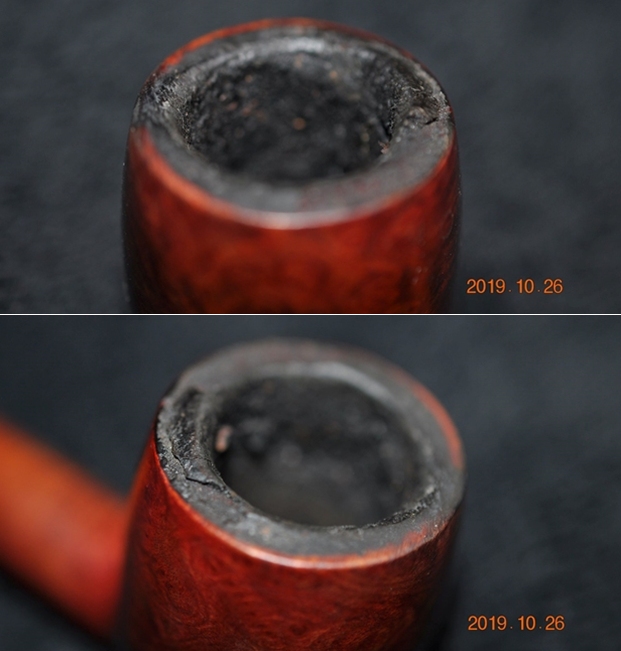
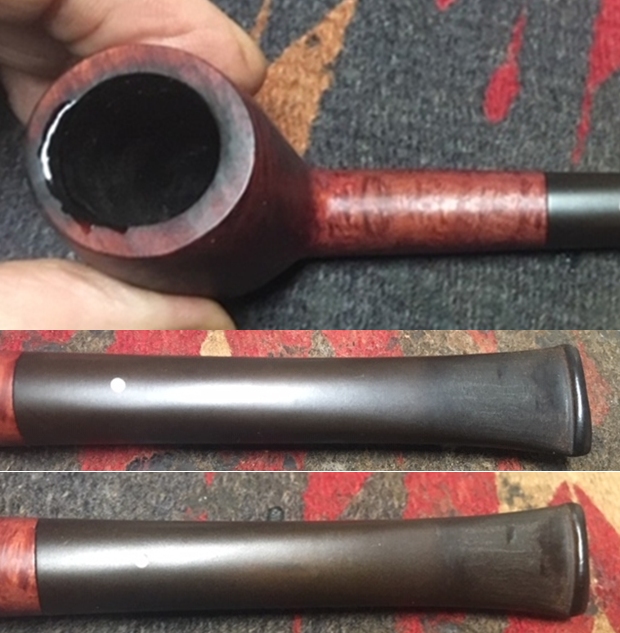
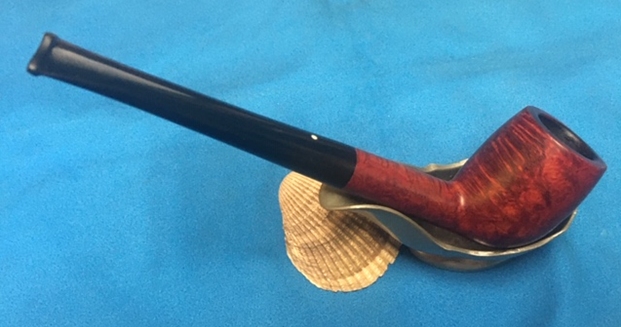
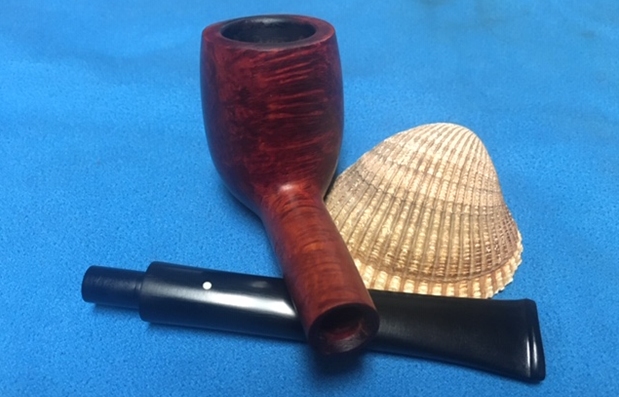
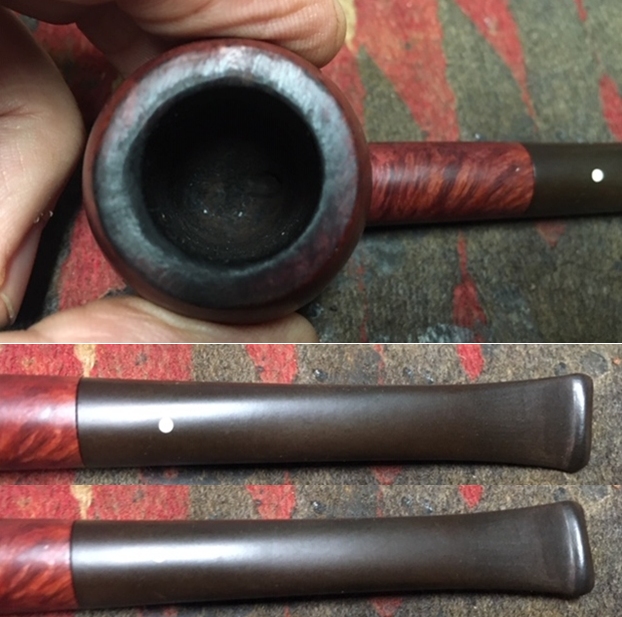
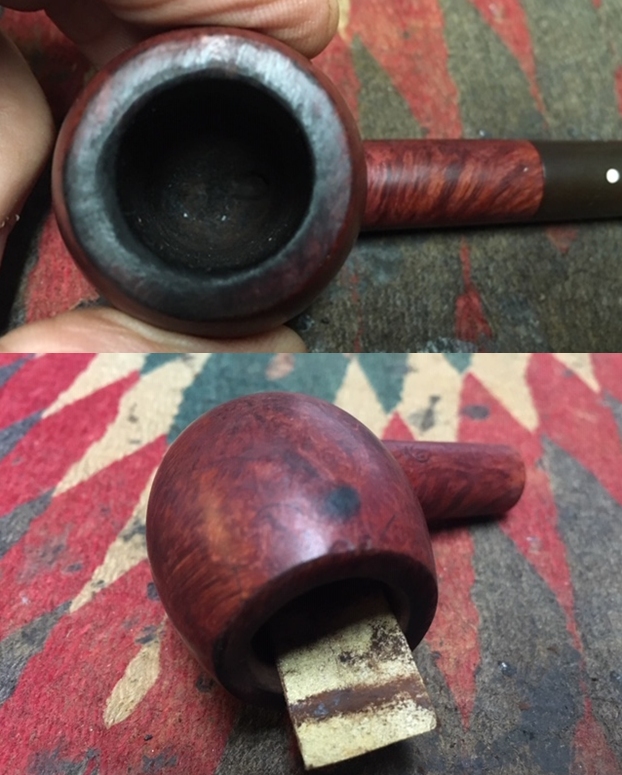
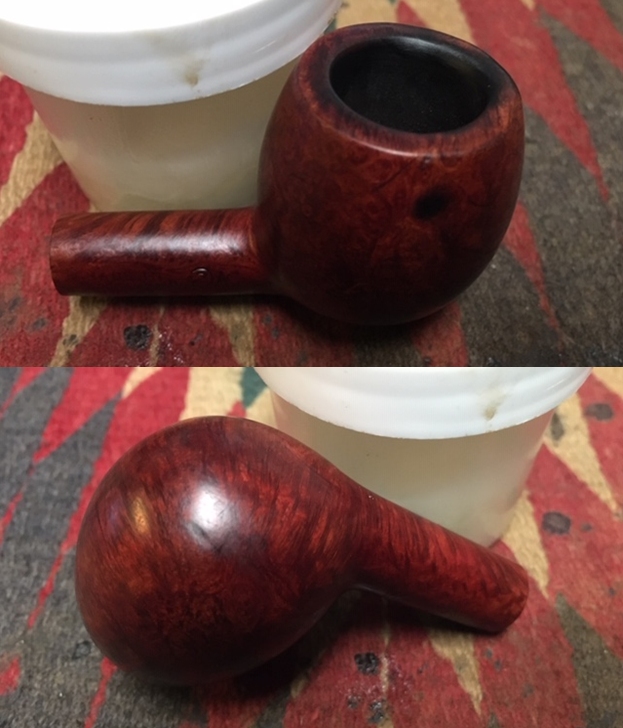
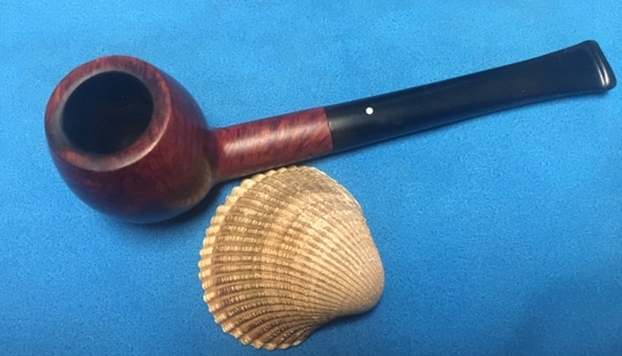
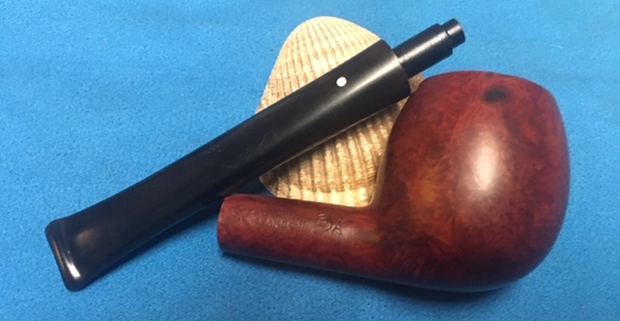
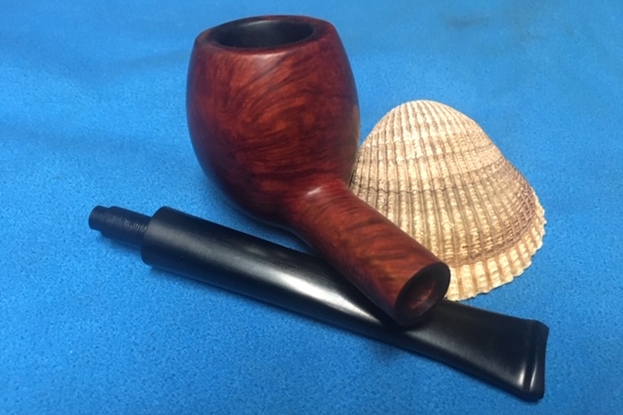
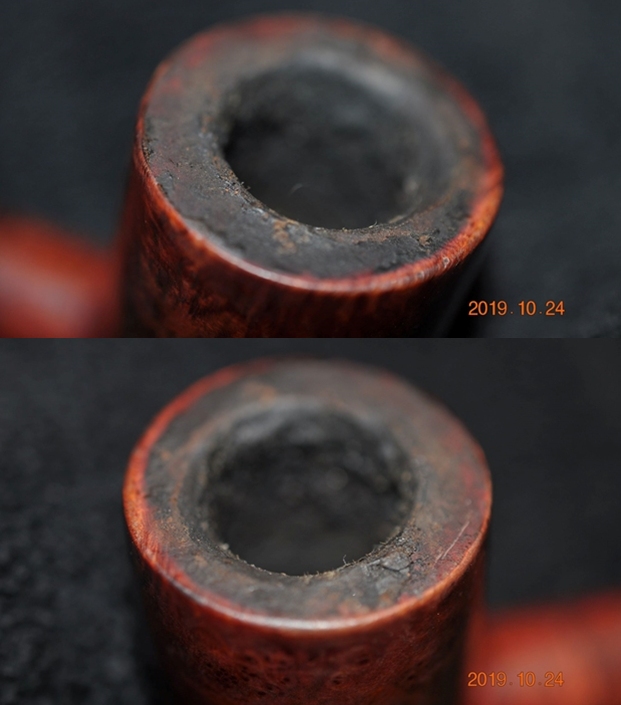
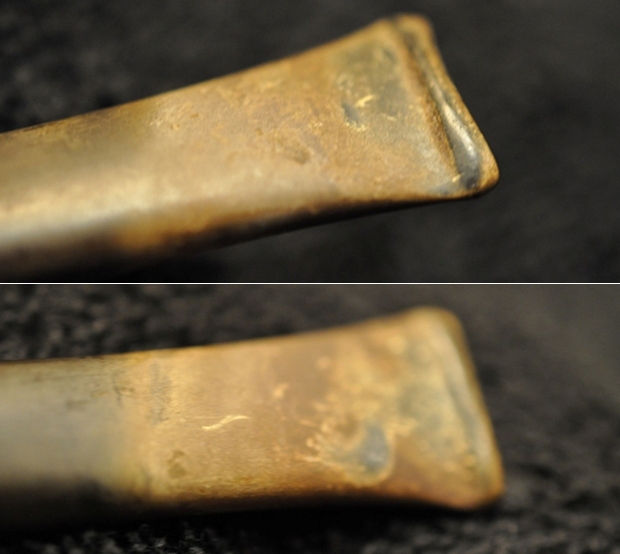
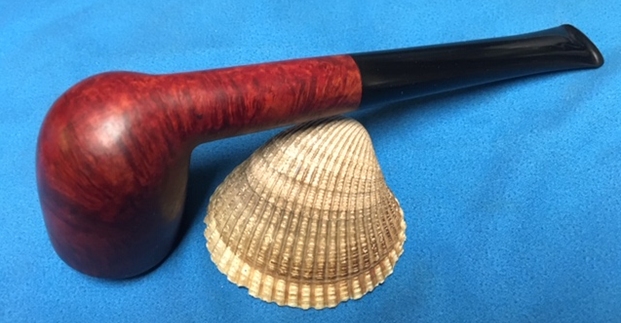
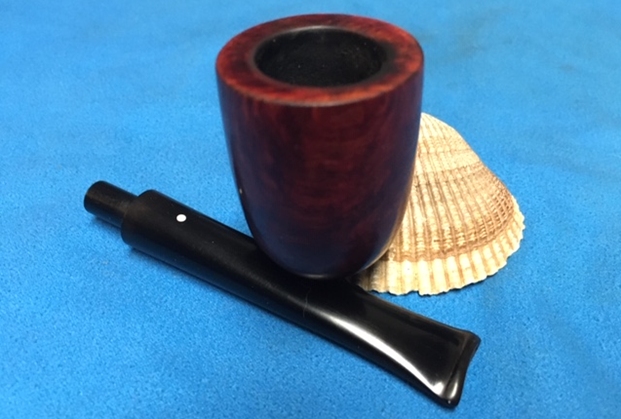
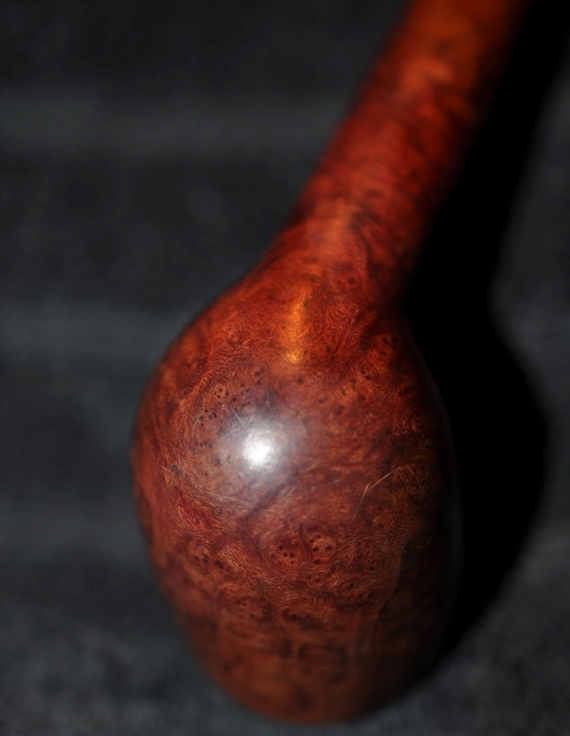
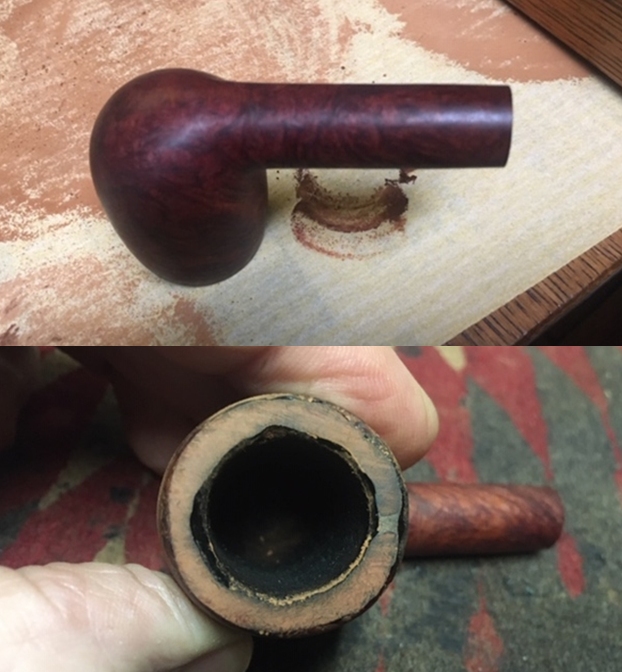
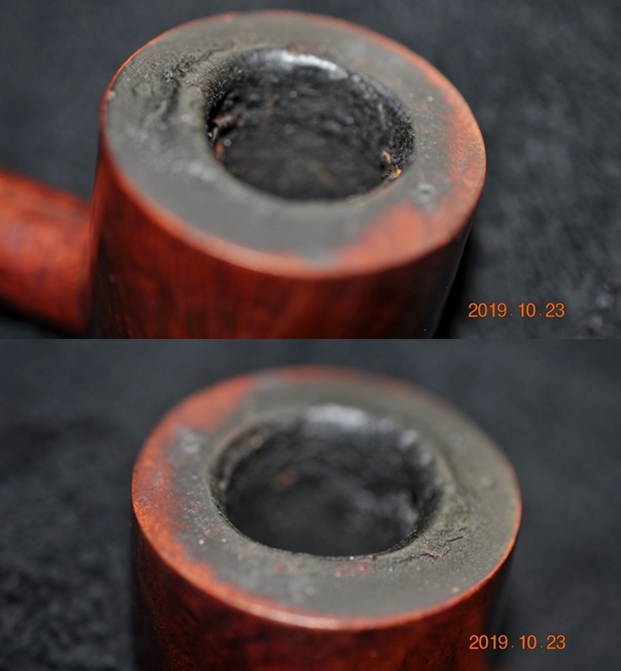
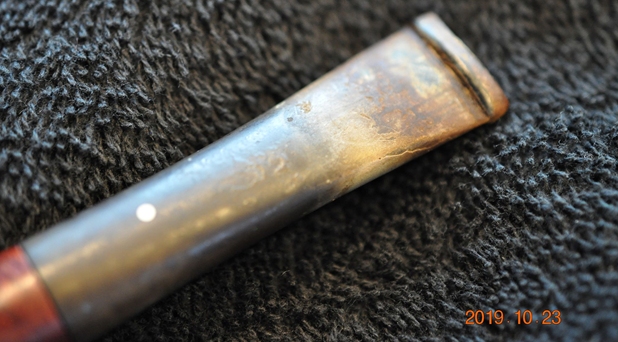
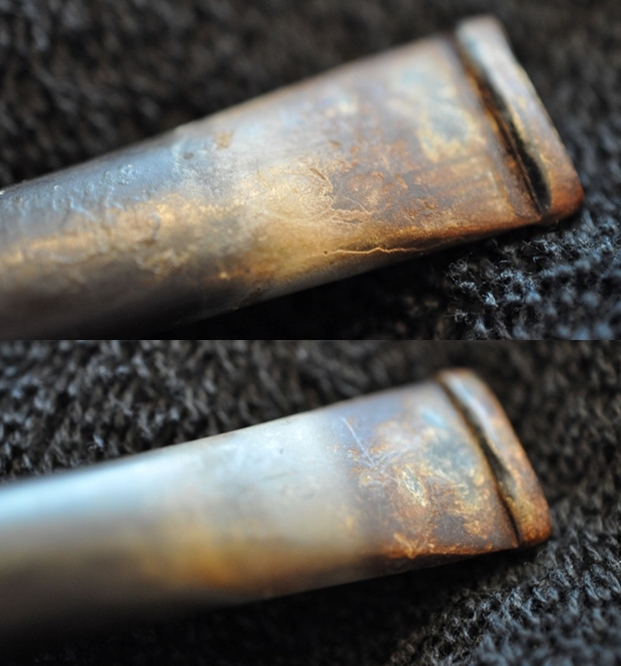
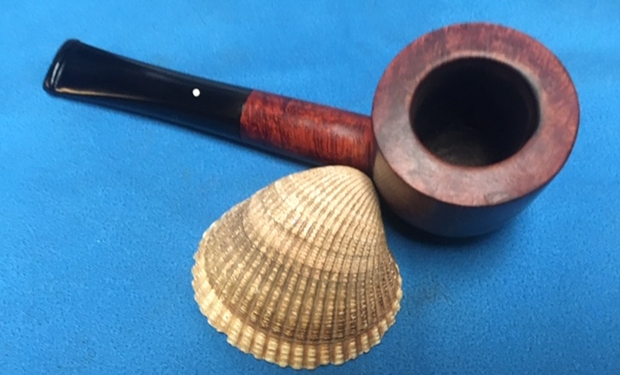
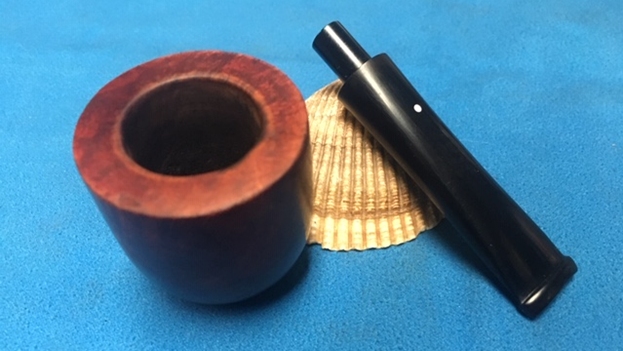
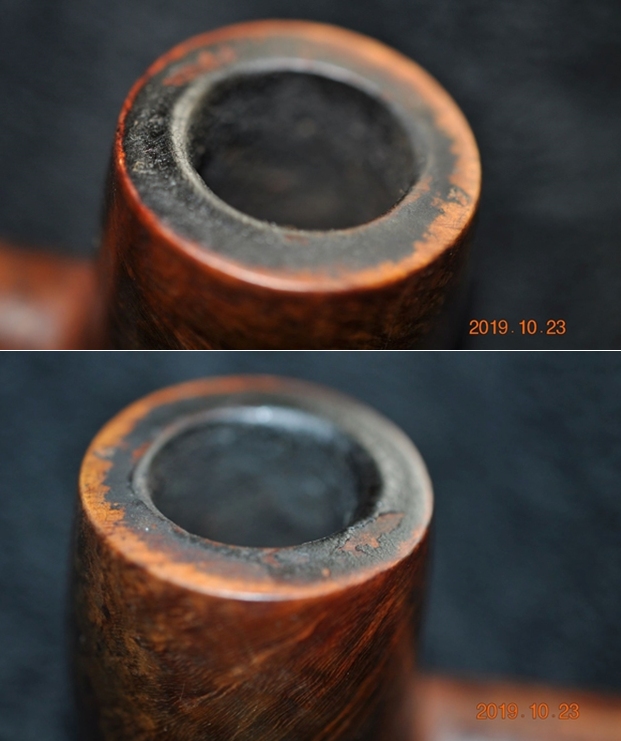
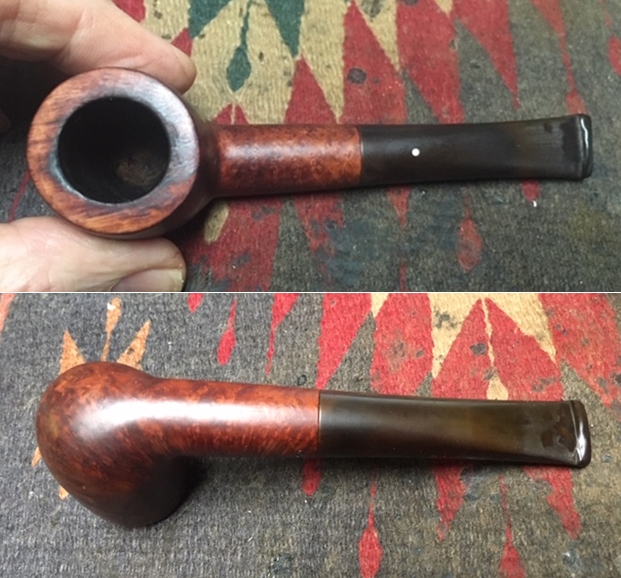
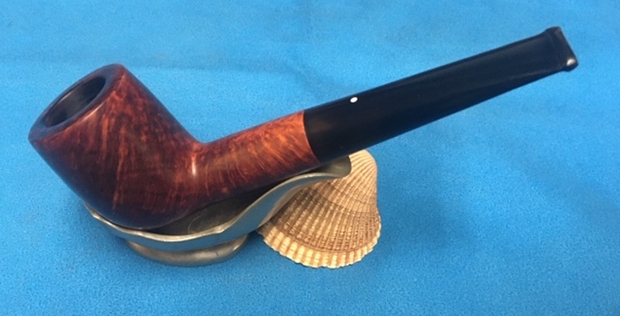
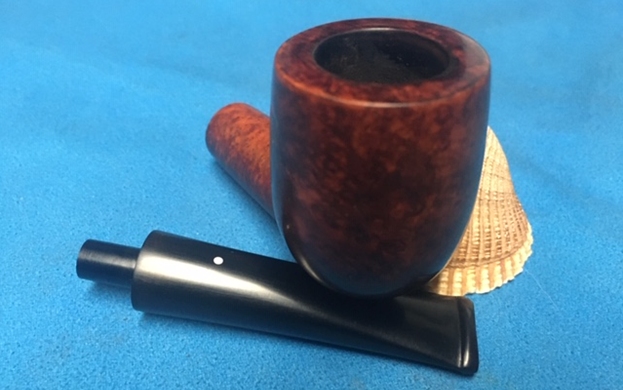
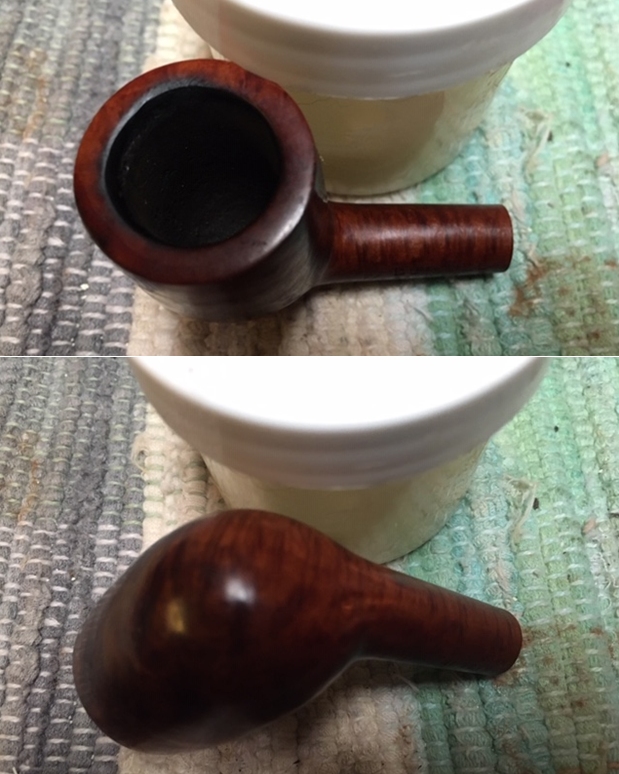
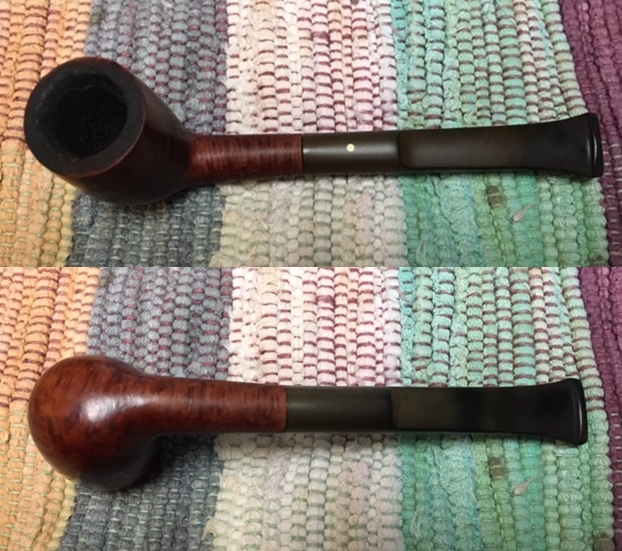 I took some close up photos of the bowl and rim top and the stem surfaces. The first photo shows the condition of the bowl and rim top. I described the damage above but I have to say I probably minimized it in my description. It is in rough shape. The inner edge is hacked and uneven showing that it had probably been reamed with a knife. There was burn damage on the right inner edge and on the front edge. The stem on the other hand looked good other than the heavy oxidation on the surface. There was light tooth chatter but it still was in great shape.
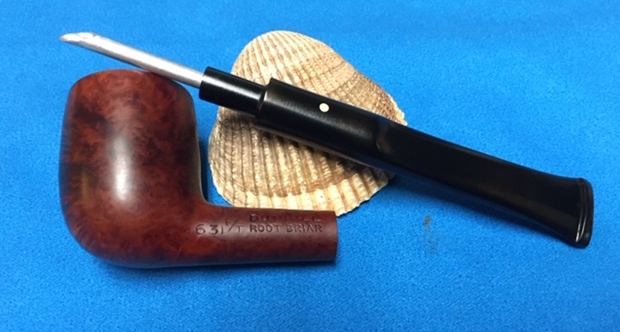
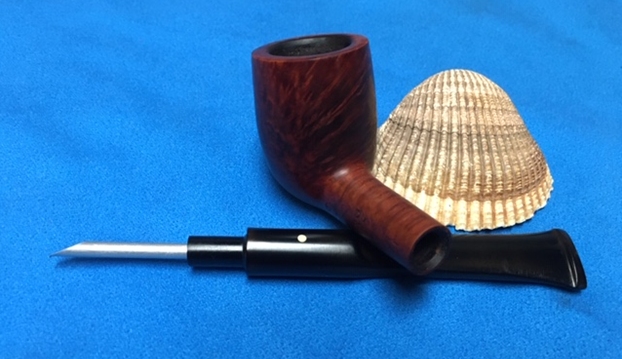
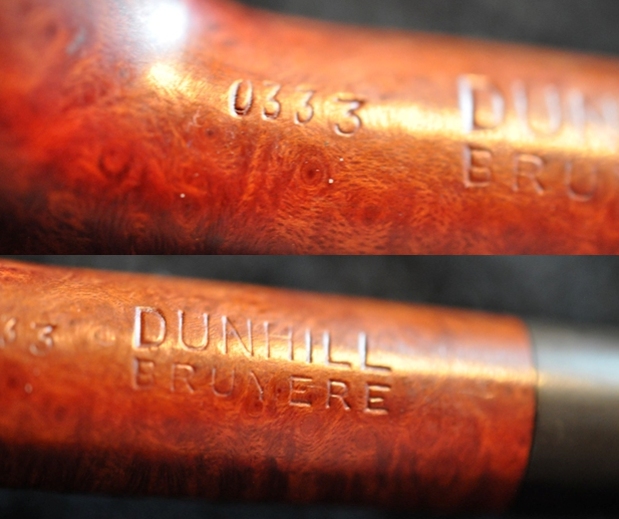
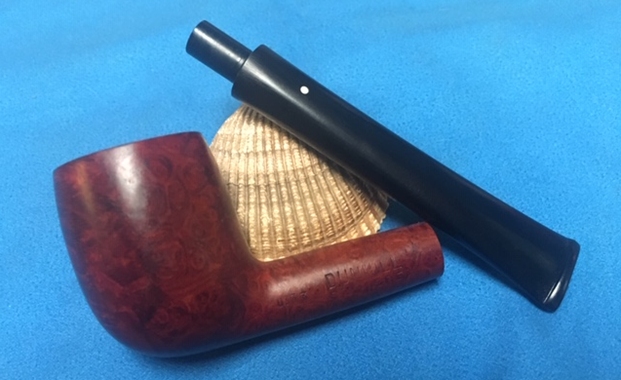
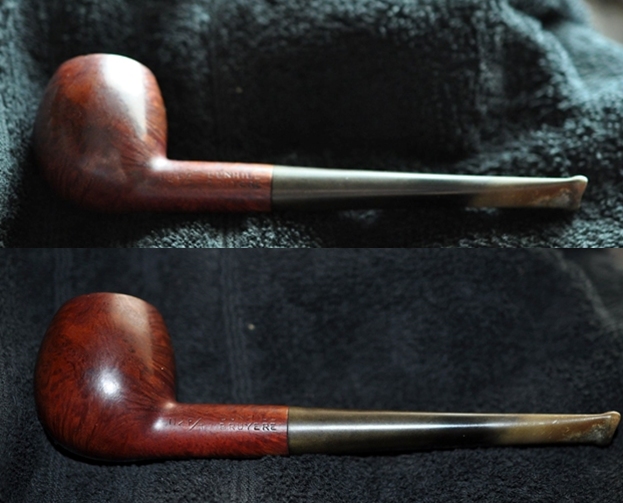
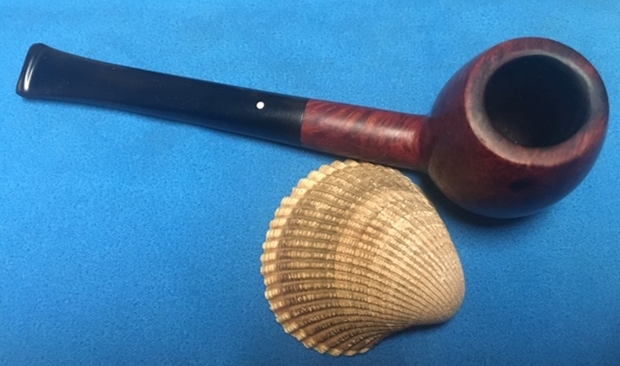
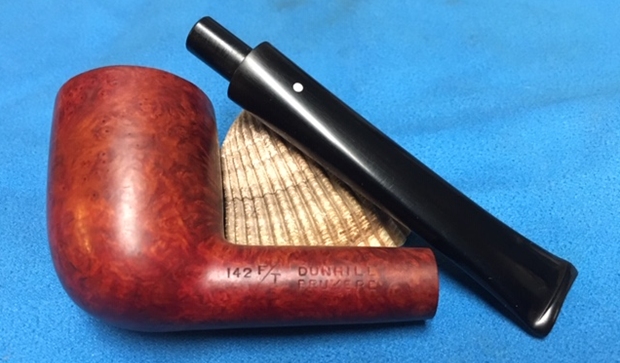
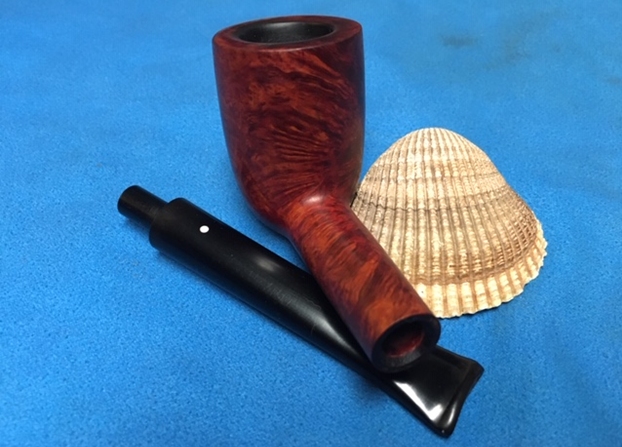
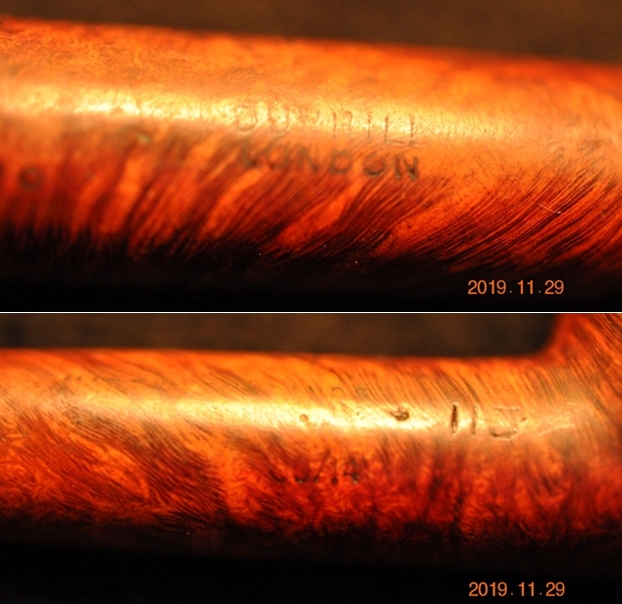
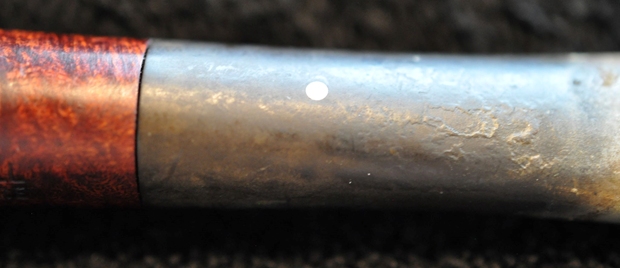
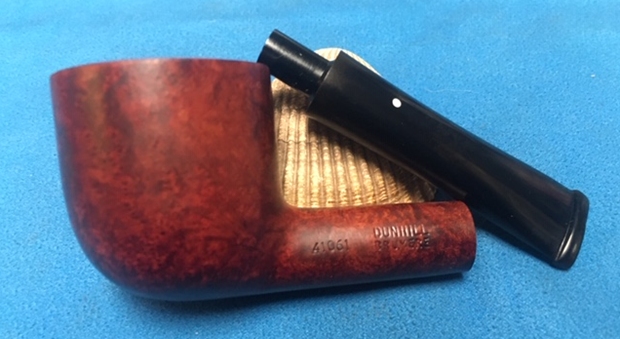
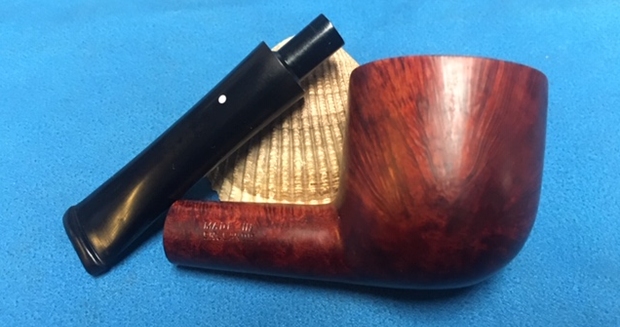
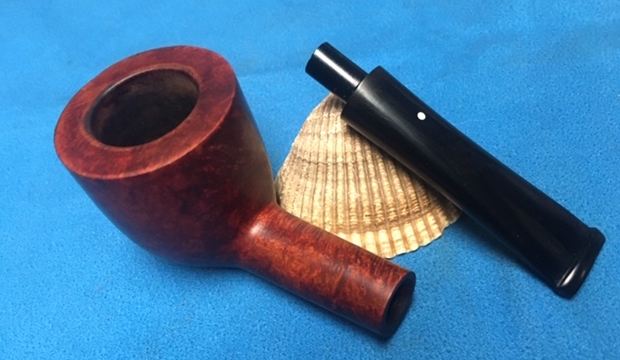
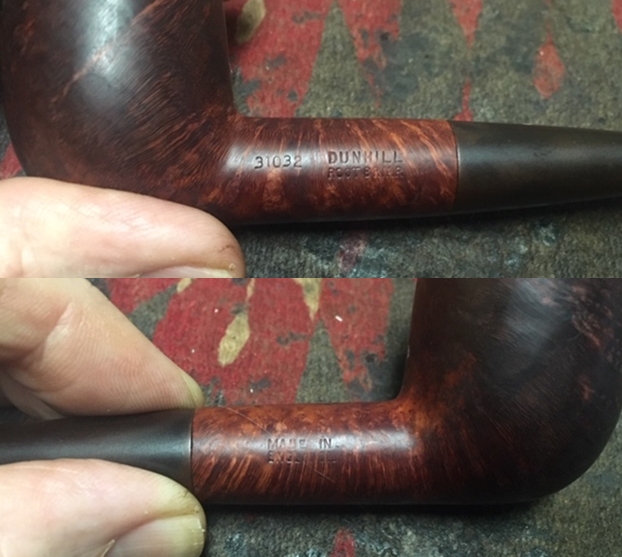
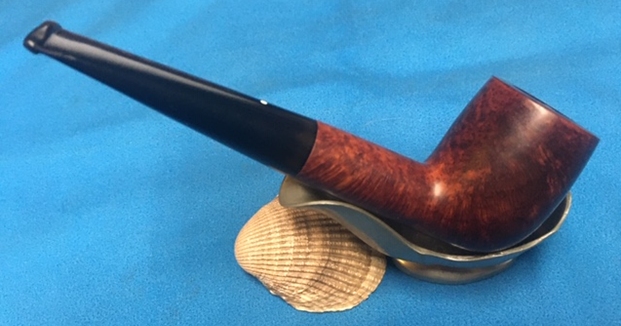
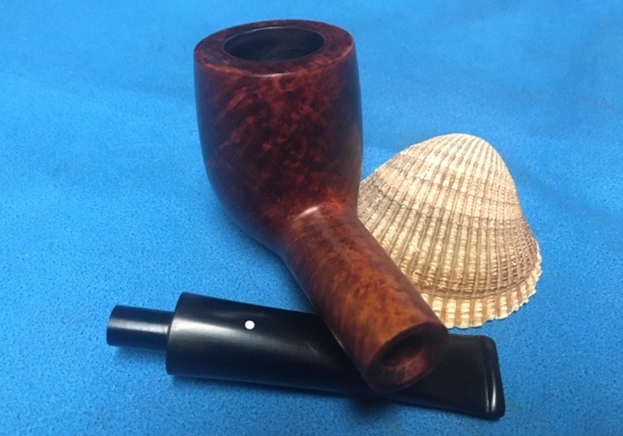
 I took photos of the stamping on the shank. The left side was definitely in better condition than the left. You can see the stamping on the left side in the first photo. The second photo shows the right side of the shank. It reads as noted above.
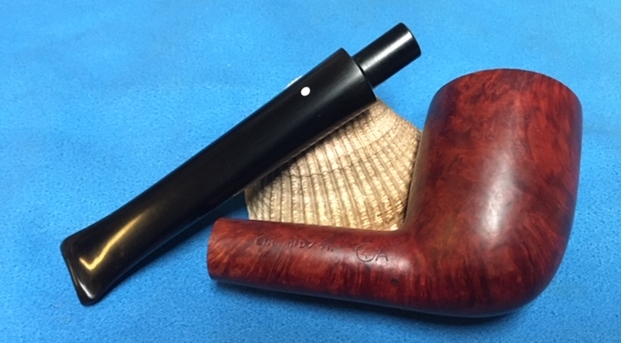
 I turned to Pipedia to read about the Root Briar. I have worked on enough Dunhill pipes to have a good idea of the history and I already knew I was working on a 1965 pipe but I wanted to refresh my memory on the Root Briar finish (https://pipedia.org/wiki/Dunhill#Root_Briar).
(The Root Briar finish) was introduced in 1931 and highly prized because the grain is more pronounced in this finish (usually made using Corsican briar). The Root Briar finish requires a perfectly clean bowl with excellent graining. Therefore, it is the most expensive of the Dunhill pipes. Corsican briar was most often used for the Root finish since it was generally more finely grained. This is a rare finish, due to the scarcity of briar suitable to achieve it. These pipes are normally only available at Company stores, or at Principle Pipe Dealers. Straight grained pipes were formerly graded A through H, but are now only “Dr’s” and graded with one to six stars, with the letters G and H still used for the very finest pieces.
“Dunhill introduced its third major finish, the Root finish, in 1931. Corsican mountain briar is characteristically beautifully grained and the Root was made exclusively from that briar into the 1960s. The pipe was finished with a light natural stain to allow the beauty of the graining to show through. Although always available with a traditional black vulcanite bit, the Root was introduced in either 1930 or more likely 1931 and fitted with a marble brown dark and light grained vulcanite bit that has since become known as the ‘bowling ball’ bit because of the similarity in appearance between the bit’s finish and that of some bowling balls of the time. With the war, however, the bowling ball bit was dropped from production. Through 1954 (and after) the Root pipe nomenclature (including shape numbers) was identical to that of the Bruyere except that instead of the “A” of the Bruyere, the Root was stamped with an “R”. In 1952 when the finish rather than LONDON was placed under DUNHILL, ROOT BRIAR rather than BRUYERE was used for the Root.” Loring, J. C., The Dunhill Briar Pipe, The Patent Years and After (self-published, Chicago, 1998).
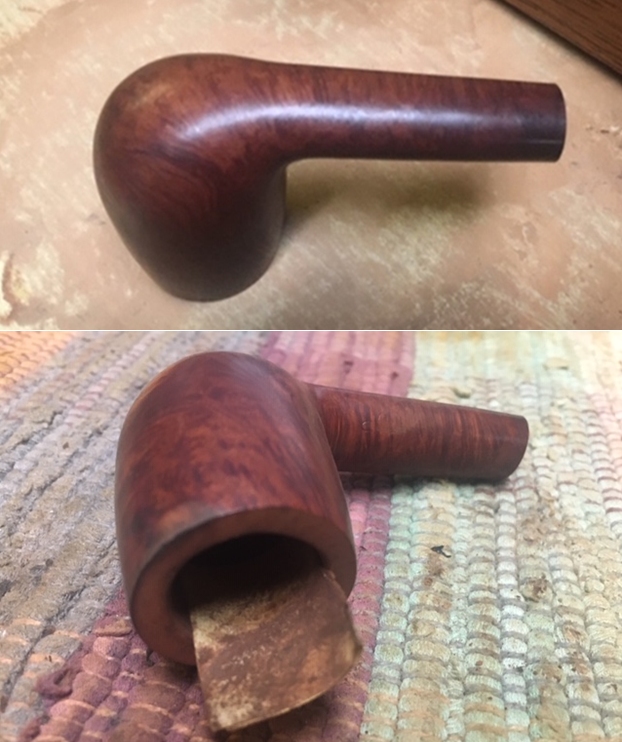
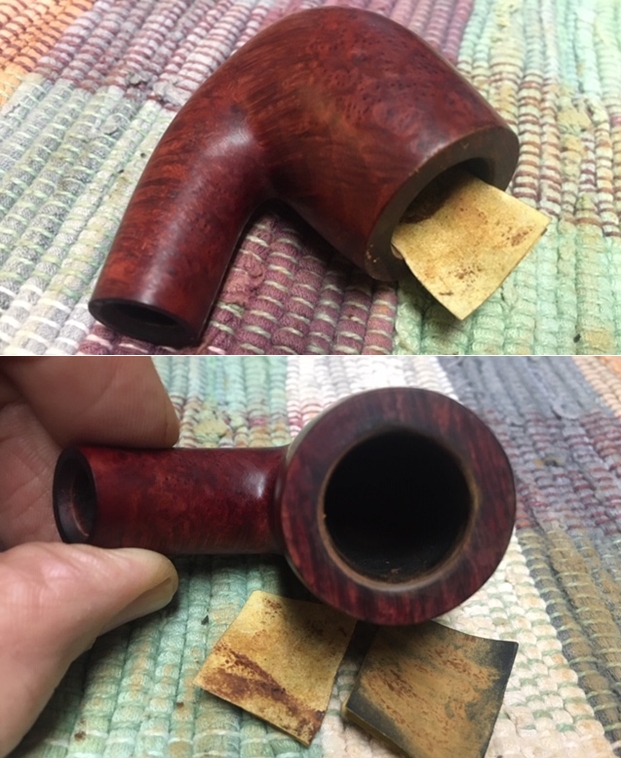
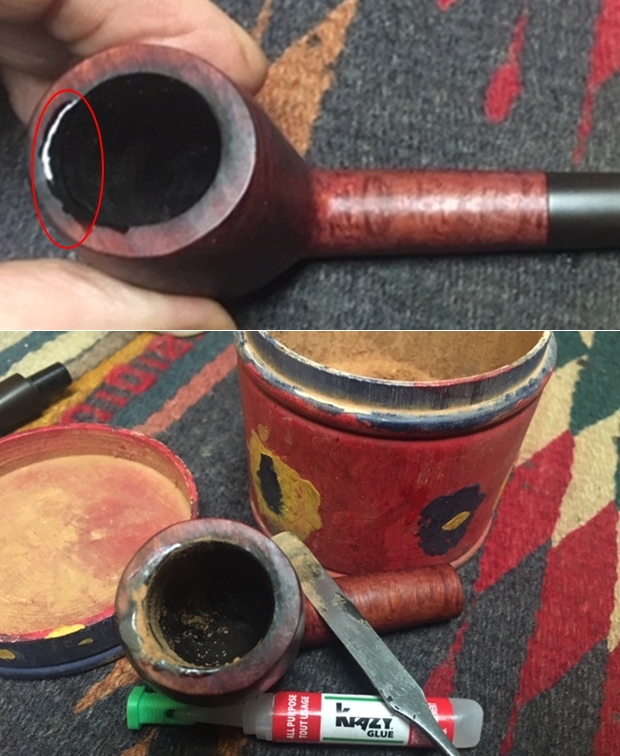
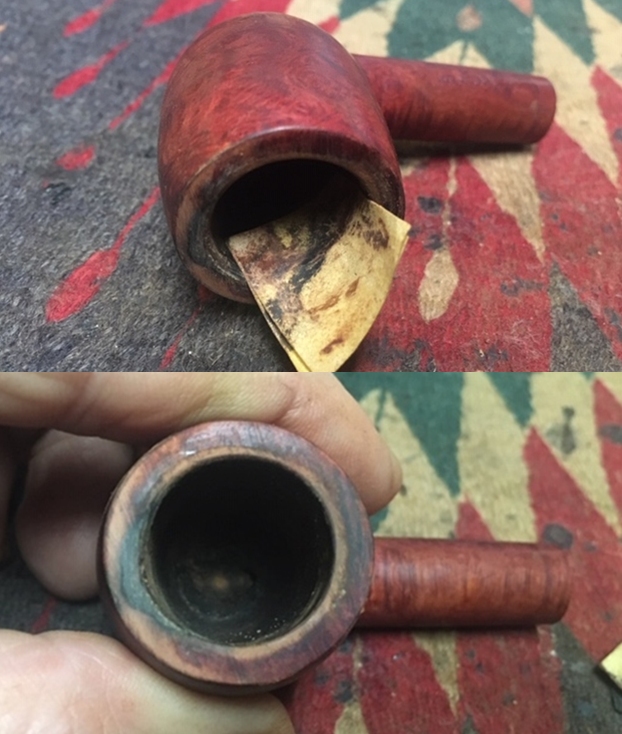
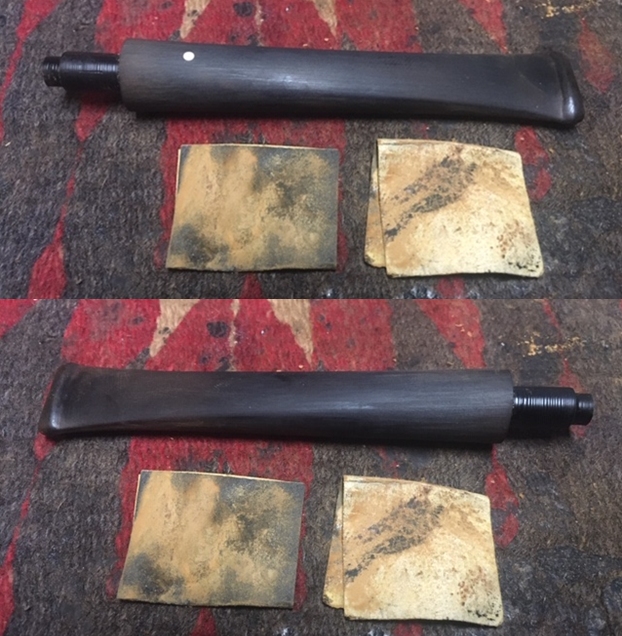
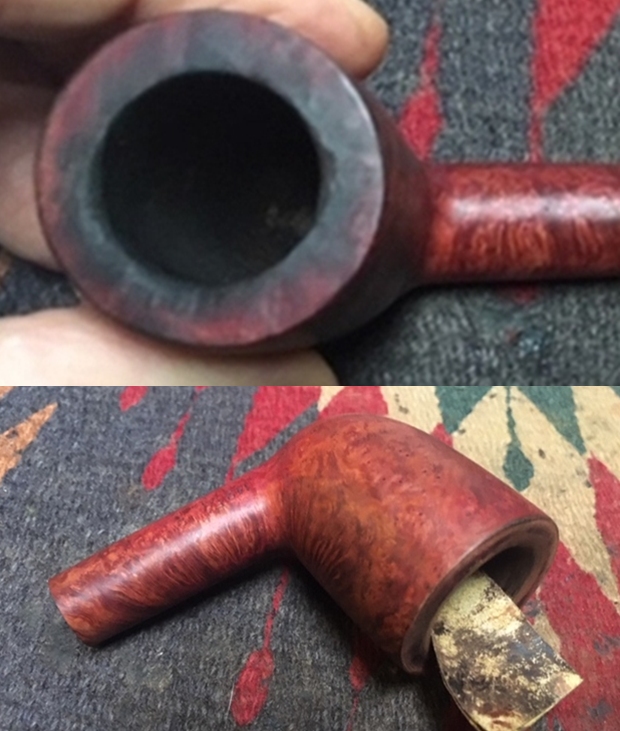
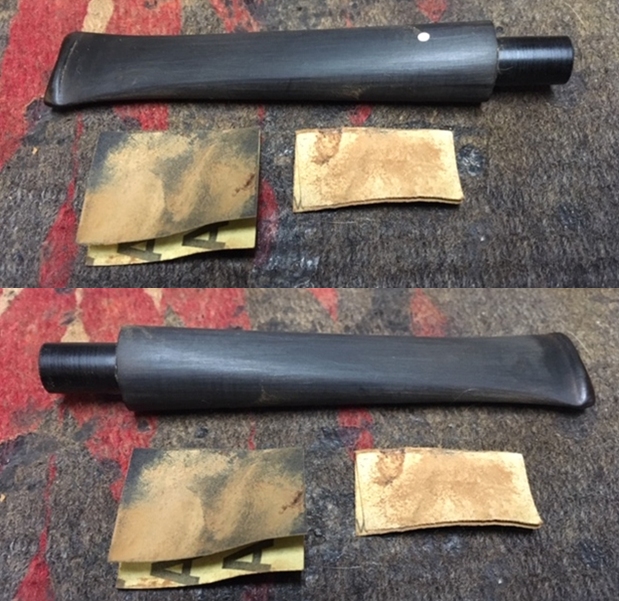
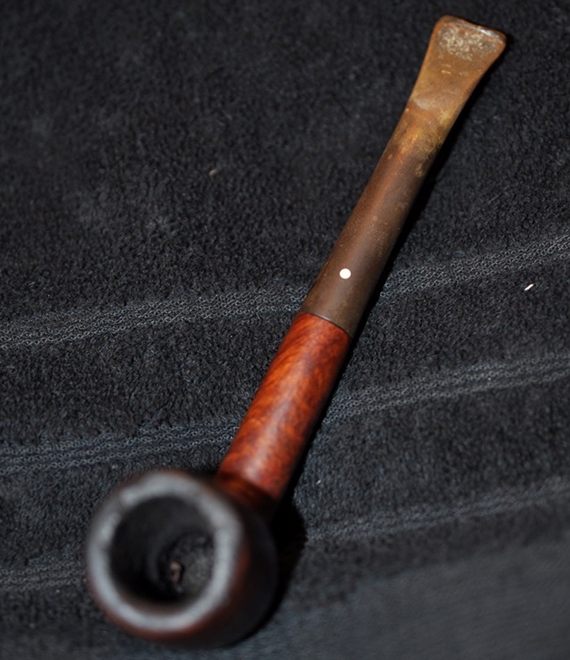
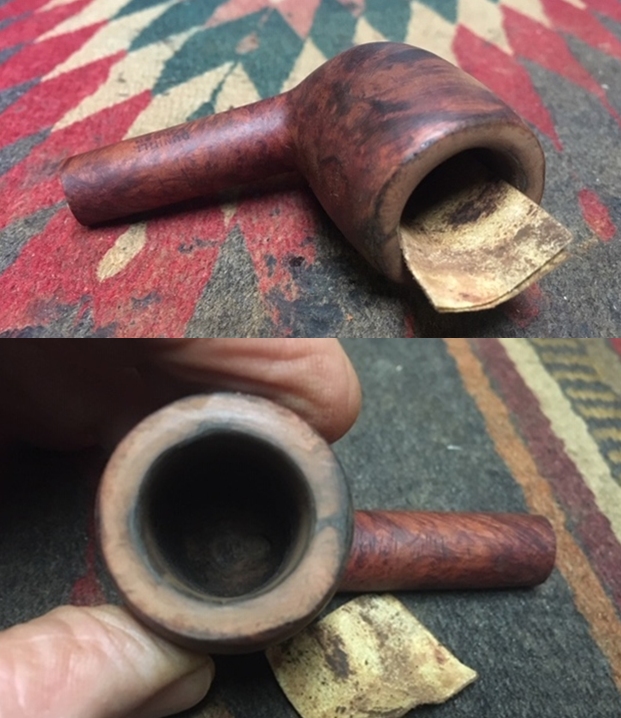
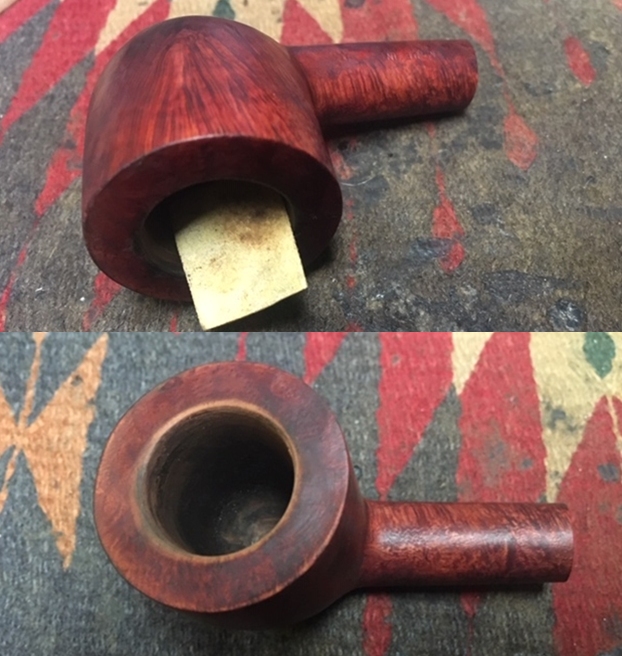
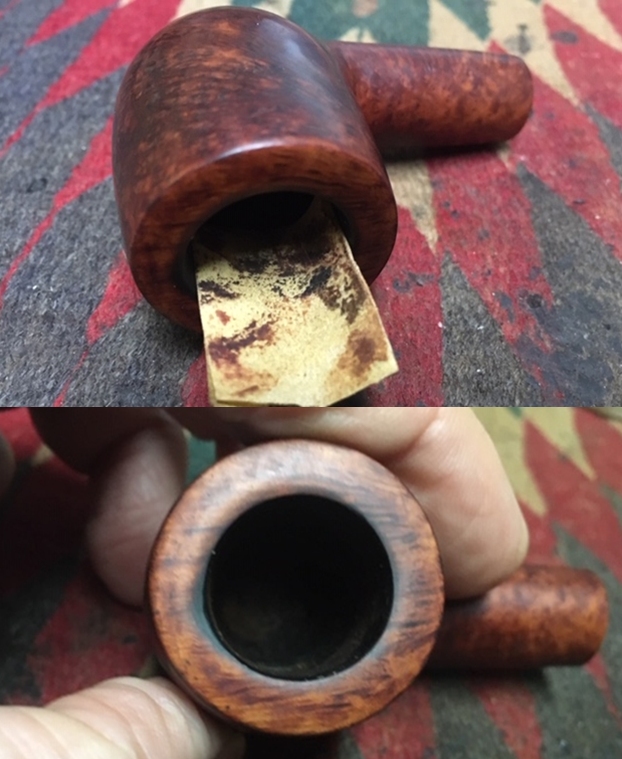
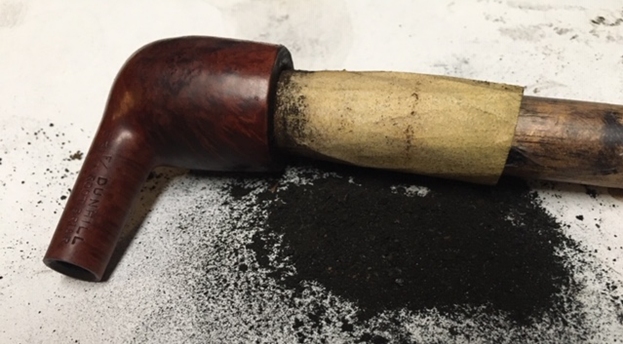
That was a good reminder for me of the character and the rarity of the finish. Henry was going to enjoy this pipe. Now it was time to work on it. I carefully removed the stem and found that there was an inner tube stuck in the shank. I examined it and found that I could see glimmers off it under the cake in the bowl. I would need to work on the cake and try to ream the bowl a bit around the entrance of the airway to loosen it. I reamed the bowl back around the airway with the tip of a Savinelli Fitsall Pipe knife. I ran alcohol down the tube using a pipe cleaner. I folded the pipe cleaner and dribbled alcohol around the end of the tube sticking into the bottom of the chamber. I worked alcohol in next to the tube using pipe cleaners. I paused and wiggled the tube regularly. I heated it a bit with a lighter and wiggled some more. Finally it came free. You can see all the debris on the outside of the tube.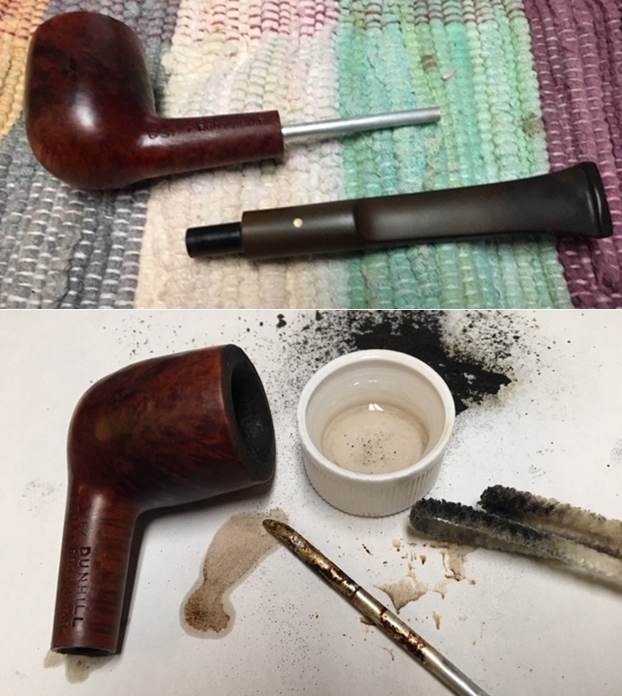 I cleaned up the outside of the tube with sandpaper to remove the grime. Once it was gone I could see significant damage to the tube. Where it was stuck in the shank there some deep pinch marks. Where it sat in the shank also had some grooves. It was actually damaged enough that I did not want to use it again. I have a box of inner tubes that I picked up in an estate I purchased. I have probably 8-9 different tubes of different sizes. I went through the tubes and found the identical tube but undamaged. The photos below show the original tube and the new replacement tube. I checked the fit in the bowl, shank and stem and it was perfect.
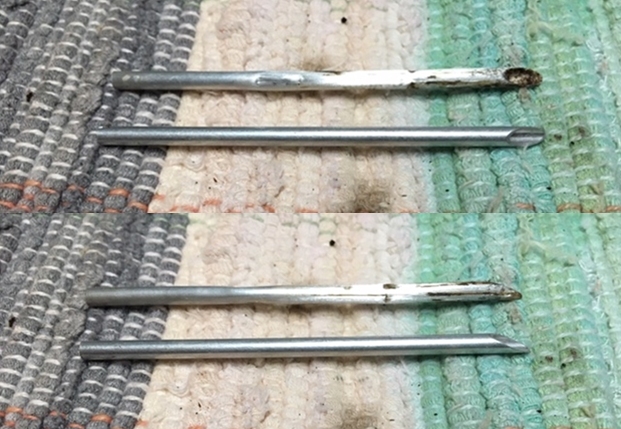 I reamed the bowl with a PipNet pipe reamer using the smallest cutting head. I was able to remove the heavy cake. I cleaned up the remaining cake with a Savinelli Fitsall Pipe knife and then sanded the walls of the bowl with 220 grit sandpaper on a piece of dowel. I was pleased to see that the walls of the bowl were undamaged.
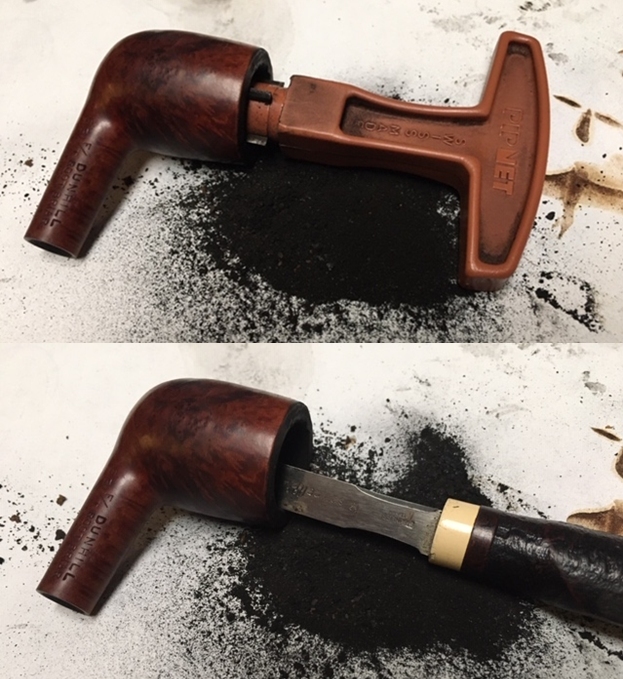
 I moved on to clean the interior. I scraped the walls of the shank with a pen knife to remove the oils and tars that had locked the inner tube in the shank. I was able to remove the majority of the debris with the knife. I followed up by scrubbing the airway in the shank and mortise as well as the stem with alcohol, cotton swabs and pipe cleaners.
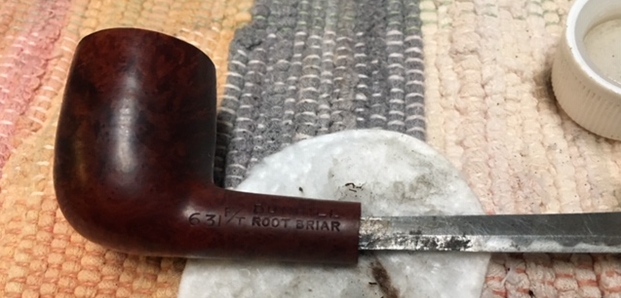
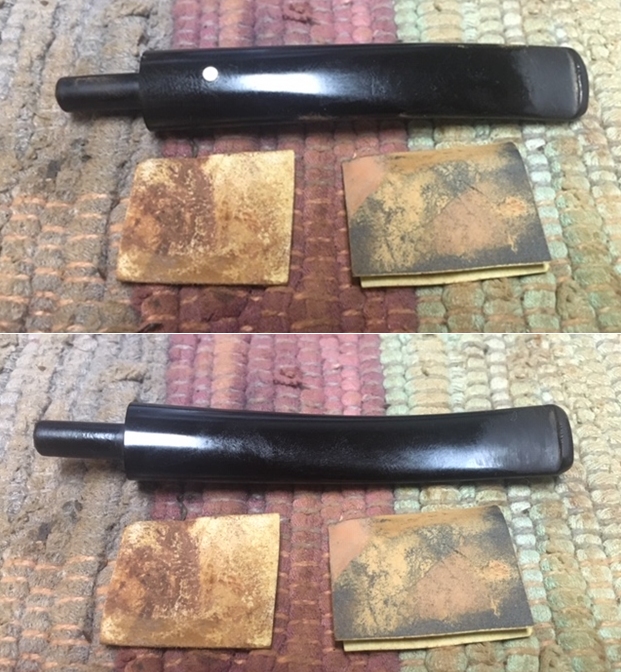
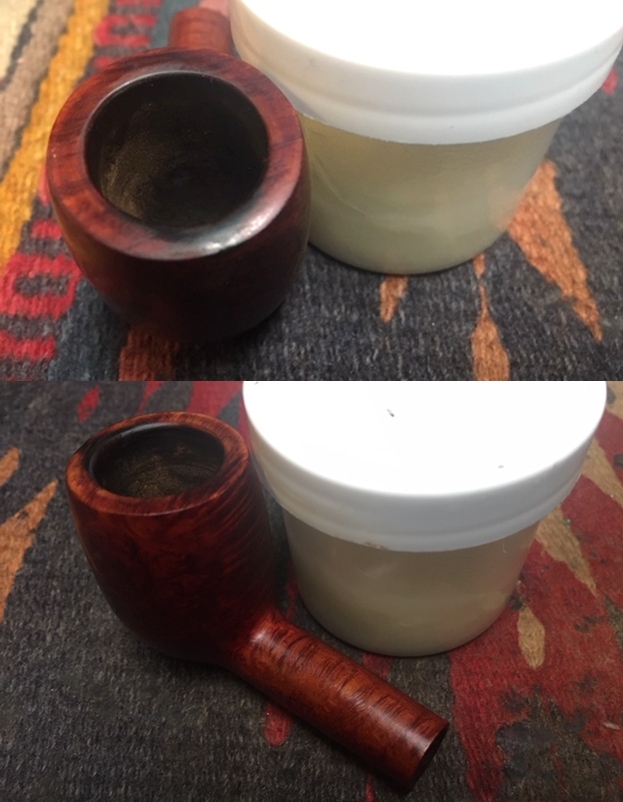
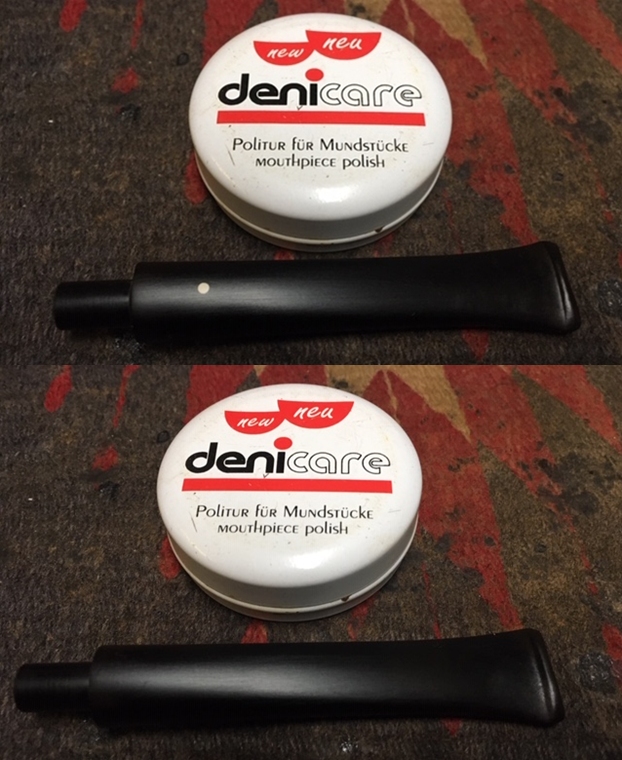
 I scrubbed the exterior of the stem with some Soft Scrub to soften and remove some of the oxidation (of course I forgot to take photos of that part of the process). I used 3-4 cotton pads to scrub the stem and I was happy with the amount of oxidation that it removed. When I was finished I rinsed it off and dropped the stem into a bath of Before & After Deoxidizer. I left it in the mix for a while and turned my attention to the bowl.
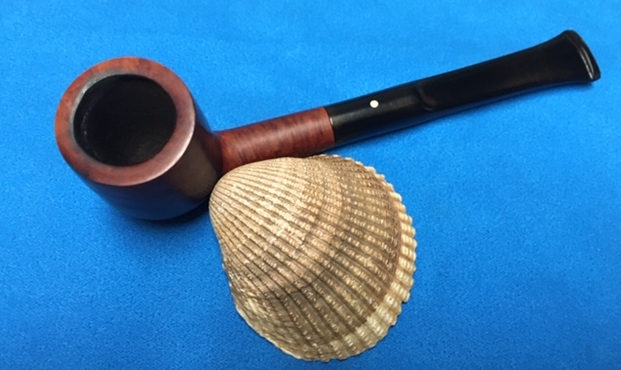
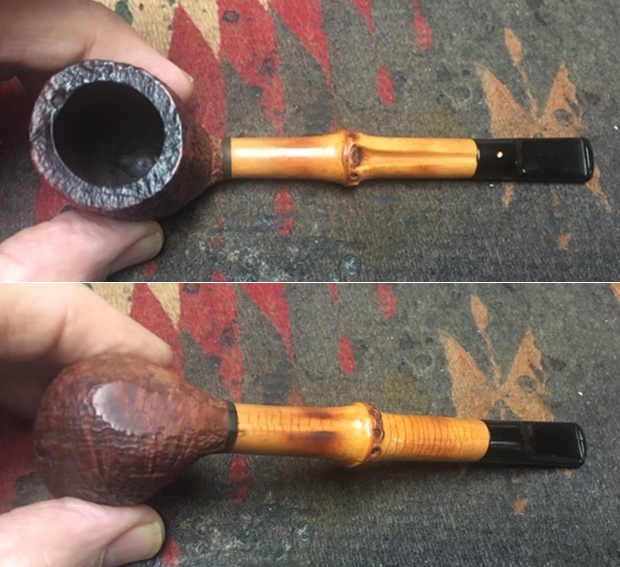
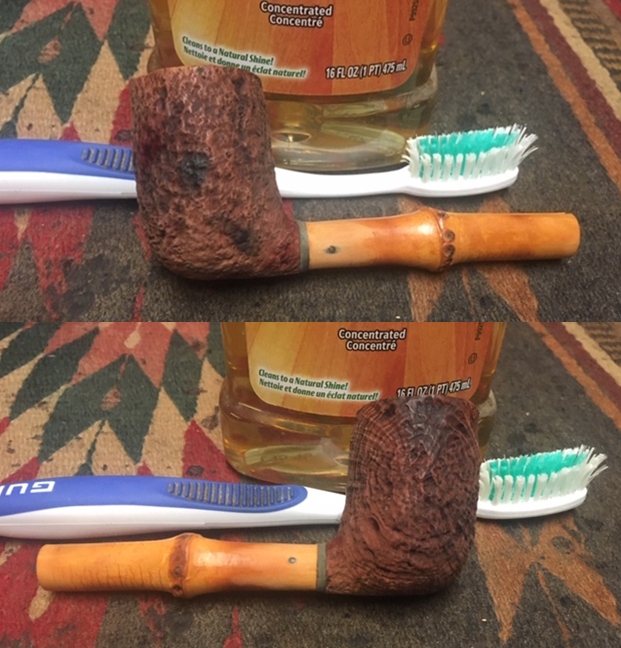
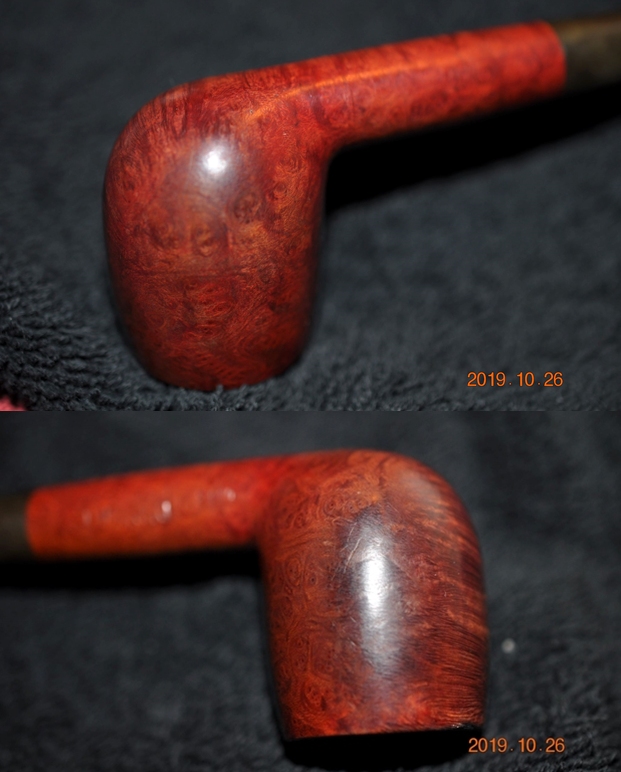
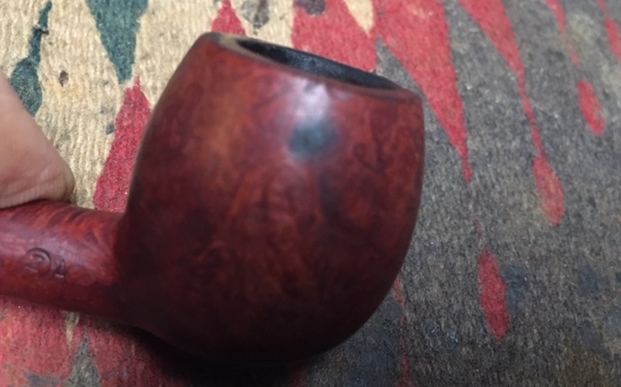
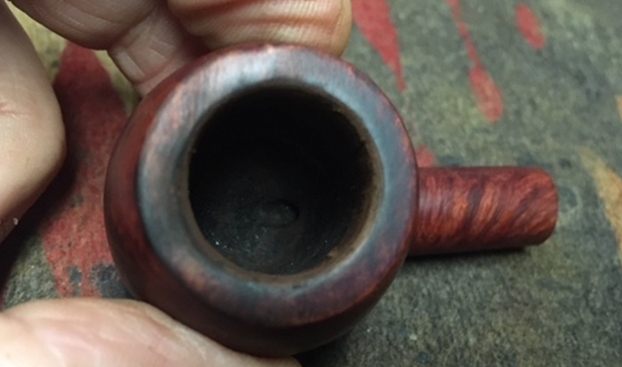
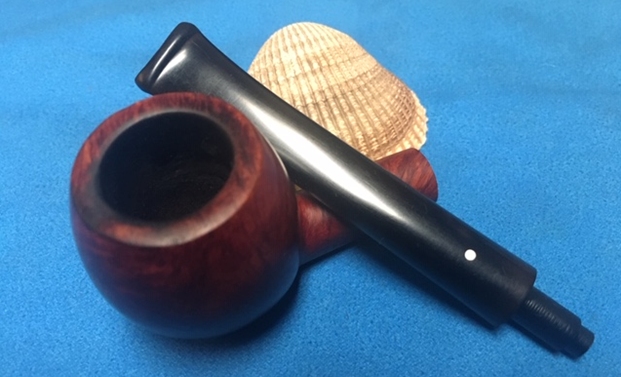
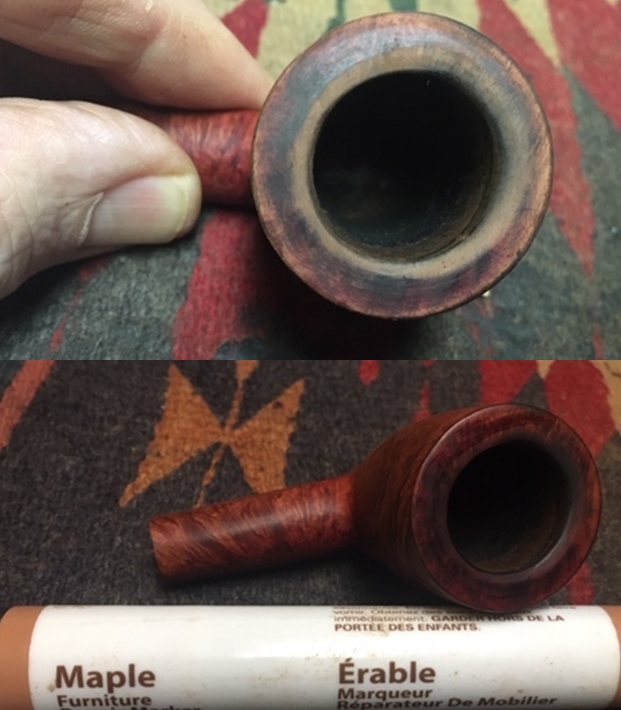
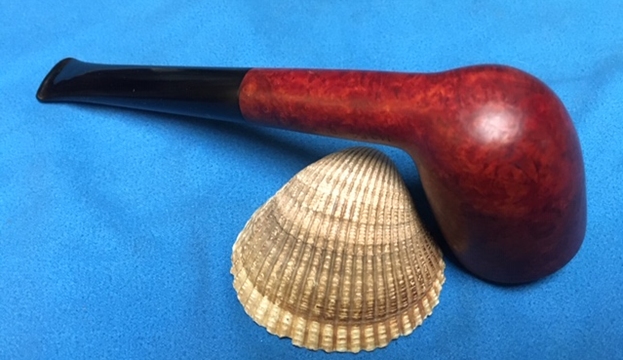
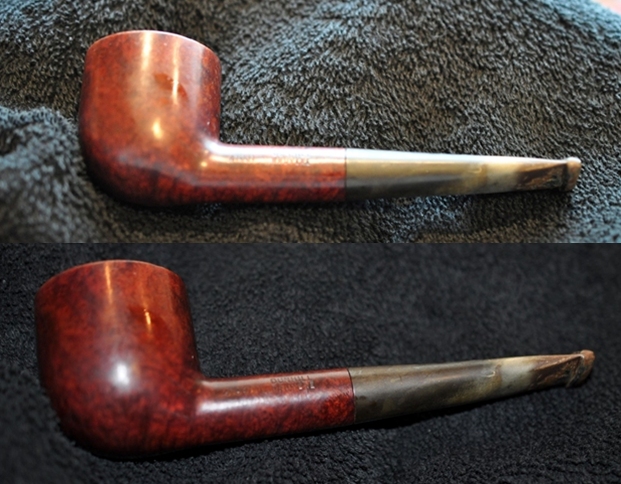
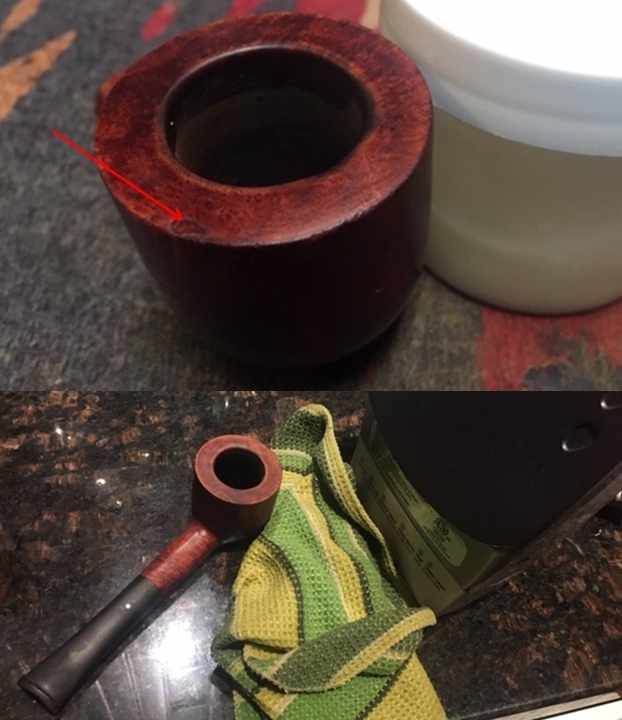
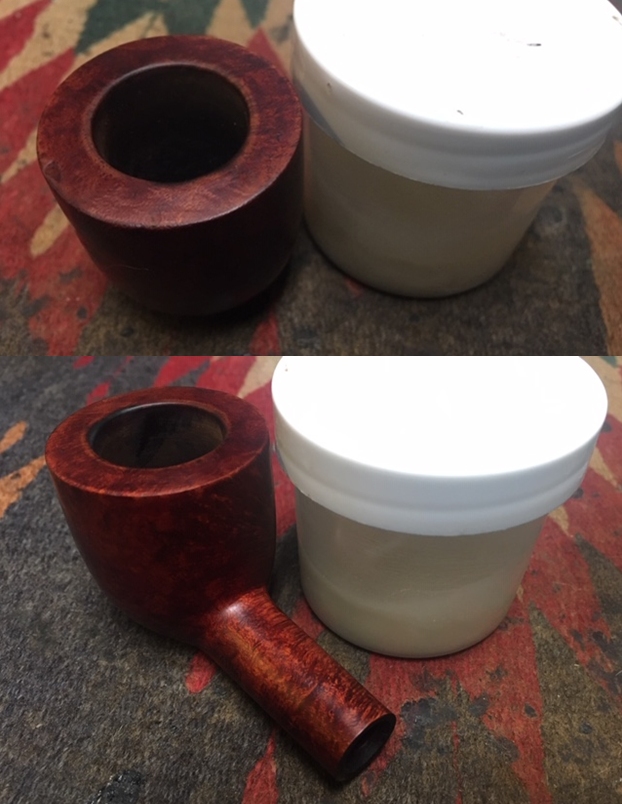
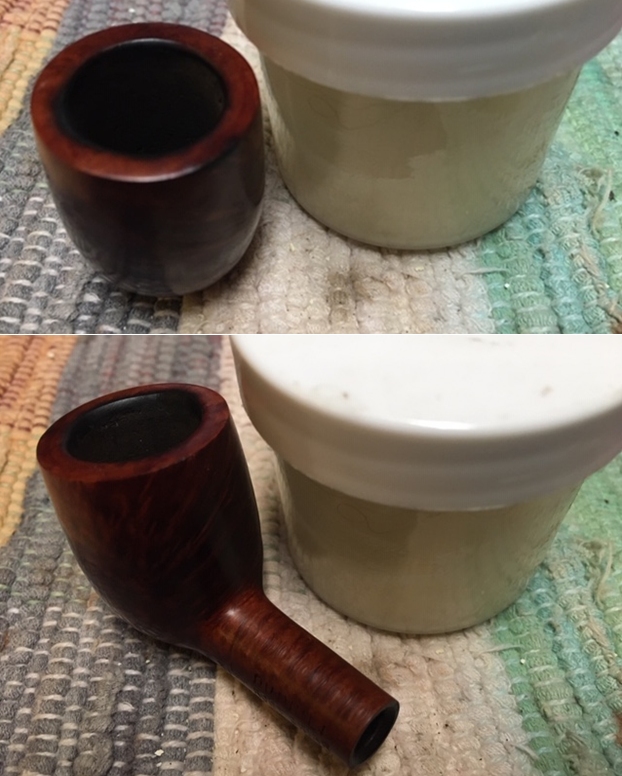
 I topped the bowl with 220 grit sandpaper on a hard board to minimize the damage. I worked it over the sandpaper in a circular motion to reduce the scratches left behind by the sandpaper. When I finished topping it to my liking I used a folded piece of 220 sandpaper to give the inner edge of the bowl a bevel to reduce the burn damage. The third photo below shows the rim top after this treatment. It has come a long ways from the original rim top.
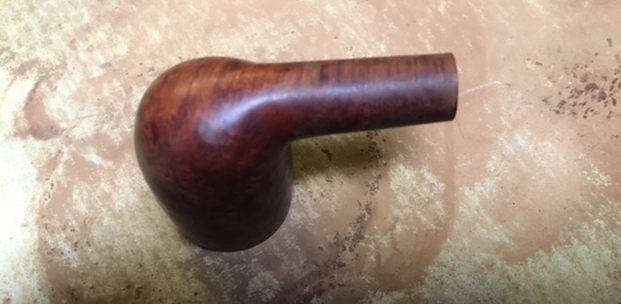
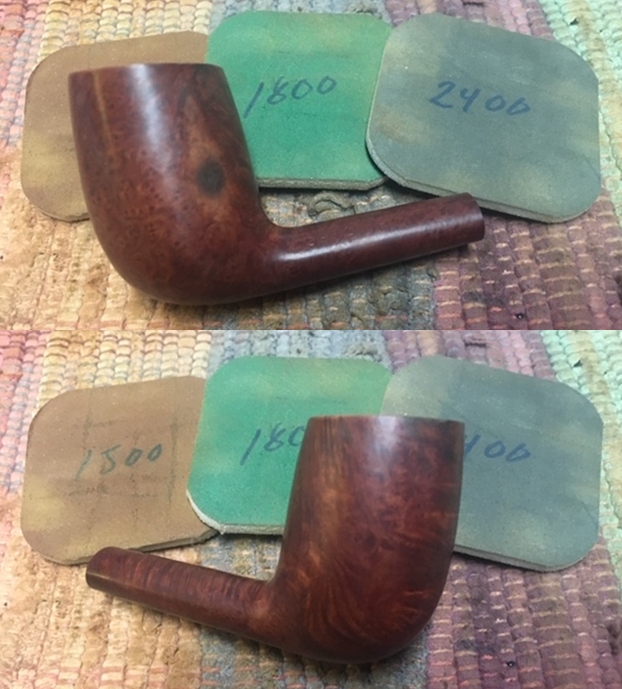
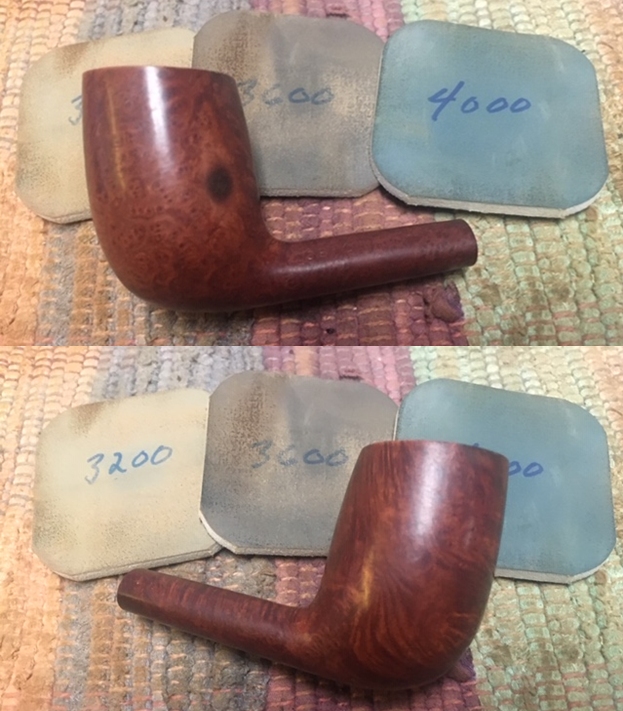
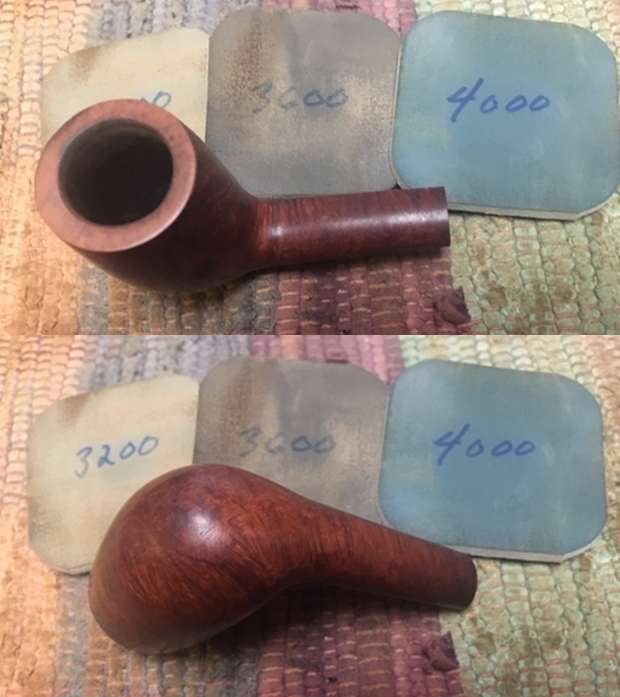
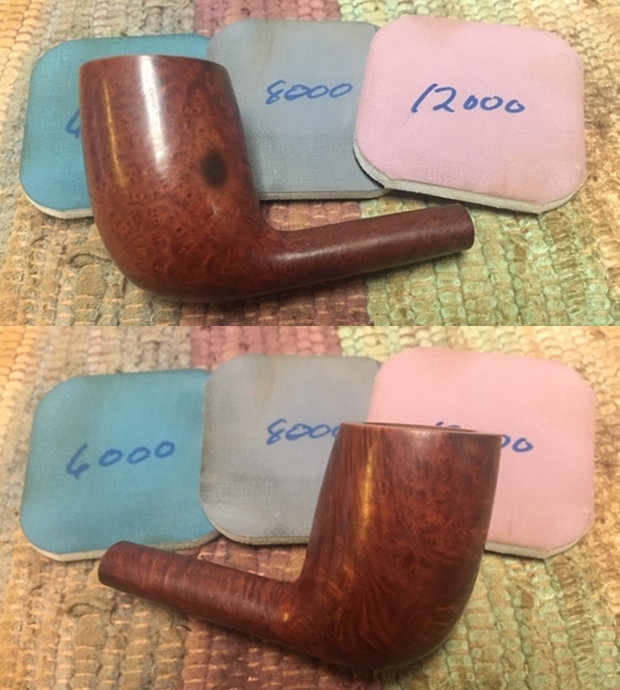
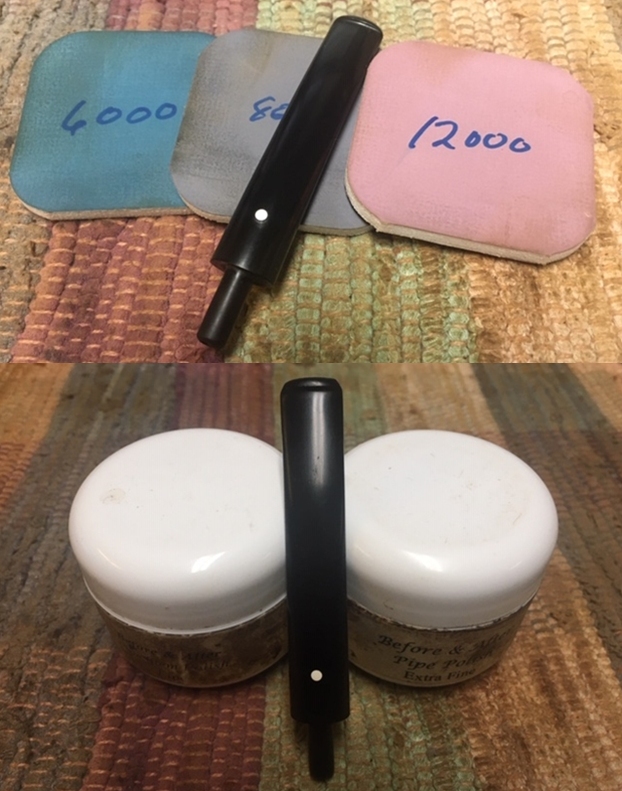
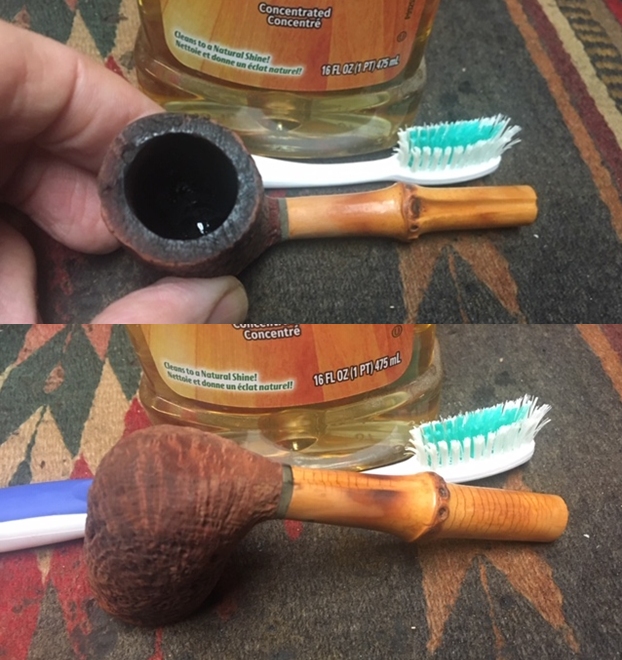
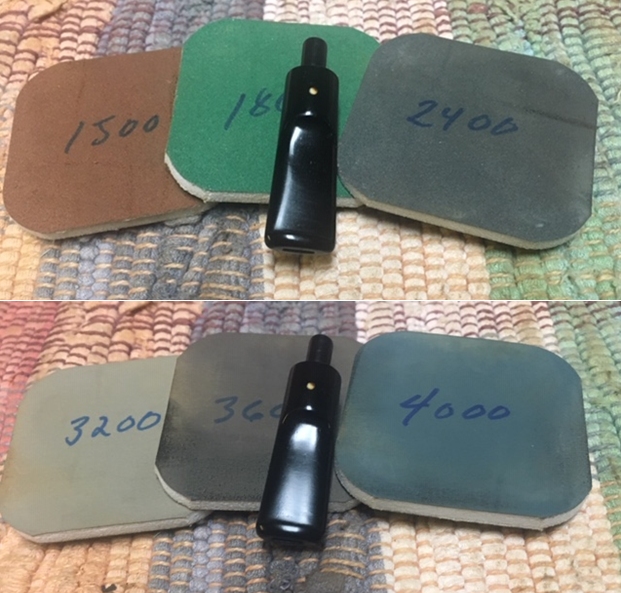
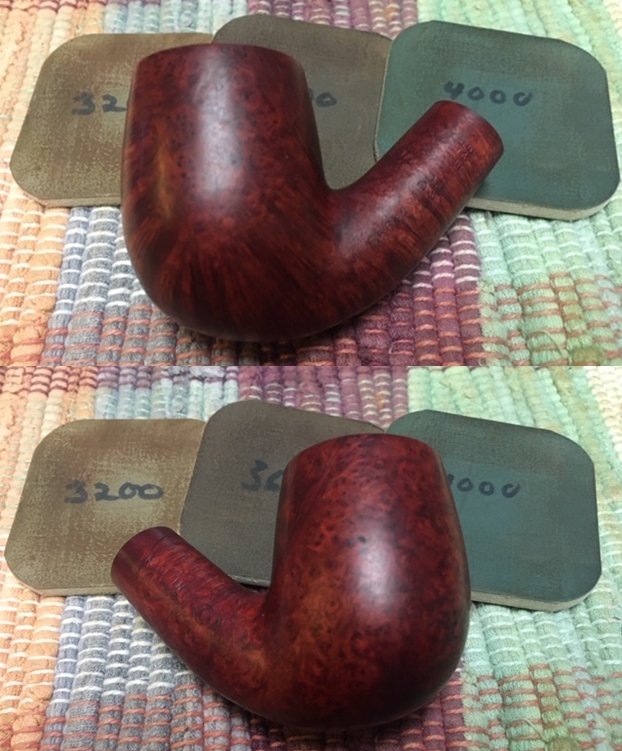
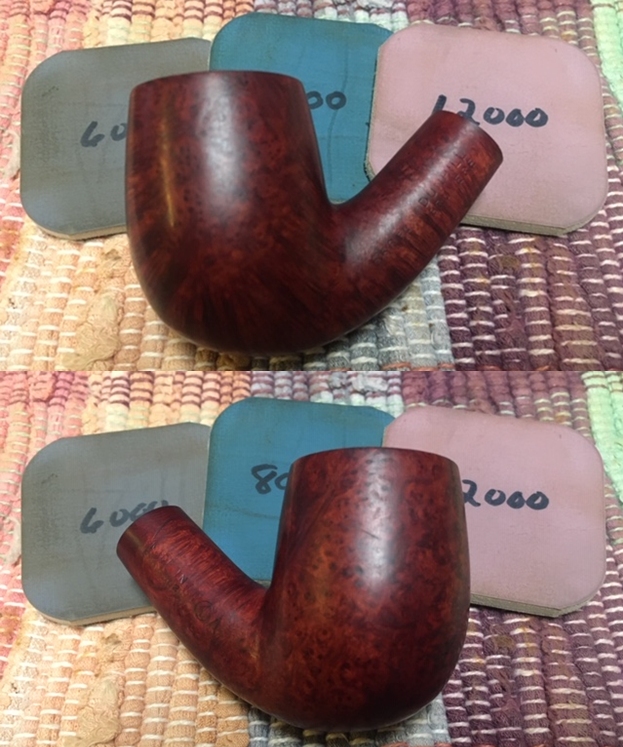
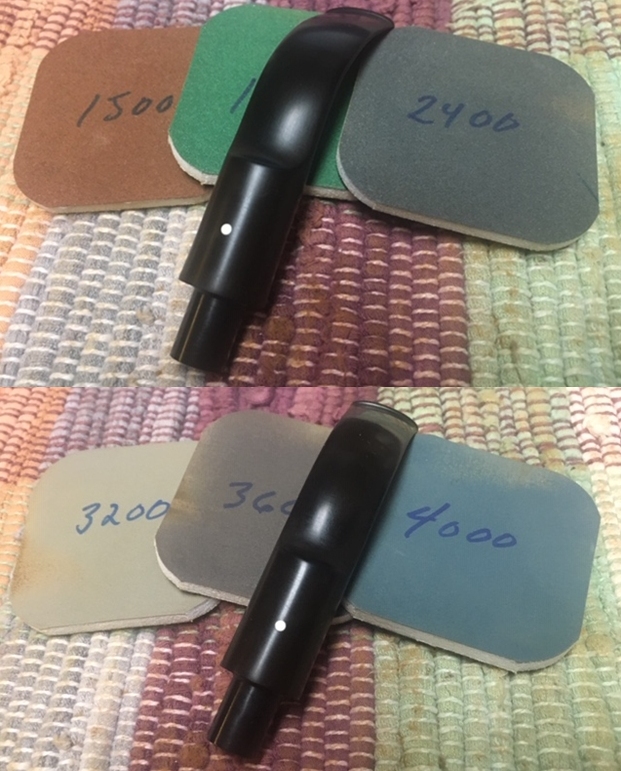
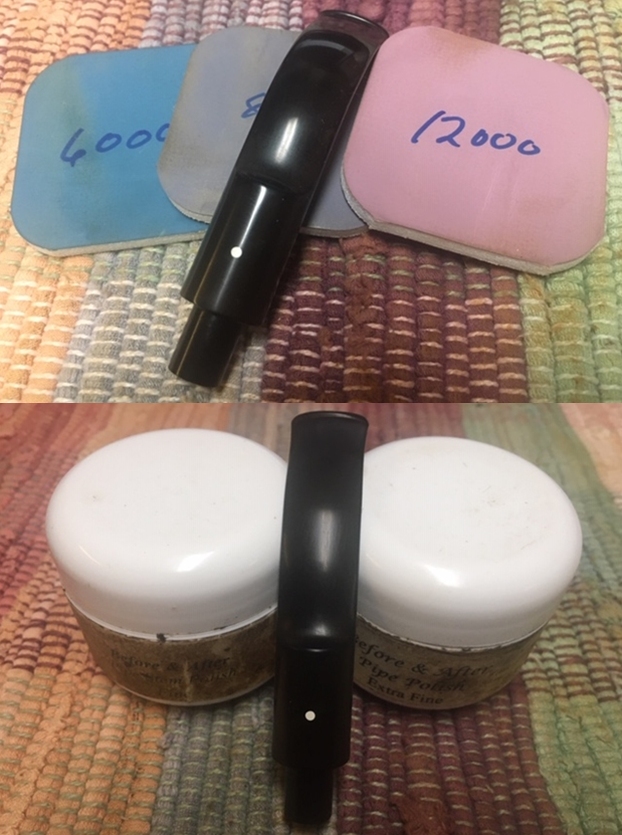
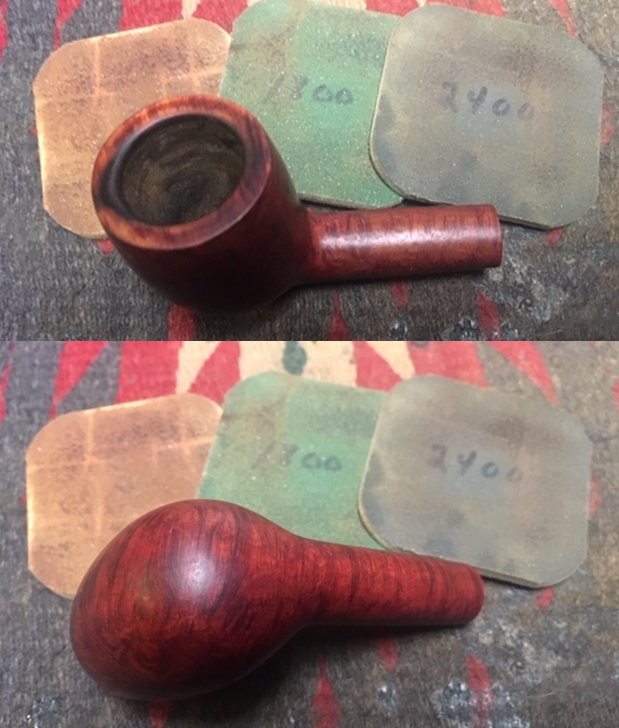
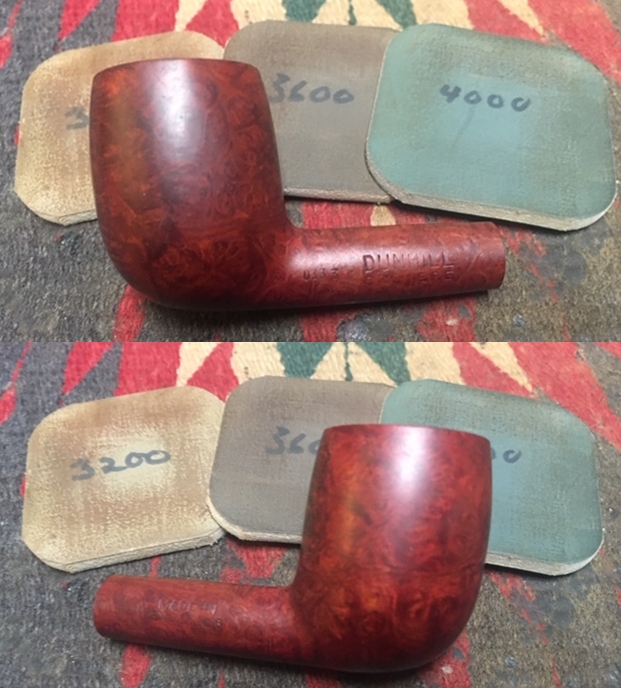
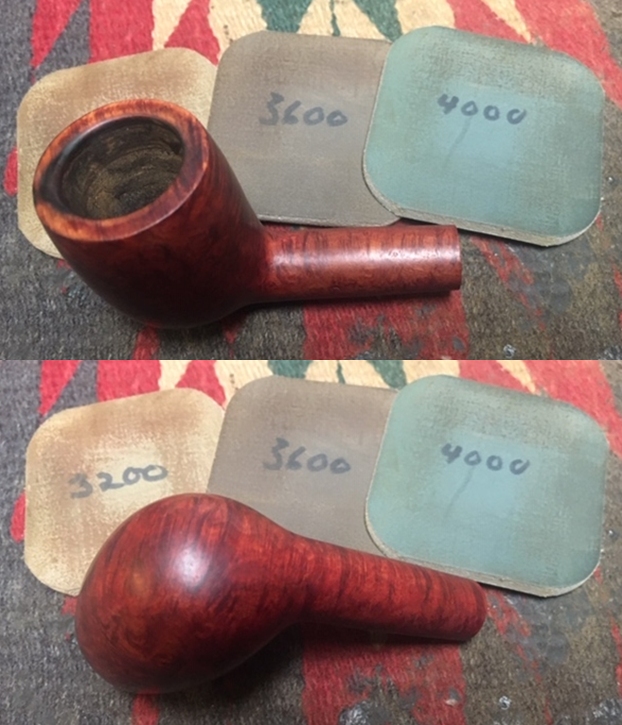
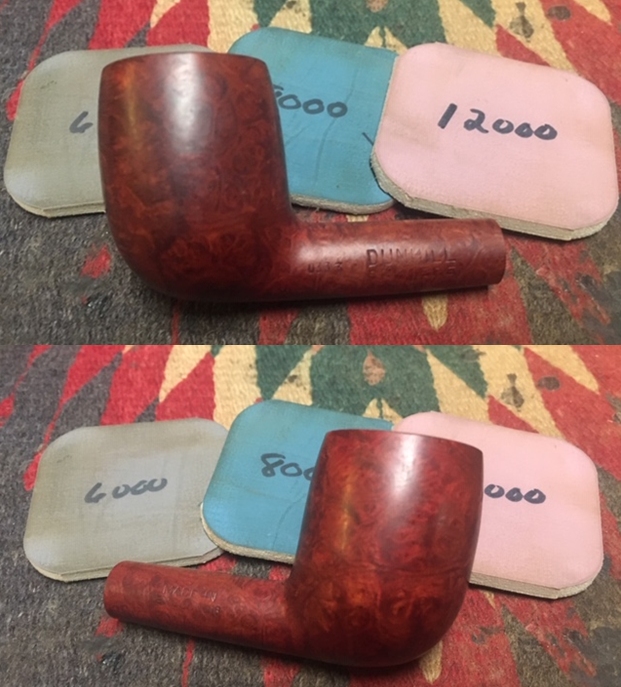
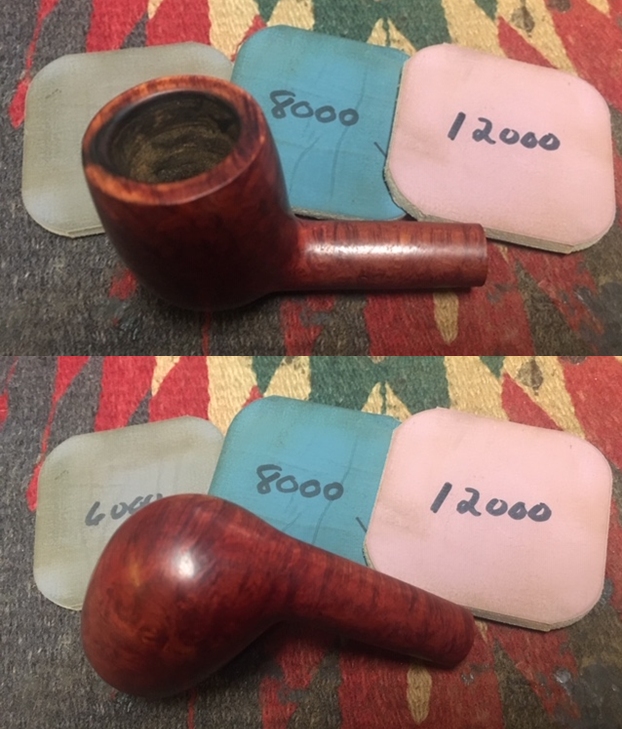
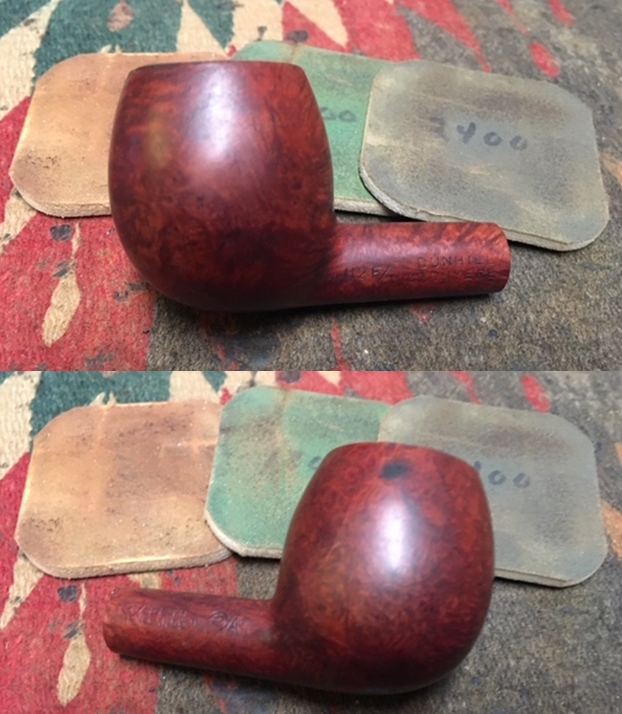
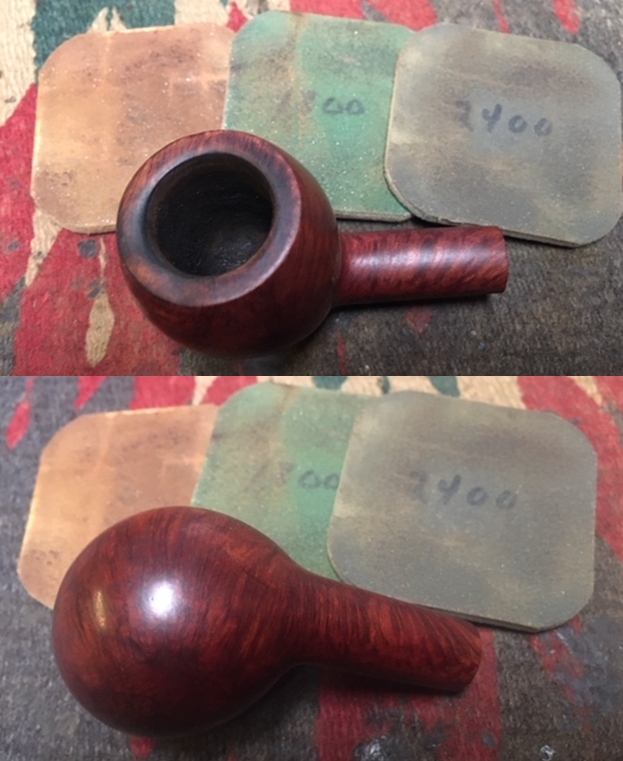
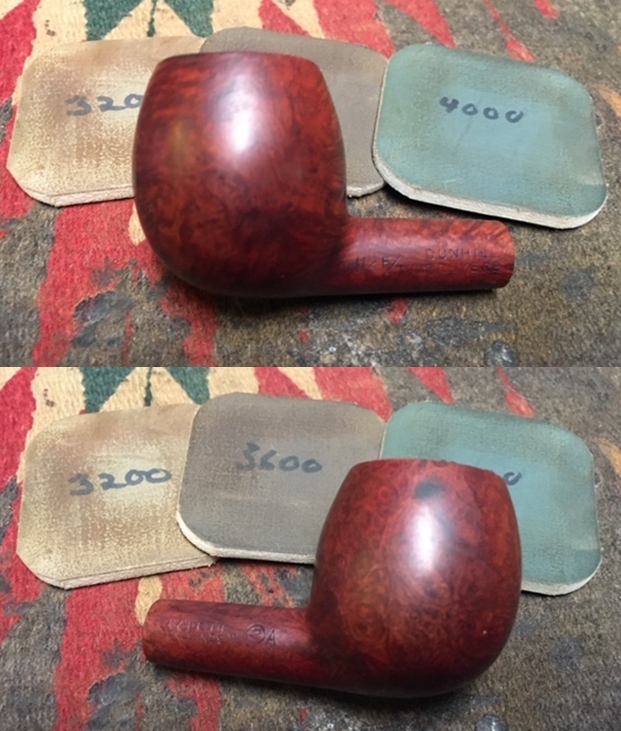
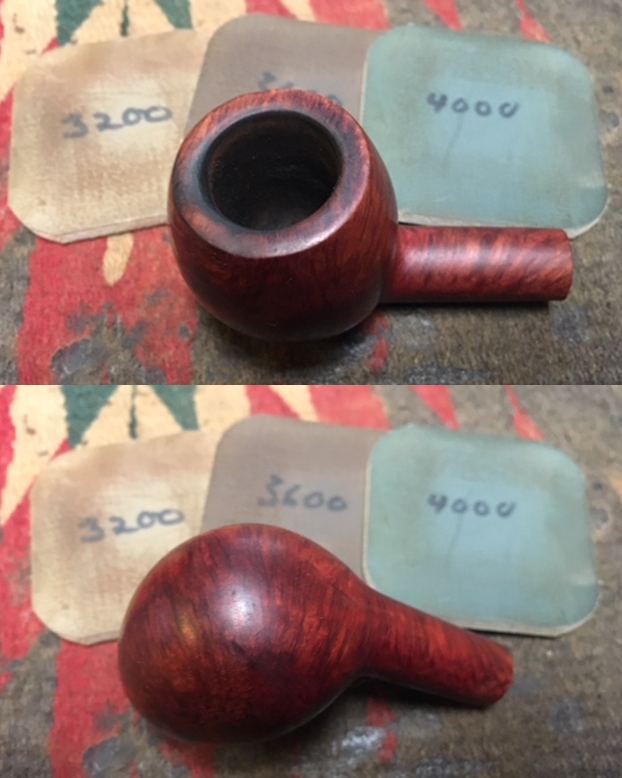
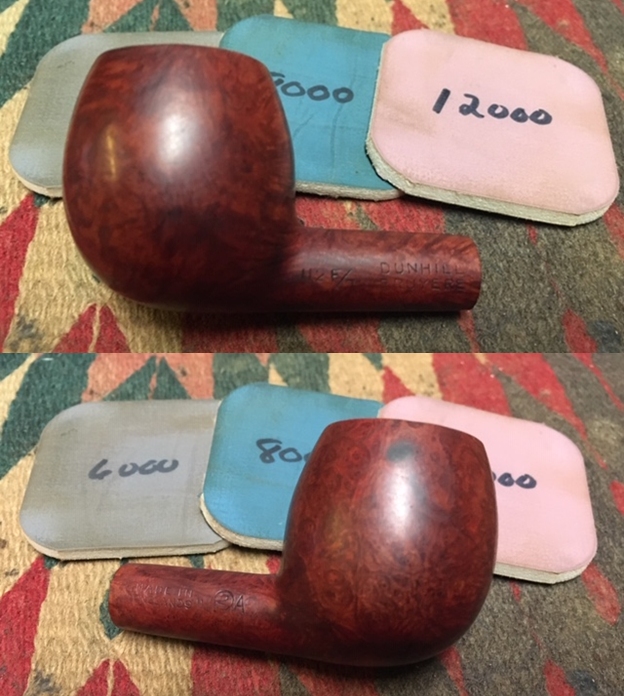
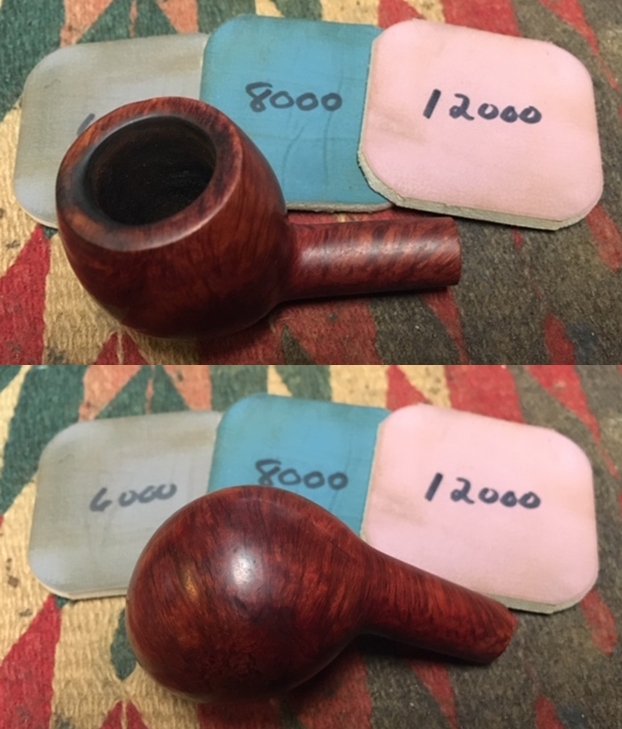
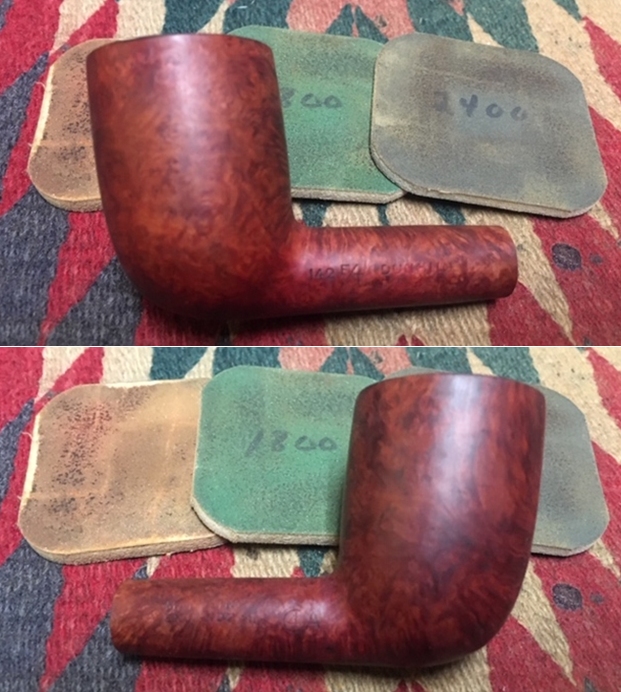
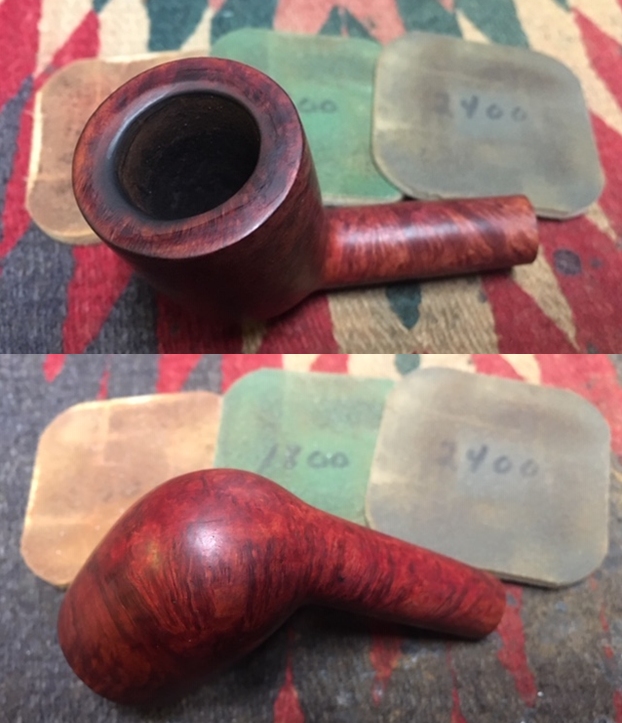
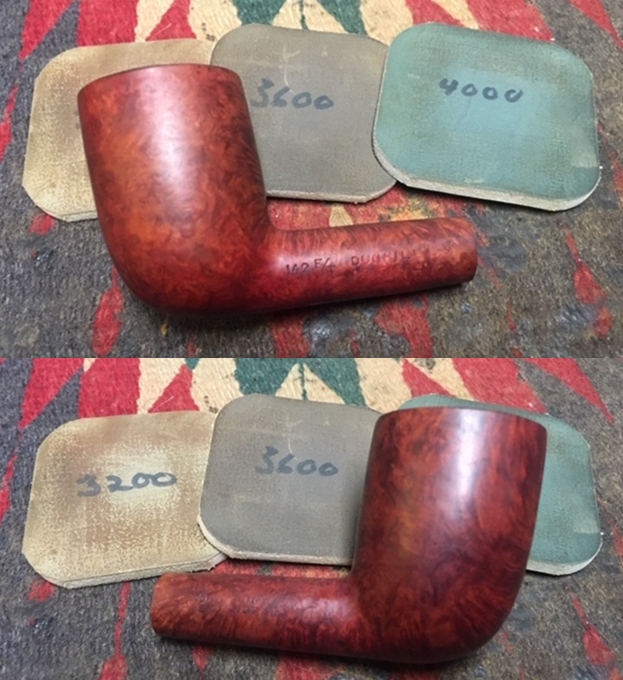
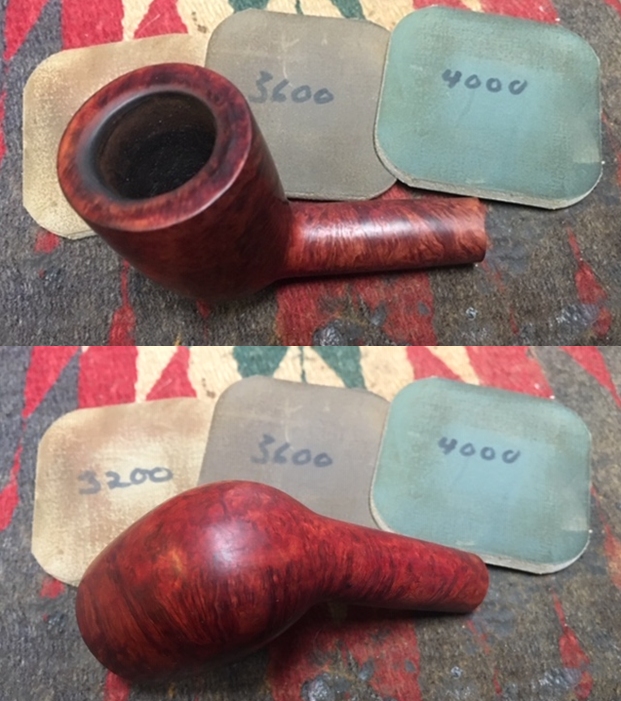
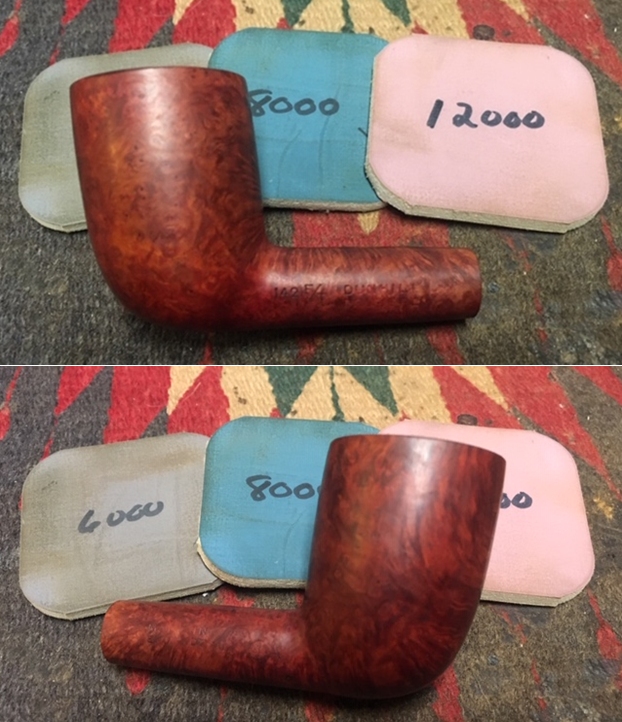
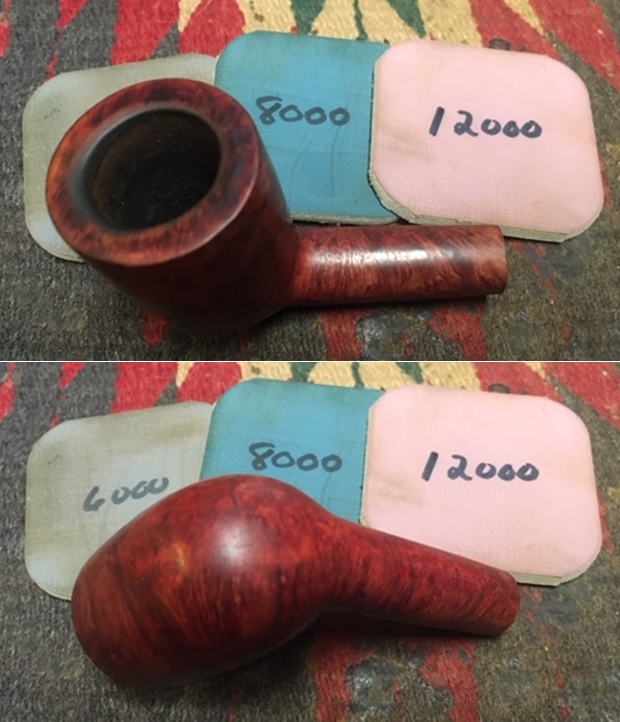
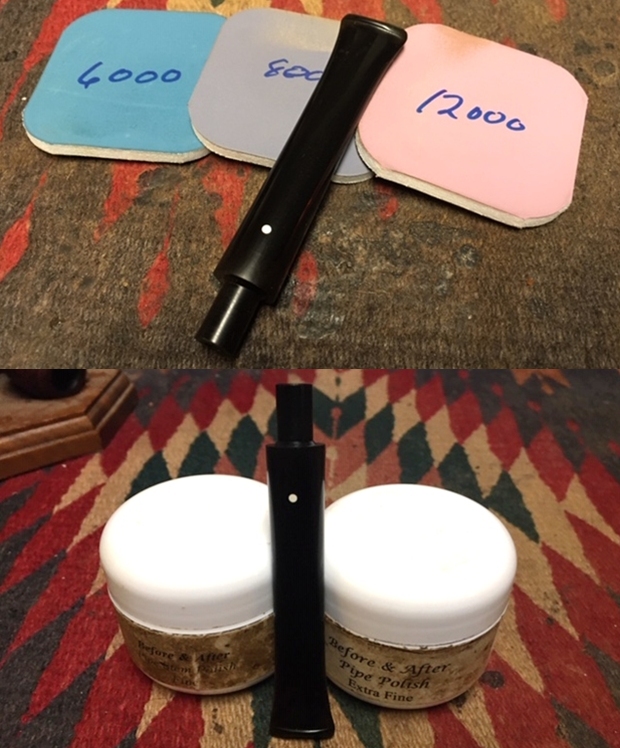
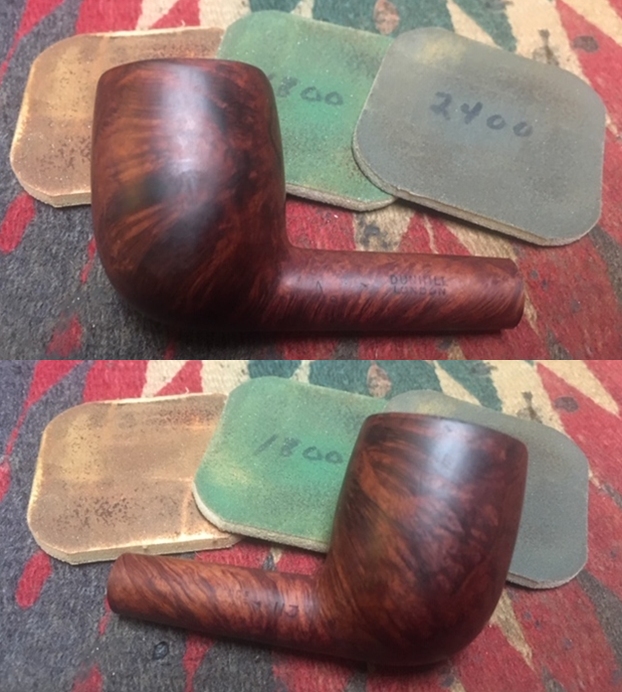
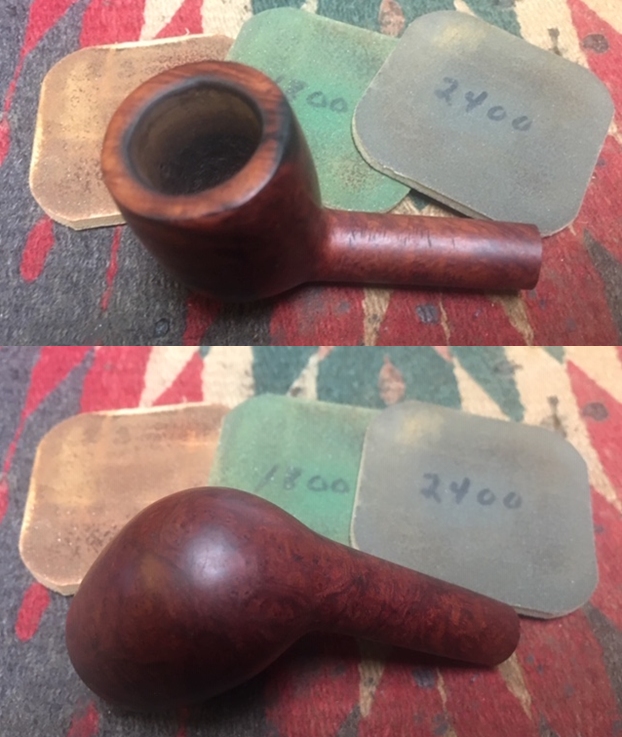
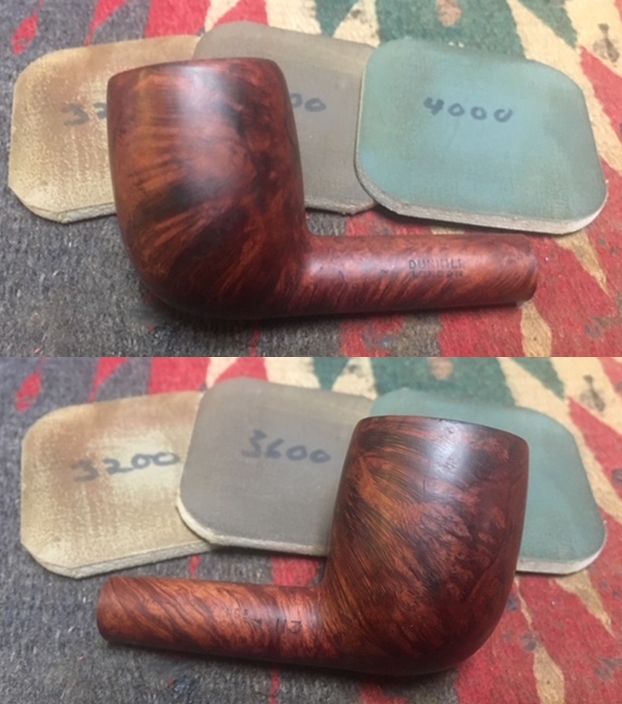
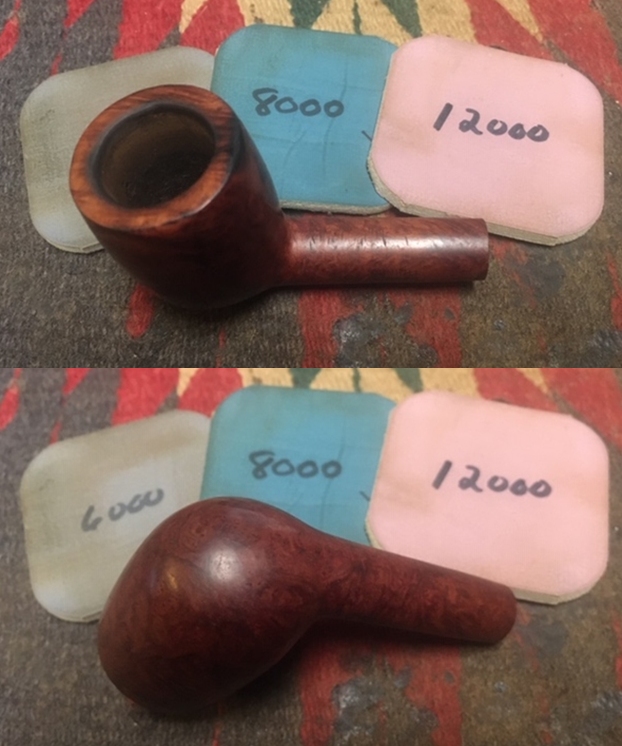
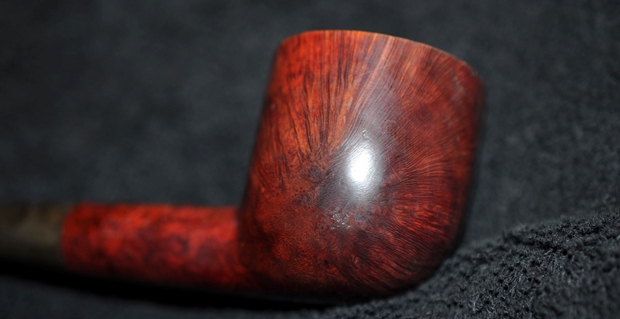
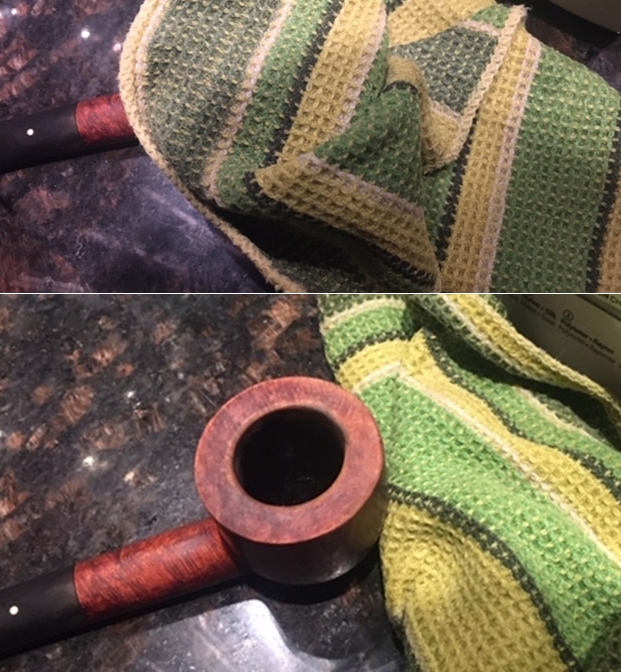
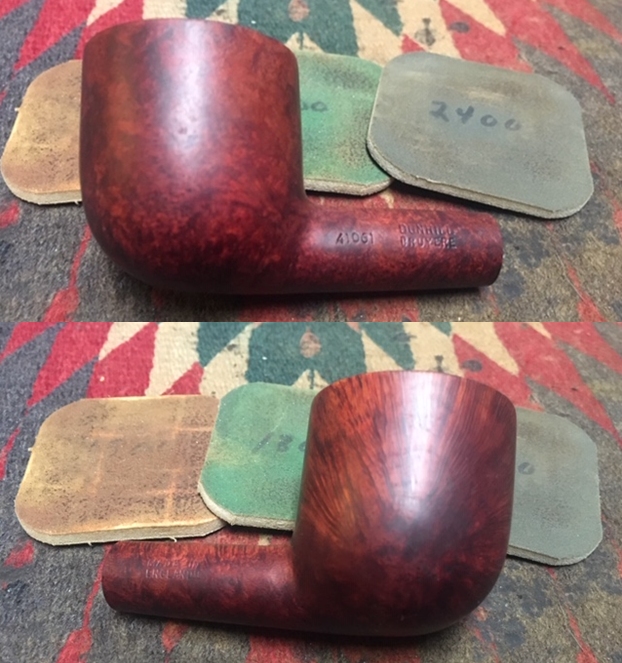
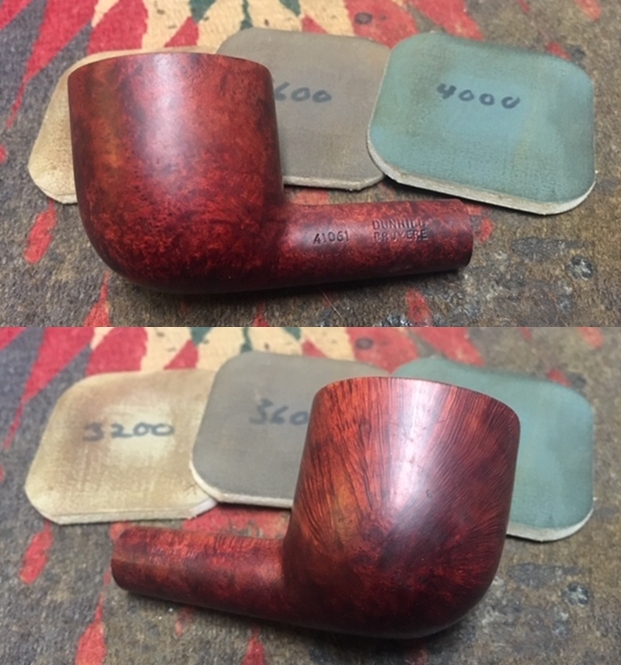
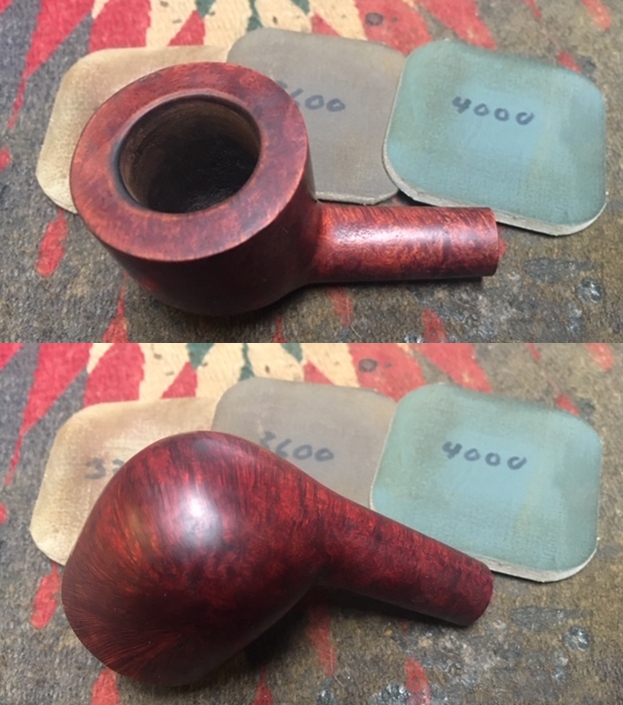
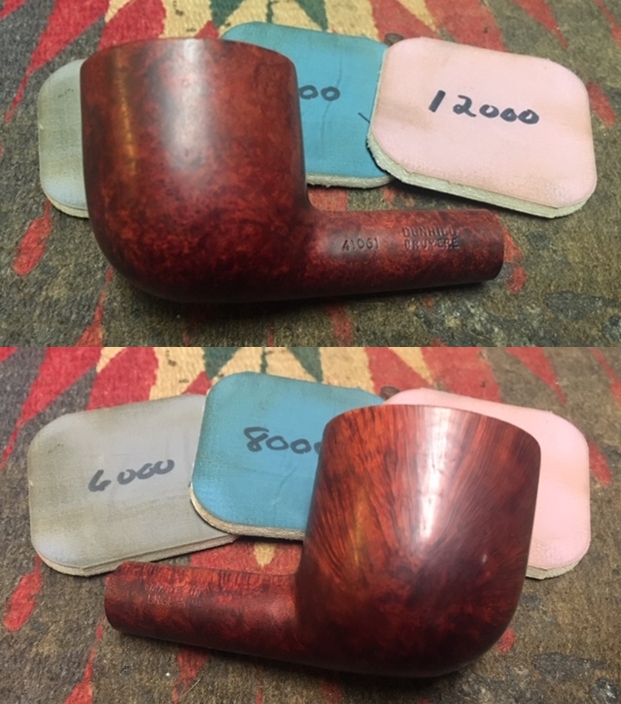
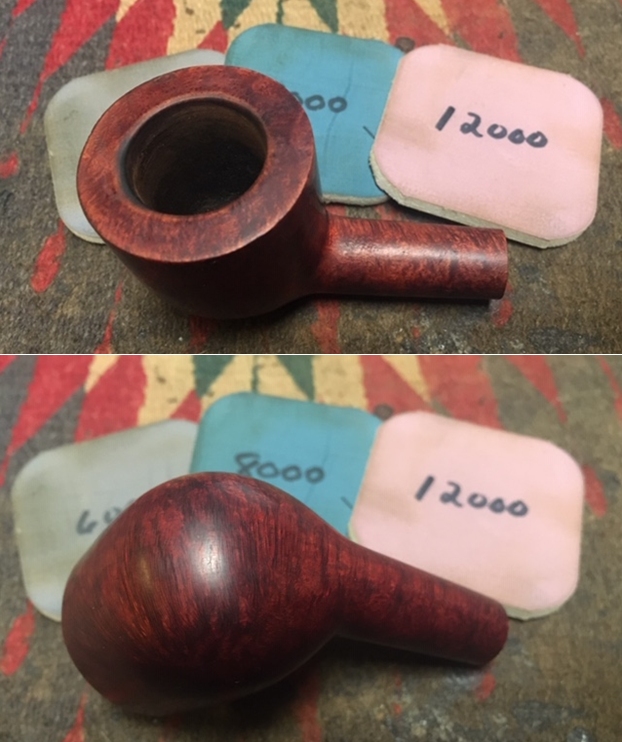
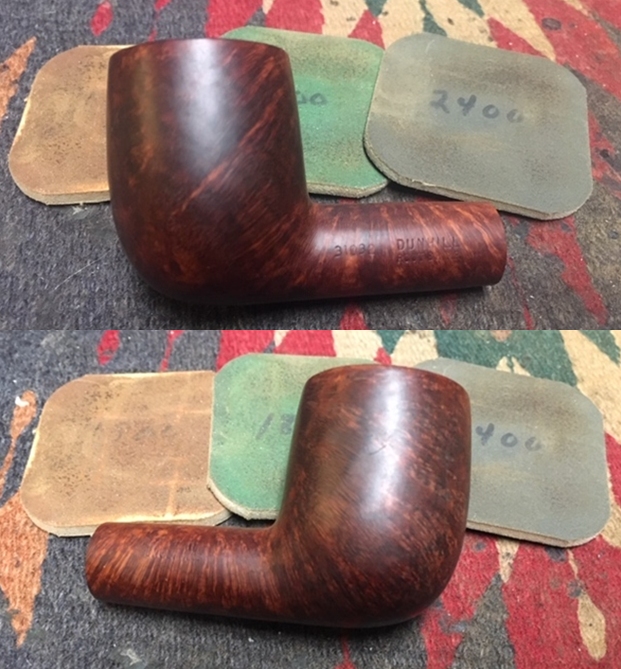
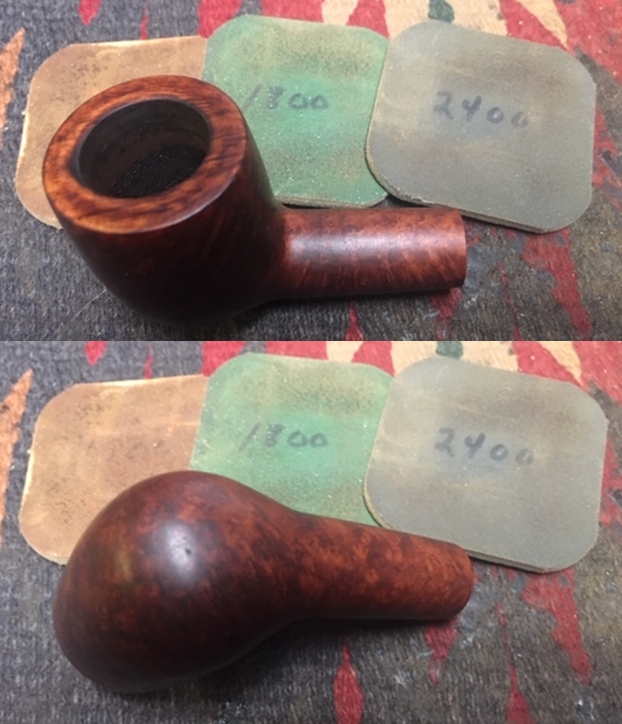
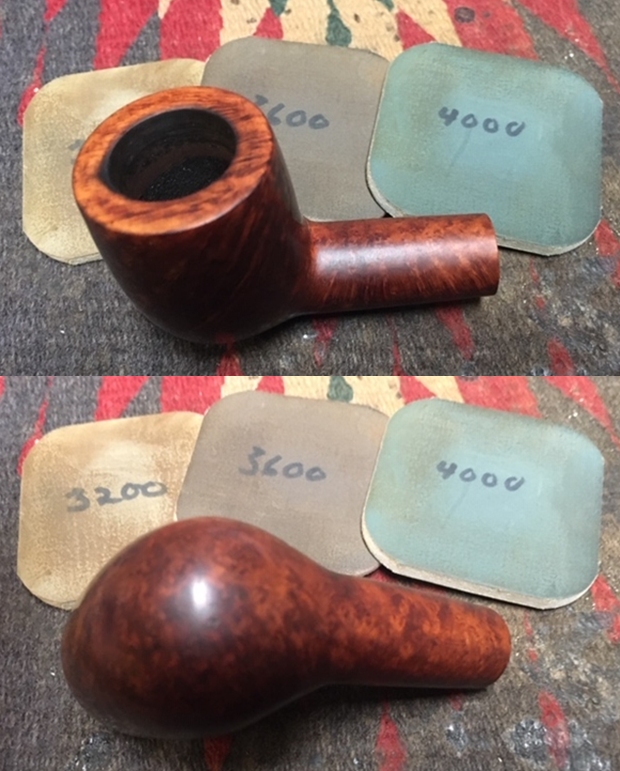
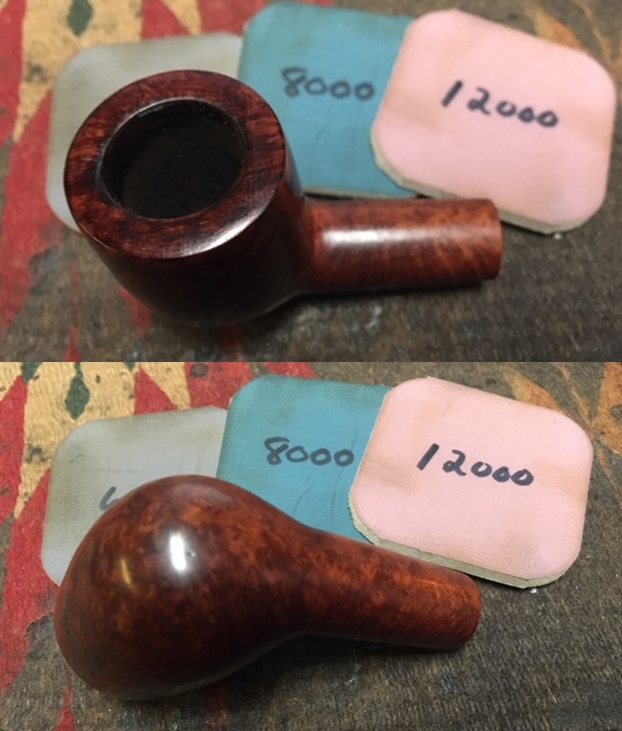
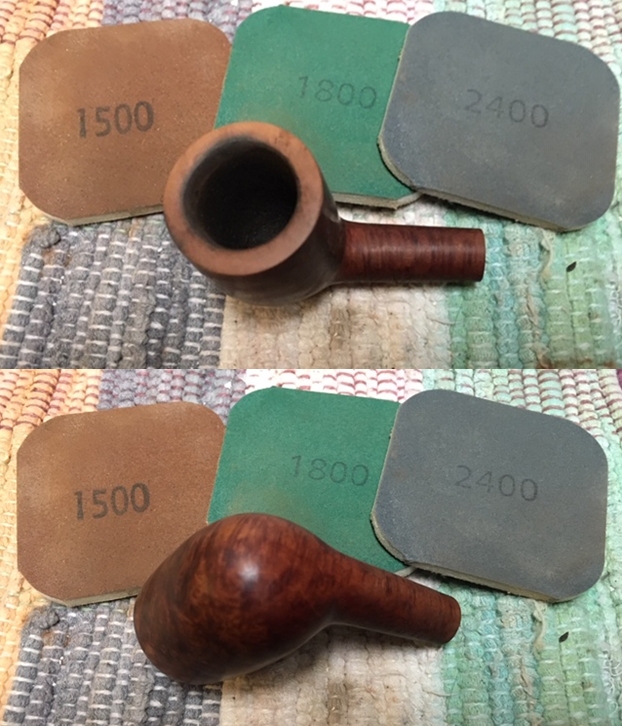
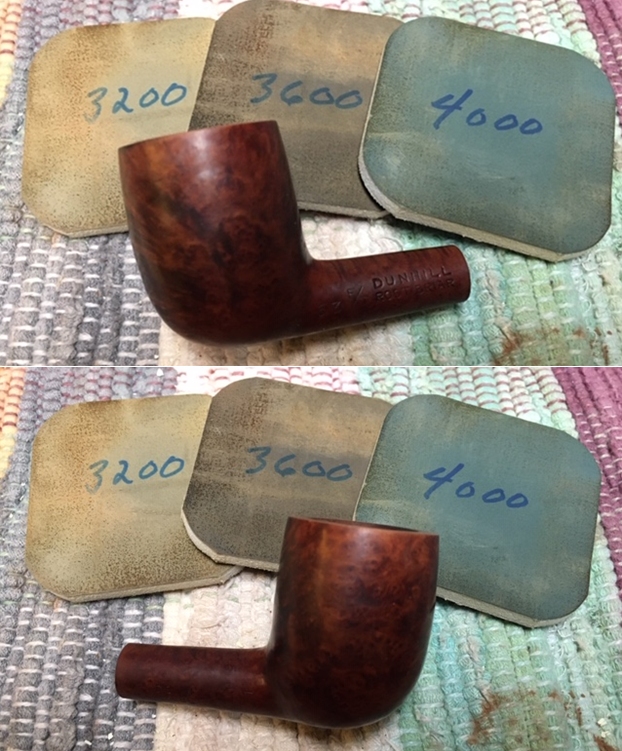
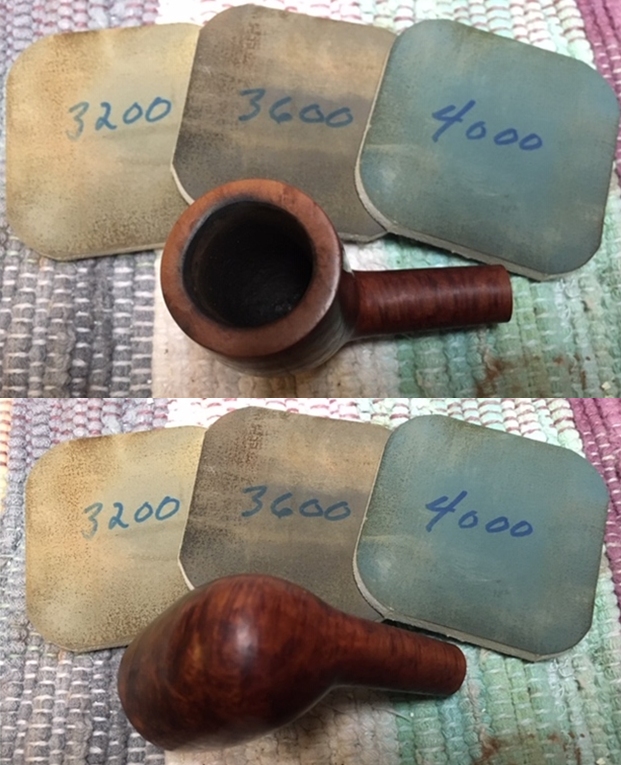
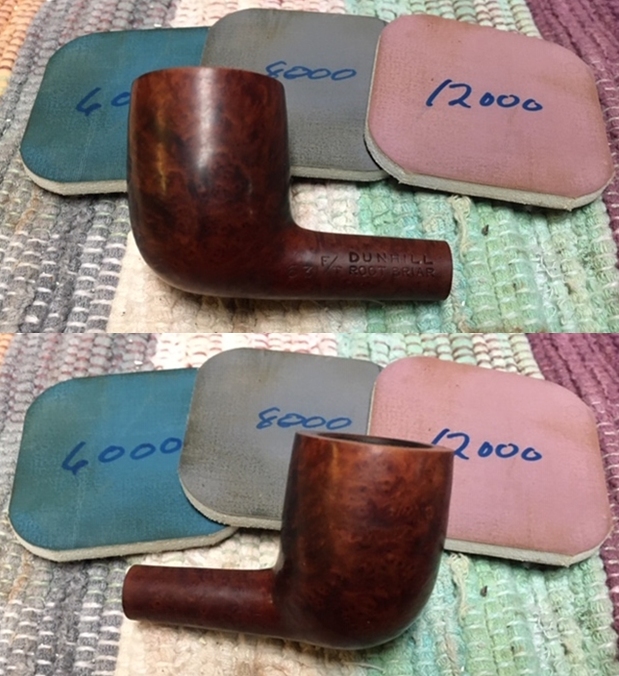
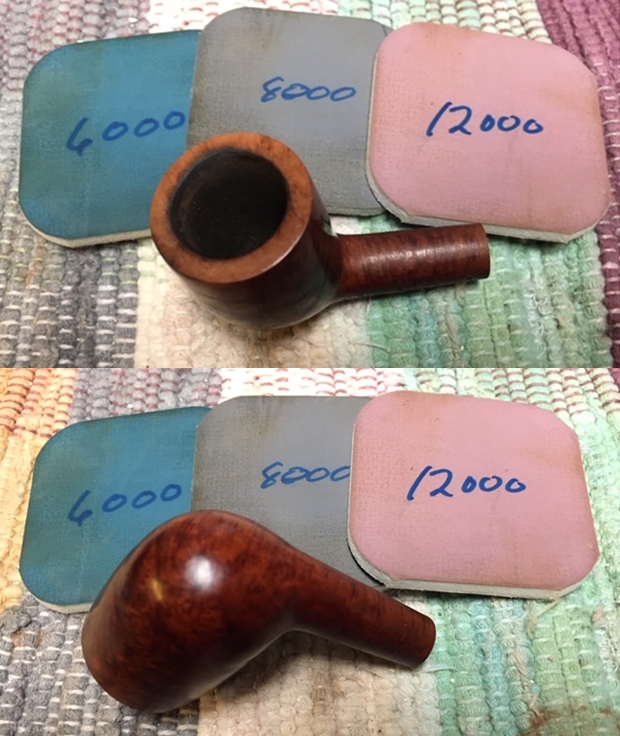
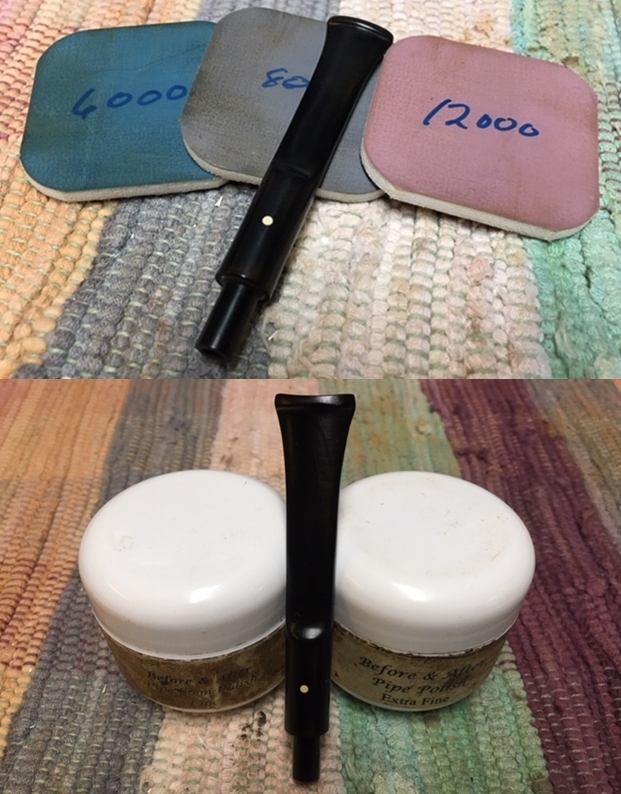
 I polished the briar with micromesh sanding pads – wet sanding with 1500-12000 grit pads. I wiped the bowl down with a damp cloth after each sanding pad to remove the debris from sanding. The photos show the developing shine on the bowl and rim top.
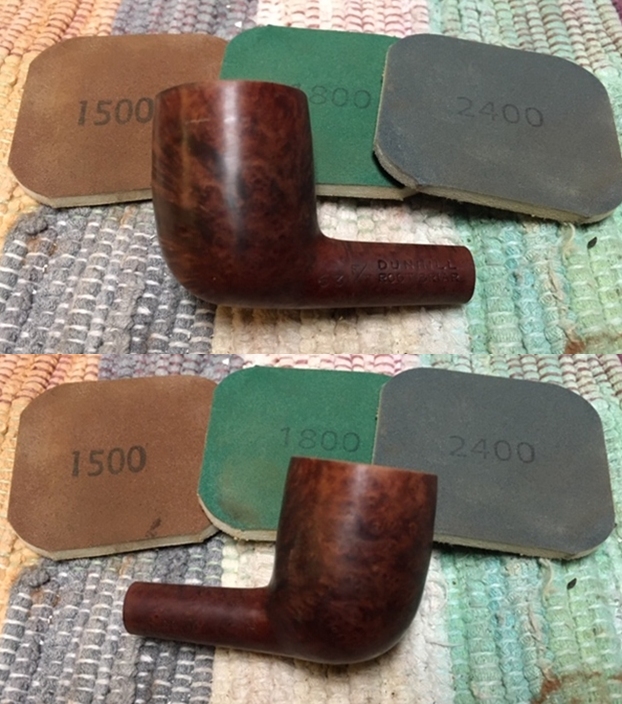
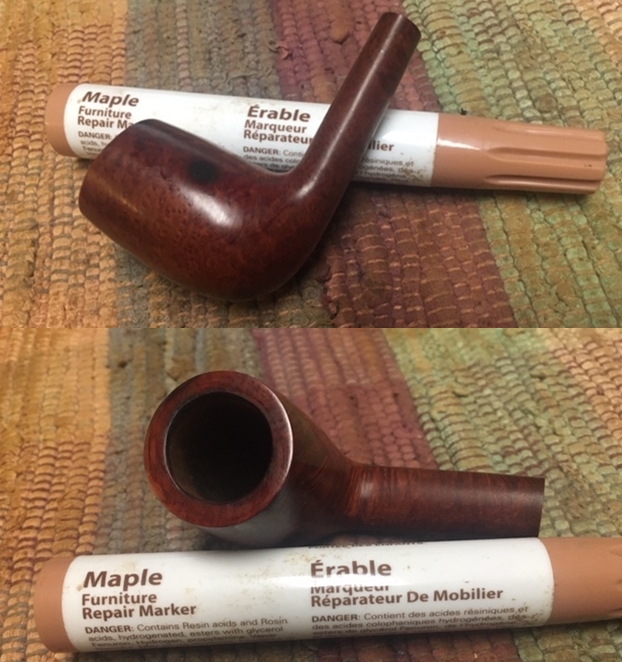
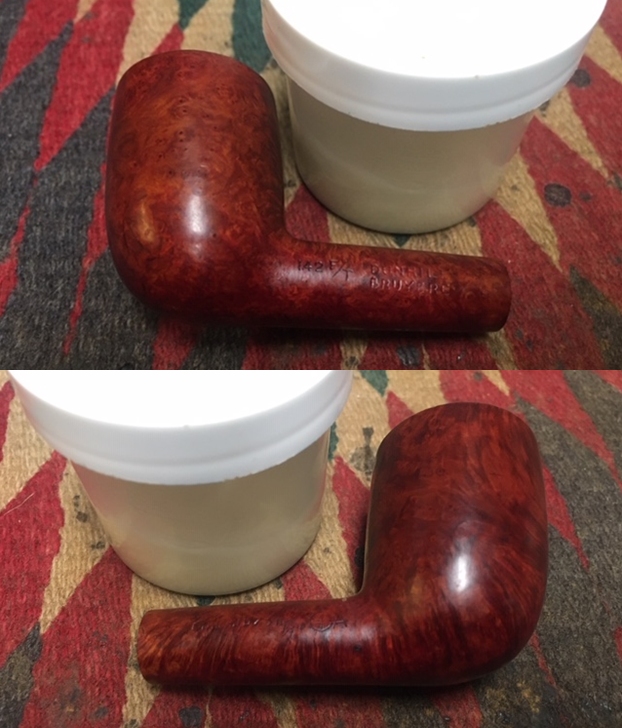
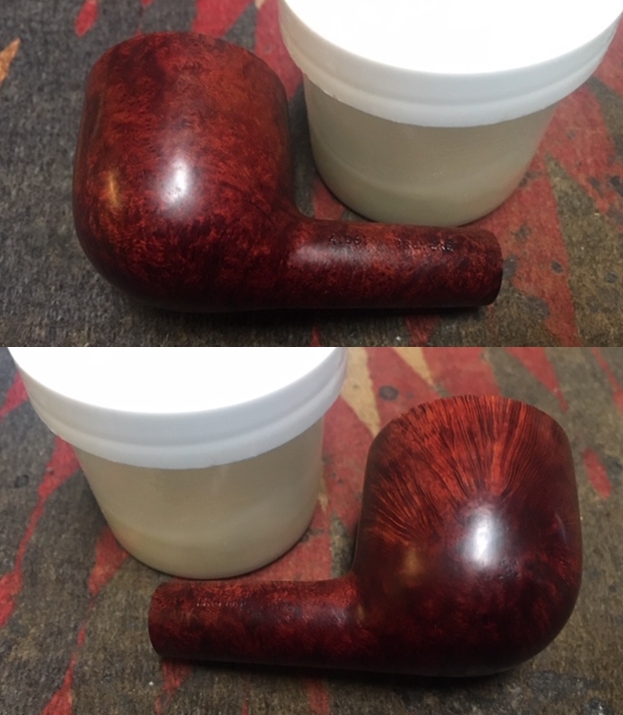
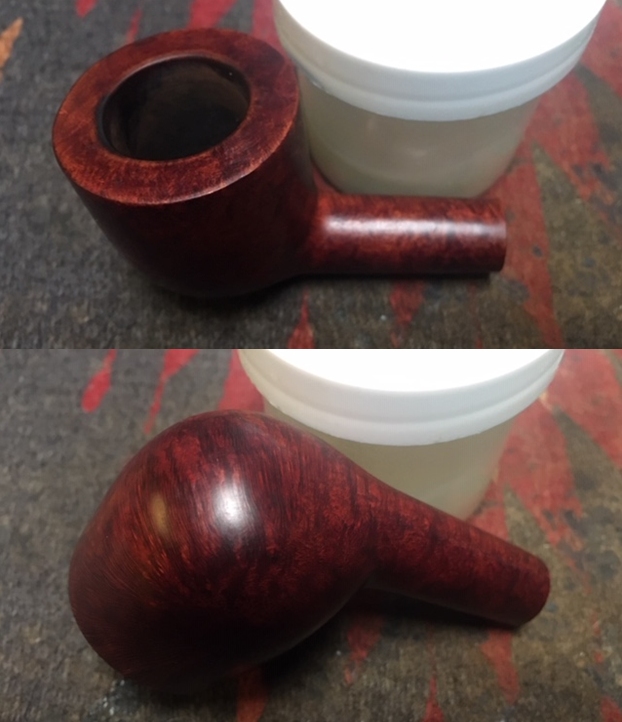
 I used an Oak and a Maple stain pen to blend the colour of the rest of the bowl. I am happy with the blend as well as the new look of the rim top… What an improvement.
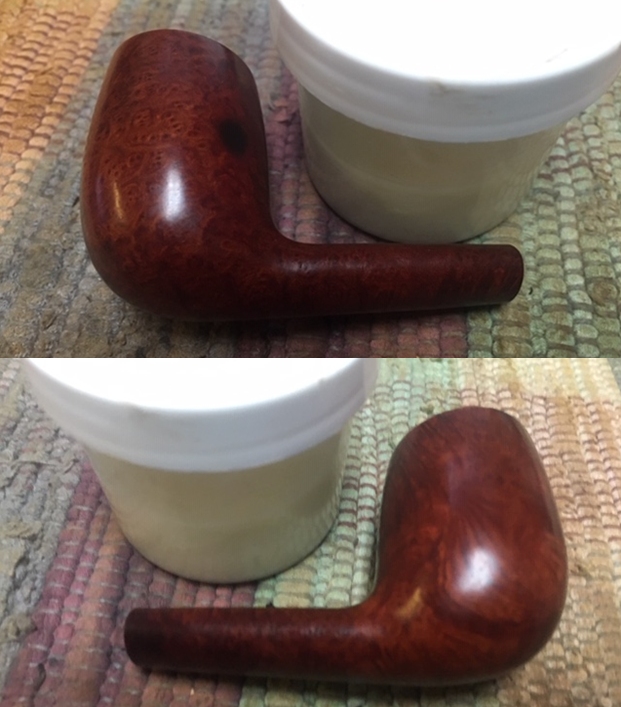
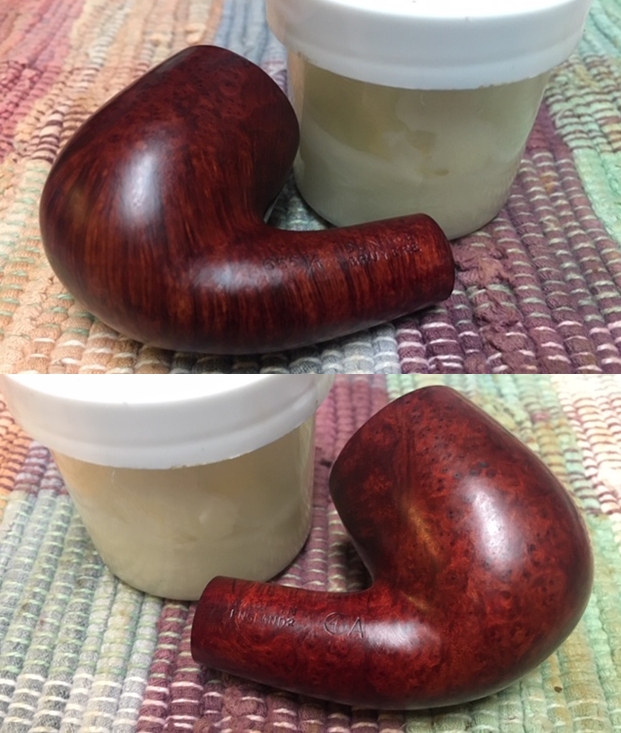
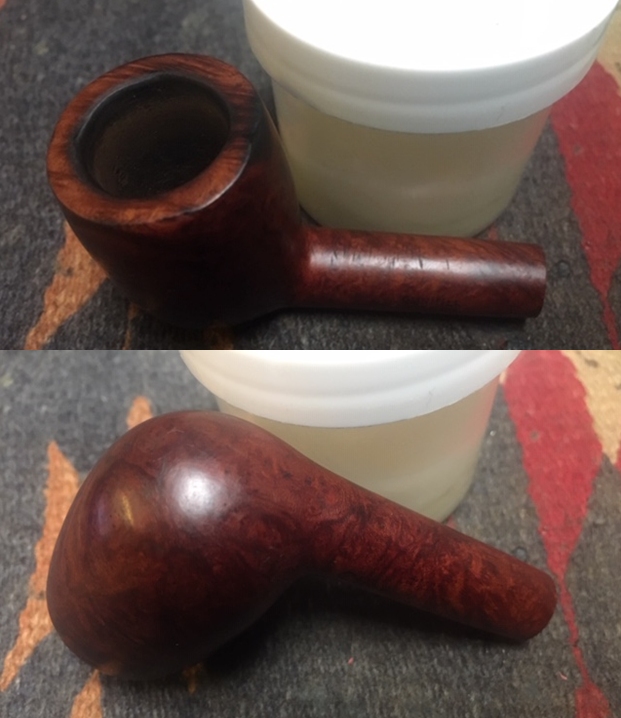
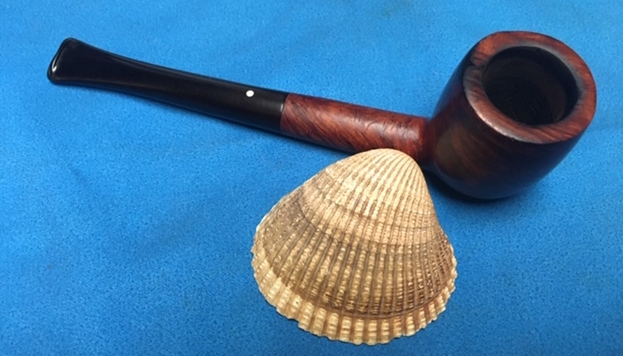
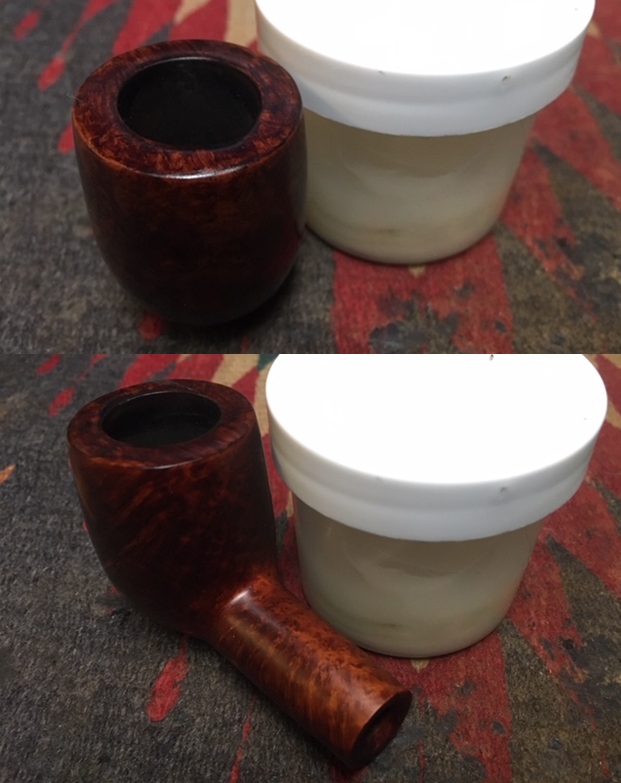
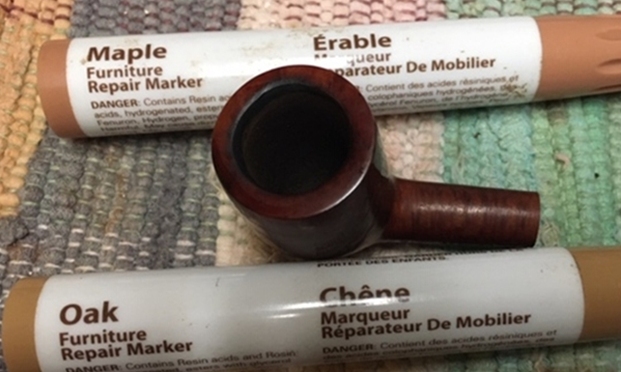 I worked some Before & After Restoration Balm into the briar with my fingertips to clean, enliven and protect it. I find that the balm really makes the briar come alive again. It also works well to blend the restained areas of the bowl with the rest of the pipe. The contrasts in the layers of stain really made the grain stand out. I let the balm sit for a little while and then buffed with a cotton cloth to raise the shine. This is the point that tells the truth about the blend on the rim top. It really does look good! I am very happy with the way the pipe is looking at this point in the process.
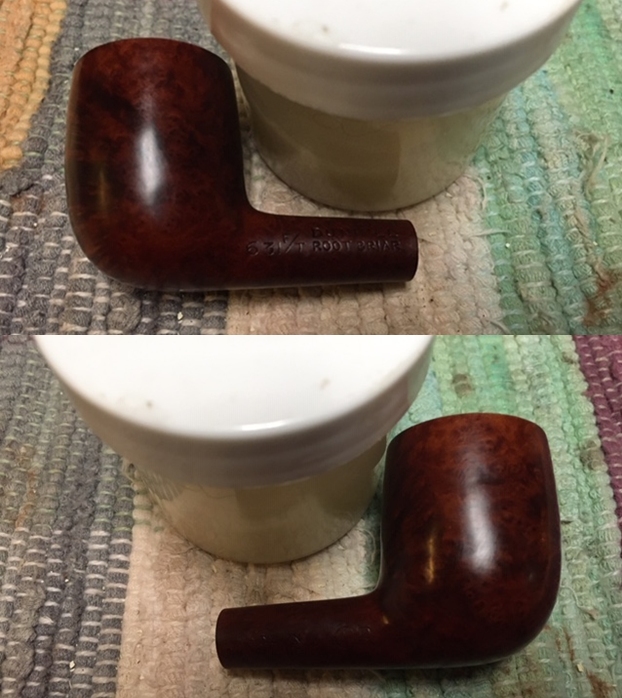
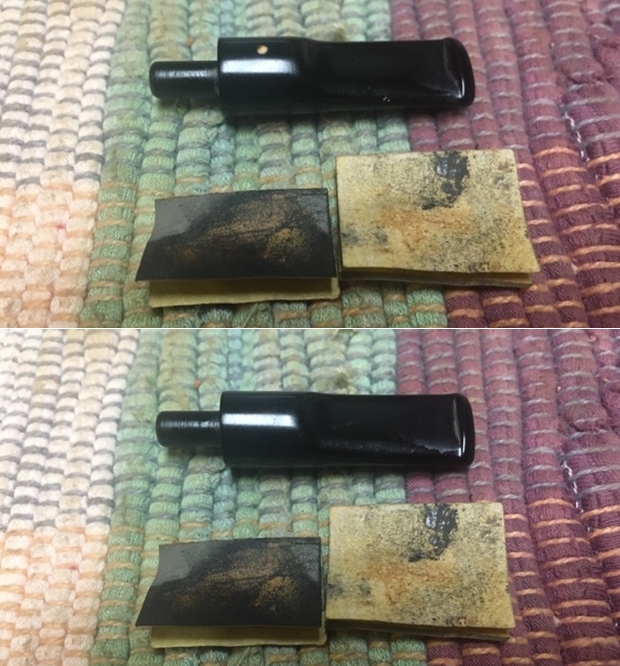
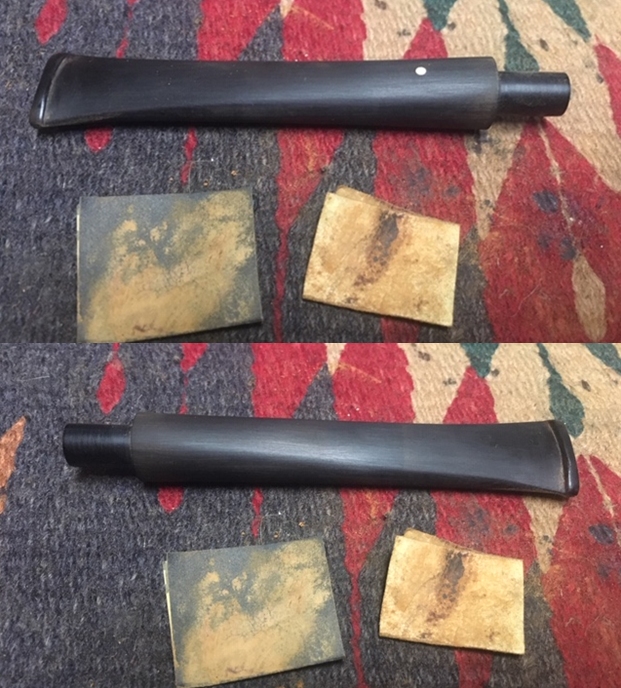
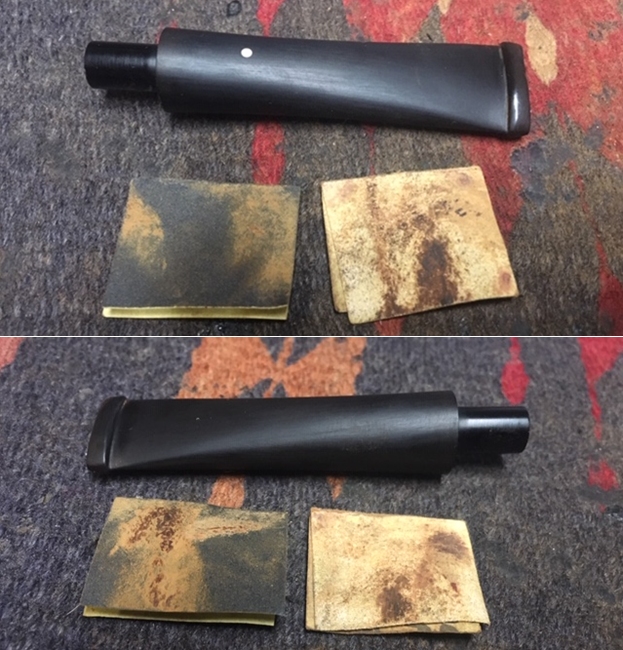
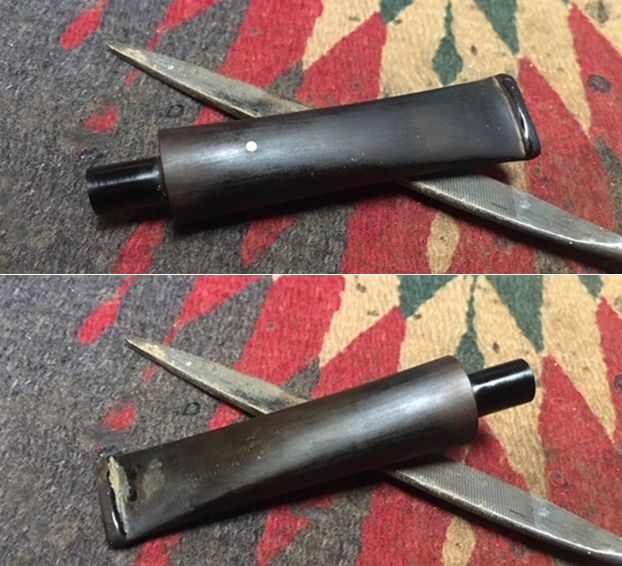
 I set the bowl aside and turned my attention to the stem. I took it out of the Before & After Bath and scrubbed it with warm water to remove the bath product and blew out the airway. I buffed it with a rough cotton cloth but sadly the oxidation though better was still present. I scrubbed it again with Soft Scrub and was able to remove a lot more of the oxidation.
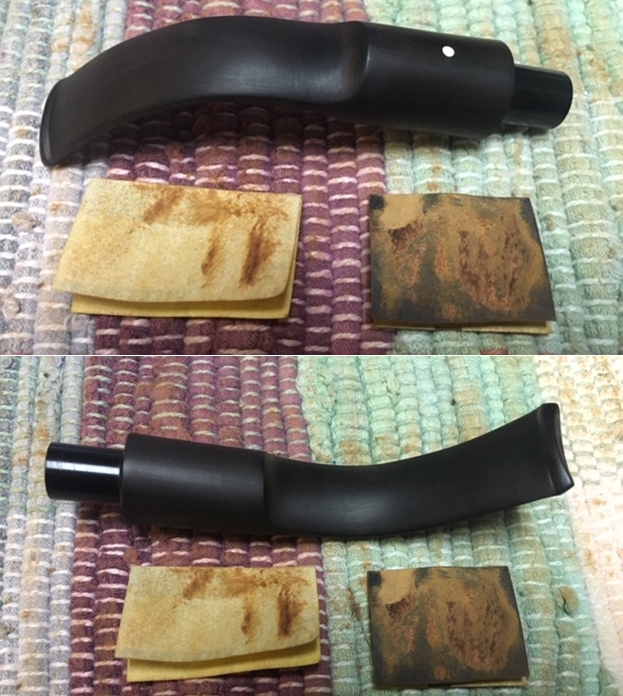
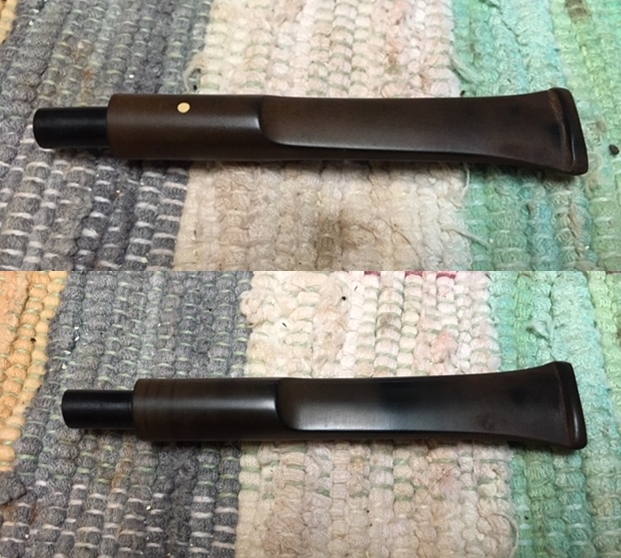 I sanded the stem with 220 grit and 400 grit wet dry sandpaper to remove the oxidation that remained. Even after the sanding it was still present.
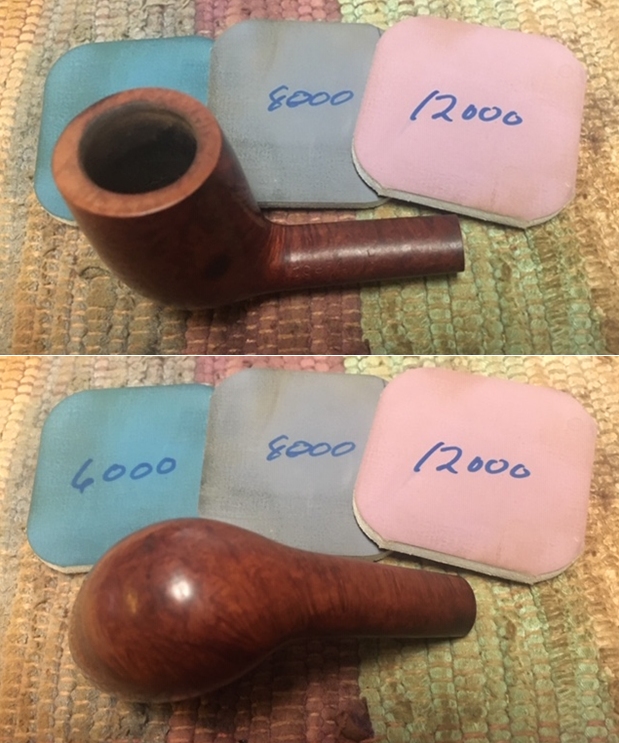
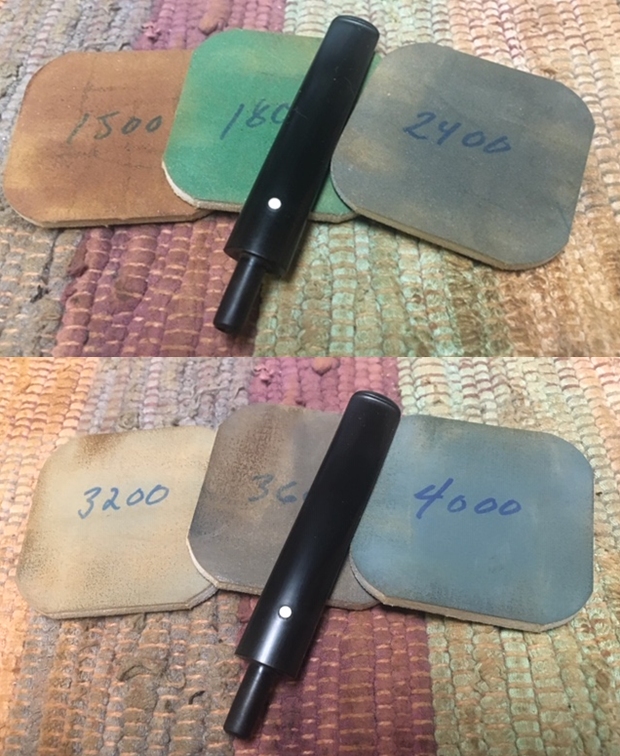
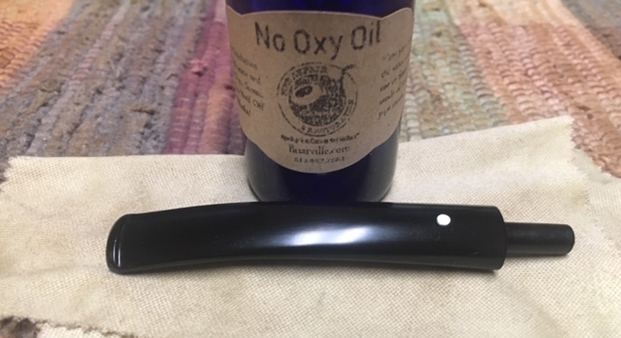
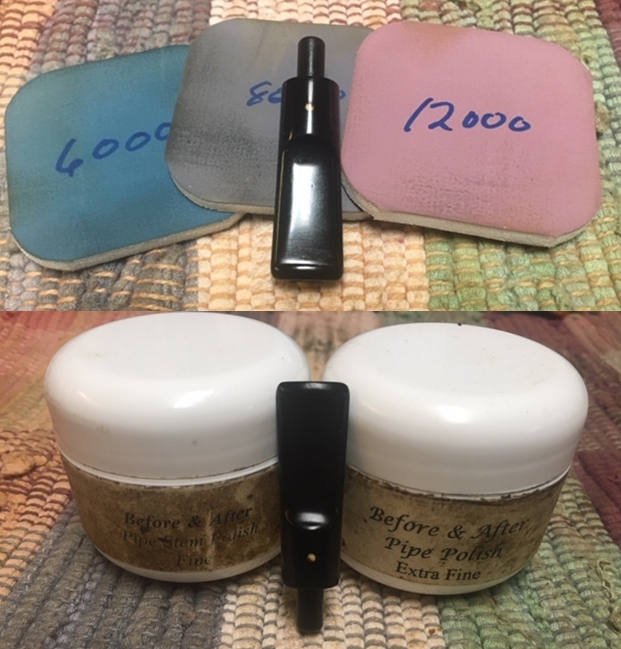
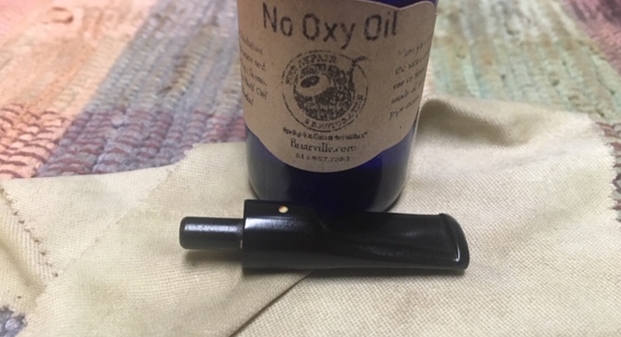
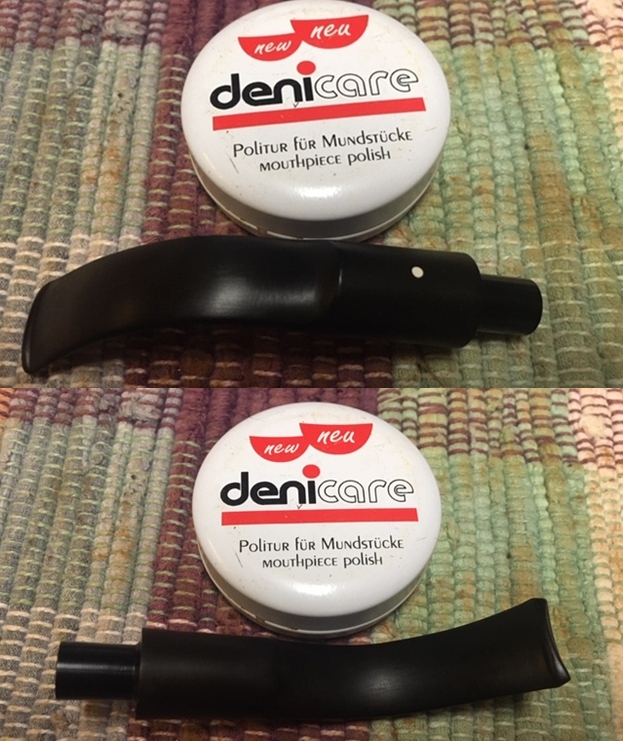
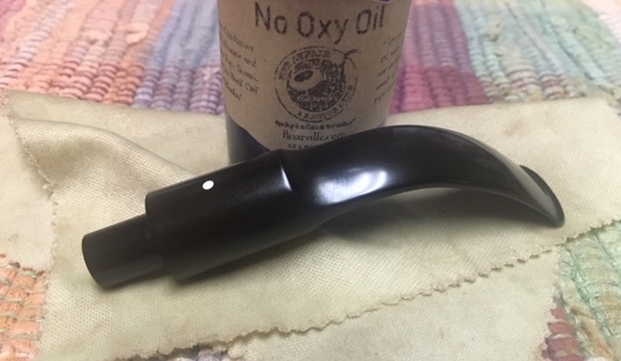
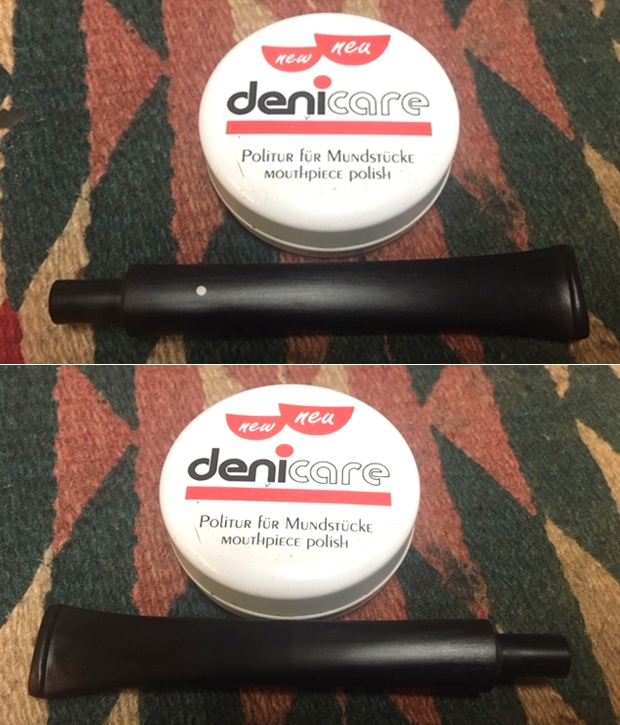
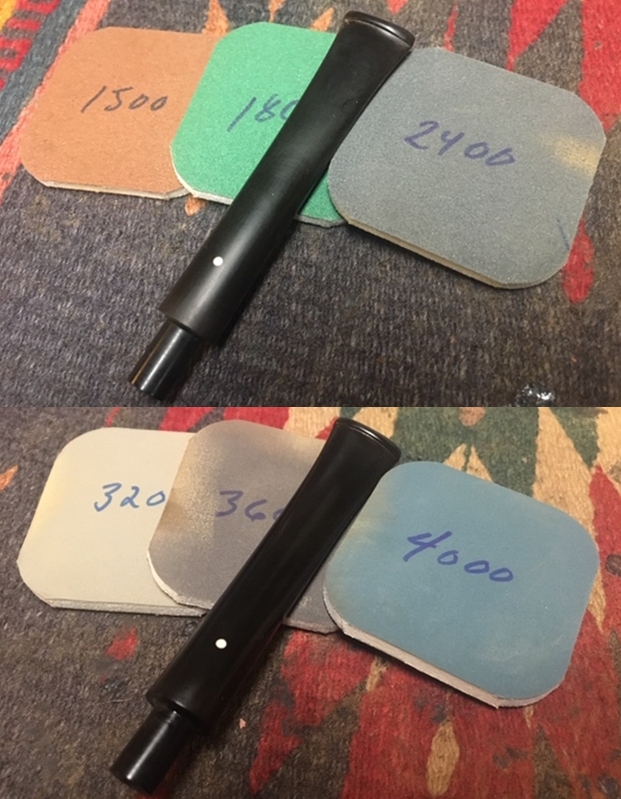
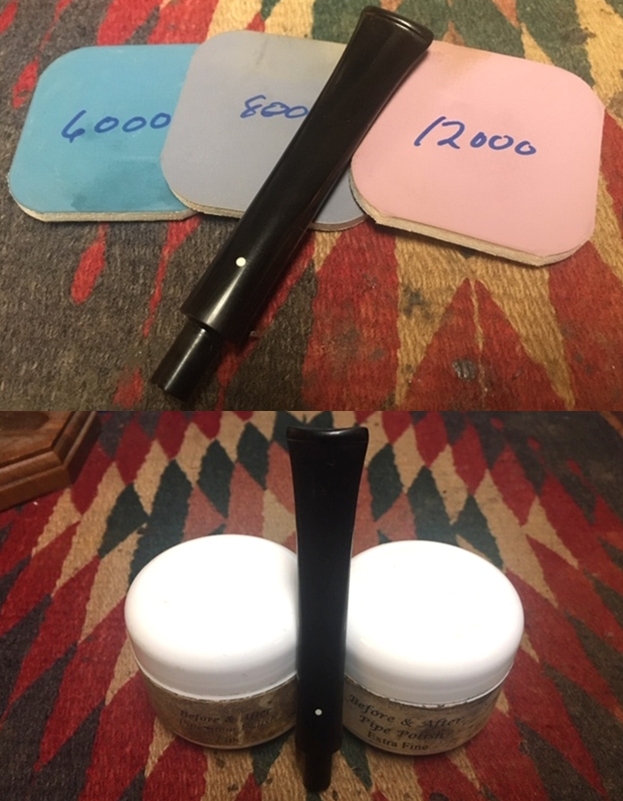
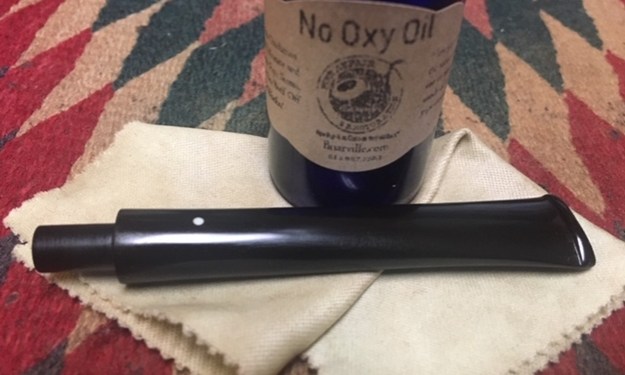
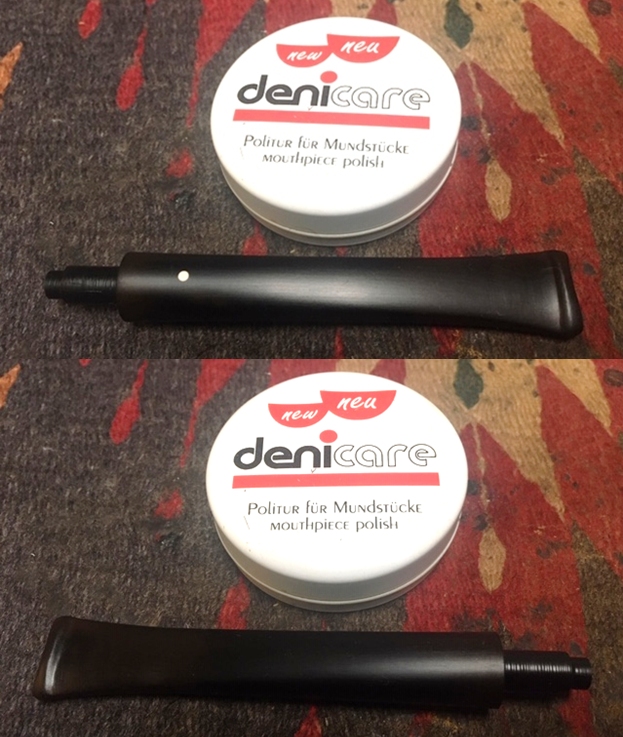
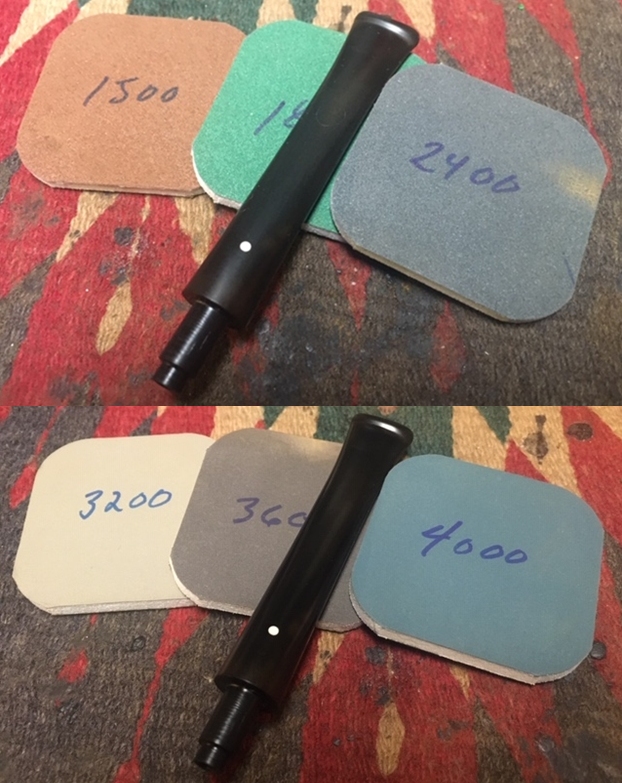
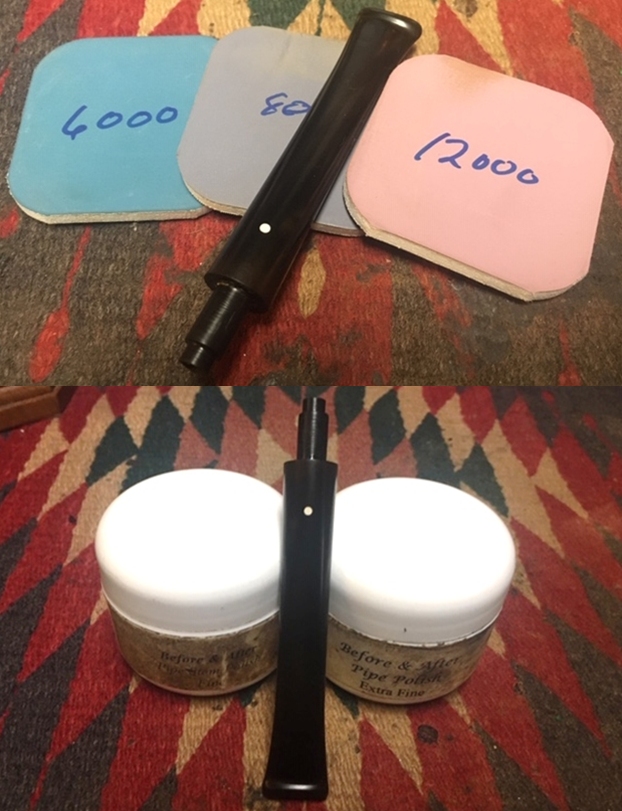
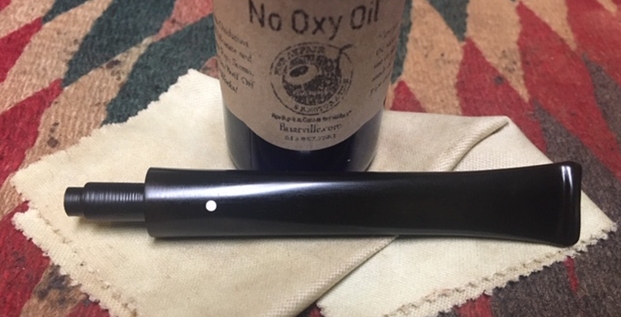
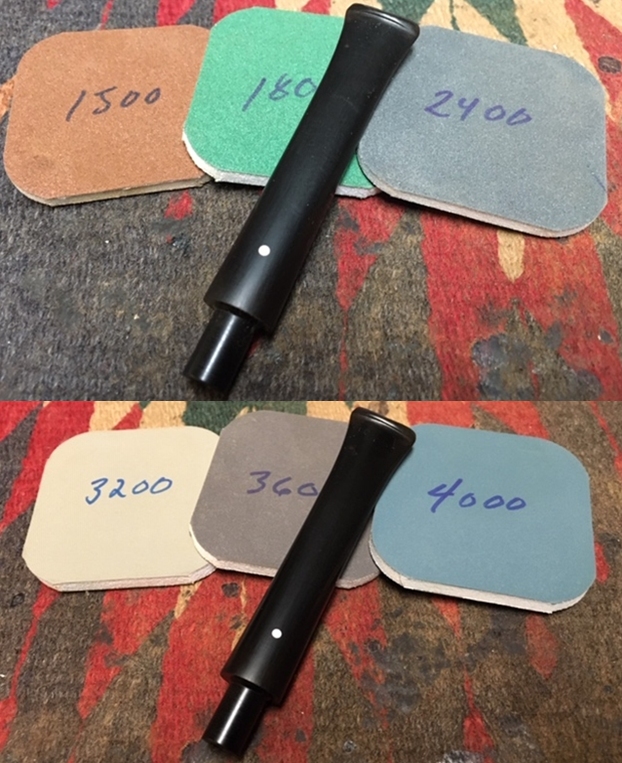
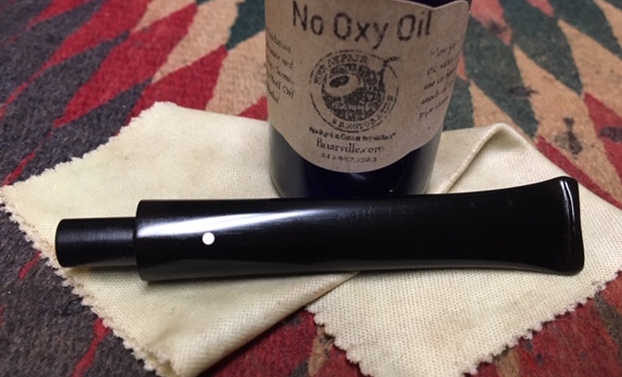
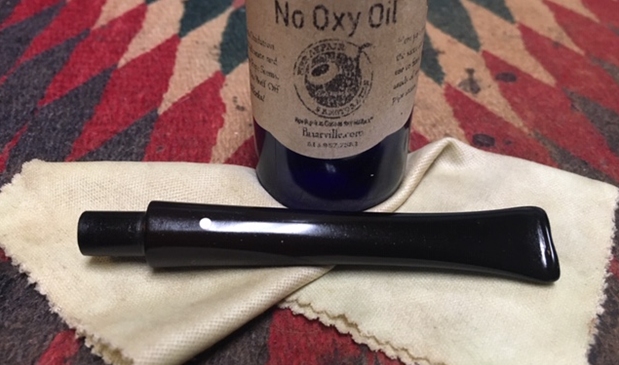
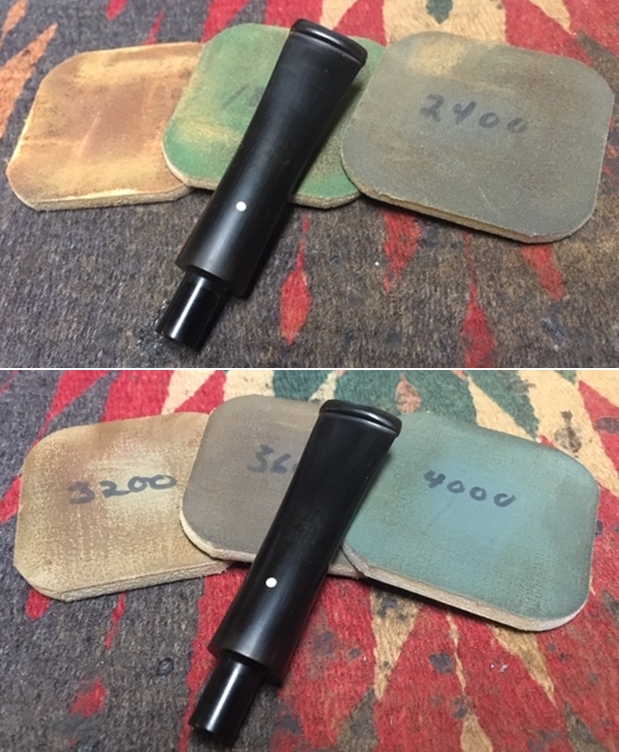
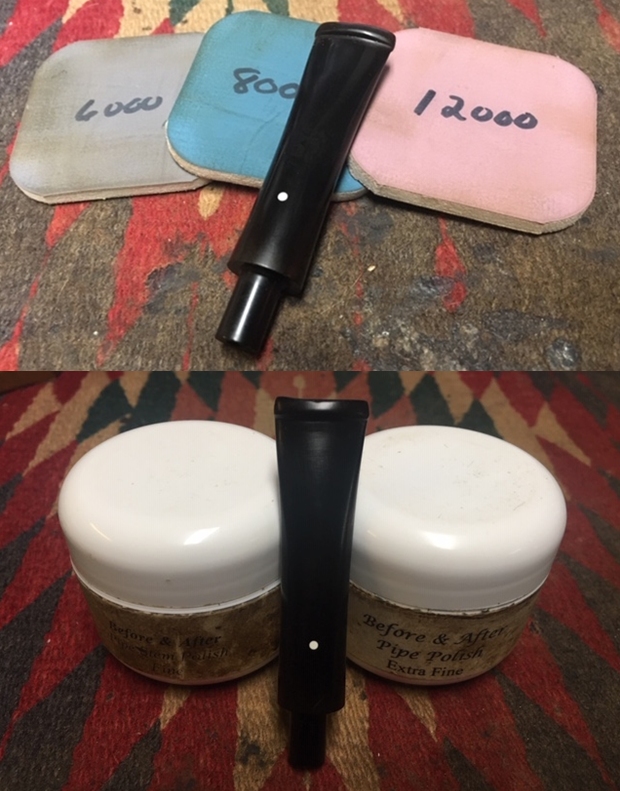
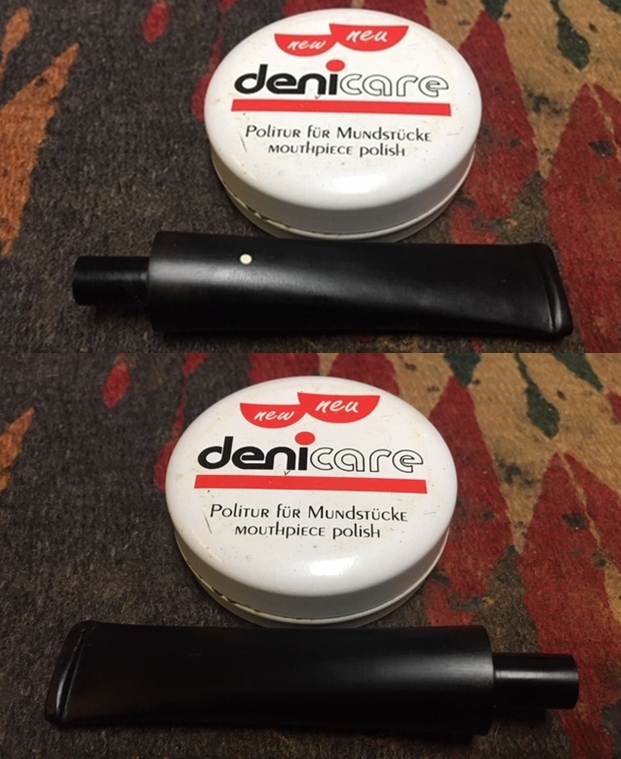
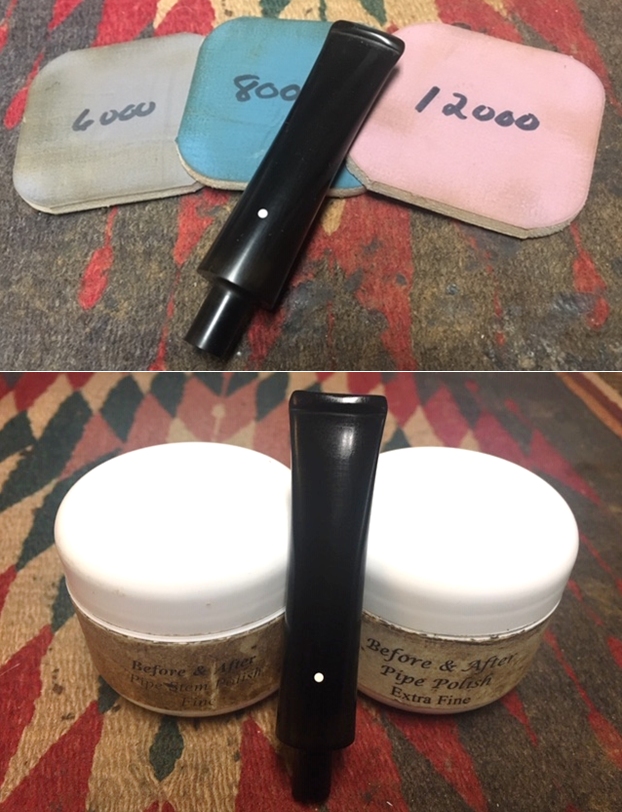
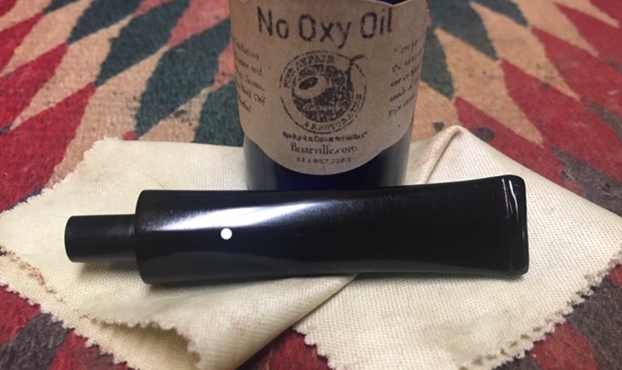
 I polished the stem with micromesh sanding pads – wet sanding with 1500-12000 grit pads. I wiped the stem down after each pad with a damp cloth. I polished it with Before & After Pipe Polish – Fine and Extra Fine. I finished by buffing the stem with Briarville’s No Oxy Oil.
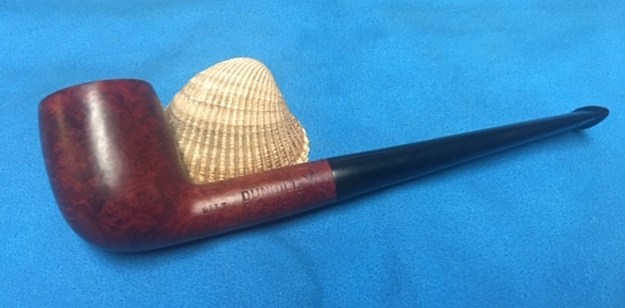
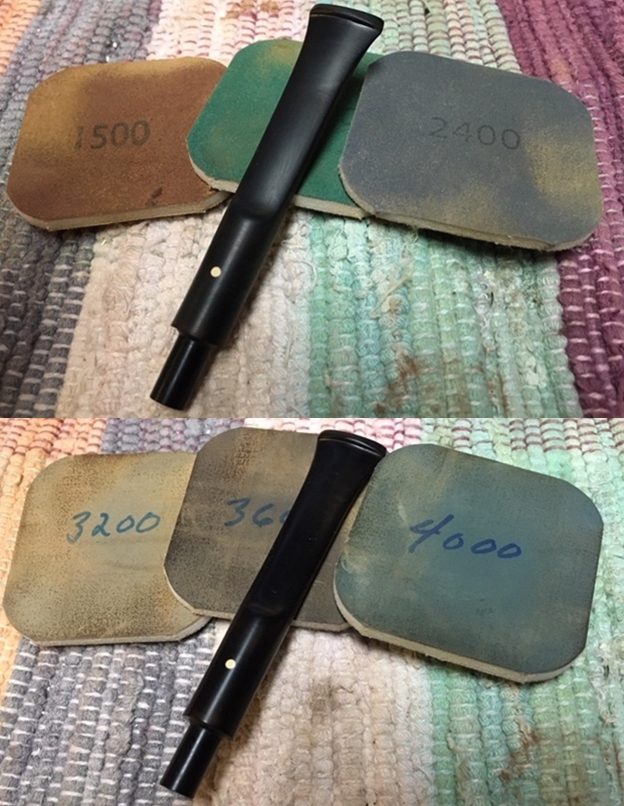
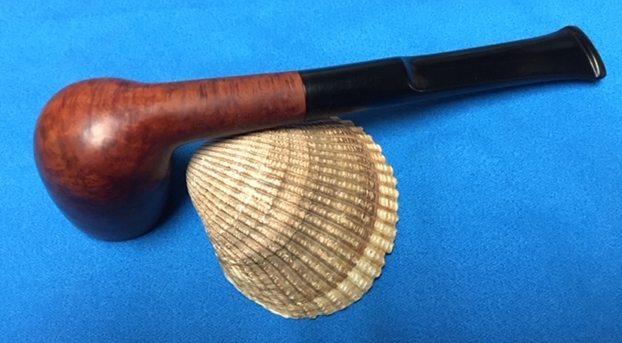
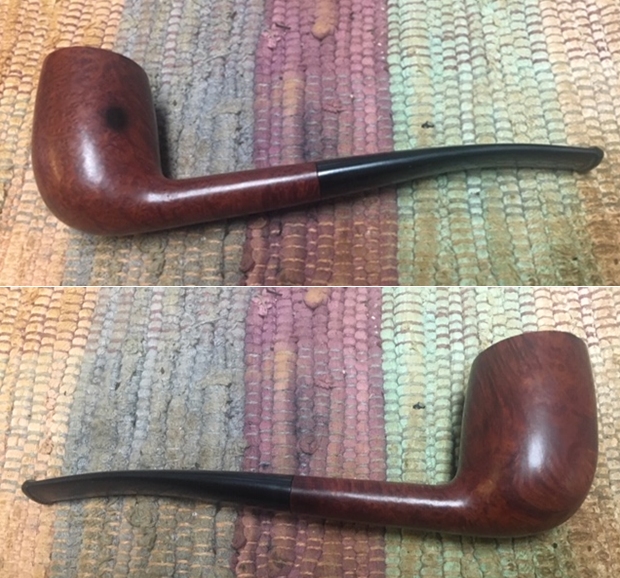
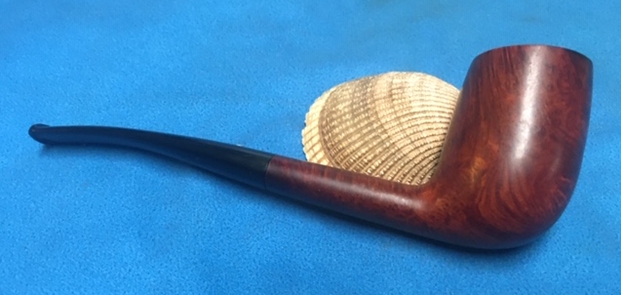
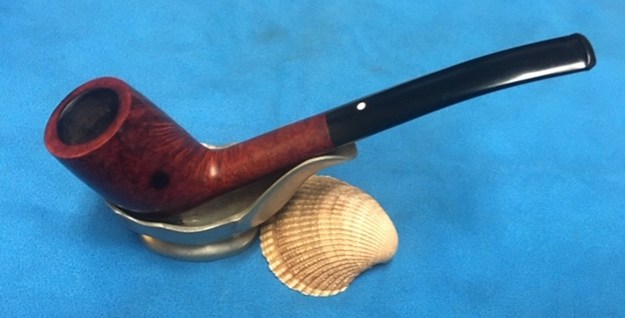
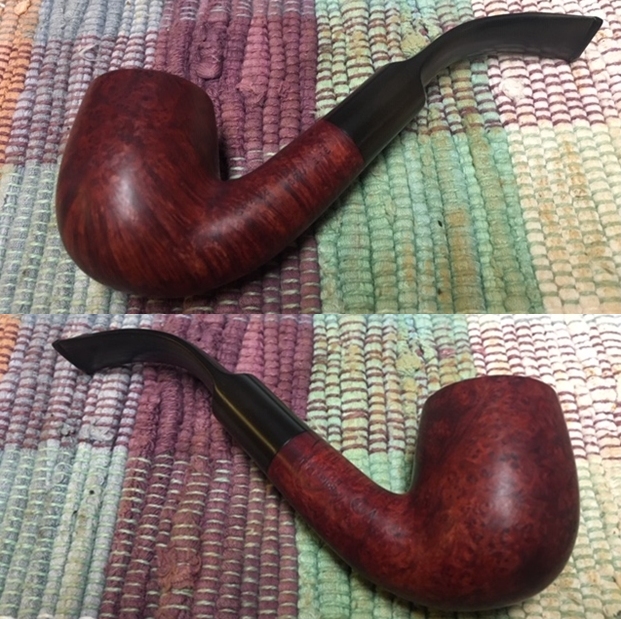
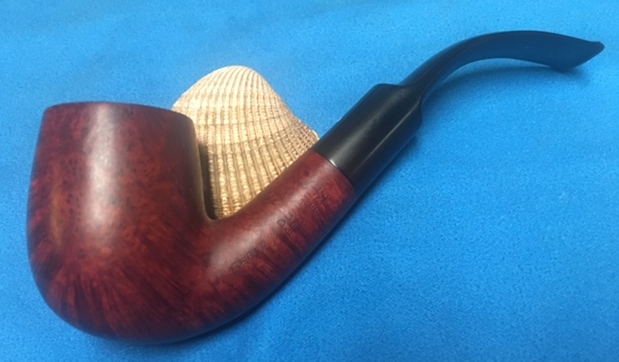
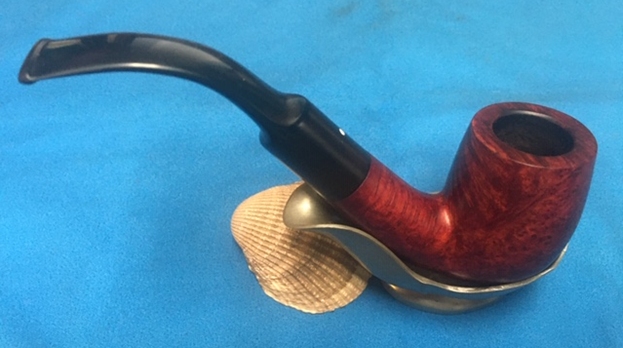
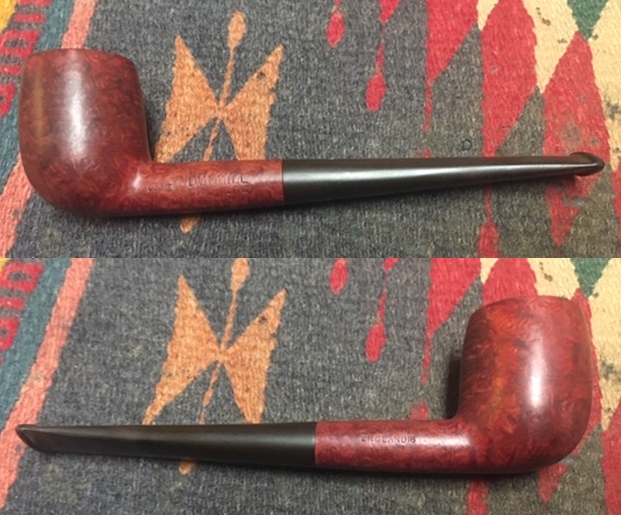
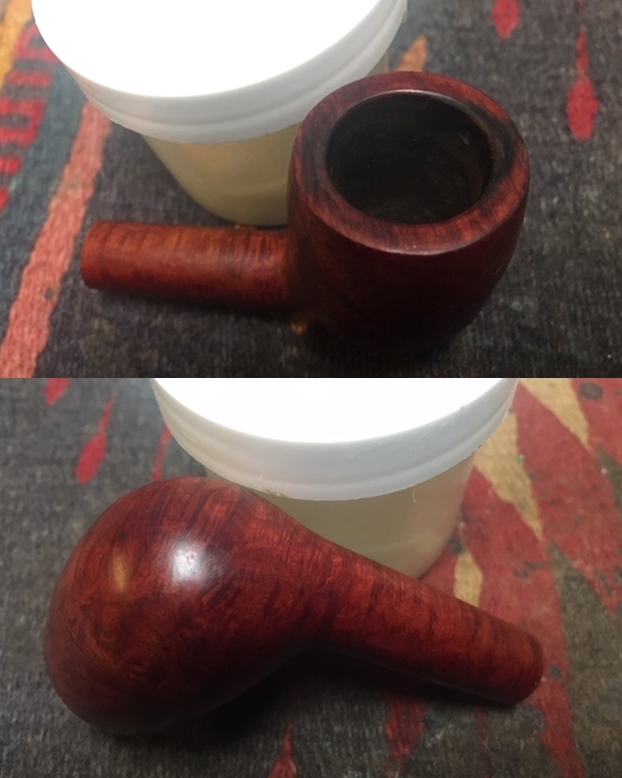
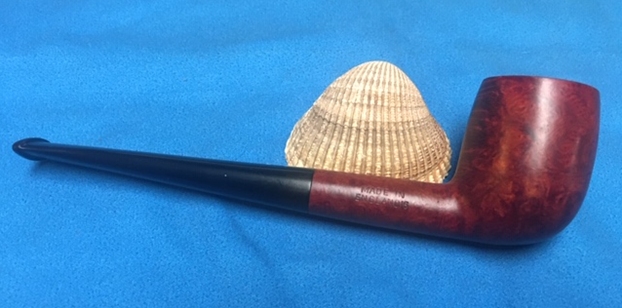
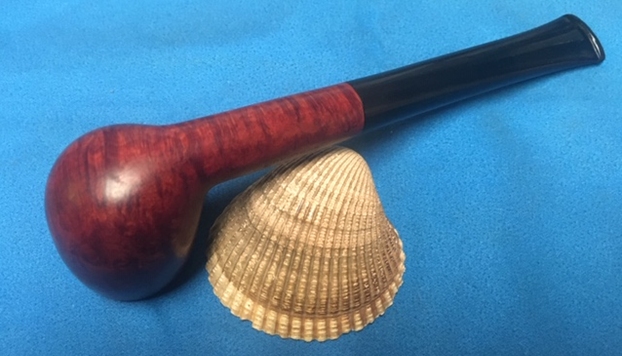
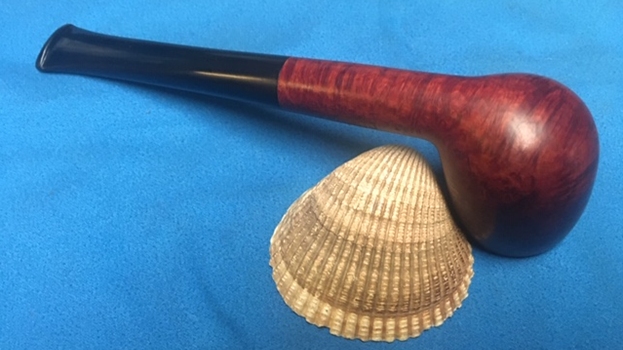
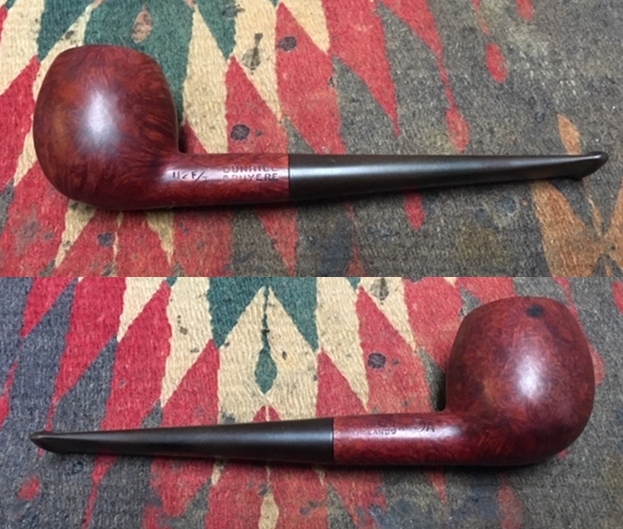
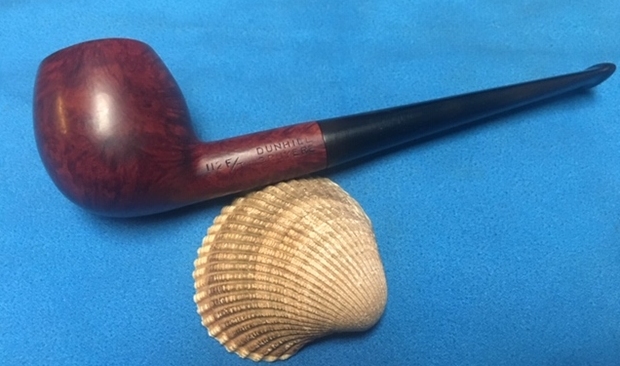
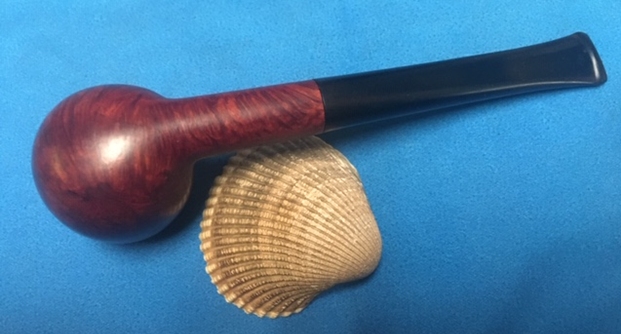
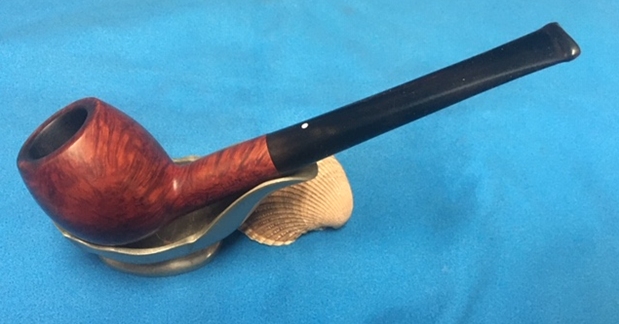
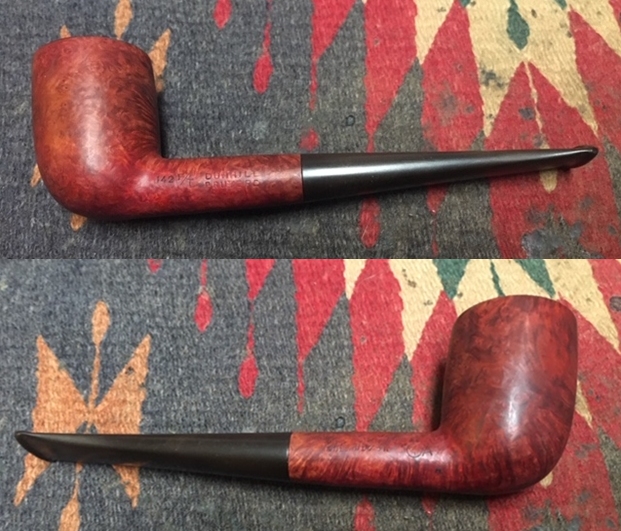
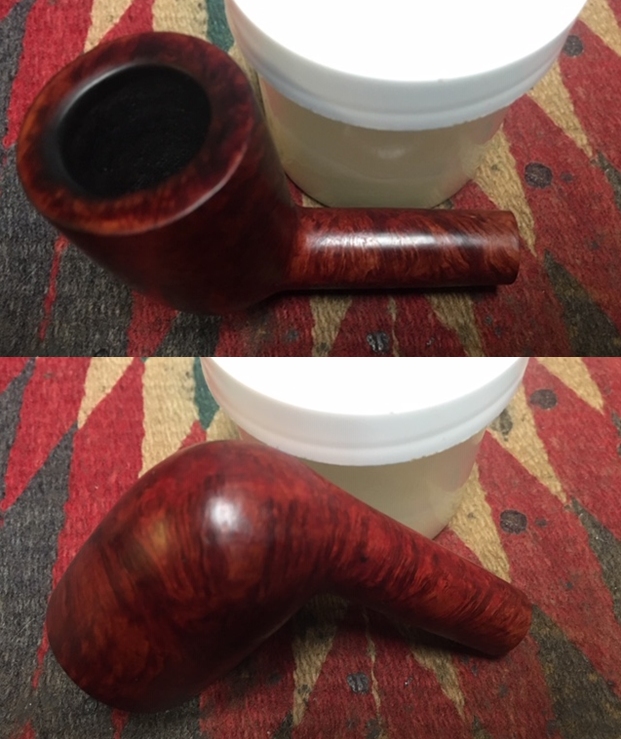
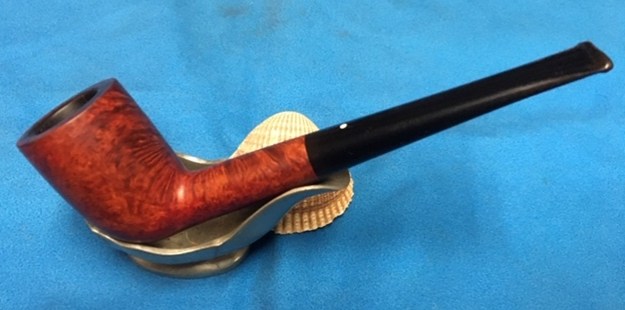
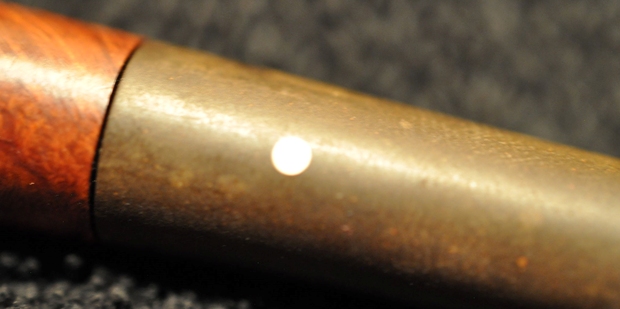
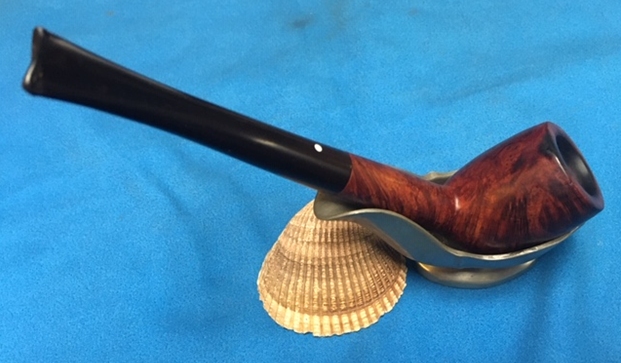
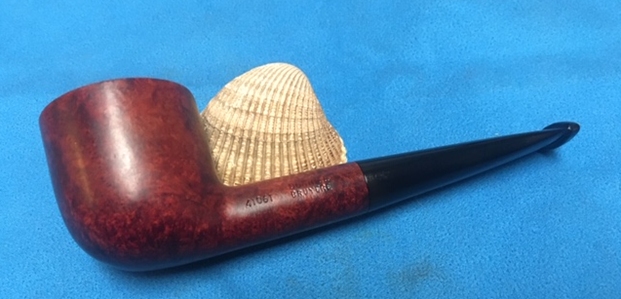
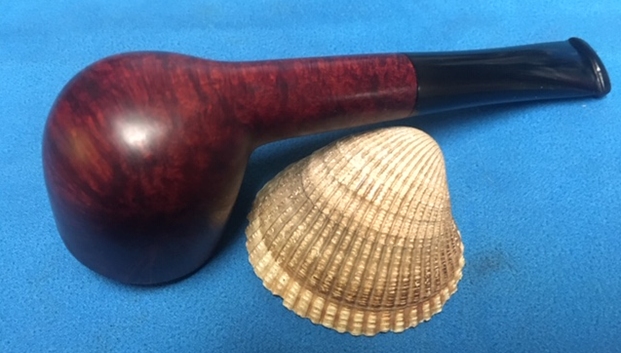
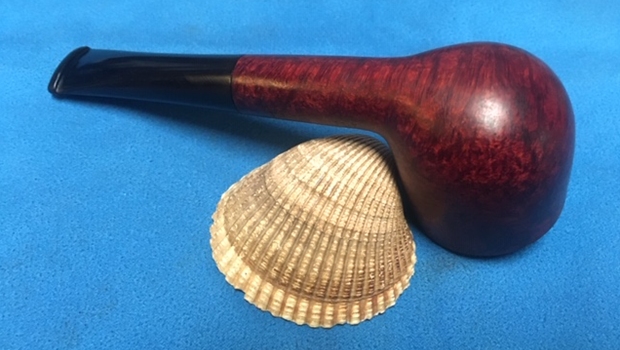
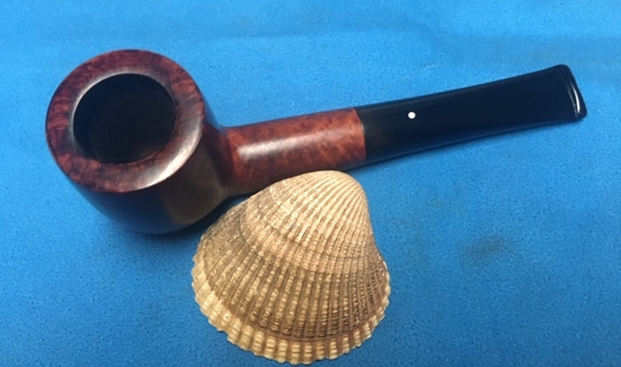
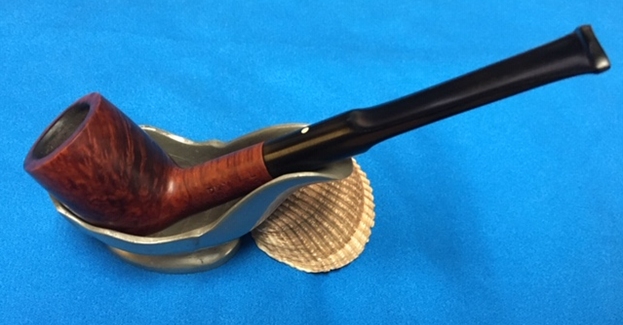
 Now that the stem is finished the pipe is one step away from packing and sending back to Henry. It is a pretty little Group 1 Dunhill saddle billiard. The pipe cleaned up really well and the stem looks quite stunning in place. I put the new inner tube in place and put the pipe back together again. I buffed it on the wheel with Blue Diamond polish and then gave the entirety several coats of carnauba wax. I buffed it with a clean buffing pad to raise the shine. I hand buffed it with a microfiber cloth to deep the shine. It really is a beauty and should serve Henry well while he holds it in trust. The dimensions of the pipe are Length: 5 inches, Height: 1 ½ inches, Diameter of the bowl: 1 1/8 inches, Chamber diameter: 5/8 of an inch. I will be putting it in the mail to Henry on Monday after work. I am looking forward to what he thinks of the pipe when he receives it. I am happy with the finished look of the pipe. Thanks for walking with me through the restoration. It was a fun one with its own set of challenges.