Tag Archives: Dr. Grabow pipes

Bringing a Dr. Grabow De Luxe 9704 Bent Billiard Back to Life


Blog by Steve Laug

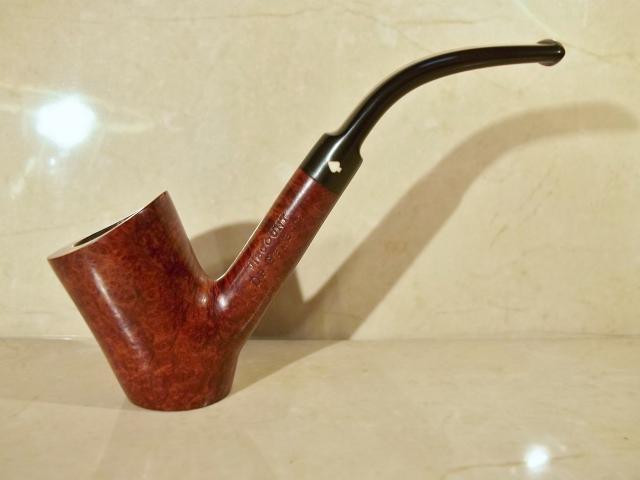
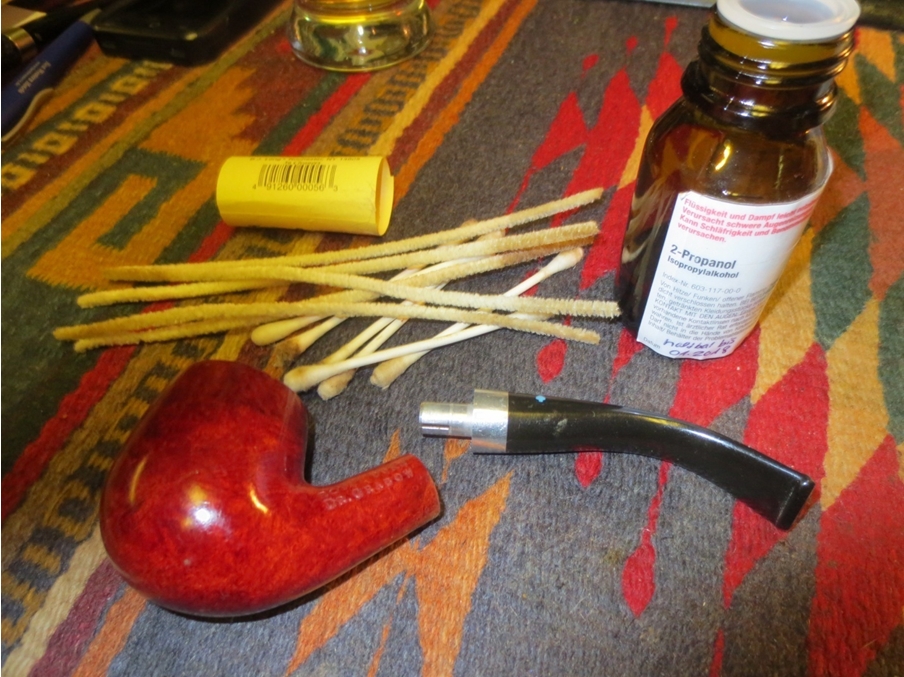
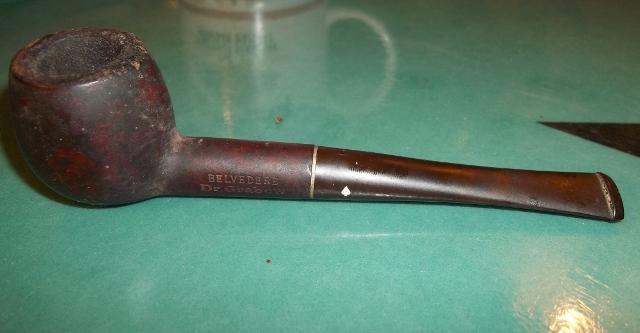
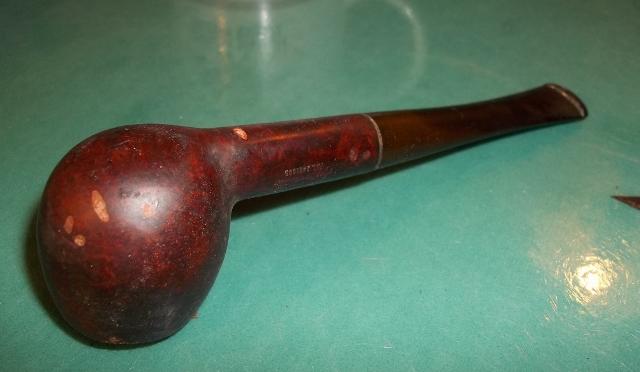
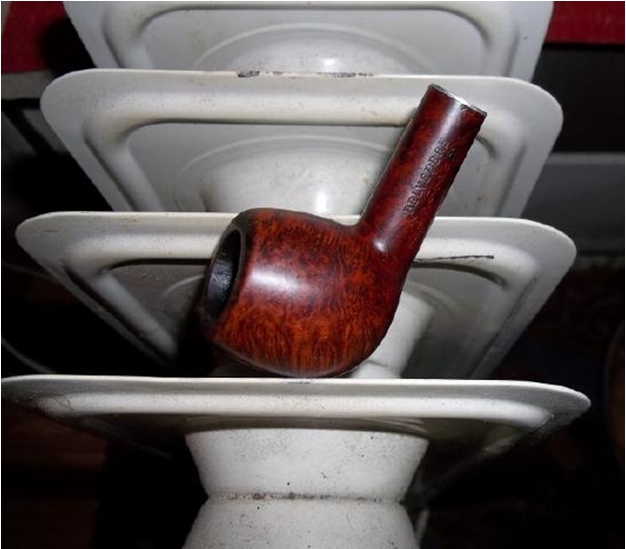
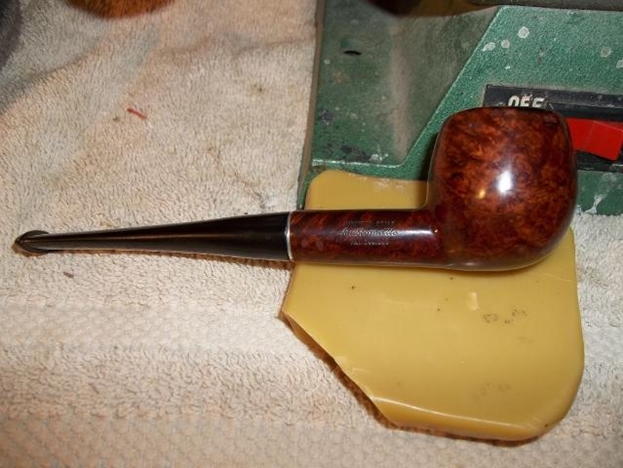
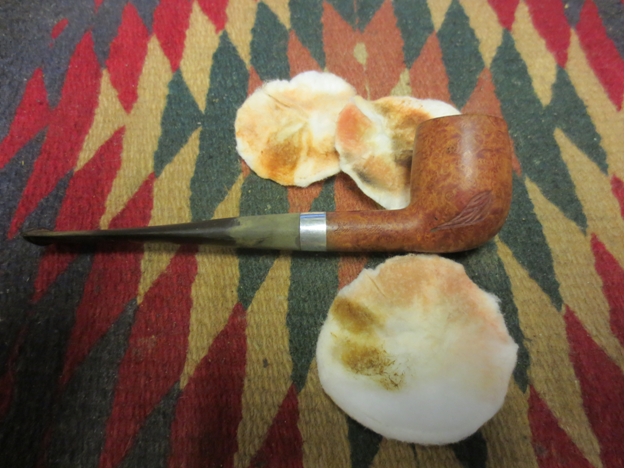
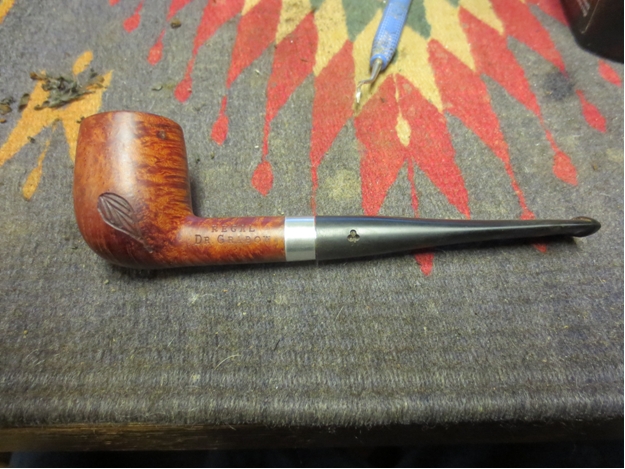
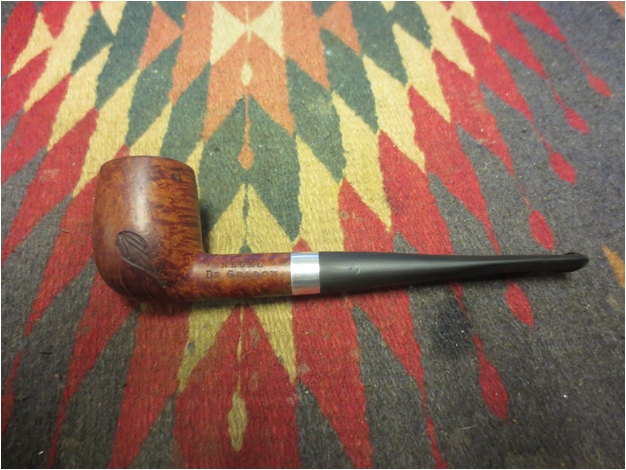
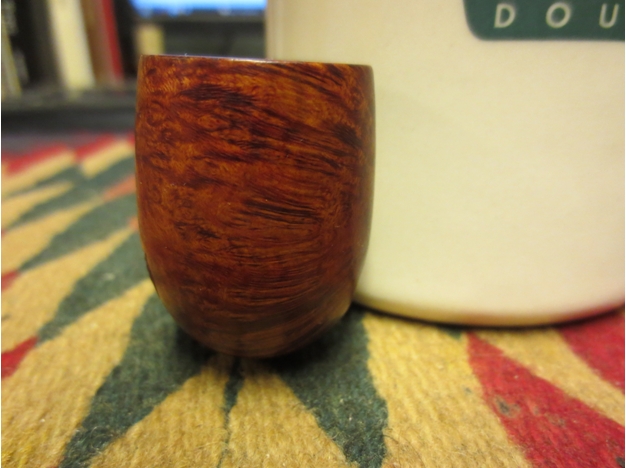
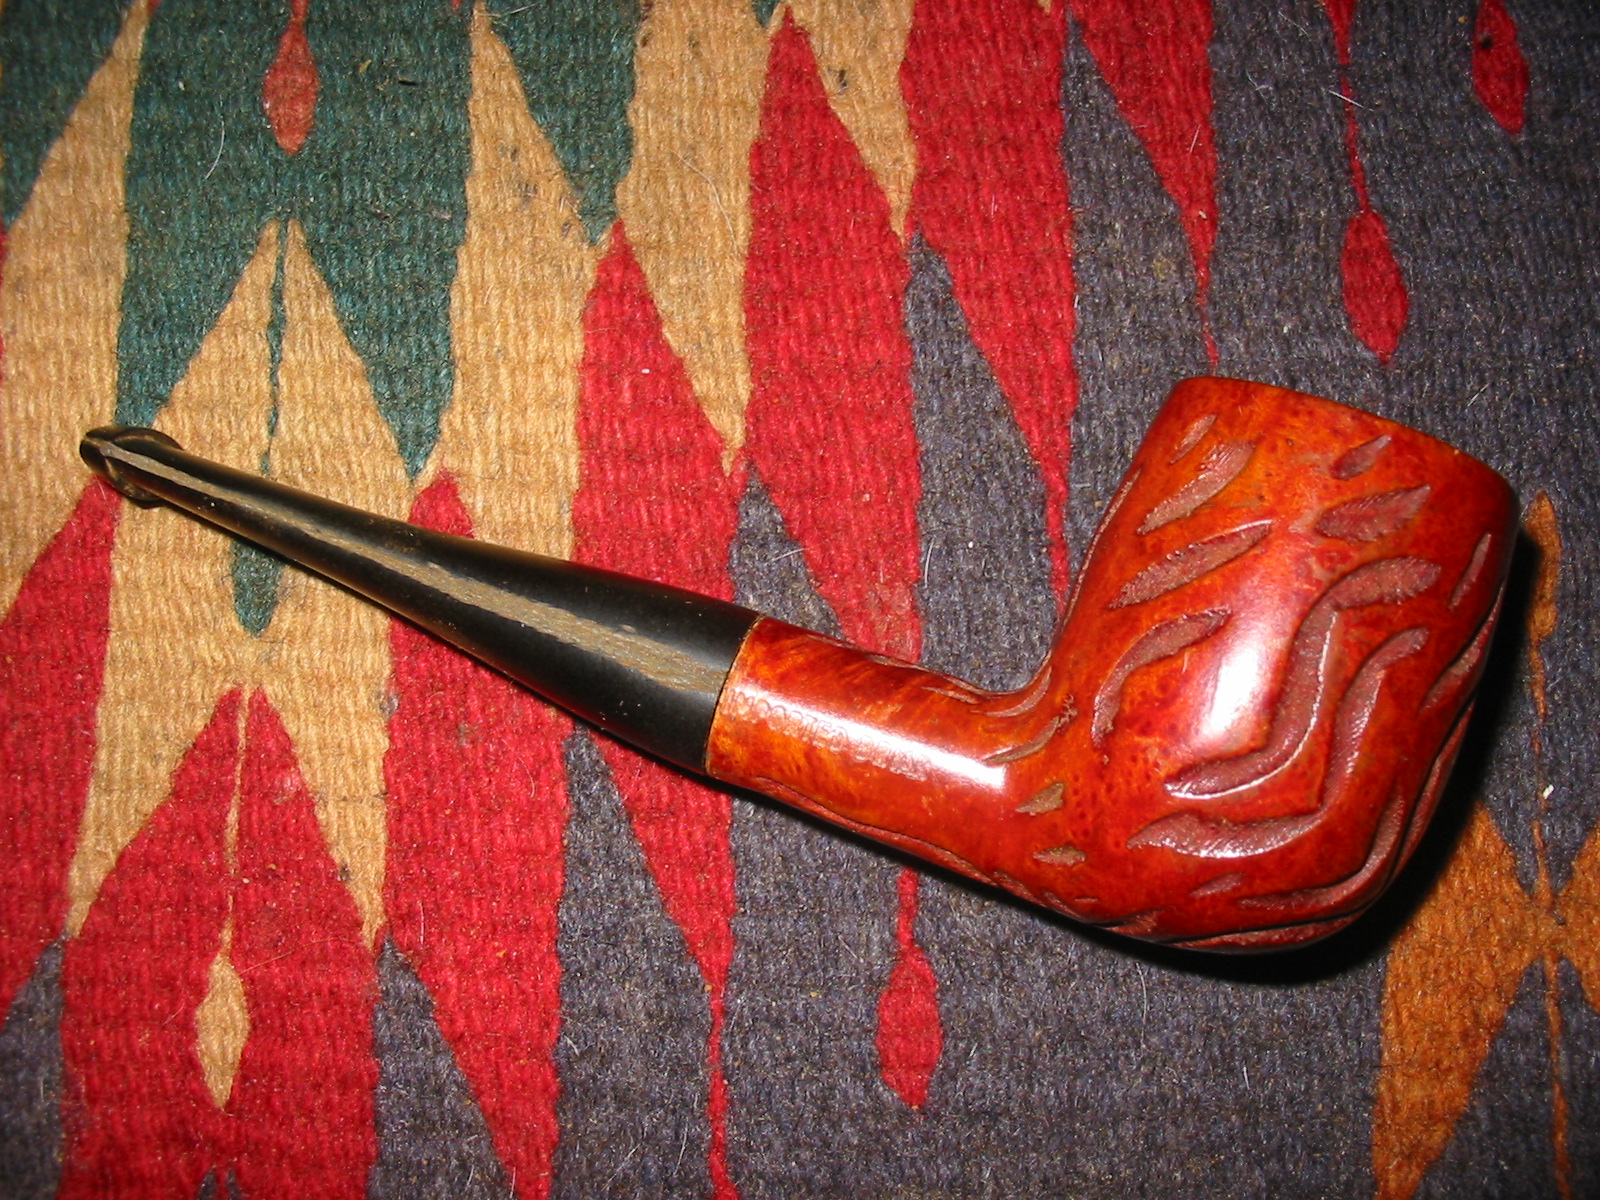
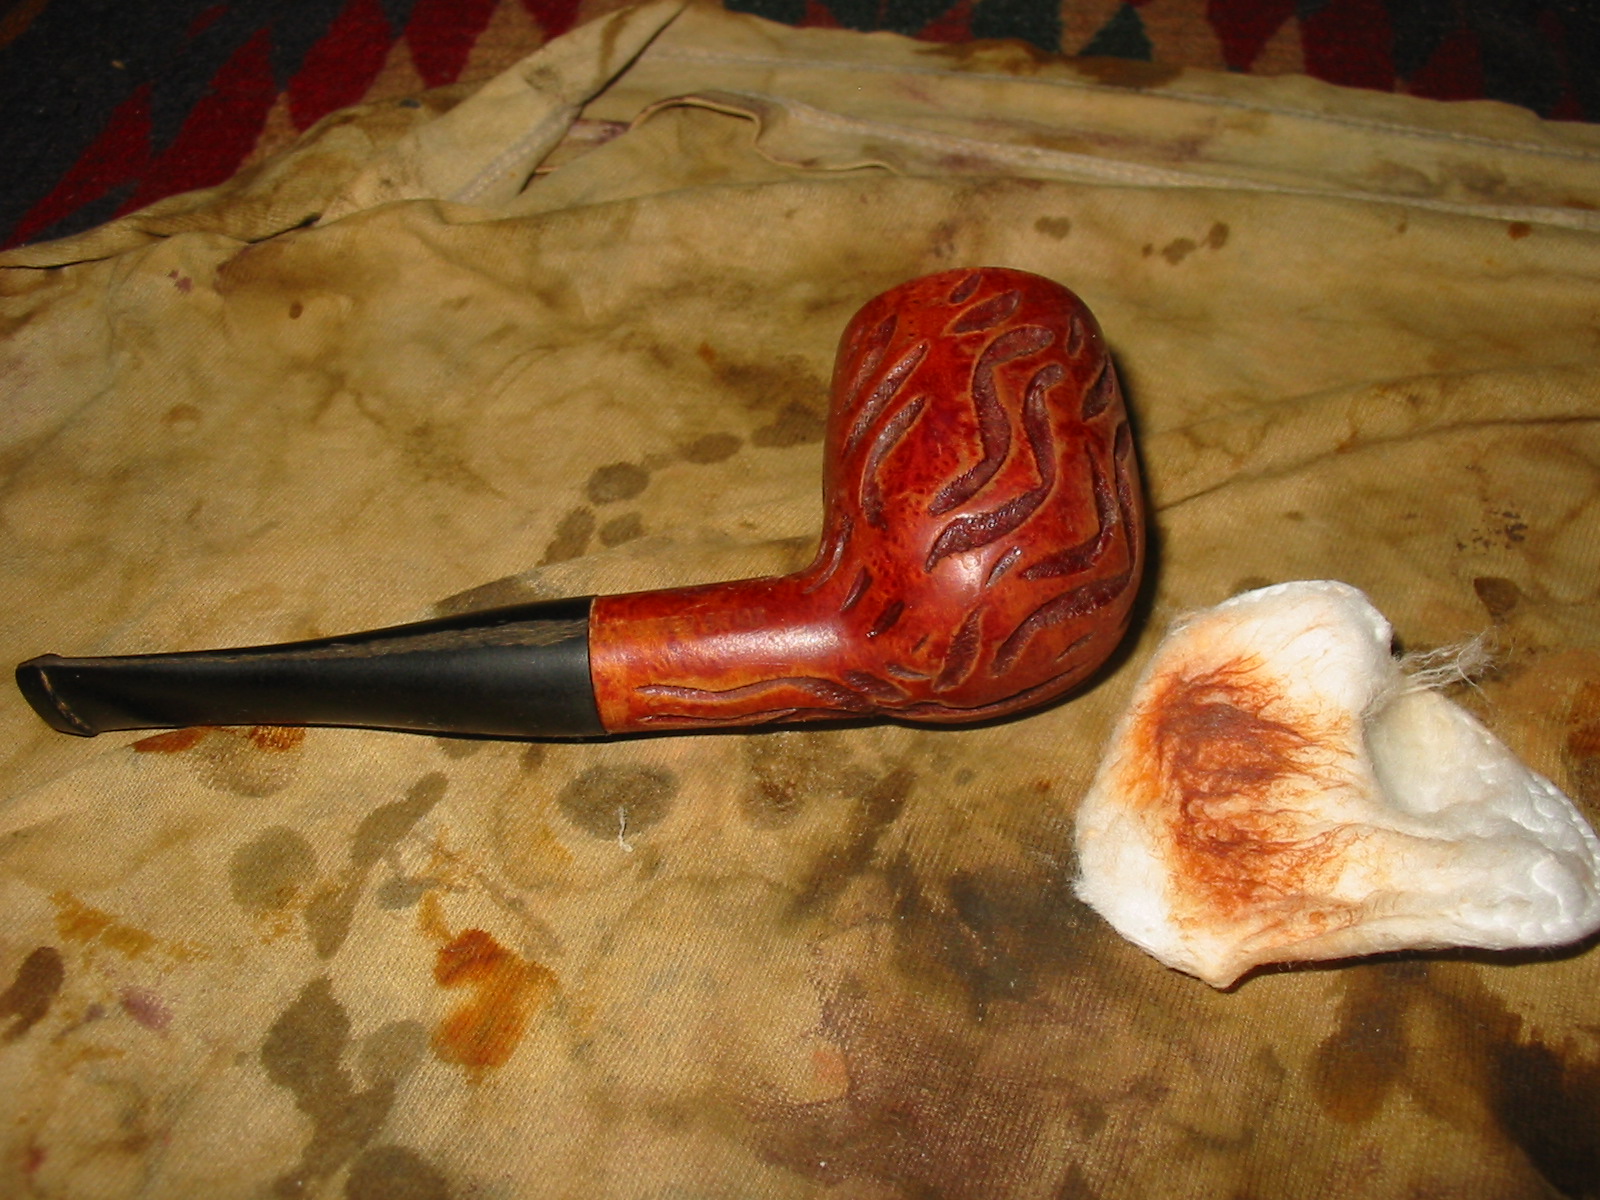
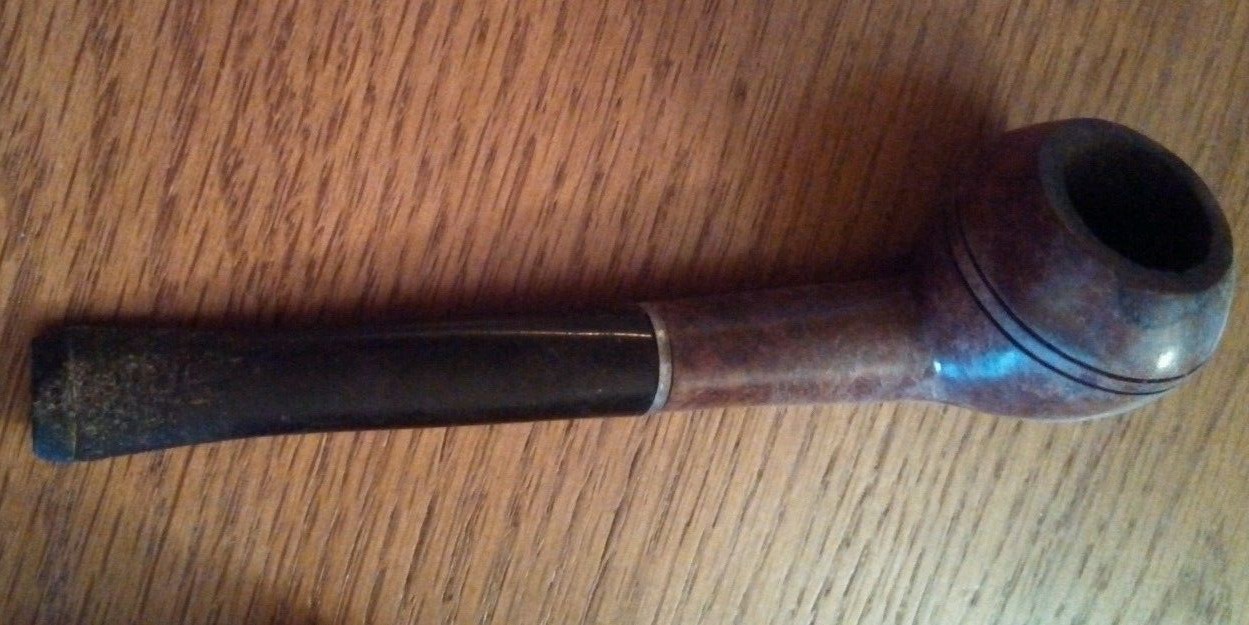
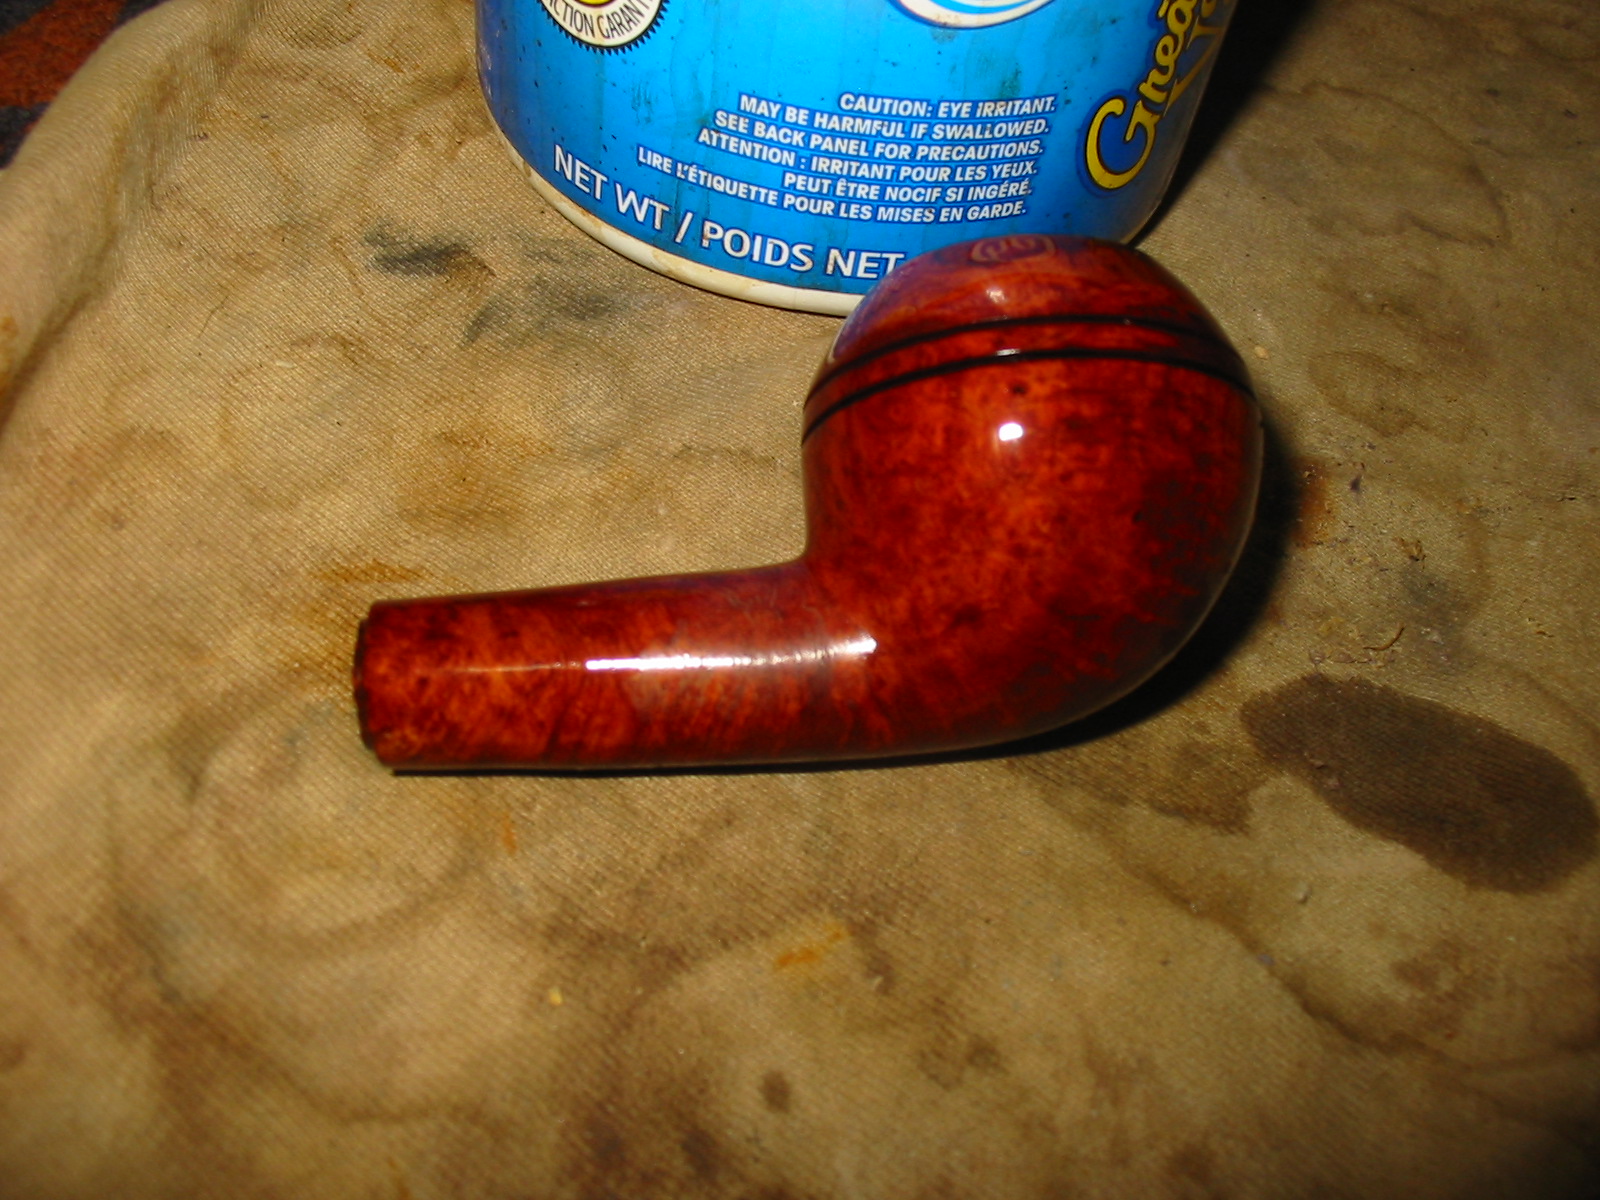
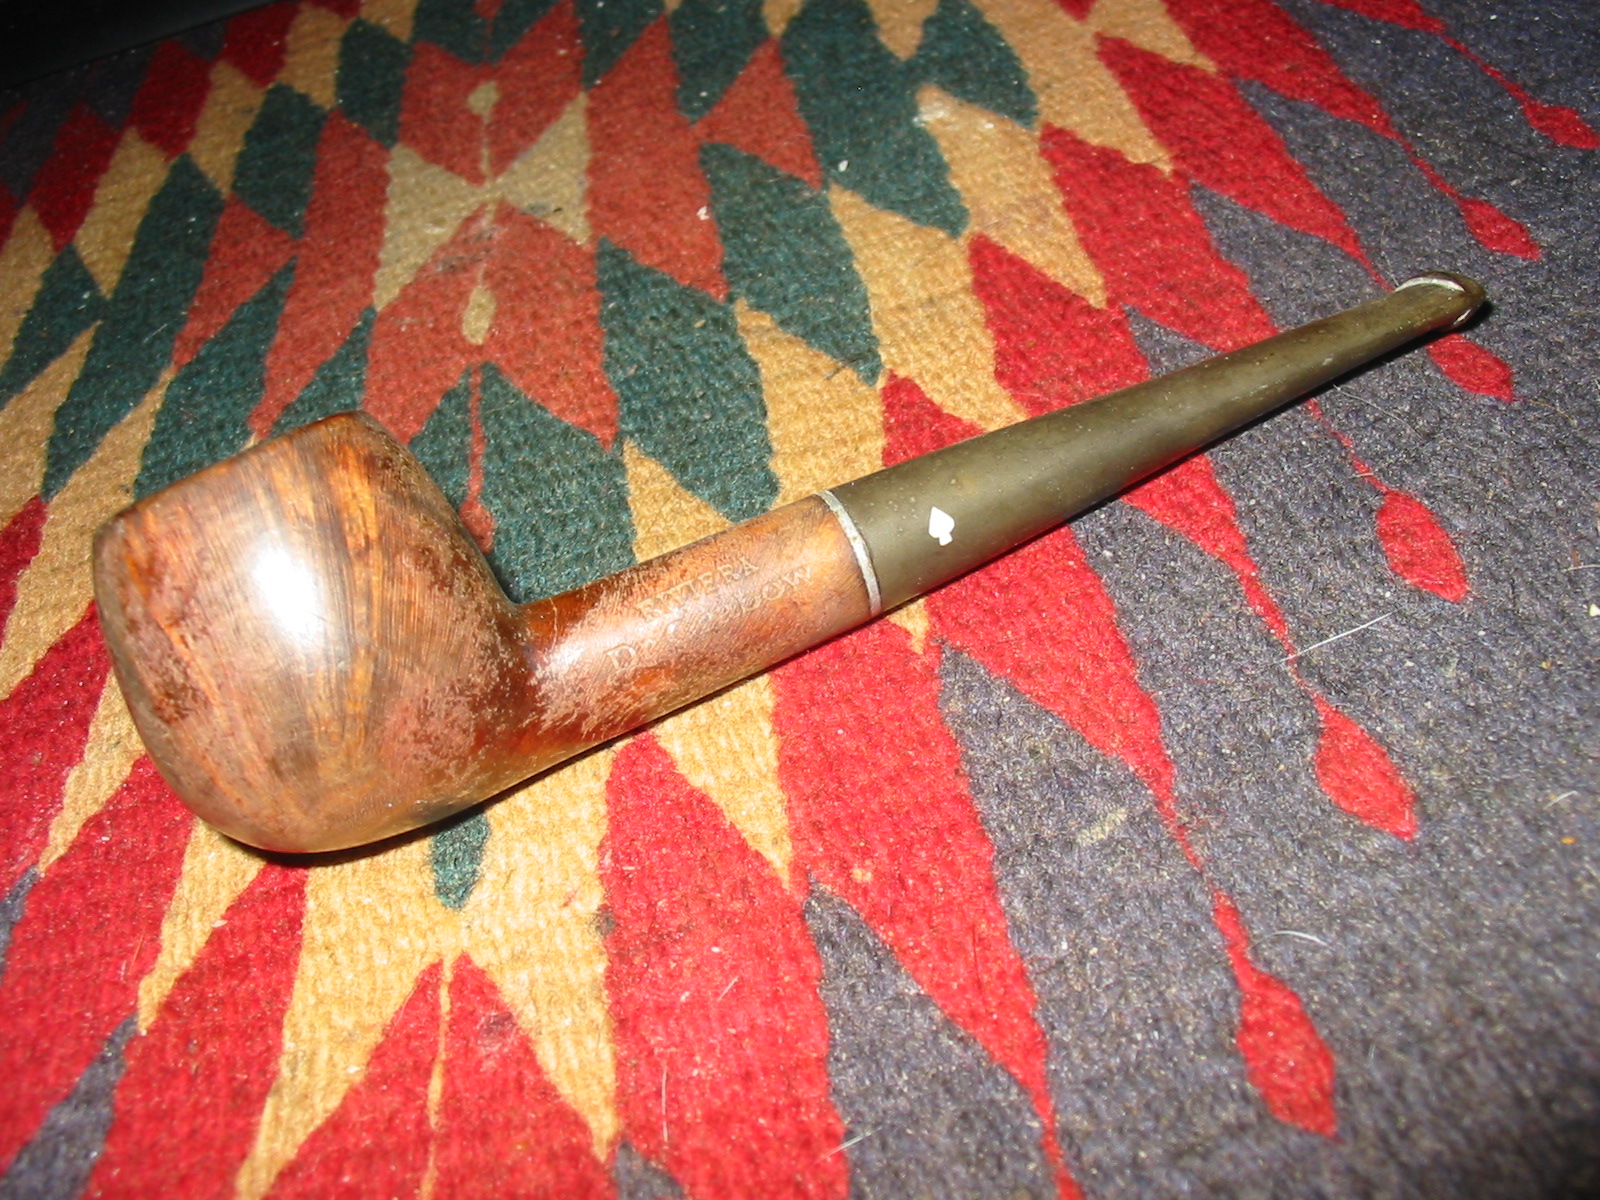
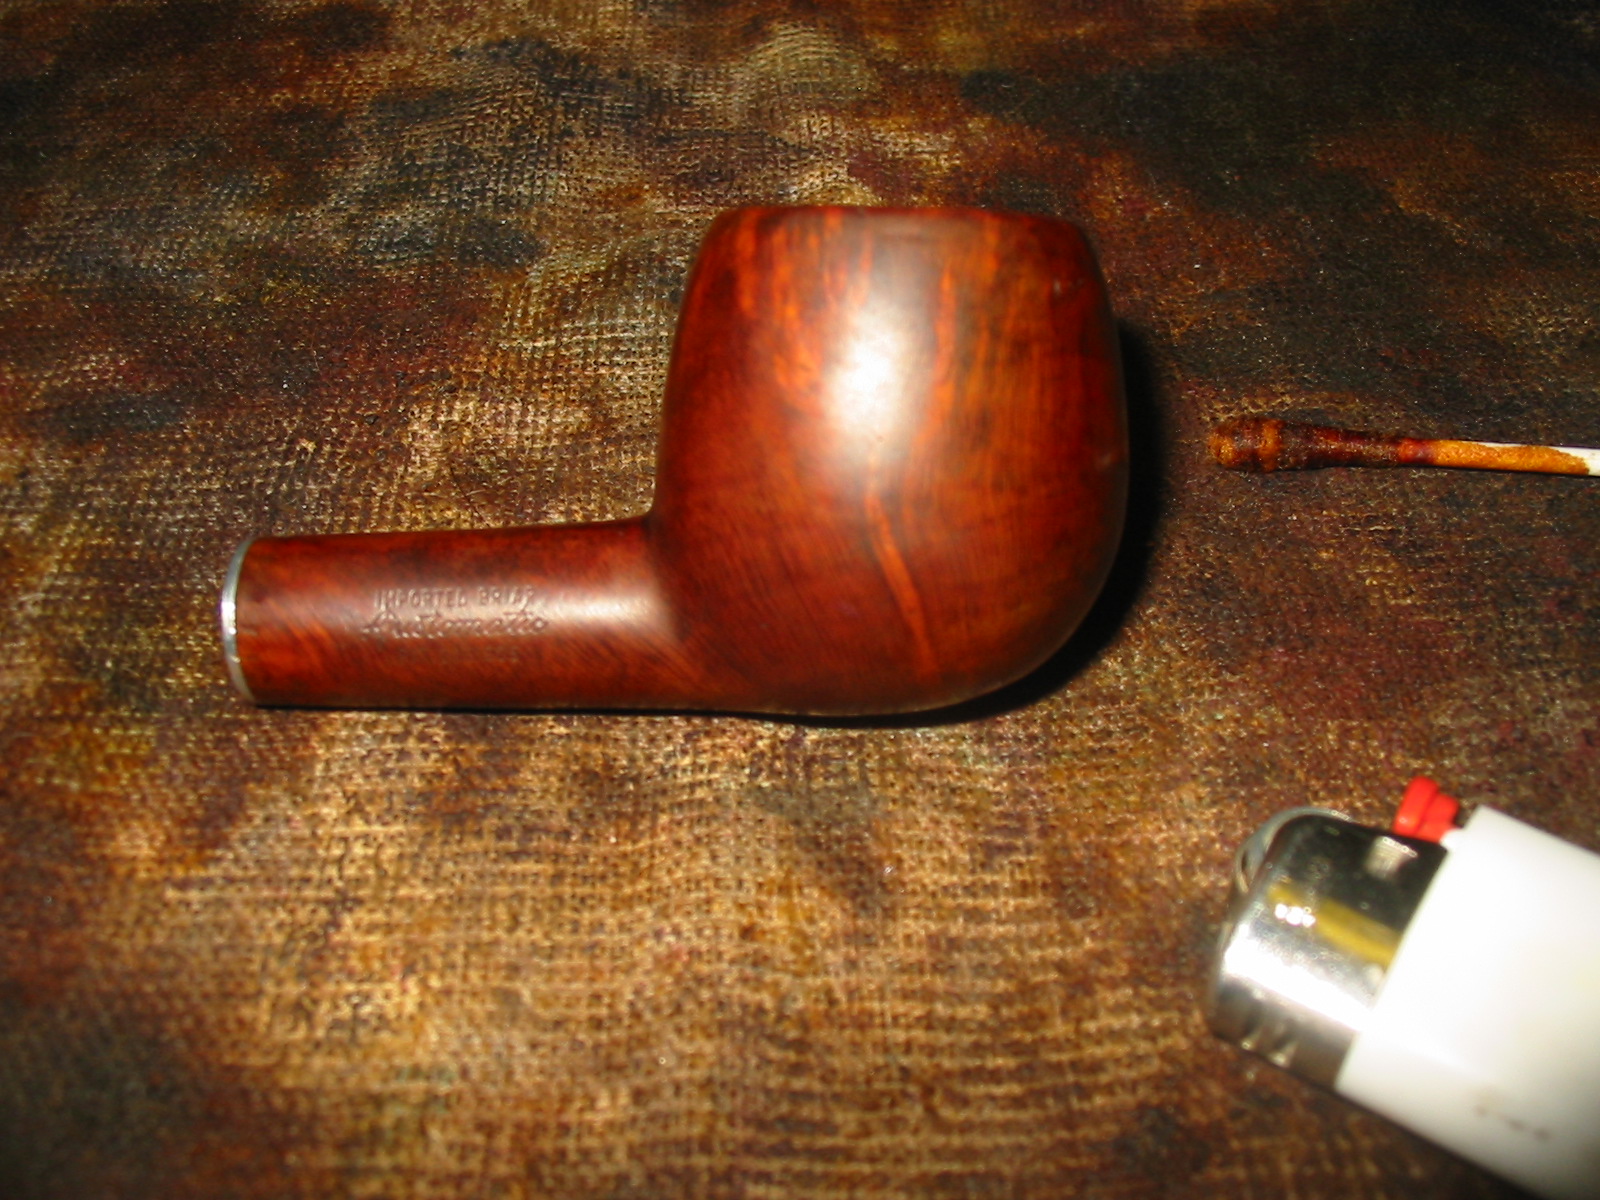
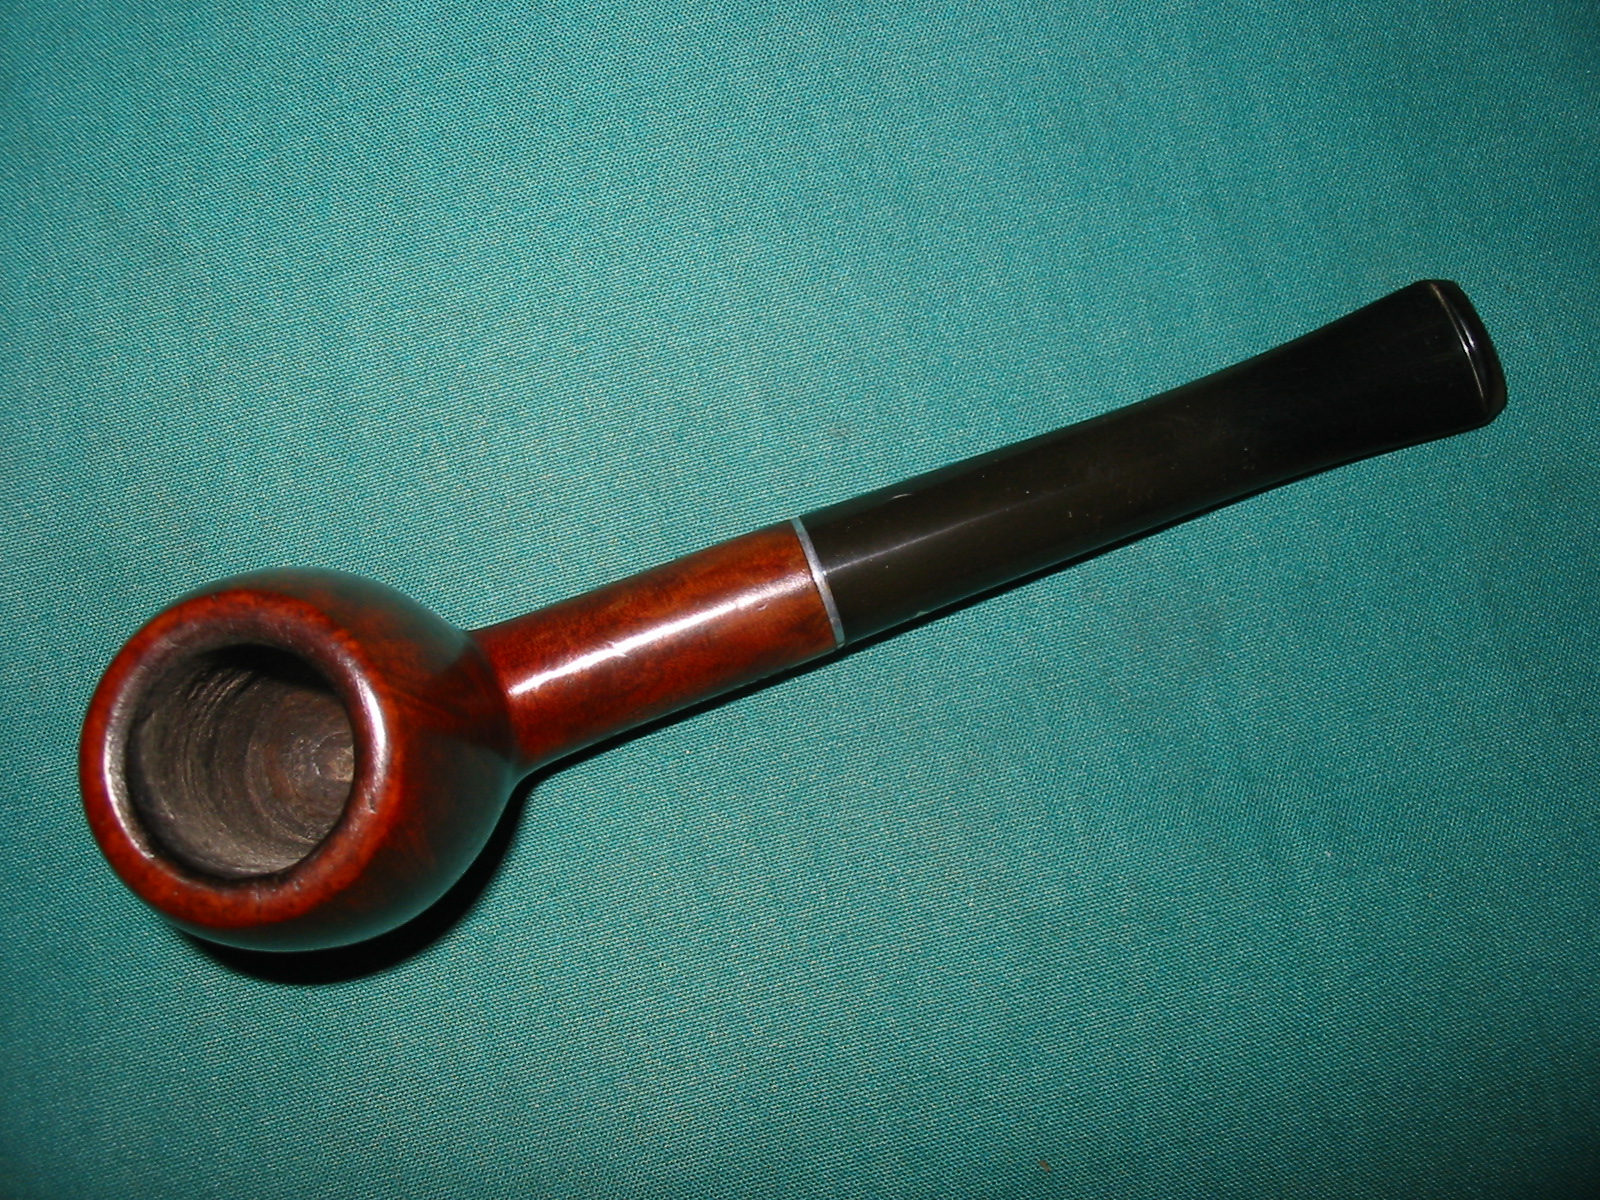
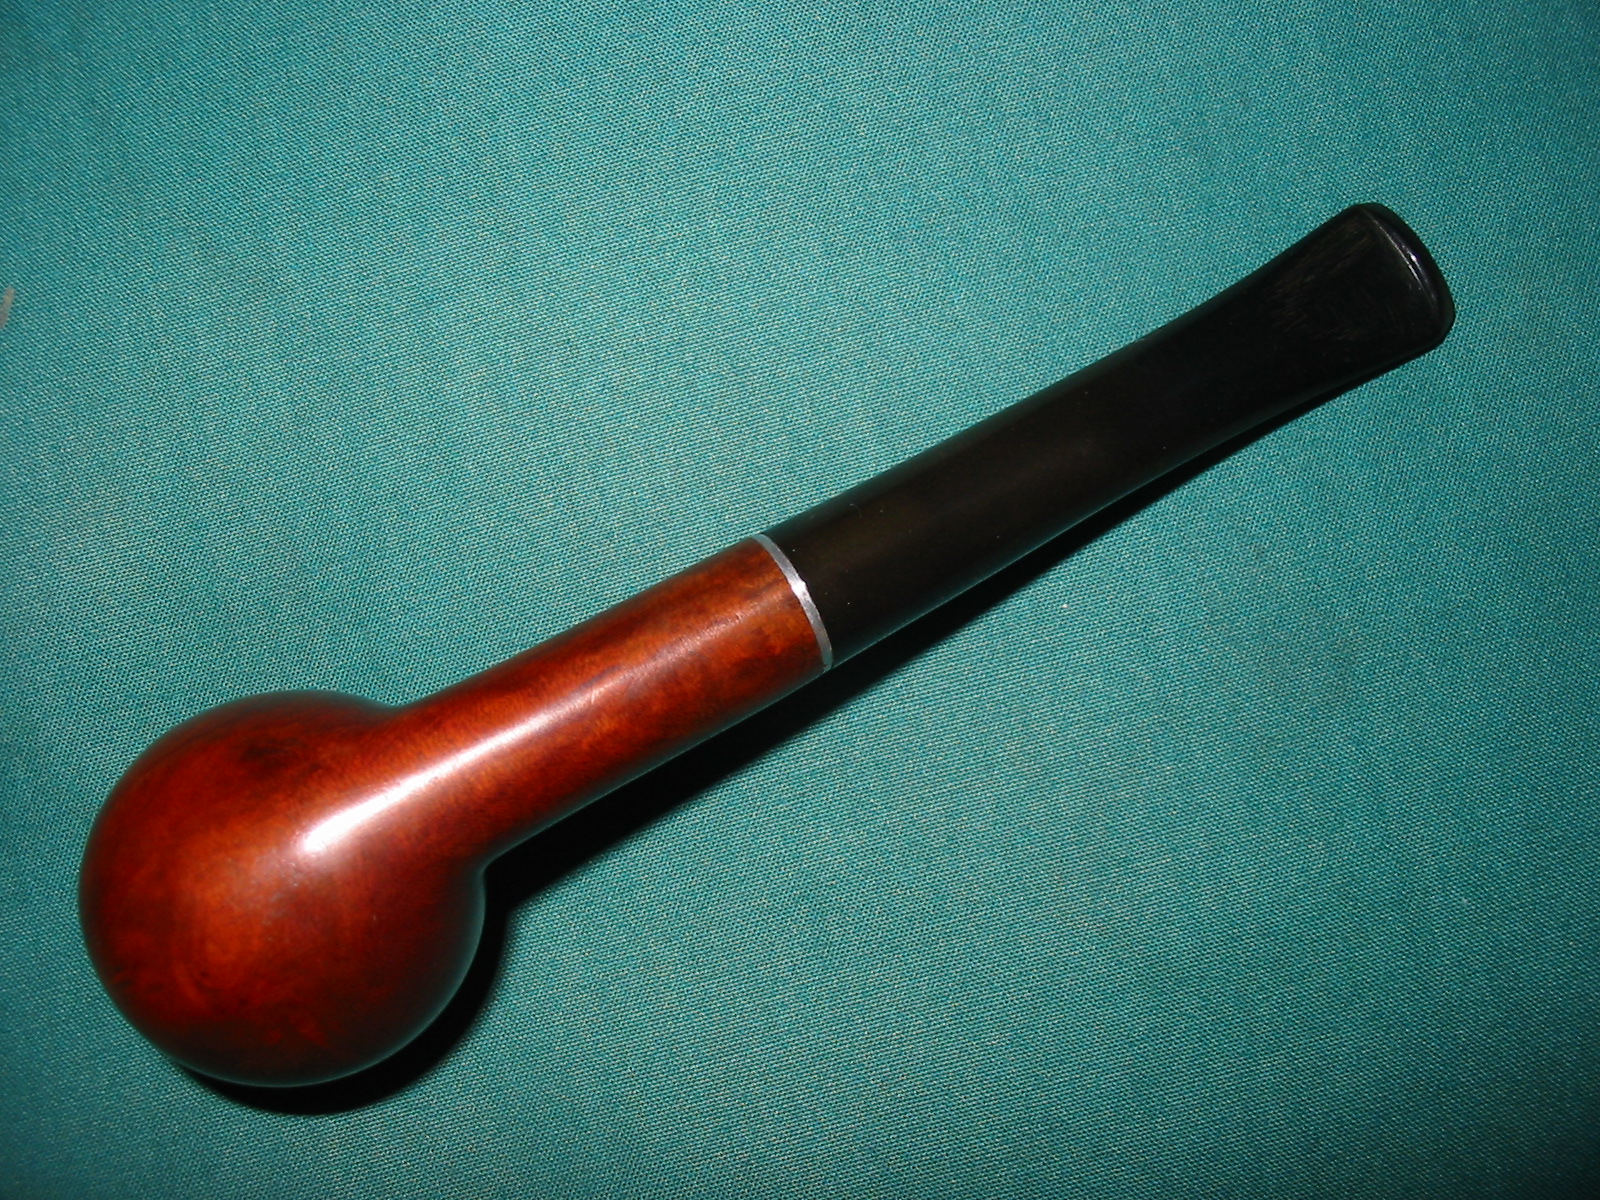
I just finished cleaning up the last of the pipe I picked up from the antique malls while I was in Idaho Falls. It is a little Dr. Grabow bent billiard. It is stamped on the left side of the shank Dr. Grabow over De Luxe over Imported Briar. On the right side near the stem shank union it is stamped with the shape number 9704. From what I can find on the Grabow shape charts the 04 shape is the bent billiard. This one was in rough shape. The finish was basically worn off and the bowl had spots of sticky grime on the sides and shank. There were also spots of paint on the shank and bowl. There were scratches all over the bowl. There were a lot of small fills on the right side of the bowl and the top of the shank as well as a large one on the lower part of the front of the bowl. Because of the missing finish these stood out. The top of the rim had a buildup of tars that looked flaky and hard. The bowl had a thick cake that made it impossible to see if the inside of the rim was in decent shape. I would need to ream it back to be sure. The stem was oxidized and the dirty with light tooth chatter on the underside near the button.Dr1

Dr2

Dr3

Dr4 
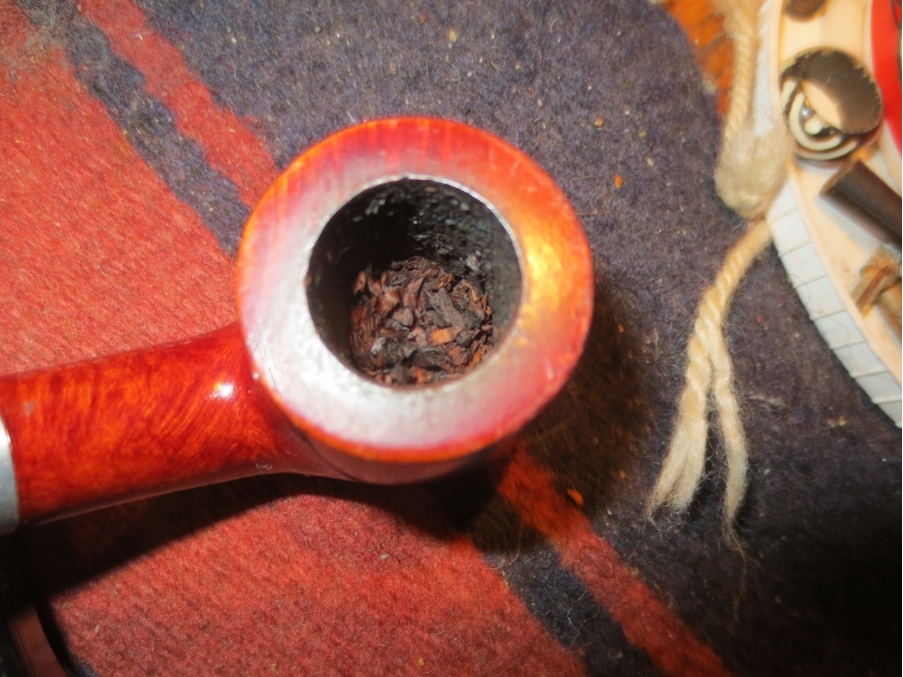
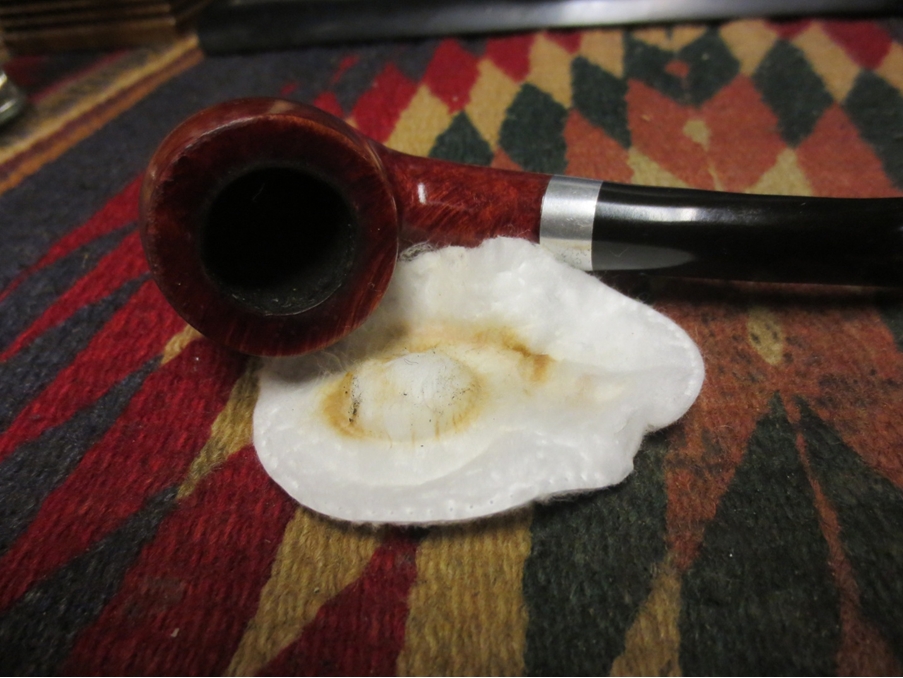
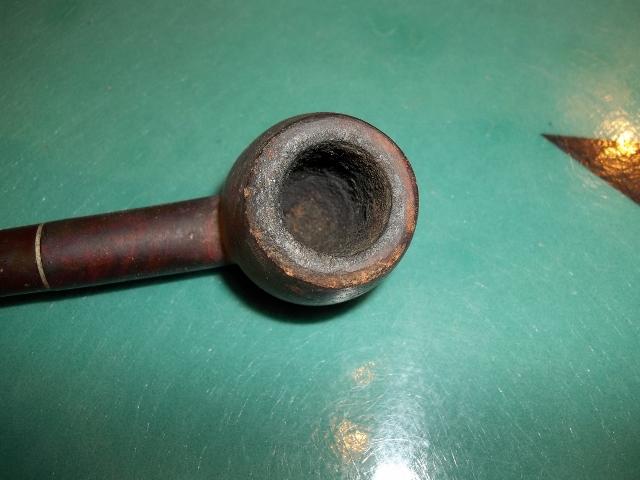
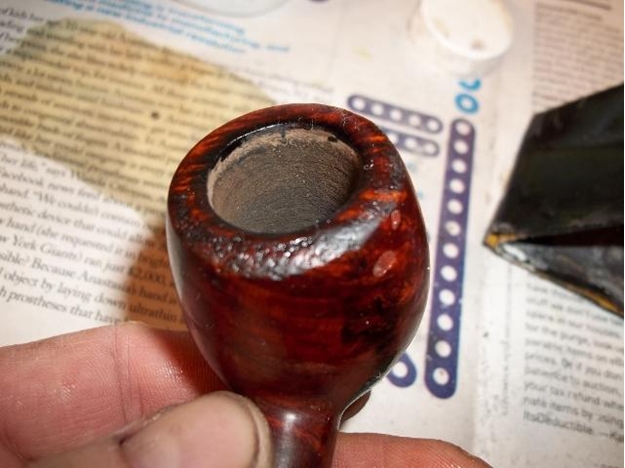
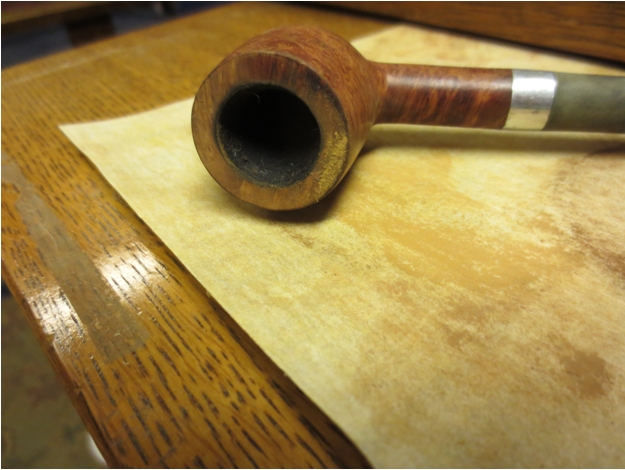
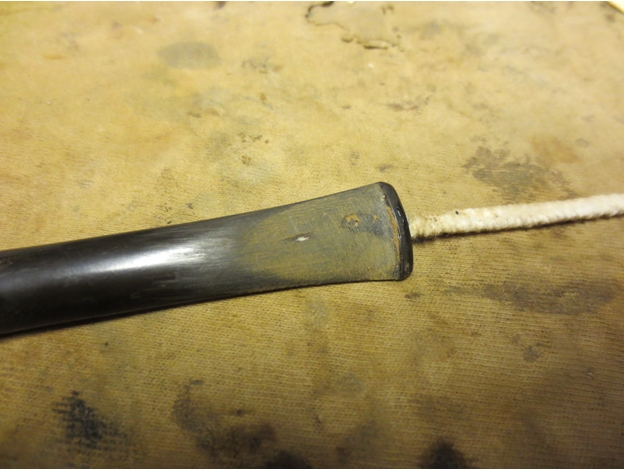
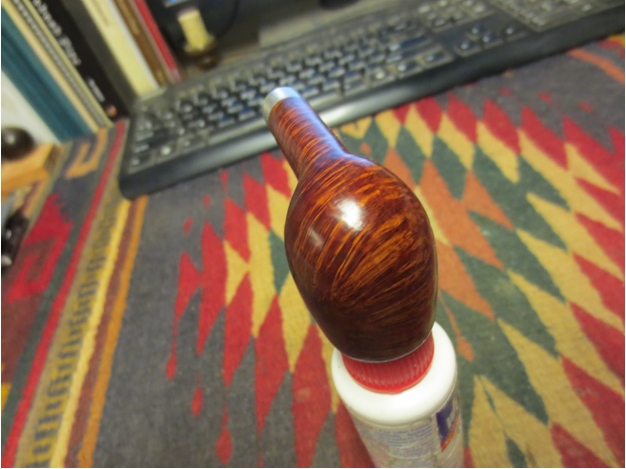
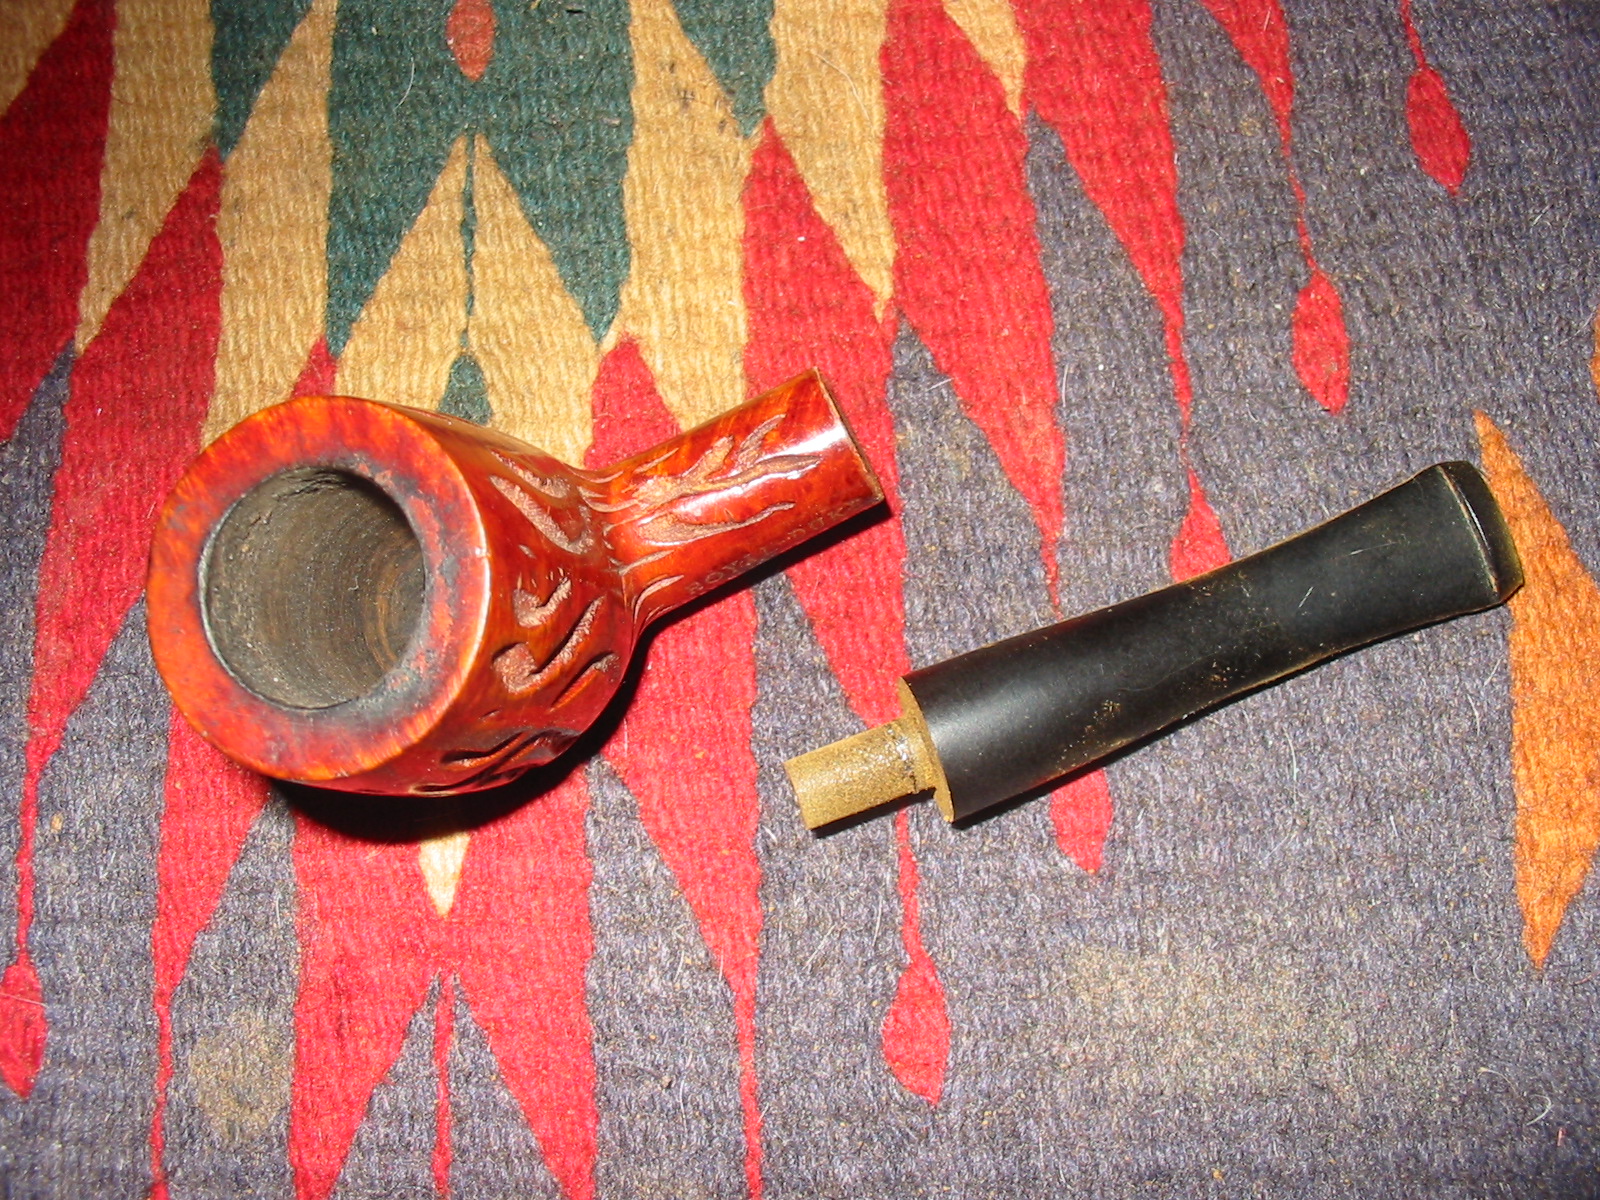
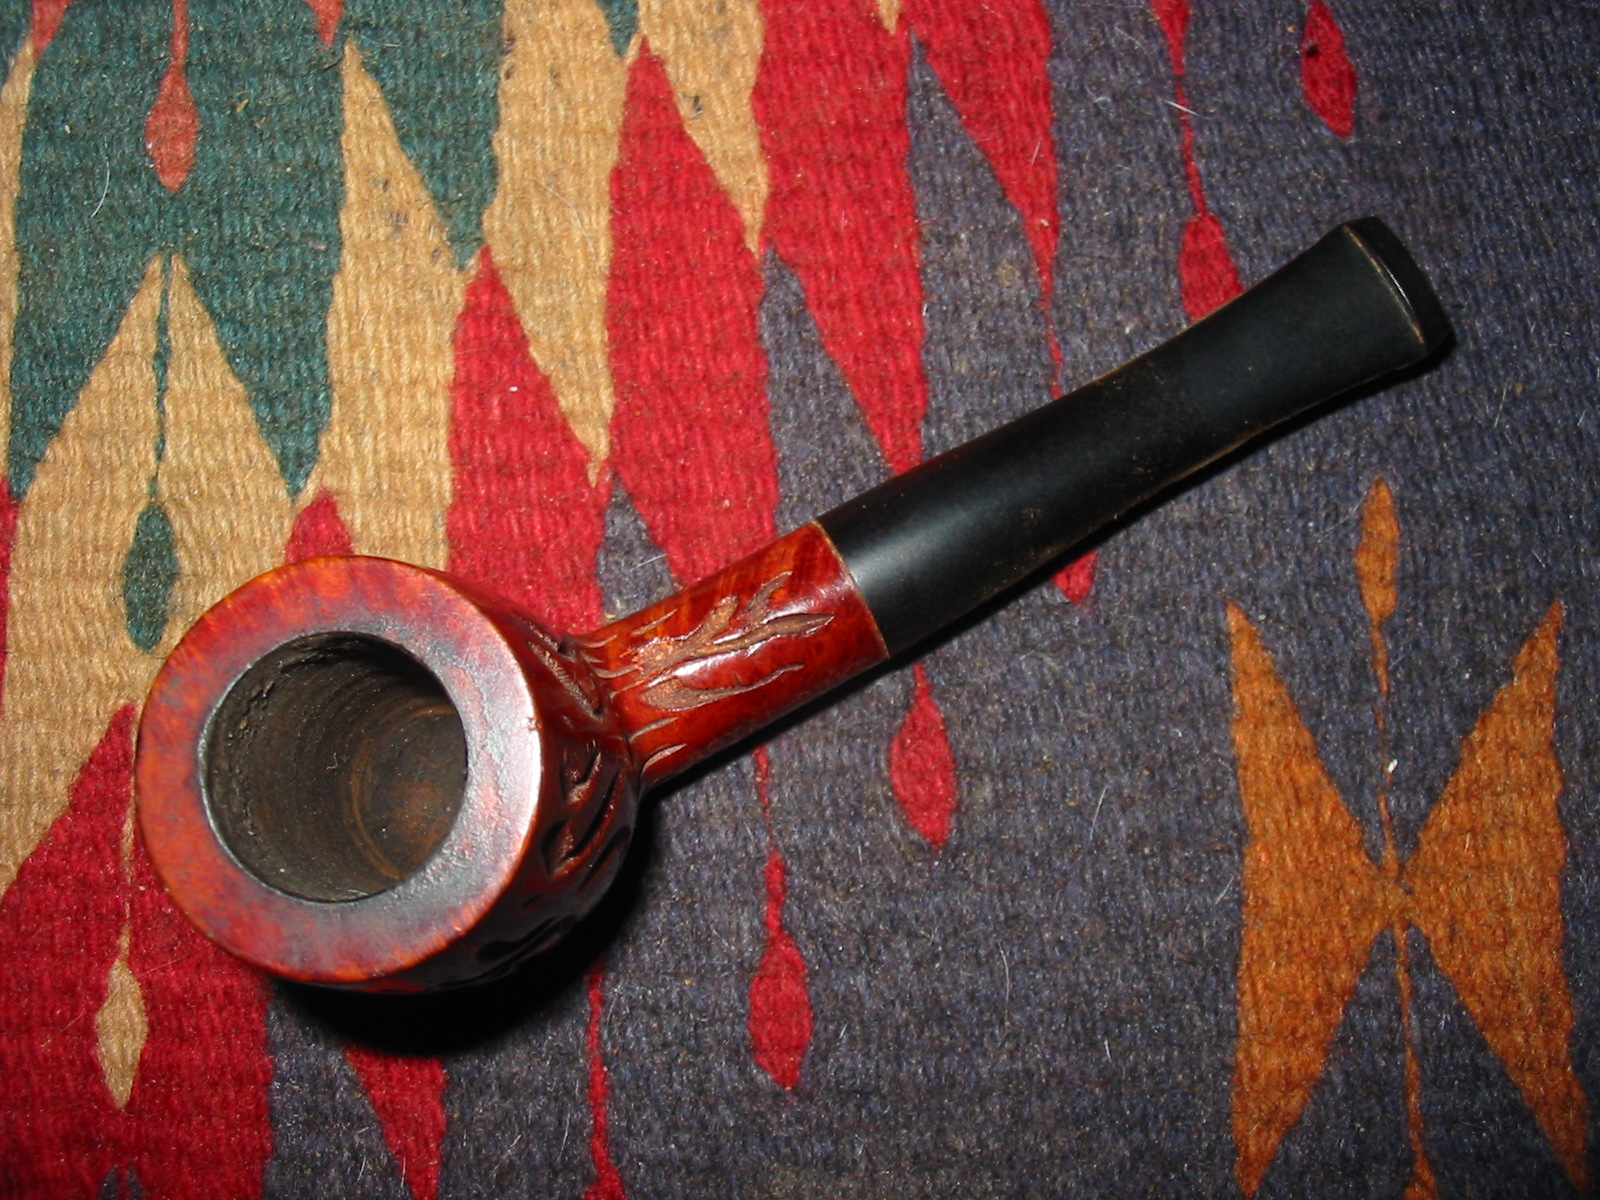
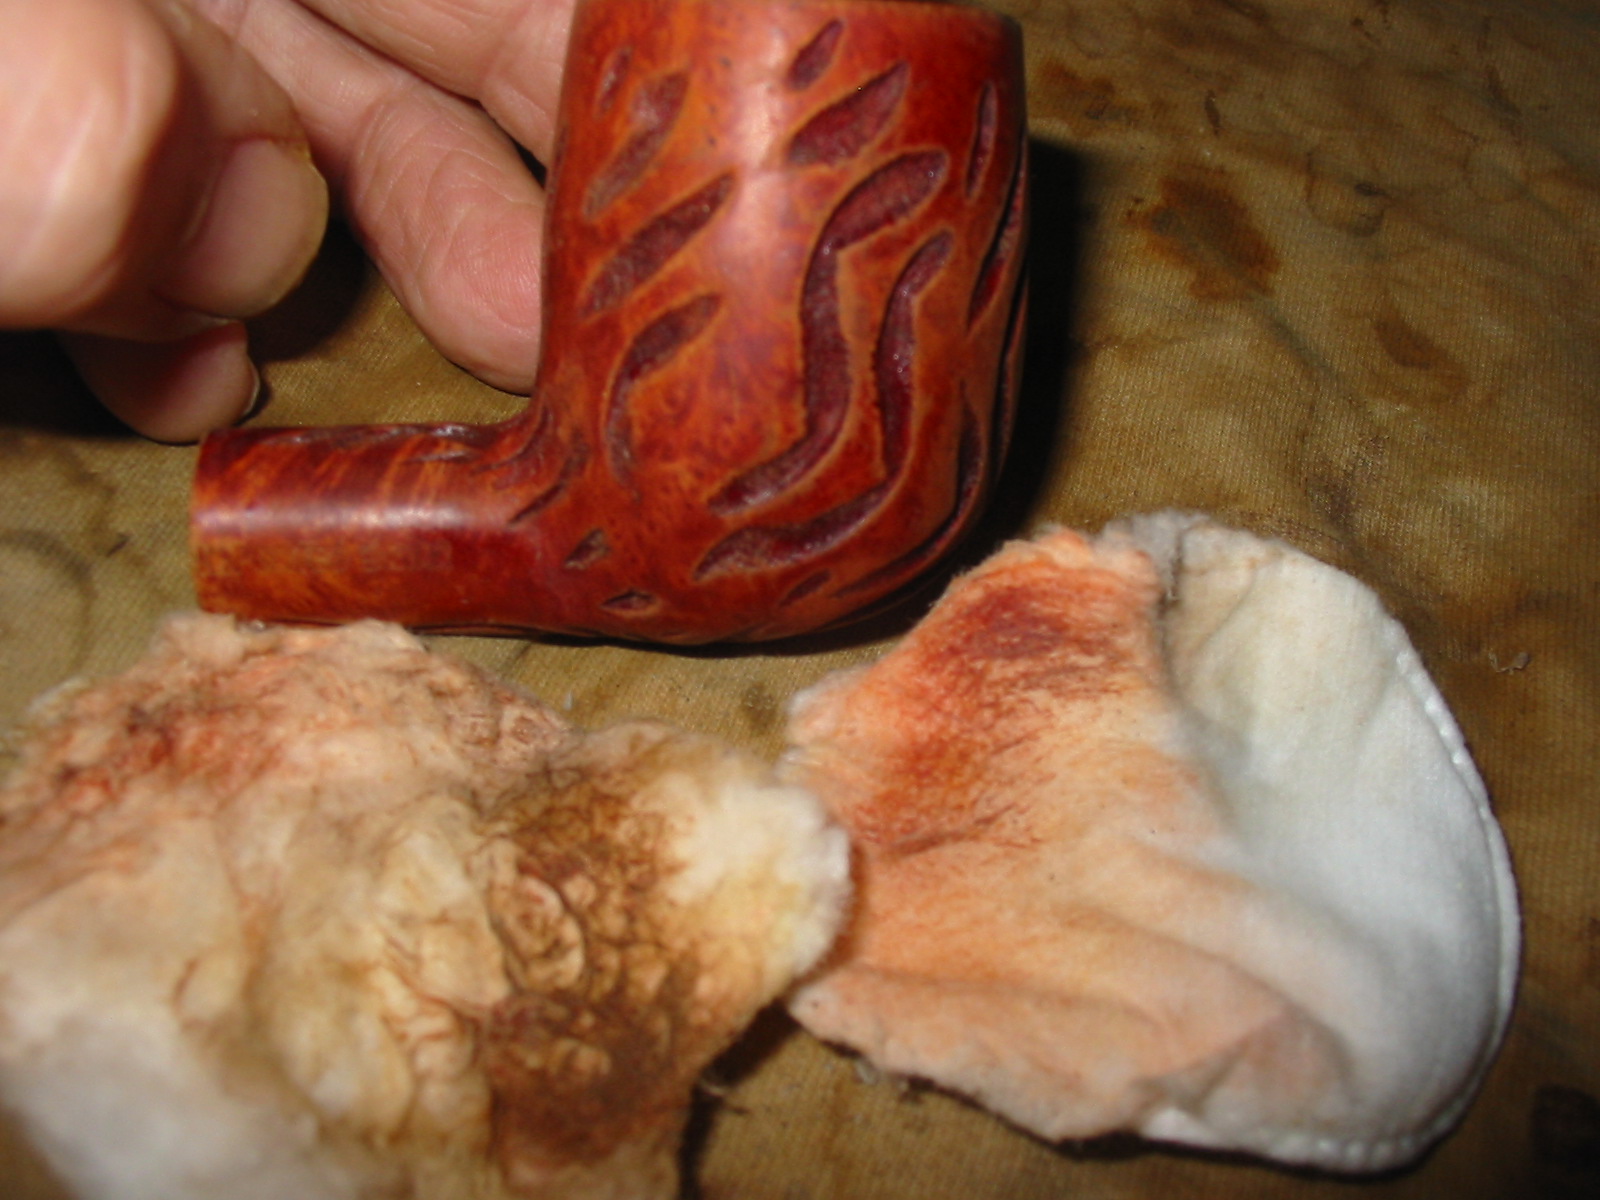
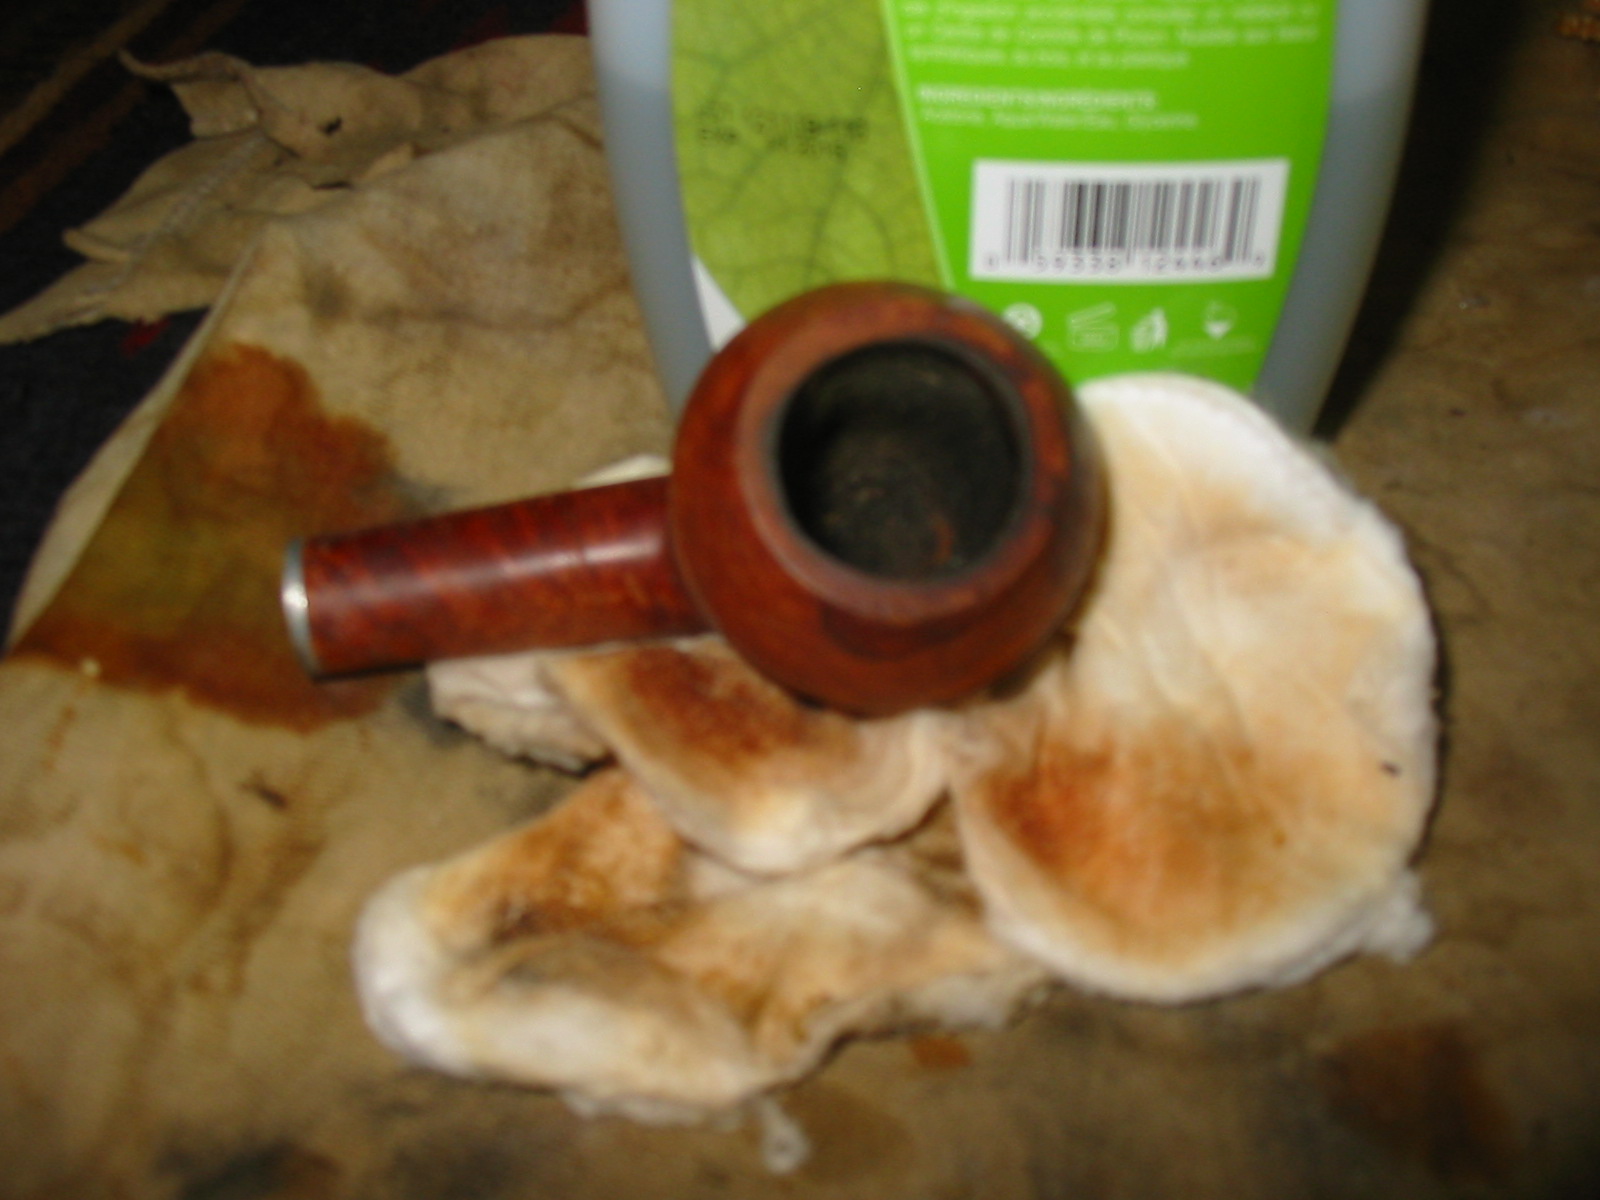
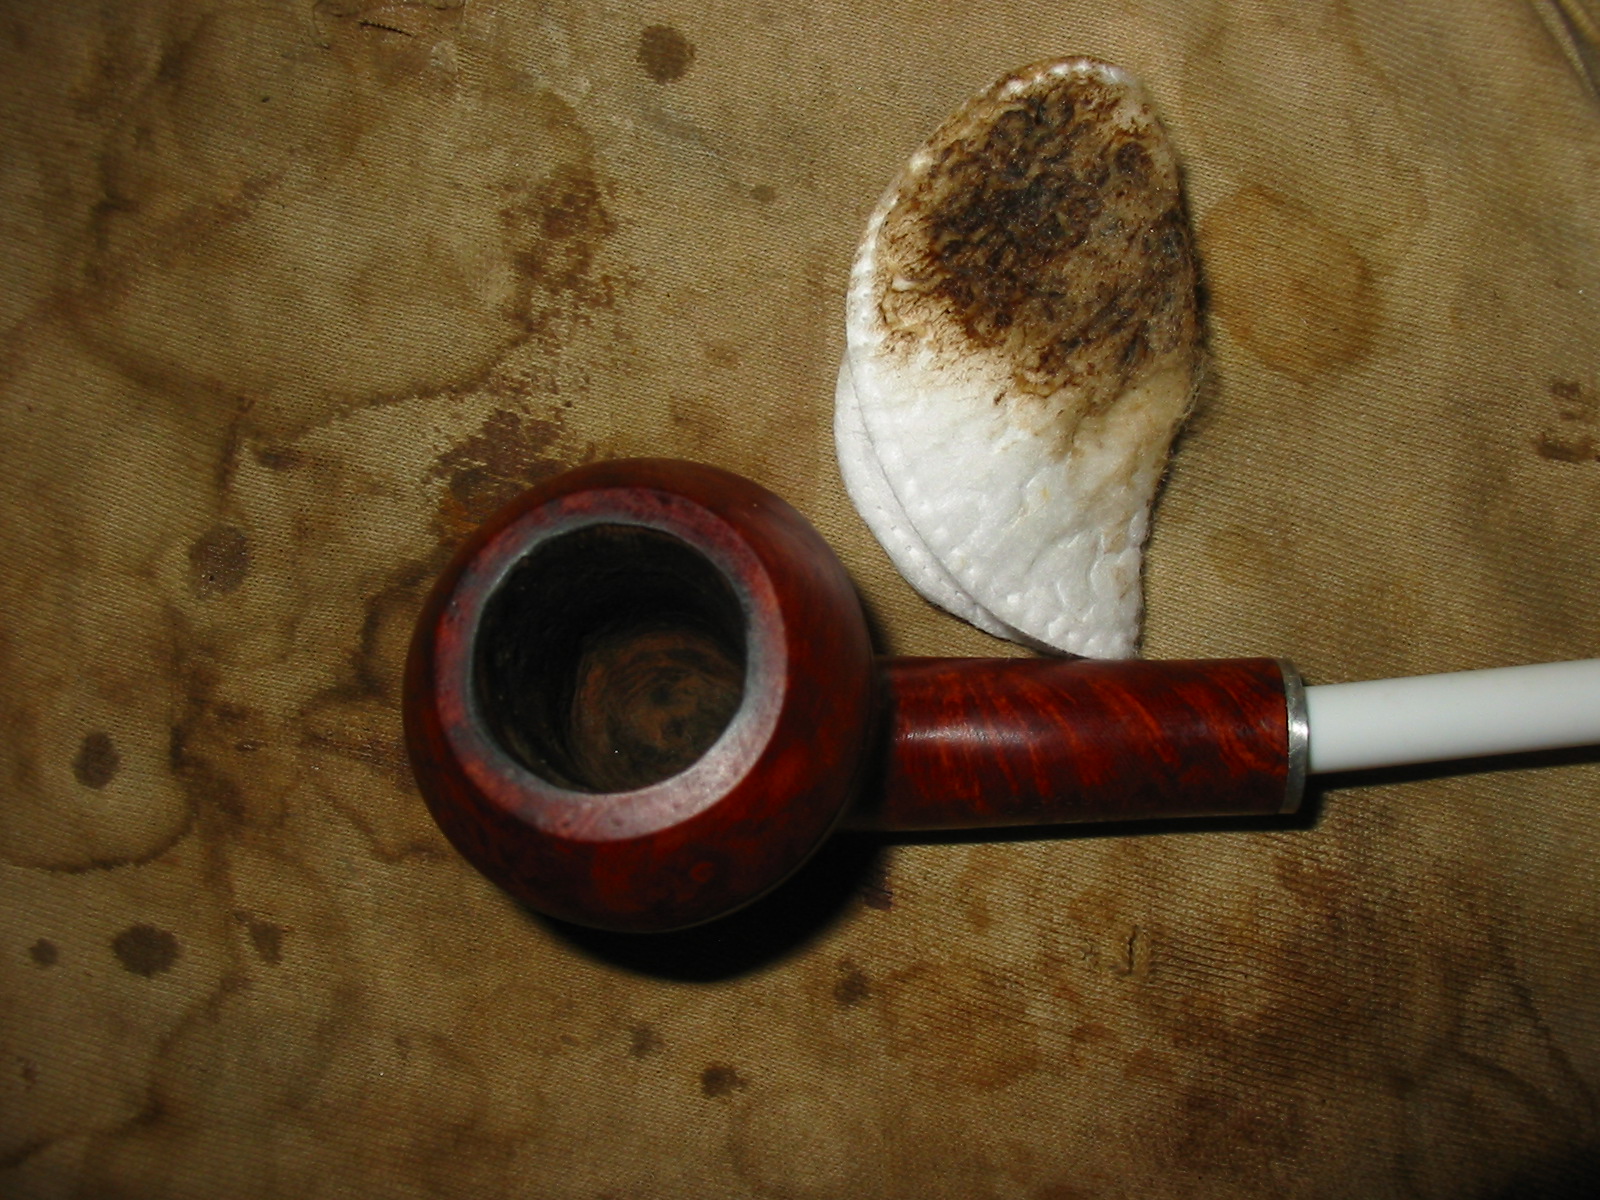
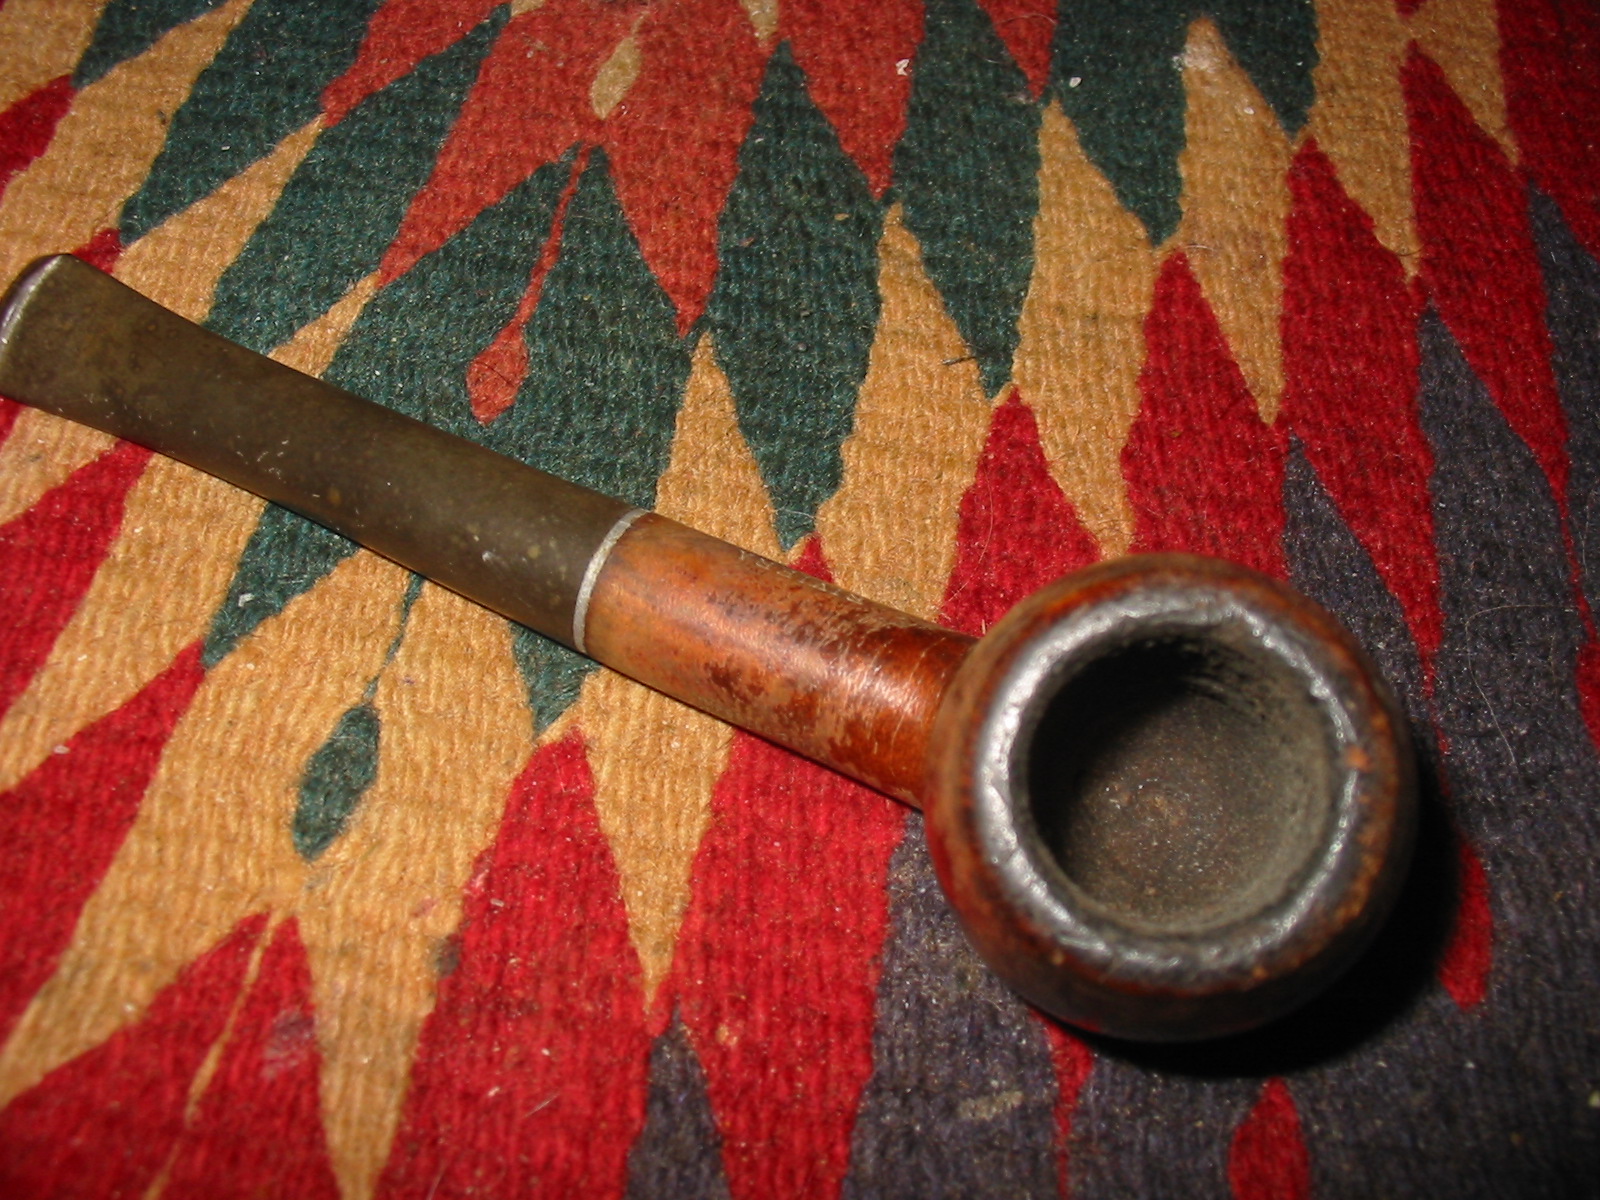
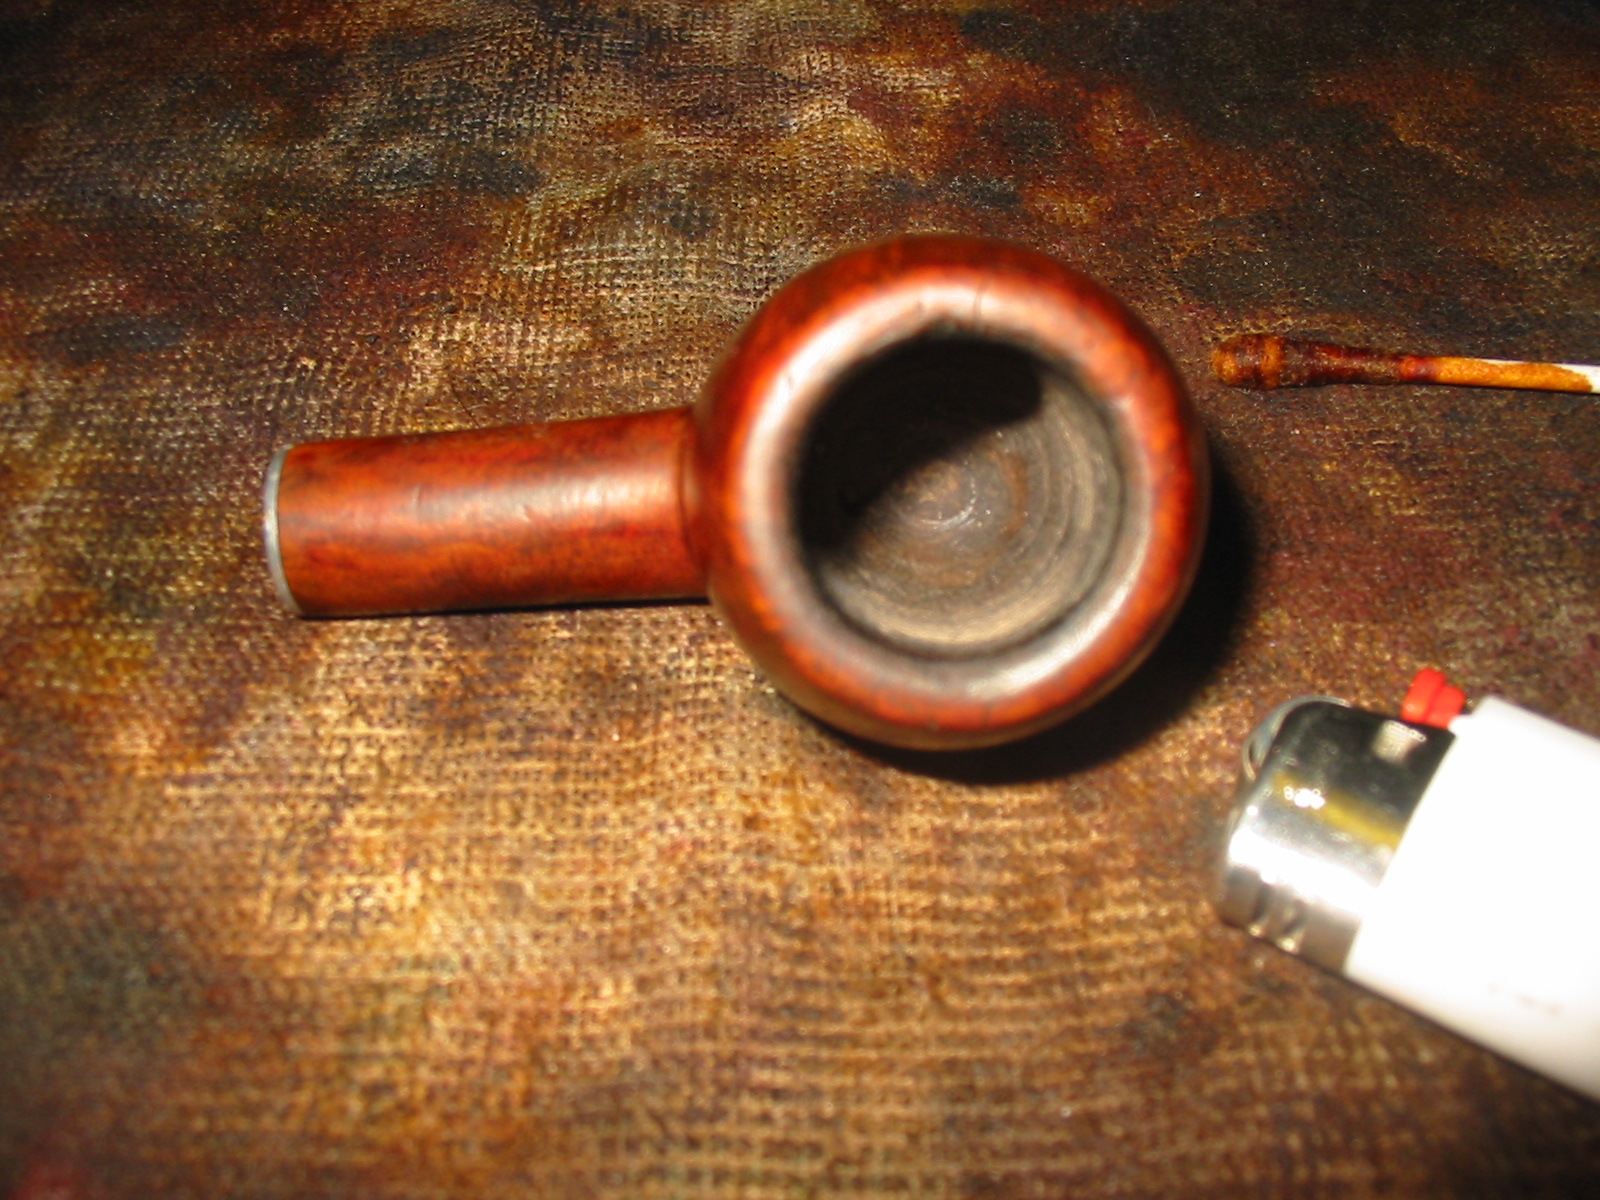
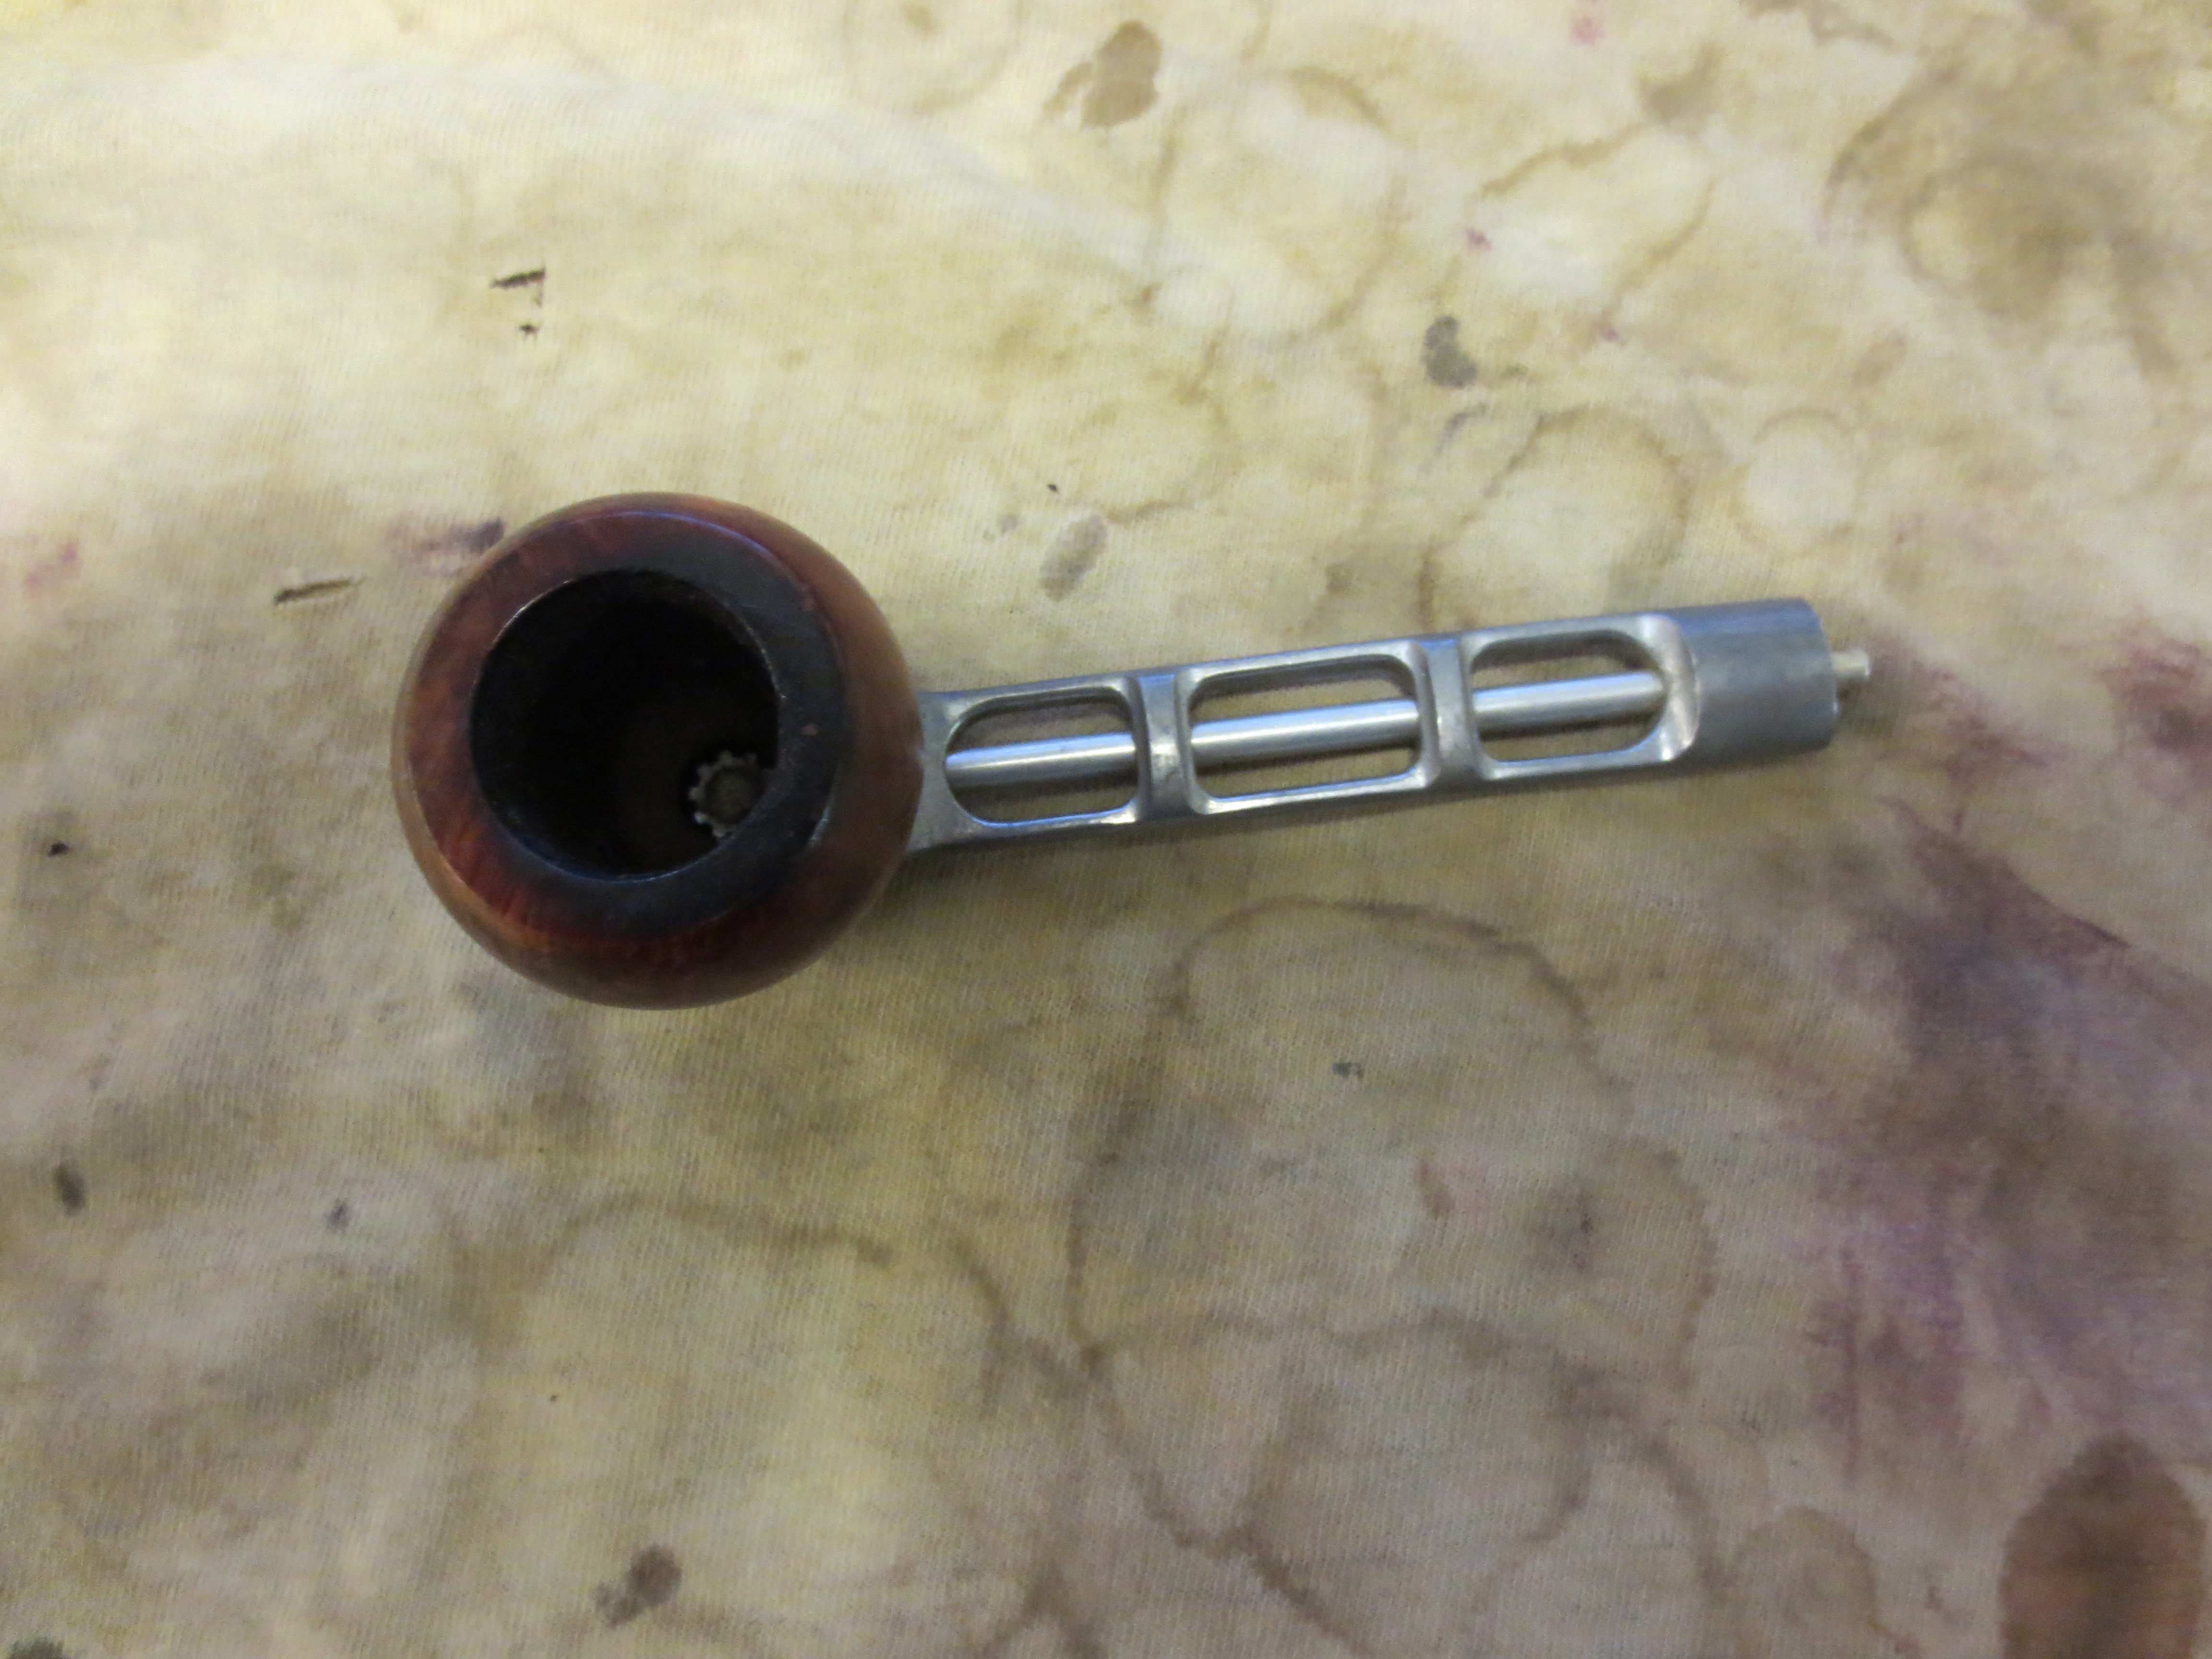
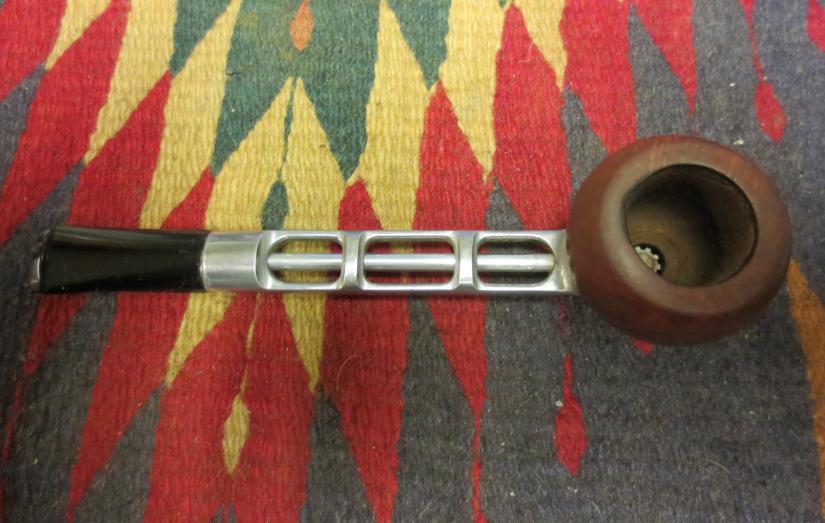
I took a close up photo of the top of the rim to show what I had to work with in cleaning up the bowl and rim.Dr5 
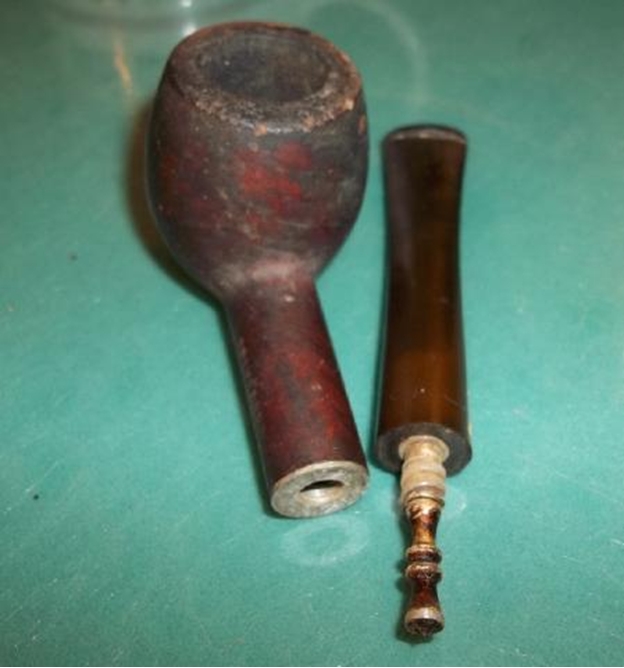
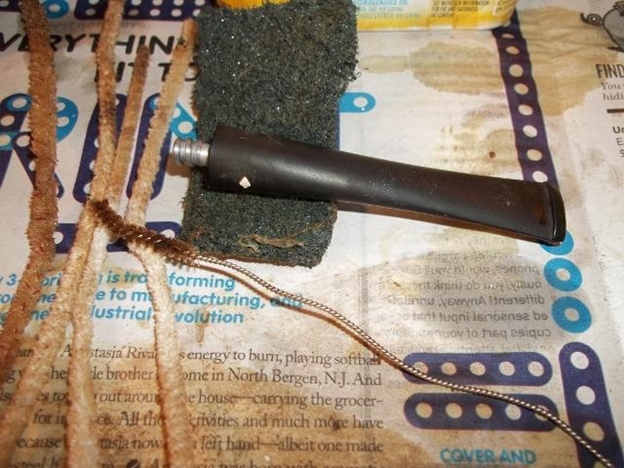
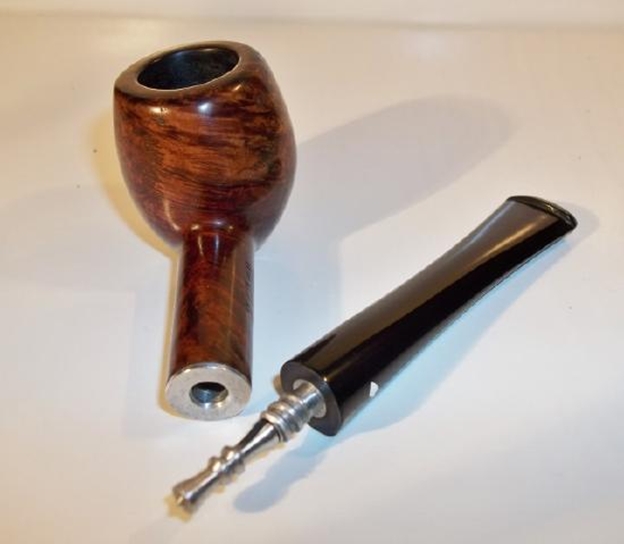
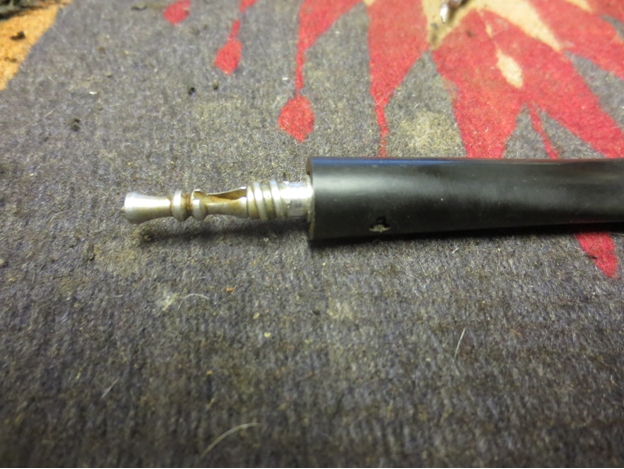
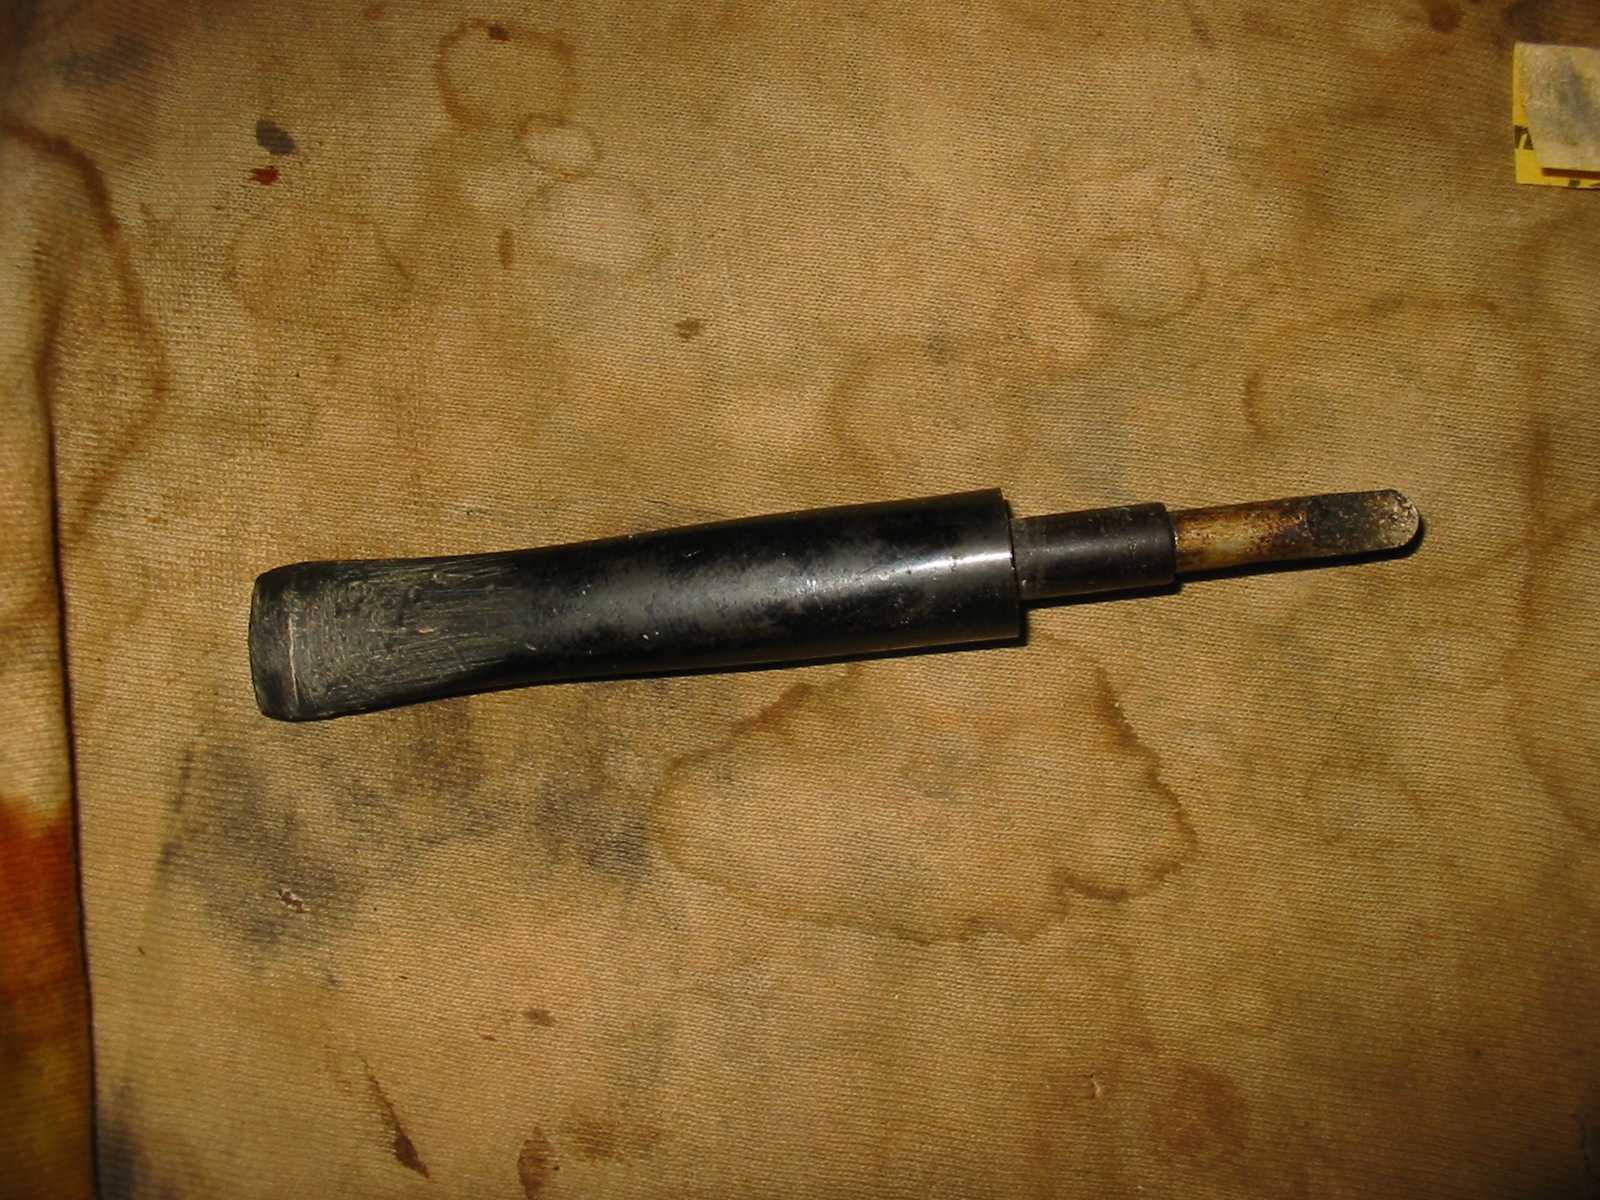
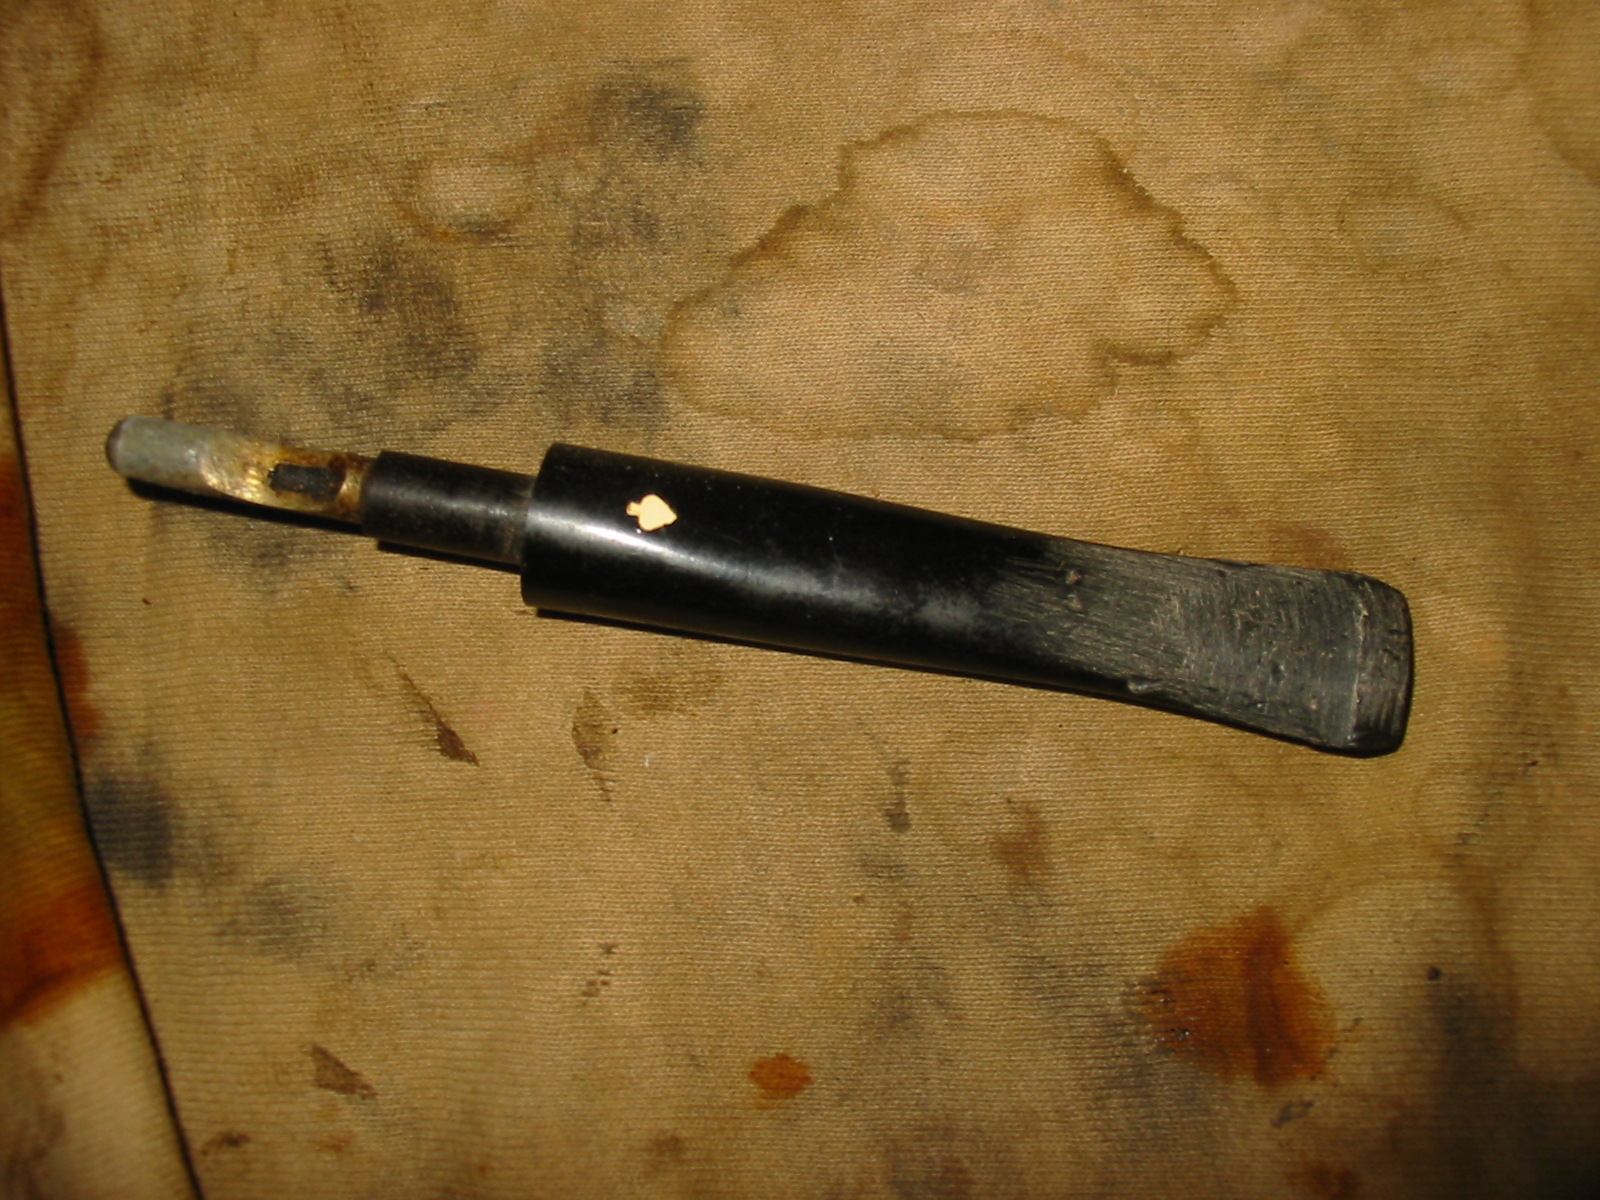
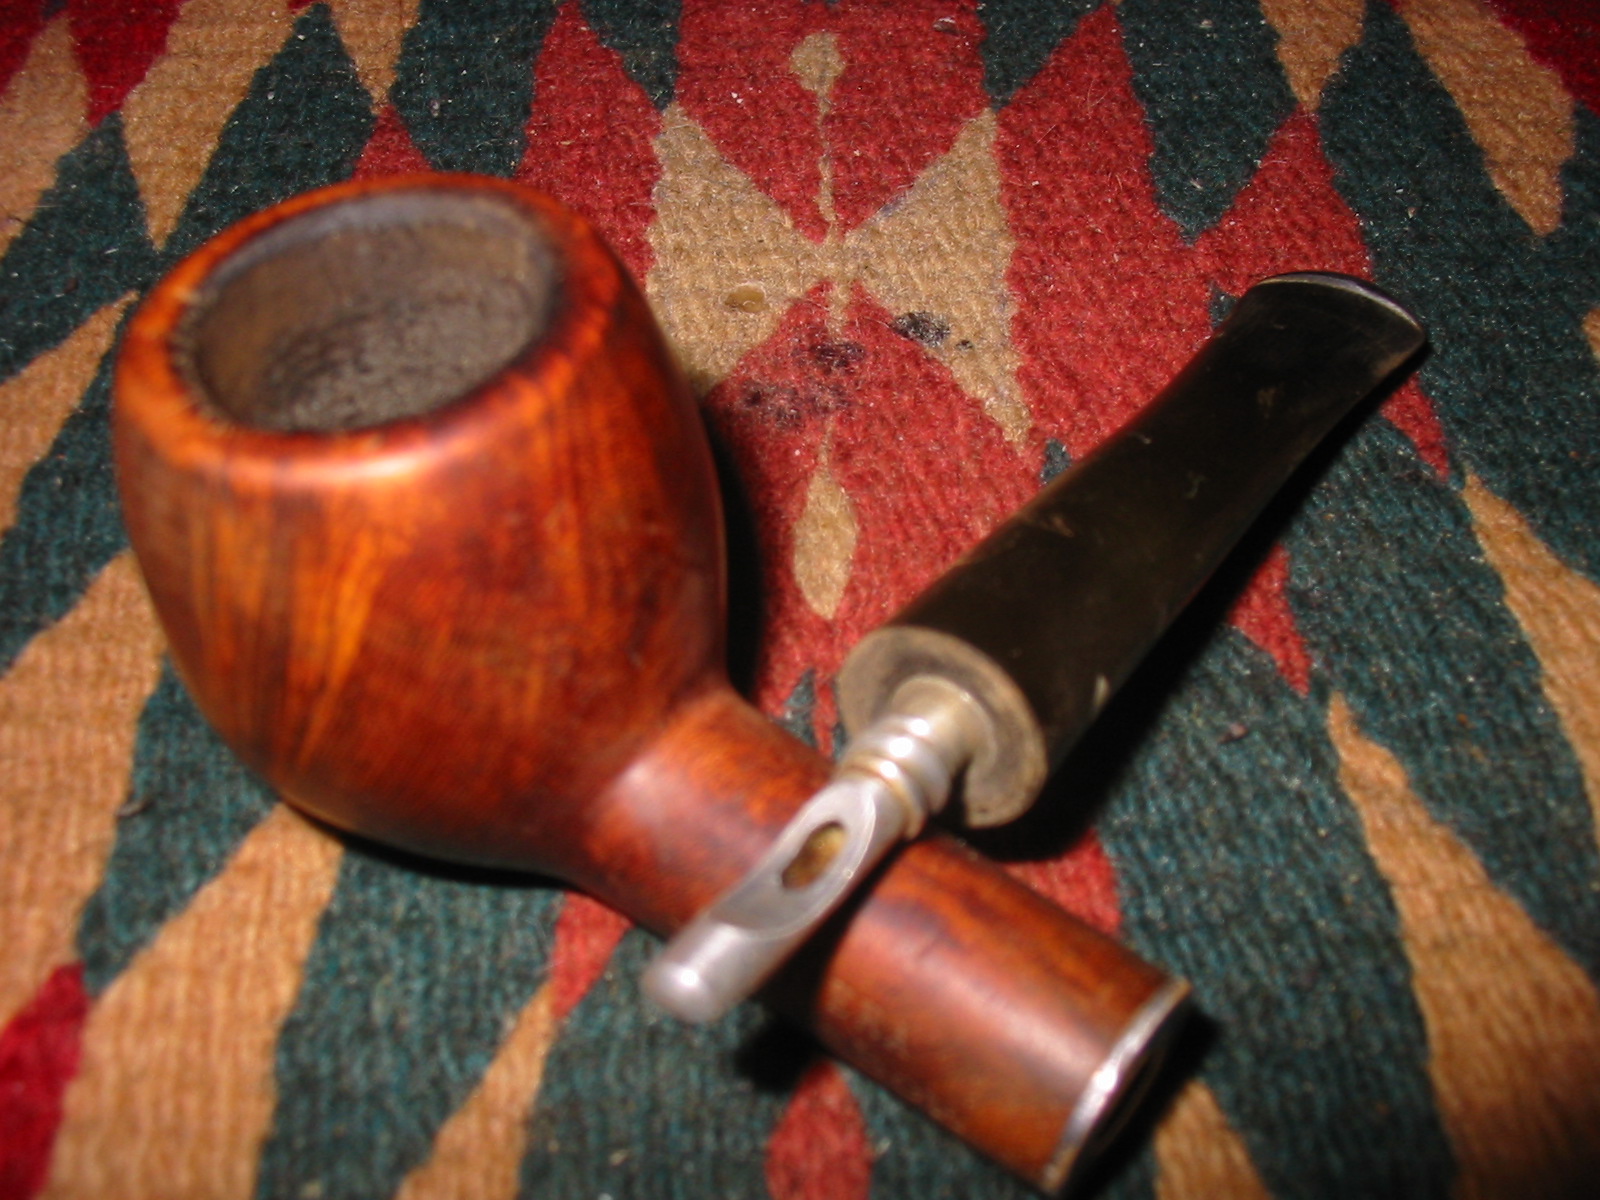
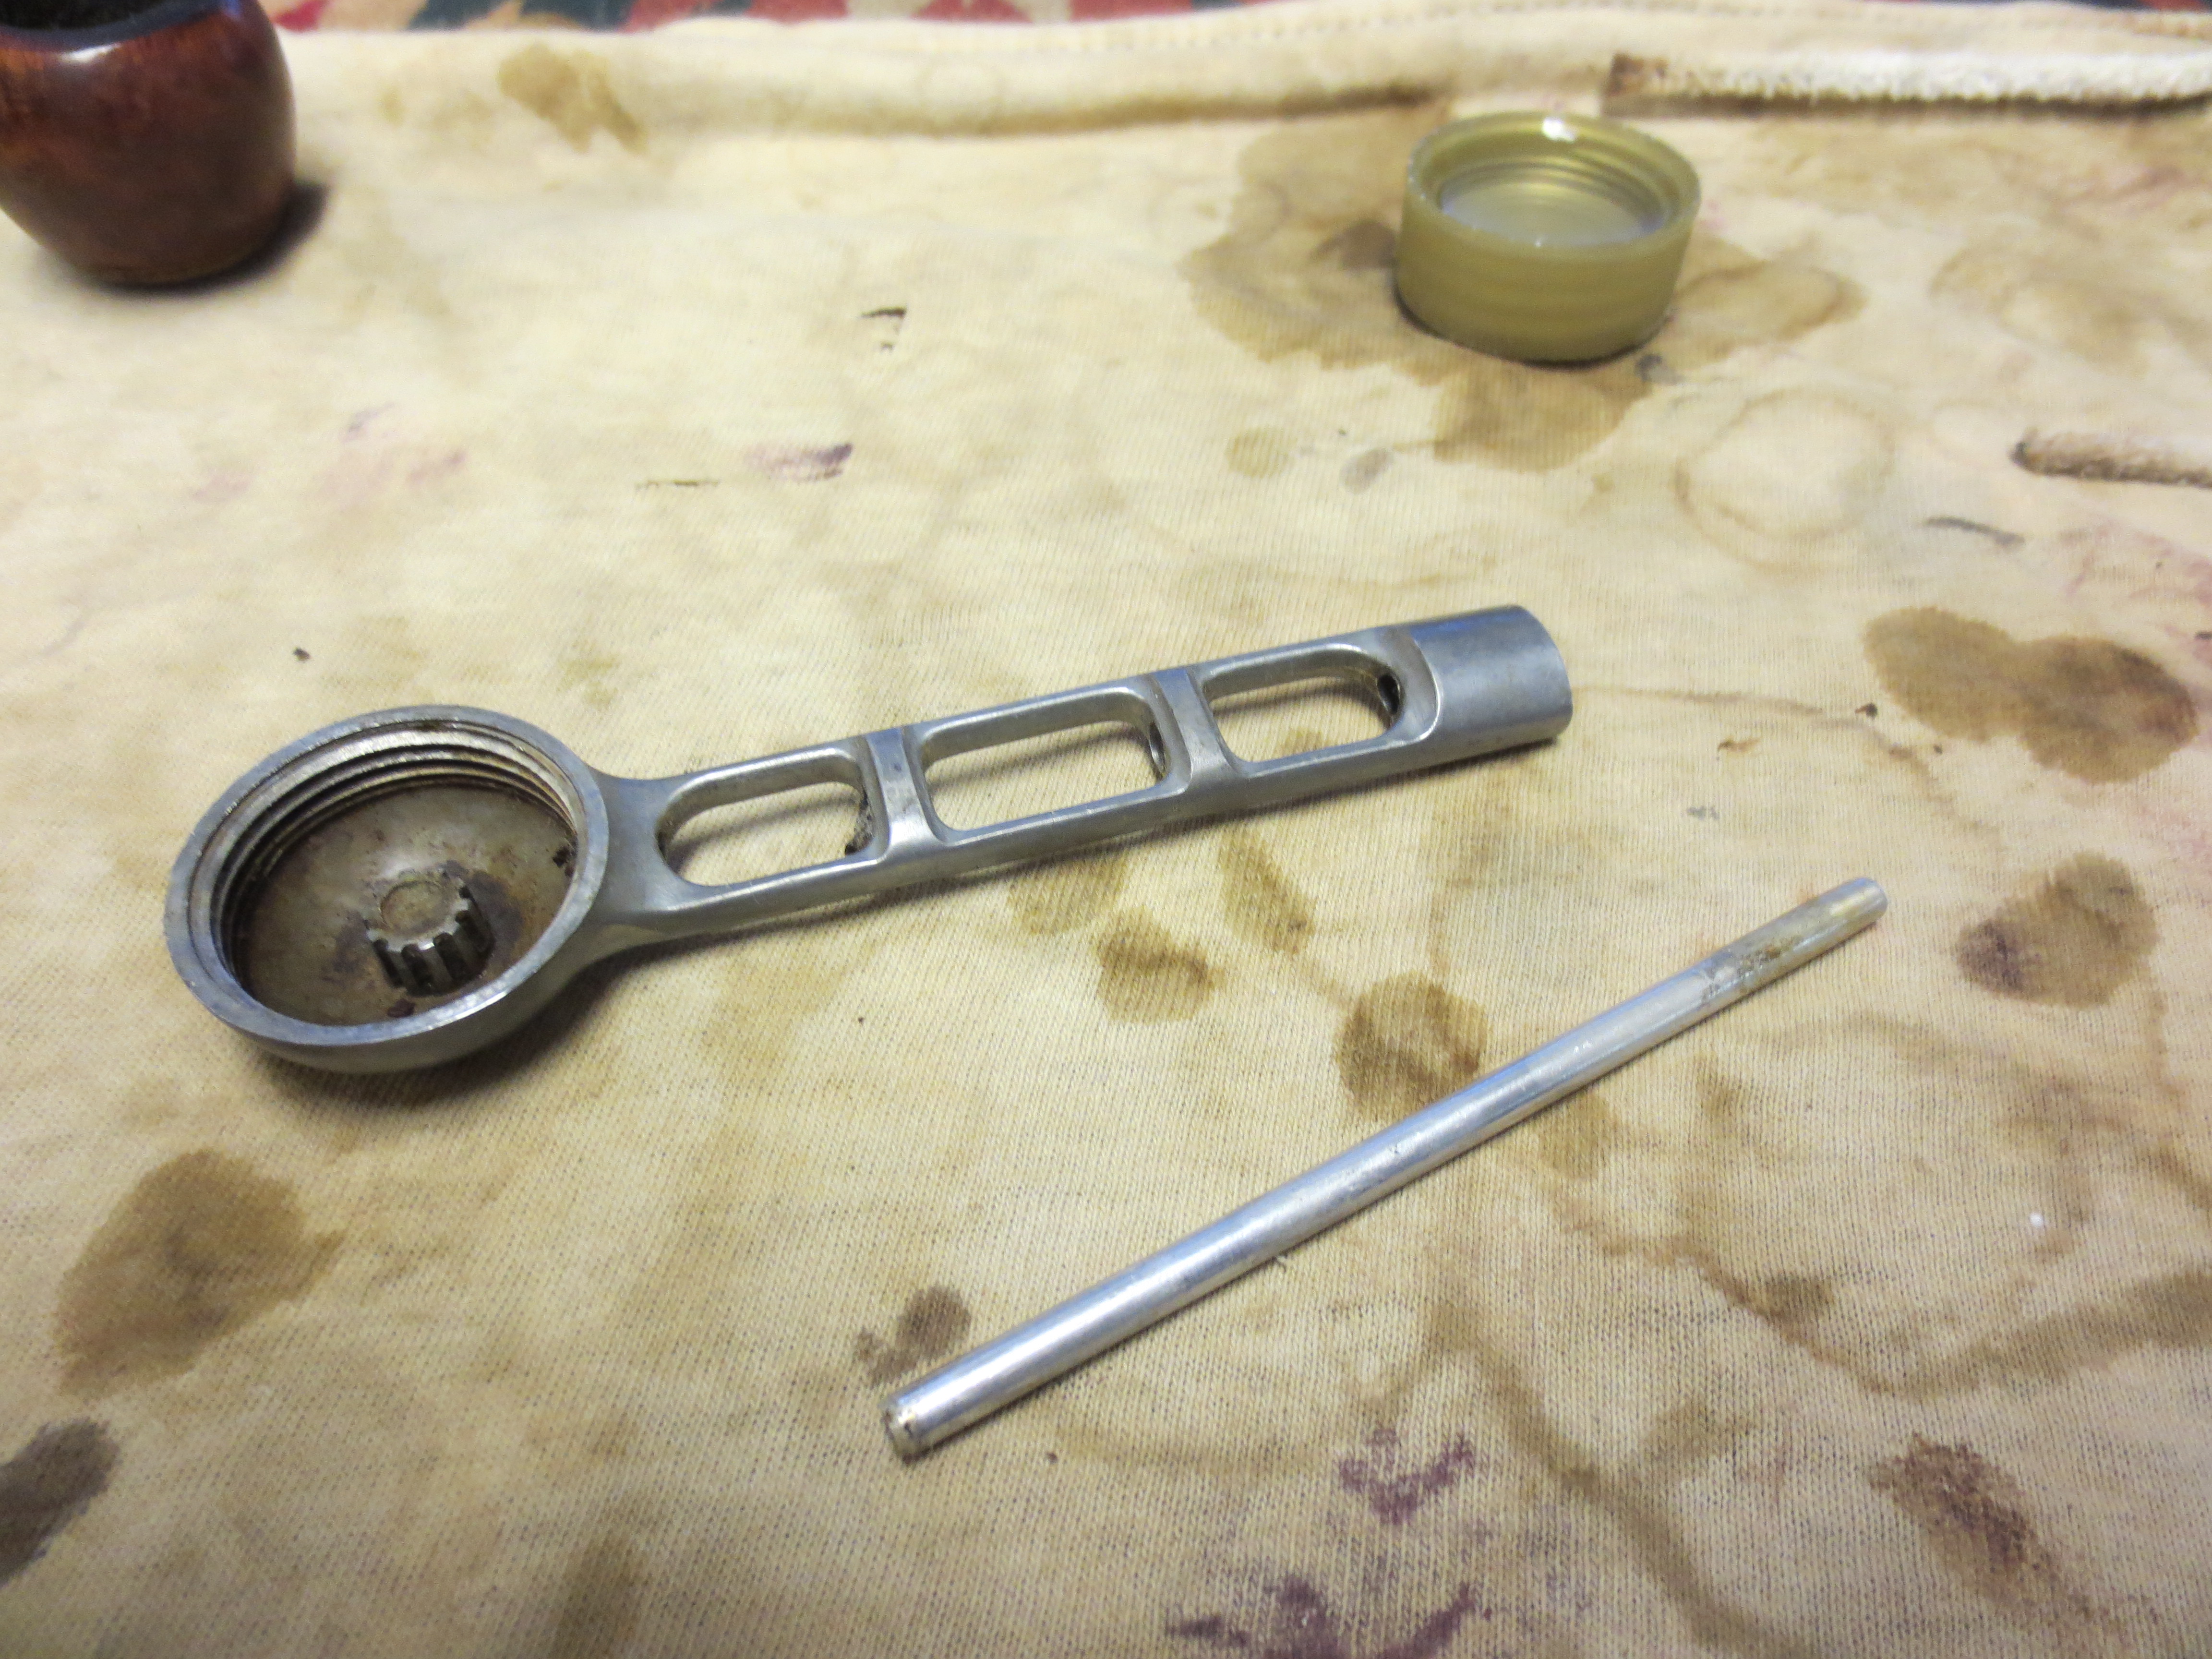
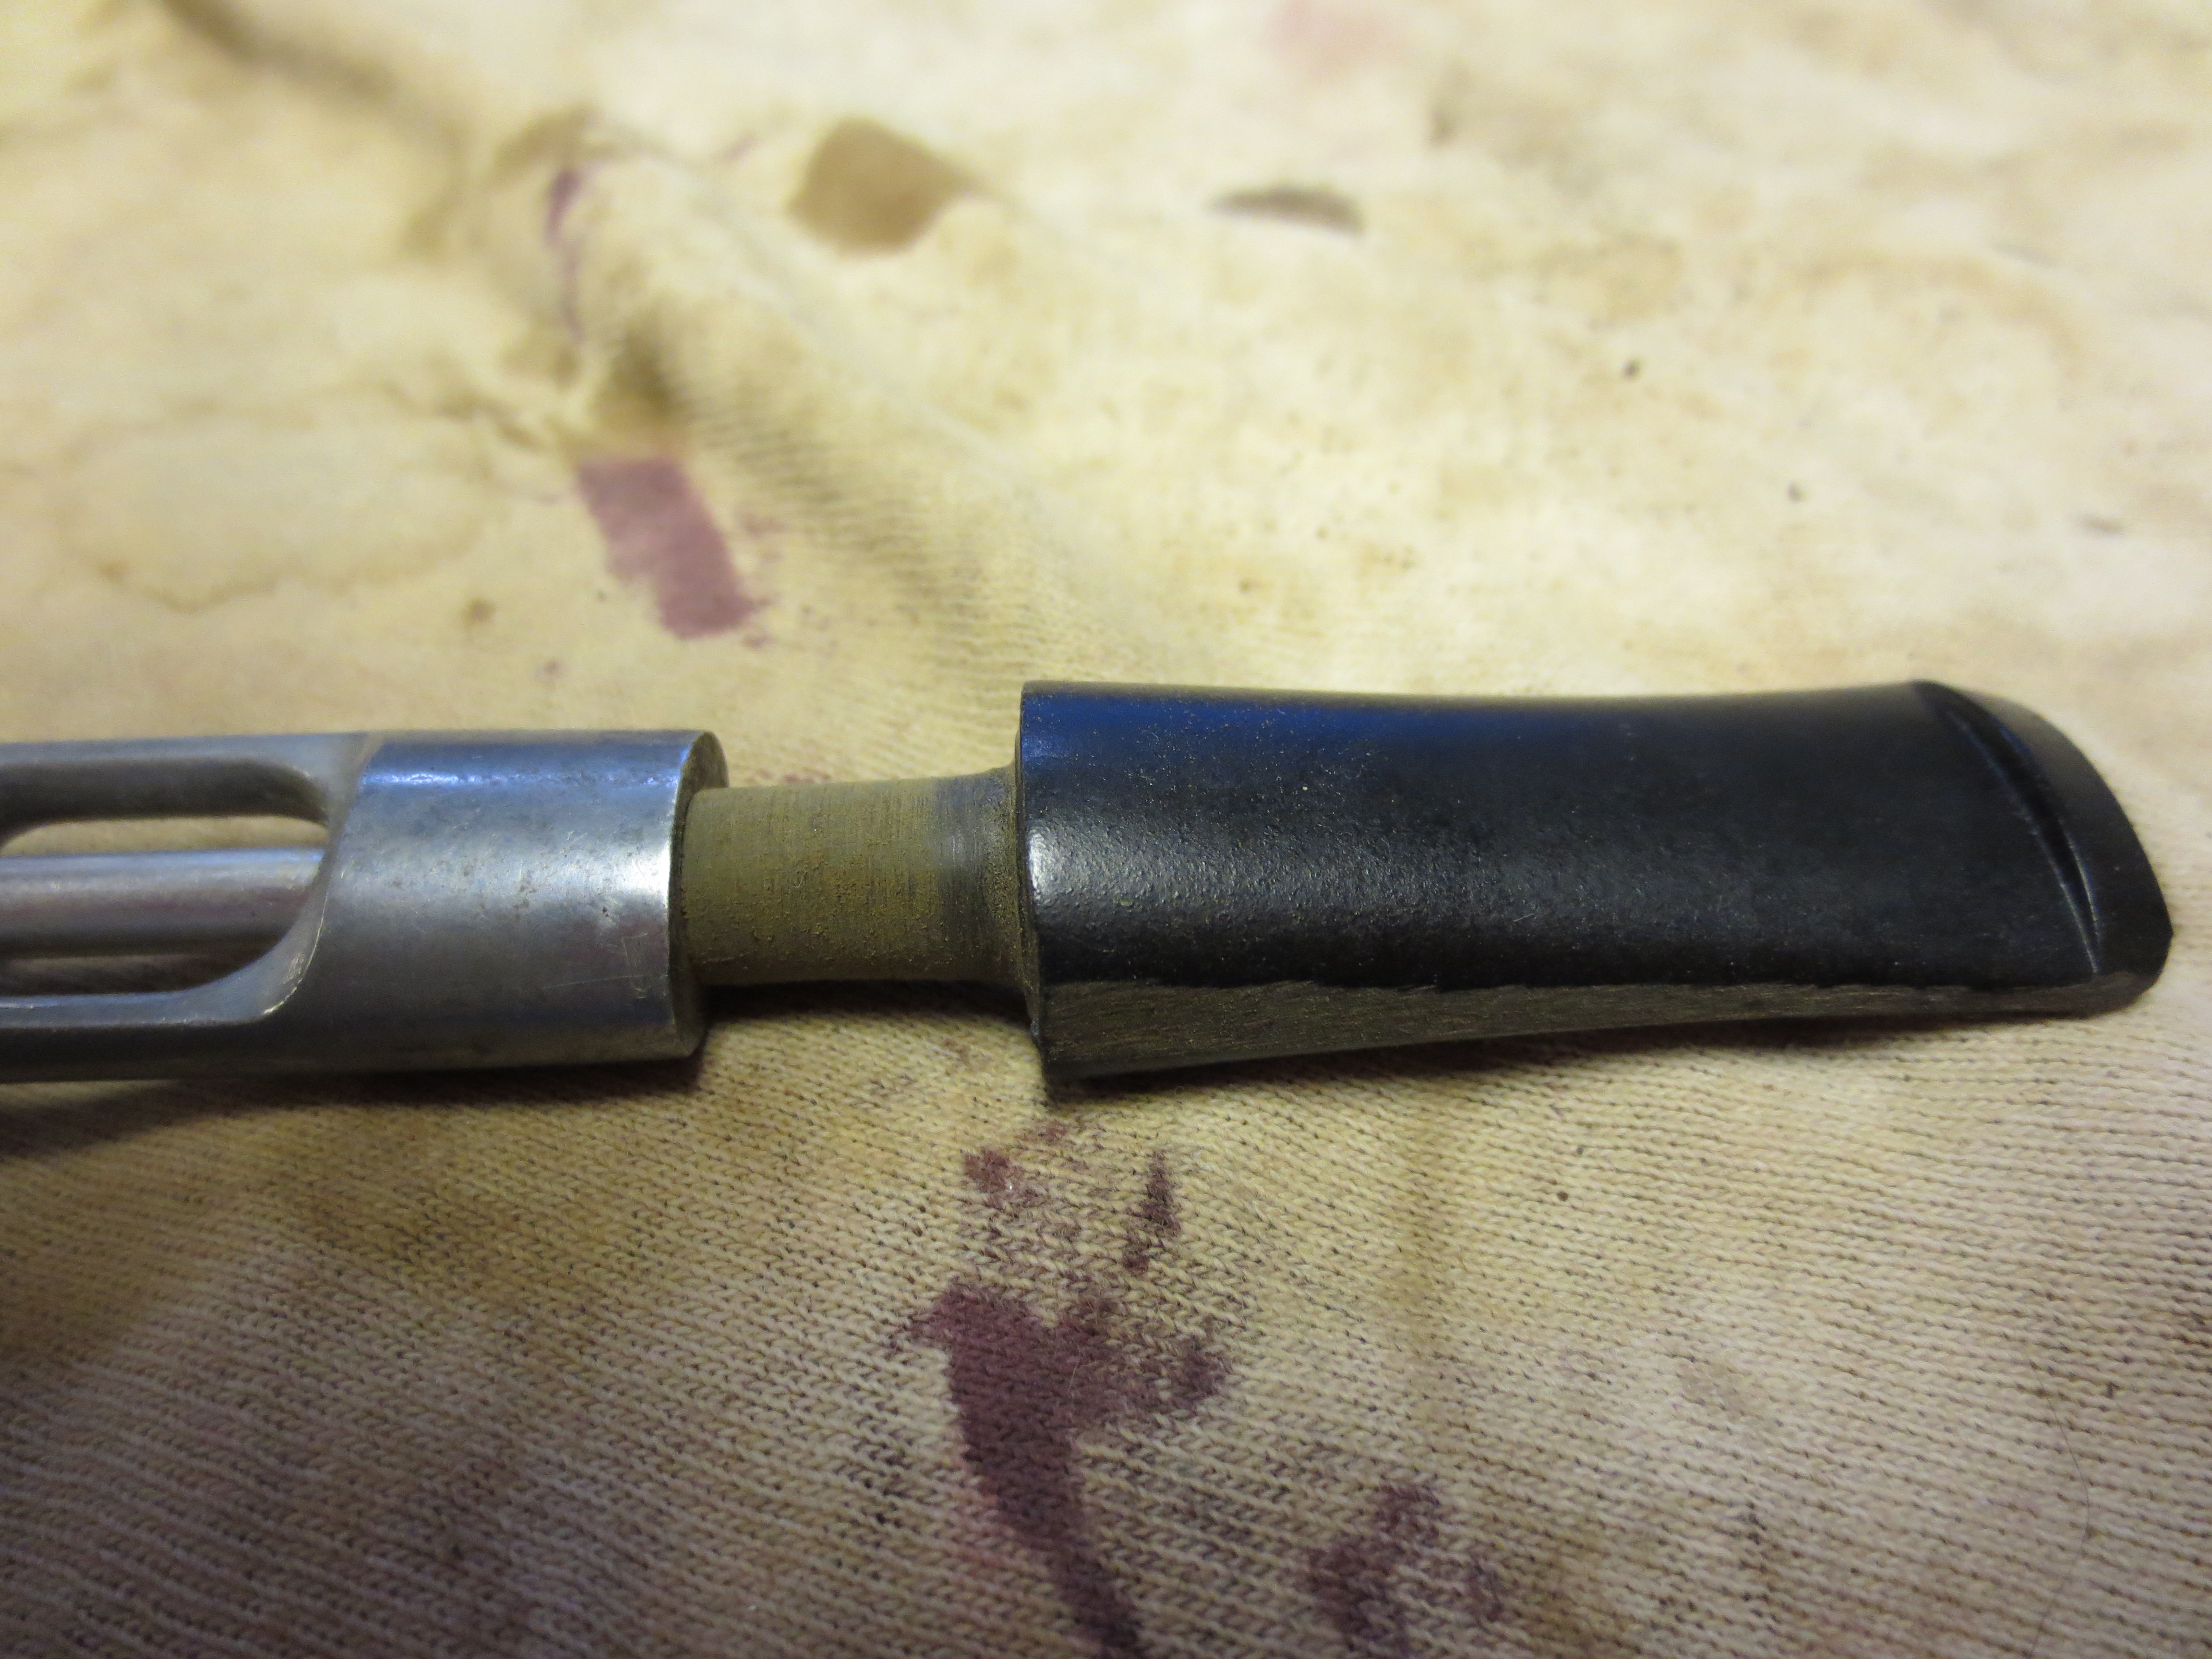
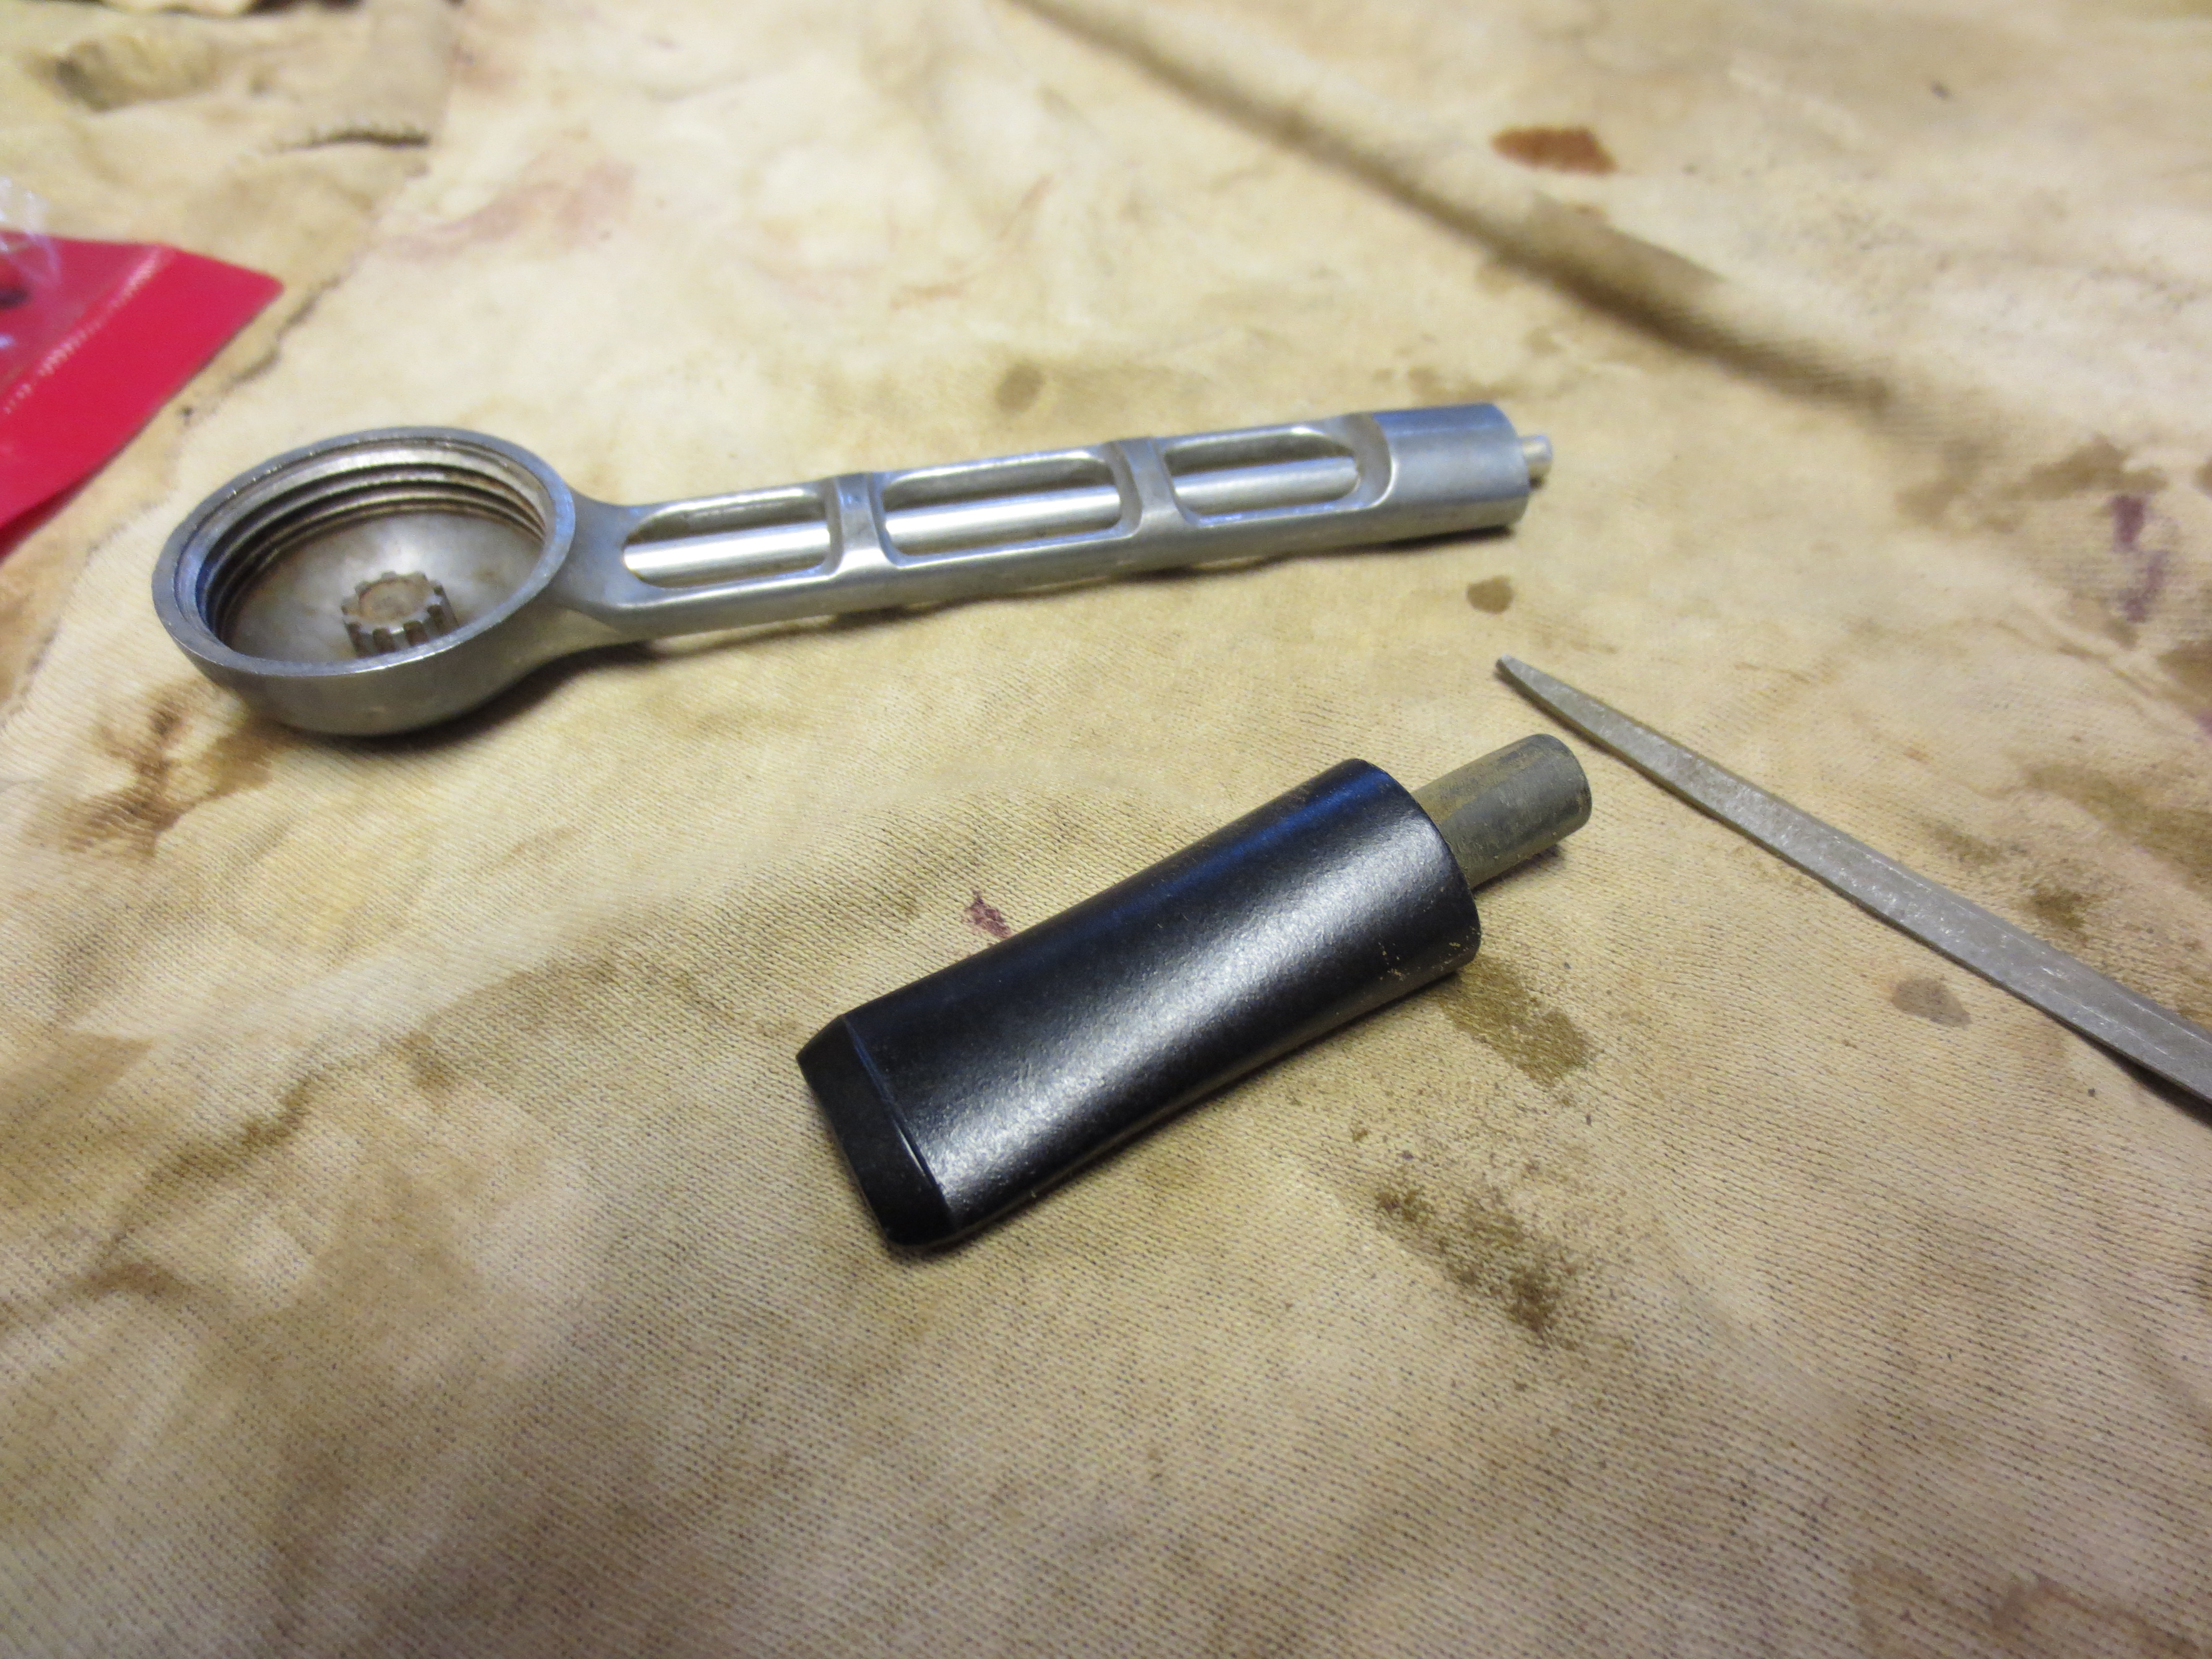
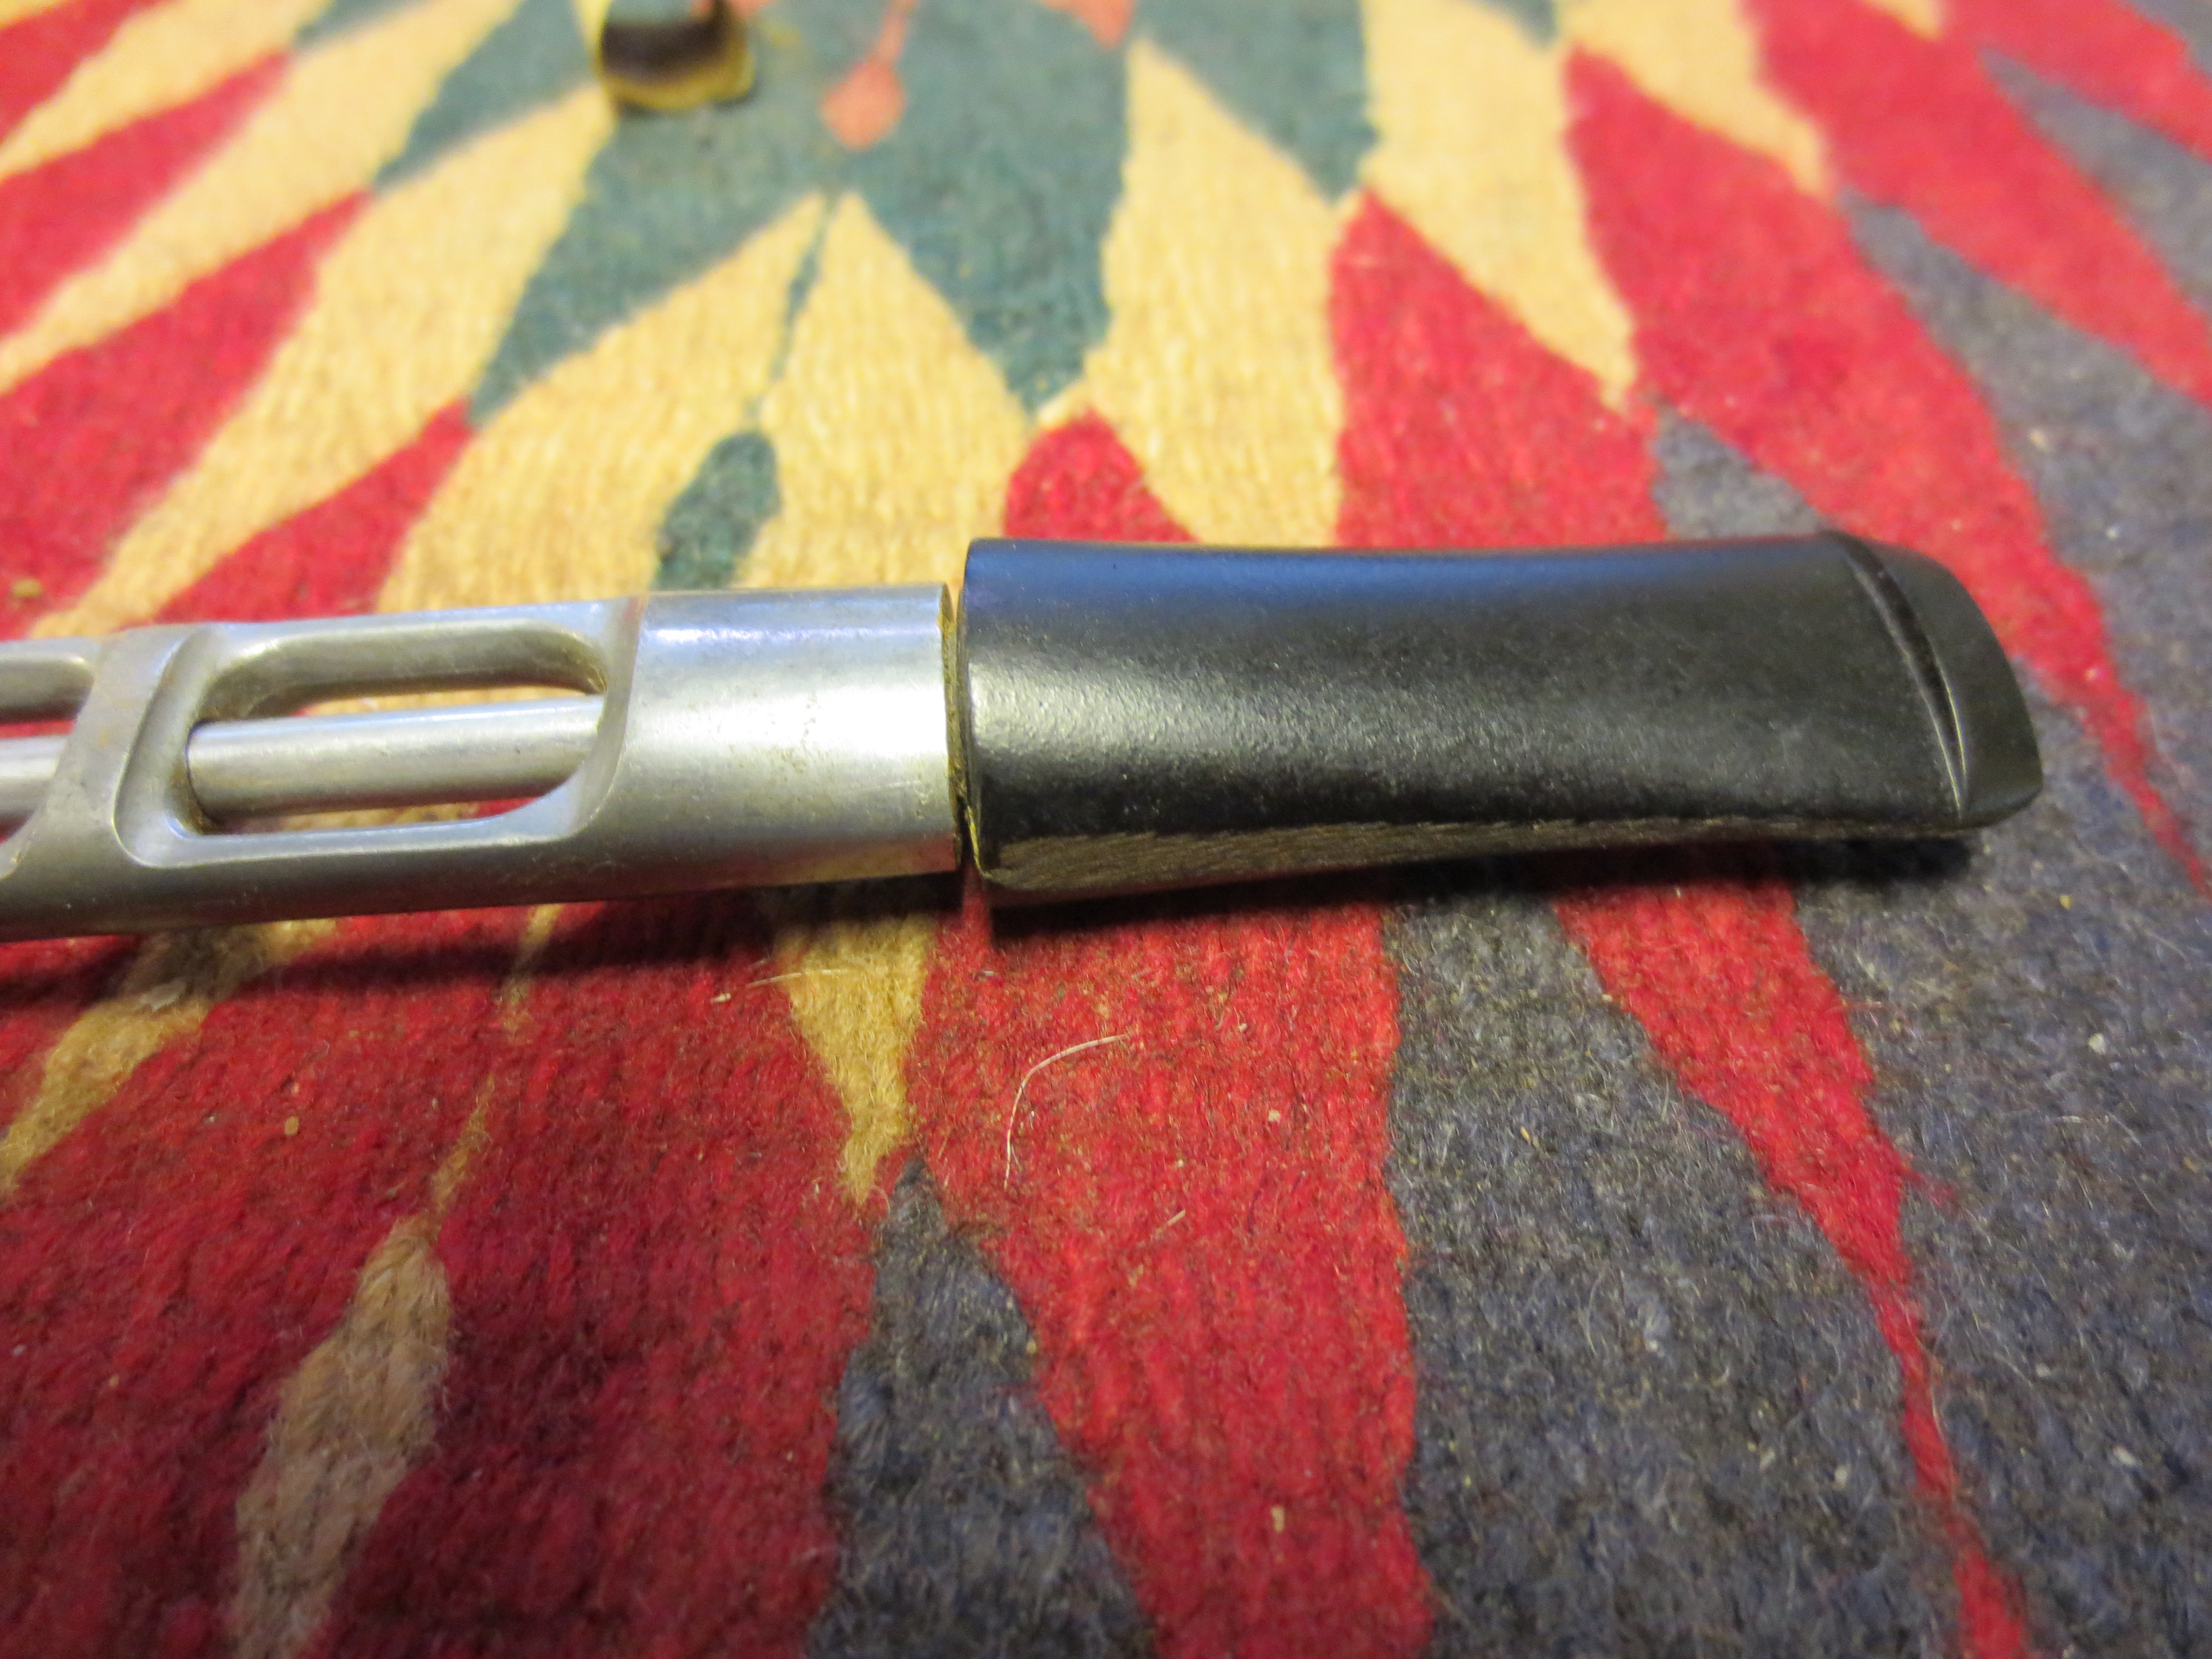
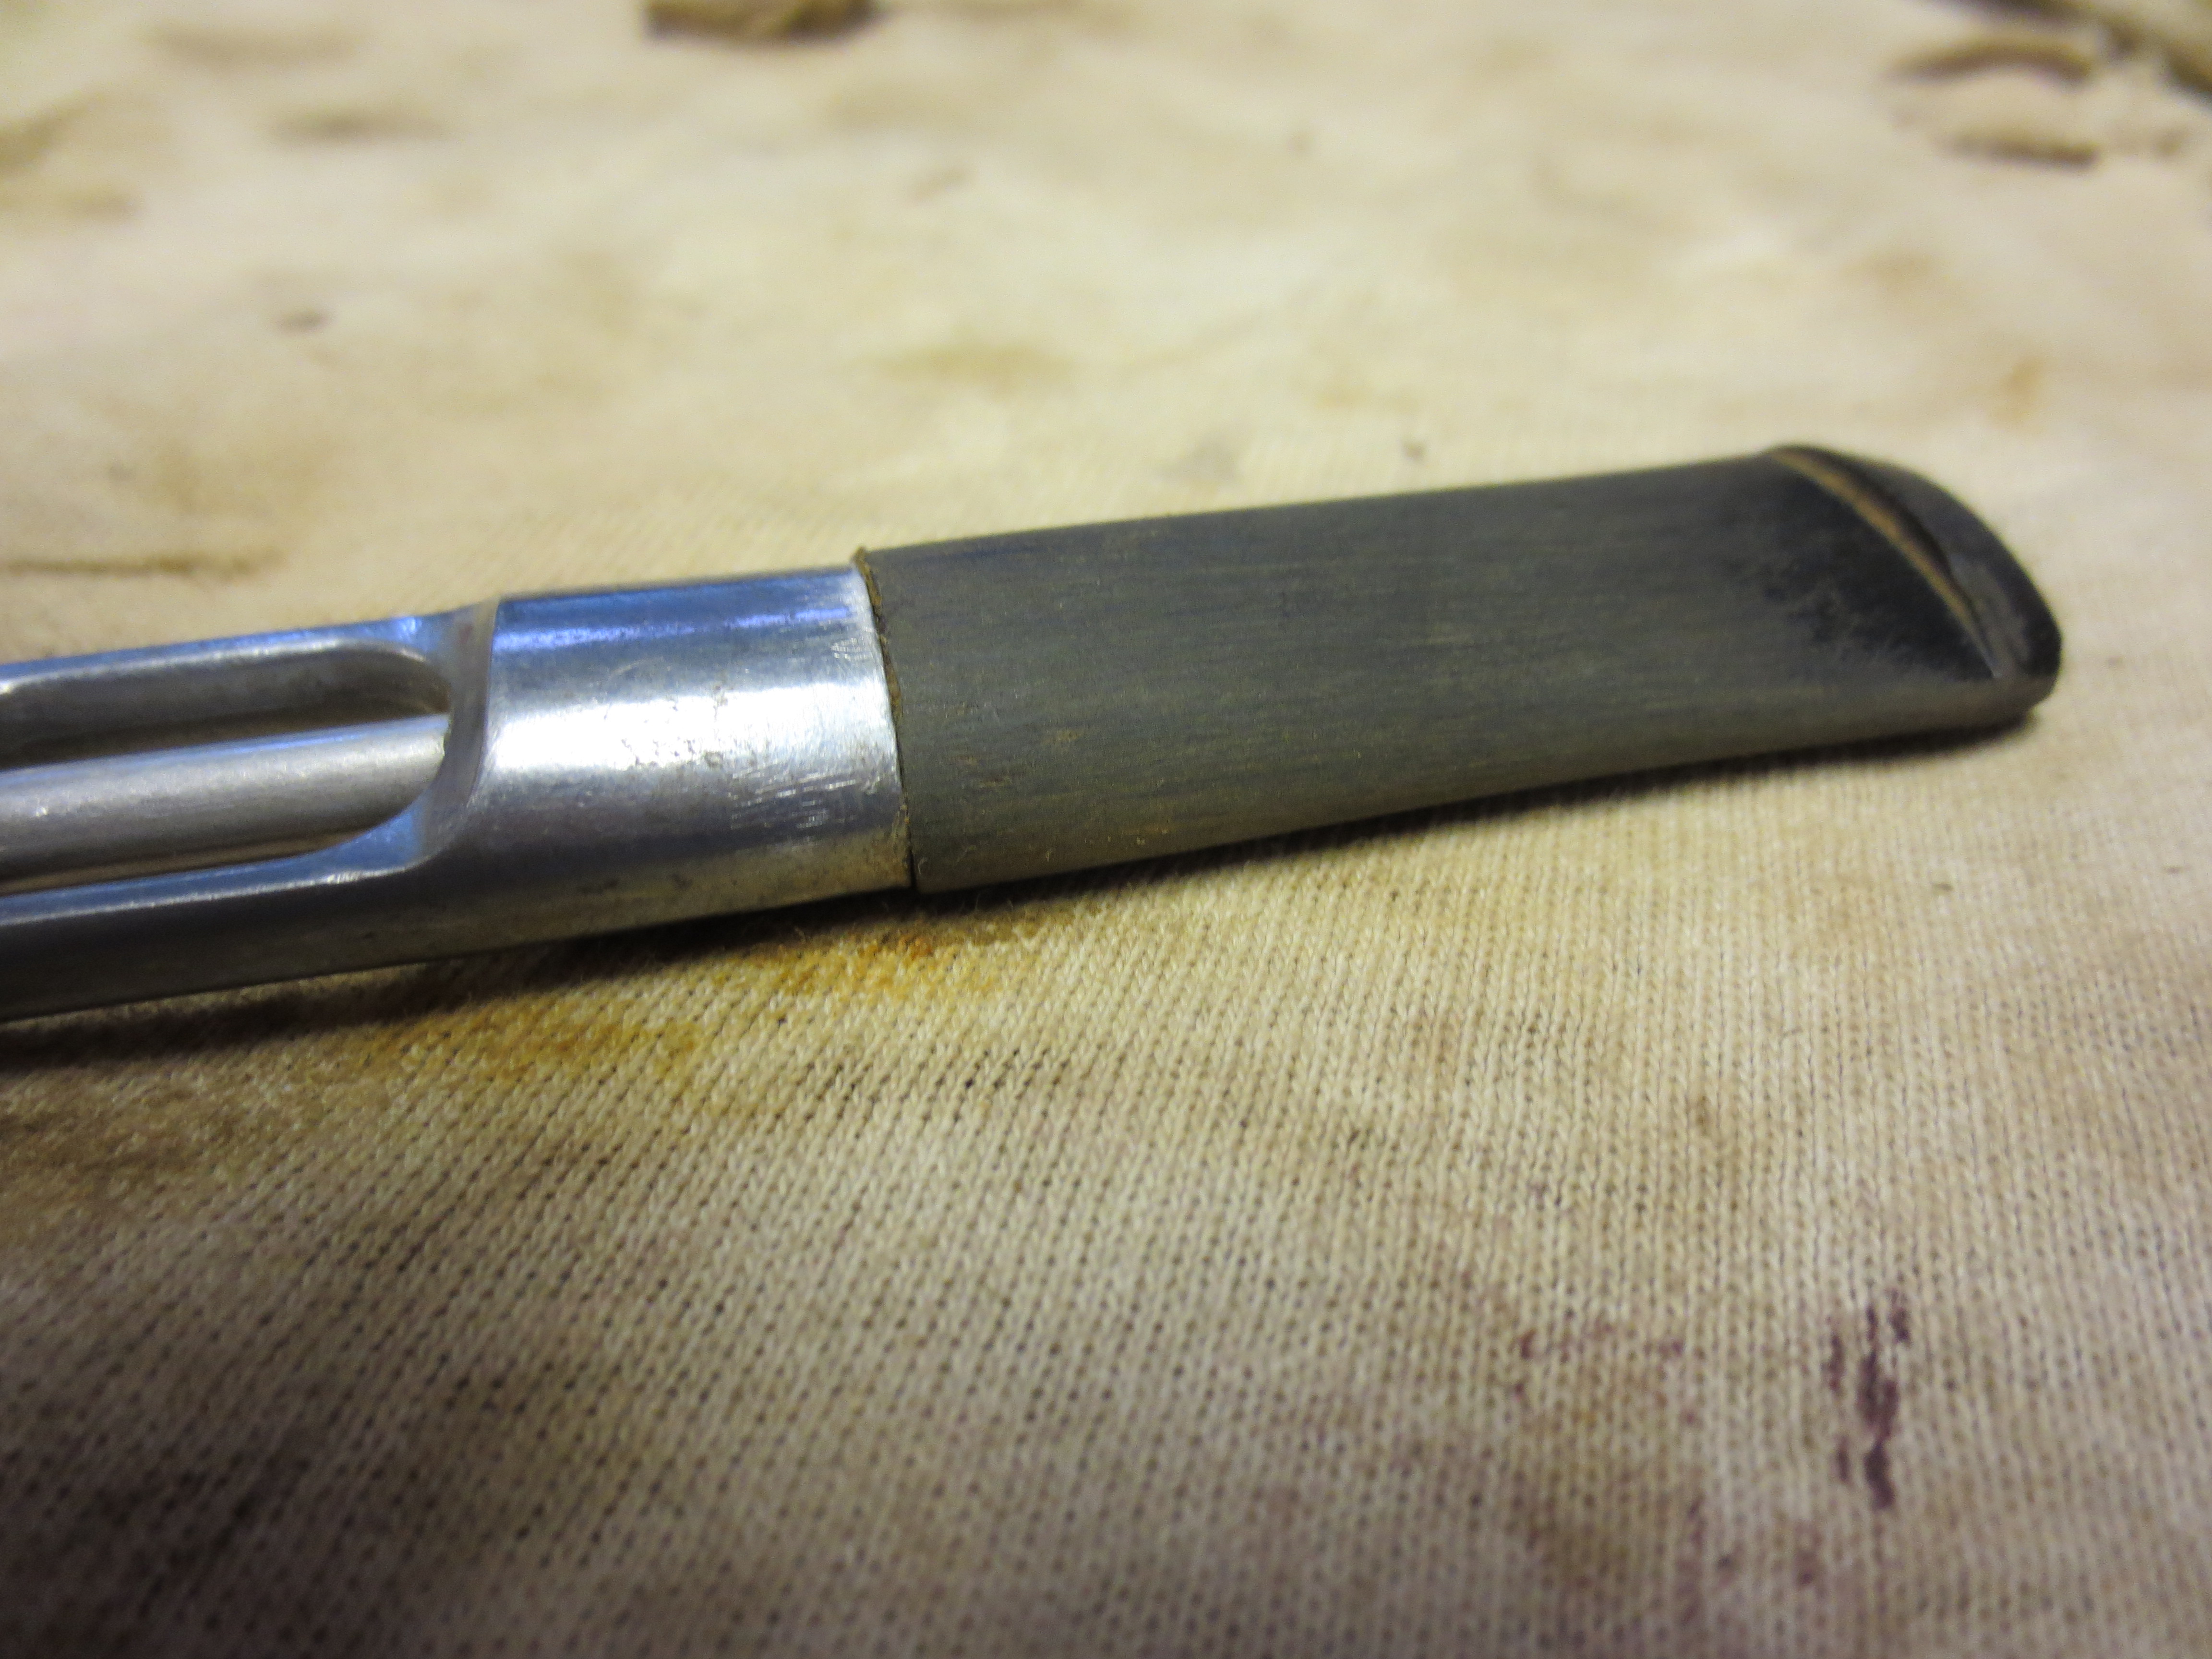
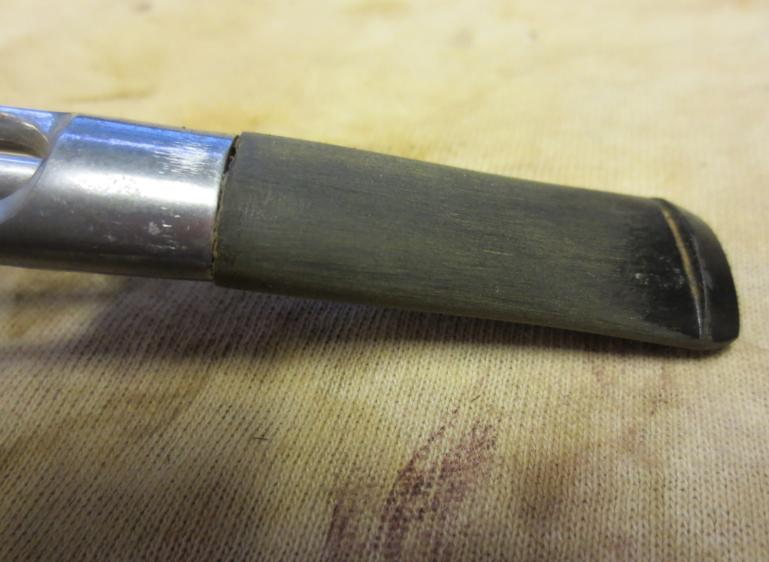
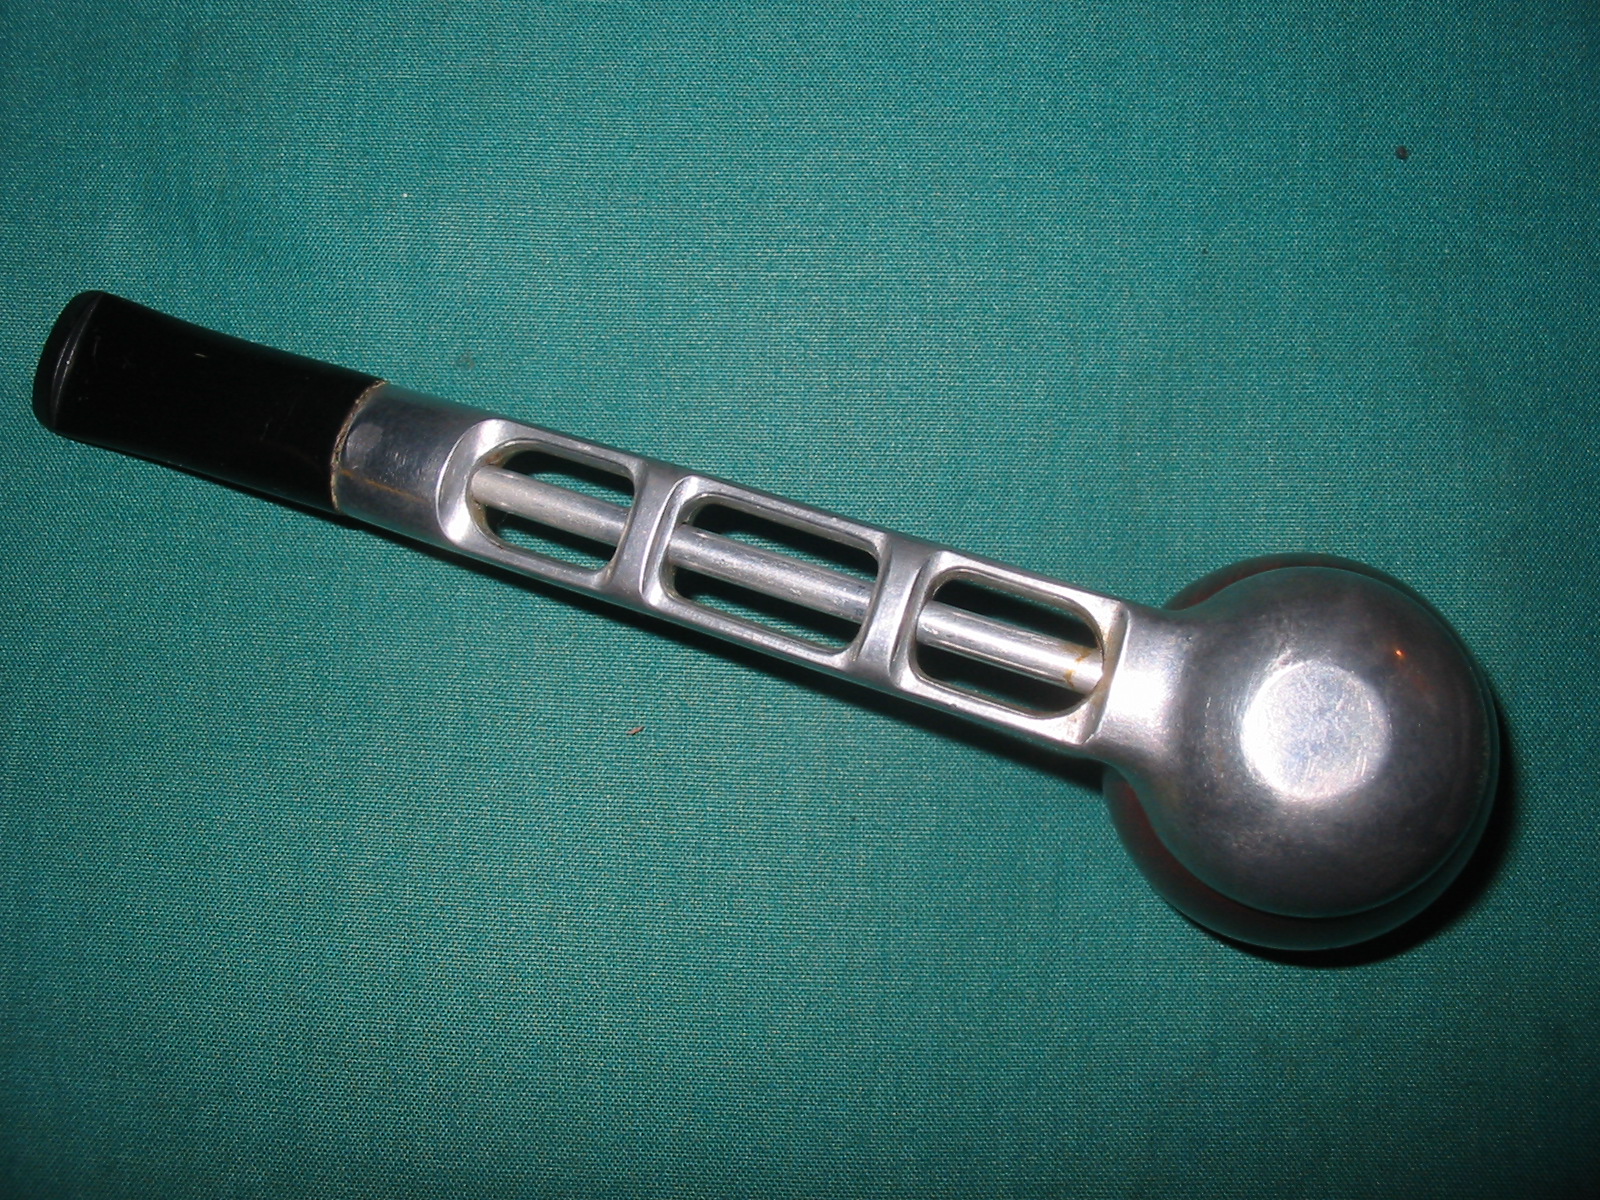
When I took the stem off the pipe it had the usual Dr. Grabow shovel stinger apparatus. This was a little unique in that it was not inserted into the metal tenon but was an integral part of the tenon. The two were cast together which made removing it impossible. It was covered in tars and in a tobacco coloured lacquer that was rock hard.Dr6 
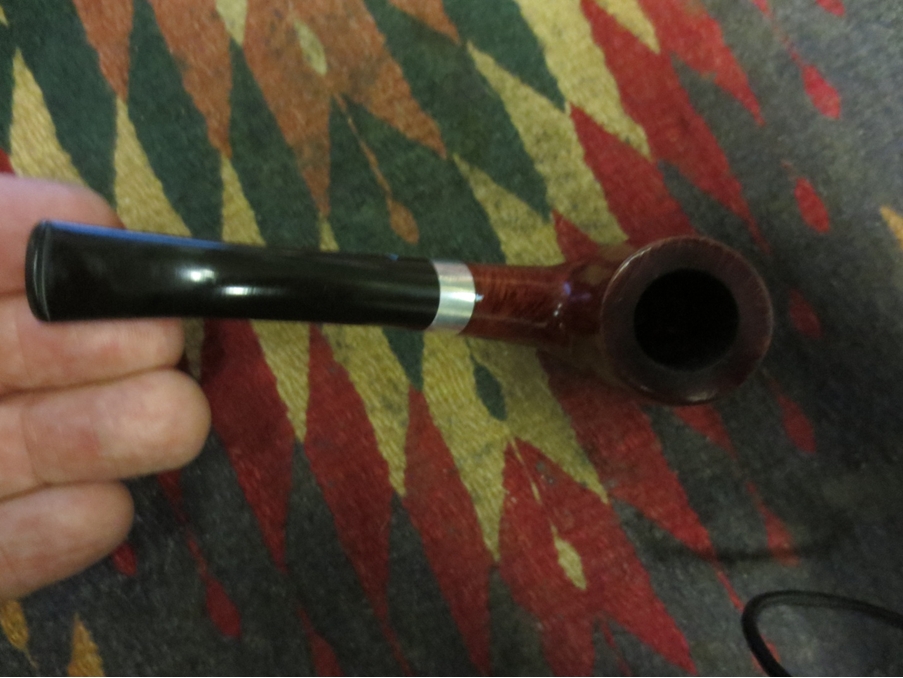
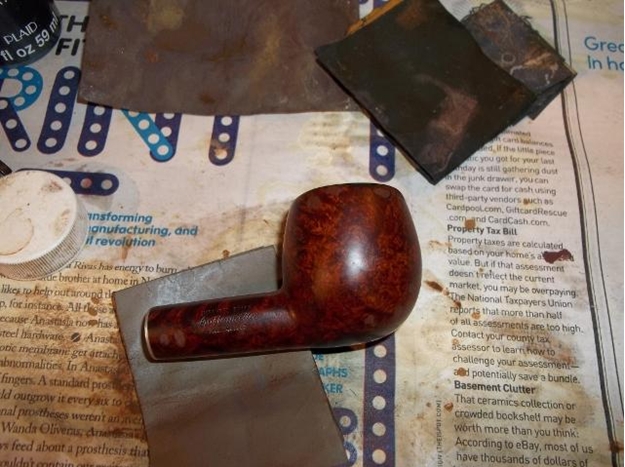
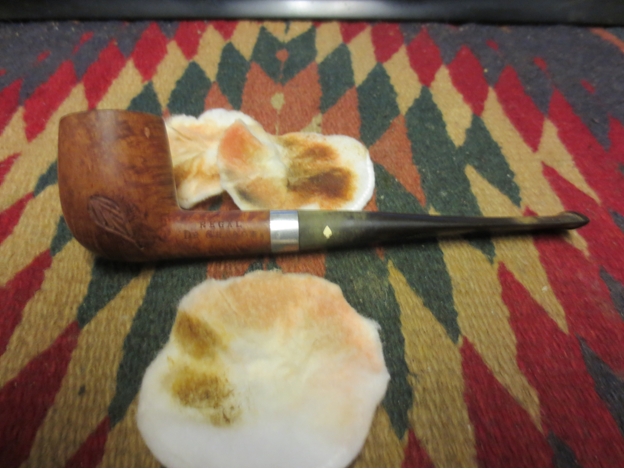
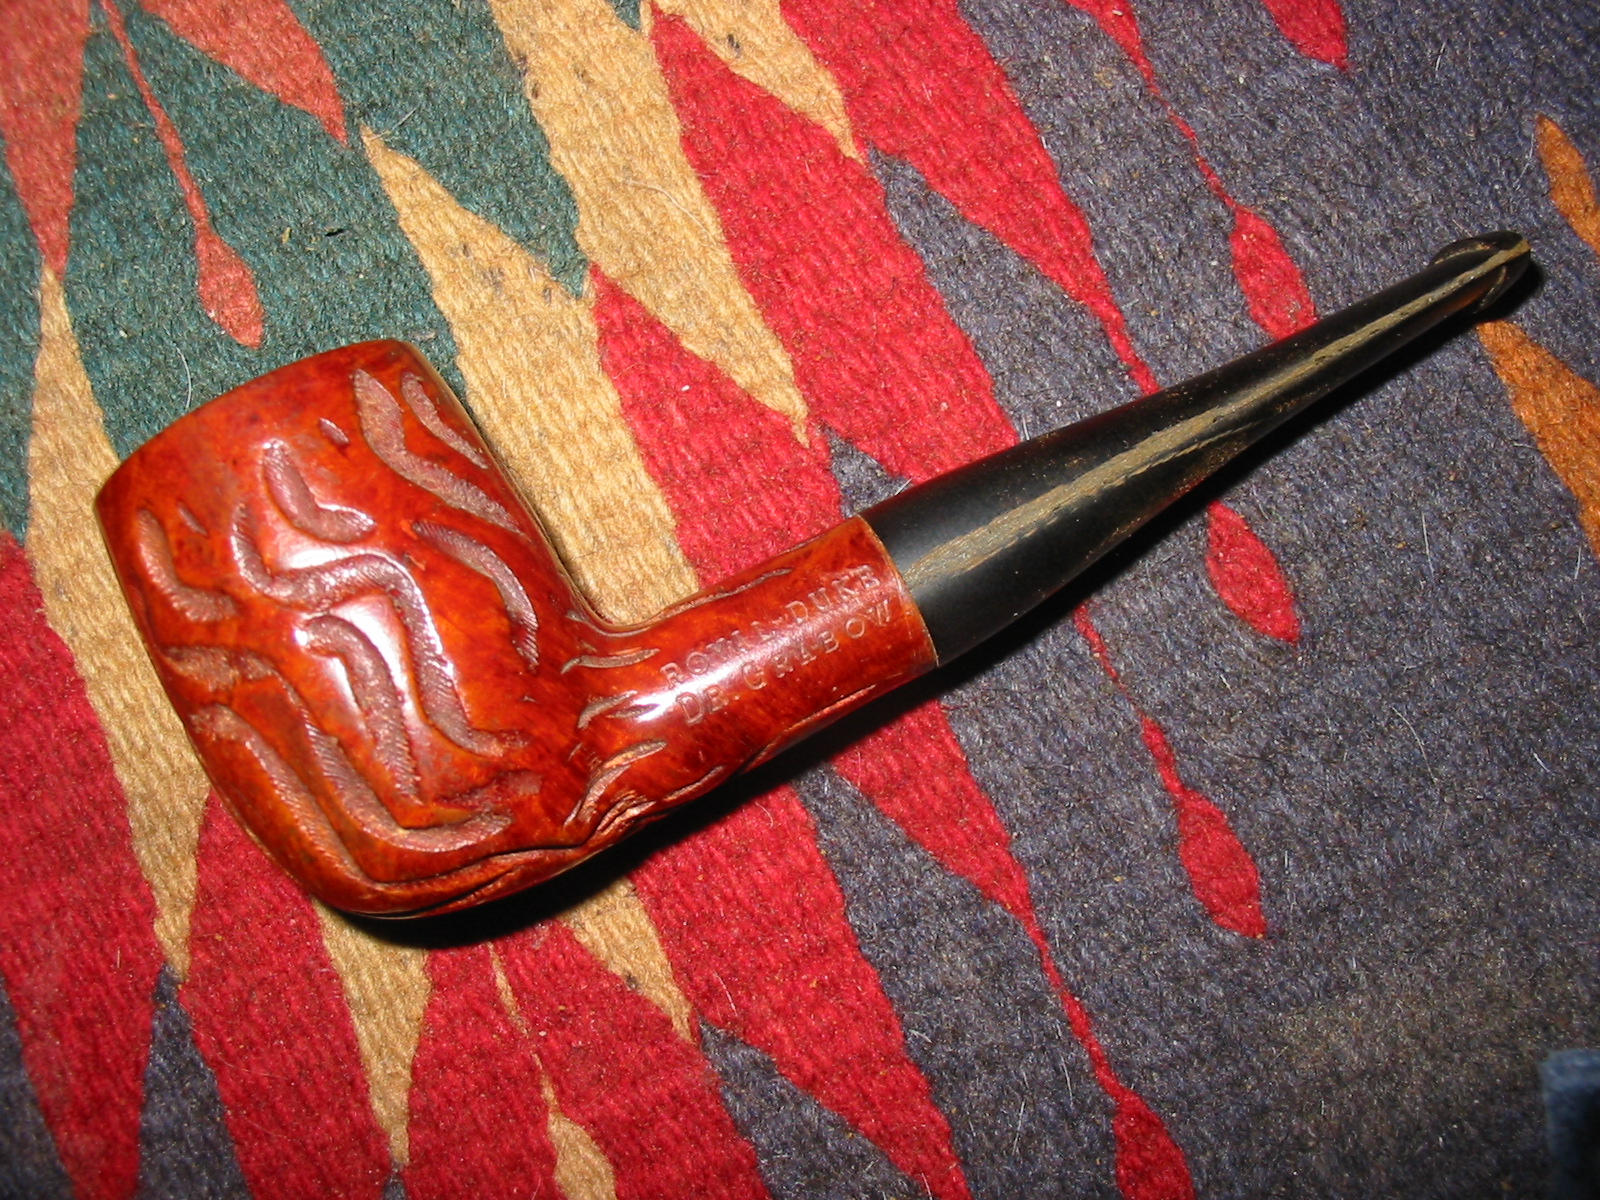
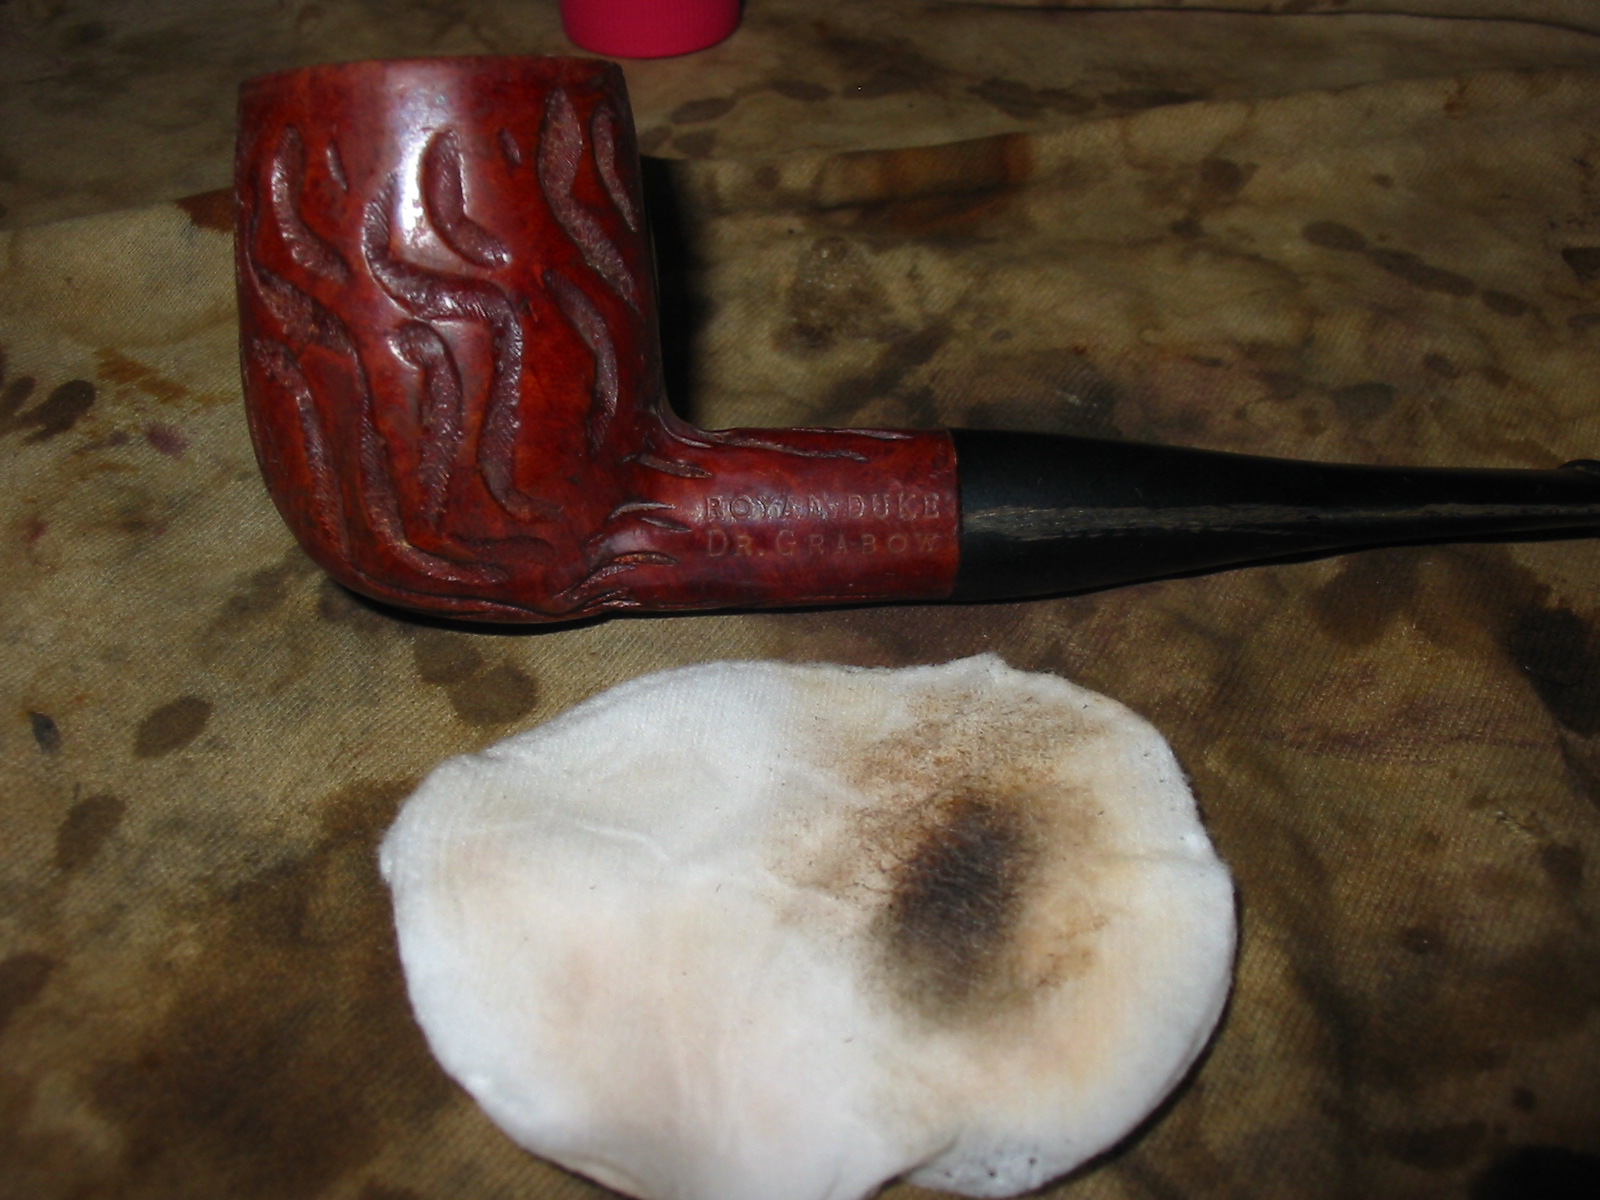
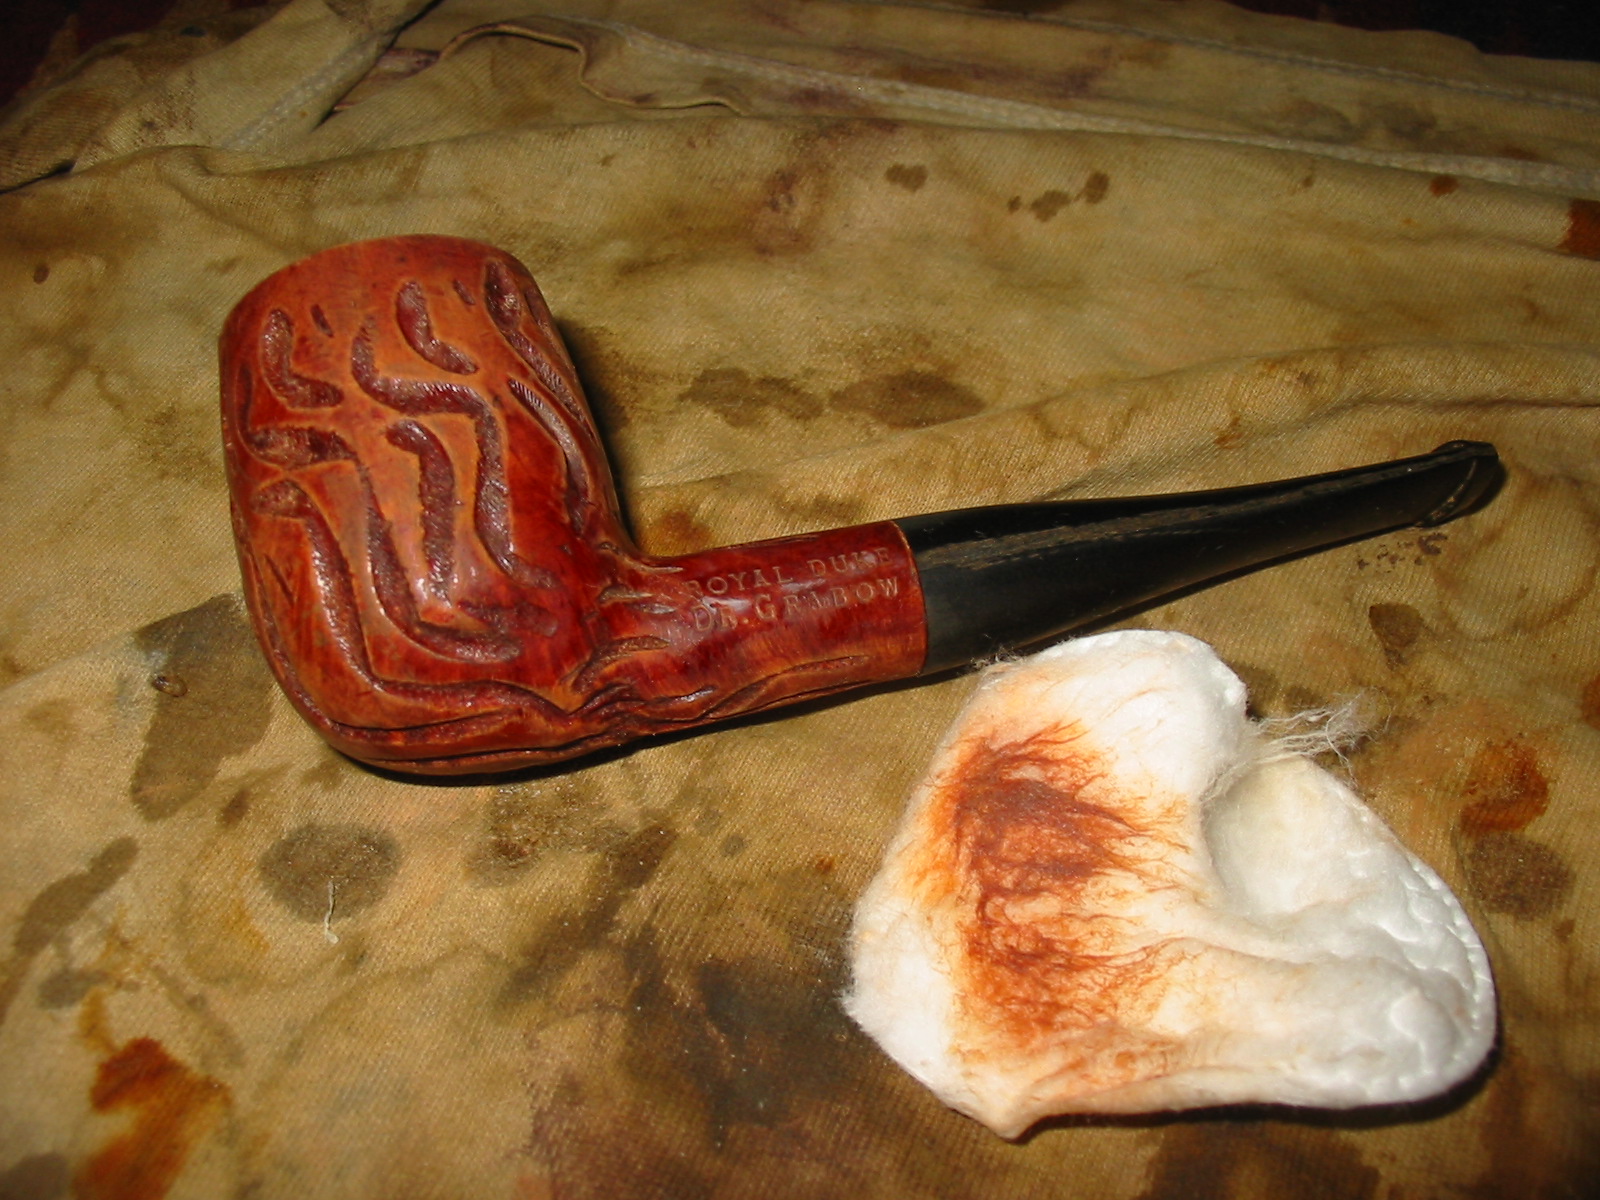
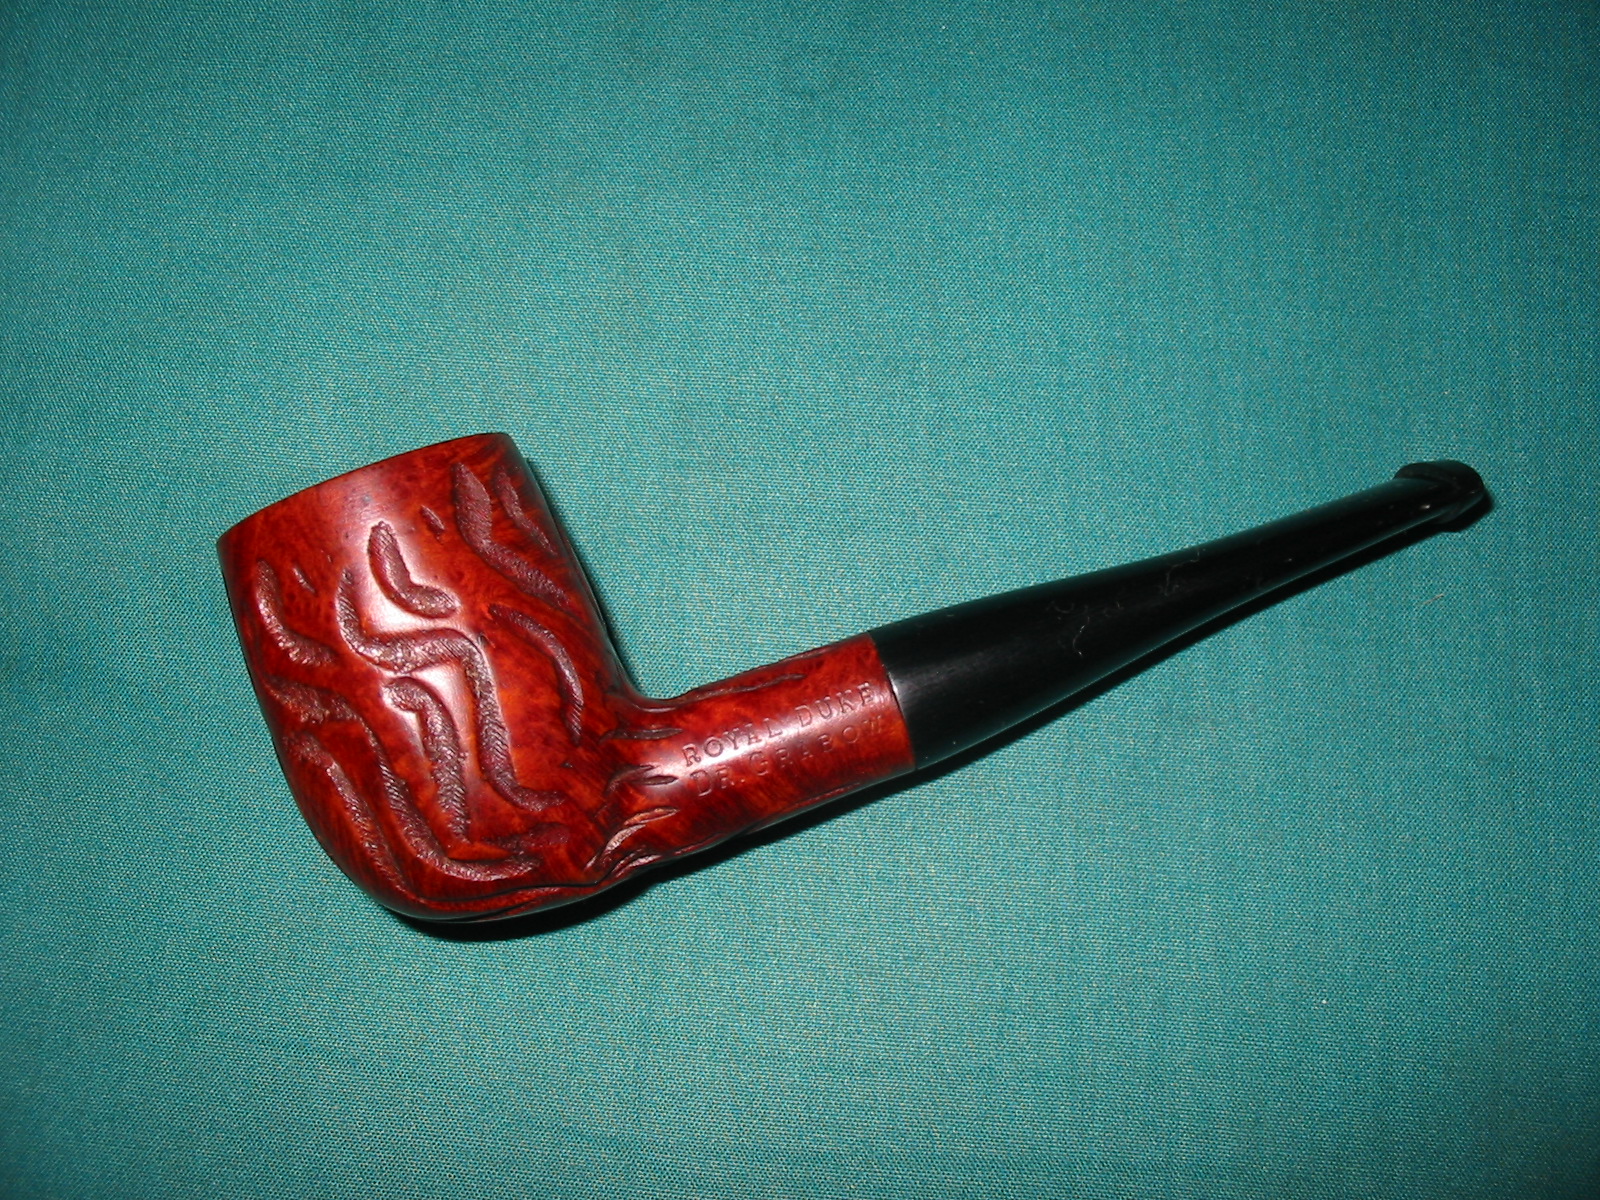
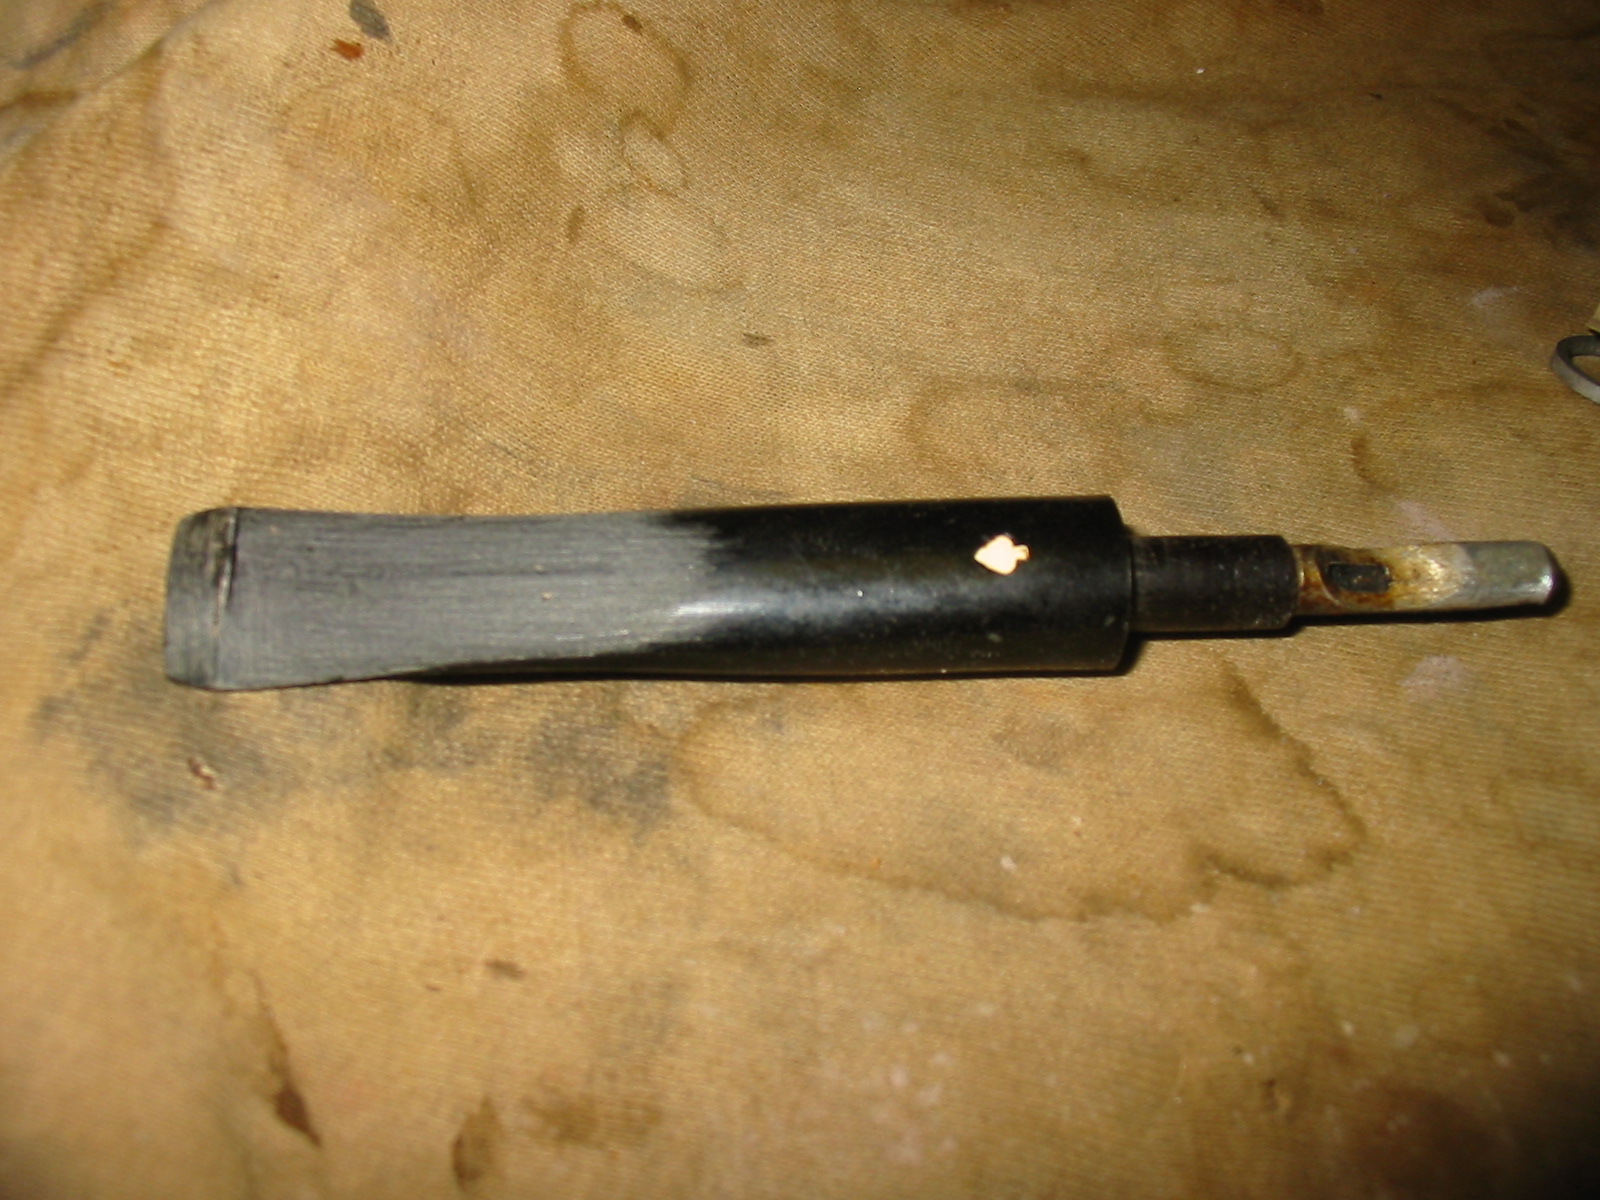
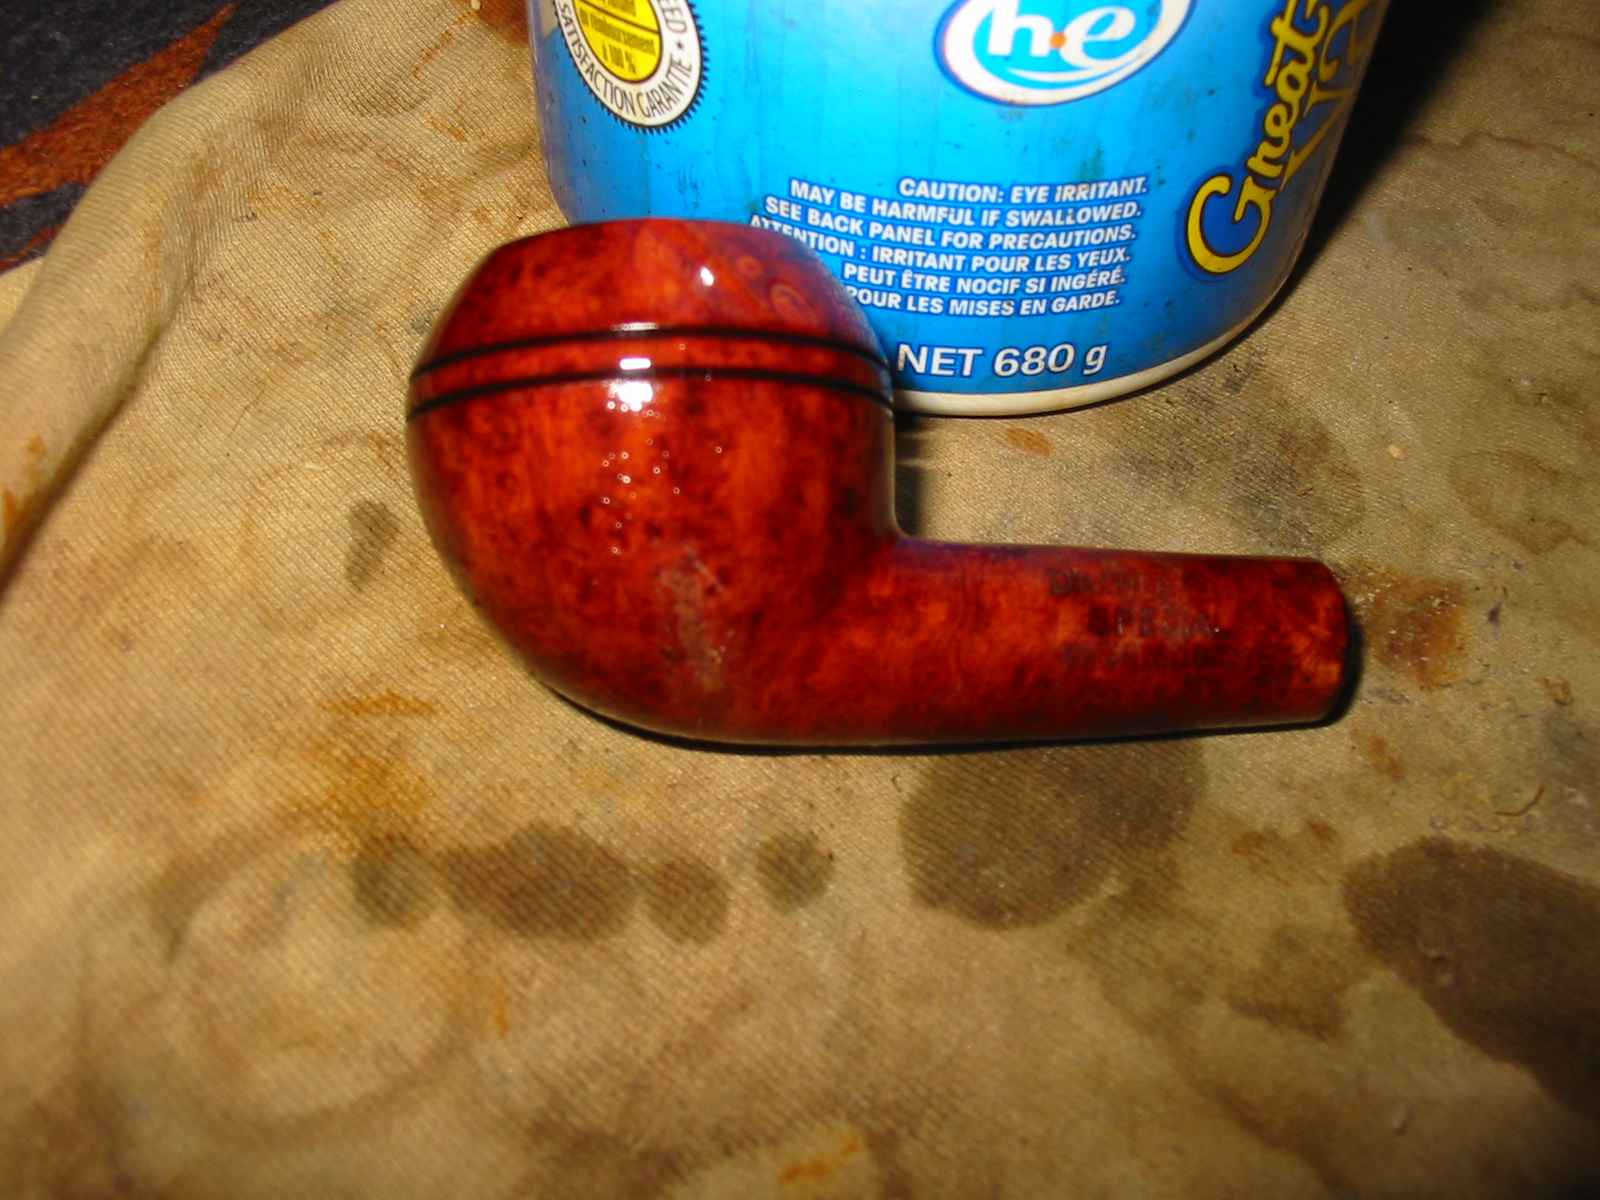
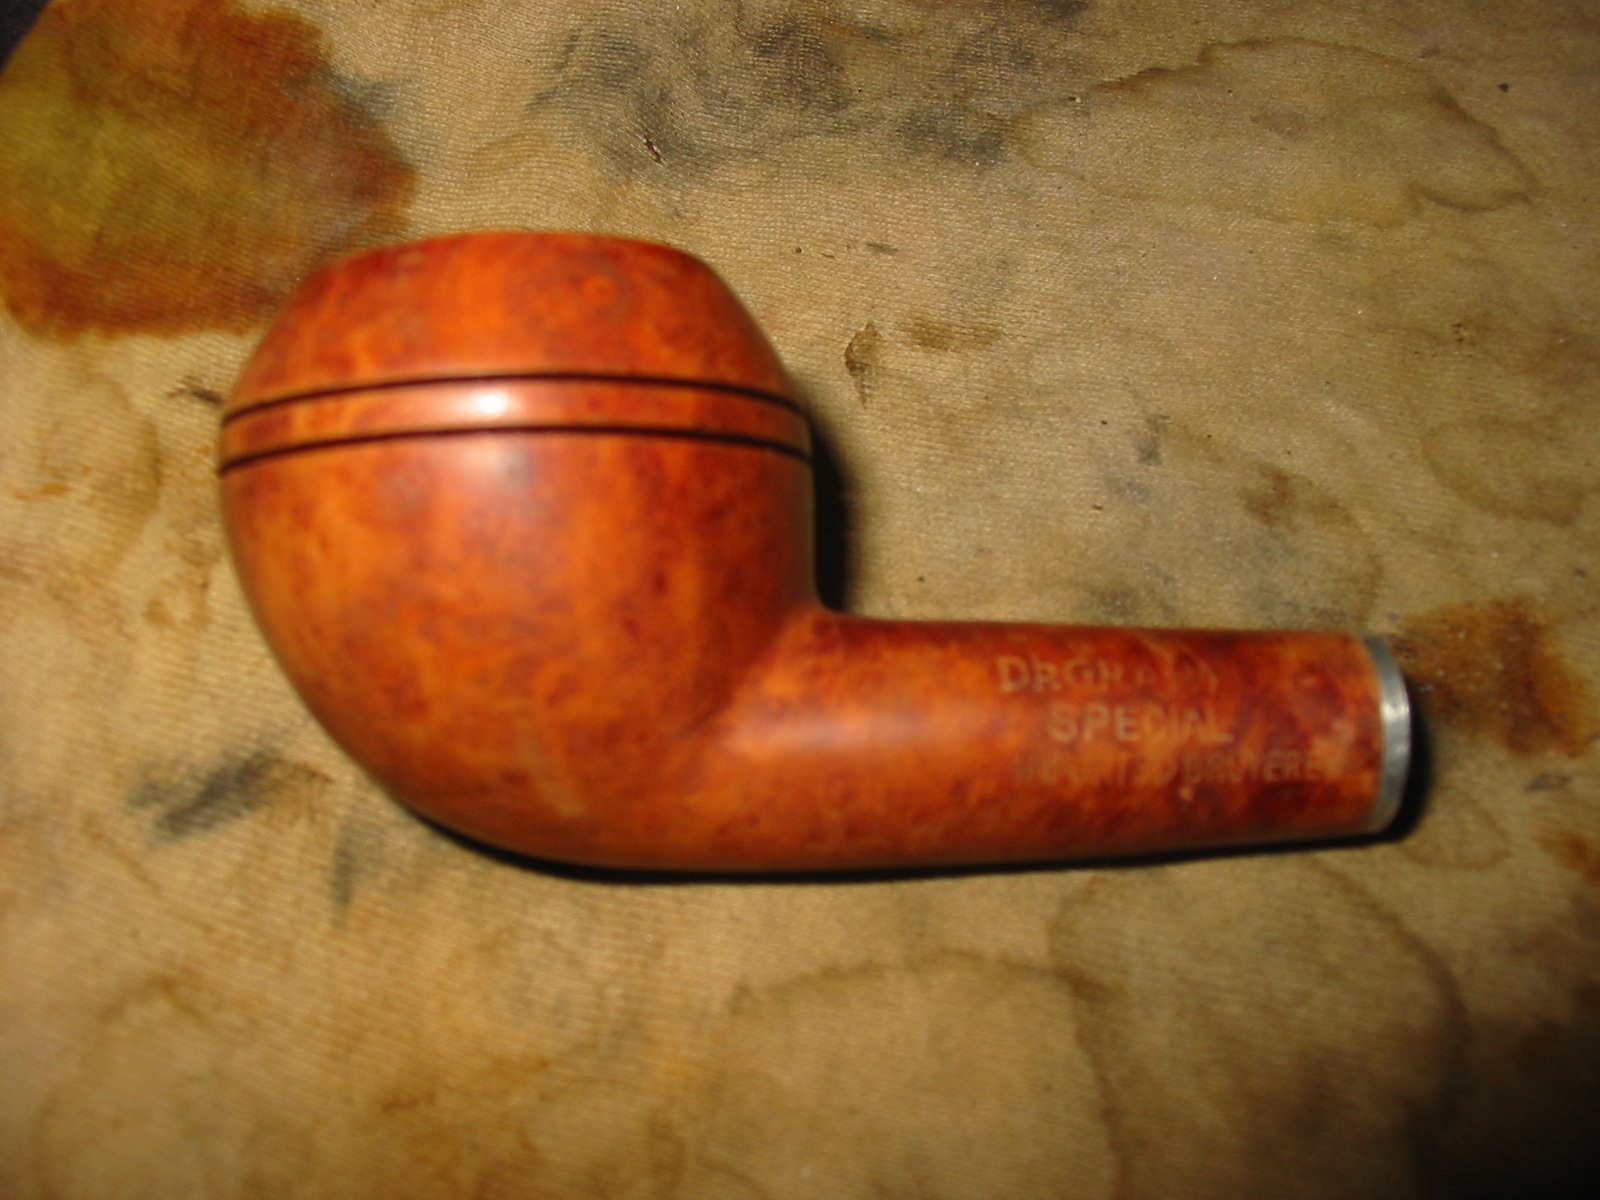
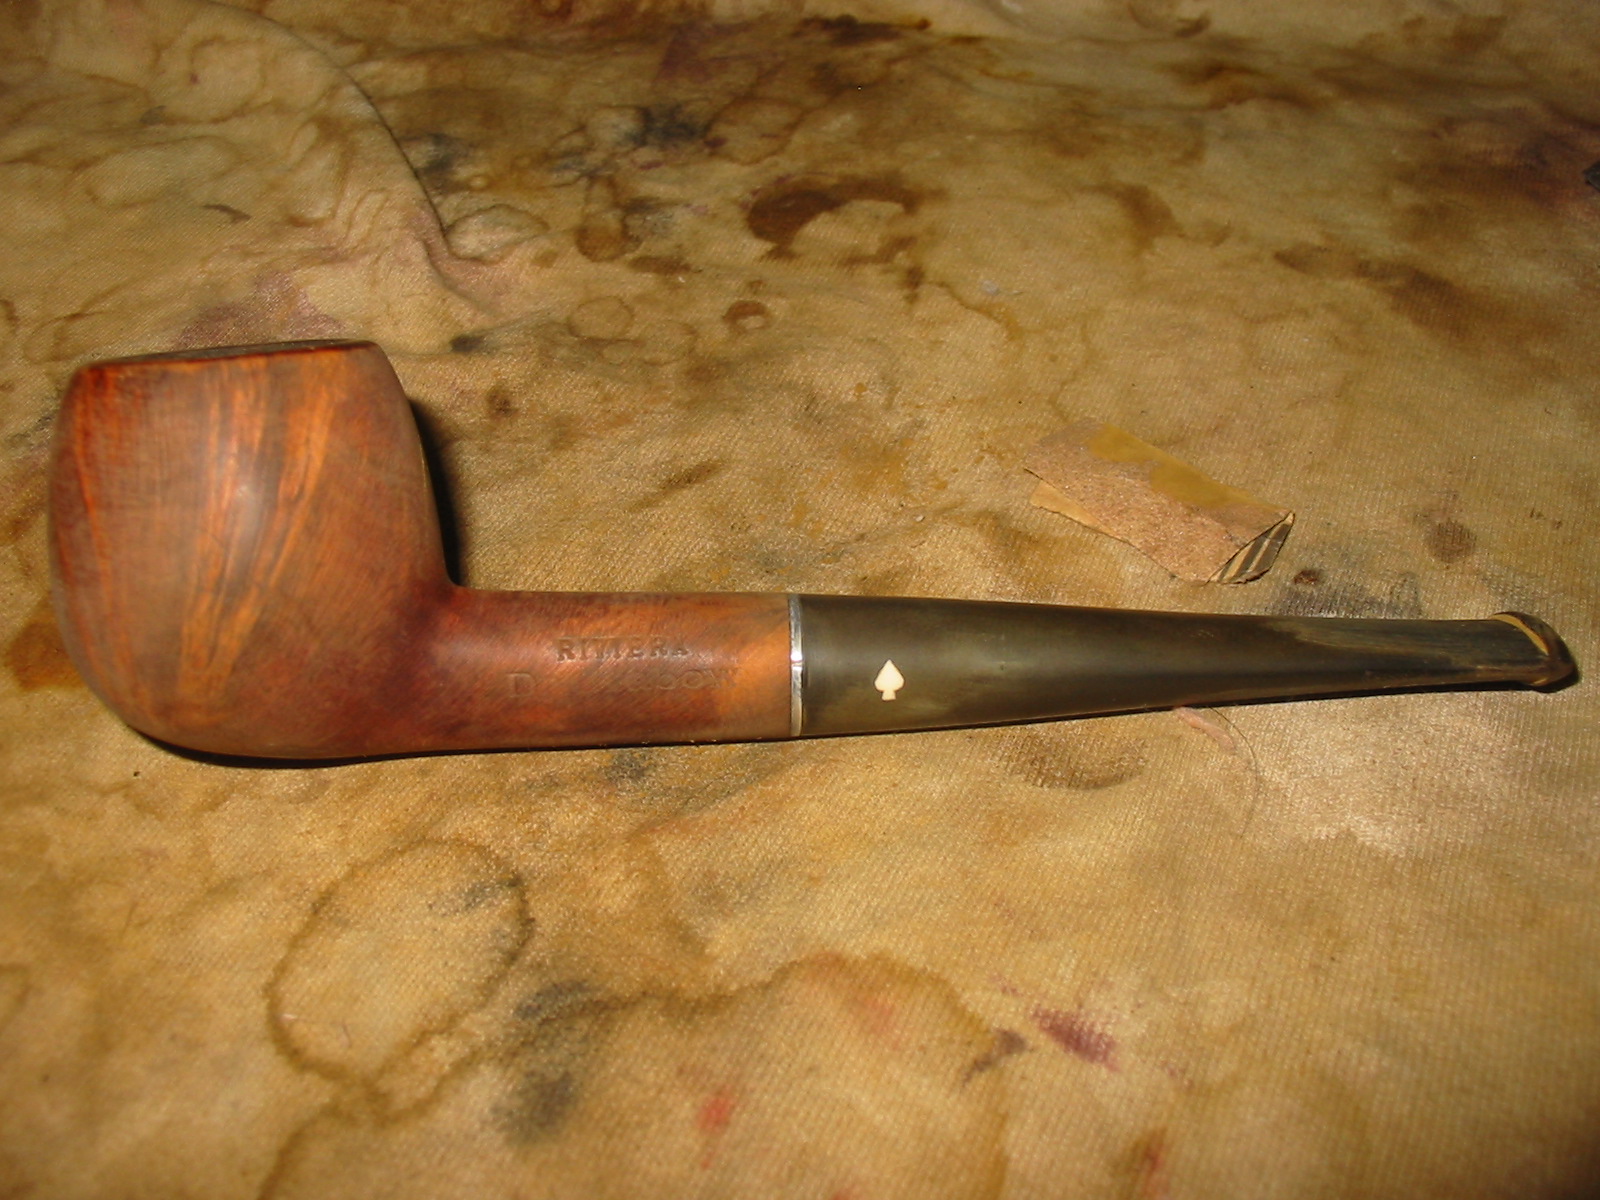
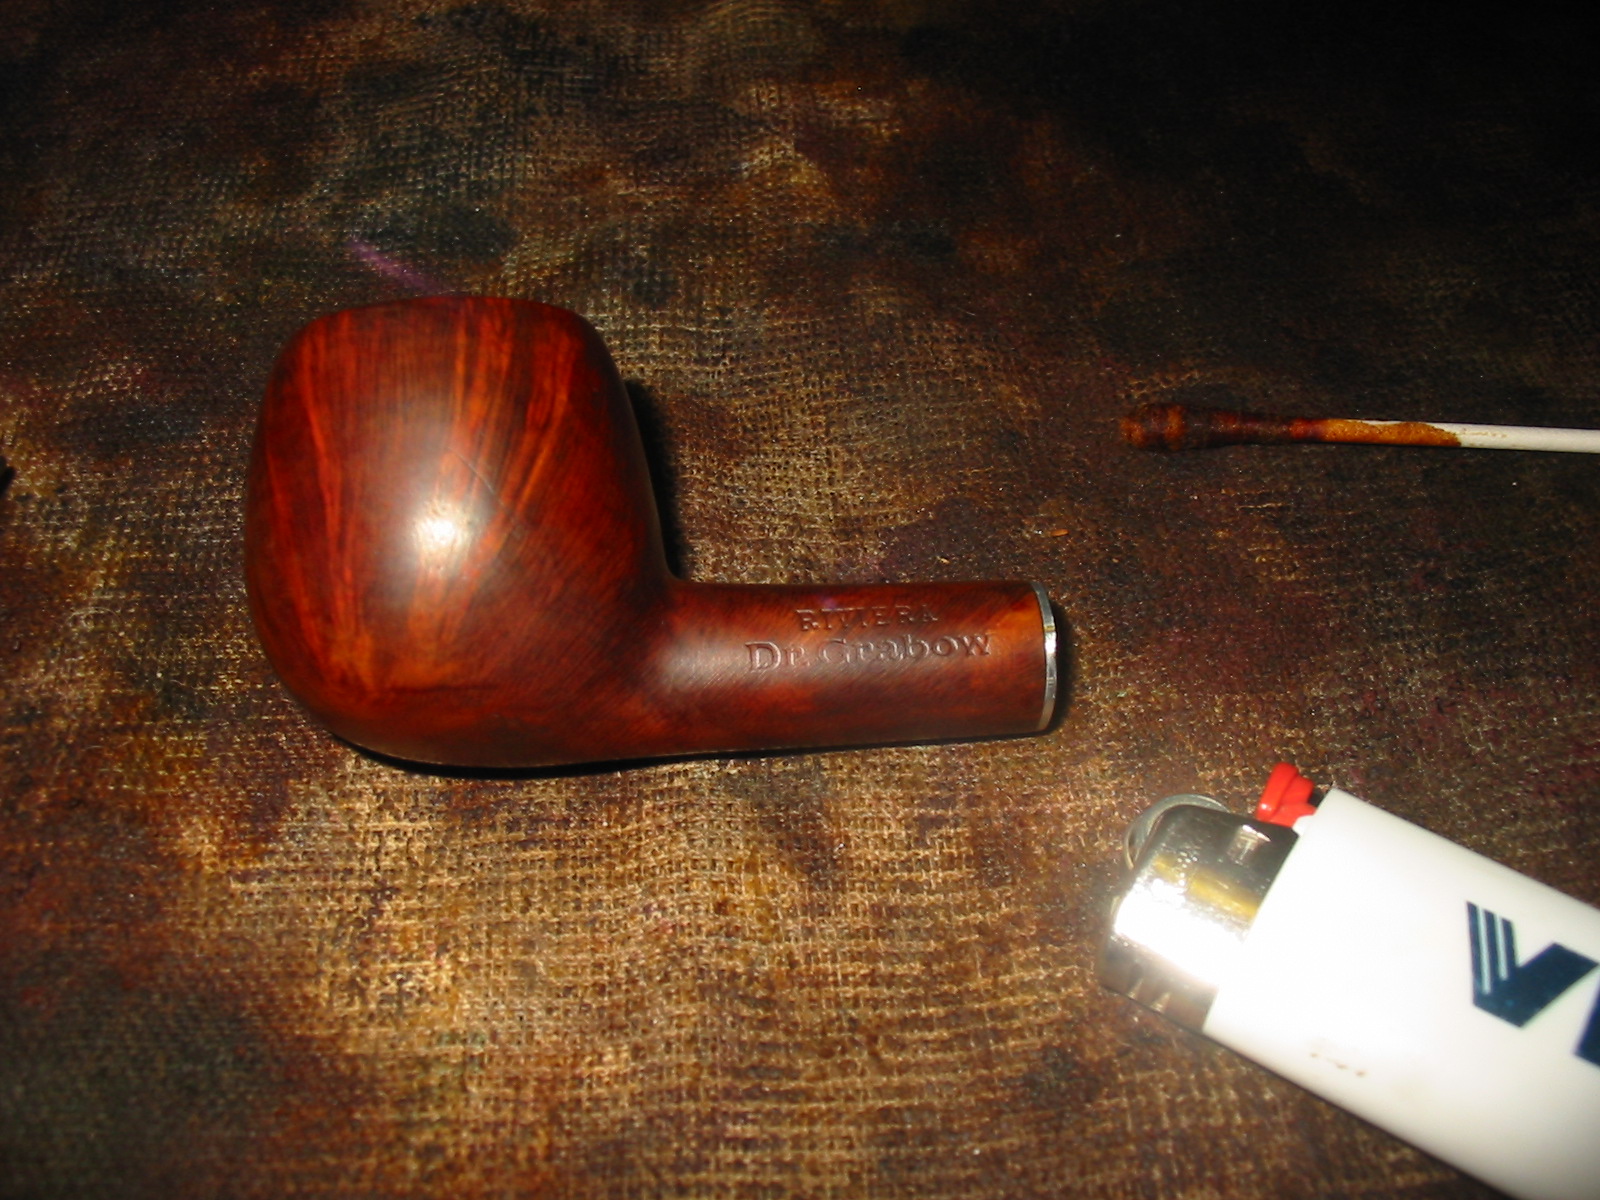
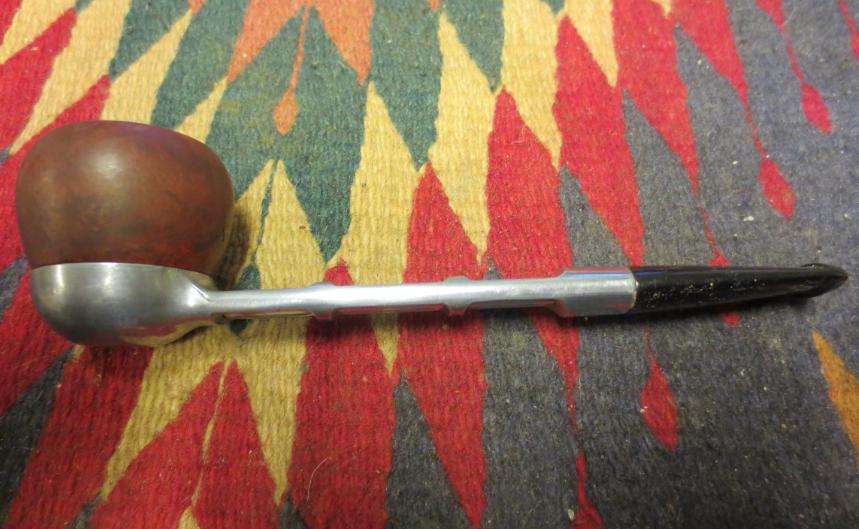
The next two photos show the stamping on both sides of the shank. The right side shows the clear shape number stamp and the left side the Dr. Grabow stamping. The Imported Briar stamping is weak but visible.Dr7

Dr8 
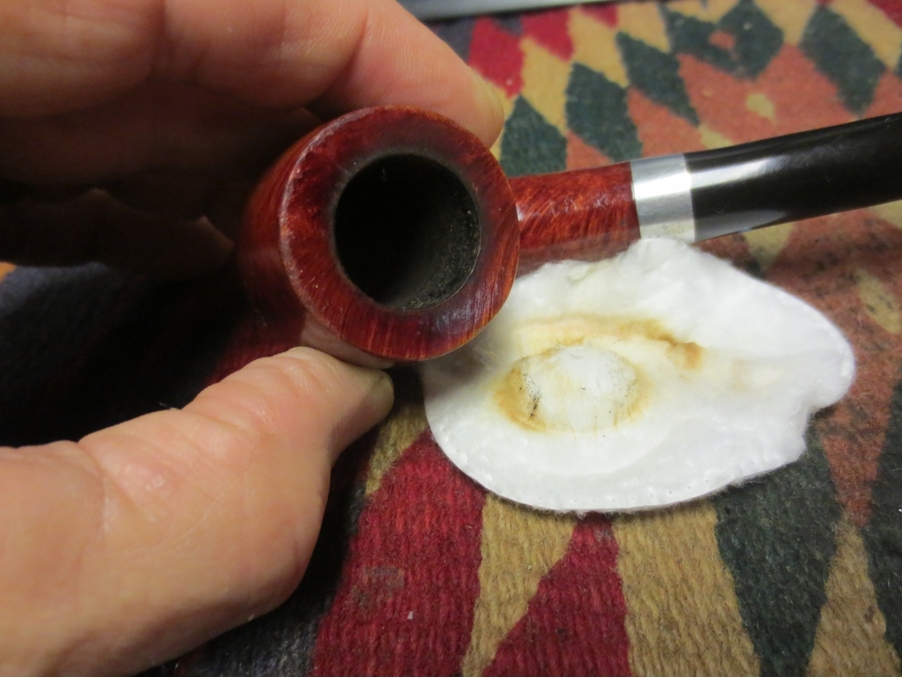
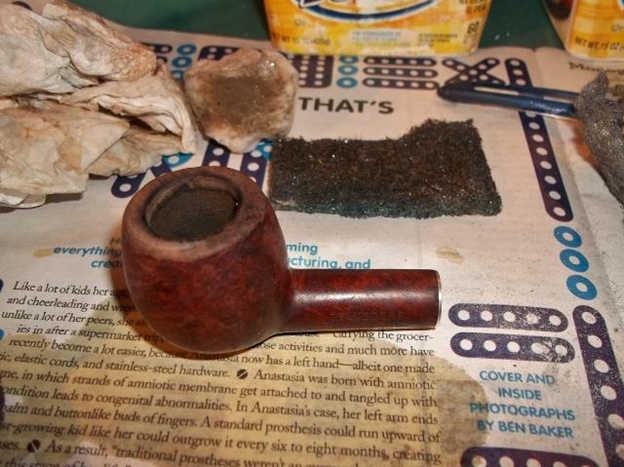
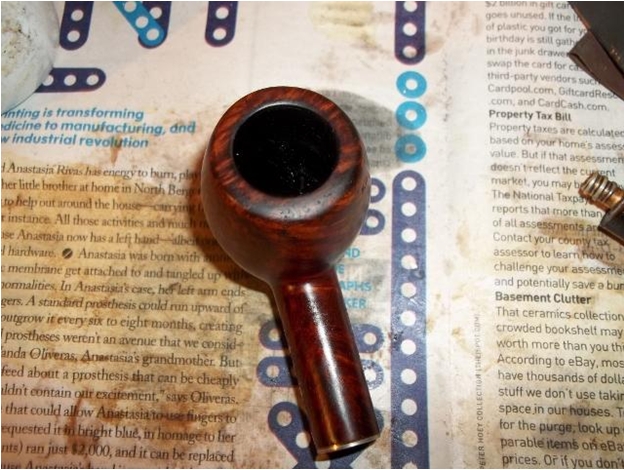
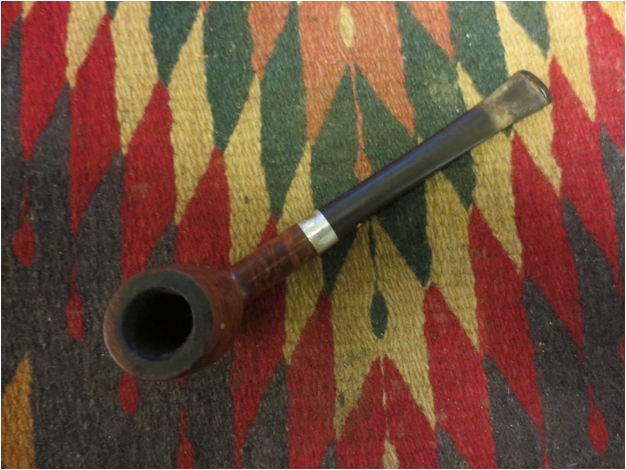
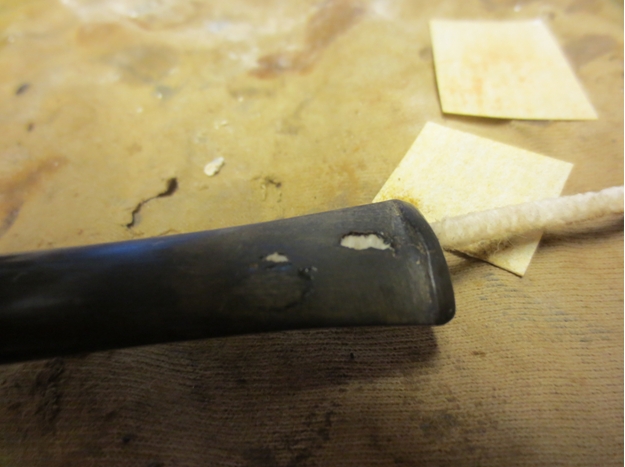
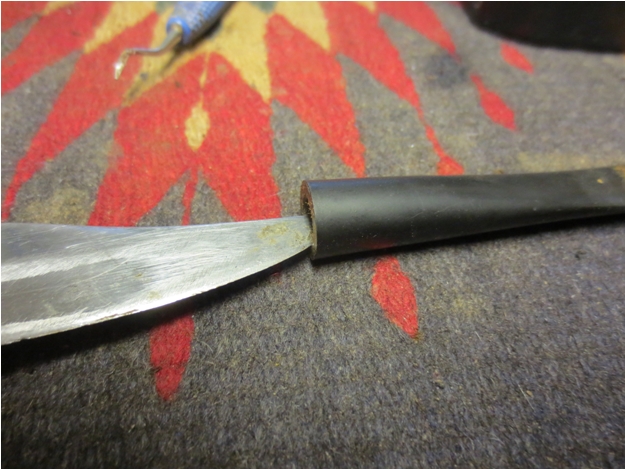
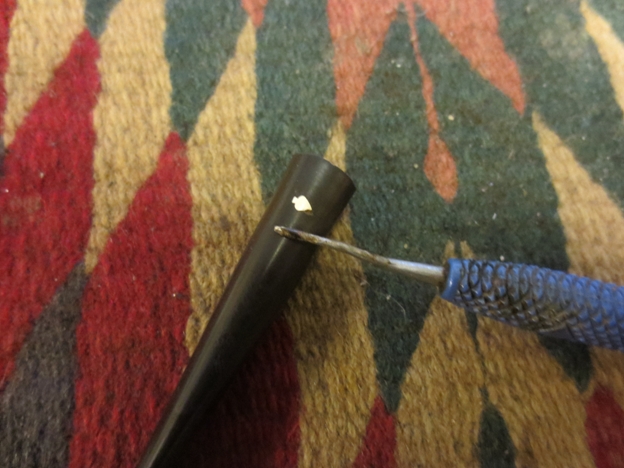
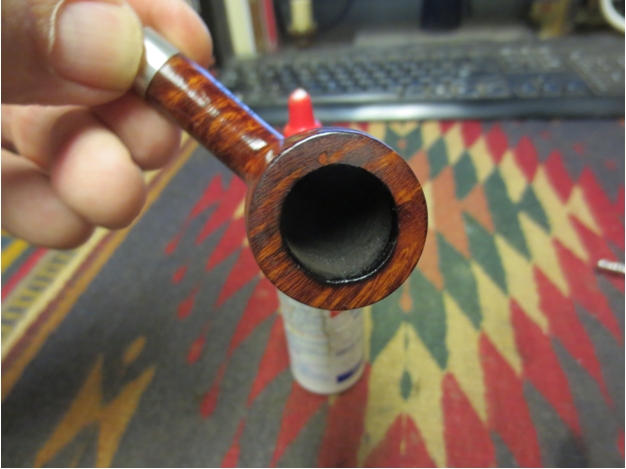
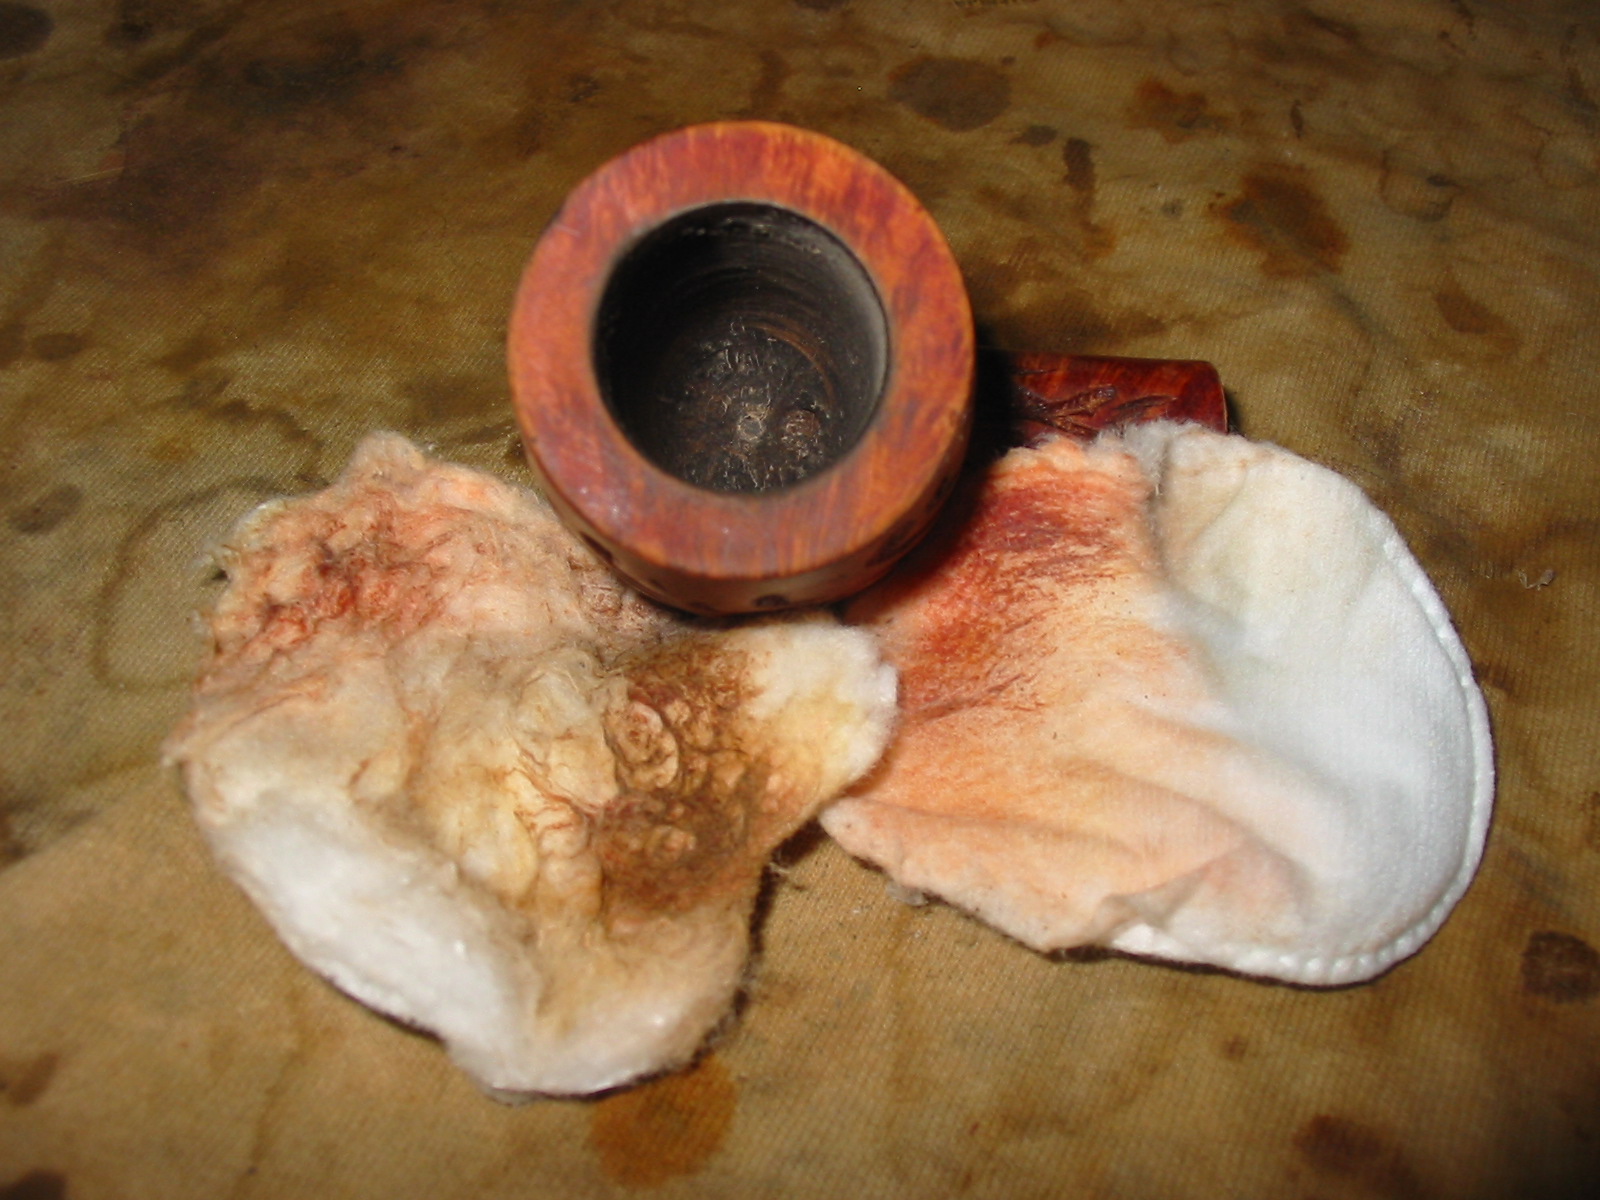
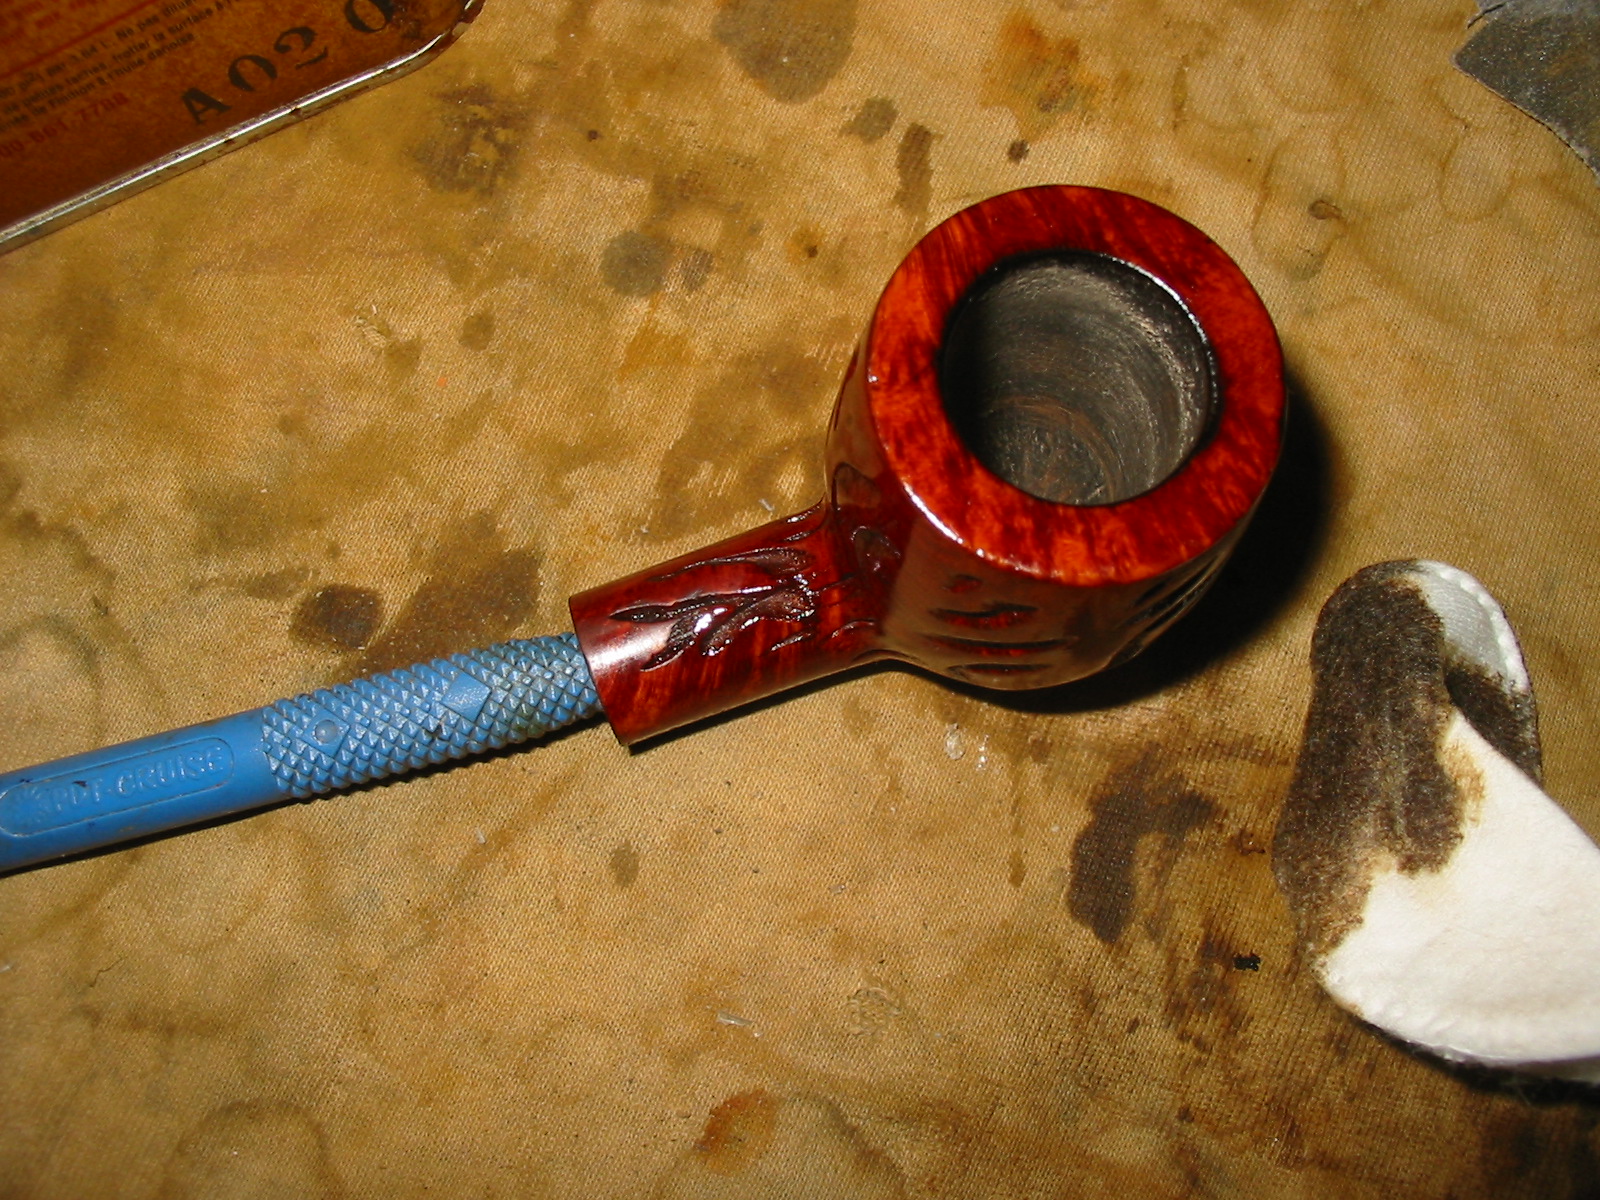
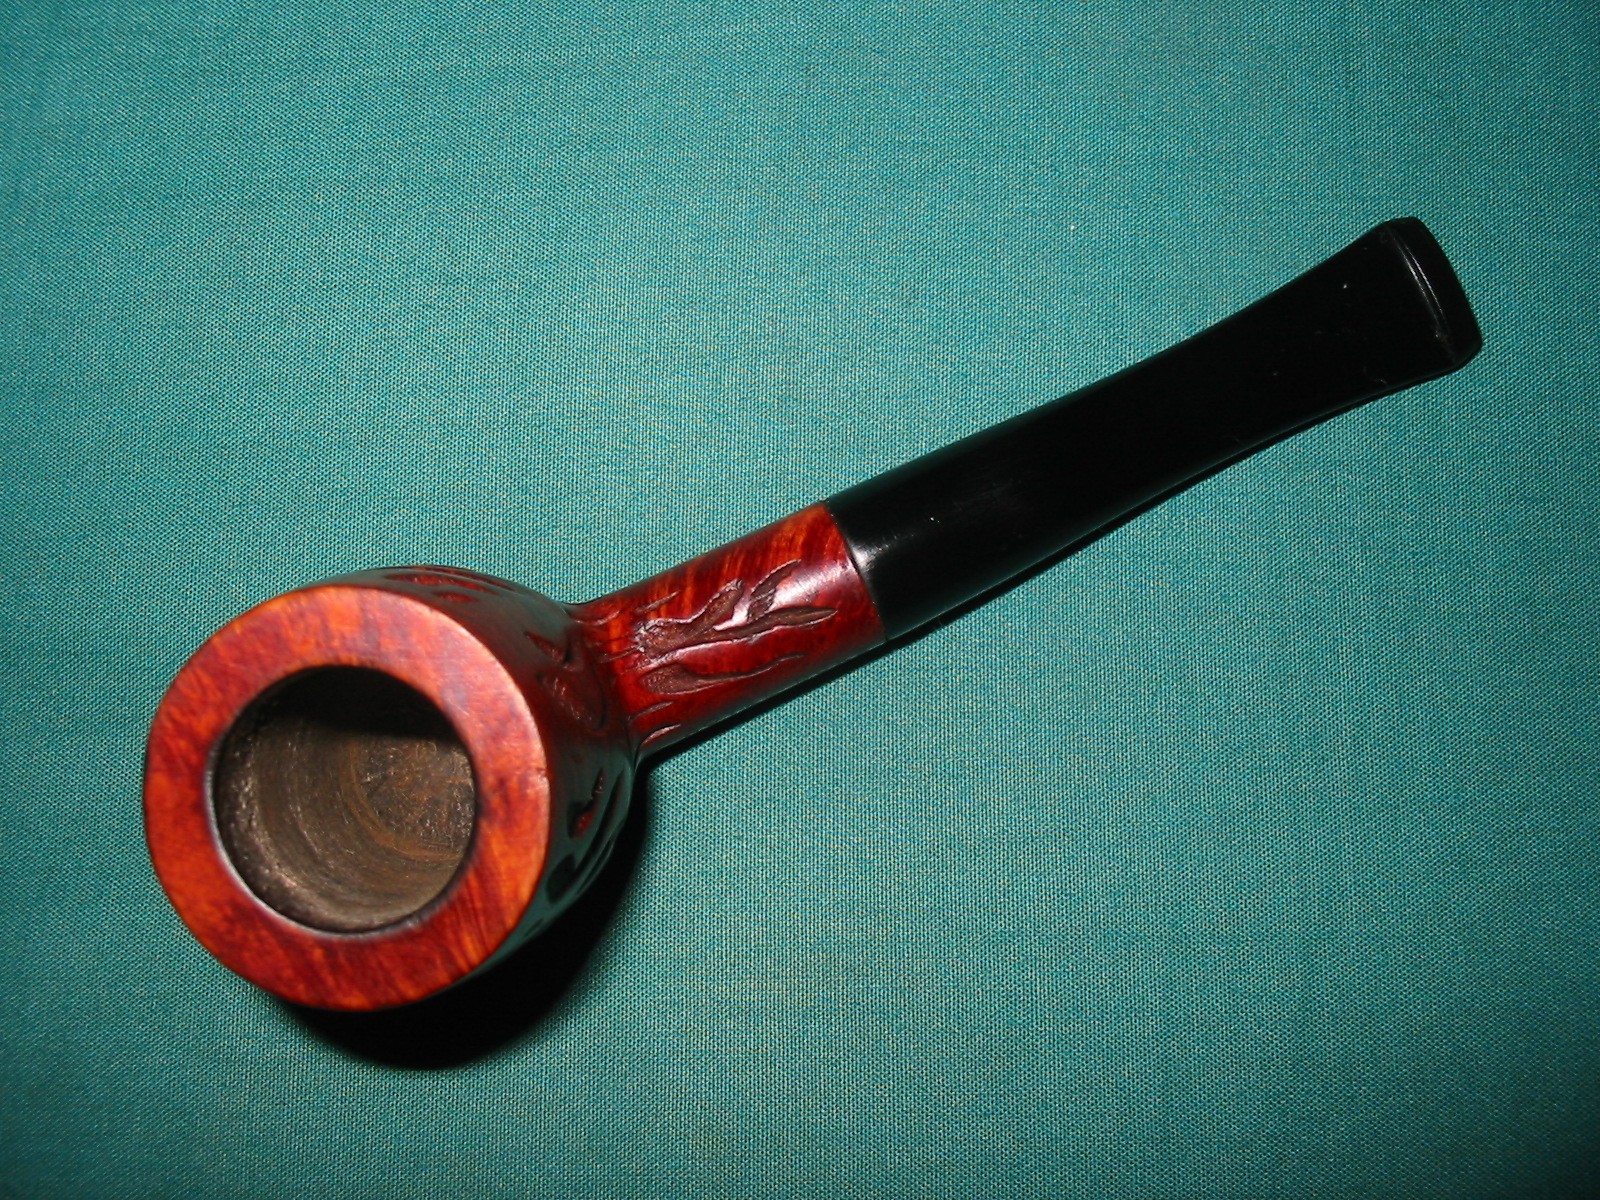
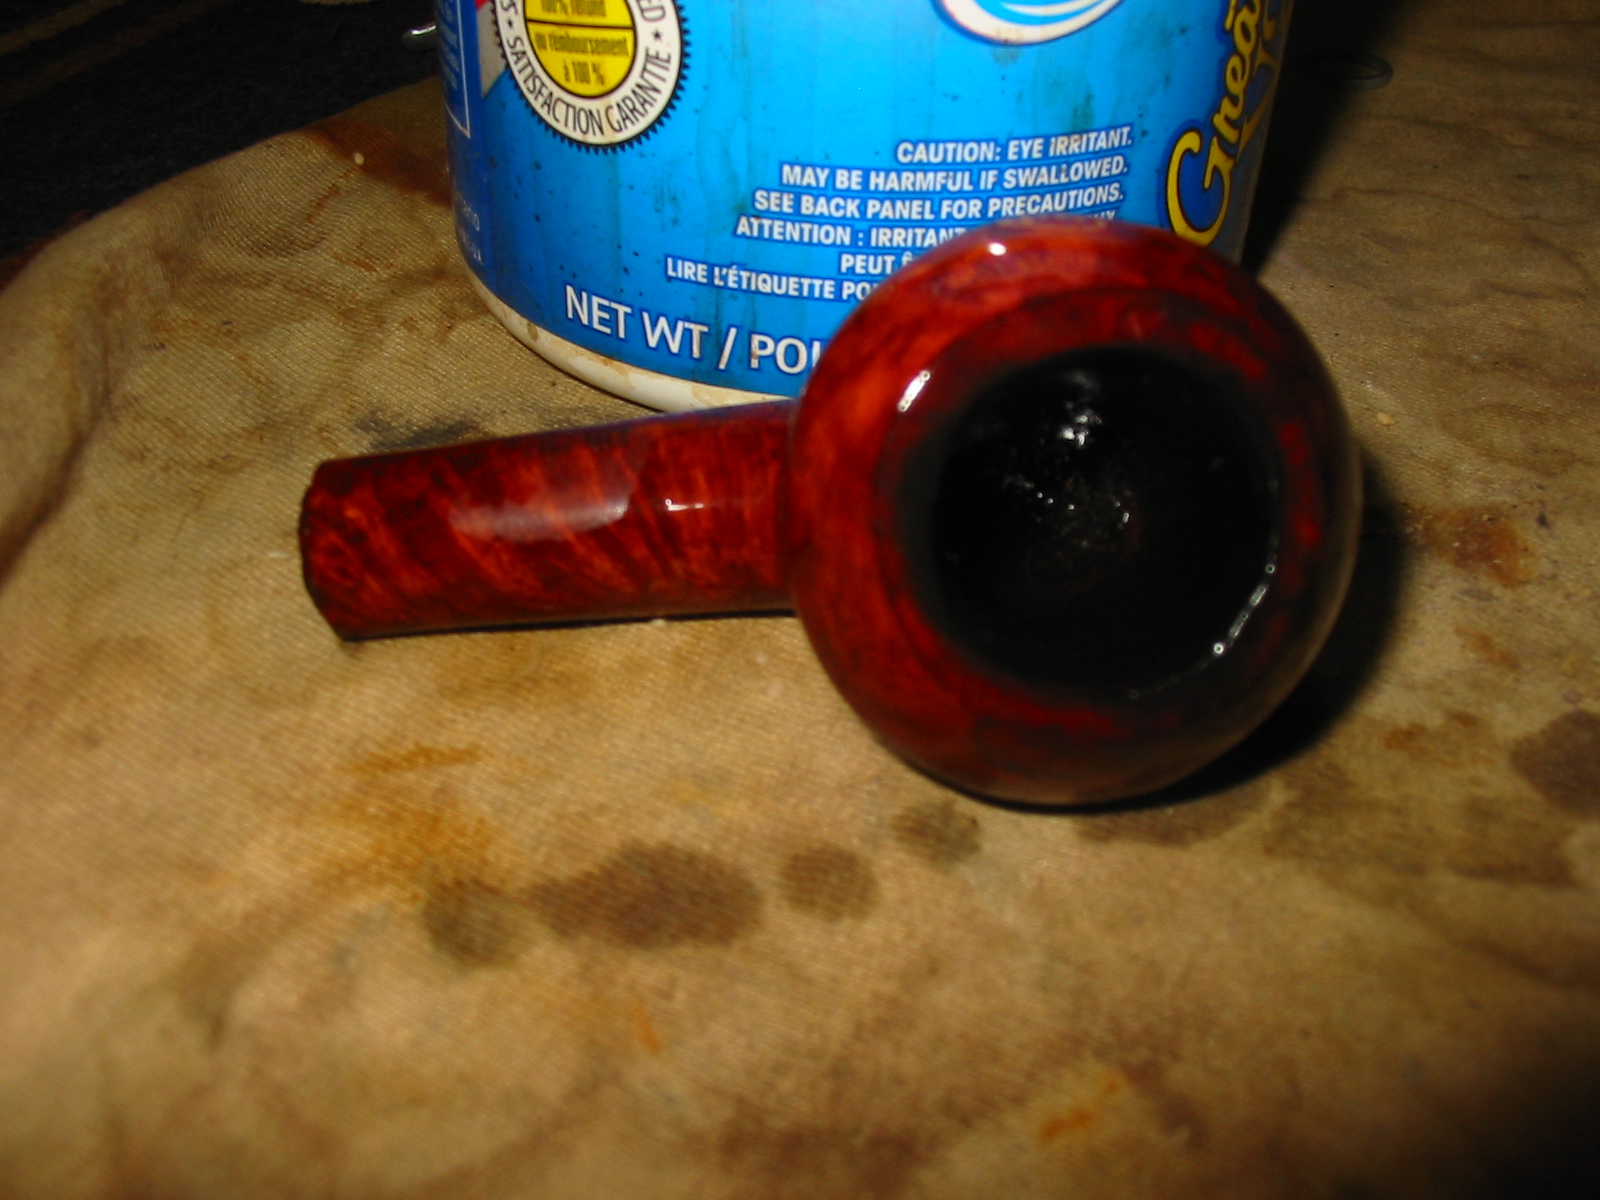
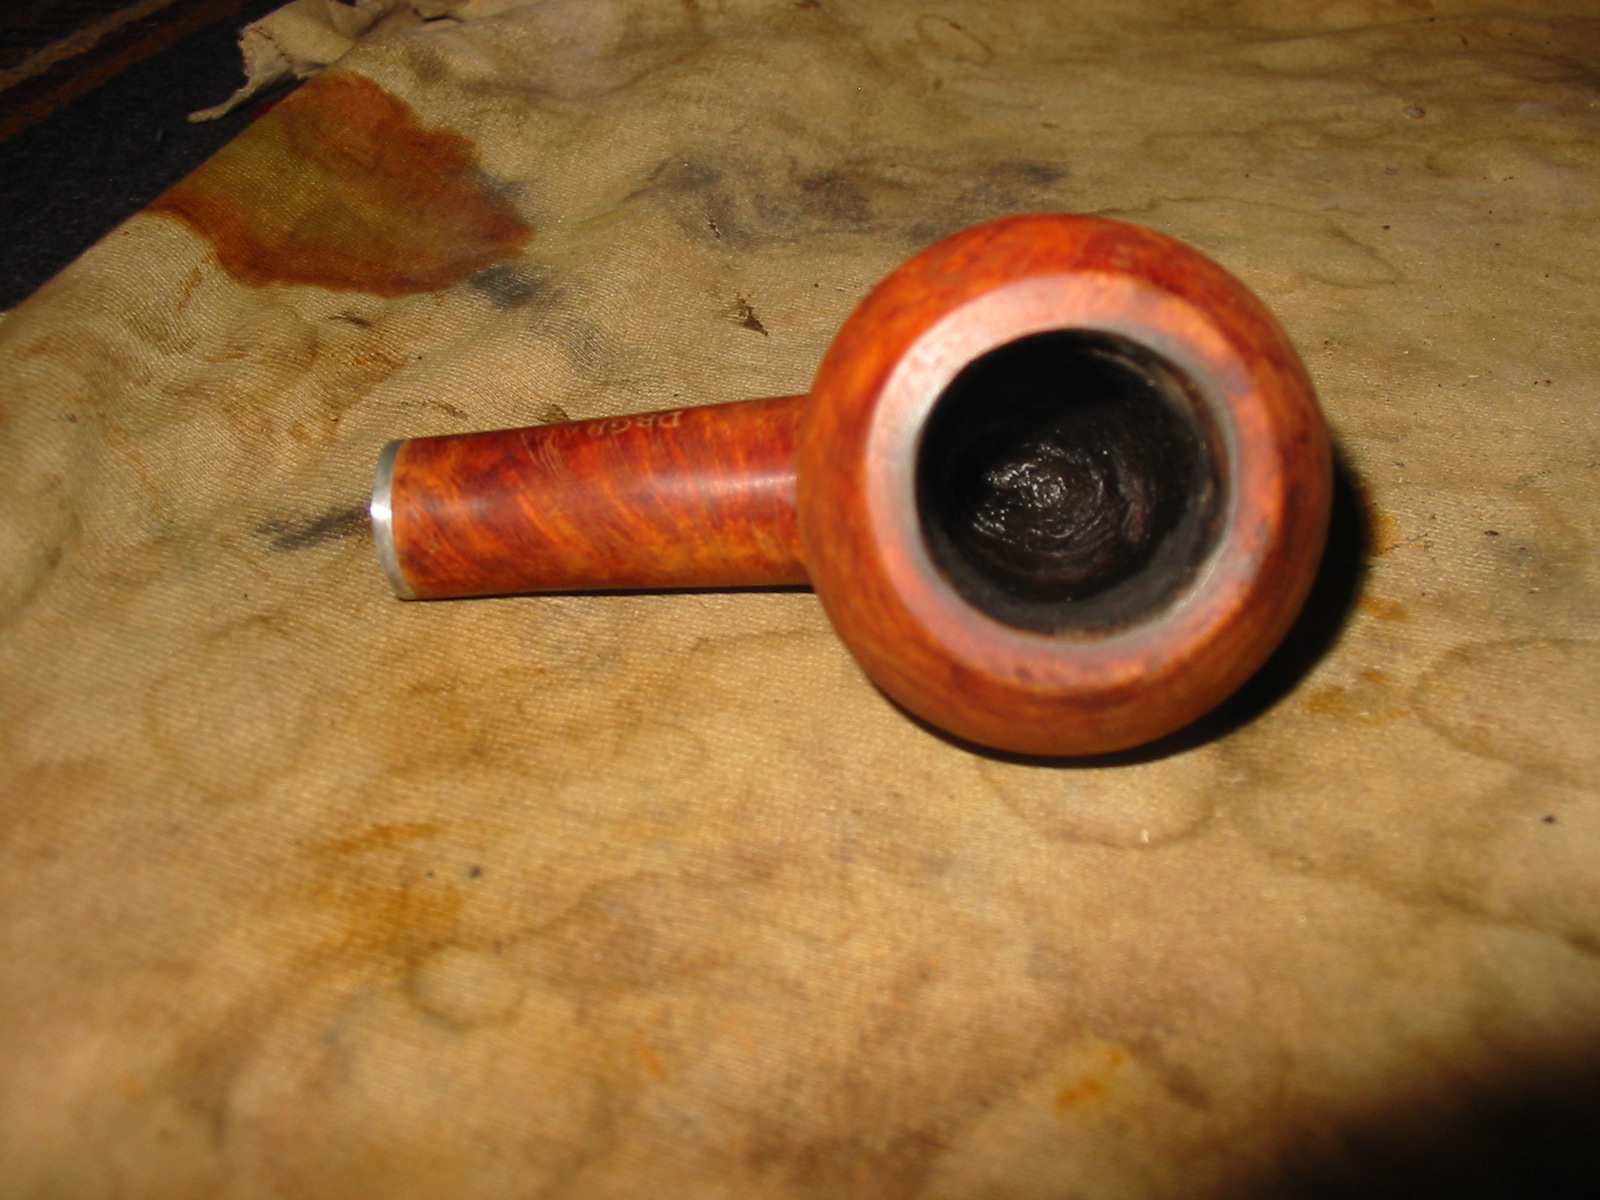
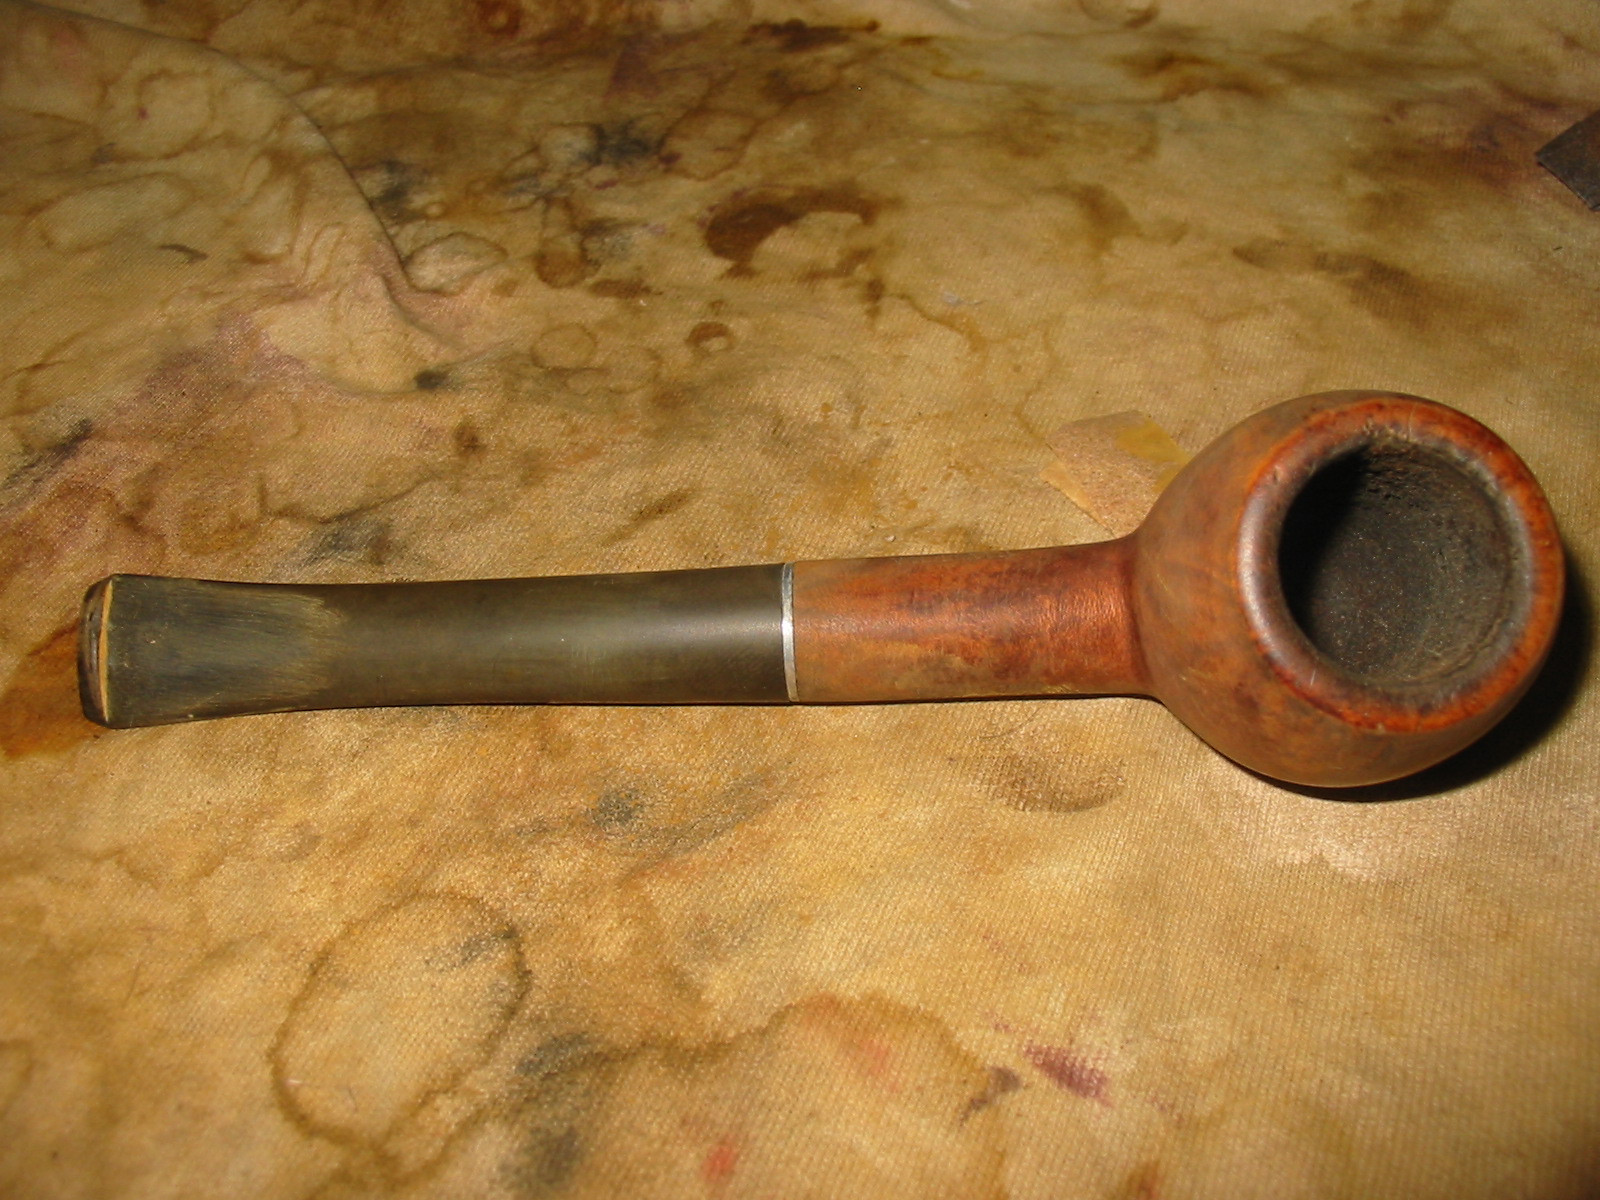
I reamed the bowl back to bare wood with a PipNet reamer. I started with the smallest cutting head and worked my way up to one that was the same diameter as the inside of the bowl. Once the cake was cleaned out I used a pen knife to clean up the small ridge that shows up in the second photo below.Dr9

Dr10 
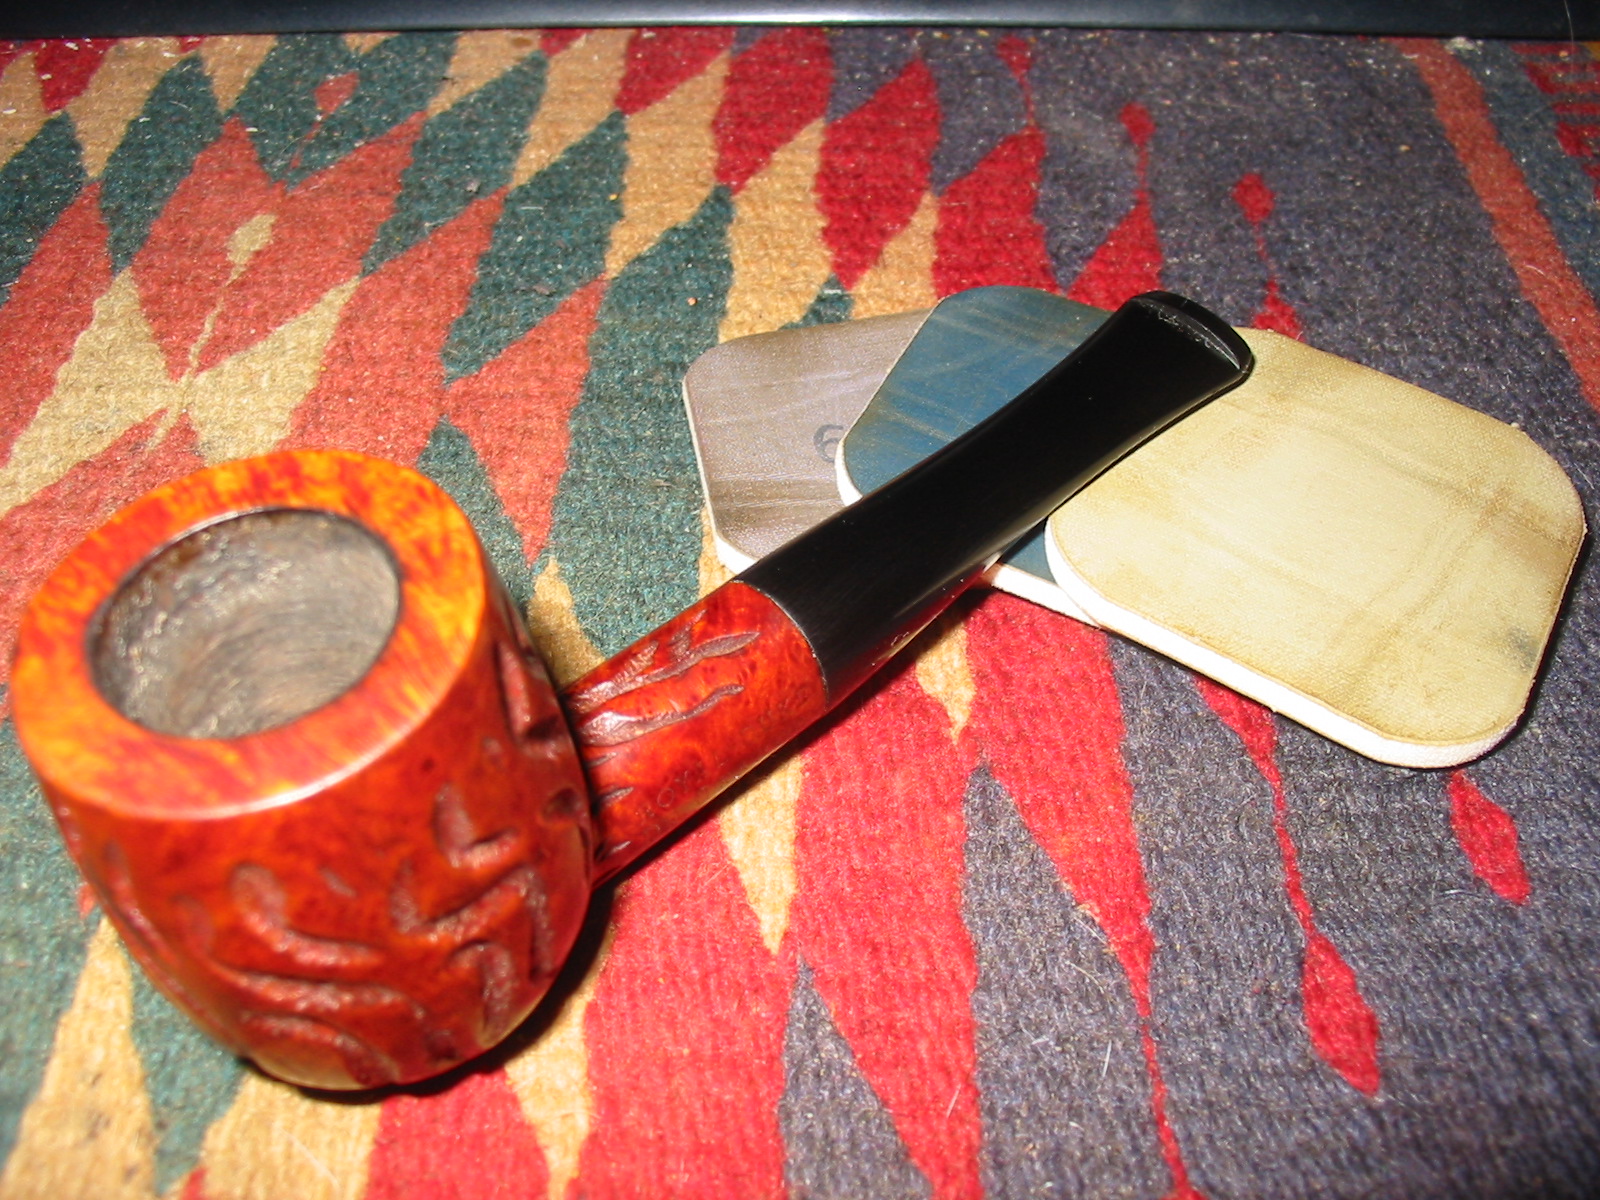
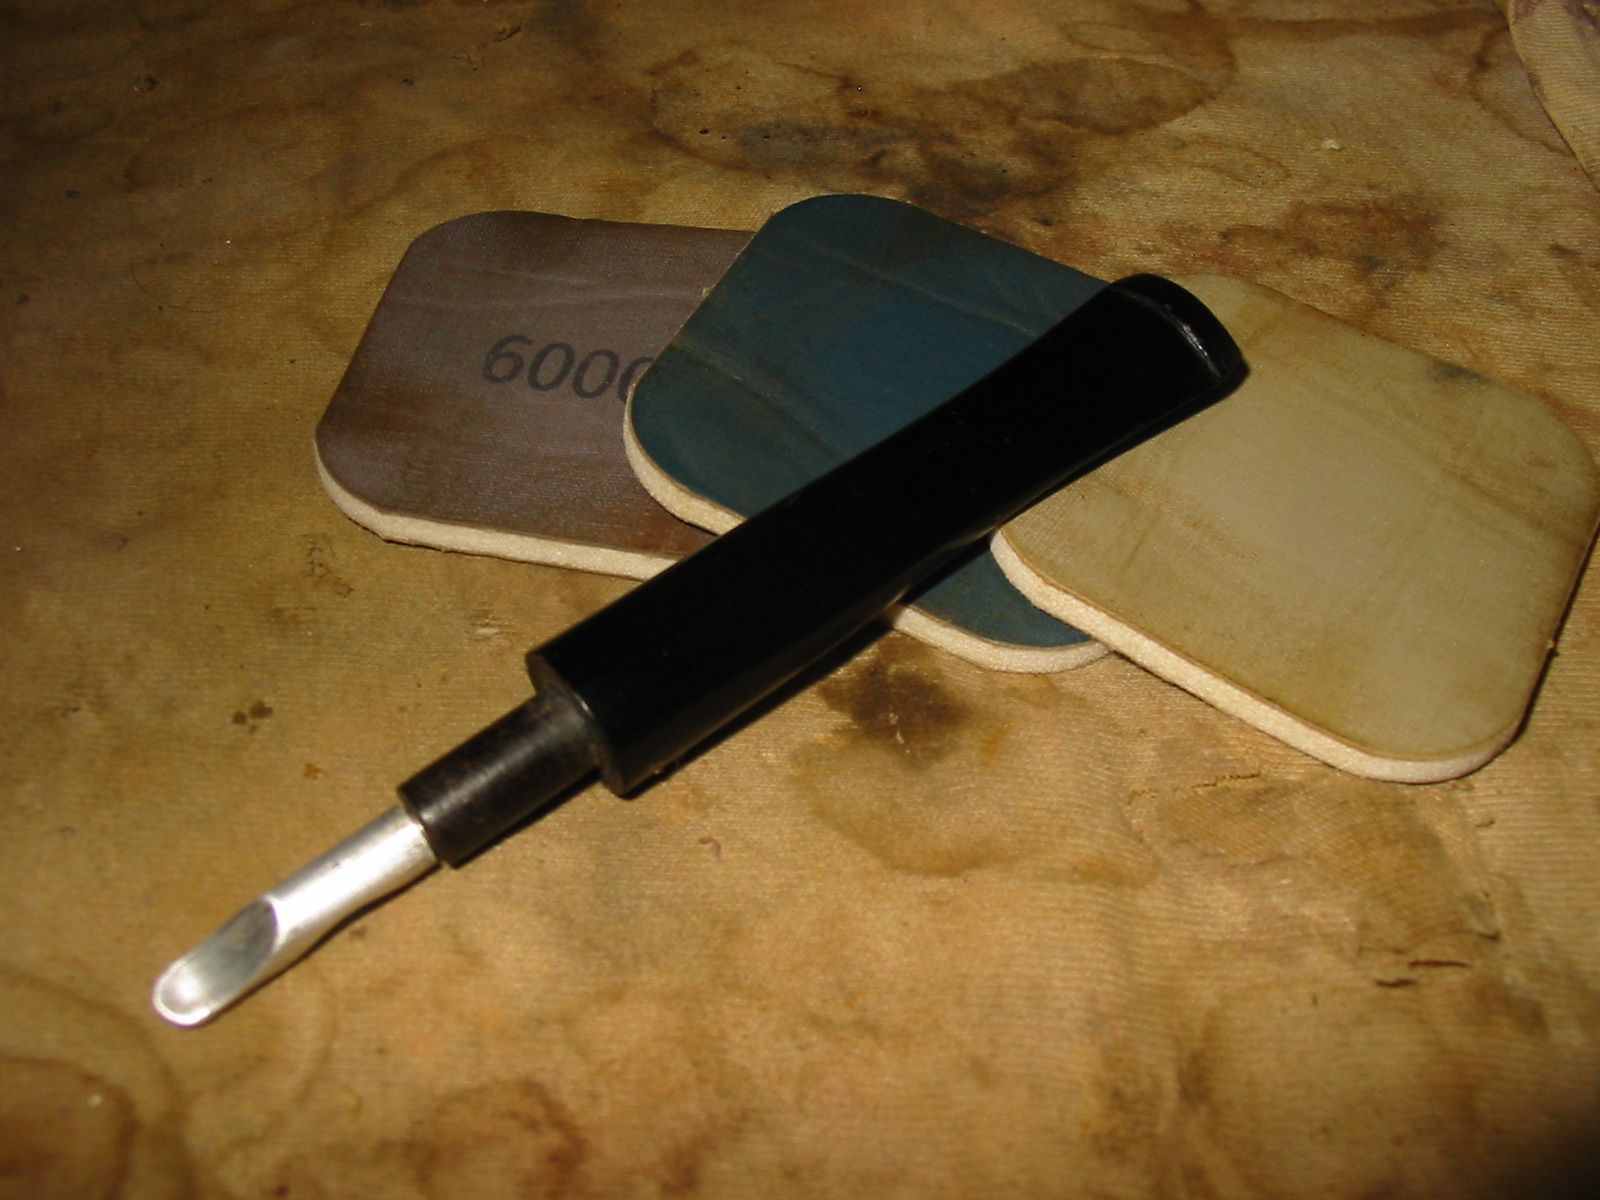
I used a sanding sponge to lightly top the bowl. The tars and lava on the top were hard and this was the way I chose to remove it without damaging the finish to the rim. I worked on it until the rim was clean and smooth. It would still need to be scrubbed to remove the darkening.Dr11

Dr12 
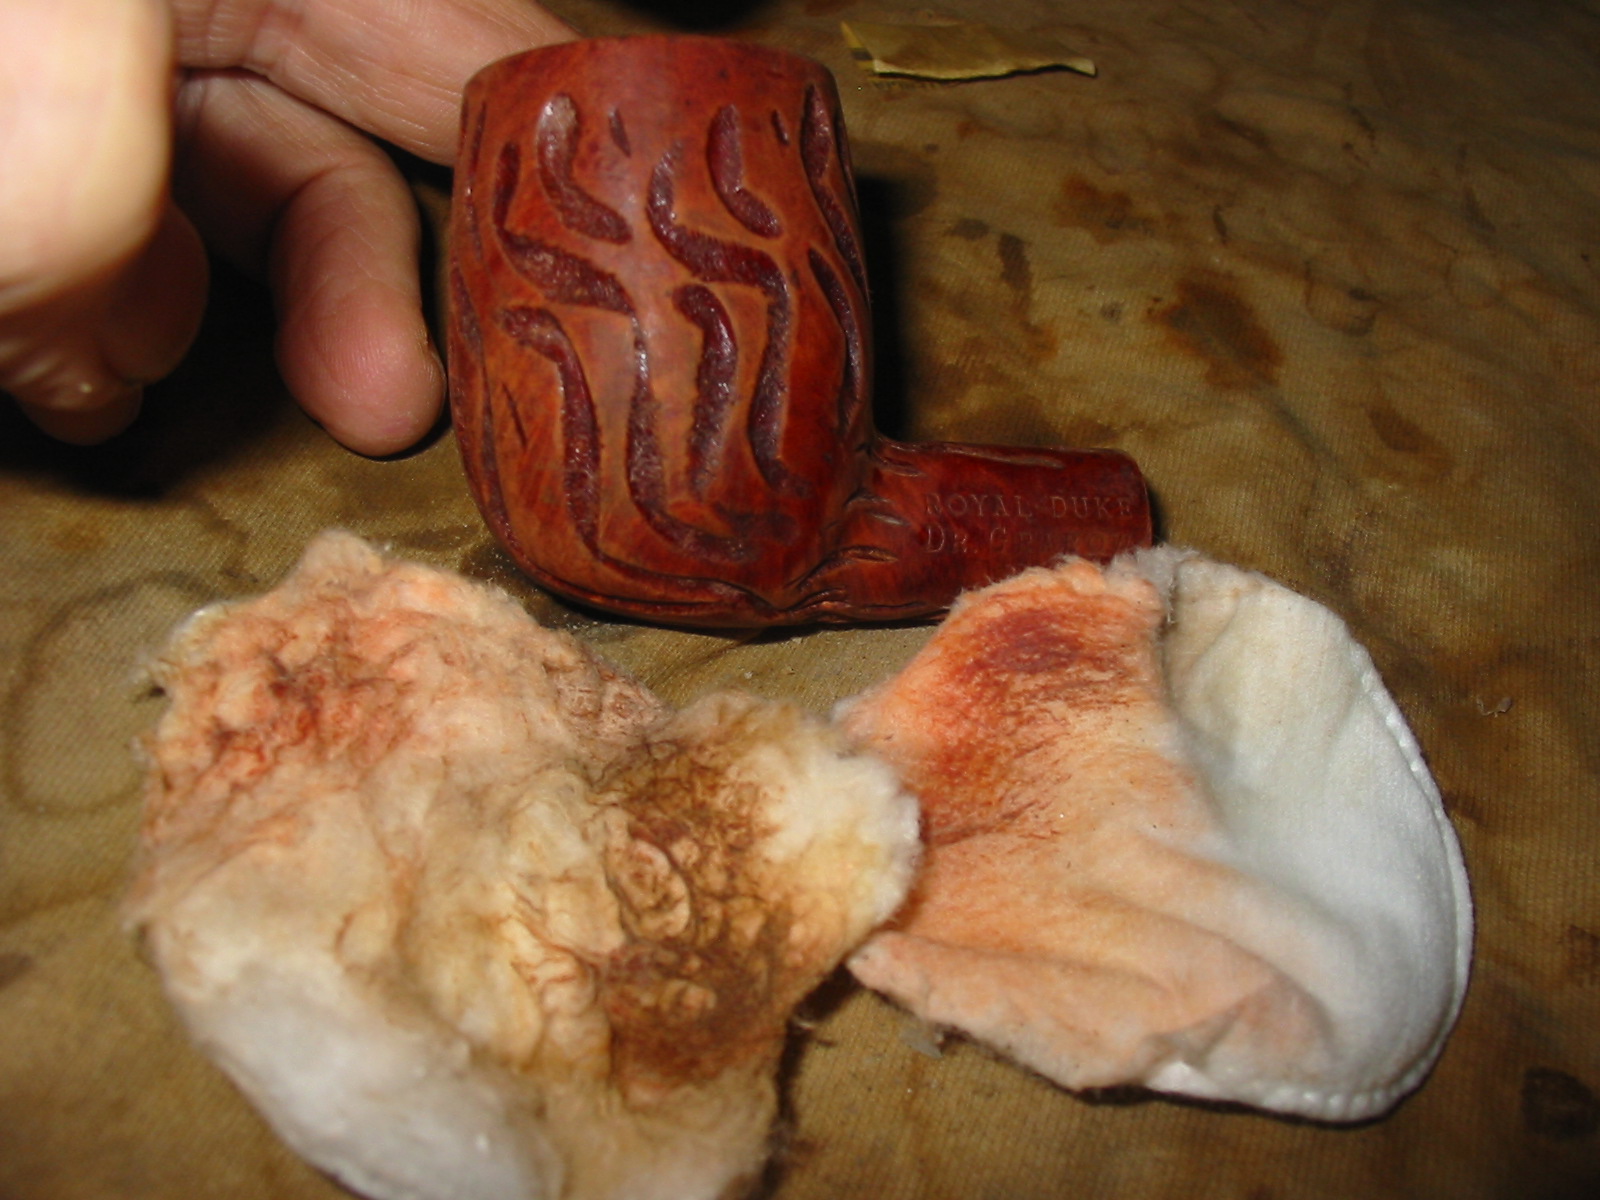
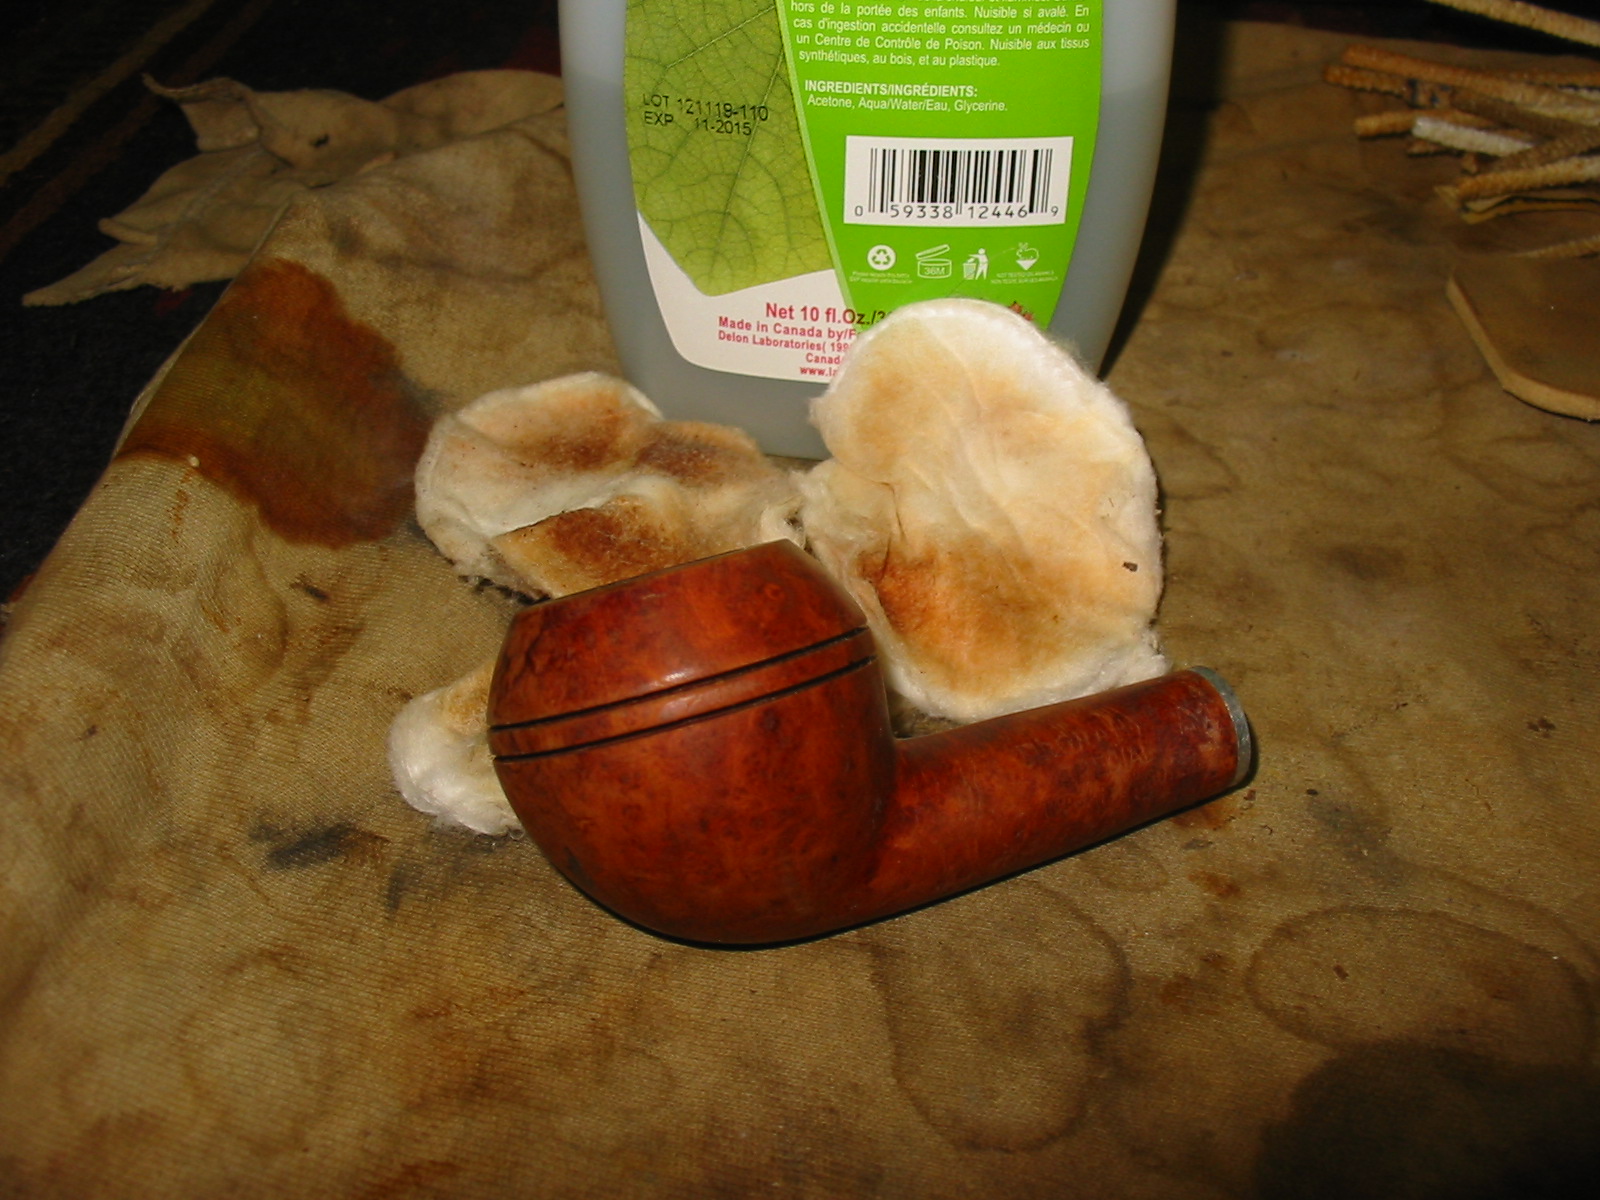
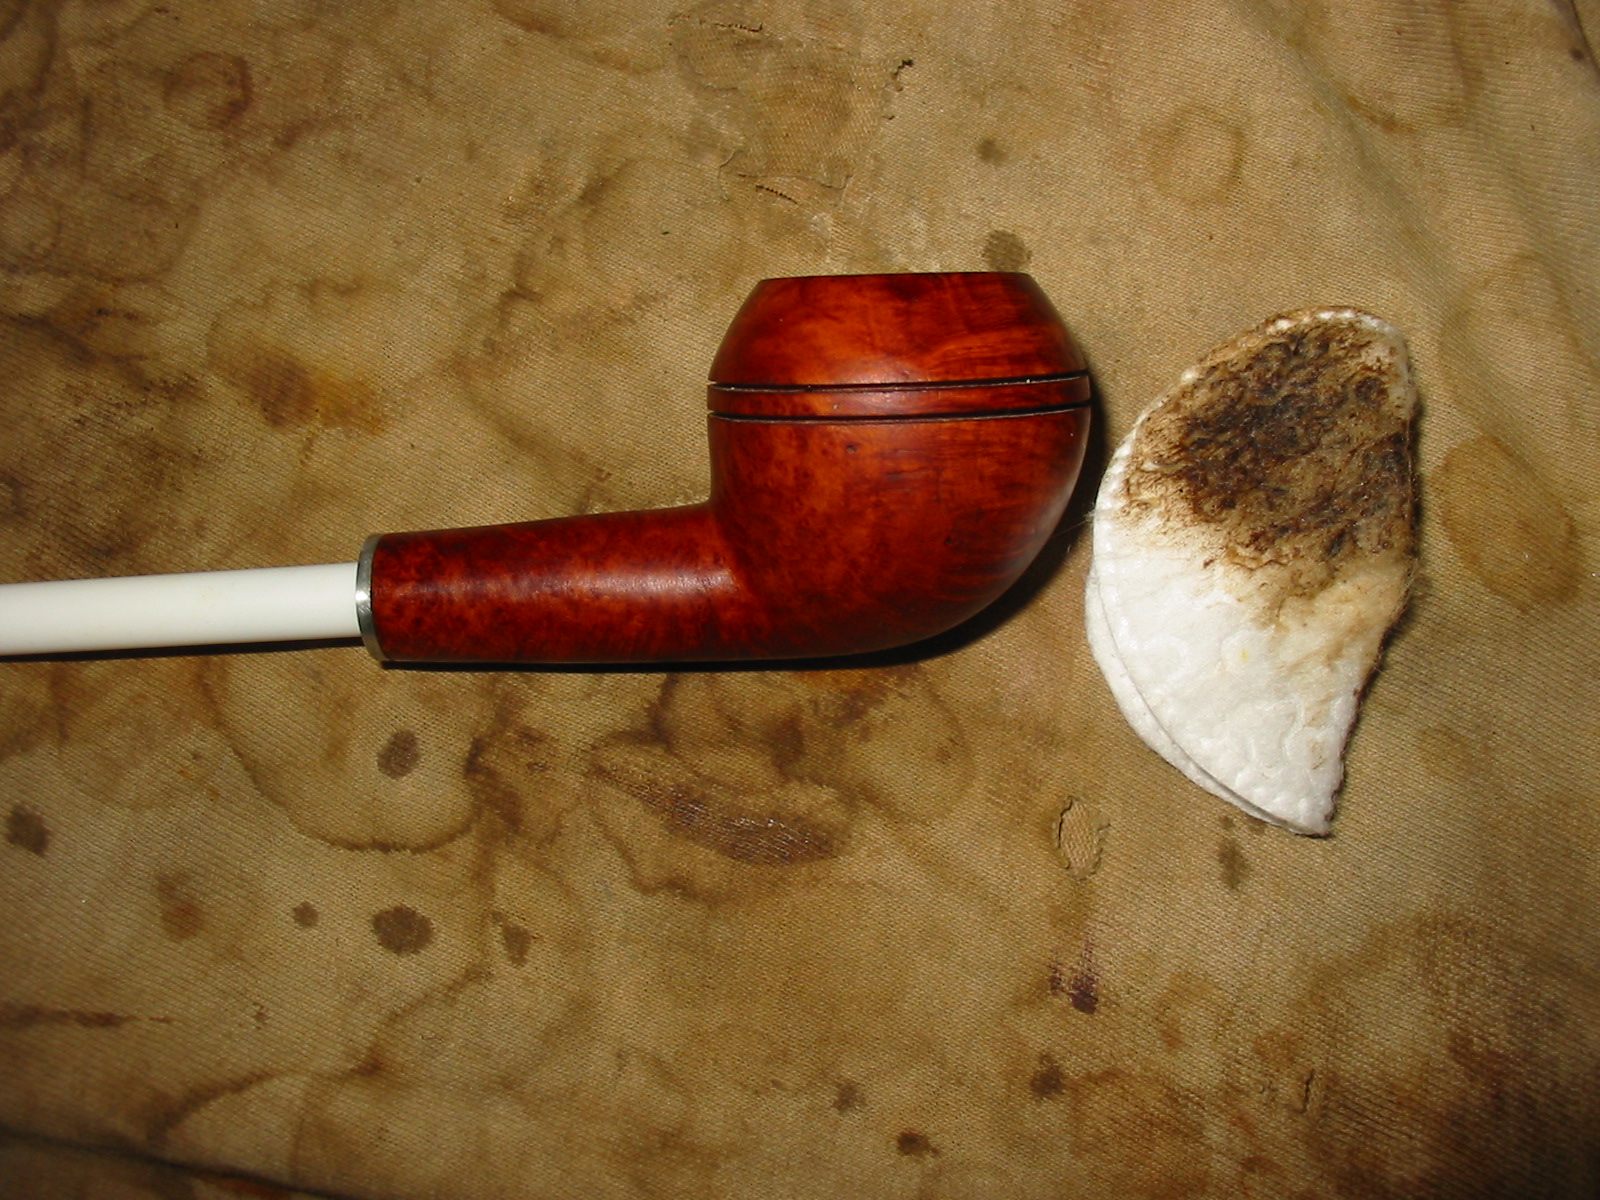
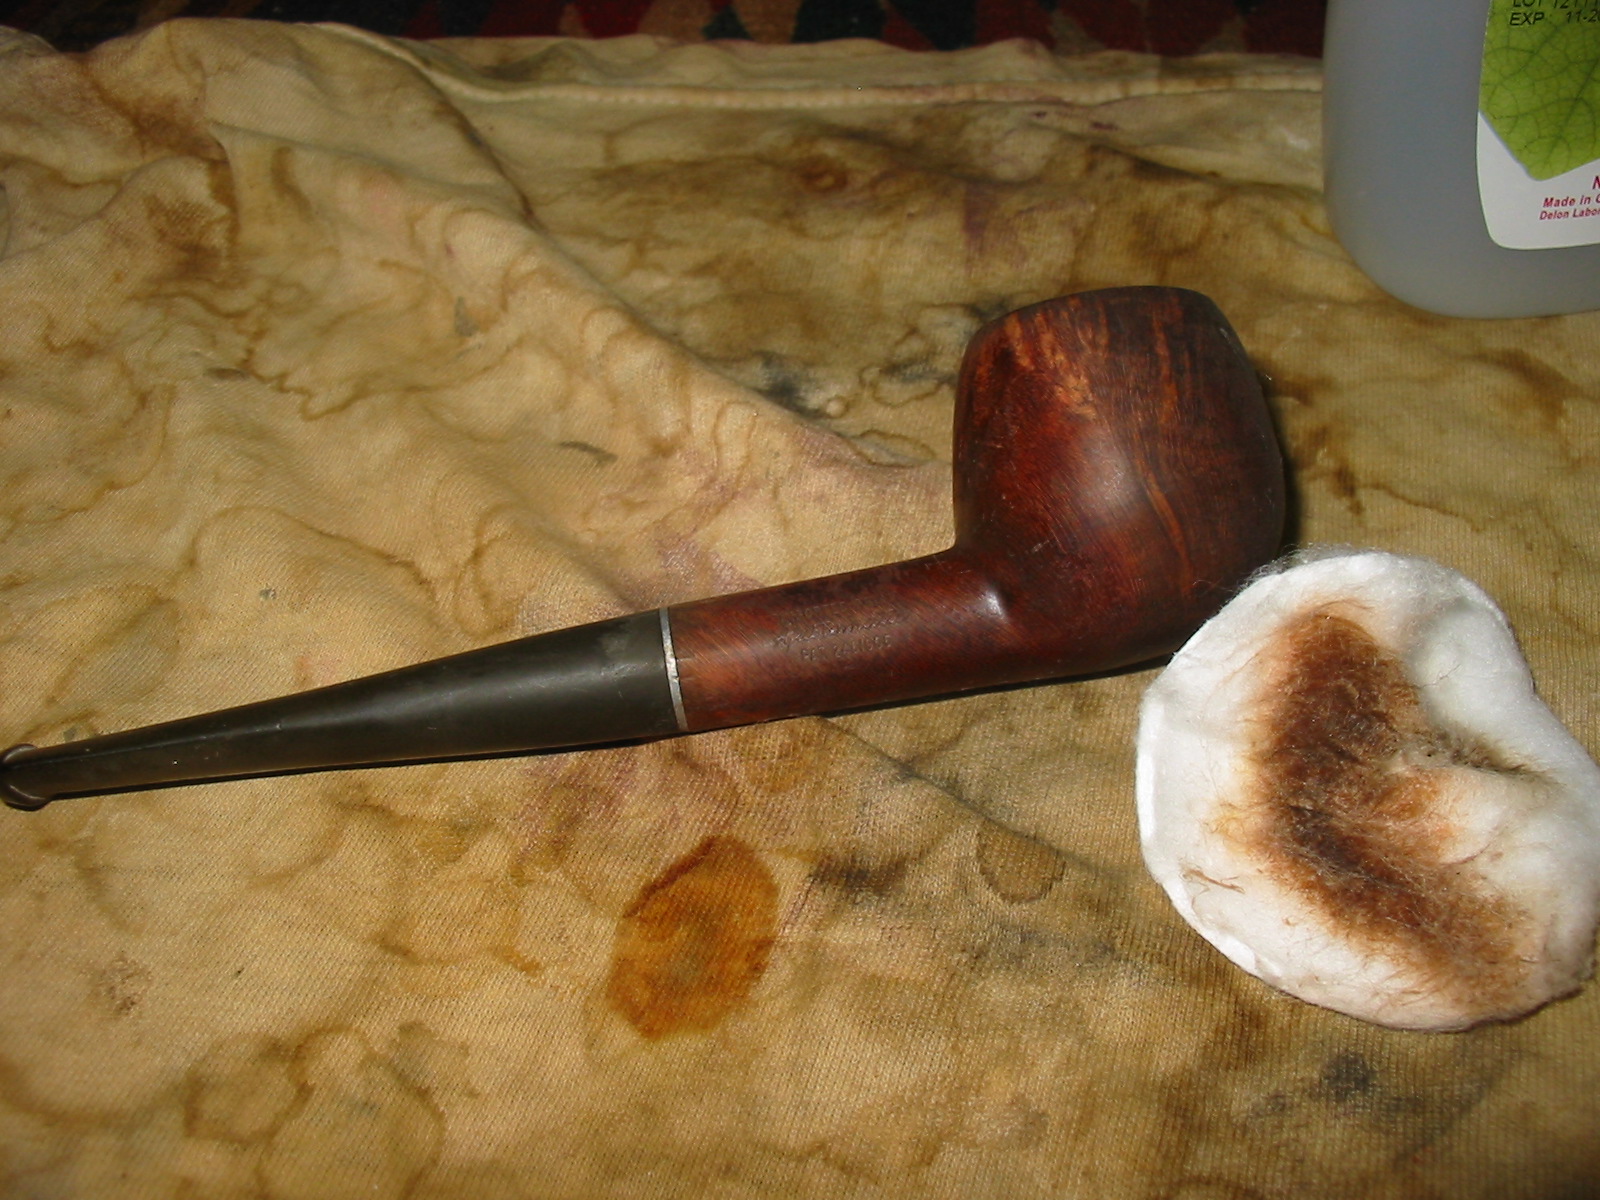
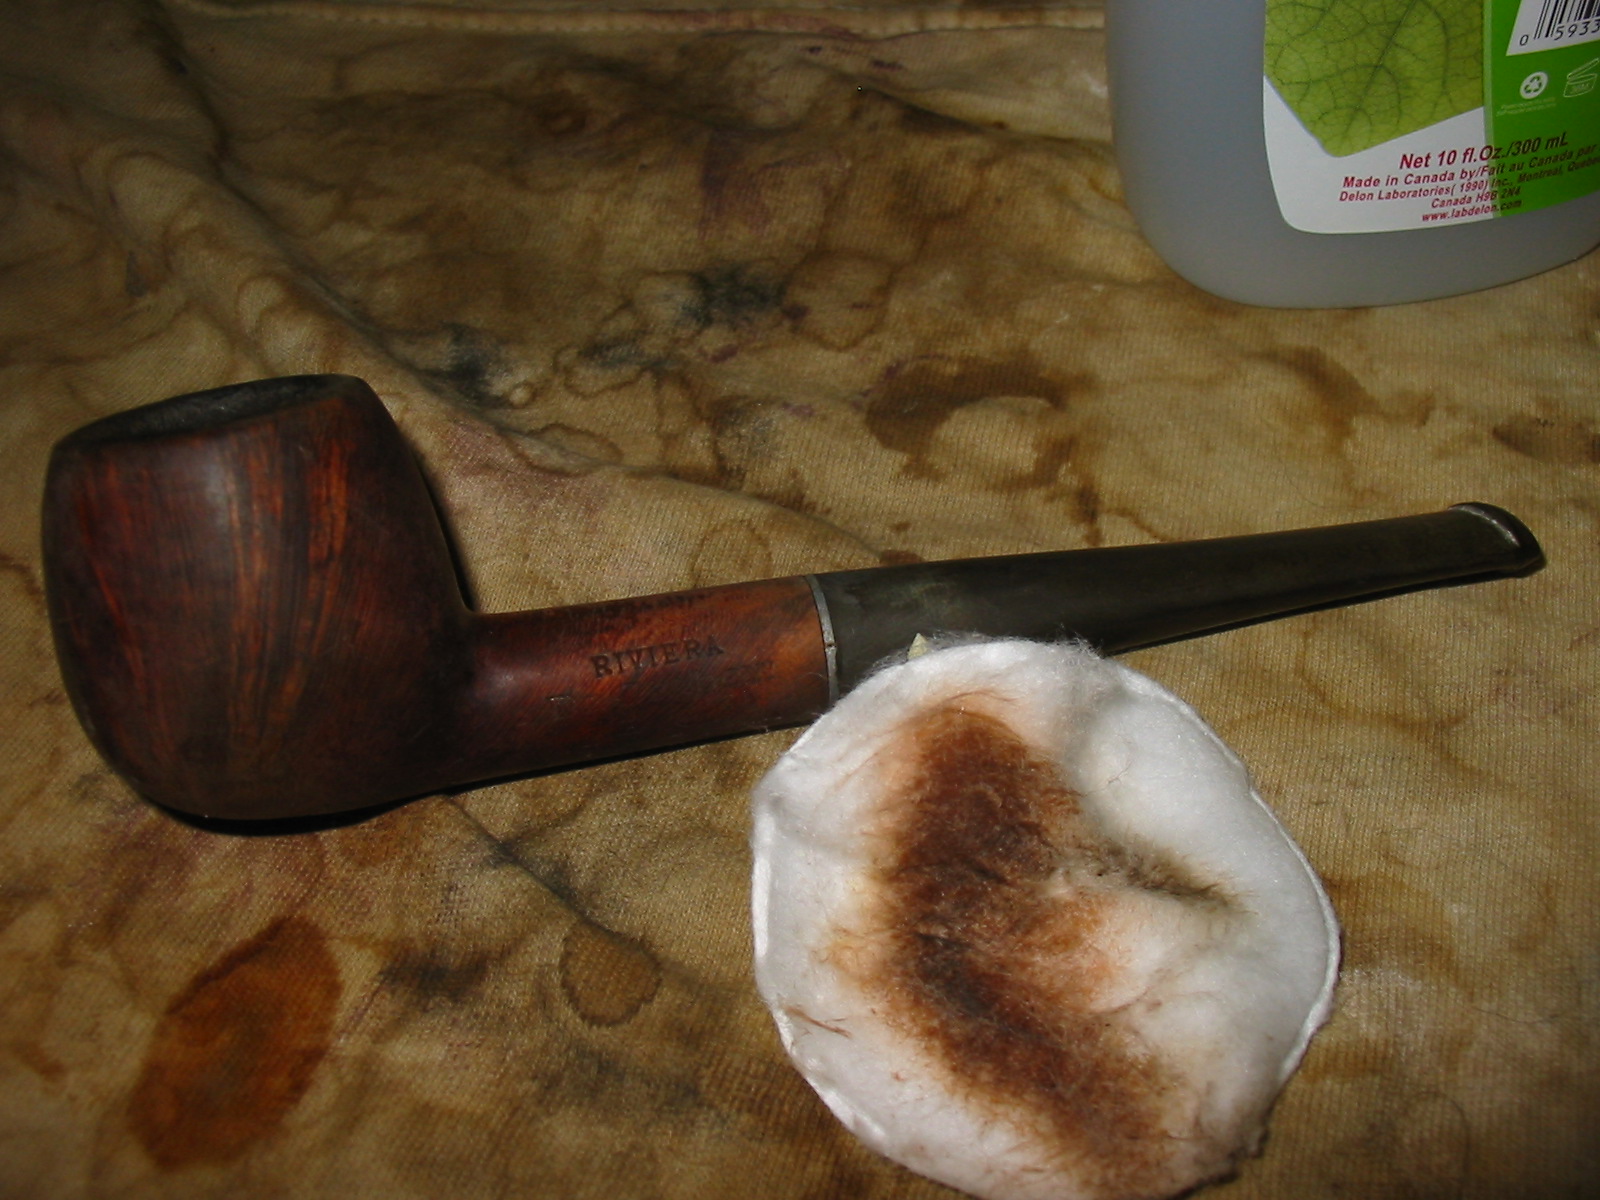
I scrubbed the rim and the bowl with acetone on a cotton pad to remove the grime and oils left in the finish. I scrubbed until the rim and bowl were clean.Dr13 
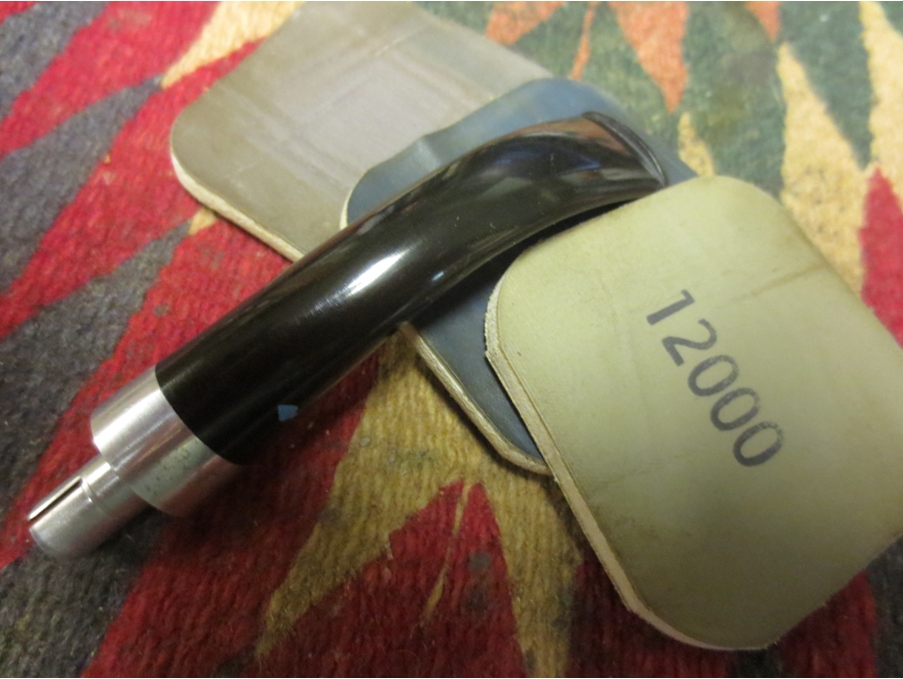
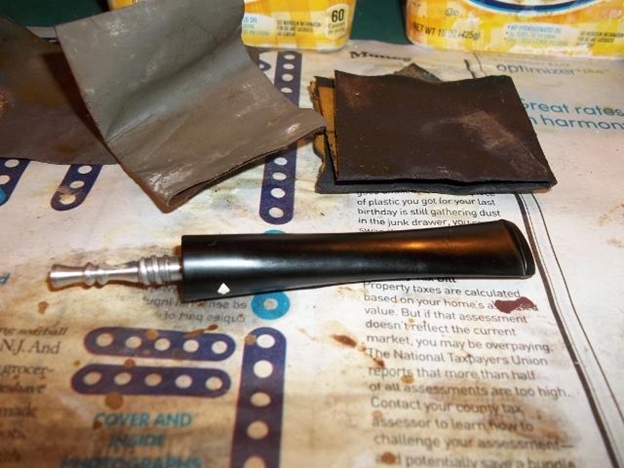
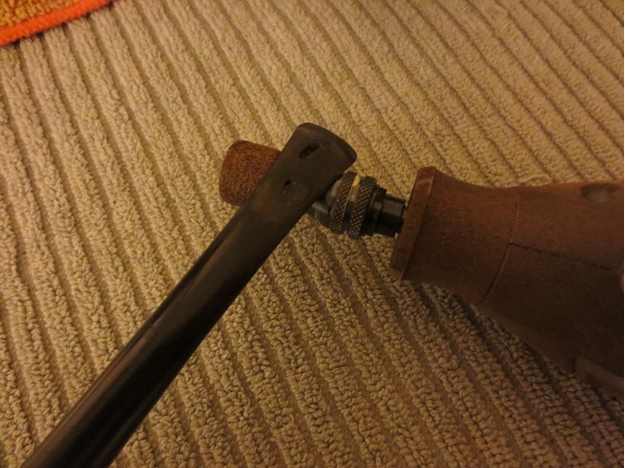
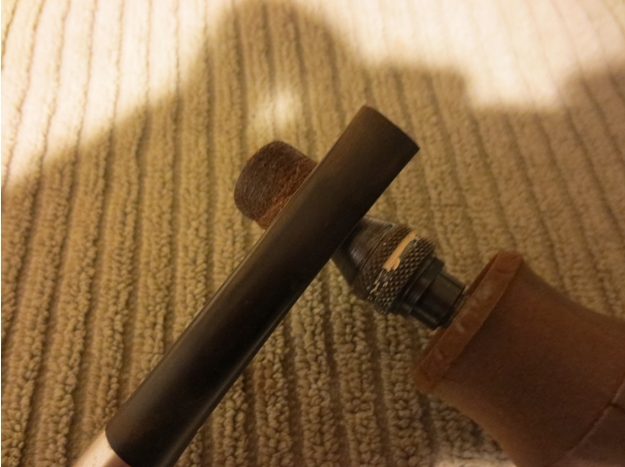
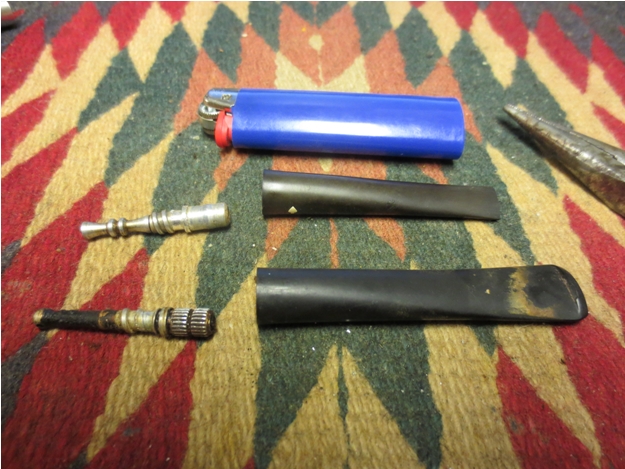
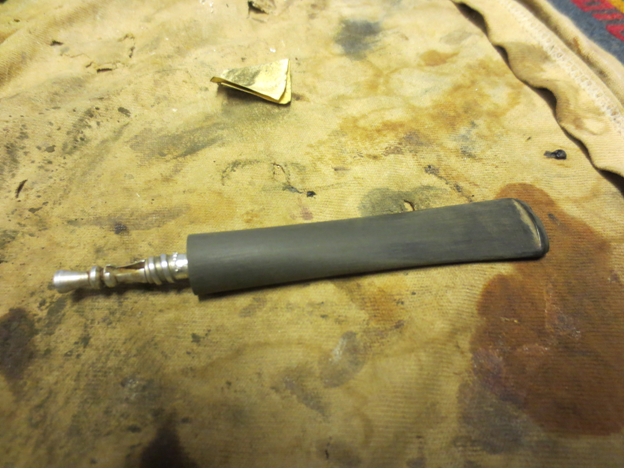
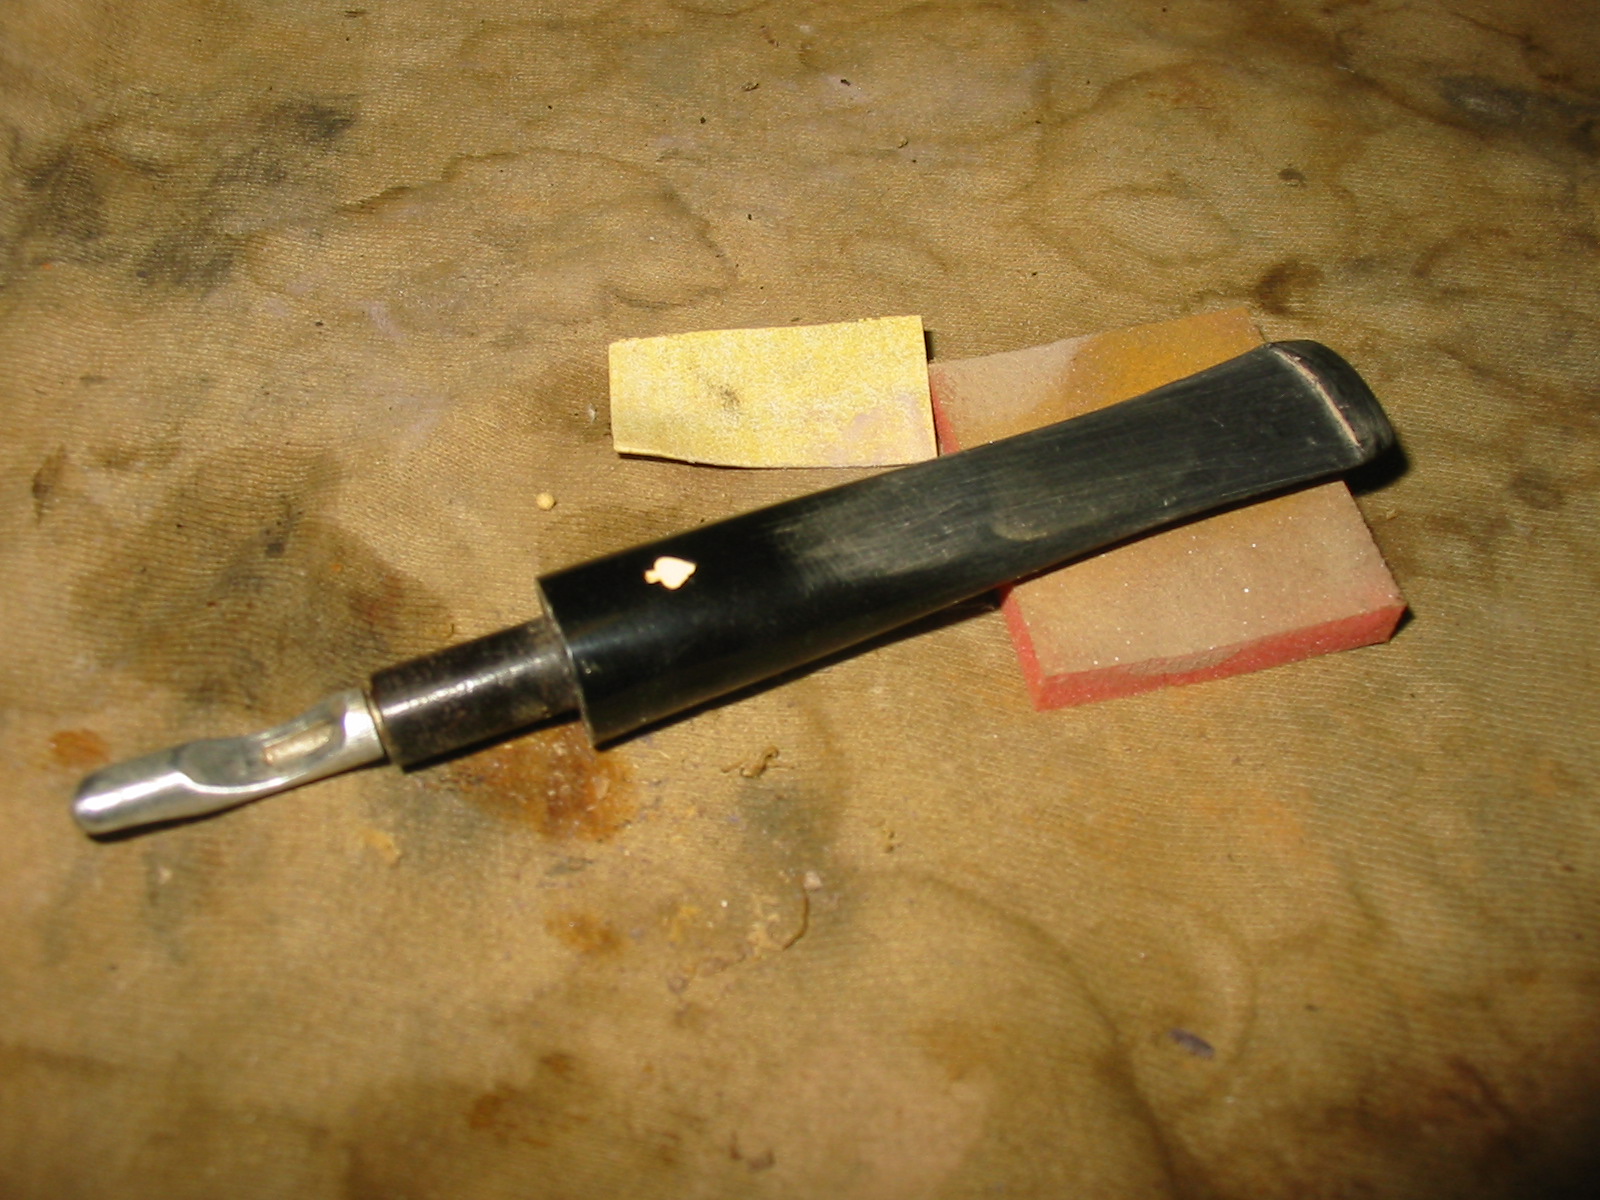
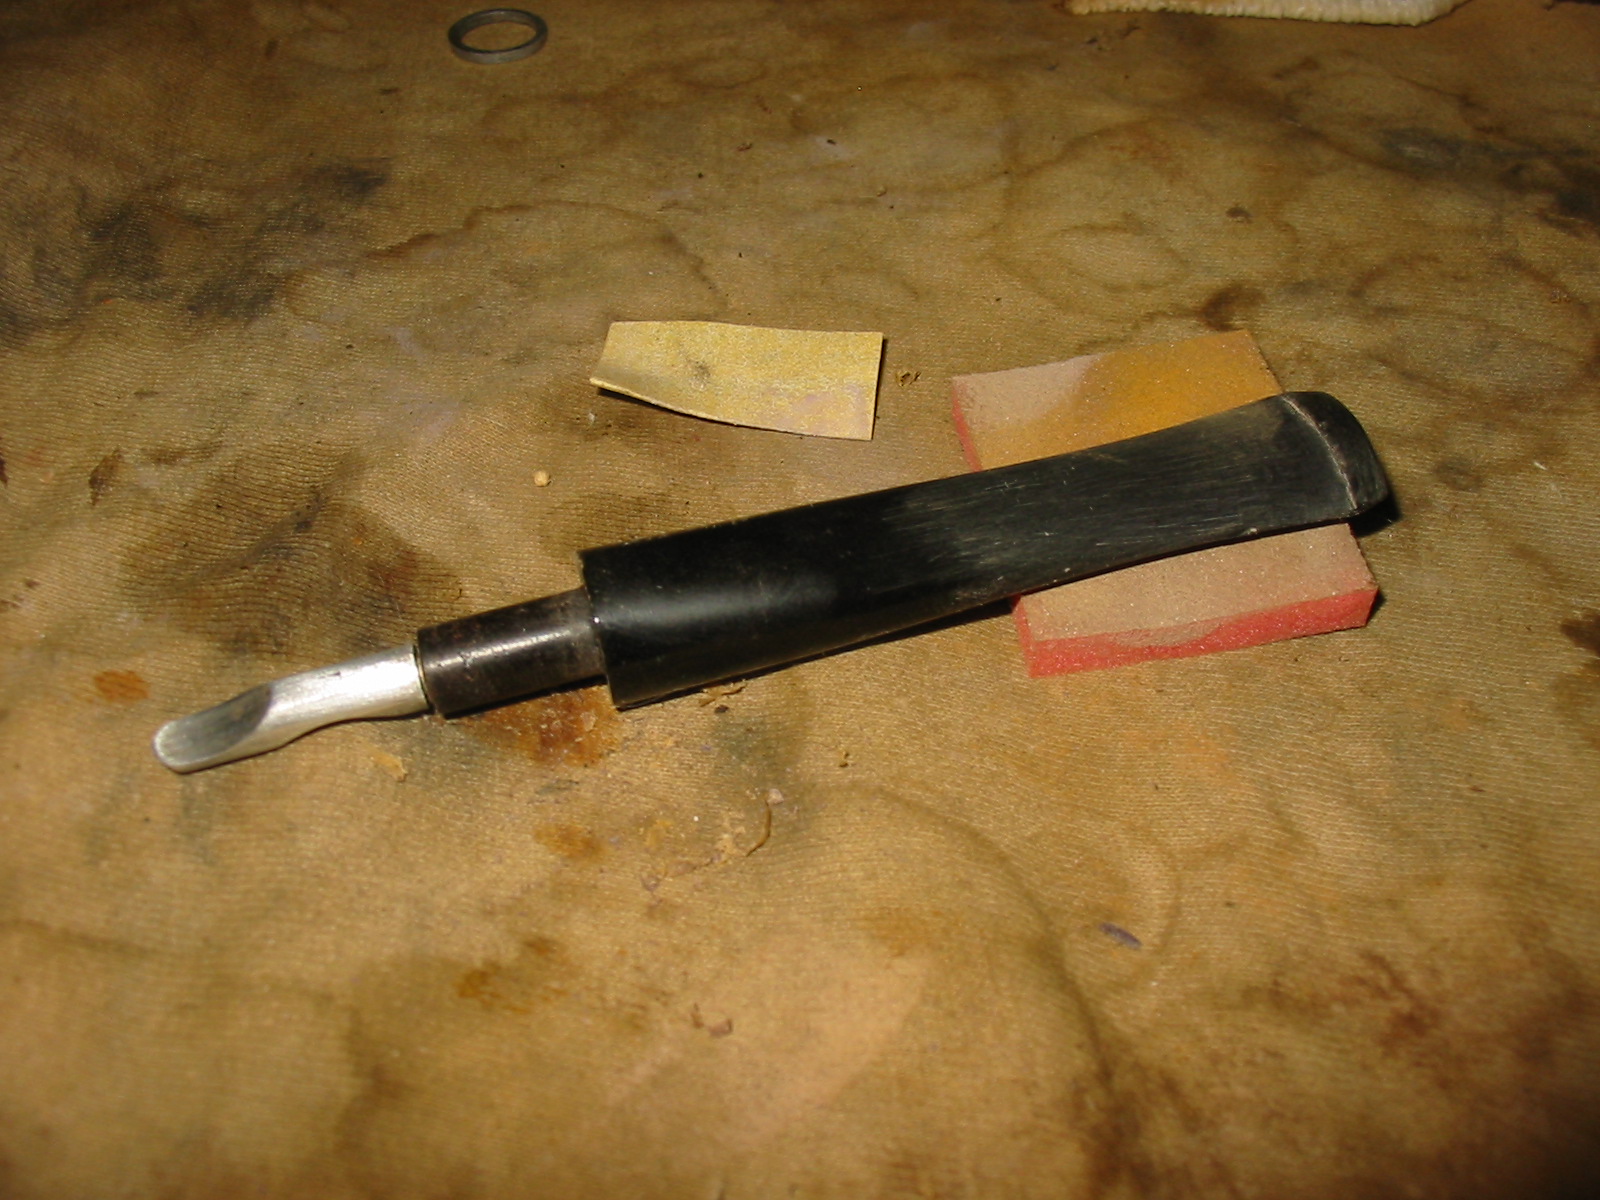
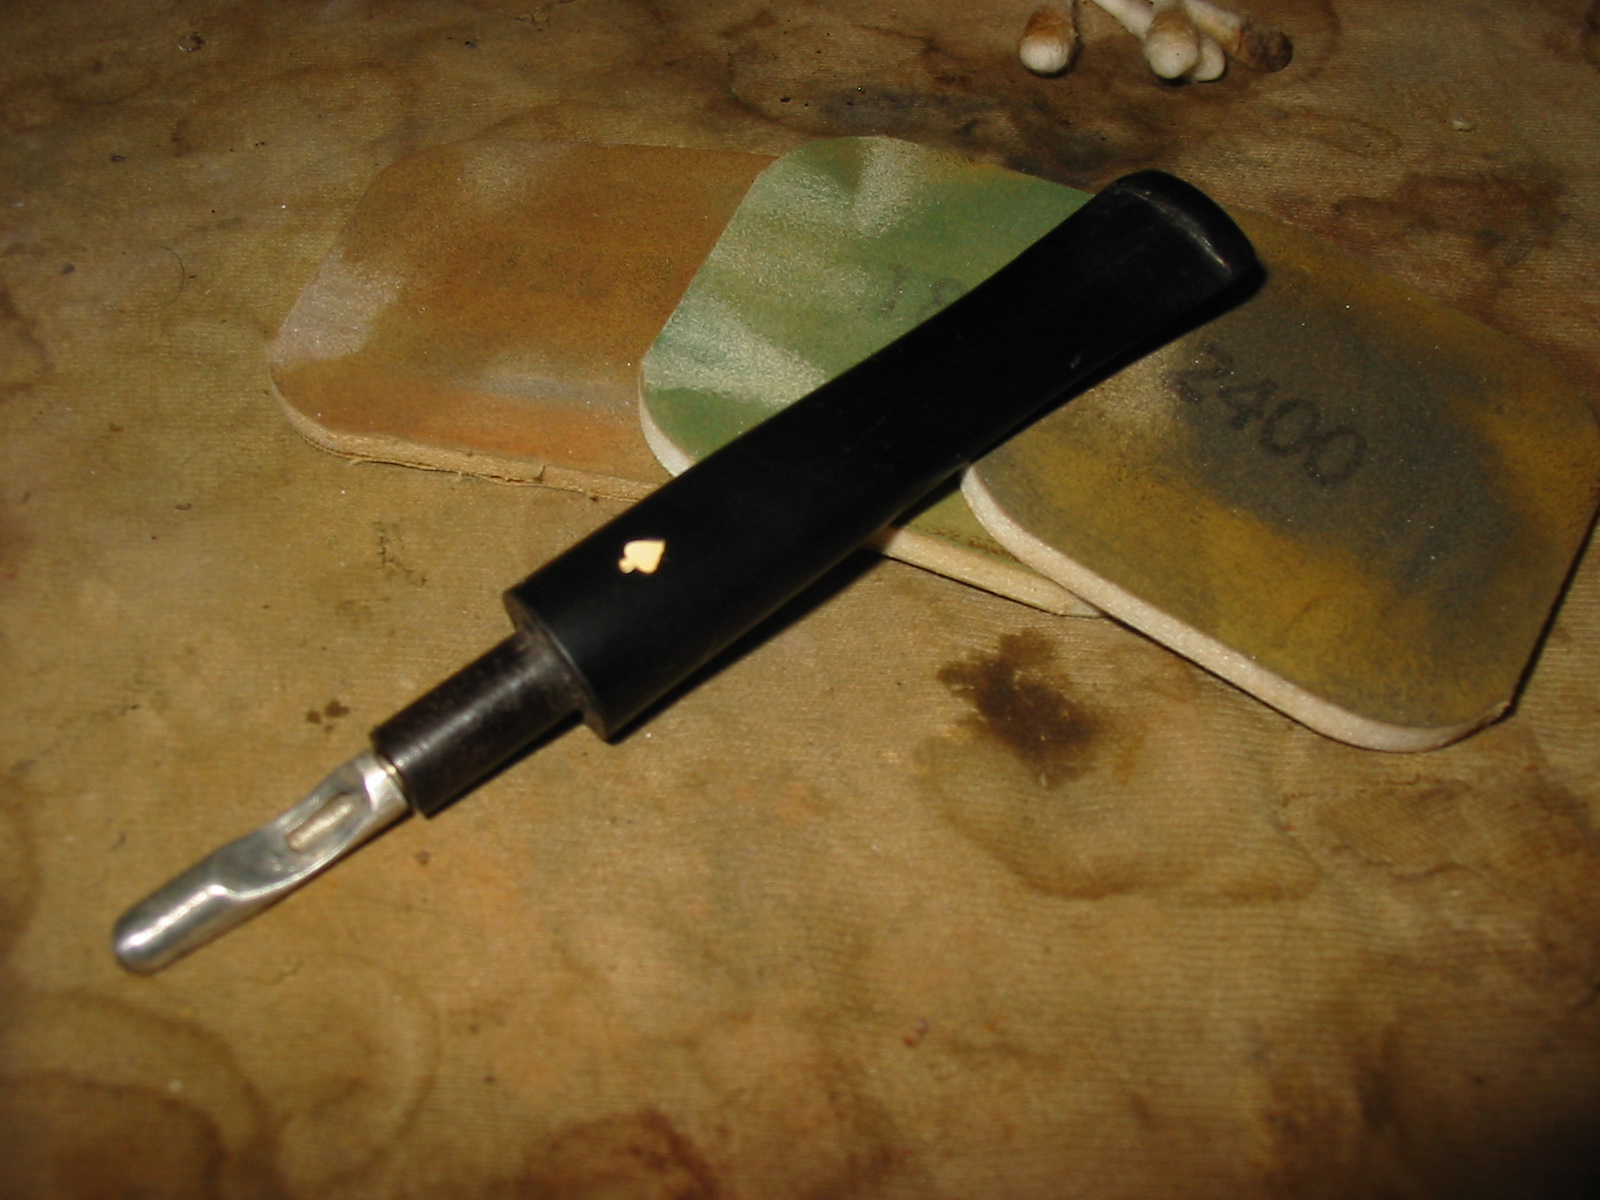
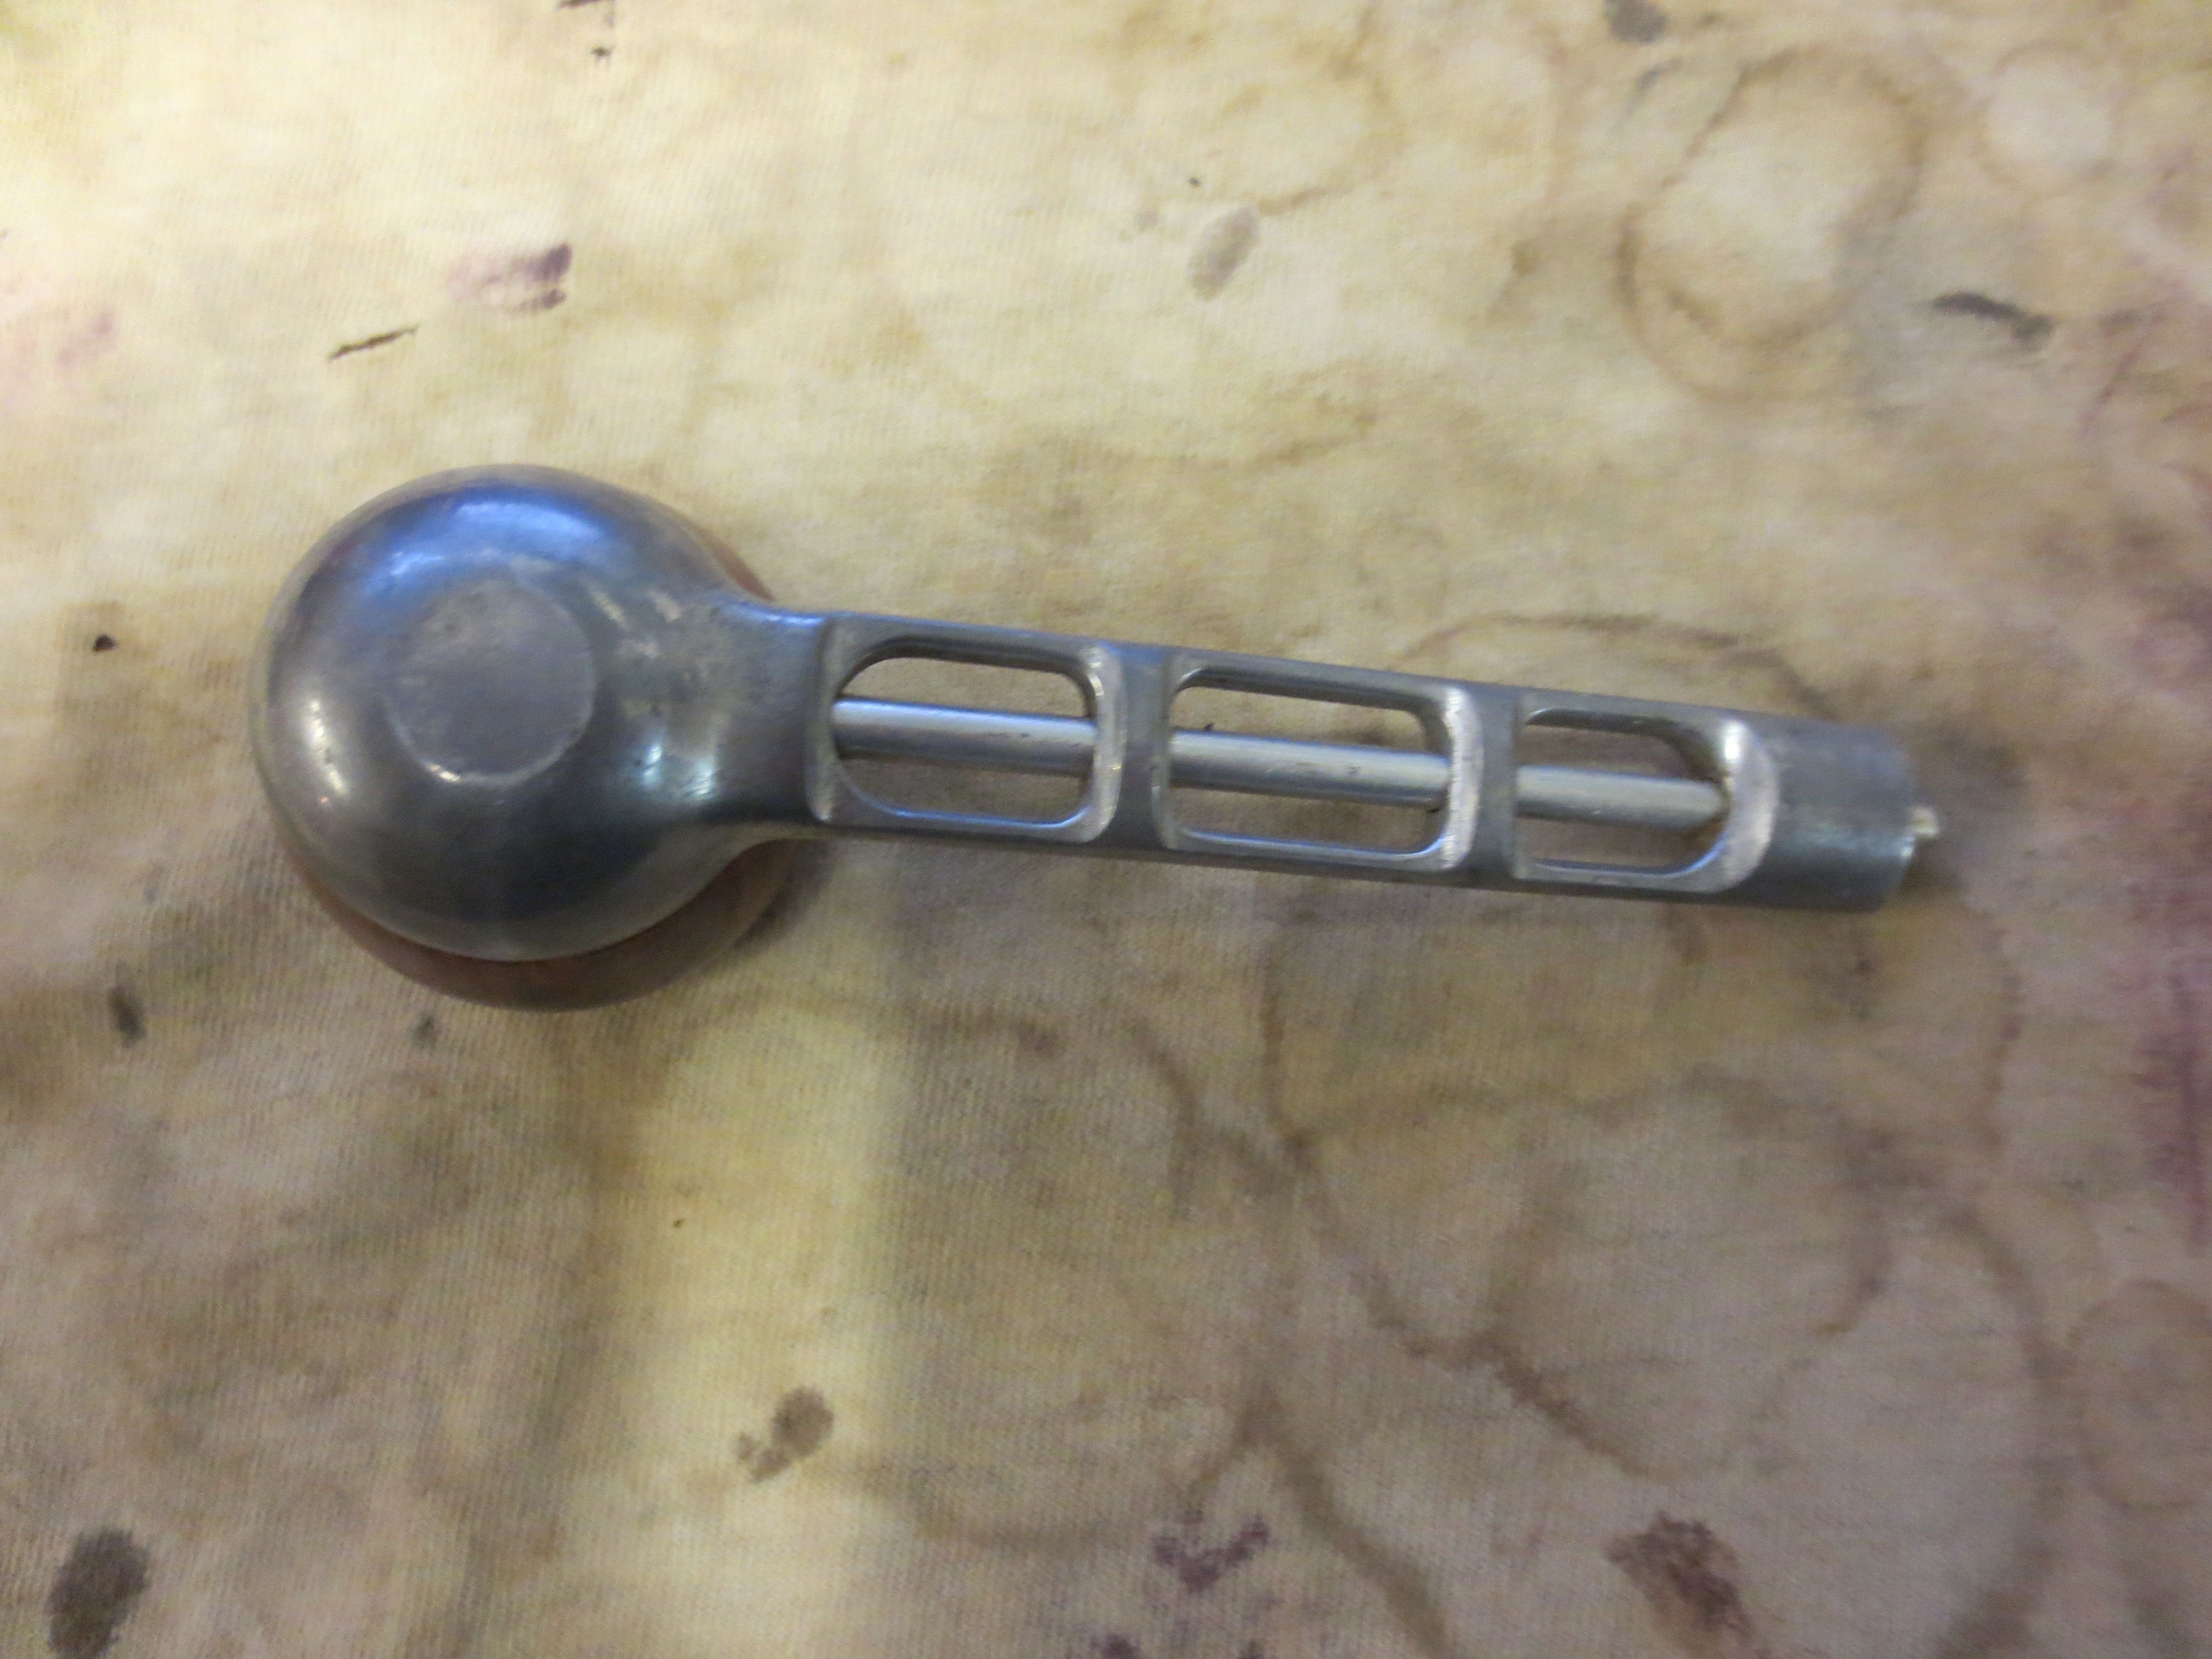
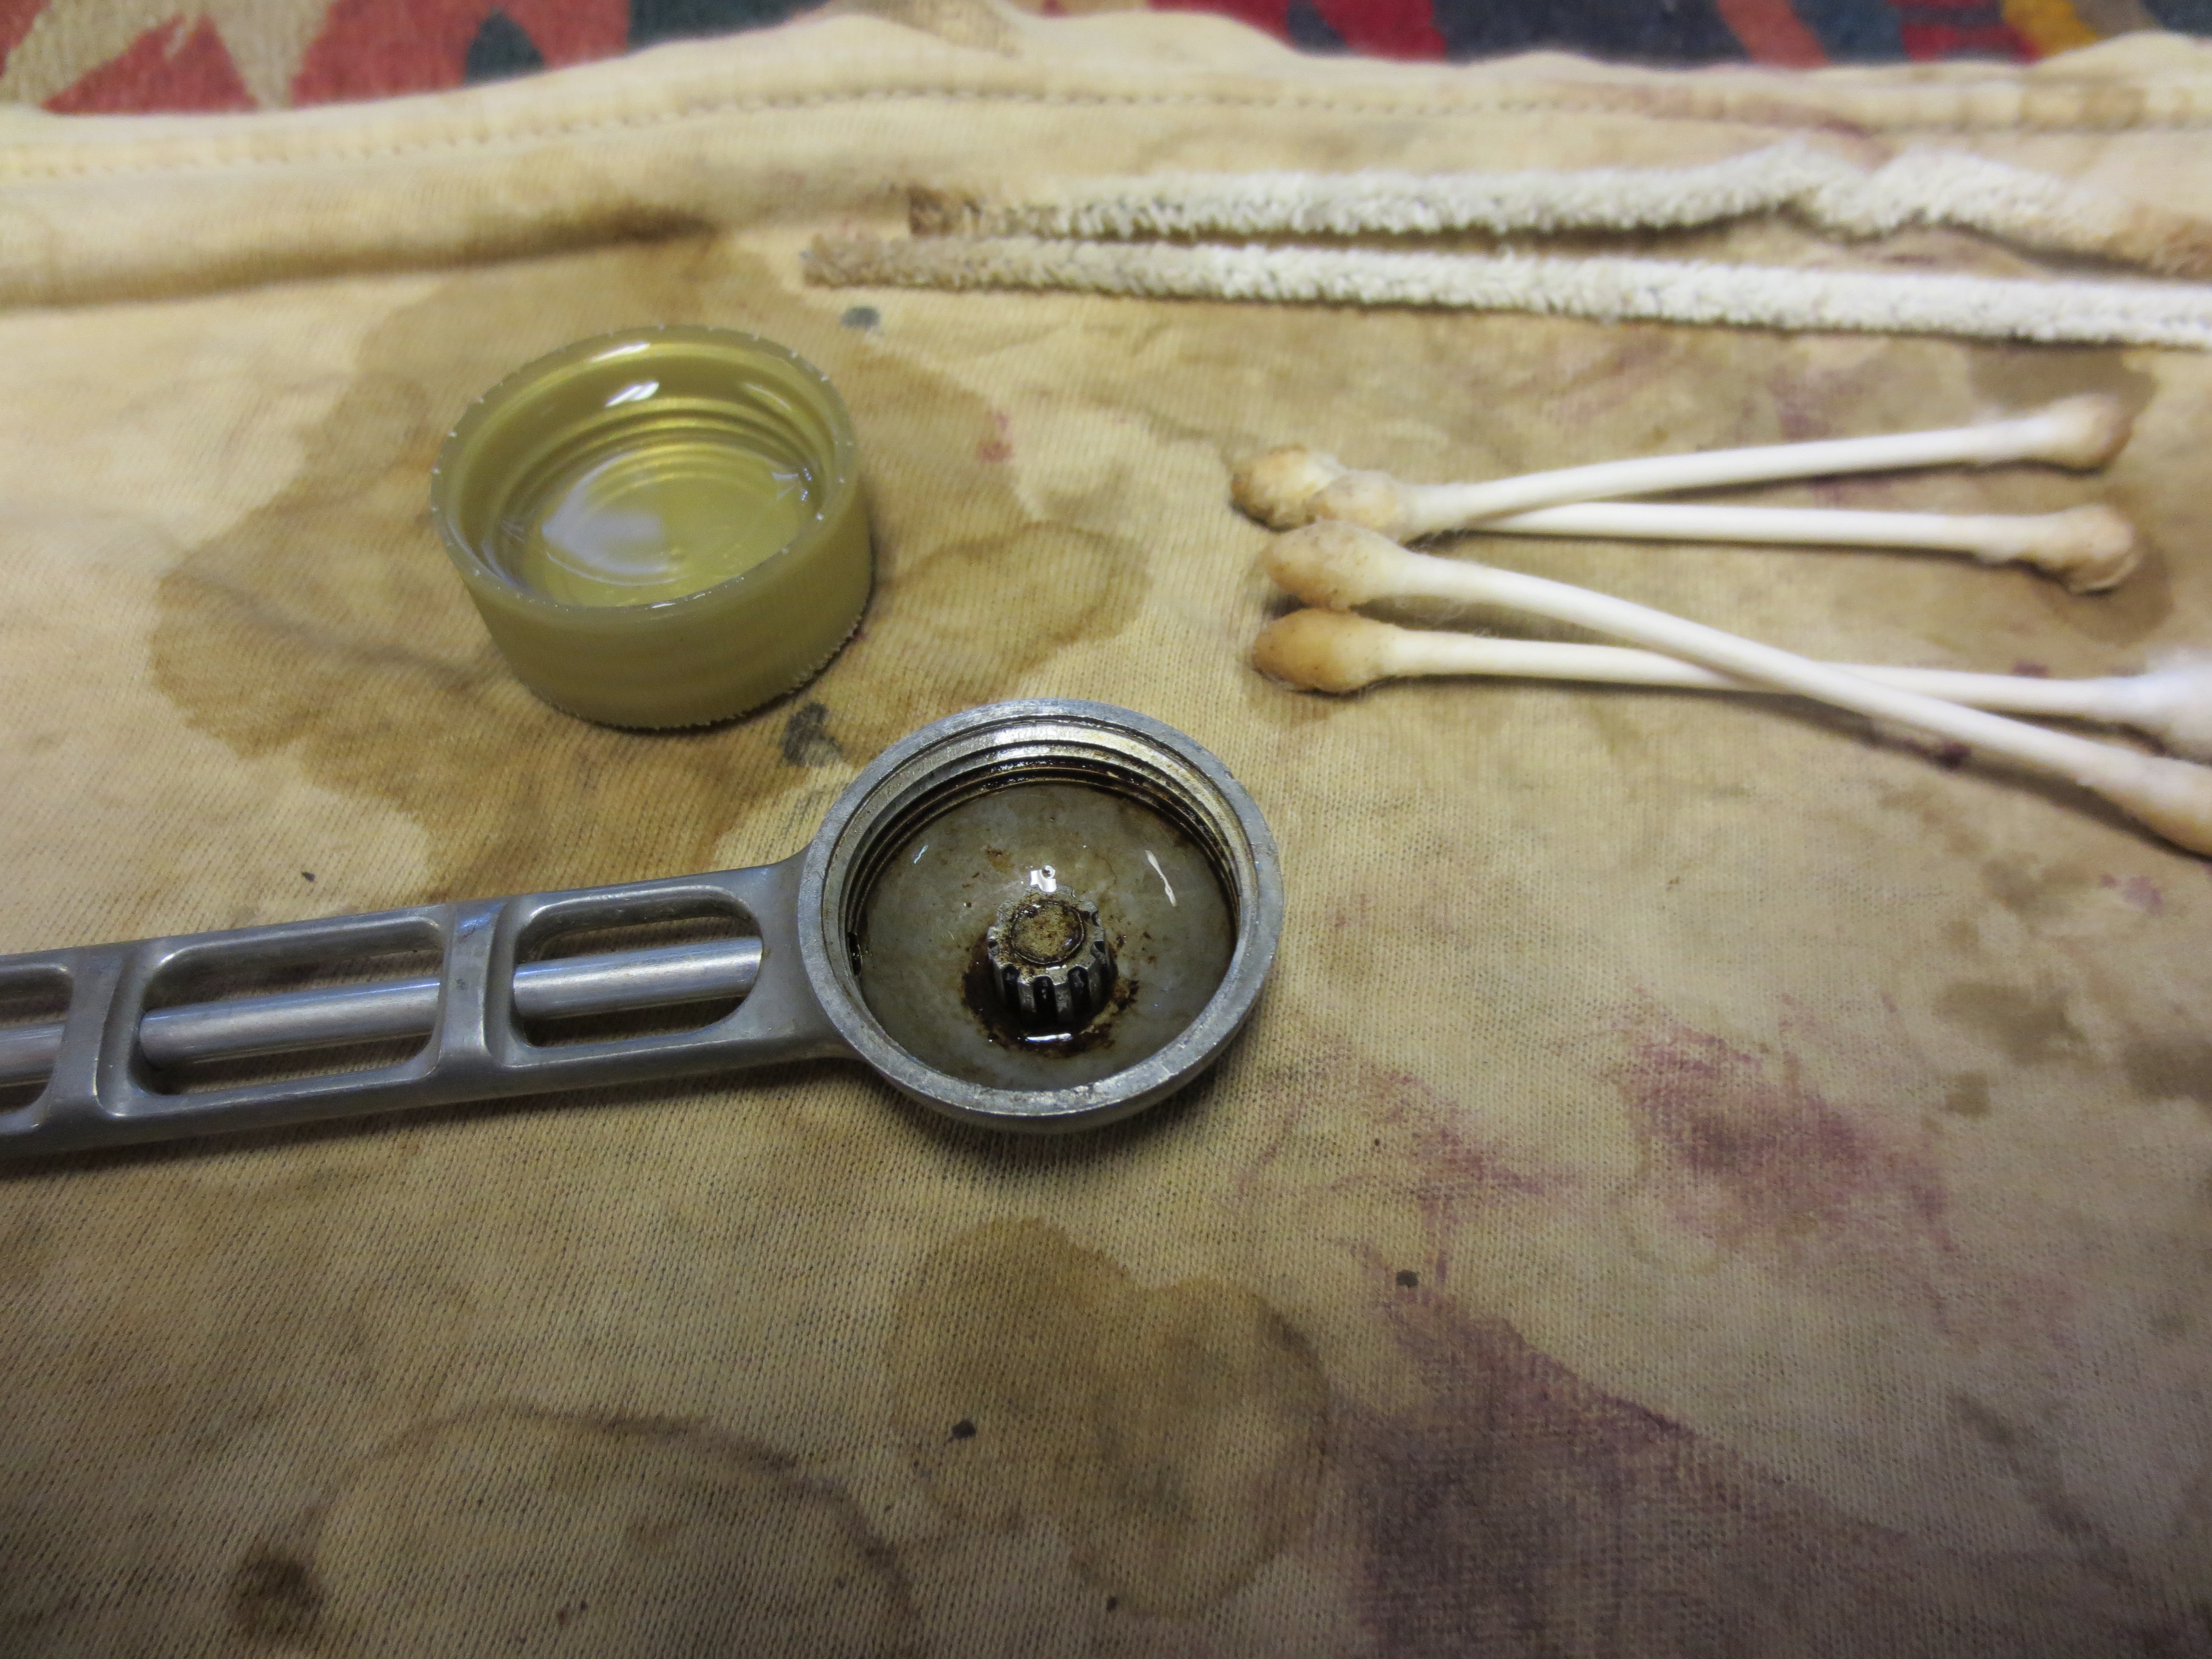
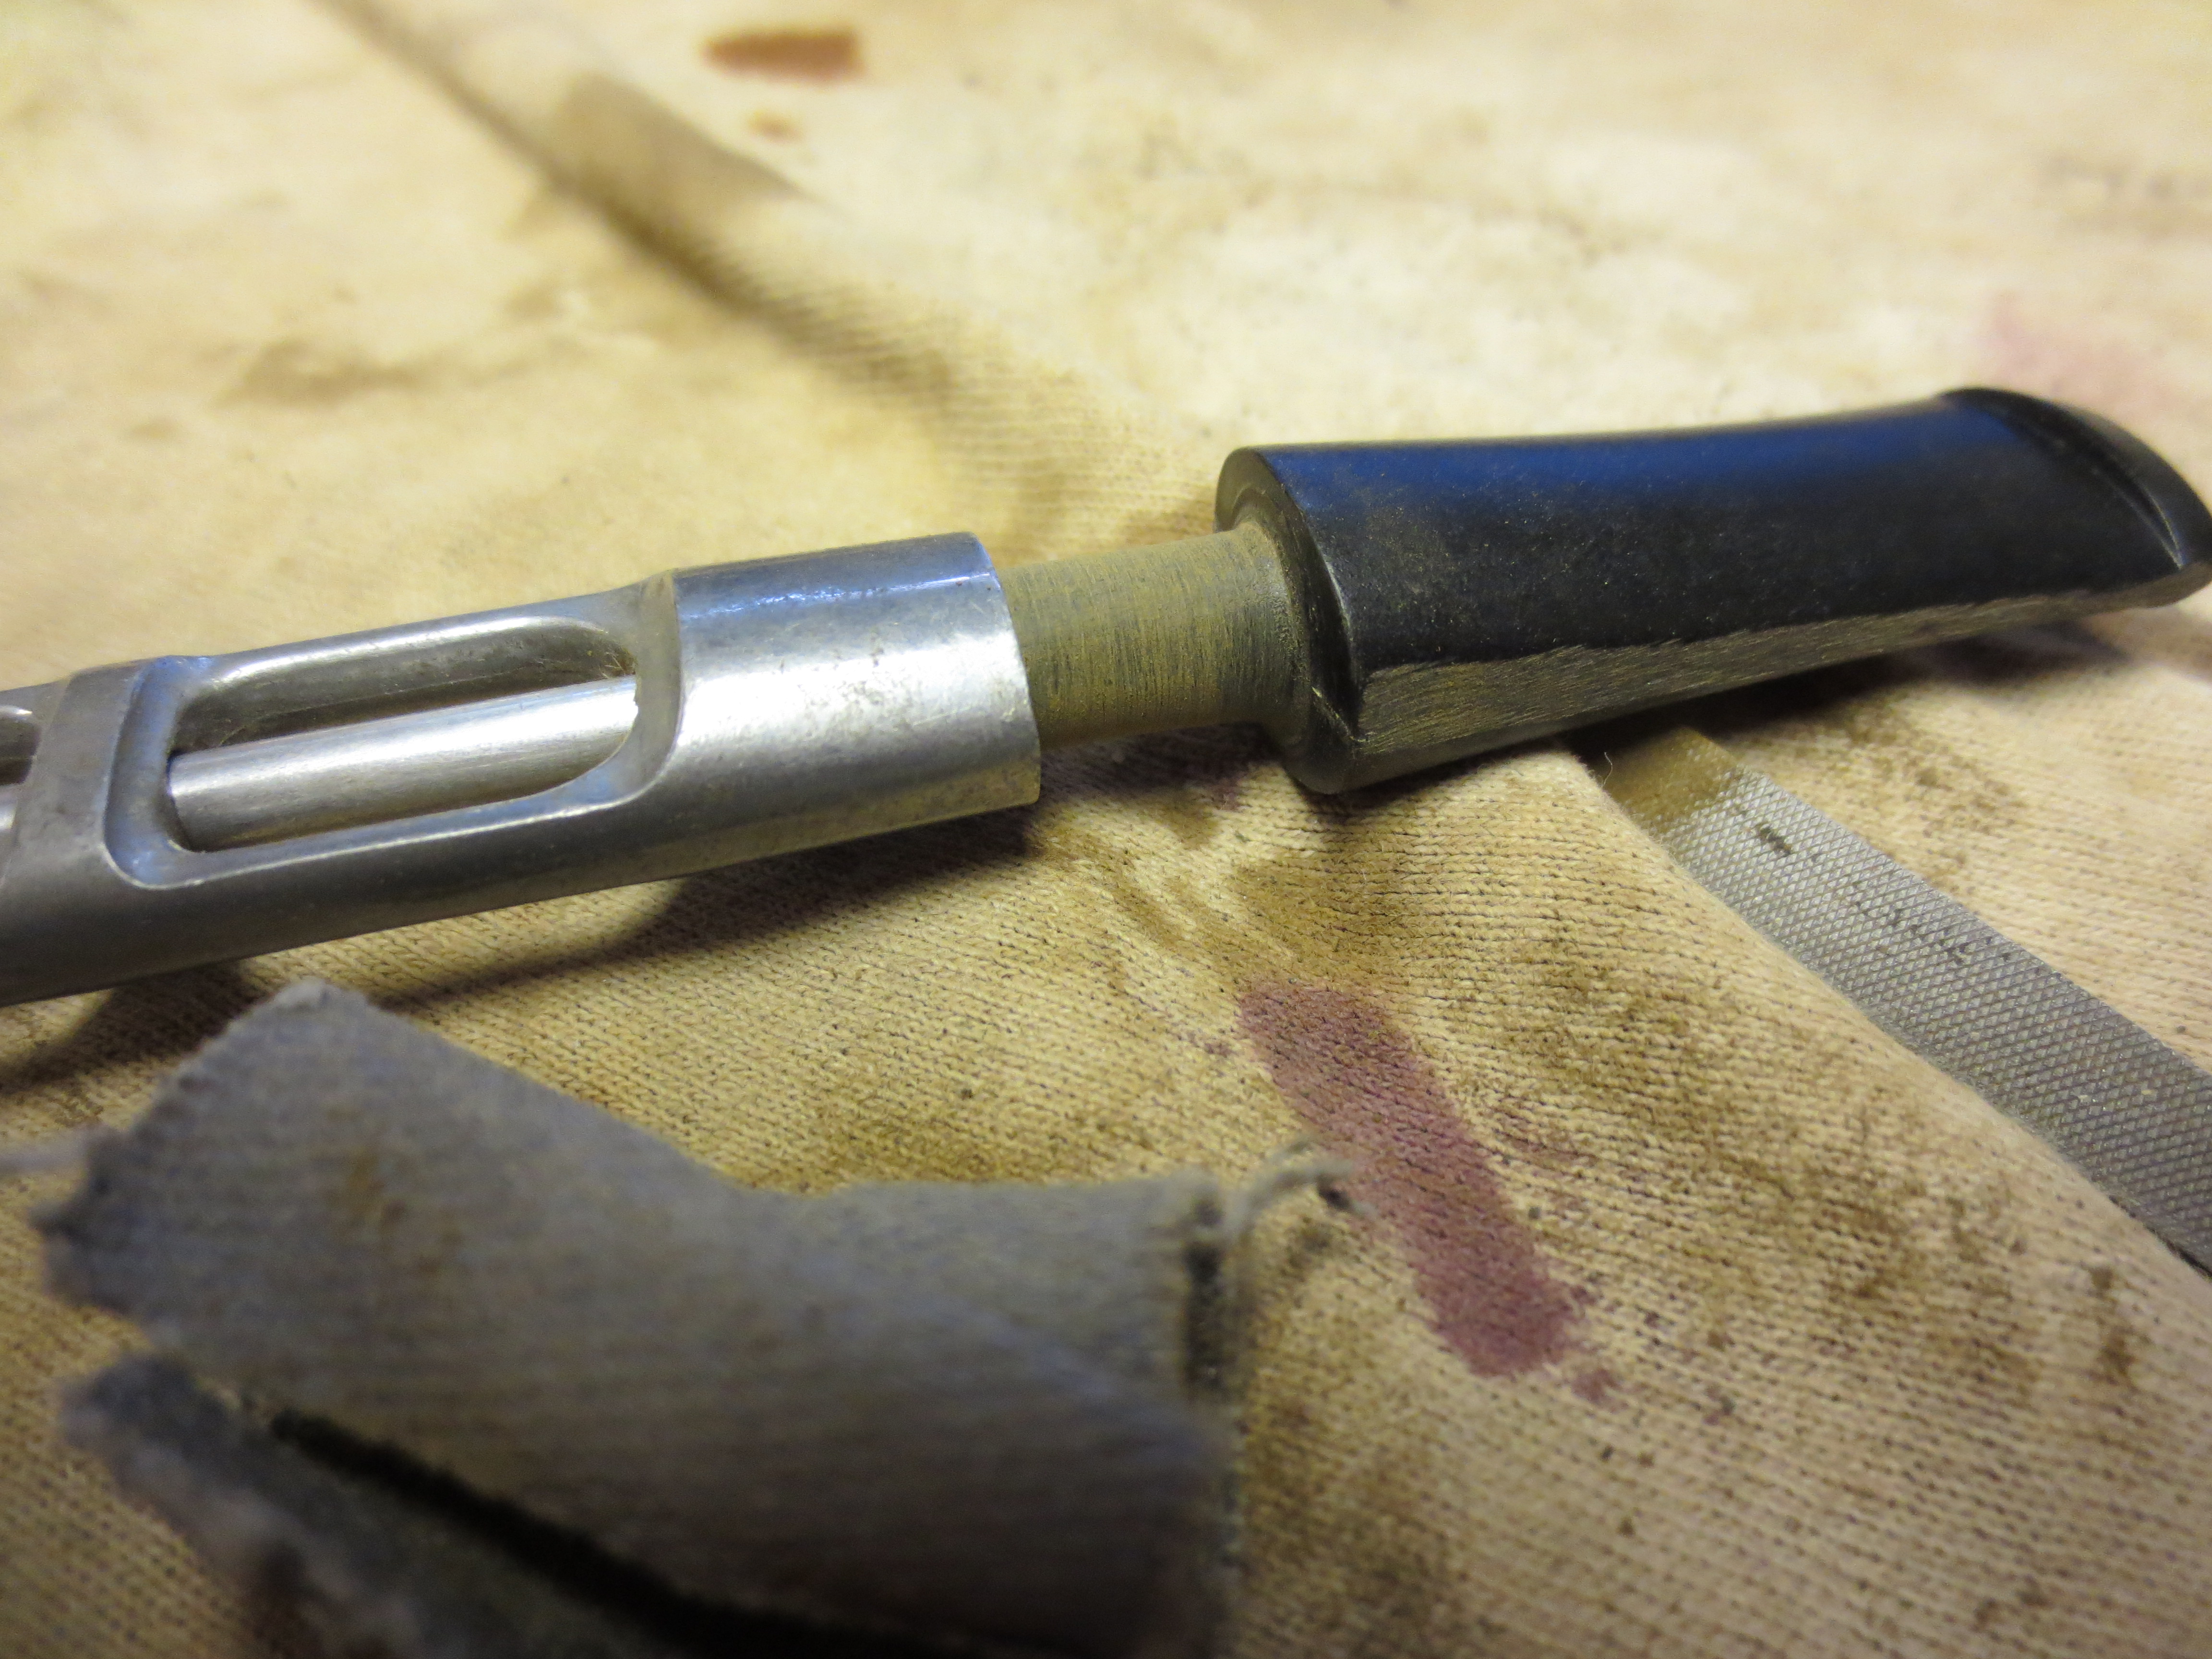
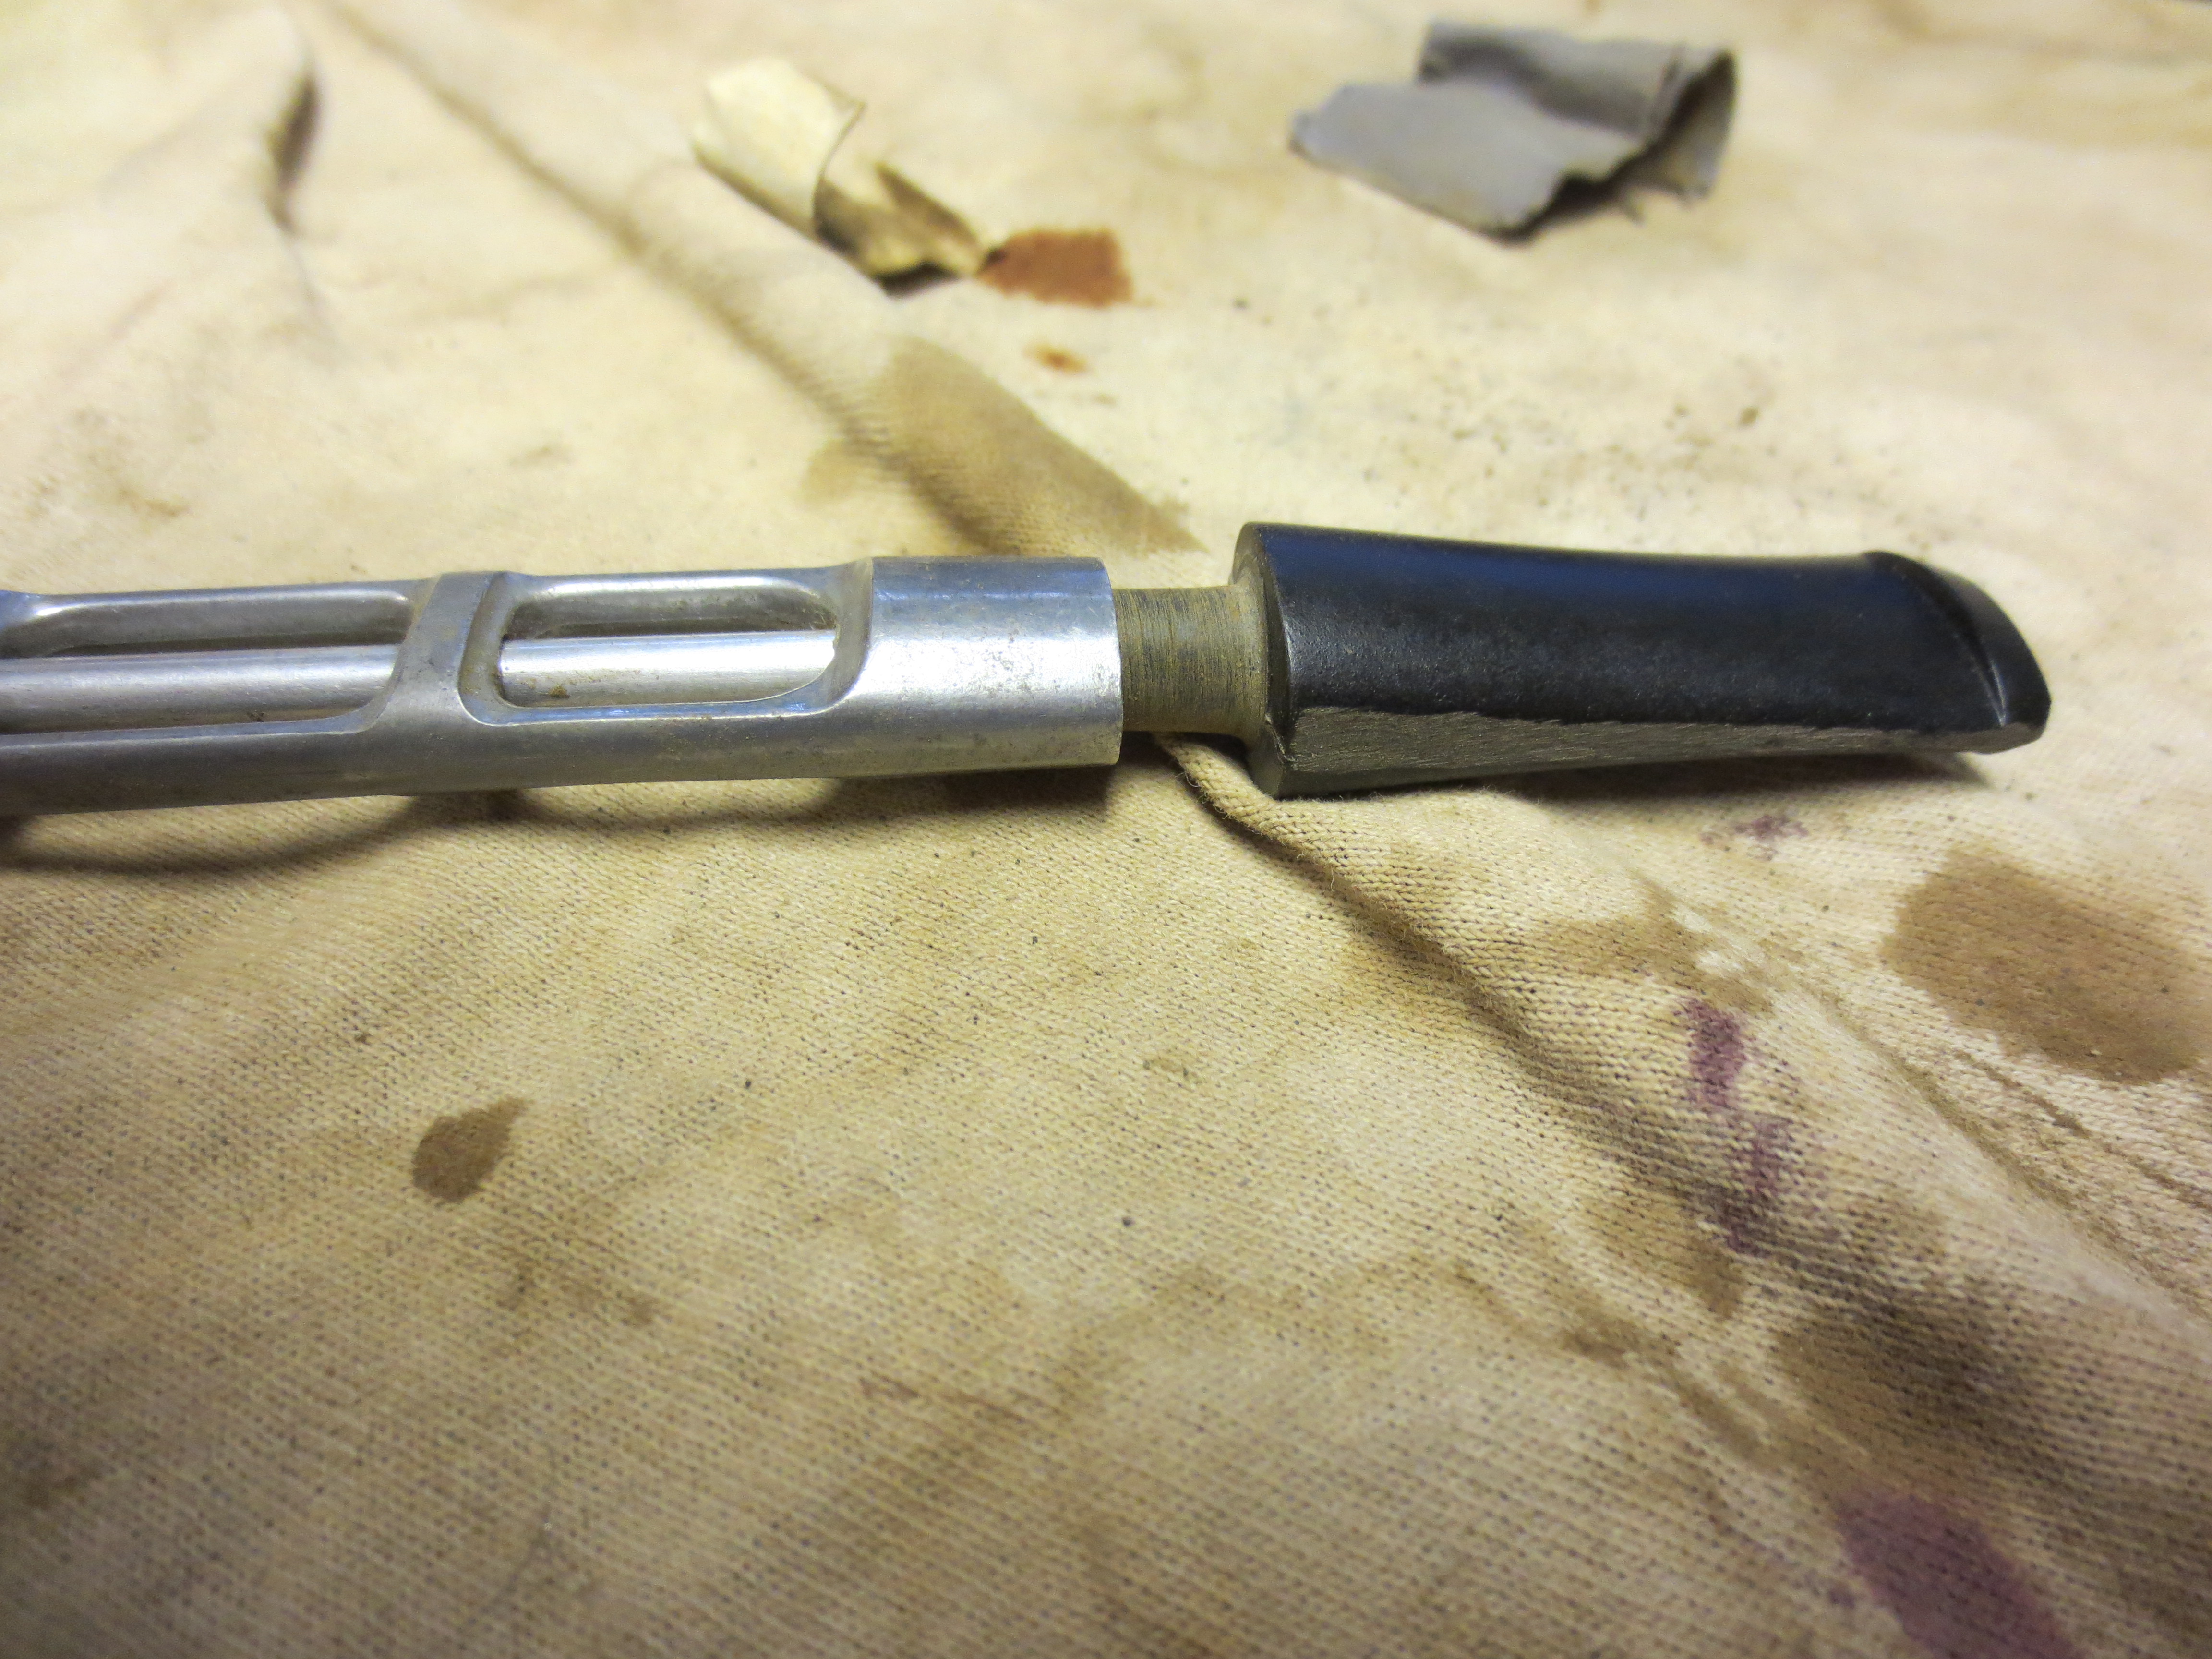
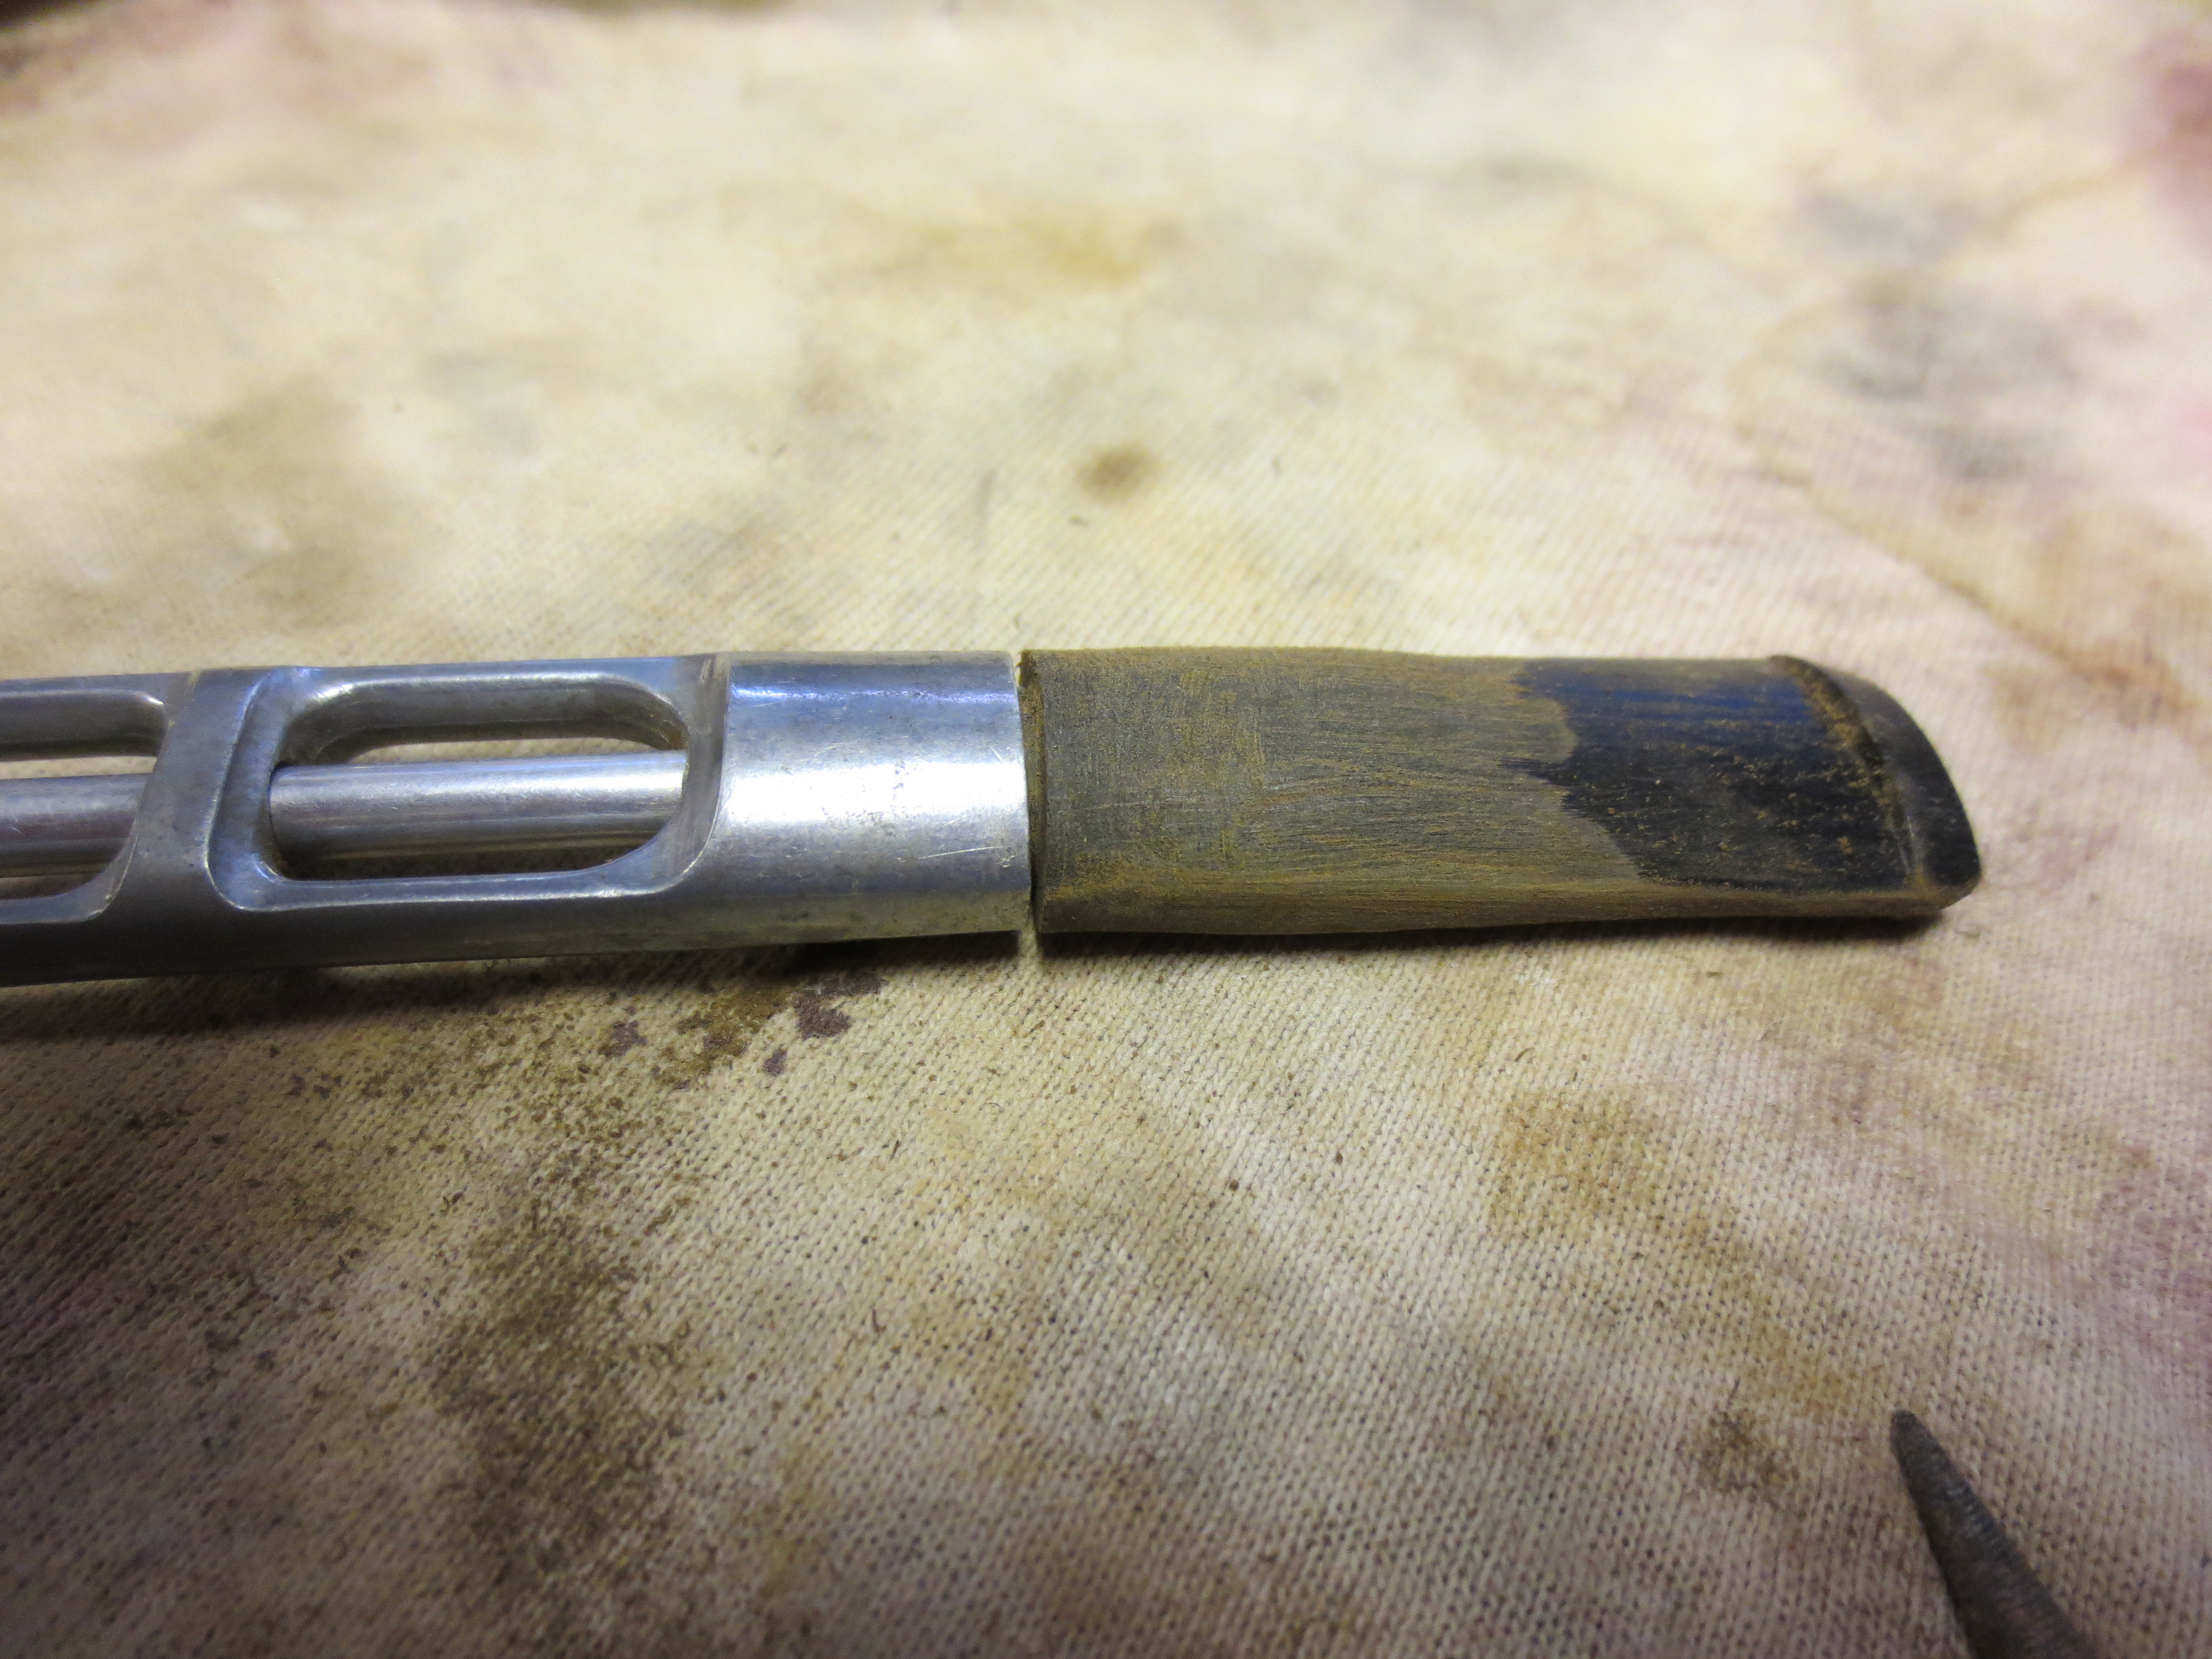
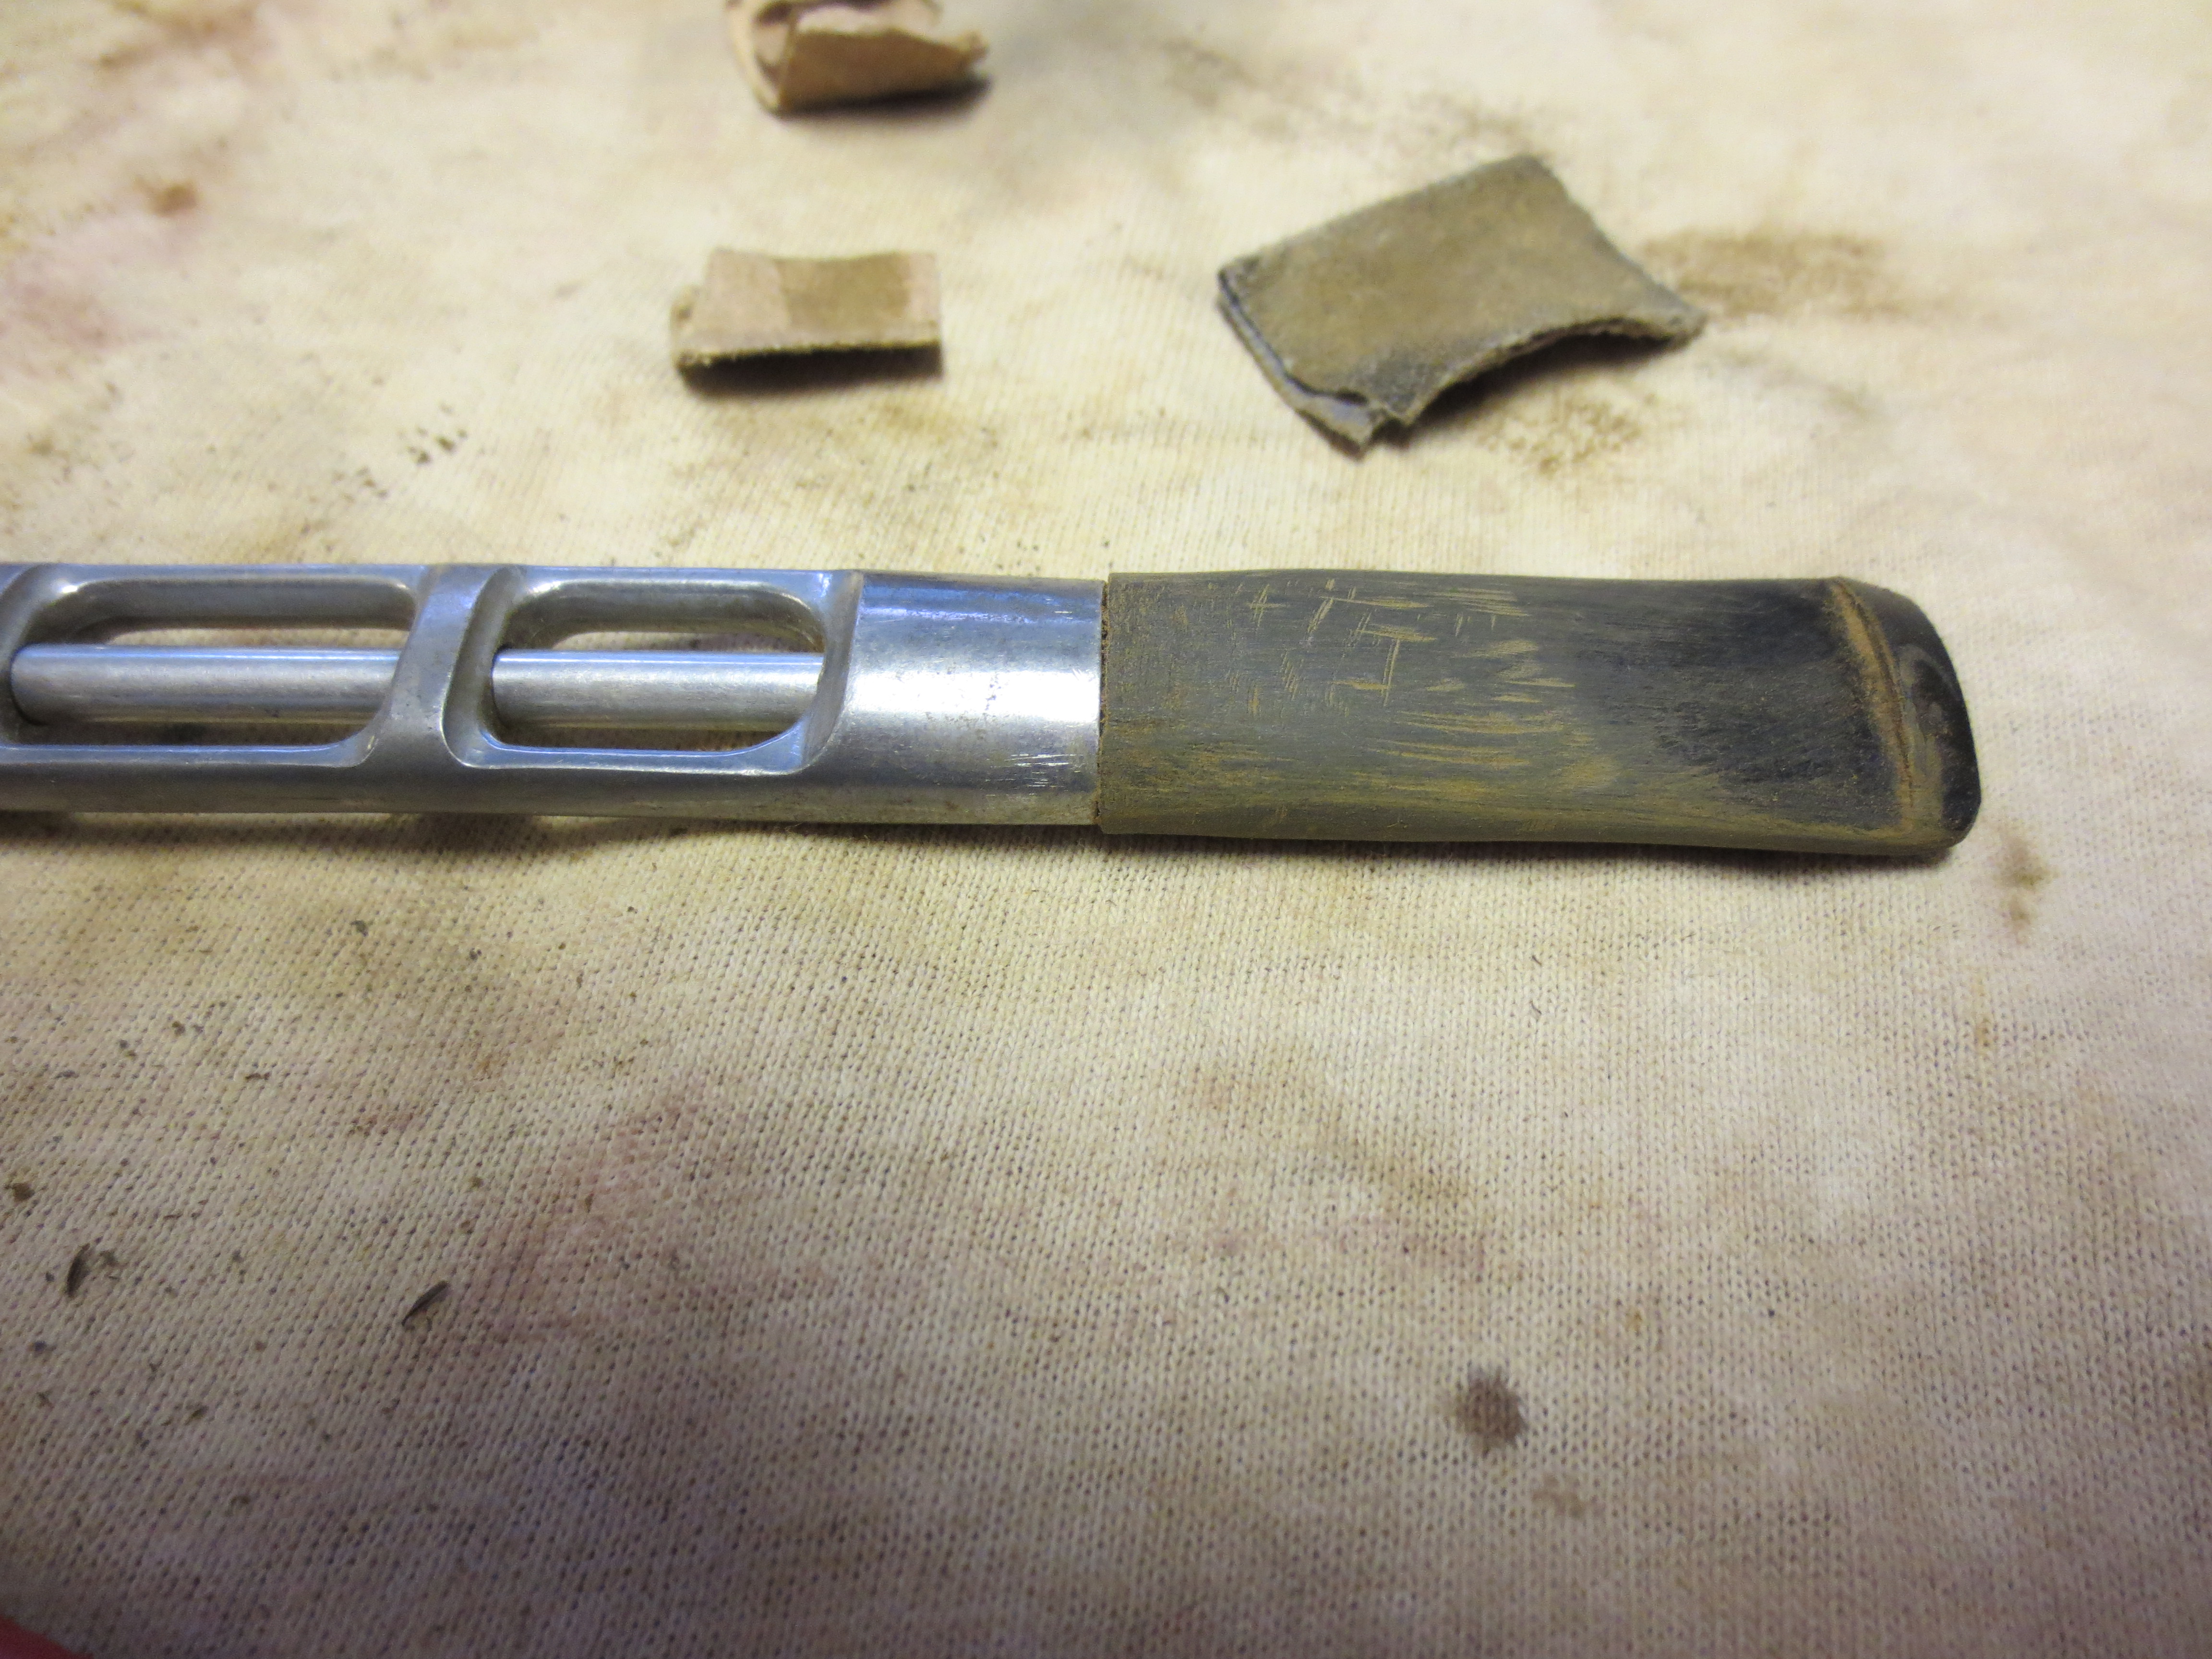
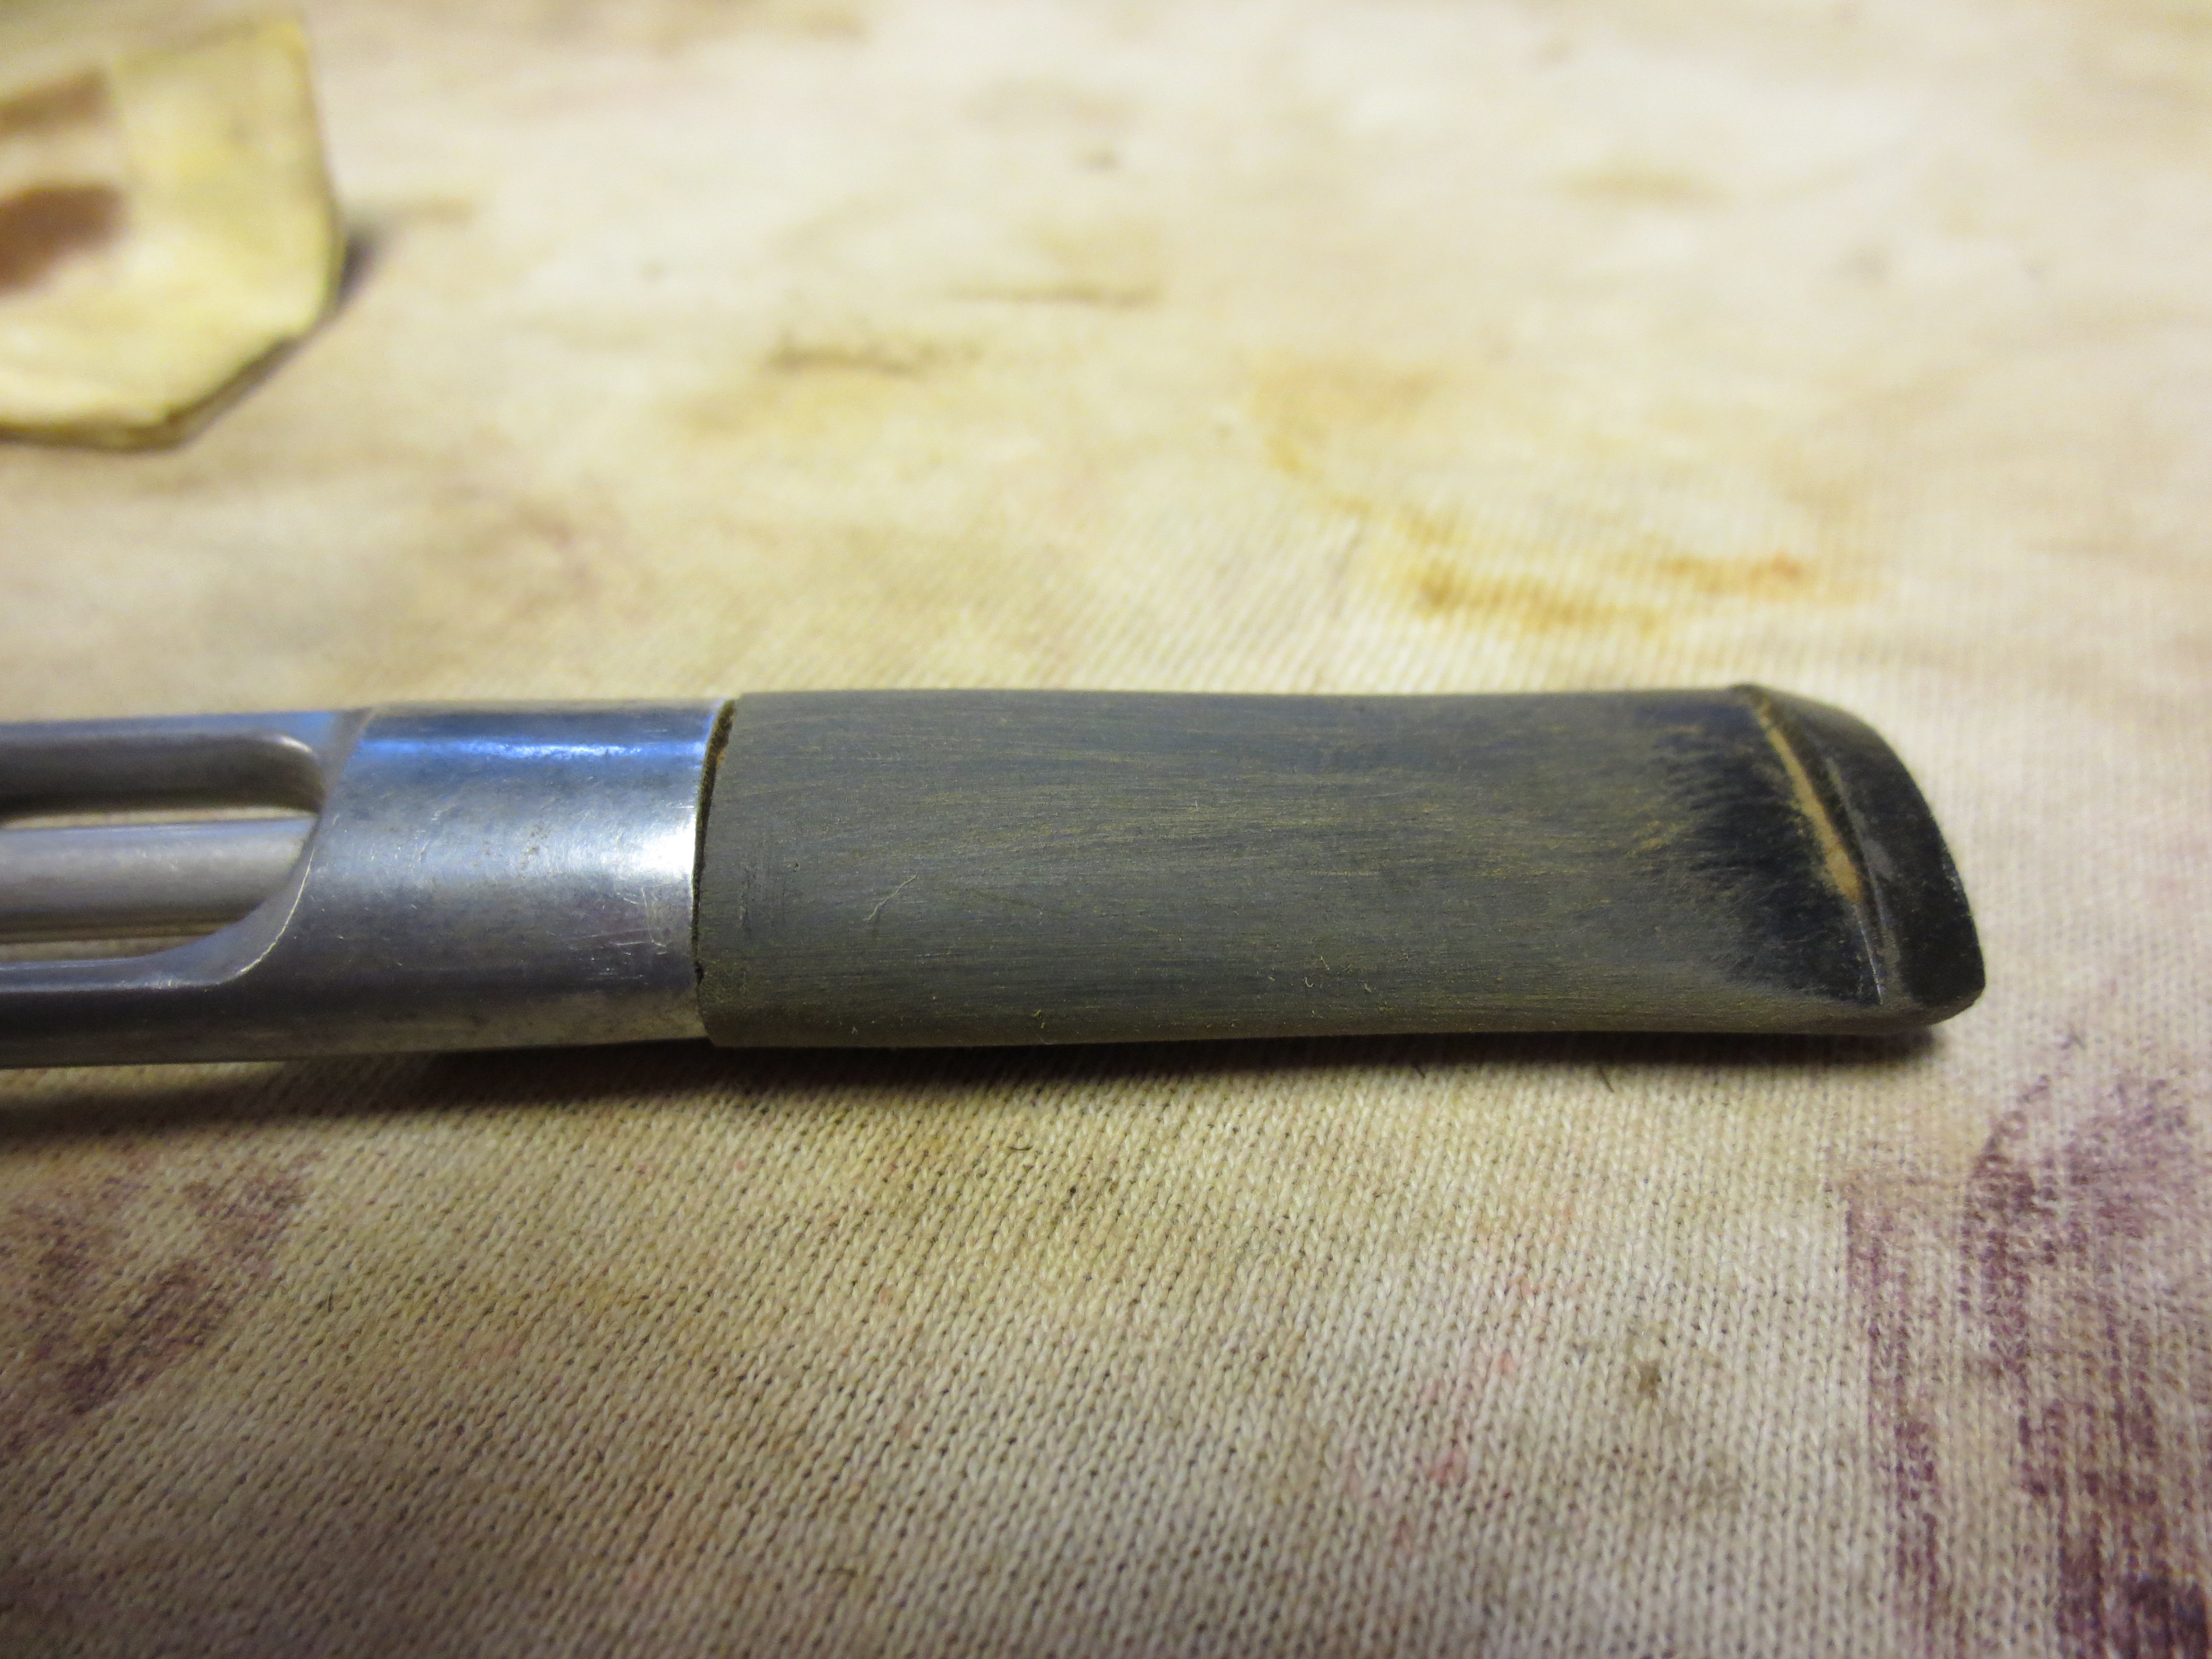
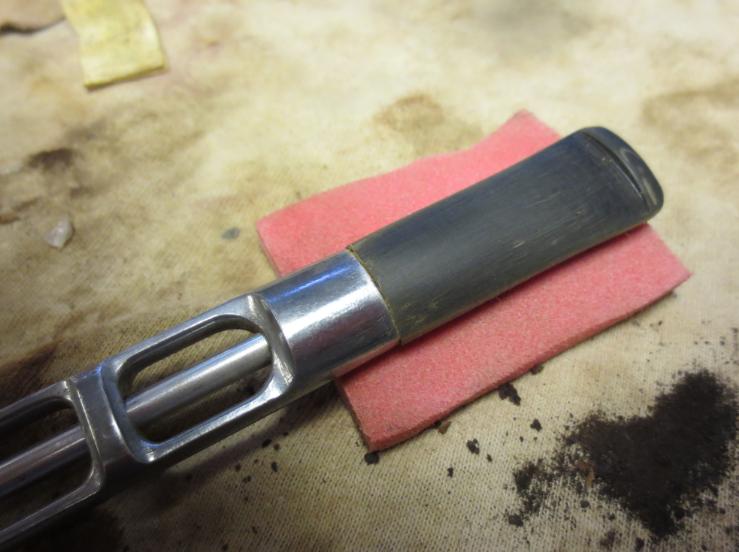
I scrubbed the shovel stinger with 0000 steel wool to remove the buildup on the aluminum and polish it at the same time.Dr14

Dr15 
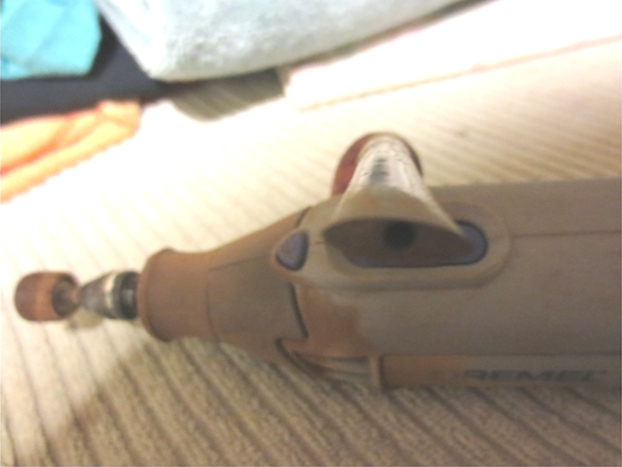
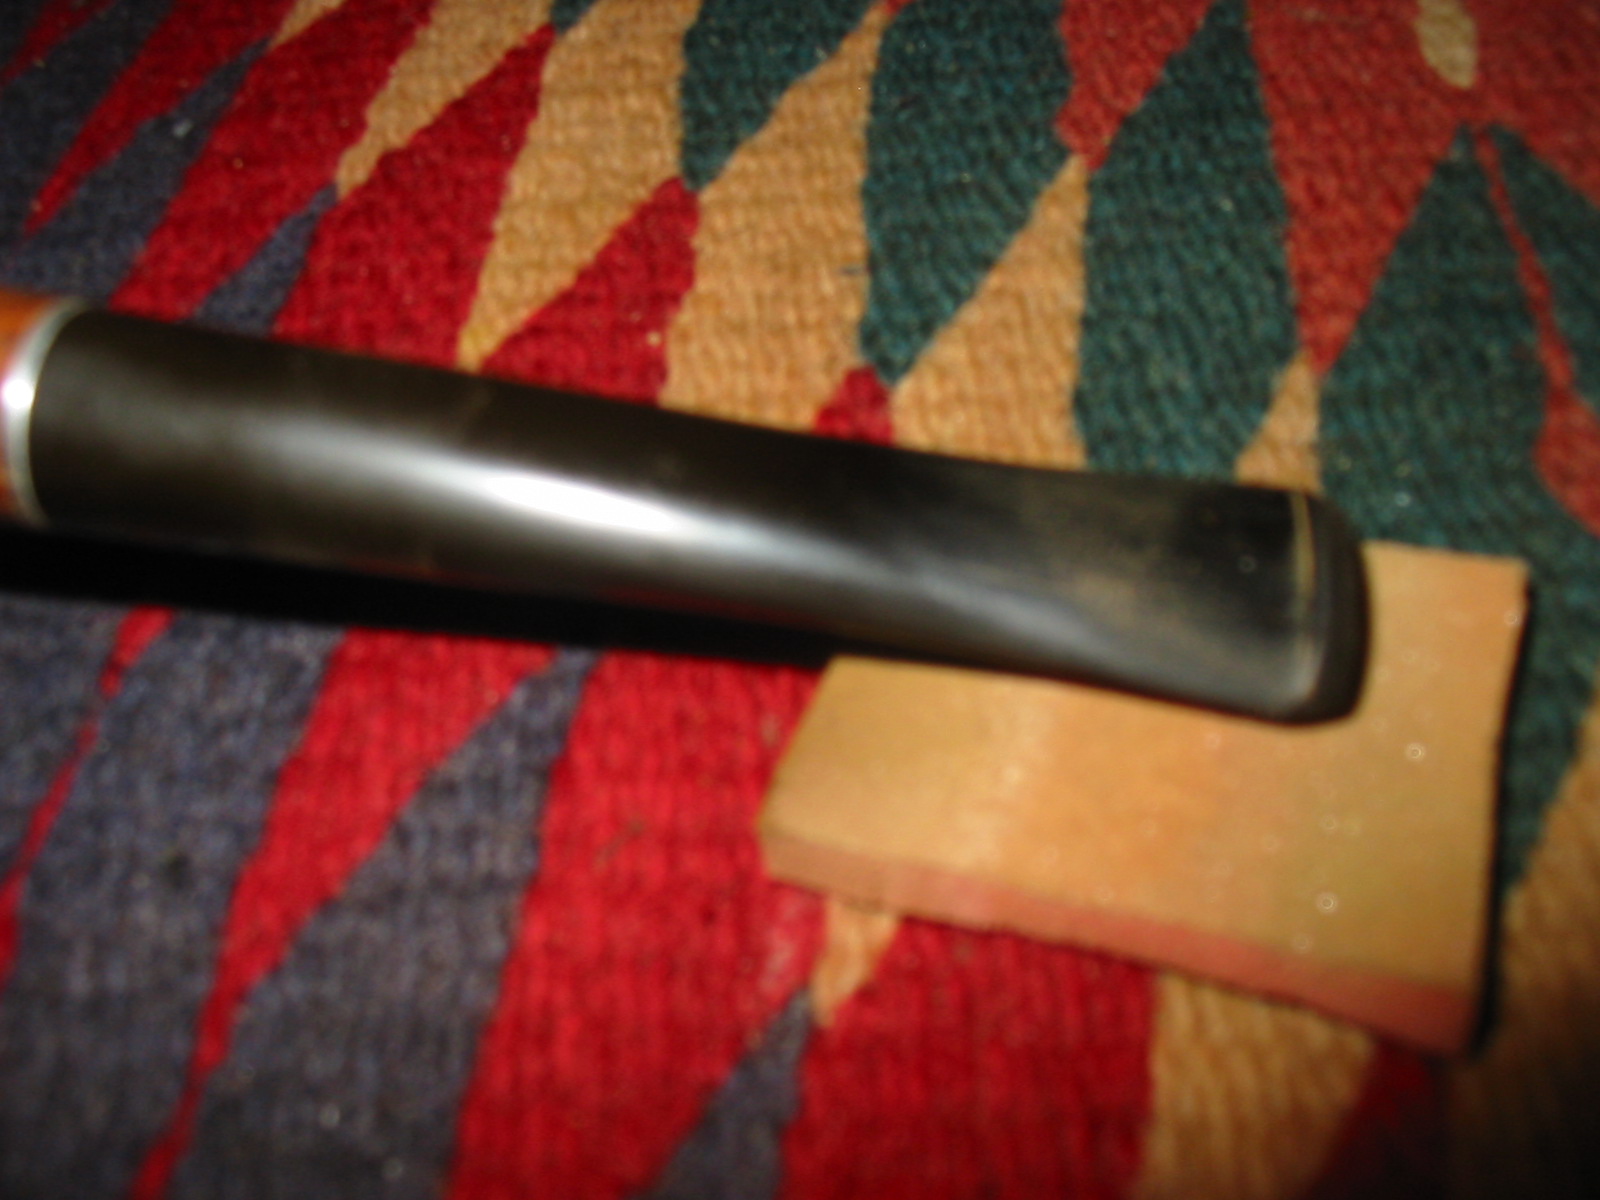
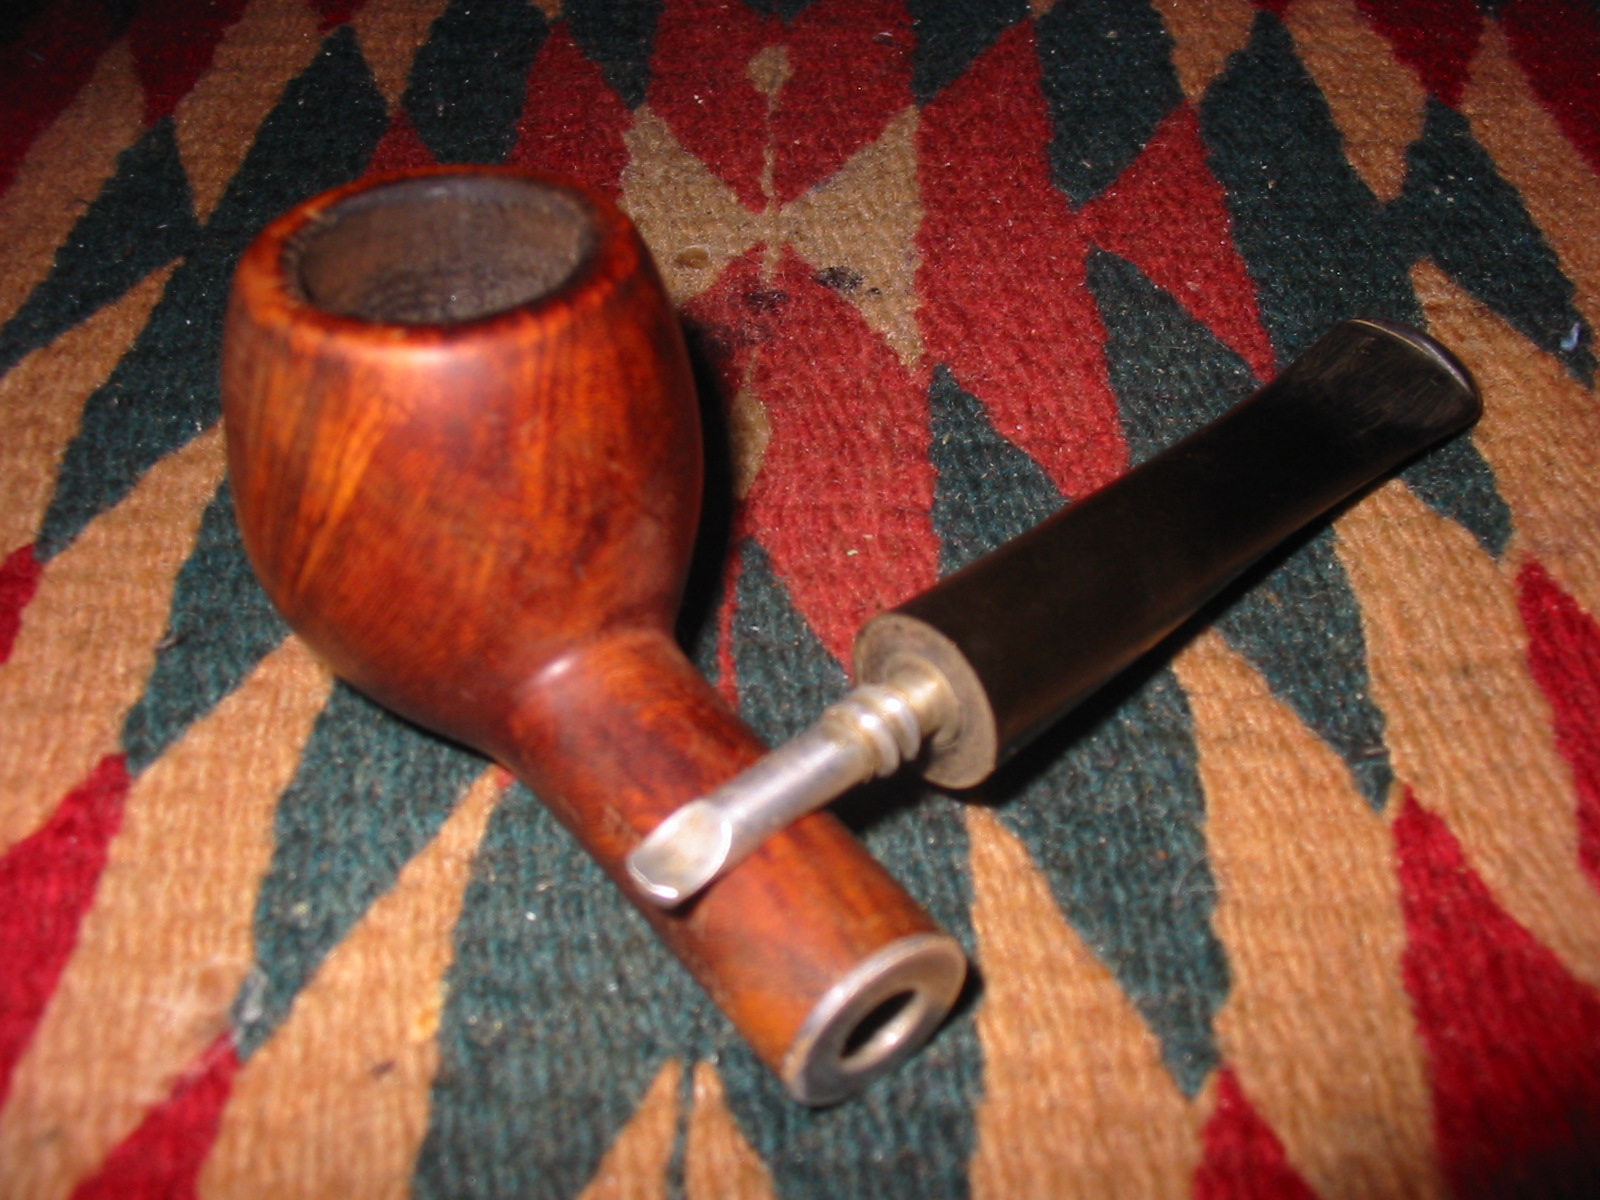
I cleaned out the shank with alcohol, pipe cleaners and cotton swabs until it was spotless. I then worked on the stem. It was made a bit more difficult with the built in stinger but I was able to get it clean with a bit of effort.Dr16 
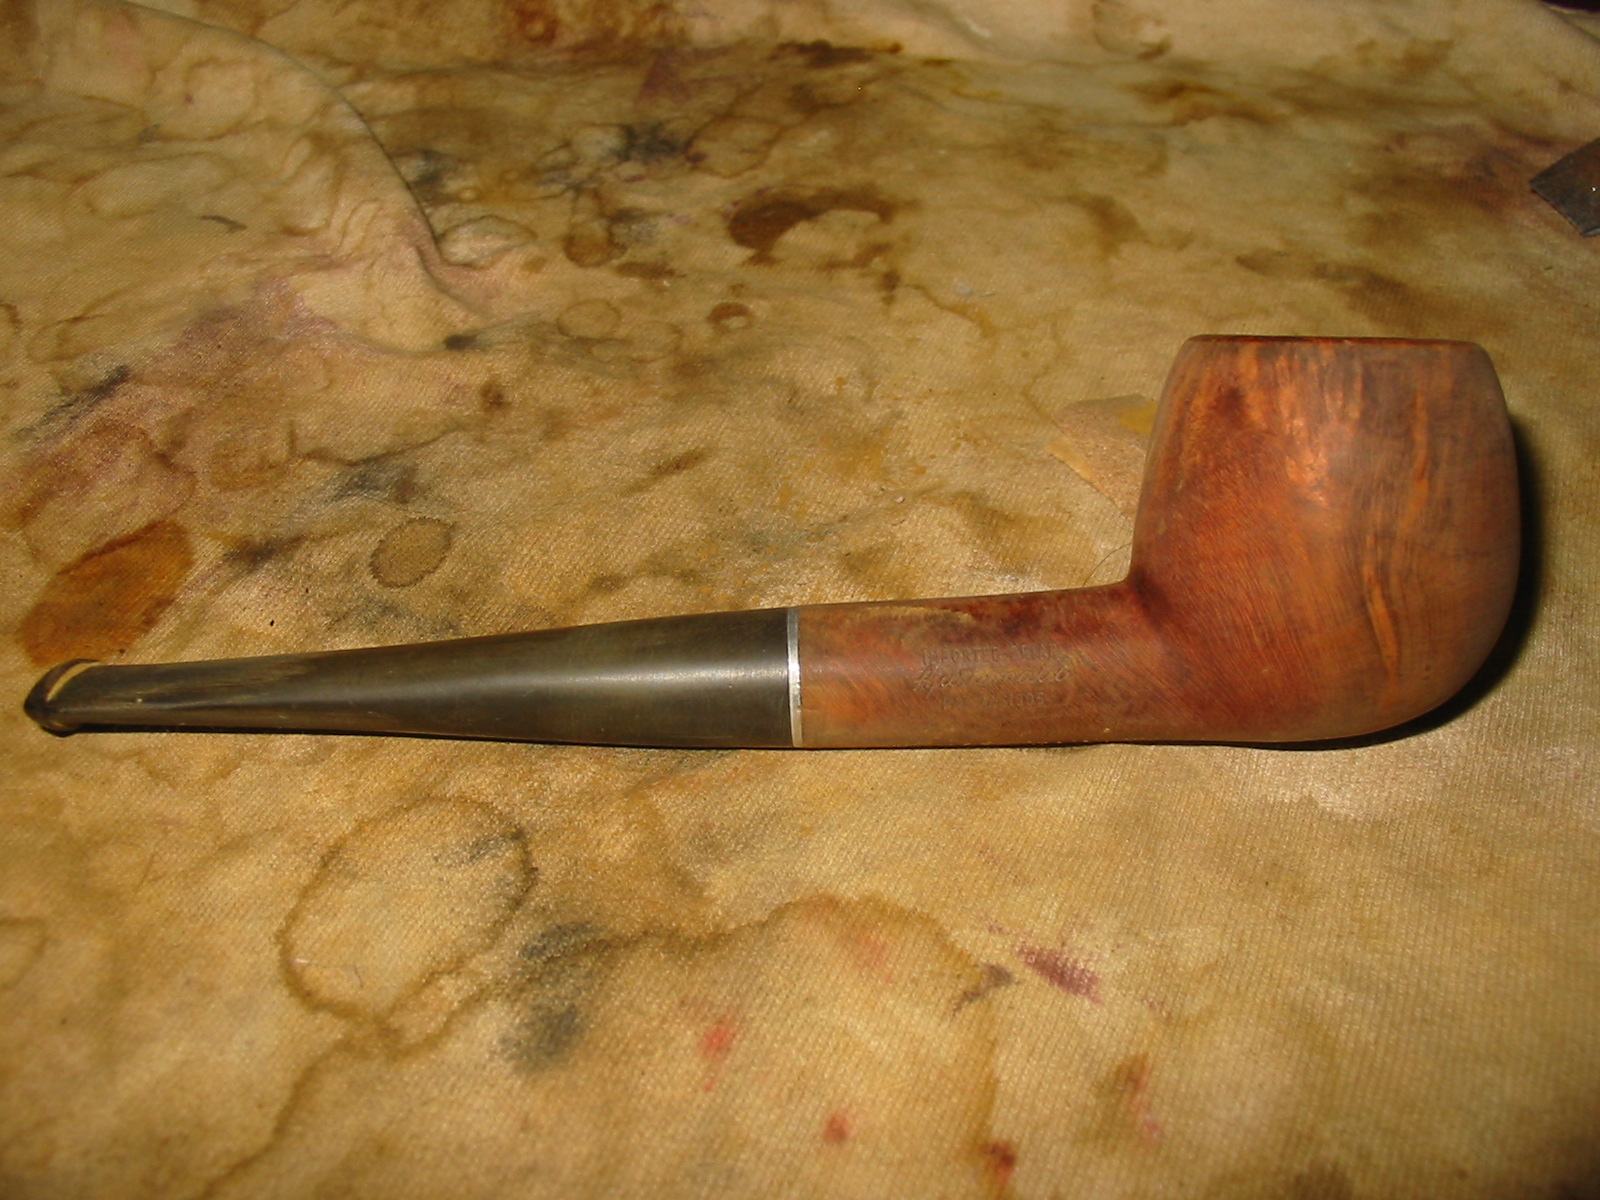
With the inside clean I sanded the bowl and rim with 220 grit sandpaper and a medium and fine grit sanding sponge to clean up the finish. I was able to remove the darkening on the rim and also the dark spots on the sides of the bowl.Dr17

Dr18

Dr19

Dr20 
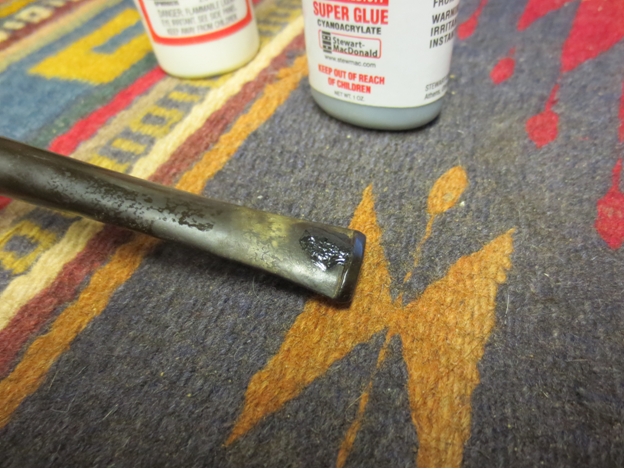
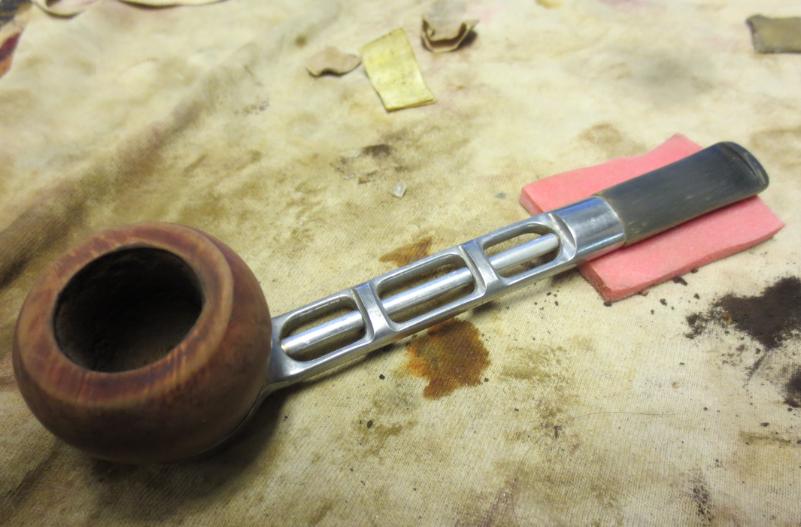
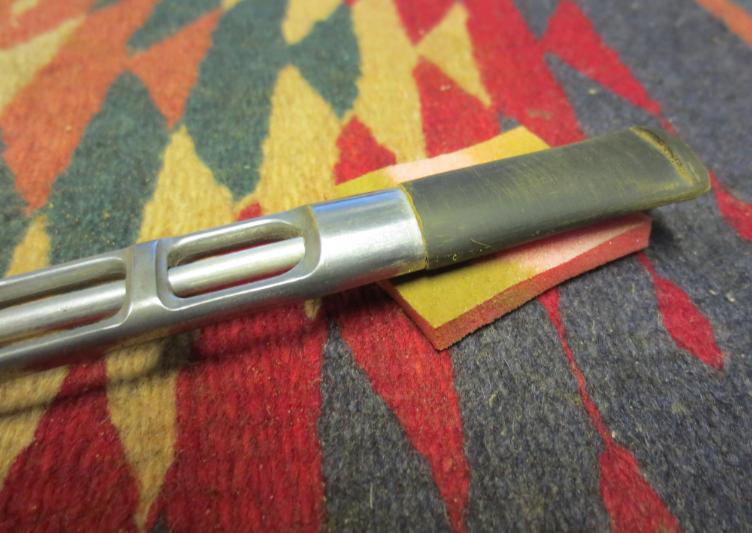
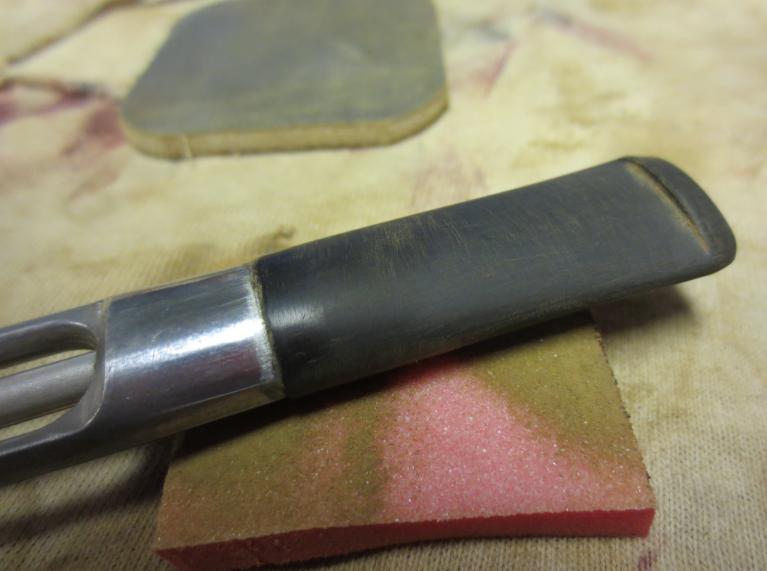
I screwed the stem back on the shank and then sanded the stem with the same sandpapers as I had sanded the bowl. I removed tooth chatter and the calcification on the first inch of the stem. I worked on the slight tooth marks on the button itself and cleaned them up. The pipe was beginning to take shape. Much more sanding would need to be done to the bowl to remove all of the scratches left behind by the sandpaper and a lot of polishing would need to be done on the stem before the pipe was finished.Dr21

Dr22

Dr23

Dr24 
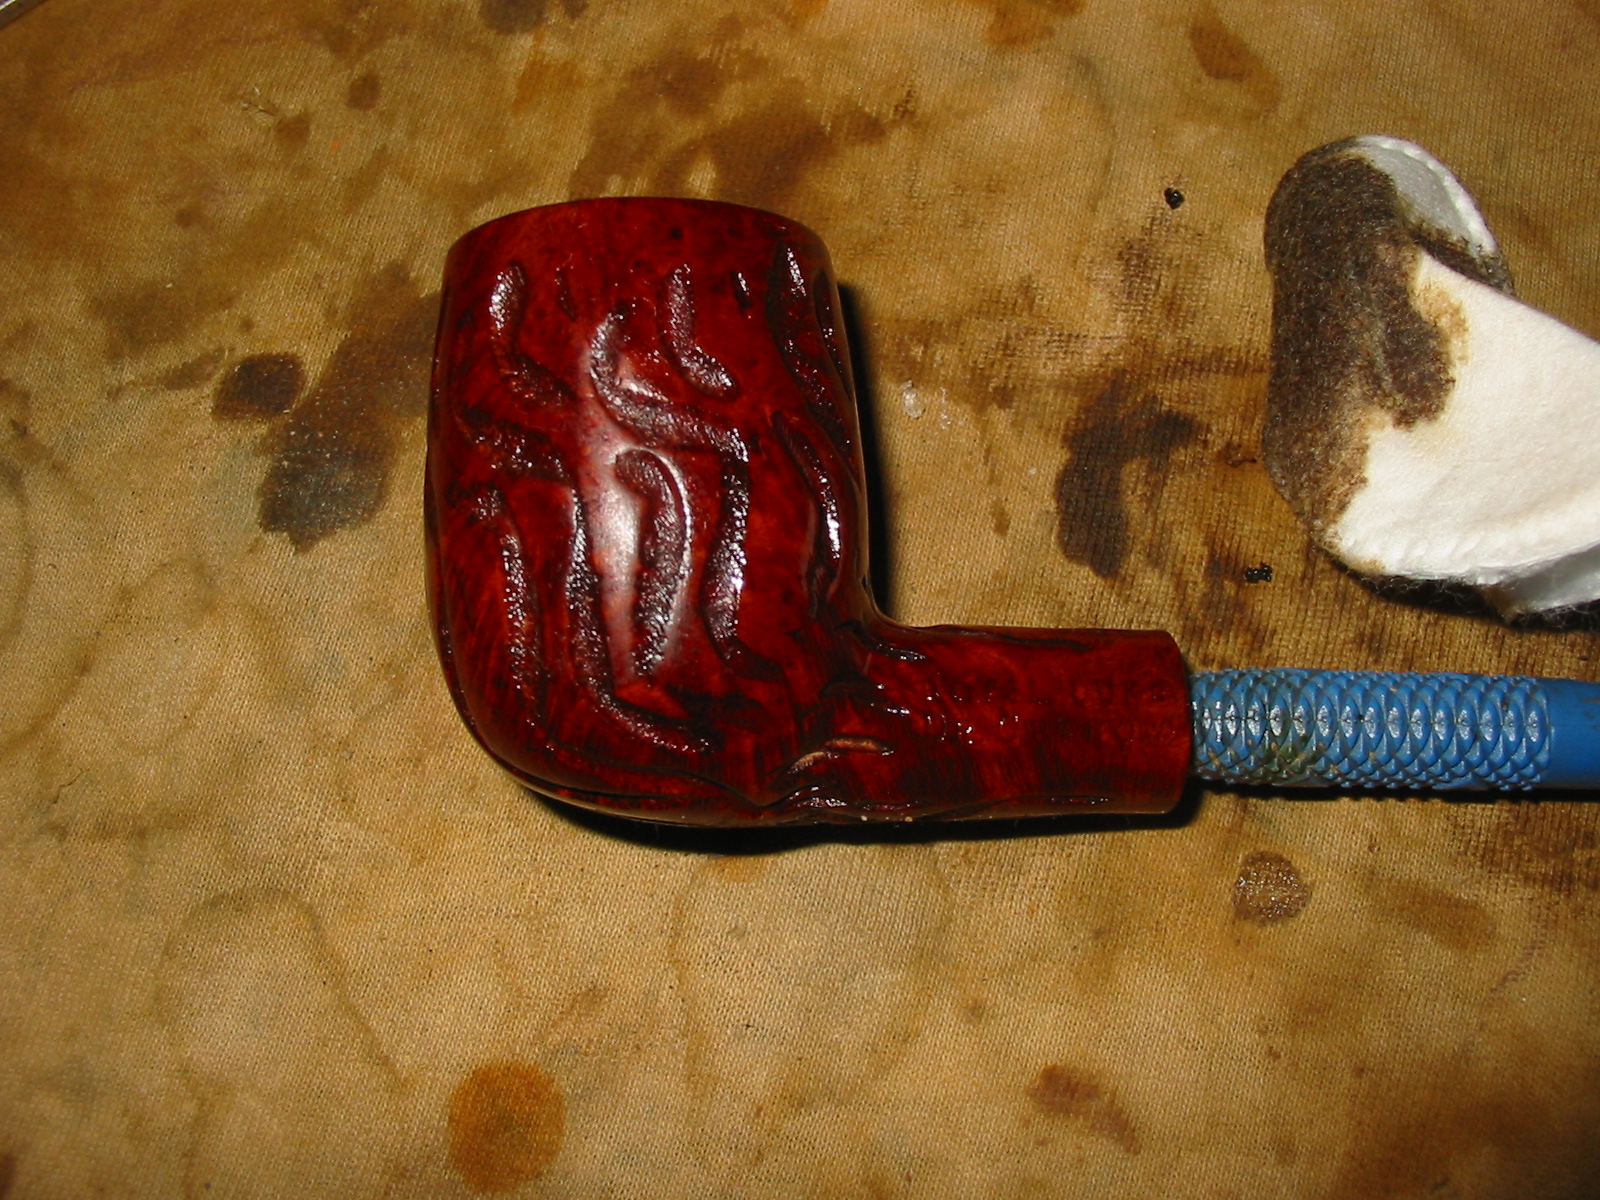
I rubbed the bowl down with olive oil so that I could wet sand the finish and work out the scratches.Dr25

Dr26

Dr27 
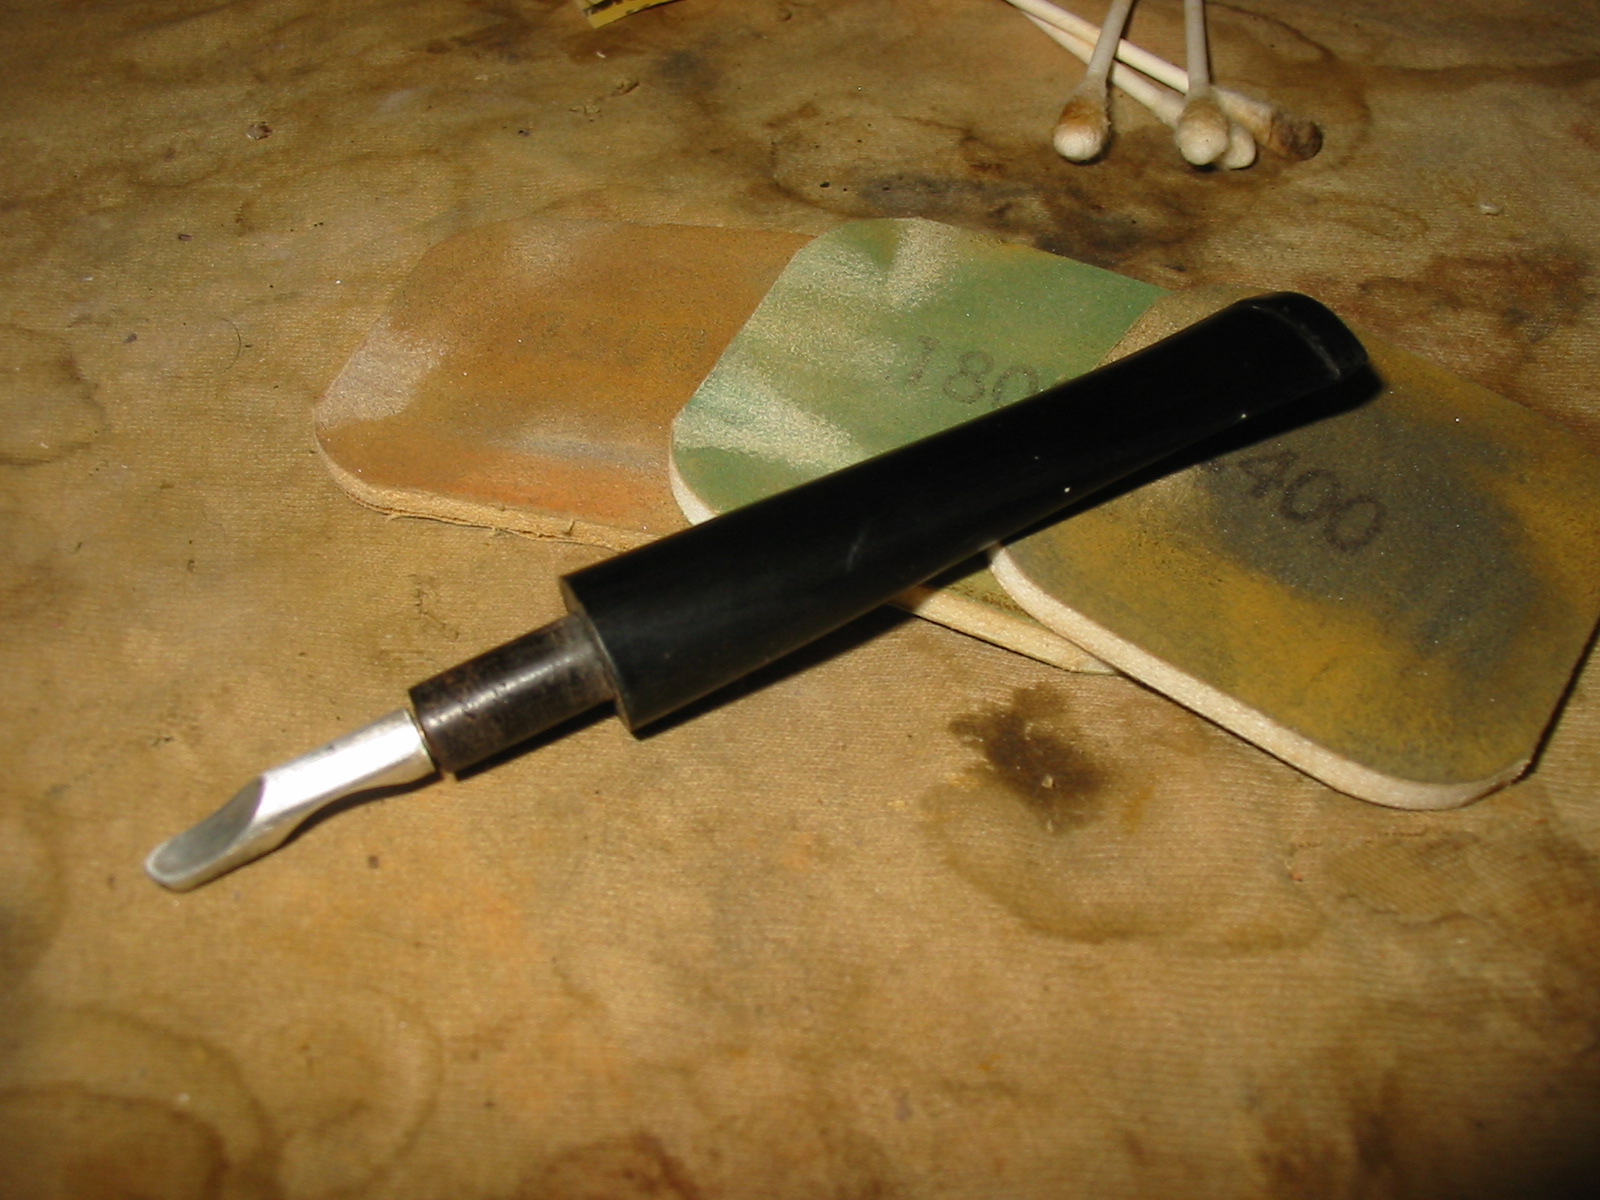
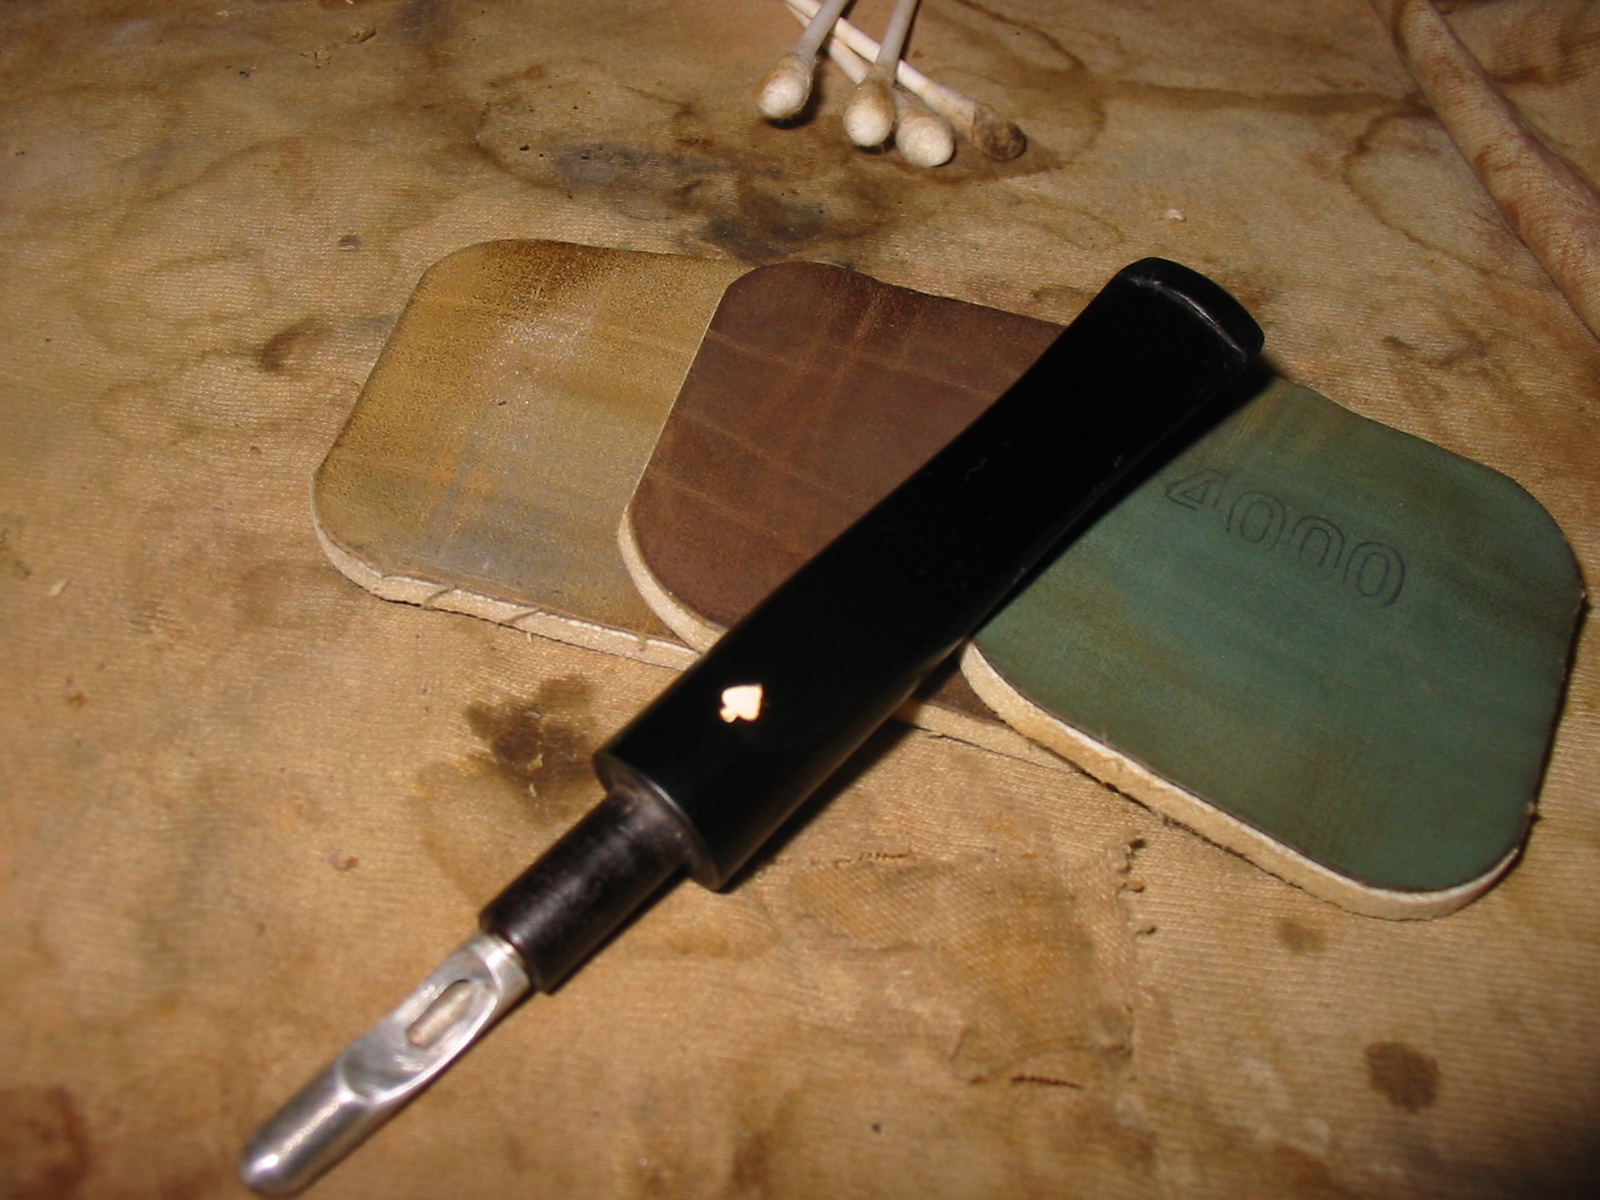
I sanded the bowl with micromesh sanding pads and the olive oil until I was able to remove the scratches. I started with 1500-2400 grit pads and sanded until the scratches were minimized and then rubbed it down with olive oil once again before sanding with 3200-4000 grit pads. Each successive micromesh pad brought more of a shine to the briar. The fills became smooth and blended into the briar better and began to disappear into the briar as the scratches around the edges were smoothed out.Dr28

Dr29

Dr30

Dr31

Dr32

Dr33 
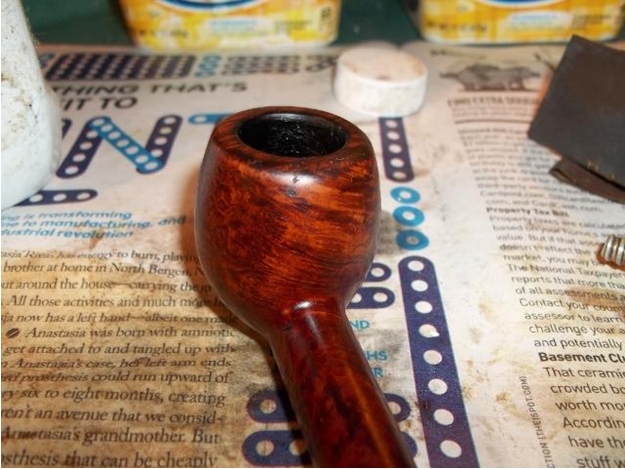
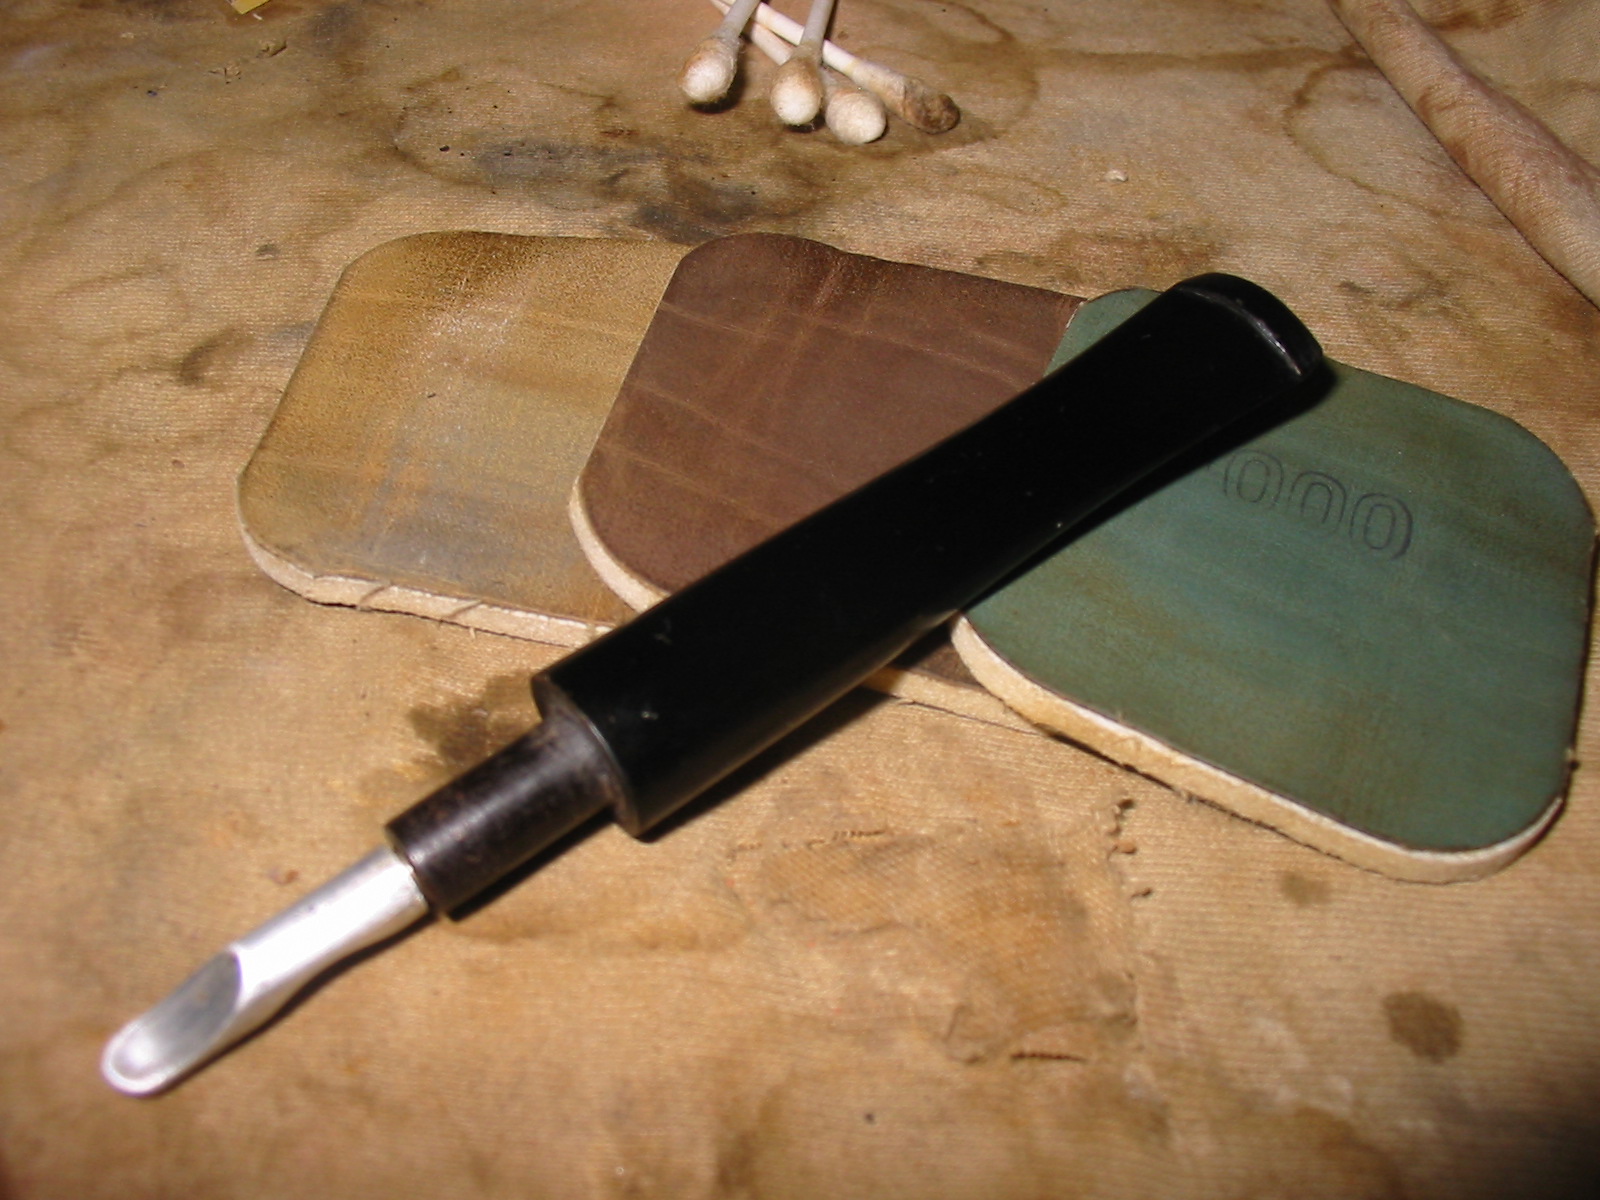
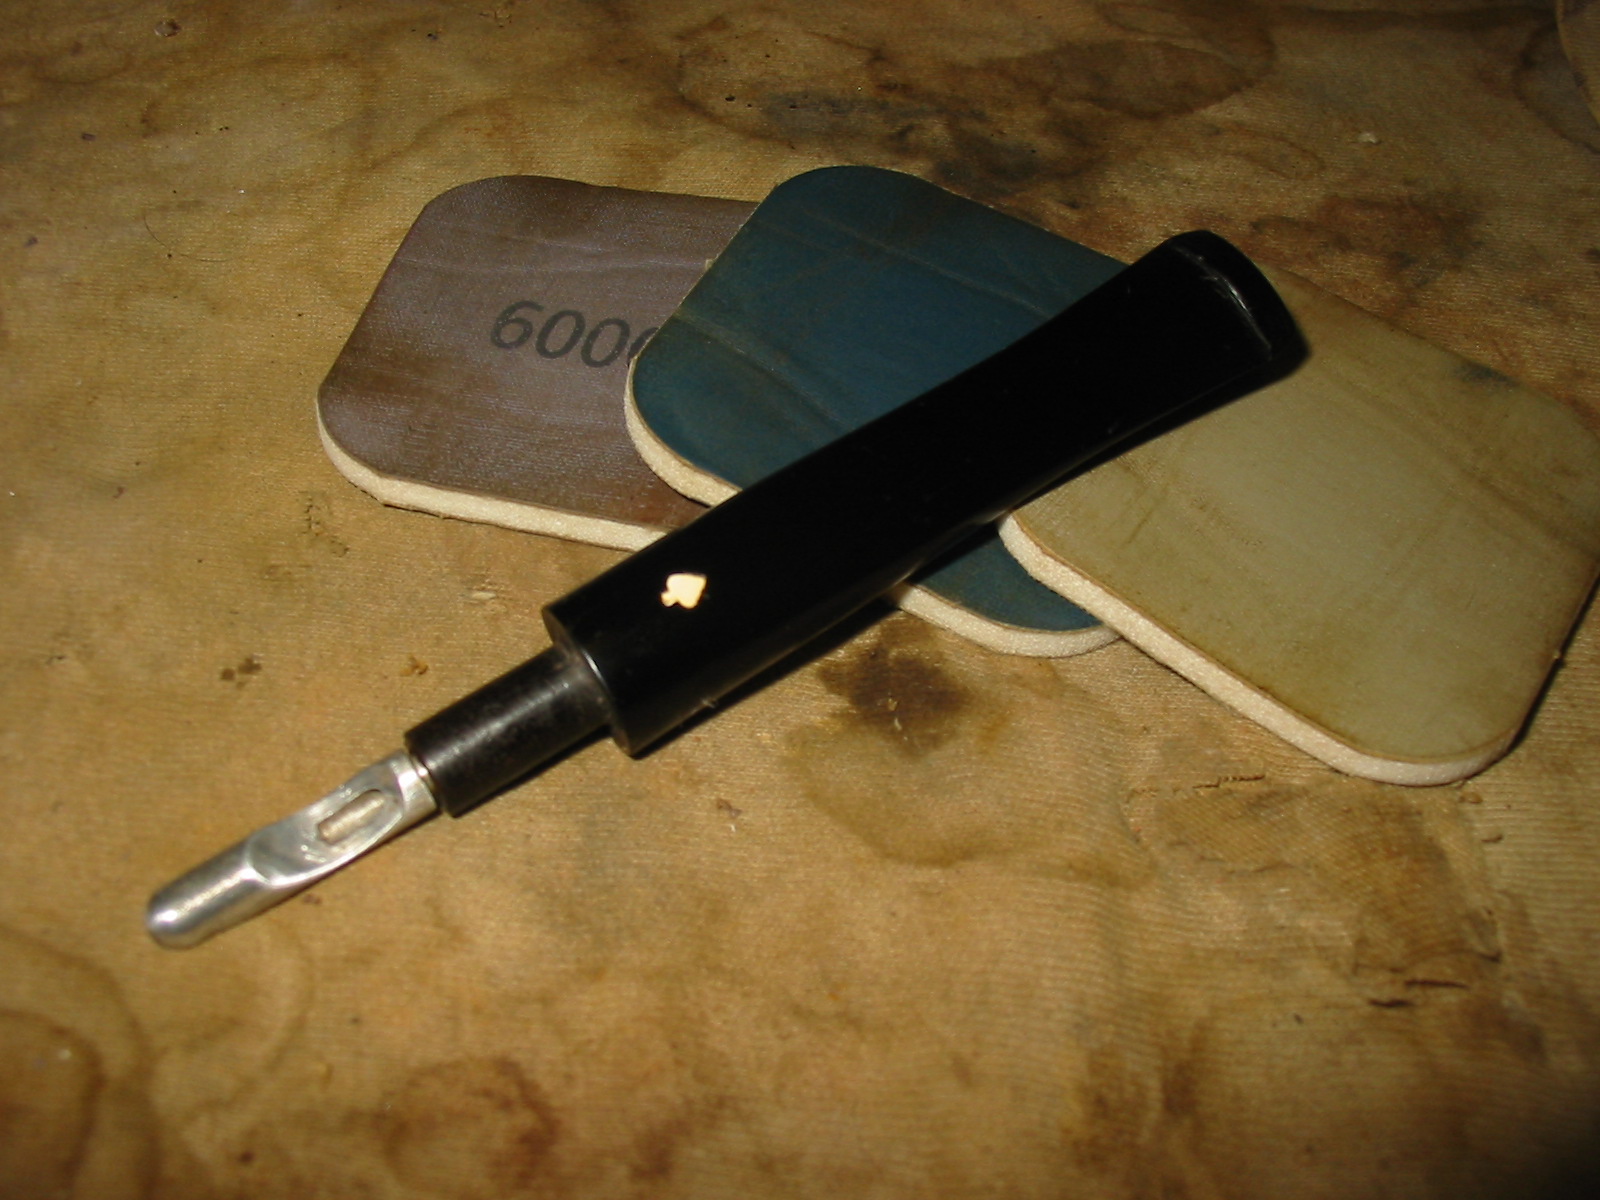
I gave it a final rub down with oil and then finished sanding it with the last three grits of micromesh – 6000-12000. The bowl was smooth to the touch and had a shine to it that once was buffed and waxed would glow.Dr34

Dr35 
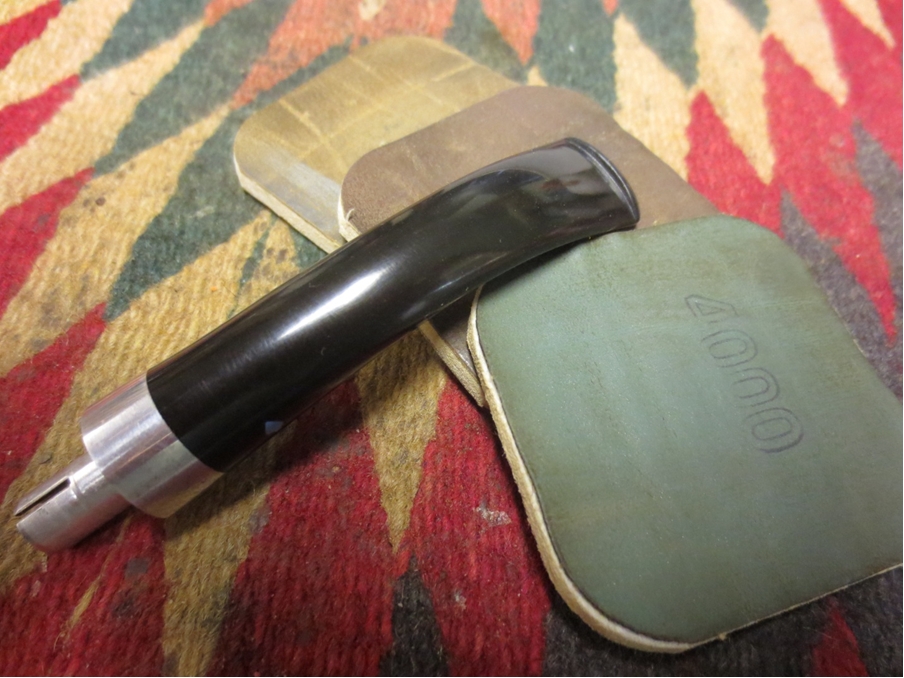
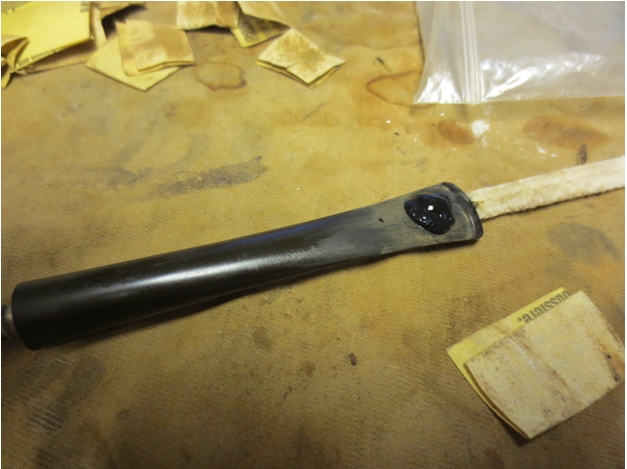
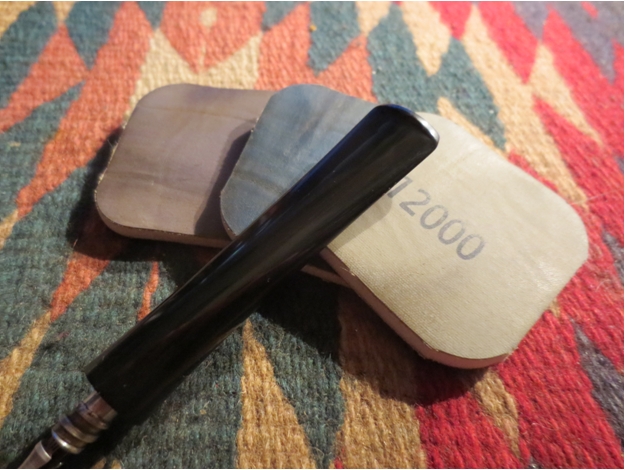
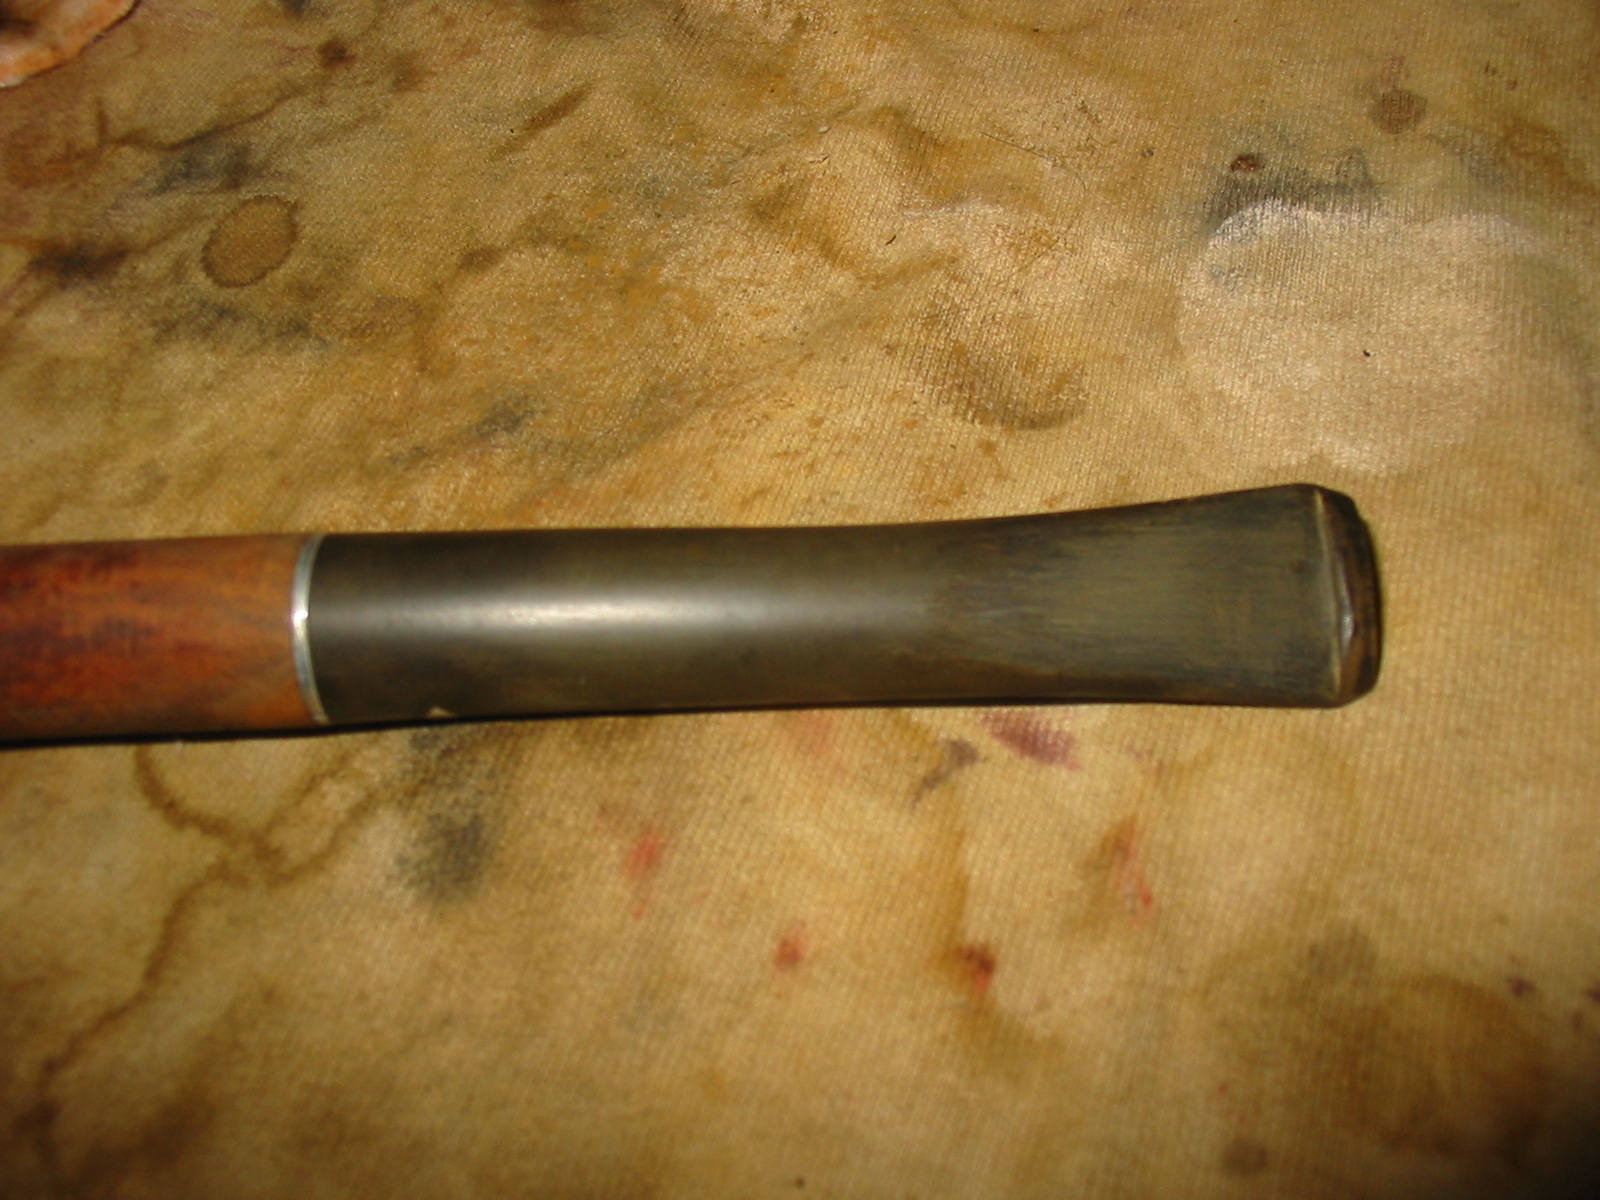
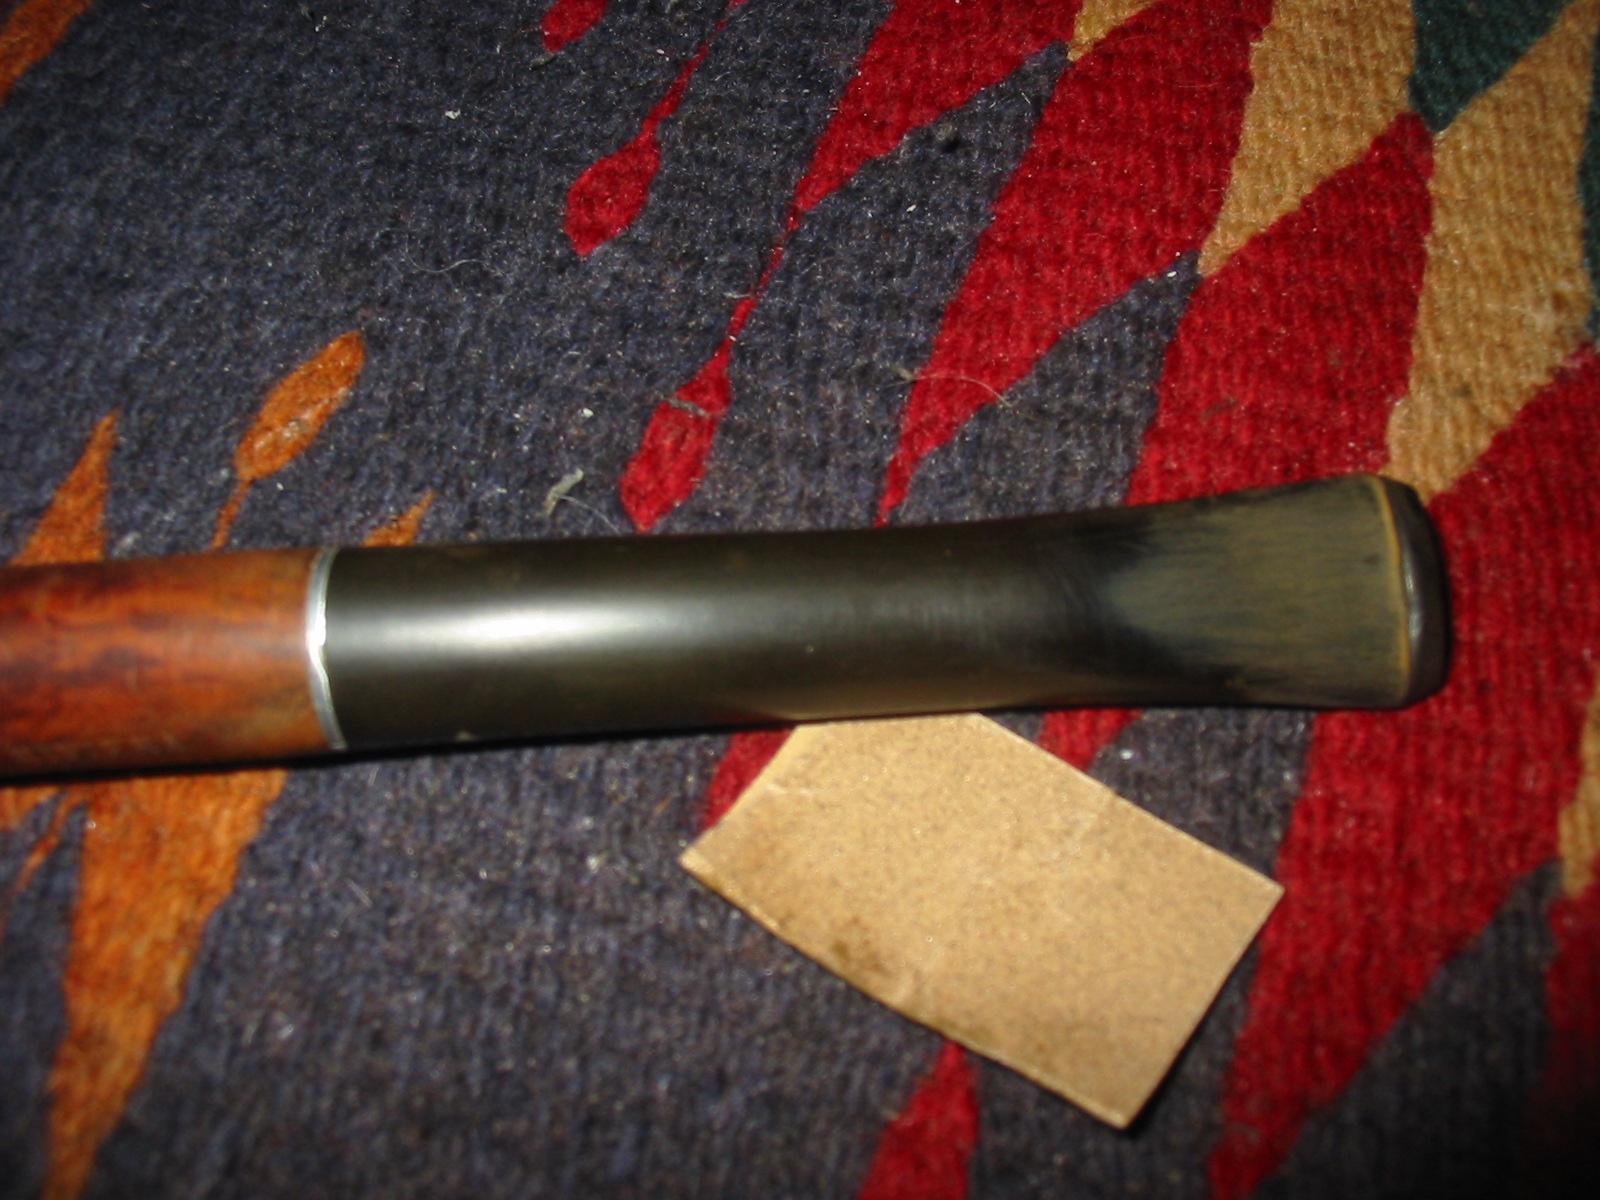
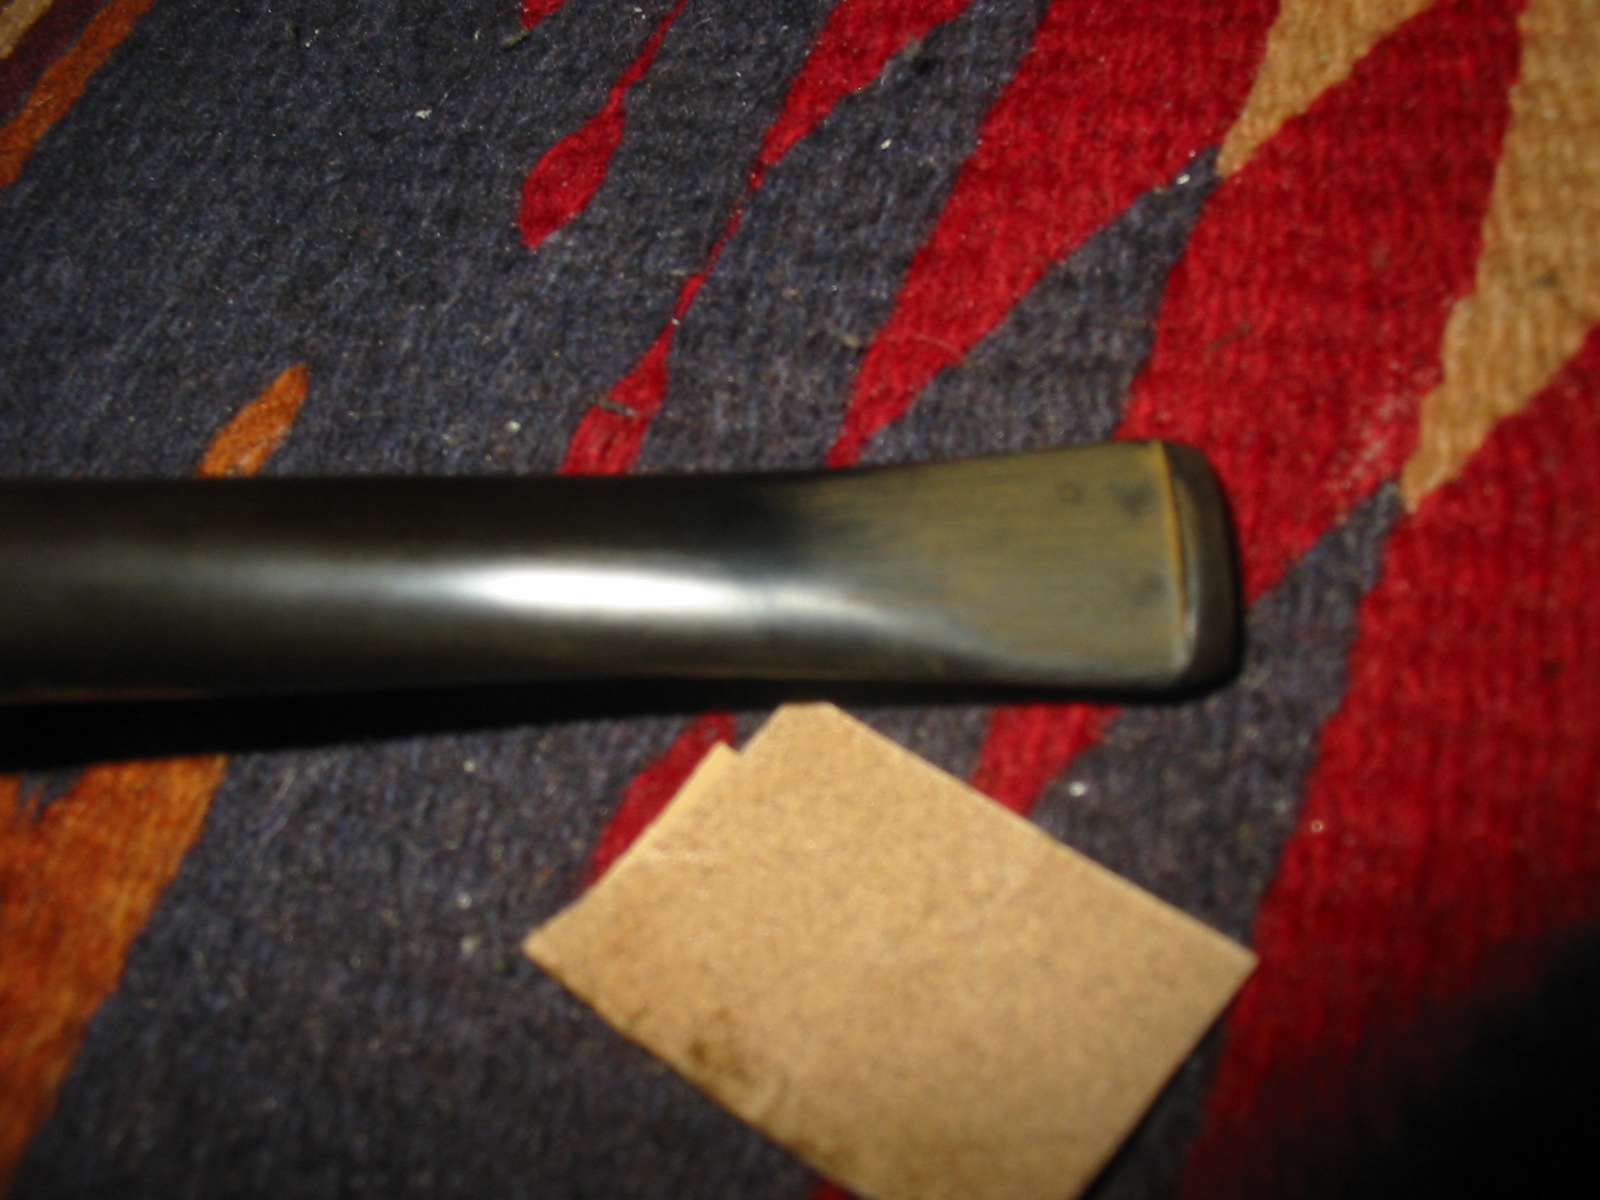
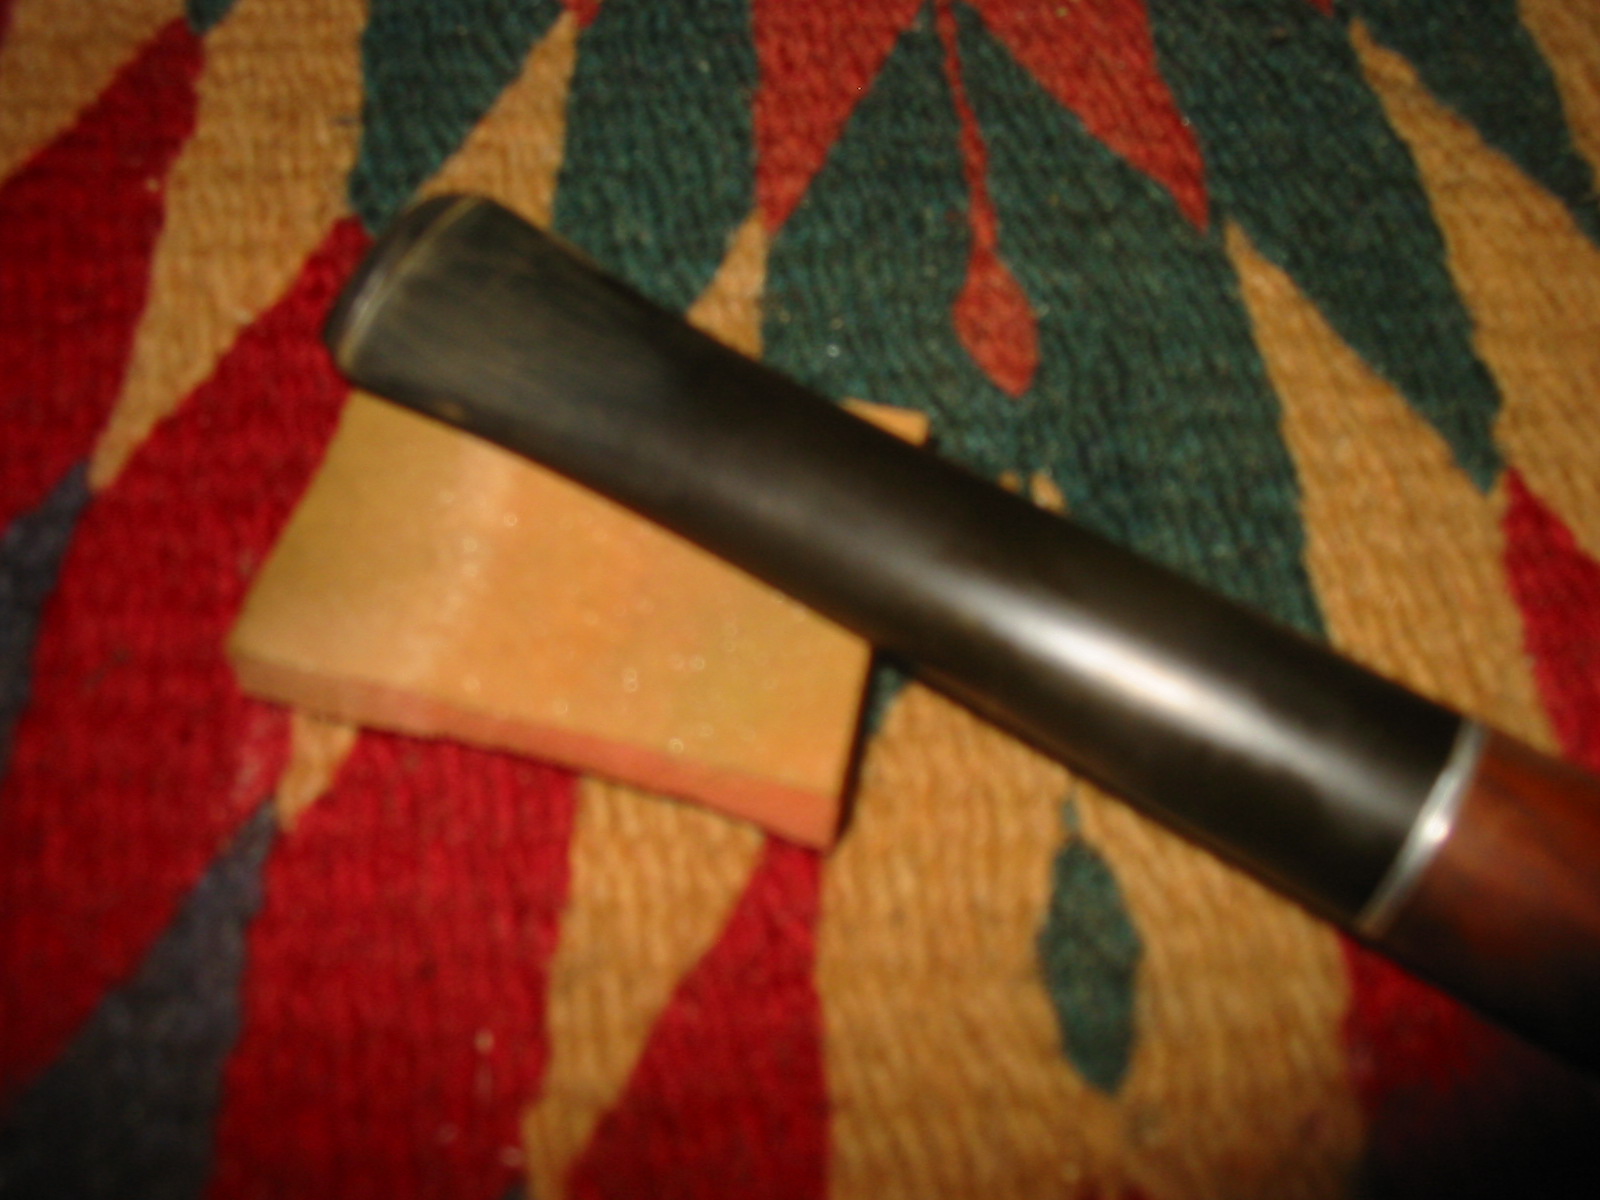
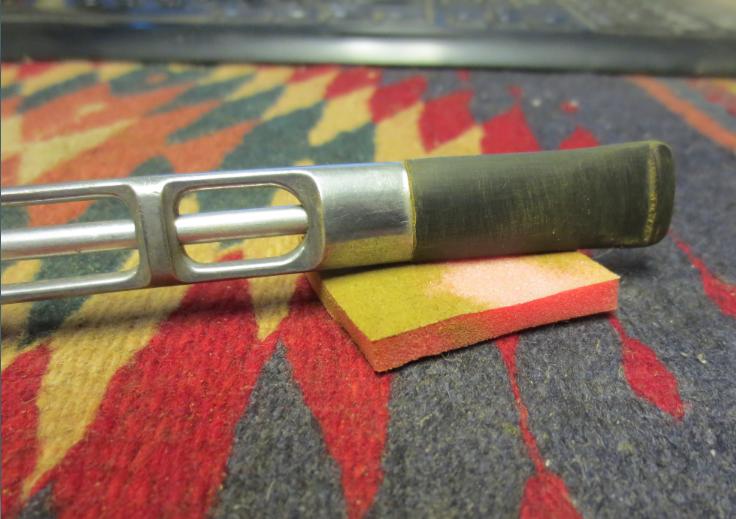
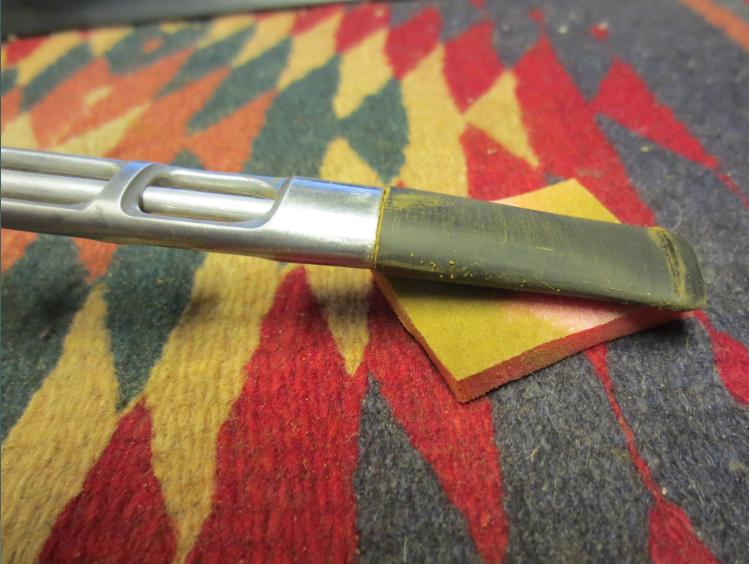
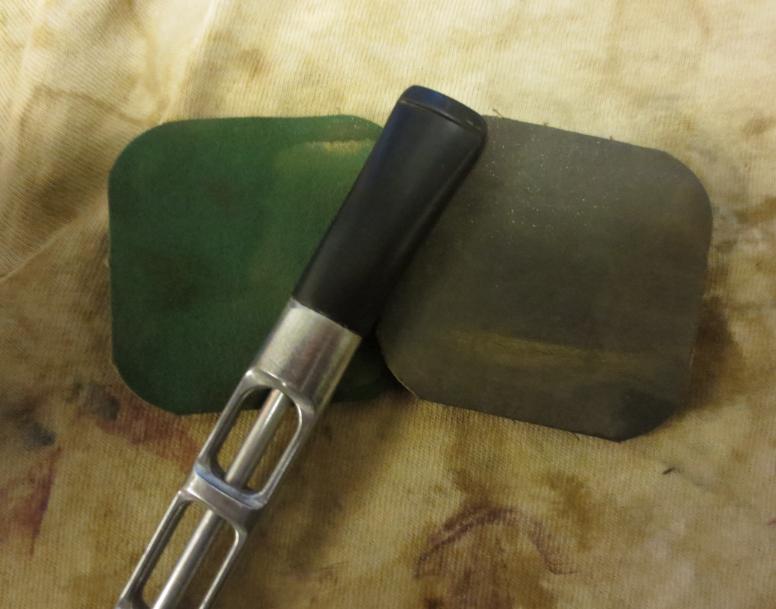
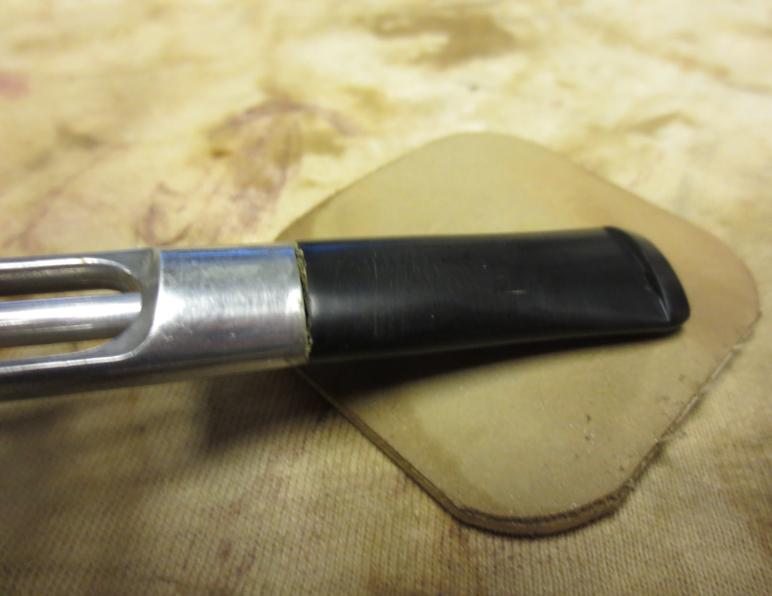
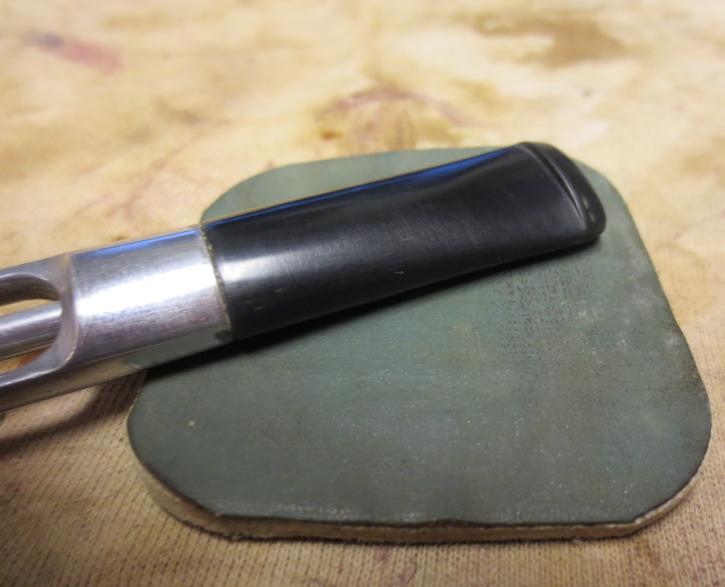
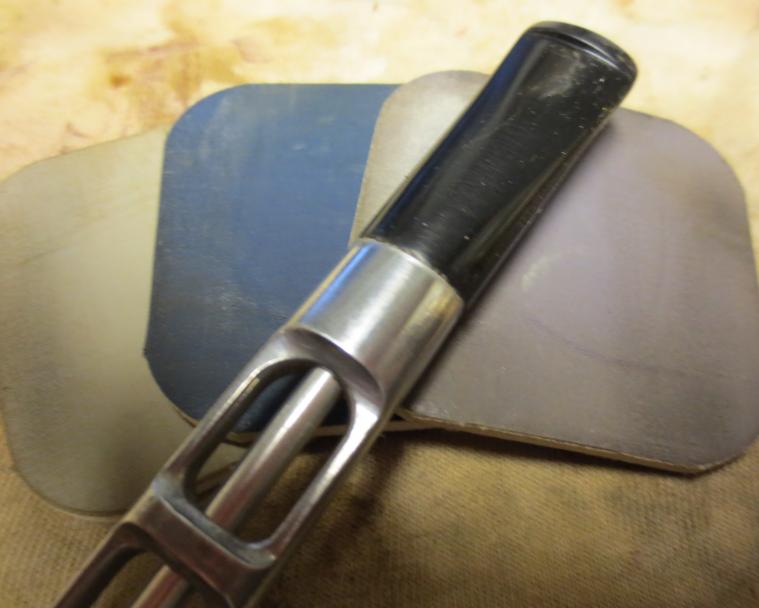
I sanded the stem with micromesh sanding pads – wet sanding with 1500-2400 grit pads and then rubbing it down with Obsidian Oil. I continued to dry sand with 3200-4000 grit pads and gave it another coat of the oil. I finished by sanding it with 6000-12000 grit pads and then gave it a final coat of oil and let it dry.Dr36

Dr37

Dr38 
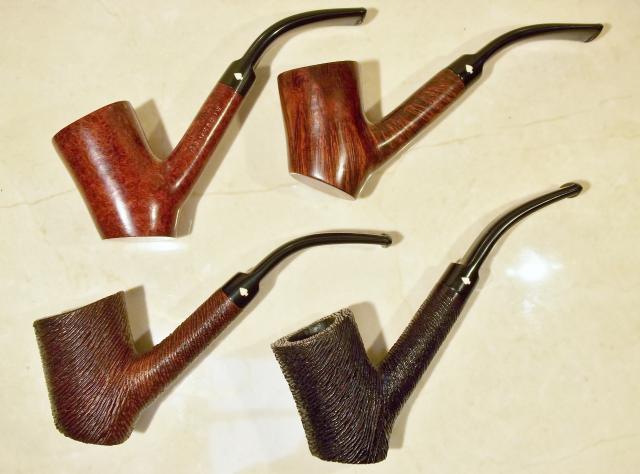
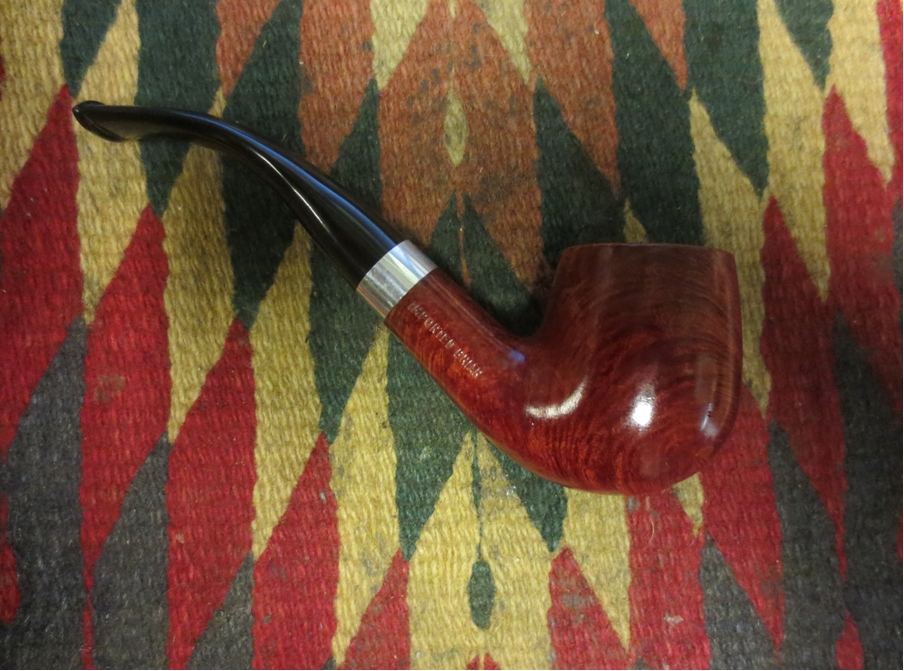
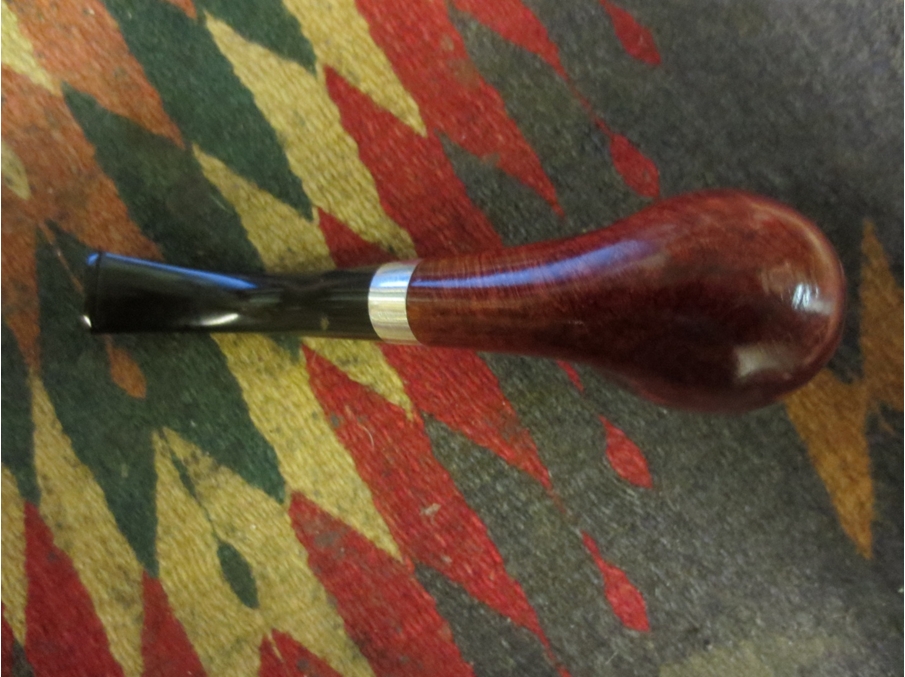
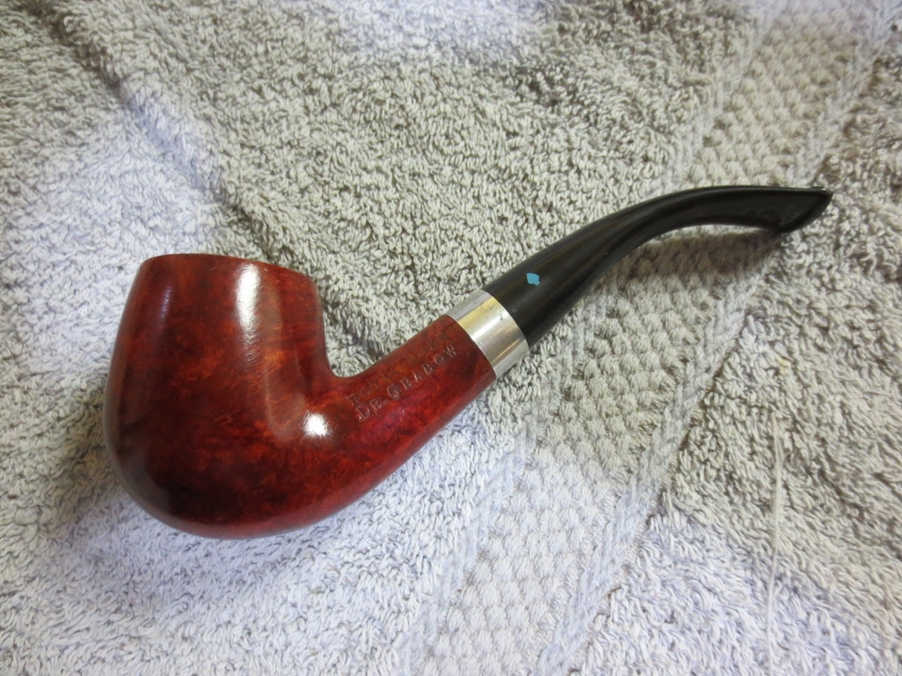
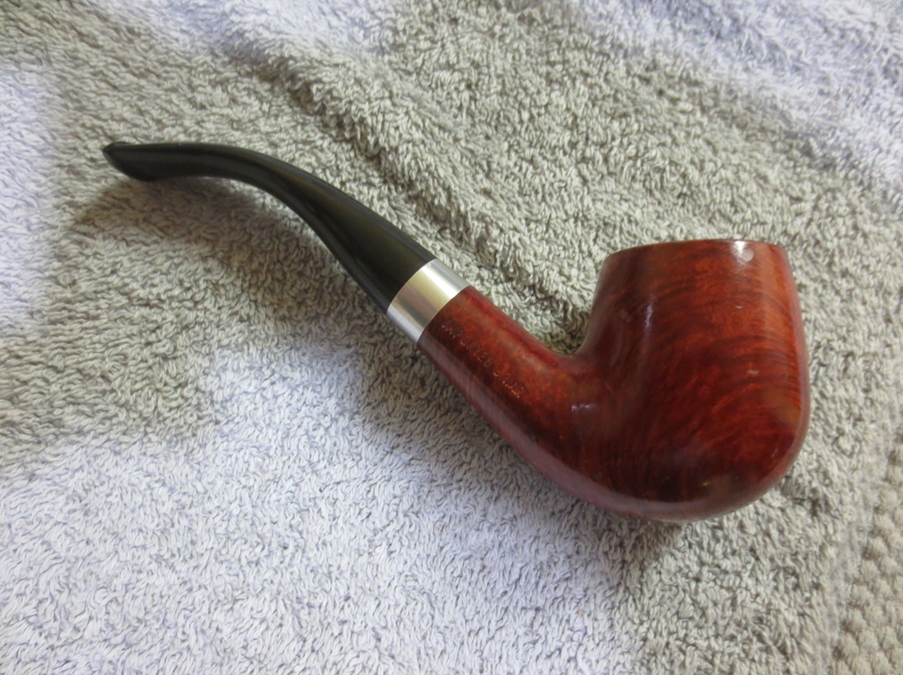
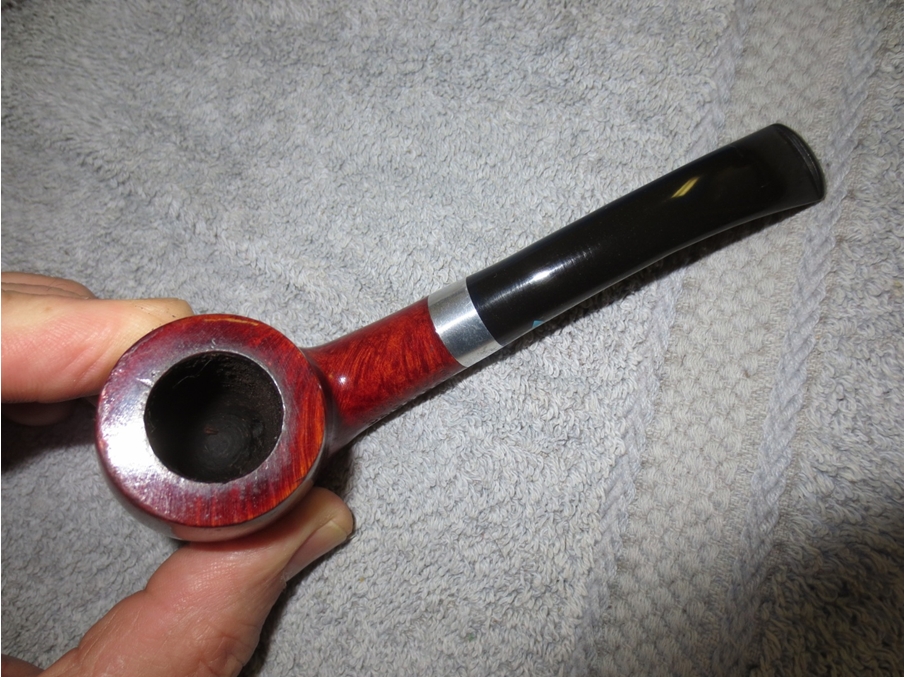
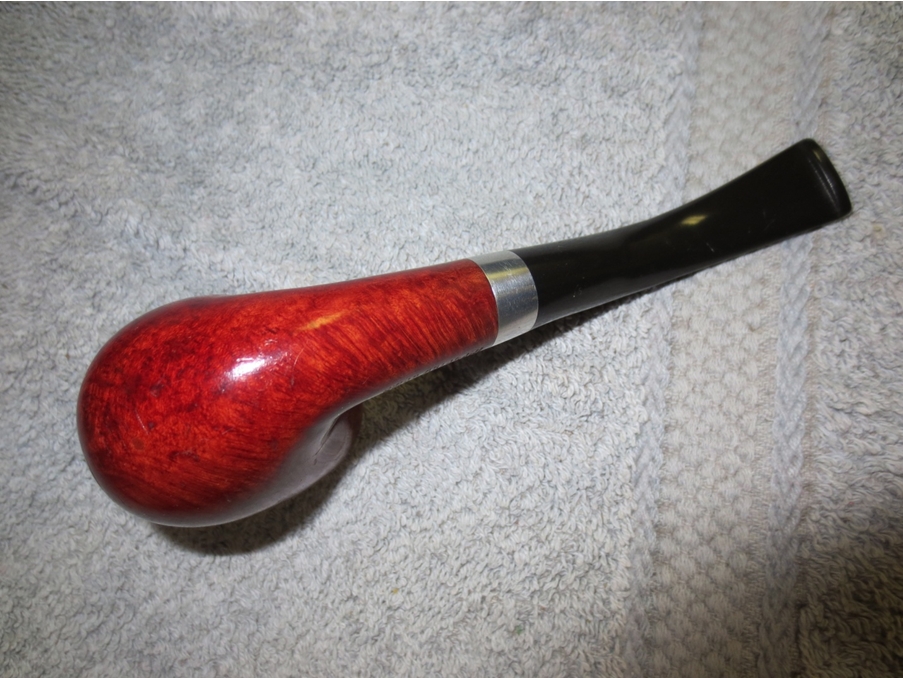
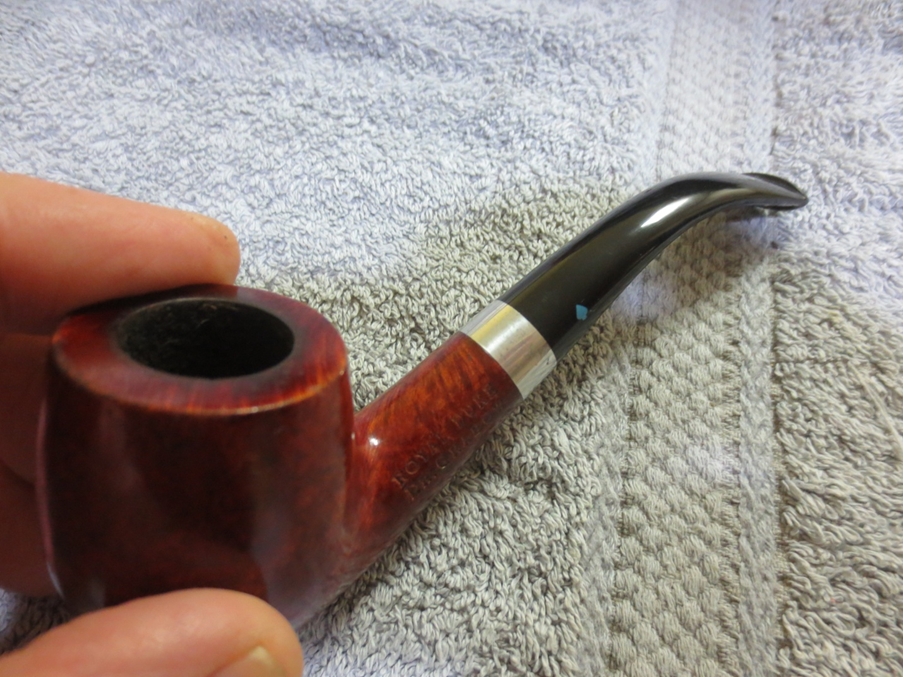
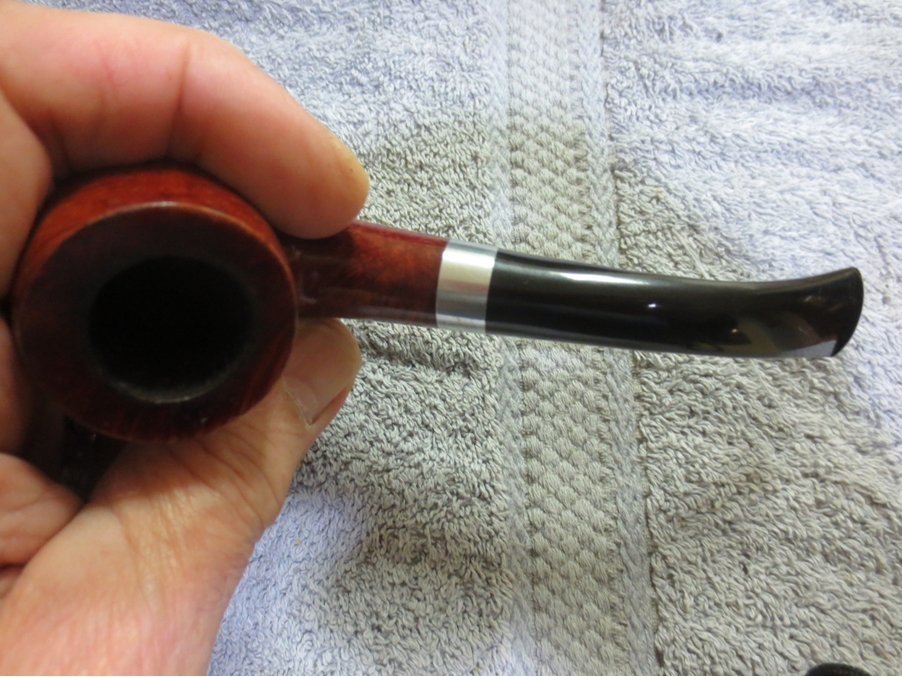
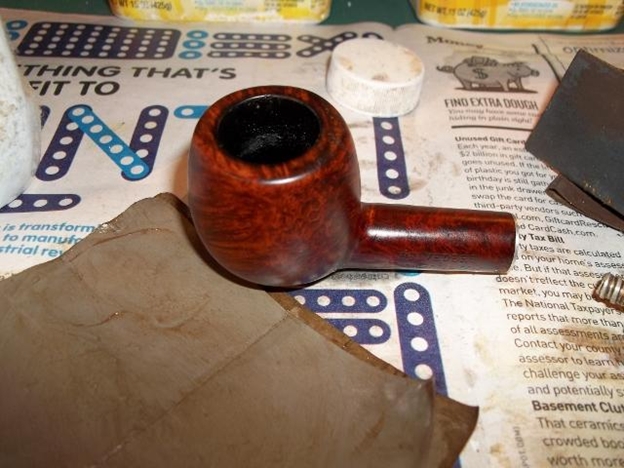
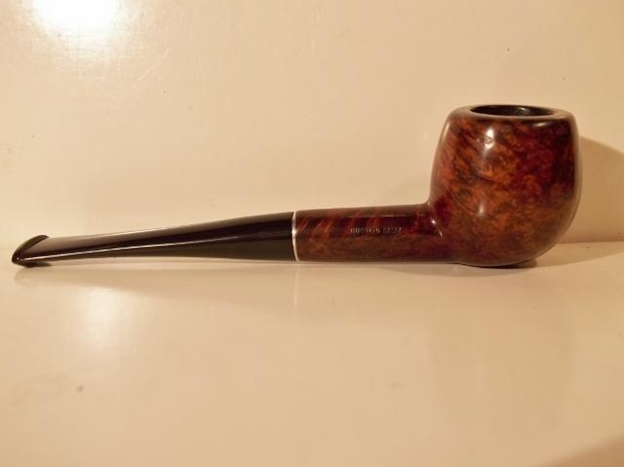
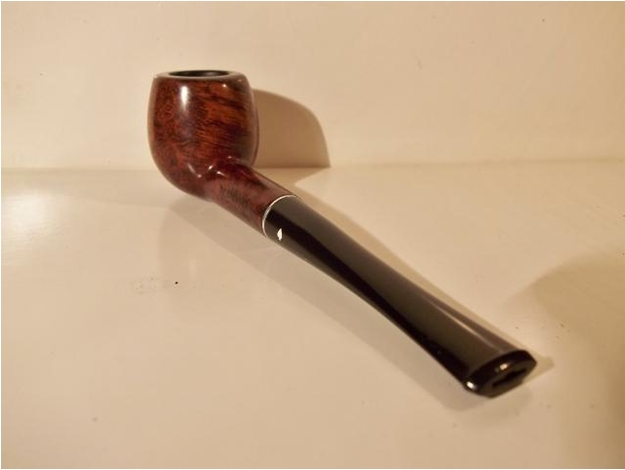
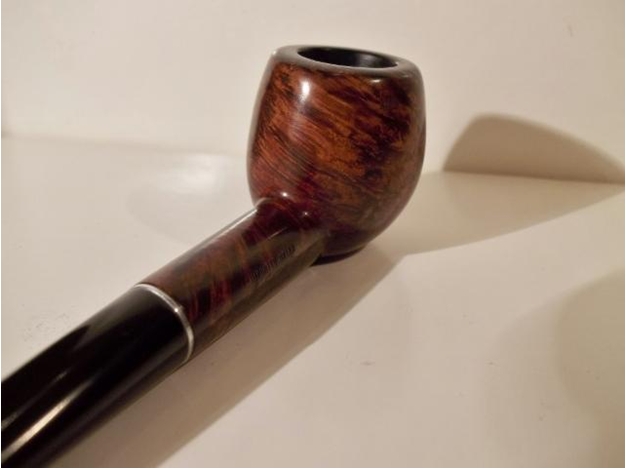
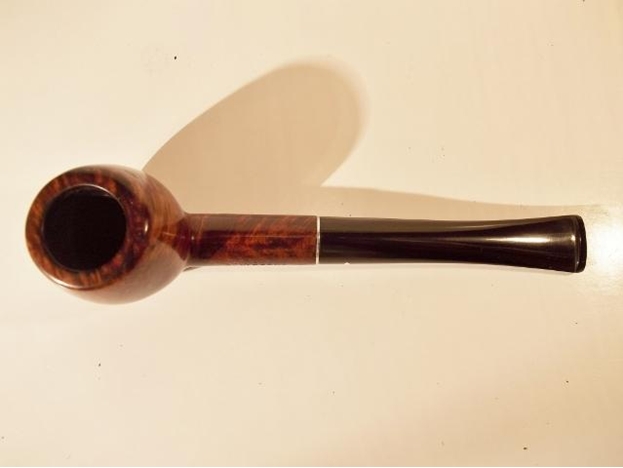
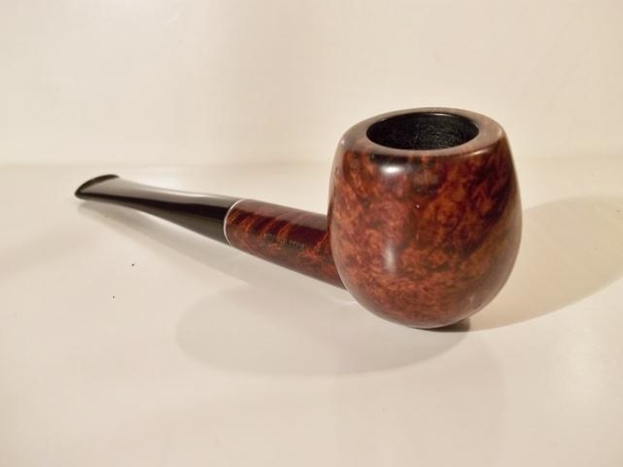
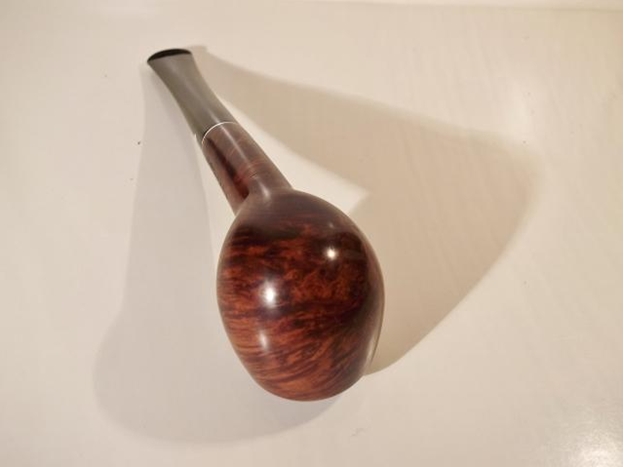
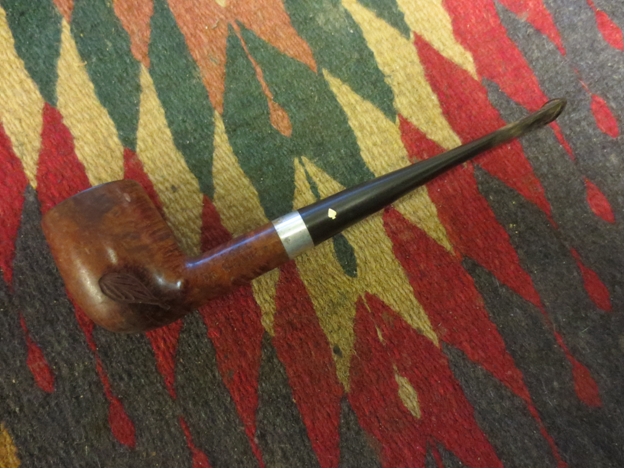
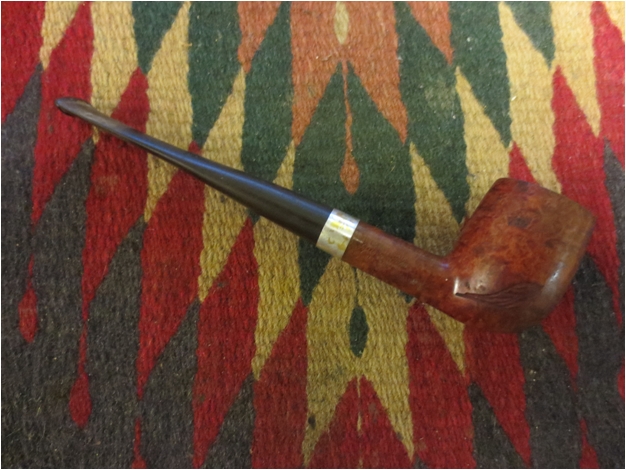
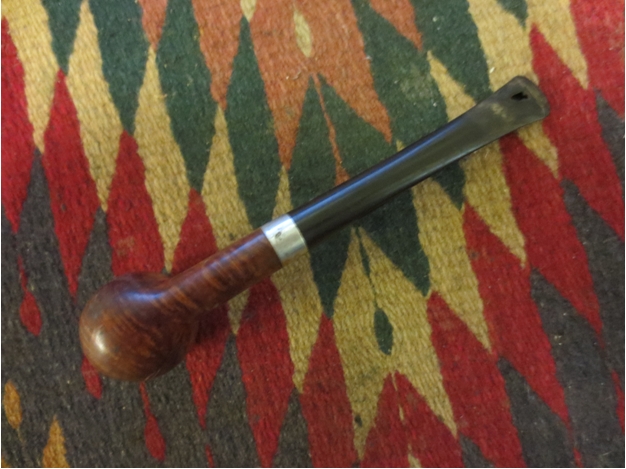
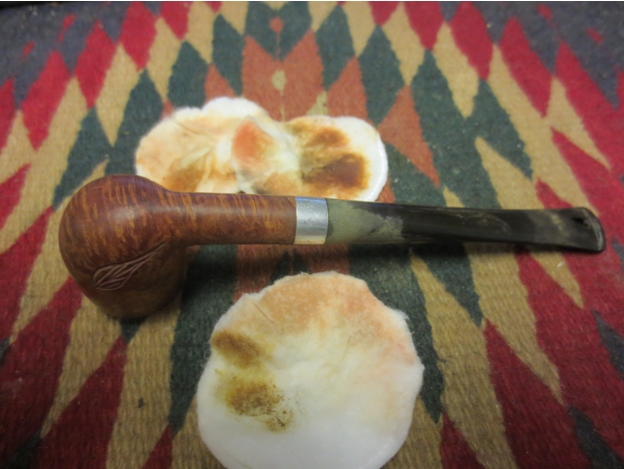
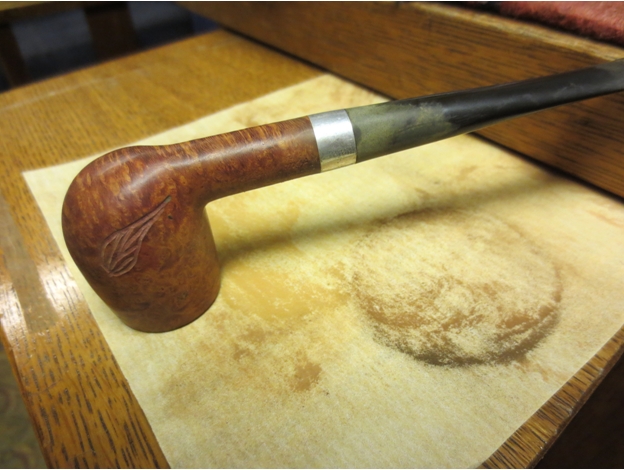
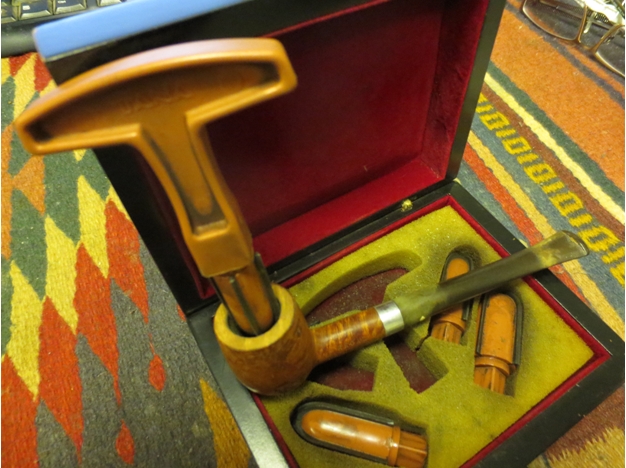
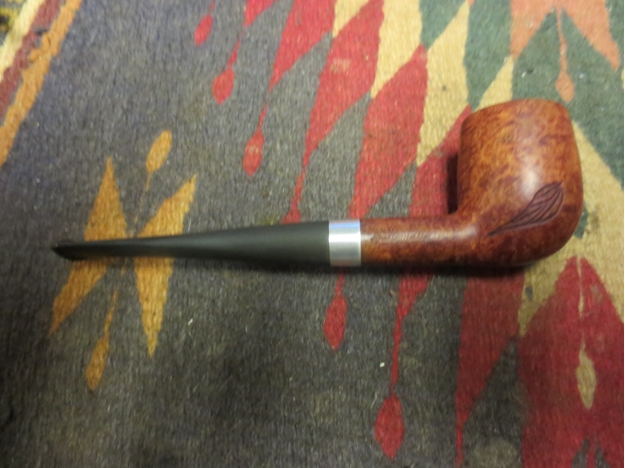
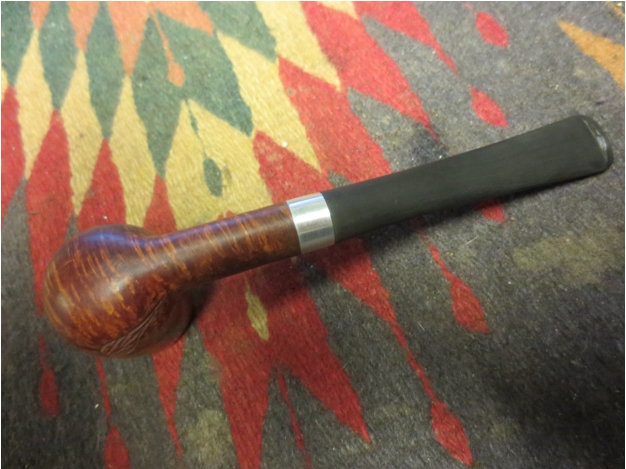
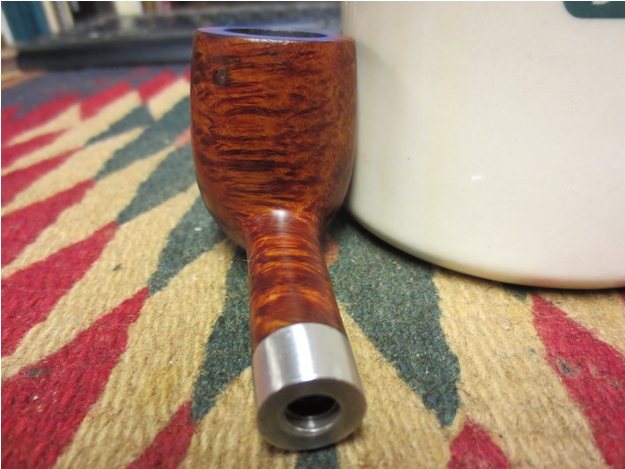
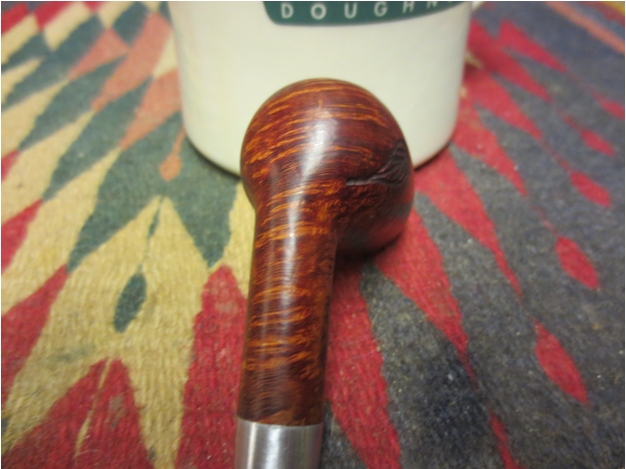
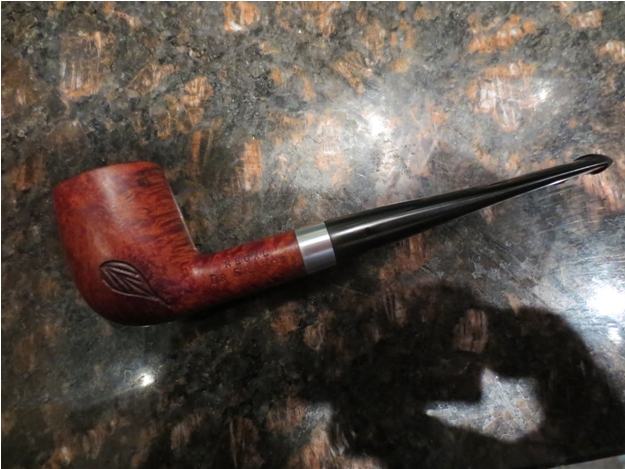
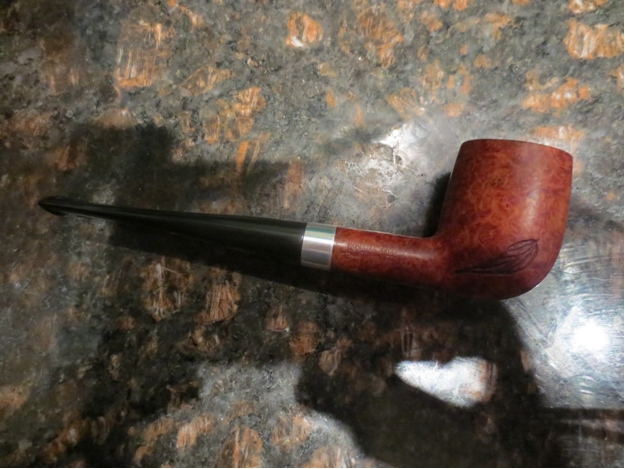
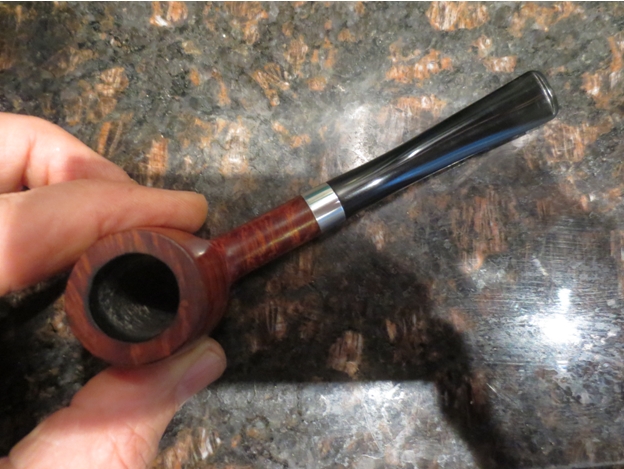
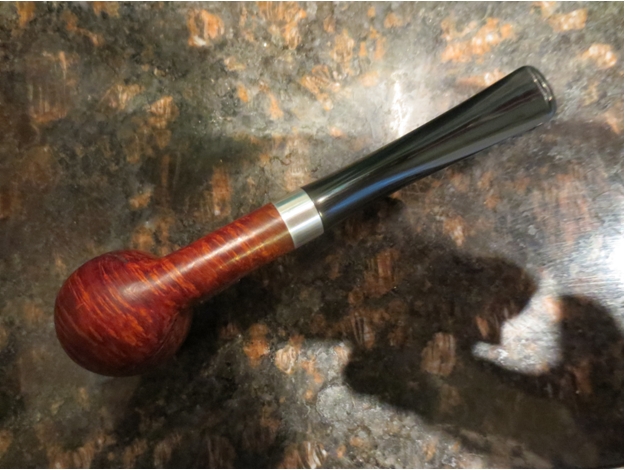
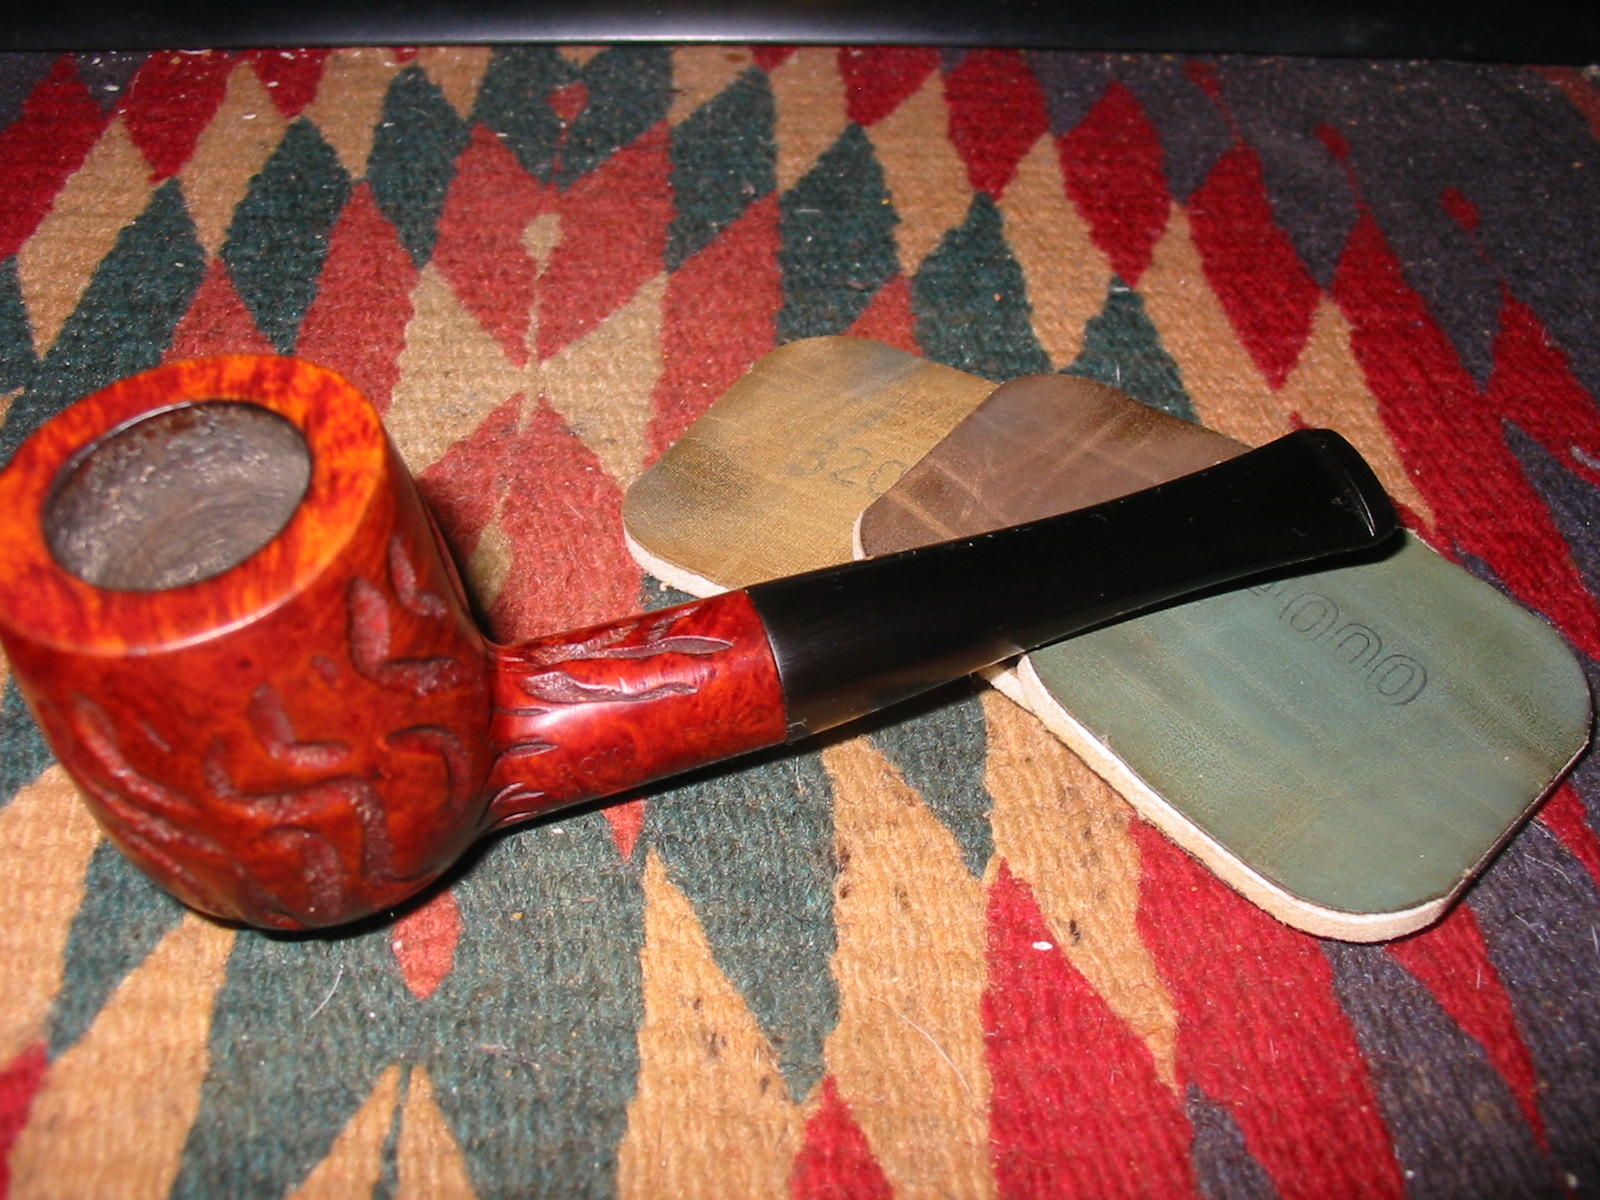
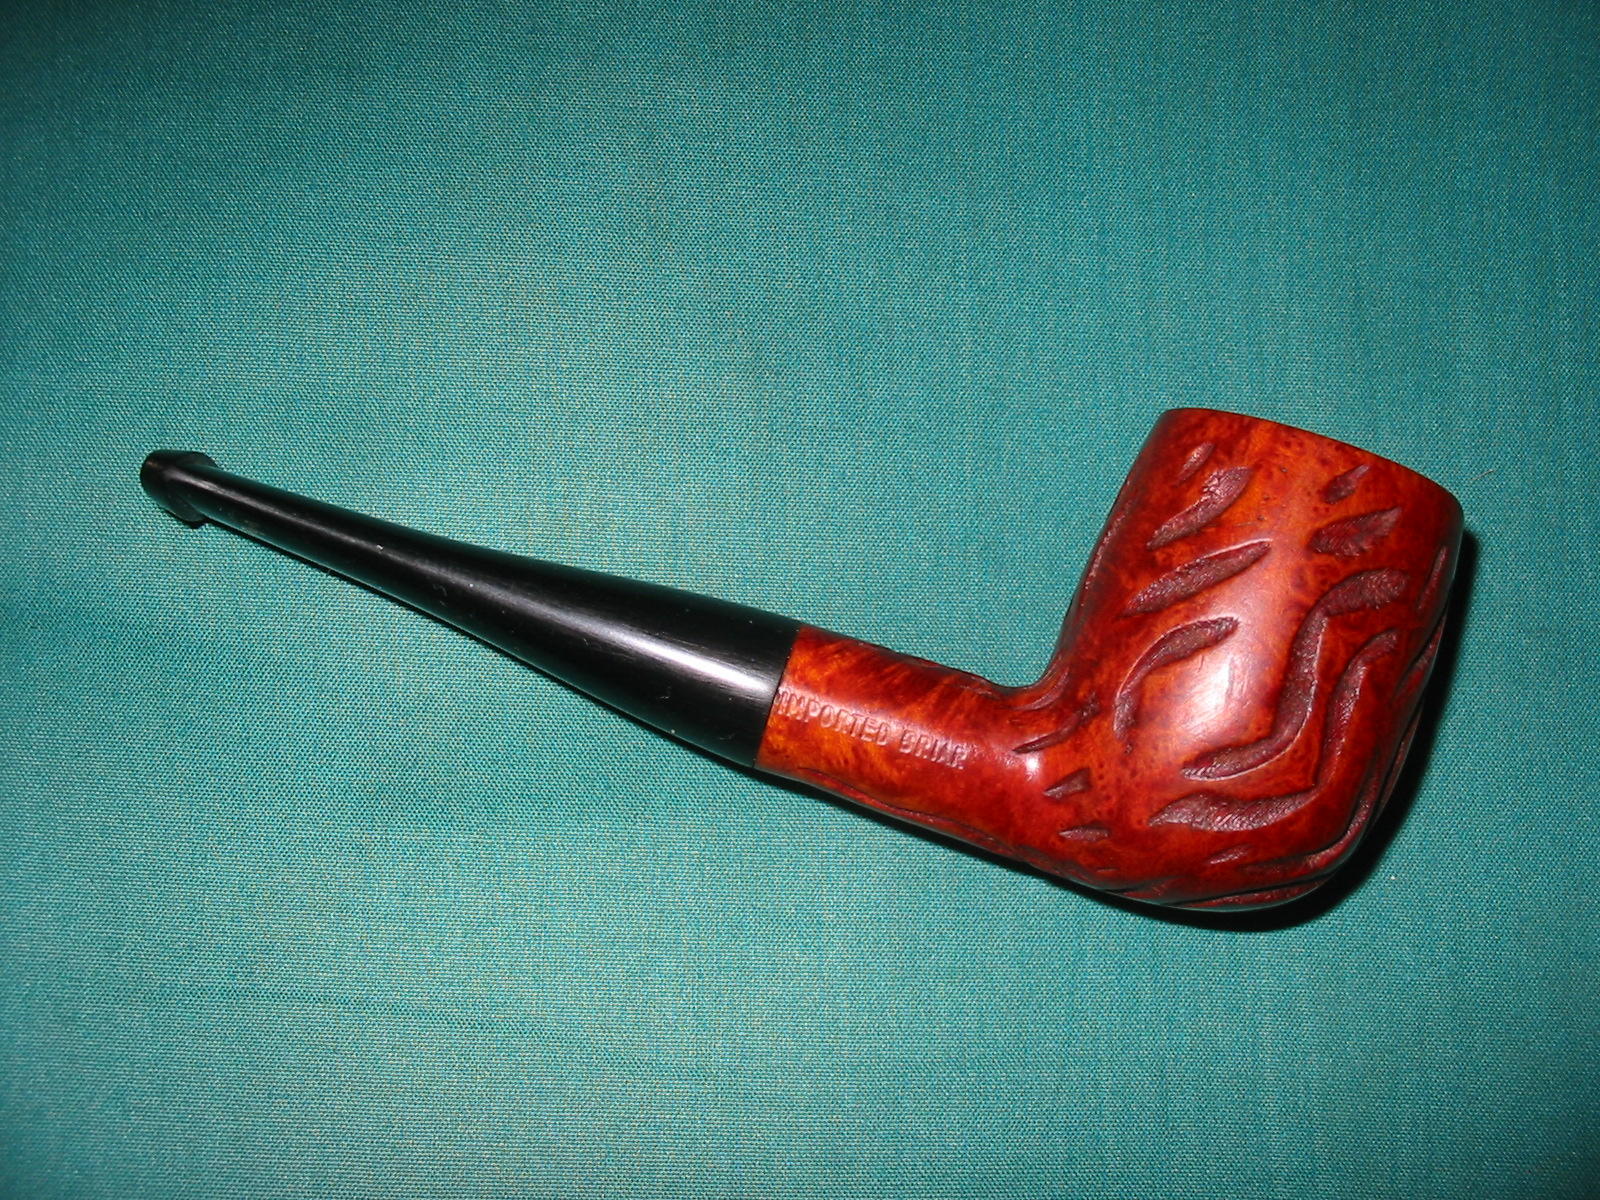
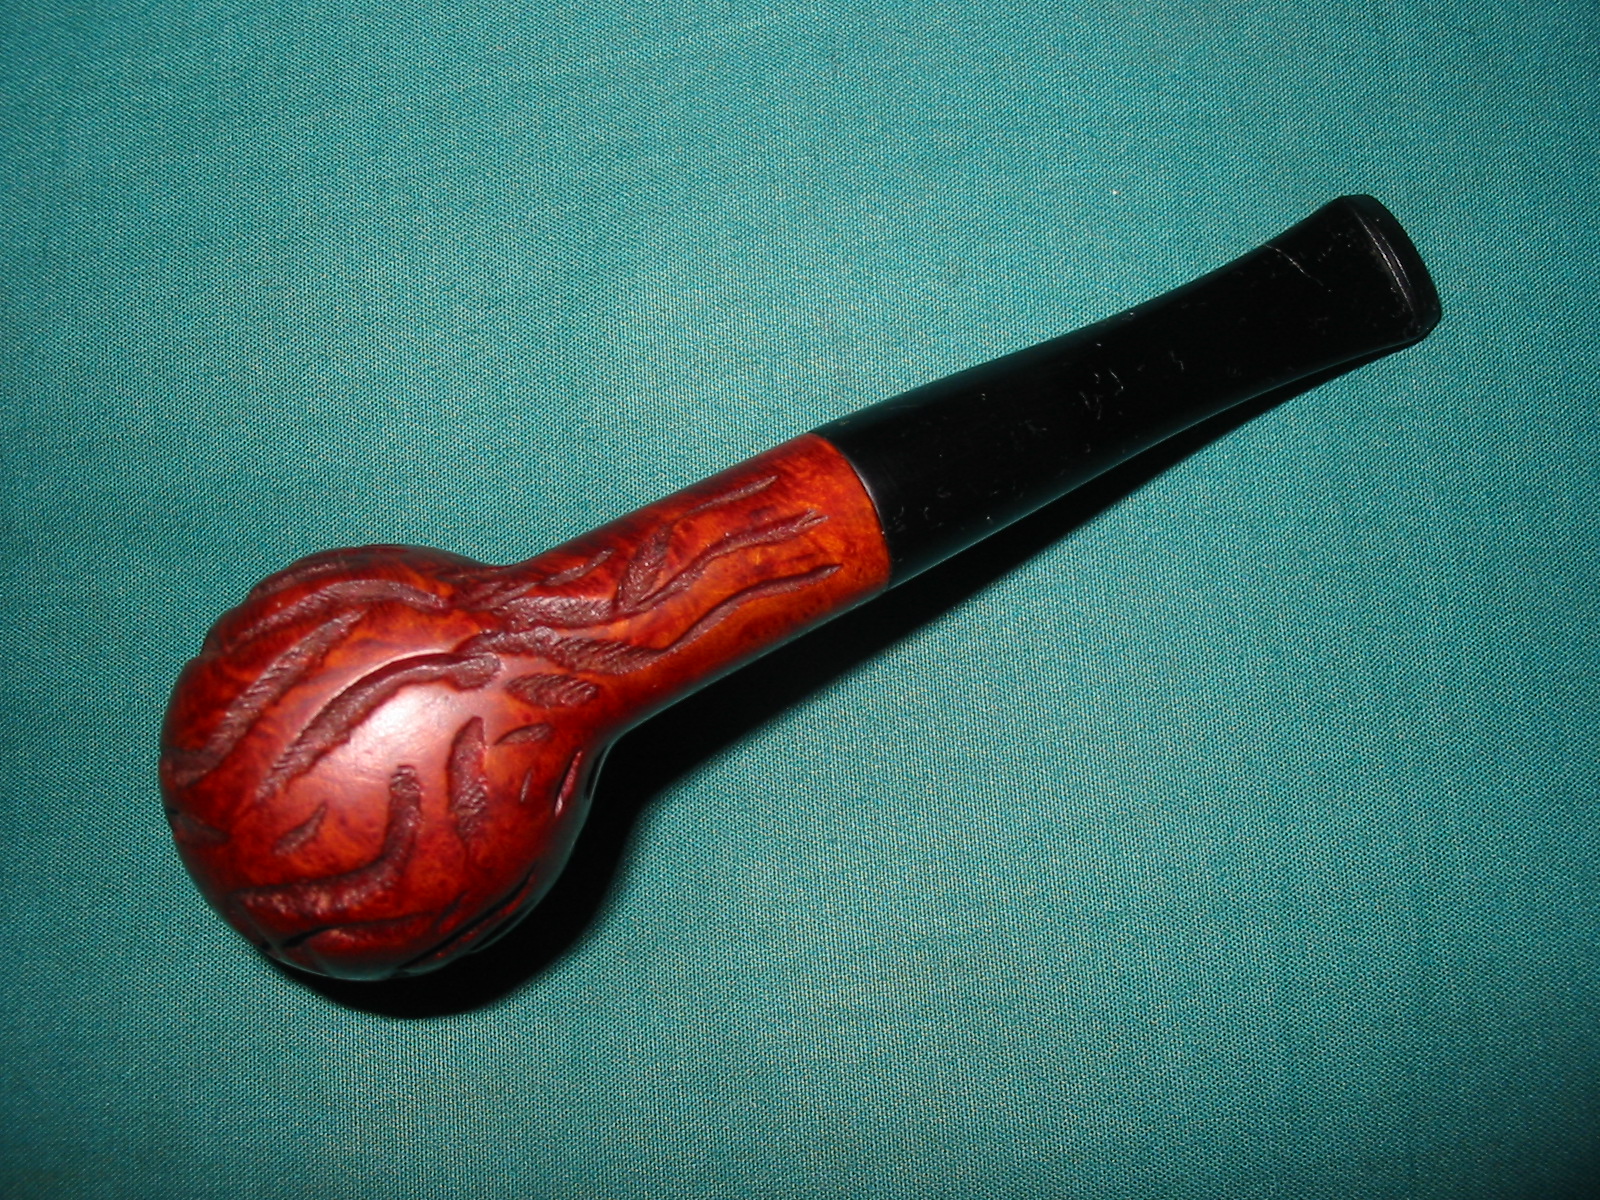
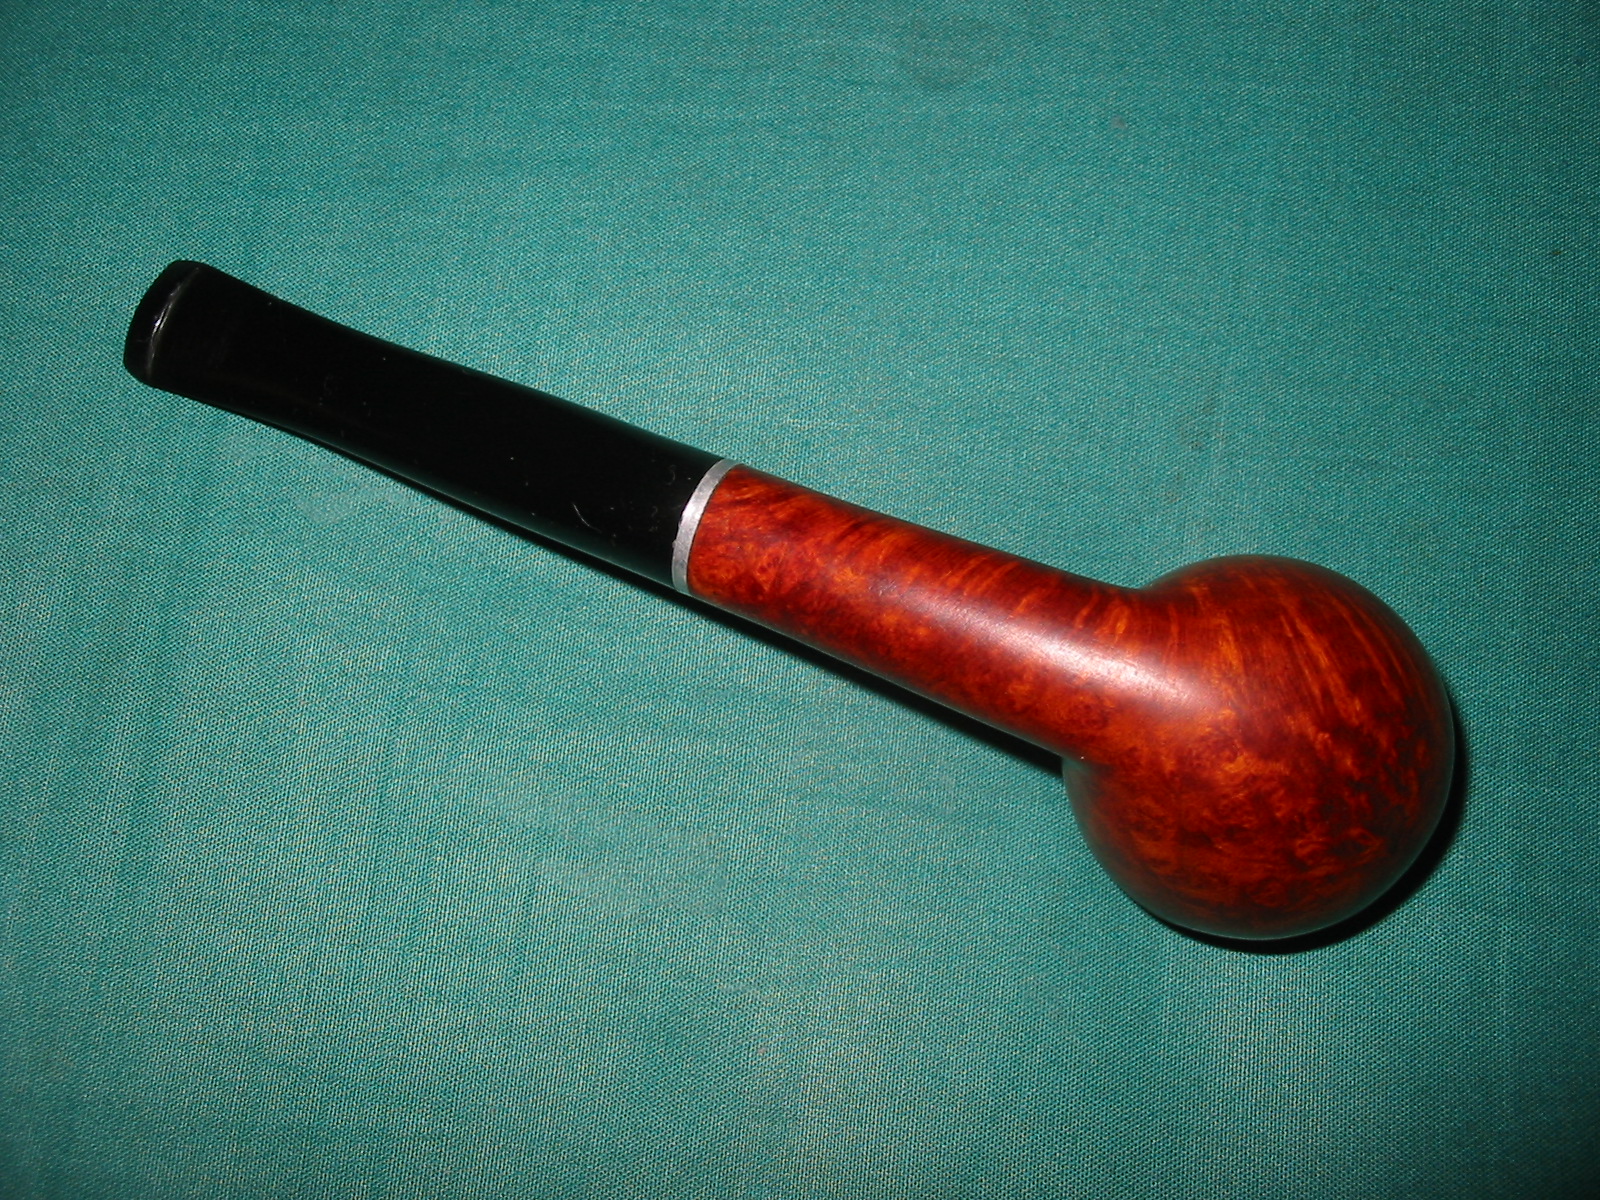
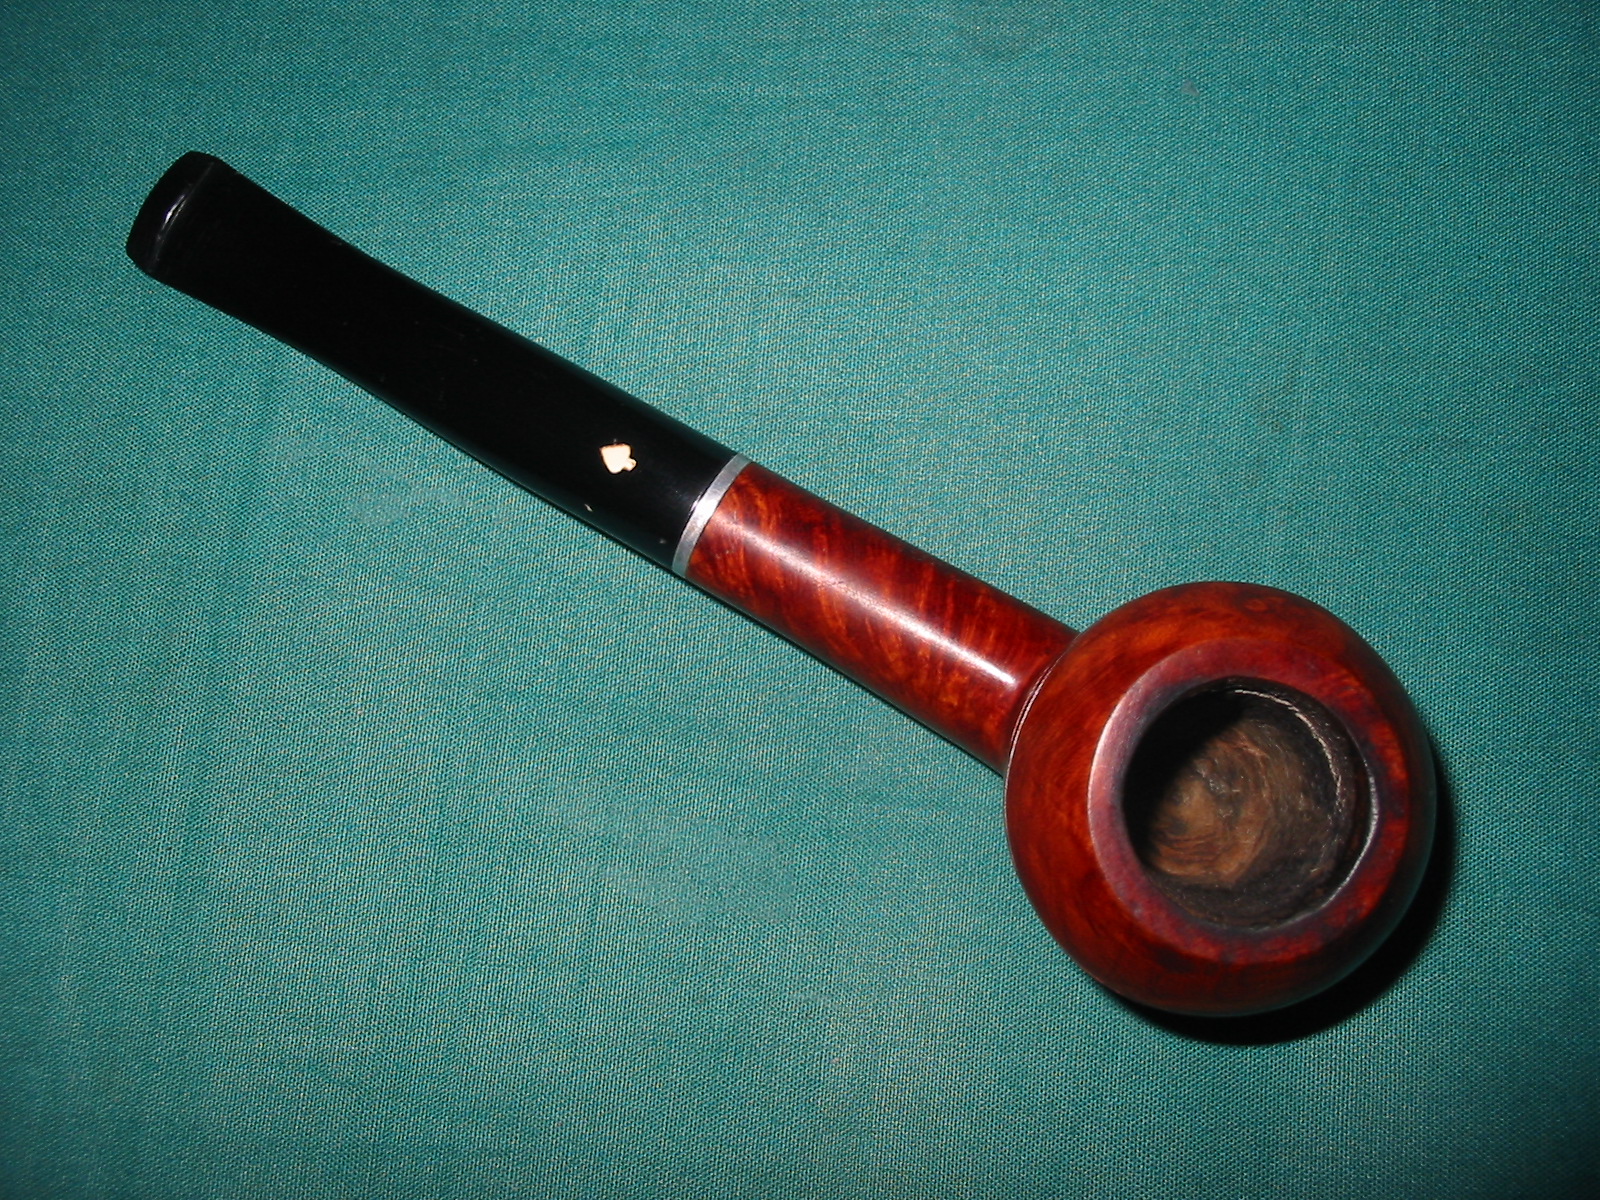
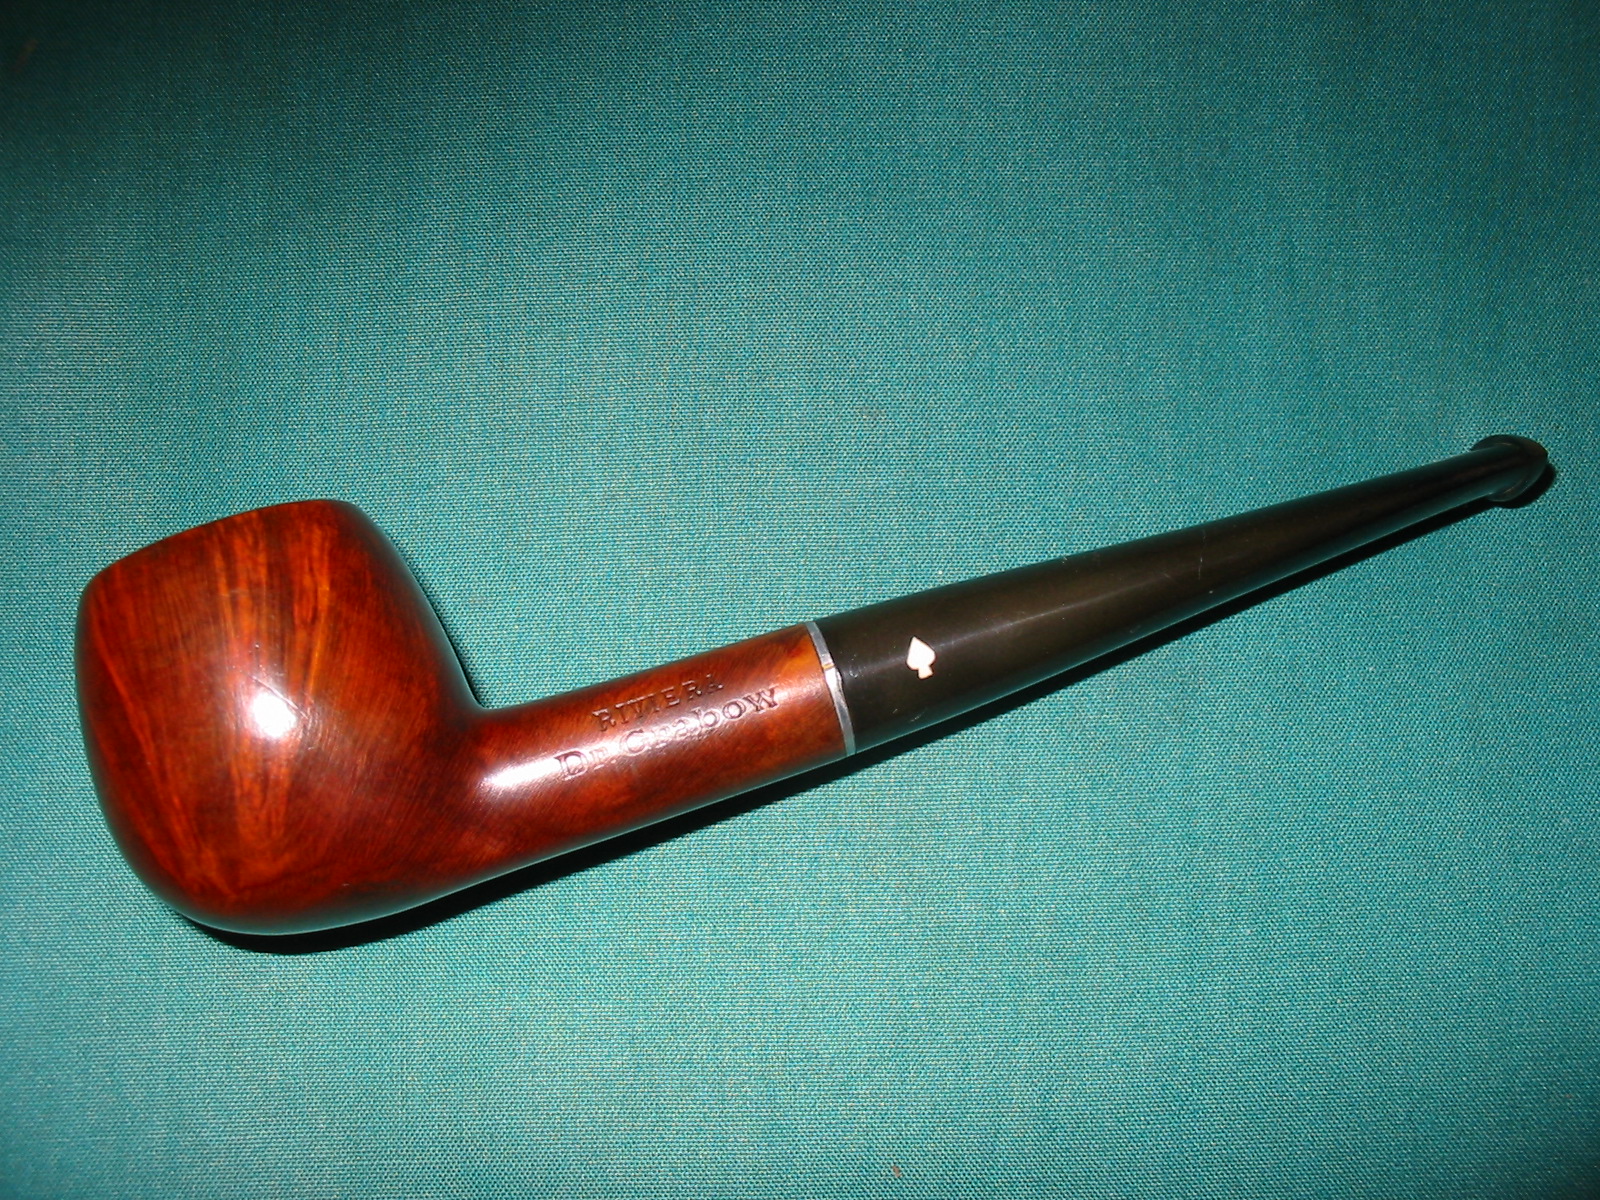
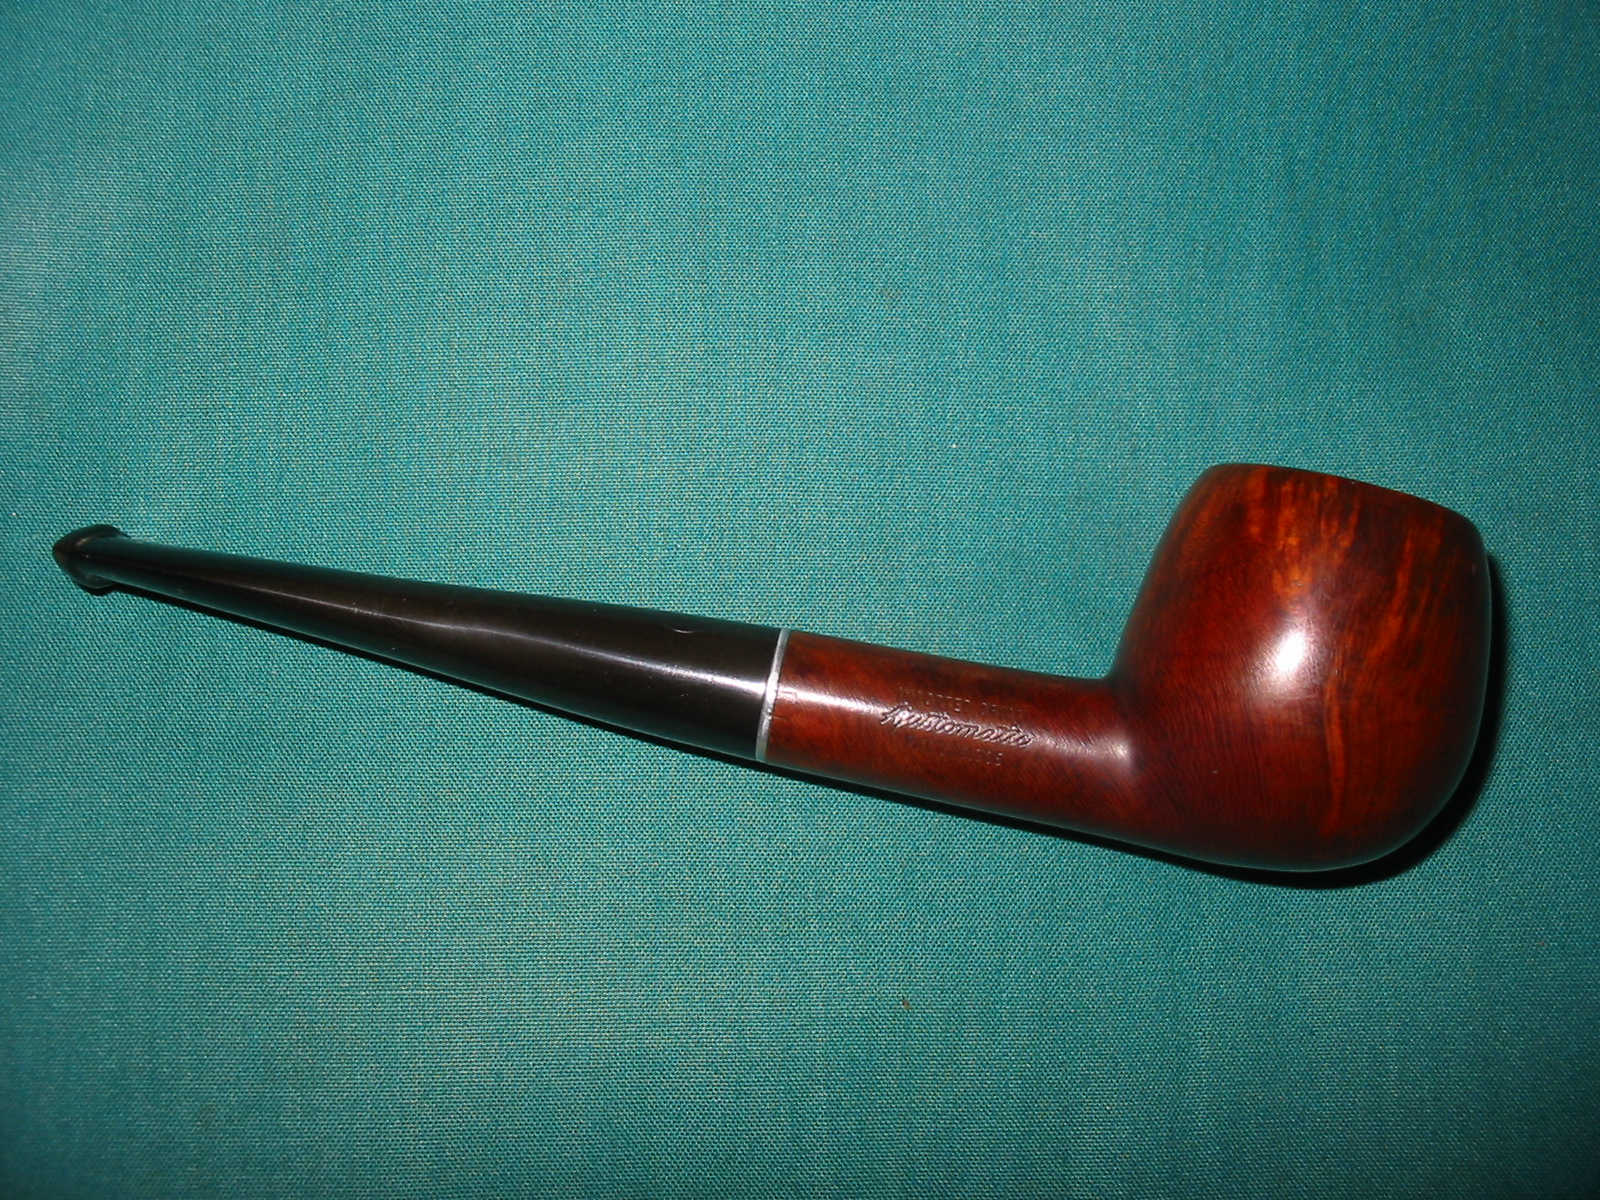
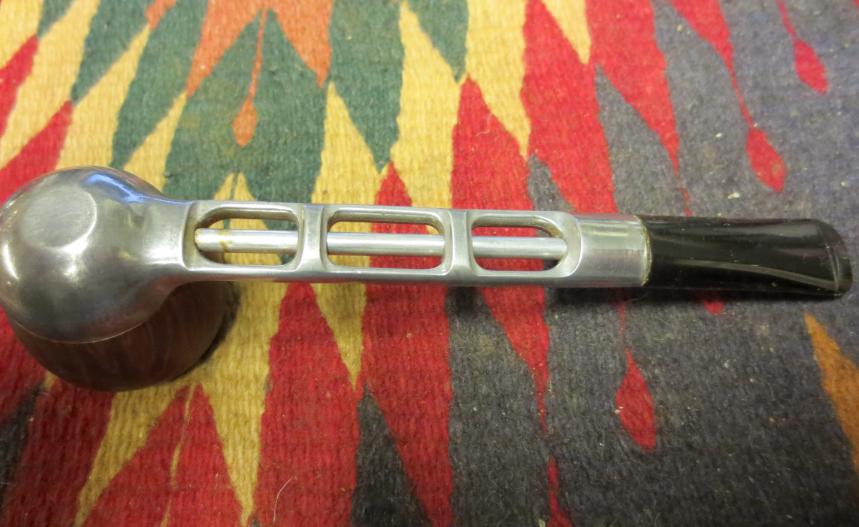
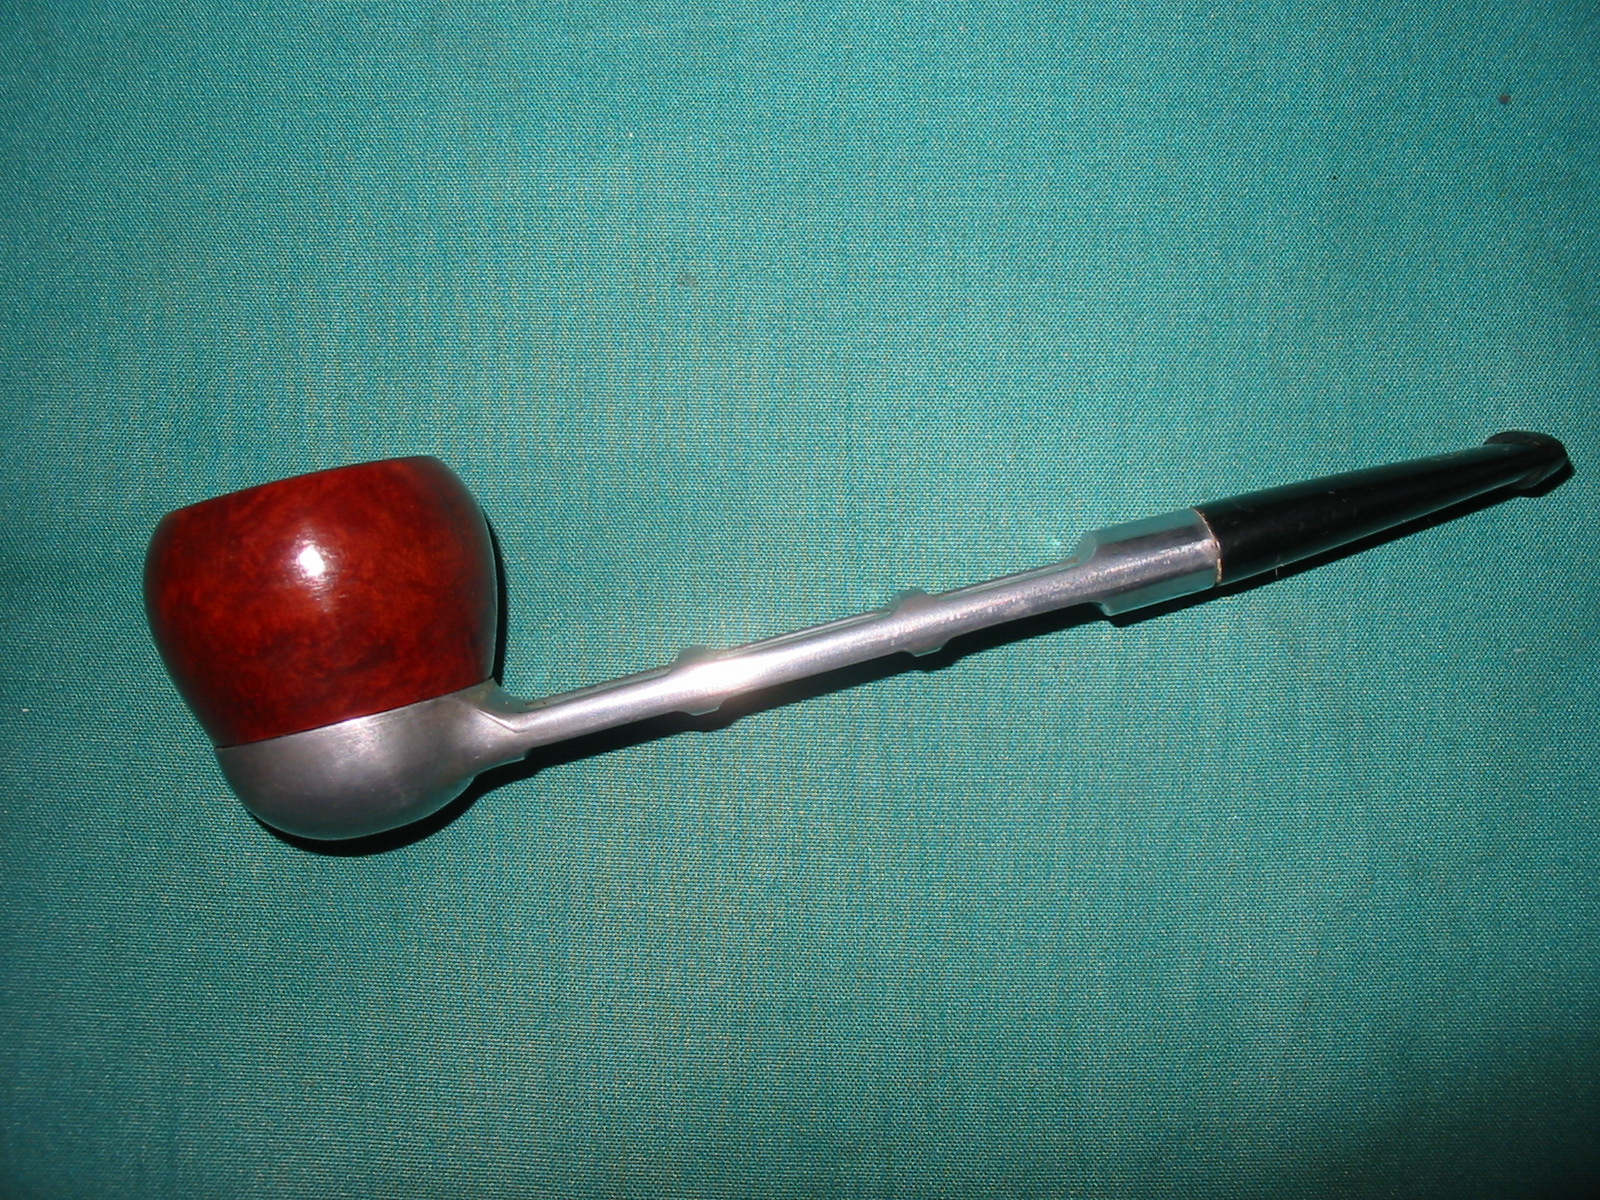
I buffed the pipe on the wheel with Blue Diamond polish and then gave the bowl and stem multiple coats of carnauba wax. I buffed it with a clean flannel wheel to give it a shine and finished by buffing it with a microfibre cloth to deepen the shine. The finished pipe is shown in the photos below. It is a beautiful old Grabow that has a lot of life left in it. Whether I keep it or pass it on to someone else it should last much longer than I will. It should continue to give companionship to whoever’s rack it graces. Thanks for looking.Dr39

Dr40

Dr41

Dr42

Dr43

Dr44

Dr45

Dr46

ADDENDUM: I received the following message on FaceBook from Christopher Chopin. It adds much to the information on this pipe so I add it here:

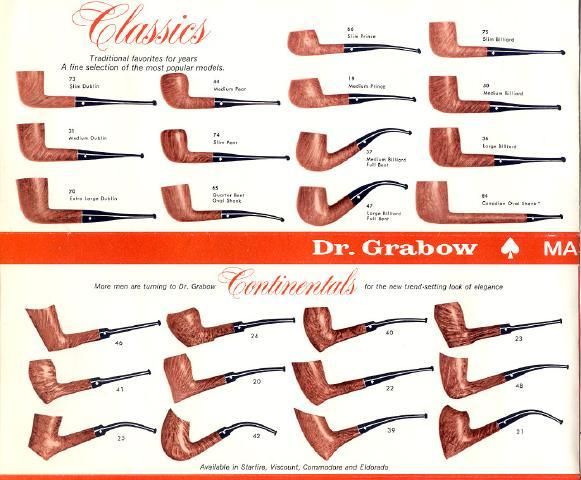
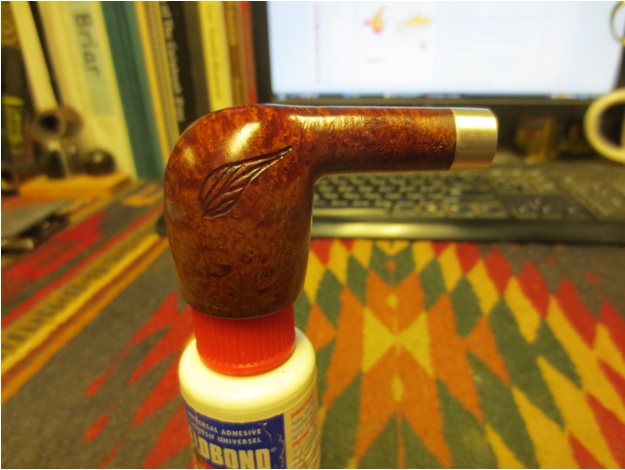
A favorite shape. Nice job as always Steve. And yes, 04 is the shape code, 97 was the finish code for deluxe. Also 92 and 98, there was more than one De Luxe, and 97 was the natural variegated finish. Dating on that if I’m not mistaken is between 1944 and 1953, at which point the spade was rotated so that the tip pointed to the bowl instead of the mouthpiece, after the company was purchased by HL&T. That is a true Linkman’s grabow, they just discontinued the Linkman’s stamp in ’44. I suspect it’ll find a place in your regular rotation.

A Very Simple Cleanup on a Dr. Grabow Regal Dublin


Blog by Steve Laug

This pipe came to me in a box of pipes that a friend brought by for me. He was getting rid of a bunch of the pipes that he no longer smoked and thought I might enjoy cleaning them up. This one is stamped on the left side Regal over Dr. Grabow and on the right side, Imported Briar over Adjustomatic over Pat. 2461206. When I took it out of the box it had a half stem. The rest of it had been broken off and it was about 1 ½ inches long. I took it off and put the bowl back in the box. I have no idea what I did with the old stem; I have looked for it for a while now as I wanted to pirate the Adjustomatic tenon from the stem. It will show up when I least expect it and I will deal with it then. Yesterday I took the bowl out of the box and was looking it over. It was in very decent shape. The finish was clean. There were some lighter marks on the back right outside edge of the rim but other than it was clean. There was no cake in the bowl. It was worth a little time to see what I could do with it.

I went through my can of stems and found a Dr. Grabow stem that was the proper diameter. It was in decent shape. There were tooth marks on the top and underside of the stem next to the button. The button itself had some tooth dents. There was some calcification on the surfaces as well. The tenon and stinger were black with tars and oils but would clean up easily enough. The only thing with this stem and tenon is that it was not an Adjustomatic stem but it would do.Dr1

Dr2

Dr3

Dr4

Dr5 I cleaned out the shank and mortise with cotton swabs, pipe cleaners and alcohol. The shank was pretty clean and it did not take much to remove the little that was there. I removed the stinger and cleaned out the stem with alcohol. It too was not in to bad of shape on the inside. I cleaned the stinger and tenon with alcohol and 0000 steel wool.Dr6

Dr7 I heated the stem and raised the tooth dents as much as possible and then sanded them smooth with 220 grit sandpaper. One of the divots was a little too deep to raise so I filled it with a small batch of black super glue and sanded it smooth.Dr8

Dr9 I used a needle file to redefine the sharp edge of the button and make a clean line on both sides of the stem.Dr10 I sanded it with a medium and a fine grit sanding sponge to remove the scratches from the vulcanite and then wiped the stem down with Obsidian Oil.Dr11 I sanded the stem with micromesh sanding pads – wet sanding with 1500-2400 grit pads and then wiping down the stem with Obsidian Oil. I dry sanded with 3200-4000 grit pads, gave it another coat of oil and then continued with 6000-12000 grit pads. Each successive grit of pad made the patch disappear and blend into the surface of the stem. I gave the stem a final rub down with Obsidian Oil and let it dry.Dr12

Dr13

Dr14 I buffed the pipe with Blue Diamond polish on the wheel and then gave it multiple coats of carnauba wax. I buffed it with a clean flannel buff on the wheel and then hand buffed it with a microfibre cloth for a final deep shine. The following photos show the finish pipe. It should work well for many years to come. This one is for sale should anyone wish to add it to their rack. Email me and let me know.Dr15

Dr16

Dr17

Dr18

Dr19

My Dr. Grabow Continental Shape # 25 Collection


Blog by Troy Wilburn

I just picked up this Dr. Grabow Viscount Continental shape #25 a short while ago from a friend over at Dr. Grabow Collectors Forum. It was in excellent lightly smoked condition and only required some very slight cleaning and buffing.Grabow1

Grabow2

Grabow3 This pipe completed my Continental 25 Collection. The Continental shapes were offered by Dr. Grabow from the early 60s to no later than 67-68.Grabow4 The Shape #25 seems to be the rarest of the Continental shapes as they were not offered in the RJ coupon pipes such as Westbrook, Sculptura, Emperor, Commodore etc. (There is an Emperor 25 owned by a former employee of Dr. Grabow. It was most likely made at factory by a worker and a one-off.) Although the other Continental shapes were offered in RJ Coupon pipes. Some models lines did not use the Continental shapes at all (example Belvedere)

So it boils down to the fact that the Continental 25 was only offered in two lines – the Viscount and Starfire. Take that with a grain of salt though as with pipes there are always some odd balls out there that might have been made and is an exception to the rule.

The Viscounts line was not stained and only came as natural wood color. The Viscount Continental 25 was offered in both smooth and wire carved versions. Grabow5 The Starfires were lightly stained in the smooth pipes but the wire carved pipes were always stained black in the Starfire line.Grabow6 Here is my Continental 25 collection all together.Grabow7

Grabow8 These are fine little flake pipes and it was a lot of fun collecting and searching for them. I hope you enjoy looking at them as well.

Cleaning up a Dr. Grabow Royal Duke Bent Billiard


Blog by Steve Laug

One of my pipe finds last weekend was a Dr. Grabow Royal Duke Bent Billiard. It was in pretty decent shape. The rim had a little buildup and darkening but no damage. The bowl itself was lightly smoked but was half full of unsmoked tobacco. The stem had some scratches and small marks on the surface of the top and bottom. There were no tooth marks though and that was a bonus. The aluminum cap on the stem was oxidized. There was a Medico filter in the aluminum shank that was almost black. The finish was in good shape. There were some scratches and small dents in the briar on the bottom of the bowl. Overall the pipe was in pretty decent shape and needed a thorough cleaning. It was an easy refurbish.Grabow1

Grabow2 Because it was an easy cleanup I decided to see if I could gather any information on the history of the Royal Duke. I posted on the Dr. Grabow Collectors Forum and put pictures of the pipe there to see if I could get some help on the brand. I got some great responses and information from the folks there. The first of them came from Ted D. who was a past CEO of Dr. Grabow in Sparta. Here is what he wrote:

“Royal Duke was the first paper filter pipe made by Grabow. The name and construction were bought from Continental Briar Pipe Co. in the early 50’s. Continental made the “Royal Duke of Dundee” and “Duke of Dundee”. Royal has been made continuously since then, and is still made. It went through several minor changes through the years. With a “before” picture I might get within a 10 year period… maybe closer. Td” Grabow3 Spadefan on the same forum also posted this for me: The Grabow Timeline post:

http://drgrabows.myfreeforum.org/viewtopic.php?t=4834&start=0 shows Royal Duke starting somewhere in the broad timeframe of 1955 – 1964. Royal Duke continues in production today. Here are a few quotes from forum member DRBridges, one of the forum’s “founding fathers” and “Old Timer” TED that place the blue spades on early production Duke series filter pipes until abt. 1993/4. Here are the money quotes:

“HL&T began replacing the older Dr. Grabow model names after 1955 with new models. These included the “Ajustomatic” ELDORADO, REGAL, SAVOY, STARFIRE, VISCOUNT, and the “Duke Filter” DUKE, GRAND DUKE, and ROYAL DUKE. The early “Ajustomatic” pipes displayed a white spade emblem. The early “Duke Filter” pipes diplayed a blue spade. The early push stem [without filter] pipes displayed a yellow spade. Additional models were introduced during the 1960s and 70s, and all later Dr. Grabow pipes displayed a white spade emblem.” DRBridges

“Through the 1950s, 60s, 70s, and 80s, DG filter pipes used blue spades, except for the ajusto Dukes. They all went white in the early 1990s. Mortise and tenon DG pipes used yellow spades. Ajustomatics were white.” DRBridges

“We were still using the colors in 1991. I guess they changed about 93/94.” ted

So it looks like blue spades were used exclusively on Duke lines of filter pipes from their introduction sometime 1955-1964 through 1993/4. Anyone have more info on blue spades?Grabow4I posted photos of the pipe as Ted requested and then received another answer from him that helped date the pipe. He wrote: “I think it’s the old Spruance Southern lacquer. That and a vulcanite bit will put it at 1975 +- 5.. td”

Knowing that information gave me some helpful information on the pipe I had. I liked the idea that it came from the era in which I finished my high school and entered university. It came from the same era as my first pipe purchased in the early 1970’s. The photos below show the state of the rim and the half filled bowl of tobacco.Grabow5 The pipe has some absolutely beautiful grain that swirls around the bowl.Grabow6

Grabow7 I scraped the tobacco out of the bowl, threw away the paper filter and then cleaned out the shank and stem with pipe cleaners, cotton swabs and isopropyl alcohol.Grabow8 Because the bowl had an intact coat of lacquer that was not damaged I scrubbed the rim with saliva and cotton pads. I was able to remove all of the buildup on the surface and some of the darkening.Grabow9

Grabow10 I sanded the stem with micromesh sanding pads to remove the scratches and damage to the surface. I wet sanded with 1500-2400 micromesh until the majority of the marks were removed. I dry sanded with 3200-12,000 grit pads to further polish the vulcanite.Grabow11

Grabow12

Grabow13 I gave the stem several coats of Obsidian Oil and then buffed it with Blue Diamond on the buffing wheel. I gave it several coats of carnauba wax and buffed it with a clean soft pad to raise the shine on the stem. I lightly buffed the bowl so as not to damage the lacquer. The finished pipe is shown in the photos below.Grabow14

Grabow15

Grabow16

Grabow17

Grabow18

Grabow19 I want to give a shout out to the Dr. Grabow Collectors Forum. They are great folks and always ready to help. If you have not checked them out head on over and have a look at their site. http://drgrabows.myfreeforum.org/index.php Thank you folks for your help on this one and on others that I have worked on. It is greatly appreciated.

New Life for a Dr. Grabow Belvedere Apple


Blog by Troy Wilburn

I got this pipe from a friend on Facebook. He buys lots and sells pipes out of them. He sent me a message and said he had a decent Dr. Grabow Belvedere for $2.50 + $2.50 shipping. He stated it would clean up pretty good. I’ve known him for a while and have purchased a few pipes from him. I trust his judgment, so I told him to ship it to me. I didn’t even ask what shape number it was or finish. Heck for 5 bucks a good stem is worth that. That’s cheaper than a pack of smokes nowadays.

The next group of photos shows what the pipe was like when I got it. It has several fills and the back of rim is banged up. On a good note there are no cracks or such and the stem was in fine shape. It’s not the prettiest looking pipe, but it will make a fine smoker. With all the fills this will be a work horse pipe – a pipe I can keep in a tackle box, tool box, RV /camper, pickup truck glove box or just a for beating around outside when doing work. Because of the rook stinger this makes it an early Belvedere from around mid 1950’s.Troy1

Troy2

Troy3

Troy4

Troy5 I took the bowl and gave it a good cleaning with Oxy Clean, a Scotch Brite pad and warm water. After that I cleaned out cake and shank with isopropyl alcohol.Troy6 I wiped down the bowl with mineral oil to get a good look at the damage.Troy7 Starting with 400 grit sandpaper I worked over the major damage on the bowl and slowly working it out with 600, 800, 1000, 1200, 2000 grit sandpaper. Then I used 2500 grit sandpaper over the whole pipe. I used mineral oil as a lubricant for the wet/dry paper instead of water.Troy8

Troy9

Troy10

Troy11 I set the pipe on a space heater to dry the oil out so I could work on the fills.Troy12 I scrubbed and cleaned the stem inside and out after a soak in isopropyl and then Oxy Clean. The stem wasn’t that bad. After using a shank brush on it I found that it only needed a few cleaners.Troy13 I then took some paint and mixed up a color that would help blend the fills in somewhat. It was just plain old acrylic paint from Walmart.Troy14

Troy15 I applied it on fills of course using a small brush.Troy16 I then set the pipe back on heater for drying. While it was drying I wet sanded stem with 400 grit sandpaper on up to 2500 grit sandpaper, just like I had done with the bowl. I also cleaned the stinger and male threads with steel wool.Troy17 After bowl dried I wet sanded the pipe again with mineral oil and 2500 grit sandpaper to blend out the paint. I sanded very lightly though, as it does not take much.Troy18 The fills don’t look too bad after a couple of coats of wax.Troy19 Here are some photos of the completed pipe.Troy20

Troy21

Troy22

Troy23

Troy24

Troy25

Troy26

Troy27

Troy28

Troy29

Troy30

Troy31 For a few bucks a little time and elbow grease I got me a fine daily smoker and work pipe that will last a long time and smoke great.

Ready for those “honey do” projects.Troy32

Rebuilding a Dr. Grabow Regal Adjustomatic Patent Billiard


One of the few pipes with a stem included in my gift box of bowls was a nice little Dr. Grabow Billiard. It had a long stem that clearly fit the shank of the pipe and gave it an elegant look and feel. At first glance I figured this one would clean up quite easily. The varnish finish on the bowl was worn and spotty with pieces of the varnish coat peeling off the surface of the briar. The rim was coated with a thick layer of tars and oils but looked sound. The bowl had a thick cake particularly from mid bowl to the bottom of the bowl. It was very hard and was not crumbling at all. It had however, closed the bowl to a large degree. The mortise was part of the aluminum band on the shank. It was a threaded cast piece that was fitted against the briar and was oxidized. The internals were quite clean. The bowl was stamped on the left side: REGAL over Dr. Grabow. On the right side it was stamped Imported Briar over Adjustomatic over PAT. 2461905. I have written about the patent on the Adjustomatic tenon/stem in an earlier post on rebornpipes: https://rebornpipes.com/tag/dr-grabow-adjustomatic/ I included patent information and diagrams on that page so I will not repeat that material in this post. The stem had thick calcification on the top and bottom sides of the stem and looked like it had one time sported a softie bit. When I turned the stem over there was a large hole in the underside from the button forward. IMG_1924 IMG_1925 IMG_1926 IMG_1927 I wiped down the bowl with acetone on a cotton pad to remove the damaged varnish and prepare the bowl for possible restaining once the rim had been cleaned off. It took some scrubbing but I was able to get rid of the varnish from the surface and out of the grooves in the carved leaves on both sides of the bowl. It turned out that underneath the peeling varnish there was some very nice grain on the pipe. The top and bottom of the shank and the front and back of the bowl were really nice cross grain. There was a small nick in the back of the bowl near the top of the rim that had a small fill otherwise the briar was flawless. The sides were very nice birdseye grain. This was going to be a stunning pipe once it was finished. IMG_1928 IMG_1929 IMG_1930 I wiped down the buildup on the rim and was unable to even dent the hard tar. I lightly topped the bowl on a topping board to take of the buildup and not affect the rim itself. I carefully removed the tars, checking every move across the sandpaper to make sure that I was not damaging the surface of the rim. IMG_1931 IMG_1932 Once I had cut through the buildup the briar was in very good shape. I used a PipNet reamer with the smallest cutting head to remove the carbon cake in the bowl. Even the smallest head was hard to turn against the rock hard cake of this bowl. I carefully worked it back and forth, being careful not to tip the cutting head to either side and lose the roundness of the bowl. Once I had gotten the head in as far as possible I used a pen knife to work on the bottom portion of the bowl and then reworked the reamer in that area. IMG_1933 I decided to try to patch the hole in the stem. I cleaned hole and put Vaseline on a pipe cleaner. I inserted it in the airway then sprayed accelerator on the stem, put black superglue on the hole and let it sit. The hole was quite large and I was not sure that the repair would hold. I applied the glue in several layers building up the patch until it was quite thick. I sprayed it with the accelerator each time to speed the drying time. IMG_1934 IMG_1935 IMG_1936 I sanded the patched area with 150 and 220 grit sandpaper to smooth out the patch and then reapplied more black super glue and accelerator. IMG_1937 I set the stem aside and let it cure. In the morning I sanded the stem patch until it was smooth in the process my fingernail went through the stem above the patch. I explored the thickness of the stem up the stem and found that I could push through the airway quite a distance up the stem (Photo 1 below). After that fiasco I noticed that the patch was also quite unstable. I was able to push out the patch with my fingernail. The stem after patching and pushing through the repair is shown in Photo 2. IMG_1943 IMG_1944 At this point it was clear that a stem patch would not work on this stem. With the thinness of the vulcanite extending up the stem about an inch it was not clear how far that would go. I was going to need to do something different. I cut off the stem with a Dremel and sanding drum. IMG_1945 IMG_1946 After cutting it off I could see the problem – airway was drilled very high in the stem. There was no room for cutting a new button on the stem and opening up the slot. The top of the stem was thin for another inch toward the tenon. I had to come up with something very different to address this issue. IMG_1947 I had an old Kaywoodie stem in my can of stems that was about the same diameter as the damaged one. It was missing the club logo in the side of the stem but had a club shaped hole. I heated the stinger on the KW stem with a lighter and then was able to remove it with a pair of needle nose pliers. IMG_1948 I also heated the Grabow stem with the lighter and worked on it with the pliers. It came out slowly. I finally screwed it into the bowl and turned it until the stem came off. I then unscrewed the tenon from the bowl. I tried it in the KW stem and it was just a little bit bigger than the hole in the stem. I would need to drill it one size larger to get a fit. IMG_1949 I used my cordless drill to drill it out. It had to be slightly larger and slightly deeper than the KW stinger apparatus. To make room for the lip on the aluminum piece I used a sharp knife to bevel the inner edge of the hole to accommodate the lip. IMG_1950 IMG_1951 The Grabow tenon/adjustomatic apparatus fit in the shank and I pressed it into place to see if the fit was correct. I then removed it and used a white all purpose glue to hold it in place. There was a removable stinger end for the tenon so I reinserted that in place and the new insert was ready. IMG_1952 IMG_1953 The fit of the stem against the shank was perfect. The diameter of the stem was slightly larger than the diameter of the shank so I would need to sand it to make them match. I tried to remove the Grabow insert from the old stem so that I could use it on the new stem. I tried to pick it out with a dental pick but was not able to remove it. IMG_1954 IMG_1955 I filled the club hole with black superglue and then sanded it smooth. I used 220 grit sandpaper to work on the diameter of the stem. I also sanded the end of the stem around the button to remove the tooth marks and chatter. IMG_1956 The next series of four photos show the stem after all of the sanding and shaping. The new stem looked quite good with the bowl. The fit was perfect and the lines and flow of the angles was exactly what I was looking for when I started. IMG_1957 IMG_1958 IMG_1959 IMG_1960 I sanded the stem with a medium and fine grit sanding sponge and then refilled the small holes around the patched club logo with more superglue. I sanded the patch down with 220 grit sandpaper and resanded it with the sanding sponges until it was smooth. The photo below shows the two stem side by side. IMG_1965 I sanded the stems with micromesh sanding pads – wet sanding with 1500-2400 grit pads and dry sanding with 3200-12,000 grit pads. I rubbed it down with Obsidian Oil between each set of three grits of micromesh. I buffed the stem with White Diamond and then gave it a final coat of Obsidian Oil and set it aside to work on the bowl. IMG_1966 IMG_1967 IMG_1968 I buffed the bowl with White Diamond and carefully buffed around the stamping on the sides. I polished the aluminum shank band with the higher grades of micromesh pads and then a polishing cloth to remove the scratches and bring up the shine. The next series of four photos show the polished bowl before I worked on it with some 8000-12,000 grit micromesh pads. IMG_1938 IMG_1939 IMG_1940 IMG_1941 IMG_1942 I gave the bowl a wiped down coat of Danish Oil and walnut stain. I wanted to give the briar a shine coat but not add much colour to the finish. It really made the grain pop on this one. IMG_1961 IMG_1962 IMG_1963 IMG_1964 Once the oil had dried I buffed the bowl with White Diamond and then gave it several coats of carnauba wax. I buffed it with a soft flannel buff. I put the stem back in place and gave the bowl and stem several more coats of wax and buffed to a shine. The finished pipe is shown below. The look and feel of the pipe is like new. It is cleaned, restemmed, refinished and ready to fire up with its inaugural bowl of tobacco. It should last a long time and serve its owner well – whether I keep it or pass it on to another pipeman. (I decided to take these final photos on a piece of marble counter top to see if I could get a good contrast on the photos.) IMG_1970 IMG_1971 IMG_1972 IMG_1973

Restemmed Dr. Grabow Royal Duke Billiard


Blog by Steve Laug

I am getting close to the bottom of the box of pipes to refurbish so I pulled out this Dr. Grabow bowl to restem and to refinish. It is stamped Royal Duke over Dr. Grabow on the left side of the shank and Imported Briar on the right side. I like taking the sealer coat of varnish off of these old Grabows and seeing what they look like refinished. I reamed the bowl with the PipNet reamer and cutting heads. I found a stem blank in my box and turned the tenon with a Pimo Tenon Turning Tool until it was close and then finnished the fit by hand. I ran a Dremel with a sanding drum on it down the sides where the overflow from the casting of the stem blanks left the sides and end rough. The next six photos show the fit of the new stem and the look of the pipe with its new stem.
IMG_2685

IMG_2686

IMG_2687

IMG_2688

IMG_2689

IMG_2690

I wiped the bowl down with acetone to remove the finish (photos 1-3 below). I then sanded the smooth surface of the bowl with a medium grit sanding sponge to break up the varnish finish on the rim and sides. I then wiped it down with acetone a second time and was more successful removing the varnish coat (photos 4-9 below). As can be seen from the progress of the photos the finish came off nicely and the rim darkening and bubbled varnish was also removed.
IMG_2691

IMG_2692

IMG_2693

IMG_2694

IMG_2695

IMG_2696

IMG_2697

IMG_2698

IMG_2699

I decided to stain the pipe with a medium walnut stain in a linseed oil mixture. I rubbed it on the bowl and rubbed it off until the colour was solid and even over the bowl. The next series of three photos show the freshly stained bowl of the pipe. I was able to get into the grooves of the rustication with the cotton pads dipped in stain so that all surfaces were covered.
IMG_2700

IMG_2701

IMG_2702

I rubbed off the stain and took the pipe to the buffer. I buffed it with White Diamond to polish the surface of the bowl and rim. The fibres from the pad also polished the grooves of the rustication as well. I put the stem back on the bowl and sanded it down with 220 grit sandpaper and a medium grit sanding sponge to remove the scratches left behind by the Dremel. I particularly worked on the shank stem union to make sure it was a smooth transition. I sanded the stem with micromesh sanding pads. I wet sanded with 1500-2400 grit and dry sanded with 3200-12,000 grit sanding pads. The progress of the sanding with micromesh pads is visible in the next series of three photos below. When I finished sanding the stem I wiped it down with Obsidian Oil and let it dry. I rubbed it down and buffed it with White Diamond on the buffing wheel.
IMG_2703

IMG_2704

IMG_2705

The finished pipe is pictured below. I buffed the pipe with multiple coats of carnauba wax and then polished it with a clean flannel buff. This old timer is ready to go back into service and will be a nice addition to someone’s pipe rack.
IMG_2706

IMG_2707

IMG_2712

IMG_2713

A Dr. Grabow Special Rhodesian/Bulldog – A Makeover


The last of the pipes from the Ebay lot below was the one in the bottom left corner of the photo. It was stamped Dr. Grabow over Special over Imported Bruyere on the left side of the shank. The finish was a varnish or polyurethane coat over the briar. It was bubbling and crackling. There was water damage on the edges of the rim. The briar itself was in good shape with no dents or roughening on the rim. The rim was slightly darkened but no dents or dings. The bowl was slightly out of round from poor reaming but very workable. The stem was a mess with chew marks on the top and the bottom for about an inch up the stem from the button. The stem was made of nylon and not vulcanite. The tenon was a push style and not a screw in stem. There was a shovel like stinger in the end of the tenon. The stem was loose in the shank and there was significant debris and buildup in the shank and in the stem. The second photo below shows the pipe as it was in the pictures from the seller.
pipes1

pipes3

I took it to my worktable this evening and went to work on it. I took the stem out and began to sand on the bite marks on the top and bottom of it. The next series of five photos show the progress of smoothing out the stem by sanding. I began with 220 grit sandpaper and worked up to a medium grit sanding sponge. By the fourth and fifth photo the bite marks are gone and some sanding scratches remain that will need to be worked out with micromesh sanding pads. I recut the edge of the button on the top and bottom with a needle file to clean up the angles. That is also visible in the last two photos. I also removed the stinger and cleaned it with 0000 steel wool and then polished it with micromesh sanding pads.
IMG_2564

IMG_2565

IMG_2566

IMG_2567

IMG_2568

While I worked on the stem the bowl had been soaking in an alcohol bath to help loosen the varnish or urethane finish. My plan was to remove the finish totally and sand and restain the pipe once it was cleaned and sanded.
IMG_2569

IMG_2570

IMG_2571

The alcohol bath softened the finish so when I dried it off the finish was cloudy. I have found that with this kind of finish I can use acetone on a cotton pad afterward to further remove the softened finish. The next two photos show the bowl with the finish removed. There is some nice looking birdseye grain coming through. Once the briar was clean I reglued the metal decorative band back on the shank and let it dry.
IMG_2572

IMG_2574

I sanded the bowl with the medium grit sanding sponge and then with 1500-2400 micromesh sanding pads. The next series of four photos are a little out of focus but the cleaned surface of the briar is visible and the grain that was underneath the finish is quite nice. I was also able to remove the water marks/damage that was along the outer edge of the rim and down the side of the bowl in the process of the sanding. I also cleaned out the shank with cotton swabs and Everclear. I did the stem as well and cleaned until the cleaners and swabs came out clean and white.
IMG_2575

IMG_2576

IMG_2577

IMG_2579

While the glue dried I worked on the nylon stem. I was able to remove all of the tooth damage. I wet sanded it with 1500-2400 micromesh sanding pads and removed the majority of the scratches left behind by the sanding sponge. I continued to rework the stem with these sanding pads until all of the scratches were gone and the stem began to take on a shine. (Photos 1-2 below show a top and bottom view of the stem).
IMG_2581

IMG_2582

I dry sanded with the remaining grits of micromesh sanding pads from 3200-12,000 grit. The stem took on its original shine. The next series of four photos show the stem as it moves through each level of polishing.
IMG_2583

IMG_2584

IMG_2585

IMG_2586

I wiped the bowl down a final time with acetone on a cotton pad to remove the sanding dust and grit. I dried it carefully and then it was ready to stain. I decided to use a linseed oil and medium walnut stain on this pipe. I felt it would make the grain show well and give the bowl a good protective coat. I applied the stain and wiped it off, reapplied and wiped it until I got the coverage I wanted on the bowl. The next series of four photos show the stained bowl.
IMG_2587

IMG_2588

IMG_2589

IMG_2590

I buffed the bowl and shank on the buffing wheel lightly with Tripoli and then with White Diamond to give it a shine. I then buffed it with carnauba wax and gave it several coats to protect the wood. I did not buff the stem on the wheel as the nylon heats too quickly on the buffing wheel and melts. I have made a mess out of more than one nylon stem. It does not seem to matter how light a touch I use the wheel and the nylon stems do not work well together. I gave the stem a coating of Obsidian Oil and rubbed it into the stem. I then hand applied several coats of carnauba wax and hand buffed the stem with a shoe brush and a soft cotton cloth. The finished pipe is pictured below. All in all it is not a bad looking old Grabow. It is clean and should smoke very well.
IMG_2591

IMG_2592

IMG_2593

IMG_2594

Breathing New Life into a Dr. Grabow Riviera


Blog by Steve Laug

When I am refurbishing pipes I take the same care on older factory made pipes as I do on the more collectible ones. To me this is part of the stewardship of refurbishing. It does not matter what the original price of the pipe was – it is worth redeeming and bringing back to life. The refurbishing of the next pipe is one of those. It is an older Dr. Grabow Riviera. It was given to me by a good friend in Ponoka, Alberta. He gave it to me as a gift when I visited him recently. It is stamped Riviera over Dr. Grabow on the left side of the shank and Imported Briar over Adjustomatic over a patent number – PAT. 2461905 on the right side of the shank. The stinger apparatus in this one is an insert into the metal tenon. It is tube with a scooped portion on top that has a hole in the bottom of the scoop. The air/smoke circulates in the shank and is drawn into the stem by the smoker. The surface area of the apparatus acts as a condenser and filter. The beauty of this design is that it can be removed. The stem was badly oxidized and also had tooth dents on the top and bottom near the button. The finish was shot and the varnish was peeling from the bowl and shank. The rim was darkened and dirty and had a small crack on the top left side. The four photos below show the state of the pipe when I brought it home.

IMG_0846

IMG_0847

IMG_0848

IMG_0849

I love doing research on old patents and with US made pipes it is very simple. The following website is a simple way to find data and diagrams. http://patft.uspto.gov/netahtml/PTO/srchnum.htm In the search parameters you enter the patent number from the pipe and click on the search button. Generally, these older patents have been made into PDF files that can be downloaded. Here is a copy of the information I found there. It is a patent for the Adjustomatic connector. I always find reading through these patent application documents gives me a feel for why the designer came up with invention. This proved true of this application as well.

Grabow Patent1

Grabow Patent2

Grabow Patent3

Grabow Patent4

After reading through the patent information I was ready to restore this old pipe. It appeared to be made somewhere around the time of the Patent as it had the patent number stamped on it. That dated it somewhere around 1949 after the patent was given. I began by reaming the bowl with the PipNet reaming set to clear up the uneven and broken cake. I decided to work on the externals first. I wiped down the bowl and shank with acetone on a cotton makeup pad to remove the finish. There was some very nice grain poking through the mottled finish and very few tiny fills that made it even more attractive to me. The acetone removed the varnish very well and also took away the dirt and filth on the exterior. The first two photos below show the process of wiping down the bowl. The old finish is visible on the cotton pad.

IMG_0850

IMG_0851

Once the finish was removed from the bowl as much as possible with the acetone, I sanded it down with 340 grit sandpaper and a fine grit sanding sponge to further remove the finish. The next series of four photos show the bowl after the acetone wash and the sanding. The grain on this one is very nice. The inner rim would need to have some attention to smooth out the rough edges and the darkening.

IMG_0852

IMG_0853

IMG_0854

IMG_0855

I sanded the metal shank band as it had some deep scratches and gouges in it. I could not remove the damage but I minimized its look. I worked on the tooth marks in the topside and the underside of the stem surface. I heated the stem with a Bic lighter – passing the flame over the tooth marks to lift them to the surface. I then sanded the stem with 220 grit sandpaper to remove the remaining marks that were present (Photos 1 – 4 below). I followed that by sanding with a fine grit sanding sponge to remove the scratches left behind by the 220 grit sandpaper (Photos 5 – 6 below).

IMG_0856

IMG_0857

IMG_0859

IMG_0860

IMG_0861

IMG_0862

I sanded the entire stem with the sanding sponge to remove the oxidation from the vulcanite. I took the pipe apart and cleaned the stinger apparatus with a cotton swab and alcohol. The next two photos show that design of the stinger. It is a two part piece and the extended tube can be removed from the screw in metal tenon. I cleaned the inside of the stem and also the inside of the stinger to remove the buildup of tars and oils inside.

IMG_0863

IMG_0864

I sanded the bowl with 1500 – 12,000 grit micromesh sanding pads, being careful around the stamping on the shank. Once the scratches were removed and the bowl was smooth I restained it with a dark brown aniline stain thinned 2:1 with isopropyl alcohol. Doing this makes the stain less opaque and also several shades lighter. I wanted to highlight the grain not hide it so this was the perfect mix to do that. I applied the stain with a cotton swab, flamed it with a lighter to set the stain and then repeated the process a second time. The next three photos show that process. You will note that I also cleaned up the inner edge of the rim with the sanding process noted above. Most of the roughness is removed. A small crack remains on the top of the left side of the bowl rim.

IMG_0948

IMG_0949

IMG_0950

I set the bowl aside and worked on finishing the stem. I sanded it with 1500 – 12,000 grit micromesh sanding pads until it was smooth and finished. I rubbed down the stem with Obsidian Oil to protect and remove the oxidation. I reattached it to the bowl and buffed the stem and bowl with White Diamond on the buffer. I gave the entirety several coats of carnauba wax to bring out the shine and protect it. The final four photos show the finished pipe – cleaned, restored and ready to smoke. The photos show tinges of brown/oxidation still remaining in the stem under the flash of the camera. To deal with that I polished the stem some more and gave it another coat of Obsidian Oil and let it soak in. Upon finishing I buffed it again with carnauba.

IMG_0951

IMG_0952

IMG_0953

IMG_0954

Dr. Grabow Viking Restemmed and Refurbished


Blog by Steve Laug

In my recent EBay purchase of pipe bowls there was a Dr. Grabow Viking metal base minus the stem. I have had several of the Grabow Vikings over the years and cleaned them up and sold them. I have one that is in my regular rotation and it is a great little pipe. This one came with a Dublin shaped bowl and the shank was not bent or damaged. For a long time now I have wanted to try restemming one of these metal pipes and do a write up on the process. This would be the opportunity to do both. The metal bowl base was coated inside with the tobacco lacquer that is often found in old Vikings or Falcons that have been sitting for a long time unused. The aluminum shank was oxidized and dull but would shine up well with a little elbow grease. The finish on the outside of the bowl was not damaged and would be easy to restore. There was a rough broken cake in the bowl and the rim was tarred and caked. As I inspected the bowl I noted that there was also a burned area on the inner rim at the back of the bowl. The first three photos that follow show the condition of the pipe when it arrived on my work table.

ImageImageImage

My procedure for cleaning an estate pipe is generally the same. I may vary the steps a bit but always cover the same ground in pretty much the same order. On this one I began by working on the bowl. In this case it meant removing the bowl from the pipe. The Viking has screw on bowls that are interchangeable with other Viking bowls (but not with Falcon bowls which have a different thread size and count). I reamed and cleaned the bowl of the old broken cake and picked out the buildup around the hole in the bottom of the bowl using a dental pick. I took apart the base and the inner tube. The tube slipped out easily as it is normally held in place by the stem. I cleaned the tube with pipe cleaners and Everclear and then cleaned out the entrance of the tube into the bowl base. After cleaning that I put the tube back in place. I wanted to plug the hole with it so that I could fill the base with Everclear to soften the lacquer buildup. I soaked it with Everclear and then scrubbed it with cotton swabs once it had softened. The next two photos show the process of cleaning the bowl base and tube.

ImageImage

I sorted through my stem box and found a precast stem for a Canadian. It was a small sized taper that would give me room to work with the diameter and the length that I needed for the right dimensions. I drilled the tenon on the stem blank so that the airway would be large enough to go over the tube at the end of the shank. I turned the tenon with my PIMO tenon turner set to the smallest setting so that I would have little left to remove for a good fit into the hole in the end of the metal shank. The fit involved the tube fitting inside the airway of the tenon and then the tenon itself fitting into the opening on the end of the shank. I used my needle files and emery paper to sand the tenon after I had turned it on the turner. I needed to take it down further for the fit so I used my Dremel with a sanding drum. The next series of seven photos show the process of fitting the stem to the metal shank.

ImageImageImageImageImageImageImage

After I had the basic fit as pictured above I decided to work on the out dimensions of the stem to get a smooth flow between the metal shank and the vulcanite stem. I used my Dremel to take down the majority of the excess material that needed to be removed. The next two photos show the stem after I had used the Dremel. It was ready to hand sand at this point in the process.

ImageImage

I sanded the stem with medium grit emery paper to remove the marks from the Dremel and smooth out the angle of the stem from the shank to the button. I also shortened the tenon to get a tight fit on the stem to the shank. It was just a little too long to fit the depth of the hole in the shank. The next series of five photos show the fit to the shank and the first stage of sanding to remove the scratches.

ImageImageImageImageGrabow under

I took the stem back to the Pimo tenon turner and set it a bit deeper to smooth out the portion that goes against the shank. Then I took it back for more sanding to make it fit more tightly against the shank. I moved on to sand with medium grit sanding sponges to continue to make the stem sit correctly on the shank and to remove the scratches remaining on the stem. The next seven photos show the progress on the stem. It is getting close to a good fit and the scratches are less visible. I also wiped down the bowl with acetone and sanded the top of the bowl and the inside edge of the bowl to deal with the burn mark on the back side of the rim.

Grabow1 Grabow2 Grabow3 Grabow4 Grabow5 Grabow6 Grabow7

At this point you can see some of the minor scratches on the aluminum of the shank. These will come out when I use the micromesh sanding pads after the stem is ready. The next series of two photos show the progress of smoothing out the stem with the micromesh sanding pads. I wet sanded with 1500, 1800 and 2400 grit sanding pads. Each successive grit gave a deeper shine and polish to the stem surface.

Grabow8 Grabow9I also wet sanded with 3200 grit micromesh sanding pads. The next two photos show the change in the stem as the shine deepens.

Grabow10 Grabow11

I went on to dry sand with 3600 – 12,000 grit micromesh sanding pads. The next series of photos show the progress in polishing of the stem. To me the final three grits – 6000, 8000 and 12,000 grit – show the most change. The next two photos are selected to show the progress. The first one below is of the stem after sanding with the 4000 grit micromesh. The second photo shows the stem after sanding with the final three grits of micromesh.

Grabow12 Grabow13Once the stem was polished I used some clear superglue to glue the stem to the shank. I also went on to stain the bowl with an oxblood stain. I applied it and then flamed it and restained and reflamed it. The next four photos show the pipe after staining and before taking it to the buffer. I also used the micromesh to polish the stem and shank.

Grabow14Grabow15 Grabow16 Grabow18

The final four photos show the finished pipe. I buffed it on the buffer with White Diamond and then gave the bowl and stem multiple coats of carnauba wax and buffed with a soft flannel buffing pad to give it a shine.

IMG_0476 IMG_0477 IMG_0478 IMG_0479