Robert M. Boughton
Member, International Society of Codgers
Member, North American Society of Pipe Collectors
Member, Facebook Gentlemen’s Pipe Smoking Society
http://www.roadrunnerpipes21.biz (under construction)
http://about.me/boughtonrobert
Photos © the Author except as noted
I’m wild again, beguiled again
a simpering, whimpering child again
bewitched, bothered and bewildered am I.
I couldn’t sleep and wouldn’t sleep
when love came and told me, I shouldn’t sleep
bewitched, bothered and bewildered am I.
— “Bewitched (Bothered and Bewildered,” 1940), lyrics by Lorenz Hart (1895-1943), music by Richard Rodgers (1902-1979), a great American musical team
INTRODUCTION
Since the song “Bewitched” was introduced by Vivienne Segal in the 1940 Broadway musical “Pal Joey,” there have been many covers. Written for a woman, quite a few have made it “their” song, from Ella Fitzgerald to Lady Gaga. Men have taken their shots, also, from Frank Sinatra to Rod Stewart. But when I was a teenager, I had the enduring privilege of seeing Lena Horne at the Mark Taper Forum in Los Angeles, and she did it, as the Chairman of the Board would say, her way. She sang some parts like a choir mistress in Heaven and spoke others in the husky asides of a barfly, keeping the audience enthralled and on the befuddling edge of tears and laughter. And so to hear the song in my mind is to relive the gruff silkiness of the lady’s inimitable voice.
My mother has always been a devotee of Freudian psychology. Being more agnostic regarding the Austrian neurologist who pioneered psychotherapy, my father tended toward dismissing all of the man’s work despite the lasting innovations. Therefore, in general, I began to take my mother’s view of the matter, until I was older and found a balance between my parents that they, alas, did not.
Now, bear with me, there’s a point coming. My dad told me one day that the songs people whistle or hum, without even thinking about it, reveal their subconscious moods. He was in the frequent habit of popping out such tidbits of knowledge, and for that I am forever grateful. I realized I had stopped listening to anything else he said maybe a half-hour earlier, having dissociated deep into myself, as far away from my dad as I could get. In fact, at least on a conscious level, I forgot my dad was there until he made the casual comment, and I stopped humming. I had to stop everything, including the gardening and general cleanup work we were doing on the patio, to figure out what was the tune, and I still remember now: “Cat’s in the Cradle,” by the late great Harry Chapin.
That’s right, I was humming about a father and son who never take the time to sit down together and have serious talks. I was not aware I even knew the story of the lyrics that well, but liked the tune. My dad and I had both heard it countless times, no doubt, as the spring afternoon I’m describing was in 1978, when I was 16, and the song came out in 1974 and won the Grammy for Best Male Pop Performance. Snatches of the words came to me: “I’m gonna be like you, Dad, you know I’m gonna be like you,” and “But we’ll get together then, you know we’ll have a good time then,” and “He’d grown up just like me, my boy was just like me.” The smirk on my dad’s face, with its annoying and condescending twist of the lips, said everything. He knew he had figured me out at last, although not his own contribution, and he was right, so I grinned, my own expression of false pride I learned from my father. I could see it stung my dad, and I’m now sad to say I was happy.
Thinking back on that encounter with my dad, as I began to find my own twisted path in the world, I consider it odd that he so berated basic Freudian theory of deep subconscious conflicts influencing our conscious actions. After all, humming a Harry Chapin tune that summed up my subconscious feelings at the time seems to me nothing less than proof of a simple variation on what we still refer to as a Freudian slip. Had my conscious mind picked the song, it would have been “”Don’t Think Twice, It’s Alright,” by Bob Dylan.
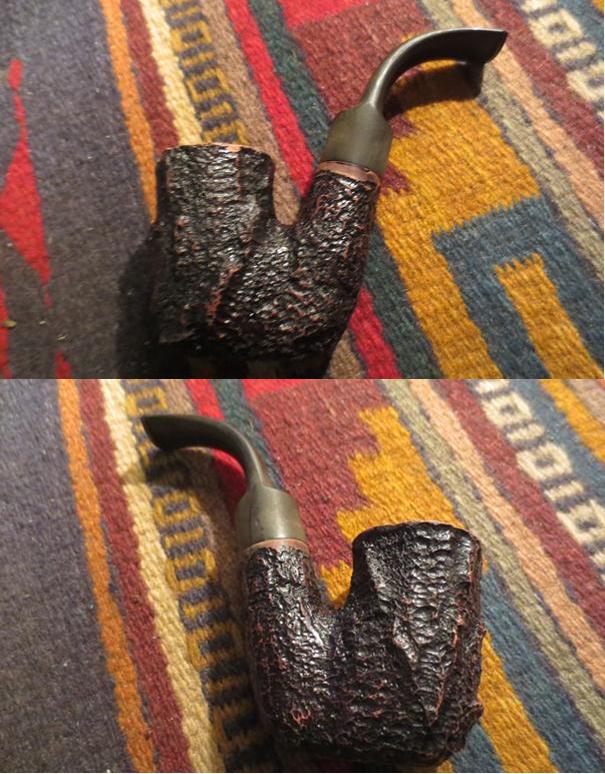
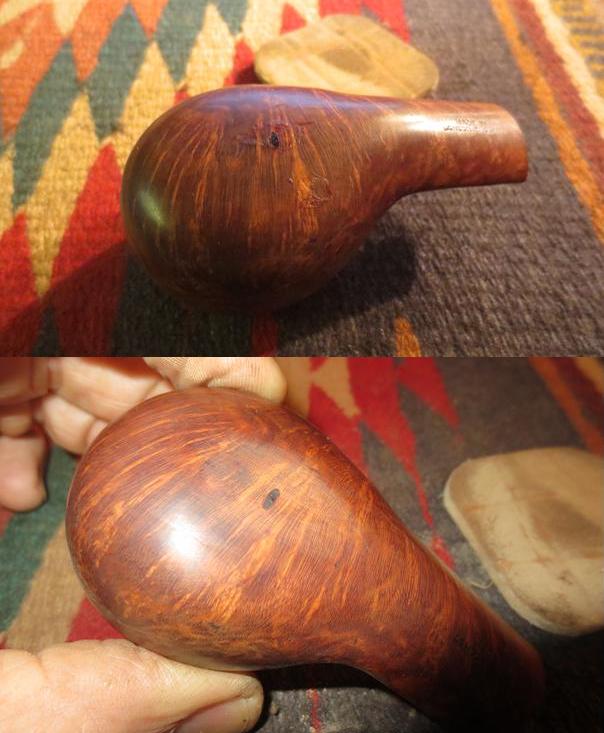
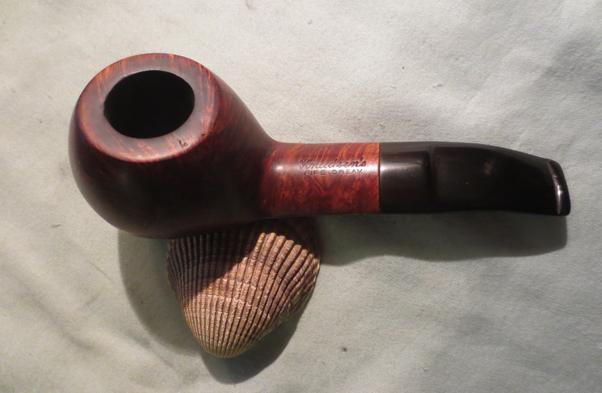
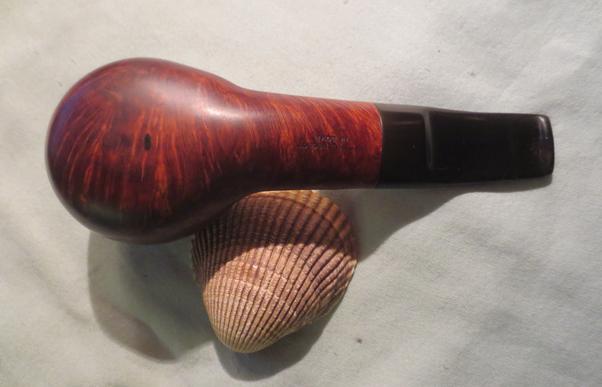
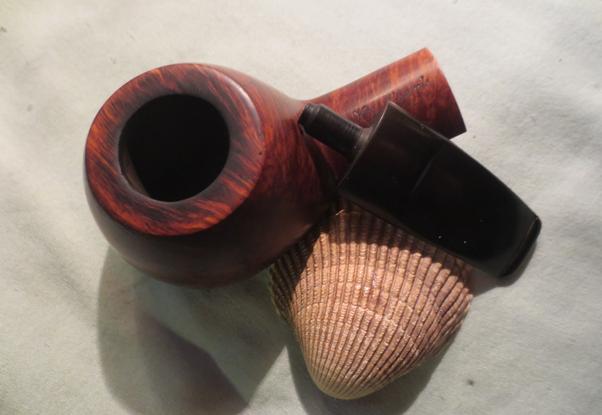
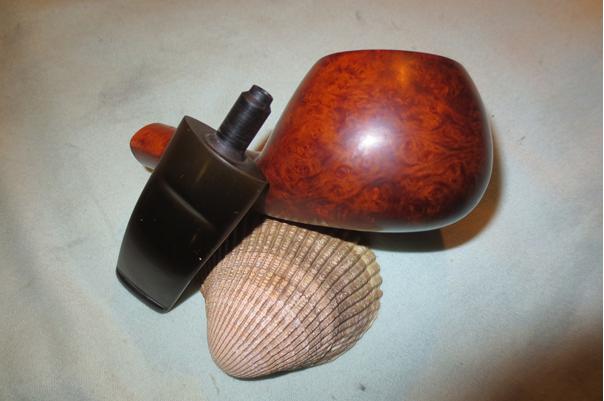
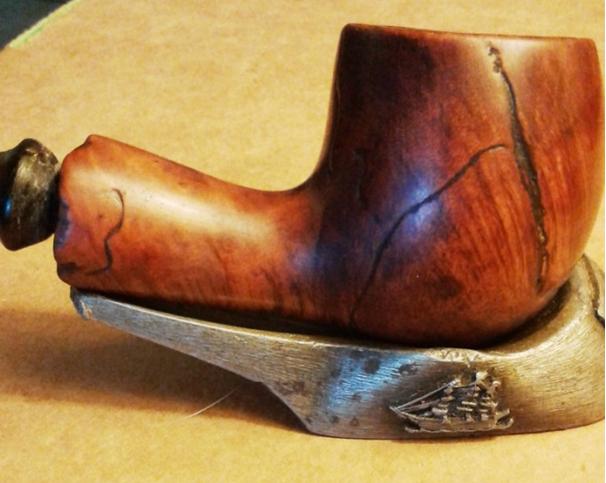
As I began work on this ornery, perplexing pipe 16 days ago, and continuing through to its completion, I found that I was humming the refrain from “Bewitched.” Sometimes I even broke out into the repetition of words that came back to me. And so I understood I was making a musical Freudian slip of sorts. The Mastersen freehand had many flaws to overcome, and I was indeed bewitched, bothered and bewildered at the challenge of removing them. I had also come to love the pipe without ever having tried it and, like the story of “Bewitched,” despite its presenting difficulties.
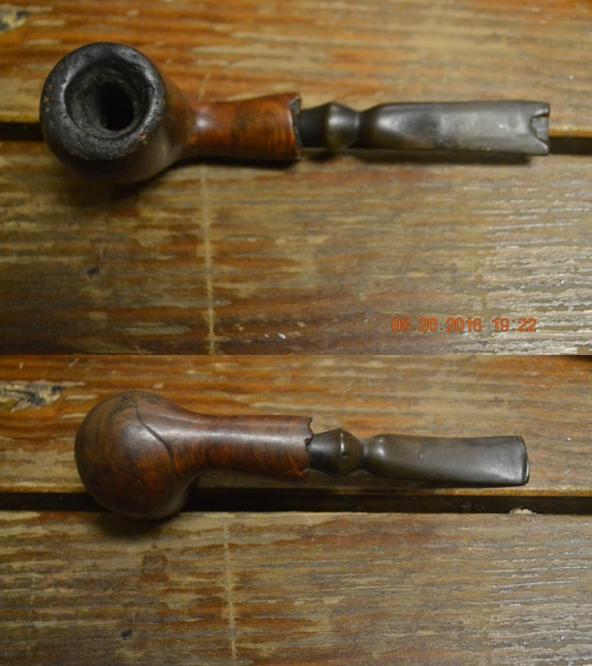
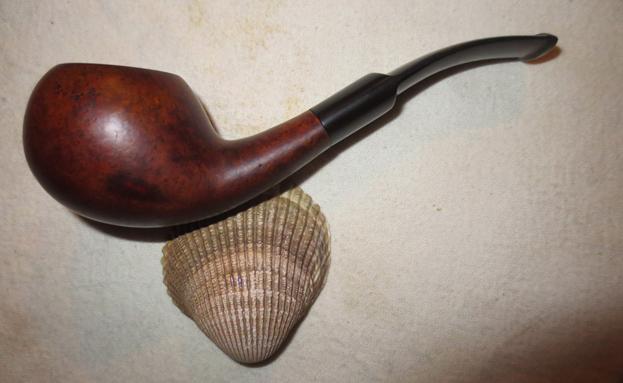
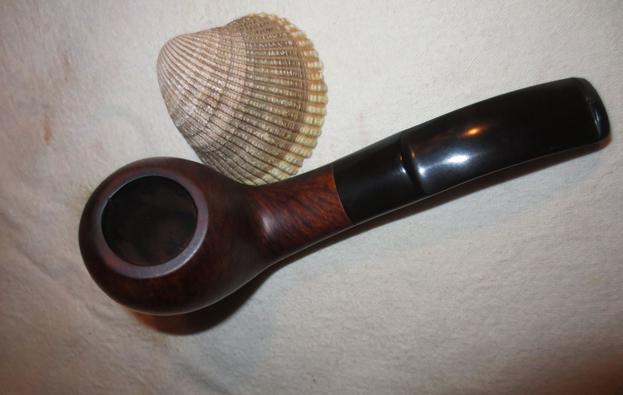
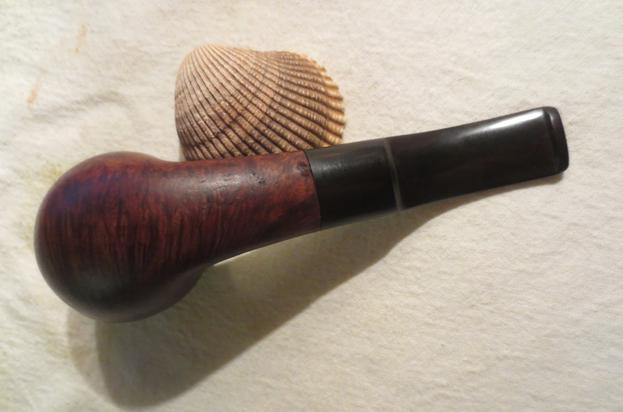
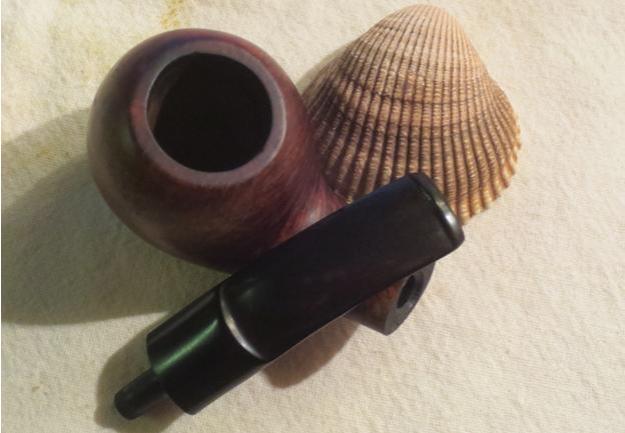
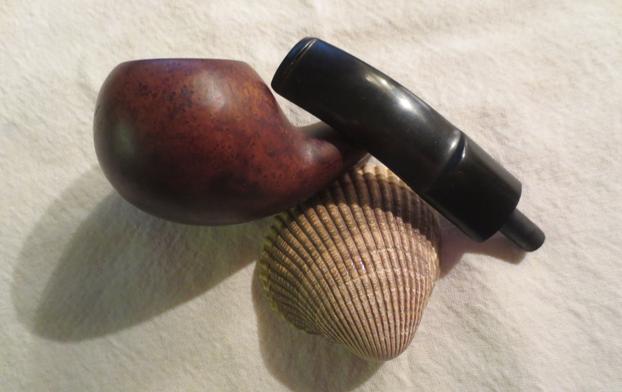
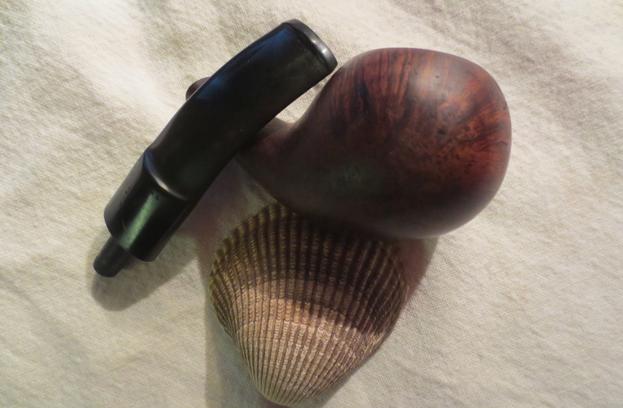
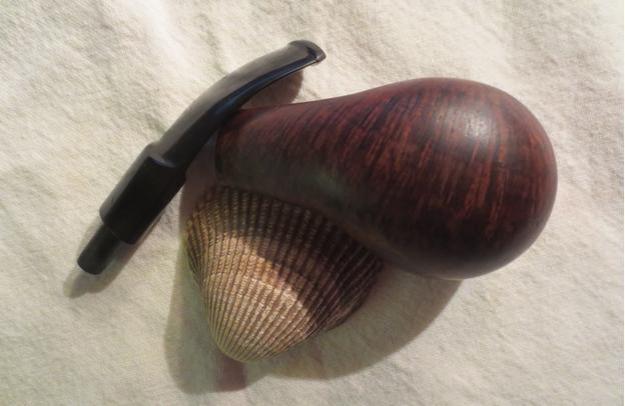
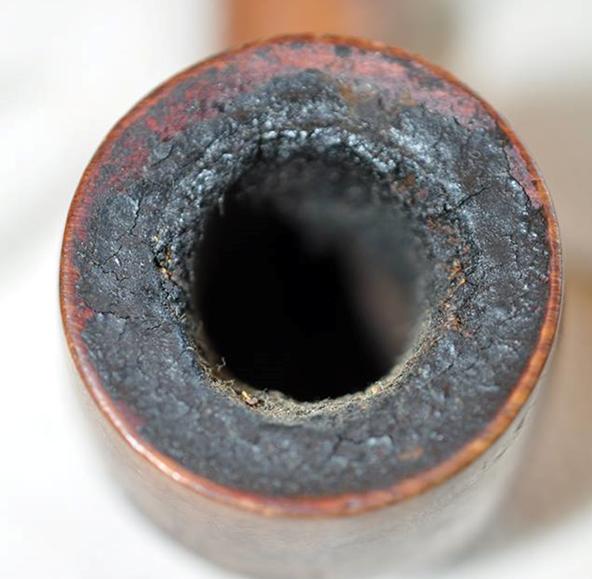
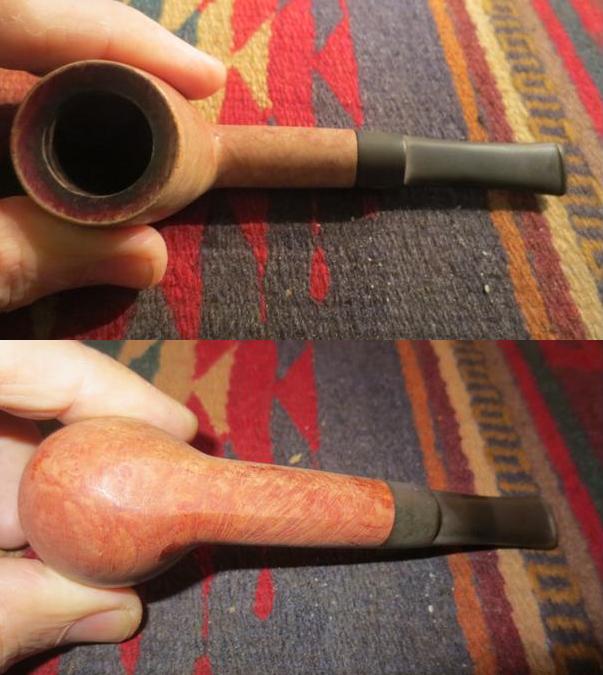
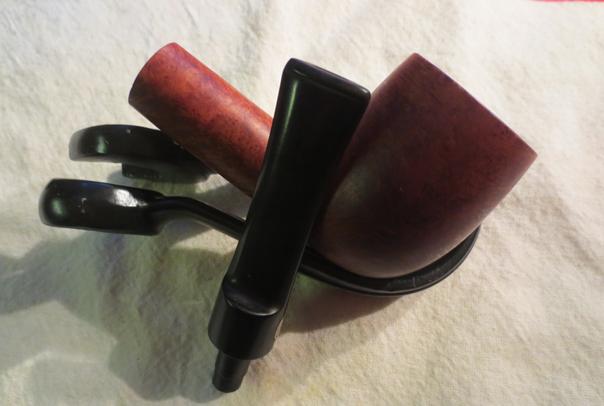
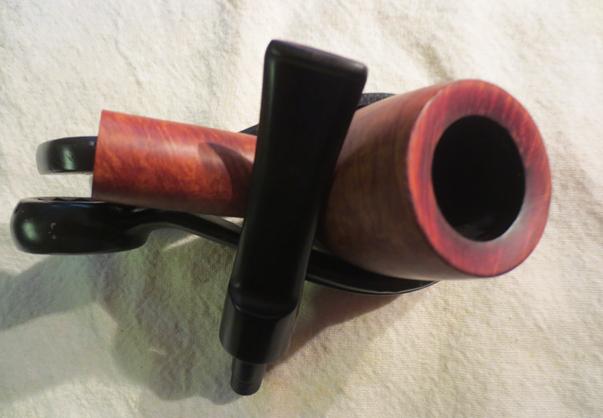
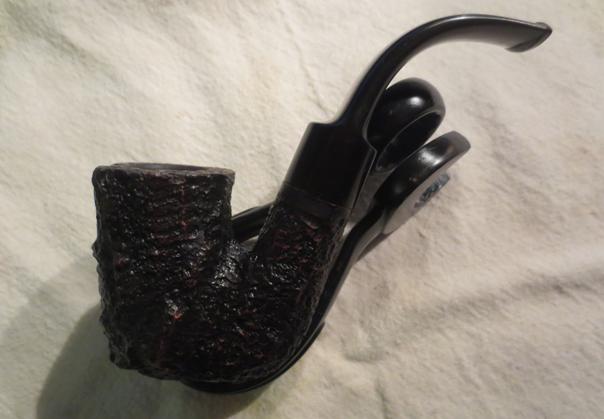
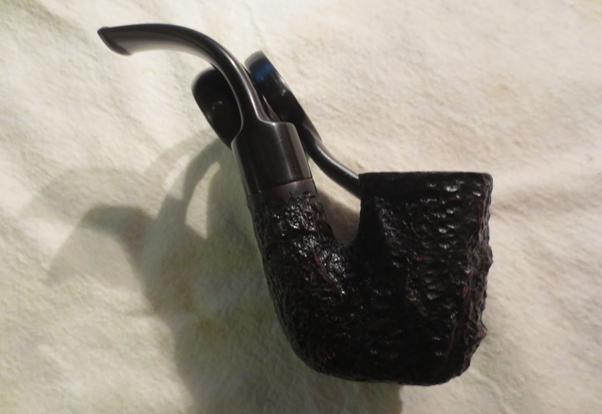
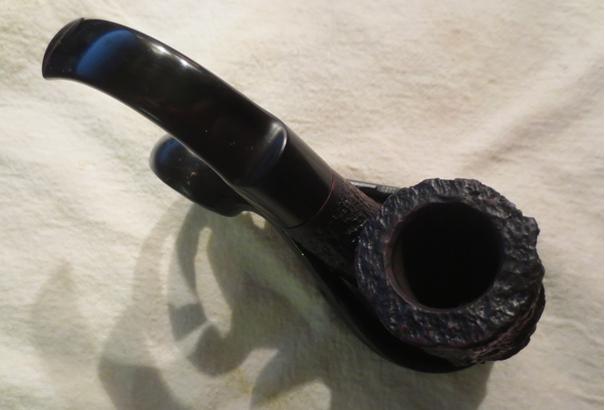
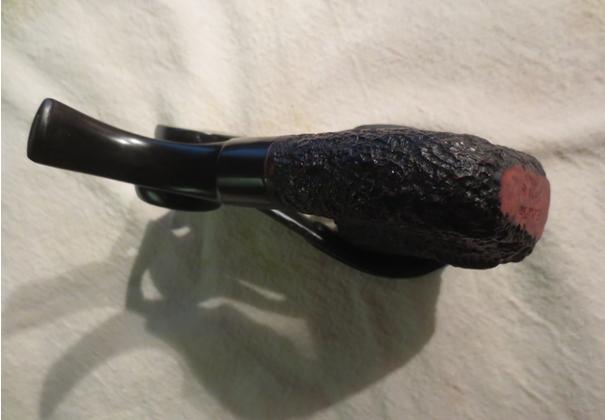
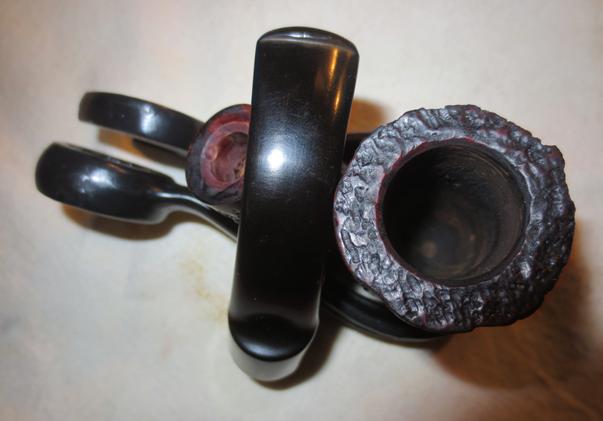
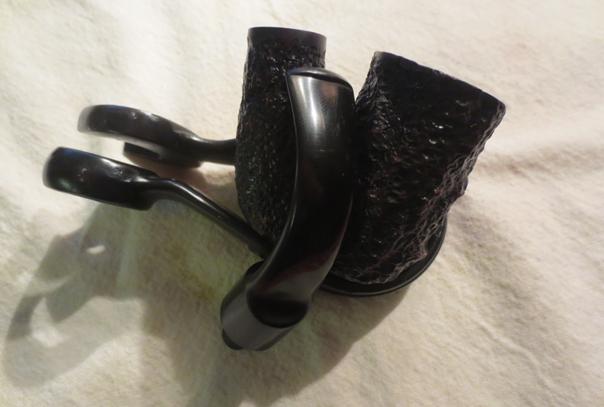
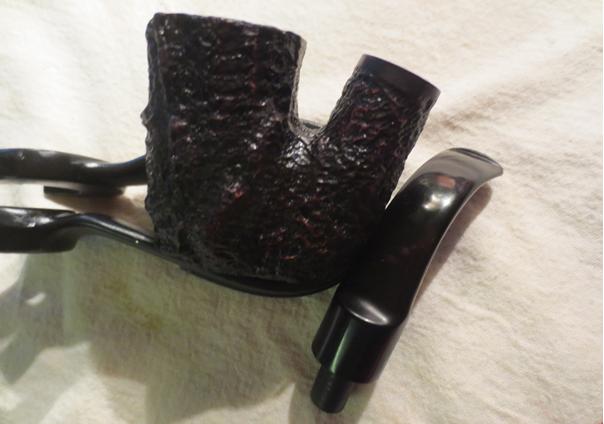
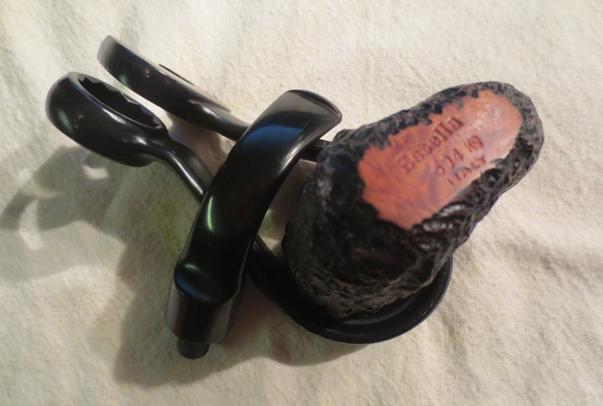
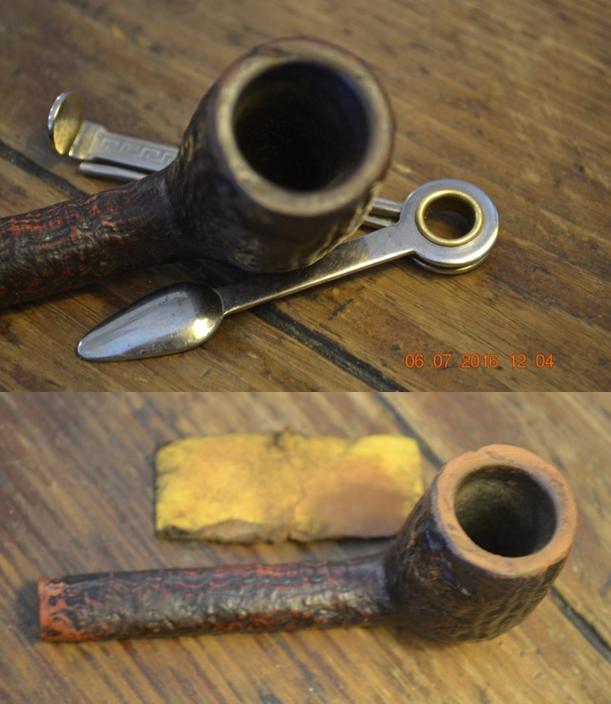
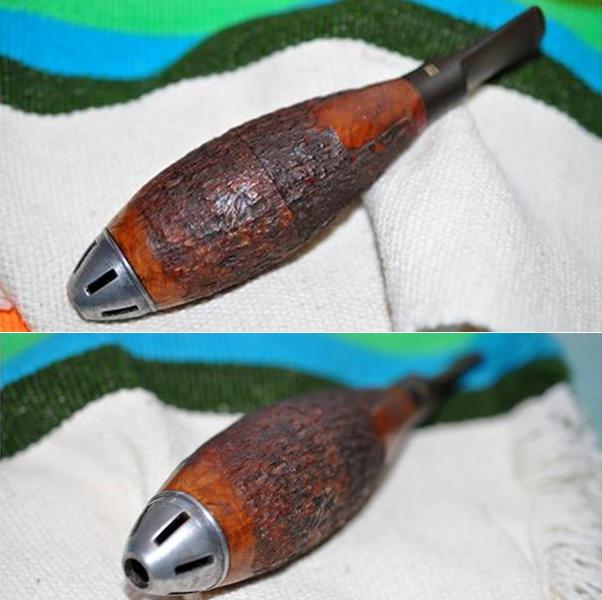
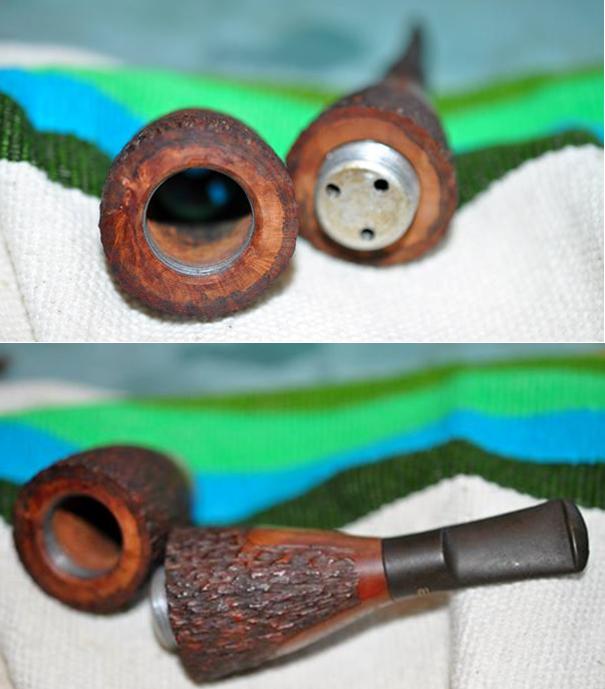
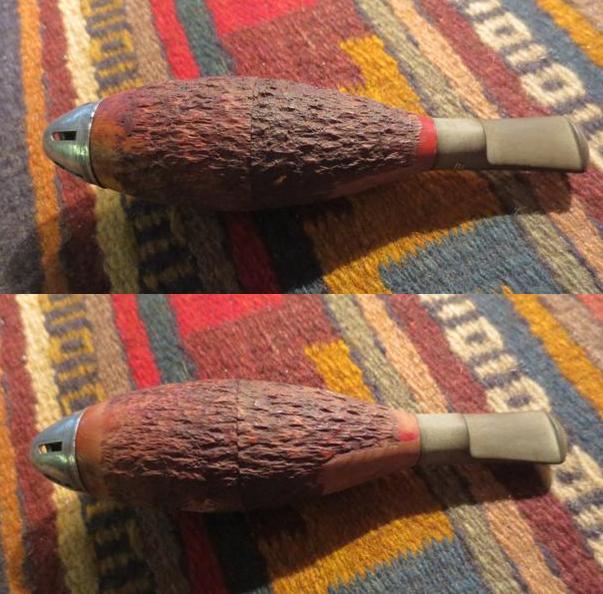
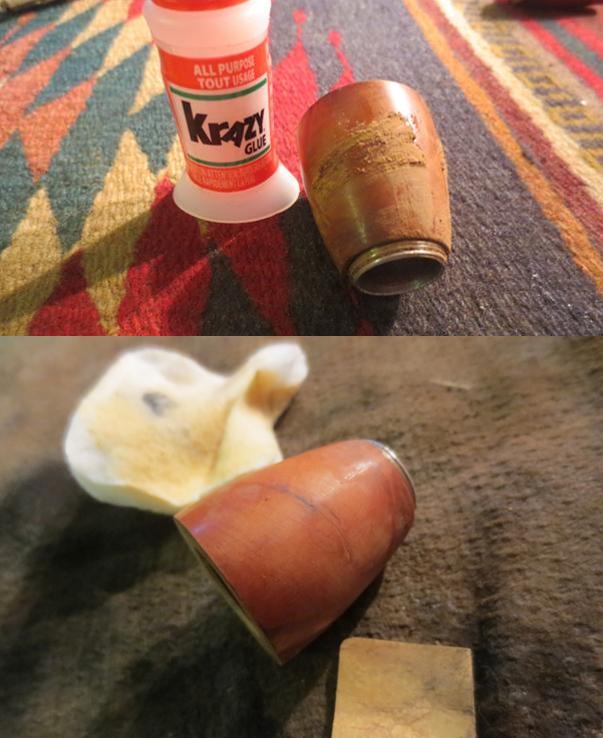
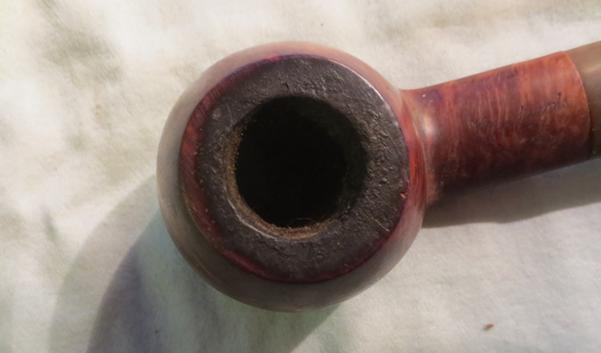
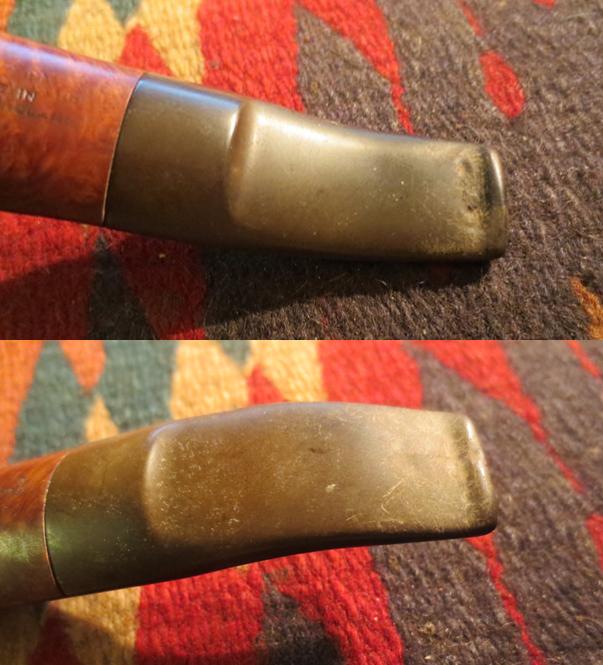
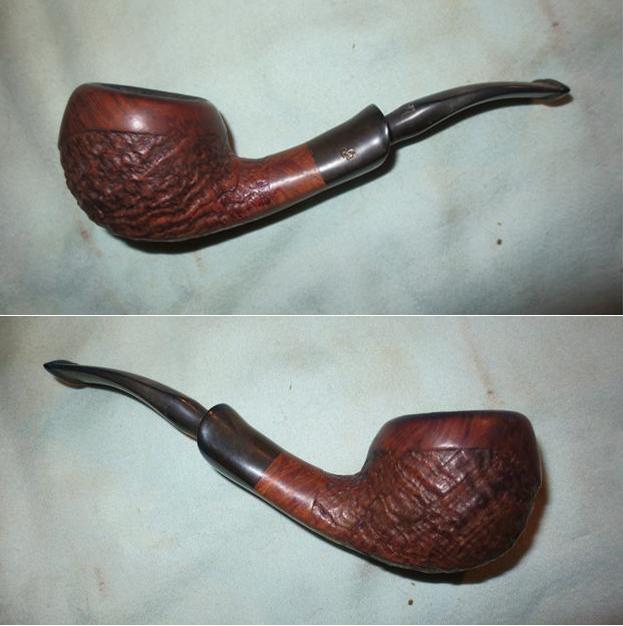
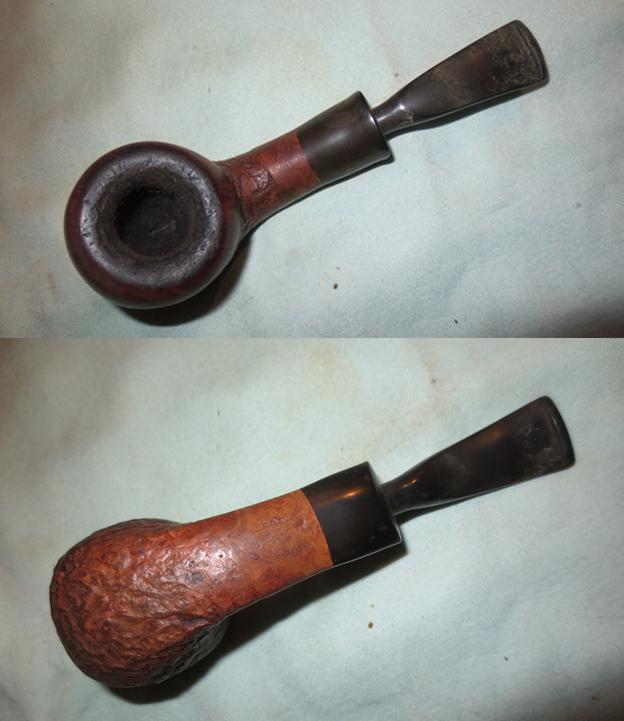
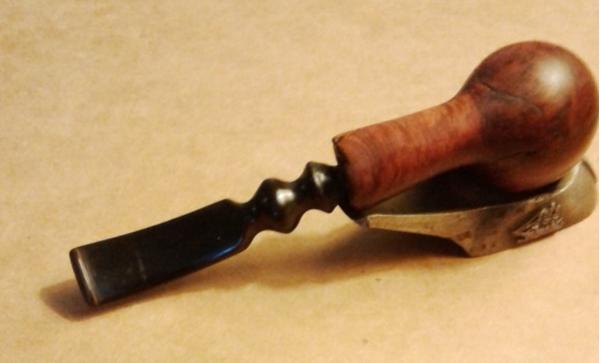
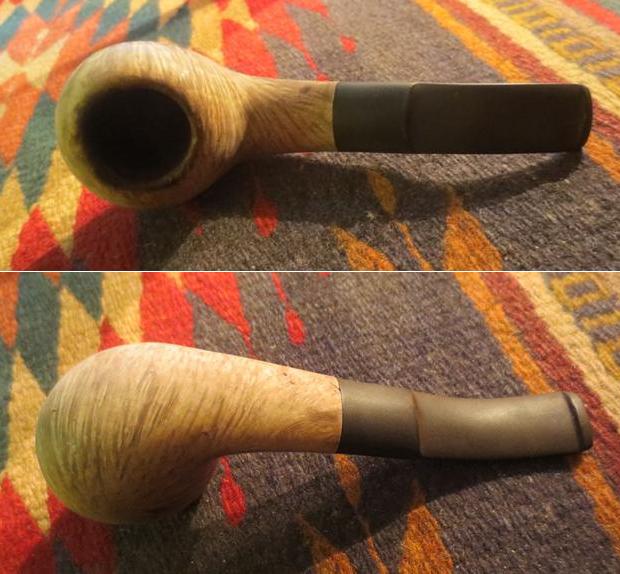
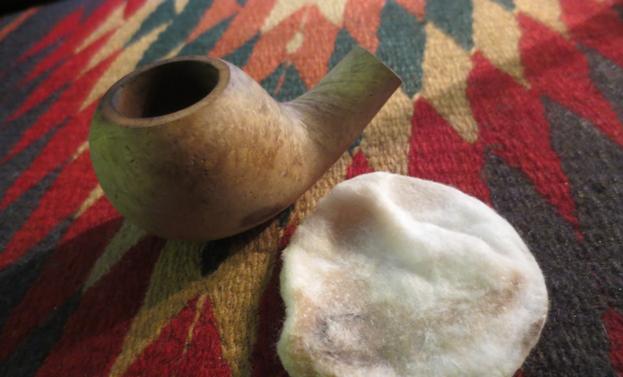
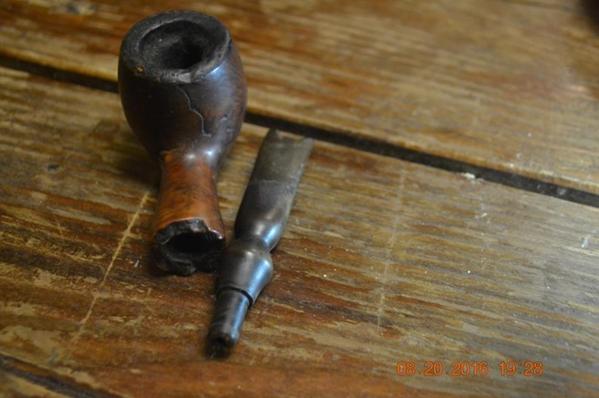 So blackened and grungy was its bowl, so almost thorough the filling of the chamber with cake, so worn and grimy the shank, and so ruined the once typical Danish freehand plateau style rim as well as the reparable-but-not-worth-the-work bit, I did not even know what brand of pipe I had.
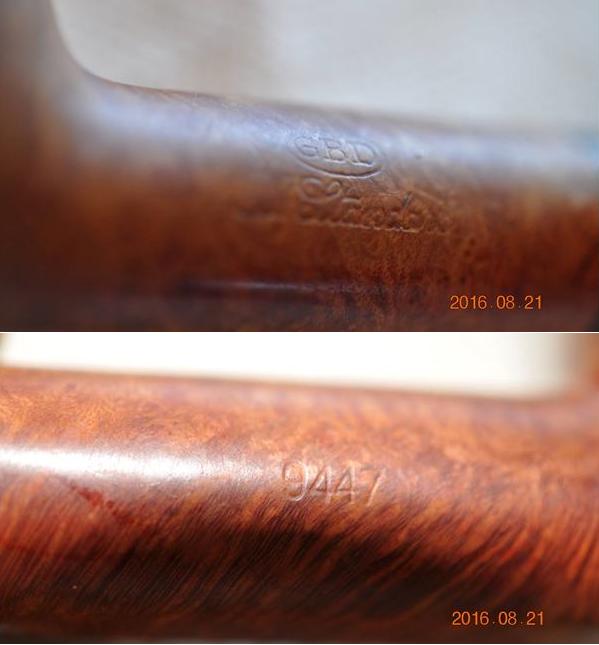
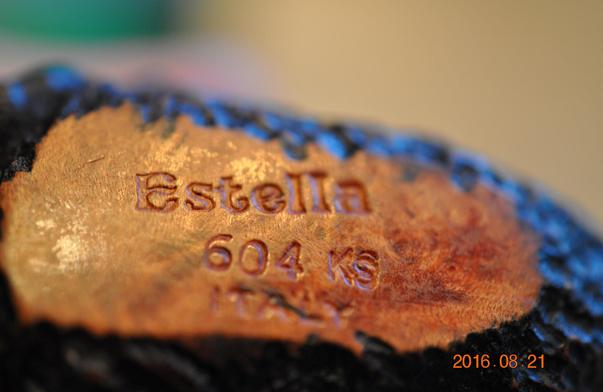
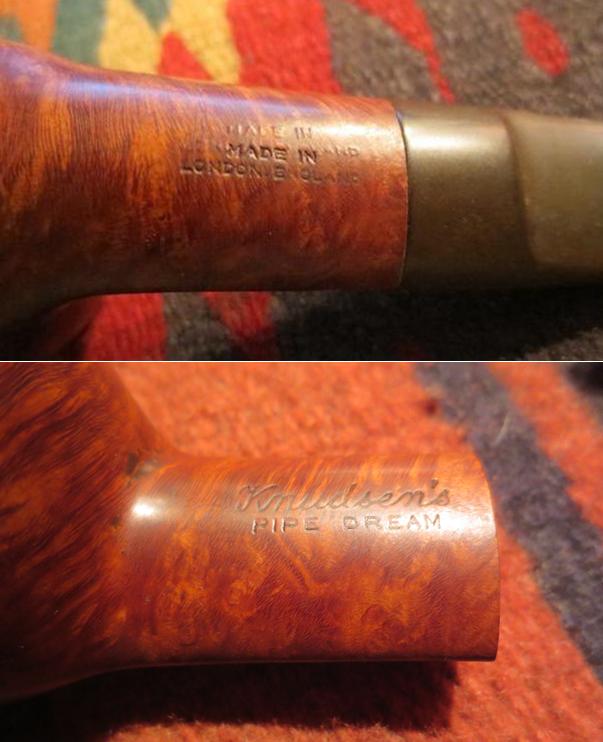
That is, until a happy coincidence that occurred at the monthly Moose Lodge meeting of my pipe club on the third Thursday of last month, August 18. One of my fellow pipers, Daryl (for whom I cleaned up an antique KB&B Redmanol socket pipe not long ago), showed me a beautiful Mastersen of which I snapped a photo with my Nikon. Due to the increasing instability of that camera, which is cheaper to replace than repair, the photo is nowhere to be found. At any rate, I handed my dingy and as yet unknown pipe to Daryl, who said, “Ah, another Mastersen!”
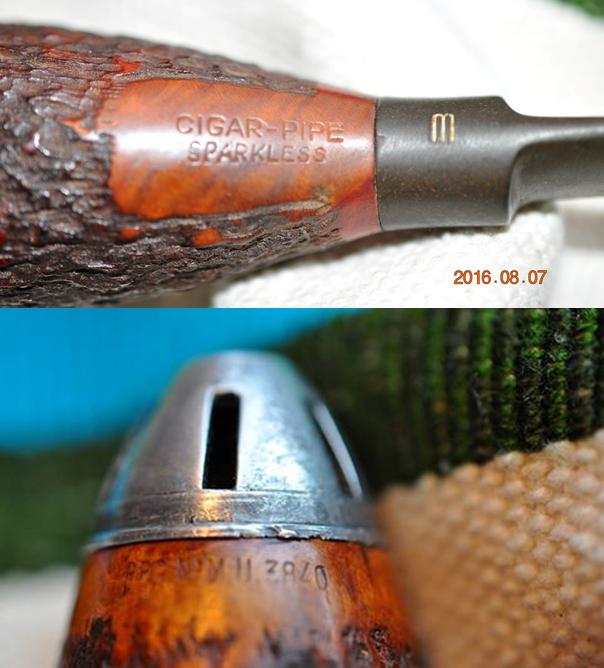
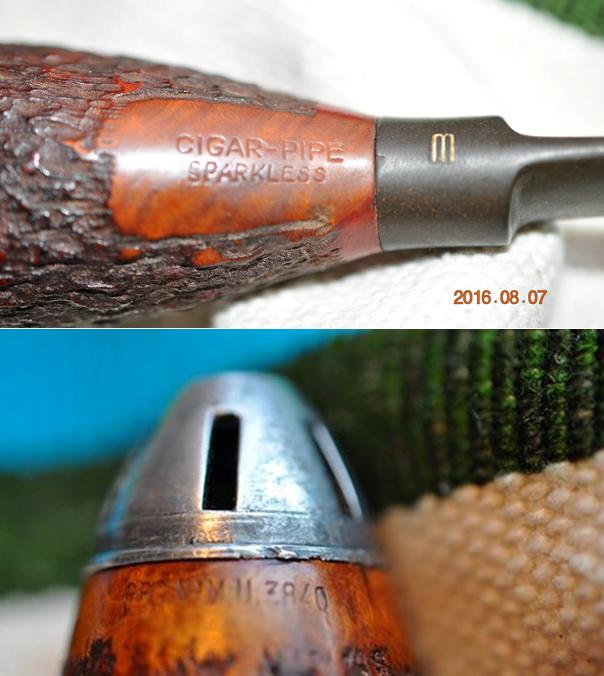
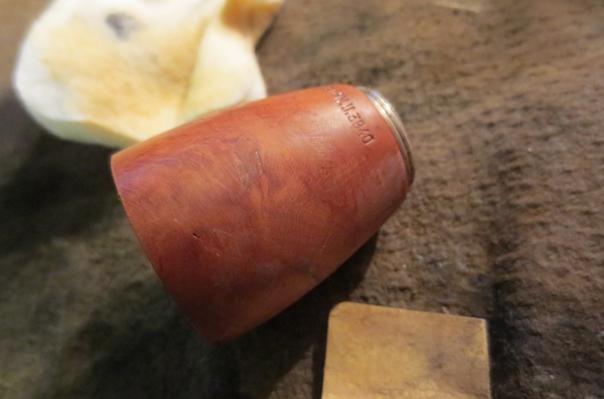
That was how I learned what I had. I ask you, what are the odds? Bestowed with a vision of the potential for a real beauty if restored with the necessary attention and care, I experienced a sudden sense of urgency to fast-track my Mastersen. I still did not even know how it was spelled, thinking it was the same as Bat Masterson, the famous TV dandy, gambler and lawman played by Gene Barry, who preferred his wits and cane to his gun for four seasons from 1958-1961. The same error by other pipe collectors and sellers accounts for the reason more examples can be found online using the spelling of Bat’s last name.
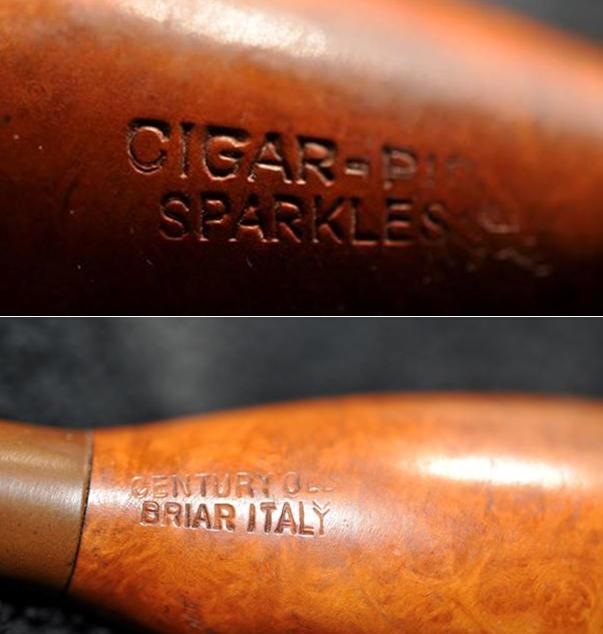
I did, however, pick up a few pieces of information along the way about Mastersen pipes. According to pipephil.com, and suggesting the brand is still in production, “Mastersen is [emphasis added] a brand of the former Shalom Pipe Co. [of Israel] which was later bought by Mastercraft.” Mastercraft, in turn, was taken over by Lane Ltd. A contributor to the Dr. Grabow Collector’s Forum (DGCF) noted the Shalom connection but added that Mastersen pipes were manufactured from the late 1960s to the mid-1970s as redemptions for Brown and Williamson’s Sir Walter Raleigh tobaccos. In this case, I suspect Pipephil was correct but meant to make clear that Mastersen was made by Shalom only, and the DGCF man had it right about the time period and redemption points.
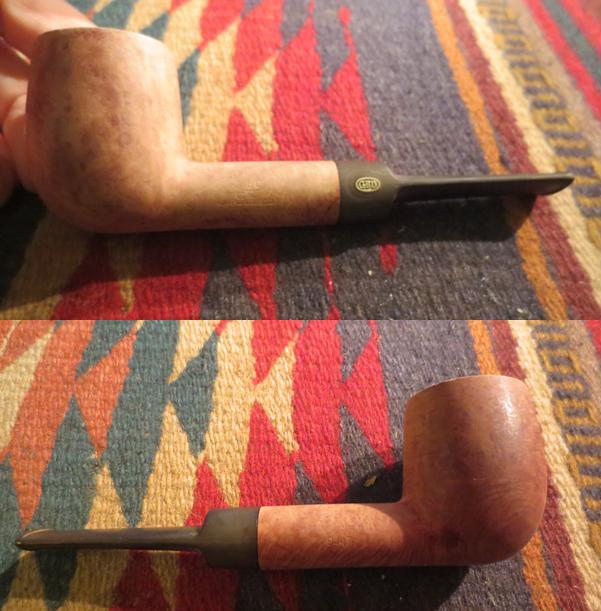
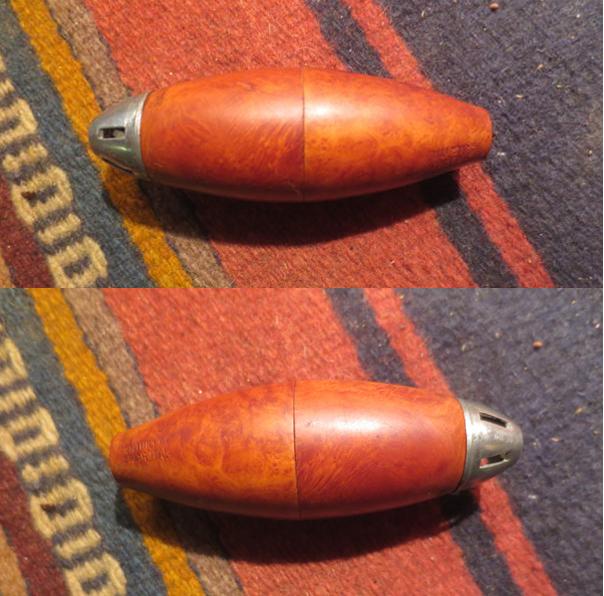
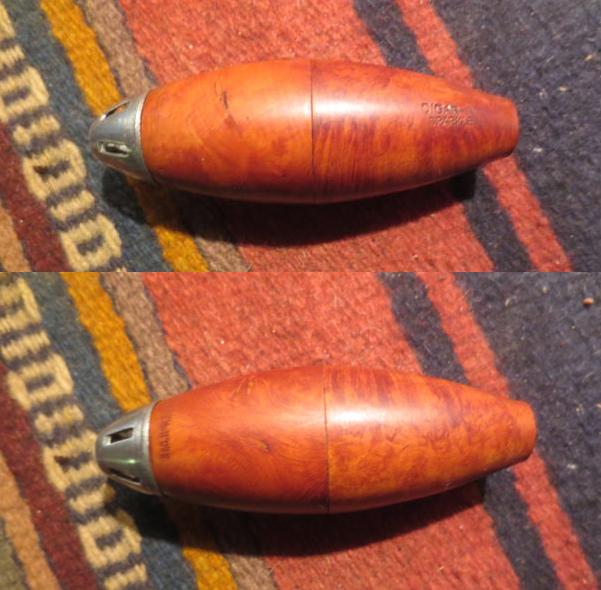
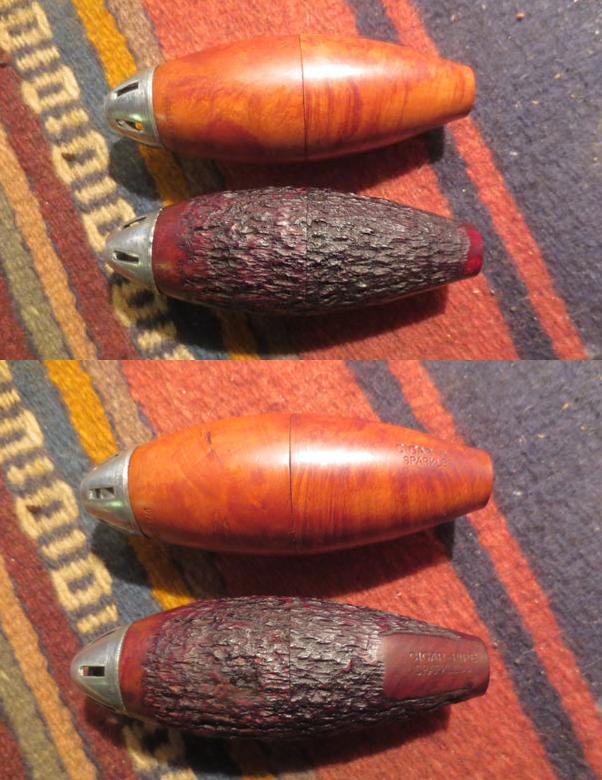
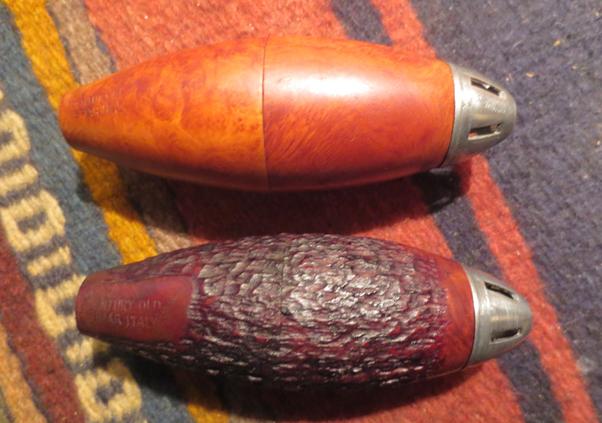
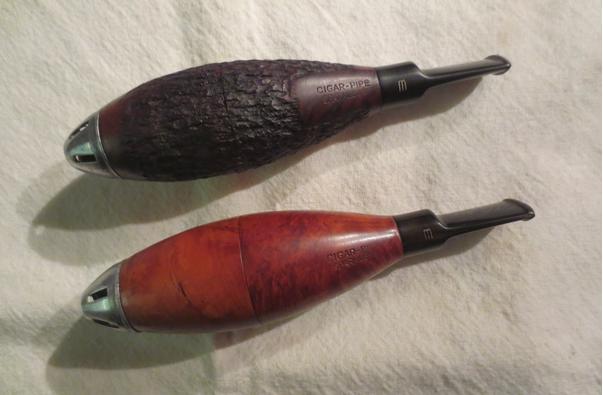
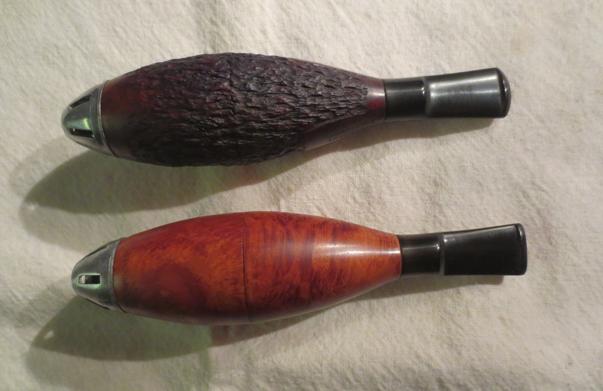
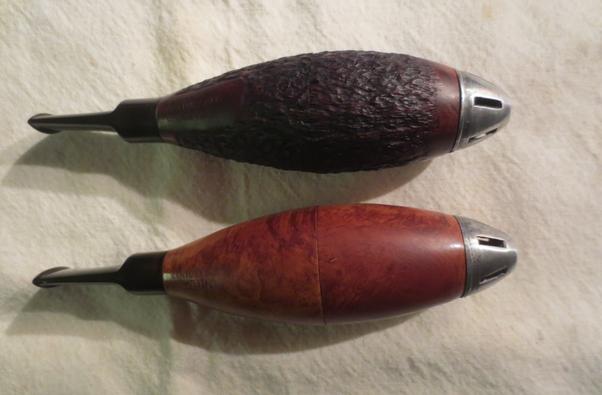
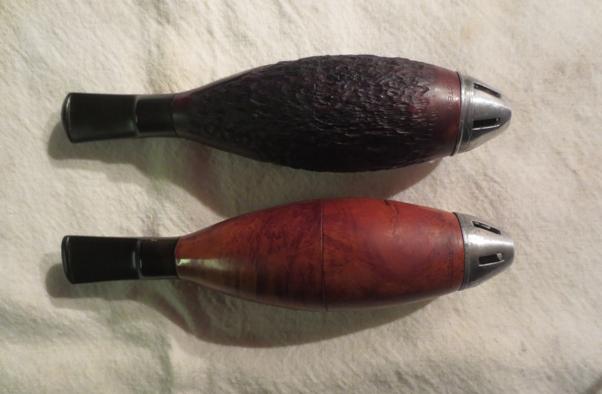
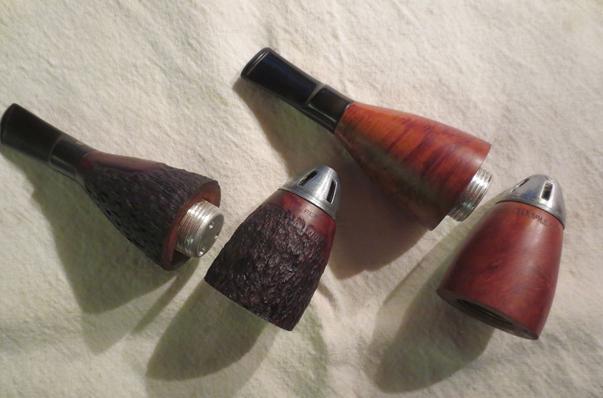
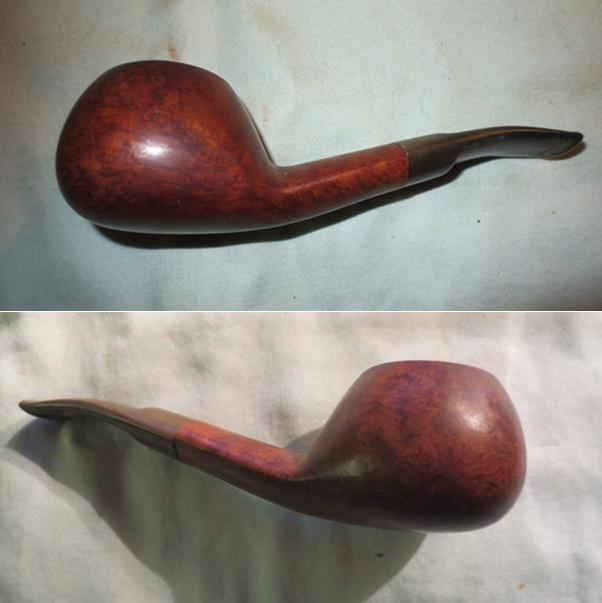
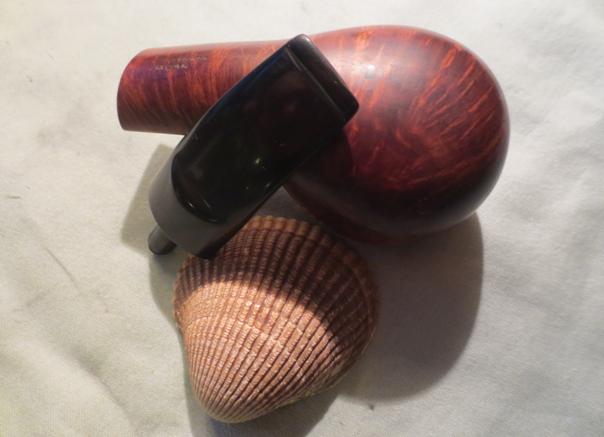
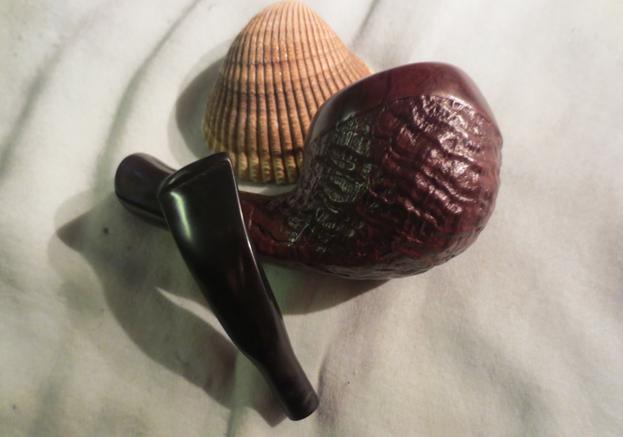
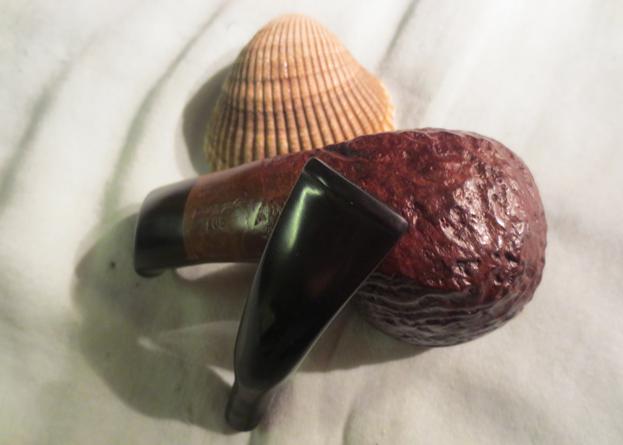
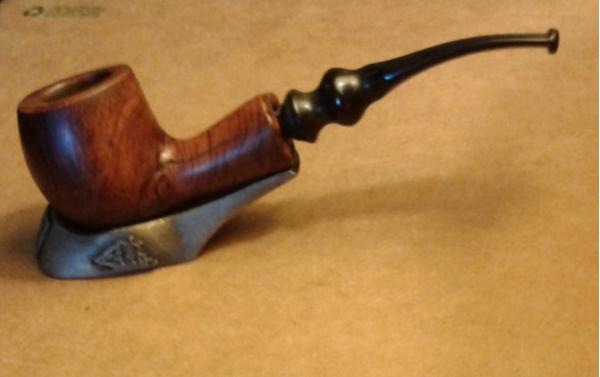
Here are two shots of Mastersens I found online, the first with nice vertical grain, and the second showing the plateau rim type natural to the brand’s freehand pipes. Neither is anywhere near the quality of the specimen Daryl is so lucky to own, with its exquisite, perfect, vertical grain and strawberry blonde shade.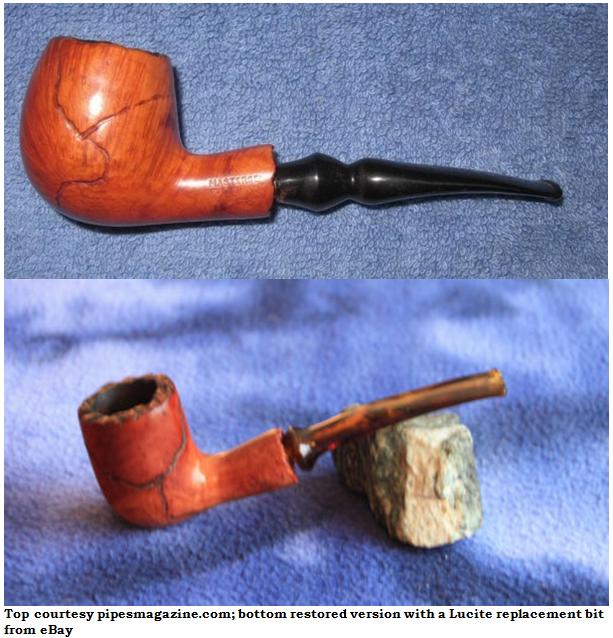 RESTORATION
Daryl’s beautiful example of what a Mastersen freehand could look like served as a wondrous counter-spell to the initial bewitchment that froze my thoughts of starting the job. Still, I was bothered by the apparent lack of any plateau remaining on the rim and the resulting need to do something about that dilemma. And of course the stem bewildered me more than a bit. (Ha-ha.)
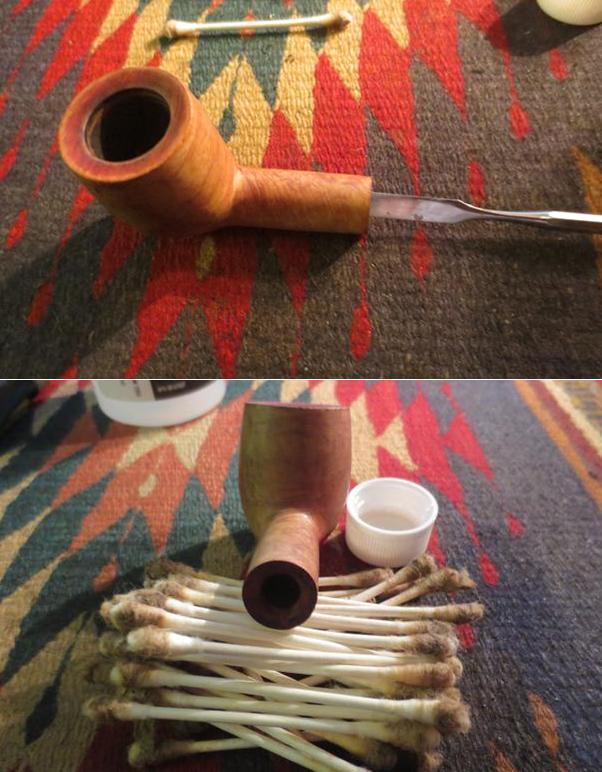
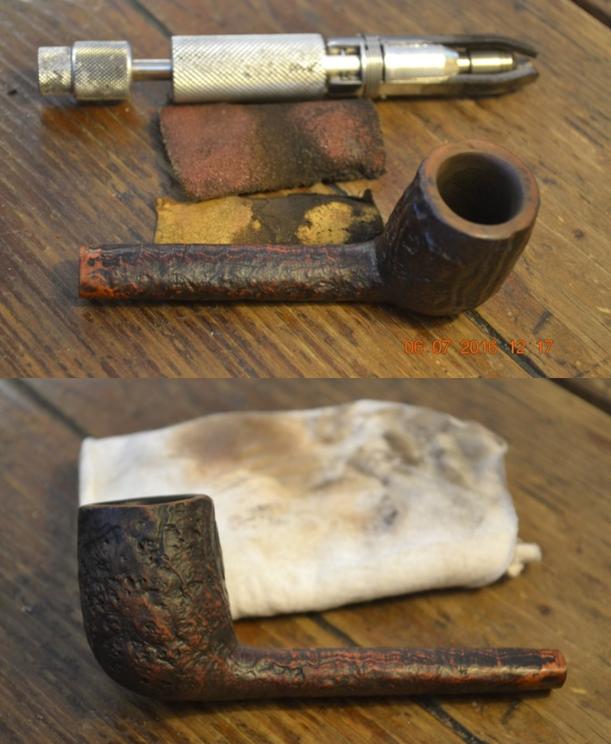
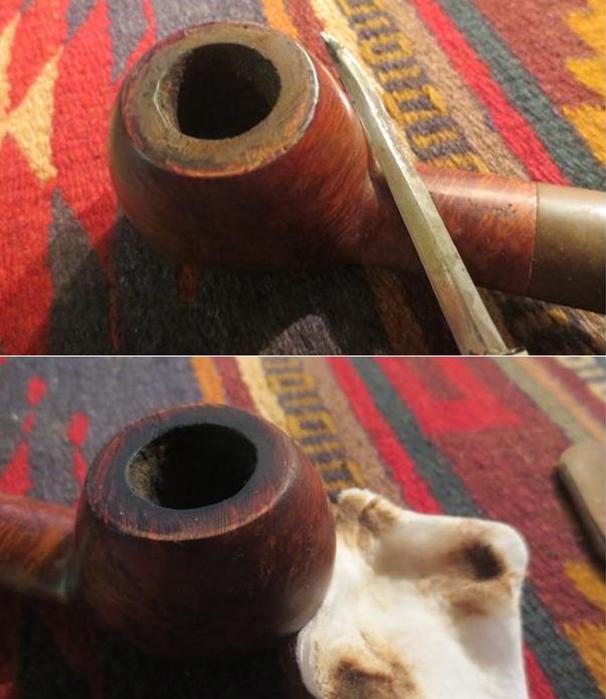
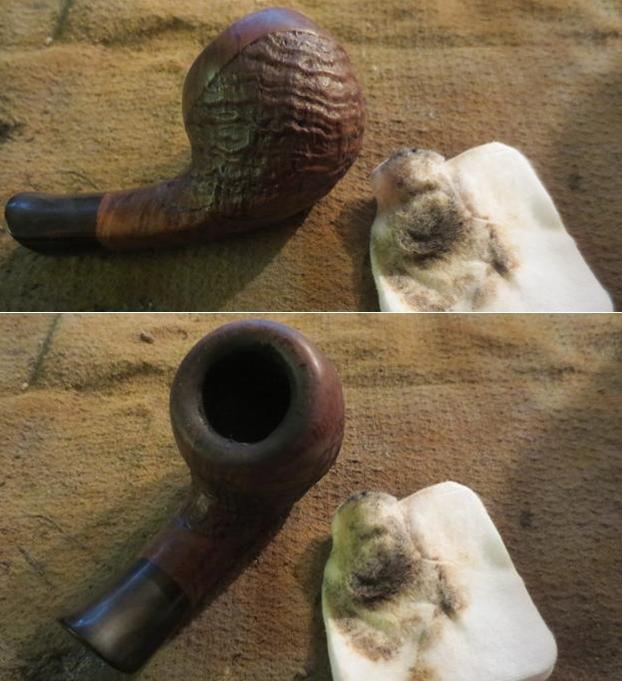
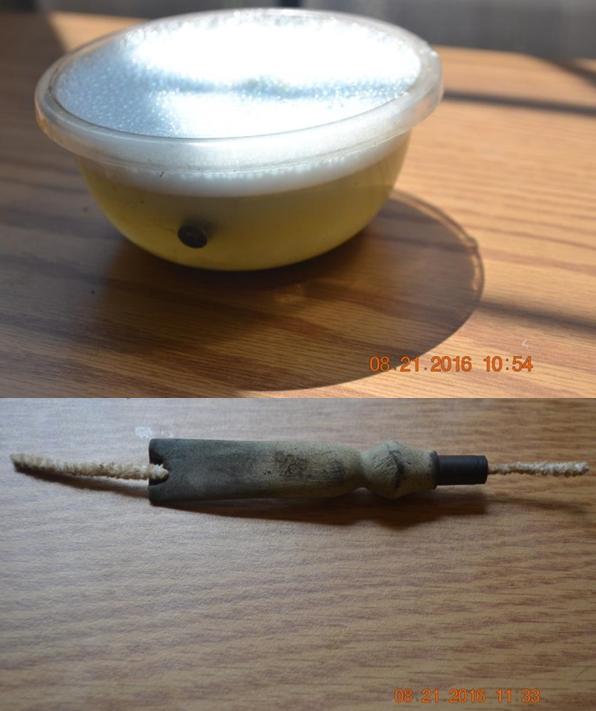
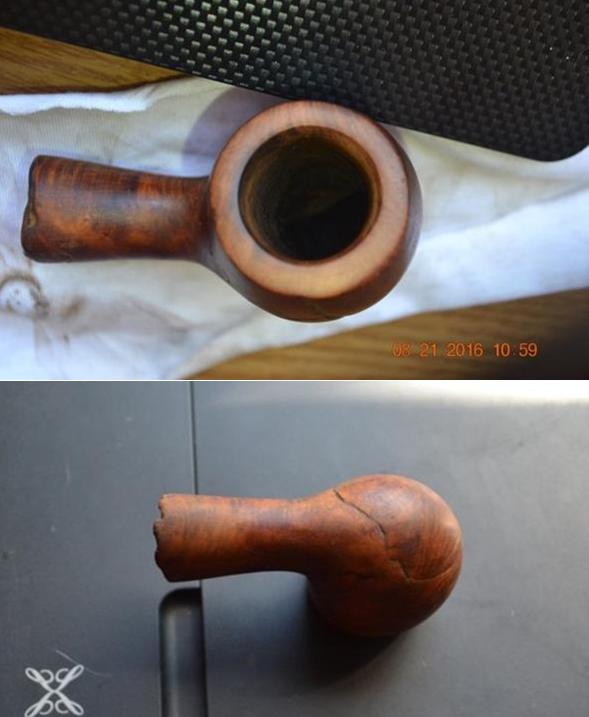
Setting the bit aside for the time being, I began my assault on the stummel by soaking it in Everclear and then giving the still-caked chamber a 40-minute preliminary reaming, as that single good, long one proved insufficient to mend the old ways of the small space. The next pictures show before, during and after. 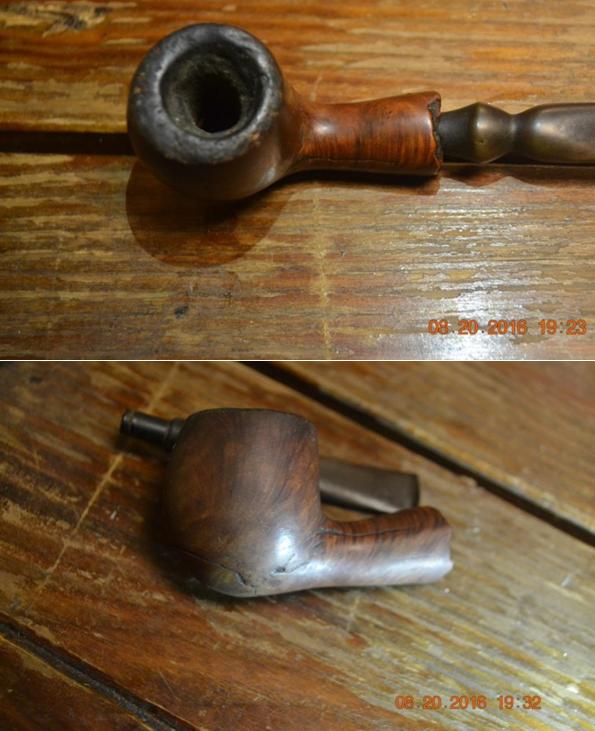

 I continued the corrective measures with both my Senior Reamer and a new “one size fits all” type I found online. The little thing was so inexpensive I couldn’t help getting one to see if it worked. I have to say it has its uses, which are limited, but this chamber of horrors was one of them. I suppose the best way to describe the only function I’ve found for the less powerful reamer is by comparison to micro meshing after sanding. The small reamer has a certain precision that smooths away some of the rough edges left by its Senior counterpart. Maybe for those of you who have seen real combat on the battlefield, it would be like sending in the Army Corps of Engineers to clean up the devastating work of Marines.
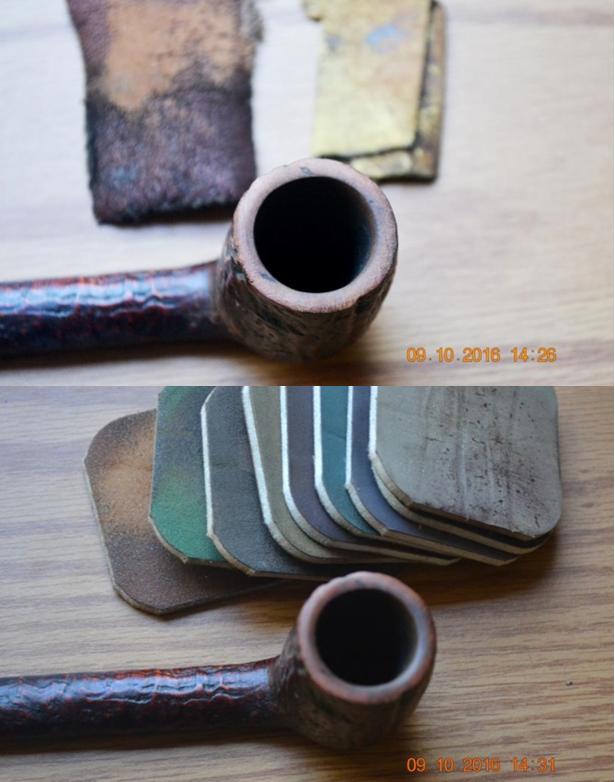
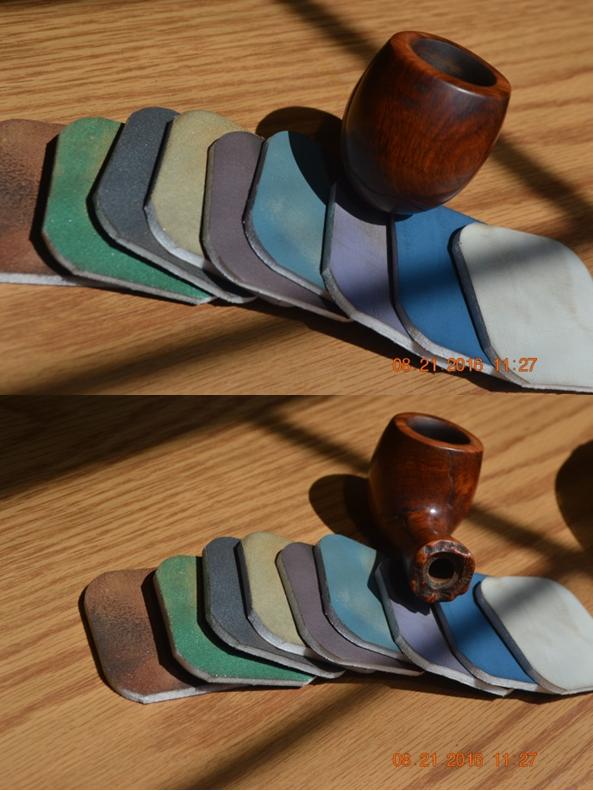
The reaming complete, I turned to sandpaper, first on the rim and chamber with 150-grit, then working up the fine line to 180, 220 and 320.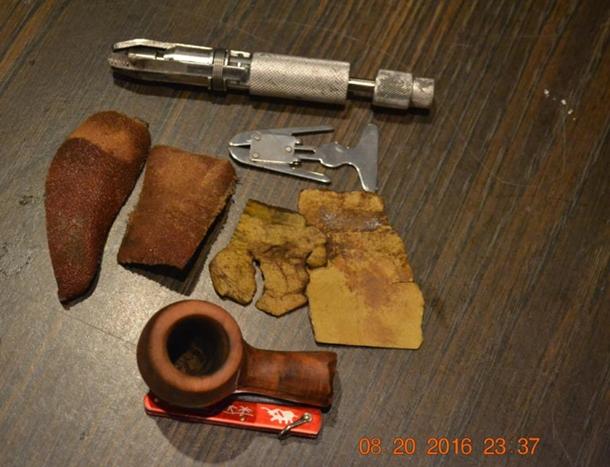 I used the same progression of paper, minus the 150-grit, on the bowl and shank. That was enough for the first night.

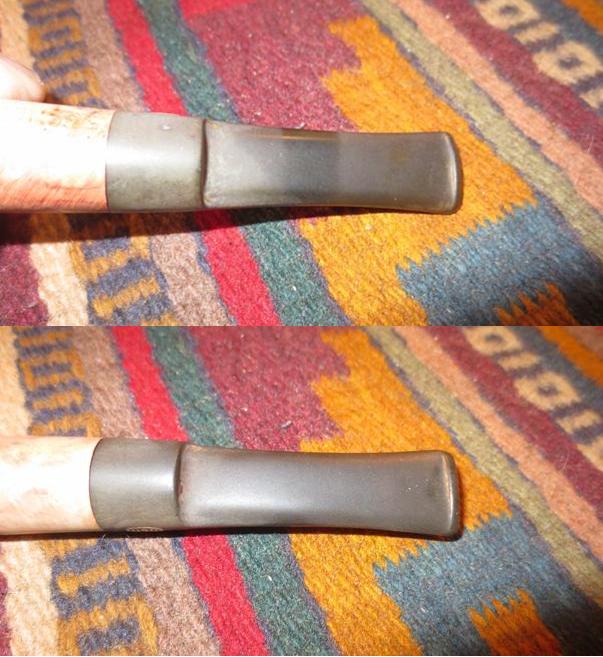
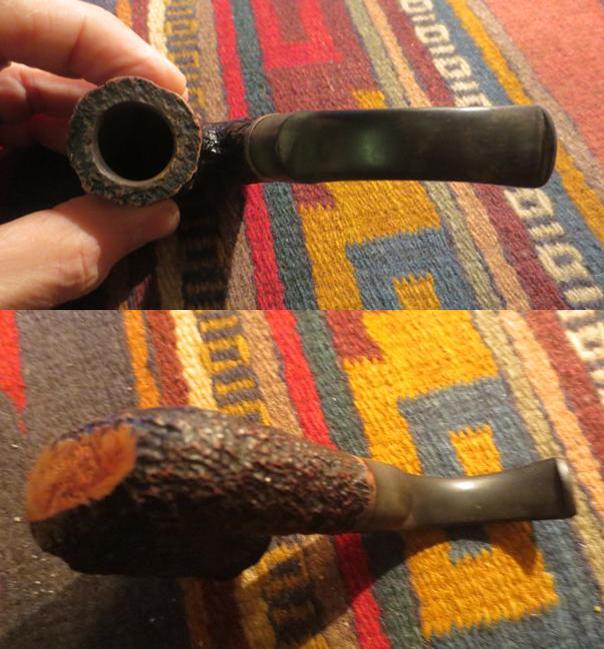
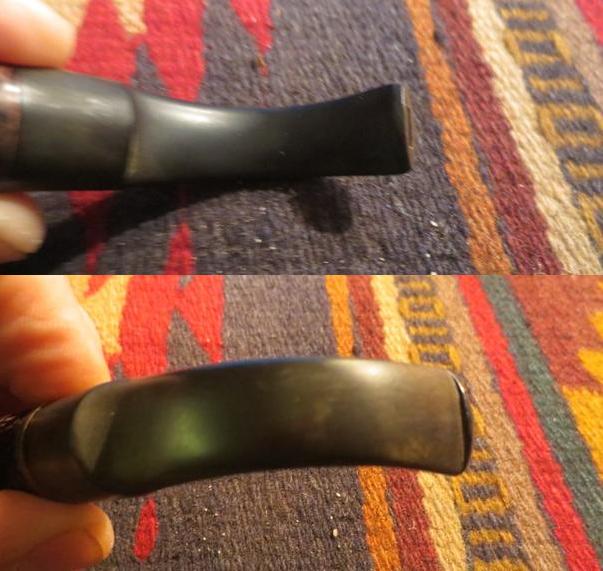
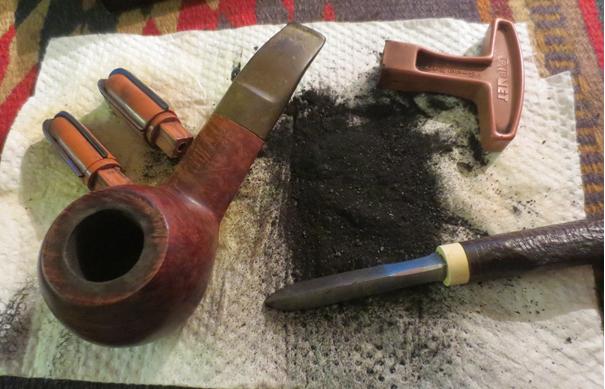
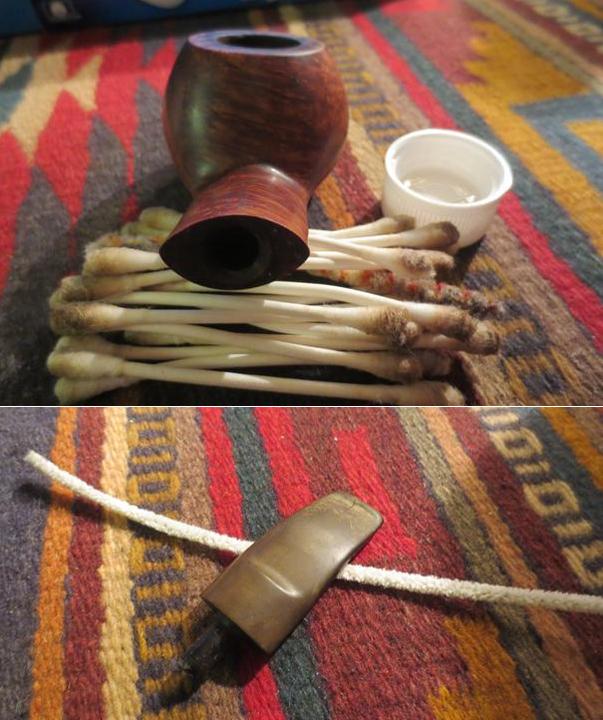
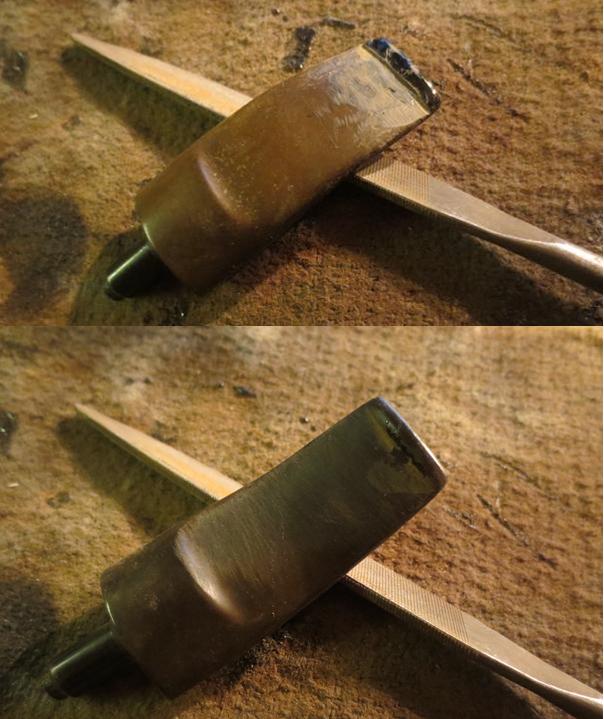
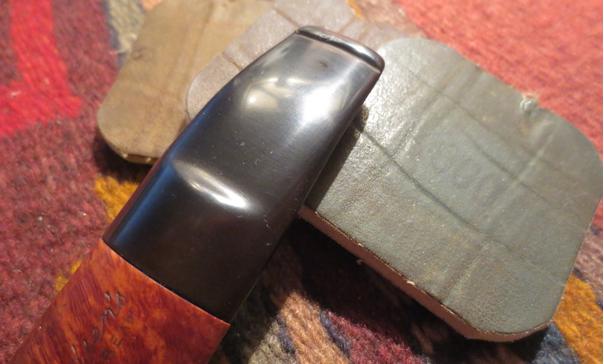
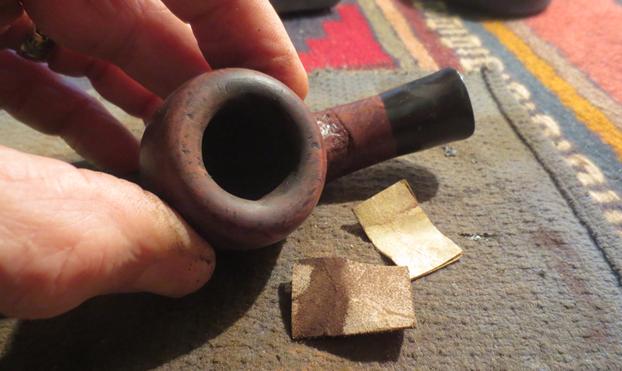
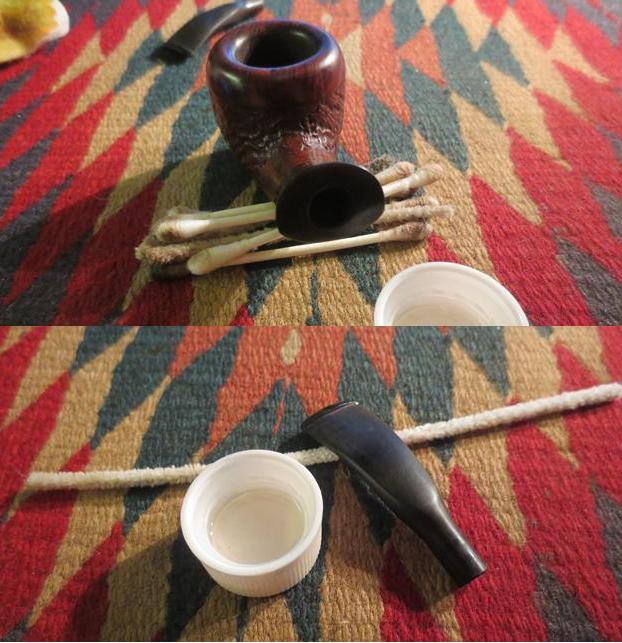
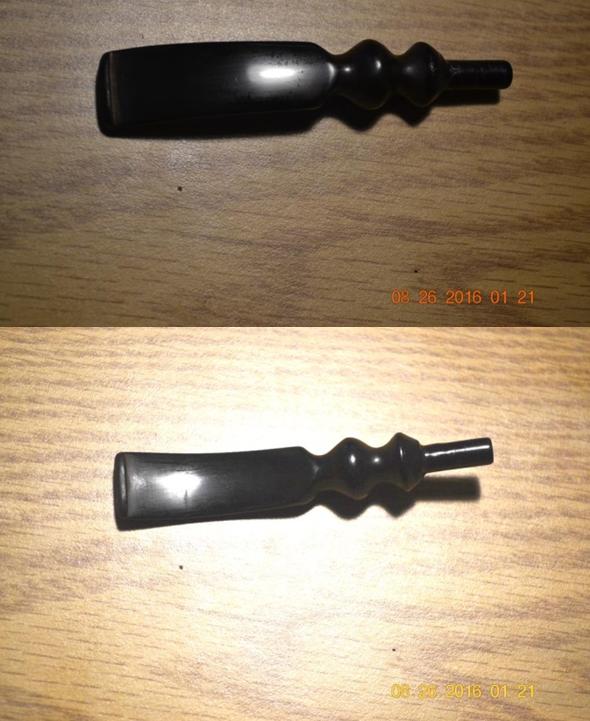
 The next day, Saturday, I slept late, meaning 9 or so in the morning, for the only time my cerebral RAM can access. I arose in an excellent mood made better by starting my first giant mug of strong, rich French Market coffee mellowed with chicory. Since I was in such a clear, positive frame of mind, I savored the moment more by turning to the bit that was wrecked by the havoc of some poor soul who must have suffered from a sort of waking temporomandibular joint disorder, even though there is no such malady since the real thing occurs while one sleeps. It’s called everyday teeth grinding when one is cognizant, and if a pipe smoker is that angry he ought to give up the best known form of relief from stress altogether. I ran a couple of cleaners through the air hole, first a dry run and then soaked with Everclear, and used the last of my supply of OxiClean to give the bit a bath. And now I’m gonna show you some 8×10 color glossies of that ordeal. You see, I was still of the mind that I might take the time to salvage the heinous wound to the mouthpiece of this bit.
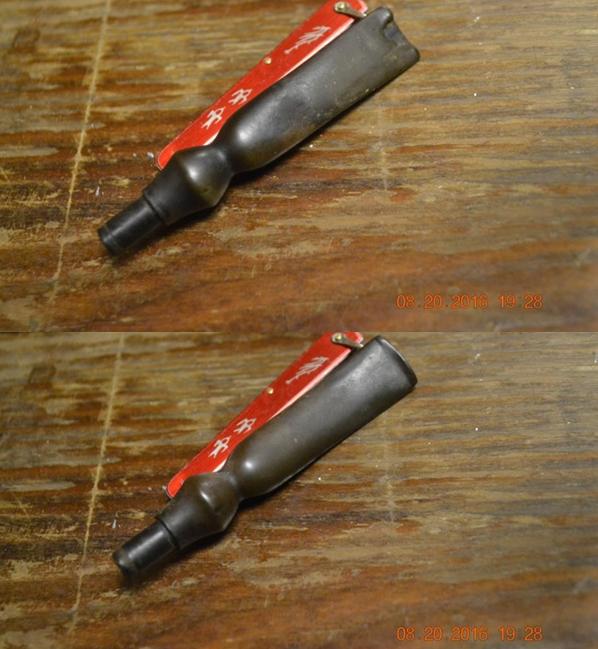
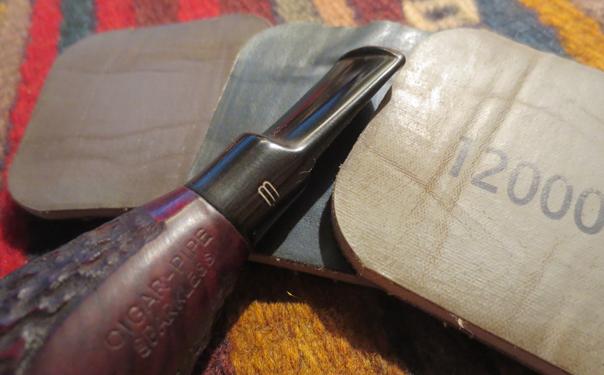
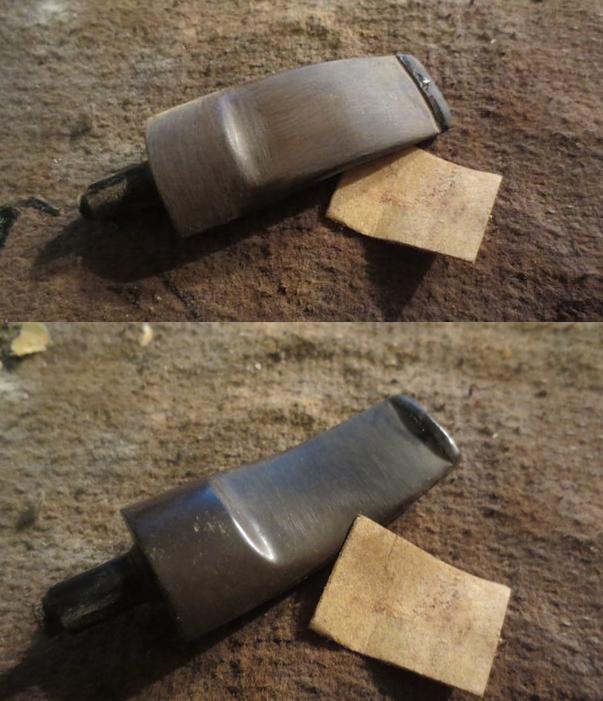
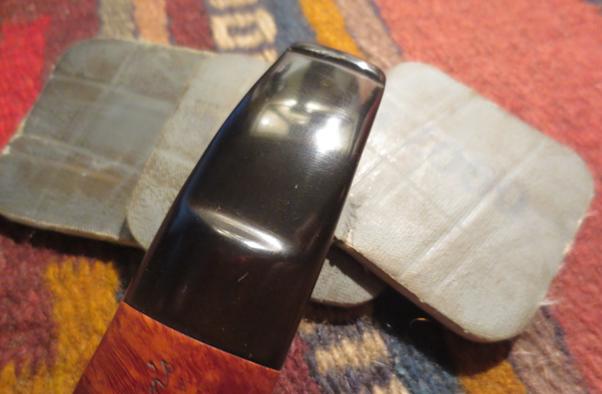
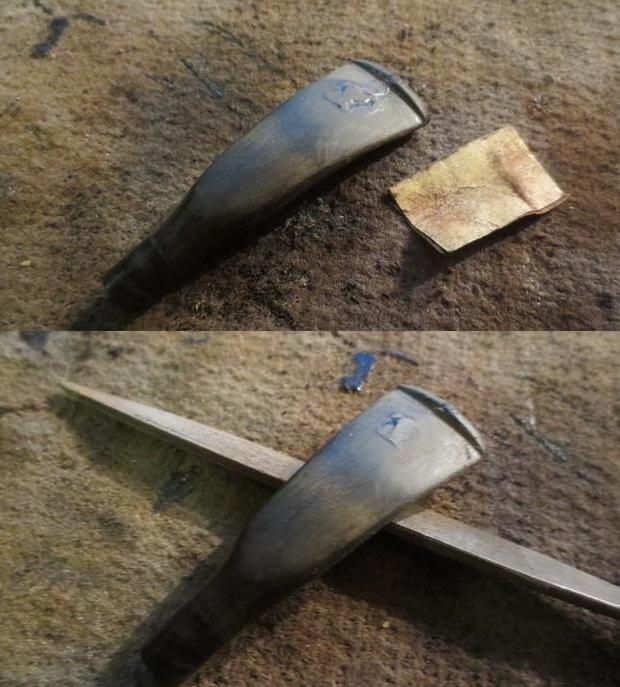
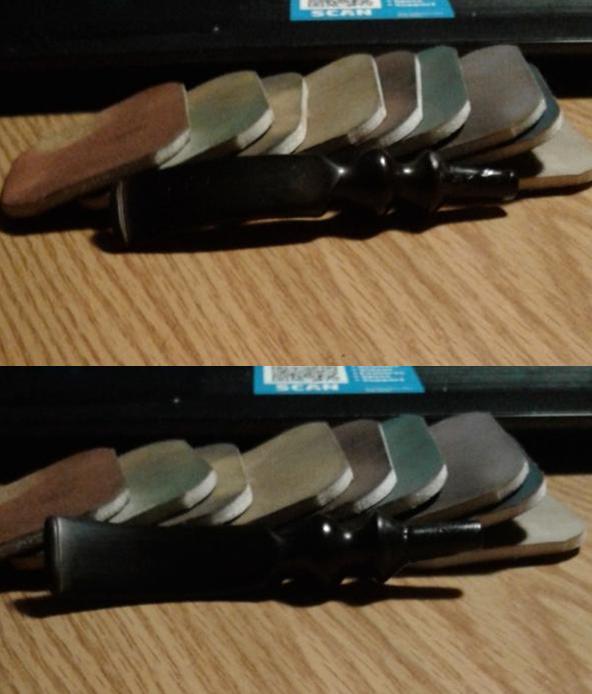
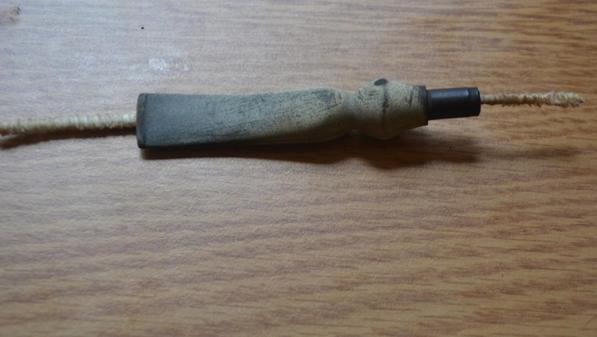 By this time I already knew I was going to find a replacement somewhere, but once I start something I have to see it through. Therefore, I used more of the fine steel wool and then micro meshed from 1500-12000, just for the sake of it. Be all you can be (for now), mighty bit!
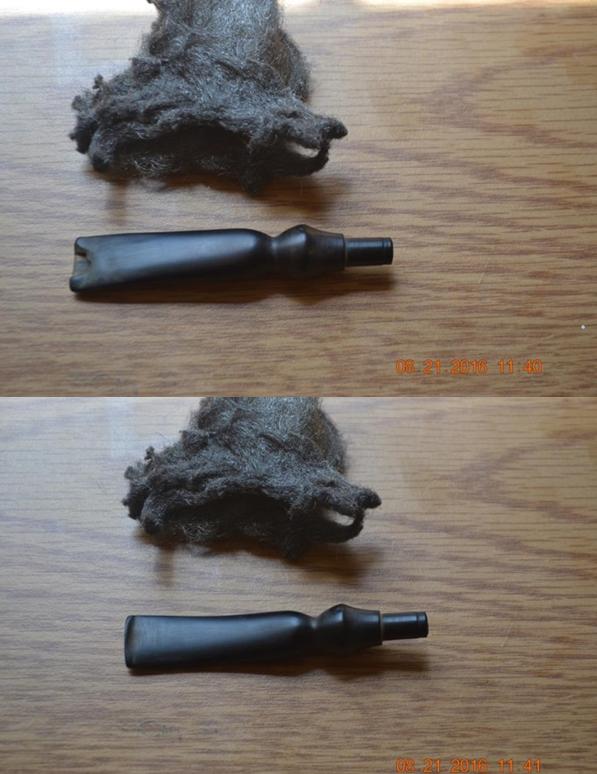
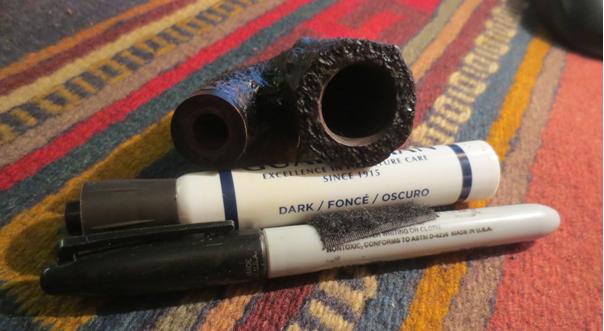
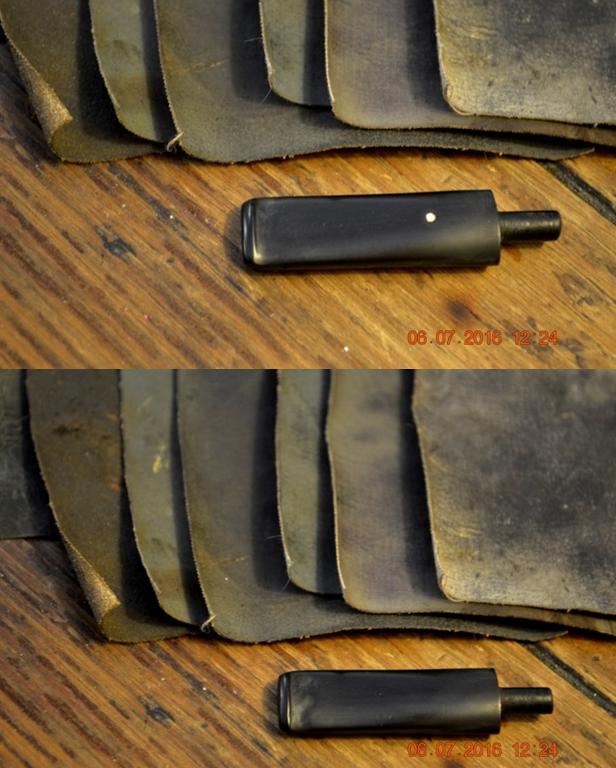
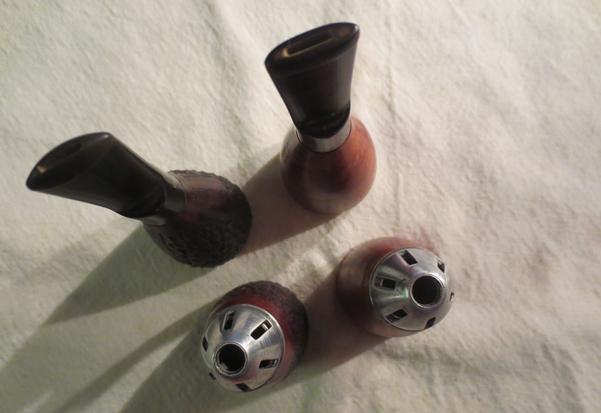
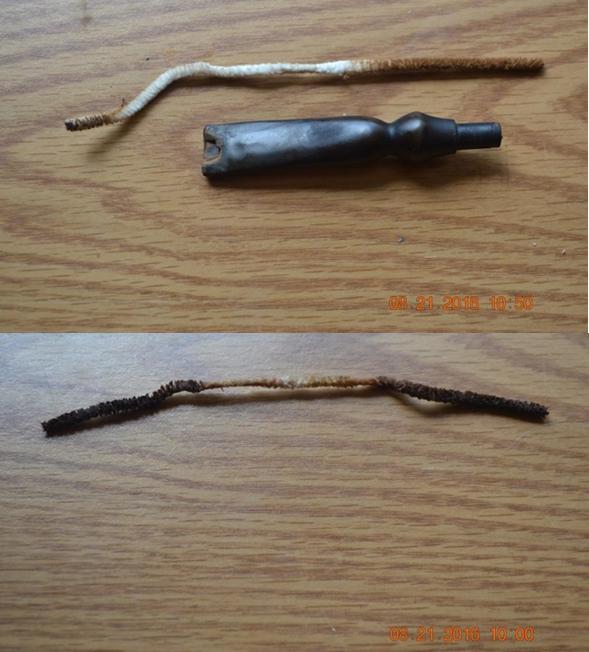
 I did find a replacement in a bag from my recent move to better digs that I’ll show you later, because I’m sick of the entire idea of bits for now and it’s out of order, and I did keep the original for some unknown pipe I will restore for my own use rather than to sell to a trusting and hapless buyer.
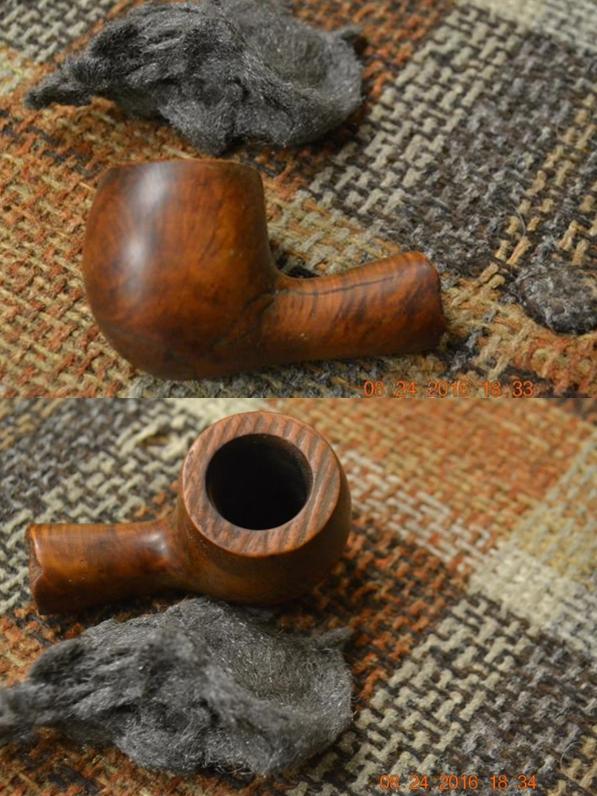
Grabbing the steel wool again, I put it to better use on the stummel, with gentle rubbing.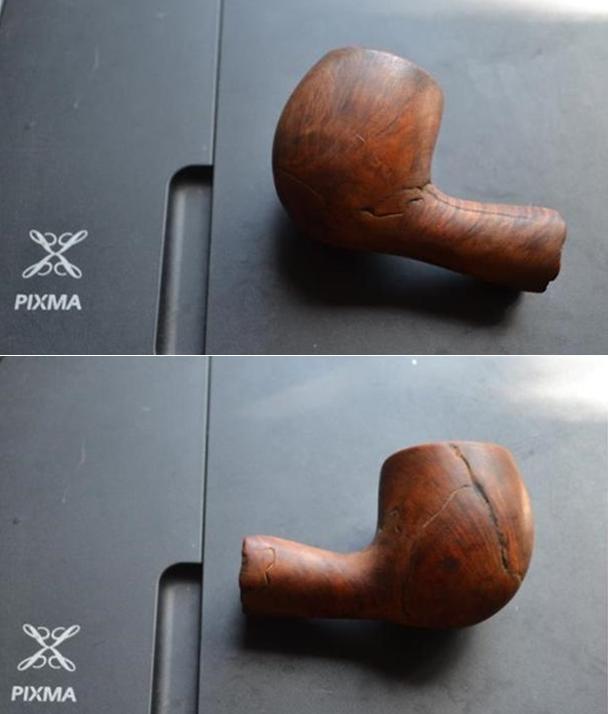
 Lo! How a simple micro mesh progression from 1500-12000 will change the hue of briar!
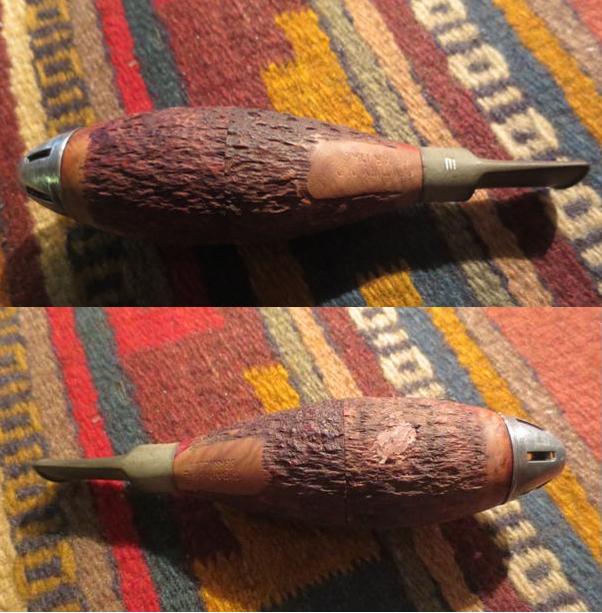
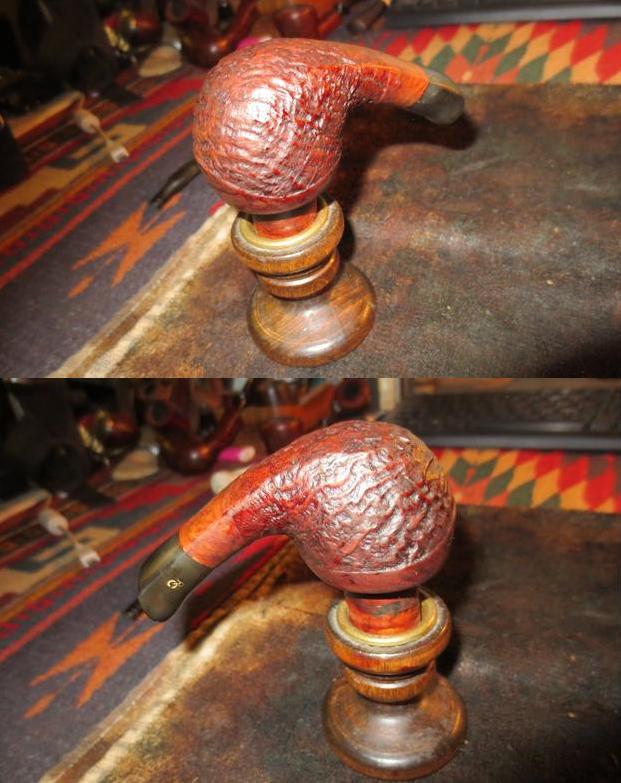
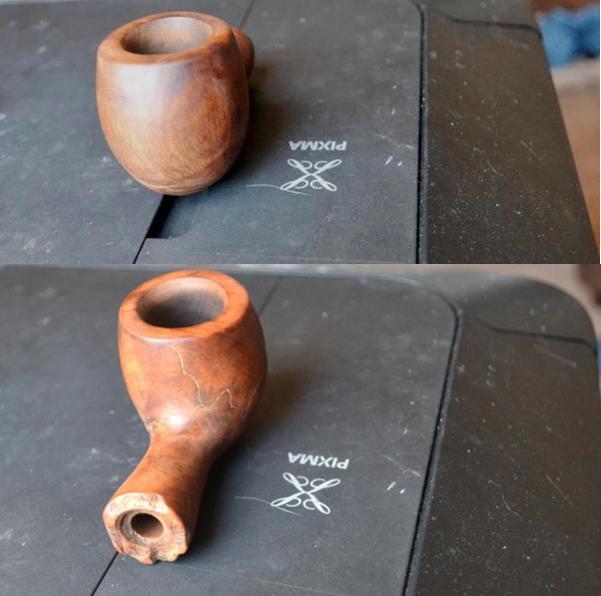
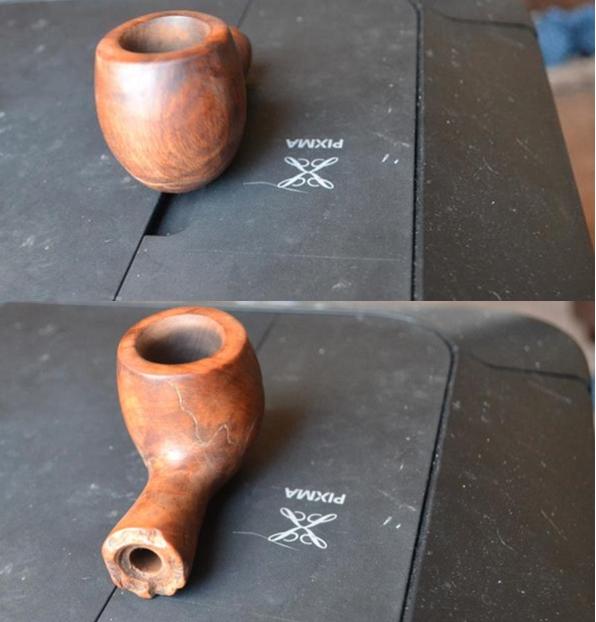
 Three days almost to the hour after I began this project, there was no more putting off the inevitable: doing something to make the rim rough rather than the usual desired velvety smooth. Part of me that had no trouble adapting to the rule “If it isn’t broken, don’t fix it,” one of my dad’s many maxims, hated the notion of touching a rim that was “perfect” the way it was.
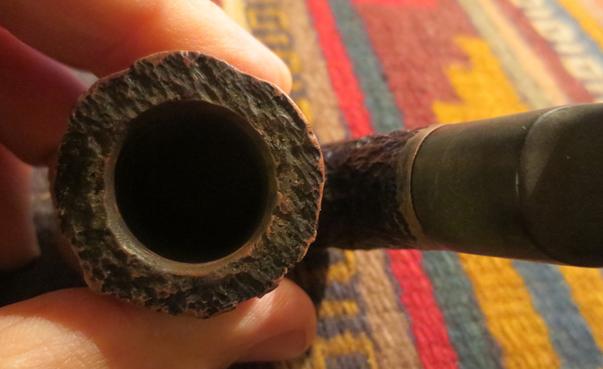
In the end, I knew that a smooth rim on a Danish freehand style pipe was anything but perfect, and I considered my options, which seemed to me to number three. 1) I could rusticate the circular top, but the Mastersen freehand is not a rustic pipe. 2) I could reshape the top and try to roughen it up, but I’ve never done that before, to be honest. 3) I could leave it flat but give it some sort of texture.
The last choice seemed the best way to go, and that’s what I did. Starting out with a couple of level but tentative strokes of a wood file, I succeeded in making the following beginning, which I later gave more depth. 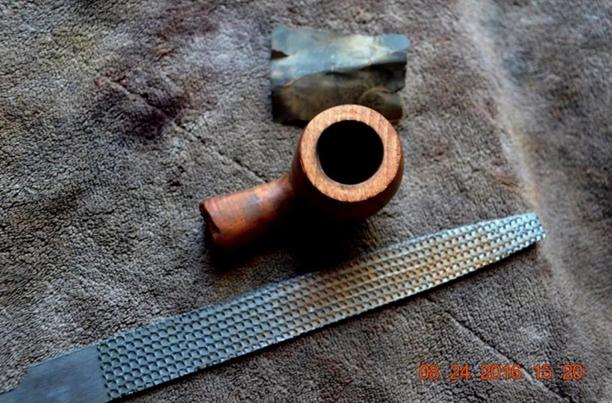 I came across a surprising number of other Mastersen freehand restorations, and two of them recounted the same obliteration of the rim and chamber stuffed with carbon char. The common rim problem suggests to me a straight, shallow plateau that lends itself to being burned away by the average pipe enjoyer. I don’t know what to make of the mystery of the overflowing chambers. The two reviews of these pipes’ level of smoking quality are very high, one coming from a regular participant in an online pipe forum and the other from my friend Daryl. Given my run on inexplicable coincidences, maybe both Mastersens were smoked close to death by the same perp.
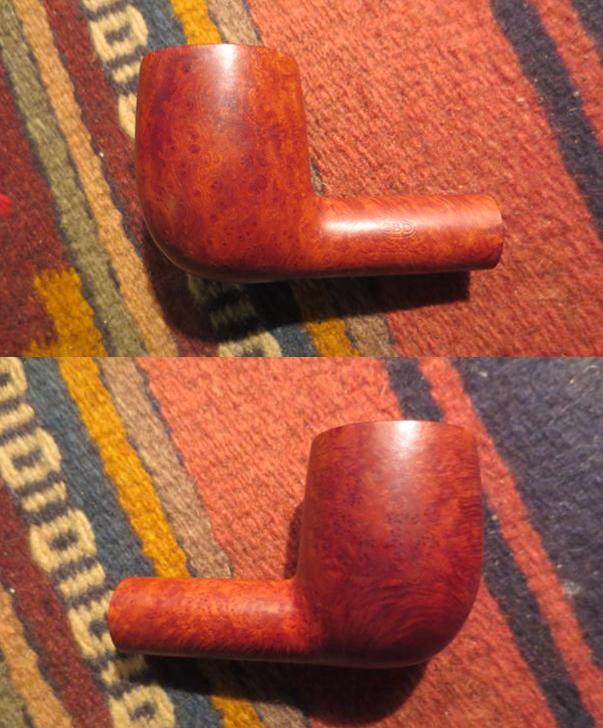
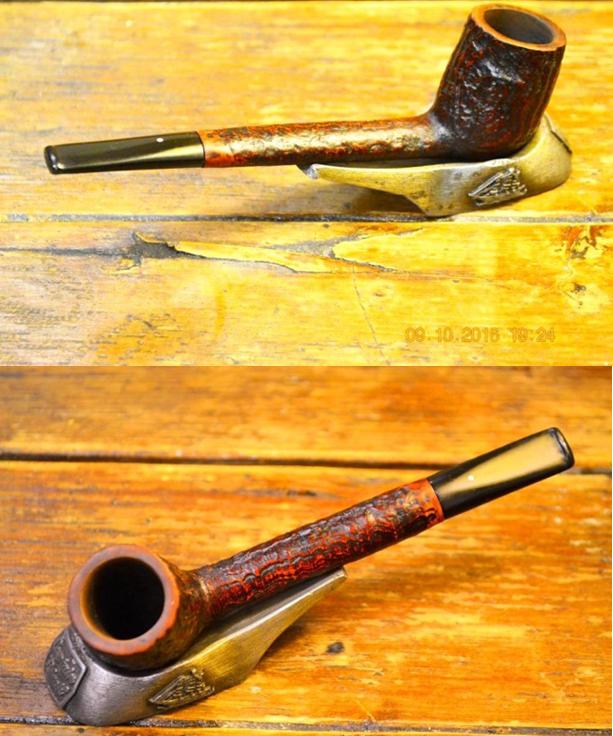
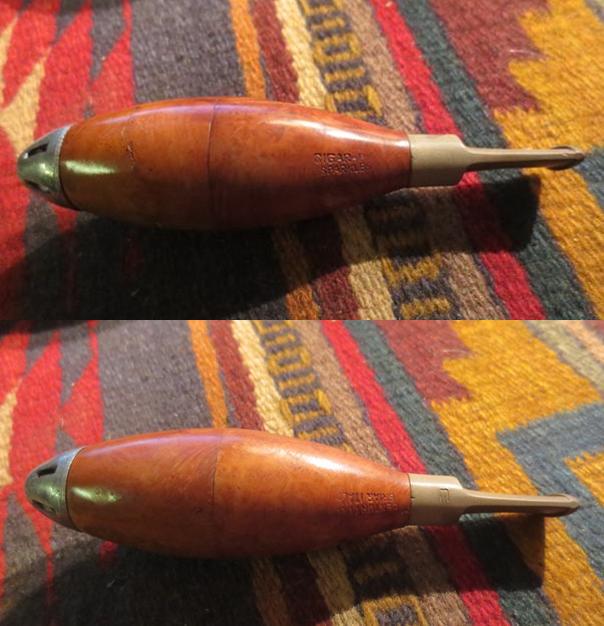
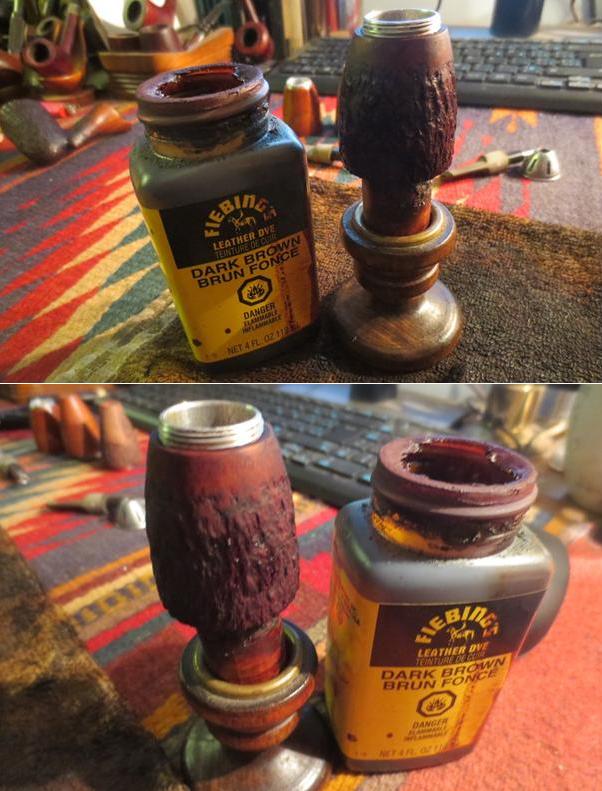
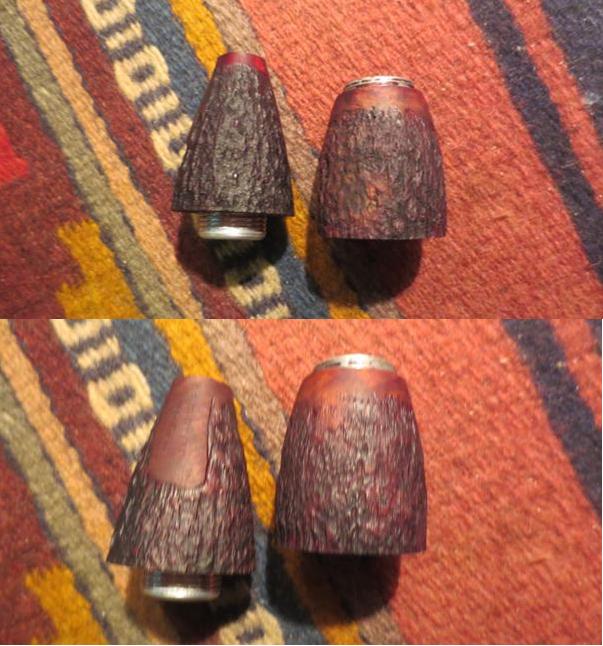
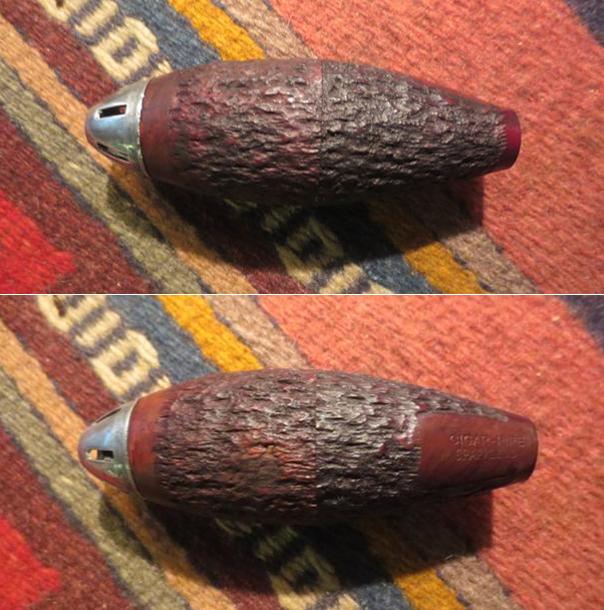
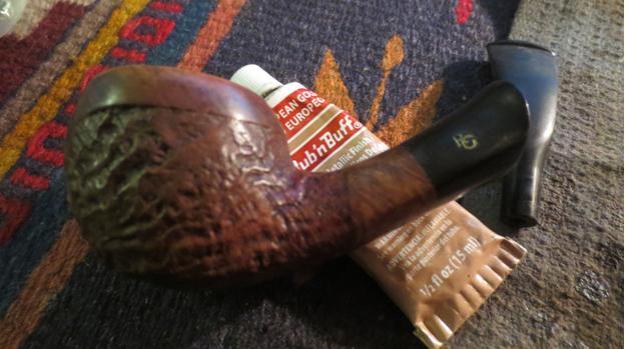
But on with the restore I must go. The beautiful briar needed a light stain, and I didn’t want to overdo that part of the task. The only problem was that I wanted the bowl to be a tad darker than the shank, and the darker stain I had was very dark, Lincoln Marine Cordovan (deep maroon) alcohol-based leather conditioner. Taking a wild chance, I used that on the bowl and rim and Fiebing’s Brown on the shank. I was surer than the first people to test the A-Bomb were with the risk they took that I could remove enough of the excess darkness from the bowl without scratching it. The scheme still must sound plain crazy. Anyway, after flaming out the alcohol with a Bic, I set it aside for 10 minutes. 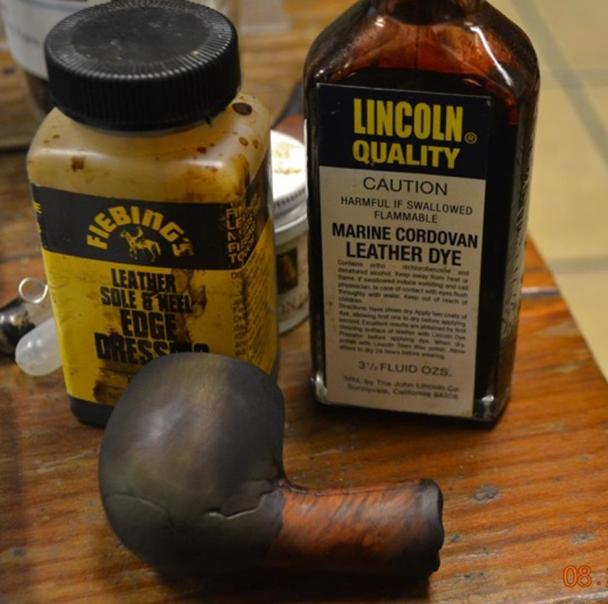
 The father of my best friend in high school used to wake up or snap out of a reverie, stretch, yawn and say, “Well, hell!” Those are the words that came to my very conscious mind as I chose 500-grit paper to begin eliminating the ash-like residue and over-darkness from the stain.
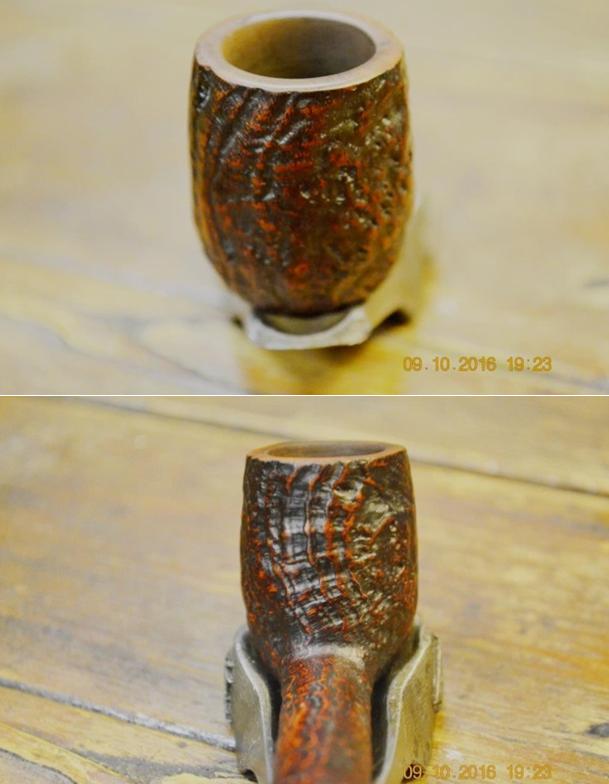
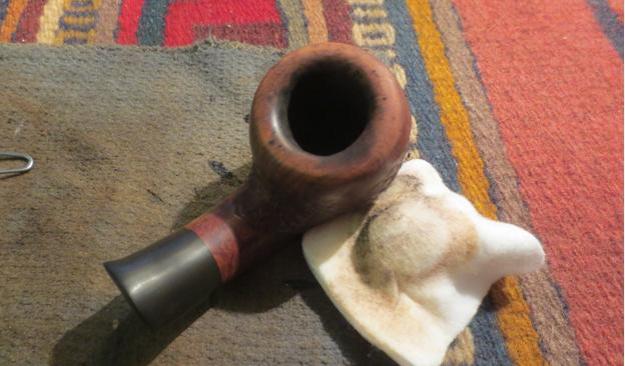
 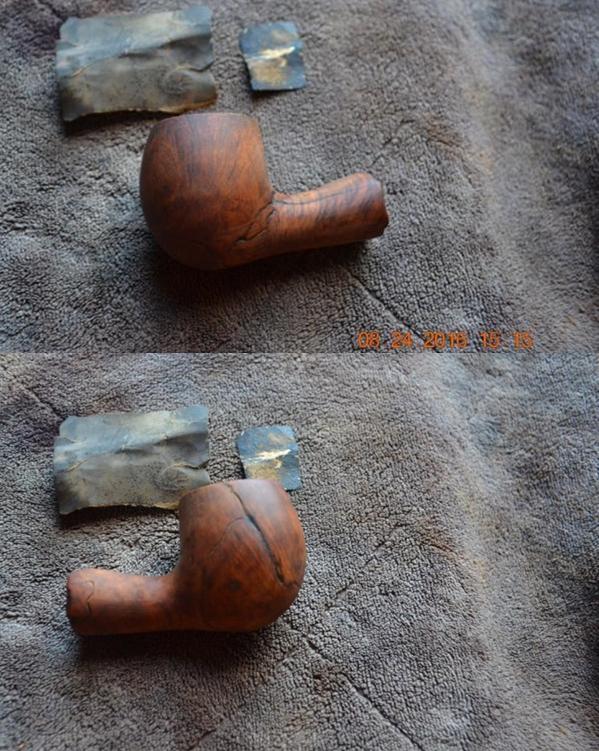 I applied Halcyon II wax and let it sit for 20 minutes before rubbing the stummel with the same soft cotton cloth shown above.
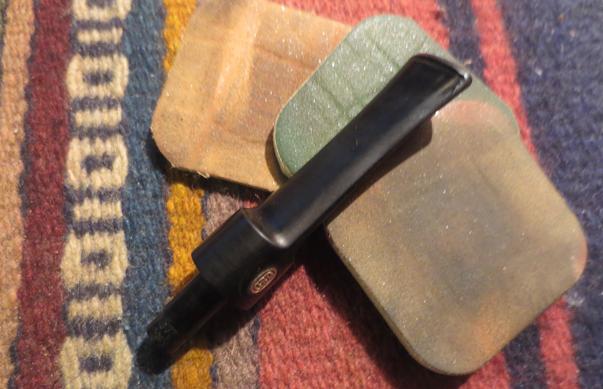
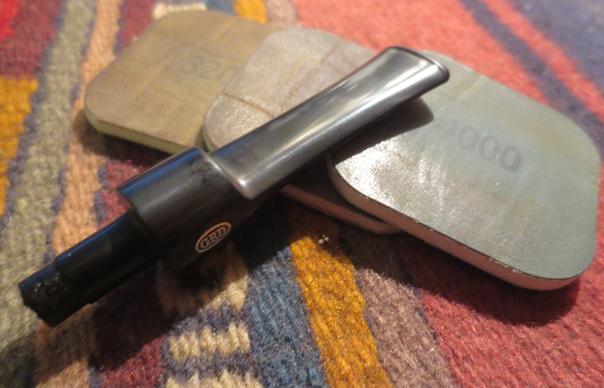
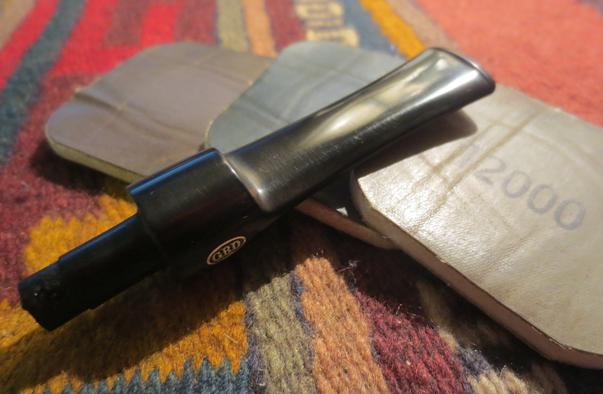
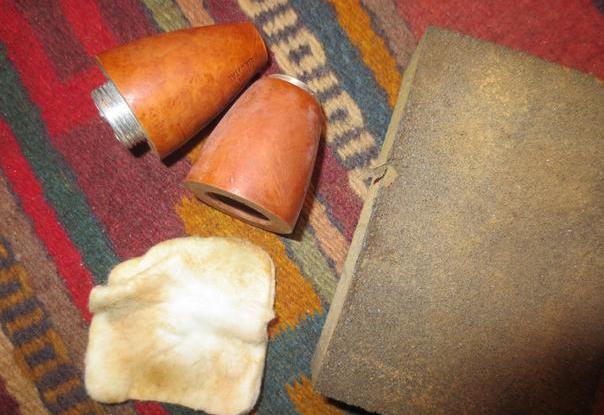
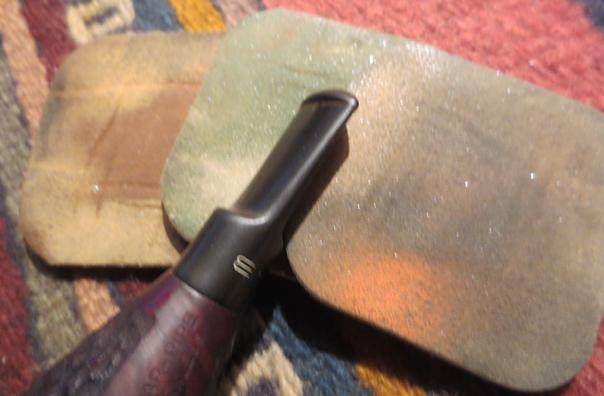
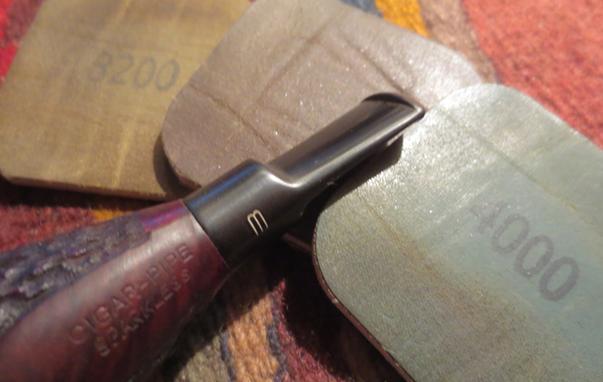
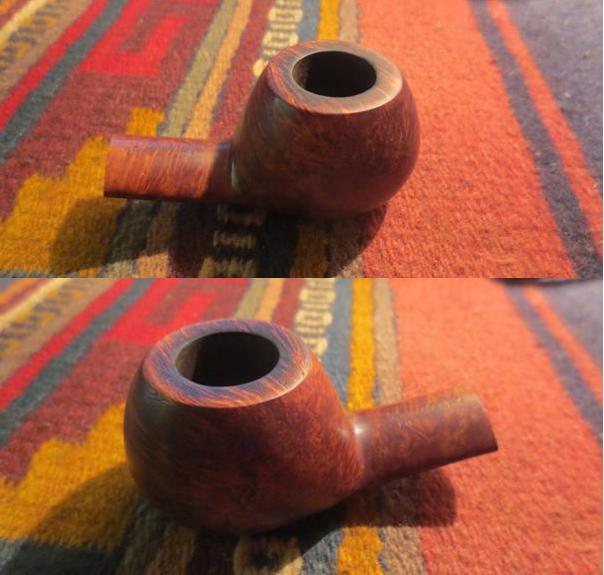
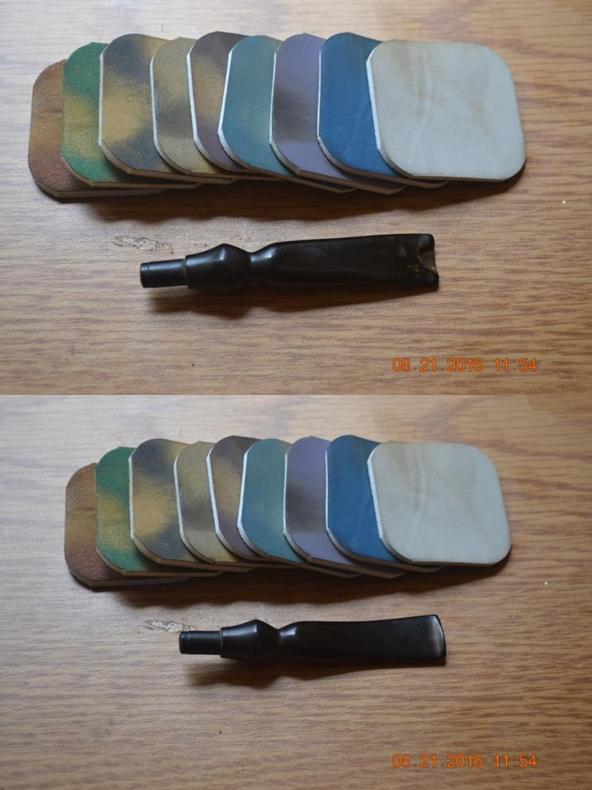
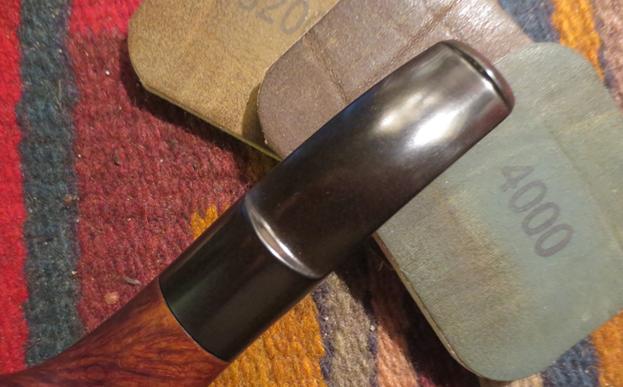
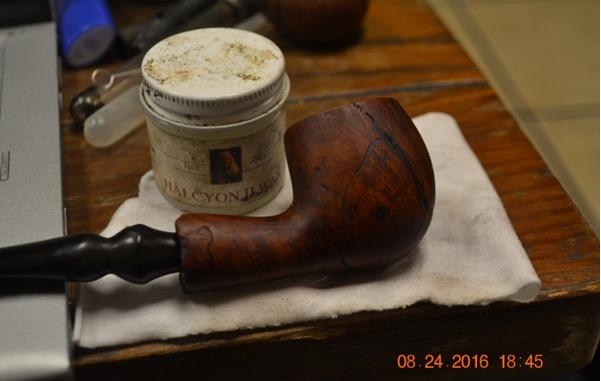 The next photos don’t quite show the subtle difference, but it is there, as I think the final shots will reveal. I was almost done, I thought. All that was left with the stummel was to make the color still lighter. Using the finest third of my micro mesh pads, I gave it a strong buff with 4000, 8000 and 12000, and even then resorted once more to the super fine steel wool. My rim work is clear here.
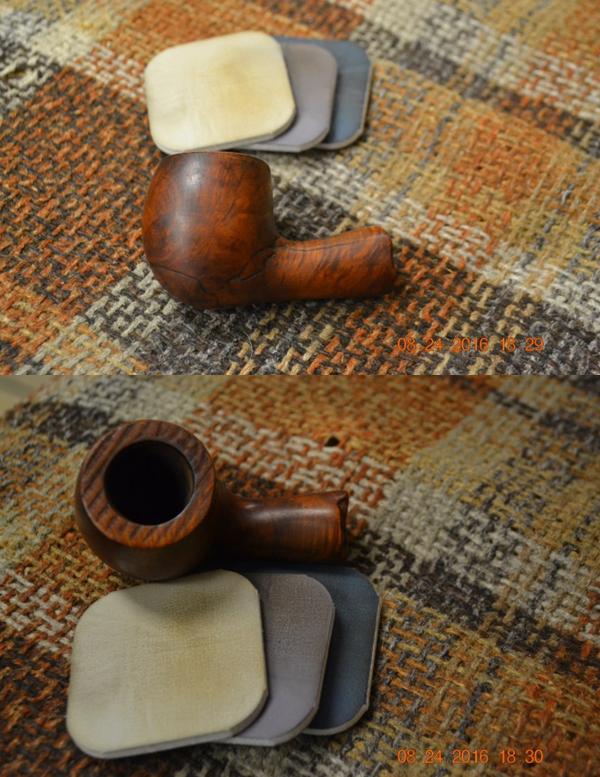
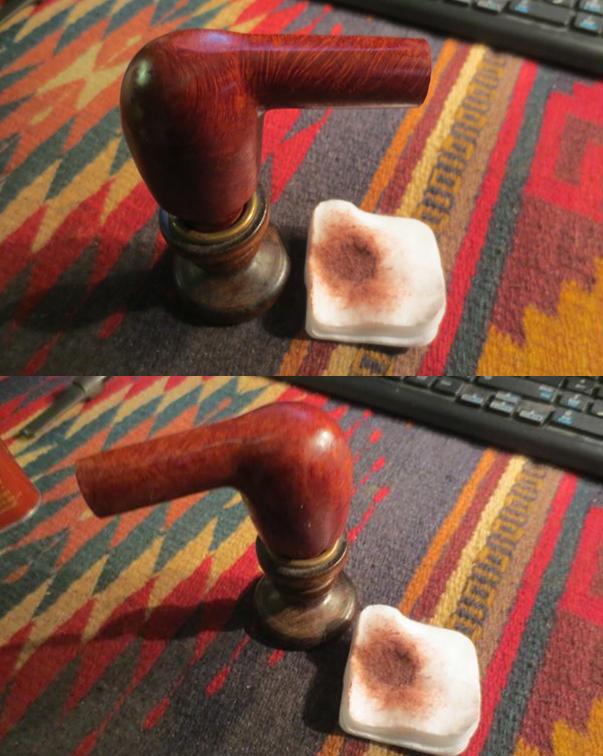
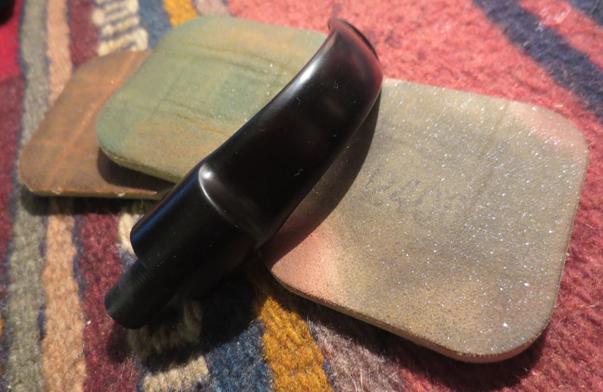
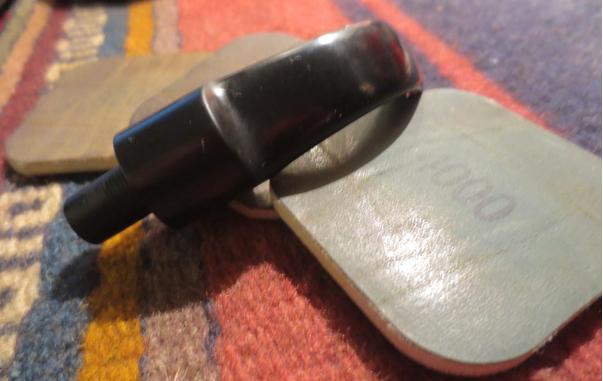
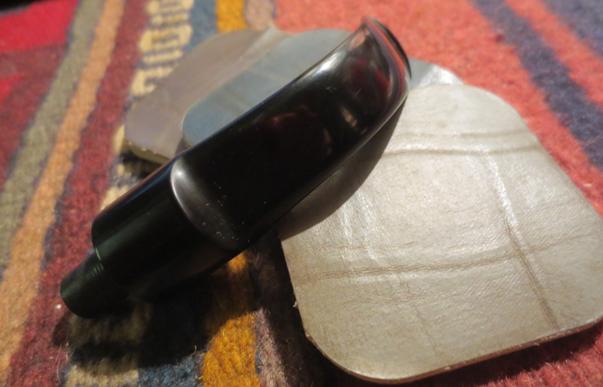
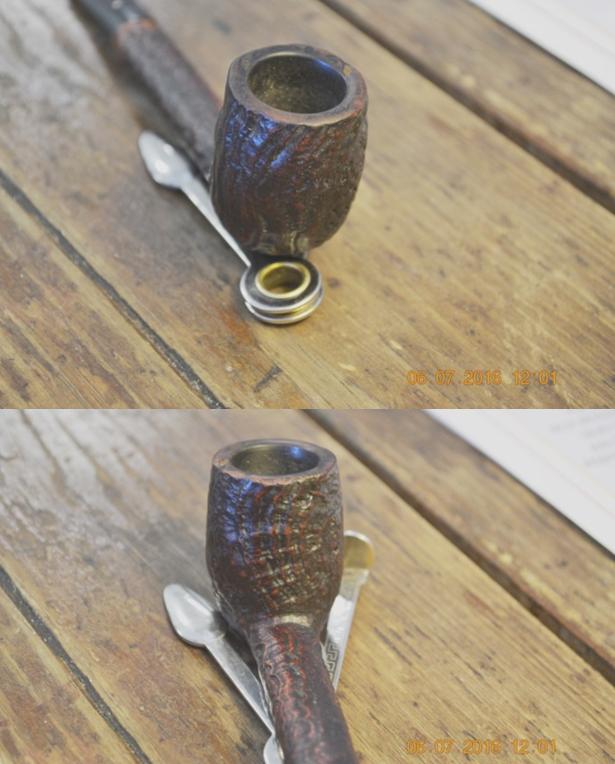
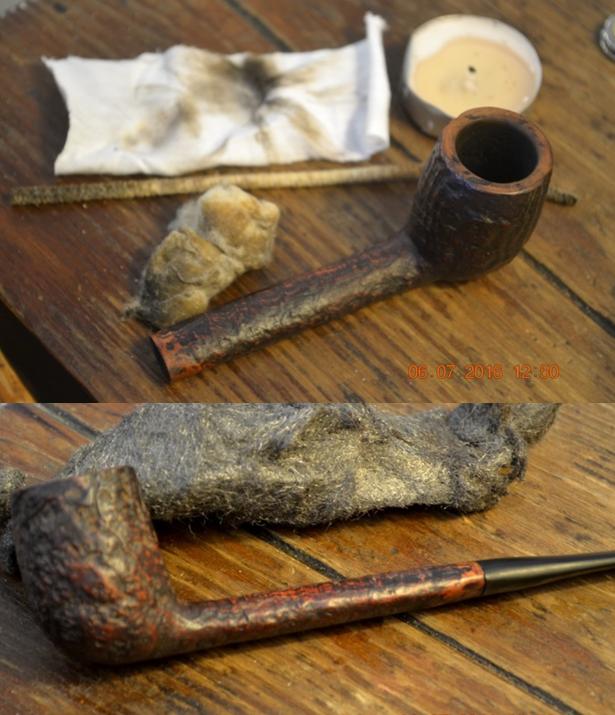
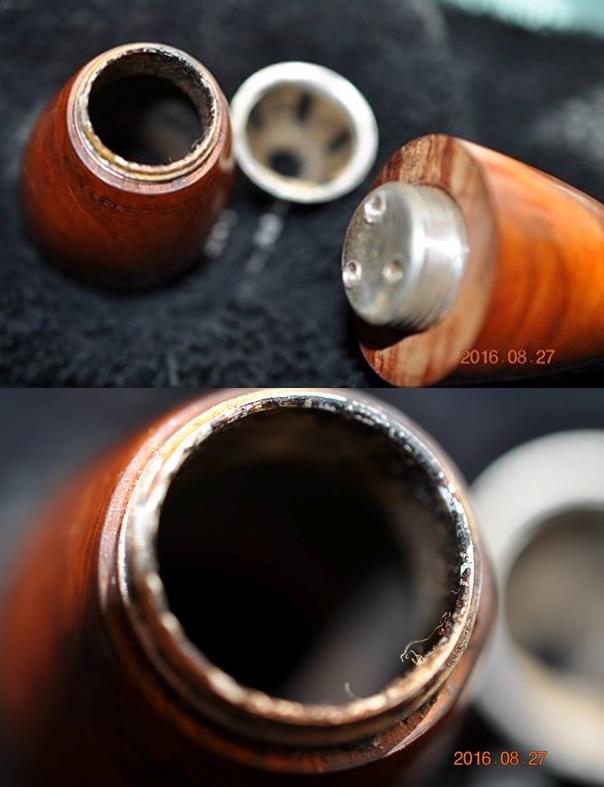
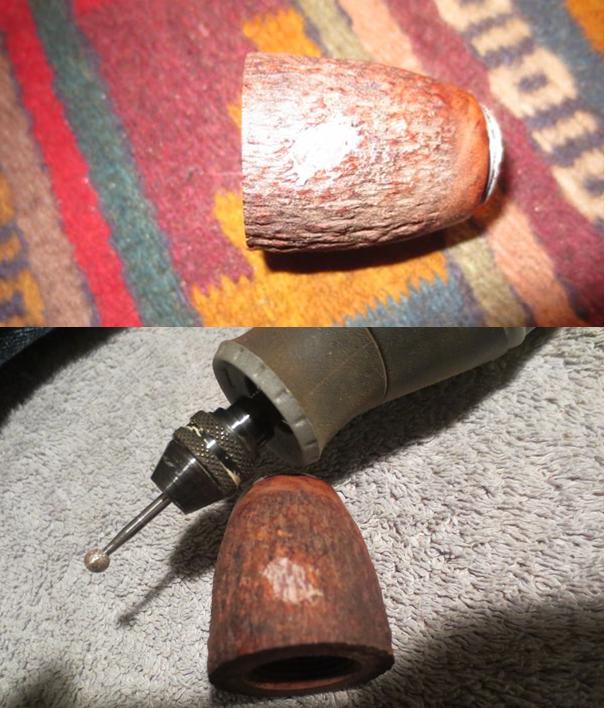
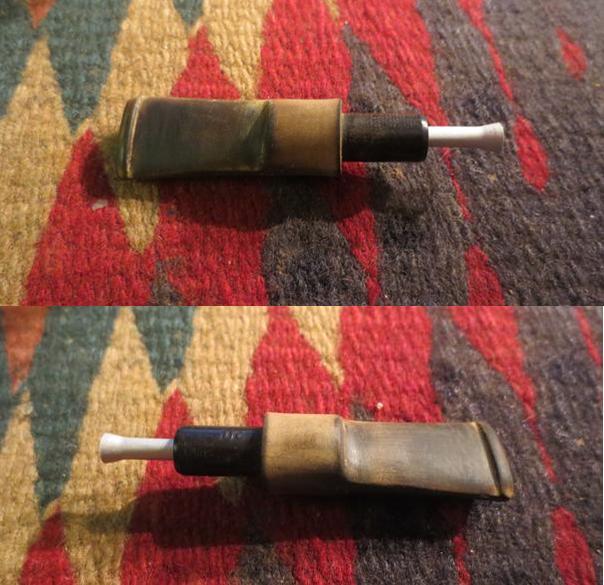
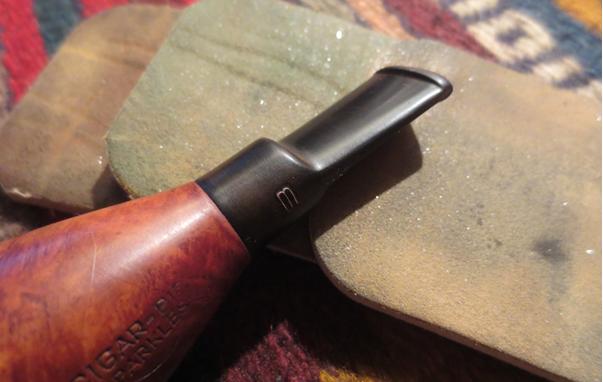
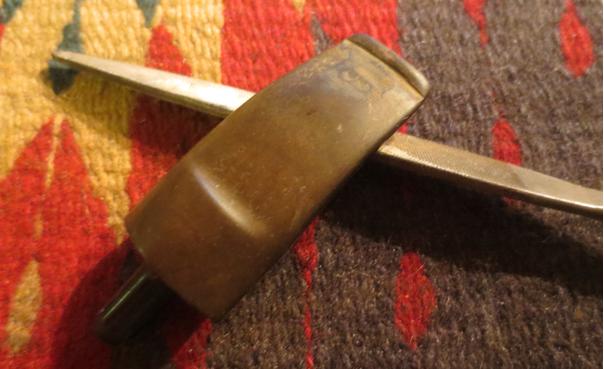
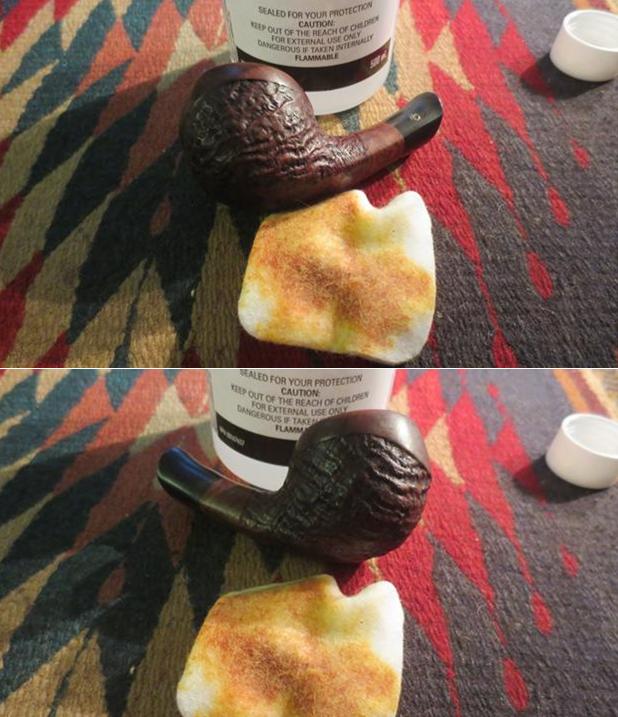
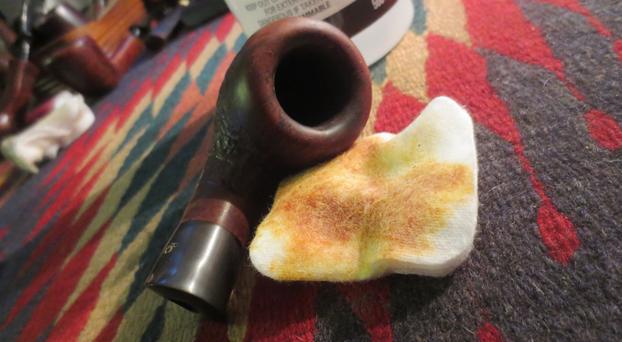
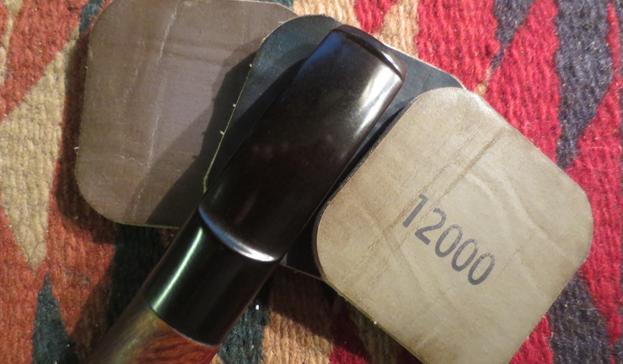
 The stummel finished, I looked for the bit and remembered I had not yet built up the tenon that was too narrow to fit the Mastersen shank. With other more pressing business to tend, I did not begin that stage for another two days. When the other matters were caught up for the time being, I considered the discolored replacement bit and gave it an OxiClean bath with a scoopful from a new tub of the powdered detergent and bleach and removed the resulting crud that was leeched out of the Vulcanite/Ebonite with 320- and 220-grit paper. I also buffed with the full range of micro mesh. As a point of interest, did you know if you Google Ebonite, almost all of the links are to bowling balls? It seems that is now the primary material for the balls used by serious participants in that sport, as it can be given color.
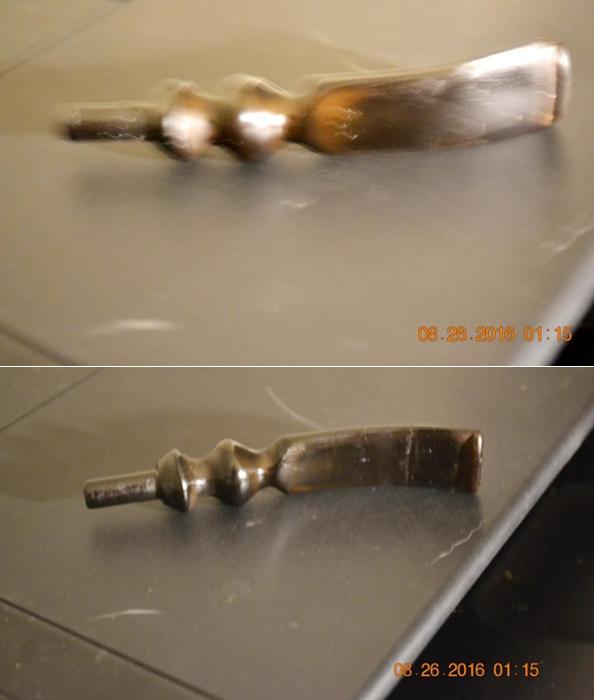
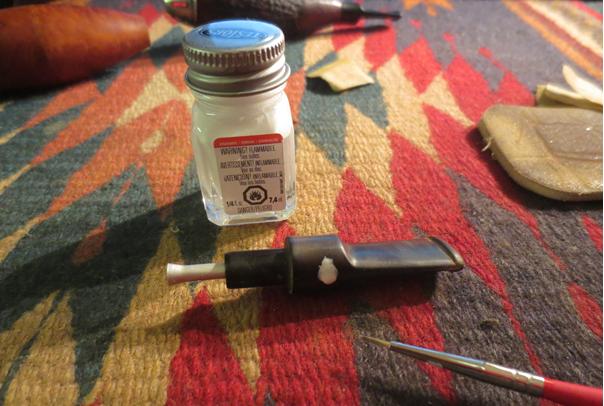
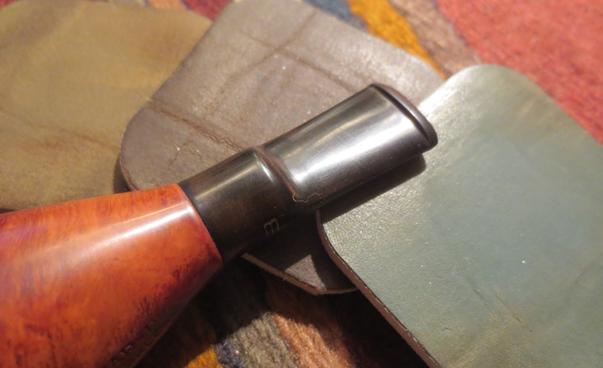
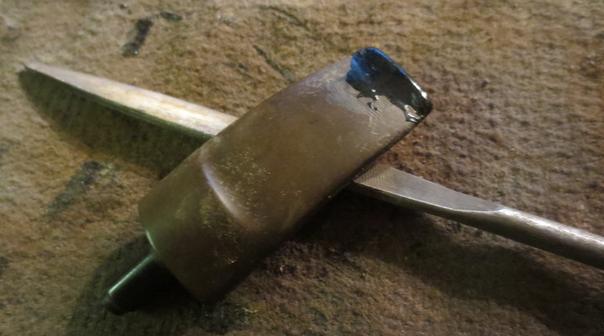
 I started the process of building up the tenon with Black Super Glue. This part took several more days. After the first layer, I added fine scrapings of Vulcanite from an old bit thrashed beyond hope of repair.
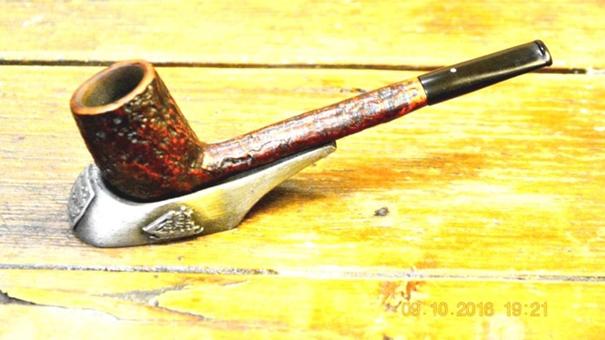
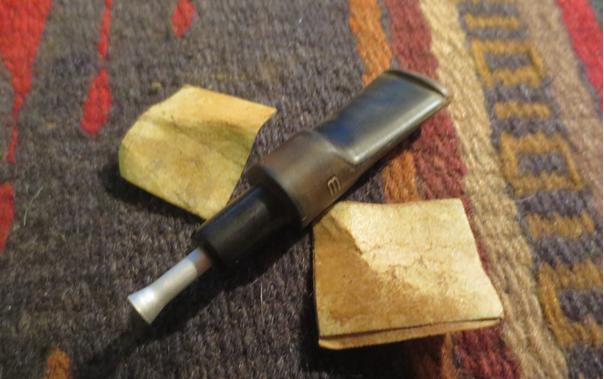
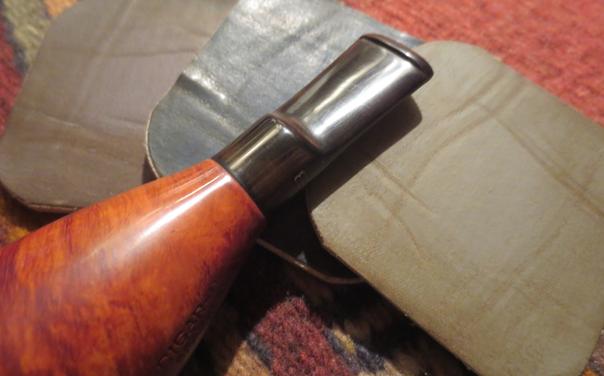
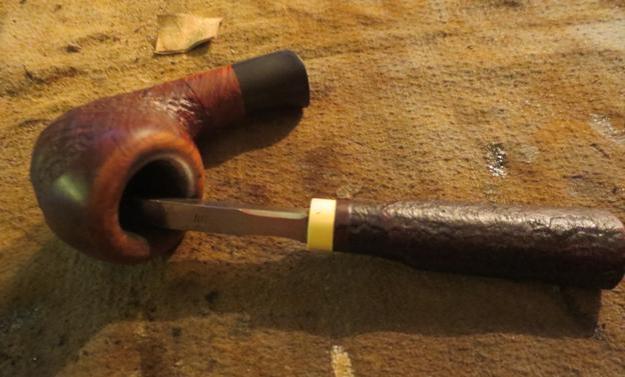
 At last the two pieces of the puzzle fit together, and I connected them.
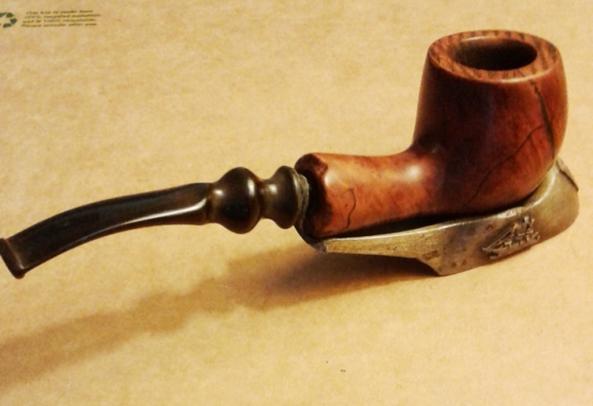


 CONCLUSION
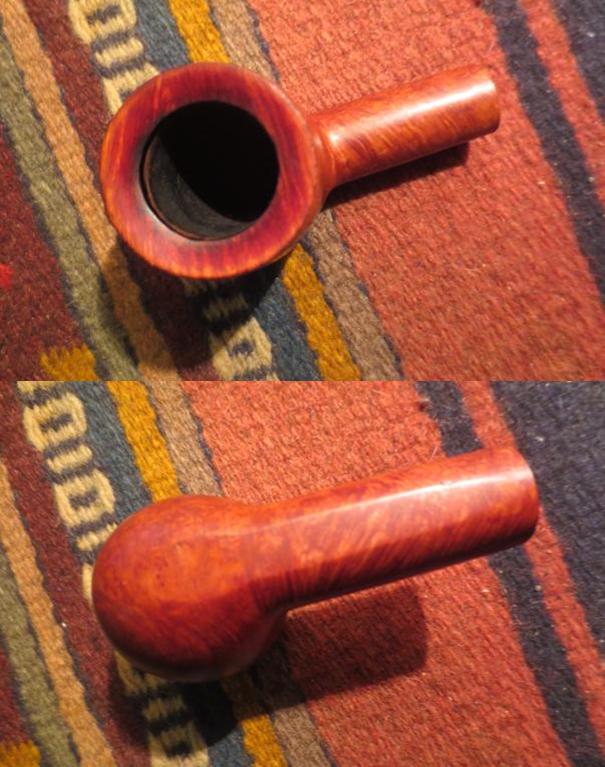
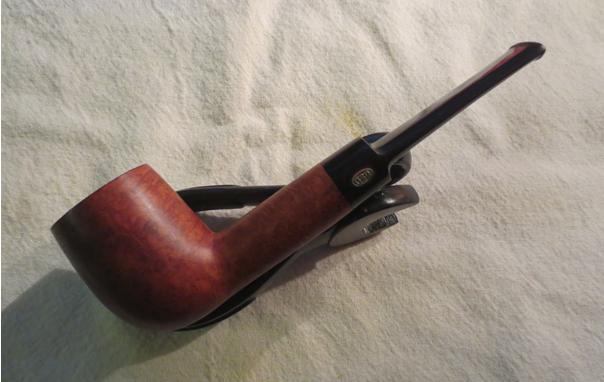
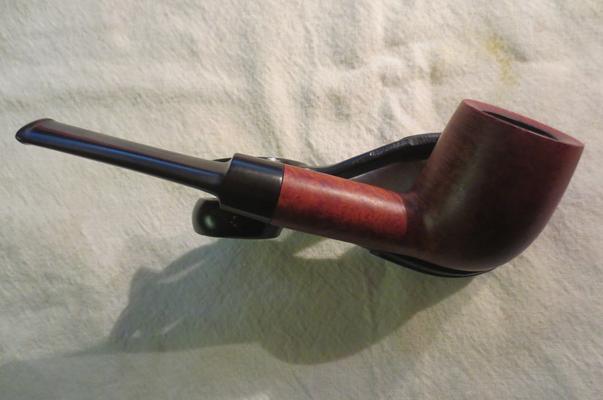
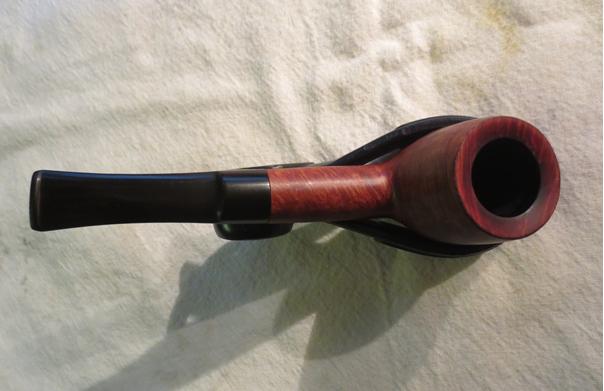
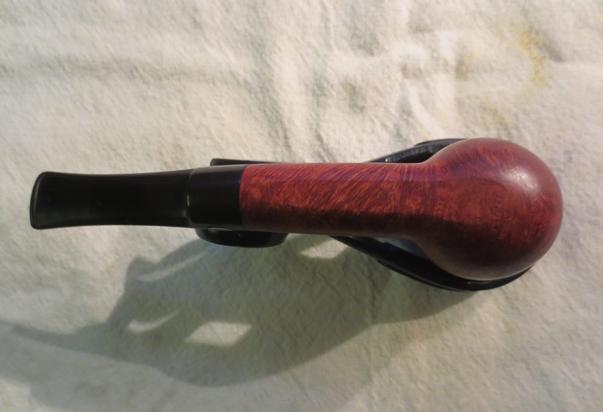
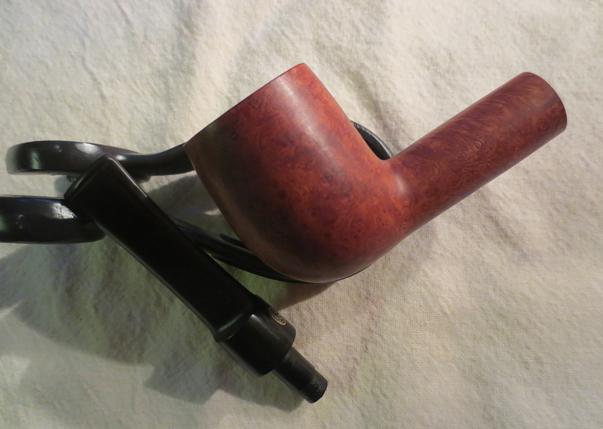
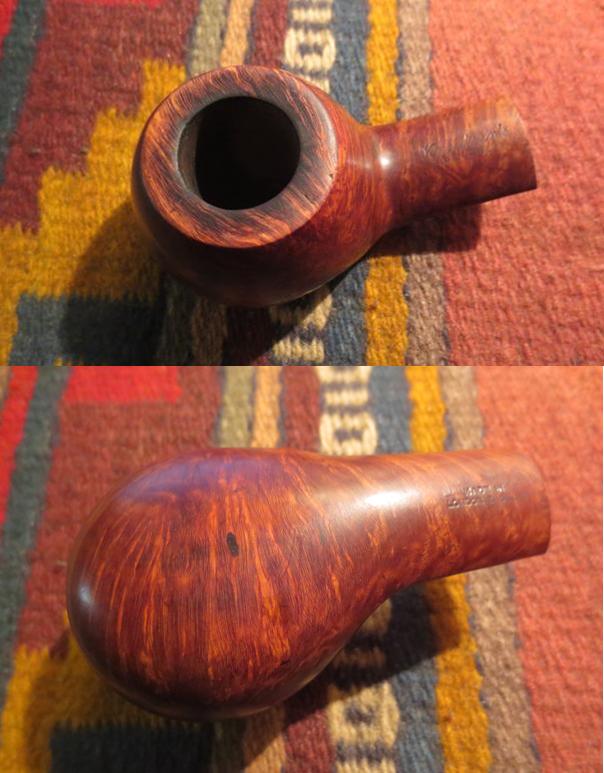
Although the grain does not have the same uniform, vertical tightness and the color is not as light as I hoped to achieve, I can say without hesitation the task was worth every bit of bewitchment, bother and bewilderment I encountered. But this seems like the perfect way to celebrate Labor Day, although this was a labor of love, not work.
But in all honesty I should add that Daryl’s recent fine acquisitions are beginning to get on my nerves.
SOURCES
http://articles.latimes.com/1991-04-17/news/vw-125_1_head-music
http://drgrabows.myfreeforum.org/archive/mastersen__o_t__t_502.html
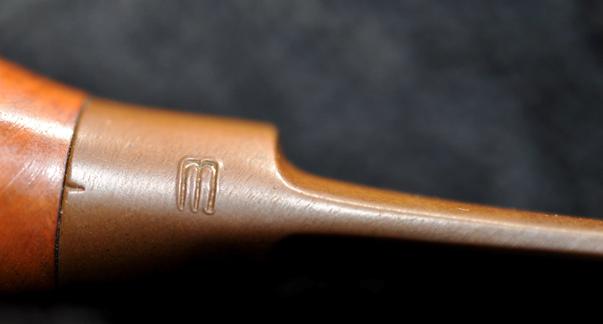
http://www.pipephil.eu/logos/en/logo-m3.html
http://drgrabows.myfreeforum.org/viewtopic.php?t=502&start=0
http://piperestorer.com/home/318-masterson-freehand-made-in-israel.html
http://pipesmagazine.com/forums/topic/by-request-the-restoration-of-my-masterson-freehand
https://www.bowling.com/shopping/ebonite/bowling-balls?gclid=Cj0KEQjwr7S-BRD96_uw9JK8uNABEiQAujbffJTXbPGJnkV_ebKRiCbi6AG7xKzy_Nd0Q5G2OeTLs3gaAoV-8P8HAQ#all
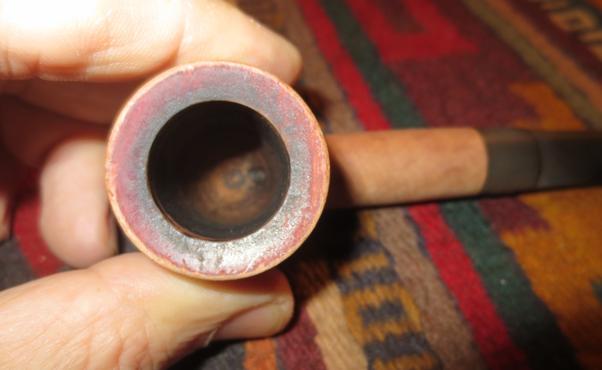
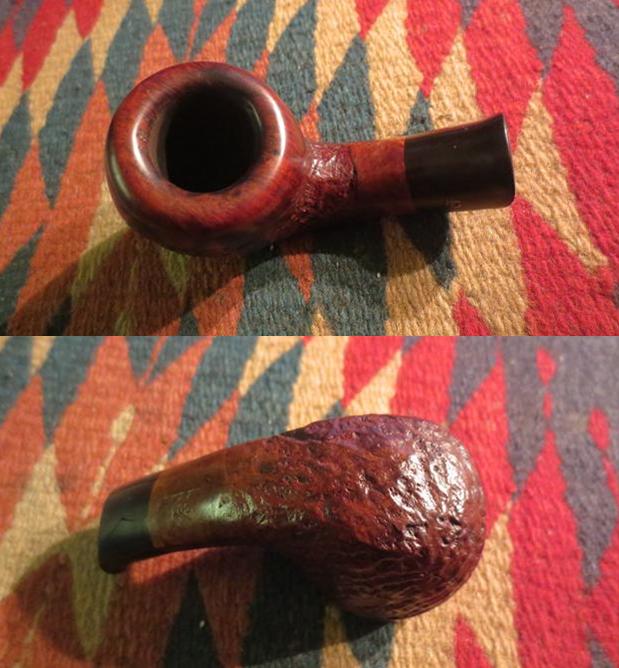
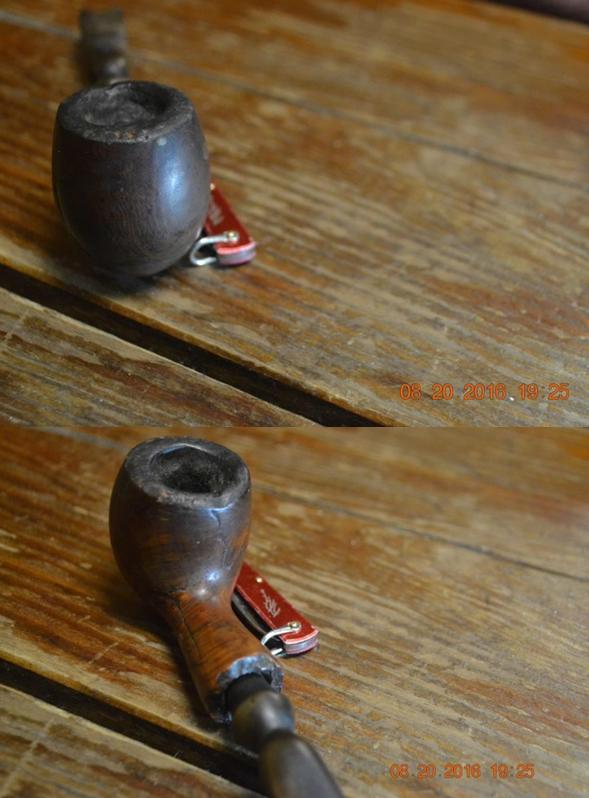
 My brother cleaned the pipe really well and the grime and remnants of the finish were all gone by the time I received the pipe. I took some photos of the pipe before I started to work on it. The dark spots on the sides of the bowl are visible in the photos below. The damage to the rim is also visible. There are some nicks in the top of the bowl and some burned areas that will need to be addressed. He cleaned out the airway in the shank and the stem as well as the mortise area. I noticed however that there was a slight ledge in the mortise that was hard and made me wonder what was happening there.
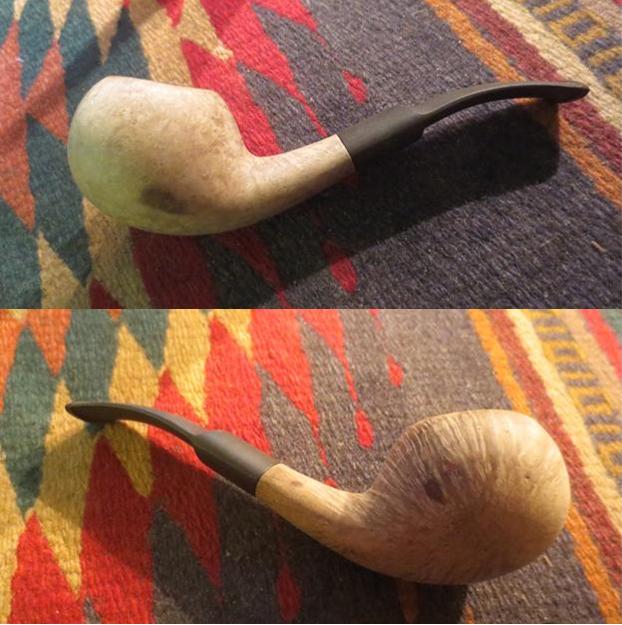
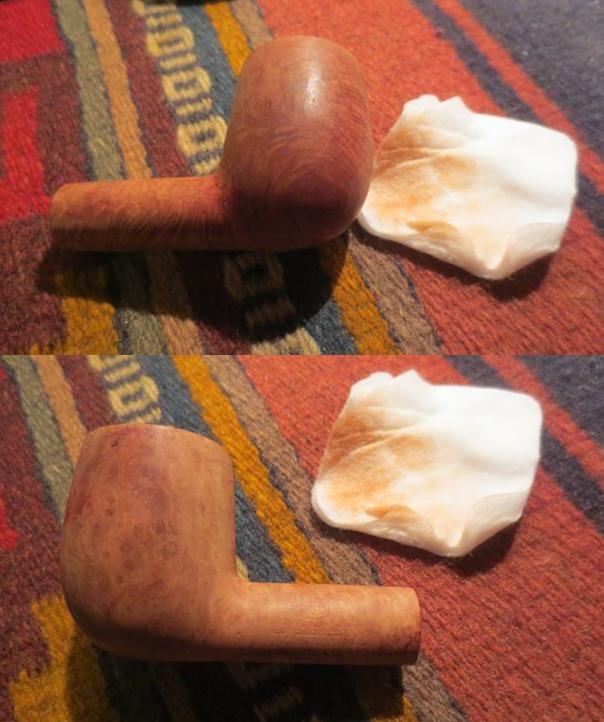
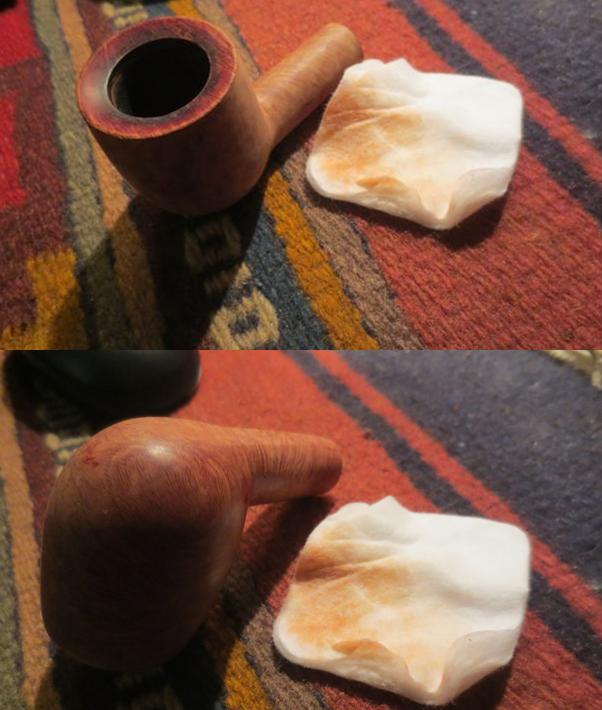
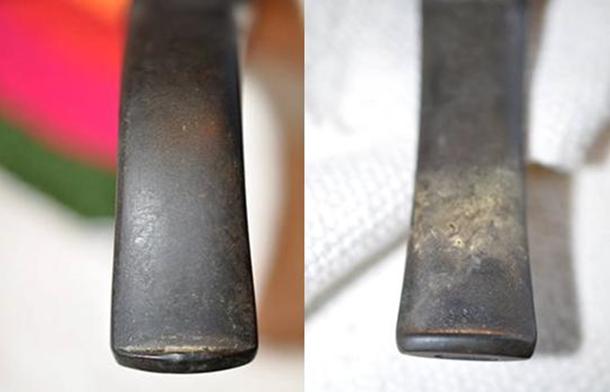
 I took a close up photo of the bowl to show the extent of the damage to the inner edge of the rim and the rim top. The bowl was quite out of round and the burn marks though not deep were prevalent in the briar. I took some close up photos of the stem as well to show the condition they were in when I started the clean up.
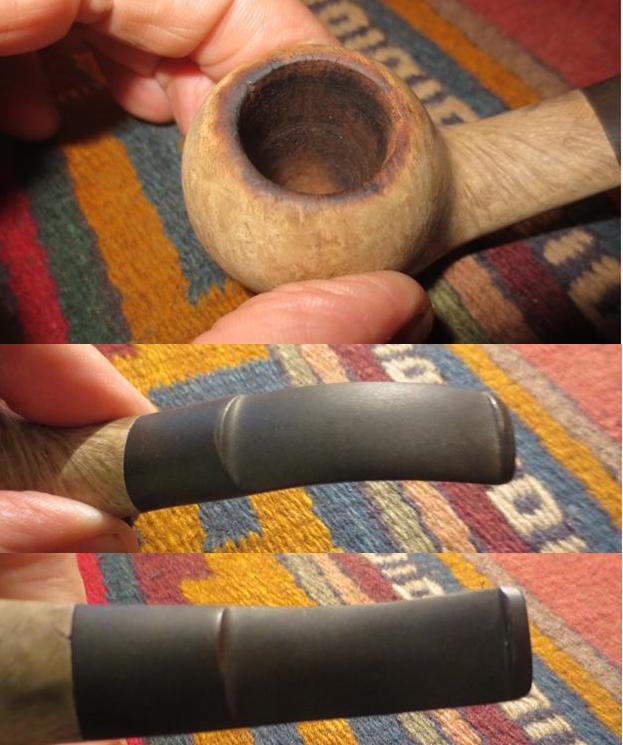 I topped the bowl on the topping board with 220 grit sandpaper until all of the damage was removed.
 I sanded the inside of the bowl and the inner edge of the rim with a tube of sandpaper until the edge was smooth and round.
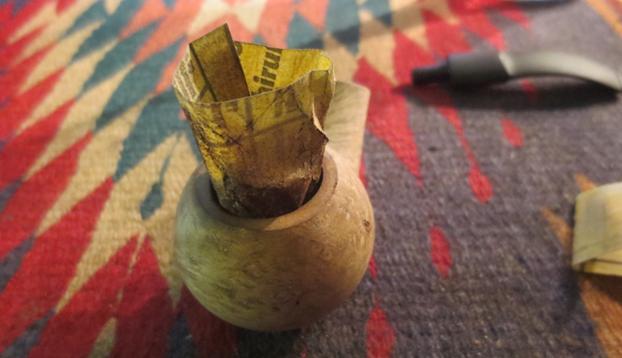 I sanded the top of the rim with micromesh sanding pads – wet sanding with 1500-2400 grit pads and dry sanding with 3200-12000 grit pads. The rim took on a shine.
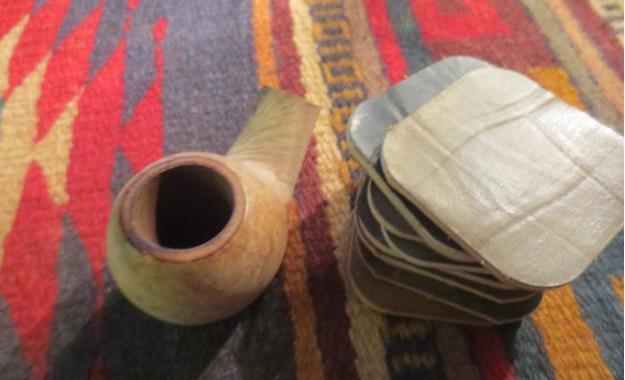 I wiped the bowl down with acetone on a cotton pad to remove the remaining debris and worked on the dark areas. The dark areas turned out to be fills and the darkening occurred around the edges of the fills.
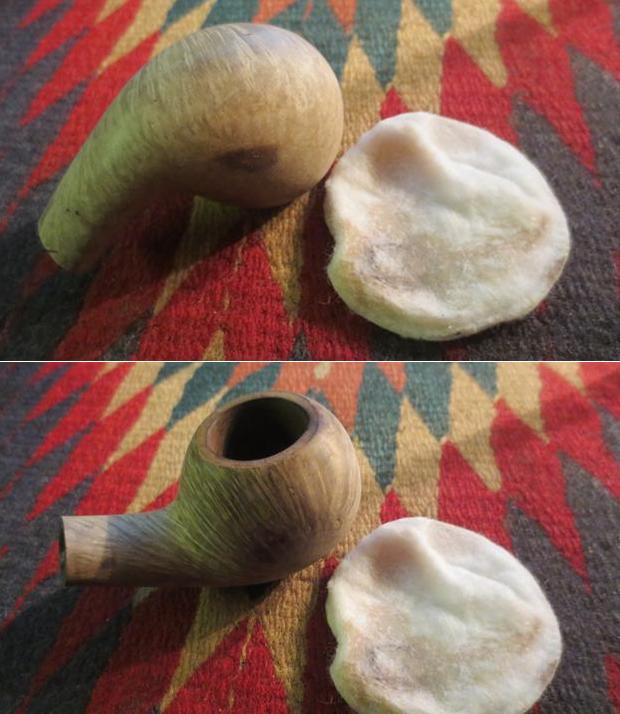
 I warmed the briar and then stained it with a dark brown aniline stain mixed 50/50 with isopropyl alcohol. I flamed the stain to set it in the briar and then repeated the process until the coverage on the bowl was good.
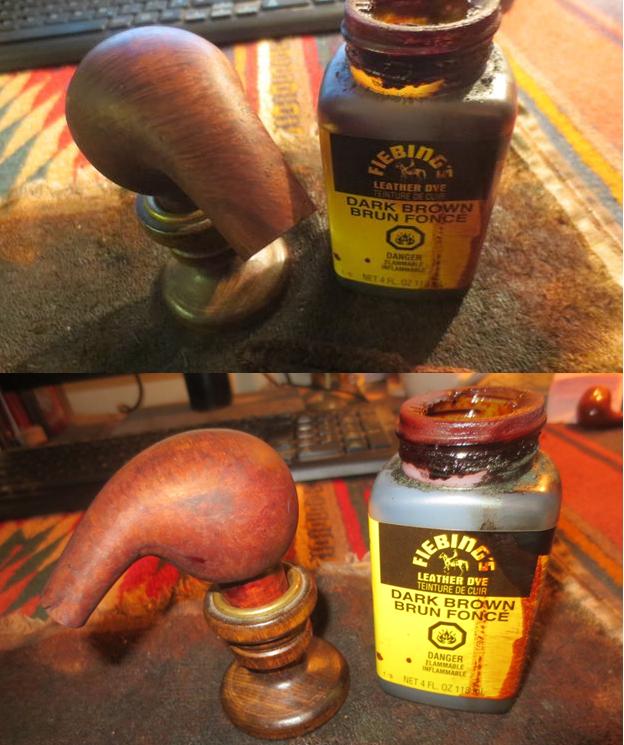 I hand buffed the bowl with a microfiber cloth to see what the coverage looked like particularly over the filled areas. The photos below show the pipe at this point in the process. The putty spots are visible in the first two photos. I have circled them in red to make them clear. Both fills were solid and tight but had a red overtone that stood out.
 The top of the rim came out looking really good. The burned spots and damage to the rim top and inner edge have been minimized.
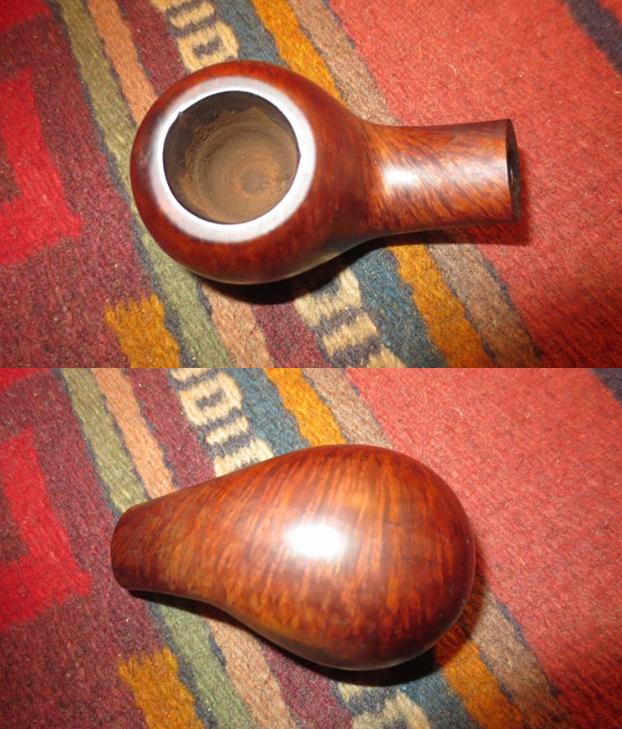 I recleaned the interior of the shank using the dental spatula to scrape away the hardened tars and oils. I scrubbed it with pipe cleaners, cotton swabs and alcohol until it was clean. I cleaned up the airway in the stem with bristle cleaners and was able to remove the last of the tars.
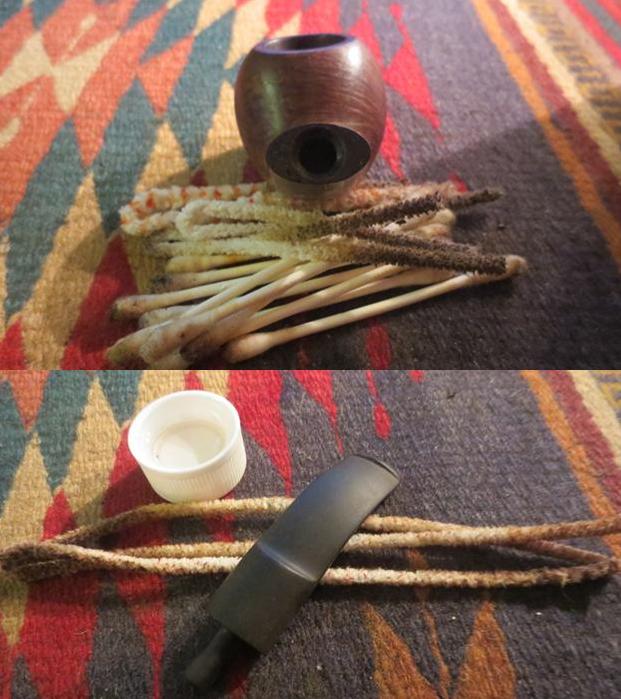 The stem fit against the shank with a slight gap on the right side. I heated the tenon with a Bic lighter and while it was still soft held it straight in the shank until it cooled.
 On the underside of the shank next to the stem there was a chipped area where the briar was missing from the shank. I cleaned out that area and filled it in with clear super glue and briar dust. Once it dried I sanded it smooth with 220 grit sandpaper and then polished it with 1500-4000 grit micromesh sanding pads. I used a dark brown stain pen to touch up the sanded area.
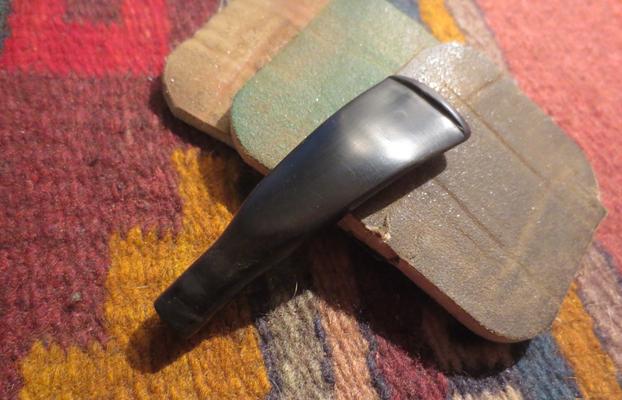
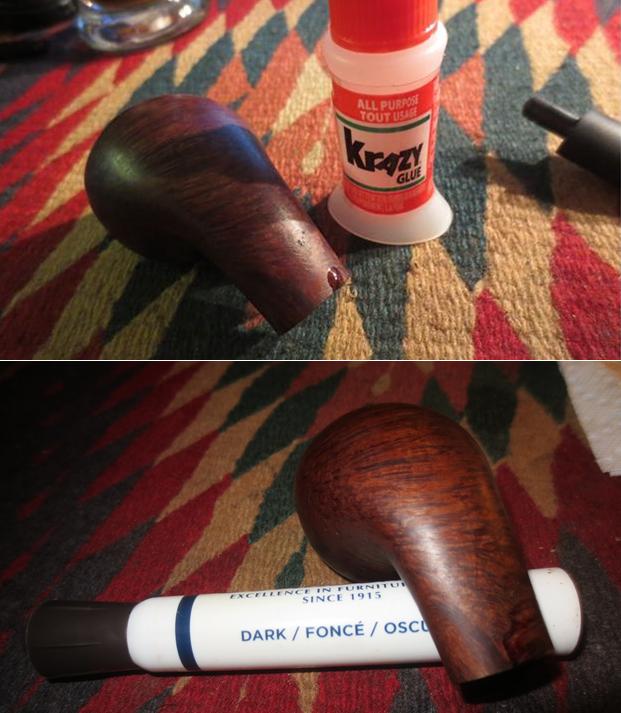 I sanded the stem with 220 grit sandpaper to smooth out the pits and roughness. I polished it with micromesh sanding pads. I wet sanded it with 1500-2400 grit pads and dry sanded it with 3200-12000 grit pads. I rubbed the stem down with Obsidian Oil between each set of three pads. After the final rubdown I let the stem dry.
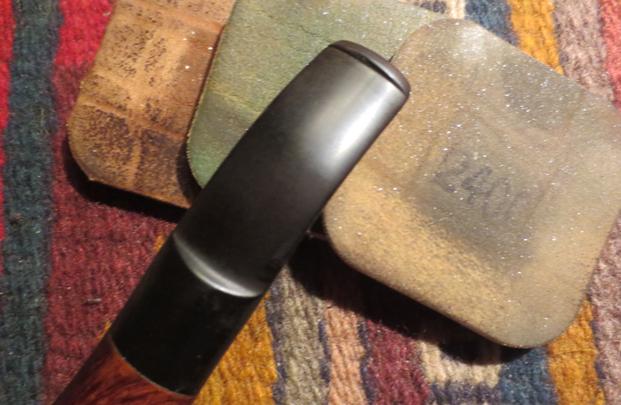
 I used a black Sharpie Pen to draw “grain” lines through the fills and used the dark brown stain pen to blend the pen lines into the body of the pipe. I buffed the pipe and stem with Blue Diamond polish on the buffing wheel to finish cleaning up the small remnants of oxidation. I gave it several coats of carnauba wax and buffed it with a clean buffing pad. I hand buffed it with a microfibre cloth. The finished pipe is shown in the photos below. Thanks for looking.