Blog by Dal Stanton
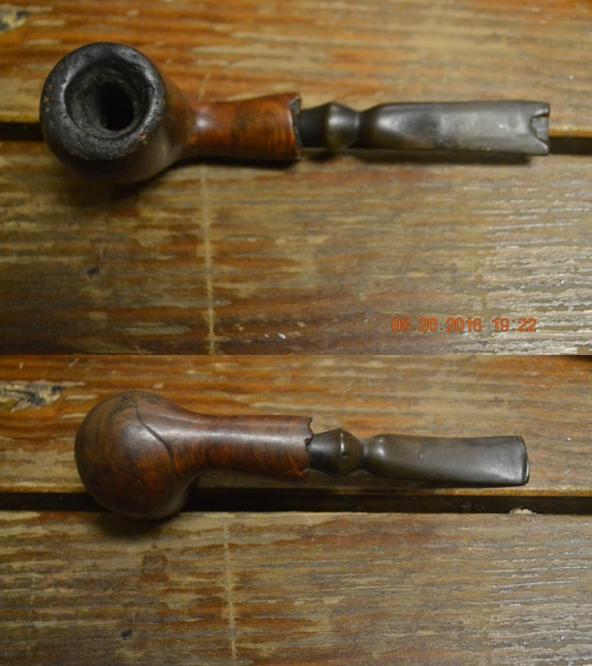
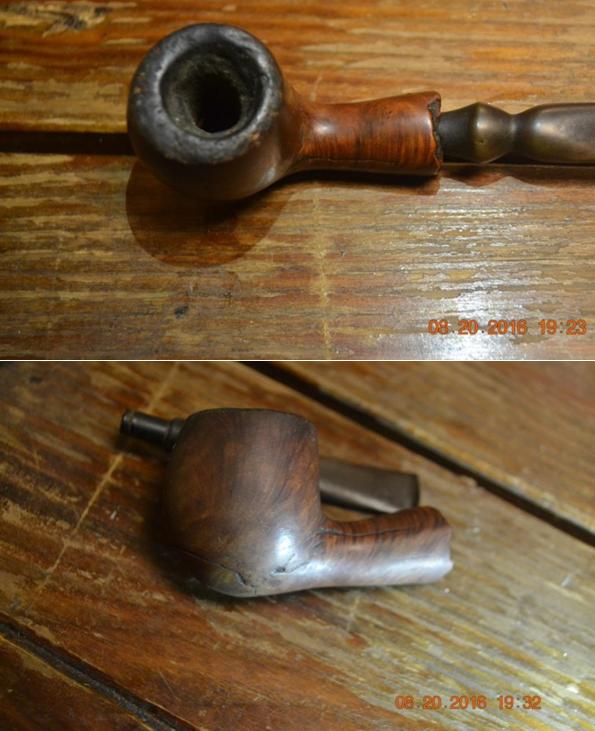
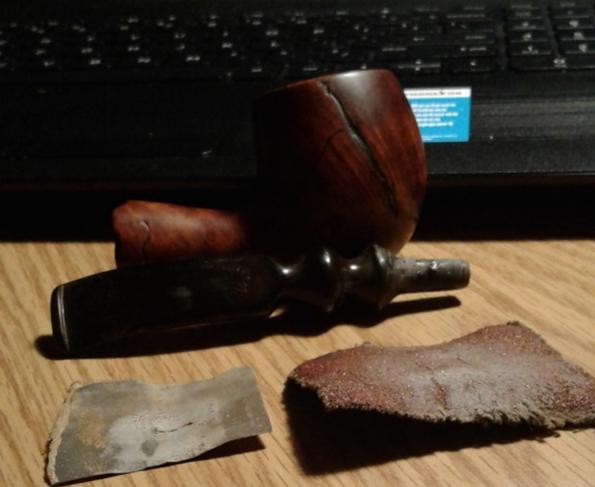
My first restoration project of the new year is on my work table! After visiting family in the US for the holidays, and putting in some overdue ‘Grandpa time’, I’m glad to be back to Sofia, Bulgaria, in our 10th floor flat of a formerly Communist Block apartment building. I acquired the Mastersen Freehand before me in the Lot of 66 some time ago – an acquisition off eBay that has produced many newly commissioned pipes for stewards around the globe. And what’s great about this is not only that these pipes were placed in the hands of stewards but that each pipe has benefited the work we do here in Bulgaria with the foundation, Daughters of Bulgaria – helping women and girls who have been trafficked and sexually exploited. I’m thankful for those pipe men and women who have commissioned the restoration of these pipes from the For ‘’Pipe Dreamers” Only! collection on the ThePipeSteward website. This is where Paul debated over 4 pipes and in the end commissioned two pipes, this Mastersen Freehand and a very nice Kaywoodie Prime Grain Imported Briar ‘Fancy’ Bulldog, which will be next in the queue. Now on my worktable, this is what got Paul’s attention.


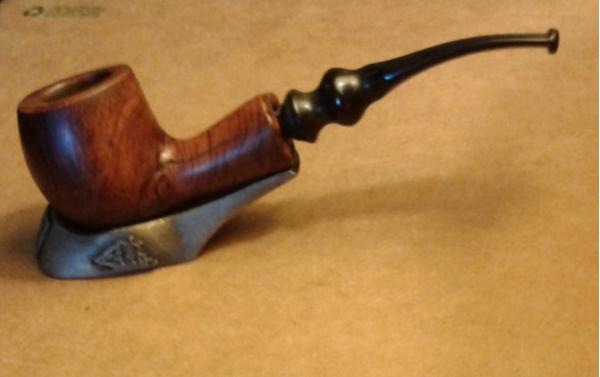
 The nomenclature situated on the underside of the shank is worn and thin. The stamp is MASTERSEN [over] BURL BRIAR [over] MADE IN FRANCE. Pipedia’s information about Mastersen shows that it was a name originally belonging to the Shalom Pipe Co. of Israel. The Pipedia article goes on to say, “Shalom was taken over by Robert L. Marx of New York City, later Sparta, NC, then of Mastercraft.” Mastersen is mentioned also in the Pipedia description of Mastercraft, which was cited from a very interesting 2008 thread devoted to Dr. Grabow pipes from Tapatalk.com – the specific thread was named, Mastercraft Pipes, Grabow Parallel Universe. The main contributor was Ted, who from 1974 till 1984 had several positions with Mastercraft including Executive Vice President. Ted’s reminiscences were fun to read, but my main interest was to understand better what happened with the name Mastersen. Mastersen’s original stamping with the Shalom Pipe Co., would be marked with Israel as the Country of Manufacturing (COM). Yet, the Mastersen on my table shows a French COM. Ted’s reflections on those years with the relationship of Mastercraft, the subsequent owner of the Mastersen name, gave some clues. This short statement was helpful describing Mastercraft’s acquisition of pipes for sale:
It doesn’t appear it was ever a manufacturer and bought pipes from multiple factories — mostly French and English…. Freehand, For M/C Andersen and (a few Mastersen) ….
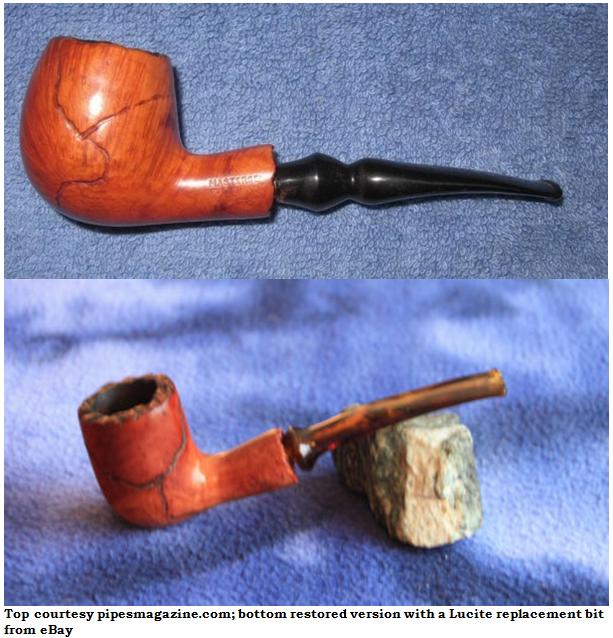
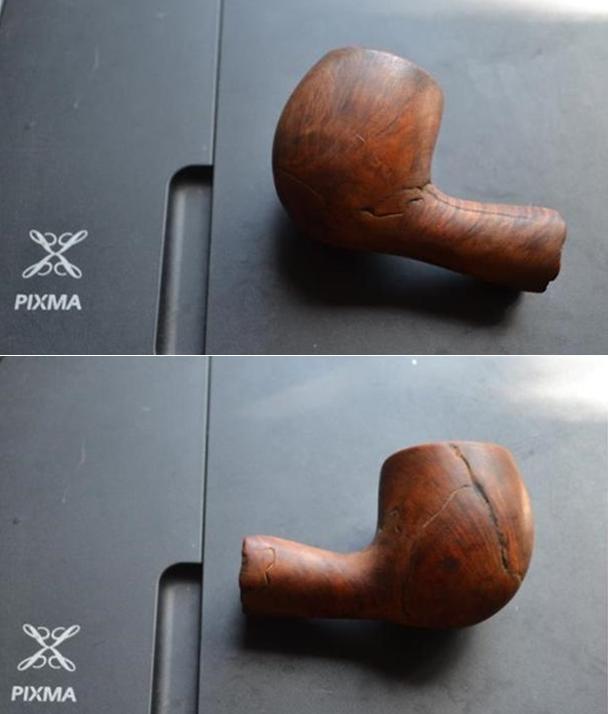
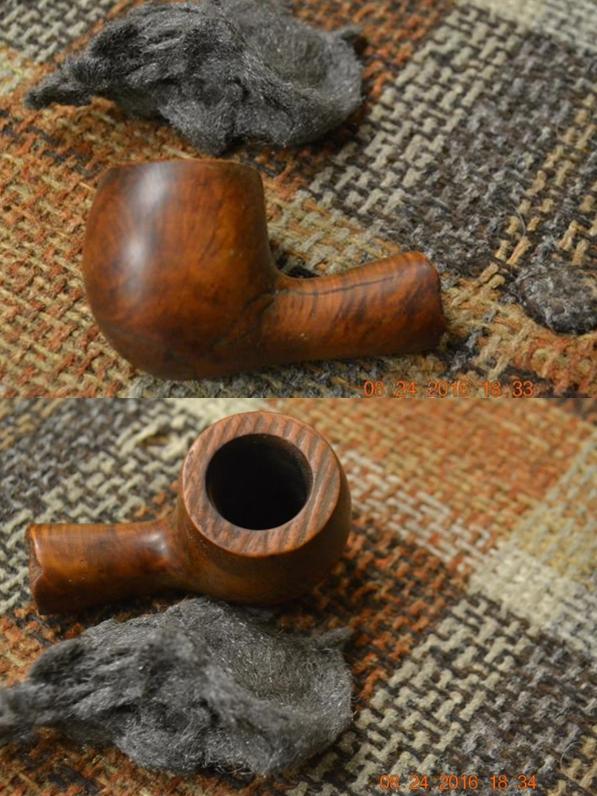
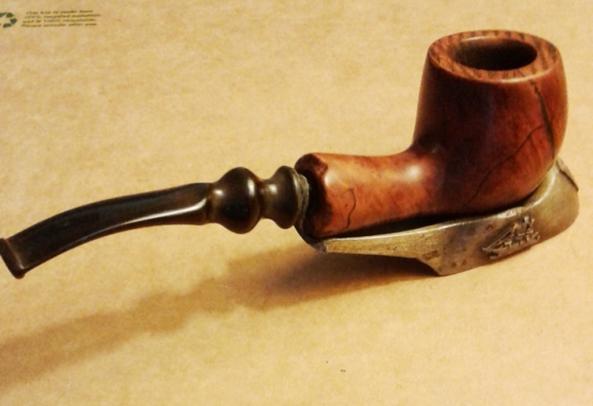
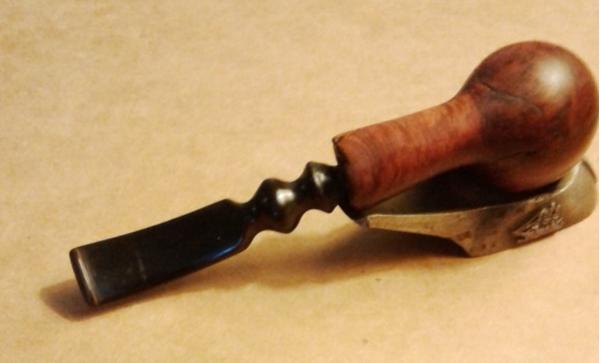
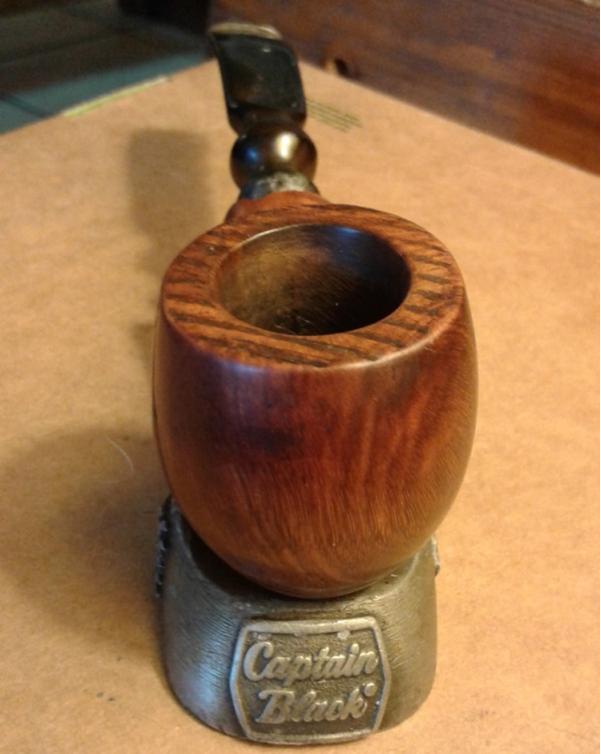
My guess based upon this scant information is that the original Shalom Mastersen Freehand style was later manufactured in France under Mastercraft ownership (1970s to 1980s?). The style of the pipe before me is consistent with Pipephil’s example of the Mastersen Freehand produced in Israel. An interesting characteristic of this Freehand is it size. For a Freehand it could be described as diminutive. The length is 5 inches, height: 2 inches at the crest, plateau width: 1 1/2 inches, chamber width: 1 inch and chamber depth: 1 1/2 inches (at the middle of the slanted plateau). I found this description of a similar Mastersen with an Israel COM described for sale on SmokingPipes.com. Christophor Huff’s description nailed the Mastersen on my worktable as well regarding it size yet plenty of room for tobacco:
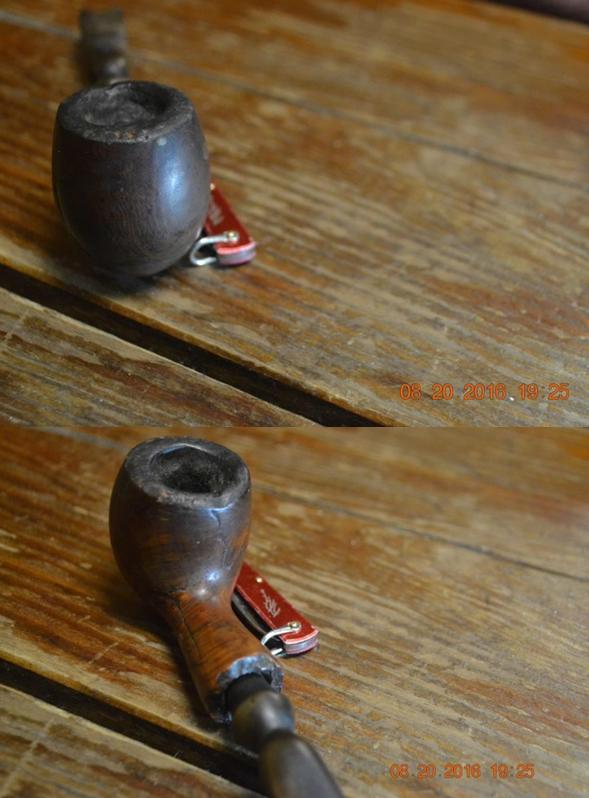
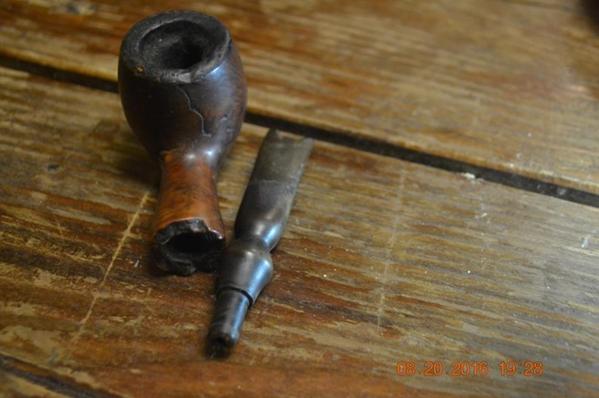
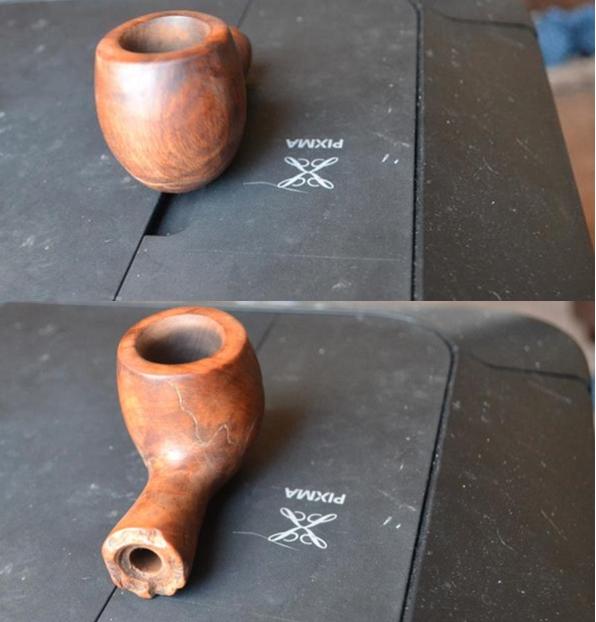
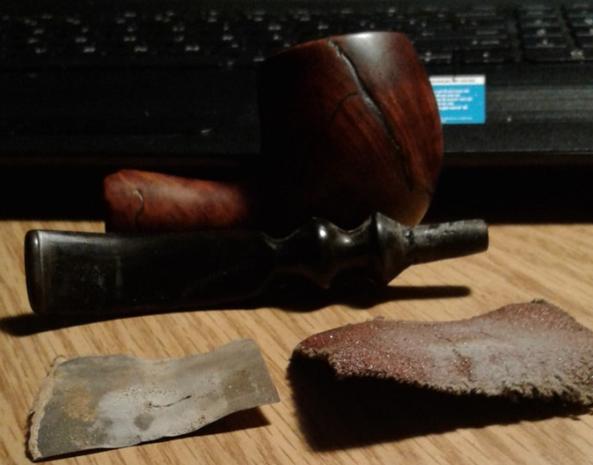
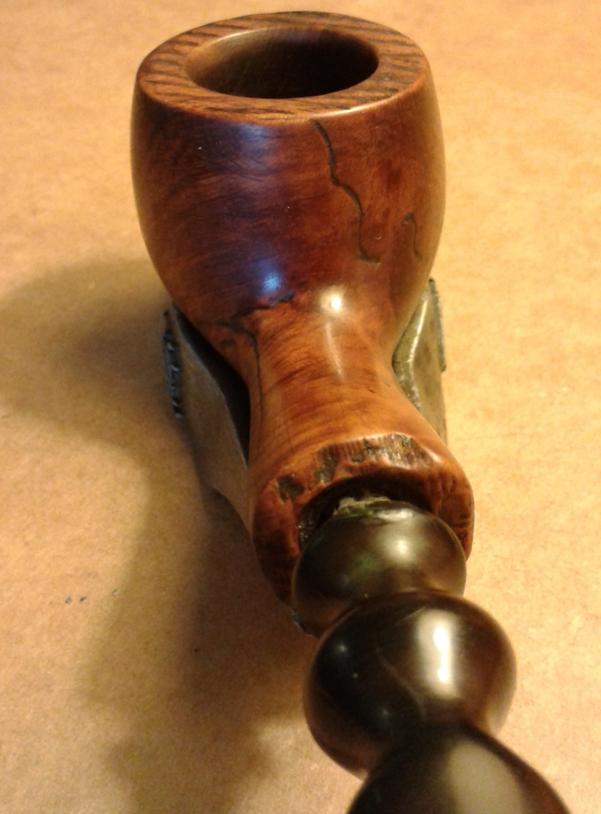
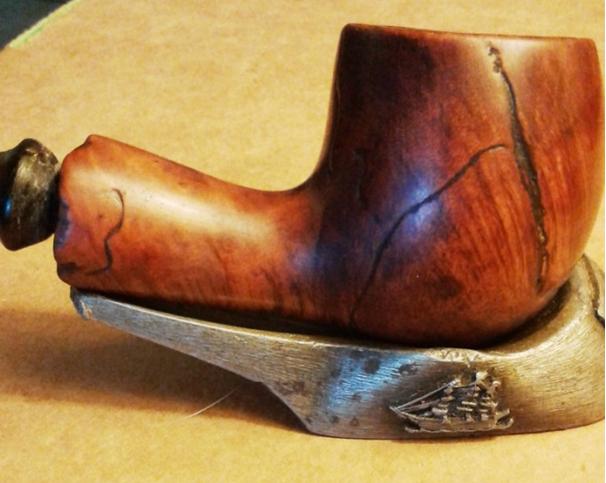
 The condition of the Mastersen on my worktable is good but needs the normal cleaning. The plateau has minor darkening and the chamber has a very light cake. I detect one small divot on the right side of the shank that needs attention. Minor tooth chatter is evident on the bit and some oxidation in the stem. Perhaps the most noticeable issue is the fancy stem fit – it is quite loose. The tenon will need to be expanded to make the army style pressure fit snugger.
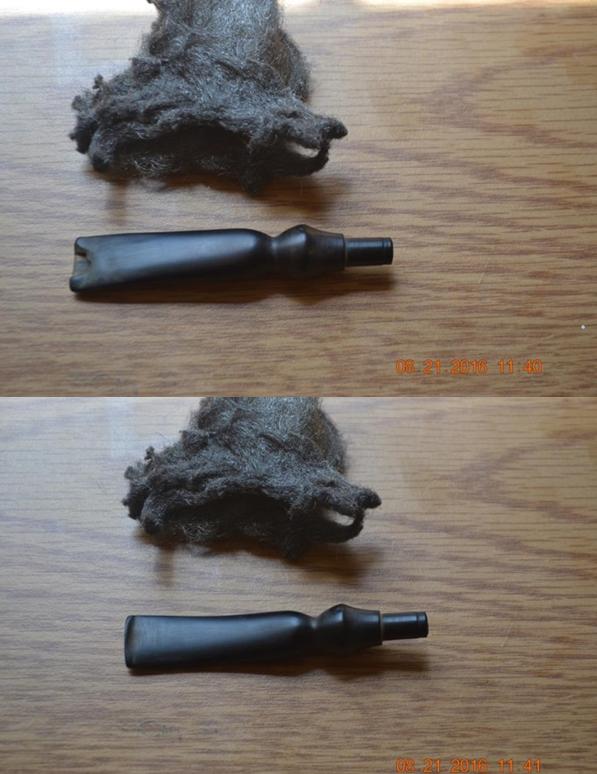
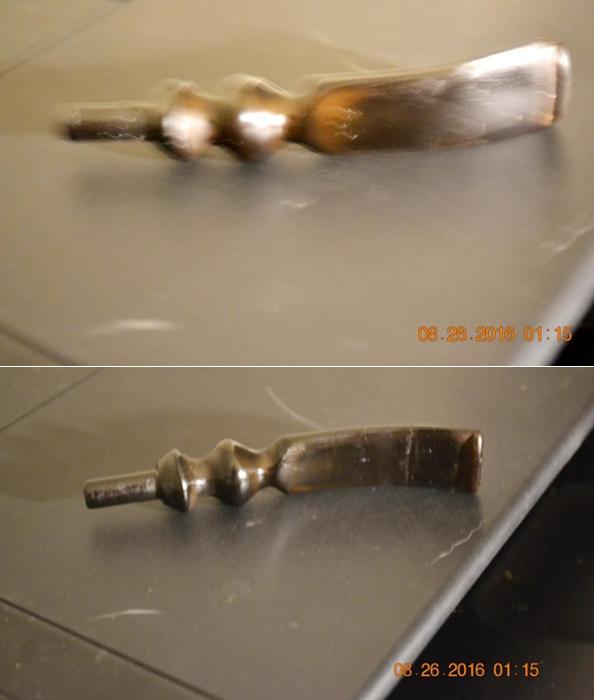
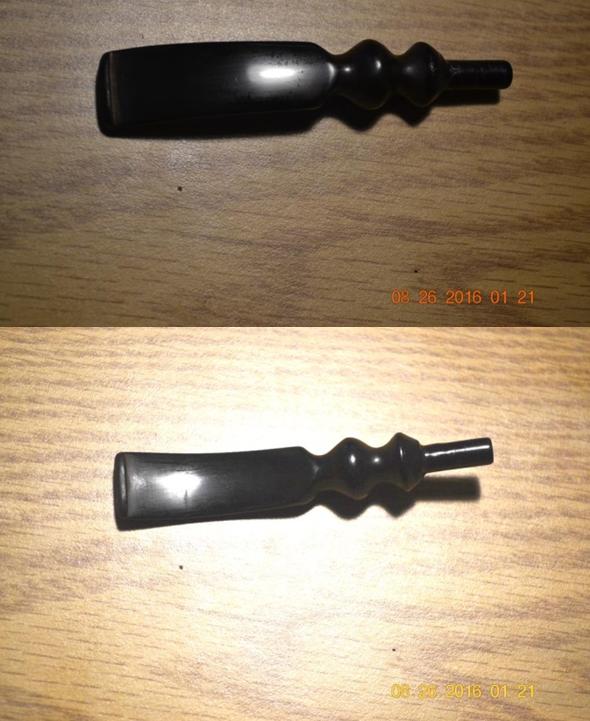
To begin the restoration of the Mastersen, I run some pipe cleaners wetted with isopropyl 95% through the fancy bent stem to clean the airway and then place it in a bath of Before & After Deoxidizer. It joins a few other pipes and their stems that are in queue for restoration. After several hours soaking, I fish out the Mastersen’s stem and drain the Deoxidizer fluid. I then wipe off the stem removing much oxidation using a cotton pad wetted with alcohol. I also run pipe cleaners through the airway to remove Deoxidizer from the internals. After wiping with alcohol, I then apply paraffin oil (a mineral oil) to condition the vulcanite and set the stem aside. The Before & After did a good job with the oxidation. The pictures show the progress.
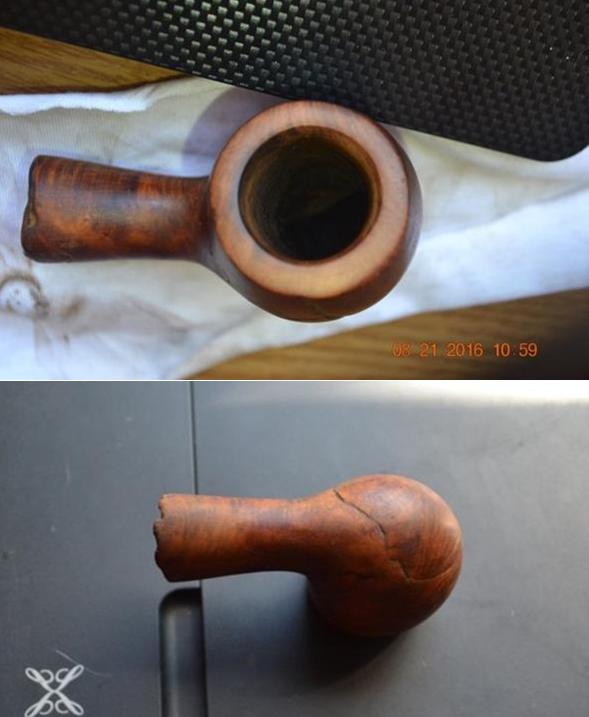
 Turning now to the Freehand bowl, I begin the cleaning process my reaming the chamber using the Pipnet Reaming Kit. I use the two smaller blade heads of four and then quickly remove the remaining carbon using the Savinelli Fitsall Tool. I sand the chamber wrapping 240 grit paper around a Sharpie pen and then wipe the chamber with a cotton pad wetted with isopropyl 95% to clear out the remaining carbon dust.
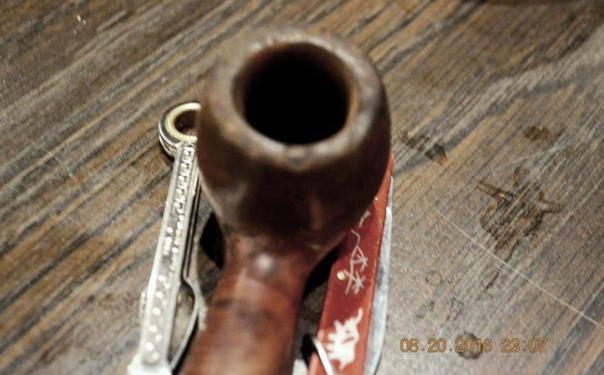
 The chamber looks good except that I detect a pit near the top of the chamber – just below the plateau. I take a couple pictures to get a close look. My thoughts are that this blemish in the briar is too high to be impacted in a large way by the fire in the chamber. Just to be on the safe side of things, I will fill it, but will CA do the job, or do I need to apply a touch of the heat resistant J-B Weld putty since it is in the chamber? I’ll give some thought to this and I decide to send a note to Steve with all his rebornpipes experience to get his input. The pictures show the progress.
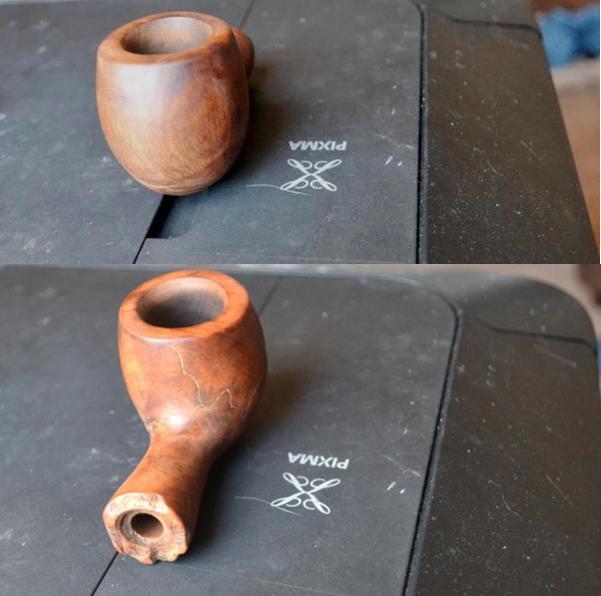
 From the chamber, I now clean the externals using undiluted Murphy’s Soap. I scrub with cotton pads on the smooth briar and utilize a bristled tooth brush to clean the plateau – getting into the crevices. The cleaning reveals a very nice piece of briar. The dimple on the bowl’s left side is attractive as it is in relief to the smooth briar. Three pictures before and two after the cleaning showing the lightening of the surface.

 Now to the internals using pipe cleaners and cotton buds dipped in isopropyl 95%. It did not take too much, and buds and pipe cleaners were coming out clean.
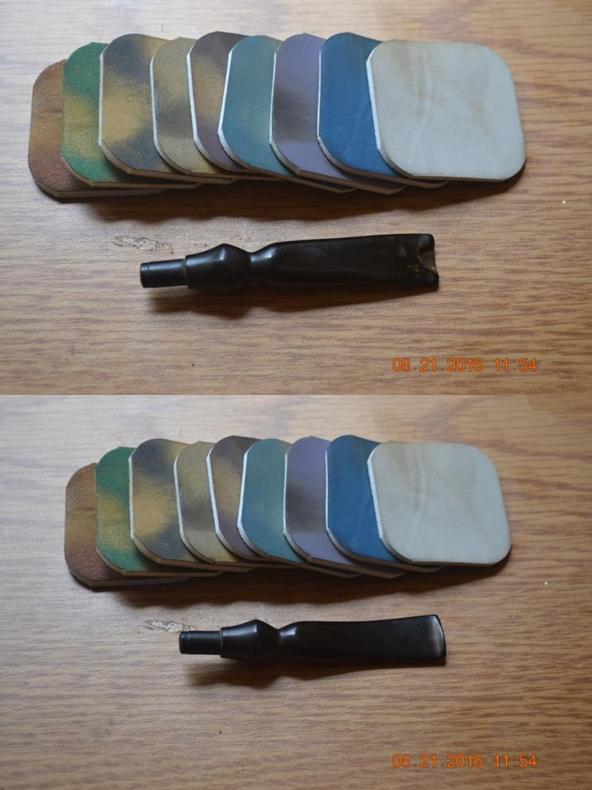
 Turning now to the stem, the Before & After Deoxidation soak did a good job. The upper bit has some bite compressions and chatter on both upper and lower. The button lip has some biting as well. I start passively by using the heating method to expand the vulcanite compressions. Using a Bic lighter, I paint the upper- and lower-bit areas. As the vulcanite heats, physics takes over – it expands and naturally reclaims its original shaping – or at least partially. This method works well, and I follow easily with sanding out the remaining tooth damage using 240 and then 470 grit papers. I took before and after pictures and I’ll let you be the judge how effective the heating method often is.
Upper, before and after:

 I follow the bit sanding by wet sanding the entire stem with 600 grit paper followed by 0000 steel wool.
 Giving the stem a respite, I look again to the pits that need repair on the stummel. A very small pit on the right side of the stummel and the larger pit on the upper area of the chamber – just under the edge of the plateau. After getting a note back from Steve with his input, I will use briar dust and CA glue putty to fill the pits in both places. With the upper chamber fill, I will follow this later by applying a coat of activated charcoal and sour cream mix to the entire chamber. This will protect the fill as well as encourage the growth of a new protective cake. I take a few pictures to get a close-up of each pit and then I mix a batch of briar dust and CA glue. I mix it gradually until the mixture reaches a thickness or viscosity like molasses. I then use a tooth pick as a trowel and apply the filler to the pits. For the upper chamber pit, I give the area an extra tamping to assure that the cavity is filled. I put the stummel aside for the night, allowing the briar dust putty to fully cure. The pictures show the process.


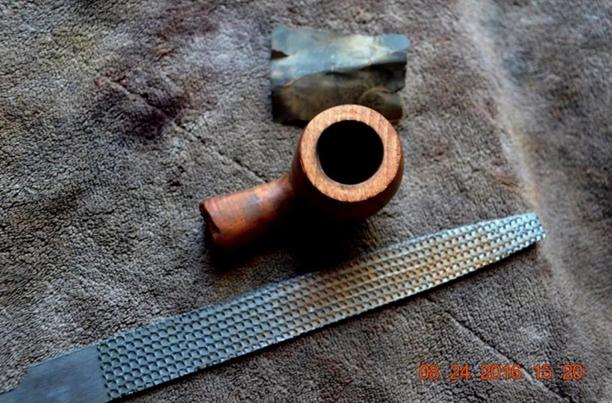
 The next morning, before the demands of the day come, I return to the stummel with the briar dust patches fully cured. I use a flat needle file and begin removing the excess filler on the smaller patch. I use the file until nearly to the briar surface then I switch to sanding with a piece of 240 grit paper bringing the patch down flush with the briar surface.

 I do the same with the larger fill in the upper chamber, except using a half-rounded needle file I’m able to sand with the contour of the chamber. I then finish the upper chamber sanding by using 240 grit paper wrapped around a Sharpie pen. I like the results.

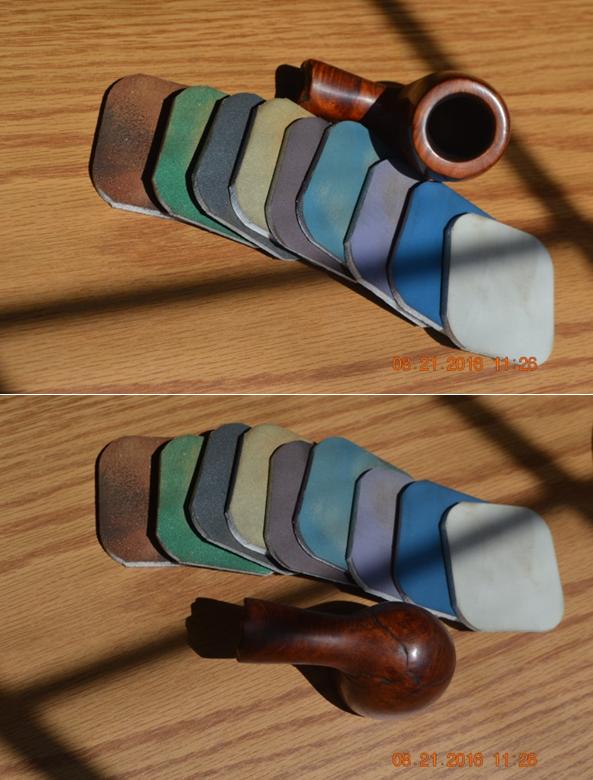
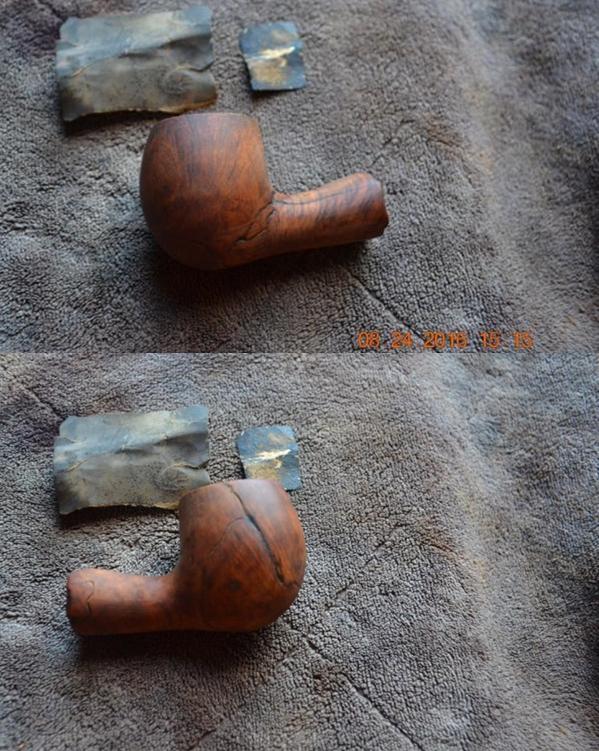
 With the stummel repair completed, I turn to the revitalization of the fancy stem by wet sanding with micromesh pads 1500 to 2400 and then dry sanding with pads 3200 to 4000 and 6000 to 12000. I apply Obsidian Oil to the stem between each set of three pads to enrich the vulcanite. I love the pop of that freshly sanded vulcanite – it looks great!
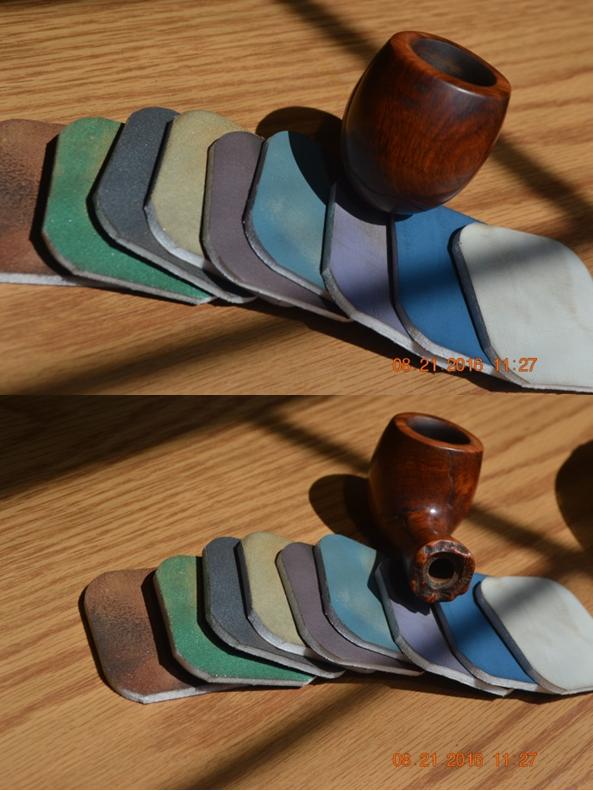
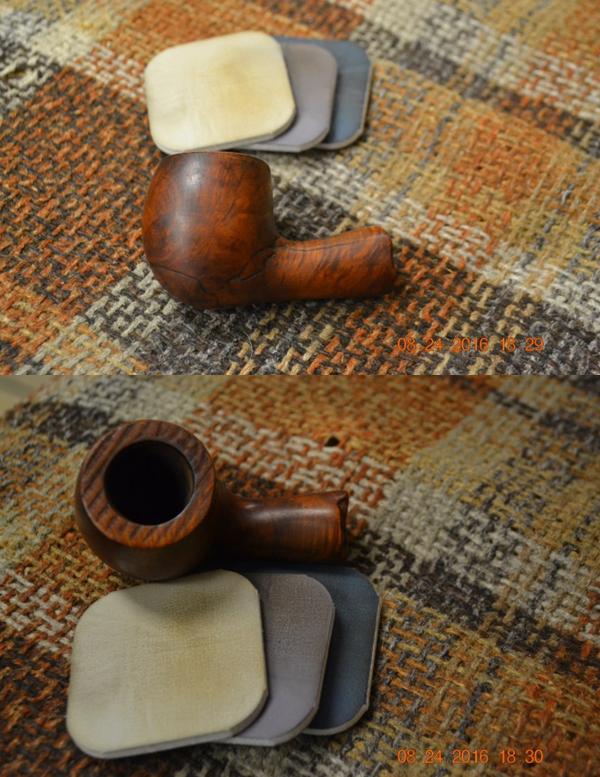
 Now we’re close to the homestretch. Using micromesh pads 1500 to 2400 I wet sand the stummel. Following this I dry sand using pads 3200 to 4000 and 6000 to 12000. I enjoy watching the grain surfacing through the micromesh process.
 I had written Steve before to get his input regarding the chamber pit repair. The other question I asked was regarding darkening the plateau or leaving it natural and allowing the natural forces of burning tobacco and lava to color the rim surface? His advice was good and something I try to do when restoring pipes that have nomenclature and historical markers. It is good to restore pipes according to the original intent when the pipe was manufactured. Most of the examples of Mastersen pipes I have seen online predate the acquisition of the Shalom Pipe Co., by Mastercraft which were manufactured in Israel. I’ve seen both natural and darkened plateaus – here are a few examples I found.
 It is difficult to tell by looking at the original picture I took of the plateau before starting the restoration to know what the original was – yet, if I had to guess, originally the inner part of the plateau was darkened some, but not fully. That is, much natural briar was exposed. The second picture is the current status of the plateau during this restoration process.
 Well, decision time has come and gone. Using a black Sharpie Pen I introduce highlights to the plateau by coloring the crevices. I start conservatively to get a feel for how it’s looking. I begin with a fine point Sharpie to draw down the narrow crevices then I use a larger one to stroke the larger areas.
  After applying what looks like an adequate amount of black, I then fan wipe the rim surface with a cotton pad with only a hint of alcohol. This has the effect of blending and soften the black hues over the contours of the landscape.
 Finally, I start with about a mid-range grit micromesh pad, 3600, and I proceed to sand the plateau. I move from 3600 to the finest grit pad, 12000. This serves to further blend and to uncover the ridges of the briar. This gives the look more contrast which I like – the black and the brown briar. Overall, I think it looks good.
 Before moving on, I need to take care of the stem fit that I noticed earlier was too loose. I retry the fit and it remains too loose for comfort. To remedy this, I find a drill bit that is just the next size larger than what will fit in the airway. Using a Bic lighter, I fan a flame around the end of the tenon to heat the vulcanite to make it pliable. My first attempt to push the smooth end of the bit into the hole was not successful – it was still too tight. I then use a pointed Dremel sculpting bit to help open the hole a bit so that the larger drill bit could be inserted into the airway. I heated the tenon again and press the pointed Dremel tool into the hole to expand it slightly – which is enough. I heat the tenon again and when it becomes supple I gradually and gently insert the bit in the airway as far as it will go without great effort. Leaving the bit in the tenon, I again reheat the tenon as well as the metal of the bit to help the internal movement. Again, when the vulcanite softens, I push the bit in a little further into the airway. With this movement of the bit, the tenon is gradually expanding to close the gap making the fit with the shank snugger. With the last heating and movement of the tenon, without withdrawing the bit, I run the tenon under cool tap water to set the vulcanite to assure that it will remain expanded. I then heat only the metal of the bit to loosen the vulcanite’s grip on it and withdraw it with the help of pliers. I try the stem fit again and success! A very nice, comfortable, snug fit with the tenon inserted into the shank.
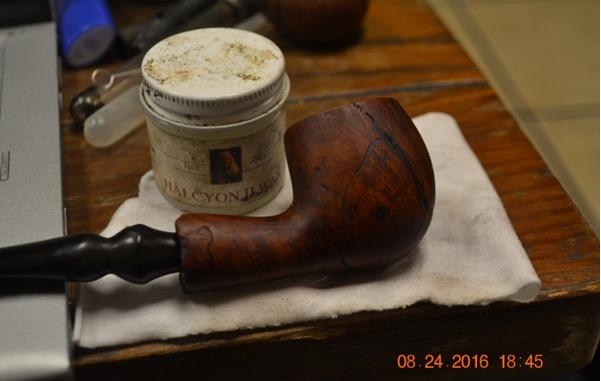
 Next, before moving to the Dremel polishing and waxing phases, I apply Before & After Restoration Balm to the Freehand stummel that is looking very nice. I like this Restoration Balm because it subtly brings out deeper, richer tones of the natural briar presentation. I squirt a little of the Balm on my finger and then simply work it into the briar grain. It starts as a thinner texture and then thickens as the Balm works into the surface. I apply the Balm on the rim as well. After letting it set for several minutes to absorb the Balm, I wipe/buff the excess Balm with a microfiber cloth. I like it. The pictures I take, I’m not sure are able to pick up on the subtle deepening that I perceive with the naked eye. The pictures are before, during Balm absorbing and then after buffed off.

 Next, I reunite stem and stummel and mount a cotton cloth buffing wheel to the Dremel and set the speed to about 40%. I then apply Blue Diamond compound to the entire pipe. To remove compound dust from the surface, I buff the pipe with a flannel rag. I then mount another cotton cloth wheel to the Dremel, remaining at the same speed, and apply carnauba wax to the entire pipe – stummel and stem. Completing this, I give the pipe a good hand buffing with a microfiber cloth to raise the shine. Yet, one more task and this Mastersen Burl Briar Freehand will be completed. To protect the upper chamber patch and to introduce a starter for the development of a cake to protect the briar surface, I mix a batch of sour cream, or in this case, natural yogurt, and activated charcoal to spread on the chamber walls. I don’t mix too much sour cream, so the mixture isn’t too liquid and runny. I insert a pipe cleaner through the draft hole to keep the airway open. After spreading the mixture over the chamber with a flat dental spatula, I set it aside allowing the charcoal/yogurt mixture to cure and harden. With this chamber surface, the new steward should not scrape the chamber after use, but use a doubled over pipe cleaner to ‘rub’ the chamber walls to remove ash and remains until a cake develops. The pictures show this final task.
 Wow! This Mastersen Burl Briar Freehand – Made in France is a keeper! I’m pleased with the presentation of the plateau and the blending of the natural and darkened briar hues. The flame grain is beautiful as it encompasses the conical Freehand stummel. As a smaller Freehand, it is light enough to function easily as a ‘hands free’ pipe which is nice – but please use a rubber bite guard! This Mastersen caught Paul’s eye and since he commissioned it, he has the first opportunity to acquire the Mastersen Freehand from The Pipe Steward Store. This pipe benefits the Daughters of Bulgaria – women and girls who have been trafficked and sexually exploited. Thanks for joining me!