Blog by Dal Stanton
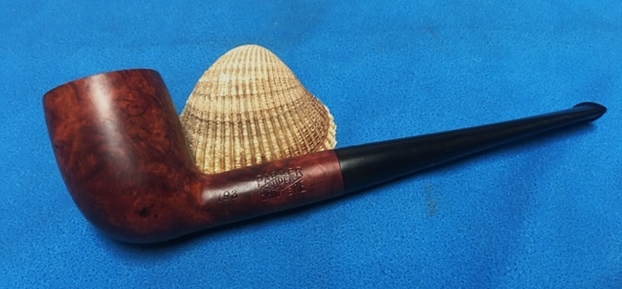
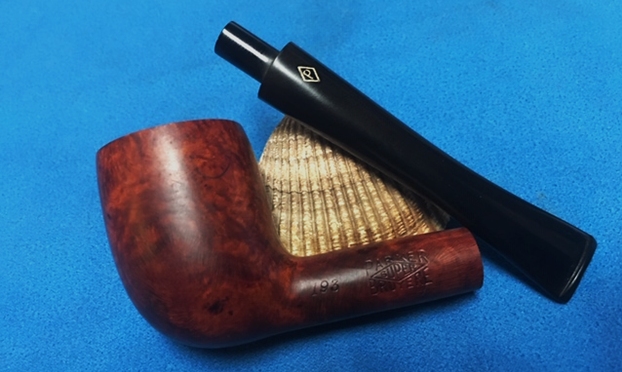
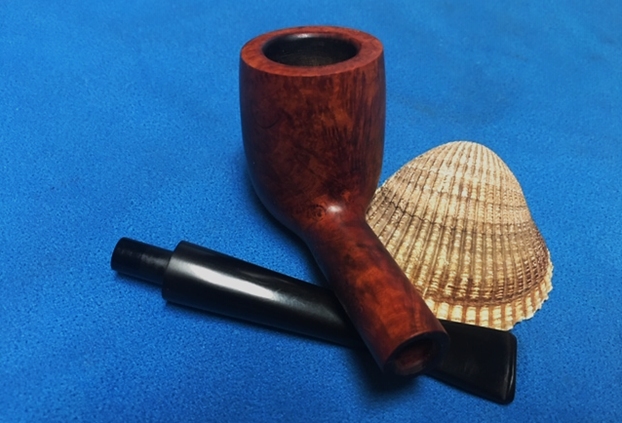
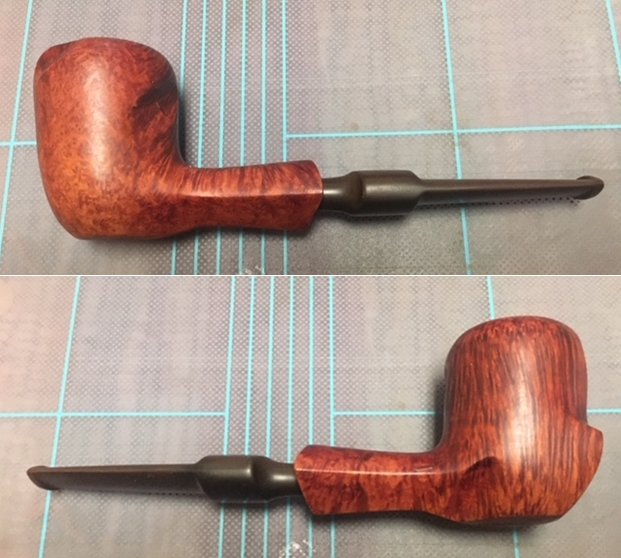
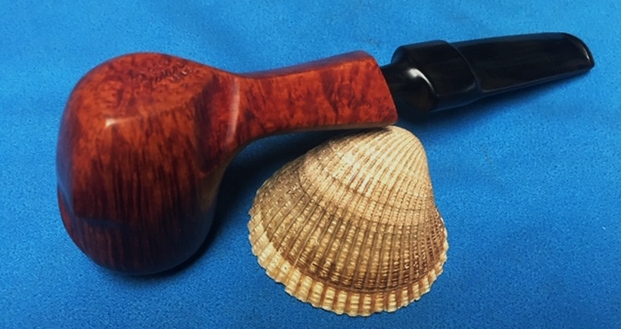
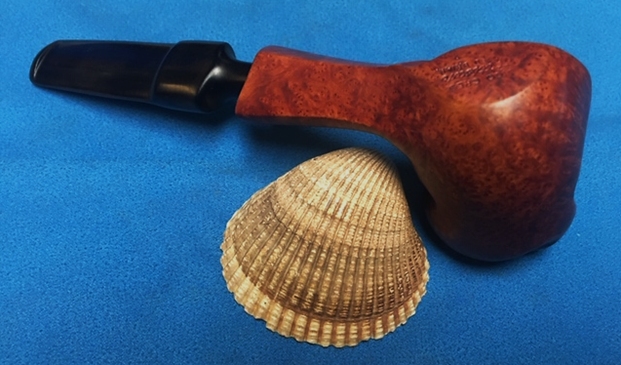
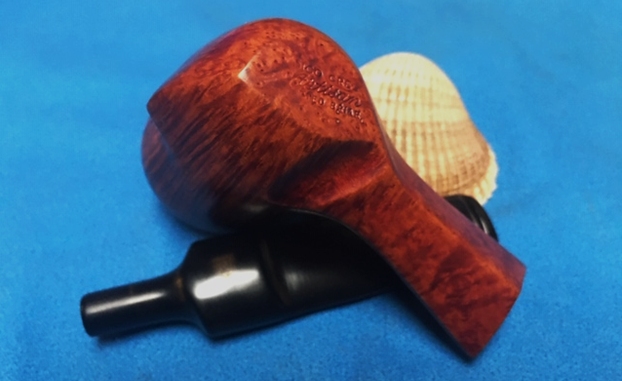
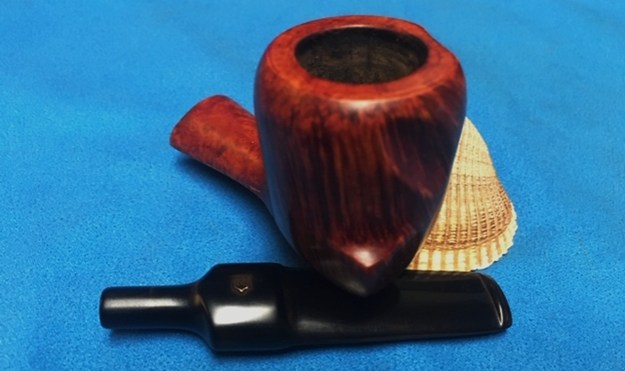
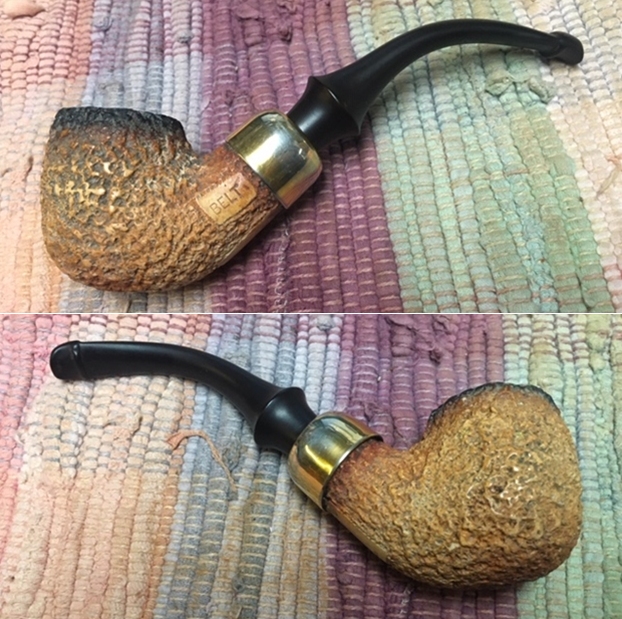
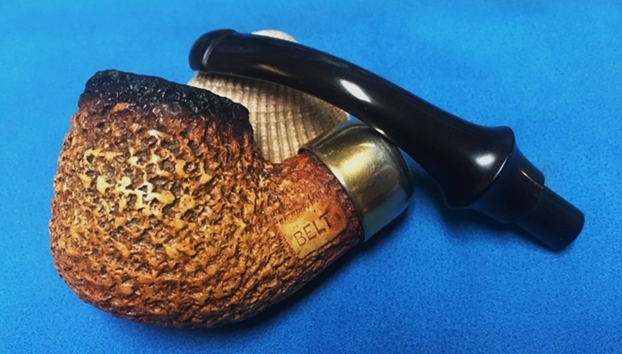
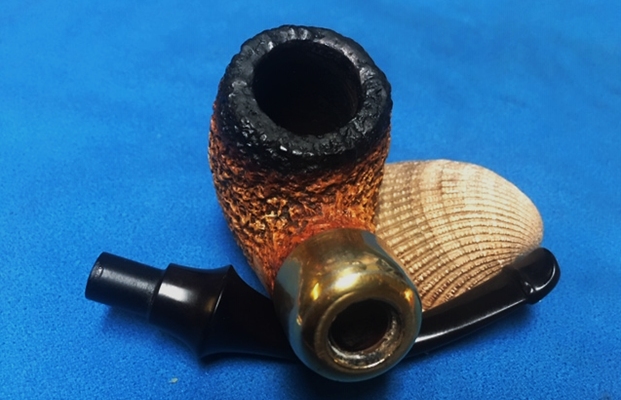
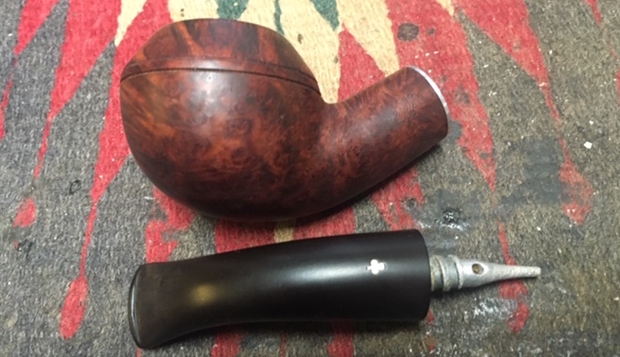
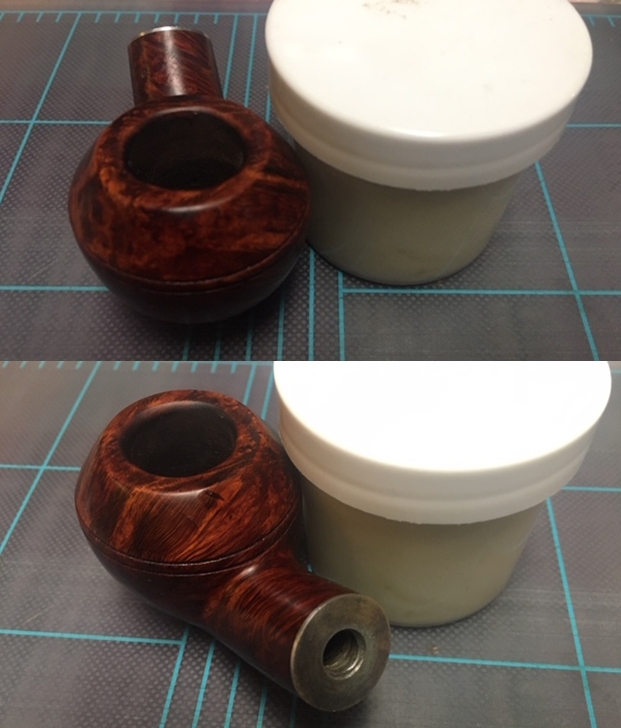
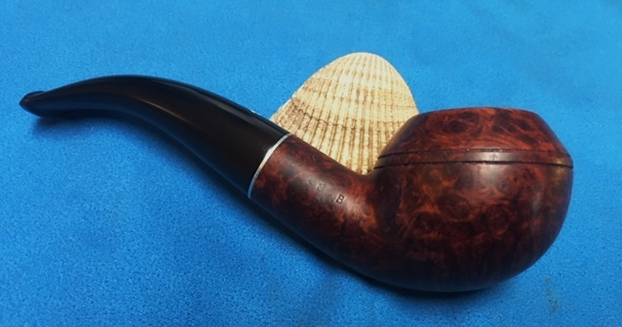
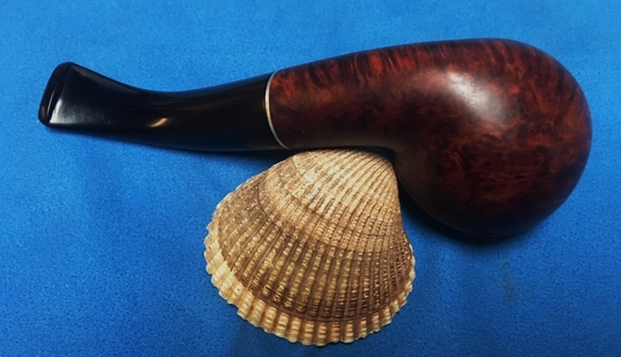
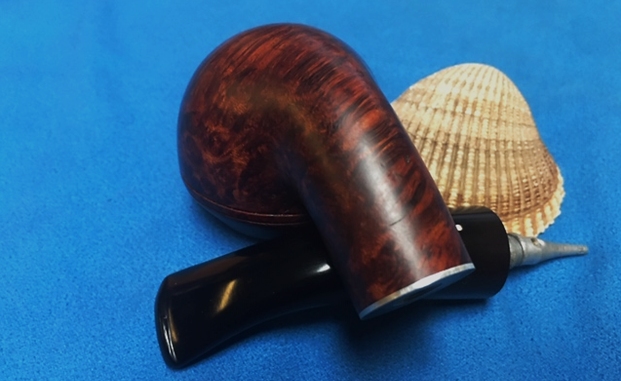
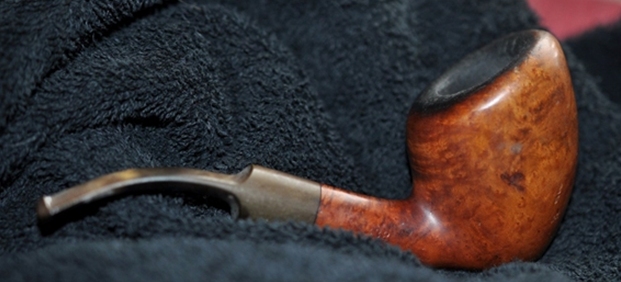
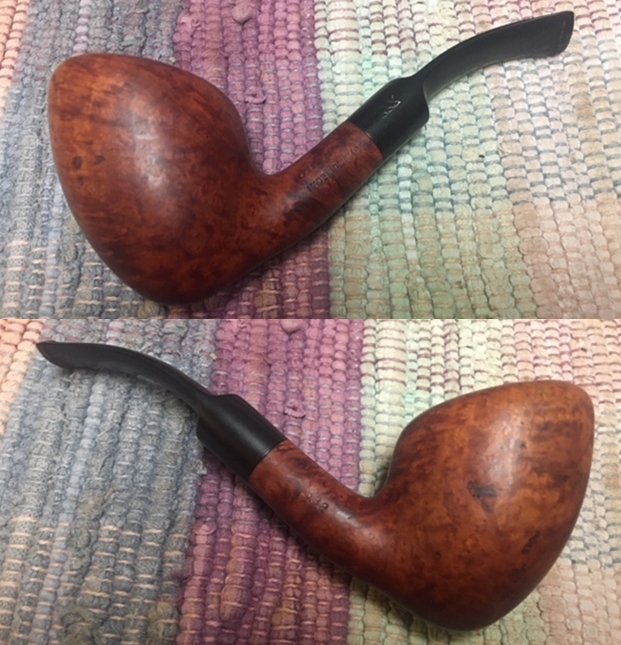
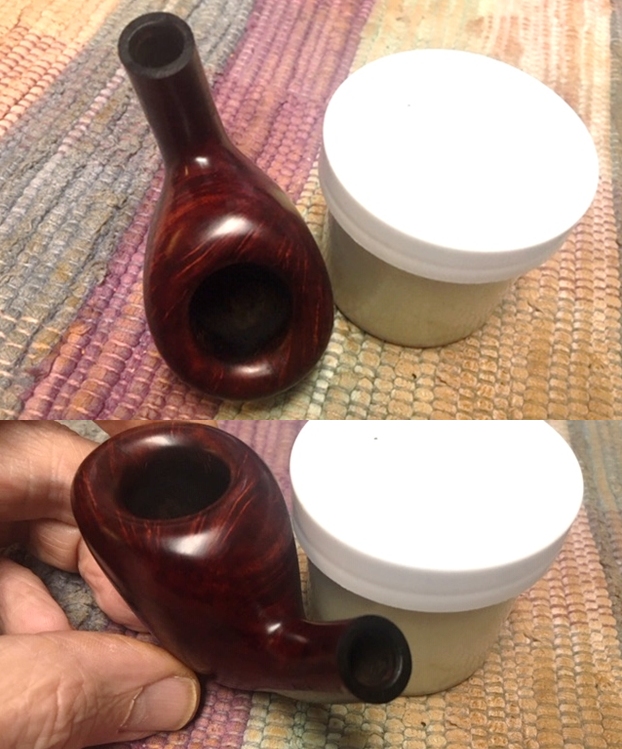
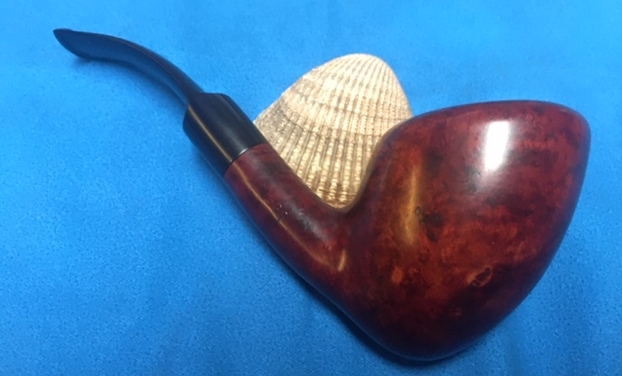
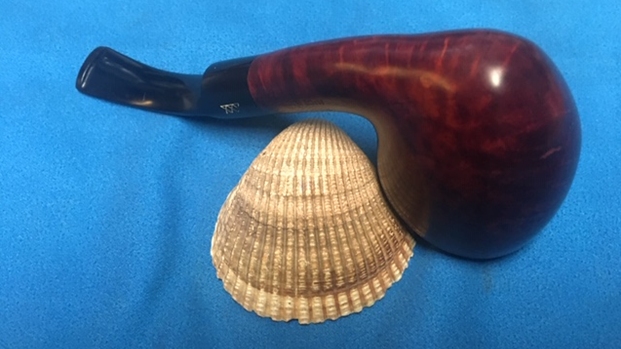
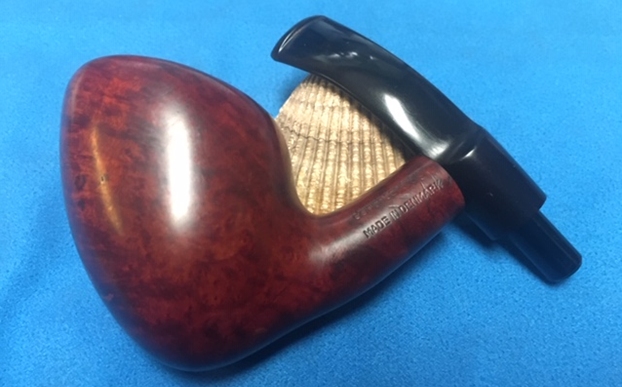
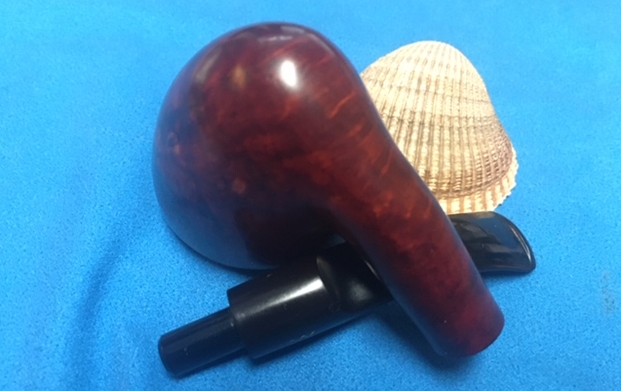
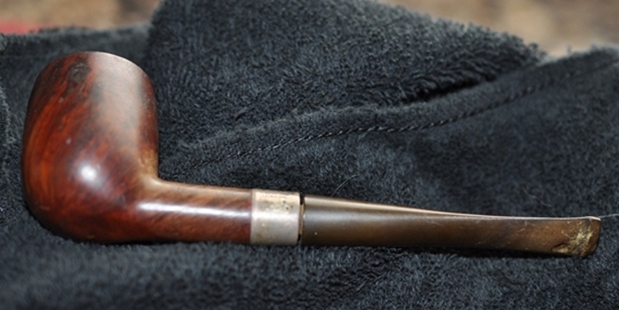
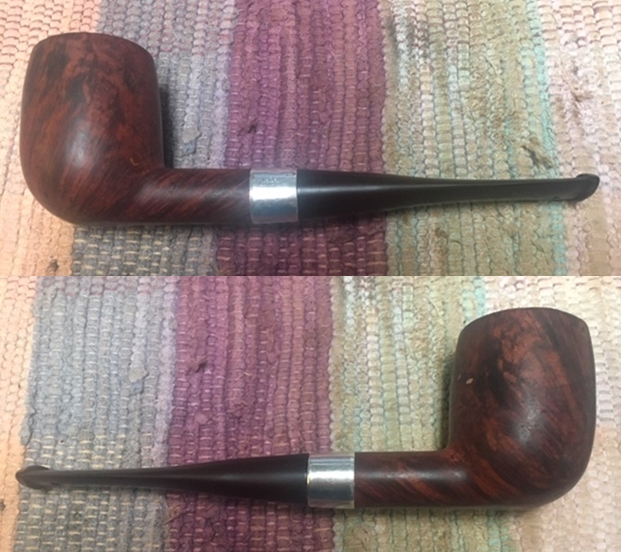
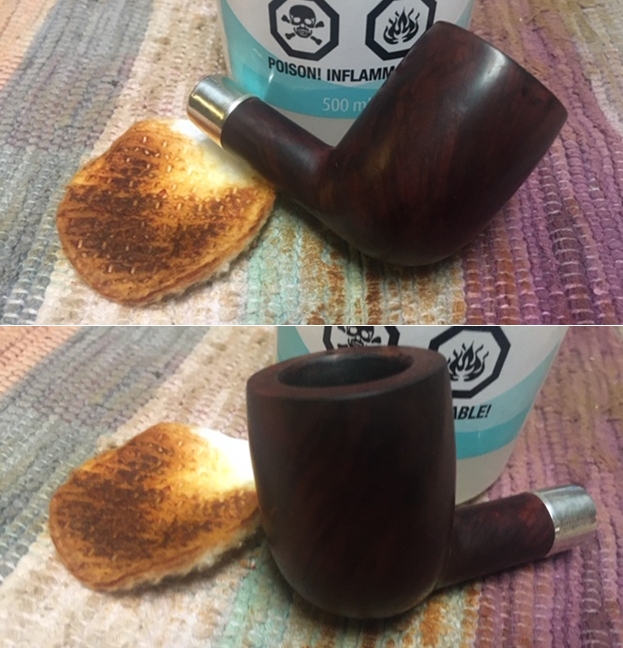
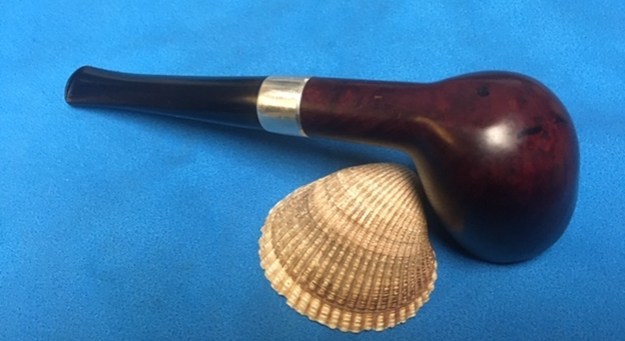
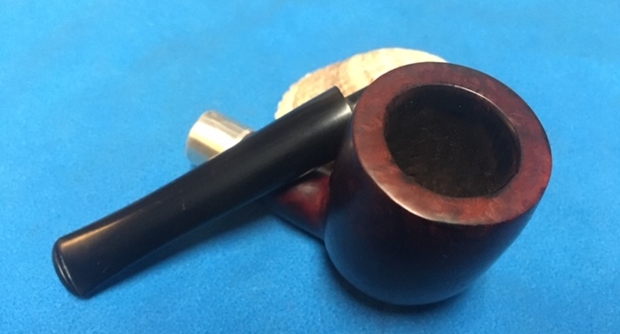
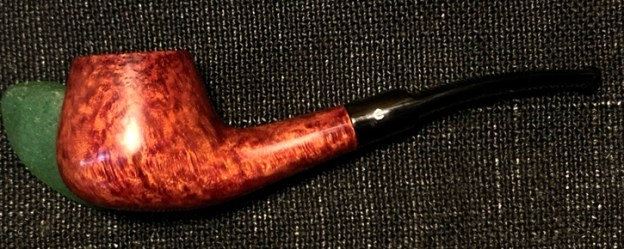
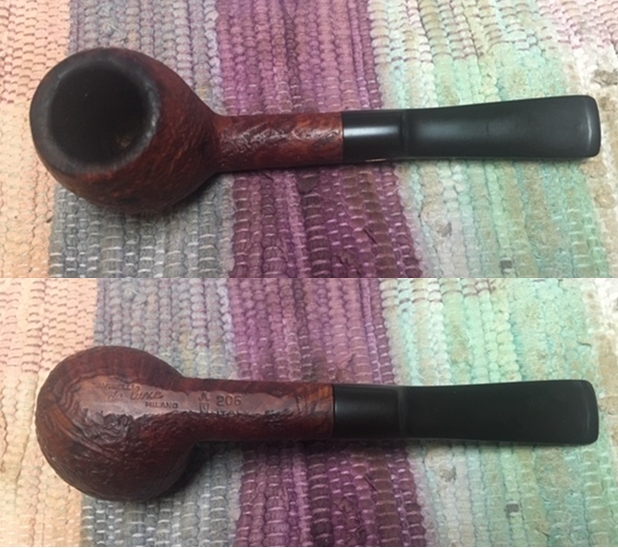
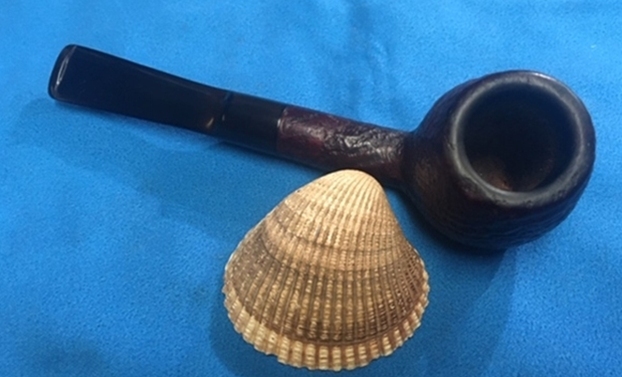
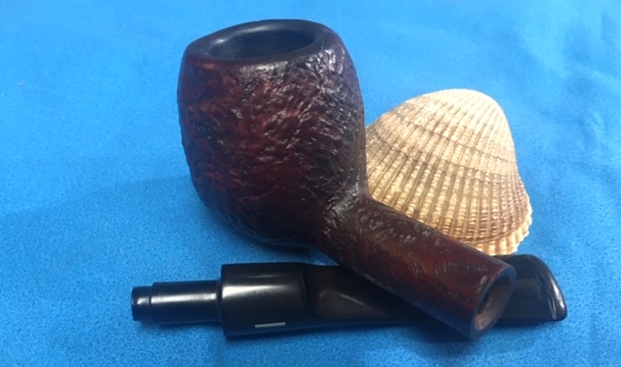
This is the second of 4 pipes that pipe man Nathan, from St. Louis, has commissioned from the online ‘Help Me!’ baskets that I call ‘For “Pipe Dreamers” Only!’ – a collection of pipes waiting to be commissioned by pipe men and women which benefit the Daughters of Bulgaria – women and girls who have been trafficked and sexually exploited. I acquired this Savinelli Dry System along with almost a twin brother from a seller in Poughkeepsie, New York. What attracted me initially to the pair was the ‘Peterson-like’ description – ‘Dry System’. I also liked the tight 3/4 bend and the ‘Dublin-esque’ conical bowls – a tight configuration that got my attention immediately. They almost seemed identical, but one had the shape number 3621, the one on my worktable now, and the other had 362. When I unpacked them here in Bulgaria and took a closer look, I could see the differences. Both have identical shapes but the 362 was a lighter rusticated finish with a smooth rim. The 3621, Nathan’s choice, is a darker blasted finish with a blasted rim. These pictures show the before & after comparison of the results of my first restoration, the Savinelli Dry System 362, which is now under the watchful care of a steward in Jackson, Mississippi. It turned out great! Nathan commissioned 4 pipes after seeing some of my other restorations posted on various pipe Facebook groups. I appreciate the opportunity to work on this next pipe that got Nathan’s attention, the Savinelli Dry System 3621.


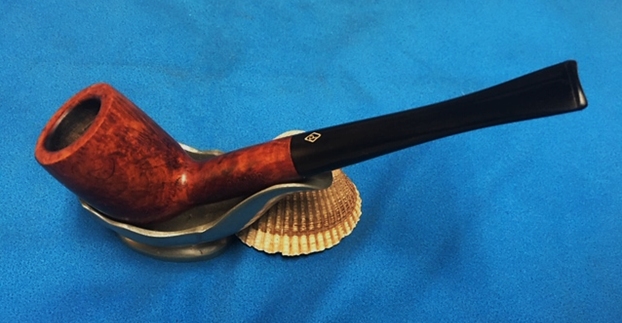
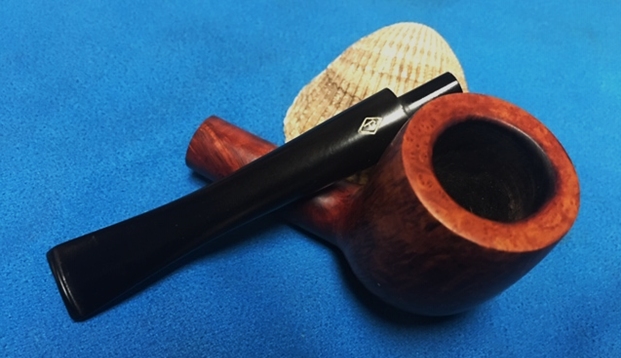
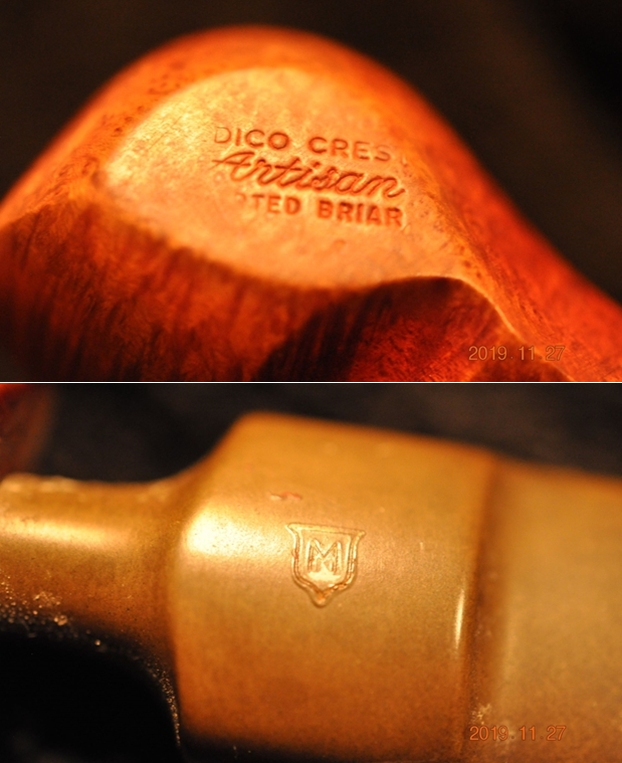
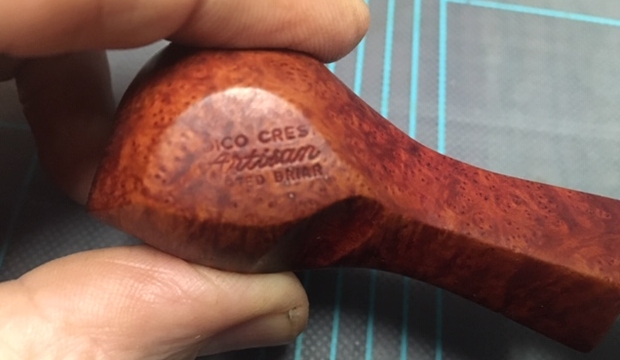
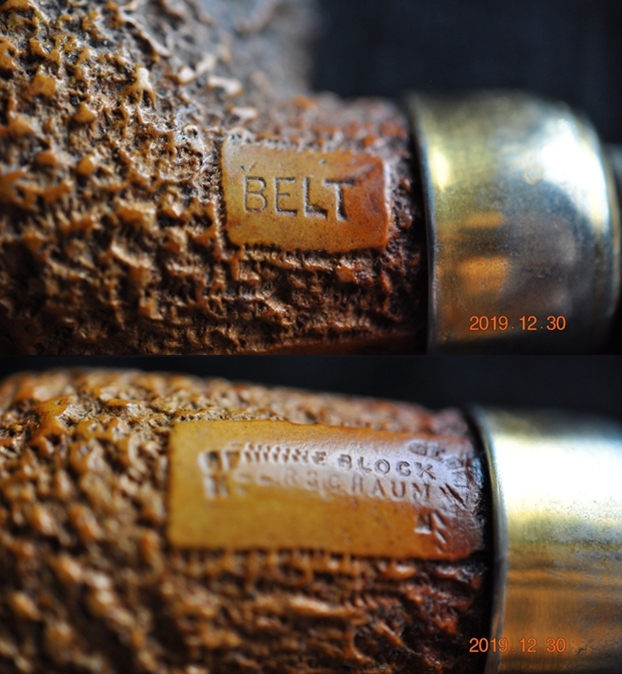
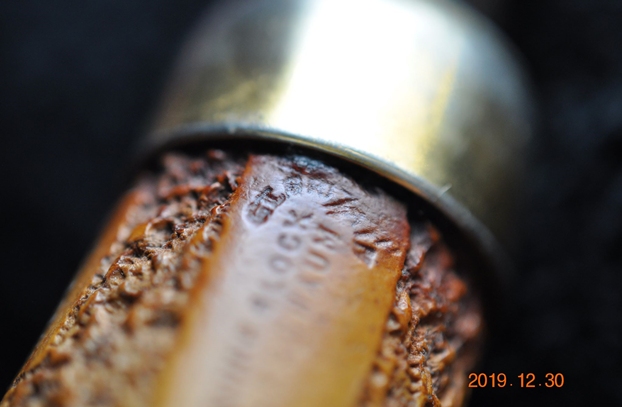
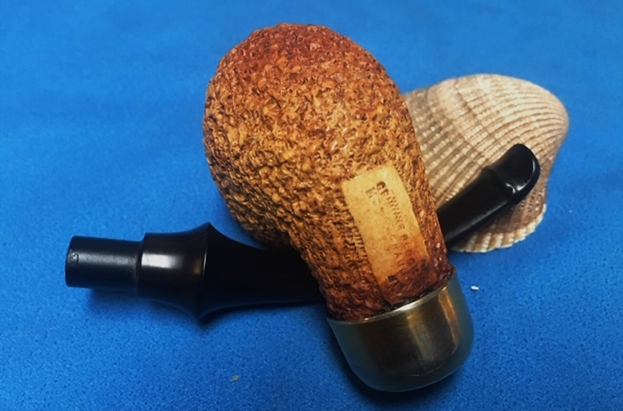
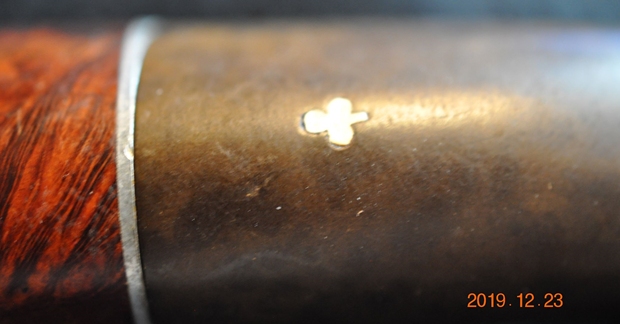
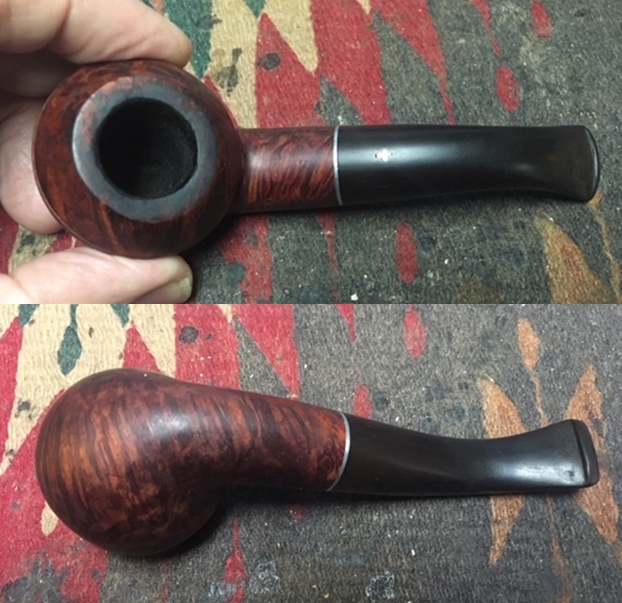
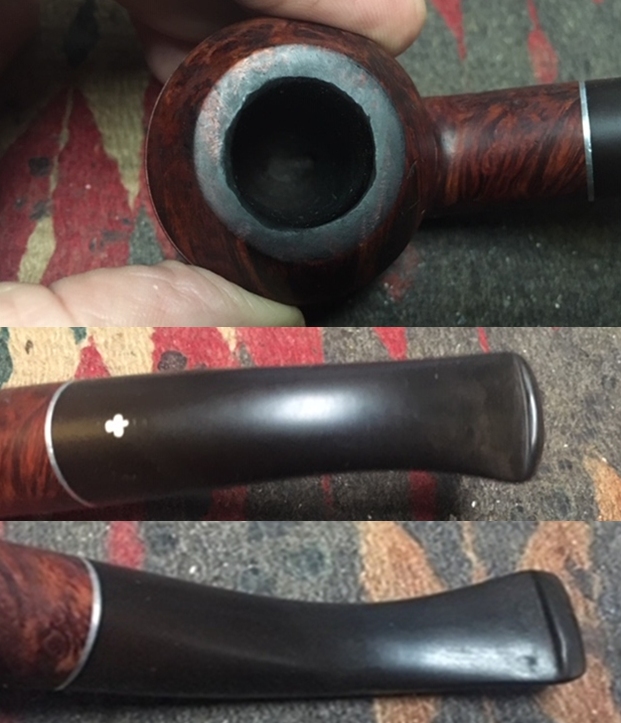
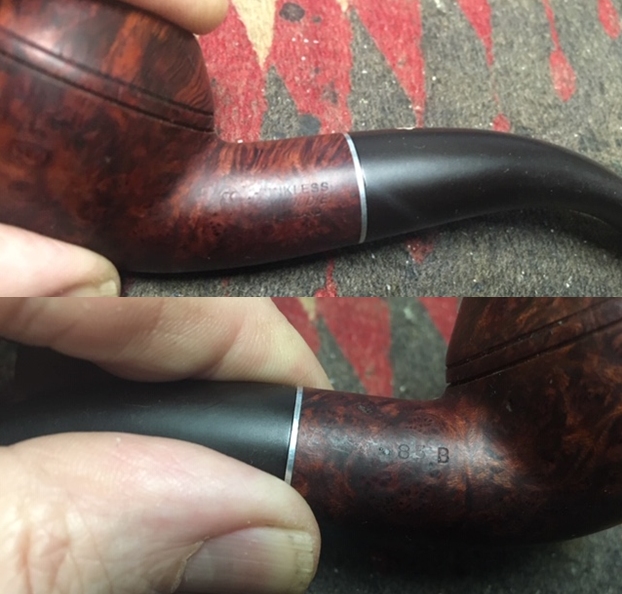
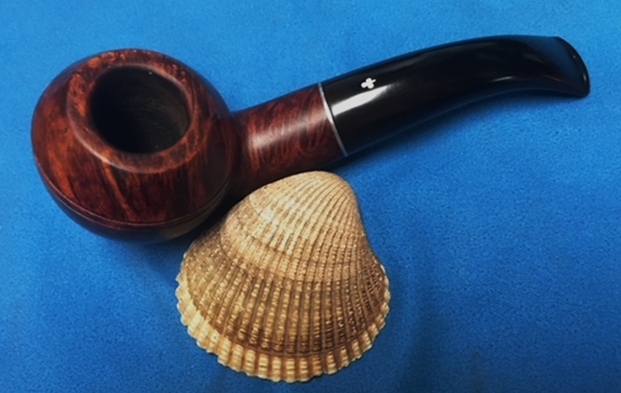
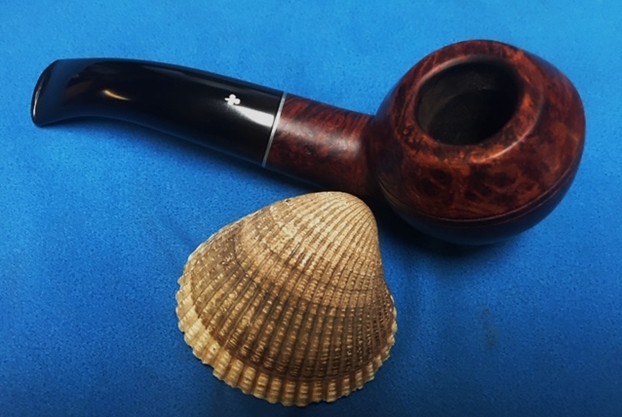
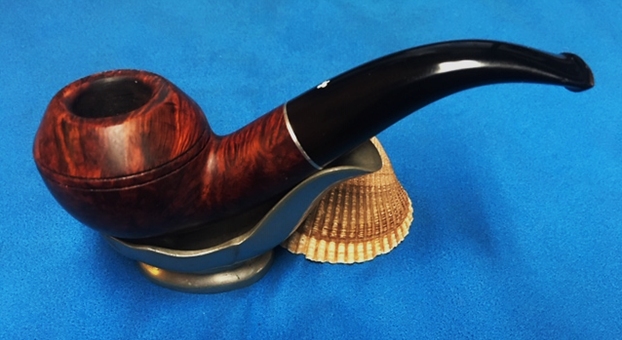
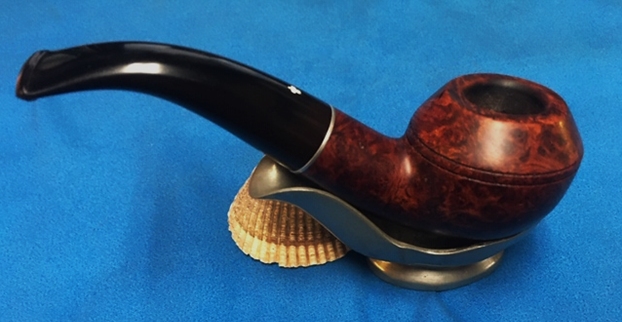
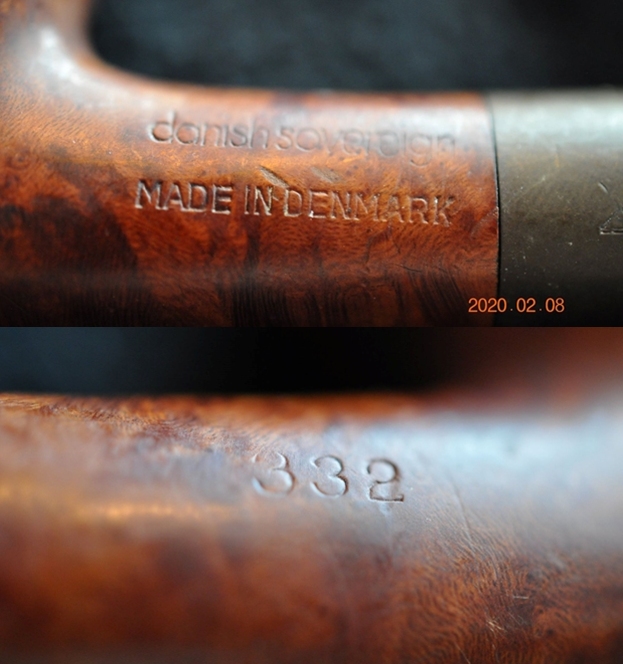
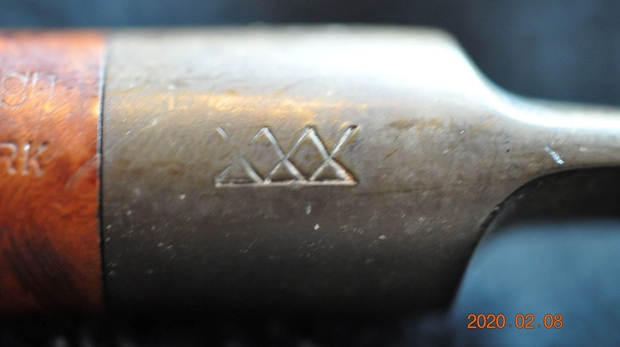
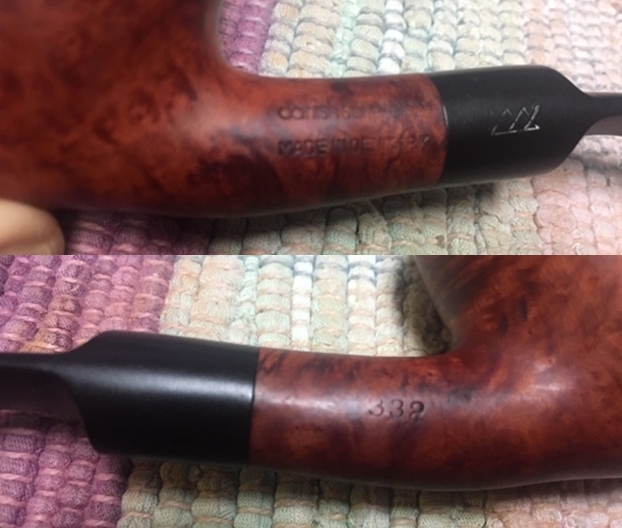
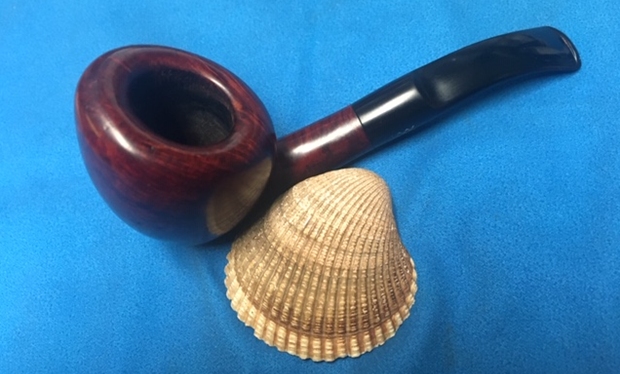
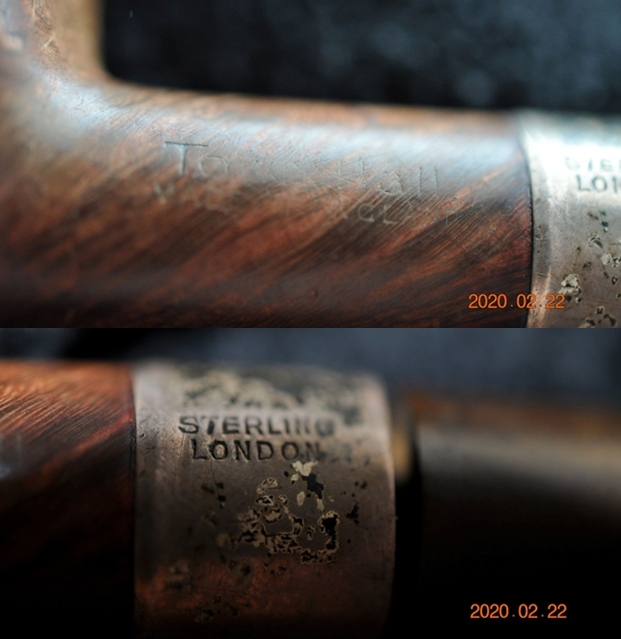
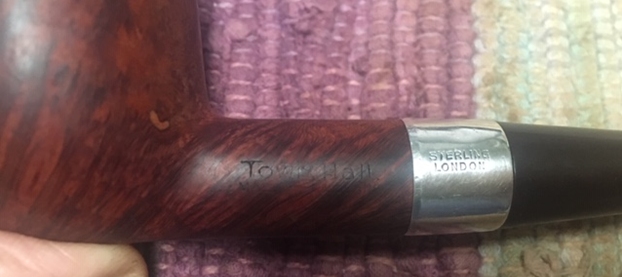
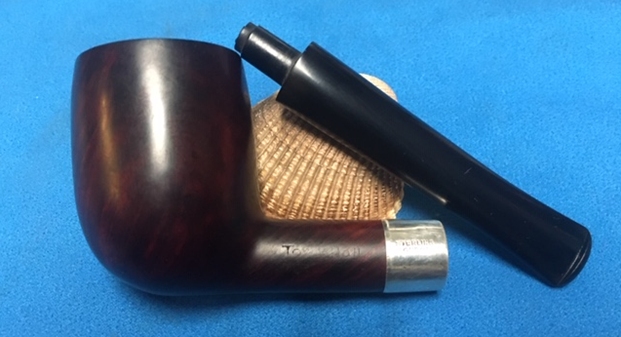
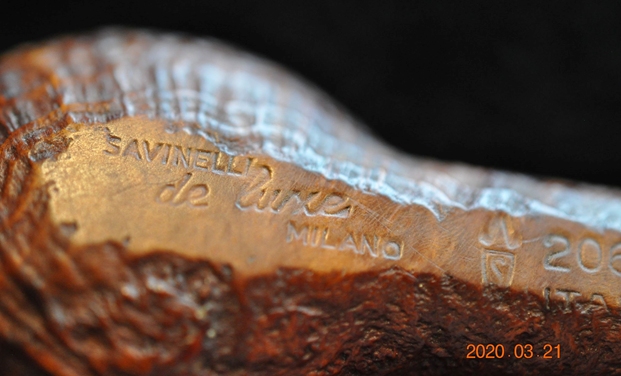
 The smooth underside panel holds the nomenclature. To the left is stamped arched, SAVINELLI [over] DRY [over] SYSTEM (reversed arch) forming a unified oval stamping. The Savinelli crown ‘S’ logo is to the right of this. Then on the far right of the logo is 3621 [over] ITALY. The nickel shank cap is stamped on the left side with ‘SAVINELLI’ along with ‘S’ on the topside of the military stem.
 In my previous research, I found nothing about the Dry System on Pipedia but Pipephil.eu helped with some useful information – especially about the shape number differences. Looking at the Savinelli shapes chart on Pipedia’s Savinelli article, shapes 362 or 3621 were not among those listed. Pipephil.eu provided this on the Savinelli Dry System with the information that the Dry System could be stamped with either 3 or 4 digits for the shape number:
 I find interesting that the panel above also references a link comparing Savinelli’s Dry System P-Lip stem with the Peterson standard.
  Repeating my previous research: I found the most information about the Savinelli Dry System on another site as I broadened my online search. A South African based tobacconist, Wesley’s (See LINK), provided a gold mine of information about the Savinelli Dry System:
 Launched in 1981, it had taken several years of research into the negative points of existing system pipes, in order to improve on them. Perseverance paid off – by combining trap and filter, and enlarging the smoke hole, Savinelli achieved the “Dry System”, which in our opinion is the best answer to “Wet Smoking” so far developed.
Especially for new pipe smokers, the Savinelli Dry System pipe incorporates everything needed to provide a cool, dry smoke.
The name “Dry” comes from the introduction of the Balsa “filter” into the traditional system pipe – the “System” being the presence of the built-in moisture trap in the shank, linked with the “smokehole on the top” mouthpiece. The balsa mops up the moisture in the smoke hence the term “Dry” system, and if the pipe is smoked without the balsa all that will happen is that this moisture will condense and collect in the trap. It can then either be mopped up with a folded pipe cleaner or flicked out. Just be careful where you flick it!
Put this all together and you can see why we say these are technically our best designed pipes. But the technical qualities are not all these pipes have to offer. Extra bonuses are the feel, the finishes and the balance.
This information marks the genesis of the Savinelli Dry System line in 1981. Added to this information, Wesley’s included the following benefits of the Savinelli system with a helpful cut-away showing the internals:
 The description of the ‘smokehole’ of the mouthpiece, is interesting in the way it disperses the smoke so that it avoids tongue burn as well as keeping moisture entering the stem from the mouth. The trademark filtering system is also optional – use of the balsa insert which I use with great satisfaction with some of my own Savinelli pipes. Yet, even if you do not utilize the absorbing qualities of the balsa insert, the built-in moisture trap will hold the moisture for clean-up after smoking. Sounds good!
Wesley’s Tobacconist also included this helpful Shapes Chart for the Savinelli Dry System pipes. The description for the 3621 suggests:
Regular shapes 3613 & 3621 are ideal for the new pipe smoker or for a short smoke for anybody.
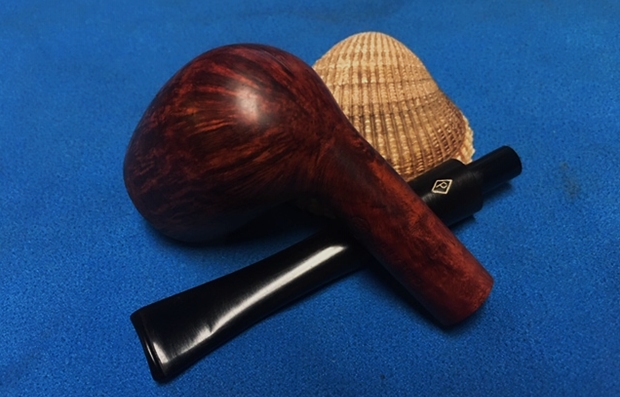
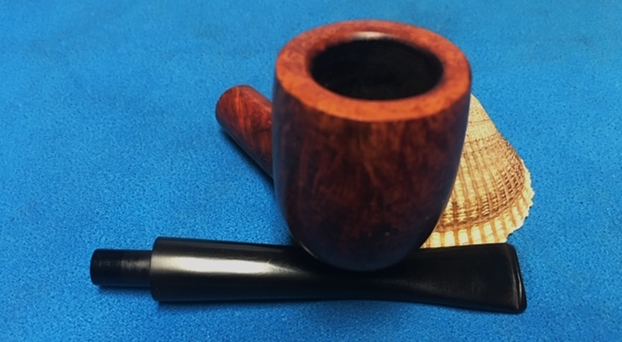
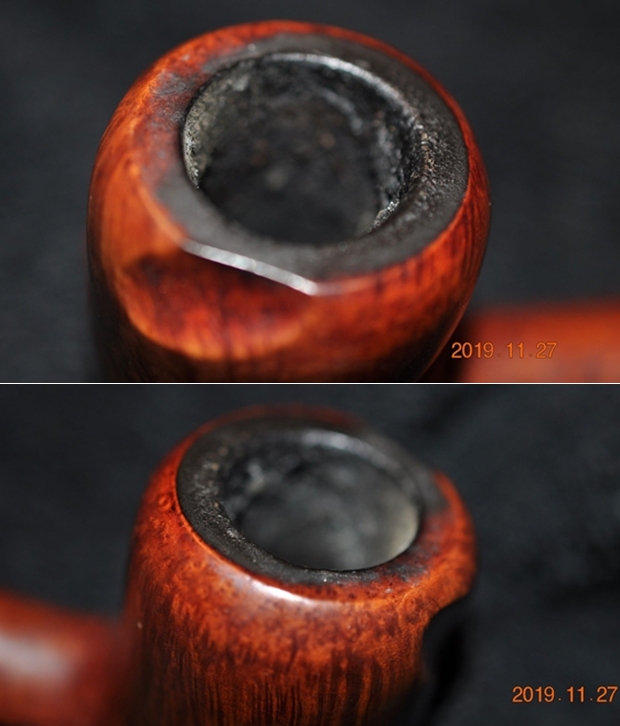
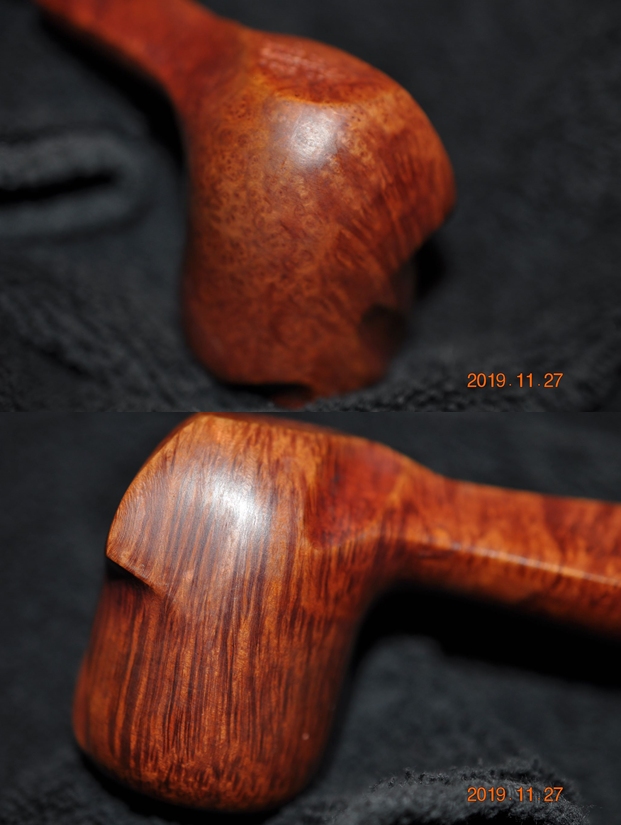
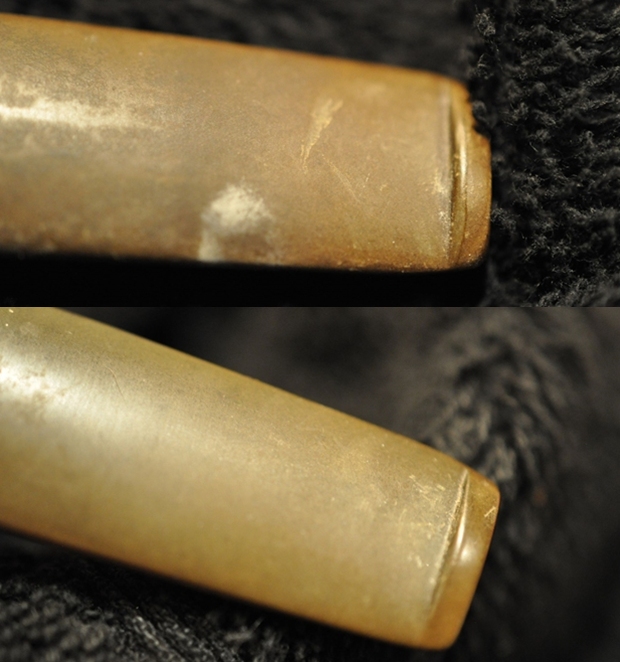
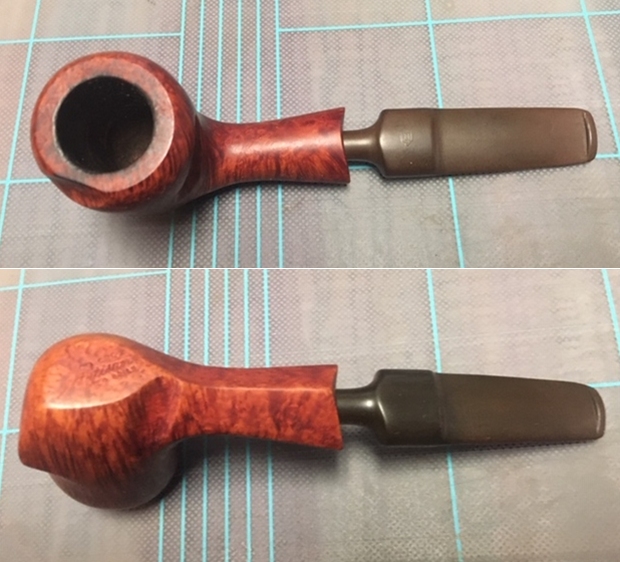
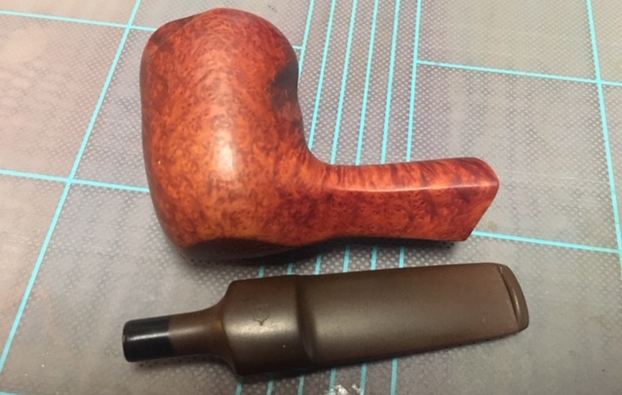
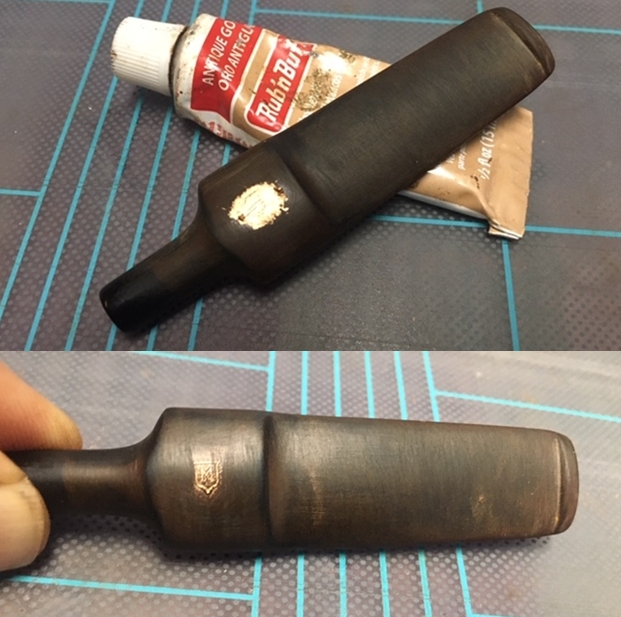
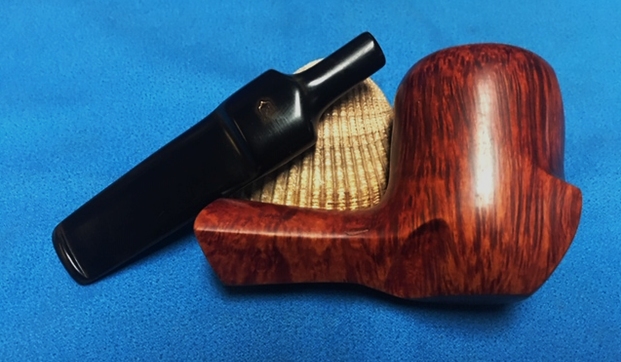
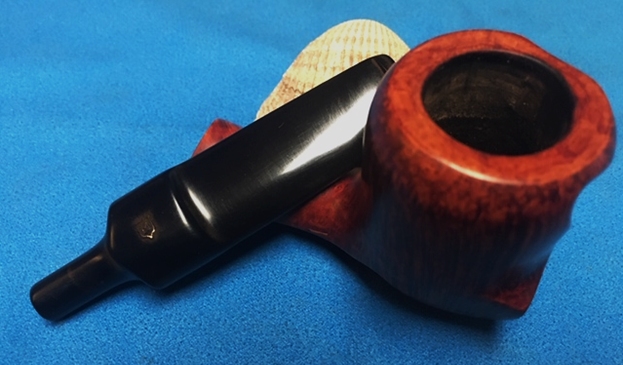
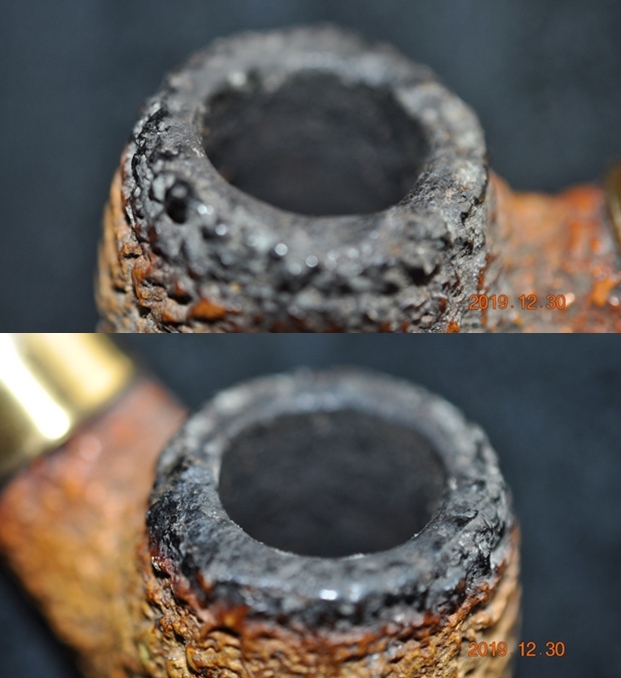
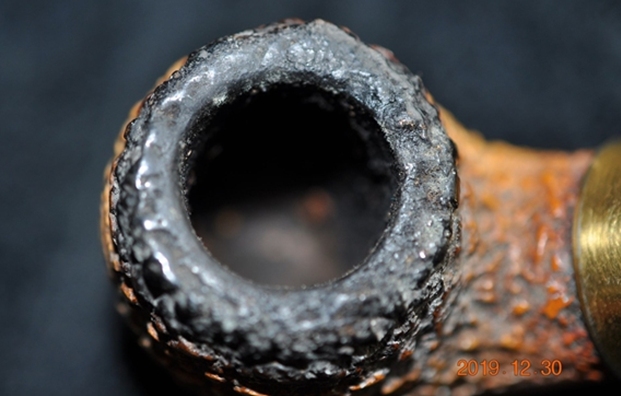
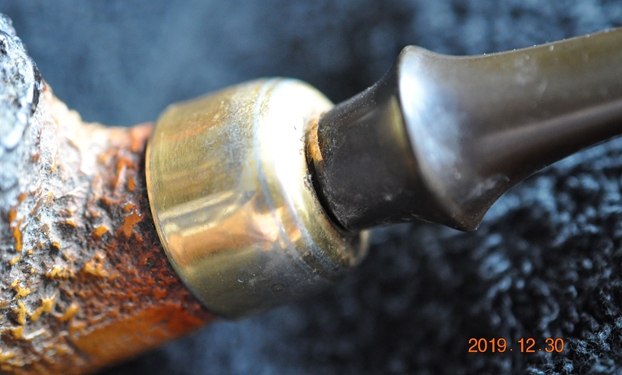
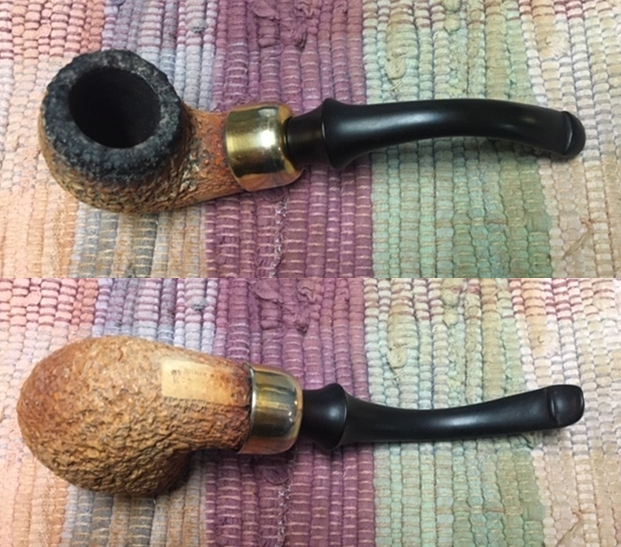
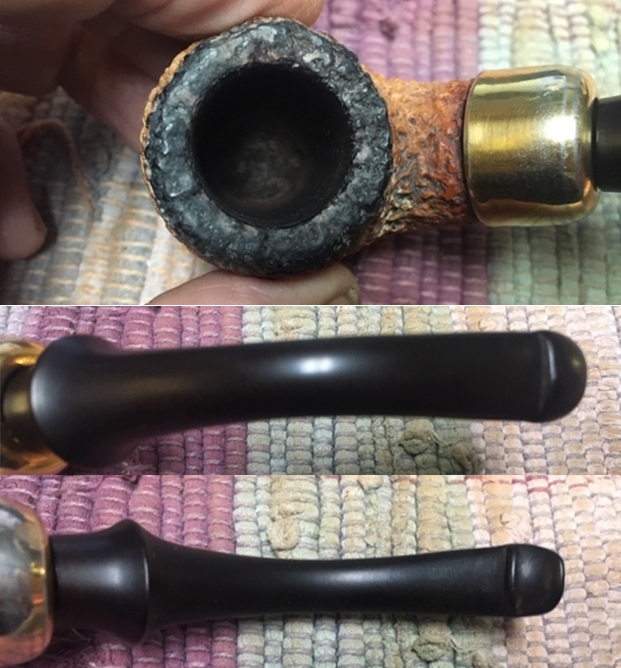
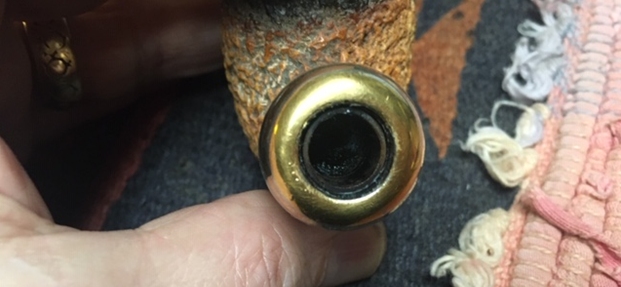
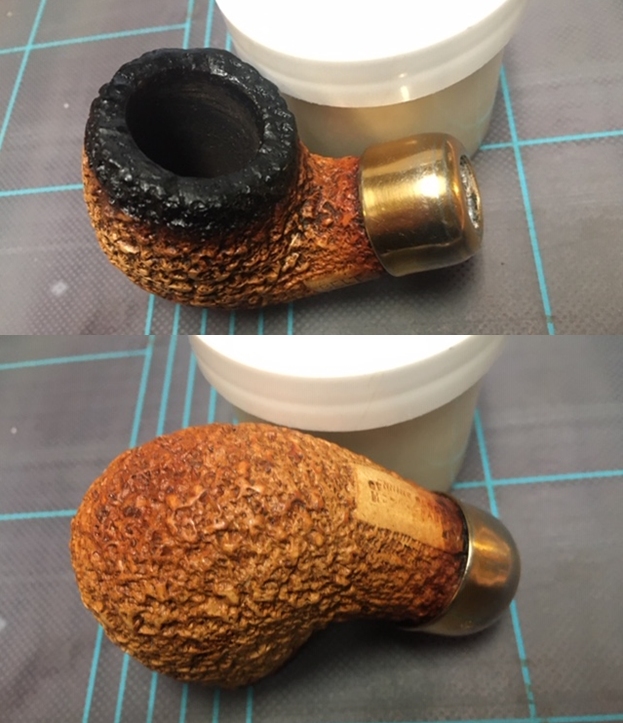
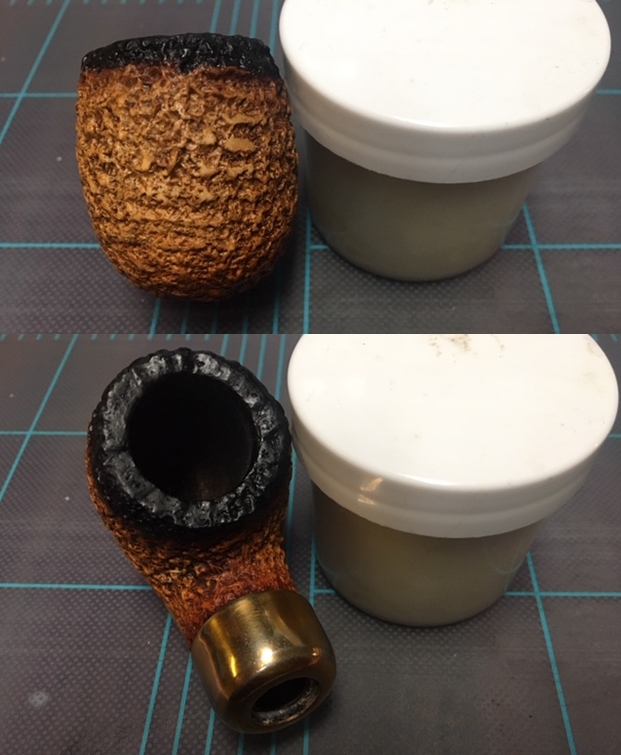
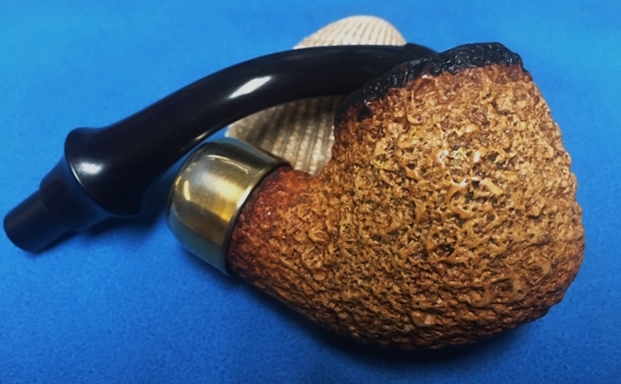
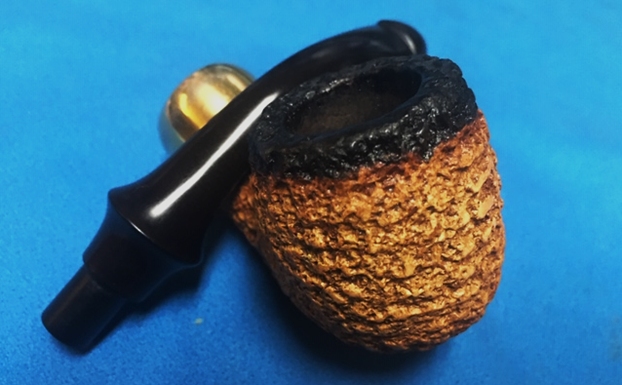
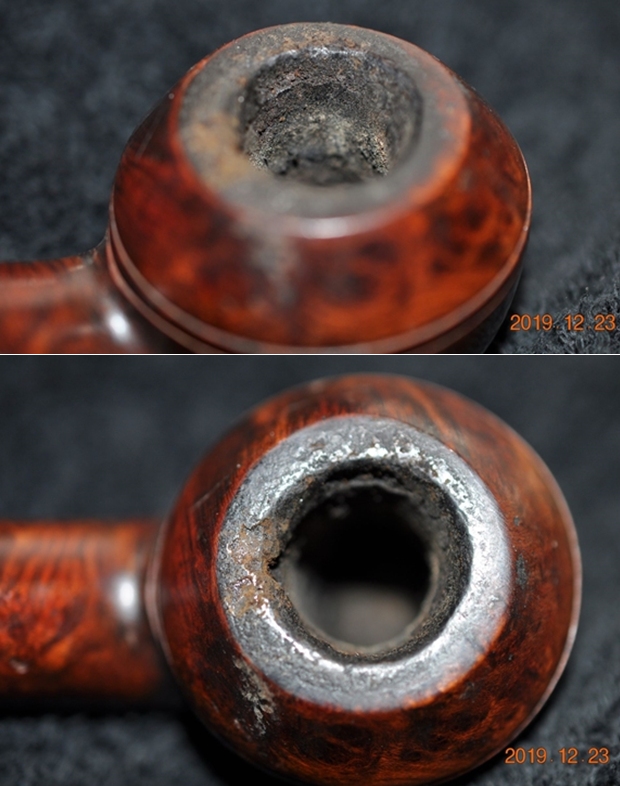
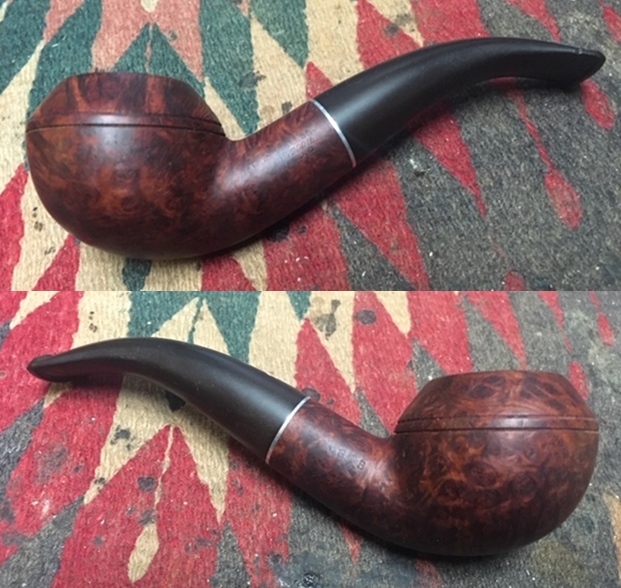
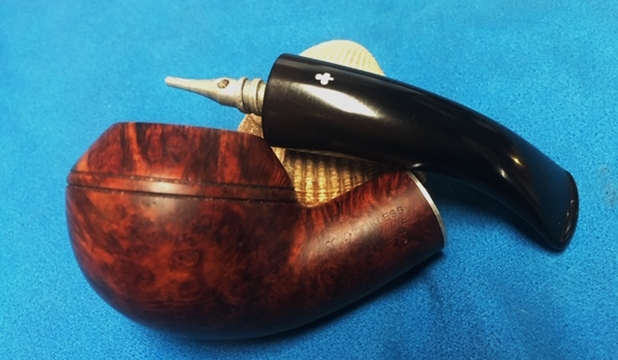
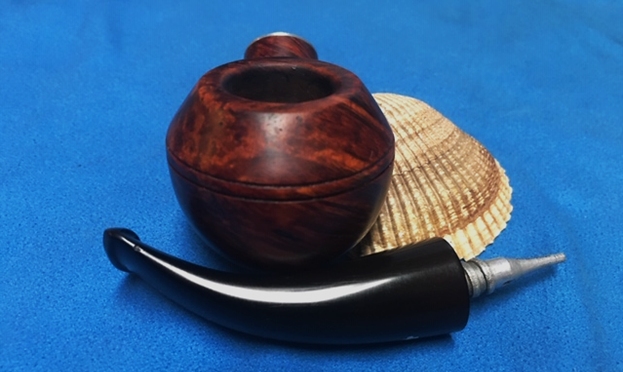
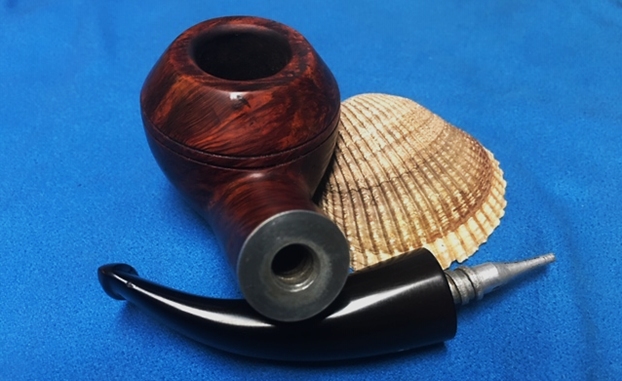
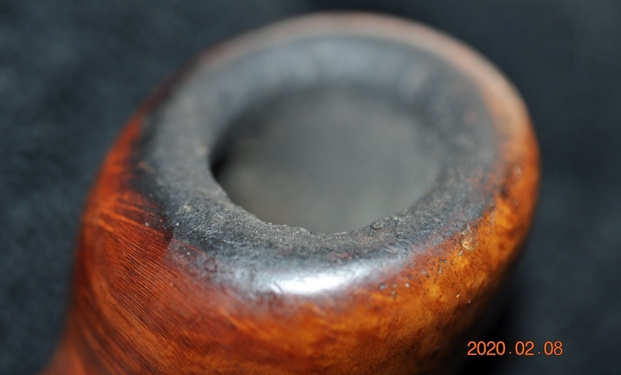
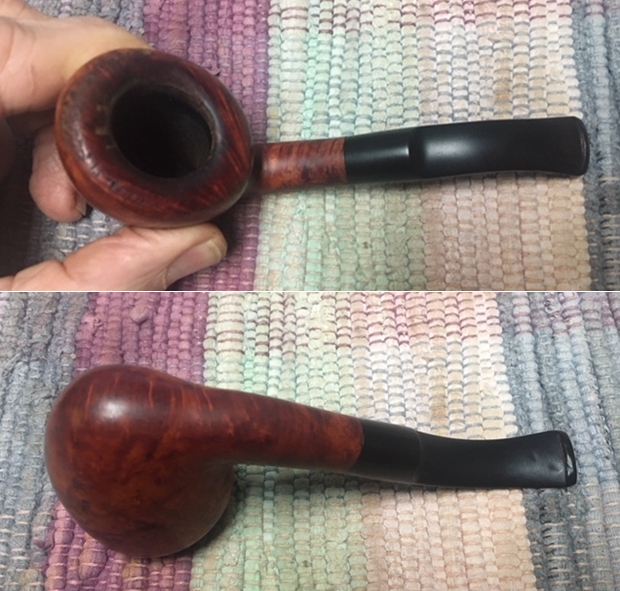
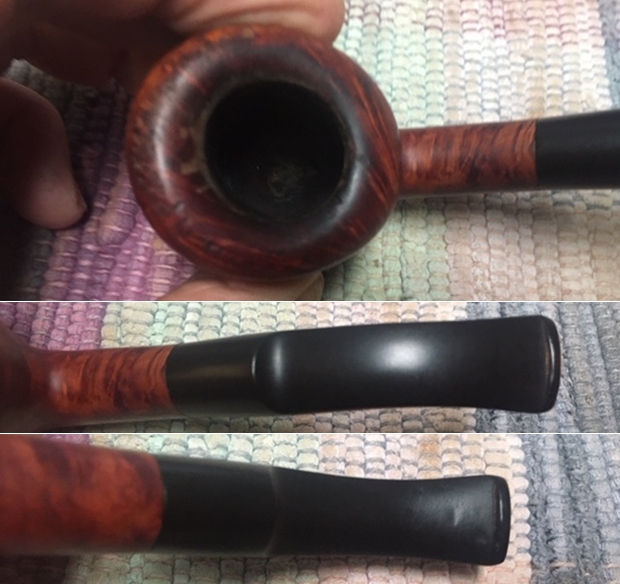
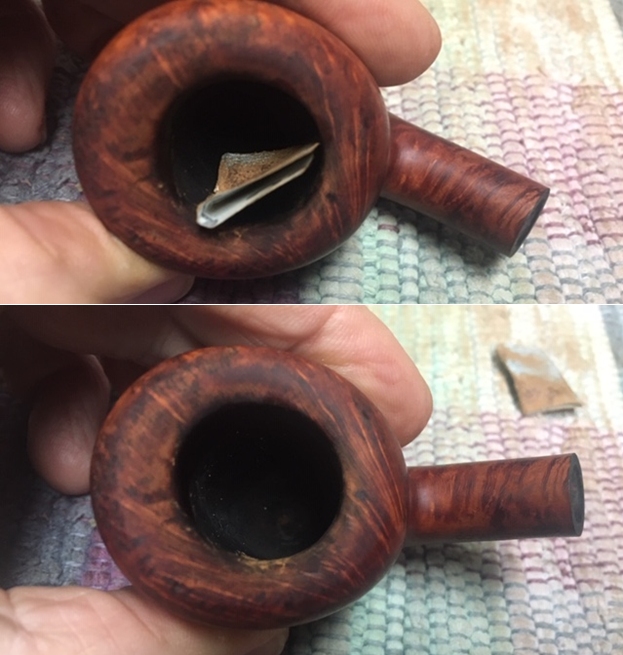
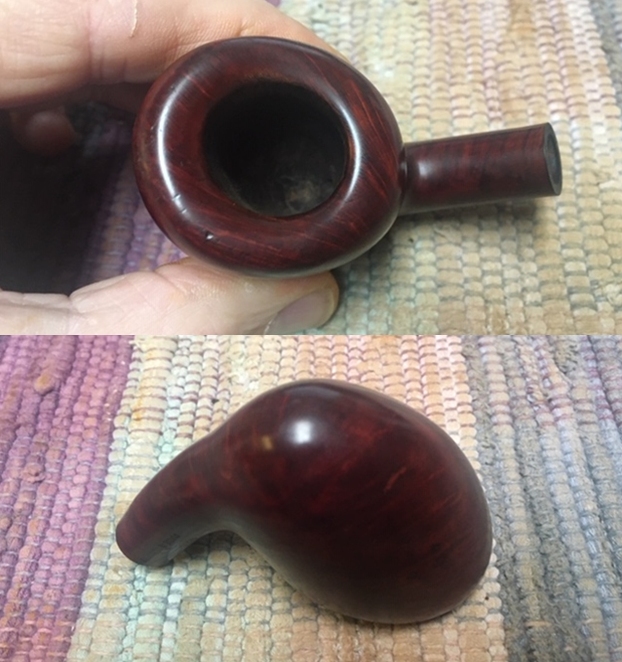
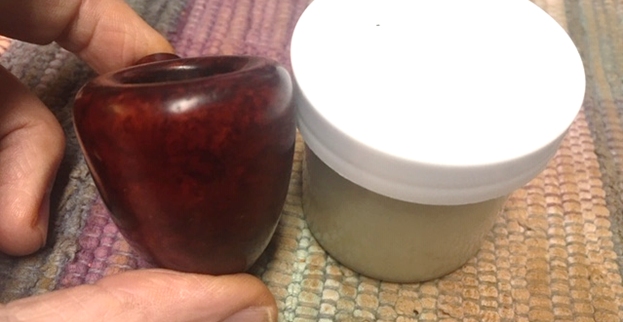
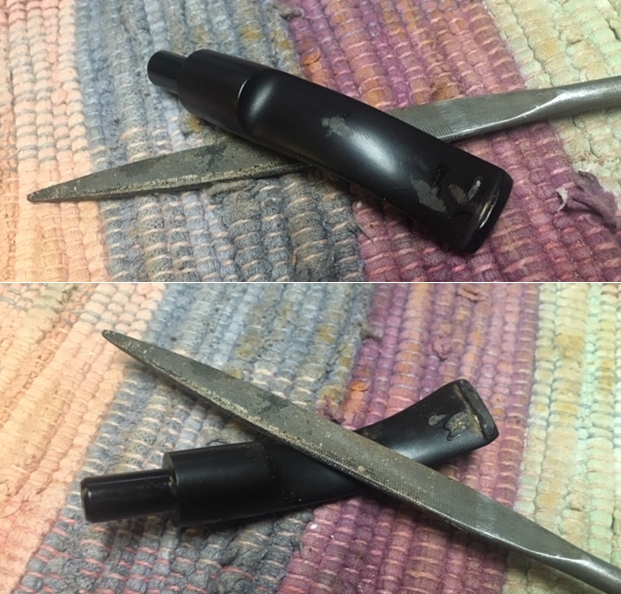
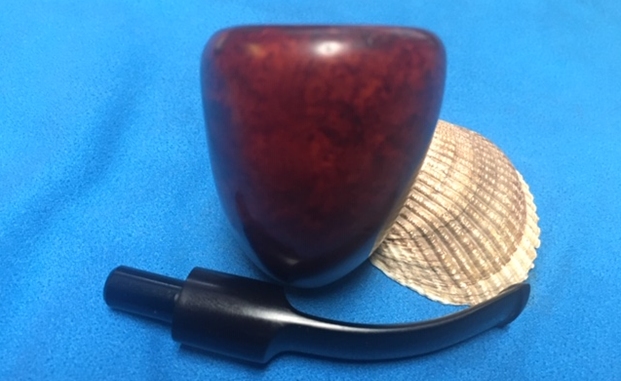
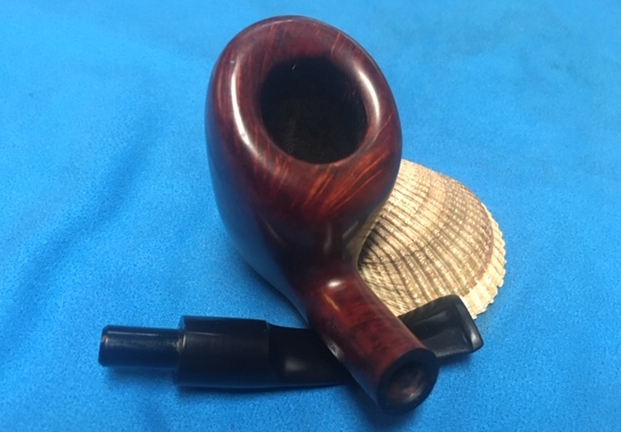
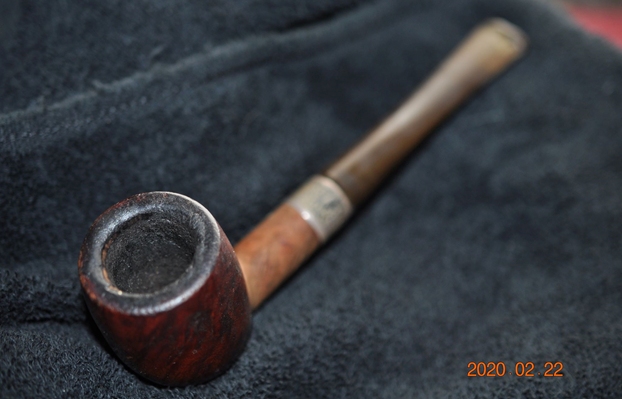
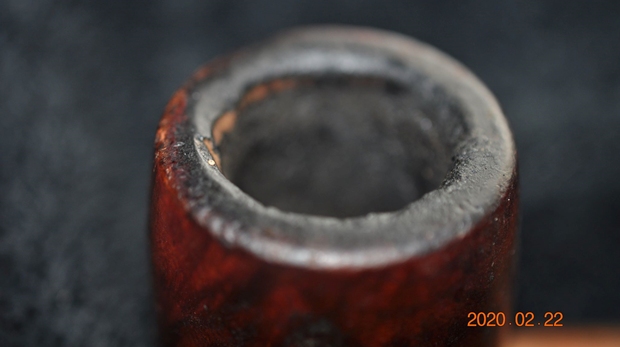
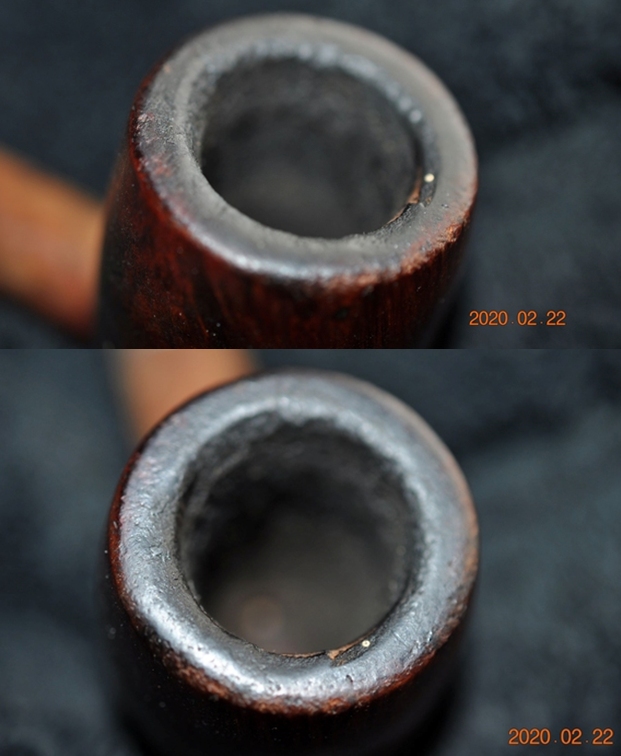
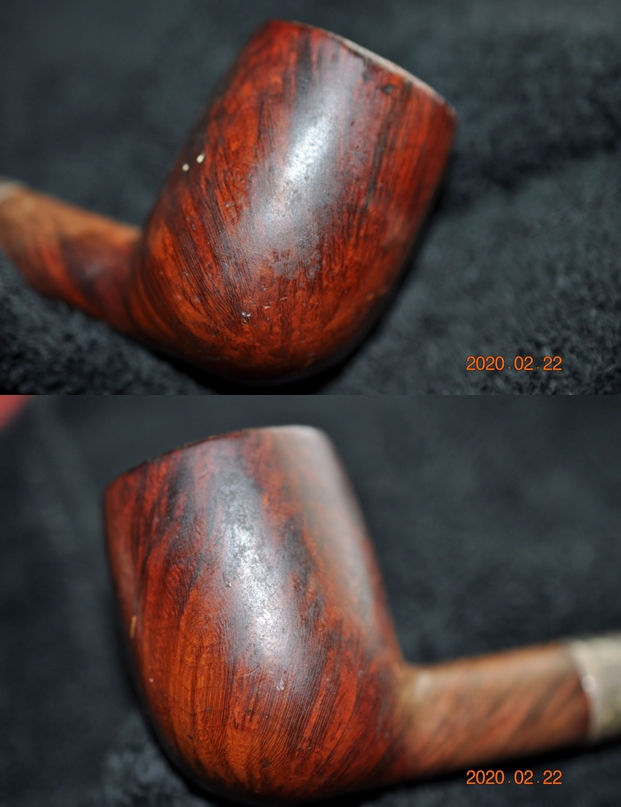
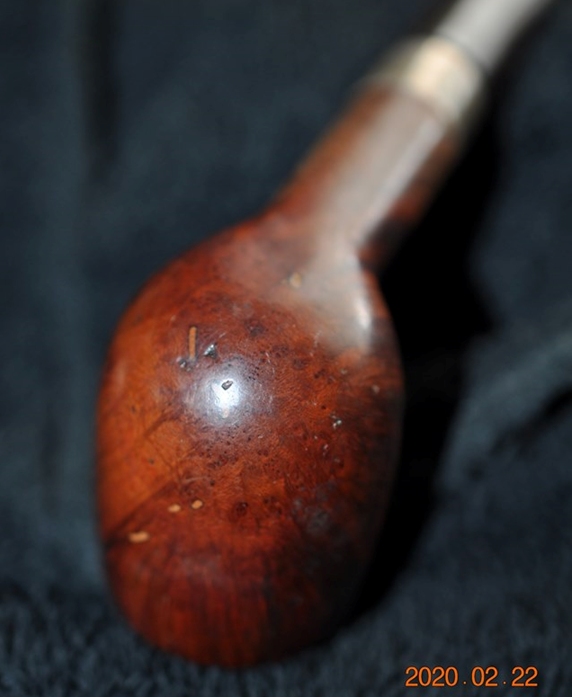
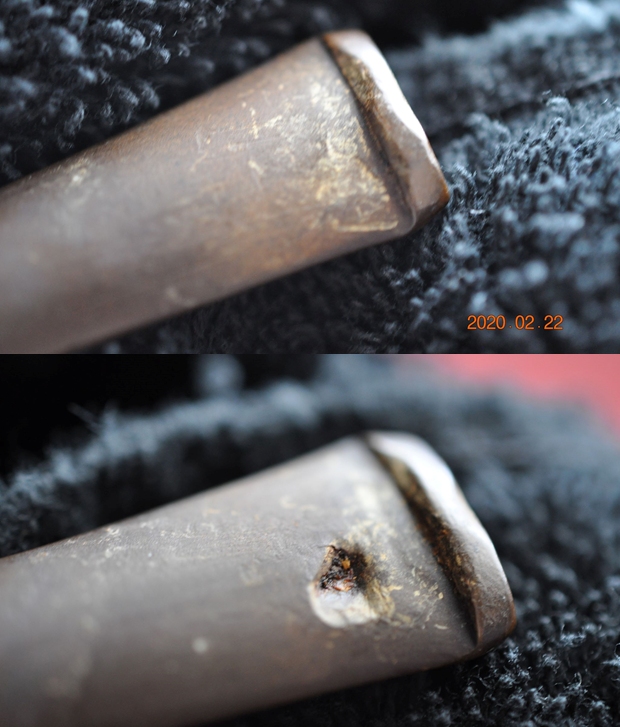
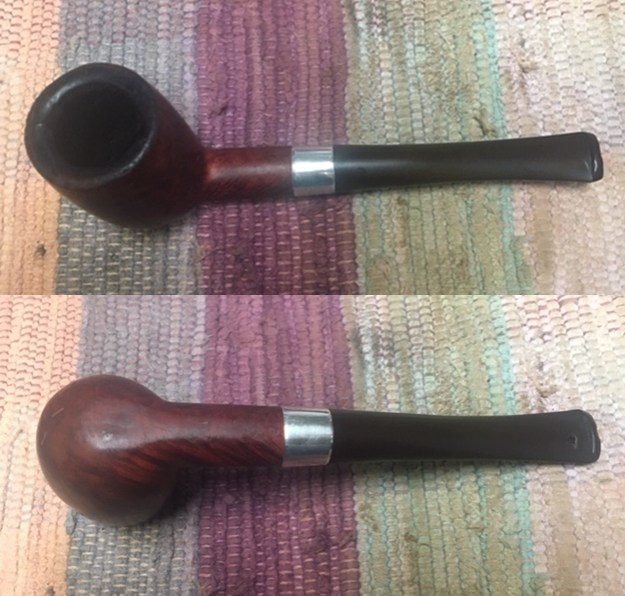
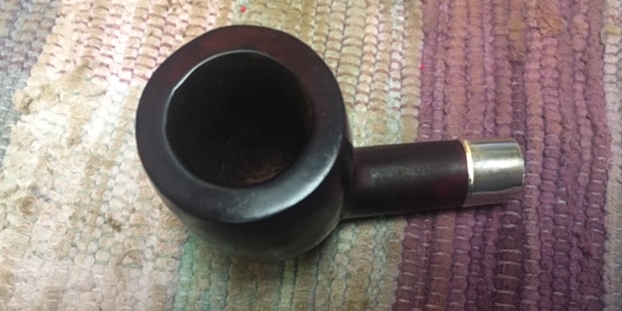
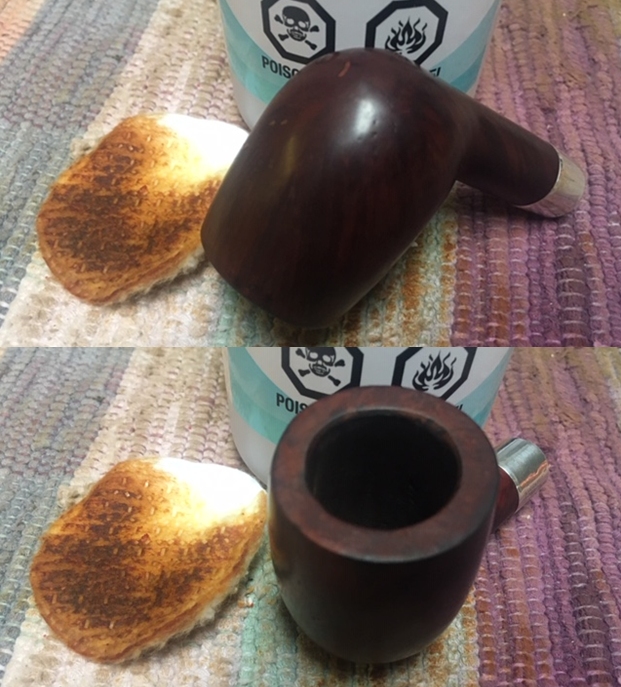
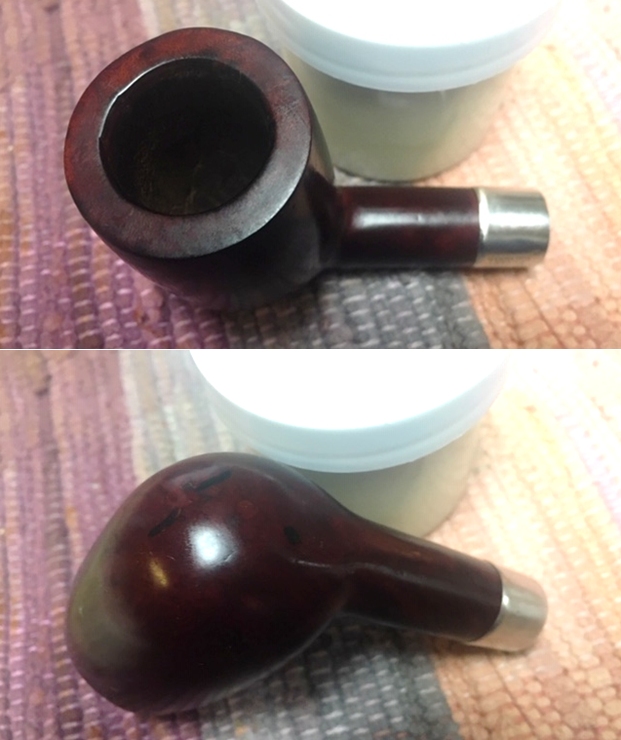
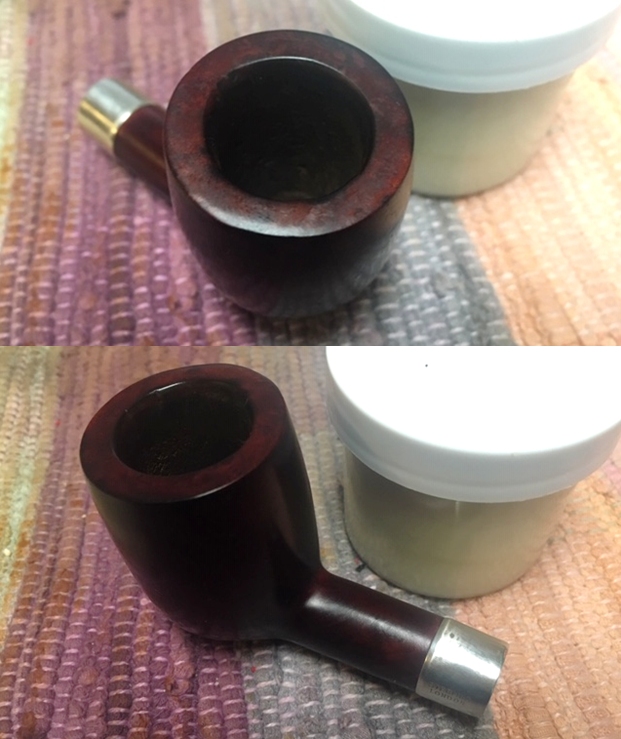
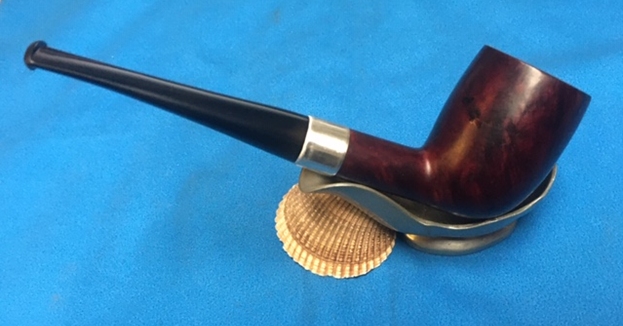
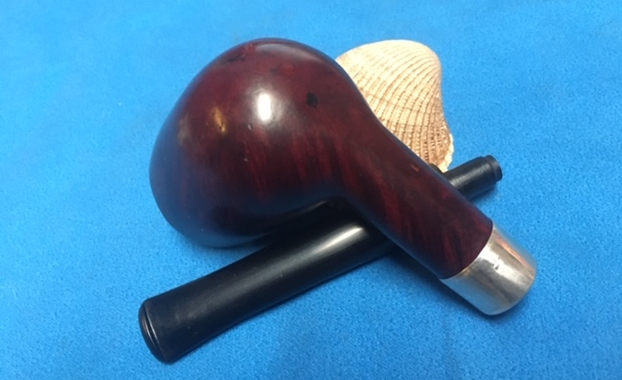
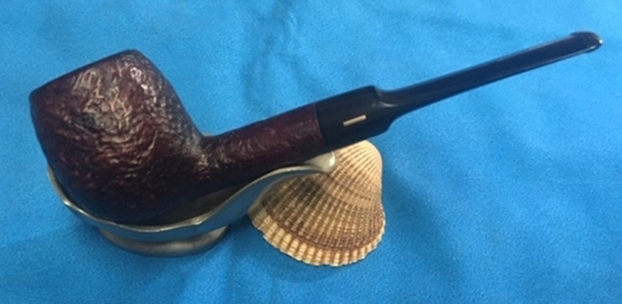
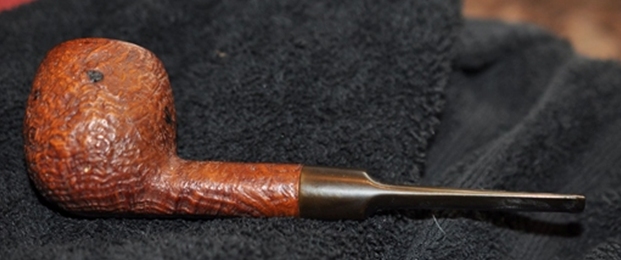
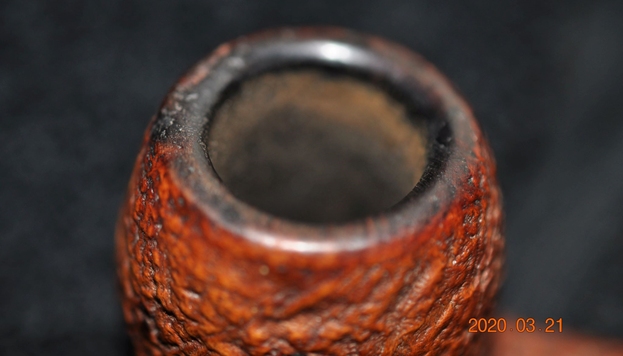
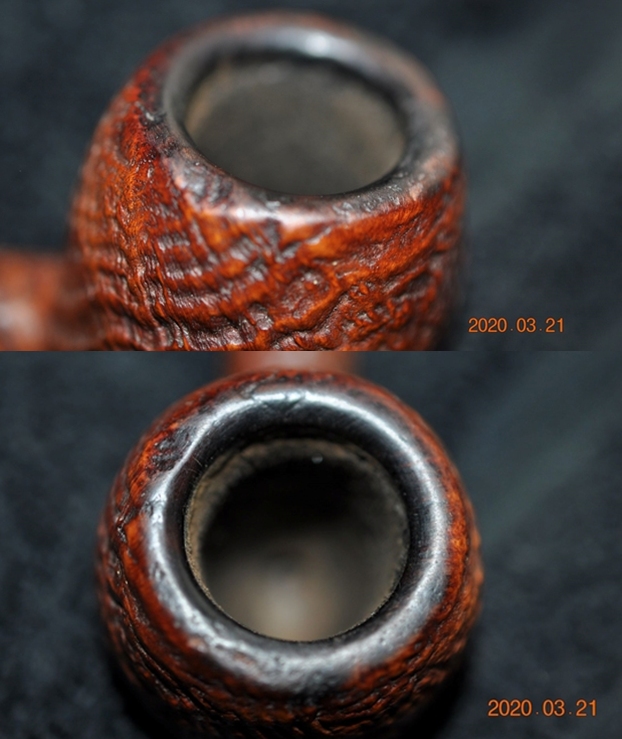
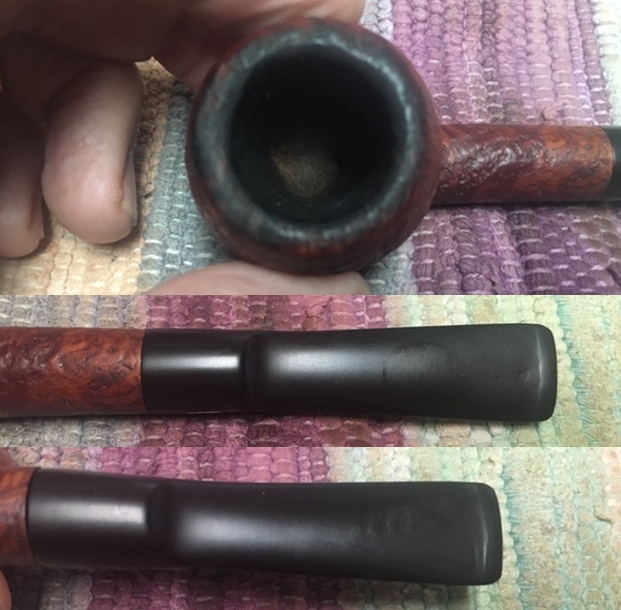
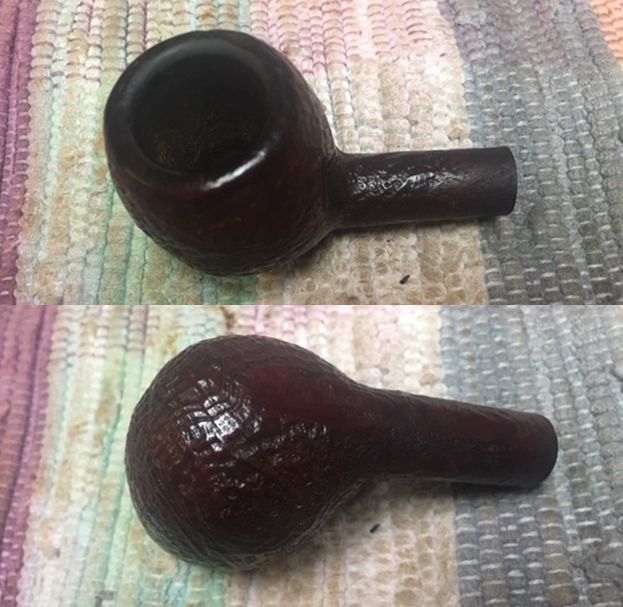
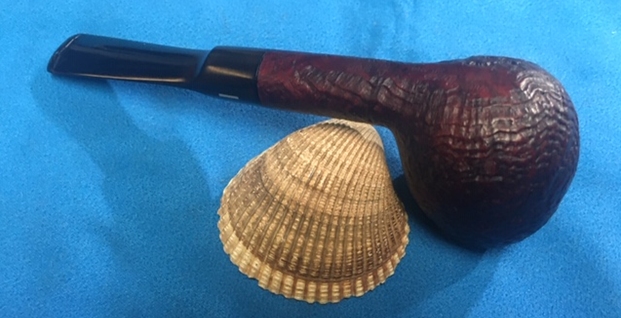
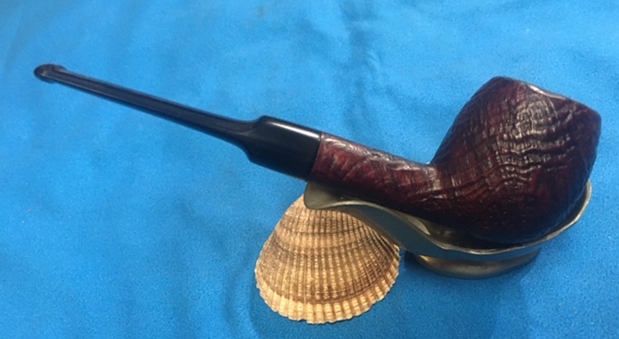
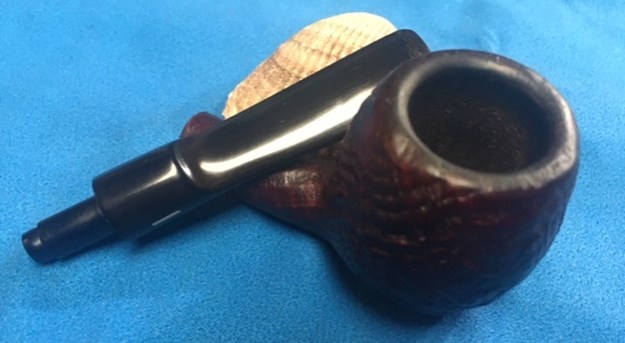
Looking now at the 3621 now on my worktable, the chamber shows thick cake that will be removed to recover fresh briar and to inspect the condition of the chamber walls. The blasted rim and stummel have grime and in need of cleaning. The blasted briar landscape is attractive, and I look forward to what cleaning will reveal. The nickel shank cap is in ok shape but needs cleaning and polishing. There are evidences of the nickel plated surface around the facing having come off revealing the base metal beneath. The stem has deep oxidation and will take some work to clean it out. The P-Lip, which is much easier to clean than Peterson’s version, has some compressions and chatter and needs sanding out.
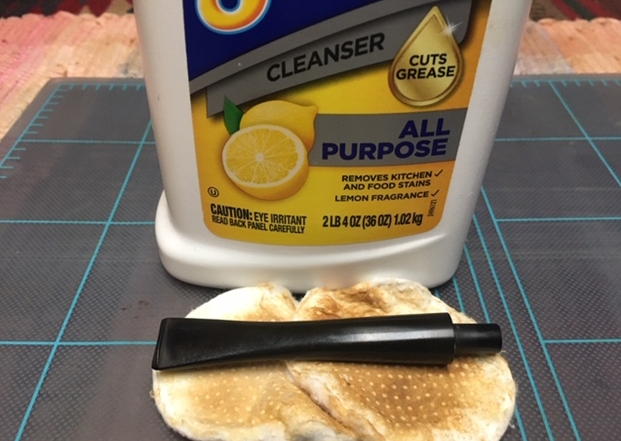
To begin the recommissioning of this Savinelli Dry System 3621, the military stem’s airway is cleaned using pipe cleaners and a cotton bud dipped in isopropyl 95%. As I said above, this P-Lip system is much friendlier than Peterson’s! The cotton bud reaches up into the balsa wood filter cavity to clean. The pipe cleaner works through the airway and P-Lip ‘smokehole’. To get a head start on the deep oxidation, a ‘Soft-Scrub’ like product available here in Bulgaria is used with 000 grade steel wool. I’m hoping to break up the oxidation to enable the Before & After Deoxidizer to be more productive.
 Next, the Savinelli stem joins other stems in the Before & After Deoxidizer soak. I leave it in the soak for several hours, but it seems that more hours does not translate into more effectiveness.
 After removing the stem from the Deoxidizer, the liquid is drained back into the vat and I help by squeegeeing with my fingers. Pipe cleaners and cotton buds wetted with isopropyl 95% are used to clear the liquid from the airway and filter cavity. Cotton pads wetted with alcohol also wipe the surface to remove raised oxidation.
 To help with conditioning the vulcanite stem, paraffin oil is applied, and the stem is set aside to absorb the oil.
 Turning now to Dublin stummel, I first take a picture to show the starting point. I remember my experience with the 3621’s brother – the conical chamber is angled severely toward the floor of the chamber.
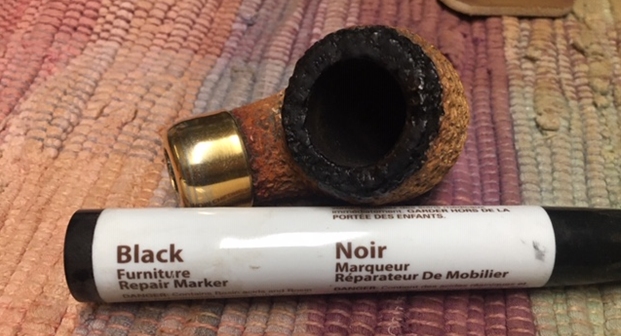
  To avoid carving a reaming ‘shelf’ from using the regular reaming blade heads, I go directly to using the Savinelli Fitsall Tool which lives up to its billing. My general rule of thumb in reaming to determine if you’ve removed all the carbon cake build up is, cake crunches as you’re using the tool, but wood surface is smooth. After cleaning the carbon cake off the walls of the chamber, the chamber is sanded using 240 paper wrapped around a Sharpie Pen.
 After reaming is completed, an inspection of the chamber reveals healthy briar – no burning or heating problems.
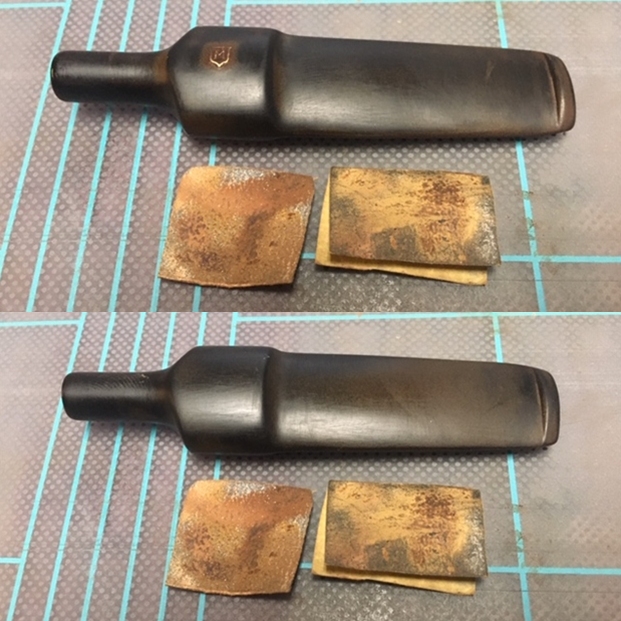
 Next, using undiluted Murphy’s Oil Soap, a cotton pad goes to work on cleaning the blasted surface of the Savinelli Dublin stummel. A bristled toothbrush assists in cleaning the blasted surface and the brass wired brush helps with lava flow on the blasted rim.
 Next, the stummel is transferred to the kitchen sink where internal cleaning is commenced using warm water with anti-oil dish liquid soap and shank brushes. After scrubbing and rinsing thoroughly, the stummel comes back to the worktable.
 Next, internal cleaning is continued using pipe cleaners and buds wetted with isopropyl 95%. The built-in moisture trap has done a good job of trapping the gunk in the trap. It takes many buds and pipe cleaners wetted with isopropyl 95% to do the job. Using a small dental spoon also helps by scraping the buildup on the internal walls allowing me to scoop out the old gunk left behind. When the buds and pipe cleaners start emerging lighter, I call it a cease fire with the plan of continuing the cleaning at the end of my work day using a kosher salt and alcohol soak to further clean and refresh the internals for the new steward.
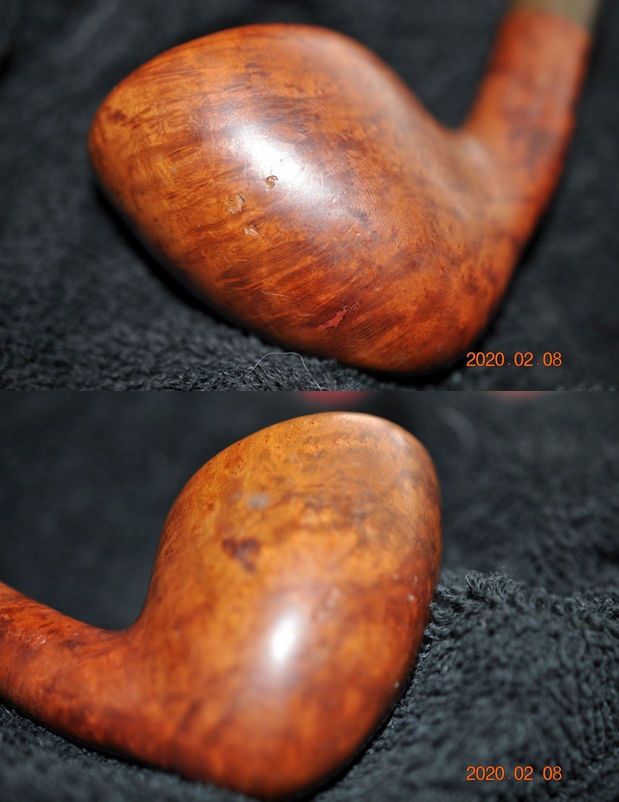
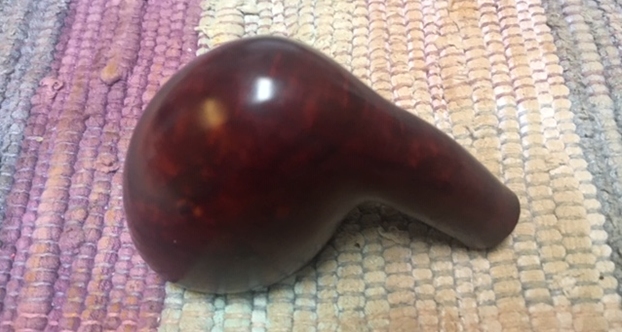
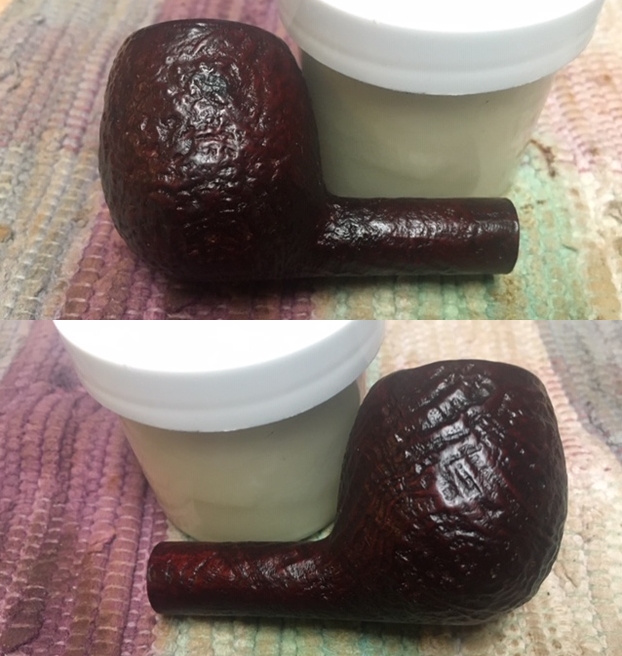
 Pausing now to examine the stummel after cleaning, I like the blasted finish. The finish is thin, but a good foundation is present.
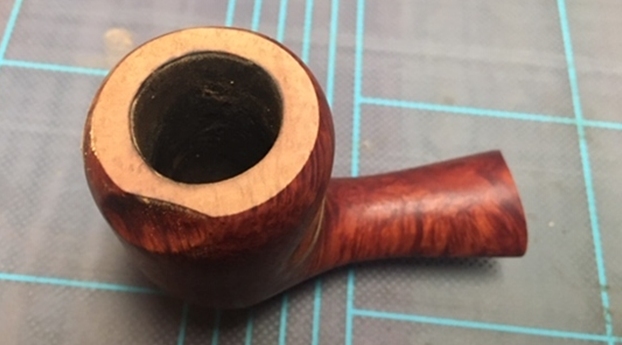
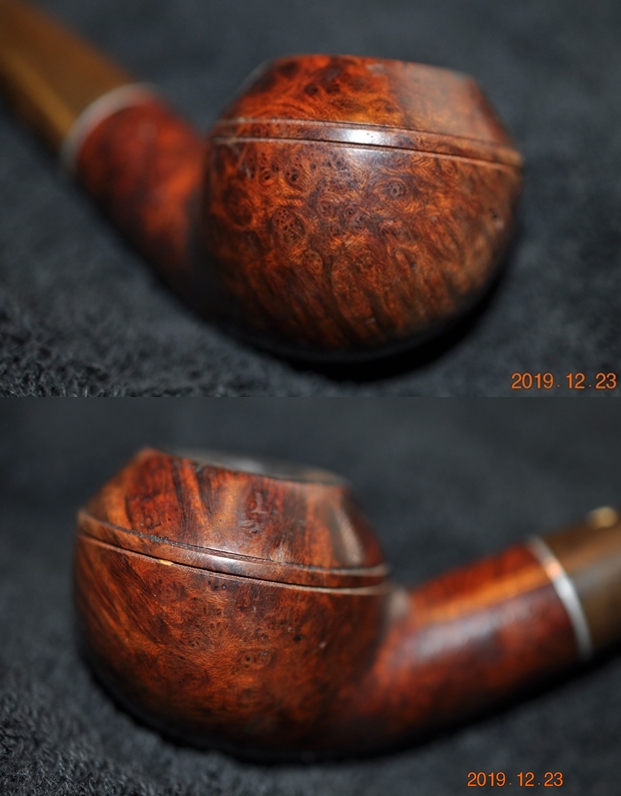
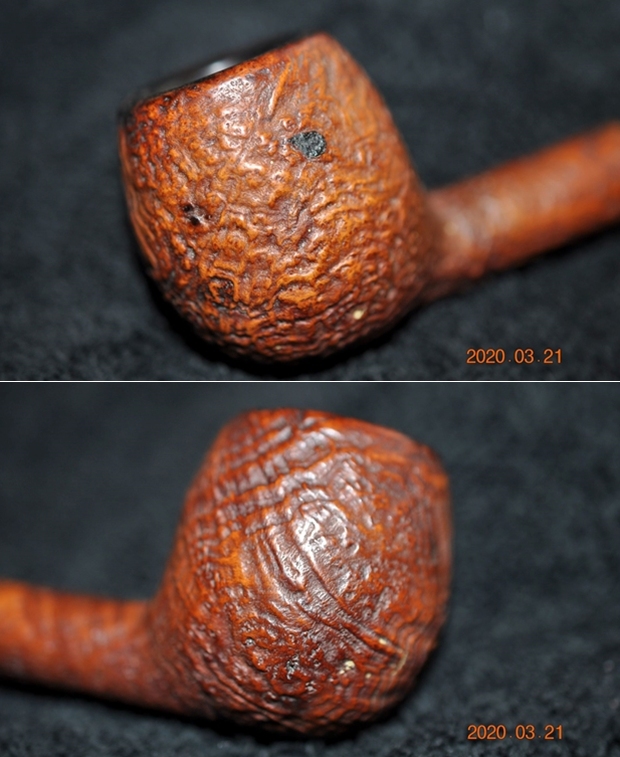
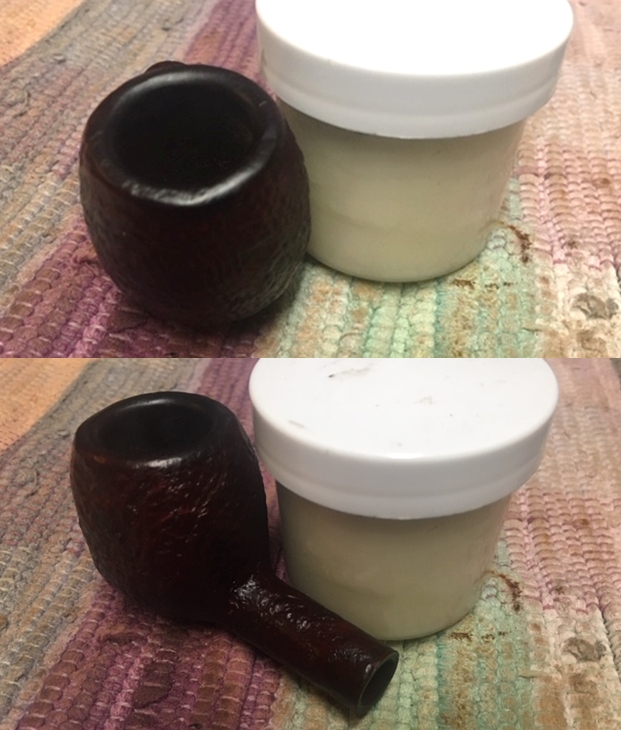
 On the rim, I’m interested to observe that the right side has more of a rough blasted surface, but the left side is smoother. Looking at the picture above you can see the grain moving upwardly toward the rim. What one would expect the rim to be showing as a result, would be the bird’s eye grain formations. Hence, smoother roughness on the left side of the rim. Also, on the rim, the Savinelli folks cut a ‘smart bevel’ on the internal rim edge. My next step before sprucing up the stummel’s color is to refresh the bevel. To do this, I use a hard surface to back 240 sanding paper and recut the bevel. I follow the 240 paper with 600 grade paper. The results are good! This slight bevel which reveals some smoother briar will look great later in contrast to the rough, blasted rim surface.
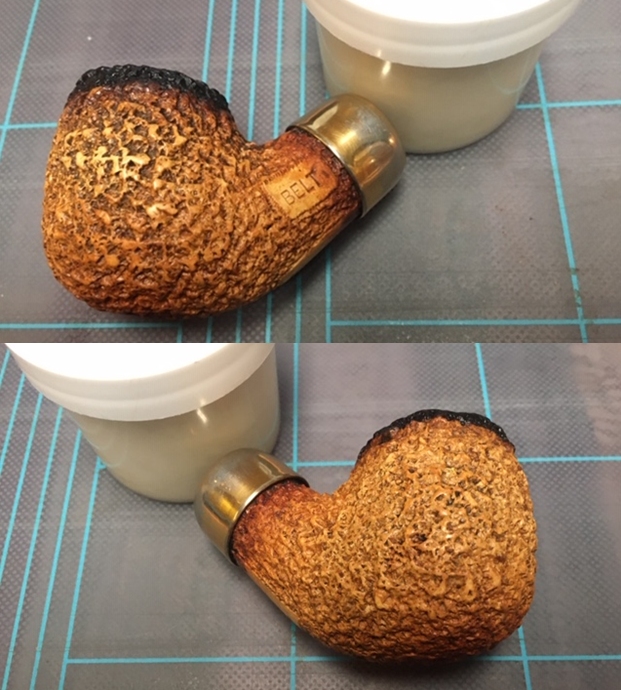
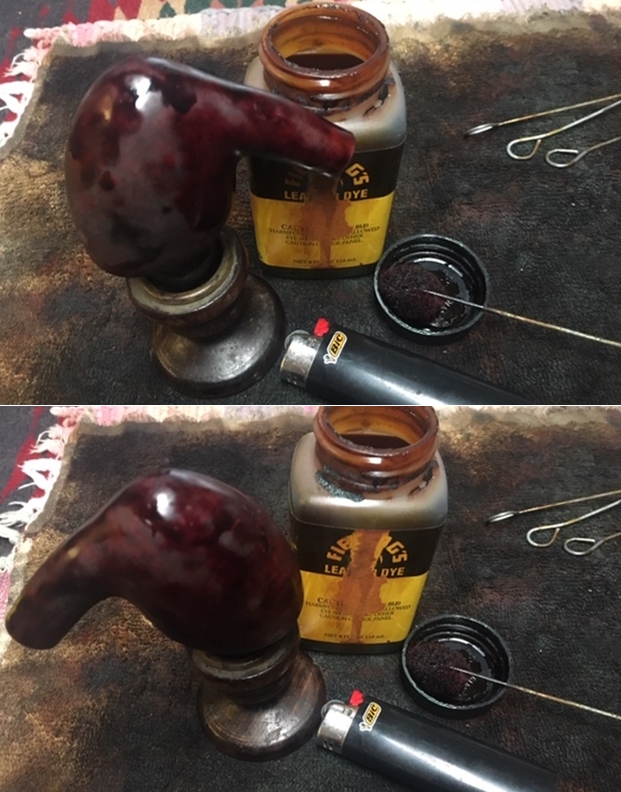
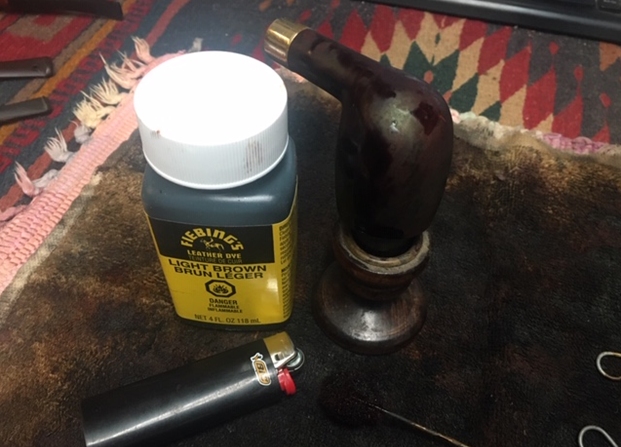
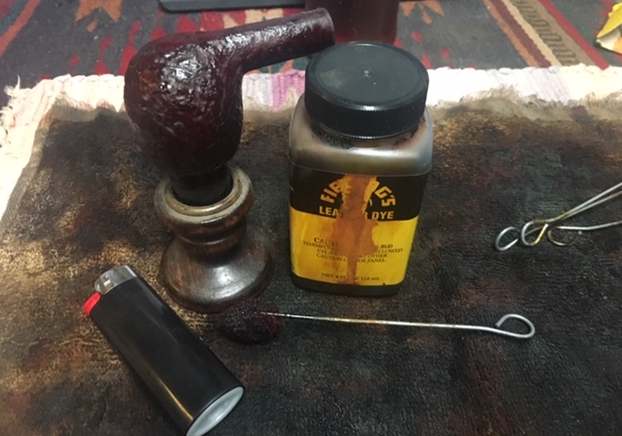
 To refresh the stummel’s hue, I use Fiebing’s Dark Brown Leather Dye to provide an undercoat foundation. The great thing about blasted surfaces, they are forgiving but later with some light sanding, the tips of the blasted briar landscape can give an attractive lighter contrasting that gives the surface depth and character. I assemble the desktop staining module and after covering the nickel shank cap with masking tape, I heat the stummel with the hot air gun to help the briar surface to open and be more receptive to the dye.
  I then paint sections of the stummel with a folded pipe cleaner and flaming it as I go. The lit candle ignites the alcohol in the aniline dye and after it combusts it leaves the pigment in the grain.
 I then put the newly stained stummel to the side for several hours allowing the new dye to set.
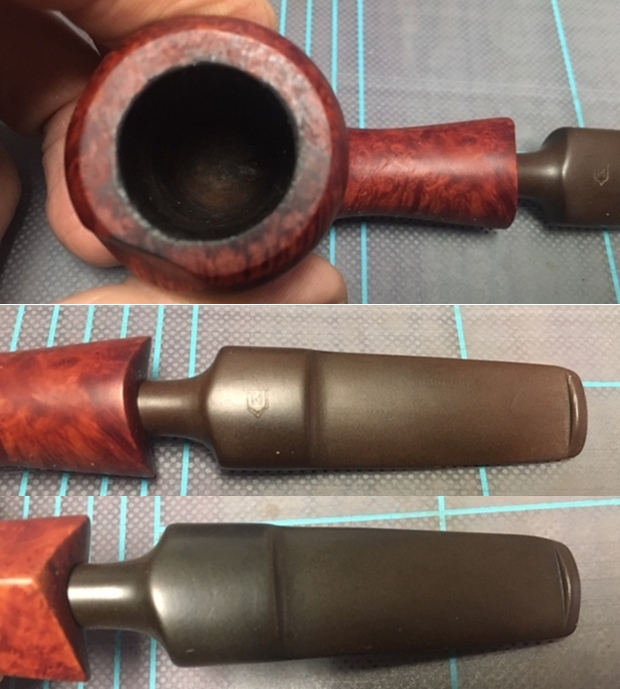
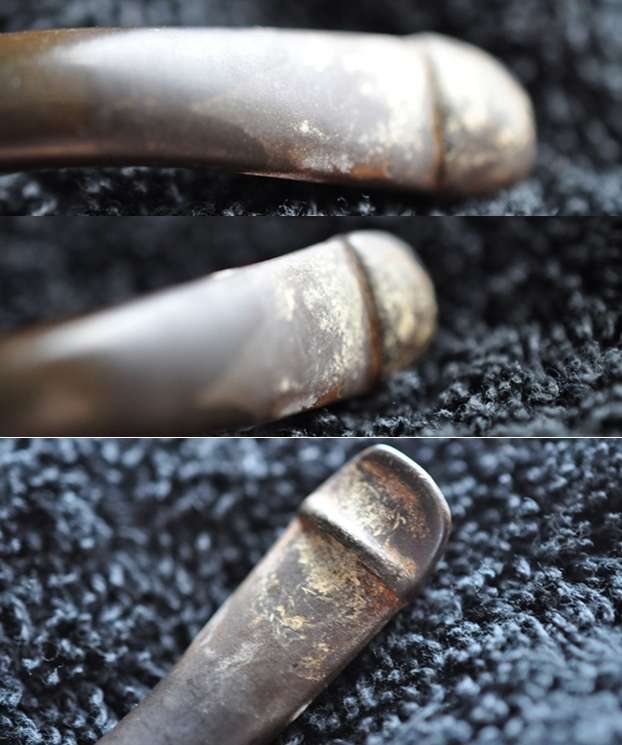
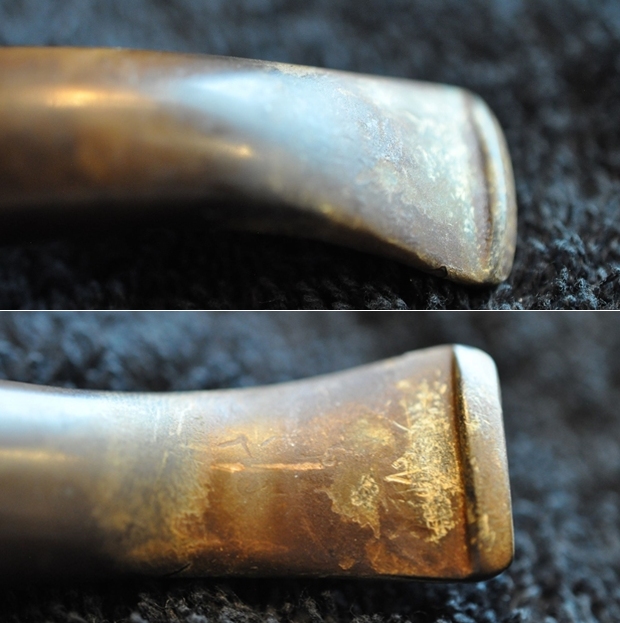
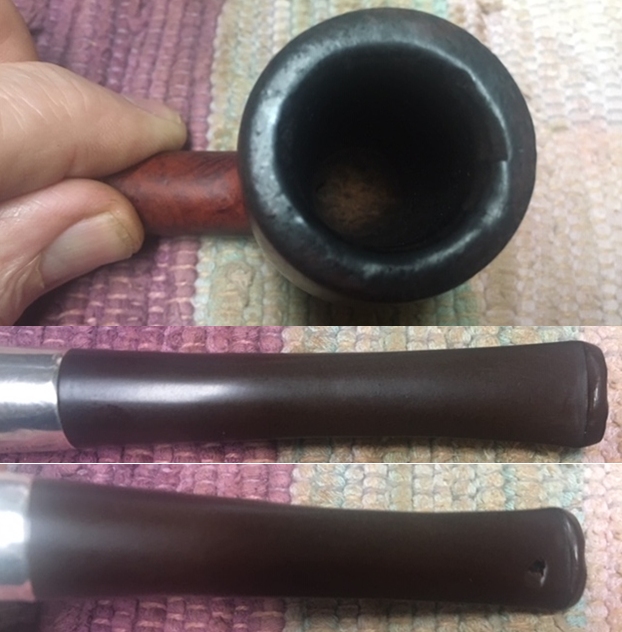
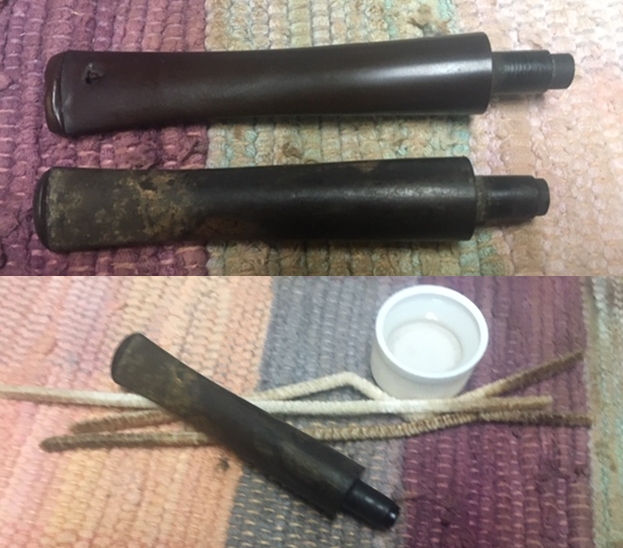
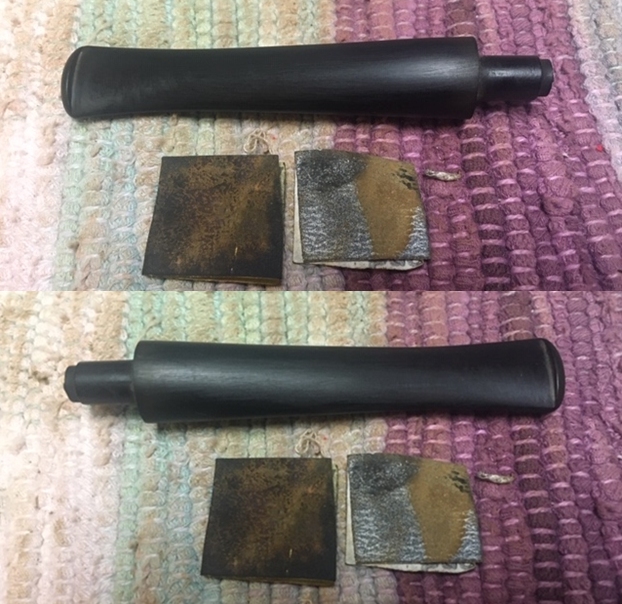
 With the stummel on the side, I turn to the military mount P-Lip Savinelli stem. I take another closer look at the issues with the stem. Both upper and lower bit have some tooth chatter, but it is minor. It should sand out without difficulty. The bigger issue is the oxidation.
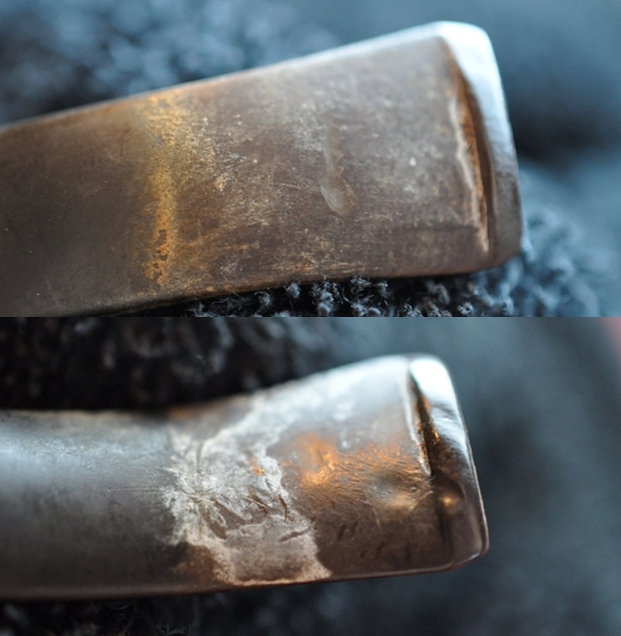
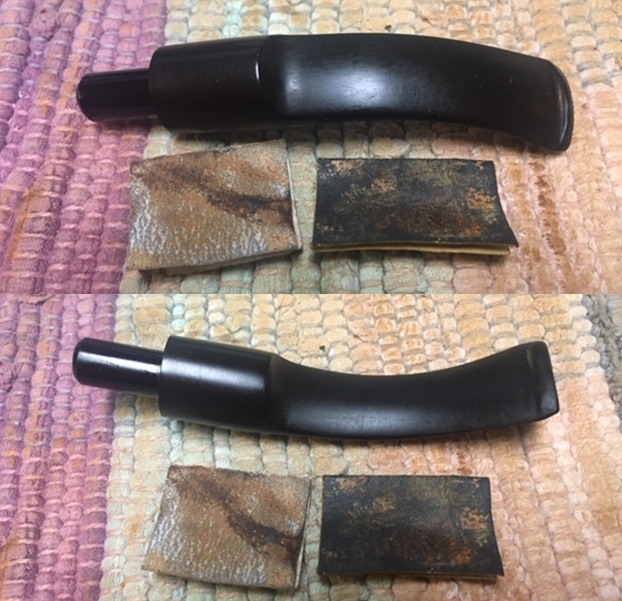
  The picture below tries to show the contrast between the inserted part of the stem that is black, without oxidation, and the rest of the exposed stem. UV light is not good for vulcanite and the oxidation comes primarily because of this.
 To address the oxidation and the light tooth chatter, 240 grade paper is used to sand the upper- and lower-bit area.
 The sanding it expanded to address the oxidation throughout the stem. To protect the Savinelli ‘S’ stem stamping, I cover it with masking tape.
 After the 240 grade paper, the entire stem is wet sanded with 600 grade paper and this is followed with 000 grade steel wool.
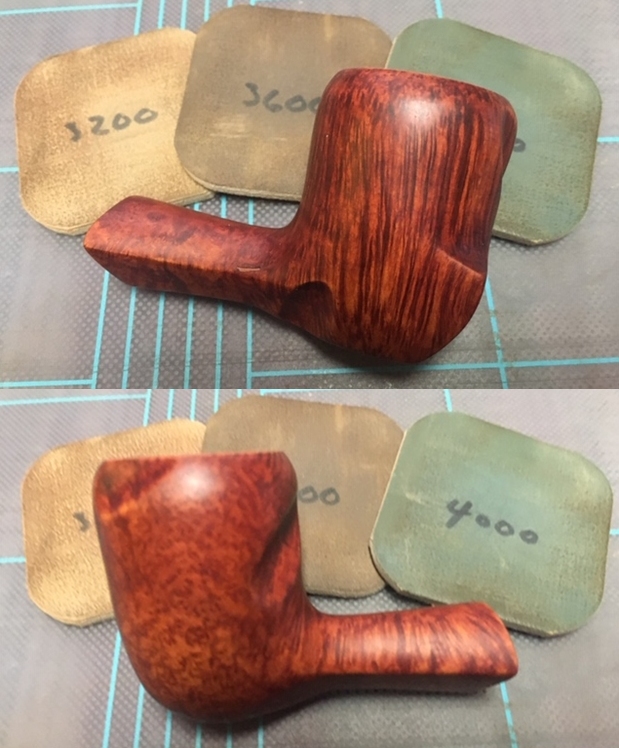
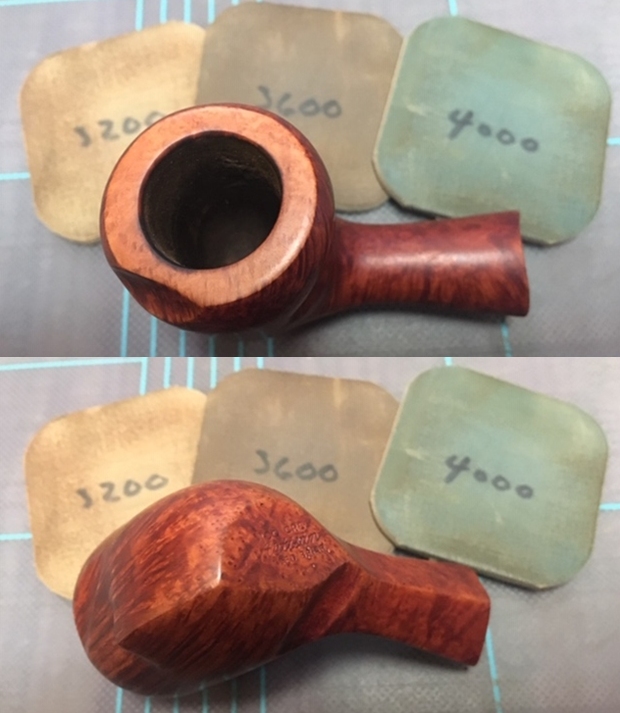
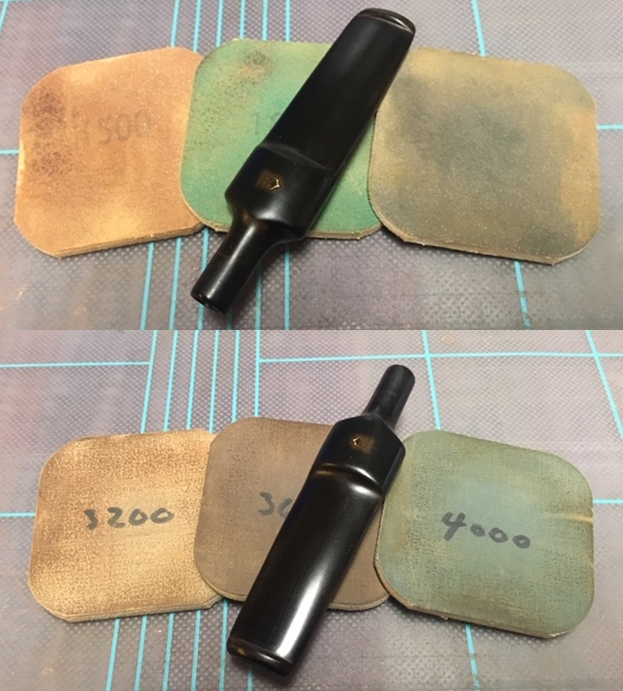
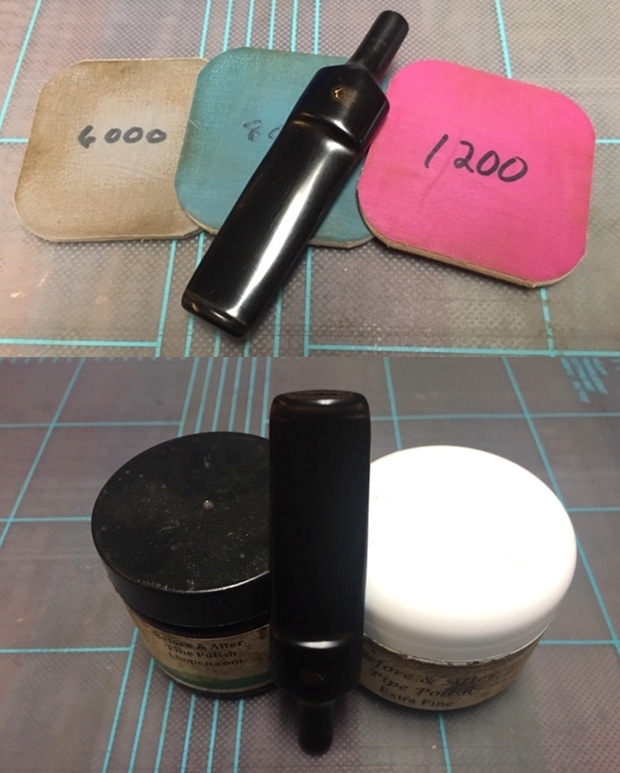
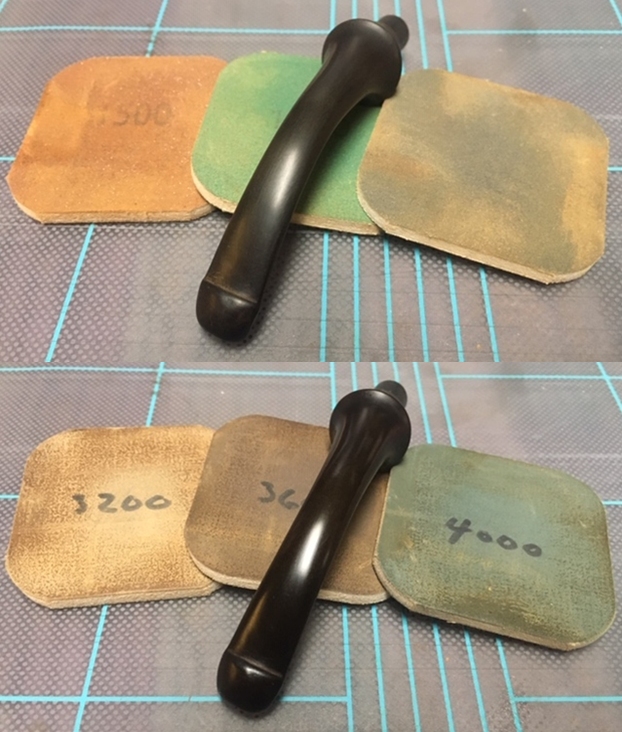
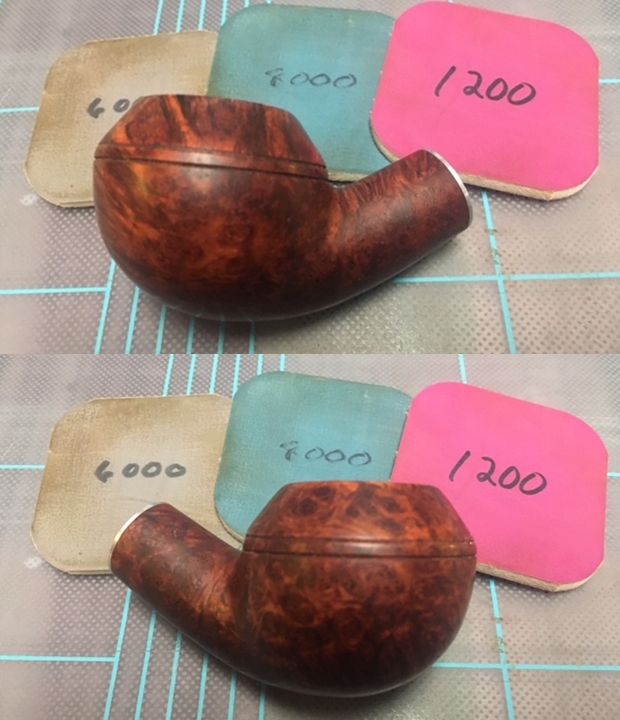
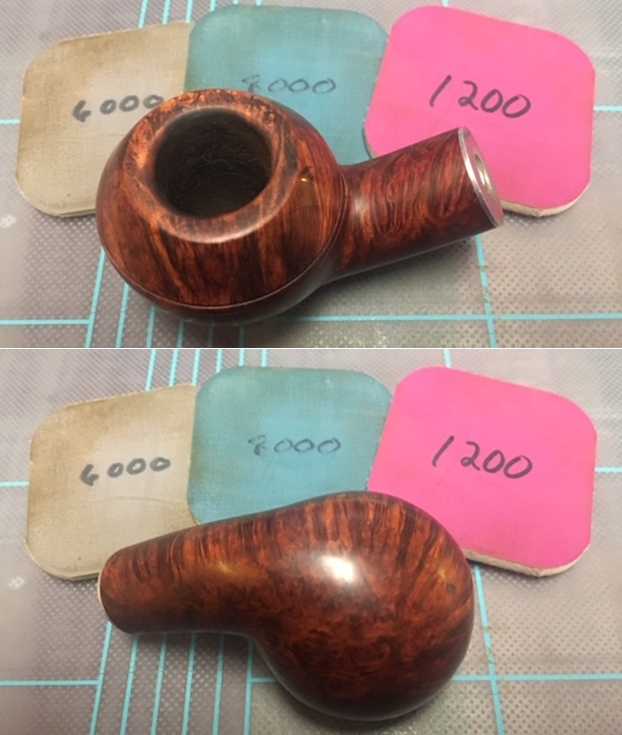
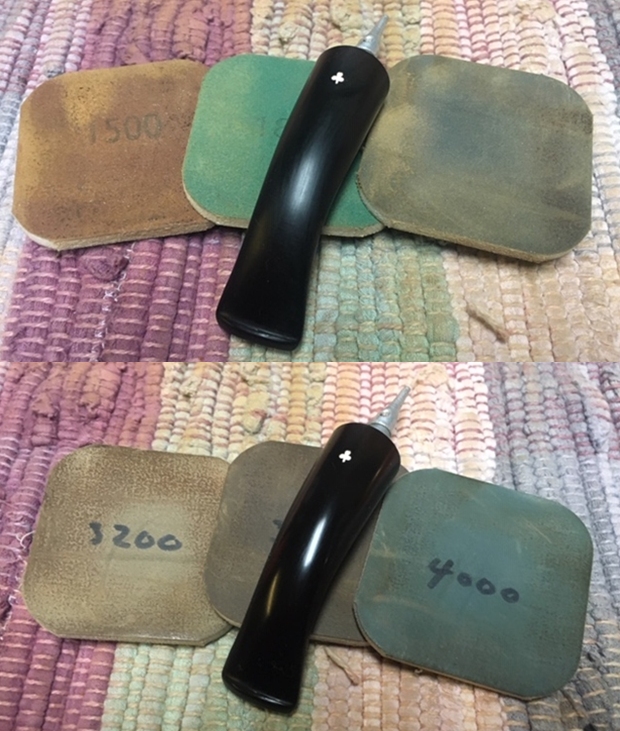
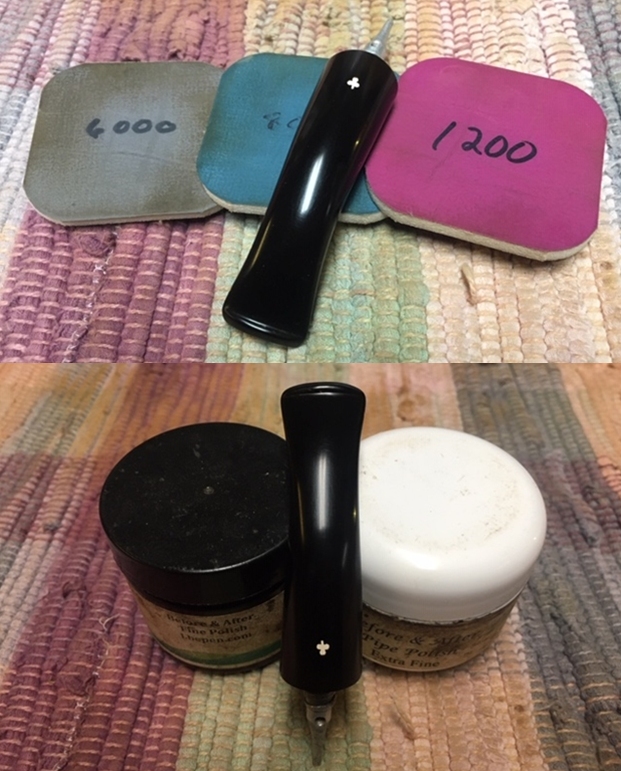
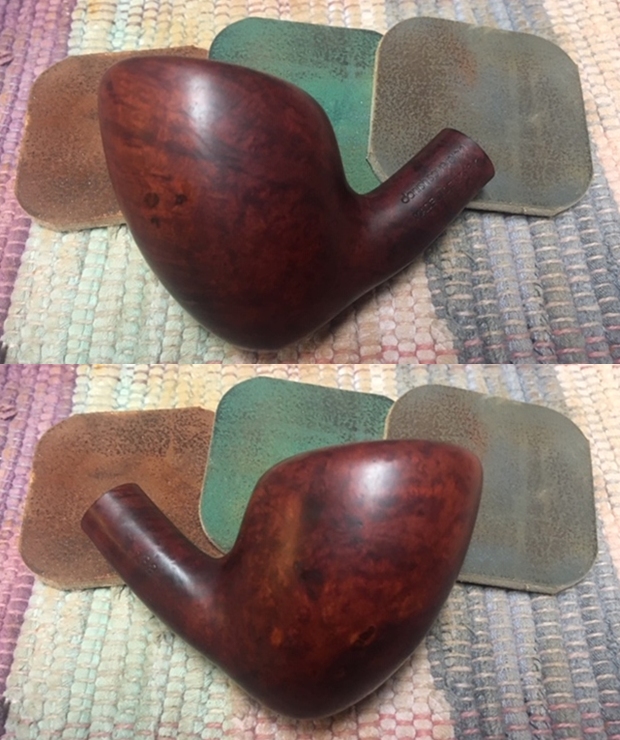
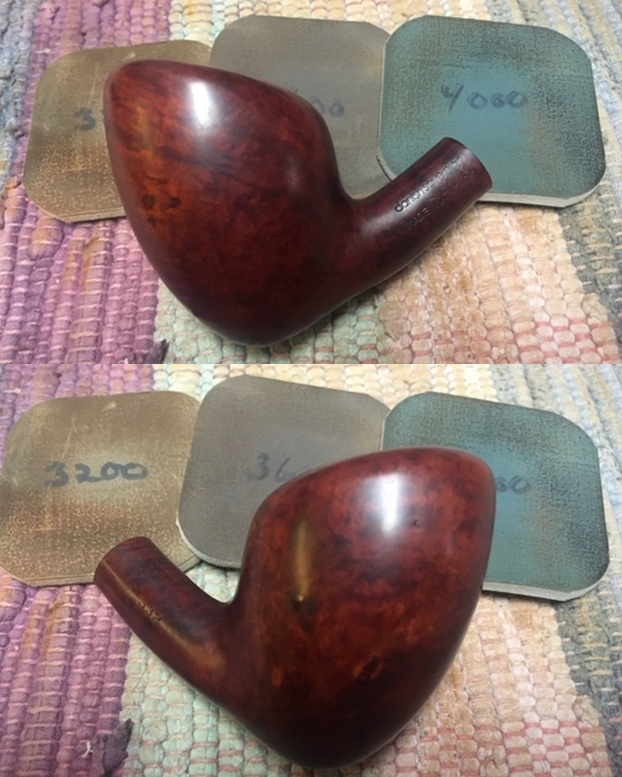
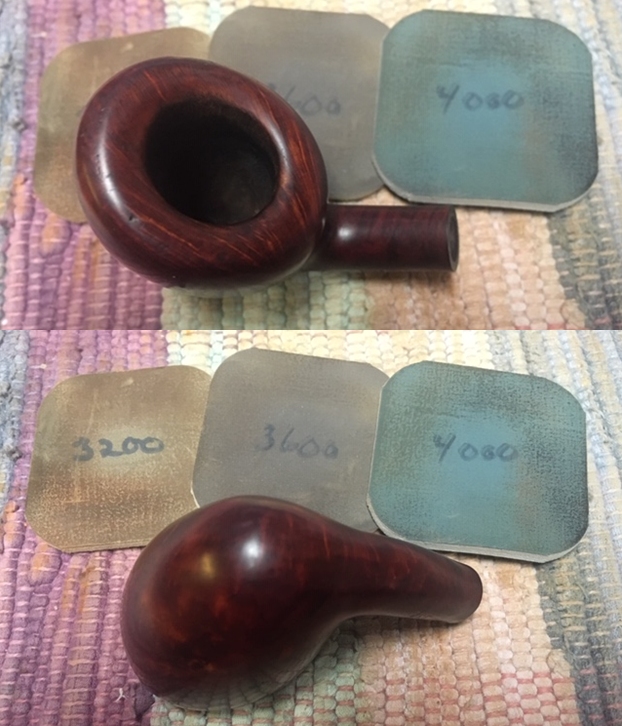
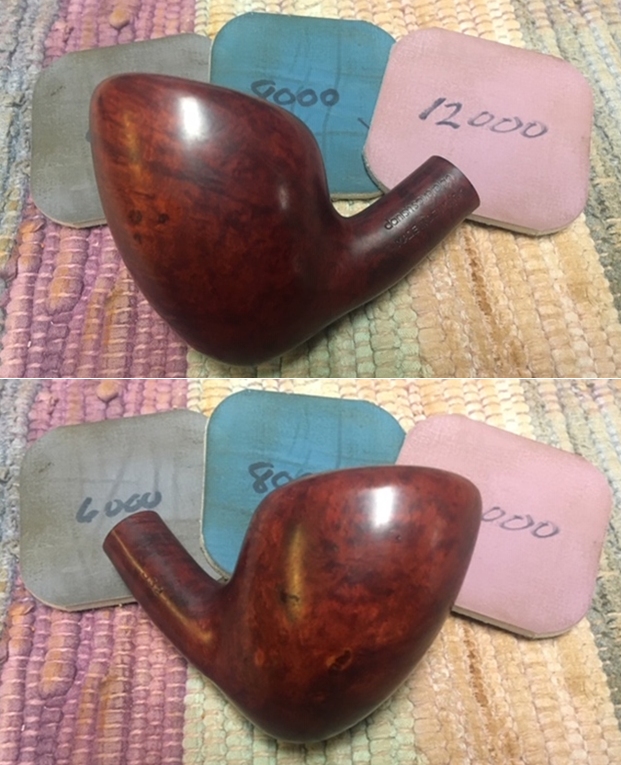
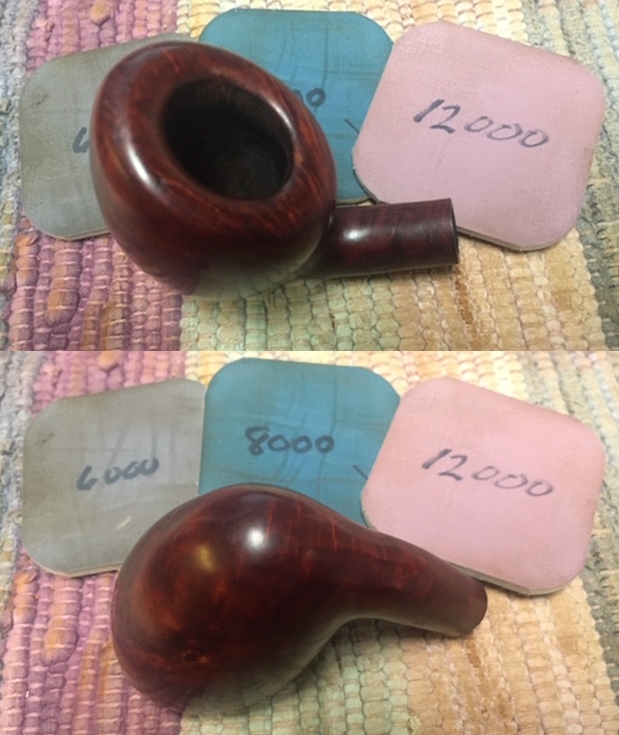
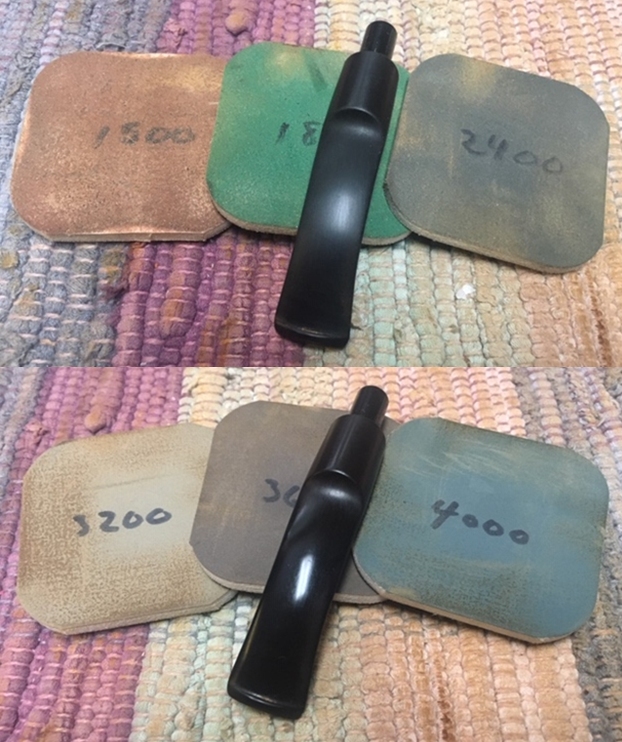
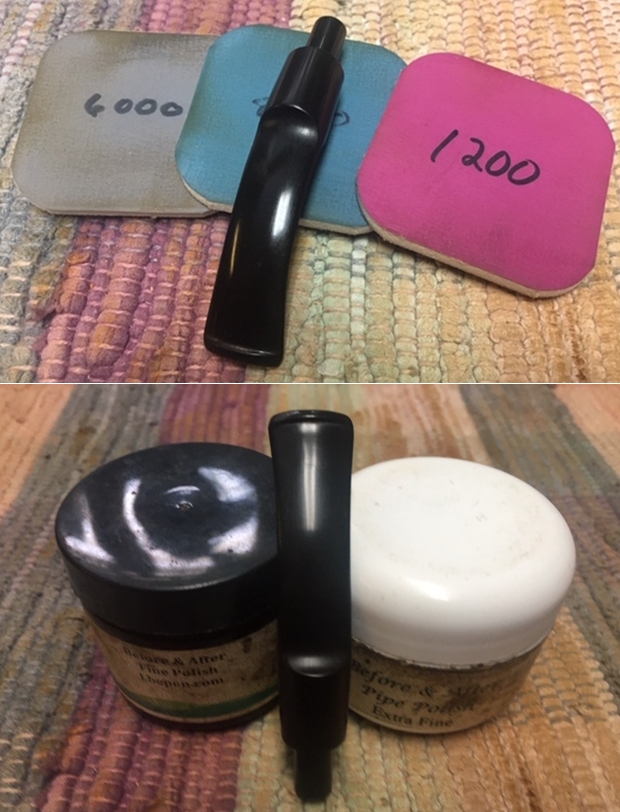
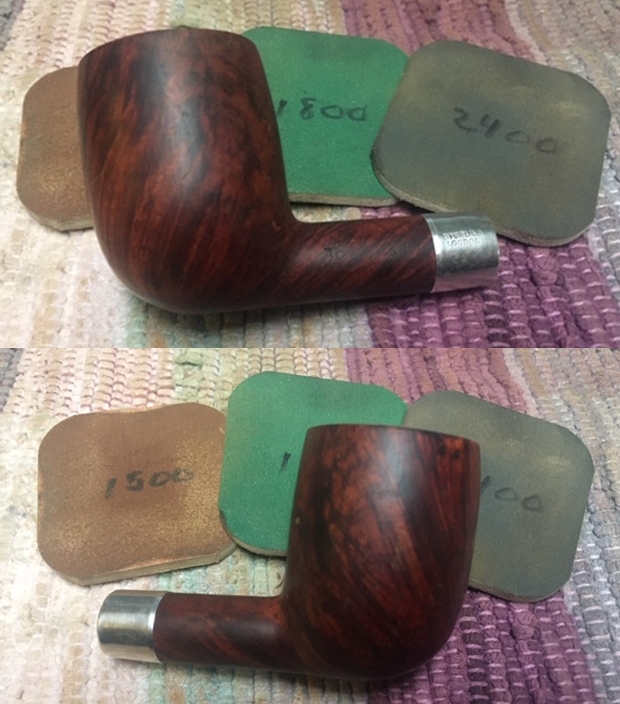
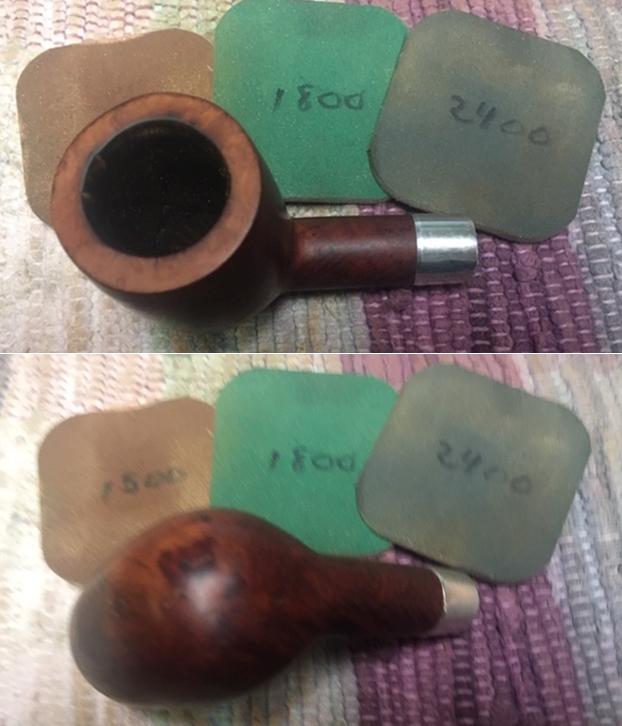
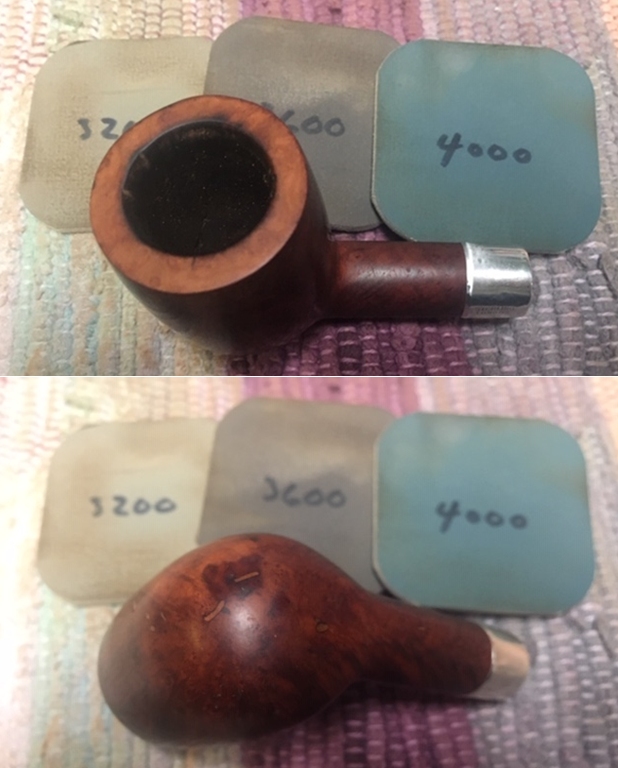
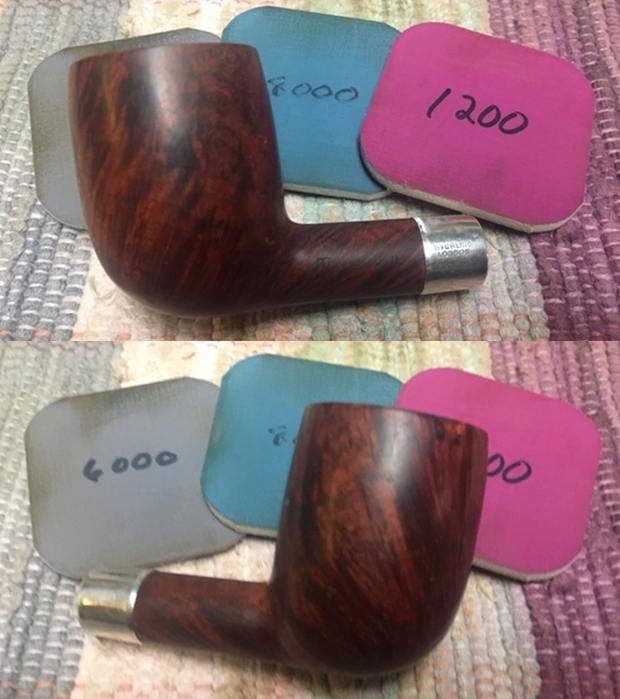
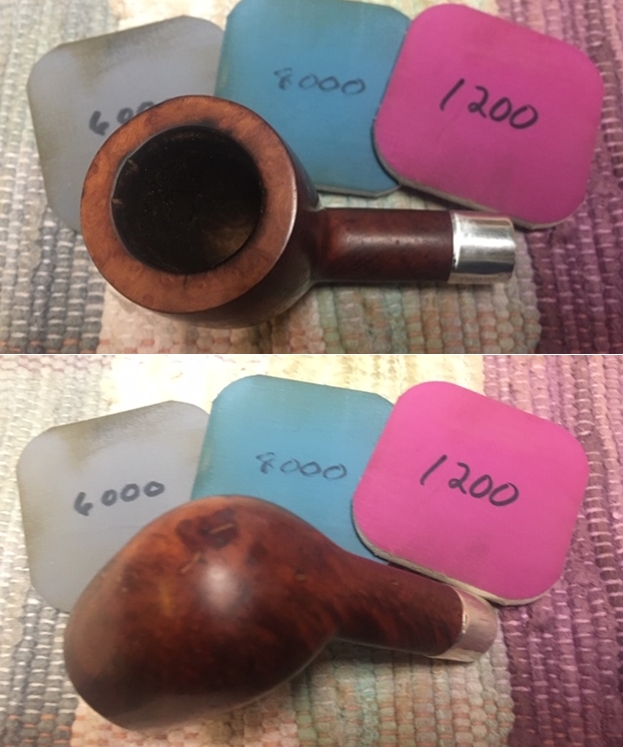
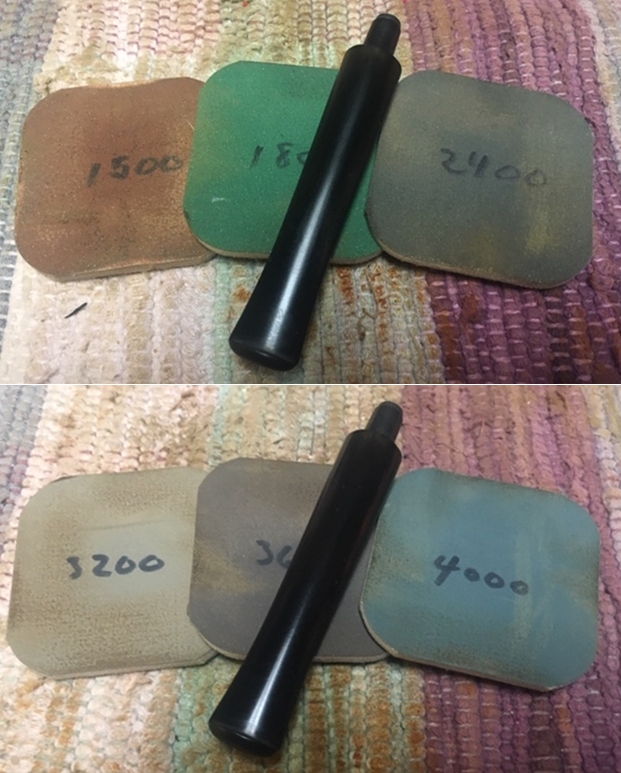
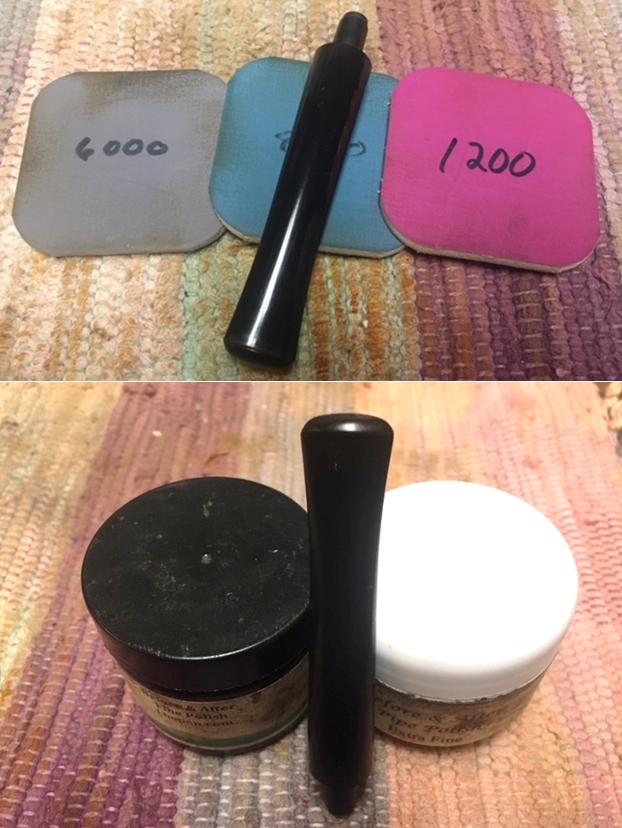
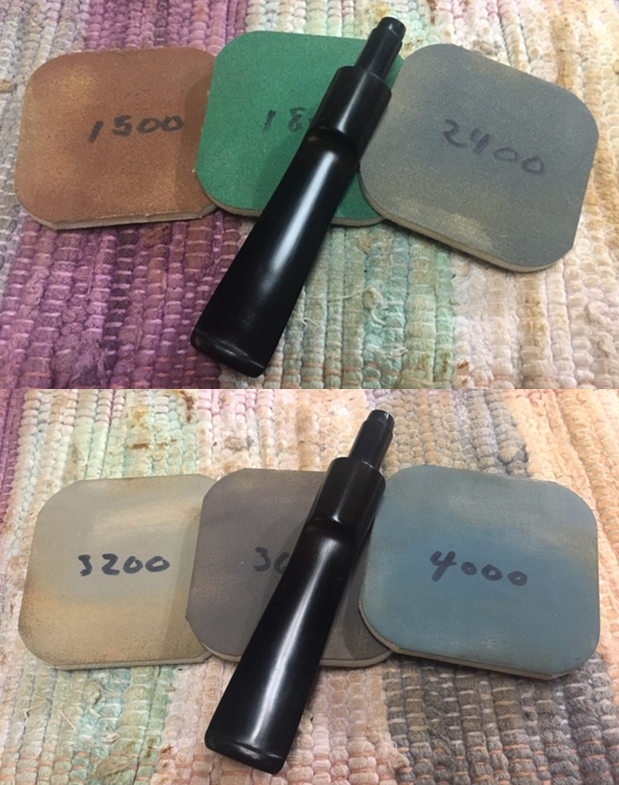
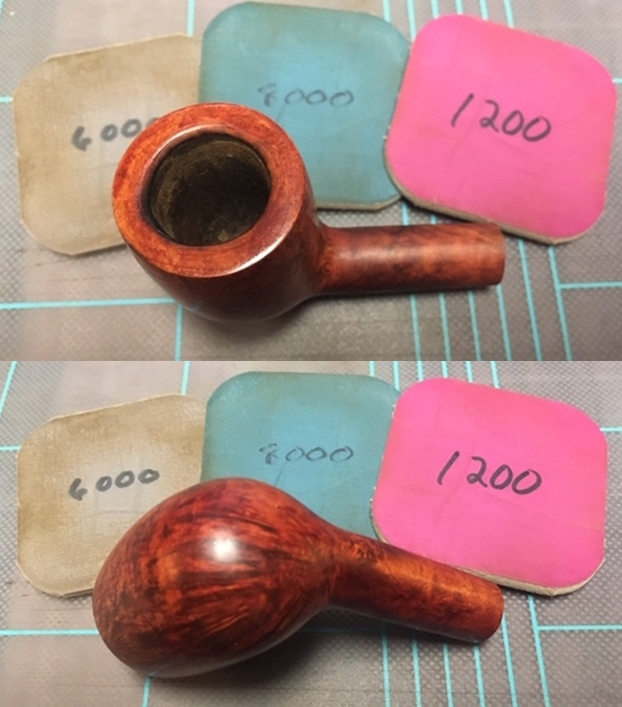
 Continuing with the stem, the full regimen of micromesh pads is applied. Starting with pads 1500 to 2400, the stem is wet sanded. Following this the stem is dry sanded with pads 3200 to 4000 and 6000 to 12000. Obsidian Oil is applied between each set of 3 to condition the stem as well as protect it from oxidation.
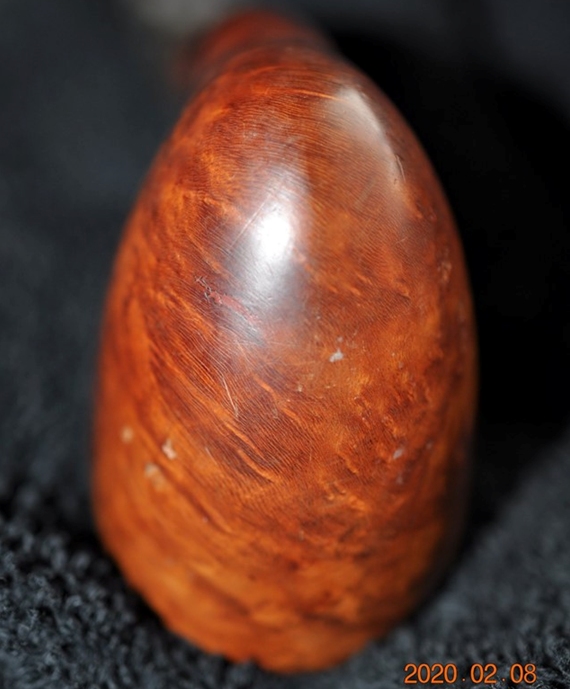
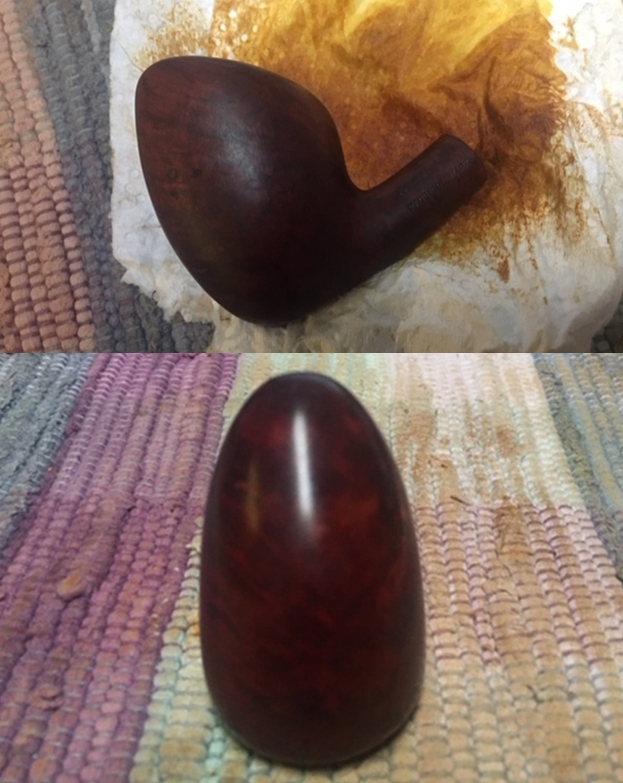
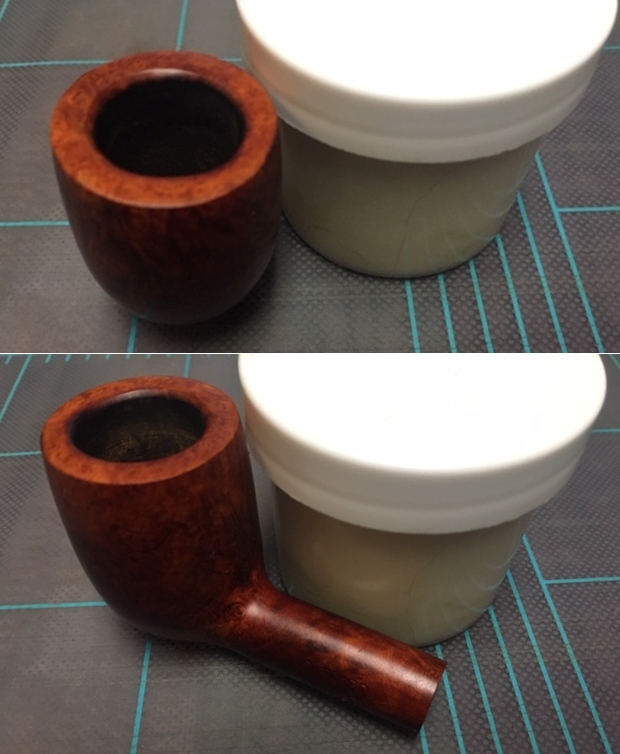
 Turning now back to the stummel, the flamed dye has been resting for several hours and ready to be unwrapped. To do this, a cotton cloth buffing wheel is mounted to the Dremel with the speed set at about 40% full power. Tripoli compound is used to help clear the fire crusted dye revealing the blasted surface beneath.
 After using the cotton cloth buffing wheel, I transition to a felt buffing wheel again using Tripoli compound with the Dremel set to the slowest speed. I lightly go over the rough blasted surface primarily to buff the peaks of the blasting with the coarser wheel to create flecking in the surface. This gives the surface more contrast and depth.
 I then wipe the dyed surface with a cotton pad wetted with alcohol not so much to lighten the dye but to blend the hue and to dissolve any dye clumps that didn’t dissolve during the buffing process.
 I reattach the stem and mount another cotton cloth buffing wheel to the Dremel setting it at 40% full power. I then apply Blue Diamond compound to the Savinelli blasted surface and to the stem.
 After completing the application of Blue Diamond compound, I look at the stummel more closely. I’m getting the desired flecking affect in the blasted surface, but I’m not satisfied with the hue of the flecks. The flecks appear more of a light brown rather than a darker, richer reddish bend. I decide to apply a dye wash of red aniline dye over the dark brown.
  After heating the stummel once again, I apply the red dye over the entire stummel surface with a folded pipe cleaner. After applying the dye thoroughly, the stummel is set aside for a few hours for the overcoat red dye to set.
 After a few hours, I again use the Dremel and apply Blue Diamond compound with a cotton cloth buffing wheel. I realize later that I didn’t picture this process. I like the results of the overcoat red dye wash. Next, to prevent the new dye coming off on the hands later when the pipe is put into surface, I warm the stummel with the hot air gun. This emulates the heating up of the stummel when lit and this usually is when newly dyed briar leaches dye onto the hands. After heating the stummel, I give it a rigorous hand buffing using a cotton cloth to remove the raised dye.
 Before moving on to the waxing of the stem and stummel, I have a few mini projects to do. The first is to clean and shine the nickel-plated shank cap. I first use a tarnish remover which is applied to the nickel with a cotton pad.
  After the liquid is buffed on, I rinse the cap with tap water. The tarnish remover does some good but leaves a lot to be desired. The nickel cap is rough, and you can see some small patches of the nickel I referenced earlier have worn off.
 After the tarnish remover, I transition to using Blue Diamond compound on the nickel. After mounting another cotton cloth buffing wheel onto the Dremel dedicated to nickel buffing and I methodically apply the compound to the metal working around the cap. I like these results. The nickel has cleaned and shined up very nicely.
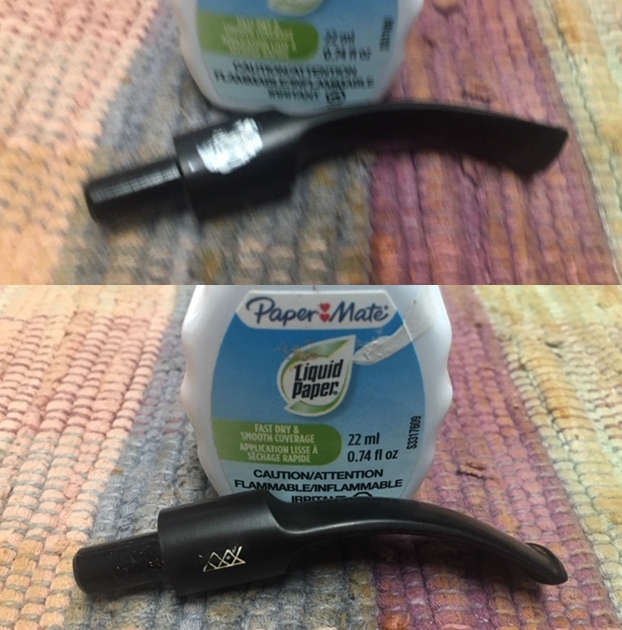
 The second mini project is to color the Savinelli ‘S’ stamping on the stem. Using white acrylic paint, I place a small amount of paint on the ‘S’ and then dob it dry with a cotton pad.
 Then I use the flat edge of a toothpick rubbing gently over the stamping removing the excess paint from the stem. The ‘S’ is left with color and with definition.
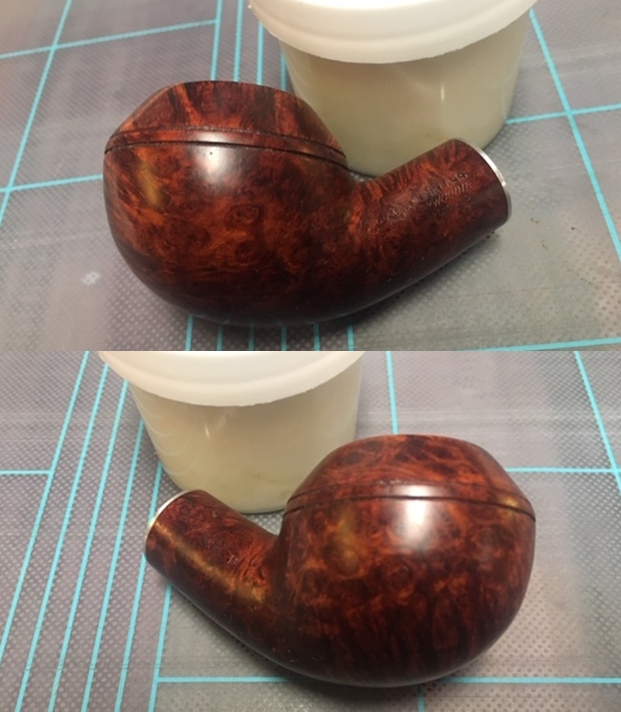
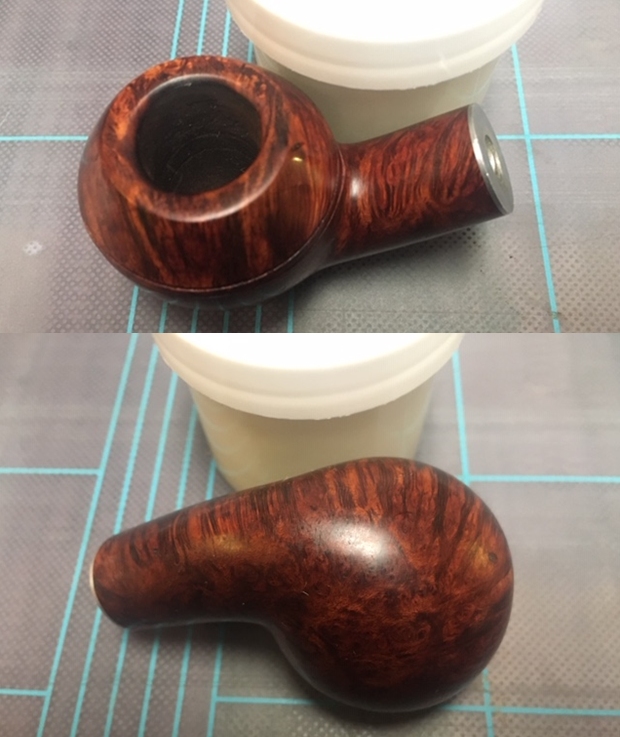
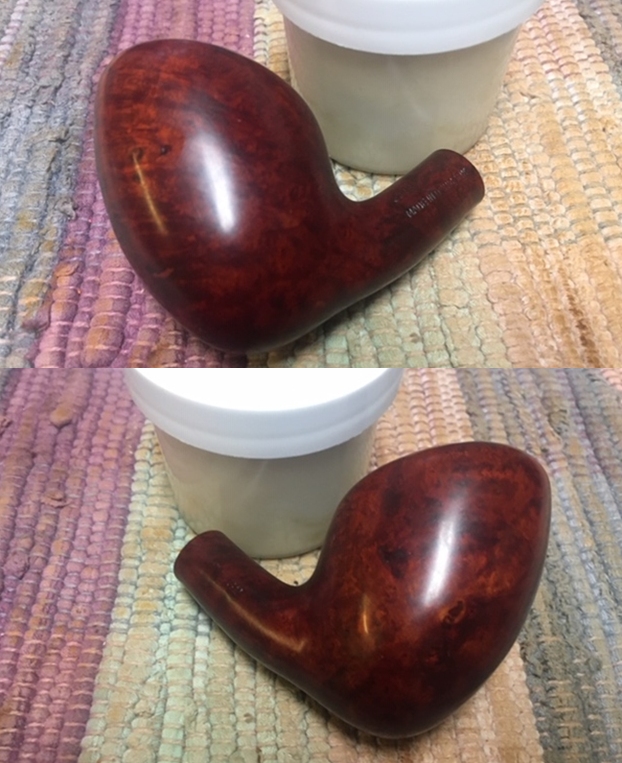
 In the home stretch – another cotton cloth buffing wheel is mounted on the Dremel with the speed at 40% of full power. Carnauba wax is then applied to both stem and stummel. After a few coats of wax, the pipe is given and rigorous hand buffing to raise the shine and to disperse undissolved carnauba wax.
 Ugh – I thought I was finished but remembered that I was going to further clean and freshen the internals with a kosher salt and alcohol soak. After twisting and stretching a cotton ball to form a wick, I use a wire to help guide the cotton wick down the airway into the mortise/trap and airway. The cotton wick serves to draw out the residual tars and oils during the soak process.
  After inserting the wick, kosher salt is placed in the bowl. Kosher salt has no aftertaste unlike iodized salt. Using a large eye dropper, Isopropyl 95% fills the bowl until it surfaces over the salt. After a few minutes, the alcohol is absorbed into the internal cavity and I top off the alcohol once again.
 After several hours, the wick and salt do not appear to have been soiled at all. I hope this means that the internals are clean. After removing the expended salt from the bowl, paper towel is used to wipe the chamber and I blow through the mortise to make sure all the salt crystals have been removed. I follow this by using one cotton bud and pipe cleaner to confirm that the internals are indeed clean. I forgot to picture this!
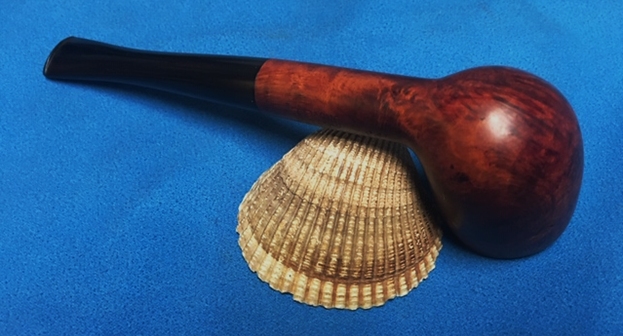
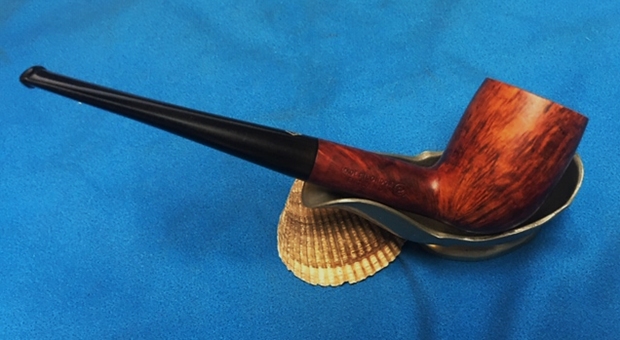
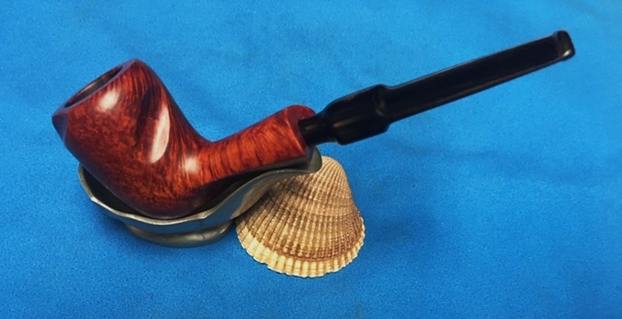
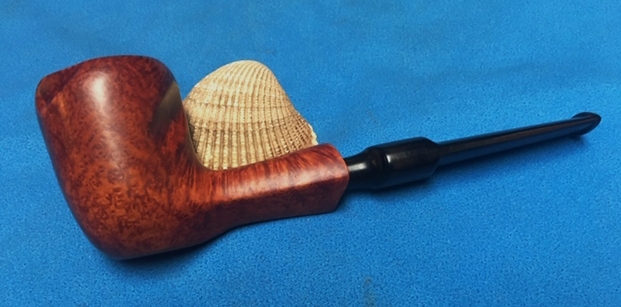
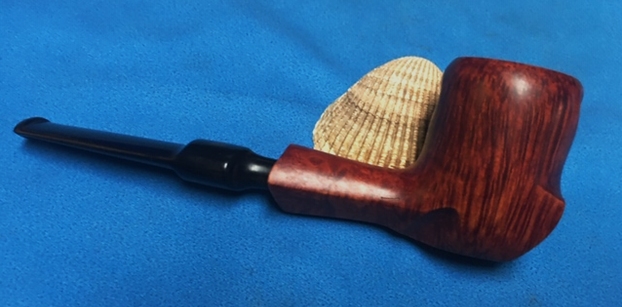
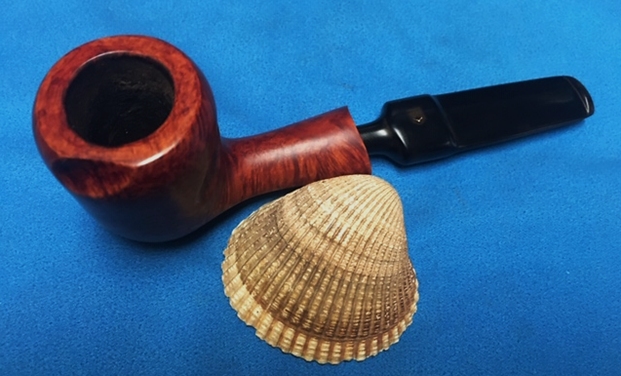
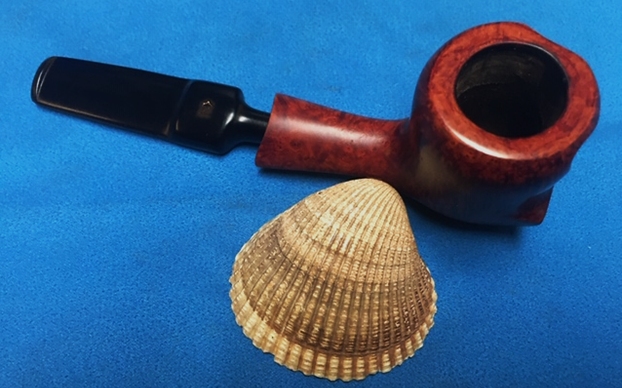
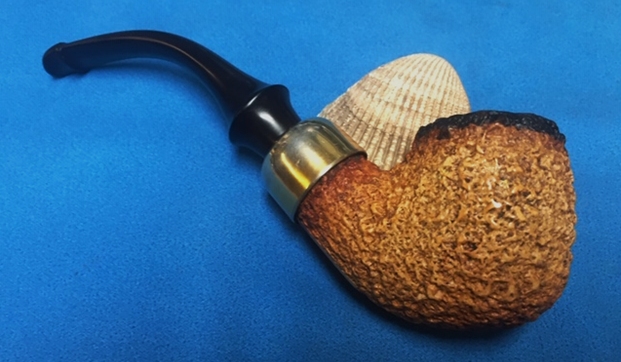
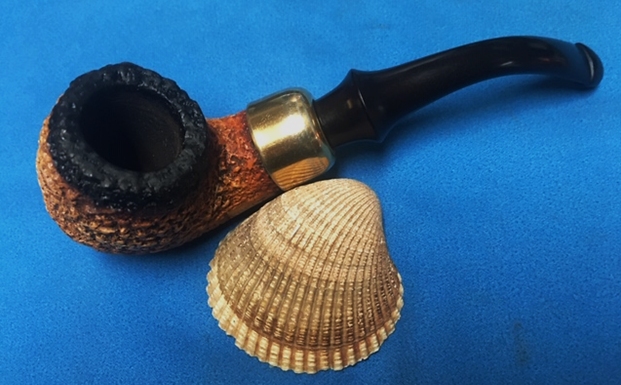
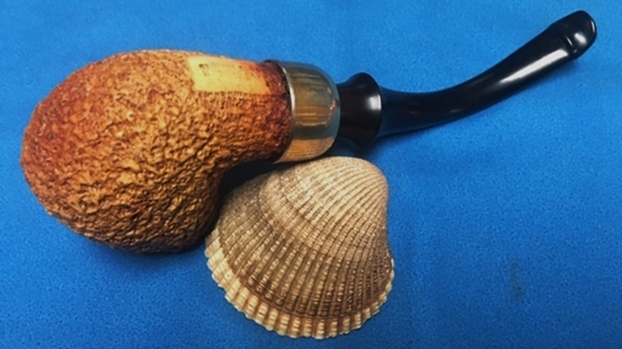
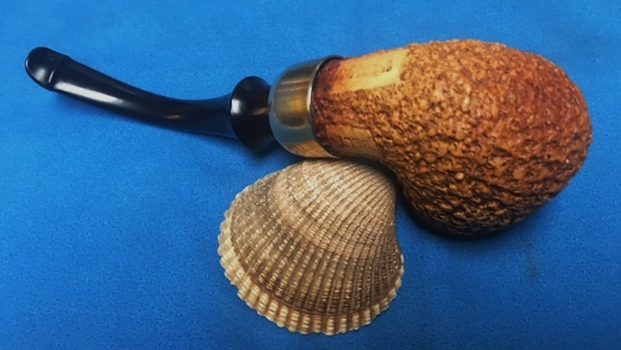
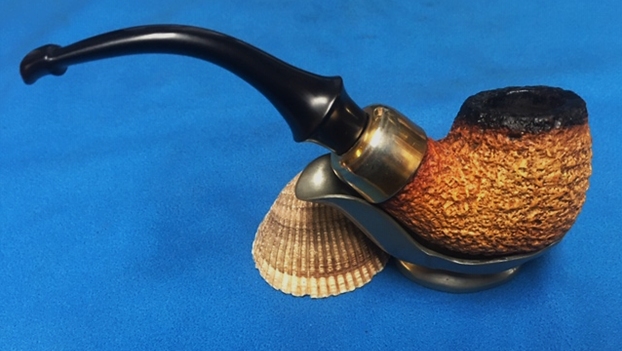
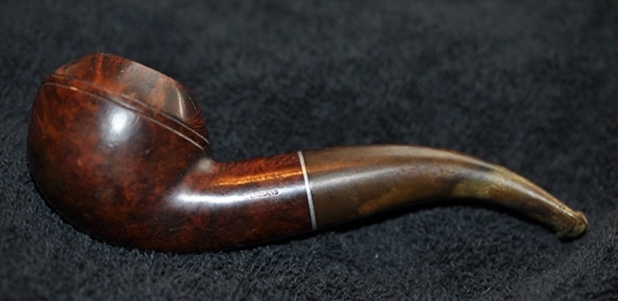
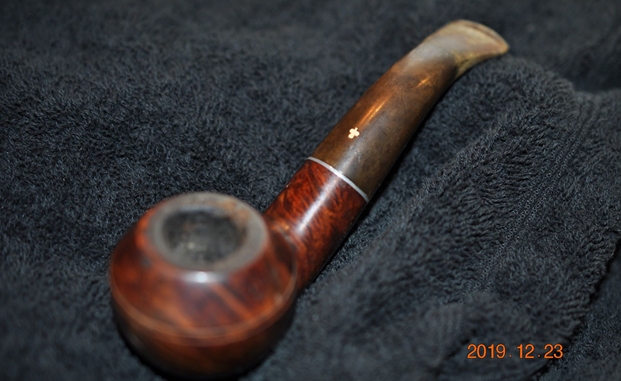
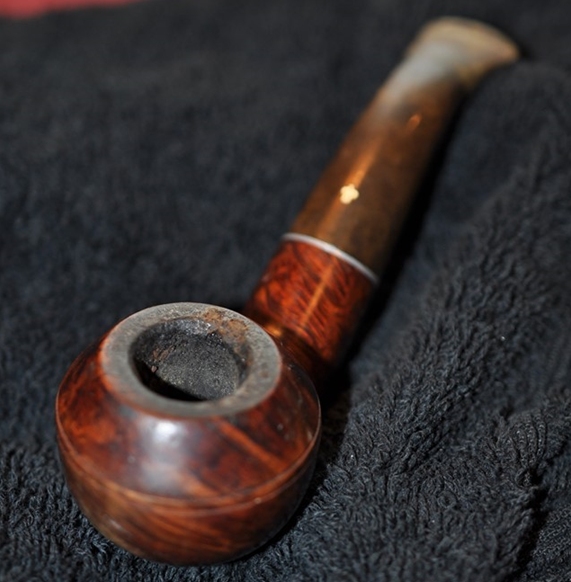
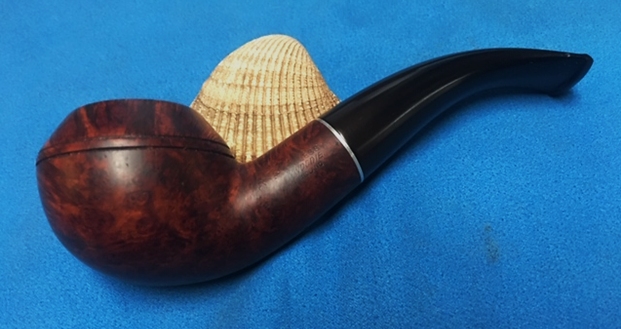
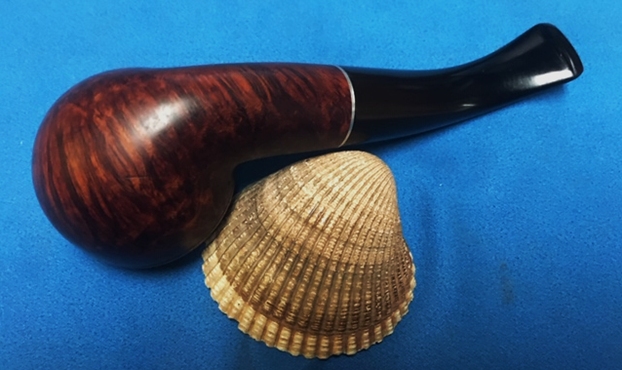
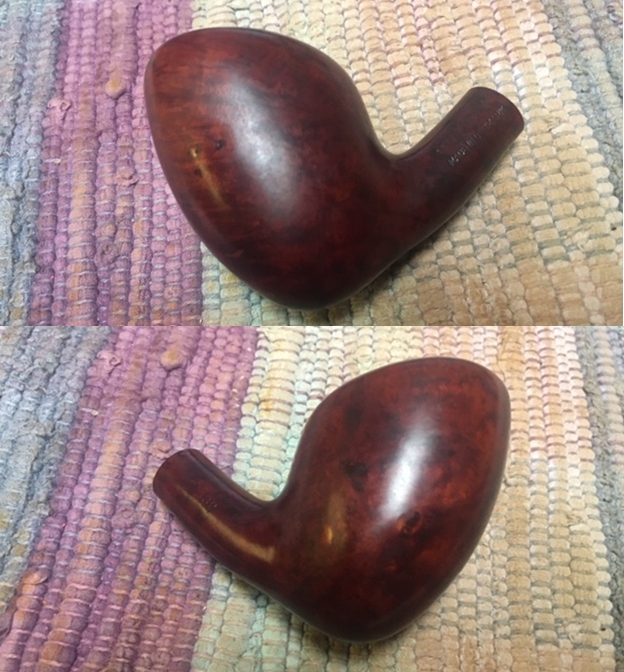
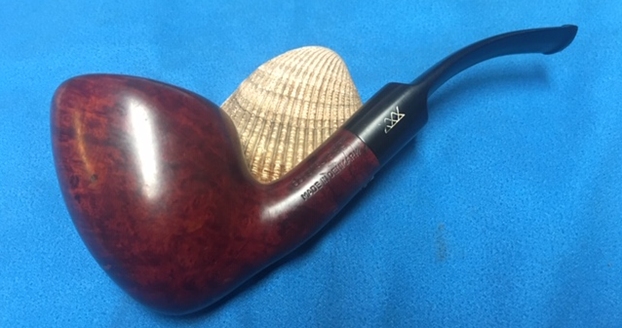
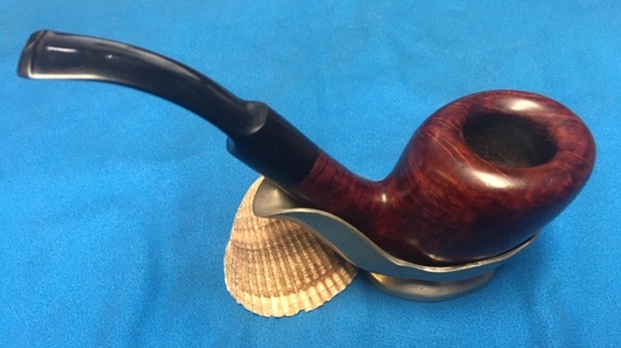
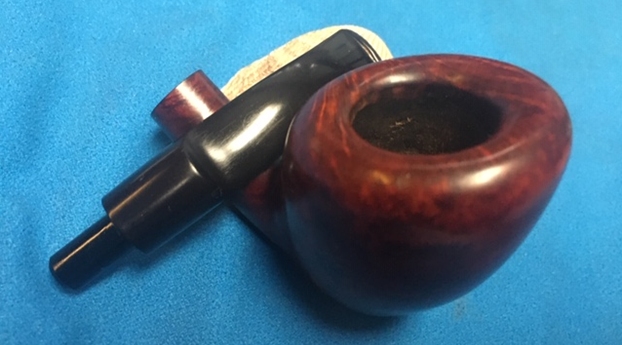
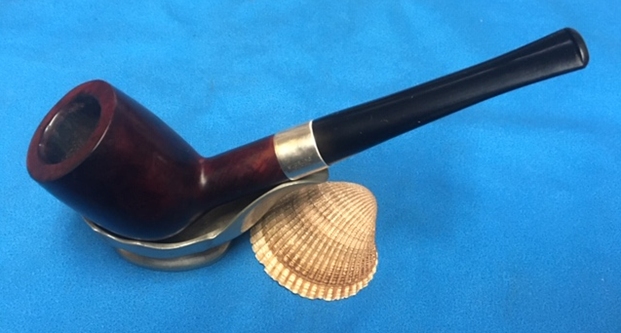
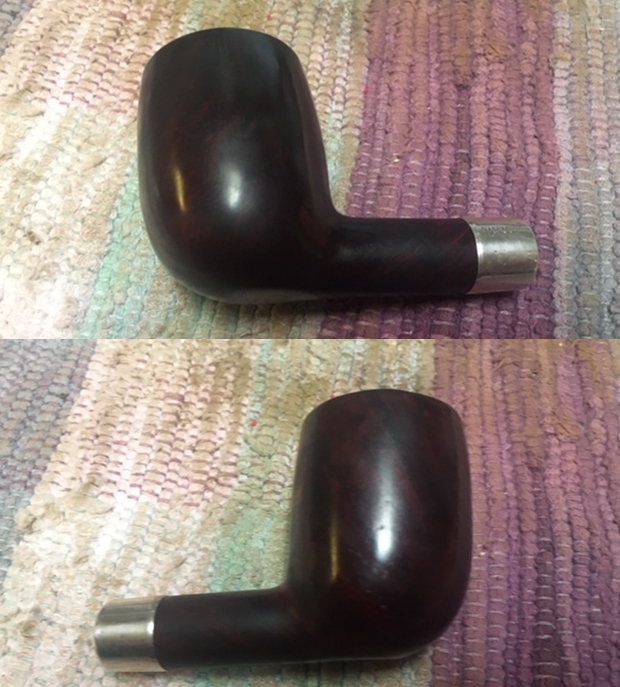
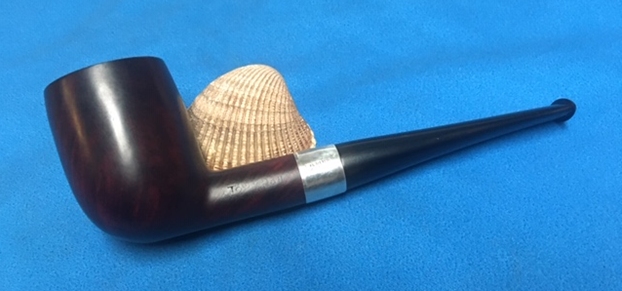
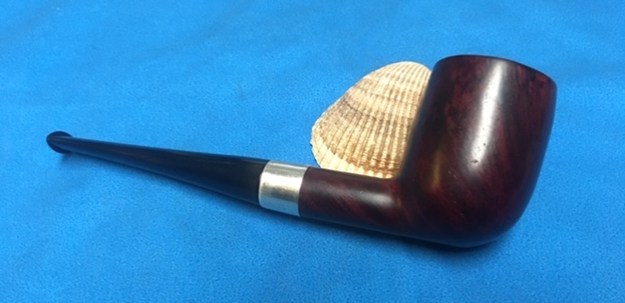
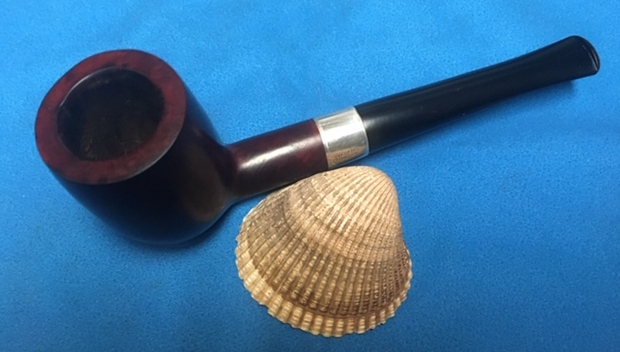
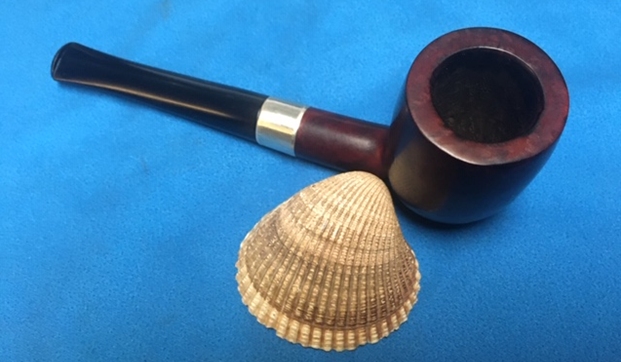
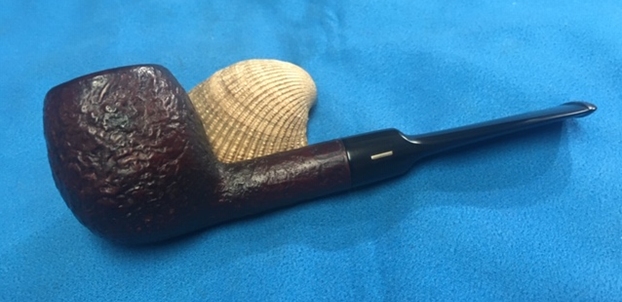
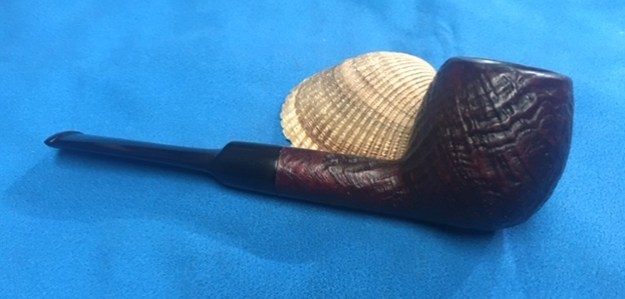
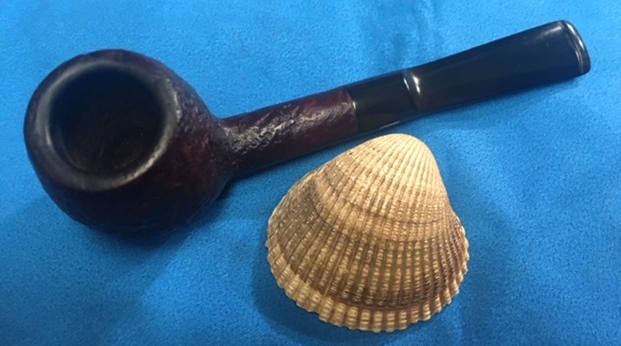
 After reassembling the pipe and a quick hand buffing with a microfiber cloth, the recommissioning of this Savinelli Dry System 3621 is completed. The tight Dublin bend presents a smart, compact look, with a genuinely nice flow from the bowl through the nickel shank cap that is carried through the military mount P-Lip stem. The smooth briar contrasts are nice – the internal rim ring and the nomenclature panel. Nathan commissioned this Savinelli Dry System 3621 and will have the first opportunity to acquire him in The Pipe Steward Store. This pipe benefits the Daughters of Bulgaria – women and girls who have been trafficked and sexually exploited. Thanks for joining me!


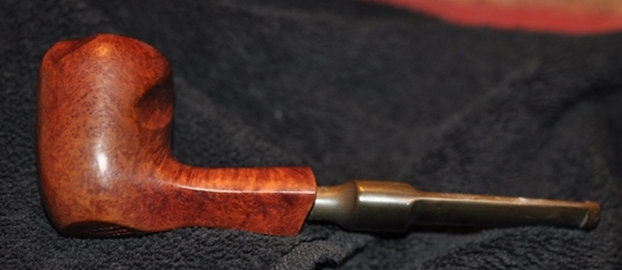
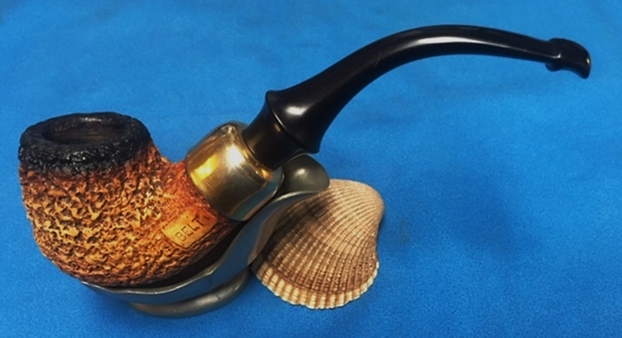
 I have only 11 more of Bob’s pipes to finish before I have completed the restoration of his estate so I am continuing to work on them. The next one from Bob Kerr’s Estate is Parker Super Bruyere billiard. It is a nice looking Billiard pipe with nice grain. (Bob’s photo is to the left). If you have not “met” the man and would like to read a bit of the history of the pipeman, his daughter has written a great tribute that is worth a read. Because I have included it in most of the restorations of the estate to date I thought that I would leave it out this time. Check out some of the recent Dunhill restoration blogs that include the biographical notes about Bob. Here is a link to one of them (https://rebornpipes.com/2020/01/01/restoring-the-last-of-bob-kerrs-dunhills-a-1962-dunhill-bruyere-656-f-t-bent-billiard/).
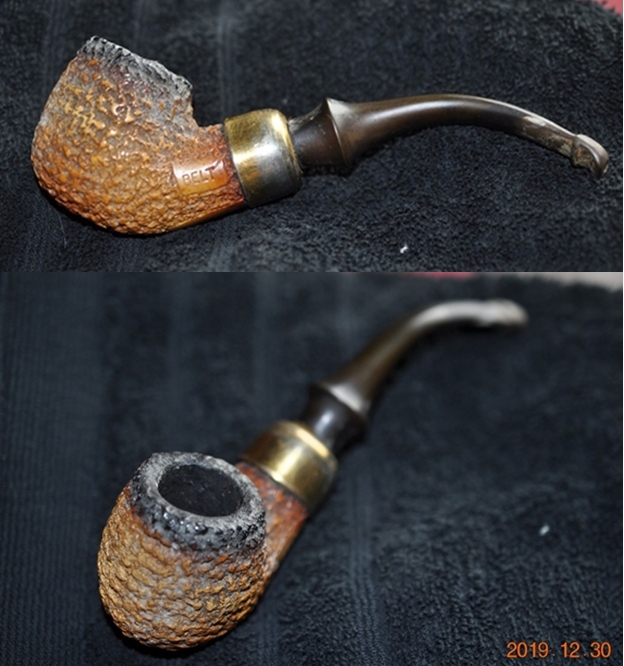
 As I mentioned above the exterior of the pipe was very dirty – grime and grit ground in from years of use and sitting. The rim top was covered with a coat of thick lava that overflowed from the thick cake in the bowl. It was hard to know what the rim edges looked like because of the lava.
 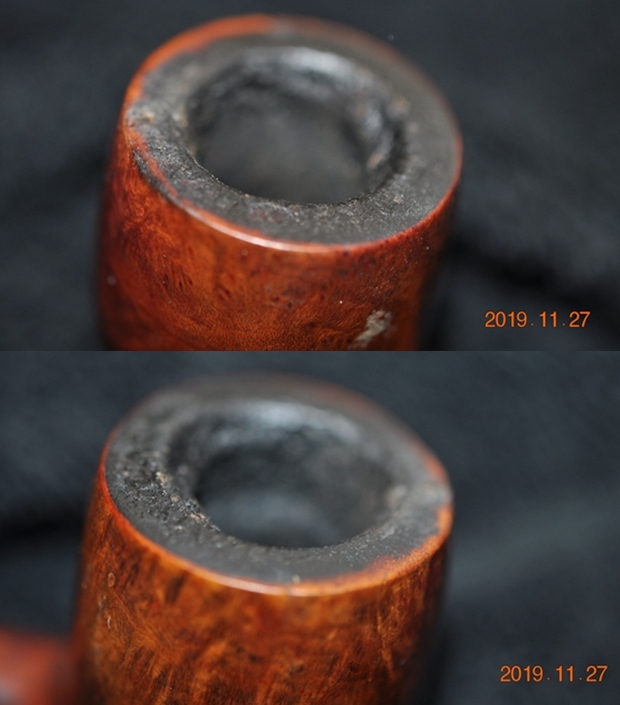 Jeff took photos of the sides and the heel of the bowl to give a better feel for the condition of the briar around the bowl.
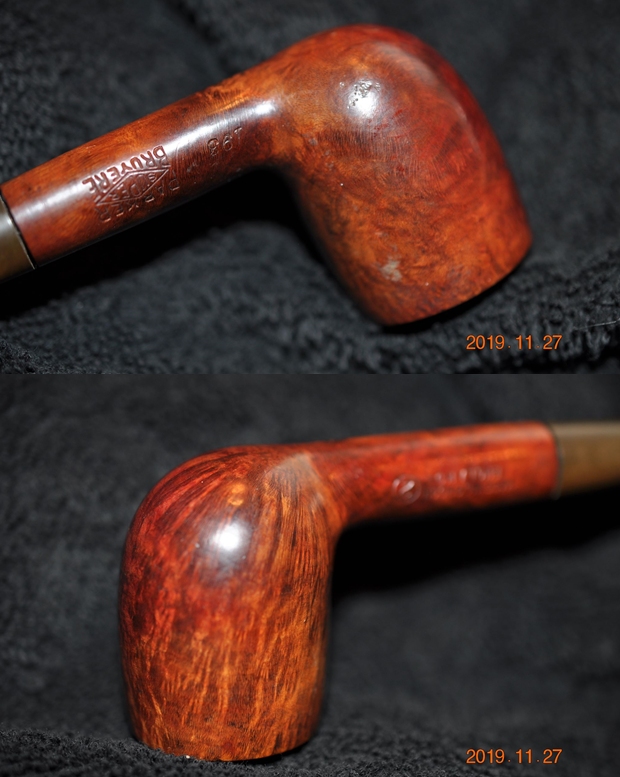
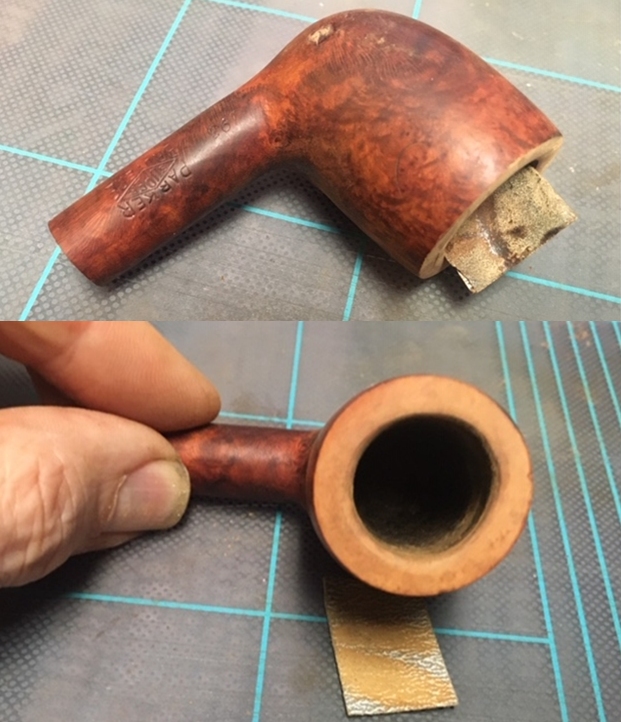
 The next photos show the stamping on both sides of the shank. The stamping is clear and readable as noted above. There is also a stamped Diamond P on the top of the tapered stem.
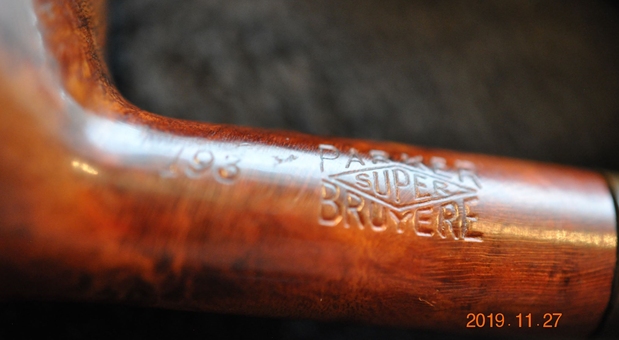
 The stem was dirty, calcified and oxidized with tooth chatter and marks on the top and underside of the stem at the button.
  I have worked on quite a few Parkers over time and I have seen them stamped like the one I have however, there as a superscript after the D in England. I turned to Pipedia to see what I could find out a Super Bruyere without a date code(http://www.pipephil.eu/logos/en/logo-parker.html). I have included a screen capture of the section showing a similarly stamped pipe.
 With over 125 pipes to clean from Bob’s estate I took a batch of them to the states with me when I visited and left them with Jeff so he could help me out. Jeff cleaned the pipes with his usual penchant for thoroughness that I really appreciate. Once he finished he shipped them back to me. Bob’s pipes were generally real mess and I did not know what to expect when I unwrapped it from his box. I was surprised to see how well it turned out. He reamed it with a PipNet pipe reamer and cleaned up the reaming with a Savinelli Fitsall Pipe Knife. He scrubbed out the internals with alcohol, pipe cleaners and cotton swabs until the pipe was clean. He scrubbed the exterior of the bowl with Murphy’s Oil Soap and a tooth brush to remove the grime and grit on the briar and the lava on the rim top. The finish looks very good with good looking grain around the bowl and shank. Jeff scrubbed it with Soft Scrub and soaked it in Before & After Deoxidizer to remove the oxidation on the rubber. When the pipe arrived here in Vancouver for the second stop of its restoration tour it looked a lot better. I took photos before I started my part of the work.
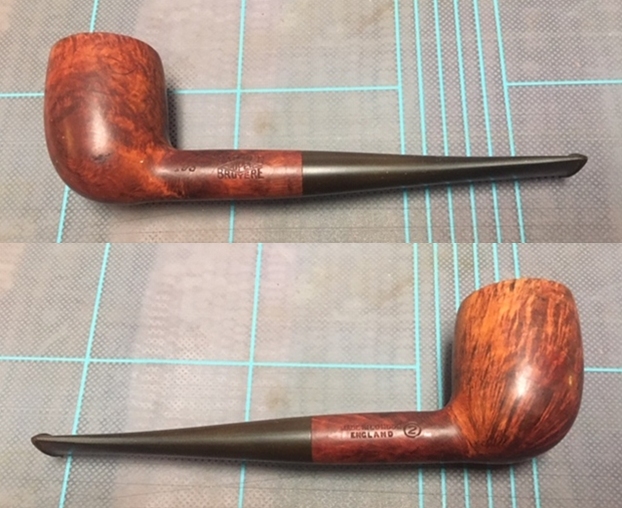
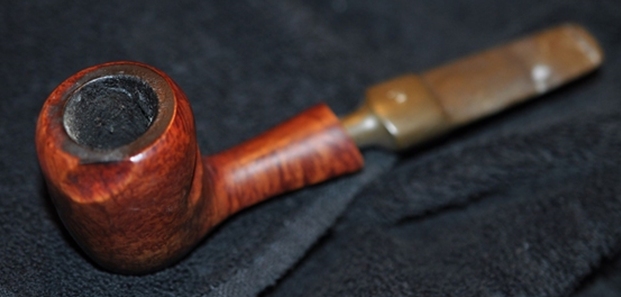
 I took some close up photos of the rim top and the stem surface. I wanted to show what cleaned bowl and rim top looked like. The rim top had some darkening but the inner and outer edges of the bowl were in excellent condition. I also took close up photos of the stem to show the tooth marks and the remaining oxidation on the stem surface.
  I took photos of the stamping on both sides of the shank. The stamping on both the left and right side are clear and readable as noted above.
 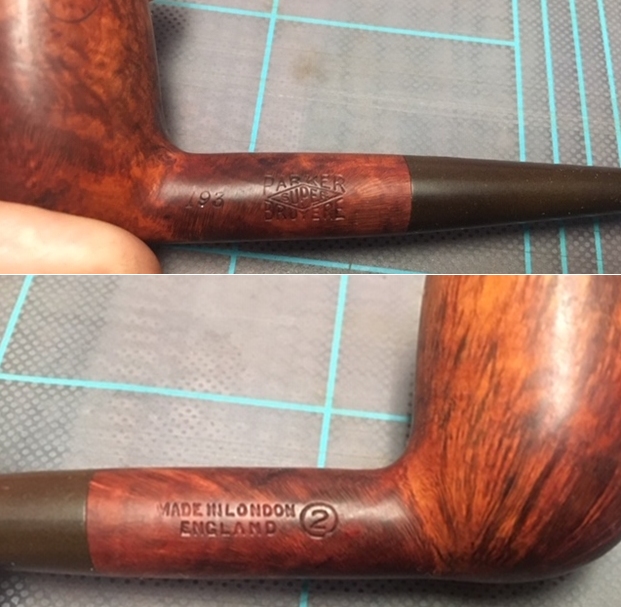 I removed the stem for the shank and took a photo of the bowl and stem to give a picture of what it looked like. The oxidation is very visible.
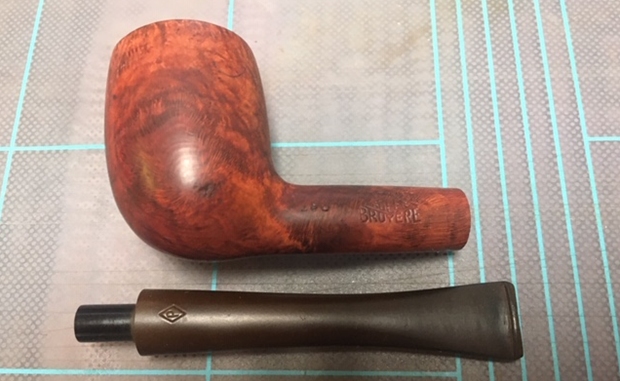 I decided to start my part of the restoration work on this pipe by addressing the damage to the rim top and inner edge first. I topped the bowl on a piece of 220 grit sandpaper on a topping board to smooth out the damage. I used a folded piece of 220 sandpaper to address the damage on the inner edge and bring the bowl back to round.
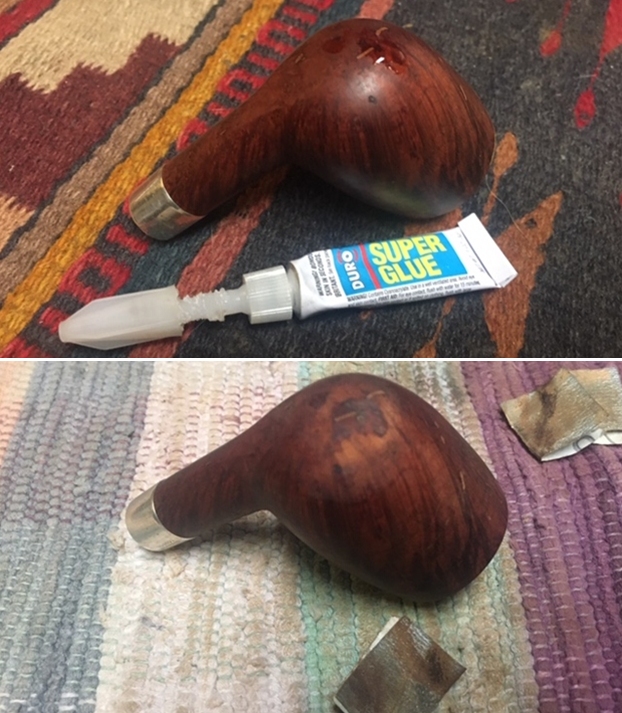
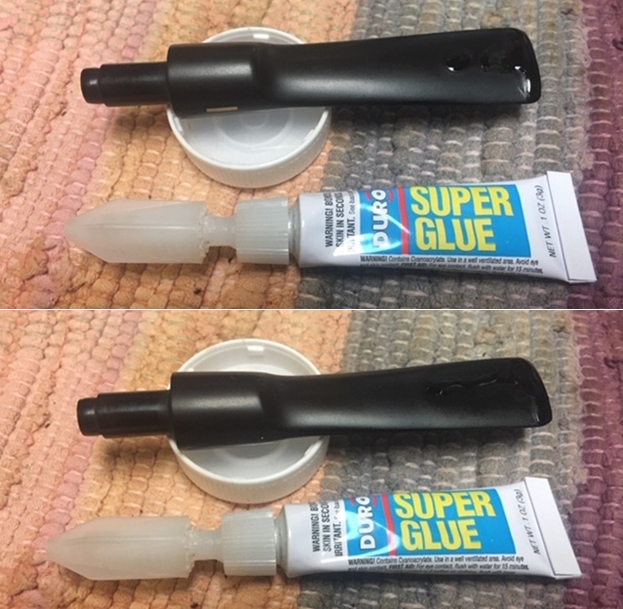
 There was a deep gouge on the left side of the heel of the bowl that I dealt with next. I filled it in with clear superglue and once it had cured sanded it smooth with 220 grit sandpaper.
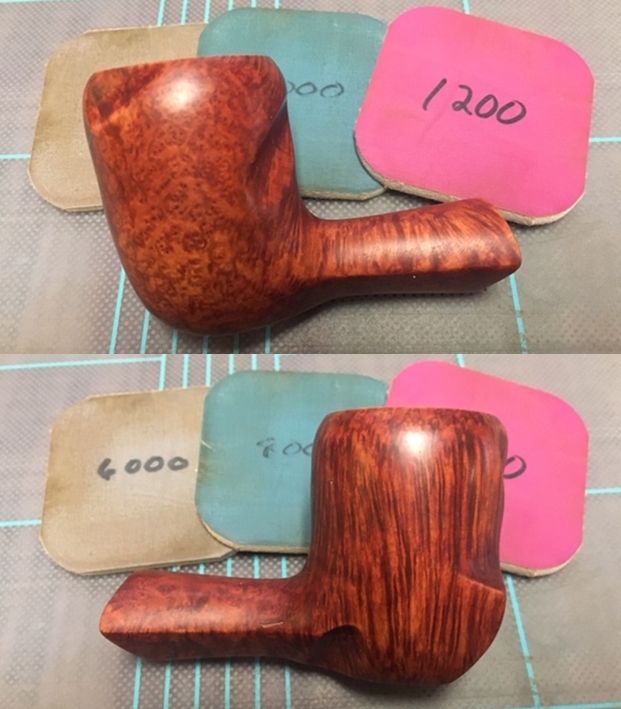
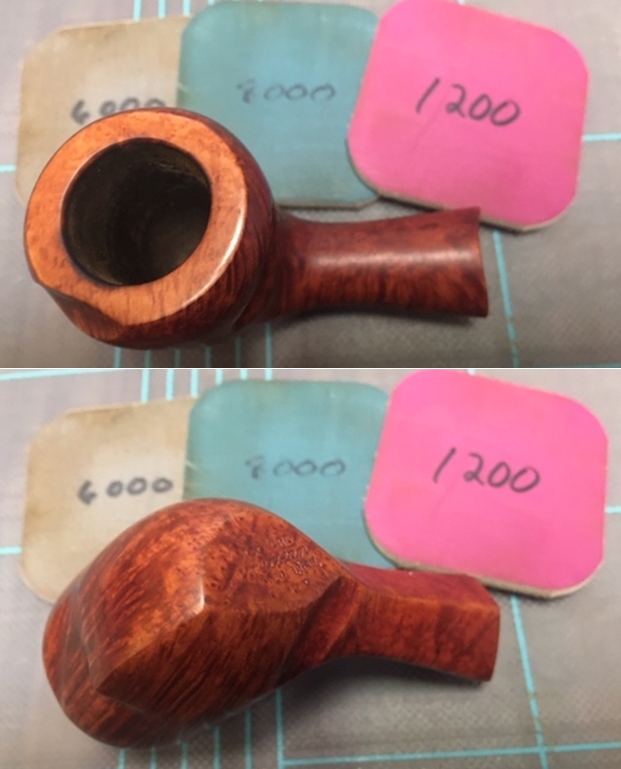
 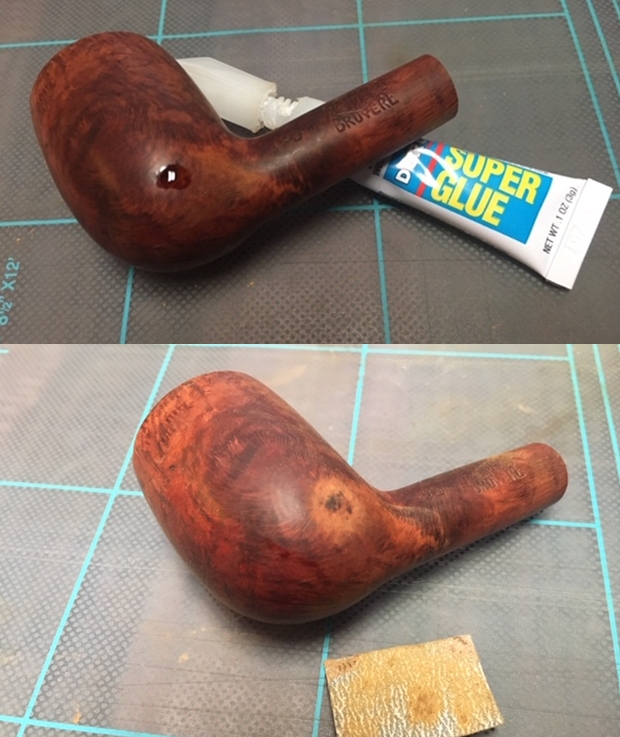 I polished the briar with micromesh sanding pads – wet sanding it with 1500-12000 grit sanding pads. I wiped it down with a damp cloth between each sanding pad.
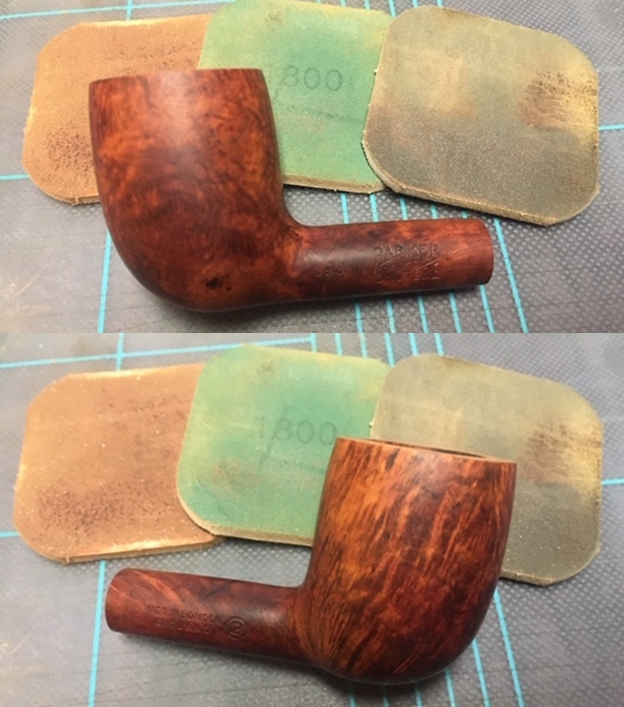


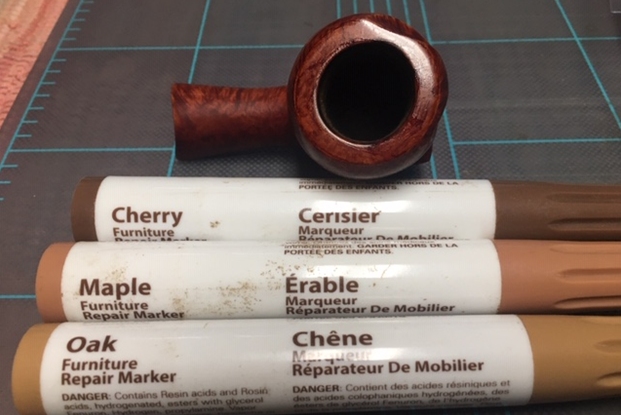
 I paused the polishing for a moment and stained the rim top with a Maple and an Oak stain pen to blend the rim top colour into the bowl and shank colour.
 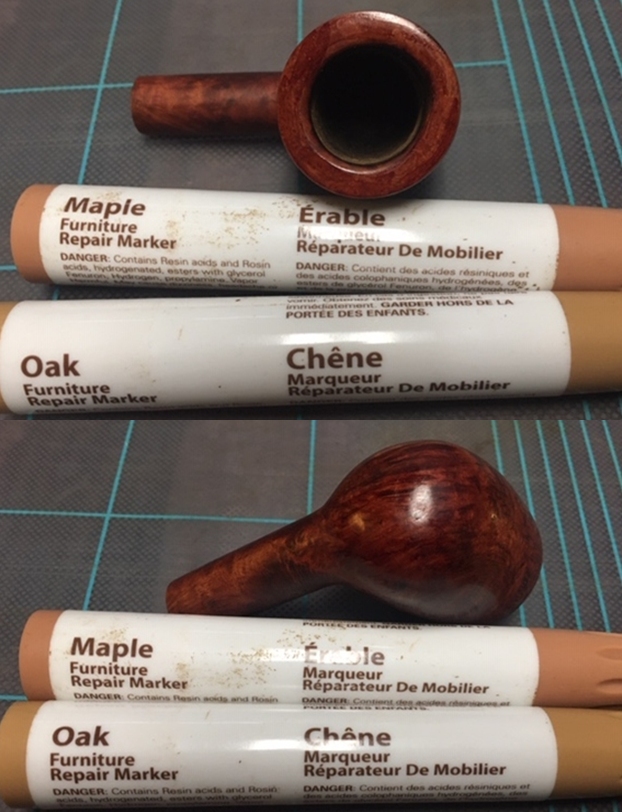 I went back to polishing the bowl with 6000-12000 grit micromesh sanding pads. The last three pads helped to blend in the restained areas of the repairs.
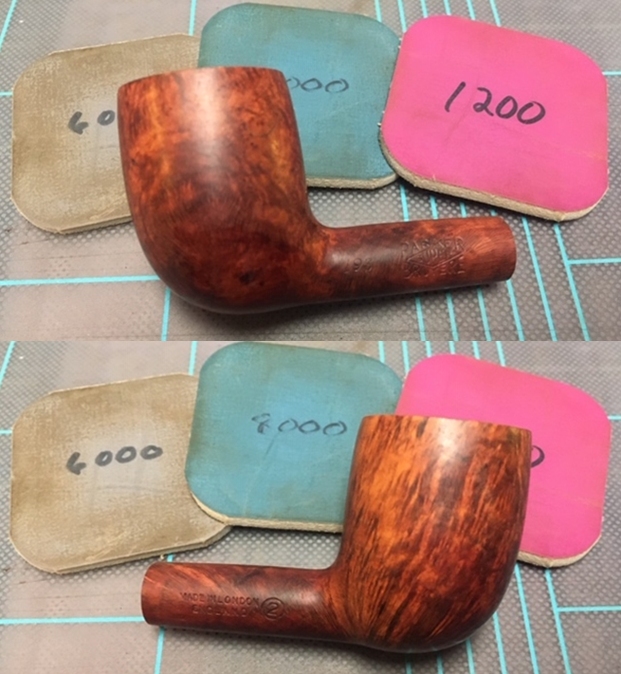
 I rubbed the bowl down with Before & After Restoration Balm. I worked it into the surface of the briar with my fingertips to clean, enliven and protect it. I let the balm sit for a little while and then buffed with a cotton cloth and shoe brush to raise the shine.
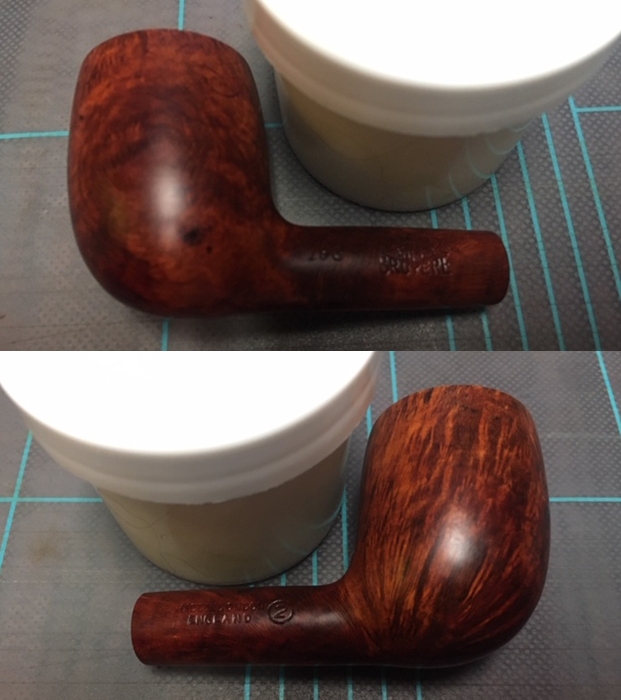

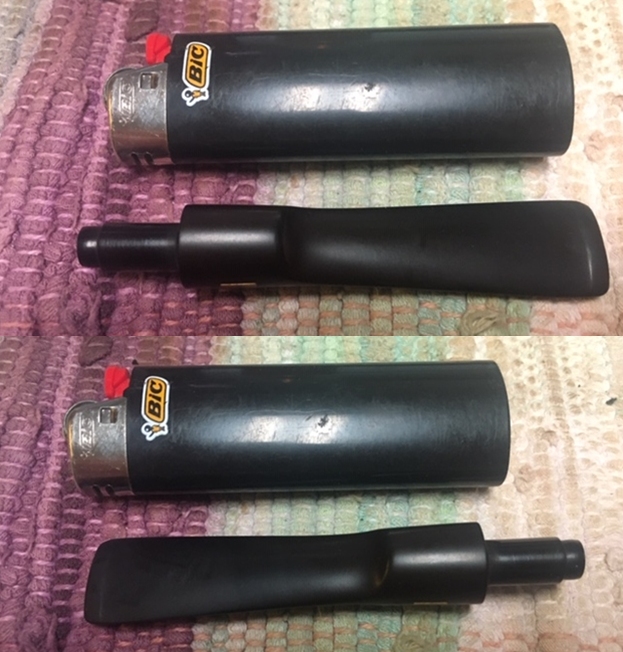
 I set the bowl aside and turned my attention to the stem. I painted the stem surface with the flame of a Bic lighter to lift the dents in the surface of the vulcanite. I was able to lift most of them out. What remained were some light marks in the surface.
  I scrubbed the stem with Soft Scrub and cotton pads to remove the remaining oxidation. It took a bit of elbow grease but I was able to remove it all.
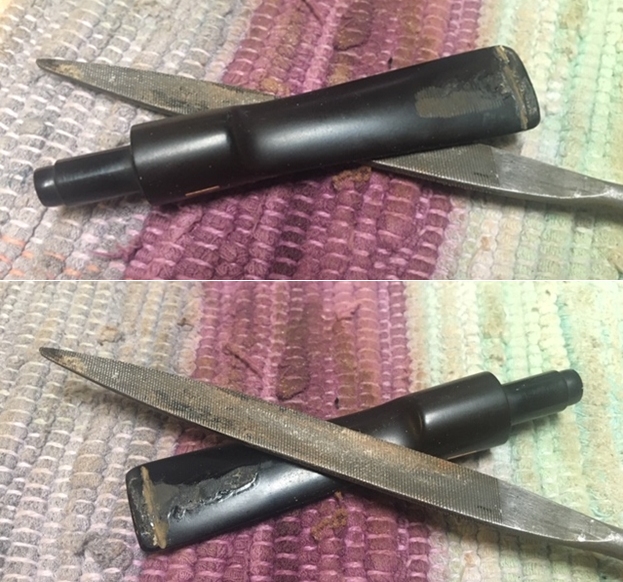
 I sanded out the remaining tooth marks on both sides with 220 grit sandpaper. I started the polishing of the stem with 400 grit wet dry sandpaper.
  I touched up the Diamond P stamp on the top of the taper stem with Liquid Paper. I worked it into the stamping with a tooth pick. I scraped off the excess with the tooth pick and the finished stamp looked much better.
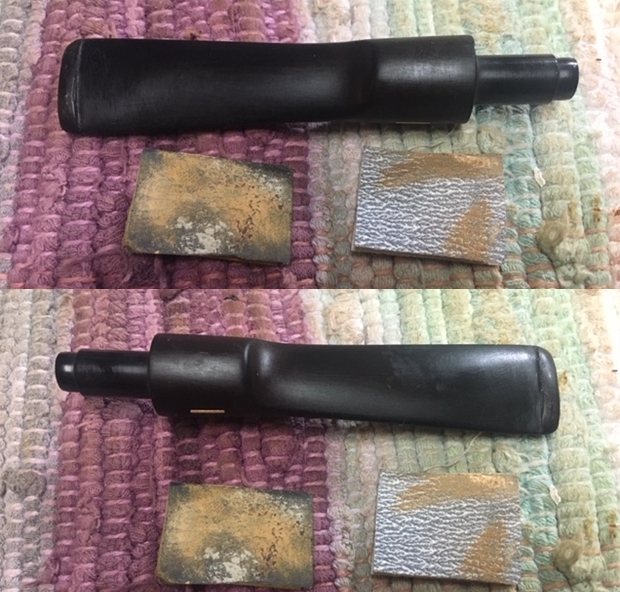
 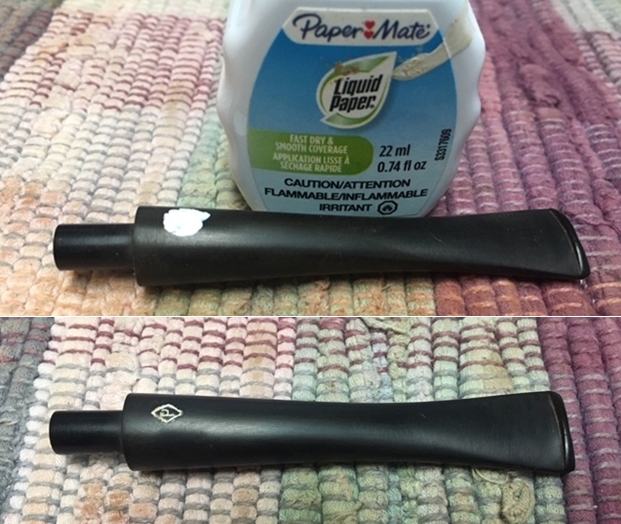 I polished the vulcanite with micromesh sanding pads – 1500-12000 grit pads. I wiped it down with a damp cloth after each sanding pad. I used Before & After Pipe Polish – both Fine and Extra Fine to further polish the stem.
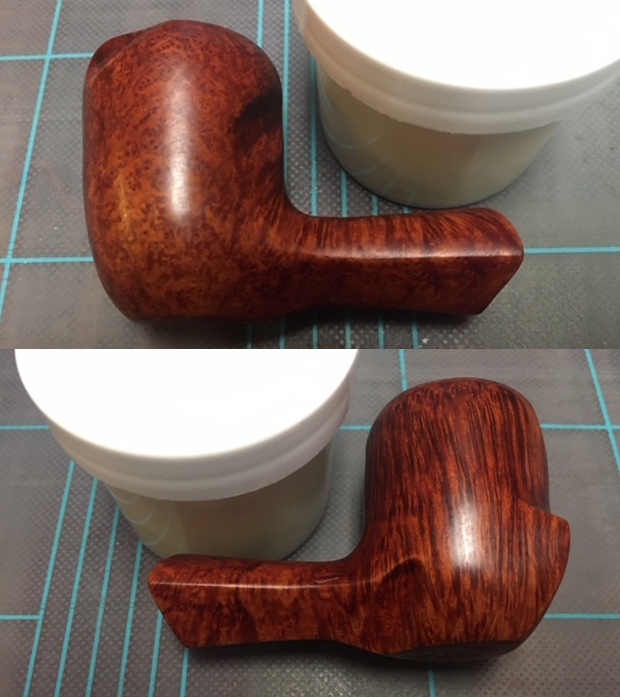
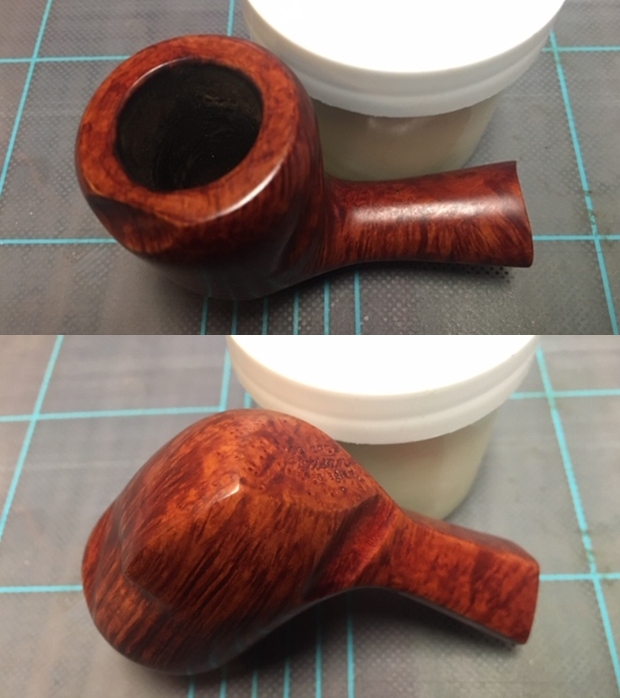
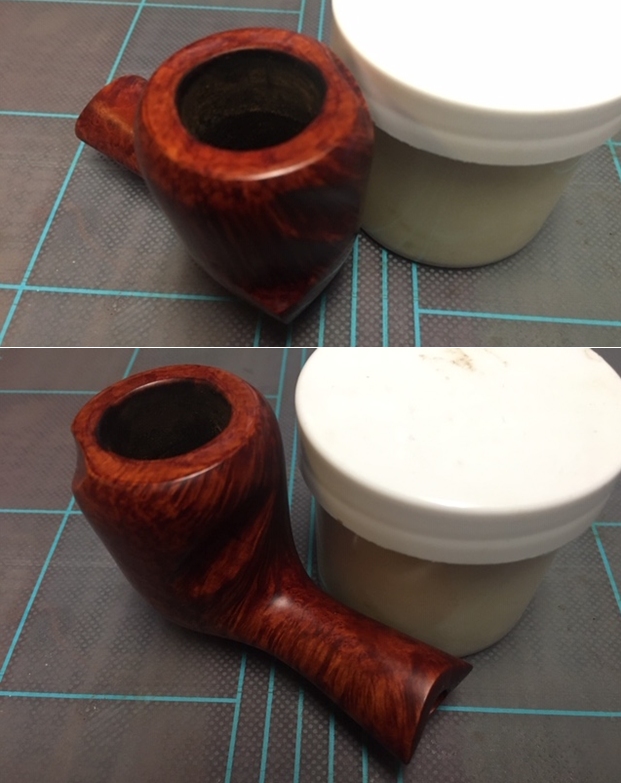
 This nice looking Parker Super Bruyere 793 Billiard from Bob Kerr’s estate cleaned up really well and looks very good. The mixed stain brown finish on the pipe is in great condition and works well with the polished vulcanite taper stem. I put the stem back on the bowl and carefully buffed the pipe with Blue Diamond on the buffing wheel using a light touch on the briar. I gave the bowl and the stem multiple coats of carnauba wax on the buffing wheel and followed that by buffing the entire pipe with a clean buffing pad. I hand buffed the pipe with a microfiber cloth to deepen the shine. The finished Parker Super Bruyere feels great in the hand and I think it will feel great as it heats up with a good tobacco. Give the finished pipe a look in the photos below. The dimensions of the pipe are Length: 5 ½ inches, Height: 1 ¾ inches, Outside diameter of the bowl: 1 ¼ inches, Chamber diameter: ¾ of an inch. If you are interested in carrying on Bob’s legacy with this pipe send me a message or an email. I have more to work on of various brands. Perhaps one of those will catch your attention. Thanks for reading this blog and my reflections on the pipe while I worked on it. This is an interesting estate to bring back to life.