by Steve Laug
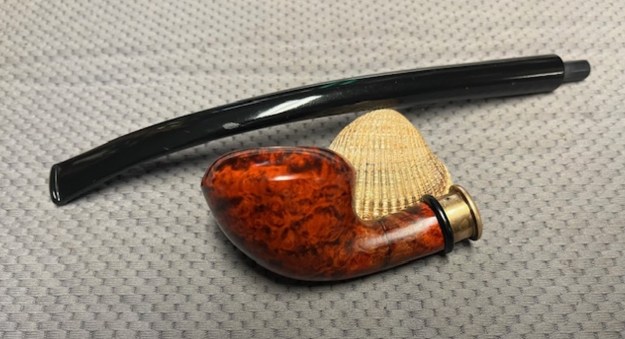
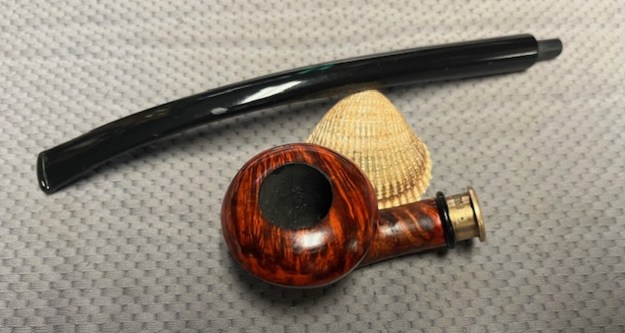
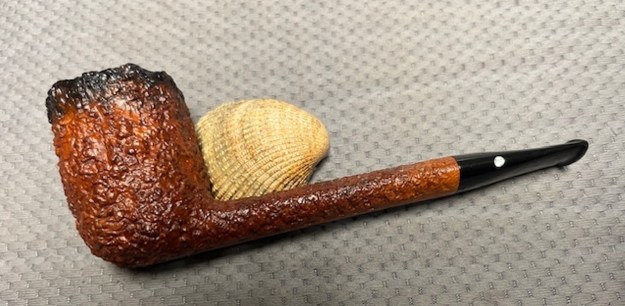
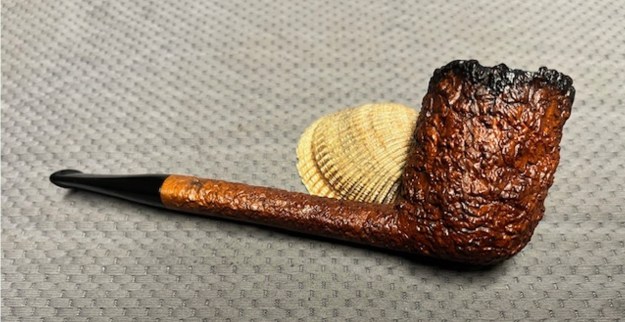
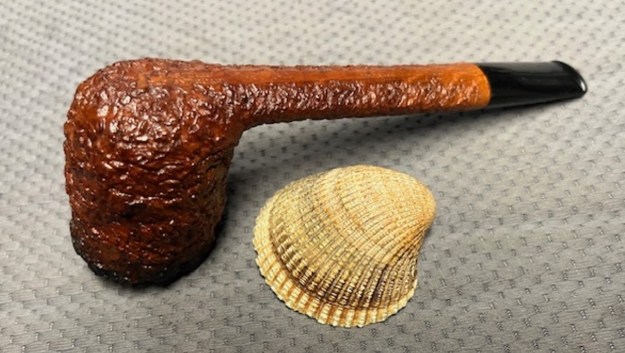
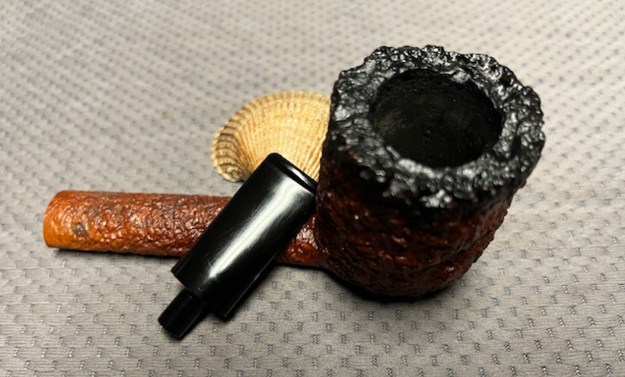
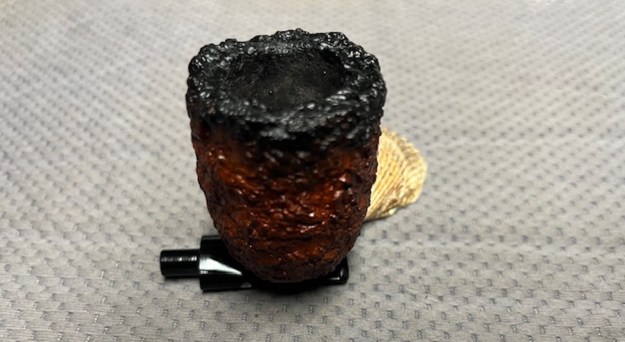
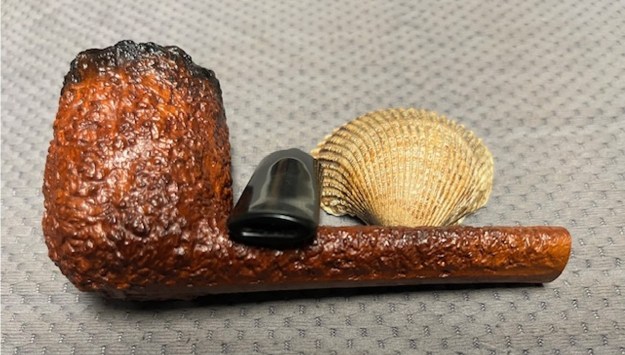
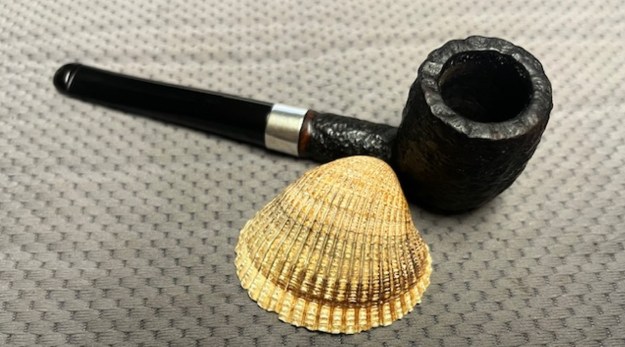
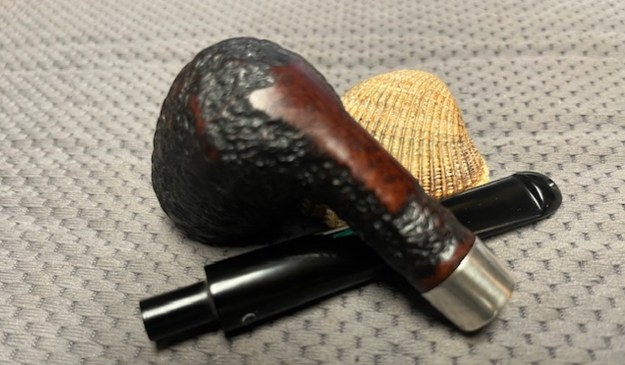
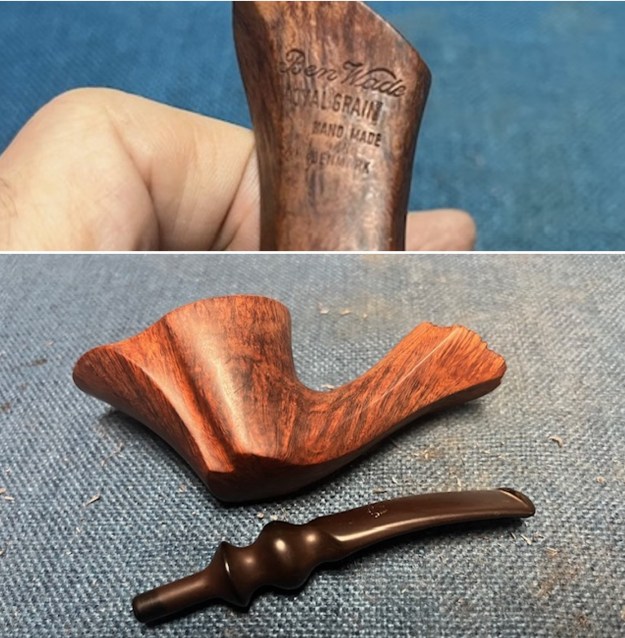
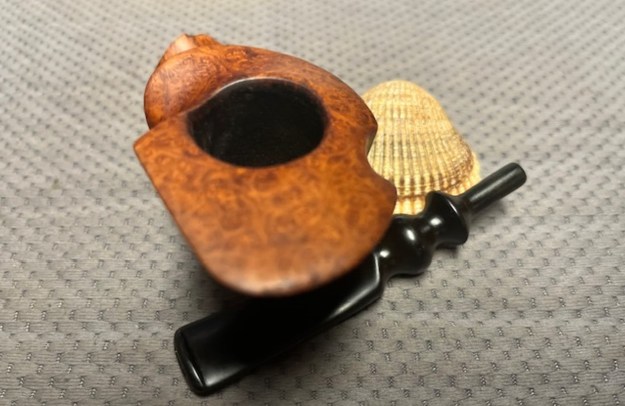
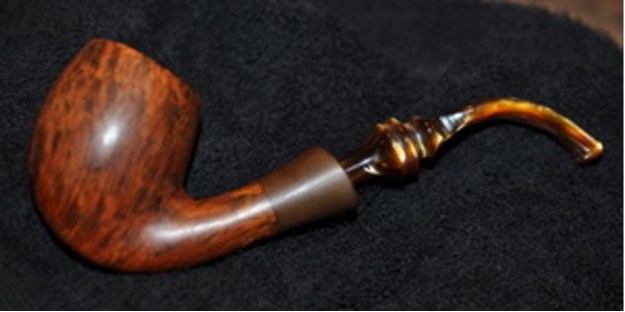
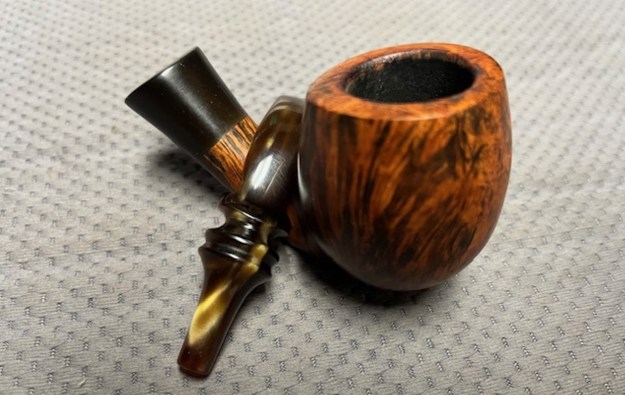
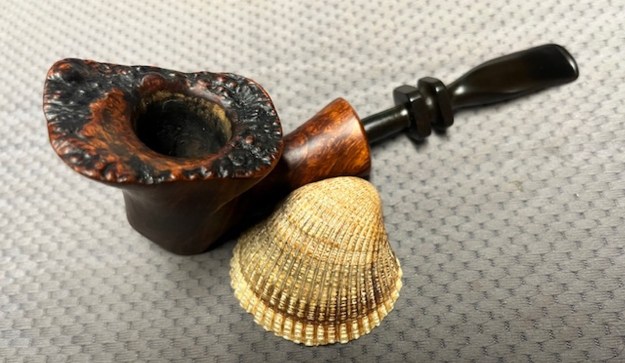
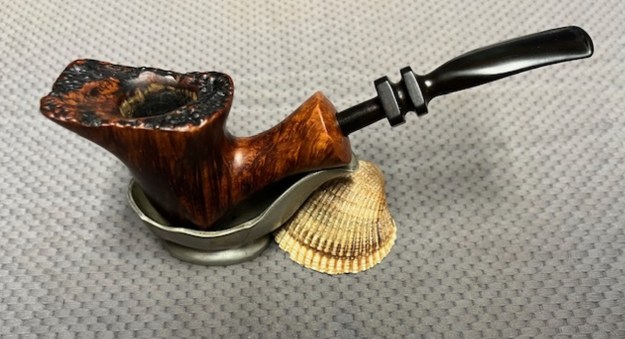
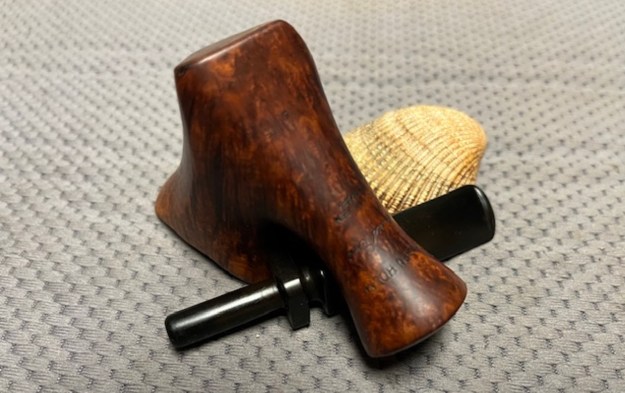
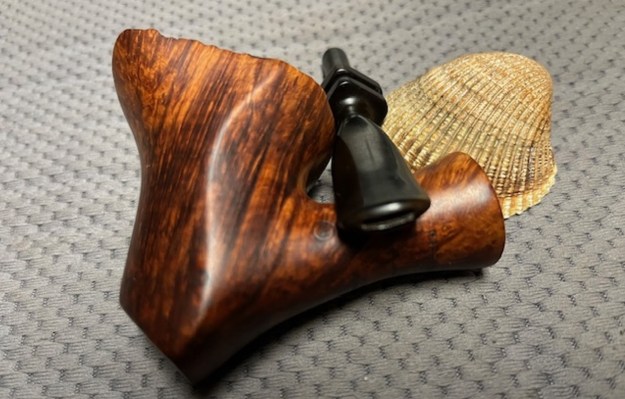
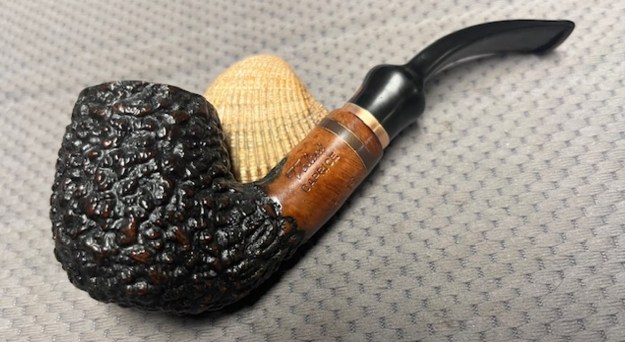
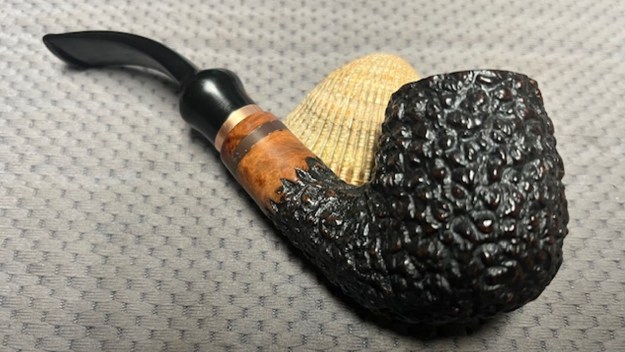
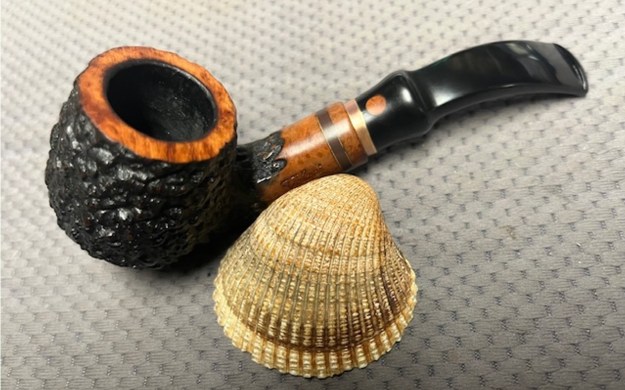
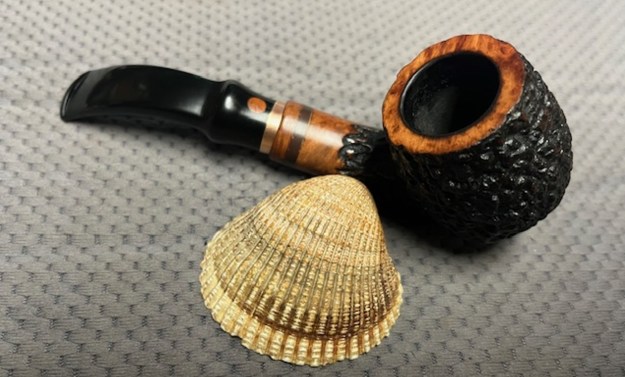
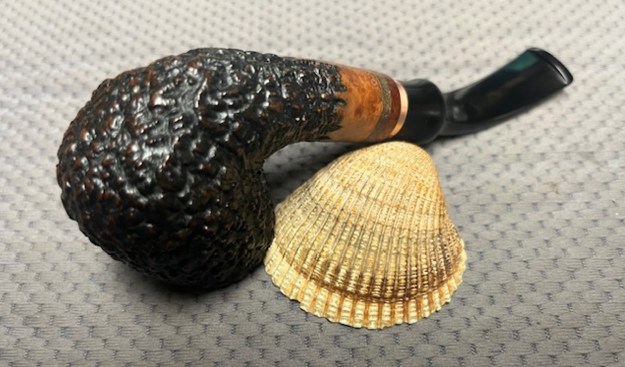
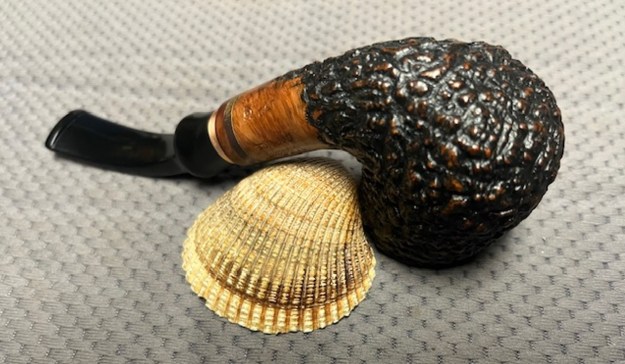
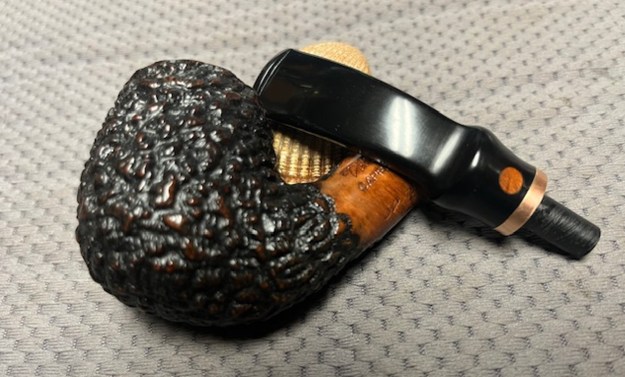
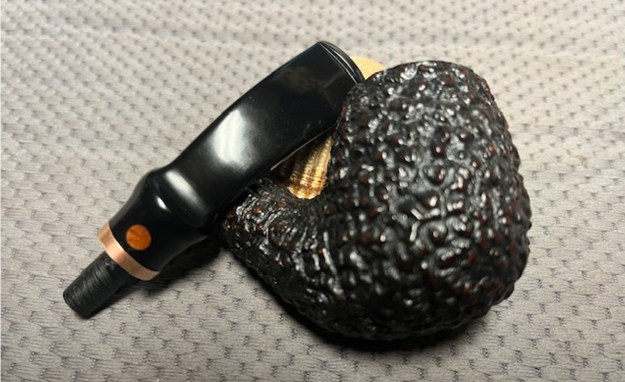
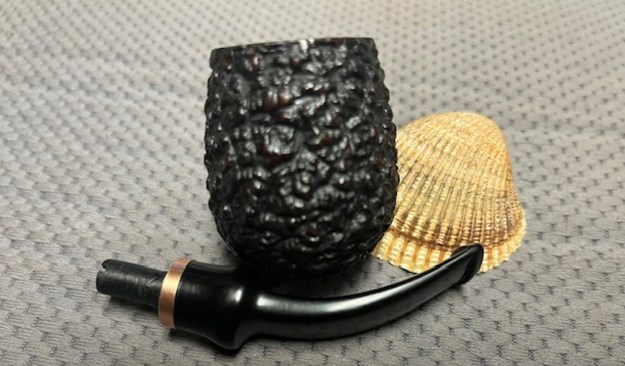
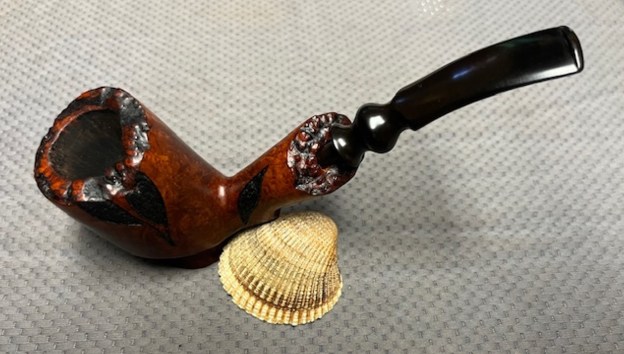
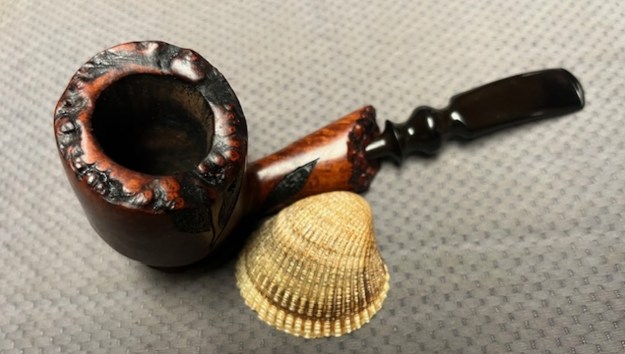
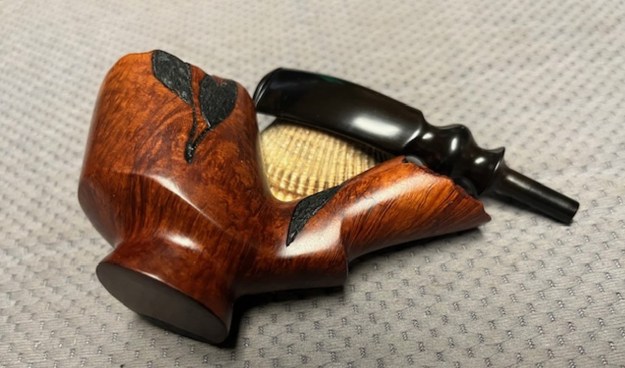
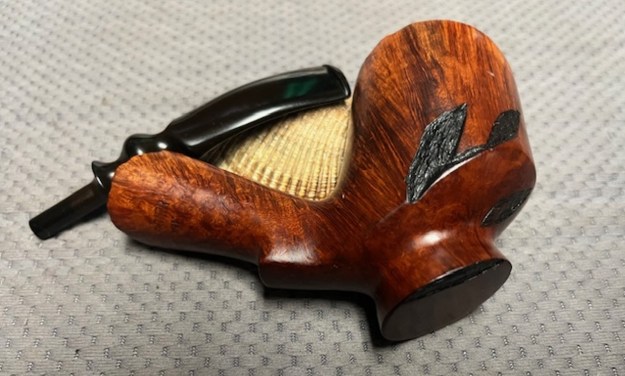
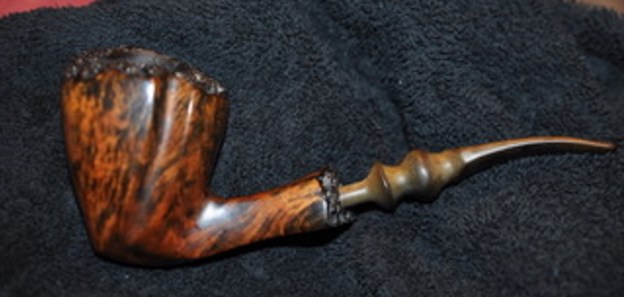
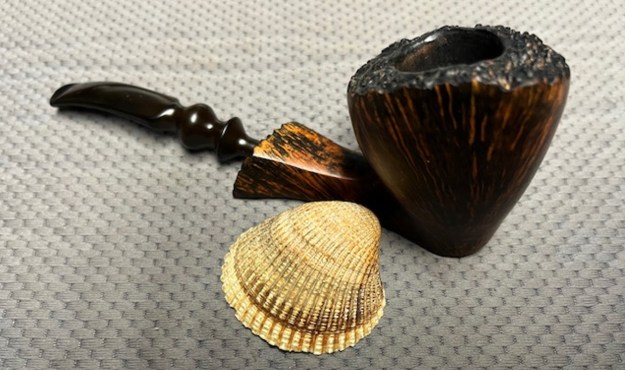
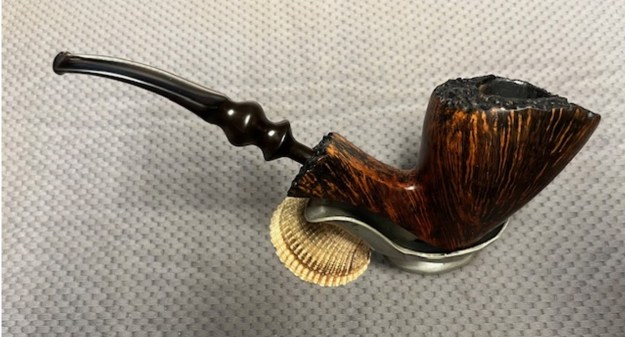
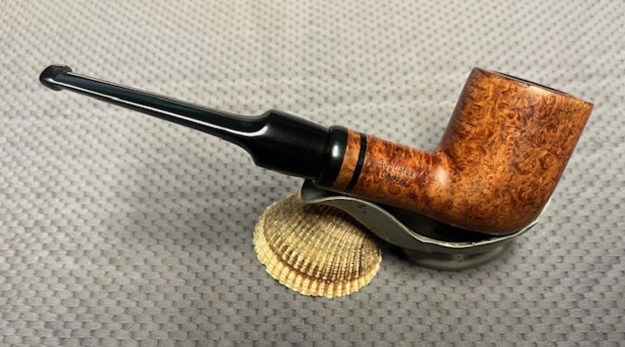
A fellow in Victoria, Brian has had me work on a few of his pipes this past few months. The pipes are generally very dirty with plugged airways and a thick damp, tarry mess in the heel of each bowl. The airway in the shank was also clogged so there was no exchange of air going through the pipe. The pipe was stamped on the left side of the shank and reads Lorenzetti in script [over] Italy and on the right side it is stamped Augustus [over] Caesar. On the underside it is stamped 03. There is a thick cake in the bowl that is wet in the bottom 1/3 of the bowl. The rim top was quite clear of heavy lava. The finish on the bowl and shank has a thick peeling coat of varnish on the bowl that looks terrible. There is an acrylic shank end with an insert of briar between the acrylic pieces. The stem acrylic stem is a filter stem and the button end has a large chunk missing that is severely damaged. I will need to restem the pipe. But I have included photos of the pipe before I started working on it.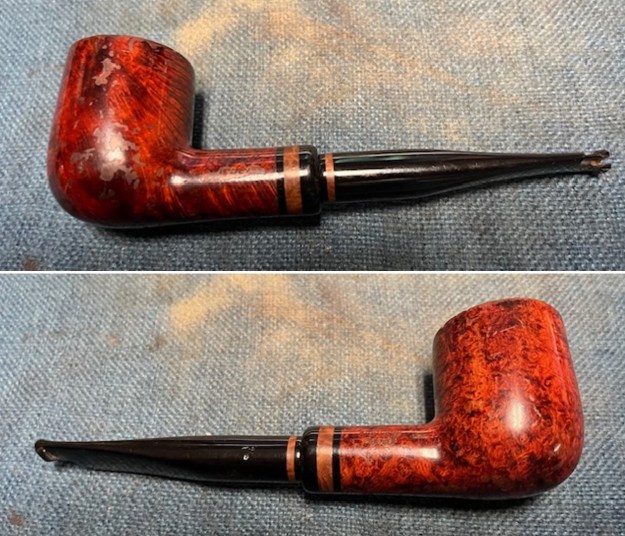
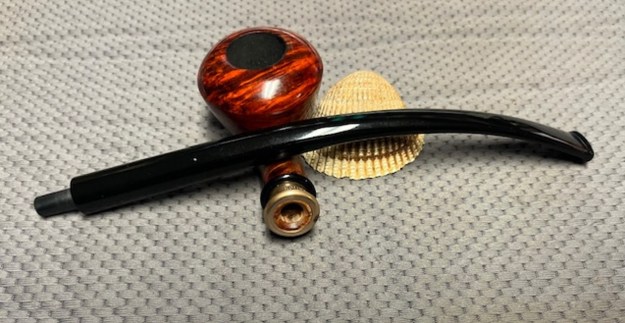
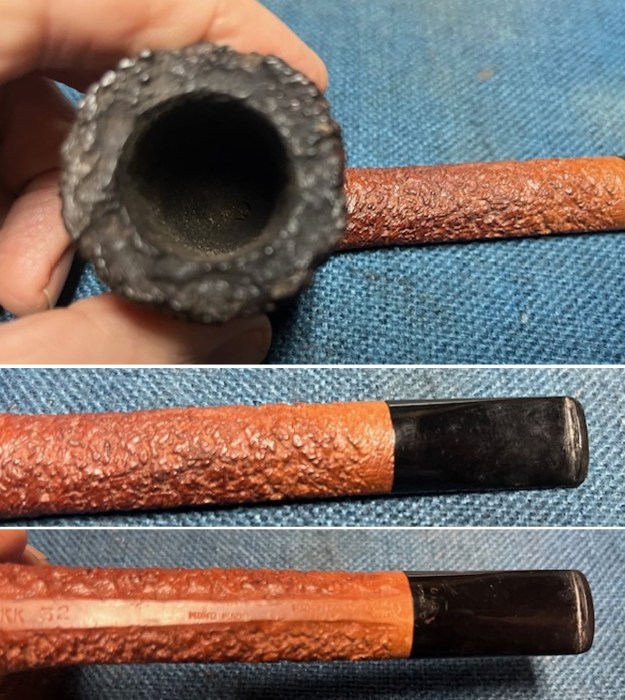
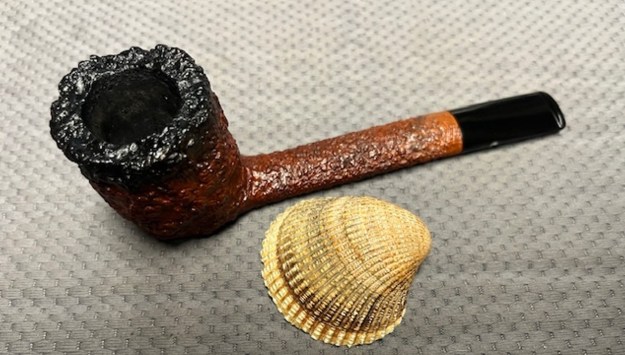
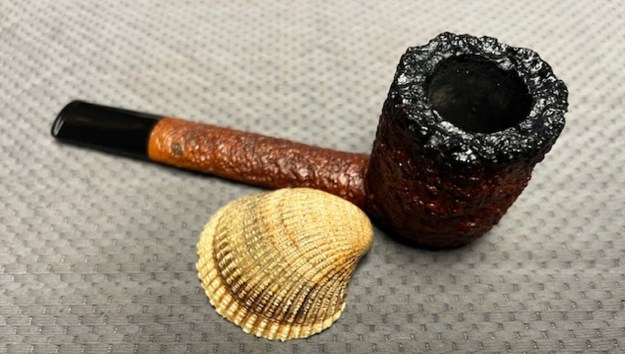
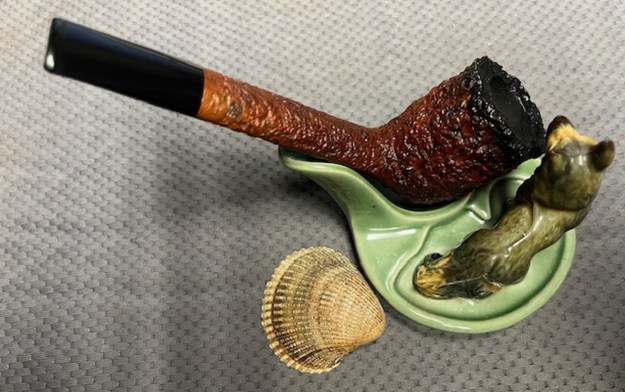
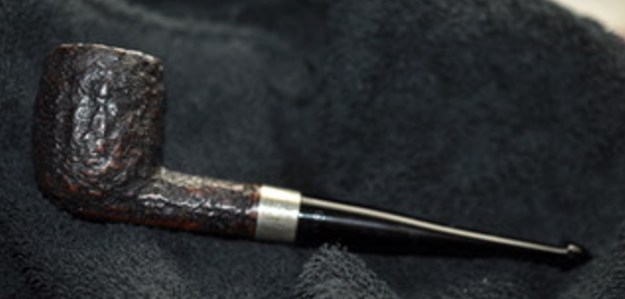
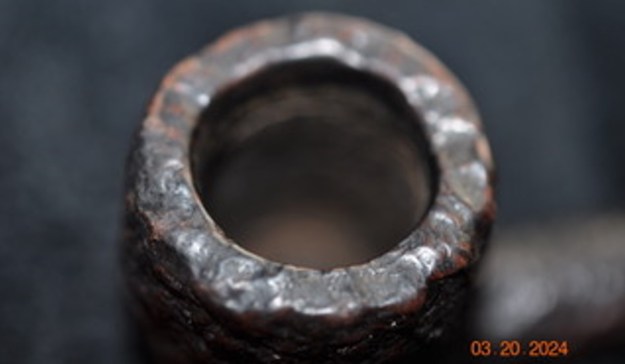
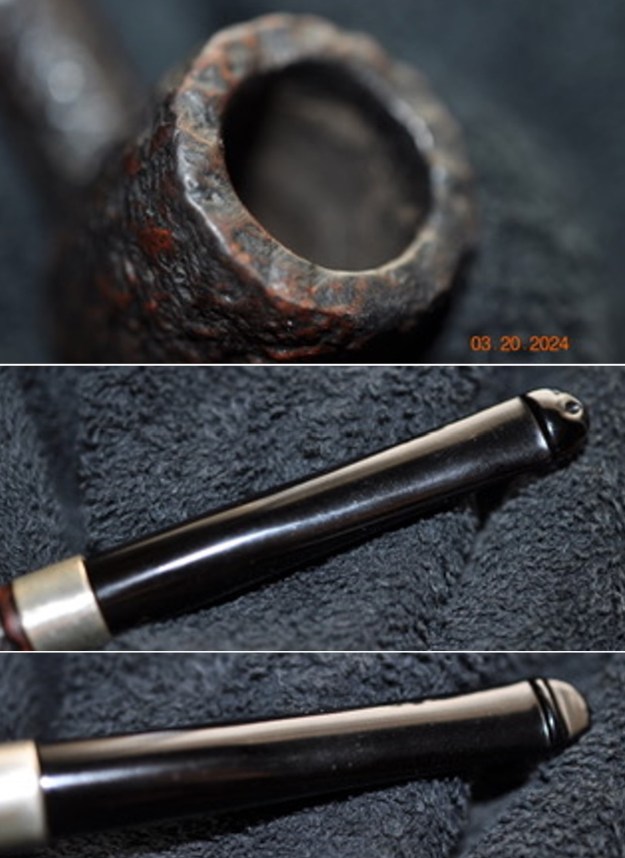
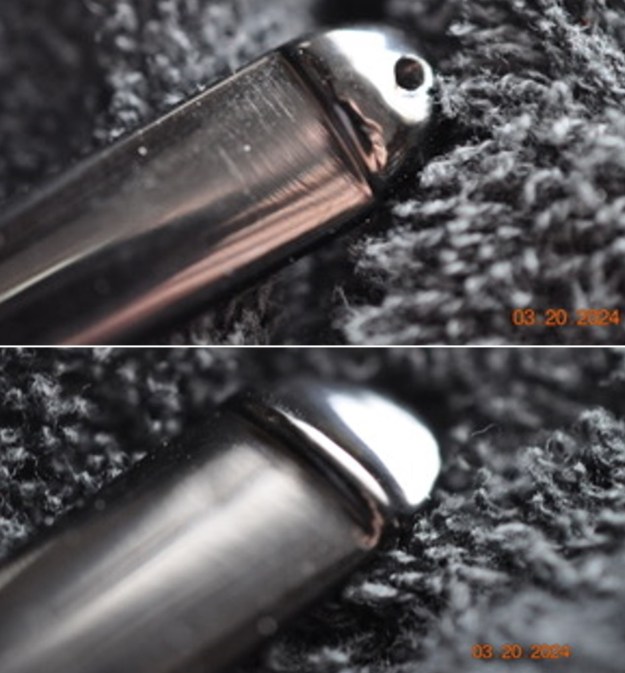
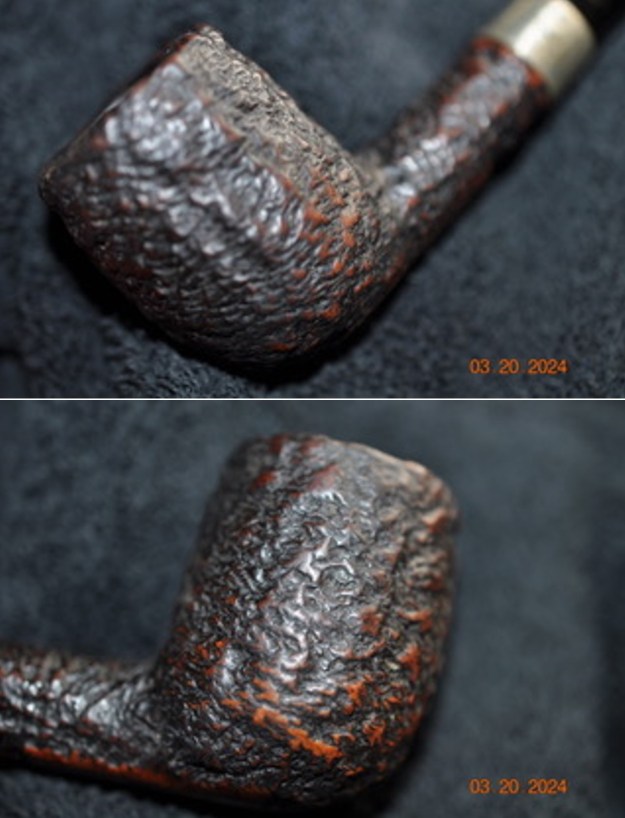
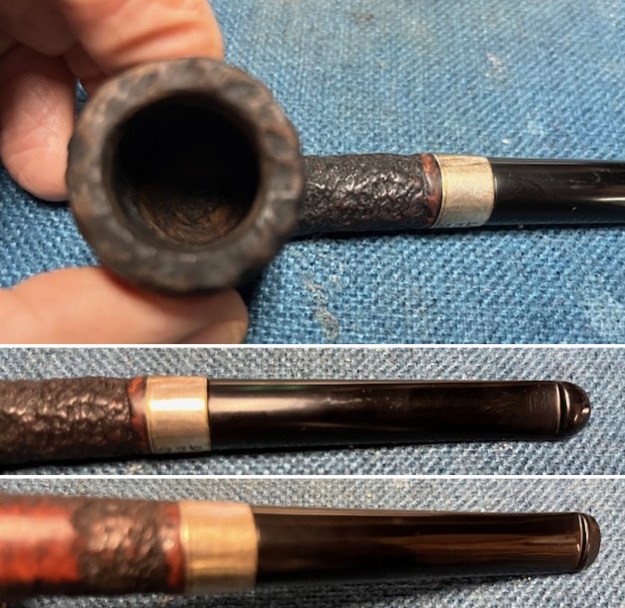
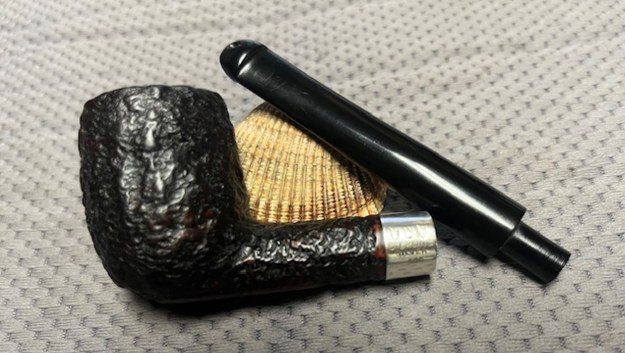
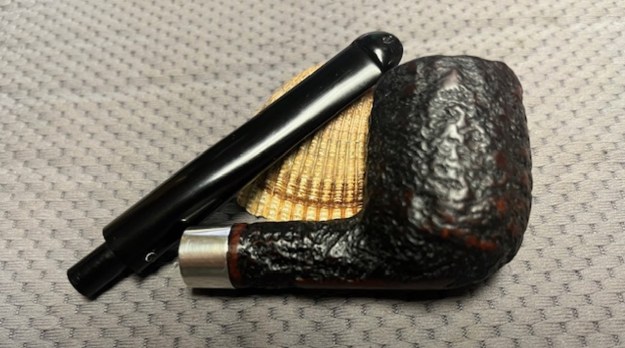
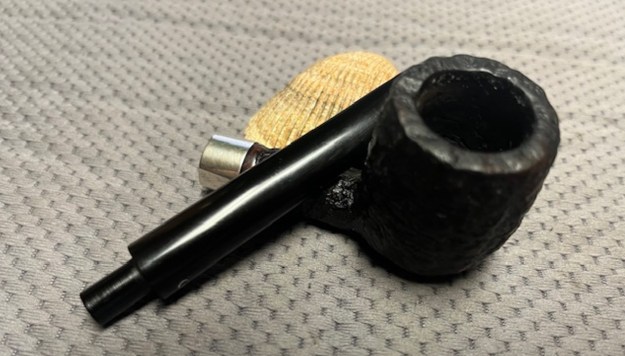
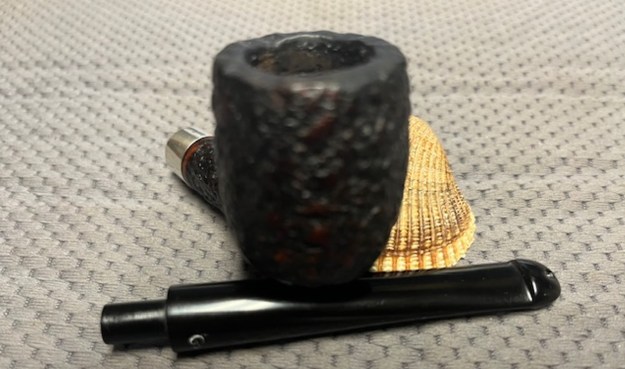
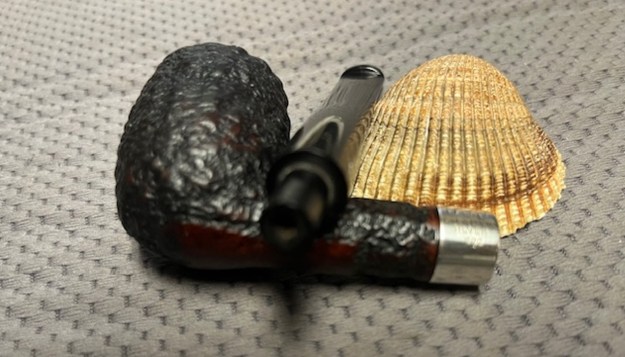
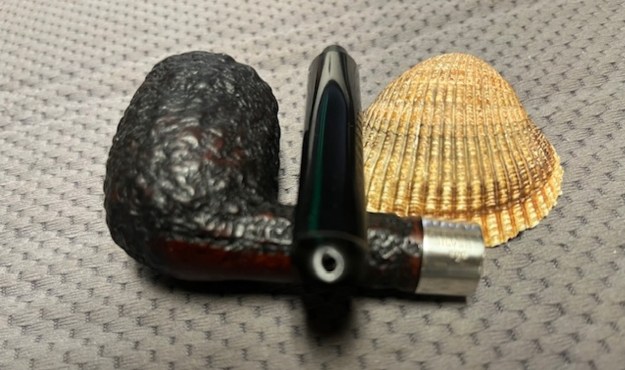
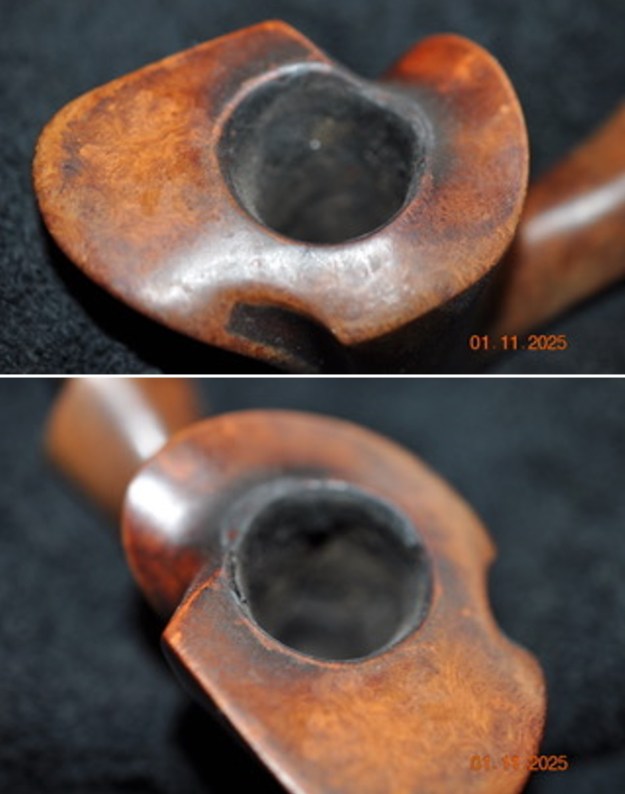
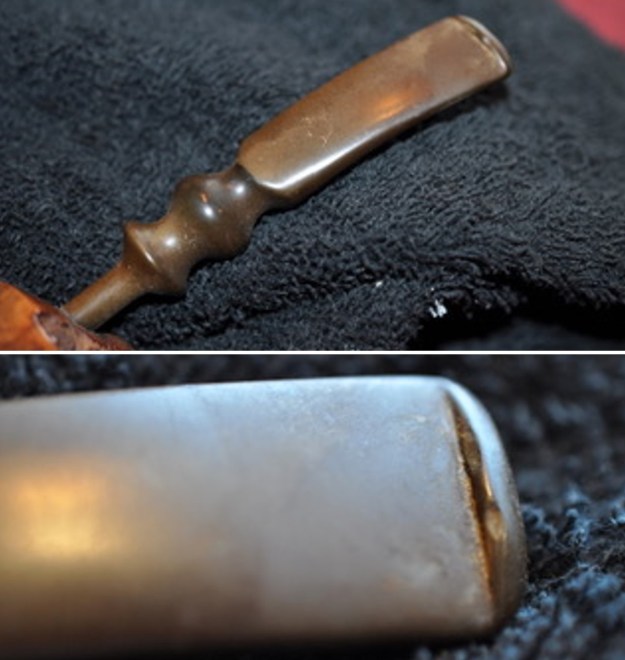
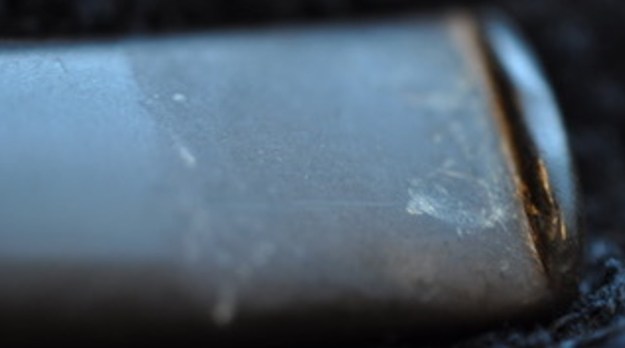
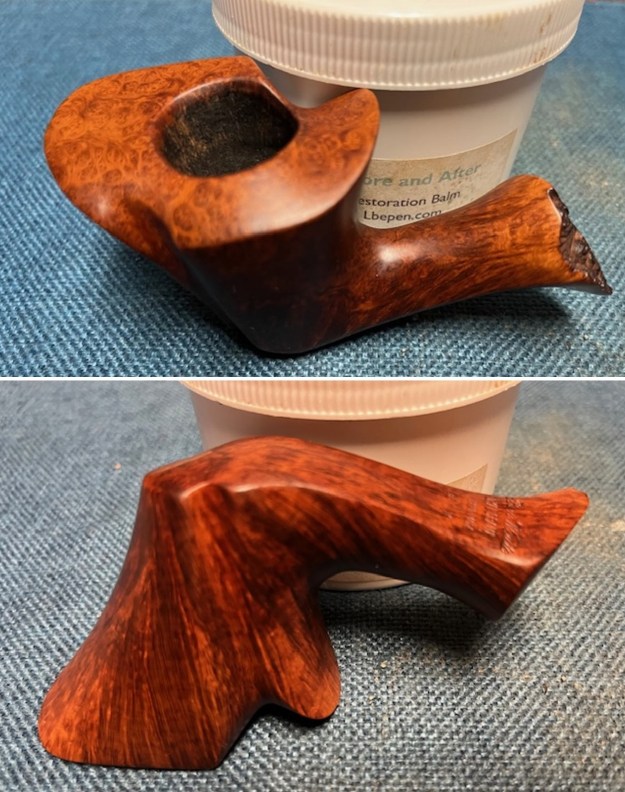
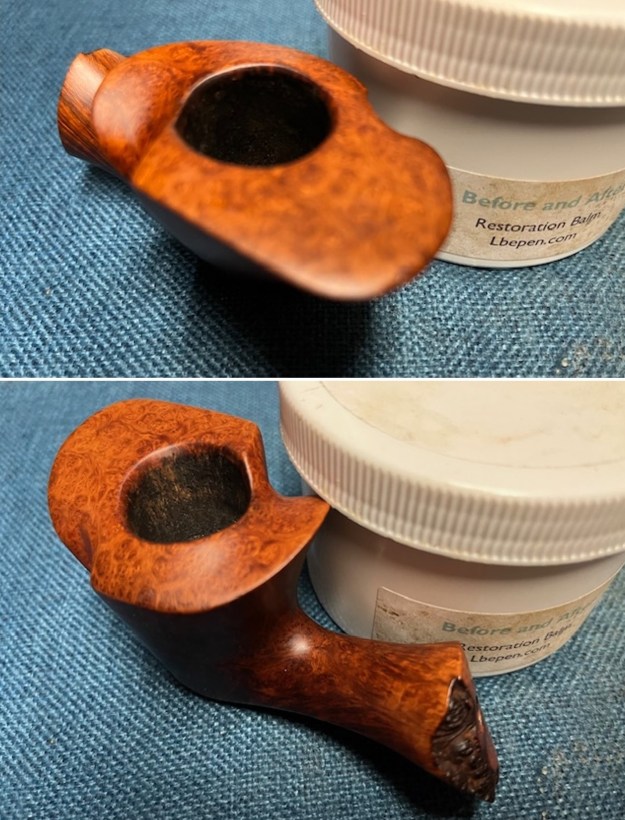
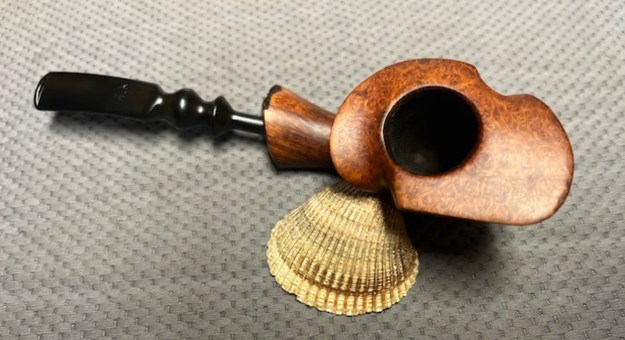
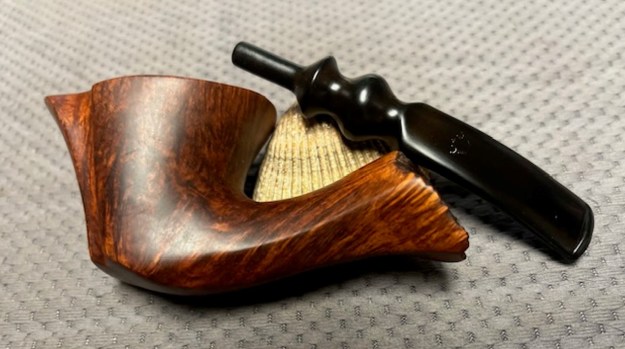
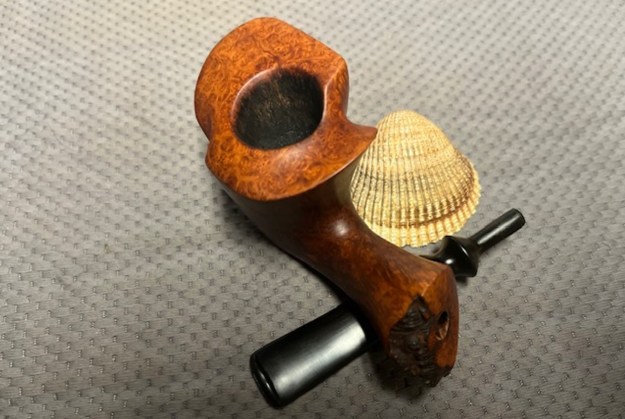
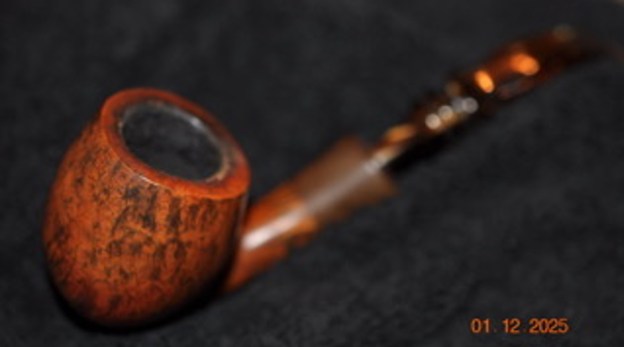
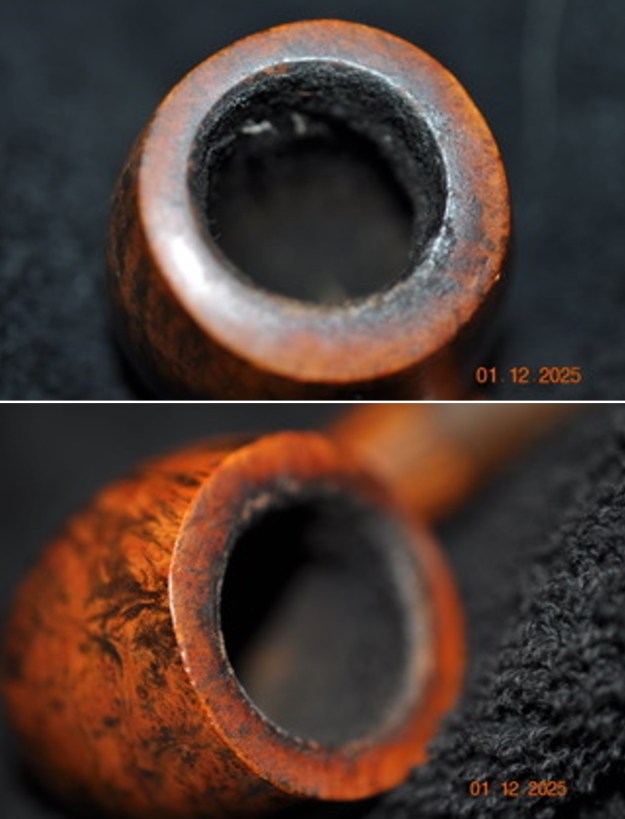
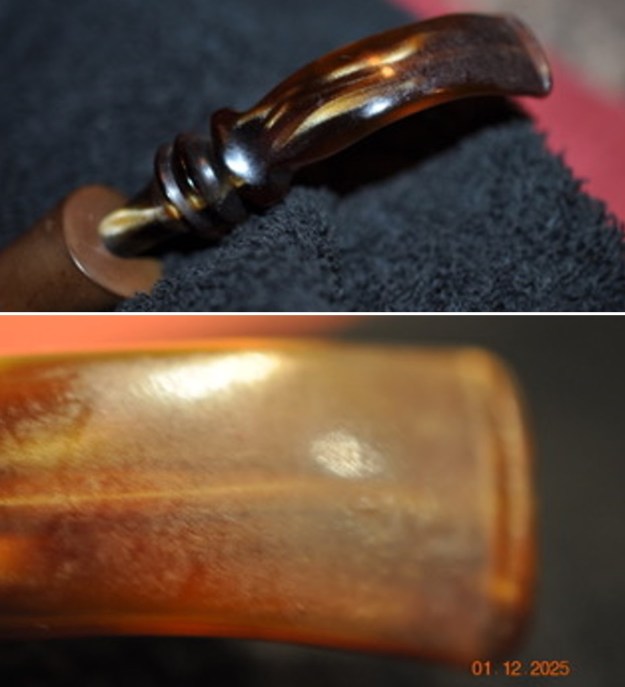
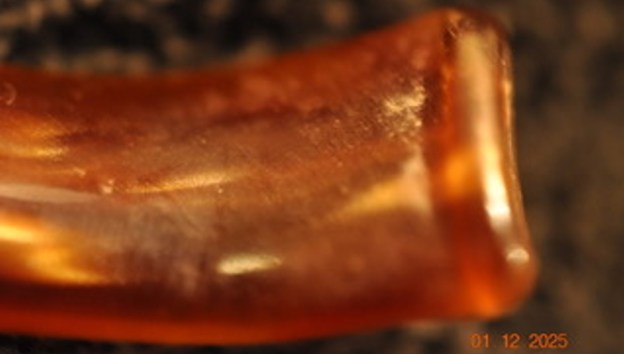
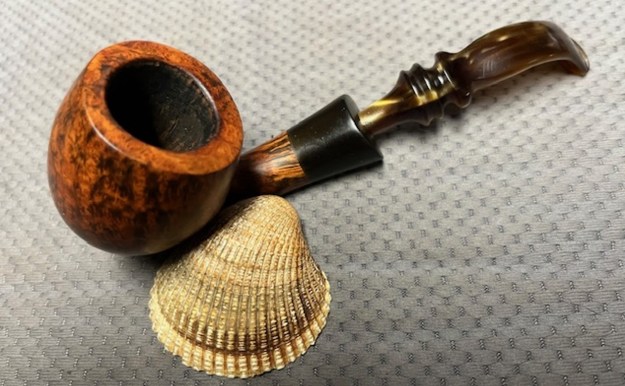
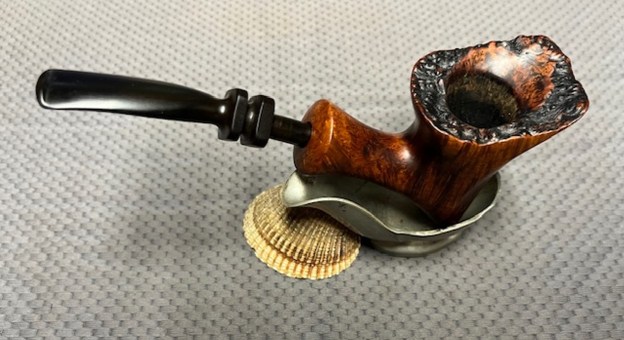
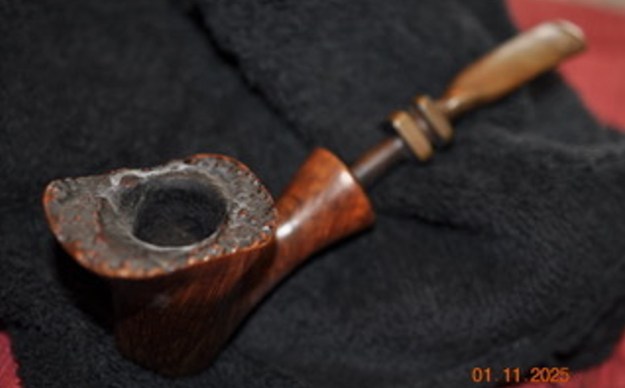
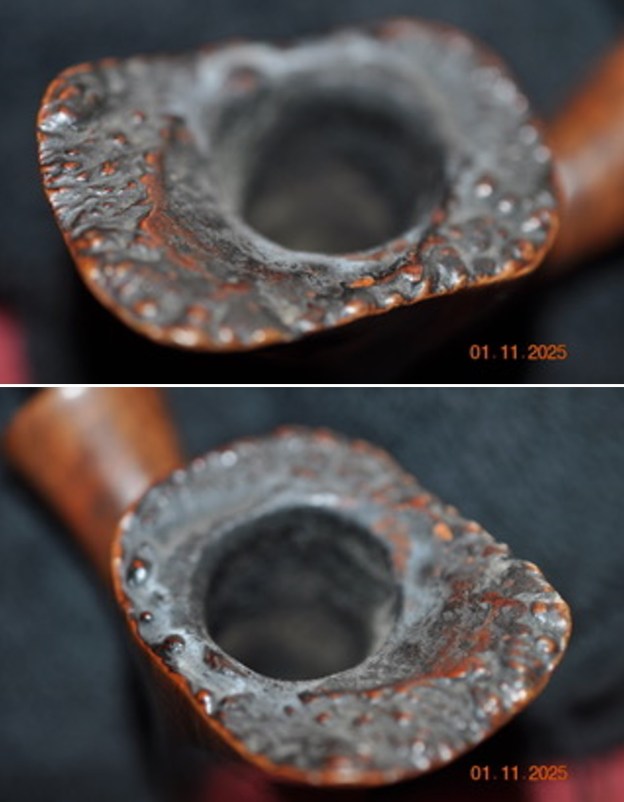
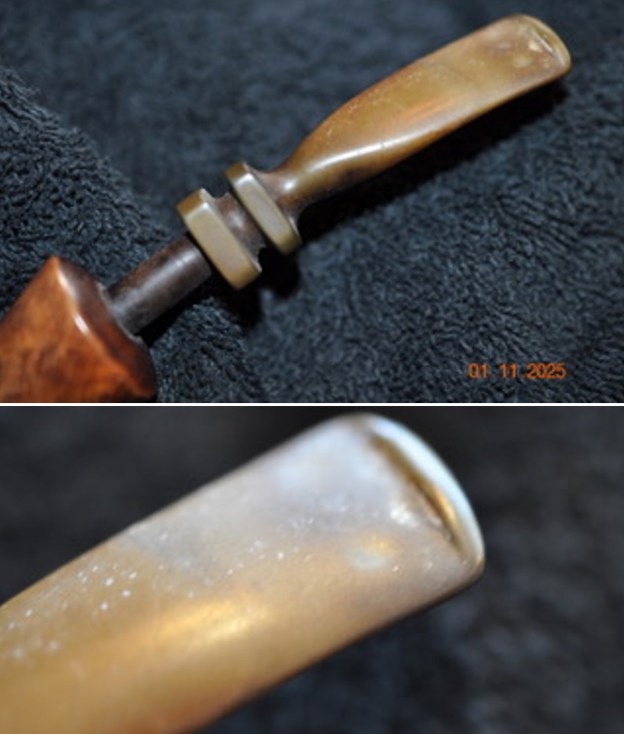
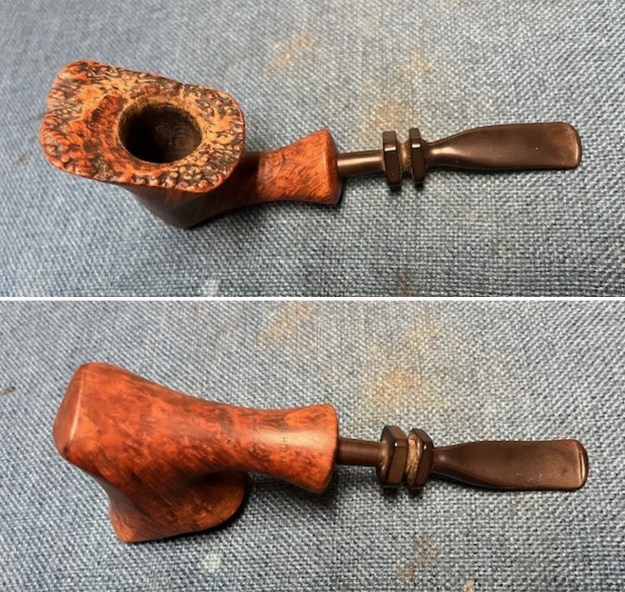
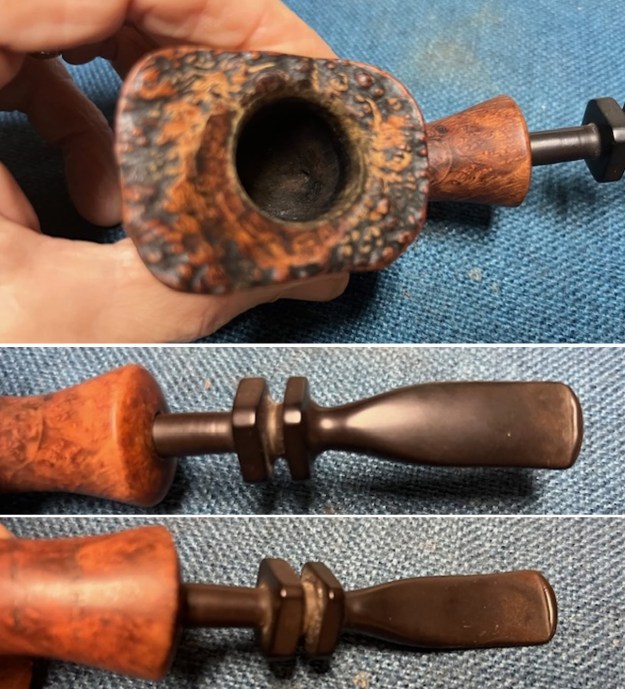
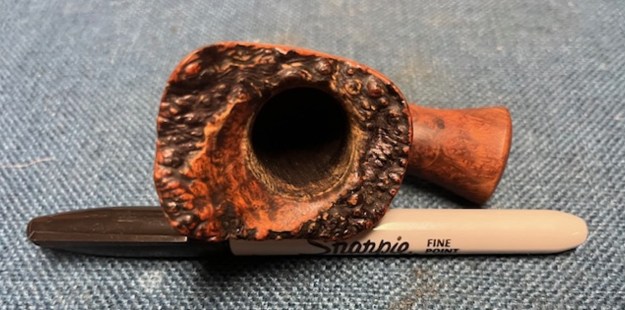
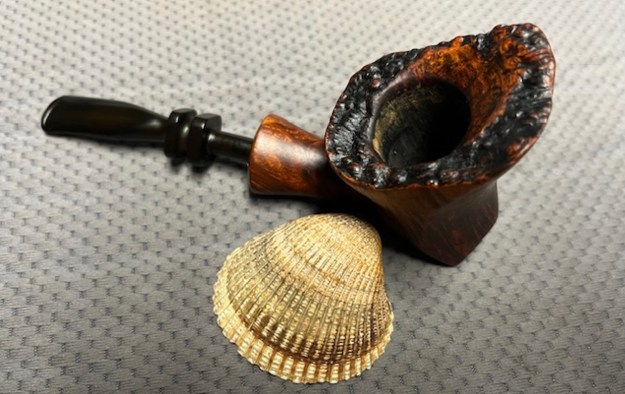
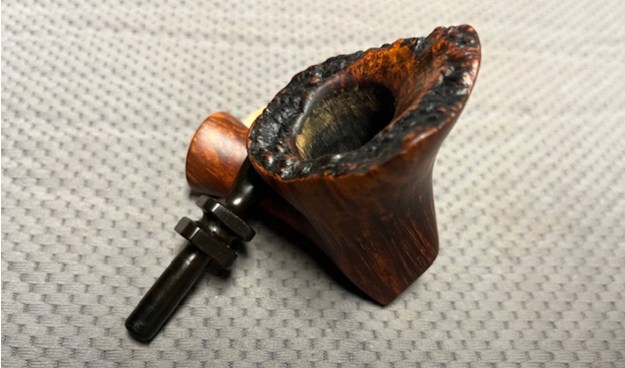
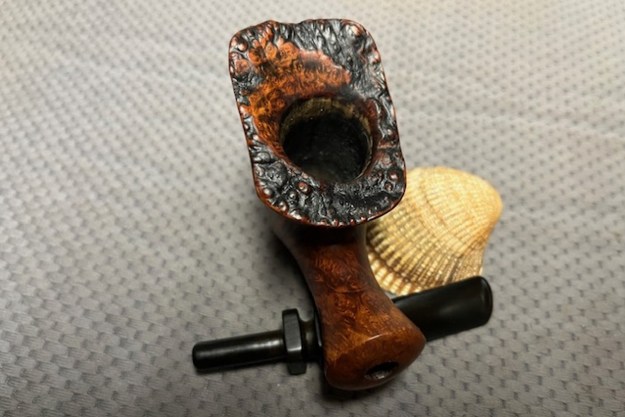
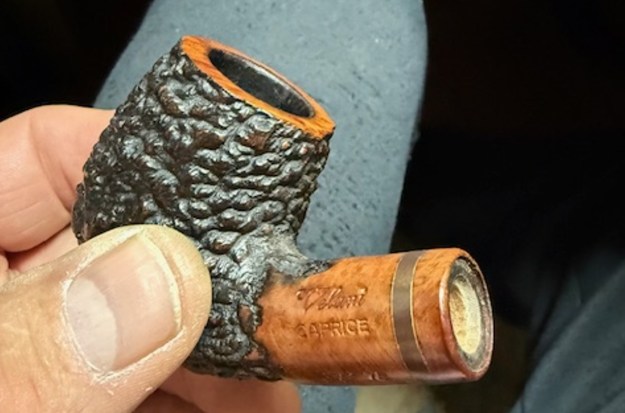
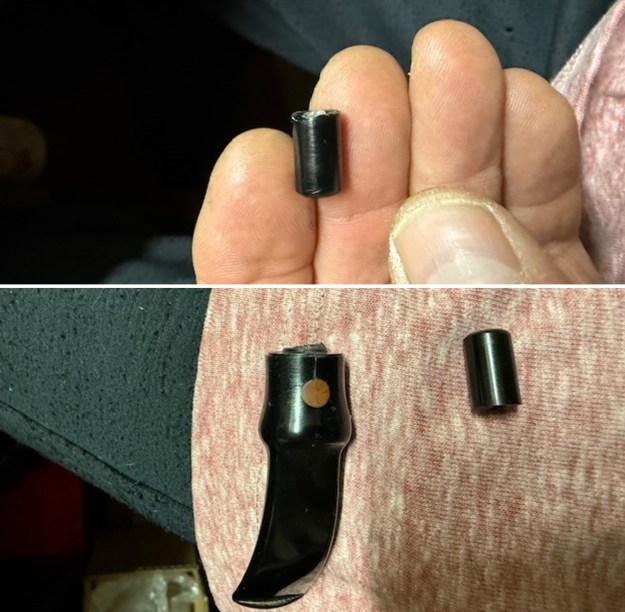
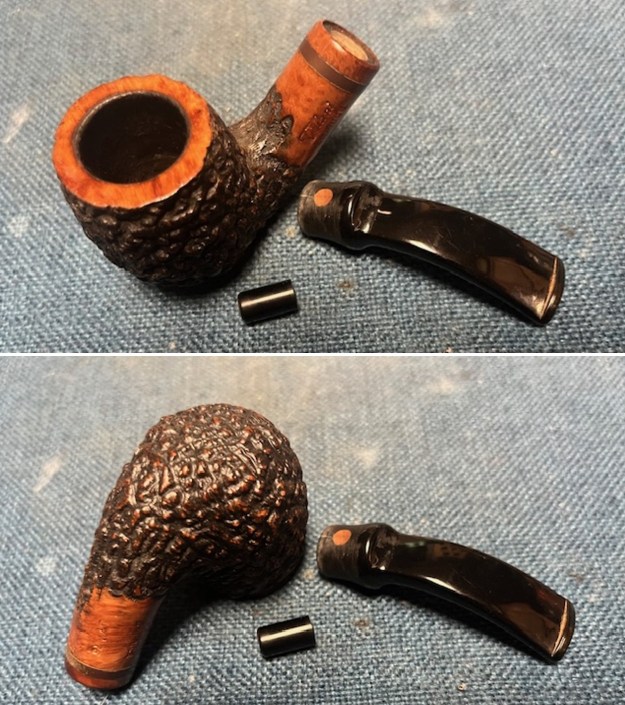
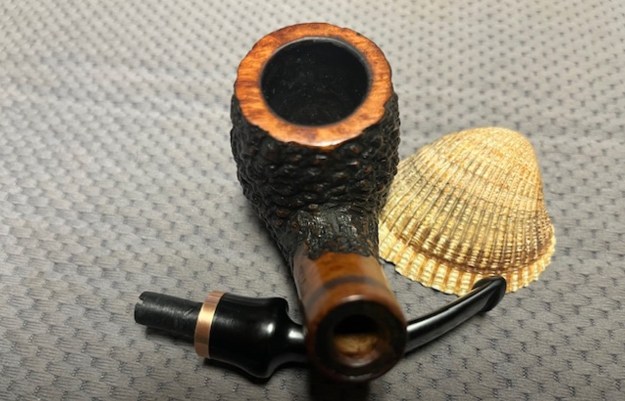
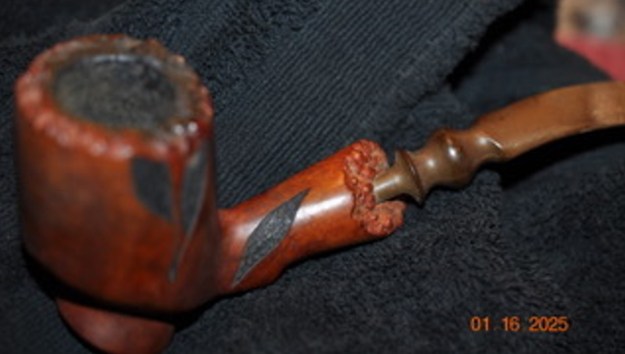
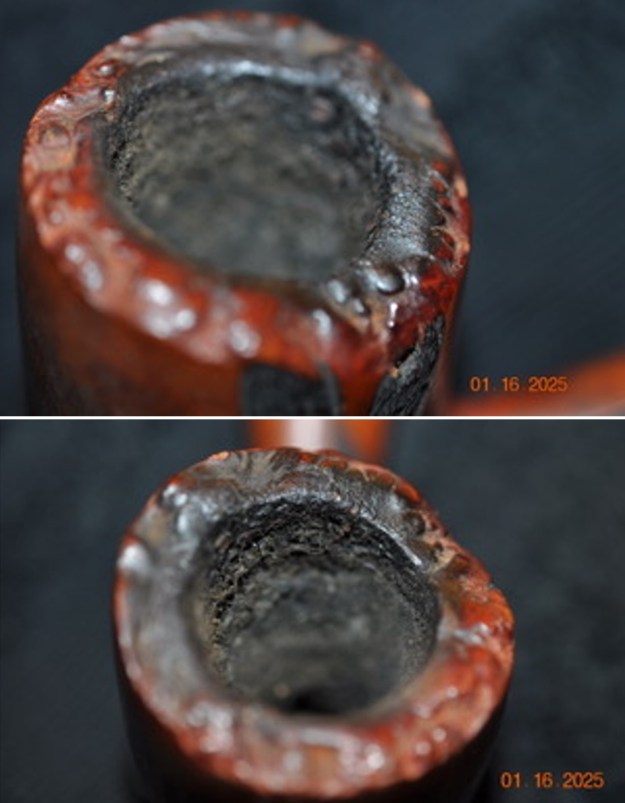
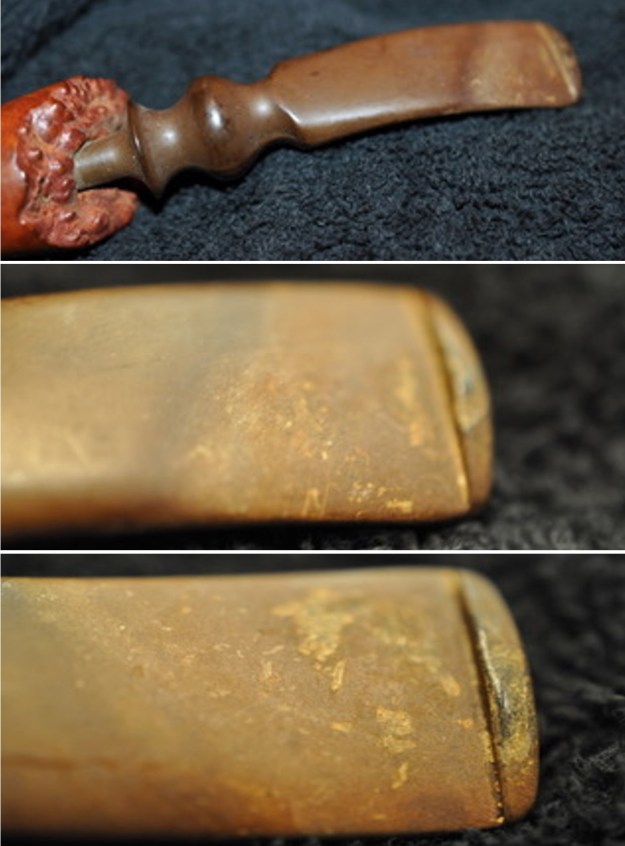
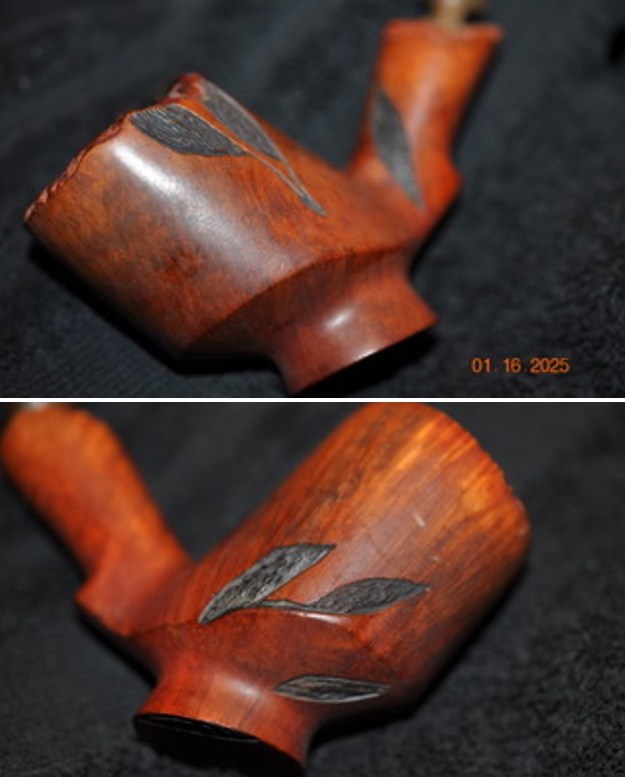
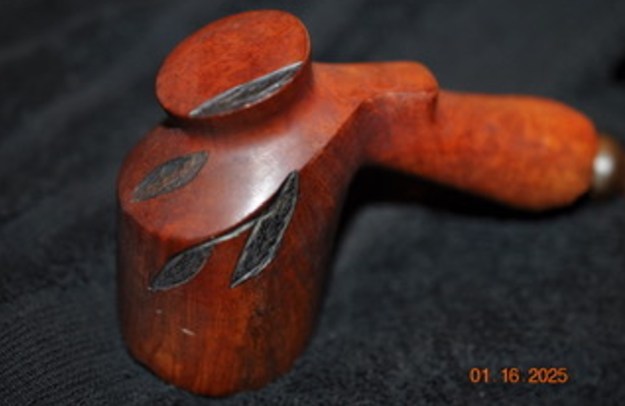
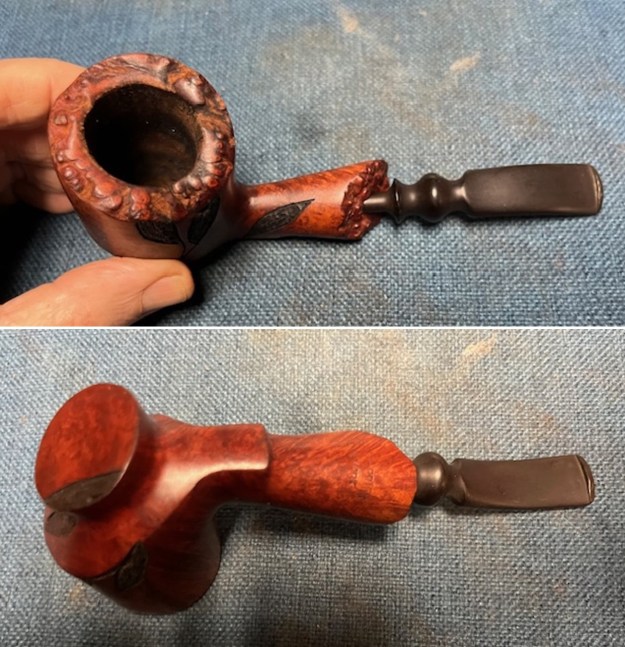
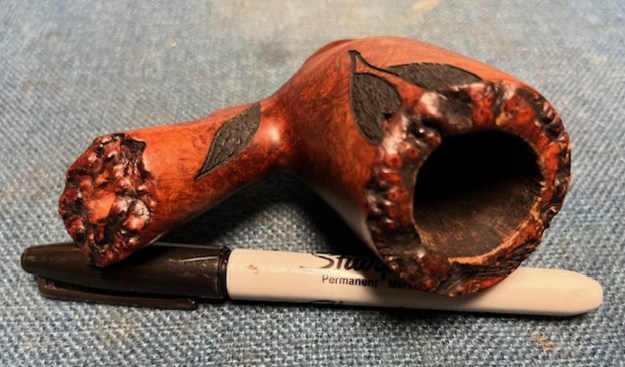
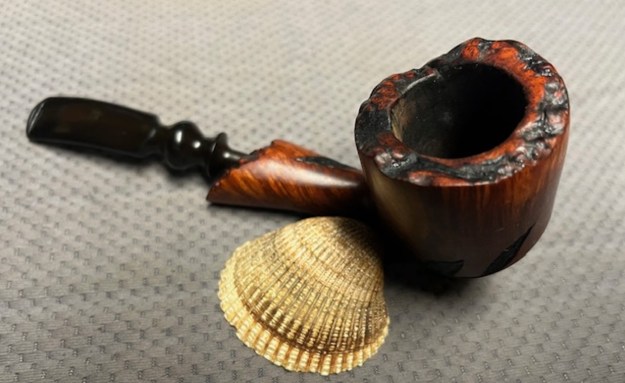
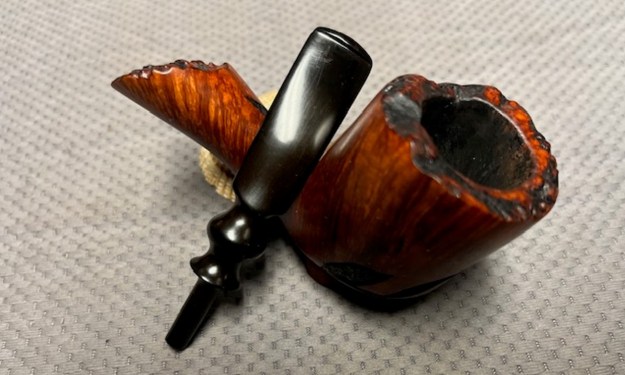
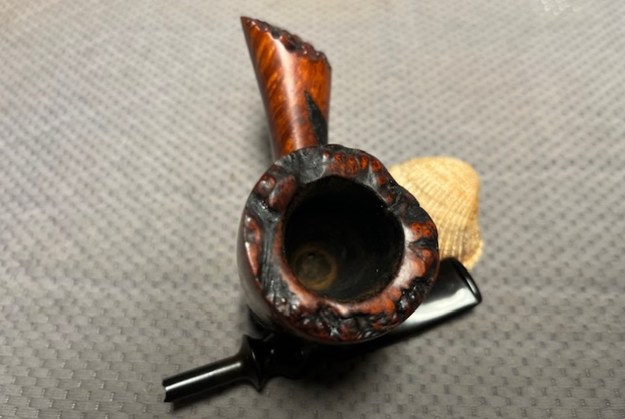
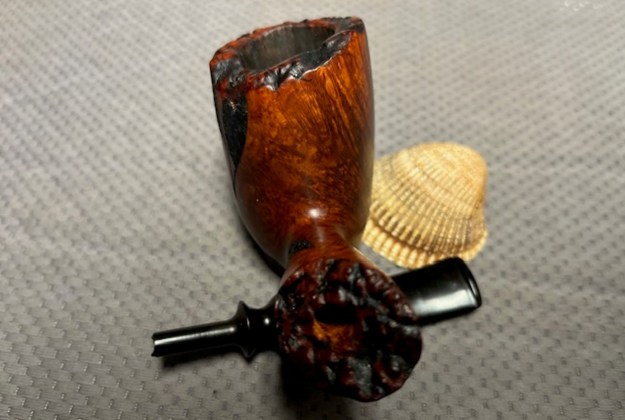
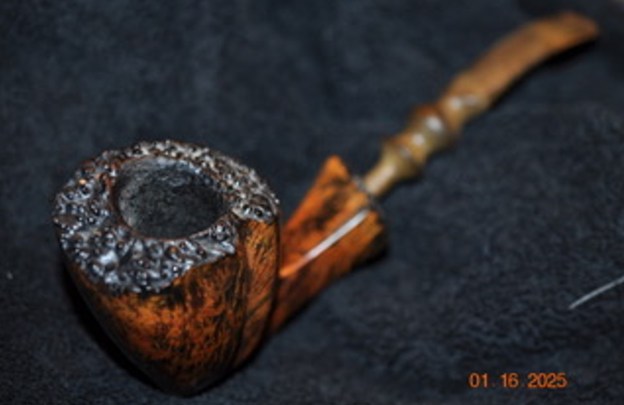
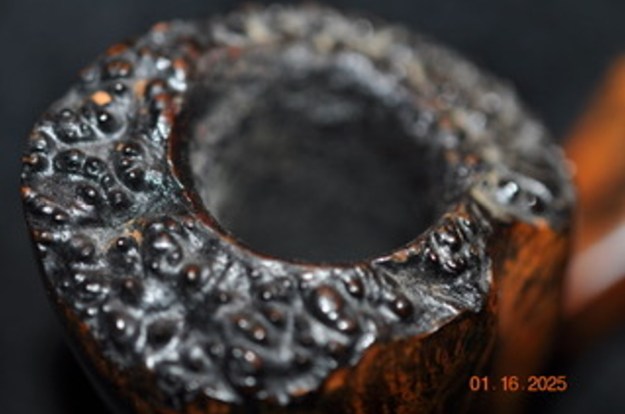
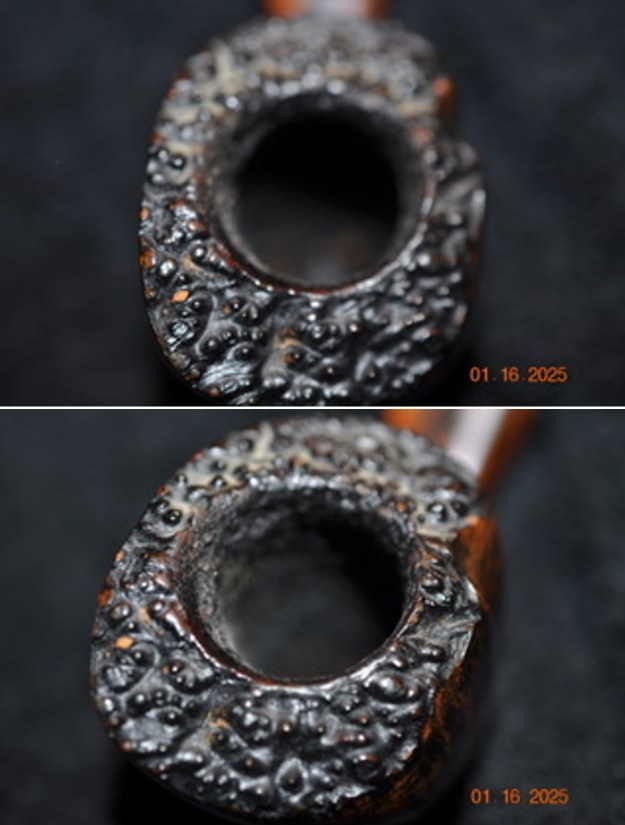
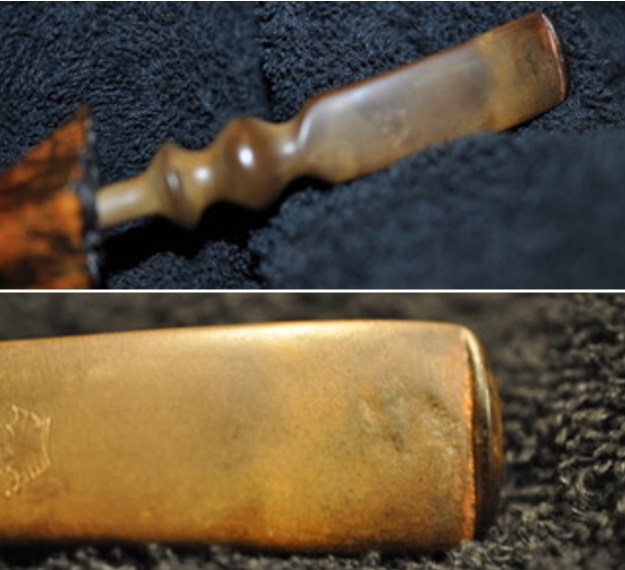
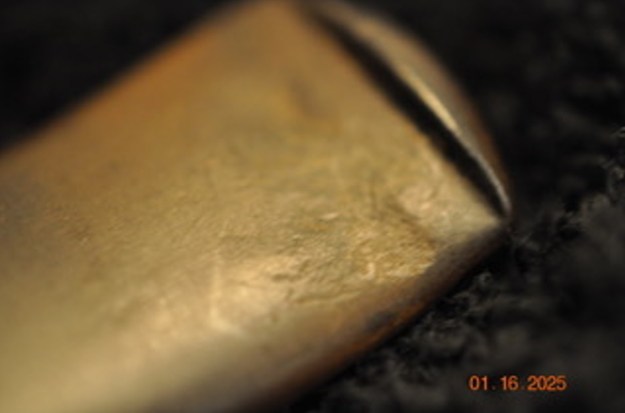
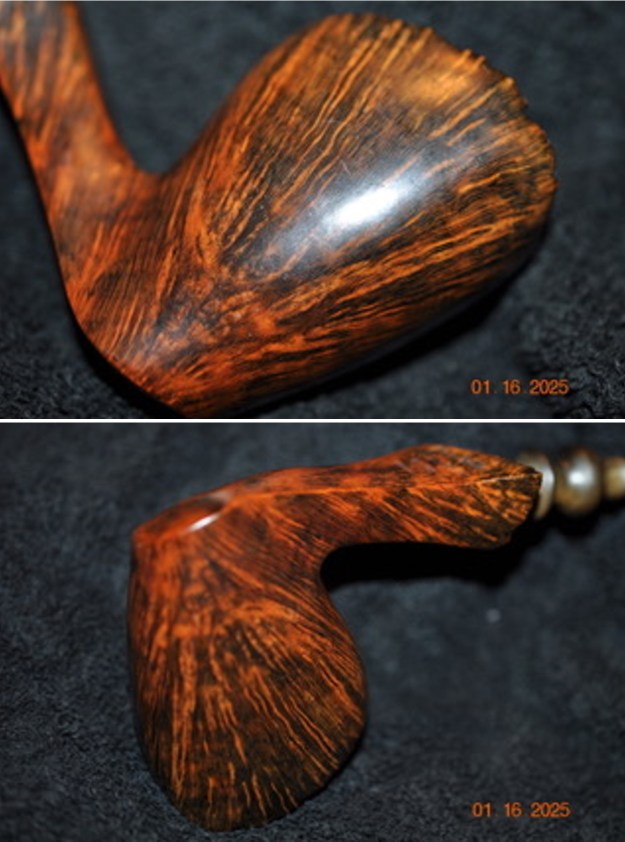
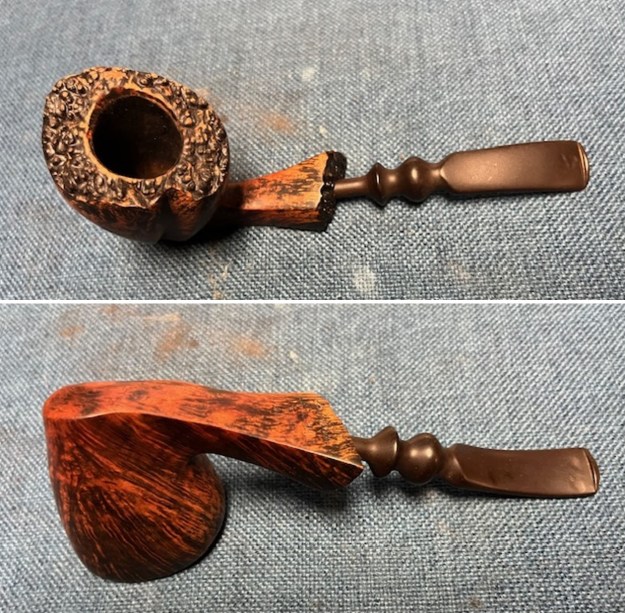
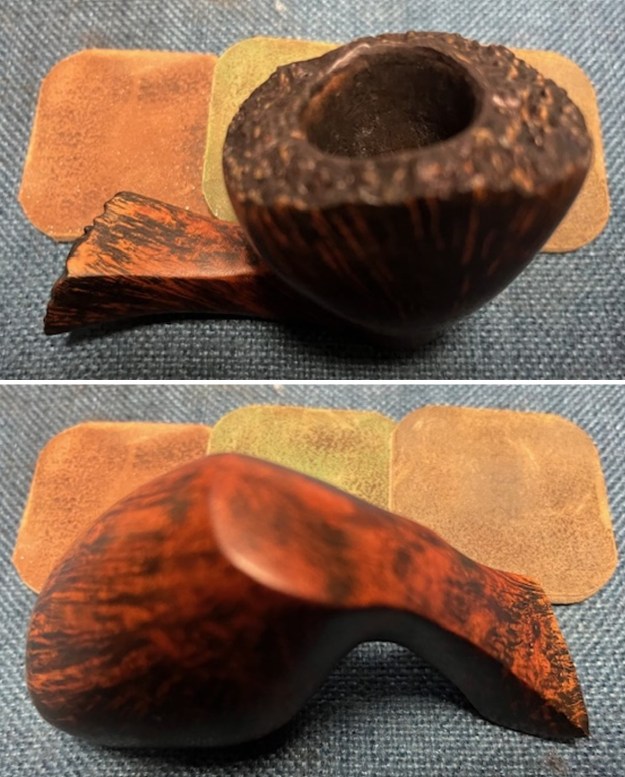
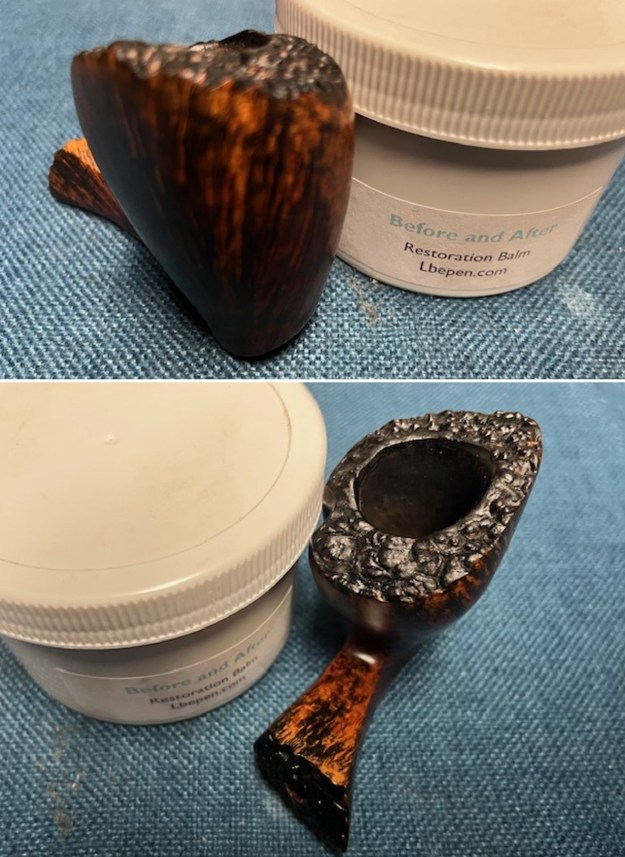
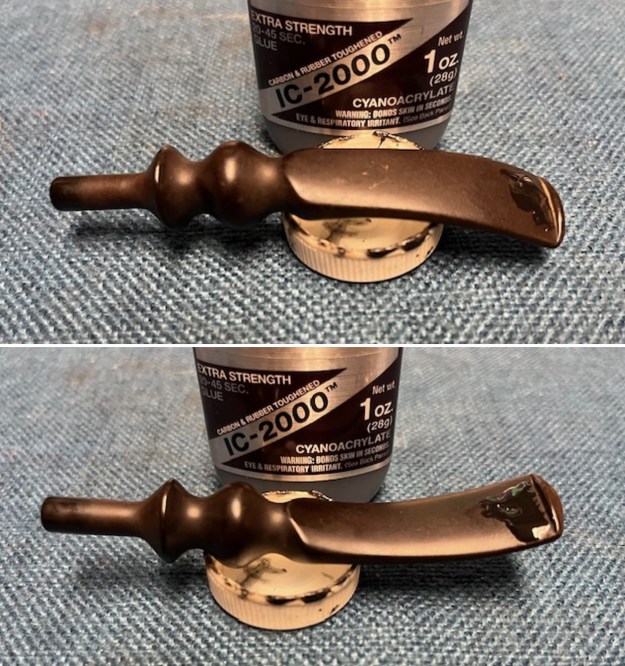
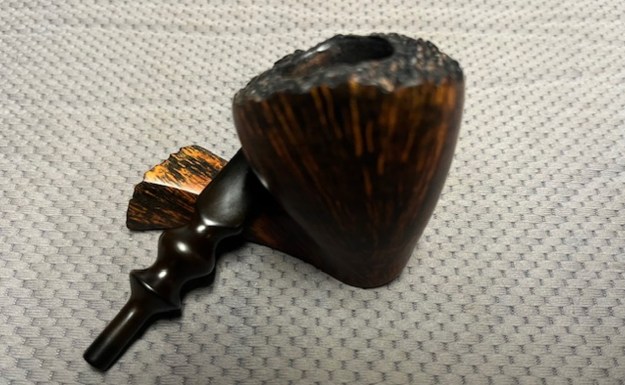
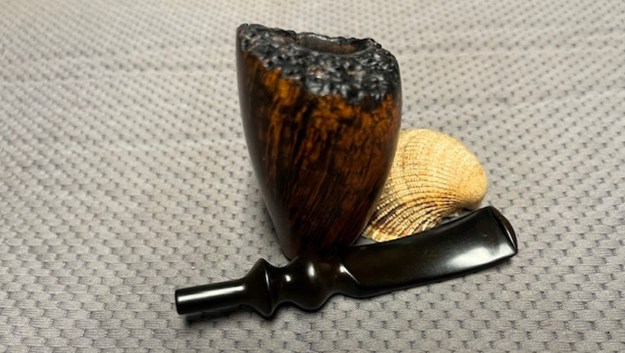
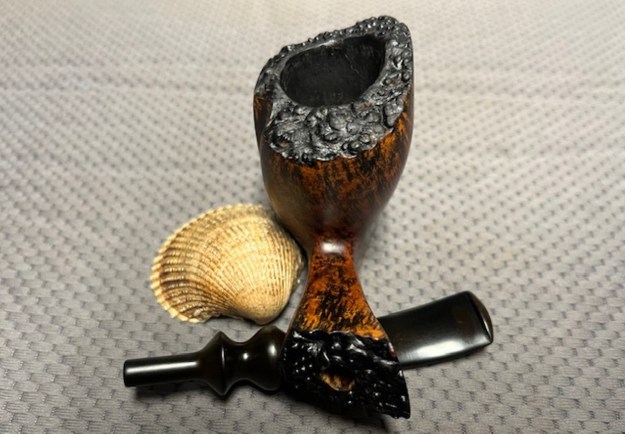
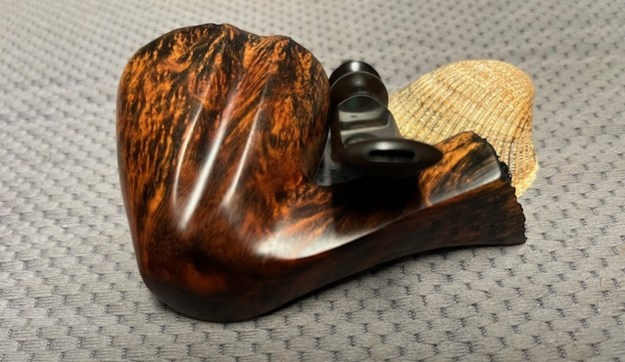
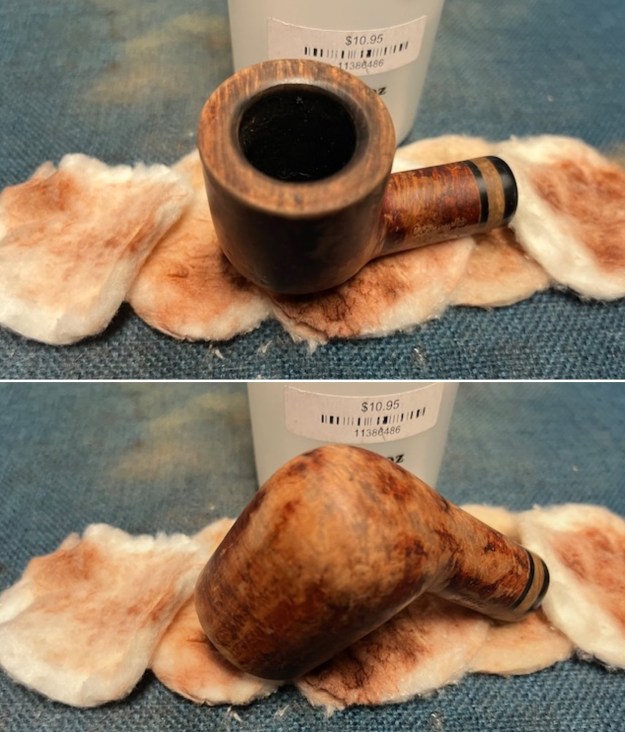
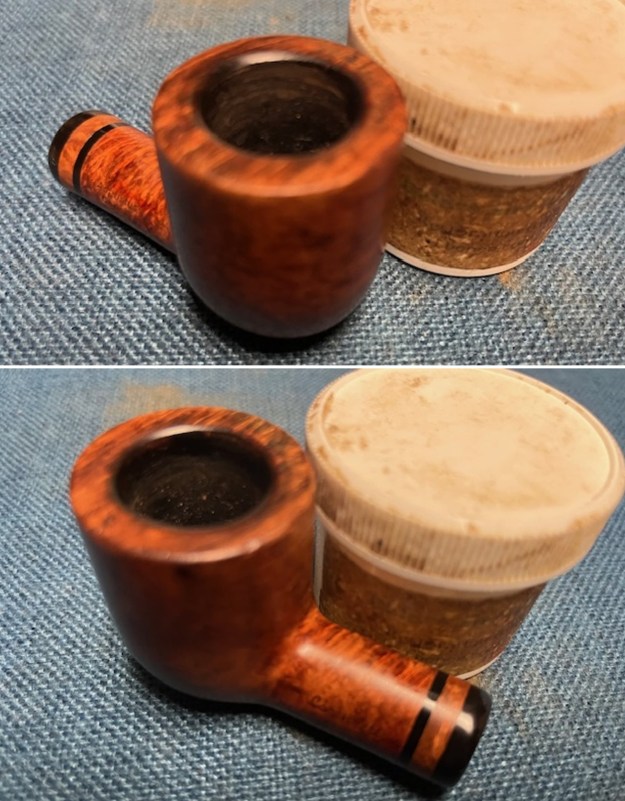
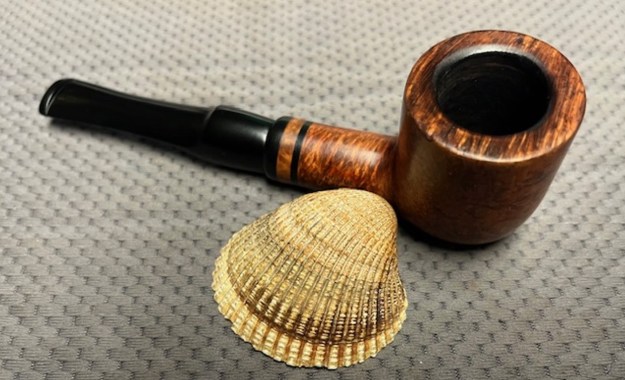
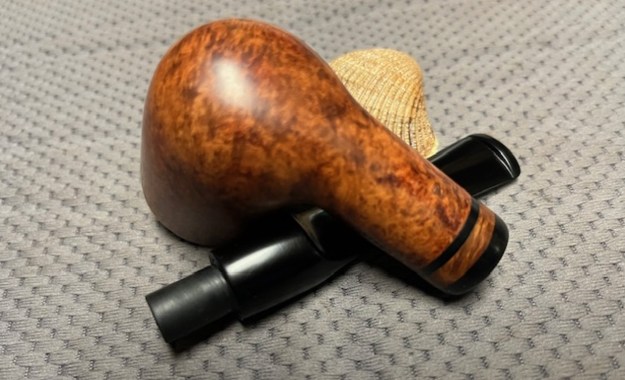
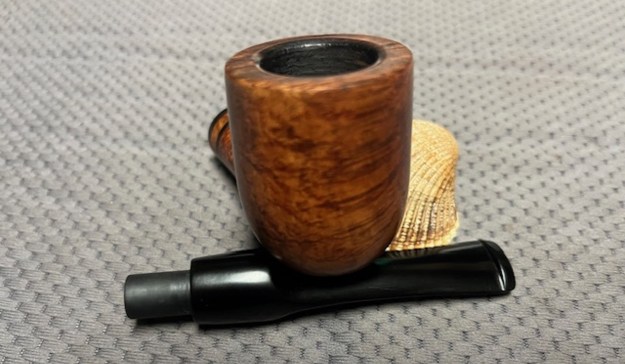
 I took photos of the rim top and stem to show the general condition of the pipe. The bowl is heavily caked and the rim top and edges have a thick lava overflow. The photos of the stem show the damage and broken part of the stem. It really is a mess and the acrylic is not repairable.
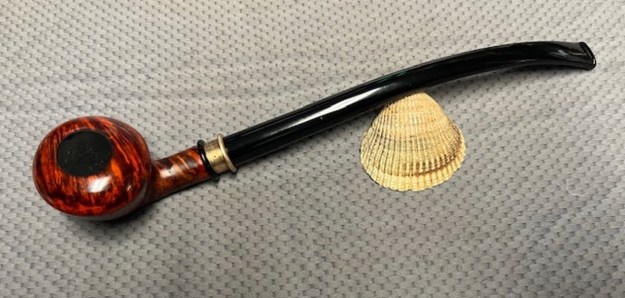
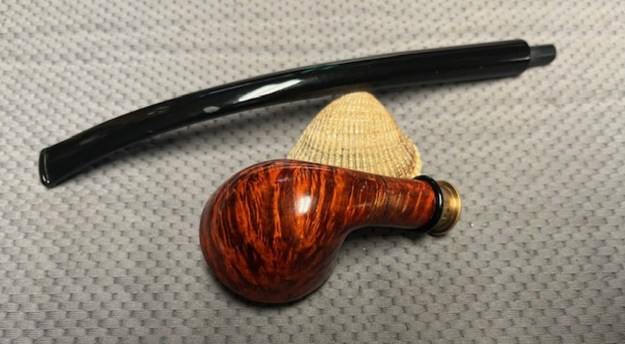
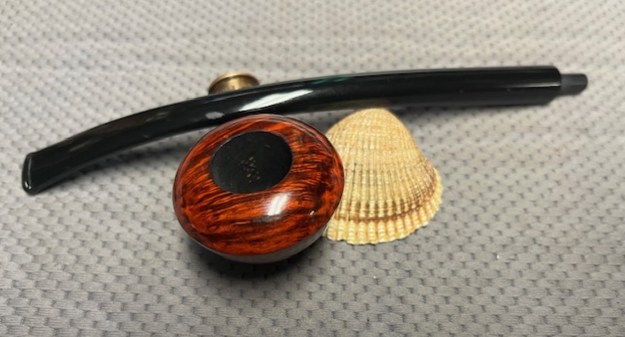
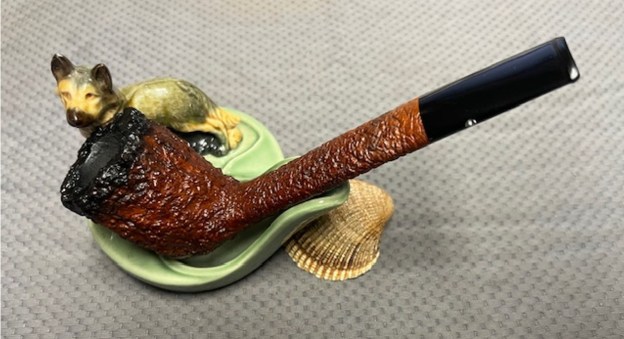
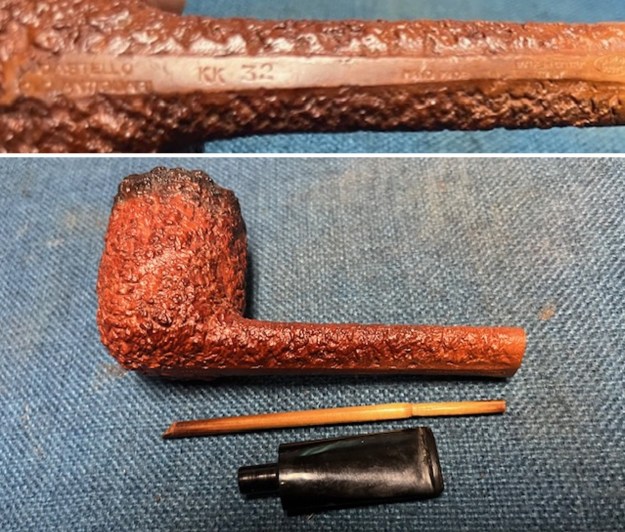
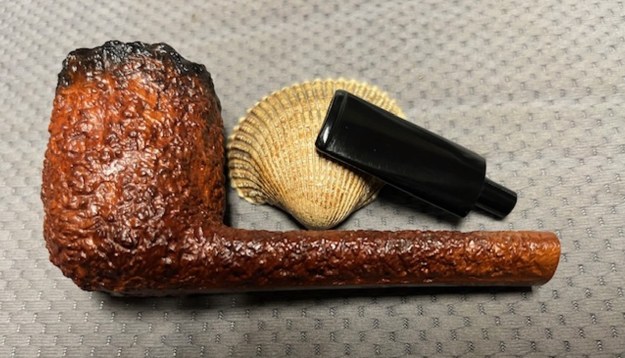
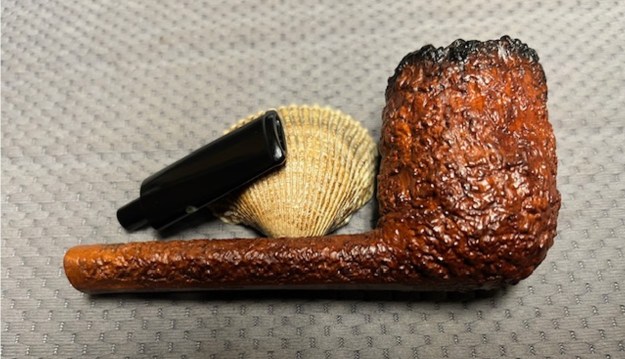
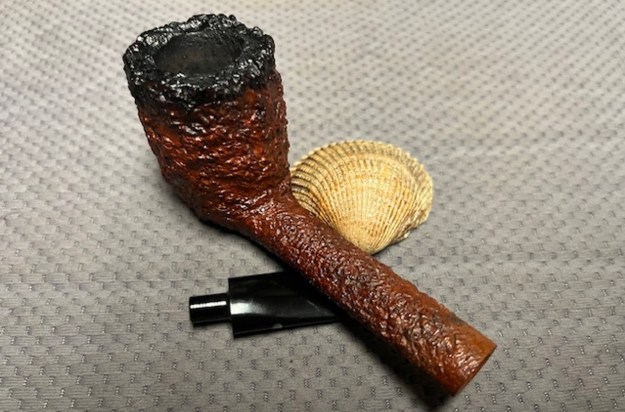
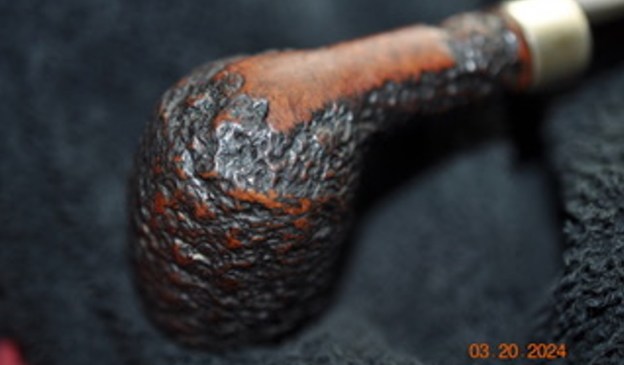
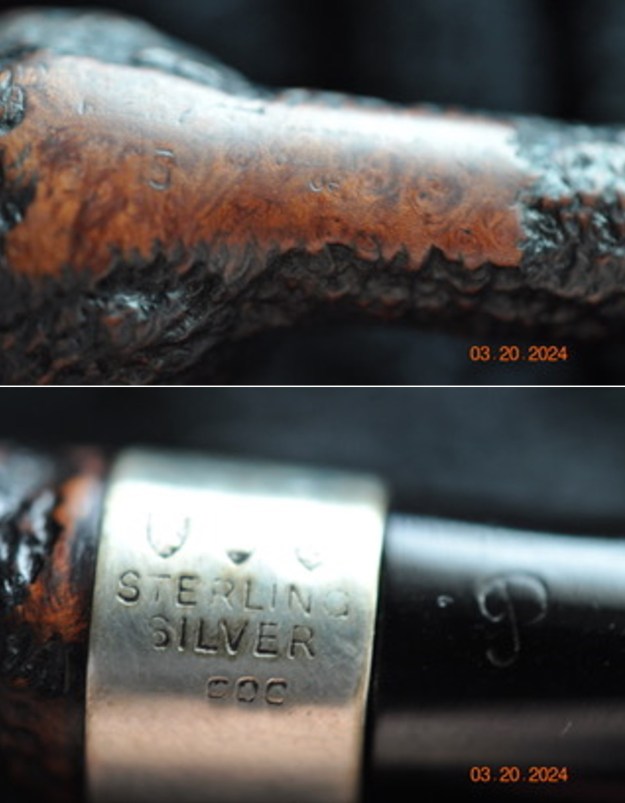
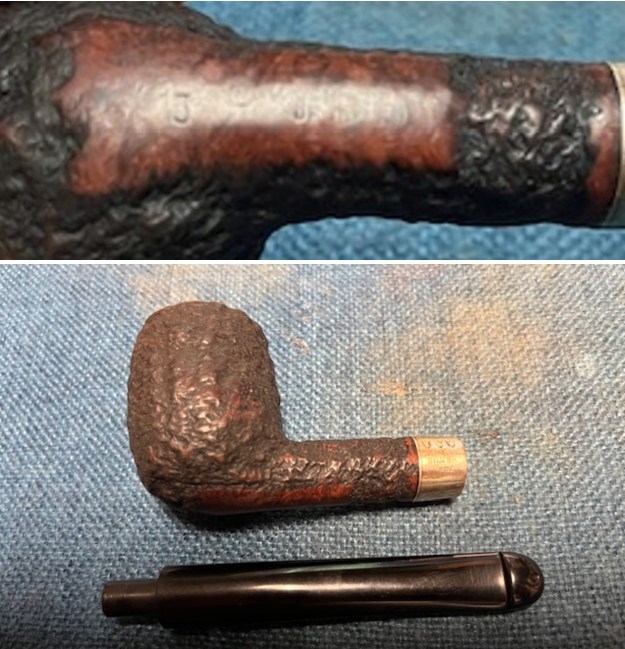
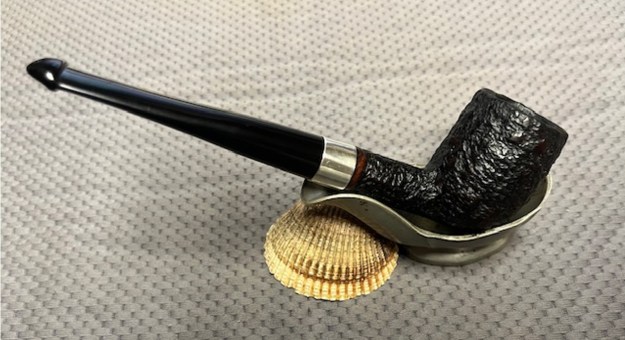
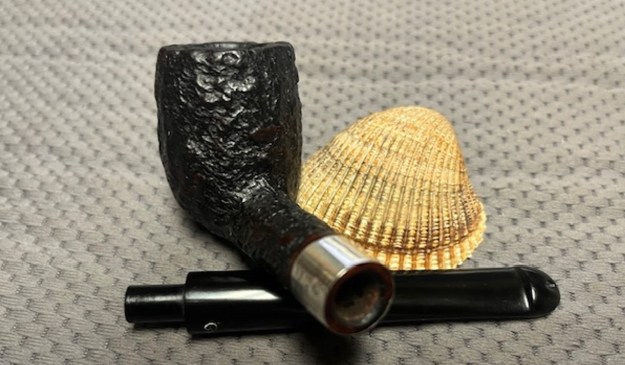
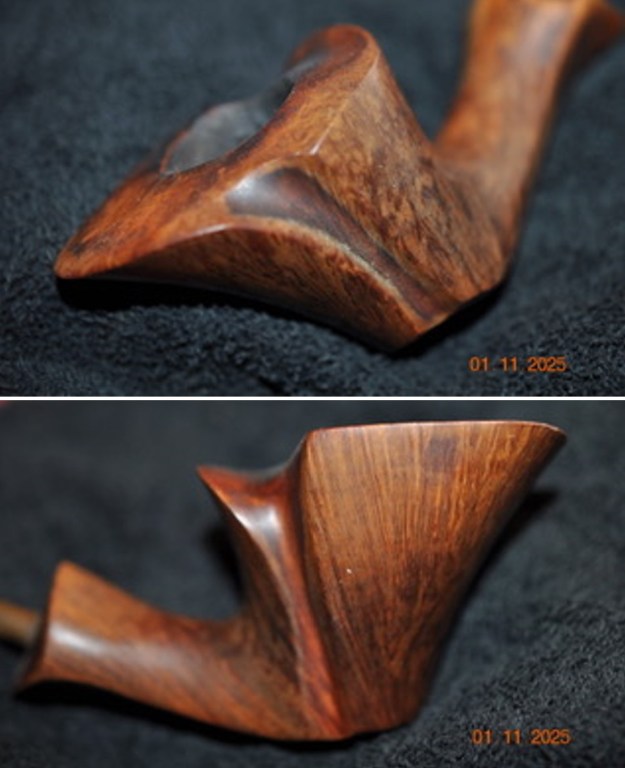
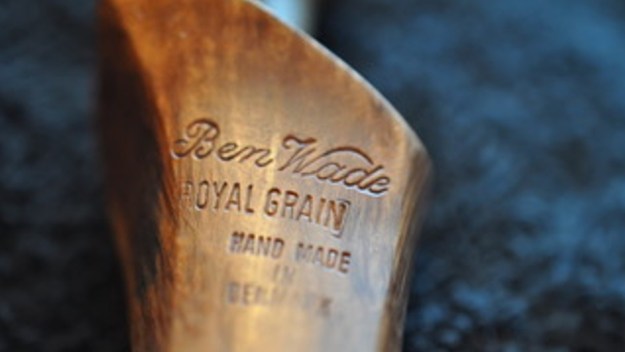
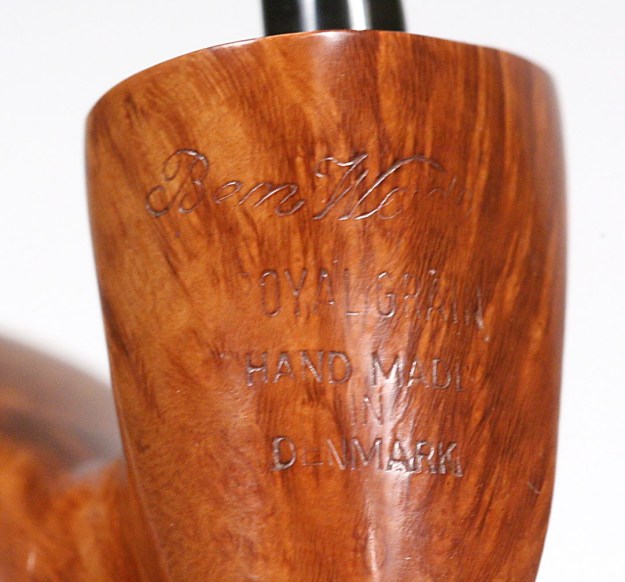
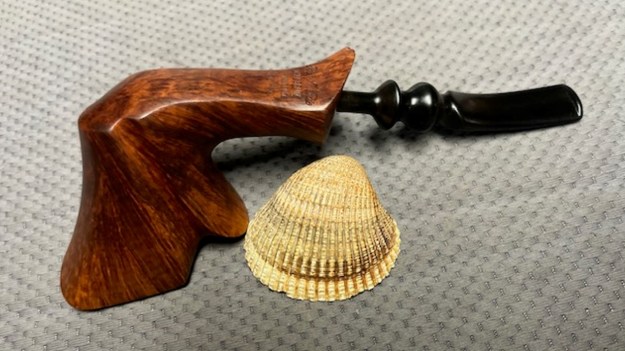
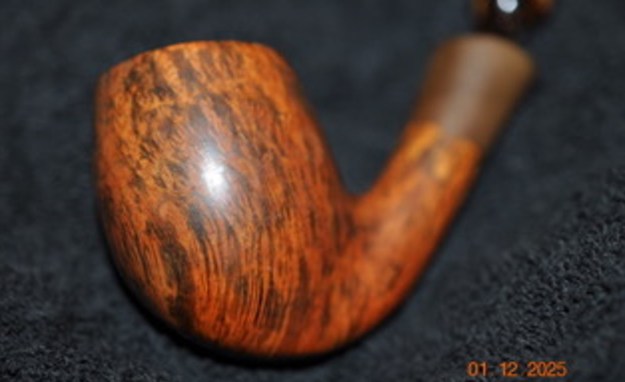
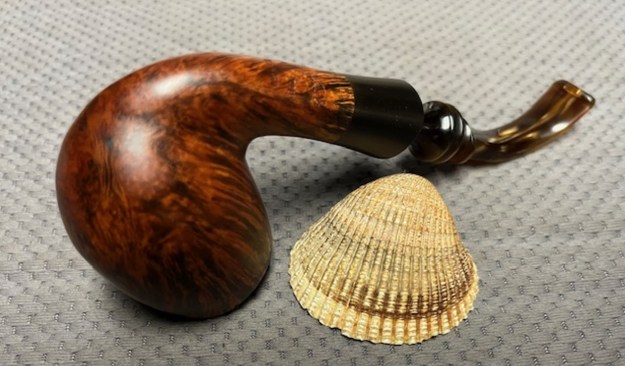
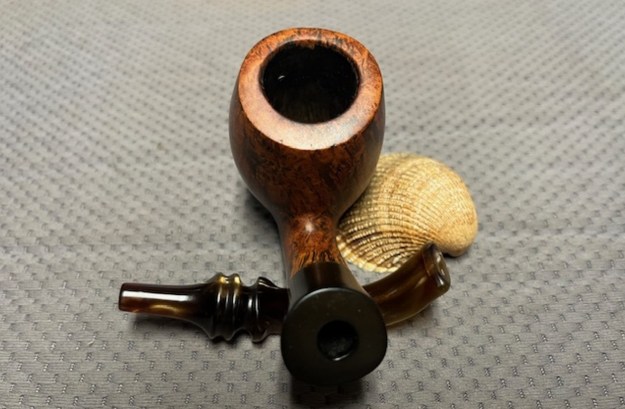
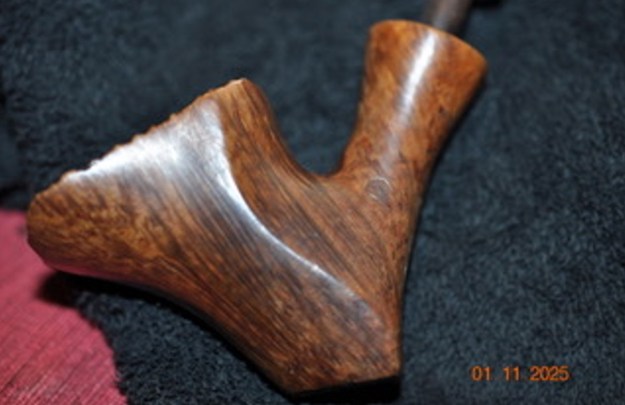
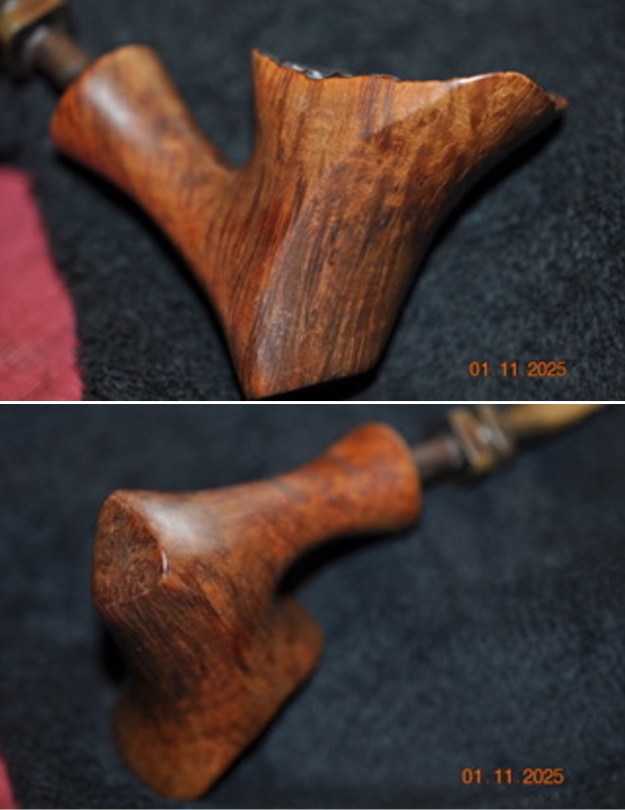
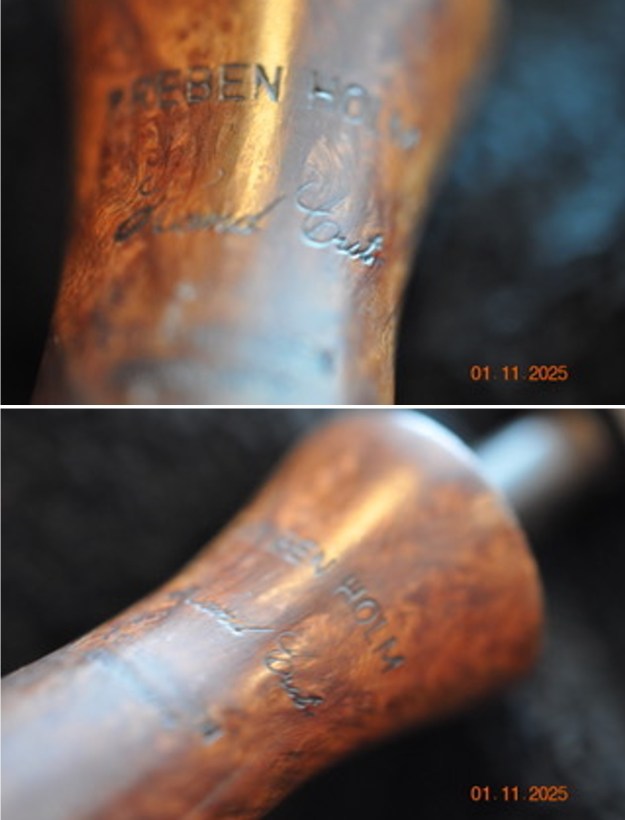
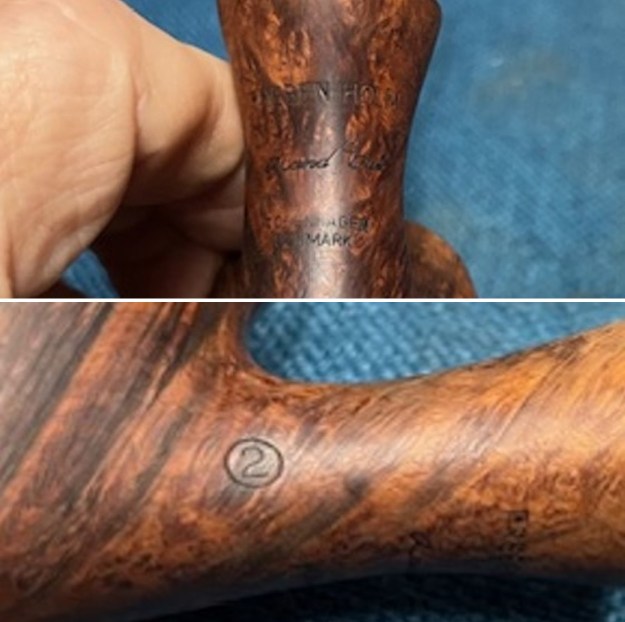
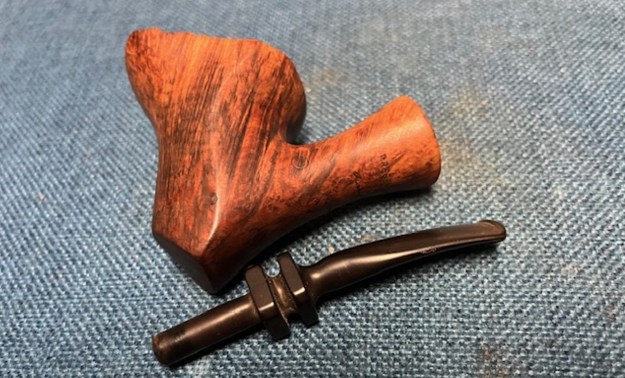
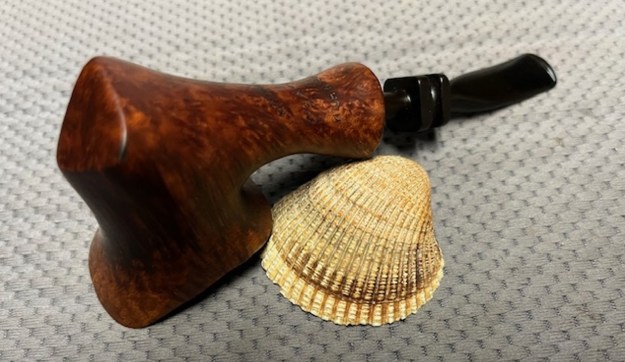
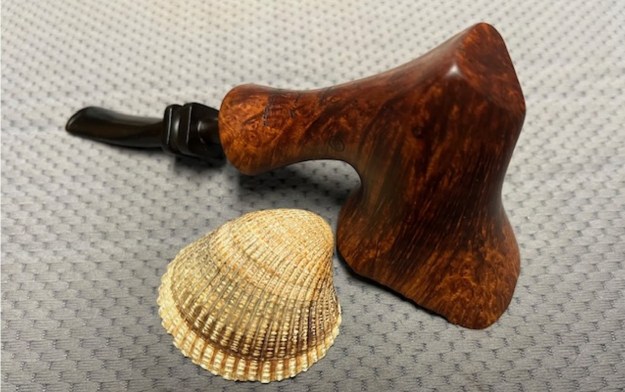
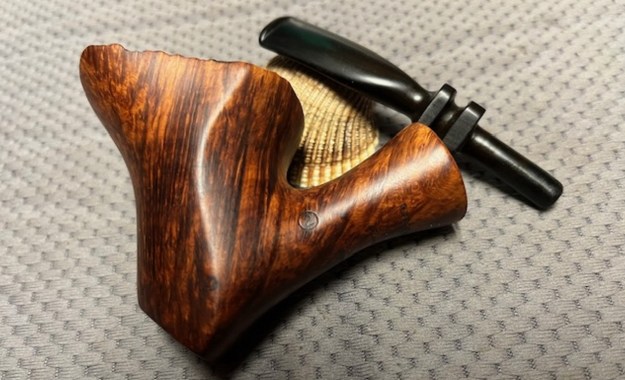
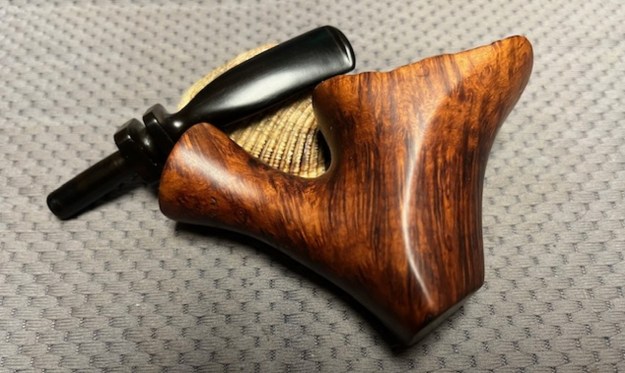
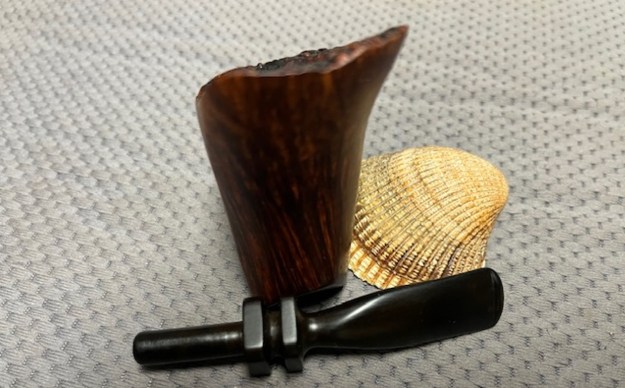
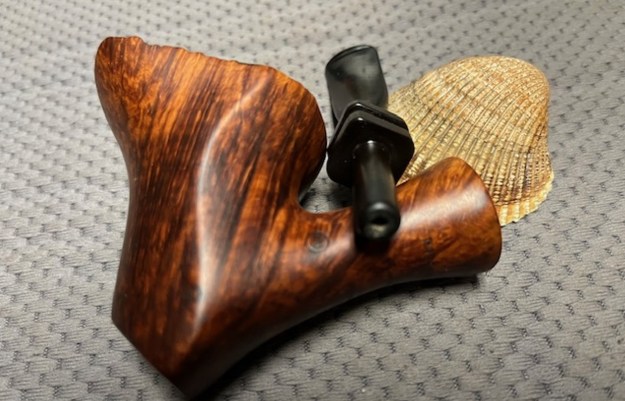
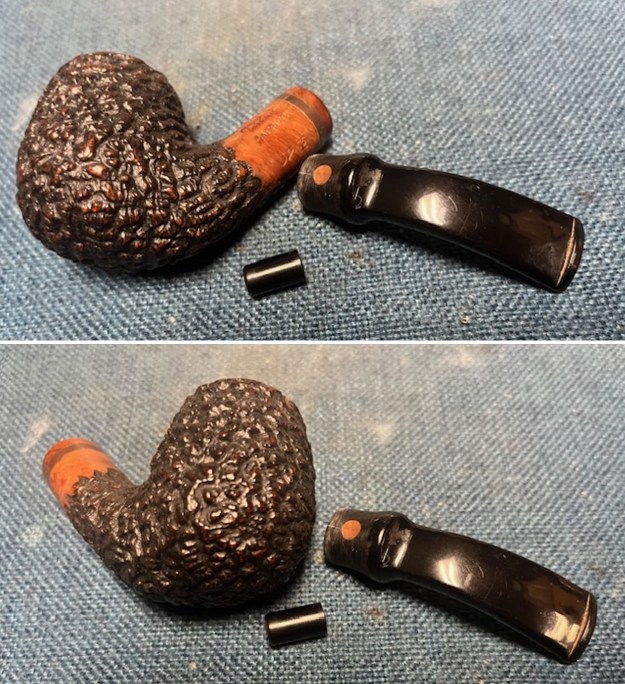
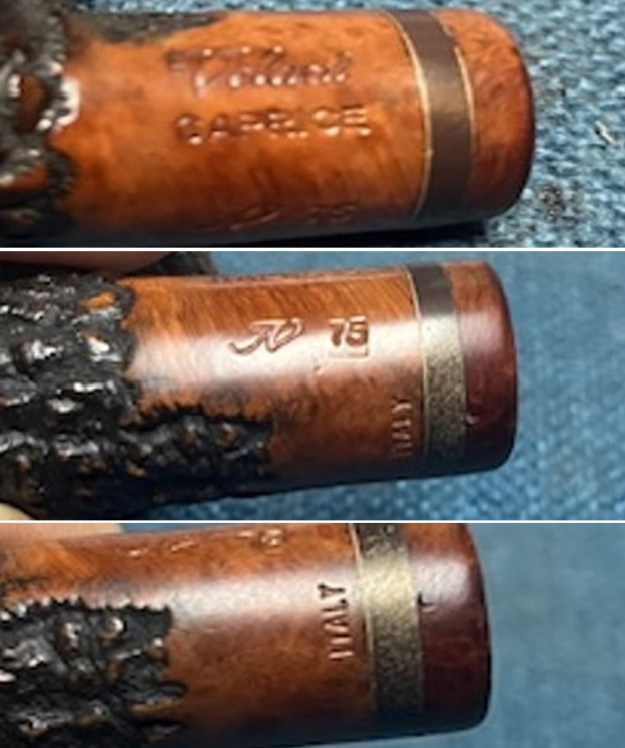
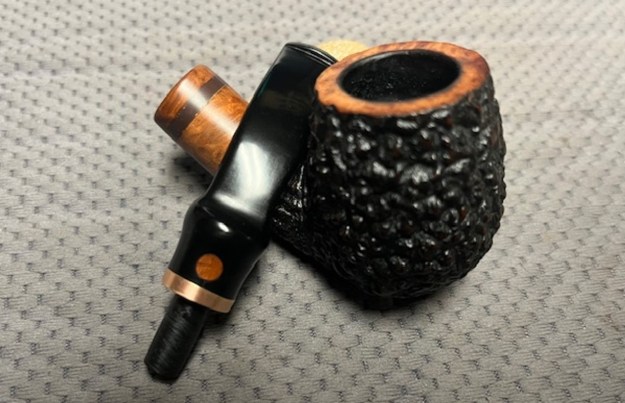
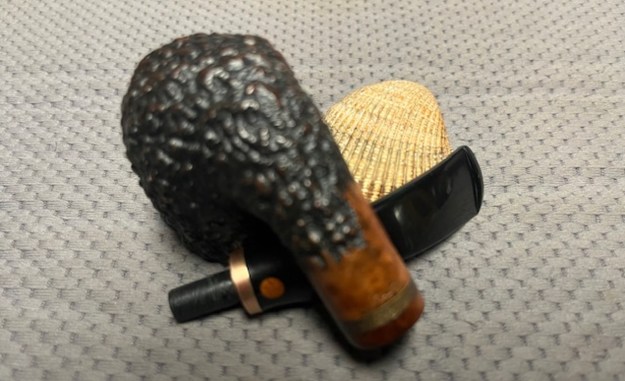
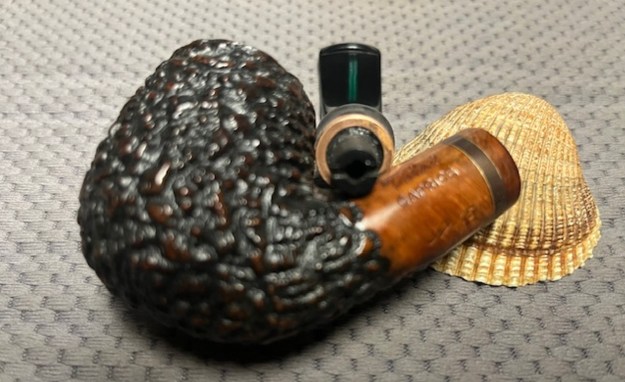
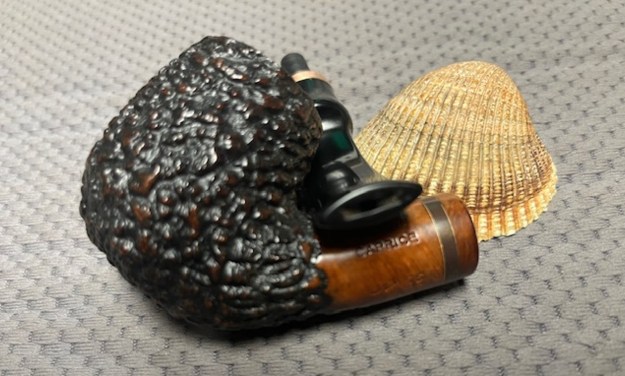
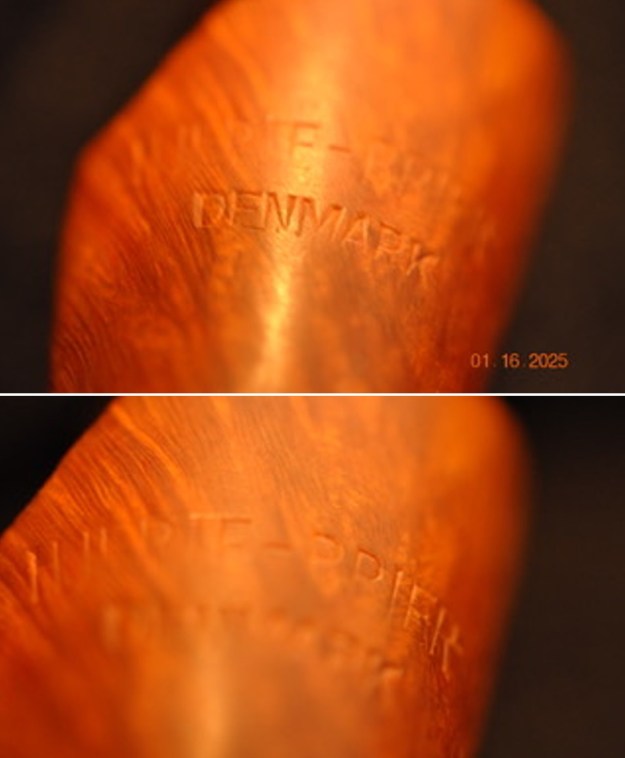
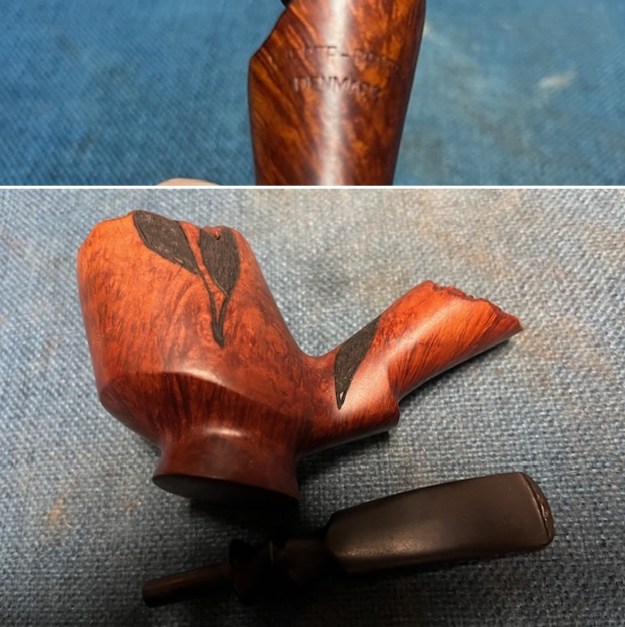
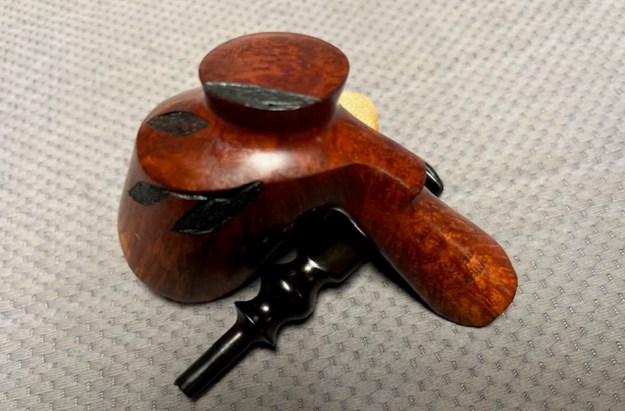
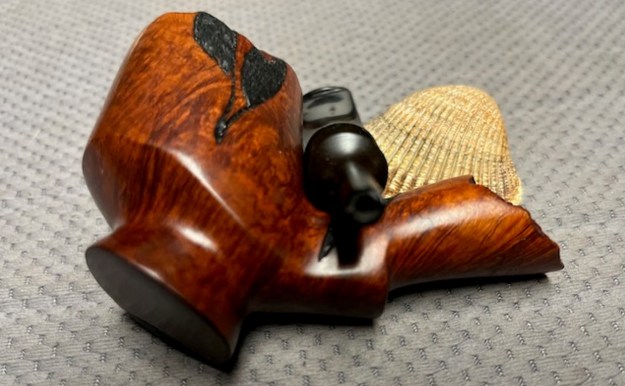
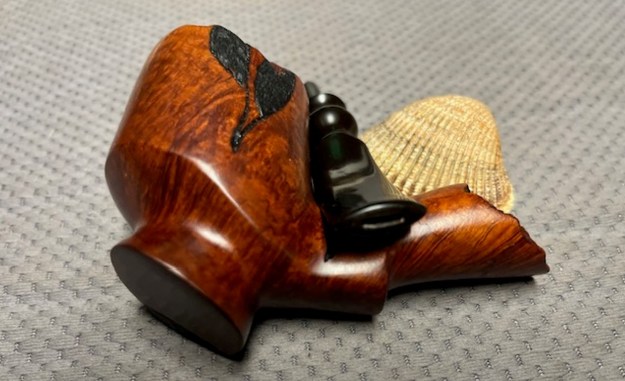
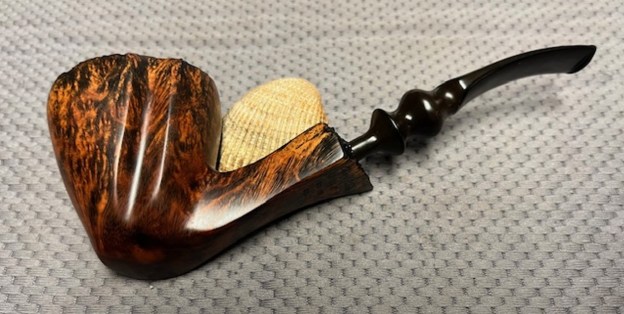
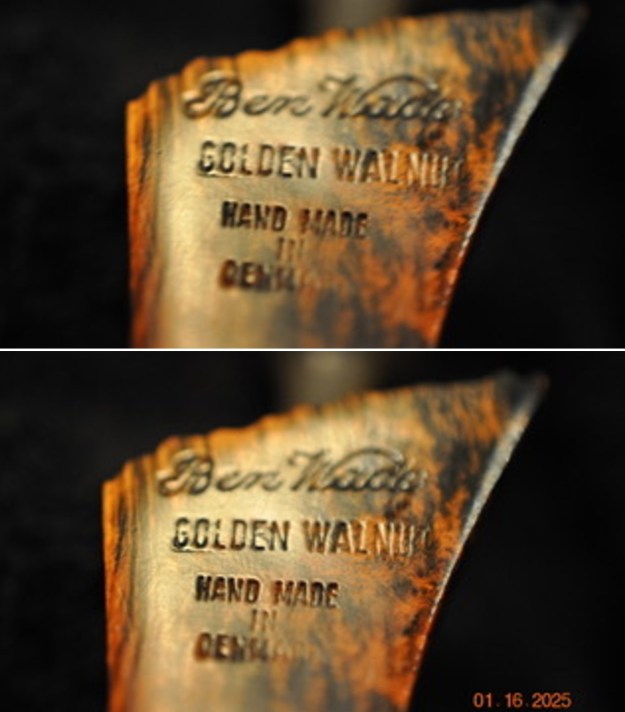
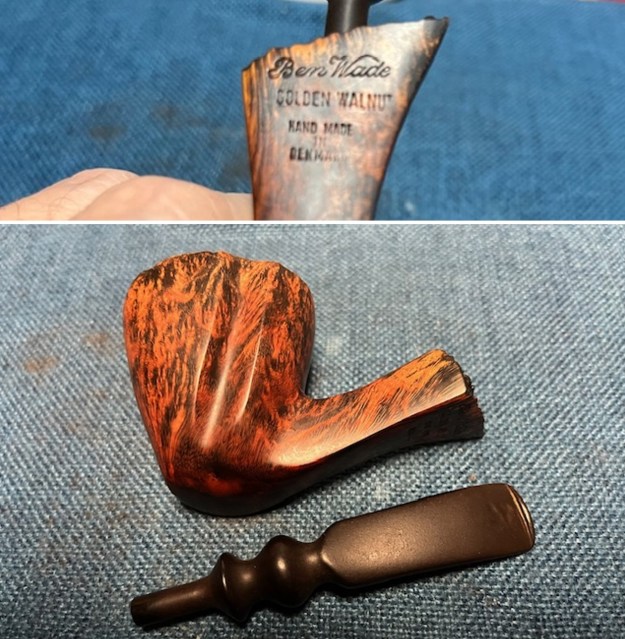
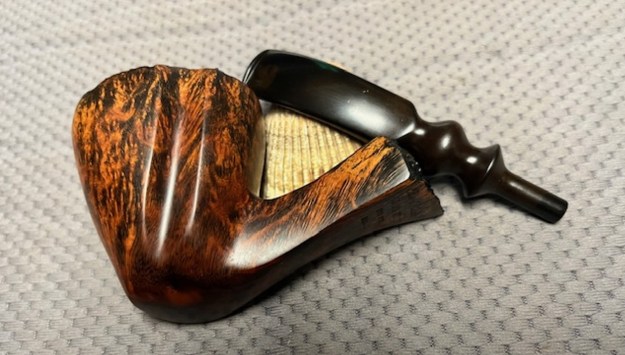
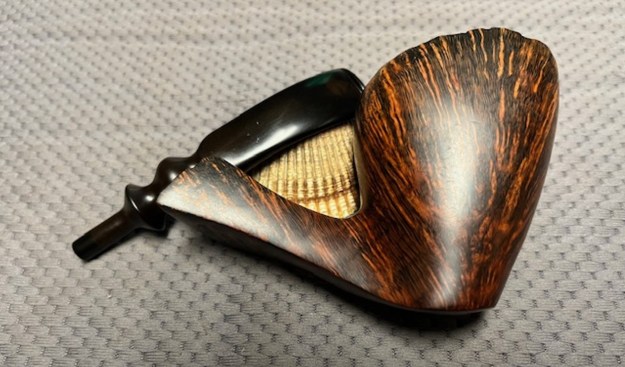
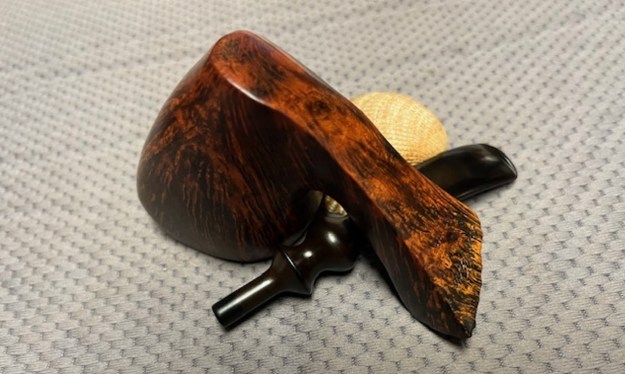
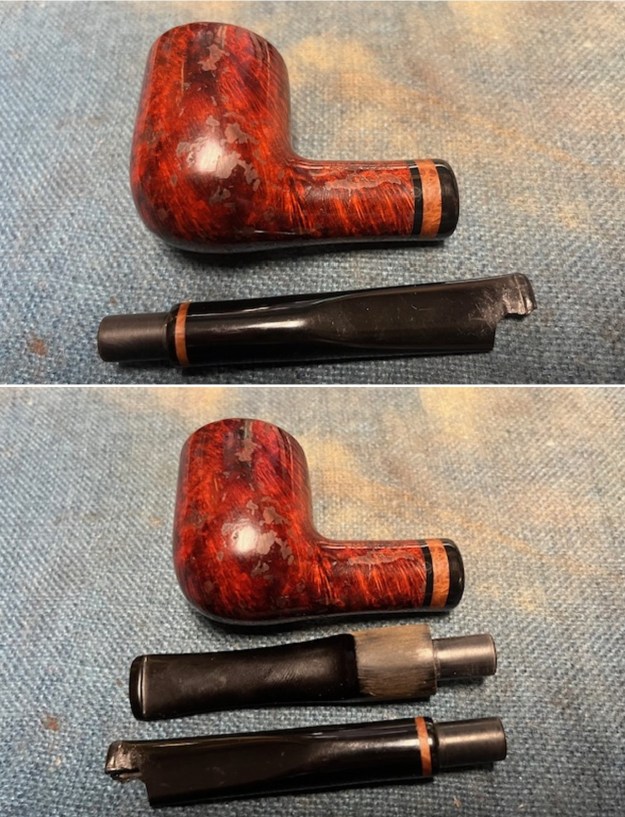
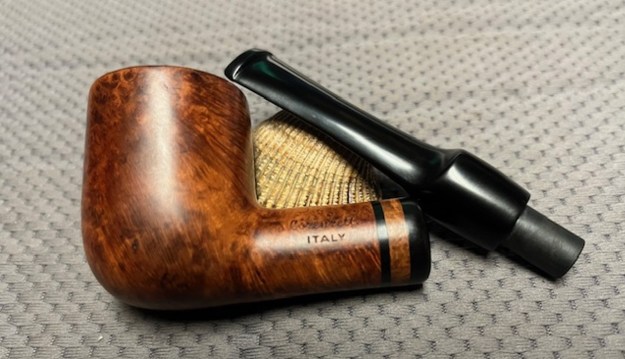
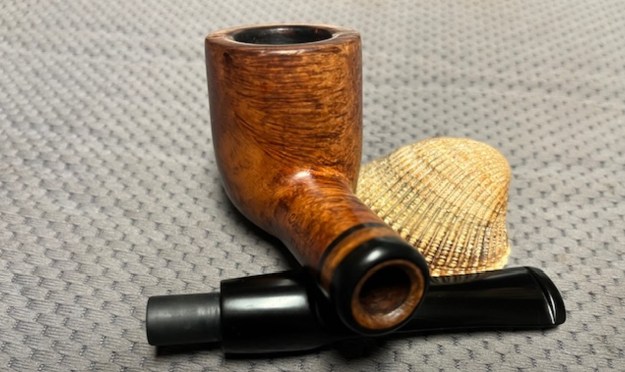
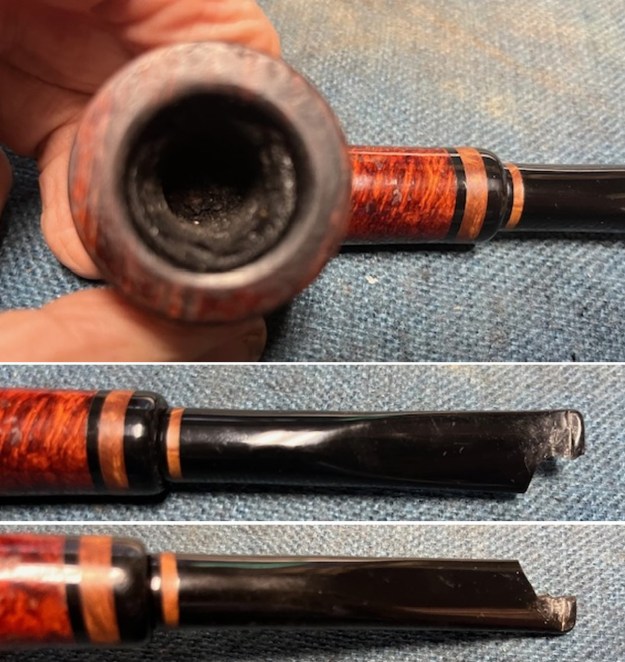 I took photos of the stamping on the sides of the shank. It is clear and readable and reads as noted above. I took a photo of the pipe without the stem to show the proportions of the bowl and stem. I also went through my stems and had a saddle stem that was made for a filter. I called Brian and asked if this would work for him and he was happy with the options.
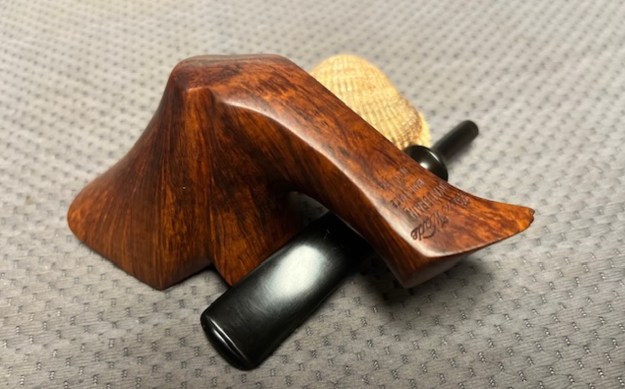
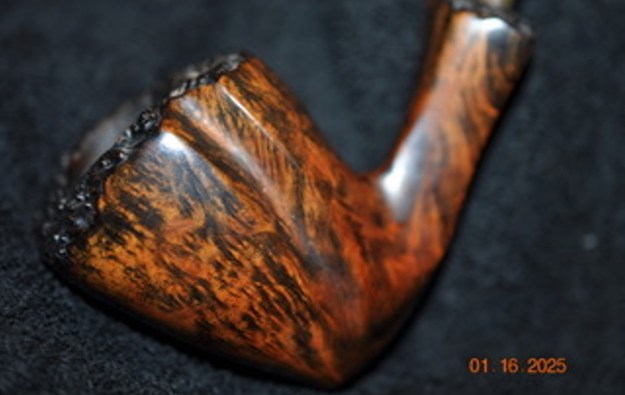
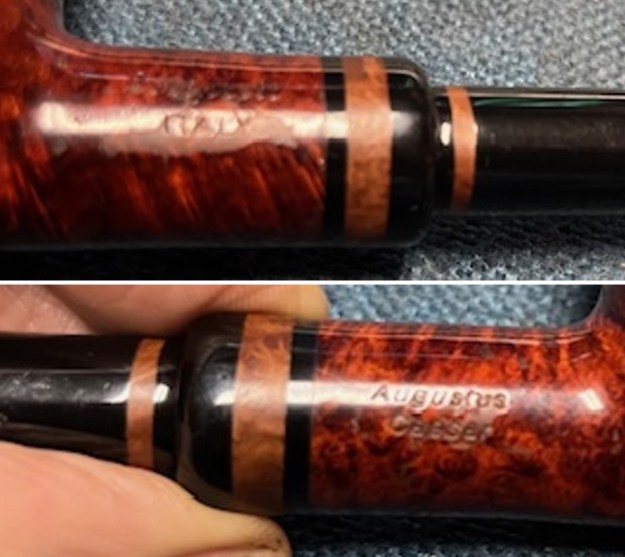
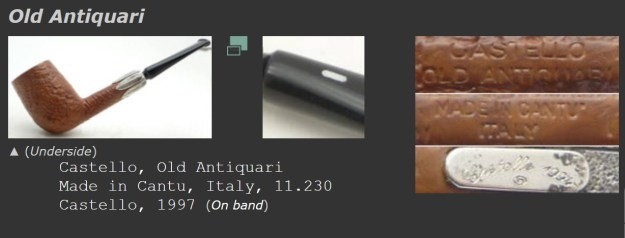
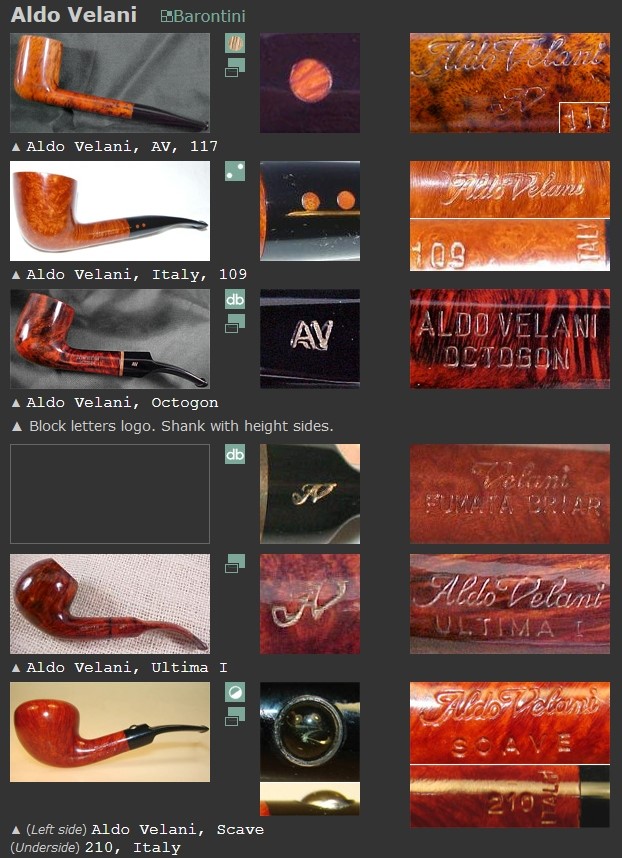
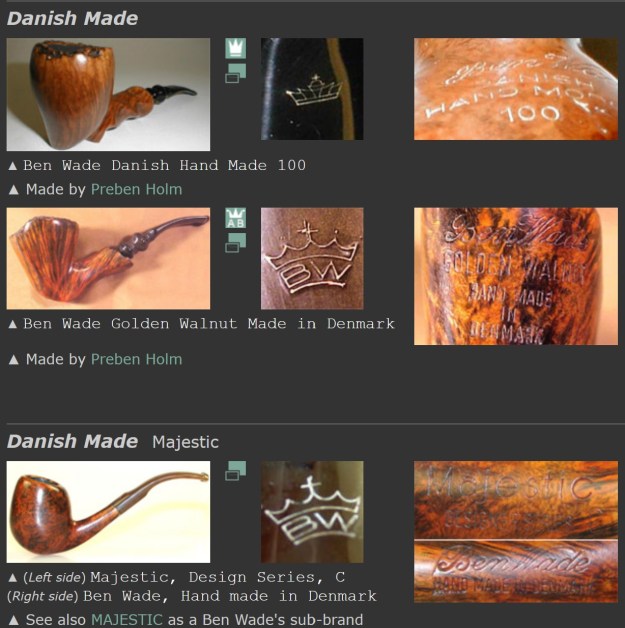
 I wanted to gather some background information on the brand. I turned first to Pipephil’s site to see what I could learn (http://www.pipephil.eu/logos/en/logo-l6.html). I was able to get a screen capture of information on the brand. I have included that below along with the sidebar info.
 Brand created 1934 by Otello Lorenzetti.Currently (2009) the company is managed by Alessandro Lorenzetti. Address: via A.Giunta, 51, 62019 Recanati (MC) – Italy.
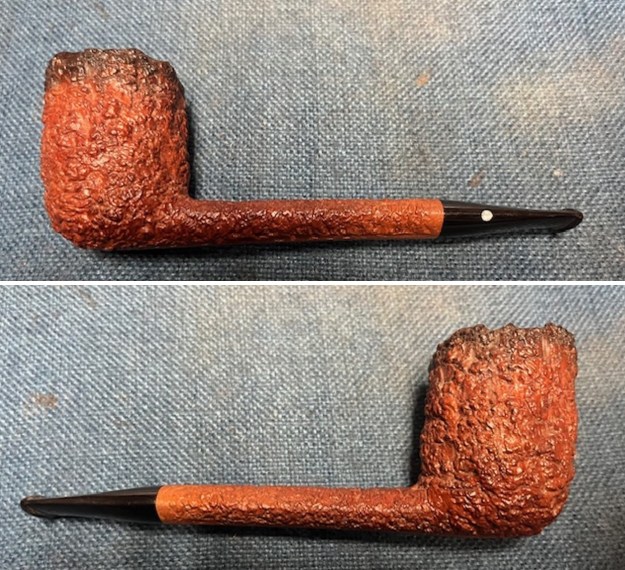
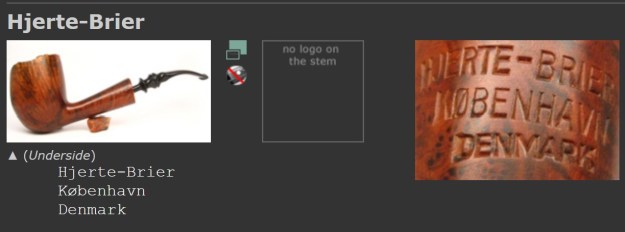
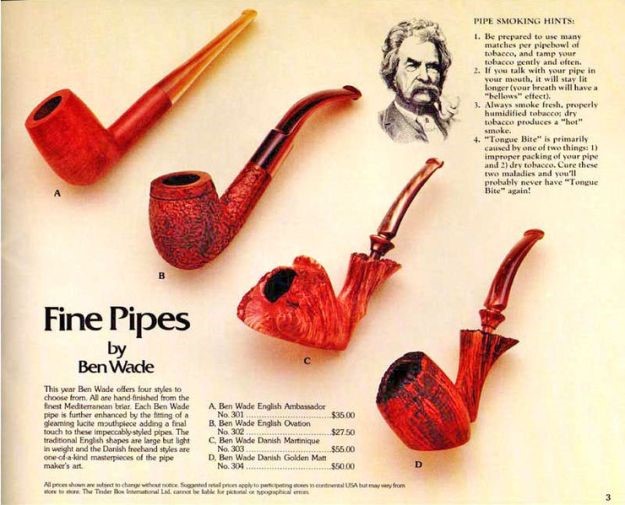
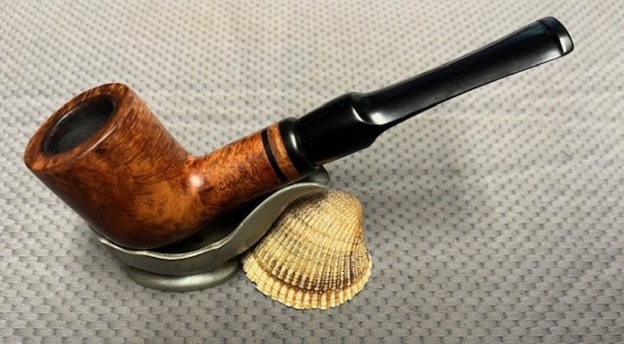
I turned to Pipedia to gather more information on the brand. It gives some great history of how the brand developed (https://pipedia.org/wiki/Lorenzetti). I quote some portions of the article below. There was also a photo of the same pipe that I am working on the site. I have included that below.
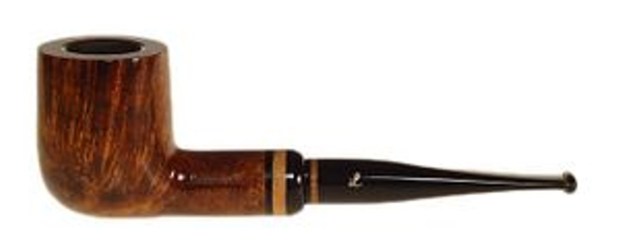
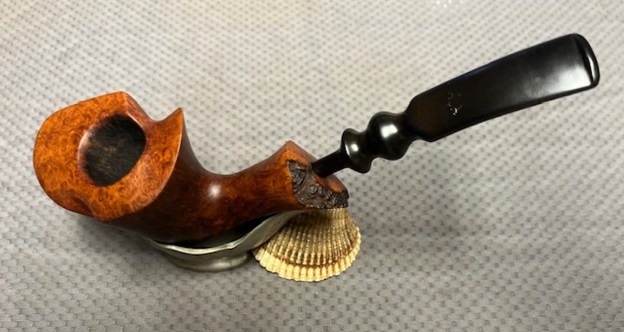
Smooth Pot, courtesy SmokersHaven.com
Otello Lorenzetti, the founder of our manufacture, was born in Castelnuovo, Recanati in 1911. He is the fifth of five children from a modest, but enterprising family, in fact they own a tavern where the young Otello, already at the age of seven, actively collaborates. He goes on his own, with a small handcart, to S. Agostino di Recanati where he purchases fizzy drinks and other soft drinks and then resells them with his mother in their small family run tavern….
After the precocious interruption of his studies he begins to work as an employee at “Catena Remigio” an old pipe manufacture in Recanati. The grand personality of Otello, who is inclined to make any art a passion, does not delay in emerging. In 1934, after having concluded 18 months of military service in Cividale, in Friuli Venezia Giulia, he decides to work on his own pondering the first bases of the actual pipe manufacture, that, in this period, operates under the company name “Otello Lorenzetti.” At that time the capital of our actual company, that was and still is his house, was constituted by: “A few rented tools and my own hands” – as Otello himself tells us. The production consists of 20-30 pipes per day. Every morning, in company of his bicycle, he tries to sell them to the tobacco shops in the area or as he says the “neighbouring shops”. With only the strength of his legs he goes to Macerata, San Severino and Civitanova Marche. His pipes are appreciated, so much so that he decides to work more than 12 hours a day to be able to increase the production. This does not constitute a sacrifice for him as his neighbours remember hearing him tirelessly working and singing everyday.
Two brisk interruptions mark the history of our pipe manufacture: the first was in 1935 -in the summer of this year Otello was enrolled in the army and then left for “the African Campaign” from which he returned in January of 1937; the second was in October of 1940, other long months spent in the service of the Italian Army after which he returned home in 1943 the year of Armistice. In 1940 Otello got married to Marinella who became, other than his wife, a great and indispensable business collaborator.
In 1947 Otello succeeded in building, alone, machines the same as the ones he used to rent up until that moment. Many of the pieces most difficult to mould by hand were designed by him and were made in a craftsman workshop in Civitanova Marche. Production increased and permitted Otello and Marinella to buy a “Vespa” helping them to, a part from the province of Macerata, also reach Abruzzo in order to successfully sell their pipes.
The Sixties-Seventies bring on the beginning of exportation abroad (Europe, Africa, America). The company begins to expand, now a part from Marinella, with the help of their children Luciano, Gabriella, Alessandro and some employees. The production begins to perfect itself to the point of being appreciated in almost all the world and by one of the biggest and most famous pipe collectors of all times: our ex-president of the Republic Sandro Pertini.
I knew that I was dealing with a Lorezetti that was probably a recent manufacture. It had some great shape and form and should clean up well once I have the varnish coat removed. Now it was time to work on the pipe.
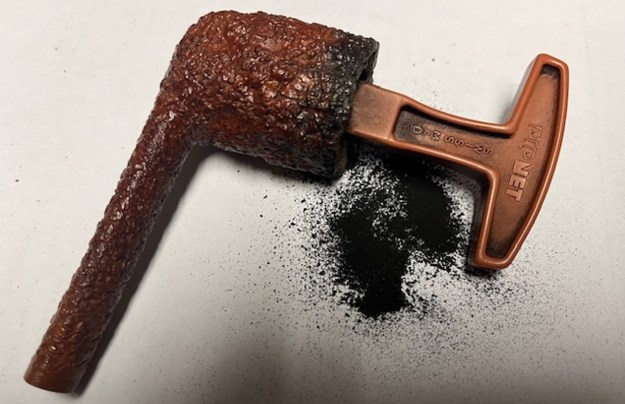
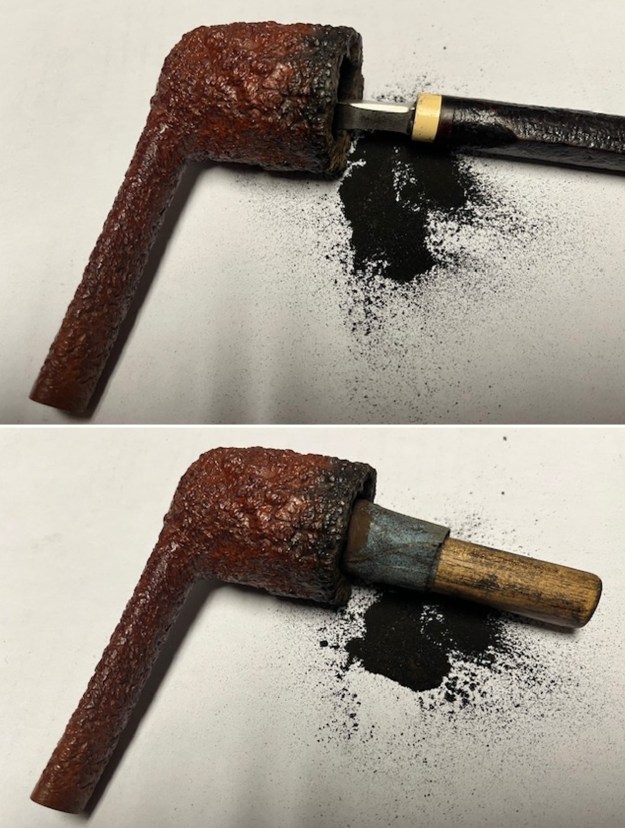
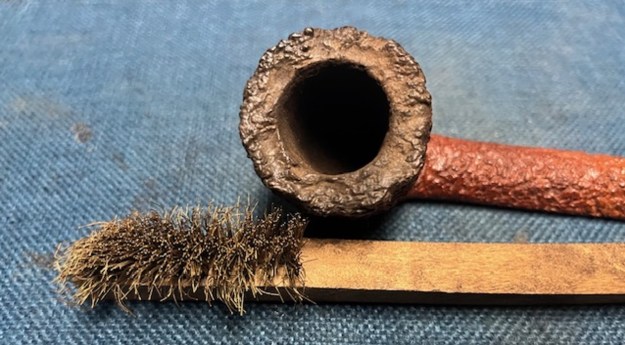
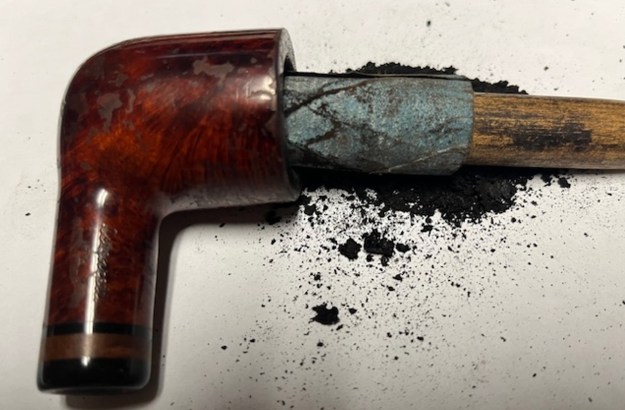
I reamed the bowl with a PipNet pipe reamer and the 2nd and 3rd cutting heads to remove the heavy cake. I took it back to bare briar and then cleaned up the reaming with a Savinelli Fitsall Pipe Knife. I sanded the bowl with a piece of dowel wrapped in 220 grit sandpaper.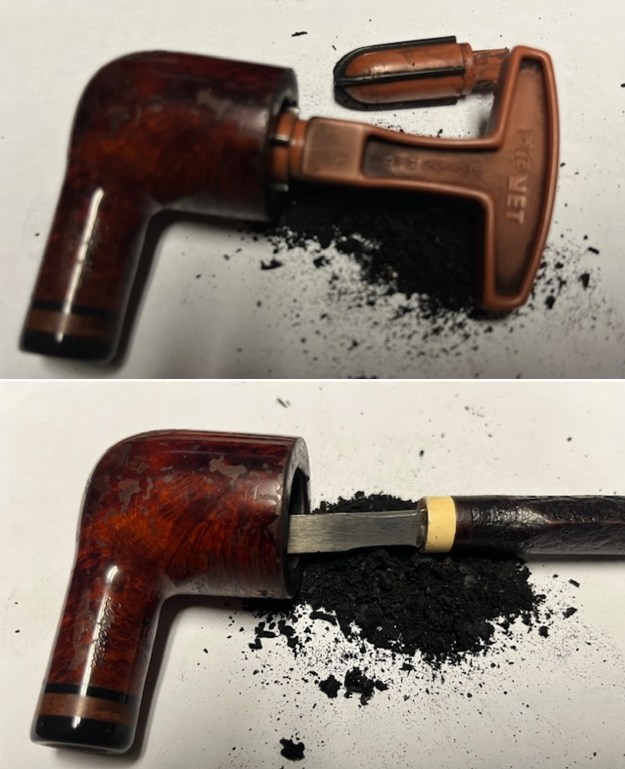
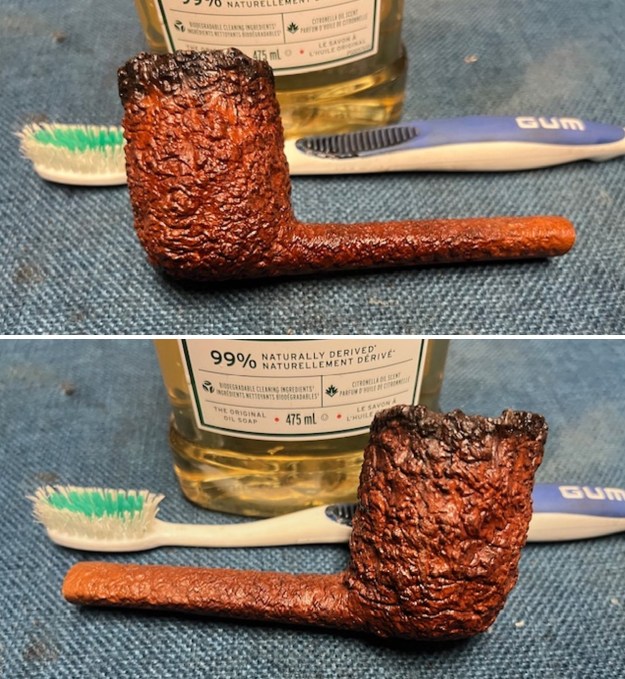
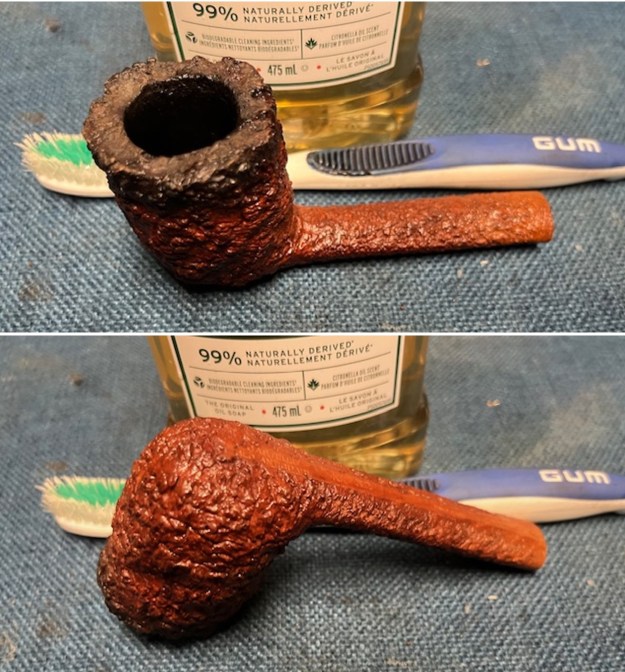
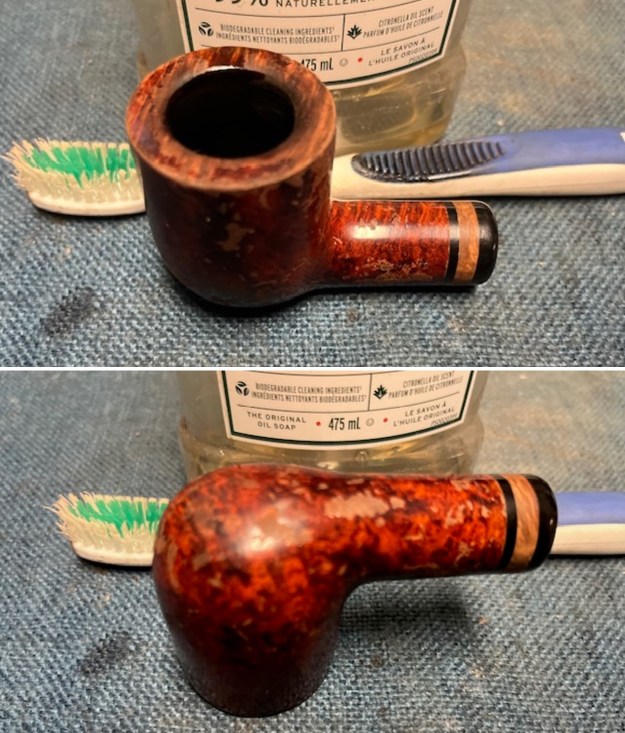
 I scrubbed the exterior of the bowl and shank with undiluted Murphy’s Oil Soap and a tooth brush. It took some scrubbing to clear off the debris on the rim top and the surface of the bowl and shank. I rinsed the bowl off with warm water to remove the grime and debris along with the soap on the pipe. It looked much better.
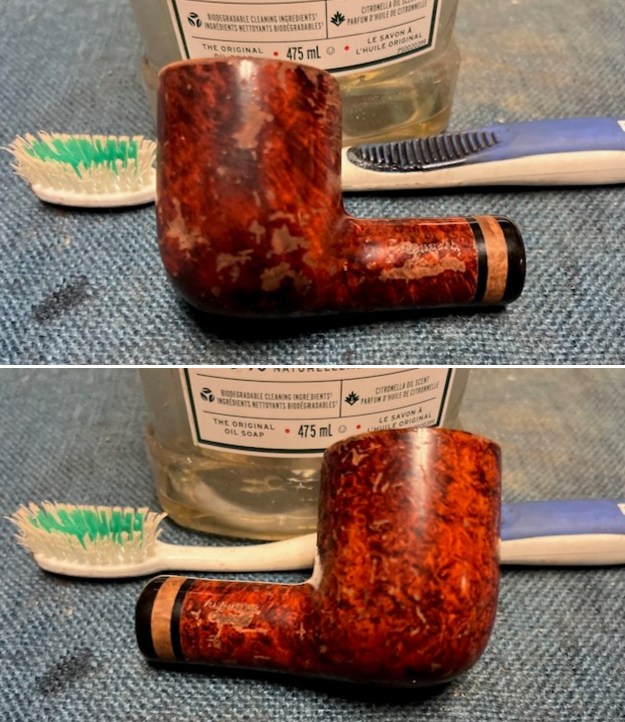
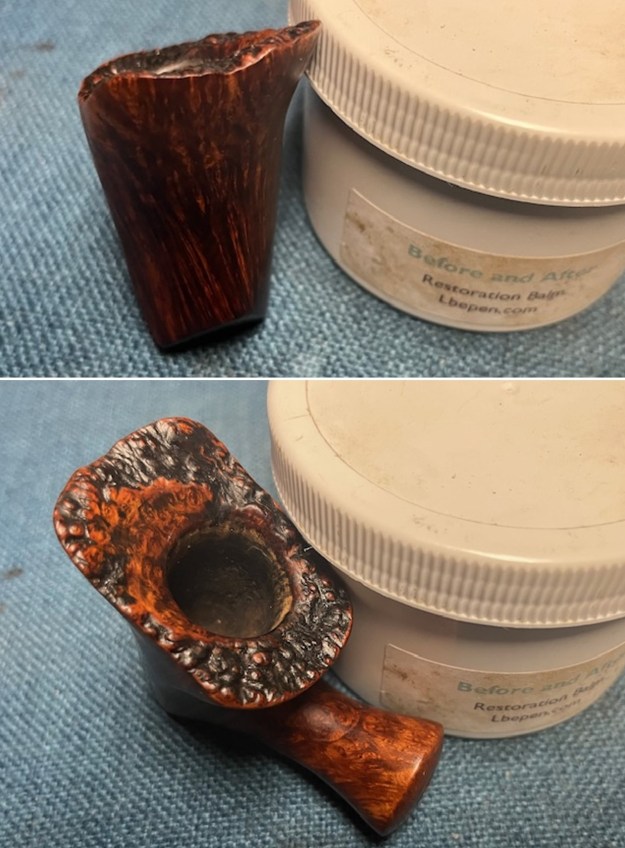
 To begin the process of breaking through the peeling varnish coat I wiped the bowl and shank down with acetone on cotton pads. It broke through a lot of the varnish and I began to see what was underneath the varnish.
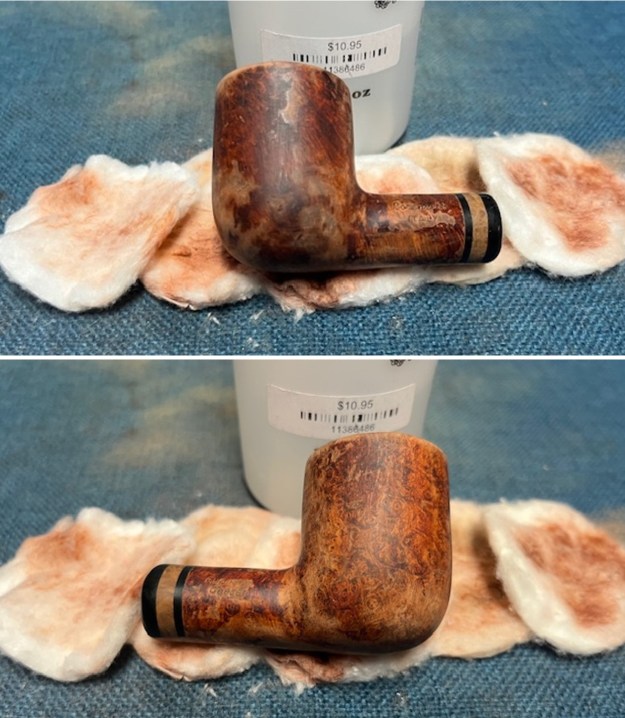
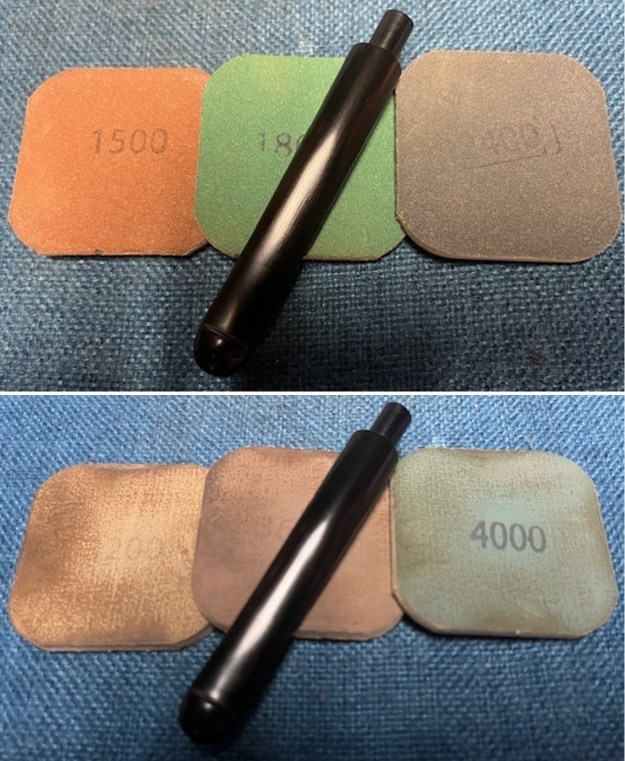
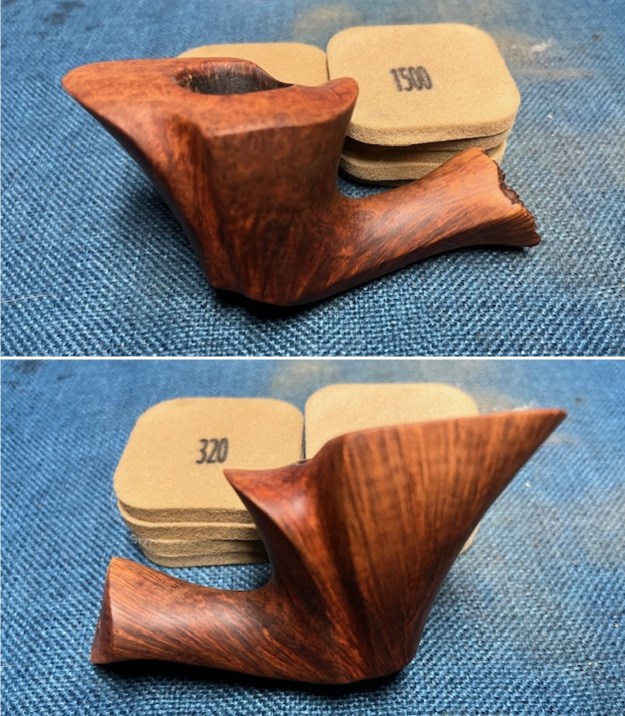
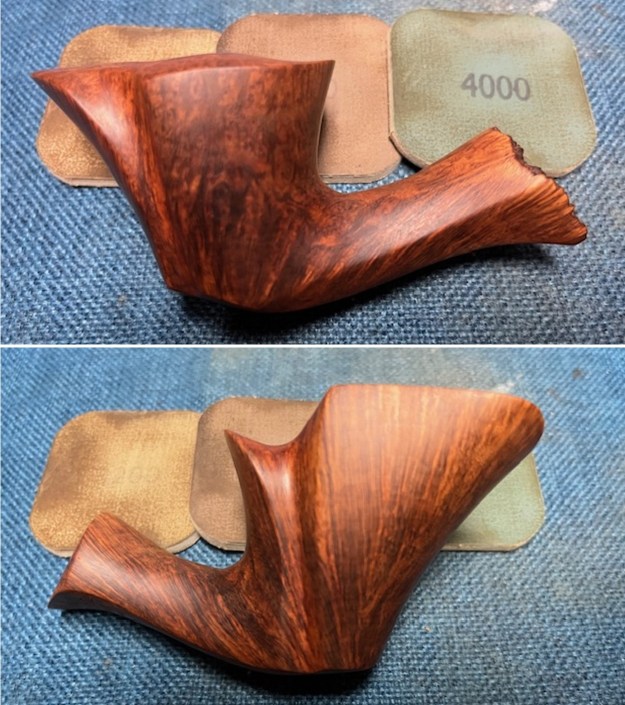
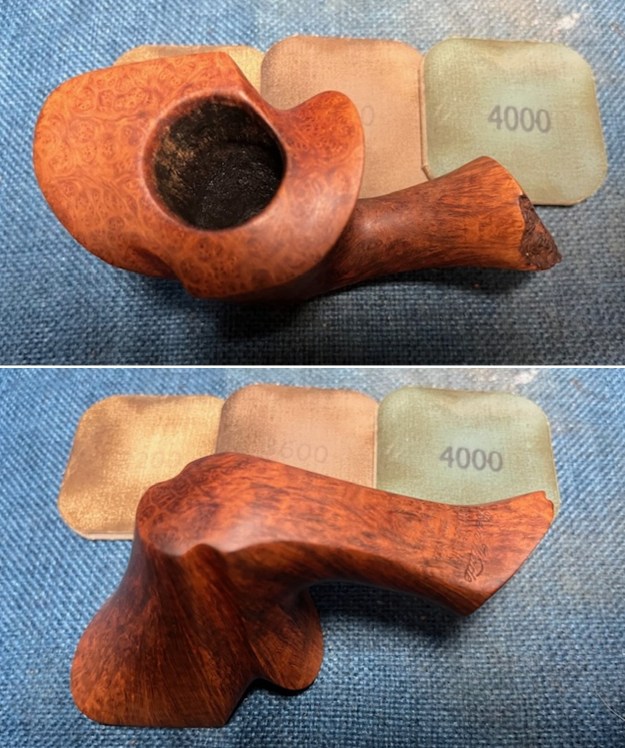
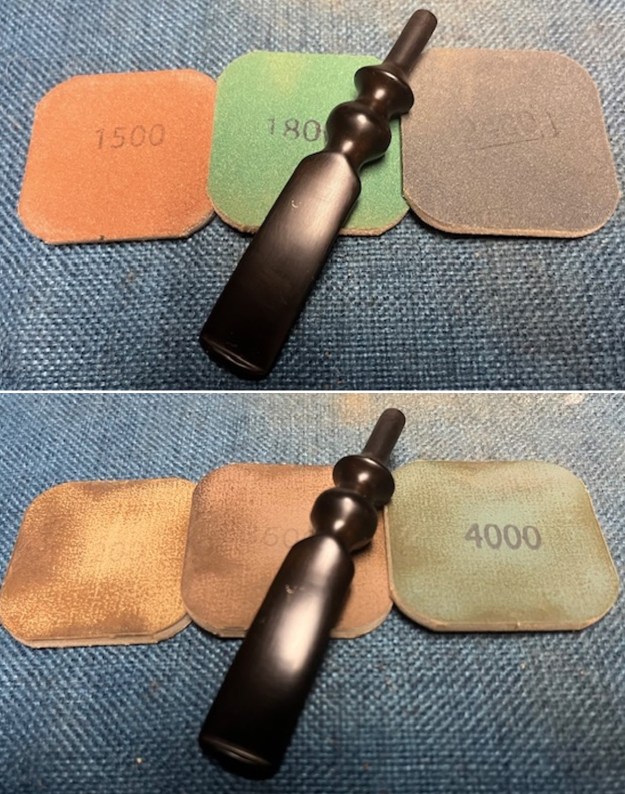
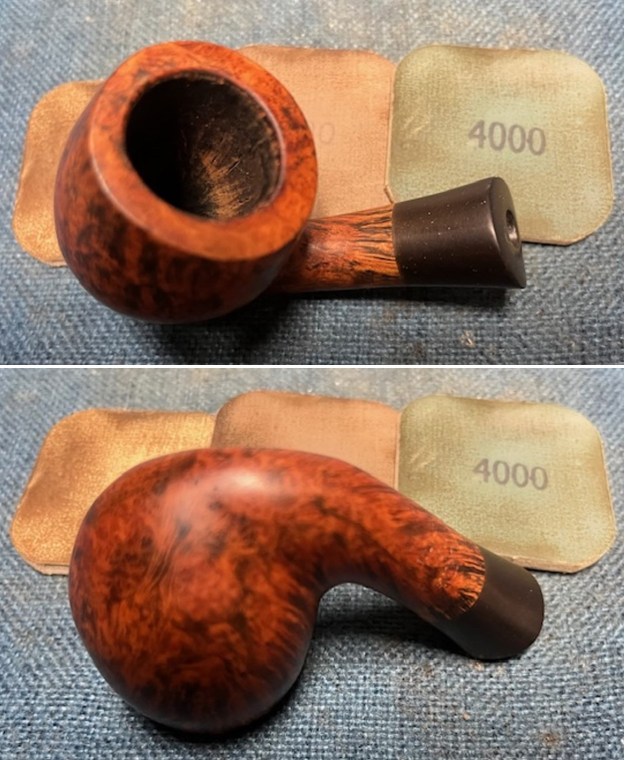
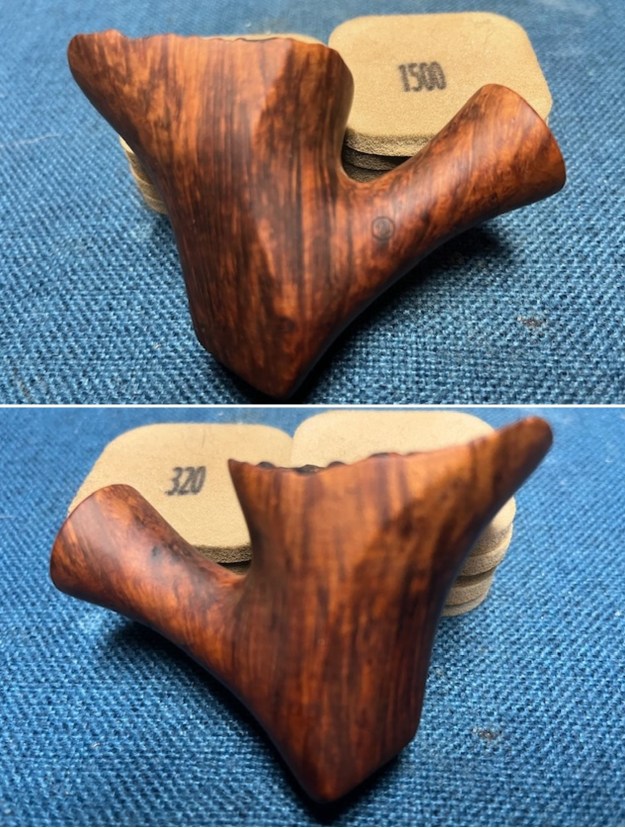
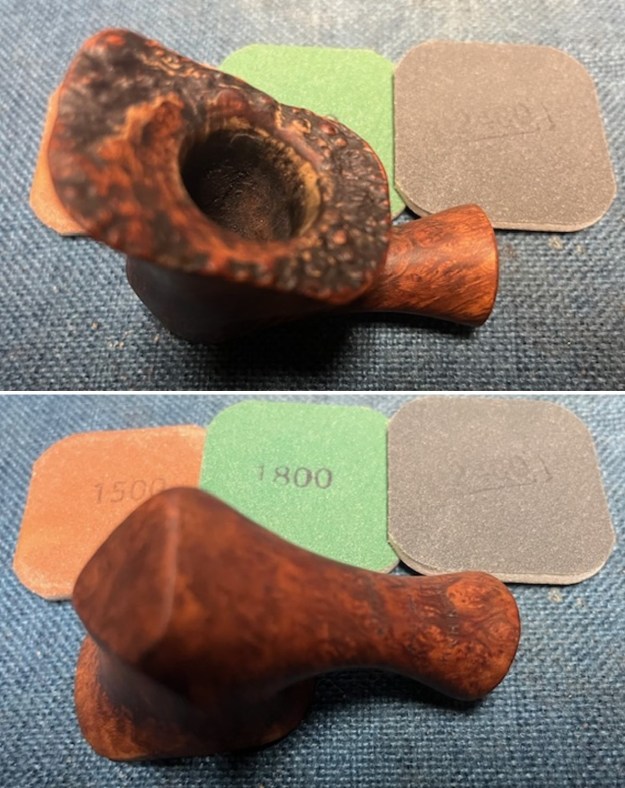
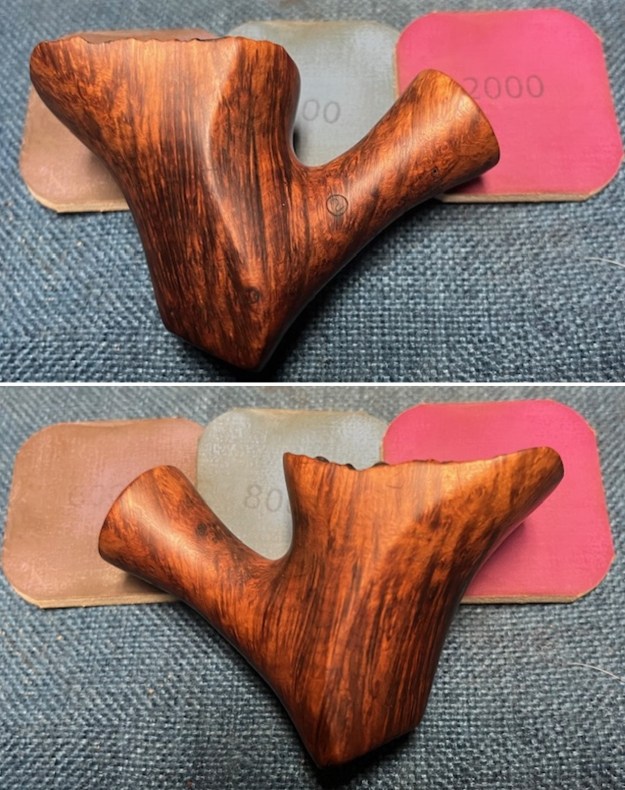
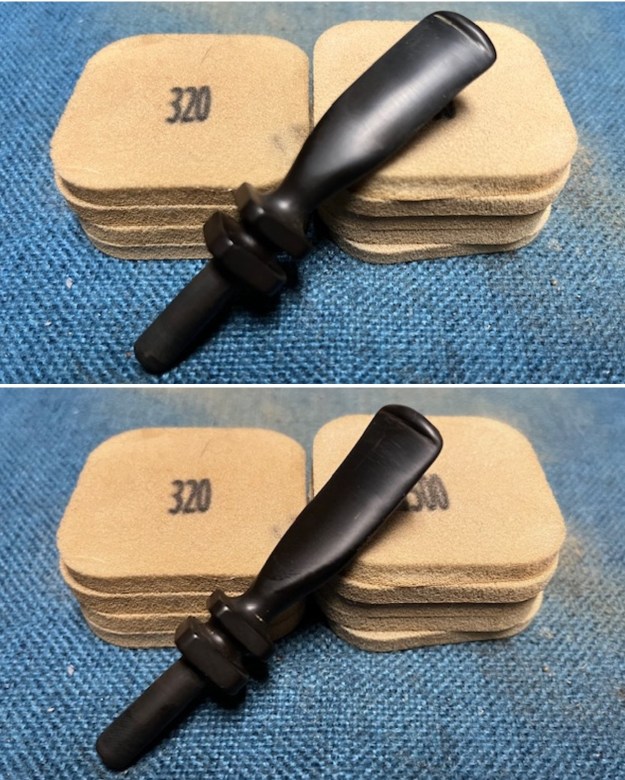
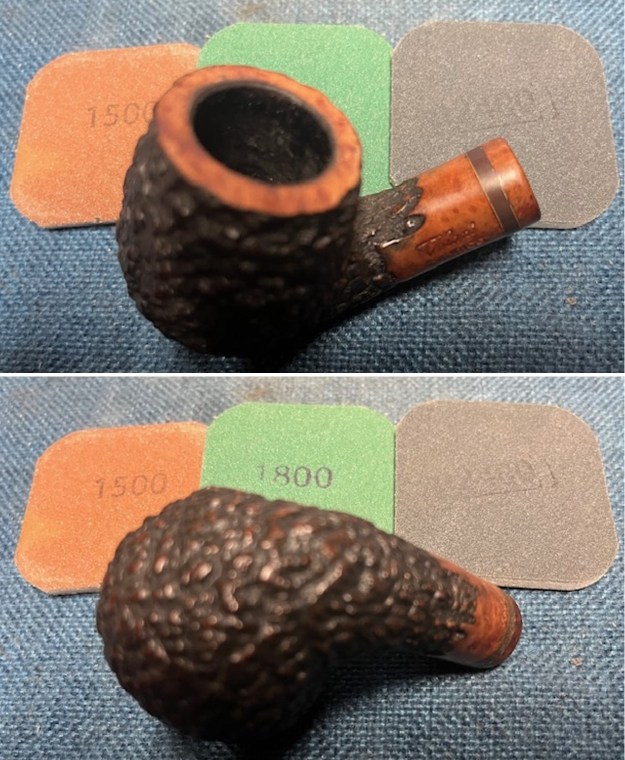
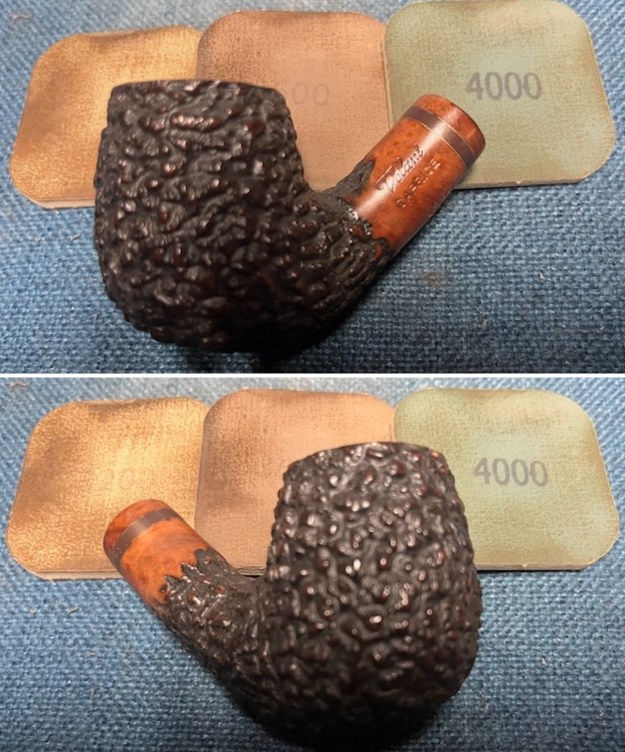
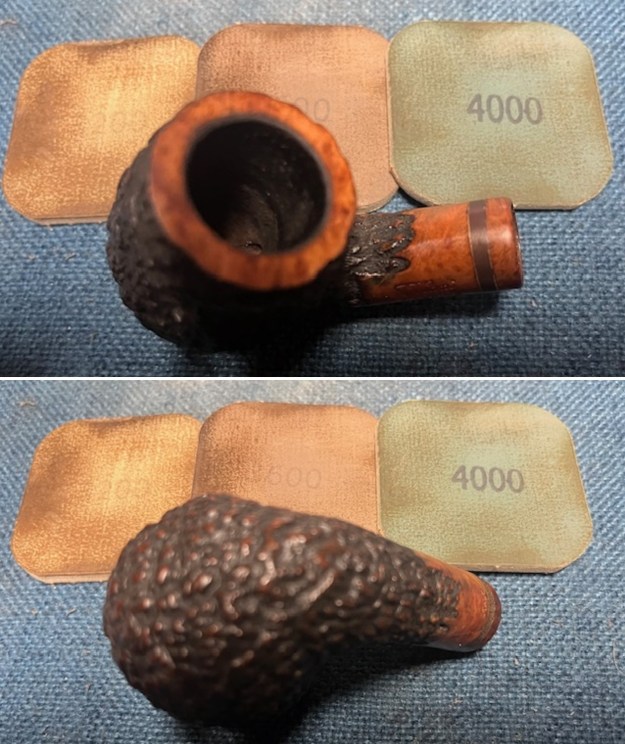
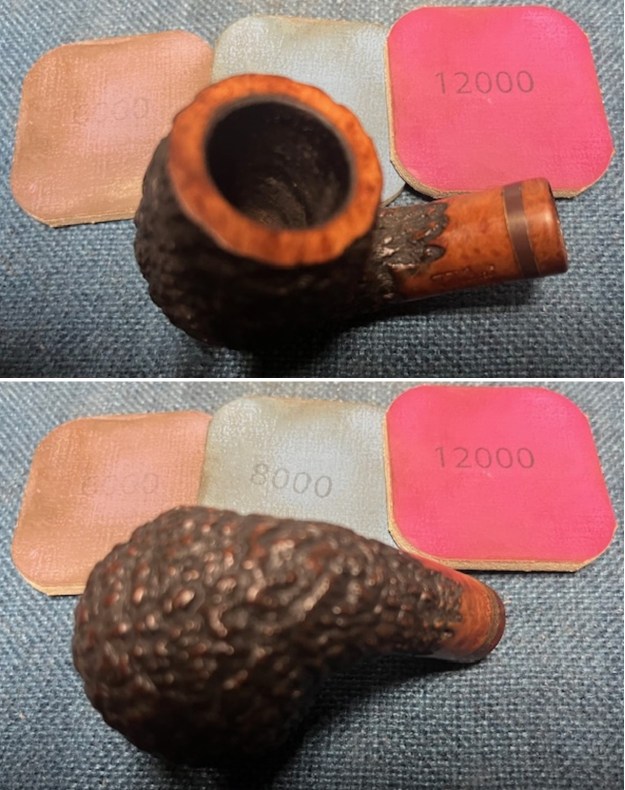
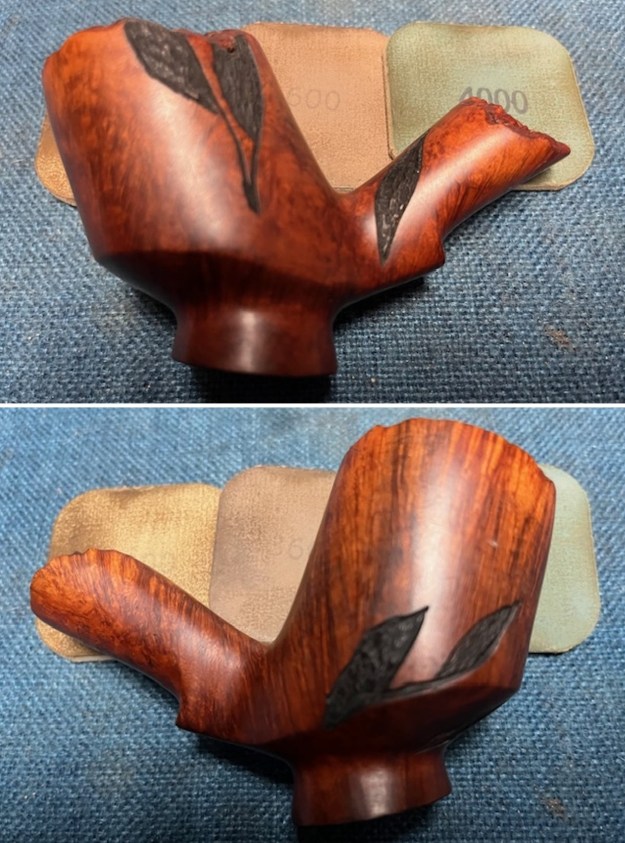
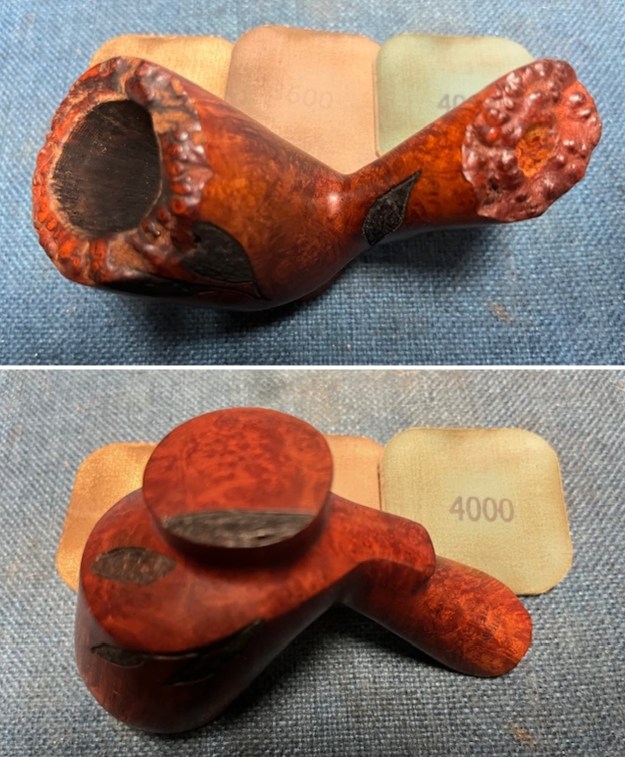
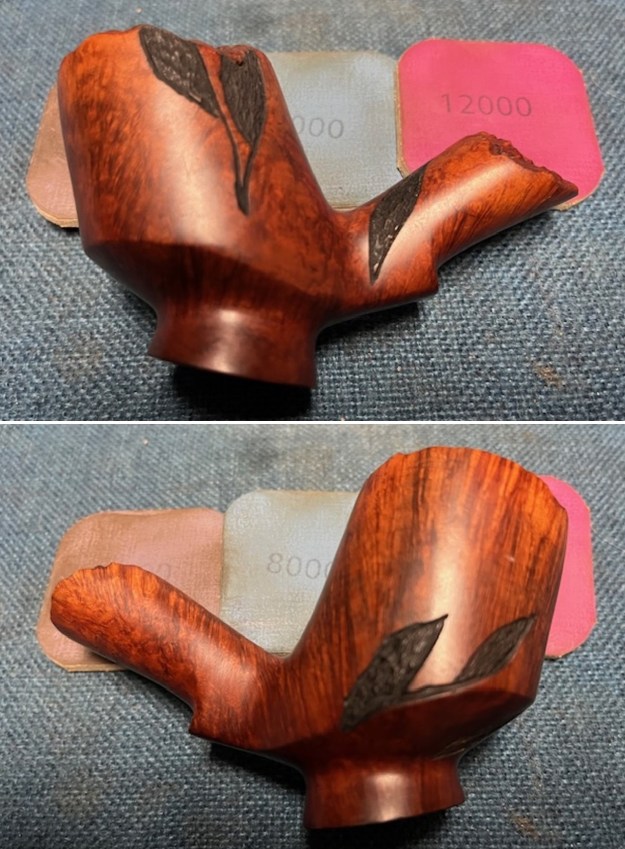
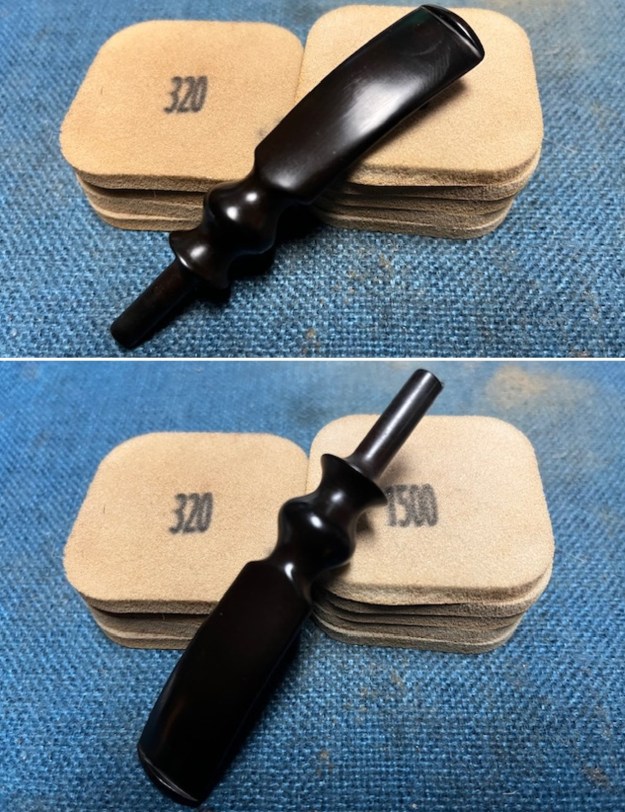
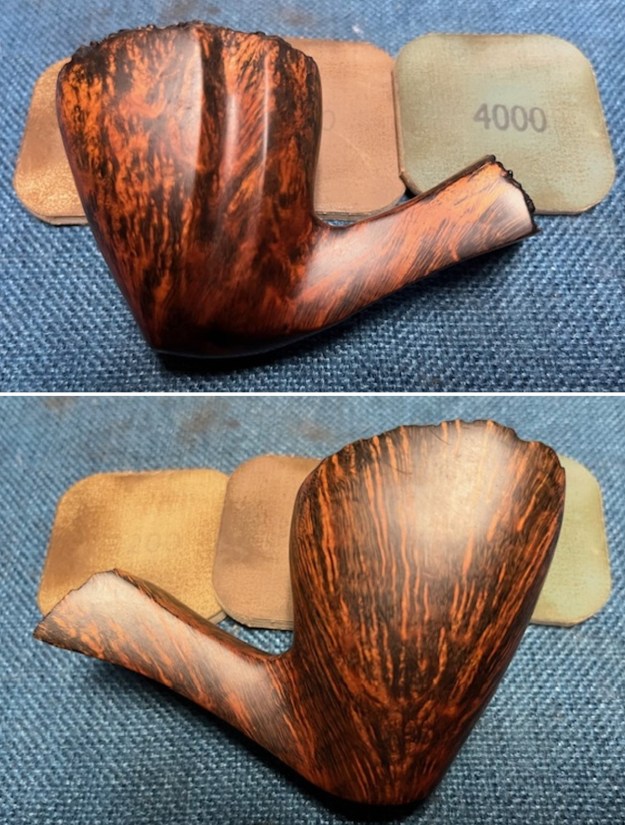
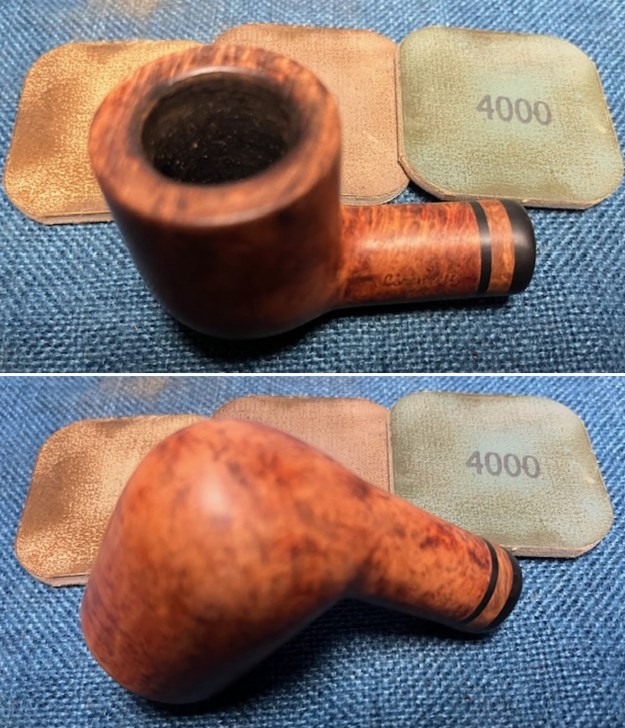
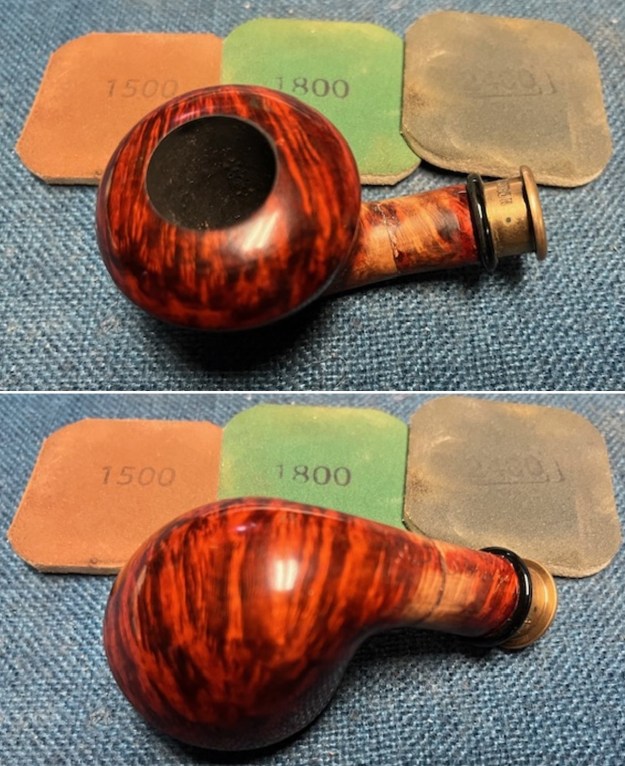
 I sanded the bowl with 320-3500 grit 2×2 inch sanding pads. I wiped the briar down with a damp cloth to remove the sanding debris. By the final pad it was looking much better.
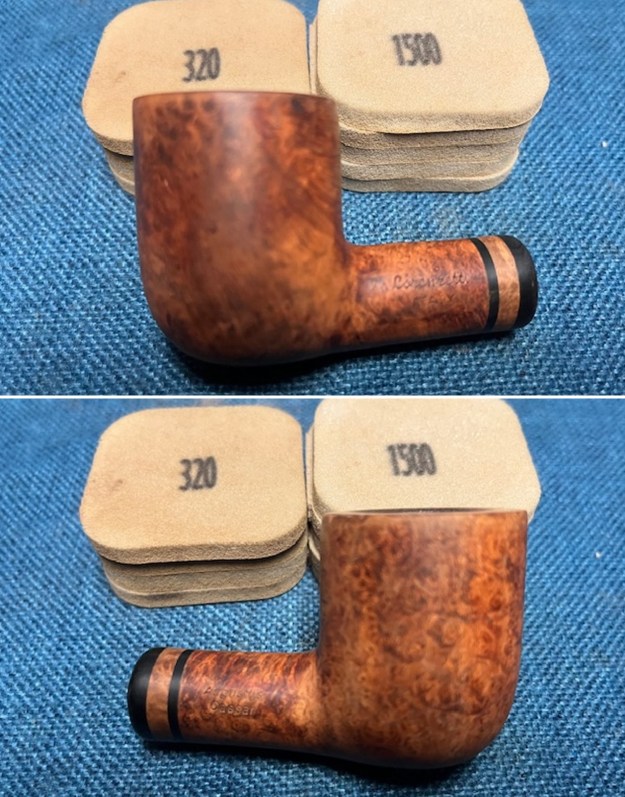
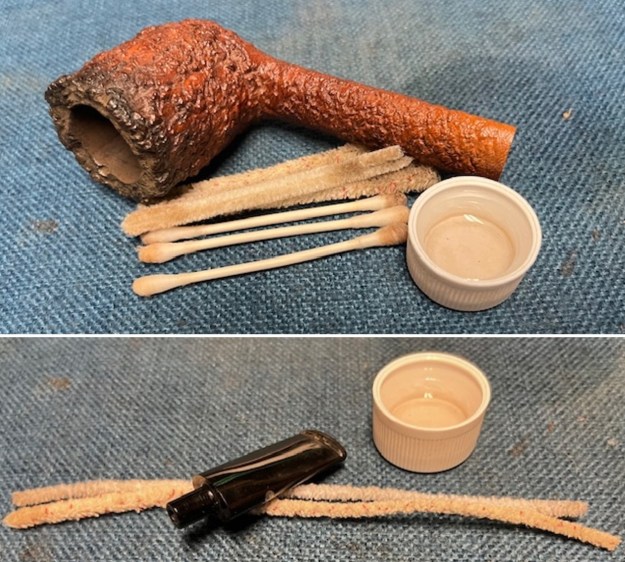
 I cleaned out the mortise and airway in the shank as well as the airway in the newly chosen stem with pipe cleaners, cotton swabs and alcohol. It was a dirty bowl and shank.
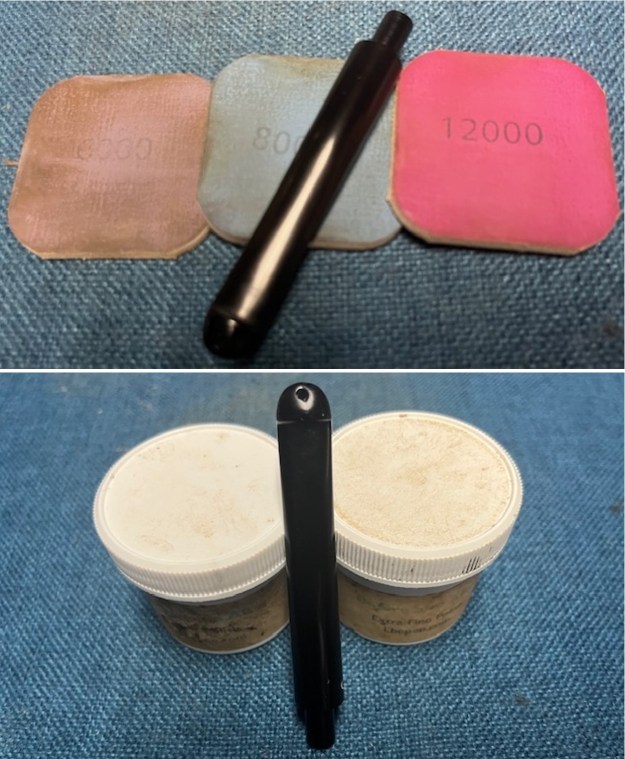
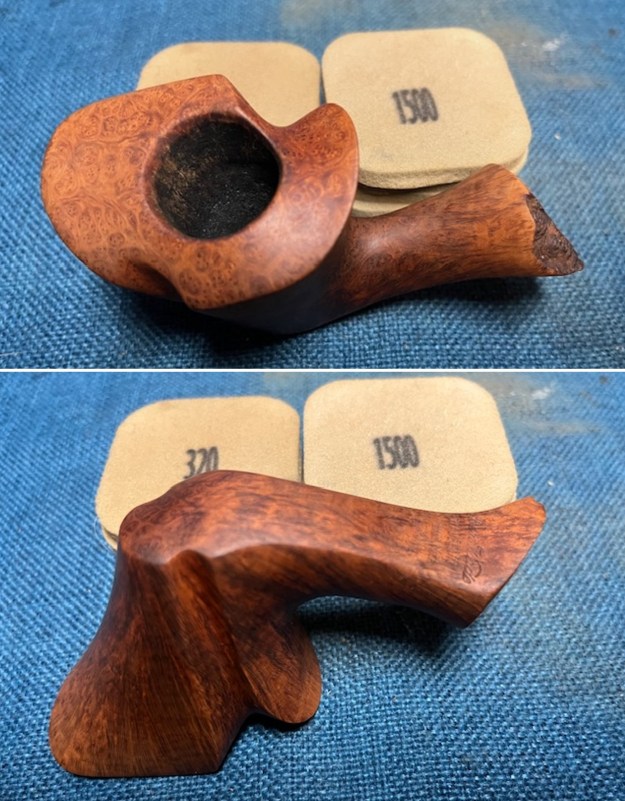
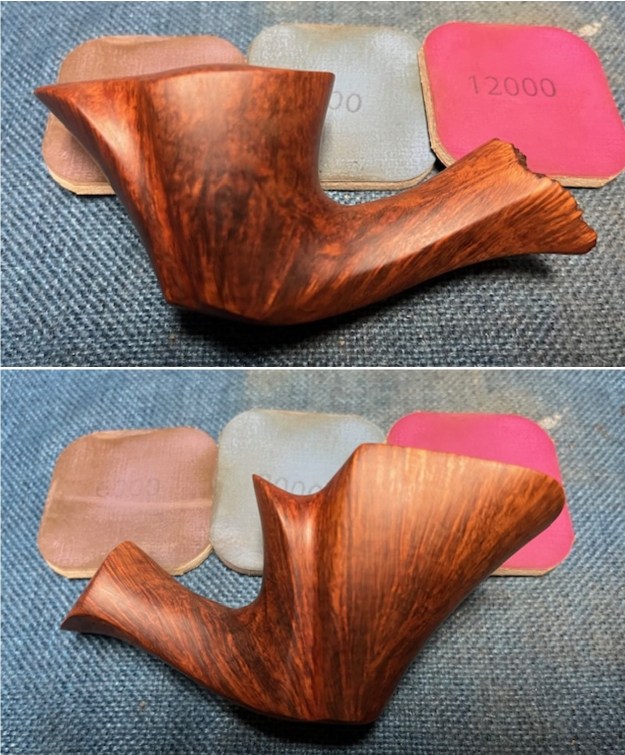
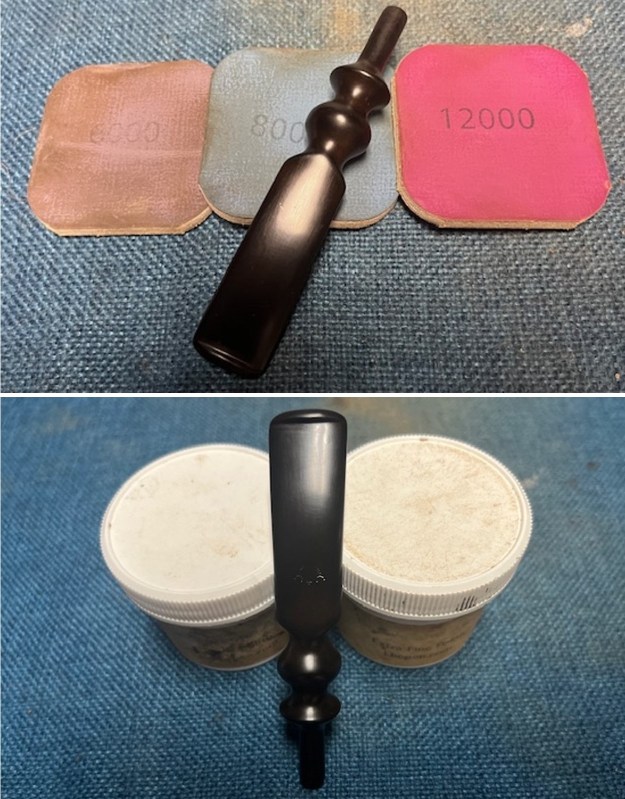
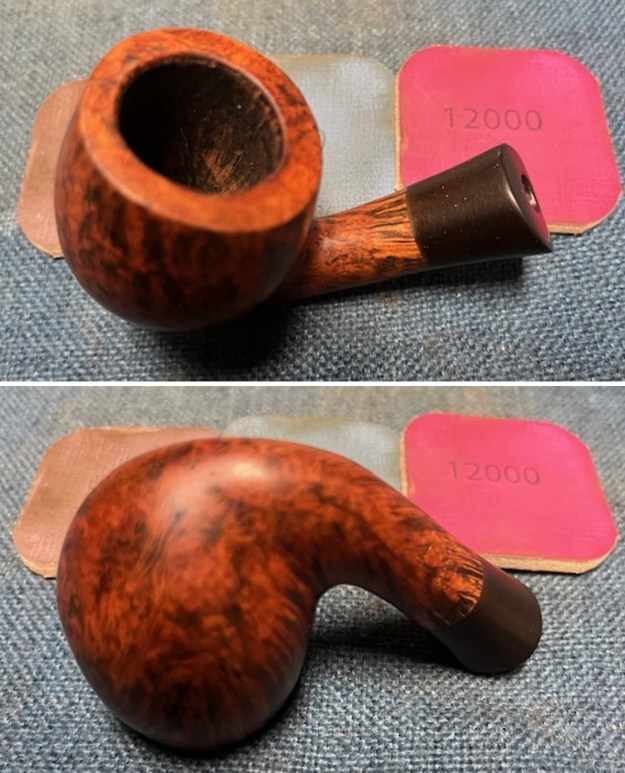
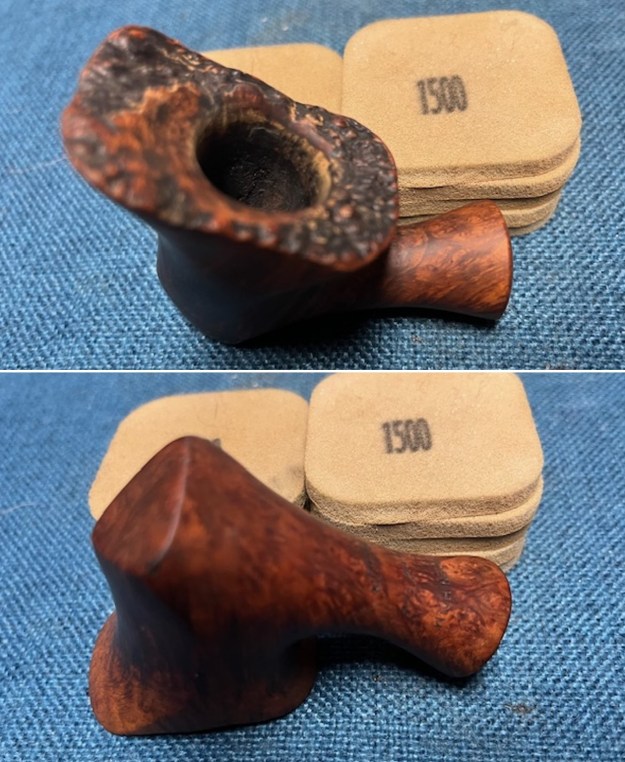
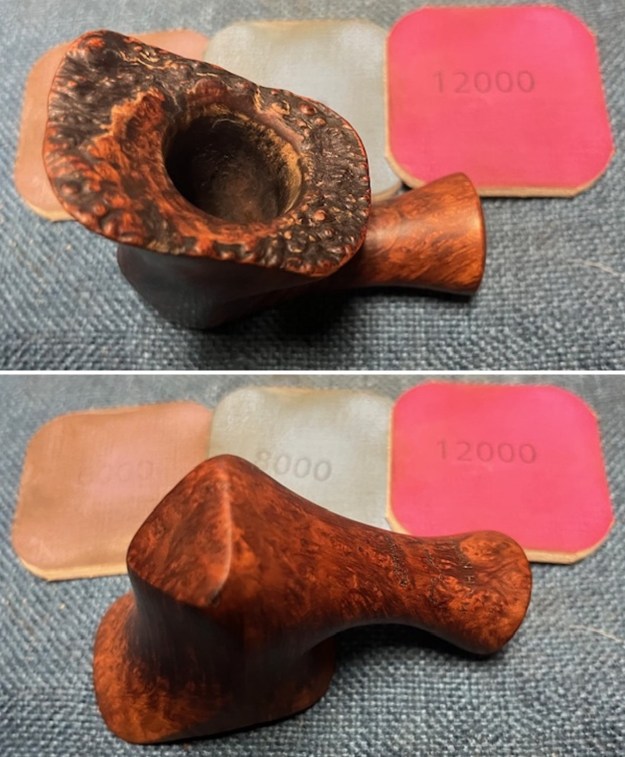
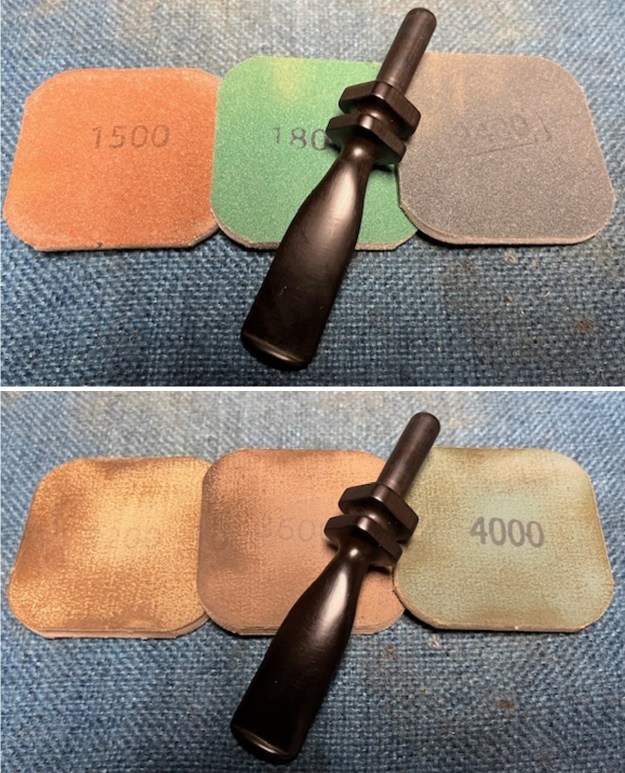
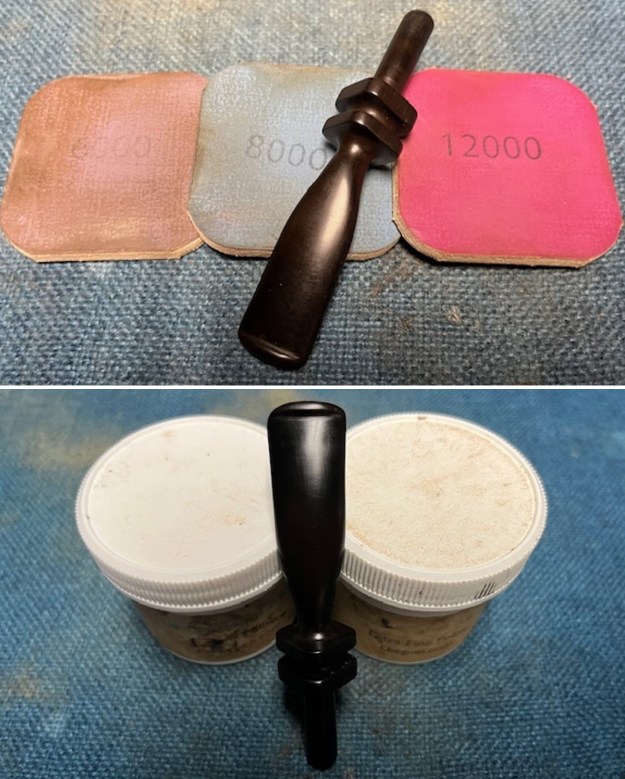
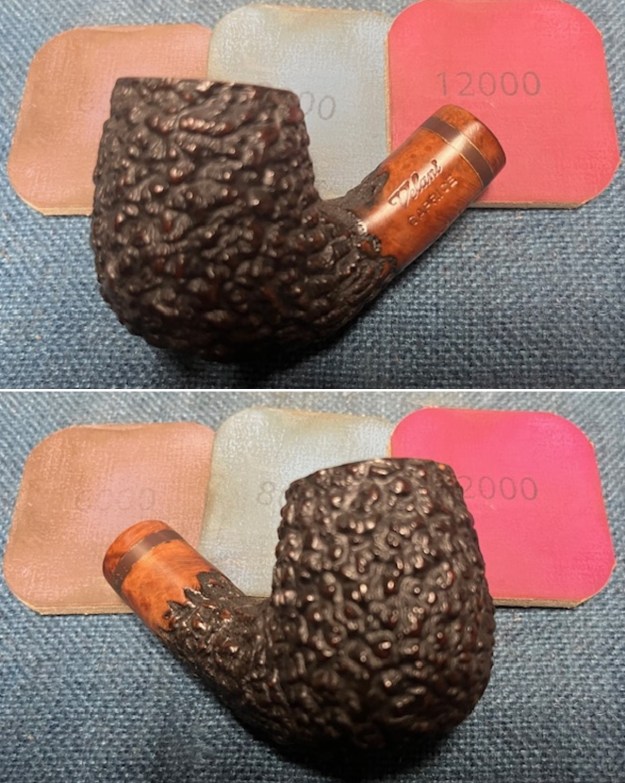
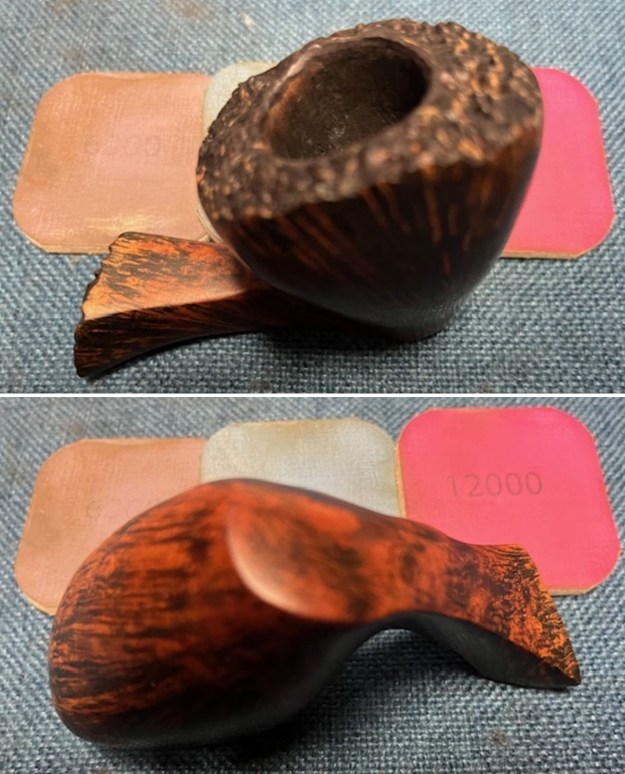
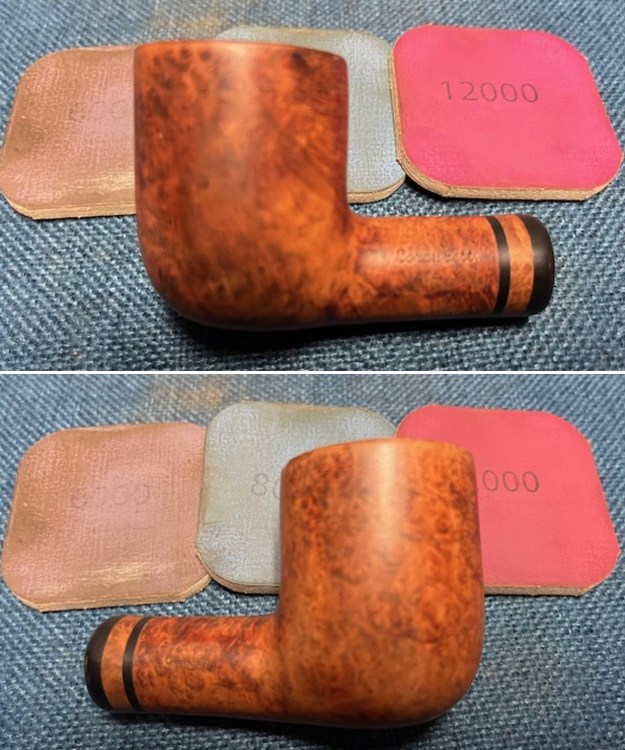
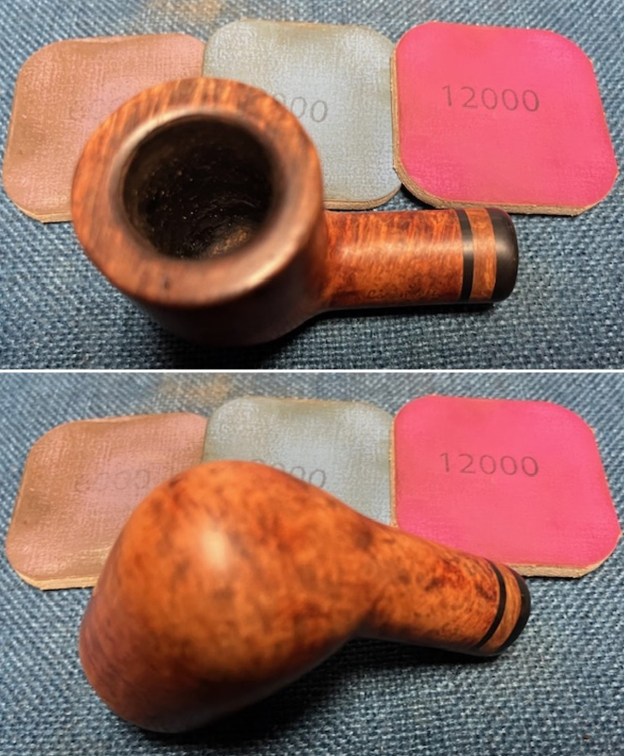
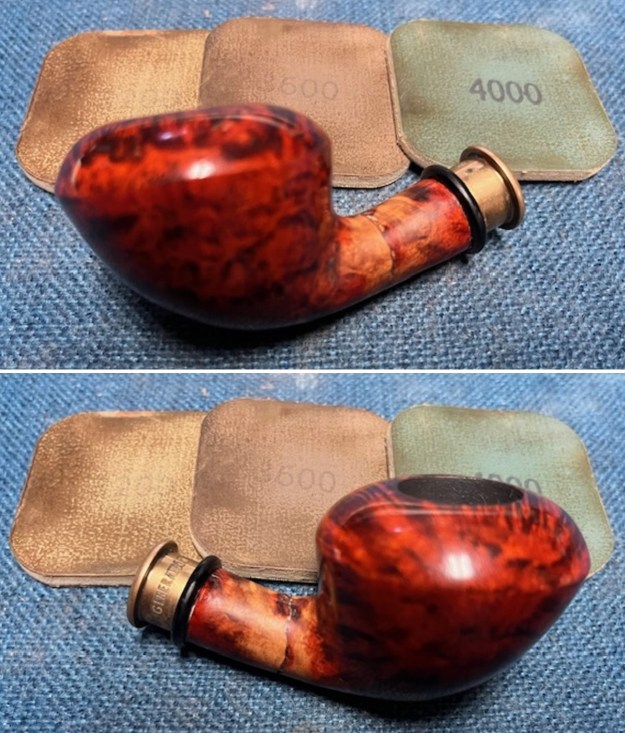
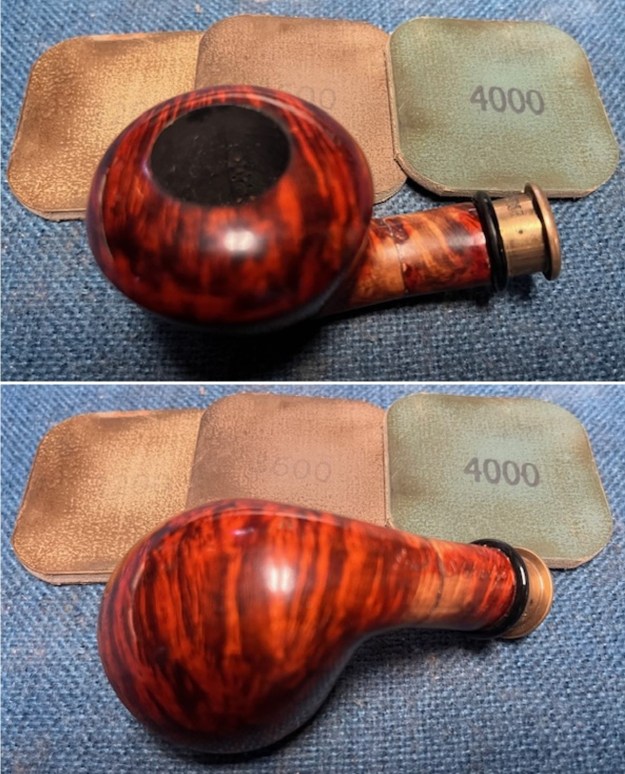
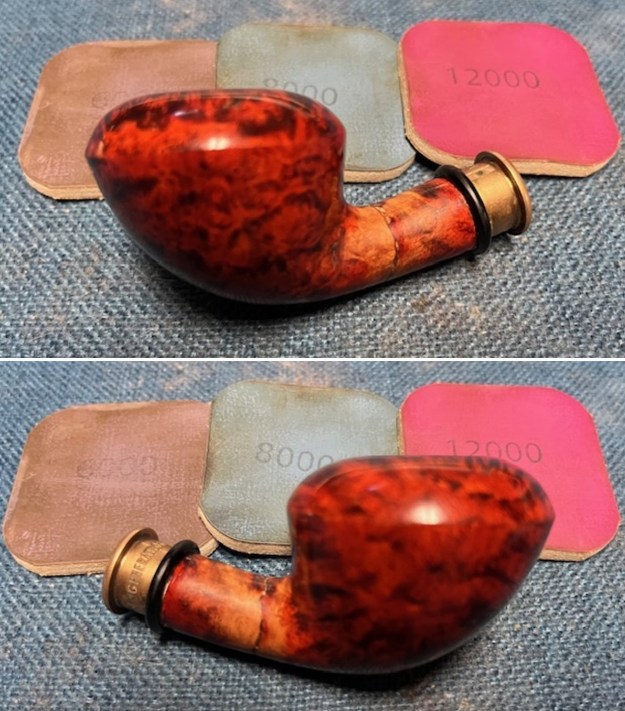
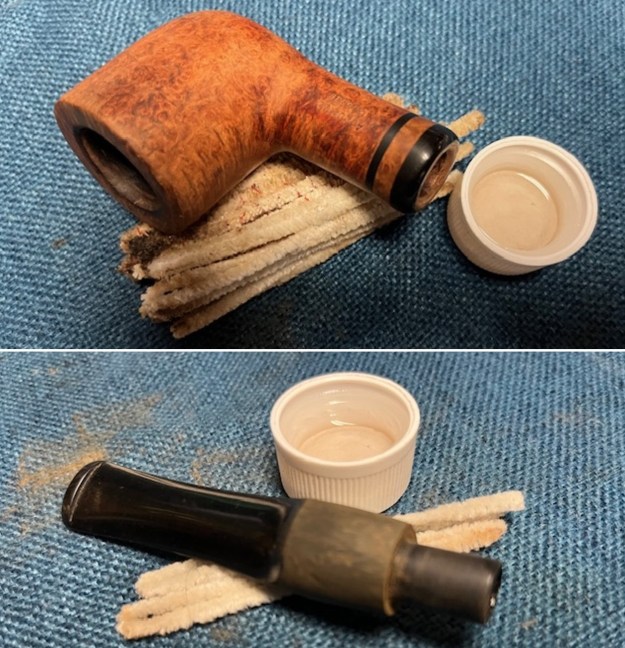 I polished the bowl and the shank with micromesh sanding pads – dry sanding it with 1500-12000 git sanding pads. I wanted to make the new stain coat a bit more transparent. I wiped it down with a cloth and some Obsidian Oil.
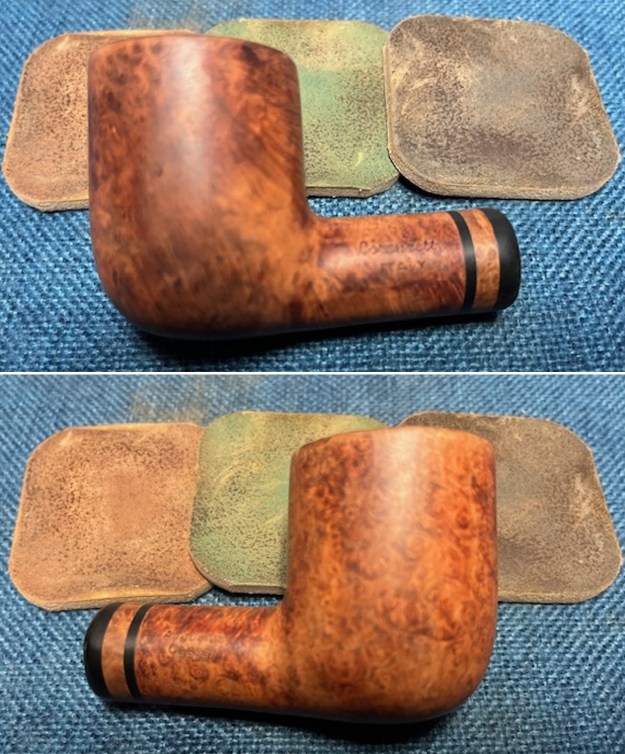
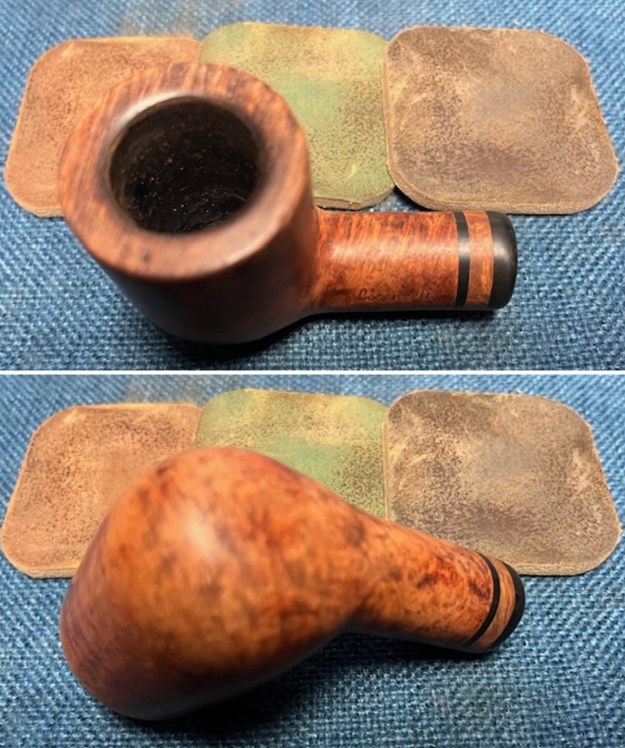
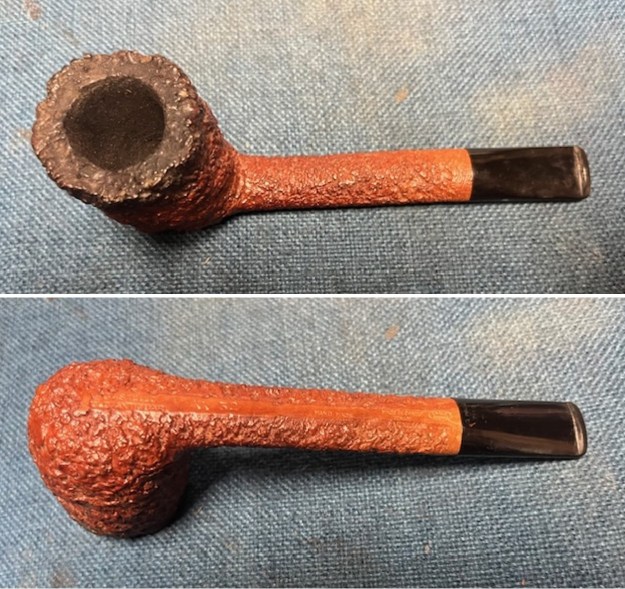
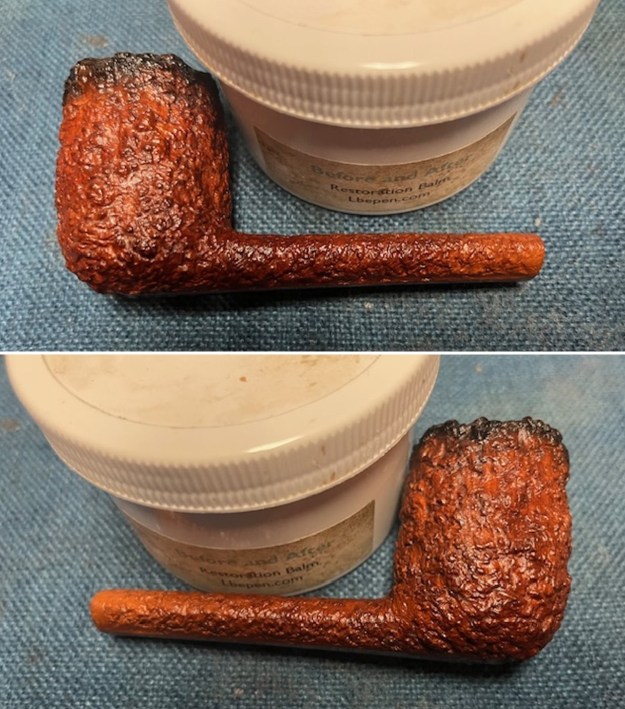
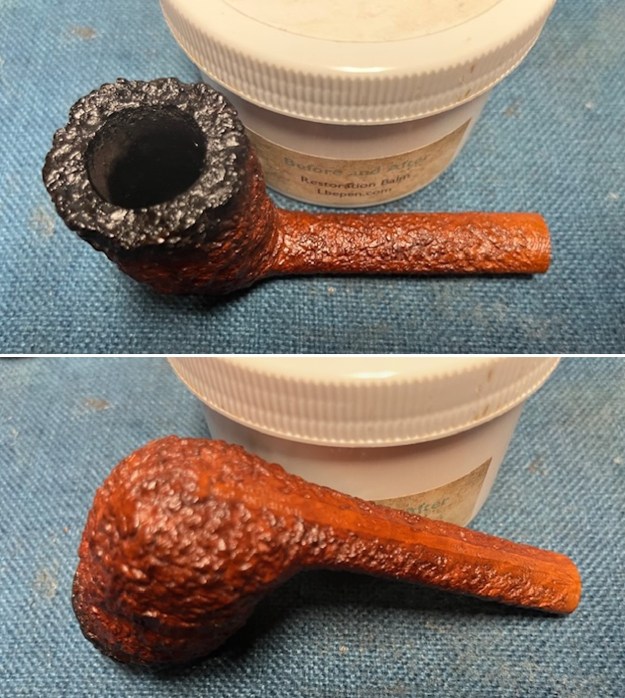
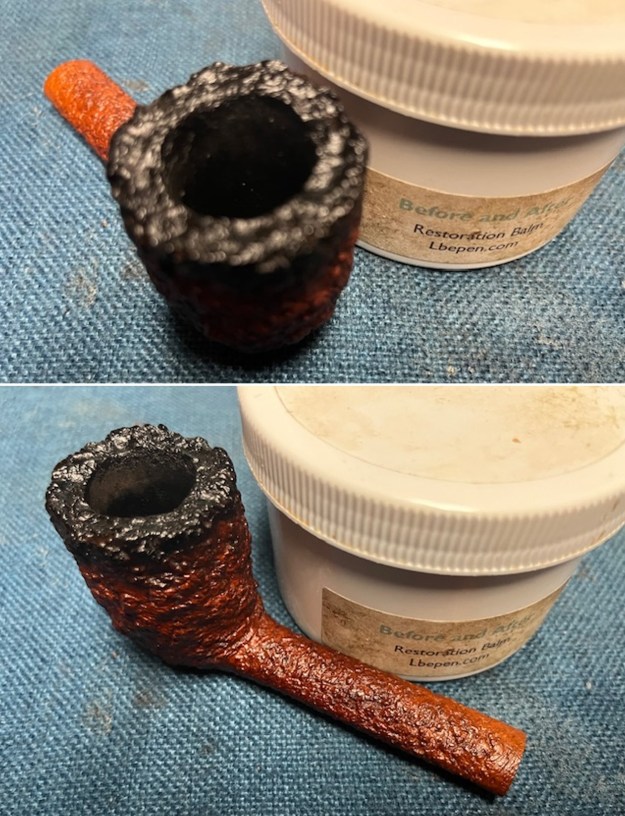
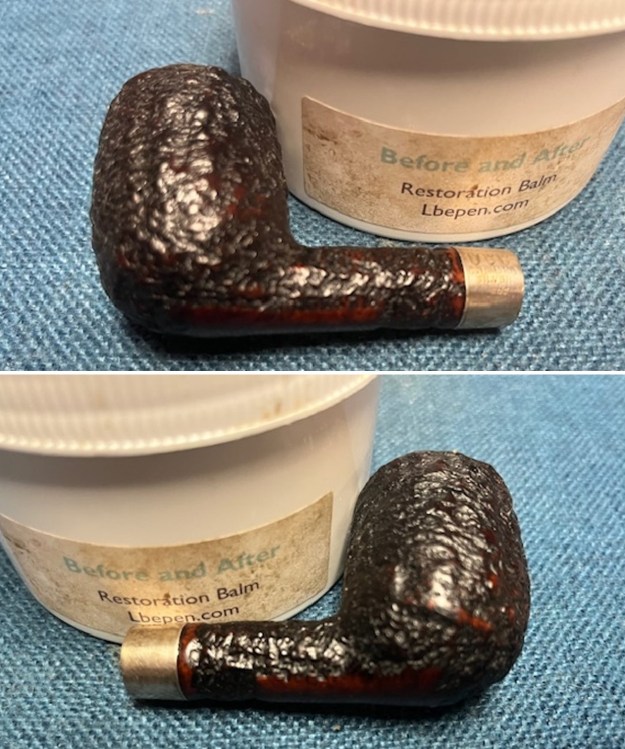
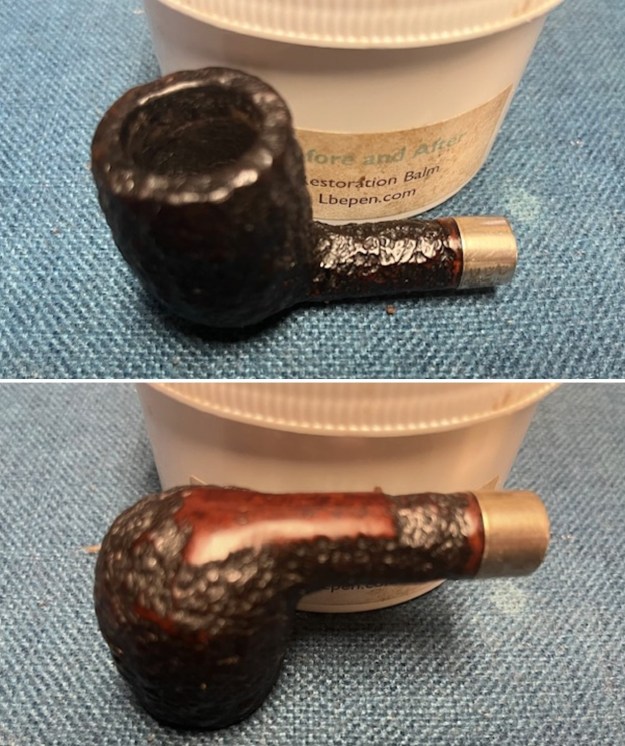
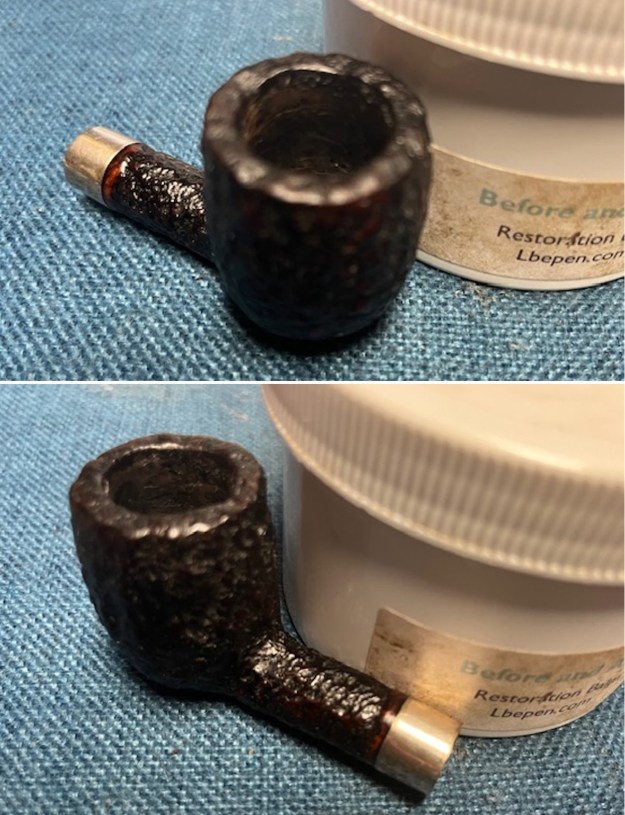
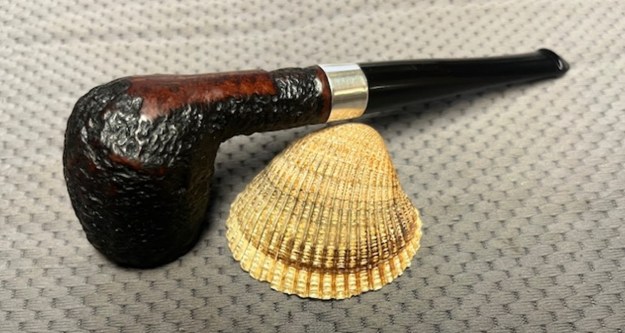
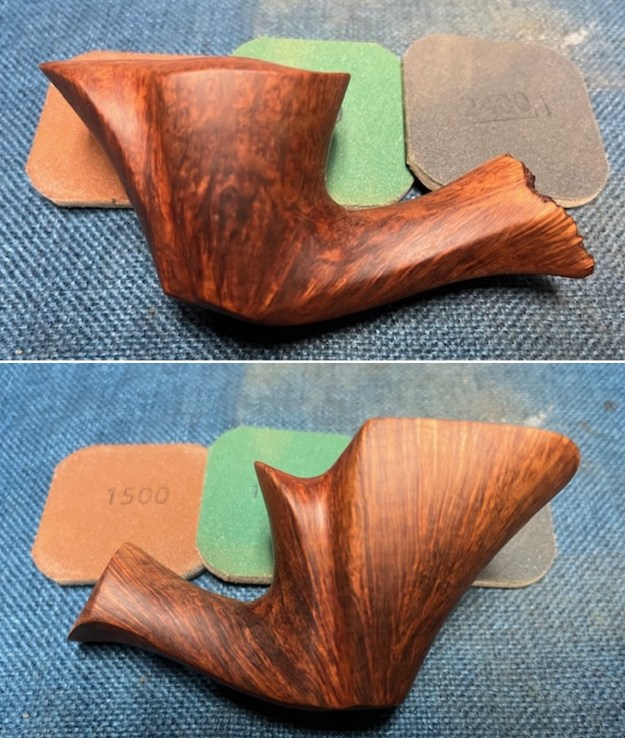
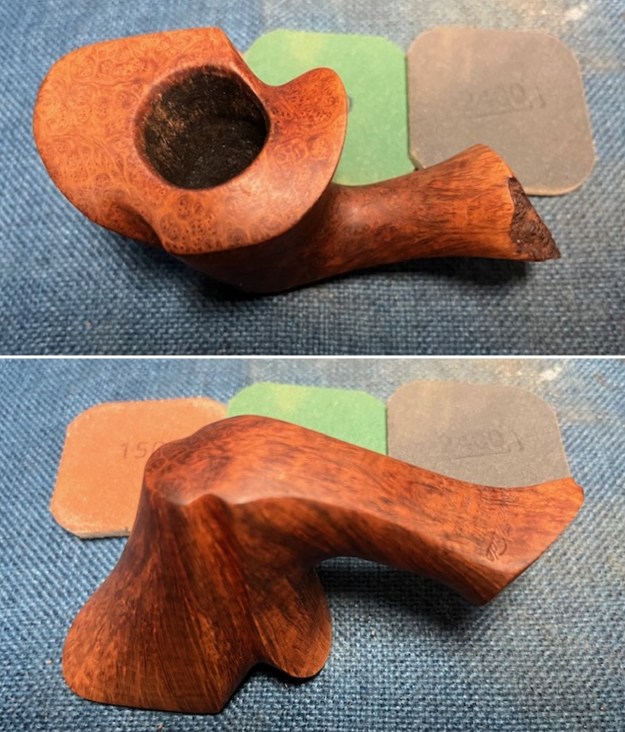
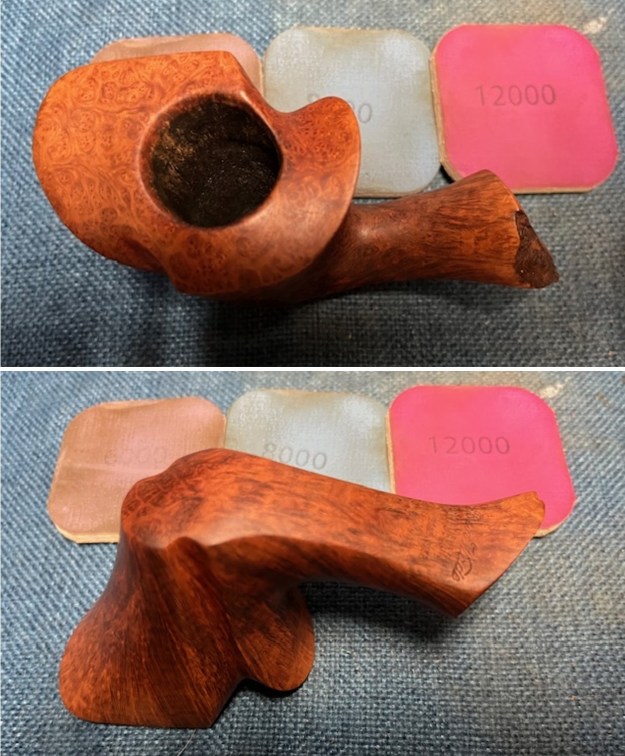
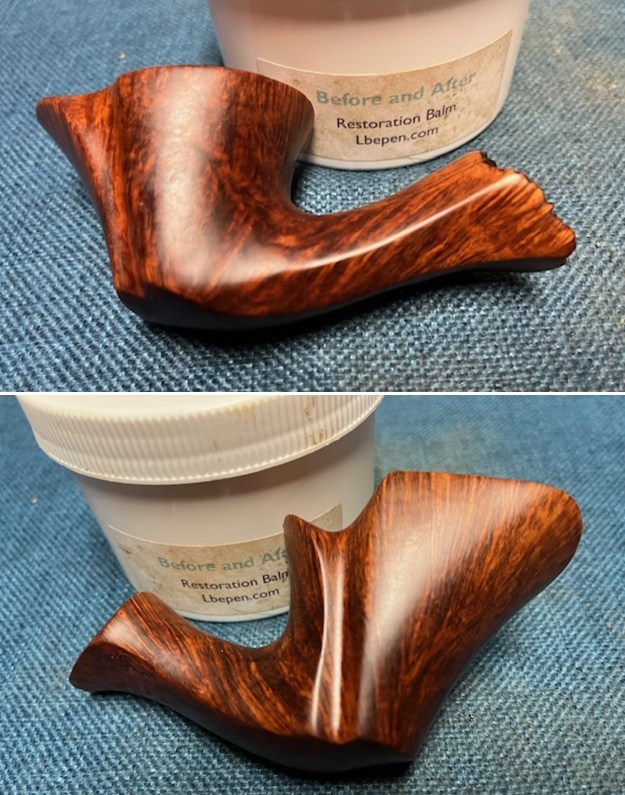
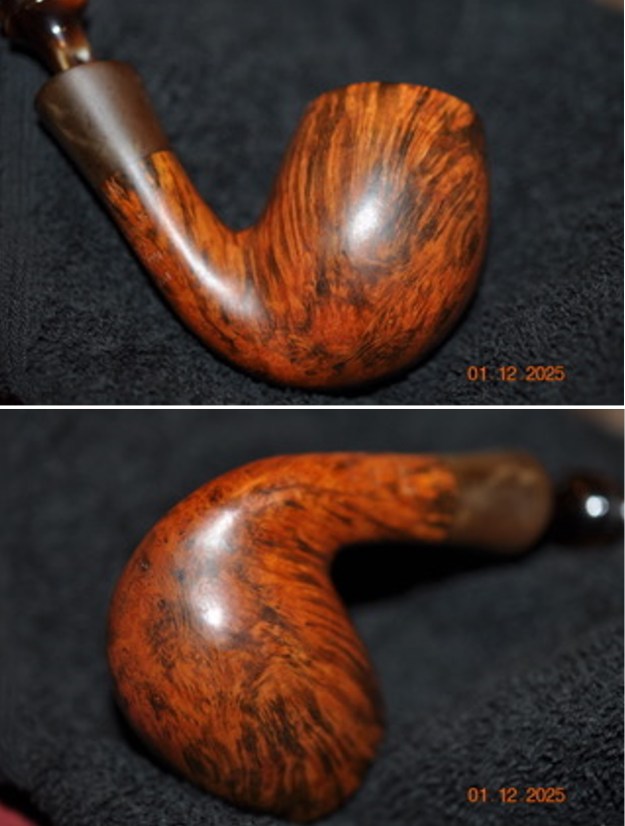
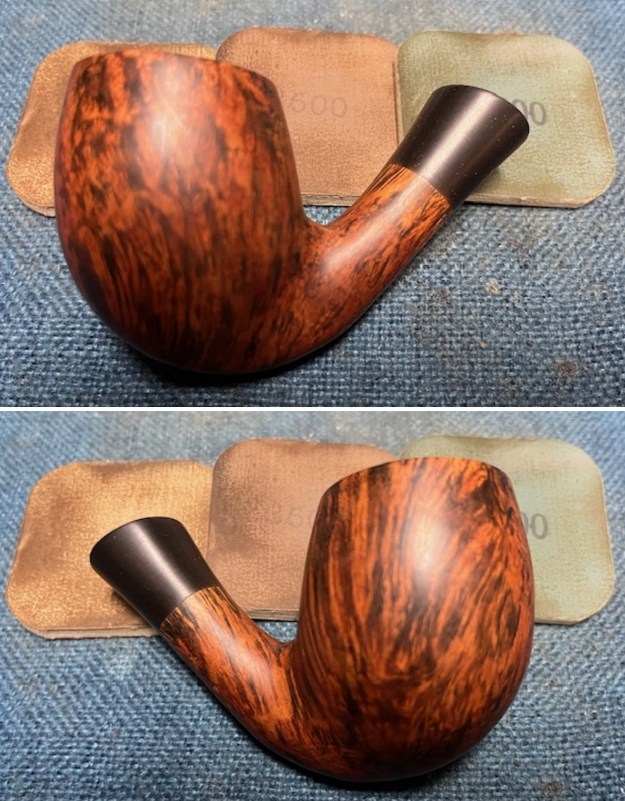
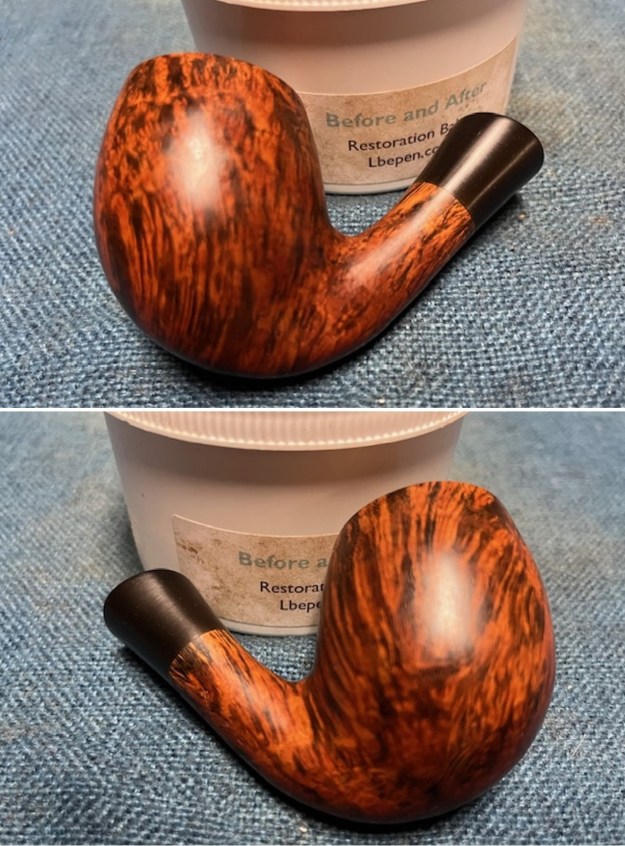
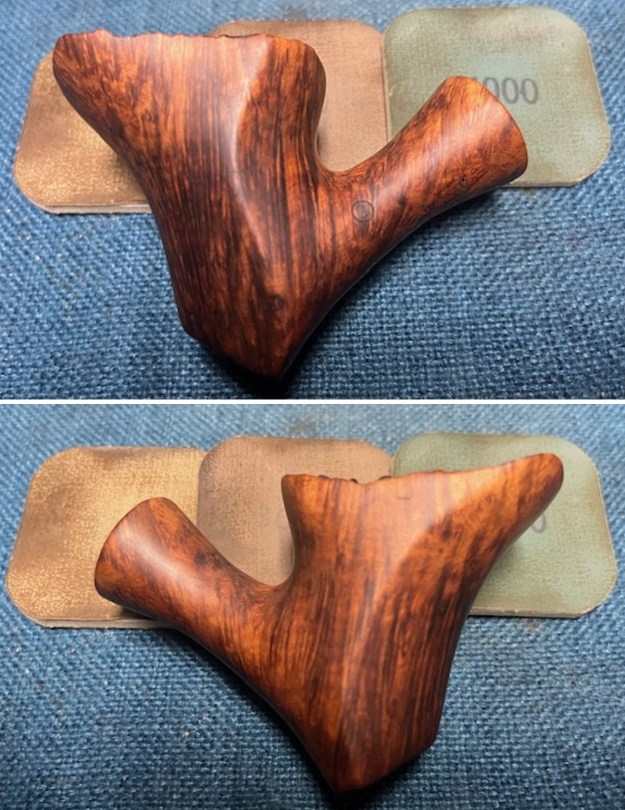
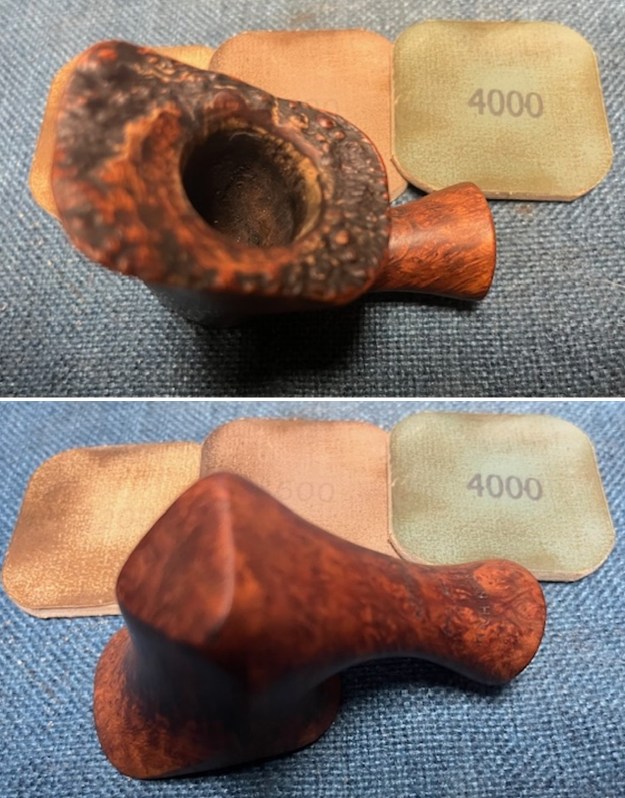
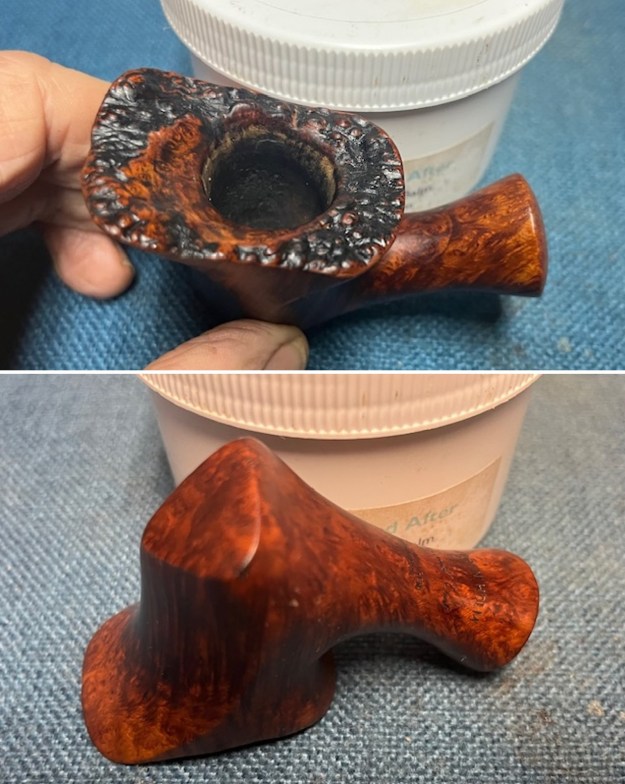
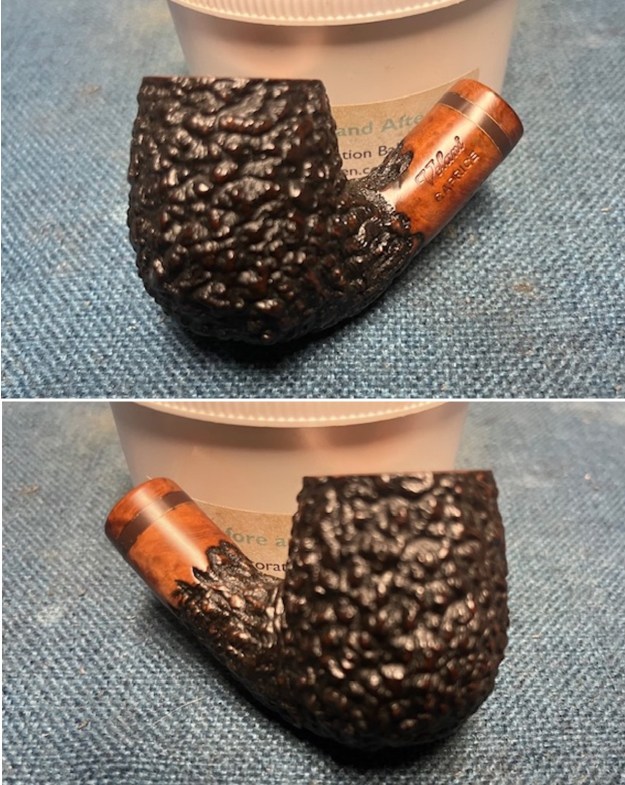
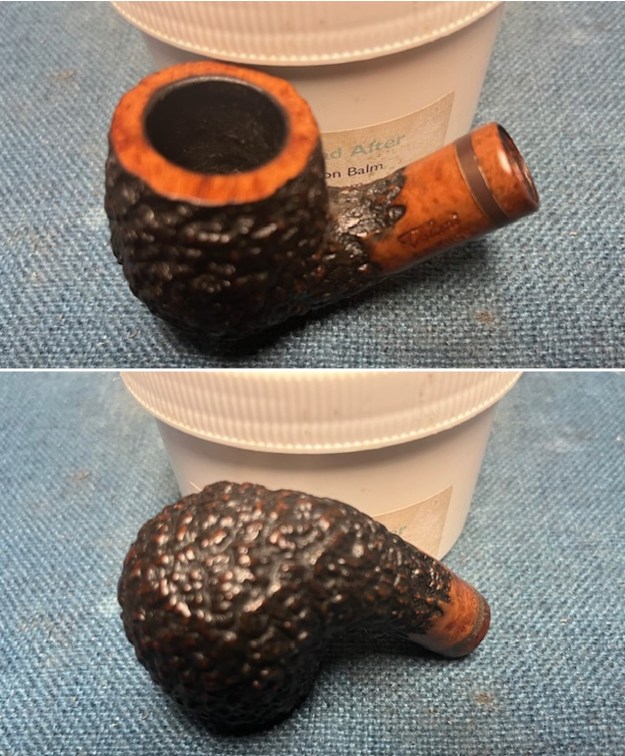
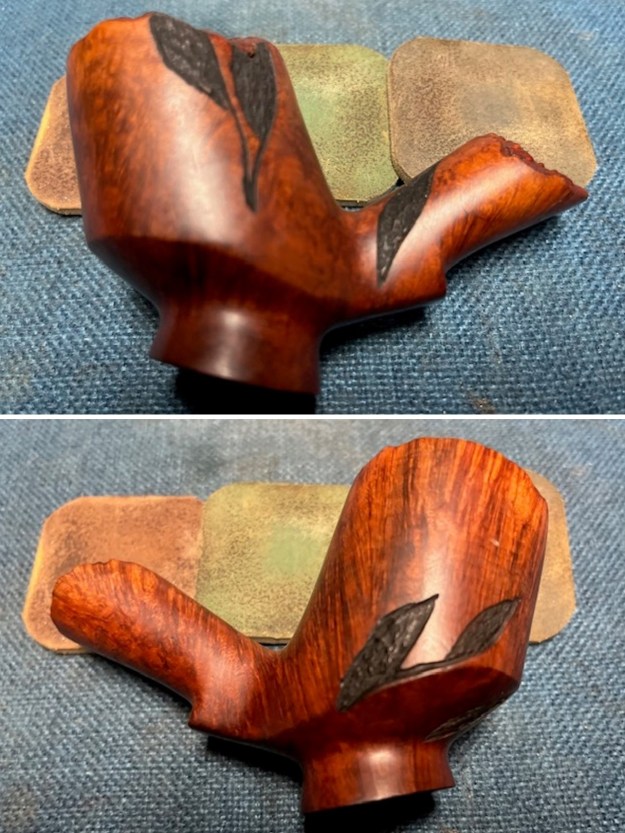
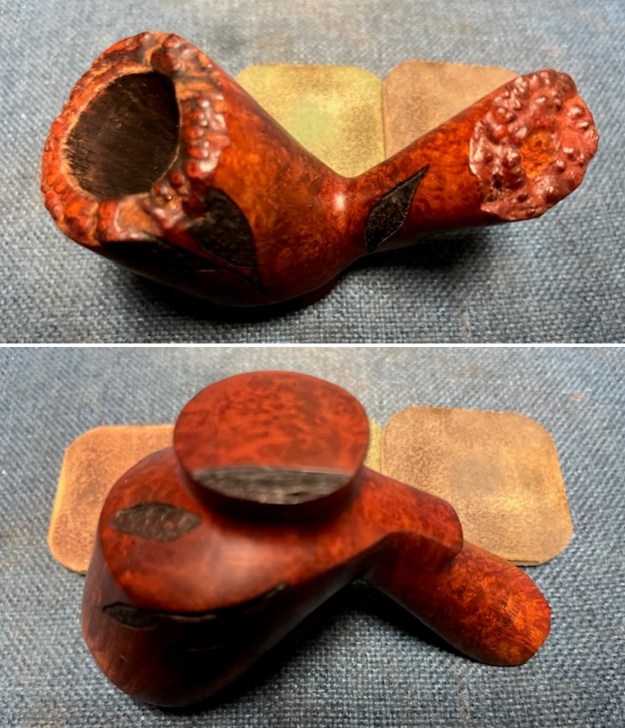
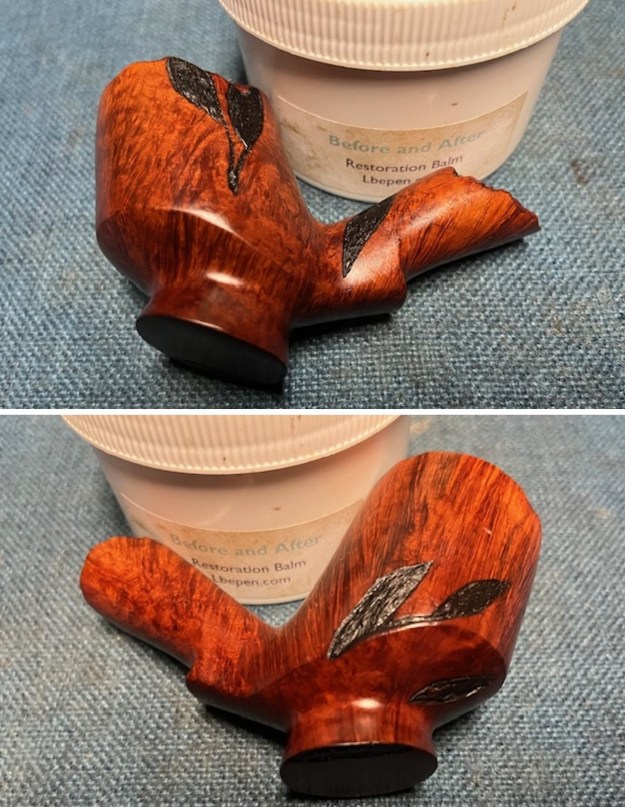
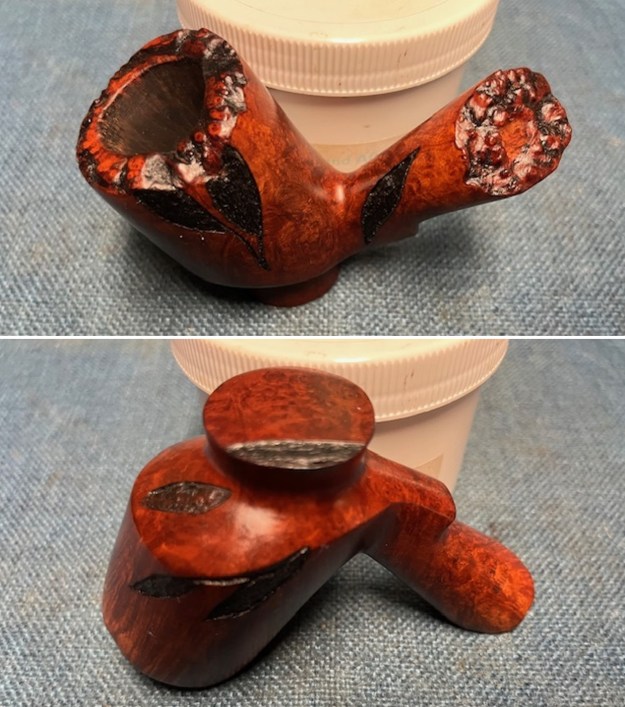
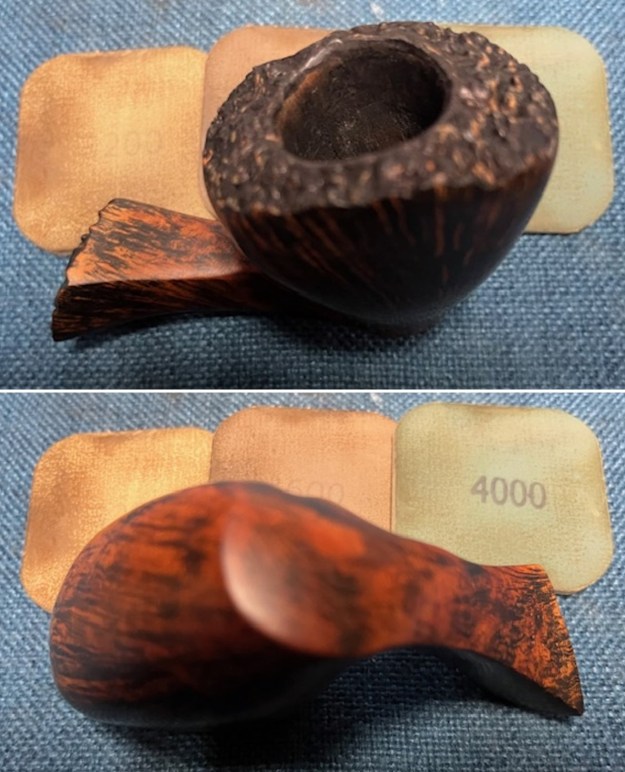
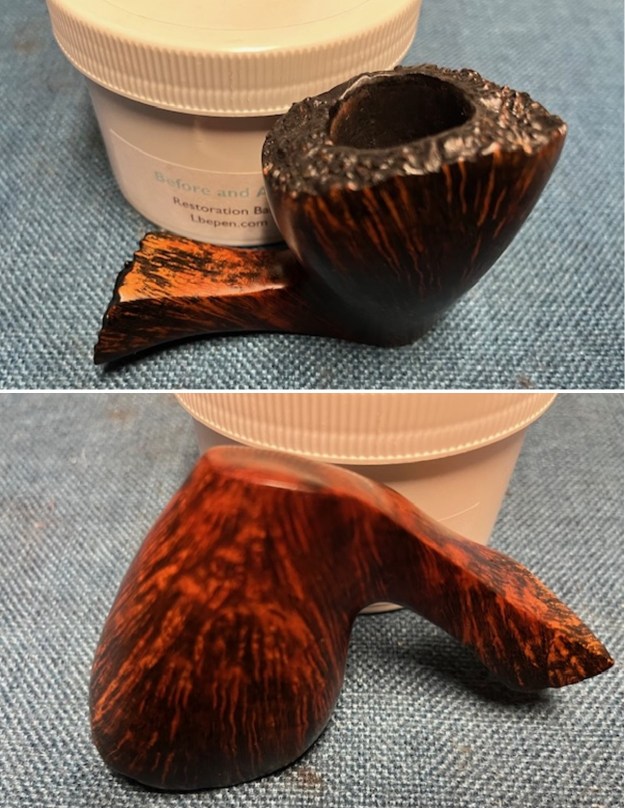
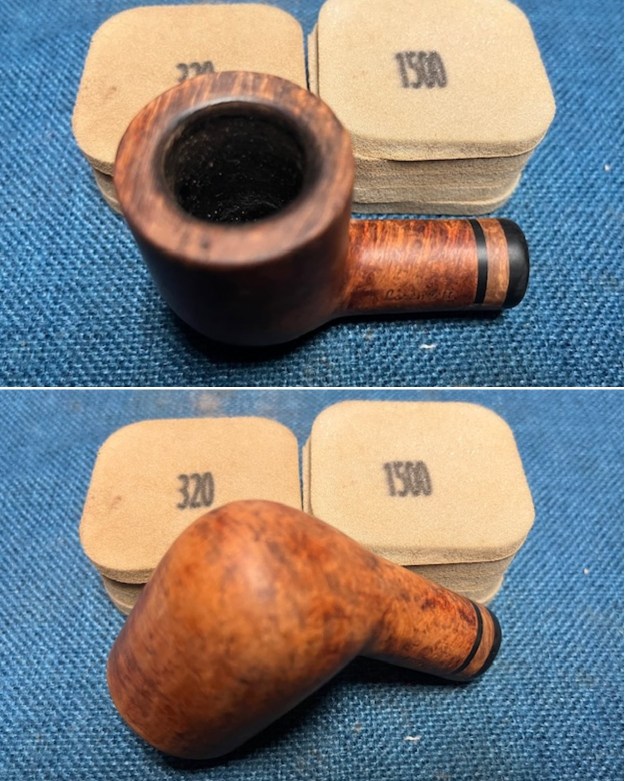
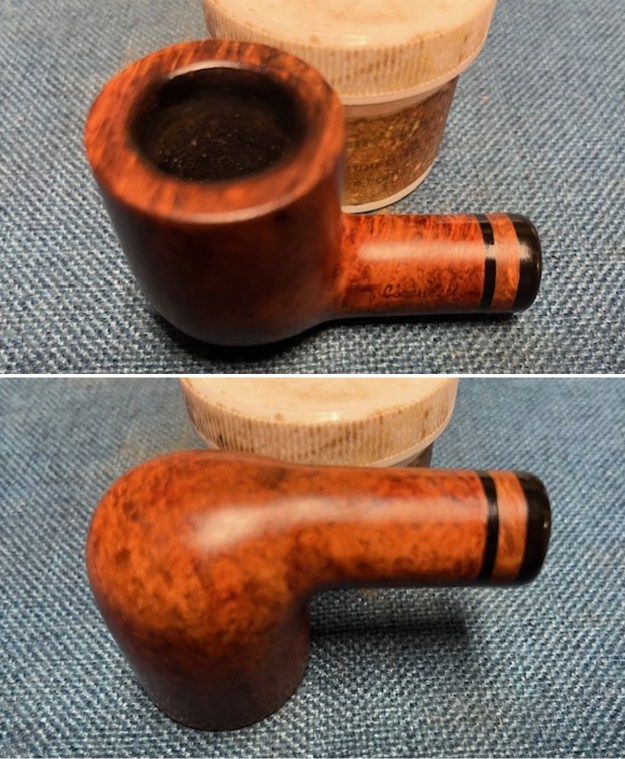
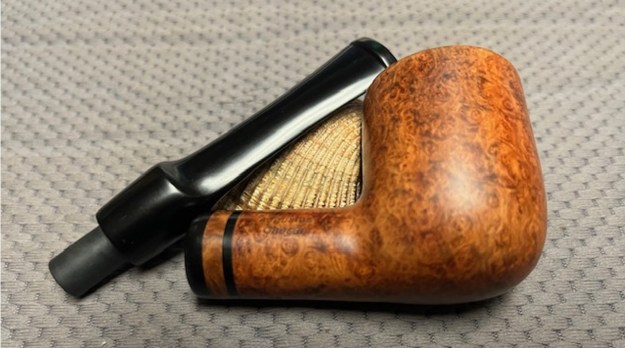
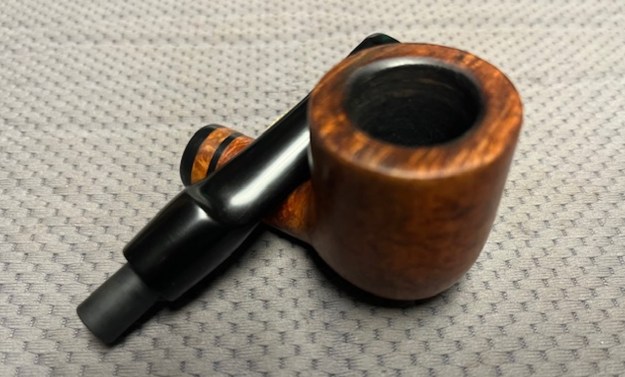
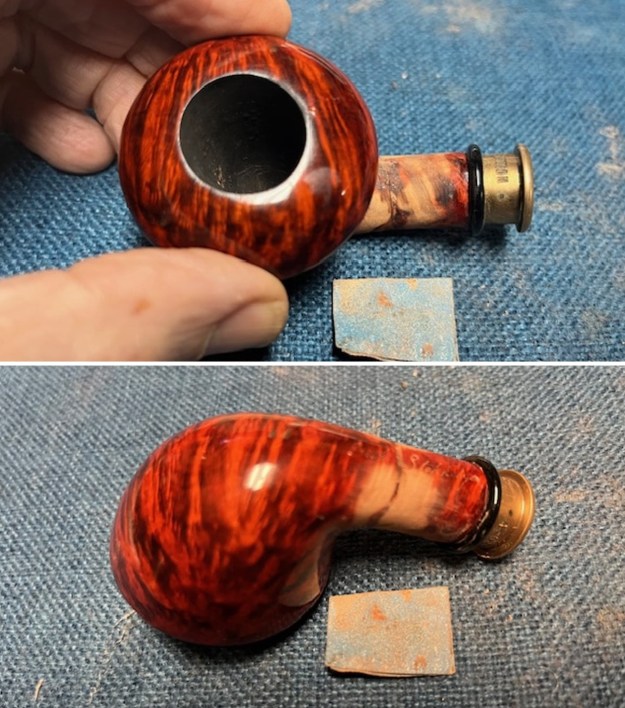
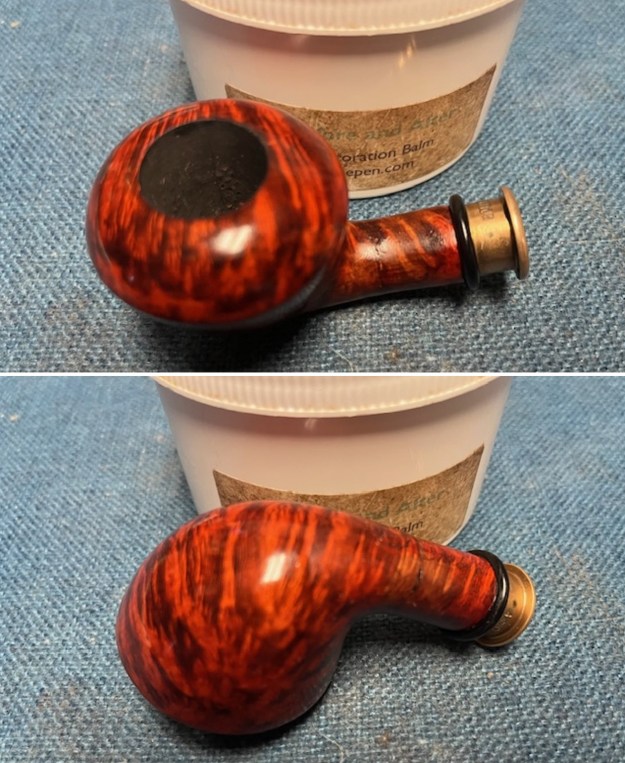
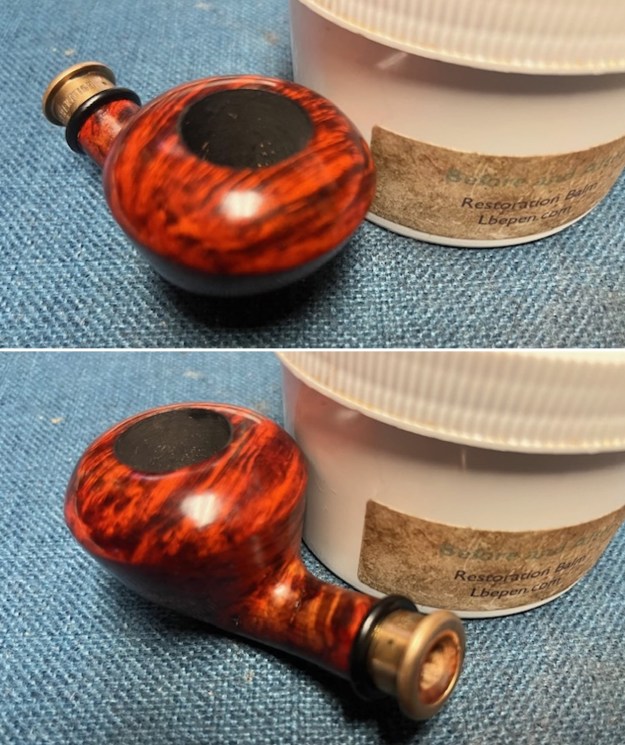
 I worked some Before & After Restoration Balm into the surface of the briar with my fingertips to clean, enliven and protect the briar. I let the balm sit for 15 minutes and then buffed with a cotton cloth to raise the shine. The photos show the bowl at this point in the restoration process.
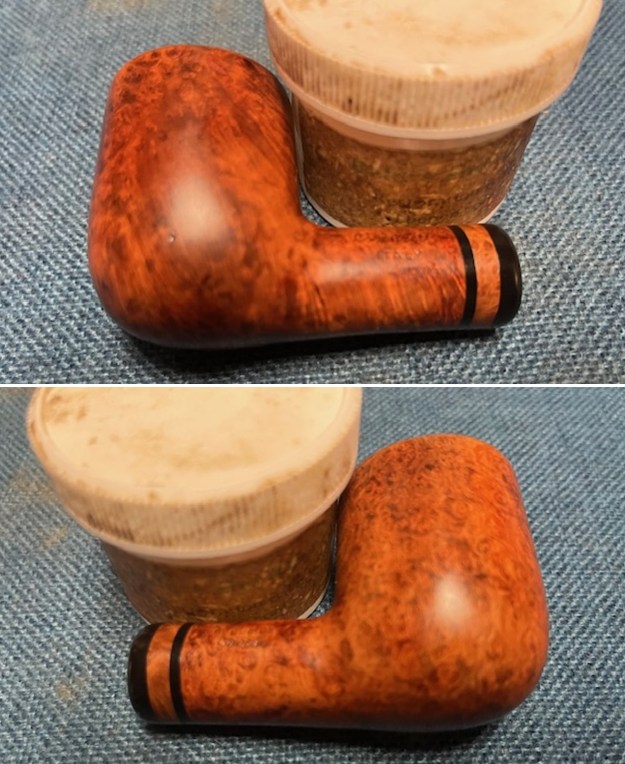
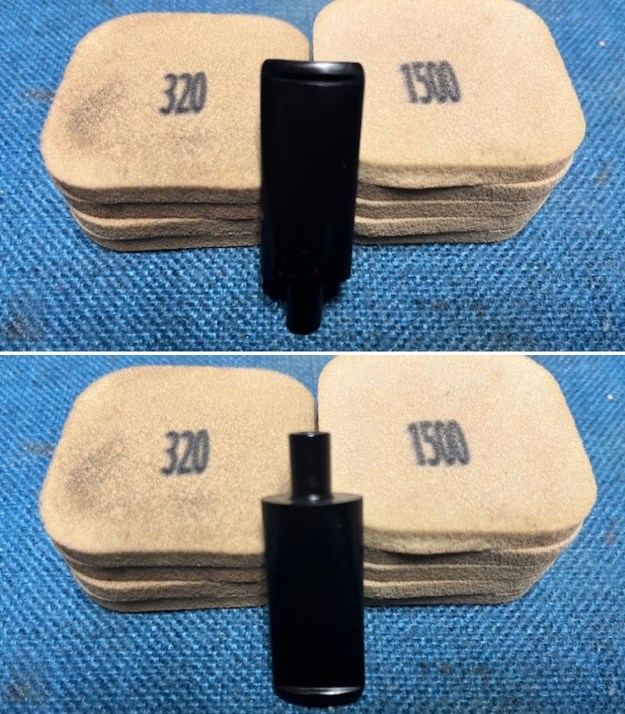
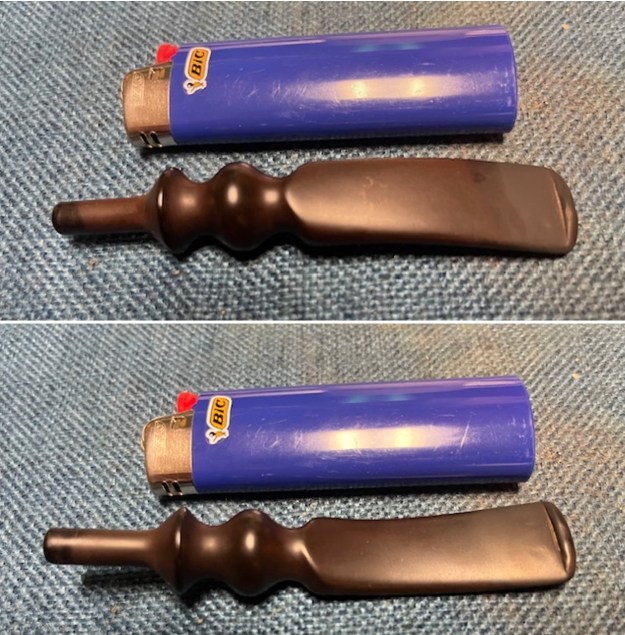
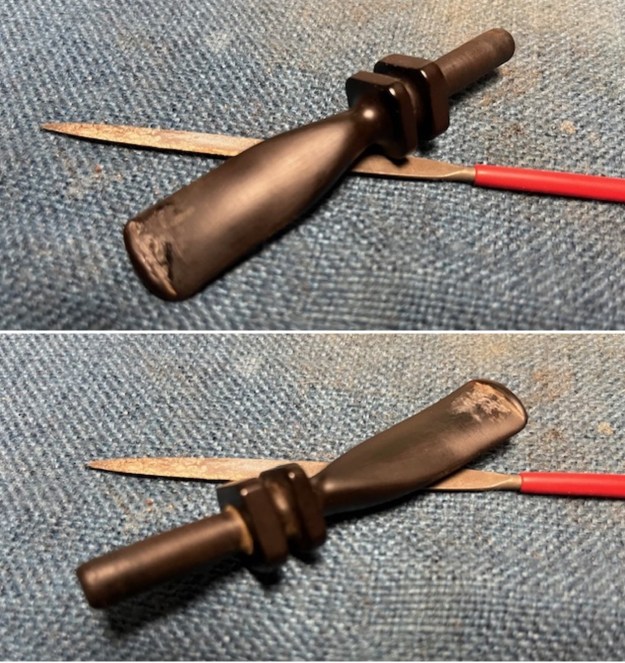
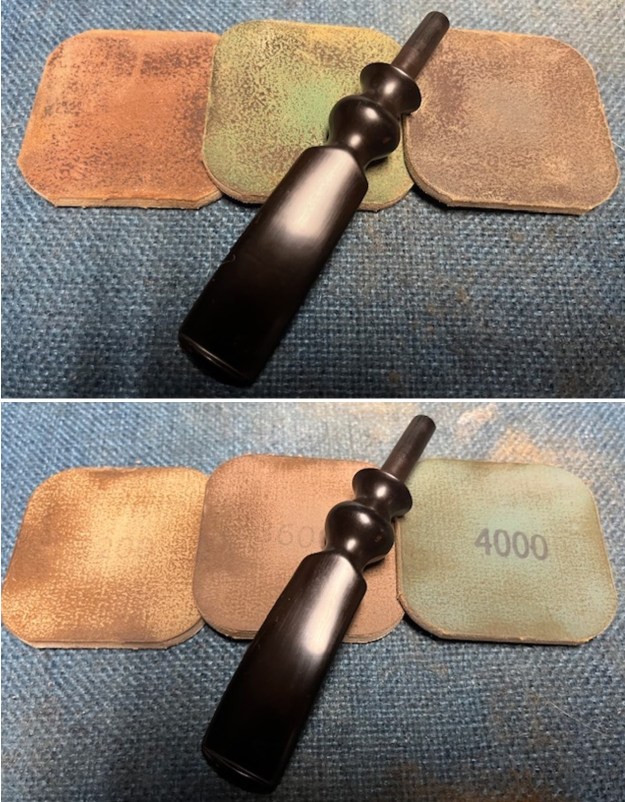
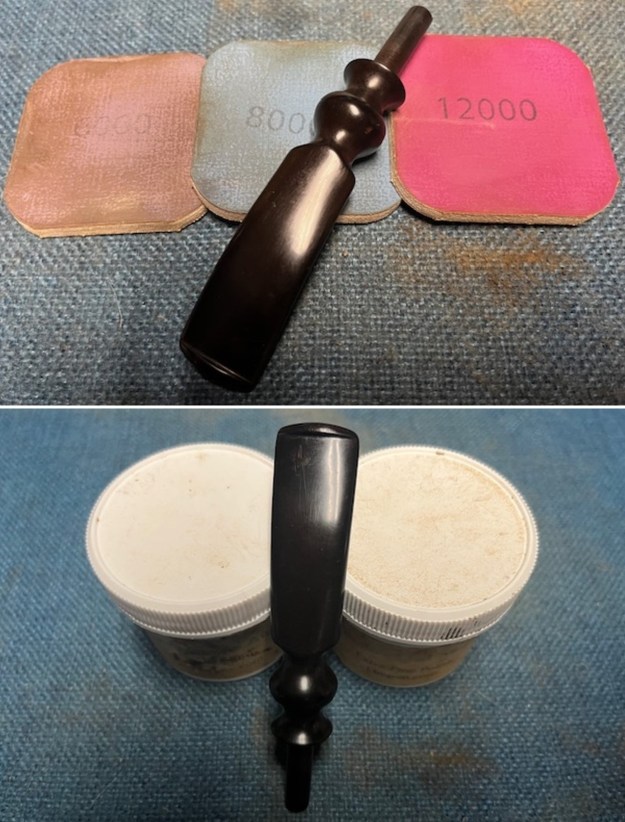
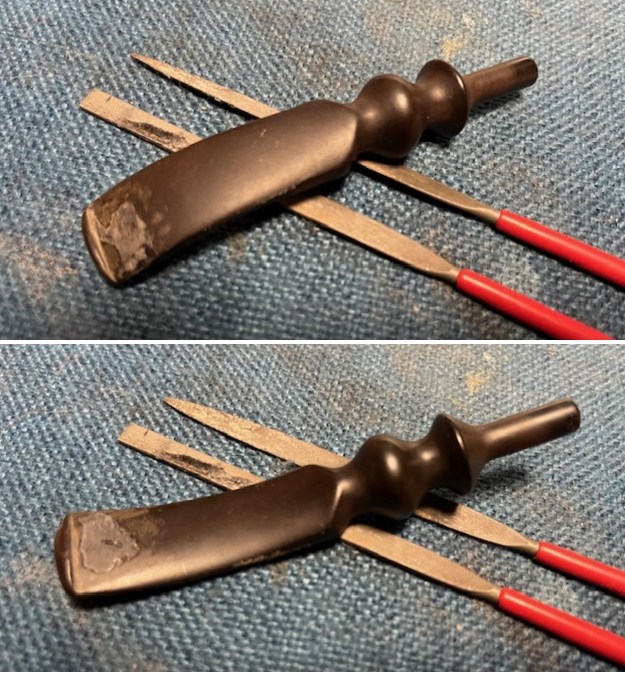
 I set the bowl aside and turned my attention to the stem. I sanded the stem to reduce the diameter of the saddle portion and give it a slight slope or taper. I used my Dremel and sanding drum to start the process. I cleaned up the sanding marks from the Dremel with a folded piece of 220 grit sandpaper. I smoothed out the marks and the stem started to look better.
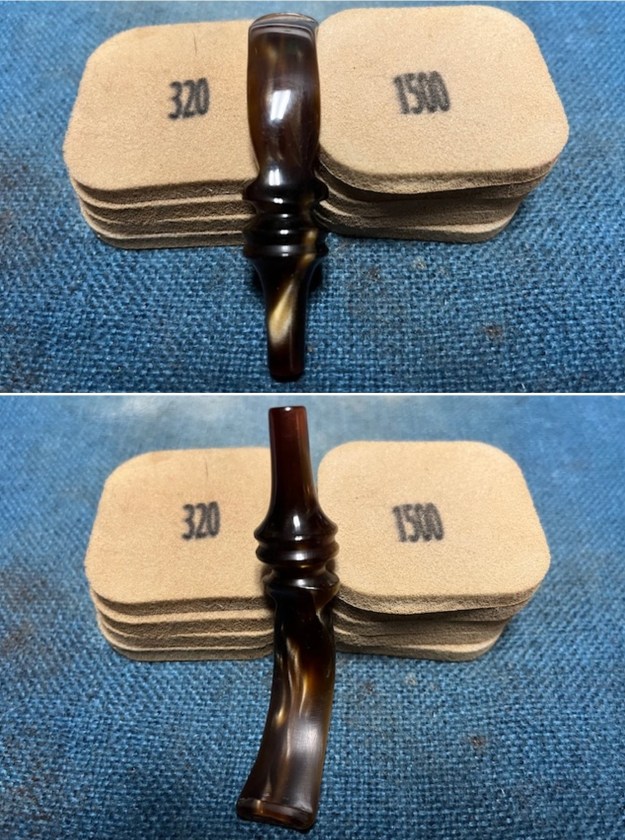
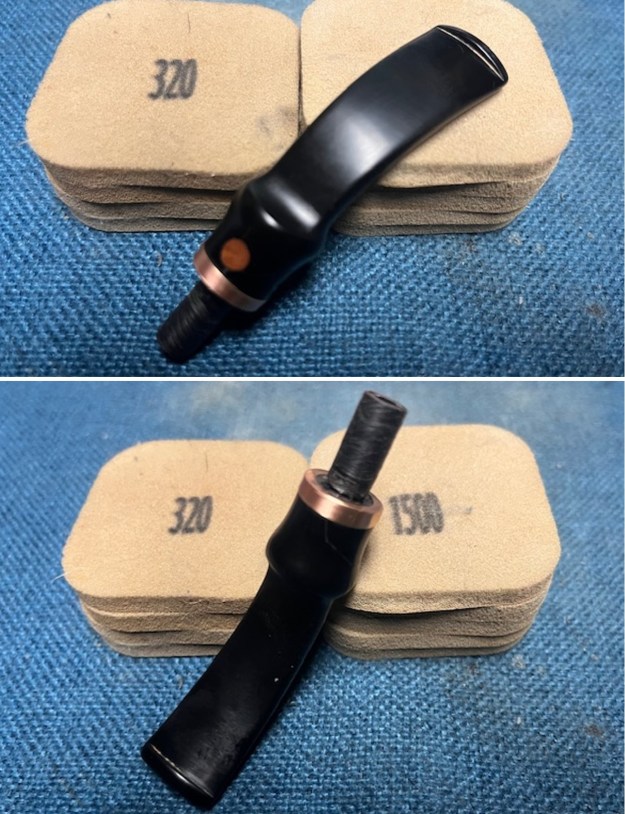
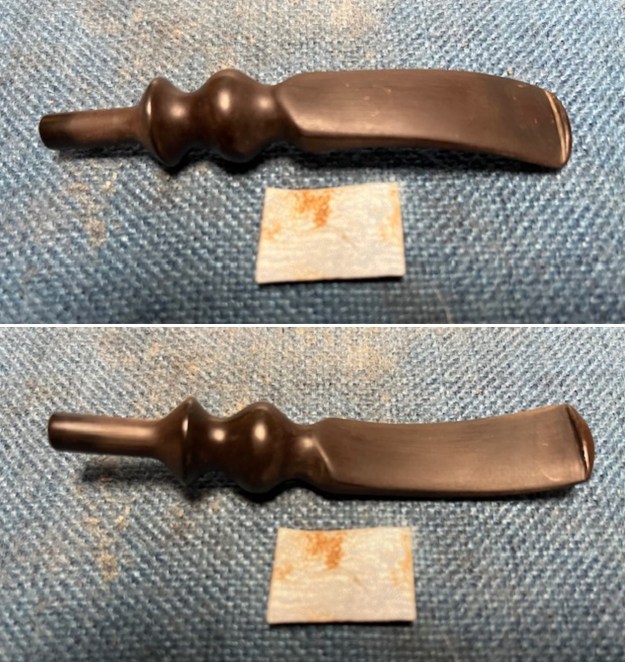
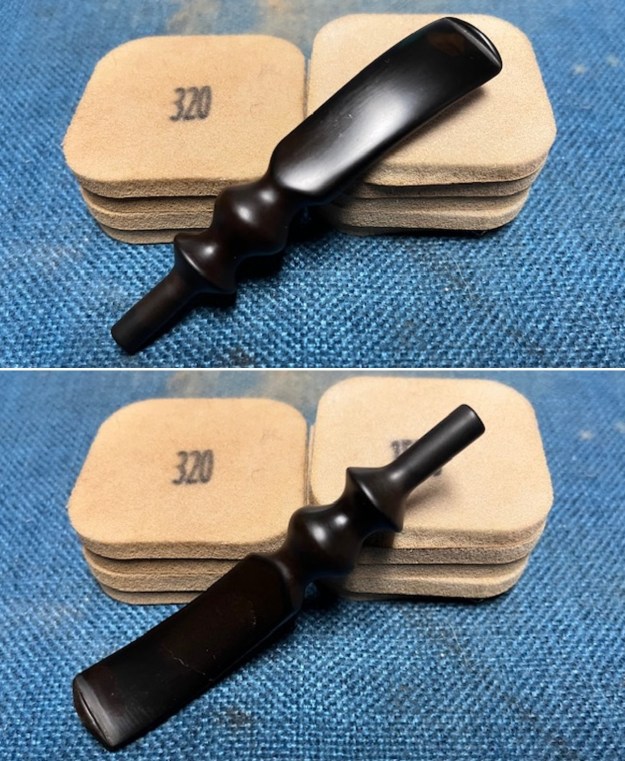
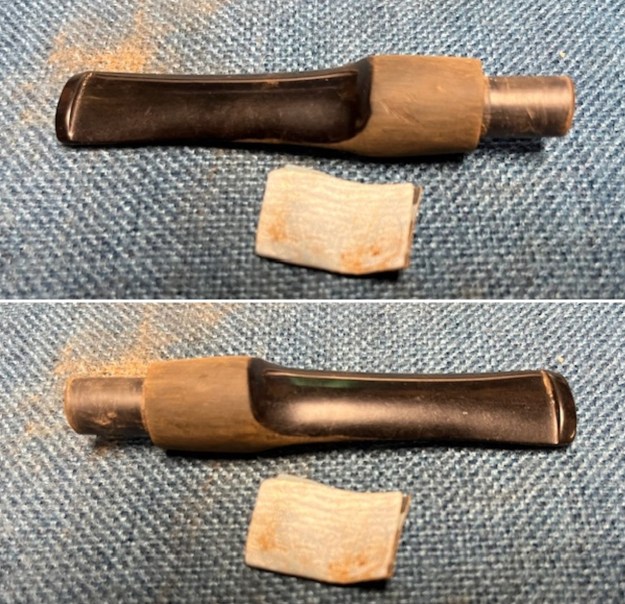 I sanded the stem with 320-3500 grit 2×2 inch pads to further smooth out the surface and remove the light residual oxidation. I wiped the stem down after each pad with an Obsidian Oil cloth to remove the debris and further protect the stem.
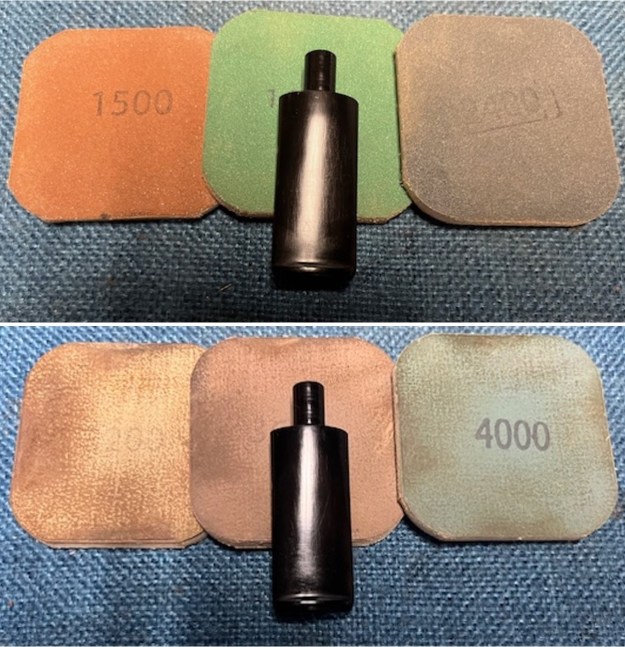
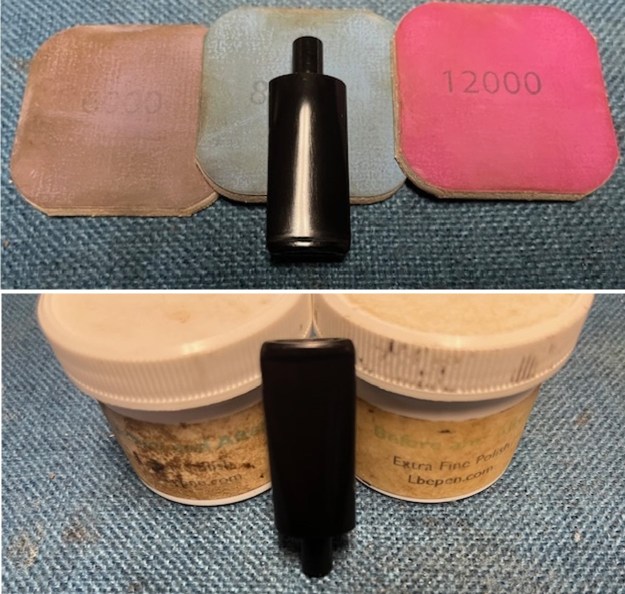
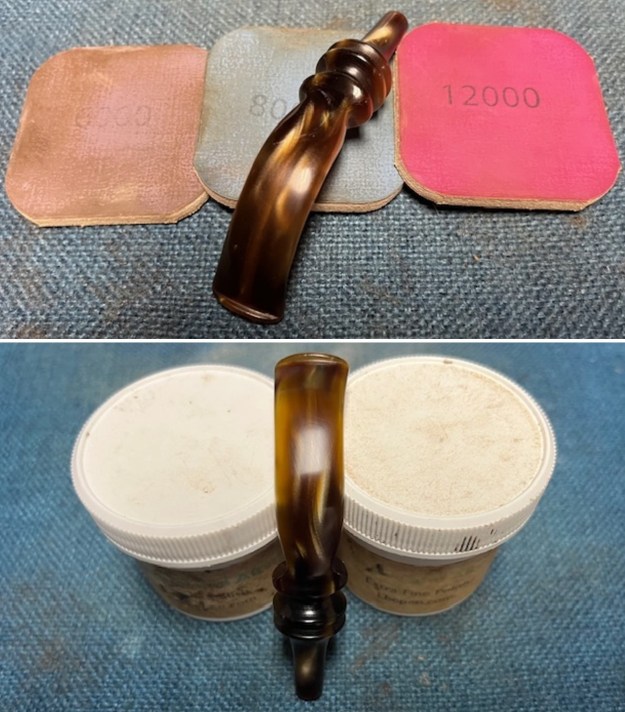
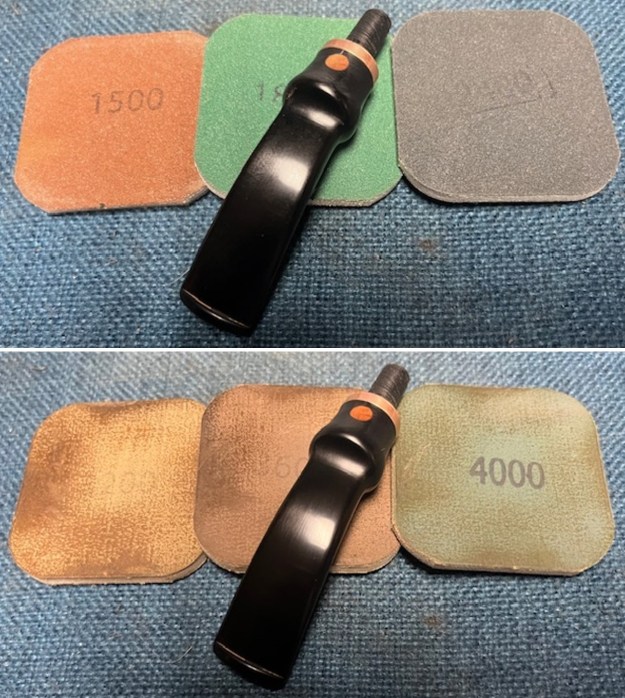
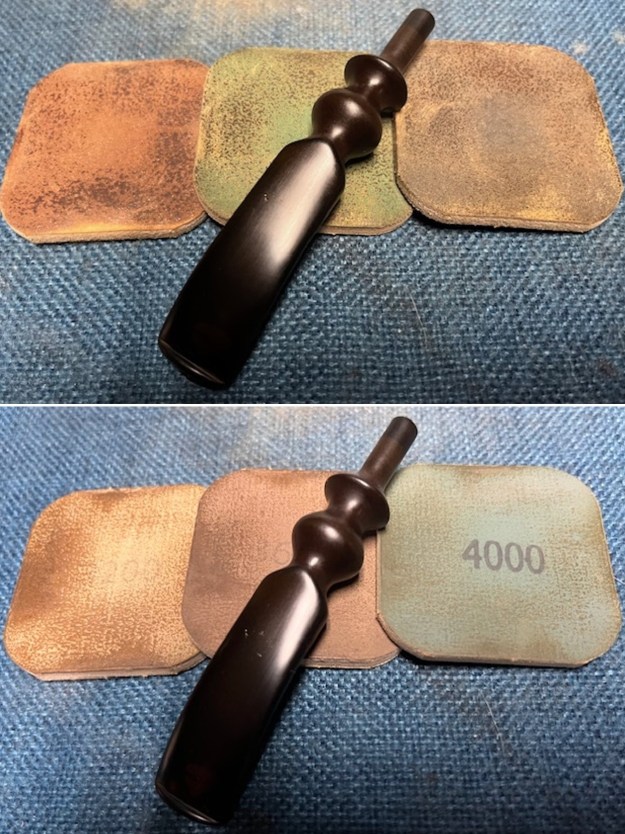
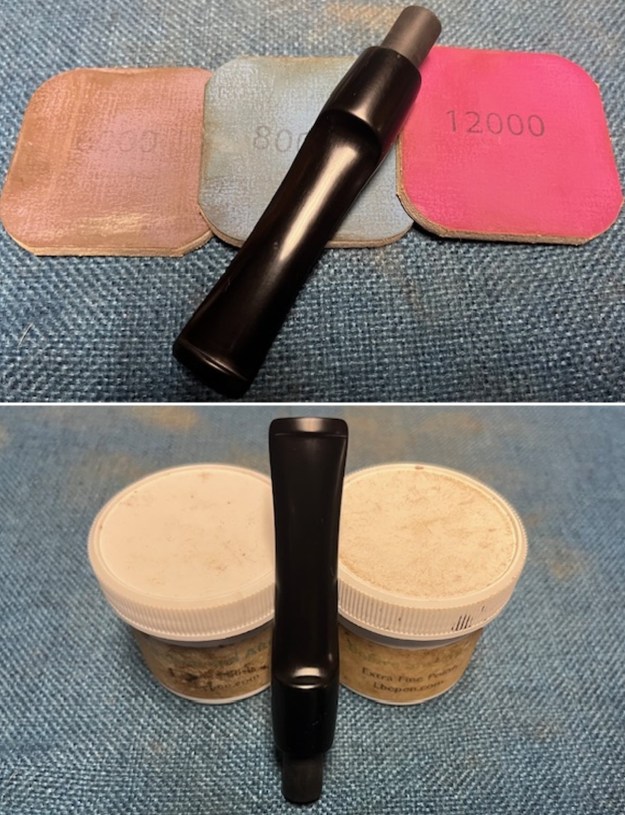
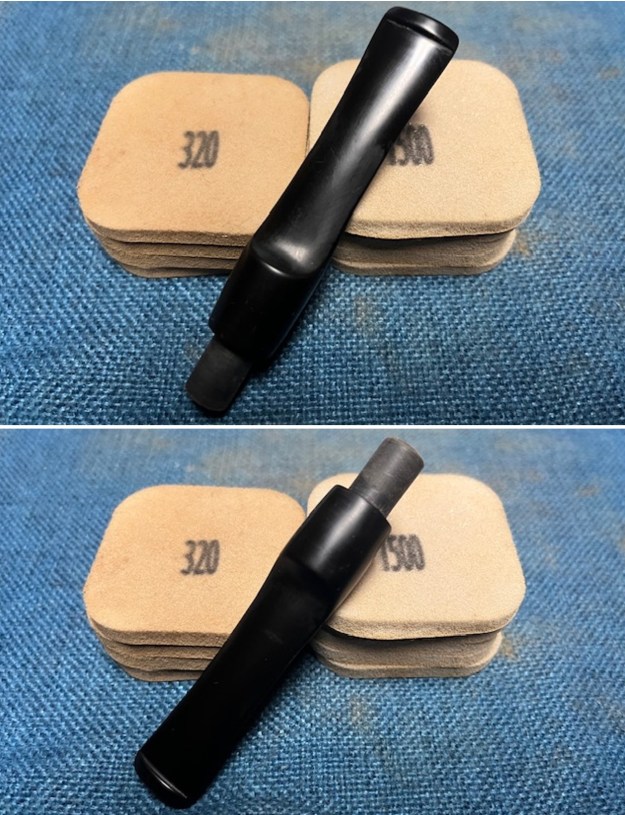 I polished the stem with micromesh sanding pads – dry sanding with 1500-12000 grit sanding pads. I wiped it down after each sanding pad with Obsidian Oil.
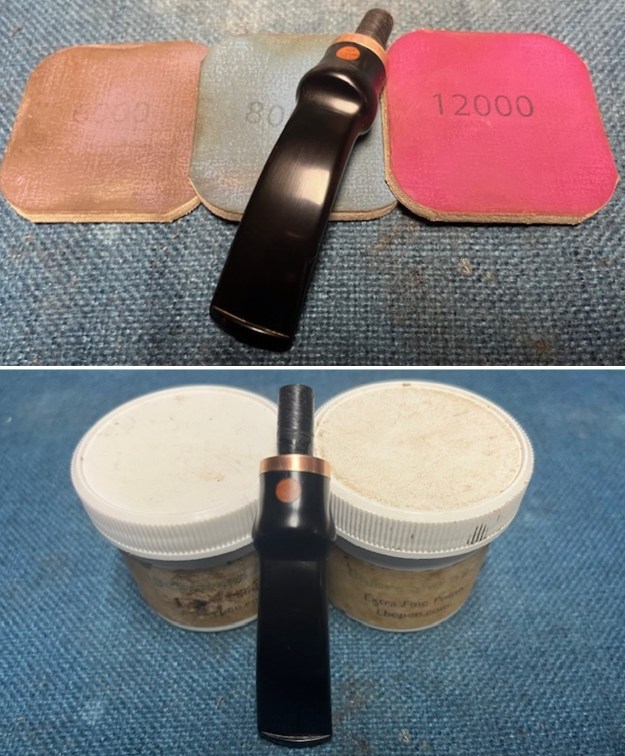
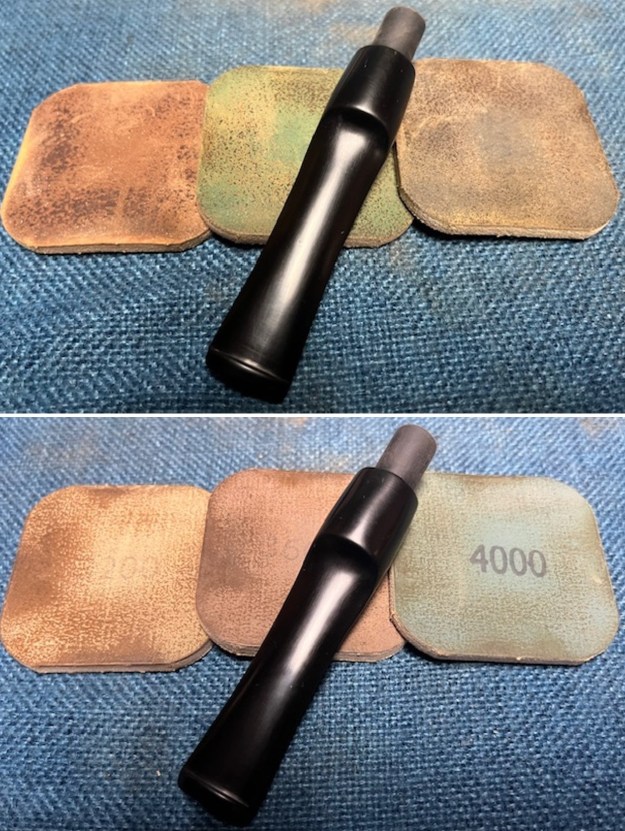
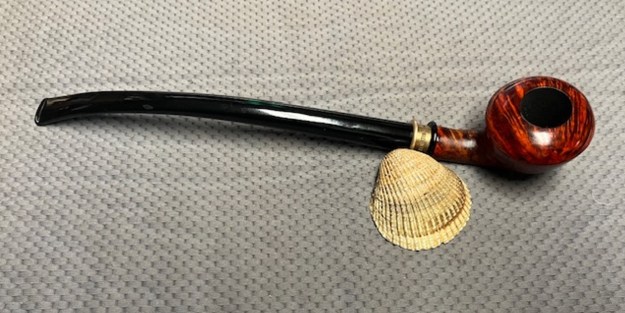
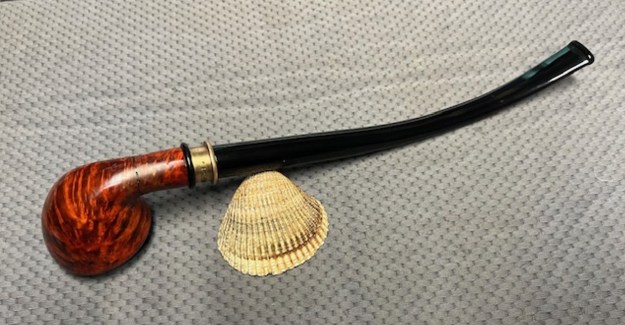
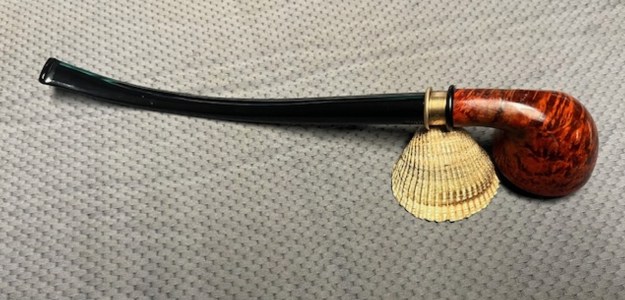
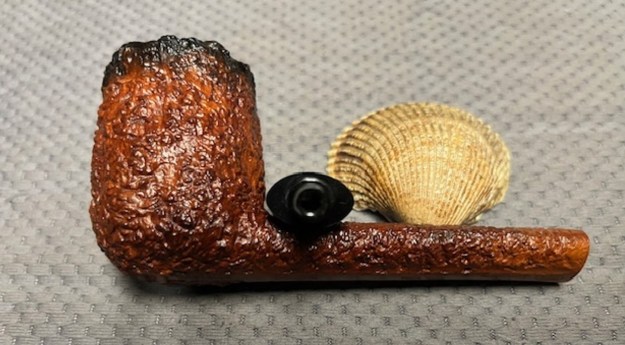
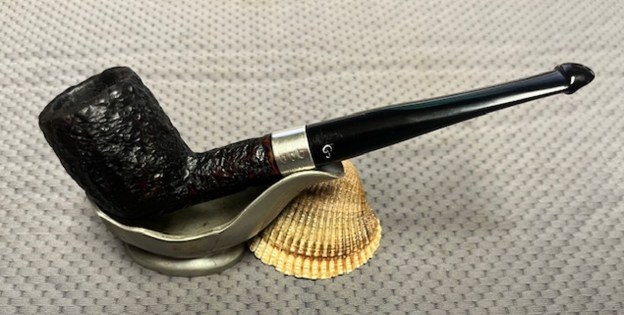
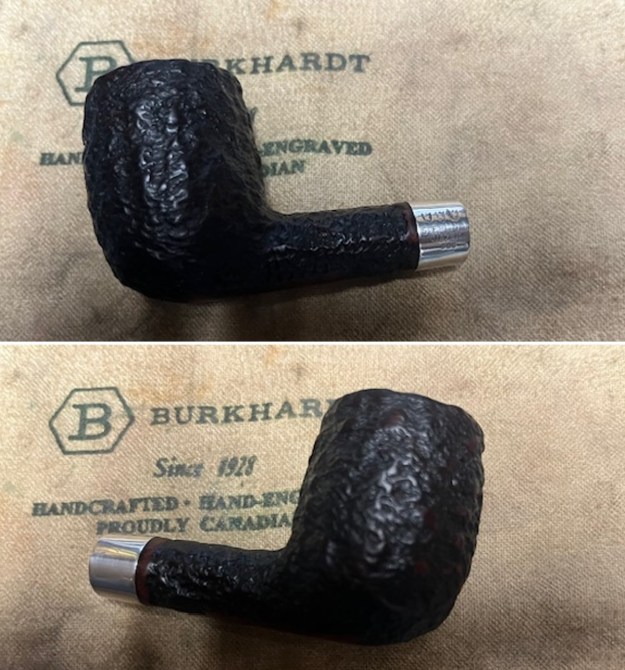
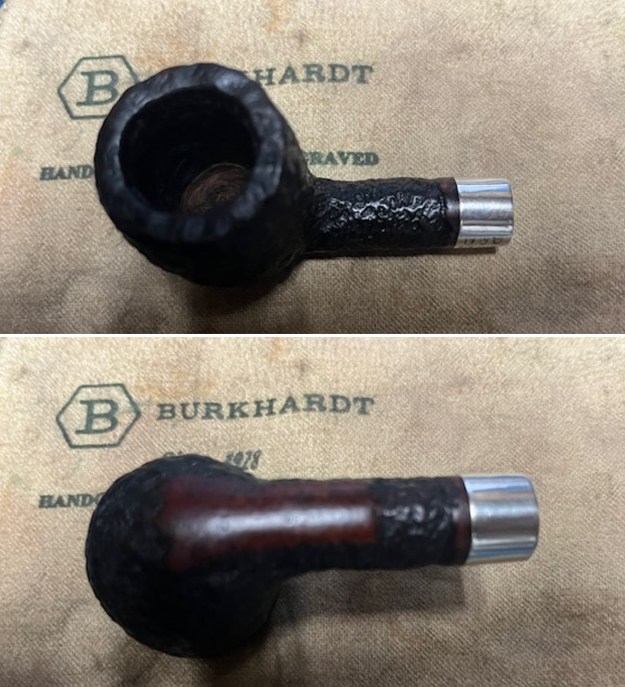
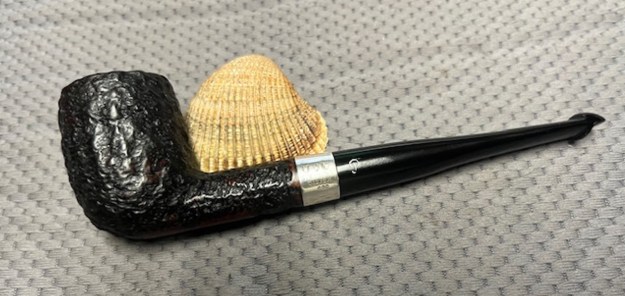
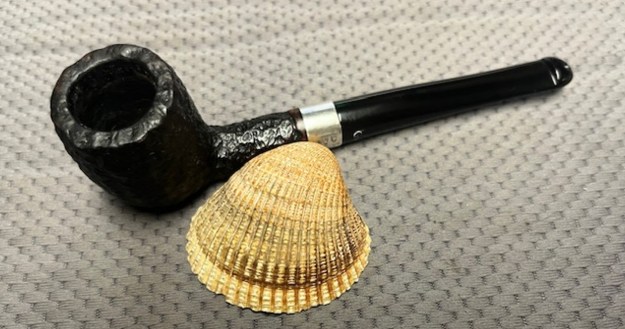
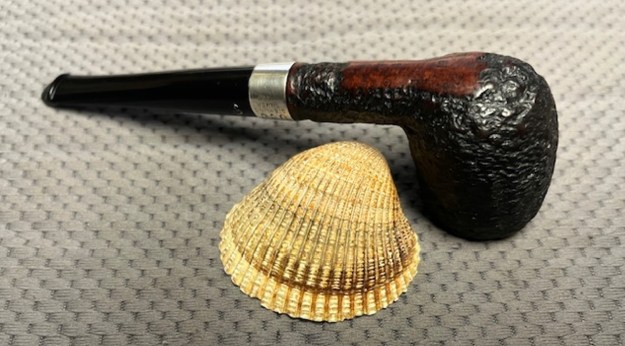
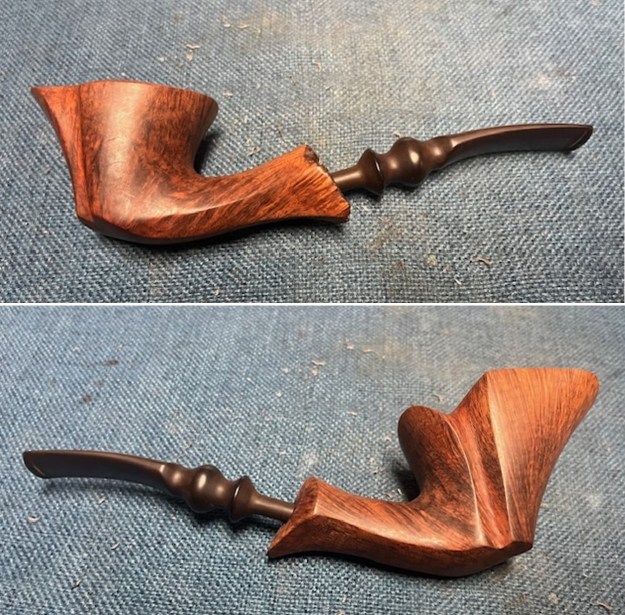
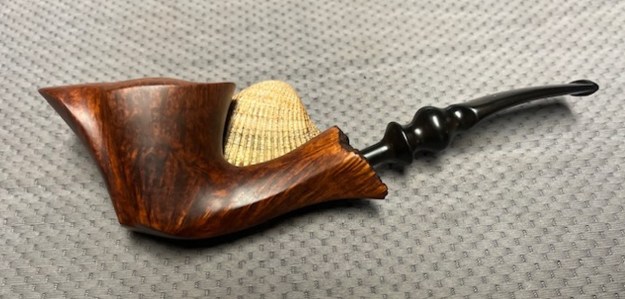
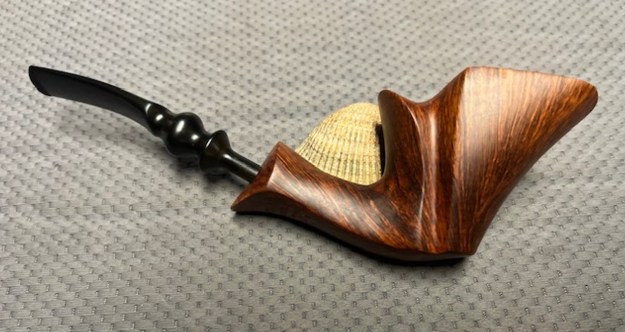
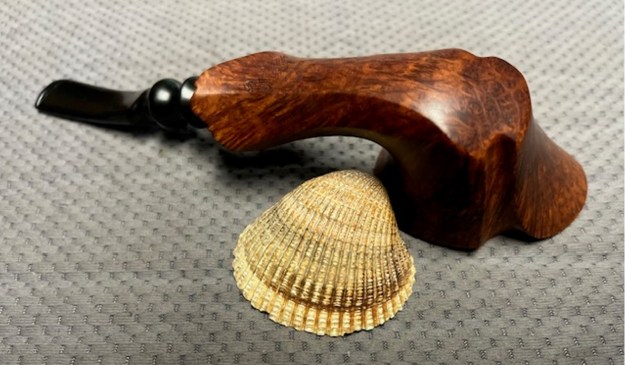
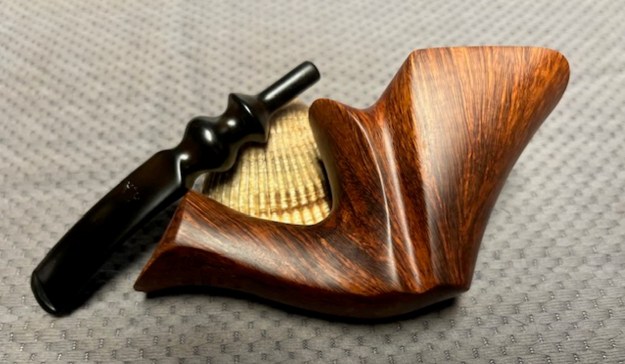
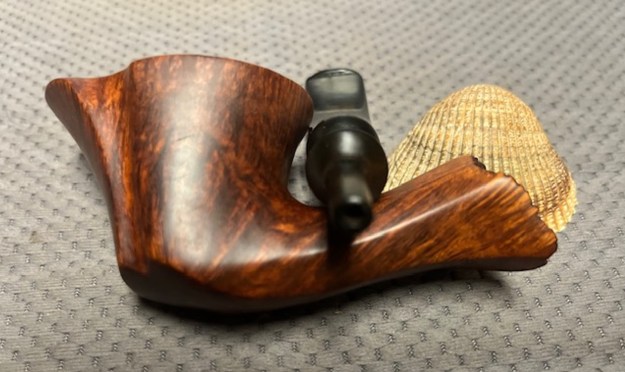
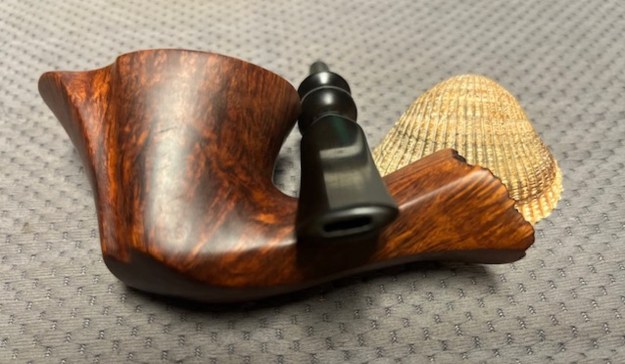
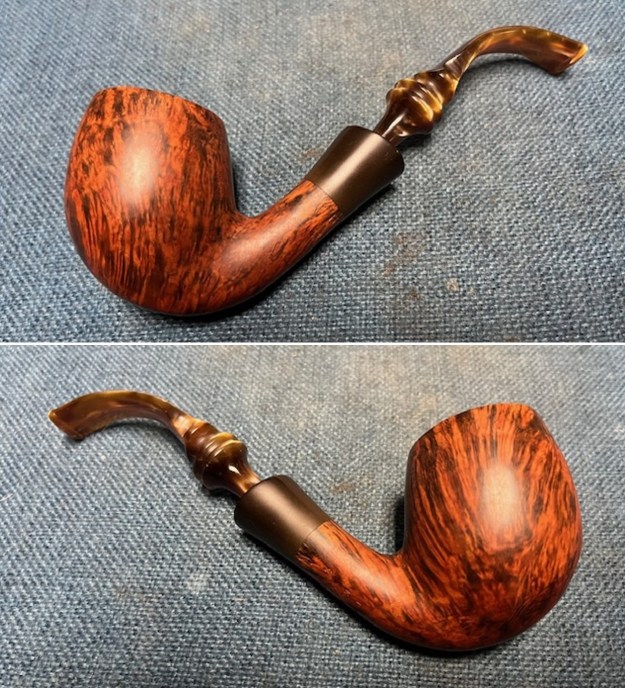
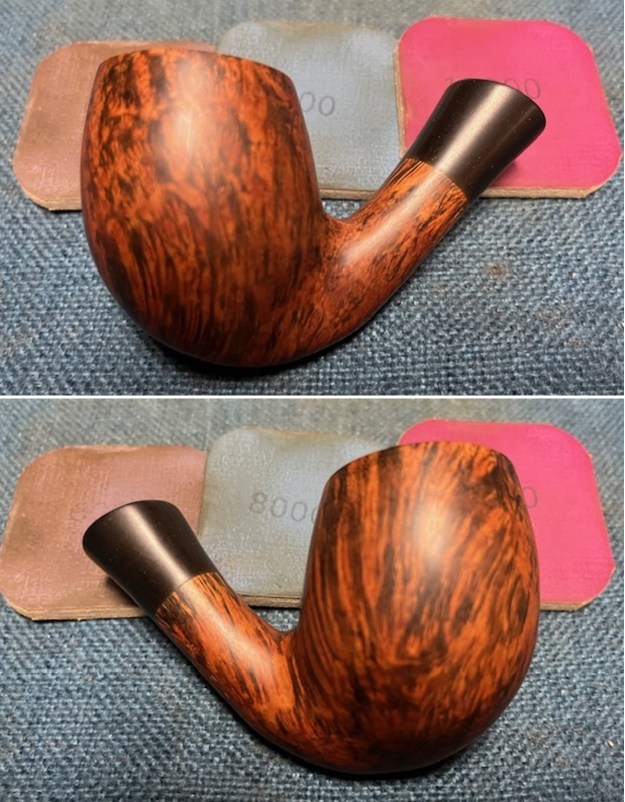
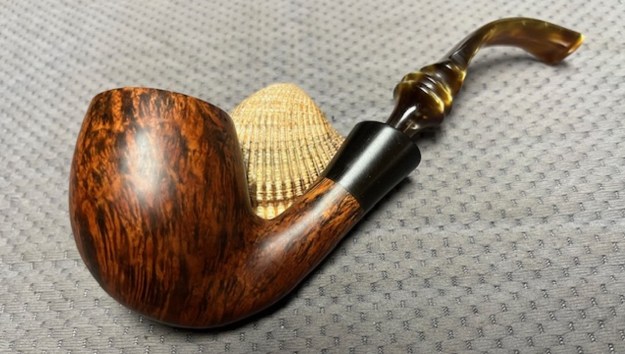
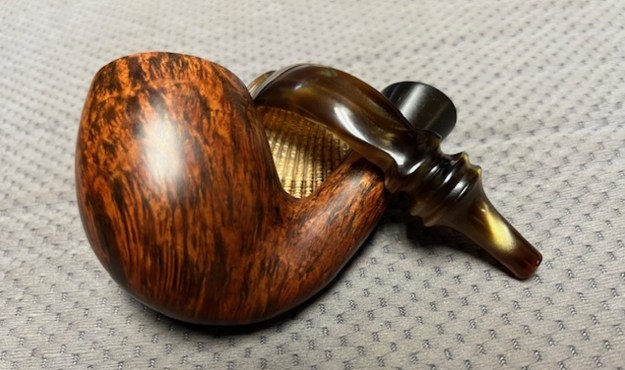
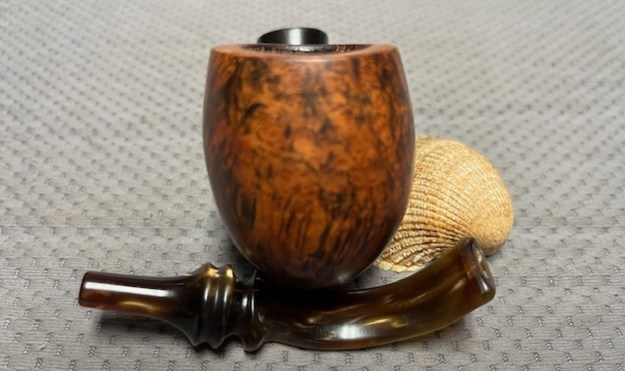
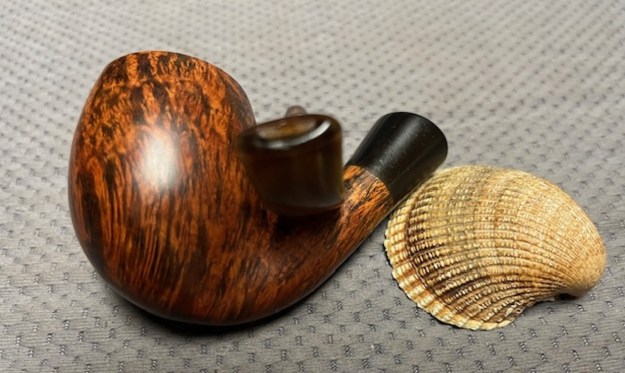
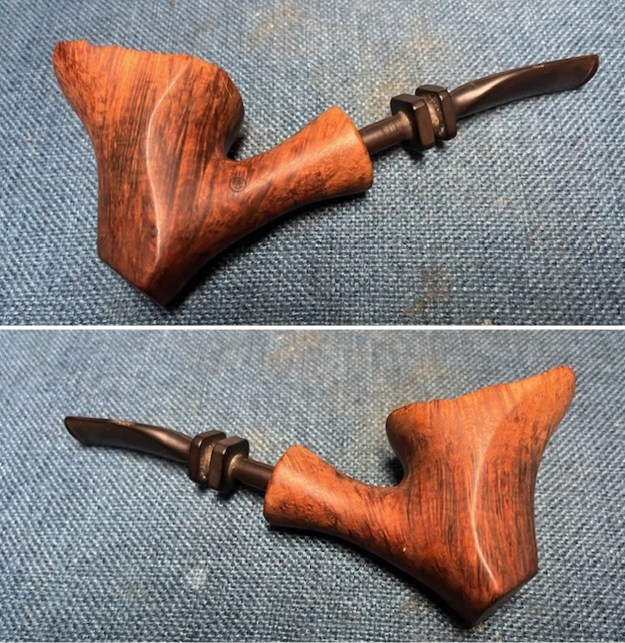
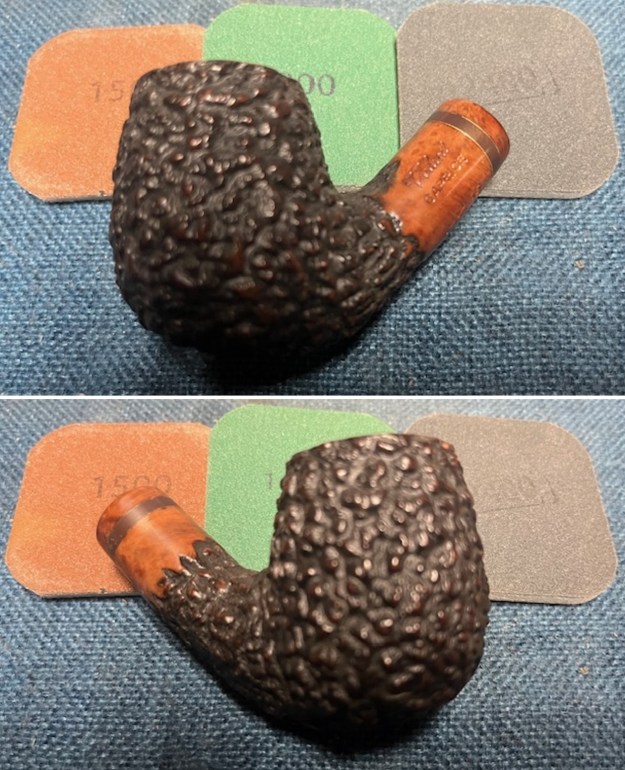
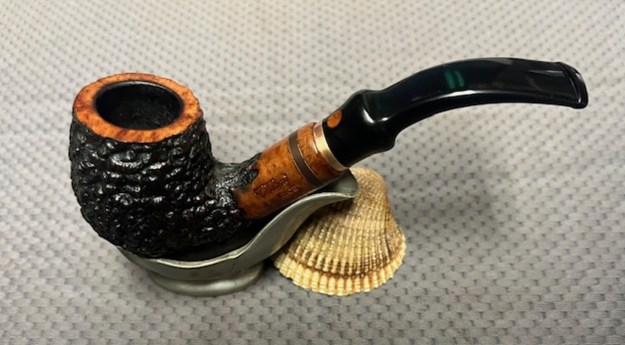
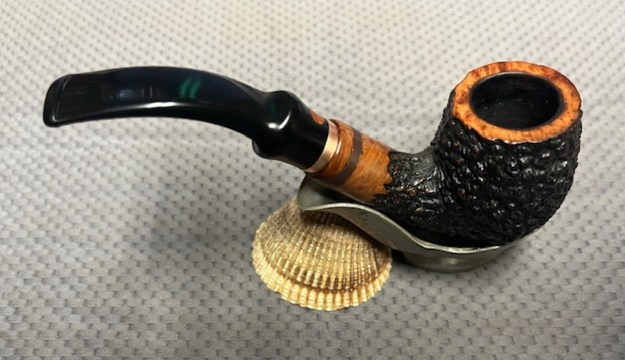
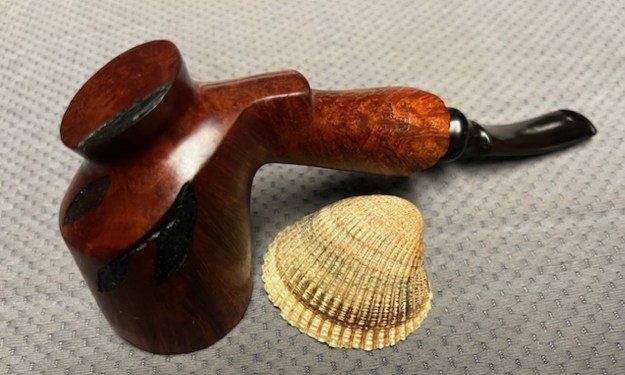
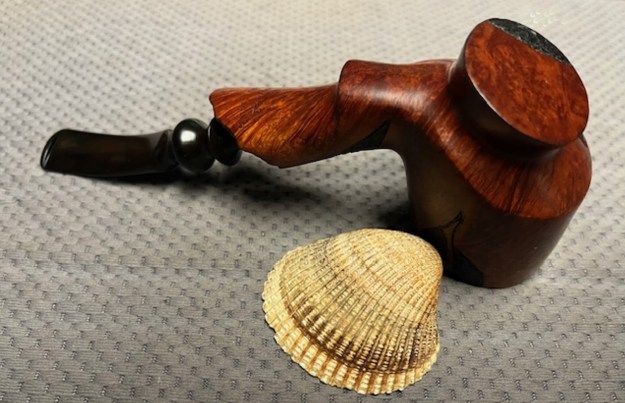
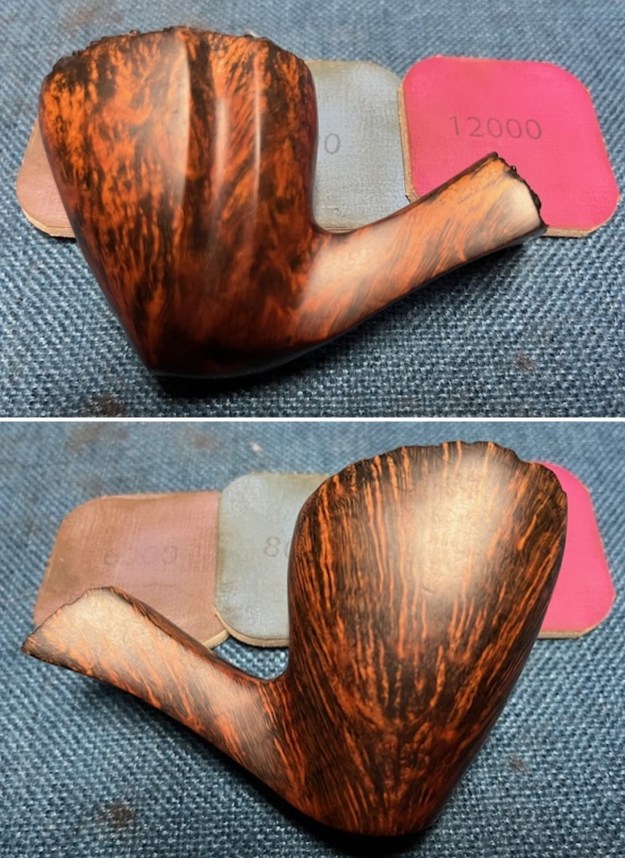
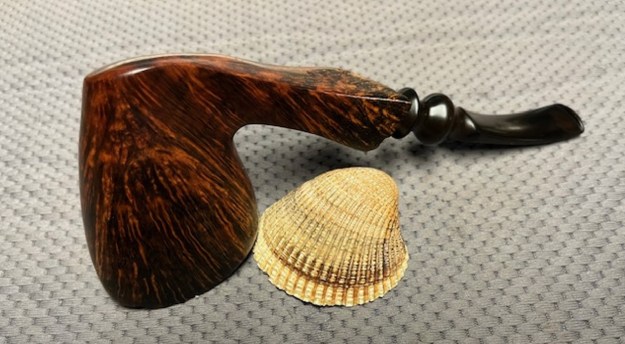
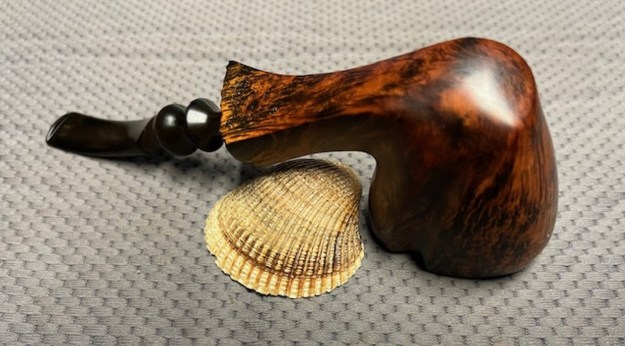
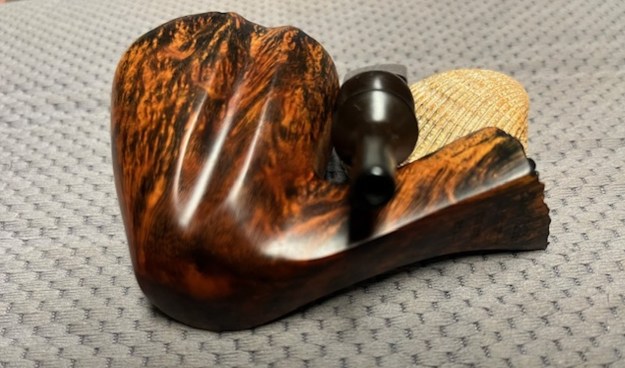
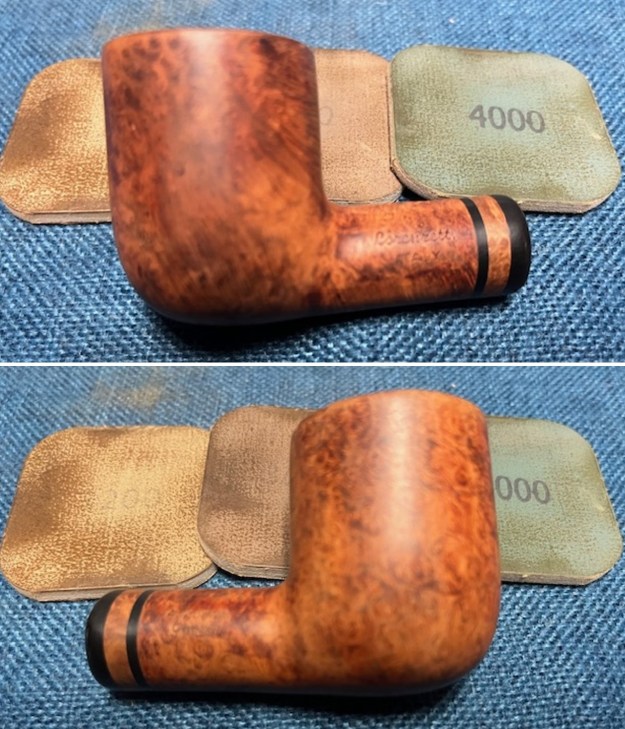
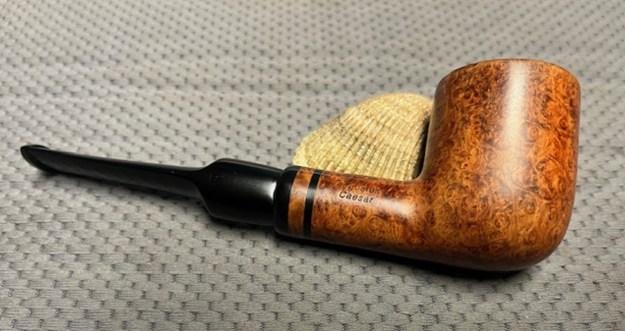
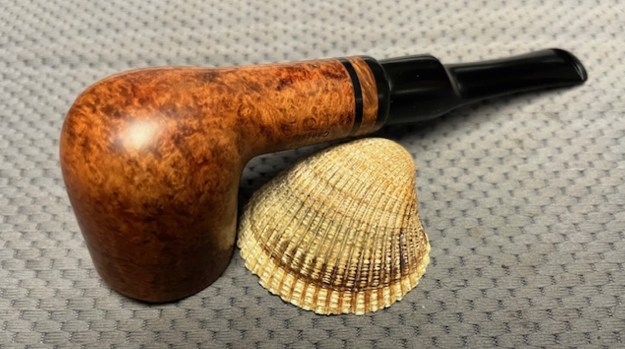
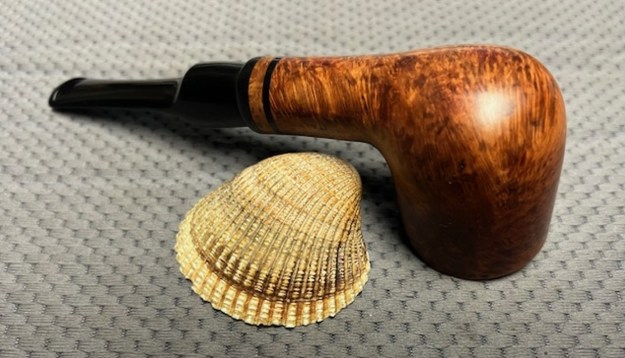
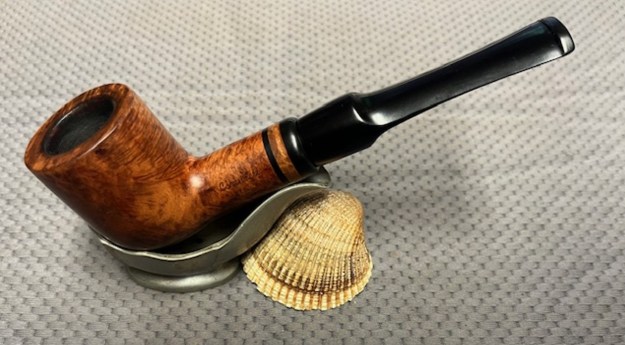
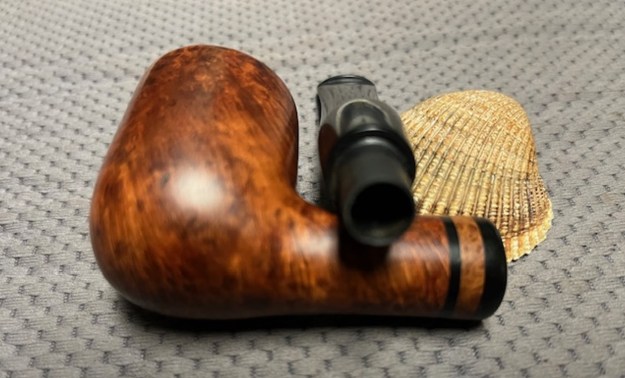
 I polished the finished Lorenzetti Italy Augustus Caesar Billiard with Blue Diamond to polish out the remaining small scratches. I gave the bowl and the newly fit saddle stem multiple coats of carnauba wax and buffed the pipe with a clean buffing pad to raise the shine. I hand buffed it with a microfiber cloth to deepen the shine. The pipe polished up pretty nicely. The smooth briar with the medium the brown stain wash works very well with the black stem. The finished pipe is shown in the photos below. I have worked on several Lorenzetti’s over the years and I have always been impressed by his ability to a craft a comfortable and functional smoking pipe. It looks far better with the varnish coat removed. The beautiful Lorenzetti Augustus Caesar had the following dimensions. The Length: 6 inches, Height: 1 ¾ inches, Outside diameter of the bowl: 1 3/8 inches, Chamber diameter: 7/8 inches. The weight of the pipe is 51 grams/ 1.69 ounces. I have two more of Brian’s pipes to work on and then they will go back to him. This is an interesting group of three pipes to bring back to life.
As always, I encourage your questions and comments as you read the blog. Thanks to each of you who are reading this blog. Remember we are not pipe owners; we are pipe men and women who hold our pipes in trust until they pass on into the trust of those who follow us.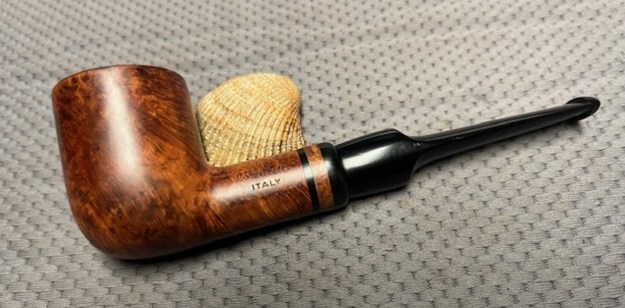


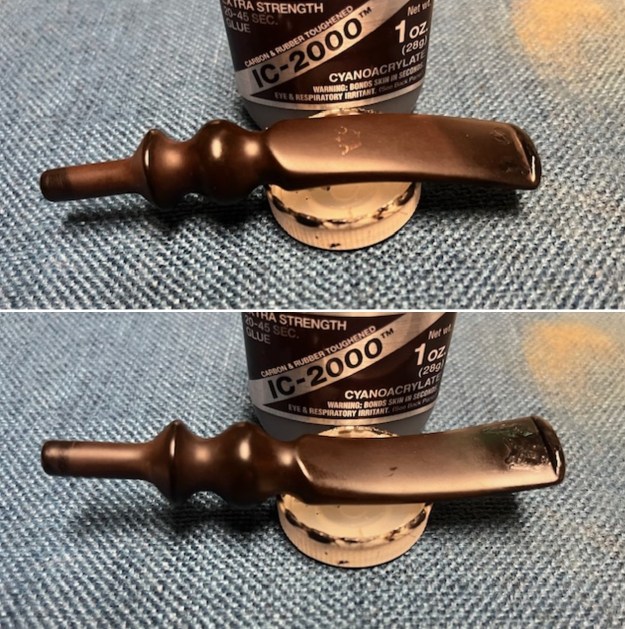
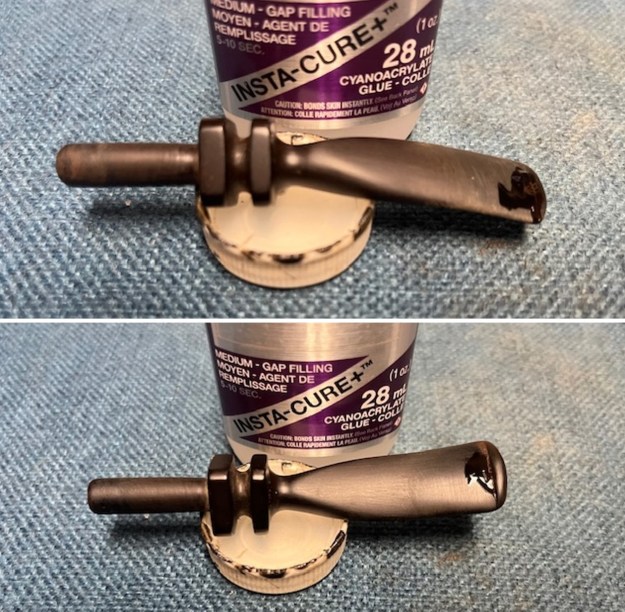
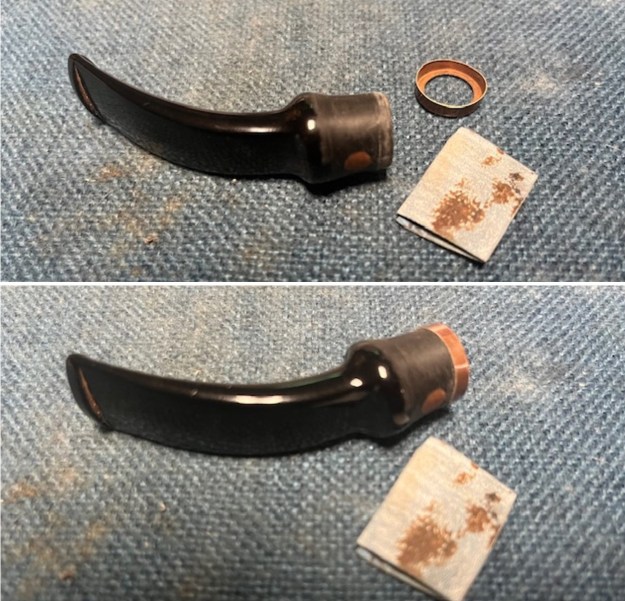
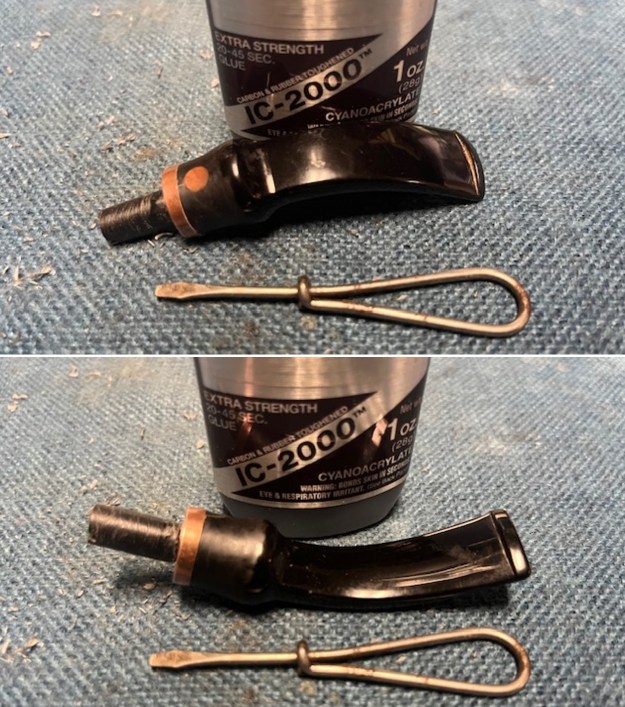
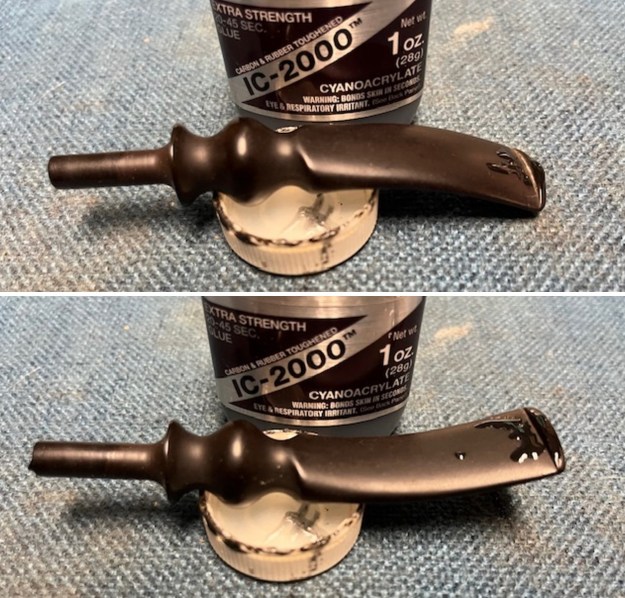
 Yesterday I cut a piece of tubing and glued it into the airway in the bowl. I let it cure overnight before I began reconstructing the pipe.
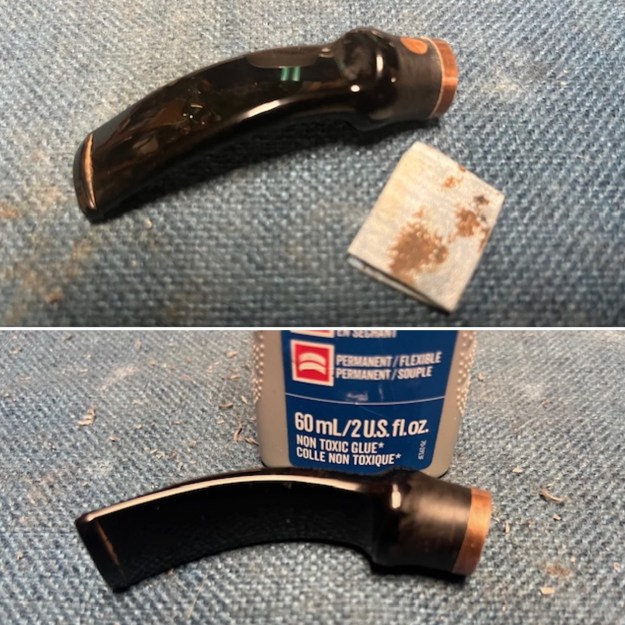
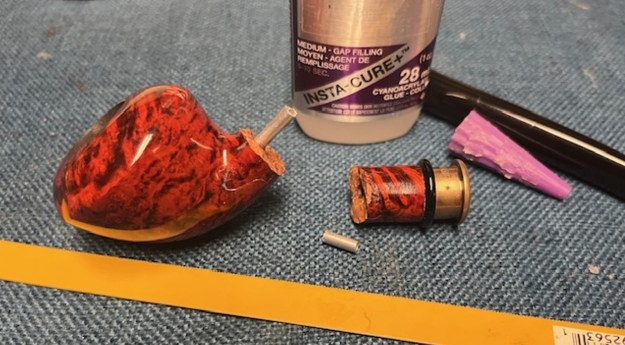 I cleaned up the end of the tube with a piece of sandpaper. I painted the extension of the tube with clear CA glue. I also used a tooth pick to coat the broken portion on the bowl and the shank with the CA glue. I slid the shank onto the tube and aligned the two parts until they were smooth and clamped the bowl until the glue cured.
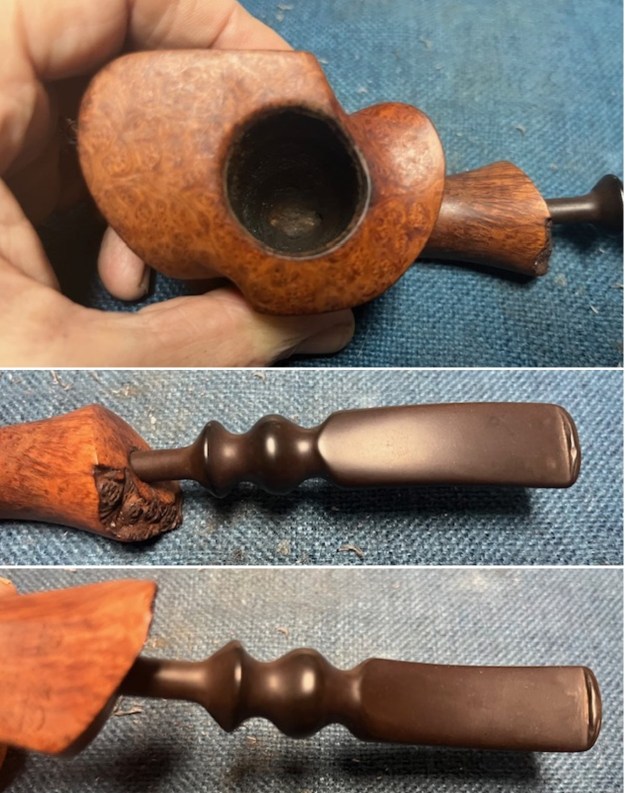
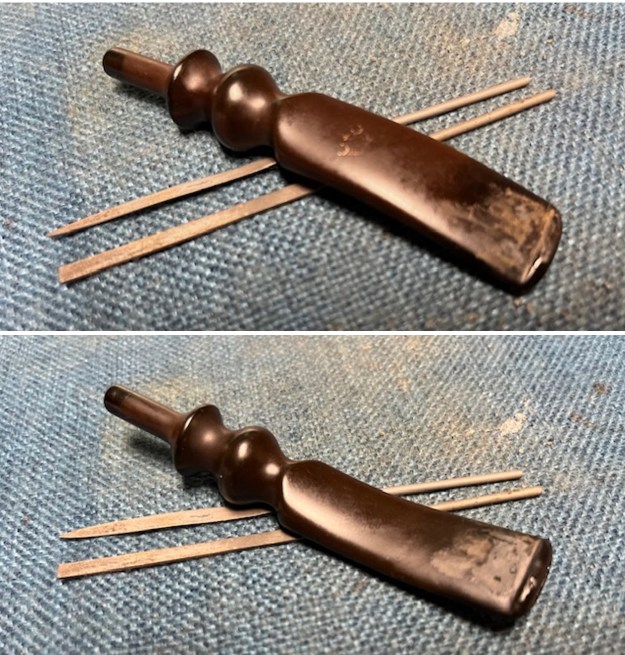
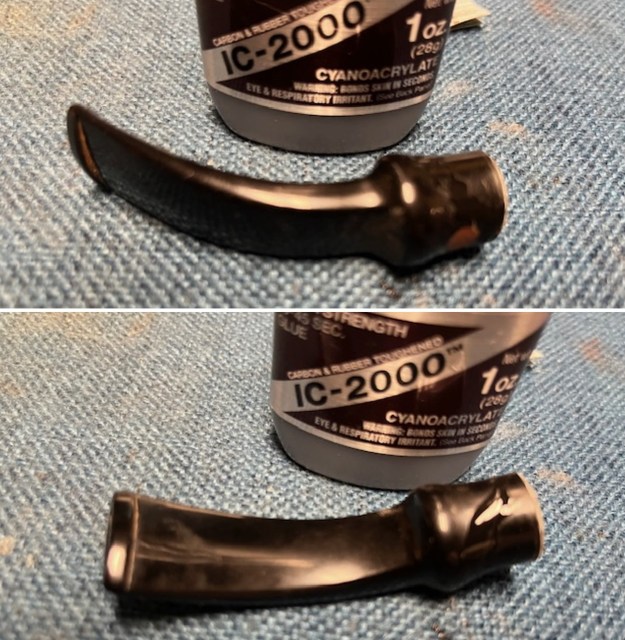
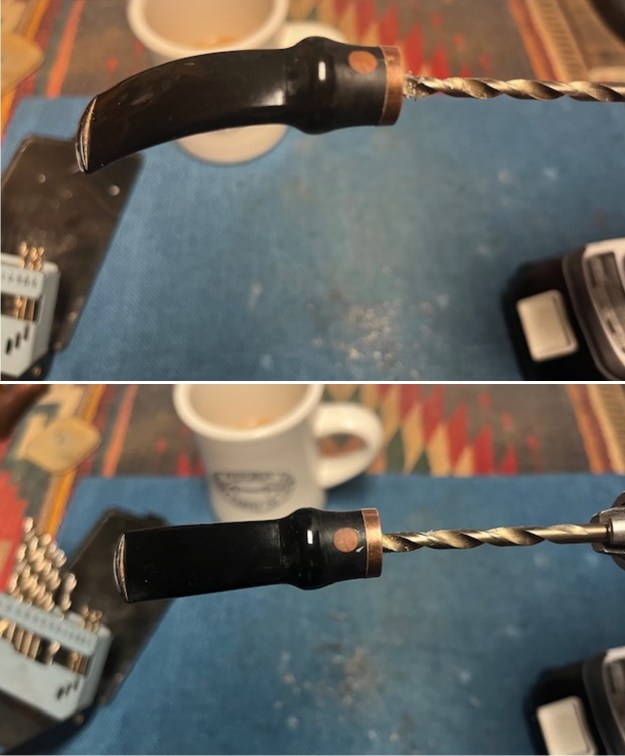
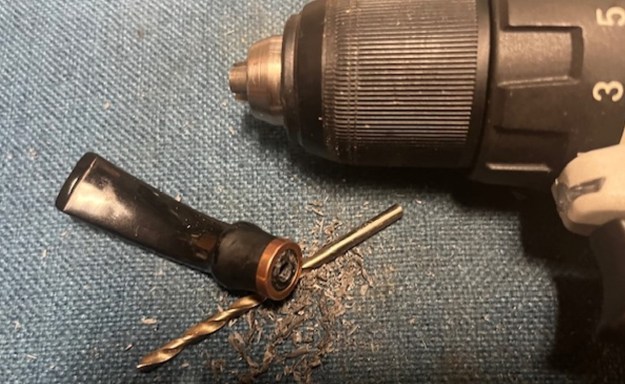
 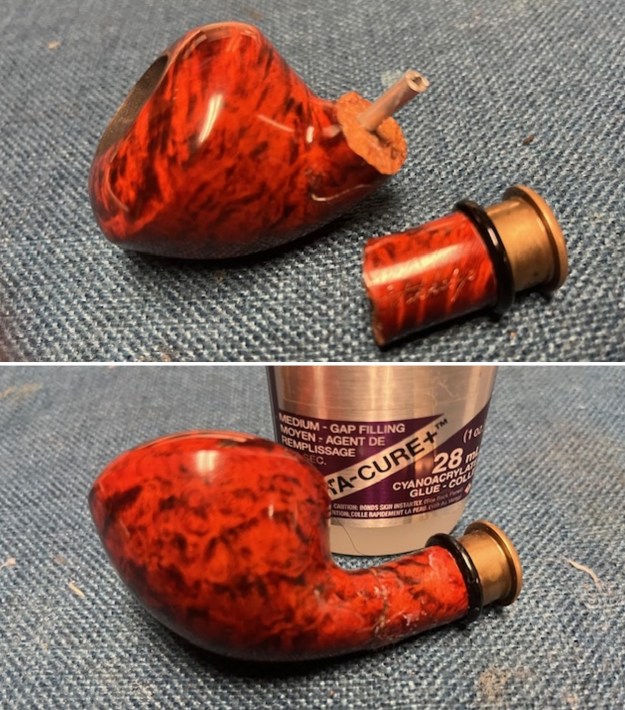 I took photos of the repair after it had cured. I let it sit for an hour while the repair hardened. It looked quite good.
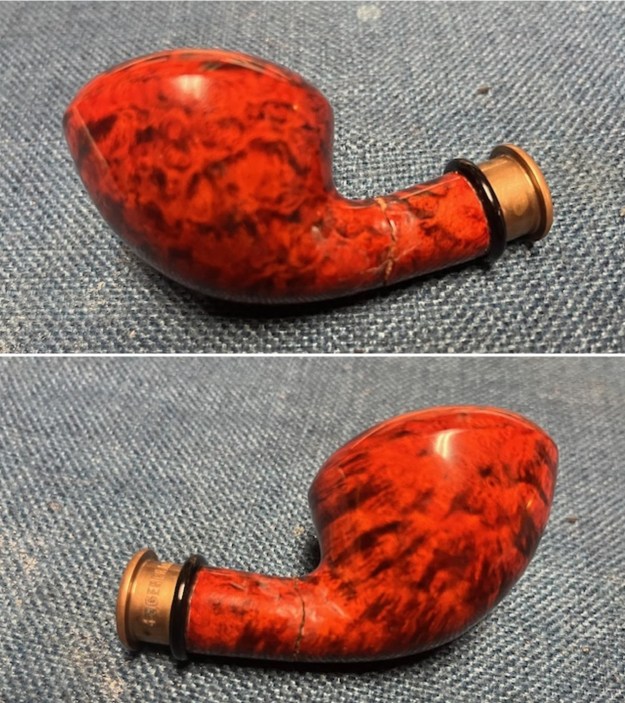
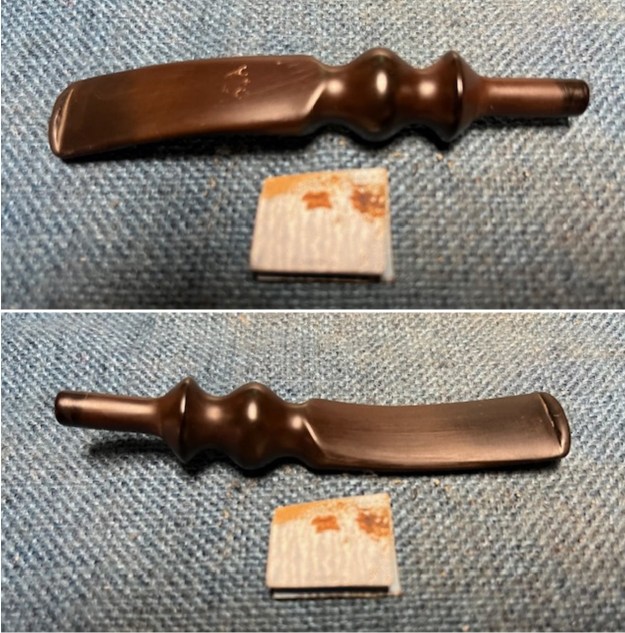
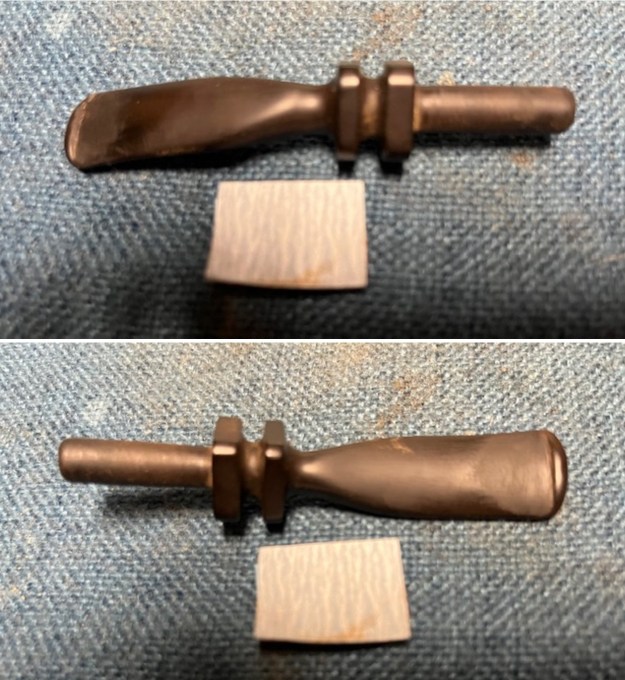
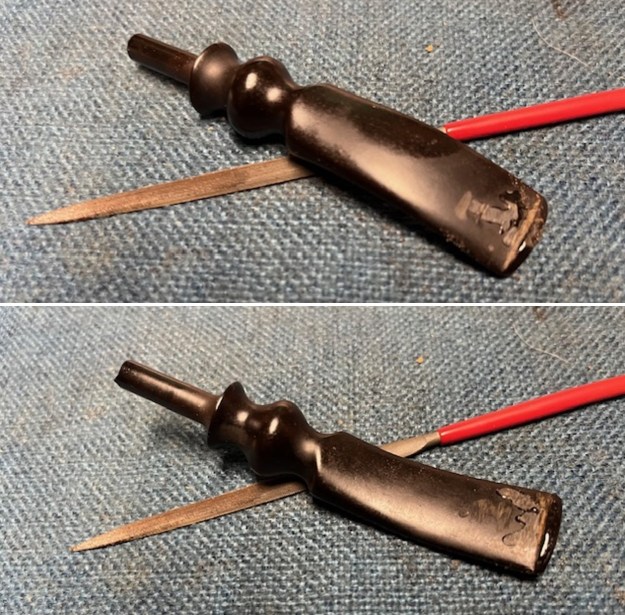
 I sanded the repaired areas on the shank with a folded piece of 220 grit sandpaper to smooth out the repairs. It took a bit of work but was able to smooth out the repairs and blend them into the surface of the briar. The pipe was beginning to look better.
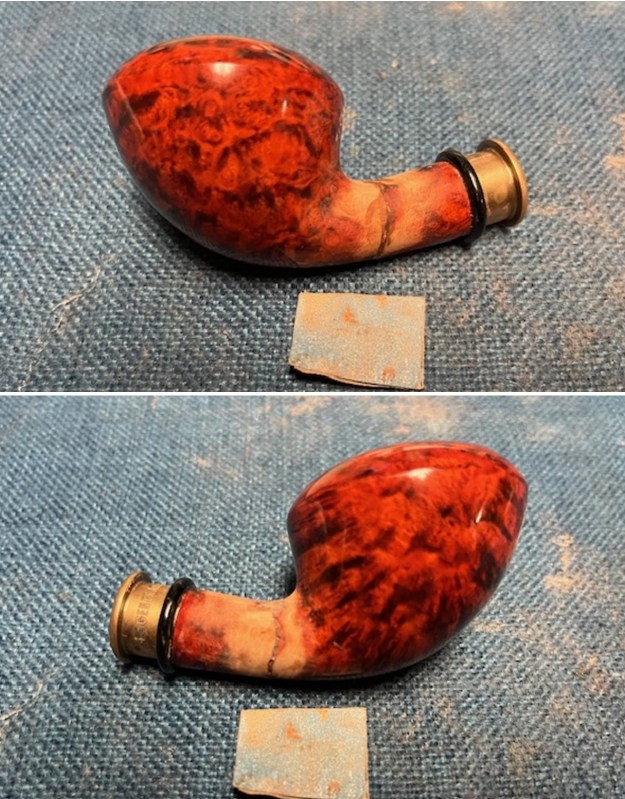
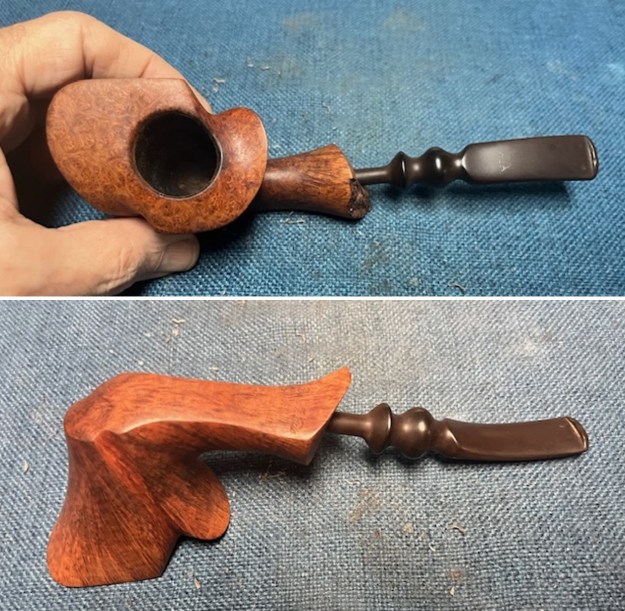
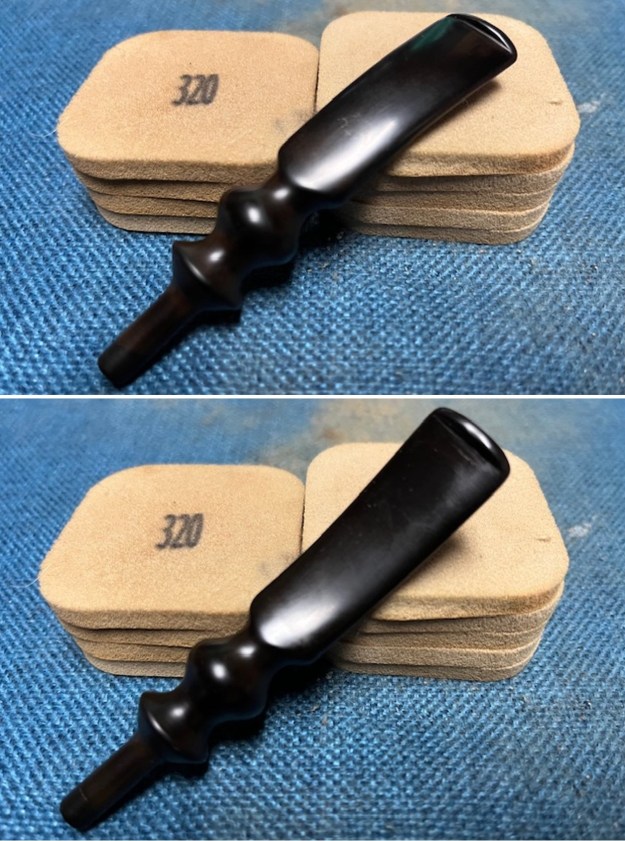
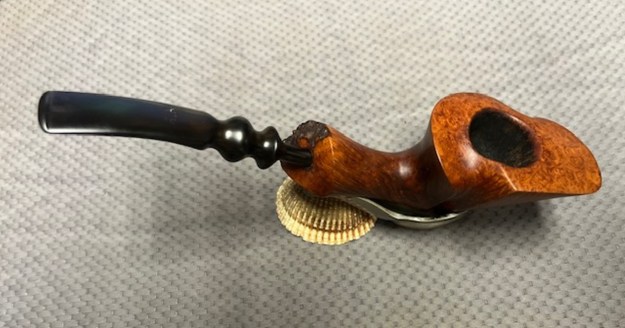
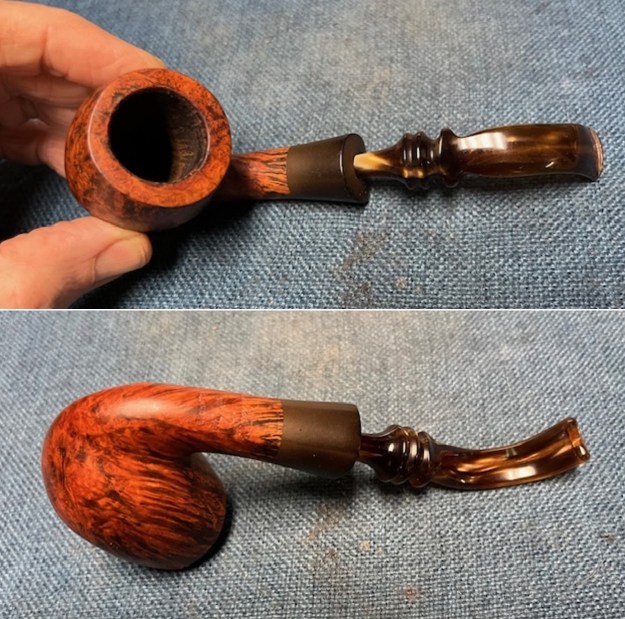
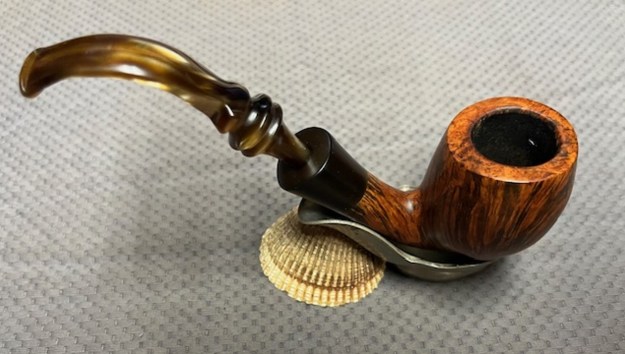
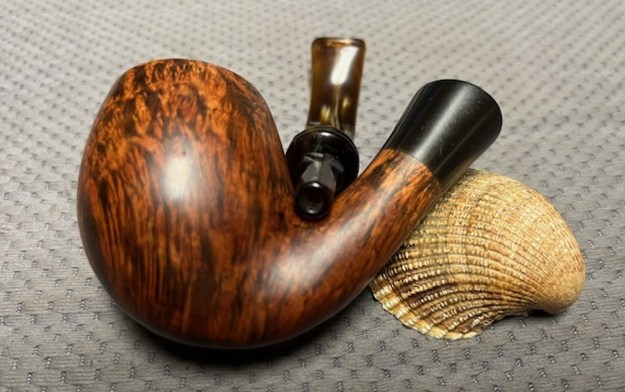
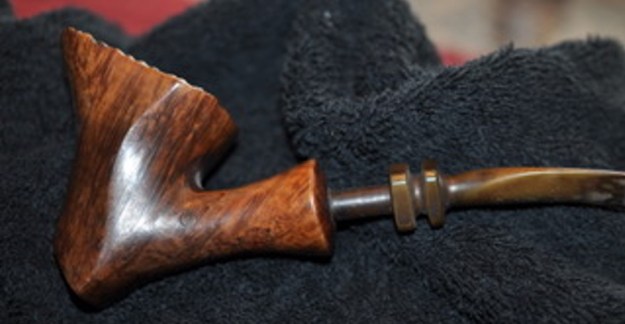
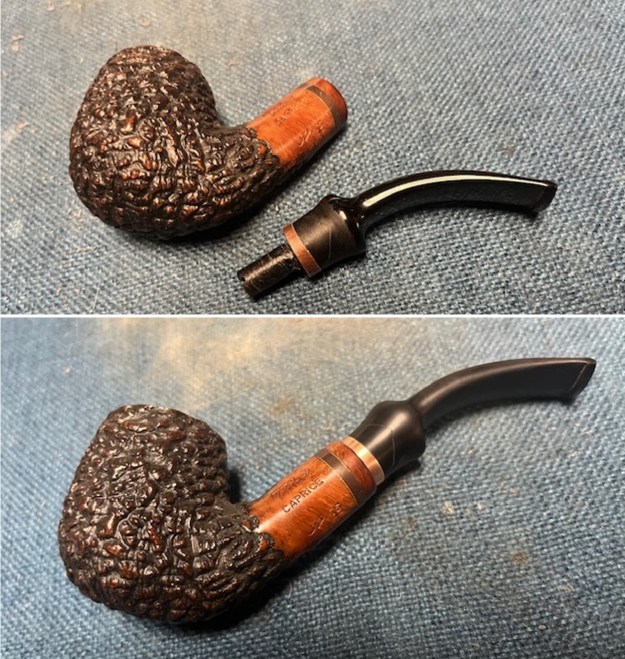
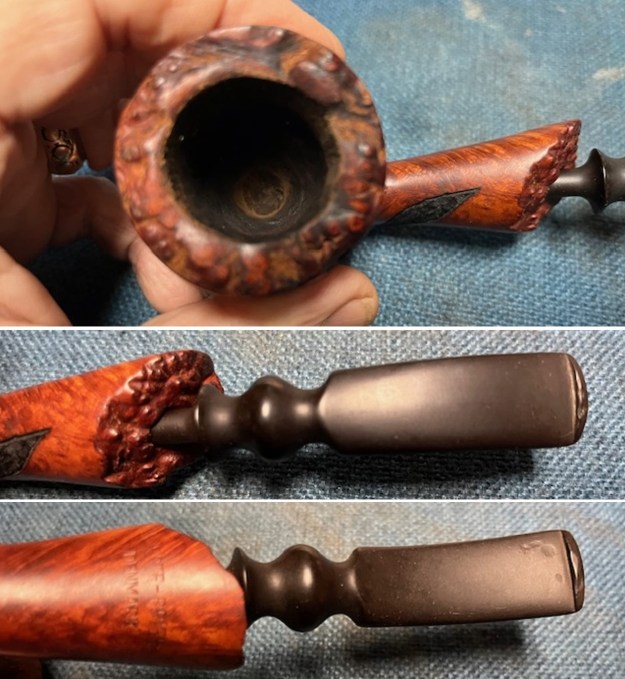
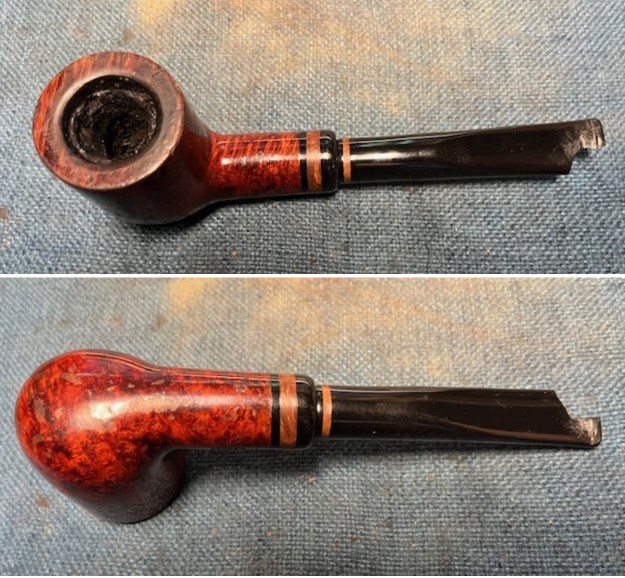
 I put the stem in place on the shank and took photos of the pipe. It is going to look very good once I smooth it out and restain it.
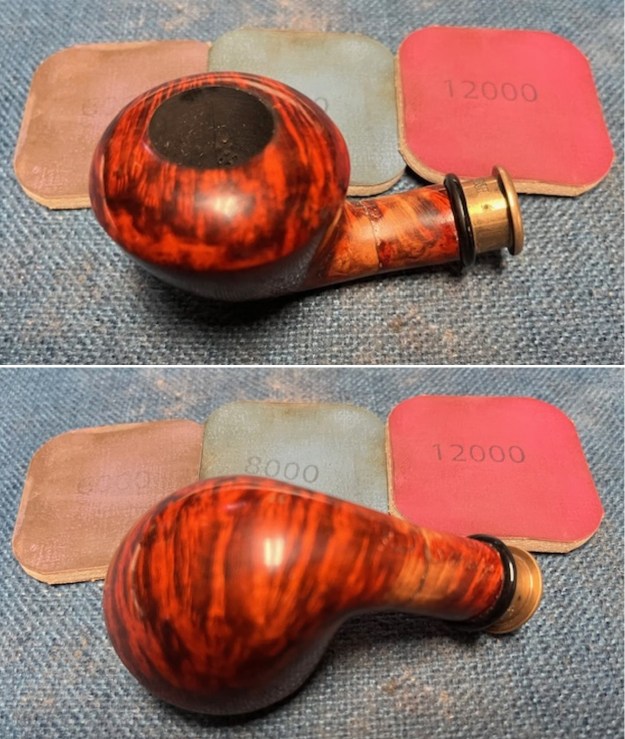
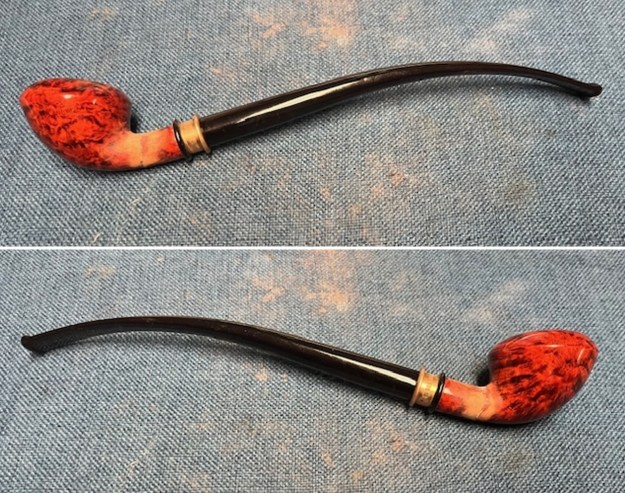 I polished the bowl with 1500-12000 grit micromesh sanding pads – dry sanding it with the pads and wiping it down with a damp cloth to remove the sanding debris. The repair began to take on a shine.
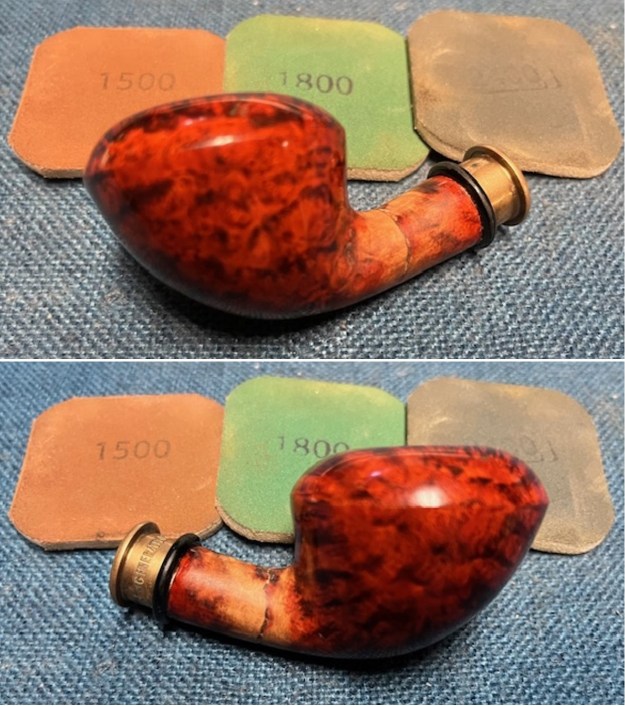
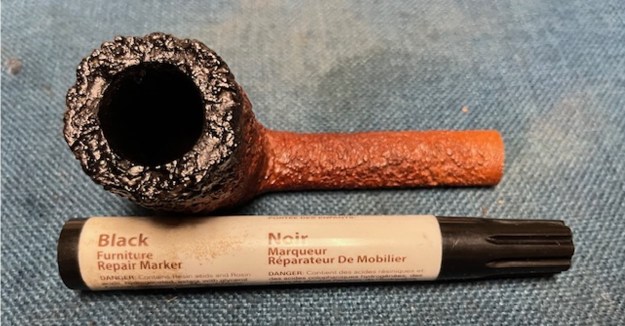
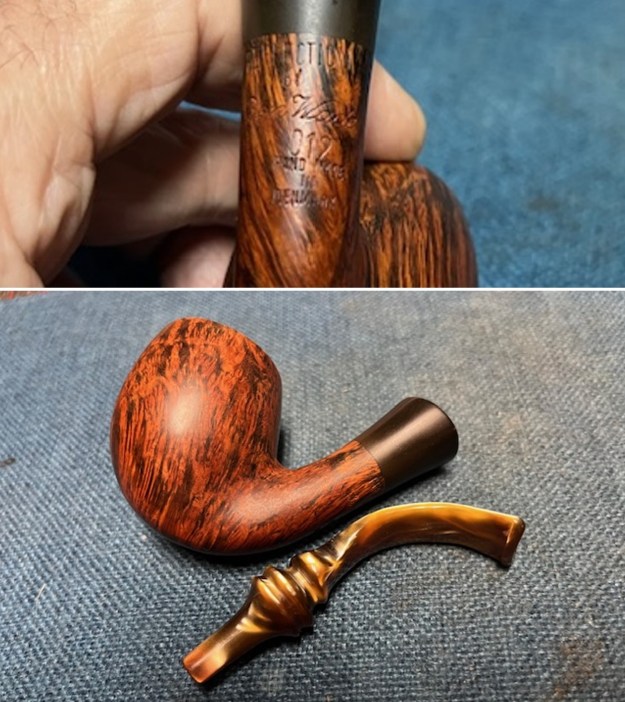
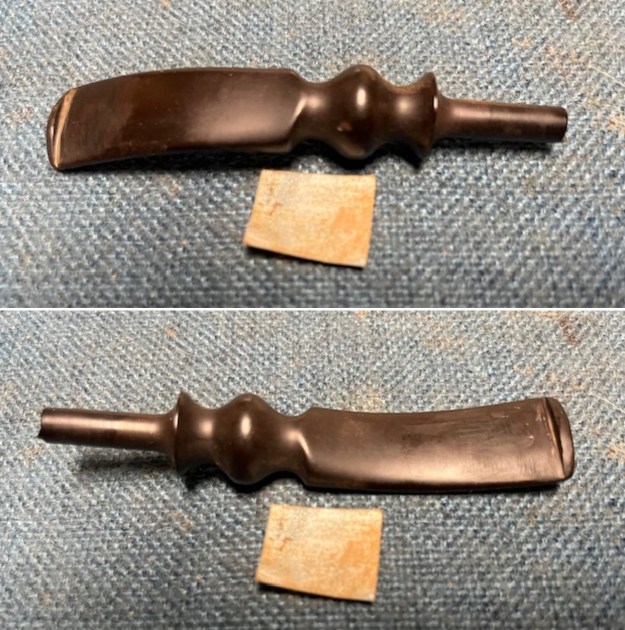
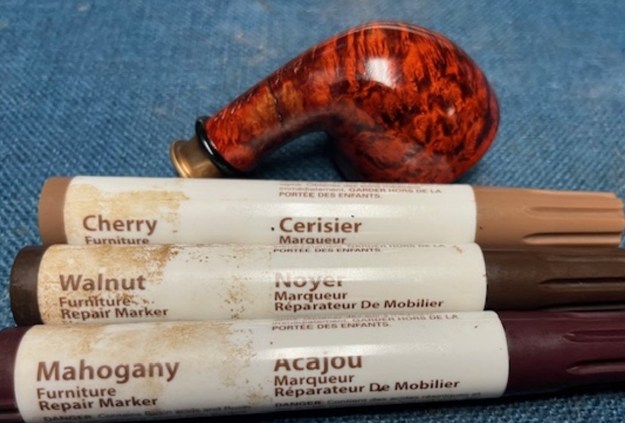
 I used a Cherry, Walnut and Mahogany stain pen to restain the repaired shank after sadning it. The combination of colours worked very well with the surrounding stain on the briar.
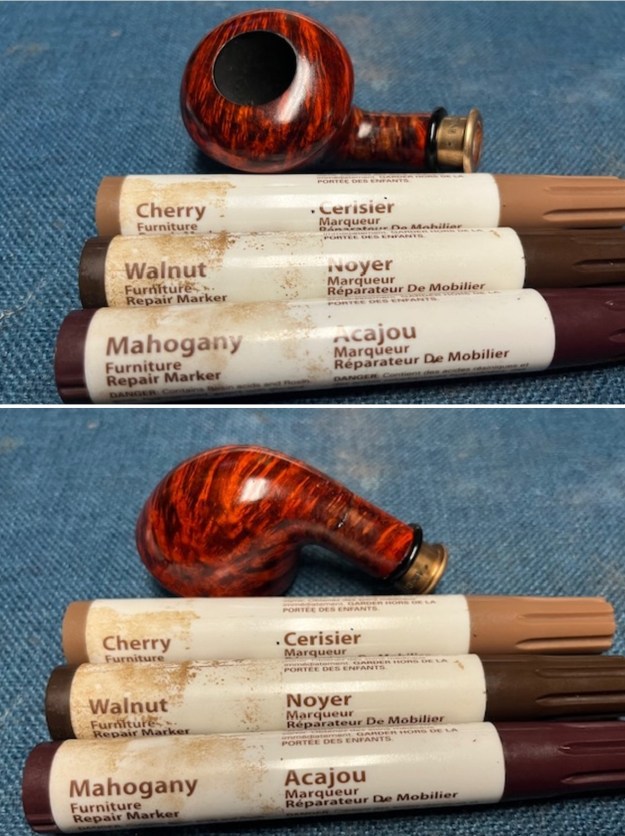
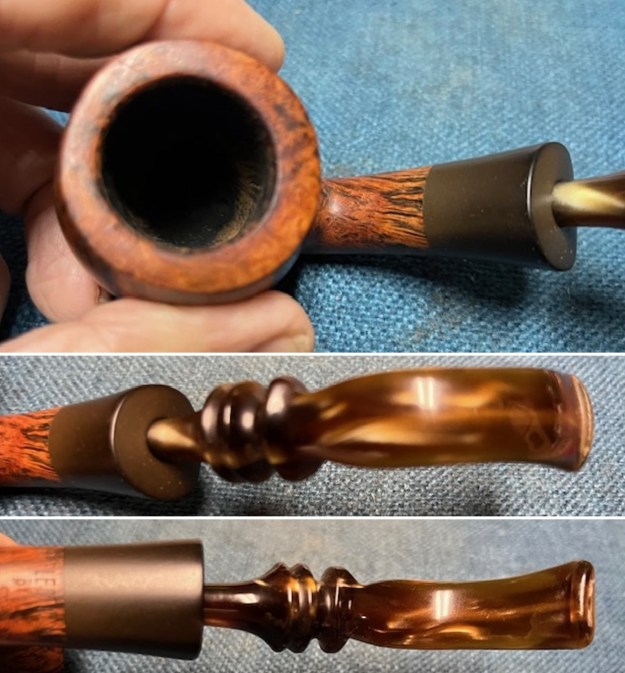
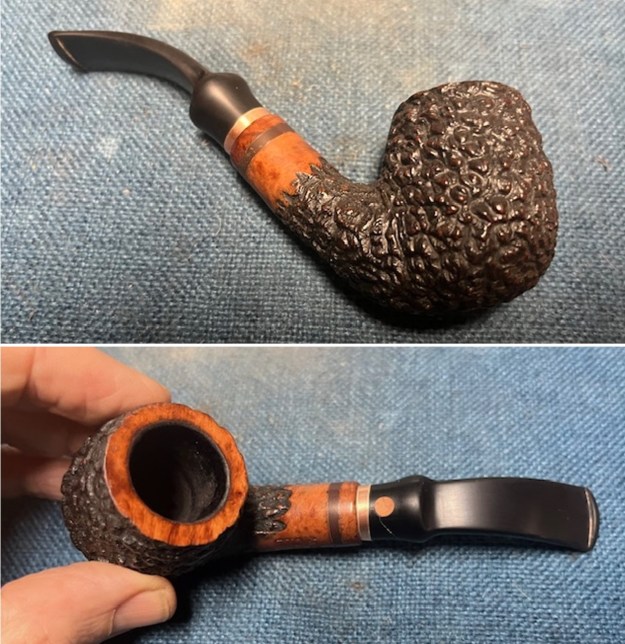
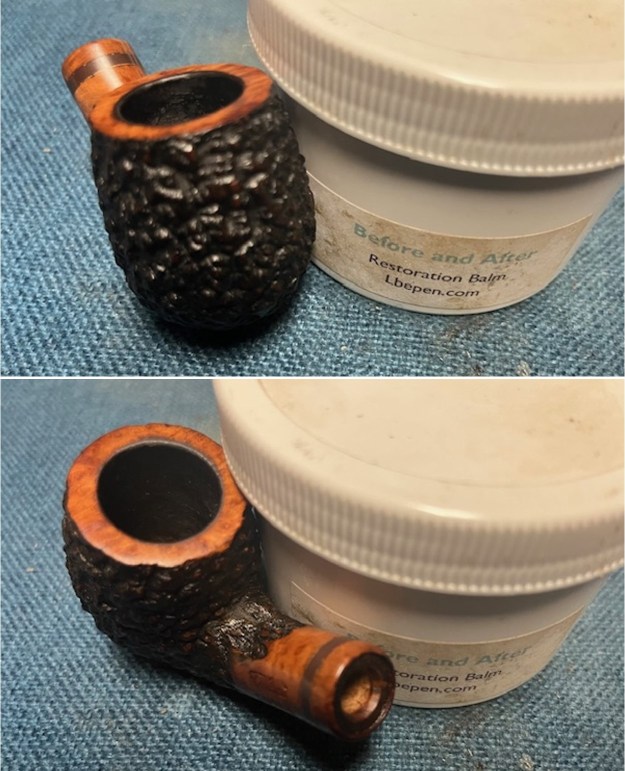
 I rubbed the bowl down Before & After Restoration Balm. I worked it into the surface of the briar with my finger tips. I let it sit on the bowl for 10-15 minutes. I wiped it down and buffed it down with a soft cloth. It looks quite good.
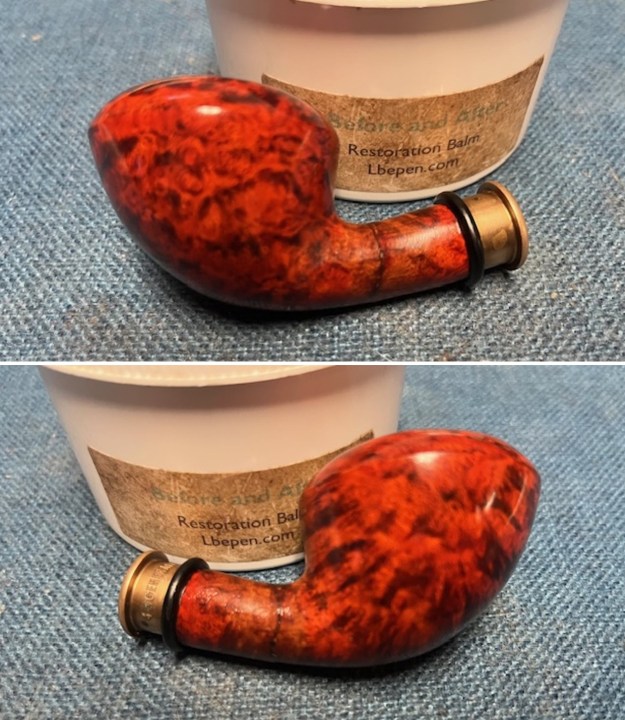
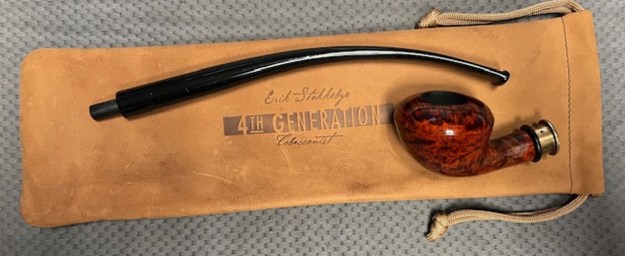
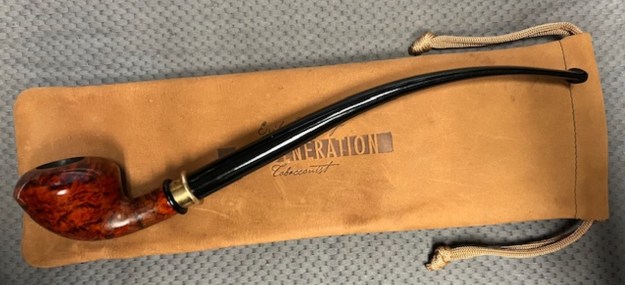
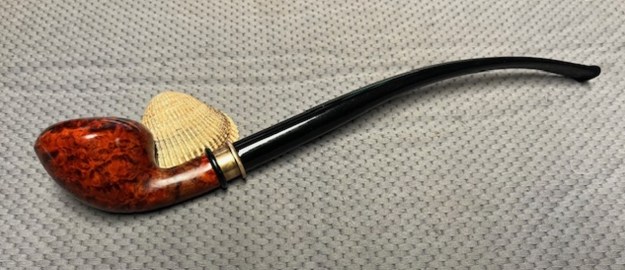
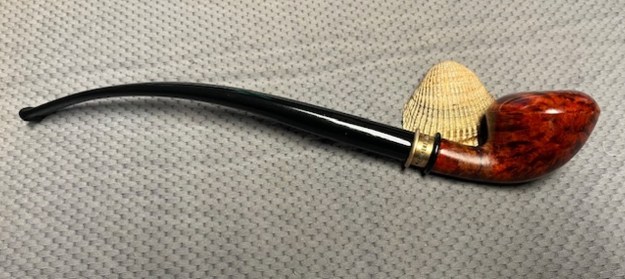
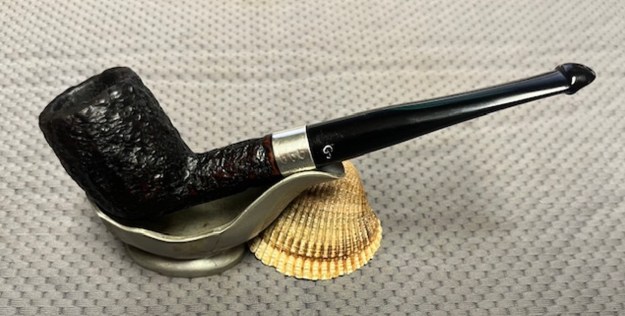
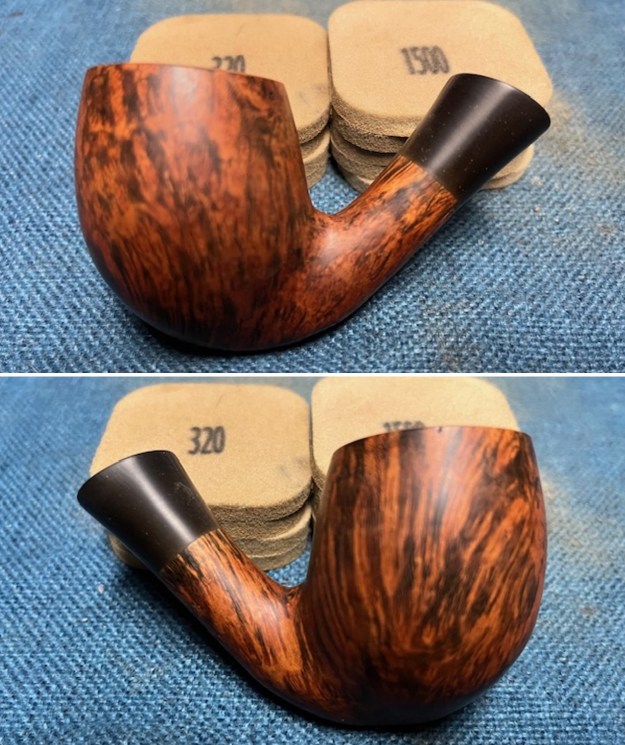
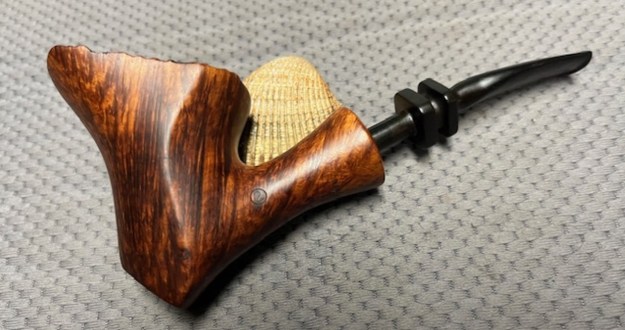
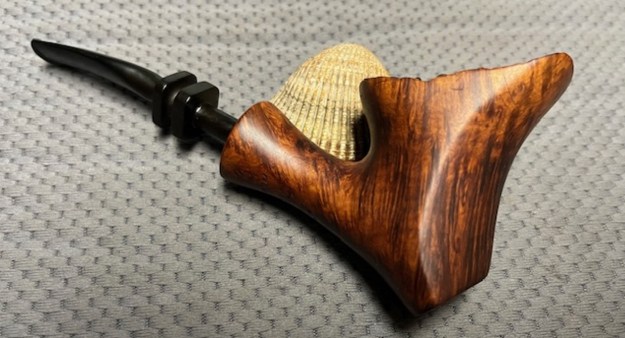
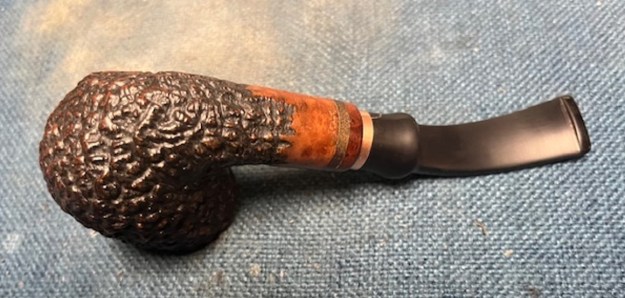
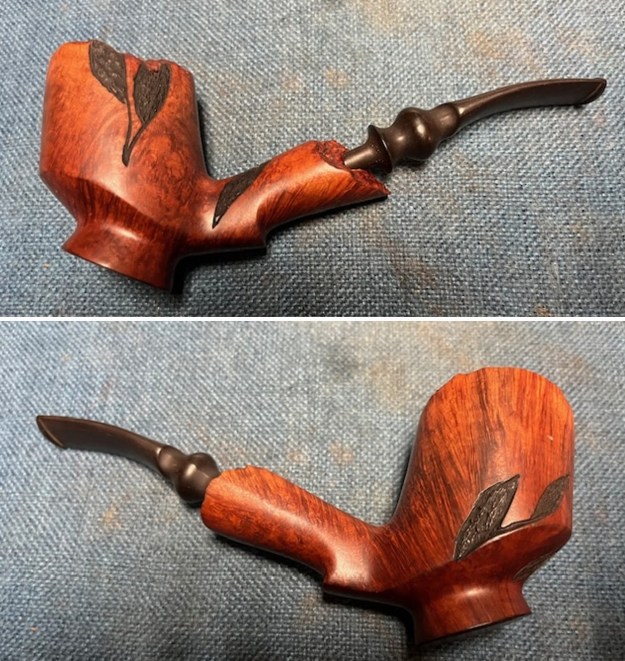
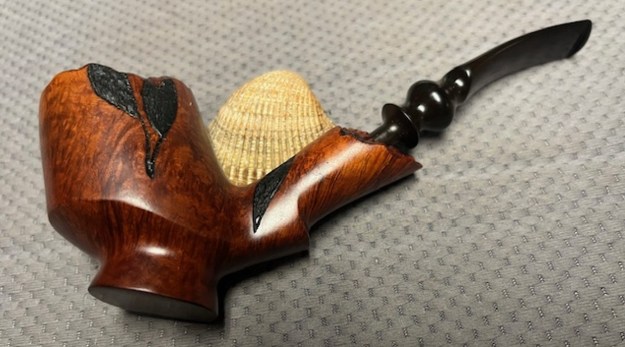
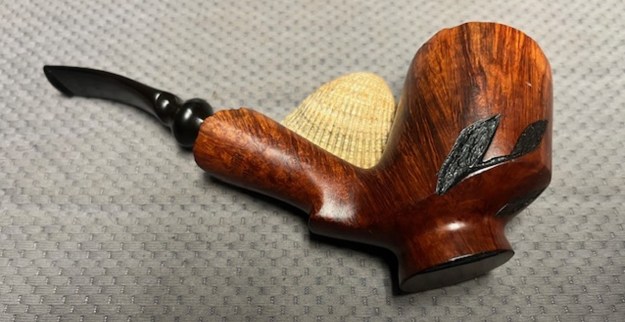
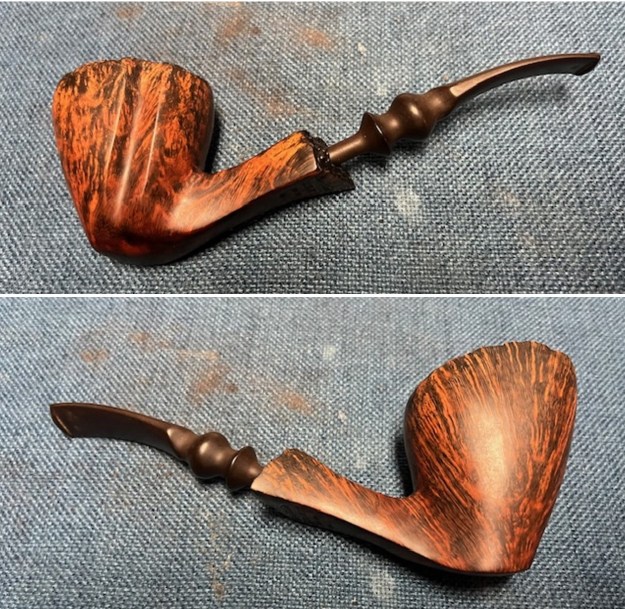
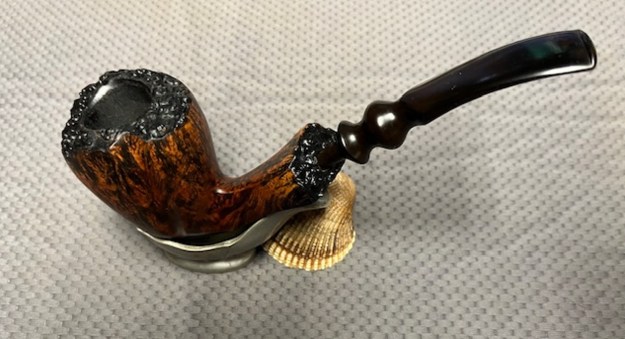
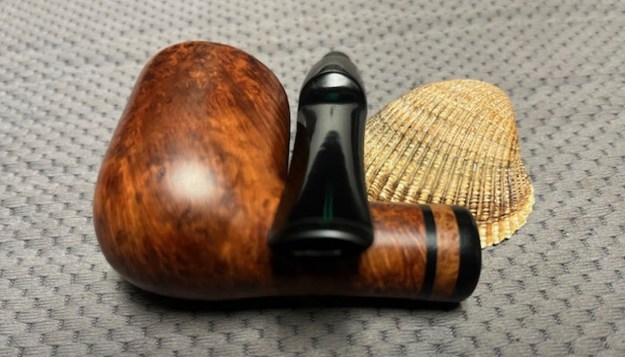
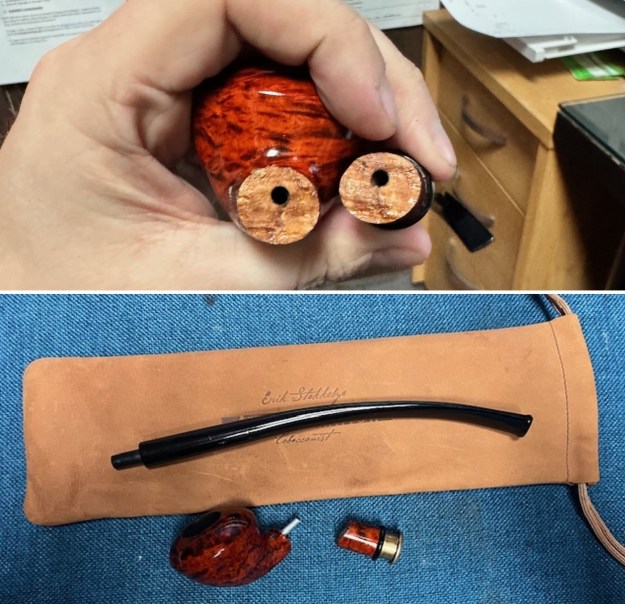
 I am excited to finish this Erik Stokkebye 4th Generation Churchwarden. I put the pipe back together and buffed it with Blue Diamond on the buffing wheel. I gave the bowl and stem multiple coats of carnauba wax and buffed the pipe with a clean buffing pad to raise the shine. I hand buffed it with a microfibre cloth to deepen the shine. It is fun to see what the polished bowl looks like with the grain just popping on all sides. This Eric Stokkebye 4th Generation Churchwarden is nice looking and the pipe feels great in my hand. It is light and well balanced. Have a look at it with the photos below. The dimensions are Length: 10.90 inches, Height: 1.68 inches, Outside diameter of the bowl: 1 ¼ inches, Chamber diameter: ¾ of an inch. The weight of the pipe is 70.75 grams/ 2.50 ounces. It is a beautiful pipe and one that will be going back to the local pipe shop that dropped it by for a repair. Thanks for walking through the restoration with me as I worked over this pipe. Thanks to each of you who are reading this blog.