by Kenneth Lieblich
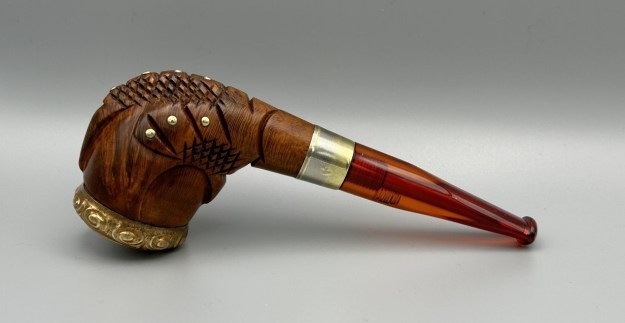
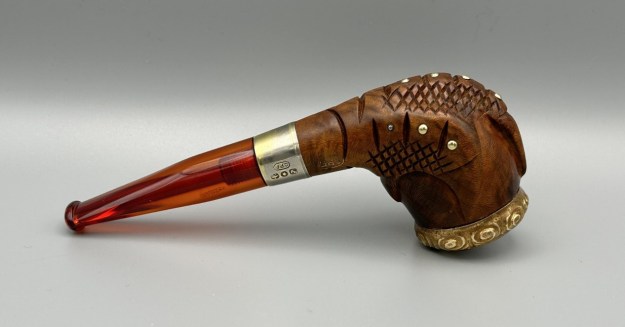
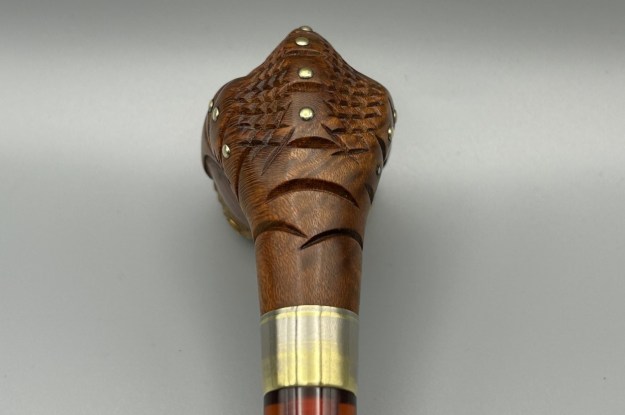
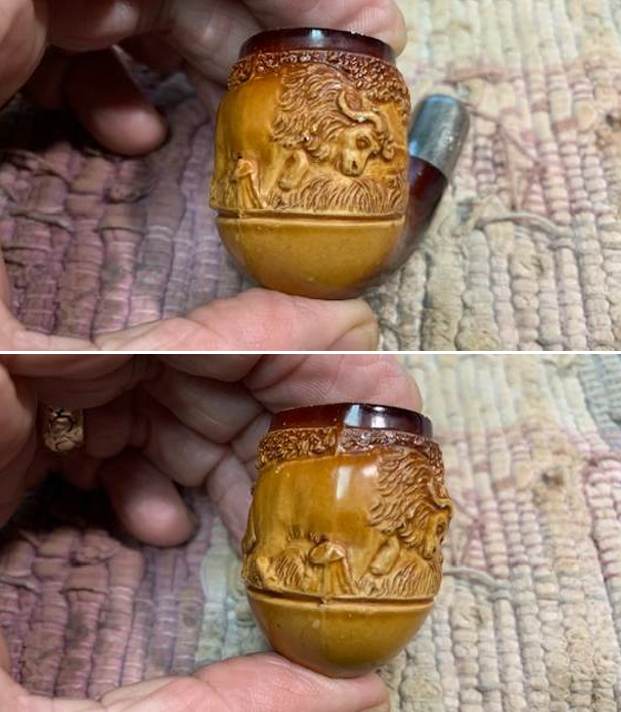
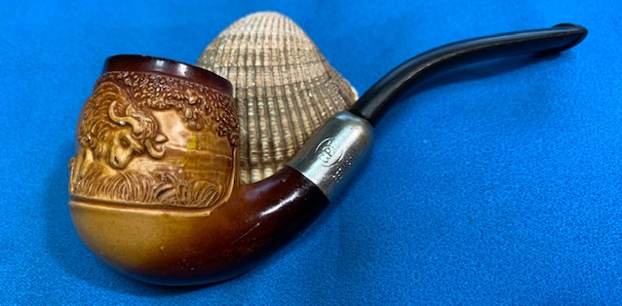
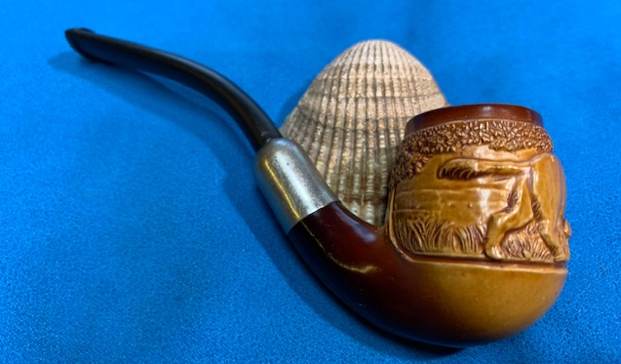
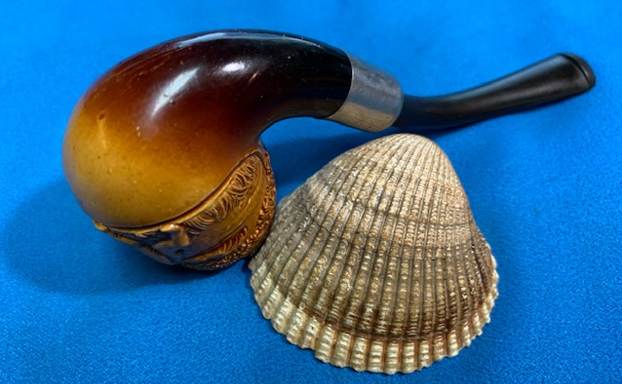
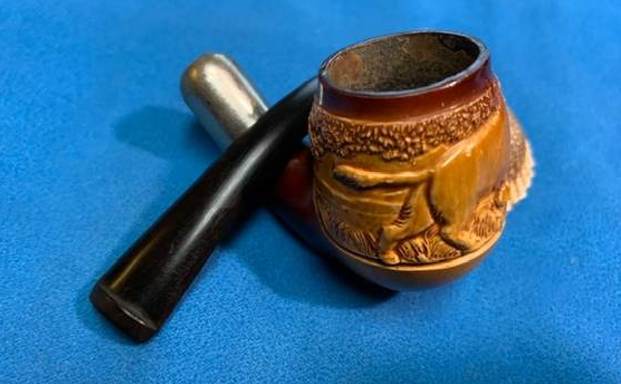
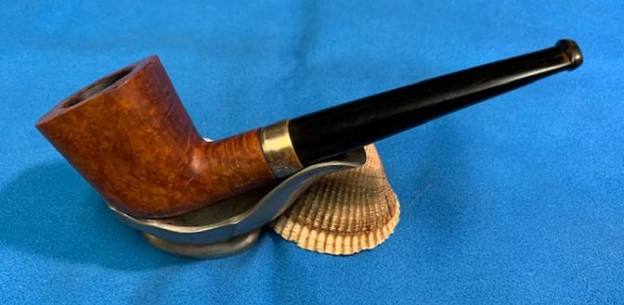
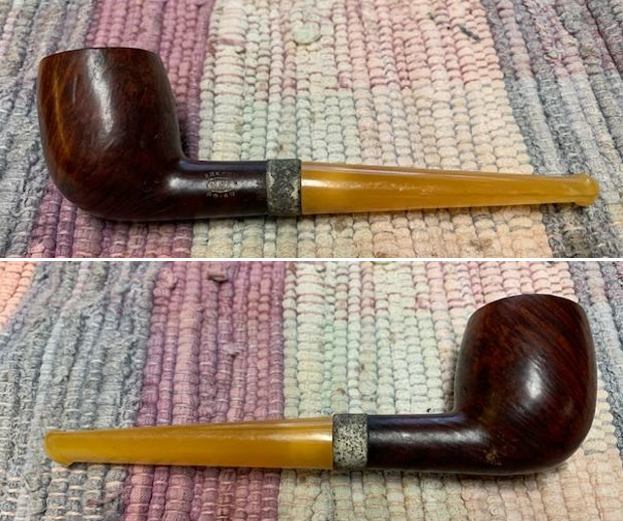
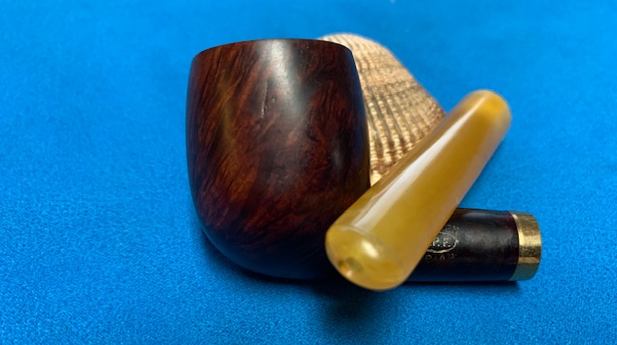
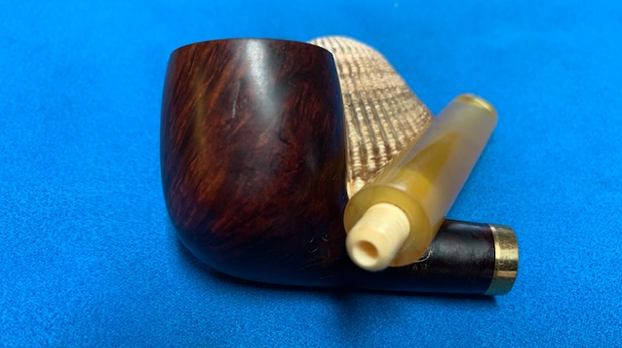
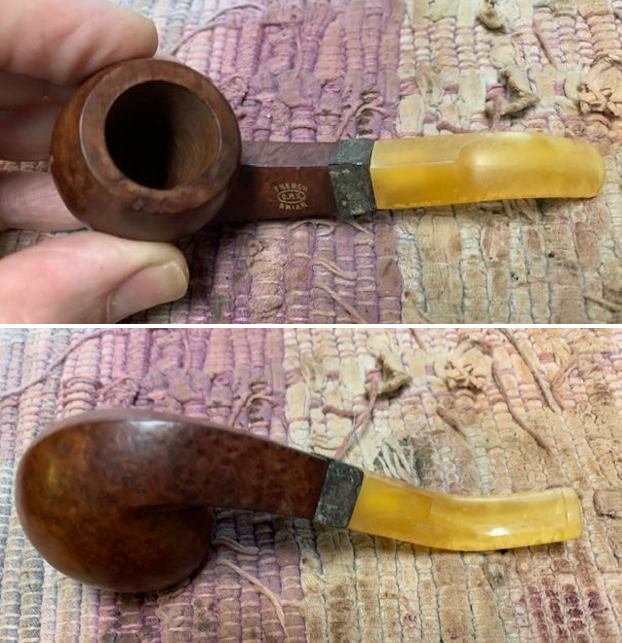
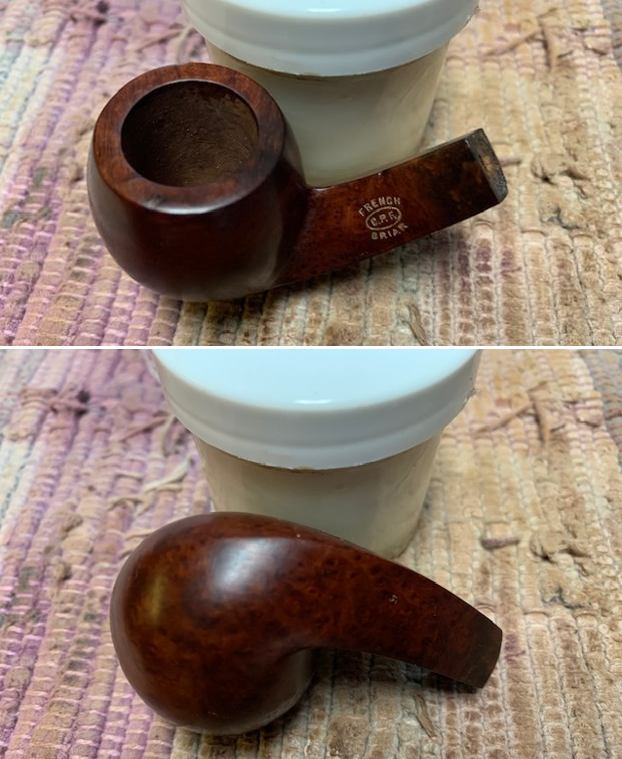
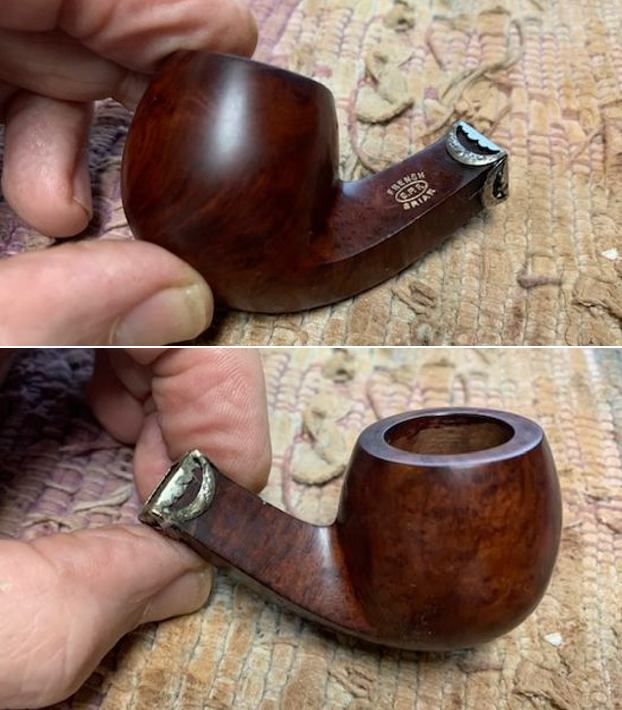
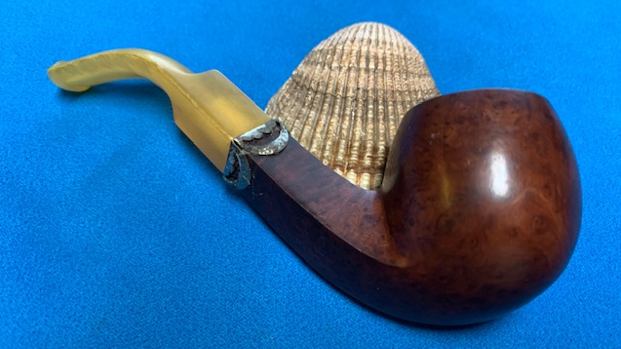
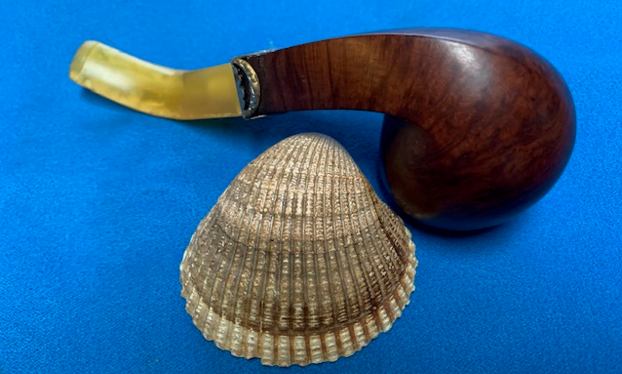
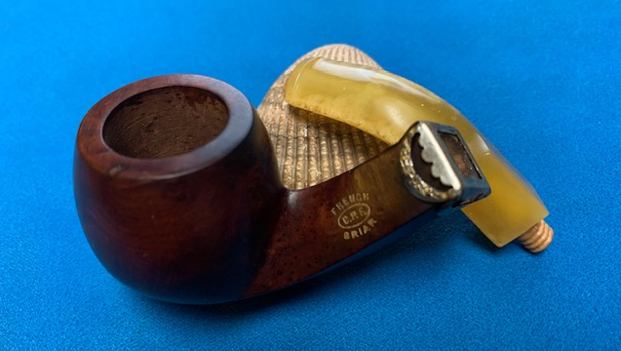
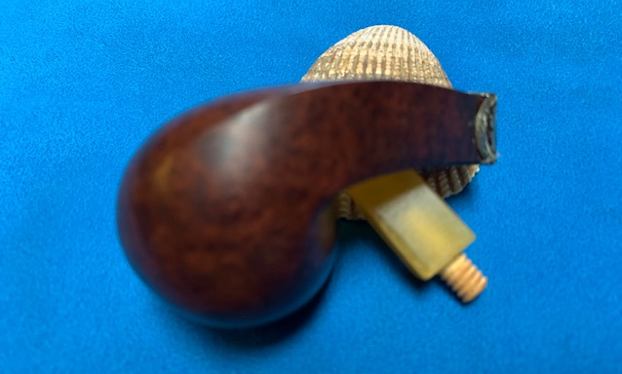
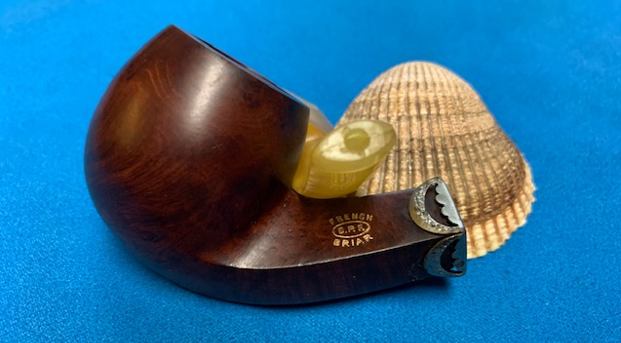
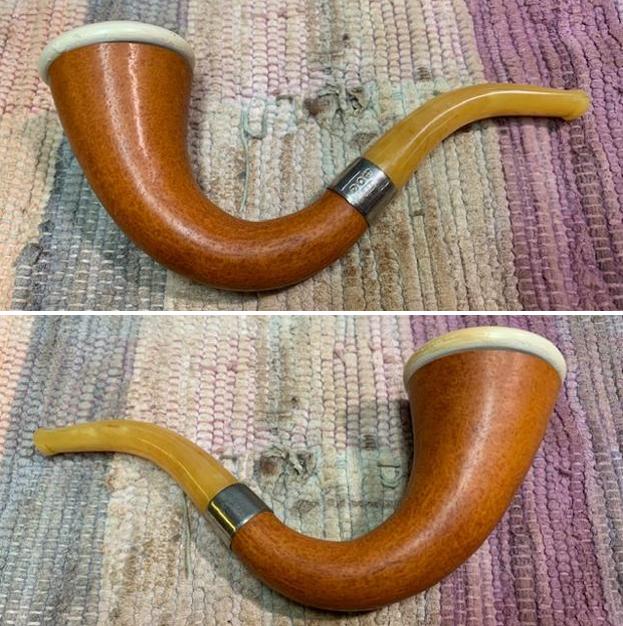
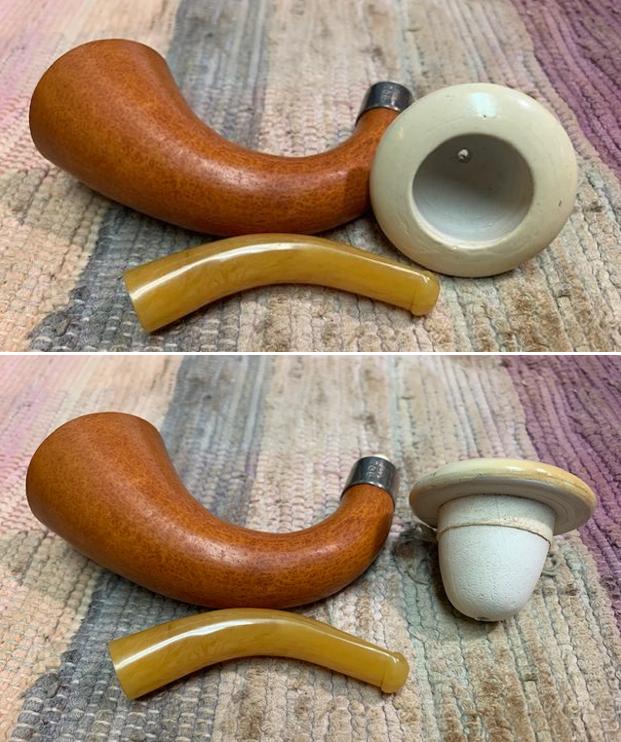
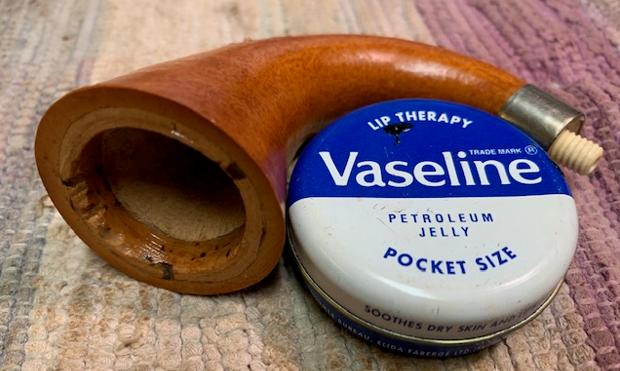
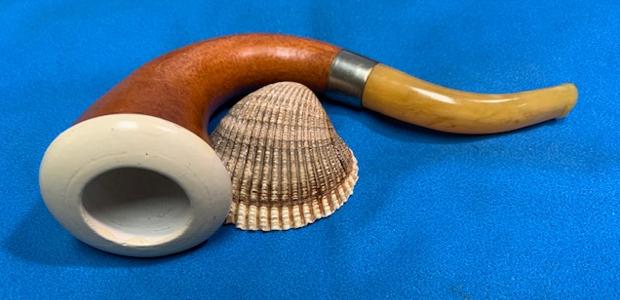
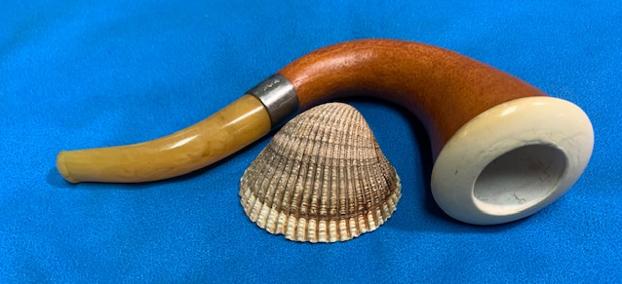
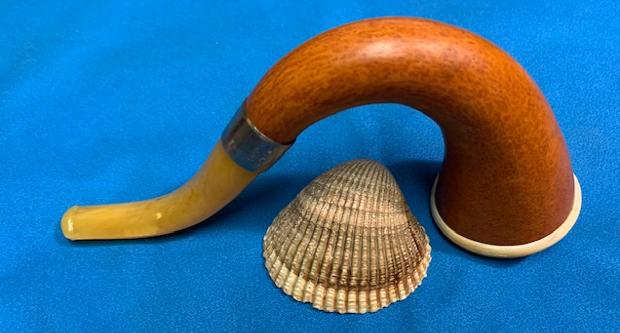
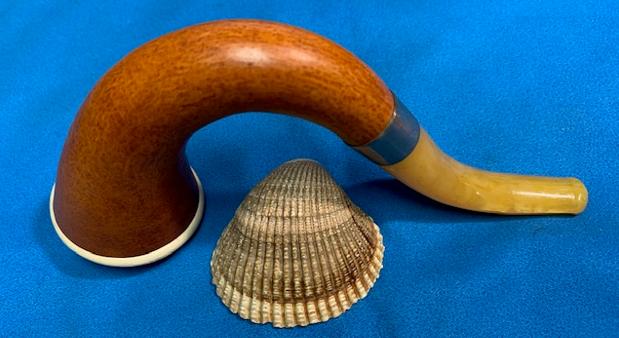
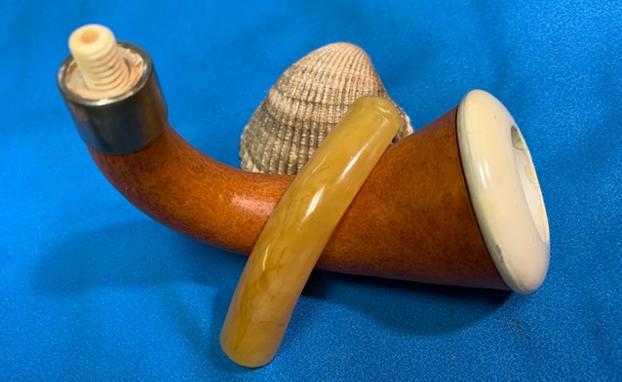
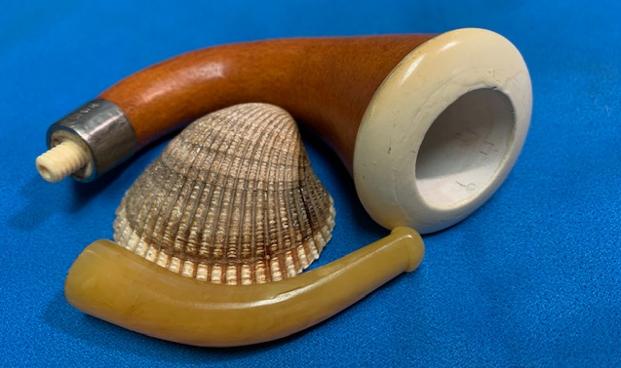
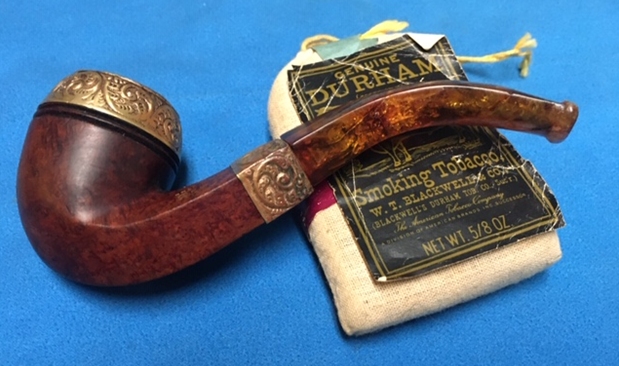
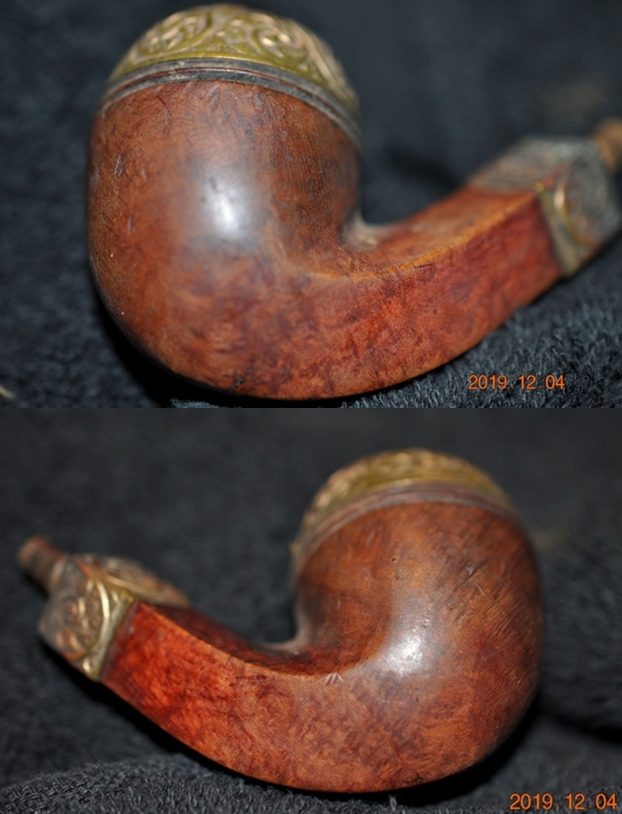
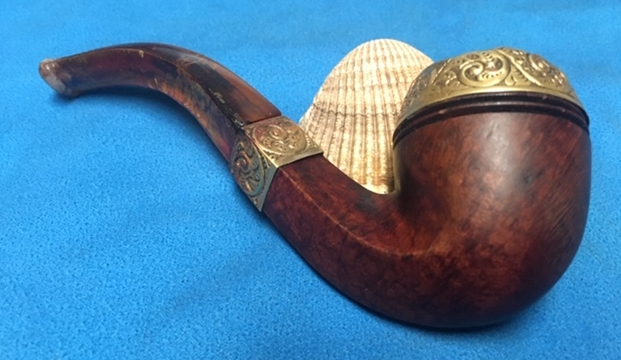
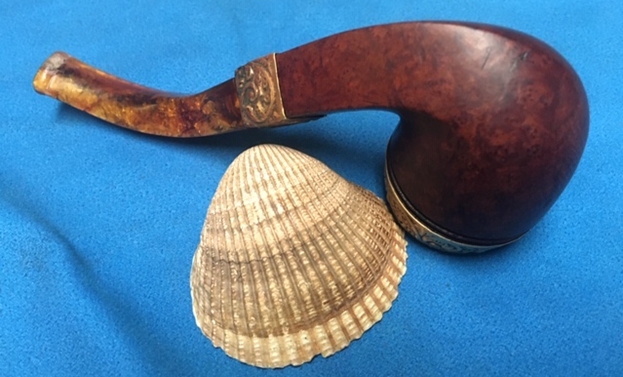
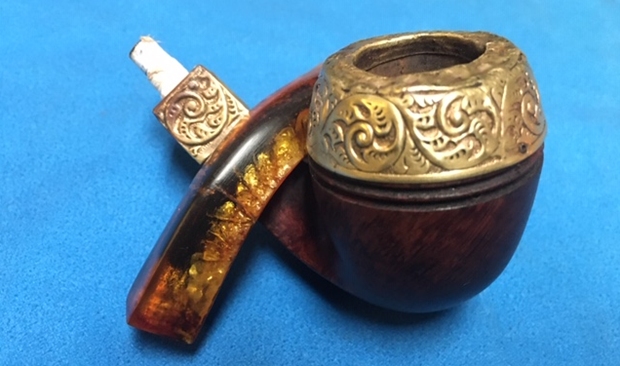
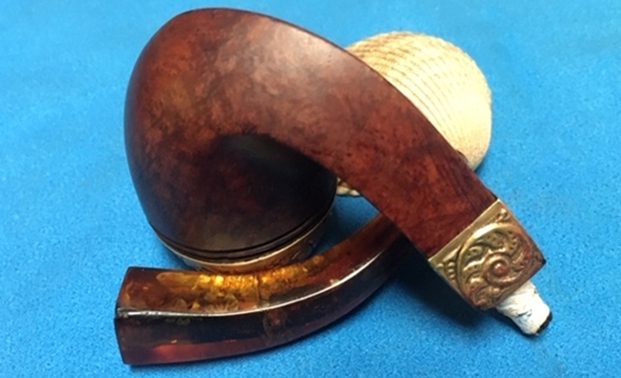
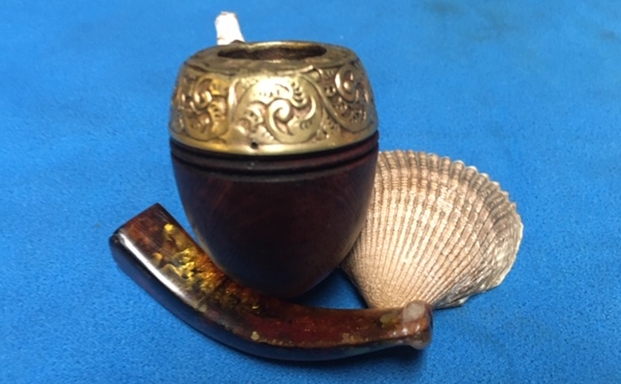
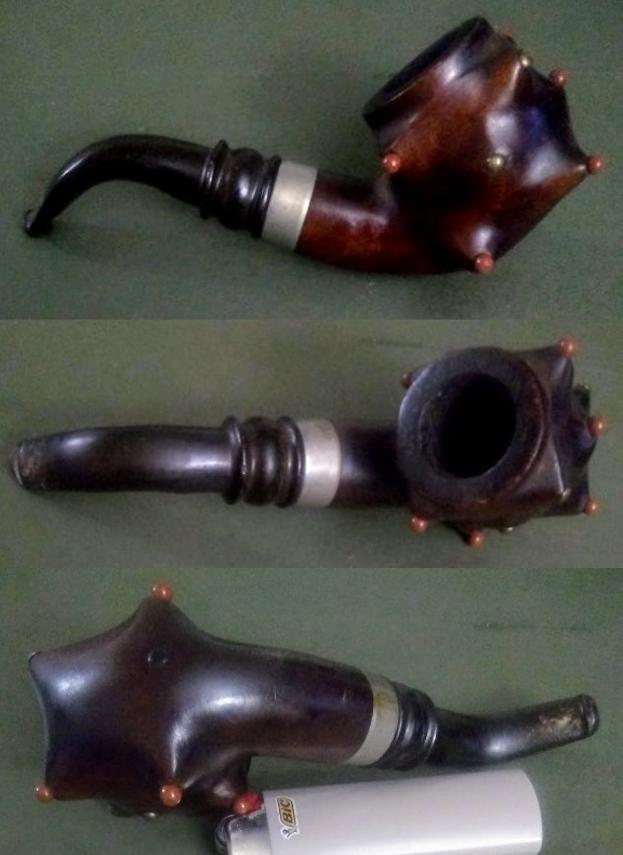
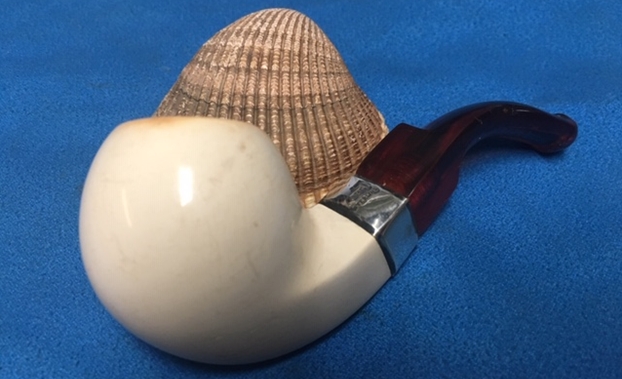
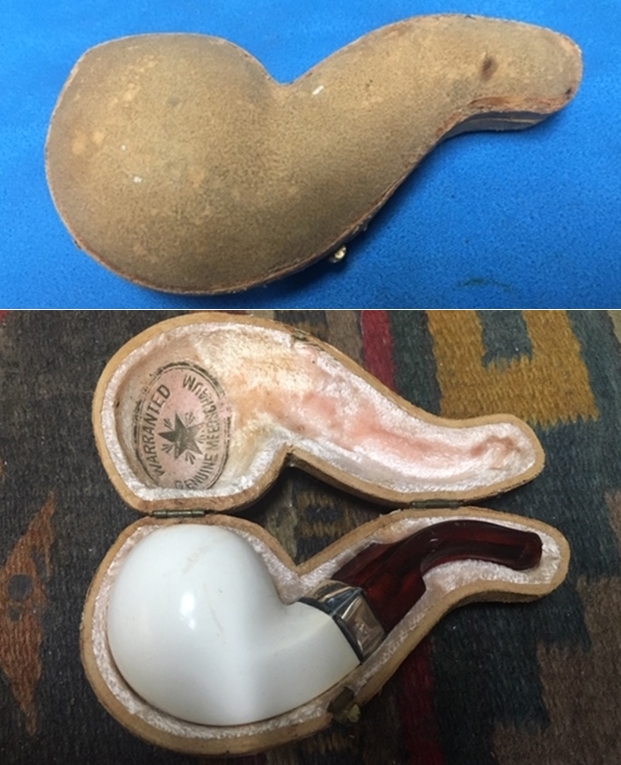
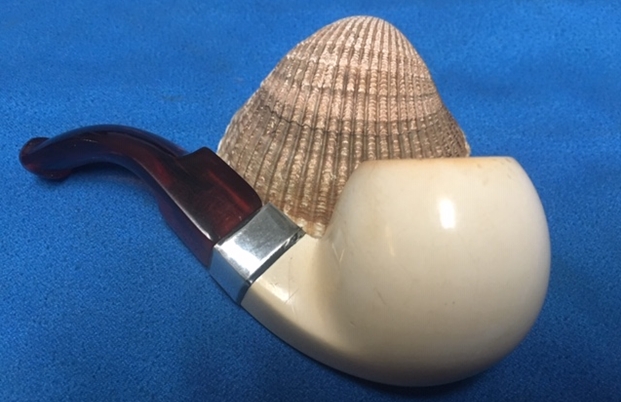
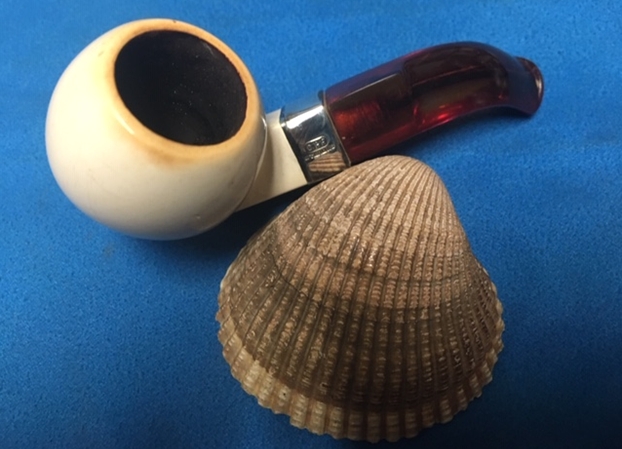
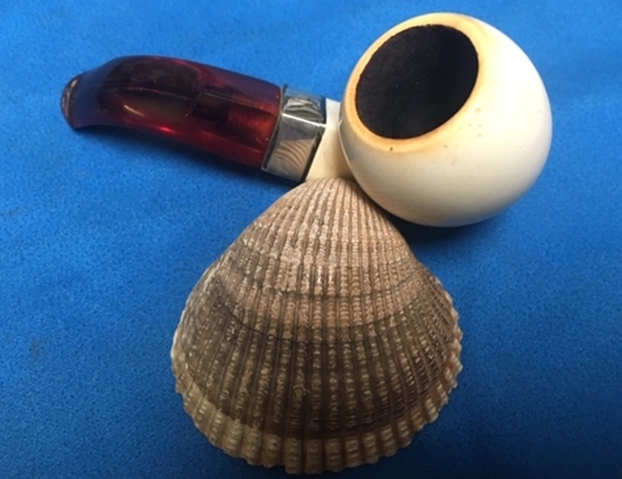
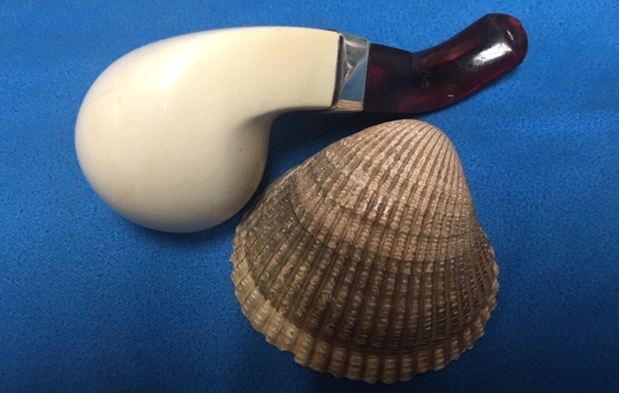
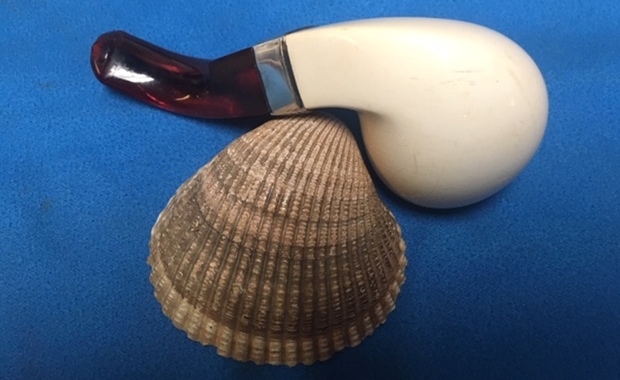
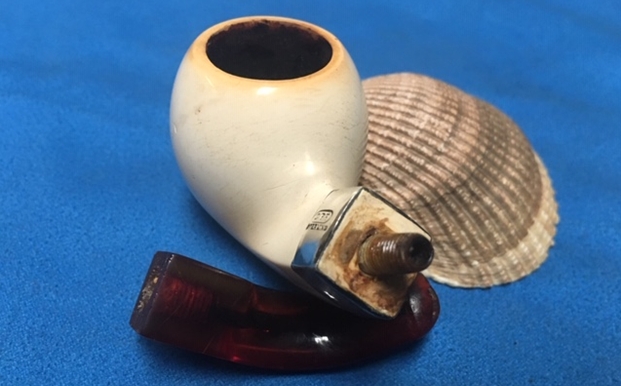
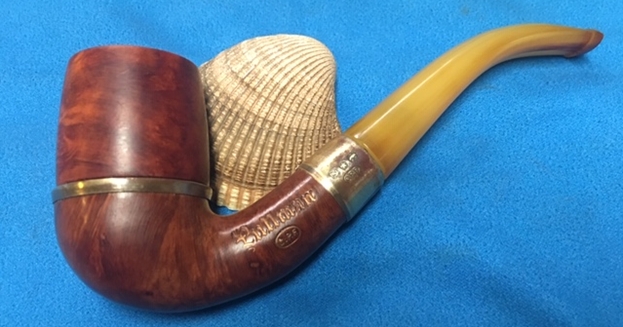
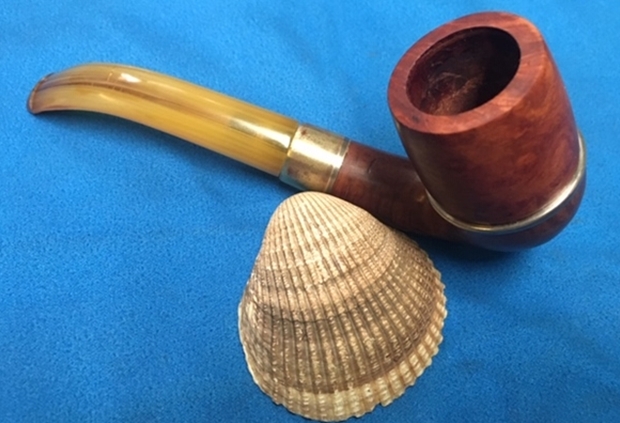
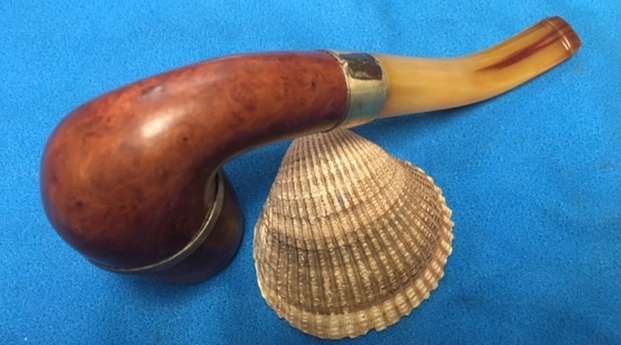
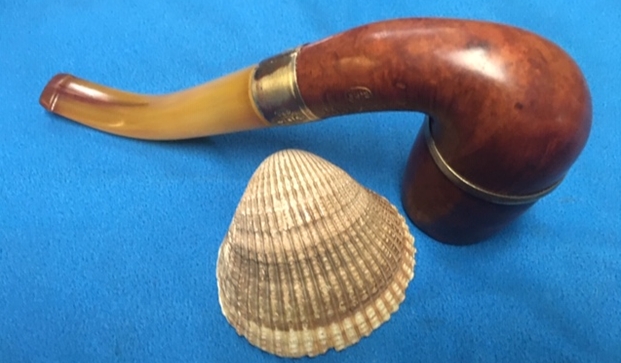
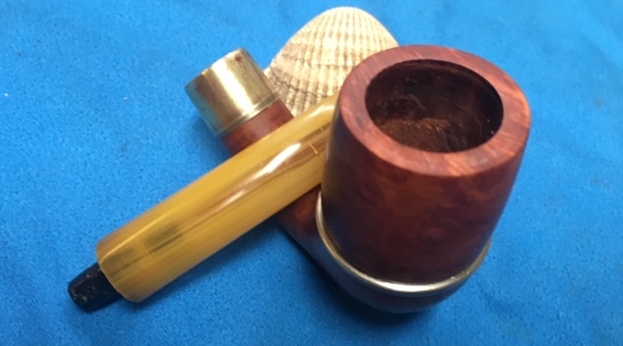
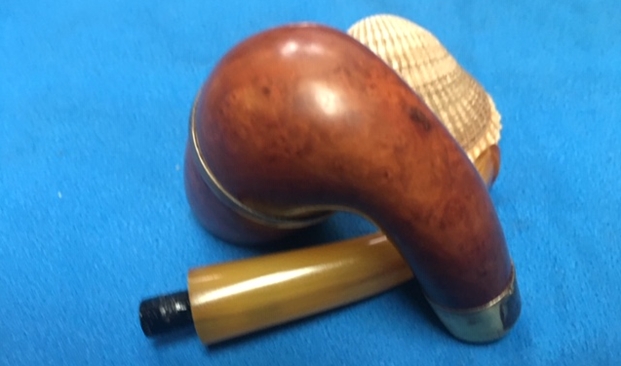
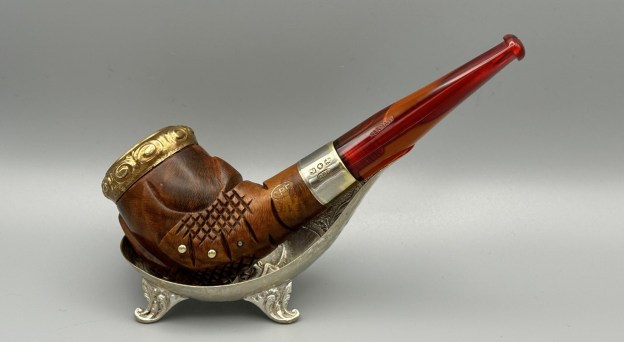
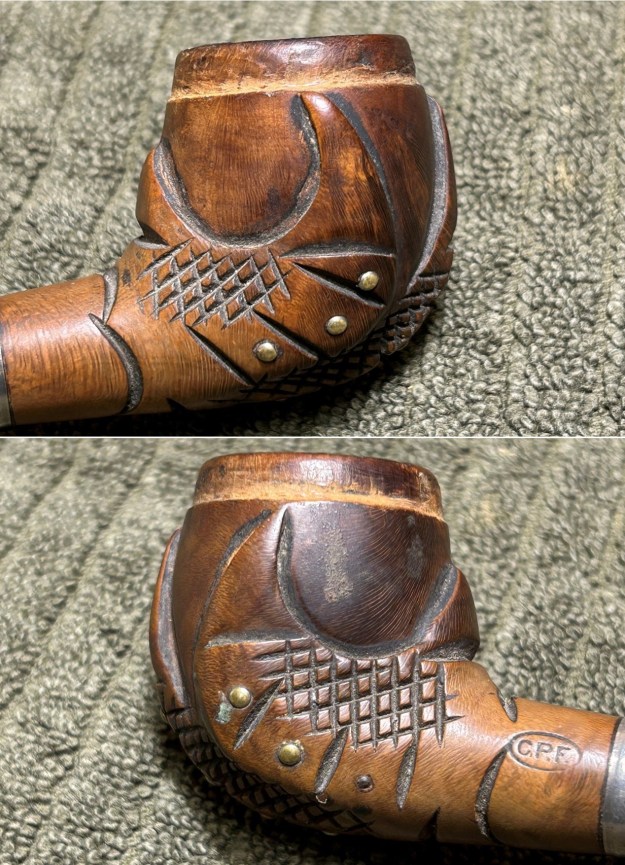
It isn’t often that I get to work on pipes that are more than a century old. It does happen from time-to-time, but – regardless – it is a delight when it does happen. This pipe came to me from an auction and it immediately caught my eye. First, I saw the initials, C.P.F., and I knew that meant the pipe was very old. Second, the shape of the pipe was unusual: an egg and claw. This is something that one sees in meerschaum pipes occasionally, but less so in briar pipes. Third, I could tell that the rim cap was lost to time and that the stem seemed … odd – but I couldn’t (yet) put my finger on why. A special thanks is due to Steve for his help on this restoration. The pipe is absolutely charming and a wonderful example of the pipe-making of a different era.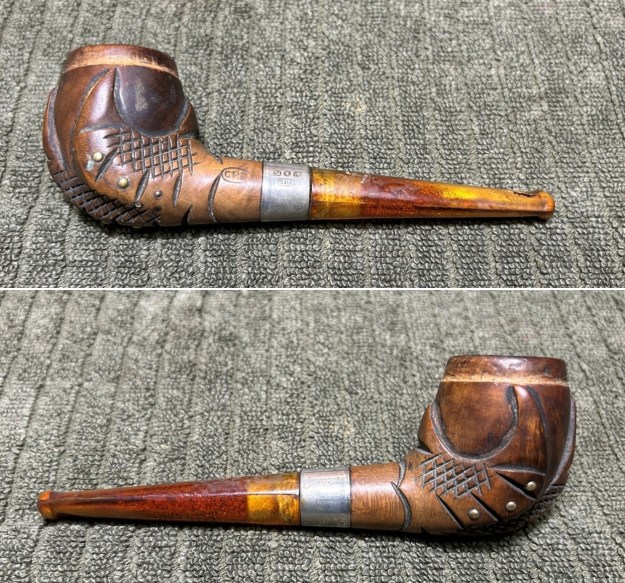
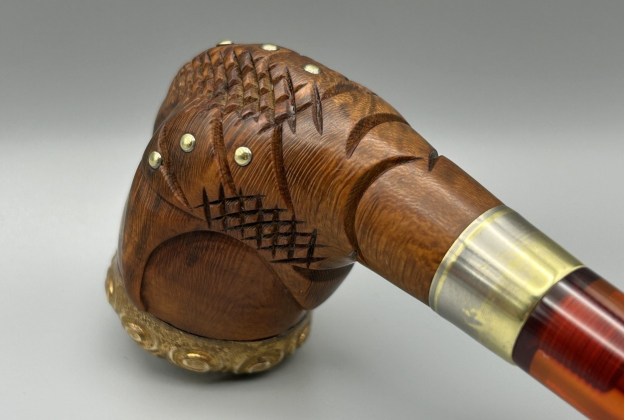
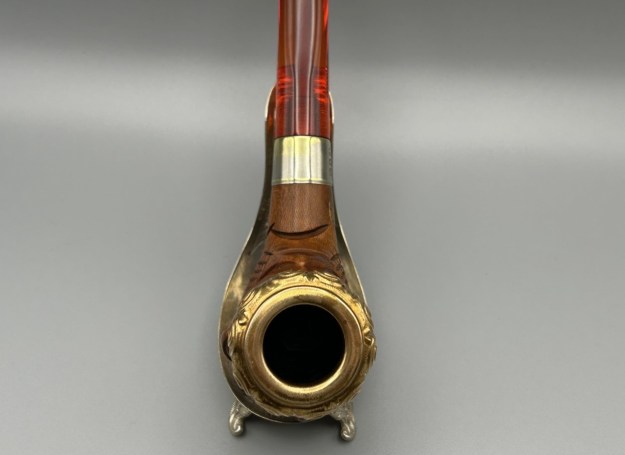
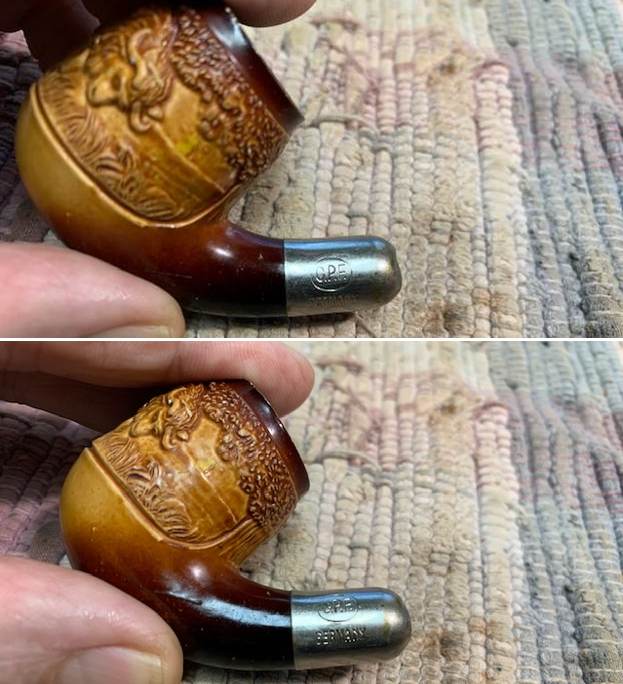
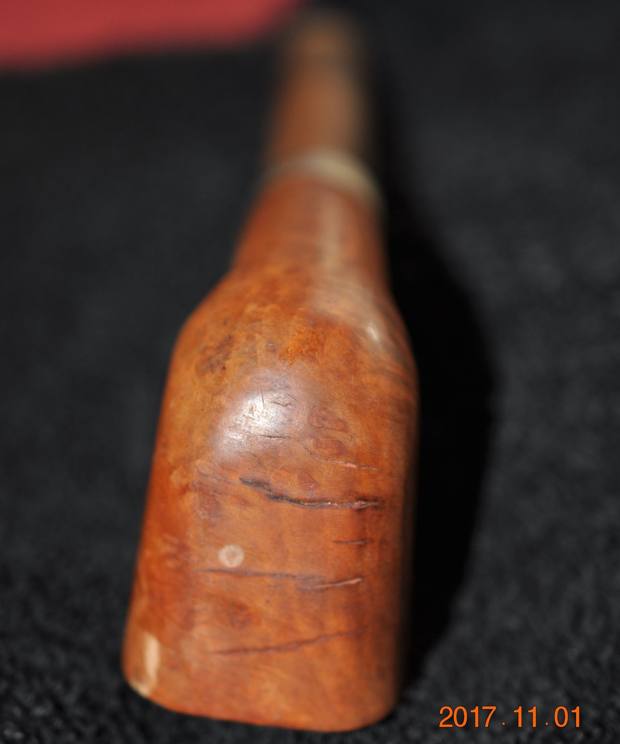
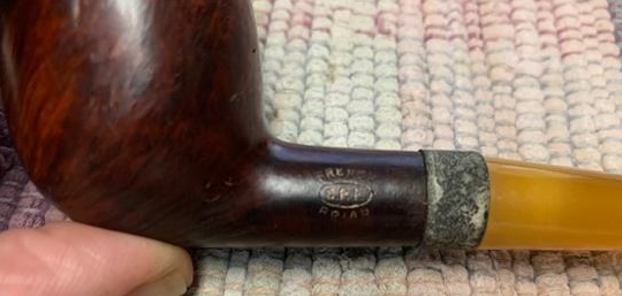
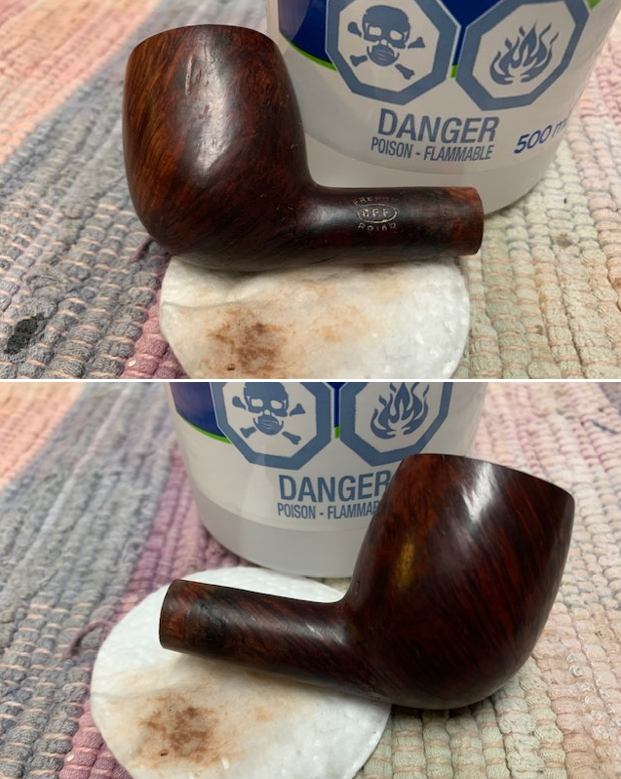
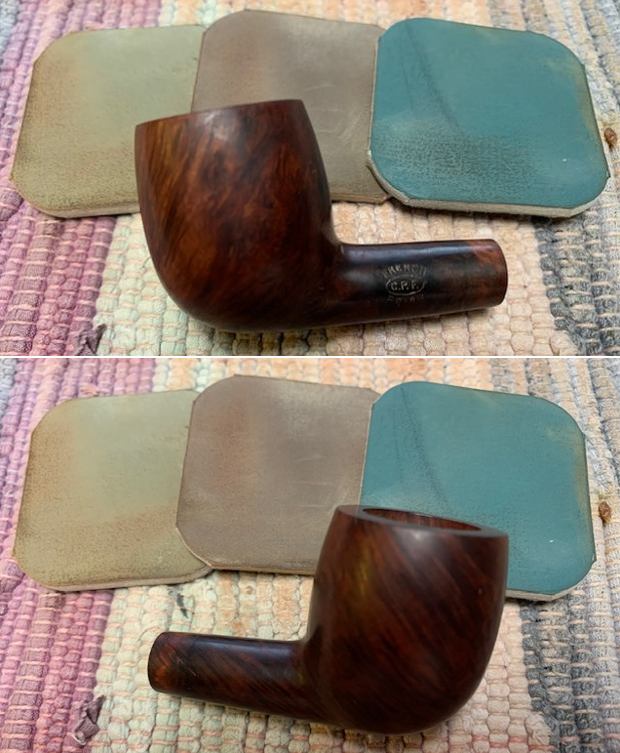
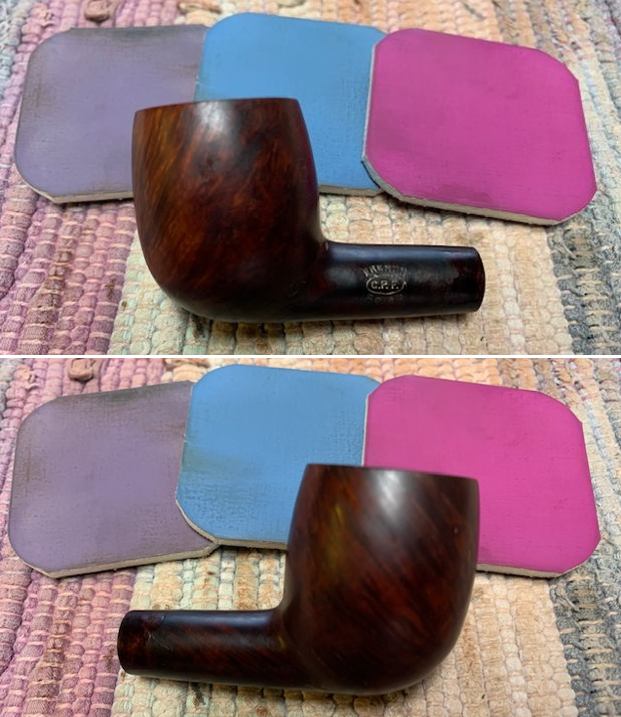
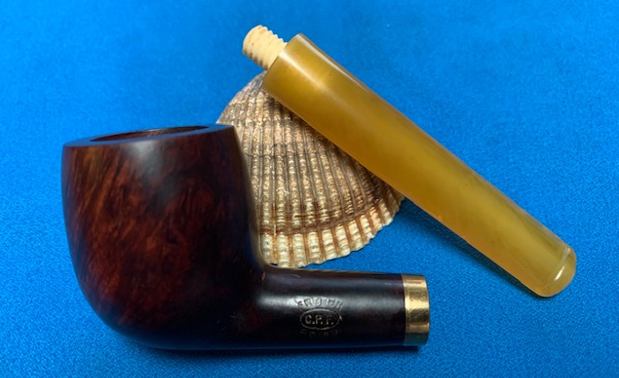
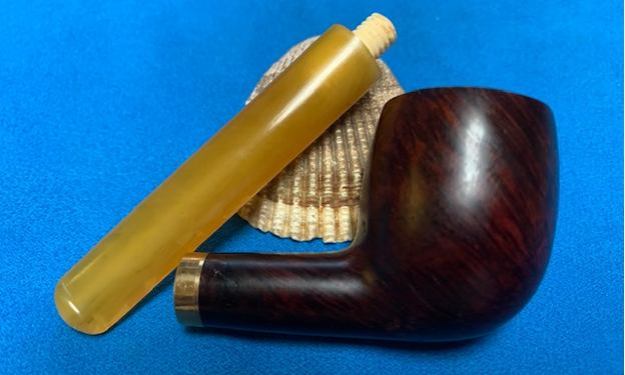
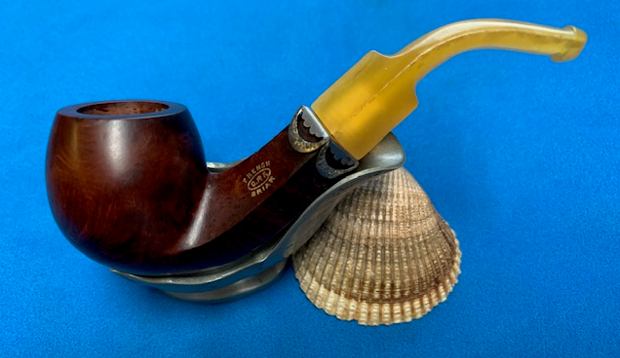
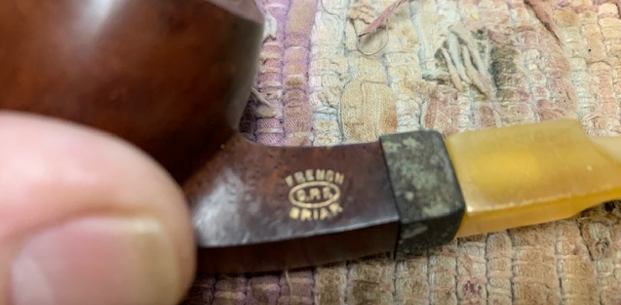
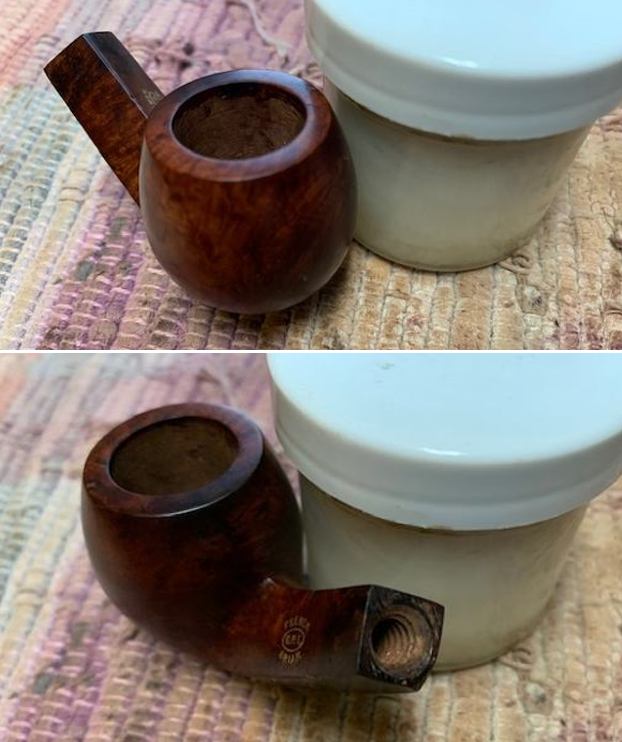
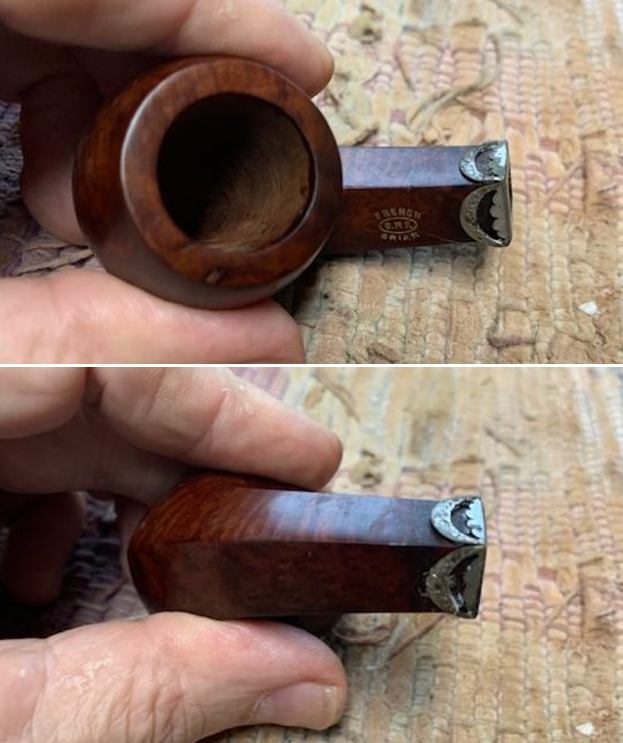
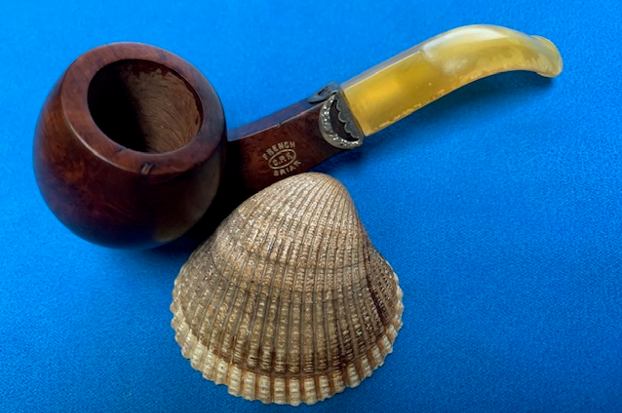
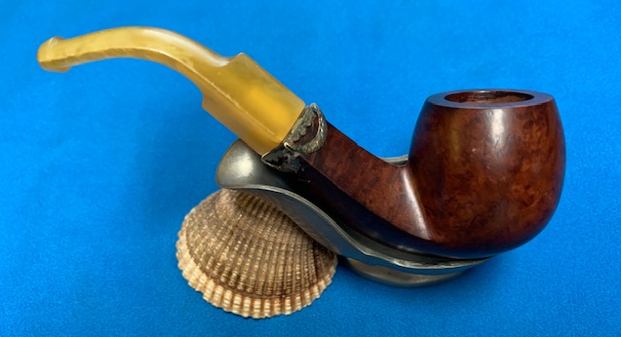
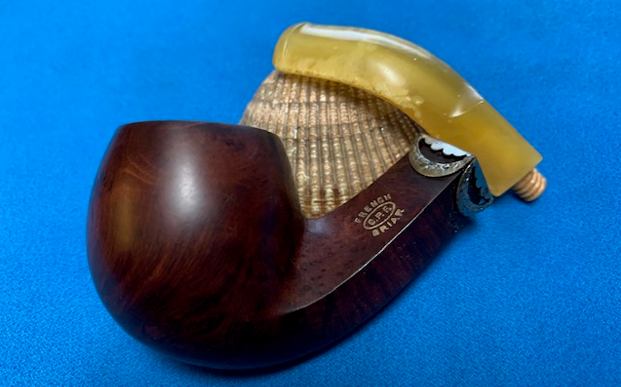
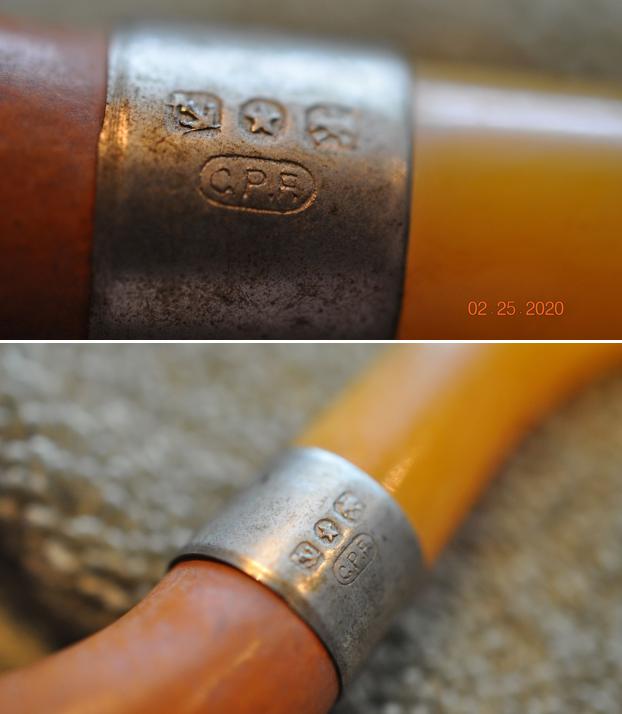
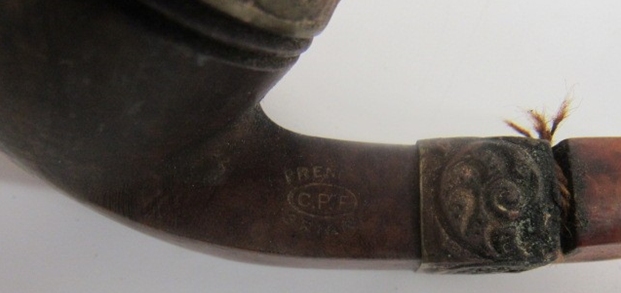
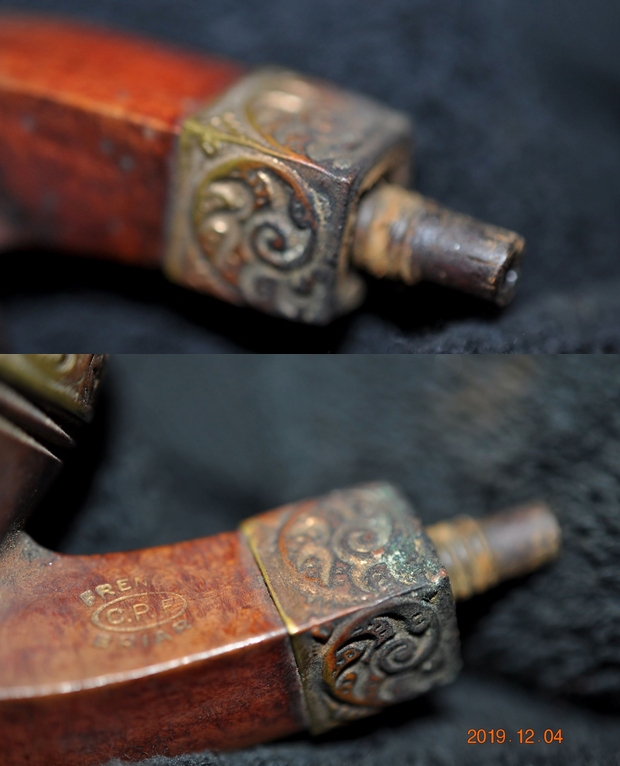
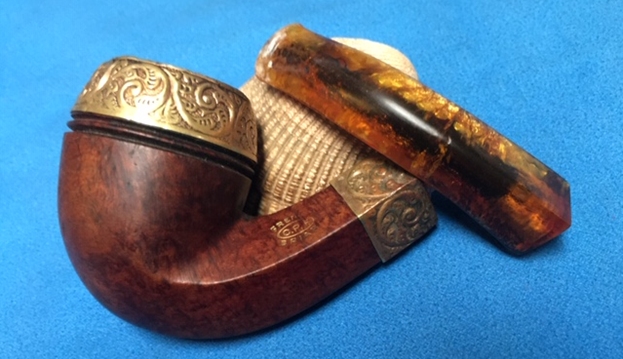
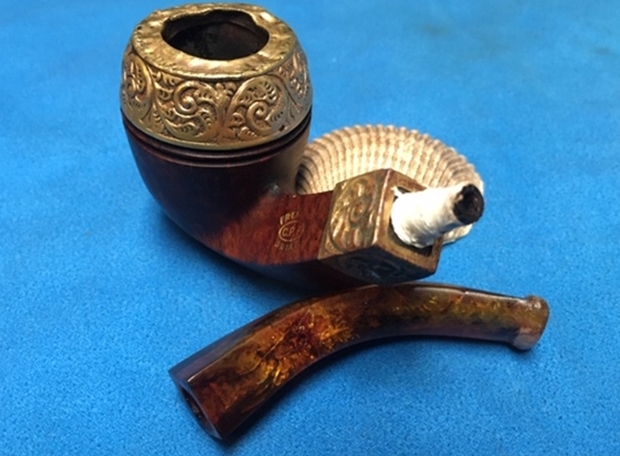
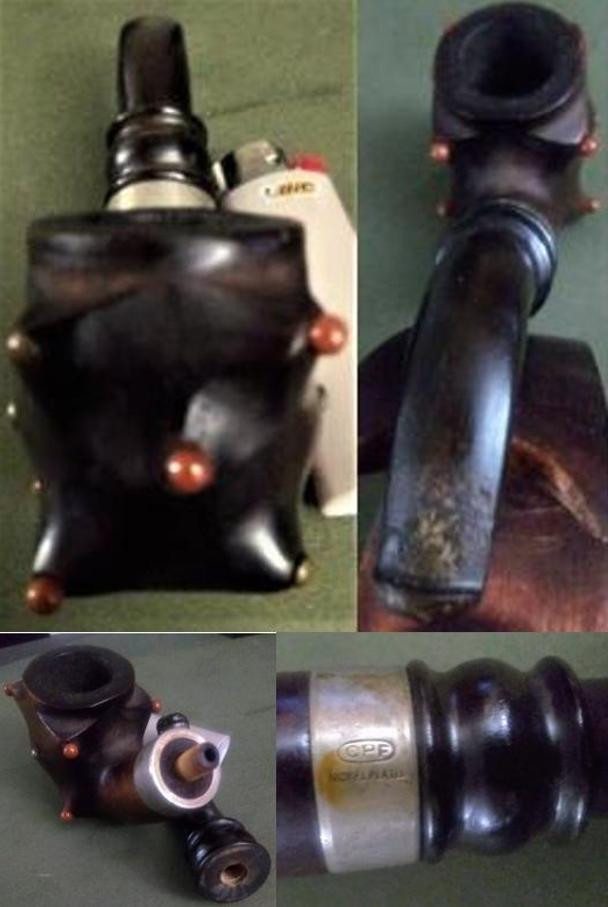
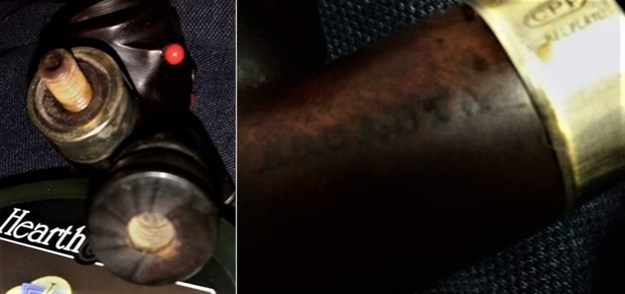
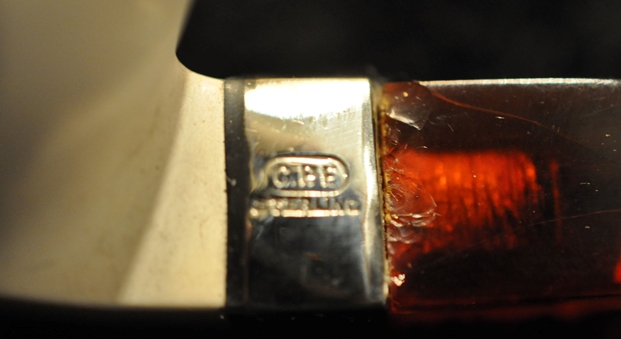
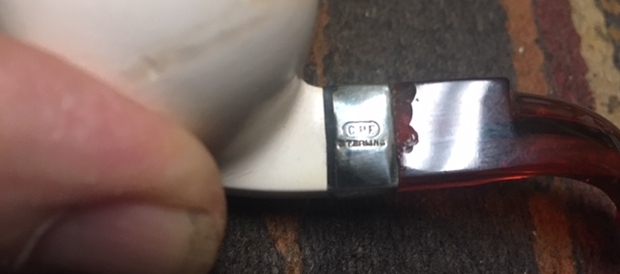
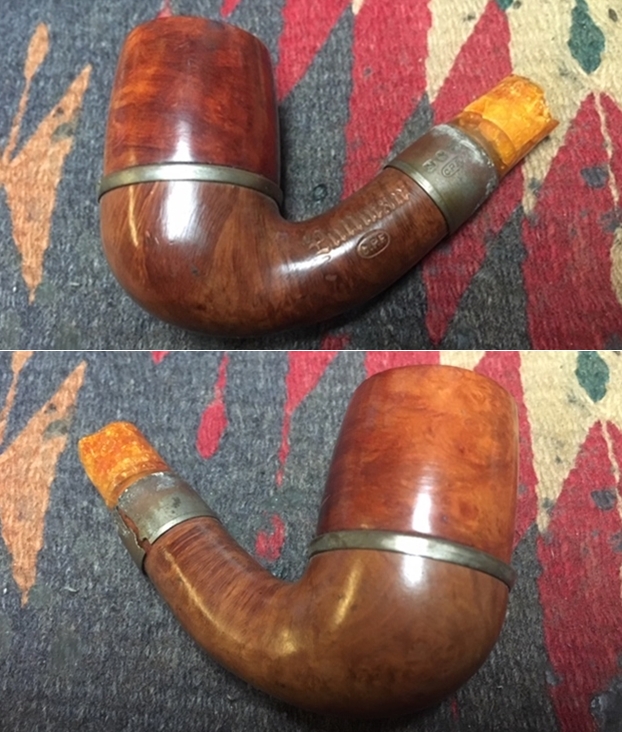
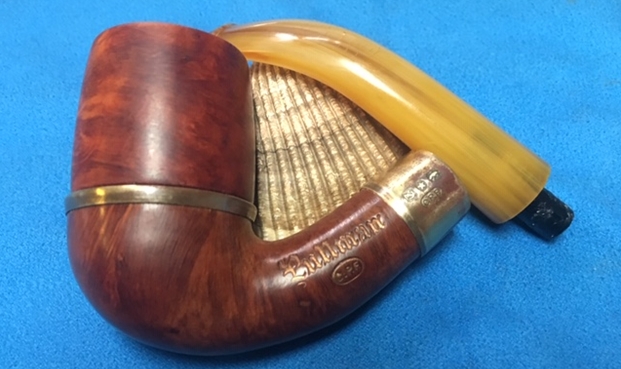
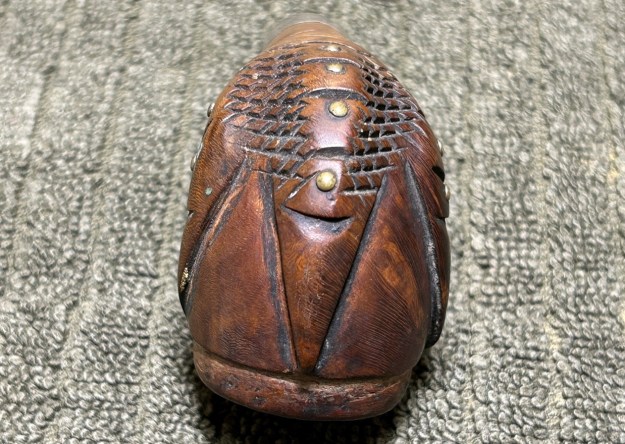
 As mentioned, the markings of the pipe included the initials C.P.F. on the left side of the shank. No other markings were in the briar. However, the brass (or nickel) band also had some markings. First, there were a set of faux hallmarks (anchor, star, bird?) above another engraving of C.P.F.
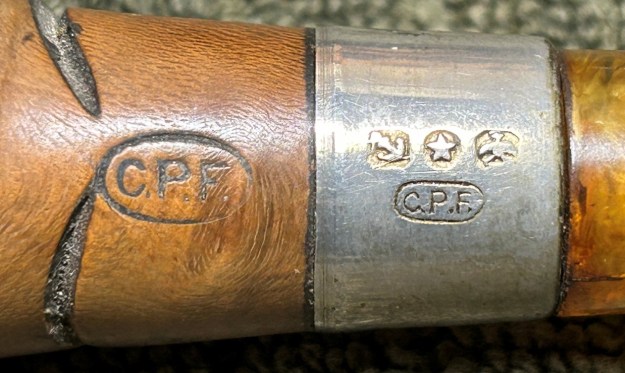 C.P.F. stands for Colossus Pipe Factory and is one of those 19th century pipe firms that is shrouded in mystery. Perhaps the mystery is simply a paucity of documentary records. There are entries for Colossus at both Pipedia and Pipephil, but the information is scant. Here’s a quotation from the Pipedia article:
There is not much known about the Colossus Pipe Factory. By the mid 1890’s it was owned by Kaufmann Bros. & Bondy. Bill Feuerbach has an old invoice from KB&B dated 1898 that has “C.P.F.” in the upper corner, with Trademark underneath. So they owned the brand by then. It could have been a company that was acquired by KB&B or possibly even founded by them. Bill Feuerbach is a VP at S. M. Frank & Co. (Kaywoodie) and has also provided the evidence to the name Colossus below. I have always been under the impression that the initials C.P.F. stood for Consolidated Pipe Factory. Many pipe collectors that I know believe the same thing. However only this week I had that cleared up. A pipe collector friend in Seattle emailed a scan of a page from a trade magazine called “The Jeweler’s Circular”, dated August 23, 1899. A reader wrote in the following question, “Please inform us who manufactures briar pipes with trademark, C.P.F.?” The answer was, “These letters stand for Colossus Pipe Factory, the business being conducted by Kaufmann Bros. & Bondy, 129 Grand Street, New York.” I have seen pipes with both the C.P.F. logo and KB&B logo on them that date to pre-1900. This may have been a way to let the public now that the companies were affiliated. As far as I can tell, the C.P.F. brand was discontinued sometime in the 1910-1920 range.
Steve has restored a few C.P.F. pipes and, quite frankly, this article he wrote about their history is probably the best place to look. You can also see some of his restorations of C.P.F. pipes here and here and here. From everything I can gather, this pipe is well in excess of 100 years old and might be much older than that.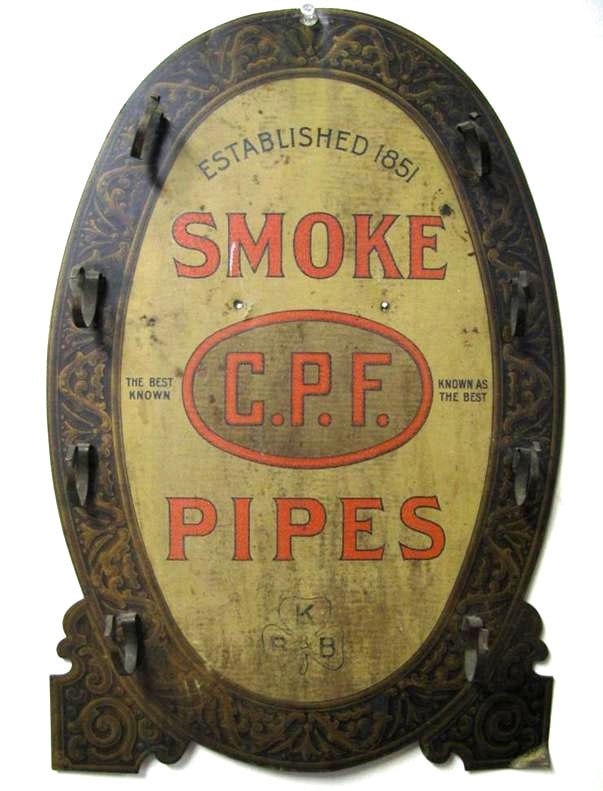
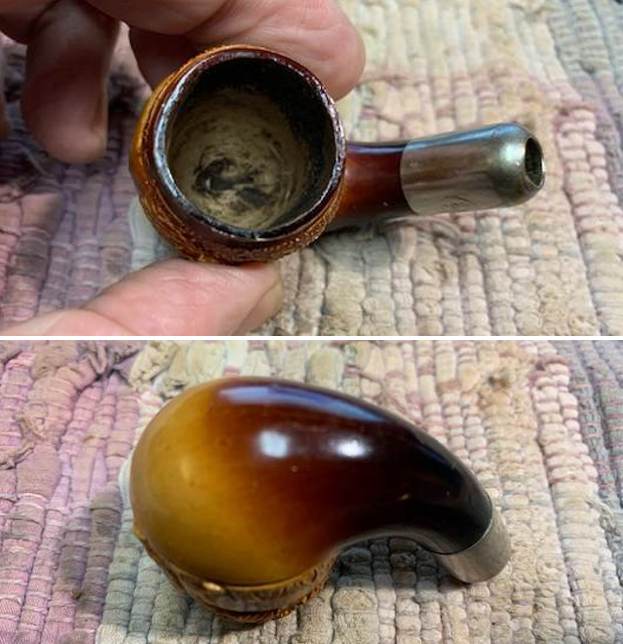
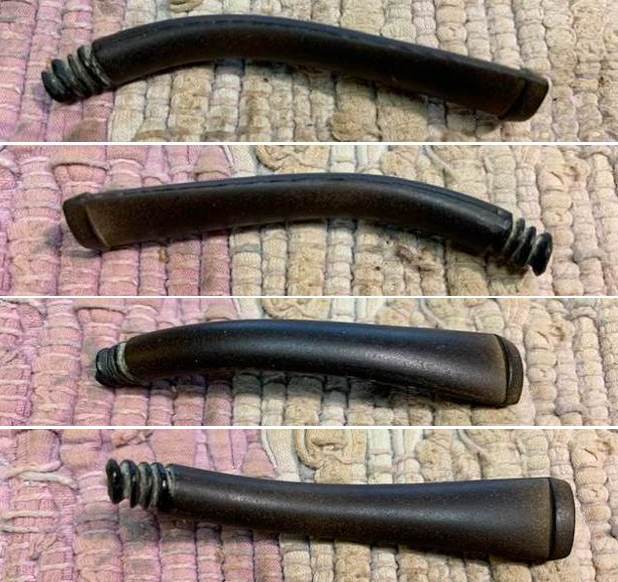
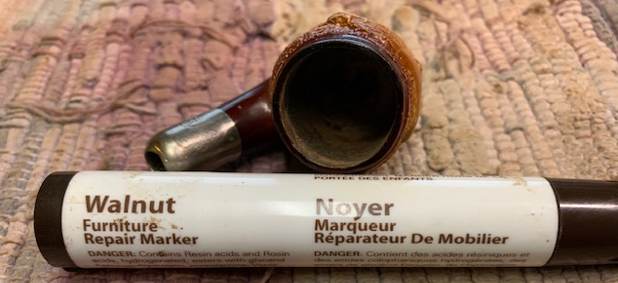
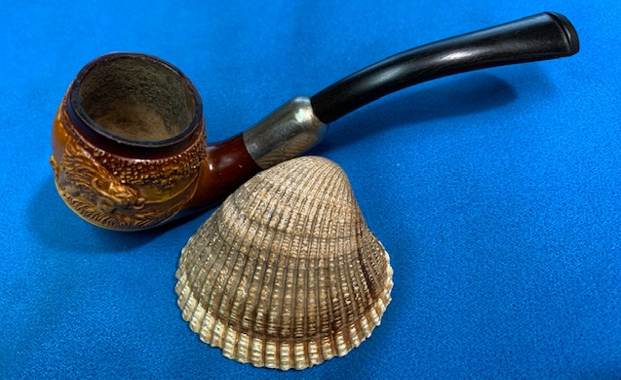
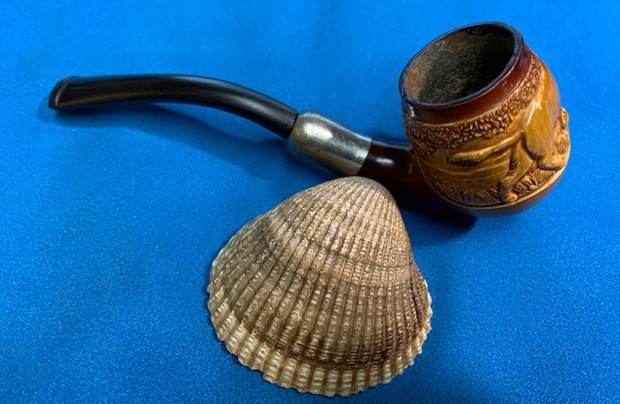
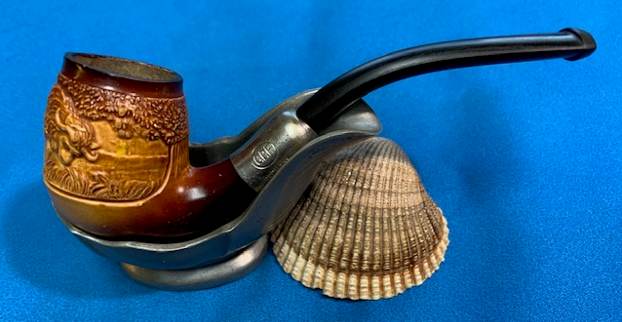
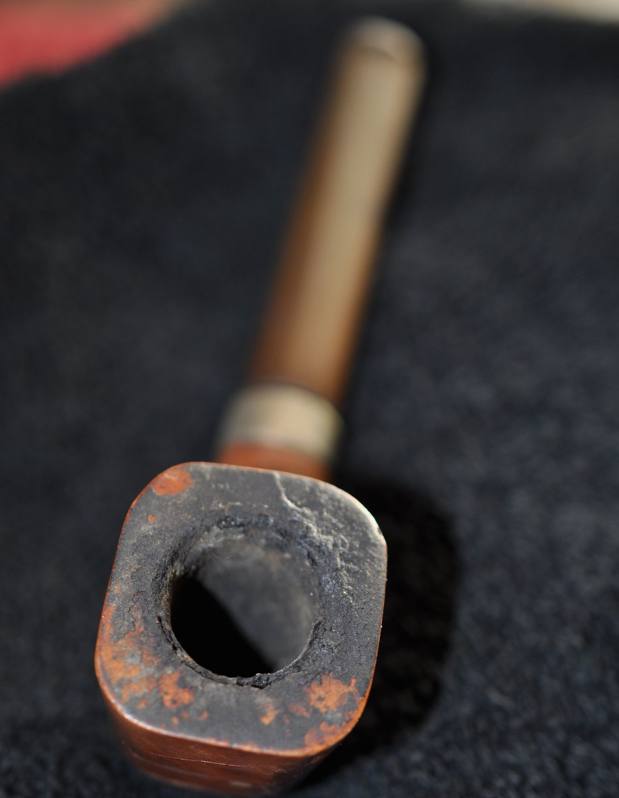
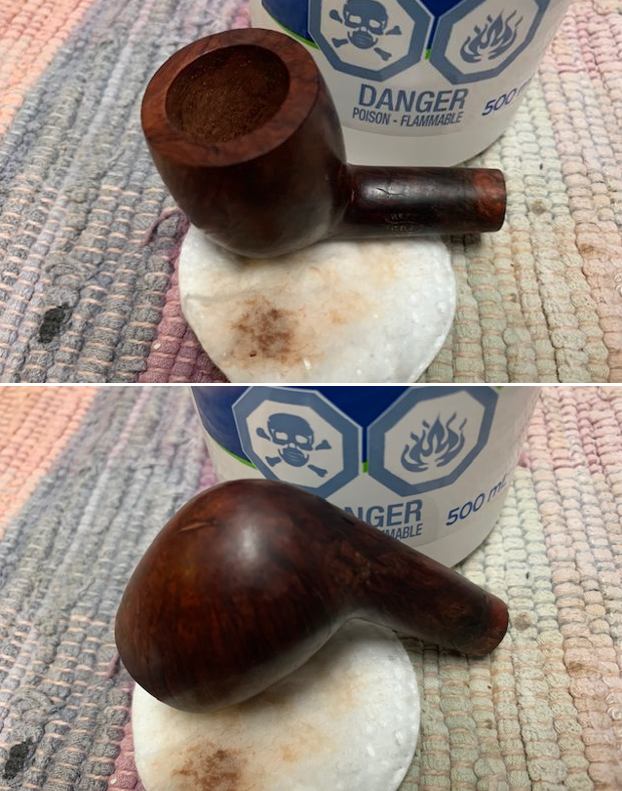
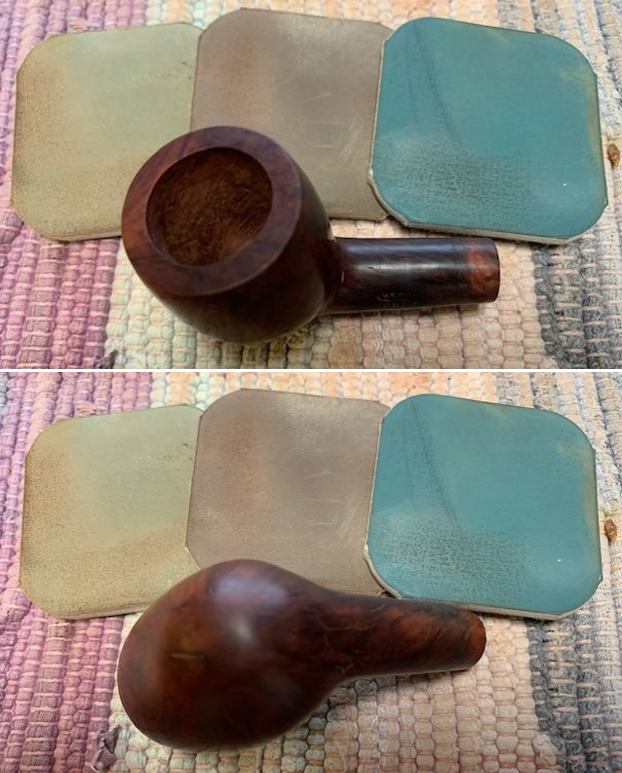
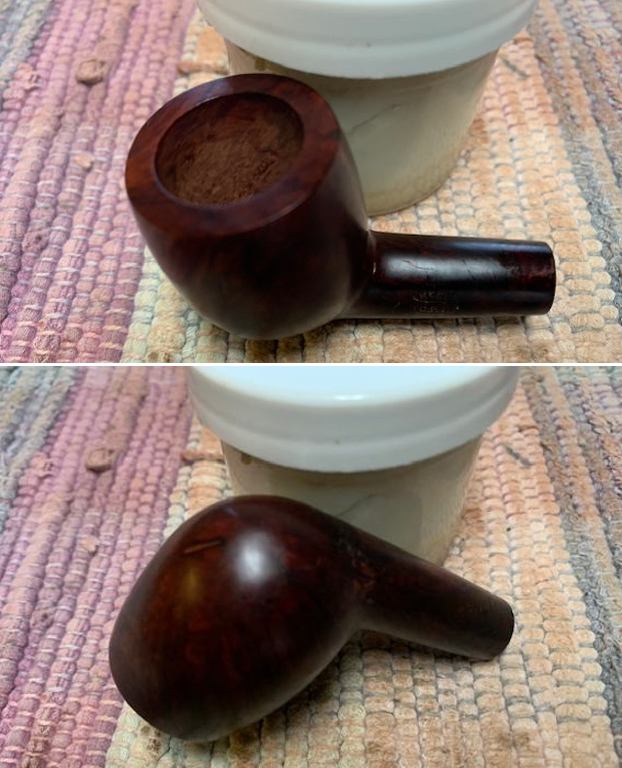
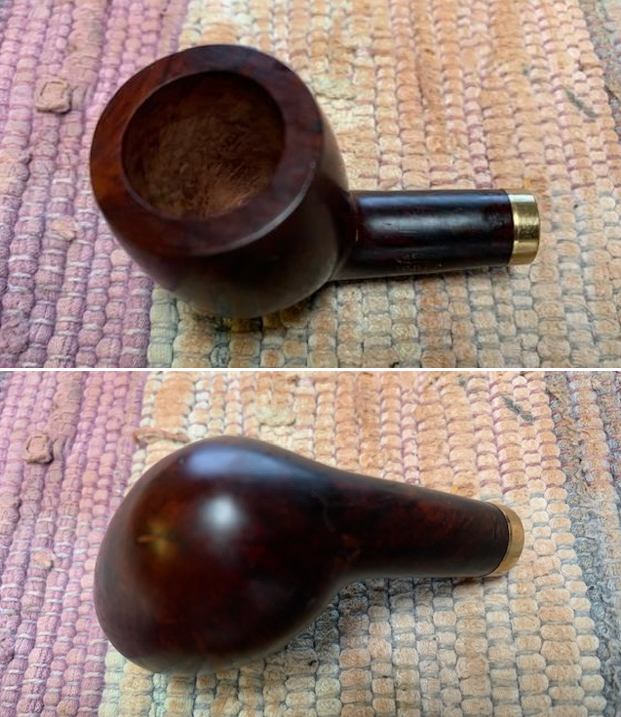
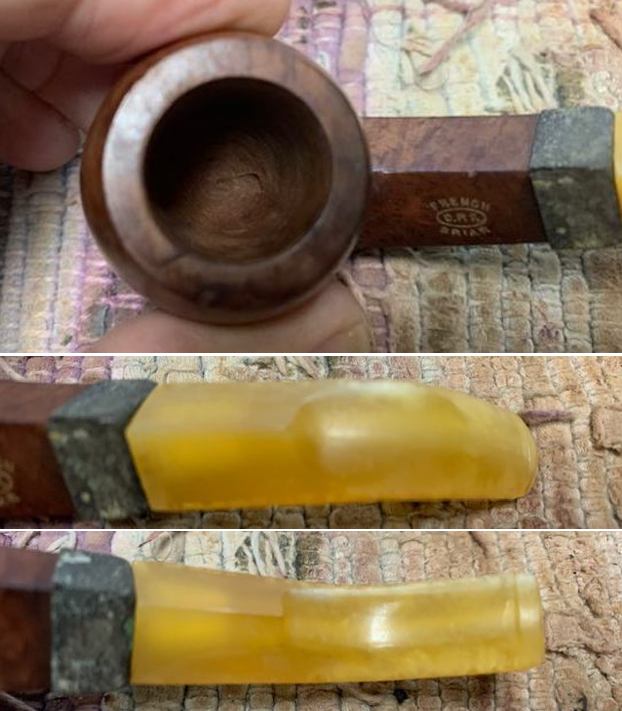
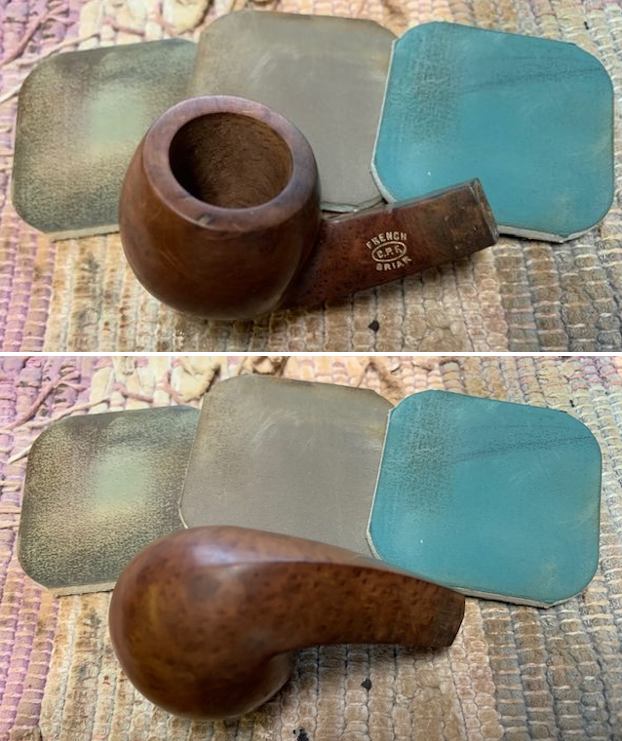
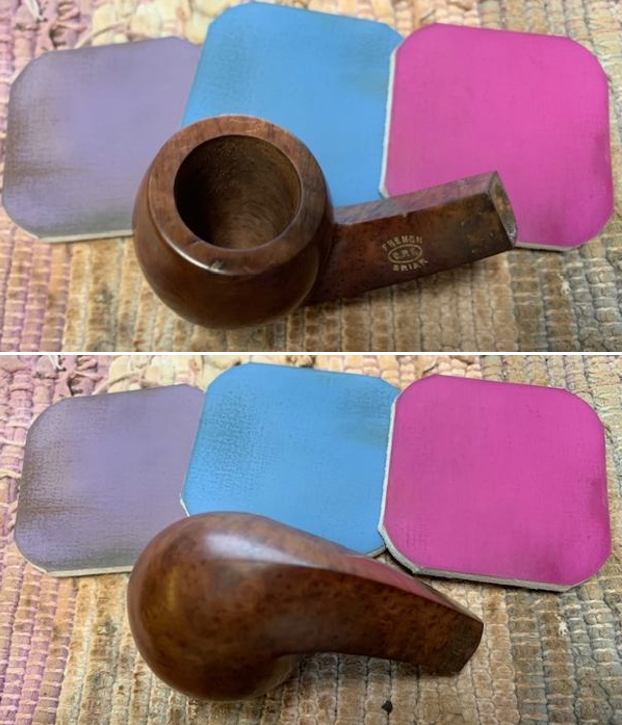
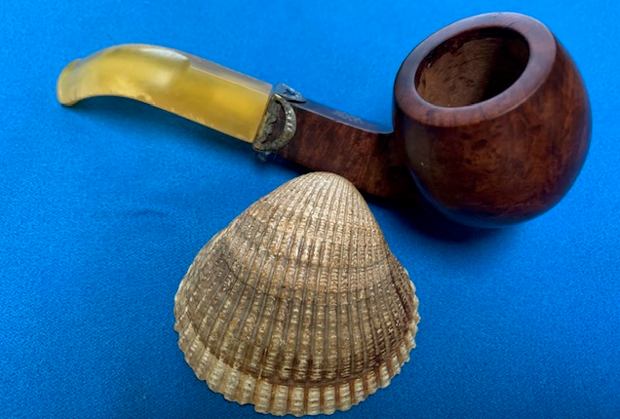
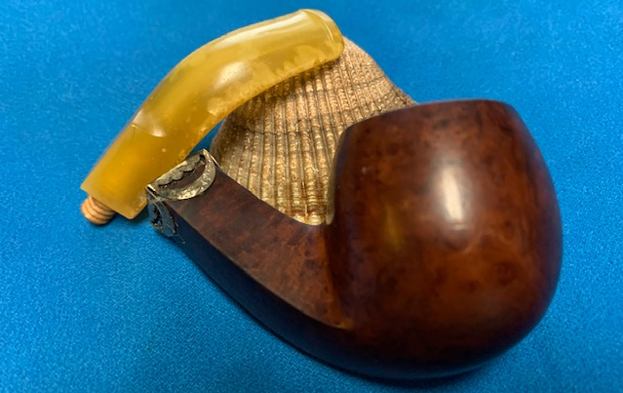
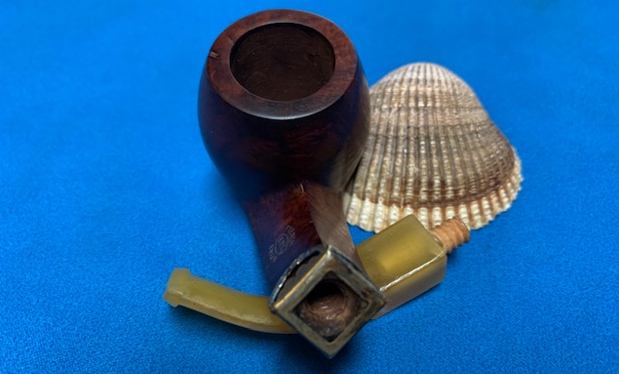
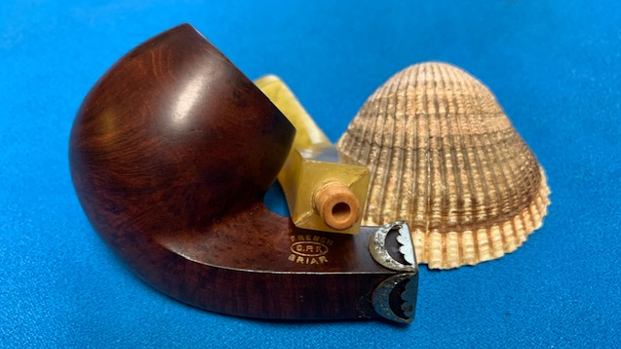
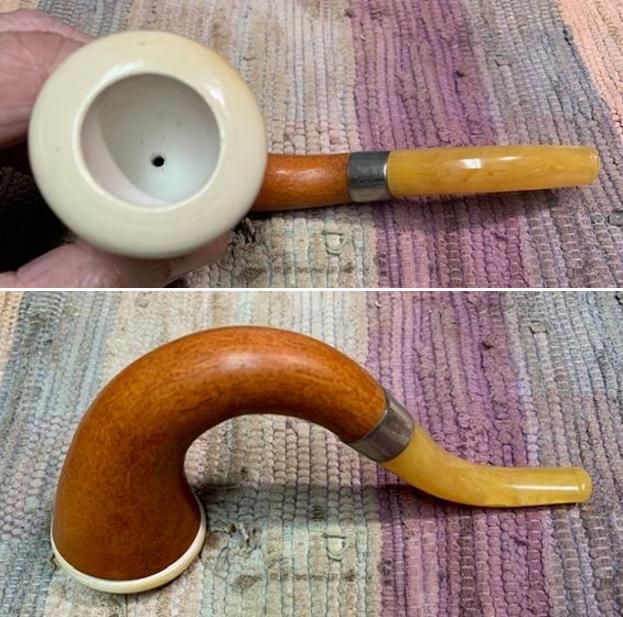
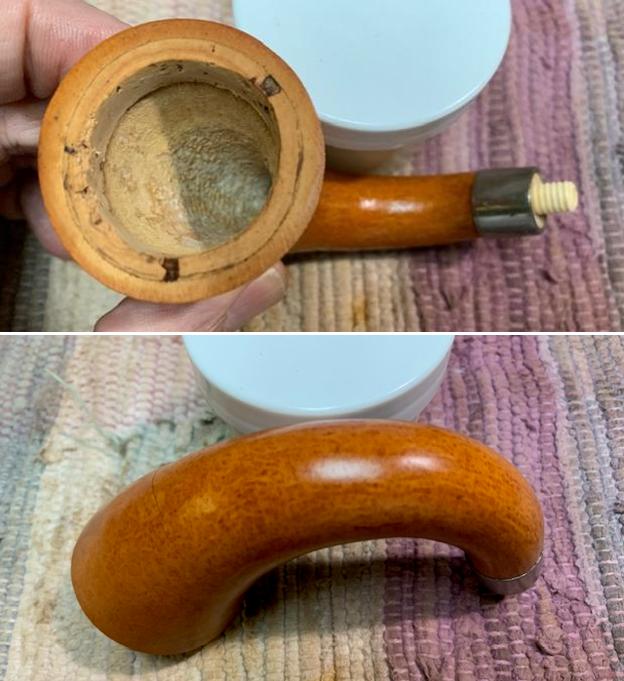
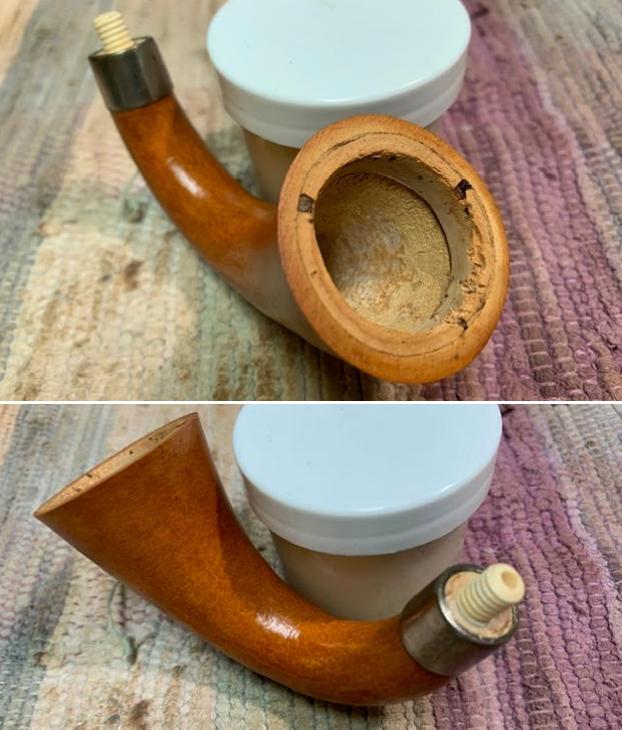
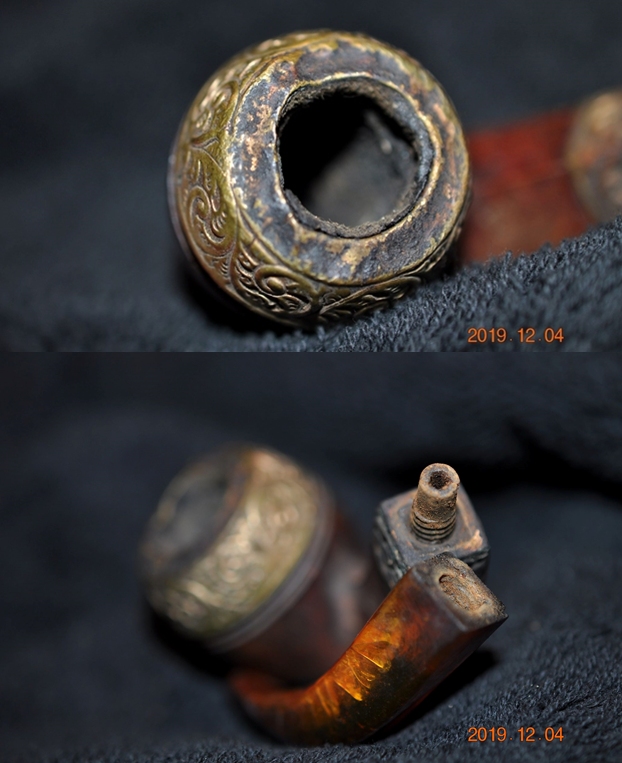
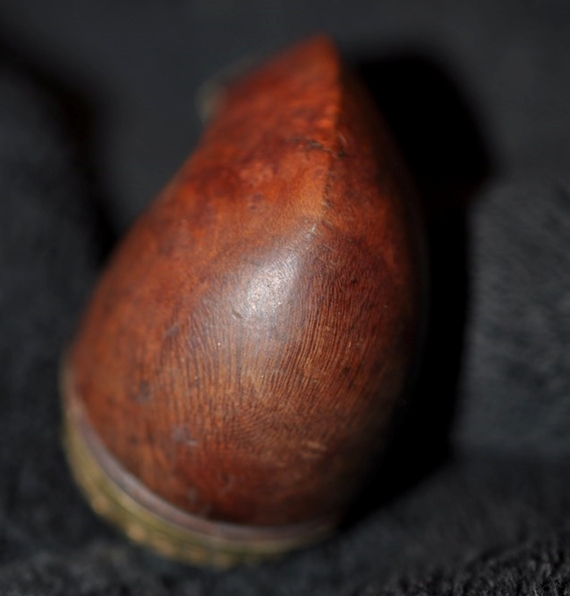
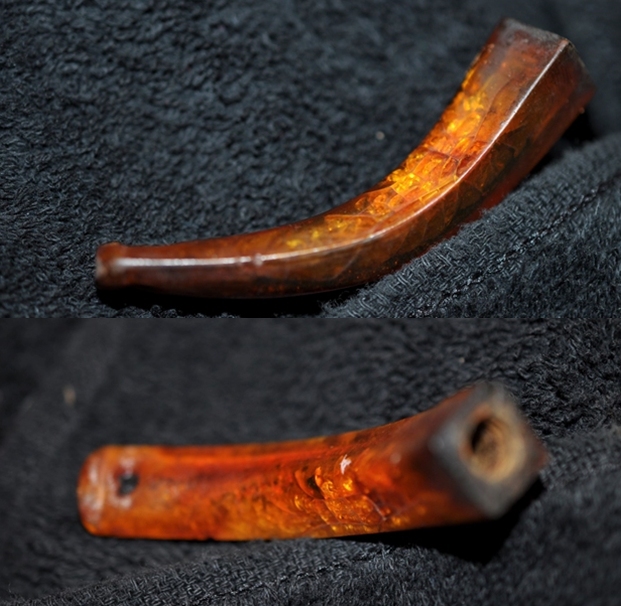
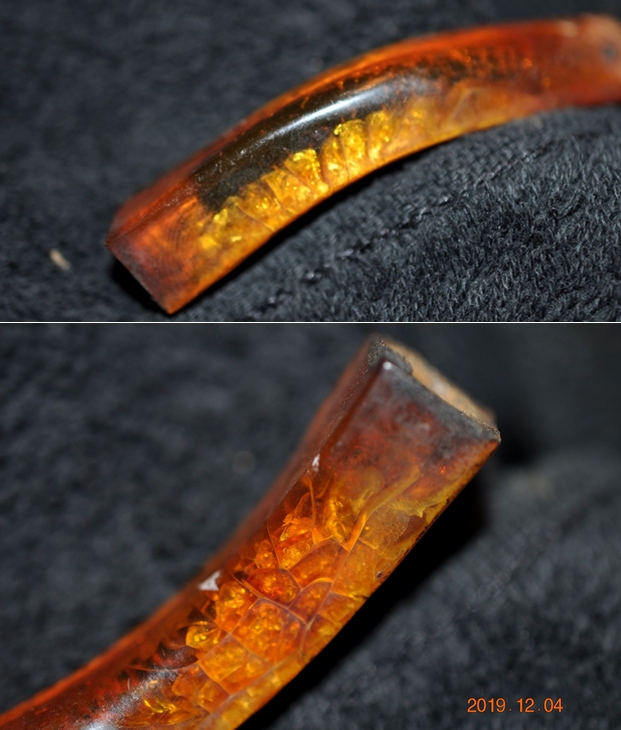
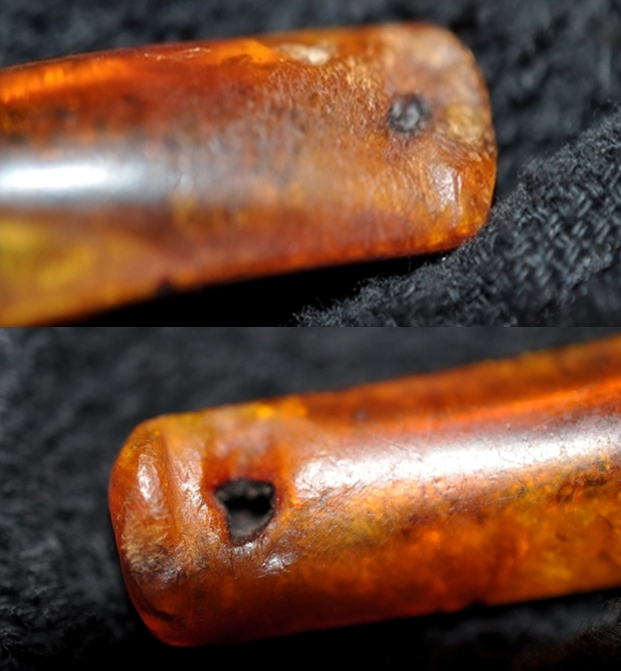
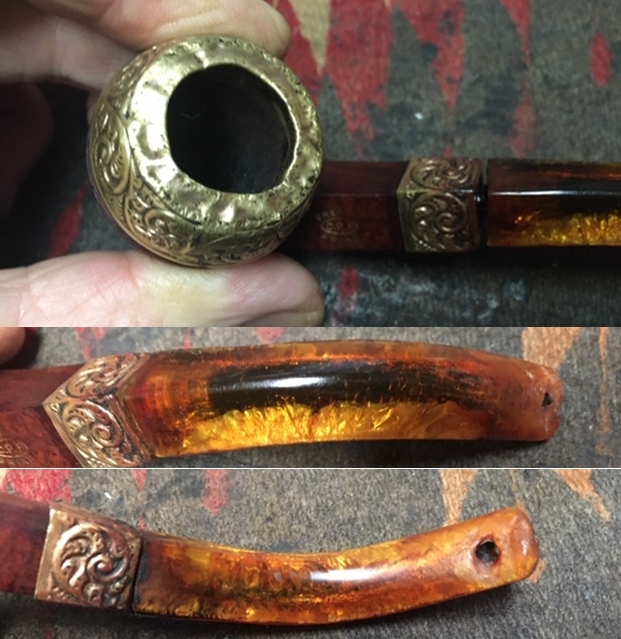
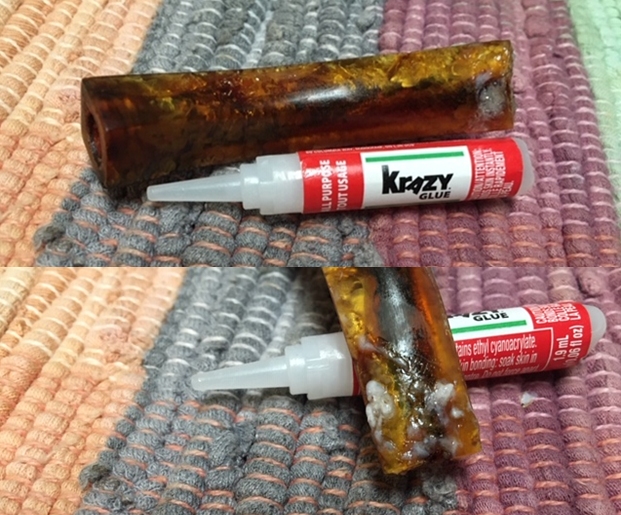
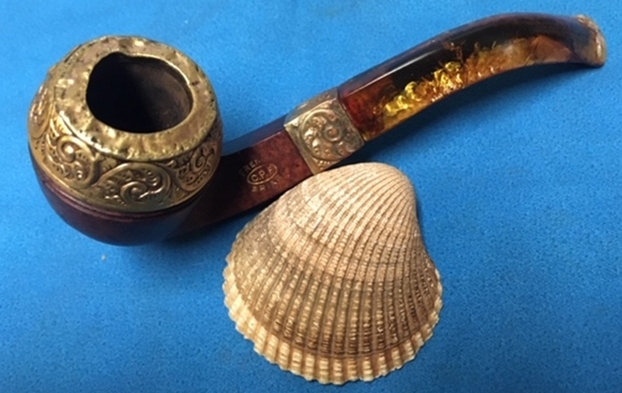
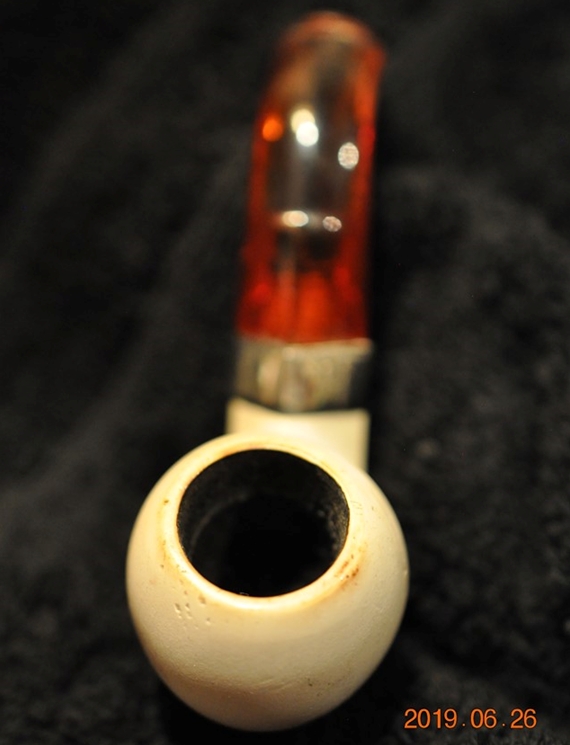
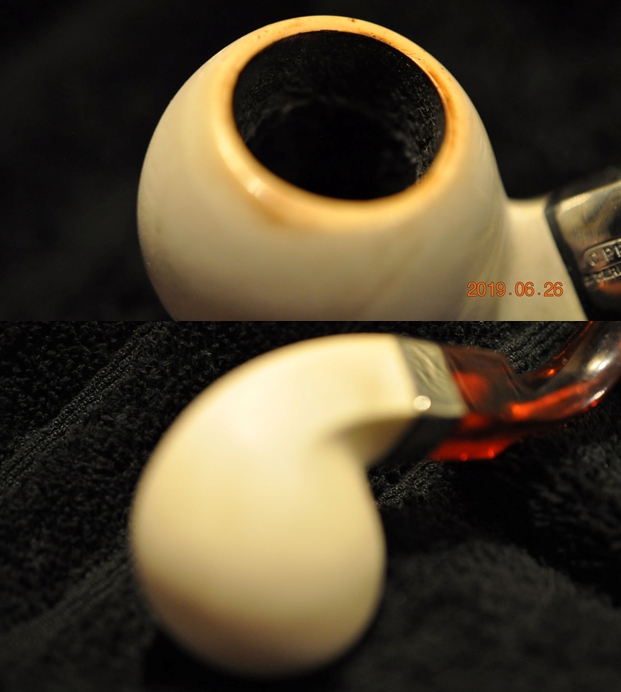
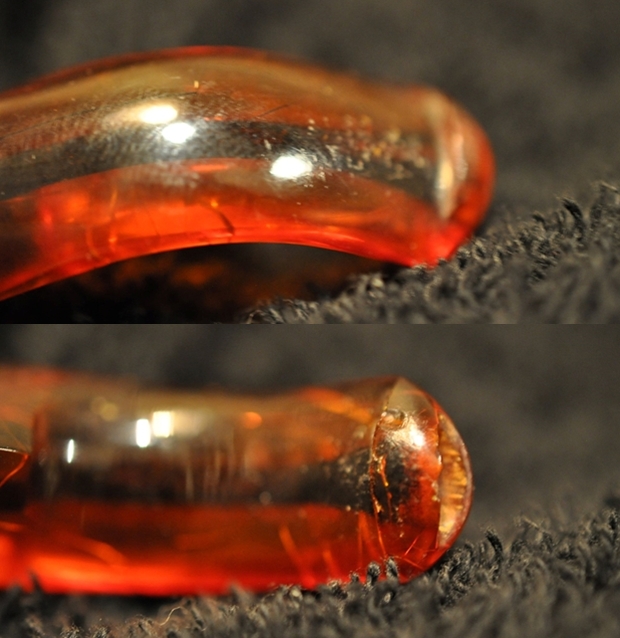
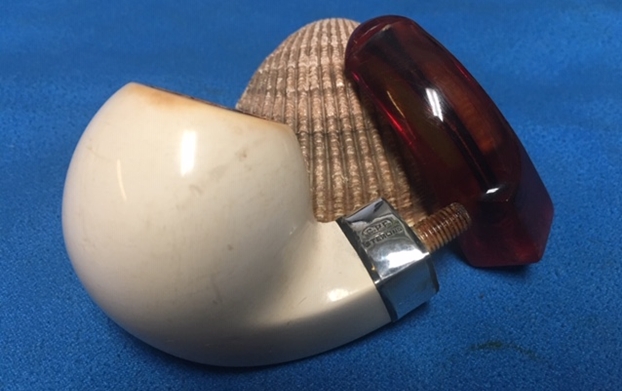
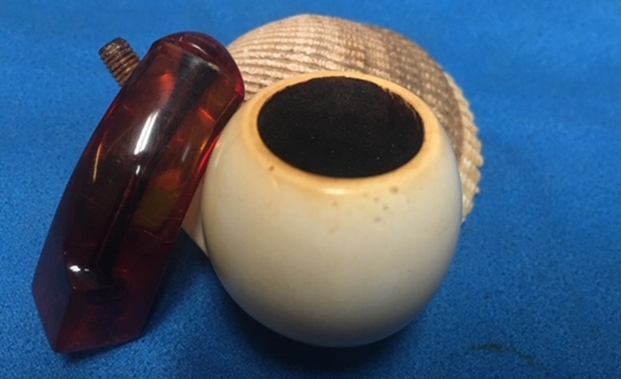
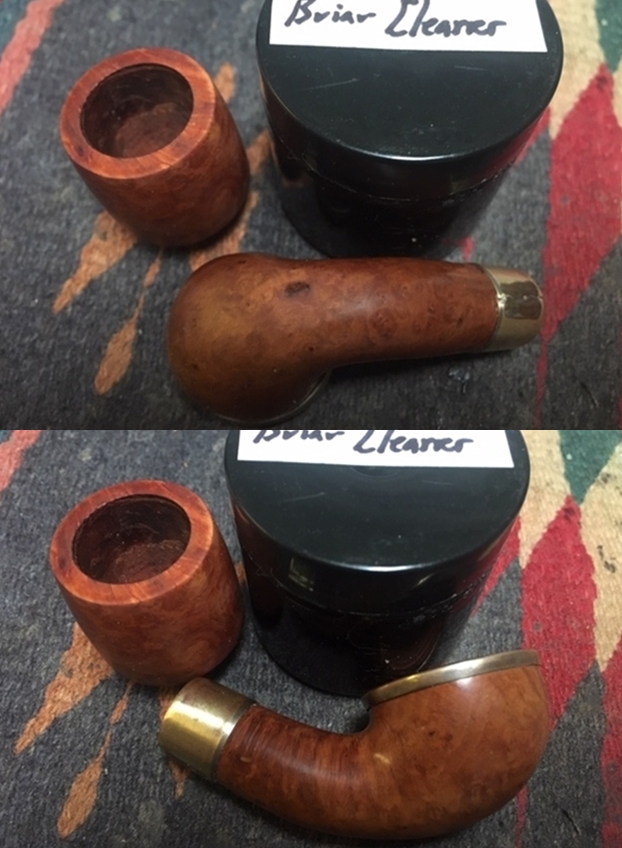
 How about the condition of this pipe? Let’s talk about the stummel first. It was dirty – very dirty. The briar was in good shape, but more than a century’s worth of dust and debris have been ground into the pipe’s crevasses. I was pleased to see how few scratches were in the wood and that made me hopeful. The inside of the bowl, however, was full of cake and seemed heavily smoked. As I mentioned earlier, the rim cap was missing. Meanwhile, the stem was the thing that made me pause. I asked Steve about it and, after a thorough chat with him about this pipe, he was of the view that this stem was not the original. It didn’t fit quite right and looked a bit too long. That made a lot of sense because this stem seemed cheap and unusually brittle. There was a bone tenon connecting stem and stummel and, although it seemed sound, I wasn’t sure it was original either.
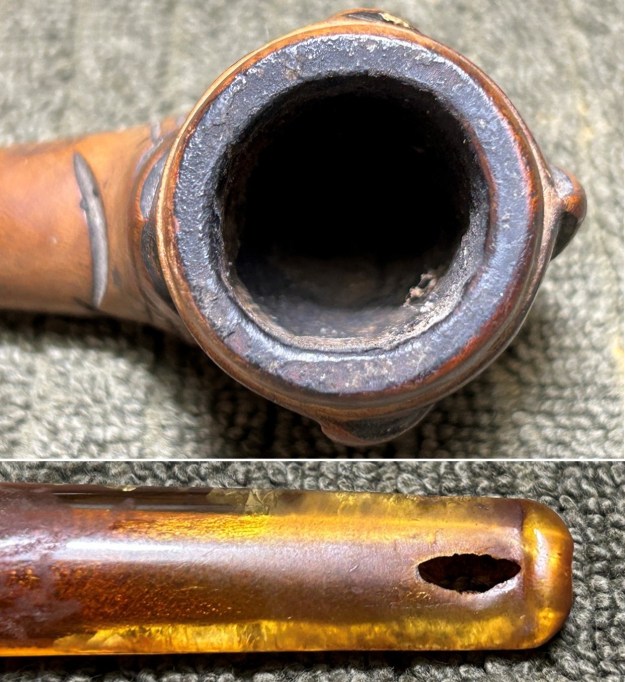
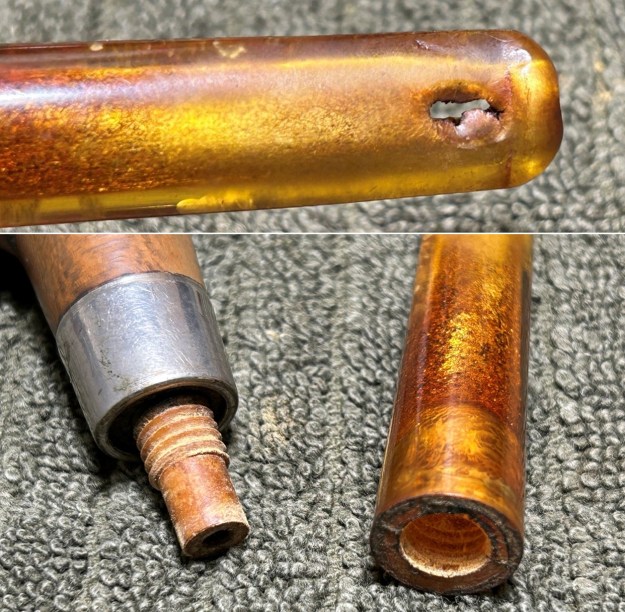
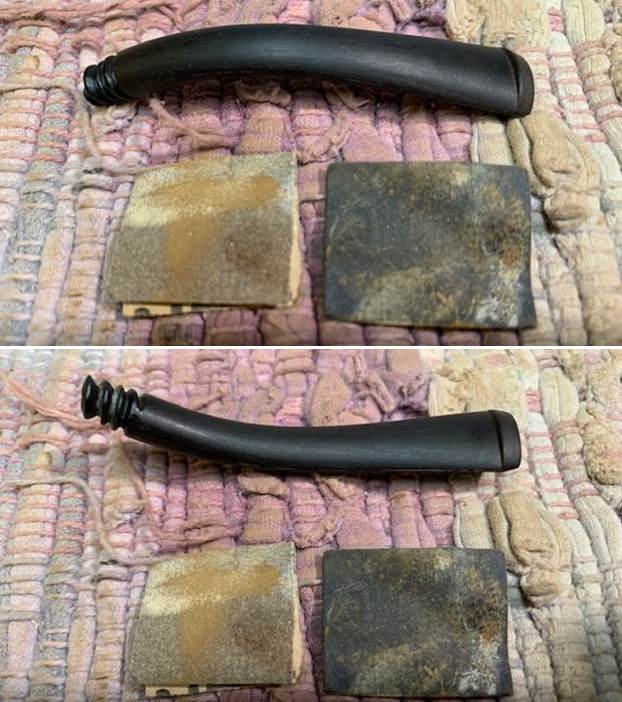
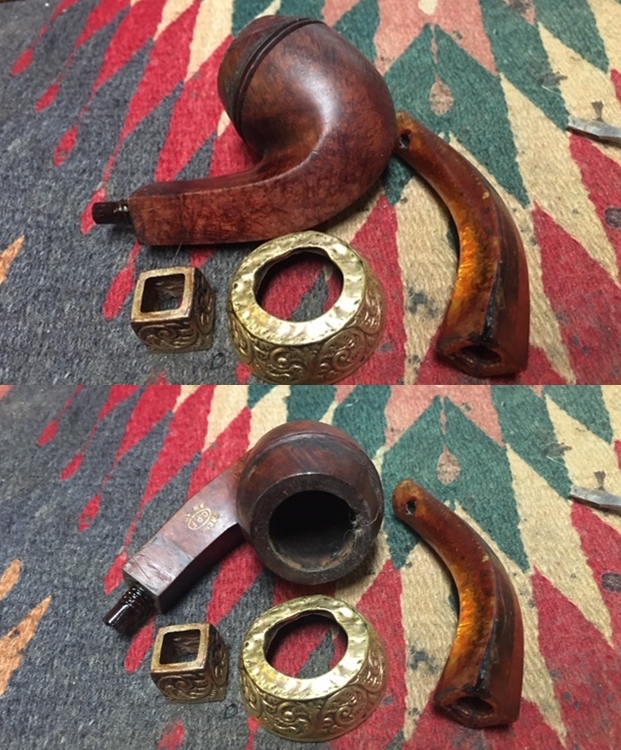
 The first item on my agenda was to extricate the tenon from the stummel – it was stuck. I opted to warm the area with my heat gun and this provided just enough softening of the internal goo to allow me to extract it.
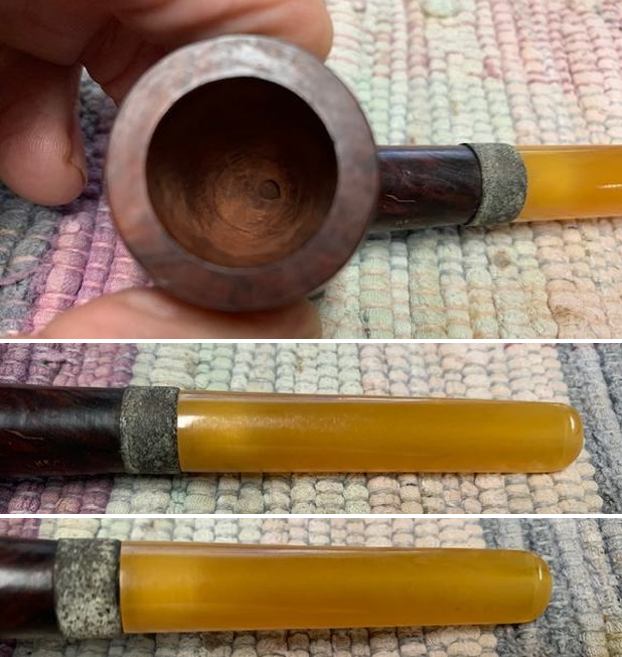
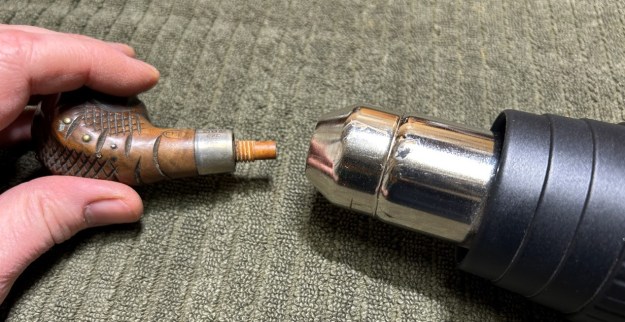 Since the stem was both not-the-original and badly damaged, I elected to set it aside for now and figure out what to do with it later. For now, I decided to remove all the cake inside the bowl. This accomplished a couple of things. First (and most obviously), it cleaned the bowl and provided a refurbished chamber for future smoking. Second, when the old cake was removed, I could inspect the interior walls of the bowl and determine if there was damage or not. I used a reamer, a pipe knife, and a piece of sandpaper taped to a wooden dowel. Collectively, these ensured that all the debris was removed. However, it was clear that the walls of the bowl had been heavily smoked, excessively reamed, and showed signs of char and craze lines. I would have to address that later.
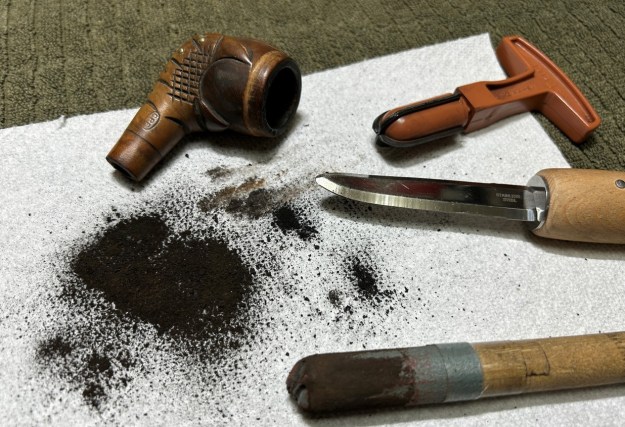 My next step was to remove the lava on the rim. For this, I took a piece of machine steel and gently scraped the lava away. The metal’s edge is sharp enough to remove what I need, but not so sharp that it damages the rim.
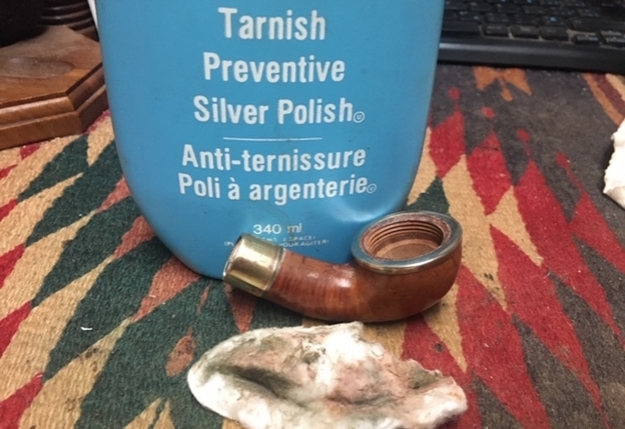
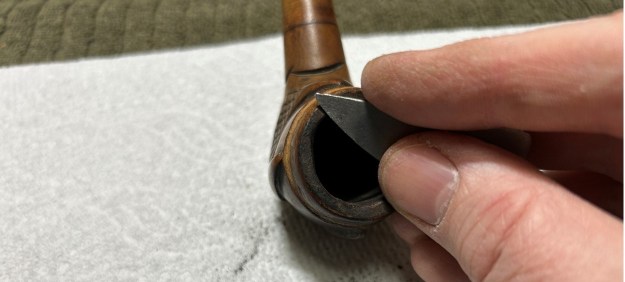 I then cleaned the stummel with both pipe cleaners and cotton swabs dipped in lemon-infused 99% isopropyl alcohol. With a pipe this dirty, it took quite a while and much cotton to clean.
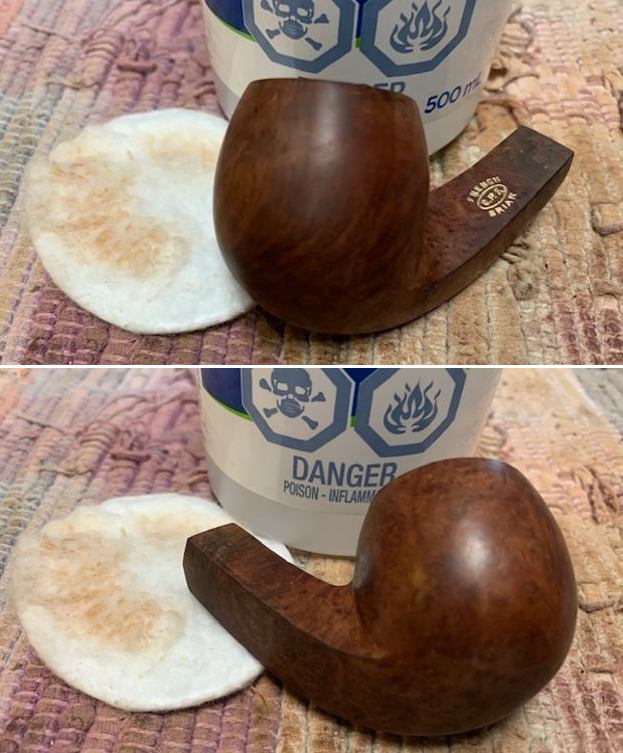
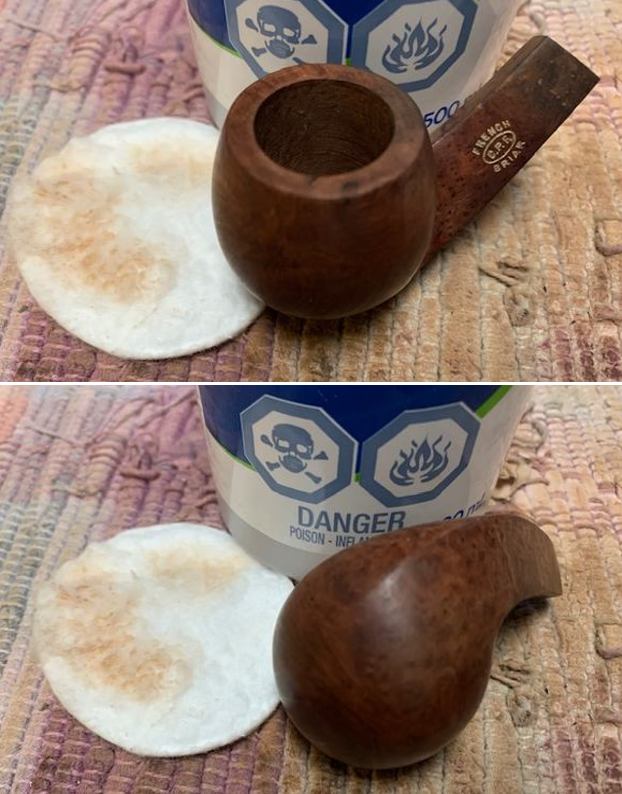
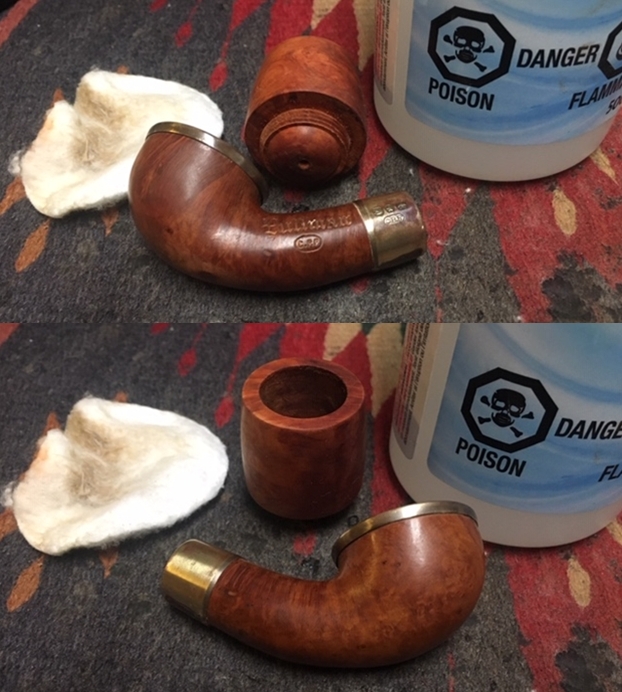
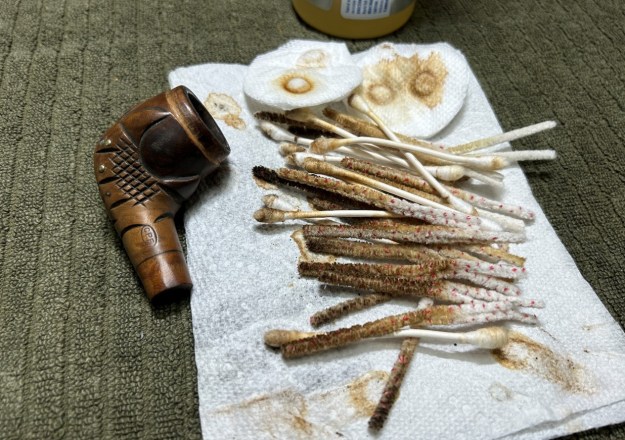 I then decided to ‘de-ghost’ the pipe – that is to say, exorcize the remaining filth from the briar. I filled the bowl and the shank with cotton balls, then saturated them with 99% isopropyl alcohol. I let the stummel sit overnight. This caused the remaining oils, tars and smells to leach out into the cotton.
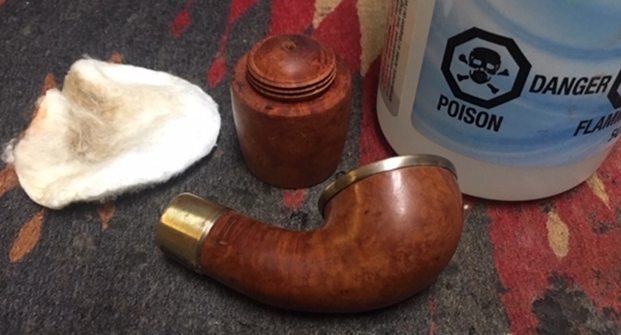
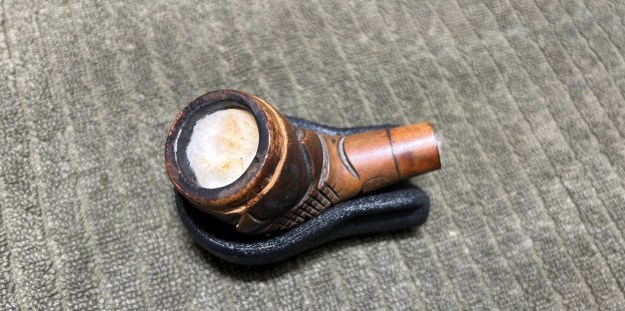 To tidy up the briar, I wiped down the outside, using a solution of a pH-neutral detergent and some distilled water, with cotton rounds. I also used a toothbrush in the crevices. This did a good job of cleaning any latent dirt on the surface of the briar. The last step of the cleaning process was to scour the inside of the stummel with the same mild detergent and tube brushes. This was the culmination of a lot of hard work in getting the pipe clean.
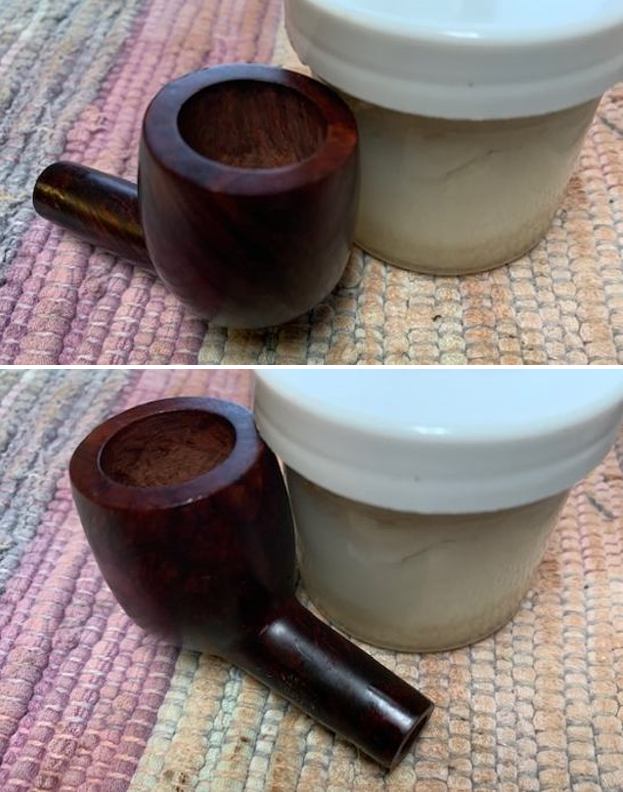
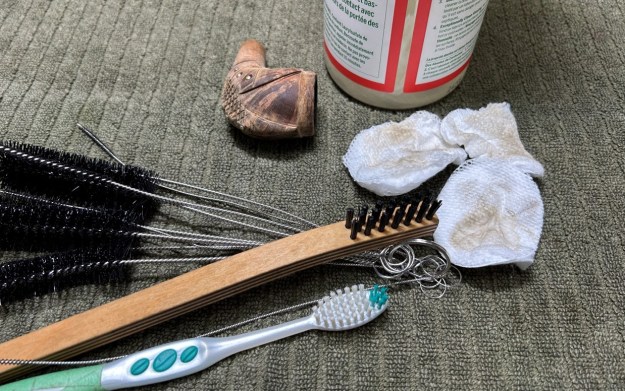 Back to the damaged interior of the bowl. To repair the craze lines, etc., I used an epoxy adhesive that is extremely hard, resistant to high temperatures, and completely inert when cured. It worked superbly. I lined the affected area with the epoxy and let it cure for a full 24 hours. I forgot to take photos of this step, so you’ll just have to take my word for it. The next day, I roughened up the epoxy’s surface with 220-grit sandpaper for the next step. I thinly coated the inside of the bowl with a mixture of my wife’s homemade yogurt and activated charcoal. Once hardened, this provided a good, faintly rough surface for a new cake to build.
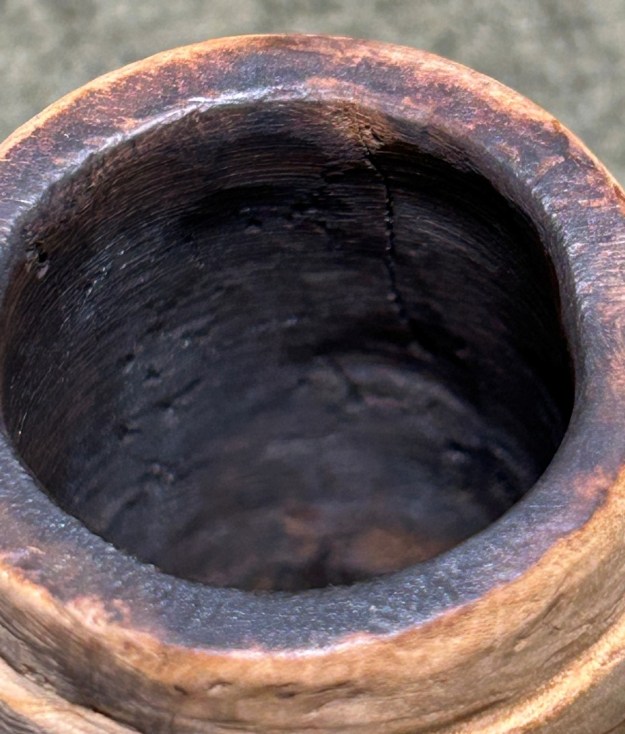
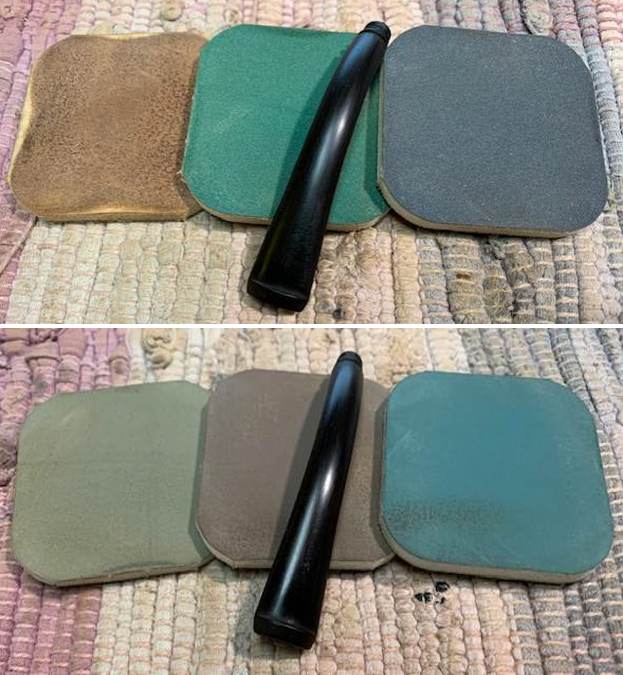
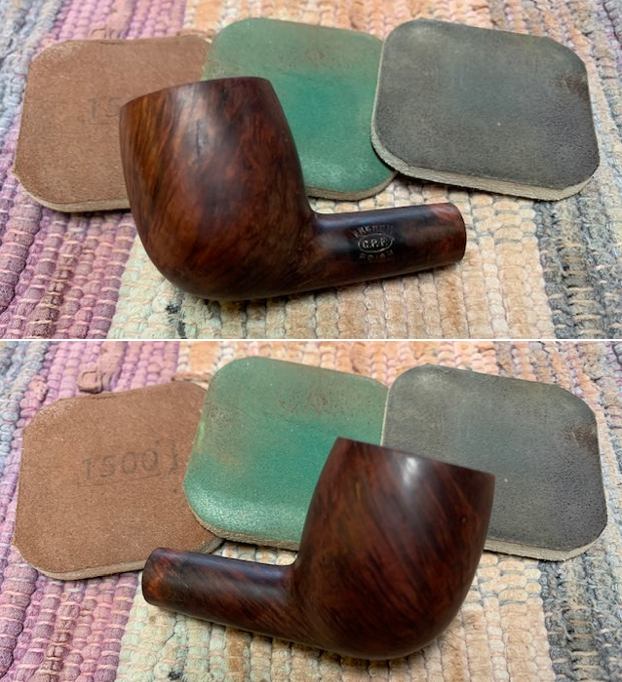
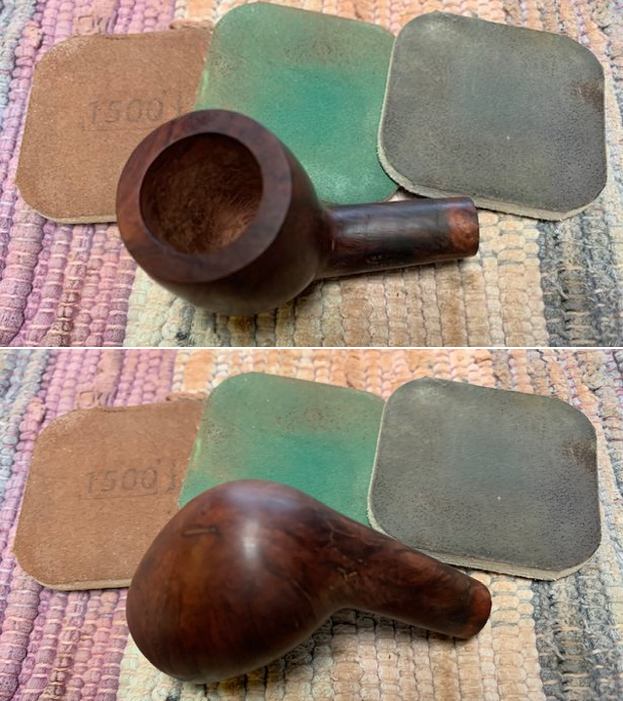
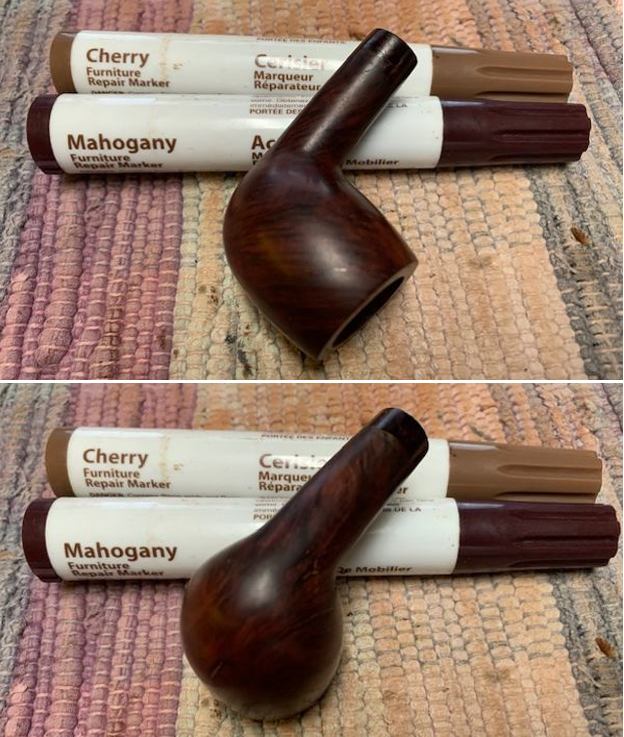
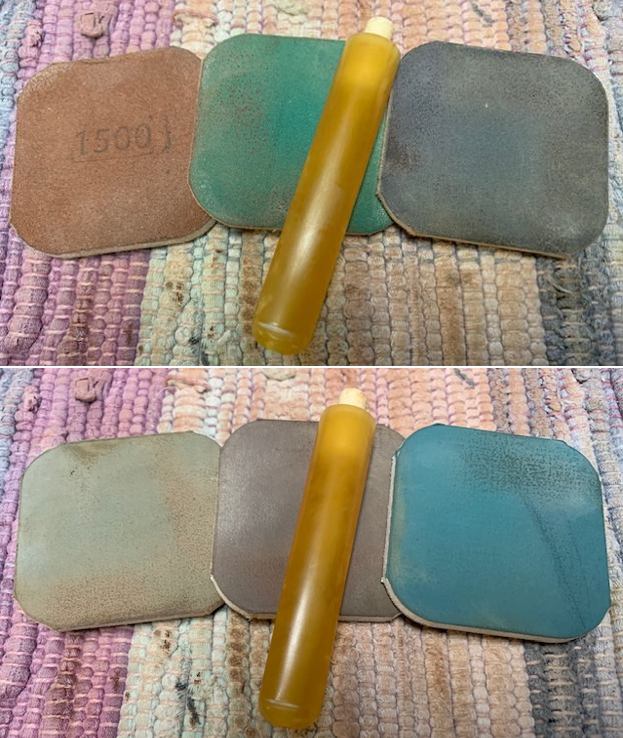
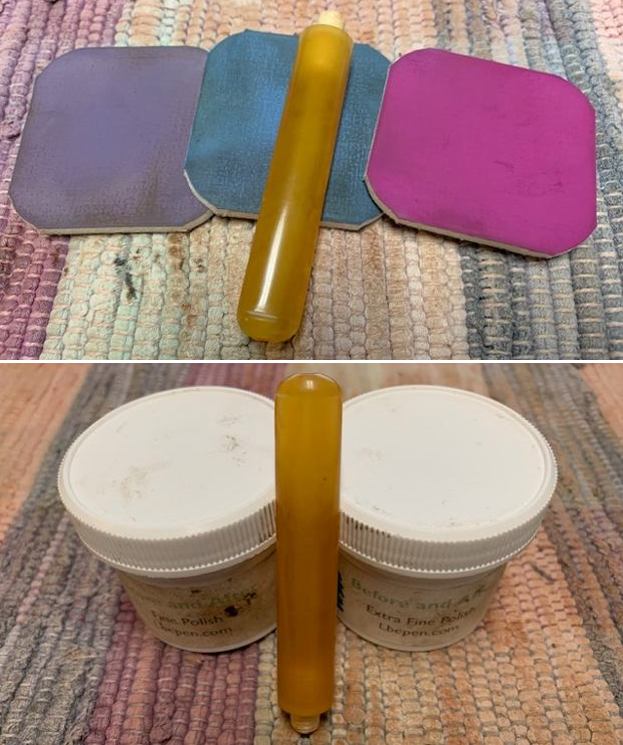
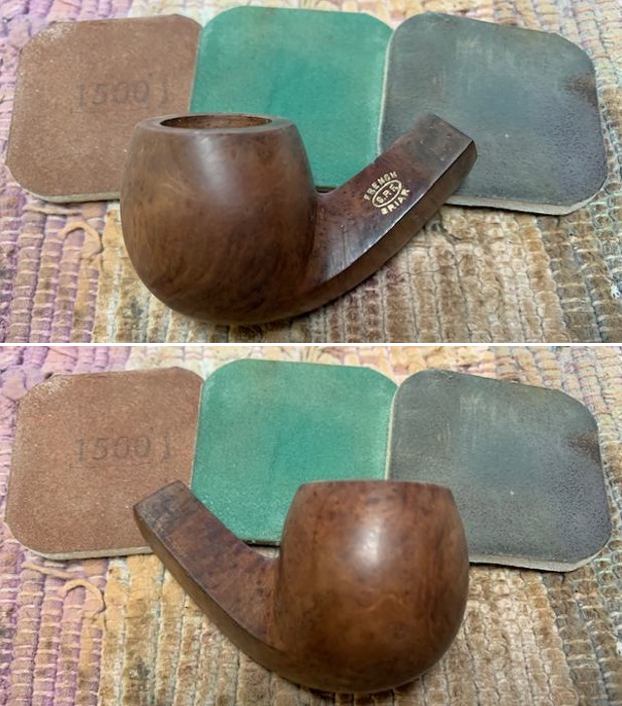
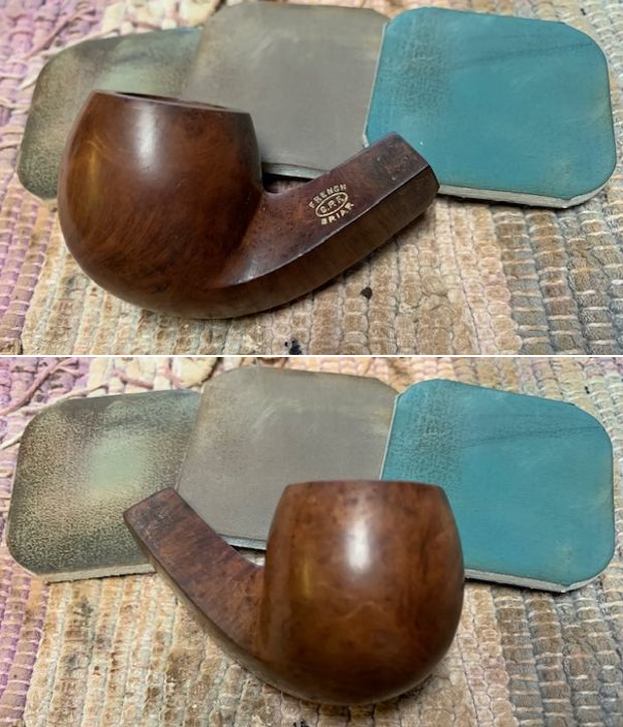
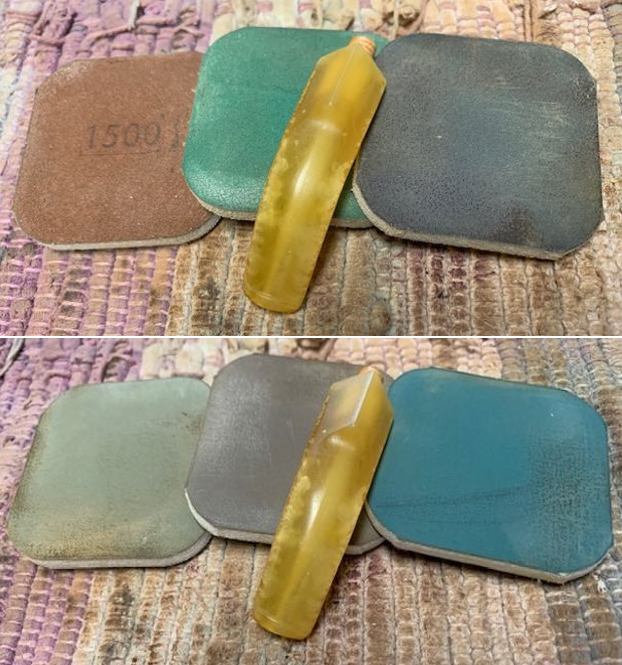
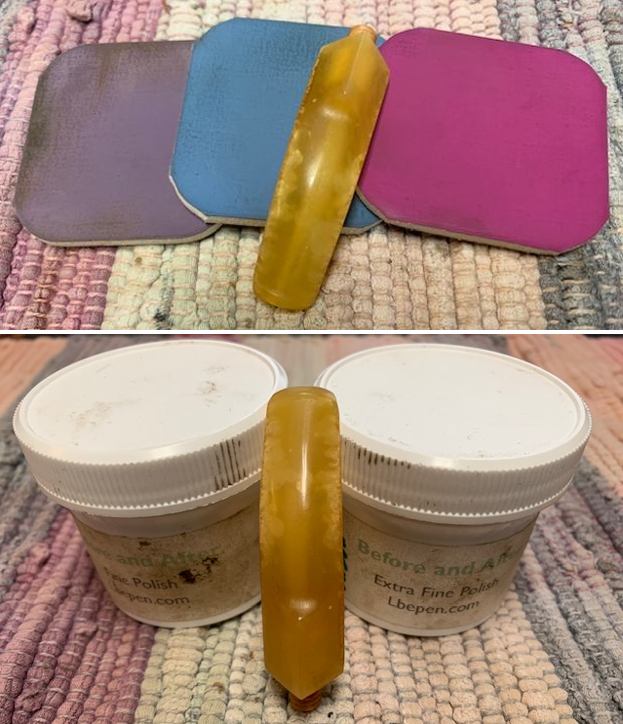
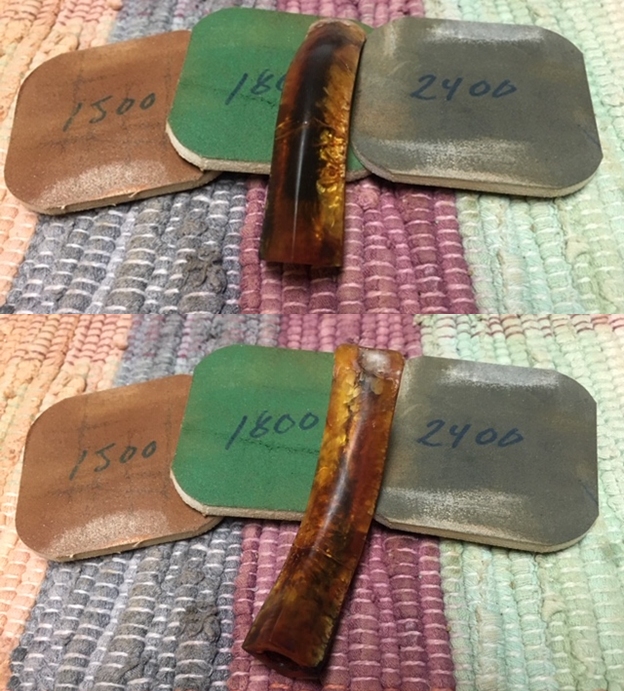
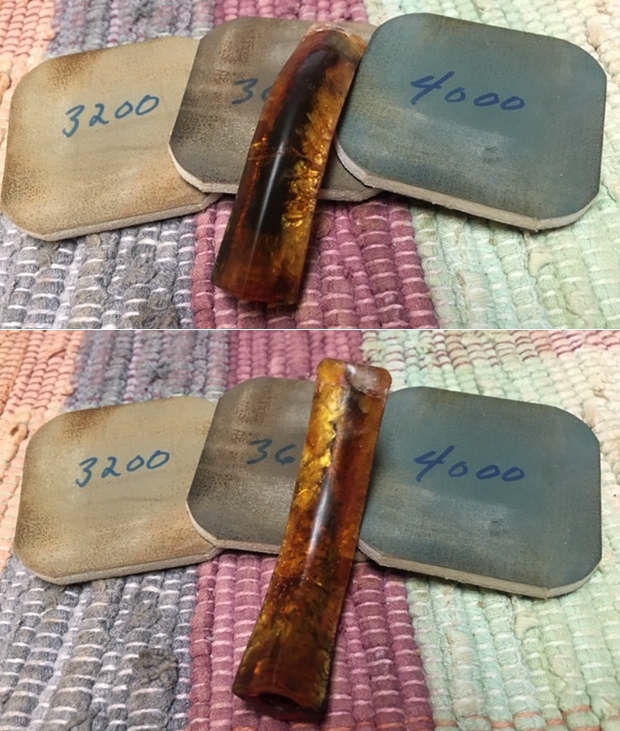
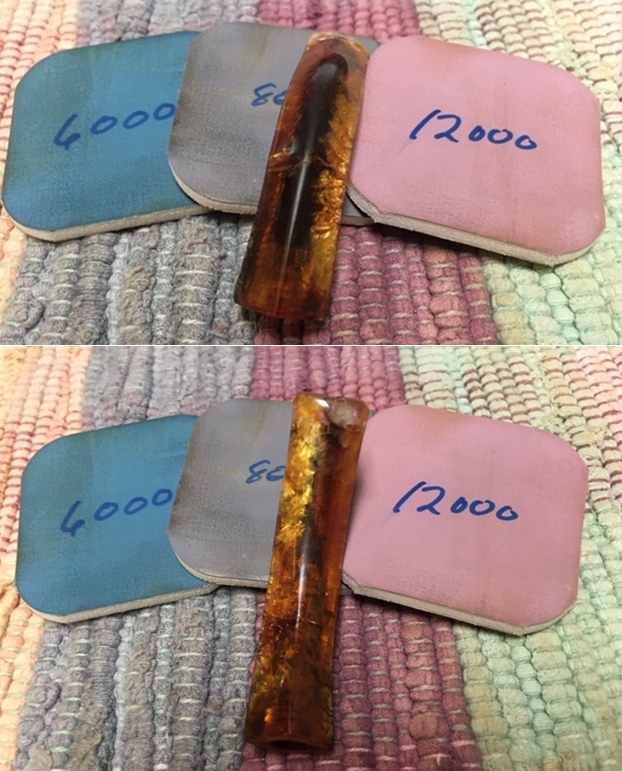
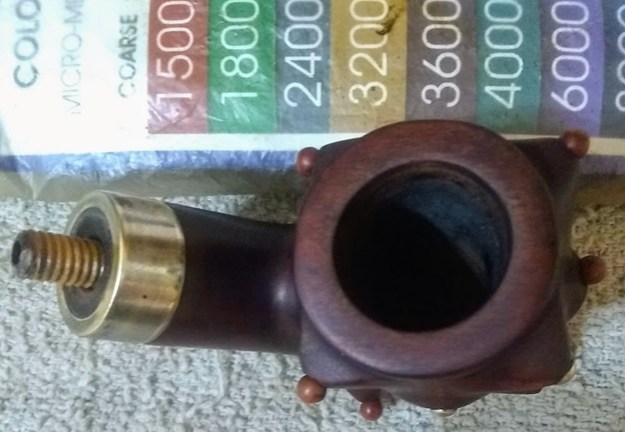
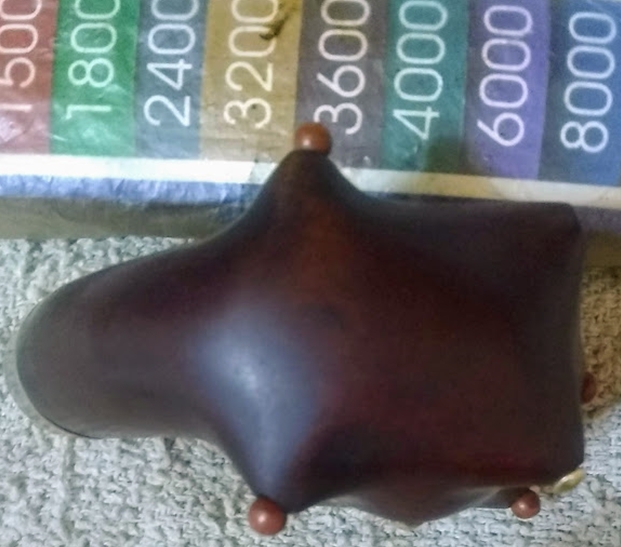
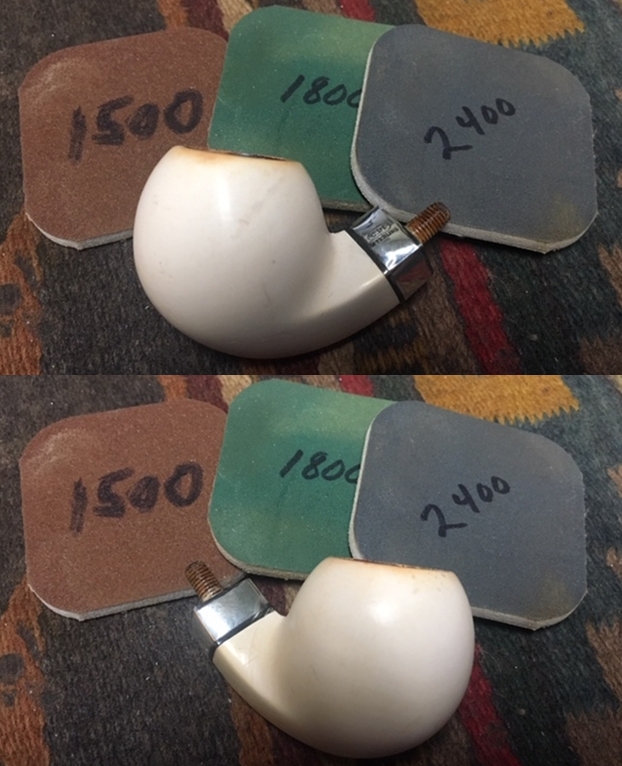
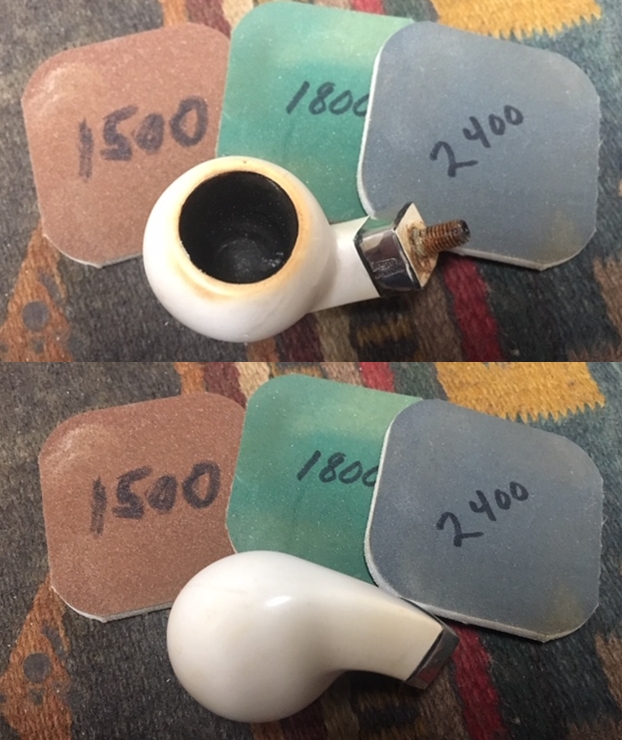
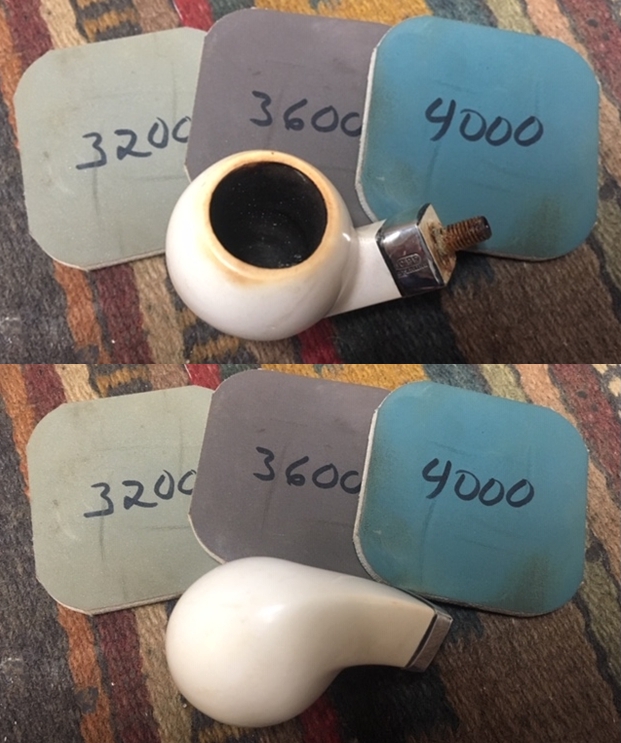
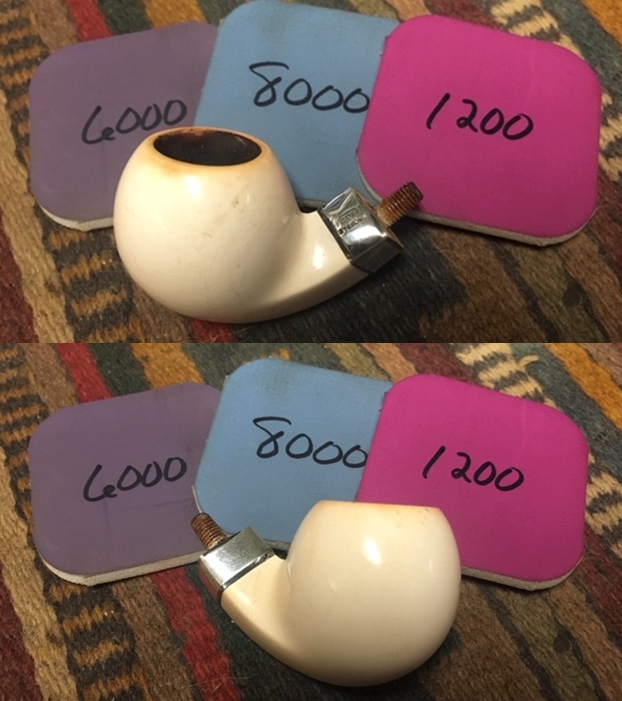
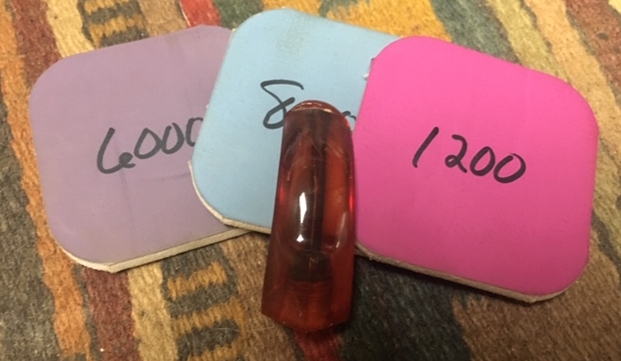
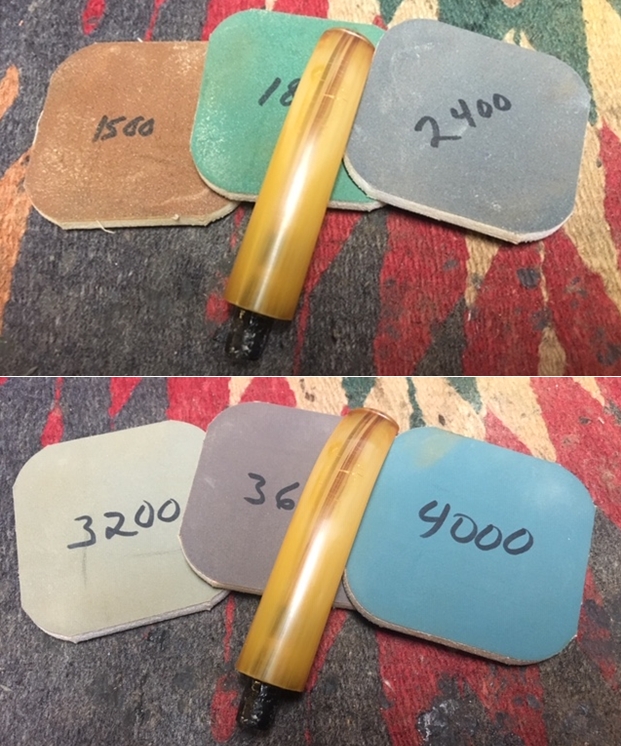
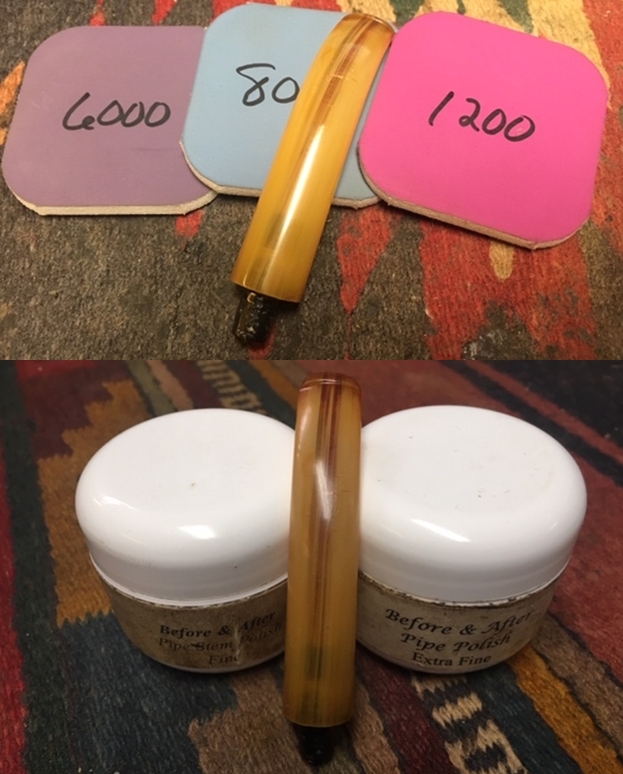
 I used all nine micromesh pads (1,500 through 12,000 grit) to sand the outside of the stummel and finish it off. This sanding minimizes flaws in the briar and provides a beautiful smoothness to the wood.
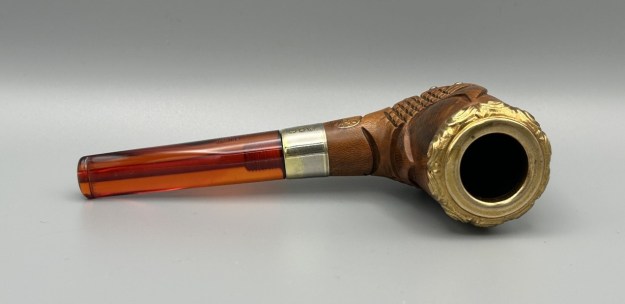
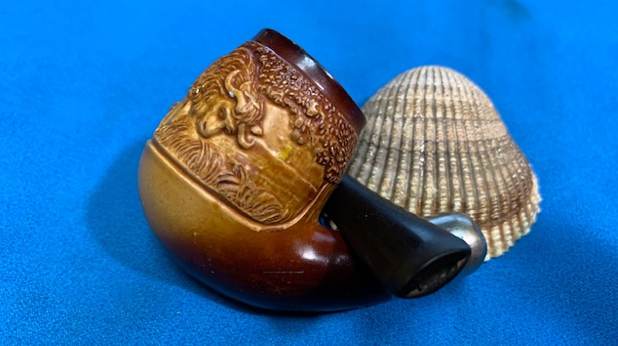
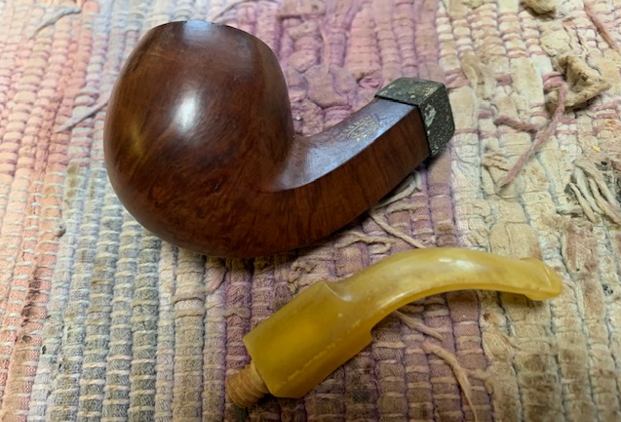
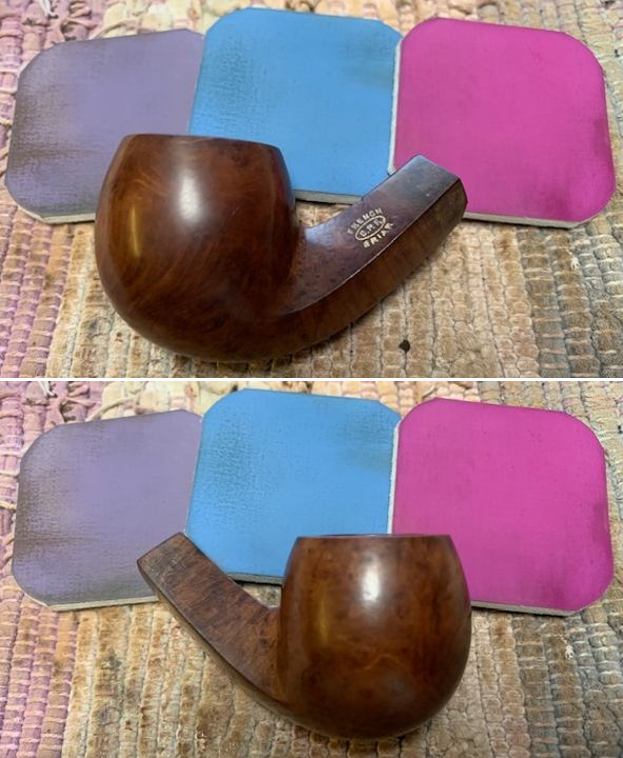
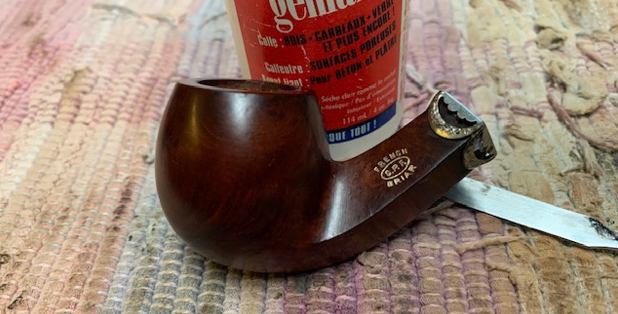
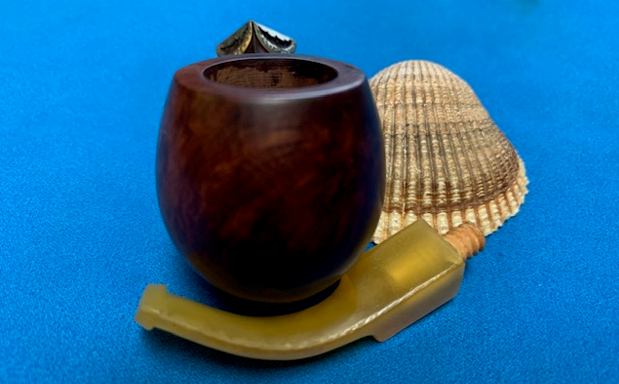
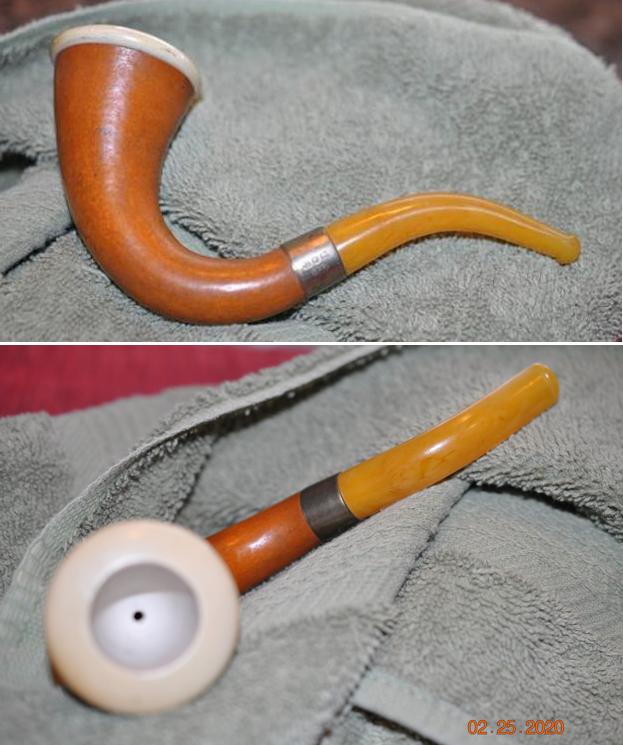
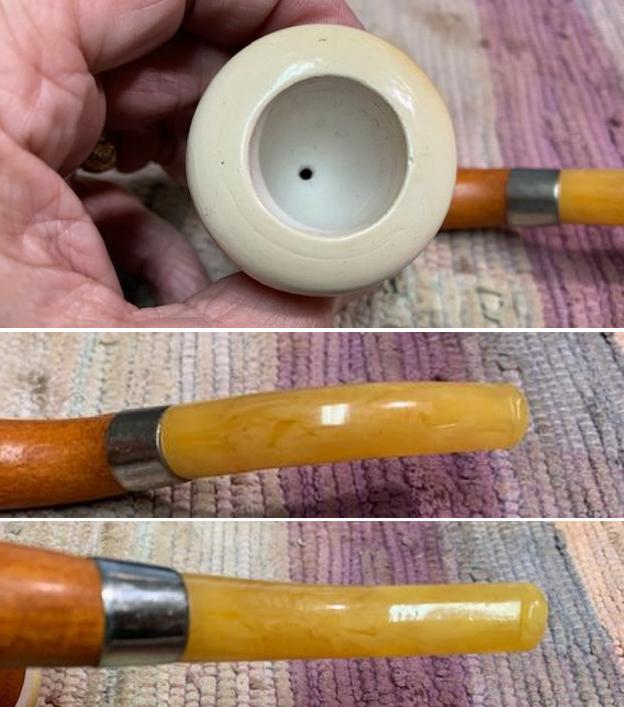
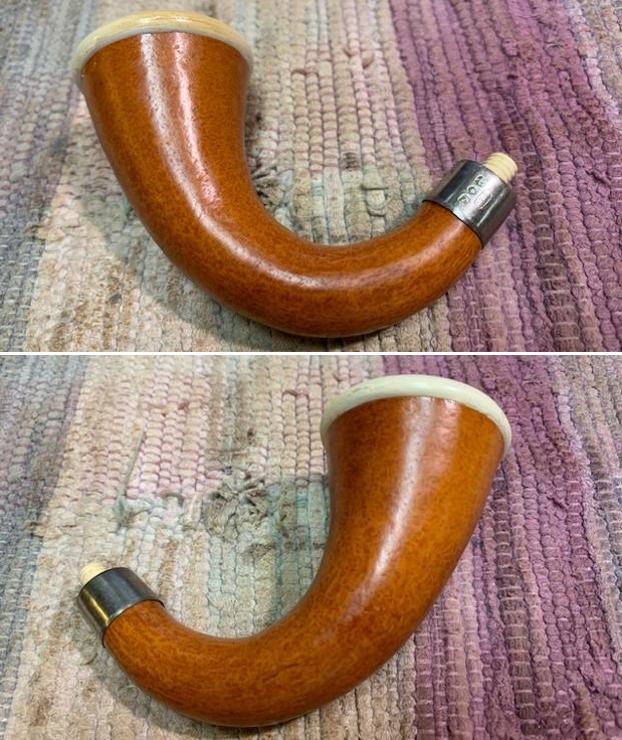
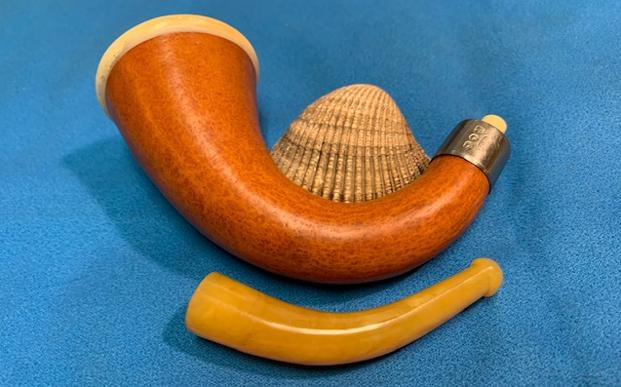
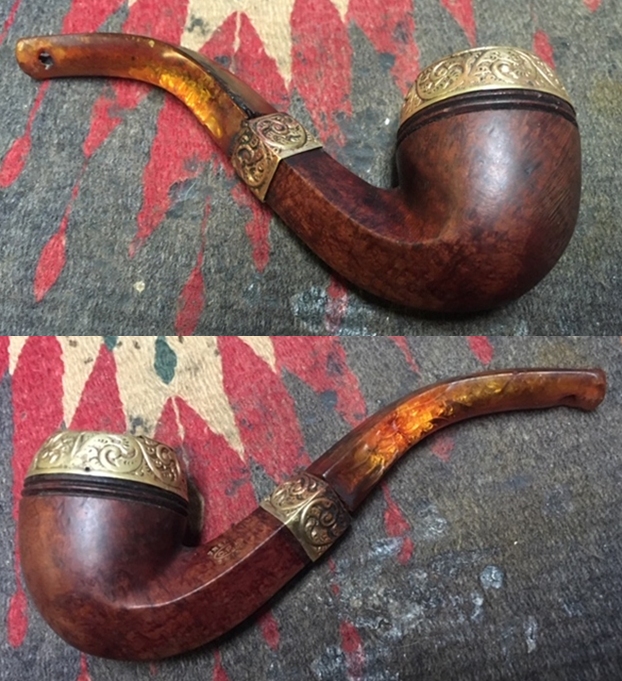
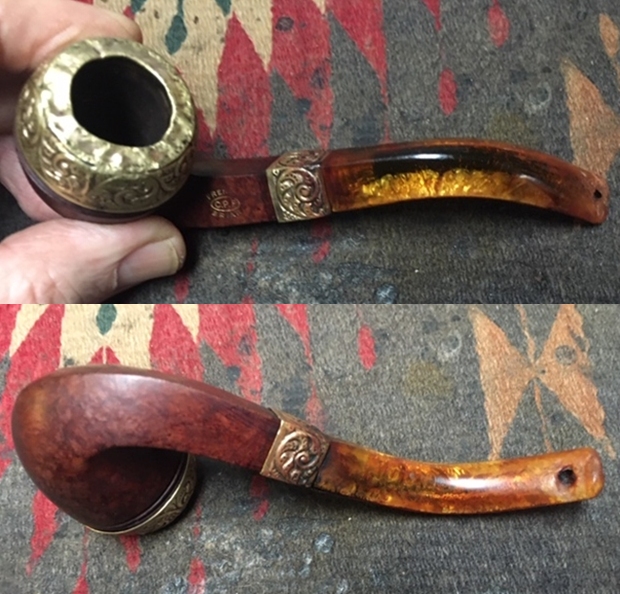
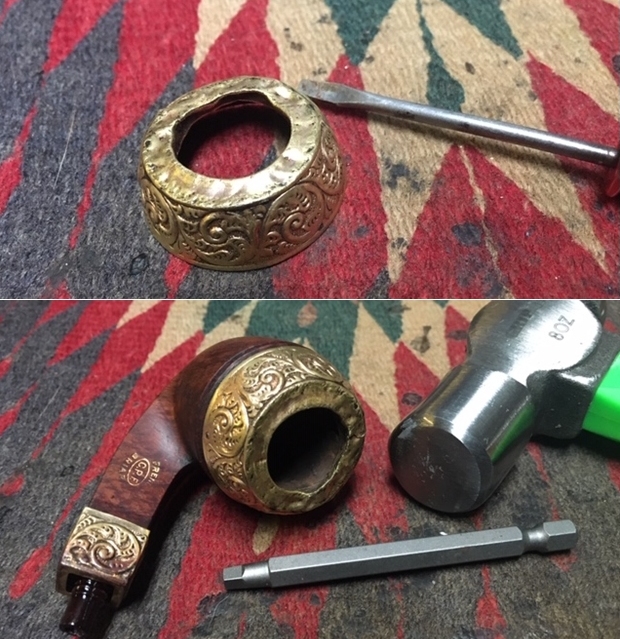
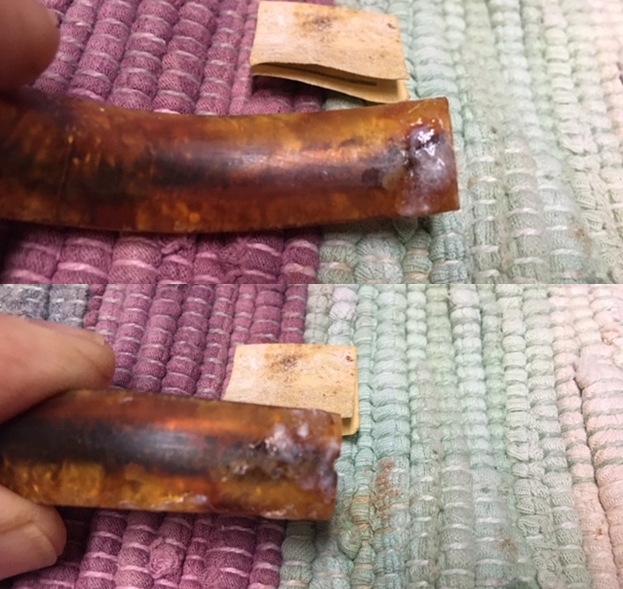
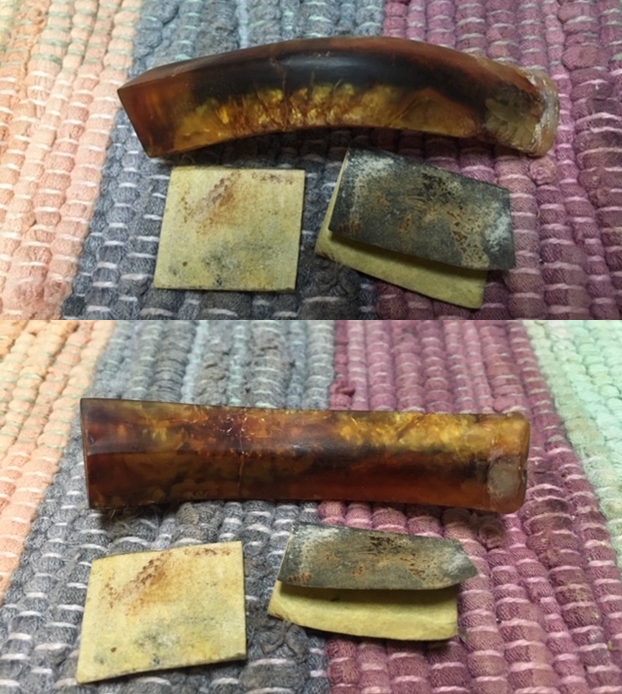
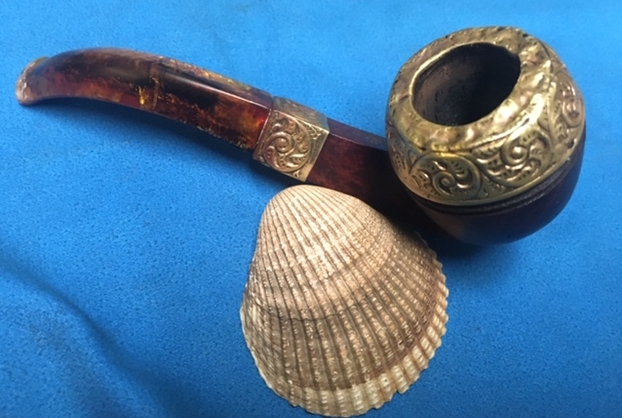
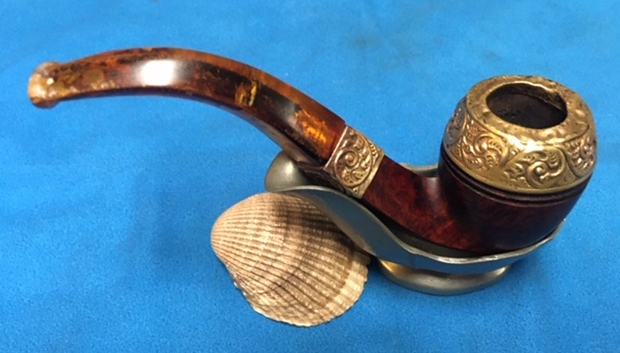
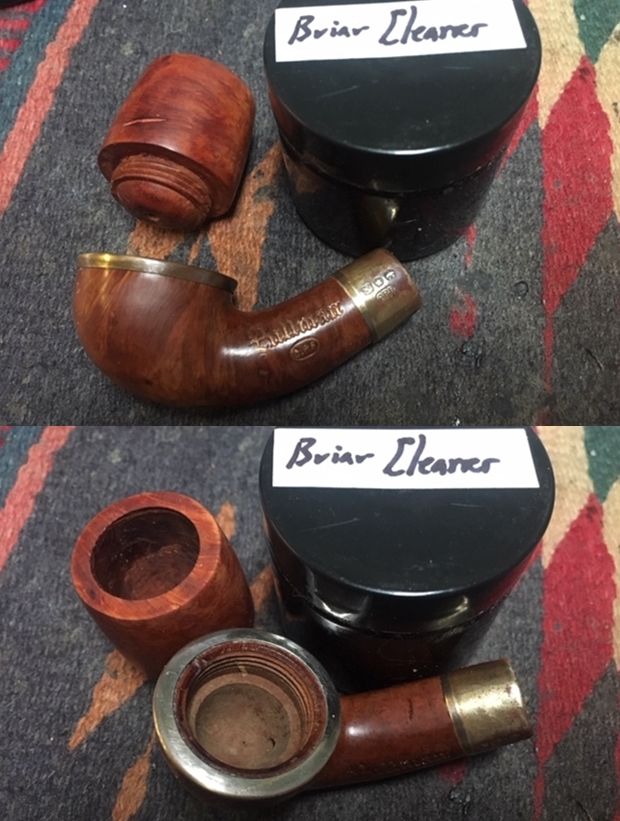
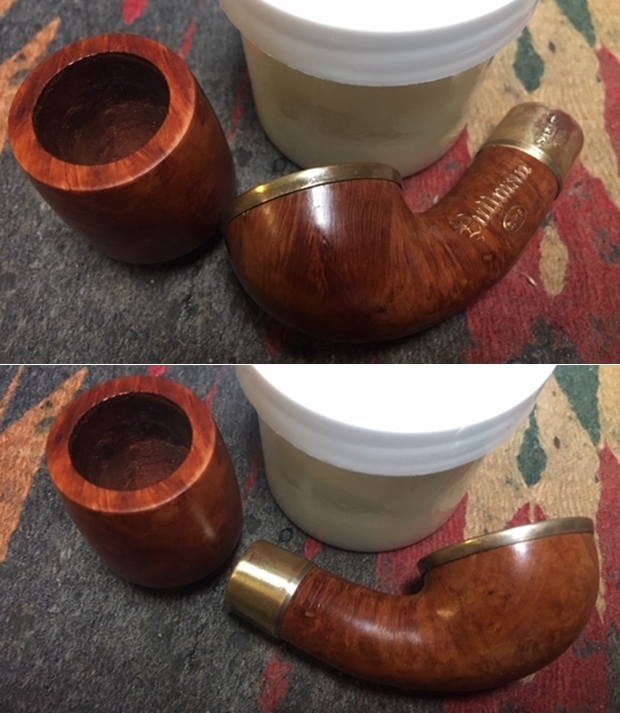
 Steve and I both have a few very old rim caps, specifically for C.P.F. pipes. We scoured both of our piles and found a perfect one in his collection. It fits correctly and is just the sort of piece that a C.P.F. pipe of that era would have had. I gave it a quick buffing with some old MicroMesh pads.
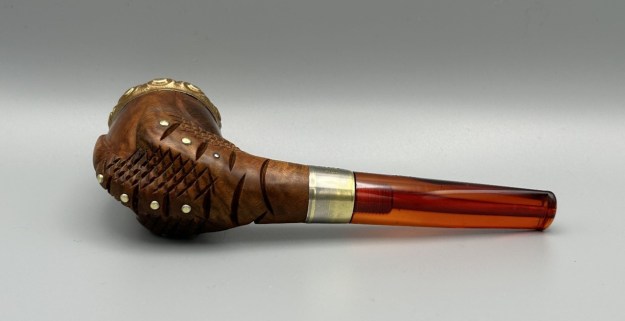
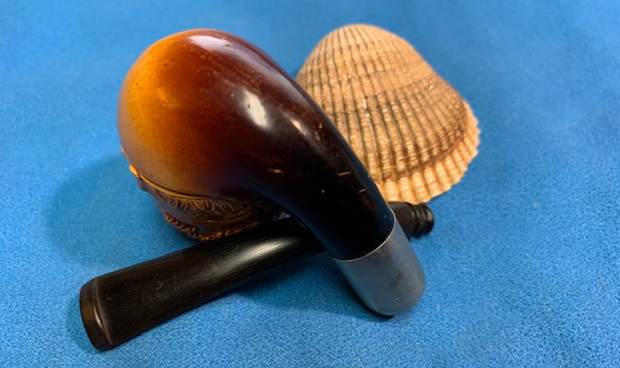
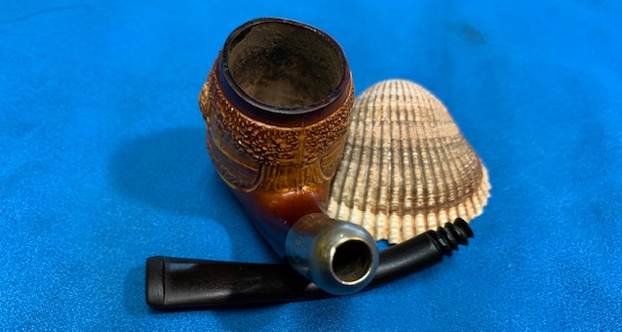
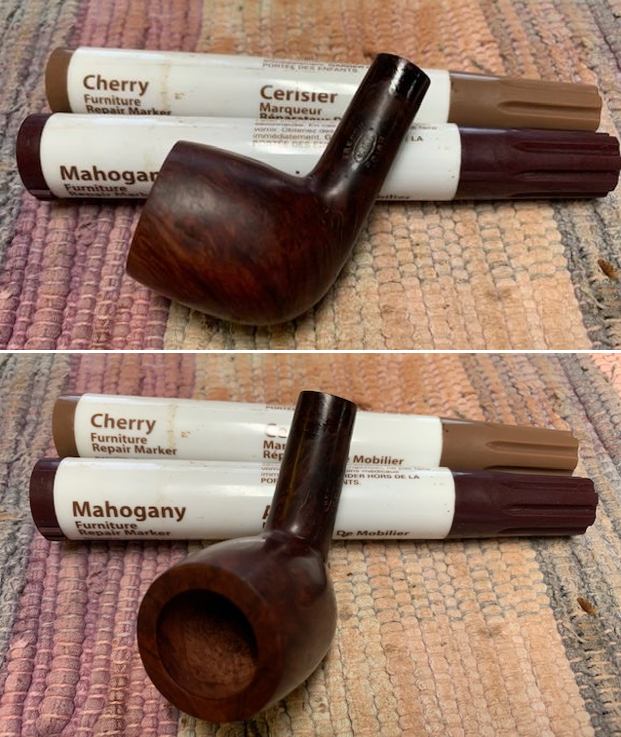
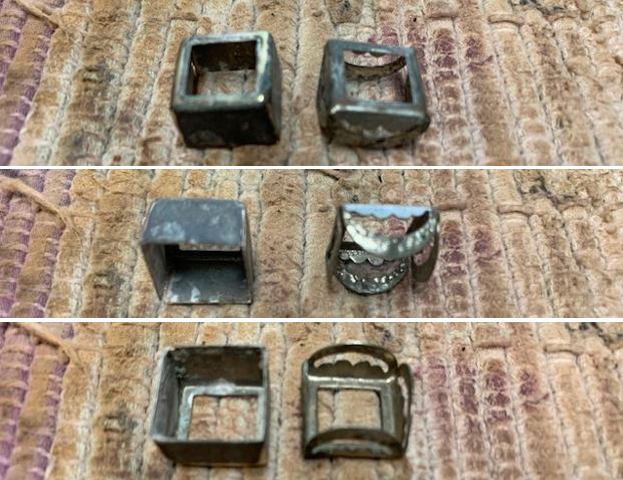
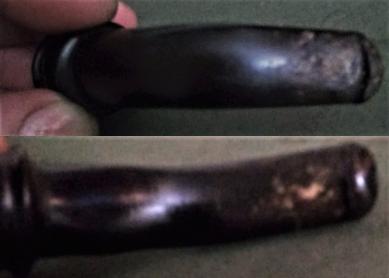
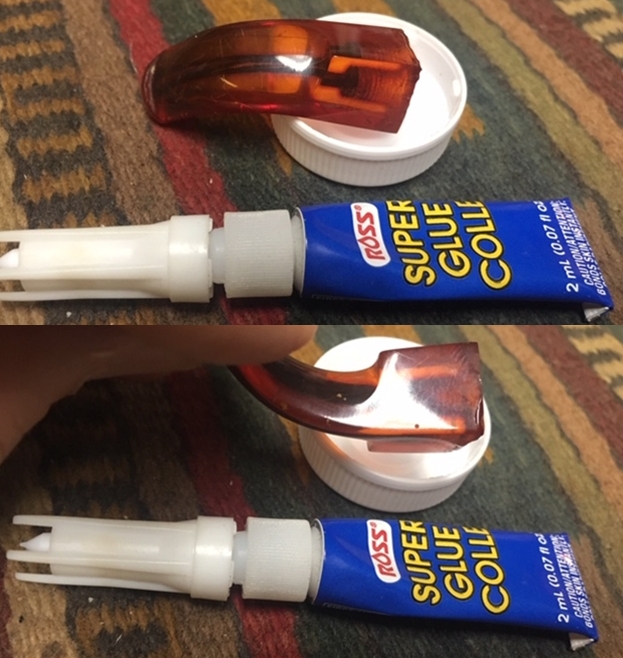
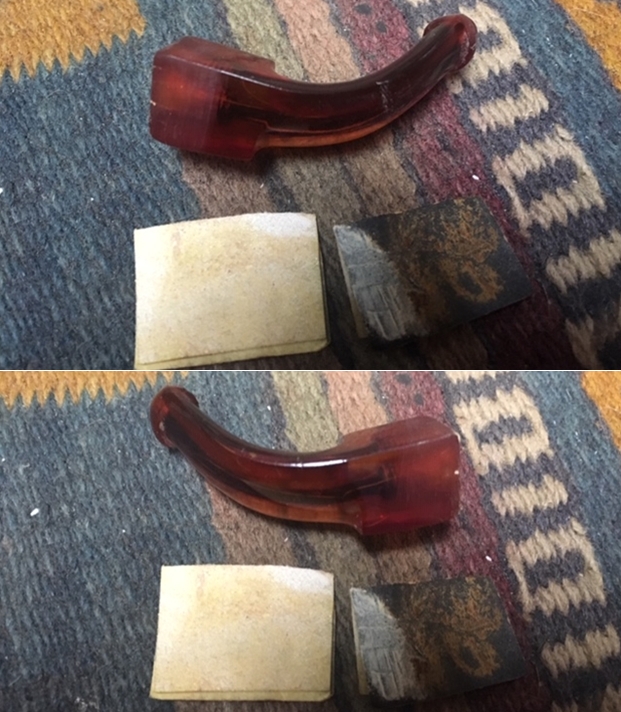
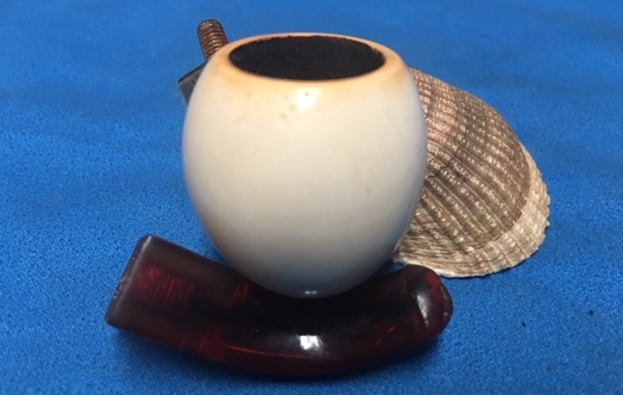
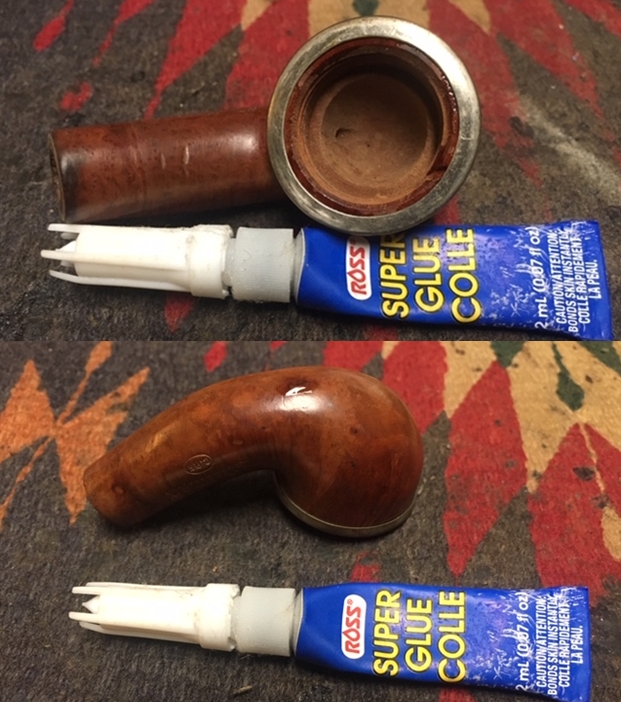
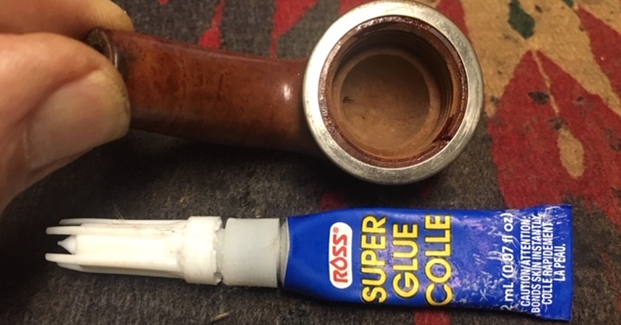
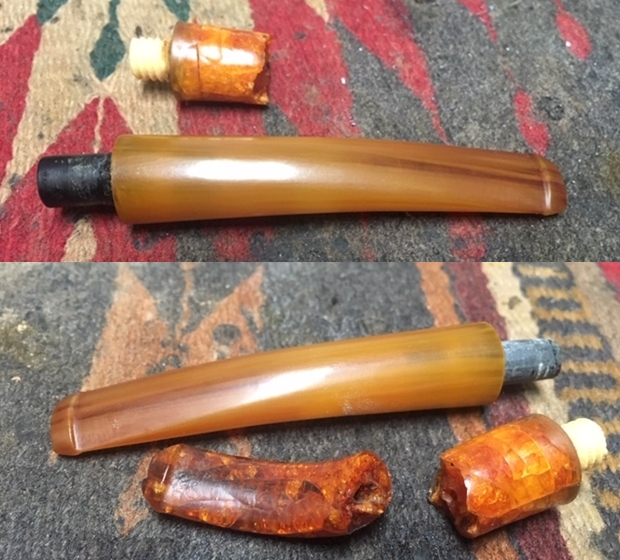
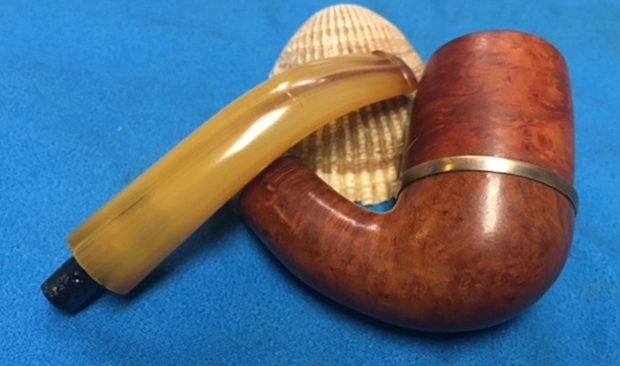
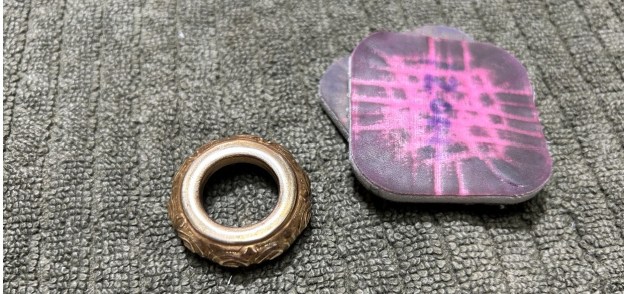 Now to address the stem issue. Similar to the rim cap, I went to my collection of stems and found an ideal replacement, based on Steve’s recommendation. I have several, very old, Bakelite stems that would be just right. The one I selected dates from the same time period as the pipe and, best of all, was unused – never smoked. The stem was marked Germany, the place of manufacture. I married the stem and stummel, and both Steve and I agreed that it looked perfect. I also had to hunt in my stores for an old bone tenon. This took a long time, but I finally found one that fit both the new stem’s mortise and the existing shank’s mortise. I quickly cleaned and polished up the stem (didn’t take long, as it was new) and put it aside.
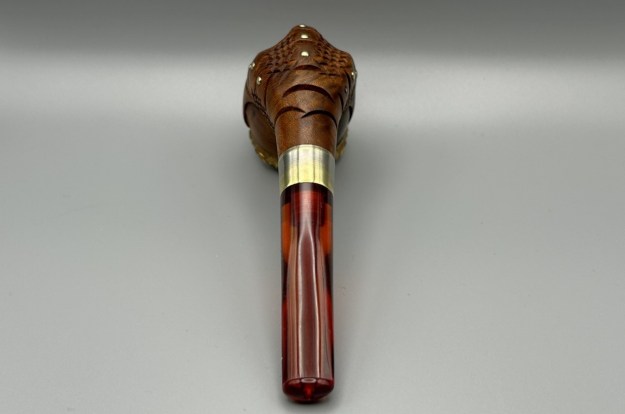
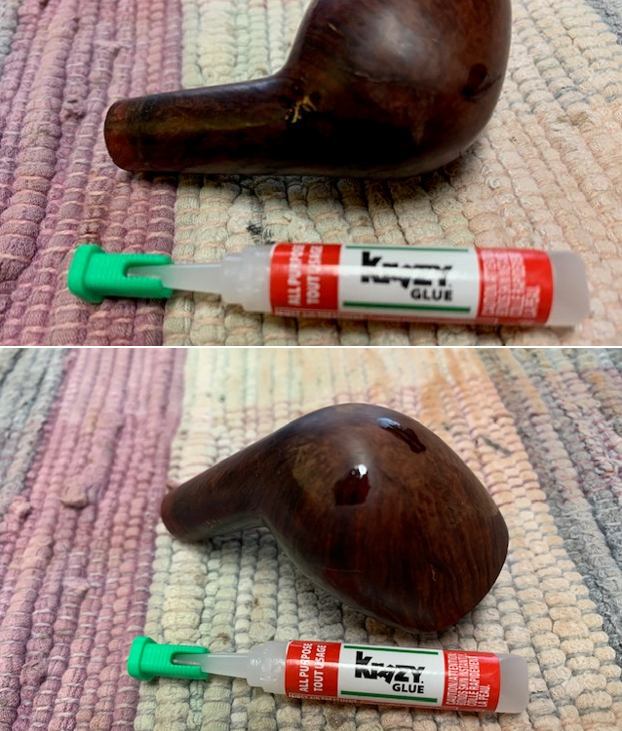
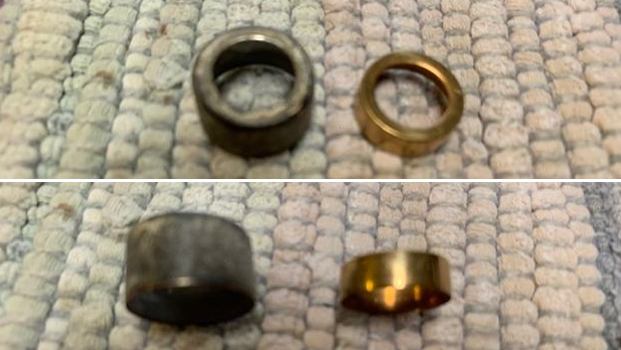
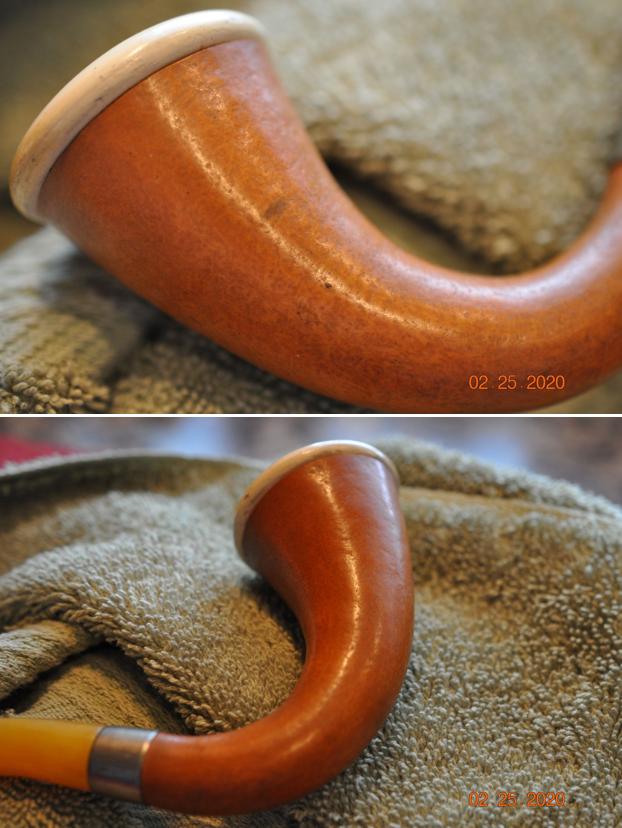
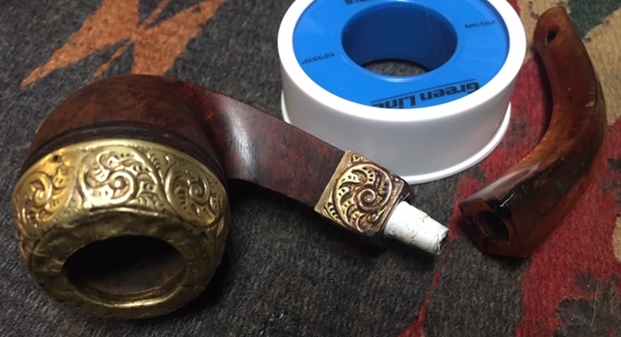
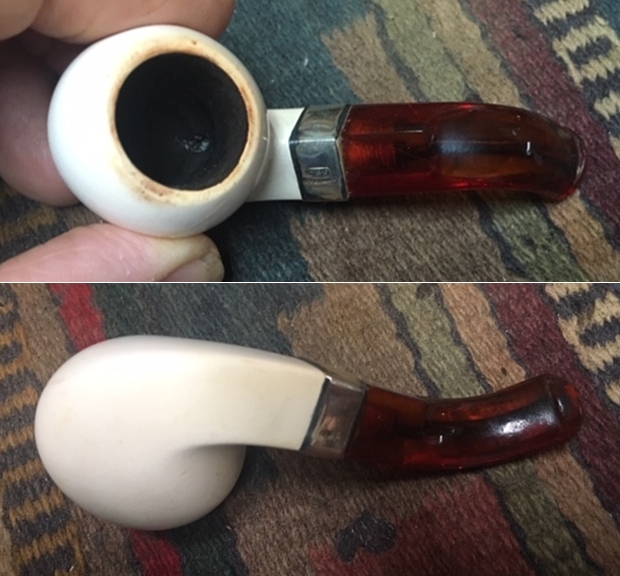
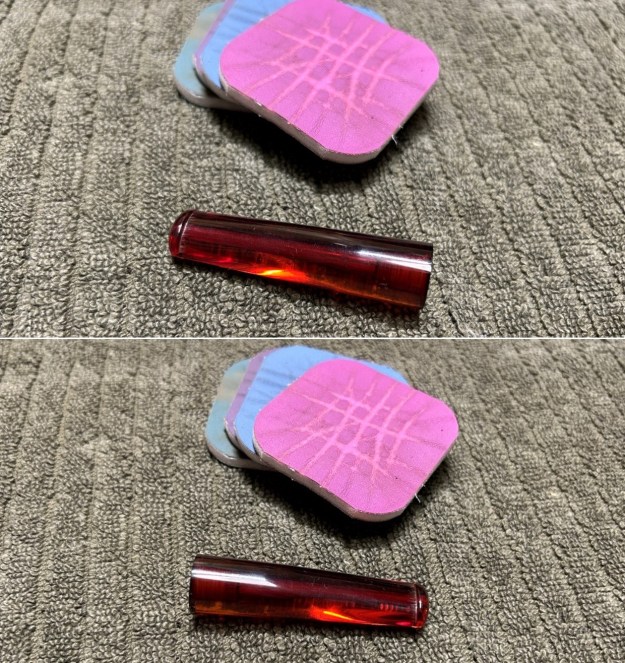 Next, I polished the brass (or nickel) band with a few grey sanding pads. This made it shine beautifully. I took the band and the rim top and glued them in place with pH-neutral adhesive. I was very pleased with the results.
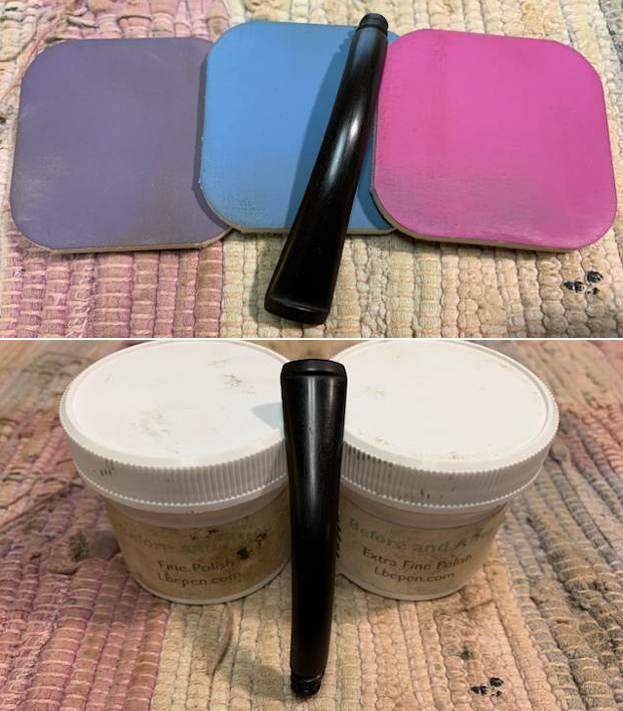
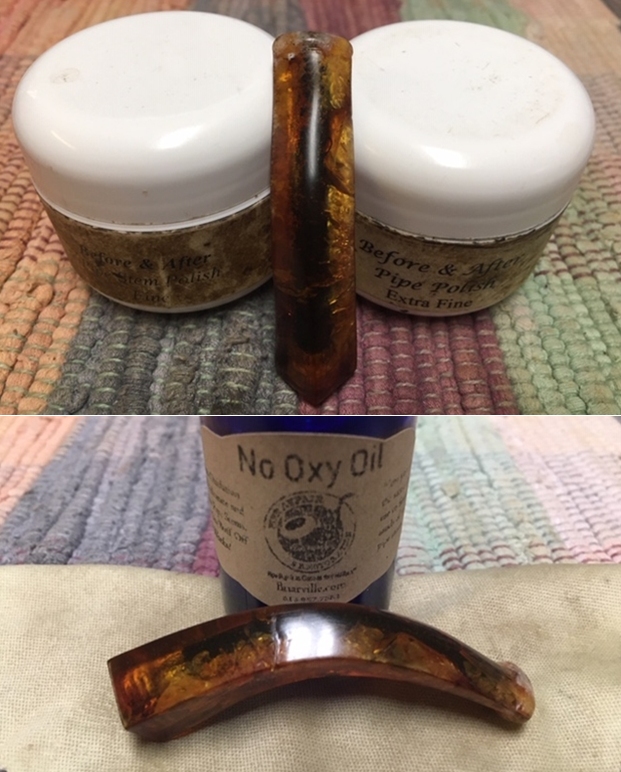
 I rubbed some LBE Before & After Restoration Balm into the briar and let it sit for 30 minutes or so. The balm moisturizes the wood and gives a beautiful depth to the briar. I then buffed the stummel with a microfibre cloth.
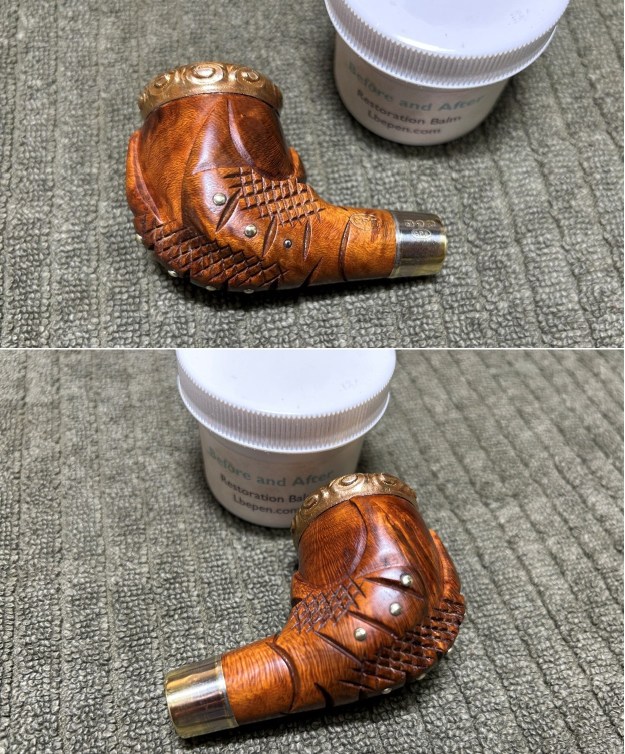
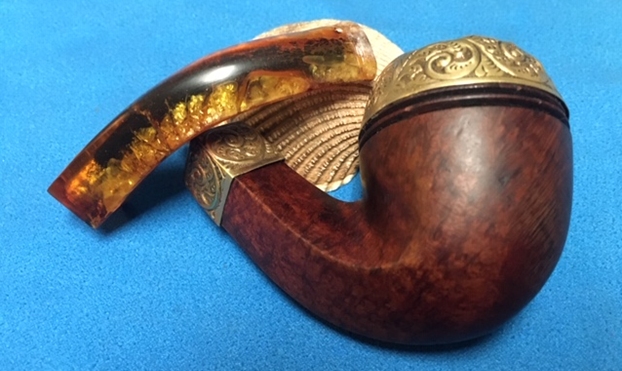
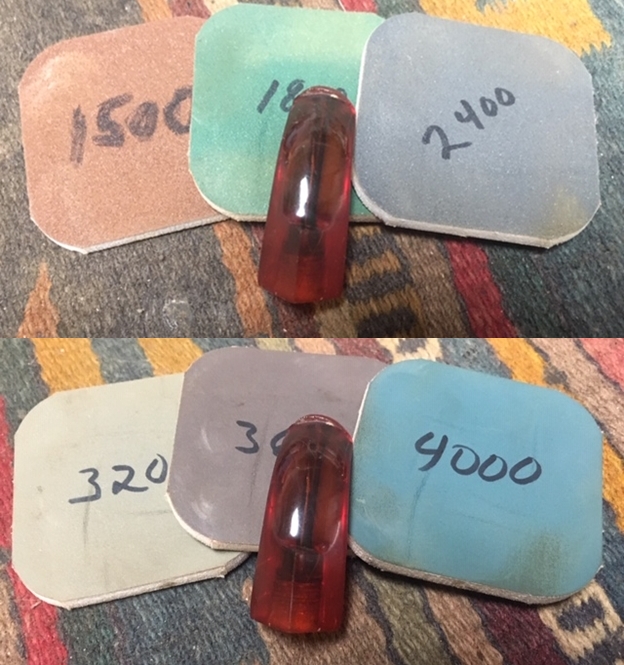
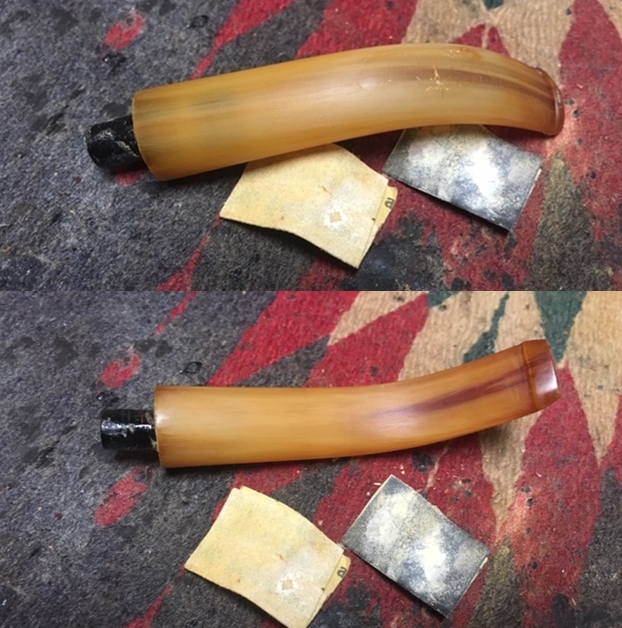
 For the final step, I took the stem (only) to my bench polisher and carefully buffed it – first with a blue diamond compound, then with carnauba wax. I chose not to buff the stummel on the bench polisher, as there were too many points for the wheel to catch on the stummel. Instead, I polished it by hand with conservator’s wax.
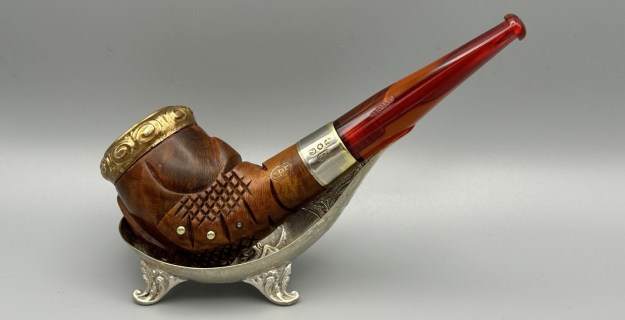
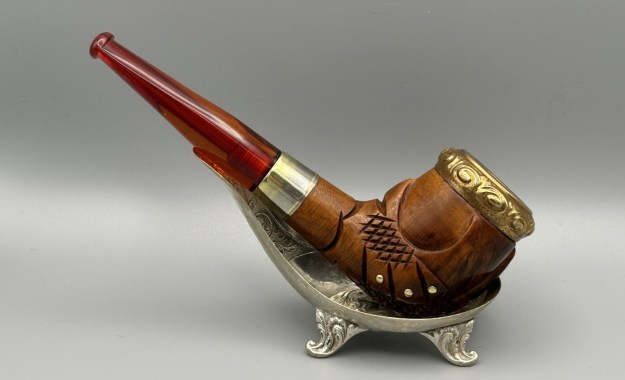
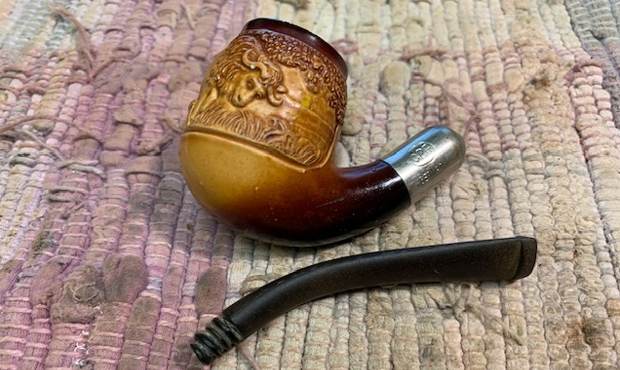
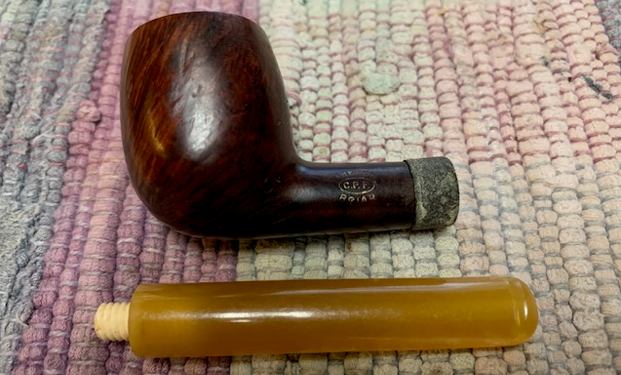
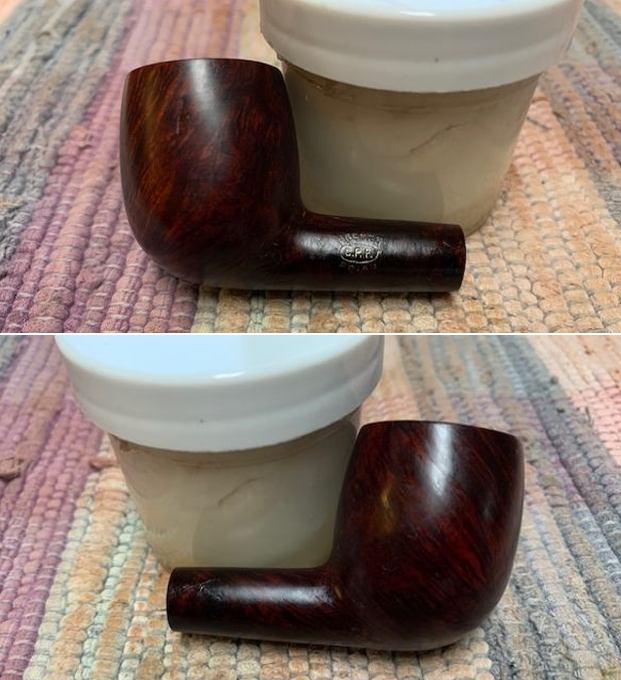
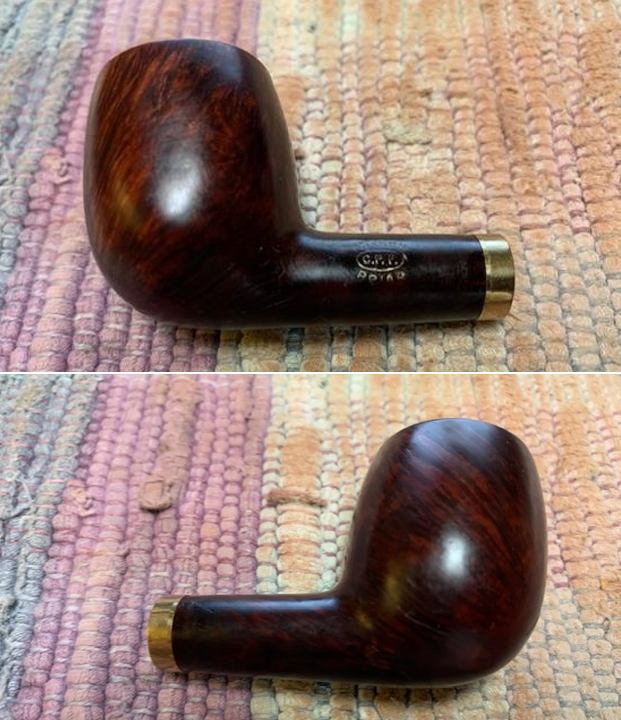
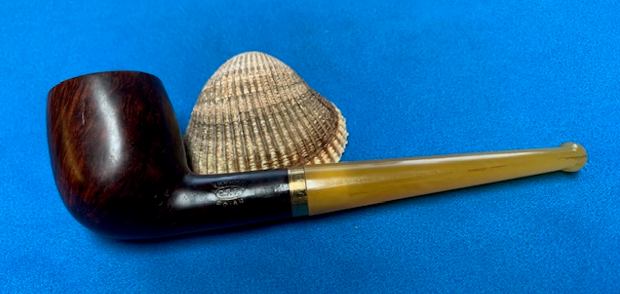
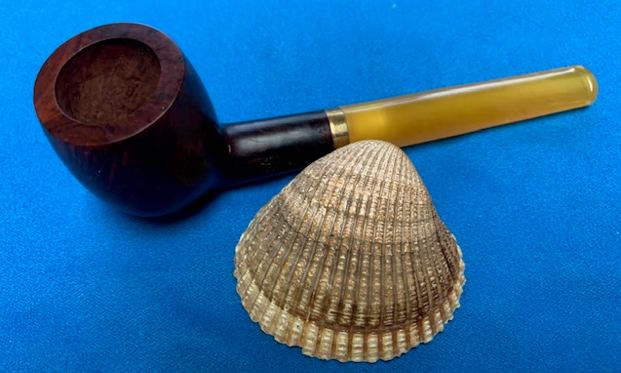
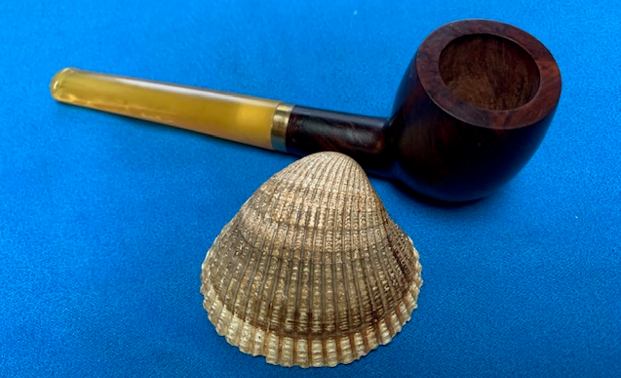
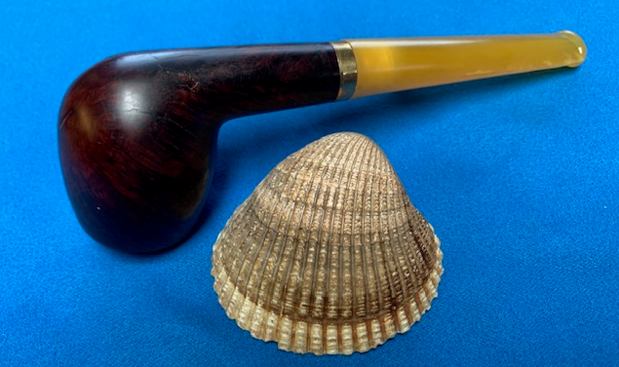
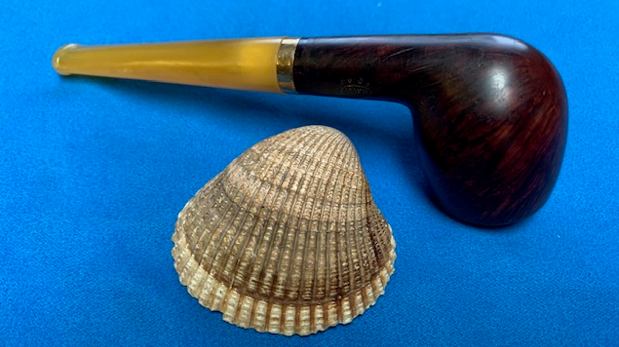
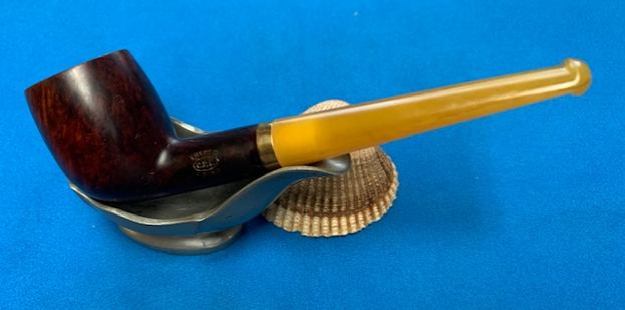
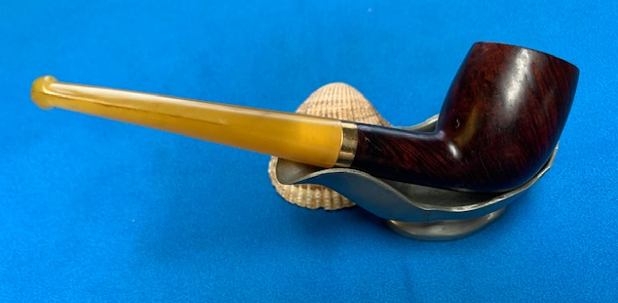
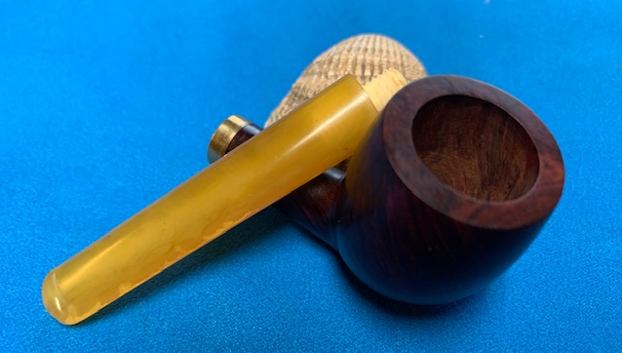
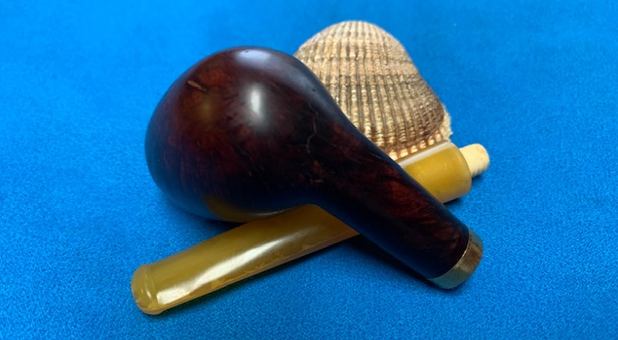
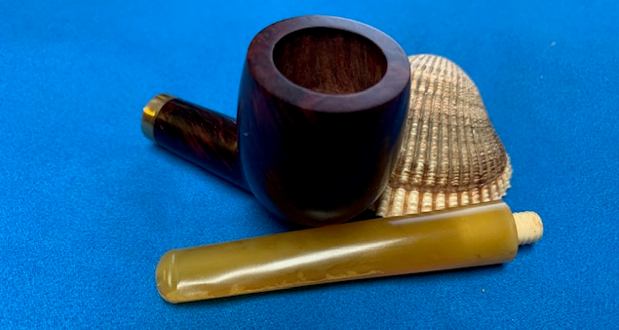
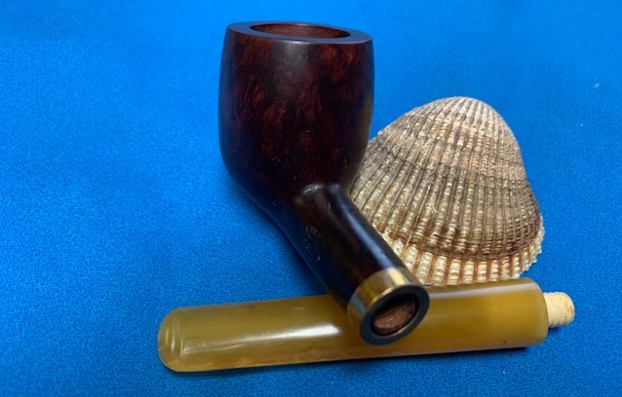
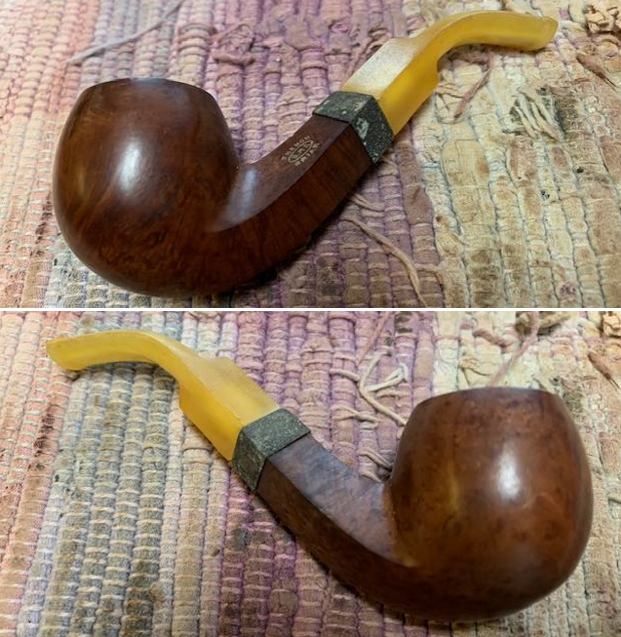
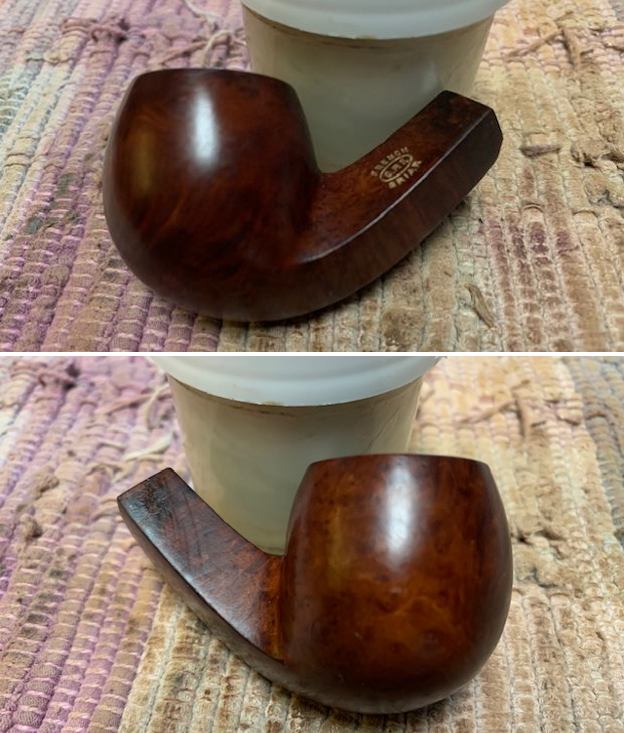
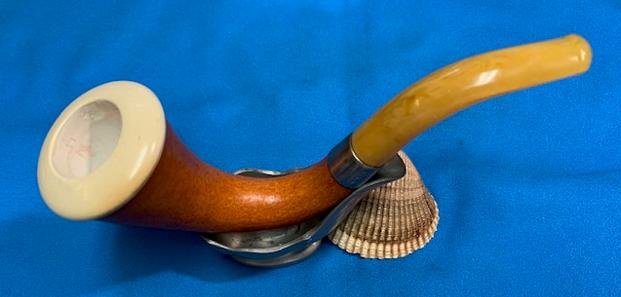
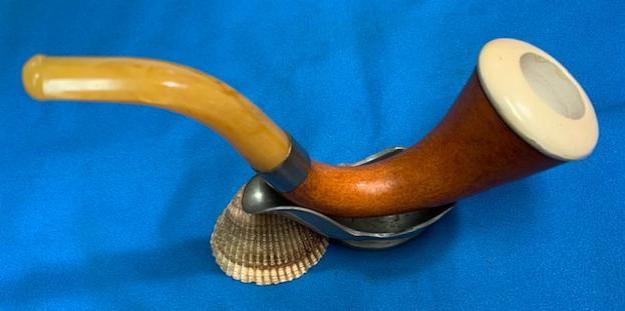
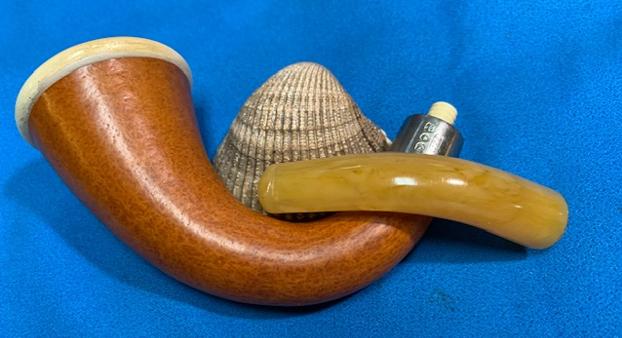
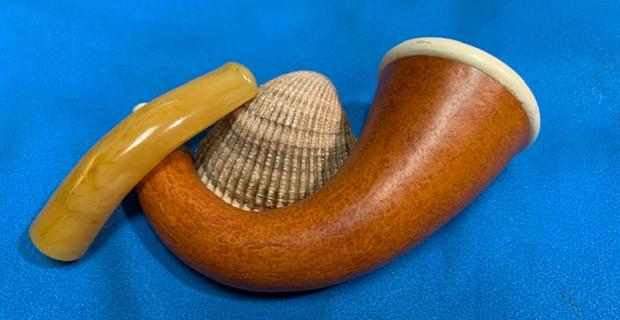
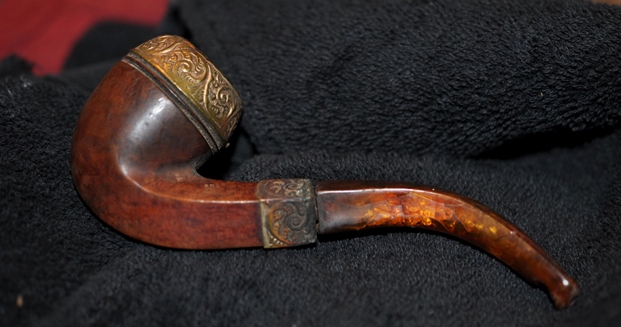
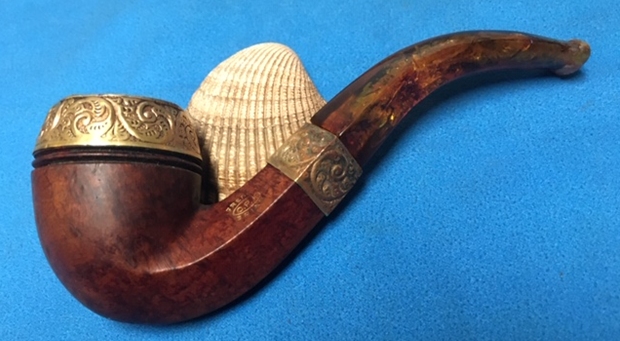
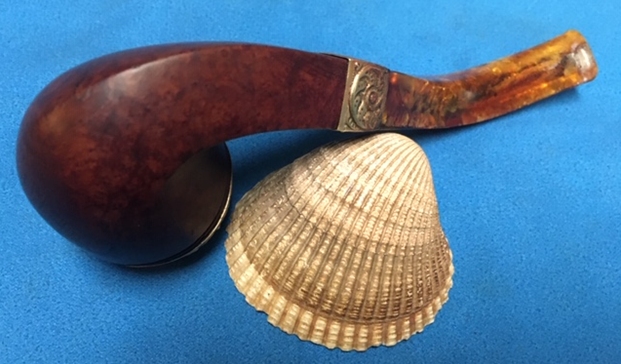
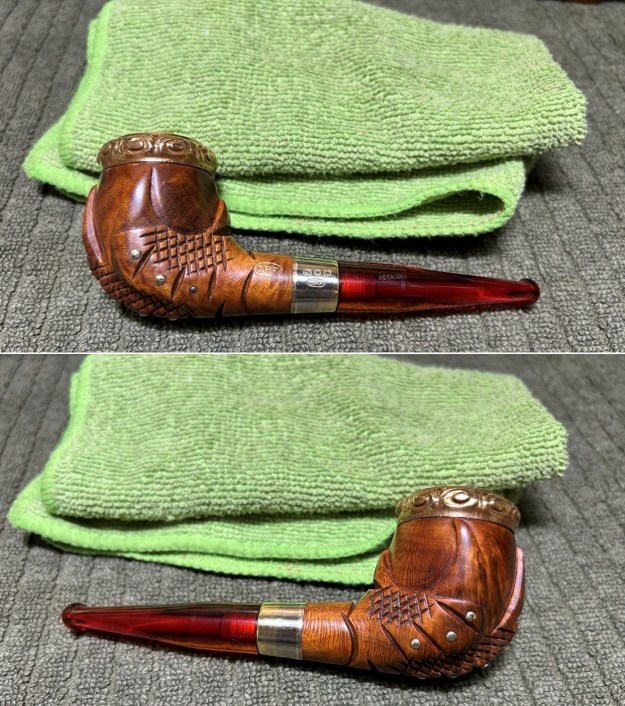 All done! This C.P.F. Egg and Claw looks fantastic again and is ready to be enjoyed by its next owner. It was a tough restoration, but this pipe is a trophy and worth having in your collection. I am pleased to announce that this pipe is for sale! If you are interested in acquiring it for your collection, please have a look in the ‘American’ section of the store here on Steve’s website. You can also email me directly at kenneth@knightsofthepipe.com. The approximate dimensions of the pipe are as follows: length 5⅓ in. (135 mm); height 2 in. (52 mm); bowl diameter 1⅝ in. (41 mm); chamber diameter ¾ in. (18 mm). The weight of the pipe is 1⅜ oz. (42 g). I hope you enjoyed reading the story of this pipe’s restoration as much as I enjoyed restoring it. If you are interested in more of my work, please follow me here on Steve’s website or send me an email. Thank you very much for reading and, as always, I welcome and encourage your comments.