Blog by Steve Laug
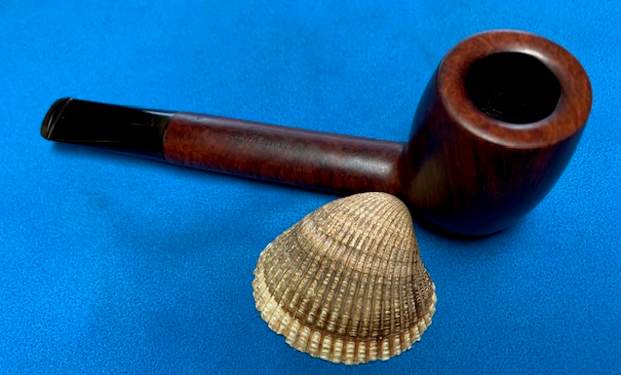
 Once again in this write up and I will take you through my process of working on each pipe that we purchase. Jeff has set up a spread sheet to track where the pipe came from, the date of purchase and what we paid for it so that we know what we have invested in the pipe before we even work on it. This takes a lot of the guess work out of the process. This particular pipe was purchased on 07/22/2021 from an Antique Shop in Vancouver, Washington, USA. I also want you to understand why we take the photos we do. If you have followed for a while then you will see the familiar pattern of the photos we include both in the before and midstream process of working on a pipe. It is not accidental or chance as the photos have been taken to help me make an assessment of the pipe Jeff sees before he starts his clean up work. We do this to record the condition that the pipe was in when received it and to assess what kind of work will need to be done on. When I look at these photos this is what I see.
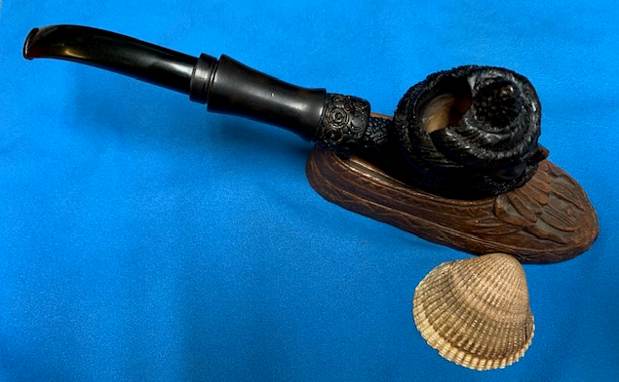
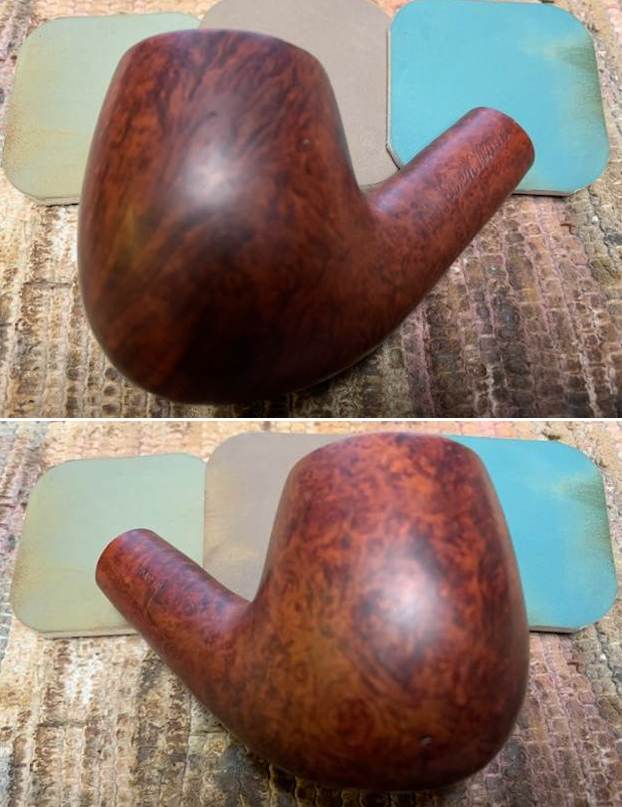
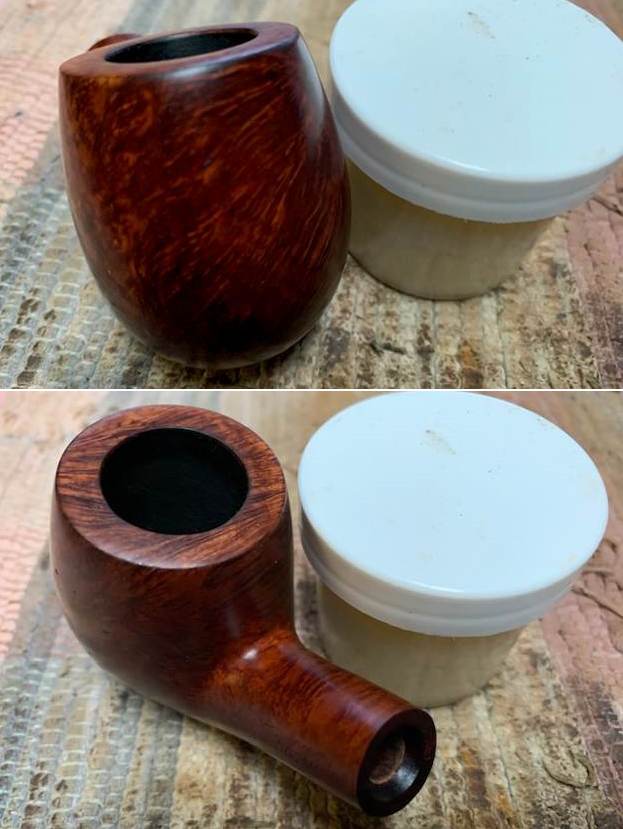
- The first thing I see is the chunky shank and large size of the bowl. It is well proportioned and well made with a classic English shape.
- The finish is dirty and there are oils from the smoker’s hands on both side of the bowl. There is grime ground into the finish as well but even so there is also some great grain peeking through.
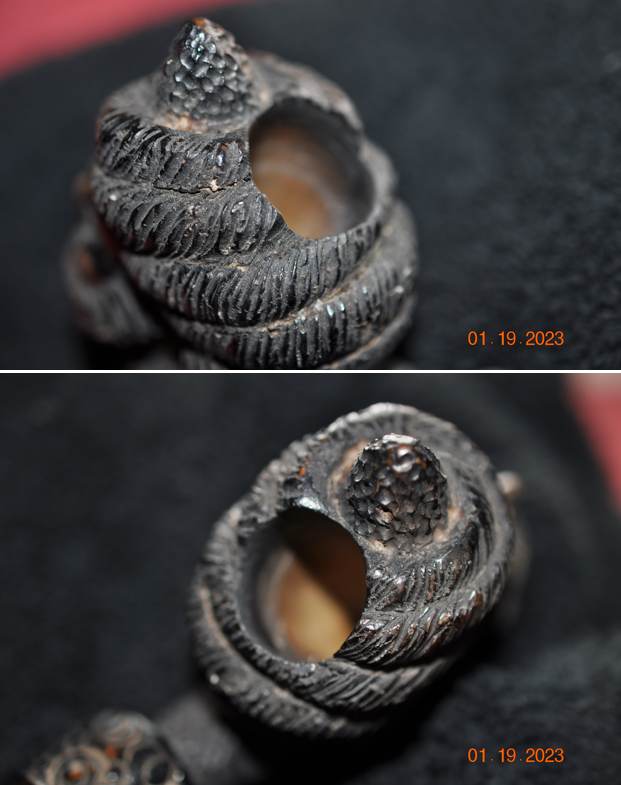
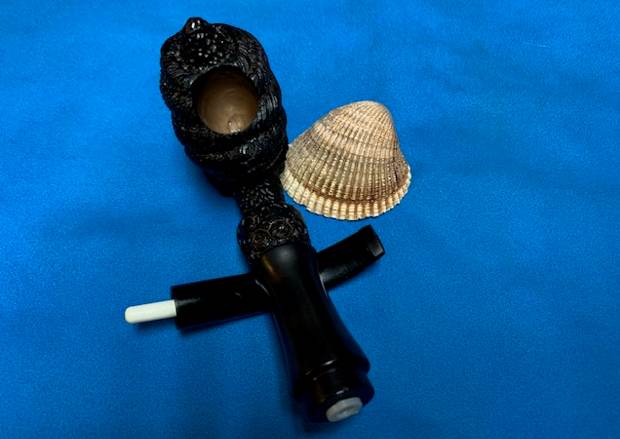
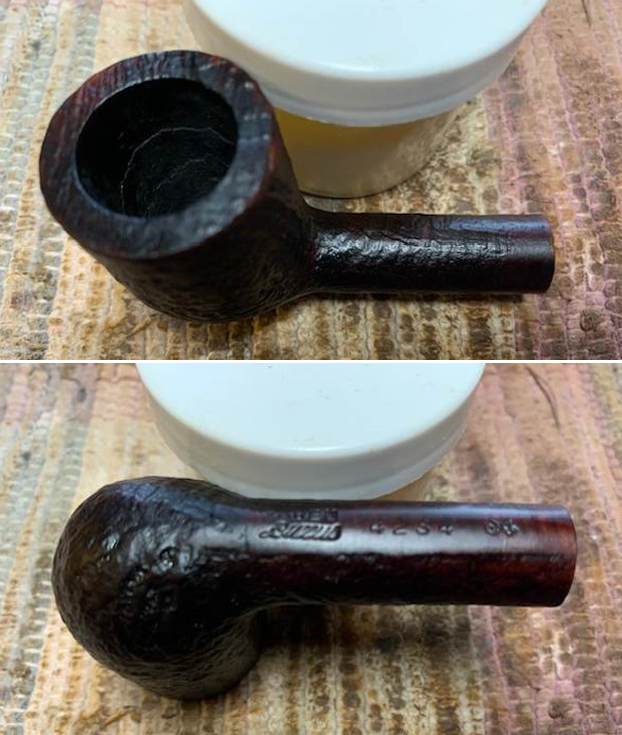
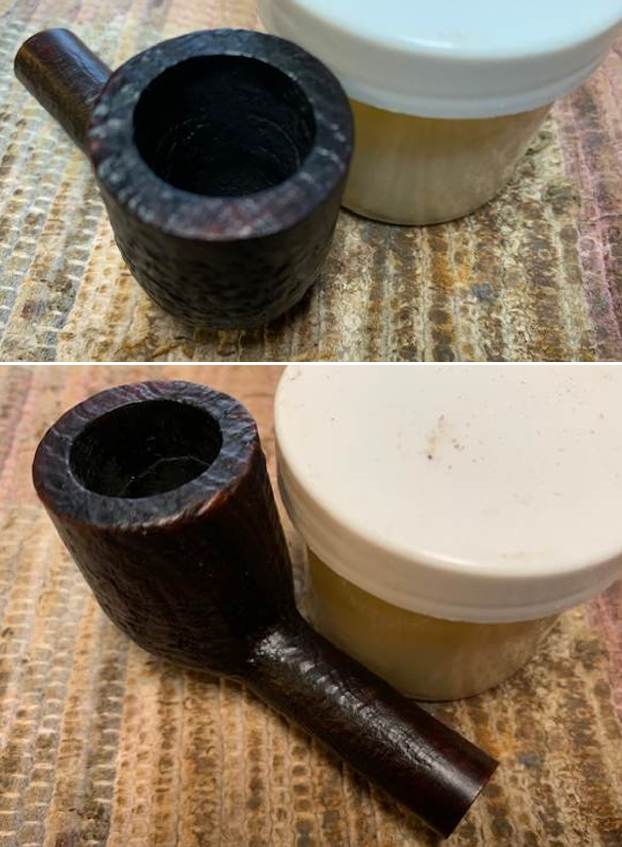
- The rim top had a thick lava overflow from the cake in the bowl. There is some damage on the front inner edge and top but it is hard to know if there is darkening or damage under the lava. Sometimes the lava protects the rim top and edges and sometime it hides issues. Its is very dirty looking.
- The bowl has a thick cake in it that hides the walls and the inner edge of the bowl but once it is clean we will know what the edges look like. There are a some nicks in the inner edge of the bowl that will become clearer when the pipe is cleaned. The outer edges look good and there does not appear to be any obvious burn damage to the top or bowl edges.
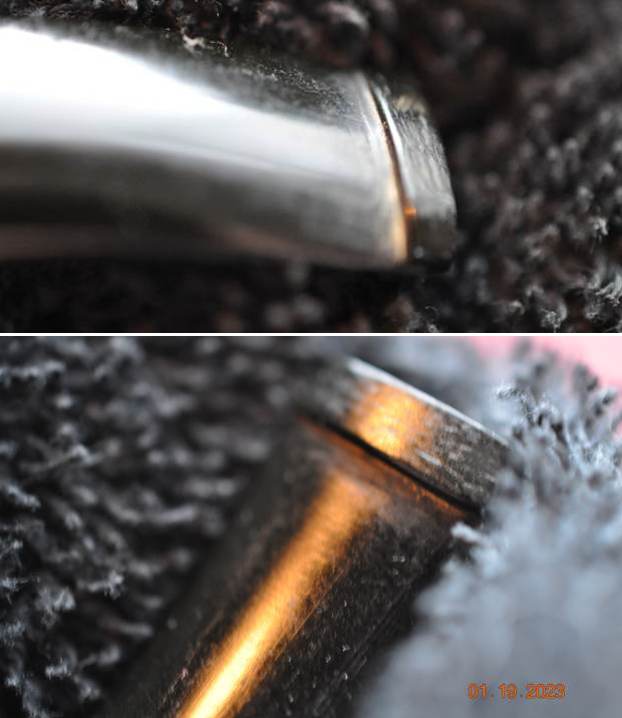
- The vulcanite taper stem is in good condition – dirty, oxidized, calcified and has tooth chatter and marks on both sides. There appears to be a CP logo on the top of the stem – it is faint but still present.
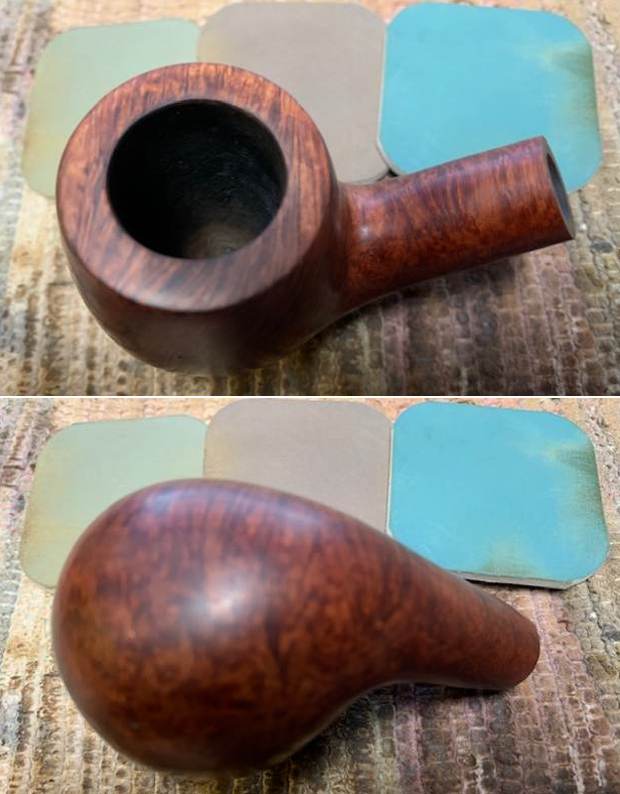
Overall my impressions of this pipe is that it is a beauty that once cleaned up will look pretty amazing. The exterior of the bowl does not show any hot spots or darkening. The pipe is very English looking and is a classic oval shank Canadian that has the distinctive cut of a Charatan. The photos below confirm the assessment above. 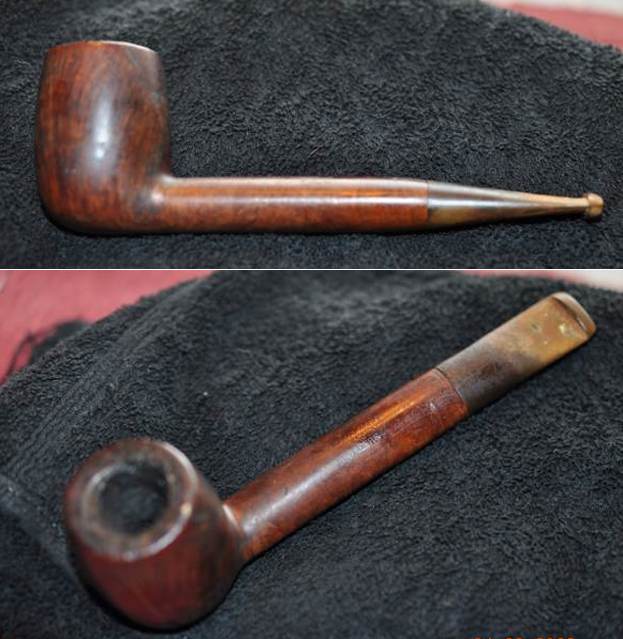 Jeff took close up photos so that I could have a clearer picture of the condition of the bowl, rim edges and top. The rim top photos confirm my assessment above. The cake in the bowl is quite thick and the rim top has lava and debris on it. You can also see the condition of the outer edge but the inner edge is a bit of a mystery at this point. This is what I look for when assessing a pipe. While there is lava and darkening there is no visible burn damage at this point. The bowl is still fairly round.
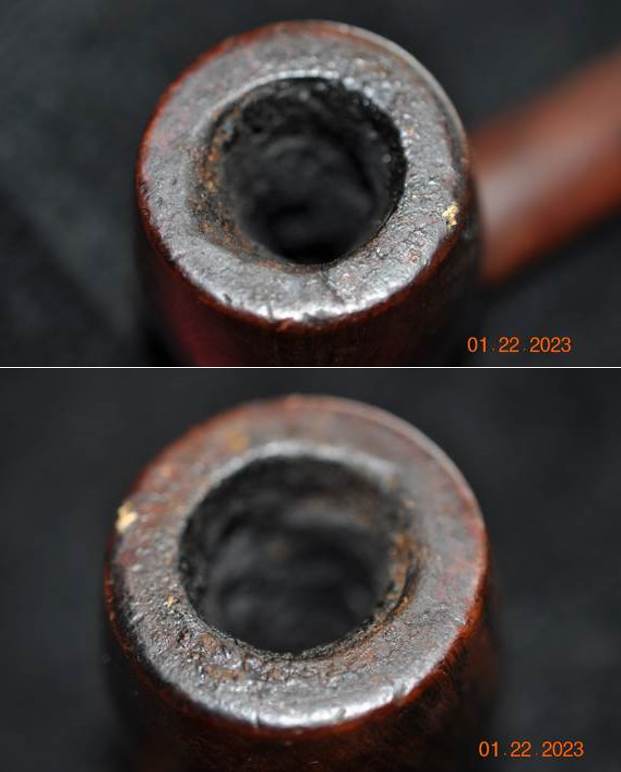
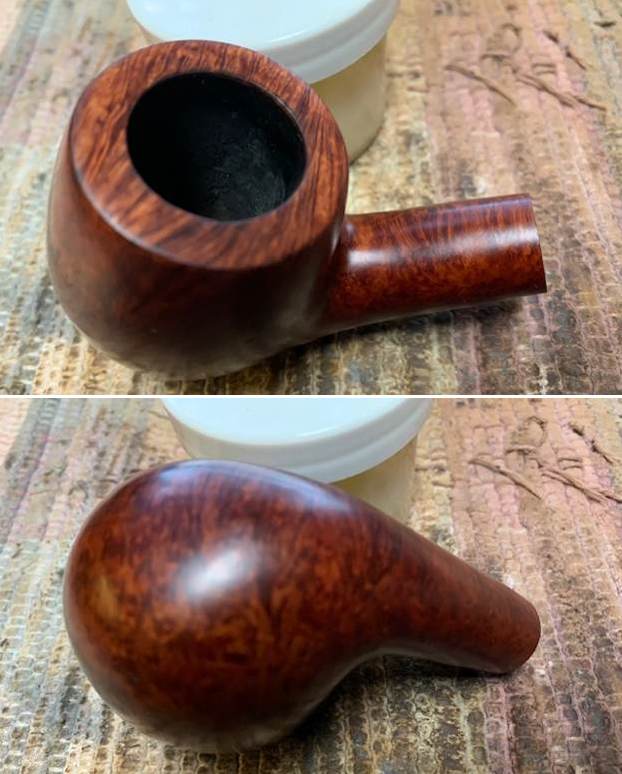
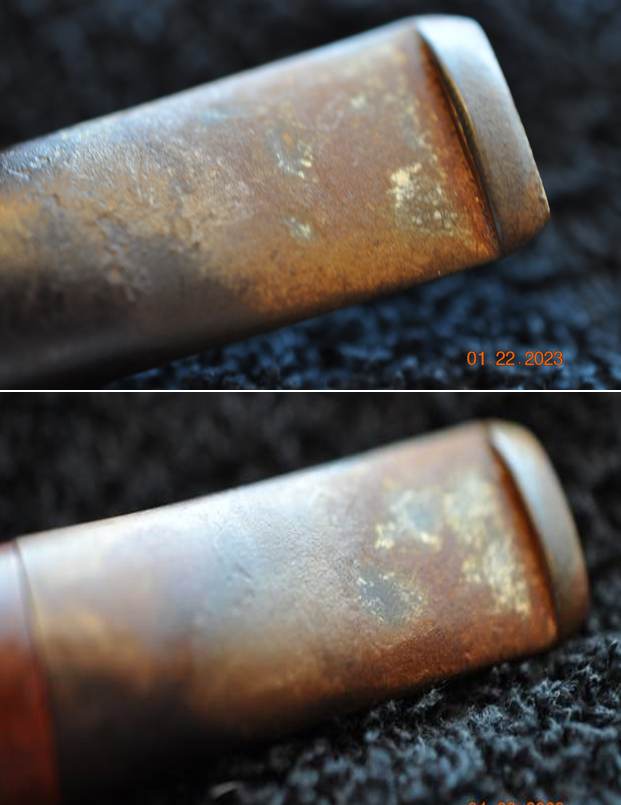
 The photos of the stem surface from various angles confirmed my assessment of its condition. You can see the oxidation and the fit against the tarnished silver band on the shank end. The stem surface though dirty does not appear to have tooth marks – chatter yes, but no deep marks. The stem is quite dirty but otherwise undamaged.
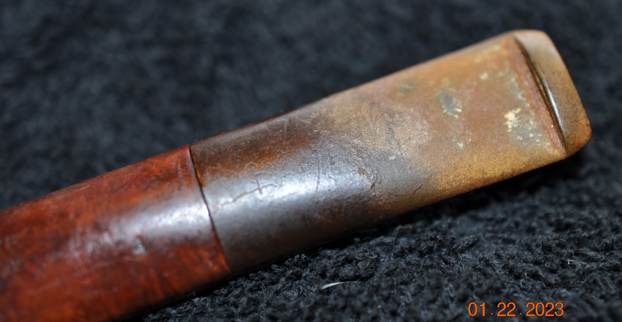
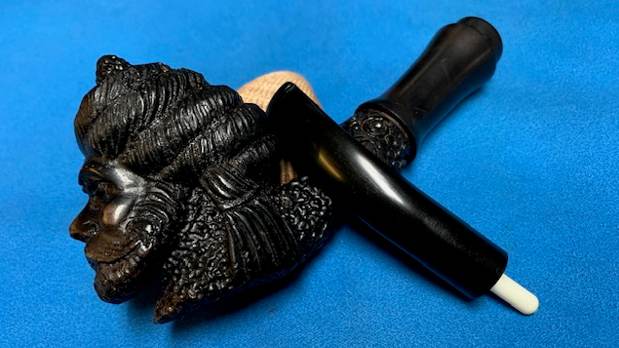
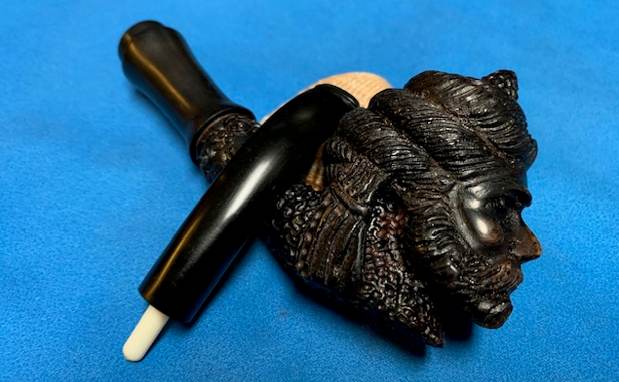
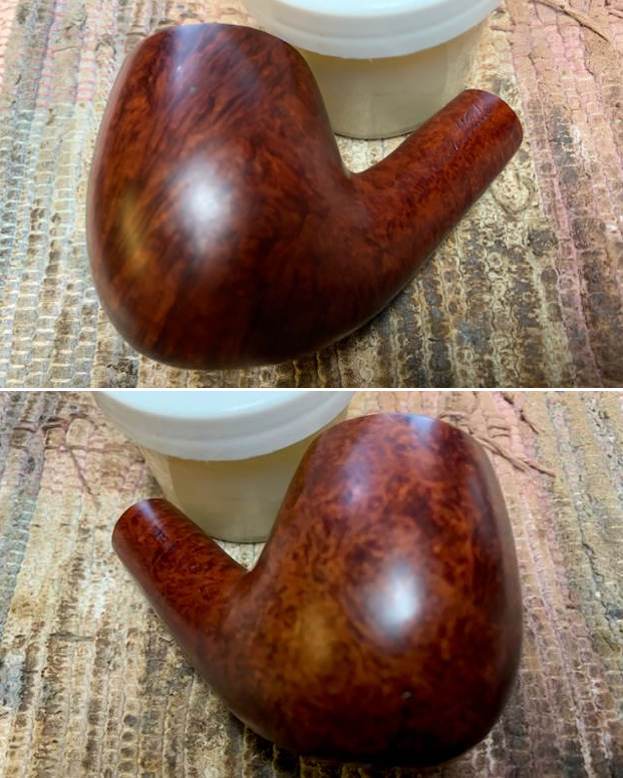
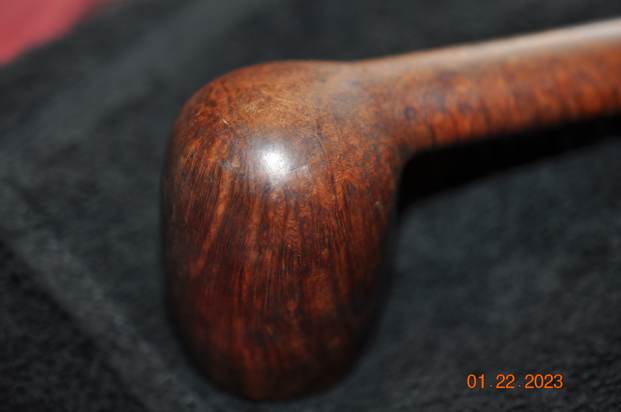
 The next photos show the amazing grain around the heel and the sides of the bowl. Tell me what you see? Are there any visible problems that stand out to you? Are the cracks or scratches? Are there visible flaws or fissures in the briar? What kind of grain stands out around the bowl and heel? Any visible issues on the heel of the bowl? Even the questions should help you to see what I am looking for when I see these photos.
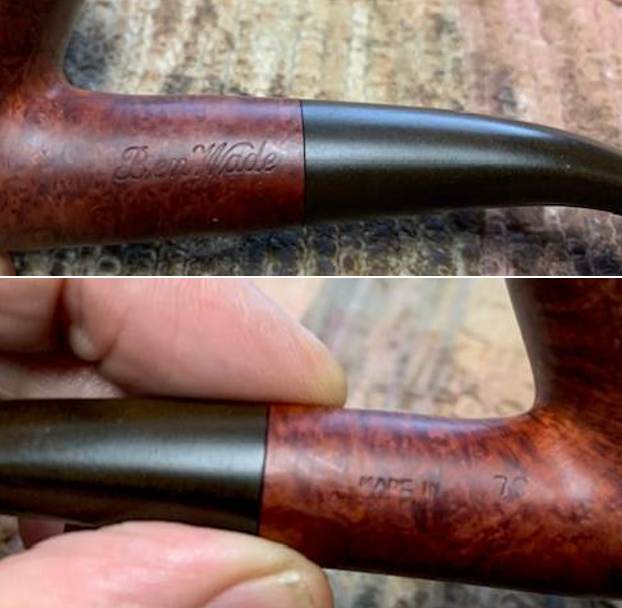
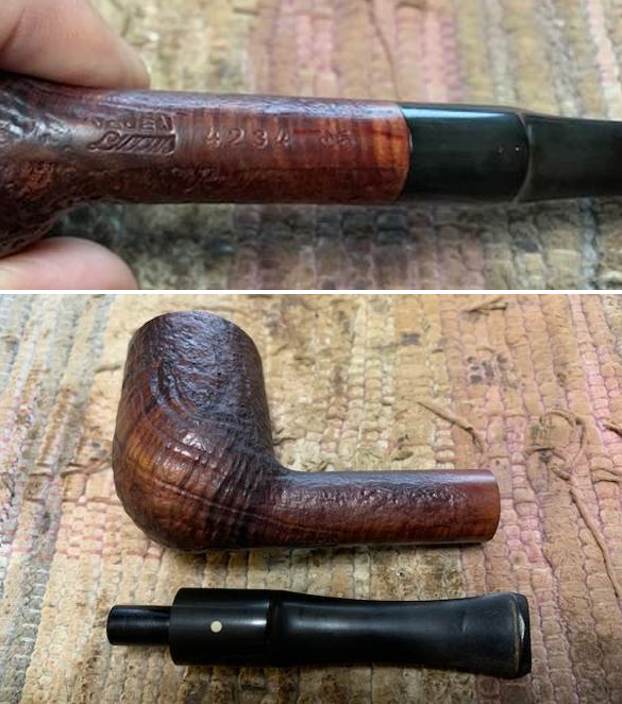
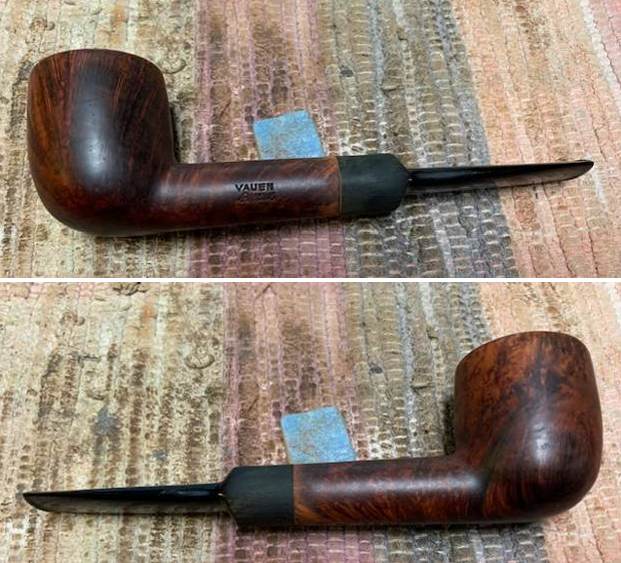
 You have read it a few times now in the previous blogs. What am I looking for when I look at the shank stamp? In this case it is stamped on the left side and reads Charatan’s Make[over] London England [over] Belvedere in three lines. How does the stamping look to you? Is it clear and readable? Is it faint in spots or is it uniform? I know you are looking at photos but so do I at this point in the process. The topside is also stamped near the shank/stem junction and reads 402 which is the shape number for a Canadian. The same questions apply here as well.
  An added part of pipe restoration for me is to try to gather as much background on a brand and maker as I can find. With Charatan that is an enjoyable web to untangle. There is a lot of information and it can lead to understanding what era a pipe was made in. To try to figure out the era of the Charatan’s pipe I was working on I turned to the Pipephil website, Logos and Stampings (http://www.pipephil.eu/logos/en/logo-charatan.html). There is some really helpful information on each of the lines of Charatan’s Make pipes that entered the market. There is an alphabetical listing of the lines but the Belvedere they showed had a stem made for a 9mm filter while the one I have is a nonfiltered pipe. The site did give a short history of the brand. I quote the portion that is most pertinent.
The brand was founded in 1863 by Frederik Charatan. When his father retired in 1910, Reuben Charatan took over the family business. All the pipes were handmade until 1973. The brand name has been overtaken by Dunhill in 1978 and sold in 1988 to James B. Russell Inc.(NJ, USA). During the period 1988-2002 Charatans were crafted by Butz Choquin in St Claude (France). Dunhill re-purchased Charatan brand name in 2002 and Colin Fromm (Invicta Briars, Castleford) followed up on freehand production.
Next I turned to Pipedia to see if I could find more information on the brand and possibly a link to the Belvedere line (https://pipedia.org/wiki/Charatan) but once again in the general article it was not listed. It did give a little more historical information. I quote the pertinent parts that give information on this particular pipe.
In 1950 Herman G. Lane, striving to expand his business in Great Britain, made contacts with the Charatan family. Apparently Lane got a certain influence soon, but it was not until 1955 that Lane Ltd. became the sole distributor for Charatan’s in the United States superseding Wally Frank. This can be documented in a “biography” written for Herman G. Lane titled “Leaves from a Tobaccoman’s Log”.
Thanks to Herman G. Lane’s dedicated labor Charatan became hugely popular in the States. As reported by Ken Barnes in an interview with Rick Newcombe, Reuben Charatan passed away in 1962, and his widow sold the firm to Herman Lane 1 or 2 years after his death.[1] In the early 1960s Charatan pipes were the first to overstep the $100 Dollar line in US pipe sales. In 1978 Lane’s heirs sold the Charatan company to Dunhill. The Prescot Street factory was closed in March 1982. Thereafter the fame and quality of the make declined.
The pre-Lane period (prior to 1955) and the Lane era pipes (1955 to until sometime between 1979 – 1984) are of primary interest the collector. The Lane era is often quoted as beginning about 1950.
Charatan records are almost non-existent before Lane due to a factory fire, making it difficult to date pre-Lane pipes. Charatan used 4 basic grades prior to 1950: Supreme, Selected, Executive, and Belvedere. After 1950 Herman Lane’s influence began, and the grades started to expand. In 1955 Lane took over sole distributorship of Charatan in the US. In 1957 he introduced the Supreme S. Most of his other introductions were from the 1960s and early 1970s.
From this I am fairly certain I am dealing with a Lane pipe made after 1955 and because of the Belvedere stamp it could potentially go back as far as before 1950. There is also a circle L script mark that is a Lane stampings on the pipe which also supports this.
I continued digging further into the dating of the pipe, but what I had found above was a good start for me. If some of you would like to try your hand at dating it more accurately as to the time period it came out you might want to check out the article on Pipedia on Dating Charatans (https://pipedia.org/wiki/Dating_of_Charatans).
I also reread the article on Pipedia by the Italian fellow who contributed some really helpful information on the brand (https://pipedia.org/wiki/Charatan_-_Milan_2014). I quote the section on the Second period: Reuben Charatan 1910 – c. 1962. I have highlighted a portion of the section on the shank in red to point out some more helpful dating information.
– In 1962 Herman Lane took over the business from the Charatan family, although he had already influenced production from the 1950s.
– The pipes were mostly larger than the previous ones and corresponded in size to Dunhill group 5. These are slightly less rare, but still difficult to find.
– Stem: Usually in ebonite, saddle shaped or tapered, bearing a fine “CP” stamp, underbore system (see below) used when necessary.
– Shank: The shape code is stamped on it together with the nomenclature “CHARATAN’S MAKE LONDON ENGLAND” arranged in two lines. From 1955 onwards on the models marketed for the USA there is also a serif and circled capital “L” (but not all models bear this) which resembles the pound sterling symbol. The “L” is for Lane, the importer.
From 1958, Lane changed the nomenclature for models marketed for the US to clarify the message: “MADE BY HAND”. In this period the underbore was introduced. Its manufacturing period ranged between 1920 and c.1930. This model was equipped with a duralumin plunger trap fitted in the stem, which served to clean the residue more easily. This particular model bore a special stamp on the stem, and also had its own catalogue…
QUALITY GRADES…The stem did not only display the stamps mentioned above. Another stamp that can help dating is the one referring to the quality of the pipe. Until Herman Lane arrived on the scene there were four quality grades. Starting with the lowest: Belvedere, Executive, Selected, and Supreme. Lane went on to add higher grades from time to time: Supreme S, Supreme S100, S150, S200, S250, S300, Coronation, Royal Achievement, Crown Achievement, and Summa Cum Laude; these last three are extremely rare and almost impossible to find. He also invented other, different grades, even changing the previous pipe classification standards. We will not go into detail here, but it means that if we find an S100 or Coronation the pipe was manufactured following Herman Lane’s acquisition. In particular, the FH mark, or Freehand pipe was commissioned to the famous Danish craftsman, Preben Holm.
Nomenclature
The Lane Trademark serif and circled L indicates the pipe is from the “Lane Era” (approx. 1955 to 1979 -1984?), however it appears that both the English factory or Lane themselves sometimes, or perhaps even often forget to stamp the L on a pipe. The Charatan factory was known for inconsistencies, especially in stampings. Therefore, although an L on the pipe definitely defines it as a Lane Era pipe, the lack of it could simply mean the pipe missed receiving the stamp from the factory. The lack of the trademark could also mean the pipe was destined for the European market.
Charatan pipes were not well distributed prior to the Lane Era, so very few pre-Lane pipes exist today. Herman Lane greatly grew the brand in the U.S., which caused corresponding growth in Europe.
Generally, when the pipe is stamped with the BLOCK letters “MADE BY HAND” it means the pipe was probably made between 1958 and 1965”
Generally, block letters “MADE BY HAND” and some of the other nomenclature in script (i.e. City of London or Extra Large next to the MADE BY HAND) means the pipe was made sometime between 1965 and the mid 1970s. The total script nomenclature “Made by Hand in City of London” evolved over this period of time, so many pipes had variants, such as Made By Hand in block letters and City of London in script, or some other variation of the terms or stampings.
It is believed the FH was used on Charatan pipes between 1957 and 1967-68. Three different sizes were used. The Charatan Logo (CP) on the pipe bit was changed over the year
Now I knew I was working on a pre-Lane pipe which actually means it was between 1950- 1955 as shown by the stamping.
I followed a link to a catalogue listing for the shape 402 which is the shape number for an Outsize Lumberman/Canadian. Here is the link (https://pipedia.org/wiki/Charatan_Models_%26_Shape_Information_for_the_Collector) 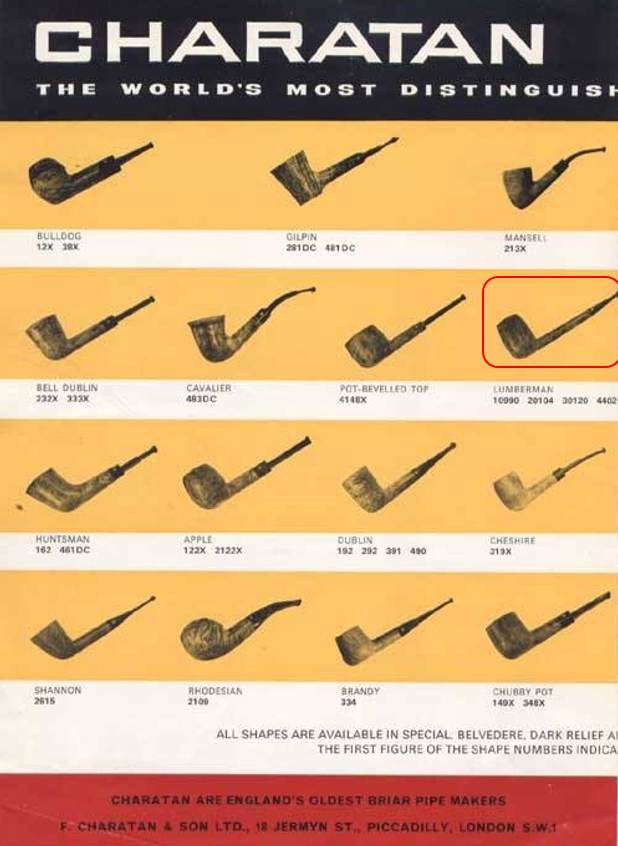 I am sure many of you will shake your head and ask maybe even out loud, “Why is he including this again?” However, please remember that the point of these blogs is not to wow your with the work or make you shake your heads but I want you to know the details of the work we do so you can do your own. Back in 2020 Jeff wrote a blog about his cleaning process. I am including a link to that now so you can see what I mean about his process. Do not skip it! Give it a read (https://rebornpipes.com/2020/01/20/got-a-filthy-estate-pipe-that-you-need-to-clean/). Here is the introduction to that blog and it is very true even to this day.
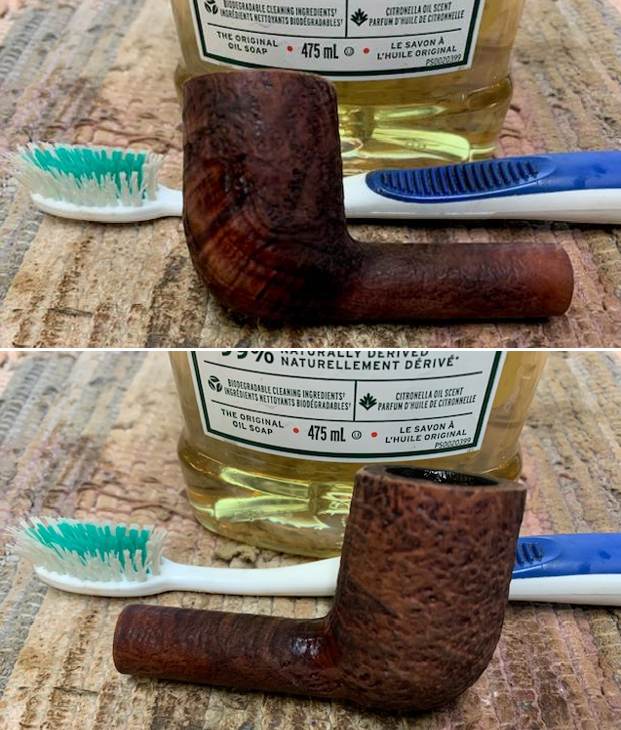
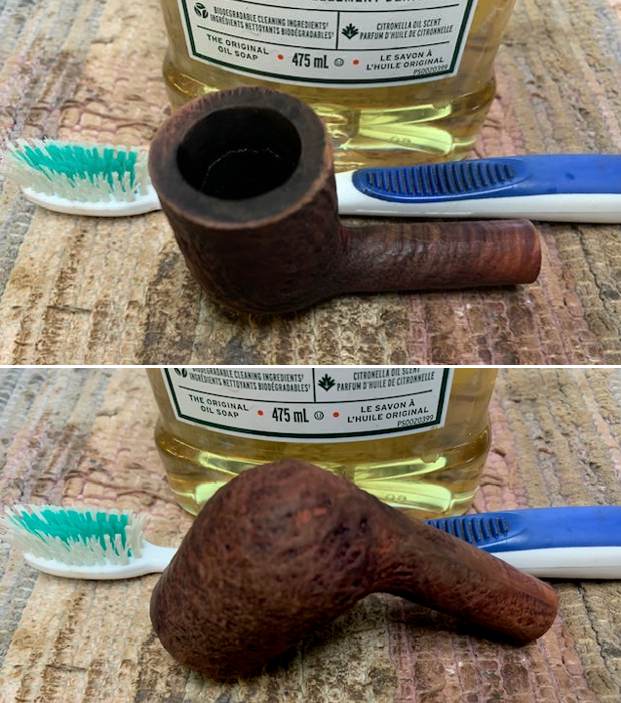
Several have asked about Jeff’s cleaning regimen as I generally summarize it in the blogs that I post rather than give a detailed procedure. I have had the question asked enough that I asked Jeff to put together this blog so that you can get a clear picture of the process he uses. Like everything else in our hobby, people have different methods they swear by. Some may question the method and that is fine. But it works very well for us and has for many years. Some of his steps may surprise you but I know that when I get the pipes from him for my part of the restoration they are impeccably clean and sanitized. I have come to appreciate the thoroughness of the process he has developed because I really like working on clean pipe!
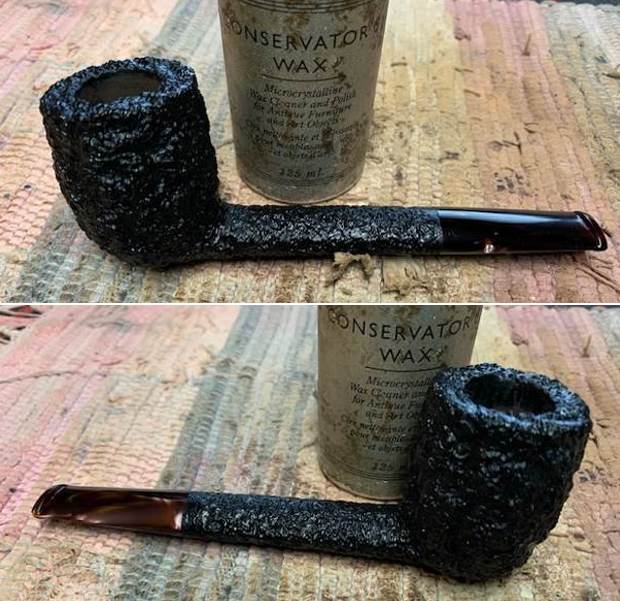
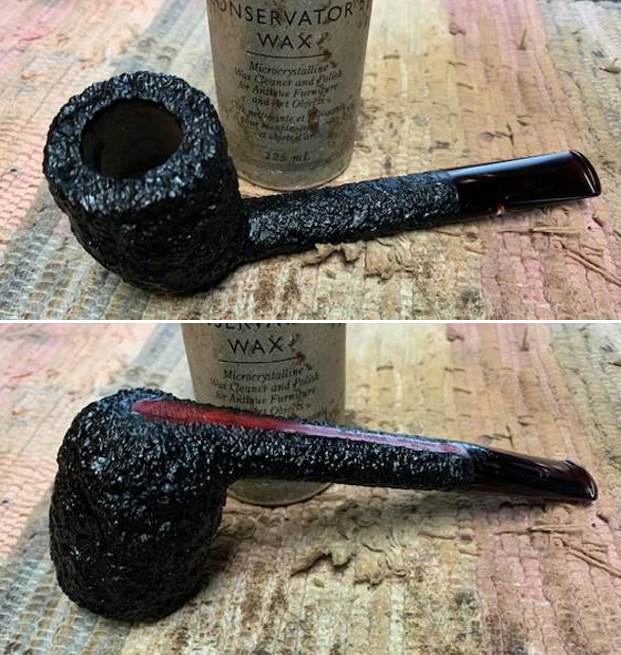
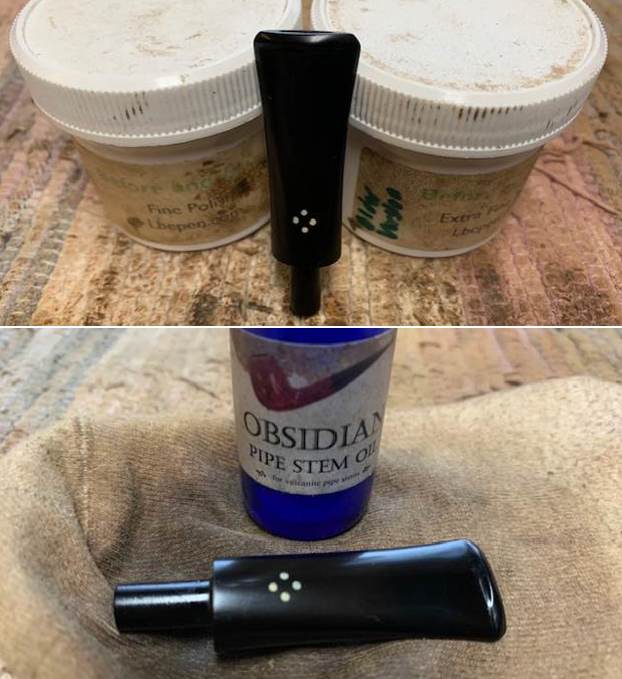
For the benefit of some of you who may be unfamiliar with some of the products he uses I have included photos of three of the items that Jeff mentions in his list. This will make it easier for recognition. These three are definitely North American Products so you will need to find suitable replacements or order these directly on Amazon. The makeup pads are fairly universal as we were able to pick some up in India when we were with Paresh and his family.
In the blog itself he breaks his process down into two parts – cleaning the stem and cleaning the bowl. Each one has a large number of steps that he methodically does every time. I know because I have watched him do the work and I have seen the pipes after his work on them. He followed this process step by step and when the pipe got to me it was spotlessly clean and ready for my work. The inside of the stem, shank and bowl were clean and to me that is an amazing gift as it means that my work on this end is with a clean pipe! I cannot tell you how much difference that makes for my work.
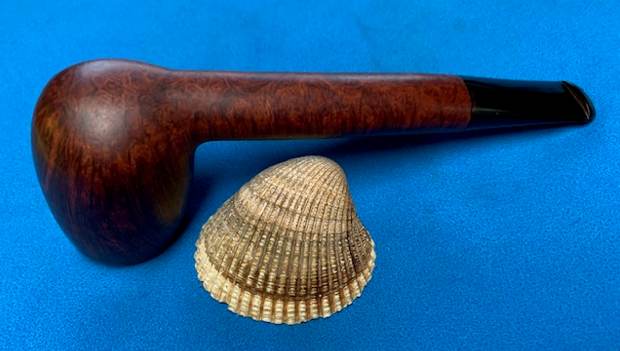
When the pipe arrives here in Vancouver I have a clean pipe and I go over it keeping in mind my assessment shared in the opening paragraph above. Now that I have it in hand I am looking for confirmation of what I saw in the photos as well as any significant structural changes in the bowl and finish as I go over it.
- The chunky shank and large size of the bowl look very good and are well proportioned and have a classic English Charatan shape.
- The finish is clean and the oils have been removed from both sides of the bowl. The grime ground into the finish is gone and there is some great grain around the bowl sides.
- The thick lava coat on the rim top has been removed and there is some nicks and damage on the top and inner edges of the bowl.
- The walls of the bowl are clean and I do not see any checking or burn damage. The inner edge of the bowl had some nicks and burn damage on the edges. There was damage on the front inner edge and some on the back edge as well. The outer edges look good and there does not appear to be any obvious burn damage there.
- The vulcanite taper stem is clean and has light tooth chatter and marks on both sides. There is a CP logo on the top of the stem – it is faint but still present.
Hopefully the steps above show you both what I look for when I go over the pipe when I bring it to the work table and also what I see when I look at the pipe in my hands. They also clearly spell out a restoration plan in short form. My work is clear and addressing it will be the next steps. I took photos of the whole pipe to give you a picture of what I see when I have it on the table. This is important to me in that it also shows that there was no damage done during the clean up work or the transit of the pipe from Idaho to here in Vancouver. 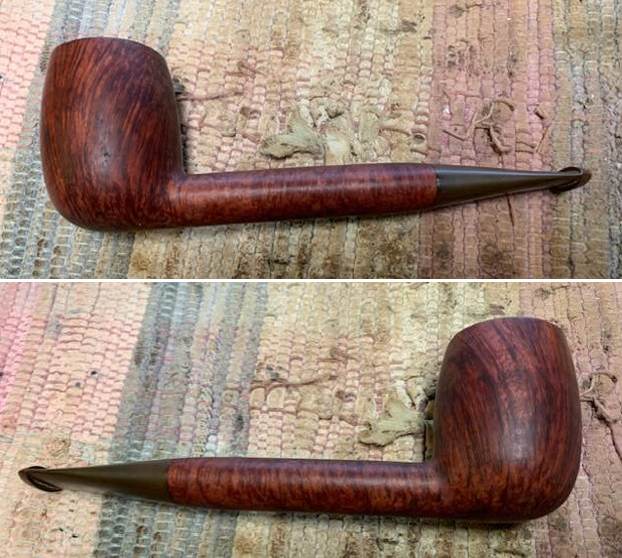
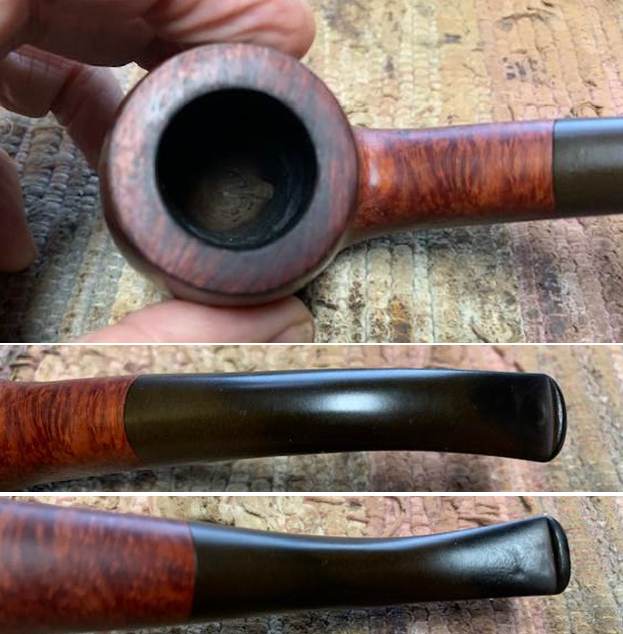
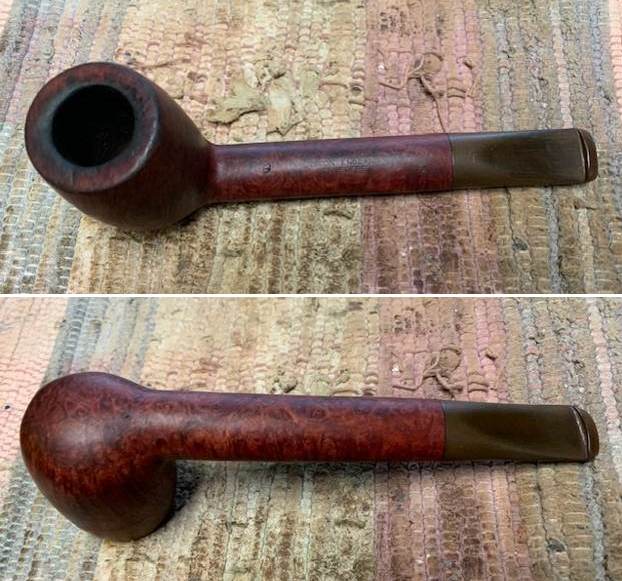 I carefully went over the bowl and rim top to get a sense of what is happening there. In this case once the lava was removed damage to the edge and top was revealed. Originally I thought it looked like reaming damage but I don’t think so as I examine it closely. I think it is actually burn damage to the edge that extends around the inner edge though it is heavier at the front and back of the bowl. The rim top also shows some damage. It is clean but will need to be worked on to bring it back to normal. I also go over the stem carefully. There were no tooth marks or dents in the stem. I could not see any sign of remaining CP stamping on the stem so no real clue as to whether it is original or a replacement. I took photos of the rim top and stem sides to show as best as I can what I see when I look at them.
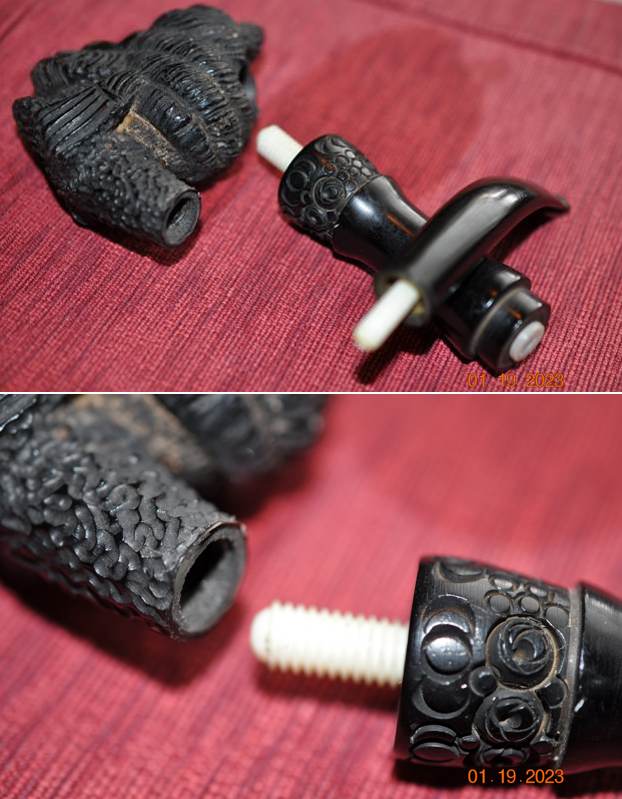
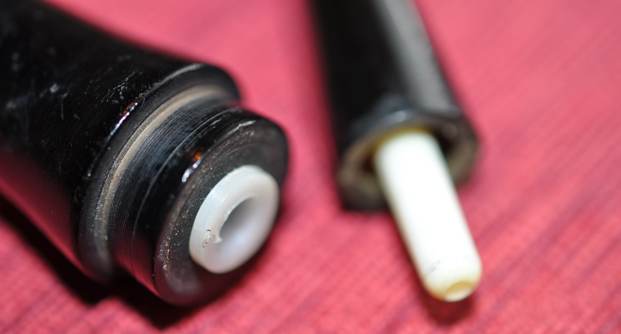
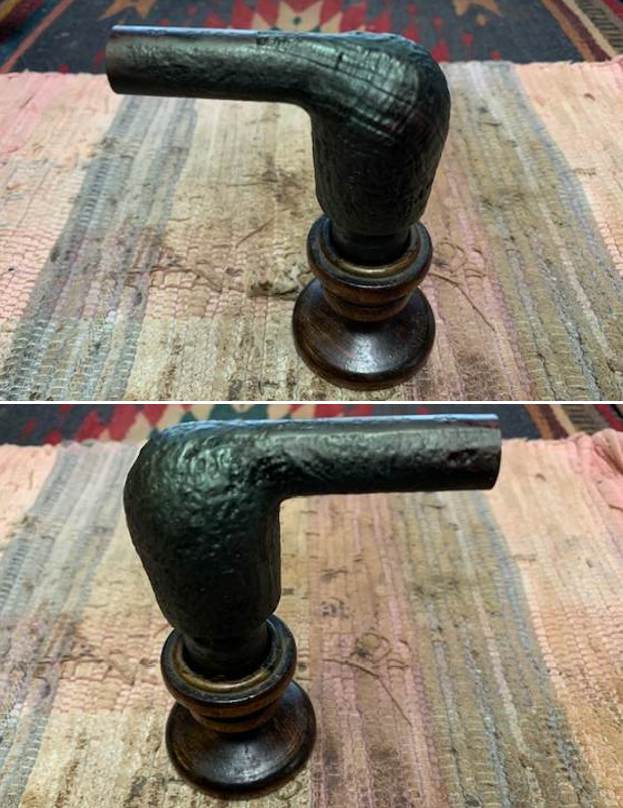
  I always check to make sure that the clean up work did not damage the stamping on the shank in any way. It looks good but is faint in some parts – particularly the edges of the stamp. I always appreciate the handiwork of the carvers at Charatan who turn a piece raw briar into a beautiful pipe. I love just looking at the beauty of the lay of the pipe with the grain and the proportion of the hand made pipes. I like to remove the stem from the shank to get a sense of what was in the mind of the pipe maker when he crafted the pipe. It is a beauty in flow and shape.
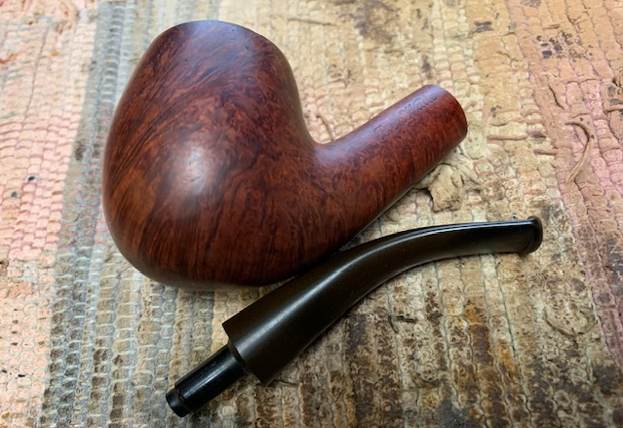
  By this time you should know that I almost always start with the bowl in my restoration because I truly do not like the tedious work of stem repairs and polishing. I always leave that until last even though I know that it needs to be done. For me the encouragement of seeing a rejuvenated bowl is the impetus I need to attack the stem work.
Today I started working on this pipe by turning to the bowl. I chose to deal with the nicks, darkening and burn damage on the rim edges and top. I used a piece of 220 grit sandpaper and a wooden sphere to reshape and remove the damage on the top and the inner edge. It took a little work but I was able to remove all of the darkening. It is a beautiful piece of briar with some great grain. 
 Once rim top was reshaped and reworked I needed to blend them into the rest of the briar. I stained it with an Oak stain pen to match the surrounding briar.
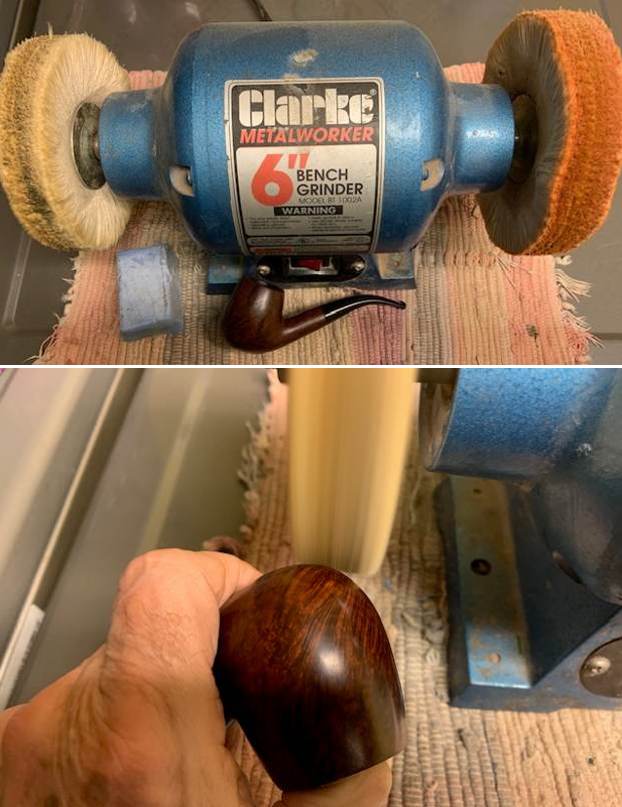
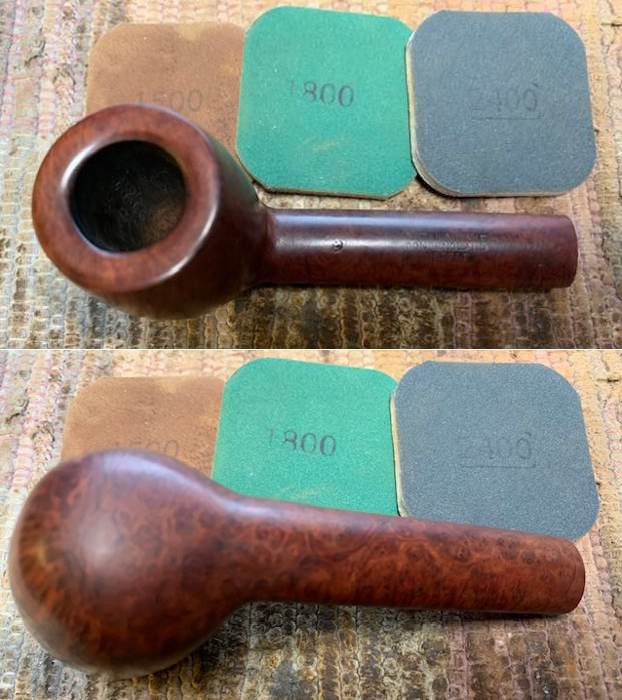
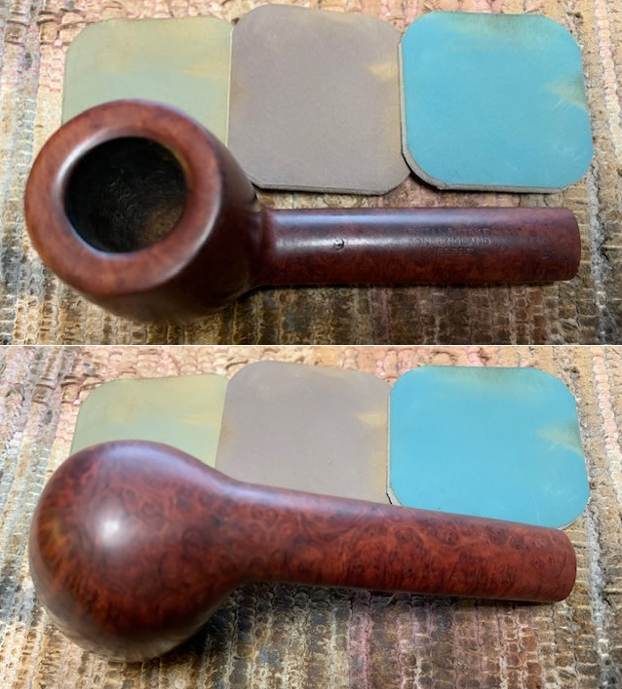
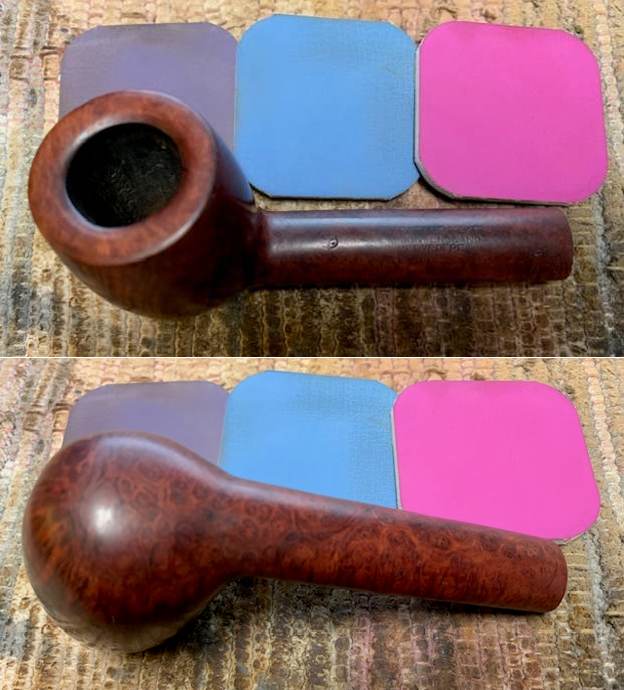
 I polished the briar with micromesh sanding pads. I choose to dry sand the briar rather than wet sand it. Again it is a matter of personal preference. I prefer to use the pads dry and find they work very well on the briar. I sand with each pad (9 in total) and group them by threes for ease of reference. I also work over the plateau areas at the same time. I wipe the bowl down after each pad with a damp cloth to remove the sanding debris and check the briar. I love seeing the developing shine on the briar as I move through the pads which is why I include so many photos of this step.
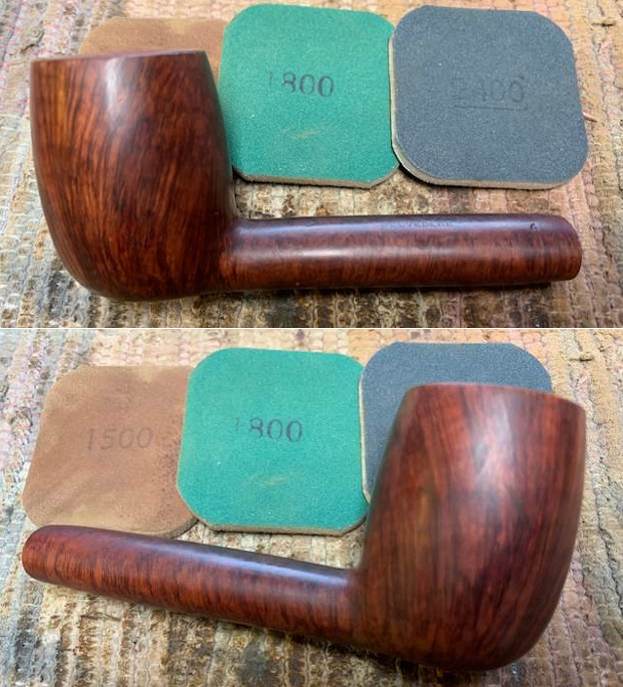


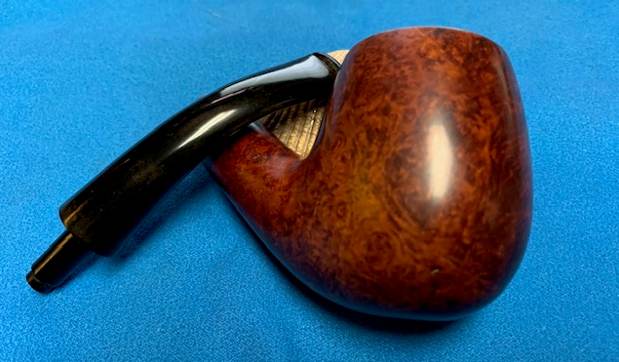
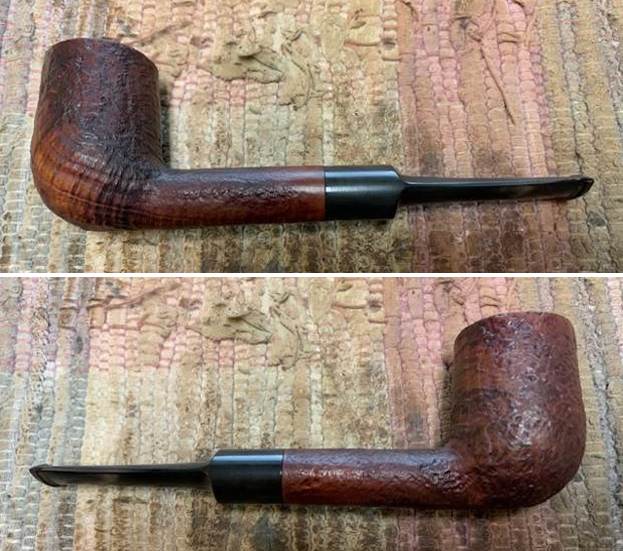
 For the past few years now I have been using a product developed by Mark Hoover called Before & After Restoration Balm. It is a paste/balm that is rubbed into the surface of the briar and the plateau. The product works to deep clean the nooks and crannies of finish, enliven and protect the briar. I worked it into the briar with my finger tips and let it sit for 10 minutes to do its work. I wiped it off with a soft cloth then buffed it with a cotton cloth. The briar really began to have a deep shine in the briar and the grain shone through. The photos I took of the bowl at this point mark the progress in the restoration. It is a gorgeous pipe.
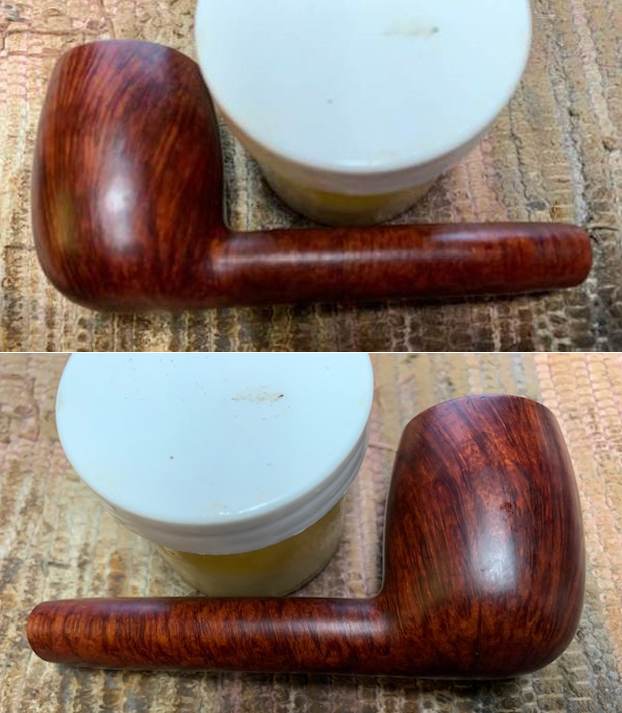

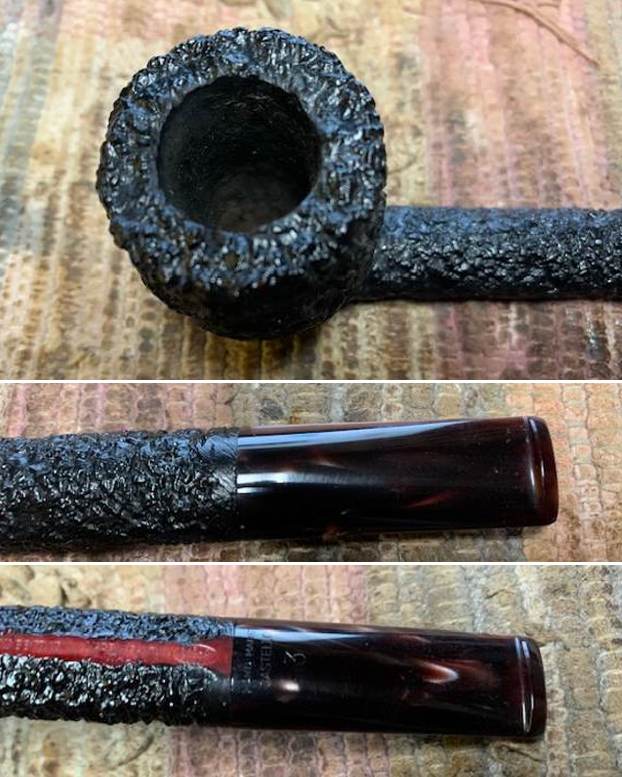
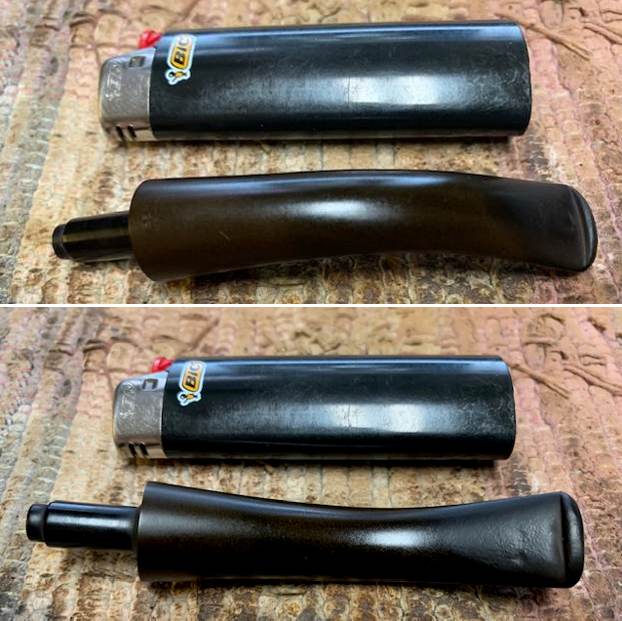
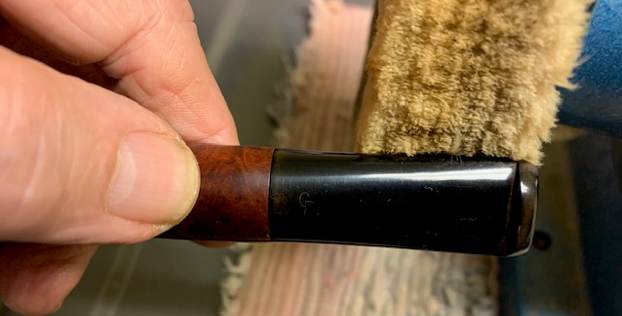
 Now it was time to address the part of the restoration I leave until last. I set the bowl aside and turned my attention to the stem. I wiped the stem down with Soft Scrub cleanser to remove the light oxidation on the surface. The CP stamp was very faint and would not hold any paint or colour. It was pretty clear that it was more or less gone. I stated with the tooth marks. I “painted” the surface dents with a Bic light flame and was able to lift them significantly. I sanded the stem with 220 grit sandpaper to further blend them into the vulcanite. I started the polishing of the stem with 600 grit wet dry sandpaper.

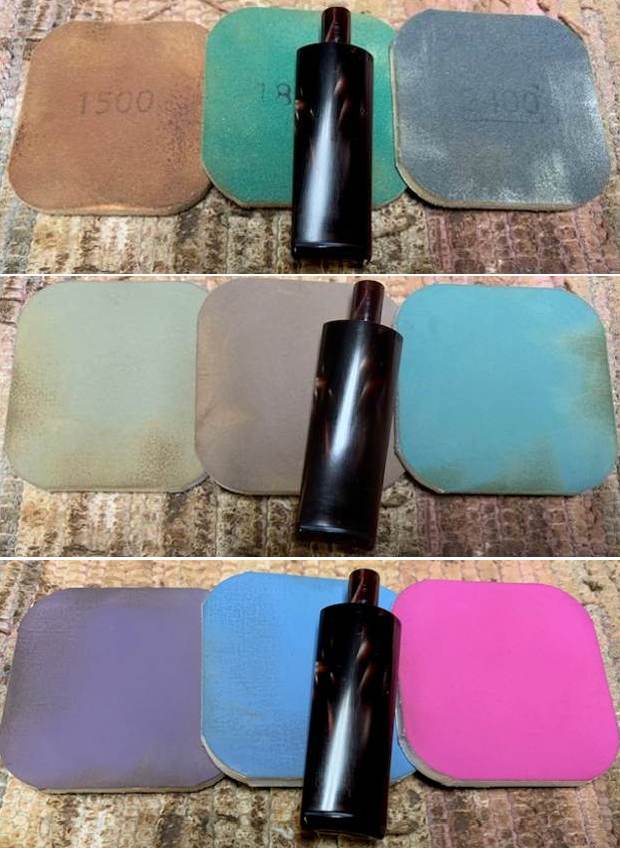
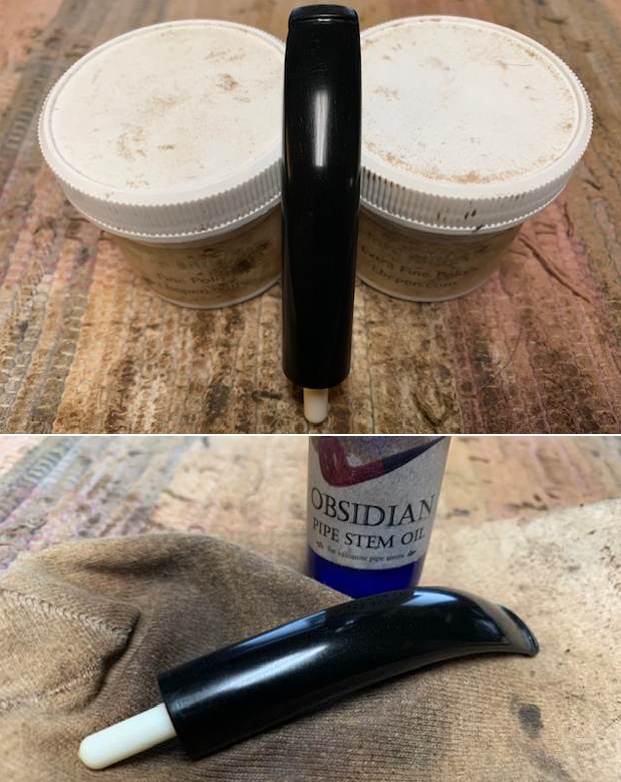
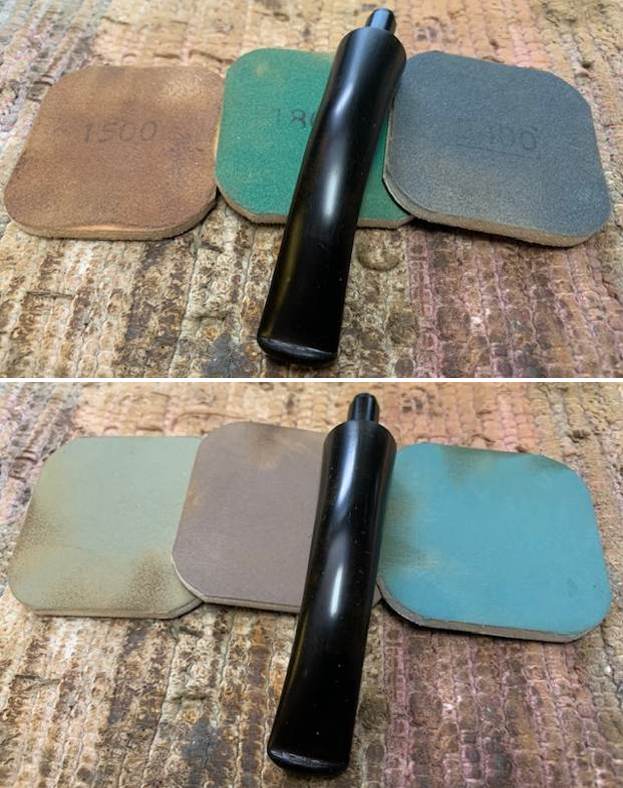
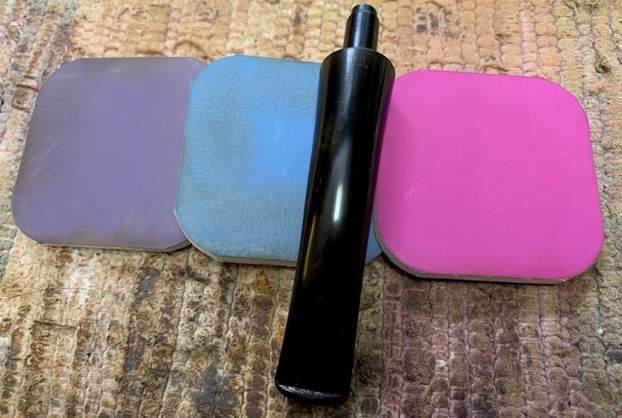
 I use micromesh sanding pads and water to wet sand the stem with 1500-12000 grit sanding pads. I wiped it down after each sanding pad with Obsidian Oil on a cotton rag after each sanding pad as I find it does two things – first it protects the vulcanite and second it give the sanding pads bite in the polishing process.
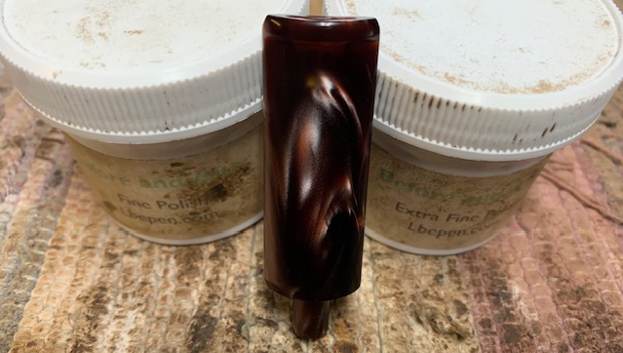
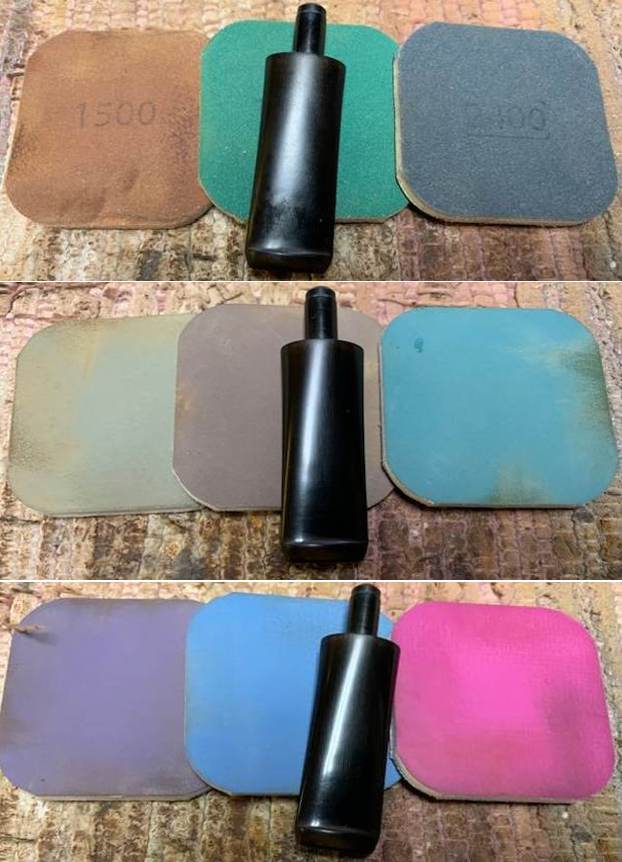 After finishing with the micromesh pads I rub the stem down with Before & After Fine and Extra Fine stem polish as it seems to really remove the fine scratches in the vulcanite. I rub the Fine Polish on the stem and wipe it off with a paper towel and then repeat the process with the extra fine polish. I finish the polishing of the stem down with a final coat of Obsidian Oil and set the stem aside to let the oil absorb. This process gives the stem a shine and also a bit of protection from oxidizing quickly.
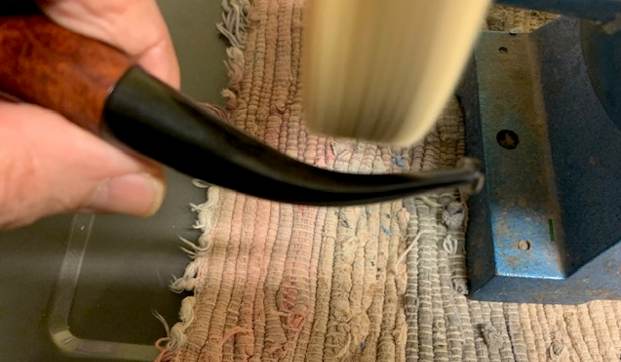
 The final steps in my process involve using the buffer. I first buff the stem and the briar with Blue Diamond on the buffing wheel. Blue Diamond is a plastic polish but I find that it works very well to polish out the light scratches in the vulcanite and the briar. I work the pipe over on the wheel with my finger or thumb in the bowl to keep it from becoming airborne. It works well and I am able to carefully move forward with the buffing. The briar and stem just shone!
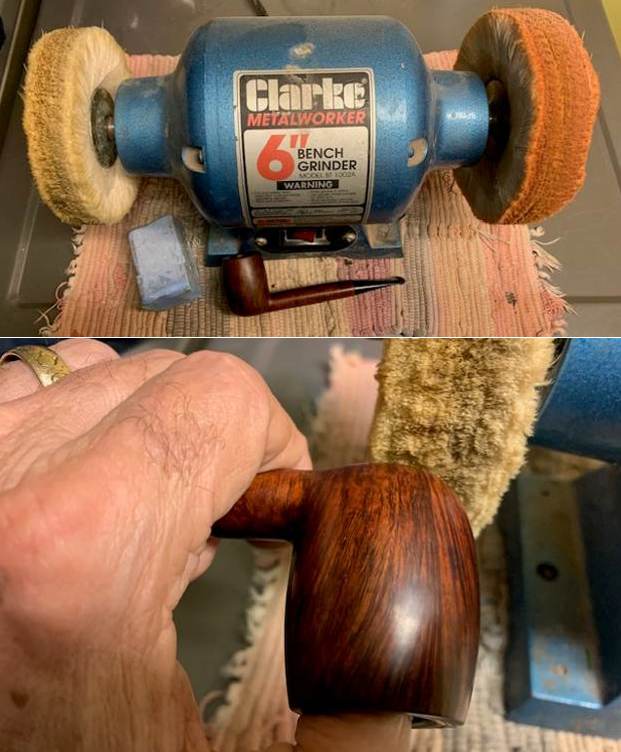
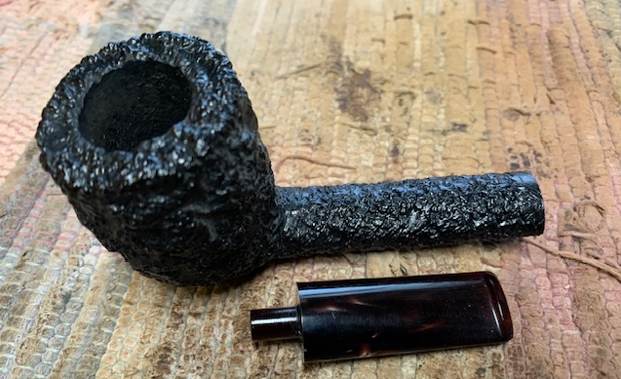
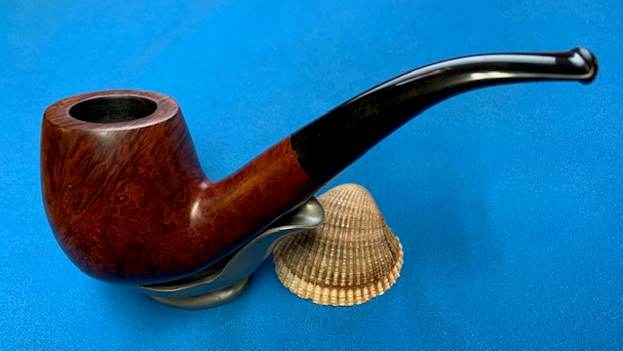
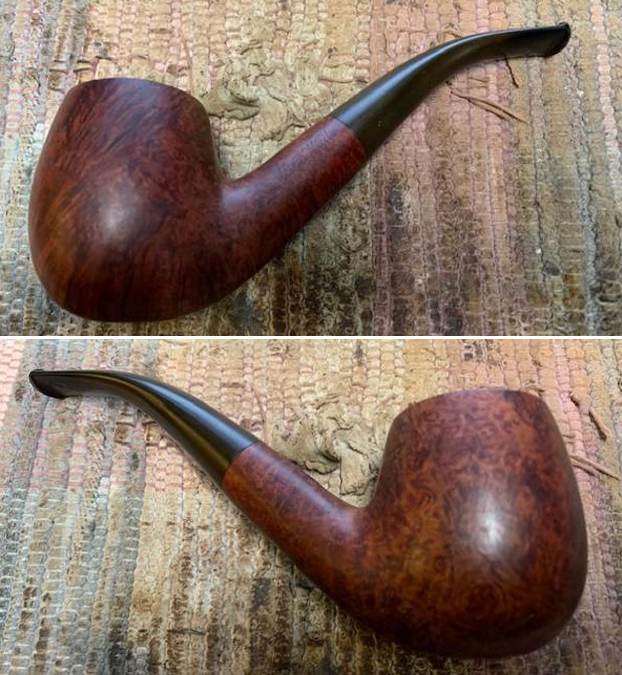
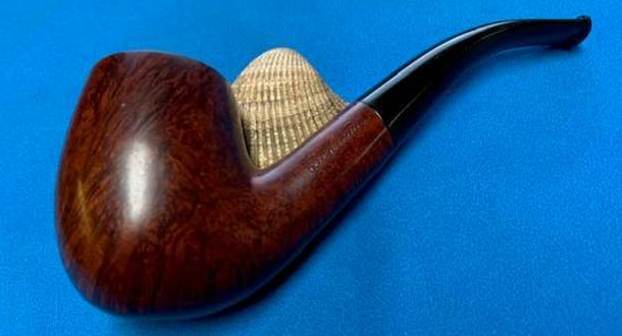
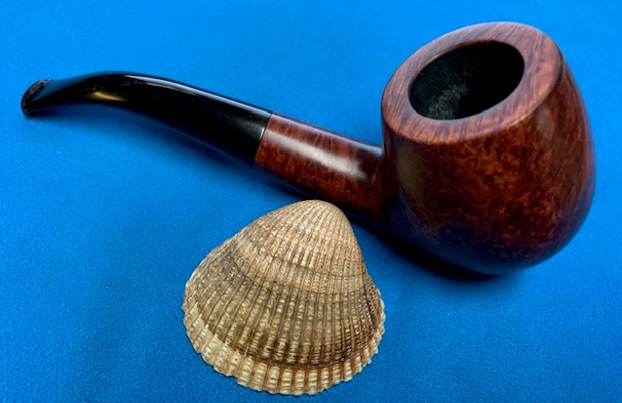
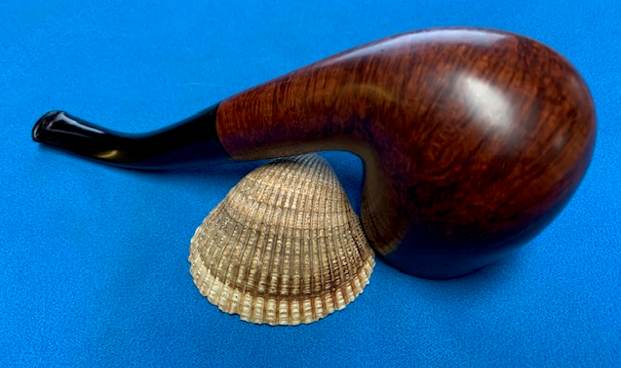
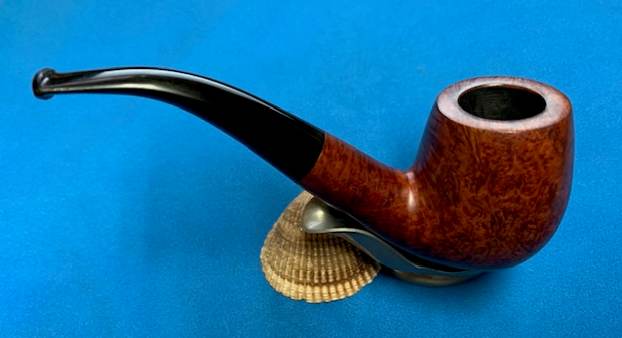
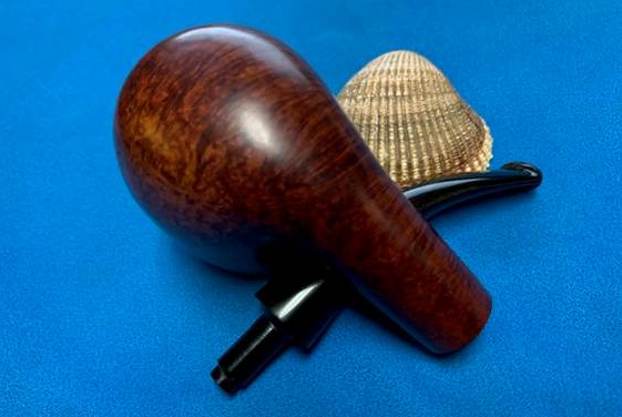
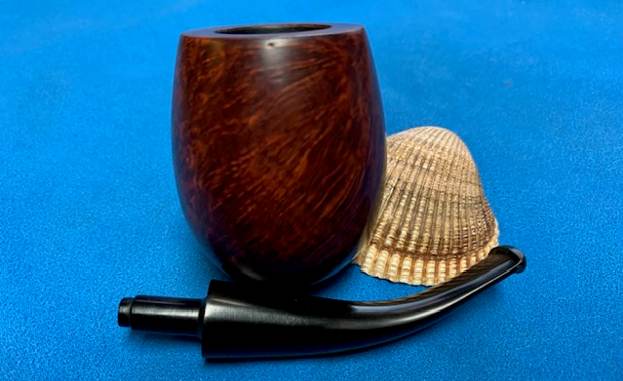
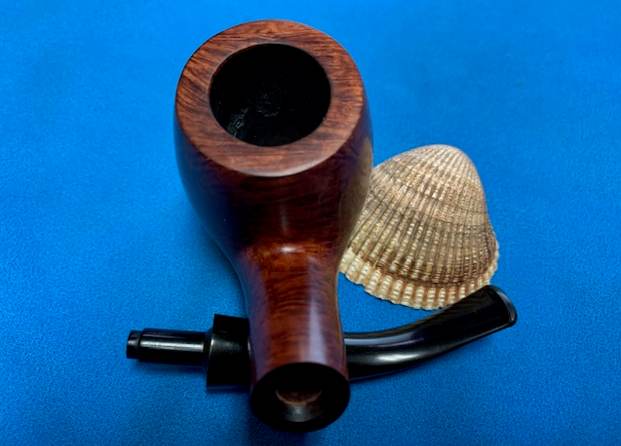
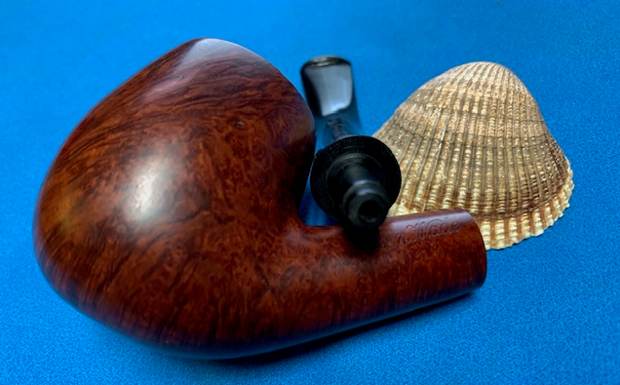
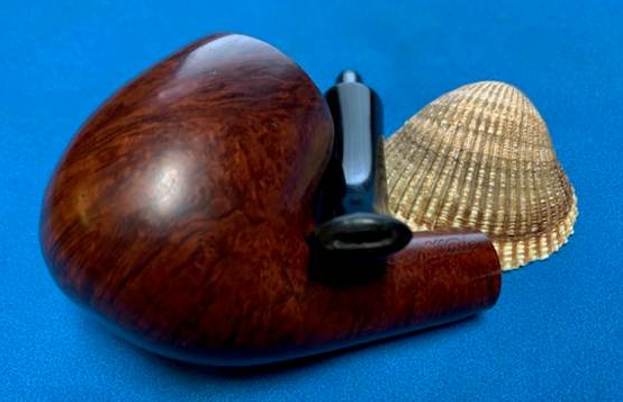
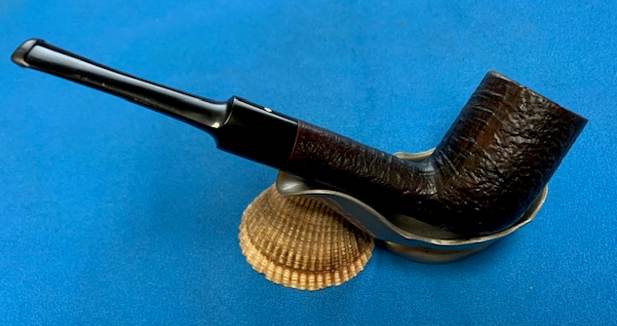
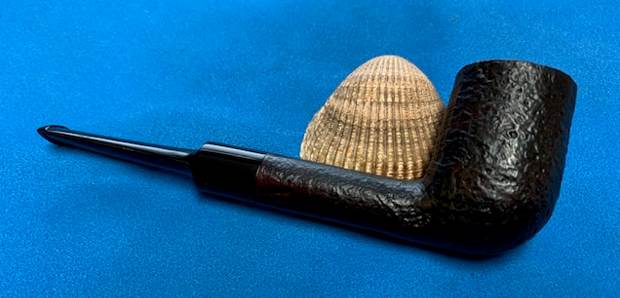
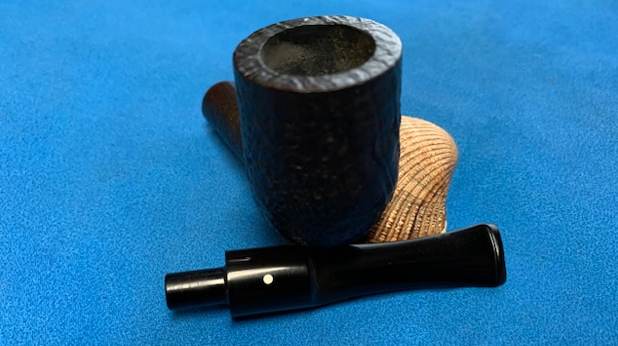
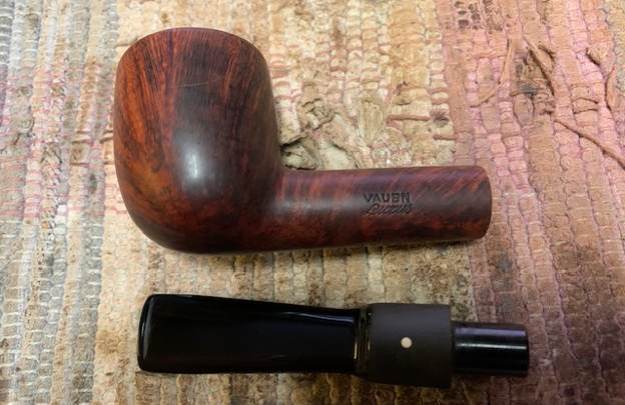
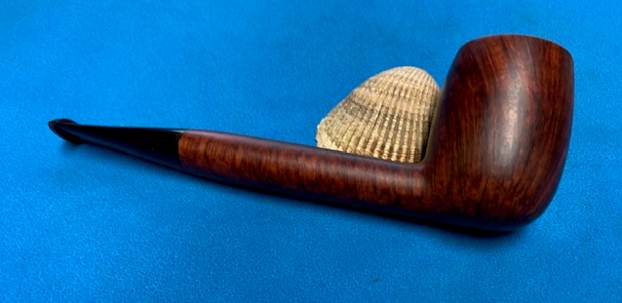
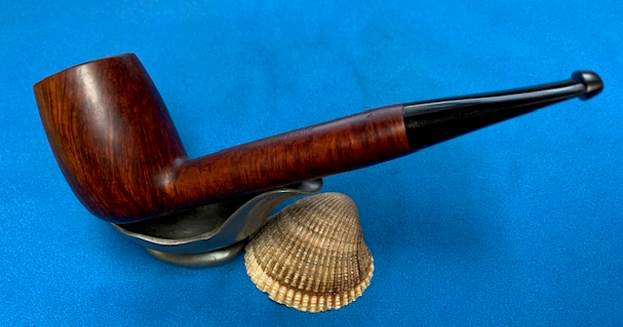
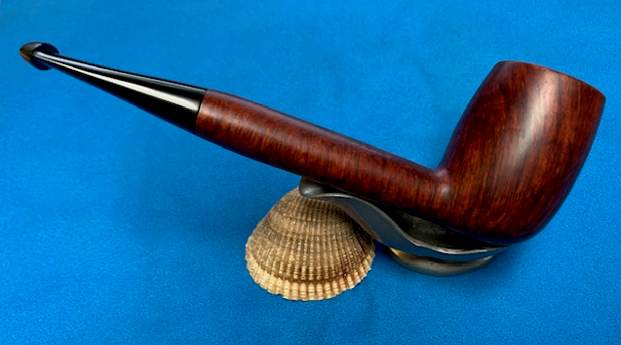
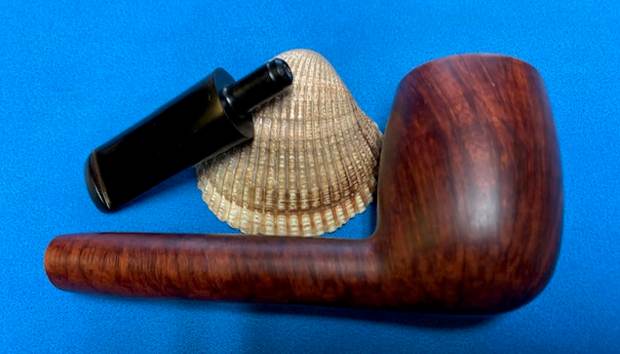
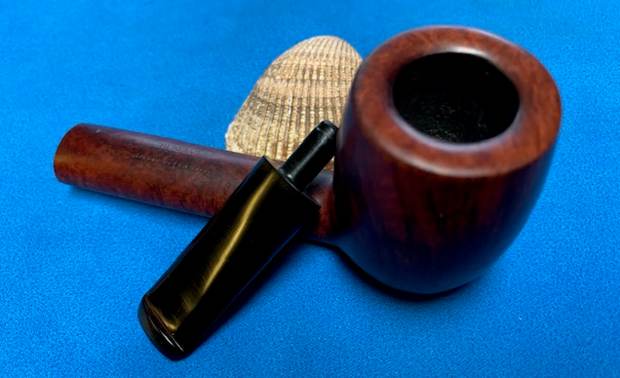
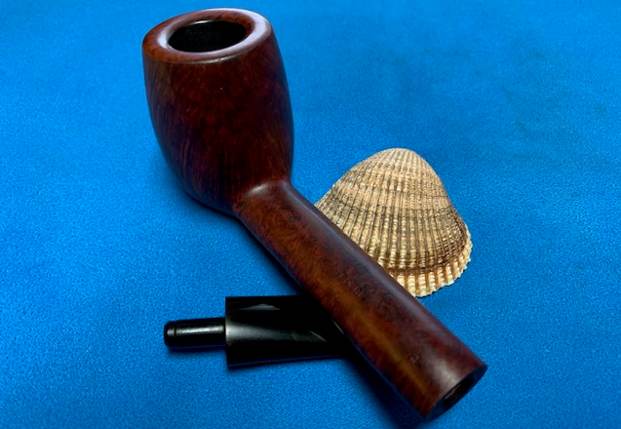
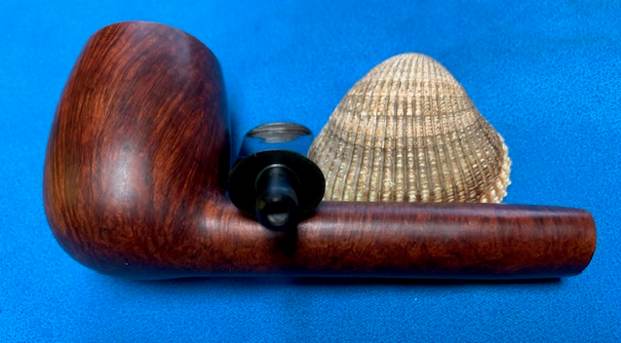
 I finished with the Blue Diamond and moved on to buffing with carnauba wax. Once I have a good shine in the briar and vulcanite I always give the bowl and the stem multiple coats of carnauba wax. I have found that I can get a deeper shine if I following up the wax buff with a clean buffing pad. It works to raise the shine and then I follow that up with a hand buff with a microfiber cloth to deepen the shine. It is always fun for me to see what the polished bowl looks like with the polished vulcanite and acrylic combination stem. It really is a beautiful pipe. The smooth finish around the bowl sides and shank show the grain shining through the rich brown stains of this Lane Era Charatan’s Make London England Belvedere 402 Canadian. The finished pipe feels great in my hand. It is light and well balanced. Have a look at it with the photos below. The dimensions are Length: 6 inches, Height: 2 inches, Outside diameter of the bowl: 1 ¼ inches, Chamber diameter: ¾ of an inch. The weight of the pipe is 1.98 ounces/55 grams. It is a beautiful pipe and one that I will be putting on the rebornpipes store in the British Pipe Maker section.
Hopefully the shape writing this blog is helpful to you in some way. In it I wanted to show both what I am looking for and how I move forward in addressing what I see when work on a pipe. Let me know if it is helpful to you. It is probably the most straightforward detailed description of my work process that I have done. As always I encourage your questions and comments as you read the blog. Thanks to each of you who are reading this blog. Remember we are not pipe owners; we are pipemen and women who hold our pipes in trust until they pass on into the trust of those who follow us.


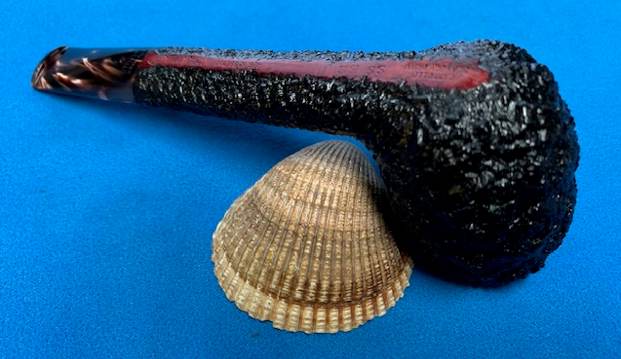
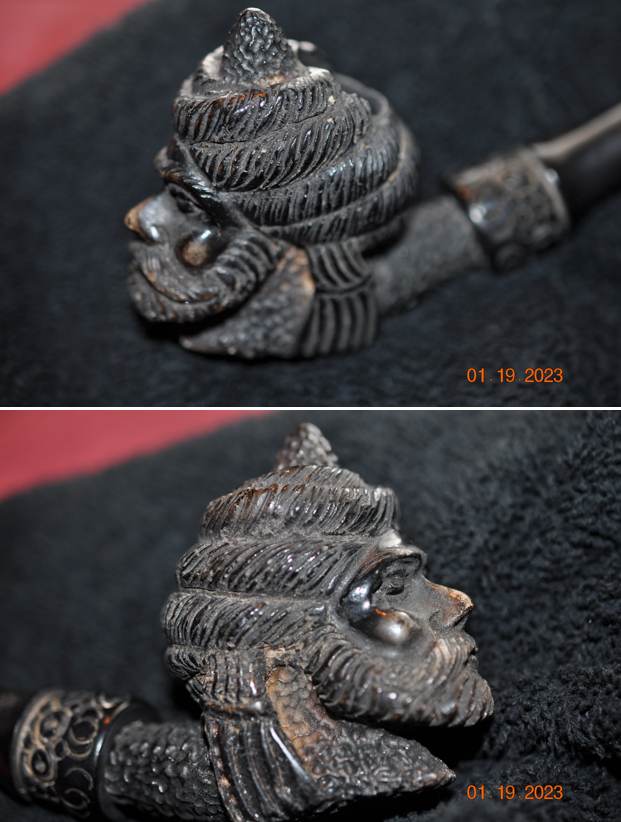
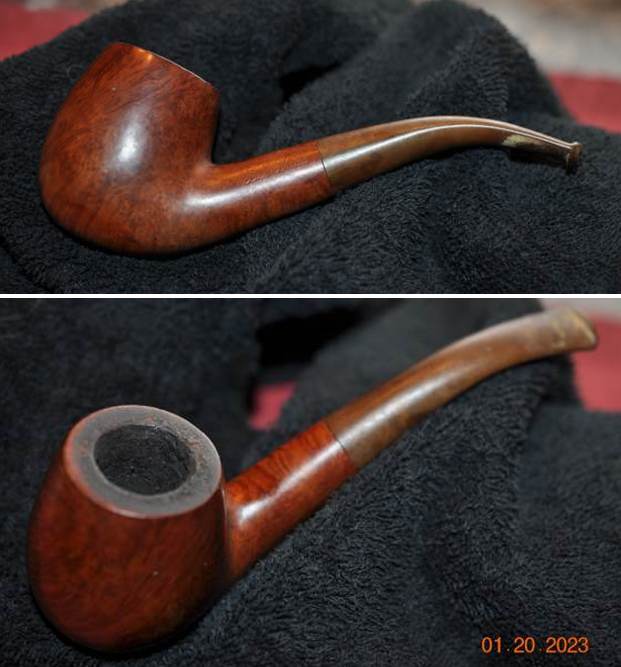
 When I took the pipe out of the bag to work on it last evening this is what I saw. The finish on the briar looked very good. It was dirty but the colour had stayed true. It had a bit of patina on the bowl but it was beautiful. The shank band was damaged along the edge where it had been bent and dented. The stem was very loose in the shank and the brass spacer on the stem was very loose. The bowl had a very thick cake and the airway in the shank was almost clogged with tars and oils. I would need to be cleaned up before I worked on tightening the fit in the shank. The stem was oxidized, calcified and had tooth marks and chatter on both sides ahead of the button.
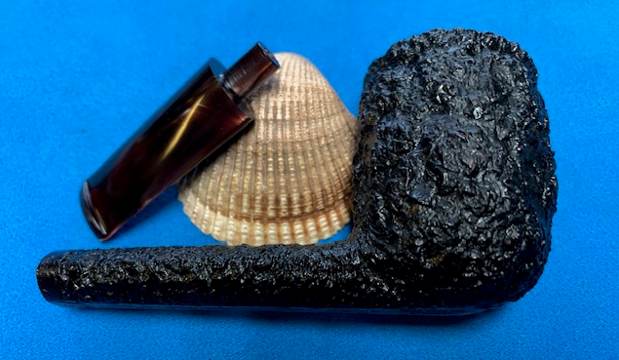
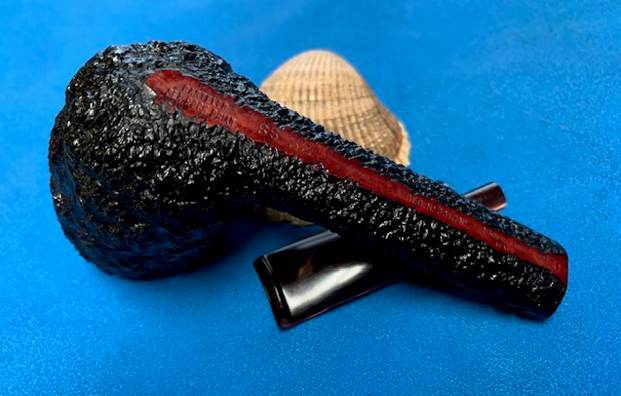
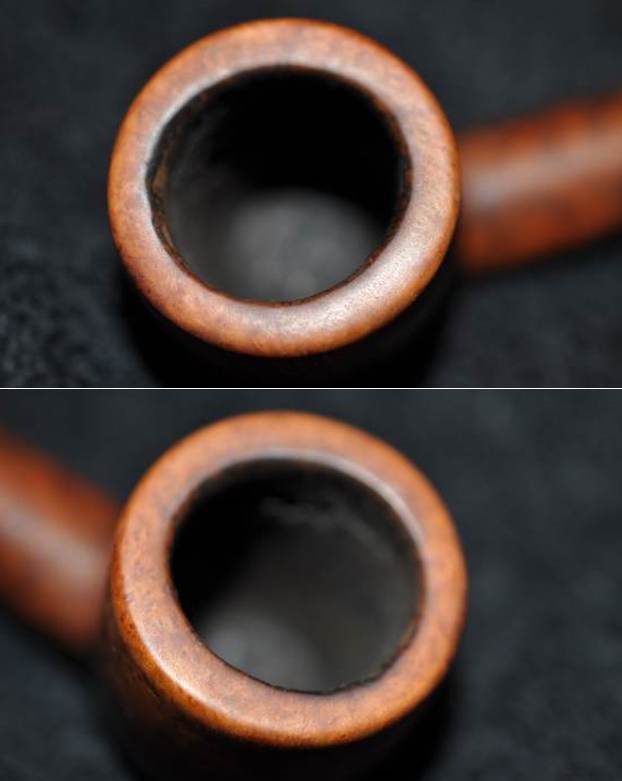
 I took photos of the rim top and the thick cake in the bowl to show how it looked. There was also tobacco debris on the walls. The rim top had some darkening and there were nicks around the inner edge of the bowl. It will clean up pretty well. The photos of the stem show the condition of the stem. You can see the tooth marks and chatter under the calcification on the stem surface.
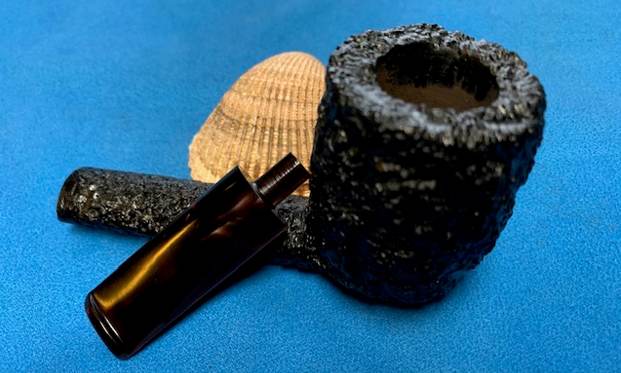
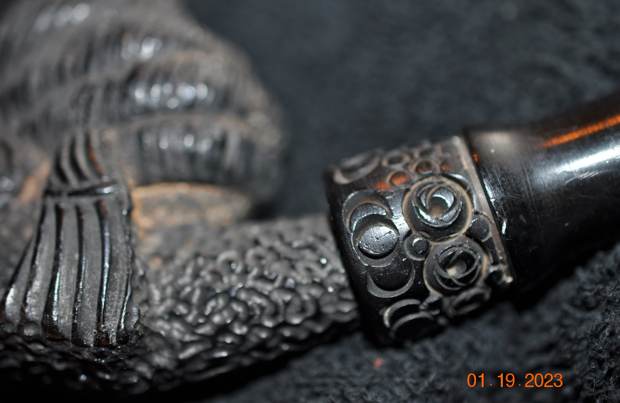
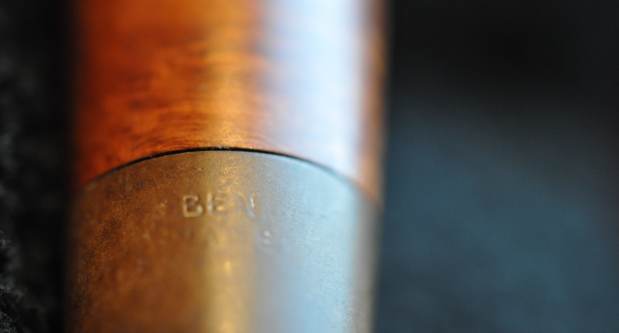
 I took a photo of the band and how much of the stamping it covered on the shank. You can also see the damage to the band between the shank and the stem. You can see the poor fit of the stem to the shank. I took the stem off the shank and photographed the look of the pipe as a whole. It is a nice looking Rhodesian that has a definite Chacom look to it.
  I went back and reread the previous restoration blog that I written on the restoration the previous time I had worked on the pipe. I also was very interested to read the back story and history on the brand. I quote from the blog below.
 There was something about the brand on the pipe that rang a bell for me. I have a tin of their Sunday’s Fantasy Tobacco in my cellar and I wondered if they might have made pipes as well.
 The band was bent at the shank end in various places around the diameter. I used a tool I have here with a sharp end and a rounded end. I worked it around the inner edge of the band to smooth it out as much as possible. I used my topping board with 220 grit sandpaper to top off the damage on the shank end edge. It looked considerably better once I had finished and the stem fit more snug against the shank end.
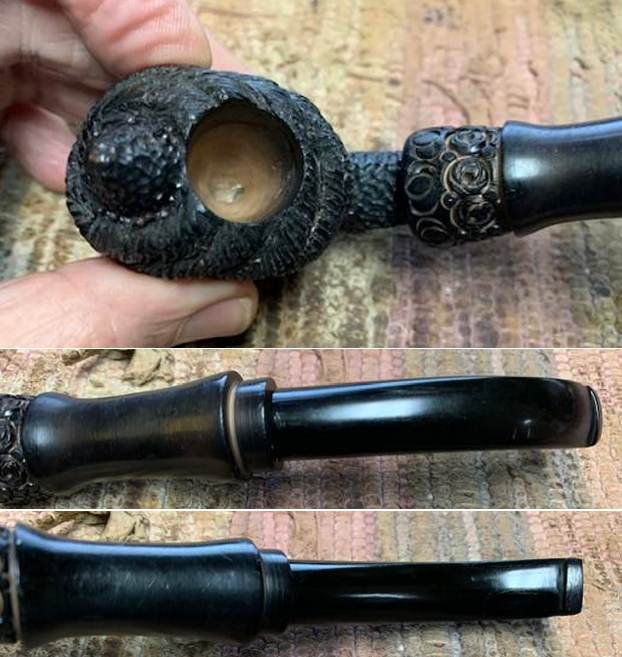
 I turned my attention to the internals at this point. I reamed the bowl back to bare briar with a Pipenet Pipe Reamer using the second cutting head. I cleaned up the reaming with a Savinelli Fitsall Pipe Knife. I finished the bowl clean up with 220 grit sandpaper wrapped around a piece of dowel. The walls were smooth and there was no sign of burning or checking. It looked very good.
 I cleaned out the internals with 99% isopropyl alcohol, pipe cleaners and cotton swabs. I worked over the shank and the airway in the stem. It took some work but once finished it was clean and smelled fresh.
 I polished the rim top with micromesh sanding pads – dry sanding with 1500-12000 grit pads. I wiped the briar down with a damp cloth after each sanding pad. It took on a real shine by the time I finished with the last sanding pad.
 I worked some Before & After Restoration Balm into the smooth rim and the sandblast finish on the bowl and shank. I worked it into the surface of the briar with my fingertips to clean, enliven and protect the wood. I used a horse hair shoe brush to work it into the crevices and keep from building up in the valleys and crevices of the finish. Once the bowl was covered with the balm I let it sit for about 15 minutes and buffed it off with a soft cotton cloth and the shoe brush. I polished it with a microfiber cloth. I took photos of the pipe at this point in the process to show what the bowl looked like at this point.

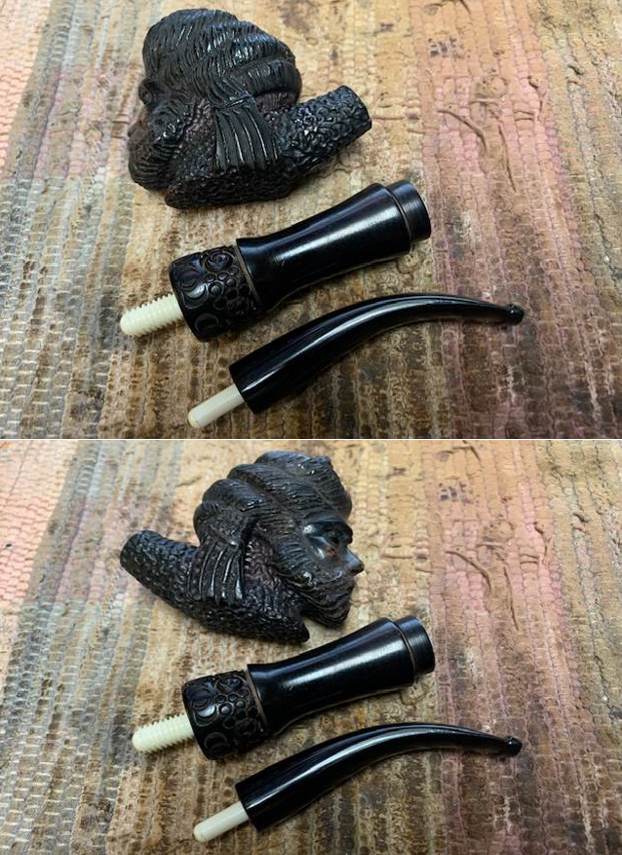
 Now it was time to address the part of the restoration I leave until last. I set the bowl aside and turned my attention to the stem. I filled in the deep grooves in the tenon to build it up and make it even. Once the repair cured I sanded it smooth to make it round and even once more. Once finished it looked better and the fit in the shank was very good. I also sanded the stem surface to smooth out the tooth marks and chatter. I also sanded it to remove the oxidation and calcification off the surface of the stem.
 I build up the damage to the button edge on the top and the marks in the underside of the stem with black CA rubberized glue. Once it had cured I recut the button edge and flattened the repairs. I smoothed out the repairs with 220 grit sandpaper and started polishing the stem with 600 grit wet dry sand paper.

 I use micromesh sanding pads and water to wet sand the stem with 1500-12000 grit sanding pads. I wiped it down after each sanding pad with Obsidian Oil on a cotton rag after each sanding pad as I find it does two things – first it protects the vulcanite and second it give the sanding pads bite in the polishing process.
 After finishing with the micromesh pads I rub the stem down with Before & After Fine and Extra Fine stem polish as it seems to really remove the fine scratches in the vulcanite. I rub the Fine Polish on the stem and wipe it off with a paper towel and then repeat the process with the Extra Fine Polish. I finished the polishing of the stem down with a final coat of Obsidian Oil and set the stem aside to let the oil absorb. This process gives the stem a shine and also a bit of protection from oxidizing quickly.
  The final steps in my process involve using the buffer. I first buff the stem and the briar with Blue Diamond on the buffing wheel. Blue Diamond is a plastic polish but I find that it works very well to polish out the light scratches in the vulcanite and the briar. I work the pipe over on the wheel with my finger or thumb in the bowl to keep it from becoming airborne. It works well and I am able to carefully move forward with the buffing. The briar and stem just shone!
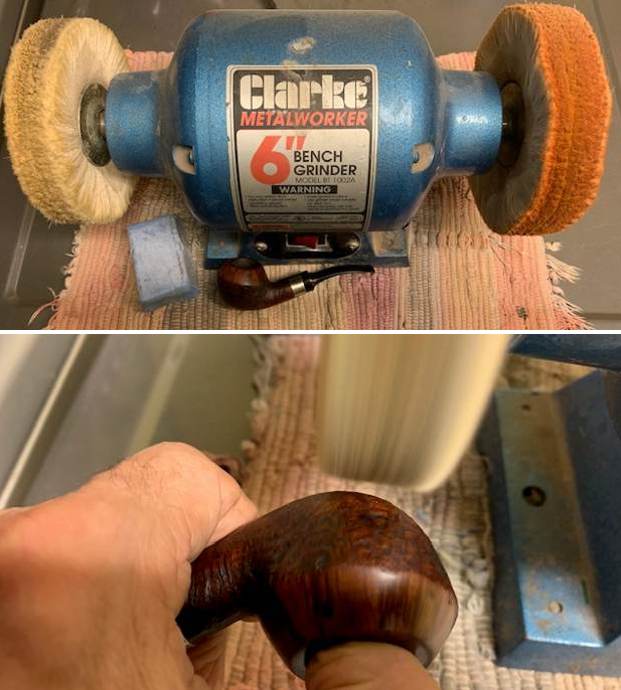
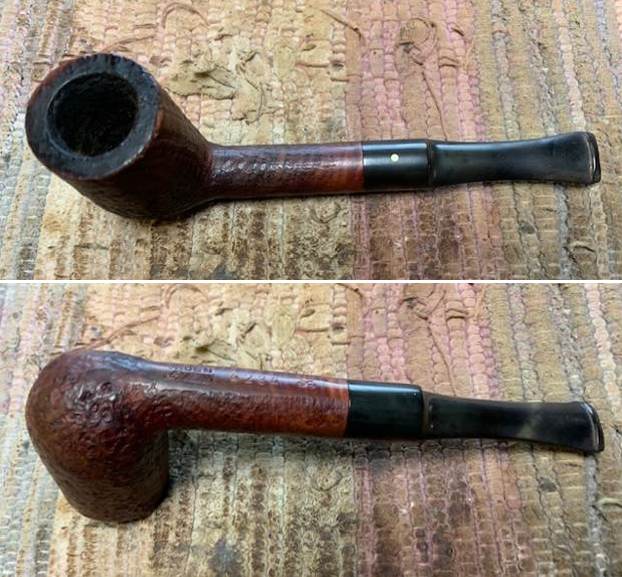
 I finished with the Blue Diamond and moved on to buffing with carnauba wax. Once I have a good shine in the briar and vulcanite I always give the bowl and the stem multiple coats of carnauba wax. I have found that I can get a deeper shine if I following up the wax buff with a clean buffing pad. It works to raise the shine and then I follow that up with a hand buff with a microfiber cloth to deepen the shine. It is always fun for me to see what the polished bowl looks like with the polished vulcanite and acrylic combination stem. It really is a beautiful pipe. The smooth finish around the bowl sides and shank show the grain shining through the rich brown stains of this Radford Ravel Rhodesian. The finished pipe feels great in my hand. It is light and well balanced. Have a look at it with the photos below. The dimensions are Length: 5 ½ inches, Height: 1 ½ inches, Outside diameter of the bowl: 1 ¼ inches, Chamber diameter: ¾ of an inch. The weight of the pipe is 1.90 ounces/53 grams. It is a beautiful pipe and the second of the five pipes for restemming I have ahead of me. Once I am finished with the lot he will get them back to enjoy once more. As always I encourage your questions and comments as you read the blog. Thanks to each of you who are reading this blog. Remember we are not pipe owners; we are pipemen and women who hold our pipes in trust until they pass on into the trust of those who follow us.