Tag Archives: buffing a stem

Comoy’s The Guildhall London Pipe Liverpool Renewed


Blog by Steve Laug

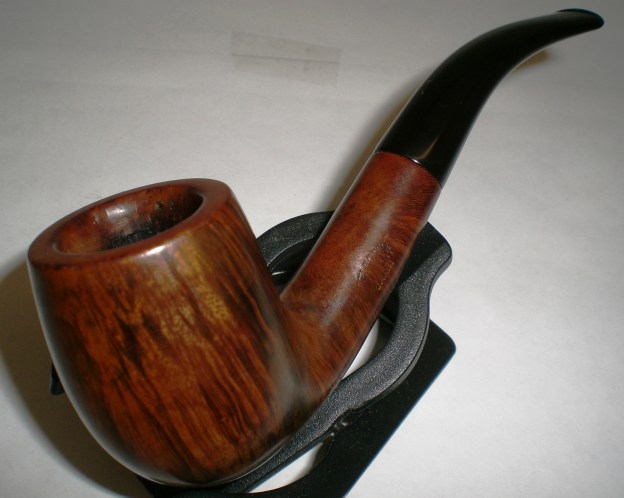
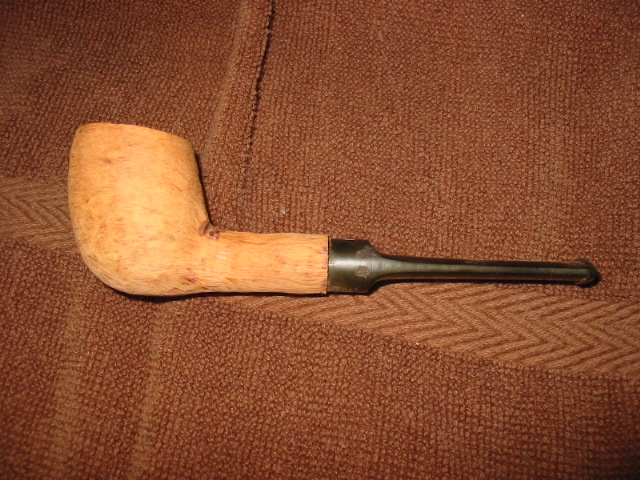
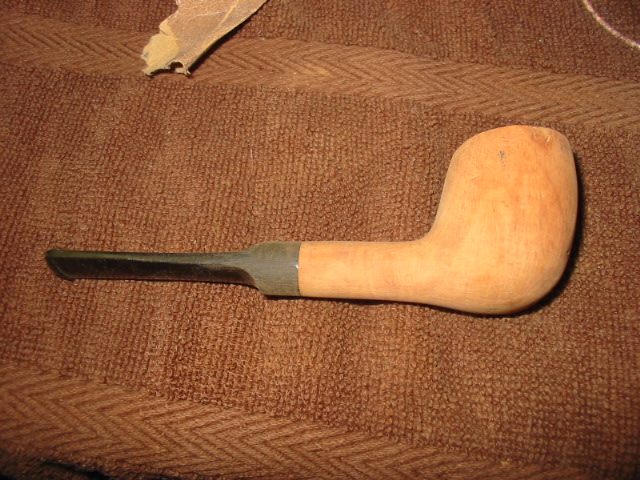
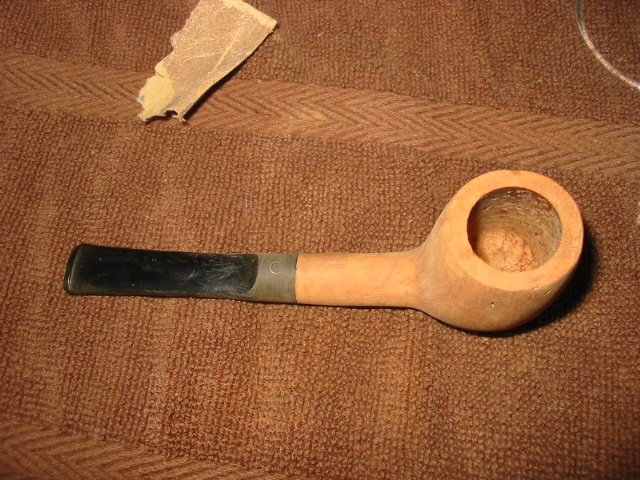
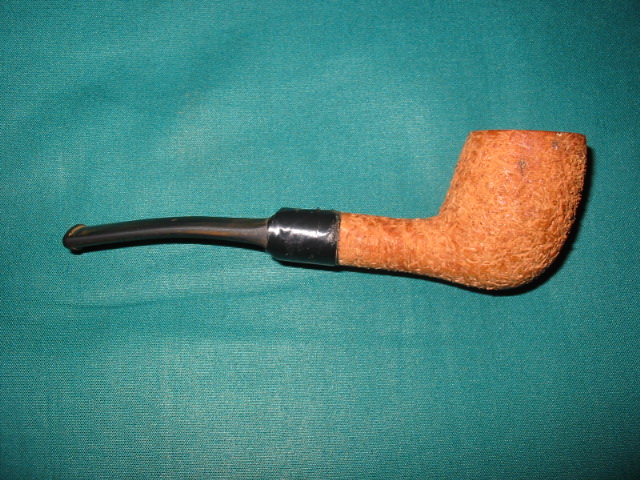
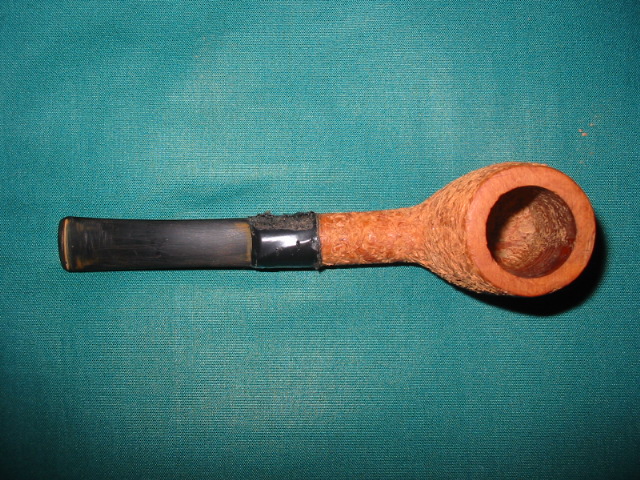
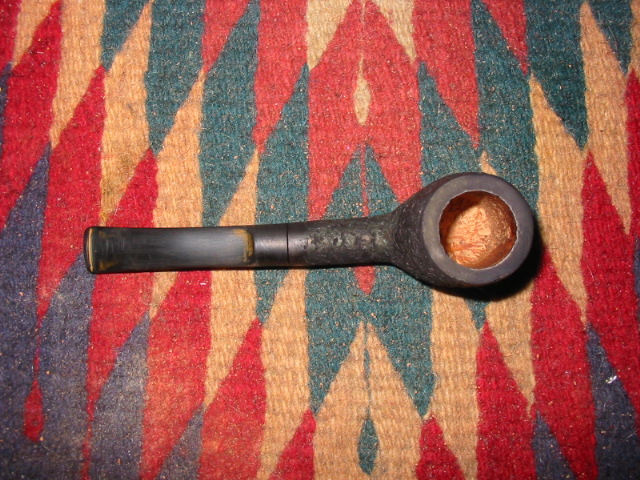
The Comoy’s pipe pictured below was one of the pipes I picked up at an Antique Mall in Edmonton, Alberta. It was by far in the best condition of the three pipes I purchased that day. It also had the highest price tag – $30 of the three. It is stamped on the left side of the shank The Guildhall over London Pipe and on the right side it is stamped Made in London in a circle over England. The shape is stamped as 30. The grain on it is very nice with a few bald spots on the sides and front on the lower portions of the bowl. The contrast stain that is on these older Comoy’s pipes is extremely well done and it is what always draws me to them. The top of the bowl rim was covered with a little tar. The bowl itself was partially caked and a few tobacco remnants sat in the bottom of the bowl. The stem had tooth chatter and slight oxidation. When I picked it up the stem was on upside down so the three metal lines that were stem logos on these pipes was not visible. I was able to rotate the stem but it was tightly stuck in the shank. I did not want to damage the shank so I left it until I got home.
IMG_0302

IMG_0304
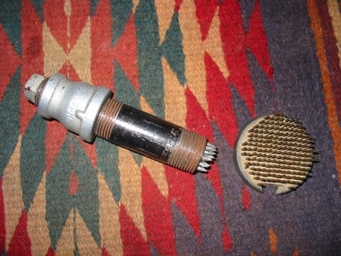
When I returned home from my trip and things settled down I took the pipe to the work table to refurbish it. I decided to take it apart to begin the process of cleaning it. The stem was tight in the shank and I needed to use the freezer technique to loosen it easily. The tenon is often easily snapped if you try to turn it when it is stuck. I put it in the freezer for 15 minutes and then it came out very easily. When I pulled it out of the shank it brought a lot of chunks of tar and oily buildup with it. The cloth on my worktable was littered with the black pieces that fell out of the shank. Once I had it out of the shank there was a stinger contraption that I have found is common in the older Everyman and Guildhall pipes. This one was covered thickly with tar and oil. It was pressure fit into the tenon but was tightly bonded to the vulcanite. I used a pipe cleaner with alcohol to scrub the inside of the stem and to also work around the exterior of the stinger. I scraped at the gunk that held it to the tenon and was able to remove much of the grit with a dental pick. I grabbed it with a piece of cloth and twisted and pulled at the same time. I kept the stem level during this process as I did not want to damage the tenon by pulling up as I tried to remove it. It finally broke free of the tenon and I laid it aside on the table top. I do not put the stinger back into a pipe that I intend to use. I tag the stingers and save them should I decide to sell the pipe in the future.
IMG_0757
I then cleaned out the shank and the stem with pipe cleaners and Everclear. It took a lot of pipe cleaners to remove the oils and tar from the stem and the shank. I cleaned it until they came out only stained but not covered in grime. I intended to use a retort on this pipe so my purpose was only to remove the heavy buildup on the surface in the stem and shank.
IMG_0758

IMG_0759

IMG_0760

IMG_0761
Once I had the interior relatively clean I took out my retort and hooked it up to the pipe. The retort is made up of a test tube and stopper with a permanently inserted brass tube to which a piece of surgical tubing is fitted on the end of the brass tube. The tubing fits over the stem. I put about ¾ of an inch to 1 inch of isopropyl alcohol in the test tube. I stuffed the bowl of the pipe with a cotton boll to stop the alcohol from coming out of the top of the pipe when I heated the alcohol. I lit a candle to heat the alcohol and boil it into the stem and shank. I began with a large candle to do the heating. The next series of seven photos show the first boil of the alcohol through the pipe. I let it boil for several minutes and then removed the test tube from the heat. As it cooled the alcohol was drawn back into the test tube. It was dark amber in colour and smelled strongly of old burned tobacco.
IMG_0762

IMG_0763

IMG_0764

IMG_0765

IMG_1109

IMG_1110

IMG_1111
I removed the tube from the flame, and once it had cooled I emptied the alcohol from the test tube, rinsed and refilled it. This time I chose to use a small tea light to heat the tube. It gave a better angle on the test tube and pipe. I boiled it again and when it cooled let the alcohol return to the tube. The series of five photos below shows the second boil and the amber fluid that filled the tube. I ran the retort a third and fourth time until the alcohol came out clear and then I knew the shank and stem were clean. I continue to boil the alcohol through the pipe until it is clean. The retort leaves a pipe smelling brand new once the alcohol smell has dissipated and the pipe dried out.
IMG_1112

IMG_1113

IMG_1114

IMG_1115

IMG_1116
I removed the retort from the stem and the cotton boll from the bowl of the pipe. Once it was removed I ran pipe cleaners through the shank and stem to remove any of moisture that may have been left behind and the pipe quickly dried out. It was time to clean the top of the rim of the pipe. Early on in the process I had examined it and found that the tars on the top were on the surface and that a good scrub with saliva on a cotton pad would remove the buildup quite easily. The next two photos show the cleaning of the rim with the cotton pads.
IMG_1117

IMG_1118
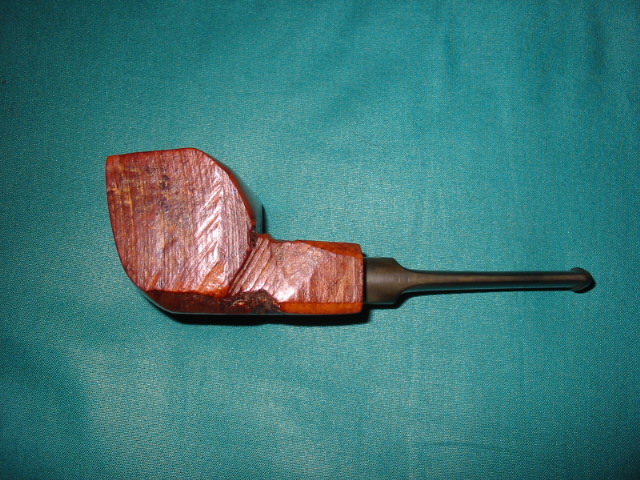
Once the rim was clean I buffed the pipe with White Diamond and gave the bowl and shank a first coat of carnauba wax. It was then time to work on the stem. I sanded the stem with 340 grit sandpaper to remove the tooth chatter and small dents in the surface of the vulcanite. I then wet sanded the stem with 1500-2400 grit micromesh sanding pads. The next two photos show the stem after the initial sanding with the 340 grit sandpaper.
IMG_1119

IMG_1120
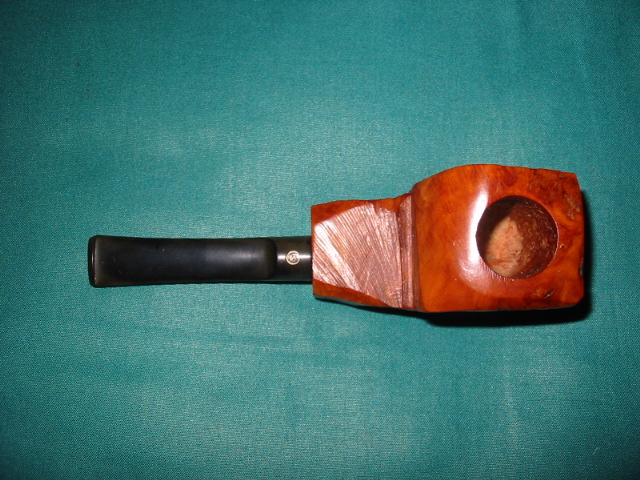
The next two photos are randomly taken after I had sanded with the micromesh sanding pads 3200-12,000 grit. I dry sanded with these grits and the stem developed a shine and a depth to the blackness of the vulcanite. When I had finished sanding the stem I rubbed it down with Obsidian Oil to preserve the finish and then buffed it with White Diamond and finally multiple coats of carnauba wax.
IMG_1121

IMG_1122
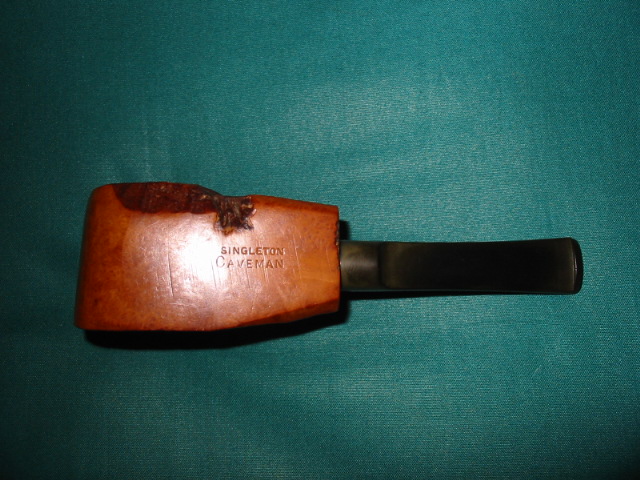
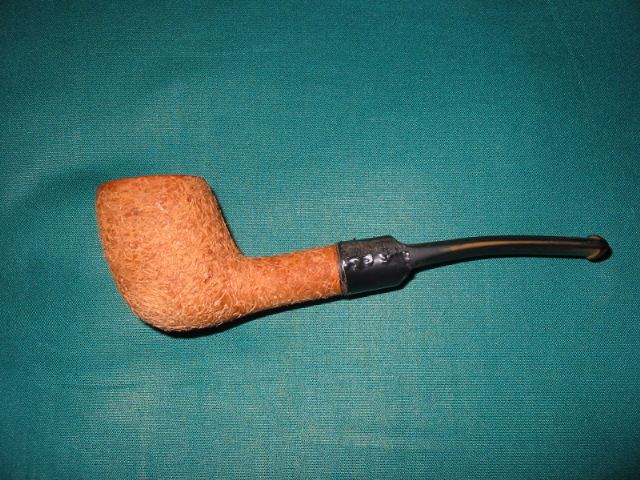
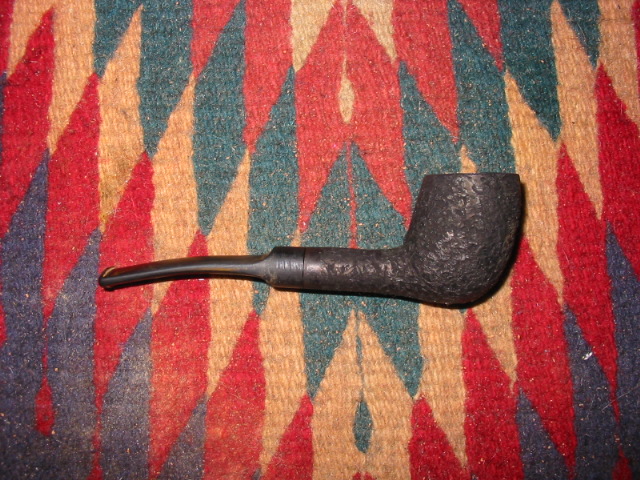
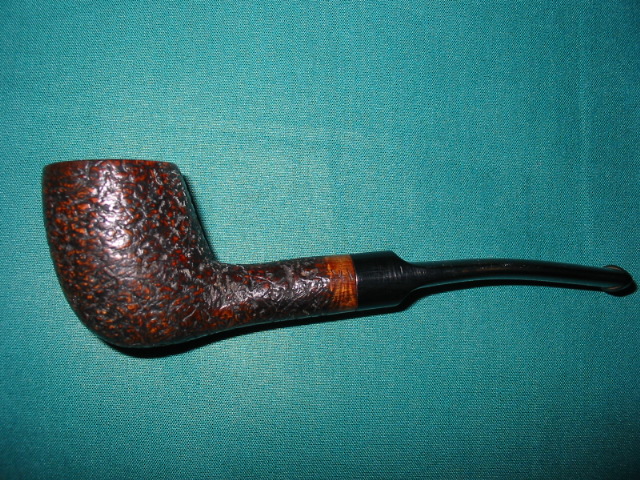
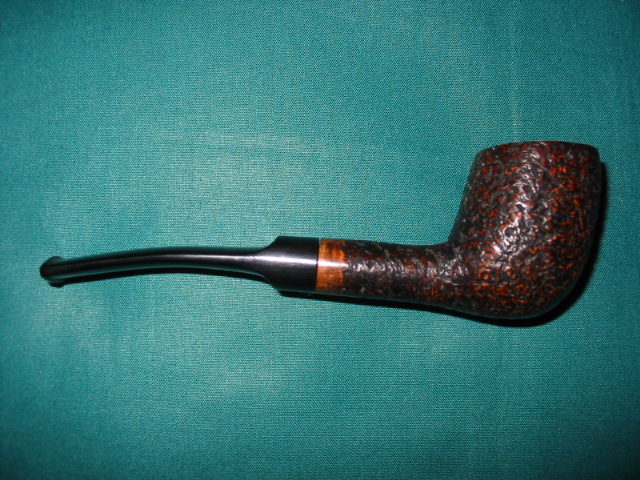
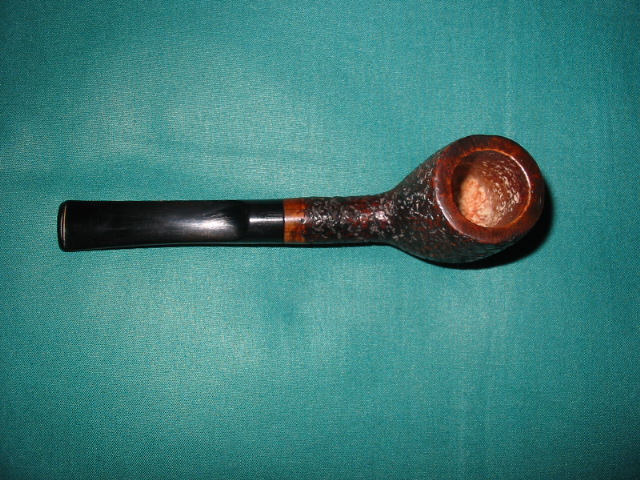
The final four photos in this essay show the finished pipe. There is a bit of ghosting around the three bars in the photo that appear to be oxidation. The oxidation is gone. Rather what is happening is a reflection off the metal bars. In natural light the stem is a deep and rich black.
IMG_0778

IMG_0779

IMG_0780

IMG_0781

Carving one of my own


Every so often I get the urge to carve a pipe of my own. I have done it from scratch, drilling the airway and bowl but often it is just as much fun for me to buy a pre-drilled block with its own stem and rework it into something I like. The pictures and essay below will take you through my process with a pipe I picked up off EBay for almost nothing. When you look at it some of you will recognize that for awhile in the 80’s and maybe earlier Singleton sold these pipes as Caveman Pipes. They were rough and were stained and waxed, stamped Singleton Caveman pipes and sold as is. I have always thought that they were ugly and looked unfinished. This one just begged to be reshaped – at least that is the excuse I gave when the package arrived and my wife commented on “yet another pipe”.

The first four photos give a good sense of what it looked like when it arrived at my house. It was a fairly small piece of briar and there was no way of knowing what lay beneath the surface of the block. It was stained and waxed. The stem was oxidized a bit but it did not matter as I was going to reshape it and make it my own. The last photo of the four shows the Caveman stamping I was referring to earlier.

ImageImageImageImage

I took out my Dremel with the larger sanding drum, replaced the sandpaper cylinder with a new one and began the process of removing the briar and making a shape that I liked and that I felt the briar held inside. The next three photos show the block with much of the briar removed and a shape is beginning to come out. I bring it to this point in the shaping process with the Dremel and the sanding drum. It works great for me. Some of you may notice the nicks from the Dremel on the saddle of the stem. Those are a pain but I was not worrying too much about it as I planned to shape the stem a bit more as well and those would disappear in the process. Also note, the shank is still not the diameter of the saddle on the stem at this point. From this stage one I do the shaping by hand with 100 grit sandpaper. It makes short work of the remaining excess briar. You will also see some burn marks at the bowl shank junction from the sanding drum – nothing that will not sand off. There are also sand pits and flaws beginning to show up in the surface of the briar.

ImageImage

Image

Much sanding went on before I took the next series of three photos. I used the 100 grit sandpaper to remove much of the excess and then progressed to 220 and 240 grit sandpaper to bring the shape to the stage in these photos. I also sanded the saddle of the stem and the edges of the blade to match the line of the shank. I wanted the flow to be uninterrupted by the juncture of the two materials and I wanted the transition to be smooth. There were many sand pits visible at this time on the sides, top and bottom of the bowl and the shank. It is always a bit of pain to get to this point in the shaping and sanding and not be able to get rid of them. This left me with a bit of a quandary. What should I do to get the best finish on this pipe? I dislike fills and did not want to use putty in any form on this pipe. I figured the next bet would be to rusticate the pipe and give it an interesting texture for the prestained finish.

ImageImageImage

I used a tool that I fashioned out of a fistful of galvanized nails, a piece of steel pipe, a cap and nipple coupling. It looks like the photos below. It is the tool on the left. I also used a florist’s frog (pictured on the right) to give the finished surface a different touch.

ImageImage

Before I used the tool on the surface of the briar, I wrapped the saddle of the stem and a 1/8th inch band with black electrical tape. I wanted to protect the saddle and the small band of briar from being rusticated with the tool. It is a work horse but is not subtle in its deep cuts. I wrap the cap end with a thick towel to protect my hand when I pushed the points of the nails into the briar. I pushed the head into the briar and twisted the tool back and forth to cut the surface of the briar and roughen it. The next series of four photos show the rusticated surface of the pipe after I finished with the nails and also after I rubbed the florist’s frog across the surface to knock off high points. I was aiming for a finish that has the look of aged leather so I wanted no roughness left but I wanted a crinkled, wrinkled look to the briar.

ImageImageImageImage

The next two photos show the pipe after I gave it a black understain. I used black aniline stain and applied it with a dauber. Once the pipe was covered I used a lighter to flame the stain to set it deeply in the briar. My goal was to have the black stain set deeply into the crevices of the rustication once I had buffed it. (I have learned that when I am staining to always start with the darkest stain and work toward the final lighter coat.) Once the stain was dry I took it to my buffer and buffed it with Tripoli. The buffer removed all of the black stain from the smoother, higher surfaces and the band next to the stem and the rim. The only black stain remaining was in the crevices and pits in the briar. At that point I restained the pipe with a medium brown aniline stain and flamed it as well. I took it to the buffer and this time buffed with Tripoli and White Diamond. I wanted the brown to give a top coat and allow the black to show through. I also wanted to smooth the surface a little to make it smooth in the hand.

ImageImage

The final series of photos show the finished pipe. I think I achieved the look of old worn leather I was aiming for with this rustication and staining. I worked on the stem and smoothed it out with 400 and 600 grit wet dry sandpaper and water. Once the scratches were gone I worked through the usual regimen of micromesh pads from 1500 to 6000 grit. These gave the stem a good polished look. I finished it on the buffer with White Diamond and multiple coats of carnauba. The bowl was waxed with Halcyon 2 wax so that I could avoid the wax build up from carnauba in the crevices of the rustication. I gave the entirety a final buff with a clean flannel buffing pad. This one has become a favourite smoker of mine. It is perfect size to fit in my jacket pocket and it is a veritable furnace for good Virginia Flake tobacco.

ImageImageImage

Dr. Plumb Bulldog Restoration


My daughter’s boyfriend found this neat little Dr. Plumb bulldog at a New Orleans shop and sent it to me for restoration. I thought Dr. Plumb had a connection to GBD and I believe they are now owned by the Cadogan group. The stem was in terrific shape, save for a heavy coat of oxidation. The top of the bowl was scorched and it had some dents and scratches.

Before:

I reamed the bowl with both my Castleford and Senor reamers. Someone in the pipes past had reamed it a little out of round, but it wasn’t too bad. I removed some of the dents with a knife heated by a flame and a wet towel. Most of the major ones popped back out nicely. The bowl has some fills, but they are hidden well by the factory finish. In order to remove the scorched top, it would have required a restain. I was afraid with the numerous fills, it would look better with the factory finish. “Character” as they say. I buffed the bowl with some Tripoli, White diamond and with a final buff using Carnuba. The stamping is very legible.

The stem was soaked in an Oxyclean solution overnight to soften the brown coating. Unfortunately, the stem logo proved very problematic. I could not get the oxidation off this part of the stem without removing the logo. The owner opted for me to leave the logo and brown patch.

Here is the finished product.

The pipe sure looks like it would be a good smoking piece and I hope the young man enjoys it for many years.

Selected Straight Grain (Comoys) Restoration


By Al Jones

Several months ago, a thread on the SmokersForum.uk about the Comoys “Selected Straight Grain” pipes piqued my interest. Member Dirigo (Tom) was kind enough to share with me how to identify these interesting pipes. I was able to grab this Shape 13 via Ebay last week, which corresponds with the Comoys shape chart. That shape looked to be in decent shape, with the exception of one putty fill. I assume this flaw made the pipe unworthy of the Comoys stamping. There were only the slightest tooth marks and no pesky stem logo to worry about.

From the Ebay picture, you can see the ugly fill.

There was only minimal cake inside the bowl so it was lightly reamed and soaked with Everclear and sea salt. The top of the bowl was scarred, so that was going to take some work.

While the bowl was soaking, I started on the stem, which had been soaking in a Oxyclean solution. I went thru my usual 1500/2000 grit wet paper that onto the final four micromesh grades. The stem was then buffed with white diamond and a final plastic polish. Removing the light chatter was pretty straight forward. The button was worn, so I used a needle file to slightly reform the edges.  Unfortunately, I was unable to remove the oxidation without making the edge of stem slightly rounded.  I need to learn how to avoid this issue.

Once the bowl was done soaking it was moved to an alcohol bath to remove the stain. I spoke to Steve prior to this step and he recommended the fill be corrected using the superglue & briar technique he recently posted on Reborn Pipes. That solution worked well and I used two steps to fill in the pit. After restaining, the fill is just slightly visible, a big improvement from the factories solution using the bubble-gum putty.
The Super-Glue and briar dust patch.

I used a two-step stain process to highlight the grain, also a recommendation from Steve. First I “painted” on some black stain, after the bowl was warmed to open the grain. Then, the bowl was sanded with micromesh and a very diluted application of Medium Brown stain was applied. The bowl was than buffed with Tripoli and white diamond, followed by a final buff with Carnuba wax. I was careful on all steps not to diminish the stamping, which is quite legible.

Thanks to Steven Laug for his help with this one and Tom for information on this interesting Comoys niche.

Barling Garnet Grain Small Bent Billiard 2034 Given New Life


Blog by Steve Laug

I picked up this little Barling (transition era pipe so the Barling stamping is missing the “s” and is a script) in a lot I bought on EBay. It had a broken stem that was also chewed through on the end and not repairable. The tenon was still in the shank and was exceptionally tight. I put the bowl in the freezer for about 30 minutes and then used a screw to remove the broken piece from the shank. The key here is to not screw in the screw too much or you can crack the shank. I was able to easily pull it out as can be seen in picture 3. The finish on the bowl was rough on the top with tars and some denting. The sides of the bowl also had some denting. I cleaned the top of the bowl and removed the tars. I steamed the dents out of the top and bowl sides.

ImageImageImage

I wiped down the bowl with acetone to remove the grime and the waxes that were on the finish. When I had finished I inspected the shank area because the drilling was off a bit in the shank and the walls were thin near the top left. There were small hairline cracks that went through several places and spidered up to about a 1/8 inch into the length of the shank. I glued those and pressure fit a nickel band on the shank.

I turned the tenon on a recycled stem I had here and fit it on the pipe. I used my Dremel to remove the excess material where the diameter of the stem was greater than that of the pipe. I kept the broken stem near at hand to match the diameter, the flow of the stem and the shape. I used it as a bit of a template to shape the new stem. The three pictures below show the process of shaping the stem from Dremel to hand sanding with 240 grit sandpaper.

ImageImageImage

In the picture below I have finished the initial shaping with the sandpaper and have a good fit. You will notice the lightening of the shank below the band – that is part of the process of sanding to fit the band to the shank. I place the original stem below the pipe in the picture for comparison sake. It is a bit thinner in profile than the new one in this photo. I continued to sand the stem with 400 and 600 grit wet dry sandpaper and water to remove the remaining scratches and grooves that the 240 grit sandpaper left. Once I had them removed I proceeded to use the micromesh pads – 1500, 1800 and 2400 grit to sand the stem smooth. When I finished with those I buffed the stem with Tripoli and White Diamond and finished by returning to the micromesh pads -3200, 4000 and 6000 to polish it. One more trip to the buffer with White Diamond finished the polishing. I gave the stem a coat of Obsidian Oil and removed it and set it aside. It was time to work on the finish of the bowl.

Image

I used an oxblood aniline stain to match the stain to the original Garnet Grain colour. I have done this in the past and compared it to a very nice original Garnet Grain and the colour is a perfect match. Before staining I polished the bowl with the 3200 and 4000 micromesh pads avoiding the stamping on the pipe. I applied the stain with a cotton swab and then wiped it off, applied and wiped it off until I got the colour I wanted. I then flamed it and set it aside to dry. Once it was dry I put the stem on it and took it to the buffer and gave it a buff with White Diamond and carnauba wax.

In the first picture below I put the original stem in to show the damage to the underside near the button. I also put a 1 cent piece, a penny in to give perspective on the size of this diminutive billiard. I am very pleased with the overall look of the pipe. The finish came out as a perfect match to the original Garnet Grain colour.

ImageImageImageImage