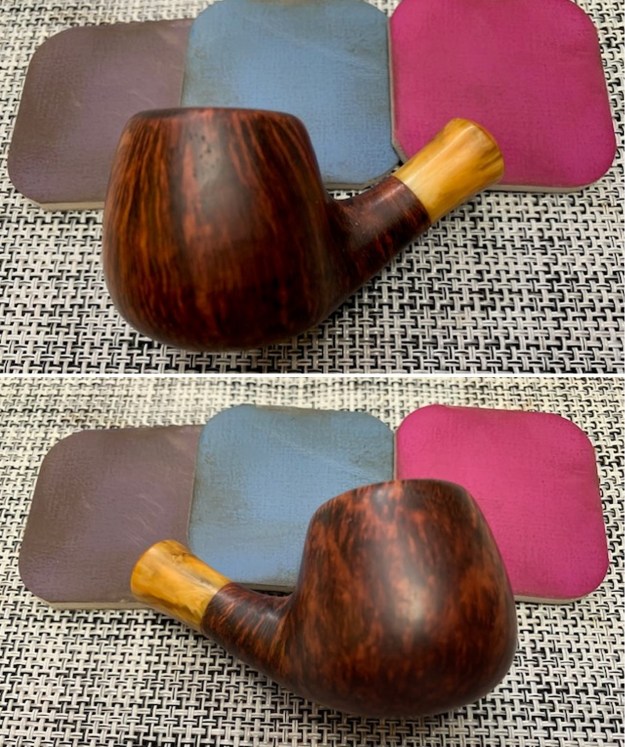
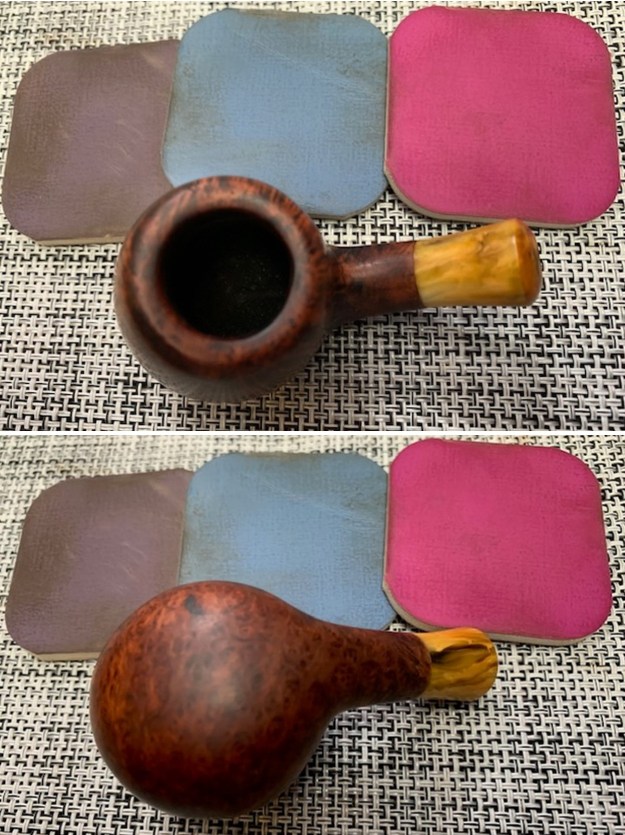
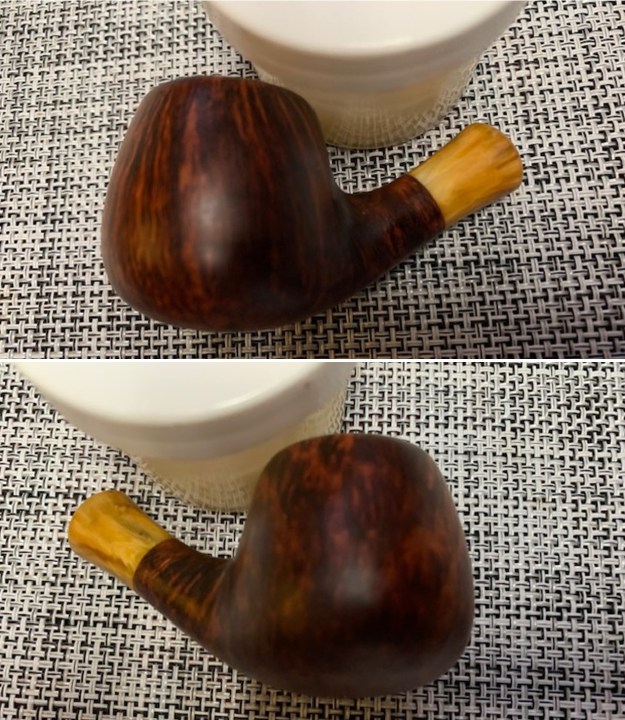
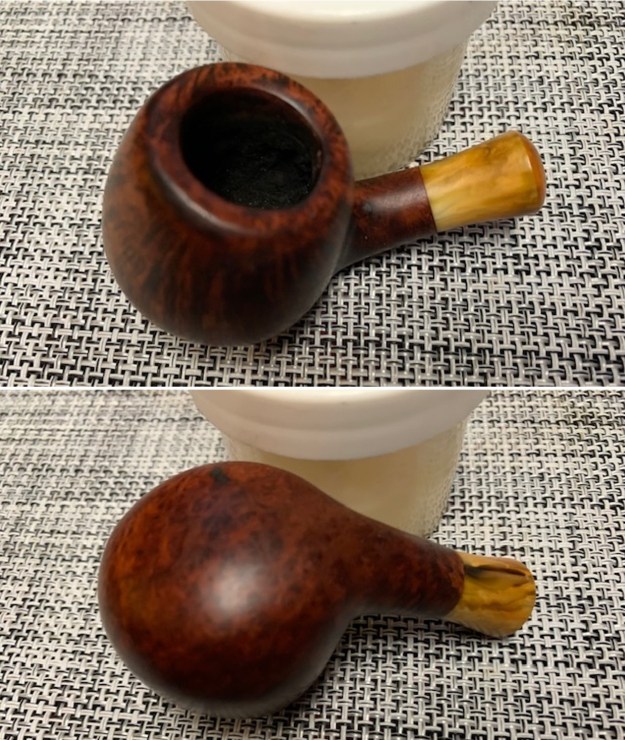
Tag Archives: bowls – refinishing

Pipe Gods Smiled And I Got Not One But Three Les Wood Pipes….Restoring Second Of The Three Les Wood Pipes; A Bark Silver Spigot


Blog by Paresh Deshpande

I had purchased three Les Wood pipes from a gentleman and had restored the first of the three pipes and have added it to my personal collection. Given below is the link to the write up posted on rebornpipes and is a recommended read to know how I came to be in possession of this lot and brief research on husband wife duo of Leslie Wood and Dolly and the pipes they make.

https://rebornpipes.com/2022/08/05/pipe-gods-smiled-and-i-got-not-one-but-three-les-wood-pipes-restoring-a-les-wood-poker/

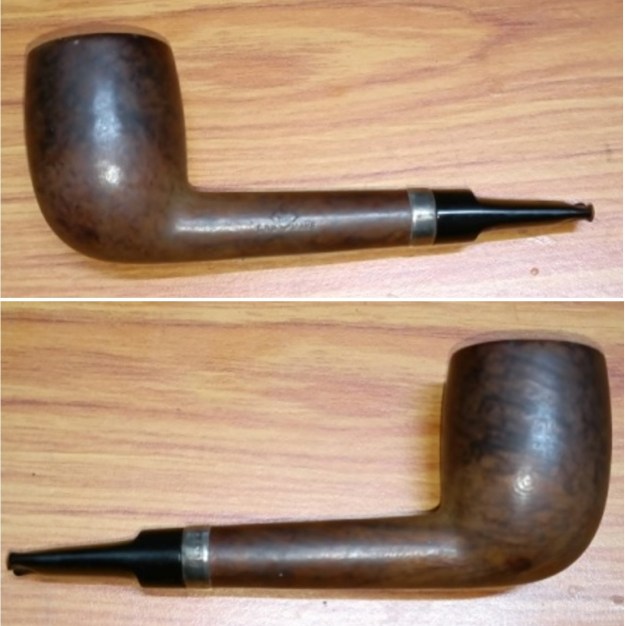
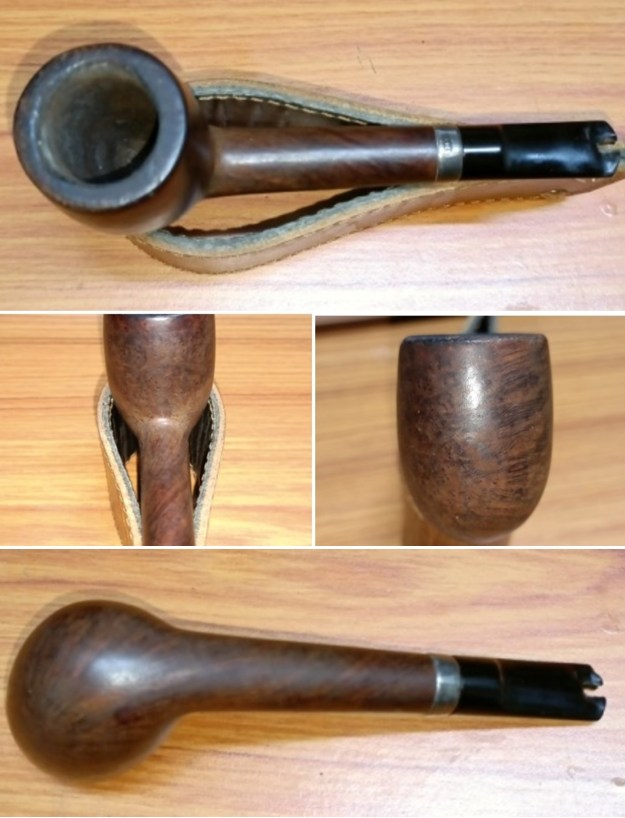
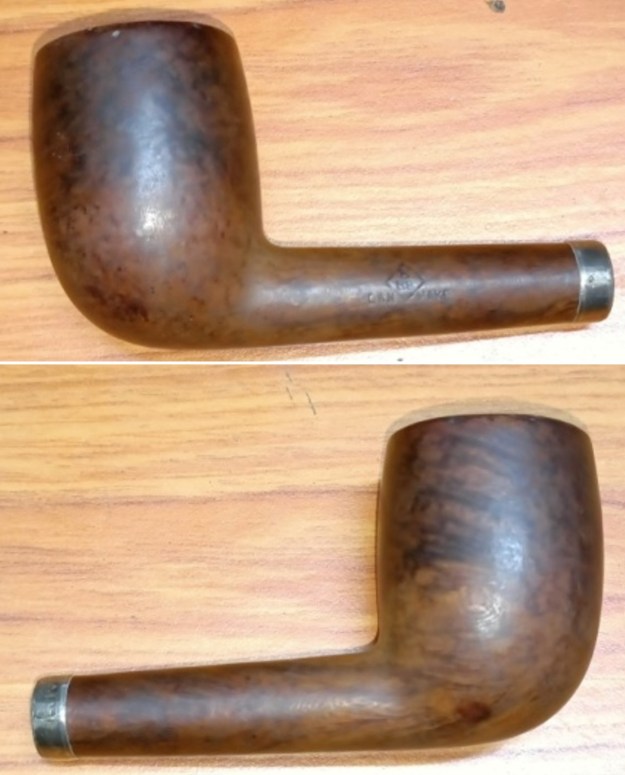
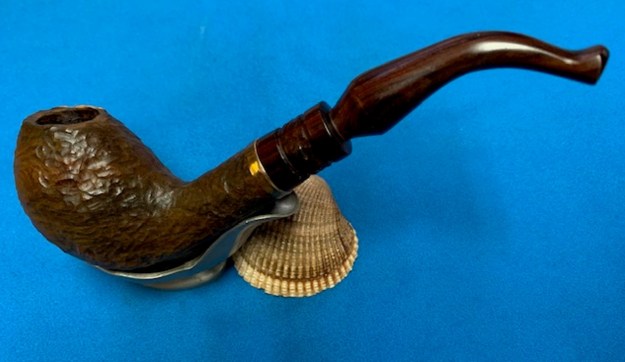
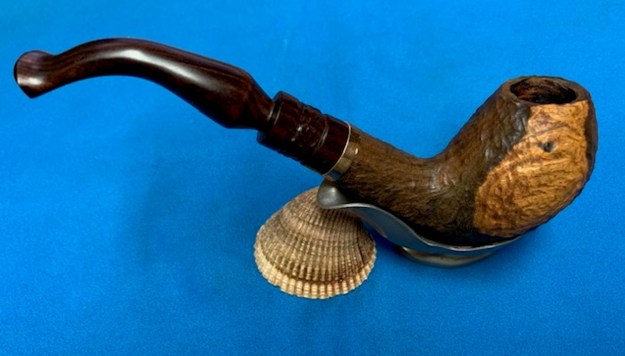
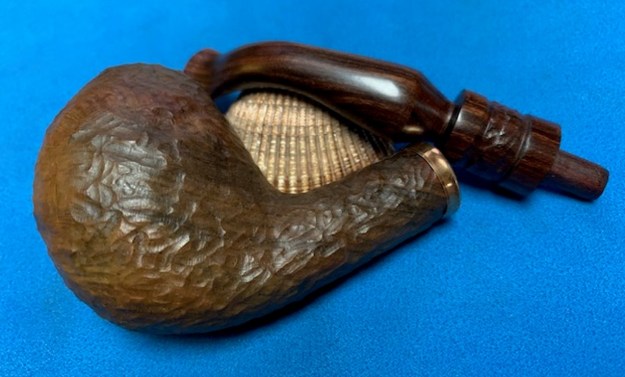
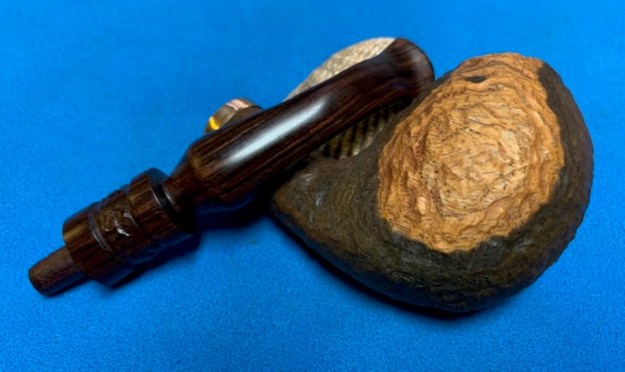
The second pipe that is now on my work table is a beautifully rusticated paneled Apple Half bent Silver Spigot. It is stamped on the bottom smooth surface of the shank as “FR LOUIS HESTON” over “FERNDOWN” in a slight arc over “BARK”. The sterling silver ferrule at the shank end bears the stamp “L & JS” in a rectangular cartouche over “.925”. The sterling silver mounting at the tenon end of the stem also bears similar stampings as seen on the ferrule. The vulcanite stem is stamped on the left side as “L J S”. Now this stamping varies significantly from the one that I had worked on earlier in that this pipe does not bear the stamping LES WOOD, HAND MADE IN ENGLAND and star (*) marking to denote the size. I referred back to pipedia.org to understand the variation in stamping. Here is what I found out and also the link to the write up is given below.

https://pipedia.org/wiki/Ferndown

Due to the vagaries of international trademark law, he sold his earlier pipes as ” L.&J.S Briars”, “Ellwood”, “Les Wood” or “L. Wood”. Until recently, an average of 1500 – 2000 pipes a year were sold as “Ferndown” — named for the mansion he lives in — in the UK and US, but as “L. Wood” pipes in Germany.

From the above, I assume that this pipe is from the recent past while the poker was from the earlier period. Truth be told, I am not 100% convinced on this and would really appreciate input, clarifications and detailed information on this variation in stampings observed from learned readers of rebornpipes.

There was not much that I could find about Fr. Louis Heston. An internet search of the name threw up data about Rev. Edward Louis Heston who left for heavenly abode in 1973. This period definitely does not coincide with the time period when Leslie Wood started making pipes under the FERNDOWN! Well, this too then is a grey area and would request readers to fill us all on this name and establish a relation between the name Fr. Louis Heston and this Les Wood pipe.

Initial Inspection
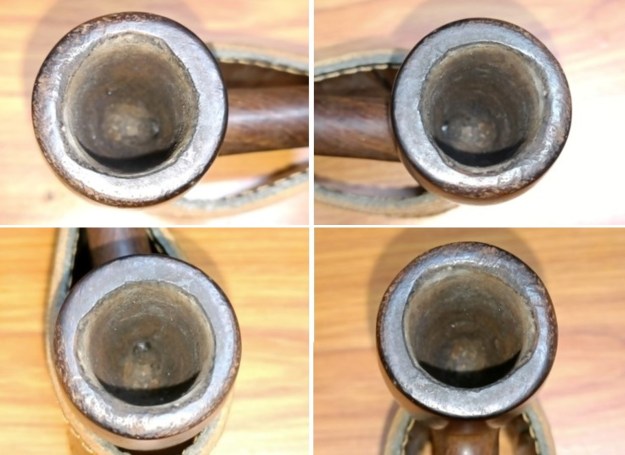
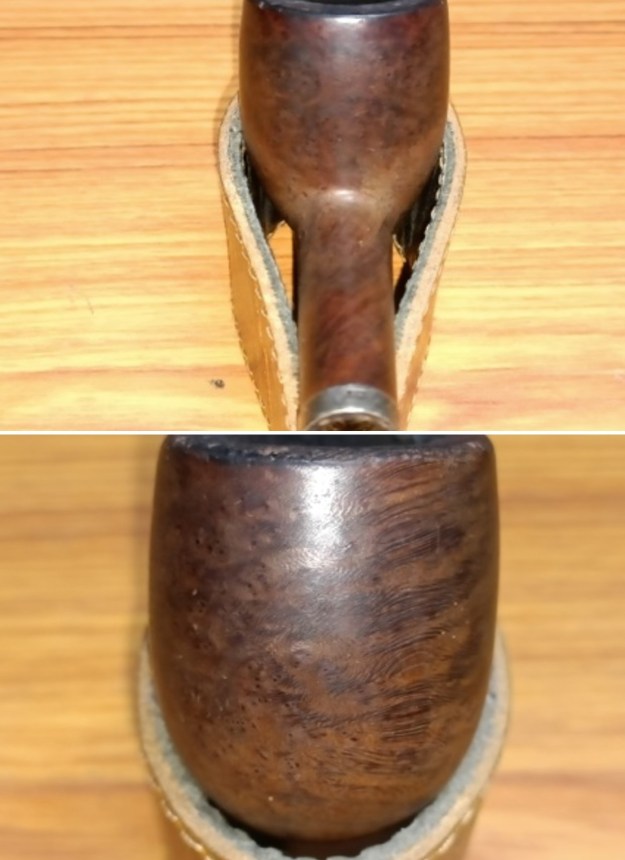
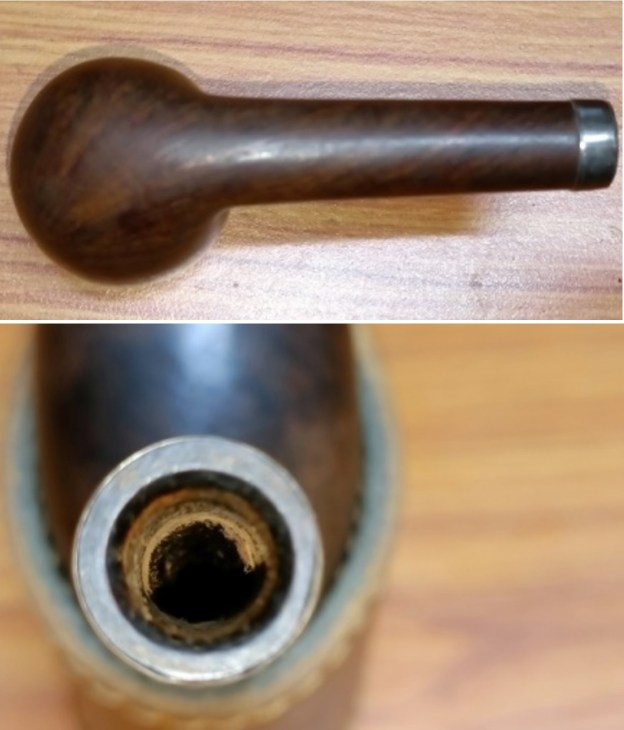
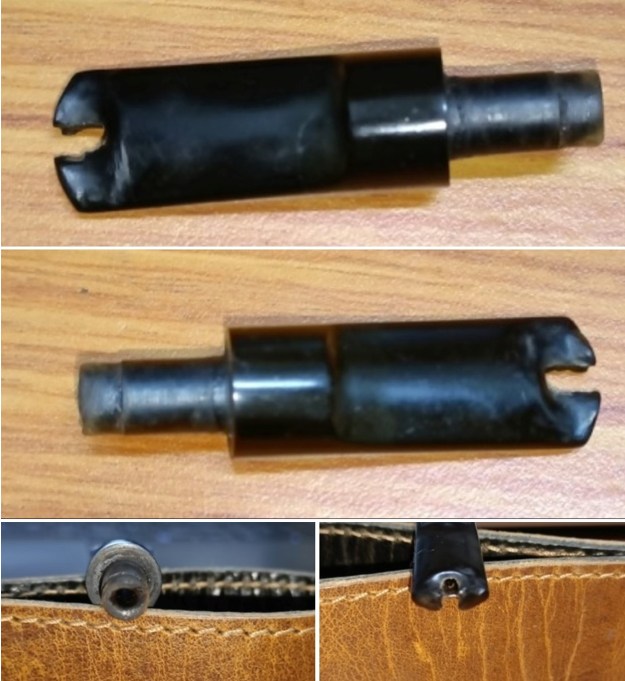
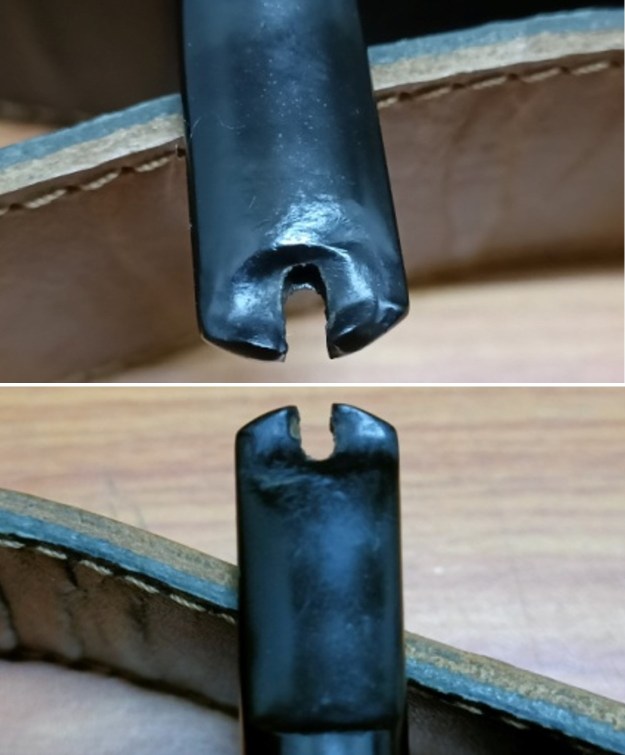
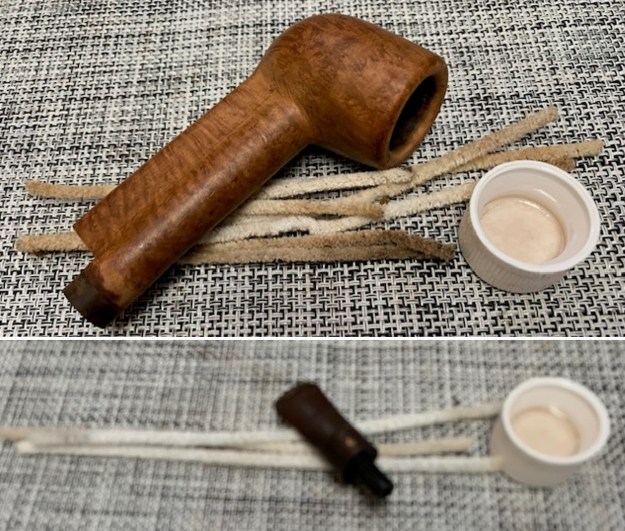
As observed with the Les Wood Poker that I last restored, this half bent Apple Silver Spigot too is in excellent condition. There is an even layer of cake of medium thickness in the chamber that is very hard and completely dry. The smooth rim top is sans any crusting of lava over flow but darkened towards the front. The eight panelled rusticated stummel appears in good condition with no signs of hot spots or cracked surfaces. The stummel has a lot of dirt, dust and grime grounded in to the crevices of the rusticated surface. The black and dark brown stain is faded at places giving the stummel is dull appearance. The fishtail vulcanite stem is deeply oxidized with some tooth chatter on either surface of the stem in the bite zone. The stampings on the shank, silver spigot and stem are all crisp and easily readable. The following pictures will provide a visual description to supplement the description given above. I like the feel and heft of this large stummel in my hand. The rusticated panelled surface with it prominent ridges feels tactile in the hand and very comfortable to hold. There is a lot of dirt, dust and grime trapped in to the crevices of rusticated surface giving it a dirty grayish appearance. The entire stummel looks dull, dirty and lifeless. Heavy accumulation of dried oils, tars and gunk is seen clogging the mortise. The dark stain has faded in couple of spots further adding to the sorry appearance of the stummel. The sterling silver ferrule is oxidized and dull looking. However, once the stummel surface is cleaned up and rejuvenated, this will be one beautiful looking pipe. I like the feel and heft of this large stummel in my hand. The rusticated paneled surface with it prominent ridges feels tactile in the hand and very comfortable to hold. There is a lot of dirt, dust and grime trapped in to the crevices of rusticated surface giving it a dirty grayish appearance. The entire stummel looks dull, dirty and lifeless. Heavy accumulation of dried oils, tars and gunk is seen clogging the mortise. The dark stain has faded in couple of spots further adding to the sorry appearance of the stummel. The sterling silver ferrule is oxidized and dull looking. However, once the stummel surface is cleaned up and rejuvenated, this will be one beautiful looking pipe. The beautiful sterling silver mounted vulcanite stem is hand cut and oozes very high quality of material use and also craftsmanship of highest quality. The stem is heavily oxidized to an extent that it appears dirty green. Dark coloration and calcification is seen on either surfaces of the stem in the bite zone from prolonged use of rubber bit. Very minor tooth chatter and bite marks can be seen in the bite zone on both the upper and lower surfaces of the stem. These tooth chatter and tooth indentation should be easily addressed by heating the affected areas to raise the vulcanite and thereafter sanding it down to match the rest of the stem surface. The tenon end and the horizontal slot end shows accumulation of dried gunk and grime. The sterling silver mount is oxidized but shows no signs of any damage whatsoever.The Process
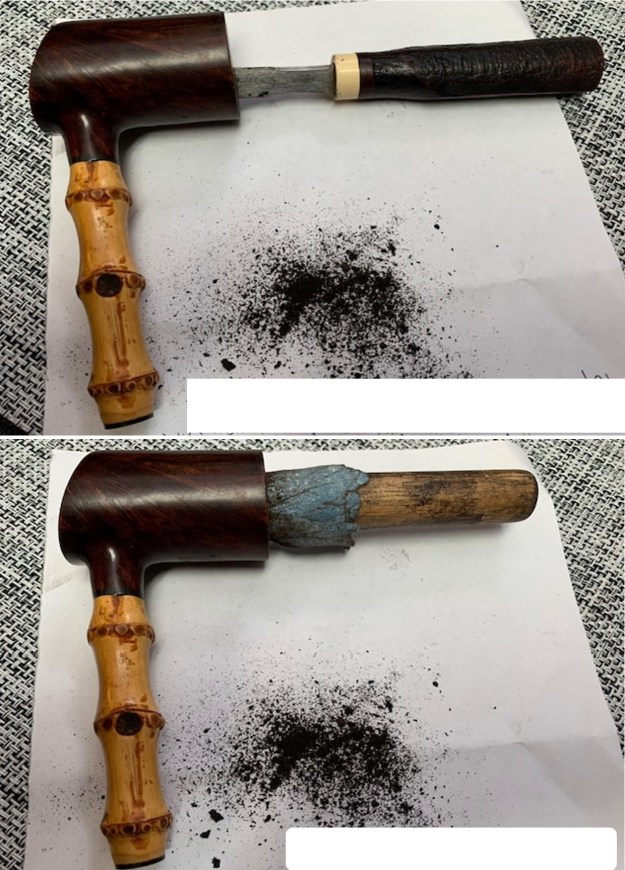
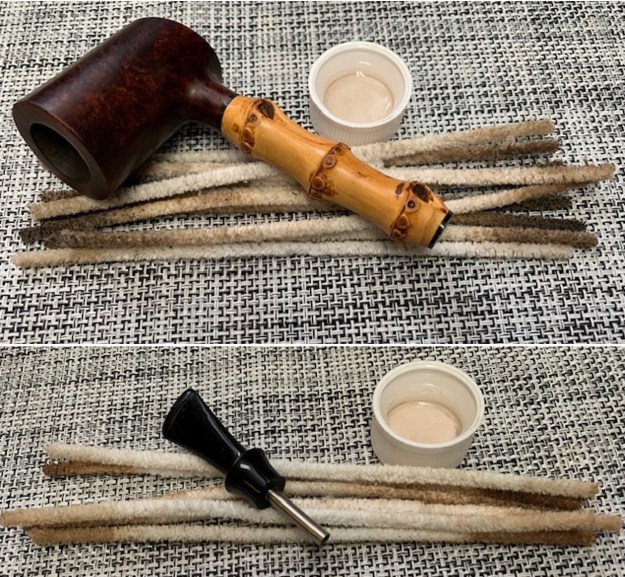
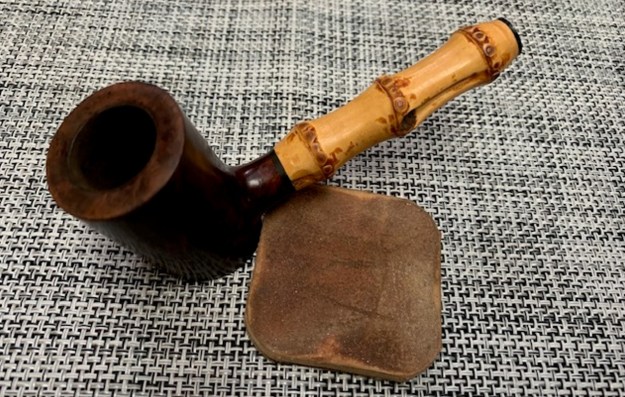
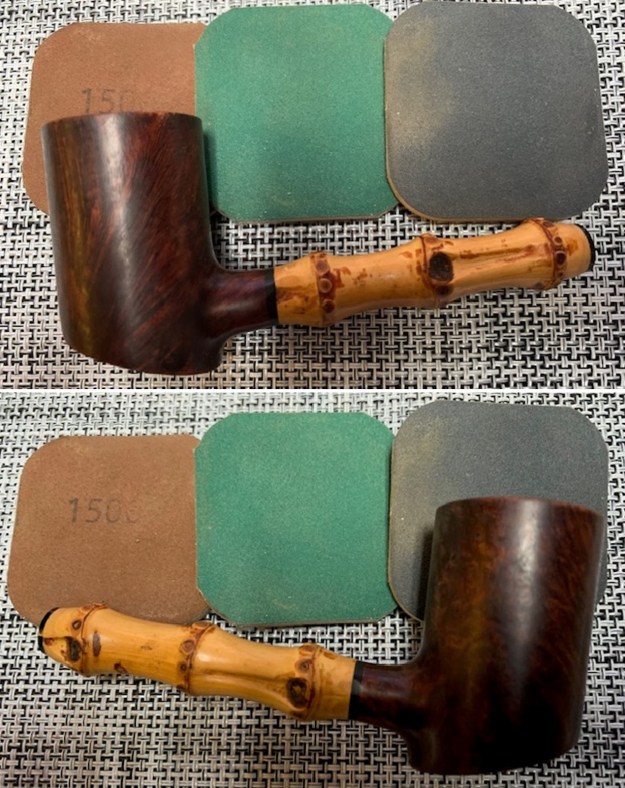
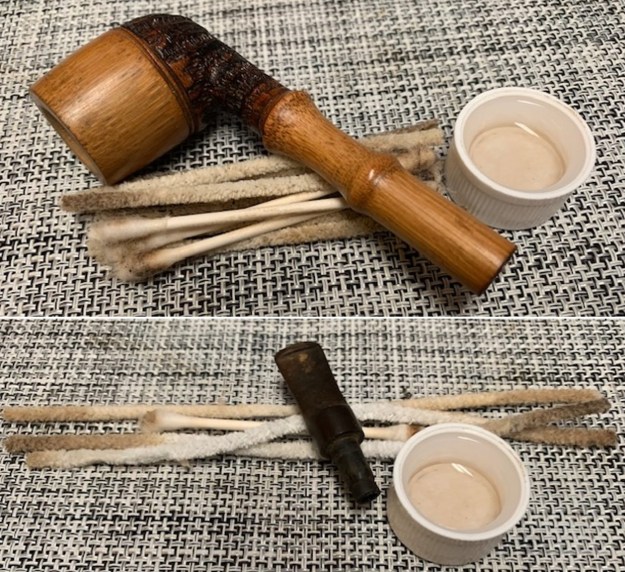
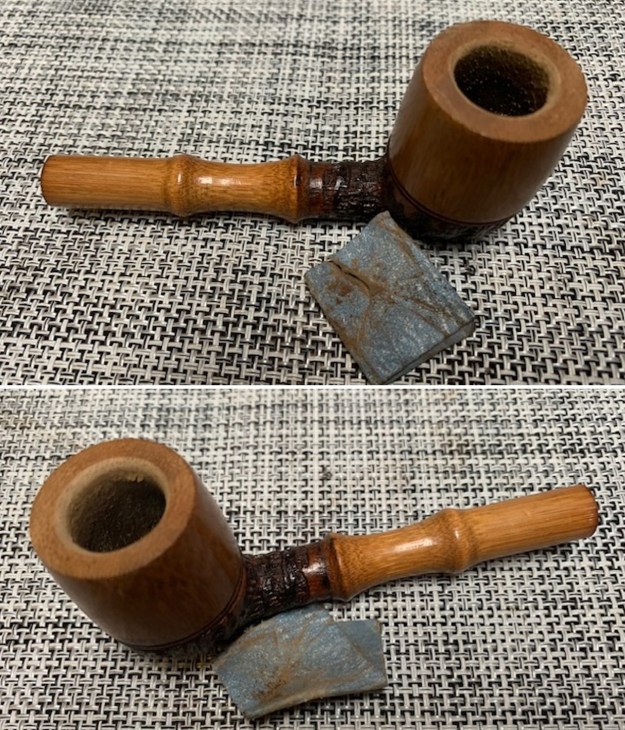
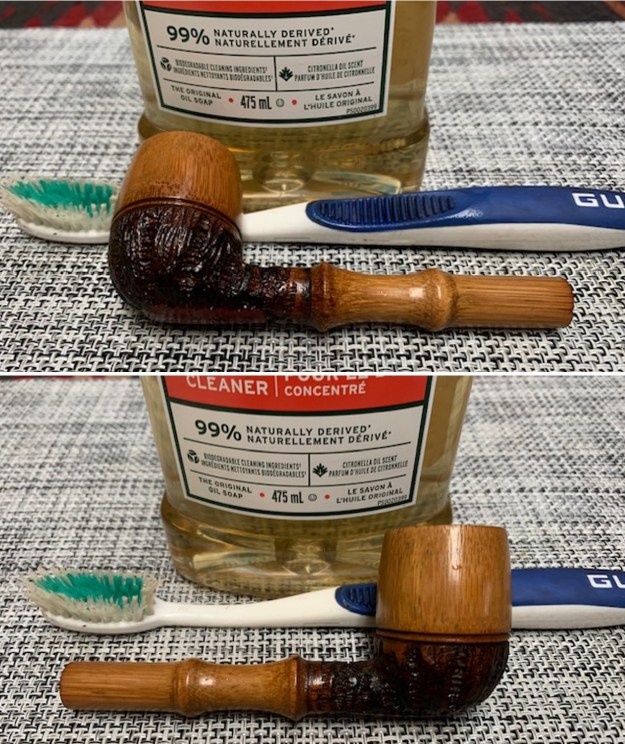
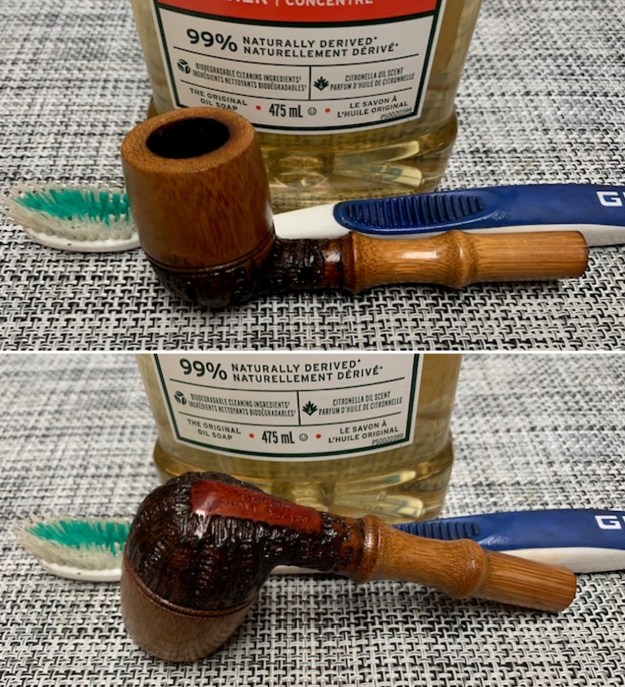
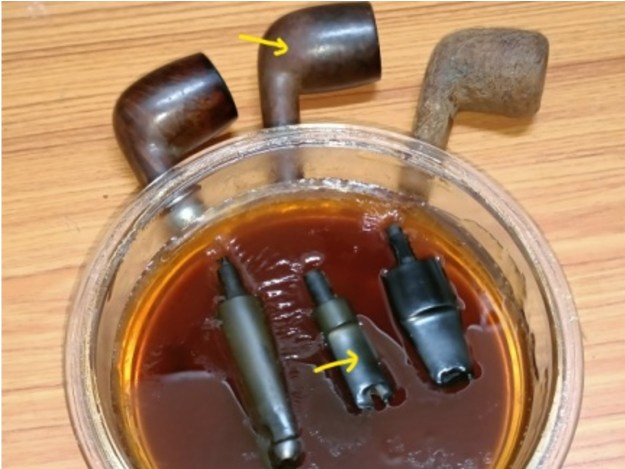
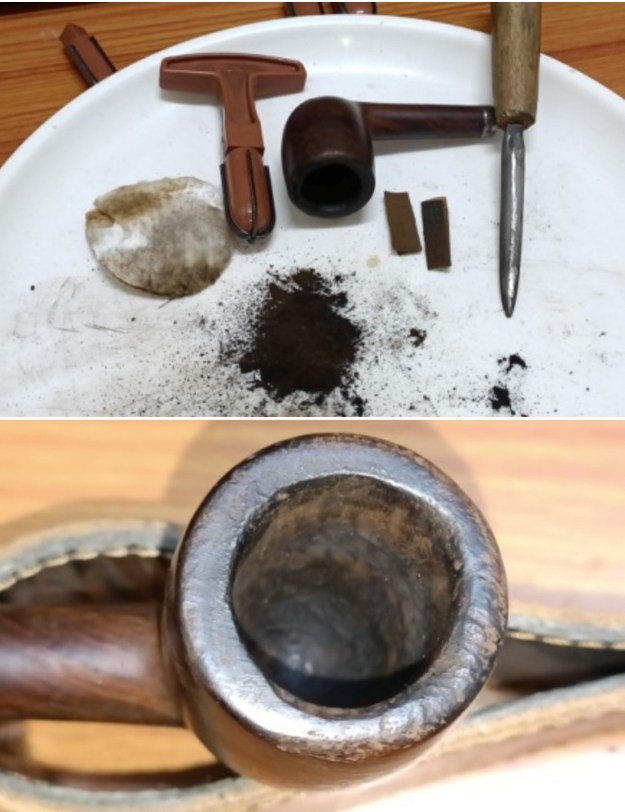
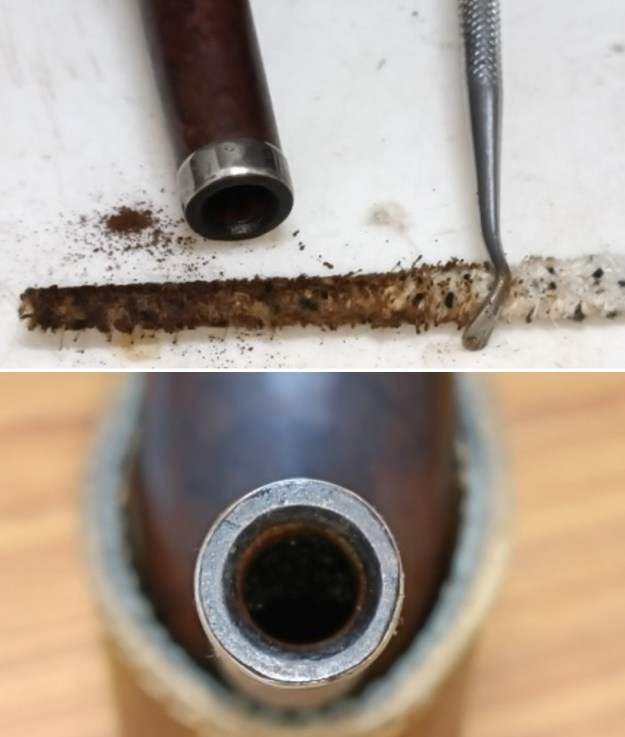
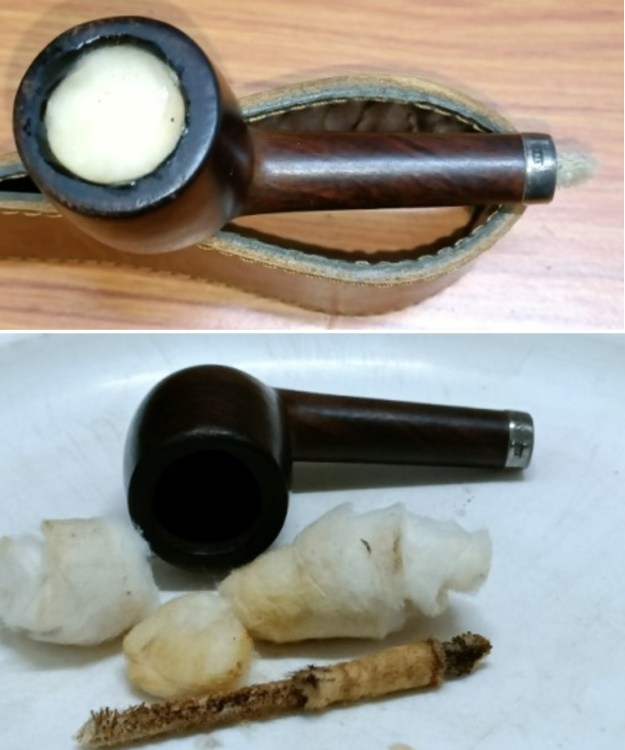
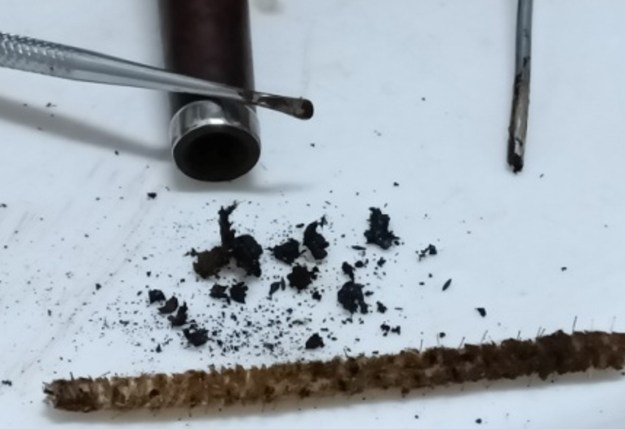
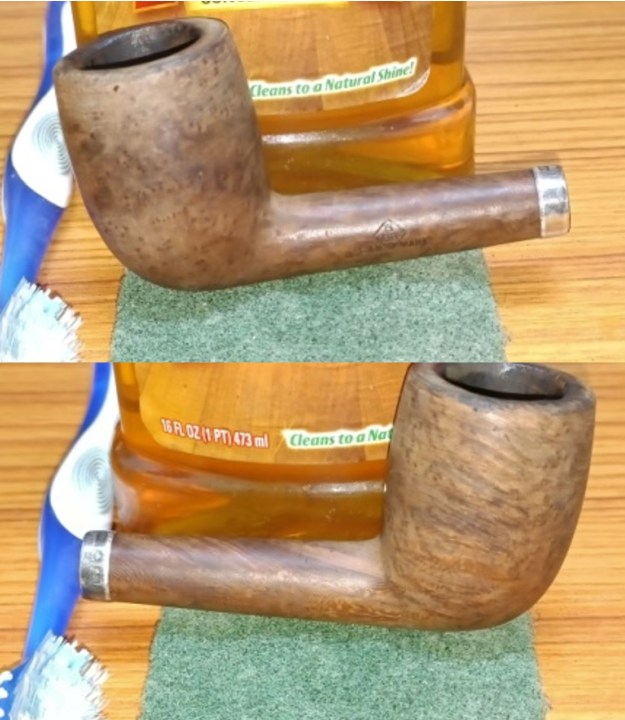
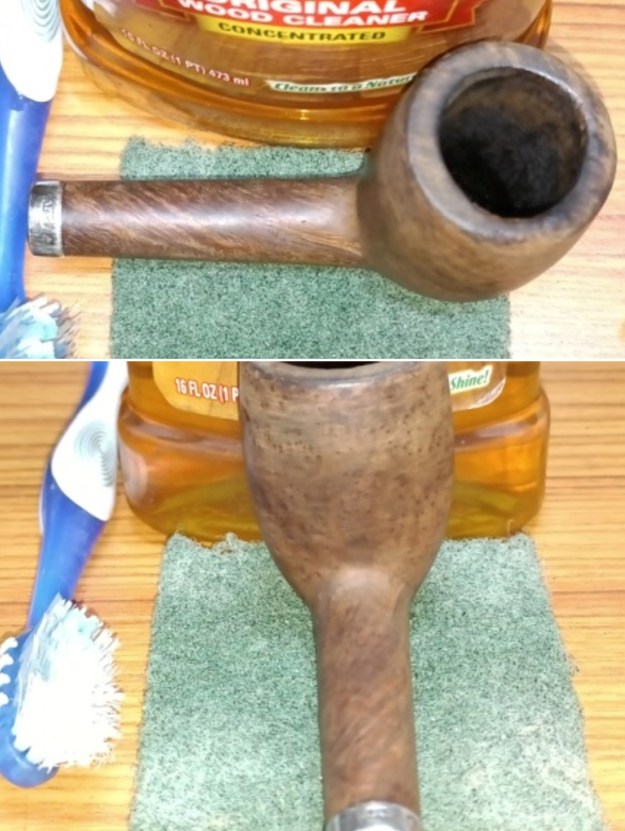
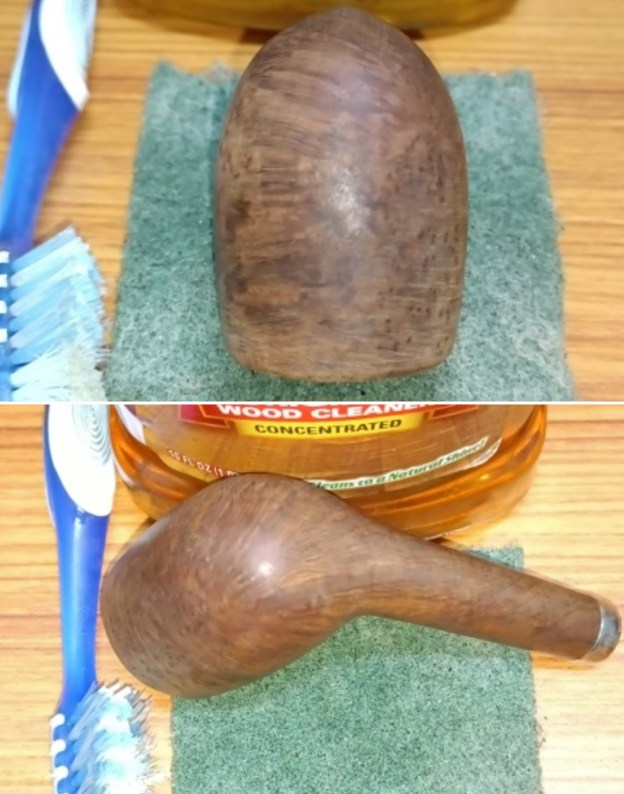
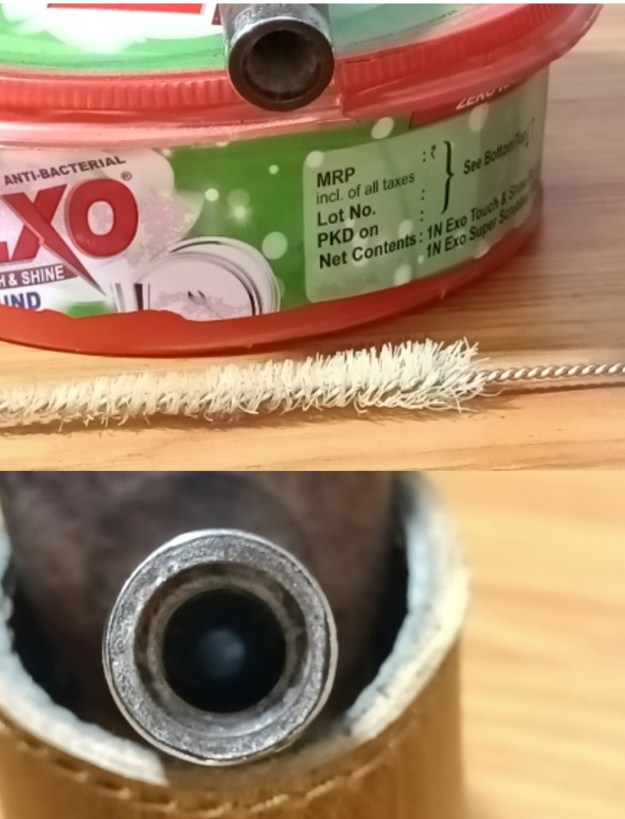
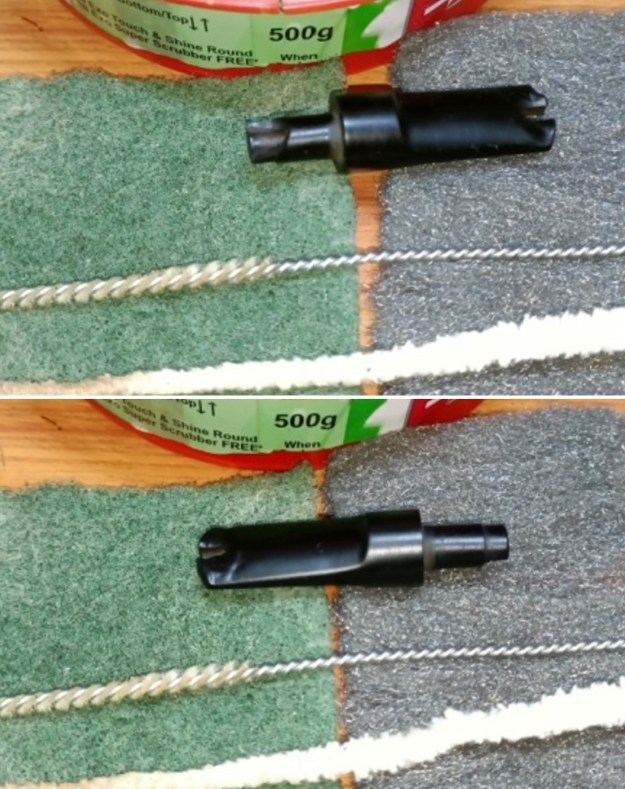
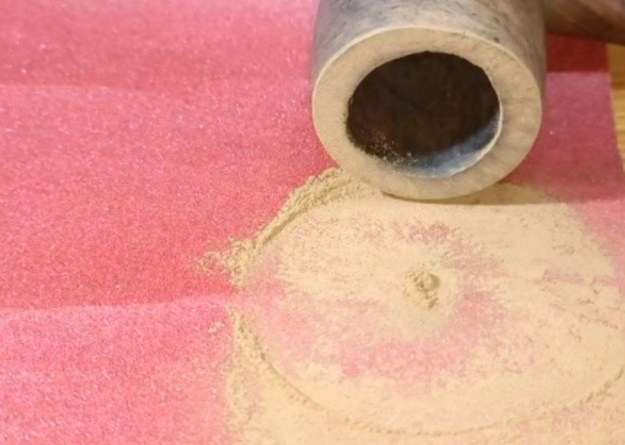
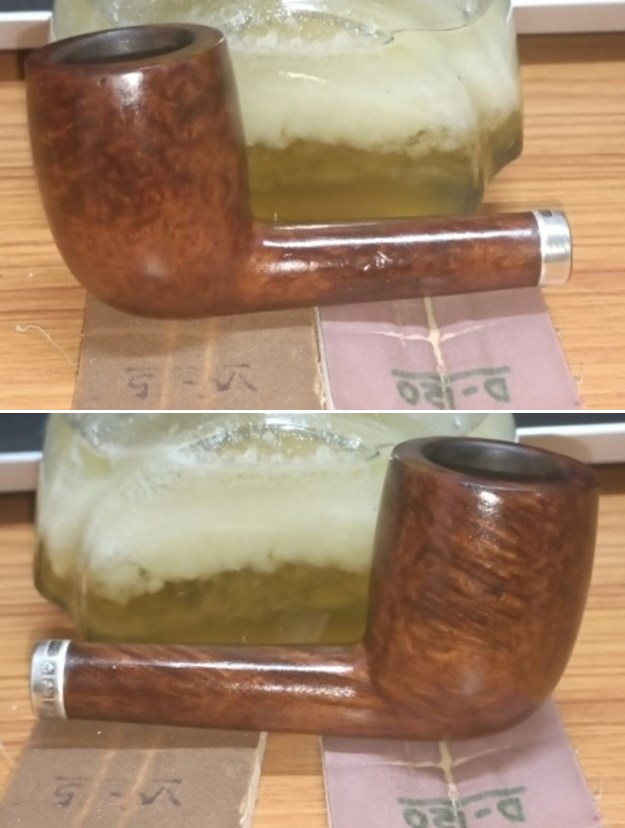
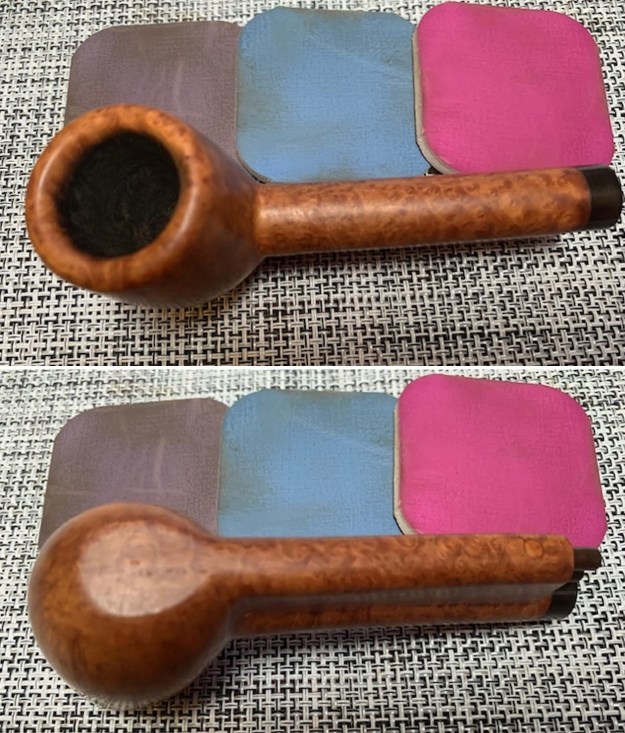
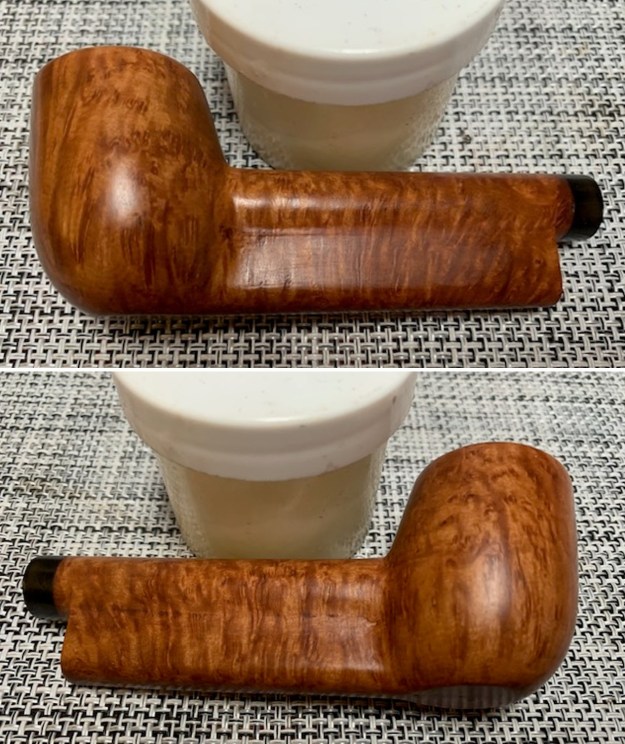
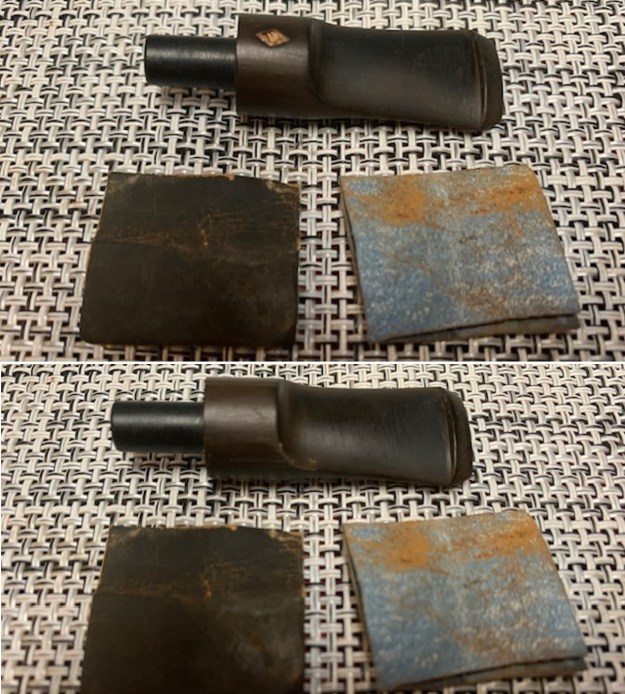
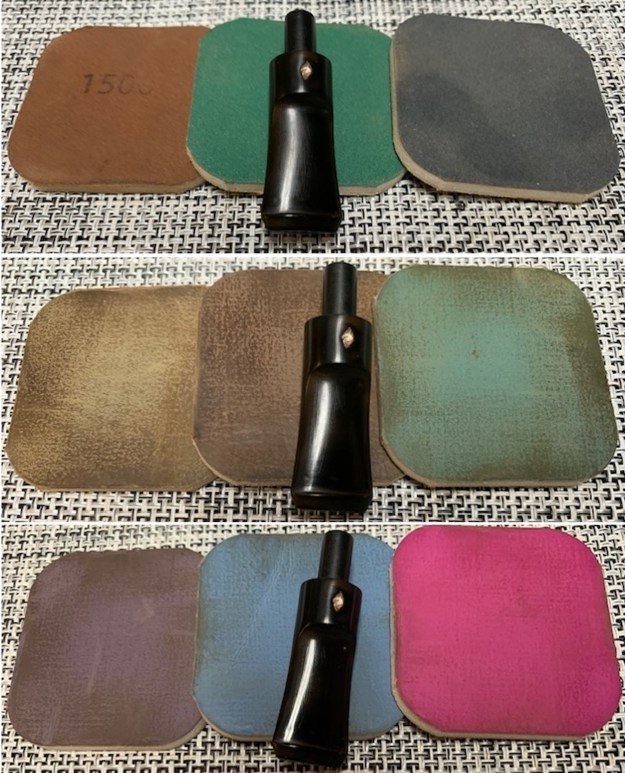
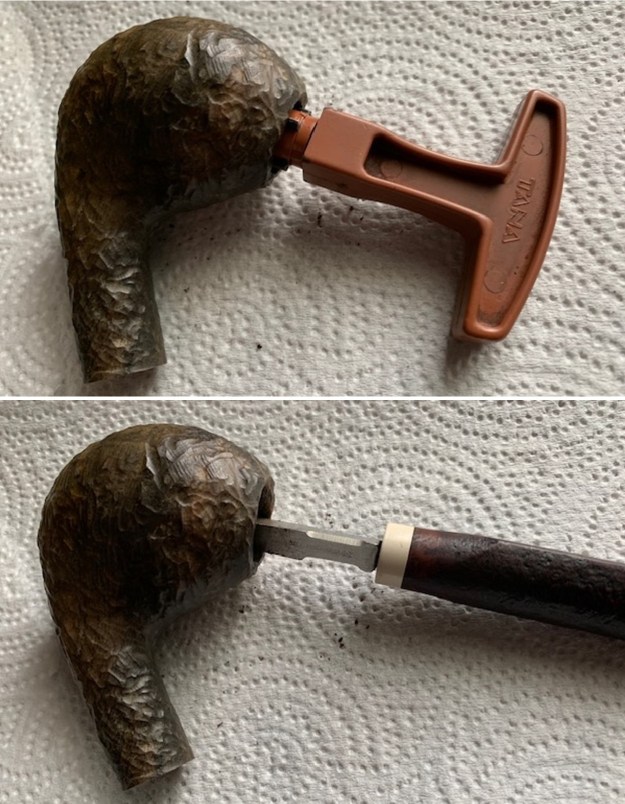
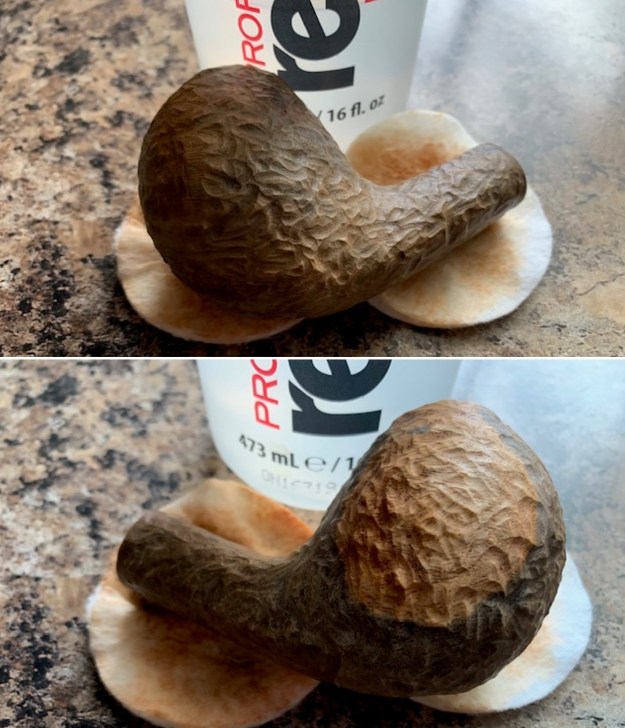
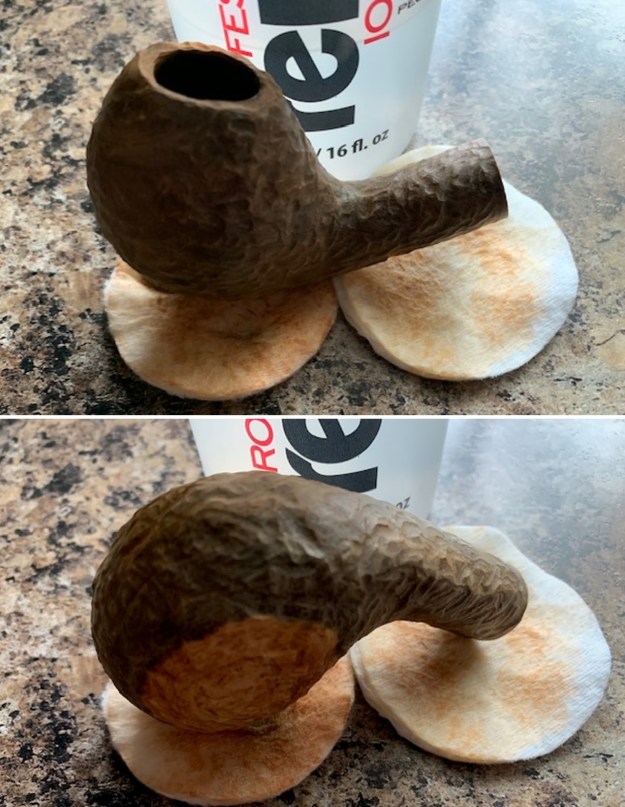
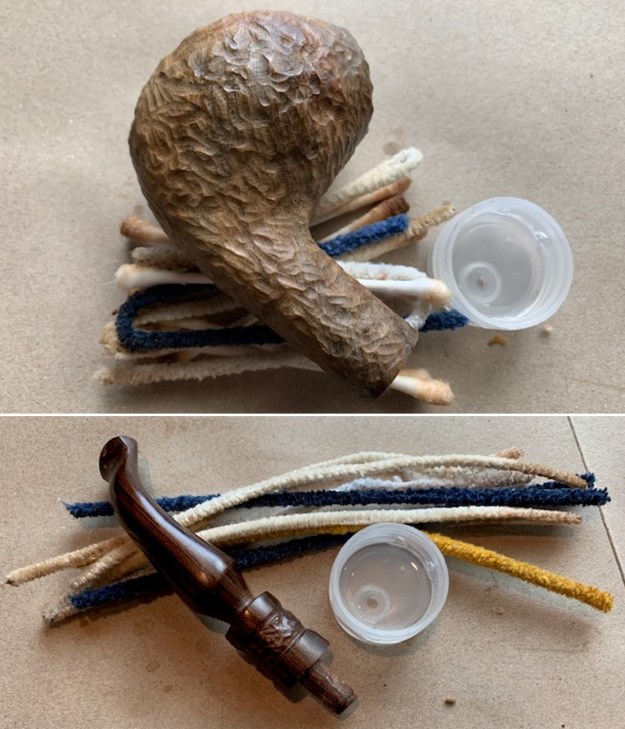
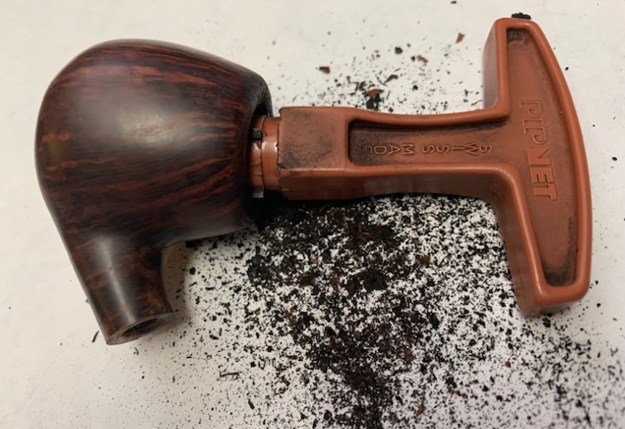
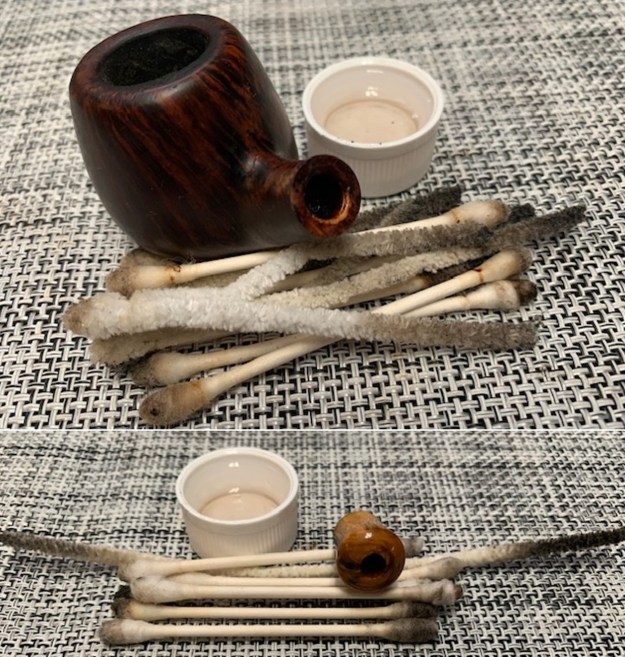
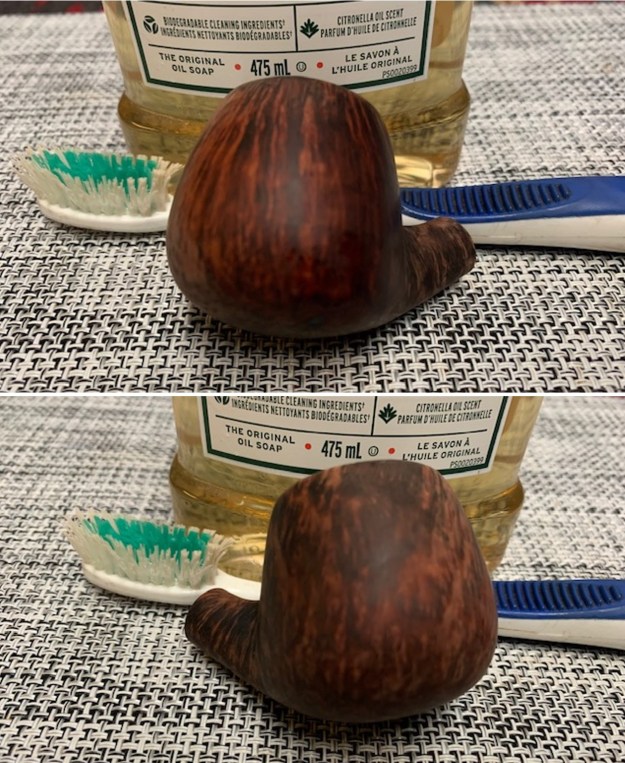
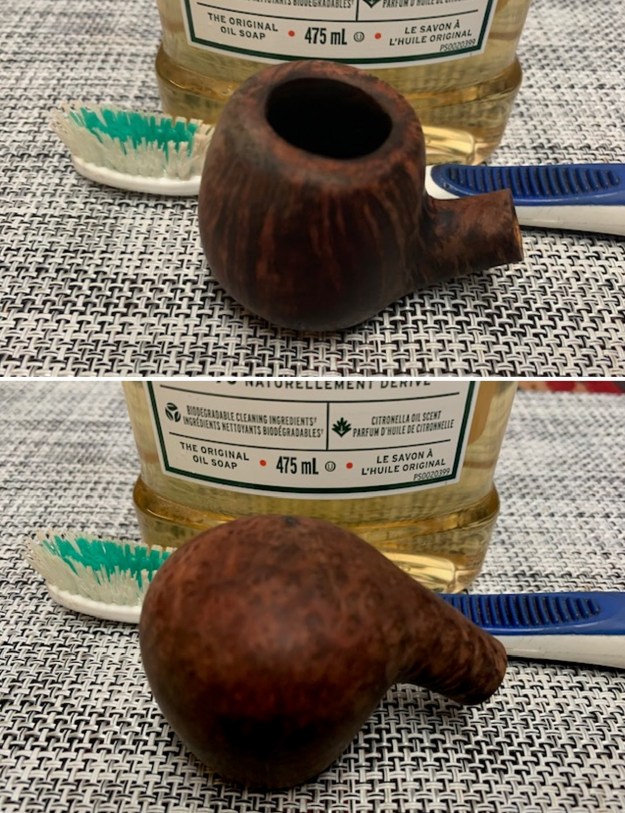
I started the refurbishing of this Les Wood by working the stem first. Since there were other stems that were ready to be put into the stem deoxidizer solution, I decided to clean the internals of this stem first so that it could be put in the solution with other stems. I cleaned the stem airway with a thin shank brush and anti oil soap. It took considerable time and elbow grease to get the stem airway clean. I used a sharp dental tool to clean the horizontal slot and further cleaned the internals with regular and bristled pipe cleaners dipped in alcohol.The stem was immersed in the Deoxidizer solution, a product that has been developed by Mark Hoover. This solution raises the oxidation to the stem surface and helps in easy removal and imparting a nice shine to the stem after polishing. The pipe is indicated with a red arrow. The stem is allowed to soak into this solution overnight.Now it was time for me to work on the stummel. I did this by first reaming the chamber with size 2 followed by size 3 and 4 PipNet reamer heads. I further scraped the chamber walls with my fabricated knife to remove the remaining carbon deposits where the reamer head could not reach. Once the cake was reamed back to the bare briar, I used a 220 grit sand paper to remove all the traces of remaining cake and also to smooth out the inner walls of the chamber surface. Finally, to remove the residual carbon dust, I wiped the chamber with a cotton pad wetted with 99.9% pure isopropyl alcohol. The huge pile of carbon dust that was reamed out is an indication enough to the amount of carbon that had accumulated in the chamber. The chamber walls are solid without any heat lines or fissures. However, the hard cake was getting increasingly difficult to dislodge. I shall try and remove residual the hard cake after it has been moistened during the salt and alcohol soak. I further cleaned the mortise by scrapping out the dried gunk with a dental tool. I ran a few pipe cleaners dipped in alcohol to moisten the dried gunk and assist in its removal. I shall further continue the internal cleaning of the chamber and mortise with cotton and alcohol soak.I continued the cleaning of the chamber and shank internals with a salt and alcohol bath. I use cotton balls which is an at par substitute to Kosher salt as I have realized over the years. I draw out a wick from the cotton and along with a folded regular pipe cleaner; insert it in to the mortise and through the draught hole in to the chamber. Thereafter, I packed the chamber with cotton balls to about quarter of an inch below the inner rim edge and soaked the cotton balls with isopropyl alcohol up to the brim. About half an hour later, the level of alcohol had gone down, having being absorbed by the cotton. I topped it up once again and set it aside overnight. By next morning, the cotton and alcohol had drawn out all the remaining oils and tars from the chamber and mortise, fulfilling its intended task. I removed the cotton balls and ran pipe cleaners through the mortise to clean out all the loosened tars and gunk and further cleaned it with alcohol and q-tips.The cotton and alcohol soak had softened the hard and stubborn cake in the chamber and the mortise. Using my fabricated tool, I scrapped out all the hardened cake from the chamber and gunk from the mortise. The chamber now smells clean and fresh.Once the internals of the shank were cleaned, I cleaned the external surface of the stummel with Murphy’s Oil soap and cotton swabs followed by scrubbing the rusticated surface with a toothbrush and dish washing soap. This rid the nooks and crevices of all the accumulated dust, dirt and grime from the rusticated stummel. With a copper soft wired brush, I cleaned the rim top surface of all the crud that had accumulated over it. I wiped the stummel with a soft cotton cloth and set the stummel aside to dry out naturally. The charred inner rim edge (encircled in red) is now clearly visible and would need to be addressed. I simultaneously cleaned the shank internals with dish washing soap and shank brush.Next, I decided to address the issue of charred inner rim edge and getting the chamber back to round. I topped the rim top over a 220 grit sandpaper to reduce the charred surface. I checked the progress frequently to ensure that the topping is just adequate. I addressed the darkened inner edge by running a folded piece of 220 grit sandpaper pinched between my thumb and index finger along the inner edge and crated a smart bevel. This bevel also helped to get the chamber back to round.I polished the smooth rim top surface by dry sanding with 1500 to 12000 grit micromesh pads.The polished rim top looks much lighter than the rest of the stummel because of the topping process to remove the charred rim edge. To match the dark browns and black stains over rest of the stummel surface, I decided to re-stain the rim top surface using dark brown stain pen. I applied a coat of brown stain using a stain pen and set it aside for some time. I wiped the rim top using a soft cotton cloth to check the stain color and found it to be a bit lighter. I repeated the process till I had requisite color match and set it aside for the stain to set in.I rubbed a small quantity of “Before and After Restoration Balm” into the briar with my finger tips and let it rest for a few minutes. The balm almost immediately works it’s magic and the briar now had a nice vibrant appearance with the beautiful rustication patterns on full display. I have been using this balm ever since I embarked on this journey and it is this part of restoration that I always look forward to. I further buffed it with a horse hair shoe brush. This pipe really oozes of a very high quality, in fact similar to the Les Wood Poker that I had worked on earlier. The consistent quality is awesome, to say the least. The rim top appears lighter hued, but that’s due to the lighting when I took pictures. Now that the stummel refurbishing was nearly done and also the stem had now been soaking for more than 24 hours, I removed the stem from the solution. I first scrubbed the stem surface with a Scotch Brite pad, always being mindful of the stem logo on the left side. I followed this scrubbing with a nice cleaning of the surface using a 0000 grade steel wool. I rinsed the stem under running water to rid the stem of the thick deoxidizer solution. I ran a couple of pipe cleaners to remove the deoxidizer solution from the airway. The beauty of a high quality vulcanite hand cut stem in shining black can now be appreciated once the heavy oxidation has been eliminated. There are spots/ areas where oxidation is still visible, but that will be eliminated once the stem is subjected to sanding and polishing using sand papers and micromesh pads. The beauty of this stem will be enhanced once it has been all polished and waxed. A polish by wet sanding using all 9 micromesh pads (1500 to 12000 grit pads) brought out the deep black shine of the vulcanite. I rubbed a small quantity of EVO to hydrate the stem and deepen the shine.This was followed by removing oxidation from over the sterling silverware seen on the pipe using a locally made compound that Abha, my wife, uses to polish her silver and gold jewellery and silver cutlery. This compound is a very fine powder and is least abrasive with fantastic results. The silver ferrule at the shank end and the silver spigot are now nice shining pieces of silver and provides a nice contrast to the shining black stem and the dark brown and black stummel. I painted the stem logo L J S using a Gold paint glitter pen and wiped off the excess paint. The stem logo is now nice and prominently visible.I have reached that stage in this project which can be considered as the home run. I polished the rim top and the entire stem with blue diamond using a cotton wheel mounted on to my hand held rotary tool. The blue diamond compound helps to eliminate the minor scratches that remain after the use of micromesh pads. I completed this project by hand polishing the stummel with Halcyon II wax. I rubbed this polish deep into the rustications and after a couple of minutes, vigorously hand buffed the stummel with a microfiber cloth to a deep shine. I polished the stem with carnauba wax using my hand held rotary tool. This is a gorgeous looking spigot and I consider myself fortunate to have the opportunity to work on this beauty and, as my Guru Steve says, carry forward the trust in this pipe till it is time to pass it on to the next pipeman or pipewoman. Here are a few pictures of the completed pipe for you to appreciate while I take the opportunity to thank you each of you for sparing your valuable time in joining me on this journey.

Restoring a Wilson Pipe Studio Roadtown Hand Made Bamboo Shank Poker


Blog by Steve Laug

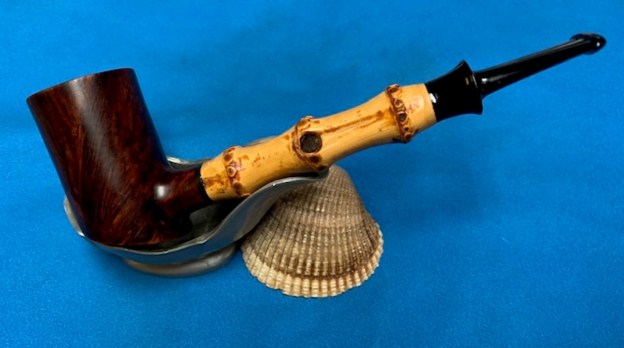
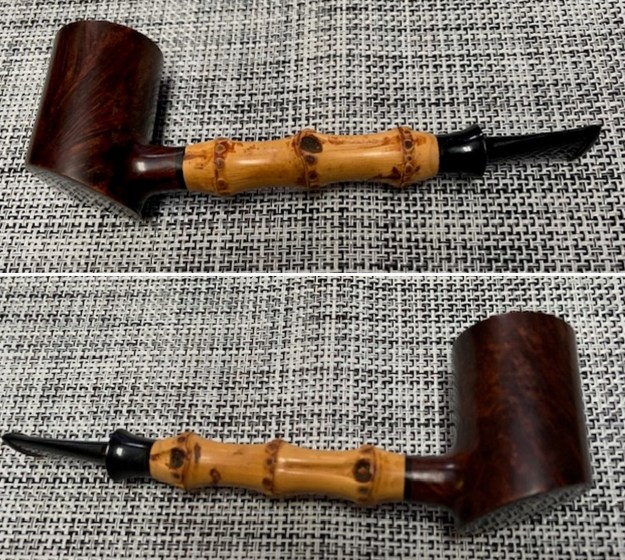
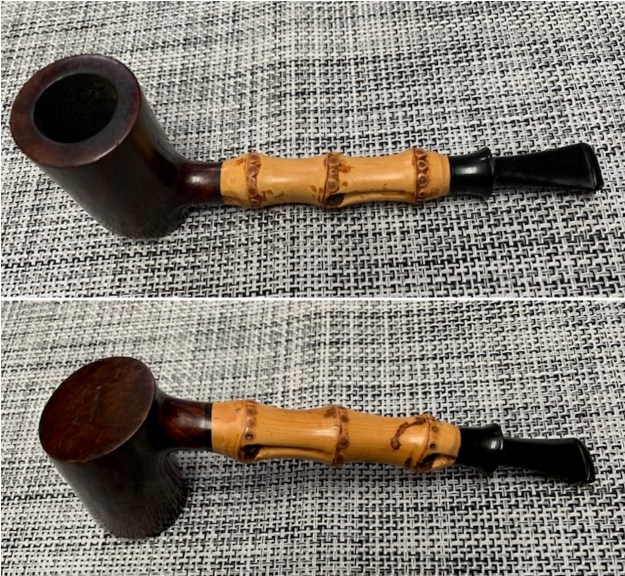
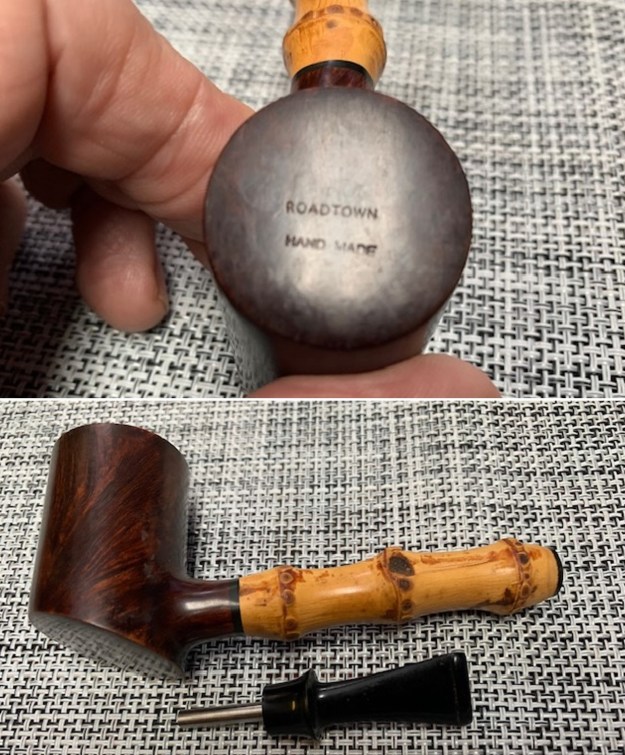
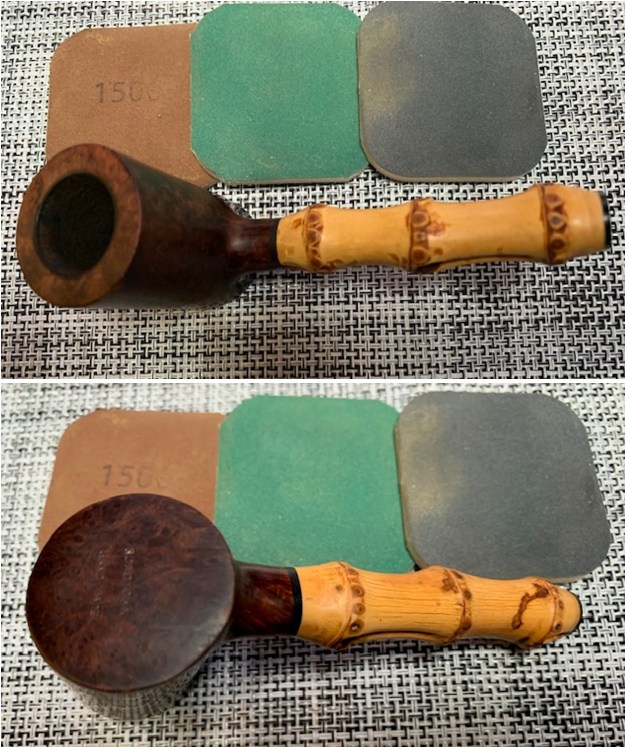
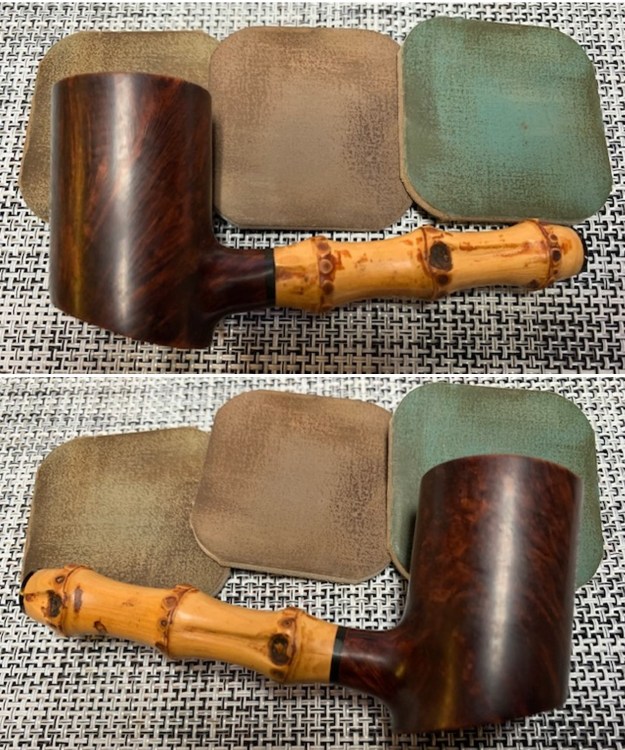
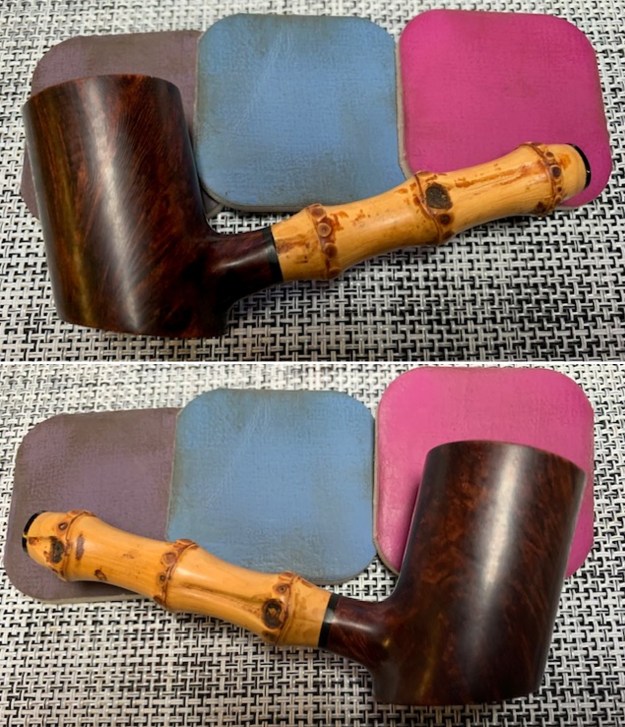
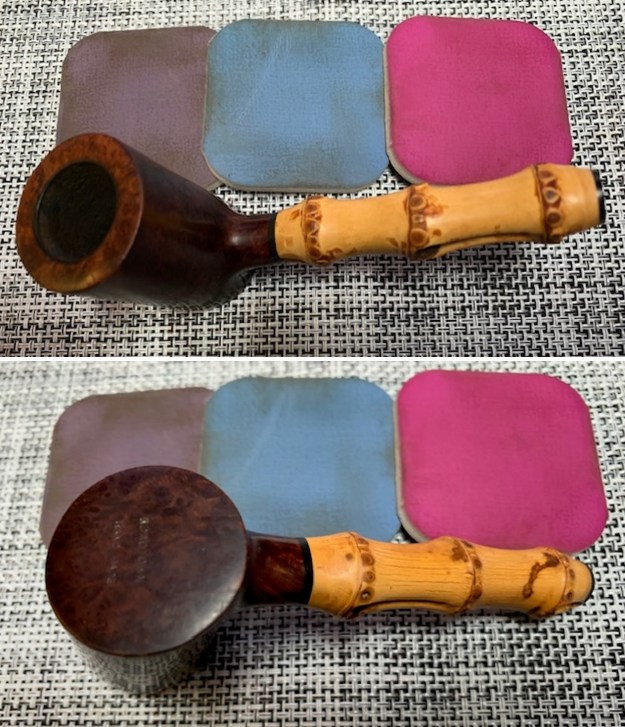
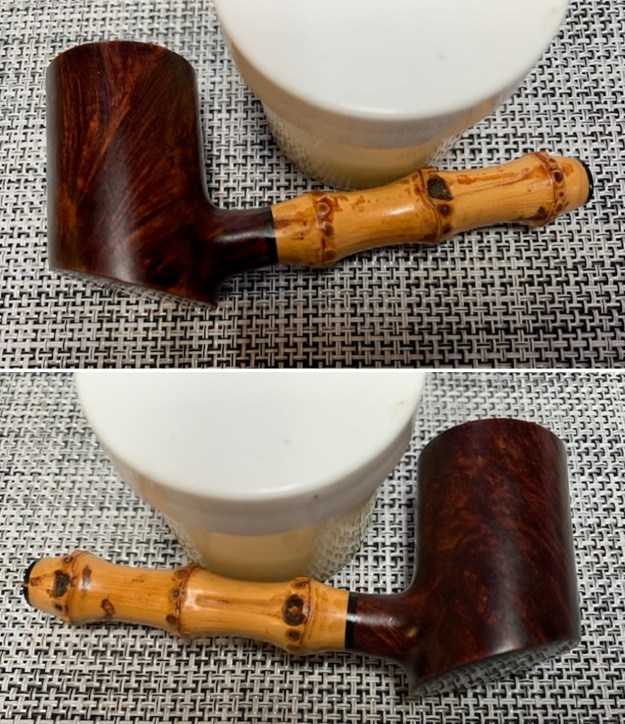
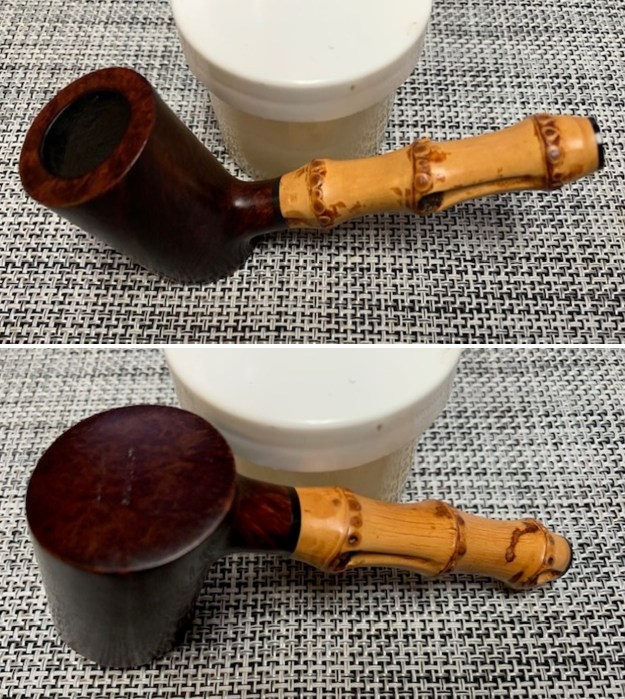
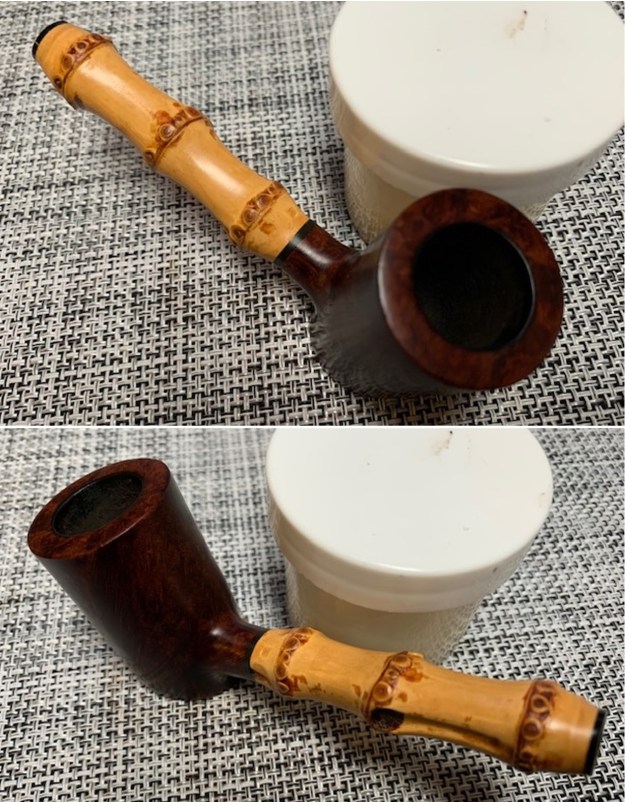
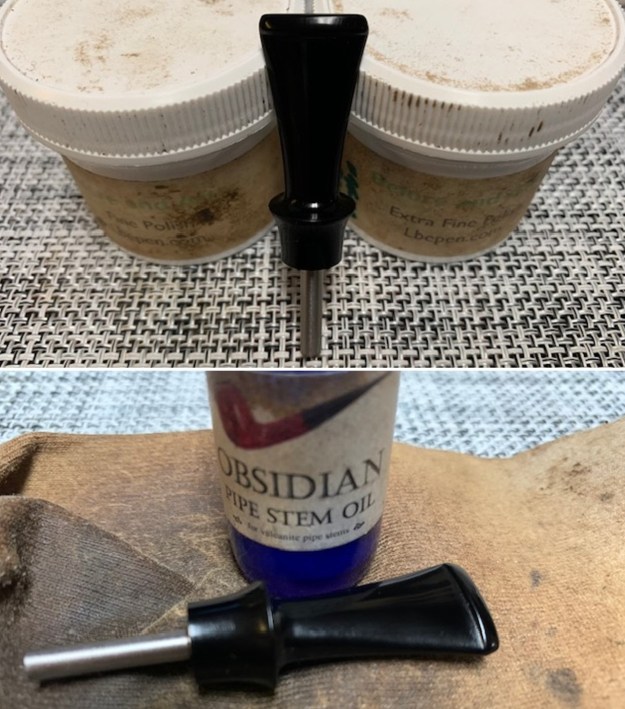
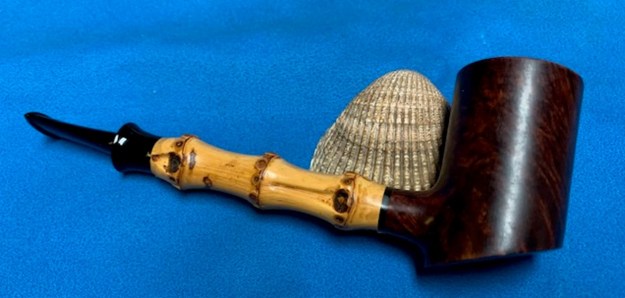
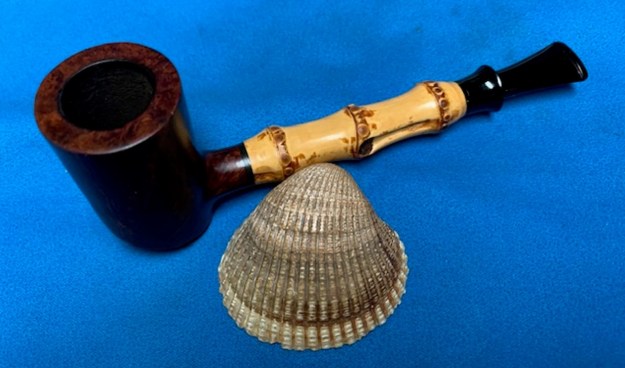
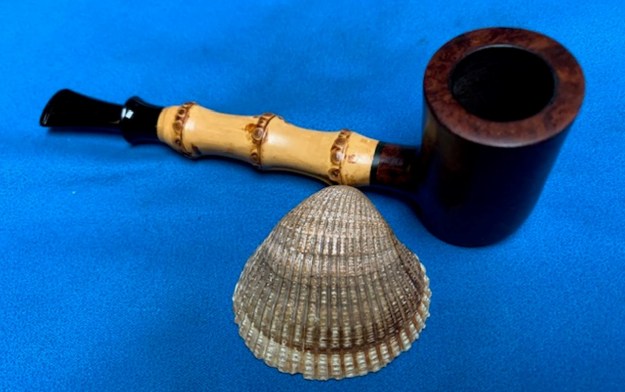
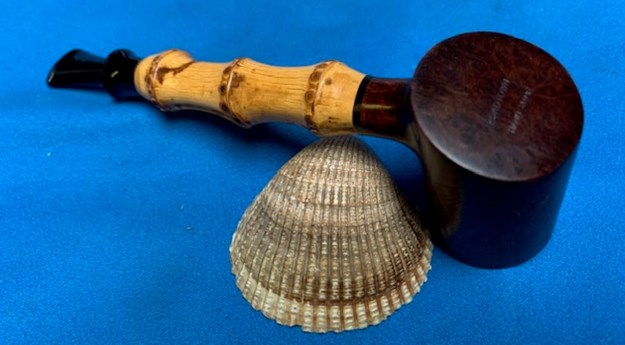
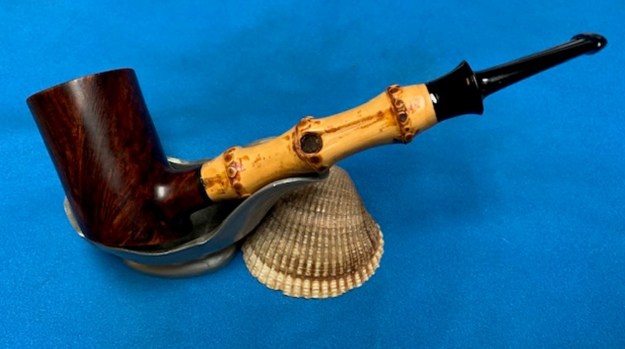
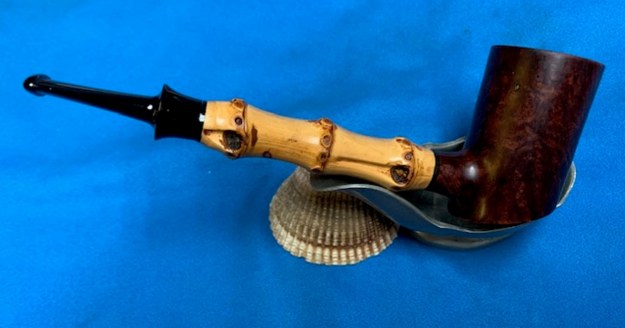
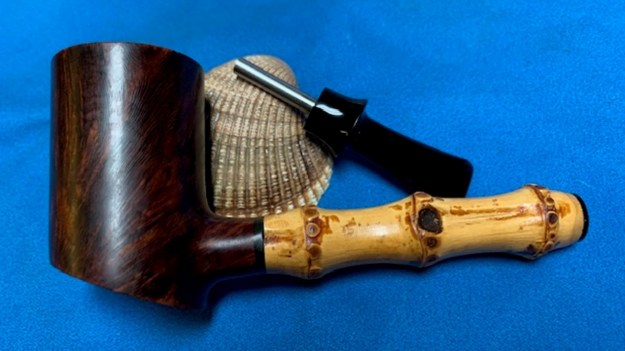
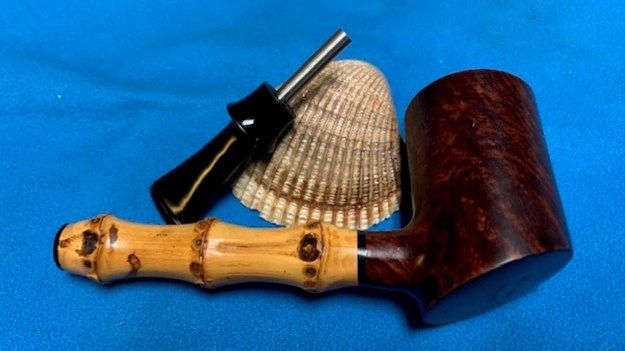
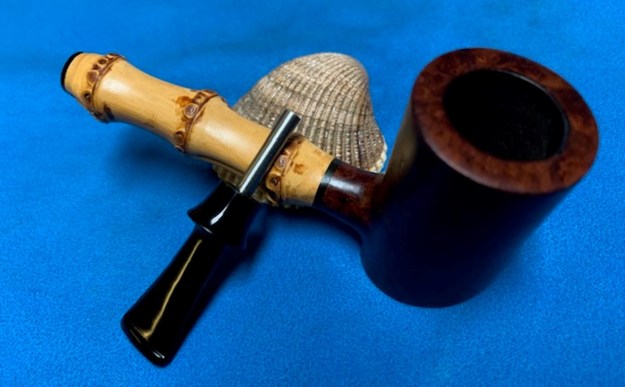
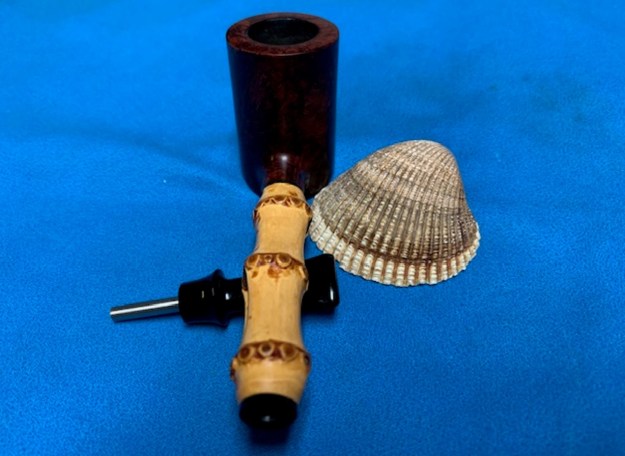
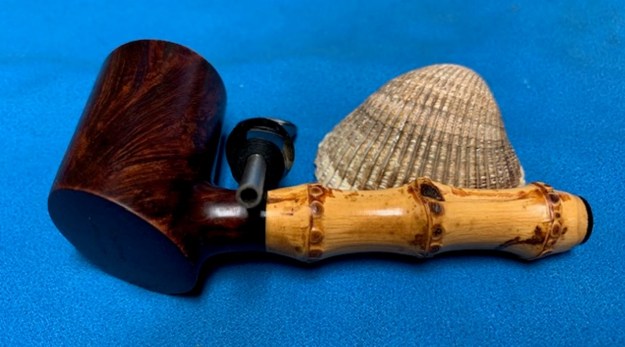
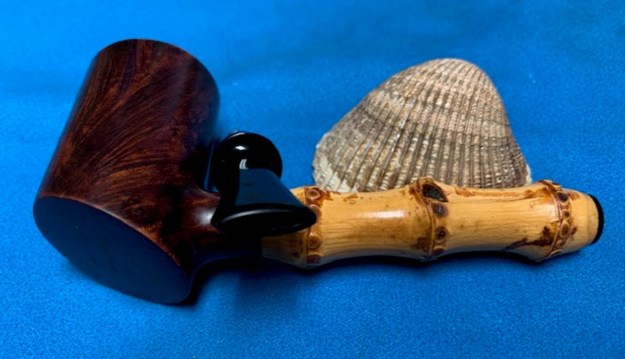
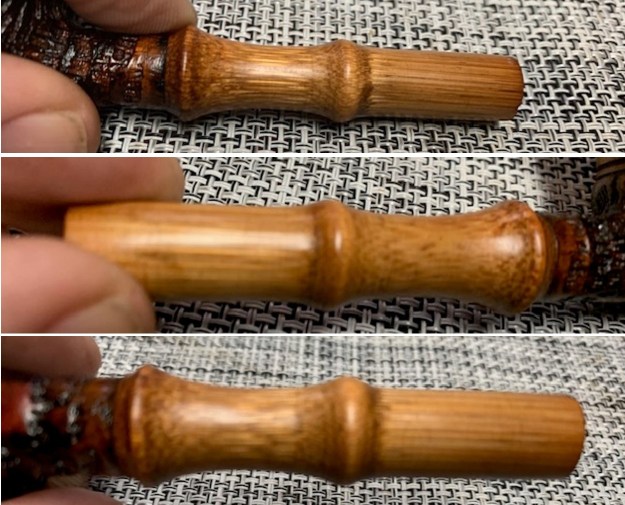
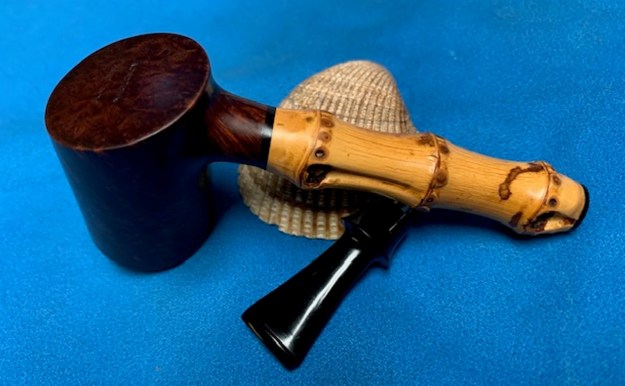
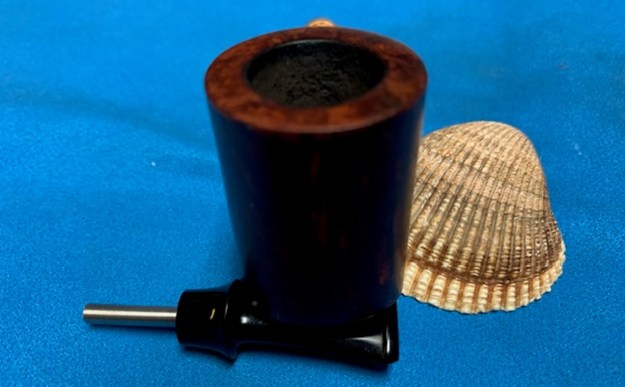
The next pipe on my work table is an interesting Bamboo style Poker/Sitter. We purchased it on 04/09/2022 from a fellow in Valley, Alabama. It has a three knuckle piece of bamboo joined to the shank with a black acrylic spacer and a metal tenon allowing it to be flush mounted. There stem is also held in place on a metal tenon fixed in the acrylic stem. The stamping on the heel of the bowl reads Roadtown [over] Hand Made. The airway in the shank is the same diameter from the shank end to its entry into the bowl with stainless tubing on both ends. The draught on the pipe is open and unhindered. The design is definitely made to create a very cool smoke. The bowl had a moderate cake and there was lava and darkening on the rim top and inner edge on the back of the bowl. The airway and mortise are full of tars and oils both in the shank and stem. It was dirty. The acrylic saddle stem has light chatter on the top and underside of the stem ahead of the button. There is an acrylic spacer attached to the end of the bamboo. I am including photos of the pipe to show what it looked like when I brought it to the work table. I took photos of the rim top and stem. You can see the cake in the bowl and the darkening on the rim top and on the front and back inner edge of the bowl. The stem had some chatter on both sides ahead of the button. I took a photo of the stamping on the heel of the bowl. It is clear and readable as noted above. I also removed the stem from the shank and took a photo of the part to give a sense of the flow of the pipe. It is truly a unique pipe and the grain shows well in the photo.I turned to Pipedia to have a look at the history of the brand as I was unfamiliar with Road Town Pipes (https://pipedia.org/wiki/Road_Town). Here is the information from the article.
Road Town pipes are made in China, apparently by various makers and distributed though Wilson Pipe Studio. There is very little information associated with this brand aside from the following description in eBay auctions.

Brand founder, Wilson is a former architect who was once a world-renowned pipe agent. Since the establishment of “Wilson pipe studio” in 2011, we have been learning traditional pipemaking methods and developing our unique style at the same time. At present, we have more than 20 professional pipemaker. We are committed to creating beautiful, interesting and easy to use pipe works for the customers.

There are two series under HS Studio:

  • “Classic” series, inscribed as “HS STUDIO / ROAD TOWN”, Make the traditional style of pipe.
  • “FREEHAND”series, inscribed as “HS STUDIO / HAND MADE”, Make freestyle pipe.

A thread on PipesMagazine.com indicates they smoke well and are attractive for the price, but there is some concern about the nature of the bowl coating. roadtown-pipes on PipesMagazine.com.

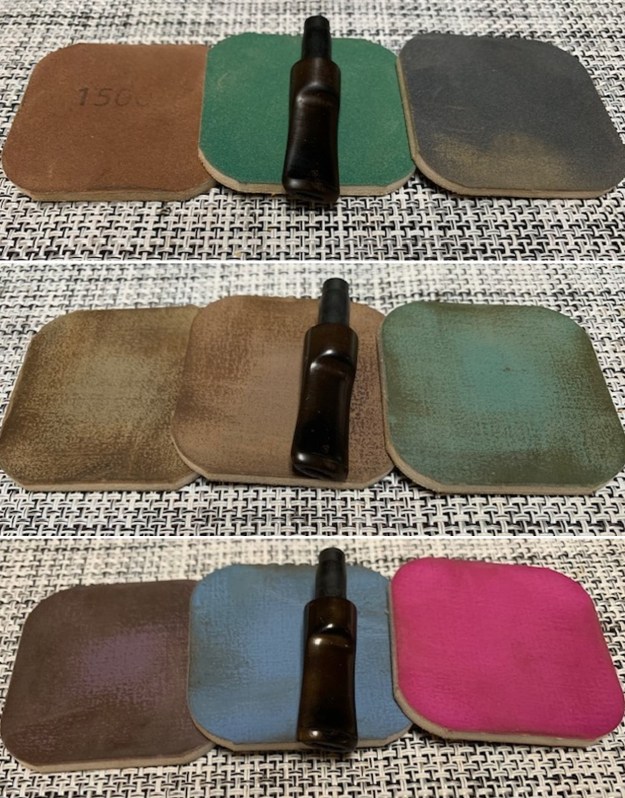
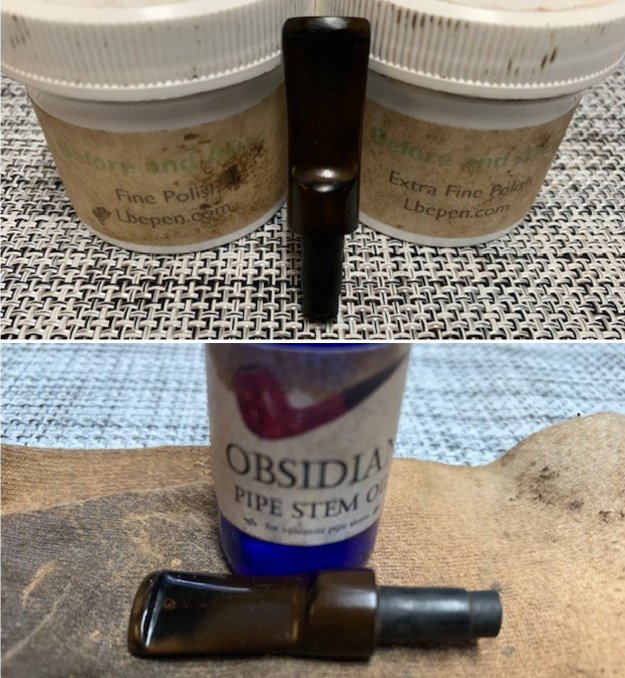
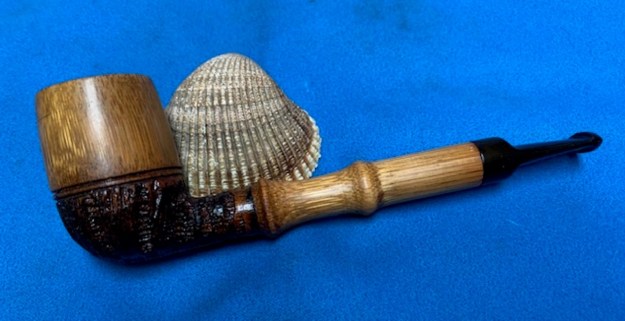
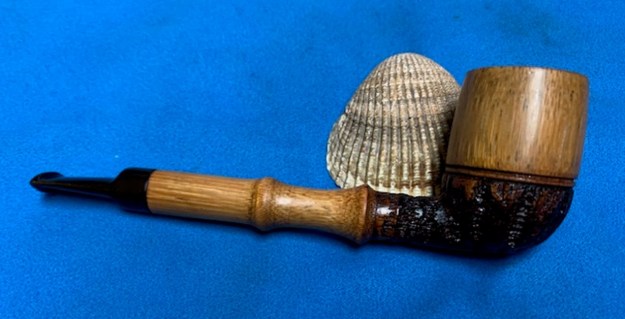
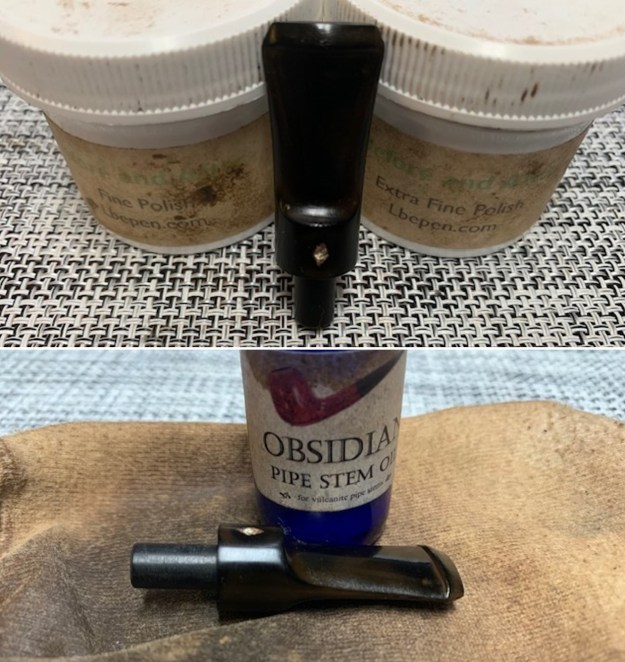
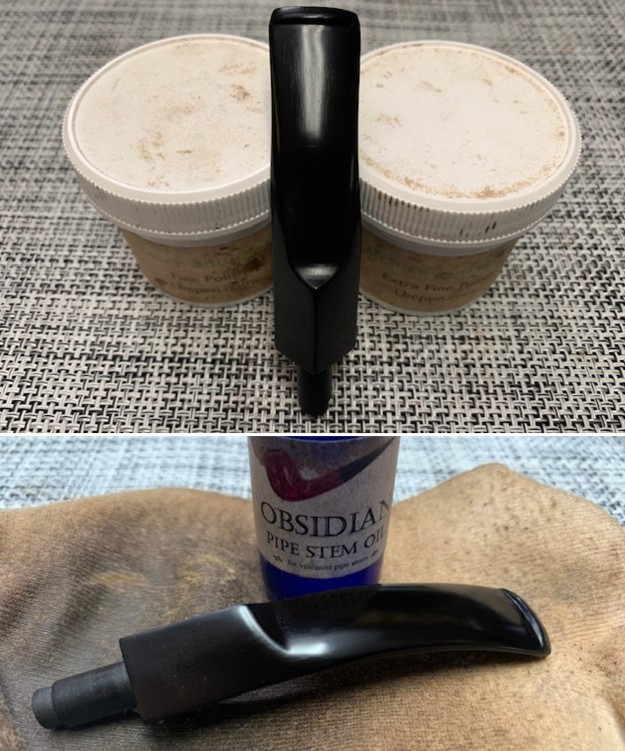
I started my work on this pipe by scraping it out with a Savinelli Fitsall Pipe Knife to remove the cake. I sanded the bowl walls with a piece of dowel wrapped with 220 grit sandpaper. I took the cake back to smooth bowl walls. I cleaned out the mortise and the airway in the shank and the stem with alcohol and pipe cleaners. It was quite dirty but once cleaned smelled better.I cleaned out the mortise and the airway in the shank and the stem with alcohol and pipe cleaners. It was quite dirty but once cleaned smelled better.I polished the smooth portions of the bowl with micromesh sanding pads – dry sanding with 1500-12000 grit sanding pads. I wiped the bowl down after each sanding pad with a damp cloth to remove the sanding debris. The bowl began to take on a rich glow. I rubbed down the bowl and shank with Before & After Restoration Balm. It is a paste/balm that is rubbed into the surface of the briar. The product works to deep clean the finish, enliven and protect the wood. I worked it into the briar with my finger tips. I let it sit for 10 minutes then wiped it off with a soft cloth then buffed it with a cotton cloth. The pipe really began to have a deep shine and the grain shines through. The photos I took of the bowl at this point mark the progress in the restoration. It is a gorgeous pipe. I set the bowl aside at this point and turned my attention to the stem. I polished the stem with micromesh sanding pads – 1500-12000 grit sanding pads and water to wet sand the stem. I wiped it down after each sanding pad with Obsidian Oil on a cotton rag after each sanding pads. I know that many say Obsidian Oil does nothing for acrylic stems, but I find it does two things – first it gives some protection to the stem from buildup and second it gives the sanding pads bite in the polishing process.I have found that Before & After Fine and Extra Fine stem polish works well to remove the fine scratches in the vulcanite. I rub the Fine Polish on the stem and wipe it off with a paper towel and then repeat the process with the Extra Fine polish. I finish the polishing of the stem down with a final coat of Obsidian Oil and set the stem aside to let the oil absorb. This process gives the stem a shine and also a bit of protection. The final steps in my process involve using the buffer. I buffed the bowl and stem with Blue Diamond to polish out the light scratches in the wood and the remaining surface oxidation in the stem. I gave the bowl and the stem multiple coats of carnauba wax. I have found that I can get a deeper shine if I follow up the wax buff with a buff with a clean buffing pad. It works to raise the shine and then I hand buff with a microfiber cloth to deepen the shine. It is always fun for me to see what the polished bowl looks like with the polished stem. It turned out to be a nice pipe. The interesting tight grain around the bowl sides and shank looks great. The vulcanite saddle stem polished very well and looks good with the bowl. The Roadtown Hand Made Bamboo Poker feels great in my hand. It is a well-balanced pipe. Have a look at it with the photos below. The dimensions are Length: 6 inches, Height: 2 inches, Outside diameter of the bowl: 1 ¼ inches, Chamber diameter: ¾ of an inch. The weight of the pipe is 1.16 ounces/32 grams. It is a beautiful pipe and the bamboo shank is well fitted to the bowl. The black acrylic shank end spacer and the saddle stem is well chosen and work well with the bowl. It you are interested in adding the pipe to your rack let me know. It will be going on the rebornpipes store in the  Various Makers Section soon. Thanks to each of you who are reading this blog. Remember we are not pipe owners; we are pipe men and women who hold our pipes in trust until they pass on into the trust of those who follow us.

Restoring an American Made JSP 7 Bamboo Shank Poker


Blog by Steve Laug

The next pipe on my work table is an interesting Bamboo style Poker/Sitter. It has a three knuckle piece of bamboo joined to the bowl with a metal tenon allowing it to be flush mounted. There stem is also held in place on a metal tenon fixed in the mortise end of the bamboo. The stamping on the heel of the bowl reads JSP over 7. The airway in the shank is the same diameter from the shank end to its entry into the bowl with stainless tubing on both ends. The draught on the pipe is open and unhindered. The design is definitely made to create a very cool smoke. The bowl had a moderate cake and there was lava and darkening on the rim top and inner edge on both the front and the back of the bowl.  The airway and mortise are full of tars and oils both in the shank and stem. It was dirty. The stem has some light tooth chatter on the top and underside of the stem ahead of the button. There is also a carving in the left side of the stem that matches the grooves in the bamboo. There is an red acrylic spacer fixed to the end of the bamboo. I am including photos of the pipe to show what it looked like when I brought it to the work table. I took photos of the rim top and stem. You can see the cake in the bowl and the darkening on the rim top and on the front and back inner edge of the bowl. The stem had some tooth marks and chatter on both sides ahead of the button. I took a photo of the stamping on the heel of the bowl. It is clear and readable as noted above. I also removed the stem from the shank and took a photo of the part to give a sense of the flow of the pipe. It is truly a unique pipe and the grain shows well in the photo. I turned to Pipedia to have a look at the history of the brand. I was pretty sure it was made by Joel Shapiro but needed confirmation (https://pipedia.org/wiki/JS_Pipes). Here is the information from the article.

Welcome to JS Pipes! http://www.jspipes.com

Let me introduce myself. My name is Joel Shapiro, and I live in Rancho Cordova, California. I offer a limited number of handmade briar pipes for sale.

The type of briar (Grecian, Italian, etc.) will be noted for each pipe made, along with further details concerning stem type (ebonite, lucite, cumberland, etc.) and shank extensions. A complete size description will be included with each pipe posted for sale.

I do not fill any flaws in the briar, so the buyer will see exactly what is offered with nothing to hide. All pipes are finished with a buffed in coat of carnauba wax over the stain. Stains are all alcohol based and will not seal the wood, so won’t alter the smoking experience or the breathing qualities of the briar.

In addition, I also offer a unique tamper design. My tampers are hand turned from quality hardwoods and the foot is cut at an angle to aid in mounding the tobacco and keeping the ember banked. I have found that this design results is fewer relights for a more enjoyable smoke. I can make these in any custom size and in most hardwoods, including some exotics. If you’d like a custom size (for very large pipes for example) or material, please contact me at jspipes@jspipes.com. All tampers are priced at $24.95, unless the material chosen is particularly expensive or difficult to work.

If you’d like to buy a pipe or tamper, but prefer to pay by money order or check, please e-mail (jspipes@jspipes.com) for my mailing address.

Would you like an email when new pipes are posted? Send me an e-mail and request to be on the JS Pipes mailing list! jspipes@jspipes.com

I started my work on this pipe by scraping it out with a Savinelli Fitsall Pipe Knife to remove the cake. I sanded the bowl walls with a piece of dowel wrapped with 220 grit sandpaper. I took the cake back to smooth bowl walls. I cleaned out the mortise and the airway in the shank and the stem with alcohol and pipe cleaners. It was quite dirty but once cleaned smelled better. I worked on the darkening on the back inner edge of the rim top and on the top itself. I was able to polish it out with a worn 1500 grim micromesh sanding pad.I polished the bowl with micromesh sanding pads – dry sanding with 1500-12000 grit sanding pads. I wiped the bowl down after each sanding pad with a damp cloth to remove the sanding debris. The bowl began to take on a rich glow. I rubbed down the bowl and shank with Before & After Restoration Balm. It is a paste/balm that is rubbed into the surface of the briar. The product works to deep clean the finish, enliven and protect the briar. I worked it into the briar with my finger tips. I let it sit for 10 minutes then wiped it off with a soft cloth then buffed it with a cotton cloth. The briar really began to have a deep shine in the briar and the grain shines through. The photos I took of the bowl at this point mark the progress in the restoration. It is a gorgeous pipe. I set the bowl aside at this point and turned my attention to the stem. I polished the stem with micromesh sanding pads – 1500-12000 grit sanding pads and water to wet sand the stem. I wiped it down after each sanding pad with Obsidian Oil on a cotton rag after each sanding pads. I know that many say Obsidian Oil does nothing for acrylic stems, but I find it does two things – first it gives some protection to the stem from buildup and second it gives the sanding pads bite in the polishing process. I have found that Before & After Fine and Extra Fine stem polish works well to remove the fine scratches in the vulcanite. I rub the Fine Polish on the stem and wipe it off with a paper towel and then repeat the process with the Extra Fine polish. I finish the polishing of the stem down with a final coat of Obsidian Oil and set the stem aside to let the oil absorb. This process gives the stem a shine and also a bit of protection. The final steps in my process involve using the buffer. I buffed the bowl and stem with Blue Diamond to polish out the light scratches in the wood and the remaining surface oxidation in the stem. I gave the bowl and the stem multiple coats of carnauba wax. I have found that I can get a deeper shine if I follow up the wax buff with a buff with a clean buffing pad. It works to raise the shine and then I hand buff with a microfiber cloth to deepen the shine. It is always fun for me to see what the polished bowl looks like with the polished stem. It turned out to be a nice pipe. The interesting tight grain around the bowl sides and shank looks great. The vulcanite saddle stem polished very well and looks good with the bowl. The Joel Shapiro (JSP) Bamboo Poker feels great in my hand. It is a well-balanced pipe. Have a look at it with the photos below. The dimensions are Length: 5 inches, Height: 2 inches, Outside diameter of the bowl: 1 1/8 inches, Chamber diameter: ¾ of an inch. The weight of the pipe is .99 ounces/28 grams. It is a beautiful pipe and the bamboo shank is well fitted to the bowl. The ruby shank end spacer and the taper stem is well chosen and work well with the bowl. It you are interested in adding the pipe to your rack let me know. It will be going on the rebornpipes store in the American Pipe Makers Section soon. Thanks to each of you who are reading this blog. Remember we are not pipe owners; we are pipe men and women who hold our pipes in trust until they pass on into the trust of those who follow us.

A New Beginning For A 1978 Dennis Ruth Carved Freehand Pipe


Blog by Paresh Deshpande

This pipe had been lying around in the pile of pipes to be restored for a long time. How, when and from whom I got this pipe is now all but a completely faded memory.

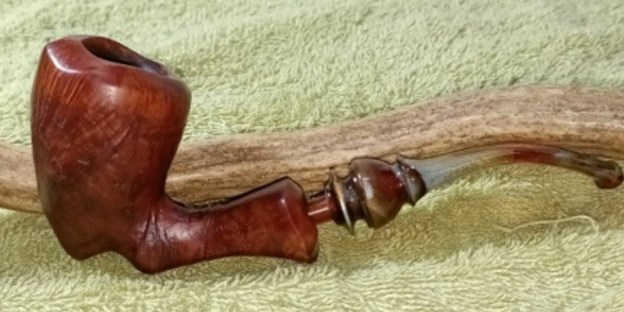
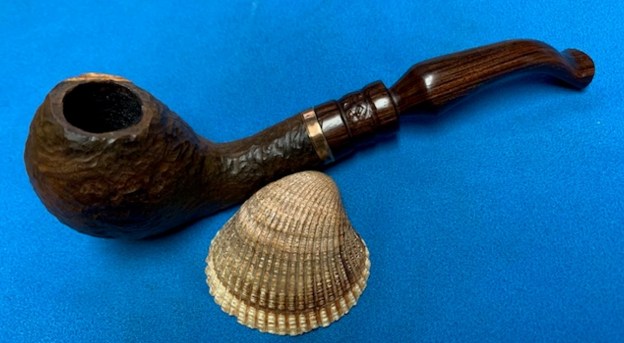
Whenever I went through the pile and came across this pipe, the Acorn shape freehand always made me believe it to be Danish made. However, when I picked it up for restoration and checked out the stampings my assumptions were proved to be incorrect. This shallow sandblasted Acorn shaped twin heeled pipe with a wavy smooth rim top and a flared shank end is stamped on the left side of the shank as “HANDCARVED” over “BY” over “DENNIS RUTH” in freehand cursive writing while the smooth bottom of the flared shank is stamped as “8 – 18 – 78” denoting the date of carving this pipe. The stampings are crisp, clear and easily readable. The acrylic fancy turned stem is devoid of any stamping.This is one maker that I haven’t come across in the years that I have been working on pipes, it piqued my interest and I wanted to know more about this maker. I visited pipedia.org where there is very brief and concise information about the carver. Given below is the link to the brief on pipedia.org for those interested to view some of his work since the information is reproduced below.

https://pipedia.org/wiki/Ruth,_Dennis

An American pipe maker working from Des Moines, Iowa, Ruth is independent craftsmen who, like others of his genus, prefer quality over quantity. He was an employee of a tobacco/pipe shop known as the Tobacco Bowl, where he custom made pipes to his customers requests during the 1970’s – 1980’s.

The date stamped on the pipe places it in the correct time period when Dennis Ruth carved pipes to his customer’s request. With a better understanding of the pipe and its carver, it was time to work on the pipe itself.

Initial Visual Inspection
This shallow sandblasted Acorn shaped freehand is perfectly proportioned and lightweight. There is a thin layer of cake in the chamber while the smooth wavy rim top surface is clean and in good condition. The stummel appears dull and lifeless. There is a slight bulge on the left side above the foot of the stummel which needs to be investigated. The shank end has what appears to be a fill. I need to check and confirm if the fill needs to be refreshed along the way. The mortise is nice and clean. The fancy acrylic stem with swirls of orange brown and grey perfectly complements the stummel and makes for a visual treat. Other than dullness of the surface, the stem is in decent condition. The following pictures will give you a general idea of the condition of the pipe. Detailed Inspection
The wavy rim top surface is pristinely clean with no damage to either the inner rim edge or rim top surface. There is a very thin layer of cake. For a pipe that is 45 years old, it has seen very minimal use and this makes me wonder what could be the reason for this? The answer could lie in the condition of the chamber walls which will be ascertained once the cake has been taken down to the bare briar.The warm honey brown colored Acorn shaped stummel has a very shallow sandblast with upper 1/6 th portion being smooth and showing beautiful straight grain. Though clean, the stummel appears dull and lifeless. A nice scrub and polish should make the briar look lively. However, there are two spots, one about half way down from the top on the left side of the stummel and the second one, continuing along the same plane to the front of the stummel (encircled in yellow) that have darkened and bulged. This definitely is not a good sign and could be the beginnings of a burn out. Whether these two spots are hot spots or otherwise will be confirmed after the chamber has been examined once the cake has been completely removed. The mortise is clean and the one fill at the shank end appears stable and solid. The variegated acrylic fancy stem has beautiful swirls of grey and orange browns that lend a trendy look to the entire pipe. The stem airway is clean and there are no bite marks/ tooth indentations or tooth chatter in the bite zone. The button edges are in pristine condition. However, there is on oddity at the slot end. The slot is rounded and seems as if the maker forgot to cut a horizontal slot. It’s definitely not orifice but appears unfinished and that is the oddity on this otherwise beautifully carved pipe. The tenon end and slot end are all clean and tidy.The Process
I ran a pipe cleaner dipped in 99.9% pure alcohol through the stem airway just to make sure that the airway is perfectly clean as appreciated and was pleased to note that it was. Now all that remained to complete the stem refurbishment was to subject it to the polishing regimen. I set the stem aside to work upon later.Using my fabricated knife, I scrapped out the little cake from the chamber walls. I further smooth out the chamber walls by sanding it with a folded piece of 220 grit sandpaper and wiped the walls with a cotton swab moistened with alcohol to remove the residual carbon powder from the chamber. Close observation of the walls confirmed that the walls have thinned out more along the mid left side and towards the front of the chamber (encircled in light blue). This damage is not deep and restricted only to being superficial, however, if not addressed now, a burn out is an imminent danger later during use. I wet sand the stem with 600, 800, 1000, 1500 and 2000 grit sandpapers. This helps remove the layer of grime and dullness from the surface, address minor tooth chatter and bite marks, while progressive use higher grit sandpaper helps remove the scratch marks left behind by the coarser grit sandpaper.I moved ahead with the polishing regimen of the stem by dry sanding the surface using 3200 to 12000 grit micromesh pads. The stem has a nice transparent shine to it and the swirls add another level of complexity to the beauty. I set the stem aside till I completed the repairs to the stummel.Turning my attention to the stummel, I continued with the internal cleaning of the stummel. Using a dental scoop, I scraped out the dirt and dust form the walls of the mortise. I further cleaned the walls of the mortise and airway using pipe cleaner and q-tips moistened with alcohol. The mortise is now clean and fresh.Once the stummel internals were cleaned and freshened up, I proceeded to the external cleaning of the surface. I cleaned the external surface of the stummel with undiluted Murphy’s oil soap and a hard bristled toothbrush. I cleaned the smooth rim top surface with the soap and Scotch Brite pad. I thoroughly cleaned the mortise with shank brush and anti-oil dish washing soap. As remarked earlier, the chamber wall on the left and towards the front had charred a bit and once the charred wood was reamed out, it left the walls slightly thin which would lead to a burnout when smoked if left unaddressed. I decided to address this issue by coating the walls with a layer of J.B. Weld. J B Weld is a two-part epoxy Cold Weld in two tubes; hardener and steel which are mixed in two equal parts (ratio of 1:1) with hardening time of 5-6 minutes and complete curing time of 6-8 hours. I poured the contents of the two tubes and mixed it well. I applied this mix over the entire chamber surface as a very thin coat. I worked fast to ensure an even coat before the weld could harden. I set the stummel aside for the application to harden and cure overnight. Next I sand the weld coating to a nice smooth and even surface using a folded piece of 180 grit sandpaper.After I had applied and sanded down the JB Weld to a thin coat, I wanted to further protect the briar while adding another protective layer between the JB Weld and burning tobacco. I addressed this by mixing activated charcoal and plain yogurt to a thicker consistency, just enough that it would spread easily and applied it evenly all along the chamber walls after inserting a folded pipe cleaner through the draught hole to keep it open. Once dry and set, this will not only protect the walls but also aid in faster build up of cake. I set the stummel aside for the bowl coat to dry out and harden for a couple of days. Three days later, the bowl coating had completely hardened. I rubbed a small quantity of restoration balm in to the stummel surface and set it aside for about 20 minutes to be absorbed in the wood. The balm not only hydrates and rejuvenates the briar wood but also enlivens it. Thereafter I hand buffed the stummel with a microfiber cloth to deepen the shine. The stummel looks absolutely stunning at this stage. I completed this project by hand polishing the stummel with Halcyon II wax. I rubbed this polish deep into the rustications and after a couple of minutes, vigorously hand buffed the stummel with a microfiber cloth to a deep shine. I polished the stem with Blue Diamond compound and subsequently with carnauba wax using my hand held rotary tool. This is a gorgeous looking pipe and will be an integral part of my collection of contemporary American Pipe Carvers. Shown below are a few pictures of the completely refurbished pipe. Hope you have enjoyed the restoration journey of this project as much as I loved working on it. Cheers!

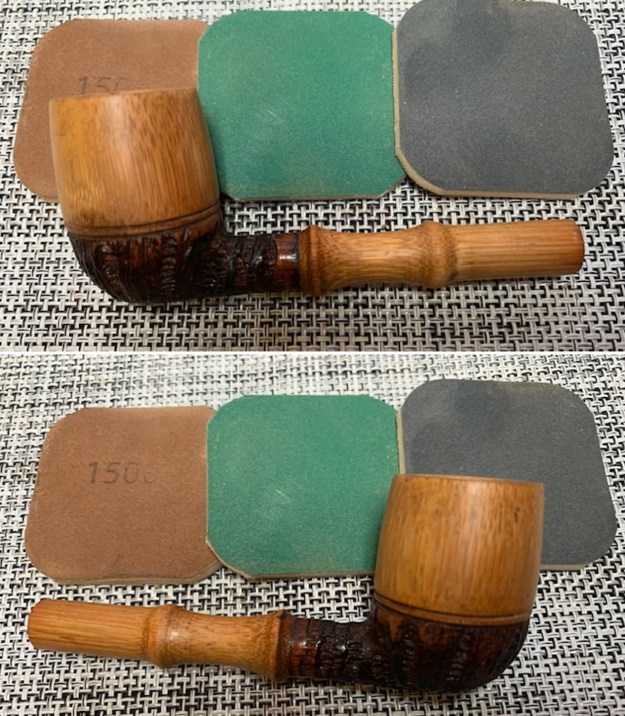
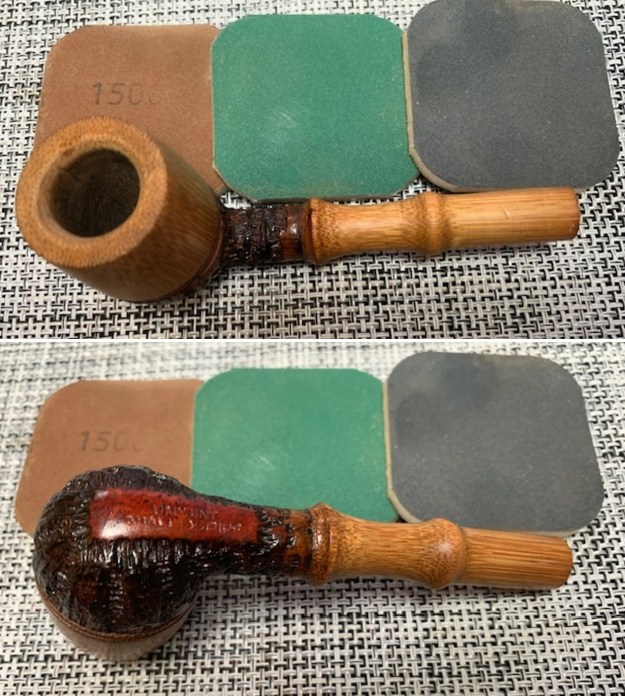
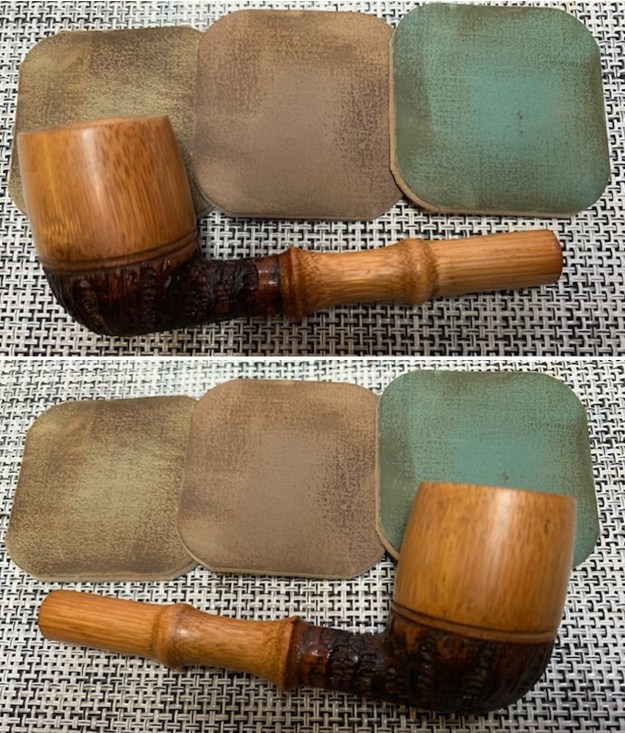
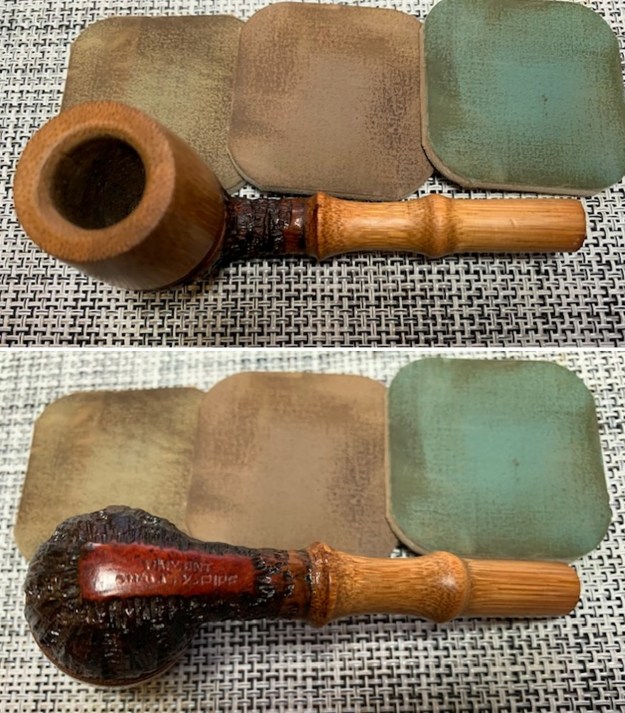
Restoring a Carved Bamboo Lovat stamped UNX UNT Quality Pipe


Blog by Steve Laug

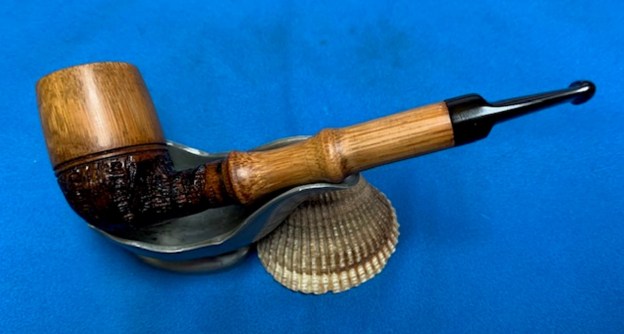
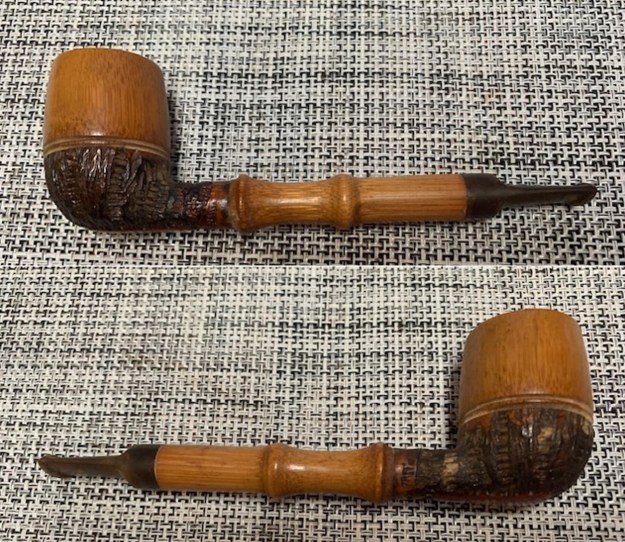
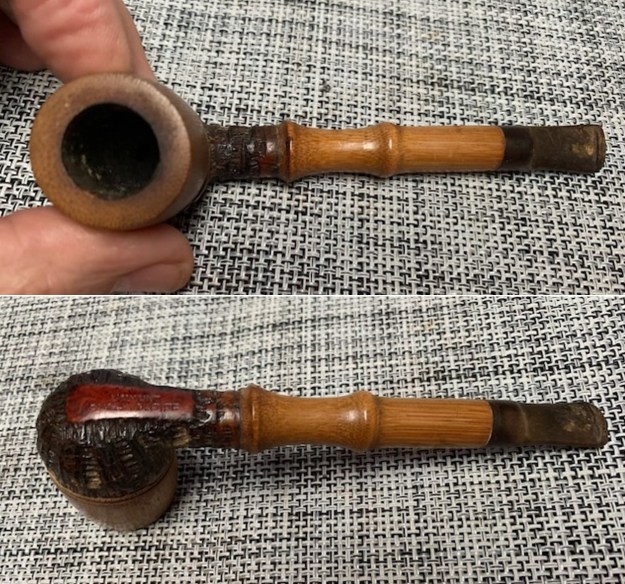
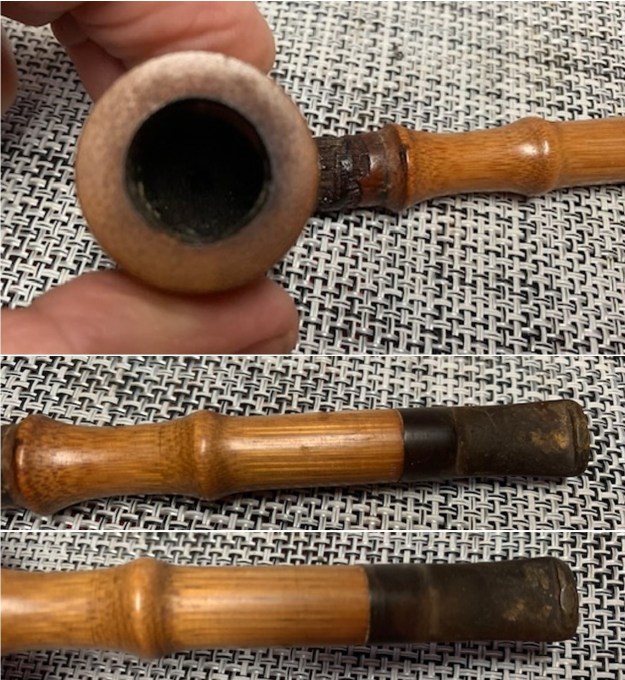
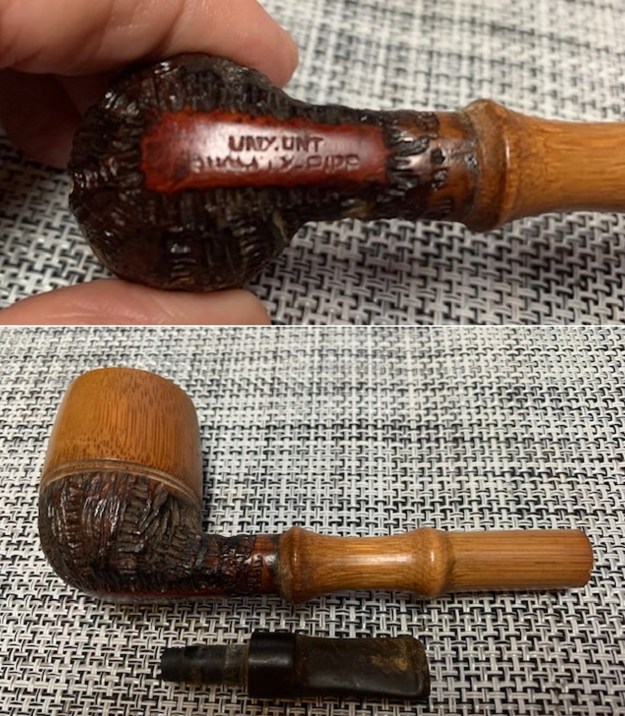
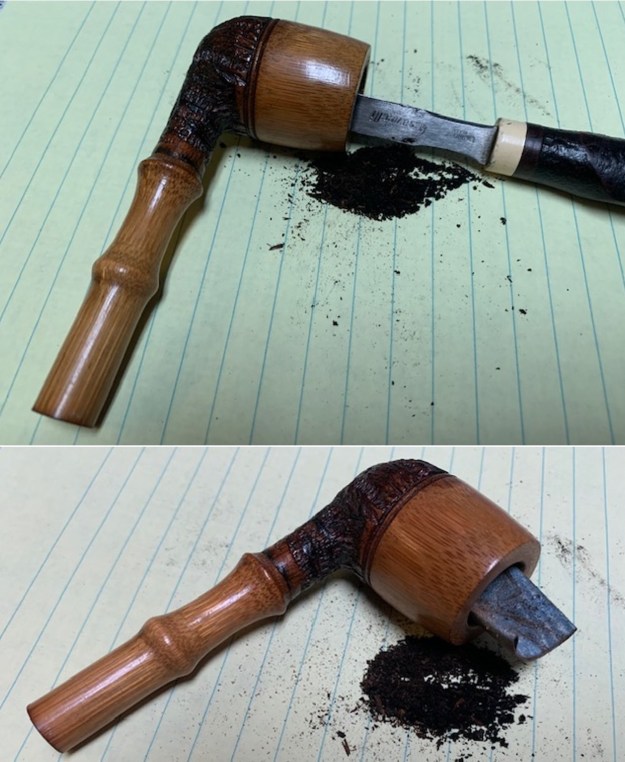
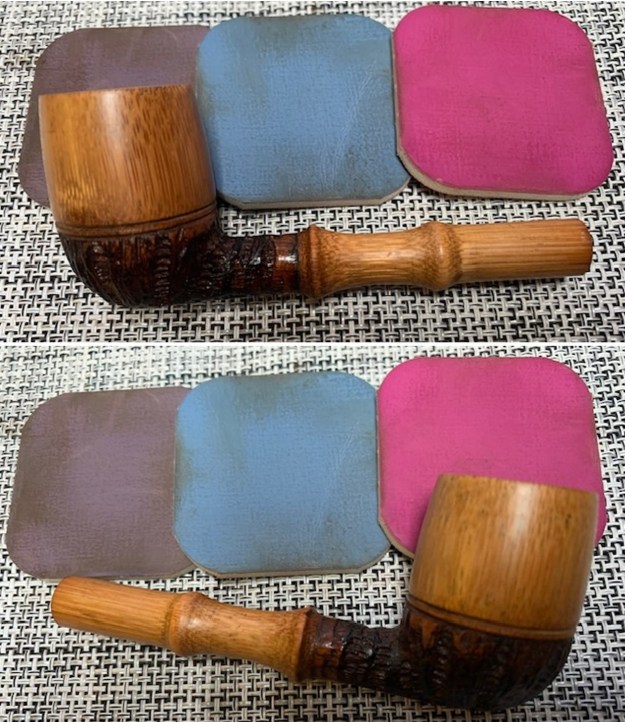
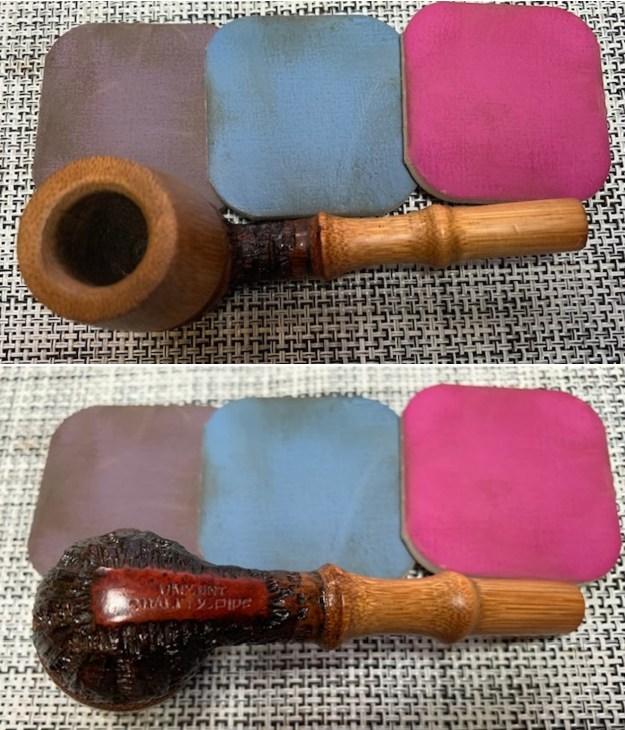
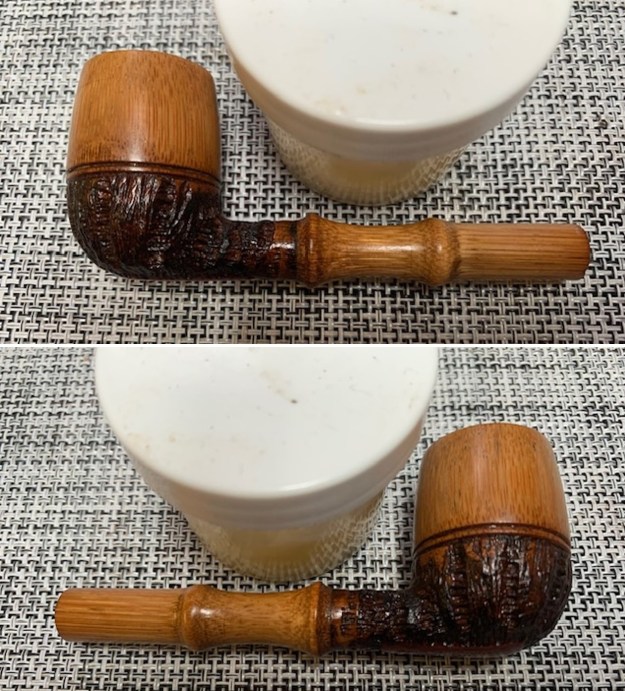
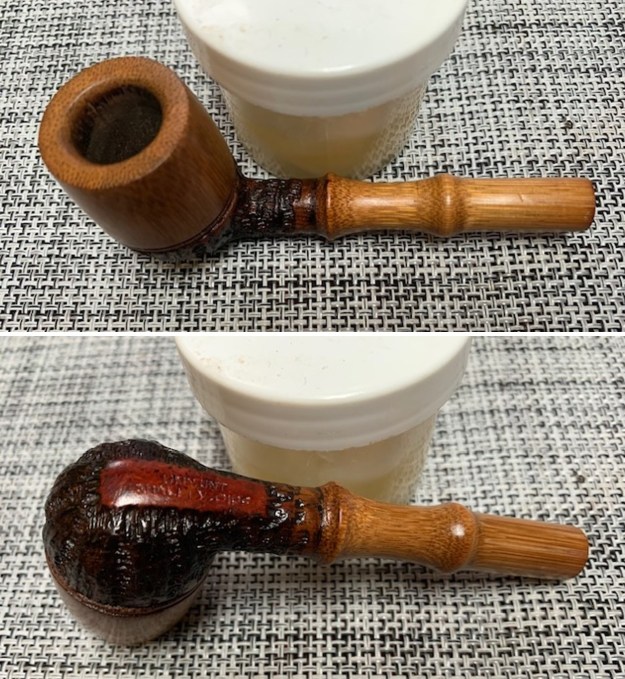
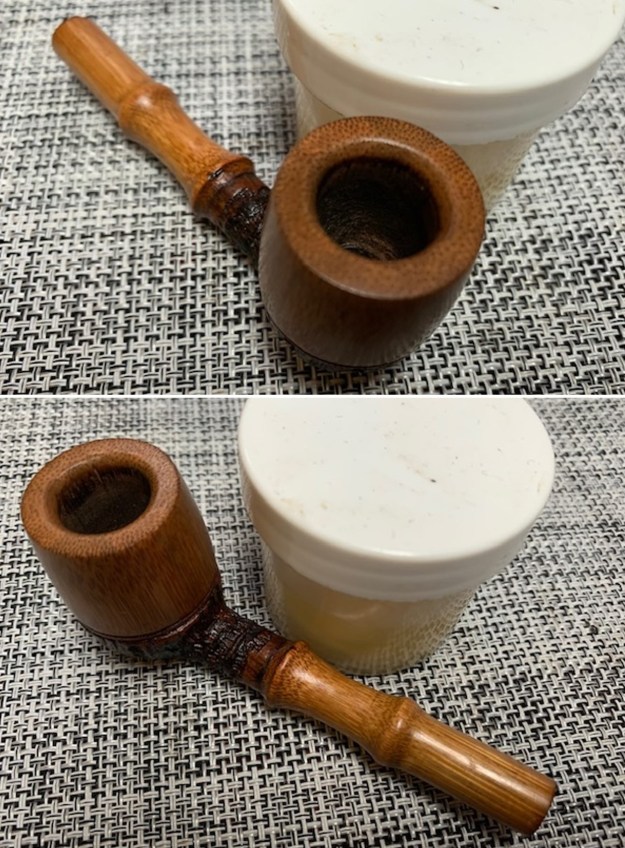
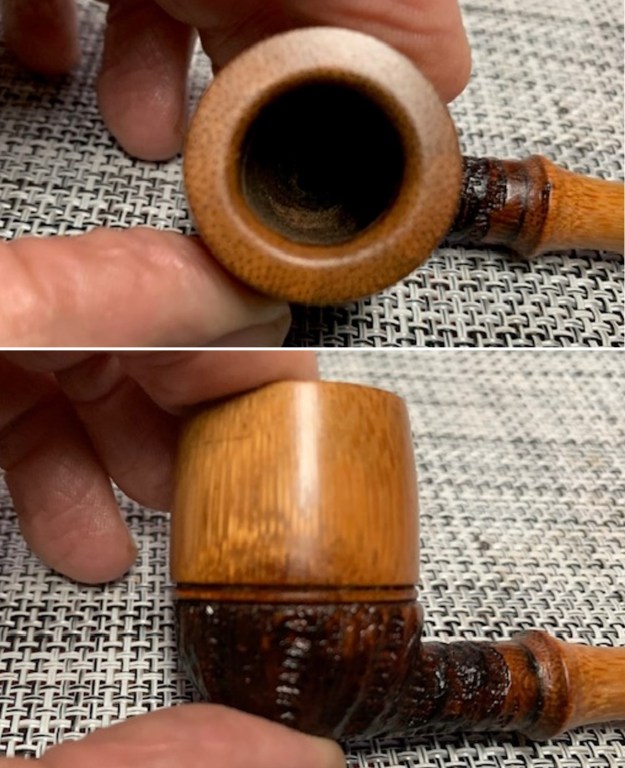
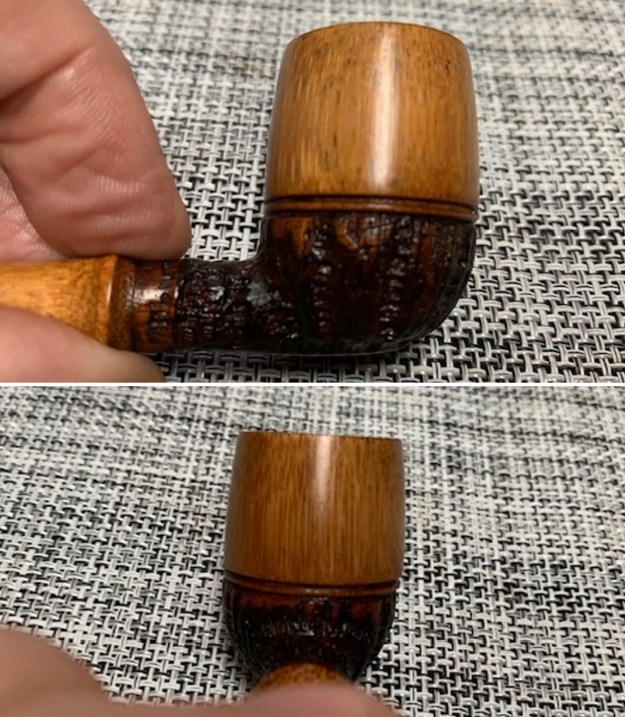
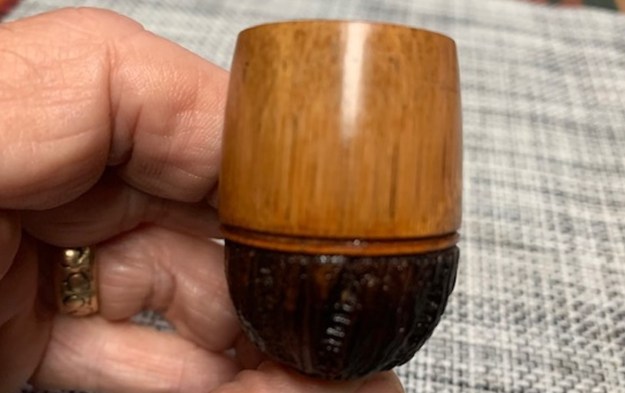
The next pipe on my work table is an interesting Bamboo style Lovat. It is a single piece rather than one joined with a shank extension. The stamping on the heel of the bowl reads UNX UNT over Quality Pipe. The pipe has some unique and interesting grain around the bowl and shank that makes we wonder what the wood is. Is it possible that it is Bamboo? The bottom of the bowl and a portion of the two knuckle bamboo style shank are rusticated with a great pattern and are stained with a dark brown stain. The stem is fit in the shank end snugly and there is no gap. The airway in the shank is the same diameter from the shank end to its entry into the bowl. The draught on the pipe is open and unhindered. The design is definitely made to create a very cool smoke. The bowl had a moderate cake and there was lava and darkening on the rim top and inner edge toward the back of the bowl.  The airway and mortise are full of tars and oils both in the shank and stem. It was dirty. The stem is oxidized, calcified and has some deep tooth marks on the top and underside of the stem ahead of the button. I am including photos of the pipe to show what it looked like when I brought it to the work table. I took photos of the rim top and stem. You can see the cake in the bowl and the darkening on the rim top and on the back inner edge of the bowl. The stem had some tooth marks and chatter on both sides ahead of the button. It was oxidized and there was some calcification on the surface. I took a photo of the stamping on the heel of the bowl. It is clear and readable as noted above. I also removed the stem from the shank and took a photo of the part to give a sense of the flow of the pipe. It is truly a unique pipe and the grain shows well in the photo.The bowl is quite small so I scraped it out with a Savinelli Fitsall Pipe Knife to remove the cake. I sanded the bowl walls with 220 grit sandpaper wrapped around my finger. I took the cake back to smooth bowl walls. I cleaned out the mortise and the airway in the shank and the stem with alcohol, pipe cleaners and cotton swabs. It was quite dirty but once cleaned smelled better.I worked on the darkening on the back inner edge of the rim top and on the top itself. I was able to sand it out with 220 grit sandpaper and give it a slight inward bevel. I scrubbed the exterior of the bowl and shank with undiluted Murphy’s Oil Soap and a tooth brush. I rinsed it off with warm running water to remove the grime and debris in the finish of the rustication and on the smooth portions. I worked over the sanded rim top at the same time. I polished the smooth portions of the bowl with micromesh sanding pads – dry sanding with 1500-12000 grit sanding pads. I wiped the bowl down after each sanding pad with a damp cloth to remove the sanding debris. The bowl began to take on a rich glow. I rubbed down the bowl and shank with Before & After Restoration Balm. It is a paste/balm that is rubbed into the surface of the bowl and shank. The product works to deep clean the finish, enliven and protect the wood. I worked it into the surface with my finger tips. I let it sit for 10 minutes then wiped it off with a soft cloth then buffed it with a cotton cloth. The bowl really began to have a deep shine and the grain shines through. The photos I took of the bowl at this point mark the progress in the restoration. It is a gorgeous pipe. I took photos of the grain on the rim top and around the bowl and shank to get a clear picture of the wood that was used. The small straight birdseye style pattern on the rim top reminds me of the pattern in Bamboo. The flow of the grain around the bowl sides and the shank sides looks also a lot like Bamboo. The shank end also shows the same birdseye pattern as the rim top. I set the bowl aside at this point and turned my attention to the stem. I cleaned up the deep tooth marks and filled them in with black CA glue. I used a small file to flatten the repairs to the stem. I sanded repairs on the button surface and on both sides of the stem ahead of the button with 220 grit sandpaper. I also sanded the rest of the stem to remove the oxidation that was present. I started polishing the stem with 600 grit wet dry sandpaper. I polished the stem with micromesh sanding pads – 1500-12000 grit sanding pads and water to wet sand the stem. I wiped it down after each sanding pad with Obsidian Oil on a cotton rag after each sanding pads. I know that many say Obsidian Oil does nothing for acrylic stems, but I find it does two things – first it gives some protection to the stem from buildup and second it give the sanding pads bite in the polishing process. I have found that Before & After Fine and Extra Fine stem polish works well to remove the fine scratches in the vulcanite. I rub the Fine Polish on the stem and wipe it off with a paper towel and then repeat the process with the Extra Fine polish. I finish the polishing of the stem down with a final coat of Obsidian Oil and set the stem aside to let the oil absorb. This process gives the stem a shine and also a bit of protection. The final steps in my process involve using the buffer. I buffed the bowl and stem with Blue Diamond to polish out the light scratches in the wood and the remaining surface oxidation in the stem. I gave the bowl and the stem multiple coats of carnauba wax. I have found that I can get a deeper shine if I follow up the wax buff with a buff with a clean buffing pad. It works to raise the shine and then I hand buff with a microfiber cloth to deepen the shine. It is always fun for me to see what the polished bowl looks like with the polished stem. It turned out to be a nice pipe. The interesting tight grain around the bowl sides and shank looks great. The vulcanite saddle stem polished very well and looks good with the bowl. The UNX UNT Quality Pipe Bamboo Lovat feels great in my hand. It is a well-balanced pipe. Have a look at it with the photos below. The dimensions are Length: 5 ½ inches, Height: 1 ¾ inches, Outside diameter of the bowl: 1 inch, Chamber diameter: 5/8 of an inch. The weight of the pipe is .74 ounces/21 grams. It is a very unique pipe and no information can be found on the stamping. Once again can any of you help me out with some identification advice on this one? It would be much appreciated. Thank you.

As always, I encourage your questions and comments as you read the blog. Thanks to each of you who are reading this blog. Remember we are not pipe owners; we are pipe men and women who hold our pipes in trust until they pass on into the trust of those who follow us.

Refurbishing an Inherited c.1908 BBB Own Make Lovat


Blog by Paresh Deshpande

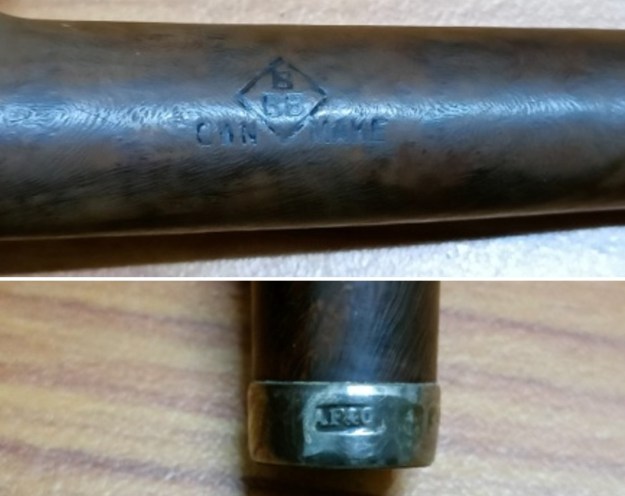
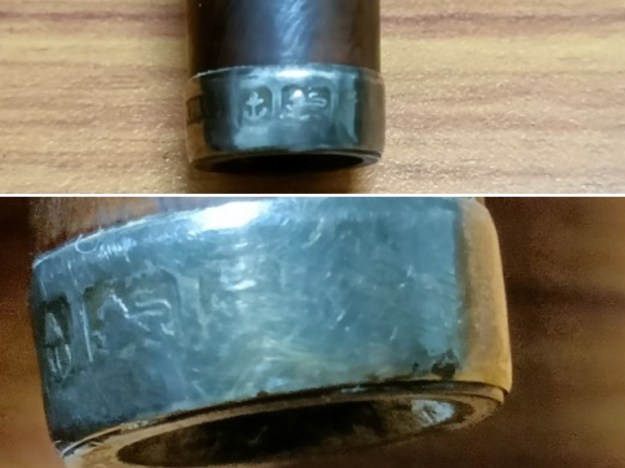
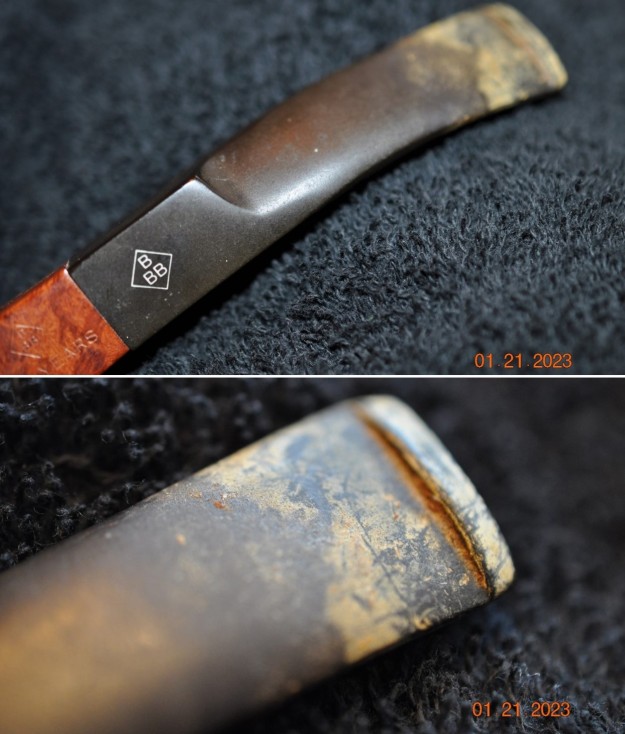
I absolutely love my classic BBB pipes that I have inherited and one such pipe is now on my worktable. This classic Lovat has some beautiful cross grains on the front, back and shank surface with beautiful bird’s eye grains on the sides that can be made out under the grime and dust covering the stummel surface. It is stamped on the left side of the shank as “BBB” in a rhombus with “OWN” and “MAKE” on either side of the rhombus. The Sterling silver ferrule at the shank end is stamped as “AF & Co.” in a rectangle followed by three cartouche bearing hallmarks. Starting from the left, the first cartouche bears the stamp of an “Anchor” for the Birmingham Assay Office followed by the “Lion Passant” certifying the silver quality and the last cartouche bears the Date letter “i” which is quite worn out and the outline of the letter can be made out only under close scrutiny under a magnifying glass. The vulcanite saddle stem is devoid of any stem logo. The stampings are clear and easily discernible except the date code letter. BBB – Pipedia has detailed information on the origins of the brand, it’s transition to the Cadogan group making this article a good read for those interested. I would like to highlight that, quote “At the beginning, BBB produces two qualities. One, BBB Own Make, became finally BBB Best Make, other pipes being simply estampillées BBB. There are reasons to believe that Own Make in fact were produced in London (Reject pipes cuts year R stamped one them.), whereas the simple BBB were imported, and this, to the paddle of the 20th century. However, if all that is not very clear, it is probable that the lines low-of-range were an import of Saint-Claude” un-quote.

Now coming on to the most interesting and satisfying part of the research on this piece of briar and that is establishing the probable date of manufacture of this pipe. I prefer to follow English silver marks: the guide to hallmarks of London sterling silver (silvercollection.it)  while establishing the dates on the basis of the date letter in the hallmarks. The Anchor points to the Birmingham Assaying Office. Thereafter, I followed the link to the dating guide of the Birmingham Assay Office to date this pipe. I have included a hallmark chart for dating the pipe and have put a red mark around the letter for 1908. It is the same style of “i” and the cartouche that holds the letter stamp.Thus it is with certainty I say that this BBB was made in 1908, give or take a year as the ferrules were assayed in bulk and used as required. The stamp of Own Make designates this as the finest quality pipe that was made in London for the local market in limited quantities.

Initial Visual Inspection
This 115 year old pipe flaunts it’s age with great dignity and élan. There is a decent layer of cake in the chamber that is even throughout. The rim top surface is covered in a layer of lava overflow. Underneath this crud and grime, the inner rim edge damage is apparent. The outer rim edge has a number of dents and dings. The stummel surface, though covered in dirt, dust and grime, has developed a nice patina. The stem has a chunk of vulcanite missing from the button and rounded orifice. The following pictures will give the readers a general idea as to the condition of the pipe as it sits on my worktable. Detailed Visual Inspection
As brought out earlier, the chamber has an even layer of hard and brittle cake. It appears that the cake was being regularly reamed to maintain the correct bare minimum thickness. The condition of the chamber walls will be ascertained after the cake has been taken down to bare briar. The rim top surface is uneven and covered in a layer of overflowing oils and tars. Also the condition of the rim inner edge is indicative of it being subjected to an amateurish use of a sharp knife to remove charred surface from the edge. The end result is an uneven and an out of round chamber. The outer rim edge too has a number of dents and dings, most likely caused due to striking against a hard surface to remove the dottle. I intend to address the issue of uneven rim top surface by topping the rim surface. It will also help to address the damage to the inner and outer rim edges to an extent and what damage remains; will be masked by creating a bevel.The stummel is covered in a layer of dirt and grime from years of uncared for storage. The sides and front of the bowl appears considerably darker due to accumulation of grime over the hand oils from over a period of 115 years. However, beautiful cross grains on the front, back and shank surface with beautiful bird’s eye grains on the sides can be made out under the grime and dust covering the stummel surface. There are no scratches/dings or dents over the stummel surface. The briar has developed a beautiful dark patina over the years and it will be my endeavor to maintain it through the restoration process. The mortise is clogged with old oils, tars and ash; however, the shank face is sans any crack or deformation. This also confirms that the band is not a repair band but is original to the pipe. There is no reason to sand the stummel surface to address any dents / dings as there are none. I shall dry sand the bowl with micromesh pads to bring out the grains and impart a shine to the surface while preserving the patina. The period correct vulcanite saddle stem with a round orifice has a quality feel to it. It is oxidized and is missing a chunk of vulcanite from the bite zone including the button and the round slot. The area around the damaged portion has deep tooth indentations. The step tenon is covered in accumulation of old oils, tars and grime. I will rebuild the damaged portion of the stem using activated charcoal and CA superglue and thereafter match the repaired portion with the stem profile and the rest of the stem surface. After the cleaning and polishing regimen, the repairs should blend in well with the stem surface. The Process
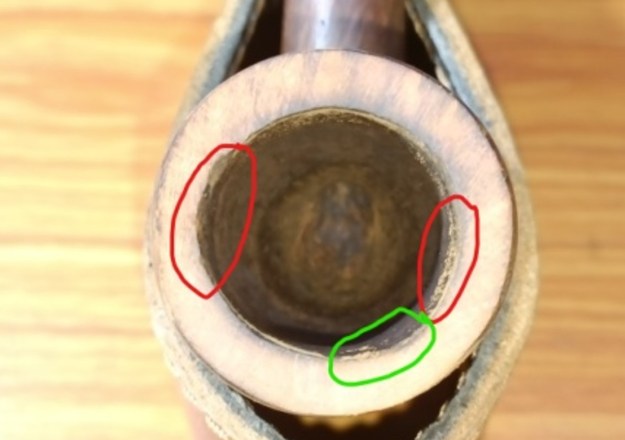
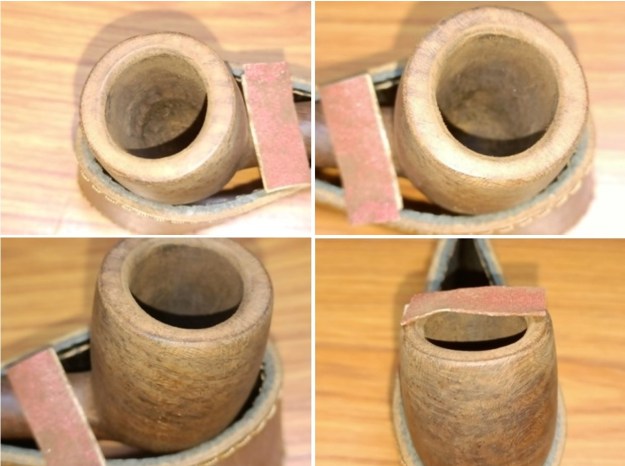
I began the repair and refurbishing process with cleaning of the stem internals. Using thin shank brushes and anti-oil dish washing soap, I cleaned the stem airway. I have modified this process of cleaning the stem airway by doing away with pipe cleaners and alcohol as it saves me a ton of pipe cleaners, which is a precious commodity for me here in India. I continued this cleaning till only white clean foam came out of the stem airway, indicating that the airway was nice and clean. I ran a couple of pipe cleaners dipped in alcohol through the airway to dry it out and make sure that there are no traces of soap and gunk hidden in the airway.With the stem internals now clean, I moved to external cleaning of the stem surface by dunking the stem into “Before and After Deoxidizer” solution developed by Mark Hoover. The solution helps to draw out heavy oxidation to the surface making it’s further removal a breeze, while the minor oxidation is eliminated to a very great extent. I usually dunk stems of few pipes that are in-line for restoration and this BARLING’S MAKE is marked in yellow arrow. I generally allow the stems to soak in this solution overnight for the solution to do its work.While the stem was soaking in the De-oxidizer solution, I reamed the chamber with size 2 head of the PipNet pipe reamer. I removed the carbon from the areas where the reamer head could not reach with my fabricated knife. To completely remove the residual carbon from the walls of the chamber and smooth out the walls, I sanded the chamber walls with a folded piece of 220 grit sandpaper followed by cleaning the chamber with a cotton swab wetted with isopropyl alcohol. The chamber walls are in pristine condition. I gently scrapped off the lava build up over the rim top using a sharp knife to avoid damage to the surface.I cleaned the mortise and shank airway using a dental pick and hard / soft bristled pipe cleaners dipped in isopropyl alcohol. I shall continue with further cleaning of the shank internals once I clean the external stummel surface.Next, I decided to subject the chamber and mortise to cotton and alcohol bath. I packed the chamber with cotton and drew out a wick from the cotton and along with a folded regular pipe cleaner, inserted it into the mortise and through the draught hole into the chamber. I tightly packed cotton balls into the remaining portion of the mortise. Thereafter, I soaked the cotton balls with isopropyl alcohol up to the brim. About half an hour later, the level of alcohol had gone down, having being absorbed by the cotton. I topped it up once again and set it aside overnight. By next afternoon, the cotton and alcohol had drawn out all the remaining oils and tars from the chamber and mortise. I removed the cotton balls and the dirt can be gauged by the appearance and coloration of the cotton balls and the pipe cleaner. With my fabricated knife and dental tools, I spent the next hour scrapping out the entire loosened gunk from the mortise. I ran pipe cleaners through the mortise and draught hole to clean out all the loosened tars and gunk that was lodged in the draught hole and mortise. The chamber and mortise now smelled clean, fresh and looked it too. I set the stummel to dry out naturally. Once the internals of the chamber and shank were cleaned, I cleaned the external surface of the stummel with Murphy’s Oil soap and cotton swabs followed by scrubbing the surface with a toothbrush and dish washing soap. This rid the stummel surface of all the accumulated dust, dirt and grime. Using a piece of Scotch Brite scrub, I deliberately cleaned the rim top and removed the crud from the surface. The damage to the rim edges is, thankfully, not as severe as I had anticipated. I also cleaned the shank internals with dish washing soap and a shank brush. I set the stummel aside to dry out naturally while I worked the stem.By the time I was done with internal and external cleaning of the stummel, the stem had been in the deoxidizer solution for nearly 24 hours. I cleaned the stem and the stem airway under running warm water and scrubbed the raised oxidation from the surface using a Scotch Brite pad and the airway with a thin shank brush. I further removed the oxidation by scrubbing the stem with 0000 grade steel wool. Once the stem was dried with paper towels, I applied a little olive oil to rehydrate the stem.I wiped the stem surface, particularly the damaged button end, with a cotton pad and alcohol to remove any traces of dirt and grime. To begin the stem repairs, I first wound a scotch tape around the tapered portion of a pipe cleaner and inserted it into the stem airway. I prepared a mix of CA superglue and activated charcoal and generously applied it over and extending beyond the broken surface and set it aside for curing over night. The tape will help prevent the mix from clogging the stem airway.While the stem fills were curing, I addressed the damage to the rim top surface by topping the rim to reduce the charred surface and bringing the bowl back to round. I always use a square piece of 220 grit sand paper and firmly hold it with my hand on my work table. I work the rim top on the sand paper in circular motion, frequently checking the progress as I want to keep the briar loss to a bare minimum necessary. The inner rim edge damage has not been addressed entirely with a few dings and uneven surface visible on the sides (encircled in red) and charred surface to the front of the bowl (encircled in green). Also a few minor dents and chipped surfaces are visible along the outer rim edge. These issues were addressed next. In order to mask the still visible damage to the inner rim edge, I created an inner edge bevel by pinching a folded piece of 180 grit sand paper between my thumb and forefinger and moving along the inner edge with a constant pressure, to minimize the charring on the inner edge of the rim. Similarly, I created a slight bevel on the outer edge of the rim to address the minor dents and chipped areas.Next, I subjected the stummel to a complete cycle of micromesh polish, wet sanding with 1500 to 12000 grit pads. I wiped the stummel with a moist cloth after every grit pad to remove the sanding dust left behind by the pads. This also helps in monitoring the progress being made and ensures early corrective action. I am happy with the progress being made until now. I massaged a small quantity of “Before and After Restoration Balm” into the briar surface with my finger tips and worked it deep into the surface and let it rest for a few minutes. The balm almost immediately works it’s magic and the briar now has a nice vibrant appearance with the beautiful bird’s eyes and cross grain patterns on full display. It was at this stage that I polished the sterling silver with a jeweller’s cloth to a nice shine. By the time I was through with the stummel polishing, the stem fills had completely cured.  I moved ahead with the process of filing and shaping the button end with a flat head needle file. With a round needle file, I reshaped the round orifice at the slot end. For a better blending, I further sanded the entire stem with a folded piece of 320 grit sandpaper. I continued to dry sand the entire stem with a folded piece of 400 followed by 600 and 800 grit sandpaper and further progressed to wet sanding with 1000, 1500 and 2000 grit sand papers. I rubbed a small quantity of EVO into the stem surface and set it aside for the vulcanite to absorb and hydrate. To bring a deep shine to the vulcanite stem, I went through the complete set of micromesh pads, wet sanding with 1500 to 12000 grit pads. I wiped the stem with moist cloth after working each pad and rubbed it down with Extra Virgin Olive oil to rejuvenate the vulcanite.To complete the restoration, I mounted a cotton cloth buffing wheel on to my hand held rotary tool and polished the stummel and stem with Blue Diamond compound. This compound helps to remove the minor scratch marks that remain from the sanding. Next, I mounted another cotton buffing wheel that I have earmarked for carnauba wax and applied several coats of the wax. I finished the restoration by giving the entire pipe a rigorous hand buffing using a microfiber cloth to raise the shine further. The finished pipe looks amazingly beautiful and is ready to join my collection. I only wish it could share with me it’s story of the past years while I enjoy smoking my favorite Virginia blend in it or maybe an English blend or maybe just keep admiring it!! The finished pipe is as shown below:- A note of thanks to all the readers who have joined me in this journey that has been such a pleasure! You and your loved ones are always in our prayers…

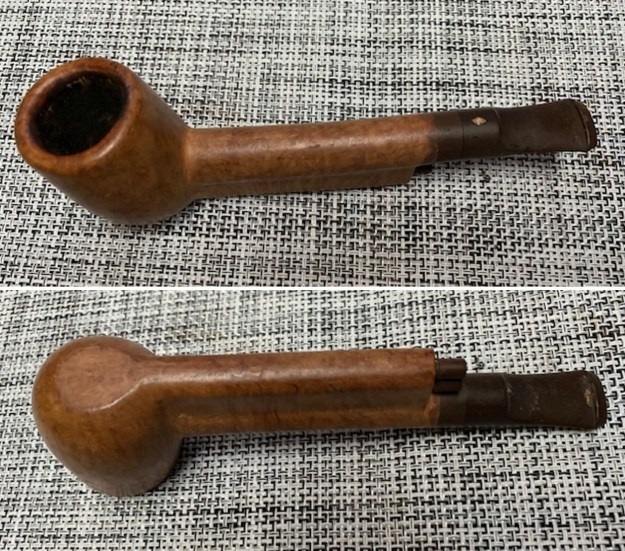
Working on a Mystery Stacked Shank Lovat – MYSTERY SOLVED – A GERRARD THREE-WAY PIPE


Blog by Steve Laug

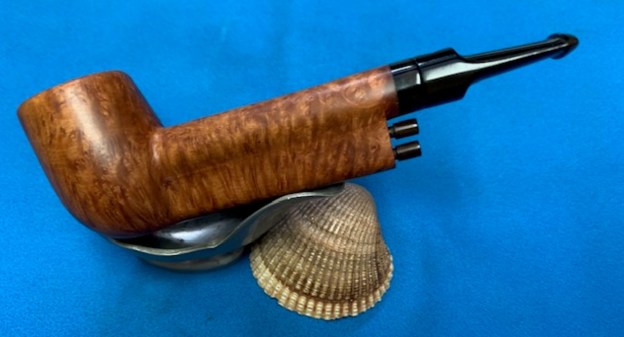
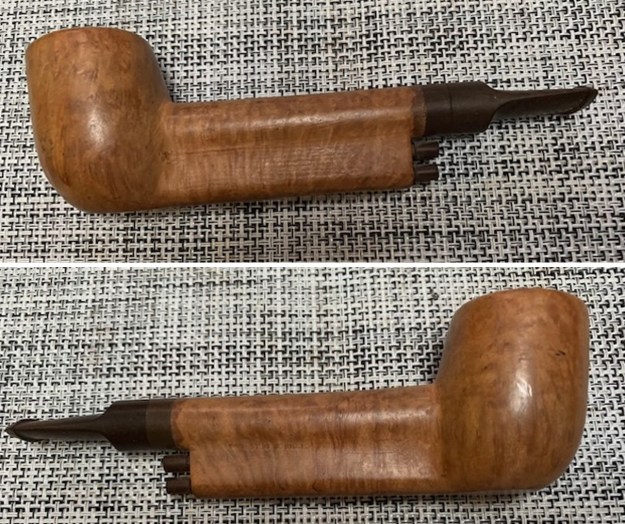
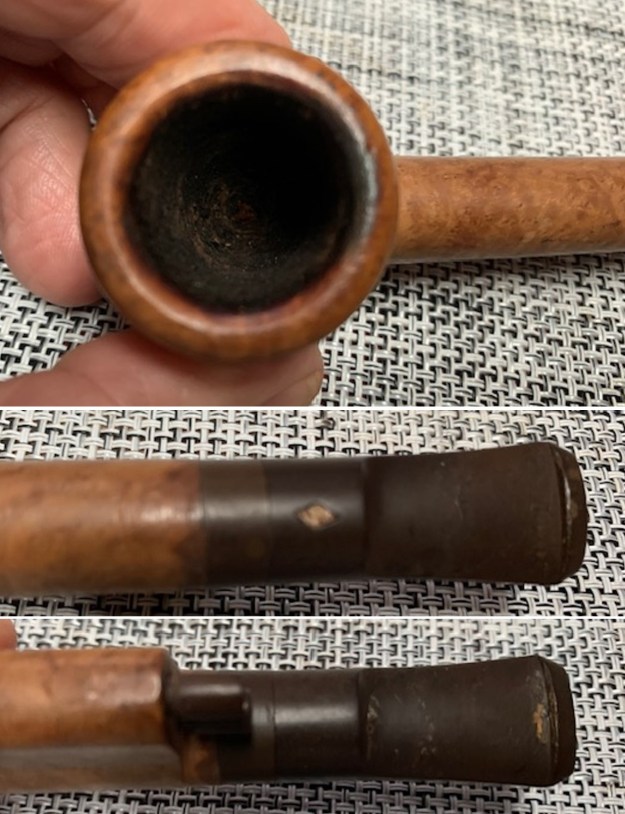
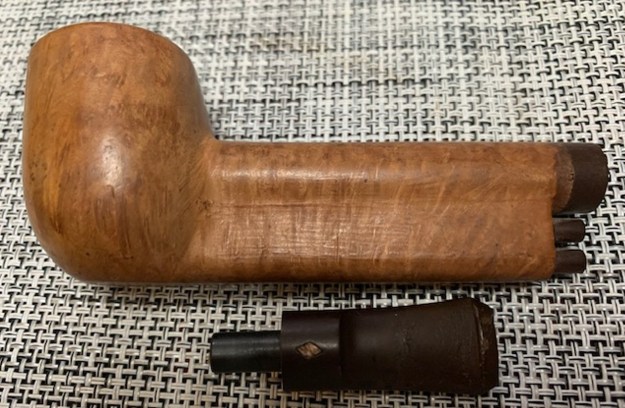
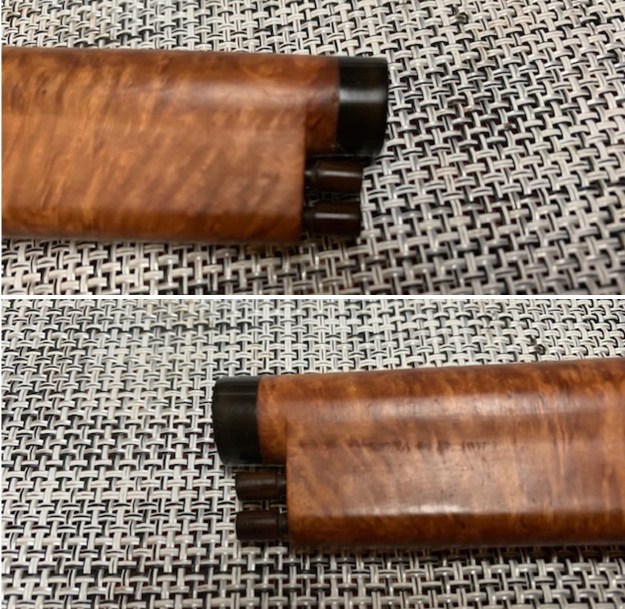
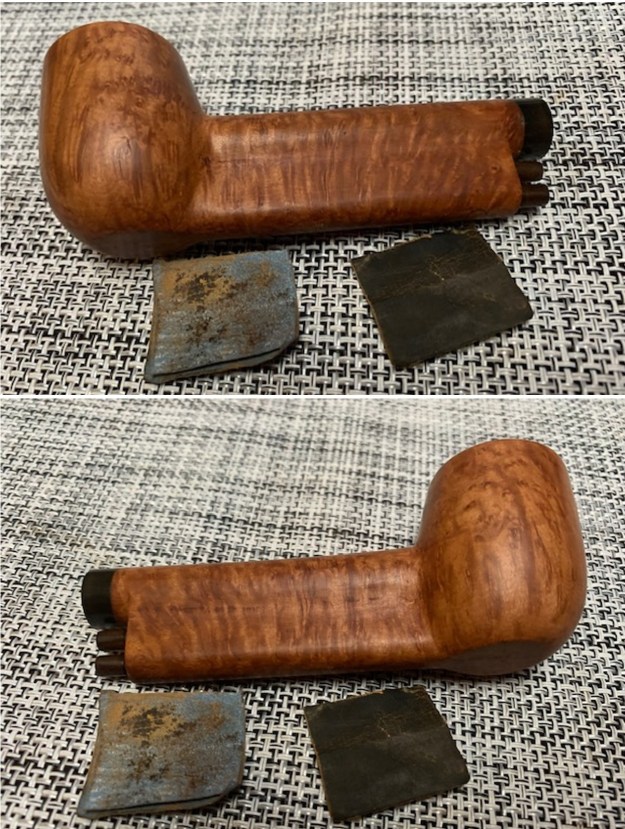
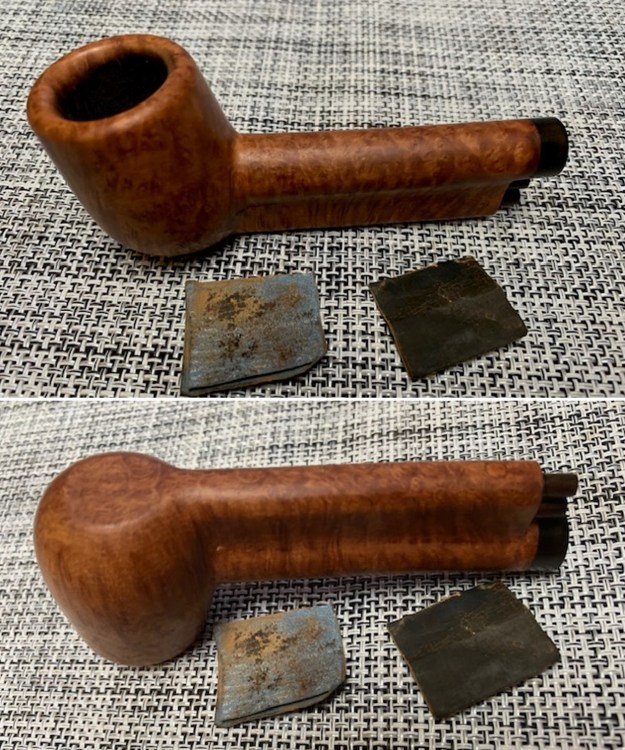
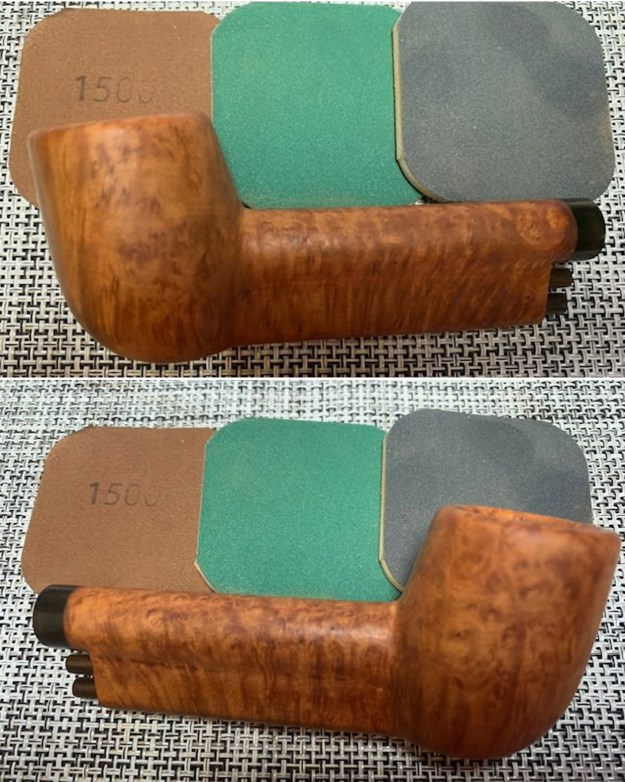
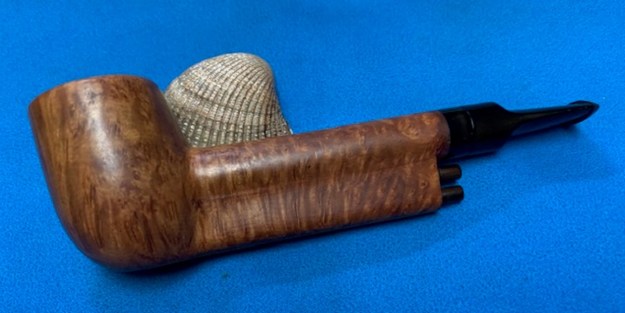
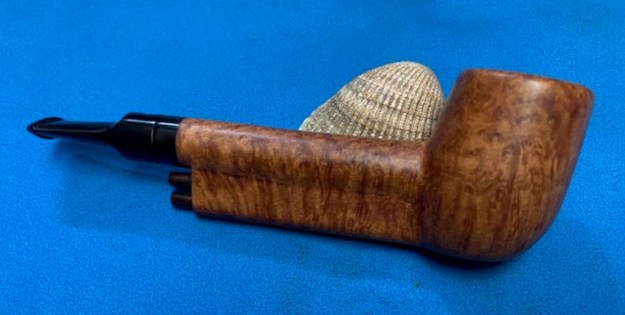
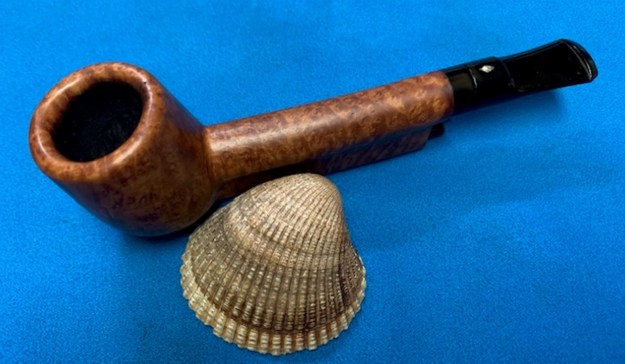
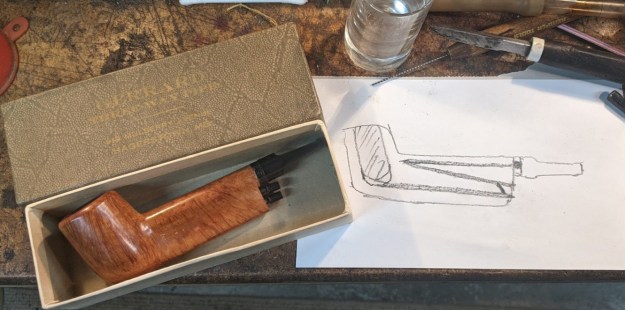
The next pipe on my work table is a real mystery to me. The stamping is unreadable, except for a B on the heel of the bowl. The pipe has some amazing grain around the bowl and shank and is well laid out to follow the grain. It has a double shank or stacked shank. The top portion or shank is where the stem fits in the mortise on the end. The airway in that portion of the shank drops to the second part of the shank at the bowl shank union. The second part of the shank has two chambers. The bottom one goes from an under-bored bowl bottom to the opening on the shank end. There is a plug at that point. The air drops moisture in that part of the shank and cools. It is circulated into the second chamber (also with a plug at the end) and then up into the top part of the shank. The smoke is drawn into the twisted and turned airway from the bowl bottom and then drawn along the bottom chamber to the end then up into the second chamber and finally into the airway in the top part of the shank and into the mouthpiece. The design is definitely made to create a very cool smoke. Because my words may not capture the look of this pipe very well I am including the next four photos to unpack the words that I have written above. The pipe was in decent condition. The bowl had been recently reamed and there was tobacco debris in the bowl bottom. The rim top had some burn damage and darkening on the back inner edge. The shank (top and lower with two chambers) was dirty and need a thorough cleaning. There were scratches on the shank and bowl sides and the finish was dirty. There was some staining on the shank end ahead of the vulcanite band on the shank. The two vulcanite pins in the lower shank were also oxidized. The stem had some tooth marks and chatter on both sides ahead of the button. It was oxidized and there was some calcification on the surface. The logo on the top of the stem was a diamond and the inside of the diamond was damaged. It appeared to have held a squiggly line – perhaps emulating the airflow through the pipe. I took closeup photos of the bowl and stem for you to see a bit of what I see here.I removed the stem from the shank and took a photo of the part to give a sense of the flow of the pipe. It is truly a unique pipe and the grain shows well in the photo.I dribbled alcohol around the pie/plugs in the lower portion of the shank. It took some time and I wiggled the pins until they came free. I took photos of the pins and of the shank. I cleaned them up and then pushed them into the shank end and took photos of the pipe at this point. I cleaned out the mortise and the three airways in the shank and the one in the stem with pipe cleaners and cotton swabs. It was quite dirty but once cleaned smelled better. I apologize for the photo of the stem cleaning as it is blurry but you can still see the grime on the pipe cleaners in the photo.I worked on the stains along the inner edge of the shank ahead of the vulcanite band. I was able to sand it out with 220 grit sandpaper and started polishing it with 600 git wet dry sandpaper. I also sanded out the deep gouges along the grooves between the upper and the lower parts of the shank. They cleaned up very well. I polished the briar with micromesh sanding pads – dry sanding with 1500-12000 grit sanding pads. I wiped the bowl down after each sanding pad with a damp cloth to remove the sanding debris. The bowl began to take on a rich glow. I rubbed down the bowl and shank with Before & After Restoration Balm. It is a paste/balm that is rubbed into the surface of the briar. The product works to deep clean the finish, enliven and protect the briar. I worked it into the briar with my finger tips. I let it sit for 10 minutes then wiped it off with a soft cloth then buffed it with a cotton cloth. The briar really began to have a deep shine in the briar and the grain shines through. The photos I took of the bowl at this point mark the progress in the restoration. It is a gorgeous pipe. I set the bowl aside at this point and turned my attention to the stem. The Diamond logo is strange and looks damaged but it appears to have a squiggle from one corner to the next. The surface is chipped. I sanded out the tooth marks and chatter on both sides of the stem ahead of the button. I also sanded the rest of the stem to remove the oxidation that was present. I started polishing the stem with 600 grit wet dry sandpaper. I filled in the pits in the diamond log with clear CA Glue and sanded that repair smooth at the same time. I did not want to further damage the log so I proceeded cautiously. The stem is looking better.I polished the stem with micromesh sanding pads – 1500-12000 grit sanding pads and water to wet sand the stem. I wiped it down after each sanding pad with Obsidian Oil on a cotton rag after each sanding pads. I know that many say Obsidian Oil does nothing for acrylic stems, but I find it does two things – first it gives some protection to the stem from buildup and second it give the sanding pads bite in the polishing process.I have found that Before & After Fine and Extra Fine stem polish works well to remove the fine scratches in the vulcanite. I rub the Fine Polish on the stem and wipe it off with a paper towel and then repeat the process with the Extra Fine polish. I finish the polishing of the stem down with a final coat of Obsidian Oil and set the stem aside to let the oil absorb. This process gives the stem a shine and also a bit of protection. The final steps in my process involve using the buffer. I buffed the bowl and stem with Blue Diamond to polish out the light scratches in the briar and the vulcanite. I gave the bowl and the stem multiple coats of carnauba wax. I have found that I can get a deeper shine if I follow up the wax buff with a buff with a clean buffing pad. It works to raise the shine and then I hand buff with a microfiber cloth to deepen the shine. It is always fun for me to see what the polished bowl looks like with the polished stem. It turned out to be a nice pipe. The mix of grain around the bowl sides and shank looks great. The vulcanite saddle stem works well with the pipe. The Mysterious No Name Stacked Shank System Lovat feels great in my hand. It is a well-balanced pipe. Have a look at it with the photos below. The dimensions are Length: 5 ½ inches, Height: 2 inches, Outside diameter of the bowl: 1 ¼ inches, Chamber diameter: ¾ of an inch. The weight of the pipe is 1.34 ounces/38 grams. It is a very unique system style pipe that I cannot find any stamping on and no information. Is it possible that any of you can help me out with some identification advice on this one? It would be much appreciated. Thank you.

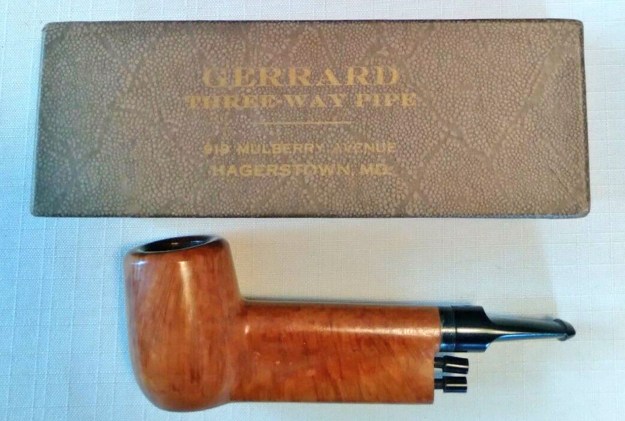
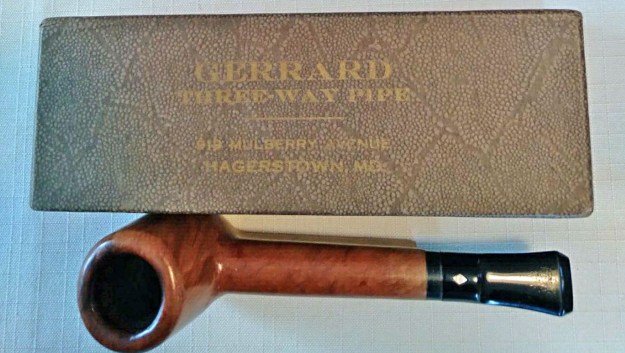
As always, I encourage your questions and comments as you read the blog. Thanks to each of you who are reading this blog. Remember we are not pipe owners; we are pipe men and women who hold our pipes in trust until they pass on into the trust of those who follow us. ADDENDUM MYSTERY SOLVED: I posted this blog on FaceBook in the Tobacco Pipe Restorers Group. I received and answer from James Connelly with a photo. He has the pipe in the photo below. It includes the original box. I have included that photo below. It shows the pipe in its box along with a diagram on the airflow from the bottom of the bowl to the mouth piece. It is indeed the shape that I expected from my clean up work on the pipe.He also included a link to a write up on Pipedia on the brand (https://pipedia.org/wiki/Gerrard). It is a short read but very interesting. I have also included  two photos from the article.

Gerrards Three-Way Pipes were custom made by a gentleman in Hagerstown, MD named E.E. Lushbaugh. He called it the “Gerrard Three-way pipe”.


Restoring and Hand Carved All Wood Rusticated Bent Egg


Blog by Steve Laug

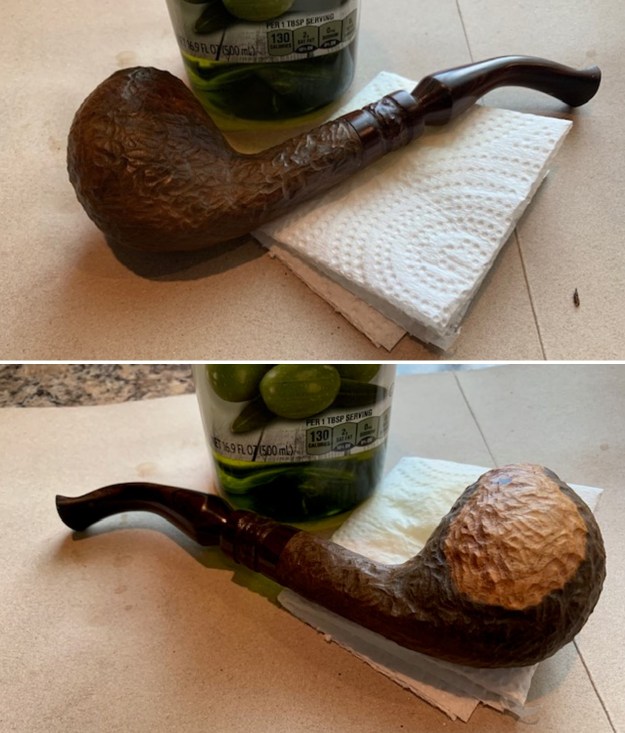
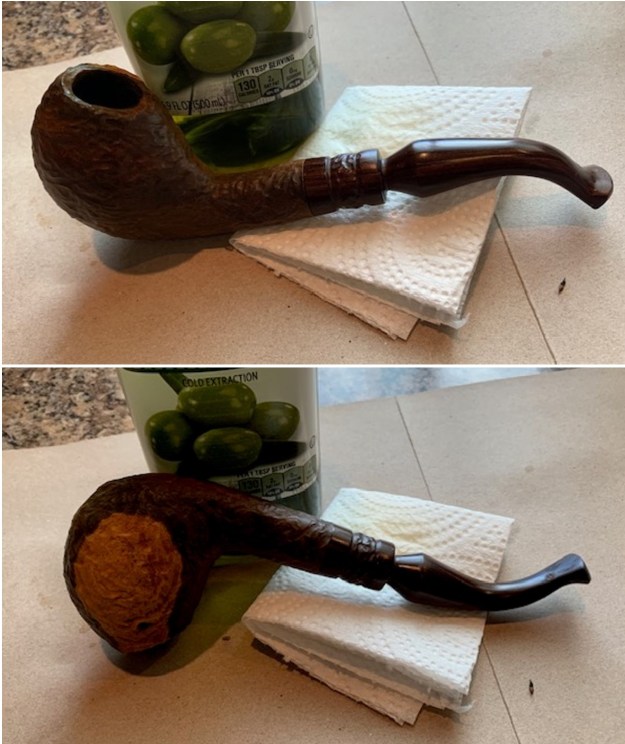
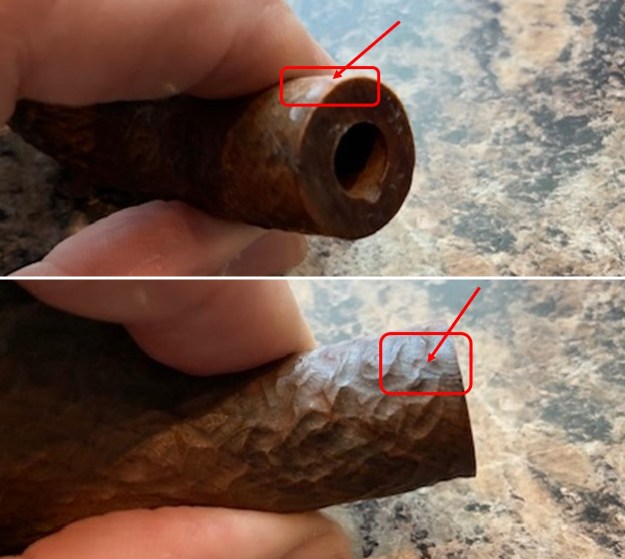
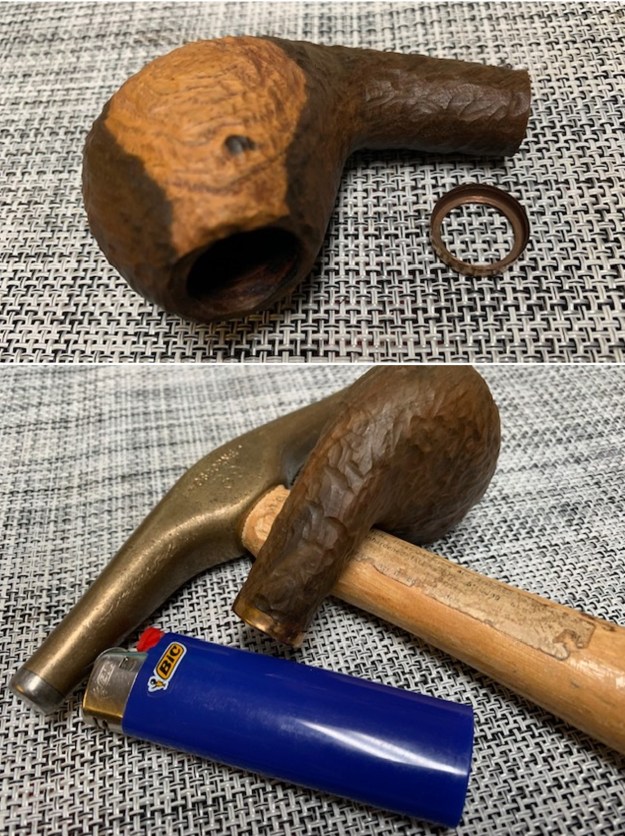
The next pipe on the table is a bit of an oddity. When Jeff picked it up it was heavy and cool and we thought it might be stone. When I was in Idaho visiting my dad for his 95th I spent some time with Jeff and had some time to examine the pipe. It was heavy and definitely seemed odd. In many ways it was not like stone but the weight and the coloration of the pipe made us question it. I removed the stem and there was grain in the shank end that confirmed it was wood. I am not sure what kind of wood it was but it was wood. It was hand made and there were no stamps or marks on the shank identifying who made it. The rusticated finish was dirty and there was grime ground into the sides and the rim top of the pipe. The right side of the bowl had a whitened spot on it that followed the flow of the egg shape on that side. It was not paint. There was a thick cake in the bowl and the airway in the shank and stem were dirty. The stem was also wood – probably ebony or other dark, hard wood. There were tooth marks on both sides ahead of the button. It obviously had been someone’s favourite pipe and was well used. Here are some photos of the pipe before I started to work on it. I took close up photos of the bowl, rim top and stem. The photos give a clear photo of the condition of the pipe. The bowl is moderately caked and the rim top actually looks quite good. There is some debris in the rustication and some darkening to the top and edges. The stem is in good condition other than the tooth marks on both sides ahead of the button.I removed the stem from the bowl and took photos of the well designed look it has. The proportions are very well done and the pipe is quite beautiful.I started my work on this pipe by reaming the bowl. I started with a PipNet reamer to clean out the cake in the bowl. I cleaned up the remnants of the cake with a Savinelli Fitsall Pipe Knife. I removed all of the cake and checked the walls. They were solid and there was no checking or damage on the walls. I wiped the bowl down with acetone to remove the spotty finish on the wood. It removed the shininess of the finish and some of the stain and the pipe looked better. It also showed some grain patterns in the wood similar to the stem wood. I cleaned out the internals of the bowl, shank and the airway in the stem with alcohol, cotton swabs and pipe cleaners until they were clean. It smelled significantly better once finished.I wiped down the bowl and stem with some Extra Virgin Olive Oil to enliven the bowl and the stem. I rubbed it on and let it soak into the wood. I buffed it with a paper towel. When Jeff looked over the shank he noted a crack in the shank. I took a photo of the side of the and the shank end to show the crack. It is hard to see in the photos. It did not go too deep in the shank end and extended about ½ inch along the top left side.I waited until I returned to Vancouver and then banded the shank with a thin brass band. I heated the ring with a lighter flame and pressed it onto the shank end against my hard desk top. I tapped the flat surface of the shank end with a small tap hammer to make sure the fit was flat against the shank. I took photos of the shank with the band in place. It looks very good with the new bling. I rubbed down the bowl and shank with Before & After Restoration Balm. It is a paste/balm that is rubbed into the surface of the briar or other woods. The product works to deep clean the finish, enliven and protect it. I worked it into the wood with my finger tips and a horsehair shoe brush. I let it sit for 10 minutes then wiped it off with a soft cloth then buffed it with a cotton cloth. The pipe really began to have a deep shine in the rustication and the grain shines through. The photos I took of the bowl at this point mark the progress in the restoration. It is an unusual looking and pretty handmade pipe. I set the bowl aside and turned to the stem. I sanded the tooth chatter and marks on the surface of the stem with a piece of 220 grit sandpaper and started the polishing with 600 grit wet dry sandpaper. It looked much better.I polished the stem with micromesh sanding pads – 1500-12000 grit sanding pads and water to wet sand the stem. I wiped it down after each sanding pad with Obsidian Oil on a cotton rag after each sanding pad. Obsidian Oil does two things when sanding with micromesh – first it gives some protection to the stem from buildup and second to give the sanding pads bite in the polishing process. I use Before & After Fine and Extra Fine Stem Polish as it seems to remove the fine scratches in the wooden stem. I rub the Fine Polish on the stem and wipe it off with a paper towel and then repeat the process with the Extra Fine polish. I finish the polishing of the stem down with a final coat of Obsidian Oil and set the stem aside to let the oil absorb. This process gives the stem a shine and also a bit of protection. The final steps in my process involve using the buffer. I buffed the bowl and stem with Blue Diamond to polish out the light scratches in the wood of the bowl and the stem. I gave the bowl and the stem multiple coats of carnauba wax. I have found that I can get a deeper shine if I follow up the wax buff with a buff with a clean buffing pad. It works to raise the shine and then I hand buff with a microfiber cloth to deepen the shine. It is always fun for me to see what the polished bowl looks like with the polished stem. It really is a nice pipe. The light rusticated finish around the bowl sides and shank looks great. The wooden carved, fancy, saddle stem works well with the pipe. The No Name Handcarved Hardwood (Ebony??) Egg with a carved wooden stem feels great in my hand. It is a well-balanced pipe. Have a look at it with the photos below. The dimensions are Length: 6 ¾ inches, Height: 2 inches, Outside diameter of the bowl: 1 inch, Chamber diameter: 5/8 of an inch. The weight of the pipe is 3.07 ounces/87 grams. It is a beautiful pipe that I will soon be putting on the rebornpipes store in the American Pipe Makers Section. It is available if you want to add it to your collection. It was a great smoker and it will give many more years of service.

As always, I encourage your questions and comments as you read the blog. Thanks to each of you who are reading this blog. Remember we are not pipe owners; we are pipe men and women who hold our pipes in trust until they pass on into the trust of those who follow us.

Doing a Clean up and Restoration of a Stanwell Revival 105 Bent Apple


Blog by Steve Laug

The next pipe on the work table is one that a fellow just dropped by. He had written to me earlier this week about a Stanwell that he had that needed some work. Here is his first email.

Your name was passed to me by the folks at City Cigar. I was lamenting to them how my decade old Stanwell was not doing well, and they suggested I check in with you. I would love to hear your thoughts on it. — Mike

I replied to him as follows:

Thank you. Can you send me a photo of the pipe on your phone?

He did not waste anytime and sent me an email with the first three pictures below and also a description of what he knew was wrong with the pipe. He wrote as follows:

Thanks for getting back to me so quickly! In the photos you can see that there are stem problems, but also a little crack in the bowl. If I could save this piece, I would so grateful. I just love the shape, as well as the elegant mouthpiece. I haven’t really seen anything else like it. — Thanks, Mike

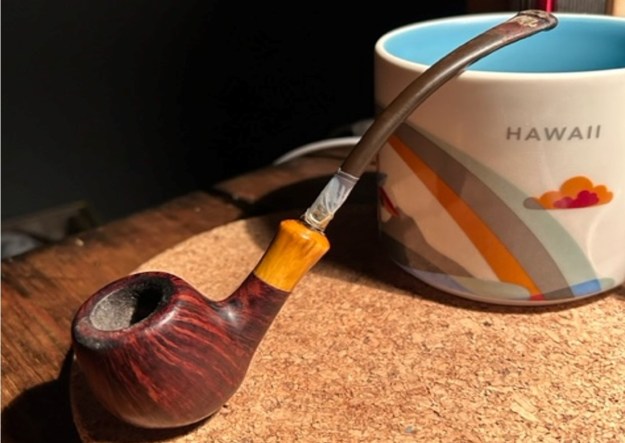
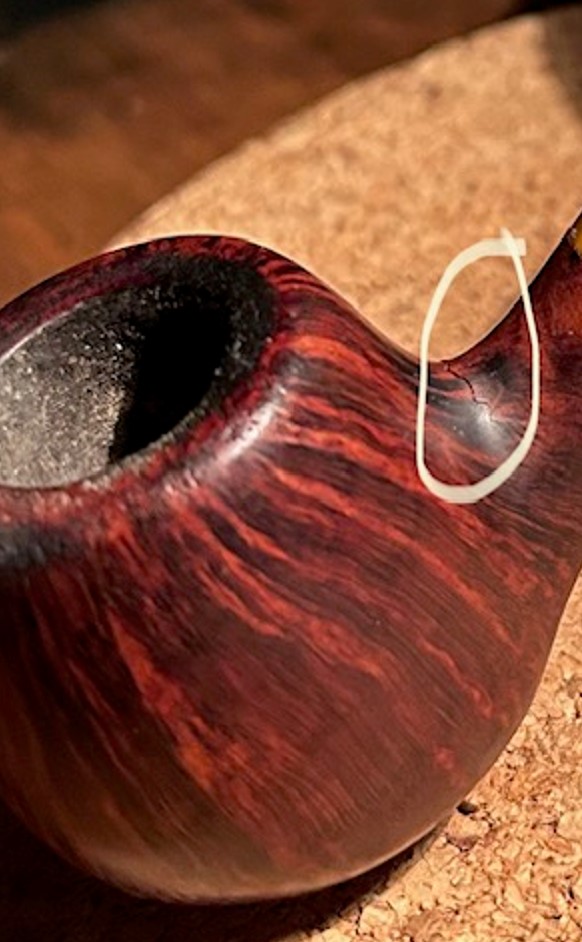
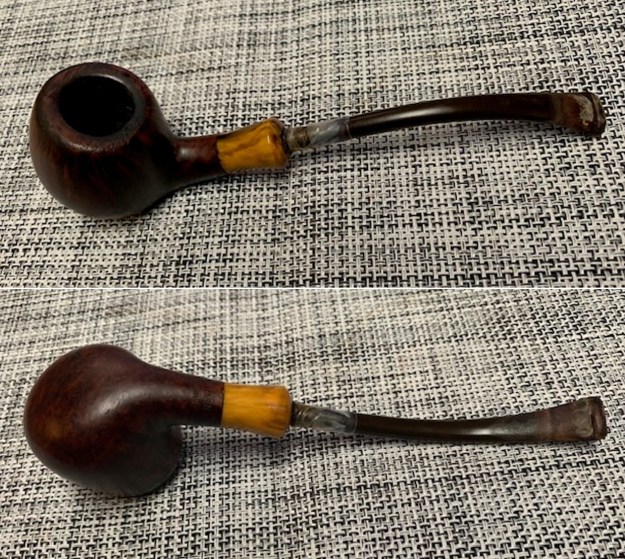
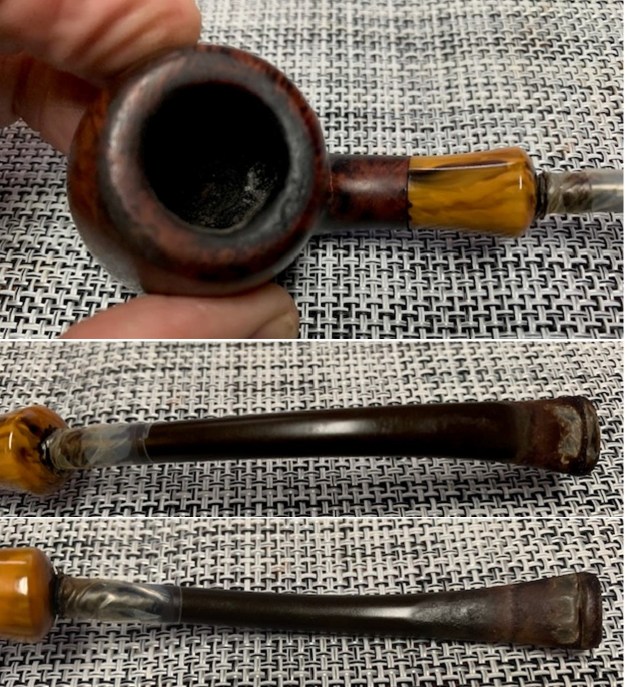
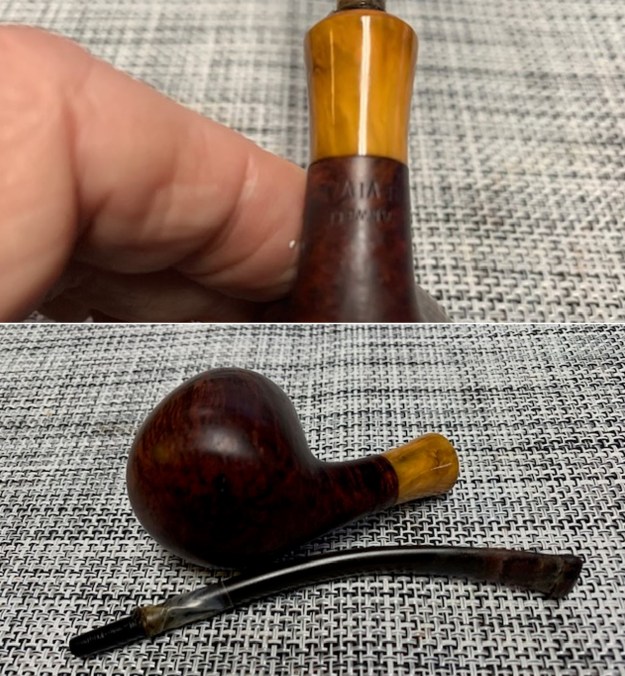
The pipe appeared to be very dirty in the photos that were included. He also circled the crack that was on the top of the shank at the bowl shank joint. The rim top was dirty and worn with some knock out marks on the top edge. The finish was grimy and tired looking. The inner edge of the bowl showed some damage and darkening around the bowl. The stem was wrapped with scotch tape around the end that fit in the shank. I speaking with Mike he stated that it was loose in the shank extension so he had wrapped it to give the stem more of a fit in shank. It was worn out and sticky but it had done the job keeping the stem from falling out of the bowl. After viewing the photos and talking with Mike about the pipe I asked him to drop it by the house so I could work on it. I took photos of the pipe once it was dropped off before I worked on it. My evaluation of the pipe confirmed all of the things that I noted above in my communication with Mike about his pipe. There was one other issue that became visible when it was here. The shank extension was loose in the shank. The glue that had held it in place had broken loose and it turned freely in the shank. It is a uniquely shaped pipe that I really like the looks of and I think that once it is cleaned up it will be a real beauty. I took photos of the bowl and rim top as well as the stem. The rim top shows the thick lava coat on the top and the inner edge of the bowl. It is heavier on the back side than the front. You can also see the tape around the stem diameter to attempt to tighten the fit in the shank extension. You can see the oxidation around the stem sides and the deep tooth marks and chatter on both sides ahead of the button.I took a photo of the stamping on the underside of the shank. It reads as noted above. It is clear and readable. The pipe is quite nice with the stem removed. You can see the flow of the design and the look of the parts.I turned to Pipedia and the section on the Stanwell Shape Numbers and Designers to see what I could find (https://pipedia.org/wiki/Stanwell_Shape_Numbers_and_Designers). I found the following information that I quote below:

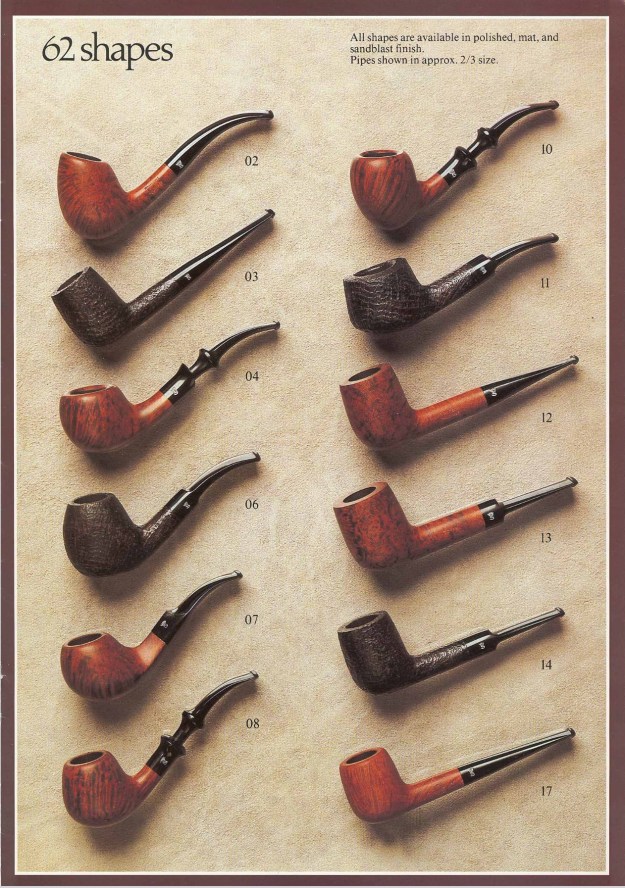
  1. ‘Elegance’; Bent apple with an acrylic mount and a long tapered stem. A reinterpretation of Sixten Ivarsson’s shape 08(b), by Sixten Ivarsson (1980s, see catalogue).

From that I can see that the pipe (105 shape) was a bent apple and was originally designed as a reinterpretation of the Sixten Ivarrson Shape 08b. I have included two pages from the 1980s catalogue below. The first show the 08 and the second page shows the 105. It is called an Elegance on that page rather than a Revival but it is a beauty. I started my work on this pipe by reaming the bowl. I started with a PipNet reamer to clean out the cake in the bowl. I cleaned up the remnants of the cake with a Savinelli Fitsall Pipe Knife. I finished by sanding the walls of the bowl with 220 grit sandpaper wrapped around a piece of dowel to smooth out the interior of the bowl. I cleaned out the internals of the bowl, shank extension and the airway in the stem with alcohol, cotton swabs and pipe cleaners until they were clean. I unwrapped the tape from the stem in order to clean and restore it. I scrubbed the exterior of the bowl with undiluted Murphy’s Oil Soap and a tooth brush. I worked on the bowl and rim top as well as the inner and outer edges of the bowl. It cleaned up really well. I rinsed it with warm water to remove the soap and the grime from the briar. I dried it off with a cotton towel. I took photos of the bowl at this point in the process. With the pipe cleaned up it was time to re-glue the shank extension to the end of the shank. I used some Weld Bond white all-purpose glue to reattach the extension to the shank end. I spread the glue around the tenon on the extension and pushed it in place. I adjusted the fit around the shank until it all aligned. I set it aside to cure. At this point in the process it was time to deal with the crack in the shank at the shank/bowl union. I used a small pinpoint to mark the ends of the crack on both sides of the shank. I drilled a hole in the small mark on each side of the crack end using a microdrill bit.I filled in the crack and the two drill holes in the shank sides with clear CA glue. I spread it into the crack and the holes with a dental spatula. Once it had cured I sanded the repairs smooth with 220 grit sandpaper and followed it up with micromesh as seen in the next photos.I polished the briar with micromesh sanding pads – dry sanding with 1500-12000 grit sanding pads. I wiped the bowl down after each sanding pad with a damp cloth to remove the sanding debris. The bowl began to take on a rich glow. I rubbed down the bowl and shank with Before & After Restoration Balm. It is a paste/balm that is rubbed into the surface of the briar. The product works to deep clean the finish, enliven and protect the briar. I worked it into the briar with my finger tips. I let it sit for 10 minutes then wiped it off with a soft cloth then buffed it with a cotton cloth. The briar really began to have a deep shine in the briar and the grain shines through. The photos I took of the bowl at this point mark the progress in the restoration. It is a gorgeous pipe.  I set the bowl aside and turned to the stem. It was in rough condition with the gummy tape on the end fitting into the shank and deep tooth marks. I painted the surface of the stem with the flame of a Bic lighter to try and lift them. I lifted them but they were still distinctly present. I filled in the marks with Black CA glue and set it aside to cure. Once cured I flattened the repair with a file and then followed that up with a piece of 220 grit sandpaper and started the polishing with 600 grit wet dry sandpaper. It looked much better. I built up the end of the stem with clear acrylic fingernail polish. I spread it around the stem with a dental spatula and set it aside to cure. Once it hardened I polished it with micromesh.I polished the stem with micromesh sanding pads – 1500-12000 grit sanding pads and water to wet sand the stem. I wiped it down after each sanding pad with Obsidian Oil on a cotton rag after each sanding pads. I know that many say Obsidian Oil does nothing for acrylic stems, but I find it does two things – first it gives some protection to the stem from buildup and second it give the sanding pads bite in the polishing process. Fine and Extra Fine stem polish as it seems to really remove the fine scratches in the vulcanite. I rub the Fine Polish on the stem and wipe it off with a paper towel and then repeat the process with the Extra Fine polish. I finish the polishing of the stem down with a final coat of Obsidian Oil and set the stem aside to let the oil absorb. This process gives the stem a shine and also a bit of protection.The final steps in my process involve using the buffer. I buffed the bowl and stem with Blue Diamond to polish out the light scratches in the briar and the vulcanite. I gave the bowl and the stem multiple coats of carnauba wax. I have found that I can get a deeper shine if I follow up the wax buff with a buff with a clean buffing pad. It works to raise the shine and then I hand buff with a microfiber cloth to deepen the shine. It is always fun for me to see what the polished bowl looks like with the polished stem. It really is a nice pipe. The smooth finish around the bowl sides and shank looks great. The oval vulcanite taper stem works well with the pipe. The Stanwell Revival 105 Bent Apple feels great in my hand. It is a well-balanced pipe. Have a look at it with the photos below. The dimensions are Length: 6 ½ inches, Height: 1 ½ inches, Outside diameter of the bowl: 1 ¼ inches, Chamber diameter: ¾ of an inch. The weight of the pipe is 1.31 ounces/38 grams. It is a beautiful pipe that I will soon be giving back to Mike who dropped it off for restoration. I am sure he will enjoy it and it will give many more years of service to him.

As always I encourage your questions and comments as you read the blog. Thanks to each of you who are reading this blog. Remember we are not pipe owners; we are pipe men and women who hold our pipes in trust until they pass on into the trust of those who follow us.

New Life for a BBB 100 Years – Made in England 560 Bent Bulldog


Blog by Steve Laug

The next pipe on the table is a nice looking smooth Bent Bulldog with a vulcanite saddle stem. We picked it up on 11/10/2022 from a seller in Copenhagen, Denmark. The stamping on the left side of the shank is readable. It read BBB in a diamond [over] 100 Years. On the right side the stamping reads Made  In England [over] the shape number 560. The black vulcanite saddle stem stamped with a faint BBB in a diamond logo the left side. The pipe has a medium reddish brown stained finish that shows the grain on the bowl sides and shank. It is light weight and comfortable pipe to hold. Jeff sent me the following photos of the pipe to show the condition it was in before he worked on it. This is what I saw when I looked over the pipe.

  1. The smooth finish had grime ground into briar and hand oils around the sides. The stain is dull and the grain patterns though visible under the grime are obscured around the bowl sides and shank.
  2. The rim top was very dirty with a heavy lava coat on it. It is heavier on the back side. The inner edge of the bowl and top show potential damage, though it is hard to see the extent through the thick build up of cake that has overflown the rim top.
  3. There was a thick cake in the bowl. The bowl itself was very dark and dirty. Once the bowl was cleaned up we could confirm the condition of the bowl walls.
  4. The vulcanite saddle stem was filthy, oxidized, calcified and had tooth marks and chatter on both sides and on the button surface.
  5. There is a BBB in a diamond logo on the left side of the stem. It is white and I am uncertain if it is a stamp or if it is a decal of some sort. The common BBB brass inset is not present on this pipe.

To summarize what I saw – this BBB 100 Year Bent Bulldog is a well-made pipe. The bowl and stem are very dirty which says to me that the pipe was once again someone’s favourite pipe. The look and feel of the pipe in the hand is great. It should clean up very well. Here are photos of the pipe taken before Jeff started the clean up.  Jeff took close up photos so that I could have a clearer picture of the condition of the bowl, rim edges and top. The rim top photos confirm my assessment above. The cake in the bowl is thick – covering the walls of the bowl. The rim top has thick lava coat overflowing and covering the inner edge. It is heavier toward the back of the bowl. It is hard to know the condition of the inner edge in this condition. There appeared to be some damage on the top and inner edge toward the back but I would not know for sure until it was reamed. This is what I look for when assessing a pipe. I look forward to viewing it in person after the clean up work.The vulcanite taper stem is dirty, oxidized and calcified. There are light tooth marks and chatter on both sides ahead of the button and on the button surface itself. Once again instead of telling you what I see in the next photos of the sides of the bowl and the heel I want to hear from you. Tell me what you see? What does the finish look like to you? Are there any visible problems or issues that stand out to you? Are there cracks or scratches in smooth finish of the bowl? Are there visible flaws or fissures in the briar? What does the finish look like? Is there a pattern to it? Any visible issues on the heel of the bowl? These questions should help you to see what I am looking for when I see these photos. He took photos of the stamping on the left and right side of the shank. It is stamped as noted above. The vulcanite stem shows a BBB diamond logo stamp on the top left side of the diamond shank. What stands out for you in the photos of the stamping? What do you look for in the stamping? It is dirty but what do you see underneath the grime on the surface of the briar? Before I started my work on the pipe I turned to a blog I posted on the history of the BBB brand (https://rebornpipes.wordpress.com/wp-admin/post.php?post=2204&action=edit). It is a translated piece on the history that I have found quite helpful. It gives a good survey or overview of the brand from its inception to the end as an independent brand.

I also remembered that a few years ago Briar Books Press reprinted a small booklet entitled 100 Years in the Service of Smokers. The subtitle on the bottom of the cover read Adolph Frankau of London Celebrate their Centenary. At the top is the classic BBB in a Diamond logo with a banner below it with the dates 1847 on the left of the Diamond and 1947 on the right of the Diamond. I took it out and gave it a read to get a sense of the 100 years of history. I did a screen capture of the cover and have included it below.
Quoting from page 5 of the book in a section entitled: Through Five Reigns to the Present Day

And so throughout the five reigns the house of Aldoph Frankau ministered faithfully and famously to the needs of smokers in every land and clime right up until the outbreak of World War II. Through the vicissitudes  of this period, and absence of staff on war service, the Company was ably steered by Mr. Fryd a Director and the Company’s Secretary, Mr. Howles, now also a director.

On the last page of the booklet there is a poster for the BBB 1847-1947 Centenary Pipe. The pipe in the poster has a similar stamping to the one I am working on and the logo on the side of the stem is the same white decal style logo – BBB in a Diamond.

Armed with that information it appears that the pipe I am working on is one that could have been issued in 1947 as a Centenary Pipe or perhaps it is a later copy of that period pipe. My guess is the former. It has the look of an older BBB rather than a Cadogan era pipe. Now it was time to work on it.

I am sure many of you will shake your head and ask maybe even out loud, “Why is he including this again?” However, please remember that the point of these blogs is not to wow you with the work or make you shake your heads but I want you to know the details of the work we do so you can do your own. Back in 2020 Jeff wrote a blog about his cleaning process. I am including a link to that now so you can see what I mean about his process. Do not skip it! Give it a read (https://rebornpipes.com/2020/01/20/got-a-filthy-estate-pipe-that-you-need-to-clean/). Here is the introduction to that blog and it is very true even to this day.

Several have asked about Jeff’s cleaning regimen as I generally summarize it in the blogs that I post rather than give a detailed procedure. I have had the question asked enough that I asked Jeff to put together this blog so that you can get a clear picture of the process he uses. Like everything else in our hobby, people have different methods they swear by. Some may question the method and that is fine. But it works very well for us and has for many years. Some of his steps may surprise you but I know that when I get the pipes from him for my part of the restoration they are impeccably clean and sanitized. I have come to appreciate the thoroughness of the process he has developed because I really like working on clean pipe!

For the benefit of some of you who may be unfamiliar with some of the products he uses I have included photos of three of the items that Jeff mentions in his list. This will make it easier for recognition. These three are definitely North American Products so you will need to find suitable replacements or order these directly on Amazon. The makeup pads are fairly universal as we were able to pick some up in India when we were with Paresh and his family.

In the blog itself he breaks his process down into two parts – cleaning the stem and cleaning the bowl. Each one has a large number of steps that he methodically does every time. I know because I have watched him do the work and I have seen the pipes after his work on them. He followed this process step by step and when the pipe got to me it was spotlessly clean and ready for my work. The inside of the stem, shank and bowl were clean and to me that is an amazing gift as it means that my work on this end is with a clean pipe! I cannot tell you how much difference that makes for my work.

  1. The finish is clean and the oils and grime in the finish shows the beautiful grain around the sides. The medium brown stain highlights the grain.
  2. The rim top was clean and amazingly there was no edge damage. There was only some darkening around the inner edge of the bowl.
  3. The cake in the bowl has been removed and the bowl is very clean. The walls of the bowl are smooth and appear to be undamaged and show no checking or burn damage.
  4. The vulcanite saddle stem looks better and there is only light tooth chatter on both sides visible.
  5. The white painted/decal BBB logo on the top left side of the diamond stem is gone leaving only a faint ghost of the original decal that is readable in bright light.

Hopefully the steps above show you both what I look for when I go over the pipe when I bring it to the work table and also what I see when I look at the pipe in my hands. They also clearly spell out a restoration plan in short form. My work is clear and addressing it will be the next steps. I took photos of the whole pipe to give you a picture of what I see when I have it on the table. This is important to me in that it also shows that there was no damage done during the clean up work or the transit of the pipe from Idaho to here in Vancouver. I carefully went over the bowl and rim top to get a sense of what is happening there. In this case once the rim top and edges were cleaned the inner edge had some darkening all the way around. I also went over the stem carefully. The fit of the stem is snug and the transitions are smooth. There was light tooth chatter on the surface of the stem on both sides. The vulcanite stem surface was clean and looked better. I took photos of the rim top and stem sides to show as best as I can what I see when I look at them. As is my habit check to make sure that the clean up work did not damage the stamping on the shank sides in any way. They are in excellent condition and are very clear and readable. I love just looking at the lay of the pipe and the proportion of the hand made pipes. I took the pipe apart to get a sense of what was in the mind of the pipe maker when he crafted the pipe. The photo shows its beauty in flow and shape. You can see the faint ghost of the BBB Diamond logo on the left side of the saddle stem. I started working on this pipe by turning to the bowl. I chose to deal with the damage on the inner edge and top of the rim. I used a piece of 220 grit sandpaper to remove the darkening on the inner edge and the damage on the top. I gave the rim a slight bevel to minimize the damage. It took a little work but I was able to remove the damage. It looks much better after I worked it over.I polished the briar with micromesh sanding pads. I choose to dry sand the briar rather than wet sand it. Again it is a matter of personal preference. I prefer to use the pads dry and find they work very well on the briar. I sand with each pad (9 in total) and group them by threes for ease of reference. I wipe the bowl down after each pad with a damp cloth to remove the sanding debris and check the briar. I love seeing the developing shine on the briar as I move through the pads which is why I include so many photos of this step. I rubbed down the bowl and shank with Before & After Restoration Balm. It is a paste/balm that is rubbed into the surface of the briar. The product works to deep clean the finish, enliven and protect the briar. I worked it into the briar with my finger tips and into the twin rings with a shoe brush. I let it sit for 10 minutes then wiped it off with a soft cloth then buffed it with a cotton cloth. The briar really began to have a deep shine in the briar and the grain shines through. The photos I took of the bowl at this point mark the progress in the restoration. It is a gorgeous pipe.   I set the bowl aside and turned to the stem. It was in great condition and the majority of the tooth marks and chatter were shallow enough that most would disappear by polishing with micromesh and buffing. There was one deep mark against the button edge on the top of the stem. I filled it in with clear CA glue and set it aside to cure. Once cured I flattened the repair with 220 grit sandpaper and started the polishing with 600 grit wet dry sandpaper. It looked much better.I polished the stem with micromesh sanding pads – 1500-12000 grit sanding pads and water to wet sand the stem. I wiped it down after each sanding pad with Obsidian Oil on a cotton rag after each sanding pads. I know that many say Obsidian Oil does nothing for acrylic stems, but I find it does two things – first it gives some protection to the stem from buildup and second it gives the sanding pads bite in the polishing process. After finishing with the micromesh pads I rub the stem down with Before & After Fine and Extra Fine stem polish as it seems to really remove the fine scratches in the vulcanite. I rub the Fine Polish on the stem and wipe it off with a paper towel and then repeat the process with the Extra Fine polish. I finish the polishing of the stem down with a final coat of Obsidian Oil and set the stem aside to let the oil absorb. This process gives the stem a shine and also a bit of protection.  The final steps in my process involve using the buffer. I buffed the bowl and stem with Blue Diamond to polish out the light scratches in the briar and the vulcanite. I gave the bowl and the stem multiple coats of carnauba wax. I have found that I can get a deeper shine if I follow up the wax buff with a buff with a clean buffing pad. It works to raise the shine and then I hand buff with a microfiber cloth to deepen the shine. It is always fun for me to see what the polished bowl looks like with the polished stem. It really is a nice pipe. The smooth finish around the bowl sides and shank looks great. The oval vulcanite taper stem works well with the pipe. The BBB 100 Year Bent Bulldog 560 feels great in my hand. It is a well balanced pipe. Have a look at it with the photos below. The dimensions are Length: 5 ½ inches, Height: 1 ½ inches, Outside diameter of the bowl: 1 ¼ inches, Chamber diameter: ¾ of an inch. The weight of the pipe is 1.34 ounces/38 grams. It is a beautiful pipe that I will soon be adding to the rebornpipes store in the British Pipemakers Section. If you would like to add it to your collection let me know. It should be a great smoking pipe.

As always I encourage your questions and comments as you read the blog. Thanks to each of you who are reading this blog. Remember we are not pipe owners; we are pipe men and women who hold our pipes in trust until they pass on into the trust of those who follow us.