Tag Archives: Bowls – refinishing

Refurbed Piece of pipe smoking history – A Brittish Buttner Billiard


Blog by Steve Laug

I picked this pipe up on Ebay awhile back solely for my historical interest in this kind of pipe. I am drawn to creative pipe manufacturers and the search for a drier and cooler smoke. It is that interest that attracted me to the gadgetry of the British Buttner pipes. This is the second one that I have purchased on Ebay. The first one is older (patent is earlier)and has a yellow Bakelite stem and is a pot in terms of shape. I have also collected a Bakelite canister that holds an extra clay insert bowl. I saw this one and added it to the collection. It looks like a briar billiard but is not. It is a Bakelite bowl and Vulcanite stem. The tenon is long and extends to the air hole in the bowl. There is a clay insert that sits in the bottom of the Bakelite bowl. This one has a few chips out of it but is still workable. The rim unscrews and holds clay bowl (much like a gourd calabash. It is mounted on the rim and screws into the bowl. I cleaned the inside of all three parts and cleaned the stem and shank. I have polished it with wax and since have smoked it several times. It is a very different smoke – very similar to a calabash smoke; very cool and dry.

Here are some pictures of it taken apart before cleaning:

ImageImage

Here it is cleaned and polished.

ImageImage

Here are some pictures of the older British Buttner


Refurbed Breezewood Acorn


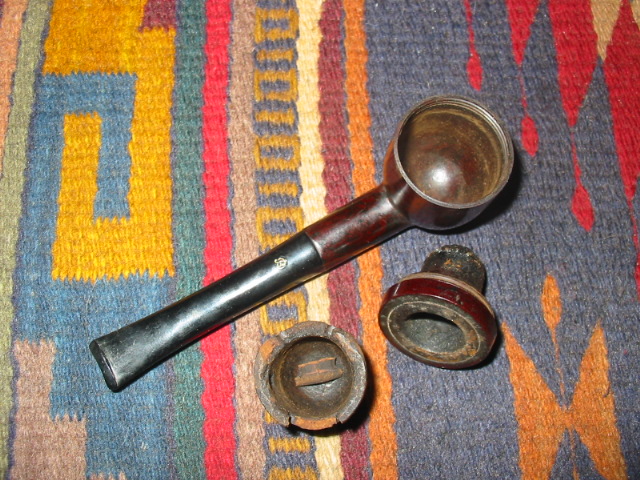
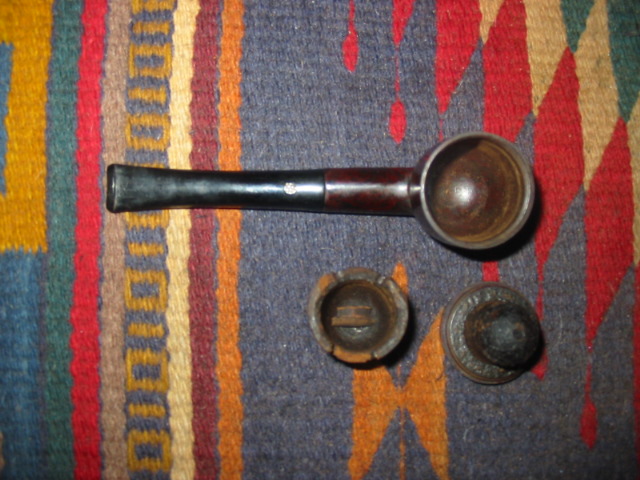
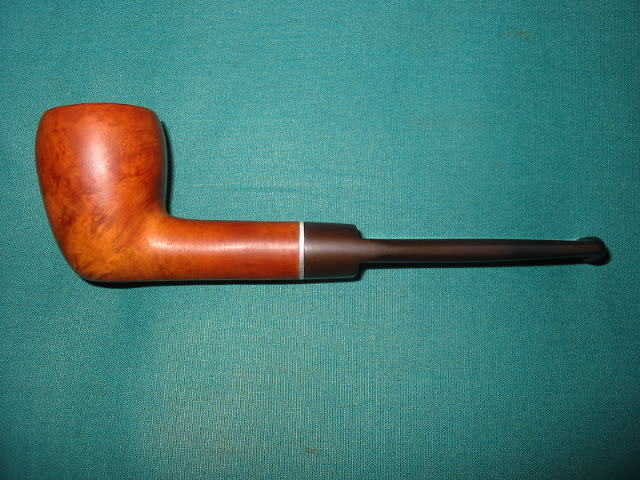
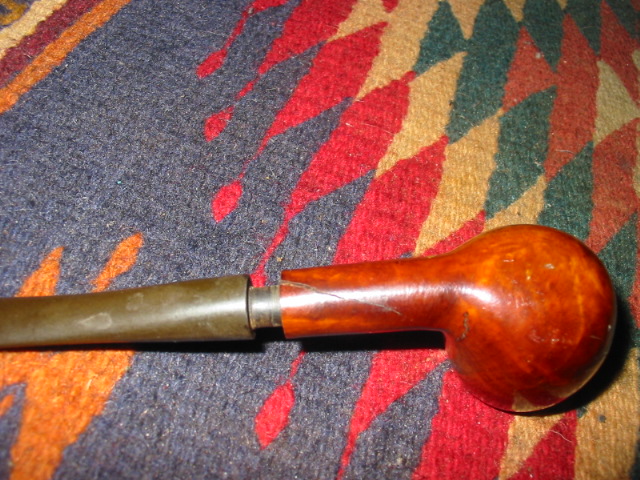
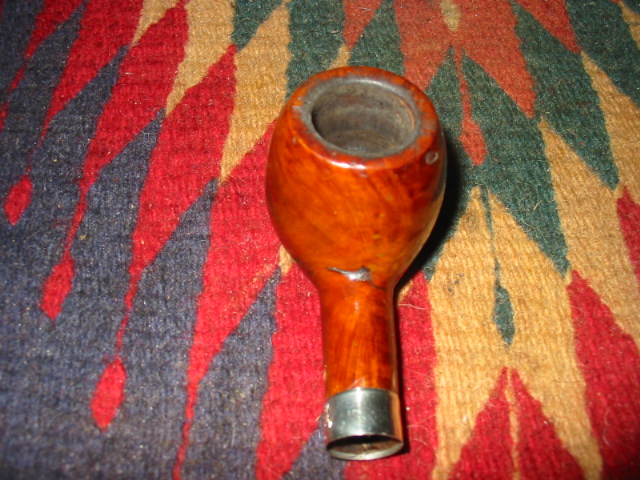
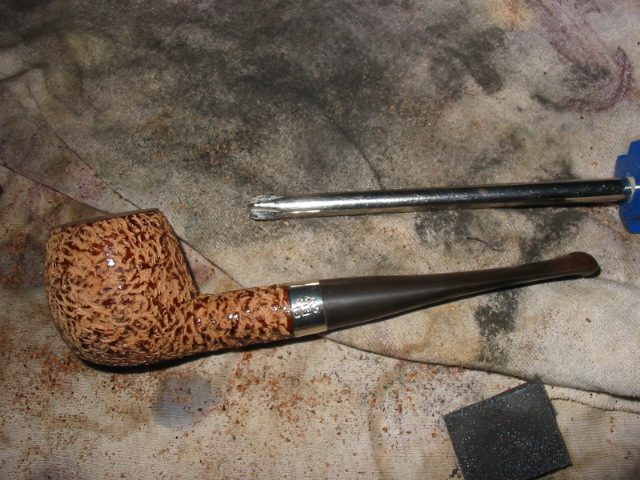
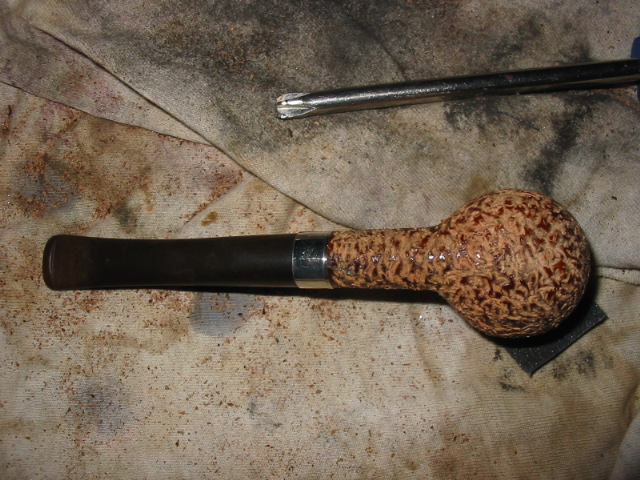
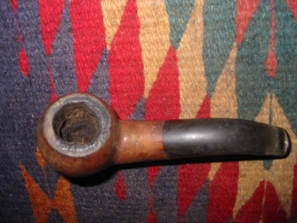
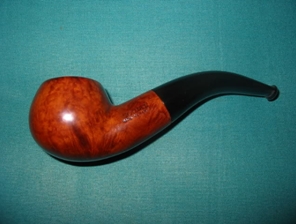
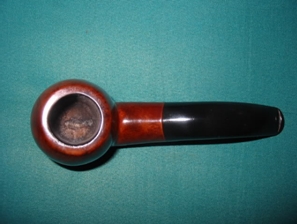
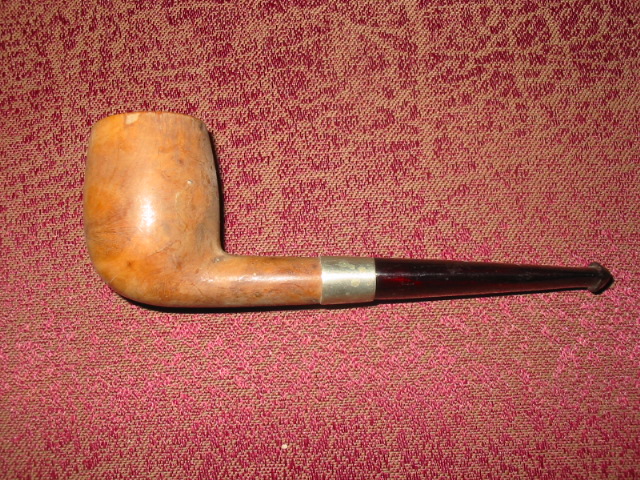
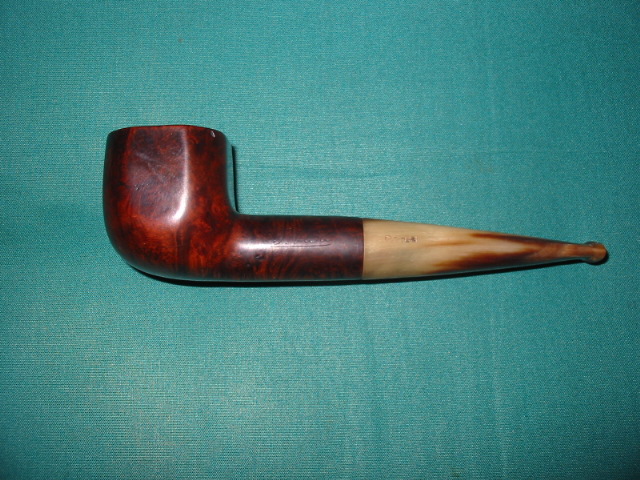
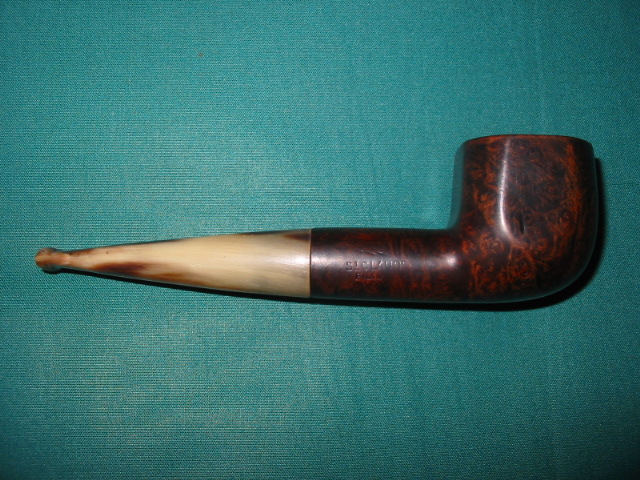
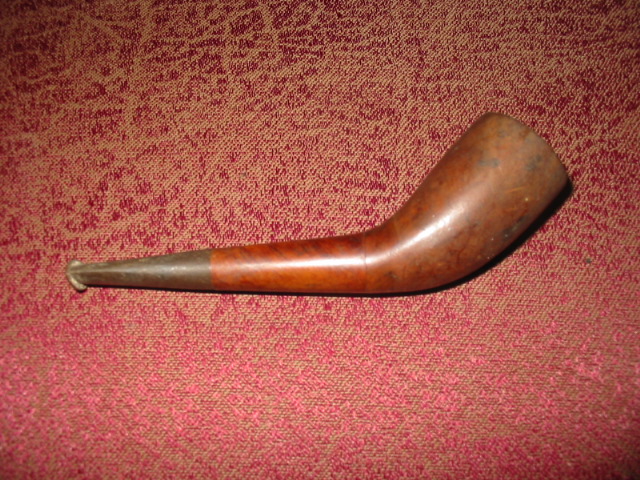
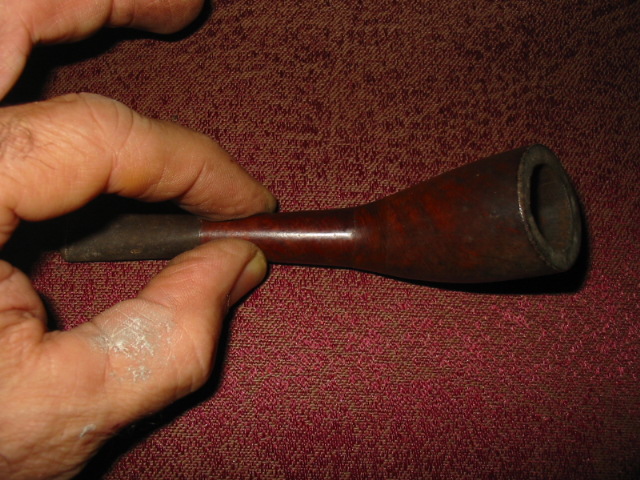
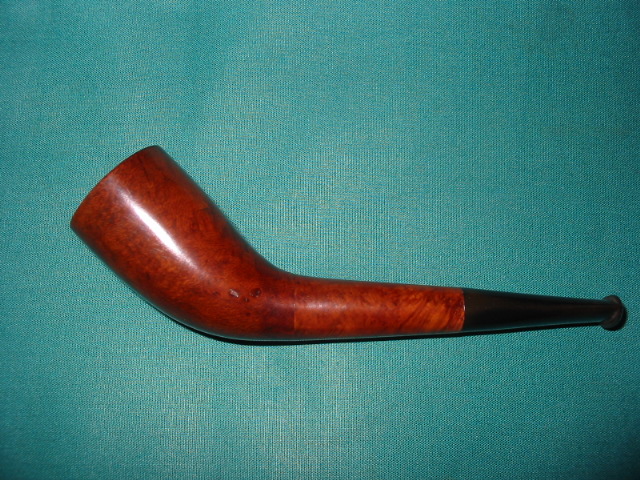
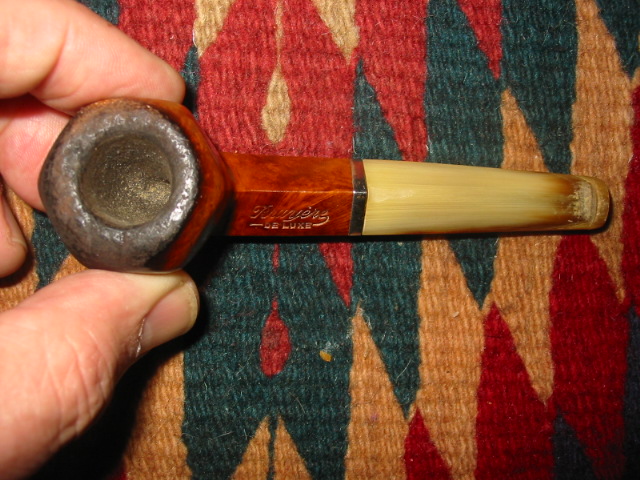
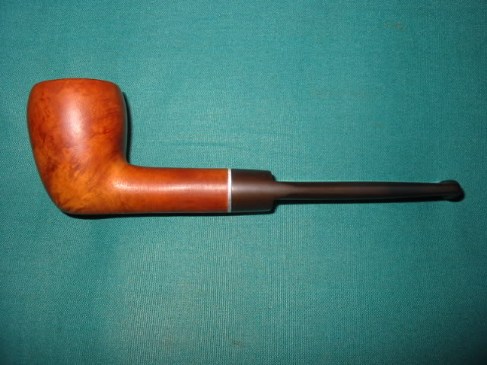
I picked this old timer up in the ebay purchase that included the Bertrams author. It was almost black it was so dirty. It is incredibly light weight. Once I got the grime off I could see a wee bit of the stamping left and it read Breezewood. I reamed and cleaned the inside. The stem is a screw mount like the old Kaywoodies. It has been clipped of stinger contraption but it is a good open draw. I cleaned the stem and used the micromesh sanding disks on it. The bowl was soaked in an alcohol bath to remove the finish and grime and then sanded with 220, 400, 600 sand paper and then micromesh 1800, 2400, and 4000 grit pads. Here are the before and after shots. Below the pictures I have posted a write up of the history of Breezewood pipes by the late Mike Leverette (a friend and historian of things pipe).

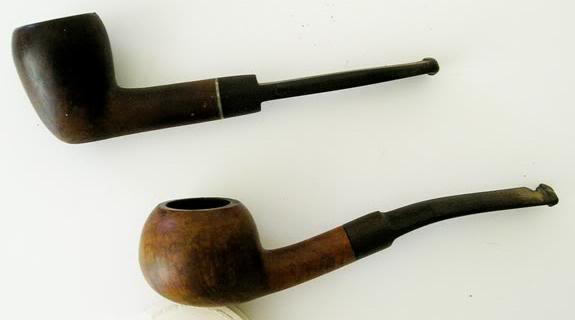
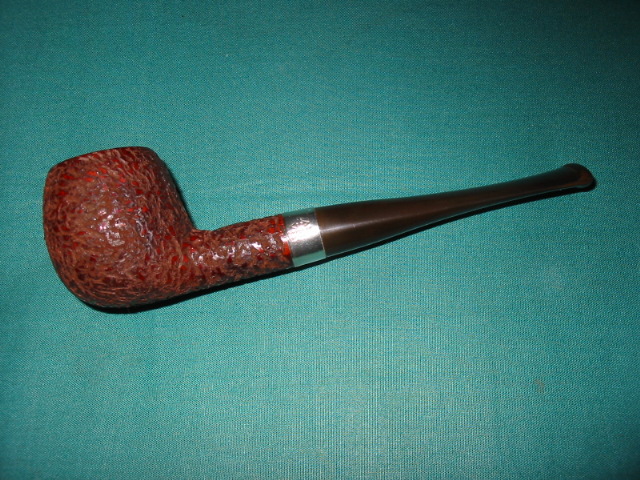
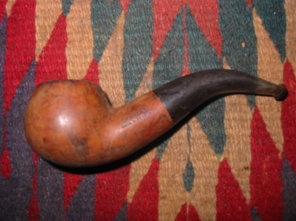
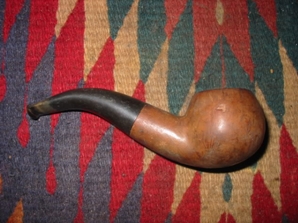
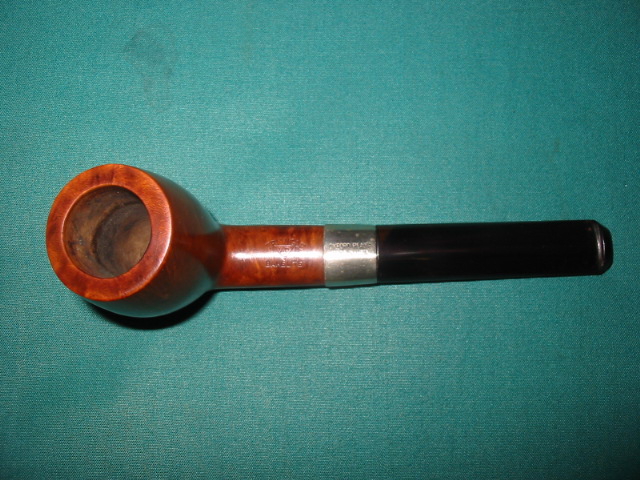
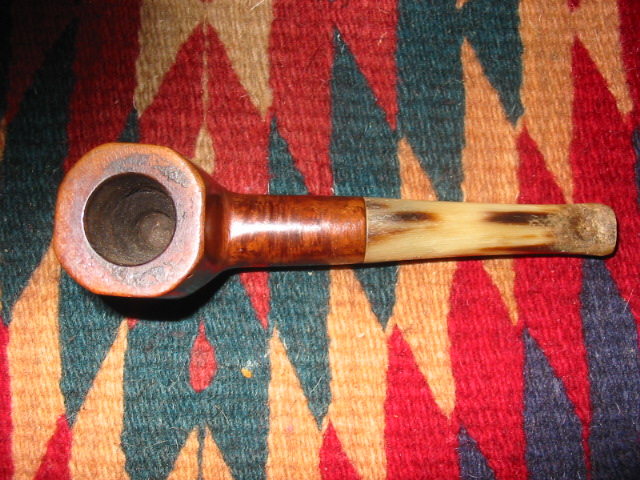
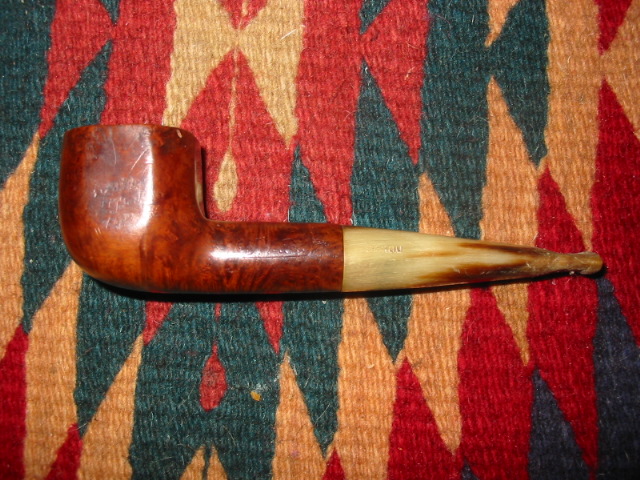
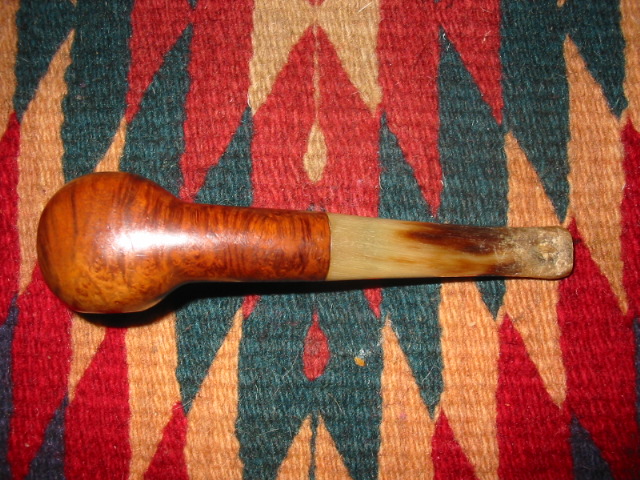
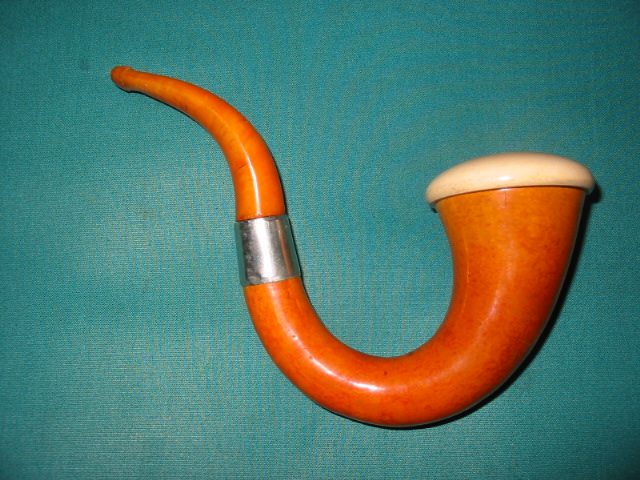
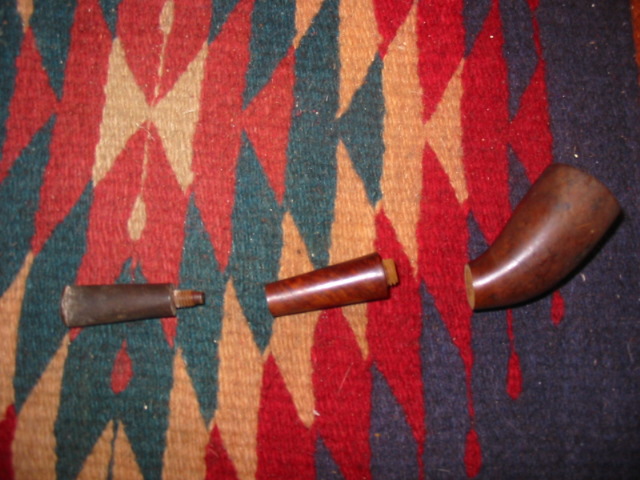
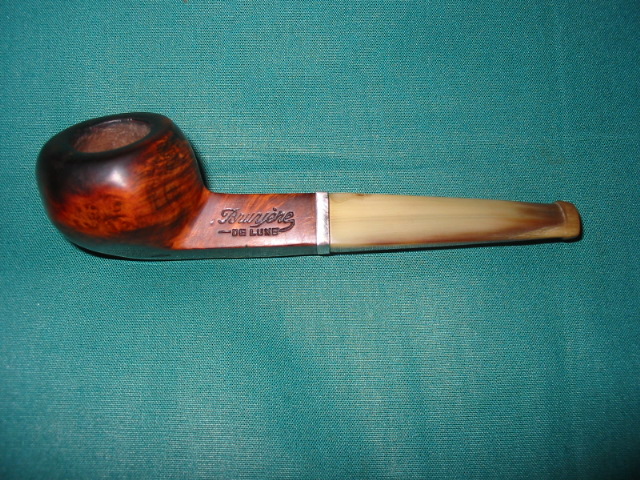
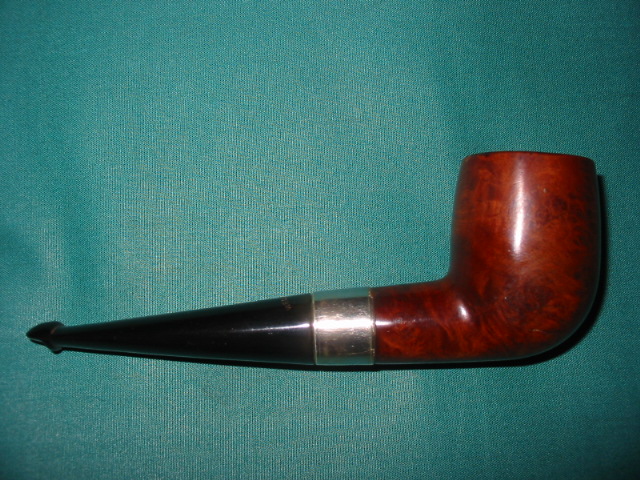
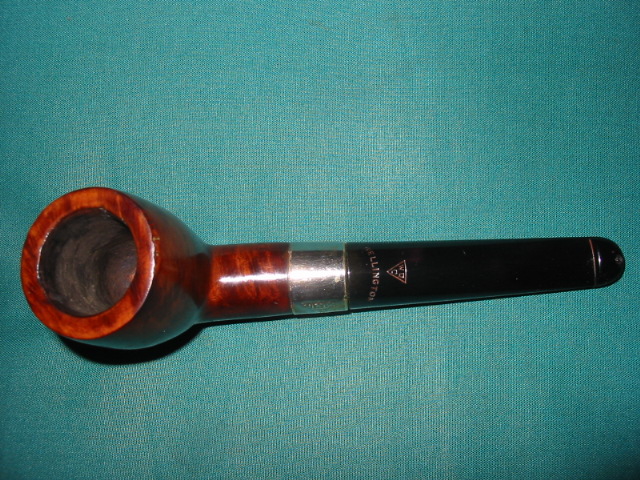
The pipe is pictured in the top photo below of the two pipes.

Image

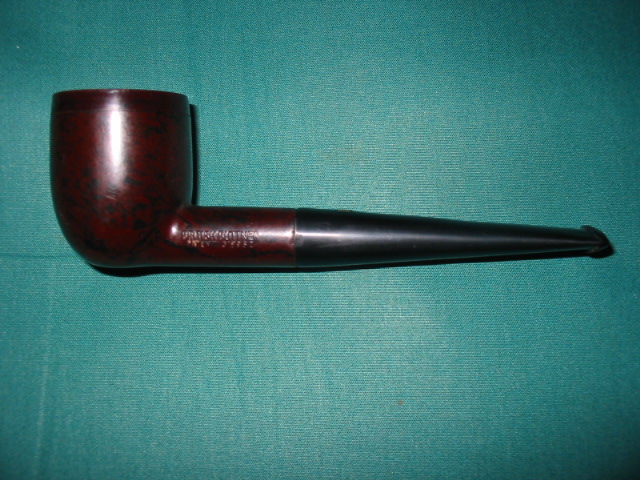
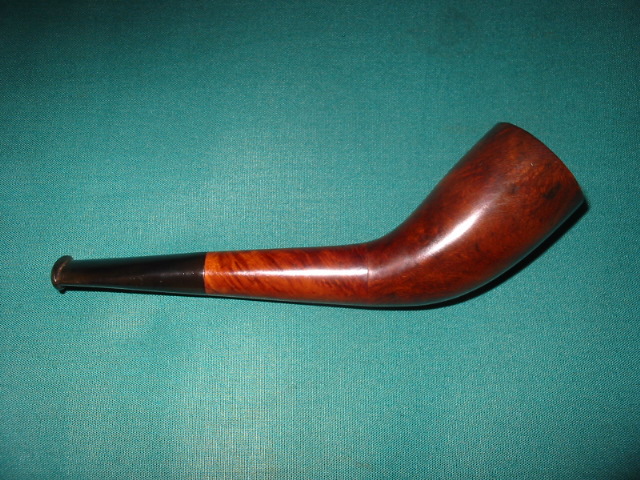
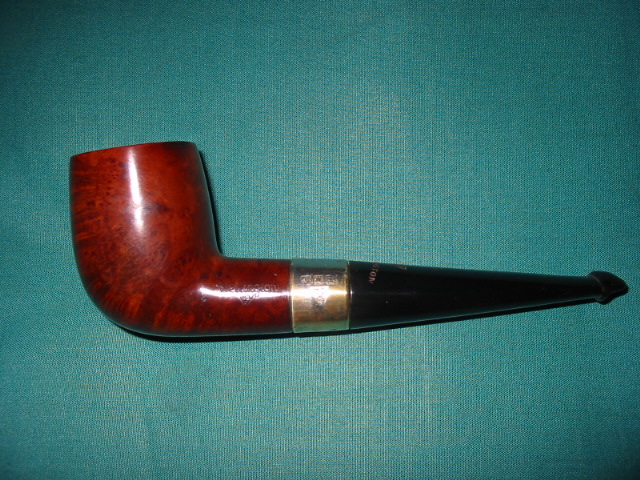
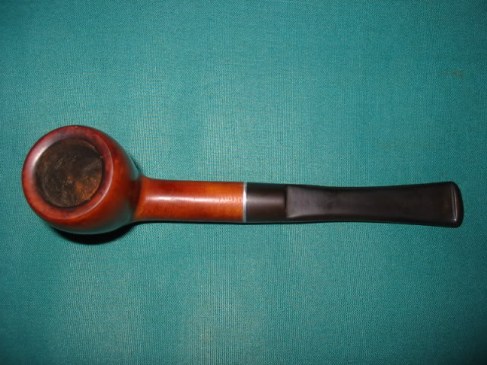
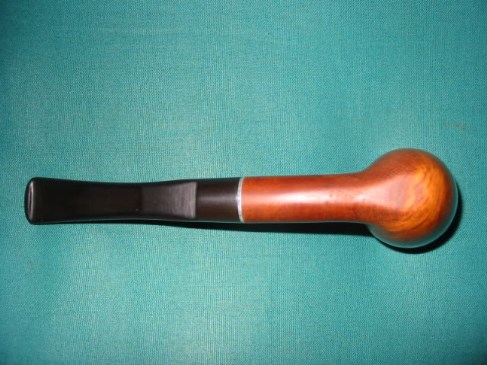
Here is a series of photos of the refurbished pipe.

Image

ImageImageImage

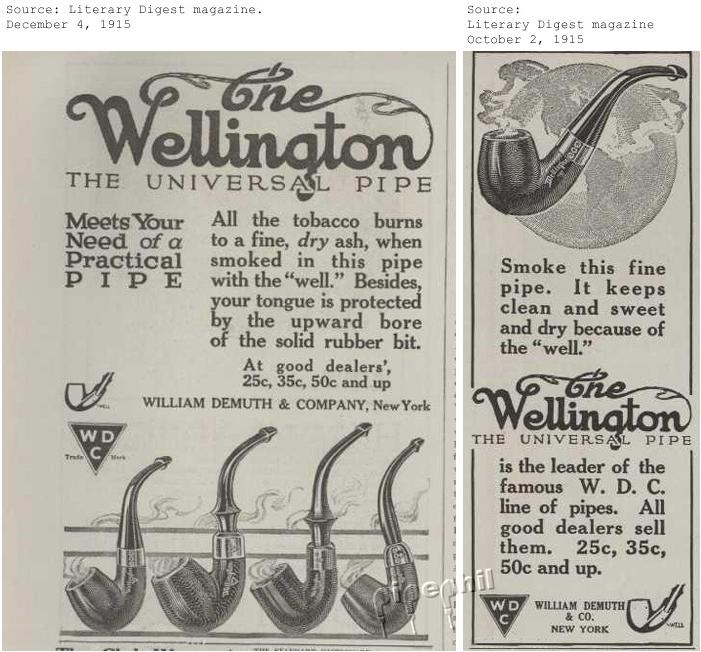
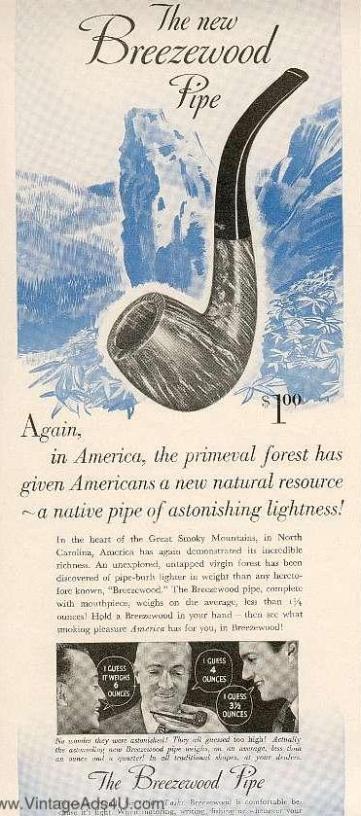
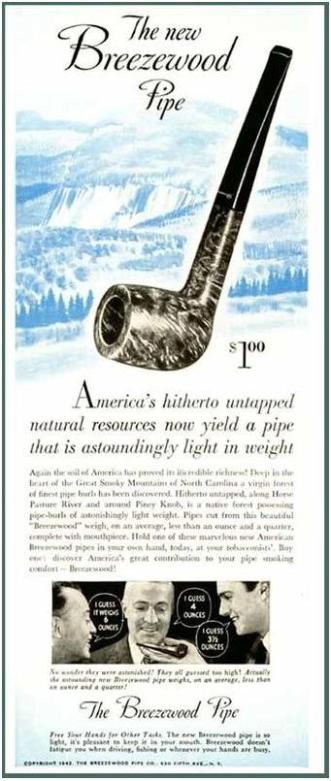
Here are some informational ads on Breezewood pipes

ImageImage

I wanted to include this brief article by Mike Leverette as it gives background history that is not commonly known or available regarding these early alternatives to briar that came out during the war years.

“There were at least three pipe brands made from the Mountain Laurel; Trapwell, Breezewood and Custombilt. Trapwell pipes were made by D & P Pipe Works beginning on or before 1943. D & P Pipe Works, owned by D. P. Levitas (Ross 2005), began making pipes in 1938 (Wilczak and Colwell 1997) probably in New York City but relocated to Sparta, Alleghany County, North Carolina in 1943 (Sparta/Alleghany CoC 2006), in order to be closer to the huge population of Mountain Laurel in the area. Later, this company changed their name to Sparta Pipe Works and still later to Sparta Industries. I have one Trapwell World’s Best Briar pipe in my collection, a small billiard, and here again; it is a great little smoker. World’s Best Briar was their marketing ploy for Mountain Laurel. Trapwell’s ‘trap’ is a highly complicated condensing system when compared to most regular metal condensers. After the war, Trapwell pipes were made from regular briar wood, or “imported briar” until their demise.

According to a 1942 Life magazine advertisement, Breezewood pipes were made by The Breezewood Pipe Company, located at 630 Fifth Avenue, New York City, though Wilczak and Colwell state the Breezewood pipes were made by Kaufmann Brothers & Bondy (KB&B) beginning in 1941 (Wilczak and Colwell 1997). The Breezewood Pipe Company may have been a subsidiary of KB&B. To quote the 1942 Life magazine advertisement; “There, deep in the Great Smoky Mountains, they found it – found an uncharted virgin forest of burls, great old burls that had been growing there uncounted years. And from these old burls, pipes of astonishing lightness of weight are made – their name: Breezewood.”

At the present time, this is all I have been able to find on the history of Breezewood pipes. Here again, the one Breezewood pipe, a small billiard, I have in my collection is a great little smoker. I am not overly fond of metal condensers and this Breezewood pipe has a simple tube condenser similar to Dunhill’s “inner tube”.


Another Rustication – another finish with the new tool


Blog by Steve Laug

I have been looking through my box of pipes for refurbishing for a second one to rusticate with the new tool. I had several laid aside as potential candidates for this treatment but had not gotten around to doing it yet. Then this week I received a box of pipes and pipe parts from a purchase on EBay. In the box was this little apple shaped pipe. It had a large split in the shank that is visible in the photo below. The bowl was also extremely caked and needed to be reamed and cleaned. I always do that field dressing before I go to work on the deep clean and refinishing. Before I could do anything with the finish on this pipe I would need to repair the cracked shank. I cleaned the surface of the shank and used a dental pick to remove the grit that had built up in the crack. I wanted the surface to be clean so that the glue would adhere correctly and bind the two sides of the crack cleanly together. I then filled the split with superglue and squeezed the crack together with a pair of pliers. After the glue dried I banded the shank with a pressure fit nickel band. I reworked the tenon so that the stem fit correctly.

Image

When I had repaired the pipe I examined the bowl to see what choices I might have regarding refinishing. The shape is one of my favourites so I would have like to just do a clean and re-stain of the bowl. However, the closer I looked the more I realized that my only option, if I were to hide the fills and crack well, was a rustication. So my choice was made and I decided to rusticate it with the new tool I had crafted from the Philips screwdriver. I also decided to give it a bit of a different rusticated look than the previous one I have posted here. I wanted to see if the tool would give a bit of versatility in the rustication pattern that it created. With that mission in mind I attacked the bowl seen in the pictures below.

ImageImageImageImage

I wiped down the outside of the bowl with some acetone to clean off the grime and give me a fresh surface to work on. I spread out a cloth on my work table to collect wood chunks that came out in the rustication. I have found that it is easier to clean up after my work this way as I merely have to fold up the cloth and shake it out when I am finished. From the last time I used the tool I had learned that the handle was hard on the palm of my hand so I also wrapped it with a thick cotton cloth to act as a pad. This additional padding would add a cushion of comfort for me as I pressed and twisted the shaft into the briar of the bowl. The picture below shows the beginning of the process of rustication. I generally start with the side of the bowl while holding the bowl in my hand and pressing the shaft of the tool into the wood and twisting it and moving across the surface of the wood. I often move from the side of the bowl to the shank. In this case I did a portion of the bowl and then moved to the shank and did the rustication all the way around the shank and on the bottom of the bowl before moving on to finish the bowl.

Image

This rustication pattern is slightly different than the previous one. I was aiming to experiment with the versatility and it was working well in my opinion. I decided to go over the surface of the bowl only one time before checking and roughing up sections that needed further roughening. I wanted the finish to have a softer look on this bowl than the first one I did. I also wanted to leave some high spots that could be polished to give a contrast finish rather than a matte finish. I think the feature I like the most in the new tool is the ability to navigate the tip very close to the band without damaging it. It is very easy to control in tight spaces on the pipe. The four pictures below show the pipe after the rustication is completed. Above and to the right in each picture is the blade of the tool that I use in the process of rustication.

ImageImageImageImage

Once the rustication was completed I used some 240, 400, and 600 grit sandpaper to sand the top of the bowl and clean it of stain and dark spots. My goal for the rim was to be able to see the grain patterns once it was stained as it would serve as a contrast to the rough surface of the bowl.

The pipe was ready to be stained. I decided to use a dark brown stain on this one, knowing full well that when I gave it a buff it would lighten considerably. I applied the Fiebings stain with the dauber that came with it. I find that the wool ball on the end of the dauber is thick enough that it carries the stain into the nooks and crannies of the rusticated surface. When I stain a pipe bowl, I always start on the bottom of the bowl as the stain will run toward the top. I follow it up the sides with good coverage and finish with a coat on the rim of the pipe as the last thing. It seems to also help keep the stain on the outside of the bowl. I generally stain the shank once the bowl is completed.

When the entirety is stained I light it with a match to flame the stain. The flame burns off the alcohol with a blue flame that sets the stain more deeply in the briar and helps it dry it quickly. The fire is short-lived and there is no concern of setting your bowl on fire. Be sure however to remove the open jar of stain so that you do not inadvertently set that on fire. I then re-stained the pipe a second time following the same pattern, flamed and set it aside while I work on the oxidation on the stem. I let the stained bowl dry for two hours before taking it to the buffer and giving a light buff with Tripoli and White Diamond. I decided to buff this bowl instead of just leaving it rough like the previous one because I was trying to achieve a different look.

I finished the buffing by giving it a light buff with carnauba wax. I am happy with the finished pipe and the look that it has. It is very different from the previous pipe I rusticated with the tool and demonstrates the capacity of the tool to work different finishes.

The final four pictures below show the finished pipe.

ImageImageImageImage

Refurbed Social by Comoy’s


This afternoon late the postie delivered the Social pipe made by Comoy’s that I picked up off Ebay a few weeks ago. I took it apart and went to work. The bowl was pretty caked and broken up inside… cake falling off the walls. The The top was tarred. I reamed and cleaned it. Interestingly this is an old timer. It has the old orific button as I show in one of the before shots of the stem. It has some kind of reservoir between then end of the stepped tenon and the the airway into the bowl. It is below the airway and the tenon is drilled with the airway high to match up.

I put the bowl in an alcohol bath and cleaned it up. The mess came off really well. I then sanded the bowl with 600, 1800, 2400 and 4000 grit and then restained it with a medium brown stain. The Stem was soaking in Oxyclean and when I removed it I cleaned the grime off of it. It was a bit oxidized so that came off no problem. I then buffed the entirety with white diamond and then Carnuba. Here are the before shots:

ImageImageImageImage

You will note there are some pretty deep dents in the side of the bowl. These came out a bit but they remain as character marks. There were some on the underside of the shank as well. They too remain.

After refurbishing:

ImageImageImageImage

Refurbed and old timer – WDC Bakelite


I finished up a pipe that is stamped WDC in a triangle and Bakelite on the shank. The bowl is briar and by the way the stem is put together it is clear that it is an old timer. It has a screw mount stem with a bone tenon and the red Bakelite stem has an orific button.

The bowl was caked and had cob webs! (no kidding). The bowl and shank were cleaned and reamed as usual. The stem had bite marks and needed to be sanded and then finished with micro-mesh pads and finally a trip to the buffer and Tripoli and White Diamond. The bowl was re-stained with cherry and then buffed and polished. The stem was over turned a bit so heated the tenon water and it seemed to expand (?) a bit and loosen so I was able to straighten it out on the shank and it fit perfectly. I wonder if on these old bone tenons that the hot water may actually expand them a bit – not sure how that works but it certainly worked with both of the ones I did today.

Thanks for looking and all of your comments. It made for a great day and it is good to look back and see the work completed today!

Before:

ImageImage

After:

ImageImageImage

Refurbished another horn stemmed pipe


I just finished the second little horn stemmed French pipe that I picked up recently. It is stamped P. Viou which is an old French brand made in St. Claude. It is a 5 inch long pot that is paneled as well. The bowl was in pretty good shape – I reamed and cleaned it. The finish was rough so I removed the varnish and the stain and re-stained it. It came out a bit darker than the original but it really highlights the grain. The rim is beveled in a bit, chamfered nicely.

The stem was a mess. The previous owner obviously gnawed it and clenched it so the horn was dented and chewed with the profile changed. I steamed the dents and lifted them with a damp cloth and hot knife. Most of them came out. I sanded the stem and cleaned up the chewed part. I then restored the profile and filled the remaining spots with super glue and then sanded and buffed. I like the end product.

Here are some before shots:

ImageImage

Image

Here is the refurbished pipe:

ImageImageImageImage

Refurb on a Gourd Calabash


This one needed a bit of work. The Meer bowl came out easily. The cork gasket was dry so I greased it with Vaseline to soften it. While it softened I cleaned out the gourd with a pic and wipes. It had some hard tars in it. The bottom of the bowl was black so I cleaned it as well. The rim was tarred and dark so I wiped it clean and then sanded with micromesh pads to get the grime off and give it a sheen. I set it aside and went to work on the outside of the gourd. It had lost its shine. I cleaned it with Murphy’s Oil Soap and once clean sanded with the micromesh pads. Once done I buffed it with White Diamond and Carnuba. Then I went to work on the stem. It is amber. In the case a piece of the stem was chipped and lying loose. I used super glue and repaired the chip. The silver band was loose on the gourd so I removed it and cleaned it with silver polish. I refastened it with superglue. Once the entire pipe was cleaned and the stem was cleaned and dry I reassembled the pipe and gave the cork another coat of Vaseline before putting the bowl back in. It is stamped with hallmarks that are hard to see as they are worn. It looks like the reclining lion (sterling silver) the other two are worn. The makers mark is MSNF in a rectangle. Not sure who that is? Anyone know??

Here is the finished product. Thanks for looking.

ImageImage

Image

I wrote to Gary Schrier regarding the Calabash via email and he replied as follows:

… Your pipe was made in the London area, and hallmarked at Goldsmith’s Hall, London, because of what sounds like a leopard’s head, that hall’s guild mark. The maker’s mark, “MSNF,” is unknown to me. Chances are likely it belongs to the “mounter” or silversmith who did the work (but not necessarily the maker of the actual pipe). It’s an insignificant brand, though; this does not detract from the pipe. It was probably made around 1907 thru 1911. I hope you enjoy it.

Refurb on a 3 part horn


Just finished up this unique piece. It is three part horn. The bowl screws off the shank and has a briar thread connection. The stem is also a screw on with a metal connection into briar. The stem is also an orific button. There is no stamping on this old timer. I really like the uniqueness of it.

I reamed and clean the bowl. I took apart the three parts and cleaned each on separately. The outside was wiped down with alcohol to get off the grime. The insides were scrubbed with a bristle pipe brush and pipe cleaners and alcohol. The stem was oxidized so it was sanded with 400, 600, wet dry sandpaper and 1800, 2400, 4000 micromesh pads and then hit with red tripoli and white diamond before being given a coat of carnuba. I sanded and restained the bowl with a cherry stain and then buffed and waxed it as well. This one will be a fun one to smoke!

Before shots:

ImageImageImage

and after shots:

ImageImage

Bruyere Deluxe Horn Stem refurb


Blog by Steve Laug

The two pipes that had what looked like horn stems arrived yesterday. They indeed were horn stems. One of them the little 4 1/2 inch bulldog need some work on the stem as it had some tooth marks. The bowl itself was rough. The varnish (?) was crackling and the lava had overflowed the top of the bowl and stained the wood around it. Fortunately it was not charred at all! I reamed and cleaned the bowl. It was a mess. Then I sent it to the alcohol soak and it lifted some of the tars and stain as well as the varnish. I then reworked the bowl with sand paper and with micro mesh pads. It then was re-stained with a black under stain and then a cherry over stain. I then buffed and polished it.

For the horn stem I heated a knife and used a damp cloth and the hot knife to lift the tooth marks. Thanks to Nigel and others (Chris/Caskwith) who gave that bit of advice. It is the same process that is used to lift dents in the briar. I repeated this process until they were gone and the stem was smooth to touch. I then used micro mesh to sand and polish the stem. Finally I gave it a buff with white diamond and carnuba wax.

Here are the before shots:

ImageImage

The front rim was solid but the tars seemed to have permanently stained the briar. I did not want to take much off as it would change the panel shape of the bowl so I cleaned the wood as deeply as I could and was able to get it so that I can see grain through the dark stain. I may give the entire bowl a dark stain to further hide the top but still considering that…

ImageImage

Image


An Interesting Wellington Straight Billiard


Just finished researching a bit on WDC Wellington Pipes. Yet in all of the research I cannot find the one that I picked up. It is a straight billiard. It is chunky and 5 1/2 inches long. It is a system pipe like the Wellington Bent pictured below but it is a standard P-lip stem with a regular tenon. The band is sterling silver and has the WDC triangle and hallmarks stamped in it – an anchor, a five point star, and an eagle. The shank is also stamped WDC in a triangle under a script Wellington. The stem is stamped the same way. The bowl is U shaped with draft hole at the shank side as usual. From there it drops down into the shank where there is a chamber – a bit different than the well in the picture below. It is more of a wide open chamber that tapers a bit to receive the end of the tenon. Very interesting design.

It was rough so I reamed and cleaned the bowl. Cleared out the reservoir and the shank with pipe cleaners folded in half and then gave the bowl an alcohol bath. I left it in for about a 1/2 hour and then took it out and cleaned it again. It did not need to be re-stained as it retained its colour. I buffed it with White Diamond and then gave it a coat of carnauba wax. The stem needed a buff as well. It was a bit oxidized. The stem is unique as well in that the tenon end is very open and tapering back to the whole in the Plip. Here are the after pics.

ImageImageImage

I have also included a couple of adverts that I came on that are interesting bits of history of the brand.

ImageImageImageImage