Blog by Robert M. Boughton
With special thanks for the contributions of Lon “Pipe Lon” Schwartz
Copyright © Reborn Pipes and the Author except as cited
His hands are miracles. I can watch them for hours, transforming wood into something it never dreamed of being. *
— Katja Millay, in The Sea of Tranquility (2012)
INTRODUCTION
 Happenstance often plays a major part in major historical, cultural and business changes. A 25-year-old American named Lon Schwartz, who owned a shop called Pipe Lon on St. Thomas in the Virgin Islands, was in Copenhagen, Denmark pursuing a rather nebulous search for “distinctive” pipes. Coming upon a certain provision store, Lon went inside and saw 18 pipes fashioned in the newly exploding freehand style. The young pipe entrepreneur, who now lives in Florida and still puffs on cigars, knew at once that he wanted all of them and more. Lon’s warm and generous insights made this blog possible.
“I never saw anything like them,” Lon told me. “I was in the right place at the right time.”
More accurately, as Preben Holm, who had carved the pipes and was 18 at the time and off performing his mandatory military service, which lasts from four to 12 months, Lon was in the right place at almost the right time. Upon the awaited arrival, Lon met the teenage pipe crafter and was so impressed with the youthful artisan’s work that he repeated his offer to buy all 18 pipes in stock and added that he would like as many more as Holm could produce. Persistence and determination to make the deal inspired the independent pipe distributor during that frigid winter to visit the Danish capital three times, staying in a small, uncomfortable room when he wasn’t prowling the city for pipes. One of Copenhagen’s stronger beers helped Lon sleep.
“One or two Carlsberg Elephant Beers, and you’d be out,” Lon said, remembering the 12% ABV content. Apparently, the alcohol level has been reduced to 7.2% in the intervening 53 years.
Popular with touris ts from around the U.S. and elsewhere, St. Thomas was an outstanding starting point for the sale of such unusual pipes exclusively by Pipe Lon, the shop’s name from its beginning in the early 1960s until Lon’s retirement in 1986.
“I sold millions of pipes and had the largest open display of pipes in the world, about 300 feet of them,” Lon said. Now, for those who are not sports-oriented, that’s the length of a football field, or a 100-yard dash in track and field.
“I had the Virgin Islands rights to all of the brands that were big in the U.S. and Europe,” Lon added. “They included English makers like Charatan, Barling, GBD and Comoy; some French brands, and Danish names such as Criswell and Stanwell.”
Lon pointed out that most people still don’t know where the U.S. Virgin Islands are, and I will hazard a guess that the same folks would not imagine any one of the three main islands – St. Croix, St. John and St. Thomas – and about 15 minor islands is big enough to hold a football stadium.
Lon’s chance encounter brought about the ensuing wild success of freehand pipes, by Holm and others, in the U.S. One word I came across in several sources described the resulting introduction to the U.S. market as hype, which translates in the best sense to hoopla, a term I’m sure Holm would have embraced.
Holm wrote of the experience: “I could simply not have had any better starting point, because the taste changes quite a lot from one place in the U.S.A. to another, but here came, as mentioned, pipe-smokers from all the States. It was wonderful to feel how something one enjoyed making really was accepted.”
That was a tremendous understatement. By the 1970s, every major Danish pipe maker and more were engaged in business in the U.S. and many on an international basis.
If anyone deserves the esteemed if a tad cliché designation of late great artist, as I have called him before in this forum, it is Holm (1947-1989). Then again, the best clichés are truths propagated across generations within cultures. Holm dedicated almost the entirety of his all too brief 42 years to the practice and innovation of pipe craftsmanship, his most outstanding accomplishment. His vocation pushed those wild vertical and horizontal lines as far as he could during the short time he spent in this dimension; his legacy is the part he played in advancing the style that was called “Unfinished” by Sixten Ivarsson and other names by different early artists. Now this wonder of woodwork and engineering is known throughout the pipe world as the Danish freehand.
Poul Winslow, another master freehand carver, cut his teeth in pipe making starting when he was 16 and began training under Holm. Winslow had this to say about his early mentor: “Preben was a genius. Maybe a bit wild, always flying from idea to idea and impatient for results. But could he turn a pipe! Some of the most extreme freehands came out of our workshop in the ’70s, and whatever his critics say, they sold like crazy, mostly in America. And when it came to finishing, he was the best in the business.” Many old-schoolers throughout the pipe world, in Denmark and everywhere else, considered the “crazy” shapes offensive. “They thought these wild new pipes were funny, or stupid,” Lon said. “It took some time to realize their potential, artistically and financially.”
Maybe if I had been a codger in the 1960s I would have agreed, but as a child then I had already learned to deal with stranger things: Flower Children in their VW Love Vans, Hasbro’s Twister and the Slinky, for example (which was, in fact, introduced in 1945). Later, as a young man, I added news of the soiled clothes saved by a certain White House intern to the list.
A series of autobiographical articles by Holm, written from 1983-1984, was published later online and in The Pipe Smoker’s Ephemeris magazine (TPSE). The first article concerns Holm’s earlier years and offers fascinating details of the young boy’s immersion into his father’s large provision shop in Copenhagen, the capitol of Denmark and one of the world’s cultural hubs. Then there are the blank spots, like spaces in the New York Times daily crossword, that can tell still more about the man Some can be penciled in with tentative answers to erase and correct from clues provided later in the disjointed narrative; others are enigmatic, parts of tight knots jumbled in Down and Across clusters of cross-questions within questions.
Tom Dunn’s founding of The Universal Coterie of Pipe Smokers (T.U.C.O.P.S.) in 1964, at the time a rag-tag group of pipers held together by Dunn’s untiring work in his Queens, New York apartment, led in short order to TPSE. As becomes the fate of many pipers, Dunn’s life was plagued by avid collections of books and pipes. As many, but not all, of the books no doubt concerned pipes, the dual diagnosis would seem to be Book and Pipe Acquisition Disorder (BPAD) and its fraternal twin, Pipe Book Acquisition Disorder (PBAD), or just BPBAD. Hardbound editions of every TPSE issue from the magazine’s inception in 1964 as an irregular quarterly through 2004 were published by T.U.C.O.P.S./TPSE. Book Two [1994, pp 670-673] contains the article relied upon most for this part of the essay and was cited by Pipedia in its re-print of the text that I found.
Mindful that, as an autobiographical work, the series called “The Story of My Firm” is written from Holm’s perspective, I took his suggestion that he was behind the transition of old Danish designs into the revolutionary freehand technique with a reporter’s mandatory skepticism, no matter how much I would like to believe. Here is the passage I didn’t wish to question but had to do so, describing Holm’s life when he was 18 or 19 – in the late-1960s.
“One day while making the rather traditional hand-carved pipes as we had to in order to come by some money, I took a fancy to make something completely untraditional at that time. From the very beginning I had only worked with the finest Bruyere that could be provided, and on the whole it all had very pretty grain patterns, and that gave me the idea to try something novel. Contrary to what was done so far I started to form some of the pipes according to the grain pattern, and out of this I got some quite particular models…I began also to let the raw bark-top be part of the design.”
Considerable research now under the bridge, I found numerous sites suggesting earlier origins of the style, but they were all vague and inconclusive. Lon confirmed my suspicion that Holm, despite his great achievements as a carver, was not the father of the freehand.
“There were people playing around with new shapes and using the bark in the 1940s and ’50s, before it really got going in the ’60s” Lon said. Sixten Ivarsson (1910-2001), “the grand old man of Danish pipe making, was just one of these chasers, but many cite him as the rightful patriarch of the now large family. The truth may never be known, but Ivarsson started repairing pipes after the end of World War II and was soon asked to make them. The results that at first followed the classic English shapes evolved into variations that were sleeker and curvier, and eventually freeform.
CHILDHOOD’S COST
Holm’s account of his childhood working in his father’s provision shop is conflicted, to say the least, and offers no truly personal insights into the man whatsoever. As an adult, the son gives alternate descriptions of his father as “somewhat mean” and “altogether a very wise man.” There are other signs that the boy might have been confused by what he saw as contradictory strictures of his father’s. For example, Holm’s father forbade the smoking of cigarettes but was not opposed when the boy took to pipes around the age of 13-14. And in at least the first installment of the series of articles he later wrote, there is the absence of a single mention of the elder Holm’s given name or having a mother much less any other family. Lon filled in some of the family gaps as well.
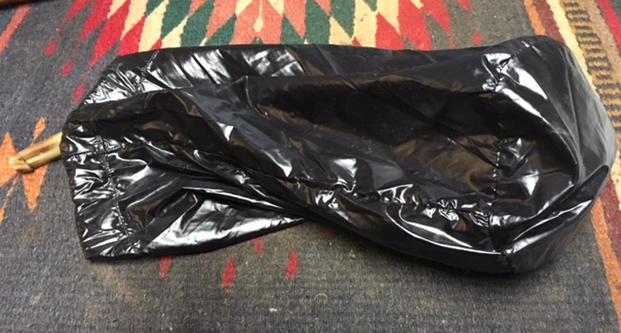
“Preben’s mother sewed the pipe pouches, and he had a brother he didn’t talk about,” Lon said. Holm also had a wife, still alive in Denmark, from whom he was divorced. “We were very close also. She came to the Virgin Islands with him. He was a very odd person, a bit disturbed, and he let all of it out in his pipe making.”
Any concrete conclusions from these signs, however tempting to wade into, I will leave to psychologists. Furthermore, the overall nature of his youth, other than being a bit precocious with adult duties and interests, may have been more a product of his generation and culture than an outright unpleasant upbringing.
At any rate, the store had three departments – wine; magazines, cigarettes and other convenience items, and the part of the shop that in a short time drew young Preben into its irresistible mysteries, the pipe and tobacco department. Best of all, the tobacco shop included a small repair service area that Preben soon took over.
Holm’s prodigious start and rapid rise in his father’s family business
Starting as an errand boy when he was 12-13, Holm possessed a pragmatic maturity which led him to the early conclusion that his wage was “a sixth of what I could earn somewhere else, but [continuing with my father], I think, was very sound.” That young Preben already was considering his advancement options seems clear. Even as a youngster, Holm saved the tips he made running about town, depositing them in the bank and using his meager wages to purchase fine tobacco that was much more expensive than the lesser Danish blends at the time available at his father’s shop and most other places. Although at first his father thought this practice “crazy,” so charismatic and business-like was his son, and one can only imagine just as persuasive the samples of superior tobacco mixes provided to the elder Holm by the boy, that the master of the shop was won over and began offering a wide selection of foreign pipe tobacco. Most of the higher quality blends were English, meaning made in England.
Even before he was put in charge of pipe and tobacco purchases when he was only 14, Holm writes, he had a large role and the adult demeanor to fill it. “Most likely I was not always popular with the sellers of pipes who considered me too critical, but I thought that necessary in order to live up to the confidence our customers of pipes gradually placed in me.”
In most cultures, the notion of a child manufacturing tobacco pipes would be frowned upon. Not so in Denmark, where a cursory survey of the Who’s Who of that craft reveals many such examples. At the age of 15 in Holm’s case, his obsession with pipes had grown so overwhelming that he became fascinated with “an elderly gentleman, who himself made hand-carved pipes.” The unidentified man visited the shop to sell them and ended up offering to help young Preben obtain the machines he would need. Holm’s hard-earned savings of 1,400 kroners (USD231.00 today) proved to be enough, again with the guidance of the gentleman, who also supplied other tools. [I can’t find a handy inflation calculator for Denmark prior to 1981. Perhaps someone could give me an educated conversion for kroners to kroners starting earlier.]
With the equipment installed in a Spartan 13.5 square foot room in the basement, Holm began experimenting late into the nights – after the demanding work of his day job. But the daily practice paid off, and just short of his 16th birthday, Holm handed over his first batch of pipes he deemed acceptable for sale in the shop. Without delay, the confident boy decided it was time to tackle the biggest seller in Copenhagen, Pipe Dan, who offered to buy 20-30 pipes every week. The most Holm ever earned from Pipe Dan, which was quite a bit, was 500kr, or USD83.00 today, for one exceptional pipe – an elaborate freehand. Holm suspected Pipe Dan didn’t believe the lad could pull it off when he described his plan and made the deal.
Before the end of his partnership with Pipe Dan, Holm and one “journeyman” were able to produce 50-60 pipes per week that the venerable middleman sold. Holm was one of the most promising pipe crafters to produce the freehand style. Of still more significance, however, is that he was the crafter responsible for the spread of the new form’s popularity to the U.S. and elsewhere.
Before Holm’s 22nd birthday in 1969, he and his 45 employees at the time were outproducing the sales he and Lon could handle, and the two concluded something needed to change. The choice of a distribution outfit called Snug Harbour in New York had mixed results, to be nice. Although sales increased, Holm ended up never seeing much of the money due to the distributor’s eventual failure to pay its bills. Holm had a hefty supply of pipes ready for export and nobody to move them.
GOING DANISH WITH LANE LTD.
“I set up a meeting with Holm and Herman Lane in New York where I was present,” Lon said. “Lane and I were very close friends.” That turning point was in February 1971.
Herman G. Lane was the enormous ego behind Lane Ltd., a continuation of the original pipe and tobacco interest opened in Dresden, Germany in 1890 by Herman’s grandfather and resurrected in Manhattan by the emigrant grandson in 1938. The Lane Ltd. empire distributed some of the world’s foremost pipe brands, including Dunhill, Charatan and for a while Dr. Grabow, as well as many more, and had made Captain Black tobacco since the family business first opened in Germany.
To say the least, the chance to “team” with the pipe giant was an opportunity for young Holm that he could not have been expected to let slip away. For the ambitious Lane, on the other hand, the talented but not very business savvy Dane was an easy conquest. In raising the price of Holm’s pipes higher than they already were, Lane’s goal, of course, was to make money. That the two did, leading to the aforementioned hoopla.
THE BEN WADE CONNECTION
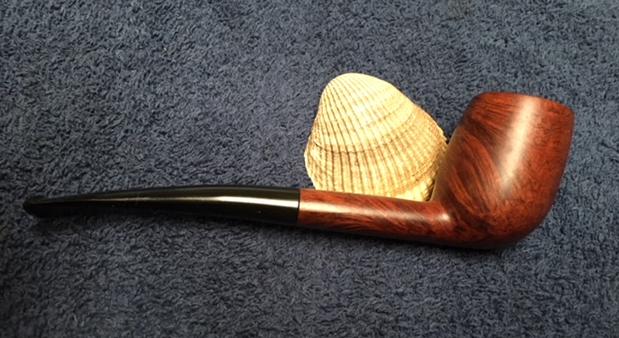
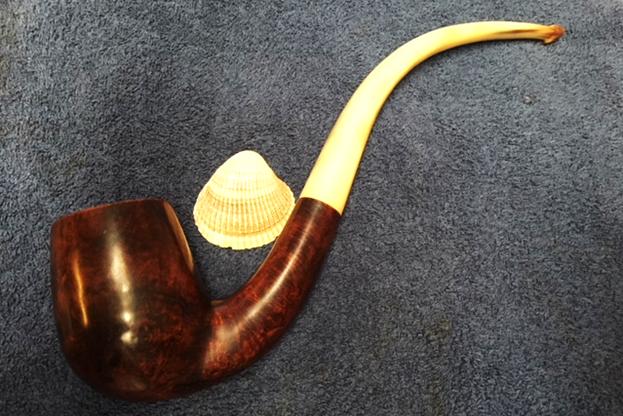
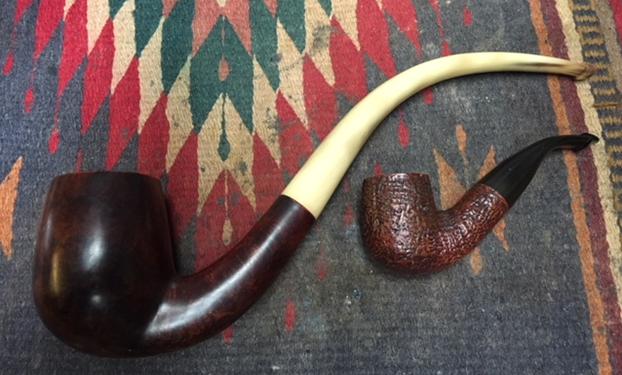
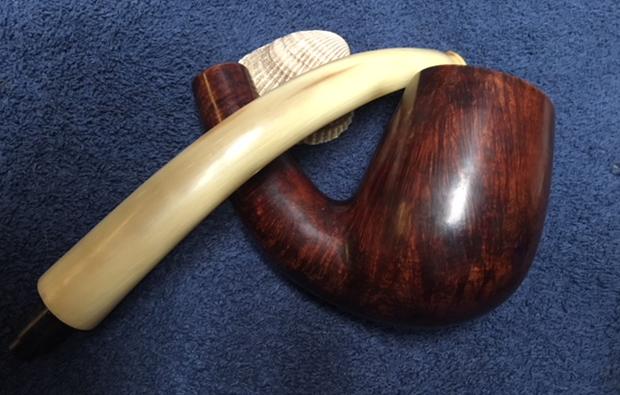
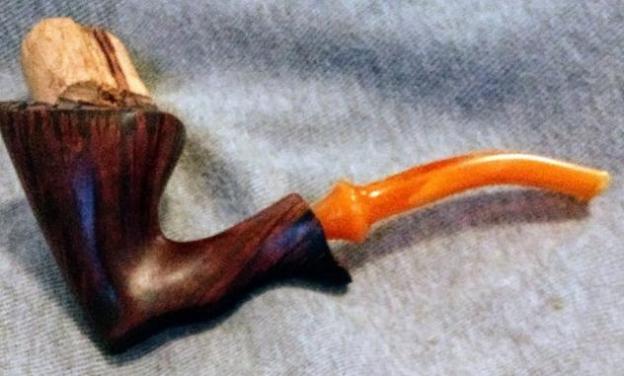
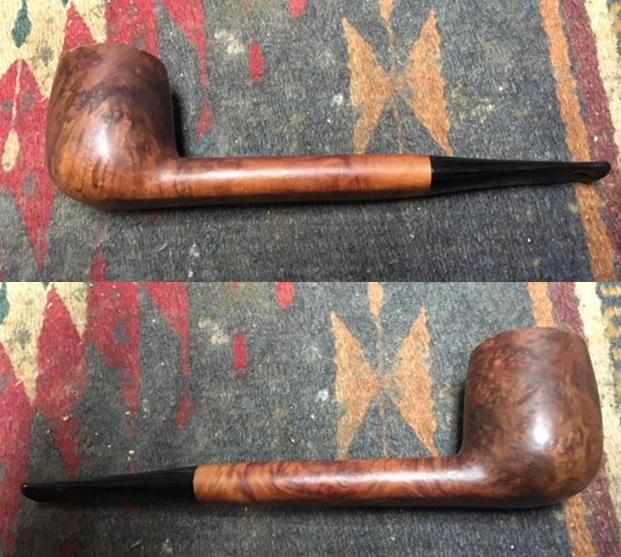
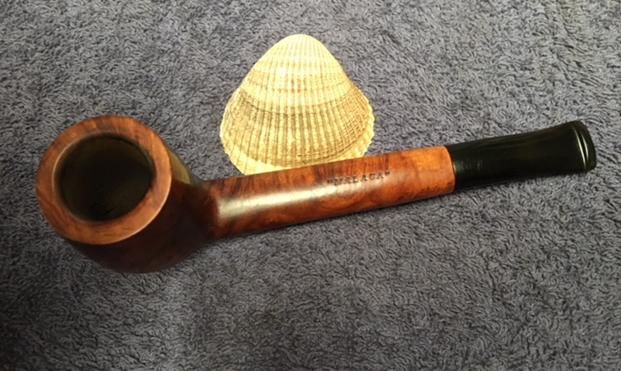
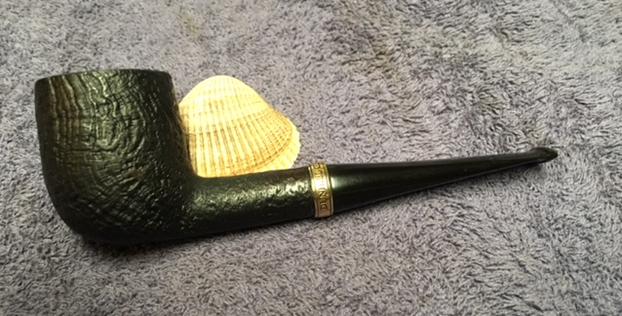
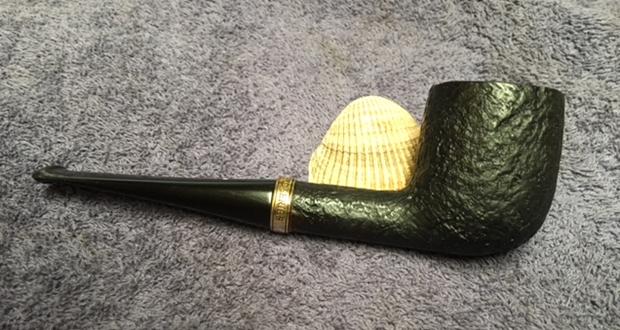
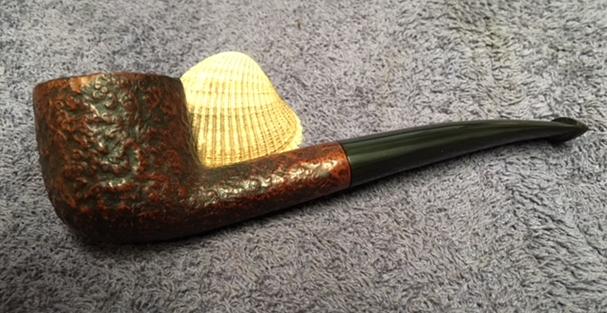
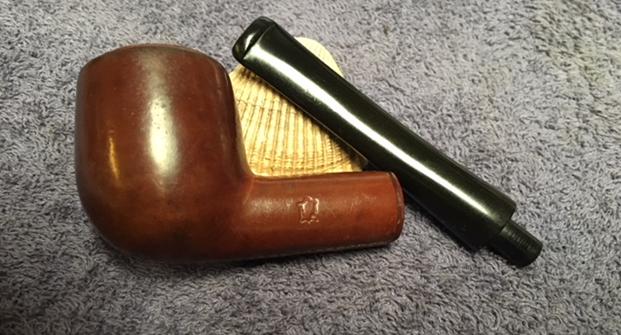
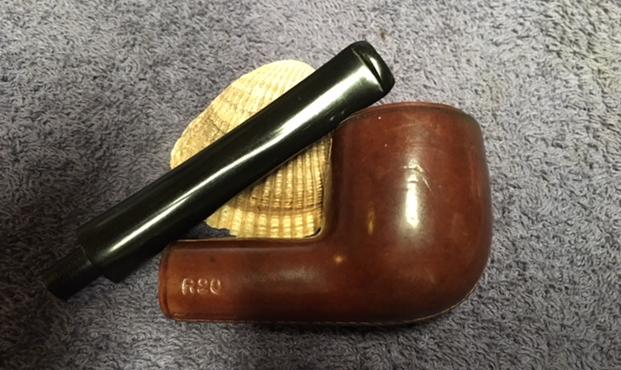
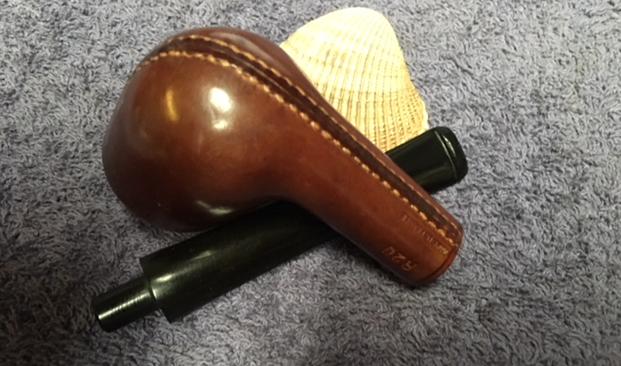
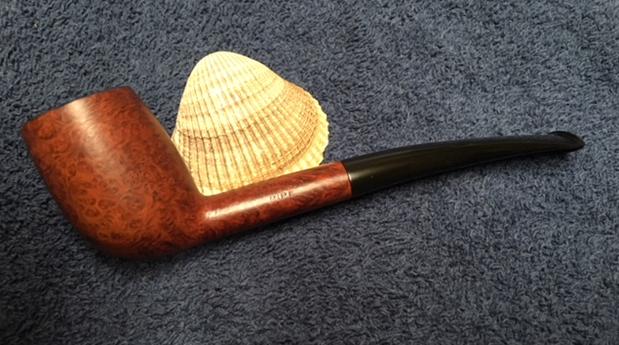
Lane was only interested in Holm’s freehands, and there was one snag to overcome: Snug Harbour retained a stockpile of Holm’s pipes and could be expected to sell them at cut-rate prices. To avoid this contingency, Lane and Holm made an exclusive rights deal for distribution of the freehand pipes and agreed the use of Holm’s name was inadvisable. As Lane Ltd. owned the Ben Wade name, Herman Lane suggested marketing Holm’s Golden Walnut Hand Made in Denmark line under that brand. One fine example of Holm’s traditional Danish pipes is the following example. Pipedia notes that “Within a very short time Ben Wade Handmade Denmark sold in much larger quantities and at higher prices than they had ever dreamed of.”
Advertisements hiked the prices well higher than Holm’s pipes ever sold for before, and one key campaign was a New York Times full-page spot for an elegant Seven-Day’s Set. The set, no surprise, is now difficult to find.
When I began work on these two blogs, I expected to accomplish the task in a single essay. Becoming bogged down by the complexity of pulling together so much information and realizing the result was becoming massive even by my wildest discourses, I knew I had to do a two-parter.
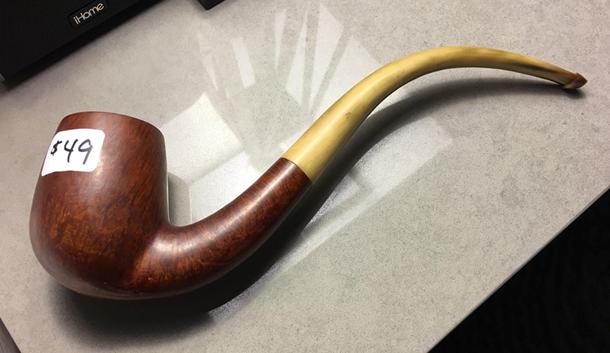
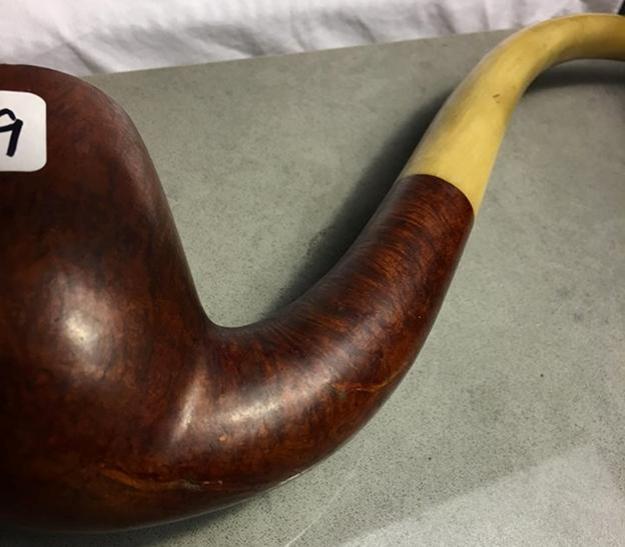
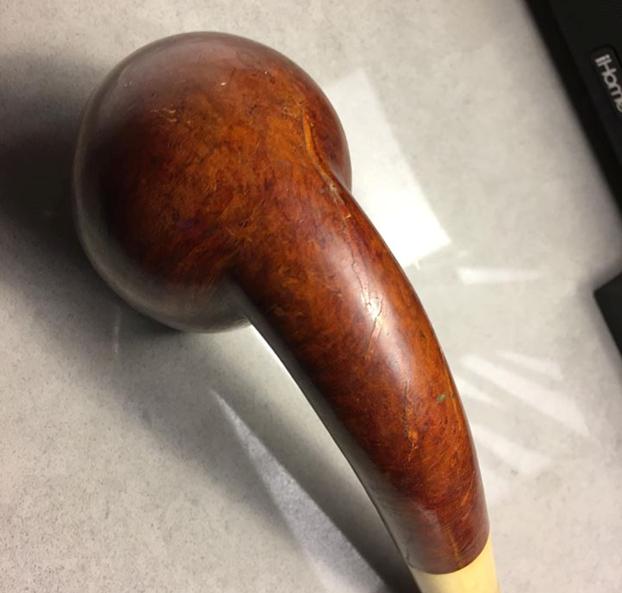
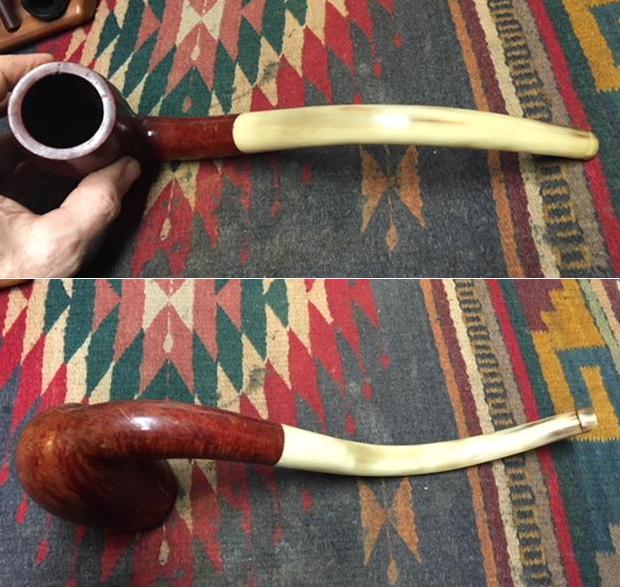
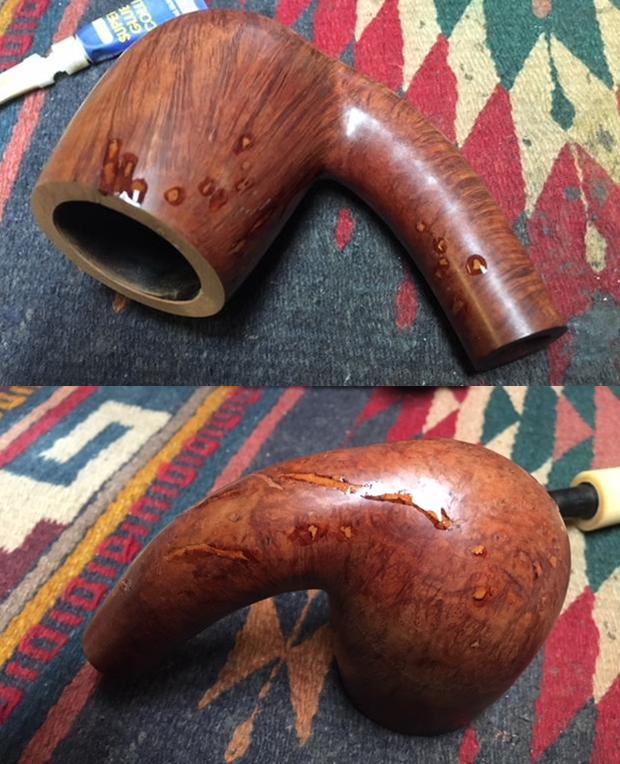
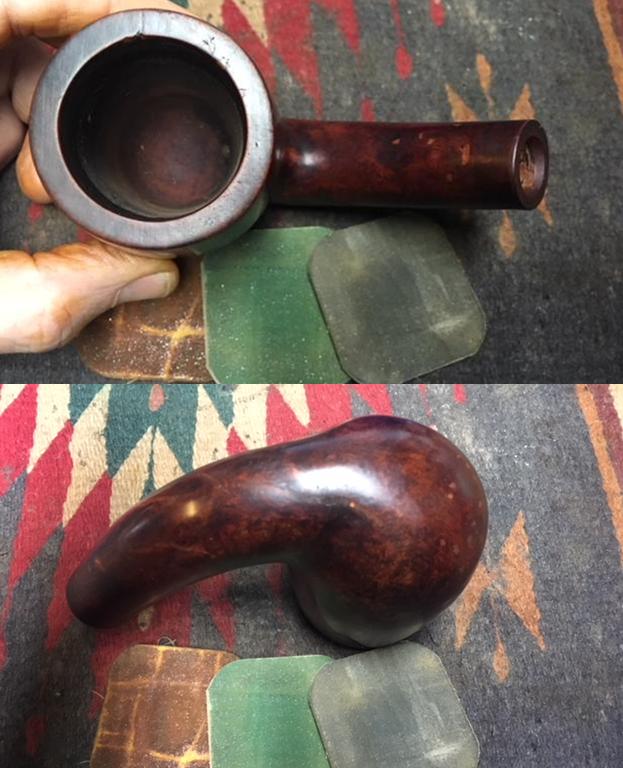
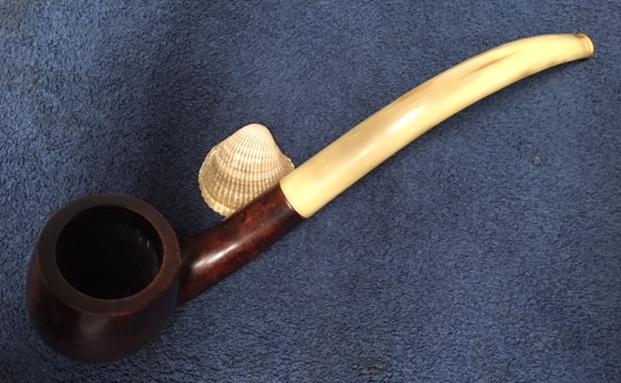
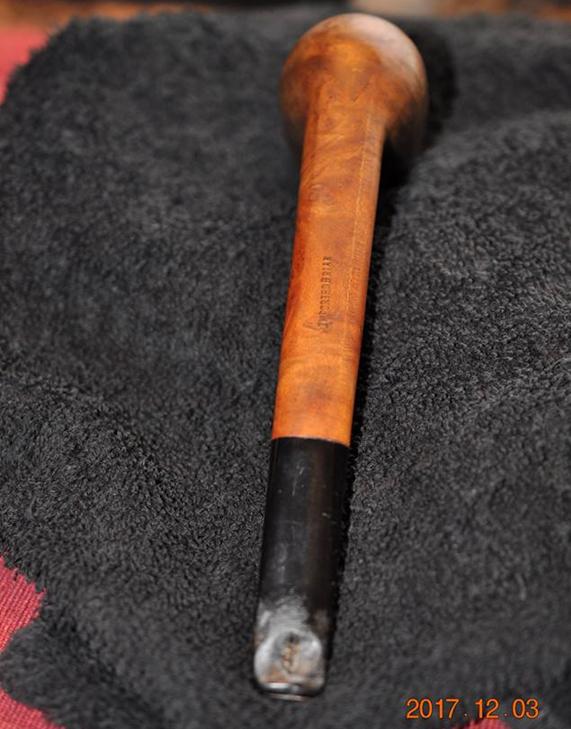
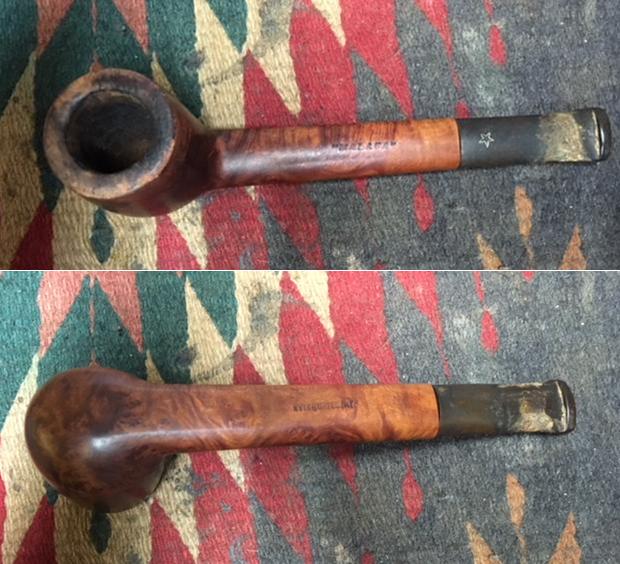
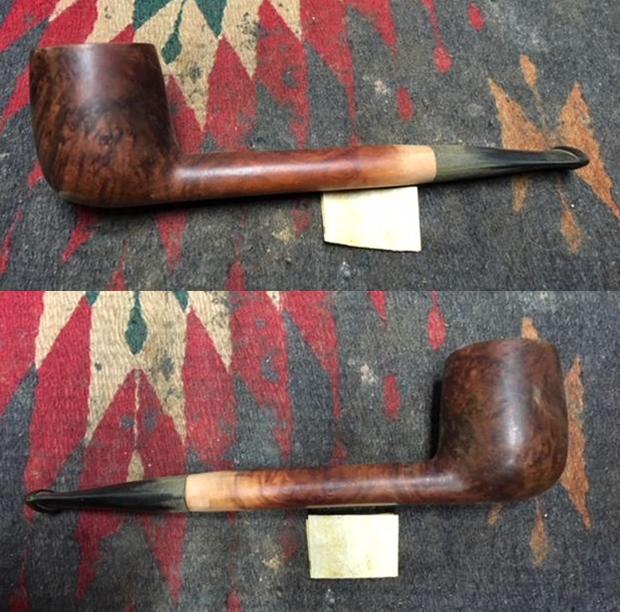
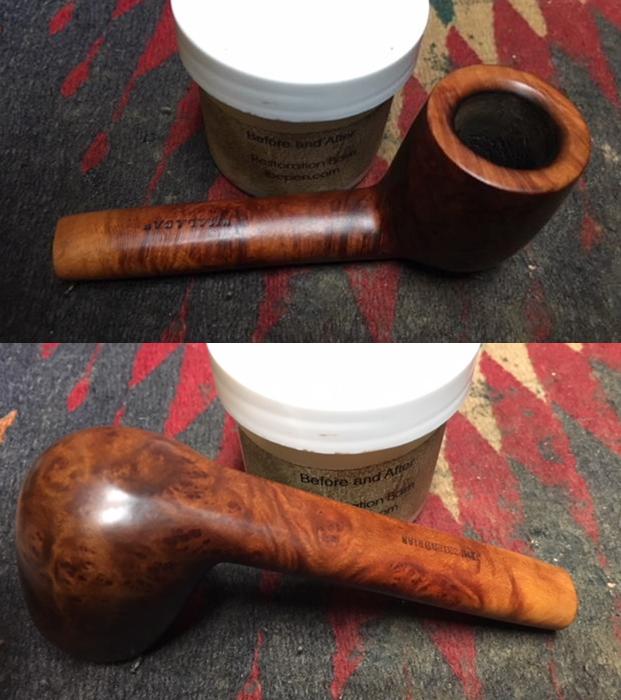
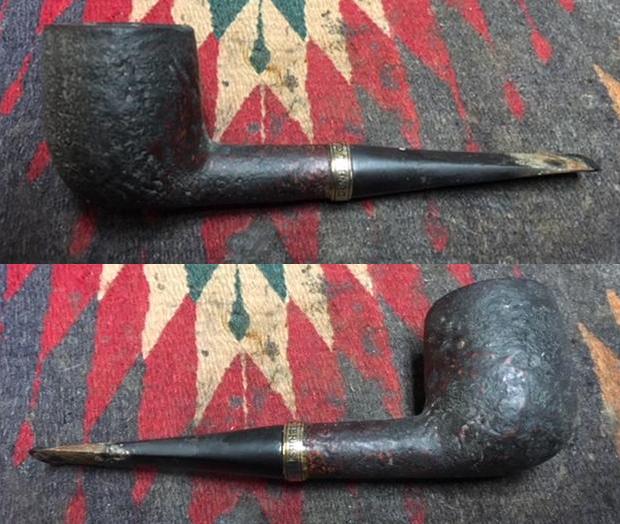
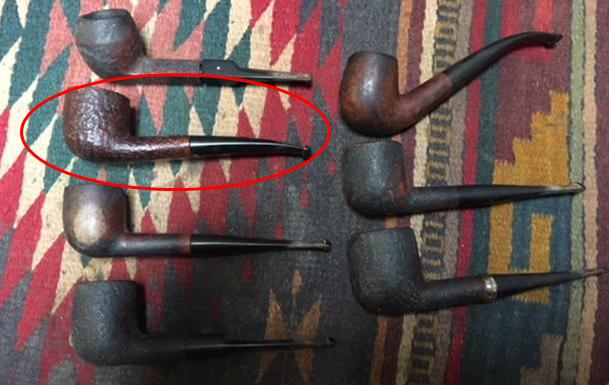
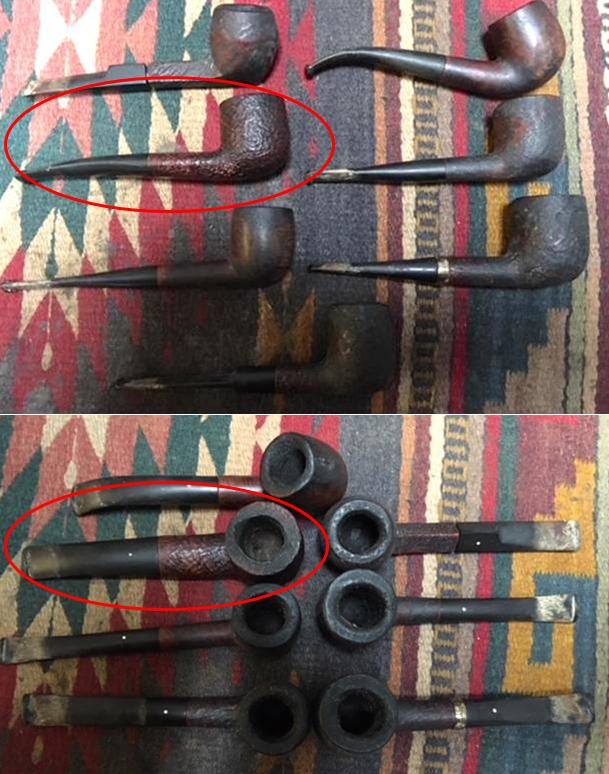
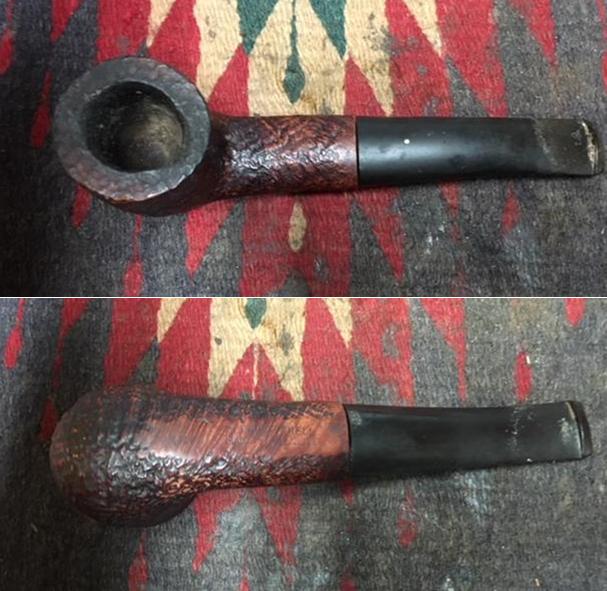
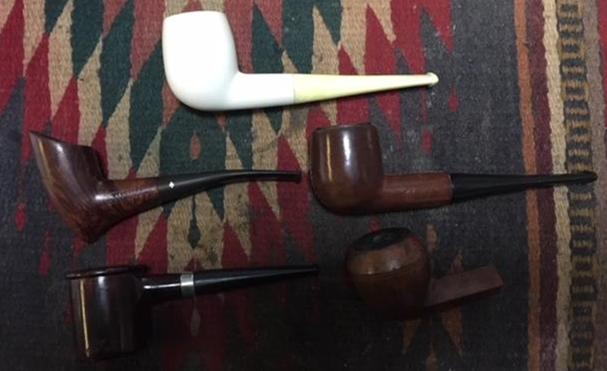
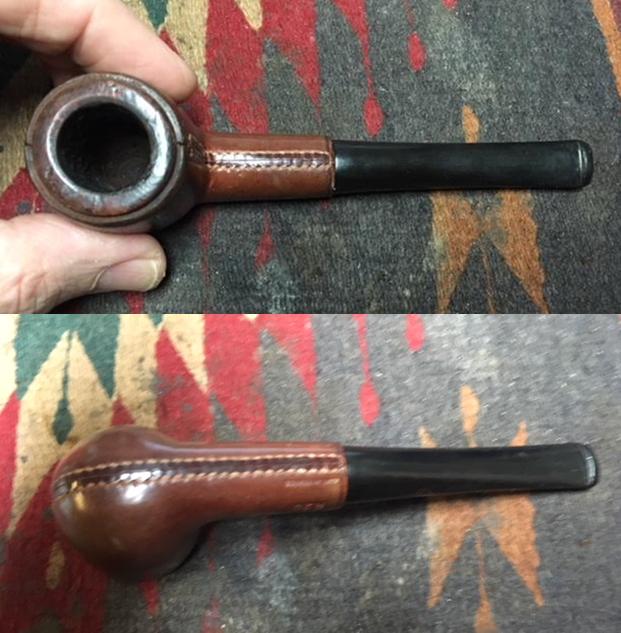
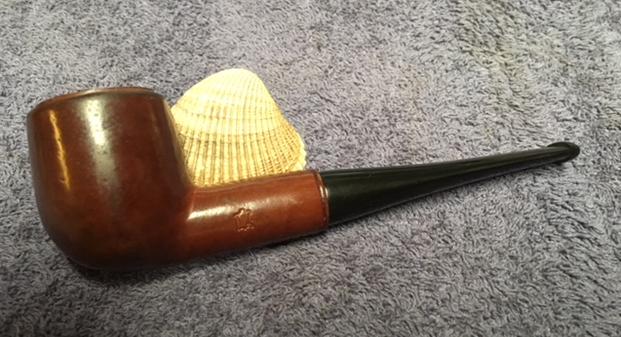
This installment started as the re-stemming of the first Danish freehand I bought for a pittance on eBay, in January 2015, as a sort of New Year’s excuse to make another P.A.D. gift to myself. Besides, it was a Buy Now deal for no more than $25 with shipping included, and no other watchers seemed to know it was something special. I wrote the original “Grooming a Ben Wade Golden Walnut Freehand” blog in 2015 because, until then, I never received an estate pipe from that online source that was anywhere close to being ready to smoke. The clean-up, in my mind, would be easy, just sanitizing the insides, removing a few petty scratches and deciding what to do with the rough rim and shank opening that were coated black, a condition I pretty much disliked. I modify the fact that the pipe was the first I bought, as I already had a couple of other freehands, as noted in Part 1.
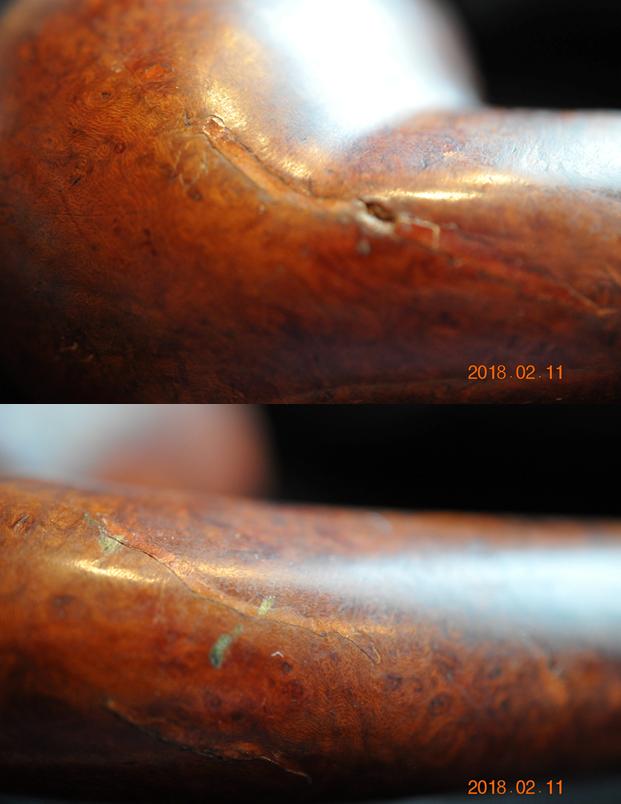
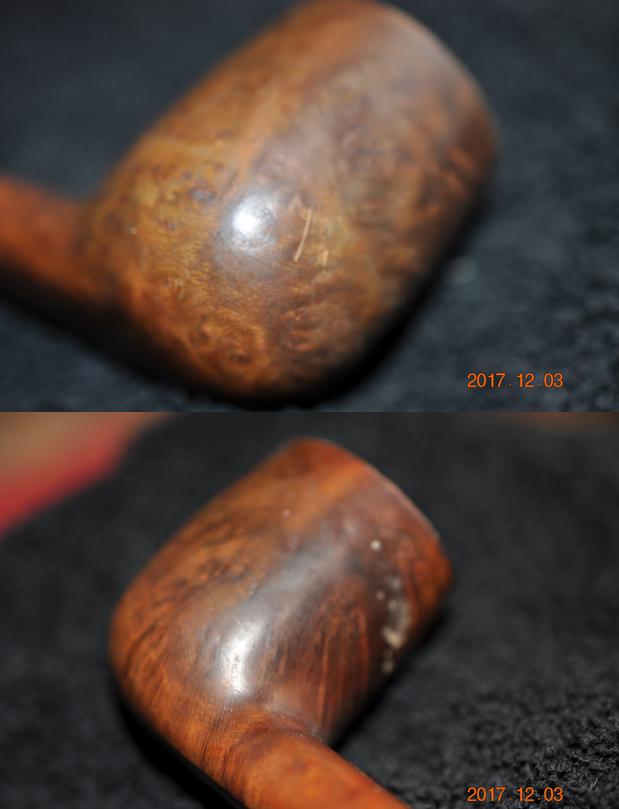
In hindsight, I recognize how, in the easier process of cleaning the freehand, I preserved what I now consider to be an unpleasant though common black finish for the natural, radiant, lighter golden hue of the walnut that was, furthermore, left with what I considered an inappropriate dark brown finish. And so, instead of the sole re-stemming idea, I found myself with the option of removing the black stain where it was added and lightening the original dark brown stain on the rest as well as the minuscule scratches. Even though I intended the pipe for my own personal use, I had a compulsion to do the job as I would for sale to a customer.
RESTORATION


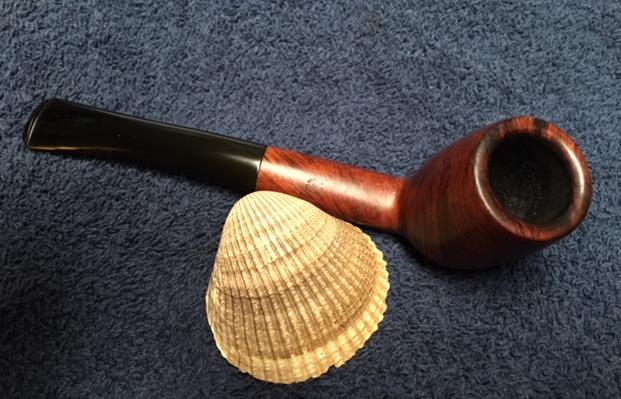
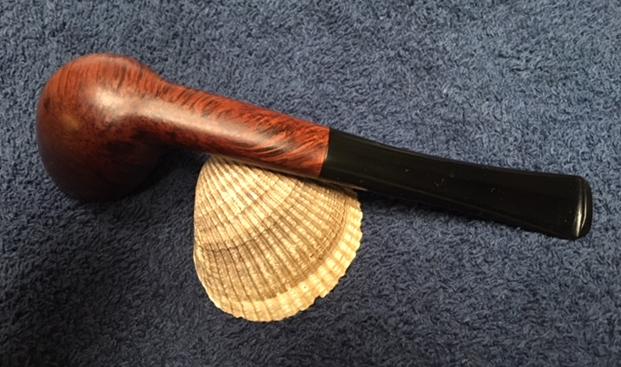
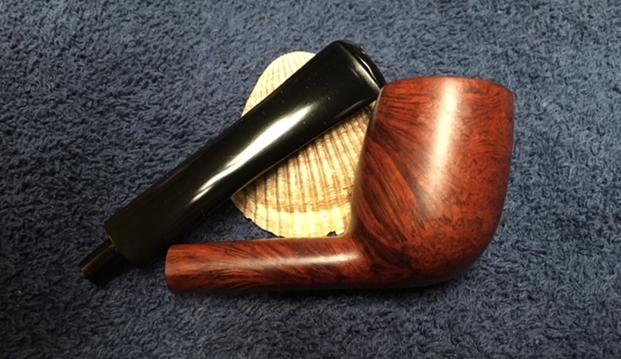
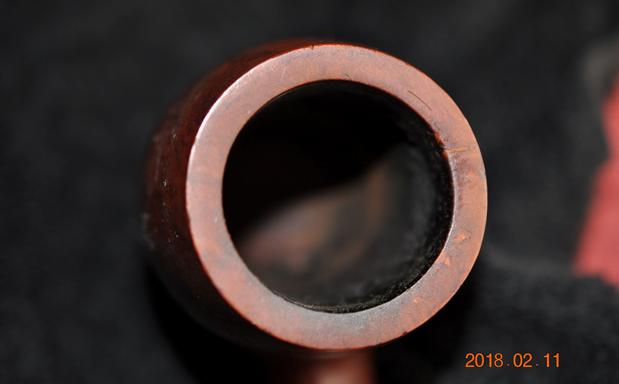
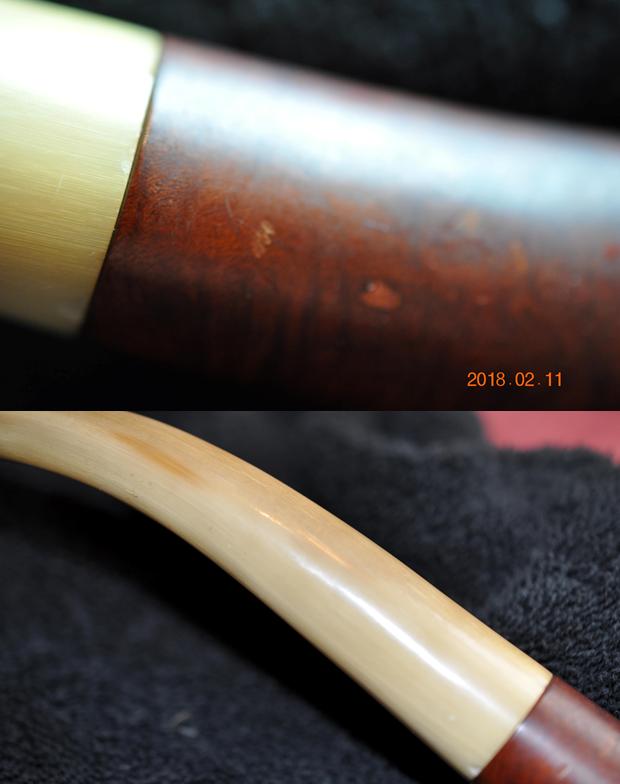
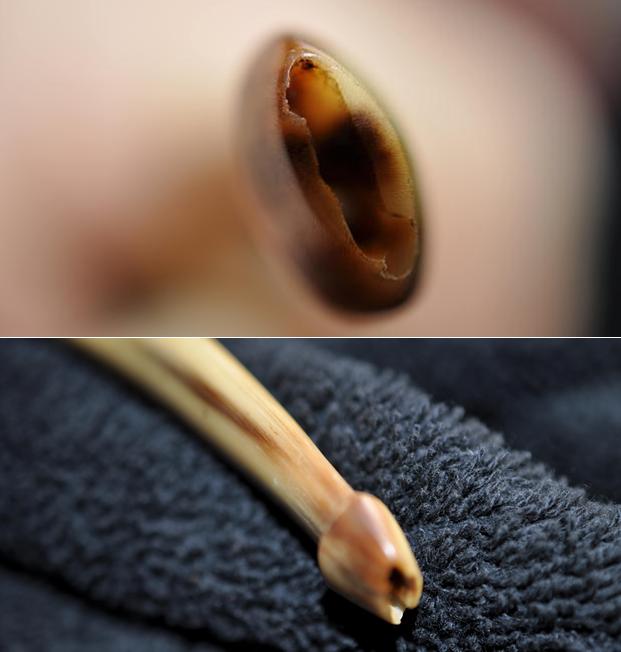
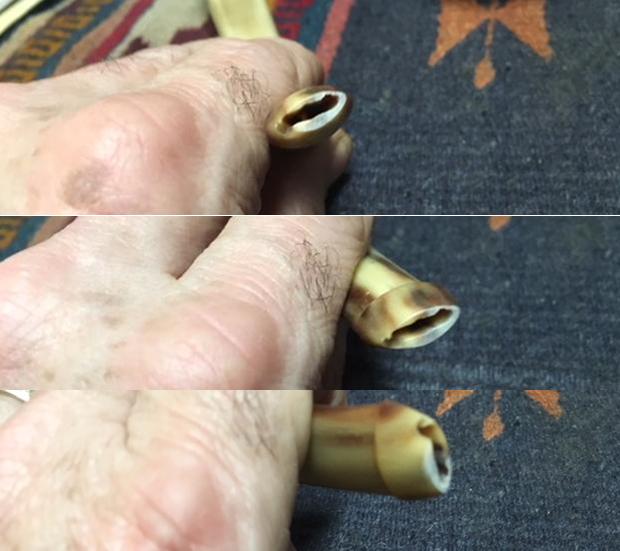
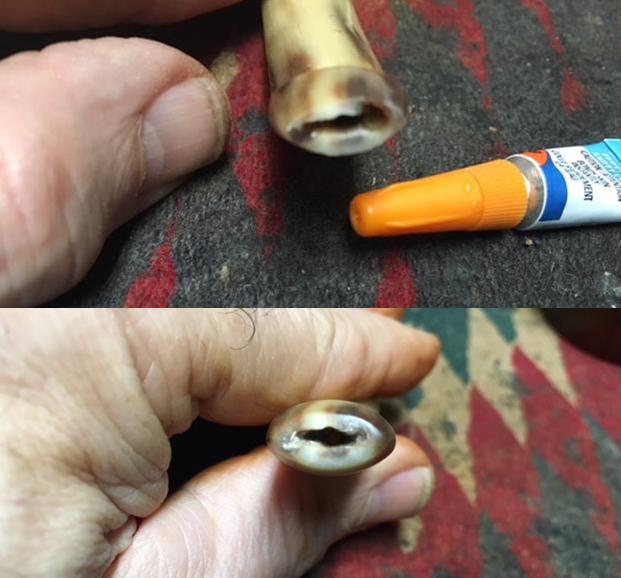
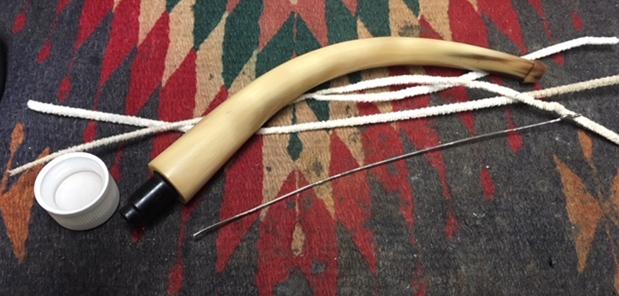
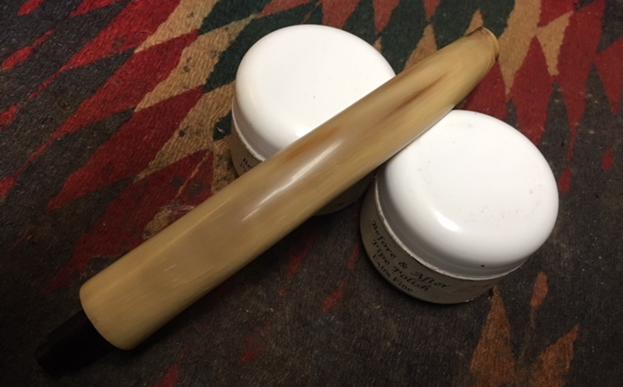
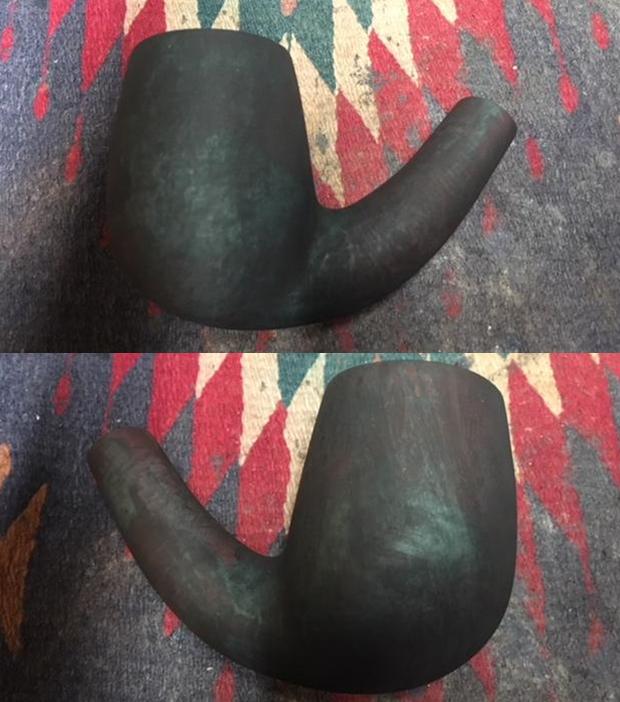
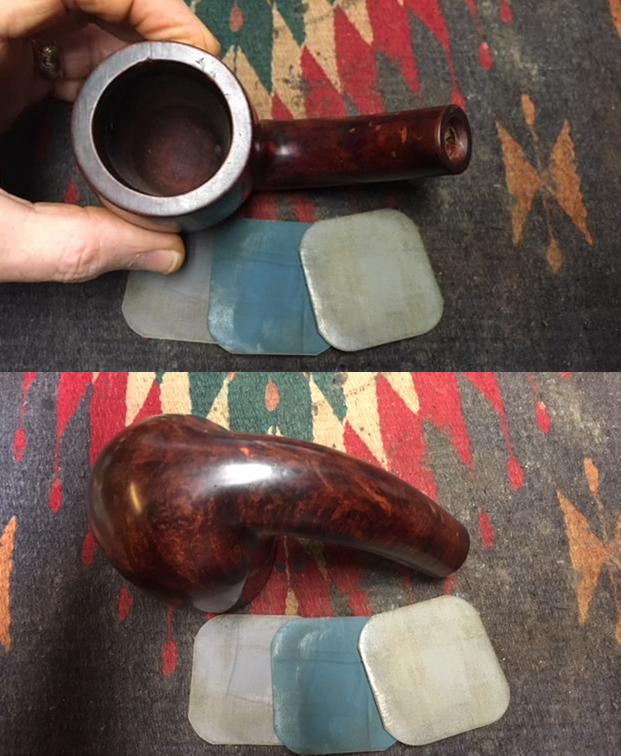
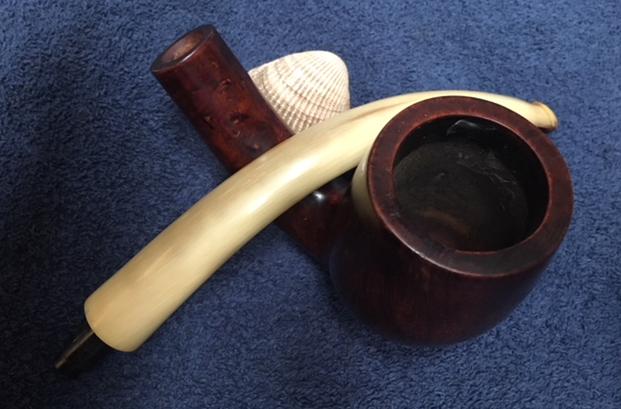
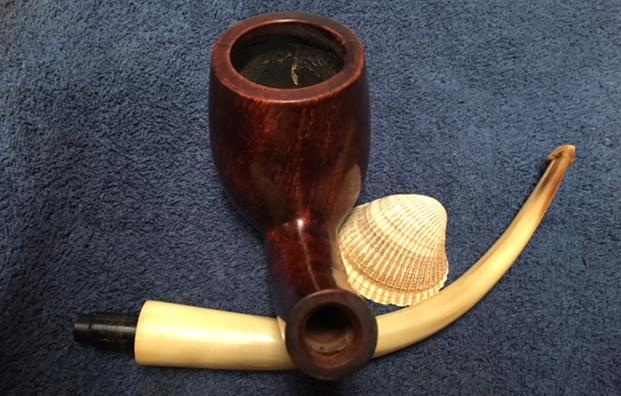
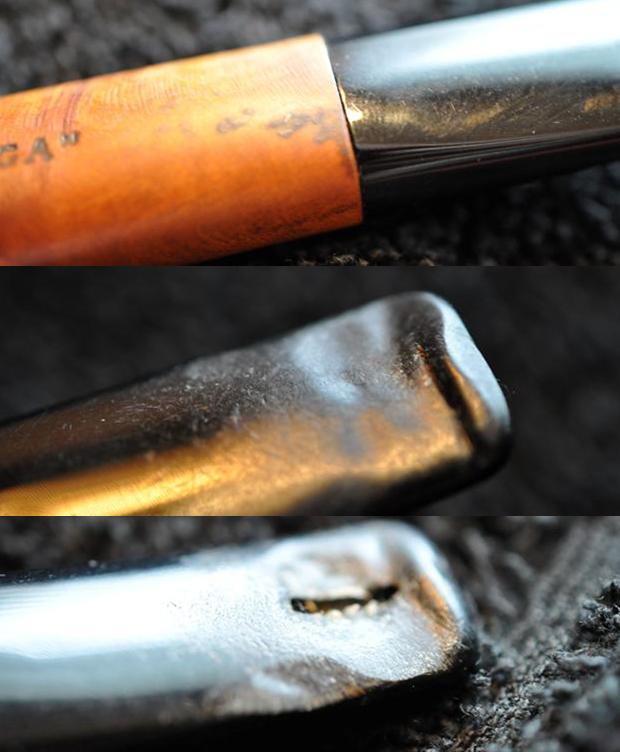
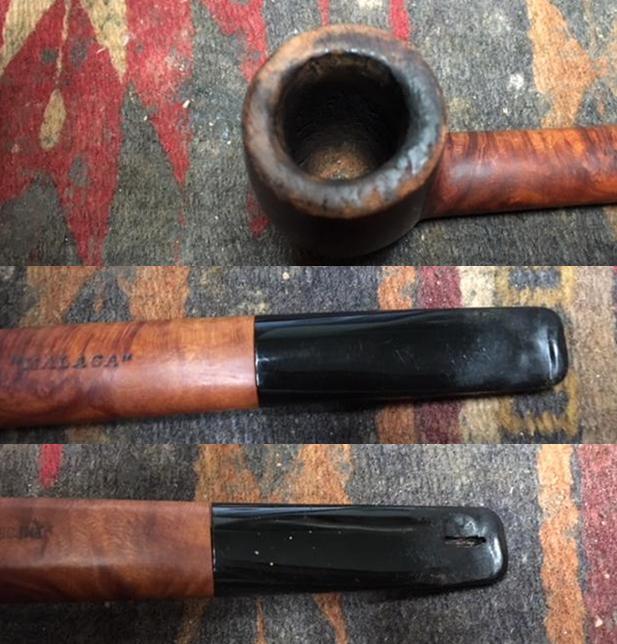
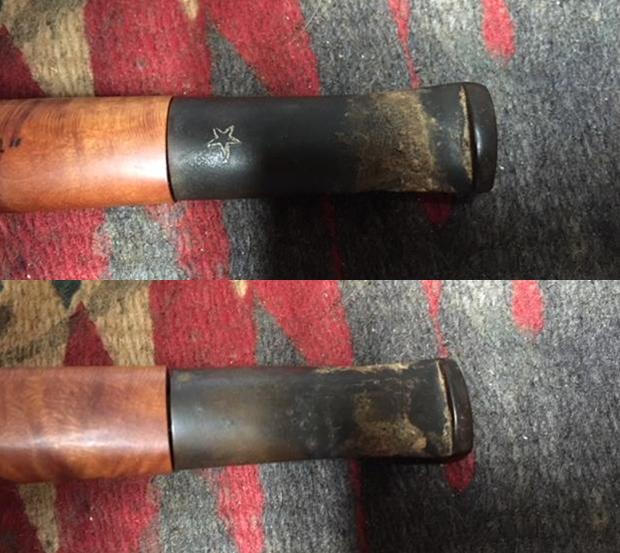
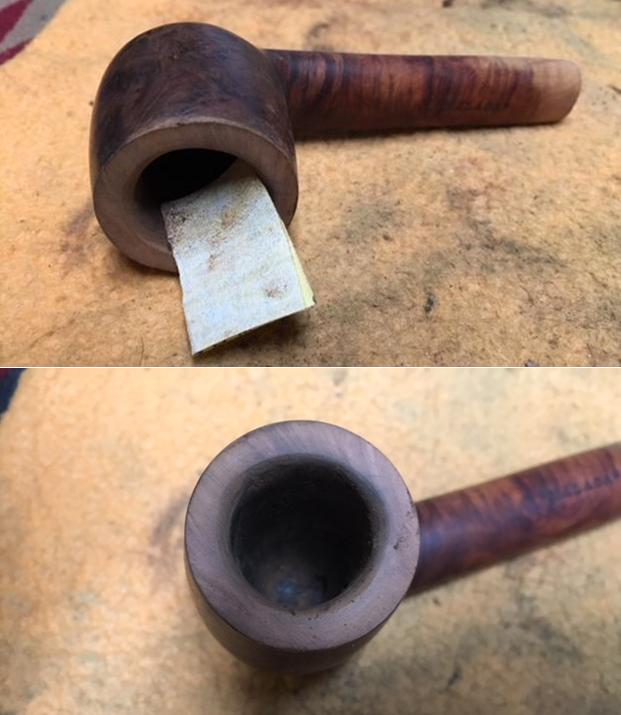
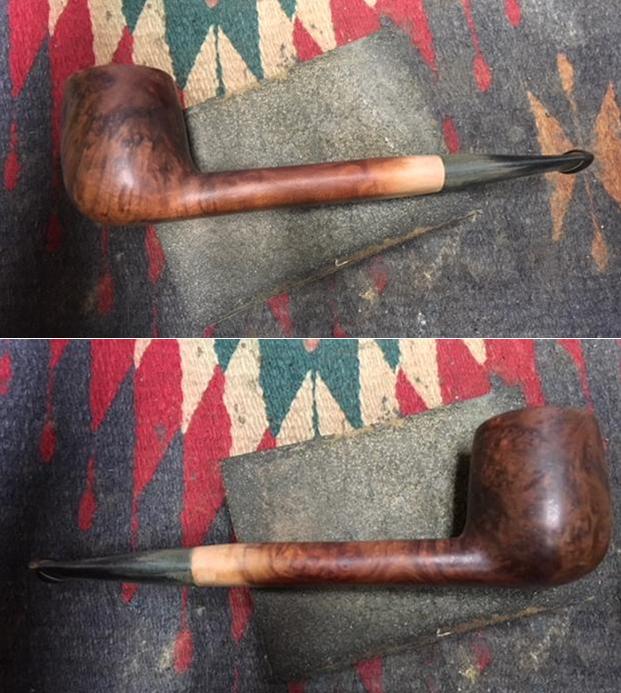
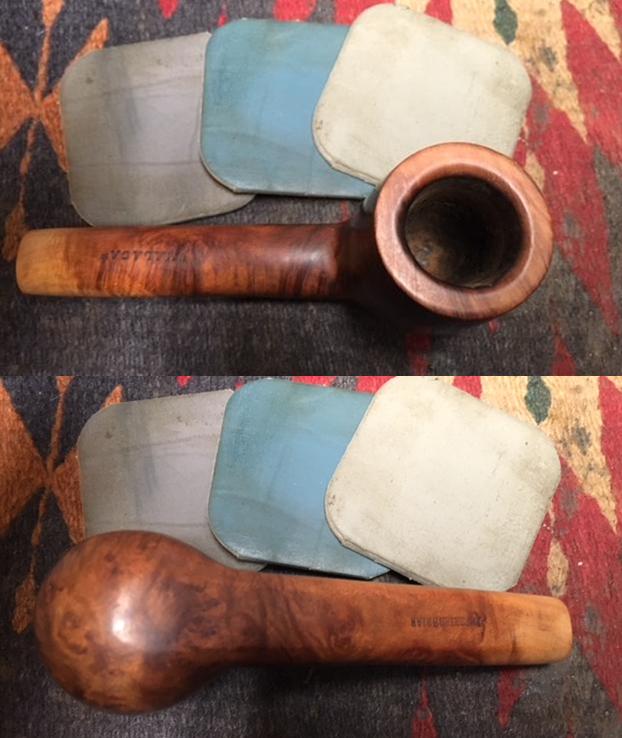
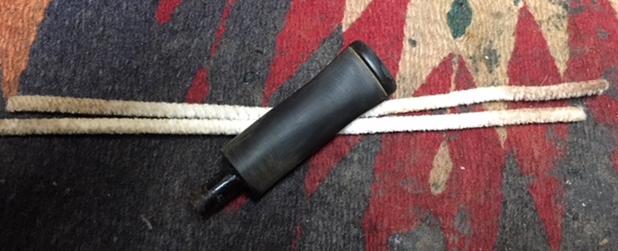
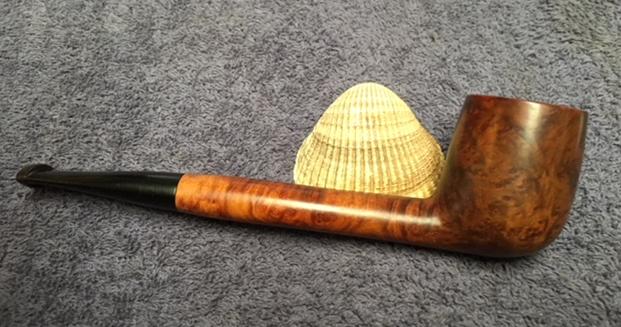
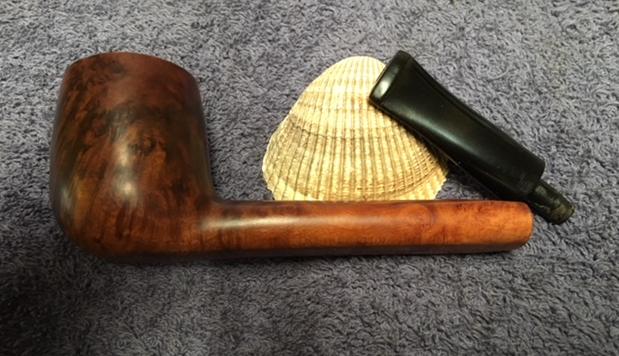
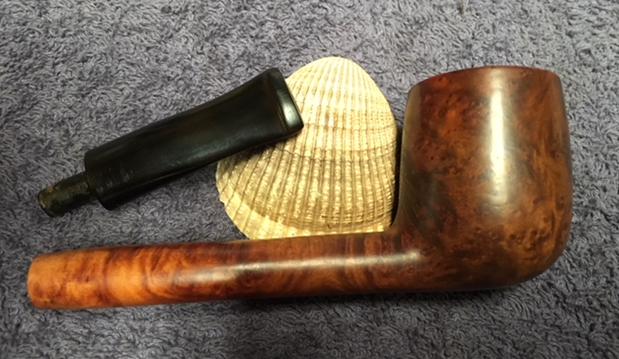
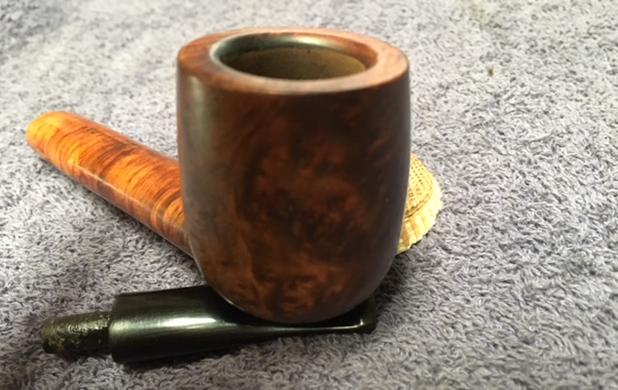
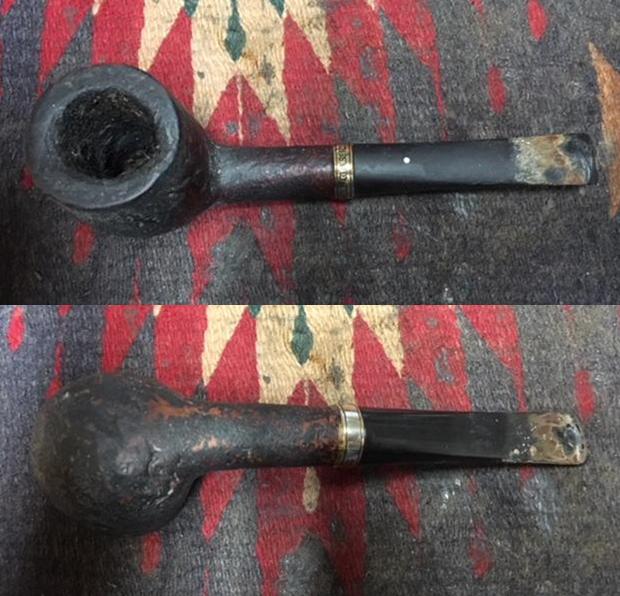
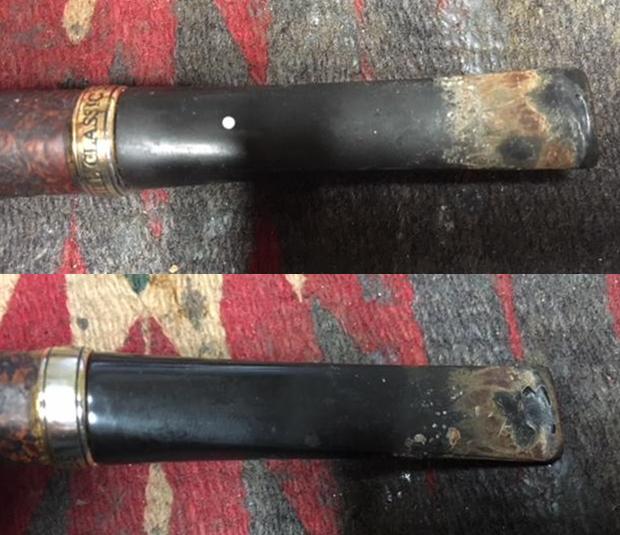
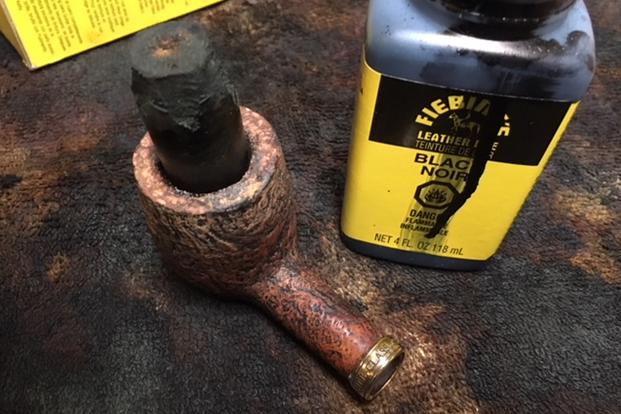
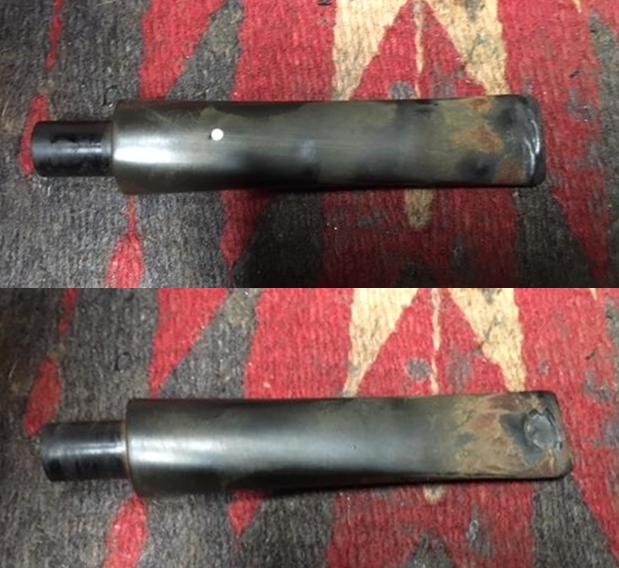
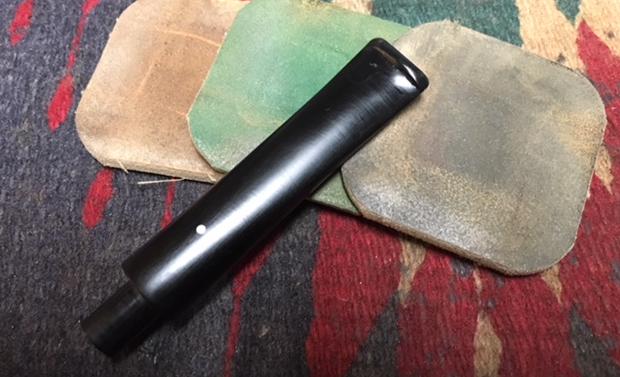
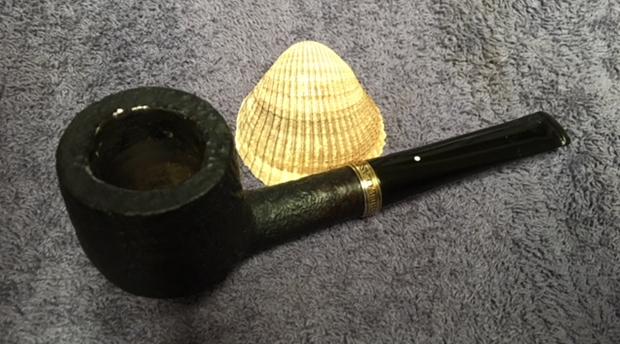
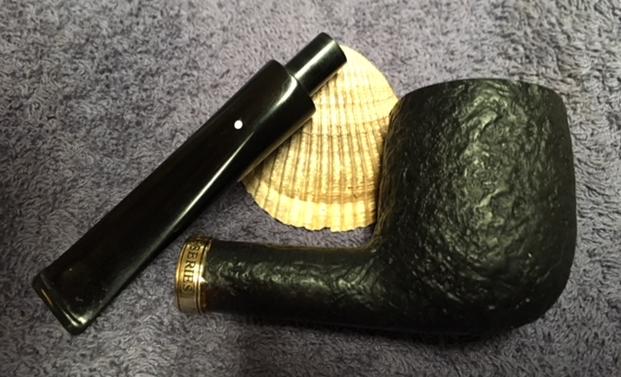
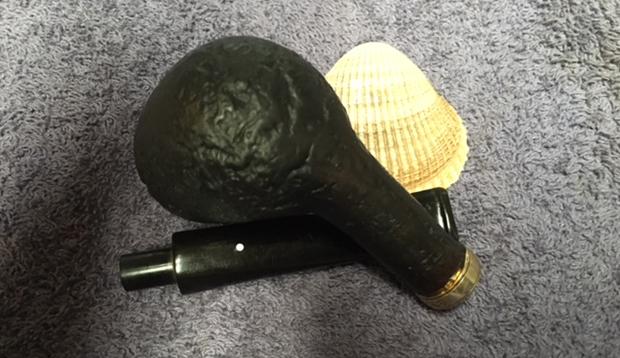
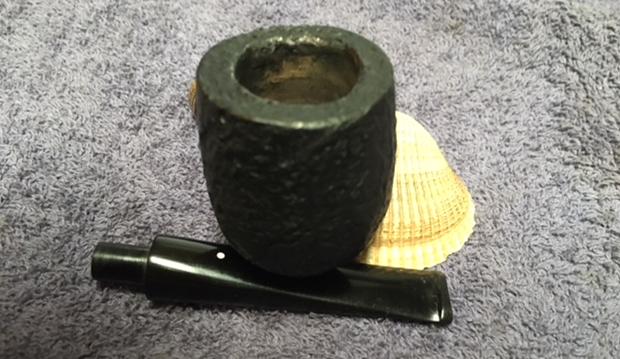
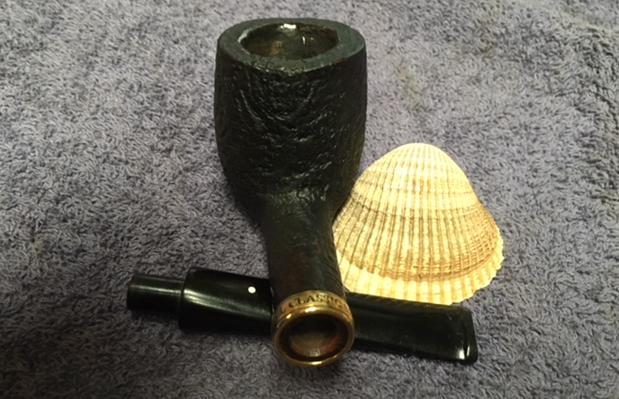
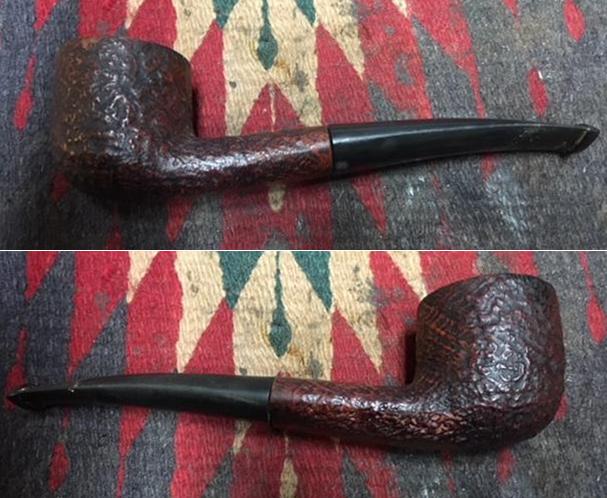
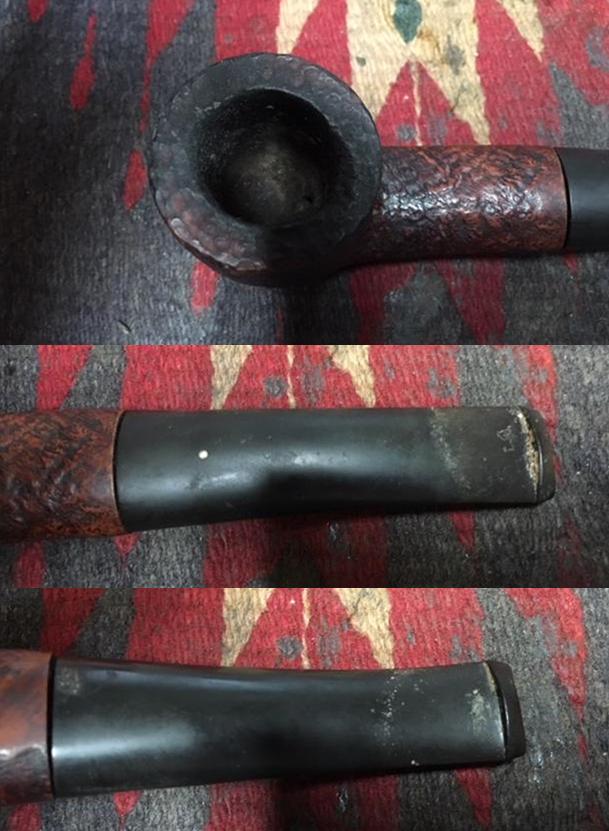
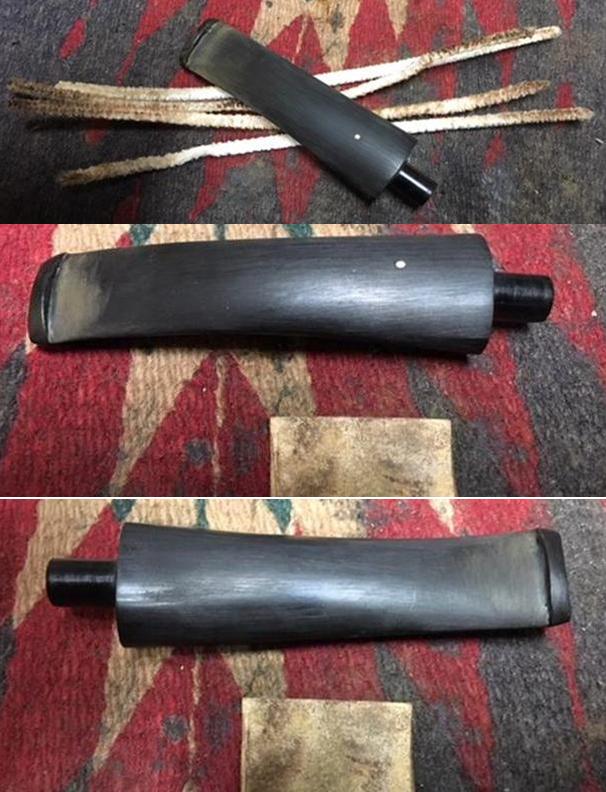
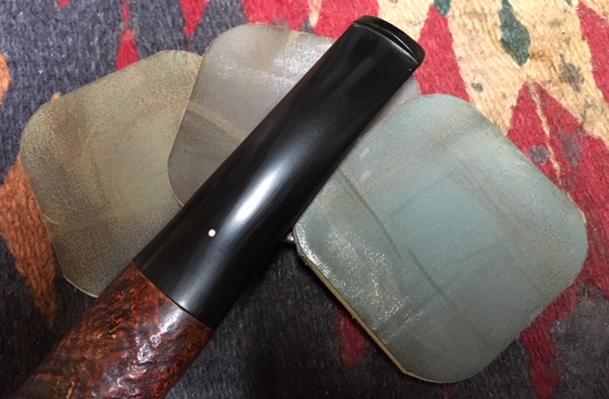
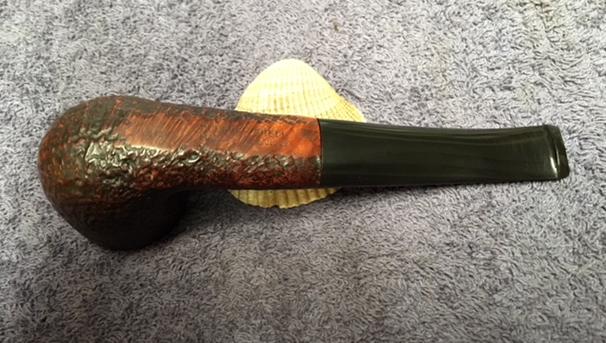
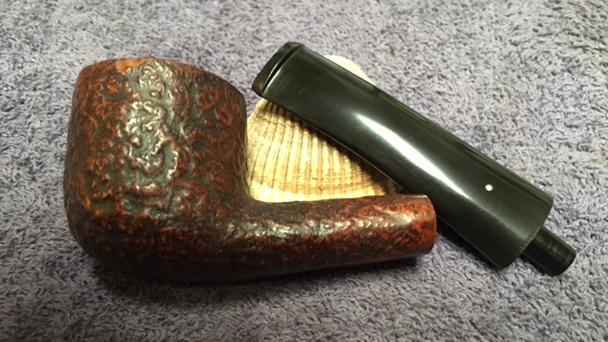
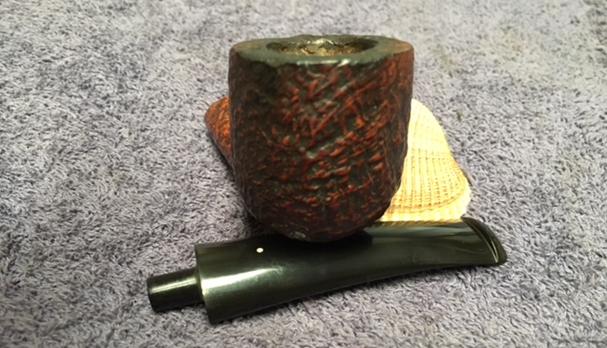
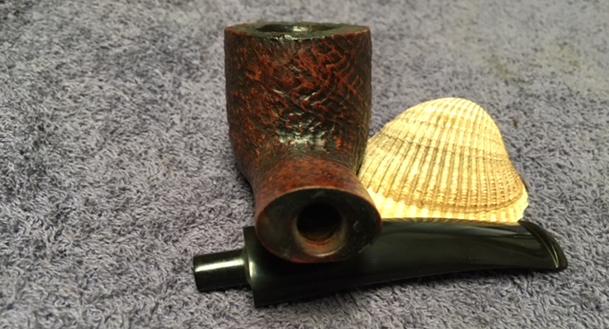
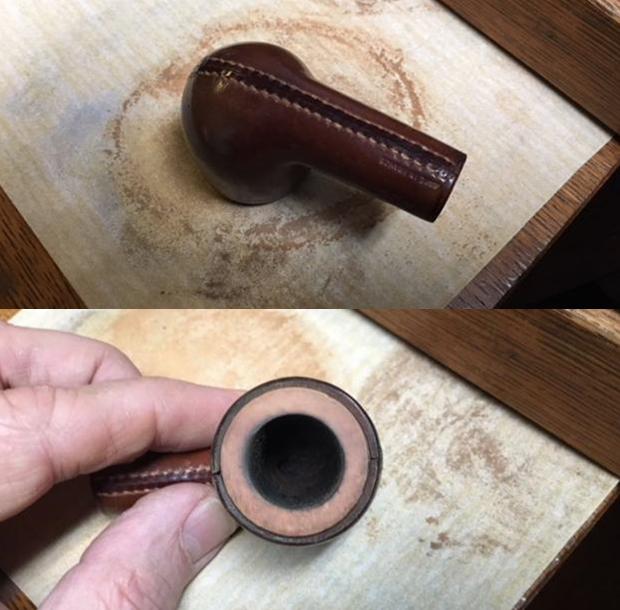
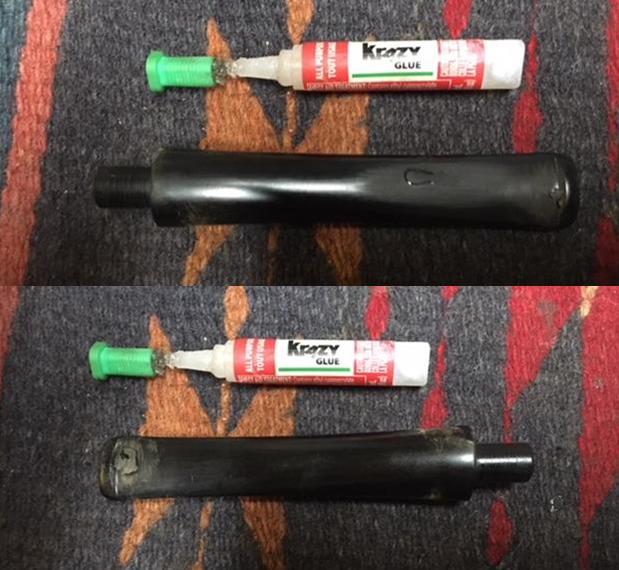
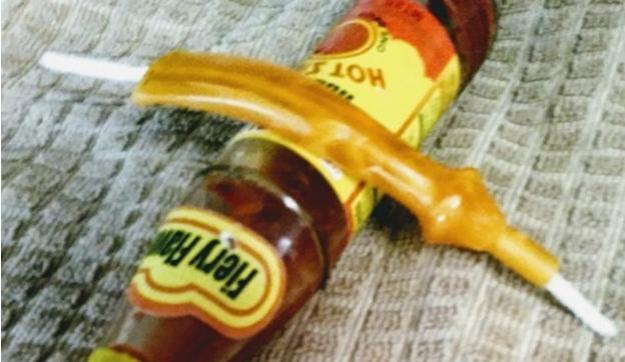
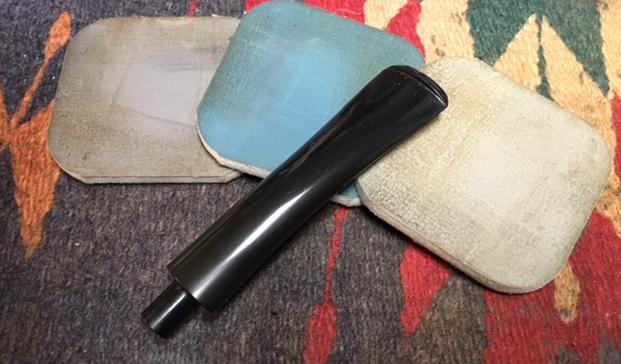
 After choosing the full refurbish course, I began with the replacement of the original Vulcanite bit that had broken during a harried move using my car. The photos below show the bit as it was before I smoothed it out when I first bought the pipe.
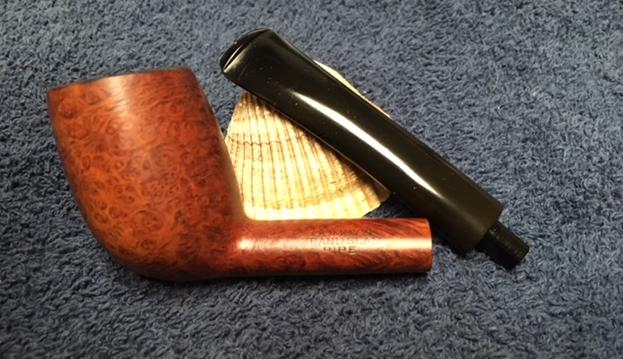
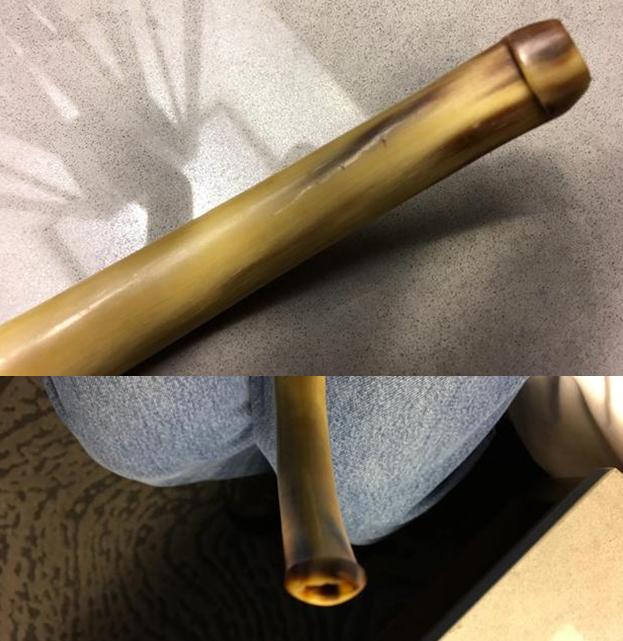
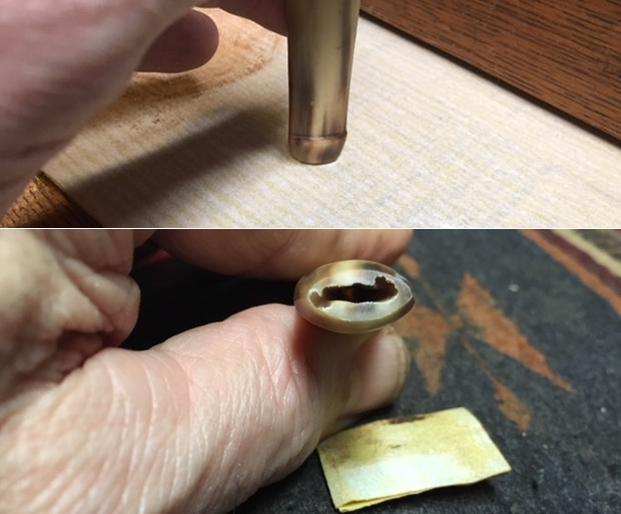
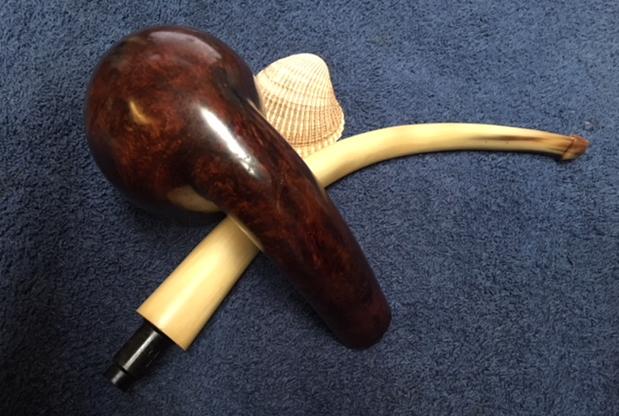
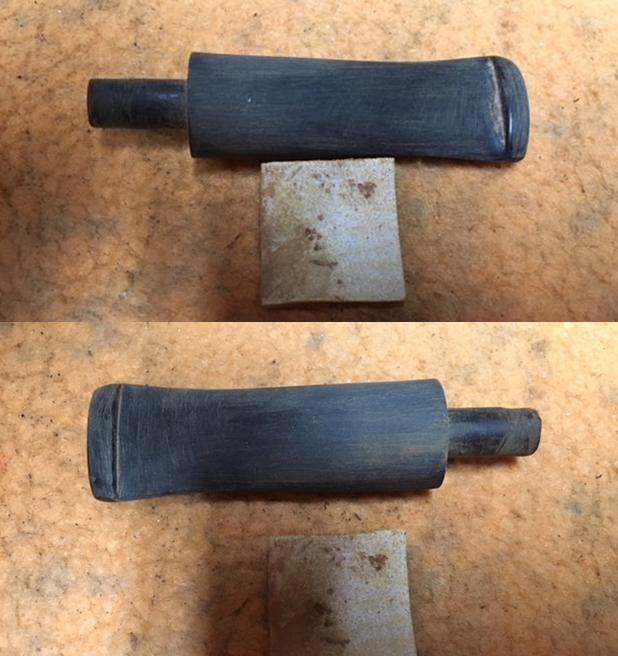
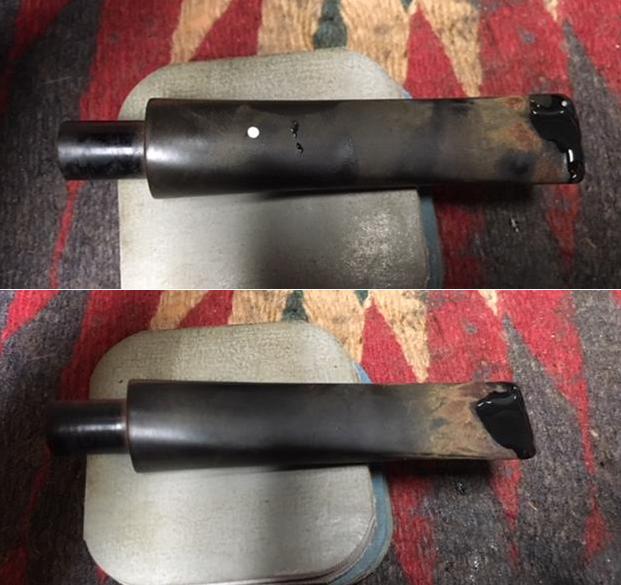
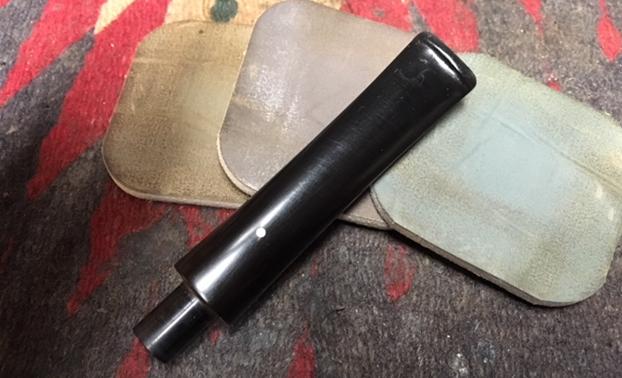
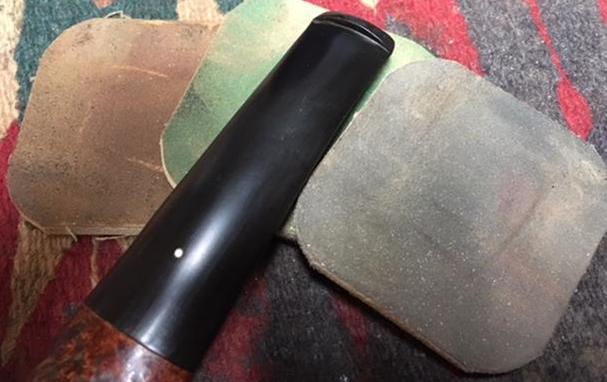
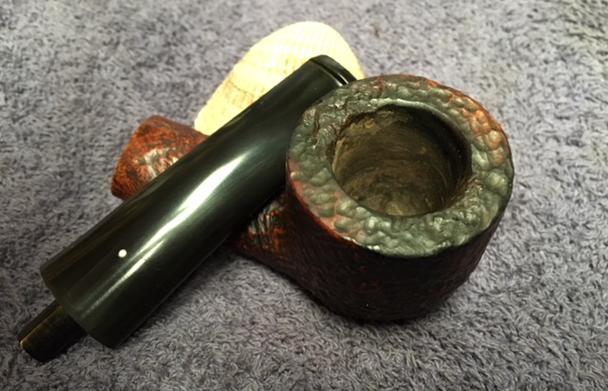
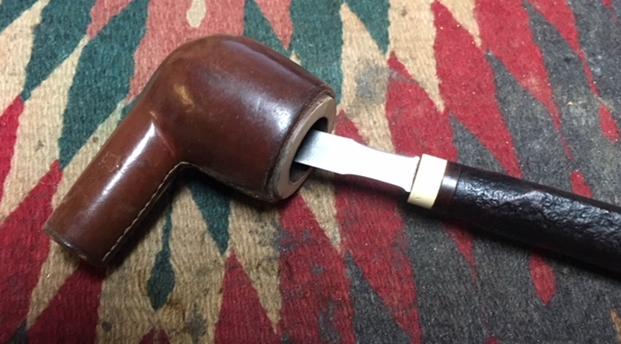
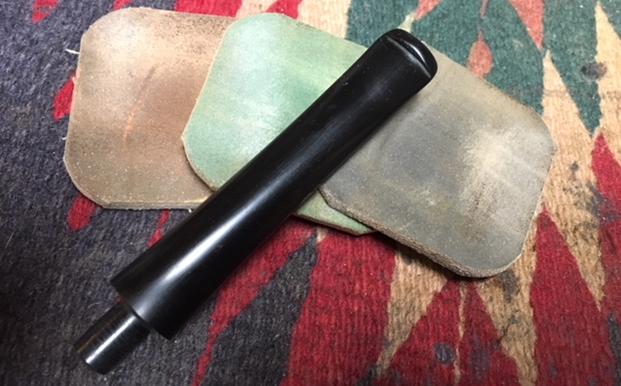
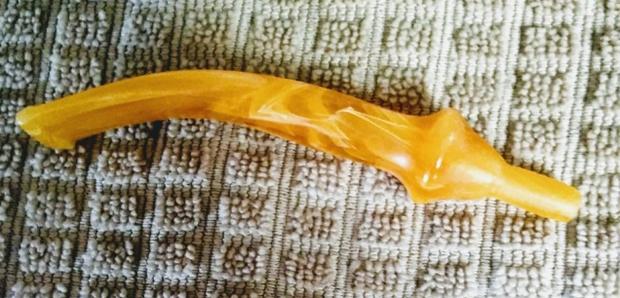
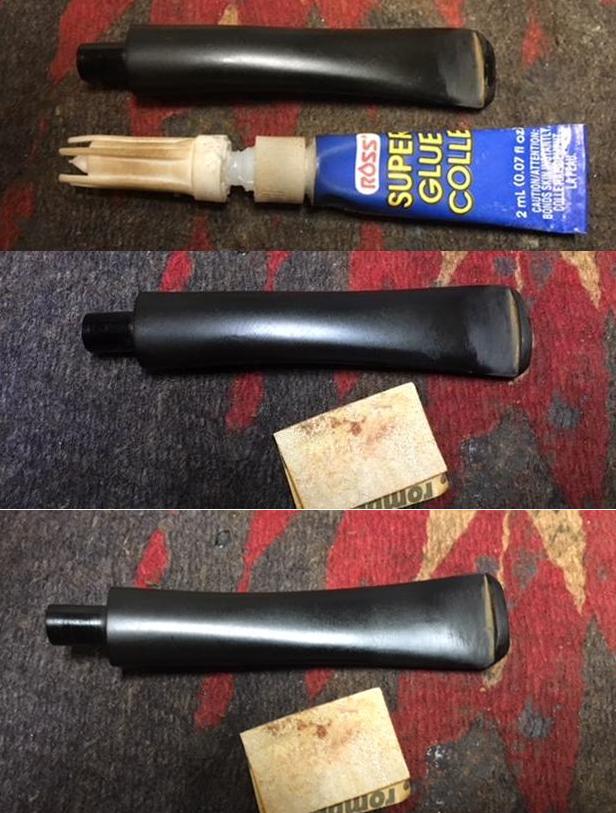
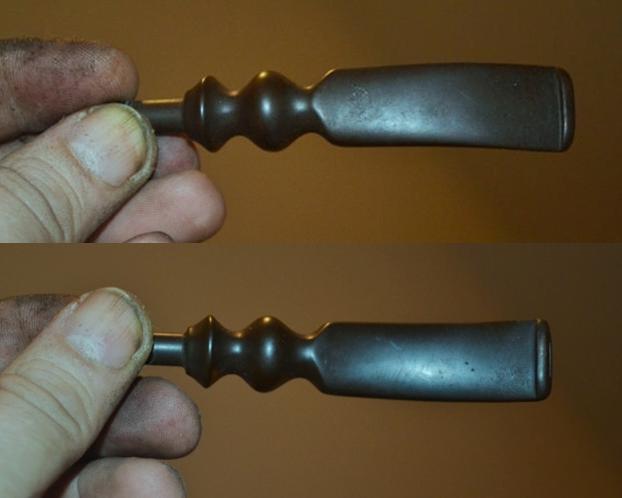 Here’s a similar new Lucite bit as it came in the mail, showing the huge 9mm tenon that was almost the same diameter as the one I used.
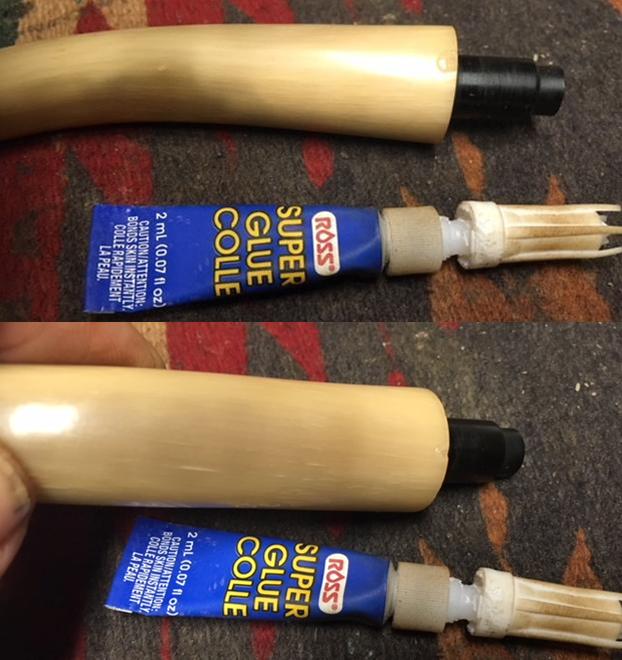
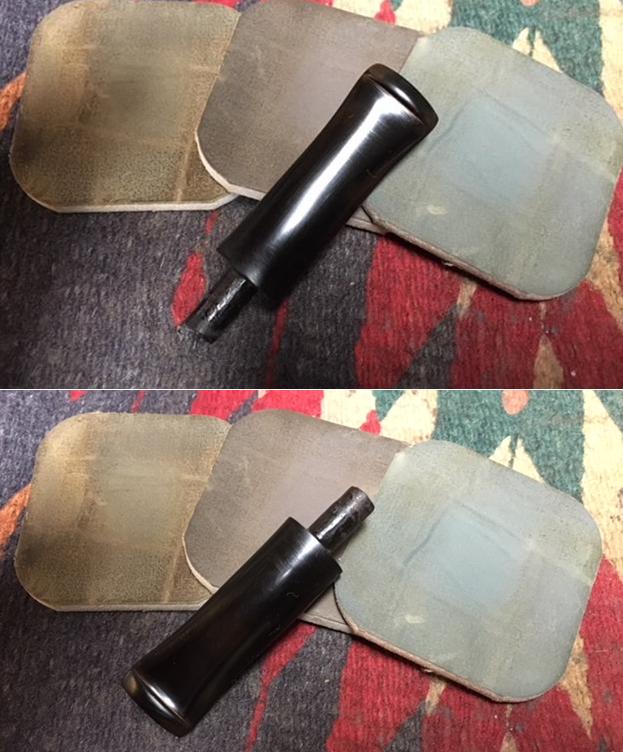
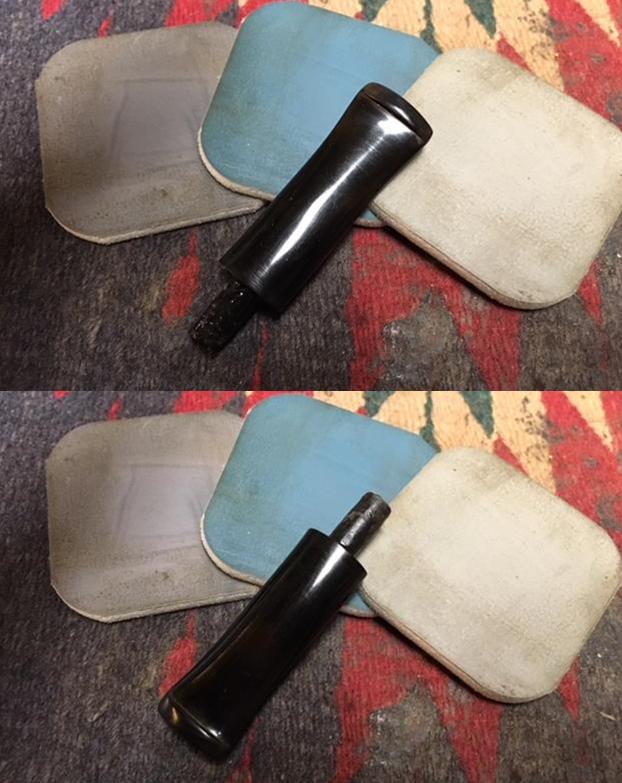
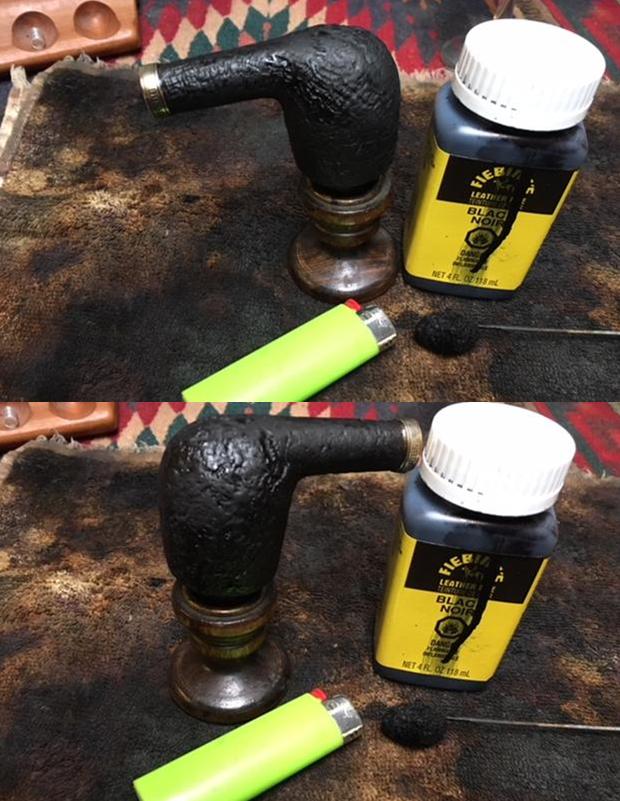
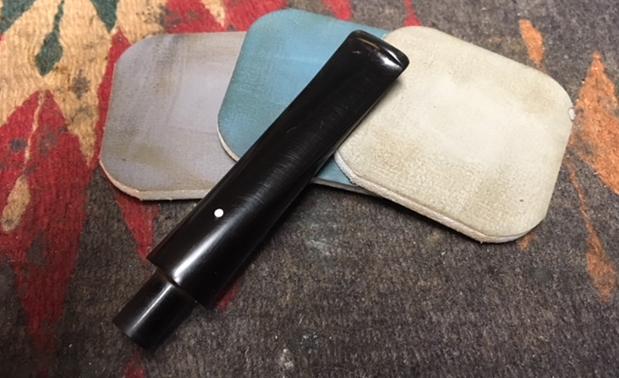
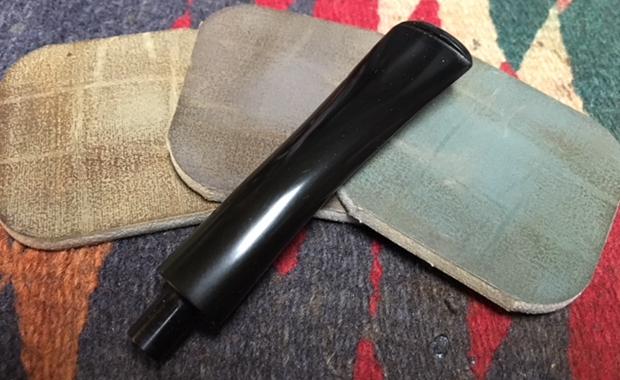
 If I owned a proper, electric stem turner, the job of fitting the tenon of the fancy Lucite bit to the shank opening would have been easy. But I had the pleasure of doing it by hand, and after previous experiments I didn’t want to mess it up with a single miscalculated stroke of a file. That left the sandpaper method. And now the fancy replacement, after hours of going over with 150-grit paper and smoothing with a steady, ascending progression, ready to heat in the oven for about 20 minutes at 210° F., and again after bending.
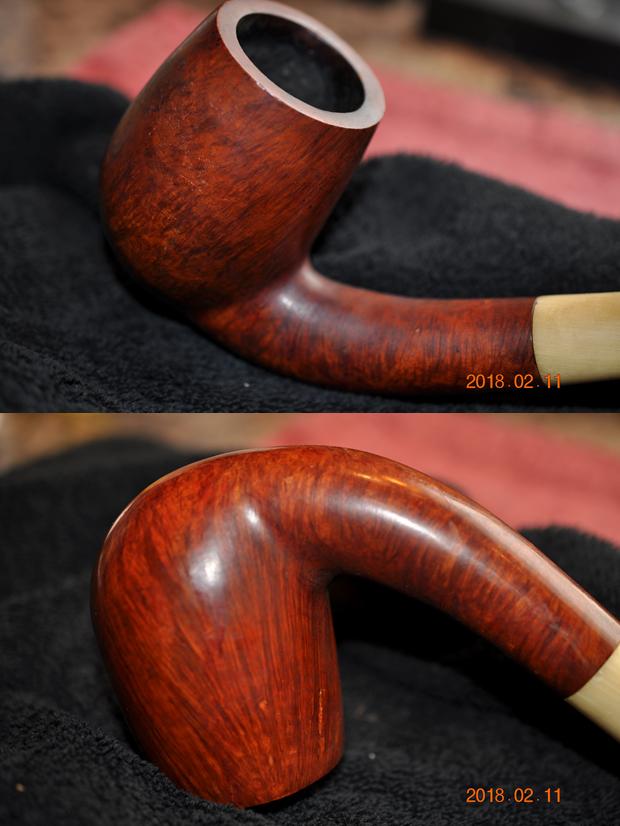
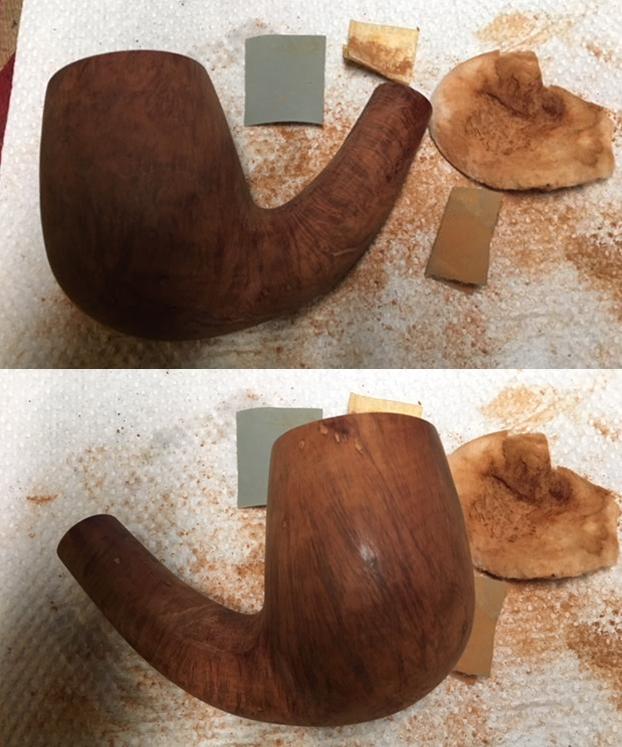
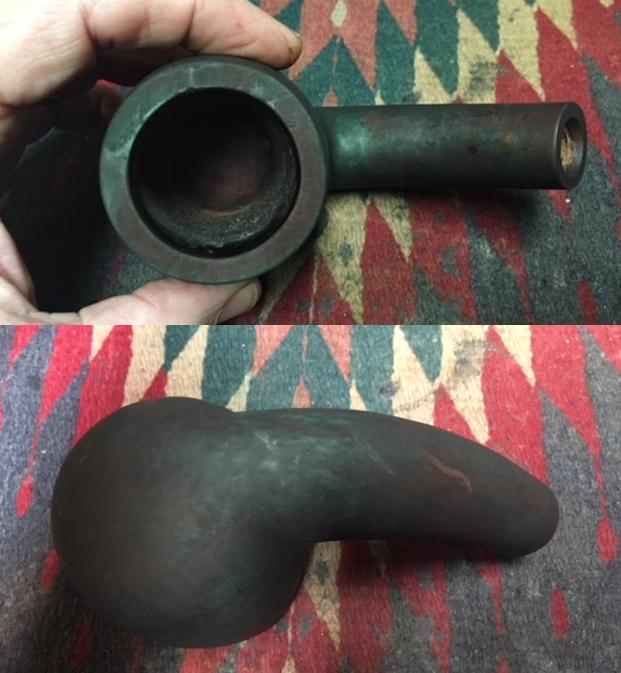
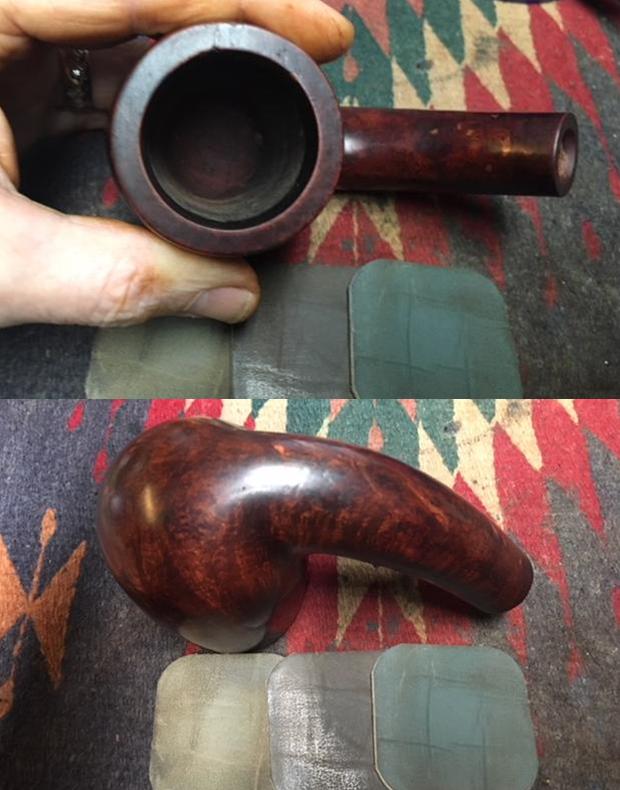
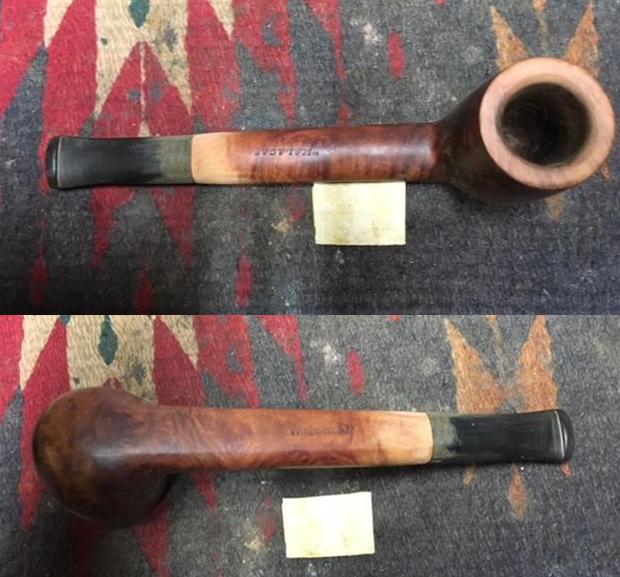
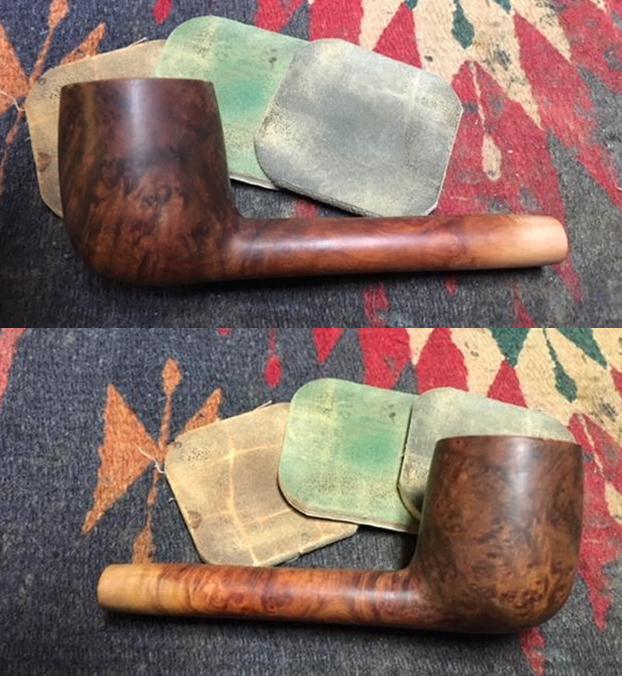
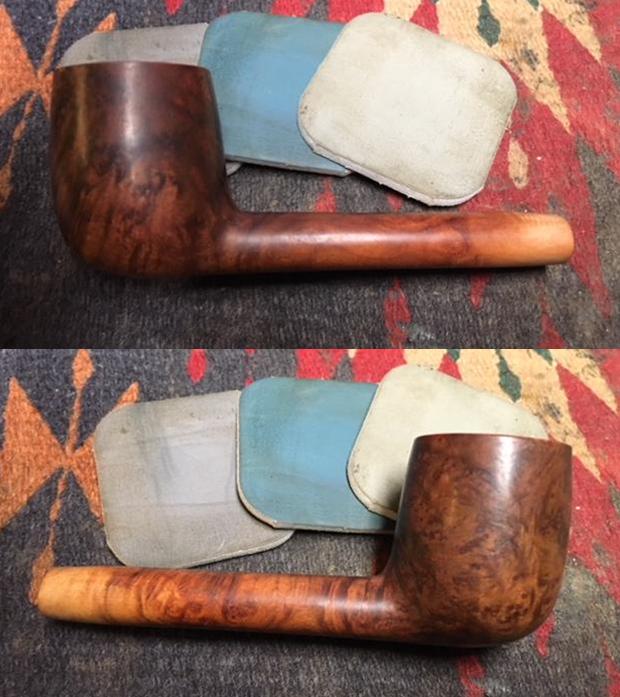
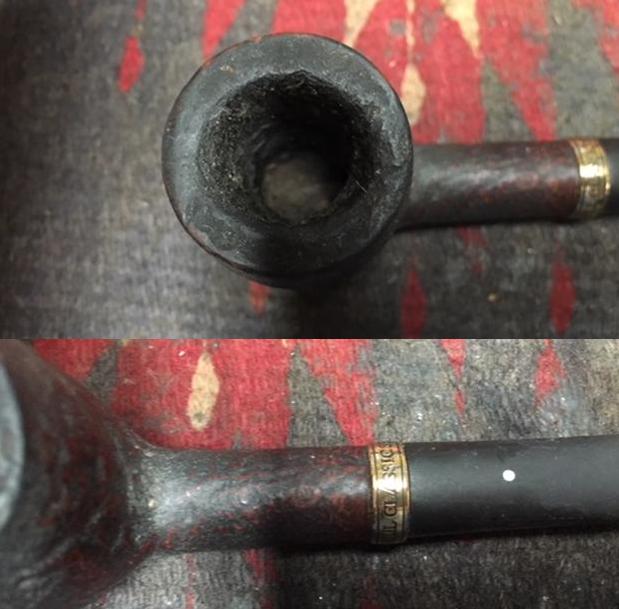
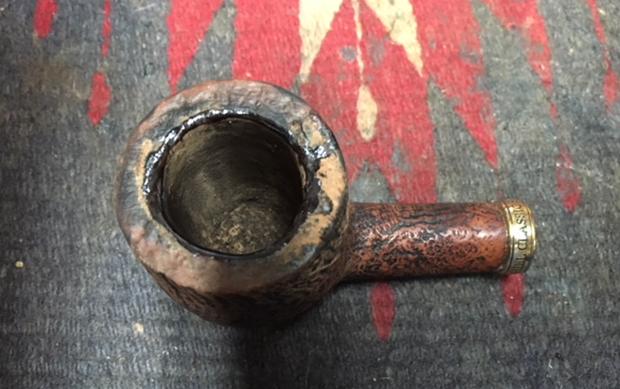
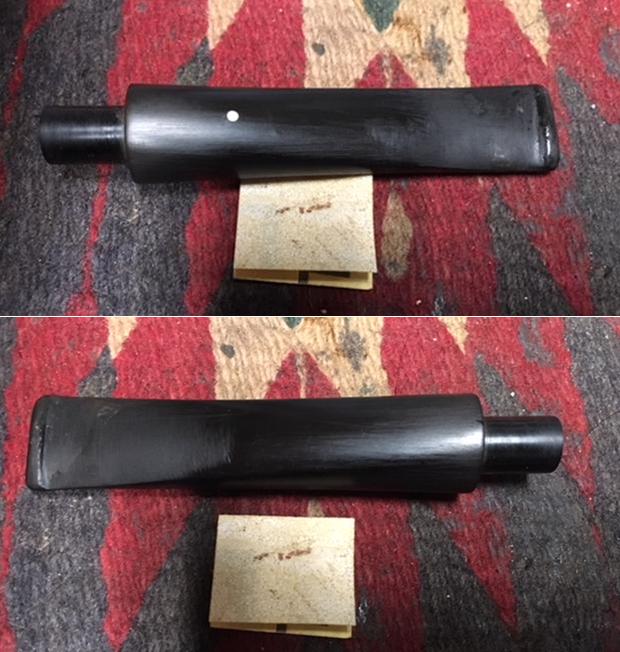
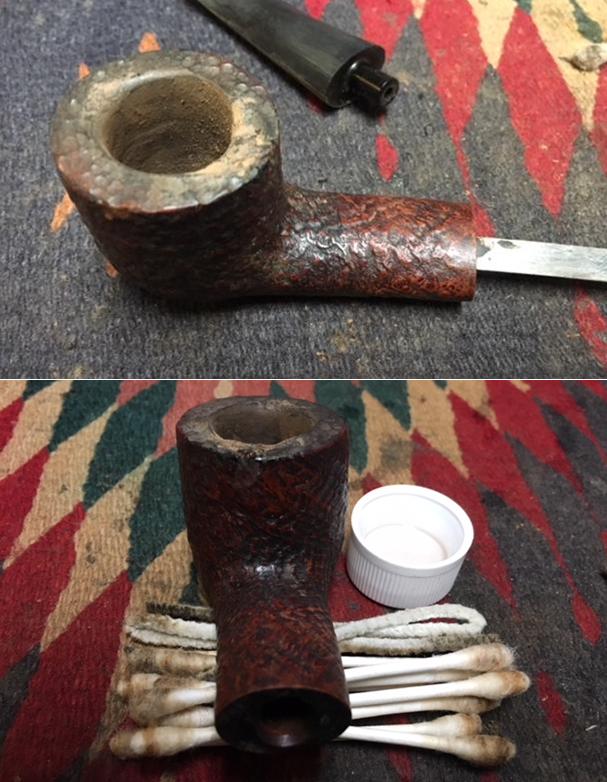
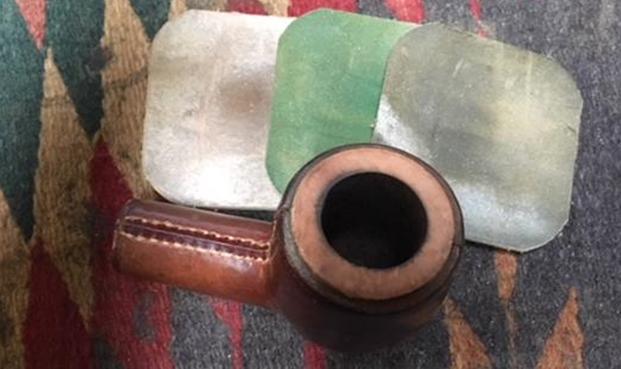
 I micro meshed the stummel, other than the rim, from 1500-12000.
 I was ready to soak the stummel in isopropyl alcohol.
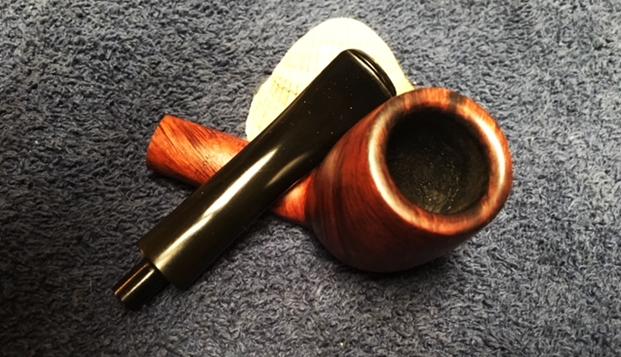
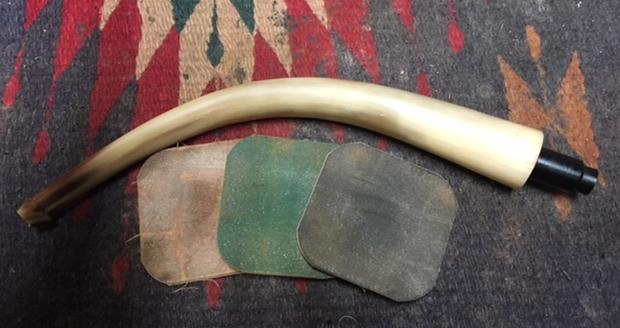
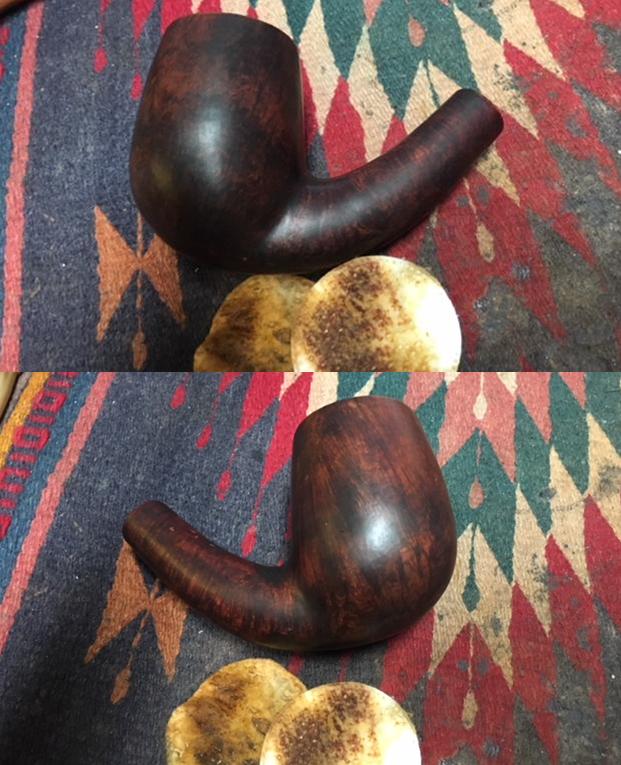
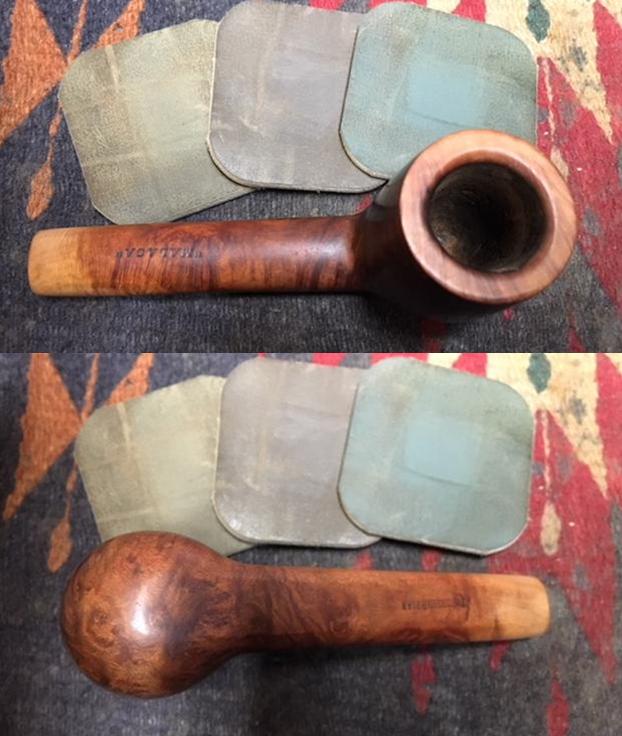
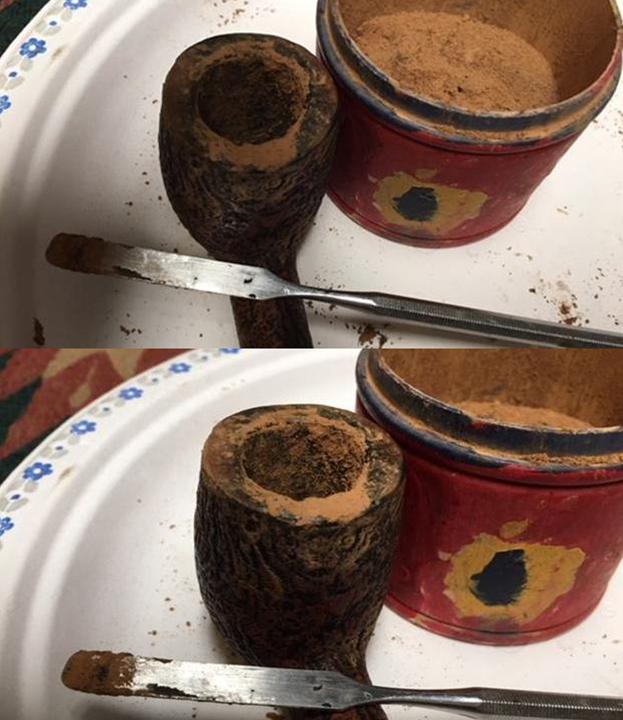
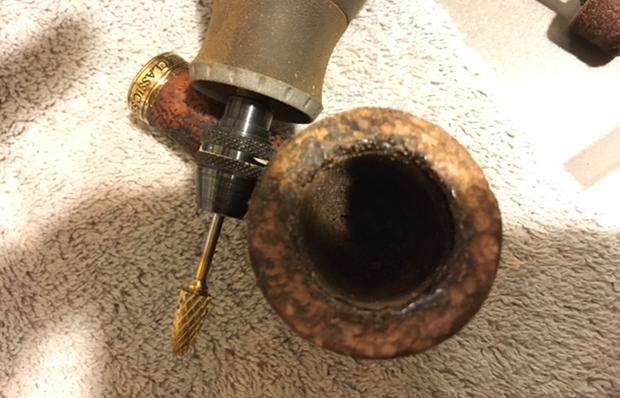
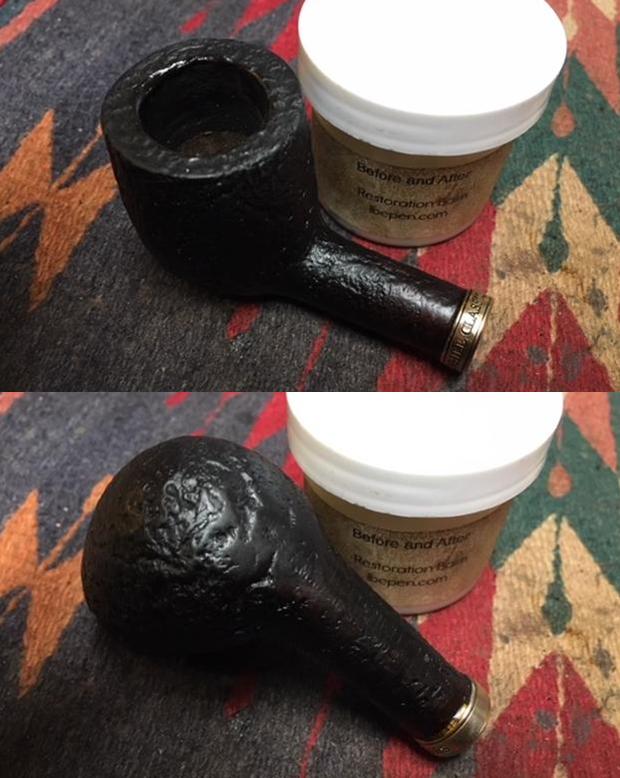
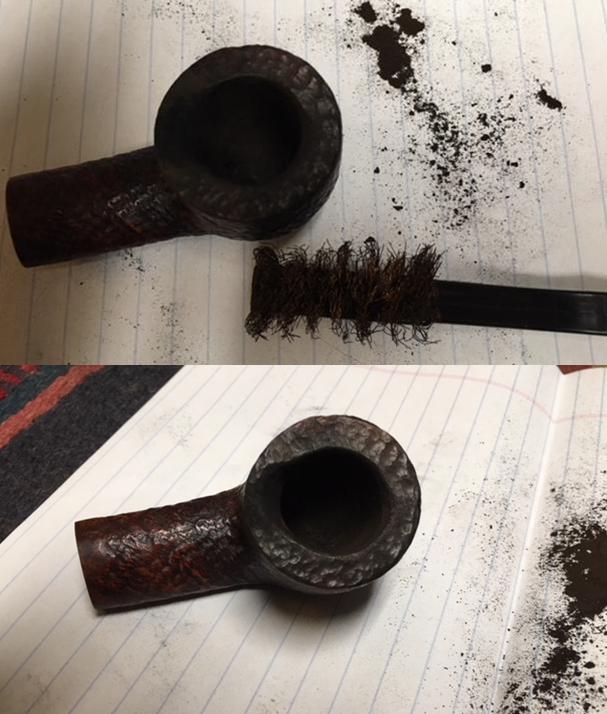
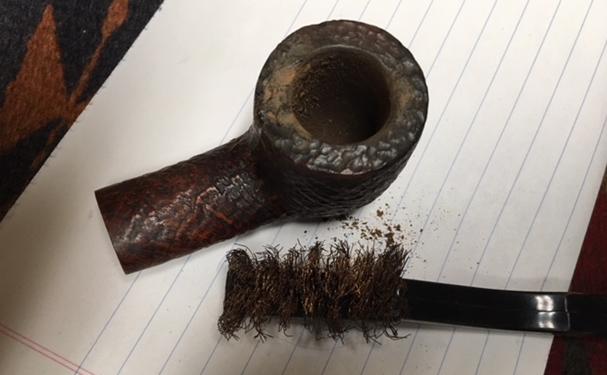
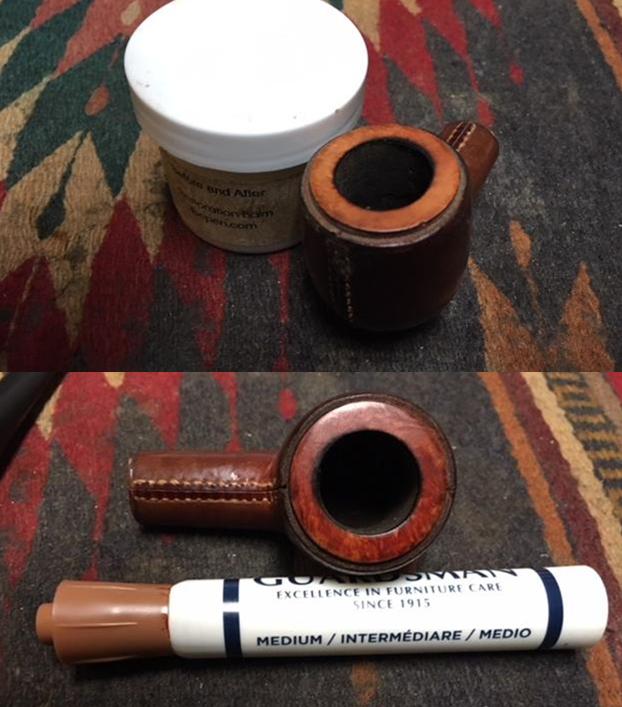
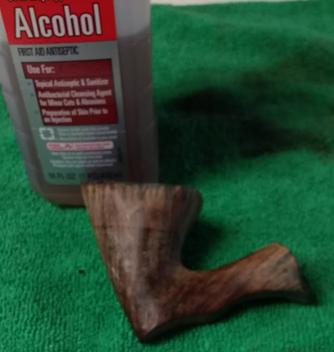 Micro meshing again, the wood was nice and smooth, and the rim and shank opening only needed some work with the 180-grit side of a sanding pad.
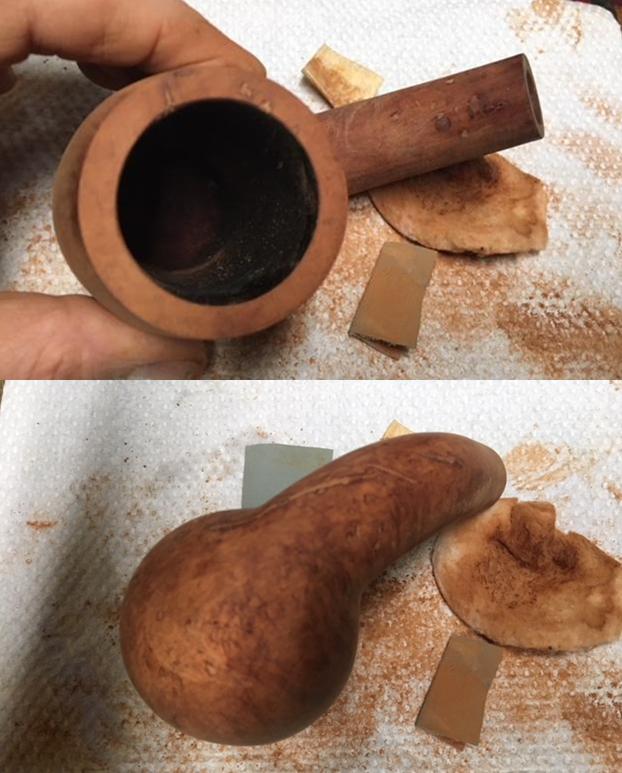
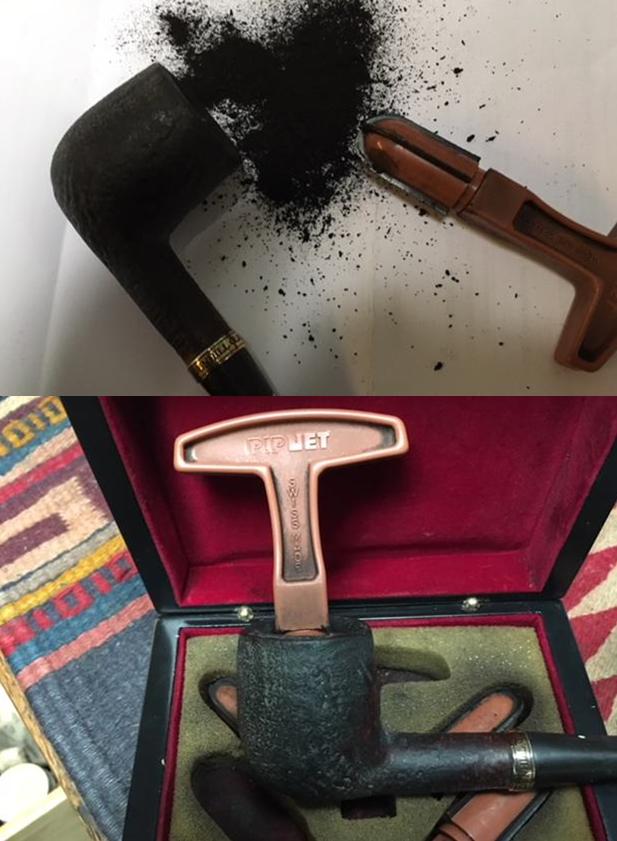
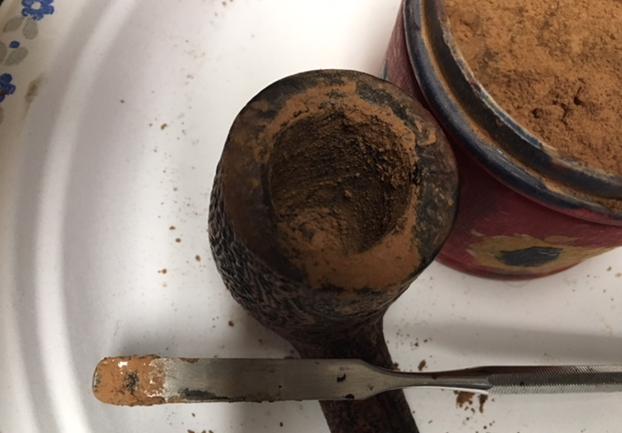
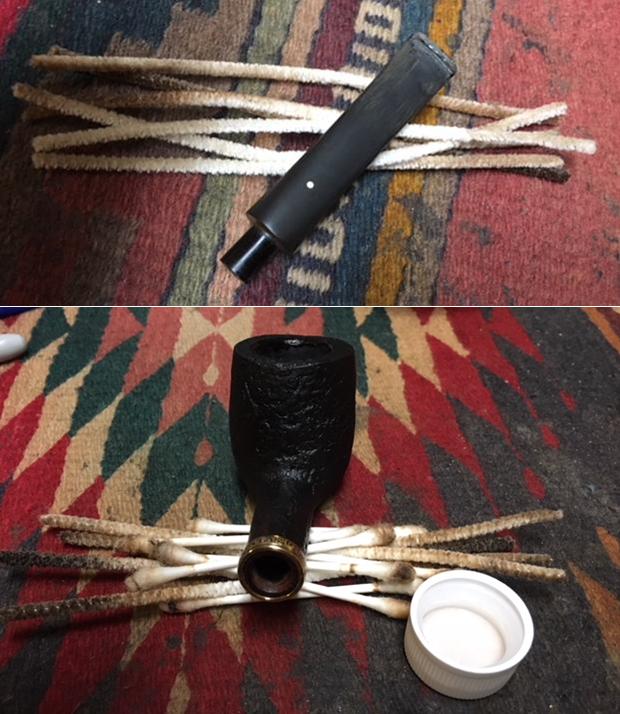
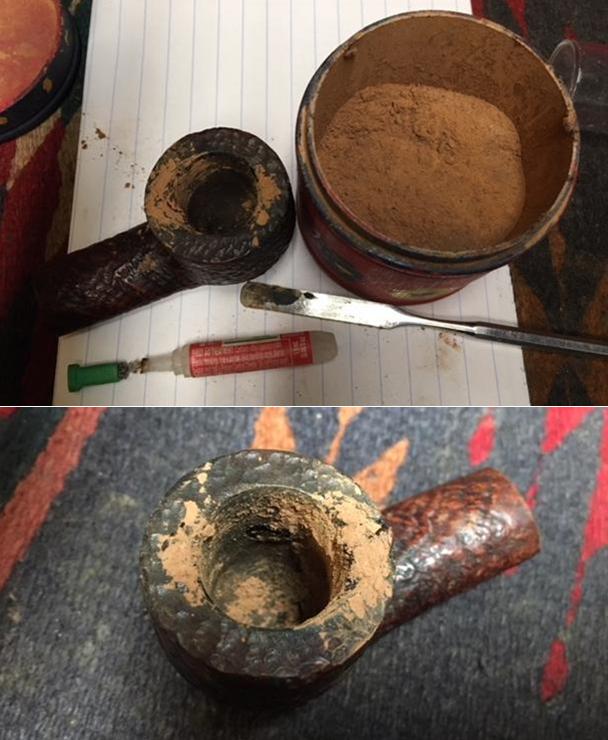
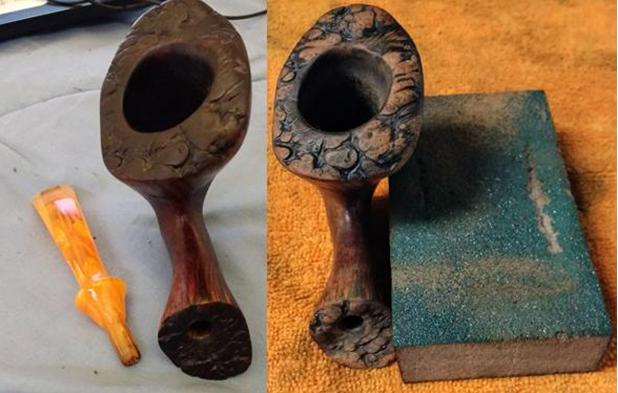 Reaming and sanding the chamber from 150-600-grit paper, that part looked much better.
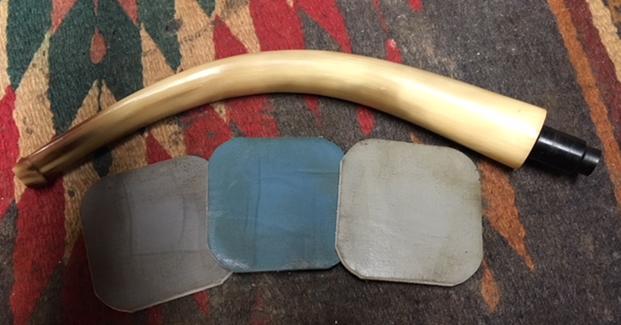
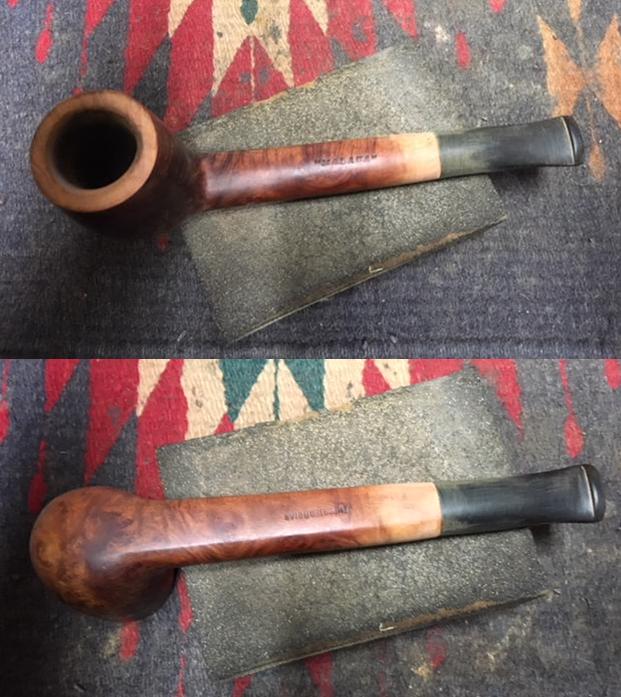
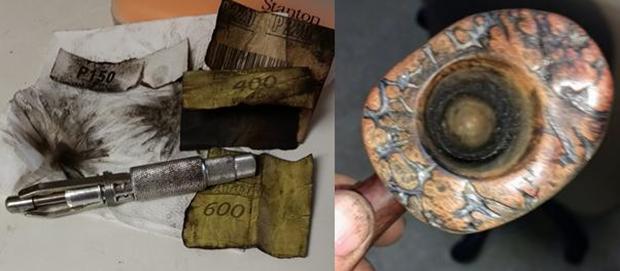 Just for good measure, I retorted the pipe, and the result was magnificent.
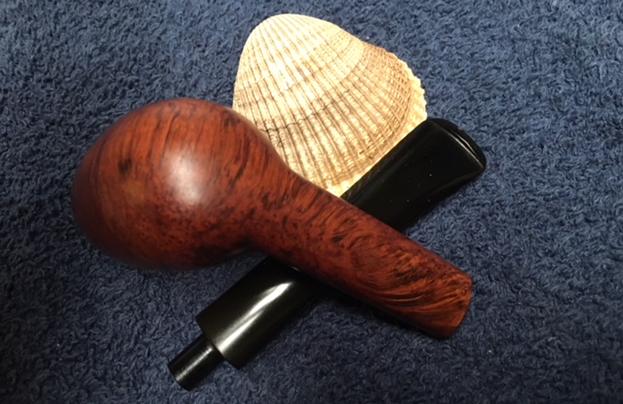
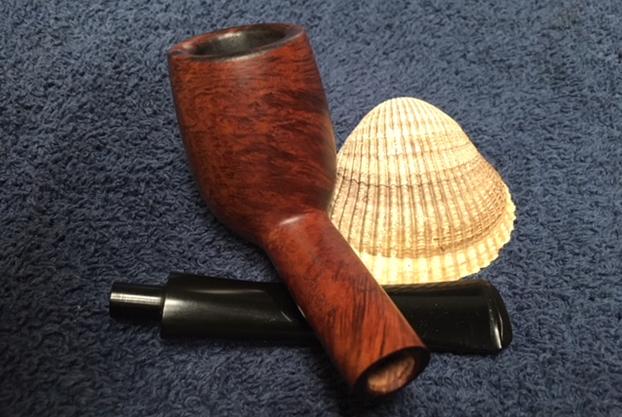
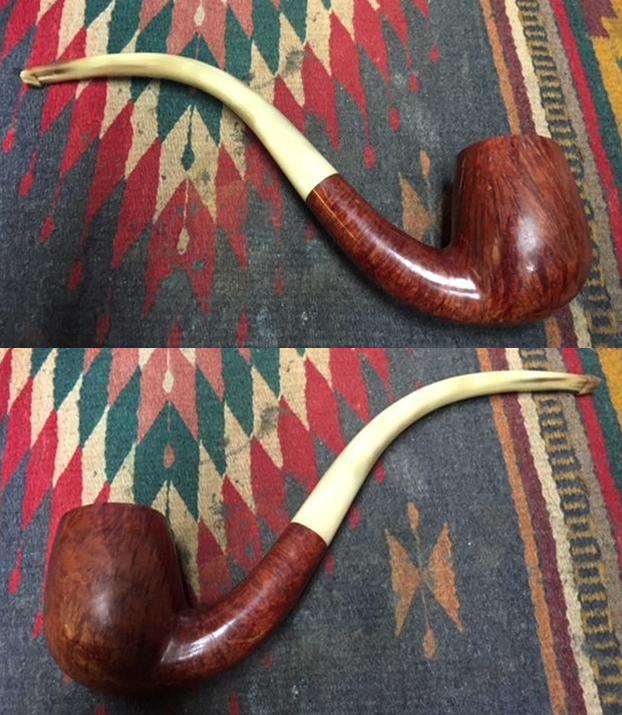
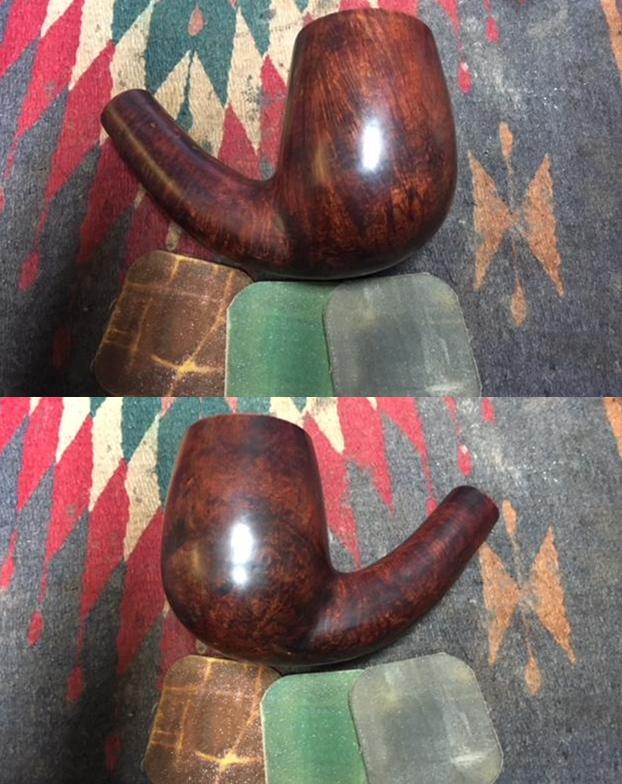
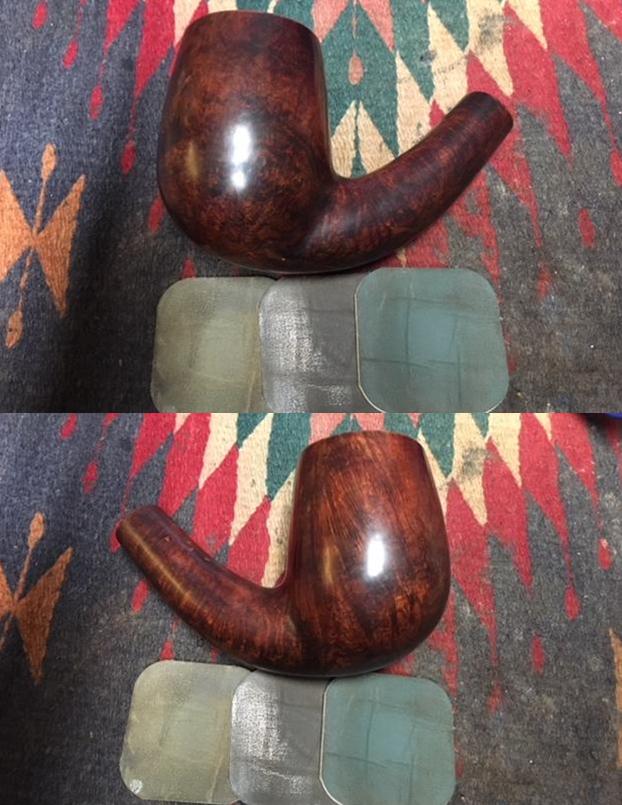
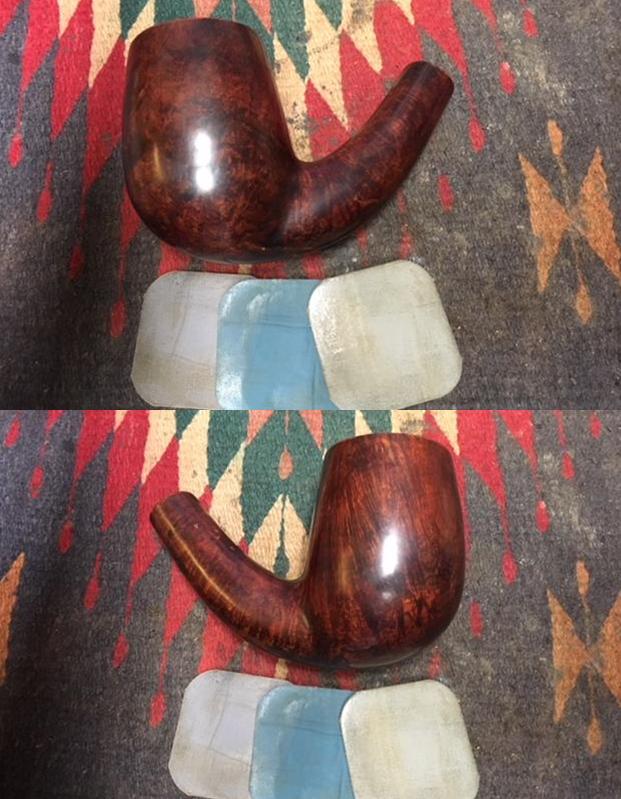
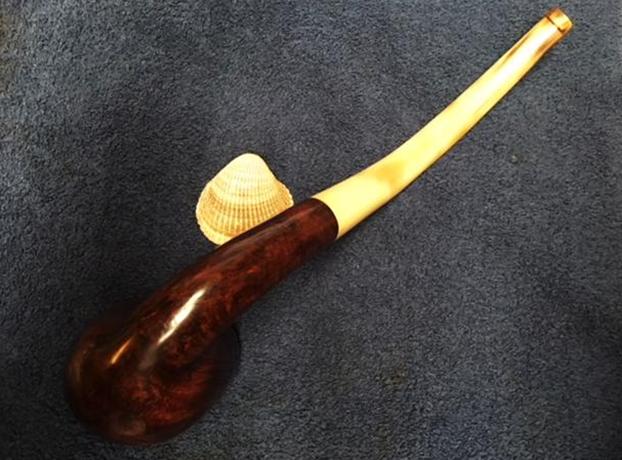
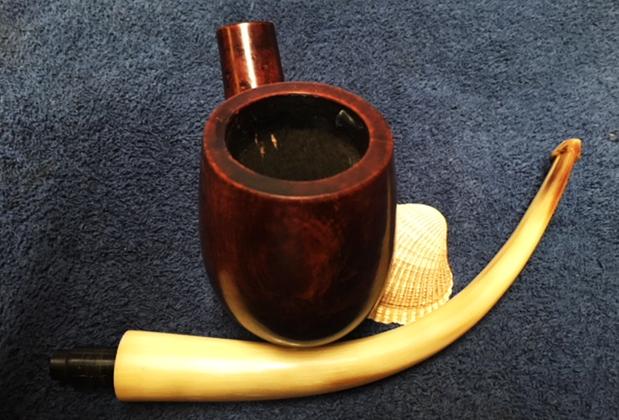
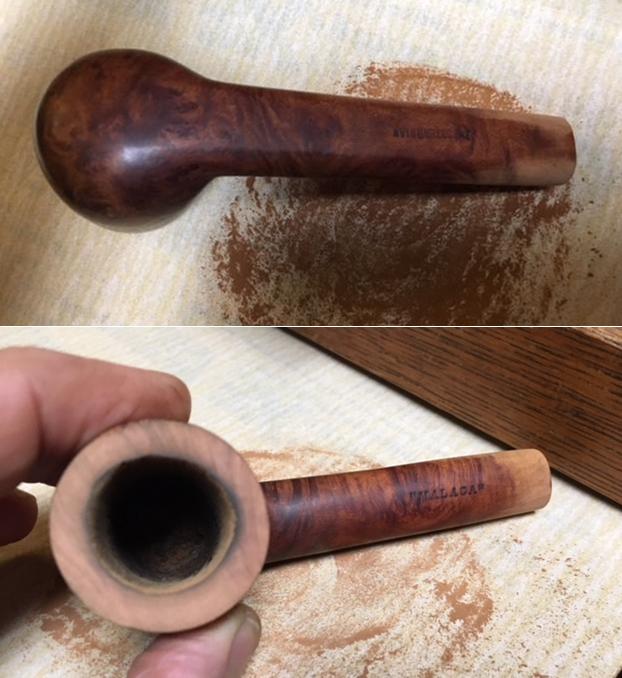
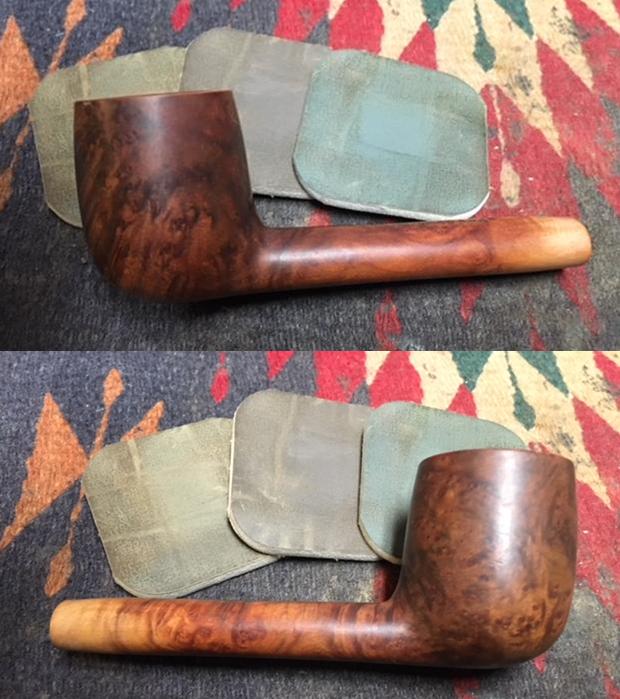
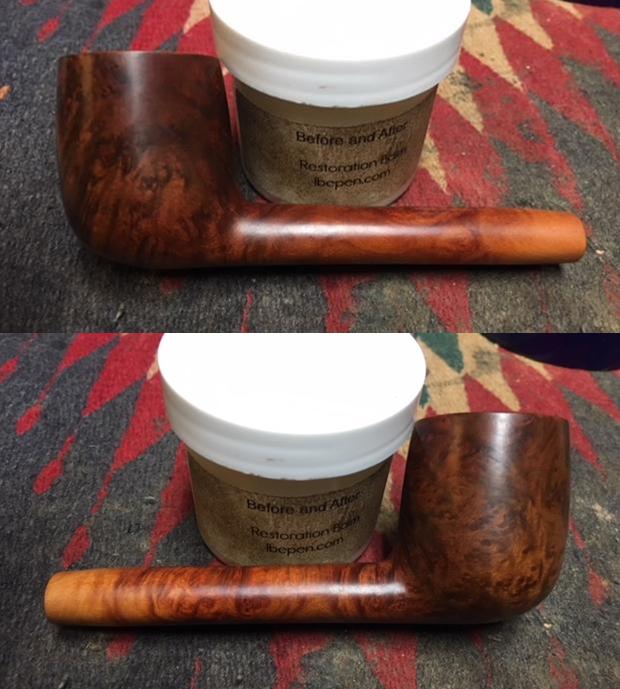
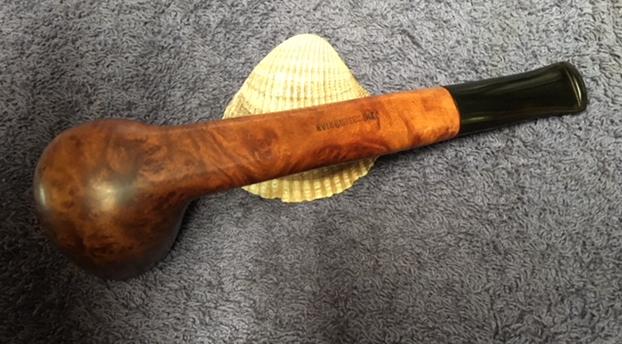
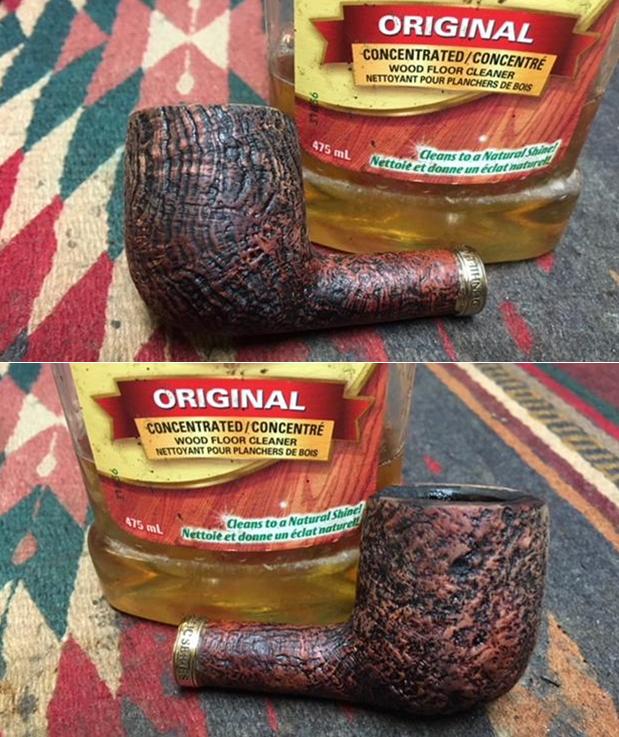
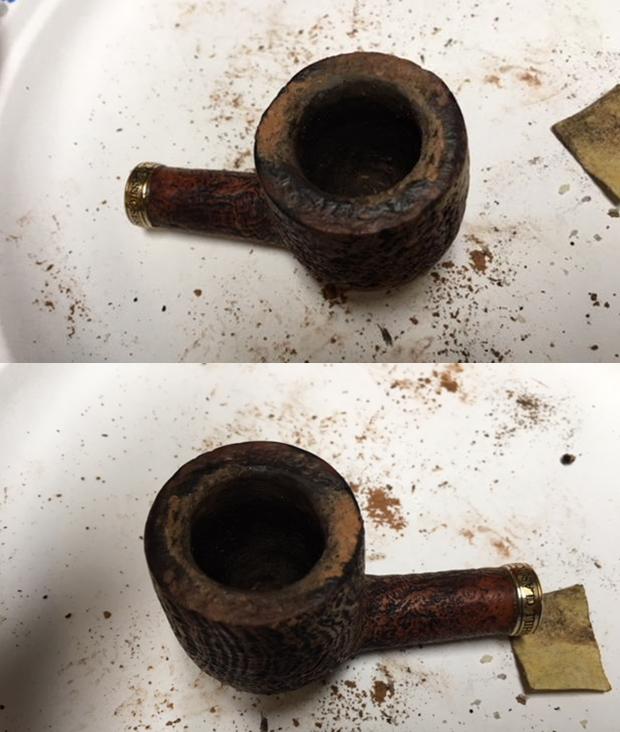
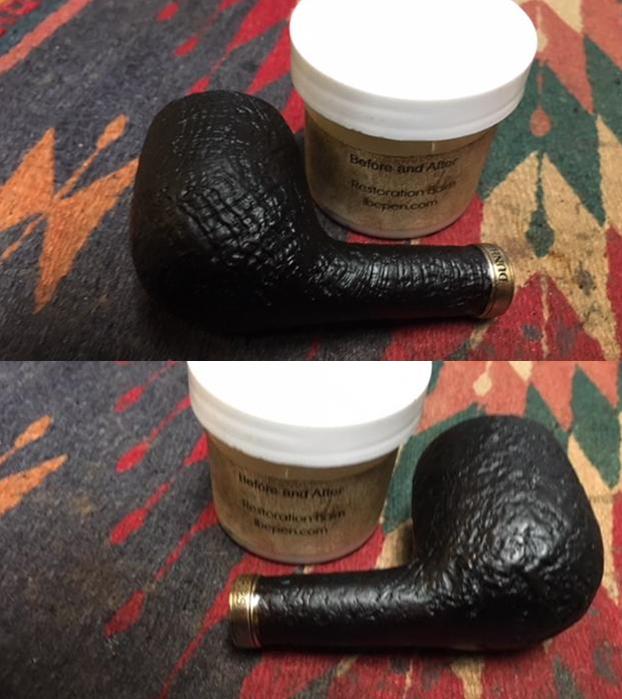
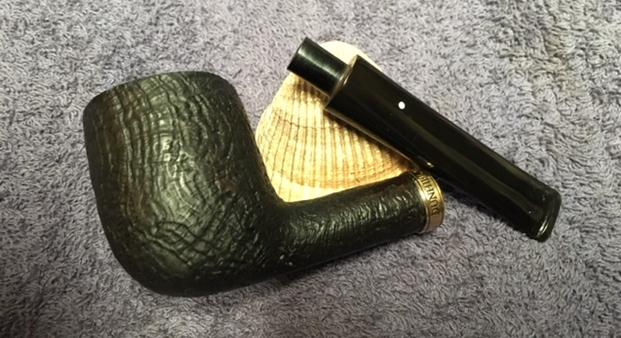
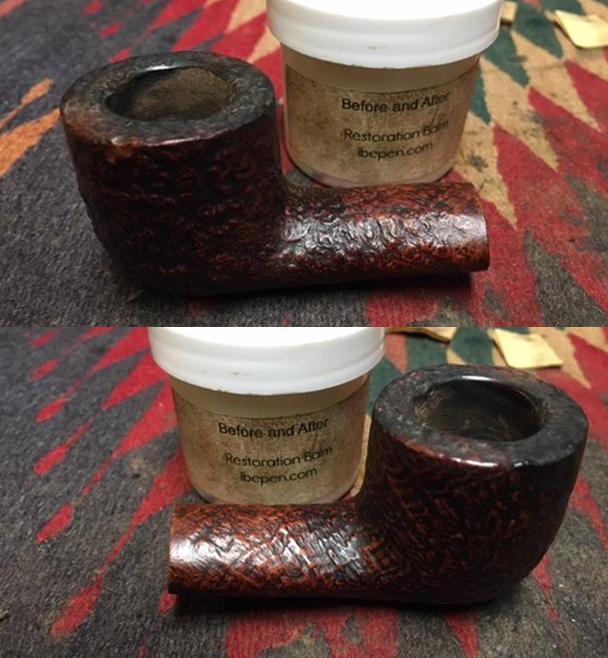
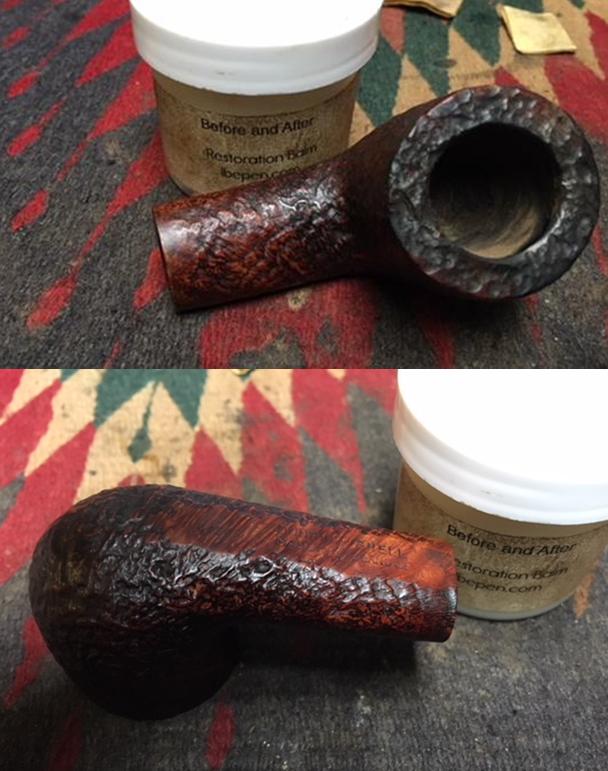
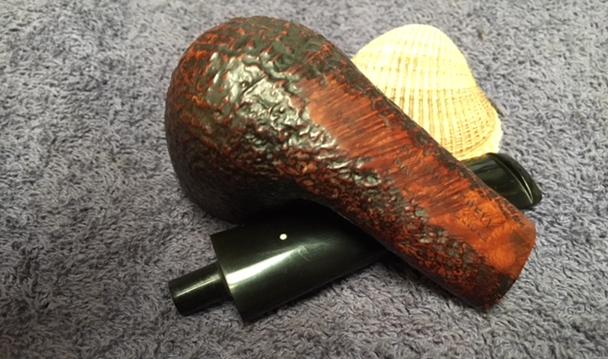
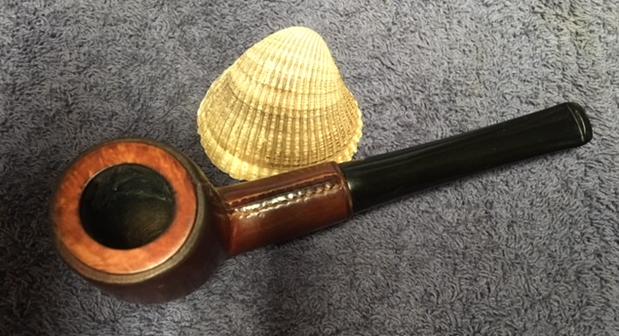
 Having re-thought my initial desire to lighten the wood, I used red and brown Tripoli and several coats of carnauba in the buffing.

 CONCLUSION
Wanting more than anything else to get an idea of what Holm was like as a person, I put the question to Lon. His answer came back with almost no delay.
“Preben once bought a 1960s Chevy Camaro – a muscle car – for about $3,000.” After a pause, Lon finished. “He shipped it back to Denmark. It cost him crazy money, at least $100,000, to do this, but that’s how he was: a rock star. He was the only person in Denmark with that kind of car!”
Perhaps because I am a recovered alcoholic with 30 years of sobriety, something in the pervasive silence concerning the cause of Holm’s early death made me suspect that alcohol was involved. Looking at various photos of Holm, I couldn’t help noting the sadness of his face and eyes. At last, I found a single comment in a thread about Holm’s Ben Wade pipes on a popular smoker’s forum that read in part, “Preben literally drank himself to death…after his wife bolted with the kids.”
And so, again, but with difficulty, I turned for an answer to the man who might have been the best friend Holm ever had. There was a long pause before Lon replied.
“When he was very strong working, making crazy money from his pipes, he was drinking a lot, as a youngster will, with everything that goes with that,” Lon said with great care and delicacy. I didn’t ask him to expand on the last part. “He was a rock star! He didn’t know what to do with that. He was getting everything he wanted and was bored.”
We both fell silent for a moment before Lon concluded, “I think we’ve said everything that needs to be said about that.”
I agree.
My hope is that this two-part essay will inspire future pipe makers, hobbyists and artisans alike to take up Chasing the Grain. I, for one, intend to try my hand and imagination at the noble goal, even if the results are less than spectacular.
I want to express my deep gratitude to Lon, a consummate gentleman, for his invaluable help filling in details of Preben Holm’s life, craft and various business adventures. Lon was unstinting in taking the time to share his reminiscences, not one but three times. The only protest I have is that Lon ignored my repeated requests for a photo of himself of his choosing. That’s why I was forced to track down, with great difficulty, the one I used. So, Lon, don’t blame me if you don’t like it!
Lon also opened up about himself. Born in 1940 in New York and now retired as a pipe buyer and seller, Lon described himself as the only child of highly educated parents who considered him “an idiot” because of his dyslexia.
“That was my motivation to leave home when I was 17 and look for work in the city,” Lon said in a matter-of-fact tone.
The uncontrollable condition, which causes written letters to become jumbled beyond sense, places Lon in the company of such historical and cultural figures as Leonardo da Vinci, Albert Einstein, Tom Cruise, Walt Disney – and even at least three U.S. presidents: George Washington, John F. Kennedy and George W. Bush.
The idea horrifies me, the more so because, when I was a child, I suffered from another optic disorder that mimicked dyslexia but proved curable. I’ll never forget the shame of not being able to read or write until I turned 10 and moved to Shaker Heights, Ohio, where I was blessed to meet a woman who loved children and teaching more than anything else. Sonia Golden was an innovator in special education and knew how to do her job when my so-called teachers in California had dismissed me as “borderline retarded.”
On his own in the Big Apple, Lon started out as a sales clerk for Wally Frank, earning $37.50/week. That’s $321.63 in today’s dollars – not bad for a start, but a long way from the ultimate success he had after discovering Holm, for all intents and purposes, first partnering with the brilliant pipe maker and later, as a friend, guiding him to bigger distributors.
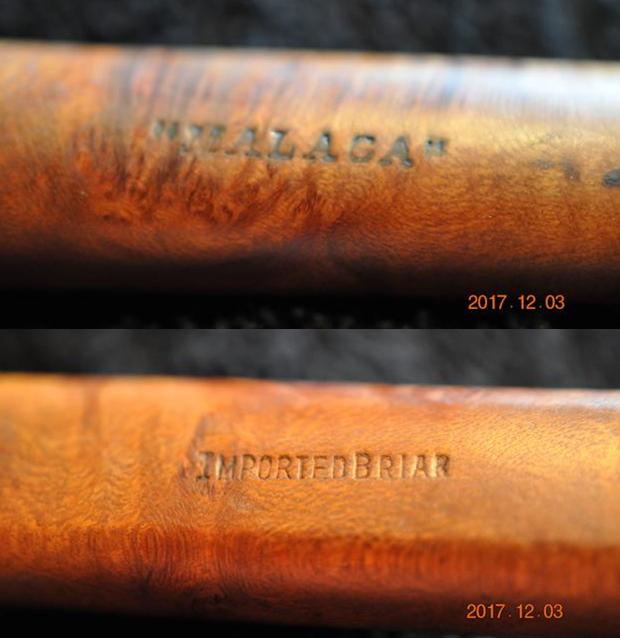
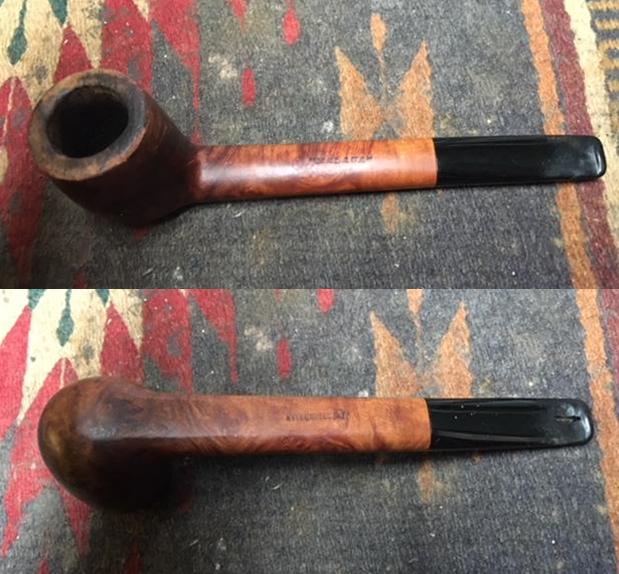
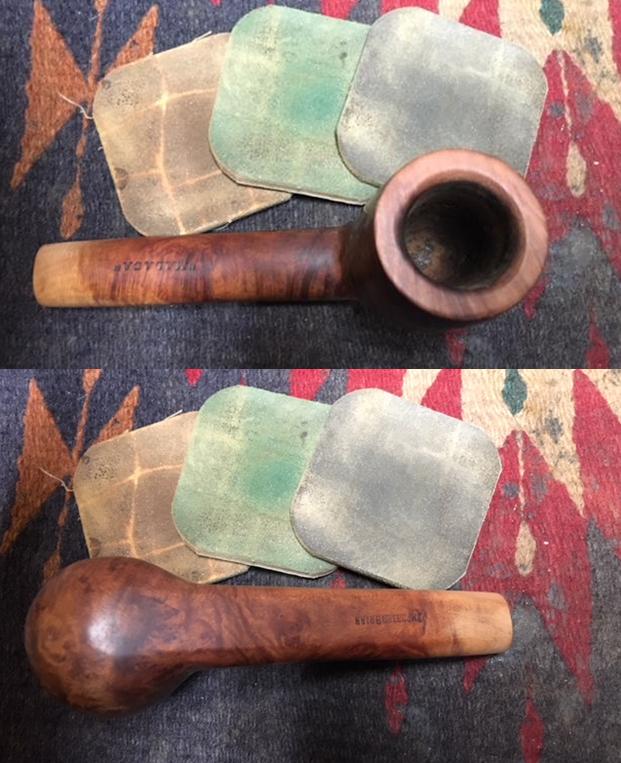
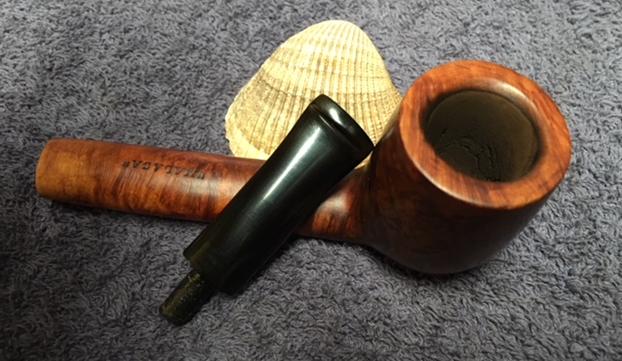
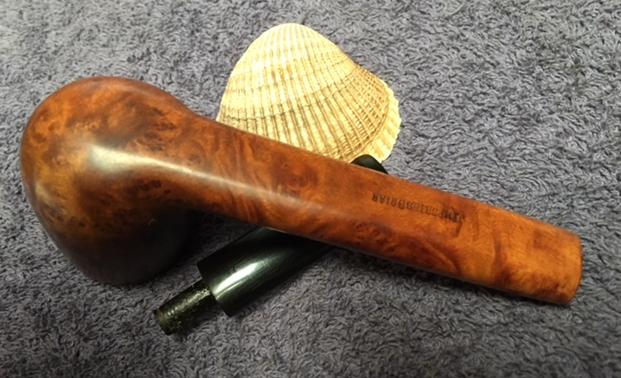
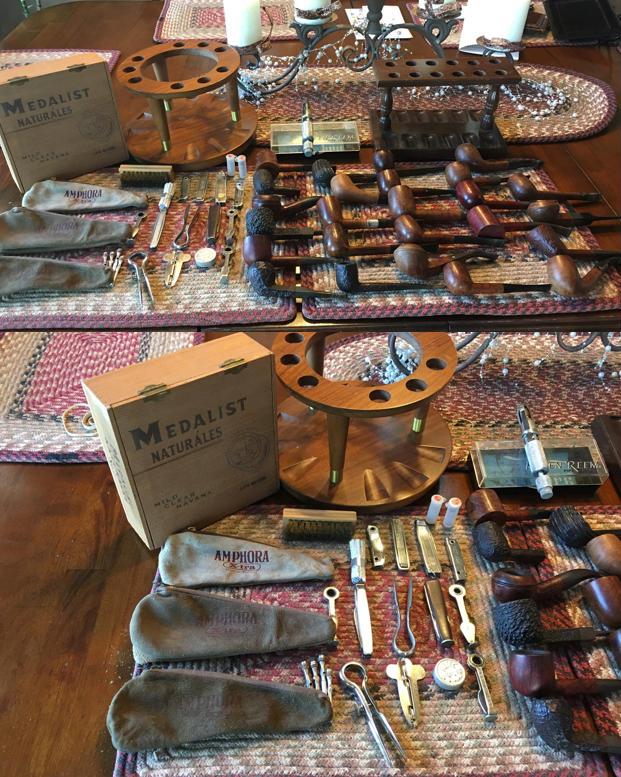
The shop known as Pipe Lon was only for a relatively short time, but the quality pipes he sold there can still be found online. Lon told me he was in the habit of stamping various pipes he sold, whether they also bore the makers’ marks or not, with the following nomenclature. In some cases, only the best guesswork can predict the actual craftsman. * The opening quote strikes me as an elegant example of the habit of personifying wood that I discussed in Part 1.
SOURCES
https://www.cia.gov/library/Publications/the-world-factbook/geos/vq.html
https://www.google.com/search?q=poul+winslow&rlz=1C1CHBF_enUS769US769&oq=poul+winslow&aqs=chrome..69i57j0l5.17027j0j4&sourceid=chrome&ie=UTF-8
http://www.danishpipemakers.com/forside/2006/1update/sixten/sixten.html
https://www.finepipes.com/danish
https://pipedia.org/wiki/Holm,_Preben
http://www.scandpipes.com/info.asp?text=3
http://www.pipephil.eu/logos/en/logo-benwade.html
https://pipedia.org/wiki/Ben_Wade
https://pipedia.org/wiki/Lane,_Ltd.
http://www.nytimes.com/1982/08/05/business/business-people-lane-ltd-gets-outsider-lane-tobacco-maker-places-outsider-helm.html
https://trademarks.justia.com/722/75/snug-harbour-72275082.html
http://pipesmagazine.com/forums/topic/ben-wade-by-preben-holm
https://rebornpipes.com/2015/01/24/grooming-a-ben-wade-golden-walnut-danish-freehand/


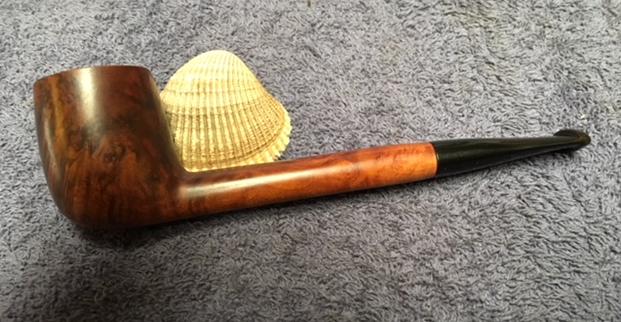
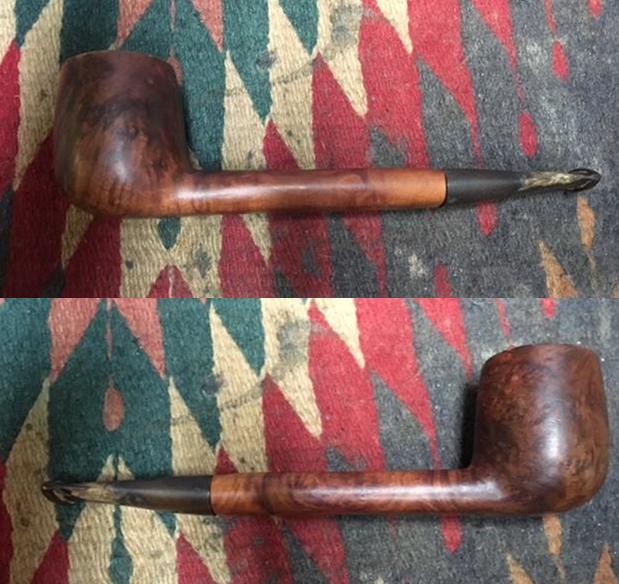
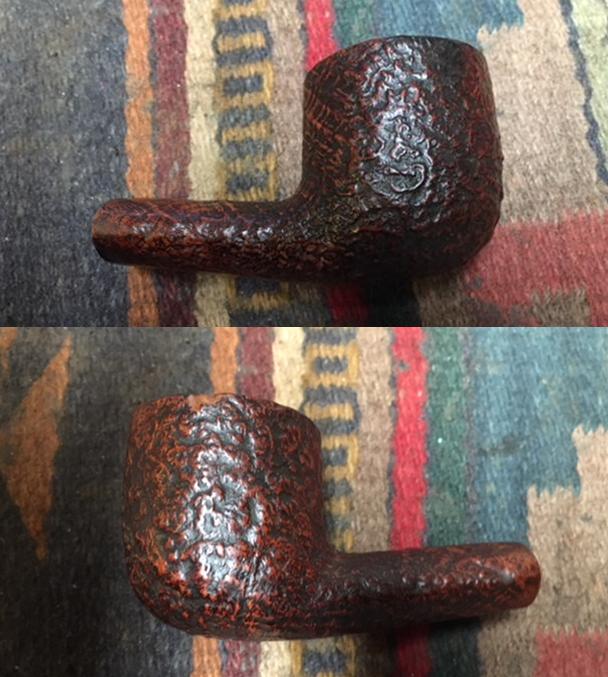
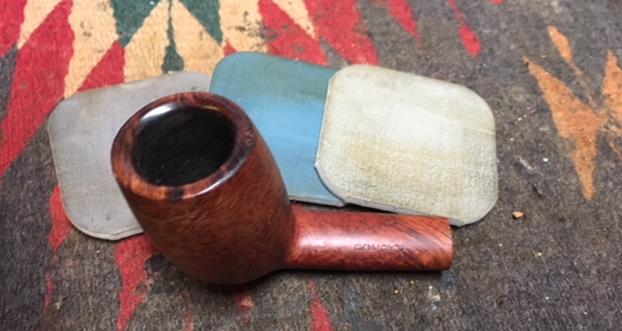
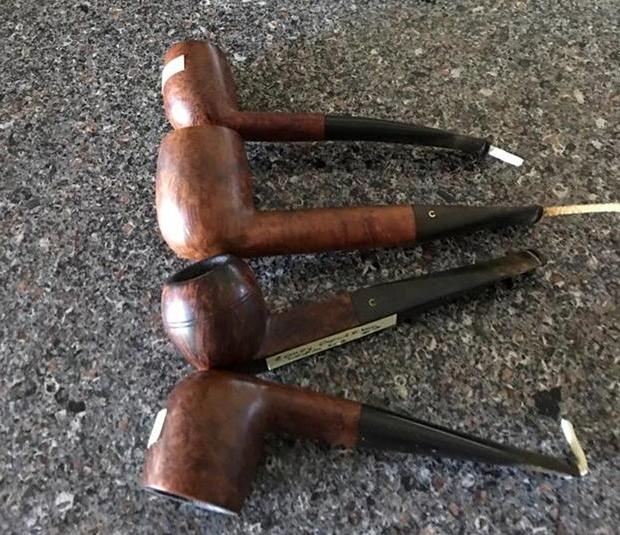 The next pipe I chose to work on from the collection was a Comoy’s Grand Slam Pipe, one of four Comoy’s pipes. It was also was missing the original stem but the shape of the bowl and shank were elegant. The shape was a classic Yachtsman or Zulu. The bottom of the shank was flattened and the pipe could stand on the desktop. The finish was dirty and filled with the detritus of years of use followed by sitting unused. The bowl was thickly caked and had an overflow of lava on the rim top. Even through the grime and grit you can still see the amazing birdseye on the sides and cross grain on the front and back of the bowl and the top and underside of the shank. Once more the presence of the replacement stem told me that the pipe had been a favourite and that the original stem had been either gnawed or broken and replaced. The new stem was well made and fit the shank perfectly. The pipe repairman had done a great job on the stem. I also had some use and was lightly oxidized and had tooth chatter and marks on both sides of the stem at the button. The surface edges of the button also had tooth marks that were present. This stem also had some calcification around the button as well that made me think that perhaps the stem had once sported a softee bit. Jeff took photos of the pipe before he cleaned it up. The photos tell the story better than my words can.
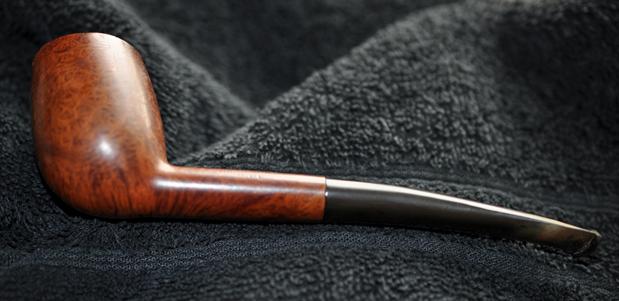
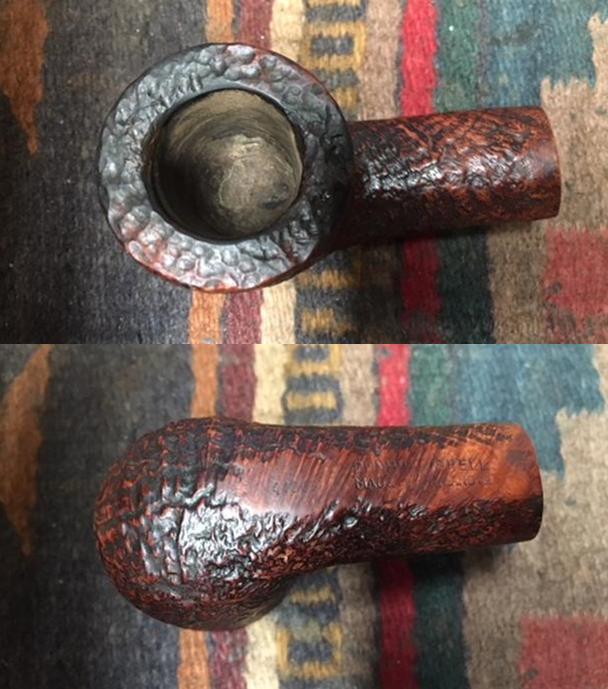
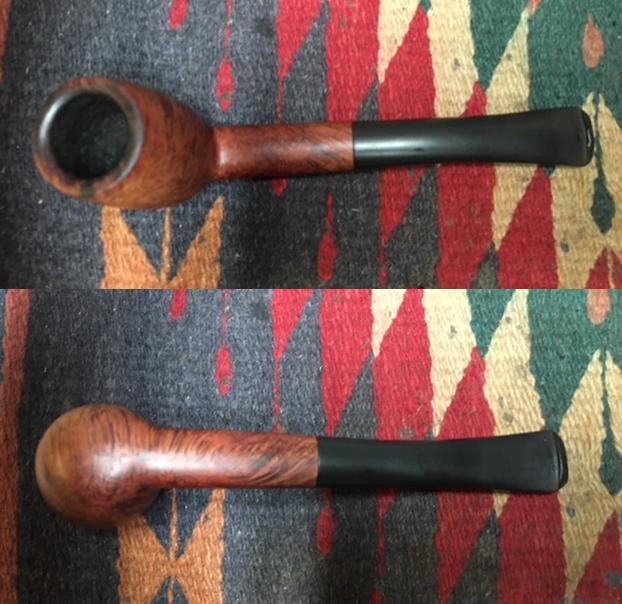
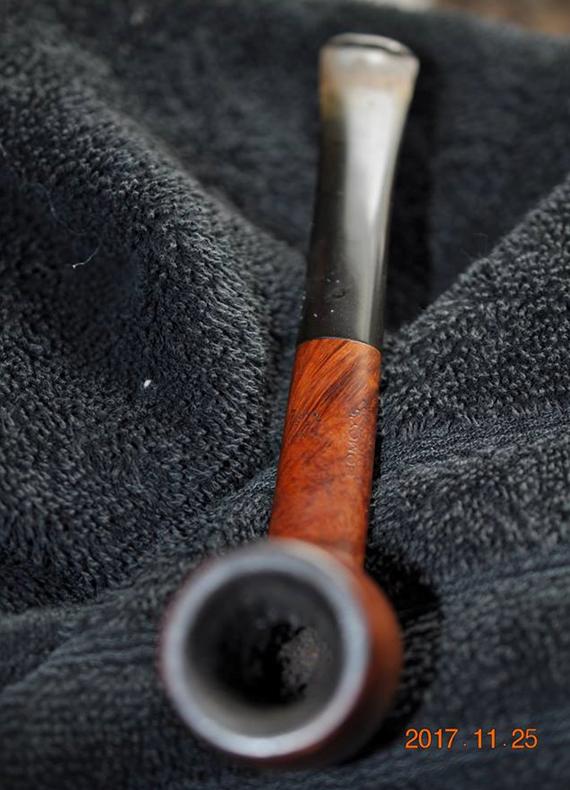 He took some close up photos of the bowl and rim top to show the cake and their condition. He also took photos to show the grain on the side, front and underside of the bowl.
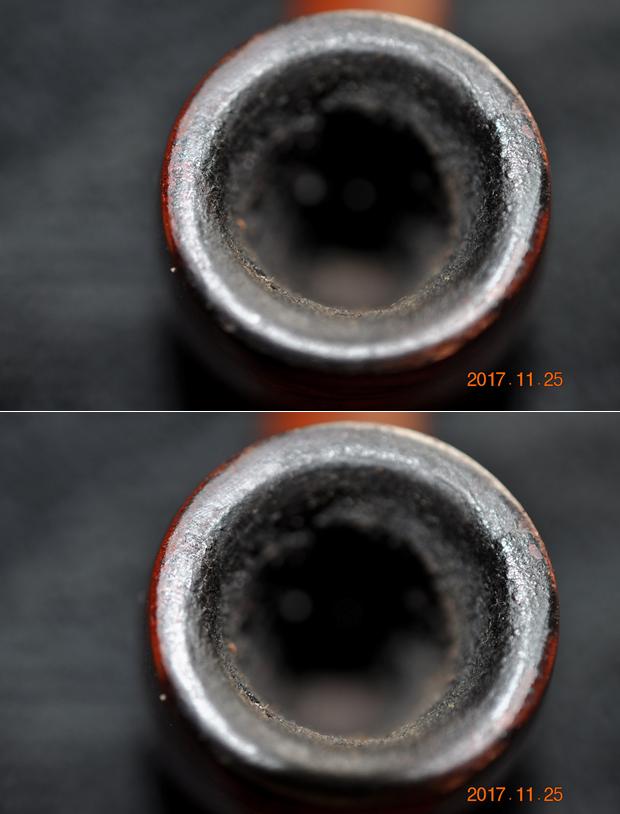
 He also photographed the stamping on both sides of the shank to show what it read and the condition of the stamping. The left side is stamped Comoy’s over Grand Slam over Pipe. On the right side it is stamped with the Comoy’s Com stamp Made in London in a circle over England. Next to that is the shape number 202. There is no patent number on the shank and the markings of the leather washer size *5 on the underside of the shank at the shank/stem union.
 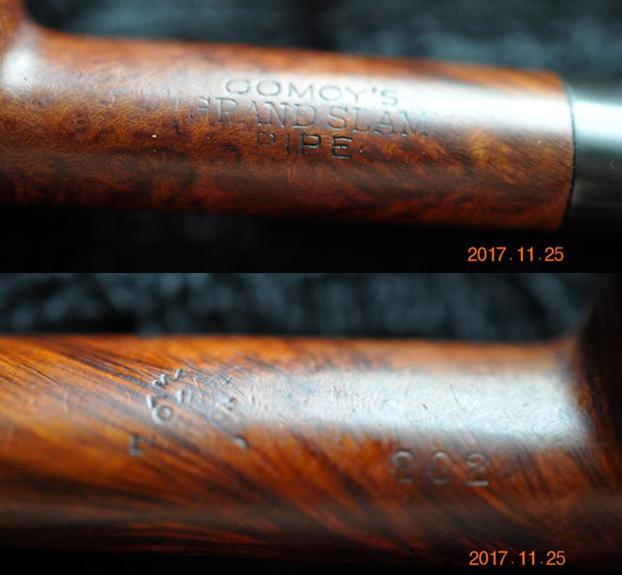 The replacement stem was oxidized as mentioned above and had tooth chatter and marks. Jeff took photos of both sides of the stem to capture their condition before he cleaned the pipe.
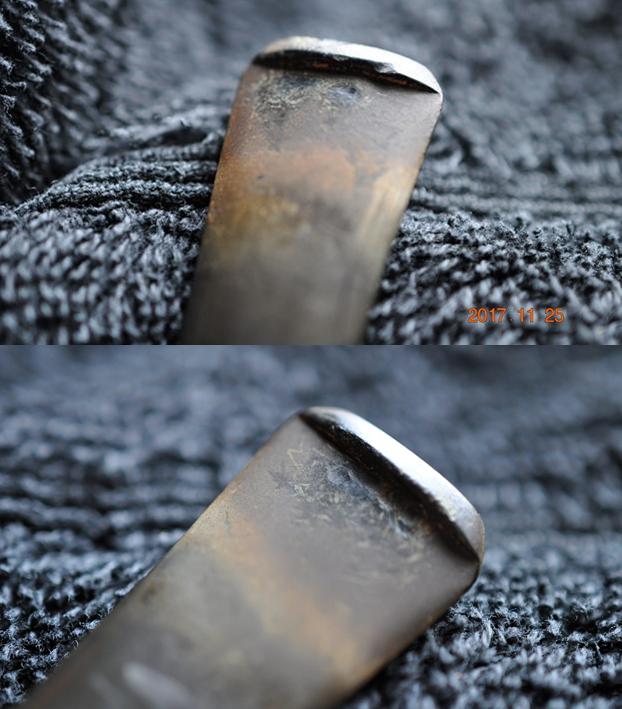 I wanted to learn a bit more about the Grand Slam line. The pipe had originally come with a special stinger/filter apparatus screwed into the tenon. I found the following photos and info on the pipephil website. I include both the link and the following photos for your information. http://www.pipephil.eu/logos/en/infos/comoy1.html
 The next photo shows the original metal filter system that was made to force “the air stream through a go-between space before entering the stem and the smokers mouth.” The stem that I have does not have the threaded tenon and thus cannot hold the apparatus. The photos below show the stem and the diagram of the system.
 I also wanted to have some idea of the date on this old pipe so I did a bit of digging on Pipedia. I found a helpful dating guide there. I found that the Comoy’s Grand Slam stamp on the shank dated it to the 1950s. At that time there were four variants to the stamping.
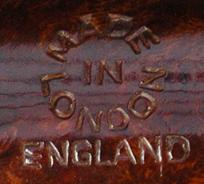 The COM stamp (Country of Manufacture) is like the one in the picture to the left. The picture shows exactly what is stamped on the shank of this pipe. It is stamped in a circle with “MADE” at the top, “IN” in the middle, and “LONDON” at the bottom, with “ENGLAND” in a straight line beneath. According to the Pipedia article it can be assumed that this stamp was first used in the export drive in the early 1950s. Here is the link to the article: https://pipedia.org/wiki/Comoy%27s_Dating_Guide
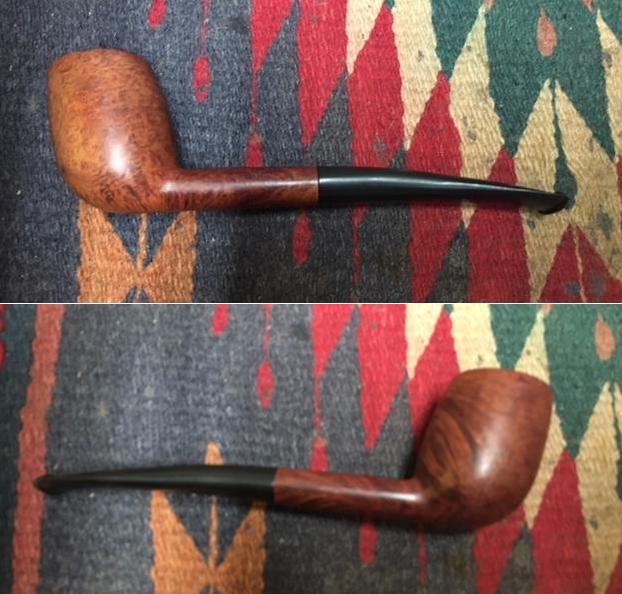
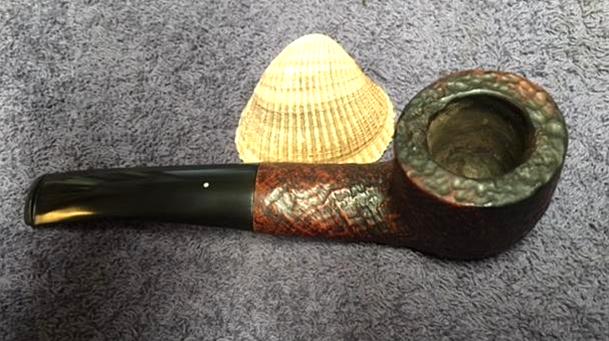
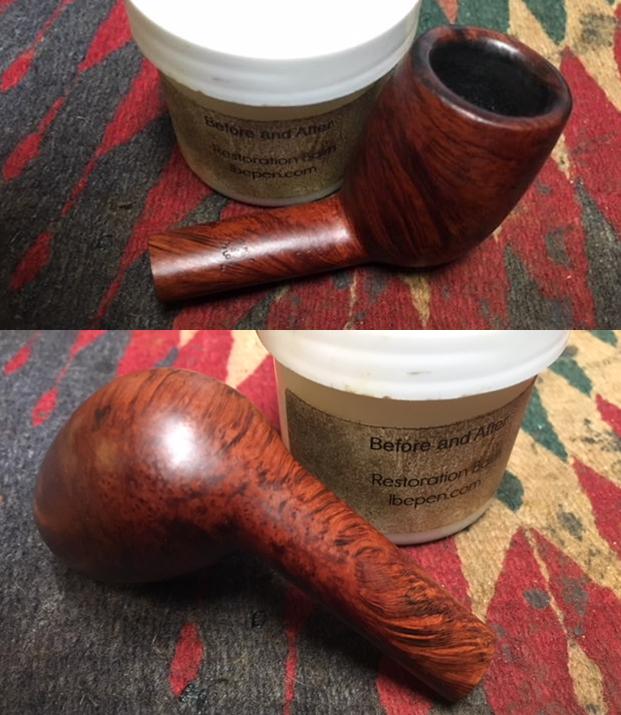
 I took some close up photos of the bowl and rim top as well as both sides of the stem to show their condition. The bowl was very clean and the rim top looked good other thank some light nicks and darkening. He had been able to remove the lava from the finish. The inner edge was in excellent condition and there was some slight roughness on the outer edge. The stem is lightly oxidized as can be seen in the photos and has small tooth marks near the button on both sides.
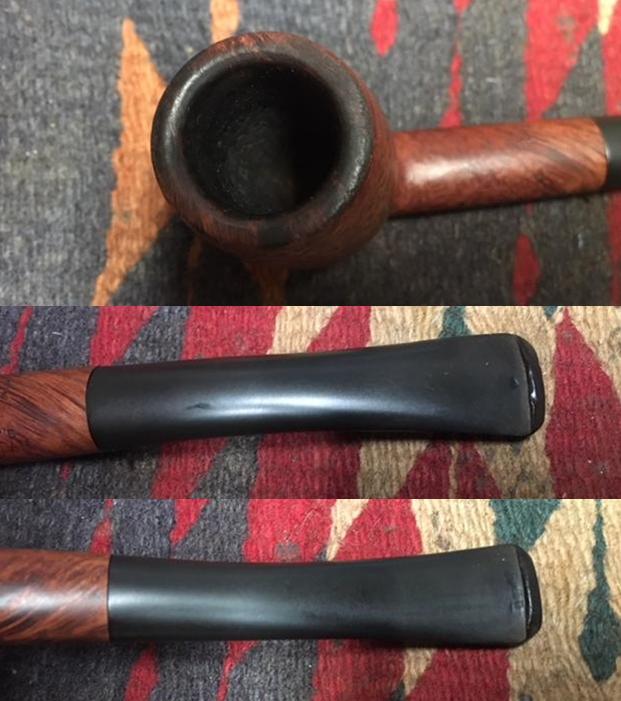 I started with the stem on this one. I “painted” the tooth marks with the flame of a Bic lighter and was able raise most of them even with the surface of the stem. I used some clear super glue to fill in the tooth mark on the top of the button that did not rise with the heat. Once the glue dried I sanded out the tooth chatter and the tooth marks next to the button on both sides and the repair on the top of the button with 220 grit sandpaper.
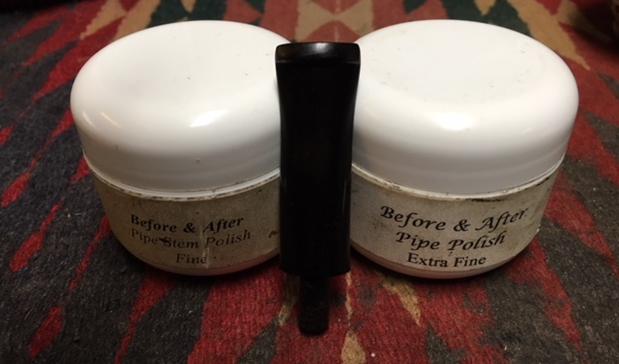
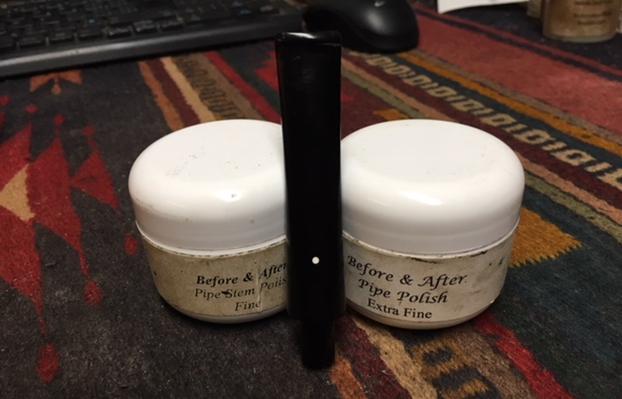
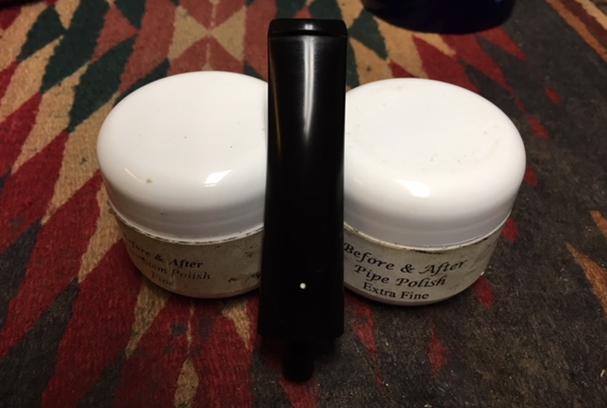
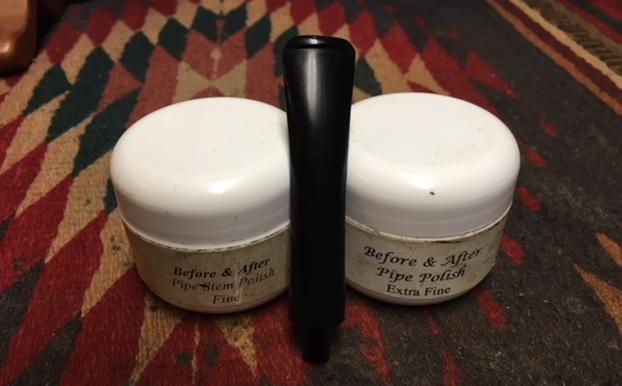
 I polished stem with micromesh sanding pads – wet sanding with 1500-2400 grit pads and dry sanding with 3200-12000 grit pads. I wiped the stem down with Obsidian Oil after each pad. I polished it with Before & After Pipe Stem Polish, both Fine and Extra Fine. I gave it a final coat of Obsidian Oil and set it aside to dry.
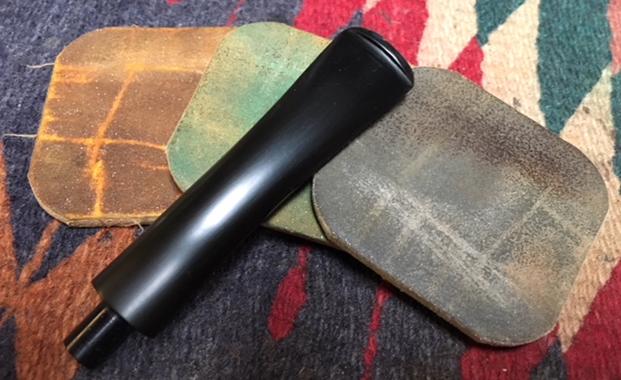
 I worked on the darkened rim and the small marks and nicks on it with micromesh sanding pads. I lightly sanded it first with 220 grit sandpaper and followed it up with 1500-12000 grit micromesh sanding pads. I wiped it down after each pad to check on the progress.
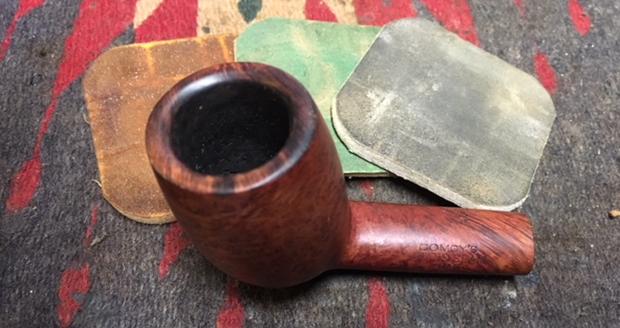
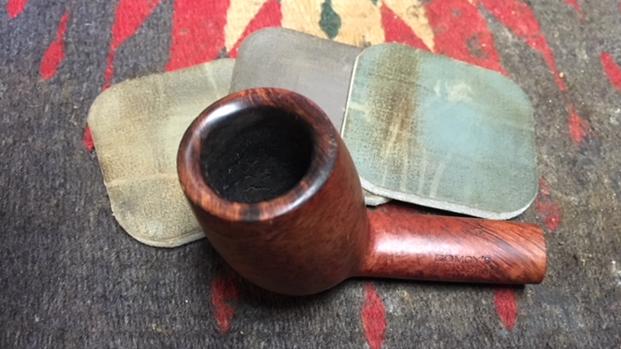
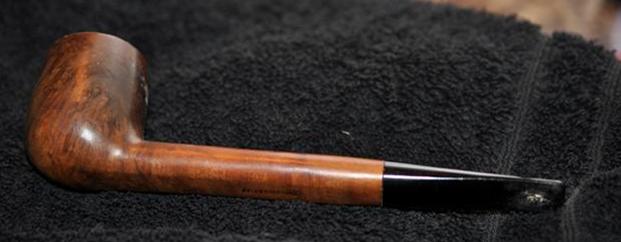
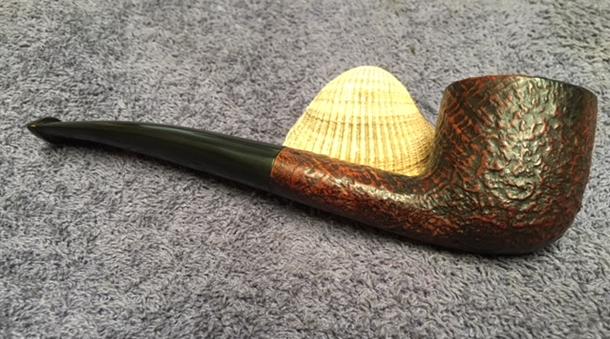
 I worked Before & After Restoration Balm deep into the briar on the smooth finish to clean, enliven and protect it. I wiped it off with a soft cloth. I buffed the bowl with a cotton cloth to polish it. It really began to have a deep shine in the briar. I took some photos of the bowl at this point to mark the progress in the restoration. The grain on the bowl is really beginning to stand out and will only do so more as the pipe is waxed.
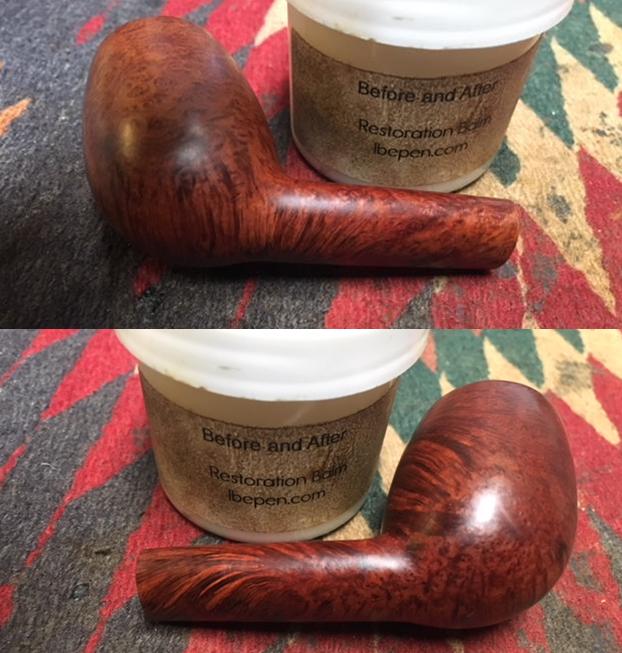
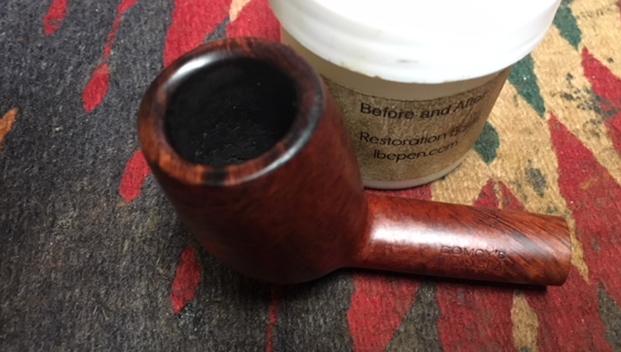 I put the stem back on the bowl and worked the pipe over on the buffing wheel using Blue Diamond to polish the stem. I buffed the bowl and the stem with Blue Diamond polish to raise the shine on the briar and the vulcanite. I was careful to not buff the stamping and damage it. I gave the bowl and stem multiple coats of carnauba wax. I buffed the entire pipe with a clean buffing pad to raise the shine. I hand buffed it with a microfiber cloth to deepen the shine. The finished pipe is shown in the photos below. The rich brown stain allows the grain to really stand out on this little pipe and it works well with the rich black of the polished vulcanite stem. This Comoy’s Grand Slam is a beautiful and interesting looking pipe. The dimensions of the pipe are: Length: 5 1/2 inches, Height: 1 3/4 inches, Outside Diameter: 1 1/8 inches, Diameter of the chamber: 3/4 inches. This 1950s era Comoy’s is one that will fit well in any pipeman’s collection and add a touch of real class. Thanks for walking through the restoration with me.