Blog by Steve Laug
All of you are probably familiar with the tale of the ugly duckling. The poor bird hatched from a clutch of duck eggs that came out gangling and very unducklike. His appearance left much to be desired when he walked beside his siblings toward the pond following his “mom’. He was always laughed at and misunderstood. He sat with his head down in shame at how much he did not fit. Each day passed and the down of the ducklings was replaced by feathers. This went on until one day the duckling looked at his reflection in the pond and found that he was not a duck at all but a regal and majestic swan. He had always been a swan inside but the fact of his swandom was not visible to any who beheld him. Instead they saw what they wanted in the misfit duckling and wrote him off as ugly. They never once saw the swan inside until it came out in all of its glory. This tale really captures the pipe that I worked on next.
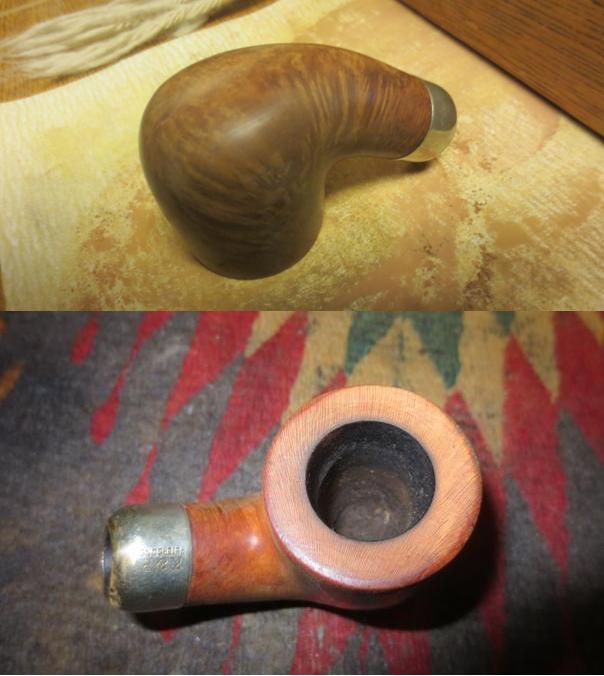
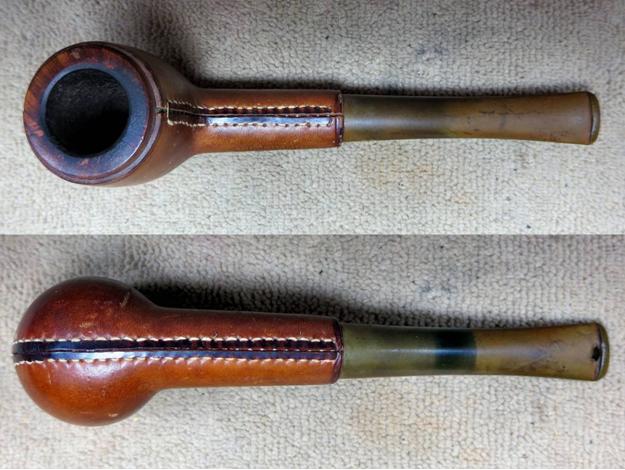
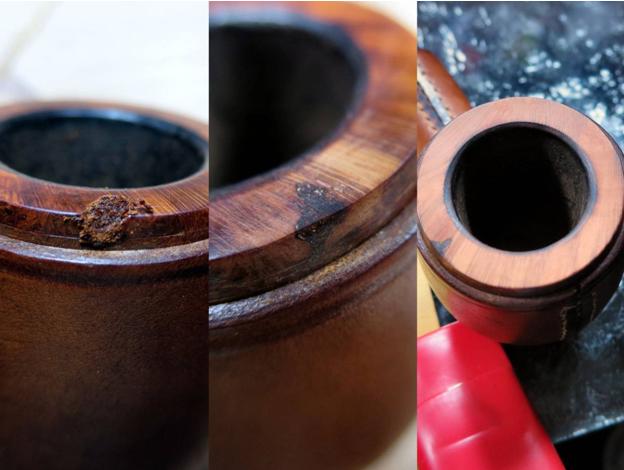
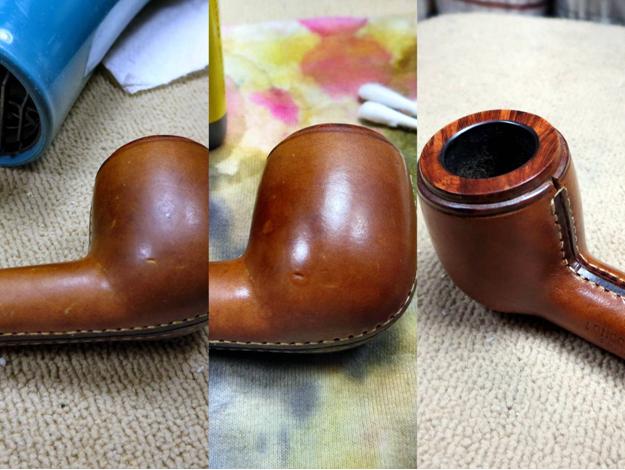
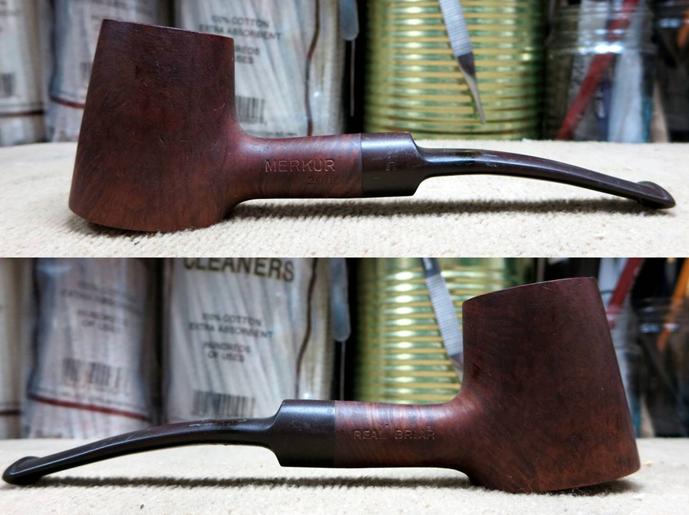
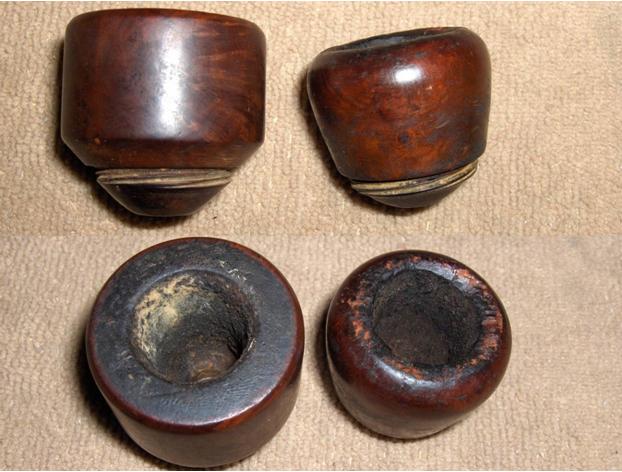
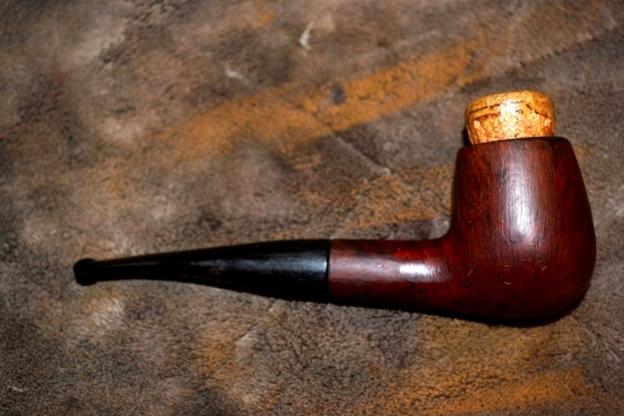
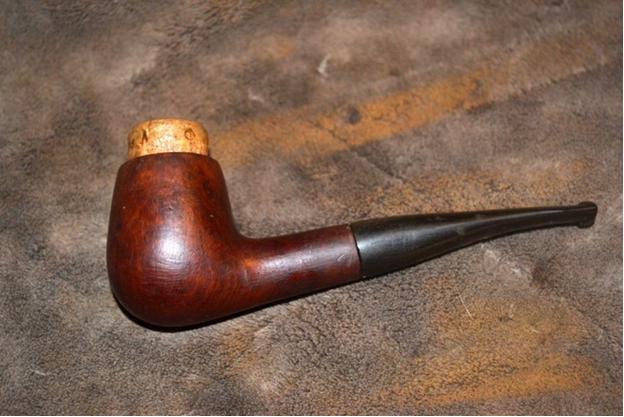
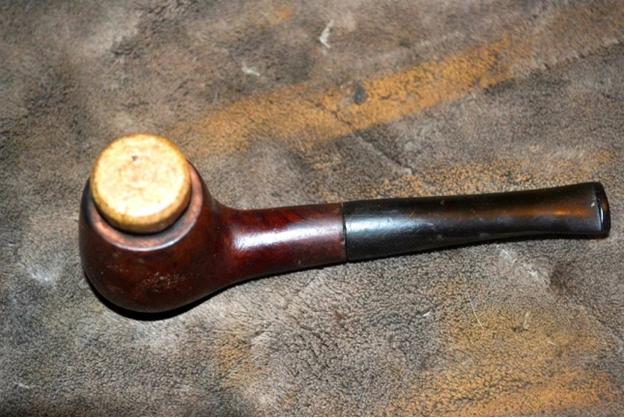
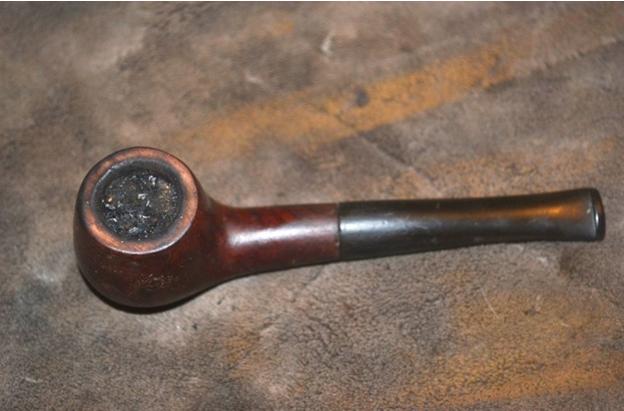
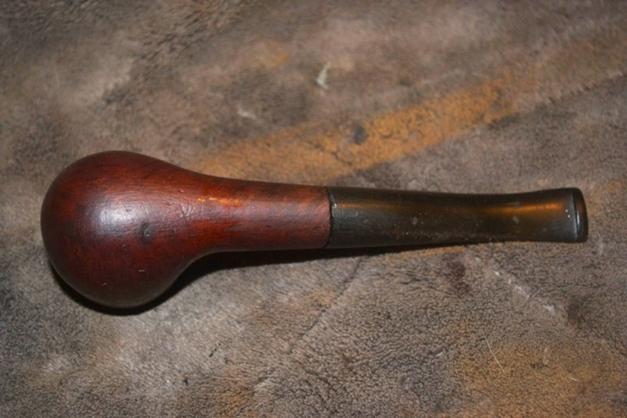
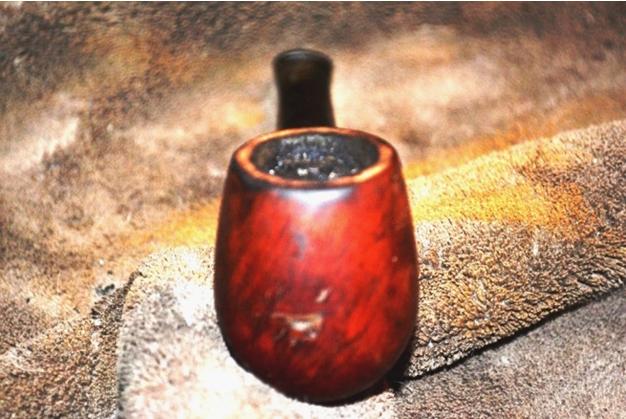
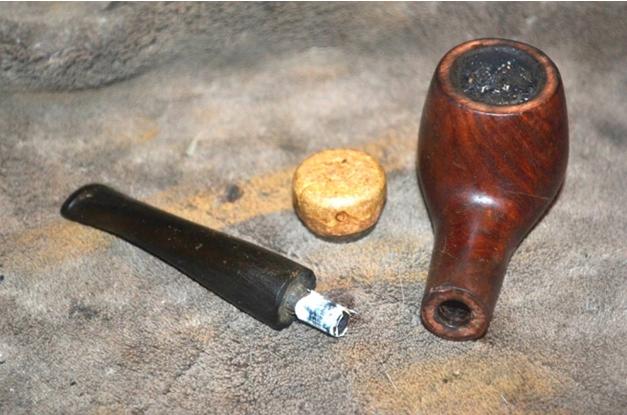
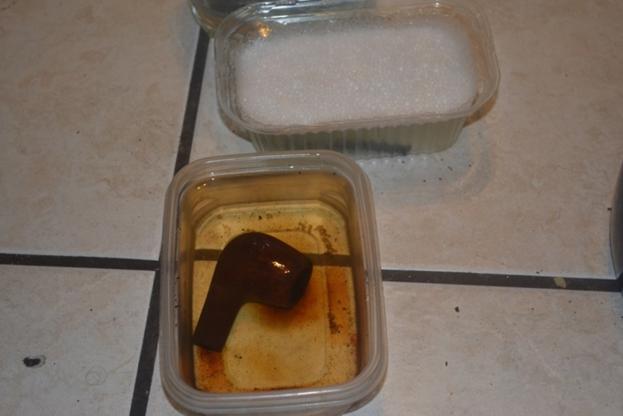
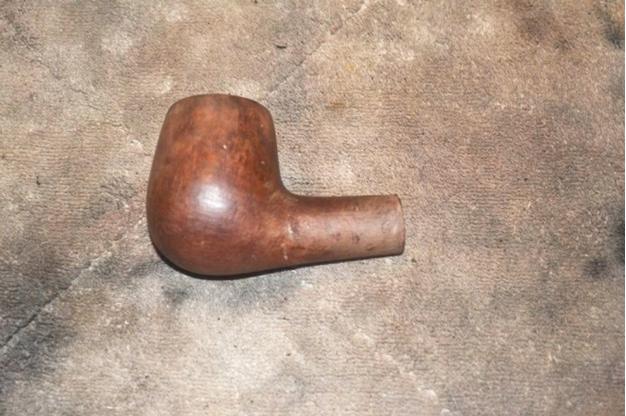
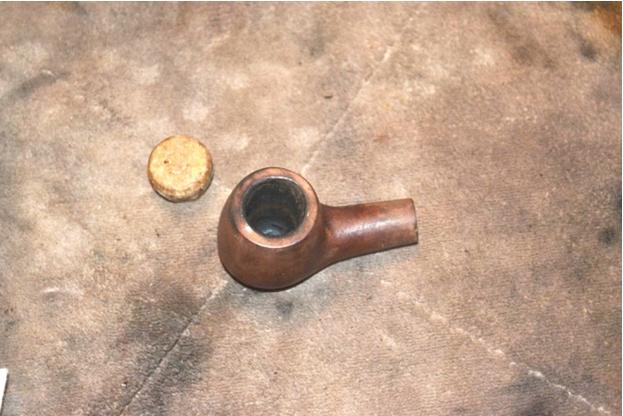
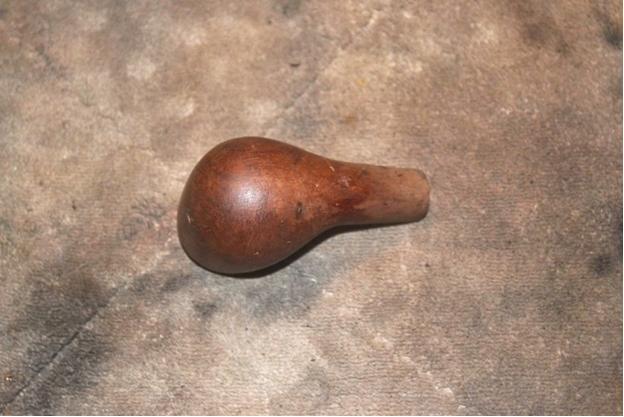
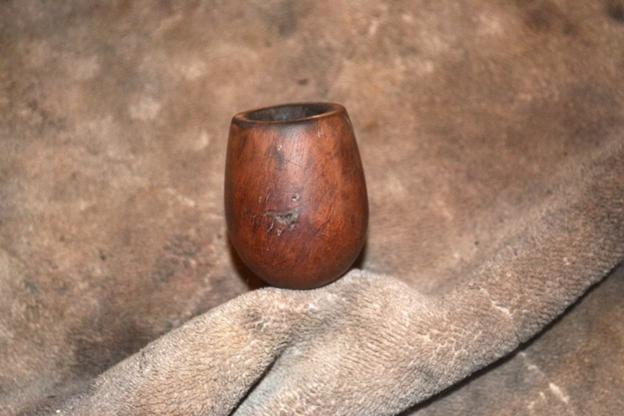
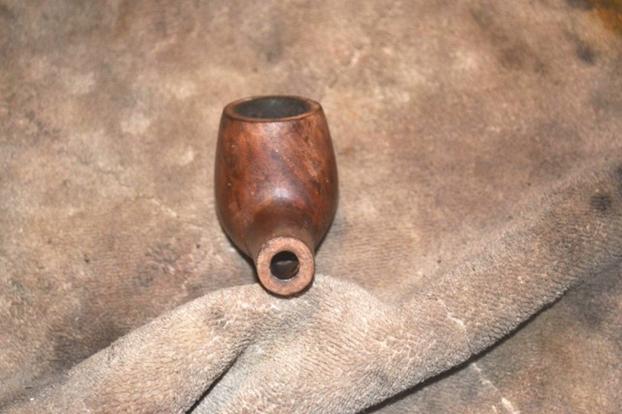
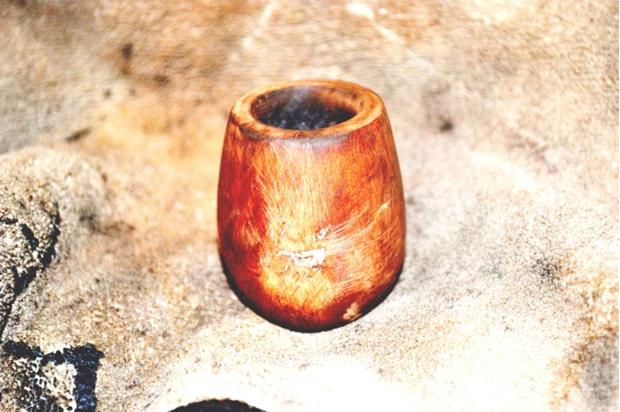
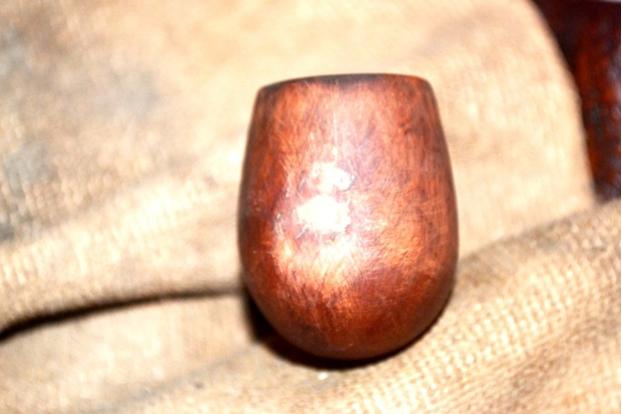
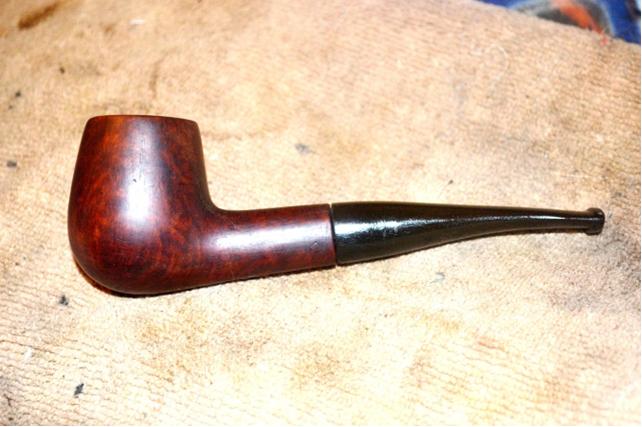
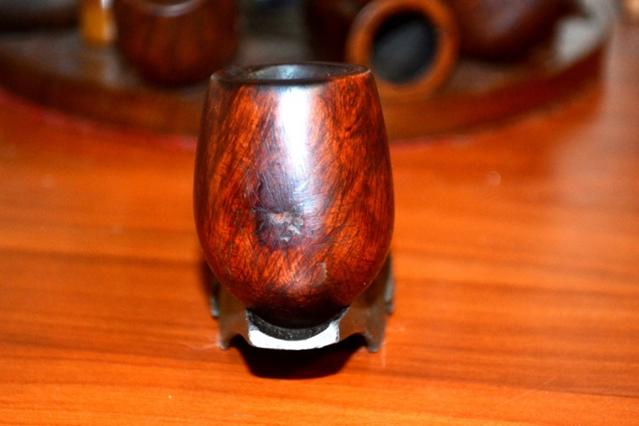
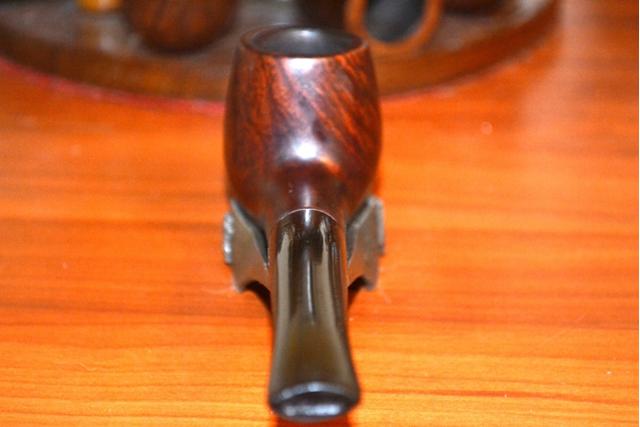
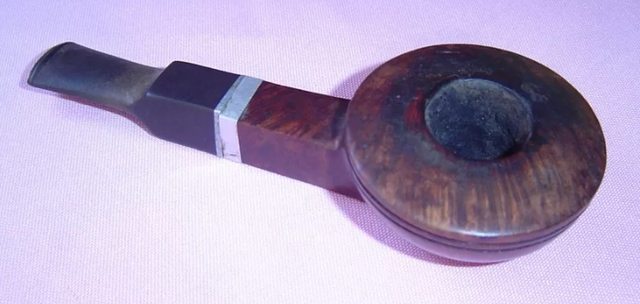
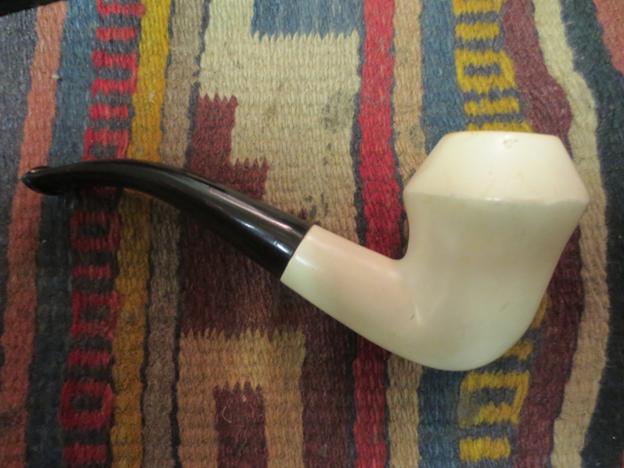
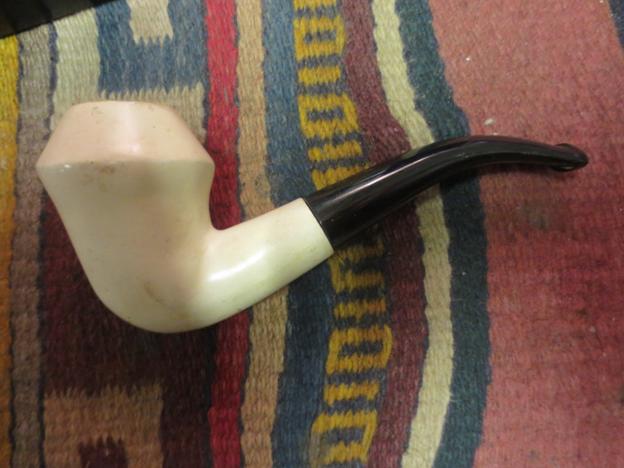
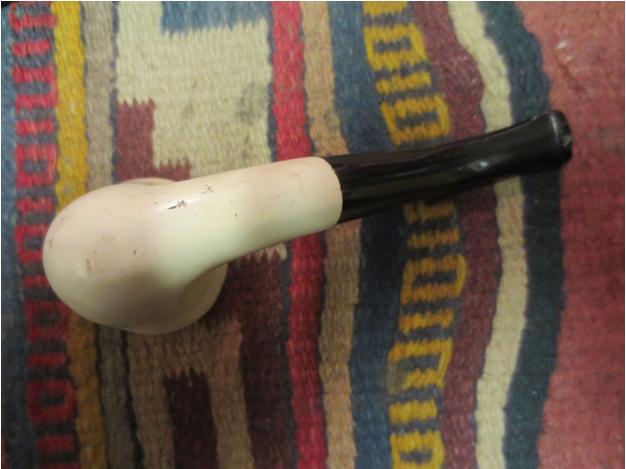
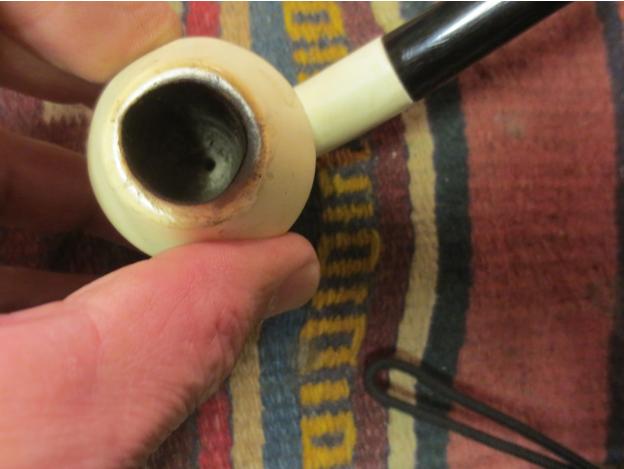
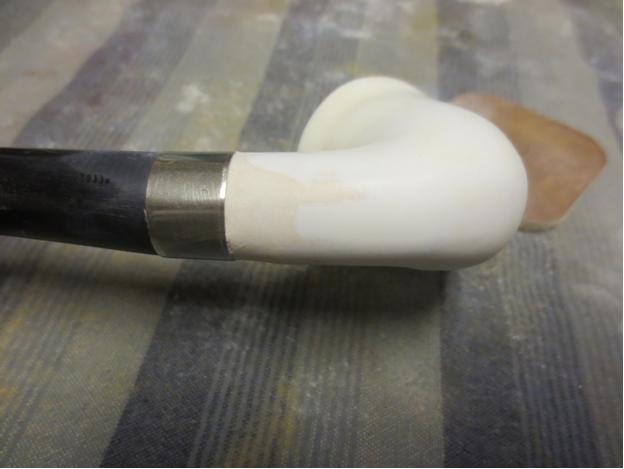
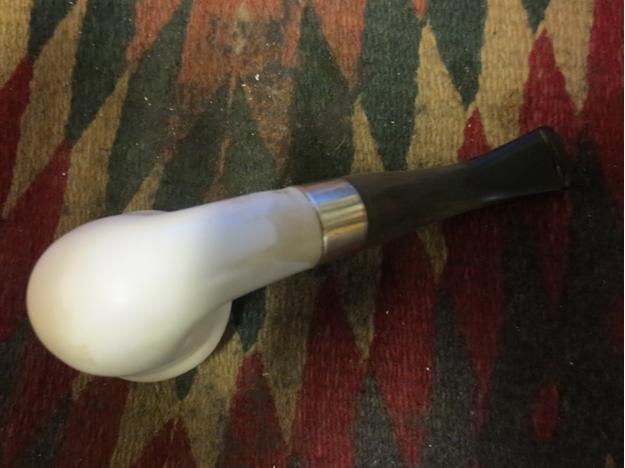
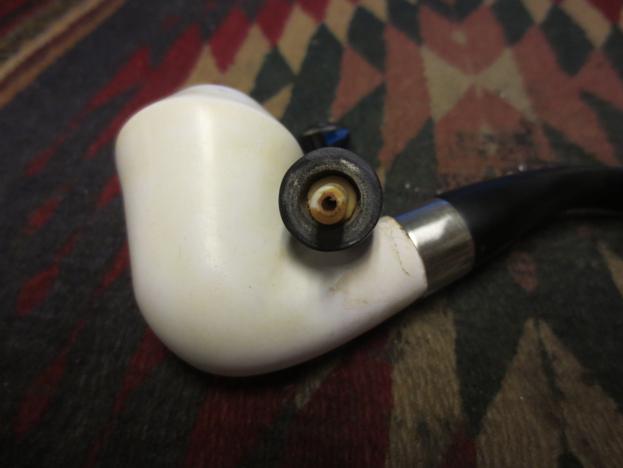
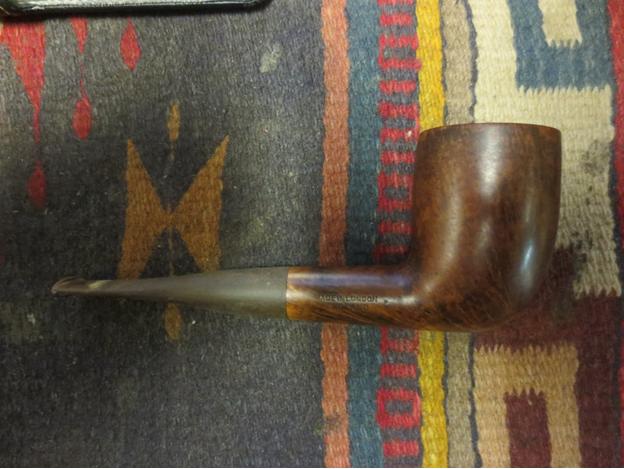
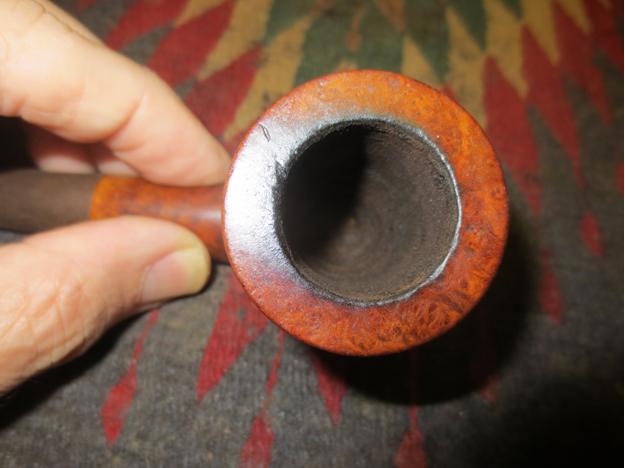
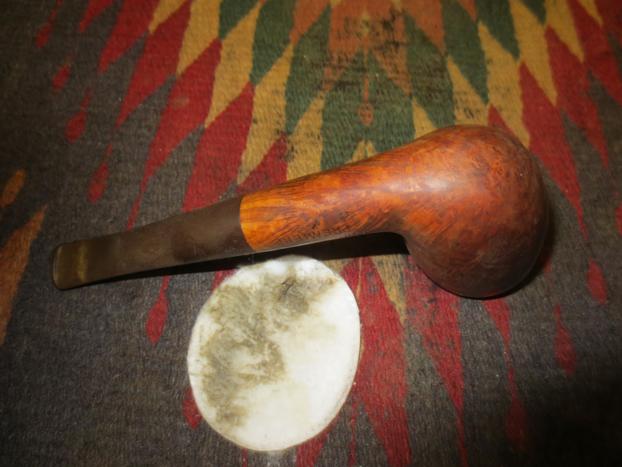
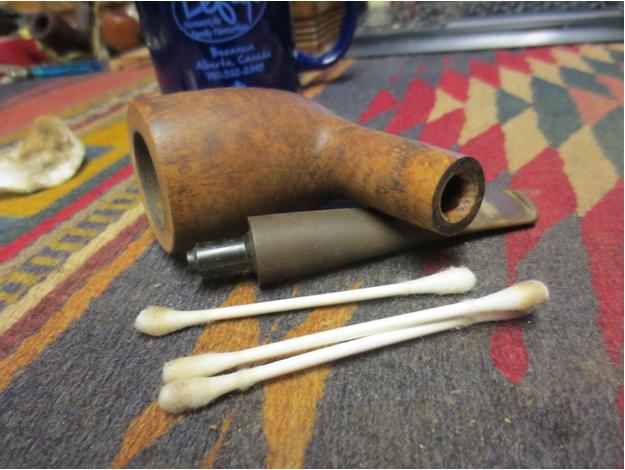
I have had a really rough older Canadian pipe sitting in the refurb box for a long time now. I have taken it out of the box and looked it over time and again but never took the step of cleaning it up. I have no idea who the maker of this old pipe is but it is a rough piece of wood. I say wood because it is clearly not briar. It is lighter and the grain pattern is quite different from briar. It has a Kaywoodie mortise insert and a Kaywoodie stem that has the stinger clipped off. I don’t know if it came that way or some creative soul made it happen. The wood was roughened and not sanded smooth. It looked as if it was rough shaped with a file or wood rasp and then just smoked. Somewhere along the way someone had put a coat of shiny urethane over the entire pipe. The shine hid none of the flaws but actually accentuated them. It had a significant fissure near the shank bowl joint on the left side that needed attention. The roughened finish had file marks going in every direction. The effect was a mess for a finish. The stem had some cardboard or thread pushed on to the threaded tenon that allowed the stem to line up correctly. I cut off the cardboard or thread washer and the stem was seriously overclocked. The bowl had a cake in it that was crumbly and uneven. The interior edge of the rim was not too badly out of round. The outer edges would need some work to smooth out before I could see if they were in round.


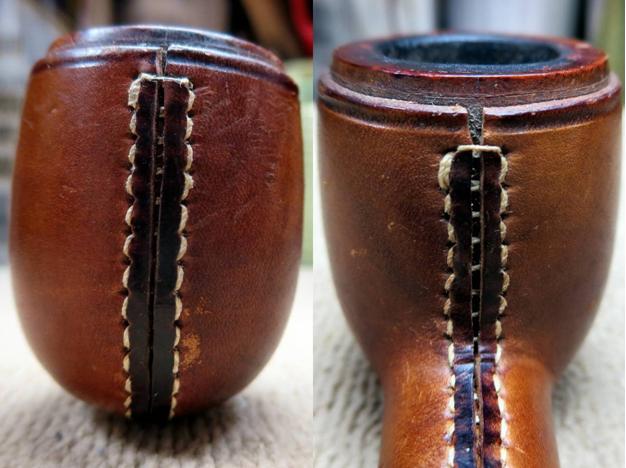
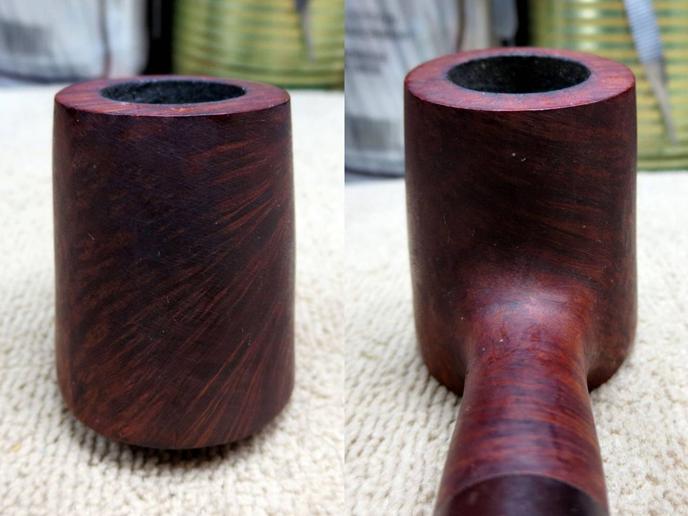
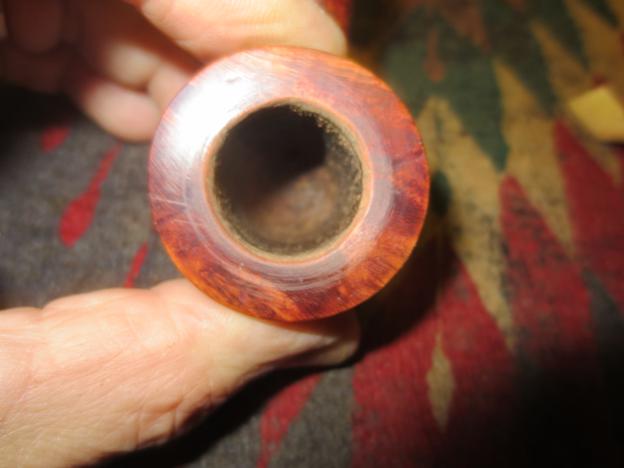
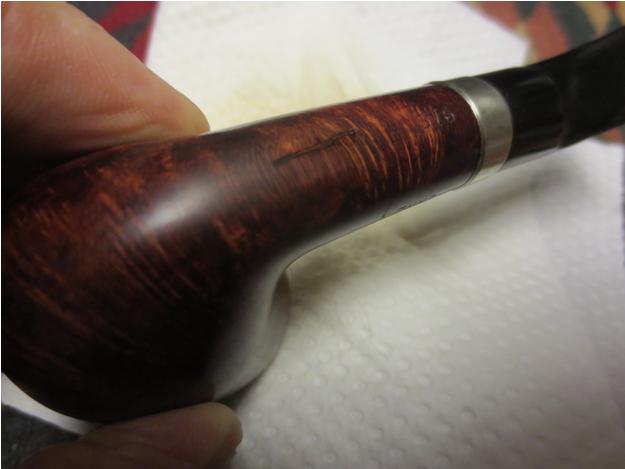
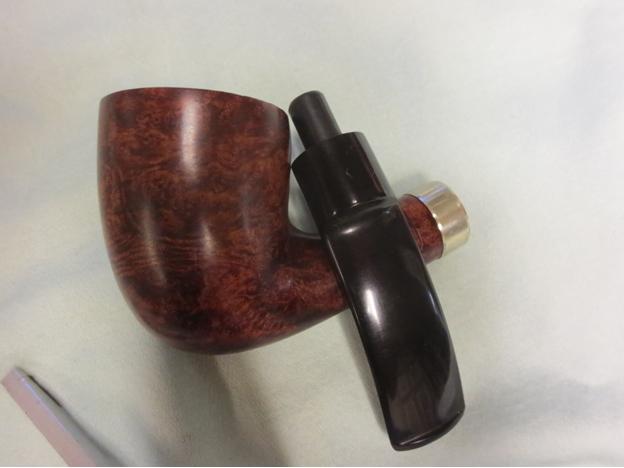
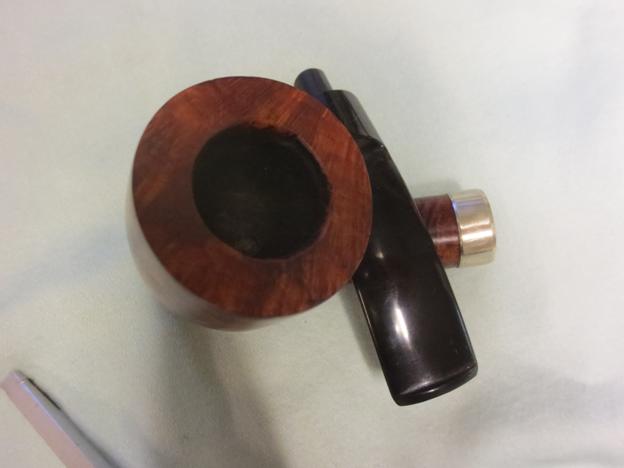
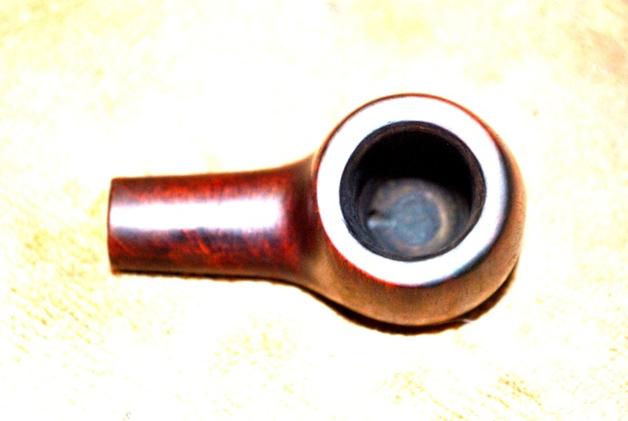
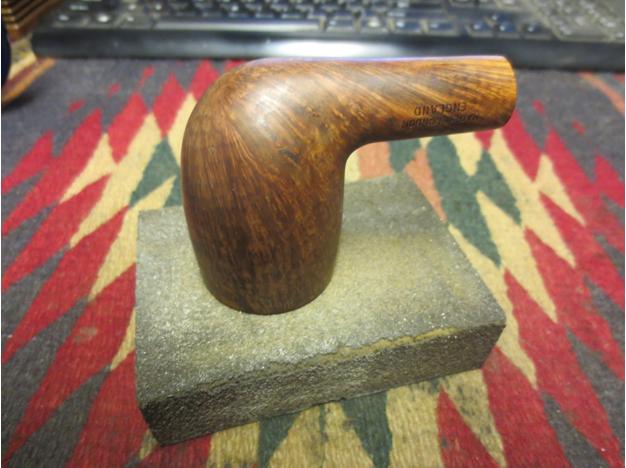
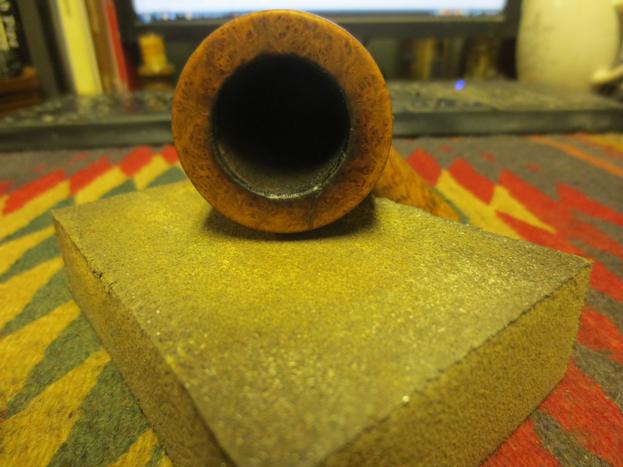
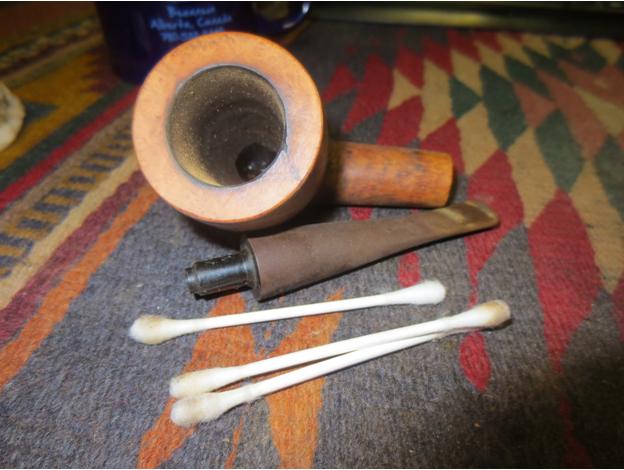
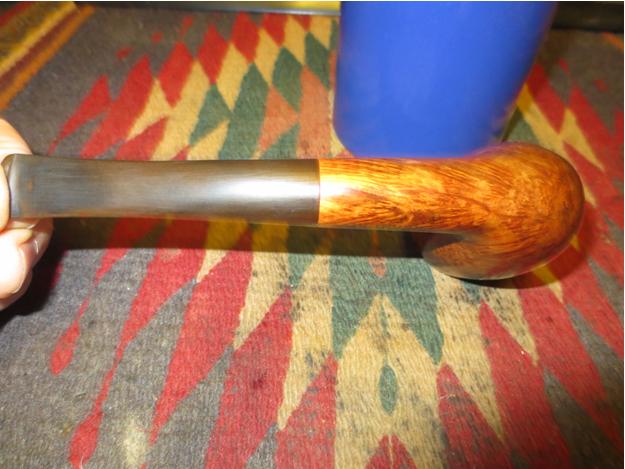
 I took some close-up photos of the bowl and the shank to give more of an idea of the kind of finish that the pipe had when I started. You can see the file marks and lines going in every which direction that were left behind in the initial shaping of the pipe. The overall look was very rustic and actually quite ugly. It was truly an ugly pipe. The beautiful Canadian that resided below the ugly exterior was virtually invisible. It would easily been put up there with “folk art” in terms of the rustic and rough finish to the pipe. Yet there was something about that seemed like raw charm that shone through the mess that sat on my table. This evening when I took it out I took more time to sit and look at it for a while before beginning to work on it. The more I looked at it the more I have to tell you that the second thoughts I was having almost caused me to put off working this old timer and just burying it in the box. I really was unsure whether I could do anything with it or that it would even be worth doing the work. I was not convinced that what I had when I was finished would be worth the time and energy that would go into reworking it.


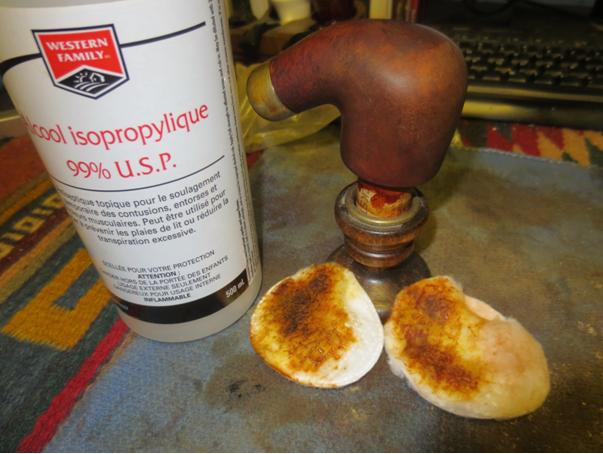
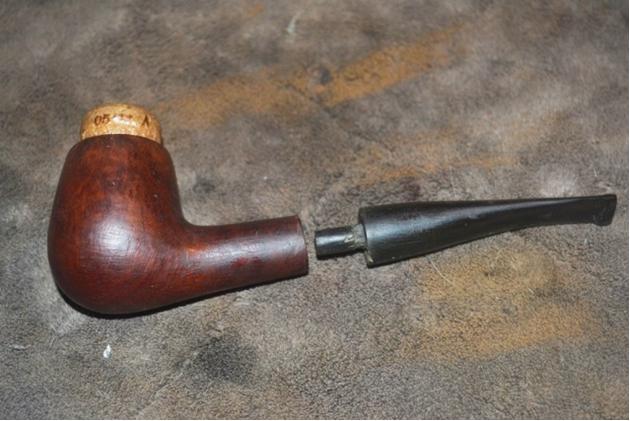
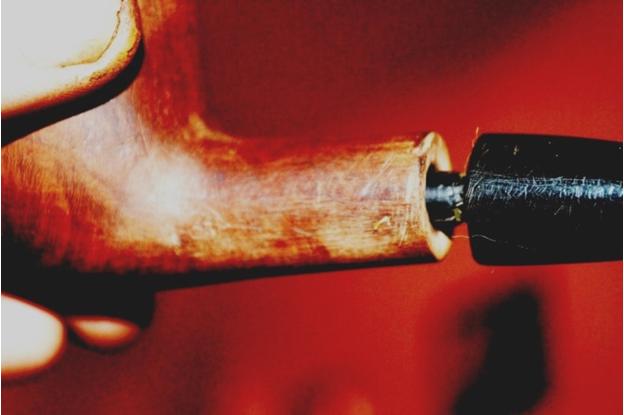
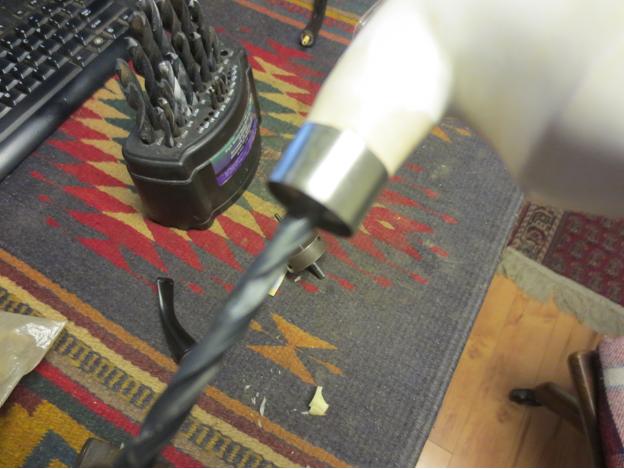
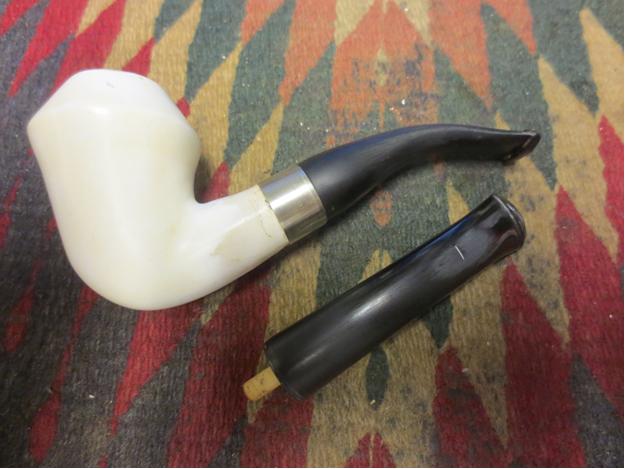
 I cleaned off the debris (cardboard or thread) that was on the tenon and then heated the tenon with a lighter to reclock the stem. I heated the metal carefully keeping the flame away from the vulcanite stem. It did not take long before the heat softened the glue that held the tenon in the stem and I was able to turn the stem back into the shank and twist it until it lined up correctly.
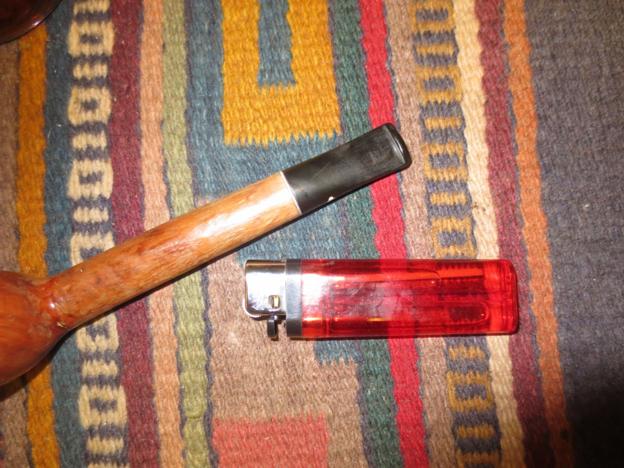
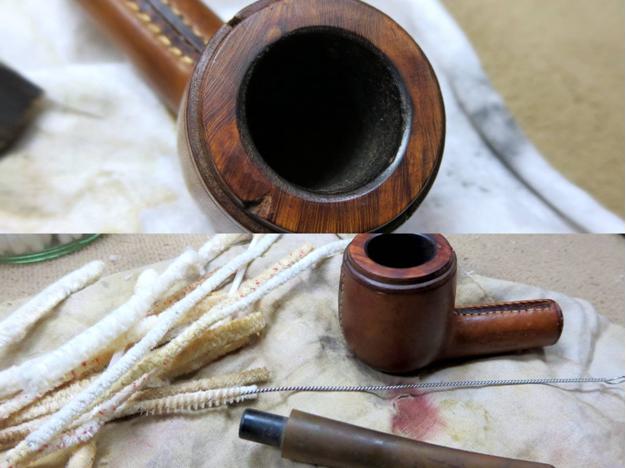
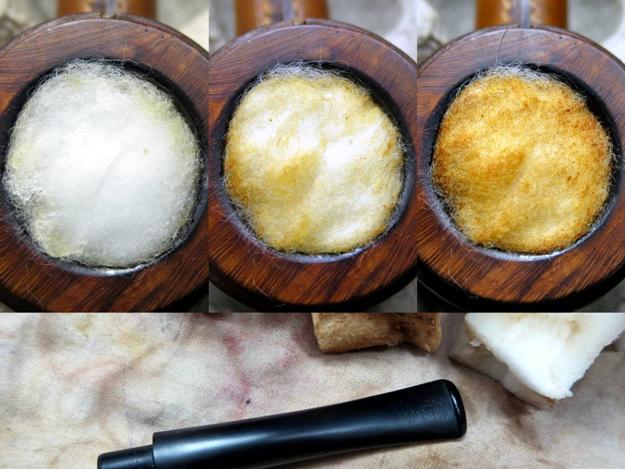
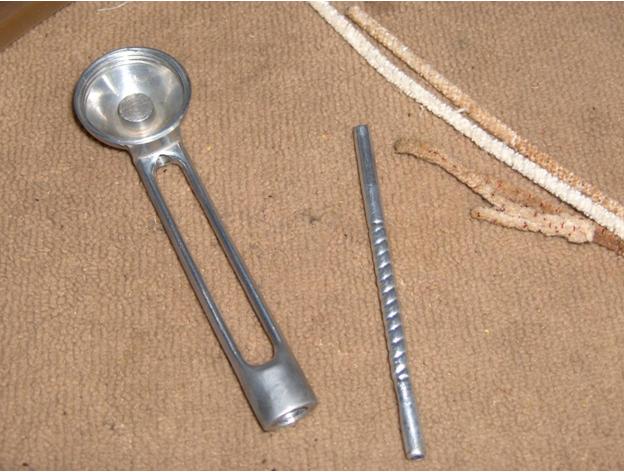
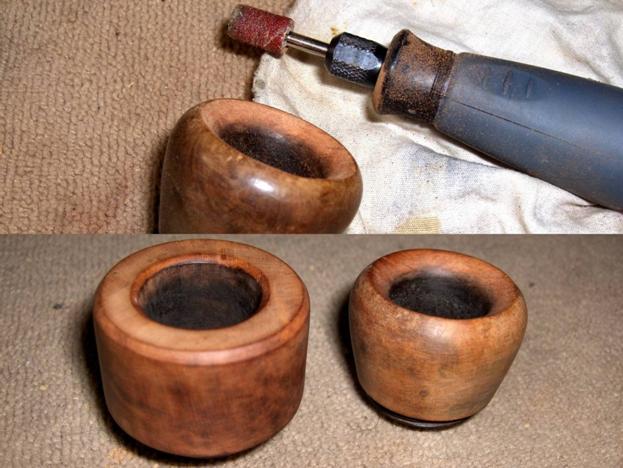
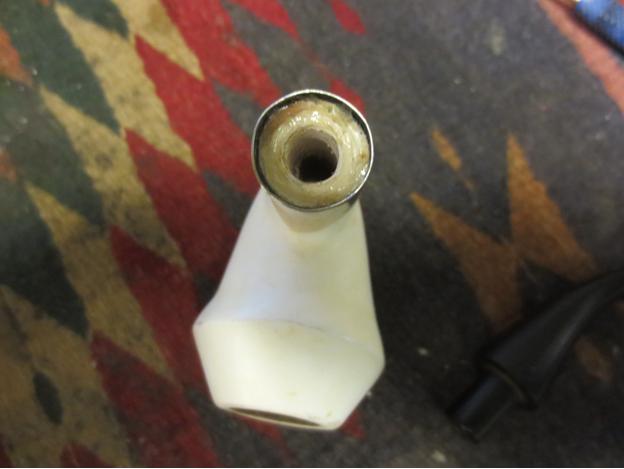
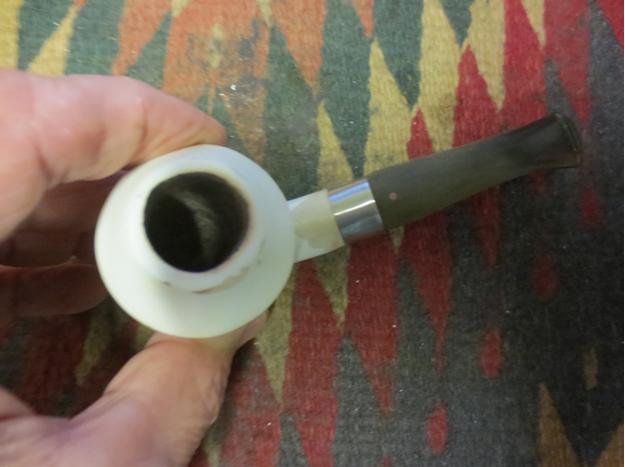
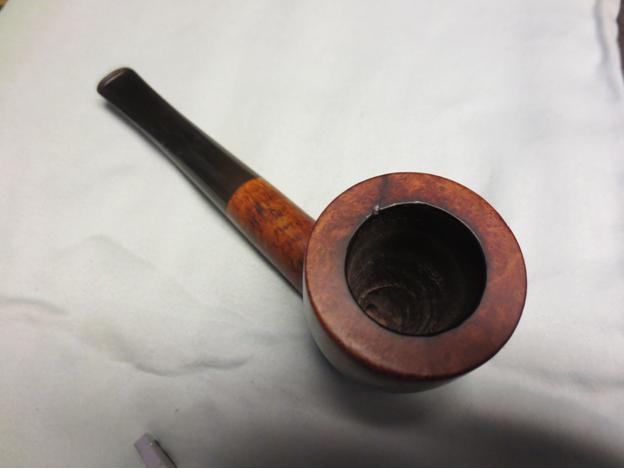
 I lightly sanded the bowl surface and then stopped to ream it with a PipNet reamer. I decided to take the cake completely out of the bowl so that I could check for cracks in the walls of the bowl.
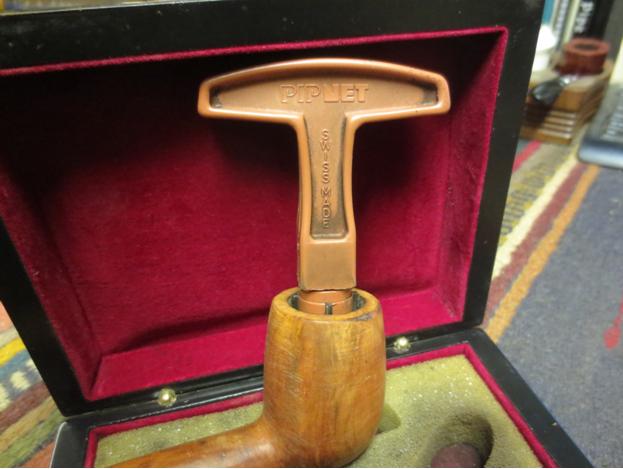
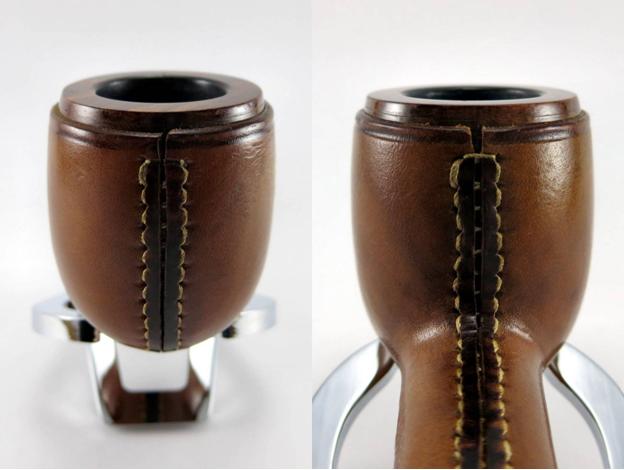
 With the bowl reamed out I turned my attention to the finish on the exterior. I sanded the bowl and shank with emery paper and with 180 grit sandpaper to remove the roughness of the finish and to sand out the file marks. I wanted to sand the bowl and shank smooth to address the generally poor appearance of the pipe. It took quite a bit of sanding to even start to make a difference in the surface of the pipe. I also sanded it with a rough sanding block to smooth out more of the scratches. I filled the flaw at the union of the shank and bowl on the left side with clear super glue and briar dust. I sanded that repair smooth with 220 grit sandpaper to blend it into the surface of the pipe. There was a dark spot on the outer right edge of the rim that did not seem like a burn. I had the appearance of a stain. It was hard and did not affect the shape of the bowl edge so I left it. I lightly topped the bowl to clean up and flatten out the rim surface.
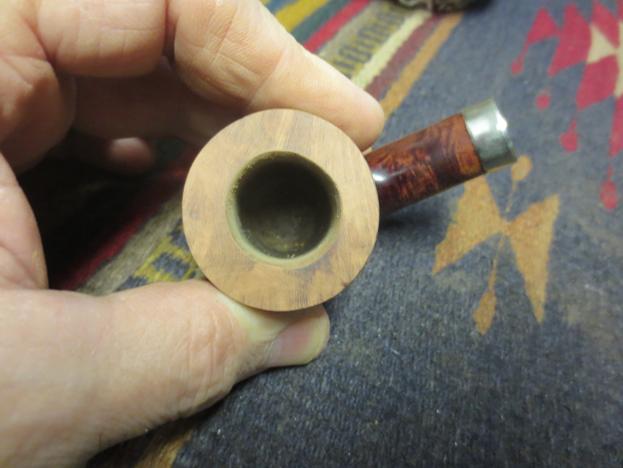
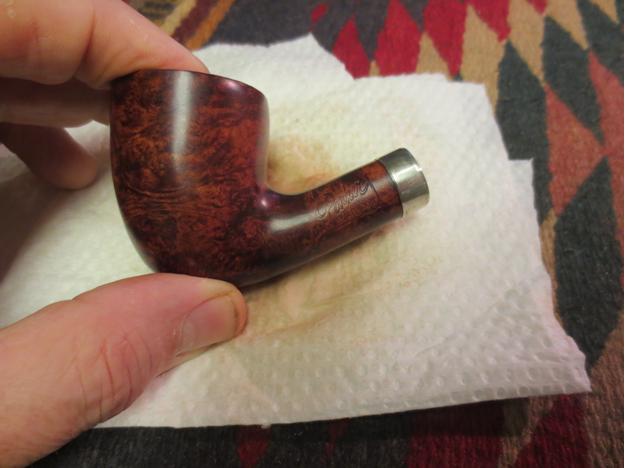
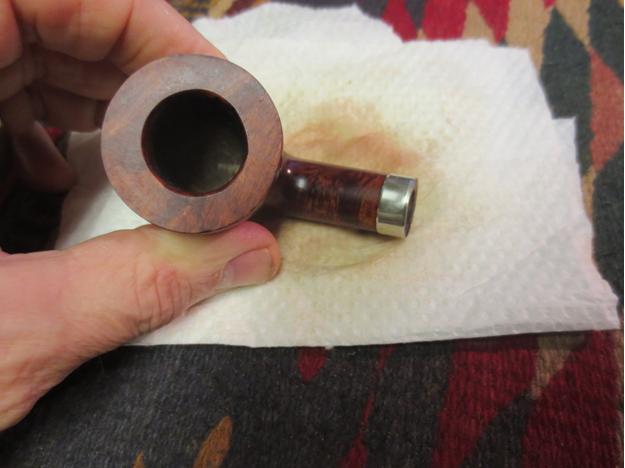
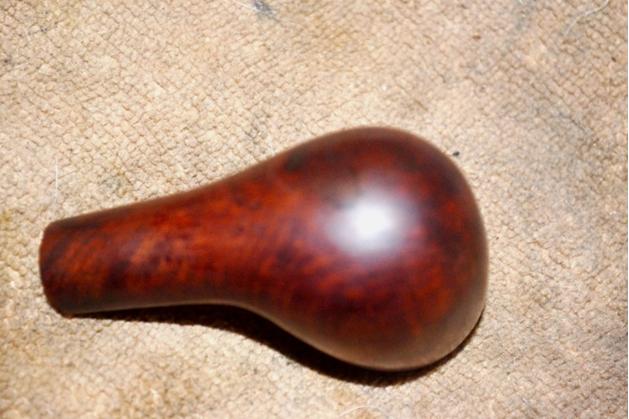
The more I sanded the grain began to come through the smoother finish of the pipe. It was clearly not briar. My guess is that it is Mountain Laurel or Manzanita. Once I get it sanded smooth and get a better look at the grain and colour I will be able to give a better assessment. The good thing was that a nicely shaped Canadian was emerging from the rough cut pipe that I started with. The shape was well executed and once I finished sanding and smoothing things out this alternative wood Canadian would look really good. My initial reticence gave way to curiosity to see what would emerge when the sanding was finished. You can see for yourself in the next set of photos below what is coming out as it is sanded.


 I continued sanding with 220 grit sandpaper and worked on the shank bowl junction. There were some deep cuts and file marks there that needed to be addressed. I sanded until the surface was smooth to touch. There were still a lot of scratches in the wood but the surface was getting smoother. I sanded it with a coarse and a medium grit sanding block to flatten out the shank and to smooth out the bowl sides, bottom and rim. I used a black permanent mark to cover the fill and line it up with the grain at that point. Once I sanded it more and blended it into the grain of the shank it would become less visible than it is in the photos below. I sanded more with the sanding blocks and then gave the pipe a light coat of olive oil to see what the grain would look like when I was finished. The wood had a red hue to it and some nice looking grain. There is a lot more sanding that needs to be done at this point but it is progressing.


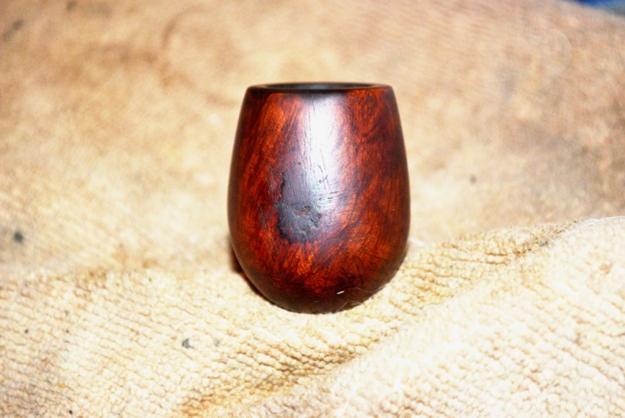
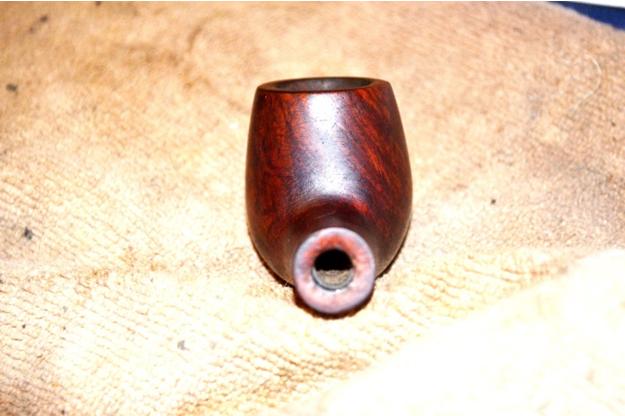
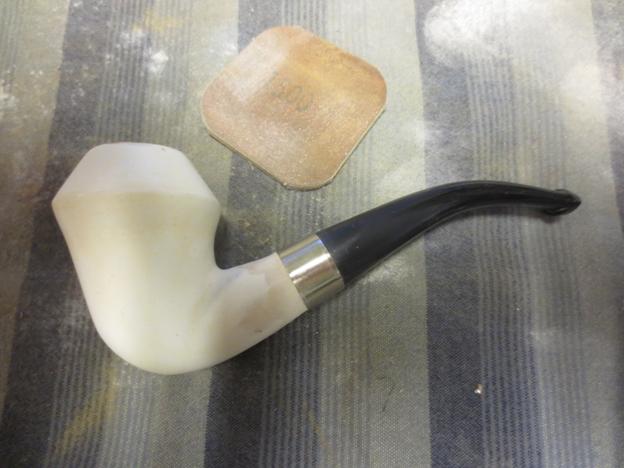
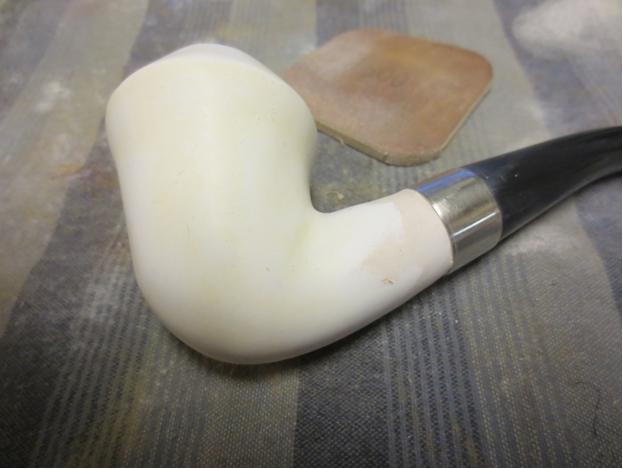
 I have included a few more close-up photos to show the progress of the sanding on the surface of the bowl and shank. There is some nice looking grain coming through in the photos of the bowl sides and shank.
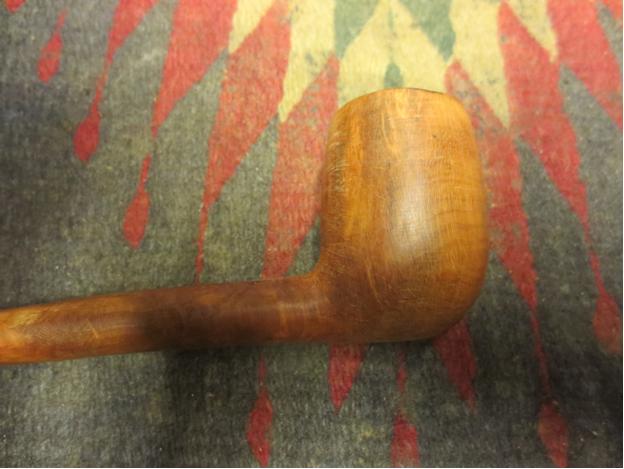
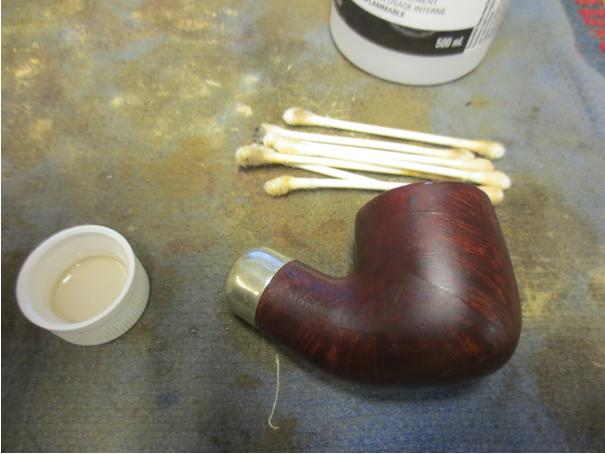
 At this point I sanded the bowl and shank with micromesh sanding pads and the oil to give me some traction while sanding. I find that the oil allows the micromesh to cut more deeply and work more effectively. I sanded with older 1500-2400 grit micromesh pads that I reserve for working with oil sanding. Unfortunately I got into the flow of things and did not take photos of this part of the process.
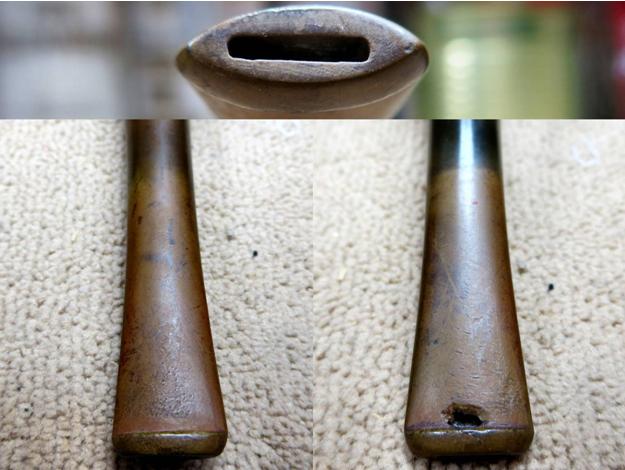
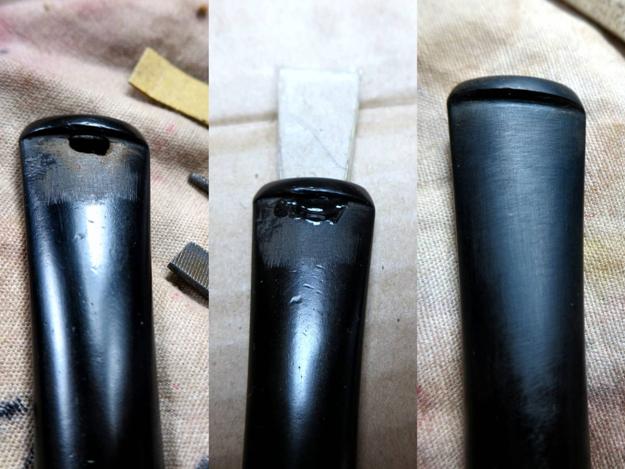
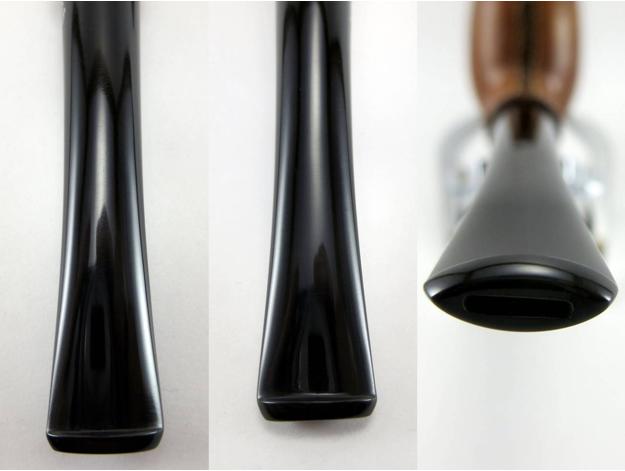
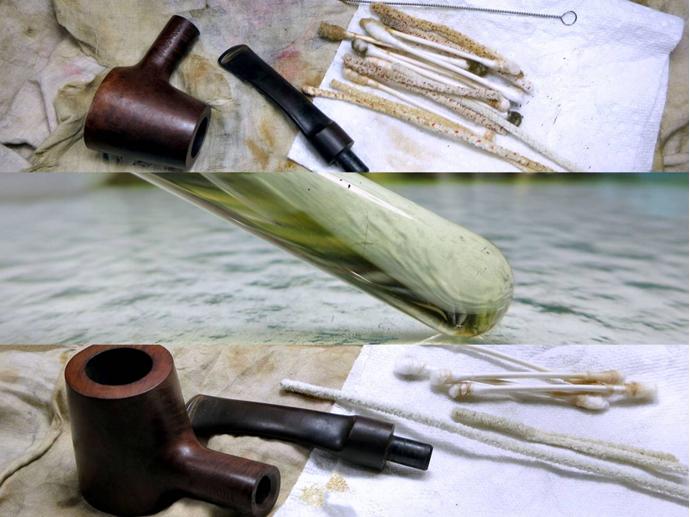
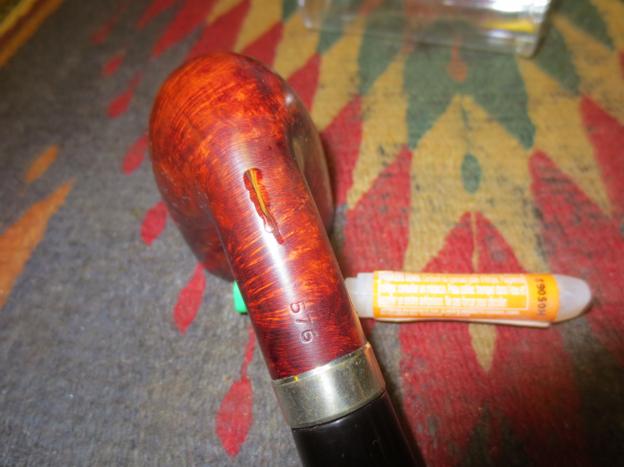
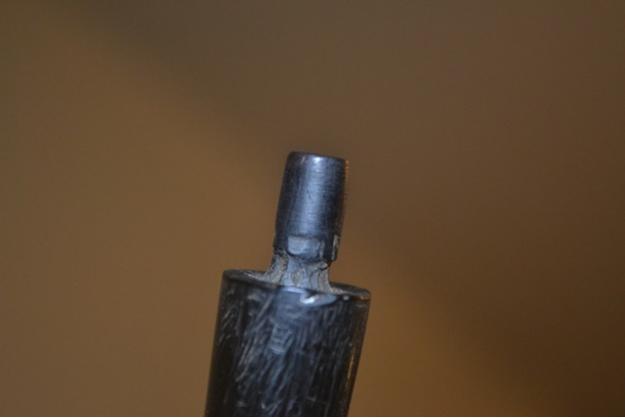
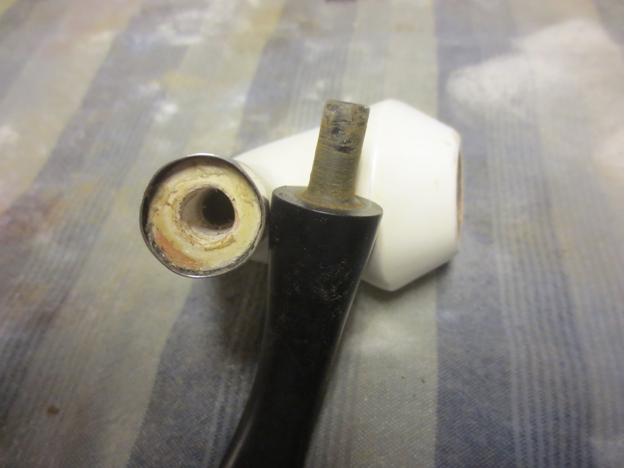
Once I had finished sanding the bowl to this point I worked on the stem. The same file marks went across and the length of the stem. There were gouges and marks and two deep tooth marks near the crease on both the top and bottom of the stem. The next two photos show the scratches and the tooth marks.
 I used an emery board to sand out the scratches and the tooth marks. I was able to remove most of the scratches and gouges with the board and then sanded the stem with 220 grit sandpaper to remove some of the deeper scratches and blend in the board marks. I also used the topping board to even out the end of the clipped stinger so that it was not rough.
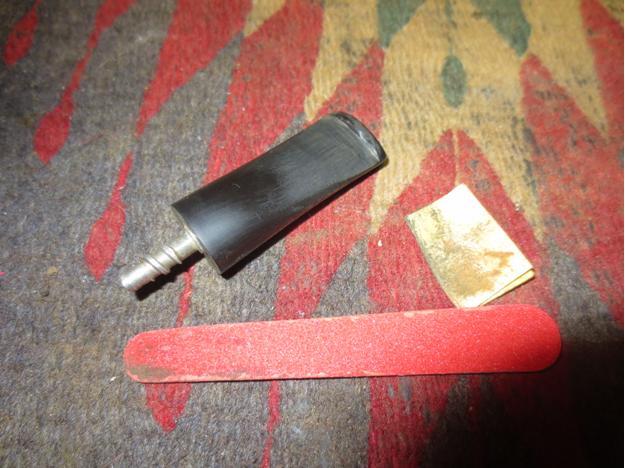 The tooth mark on the top needed to be repaired. I cleaned up the sanded area and then filled the remaining tooth mark with clear super glue.
 When the glue dried I used the emery board and the 220 grit sandpaper to blend in the repair with the surface of the stem.
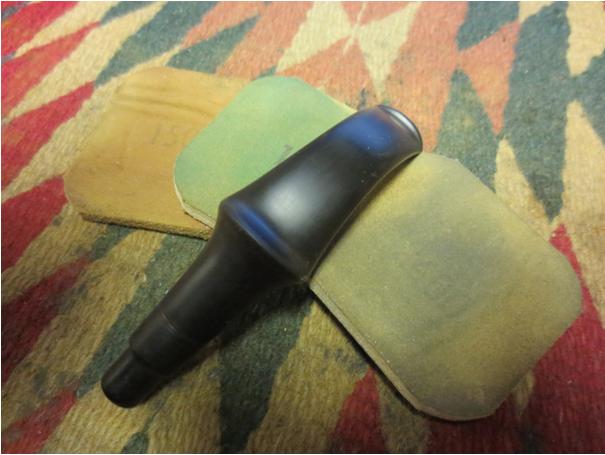
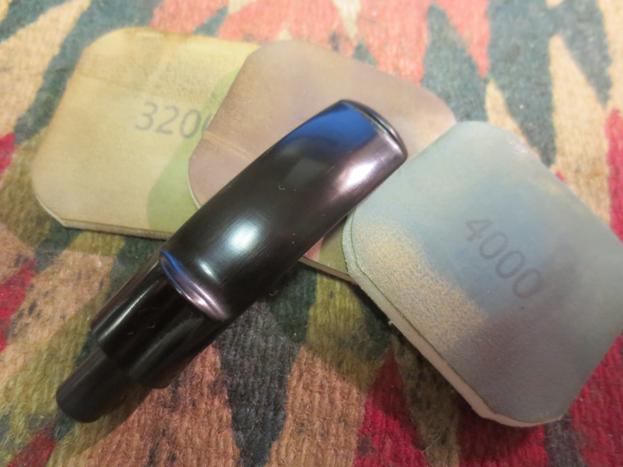
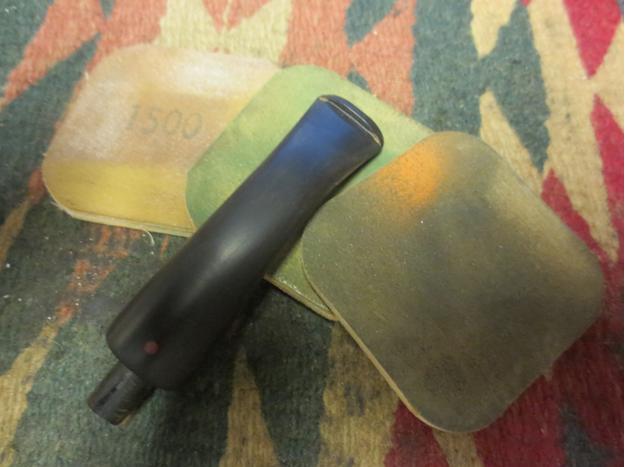
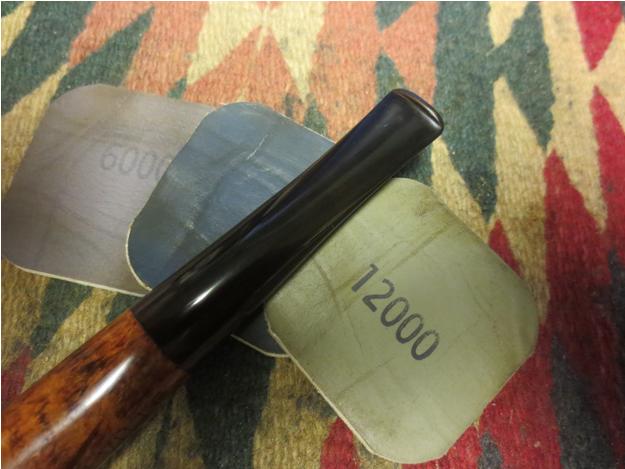
 Once the scratches and marks were gone and the patch smoothed into the surface I went on to wet sand the stem with 1500-2400 grit micromesh sanding pads. I rubbed the stem down with Obsidian Oil and then dry sanded with 3200-4000 grit pads before giving the stem another coat of oil. I finished with 6000-12000 grit pads and then a final coat of Obsidian Oil. I let it dry before taking the pipe to the buffer.
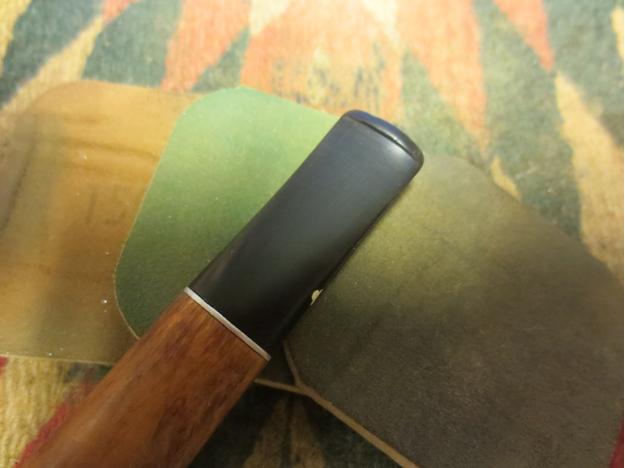

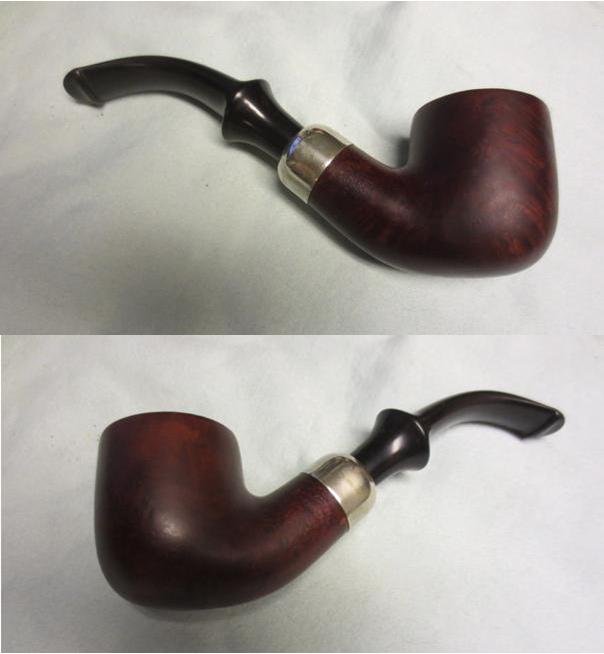
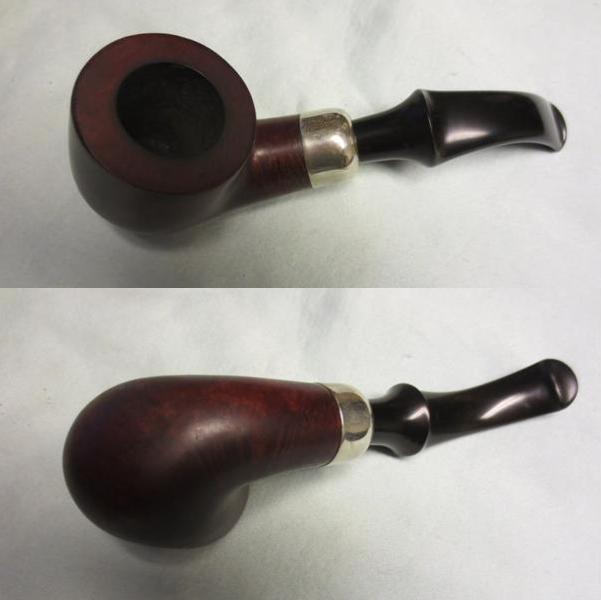
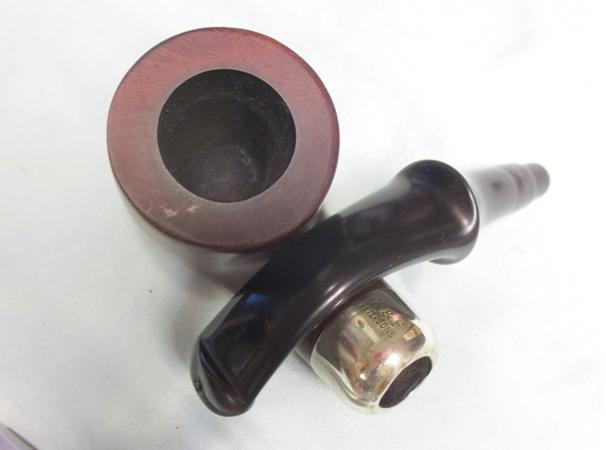
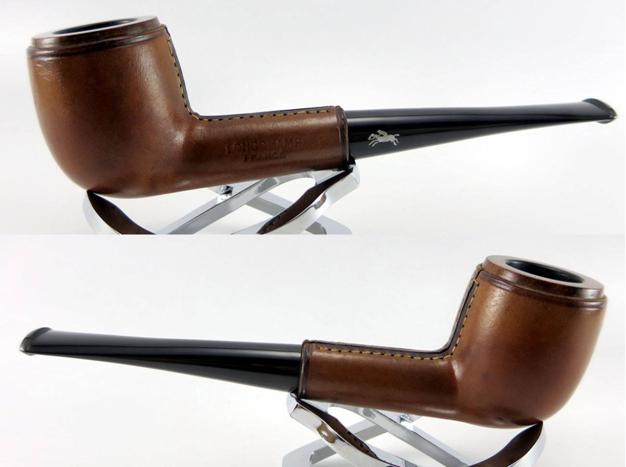
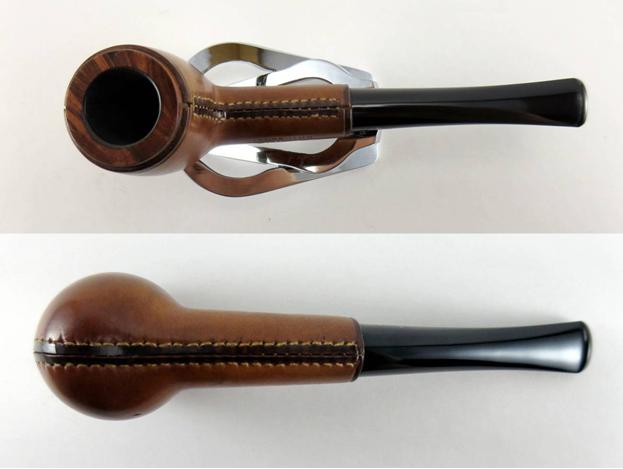
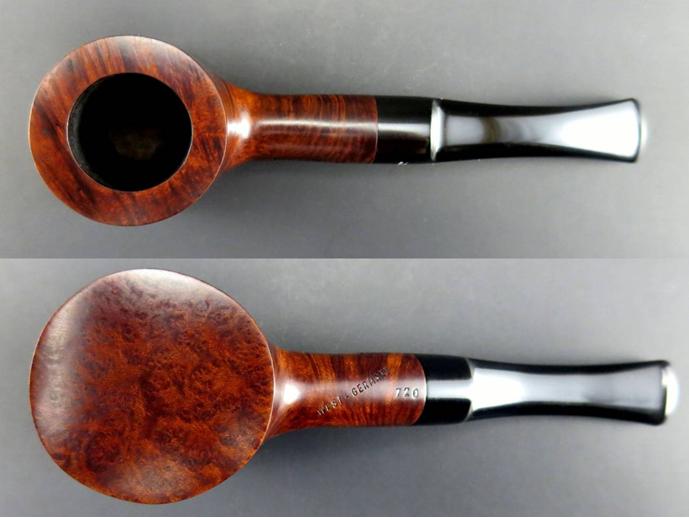
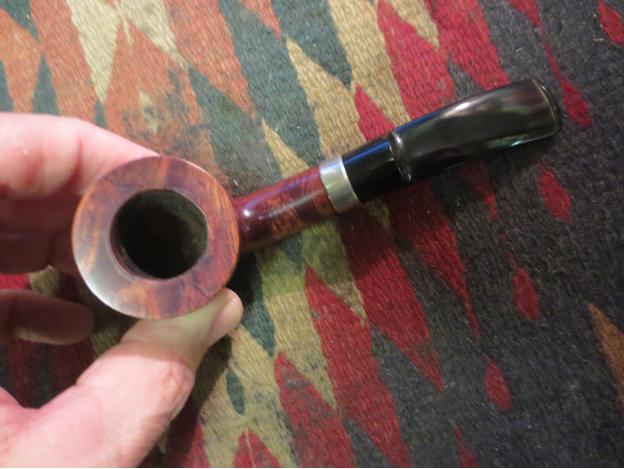
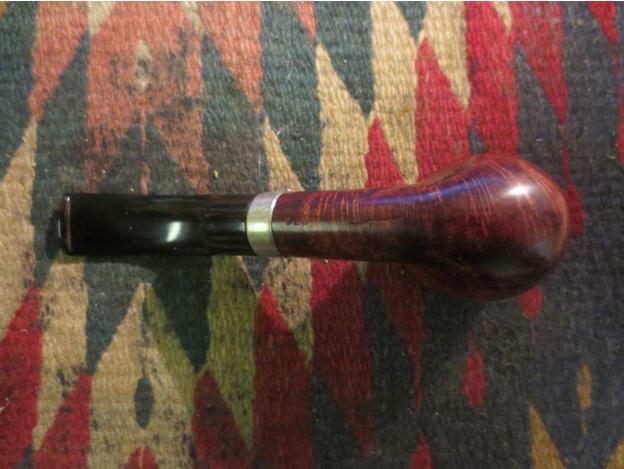
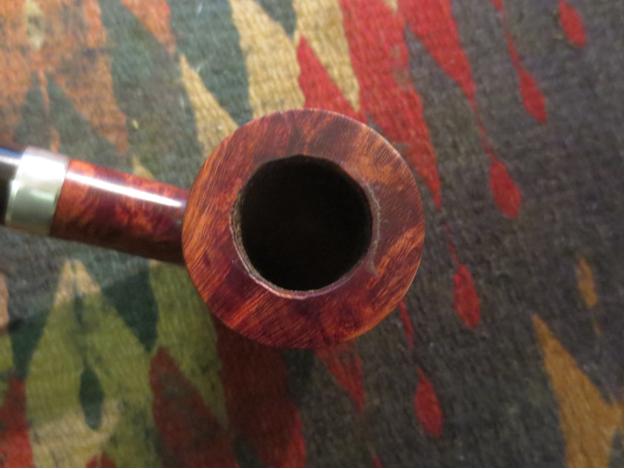
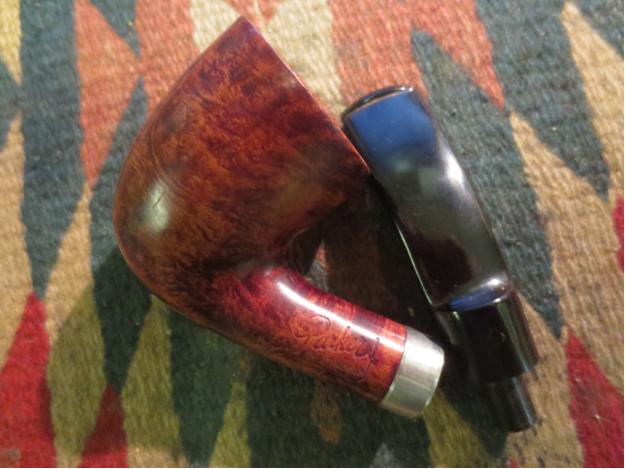
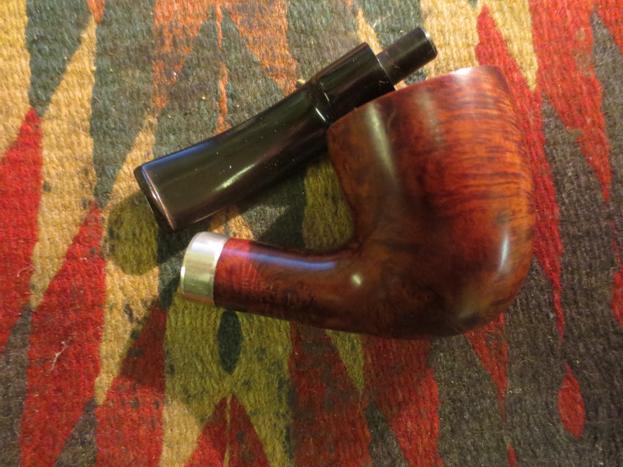
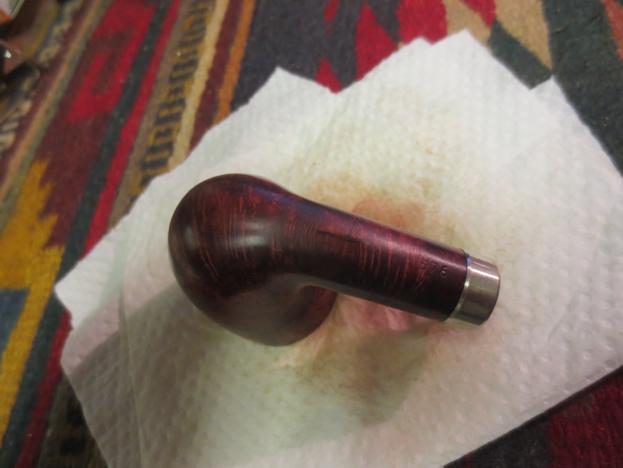
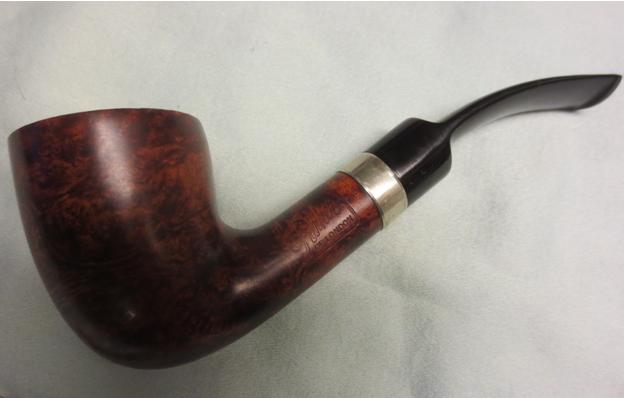
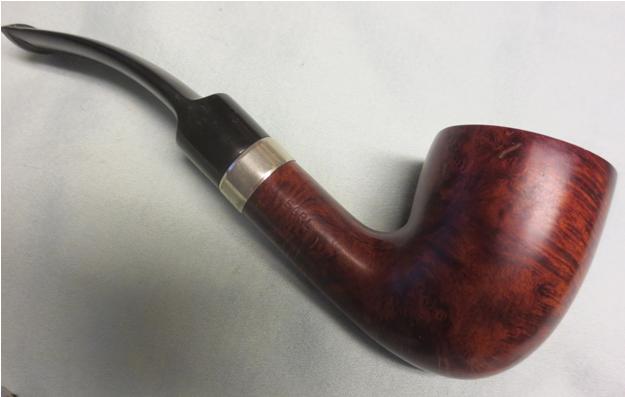
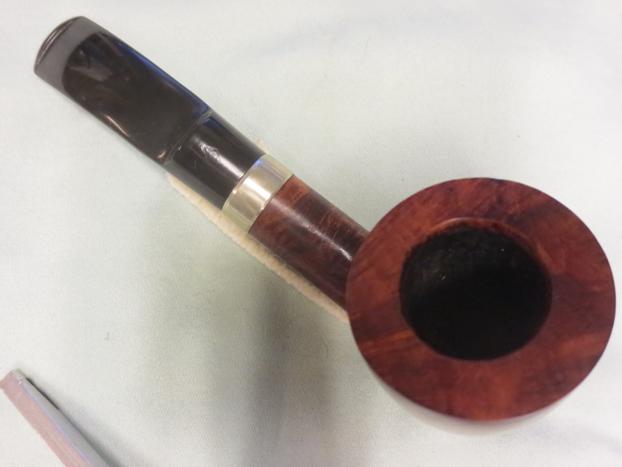
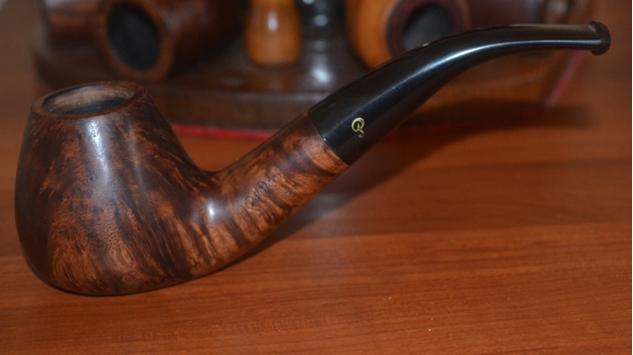
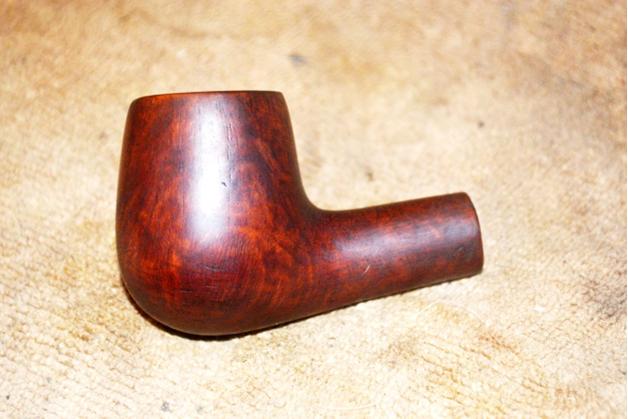
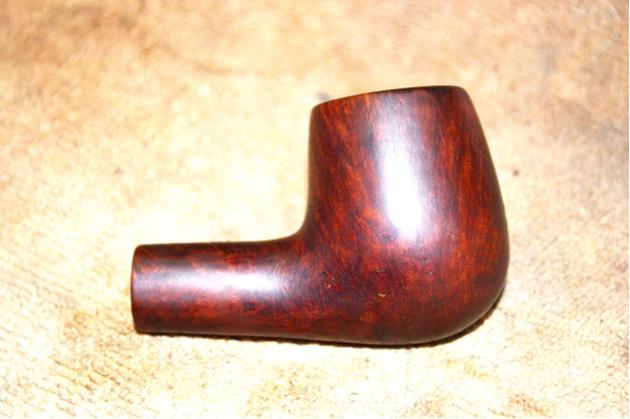
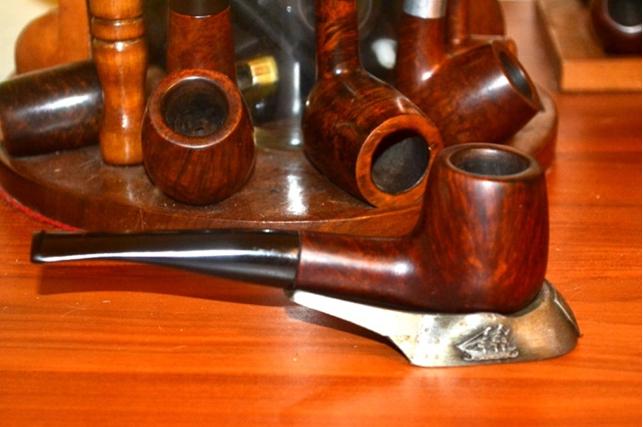
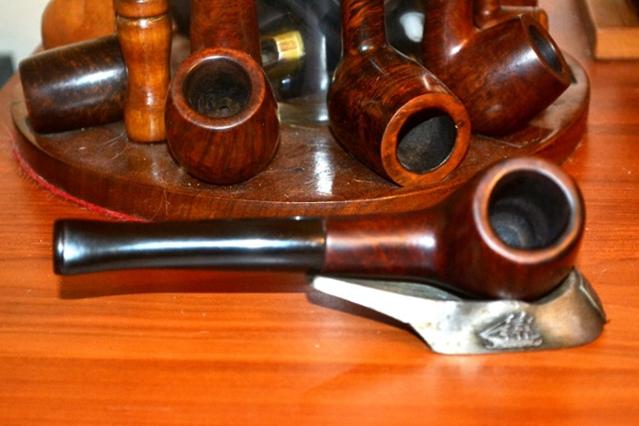
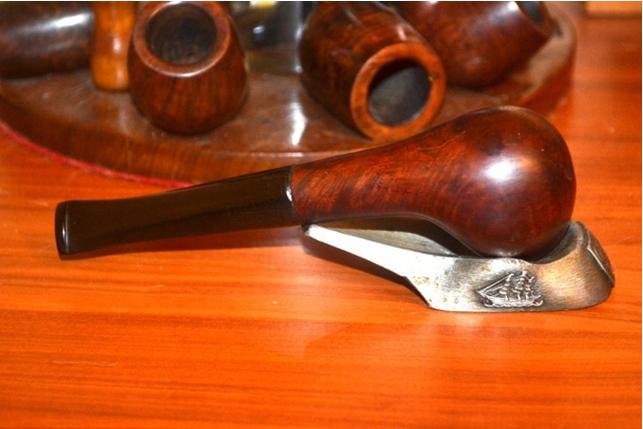
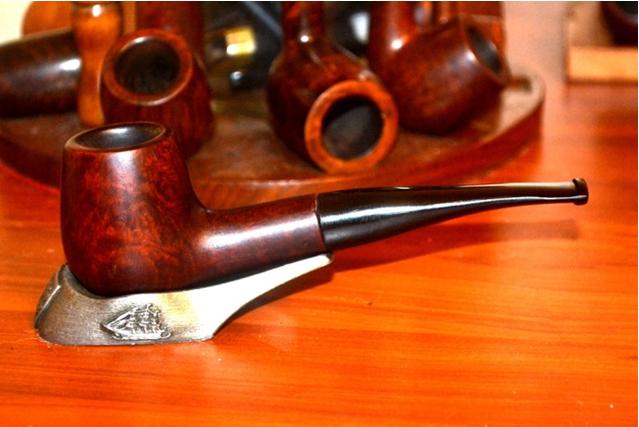
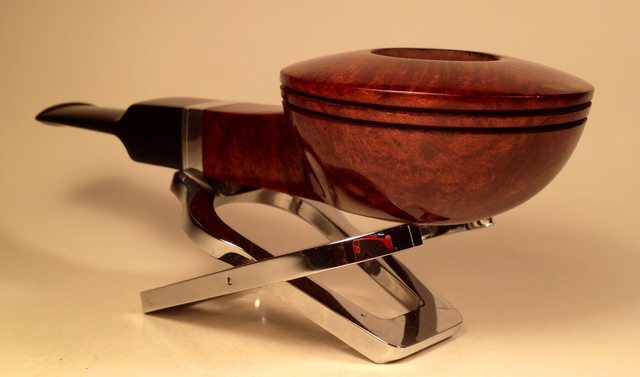
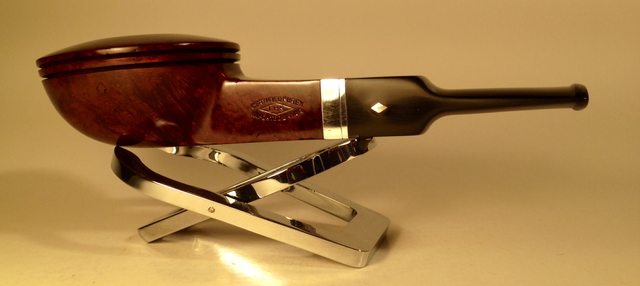
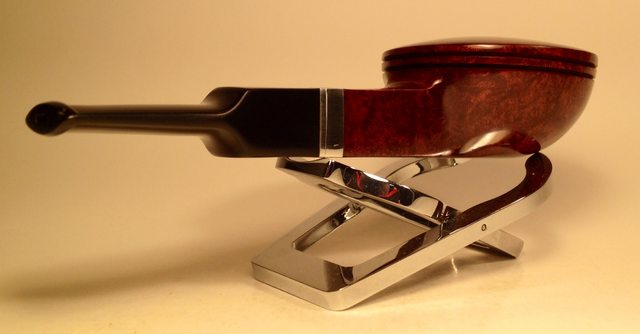
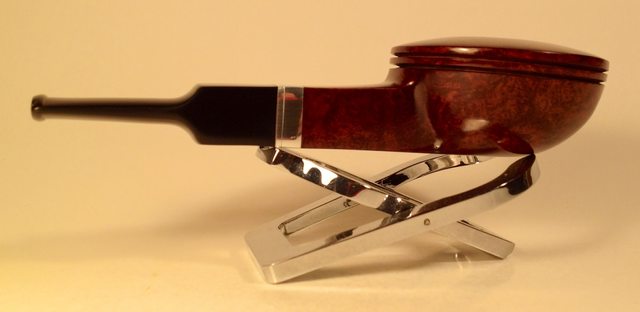
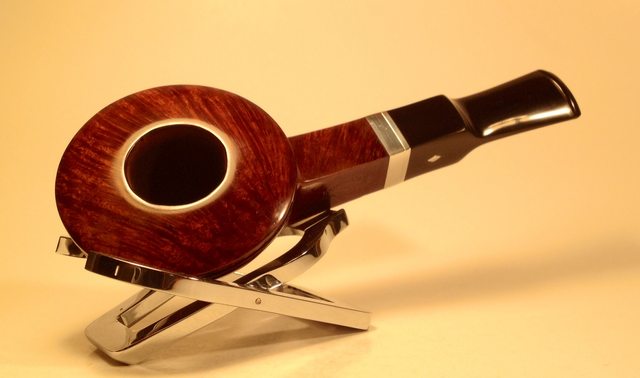
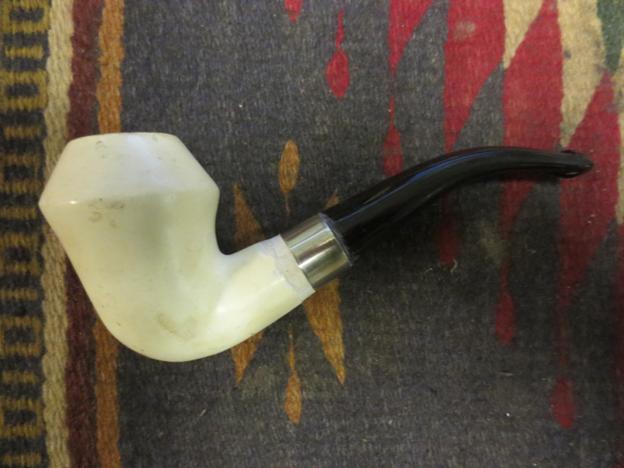
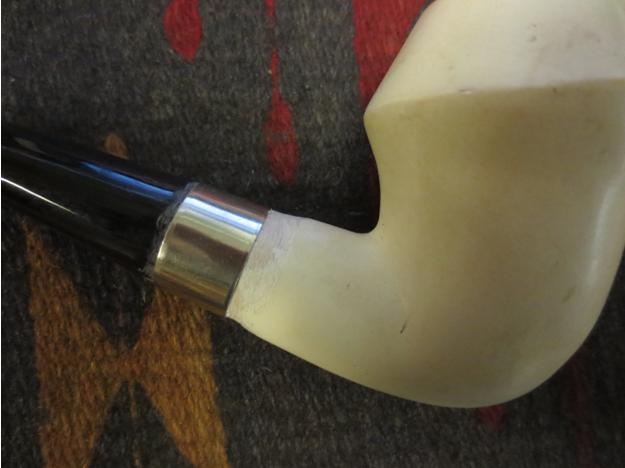
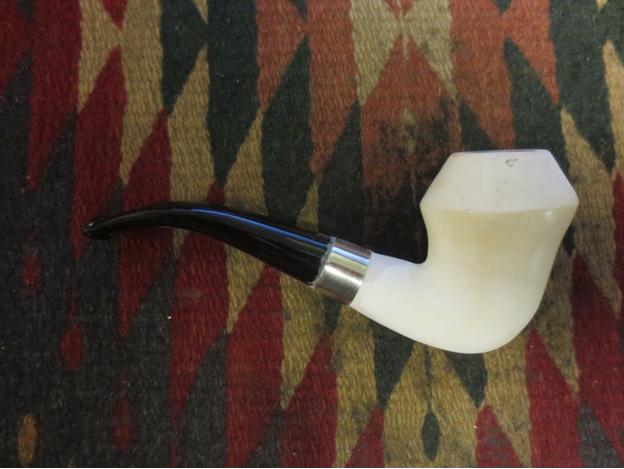
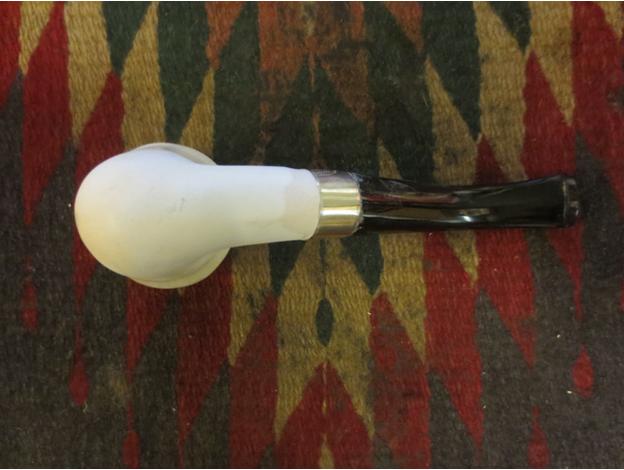
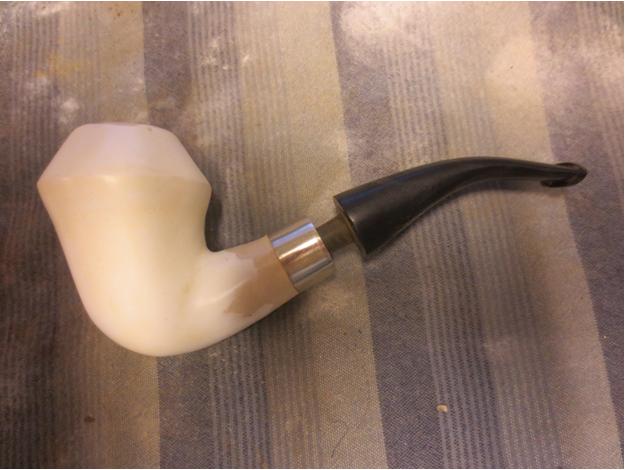
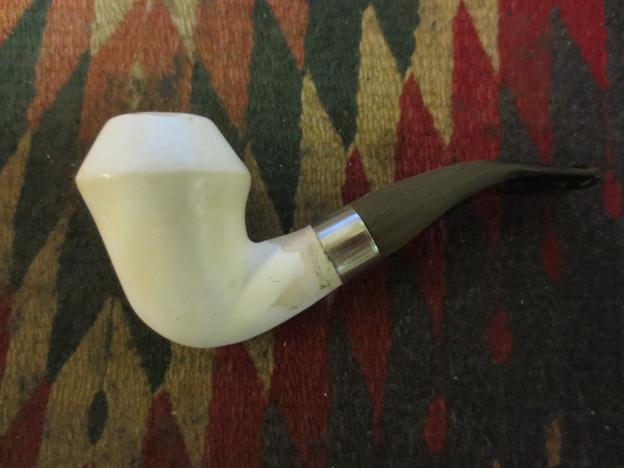
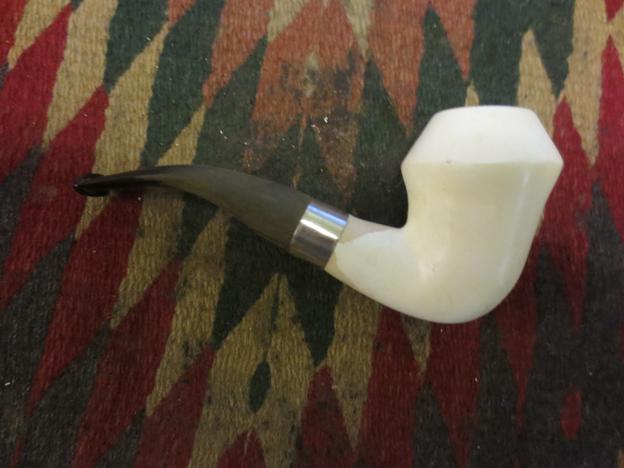
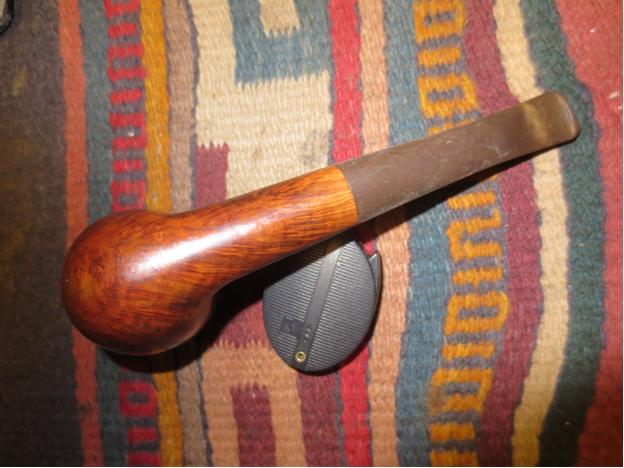
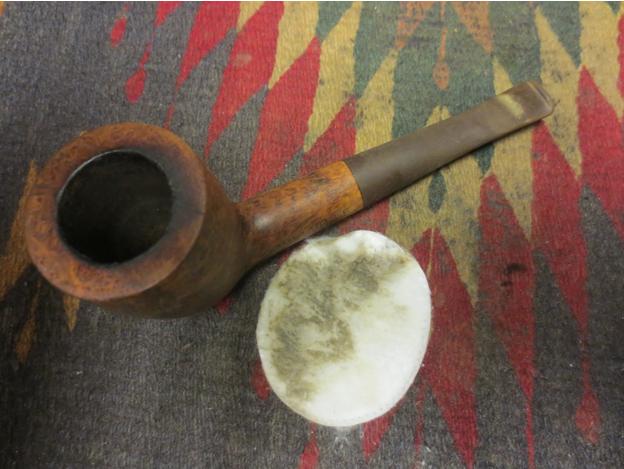
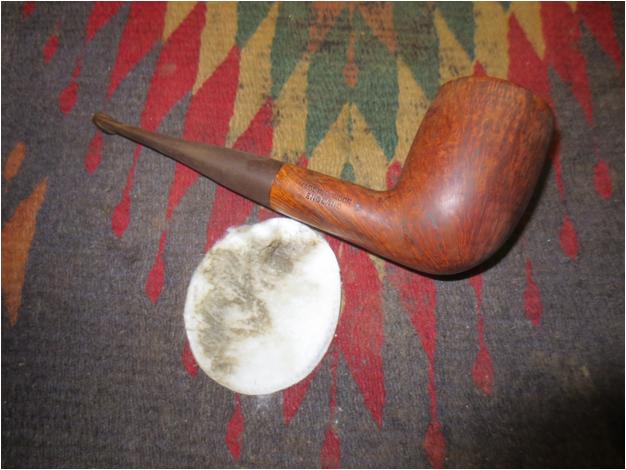
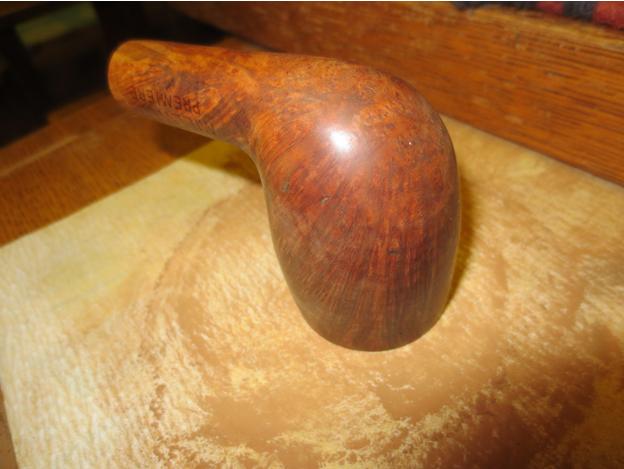
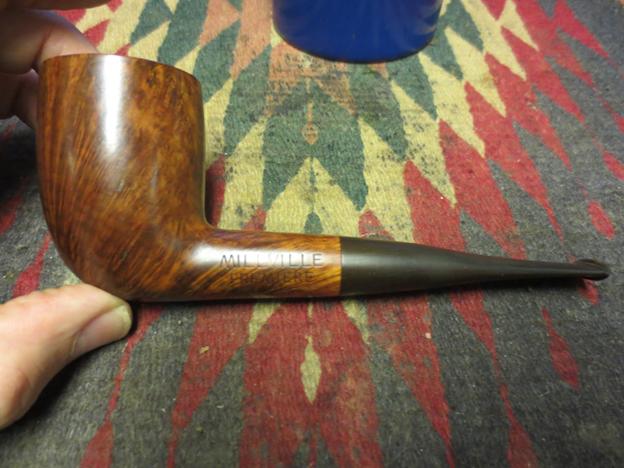
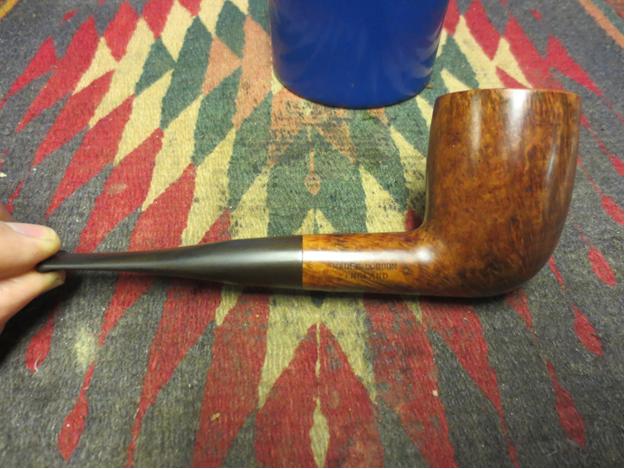
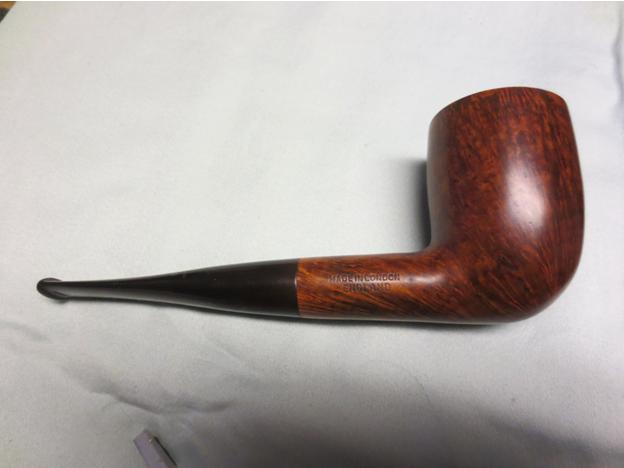
 I sanded the bowl and shank down with all of the grits of micromesh sanding pads from 1500-12000 grit. By the time I was finished the scratches were virtually gone. The repair on the shank/bowl junction though showing is smooth to the touch. The ugly duckling had become a swan. The Canadian hidden beneath the file marks and rough finish gave way to the beauty of the alternative wood. The finished pipe was truly a thing of beauty.
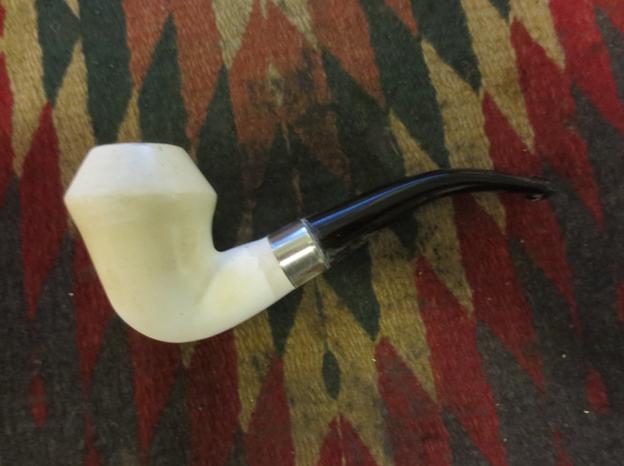
I buffed the pipe and stem with Blue Diamond Polish on the wheel. I worked it until the remaining scratches disappeared. I gave the bowl and stem several coats of carnauba wax and then buffed the pipe with a soft flannel buff. I finished by hand buffing it with a microfibre cloth. The finished pipe is shown in the photos below. The change in appearance is significant and the feel in the hand is much better. I am still pretty convinced the pipe is Mountain Laurel but could be convinced otherwise if some of you know. Thanks for looking.