Blog by Steve Laug
Earlier in June I received an email regarding restoring some pipes for her husband. Here is here email.
I have one Calich and one Dunhill pipe which my husband destroyed using a torch lighter on. I am wondering if it is possible to get them restored somehow. If you want to have a look I can send pics.
I wrote and asked for photos of the pipes. She wrote that there were actually 5 pipes not two and included photos of all five. I asked her if she was wanting to sell them or just repair them. Here is her response.
No… I don’t want to sell (yet) he’s 86 and has taken up smoking his pipes again. He was using a torch lighter until I discovered and replaced with proper pipe lighters. For now, I’m wondering if it’s possible or even wise to restore them. – Kathleen.
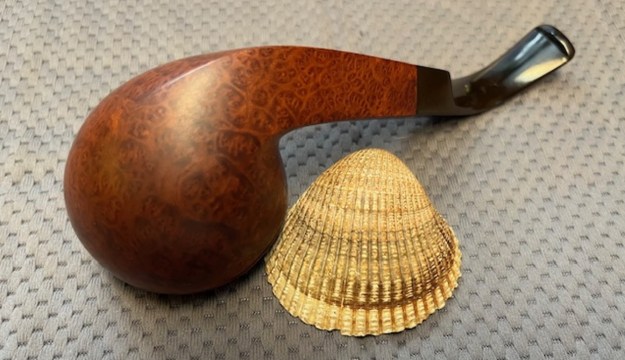
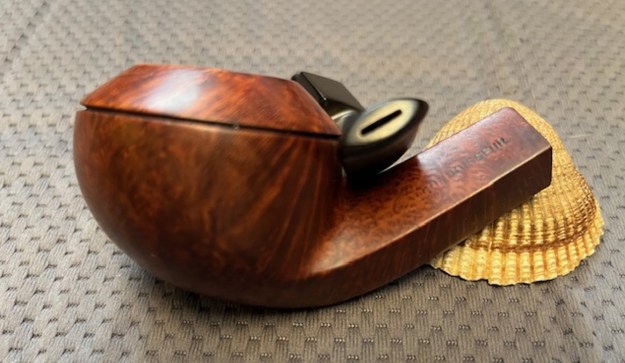
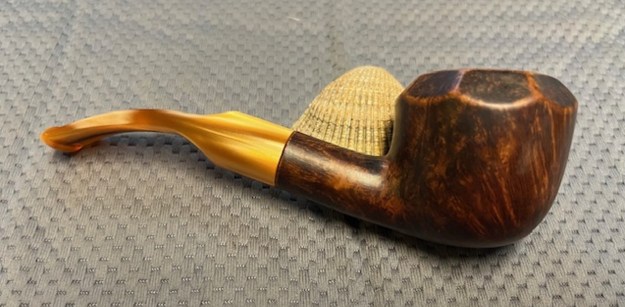
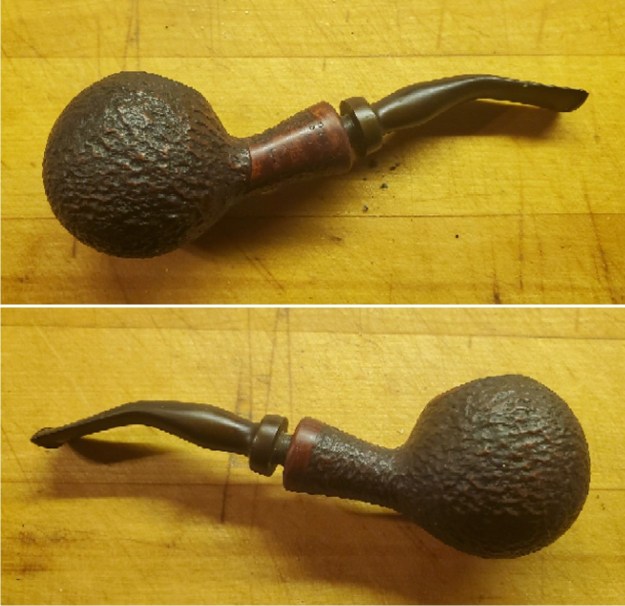
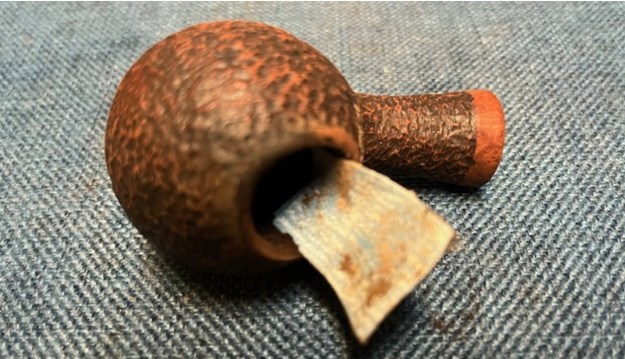
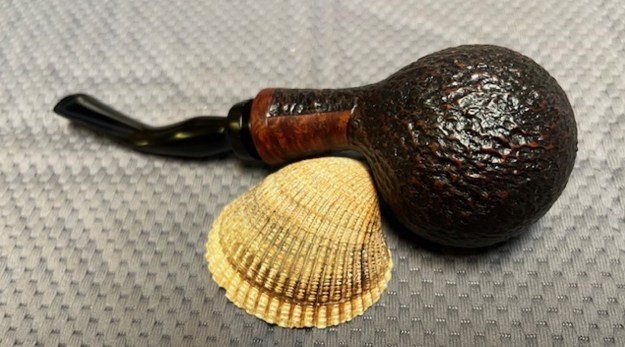
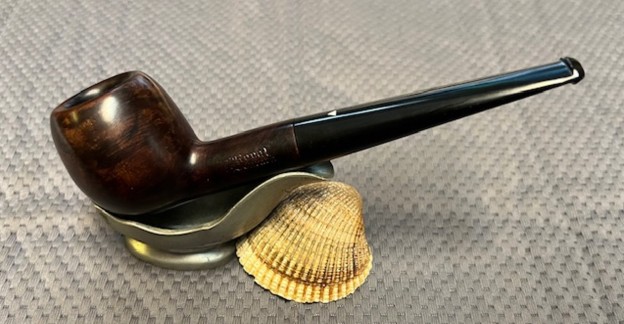
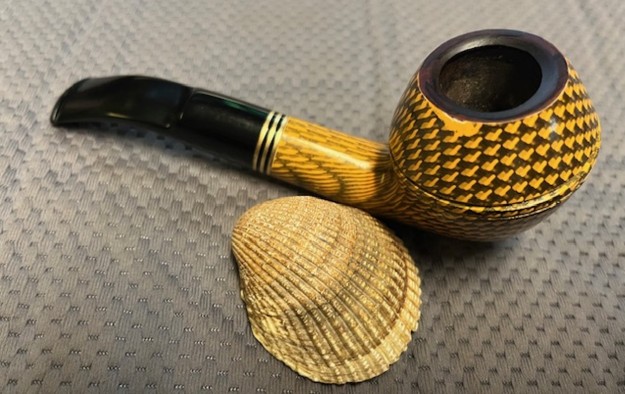
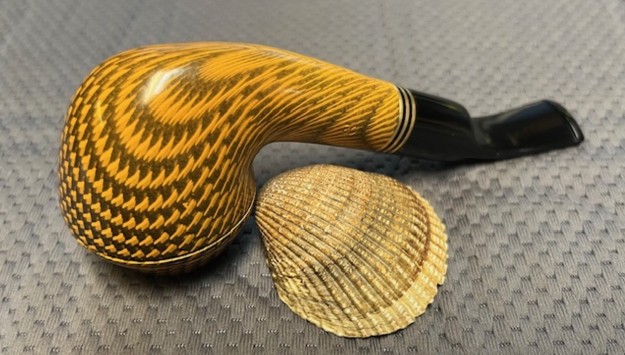
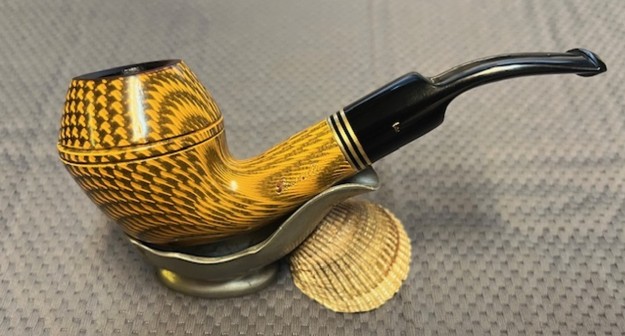
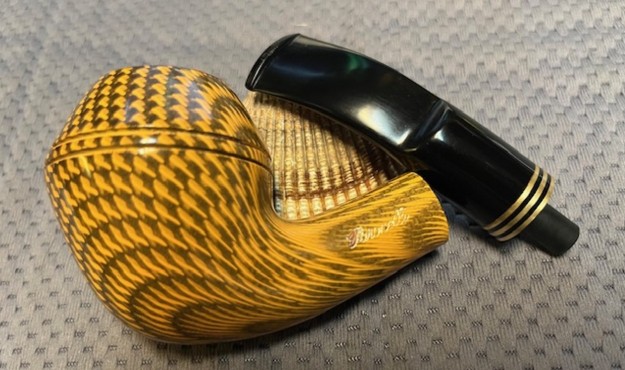
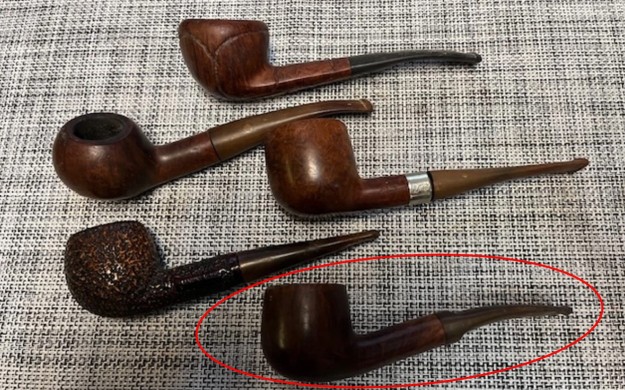
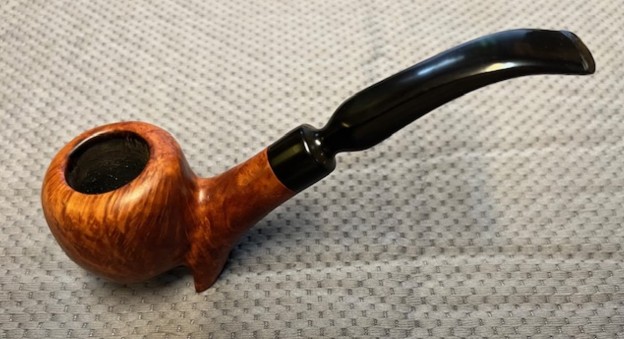
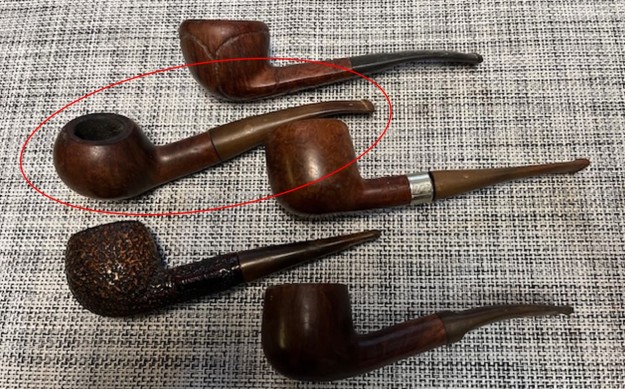
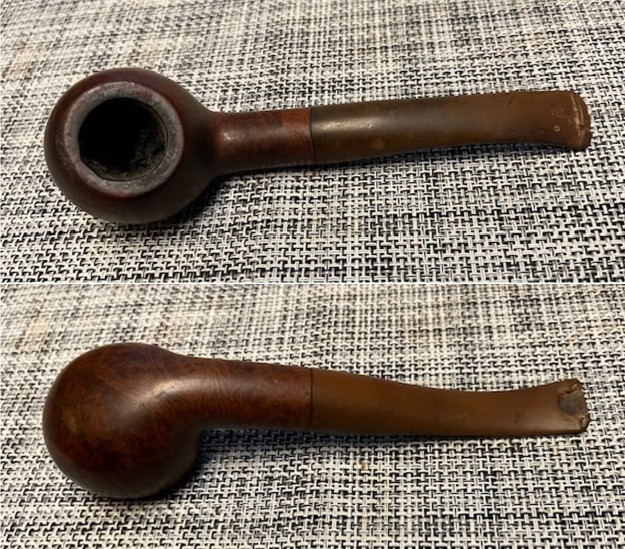
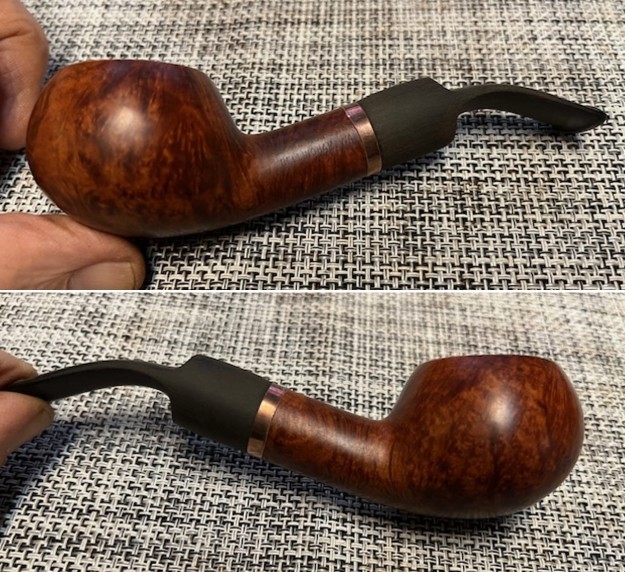
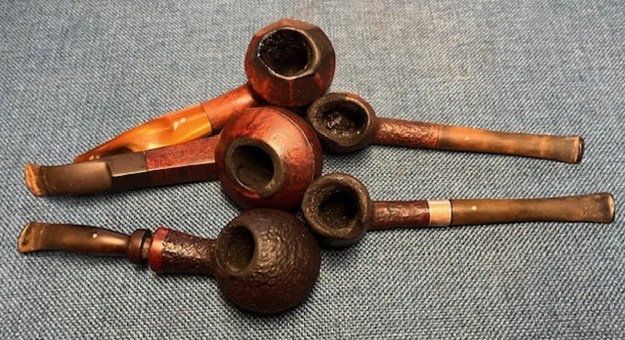
I replied to Kathleen and invited her to send the pipes to me in Vancouver. They arrived just before I left for my visit with my Dad in Idaho. Here is what I found when they arrived. There were three Caliches, a Dunhill, and an Ed Burak Connoisseur. The Calich Pipes included a rusticated straight Opera, a bent Rhodesian with an octagonal rim cap and an acrylic stem. The Dunhill was a sandblast Billiard with a repair band on the shank. The Ed Burak Connoisseur was a bent Bulldog. All had rim top damage from being lit with a torch lighter. Some were in worse condition than others. The worst were the Calich Opera and the Dunhill Billiard which had torch damage on the left side of the rim and down the bowl side. The others had varying degrees of burn damage. I set them aside until I returned home from my visit. Here are the photos that Kathleen sent me of the third pipe – a large Bent Bulldog.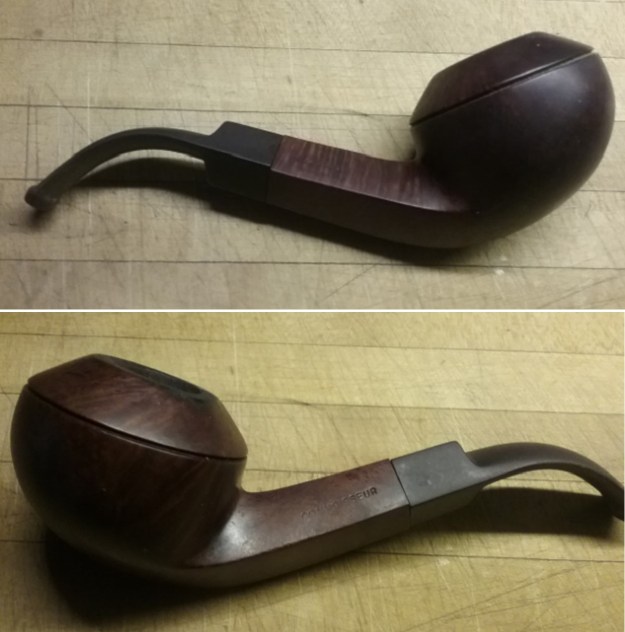
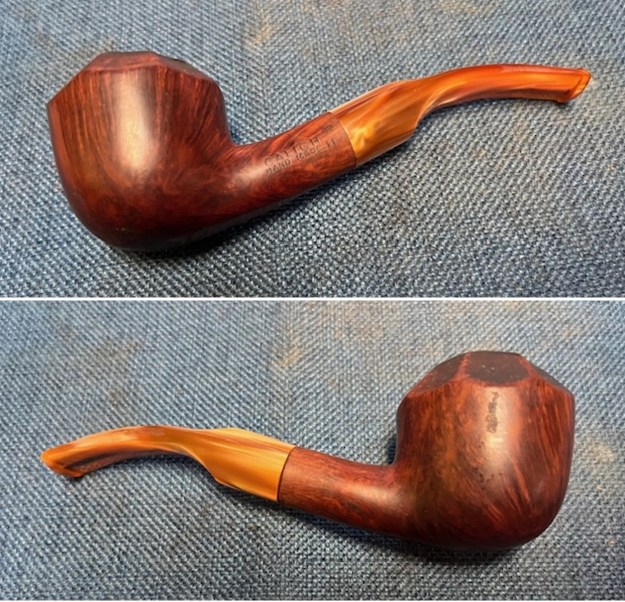
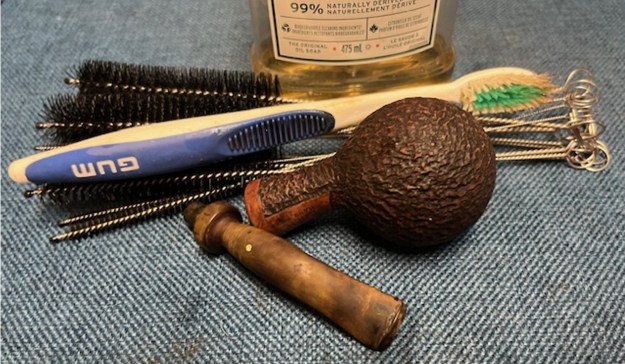
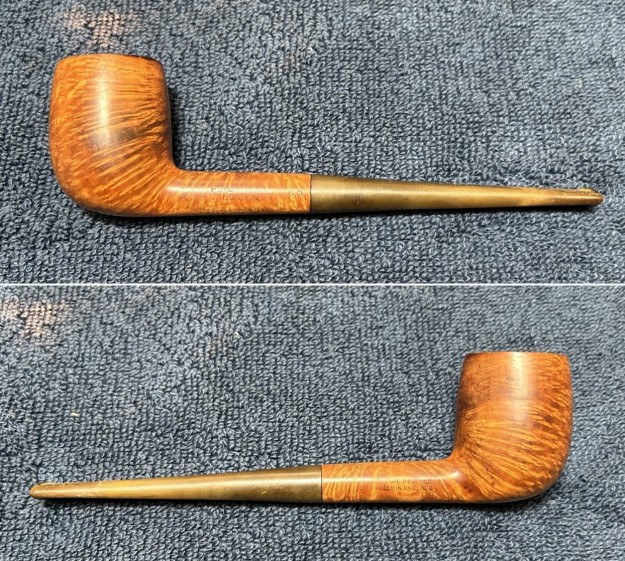
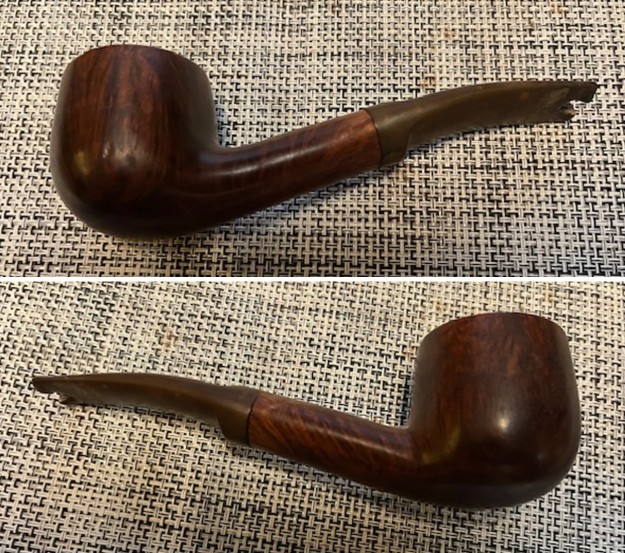
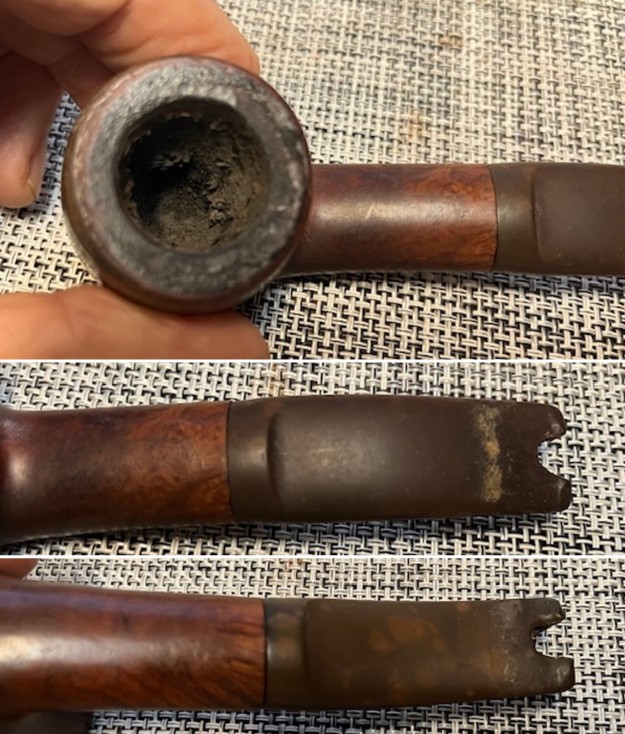
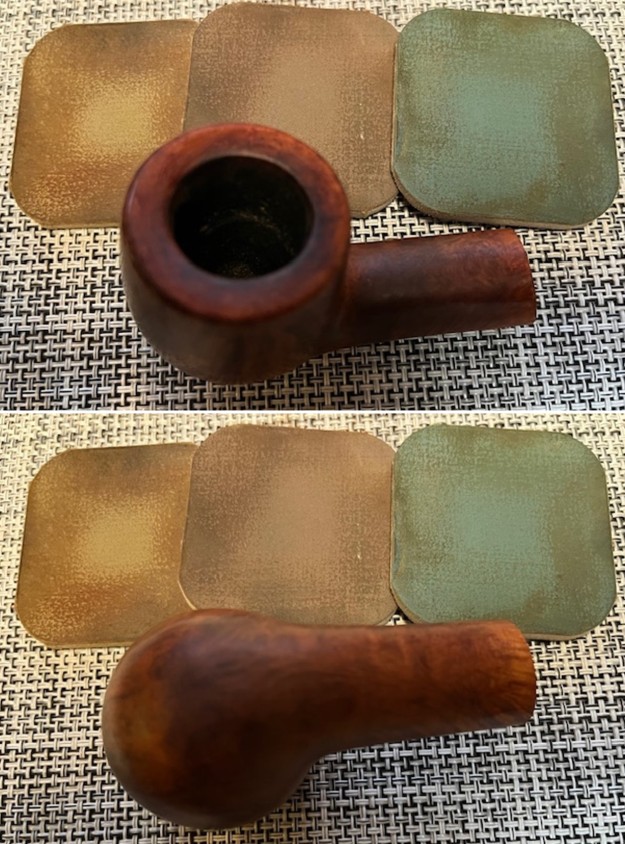
 I took the pipes out of the box and laid the group out on my worktable. I took some photos of the group to show their condition. The photo of the left side of the shank shows the damage I mentioned in the earlier paragraphs. The right-side photo looks very good. The photos from the rim top show a lot of damage and the overall condition of the pipes very clear.
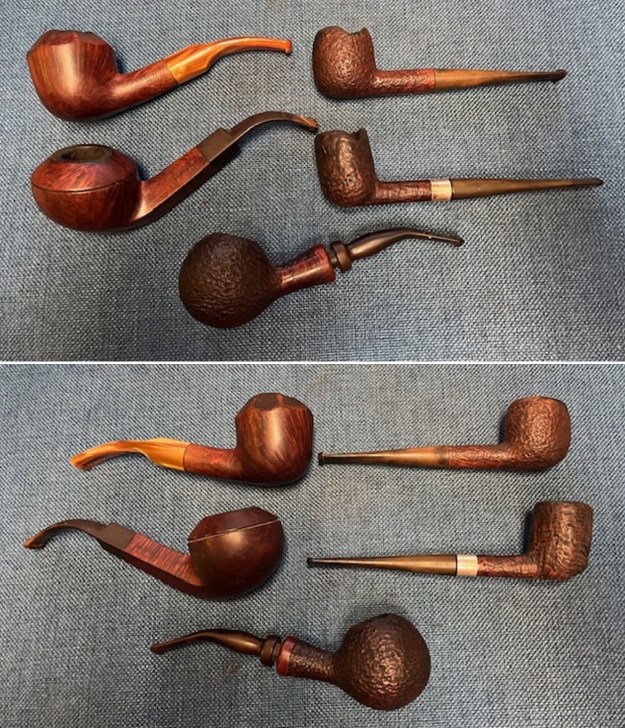
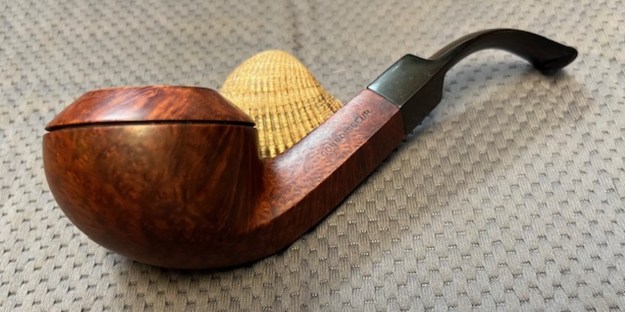
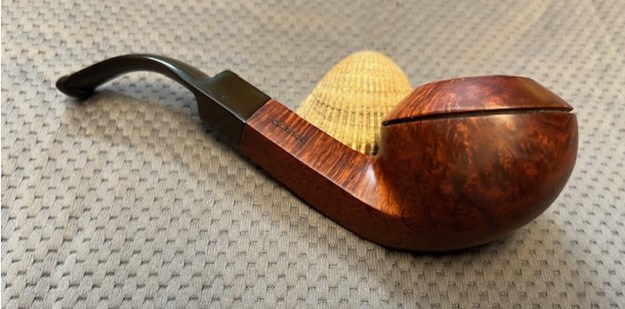
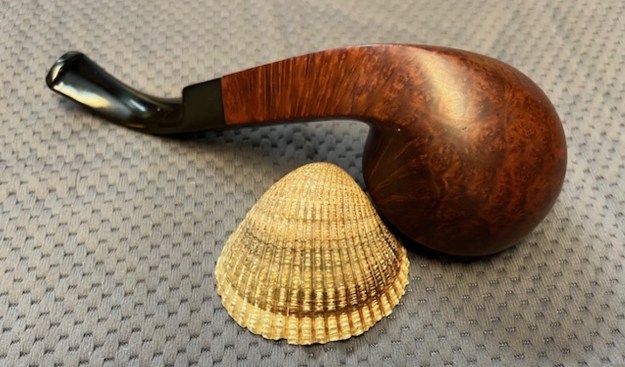
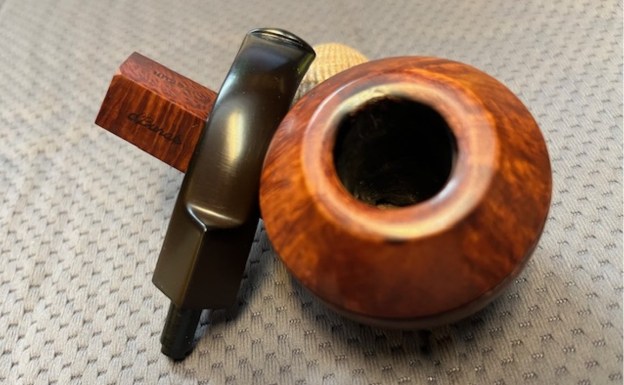
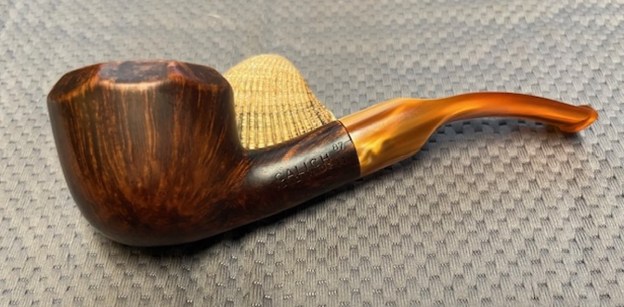
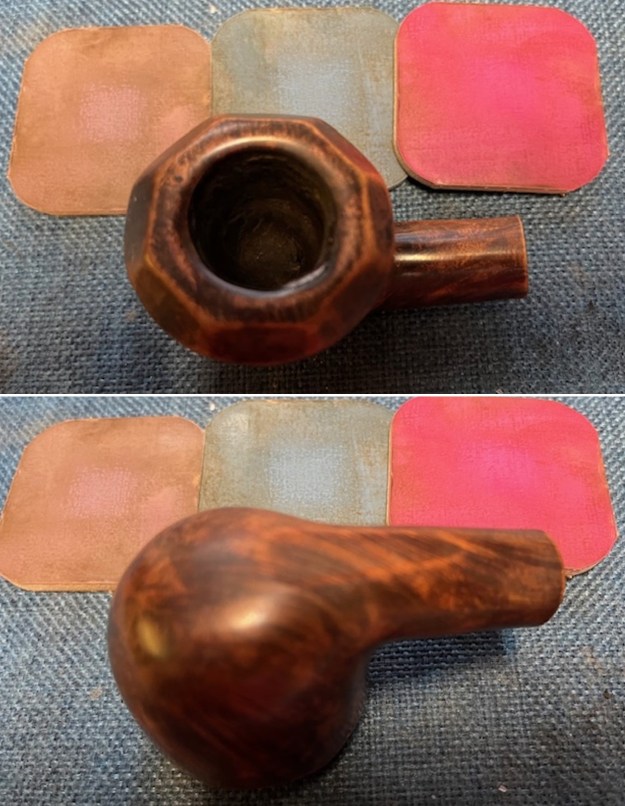
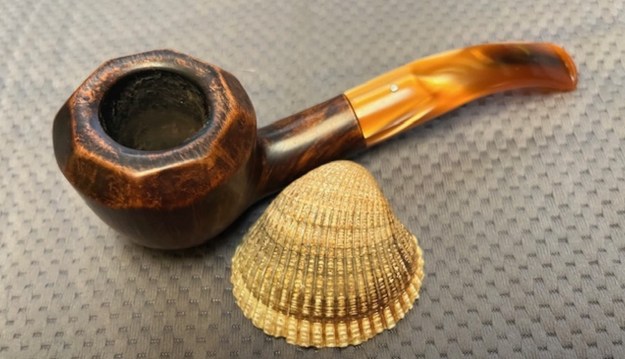
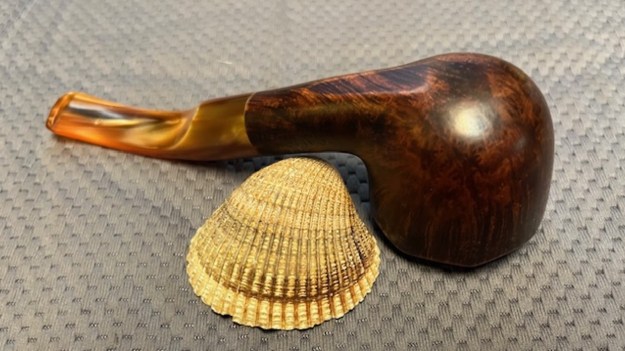
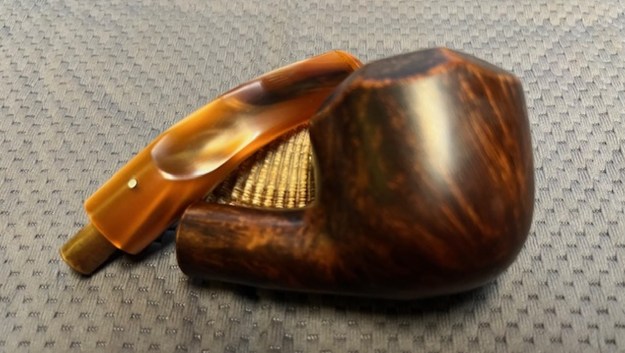
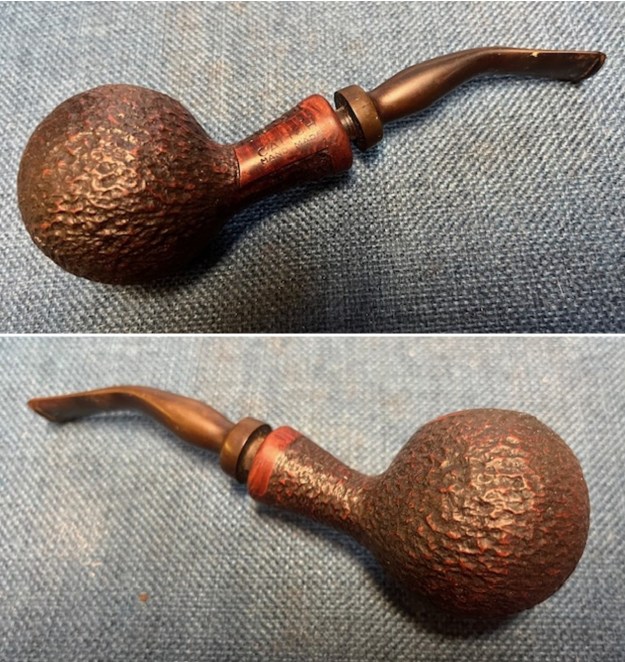
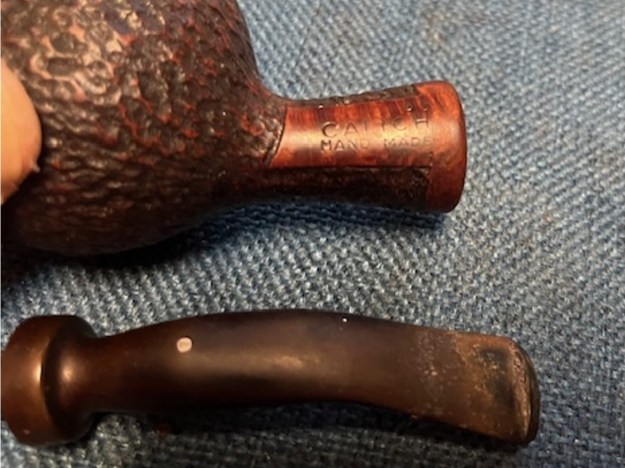
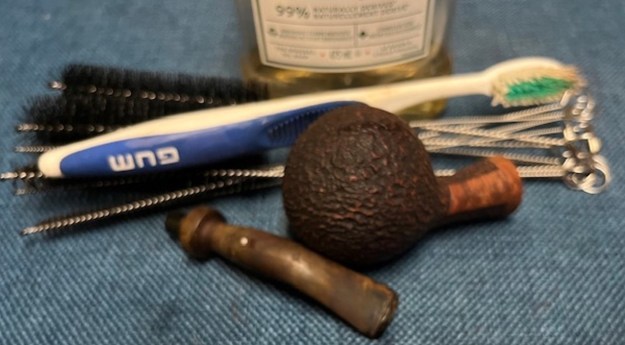
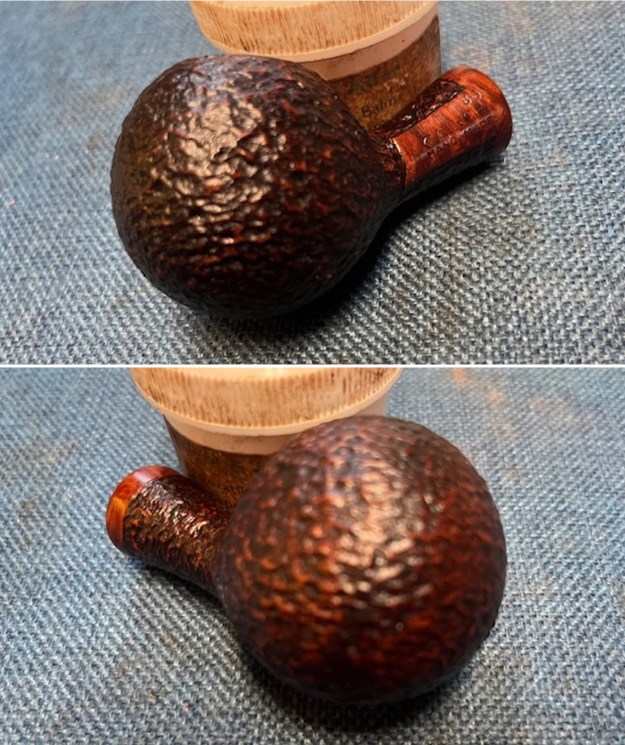
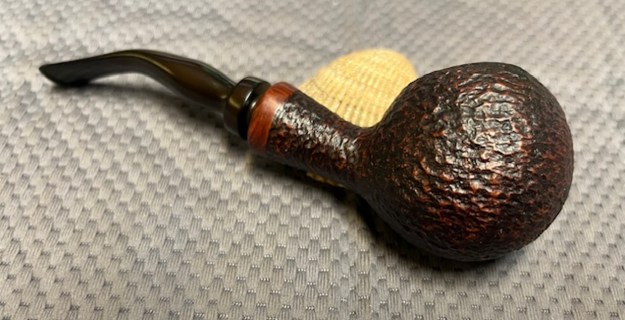
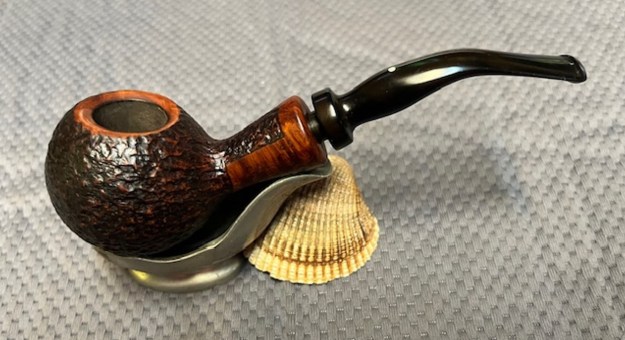
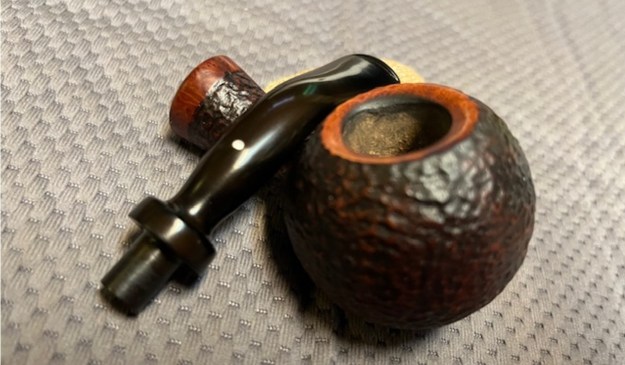
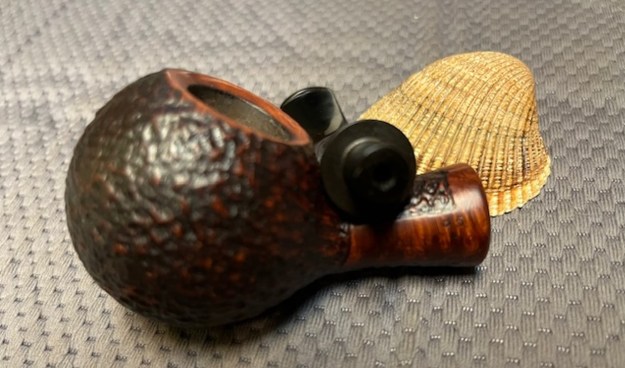
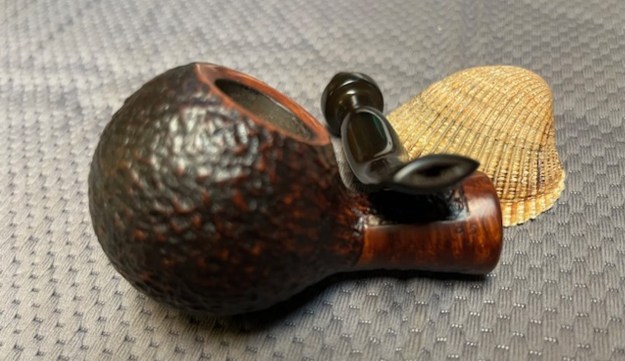
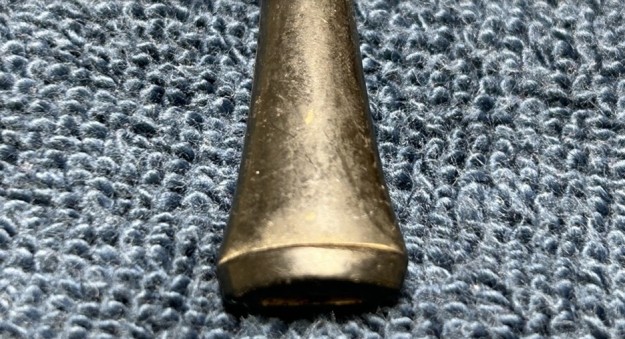
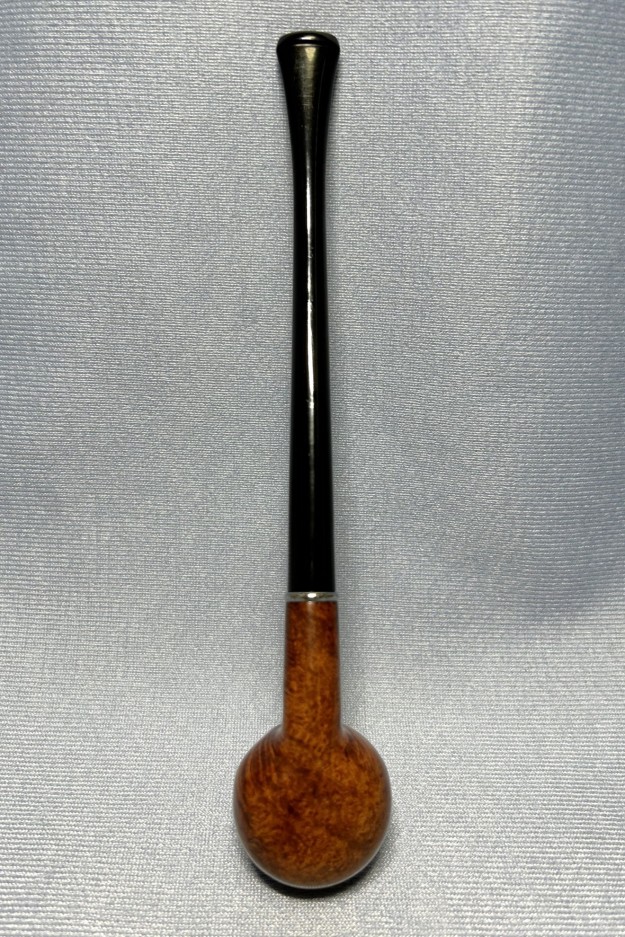
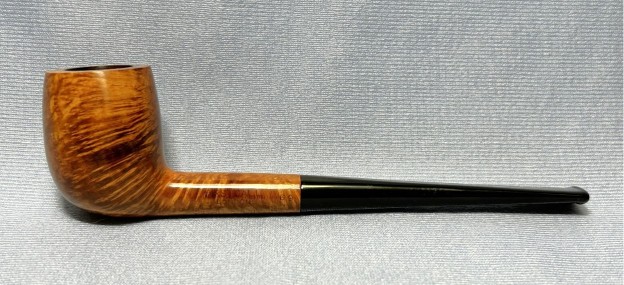
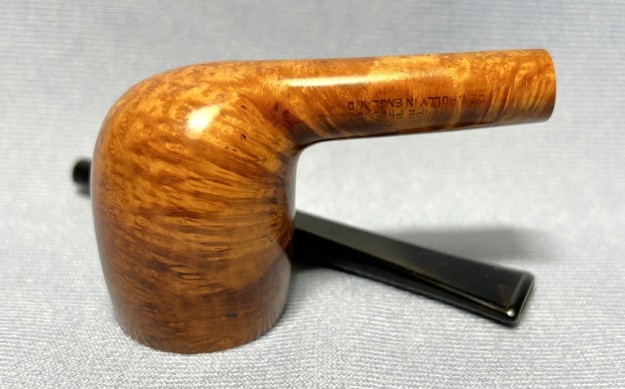
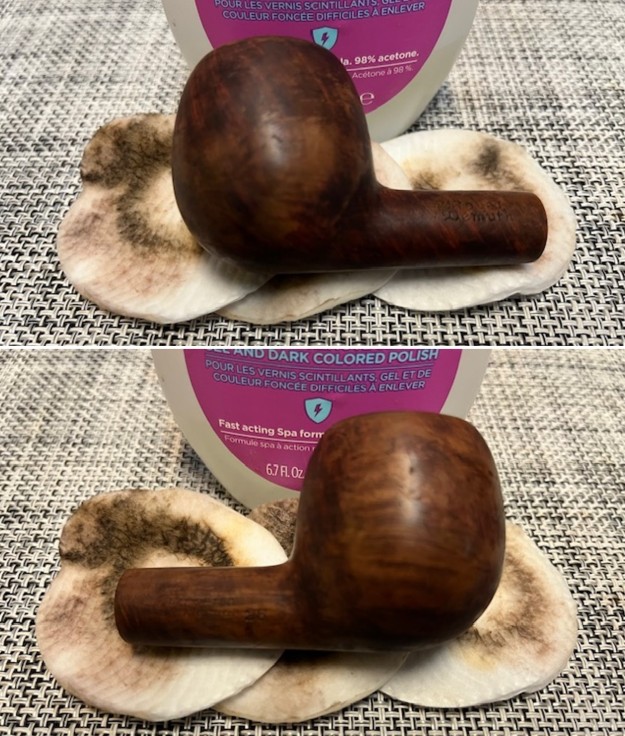
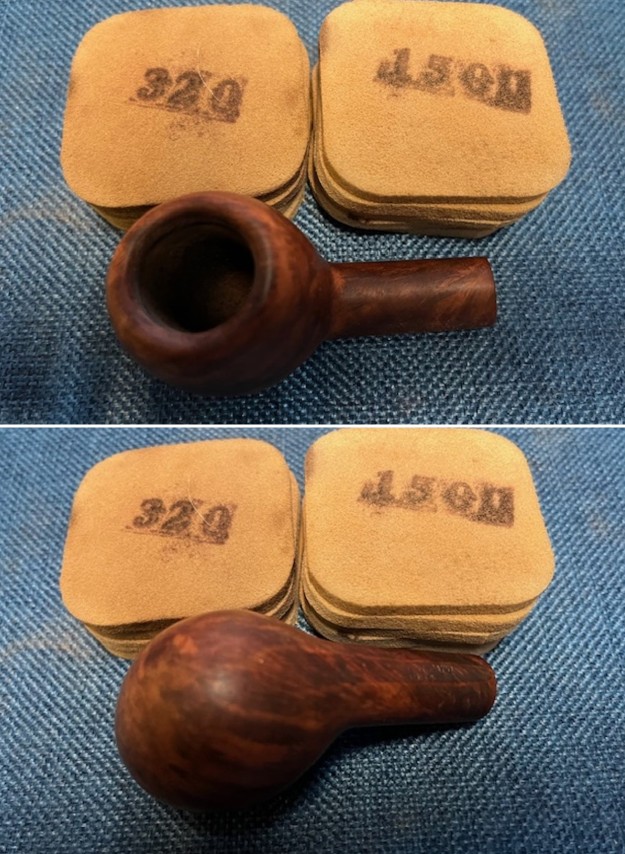
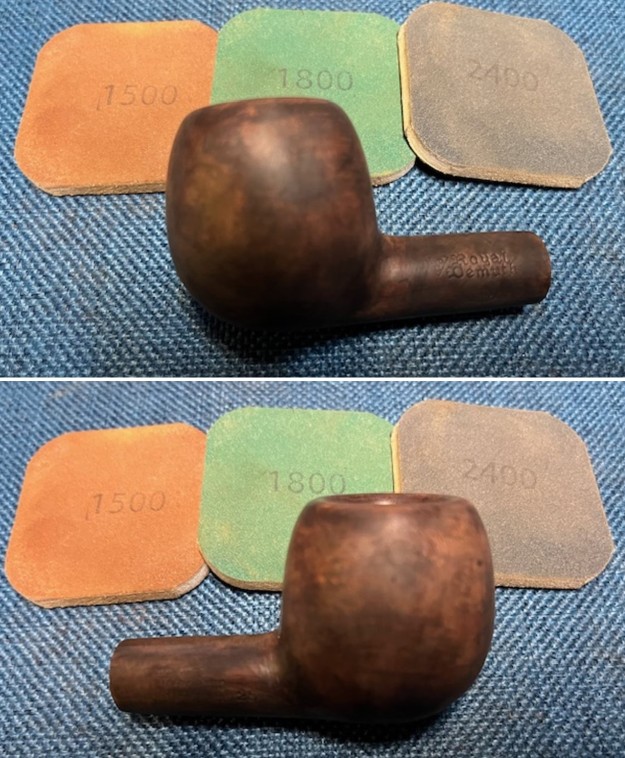
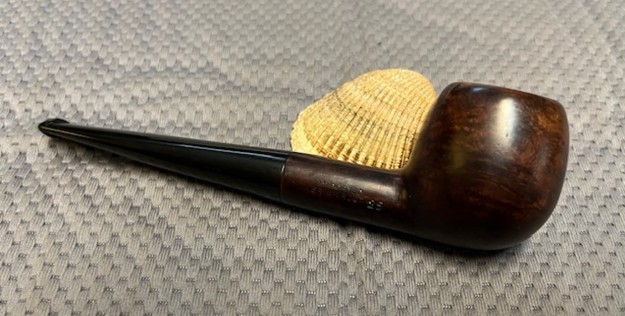
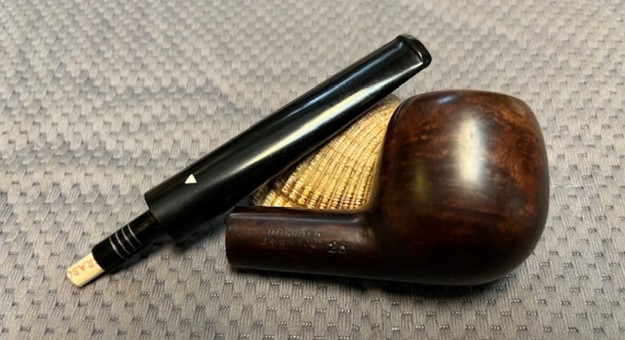
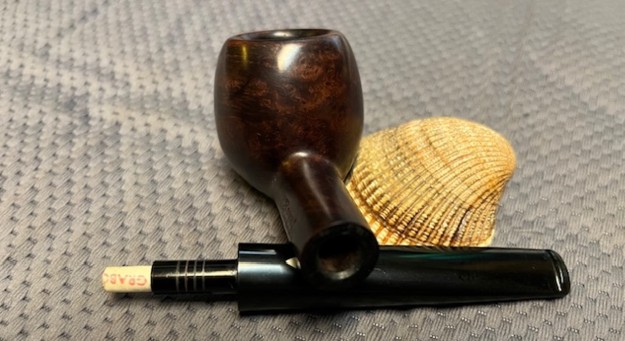
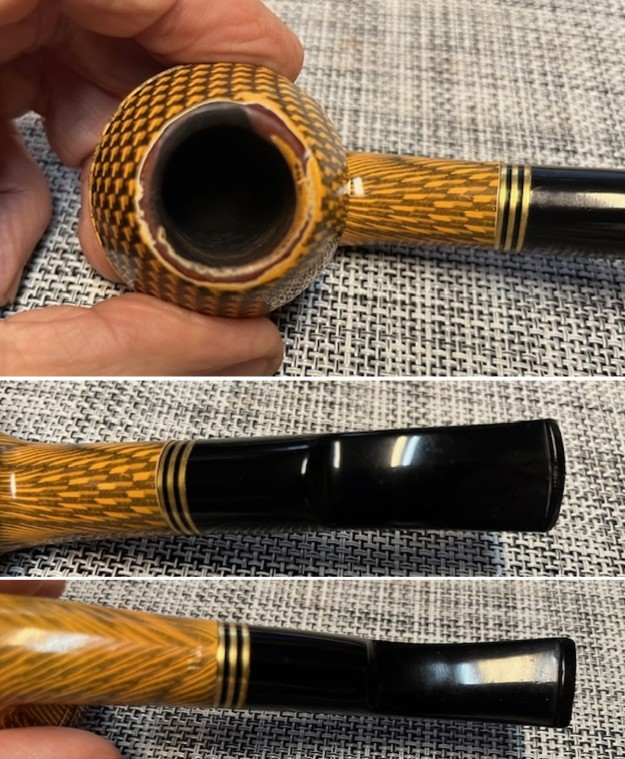
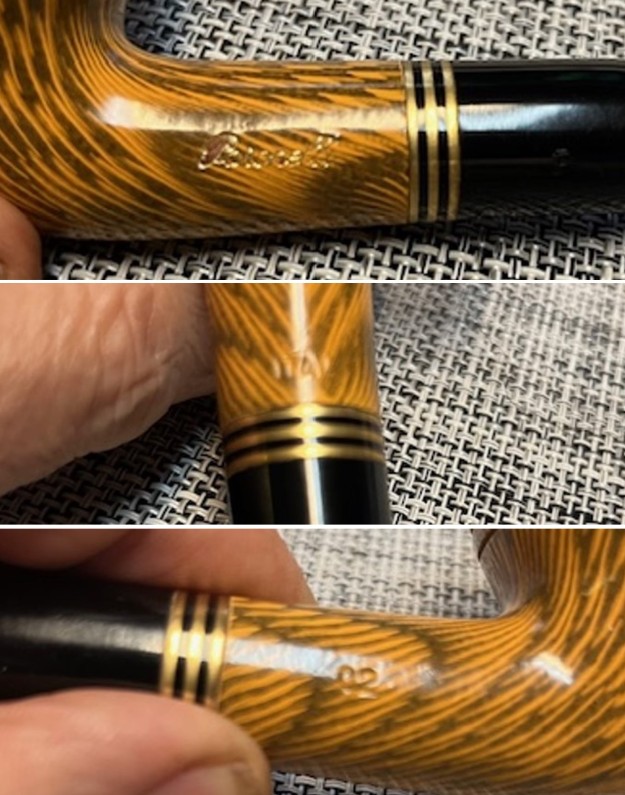
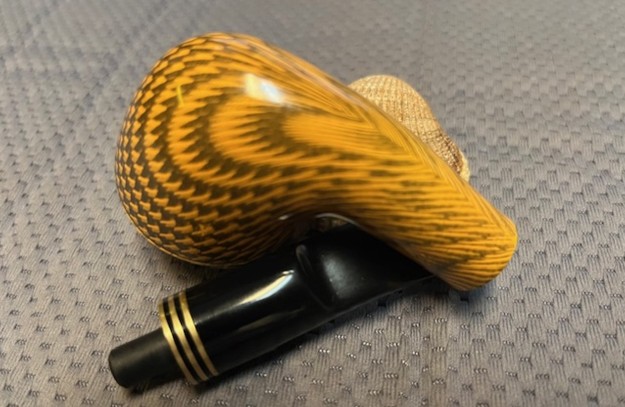
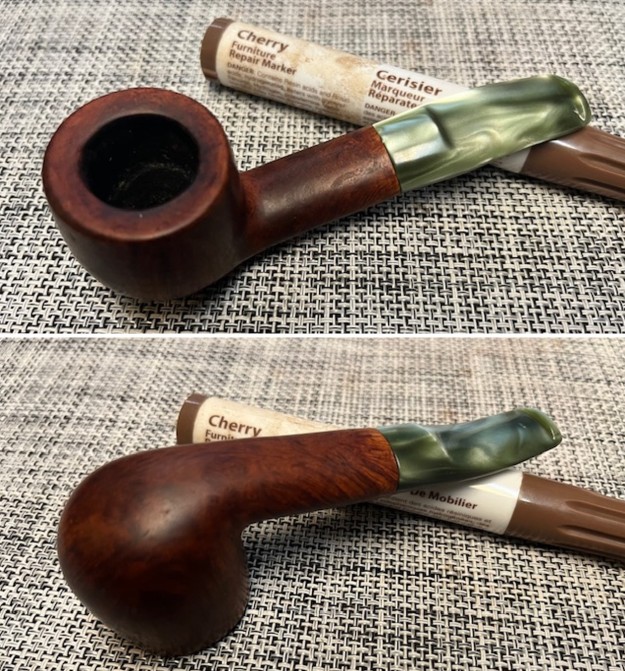
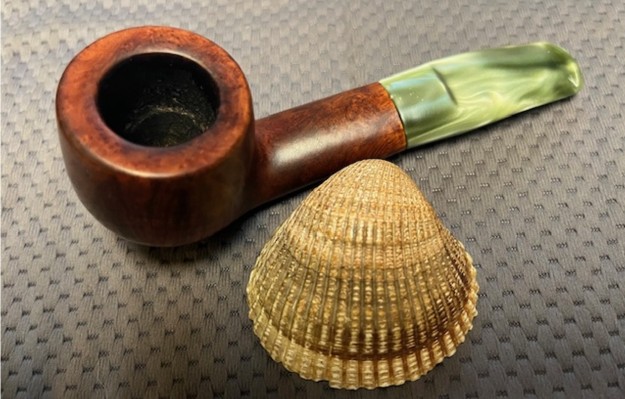
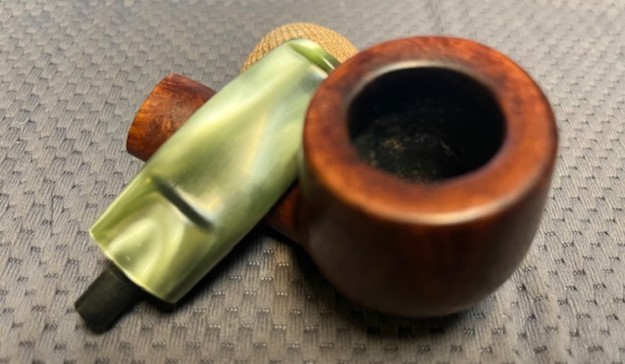
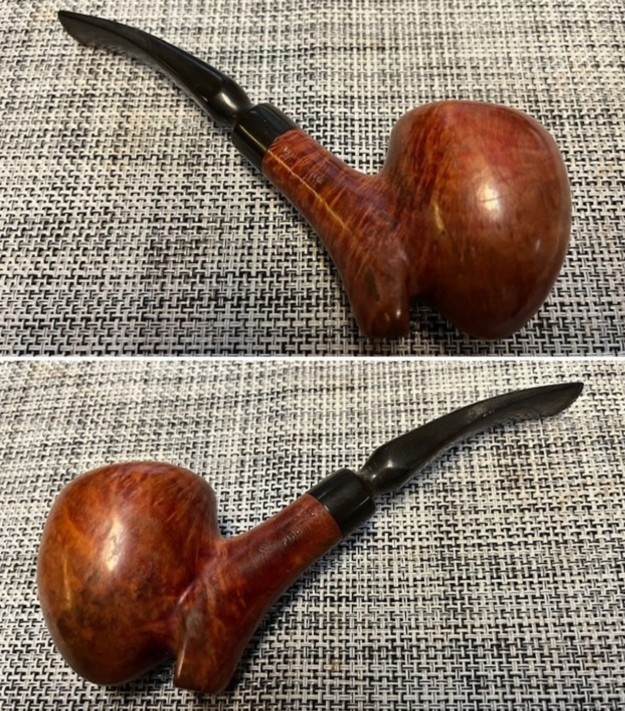
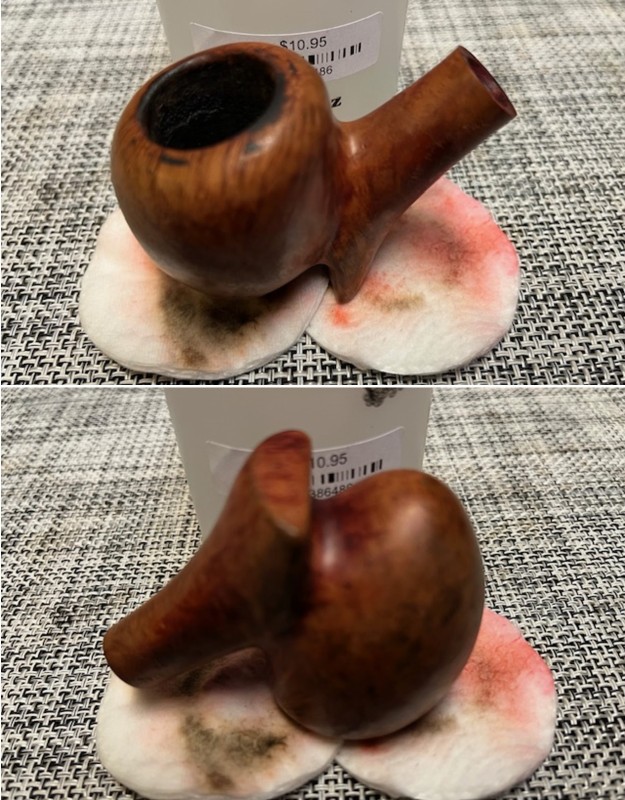
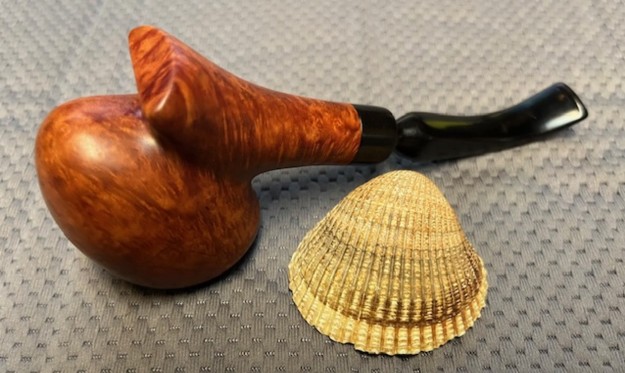
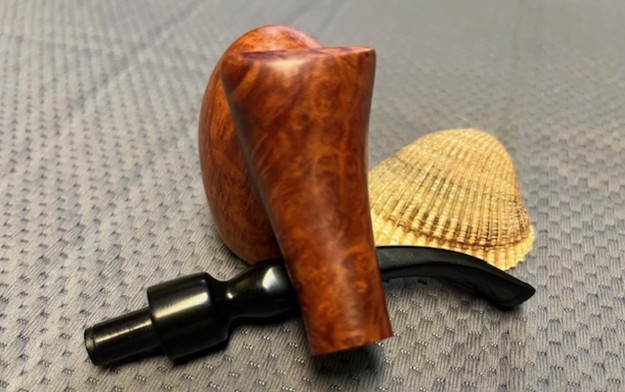
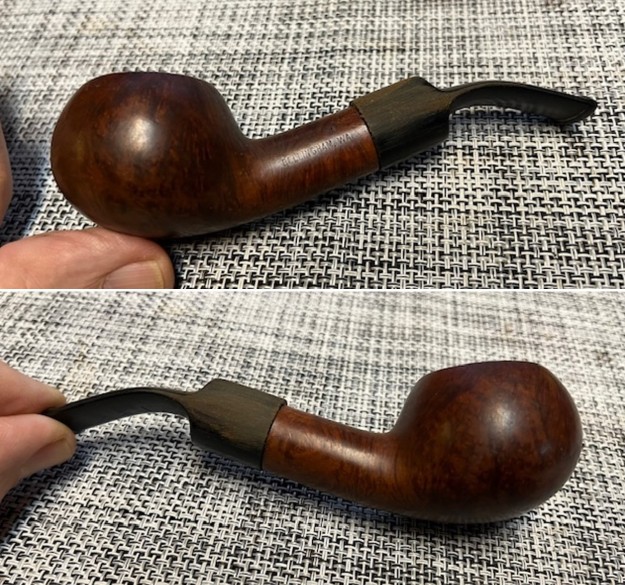
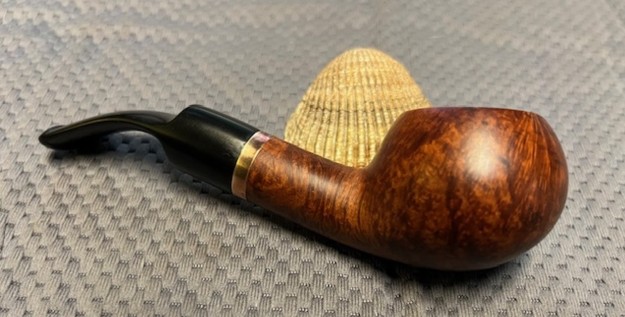
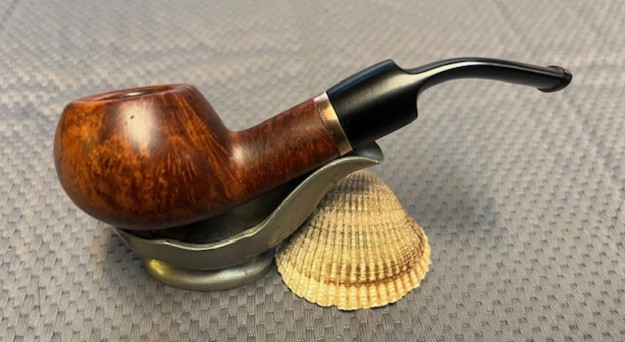
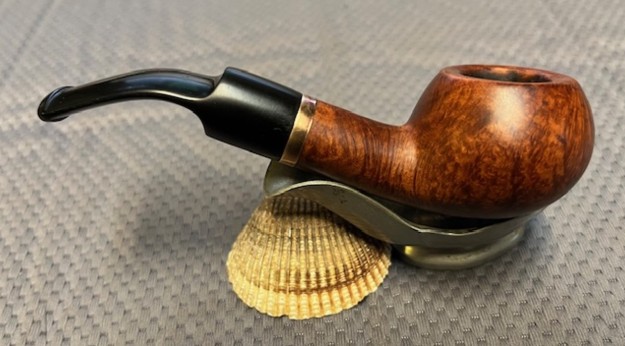
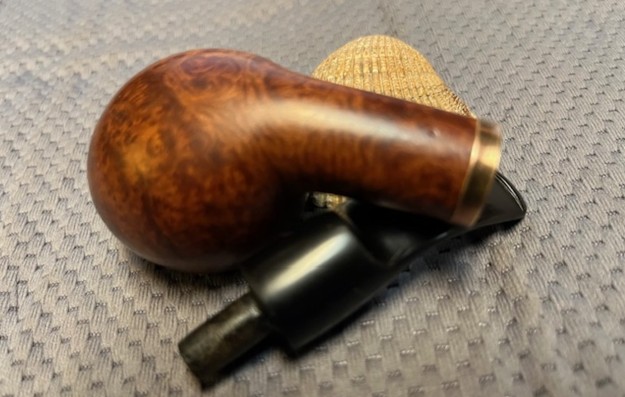
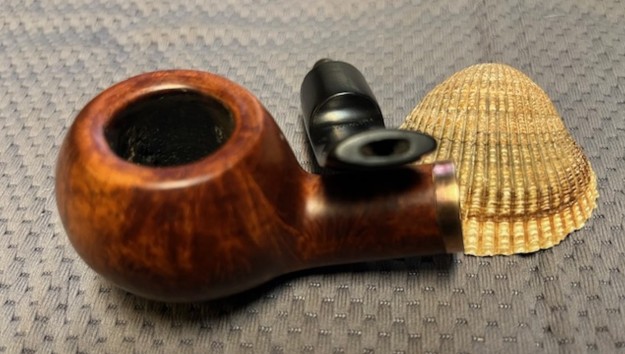
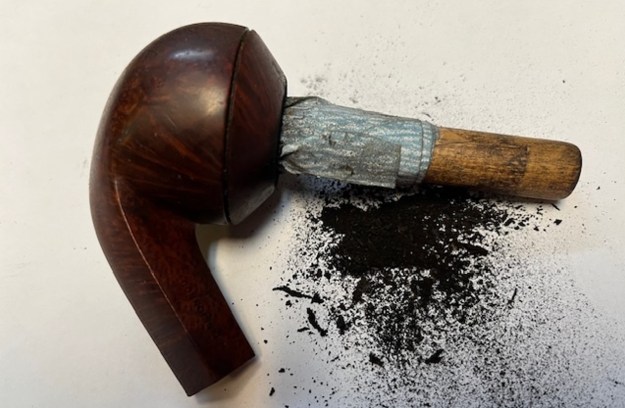
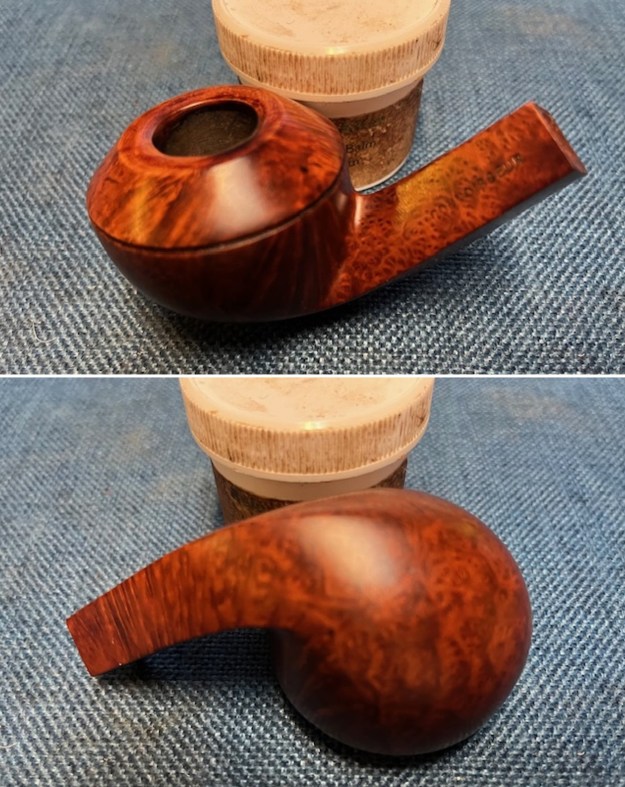
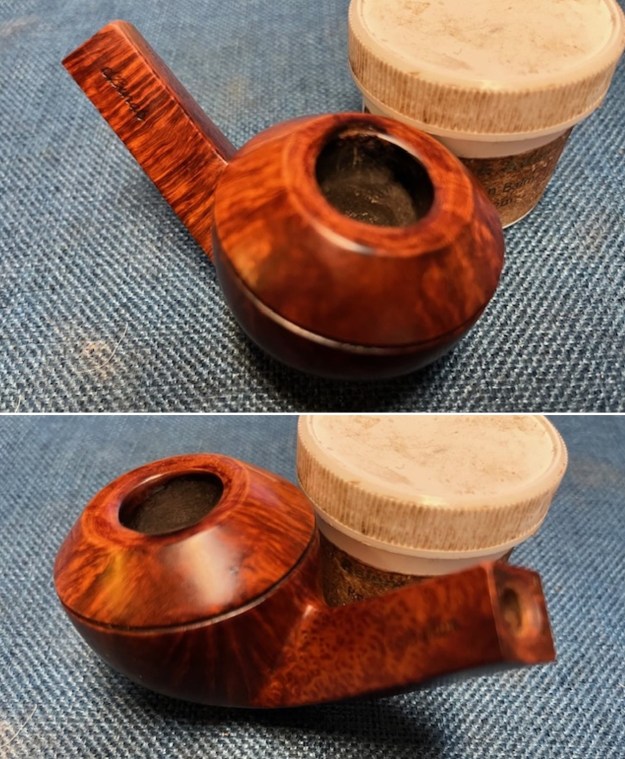
 After looking through the remaining group of three pipes I decided to work next on the Burak Connoisseur. This one is a smooth Bent Bulldog with a single ring below the rim cap. It is stamped Connoisseur on the left side of the shank. On the right side it is stamped with the signature of Ed Burak in script. The smooth finish Bulldog had a very thick cake in the bowl and there was a lava overflow on the top. There was heavy burn damage under the lava like the other two pipes I have worked on. There was one on the front edge of the bowl toward the front right as well as much heavier burn damage on the left back edge. The bowl was out of round. The finish had a lot of oils and tars built up on the sides and the cap. It was oily and sticky to the touch while I held it. The shank had a thick coat of tars and oils and the stem had a thick tar build up as well so its fit in the shank was very sticky and dirty. The stem is a vulcanite saddle without any stamping on it at all. It was oxidized, calcified and had tooth marks on the stem ahead of the button. There were overflowing tars on the smooth shank end around the fit of the tenon in the mortise. A lot would be revealed once I had cleaned it. I took photos of the pipe before I started my cleanup work.
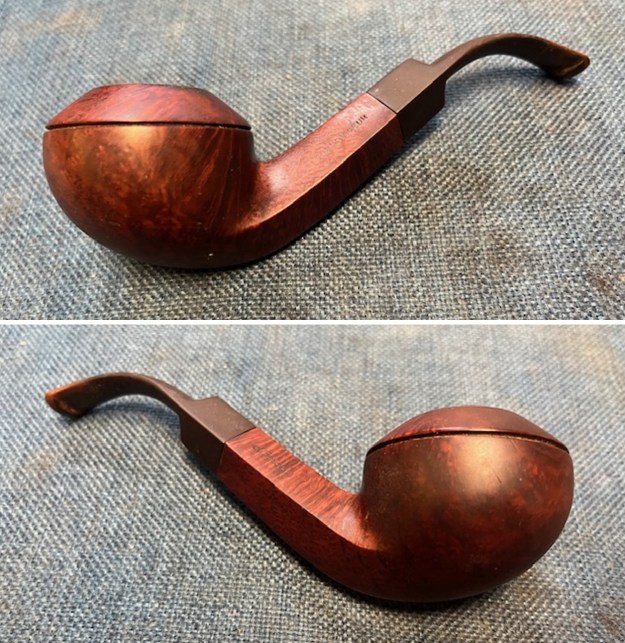
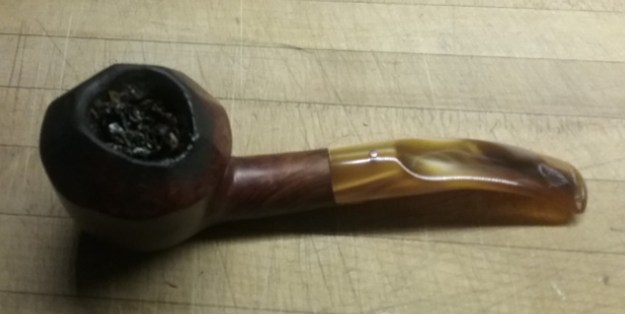
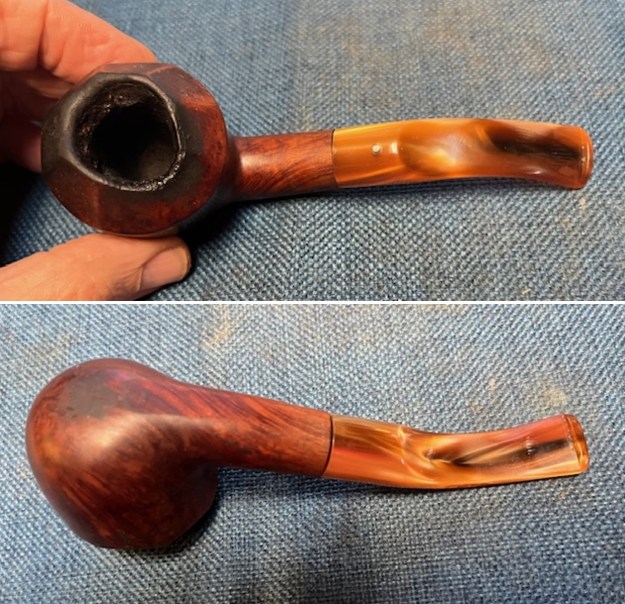
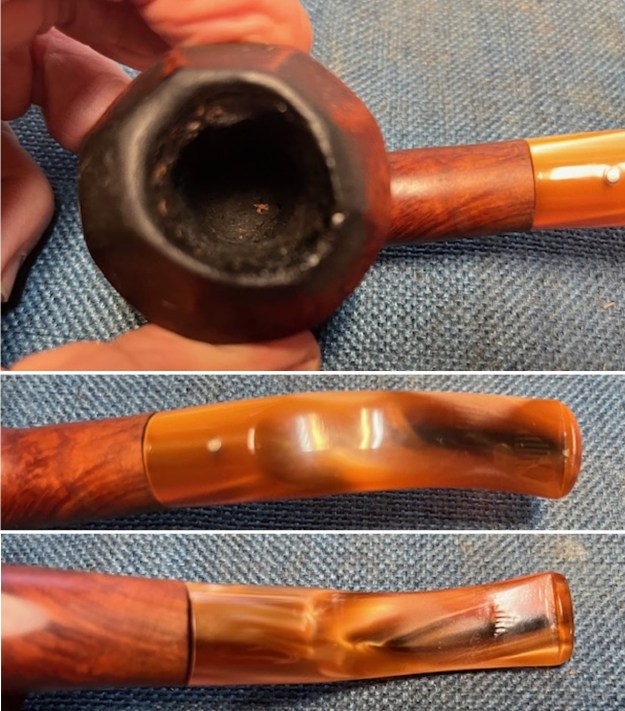
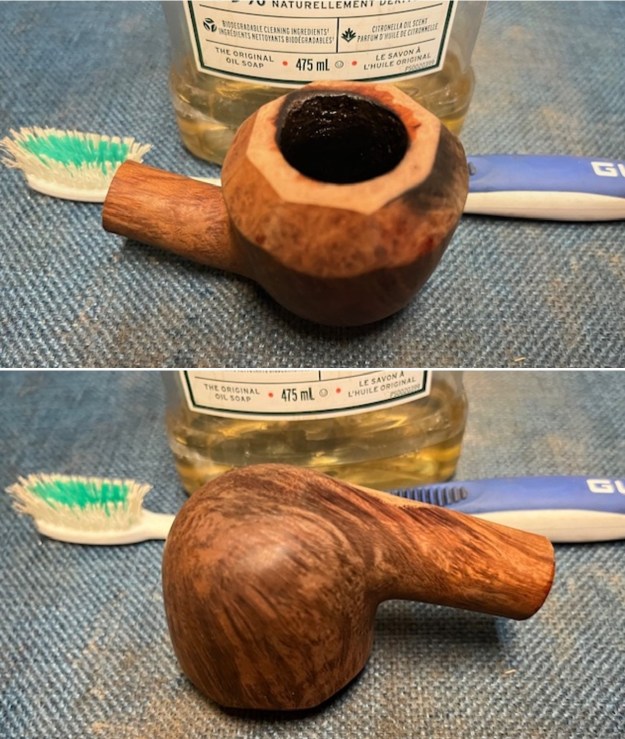
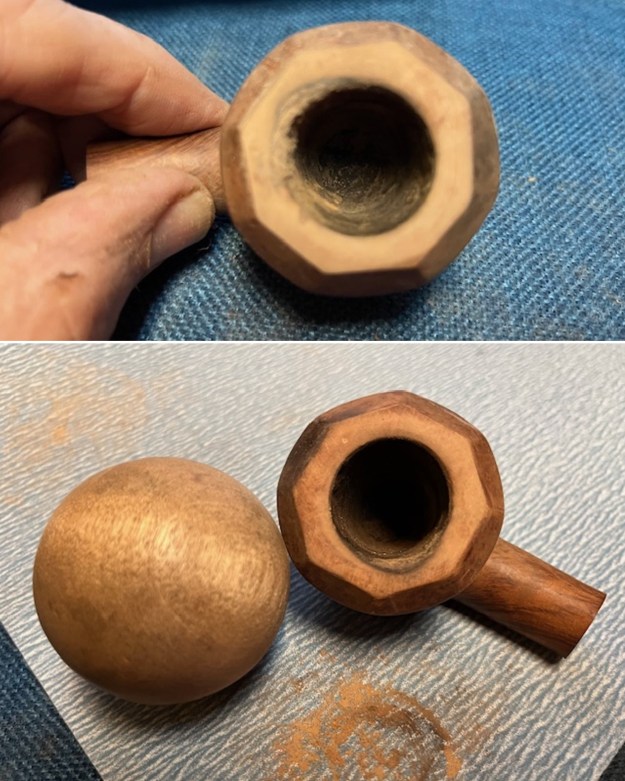
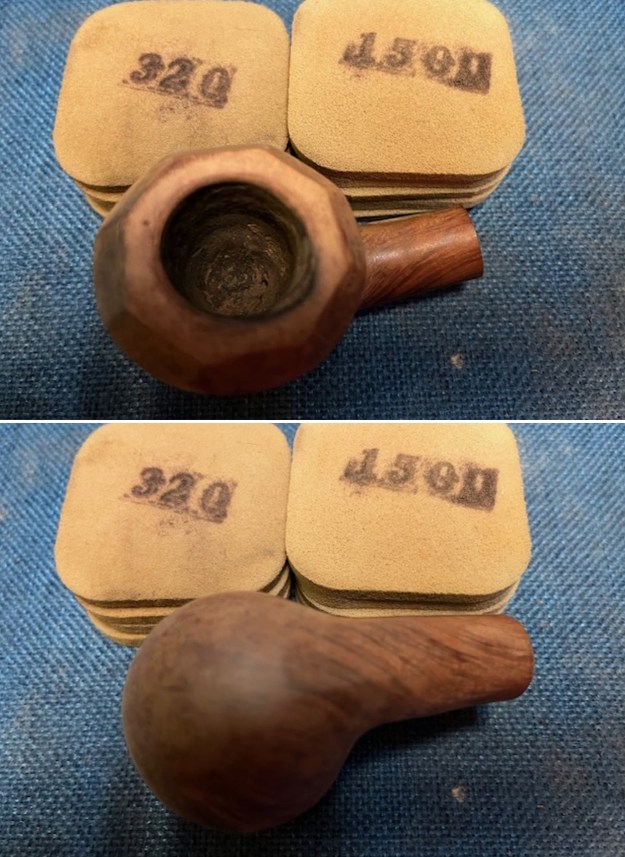
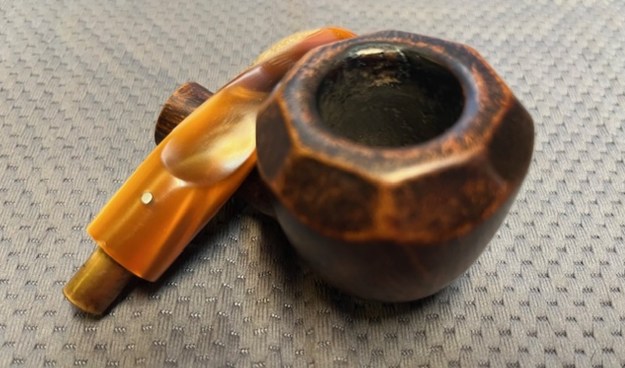
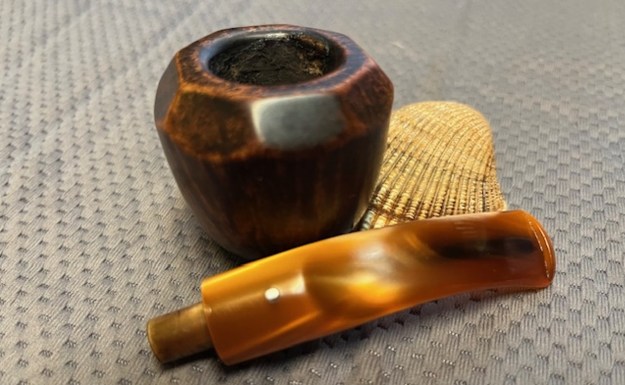
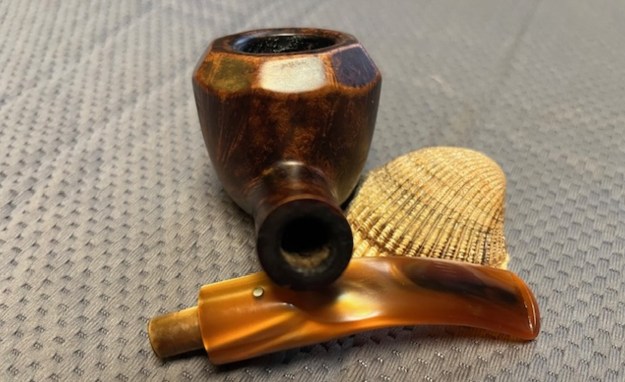
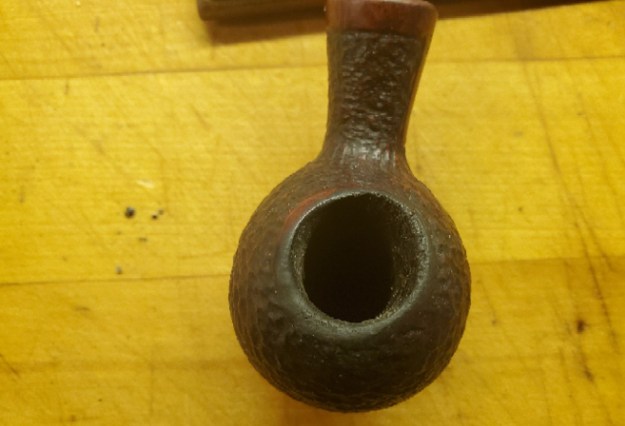
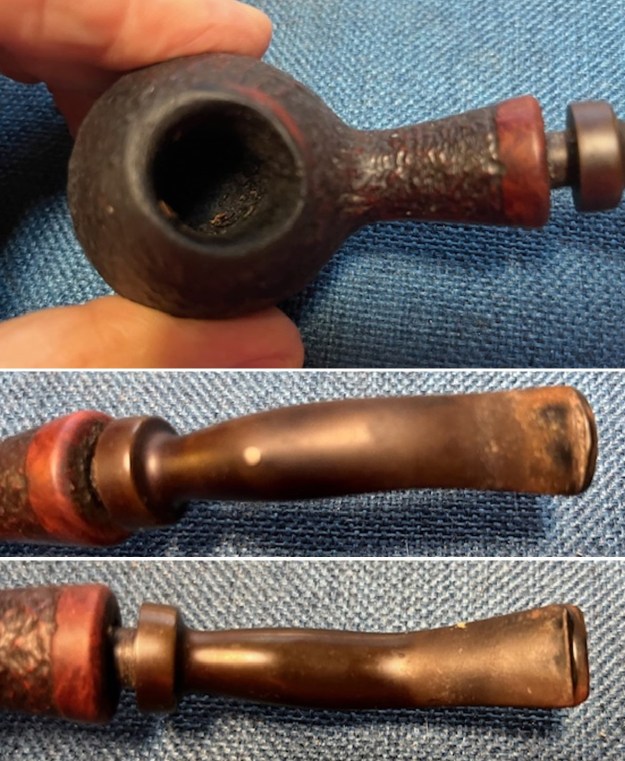
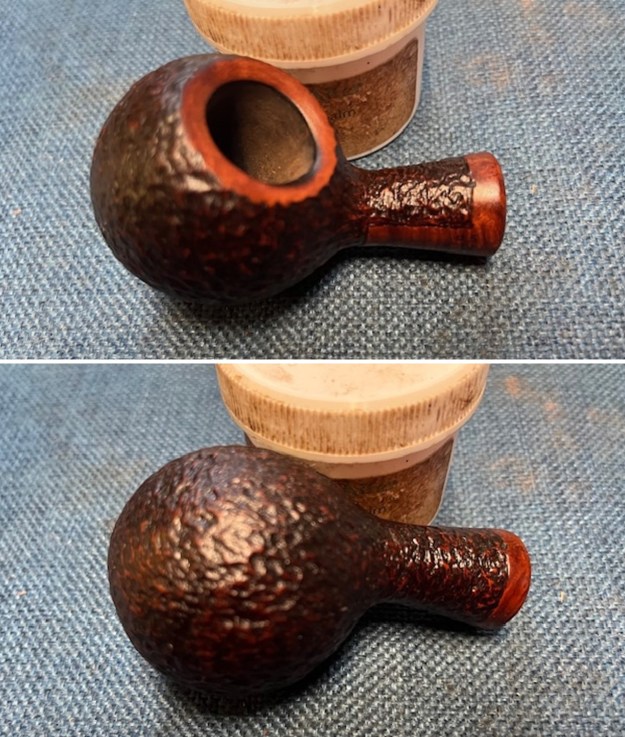
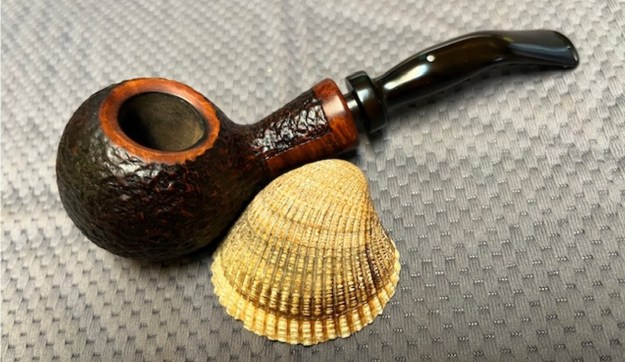
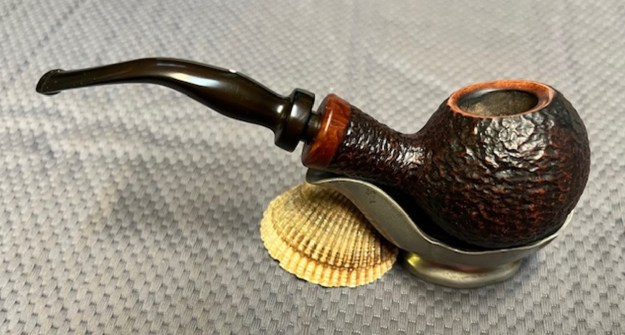
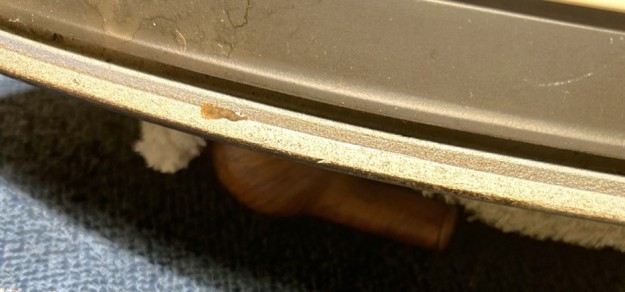
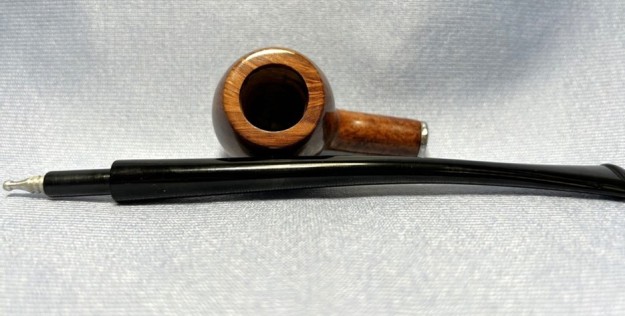
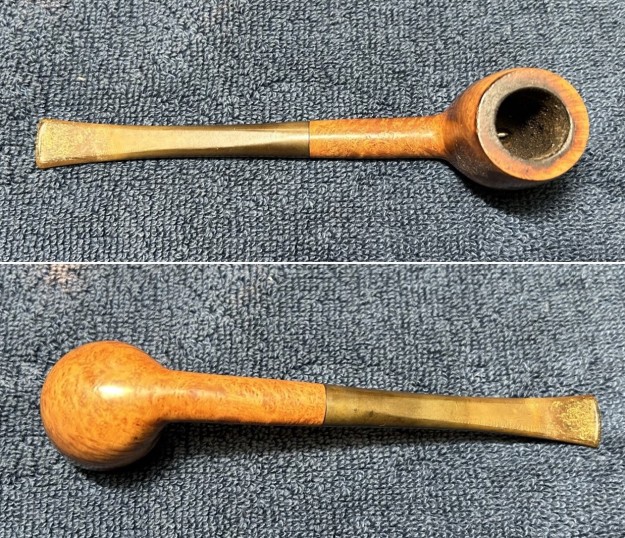
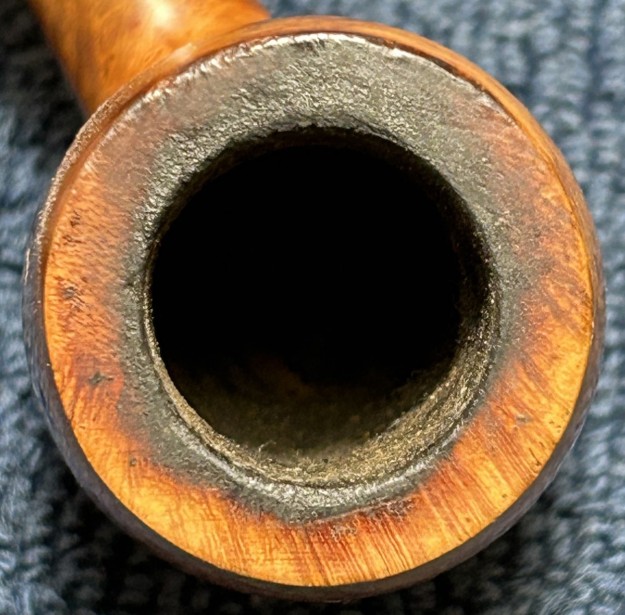
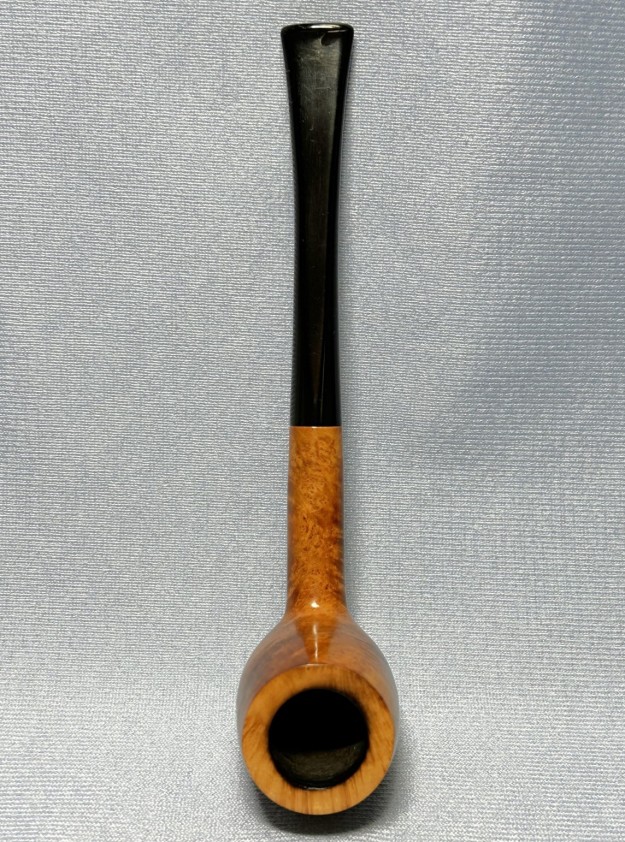
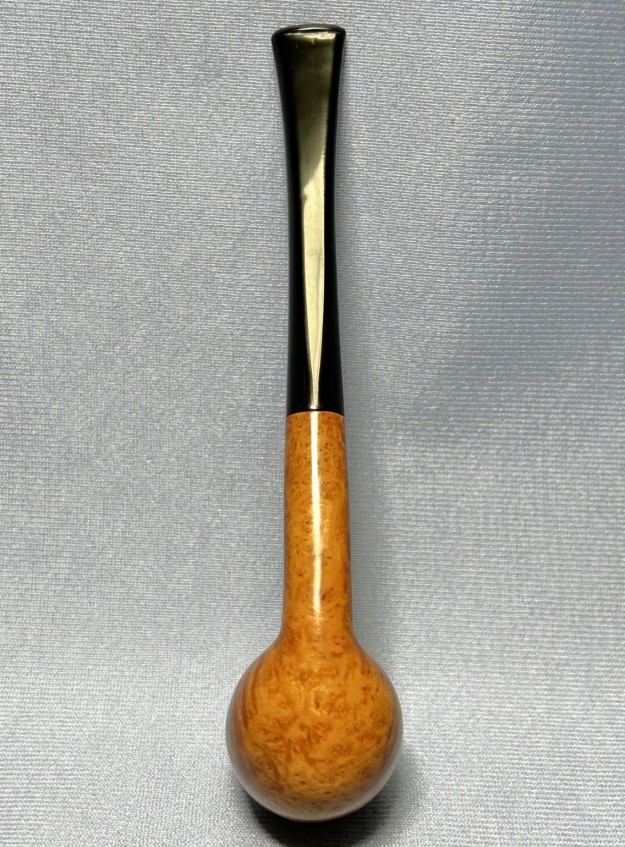
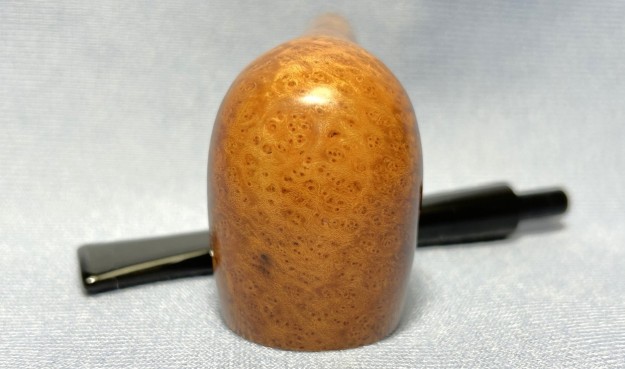
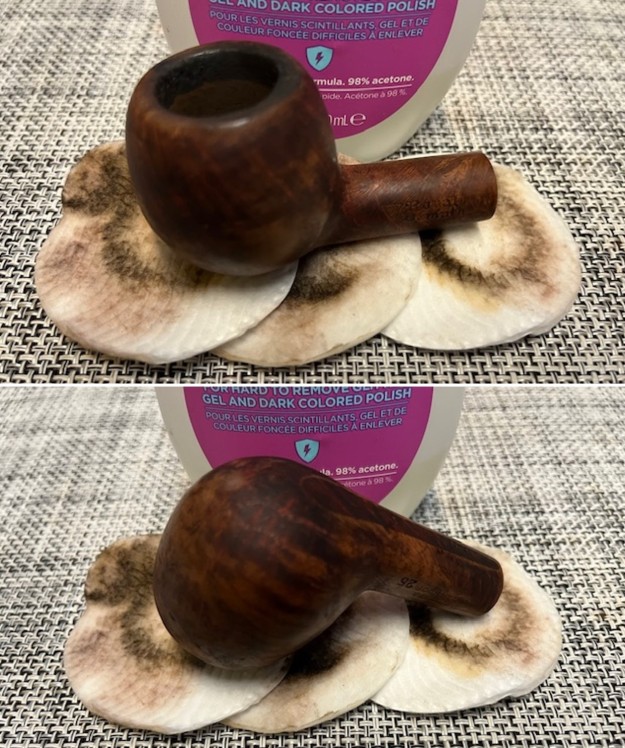
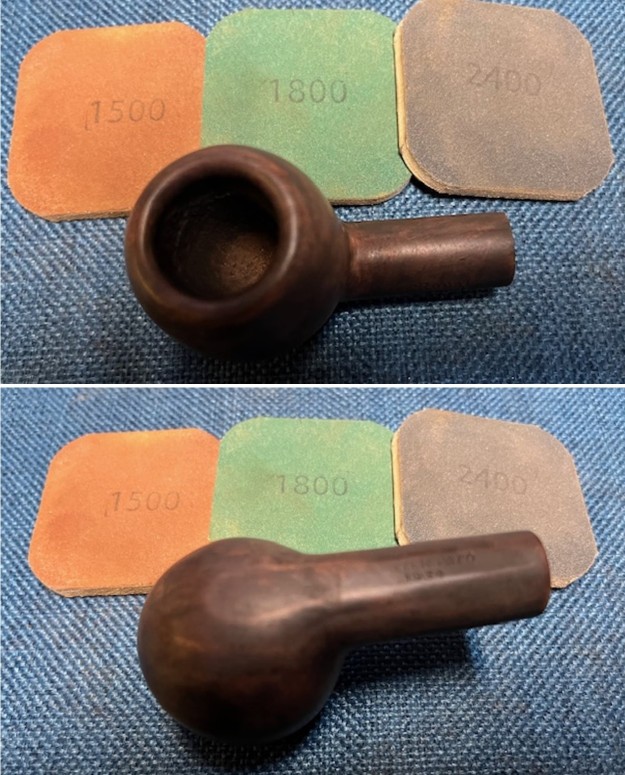
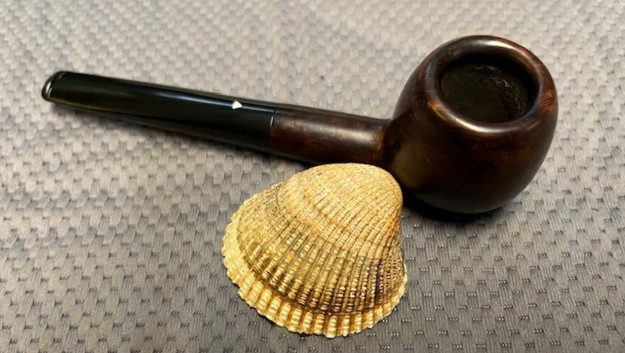
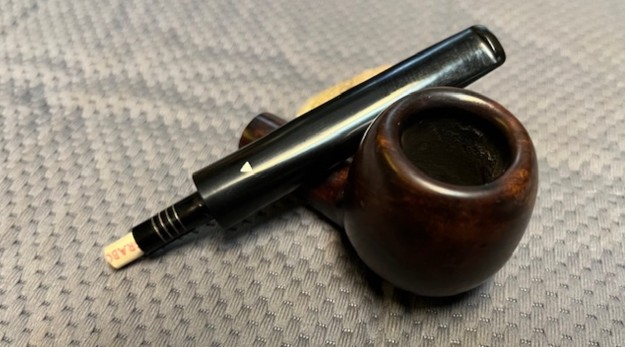
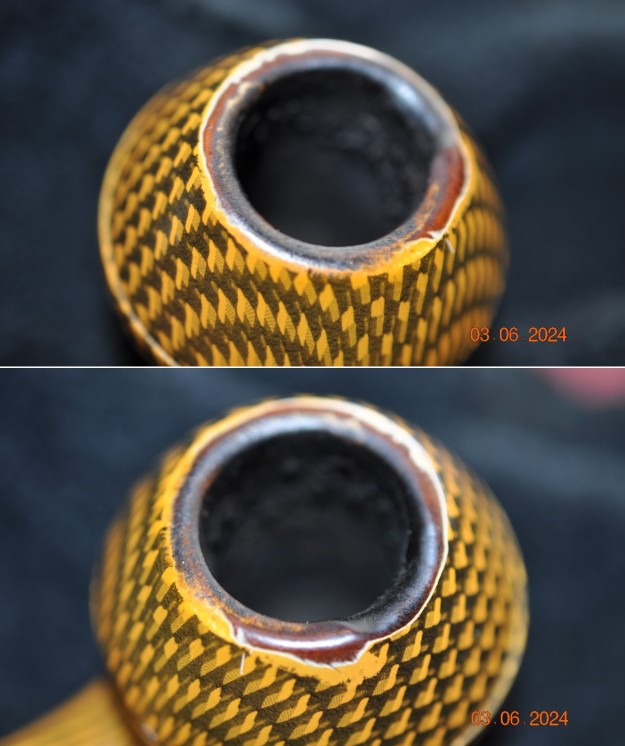
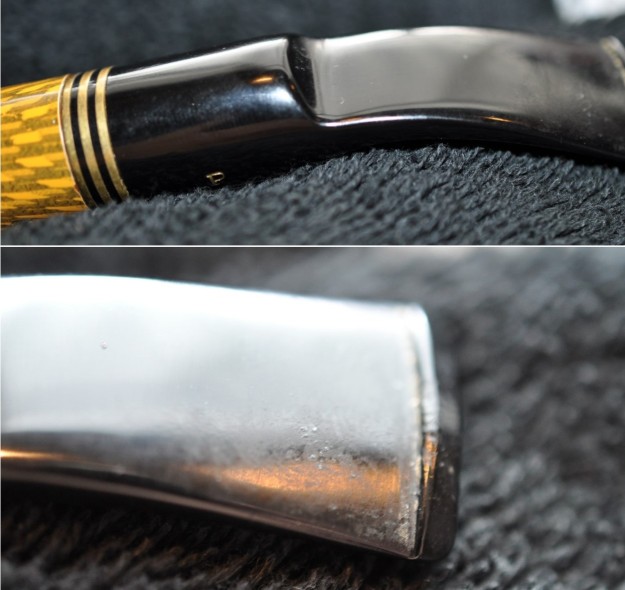
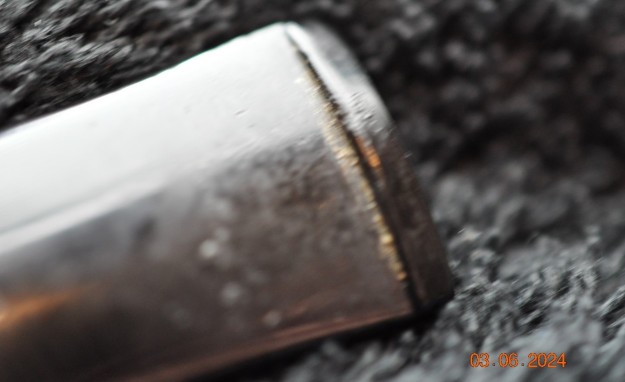
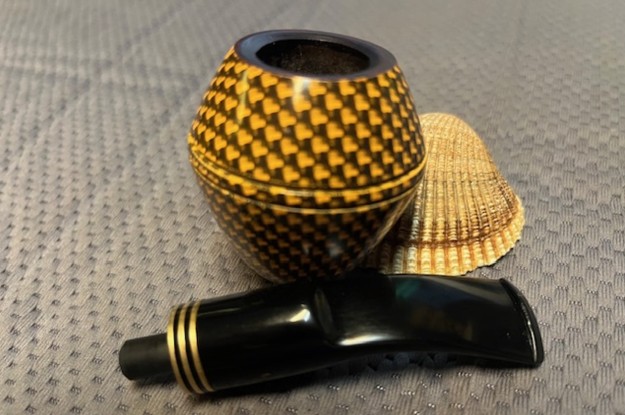
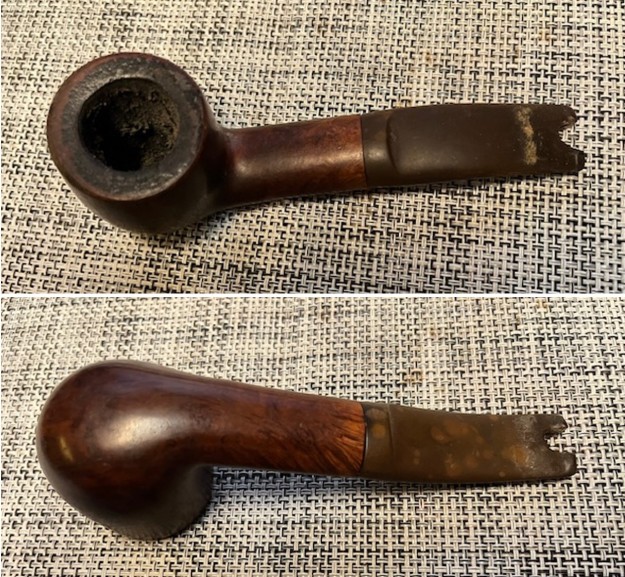
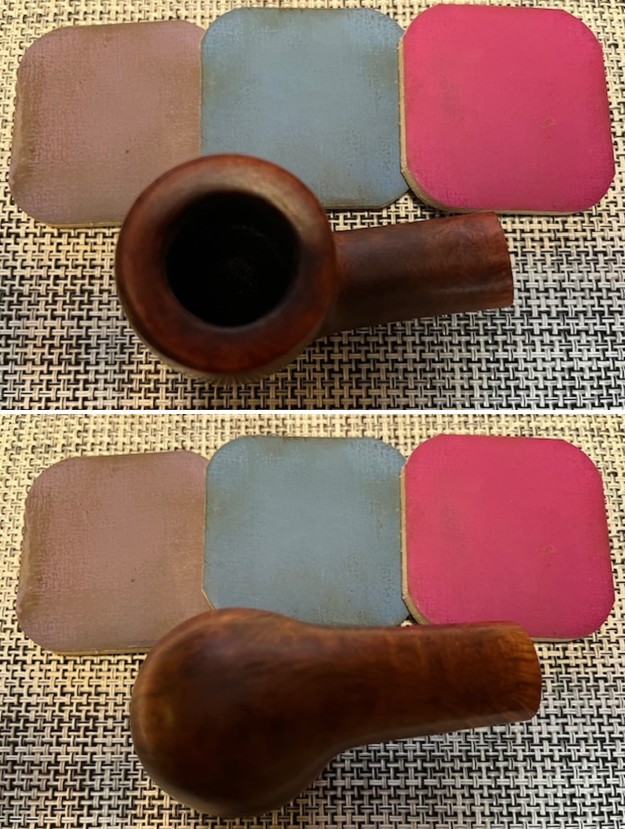
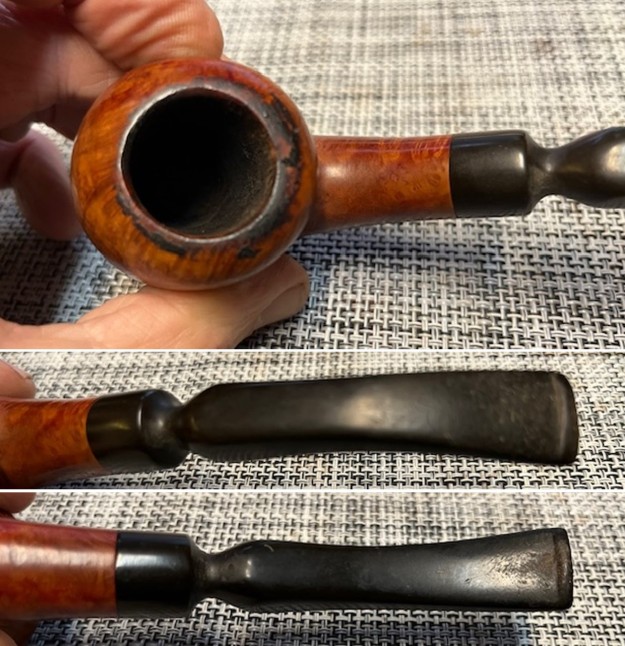
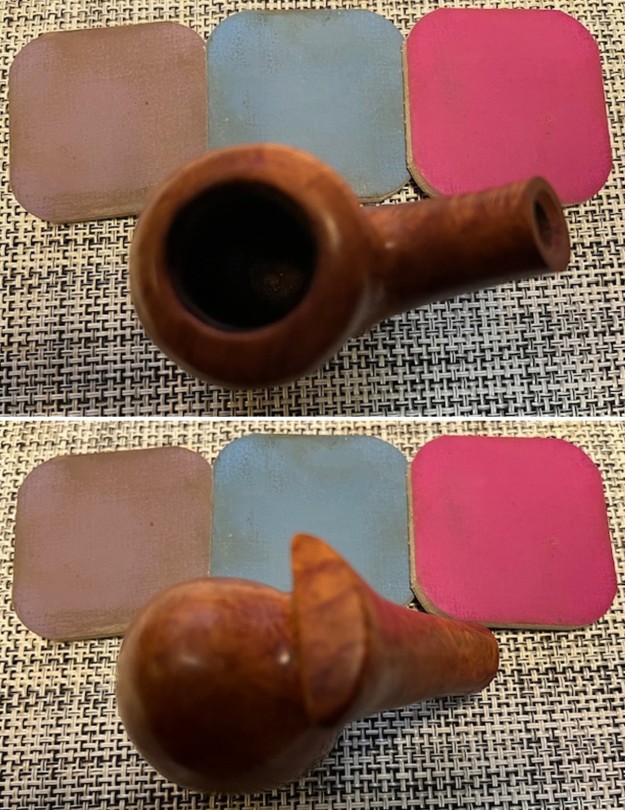
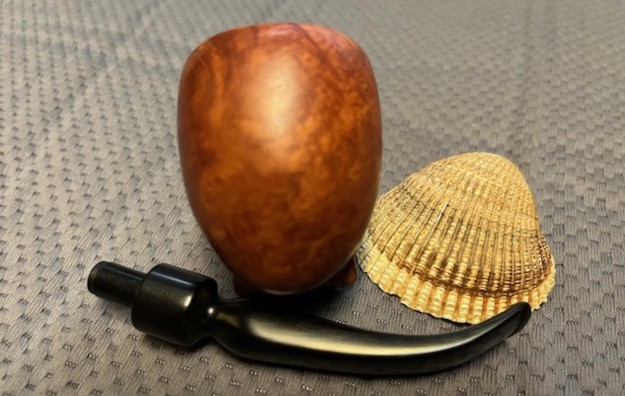
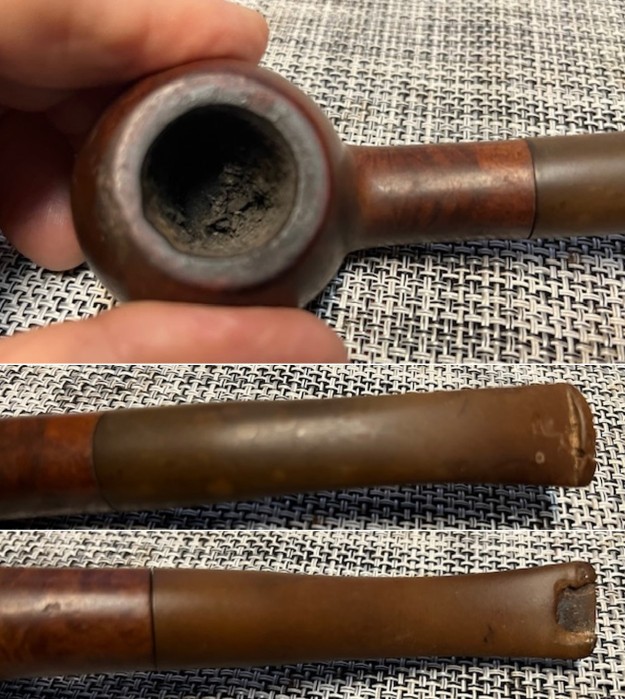
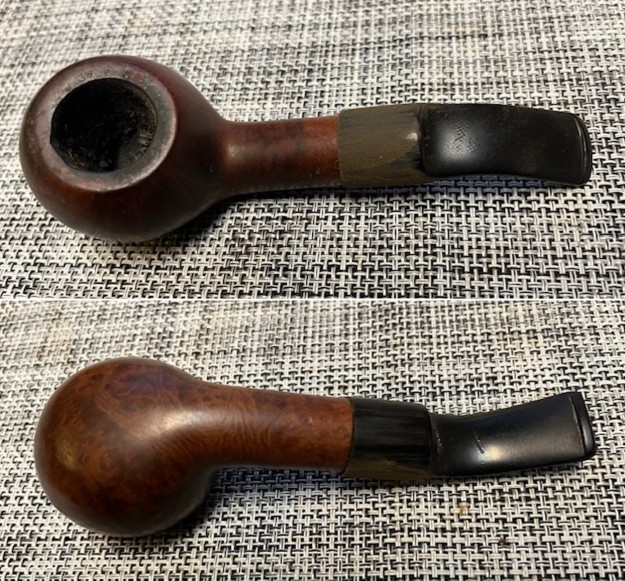
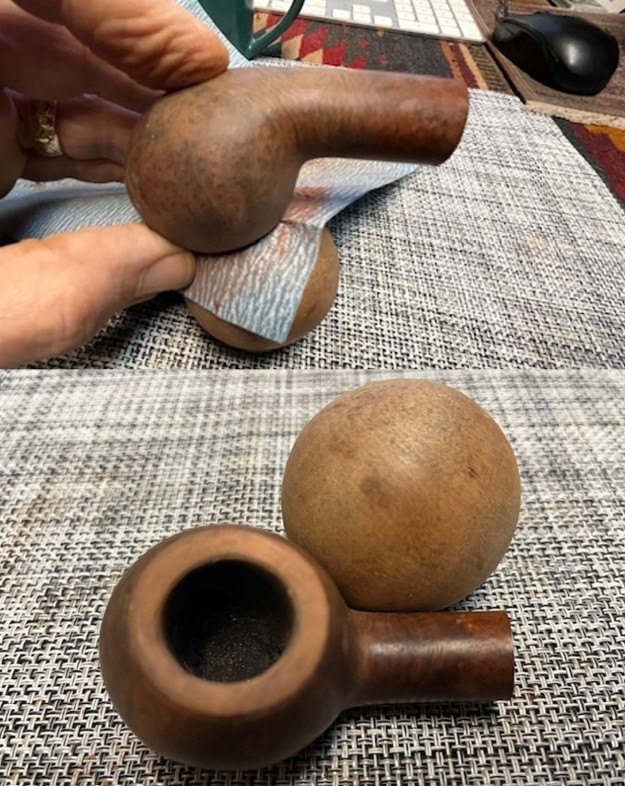
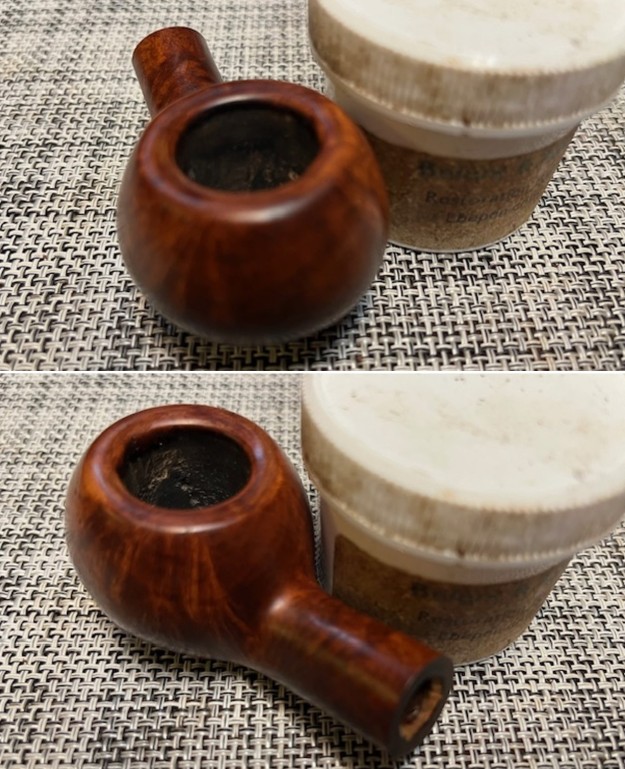
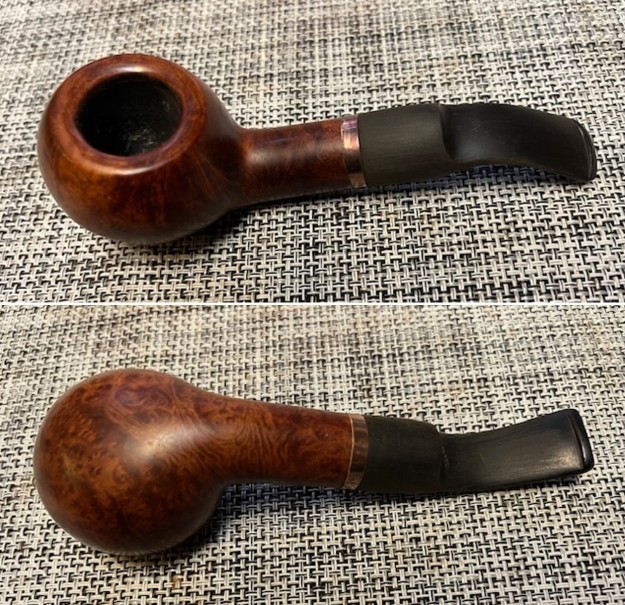
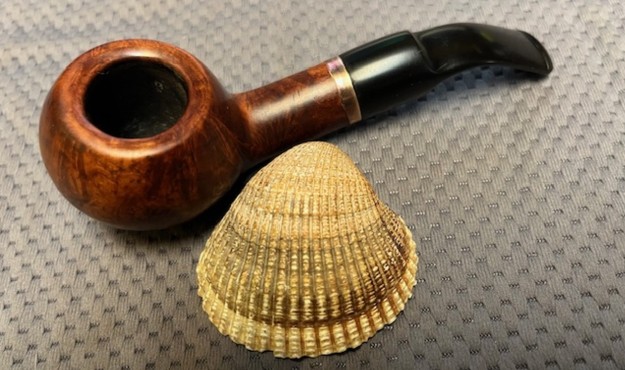
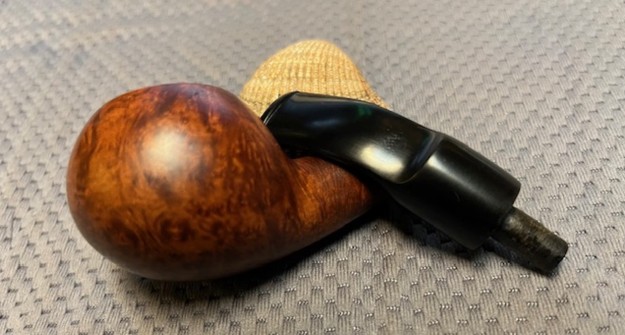
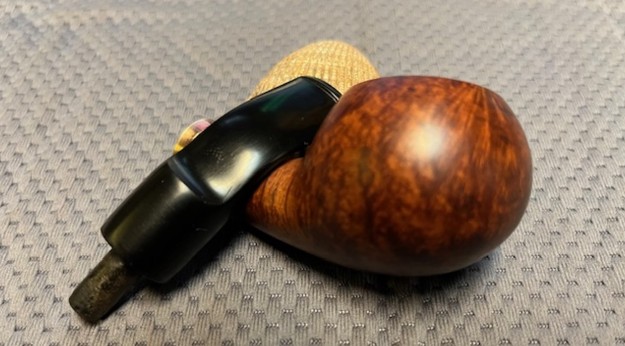
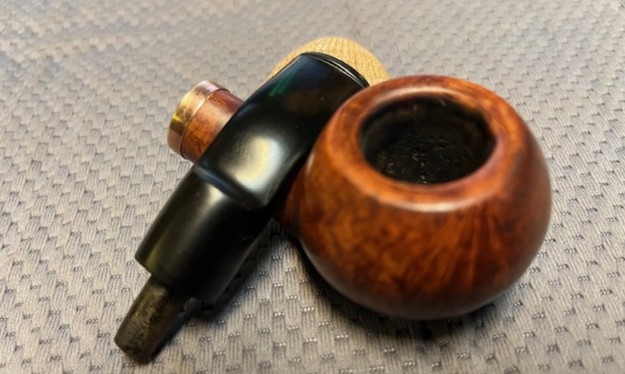
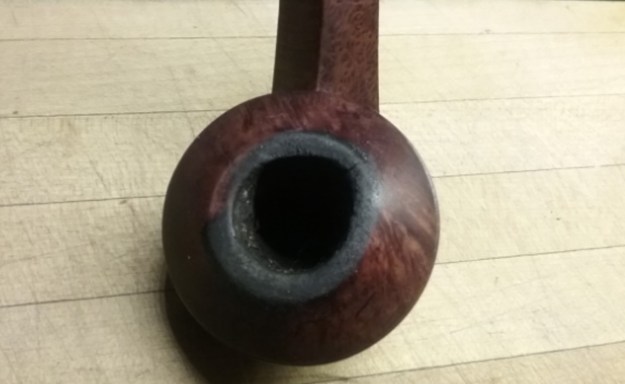
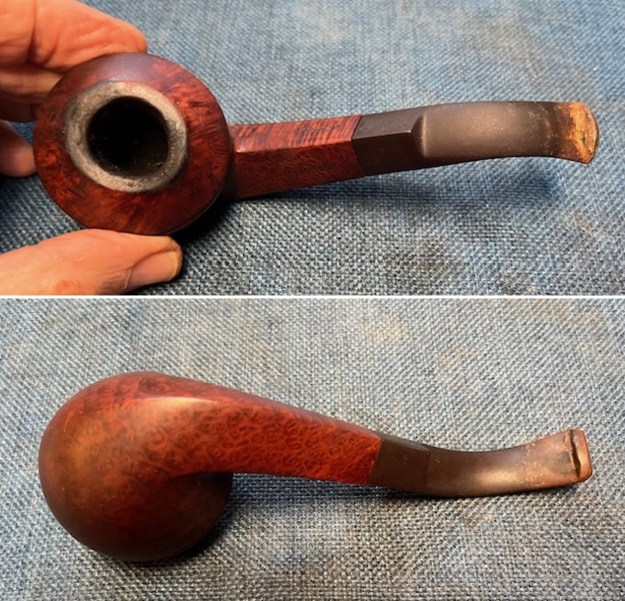 I took a close-up photo of the bowl and rim top to show its condition. The inside of the bowl was heavily caked with a wet oily tobacco. The rim top had damage on the front right in the photo below as well as on the back left. The back left side is the worst as it is quite thin and the bowl is out of round. It left a mess for me to clean up. The stem was also is a mess. There was some tooth marks and dents on the top and underside ahead of the button. There was a thick coat of calcification and oxidation on the stem.
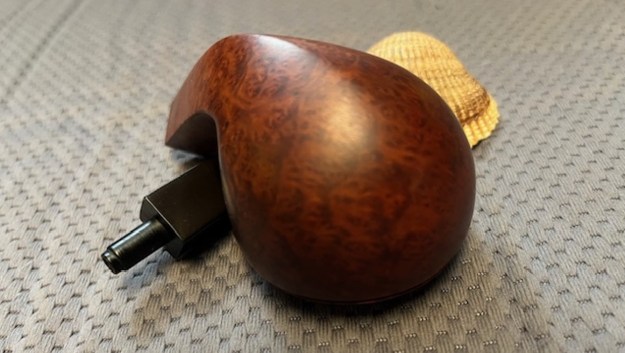
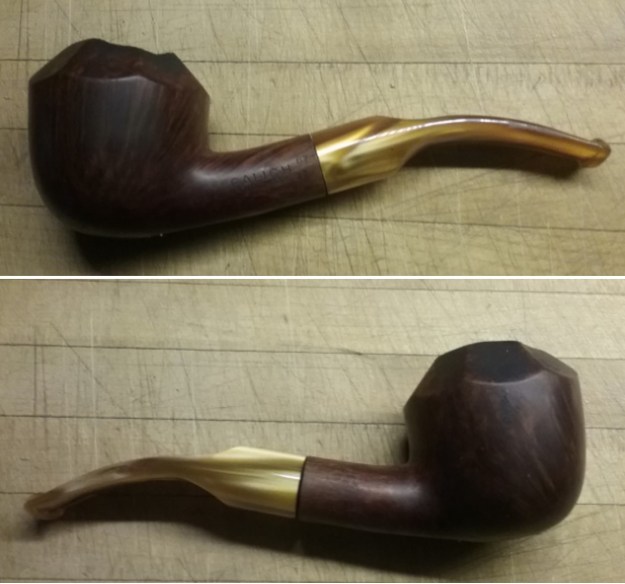
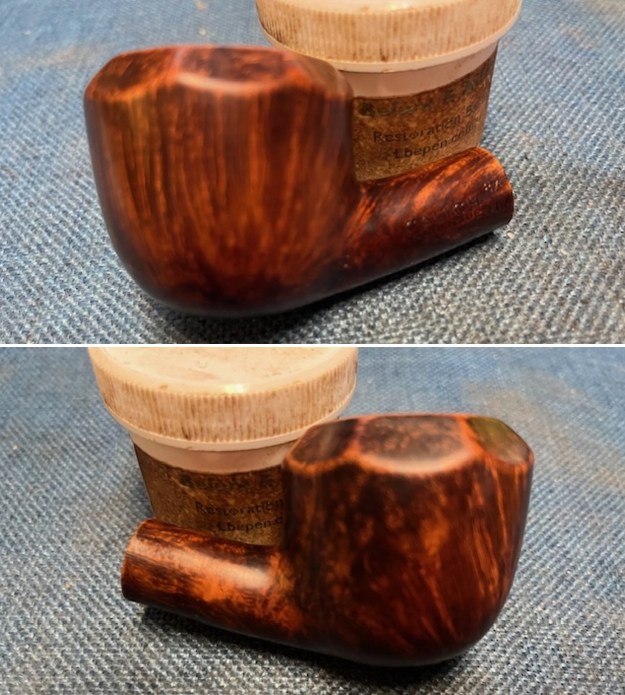
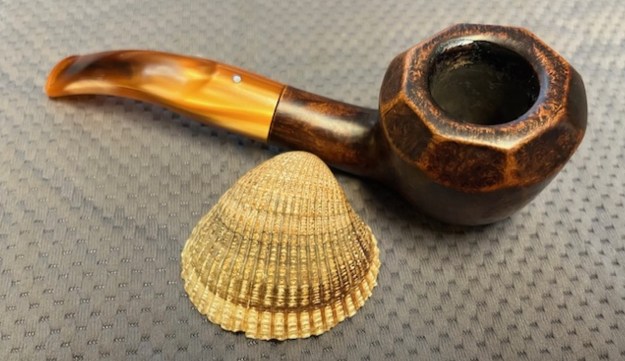
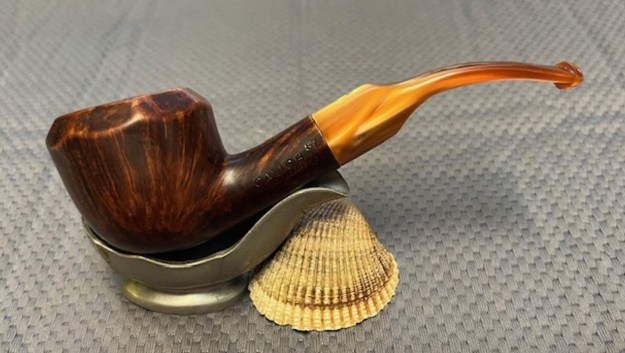
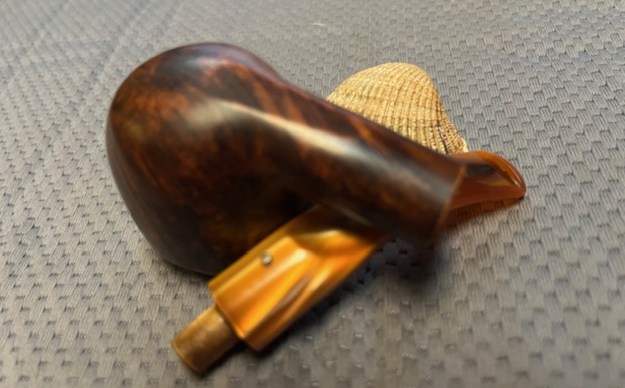
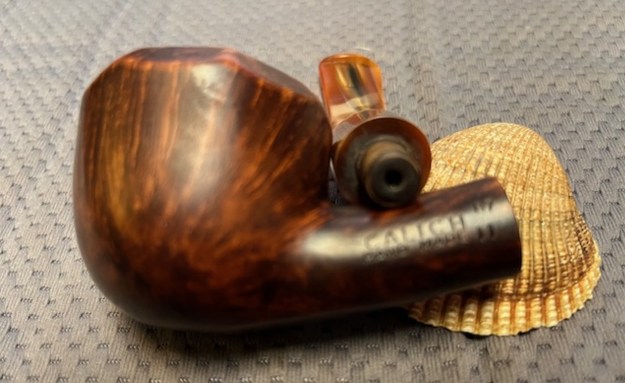
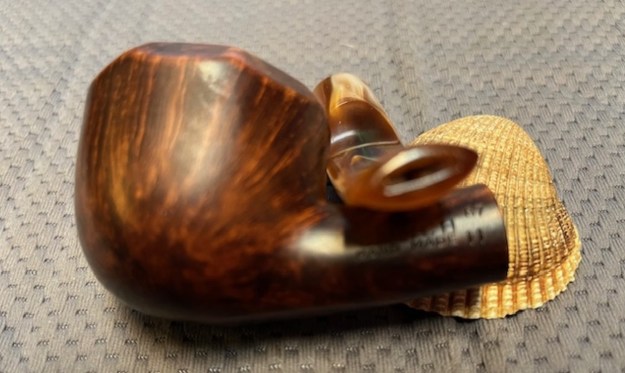
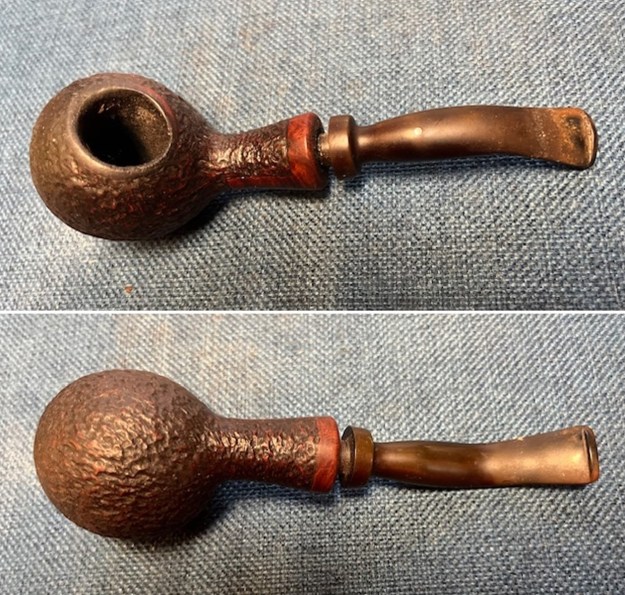
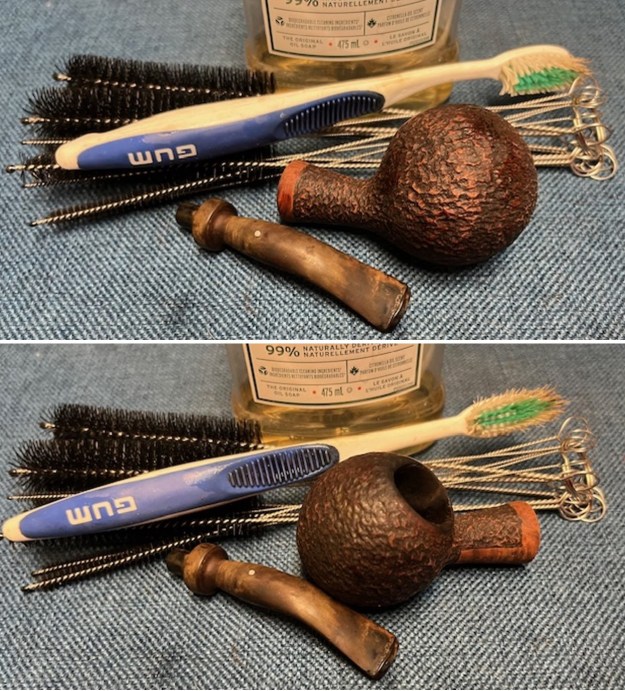
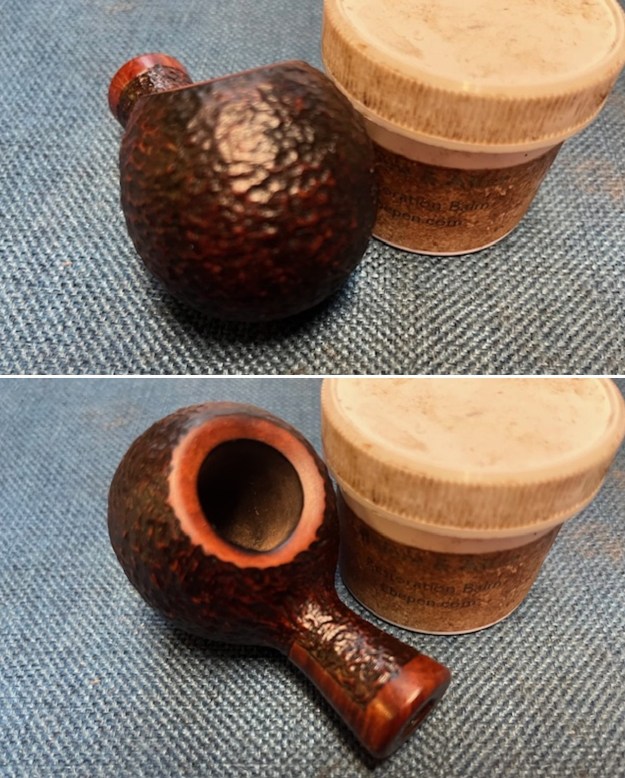
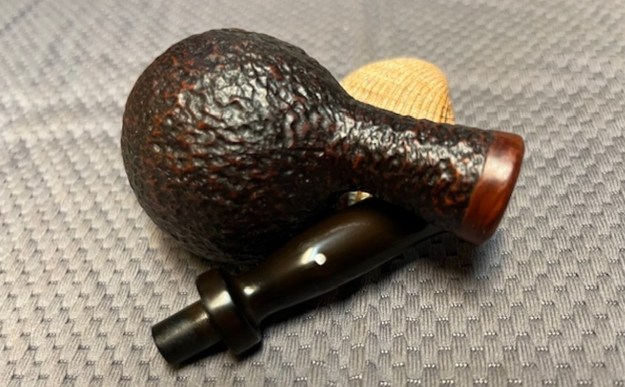
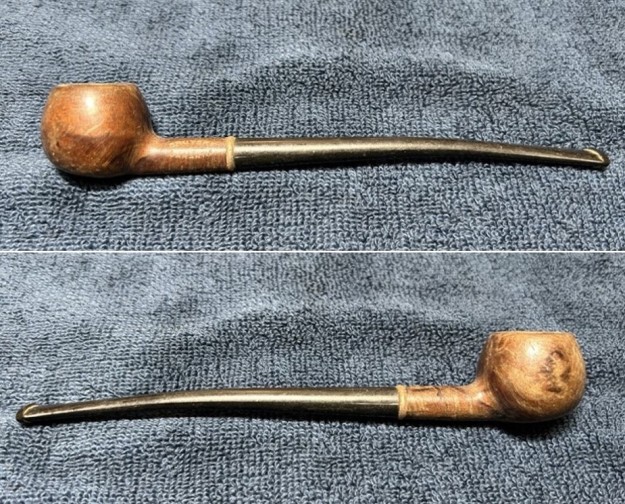
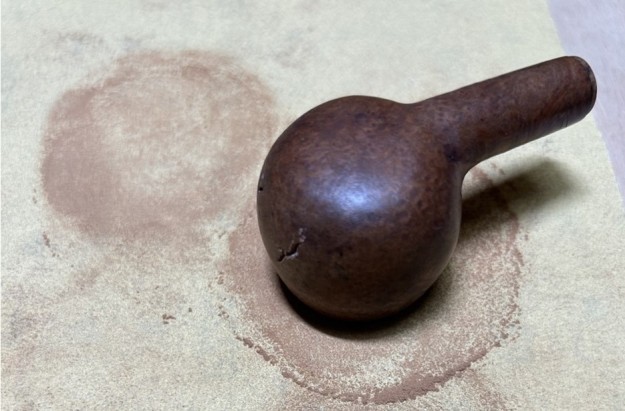
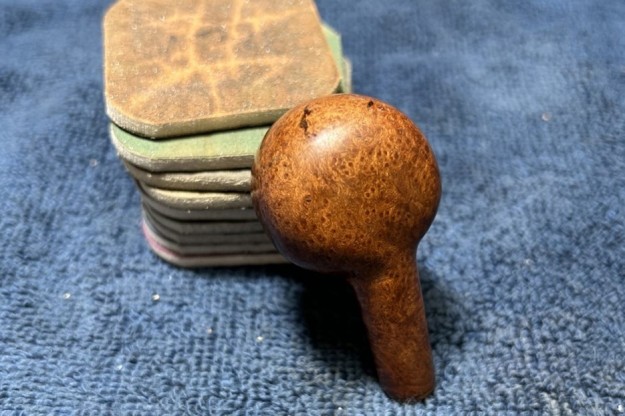
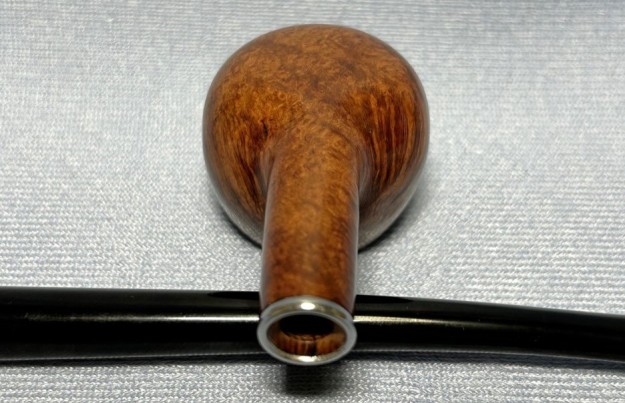
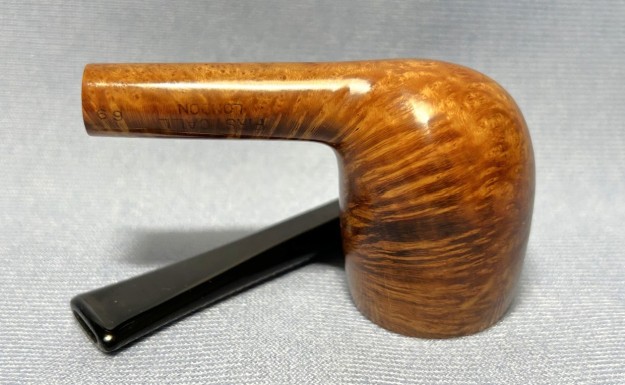
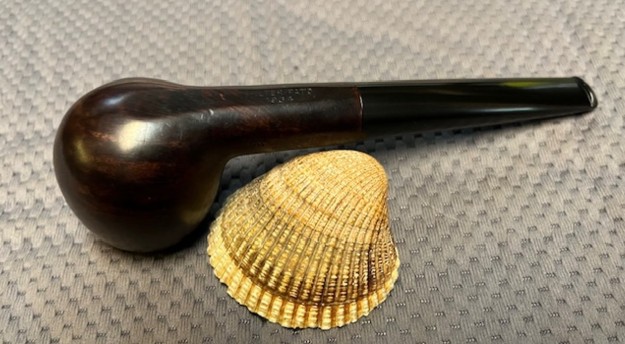
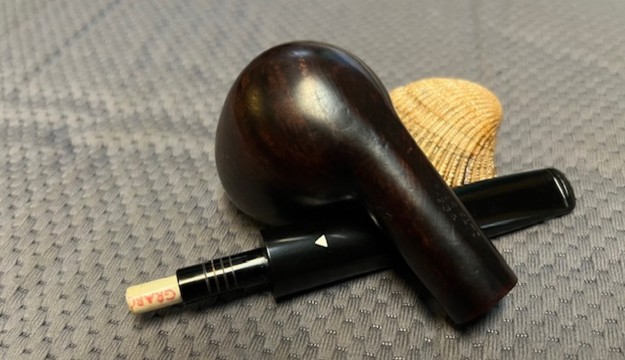
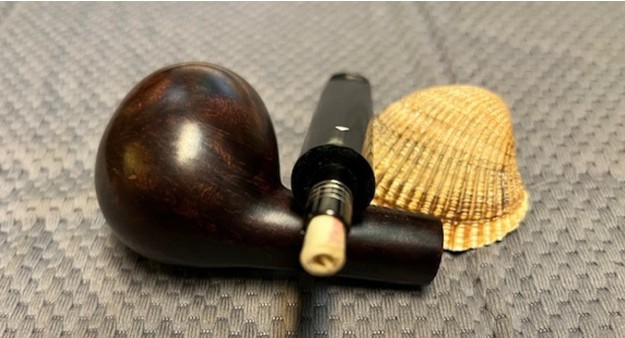
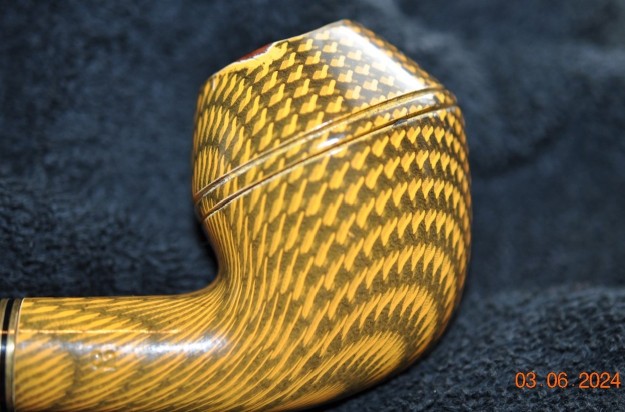
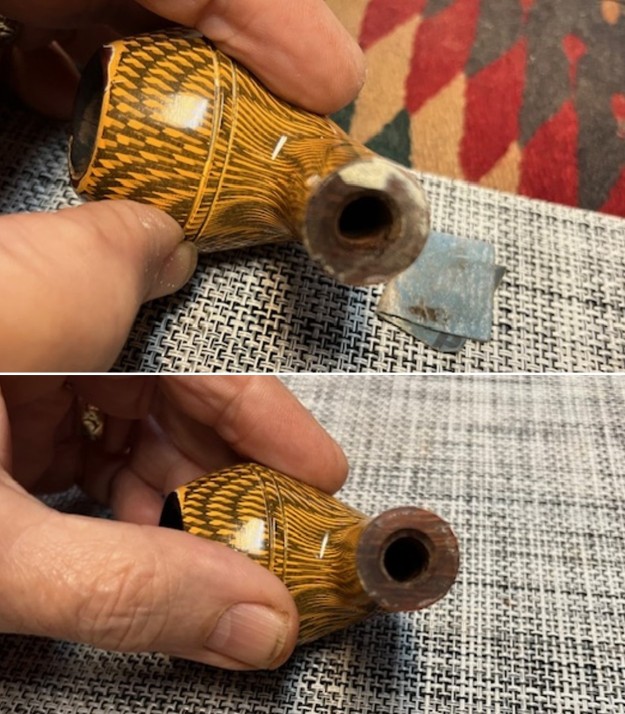
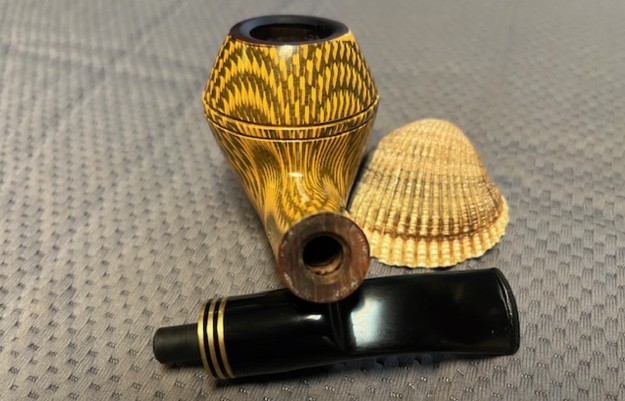
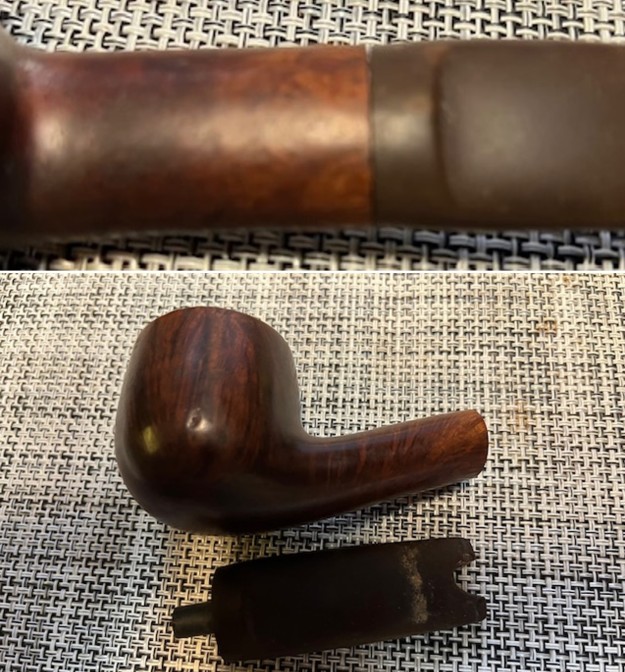
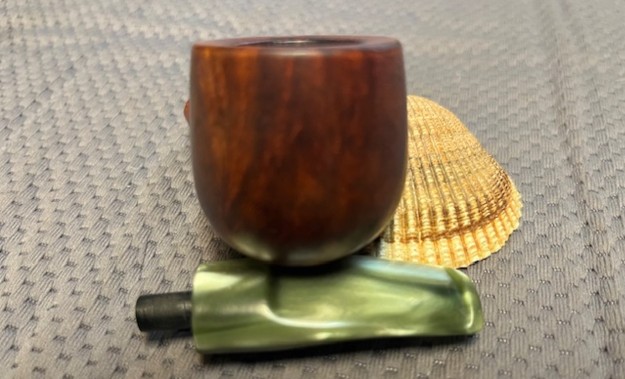
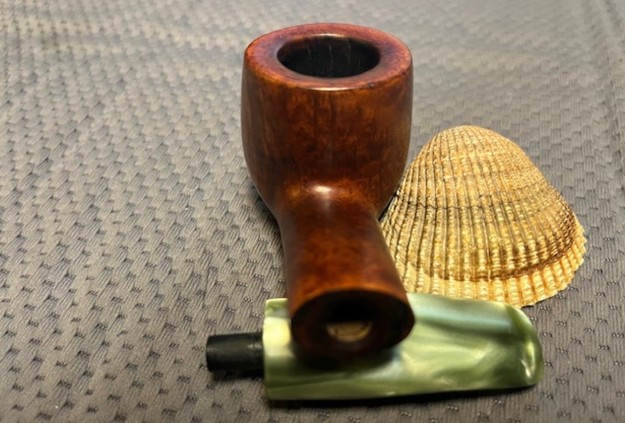
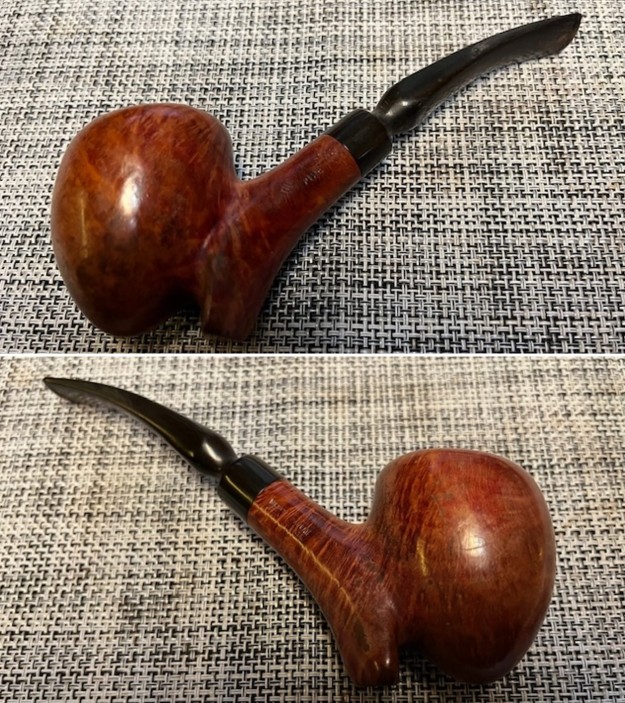
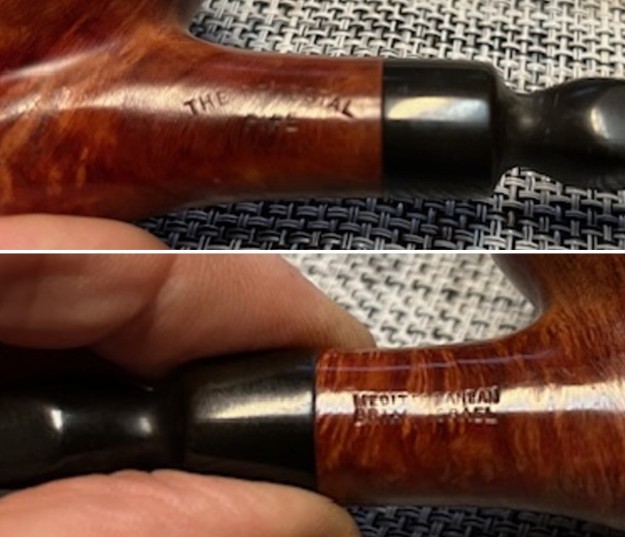
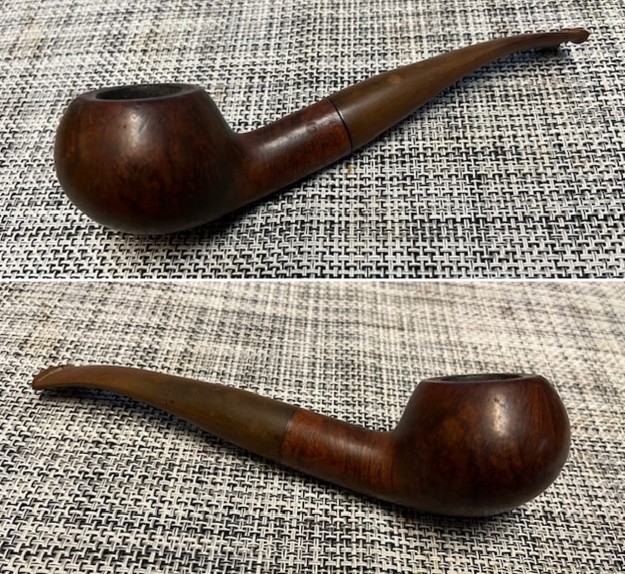
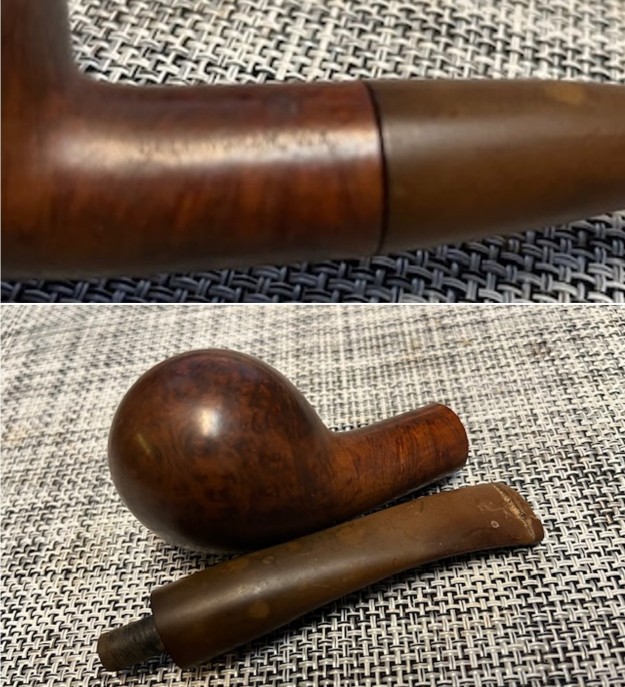
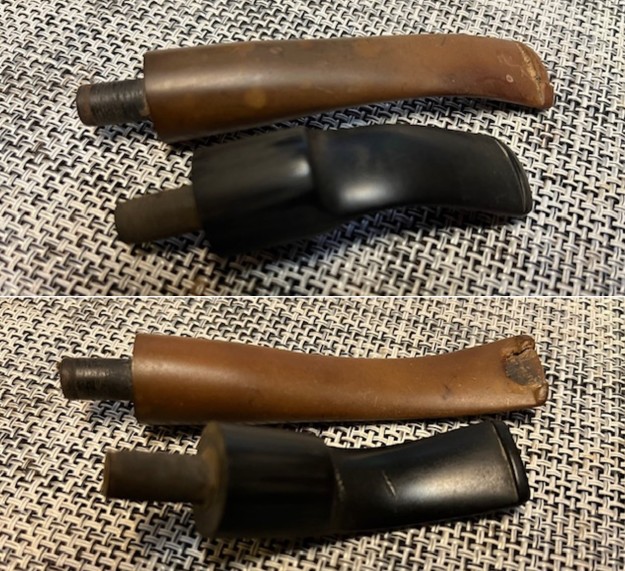
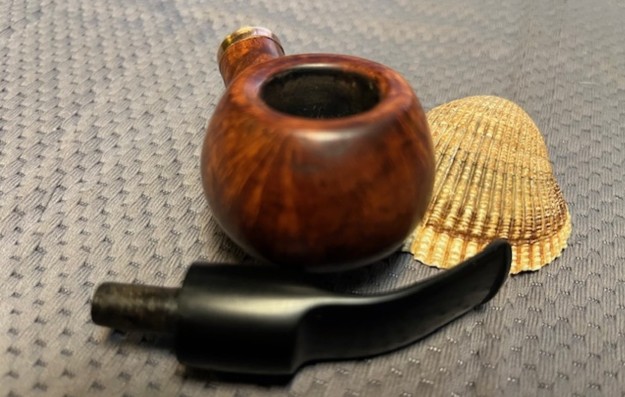
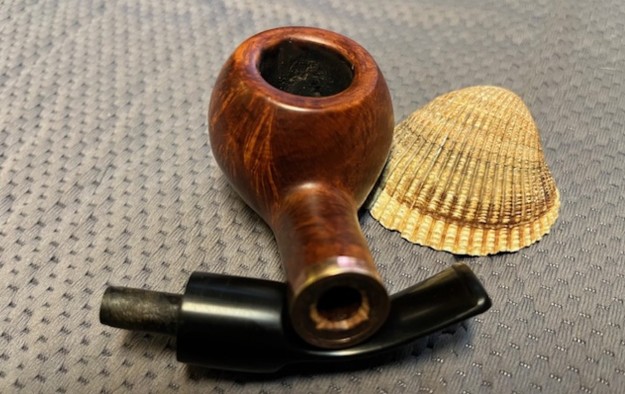
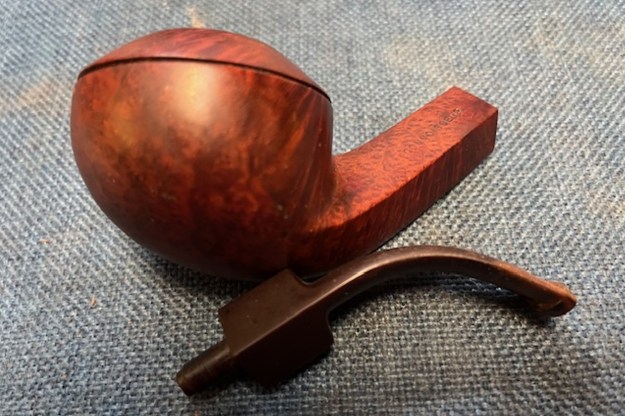
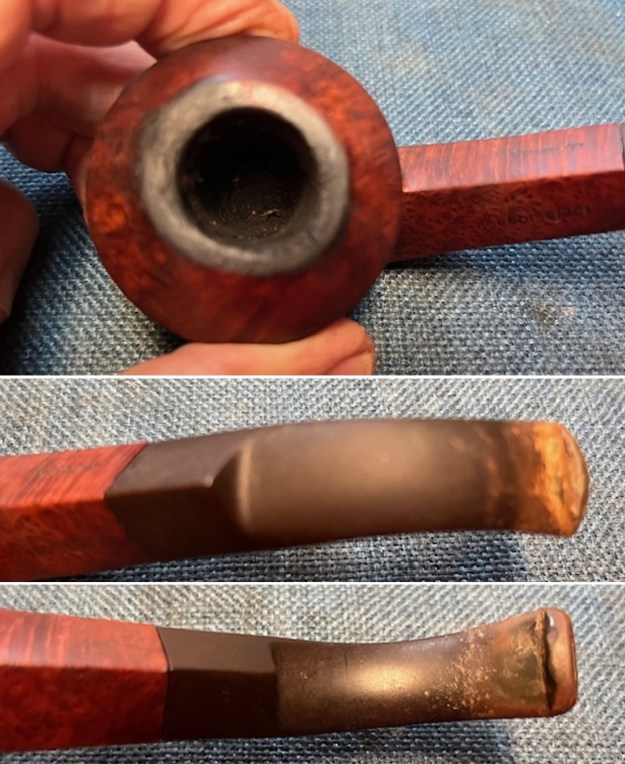 I took a photo of the stamping on the sides of the shank. It is clear and readable as noted above. I removed the stem from the shank and took a photo of the pipe showing the shape and flow of the pipe. It is a nice looking pipe that shows a lot of damage from burning.
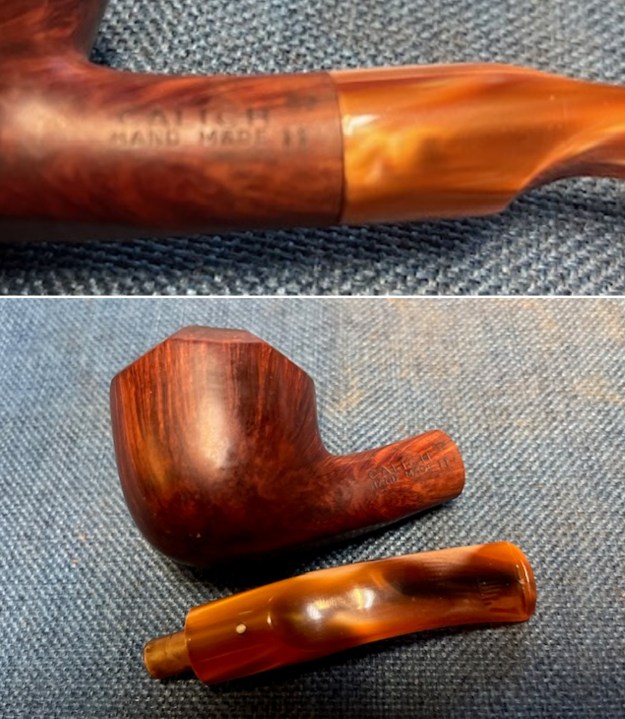
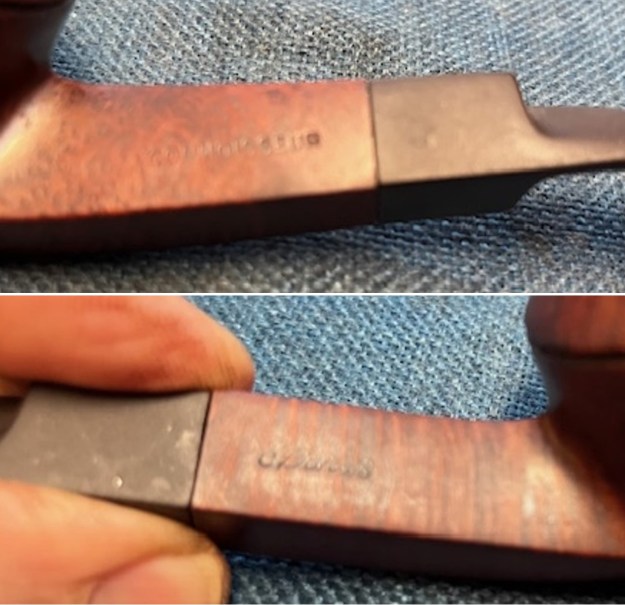
 I decided to have a look at the history of the brand. Over the years I have had a few Connoisseur pipes but none of them were stamped like this one with the Ed Burak signature on the left side. I wondered about the stamping. It was my guess that it somehow helped with dating the pipe to a particular time in Ed Burak’s pipe making career but I did not know for sure. I decided that before working on this particular pipe I would do a little research on the brand and the maker on Google. I always check Pipedia to see what they might have on a maker. In this case I was not disappointed. There as a great article on the site. The link to that is: http://pipedia.org/wiki/Burak.
On that site I found not only some history on Ed Burak and the brand. I also found some great information on the site regarding Ed Burak. I quote from that article below. If you should wish to read it in its entirety click on the link noted above. The article is entitled, The Art of Edward F. Burak, Dean of American Pipe Designers.
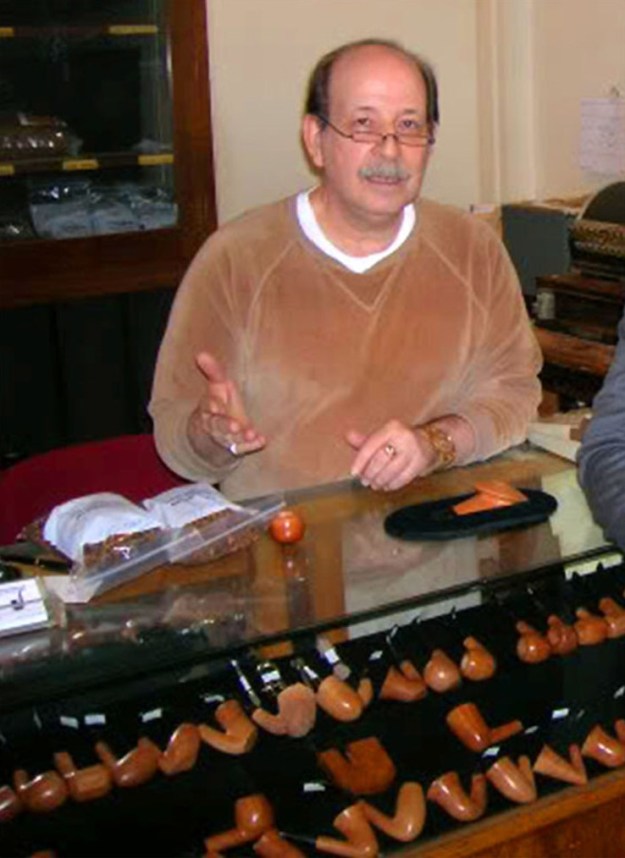 “Ed Burak is the dean of American pipe designers whose work has had a worldwide influence on the thinking and the work of contemporary pipe makers.”
“…he met and subsequently began working with Meerschaum master Paul Fisher, with whom he stayed 5 years. During that time he produced a small number of Meerschaum pipes, a few of which are still extant in collections. He also worked for Wally Frank as a pipe designer. In 1968 he bought the Connoisseur Pipe Shop, where he was able to concentrate on his own designs. Burak’s pipes have been carved by a number of well-regarded pipe makers, among them Joe Corteggione and Tony Passante. Several of his freehands are in the Museum of Modern Art in New York and have been part of a traveling exhibit of the American Craft Museum.”
“Burak’s work is best known as pipe design as fine art. He admires pays tribute to the classic English designs of the old Barlings and Comoy’s and offers a line of “Classics” which begin with these traditional values yet reflect his own interpretations.”
“Because these pipes are different, so carefully crafted, they not only please the eye, but educate it. Most pipe makers will start with an idea and work the wood toward that goal, but will change their original design to accommodate the briar. Burak does not allow the medium to modify the intent. Minor surface flaws are left on the pipes. No staining is permitted; all Connoisseurs have a natural finish, with only carnauba was added.”
“As a significant footnote, the reader should note that Ed Burak’s pipes are NOT made by Paul Perri, nor Weber, nor Jobey, as erroneously stated in Lopes’s book “Pipes: Artisans and Trademarks.” Burak prefers not to disclose the name of his current pipe carver.”
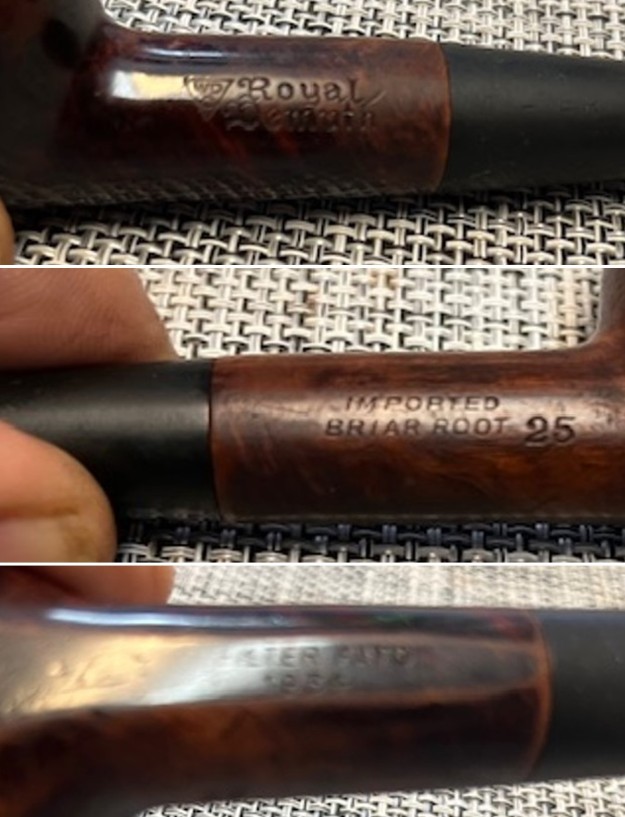
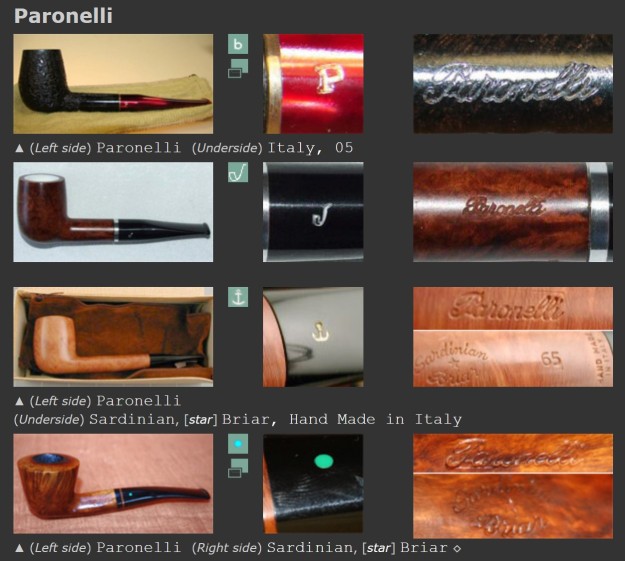
I also learned on Pipephil’s website, http://www.pipephil.eu/logos/en/about-en.html that the stamping did indeed give some information that helped in identifying the period that a particular pipe was made. There I found that one may generally separate Connoisseur pipes date of manufacture into three periods.
From late 1960’s until 1974: no stampings
From 1974 until 1981: CONNOISSEUR over N.Y.C.
From 1981 on: CONNOISSEUR over N.Y.C. and Ed Burak’s signature
The pipe I was working on was stamped like the photo below. It had the Connoisseur stamp on the left side and Ed Burak’s signature on the right side. That dated the pipe to the time period from 1981 to the time that the Connoisseur Pipe Shop in Manhattan closed in 2009 on Ed’s retirement.
I did some further searching and foun that on the Puff.com Pipe Forums was a thread on Connoisseur pipes that confirmed how the pipes were finished when they were originally made. http://www.puff.com/forums/vb/general-pipe-forum/299824-ed-burak-pipes-man.html. There in the latter part of a post by a member identified as Mr. Rogers was the information that I was seeking confirmation about.
“His premium pipes were like nothing I had seen before. He finished all of his pieces with only wax, no stain. He incorporated blemishes into his designs and made no attempt to hide these flaws with fillers. I frequented the CPS (Connoisseur Pipe Shop) as a high school, college, then grad school student, never really having the funds to purchase his premium pieces. As luck would have it, once I became established in my work/field, the CPS was long gone…”
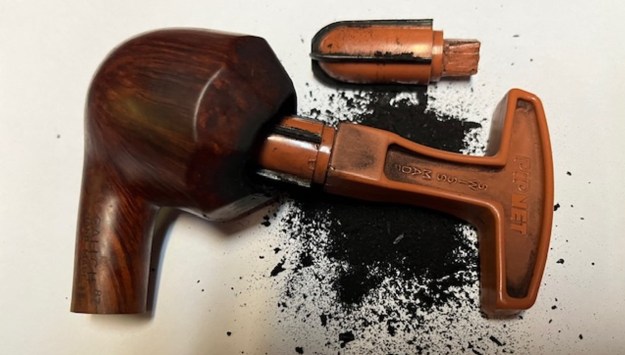
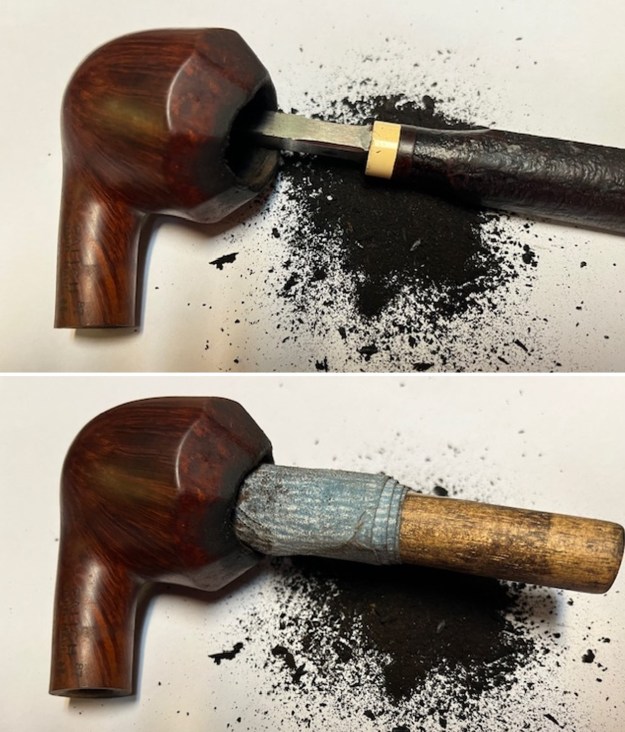
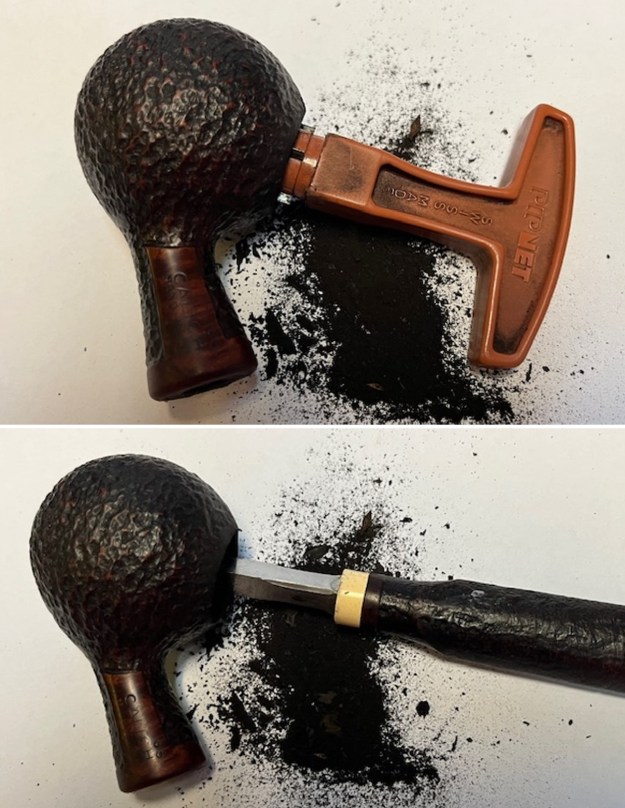
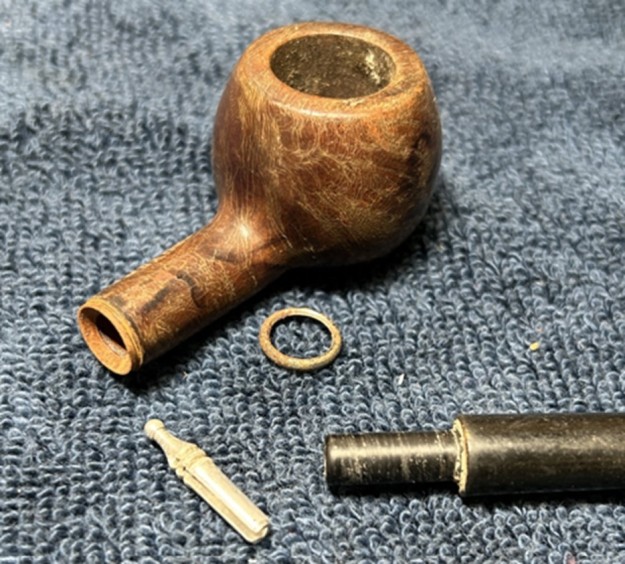
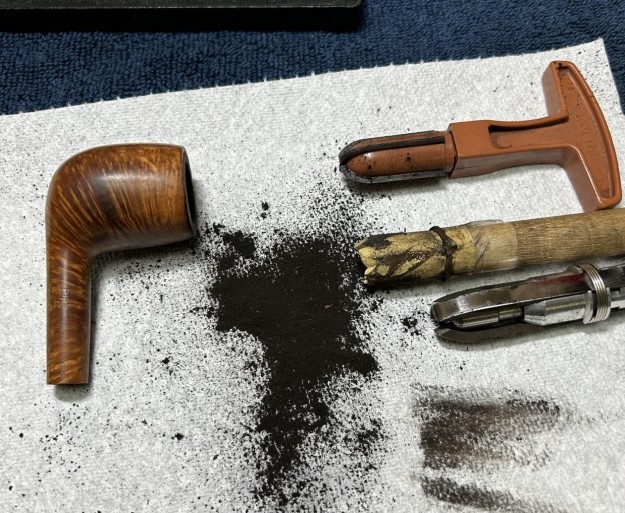
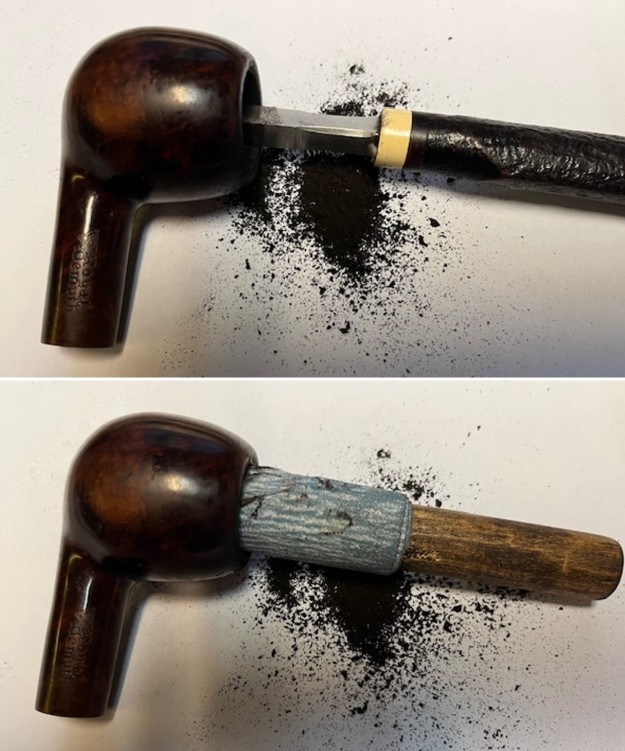
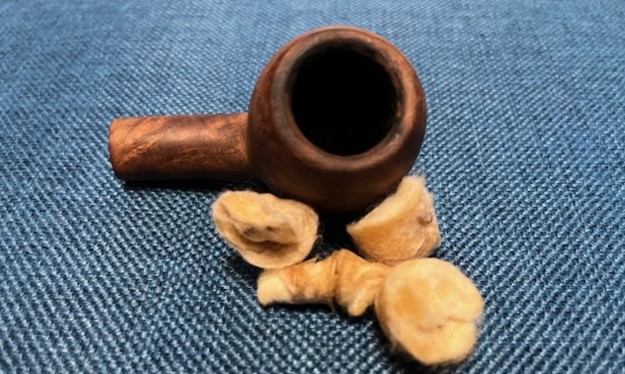
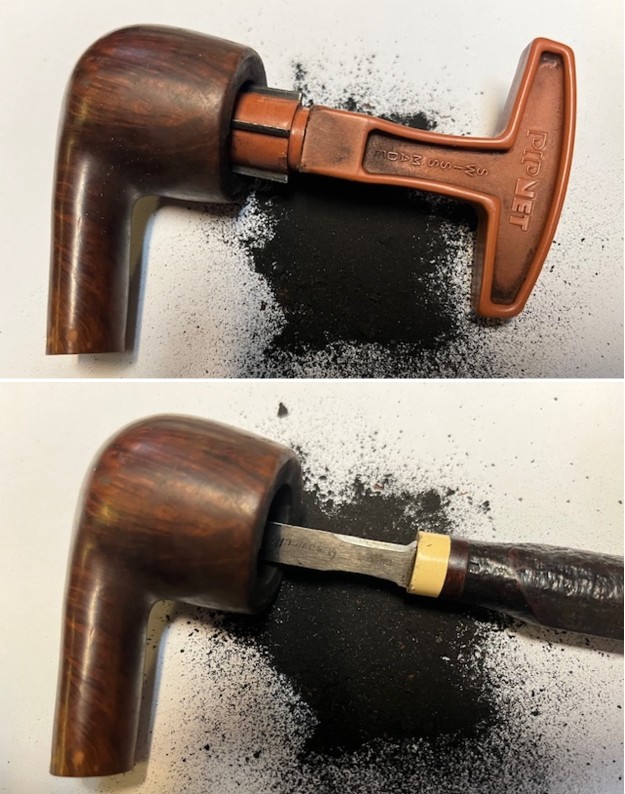
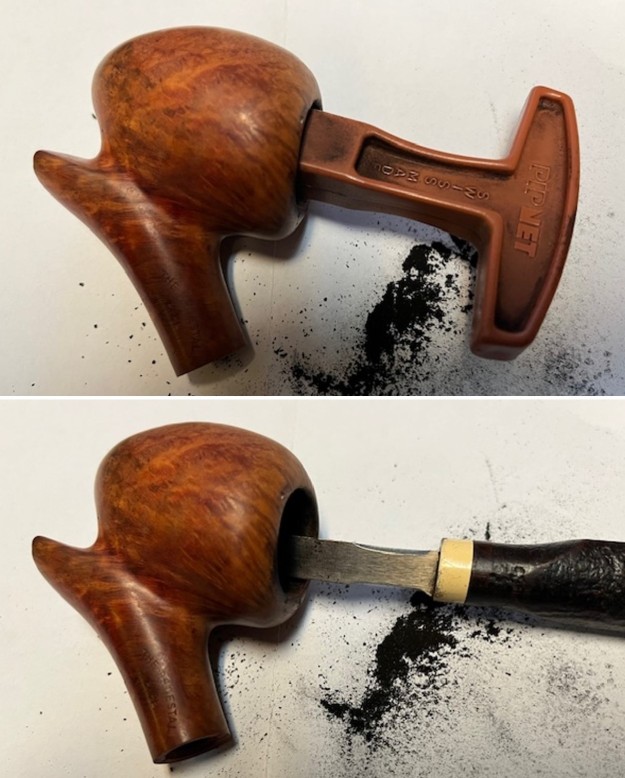
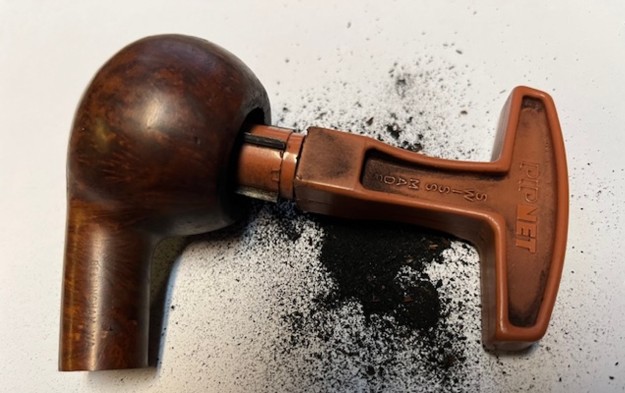
Now that I had a pretty good idea of when the pipe was made and what the stamping meant, it was time to go to work cleaning up this beauty. I knew that the pipe in hand was made between 1981- 2009. I reamed the bowl with a PipNet Pipe reamer using the first cutting head. I took the cake back to bare briar so that I could check out the inside walls. I used a Savinelli Fitsall Pipe Knife to scrape back the remaining cake. I finished my cleanup of the walls by sanding it with 220 grit sandpaper wrapped around a piece of dowel. 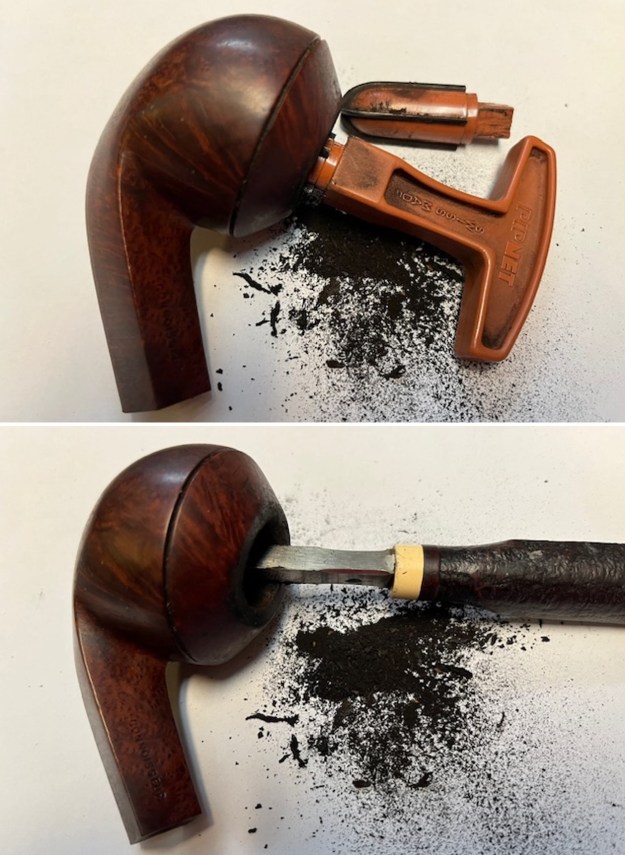
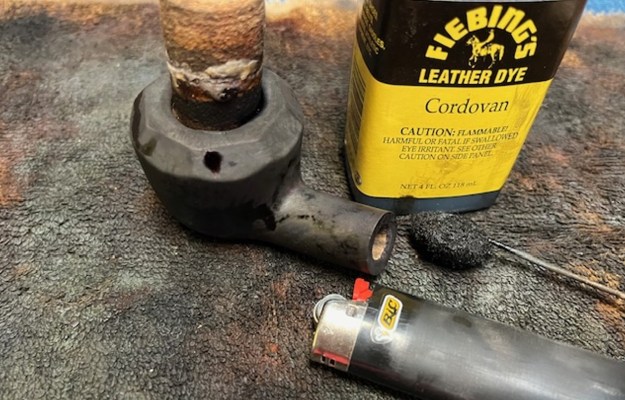
 I scraped off the lava buildup on the rim top with the edge of a Savinelli Fitsall Pipe Knife. I was able to remove the majority of the build up leaving the burn damage very clear.
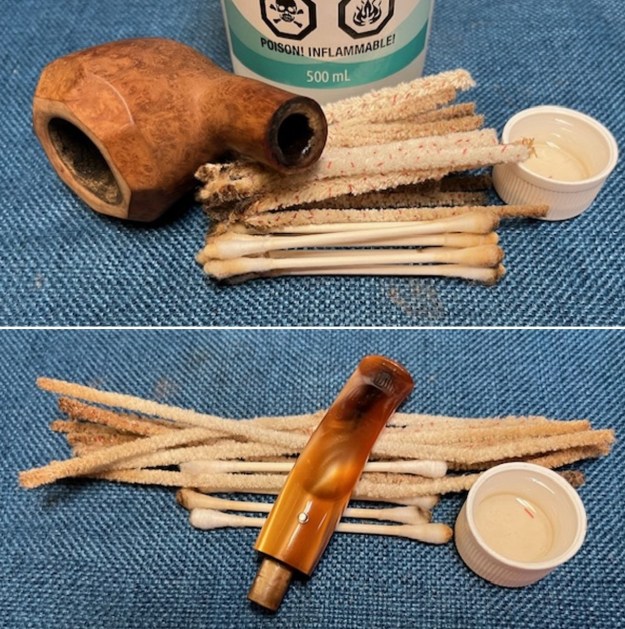
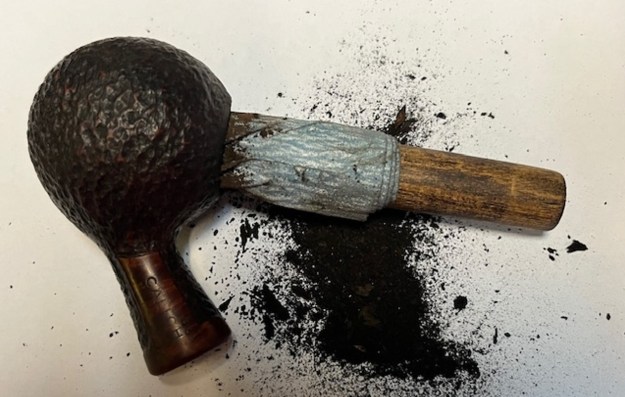
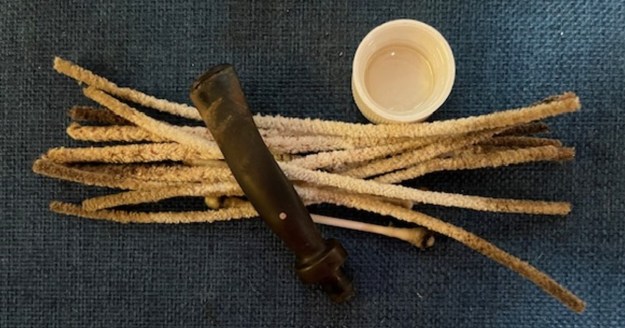
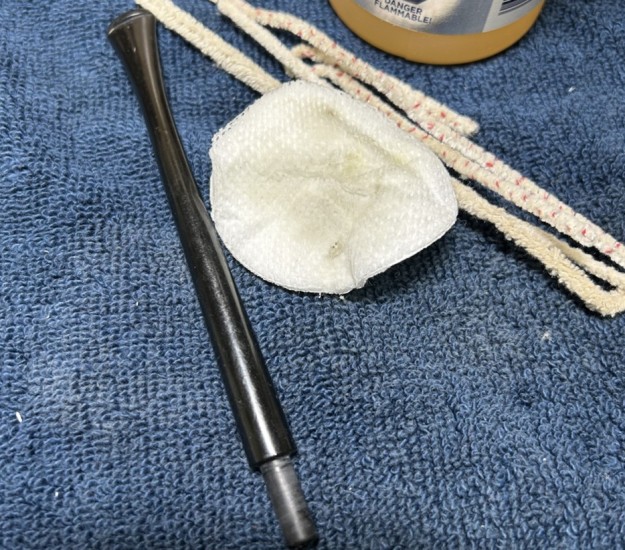
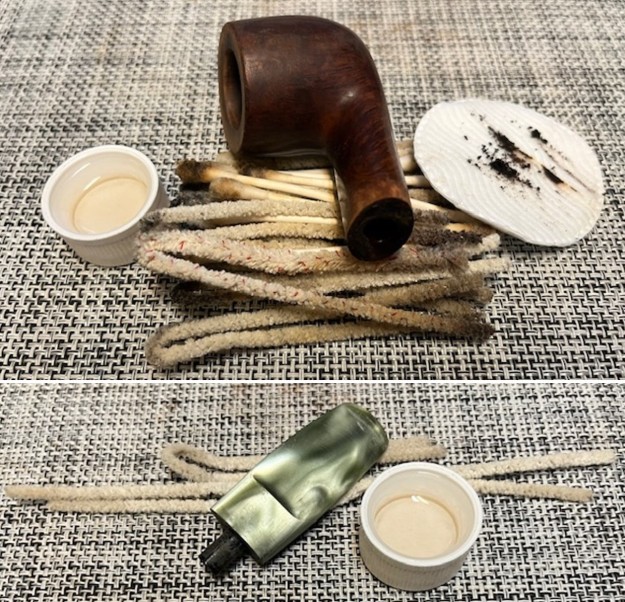
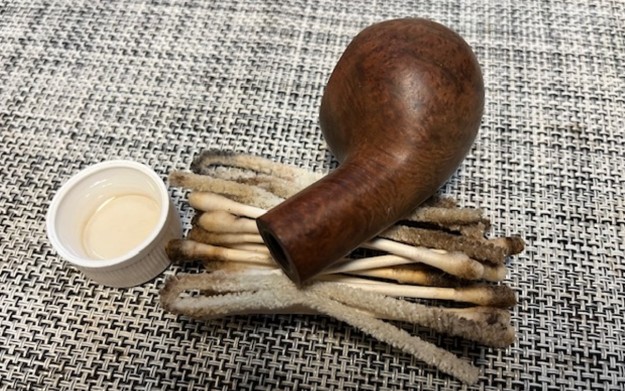
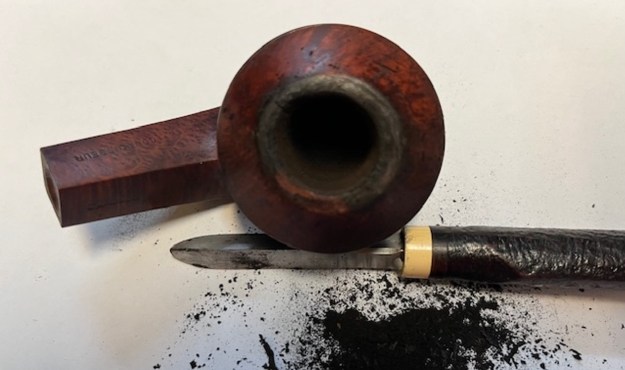 I worked on the internals next. I cleaned out the airway to the bowl, the mortise and the airway in the stem with pipe cleaners, cotton swabs and alcohol. When I finished the pipe smelled very clean.
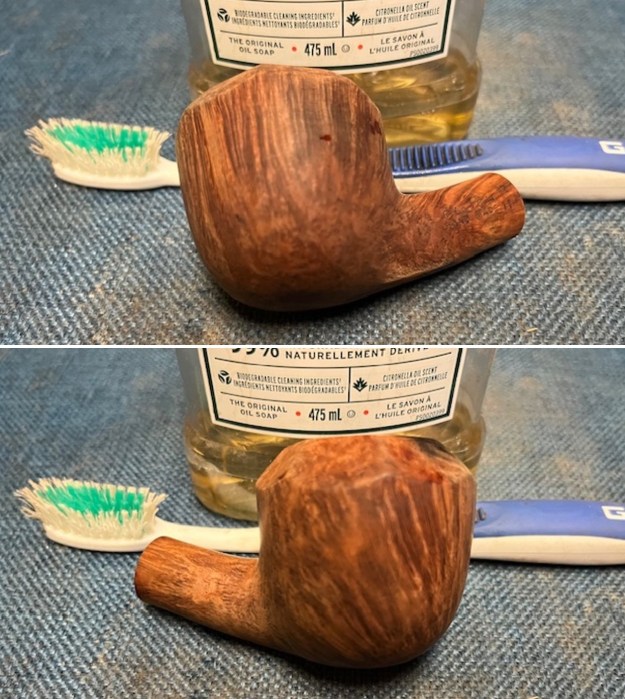
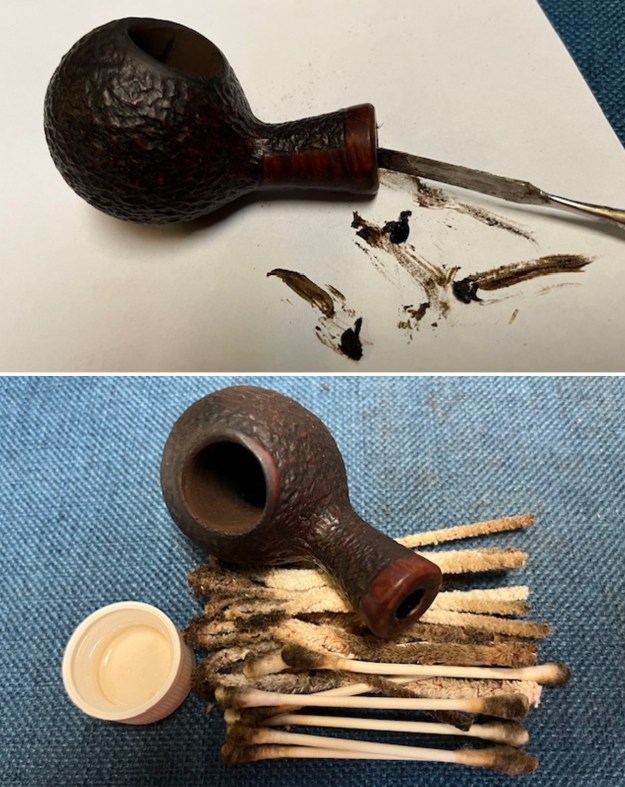
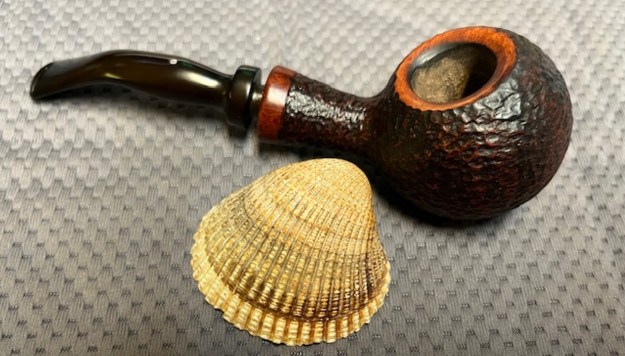
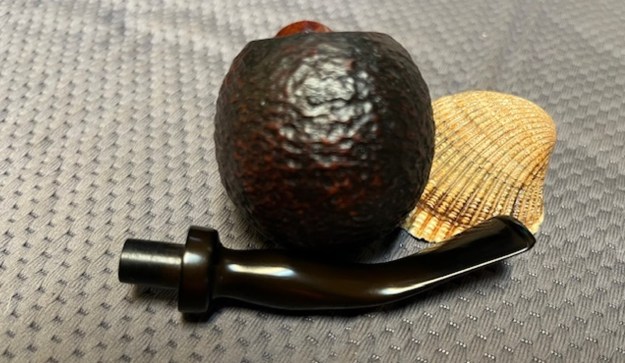
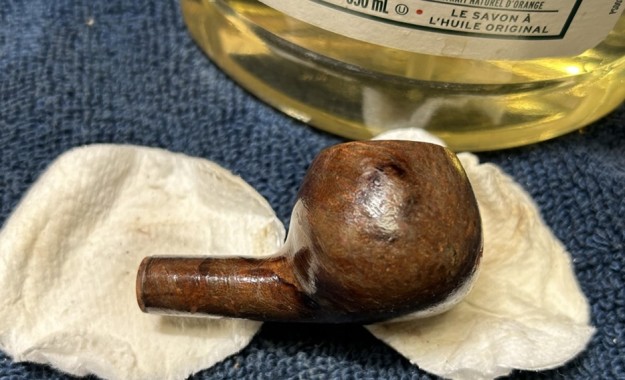
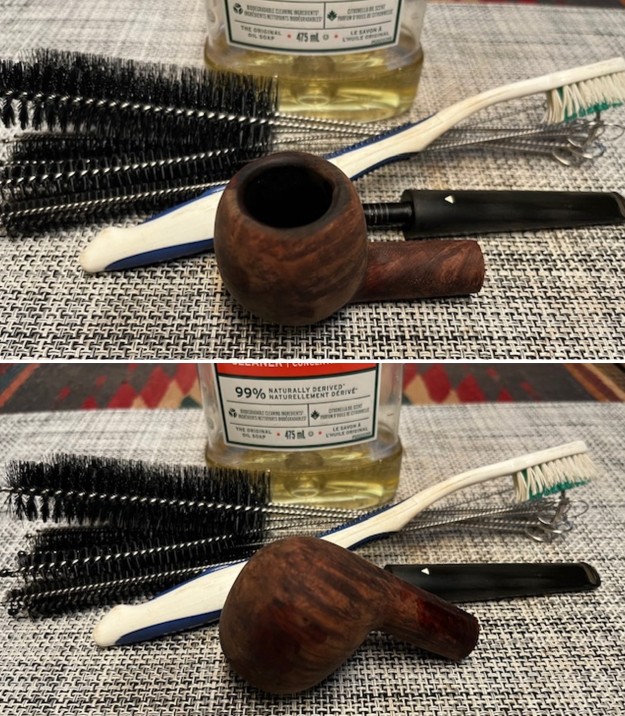
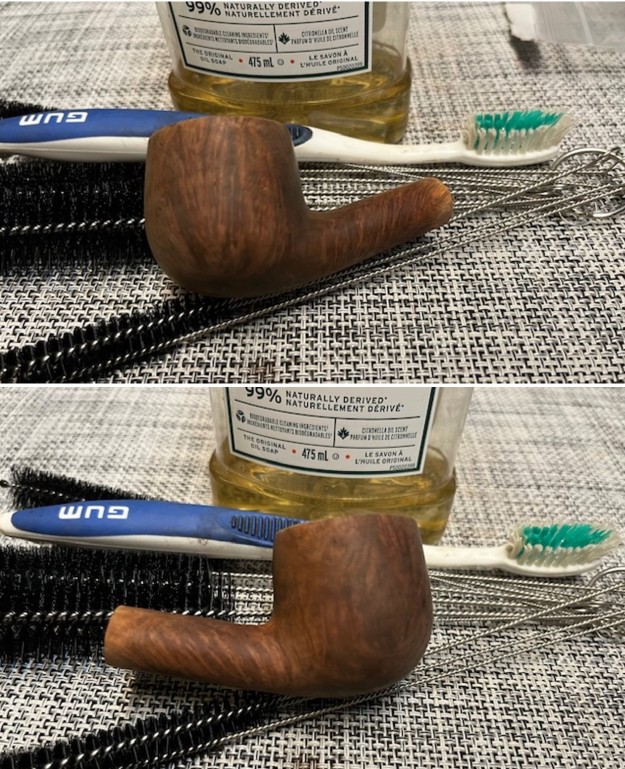
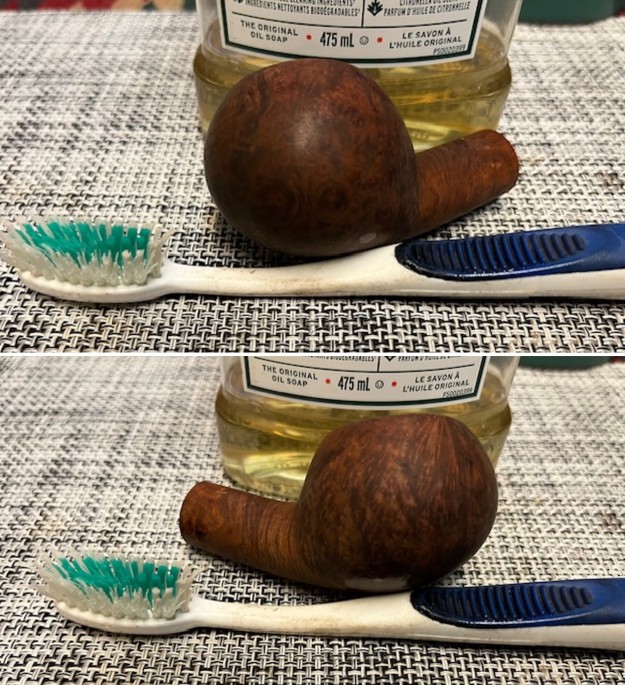
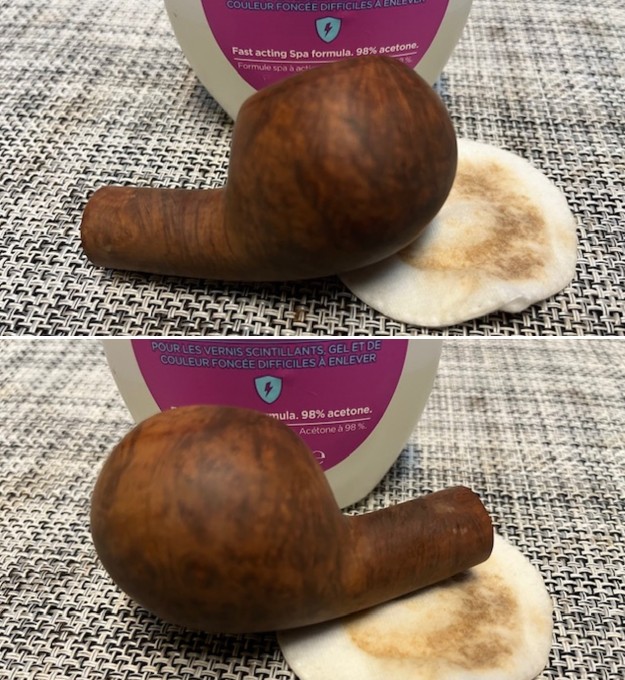
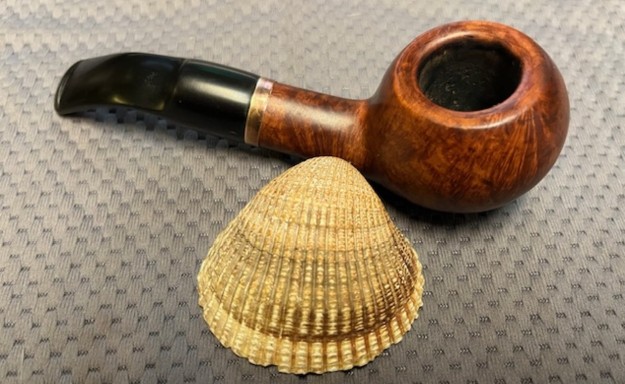
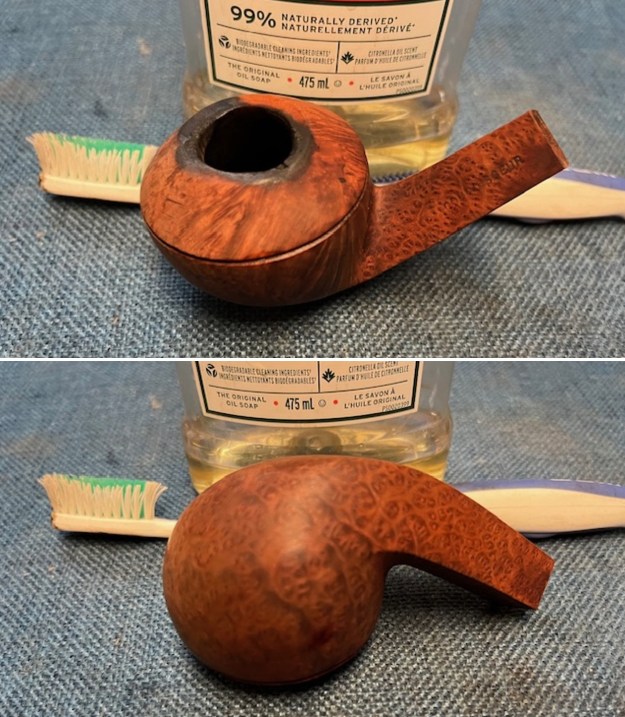
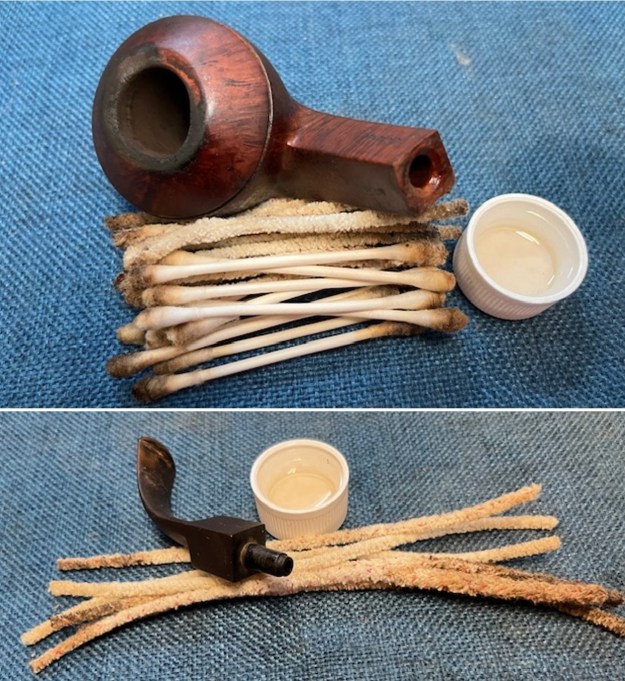 I scrubbed the briar with undiluted Murphy’s Oil Soap and a tooth brush and rinsed it off with warm running water. I scrubbed the rim top with a tooth brush and warm running water at the same time. I dried the bowl off with a soft microfiber cloth and gave it a light buffing. I also cleaned out the shank, mortise and airway in the stem and shank with Murphy’s Oil Soap and shank brushes to clean out the oils and tars on the inside. You can see the darkening or burn damage on the top of the rim and the outer edge of the rim cap. I am hoping it is removable.
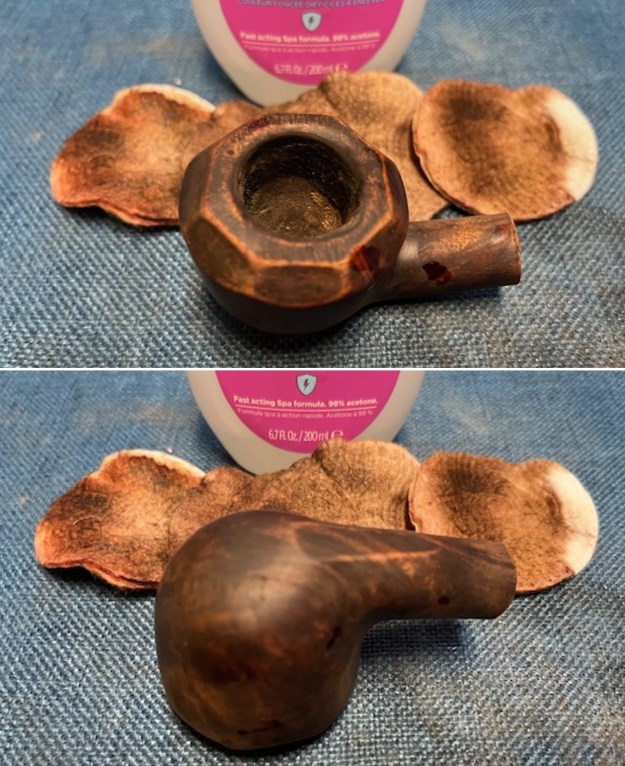
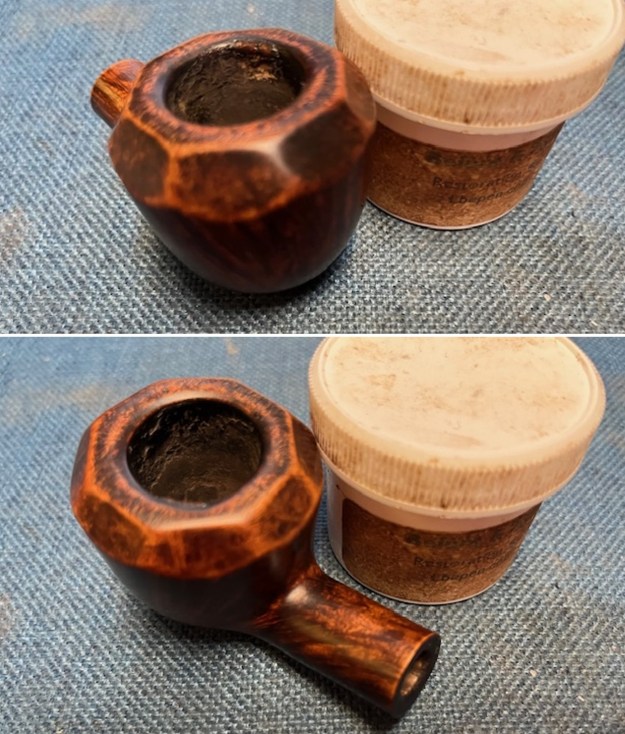
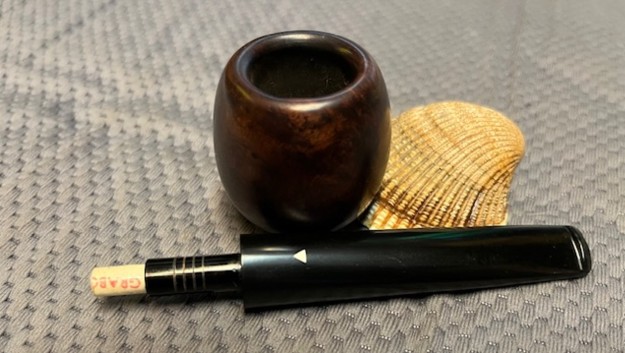
 Once it was clean I turned my attention to the rim top. To smooth out the damage on the cap I topped the bowl with 220 grit sandpaper to smooth out the top. I took a photo of the rim top at this point. The burn damage on the back left is very visible and will need to be rebuilt.
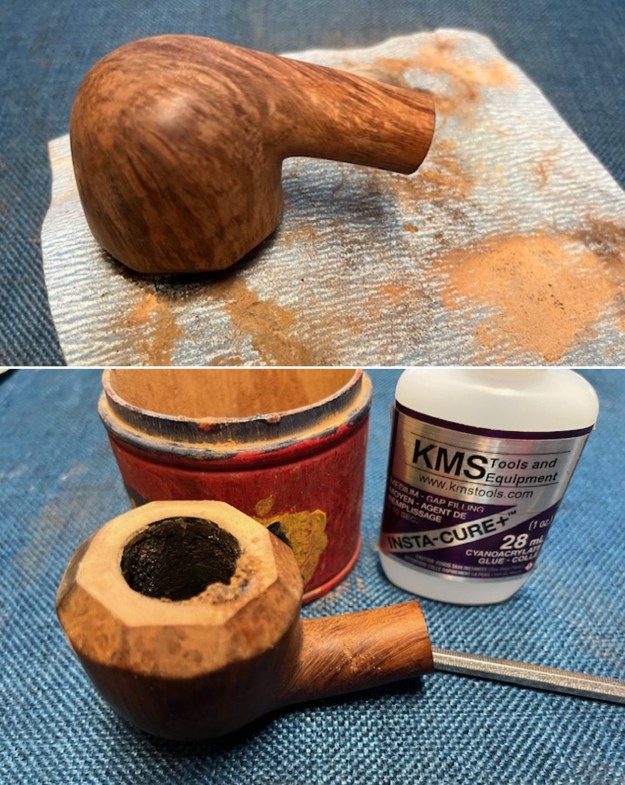
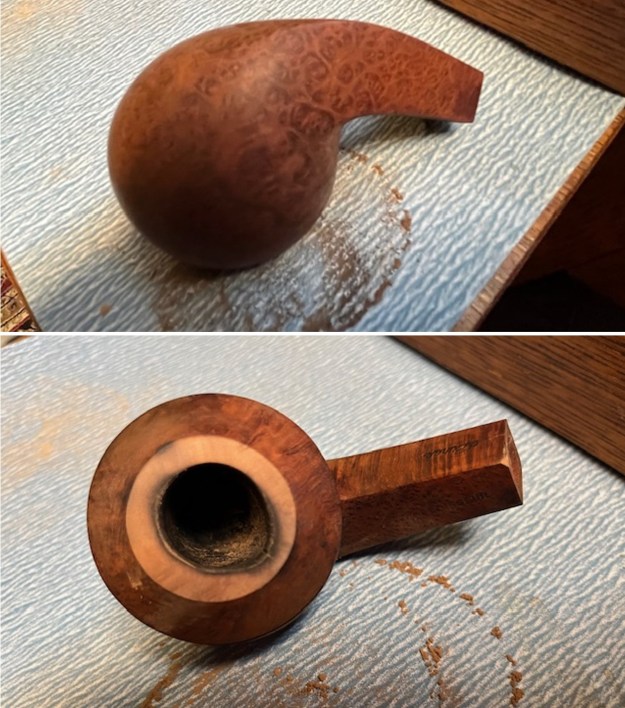 I rebuilt the back left inner edge up to match the rest with briar dust and clear CA glue. I put a drop of glue on the briar and pressed some briar dust onto the edge with a dental spatula. I carefully topped the repaired rim top with 220 grit sandpaper and took a photo of the rim at this point in the process.
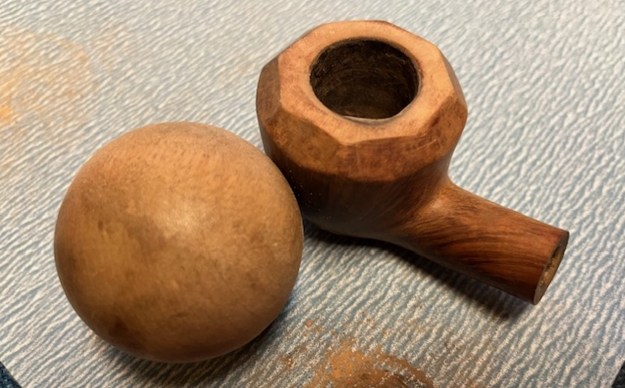
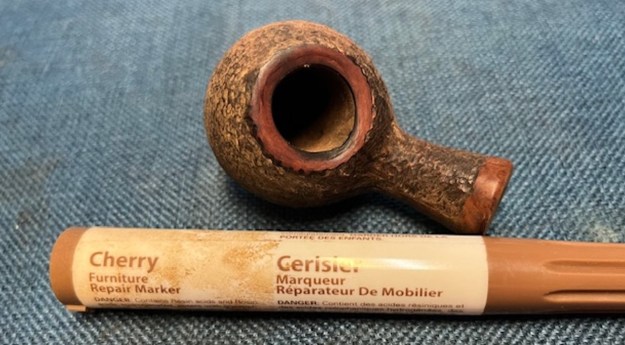
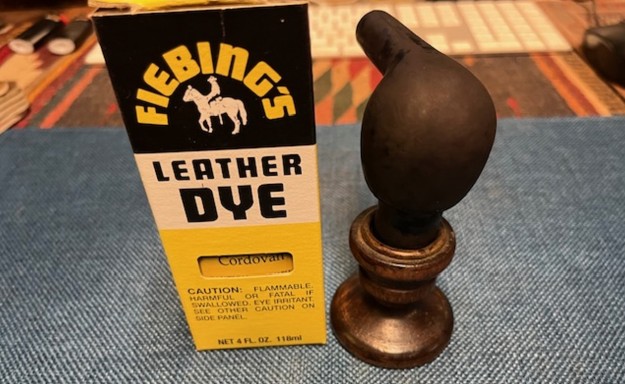
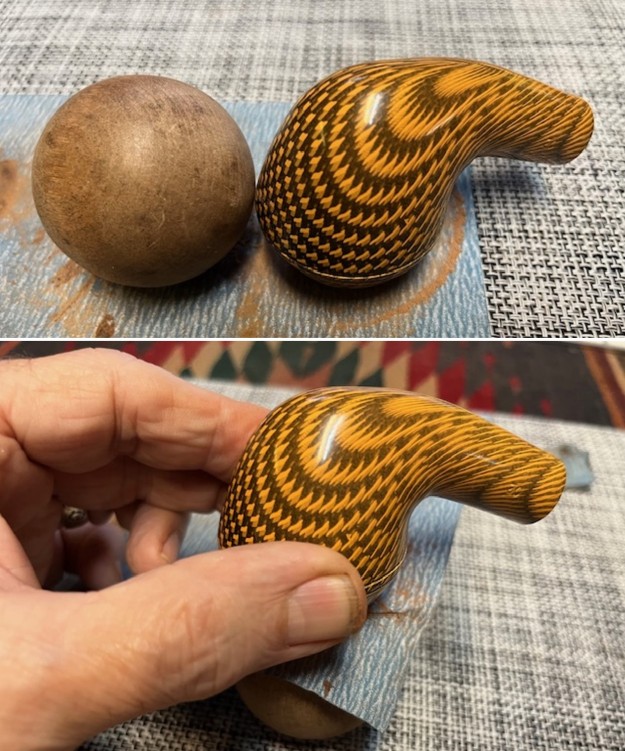
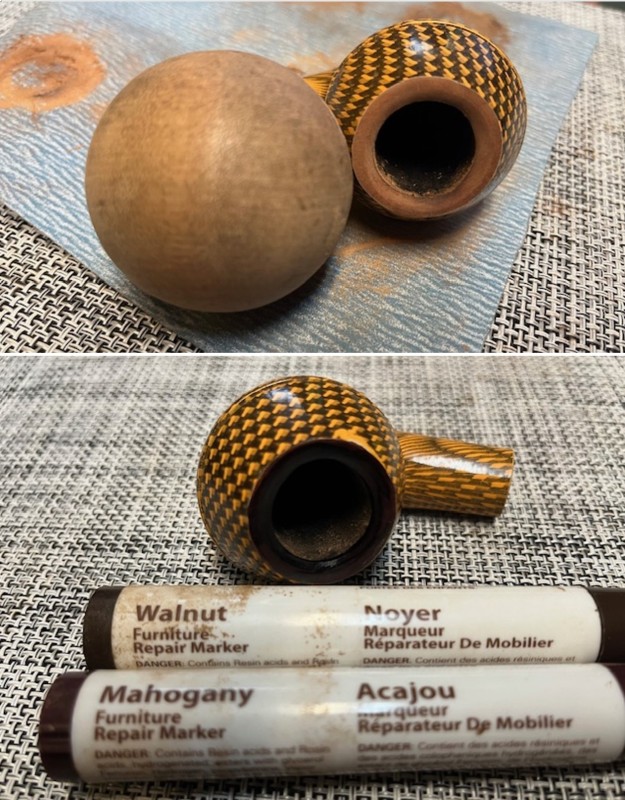
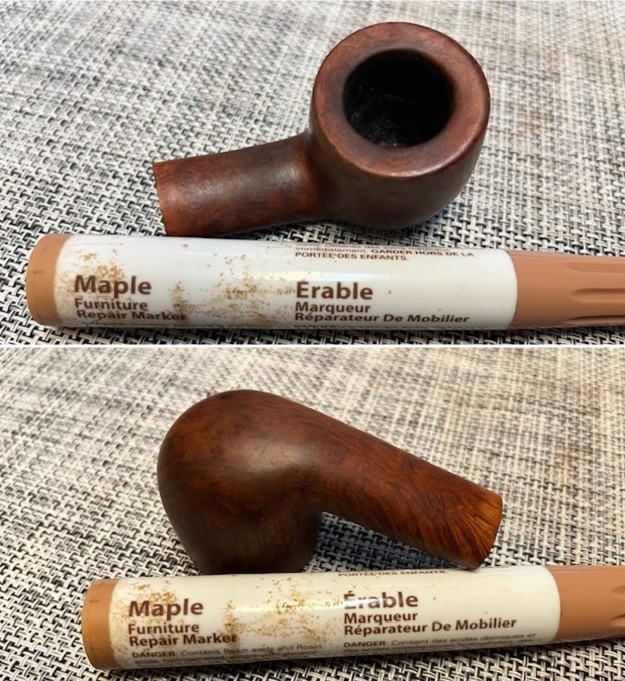
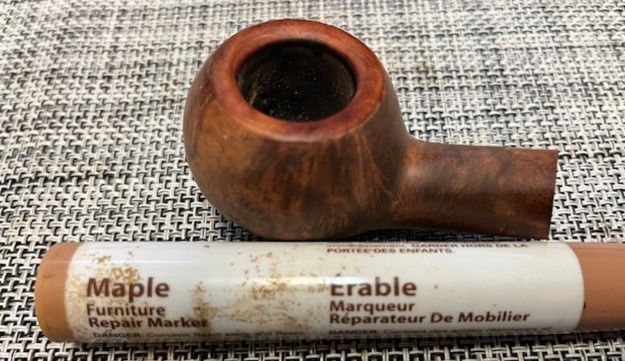
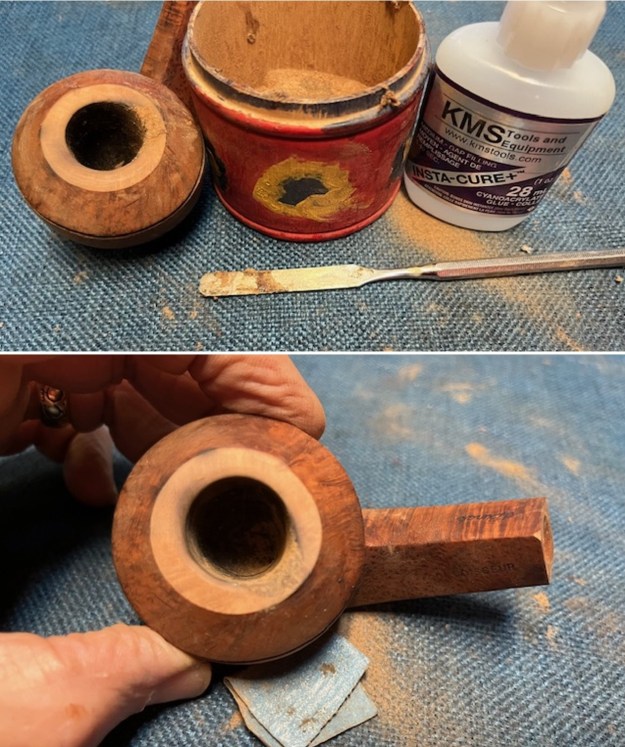 I worked over the inner edge of the bowl with a wooden ball/sphere and 200 grit sandpaper to give the inner edge a slight bevel that would help blend in the repair that I had made to the top and inner edge. It began to look much better at this point. I touched up the rim top with a Cherry Stain Pen to match the colour on the bowl. It looked pretty good considering where it started.
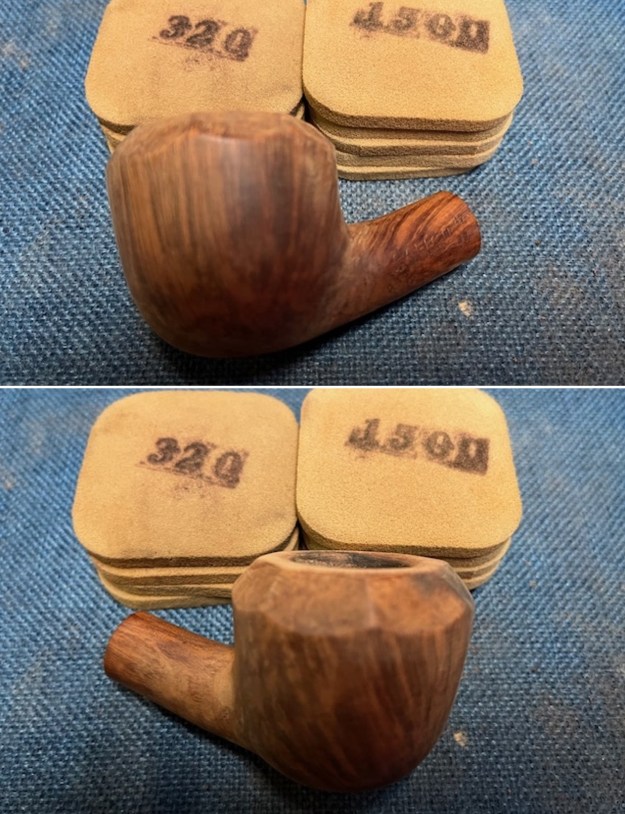
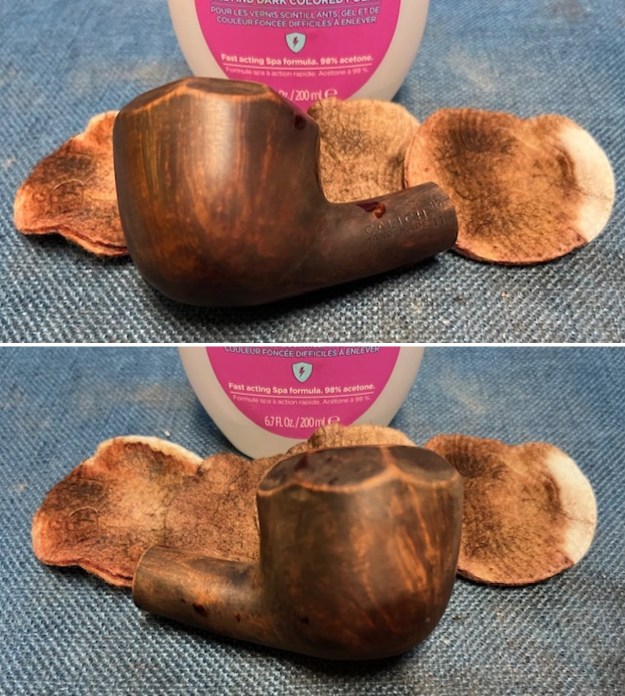
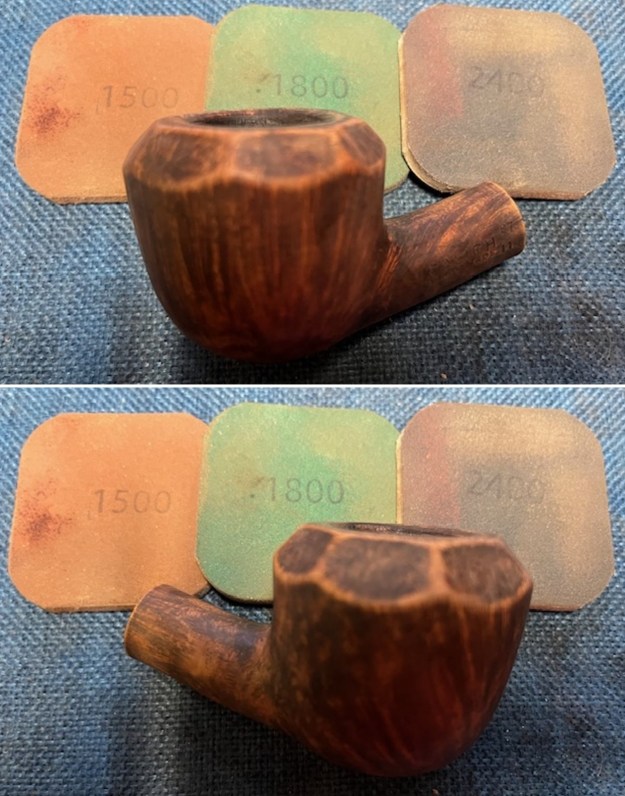
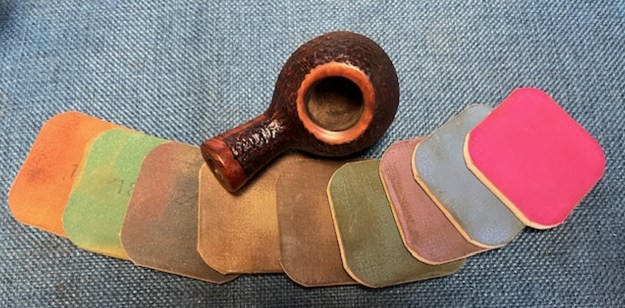
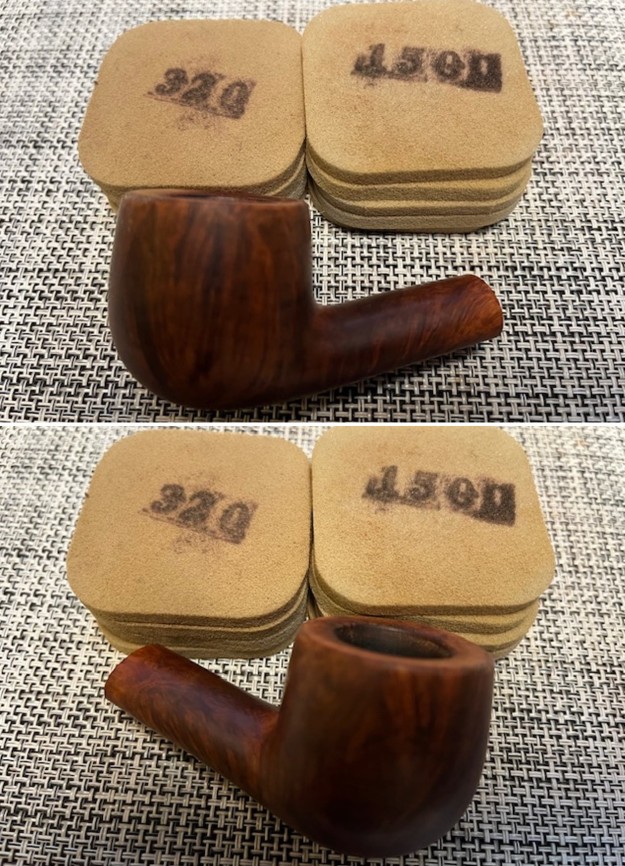
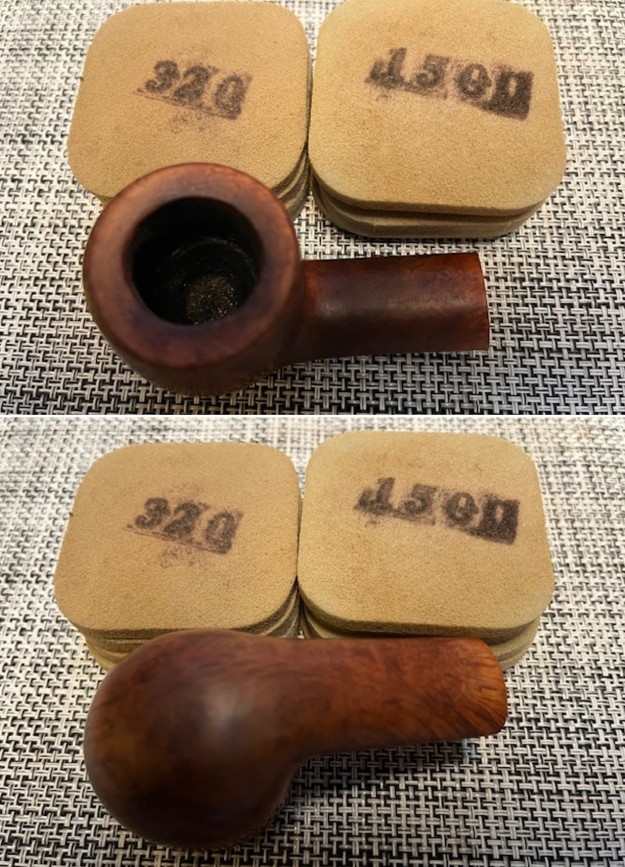
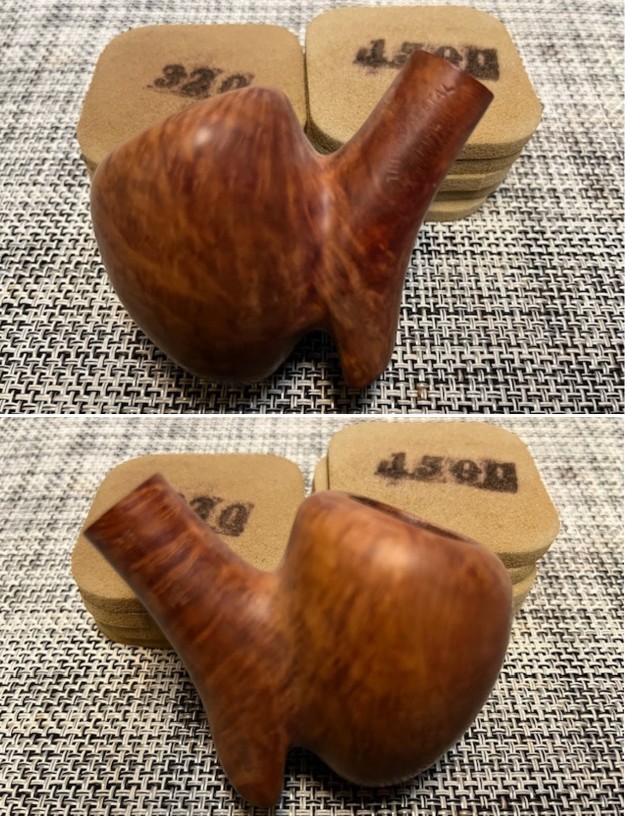
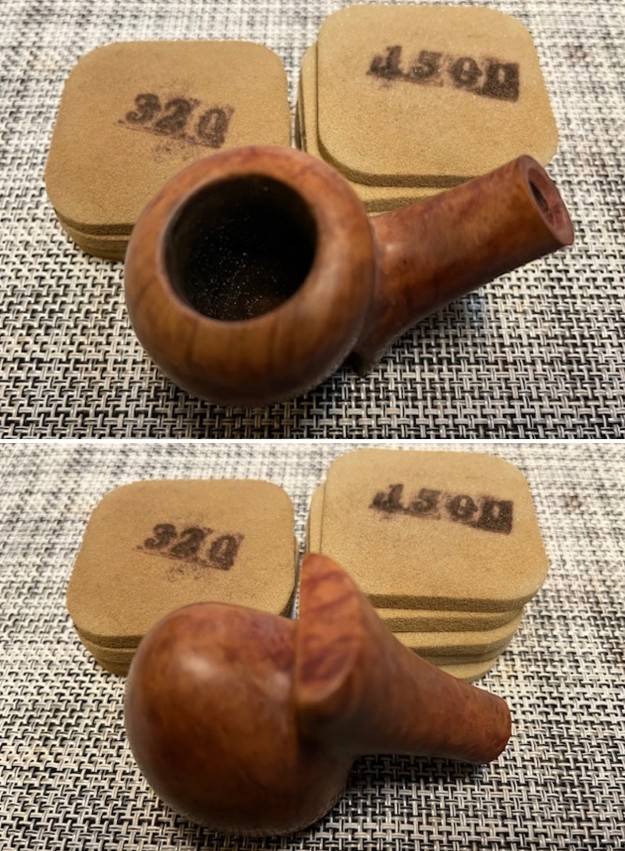
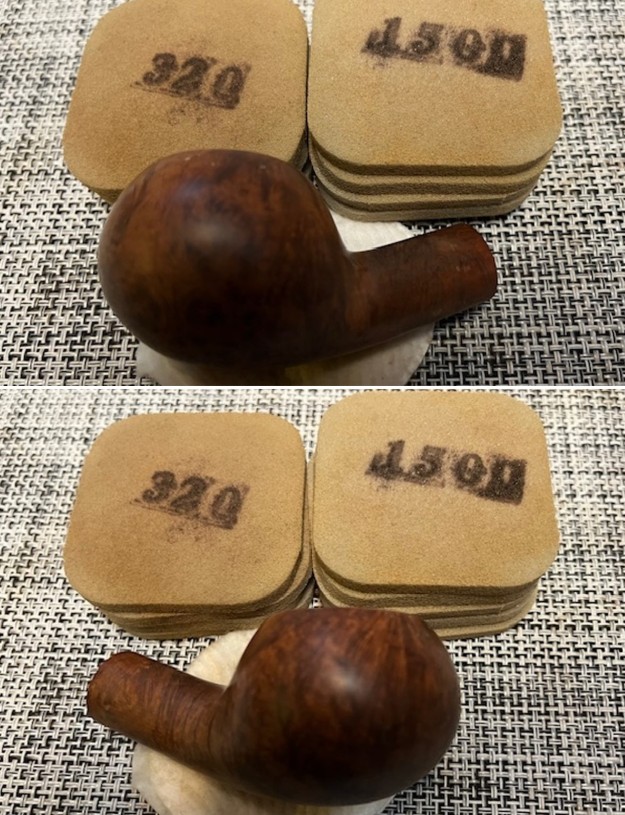
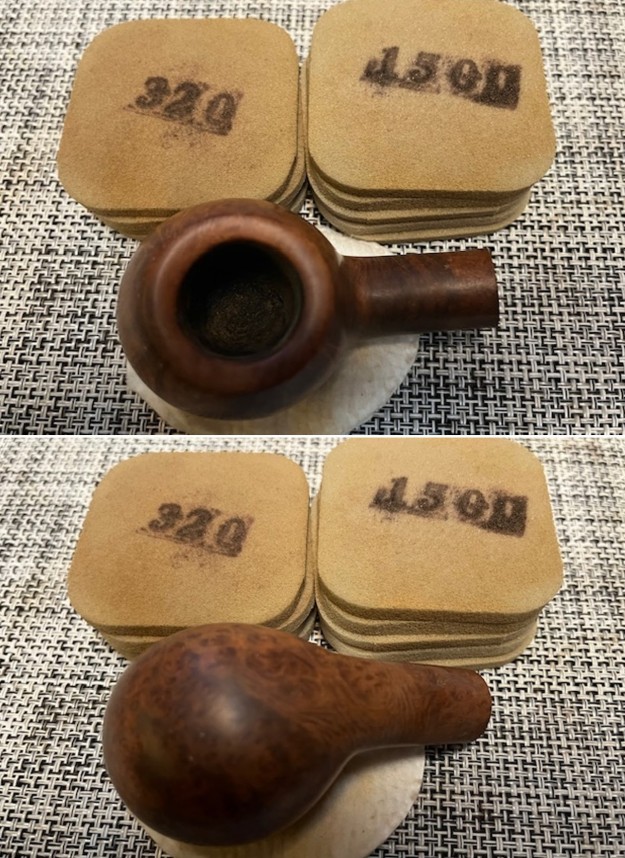
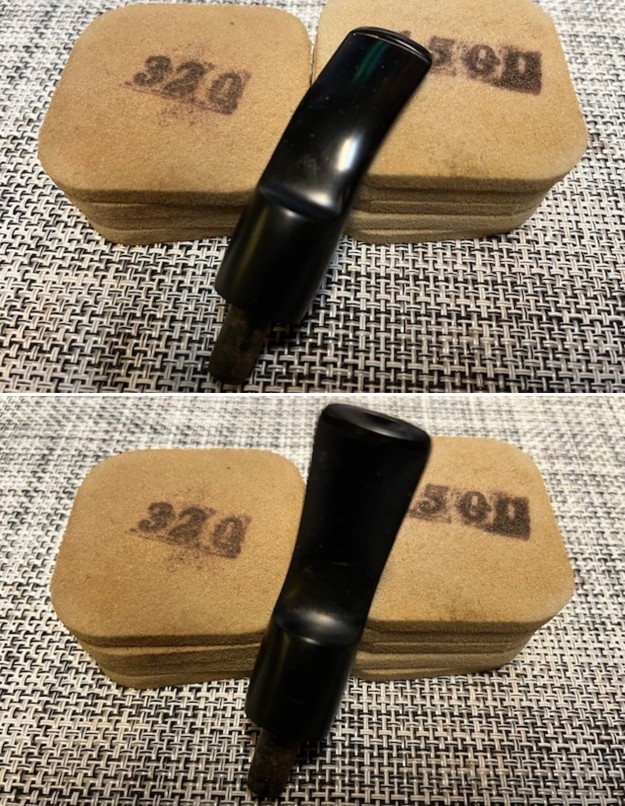
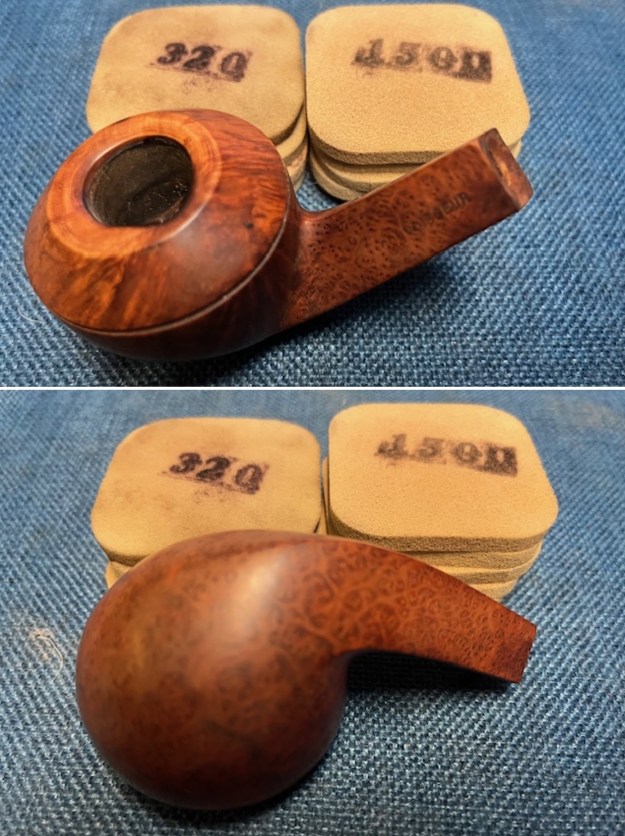
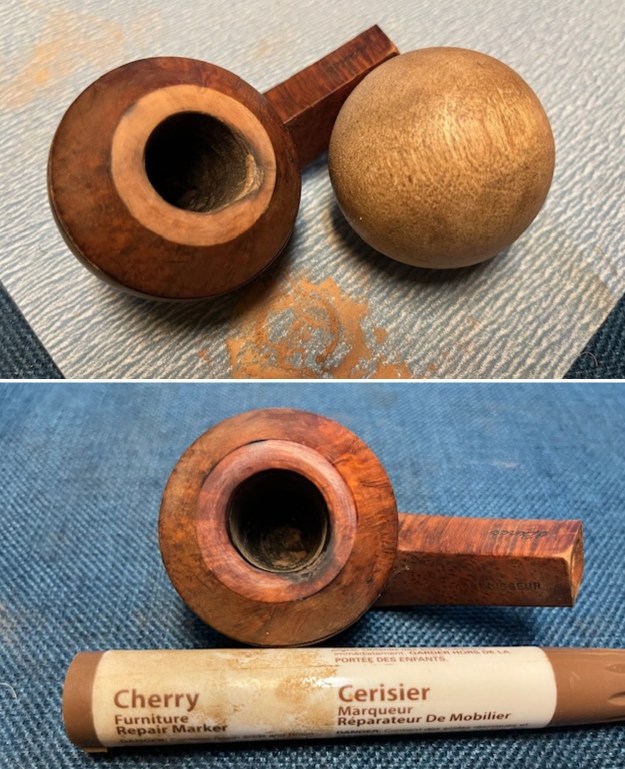 I sanded the bowl and cap with 320-3500 grit sanding pads to smooth it out and blend in the restained cap. I wiped the bowl down between each pad with a damp cloth. When I finished it wiped it down with a cotton pad and alcohol.
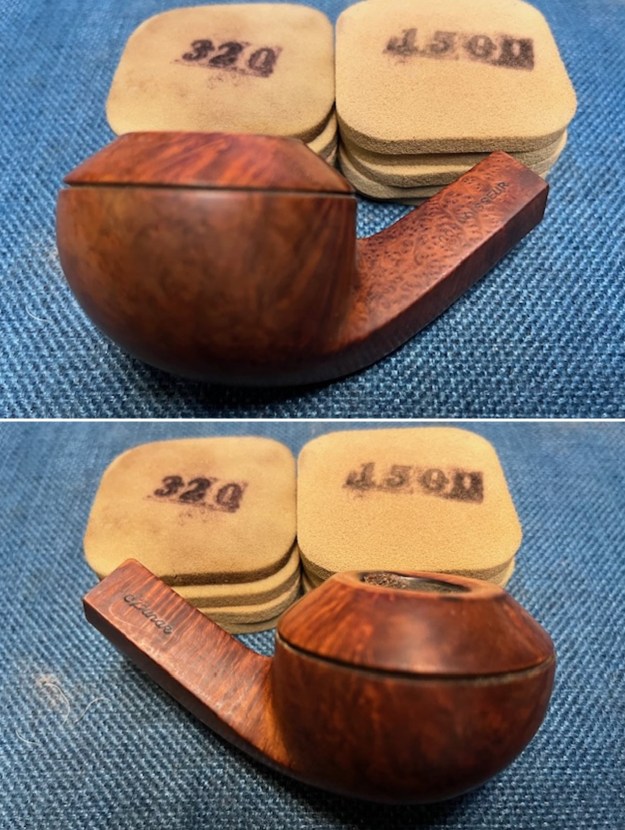
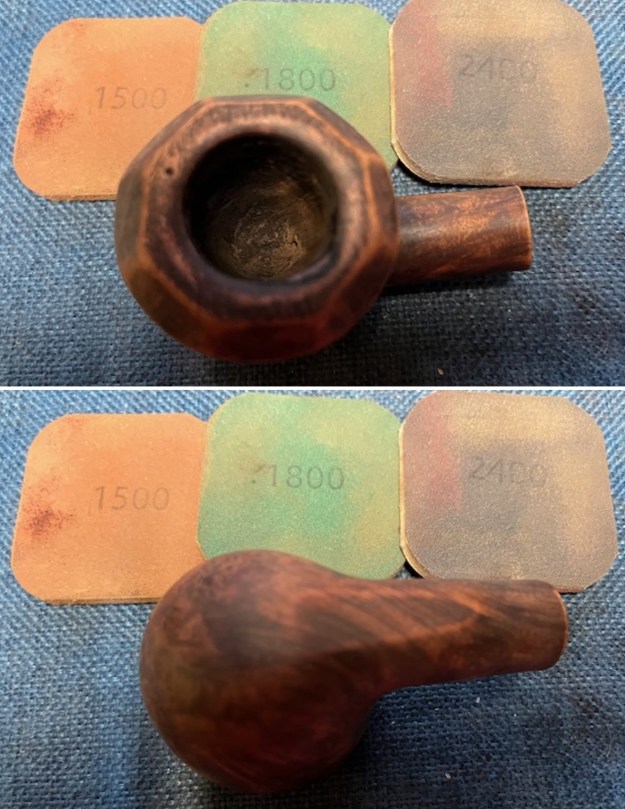
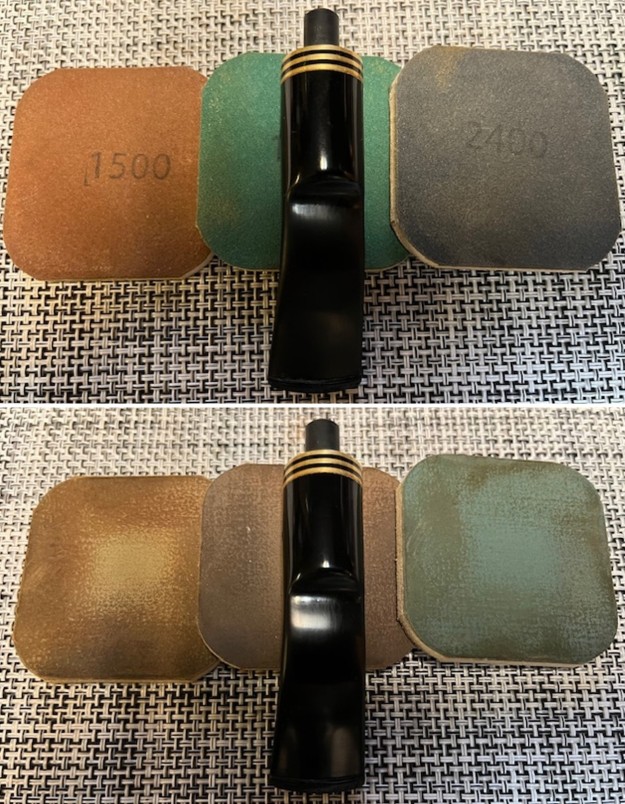
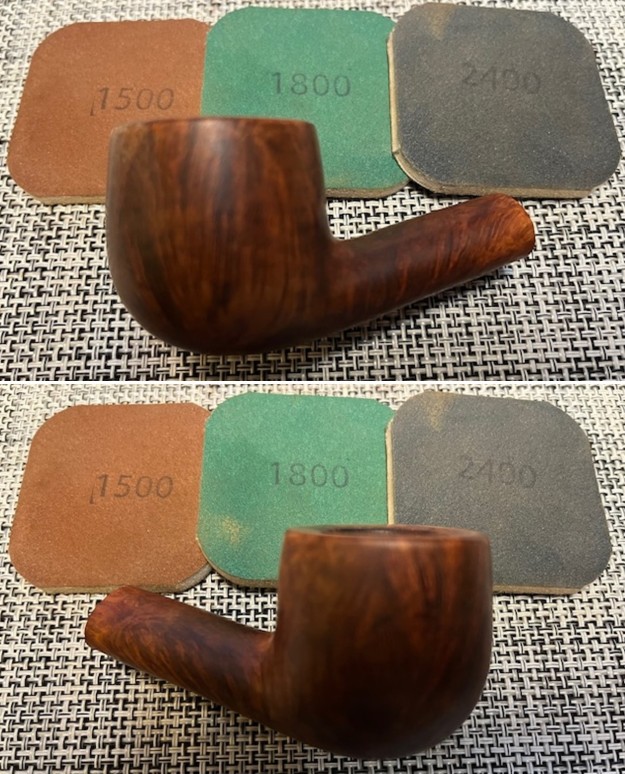
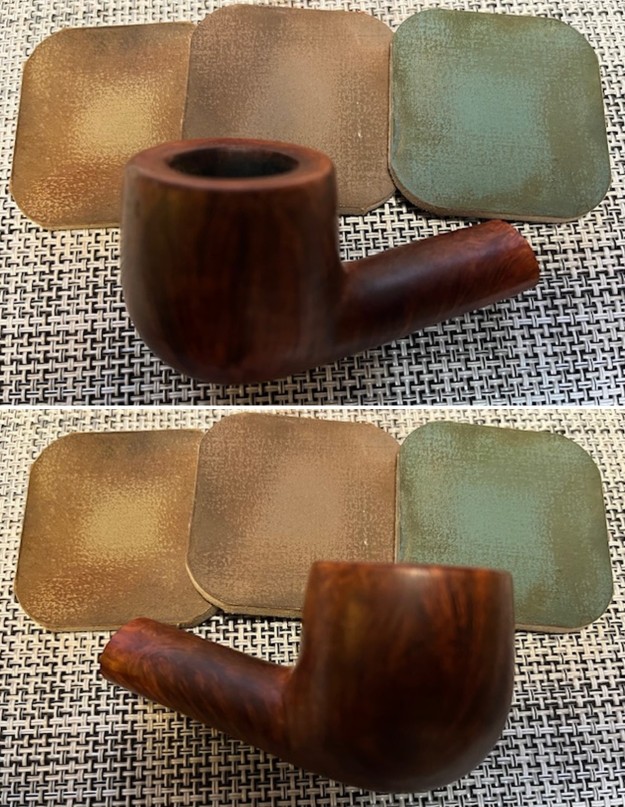
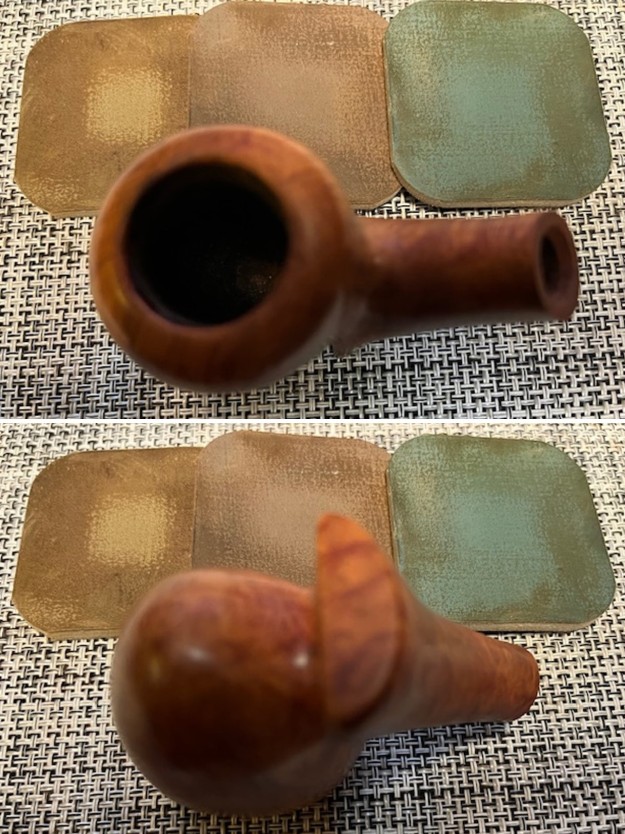
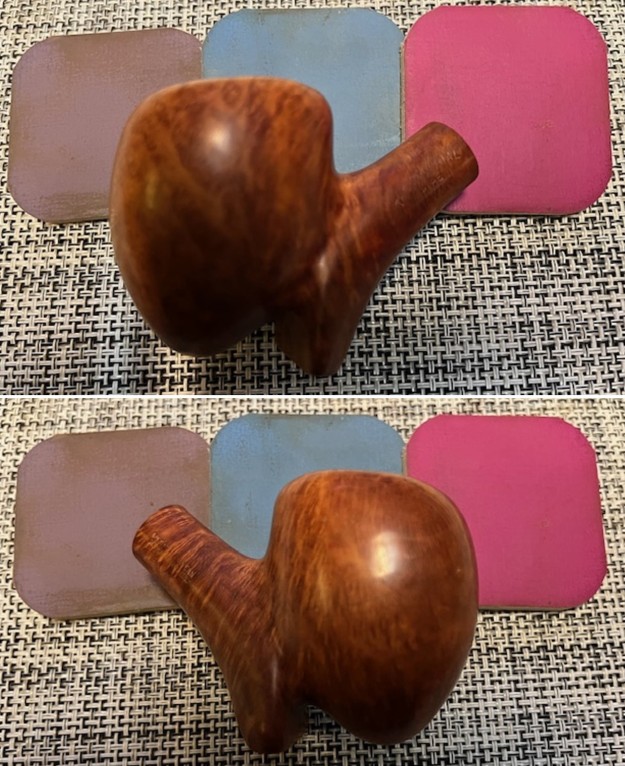
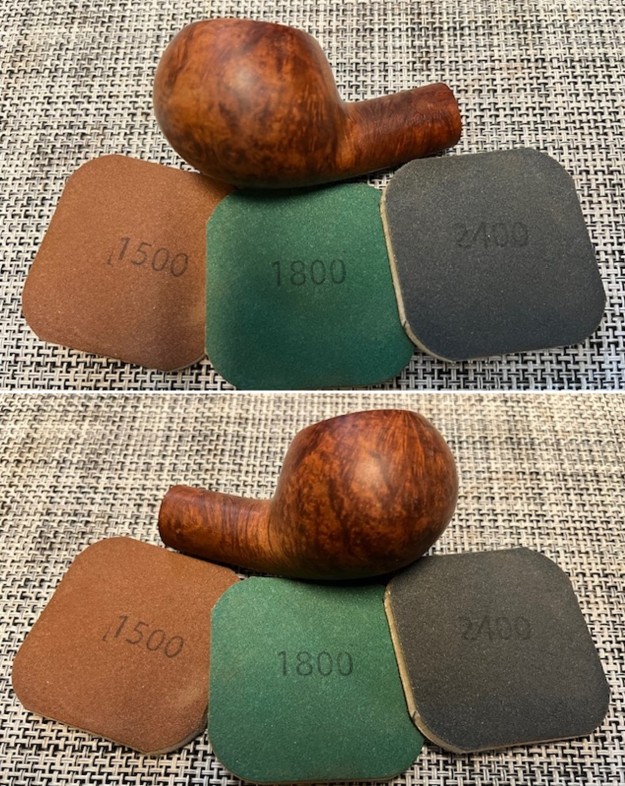
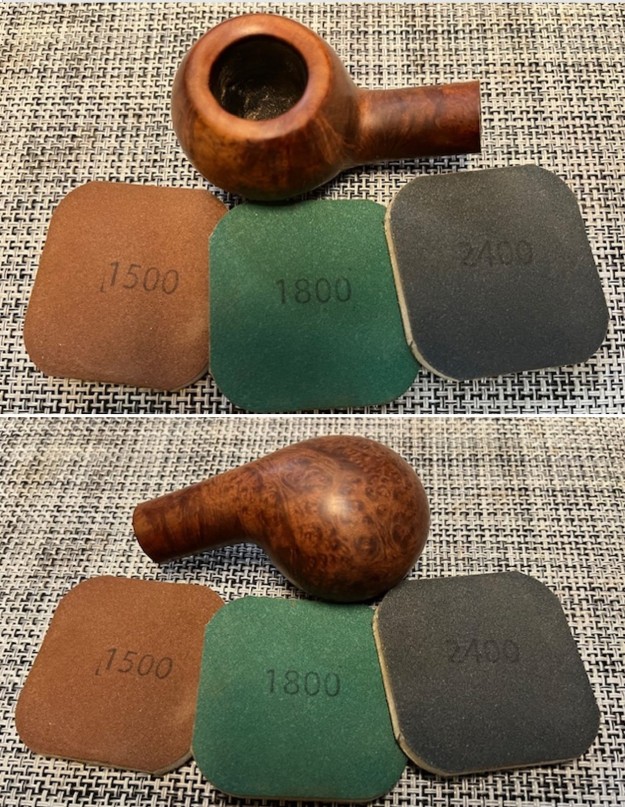
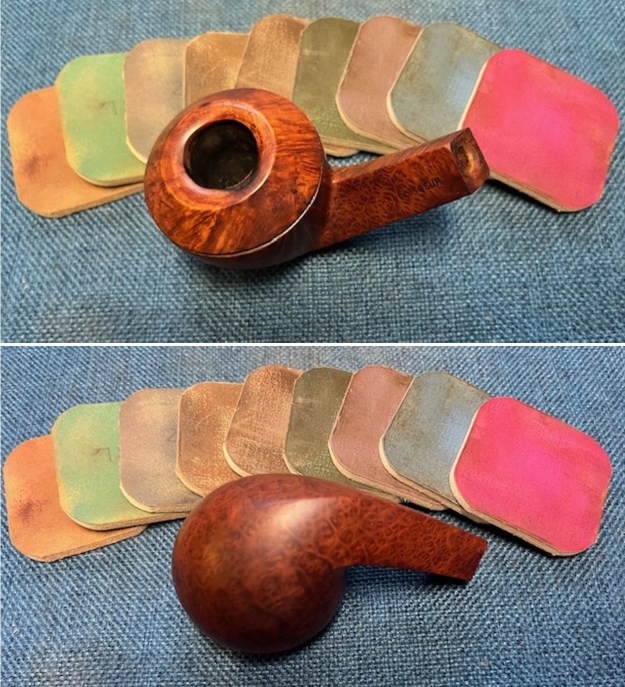
 I polished the bowl with micromesh sanding pads – wet sanding with 1500-12000 grit sanding pads. I wiped it down with a damp alcohol cotton makeup pad after each sanding pad.
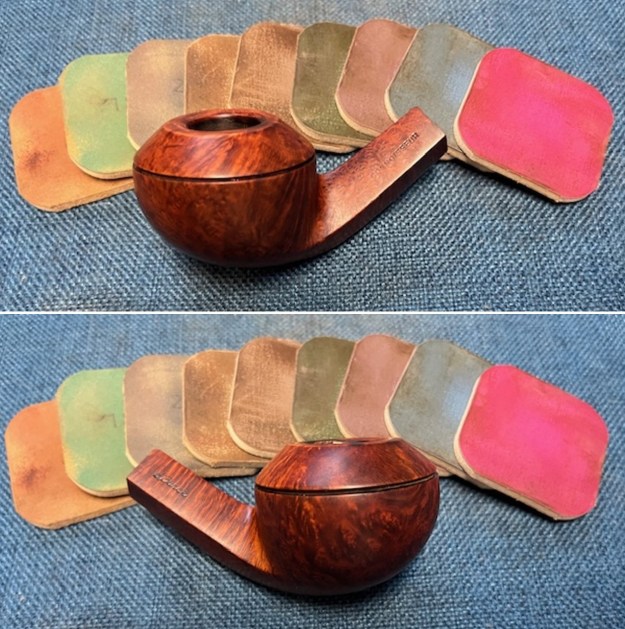
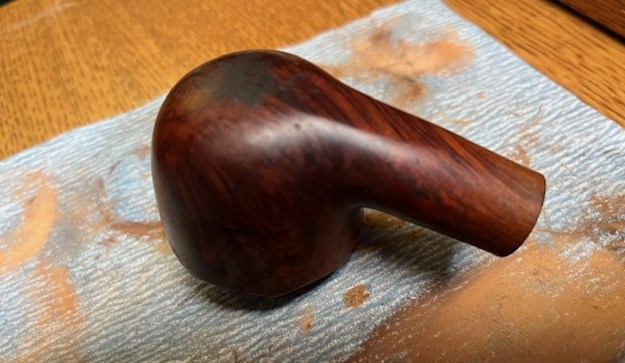
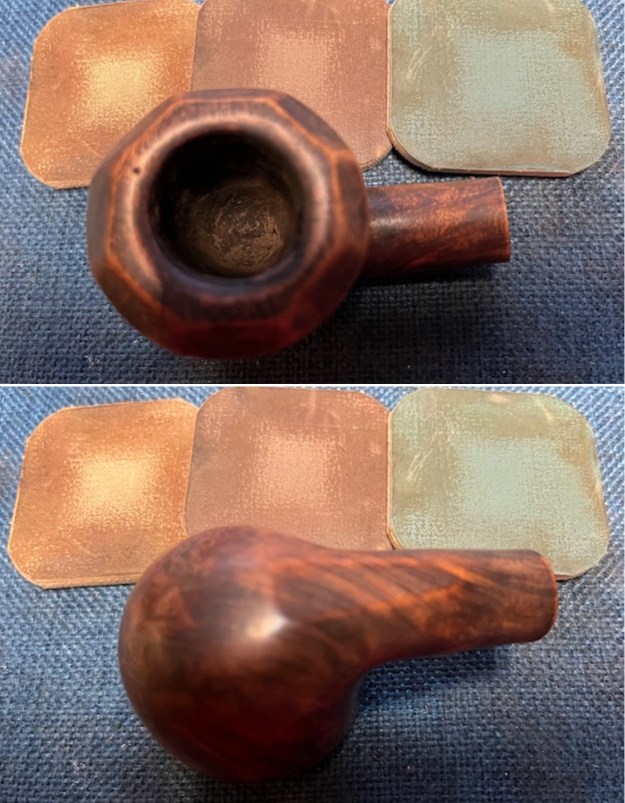
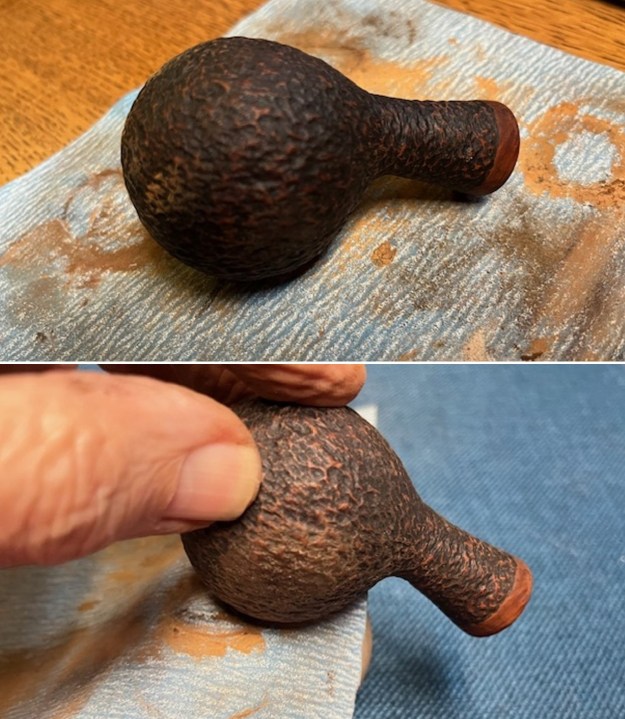
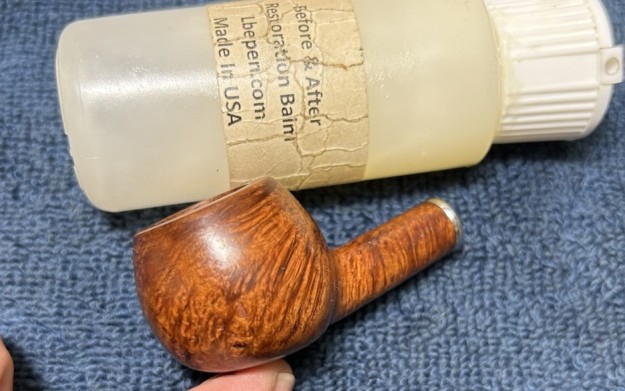
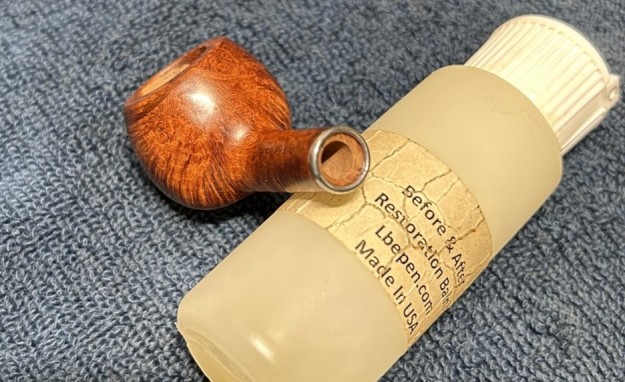
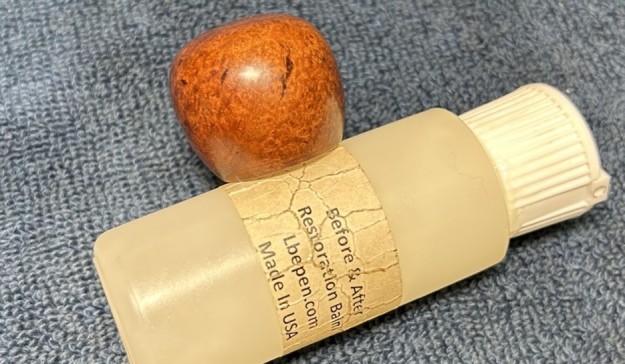
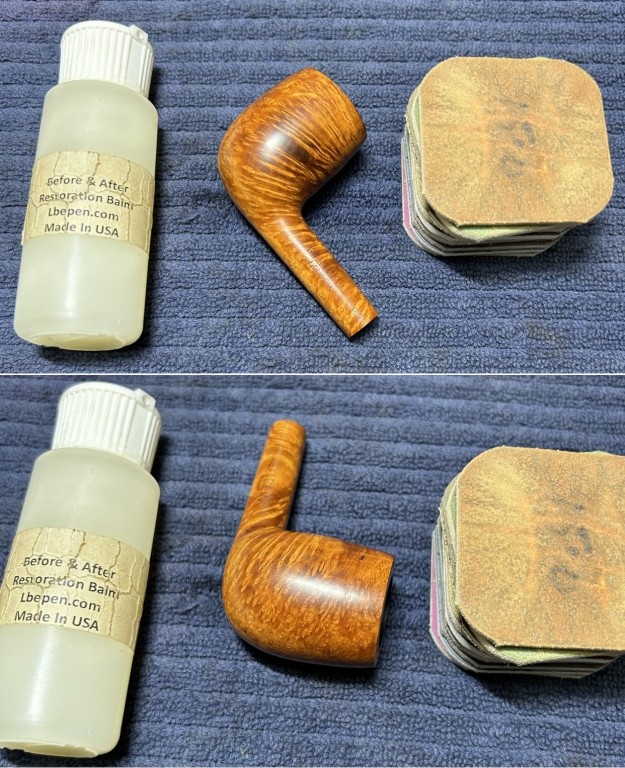
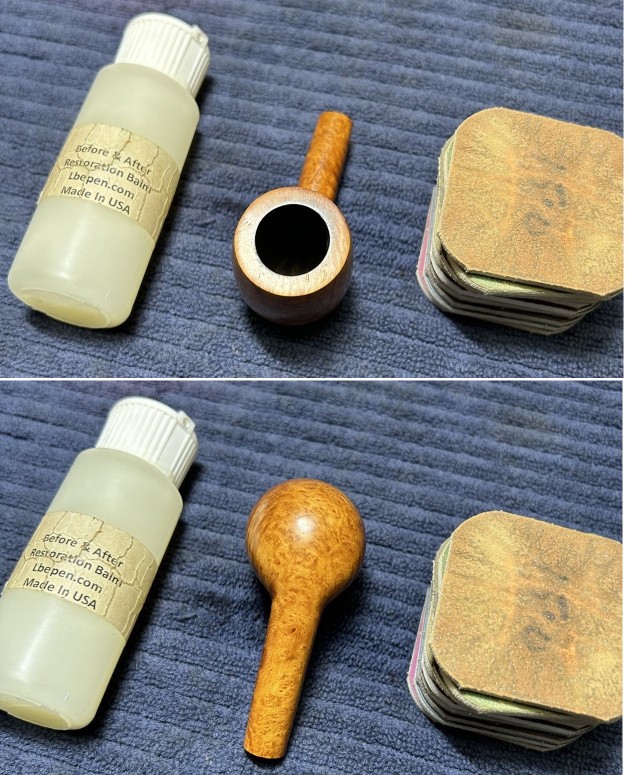
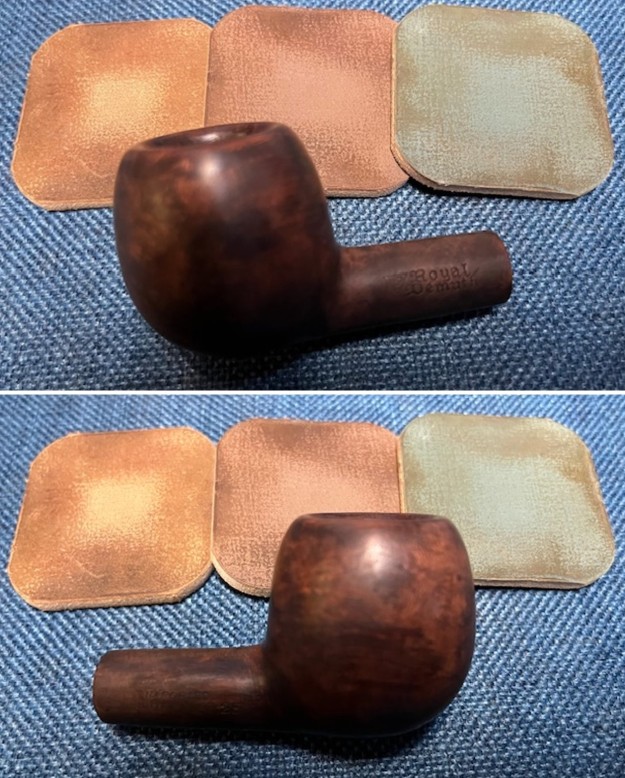
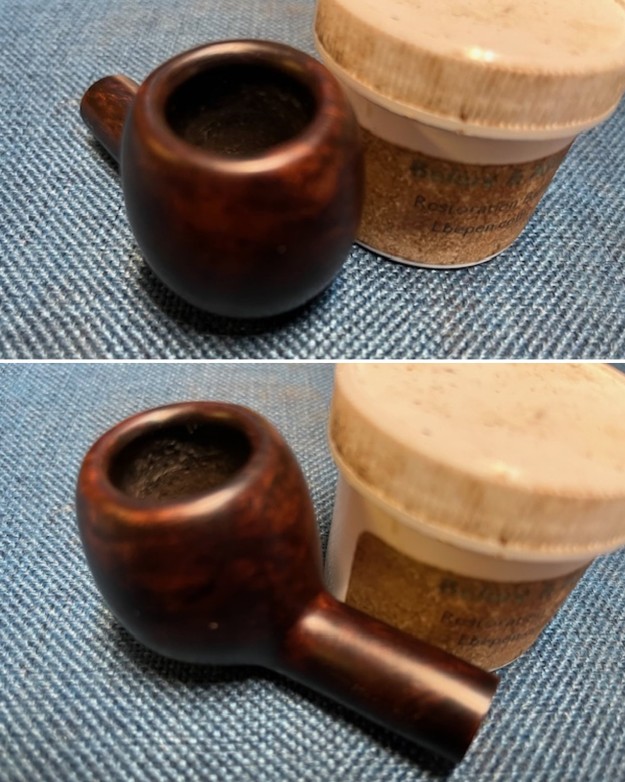
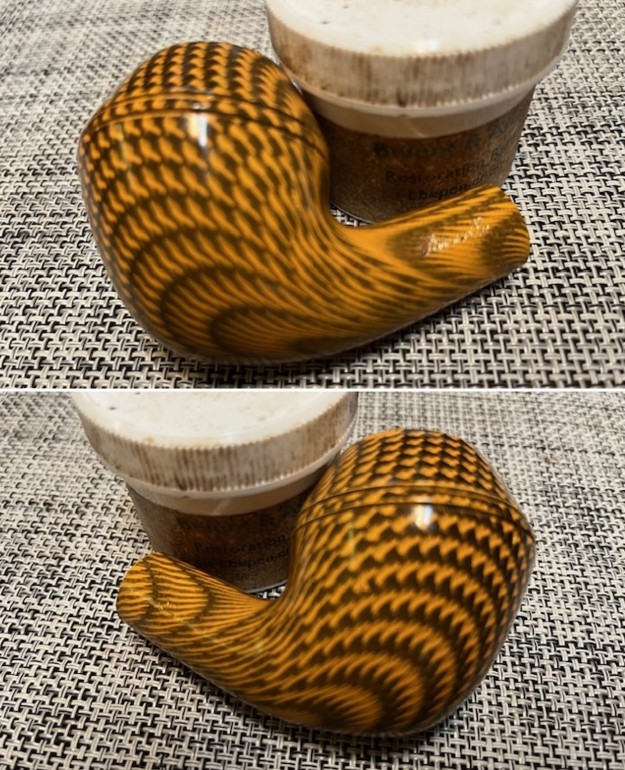
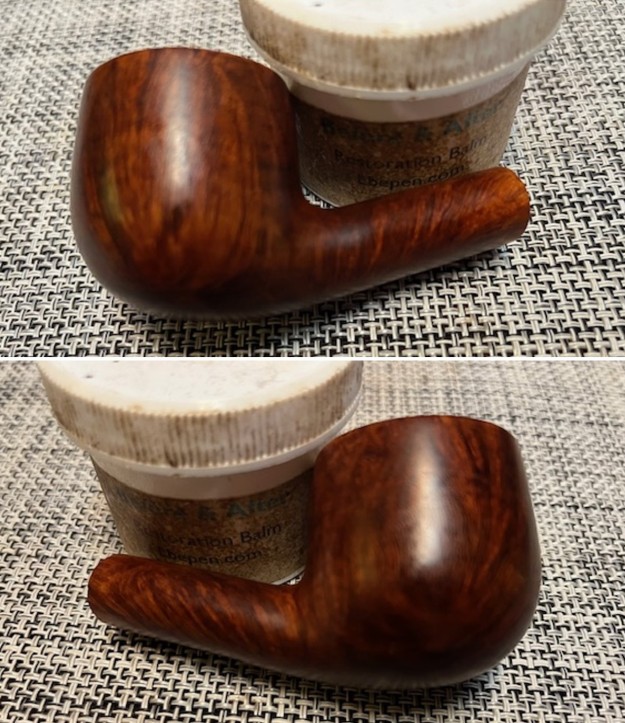
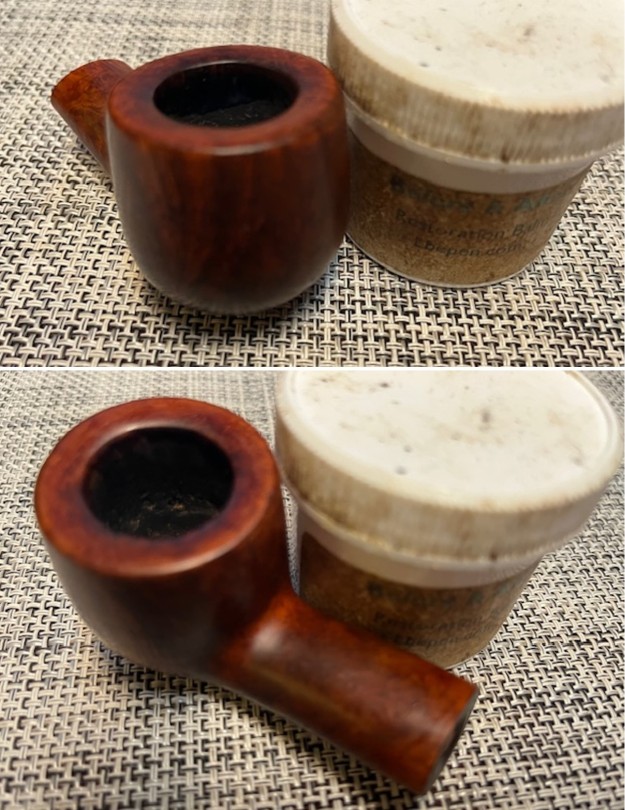
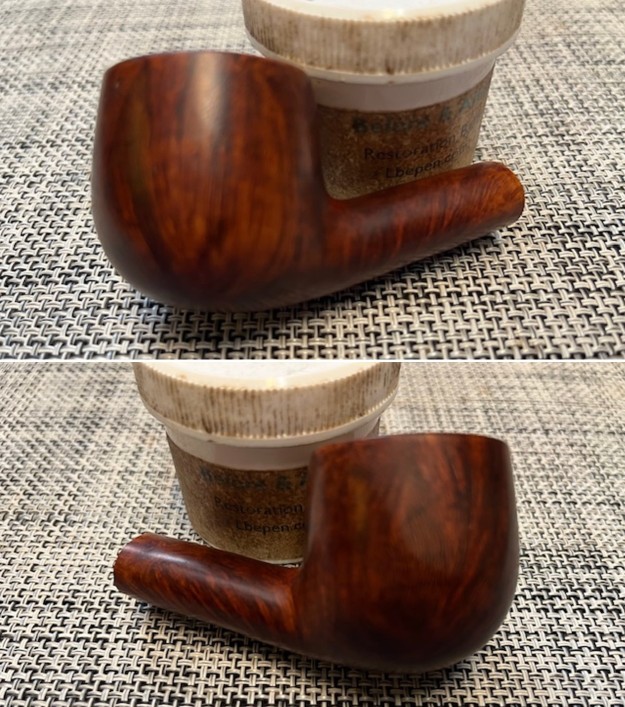
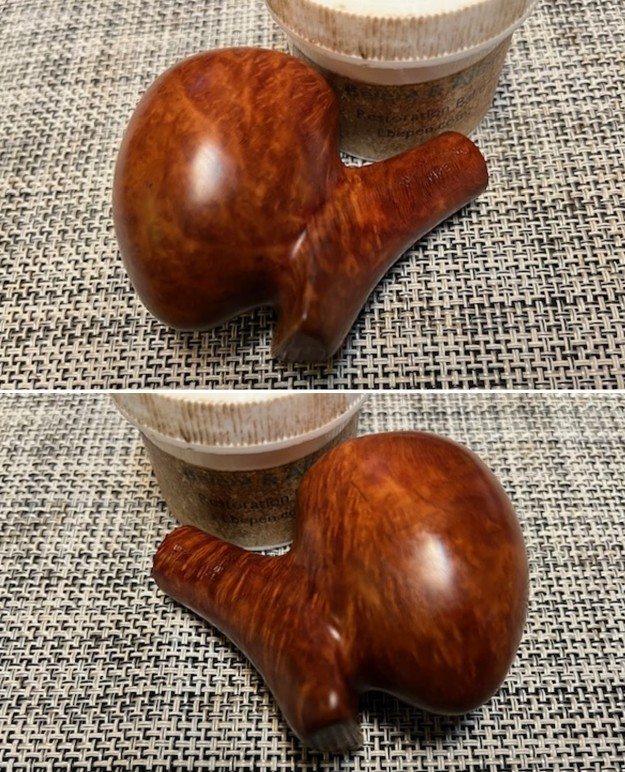
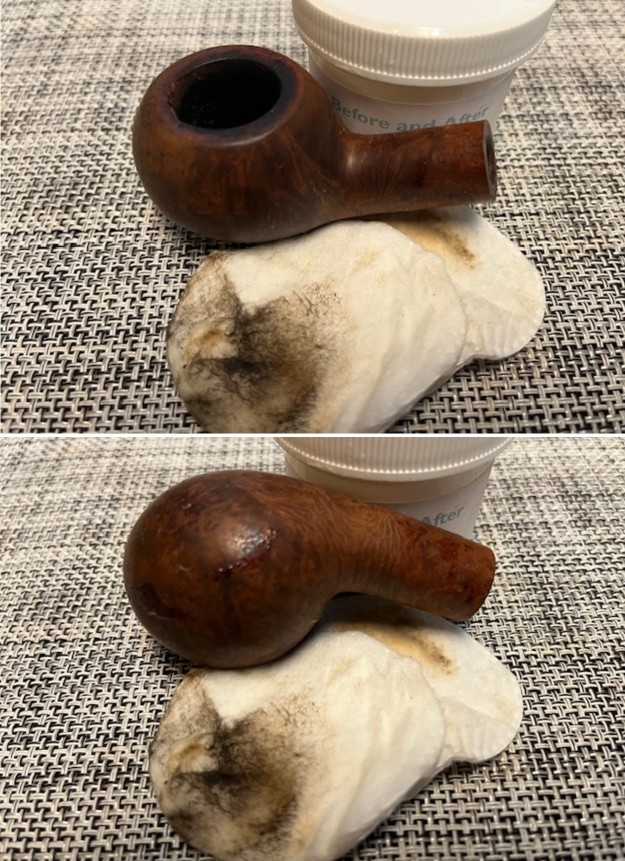
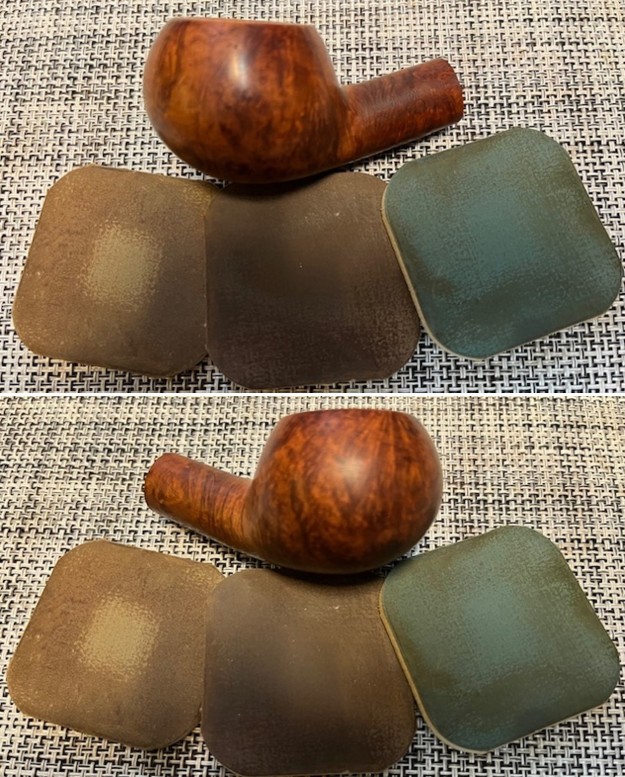
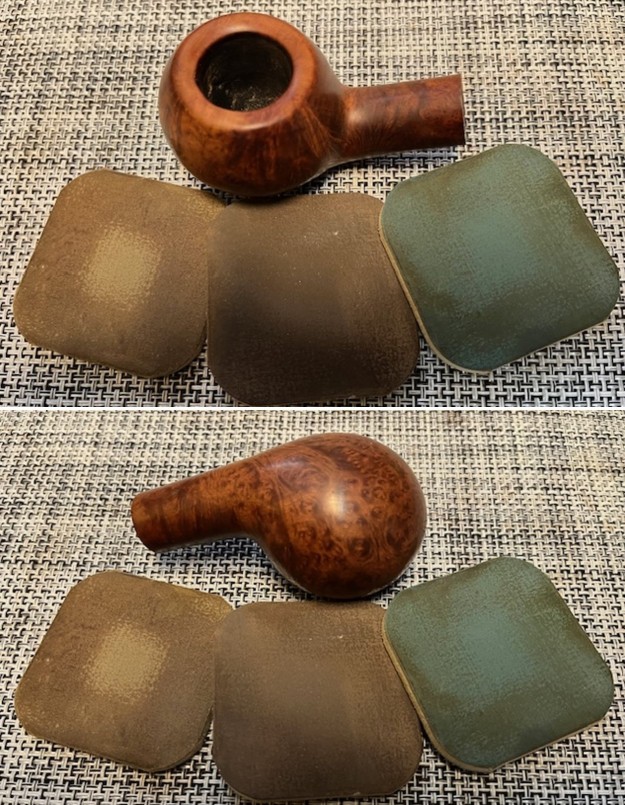
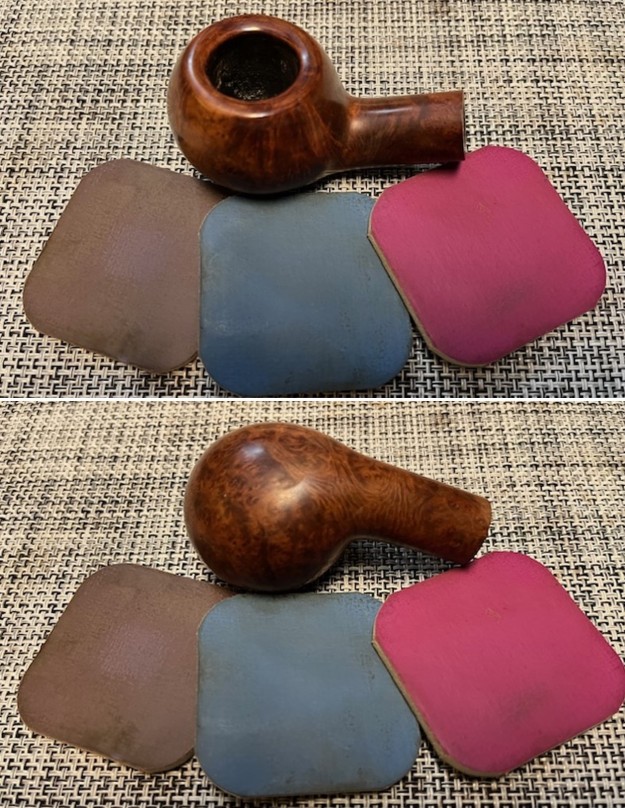
 I rubbed the bowl down with Before & After Restoration Balm. I worked it into the surface of the briar with my fingertips to clean, enliven and protect it. I let the balm sit for ten minutes then buffed with a cotton cloth to raise the shine. Mark Hoover’s Balm is a product that I have come to appreciate and one I use on every pipe I have been working on.
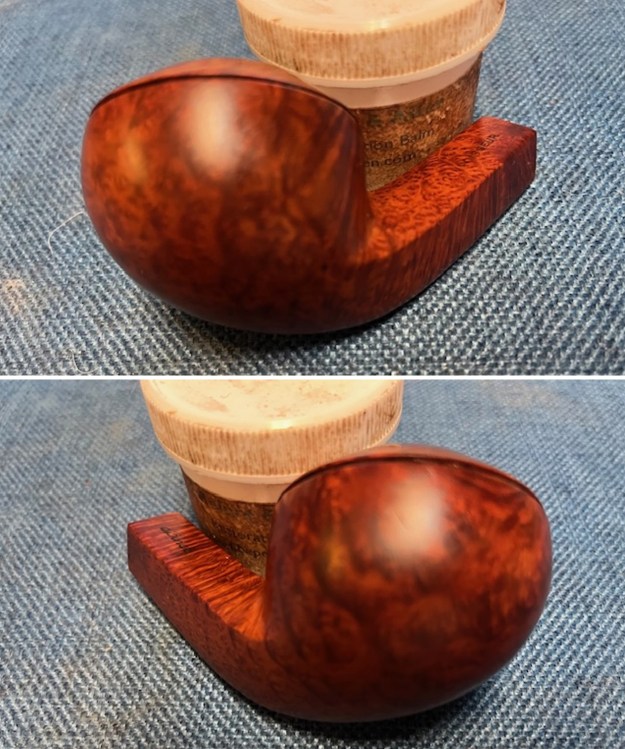
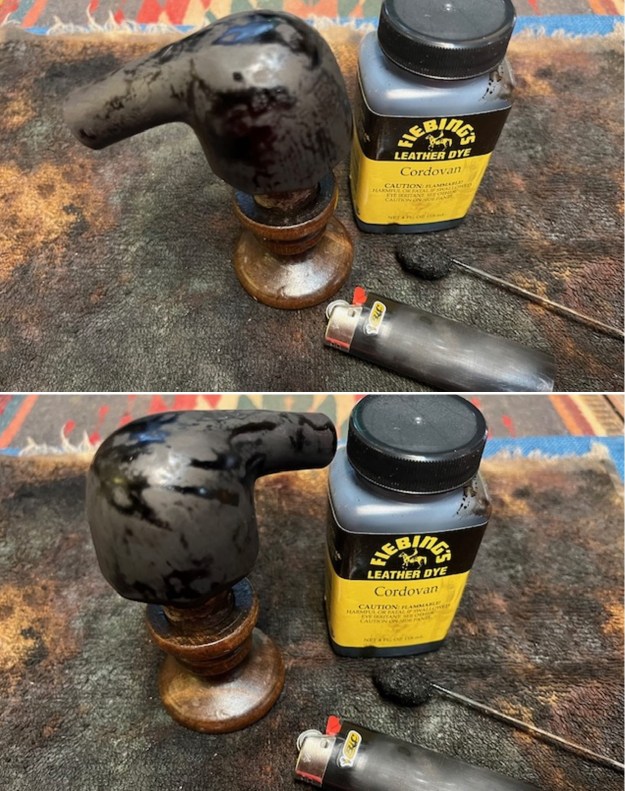
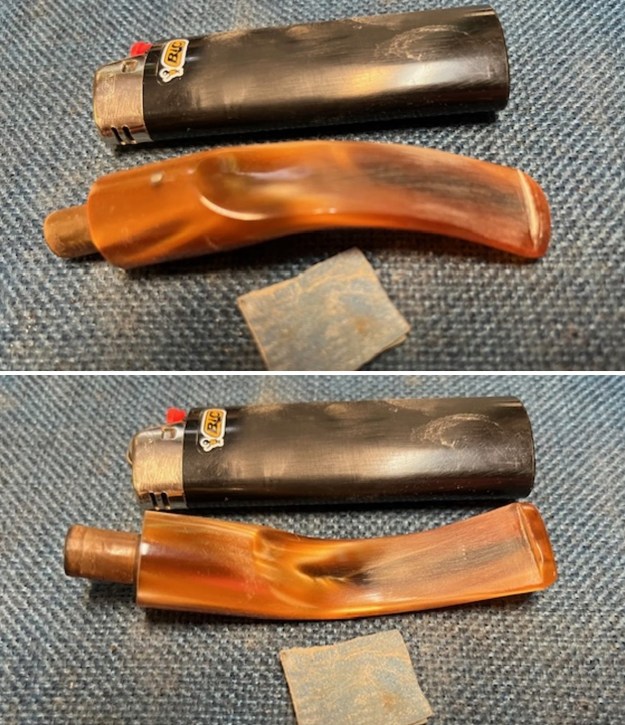
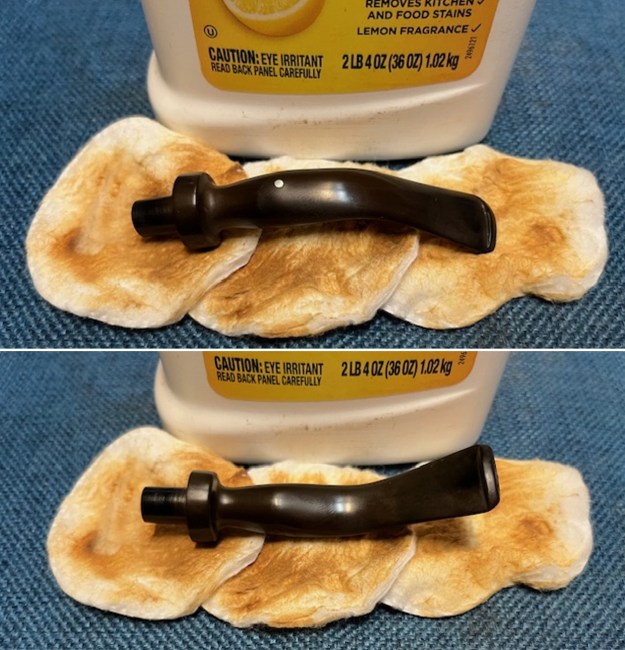
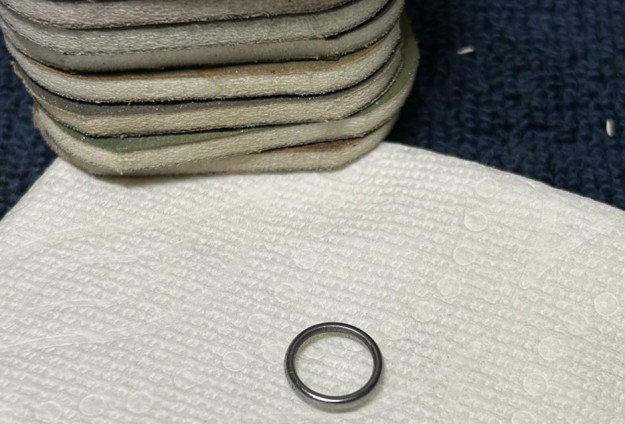
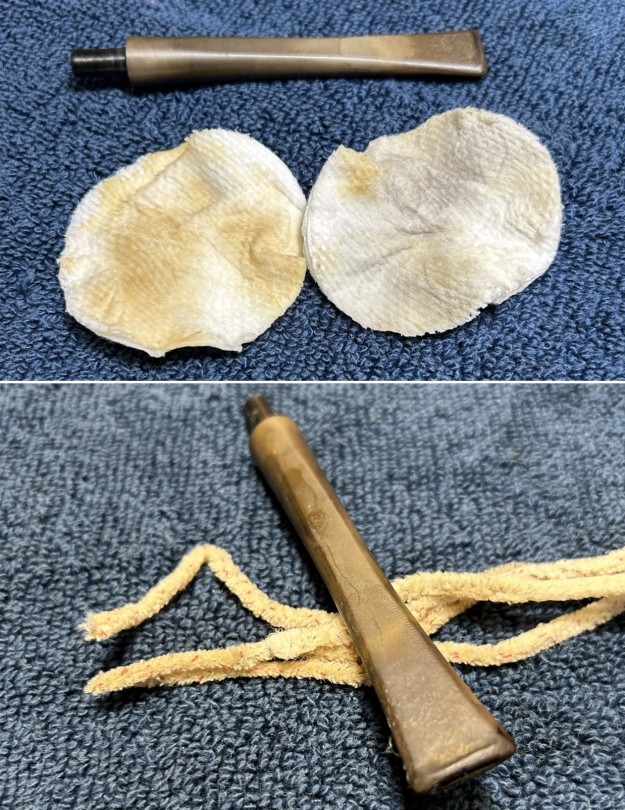
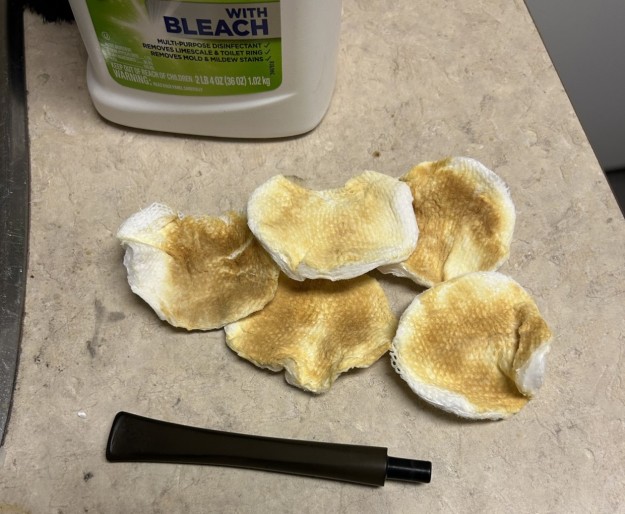
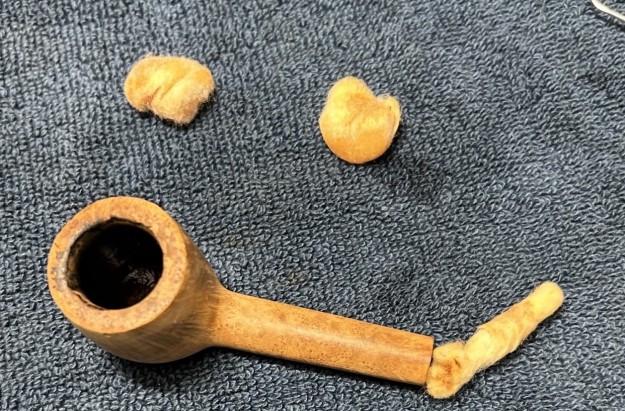
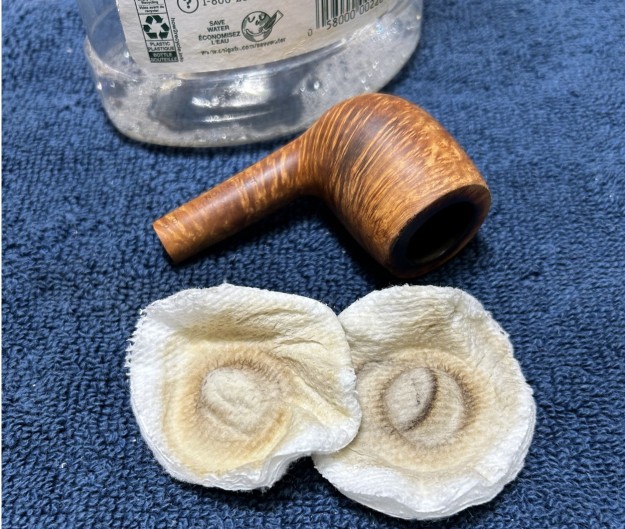
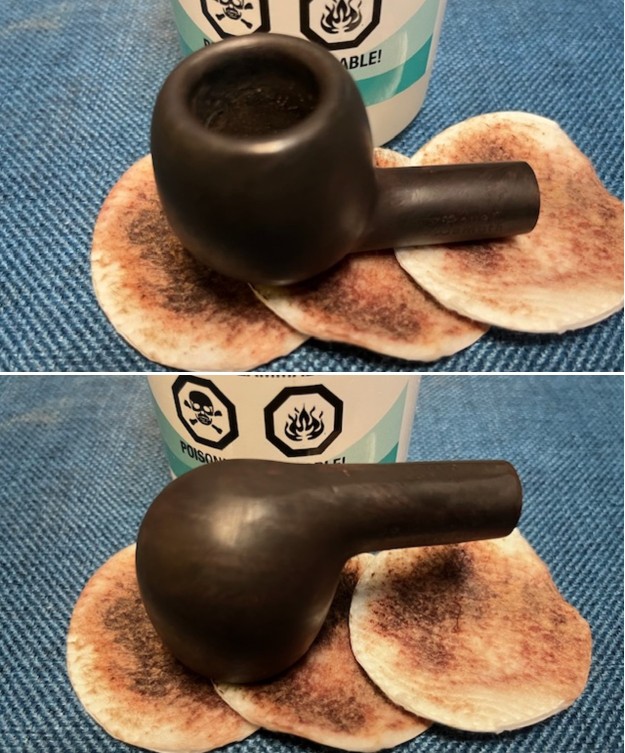
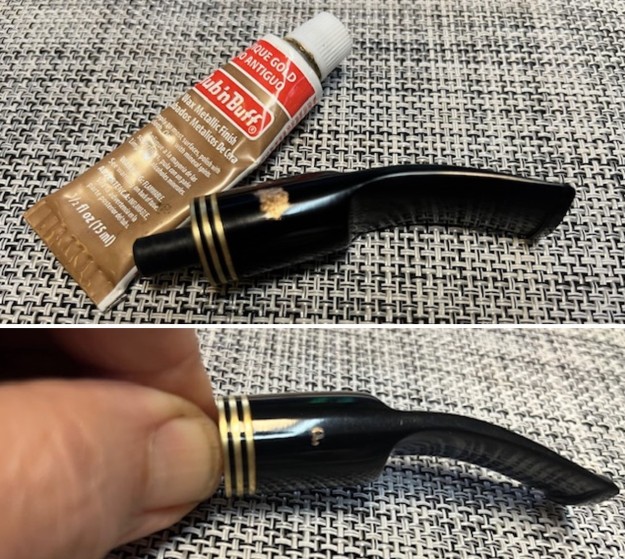
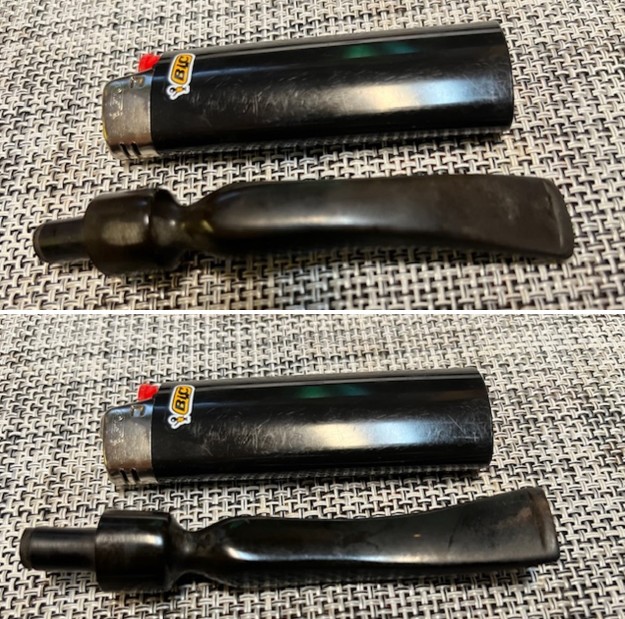
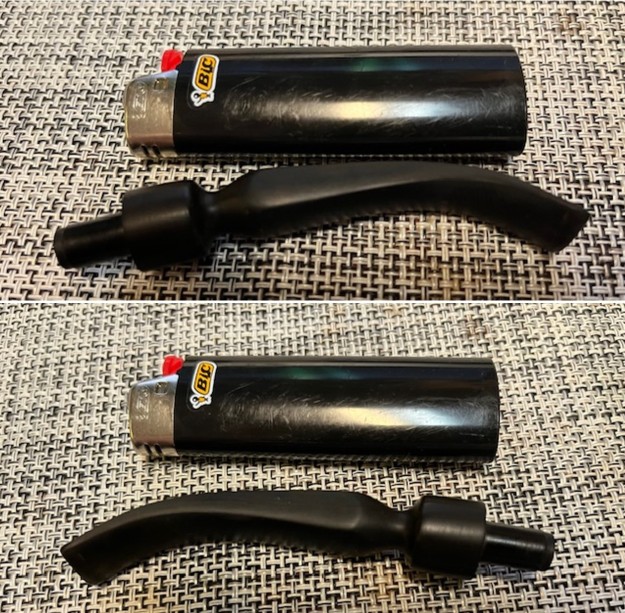
 I set the bowl aside and turned my attention to the stem. The stem had tooth marks and chatter on both sides ahead of the button. Before I could work on them I needed to remove the oxidation and the calcification on the surface. I scrubbed the stem with Soft Scrub on cotton pads to remove them both.
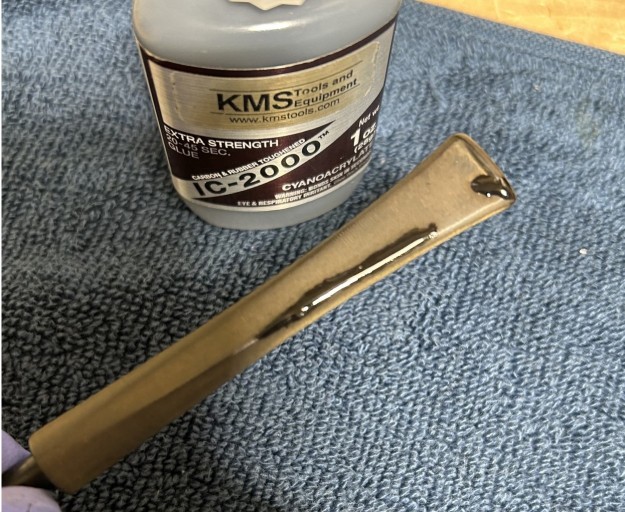
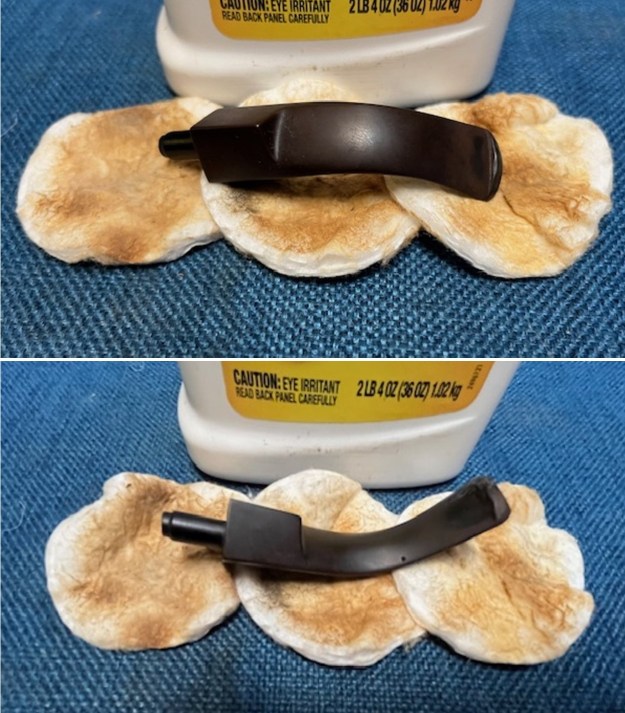 Once it was clean, I painted the tooth marks and chatter with the flame of a lighter to try to lift the marks. Many of them were lifted thanks to the memory of vulcanite. I filled in the remaining marks with black super glue and set it aside to dry.
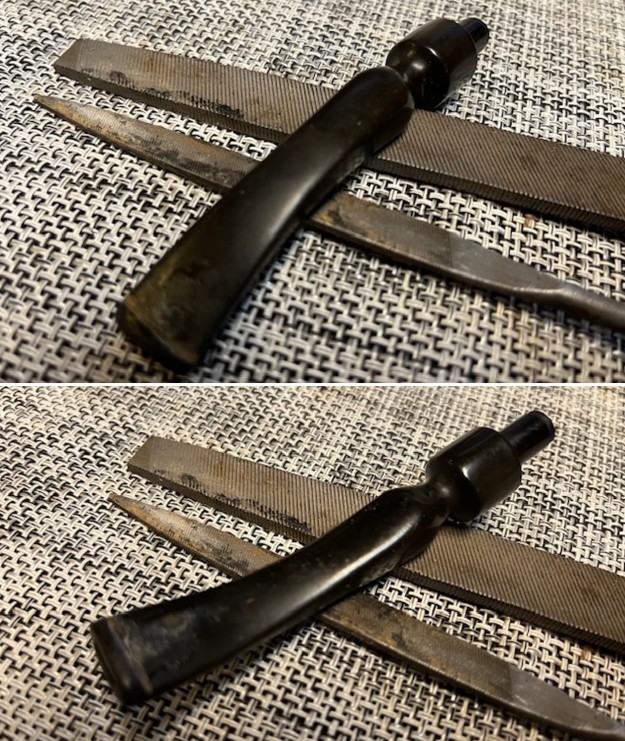
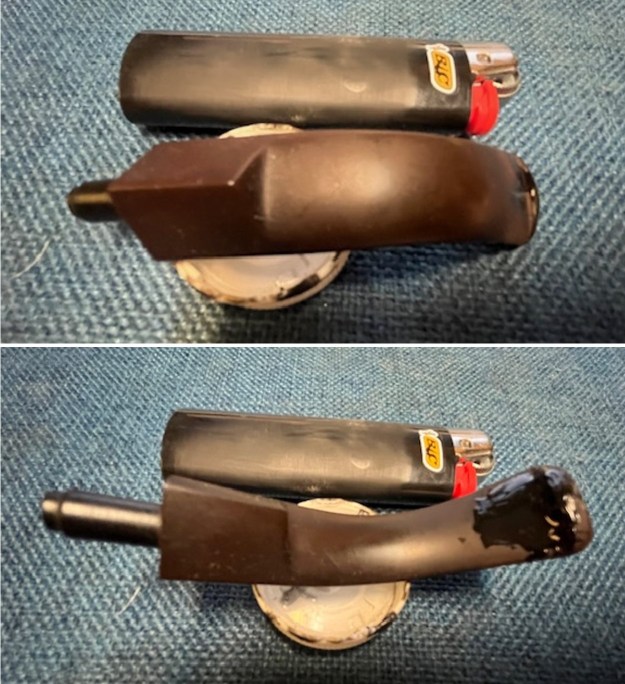 Once the repairs cured I used two small files to flatten them and started process of blending them into the surface. I sanded the repairs with a folded piece of 220 grit sandpaper and they were removed. The surface was smooth.
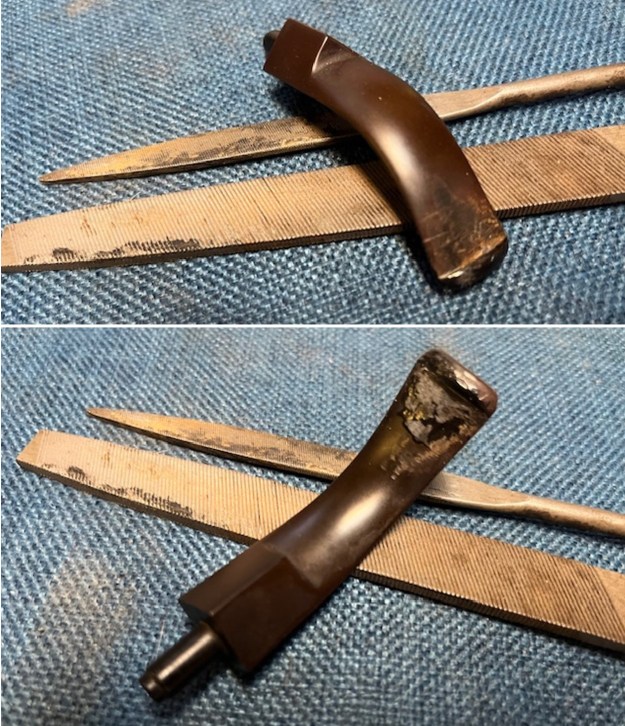
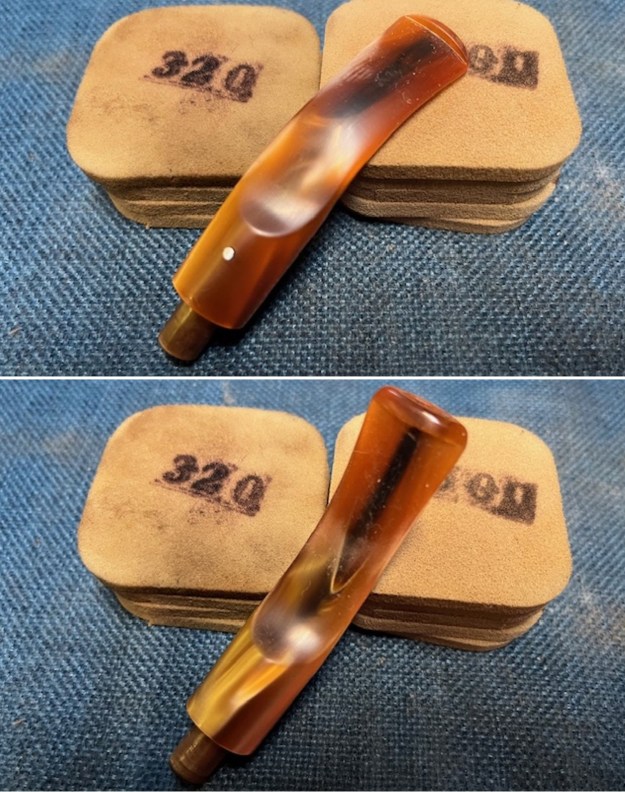
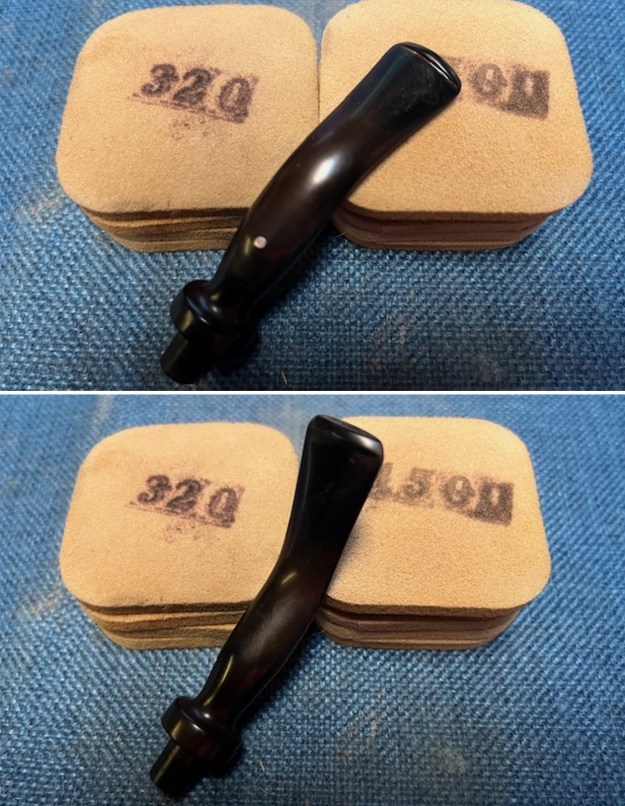
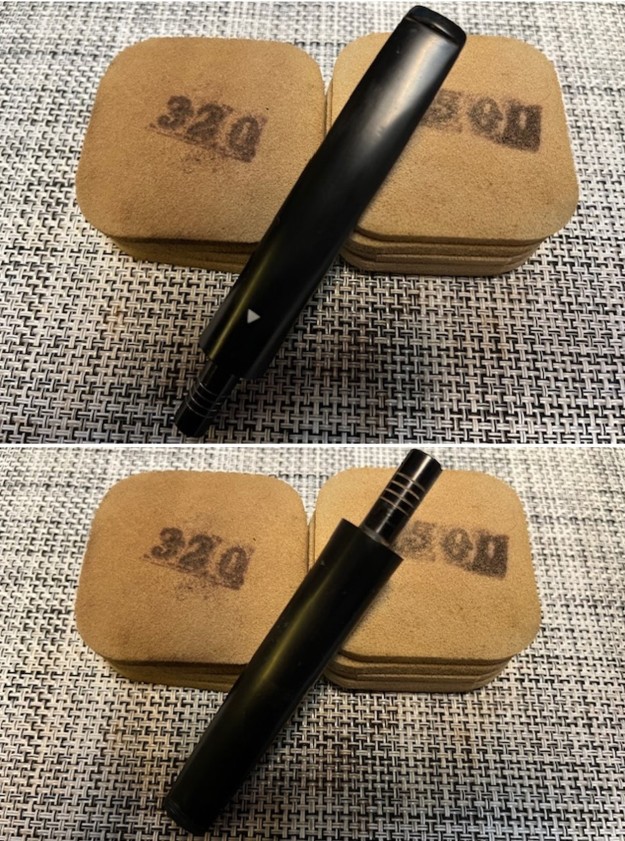
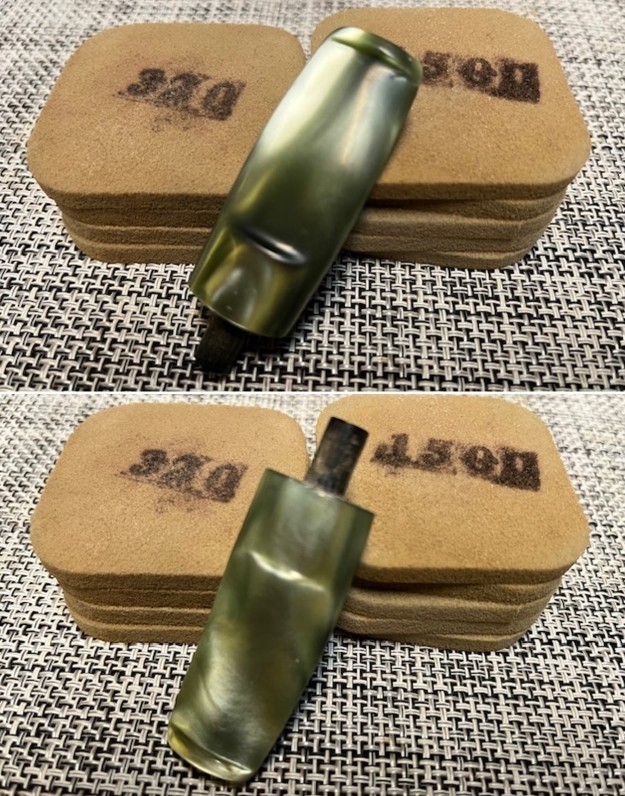
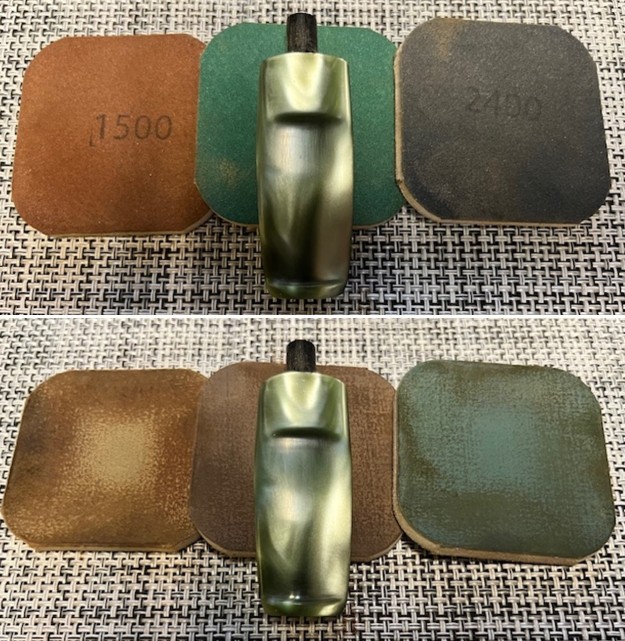
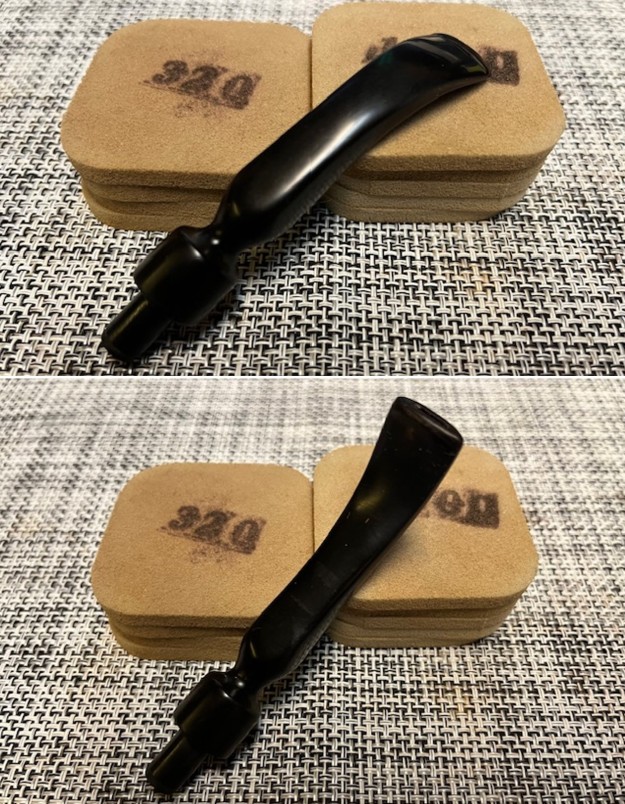
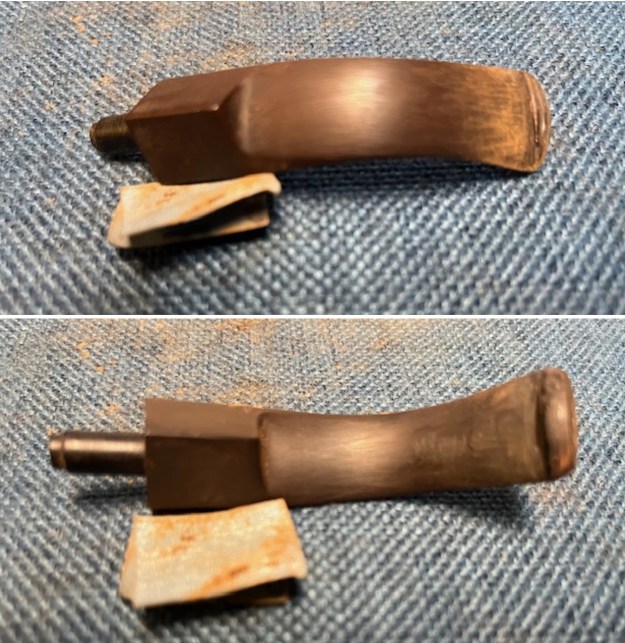 I sanded the stem with 320-3500 grit sanding pads to smooth out the remaining marks and begin polishing the stem. I wiped it down after each sanding pad with a soft cloth. It began to look good.
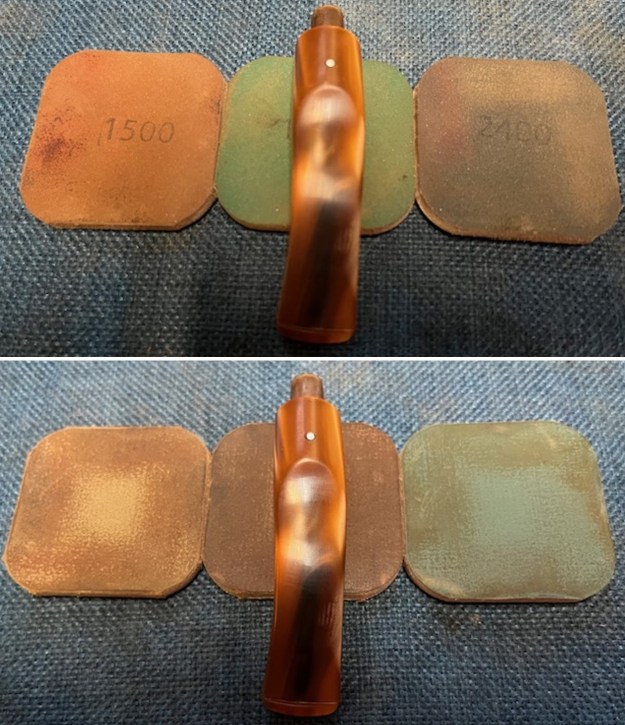
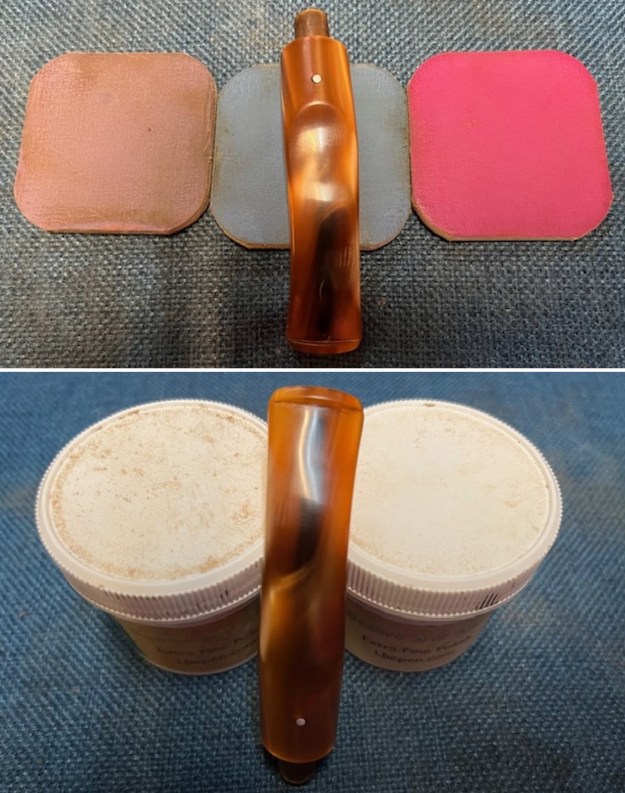
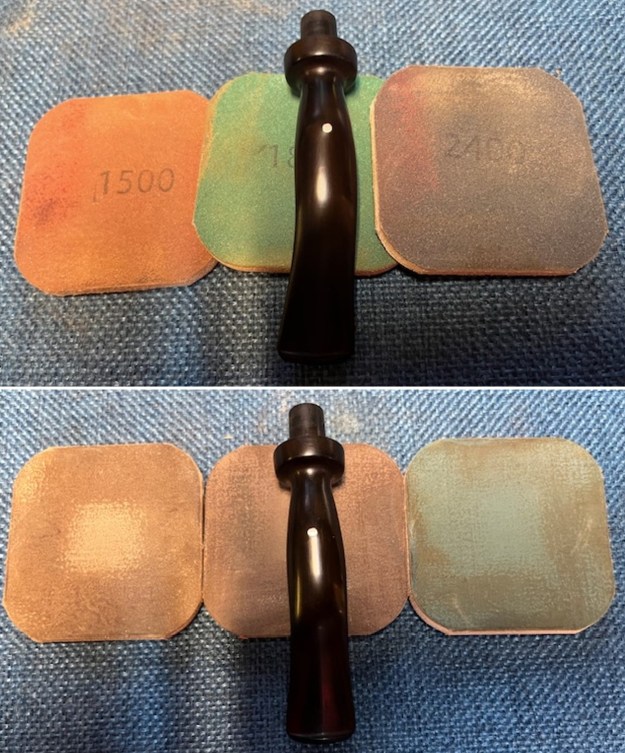
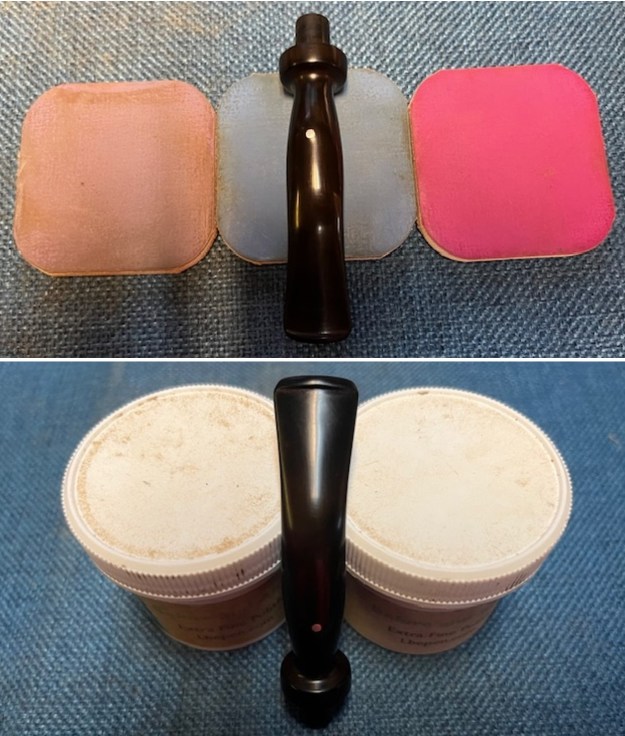
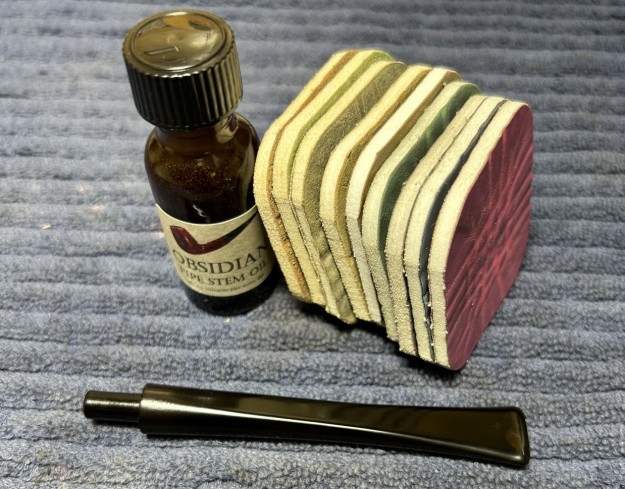
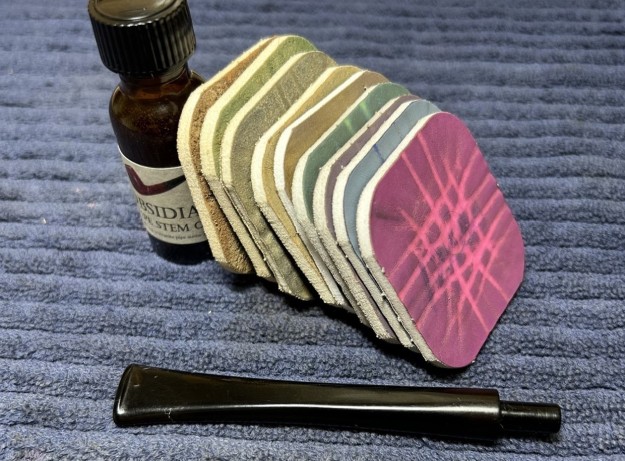
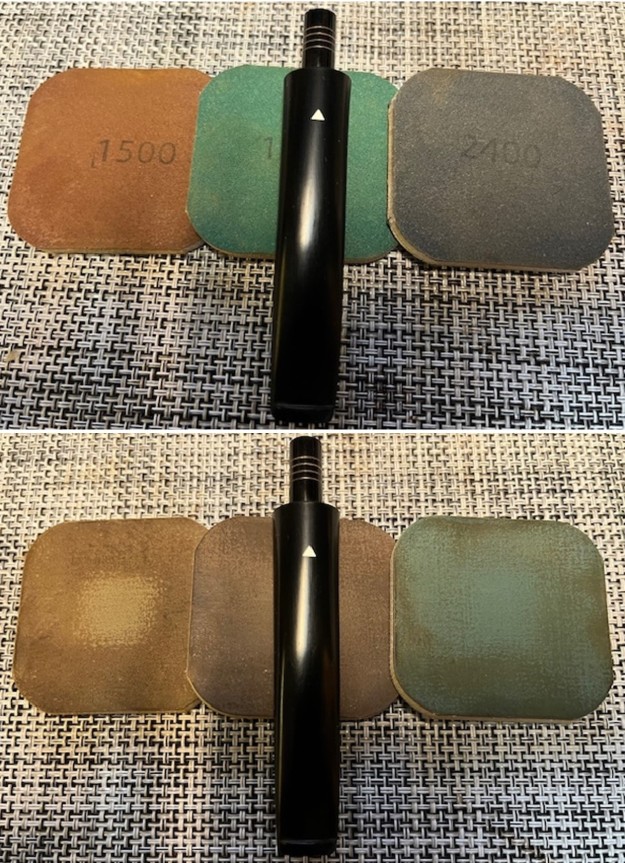
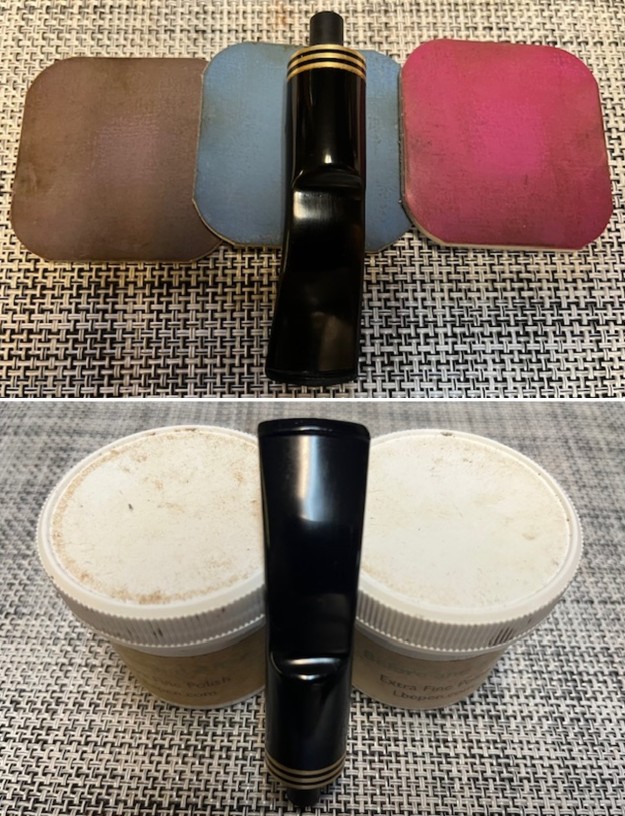
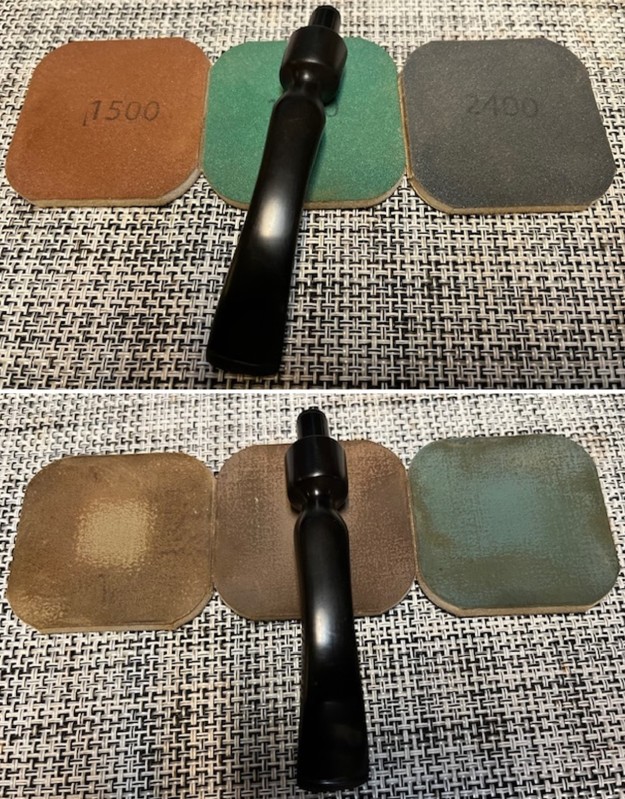
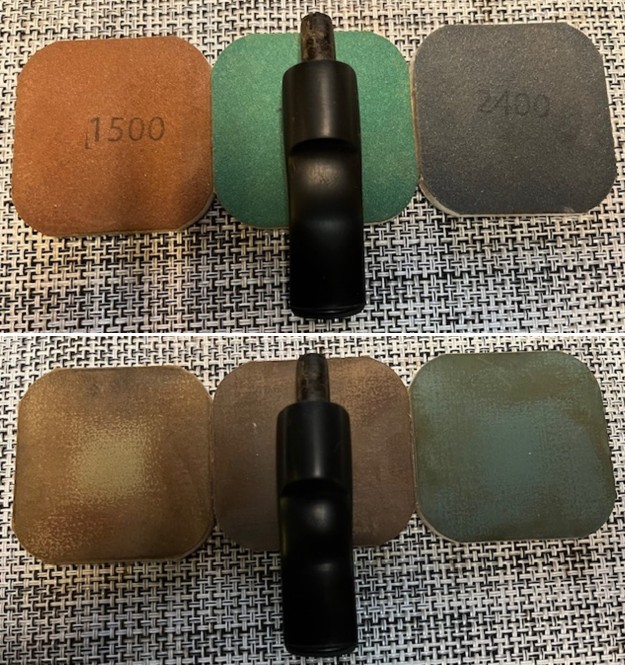
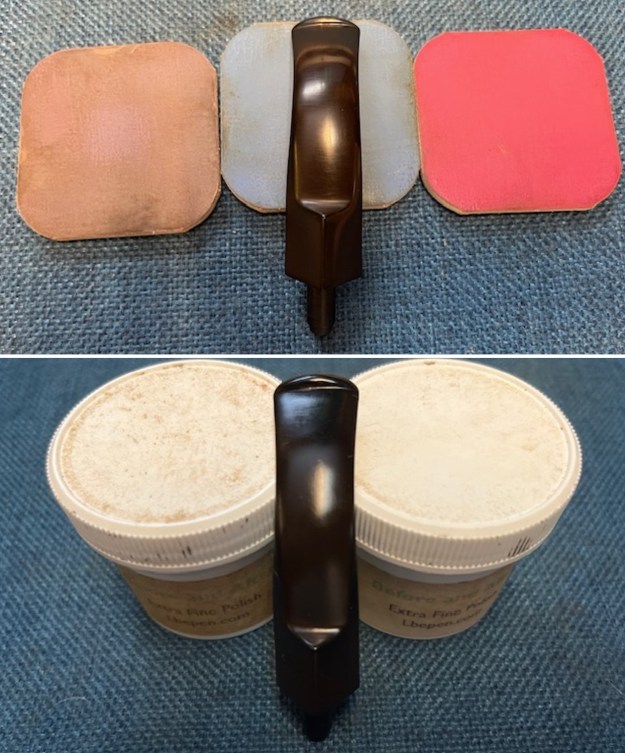
 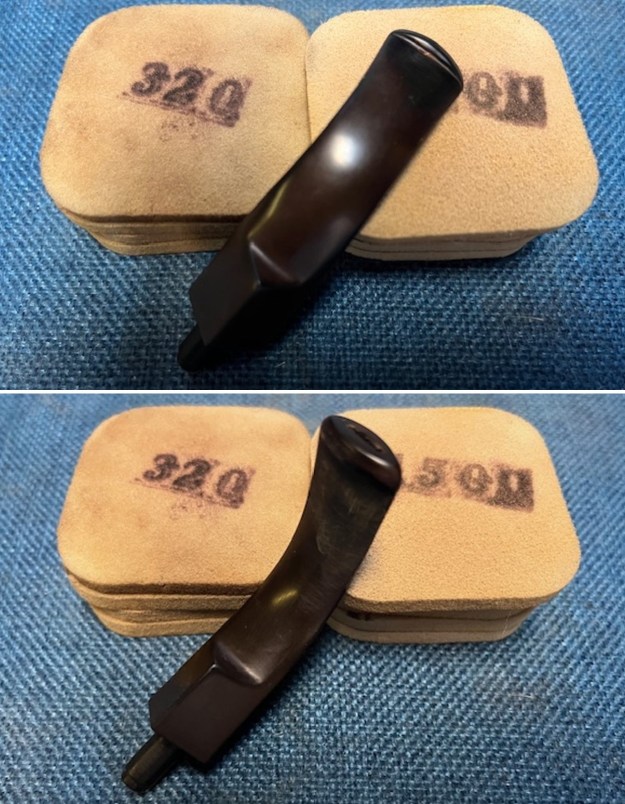 I polished the stem with micromesh sanding pads – wet sanding with 1500-12000 grit pads. I wiped the stem down after each sanding pad with Obsidian Oil. I polished it with Before & After Pipe Stem Polish – both Fine and Extra Fine. Once I had finished the polishing I gave it final coat of oil and set it aside to dry.
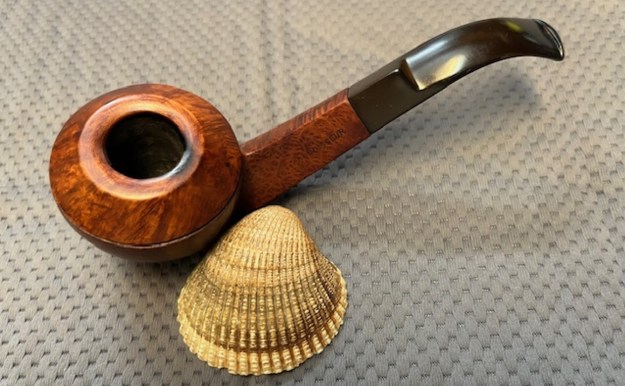
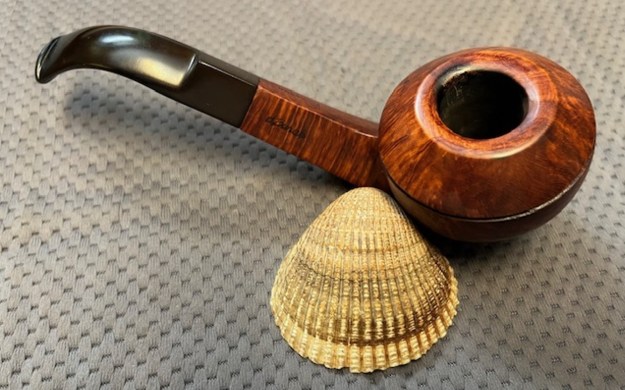
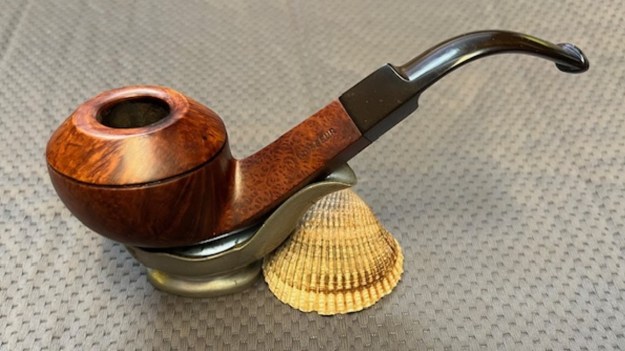
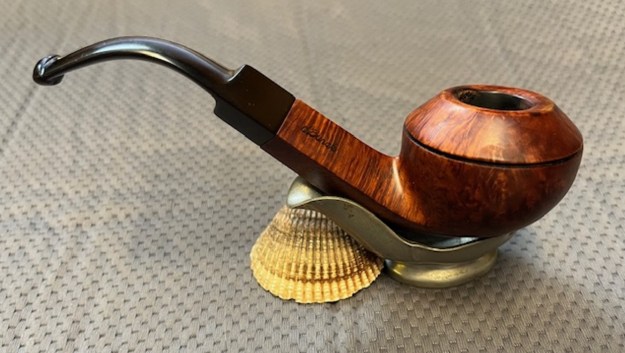
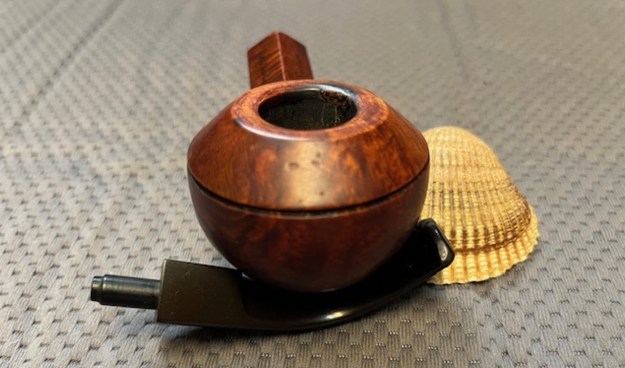
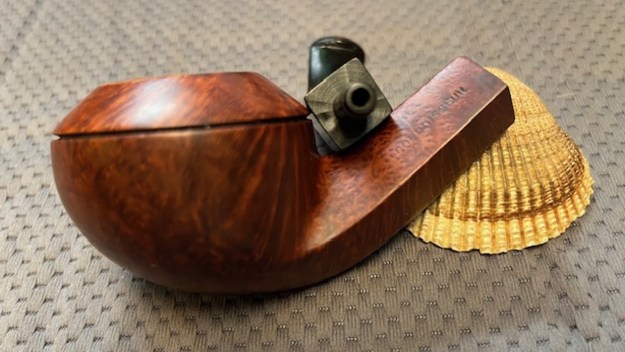
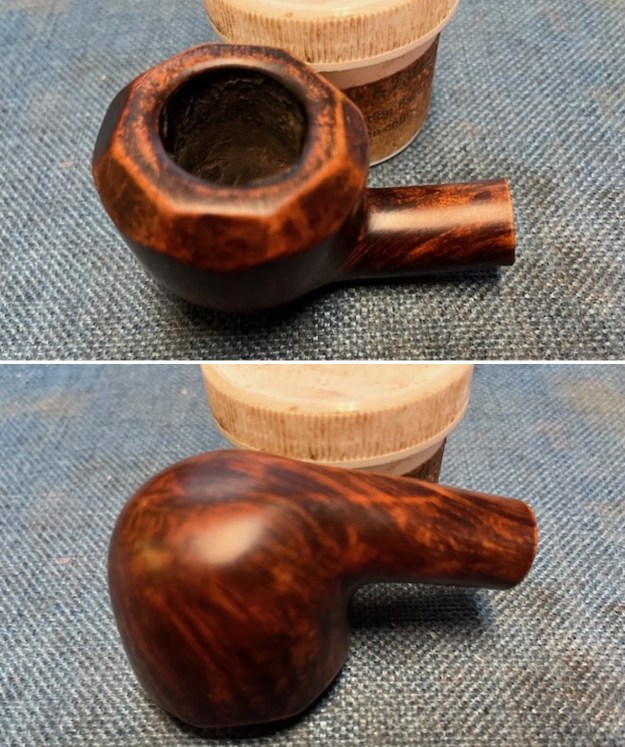
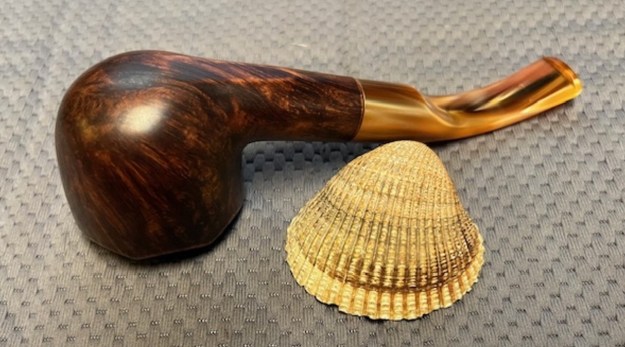
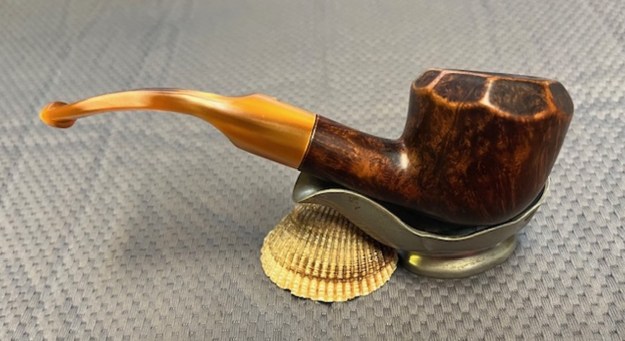
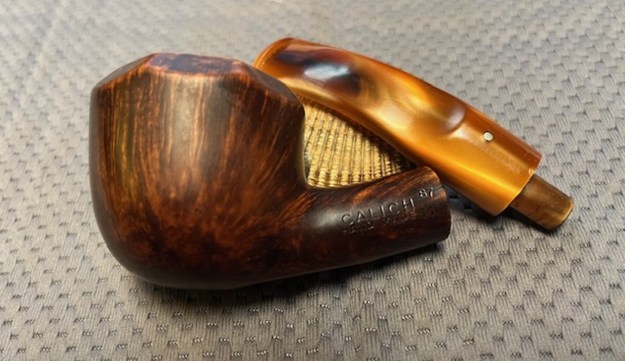
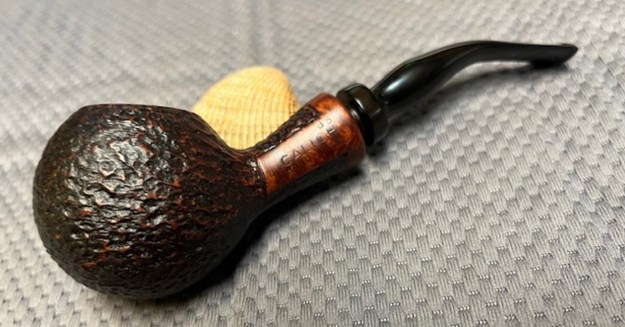
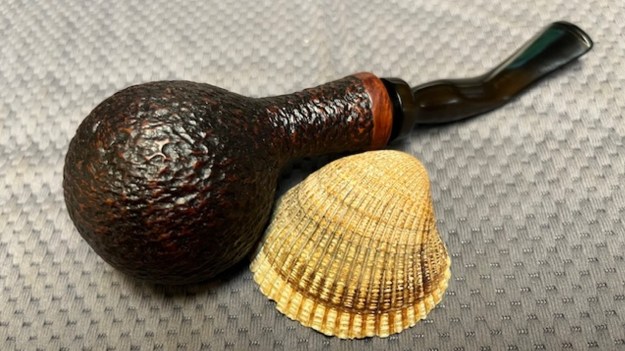
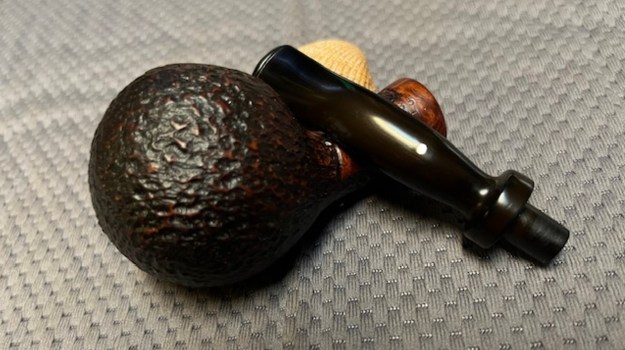
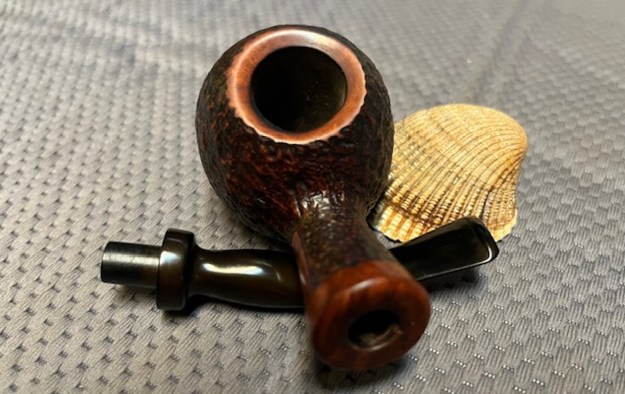
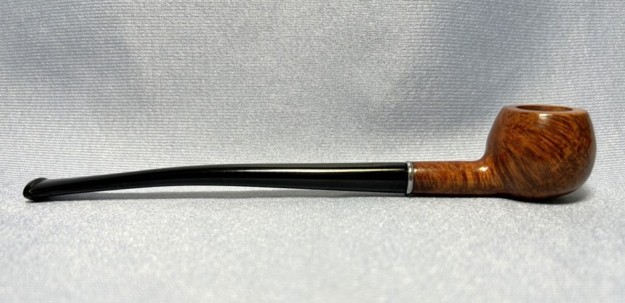
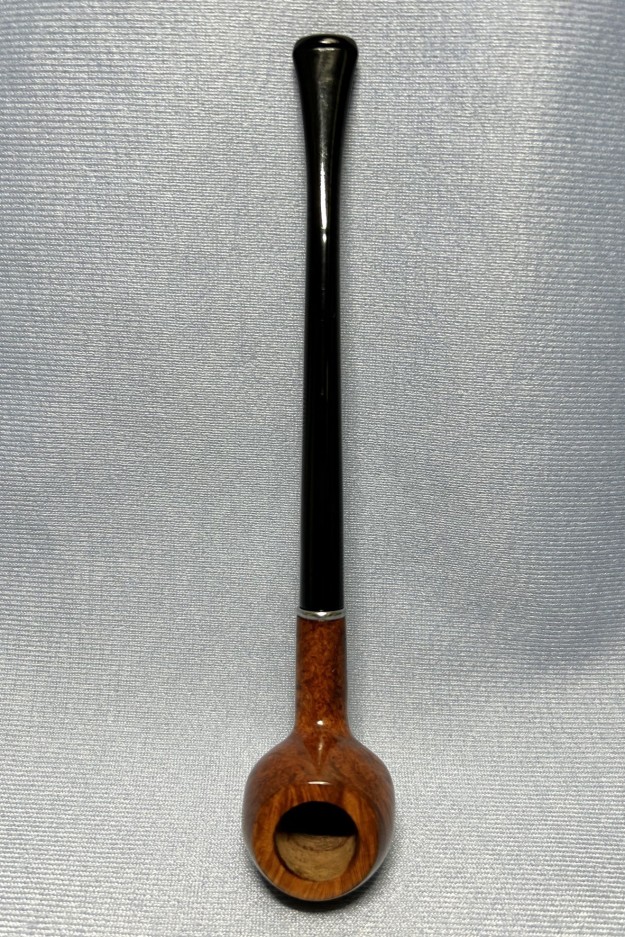
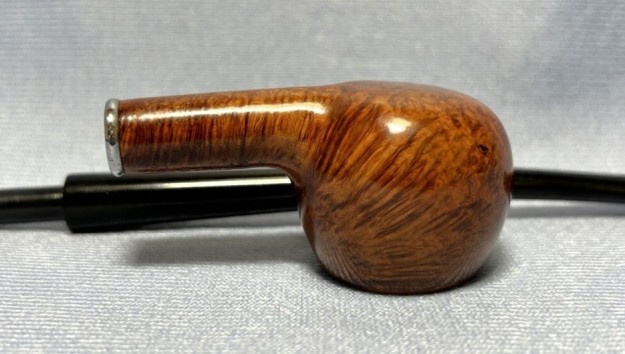
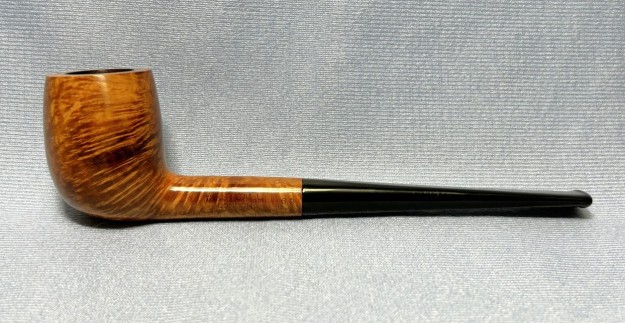
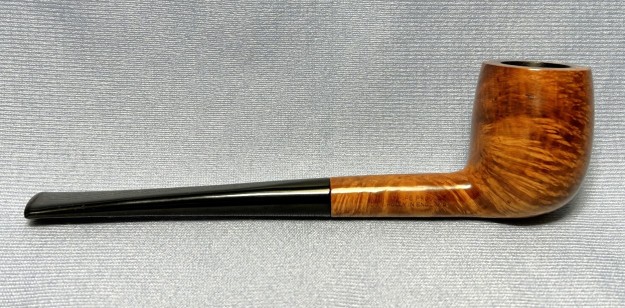
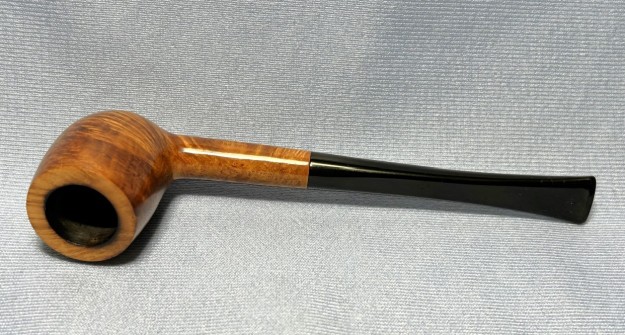
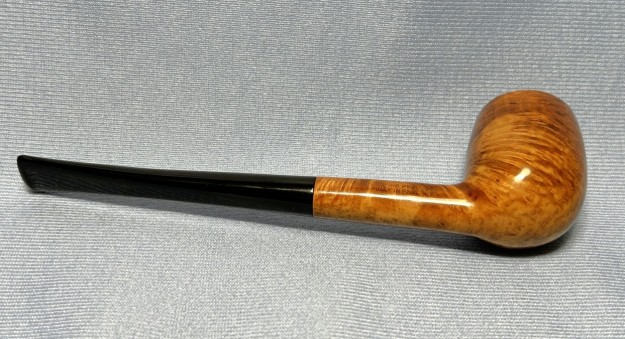
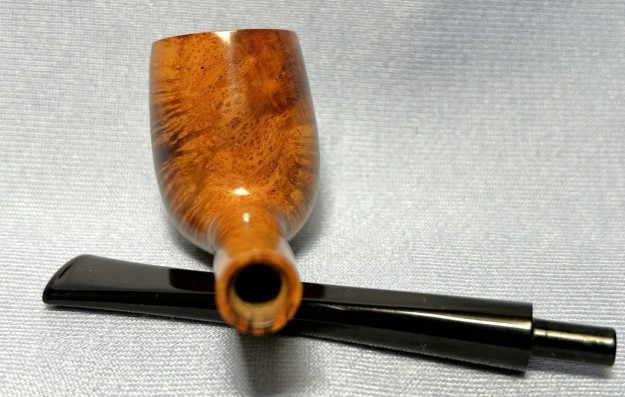
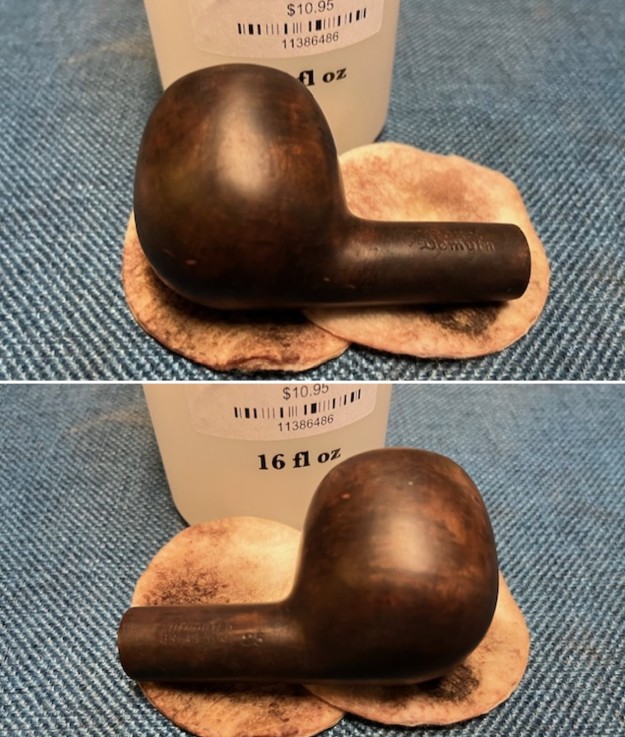
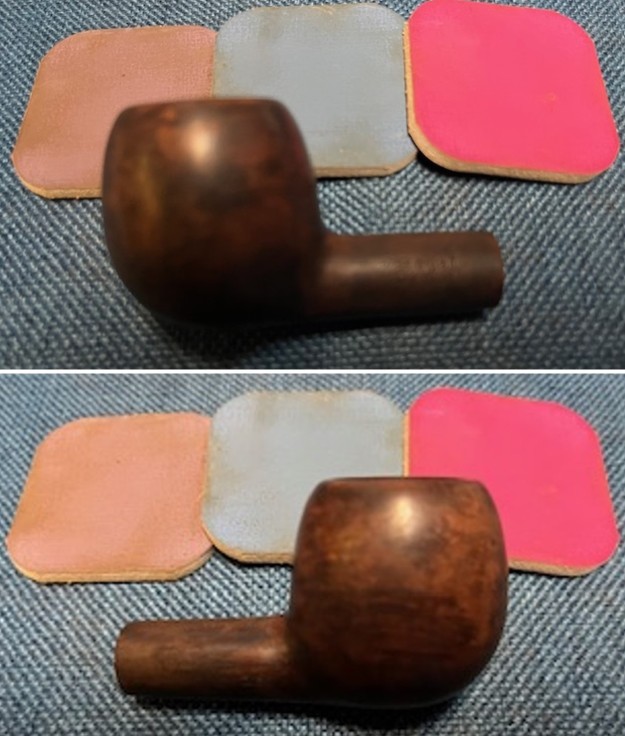
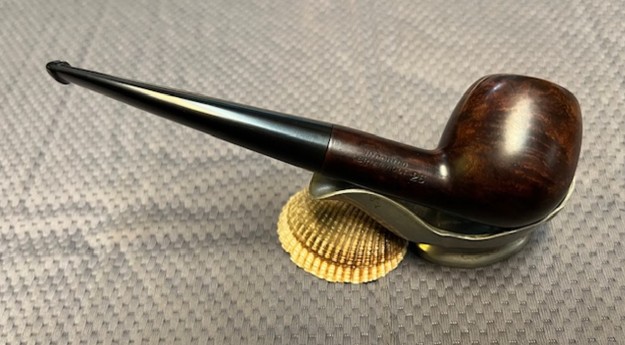
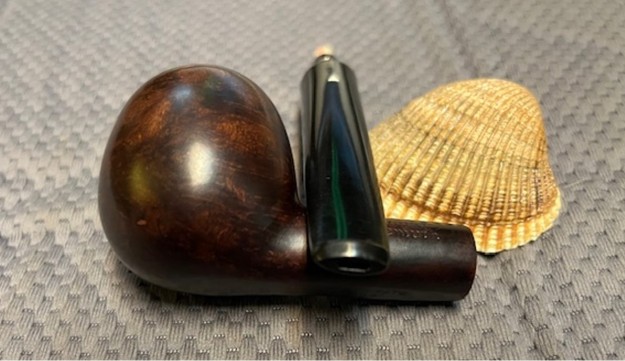
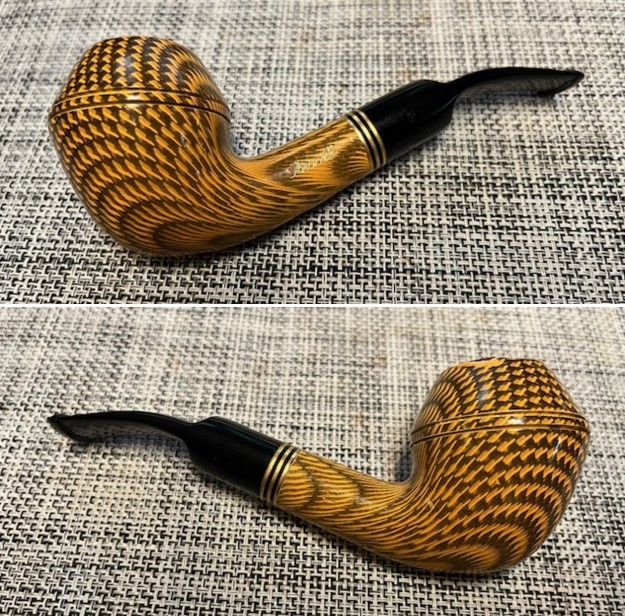
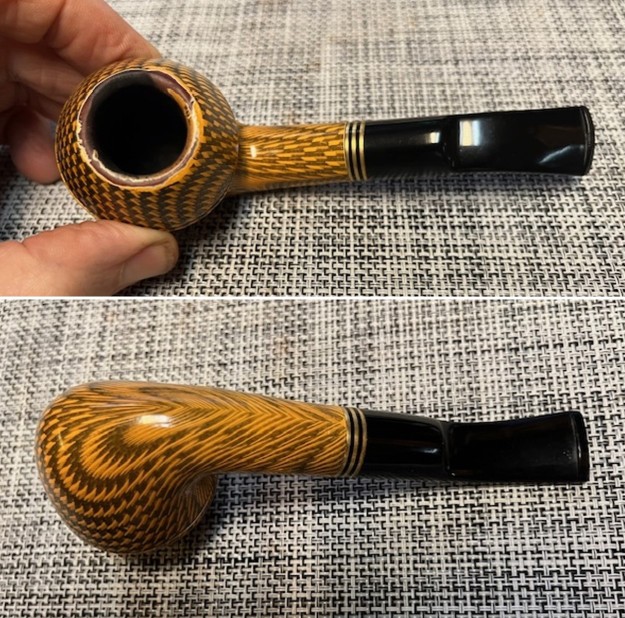
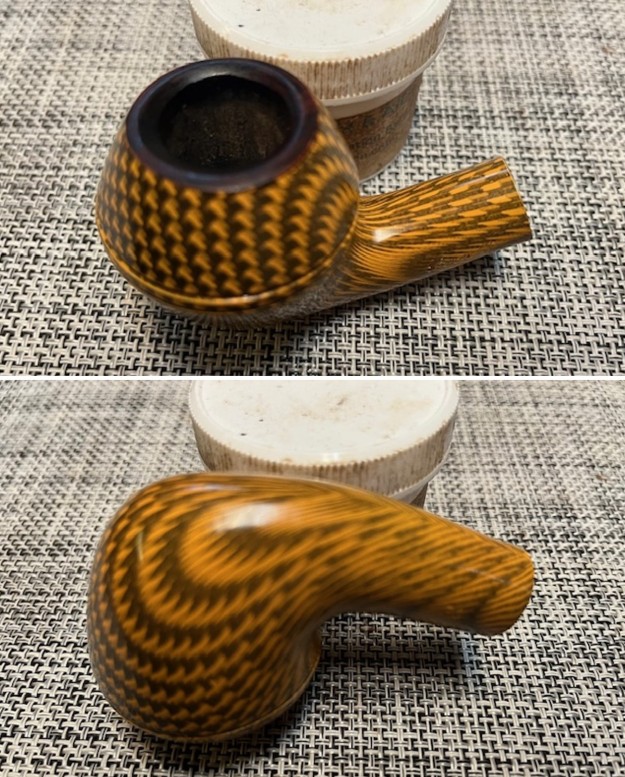
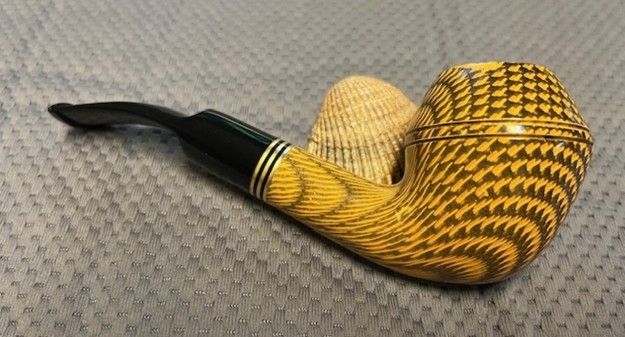
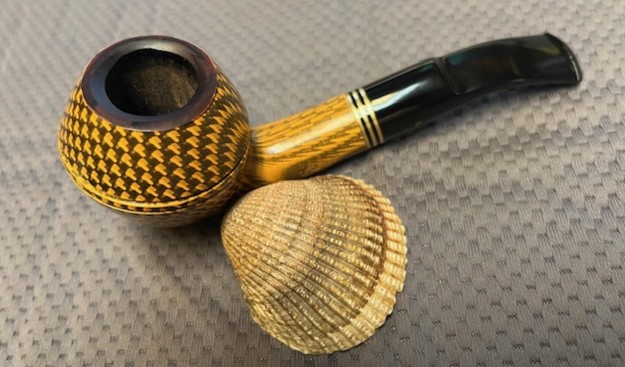
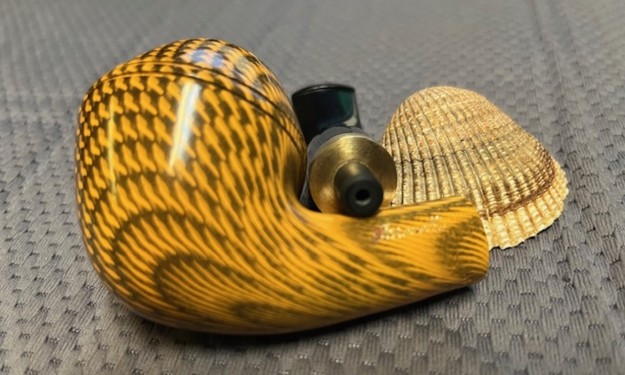
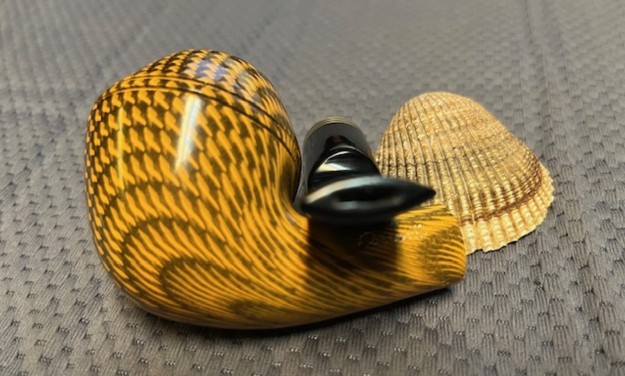
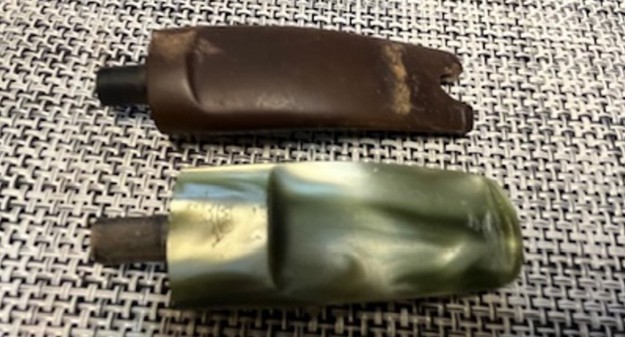
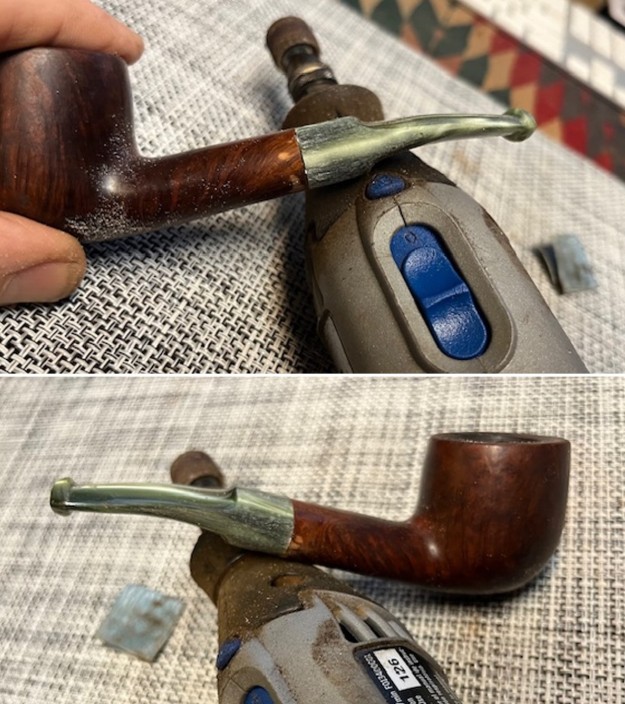
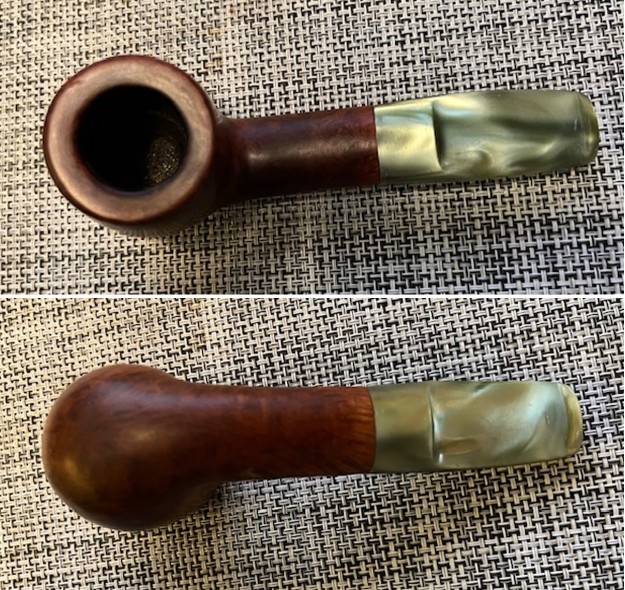
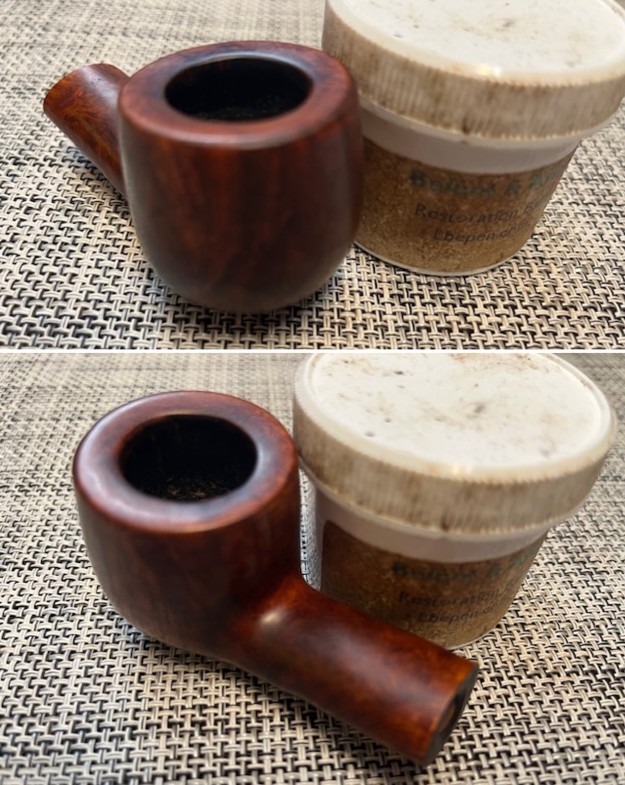
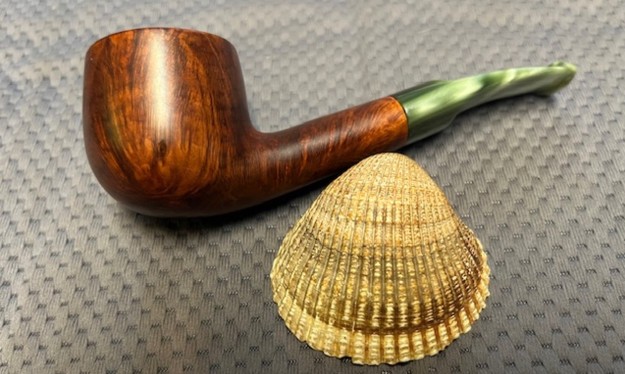
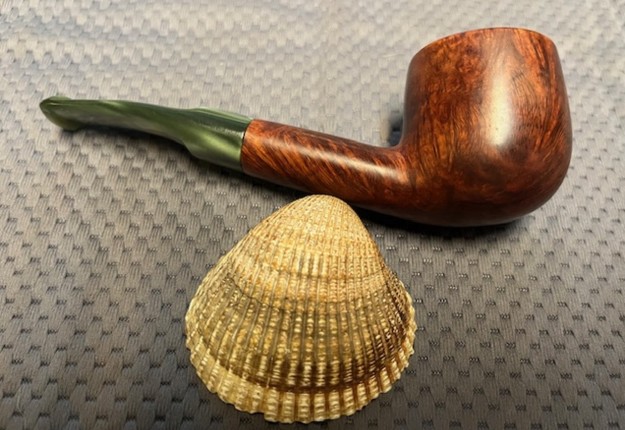
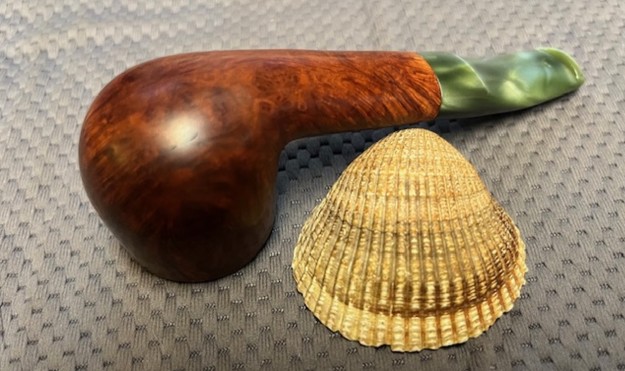
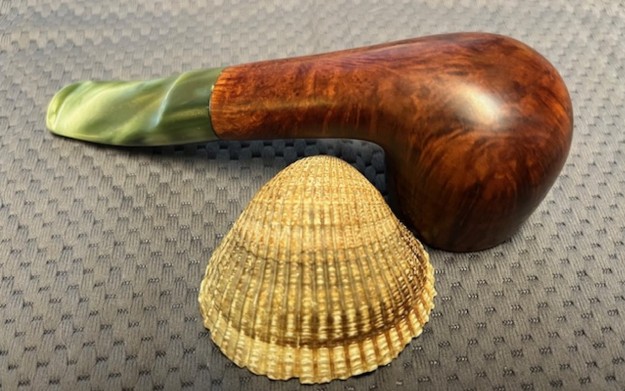
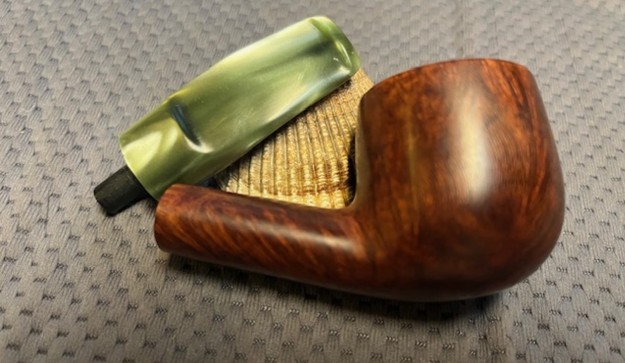
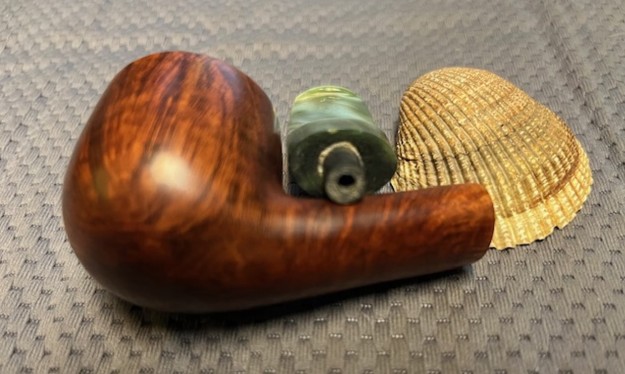
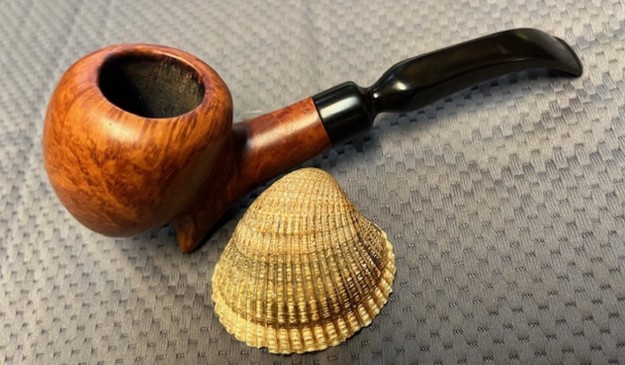
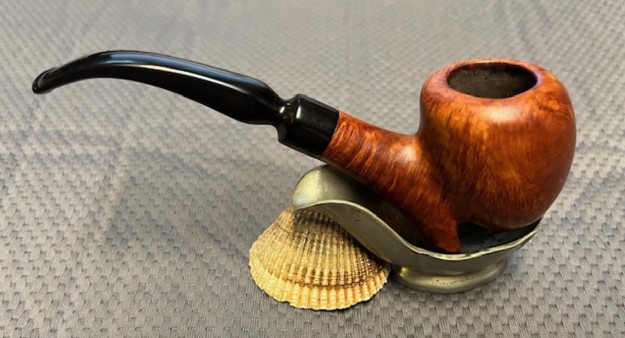
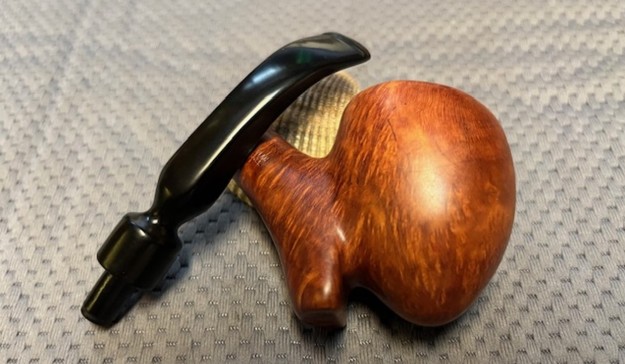
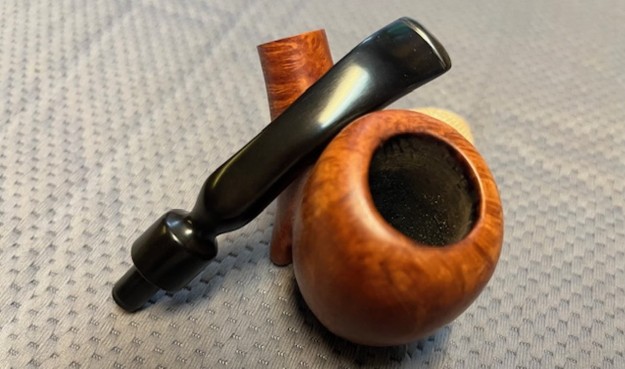
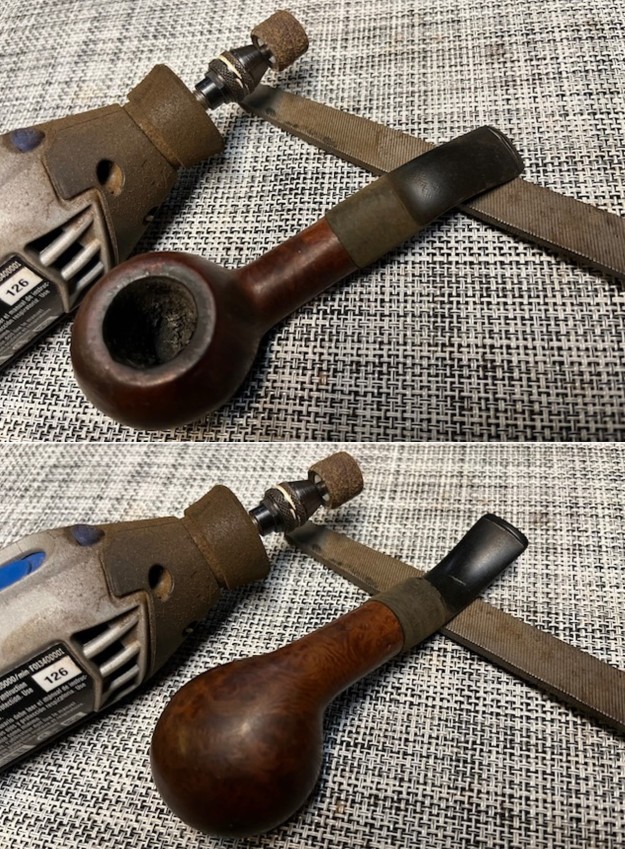
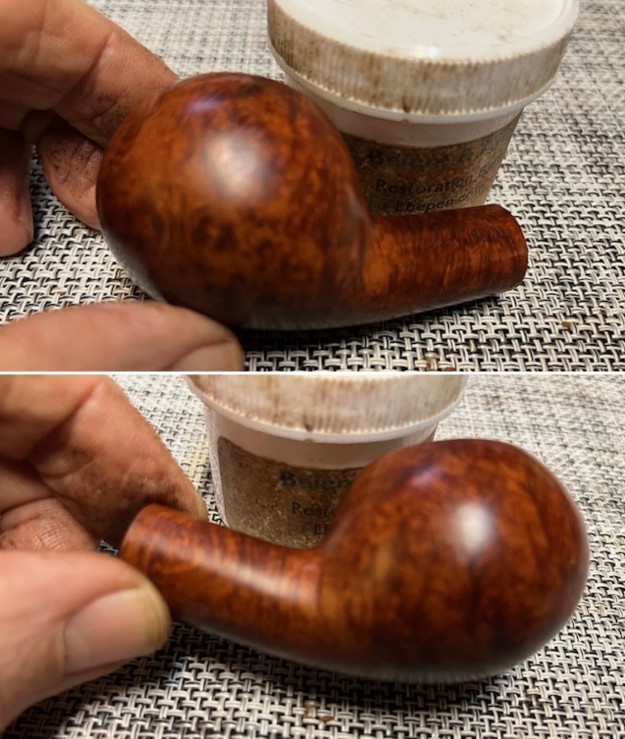
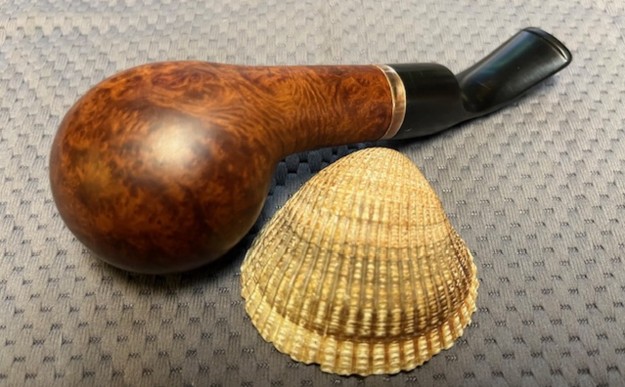
 This is the third of five pipes from Kathleen that I am working on. It is a beautifully shaped Ed Burak Connoisseur Bent Bulldog. It has the kind of beauty I have come to expect from other pipes of Ed’s I have worked on. I put the bowl and stem back together. I polished the bowl and stem with Blue Diamond to polish out the scratches in the briar and the vulcanite. I gave the bowl and the stem multiple coats of carnauba wax. I buffed the pipe with a clean buffing pad to raise the shine. I hand buffed it with a microfiber cloth to deepen the shine. The pipe polished up pretty nicely. The smooth finish is well done and the reshaped rim cap look really good with the variegated acrylic stem. This Burak Connoisseur Bent Bulldog was a fun pipe to bring back to life. It is a comfortable pipe to hold in the hand. The finished pipe is shown in the photos below. The dimensions of the pipe are Length: 6 inches, Height: 2 inches, Outside diameter of the bowl: 2 inches, Chamber diameter: 7/8 of an inch. The weight of the pipe is 61 grams/2.12 ounces. Thanks for reading this blog and my reflections on the pipe while I worked on it. Once I finish the other three pipes in the lot I will be sending them back to Kathleen for her husband to enjoy once again.