Blog by Steve Laug
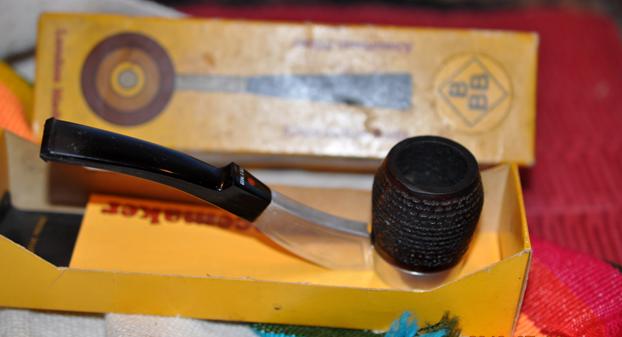
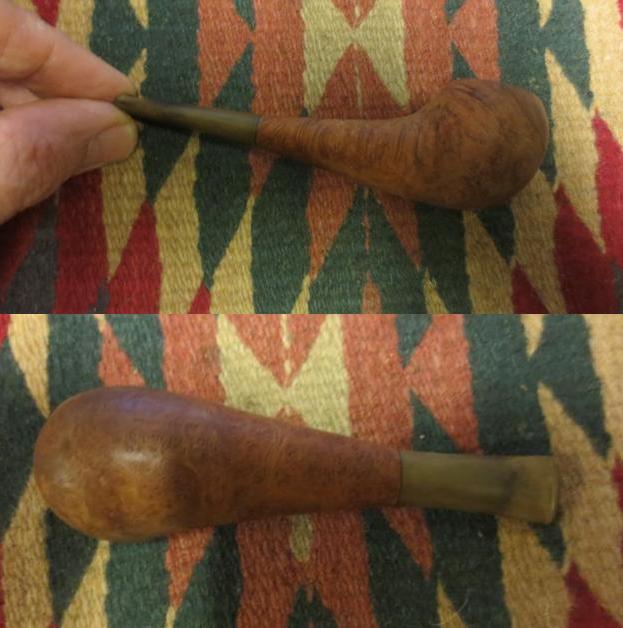
In the box of pipes my brother sent me was a beat up leather pipe and tobacco pouch. I pushed it aside and cleaned up the rest of the pipes in that particular part of the box. The other evening I was doing a bit of sorting and I took out the pouch and looked it over. It had a large tear on the bottom edge. The zipper was worn and hard to work and the leather was brittle. I almost tossed it in the bin but felt something inside of the pouch. I looked at the inside of the underside of the pouch and there was nothing there. I open the broken zipper on the top of the pipe and inside was a very small – tiny if you will – pipe. The tenon was broken and the stem and bowl sat in the pouch. I took it out of the pouch to have a look. 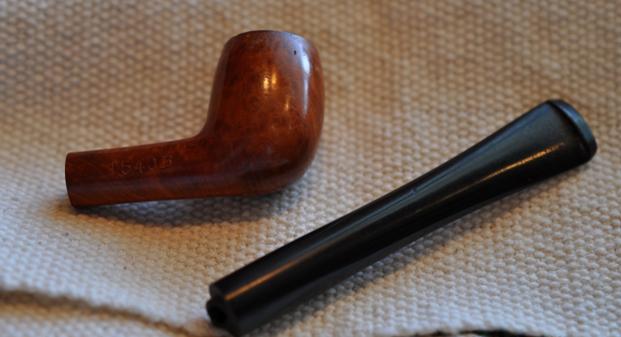 It was a KBB that was stamped Rocky Briar. Why it bore that stamp I have no idea as it is a smooth briar. There is no rustication or and carving on the bowl at all – just very smooth. Underneath the KBB in a cloverleaf stamp and the Rocky Briar on the left side of the shank it read Reg. Pat. No. 298978. On the right side of the shank it reads 1540B which it was the shape number. All of that seems very normal but did I say that this pipe is tiny? It is only 4 ¾ inches long, 1 1/8 inches tall. The diameter of the bowl is 5/8 inches and the chamber is 7/16 inches in diameter. All is proportional and well laid out. It makes me wonder if it was not a salesman’s pipe.
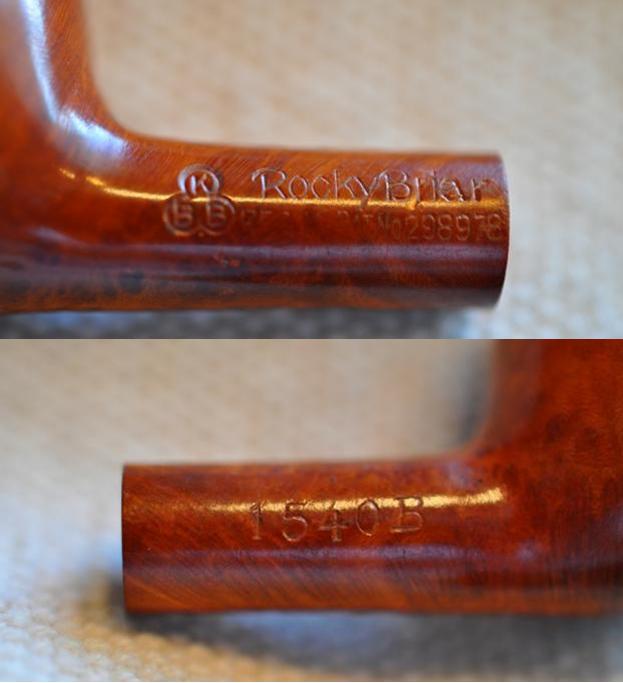 The tenon was snapped in the shank but no damage had been done to the shank itself. Really the pipe looked quite good other than the broken tenon.
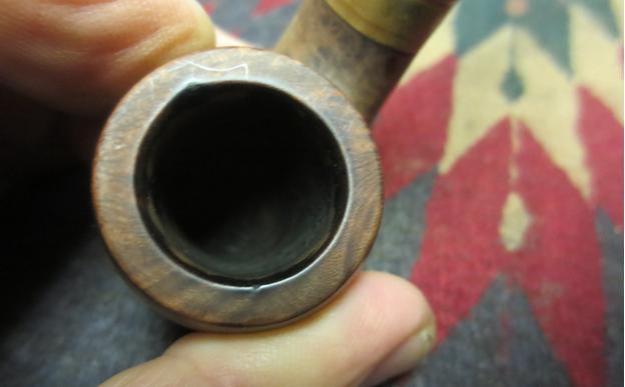
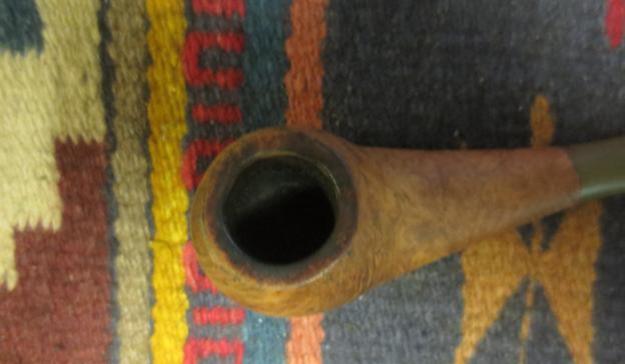
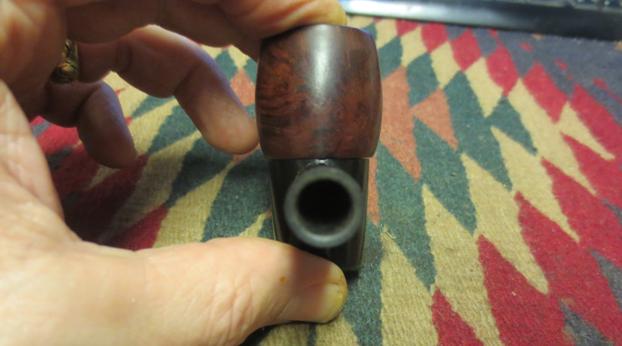
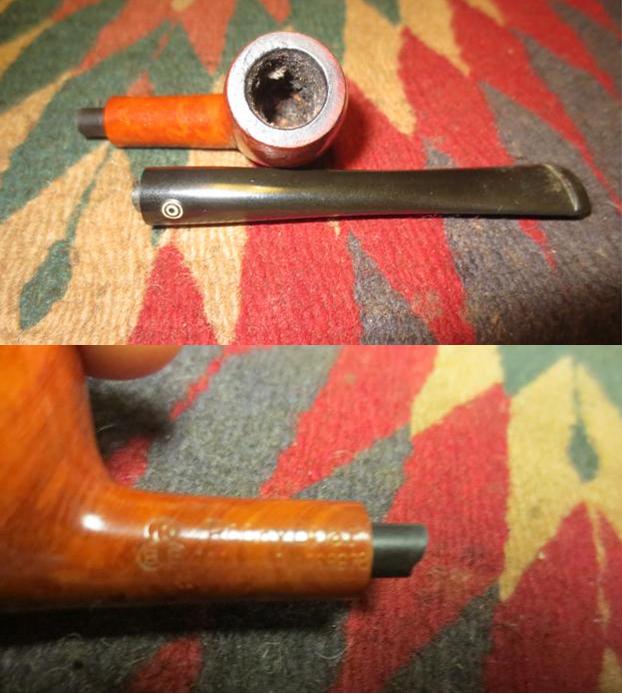
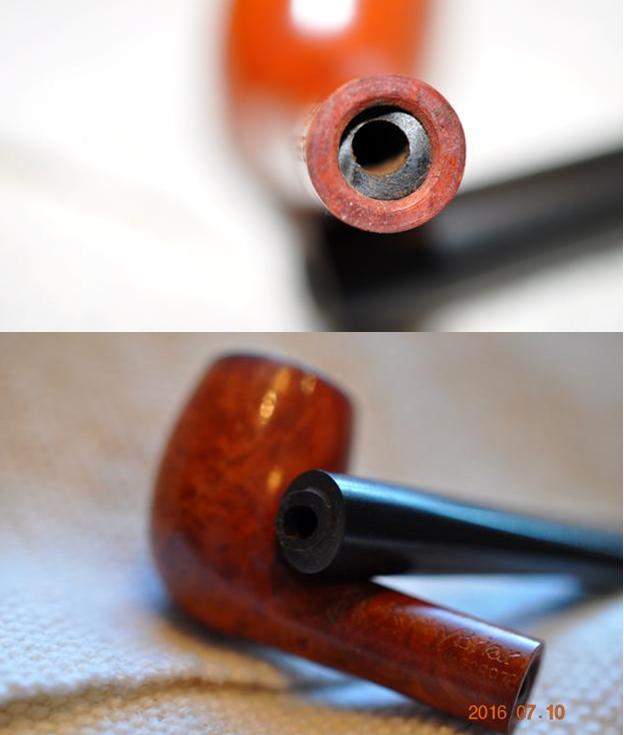 Obviously the pipe had been smoked and quite often. There was a fairly thick soft cake in the bowl and the rim top had a coating of tars and oils. The back left side of the rim had a burn mark on it that was quite large.
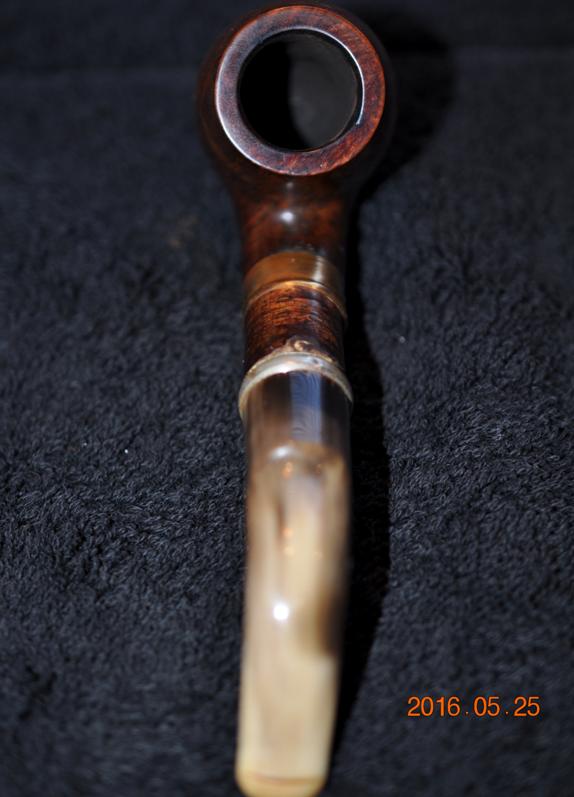
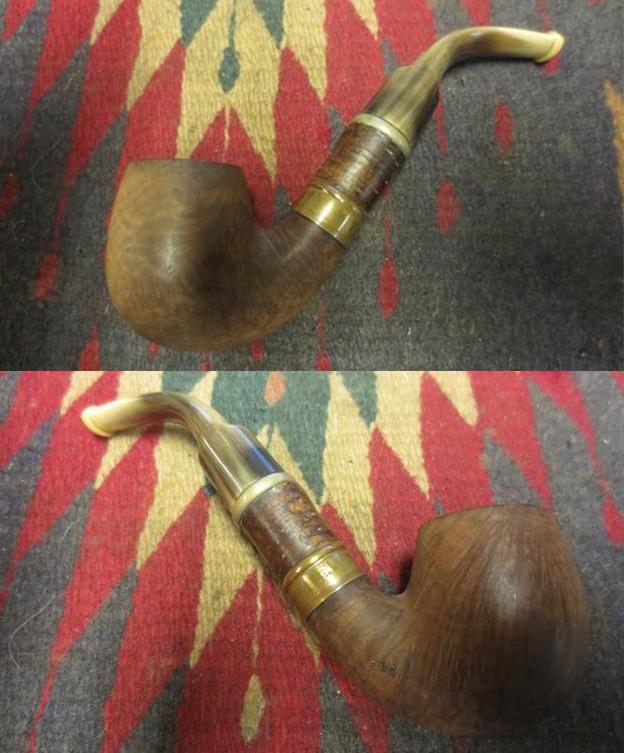
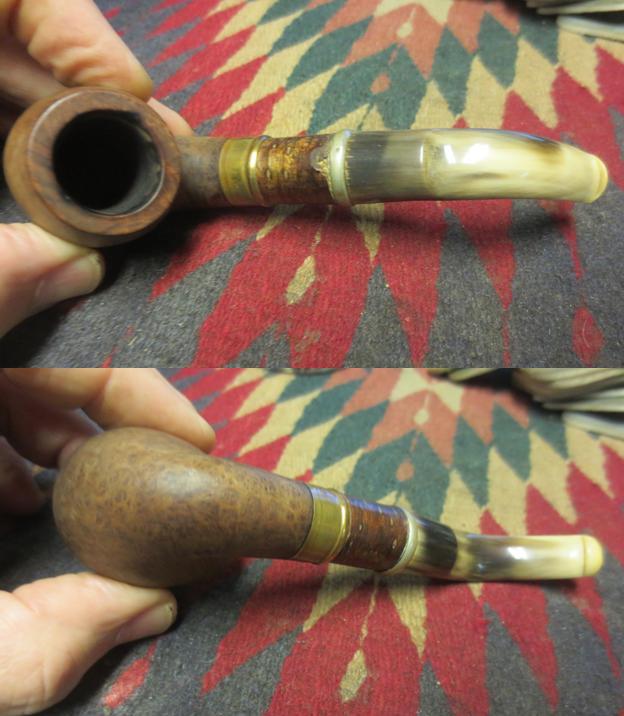
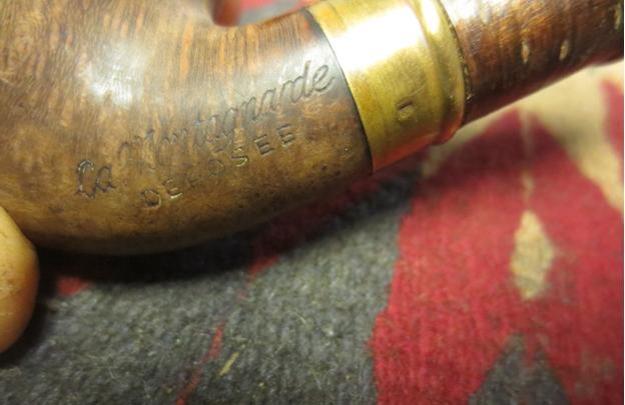
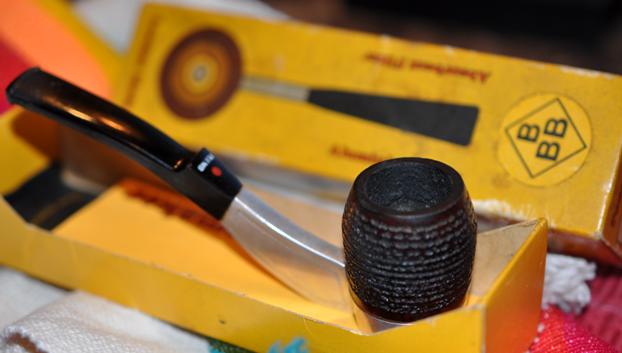
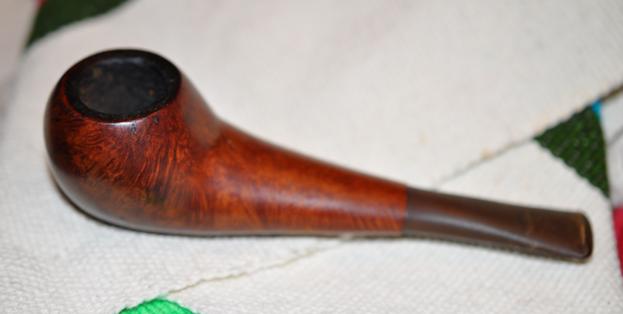
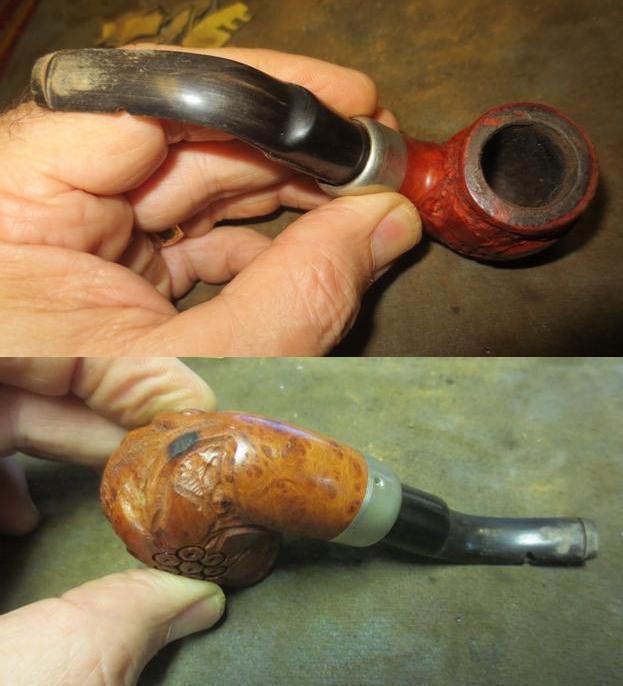
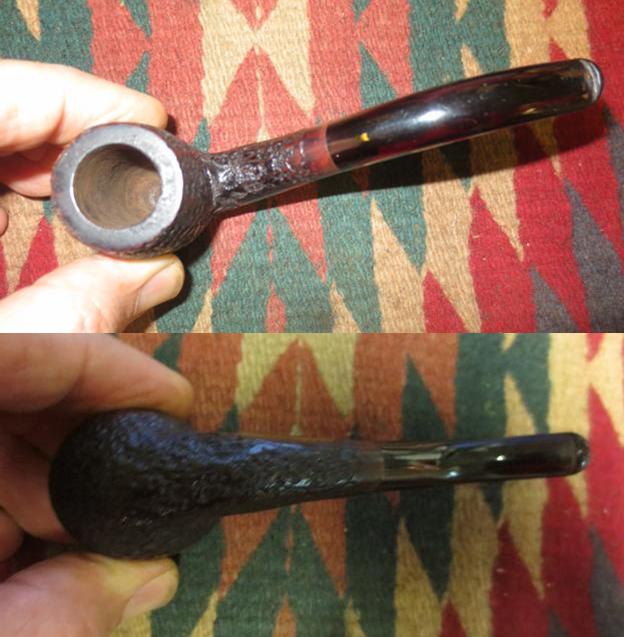
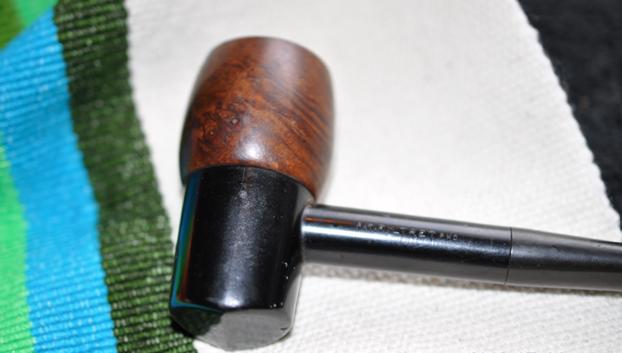
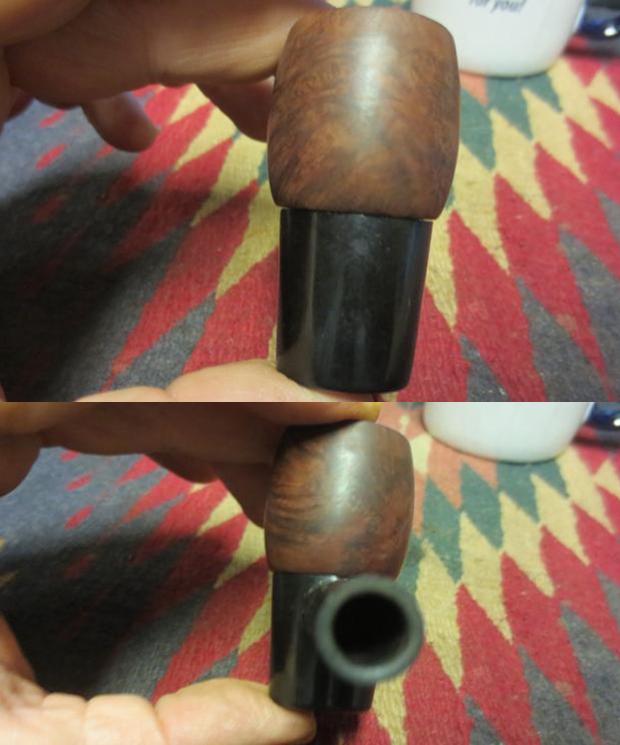
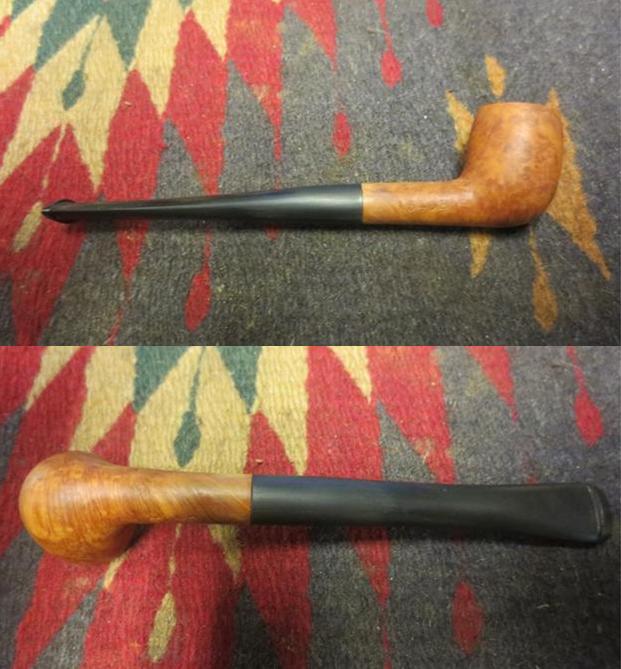
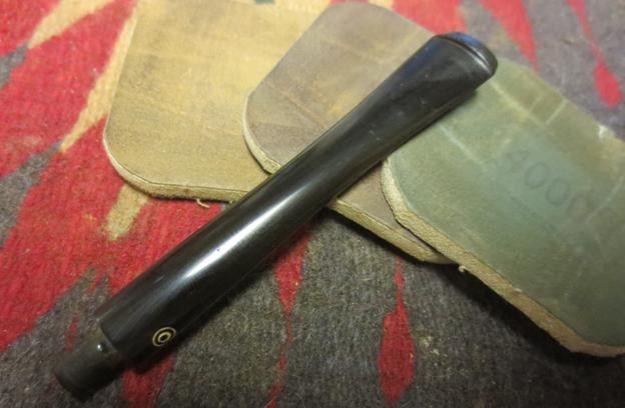
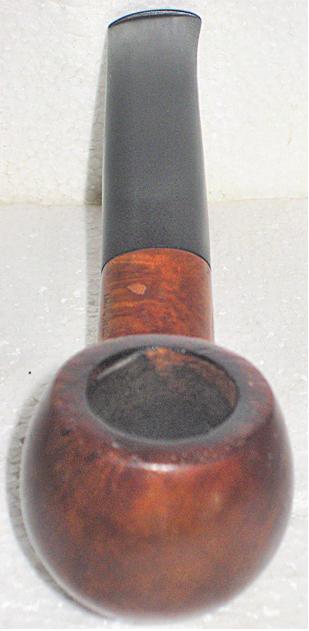
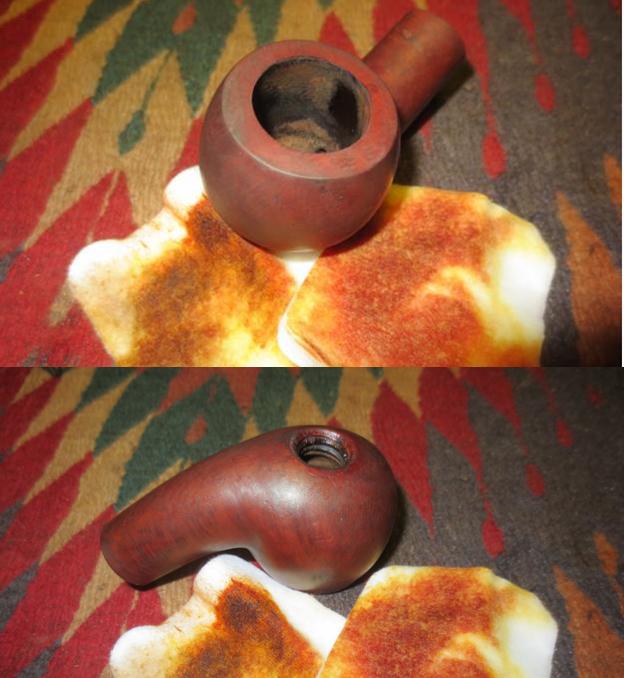
 I took a photo of the pipe before I began to work on it. The finish was very shiny – like it had been given a coat of varnish. The rim was obviously rough as you can see from the photos but the rest of the pipe looked good. The stem had tooth chatter on the top and the bottom of the stem near the button. The logo on the shank was a clearly stamped circle within a circle. The broken tenon would need to be pulled and if possible the stem given a new tenon.
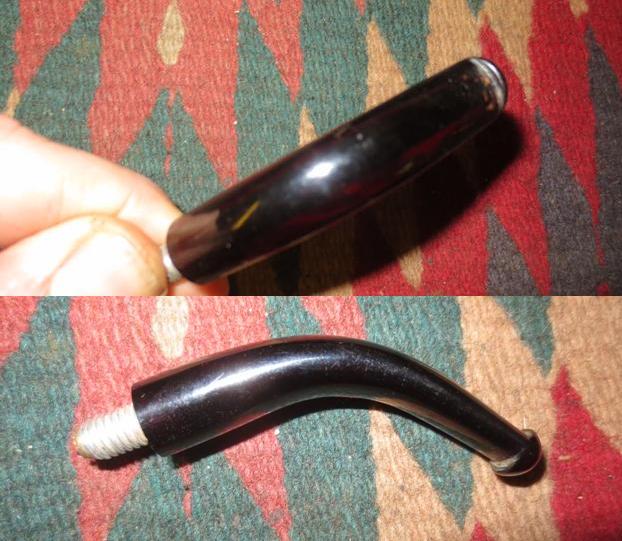
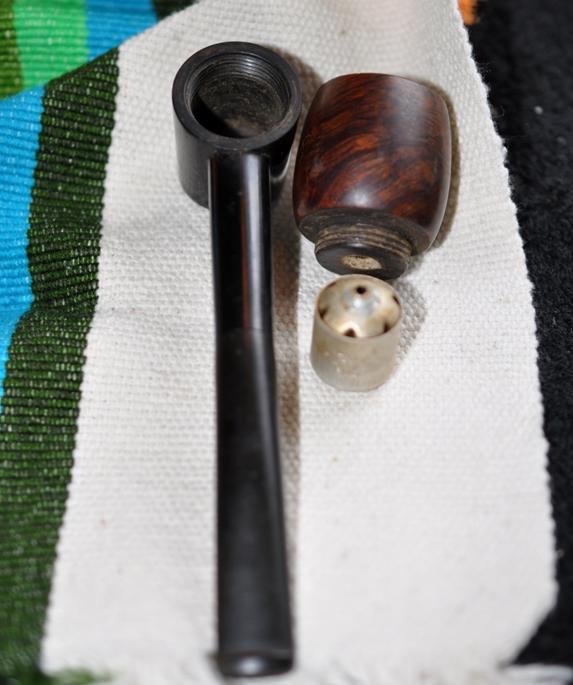
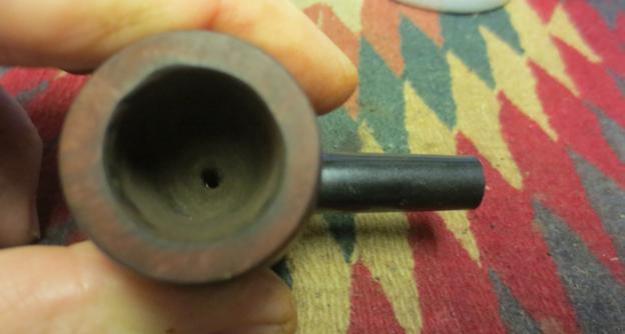
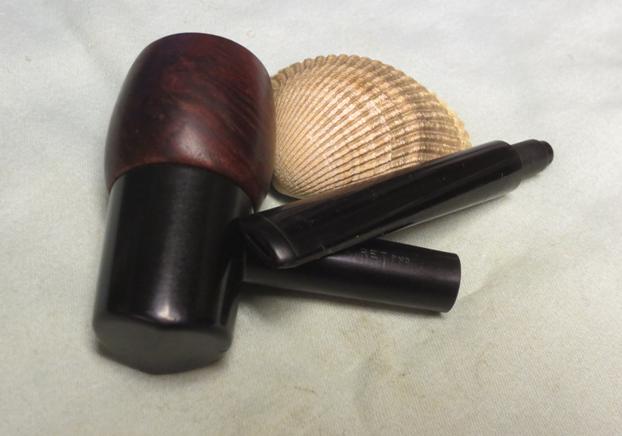
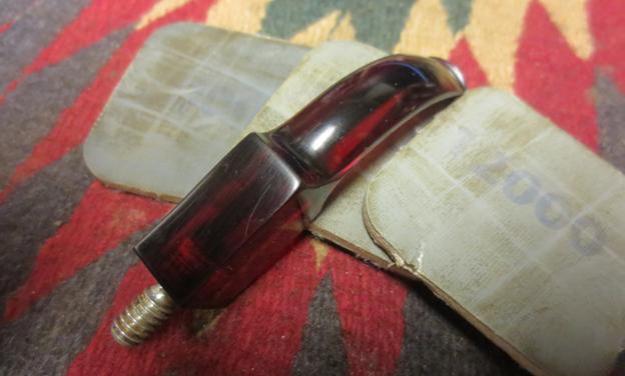
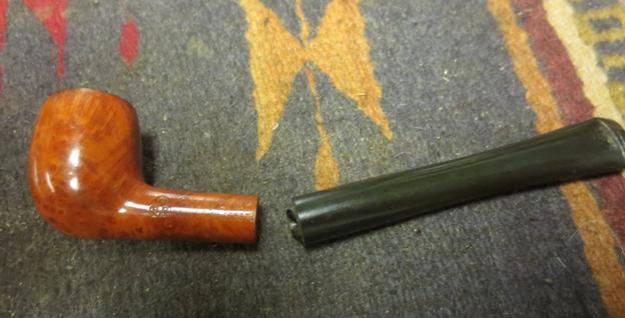 I used a drywall screw to pull the broken tenon. I screwed it into the broken tenon in the shank and wiggled it free. Before I pulled it out of the shank I took the following photos.
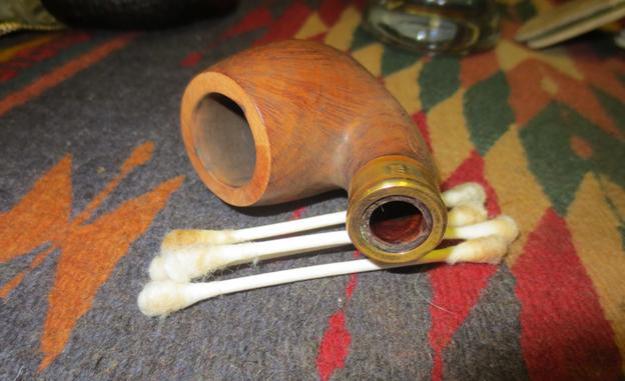
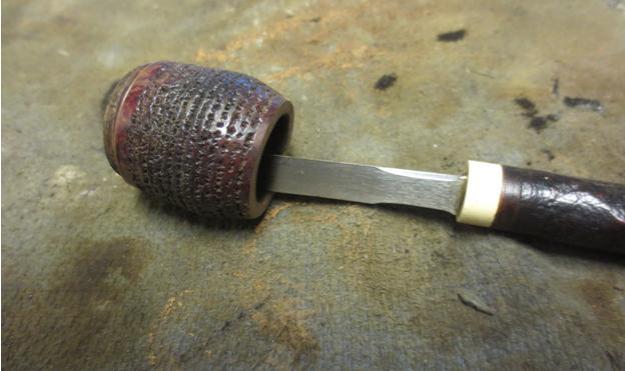
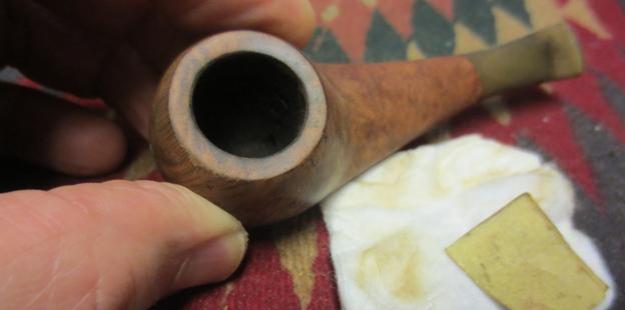
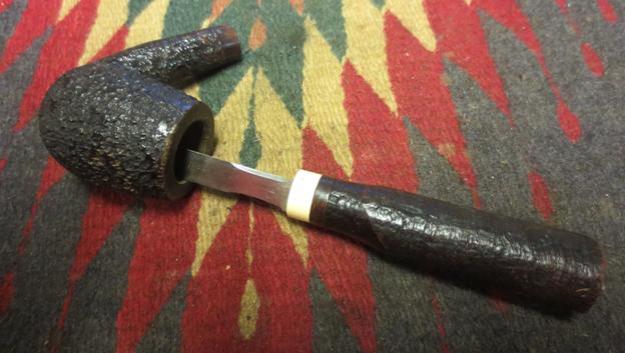
 I pulled the piece of tenon out of the shank and reamed the bowl with the only reamer that would fit in the tiny opening – a Savinelli Pipe Knife. I scraped back the cake to bare briar.
 The burned area on the top of the bowl made it necessary to top the bowl on the topping board using 220 grit sandpaper.
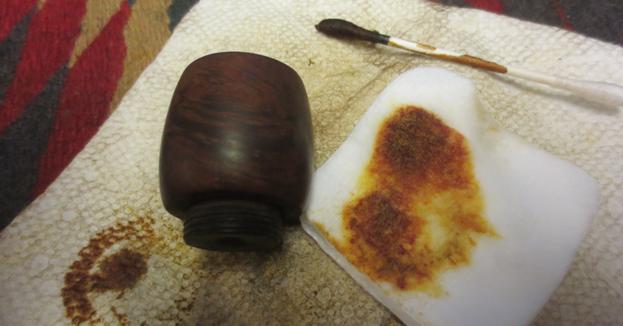
 I scrubbed off the briar with acetone on a cotton pad. I wanted to clean off the sanded rim and the shiny coat on the bowl so that it would be easier to stain the bowl and rim to match.
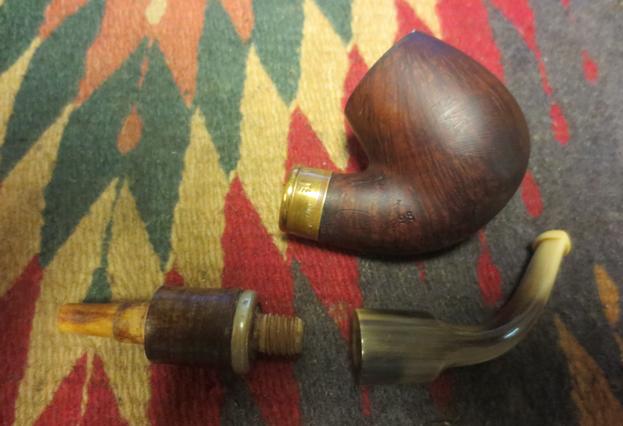
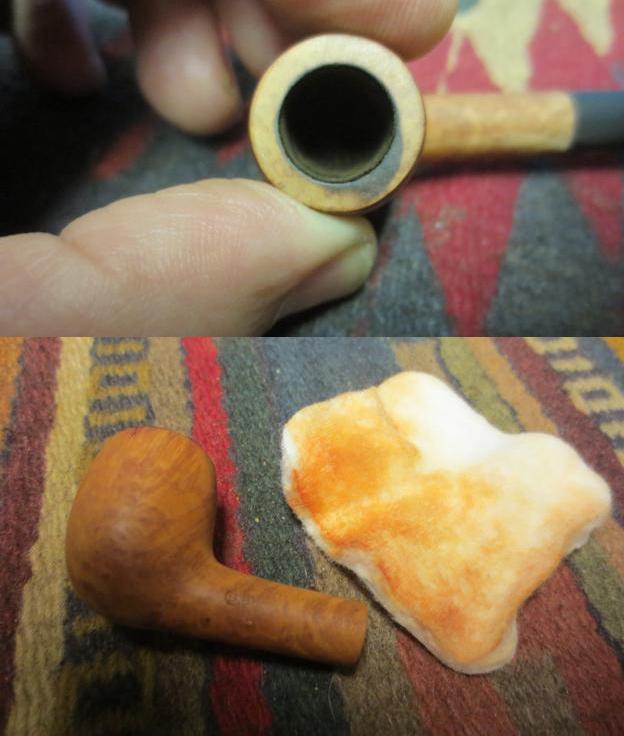 I used the Dremel and sanding drum to flatten the face on the stem and then set up my cordless drill to drill out the end of the stem. I hand twisted the stem onto the drill bit. I started with a bit slightly larger than the airway in the stem and worked my way up until I had opened up the airway large enough to hold the tenon in place.
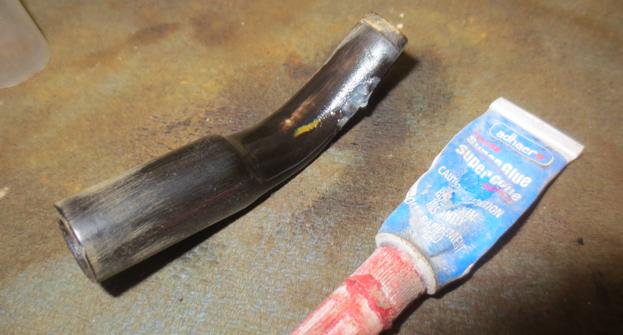
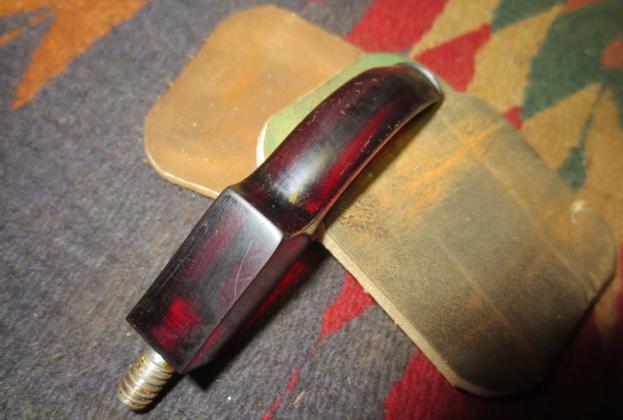
 I decided rather than trying to turn a small tenon that would fit in the shank I would clean up and use the existing broken tenon. Fortunately on these old pipes the tenon was quite long. I glued the broken tenon piece into the newly drilled opening in the stem with black super glue. I filled in around the tenon piece with the super glue using a dental pick and a piece of paper clip. I smoothed out the glue and aligned the tenon in the shank and set the stem aside to let the glue cure. Once it hardened, I sanded the new tenon with 220 grit sandpaper to remove the excess glue and make the fit in the shank smoother.
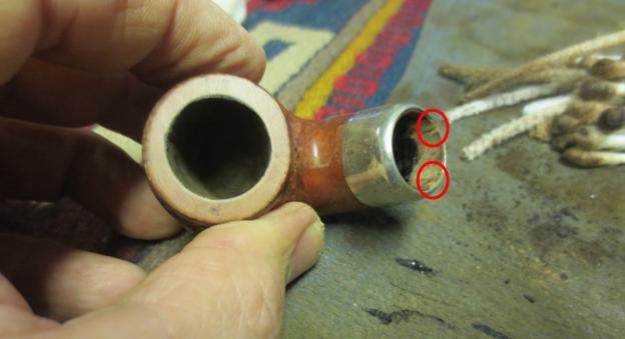
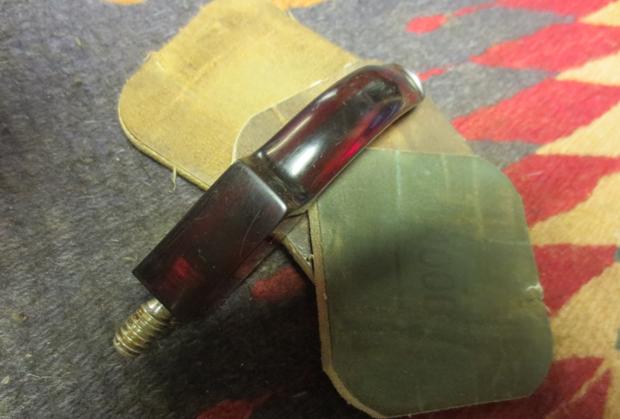
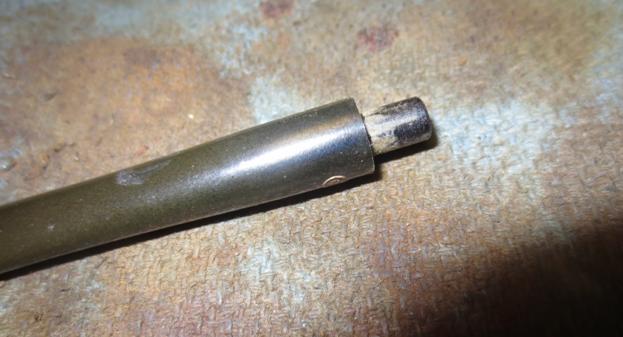 I put the stem in the shank and sanded the shank and stem to make the transition smooth. Once I had the stem fit adjusted I sanded the shank and stem with a 1500 grit micromesh sanding pad to remove the scratches.
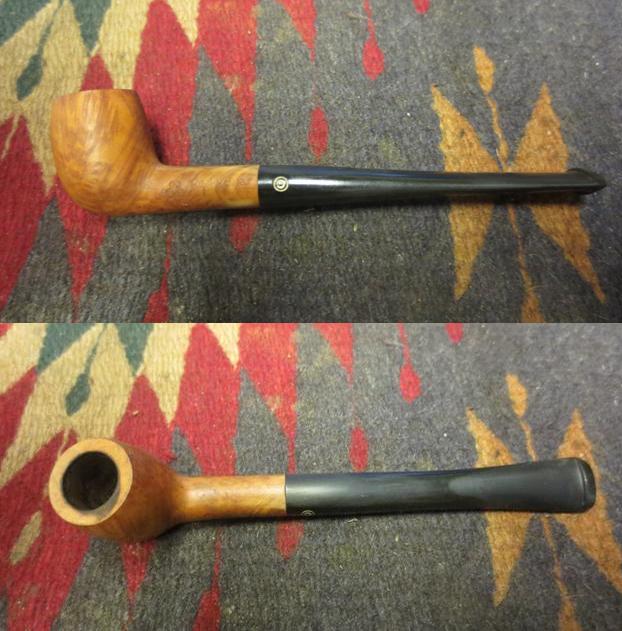
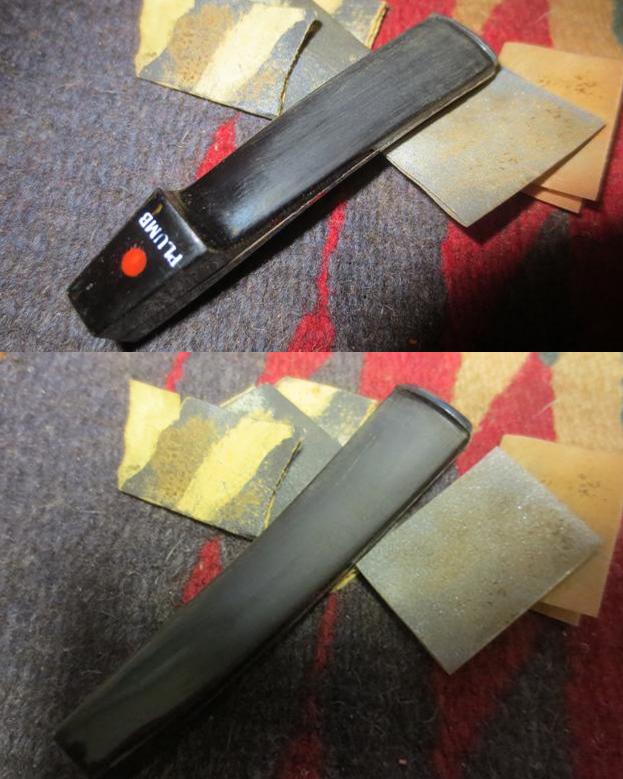
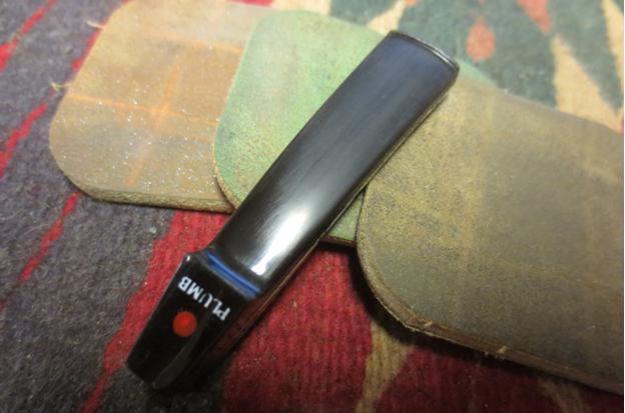
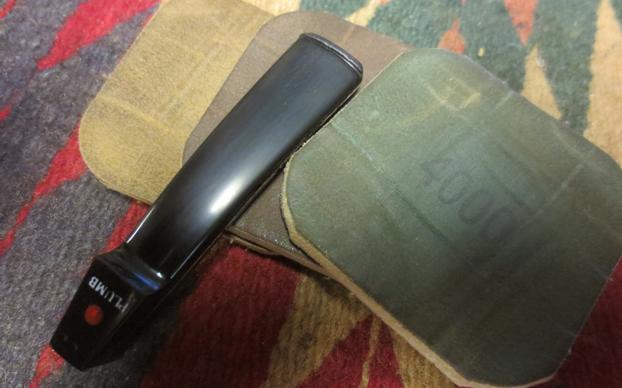
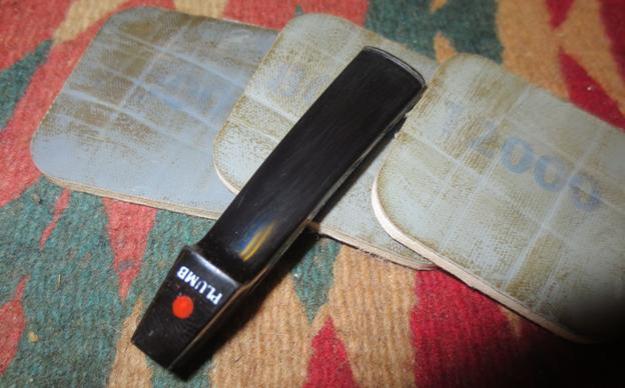
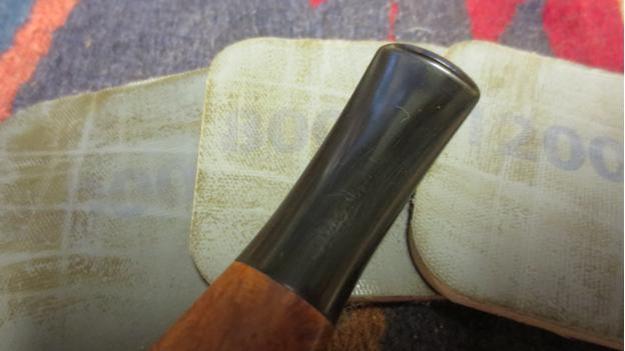
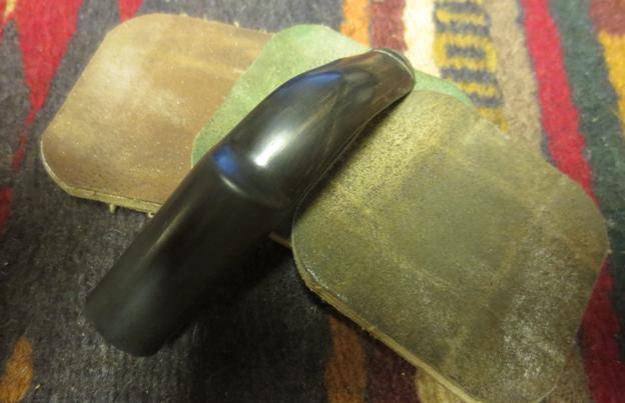
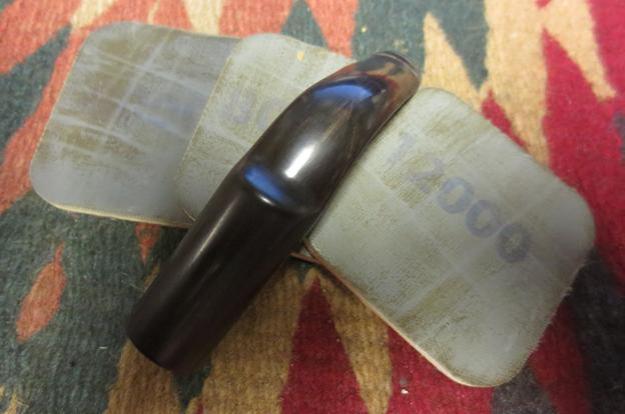
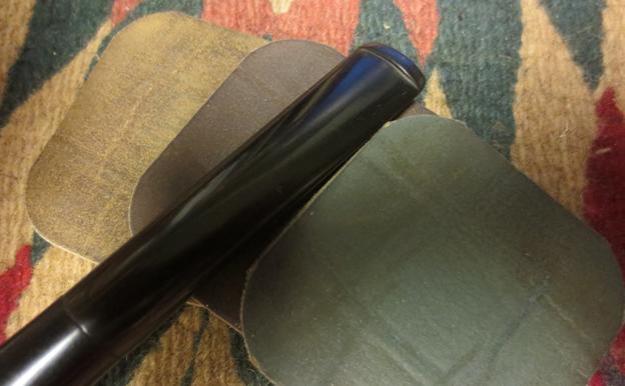
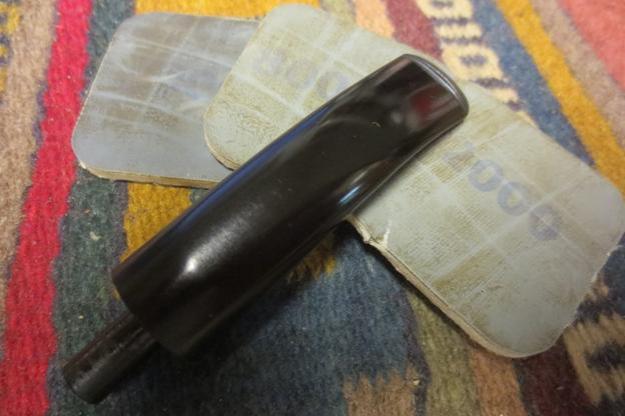
 I wet sanded the stem with 1500-2400 grit micromesh sanding pads. I rubbed it down with Obsidian Oil. I dry sanded it with 3200-4000 grit pads and gave it a second coat of oil. I finished sanding it with 6000-12000 grit pads and gave it a final coat of Obsidian Oil. I set the stem aside to dry.
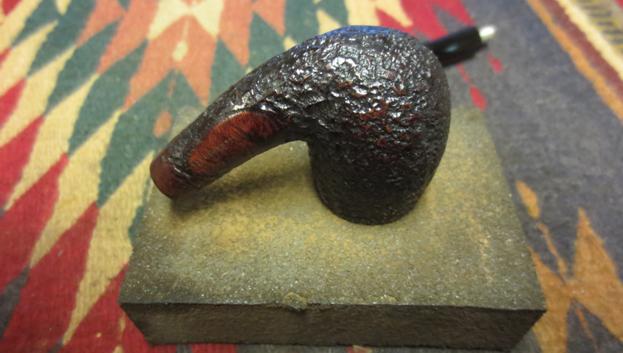
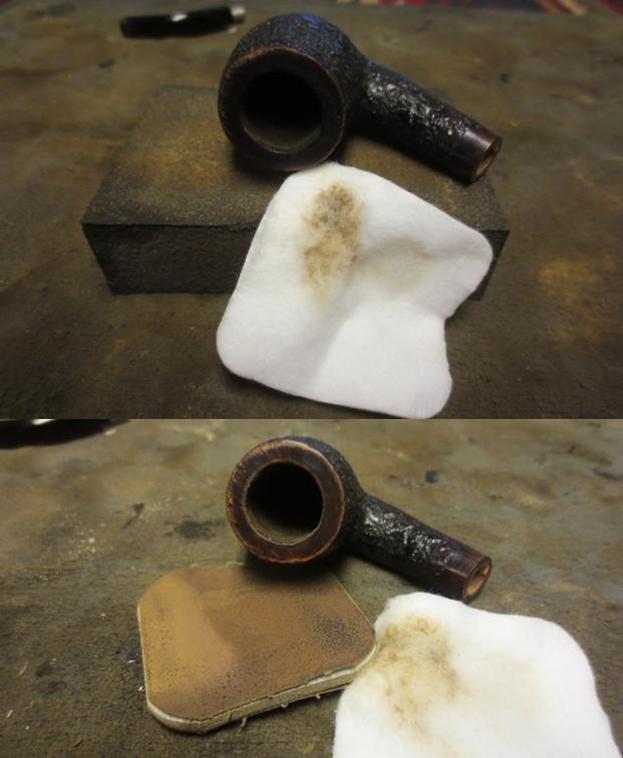
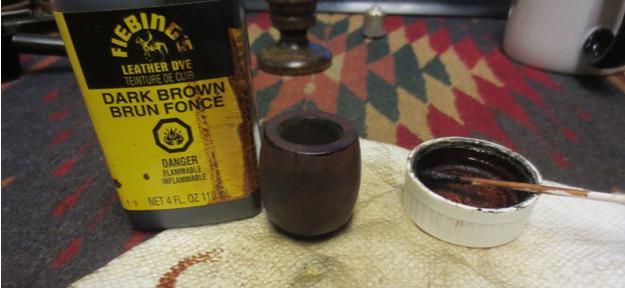
 I gave the bowl a first coat of Medium Brown Stain with a staining pen to serve as an undercoat.
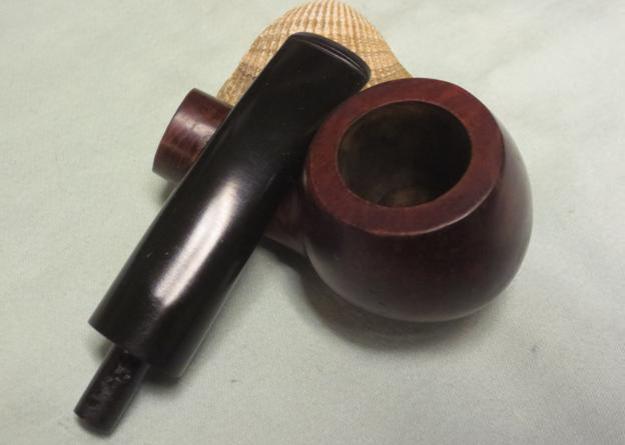
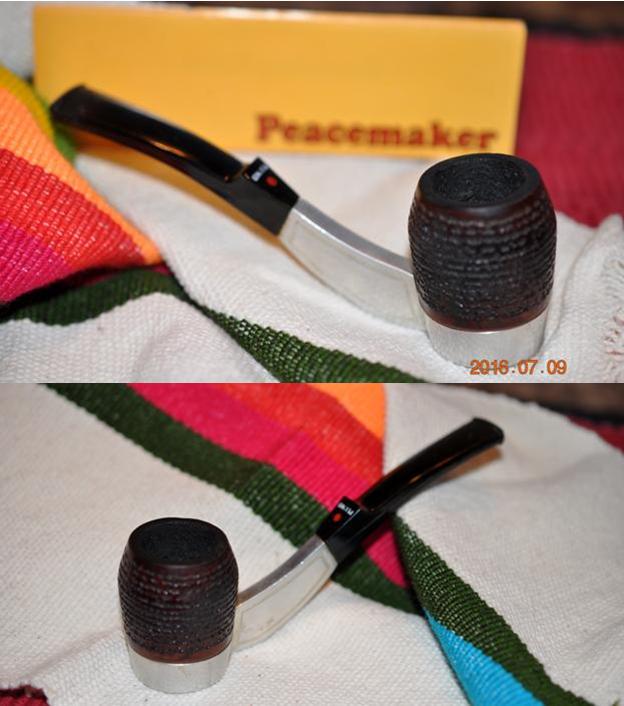
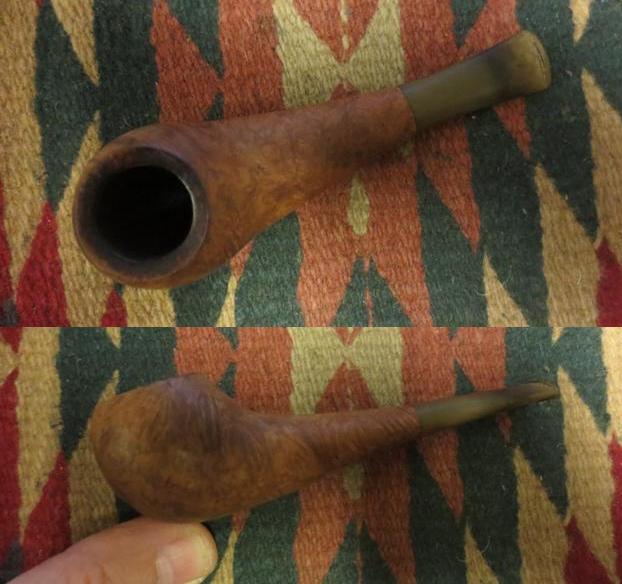
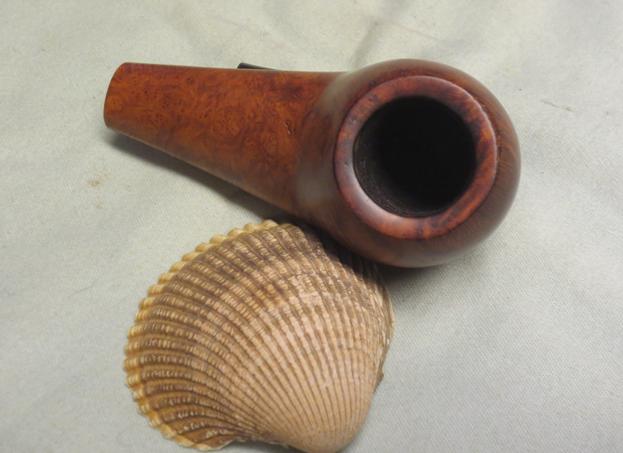
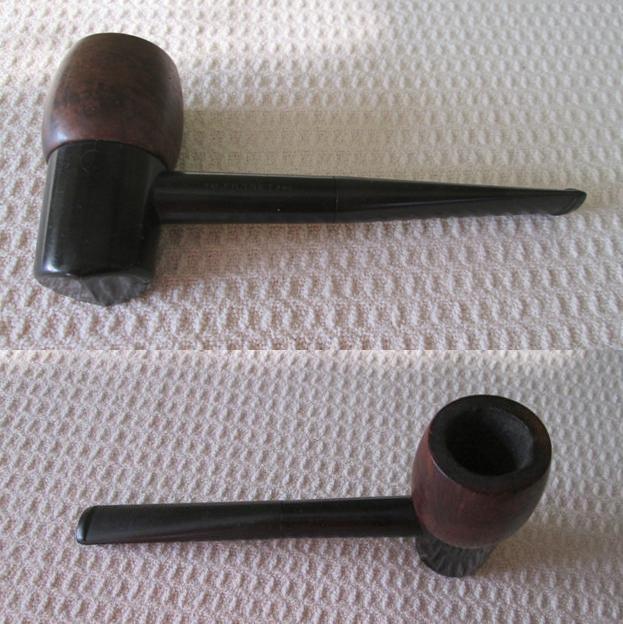
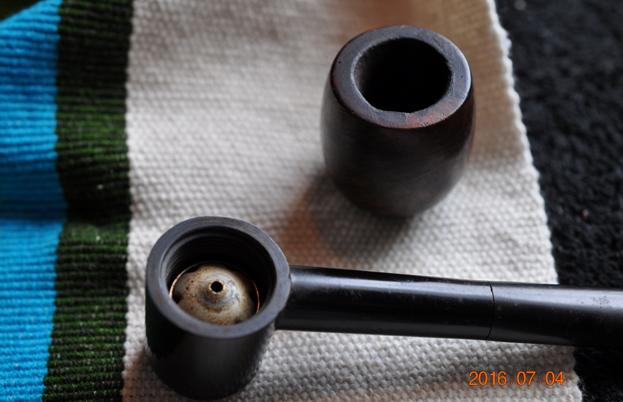
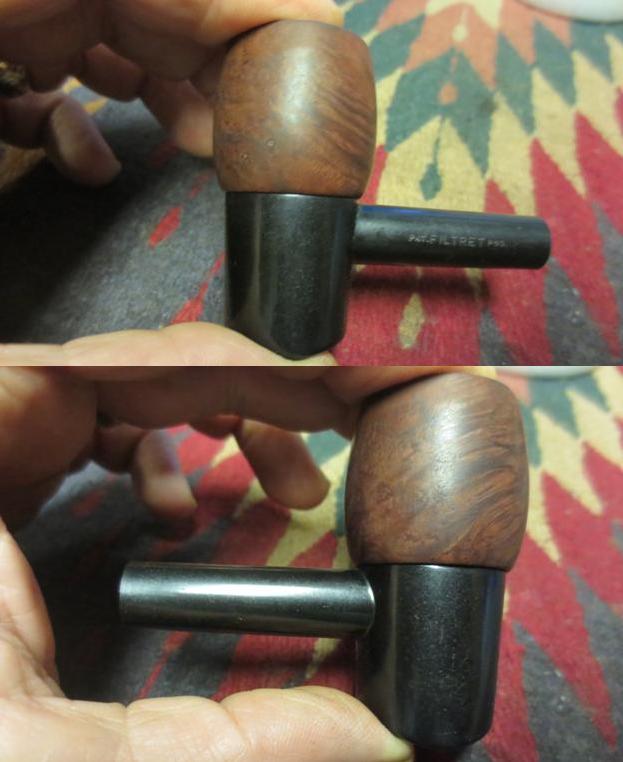
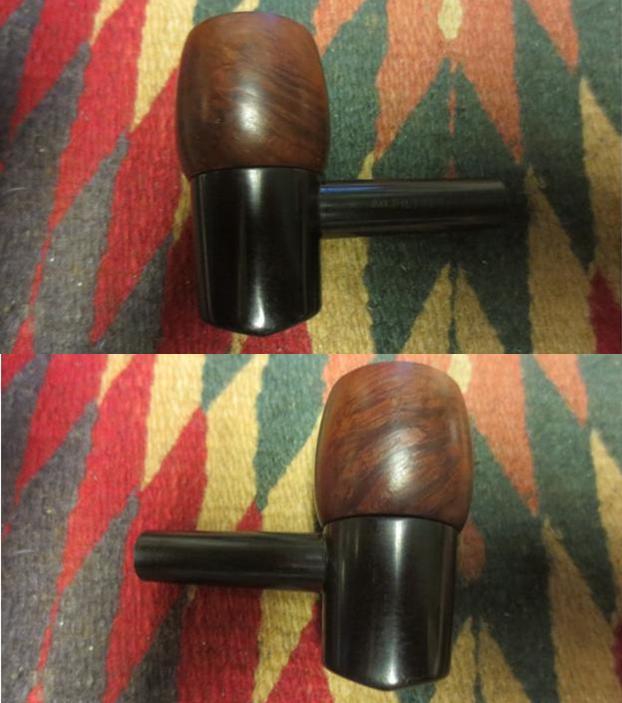
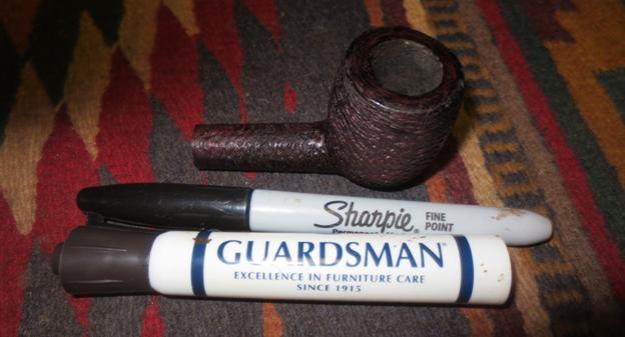
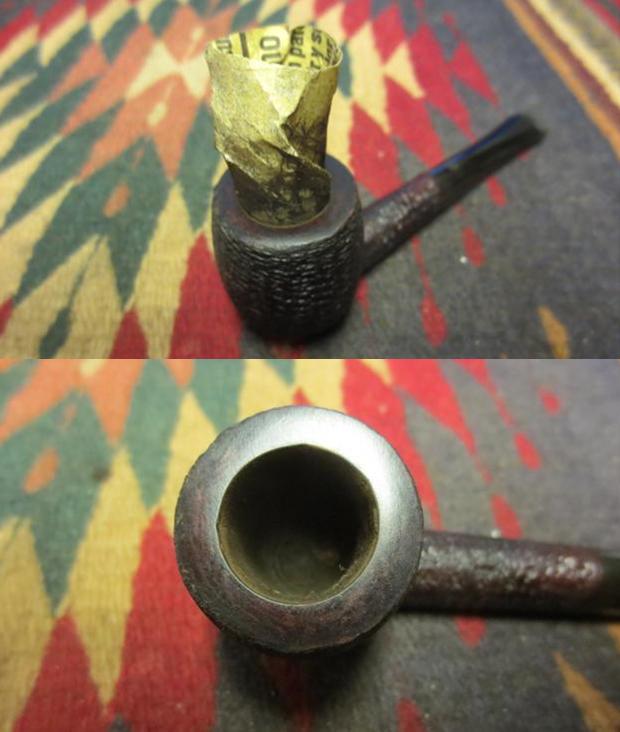
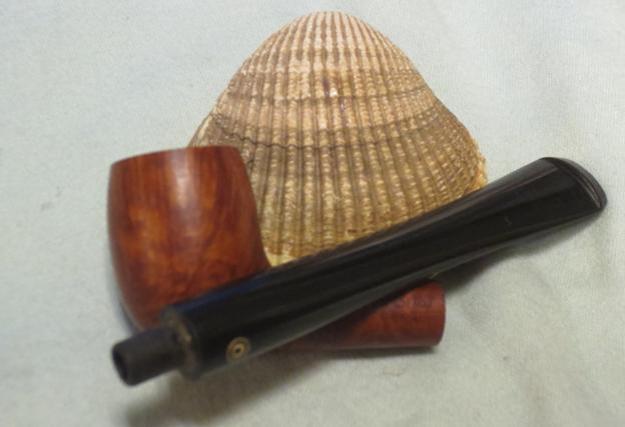
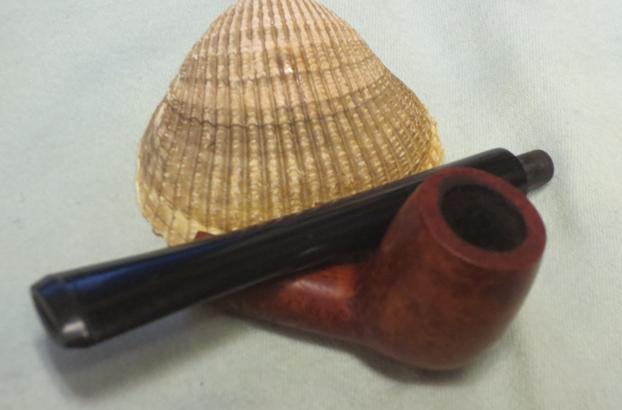
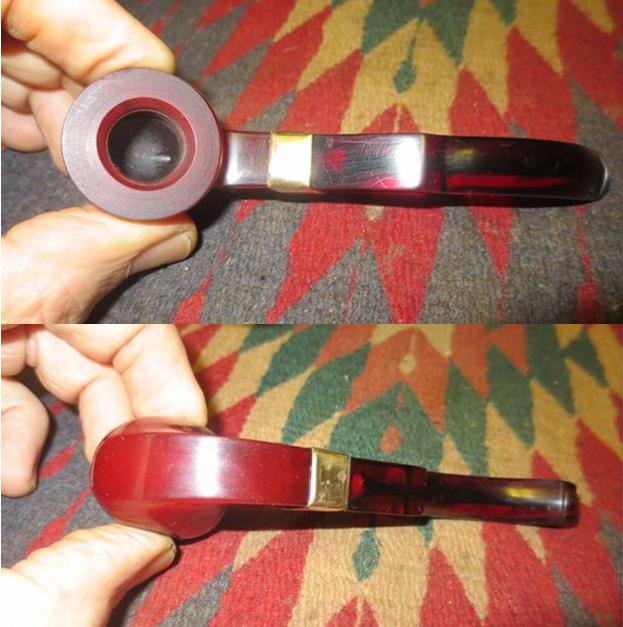
 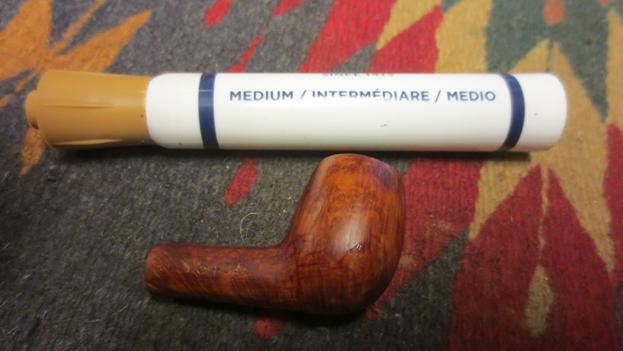 I realize that for many of us who read about pipe restoration the measurements of this pipe really do not give a clear picture of the true size of the pipe. To give more of a sense of perspective to the diminutive size of the pipe I decided to take two photos of the tiny bowl with a regular sized Comoy’s long shank billiard. The first photo shows the pipe above the larger one. The second photo shows the bowl fitting inside of the regular sized bowl. Hopefully that helps give you a clear idea of the tiny nature of the pipe.
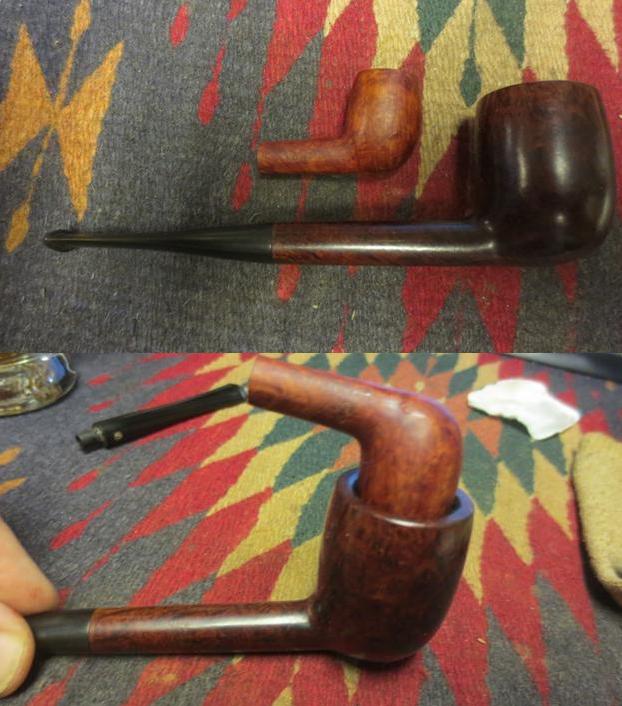 I gave the bowl a second coat of stain using a Danish Oil Cherry stain. I wanted a bit of contrast to the brown and also to enhance the reds in the briar.
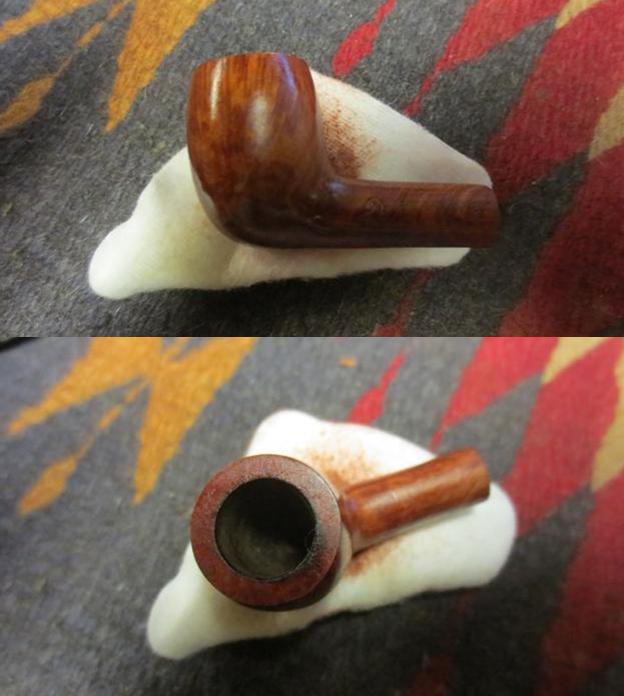
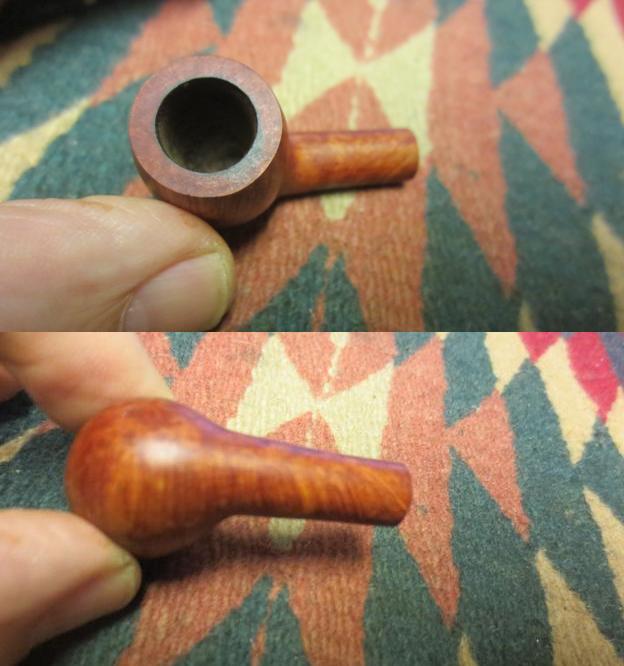
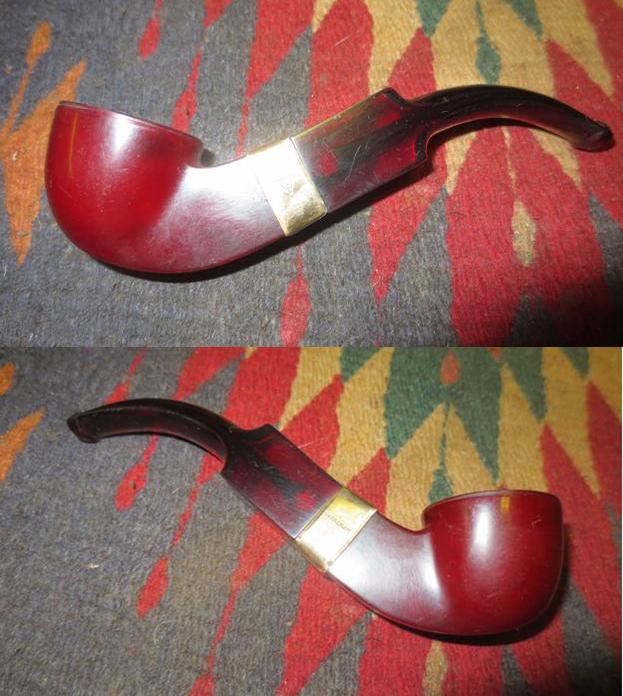
 I rubbed the bowl down with a soft cotton cloth to spread the stain coat out and rub it into the briar. The next photos show the look of the pipe after a quick hand buff.
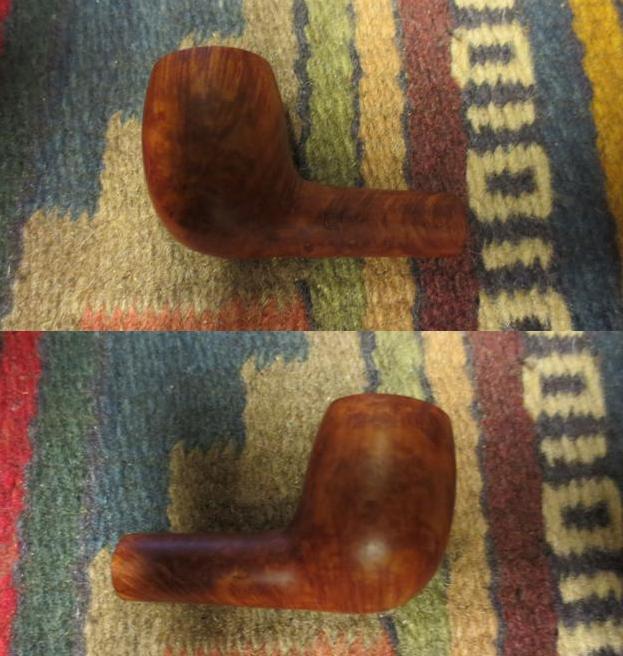 I buffed the bowl with Blue Diamond on the buffing wheel to polish it. I gave the bowl several coats of carnauba wax and buffed it with a clean buffing pad. I hand buffed it with a microfibre cloth.
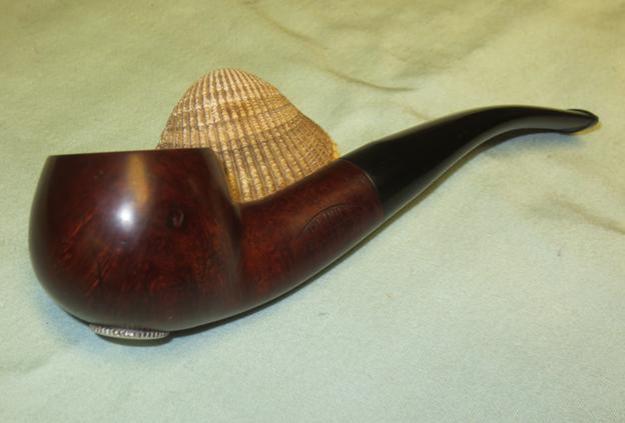
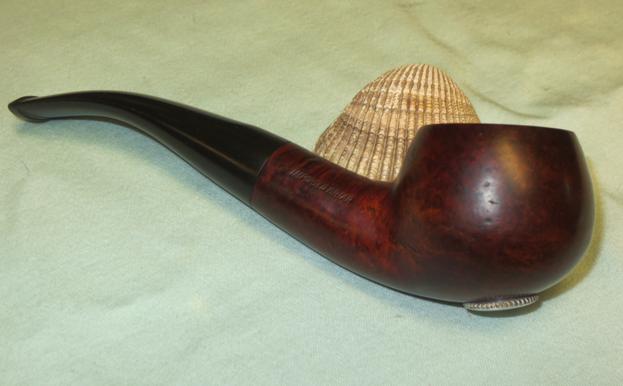
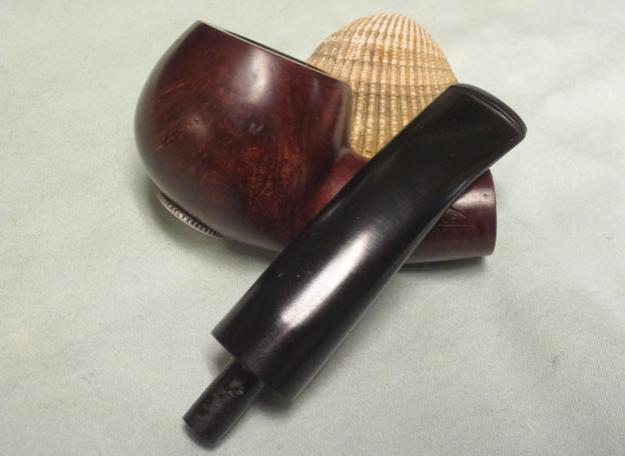
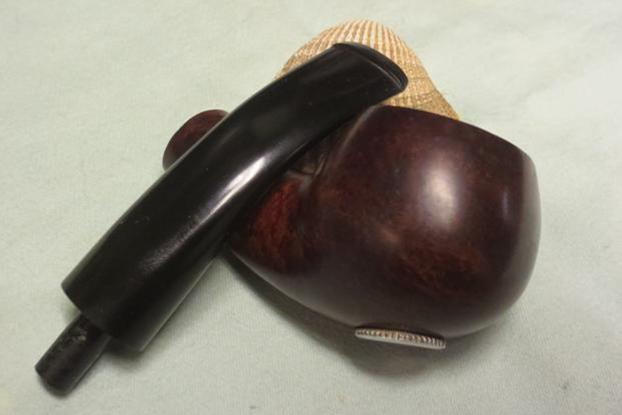
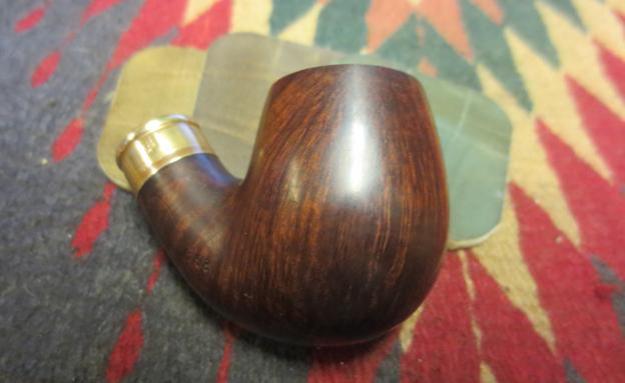
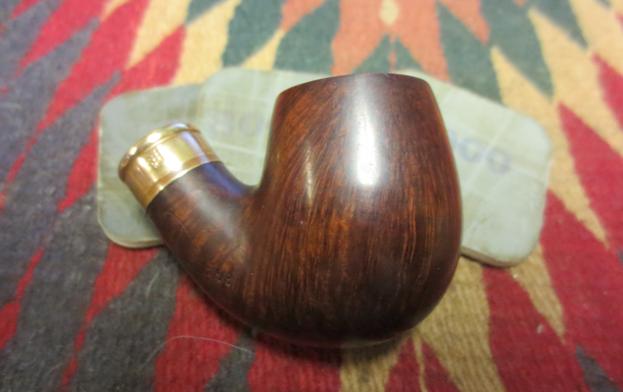
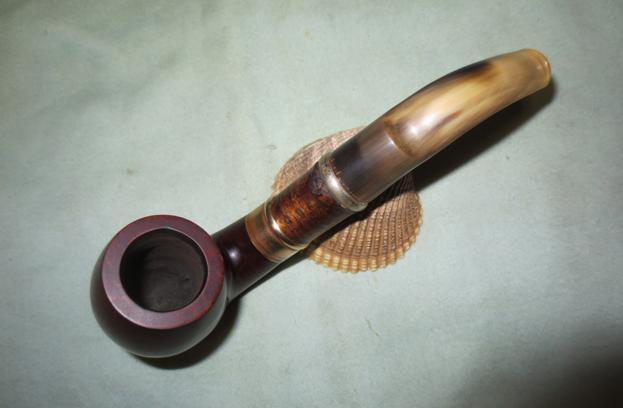
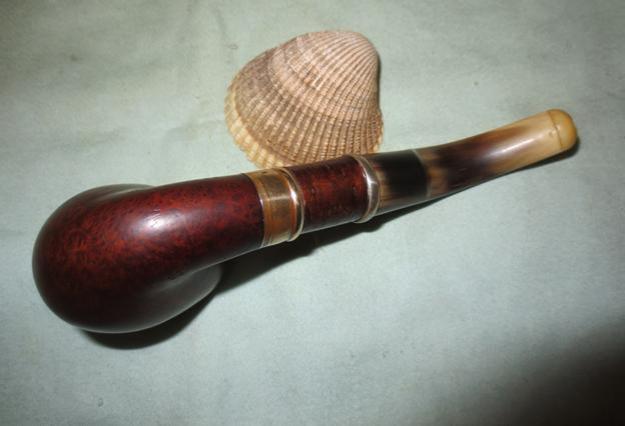
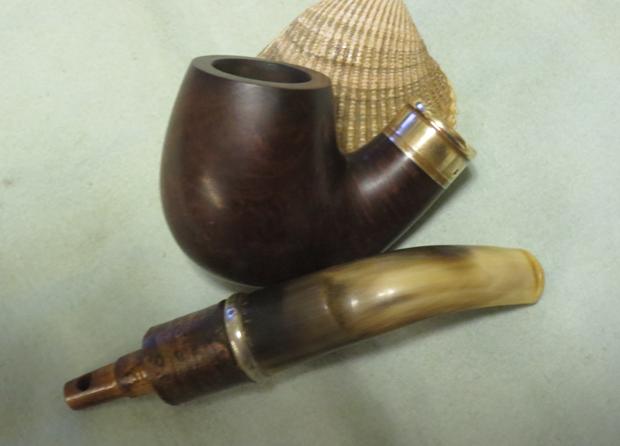
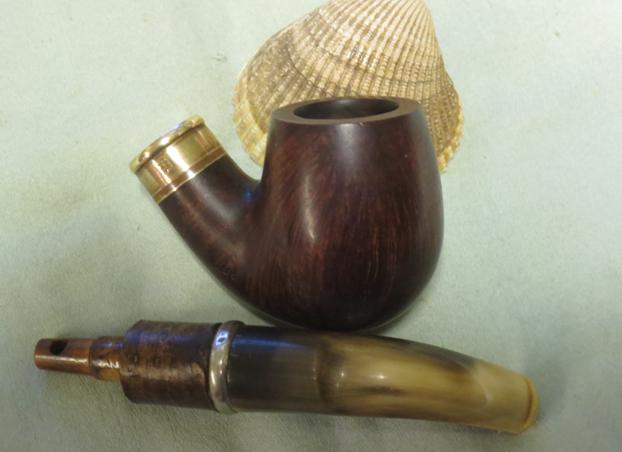
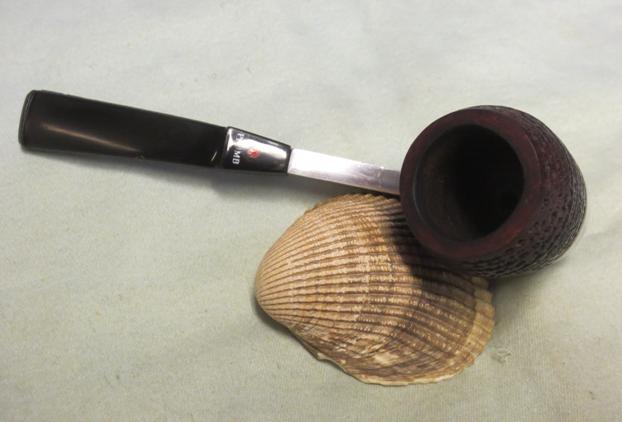
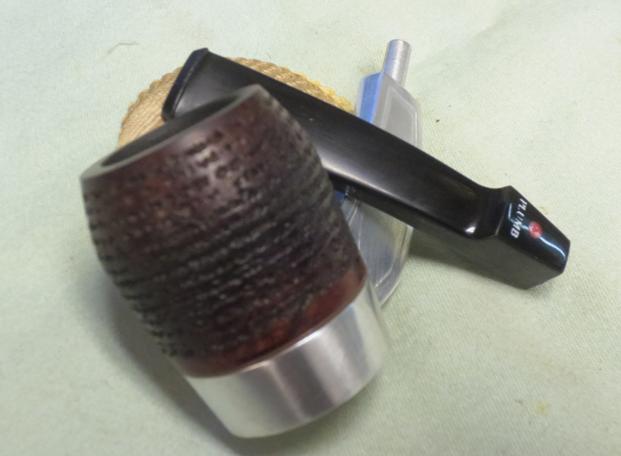
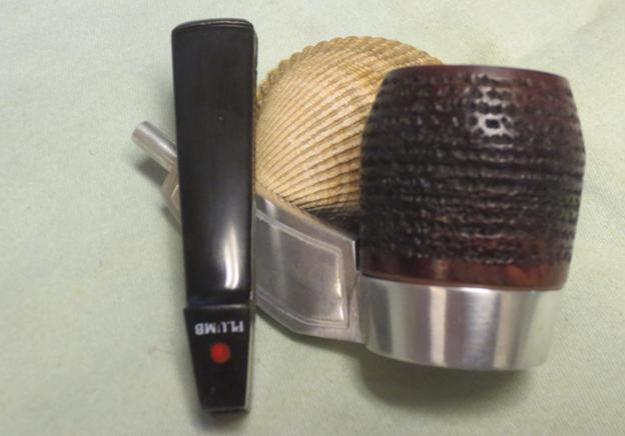
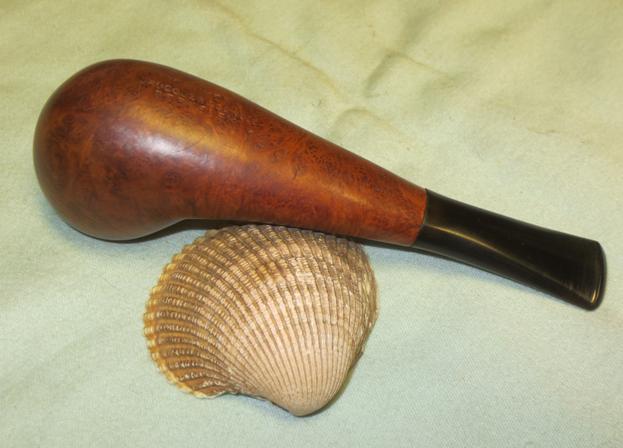
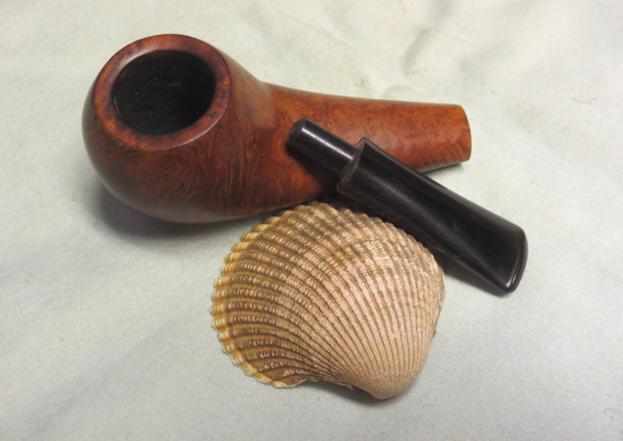
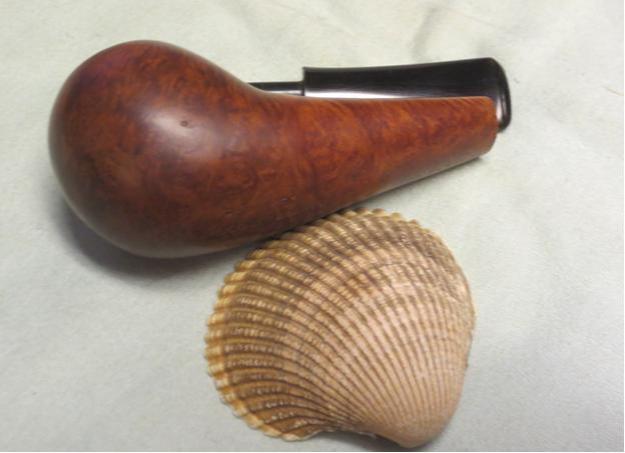
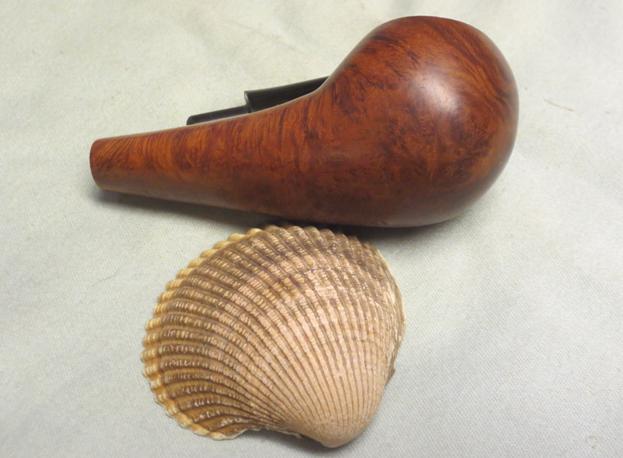
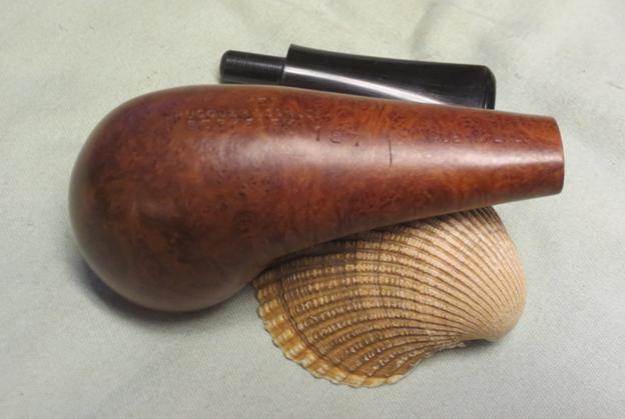
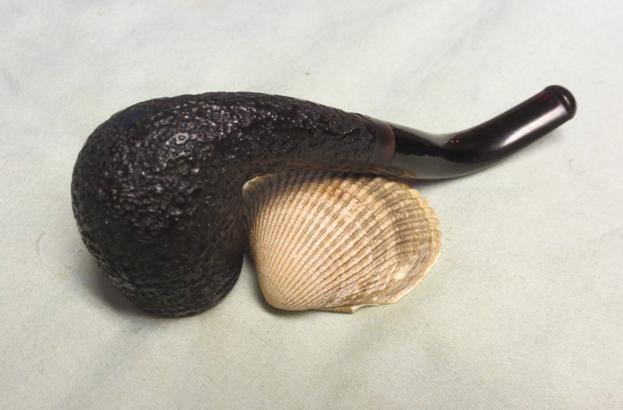
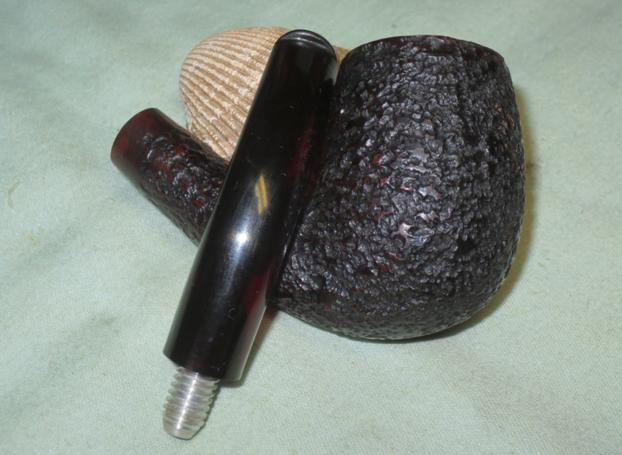
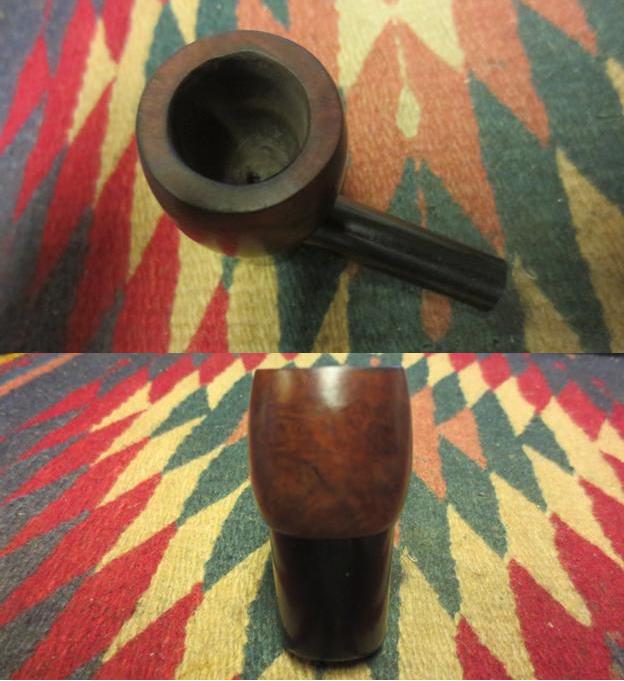
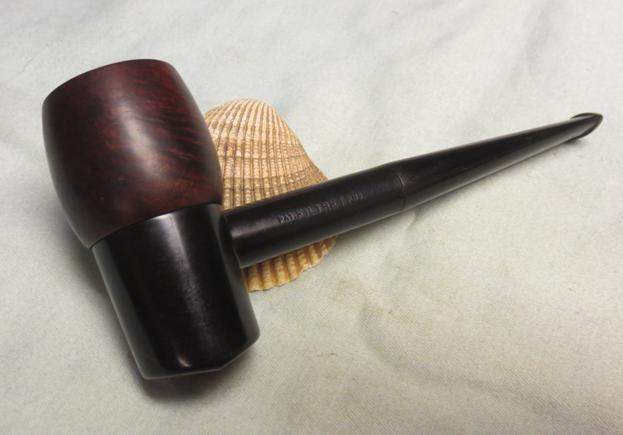
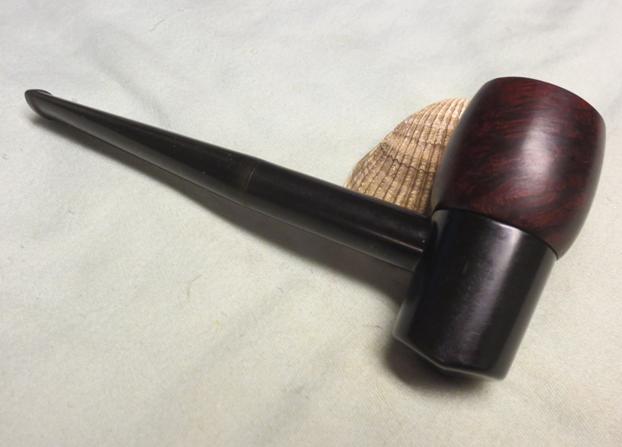
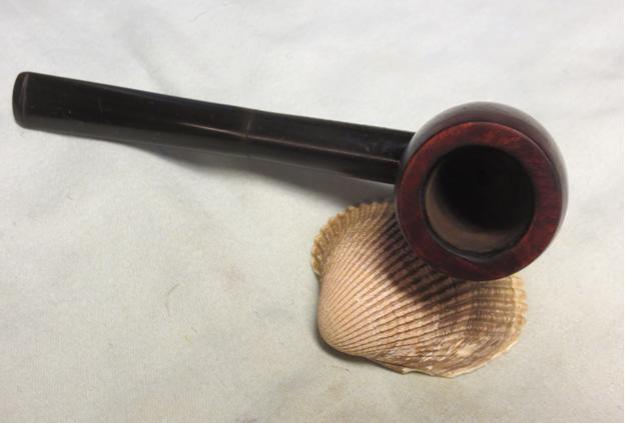
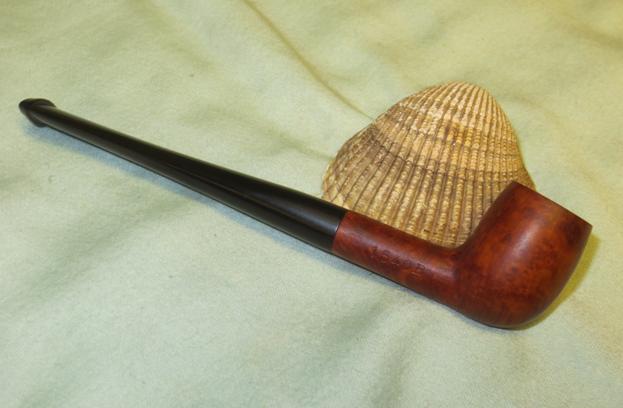
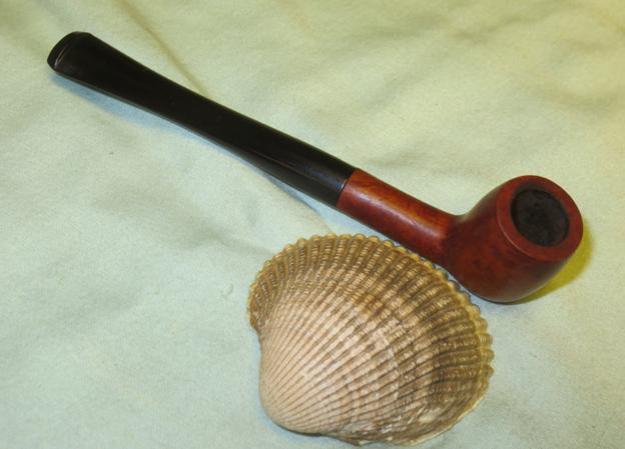
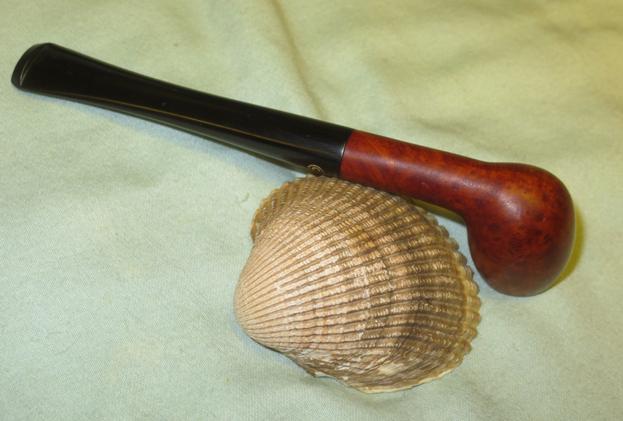
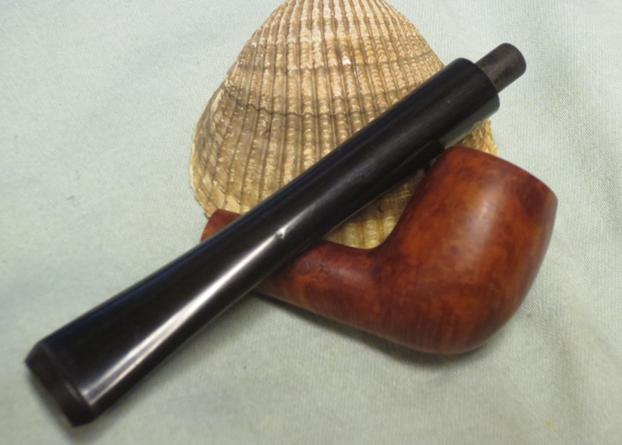
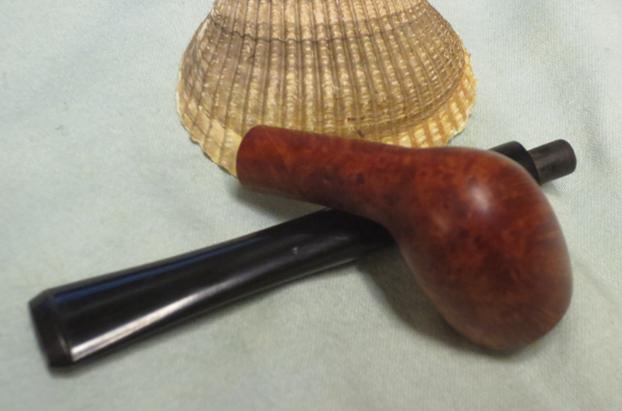
 I gave the bowl and stem another coat of carnauba wax and lightly buffed it with a clean buffing pad. I hand buffed the entire pipe with a microfibre cloth. The finished pipe is shown in the photos below. It came out really nicely. Looking at the pipe is hard to tell from the photos the tininess of the pipe as all is proportional. The seashell in the photo is the same one that I use in all of the final photos and with this pipe it seems quite large. Thanks for looking.
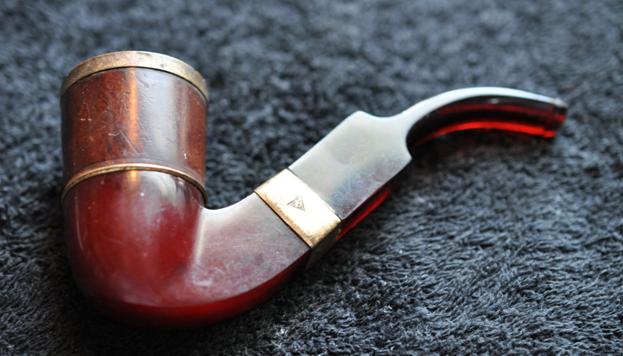
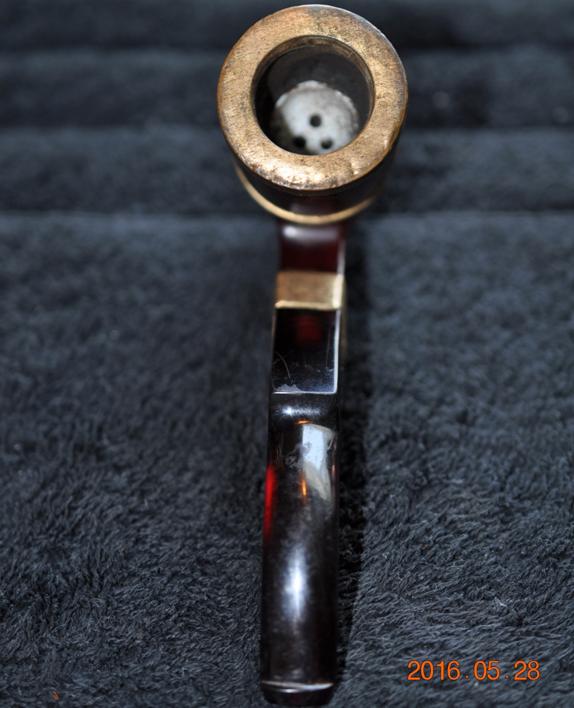

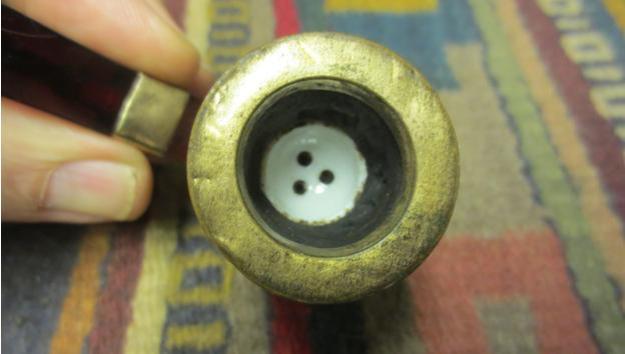

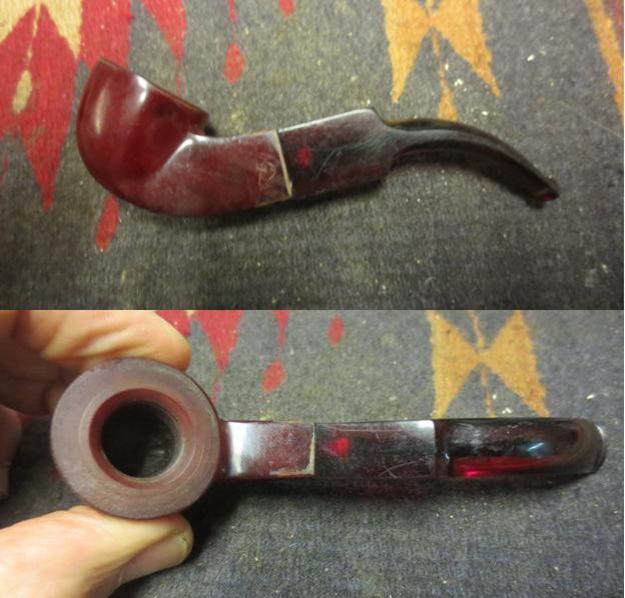


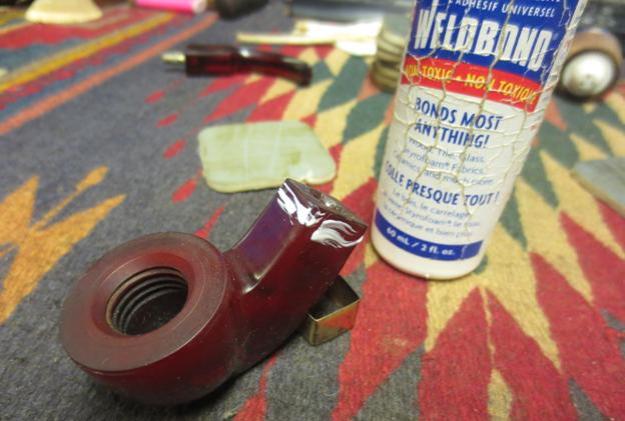
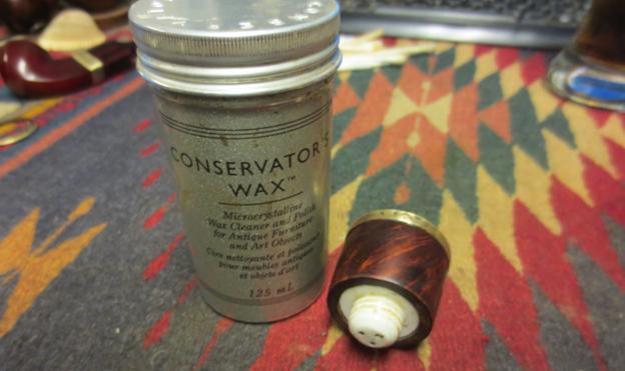

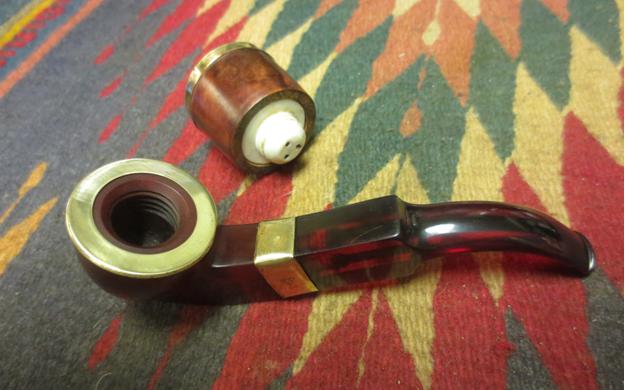

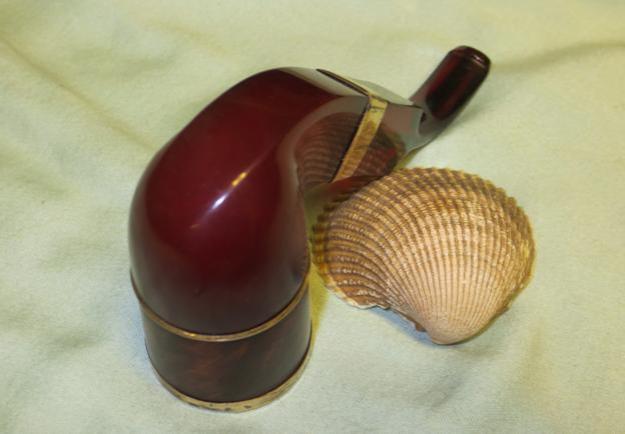
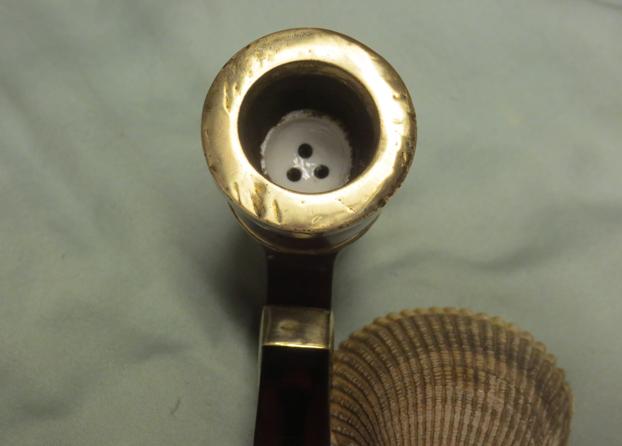
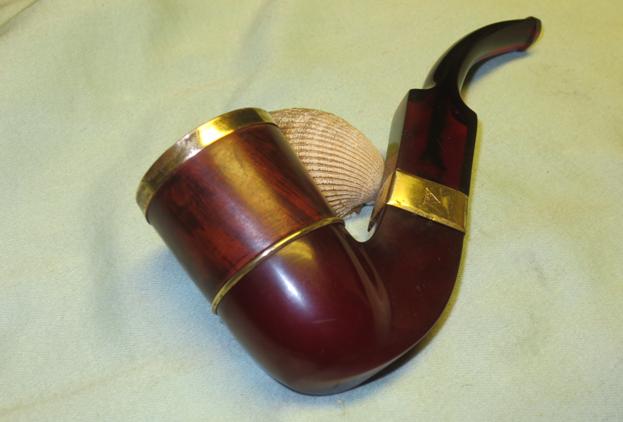


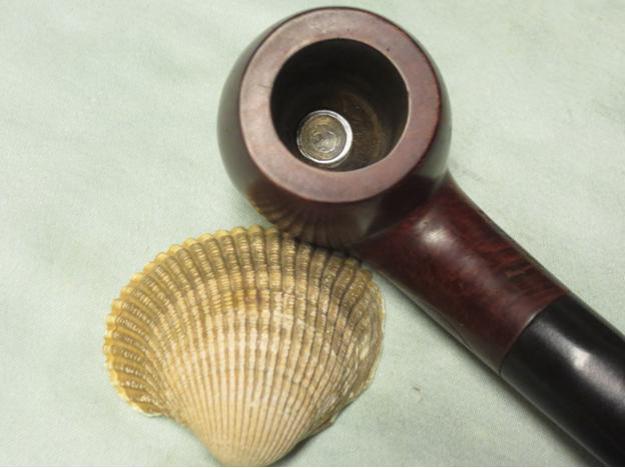
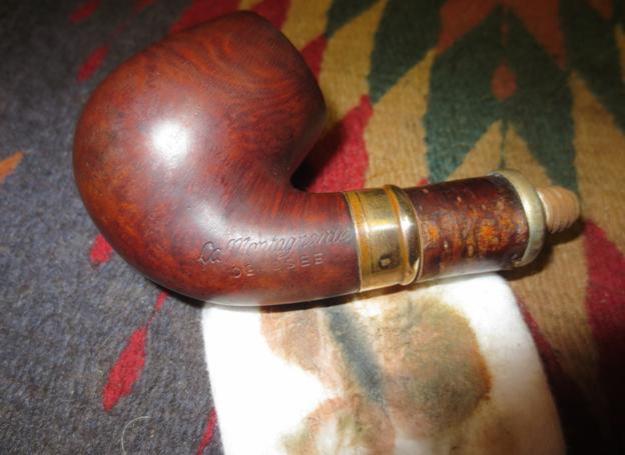
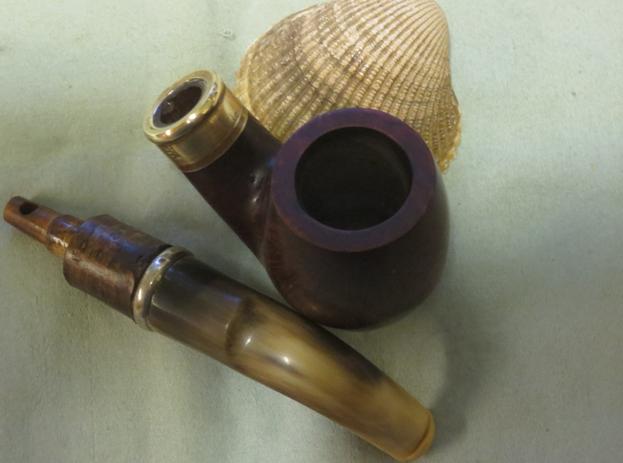
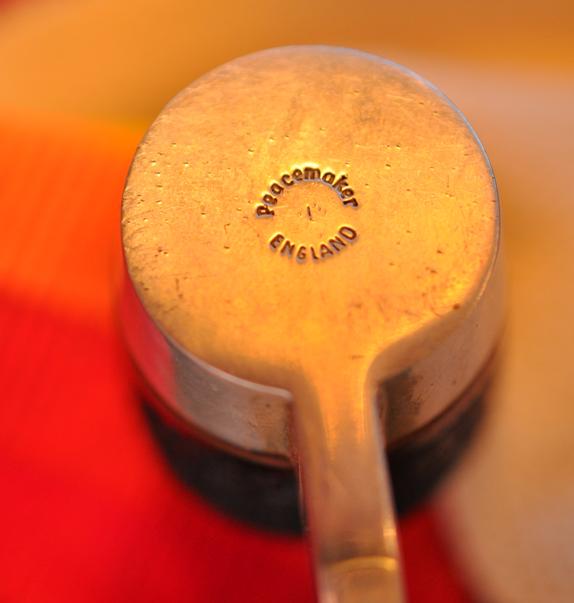
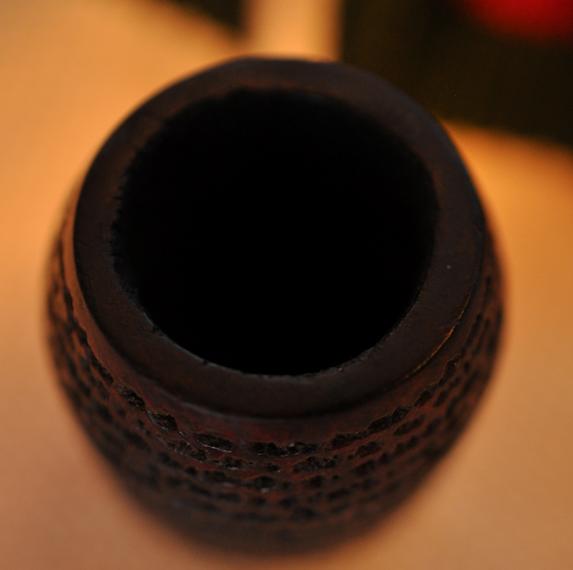
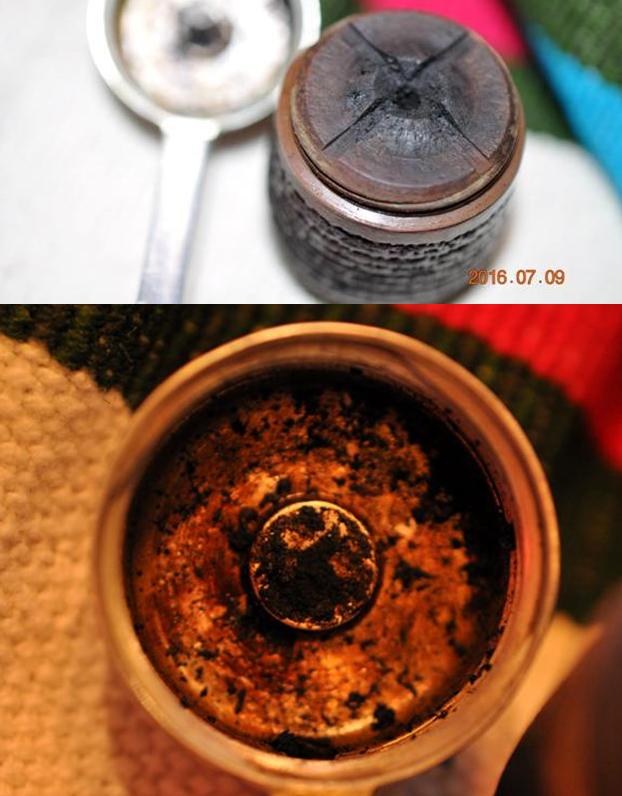
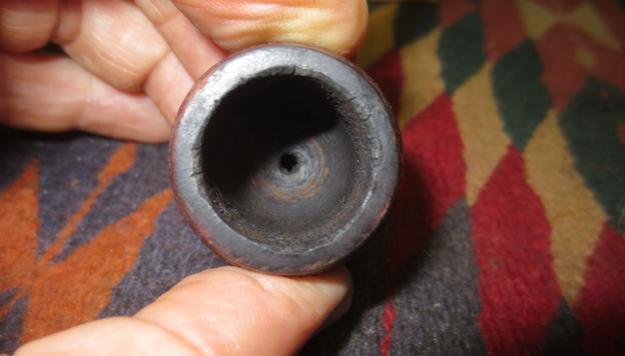
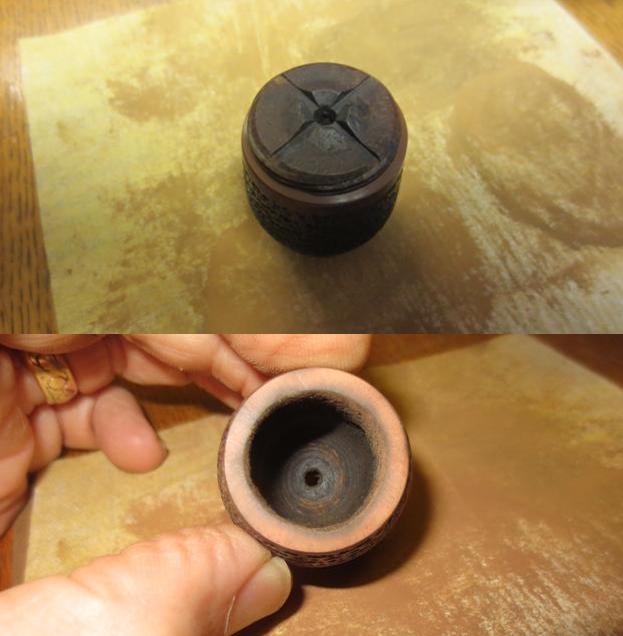
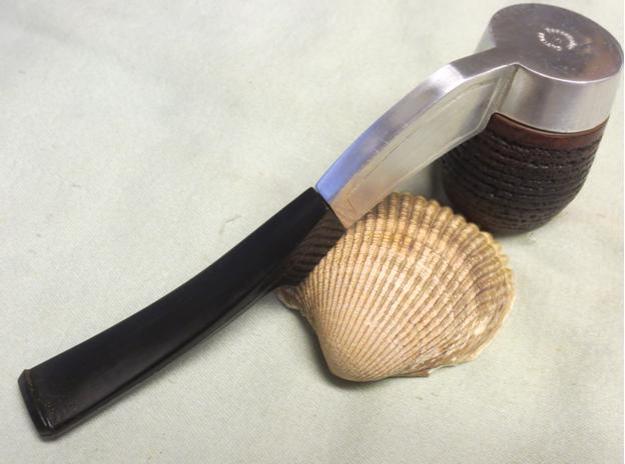
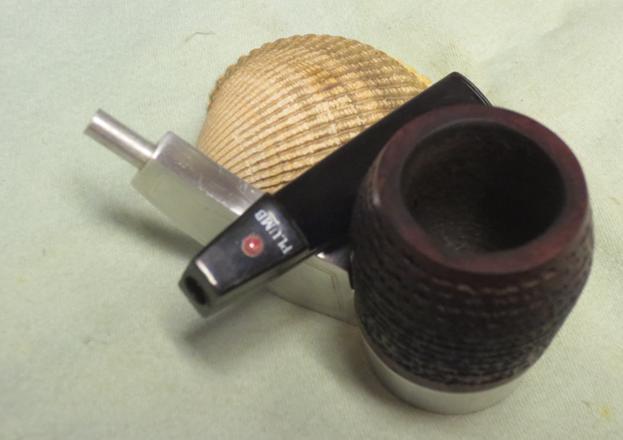
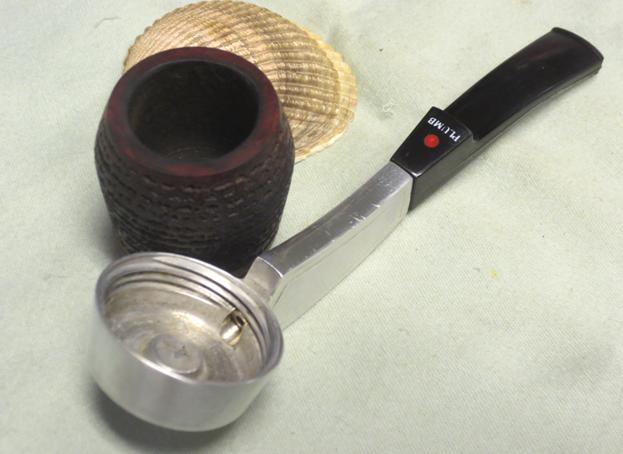
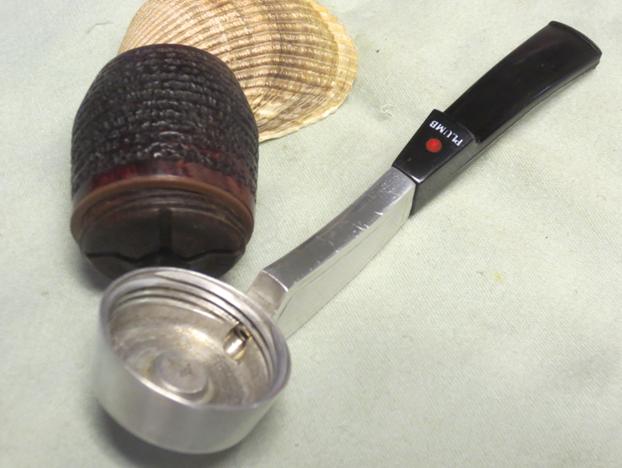
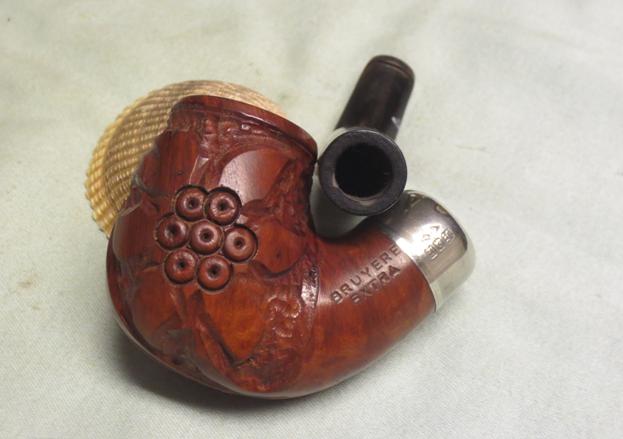
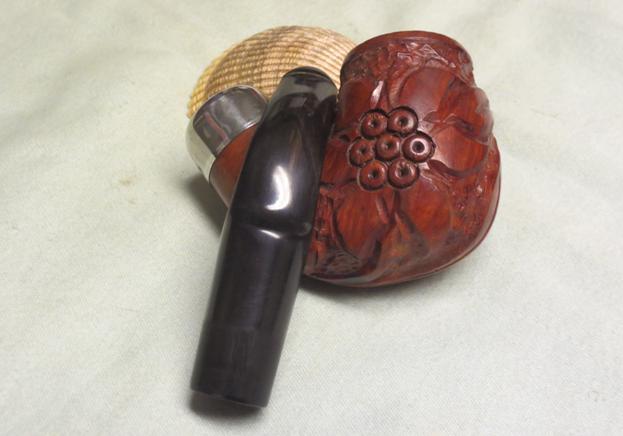
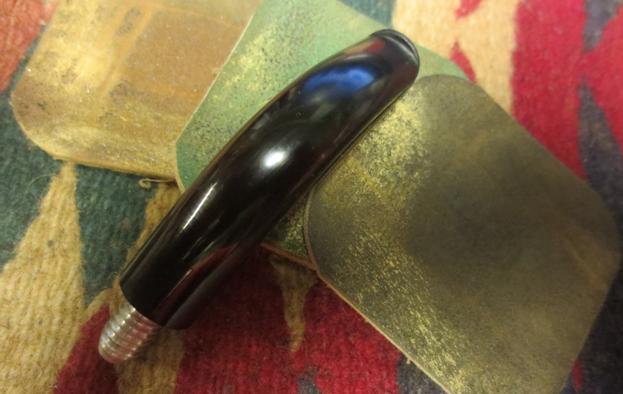
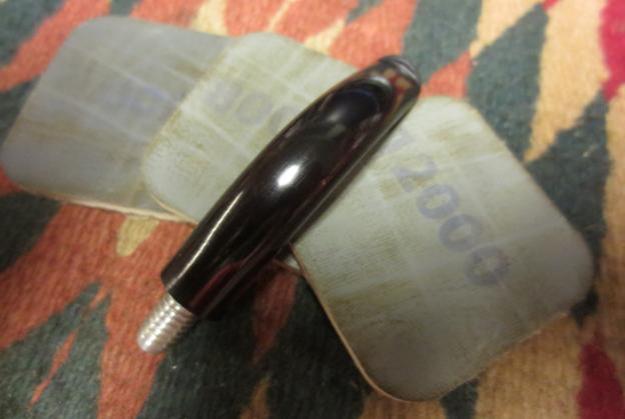
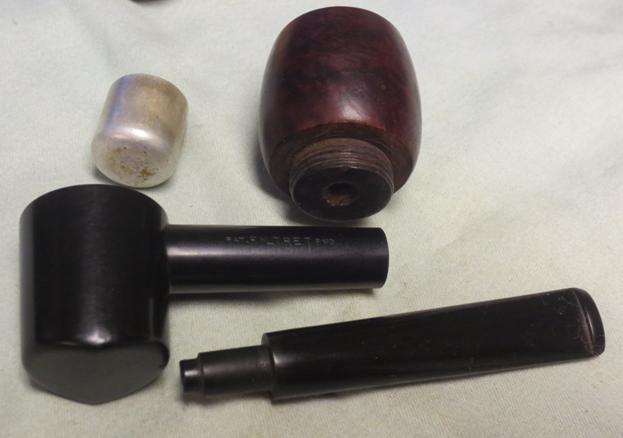
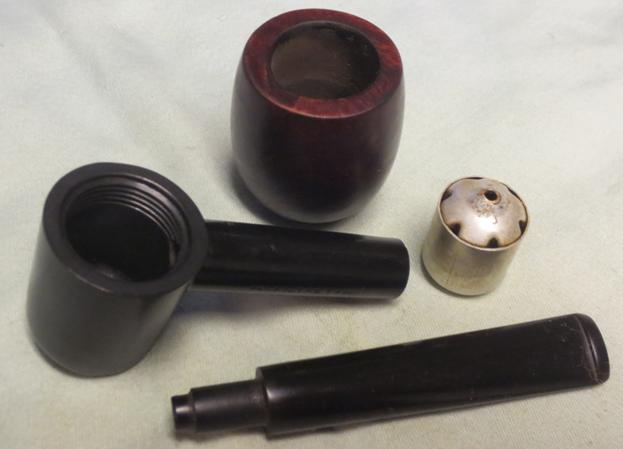
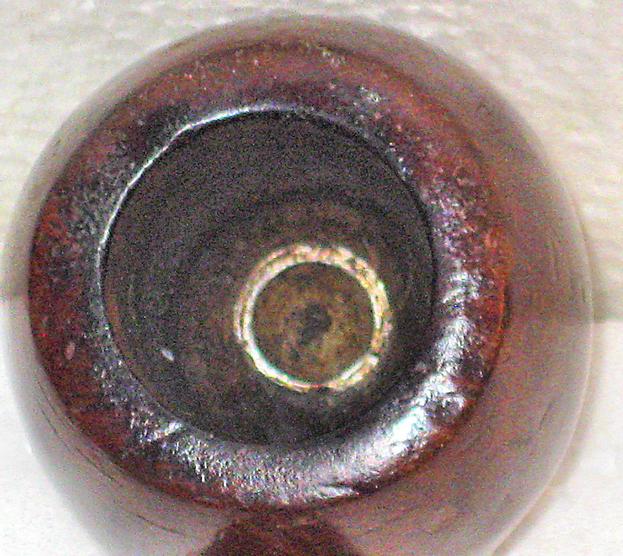
 The fourth and fifth pictures remove the mystery of the knurled edge on the bottom of the bowl that showed in the first photo. You can see in that photo of the bowl bottom that the silver disk looks like it was made to be rotated. We talked and my brother bid and won the pipe (I can’t wait for the pipe to get here so I can check this out). The fifth photo shows the inside of the bowl. The top of the disk appears to be a cup intruding into the bowl bottom. It was really odd looking.
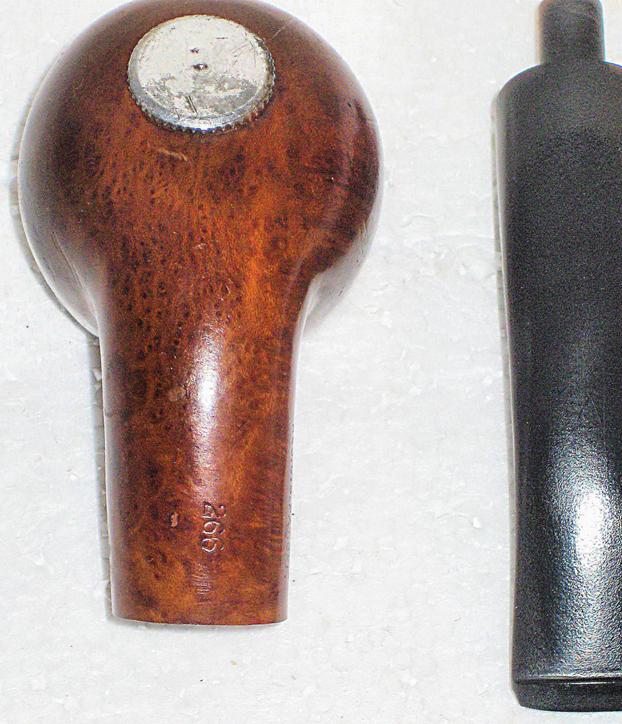
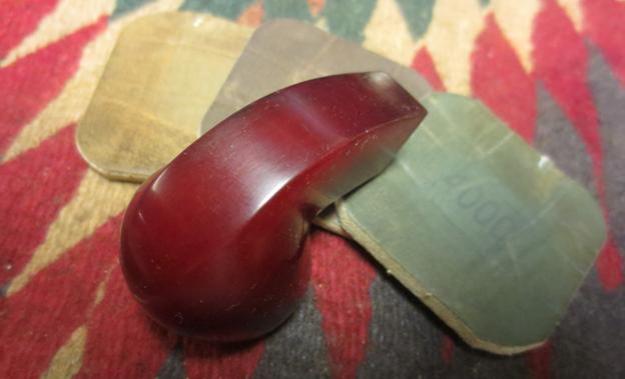
 That information was helpful on many levels. He did not however have any photos or drawings of the pipe or pictures of the advertisements. I wanted to know if the bottom “sump” as he called it was pressure fit or threaded and screwed into the briar. I wanted to know if the bottom of the bowl was damaged or if the “sump” sat as it was supposed to flush with the bottom. It was hard to tell from the photos. I wanted to know was the “wads” were that sat in the sump. From the look of the bowl bottom it appeared that the “wads” may well have been lozenges that fit in the curved cup and then sat flat in the bottom of the bowl. But what did they look like? More research would be needed to answer these questions. But at least the mystery of the knurled edge peaking from the first photo was solved. It was a single unit with a cup on the inside of the bowl. I could not wait to see this in person and “fiddle” with it.
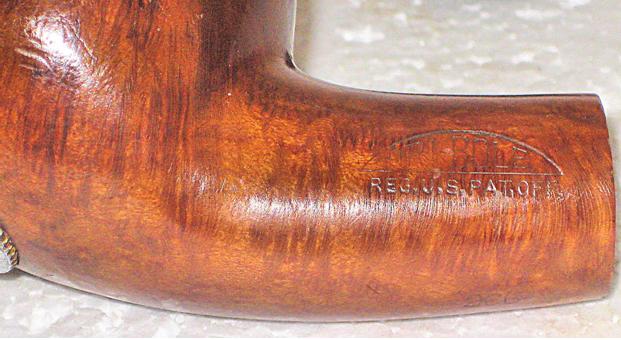 He gave the dimensions of the pipe as follows: overall length: 5 ½ inches, bowl height: 1 ½ inches, diameter of the bowl: 1 5/8 inches, bore diameter: 7/8 inches, bore depth: 1 1/8 inches and the weight: 44 grams or 1.6 ounces
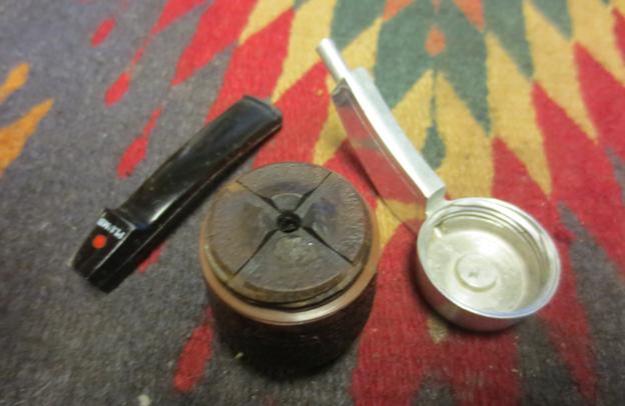
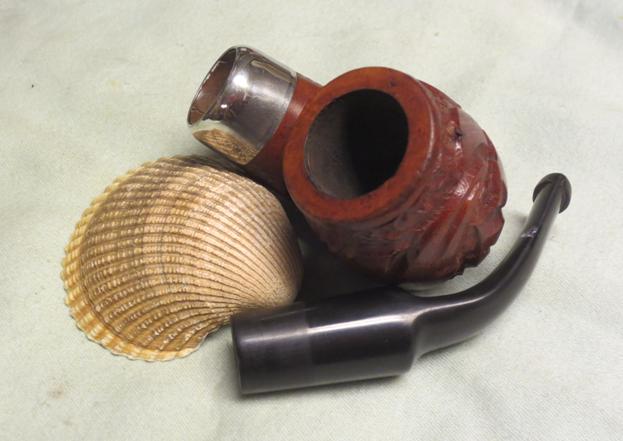
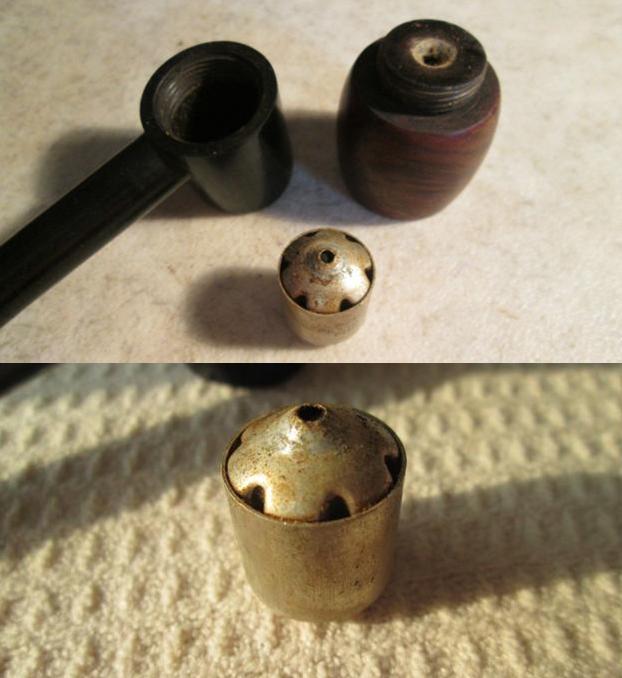
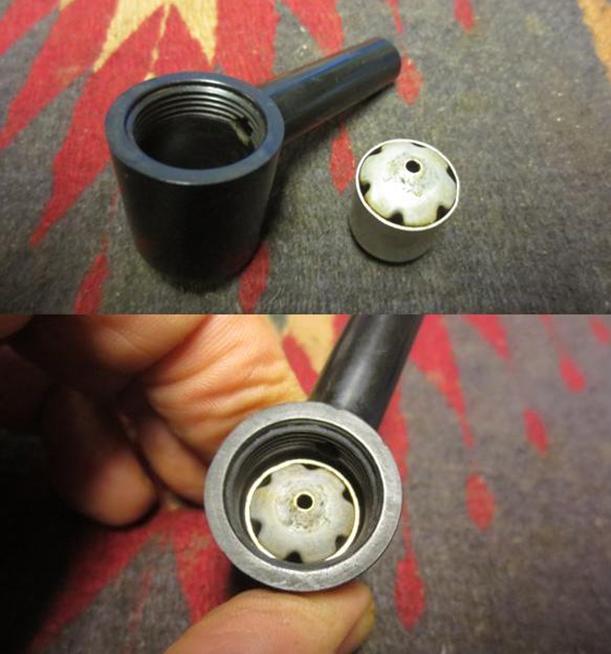
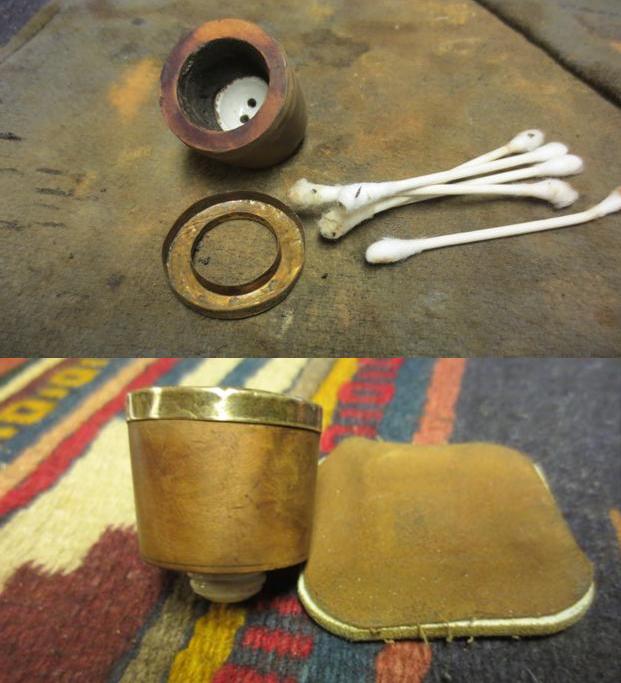
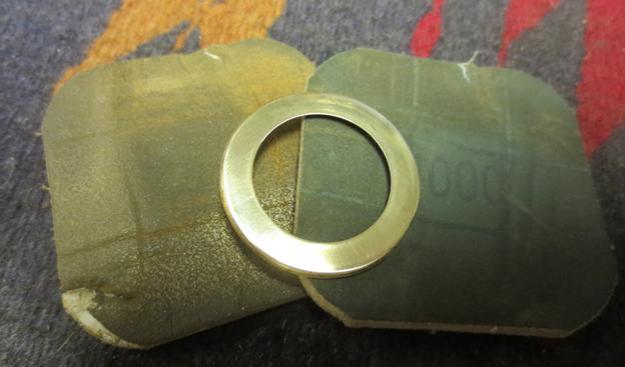
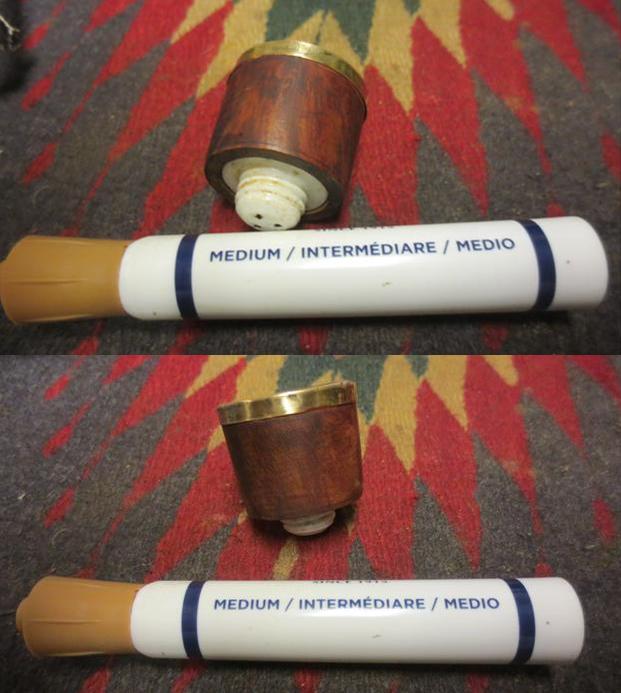
 I took it out of the alcohol bath and heated the disk with the flame of a lighter. I used a pair of pliers to hold tightly to the edge of the disk and I was able to twist it out of the bowl. Once it popped free I could undo it by hand. The first photo below shows the inside of the silver disk. The second shows the knurled outside.
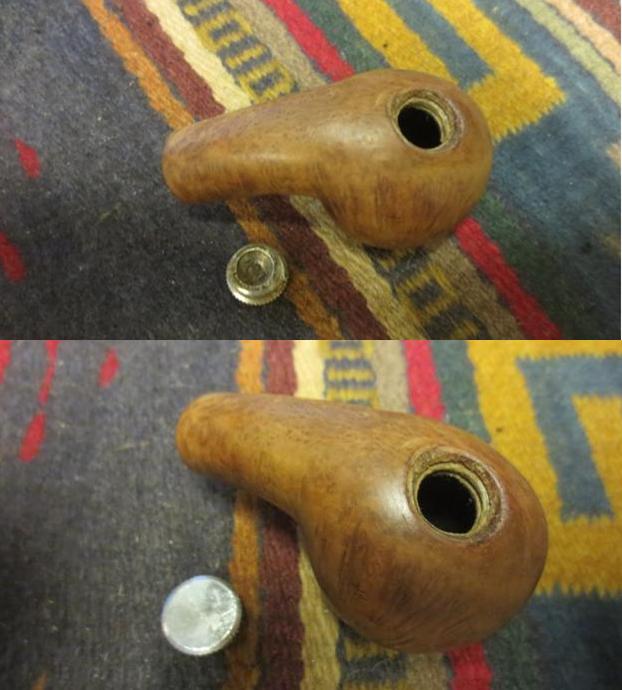 To remove the damage to the rim top and edges I topped the bowl on a topping board with 220 grit sandpaper.
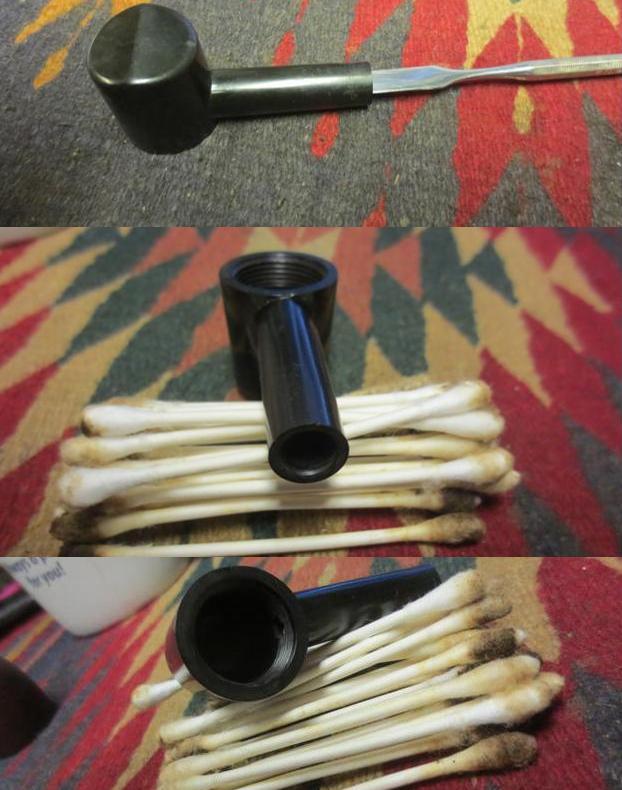
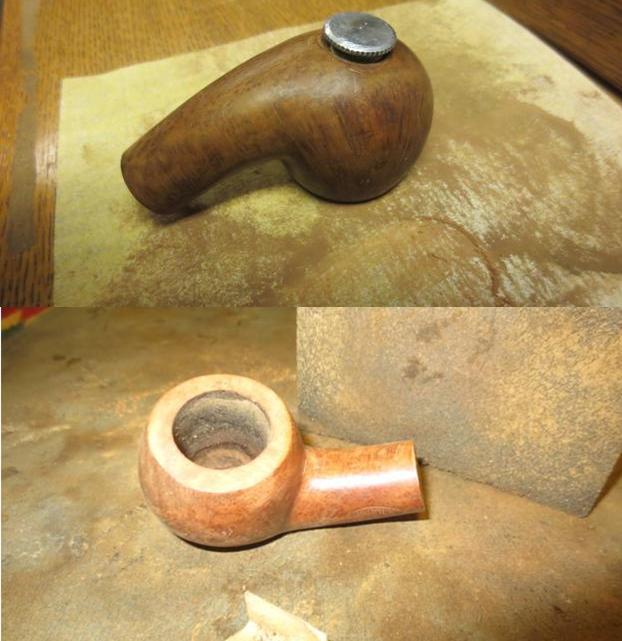 There were some nicks around the hole in the bottom of the bowl so I sanded those smooth with sandpaper and then cleaned out the threads in the briar with a cotton swab and alcohol.
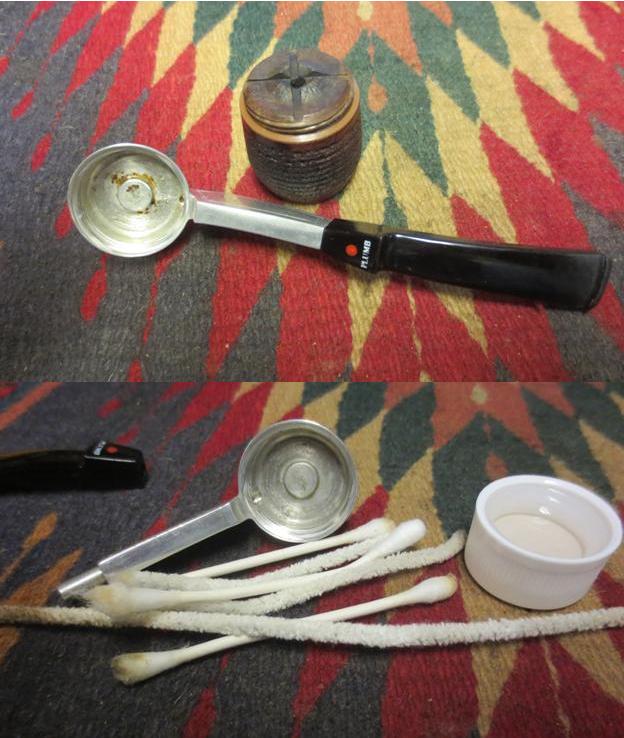
 I used the brass bristle brush to scrub the threads and the cup on the disk. I cleaned it afterwards with cotton swabs and alcohol.
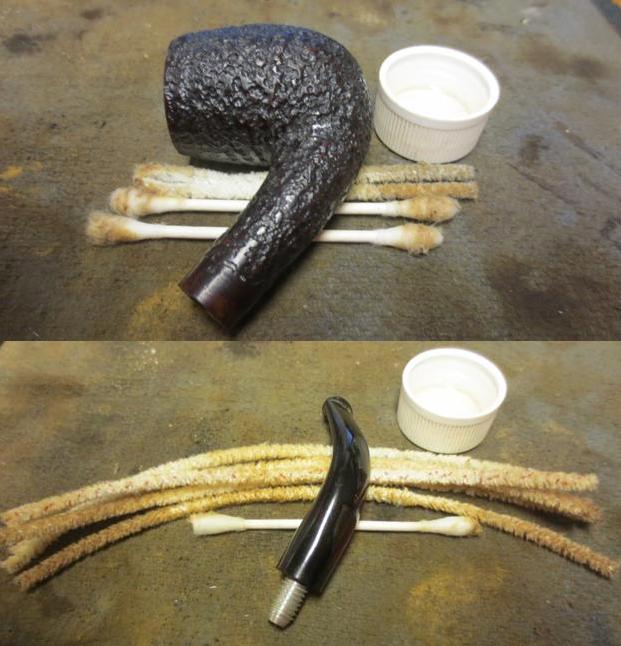
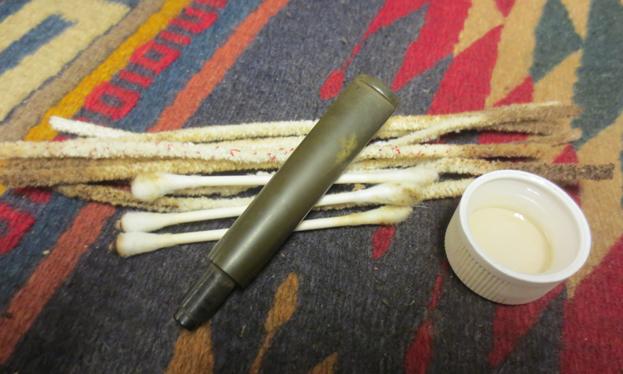
 I used a cotton swab to coat the threads on the disk with Vaseline and turned it into the bottom of the bowl. I wanted to make sure that I could easily turn the disk by hand.
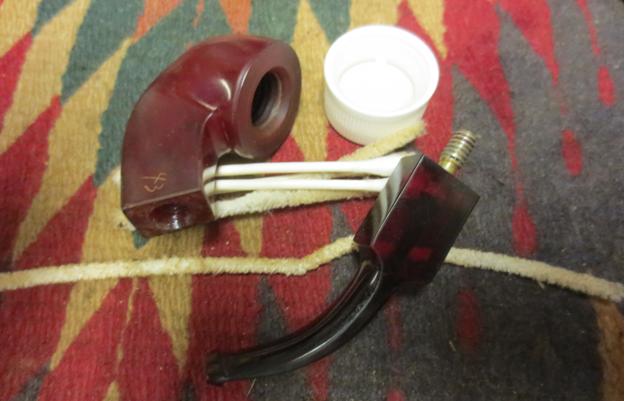
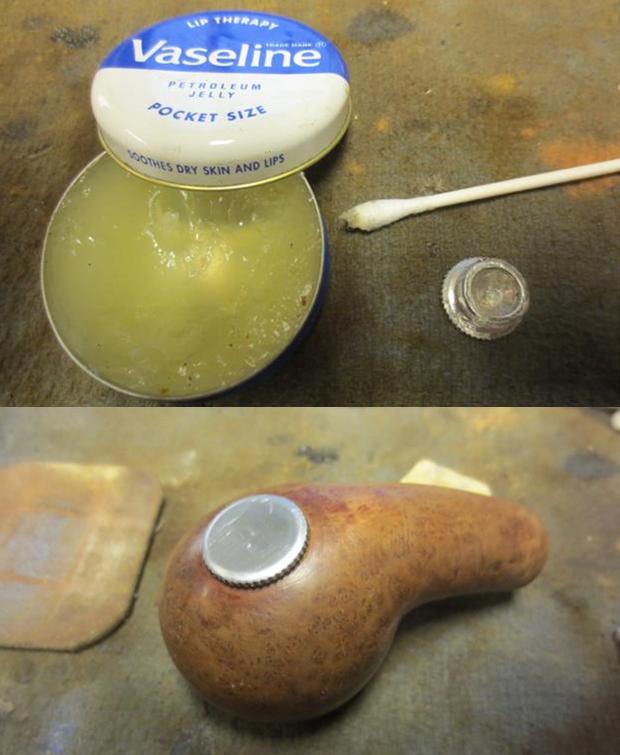 I cleaned out the internals with pipe cleaners, cotton swabs and alcohol. It was pretty clean thanks to my brother. It did not take too many to clean it out.
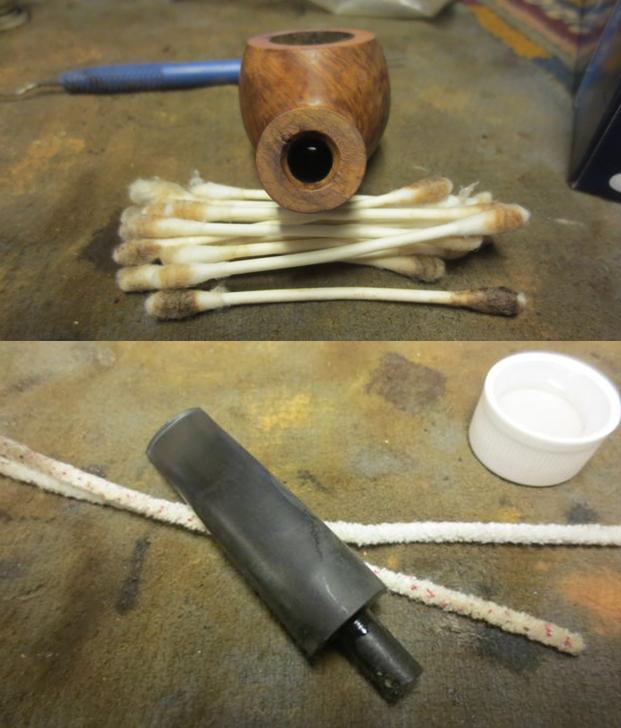 I sanded the bowl and stem with a medium and a fine grit sanding block. The pipe is beginning to look really good. I had to make a decision how far to sand the bowl and how many of the original dings and dents to remove without changing the “story” and character of this old timer.
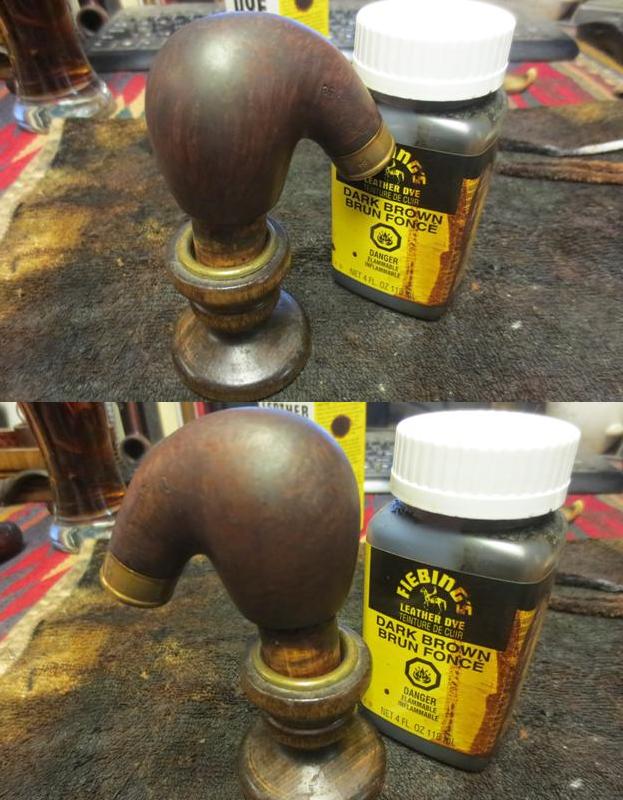
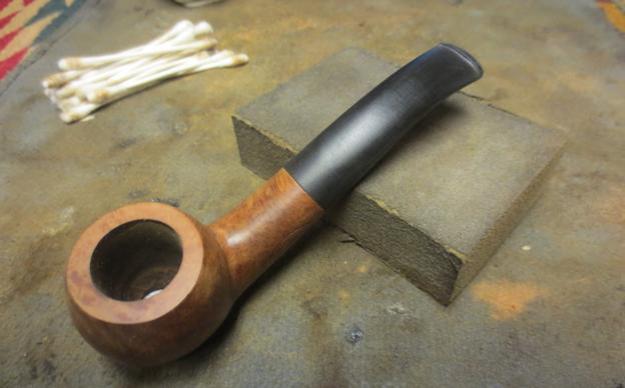 I heated the briar and then stained it with dark brown aniline stain cut by 50% with isopropyl alcohol. I flamed it to set the stain and repeated the process.
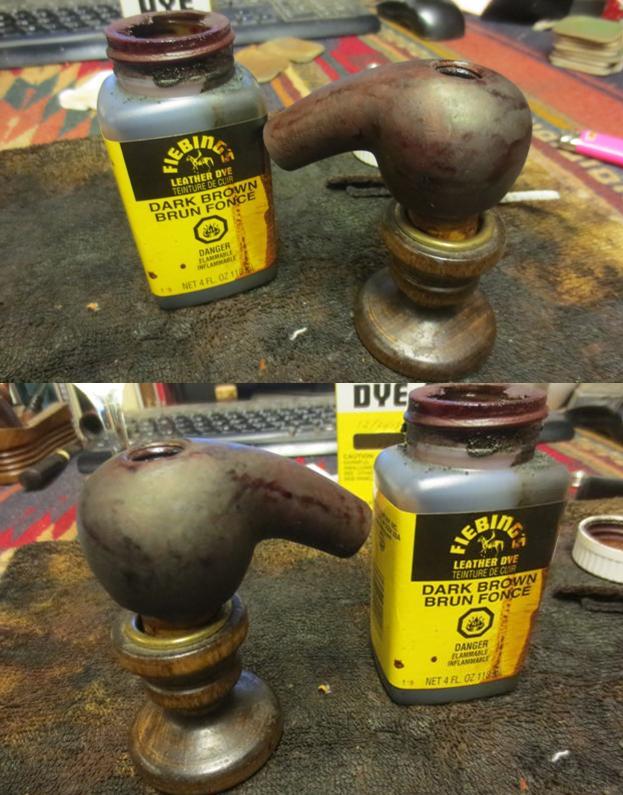 I wiped down the stain with alcohol dampened cotton pads to make it more transparent and make the grain stand out. At this point the fills stood out and I would need to address them a bit differently.
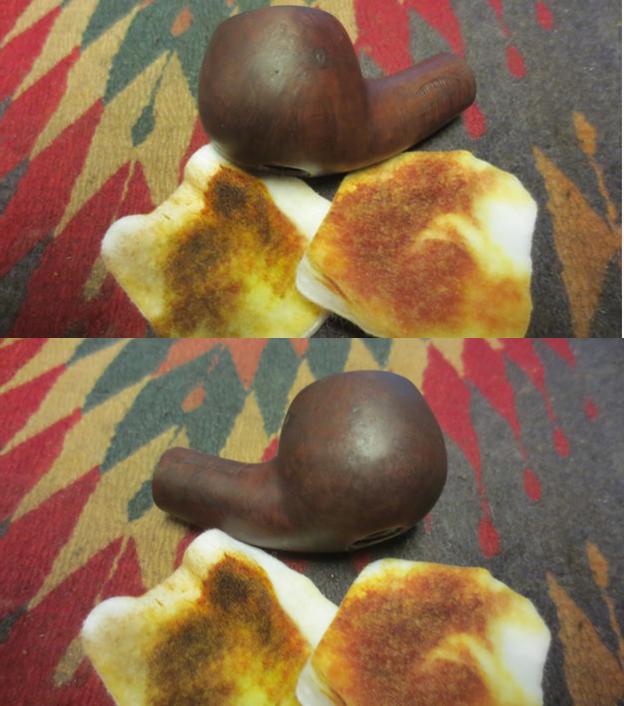
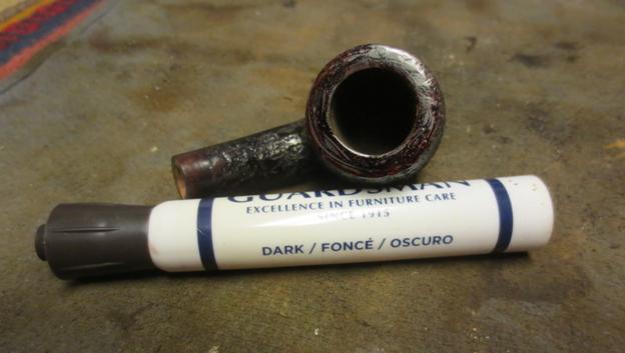
 I used a black Sharpie Permanent Marker to draw some lines across the fills and blend them into the grain on the pipe. I then chose to give the bowl a second contrast staining using a Cherry Danish Oil stain. I find that the combination of the black marker and the cherry stain blends the fills better than a brown stain. The combination of the brown and the cherry stains gives depth to the finish so I like using them together.
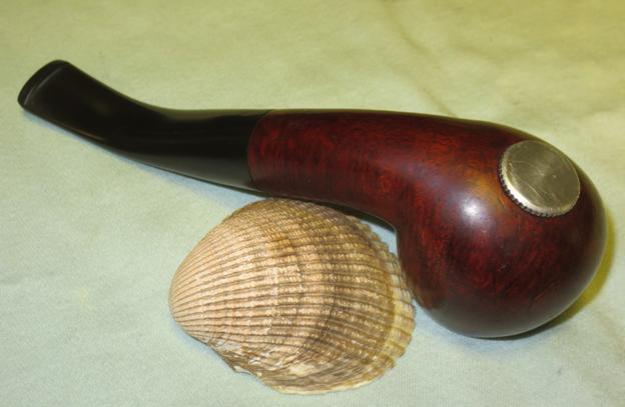
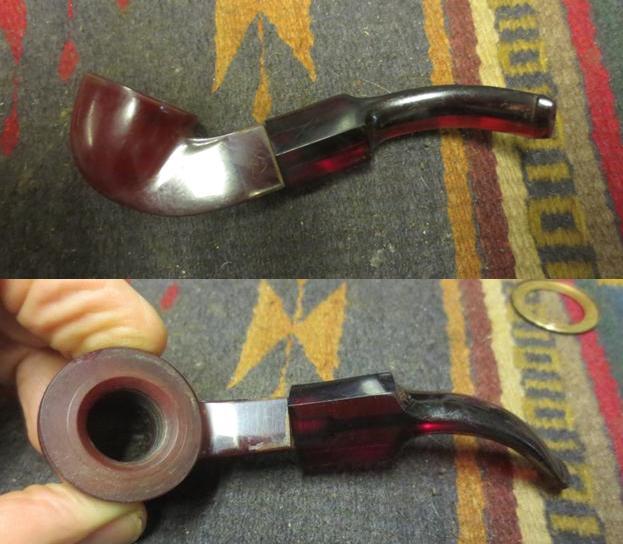
 Once the cherry Danish Oil stain dried (overnight) I buffed it lightly on the wheel with Blue Diamond and then gave the bowl a coat of carnauba wax. I hand buffed it with a microfibre cloth. You can see the small dings that I left in the bowl sides rather than change the look. I polished the silver disk with a silver polishing cloth. The next series of photos shows the bowl at this point in the process.
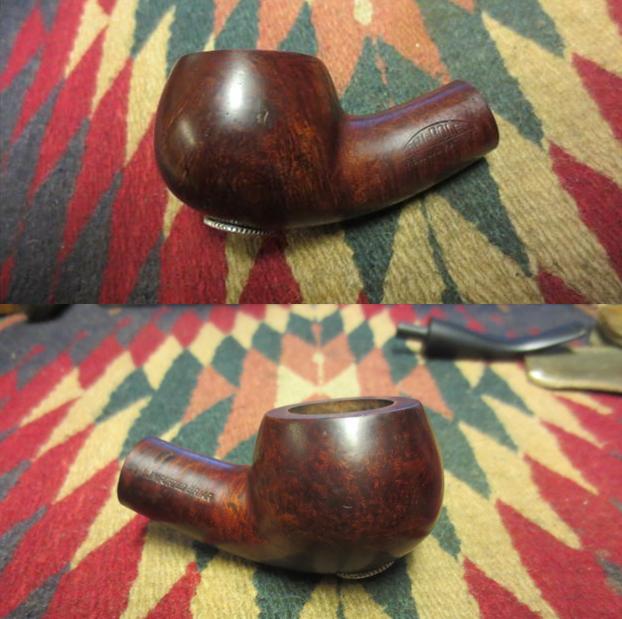
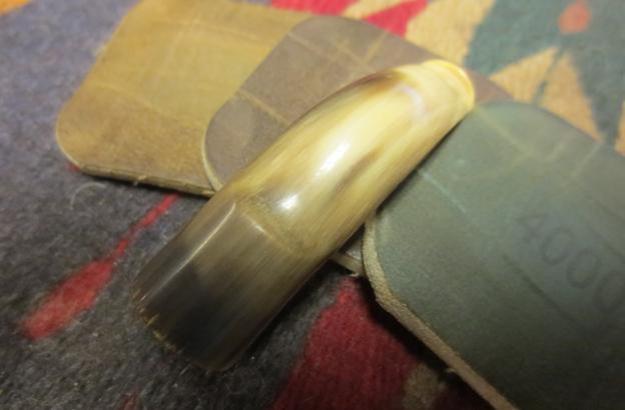
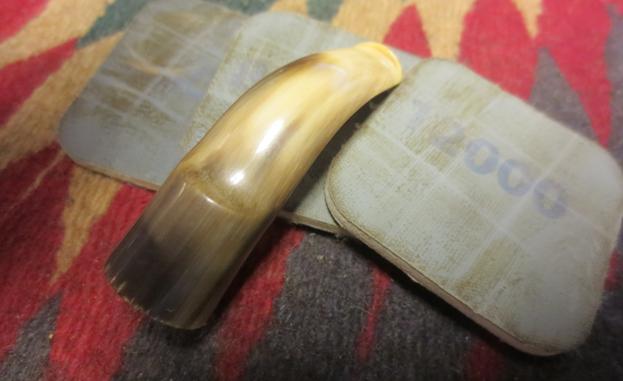
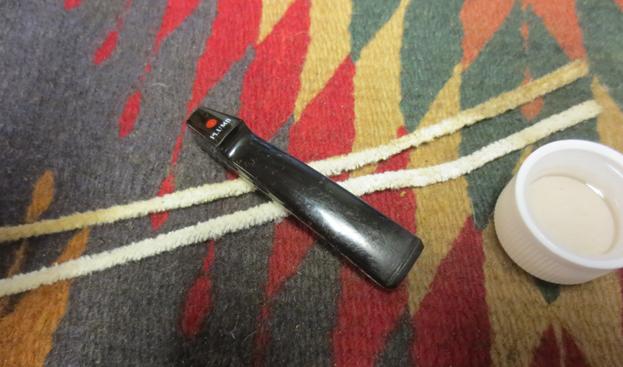
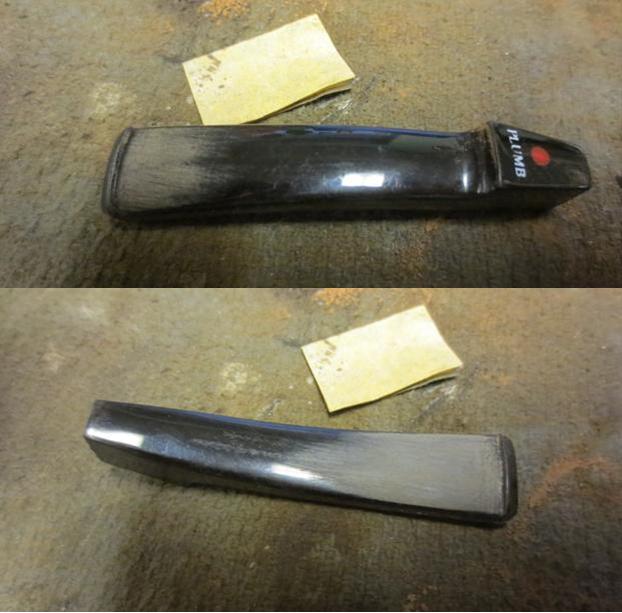
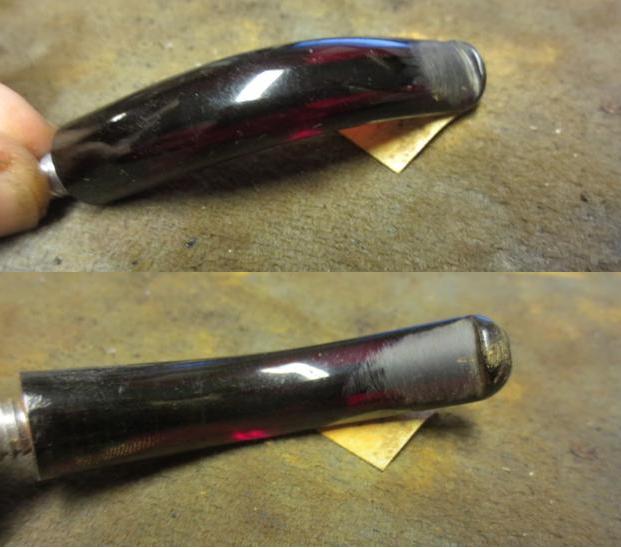
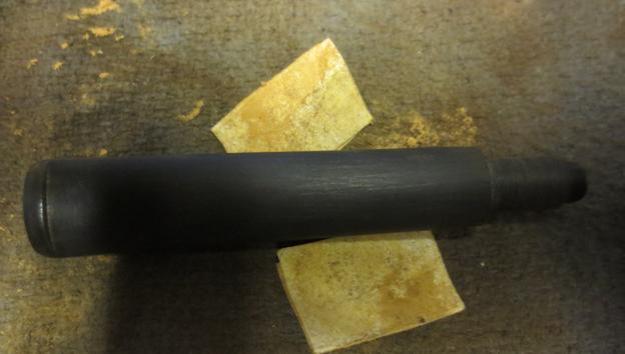
 I set the bowl aside and worked on the stem. The old hard rubber that was used on this stem was good quality. There was very little oxidation if any on it. The main issue was the pitting that covered the surface of the stem. I sanded it with 220 grit sandpaper to address the pitting and smooth out the surface and then began my normal sequence of micromesh sanding pads. Between each set of three grits (1500-2400, 3200-4000, 6000-12000) I rubbed the stem down with Obsidian Oil. I gave it a final coat of the oil and let it dry before I buffed the pipe.
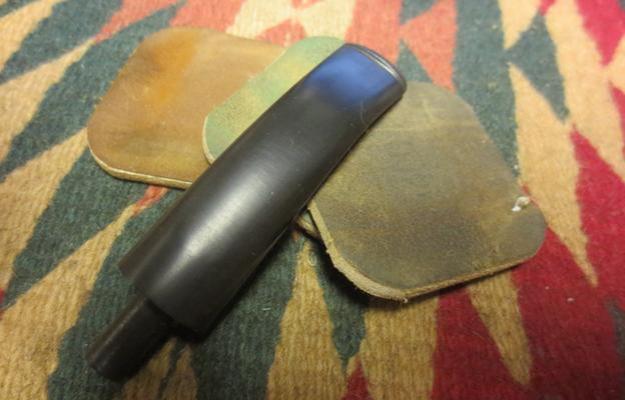
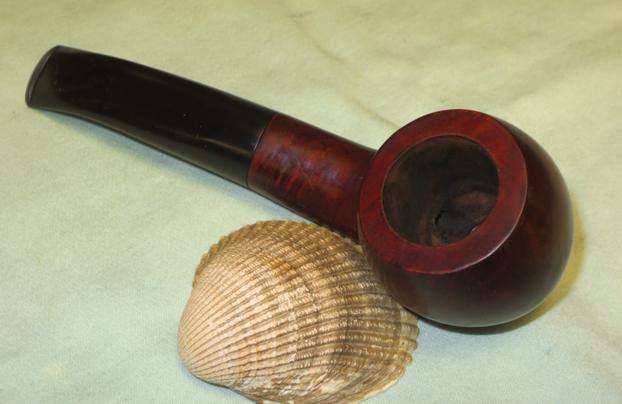
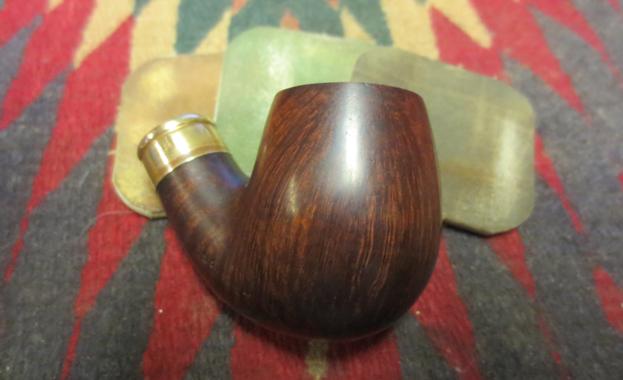
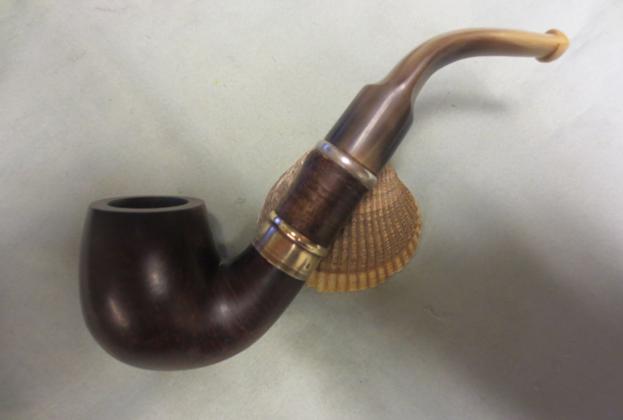
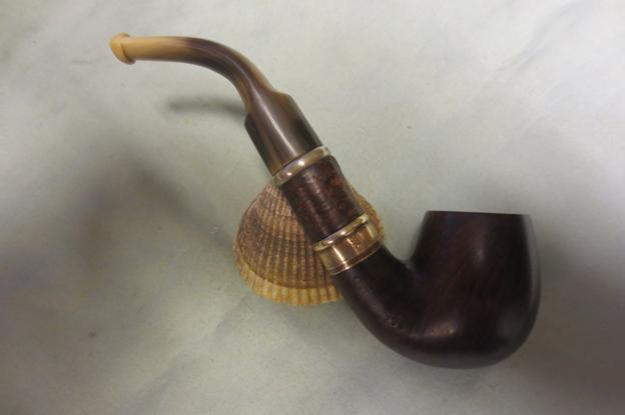
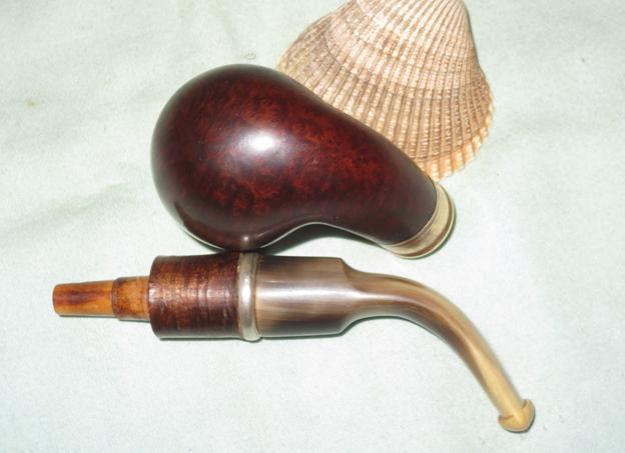
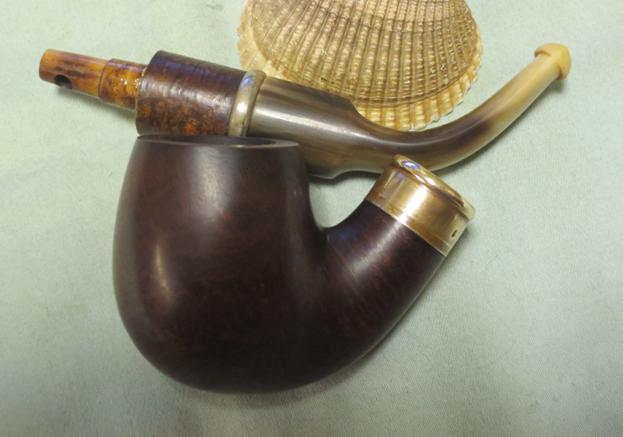
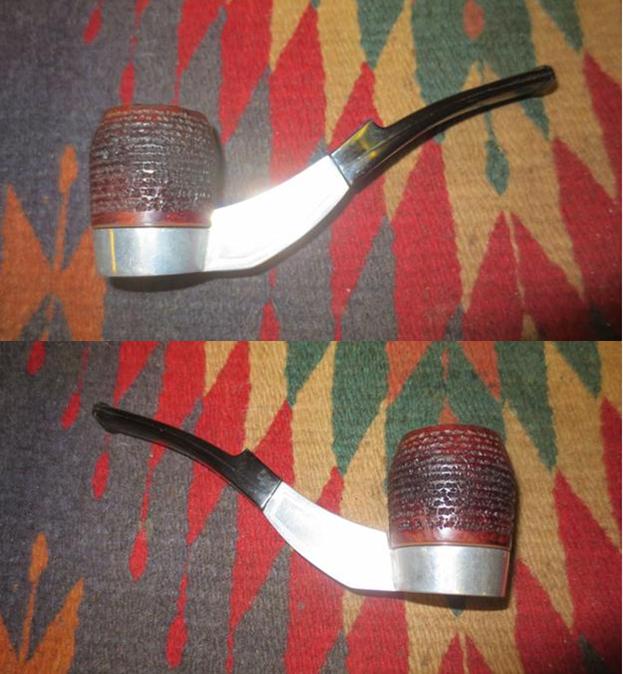
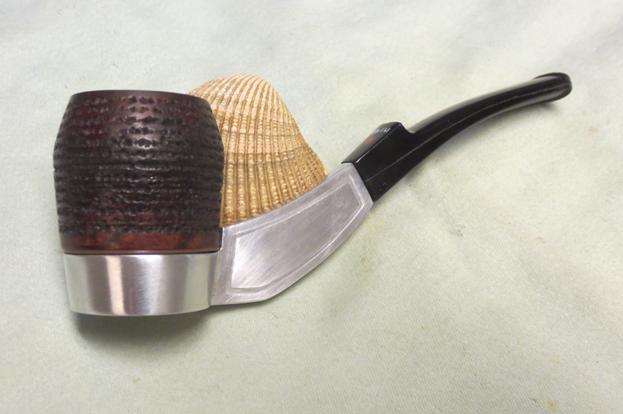
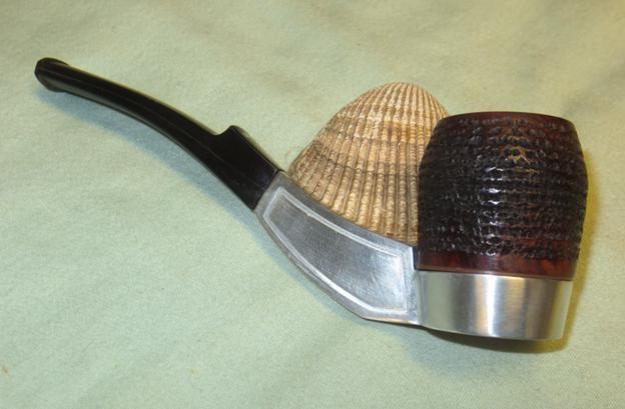
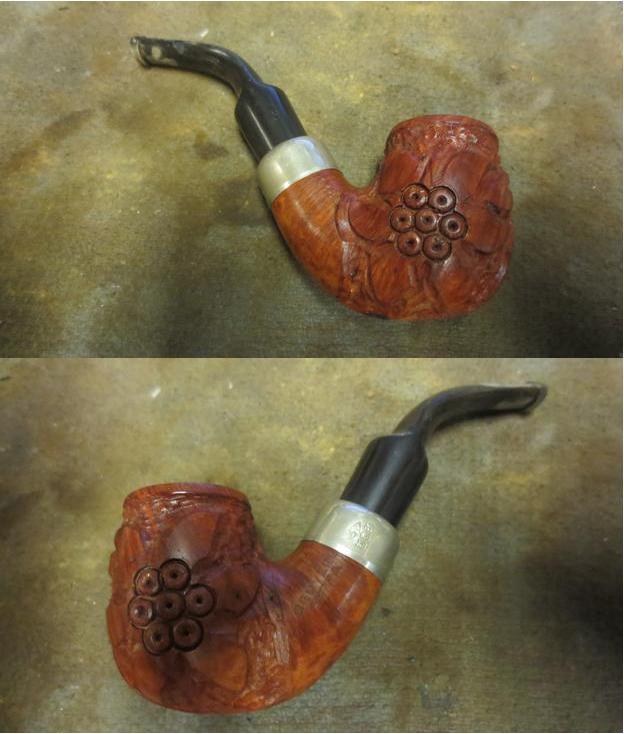
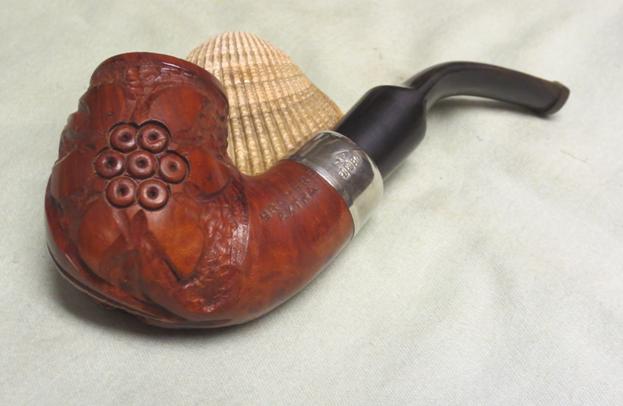
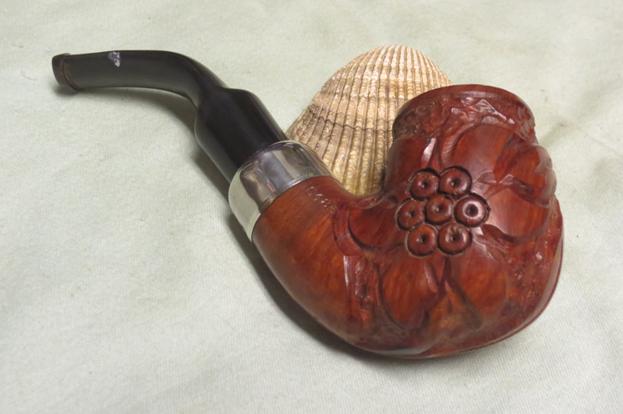
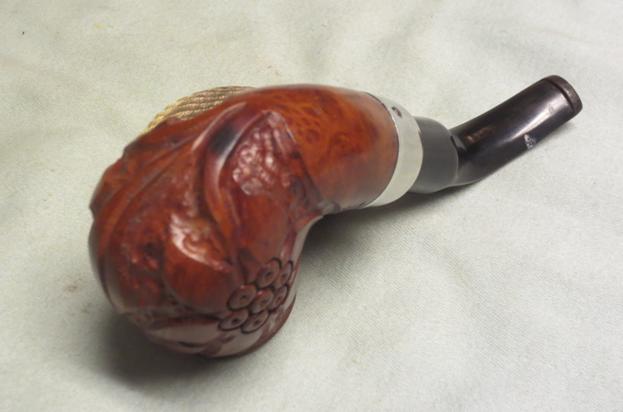
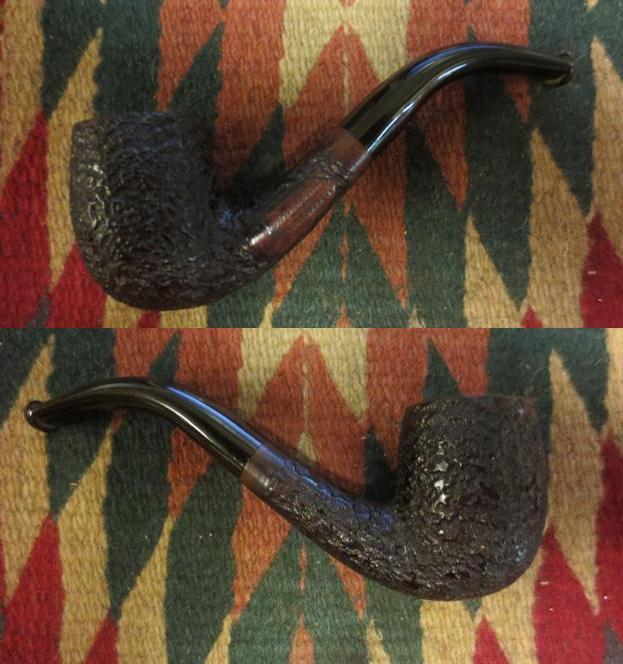
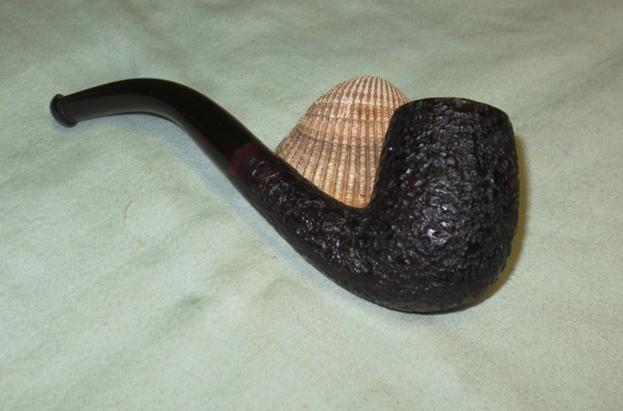
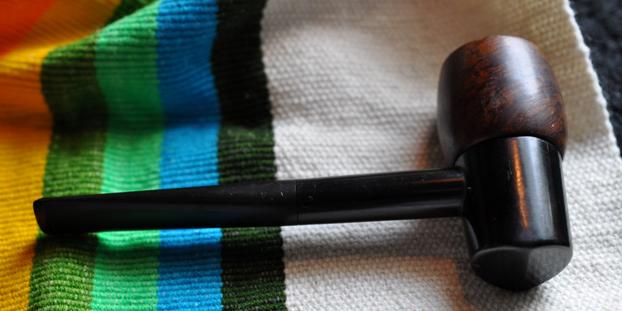
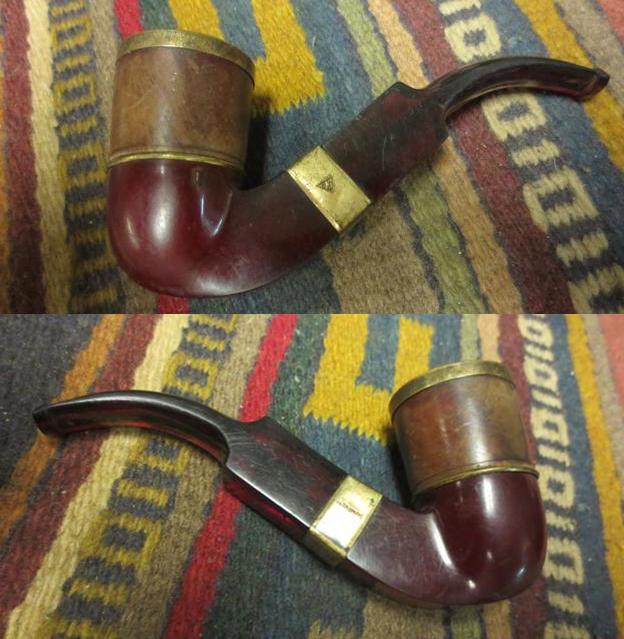
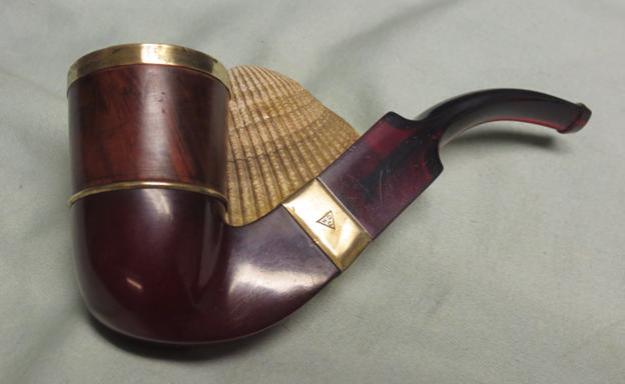
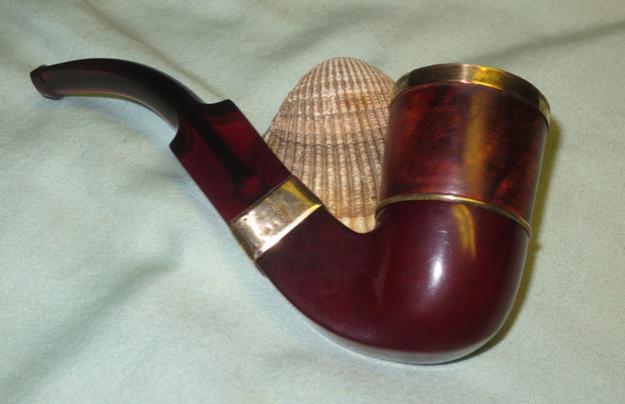
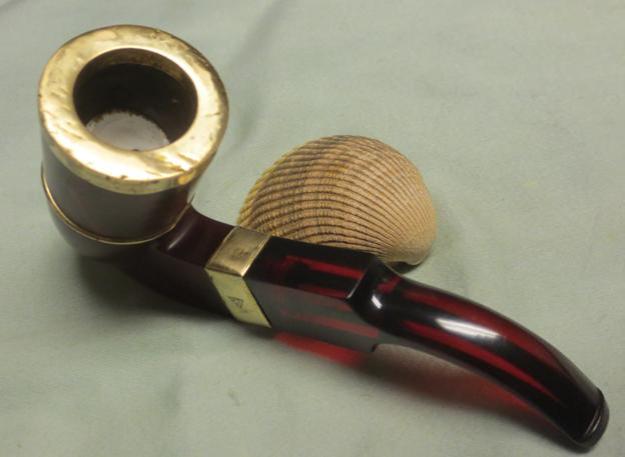
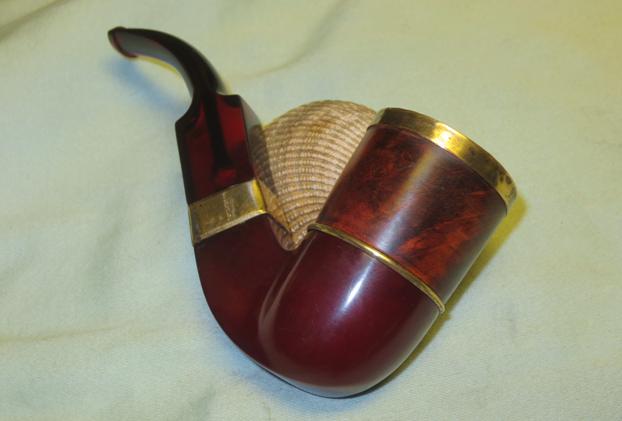
 I buffed the pipe and stem with Blue Diamond and gave it several coats of carnauba wax. I buffed it with a clean buffing pad to raise the shine. I hand buffed it with a microfibre cloth to put the finishing touches on the pipe. The finished pipe is shown in the photos below. Thanks for looking.