Tag Archives: bowl – refinishing

Loving the old WDC Campaign Pipe


Blog by Steve Laug

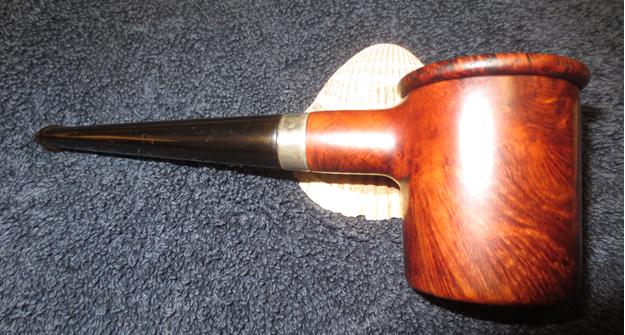
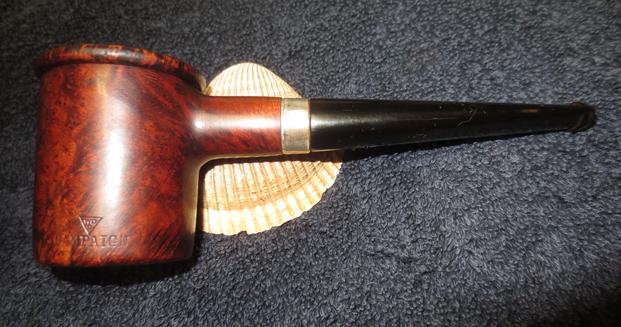
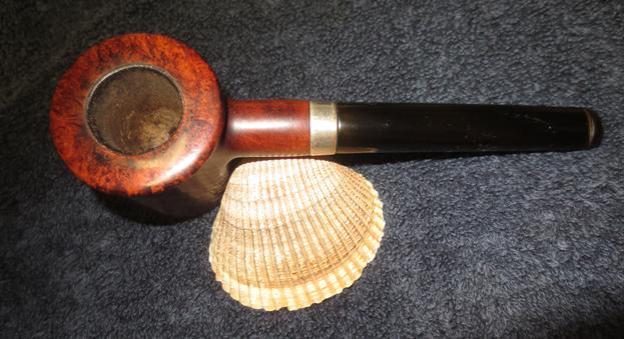
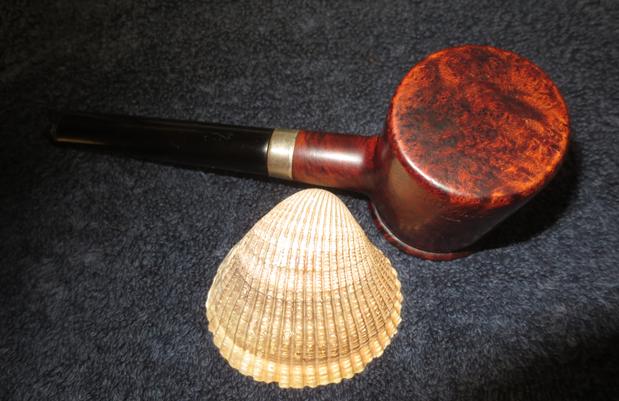
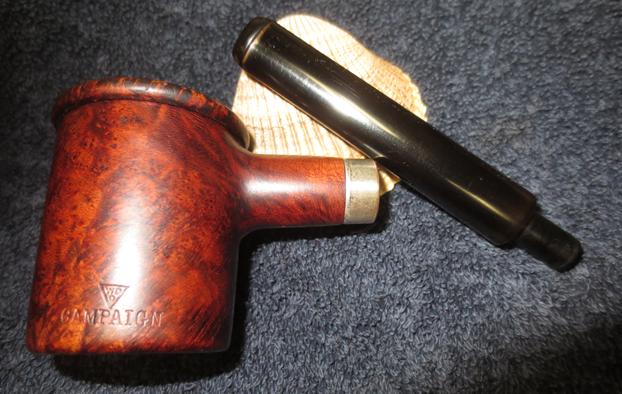
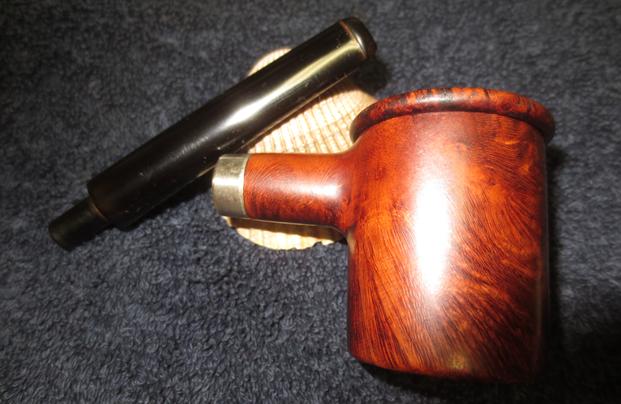
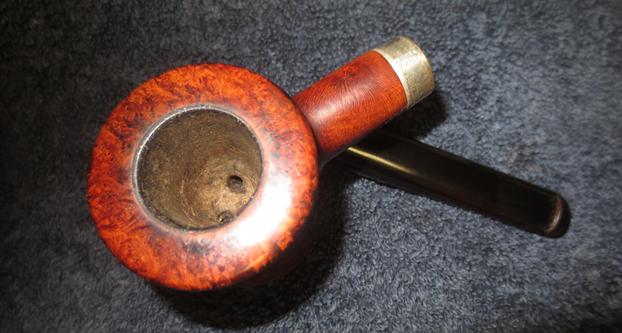
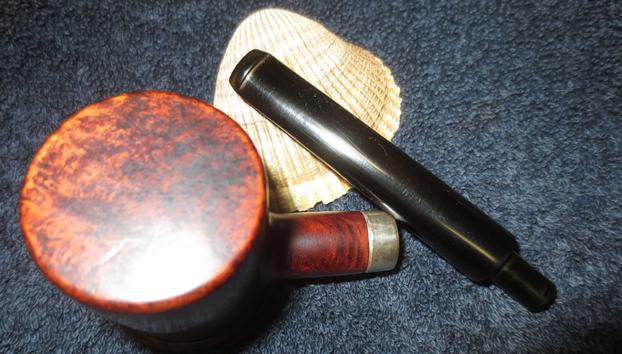
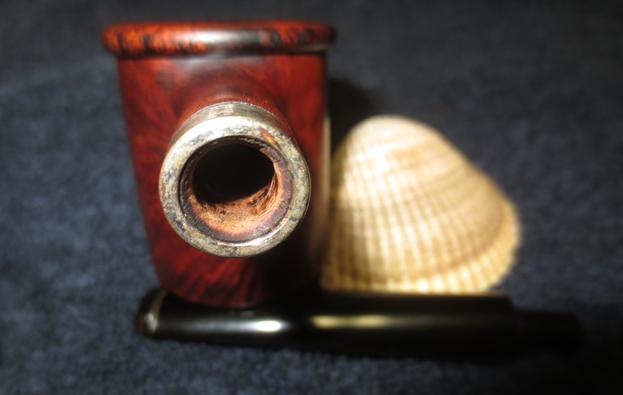
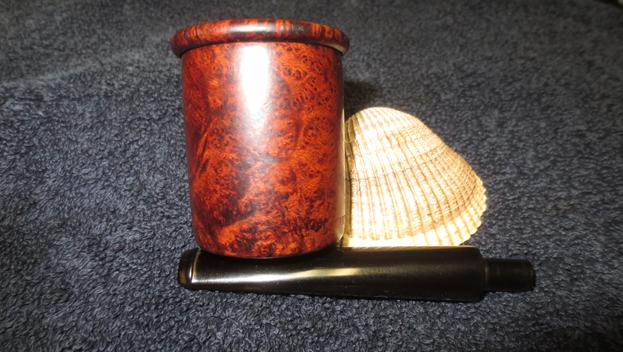
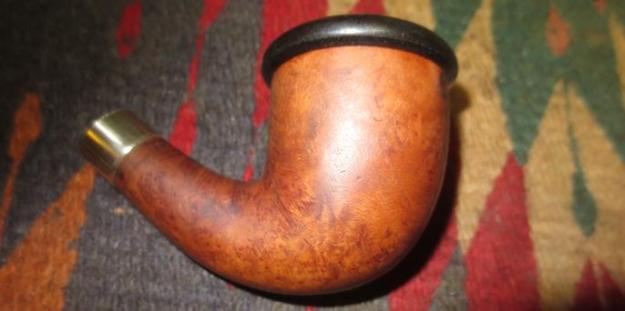
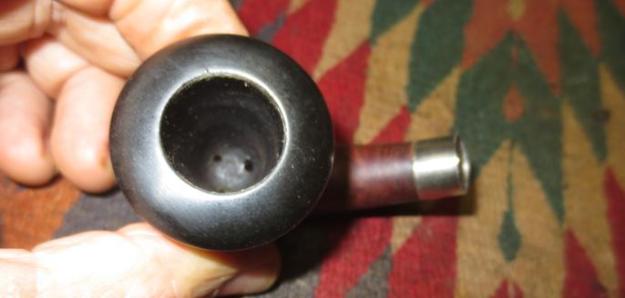
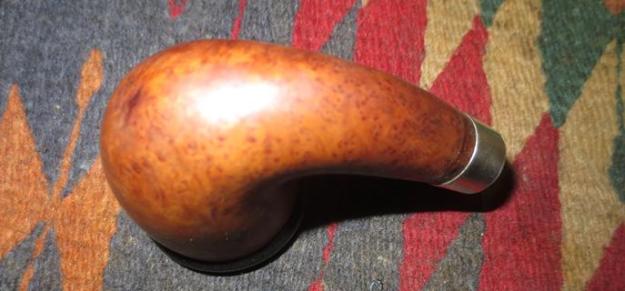
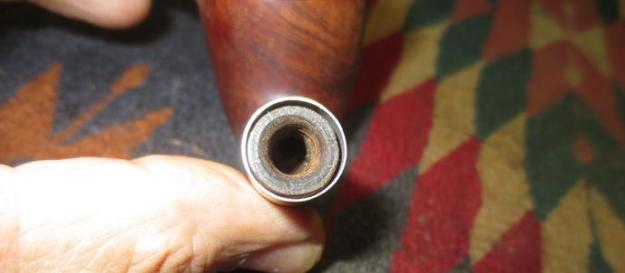
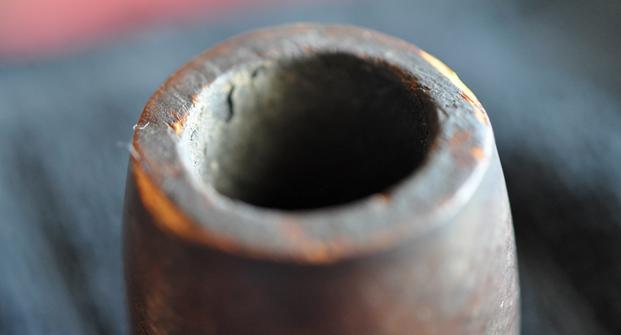
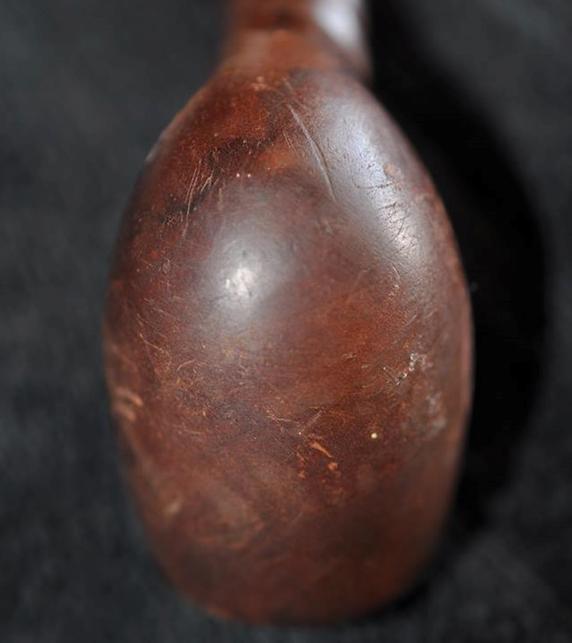
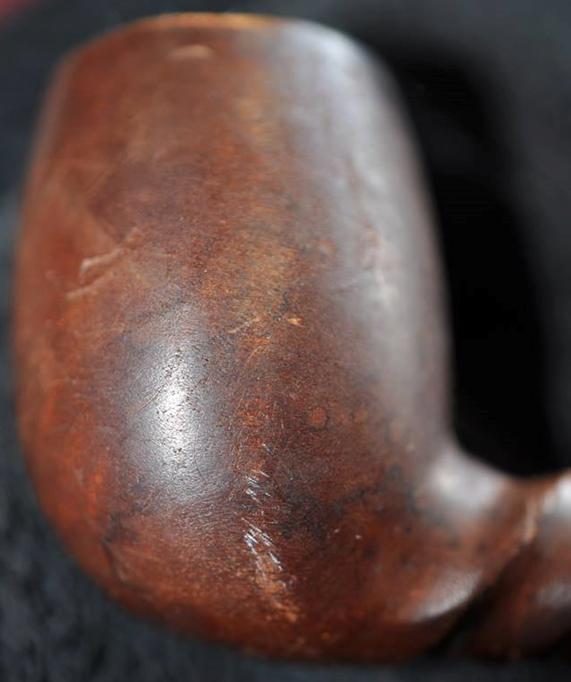
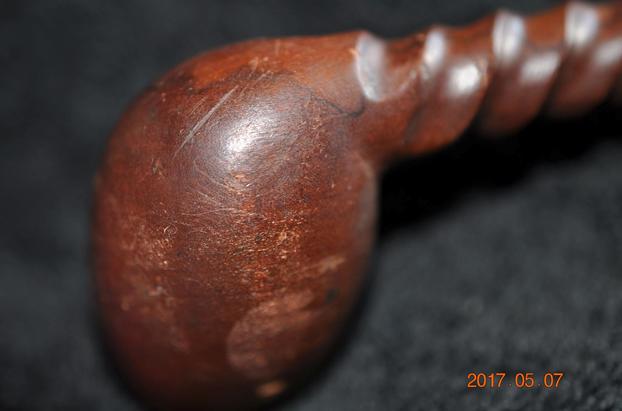
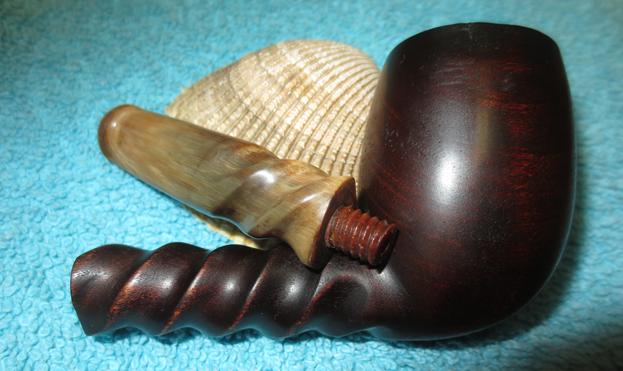
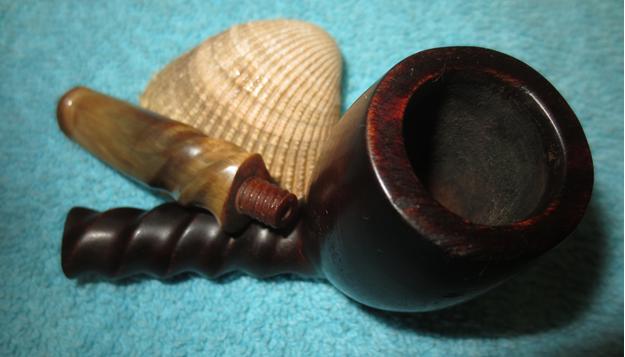
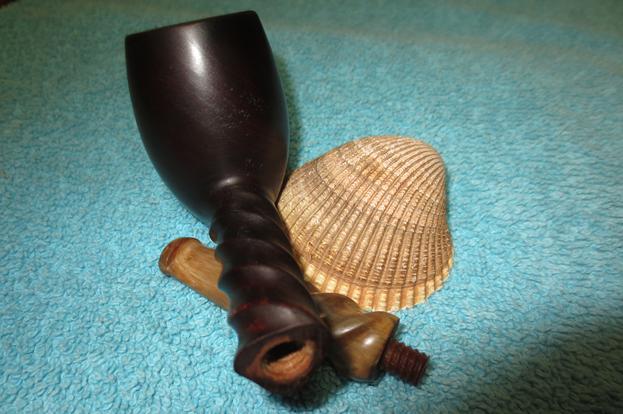
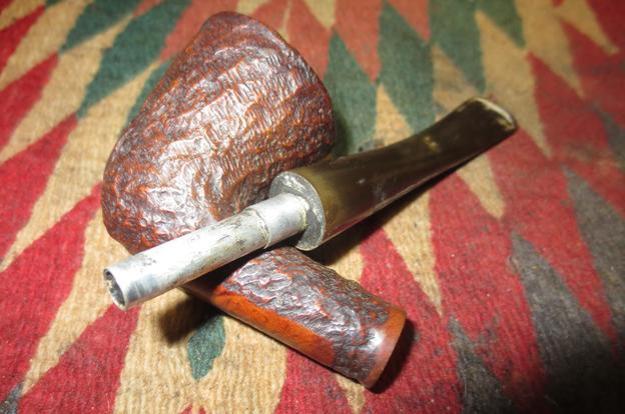
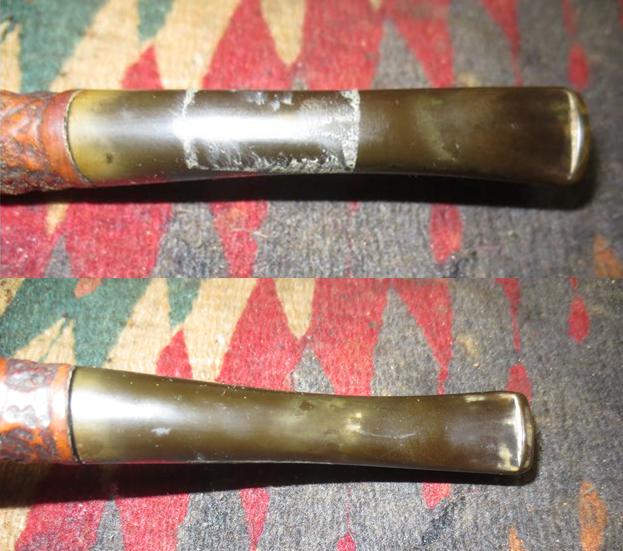
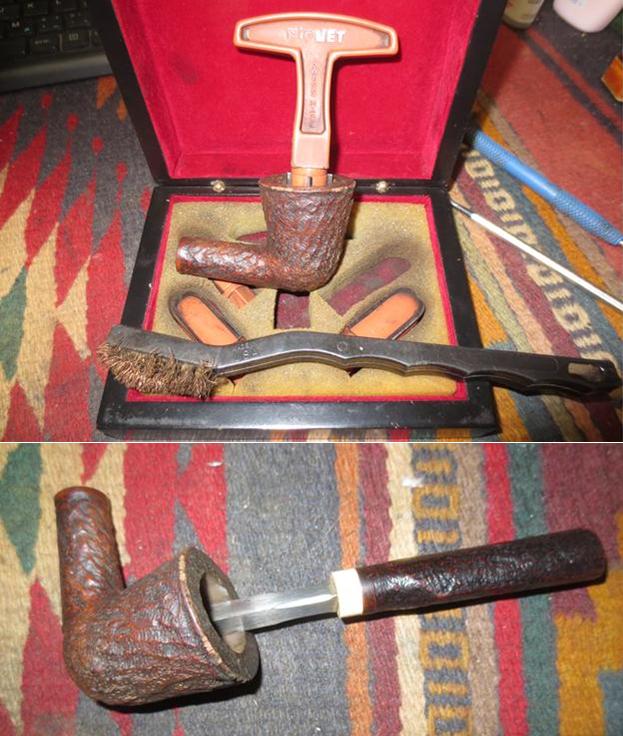
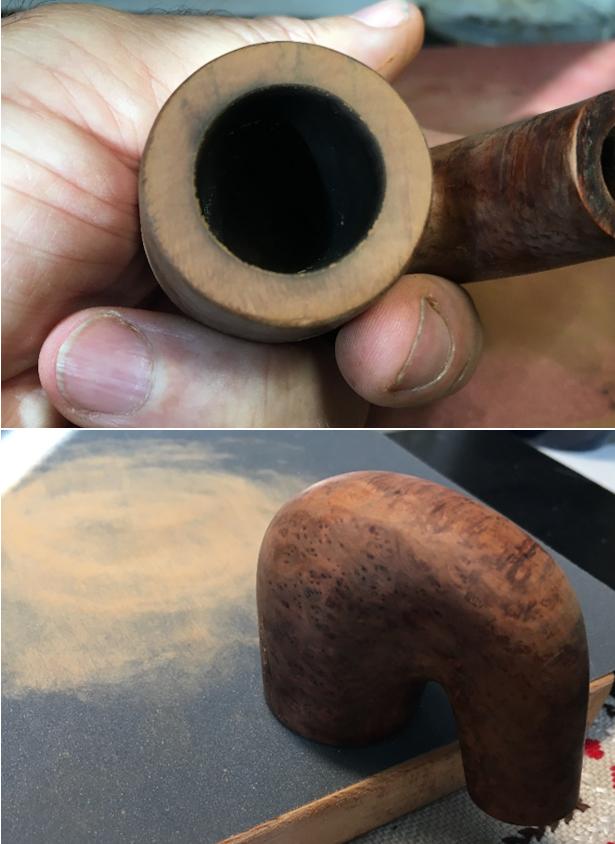
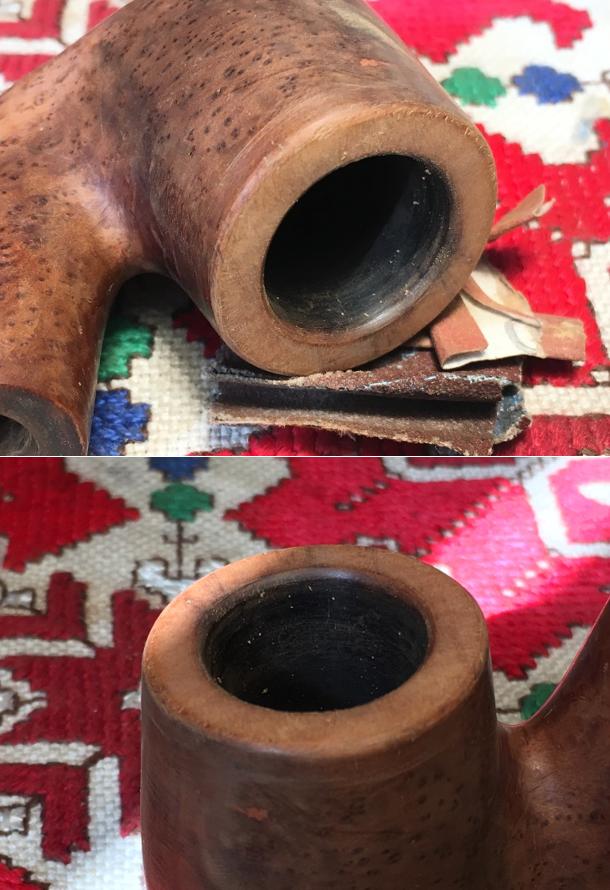
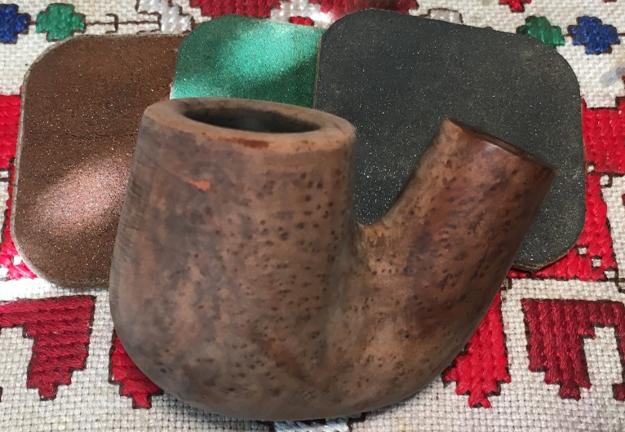
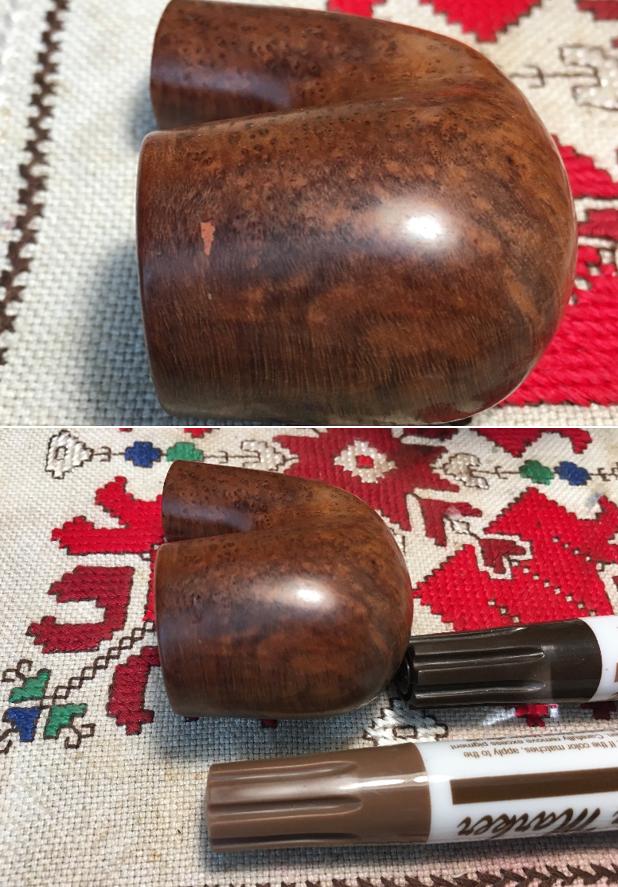
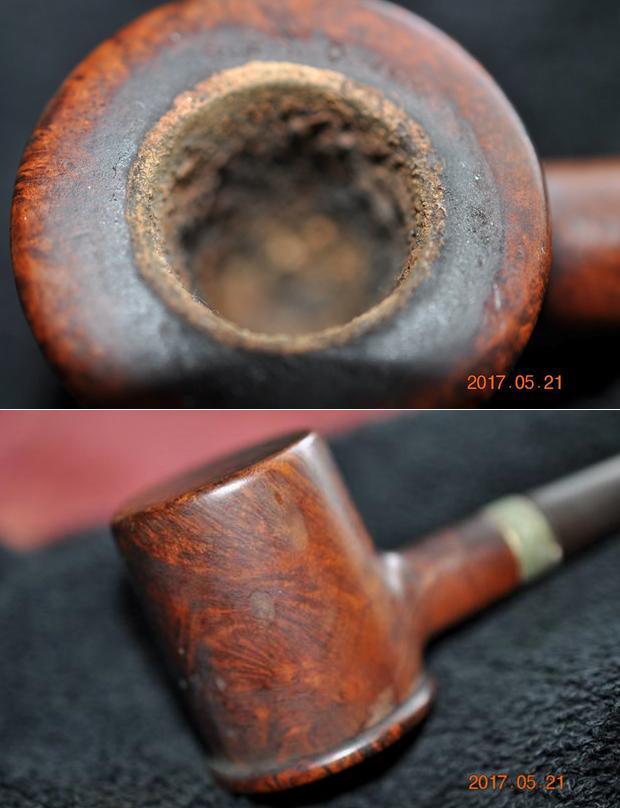
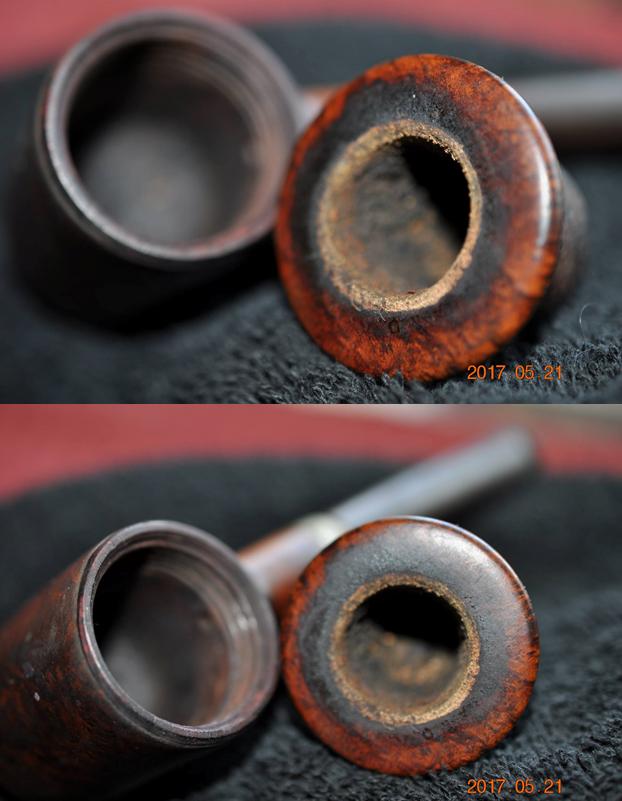
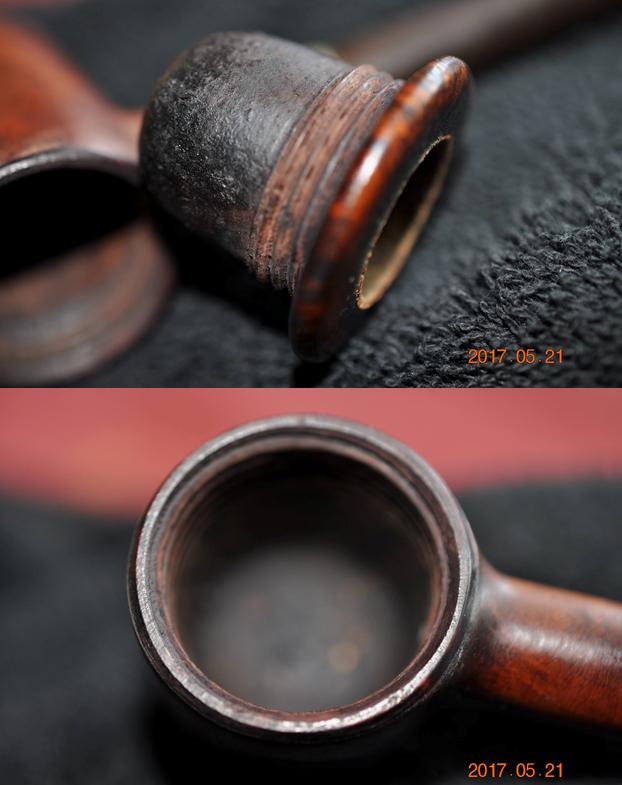
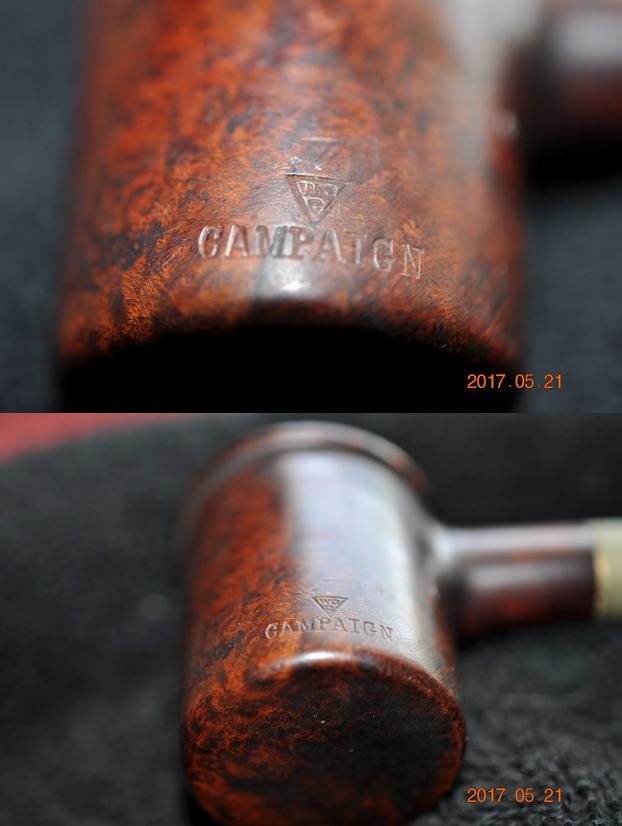
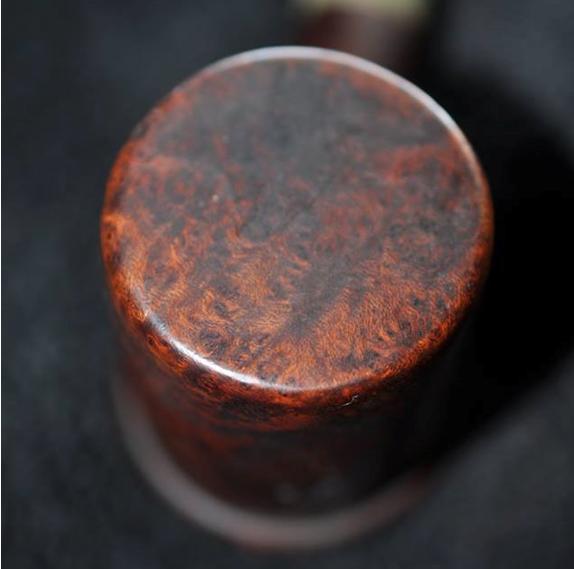
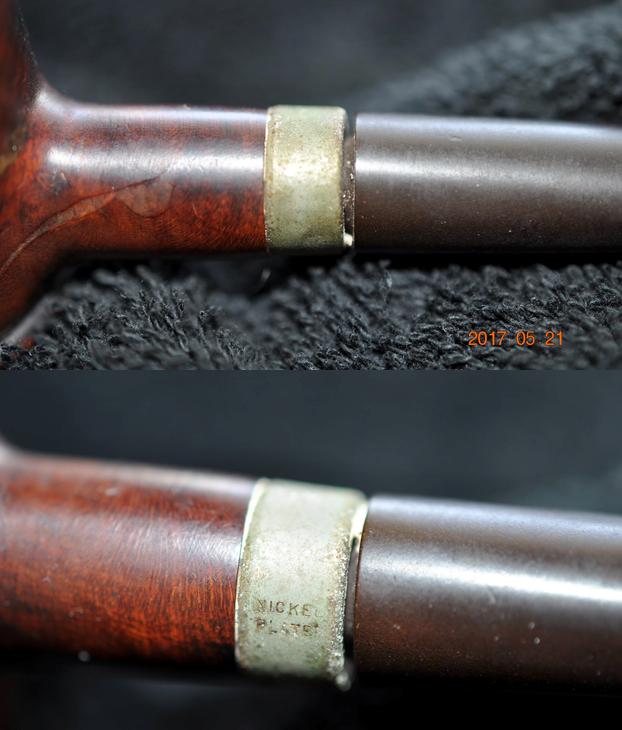
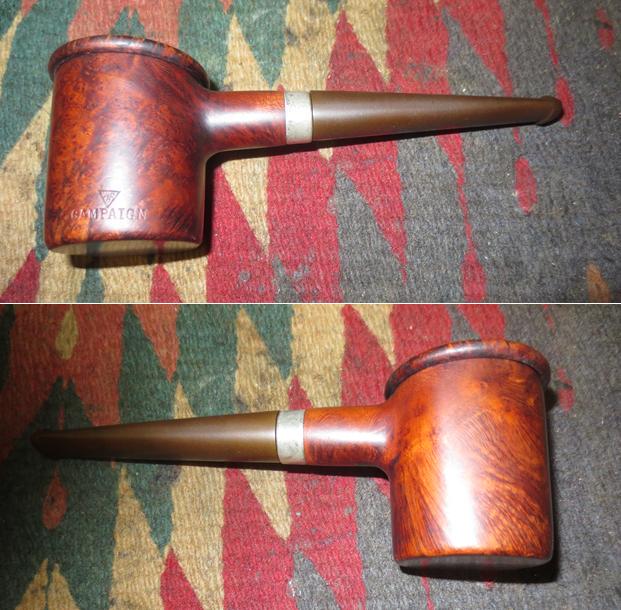
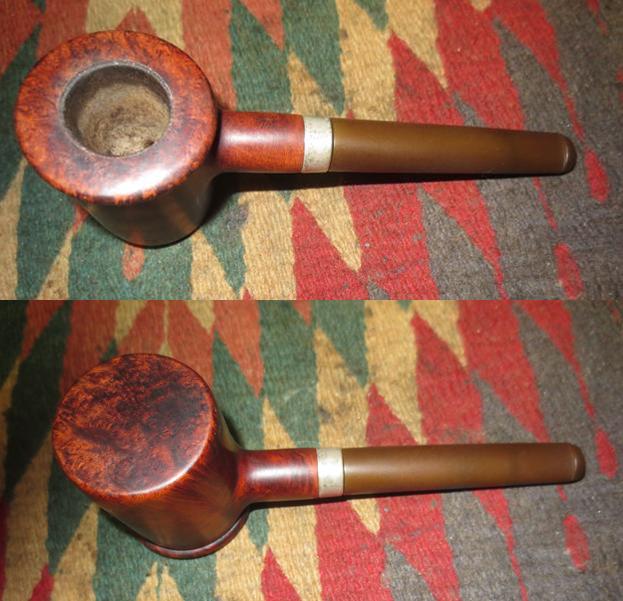
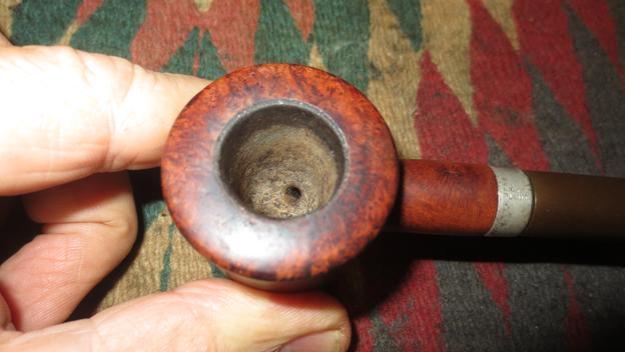
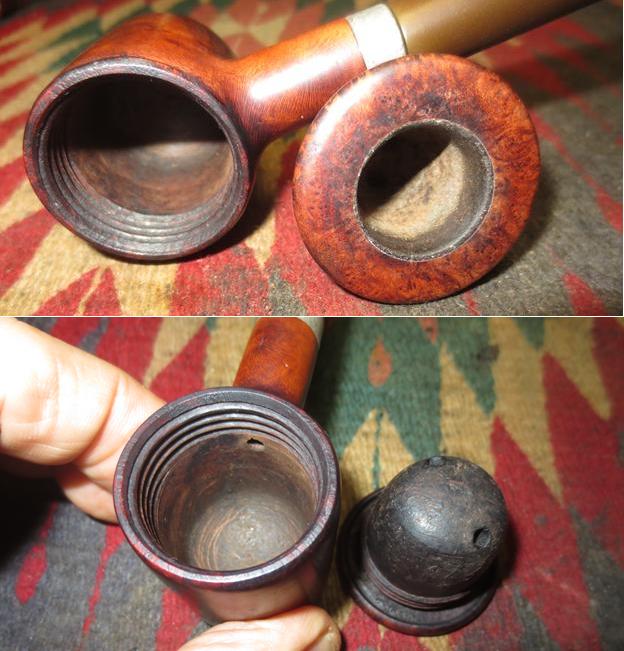
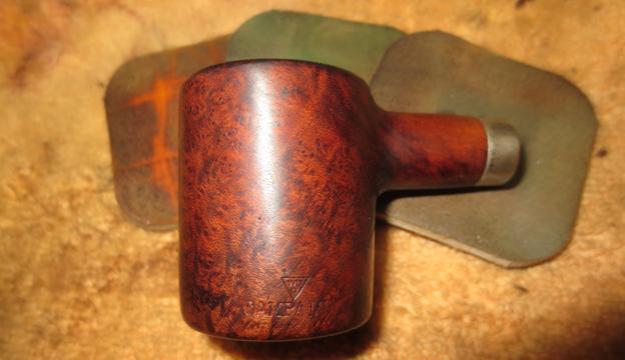
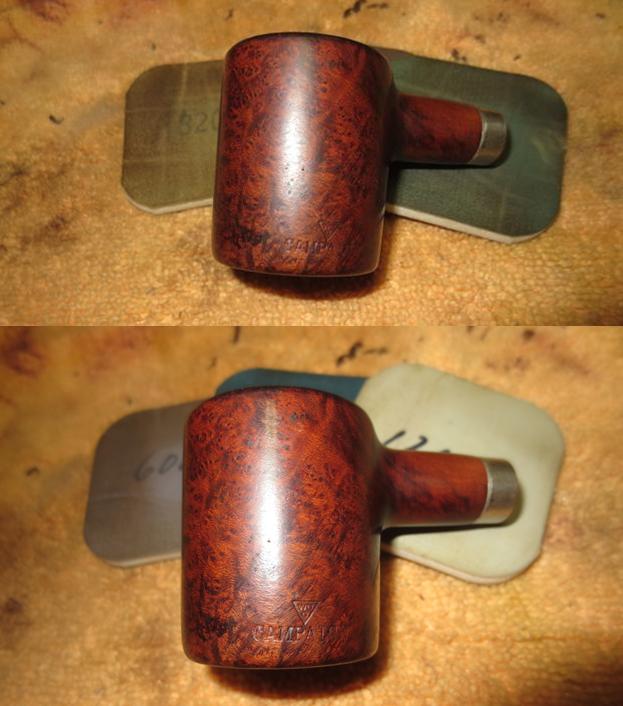
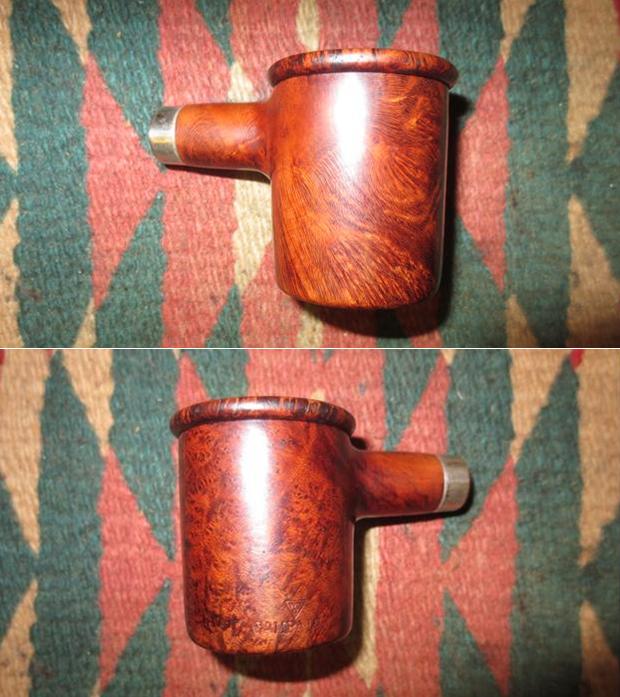
Another of the pipes found during the Virtual Pipe Hunt in Montana was one stamped on the lower left side of the out bowl with the WDC triangle logo over the word CAMPAIGN. There was no other stamping on the pipe. The bowl was like a calabash bowl and screwed into the outer bowl. The entirety was made out of briar. The grain on the bowl and rim top is quite stunning with a lot of birdseye grain on the sides and mixed grain over the rest of the bowl. There was a nickel band on the shank but there was no shank stamping. The band was stamped PLATED NICKEL. The stem was lightly oxidized and the fit against the end of the shank was not tight. There was a gap caused by what I presumed was the tars built up in the mortise area.My brother, Jeff took quite a few photos of the unique old pipe because it really was a beauty. There would need to be some significant cleanup work but the grain and the shape were both unique and quite stunning. The bowl was thickly caked and a thick buildup of tars and oils had flowed over to the top of the rim. The bowl had twin airways in the bottom of the calabash cup directing airflow into the external bowl. The airway in the outer bowl enters the shank at the top of the bowl. Smoke would have been drawn from the calabash cup into the interior of the outer bowl and up the back side to the airway into the shank and through that to the stem and button into the mouth of the smoker. I did a bit of digging online and found a brief interchange on a Google group. Here is the link if you would like to read it in context and in its entirety. It has some helpful information regarding the brand and the particular pipe that I wanted to know more about. https://groups.google.com/forum/#!topic/alt.smokers.pipes/kpkpd3zXoiwExcerpt from pipedia.org
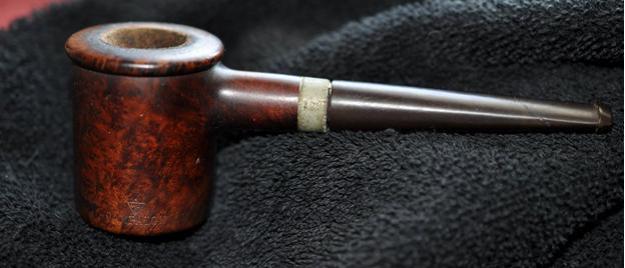
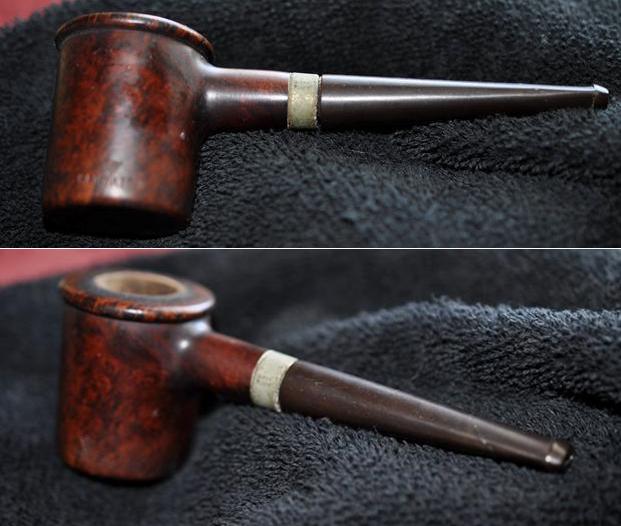
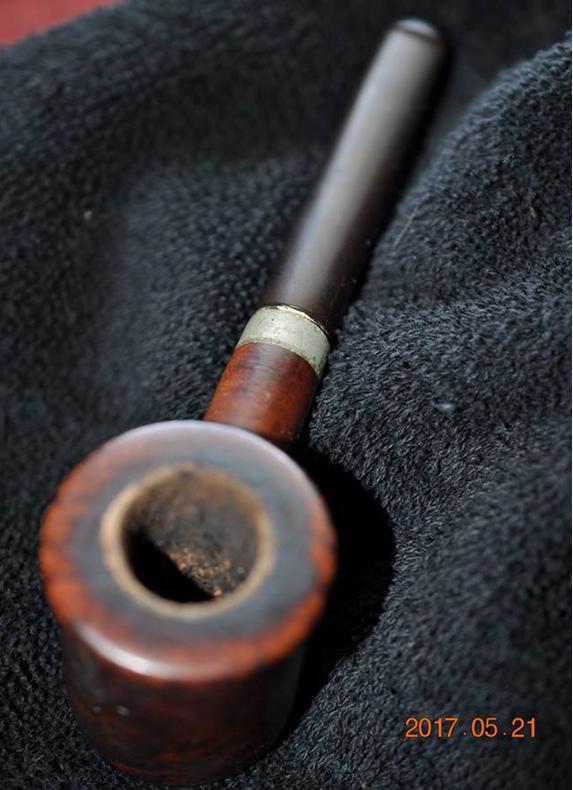
To a request for information regarding the WDC Campaign pipe on the Google Group there was quite a long string of answers. I am quoting two of those in full…

Respondent 1: While I can’t say anything about this pipe specifically, I have a hazy memory of that shape listed in a book about pipes; (I may be totally misremembering this, but here goes) the shape being called the “Dawes”, named after Harding’s Vice President?  Anyone else remember this? Sounds like an interesting pipe, whatever it’s called…

Respondent 2: From Weber’s Guide to Pipes: “The Dawes Pipe (more correctly named the Lyons, after its inventor, Charles Herbert Lyons) happened to be the favorite pipe of General Charles G. Dawes, Vice-President of the USA from 1925 to 1929. General Dawes smoked the curious pipe incessantly and it became popularly known as the Dawes Underslung, because the shank joined the bowl near its rim.”

I looked on Pipedia, https://pipedia.org/wiki/William_Demuth_Company and I quote in part from the article on the William Demuth Company.

The Demuth Company is probably well known for the famous trademark, WDC in an inverted equilateral triangle. William commissioned the figurative meerschaum Presidential series, 29 precision-carved likenesses of John Adams, the second president of the United States (1797-1801) to Herbert Hoover, the 30th president (1929-1933), and “Columbus Landing in America,” a 32-inch-long centennial meerschaum masterpiece that took two years to complete and was exhibited at the World’s Columbian Exposition in Chicago in 1893.

The Presidential series was the result of Demuth’s friendship with President James A. Garfield, a connoisseur of meerschaum pipes. Demuth presented two pipes to Garfield at his inauguration in 1881, one in his likeness, the other in the likeness of the President’s wife. Later, Demuth arranged for another figurative matching the others to be added to the collection as each new president acceded to the White House, terminating with President Hoover.

From the above information I learned some significant details about the Campaign pipe. It was invented by Charles Herbert Lyons and was the favourite pipe of General Charles G. Dawes who was the Vice President of the USA under President Harding from 1925-1929. It fits nicely into that period when WDC was having Presidential Pipes commissioned ending in 1933. That places this old pipe in the time period between the late 1920s and early 1930s.

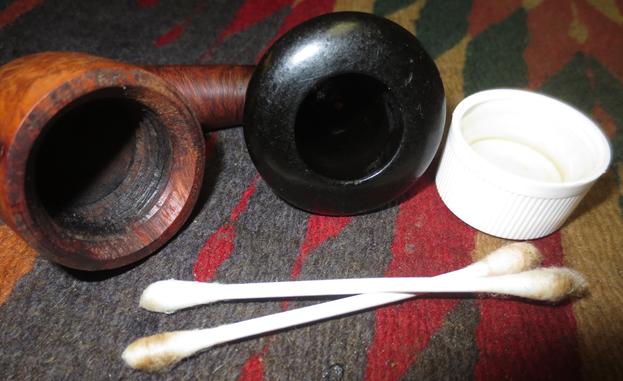
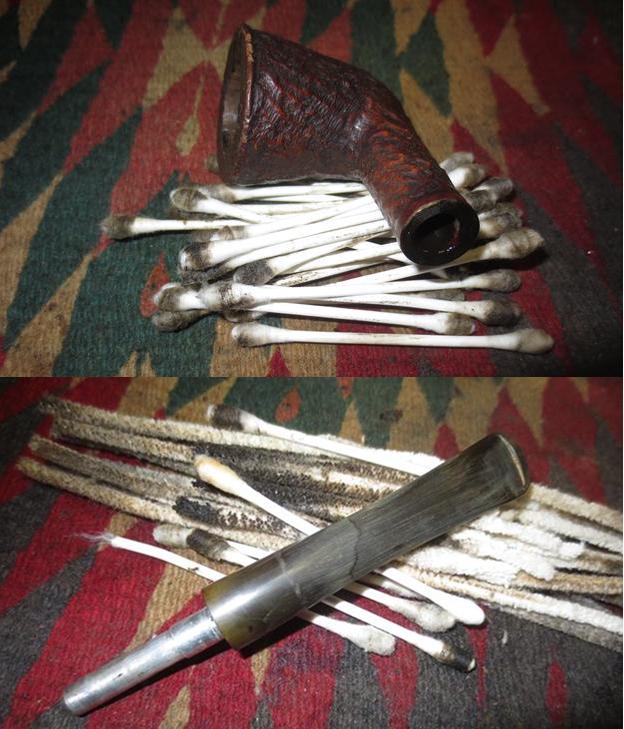
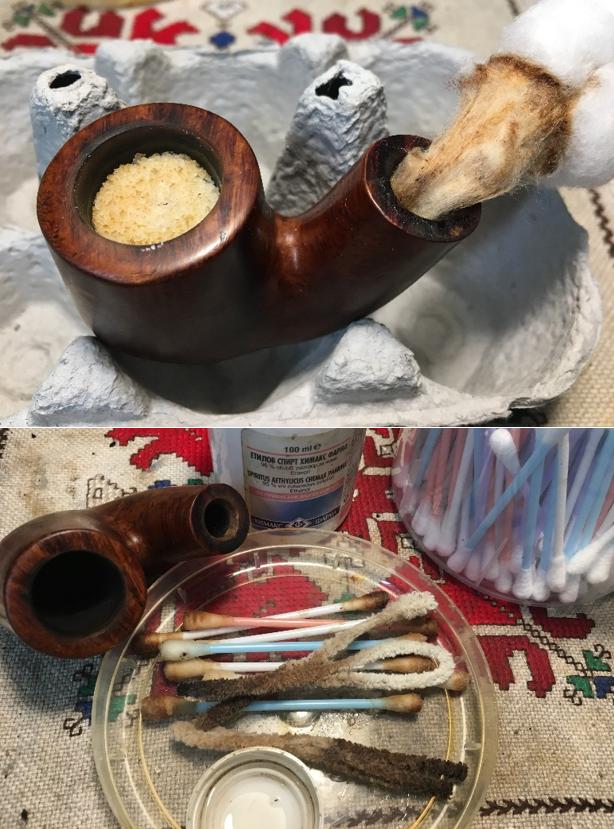
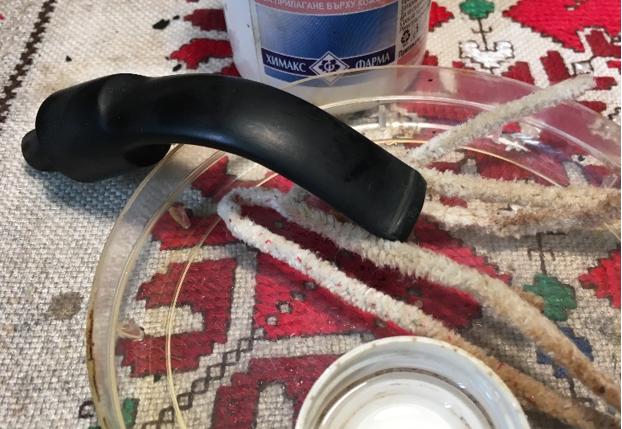
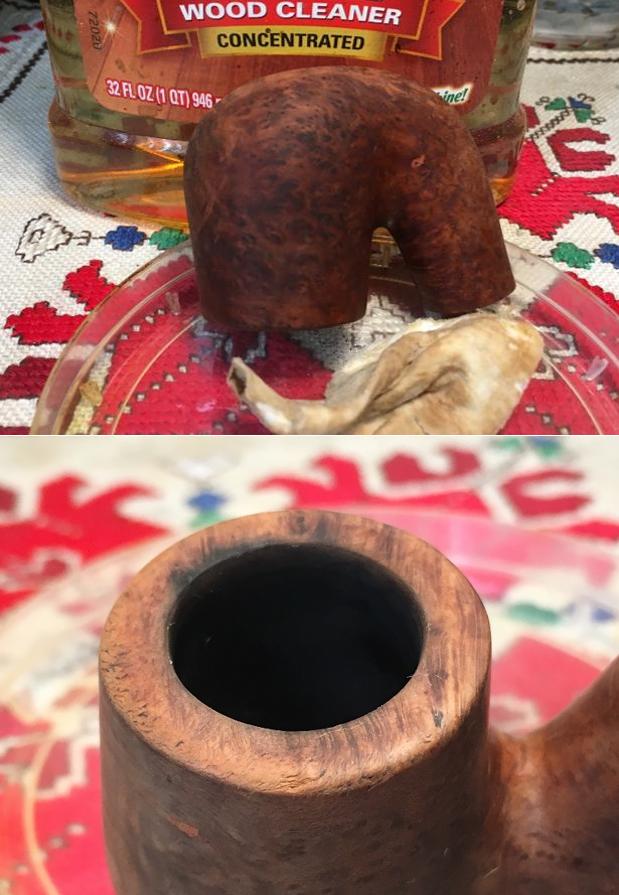
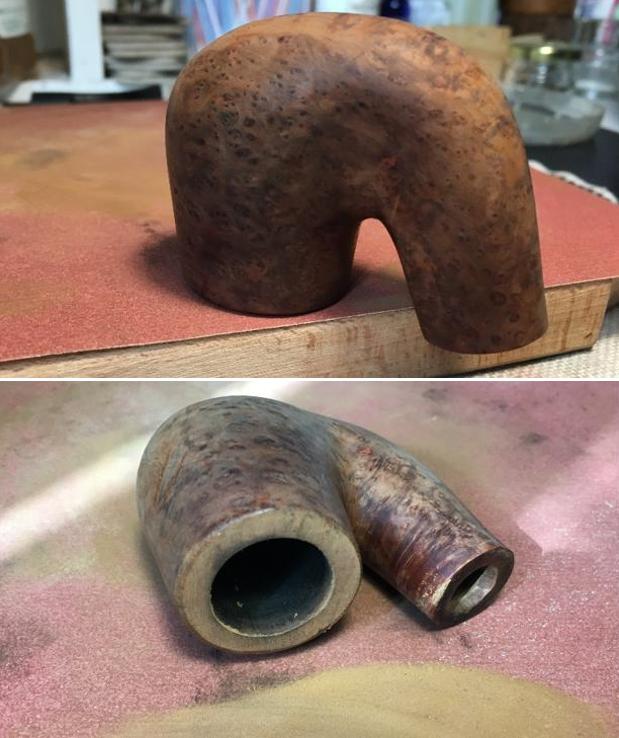
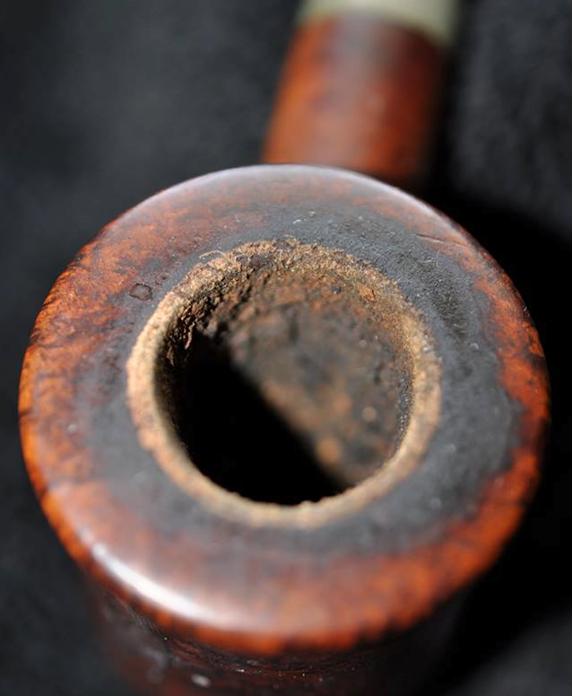
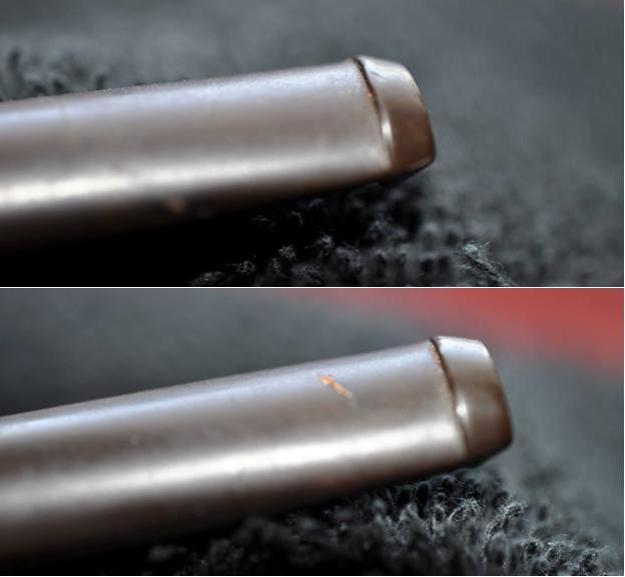
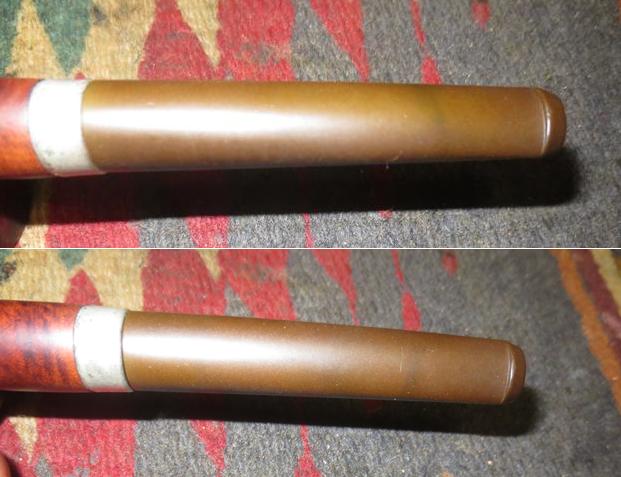
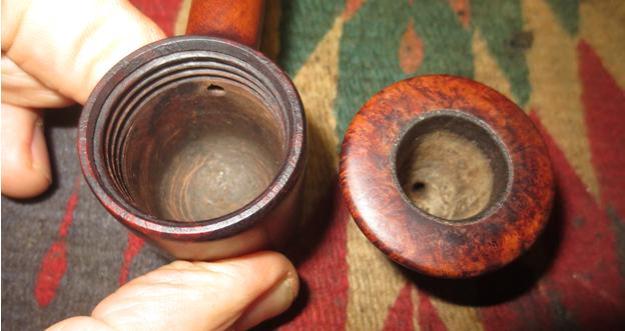
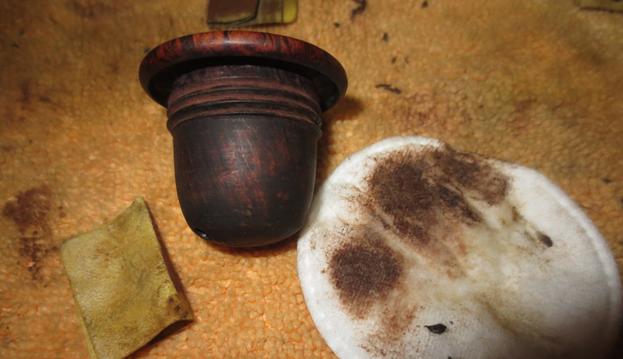
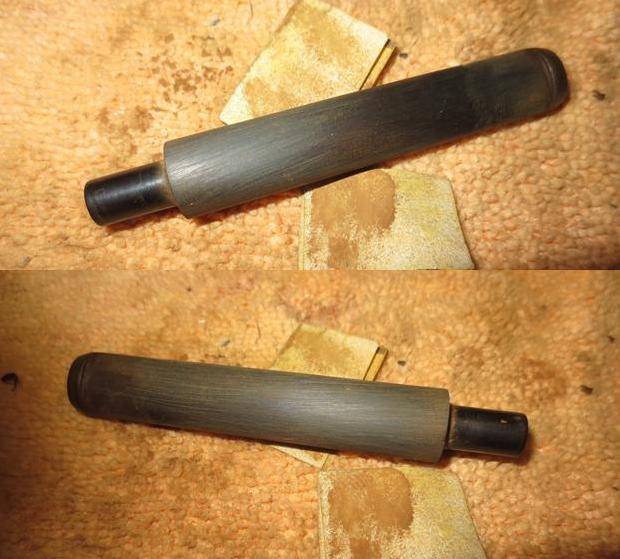
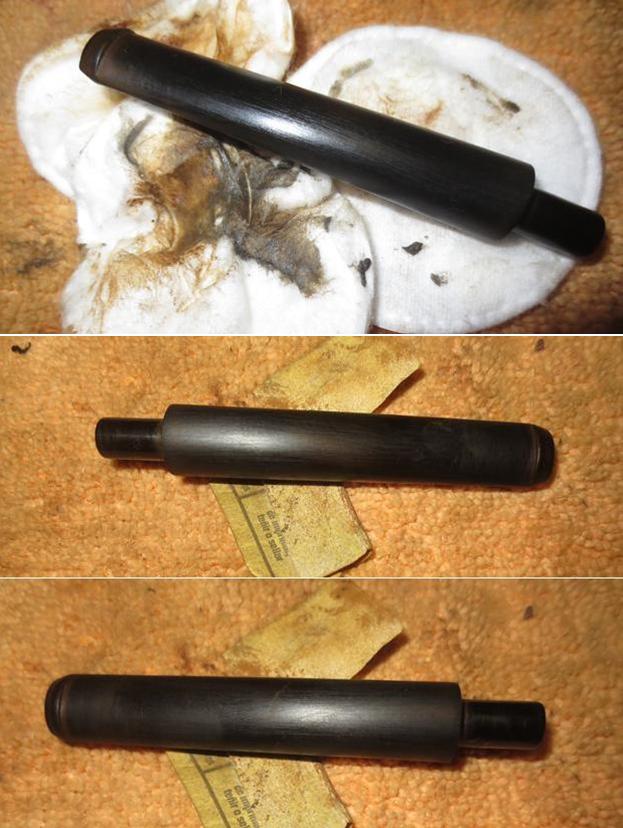
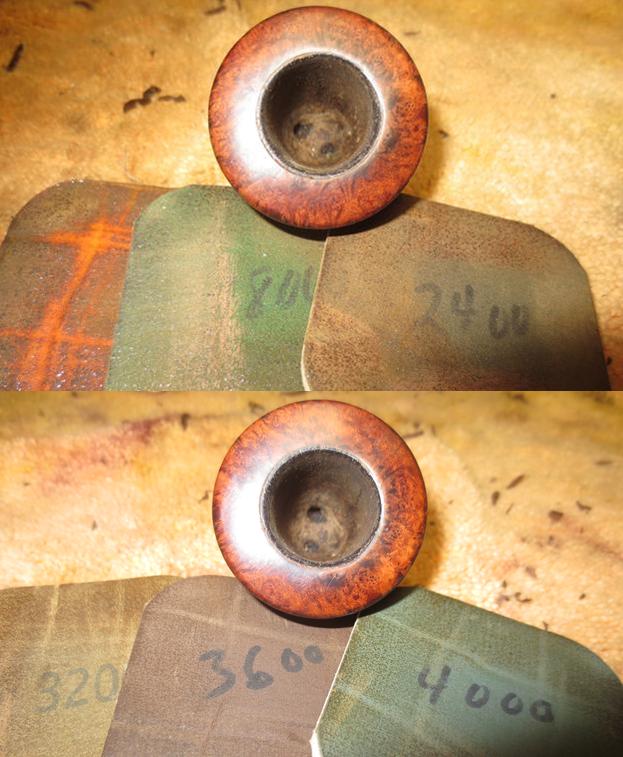
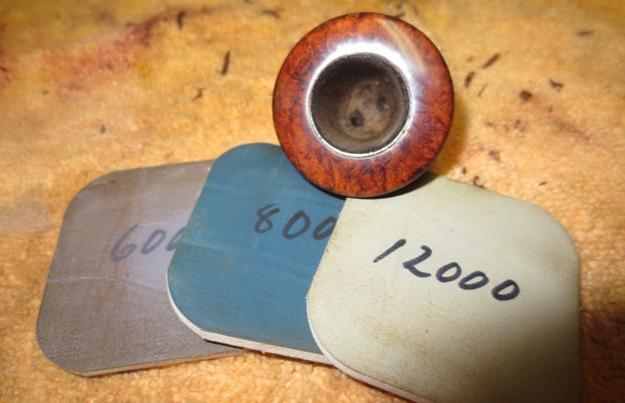
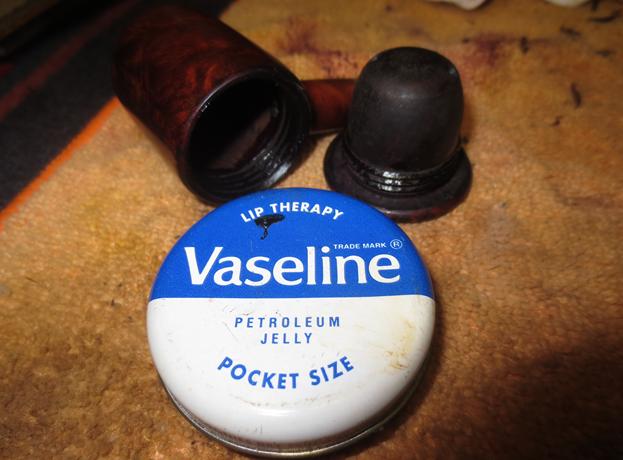
My brother took the following photos of the pipe to show what it looked like when it arrived in Idaho before he started his cleanup work. The cake in the calabash bowl was quite thick and the overflow onto the rim top was also thick. The finish while pretty decent was soiled and spotty with buildup and dirt. Jeff unscrewed the briar calabash bowl insert and removed it from outer bowl. The threads on both looked to be in very good condition. The out bowl was dirty and had a lot of dried tobacco oils and juices along the walls and bottom. The underside of the calabash bowl was dark and dirty with dried oils. It would need to be cleaned up. The next two photos show the stamping on the left side of the outer bowl. It is clearly stamped with the WDC logo in the inverted triangle and under that reads CAMPAIGN. In these photos you can see the beautiful grain of the briar. Even the bottom of the outer bowl has some nice grain. The next two photos show the wear on the finish of the shank and the oxidation on the nickel band on the shank. The band is stamped NICKEL PLATED. The stem does not sit tight against the shank and I am assuming that there is a lot of buildup in the mortise that is keeping it from seating properly.The stem was oxidized and there was some were to the sharp edge of the button. There were some light tooth marks on the surface of the button on both sides.My brother did his usual masterful cleanup on the pipe. When I received it things were much cleaner than the photos above. He had reamed back the calabash bowl to bare briar. He had scrubbed the rim top off and was able to remove the lava coat. He scrubbed the internals of the outer bowl as well. The briar had been scrubbed with Murphy’s Oil Soap and rinsed to remove all of the grime. The oxidation on the band was better than in the above photos. The stem was oxidized but it now sat properly in the mortise. I took the following photos before I started my final cleanup and restoration. I took some close up photos of the condition of the bowl and rim top. It looked far better than before his cleanup work. The stem also looked really good other than the oxidation. I took the calabash bowl out of the outer bowl and took some photos of the various parts of the pipe. It is an interesting piece of pipe history and it is in excellent condition for a pipe of its age. I did a bit more scrubbing of the internals to remove any remaining oils and tars. I used pipe cleaners, cotton swabs and alcohol to clean out the mortise and the airway in the shank and the stem. I scrubbed out the inside of the outer bowl and the inner bowl with alcohol and cotton swabs. I pushed pipe cleaners through the two airholes in the bottom of the calabash bowl. I sanded the bottom of the internal bowl to remove the last of the buildup and wiped it down with alcohol on a cotton pad. I sanded the oxidized stem and reshaped the edge of the button with 220 grit sandpaper to clean things up and bring it back to the original black vulcanite. I scrubbed it with some Before & After Stem Deoxidizer to remove the loosened oxidation. I wiped off the scrub and resanded the stem to remove the remaining oxidation. The photos below show the progress of the stem cleanup. I used a folded piece of 220 sandpaper to smooth out the inner edge of the calabash bowl and remove the remaining debris along the edge. I sanded the inside of the bowl to clean it up as well. I polished the rim top with micromesh sanding pads – wet sanding with 1500-2400 grit pads and dry sanding it with 3200-12000 grit pads. I wiped the rim top down with a damp cloth to remove the sanding debris. The photos show the progress of the polishing. I polished the outer bowl with micromesh sanding pads – wet sanding with 1500-2400 grit pads and dry sanding it with 3200-12000 grit pads. I wiped the bowl with a damp cloth to remove the sanding debris. The photos show the progress of the polishing. To preserve the threads on the calabash bowl and the outer bowl I use a small dab of Vaseline to lubricate both. I rub it into the threads by hand and wipe it down lightly with a cotton pad. I screw the two parts together and find that it removes friction and makes the cap turn easily into the outer bowl. I hand buffed the bowl with a microfibre cloth, polished the nickel band with a jeweler’s cloth and took photos of the pipe at this point in the process. I polished the stem with micromesh sanding pads – wet sanding with 1500-2400 grit pads and dry sanding it with 3200-12000 grit pads. I wiped the stem down with Obsidian Oil to bring life back to the vulcanite and protect it. The photos show the progress of the polishing. I buffed the stem with red Tripoli to polish out the last oxidation and scratching. I buffed the pipe – stem and bowl – with Blue Diamond on buffing wheel and gave it multiple coats of carnauba wax. I buffed it with a clean buffing pad to raise a shine. I hand buffed it with a microfiber cloth to deepen the shine. The finished pipe is shown in the photos below. One thing that shows through in the photos is some red along the crease of the button – I am pretty sure it is red Tripoli that is left behind from the initial buffing of the stem. After I took the photos I wiped that area down with some alcohol on a cotton pad. It removed the red Tripoli around the stem. It looks far better now that it is finished. Thanks for walking through this refurbish with me.
 

Out Damn Spots – a C.P.F. Cromwell Double Vertical Stem Bent Billiard


Blog by Steve Laug

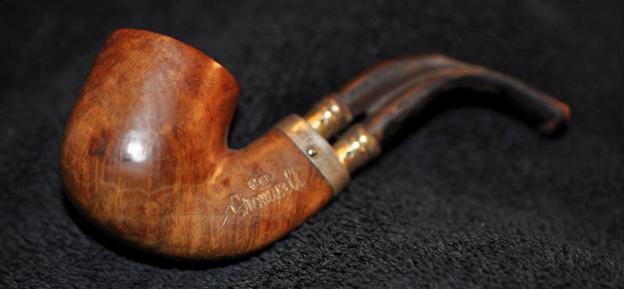
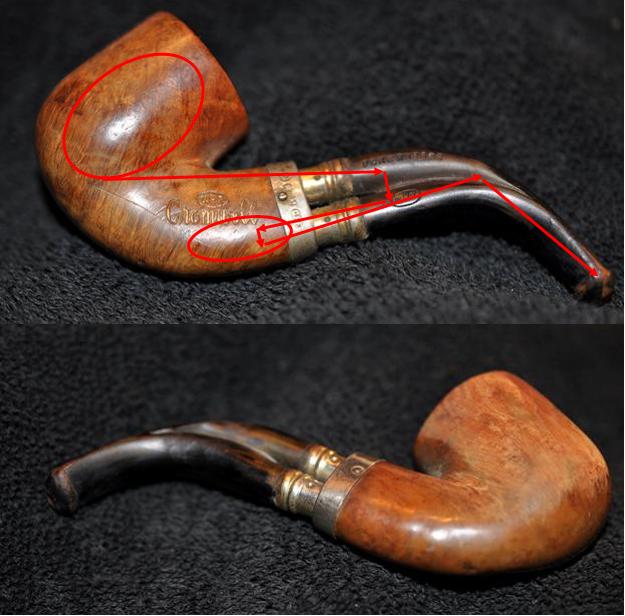
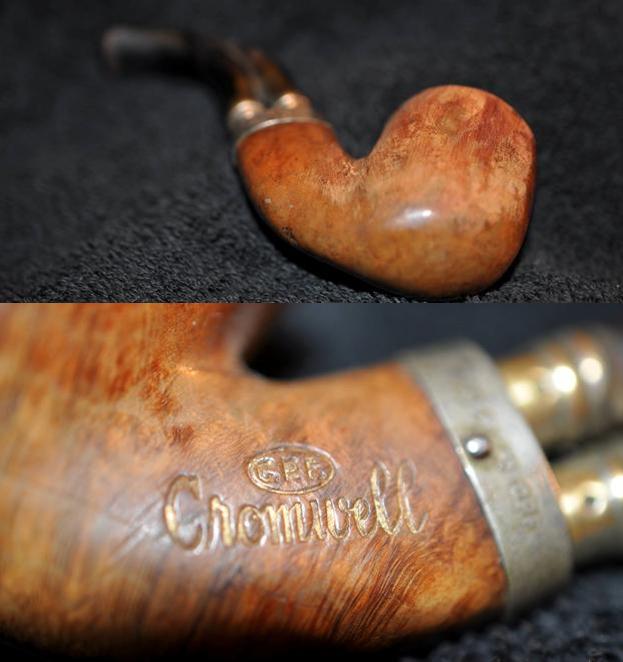
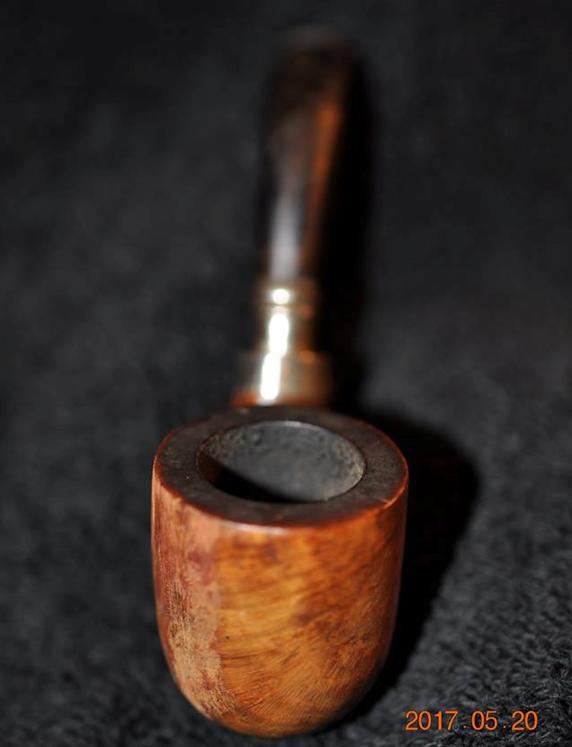
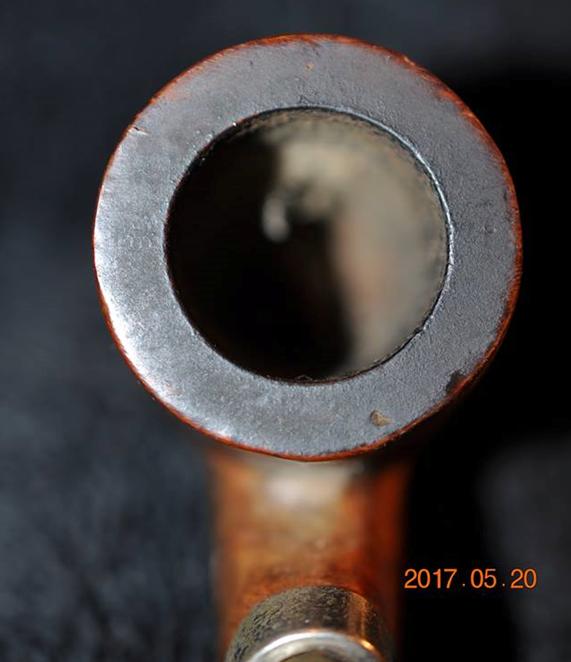
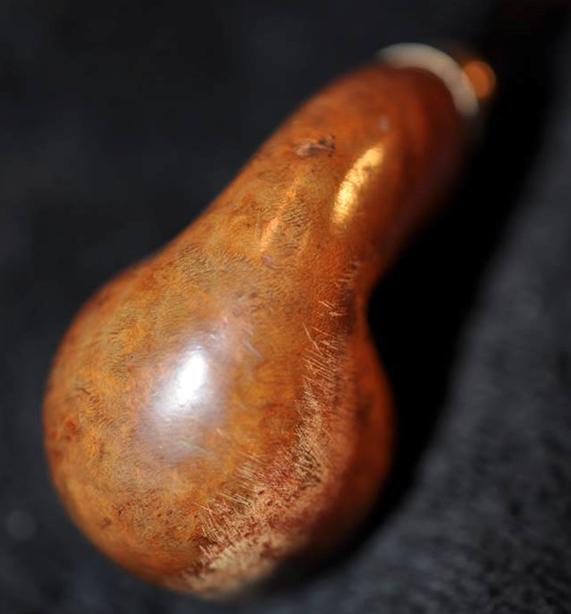
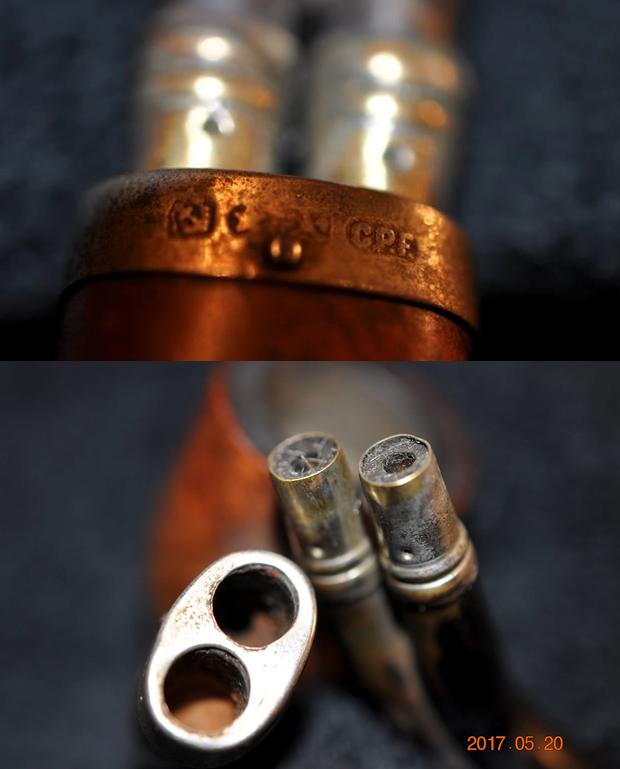
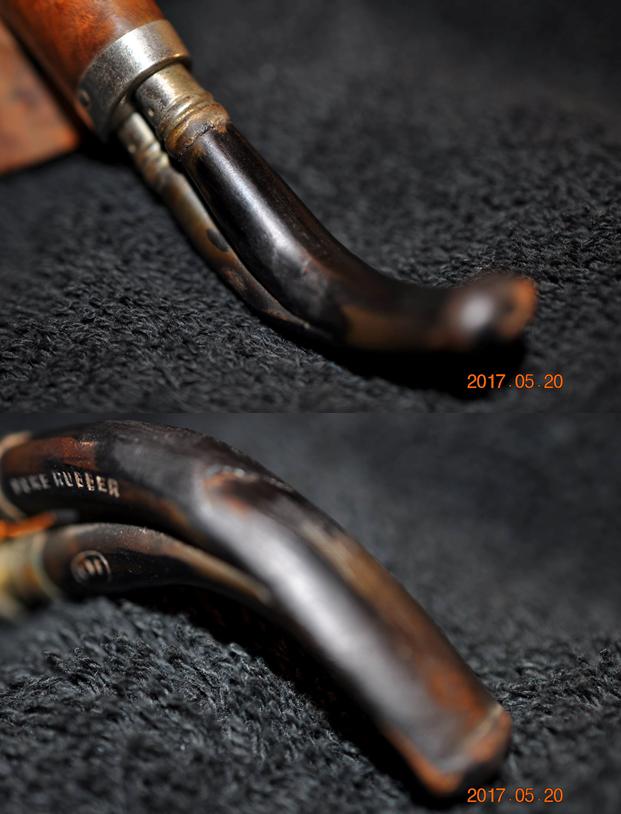
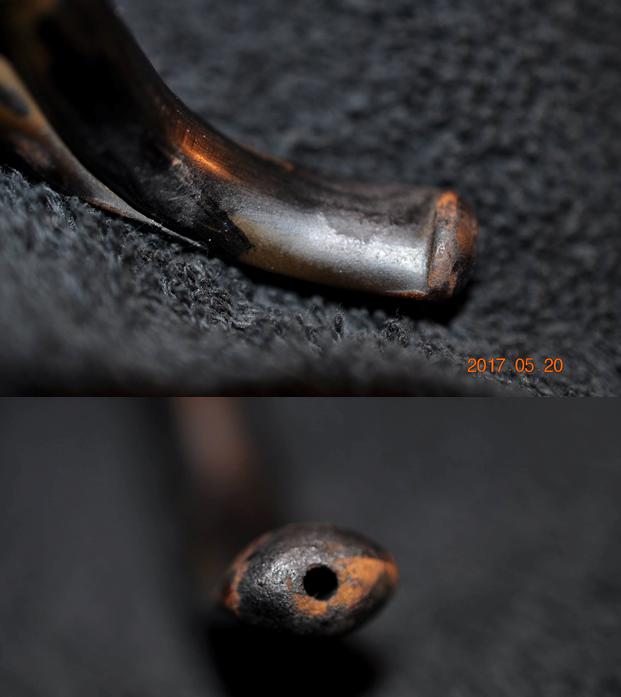
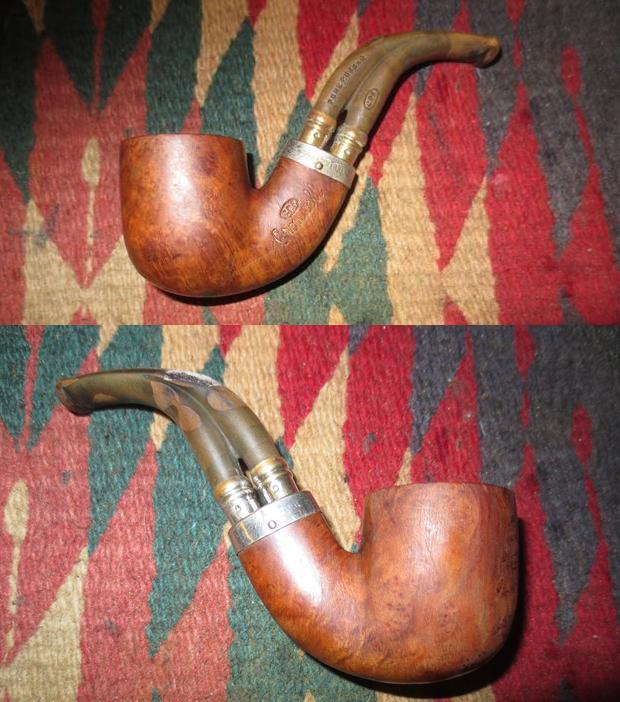
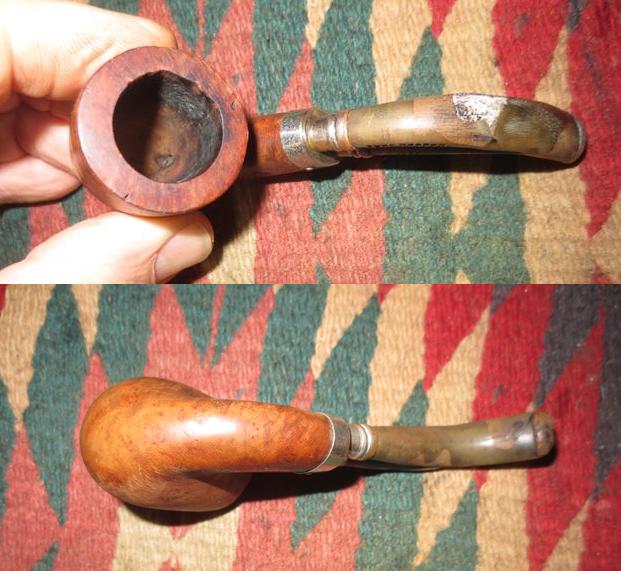
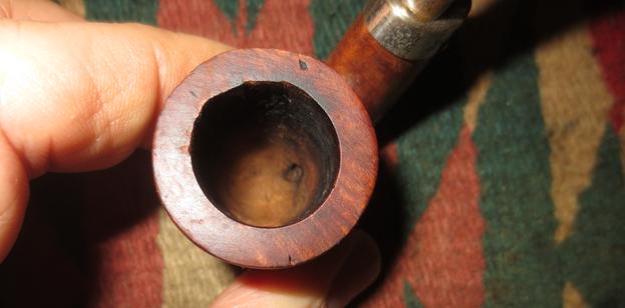
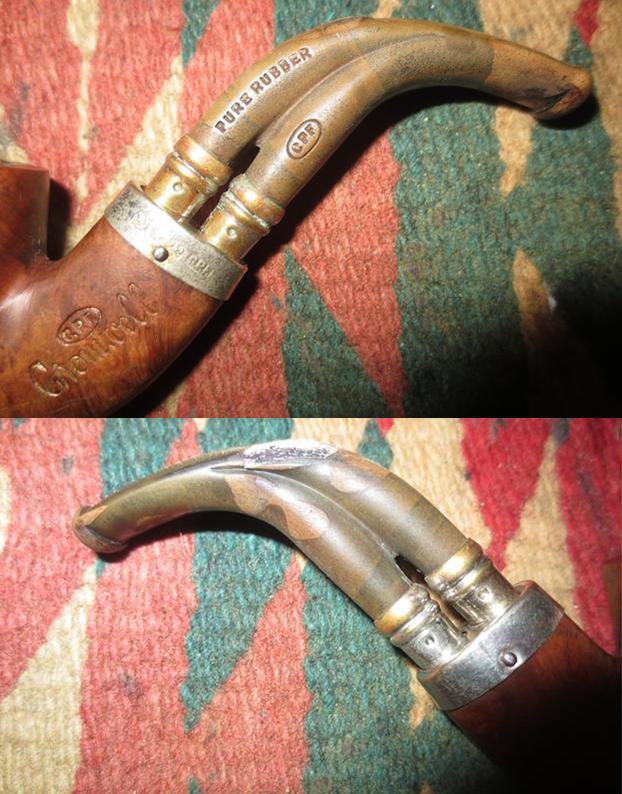
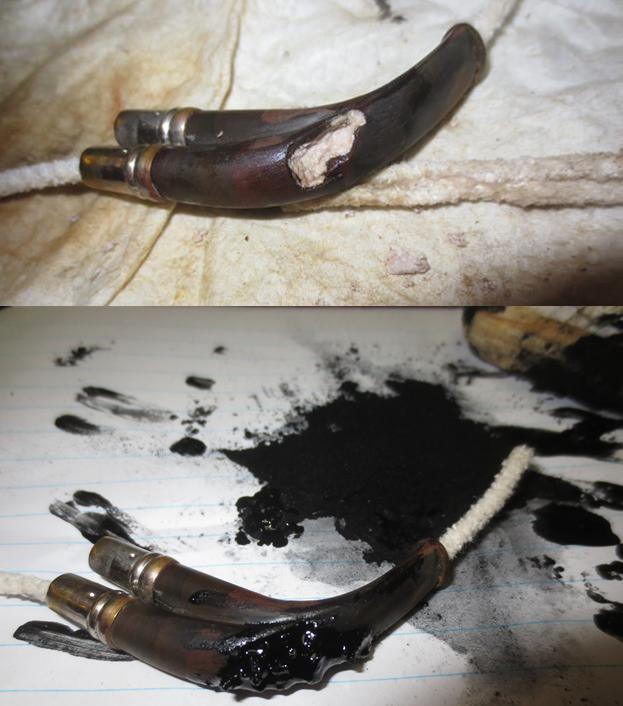
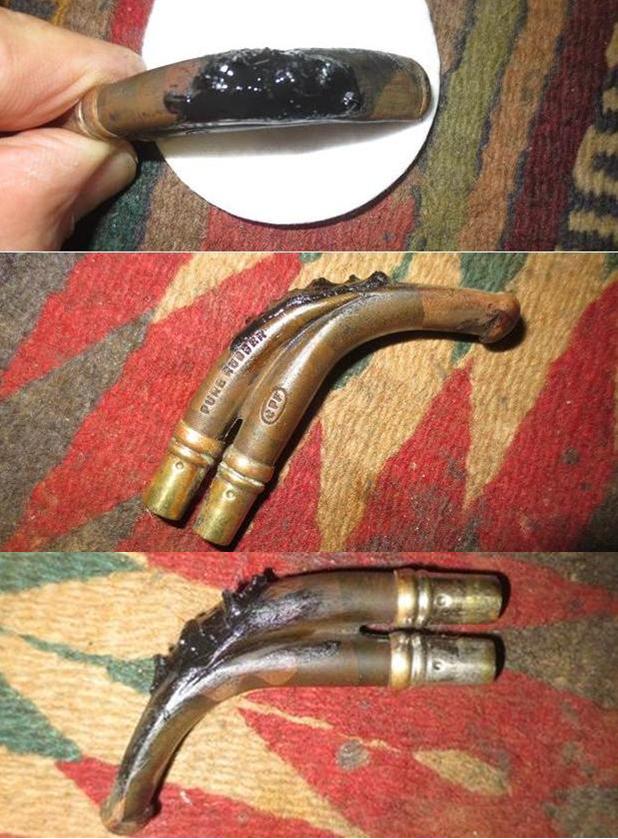
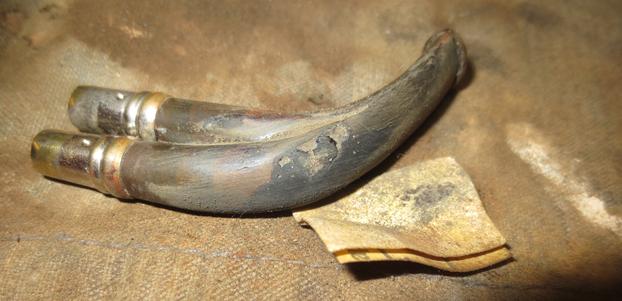
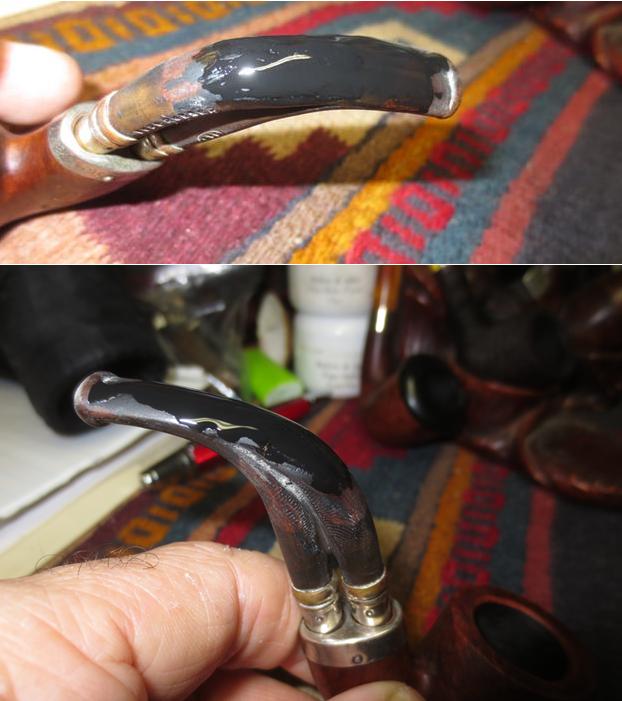
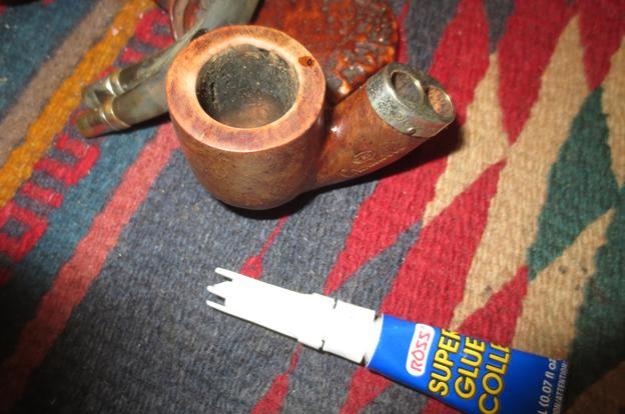
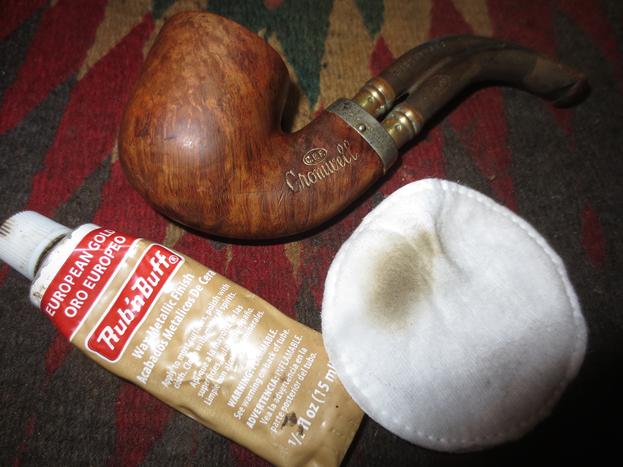
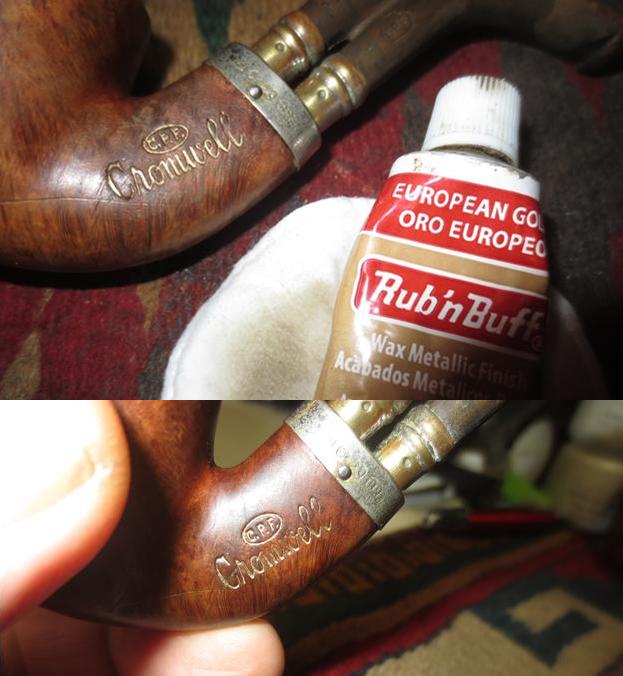
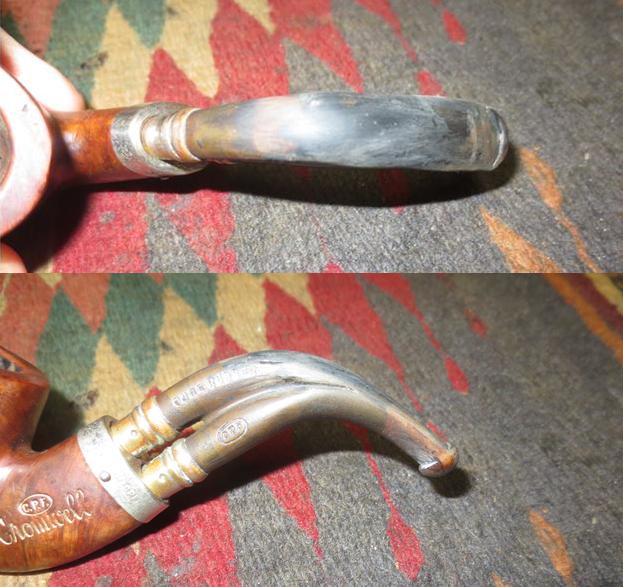
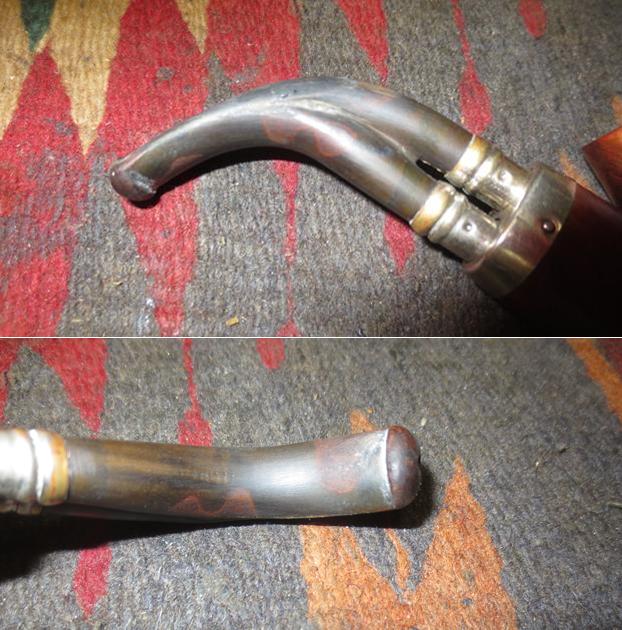
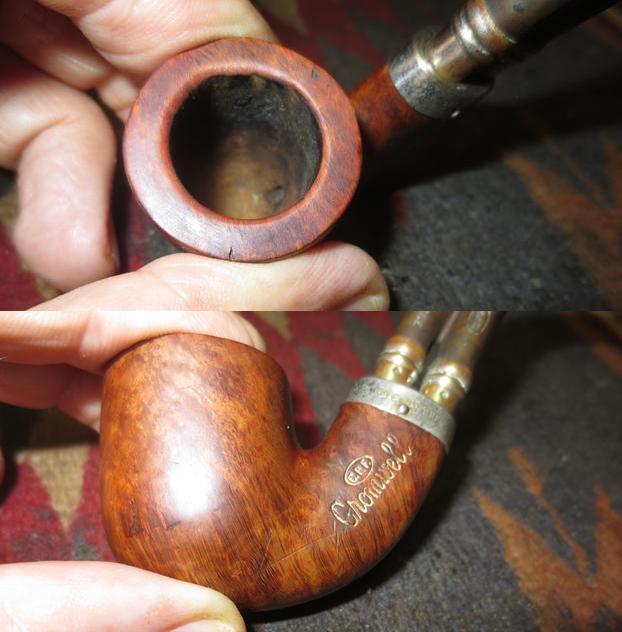
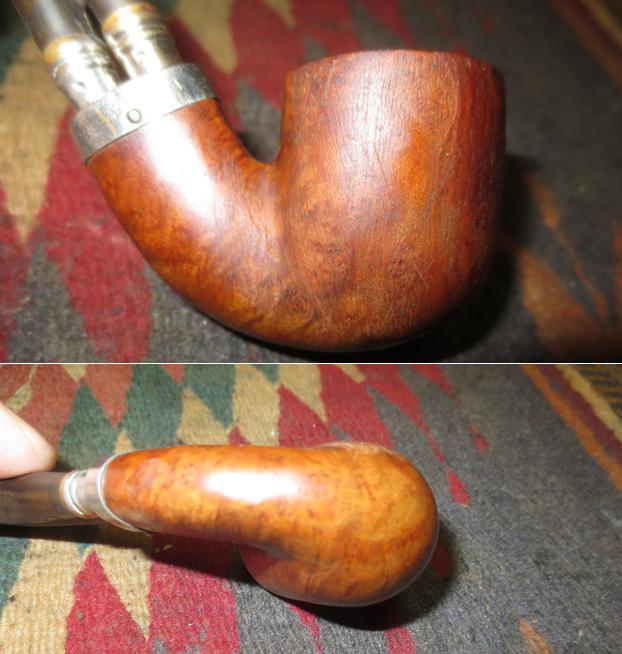
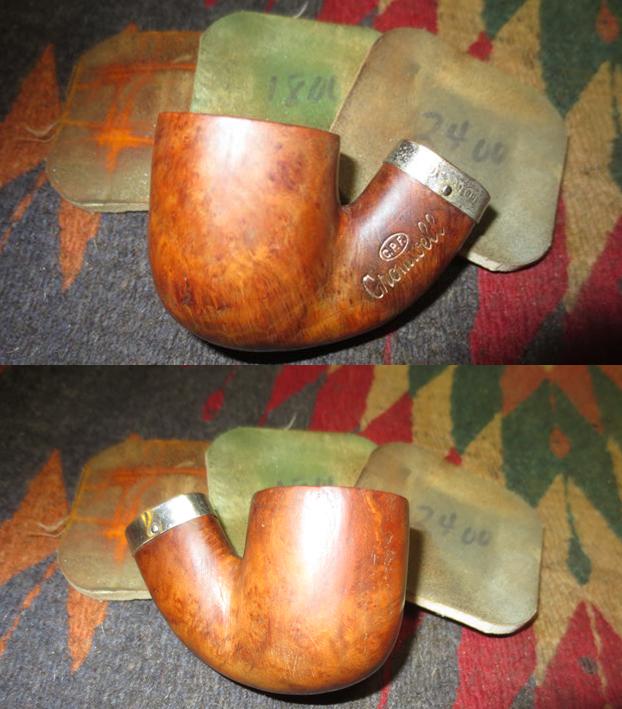
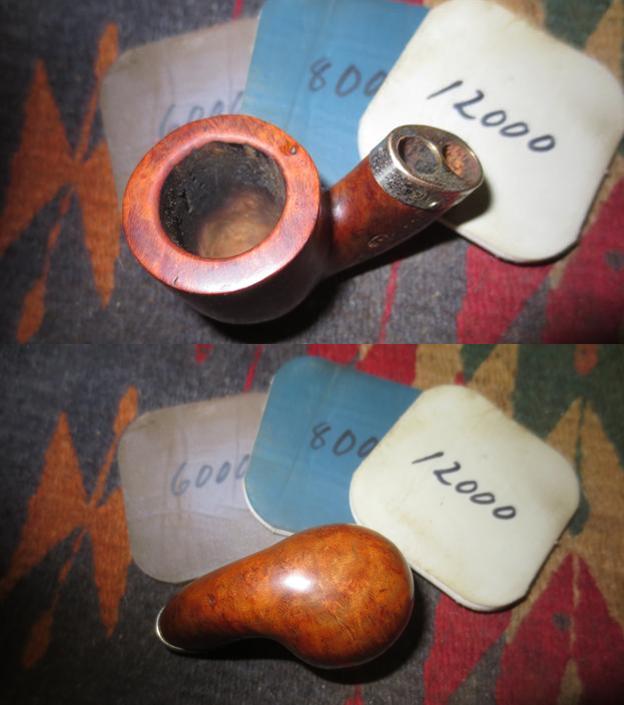
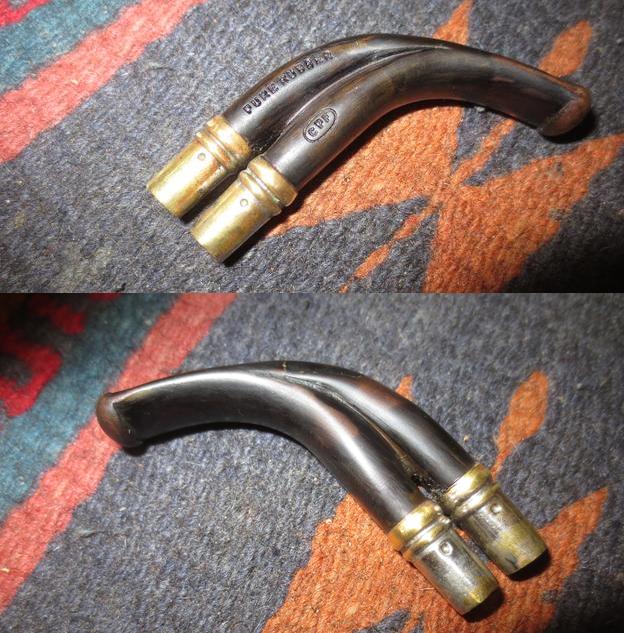
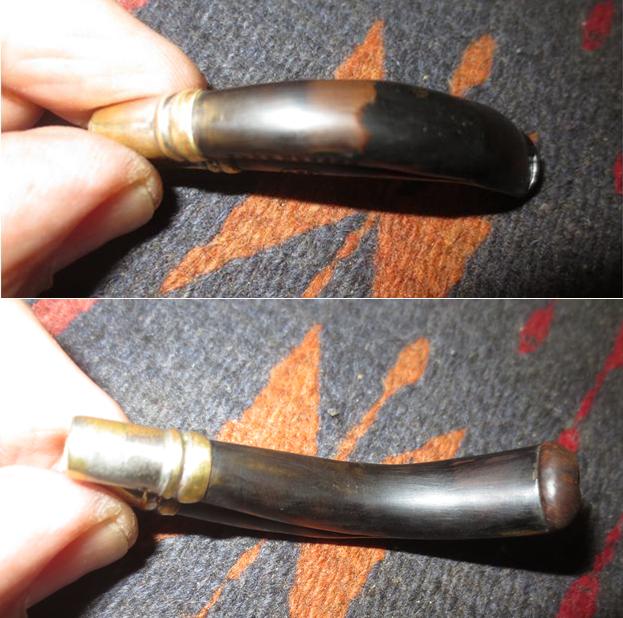
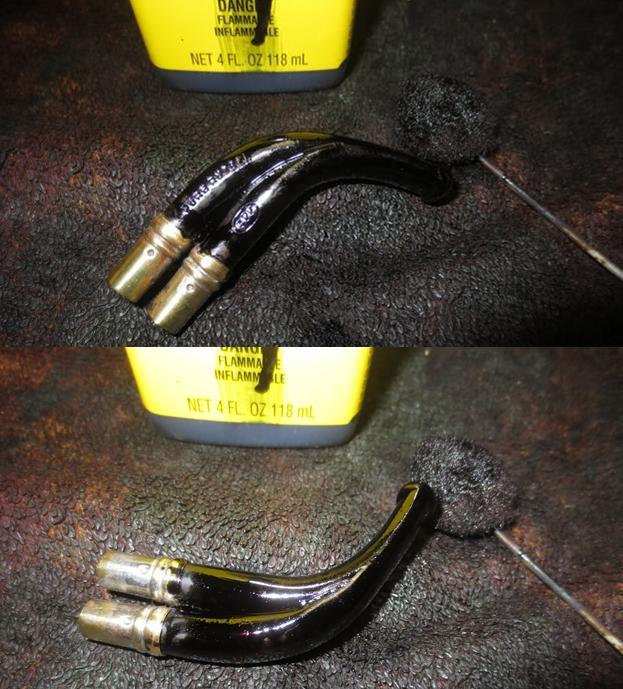
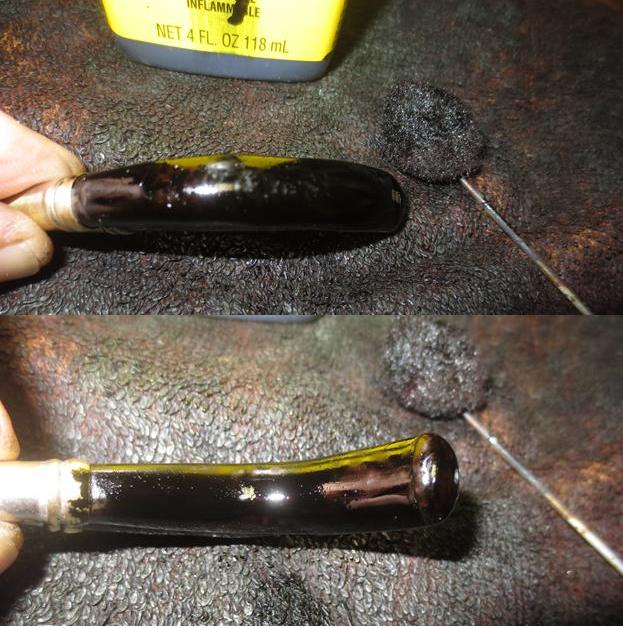
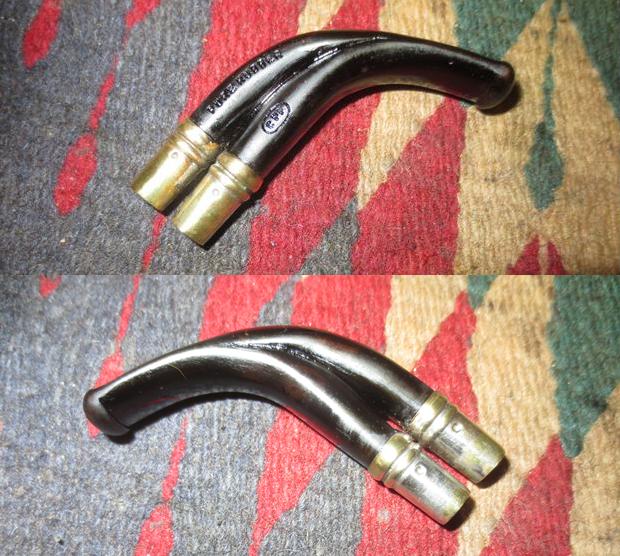
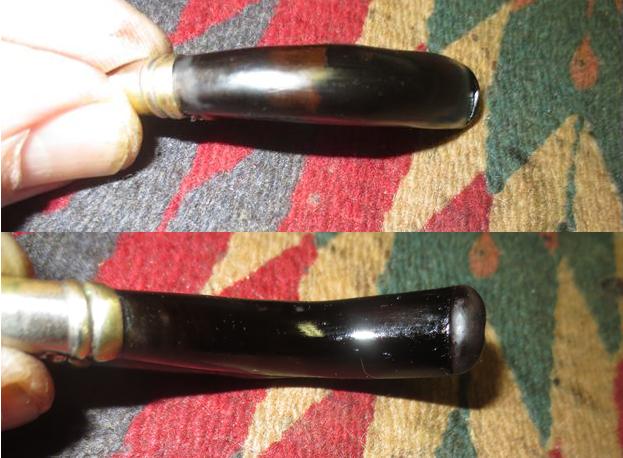
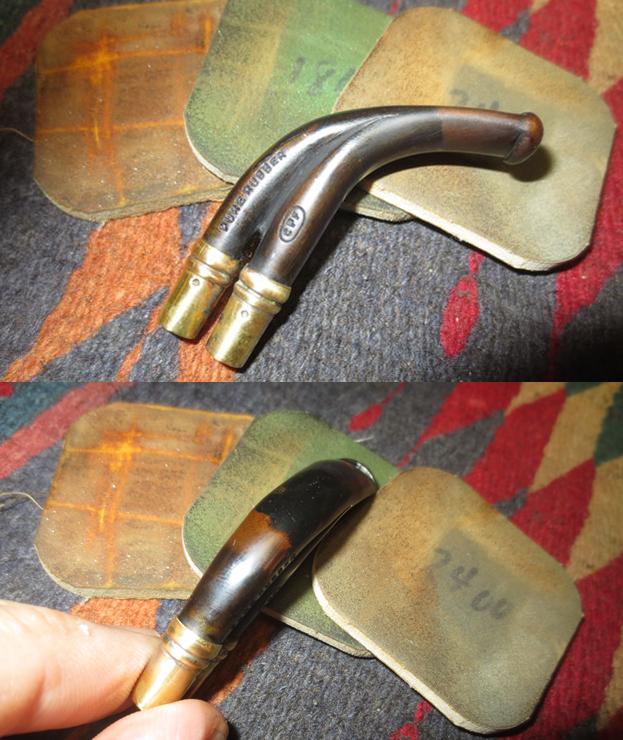
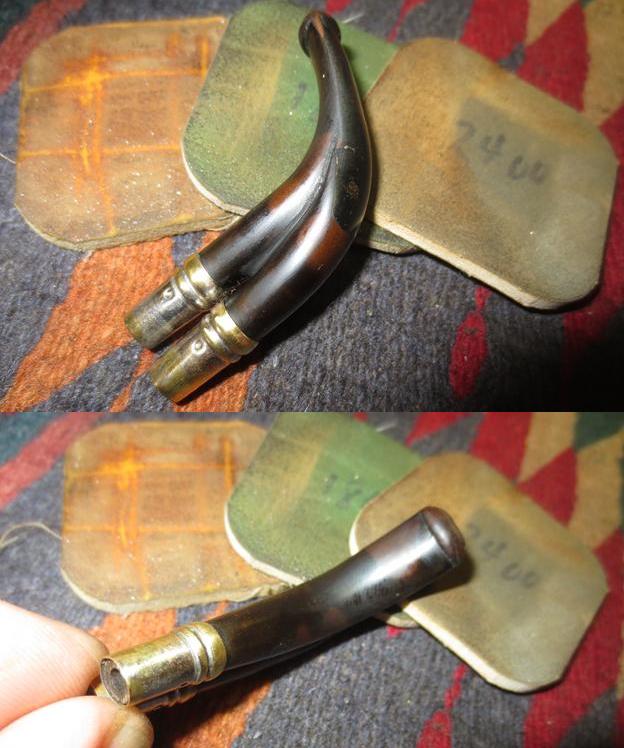
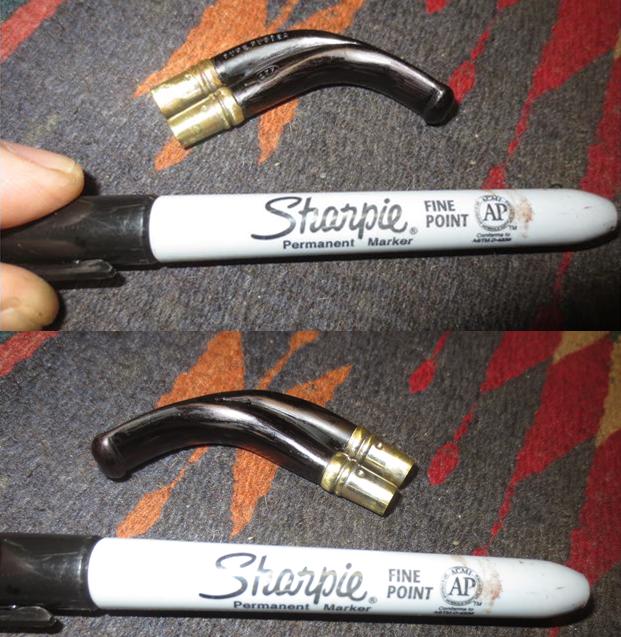
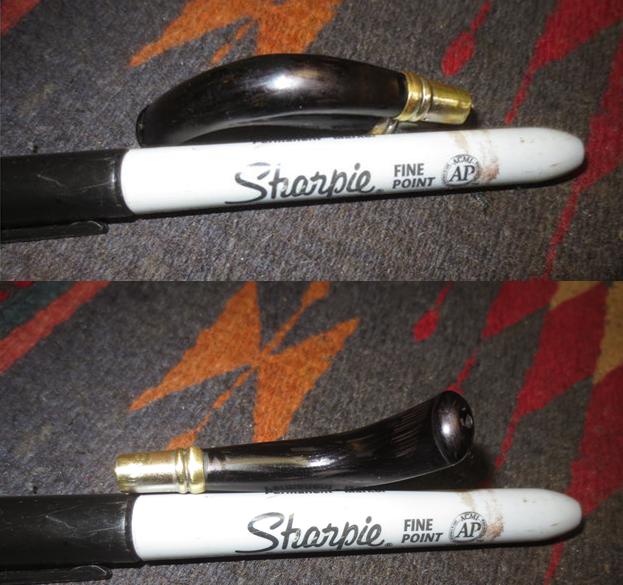
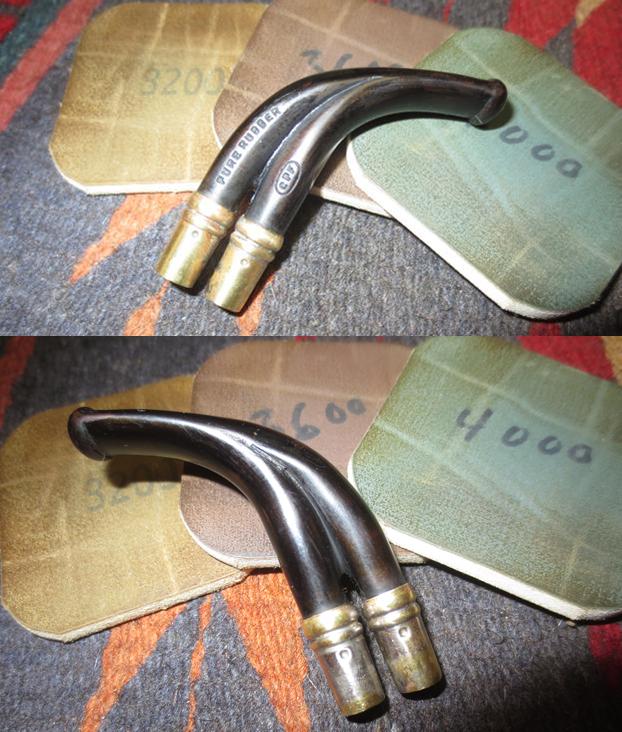
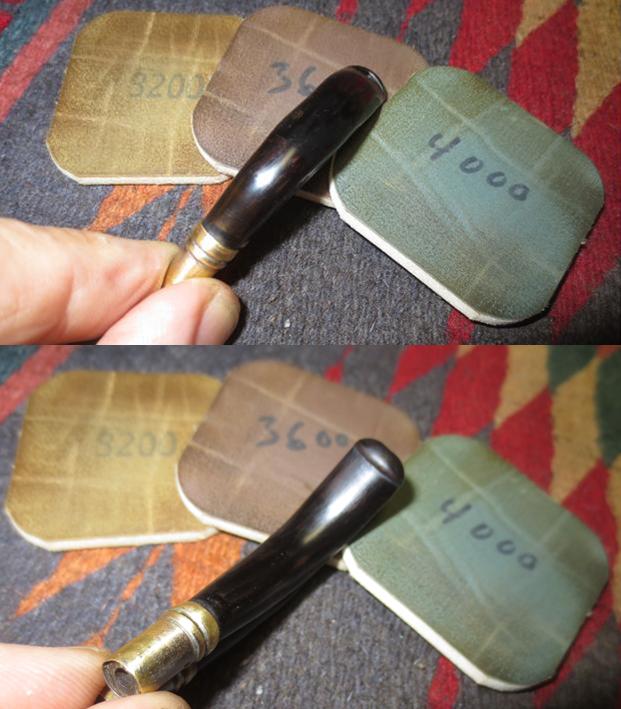
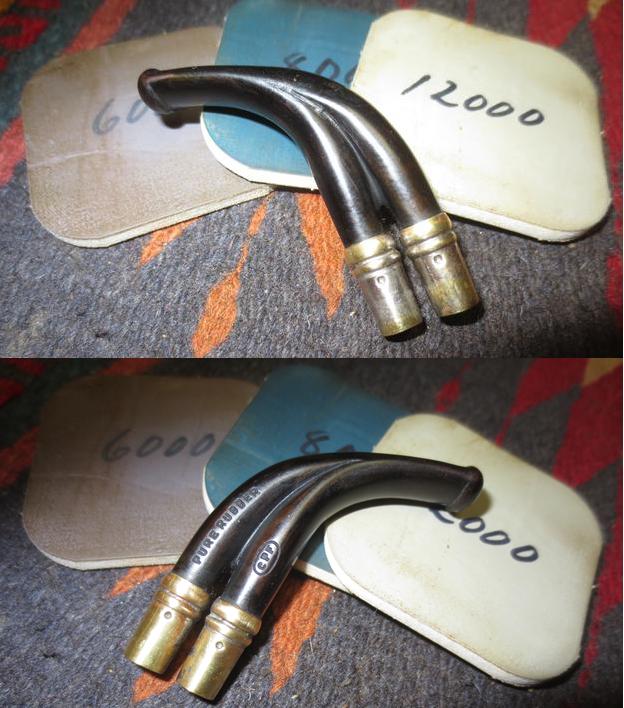
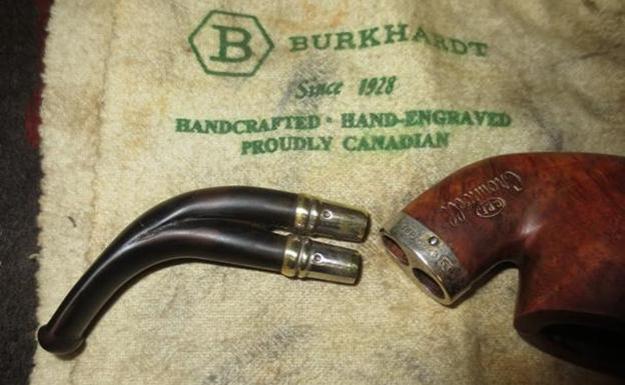
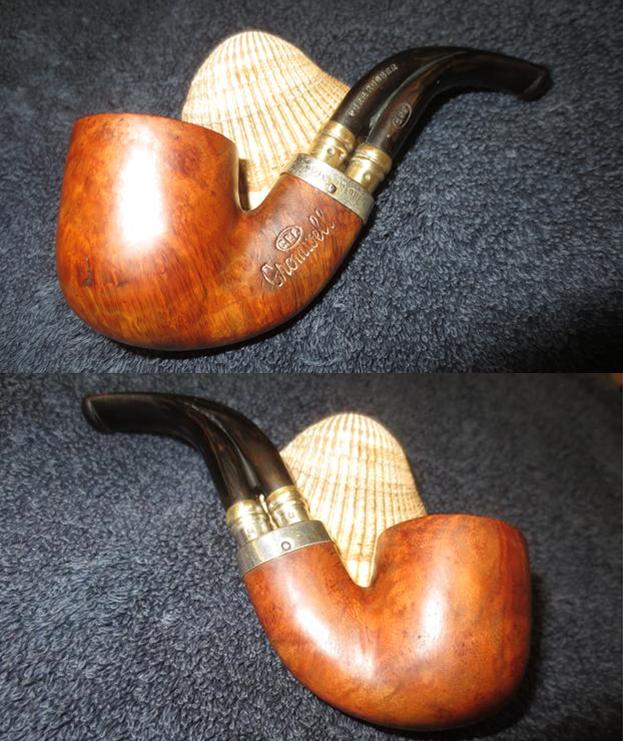
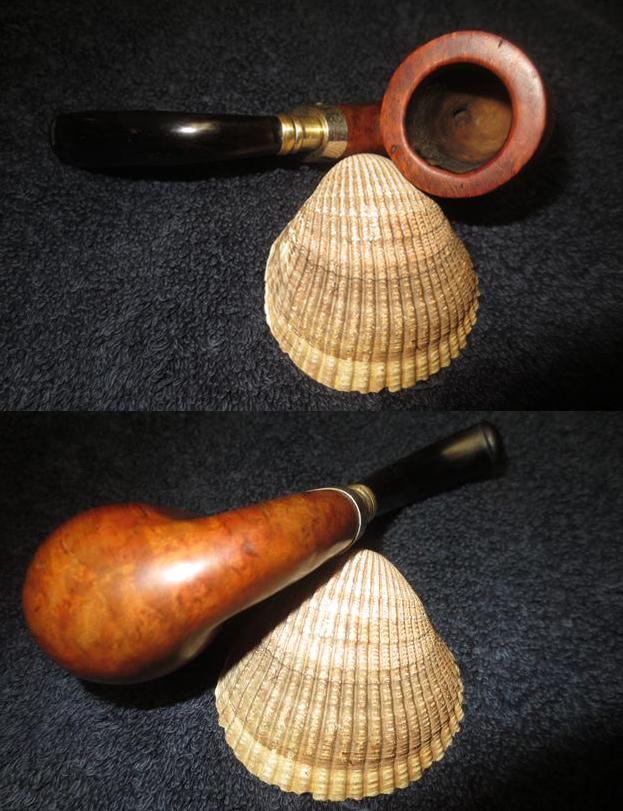
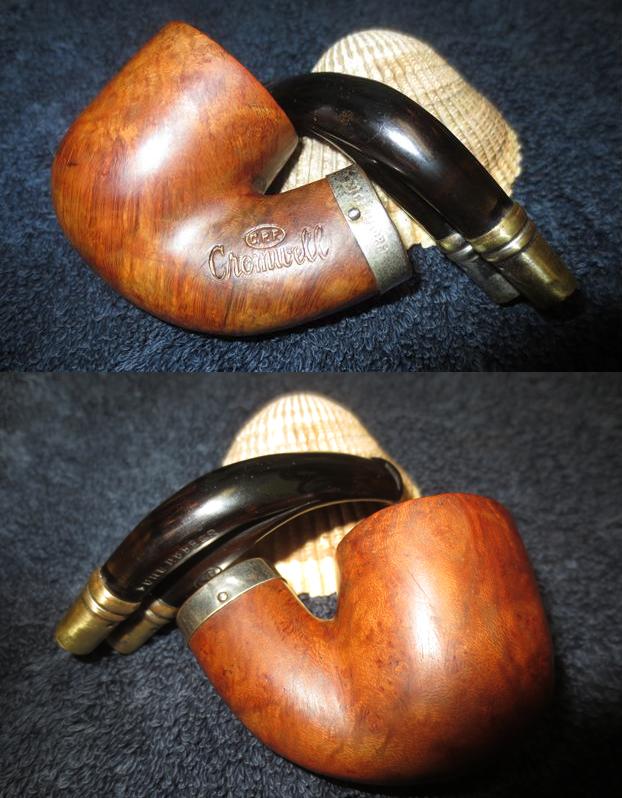
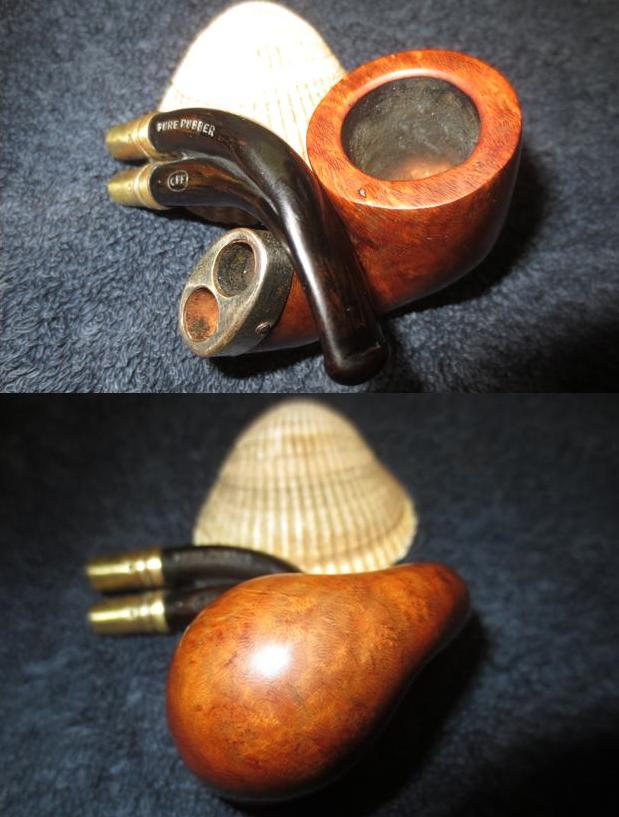
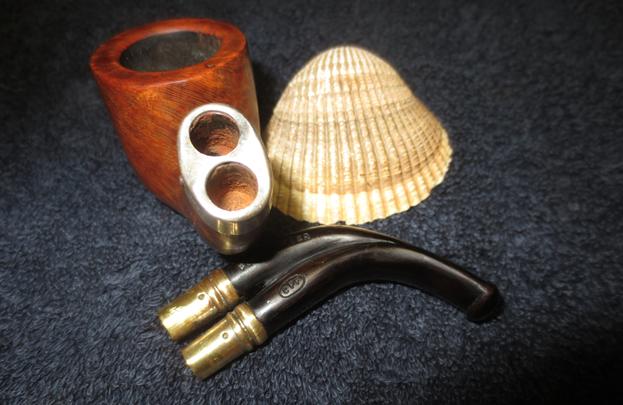
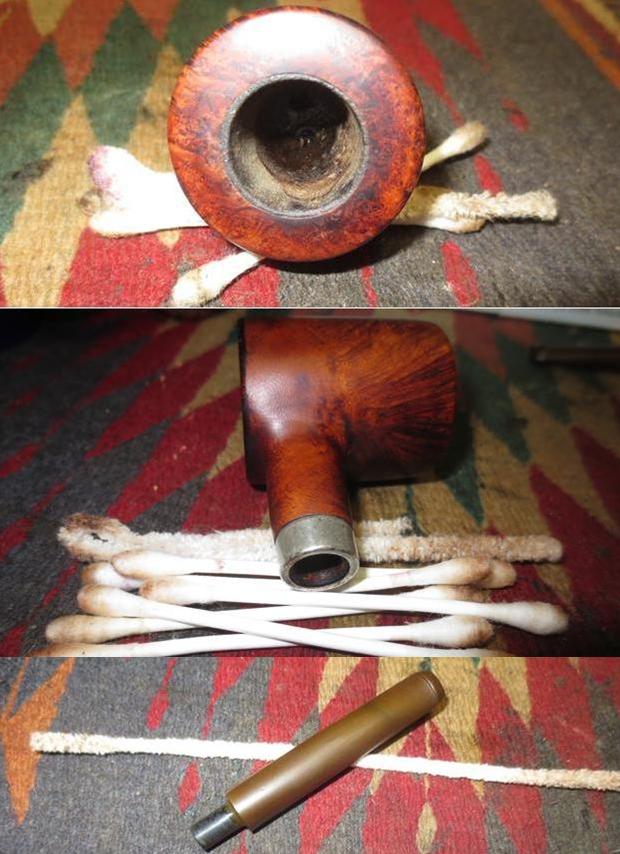
Like other older C.P.F. pipes this one has some real charm. It is on the petite side of things – 4 ½ inches long and 1 ½ inches tall. It is not a bad piece of briar, a mix of grains. The silver collar on the shank is stamped with faux hallmarks and the C.P.F. in an oval logo. It is probably silver or at least plated but I am not sure. The stem is the unusual part of the mix. It has two silver plated spigot tenons that fit into openings in the silver collar. The twin stems merge into one single airway. Looking at it I could not wait to examine it and see what it looked like with the stem removed and what the mortise looked like. The finish was worn but the pipe looked like it still had some life in it. The left side of the shank is stamped in worn gold leaf C.P.F. in an oval over Cromwell in script. There is no other stamping on the bowl. The stem is also stamped on the left side and reads PURE RUBBER on the top stem and C.P.F. in an oval on the lower stem. This pipe is also from the virtual pipe hunt my brother and I did in Montana. He took photos of the pipe from a variety of angles to show the uniqueness and the condition.I did some digging online and found a WDC Marlborough that had a similar configuration though far more boxy. It did not have the elegance that the C.P.F. does in my opinion. Playing around with the mechanics of the smoke and how it flowed through the stem I examined the dual mortise and the way the stem was laid out. I fed a pipe cleaner through the stem and found that natural flow of the cleaner was from the button through the top of the stem and into the top mortise. I could plug the lower tenon and the air was unobstructed from tenon to button. When I plugged the upper tenon and blew air through it I could feel it against my fingertip and then it made its way out the lower tenon. The airflow seems to have flowed against my finger and back a short distance to an opening between the two stems and out. From that I figured out that the smoker draws smoke through the upper mortise and into the airway on the stem. It flows into the bottom stem and mortise (which is a sump like the Peterson System pipes have) where moisture is collected and the smoke exits up the lower stem and into the button and into the mouth of the smoker. In my online search I found a photo of the Marlborough with the airpath drawn out as I conceived it in my words above. I drew the same kind of pattern on the C.P.F. to show how it appeared from my experiments. Here is the link to the Marlborough;  http://pipesmagazine.com/forums/topic/wdc-marlborough-double-airway. I used the drawing on that link to draw in the airflow on the Cromwell that I have. You can see that in the diagram below.I did some more digging on the internet to see if could find any more information on the brand. I found that C.P.F. did a second dual stem pipe called the Lafayette. Both pipes had military style bits so both were pocket pipes. Was it possible that C.P.F. did a line of pipes in honour or military leaders and these were two of those? You had Cromwell – potentially Oliver Cromwell, Lord Protector in England and Jean Lafayette, mercenary during the US Revolutionary War.The finish was very worn and there are a lot of scratches on the briar. I wonder if this little pipe was somebody’s pocket pipe and bumped against coin and whatever else was carried in the pocket of the pipe man who owned it. The bowl was caked and there was a lava overflow onto the rim top. There were some nicks and sandpits on the rim and the bottom of the bowl. My brother took photos of the stem and the mortise of the pipe. It is an unusual set up. The top portion of the twin stems fits in the mortise and the airway into the bowl is high at the bottom of that mortise. The second mortise for the lower portion of the stem is merely a dead space. It appears that the smoke came up the stem and circulated in the lower mortise before being drawn to the mouth of the smoker – perhaps it is a cooling system somewhat like the sump in Peterson System pipes. The twin ends of the stem are covered with a silver end mount and from the looks of the photos the pipe had been sitting for quite a while and cob webs had formed. The stem was oxidized for sure but something about the colour of the stem made me wonder what was happening with it. He did a lot of cleaning and scrubbing on this pipe and in the process we learned some interesting facts about the repair work that had been done on this pipe. The entire stem had been coated with what appeared to be a black paint. It was flaking and bubbling at the button end as can be seen in the photo above. The oxidized stem had some really strange patterns in the oxidation and there seem to be deep staining in spots on both the top and underside surfaces of the stem. On the topside there was a white repair that looked and felt like putty. The black paint had hidden that repair. Jeff had stripped the remaining finish off the dirty bowl, reamed the bowl and cleaned the rim top. The silver band on the shank looked better and the metal tenon ends on the military style tenons looked more brass than silver. He had cleaned out the two mortises and the airway into the bowl and the shank. Note the spotty appearance of the vulcanite stem. I took a close up photo of the rim top to show the condition of the surface and the damage on the right inner edge of the bowl. The bowl was out of round once he had removed the cake and the sandpits in the flat surface stood out.The next two photos I took show the condition of the stem. The stamping on it is very clear – Pure Rubber on the top stem and C.P.F. in an oval on the lower stem. I have not seen this spotty pattern in the oxidation before and I am wondering if in the process of the previous repair the repair guy did not damage the surface of the rubber. Note the putty fill as well. It is quite large.I used a dental pick to remove the putty fill and you can see from the photo below that it was quite large. It covered a large portion of the top and right side of the upper stem. I wiped the surface down with a damp cloth to remove the debris left behind by the putty in preparation for repairing the damage. I greased a pipe cleaner and put it in place in the airway in the stem so that it would not accidentally fill in from leakage of the repair. I mixed a batch of charcoal powder and black super glue putty and filled in the damaged area. I purposely overfilled it on the top to give me room to work. I carefully filled in the right side of the stem so as not to fill in the groove between the two parts of the stem. I put aside the stem so the repair could cure. Once the repair had dried I used a flat file to smooth out the ridges and peaks in the new surface. I sanded the repaired area with 180 and 220 grit sandpaper to further smooth it out and shape it.I wiped the stem down with a damp cloth and checked for air bubbles in the repair and areas that needed to be built up. I applied some more black super glue to the surface of the repair and smoothed it out with a dental spatula to ensure that all of the air bubbles had glue in them. I set the stem aside to dry.While the stem repair was curing I worked on the rim. I used a folded piece of 220 grit sandpaper to work on the damage to the inner edge of the bowl. It took a bit of work to blend in the damaged areas and smooth them out. I filled in the sandpits with clear super glue. It did not take too long to cure so when it had hardened I sanded it smooth and blended it in with the rest of the rim top. I wiped the bowl down with alcohol on a cotton pad to clean off any debris left behind by my rim work and used some European Gold Rub n’ Buff to touch up the gold in the stamping on the shank. I applied the product and rubbed it into the stamping and wiped off the excess with a cotton pad. The next three photos show the fresh shank. By this time the stem repair had hardened and I sanded the surface with 220 grit sandpaper to smooth things out. I used a folded piece to smooth out the grooves between the upper and lower stems. The stem is looking much better but the reddish spots in vulcanite really looked odd to me. I wondered if I would be able to polish them out of if I was going to be stuck with them in the finished pipe. The finish on the bowl was rough and there were a lot of scratches and worn areas on the sides and bottom. I sanded out the ridges and as many of the deep scratches as possible with 320 grit sandpaper. In the photos below you can still see the scratches but the feel in the hand is much better and the bowl is beginning to look smoother. I sanded these marks smoother with 400 grit wet dry sandpaper and then polished the bowl with micromesh sanding pads. I wet sanded with 1500-2400 grit pads and dry sanded with 3200-12000 grit pads. The next sequence of photos show the progress in smoothing and polishing the bowl. The stem still needed a lot of work. I shaped the repaired area and worked the surface over with 220 grit sandpaper to remove as much of the oxidation as I could. While it was definitely looking better the spotty areas were still visible. I still needed to polish the stem with micromesh pads to see how much more of the spotty surface I could clean. I also needed to finish polishing the silver tenon caps. I worked over the surface with 400 grit wet dry sand paper and 1500-2400 grit micromesh sanding pads and still could not remove the stained spots on the rubber. I decided to try something different. I stained those spots of the stem with a black aniline stain to see if that would bring the red spots more in line with the rest of the stem. When the stain dried the spots were definitely better, but they still stood out. Time to go back to the sanding and polishing! I wet sanded it some more with 1500-2400 grit micromesh sanding pads. I still had those obnoxious spots present in the rubber. They were deep and it really appeared that I would not get them out. I sanded the stem some more to try to remove more of the damaged areas. It did not seem to matter how much I sanded the spots remained. I decided to try one more trick. I used a black Sharpie Pen to colour in the spotted areas. I let the ink dry. I was hoping that these Permanent Markers would actually be permanent and cover the spots. Once the ink had dried I lightly sanded it with 3200-12000 grit micromesh sanding pads. The black seemed to stay in the spots better than any of the other methods so far. Maybe I had some success but polishing would tell the story. The more I polished most of the coverage remained but there were still remnants of the spot in the vulcanite. I polished the metal tenon caps with micromesh sanding pads and finished polishing them with a jeweler’s cloth to remove any remaining tarnish.I lightly buffed the stem with carnauba wax and buffed it with a clean buffing pad to raise the shine. I hand buffed it with a microfiber cloth to deepen the shine. I gave the bowl multiple coats of carnauba wax and buffed it with a clean buffing pad to raise a shine. I hand buffed it with a microfiber cloth. I put the parts back together and rebuffed it by hand. The finished pipe is shown in the photos below. The stem looks far better than when I first started but the spots still show through the polish. The pipe as a whole is a beautiful old piece of history. It does not look too bad for its age – over 125 years old. Thanks for walking through this restoration with me. It was a challenge and it was a pleasure to resurrect this old piece of tobacco history.

New Life for an unusual CPF COLON Calabash Pipe


Blog by Steve Laug

Not too long ago, I wrote a blog about a virtual pipe hunt that my brother and I went on. He was visiting an antique mall in Montana and I was at home in Vancouver, Canada. We met at the mall via Apple Facetime and he was the hands and feet of the exercise. He happened upon a large consignment of CPF pipes as well as others from around the same vintage – late 1880s through early 1900s. Here is the link to that blog, https://rebornpipes.com/2017/04/26/a-virtual-pipe-hunt-a-new-way-to-experience-the-joy-of-a-pipe-hunt/.

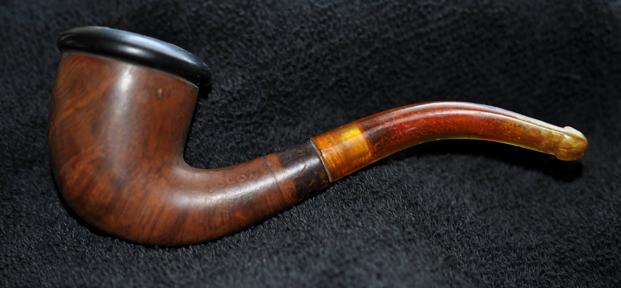
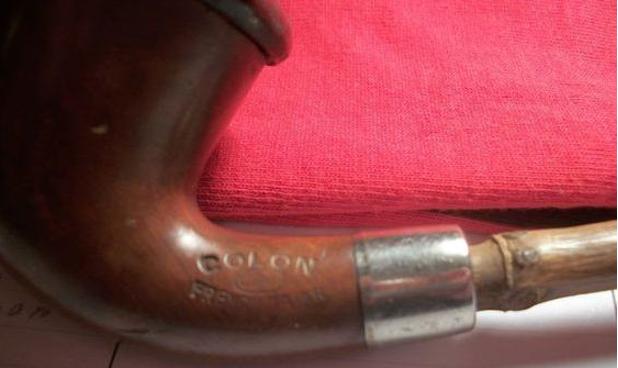
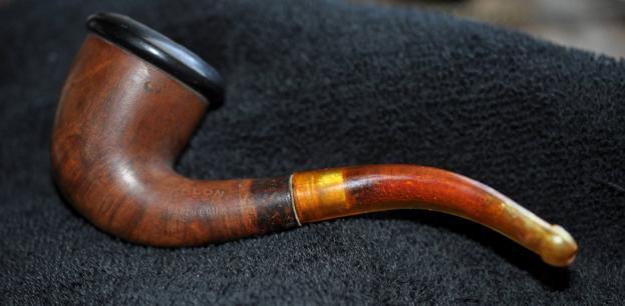
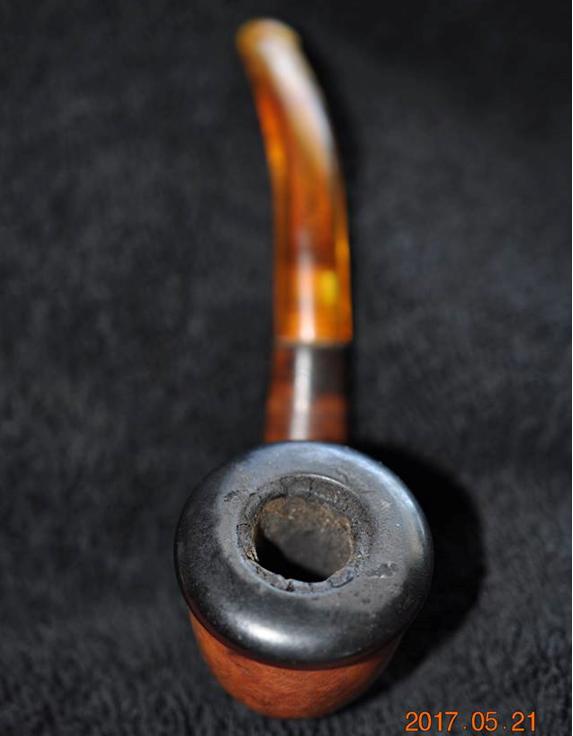
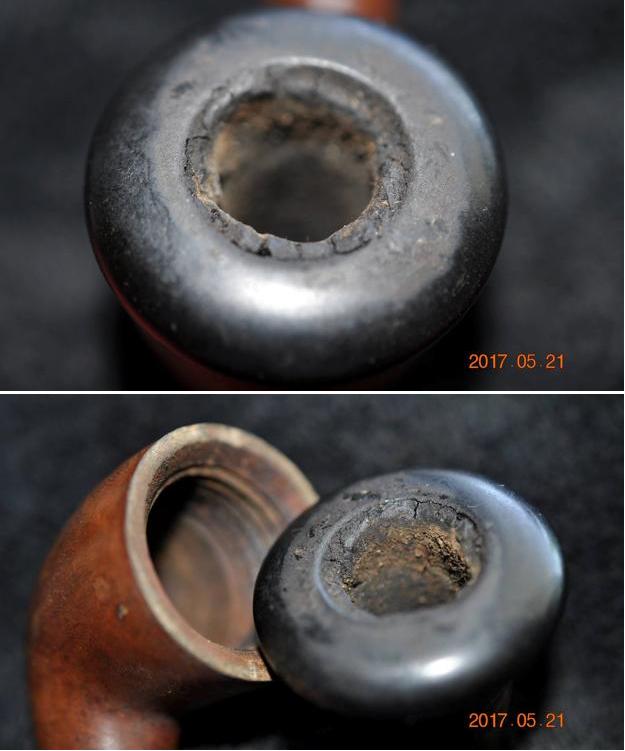
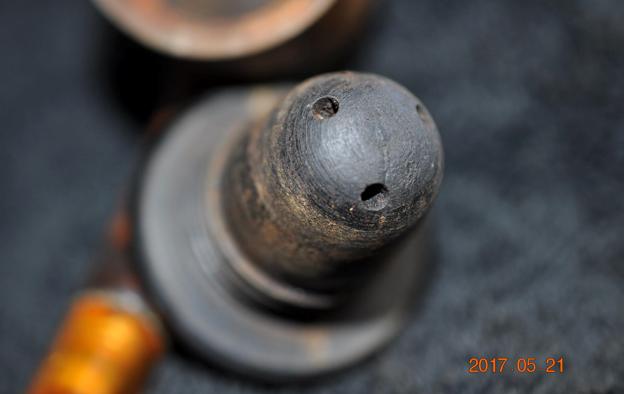
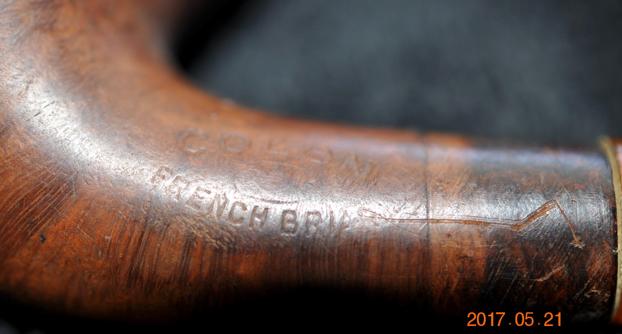
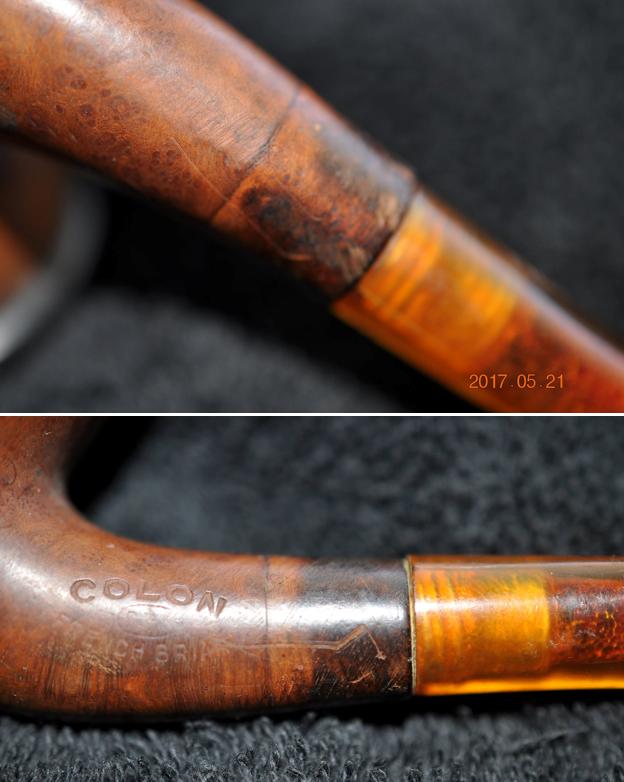
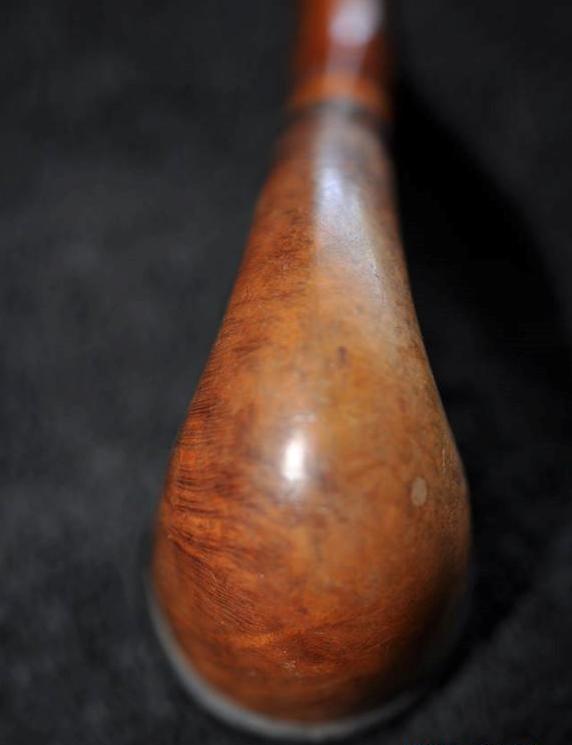
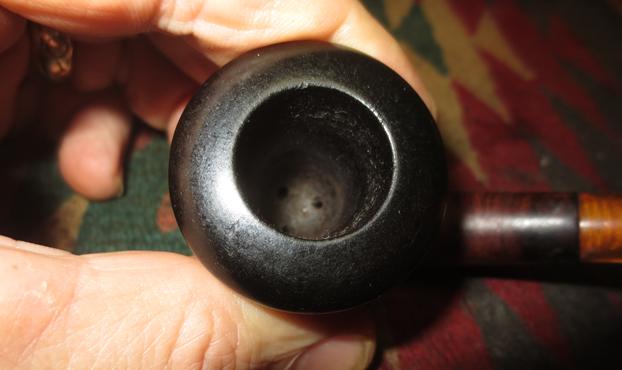
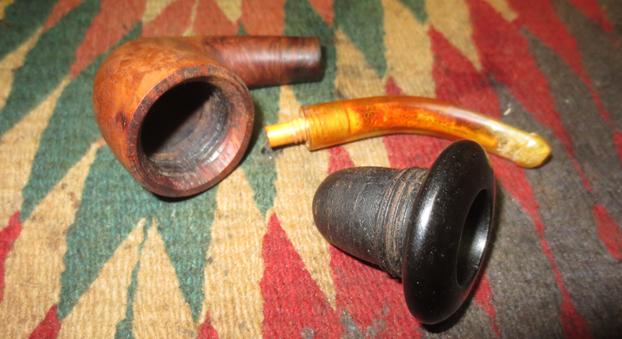
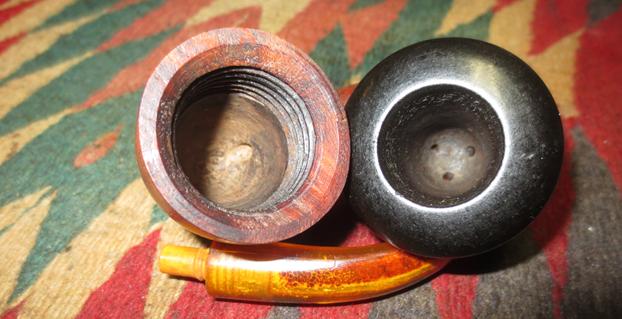
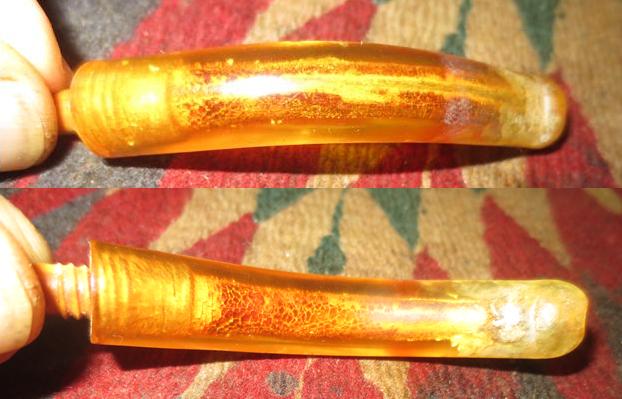
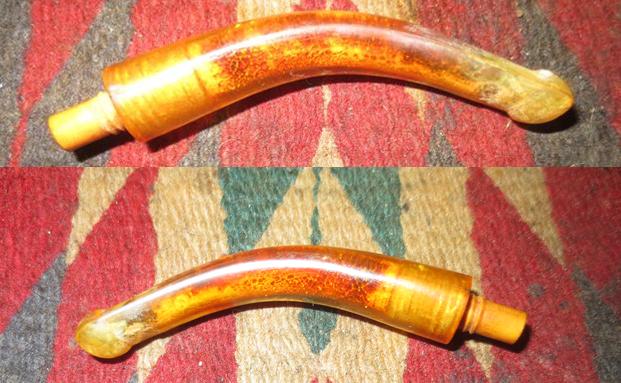
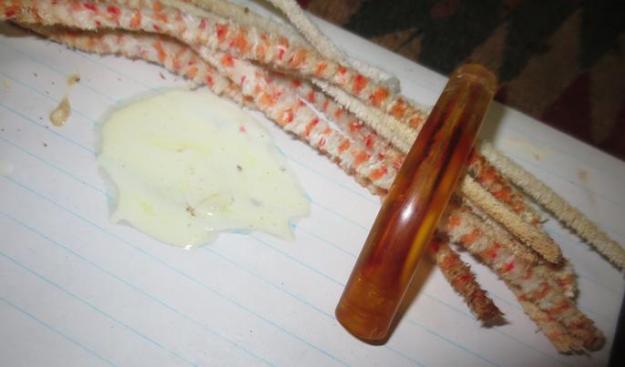
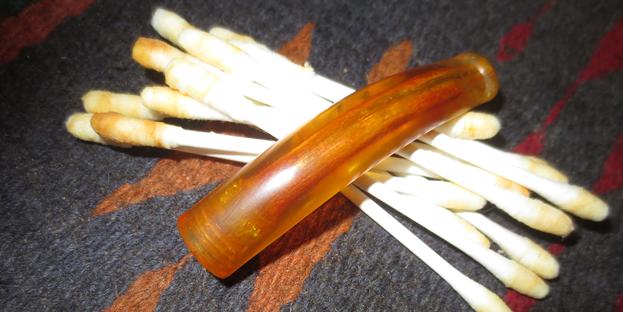
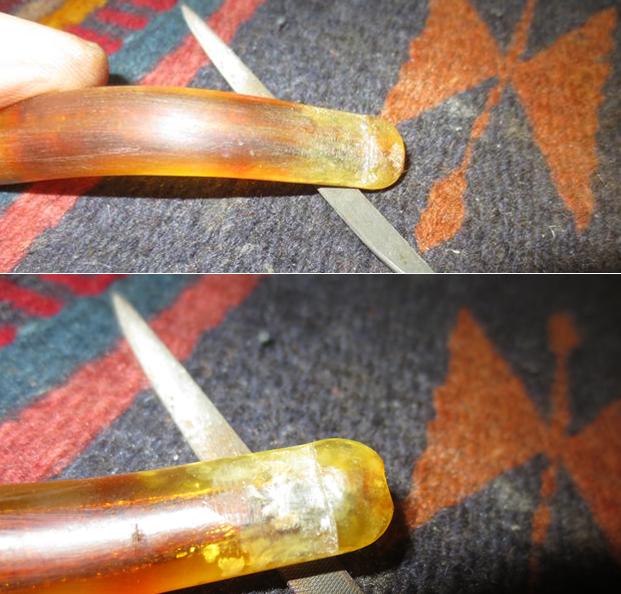
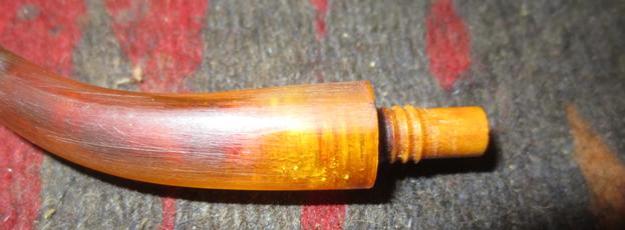
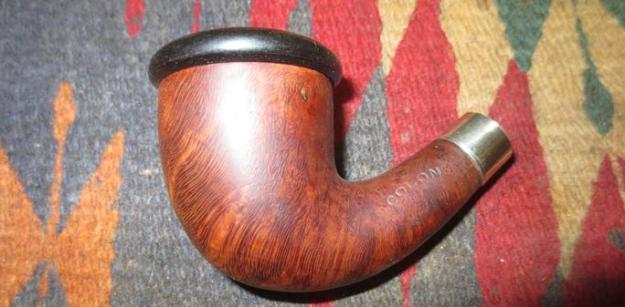
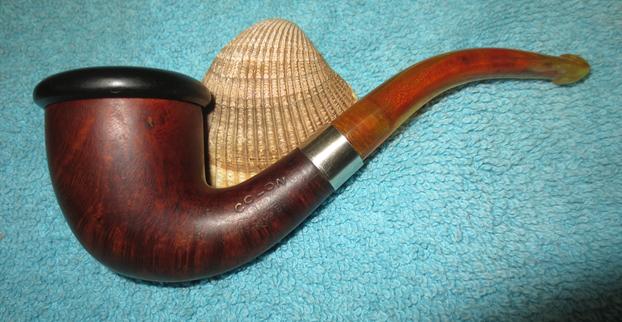
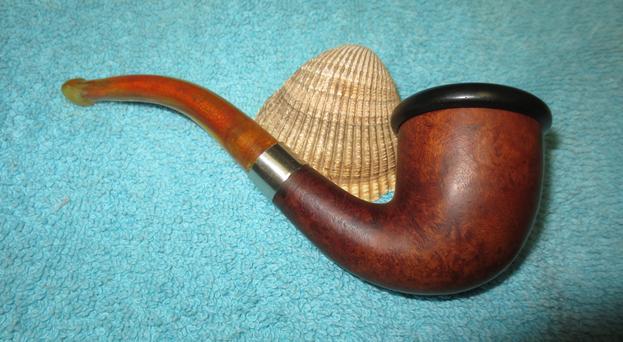
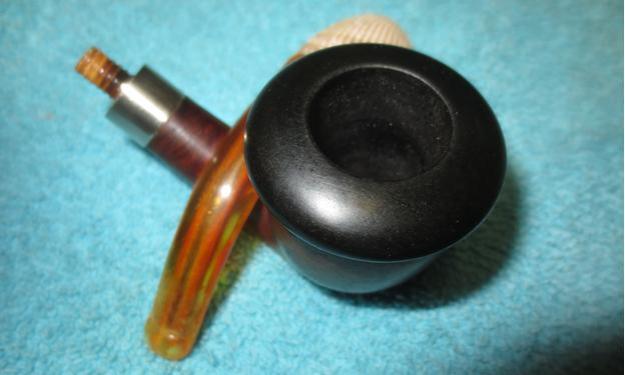
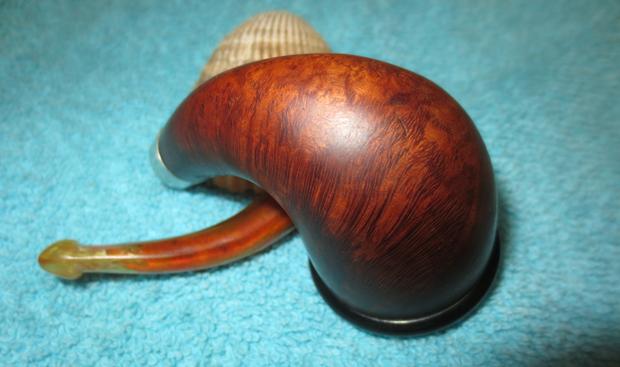
I worked on the older alternative wood pipe with a spiral shank and horn stem. It was the first pipe I worked on from the lot we found that day. I wrote about the restoration of the pipe in an earlier blog; https://rebornpipes.com/2017/06/24/bringing-an-older-1890s-era-spiral-shank-horn-stem-billiard-back-to-life/. The next pipe on the worktable was a CPF that was different from any others that I had ever seen or worked on before. It was a briar calabash with a black Bakelite screw bowl/cup. The shank was darkened and appeared to have originally had a band that had been lost somewhere along the way. That is pretty common on these old CPF pipes. The stem was amber and needed some work to bring it back to usefulness. The pipe is stamped on the left side of the shank with the words COLON in an arch over the CPF logo in an oval. Underneath that, is stamped French Briar in a reverse arch thus encircling the CPF logo. There was no other stamping on the right side or underside of the shank. There were two sandpits/flaws in the briar that I would need to address but it was a beautiful little pipe.I did a bit of research on Google to see if I could find any information on this particular CPF pipe. There was not much information on that brand and some of the info was almost comical in that the key word in every listing was “COLON”. You don’t need me to spell out what kind of listings were found. The one thing I did find was a photo that someone pinned on Pinterest. Here is the link; https://www.pinterest.com/pin/495255290248000765/ . I have included the photo below that was posted there. The label on the pinned photo read: TOBACCO PIPE, CIRCA 1915, “COLON” BOWL, French Briar, C.P.F. It is the same pipe as the one on my table but mine has better grain in the briar bowl. Mine also came with a stem.My brother took photos of the pipe (including the first one above) before he started to work on it and clean it up. When he sent me these photos, I was really interested in getting my hands on it and cleaning it up. I could not wait to see it up close.Jeff’s photos showed the condition of the pipe really well and gave the reader some idea of what it looked like from a variety of angles. The top view of the bowl showed the thick cake that had formed in the Bakelite bowl and the lava that overflowed on to the rim top.  The next three photos show the Bakelite bowl and rim top, the bowl unscrewed from the briar bowl and the underside of the Bakelite bowl. The cake is very thick and looks hard. Once the bowl is out of the base it is amazingly clean considering the condition of the Bakelite bowl. The underside of the Bakelite bowl is also clean. It has three holes that carry the smoke from the bowl into the base, shank and stem to the mouth of the smoker. The threads in both are intact. He also included some close up photos of the shank and the stamping. He has a much better camera than I do so the stamping photos clearly show the condition of the stamps – they are worn but readable with a lens and a light. The marks on the shank appear to be from the time that the band was pried off the shank. Looking at it under a lens there are no cracks in the shank. He sent along a photo of the underside of the bowl as well. It is a pretty piece of briar.The photos of the condition of the stem were telling in many ways. There was a lot of tooth chatter and tooth marks on both the top and underside of the stem near the button. There were also fracturing and splintering along the edges that helped me conclude that the stem was amber. The next photos show the stem from a variety of angles including a photo of the orific airway in the button. The stem had a buildup of tars and oils on the inside of the airway that would need to be removed. I reread what I had written regarding the history of the CPF or Colossus Pipe Factory brand before I started the restoration work on this pipe. I am glad I collected the data in one place because I would otherwise have had to redo the work each time I work on a CPF pipe. Here is the link to the history of the brand. https://rebornpipes.com/2013/04/14/some-reflection-on-the-historical-background-on-cpf-pipes/ I have included a few choice paragraphs that help with the identification and the dating of the brand. You can read the entirety at the above link but here is a summary to connect this pipe to the history of the brand.

“One of the secondary hobbies to pipe refurbishing that I enjoy doing is to research the history of a particular brand or make. In a recent EBay lot I bought there were 3 pipes that were stamped with the CPF logo – CPF in an oval with the word FRENCH stamped in an arch above the oval and the word BRIAR stamped in an arch below the oval. I had heard that the CPF stood for a variety of names from Consolidated Pipe Factory to Colossus Pipe Factory and even Chesterfield Pipe Company. There was a wide range of conflicting information available on the websites and forums that I read while looking into the brand…”

“…CPF in the logo stands for Colossus Pipe Factory. The brand was purchased by KB&B sometime between 1884 and 1898 and it continued until 1915. That time frame gives help in dating some of the older CPF pipes you or I might find. It can be said that prior to the dual stamping it is fairly certain that the pipe is pre-1884 to 1898. After the dual stamping it can be placed post 1898 until the closure of the brand line in 1915. CPF made beautiful pipes. I believe Sam Goldberger was correct in his assertion that the carvers who made the pipes were of European training and used the classic shapes and well-aged briar.”

Armed with that information I was able to narrow down the period that this was made. Since the pipe bears only the CPF logo, I think that it is safe to say it was made before the time of the buyout by KB&B in 1898. That would mean that it is dated somewhere between 1884 and 1898. From 1898-1915 all of the pipes that came out of the factory bore a dual CPF/KB&B stamp. The fact that this one does not have the dual stamp further solidifies the date of manufacture as being from the 1880s to the late 1890s. This information goes against the information I included with the Pinterest photo above which identified the pipe as being made in 1915. Like I thought when I took when I first saw it – this is an old pipe.

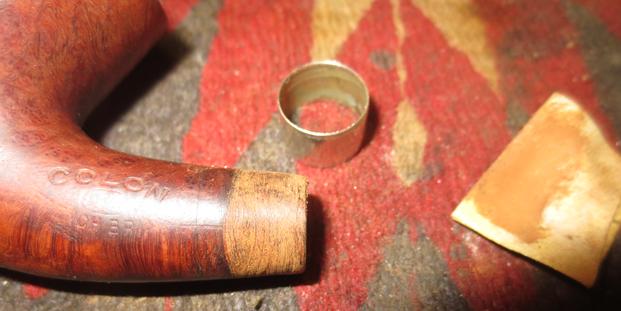
My brother did a great job cleaning up the pipe – bowl, base and stem. He reamed the bowl with a PipNet pipe reamer and a Savinelli Fitsall Reaming Knife and removed all of the cake. He cleaned the Bakelite with soap and water and scrubbed it with a tooth brush. He scrubbed the briar exterior with Murphy’s Oil Soap to remove the grime and grit. He cleaned the interior of the briar bowl and the mortise and shank with pipe cleaners, cotton swabs and alcohol. The stem was harder. He cleaned out the majority of the oils and tar build up with pipe cleaners and a little alcohol. He sent it to me to finish up but it was pretty decent. I took the next four photos of the pipe to show what it looked like when it arrived in Vancouver. I took a close up photo of the bowl and the rim top to show the difference between what it looked when he brought it home and what it looked like when I got it. I also took the bowl apart and took two photos of the parts. I took photos of the stem to show the condition from all angles. He got a lot of the grime out of the airway but there was still a lot there that needed to be cleaned out. I would need to remove the threaded tenon to do justice to the airway cleaning. I ran some alcohol, pipe cleaners and cotton swabs through the shank and the bowl to double check on the cleaning and it was really well done. The inner beveled edge of the bowl looked really good. I removed the tenon and scrubbed the stem with pipe cleaners, cotton swabs and Soft Scrub Cleanser. I rinsed it with warm water to remove the soap. I was able to get much more of the tars and oils out with the Soft Scrub. I used a needle file to define the edge of the button and make the angle sharp once again. I used the file on both sides.I lightly screwed the bone tenon in place in the stem. I would adjust it once I was ready to put the pipe back together again.I went through my bands and found a nickel band that would fit the shank. I sanded the shank to remove the darkening, nicks and dents and prepped the surface for pressure fitting the band. I used a Dremel and sanding drum to grind back the band width to make it fit the depth of the shank that I wanted to cover. I did not want the band to extend over any of the stamping.I heated the band and pressed in place on the shank. I used the Dremel to grind the band down further and sanded the edge with 1200-2400 grit micromesh to smooth out the sharp edge. I filled in the sand pits on the bowl with clear super glue and briar dust and sanded it in to blend with the rest of the briar. I filled in the nicks on the top of the Bakelite with clear super glue and sanded it smooth once it dried. I needed to buff both bowl and cup but it definitely looked better. I screwed the bowl in place on the base and took the following photos. I polished the stem with micromesh sanding pads – wet sanding it with 1500-2400 grit pads and dry sanding with 3200-12000 grit pads. I rubbed the stem down with Obsidian Oil after each grit to remove the sanding dust and give me some more bite when I sanded it with the next grit of pads. I polished the briar bowl and the Bakelite insert cup with micromesh sanding pads – wet sanding with 1500-2400 grit pads and wiping it down with a dab of olive oil after each pad. I touched upt the gold leaf in the stamping with some European Gold Rub’n Buff. Once I finished I buffed the bowl and insert with Blue Diamond on the buffing wheel to polish it and buffing the stem separately. I waxed them separately as well with Carnauba wax. I buffed them with a clean buffing pad and hand buffed them with a microfiber cloth. The finished pipe is shown in the photos below. I really like the finished look of the pipe.

Bringing an older 1890s Era Spiral Shank Horn Stem Billiard back to Life.


Blog by Steve Laug

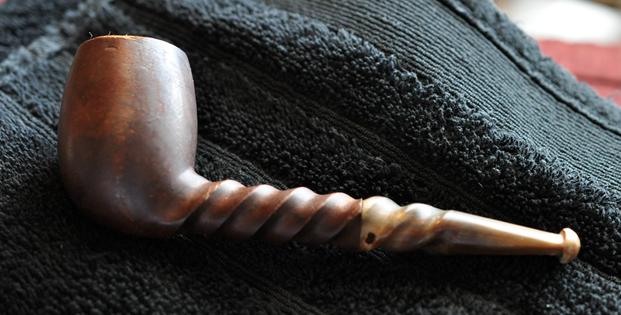
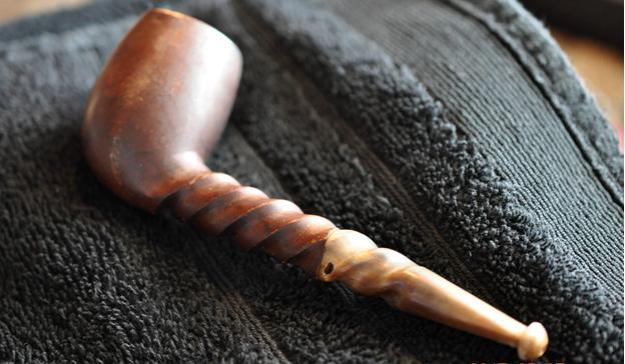
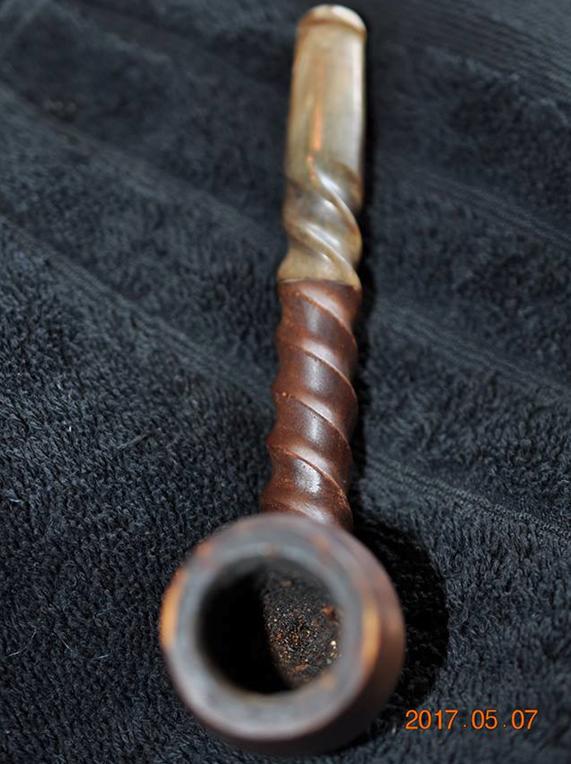
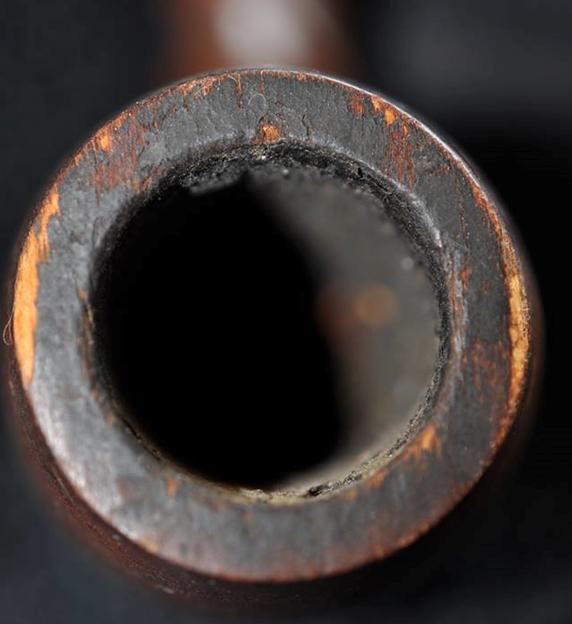
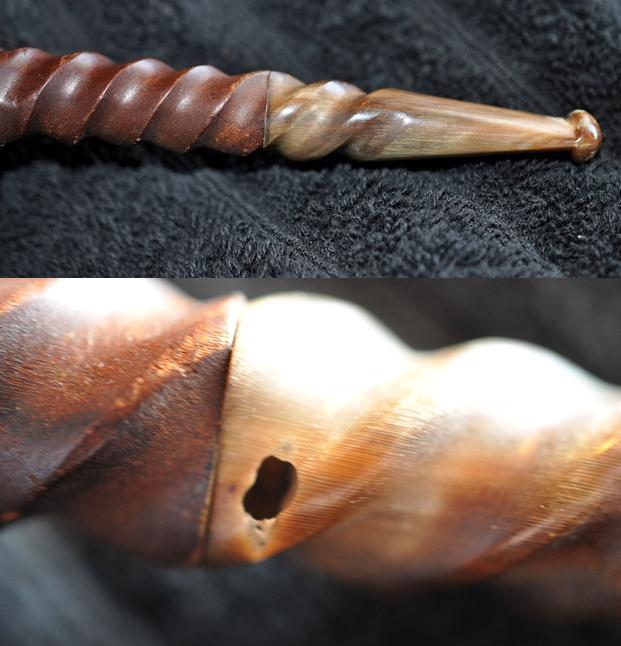
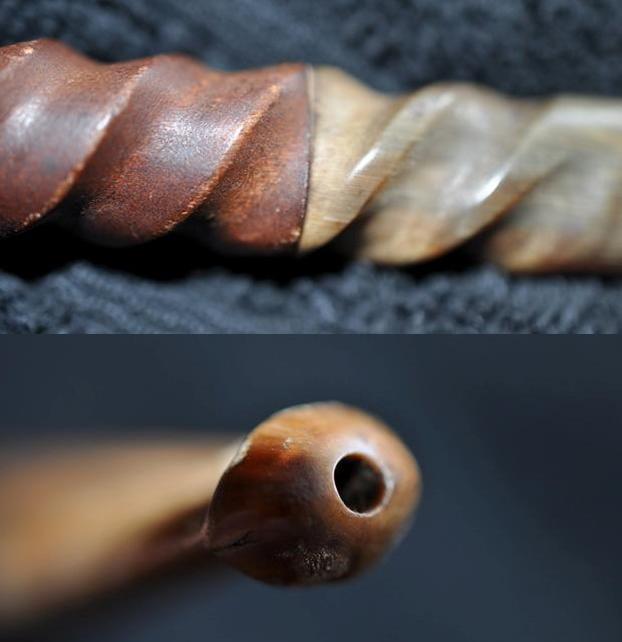
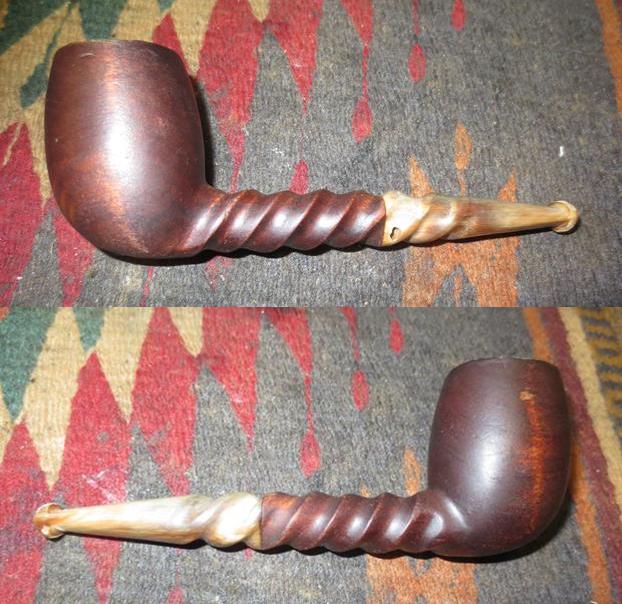
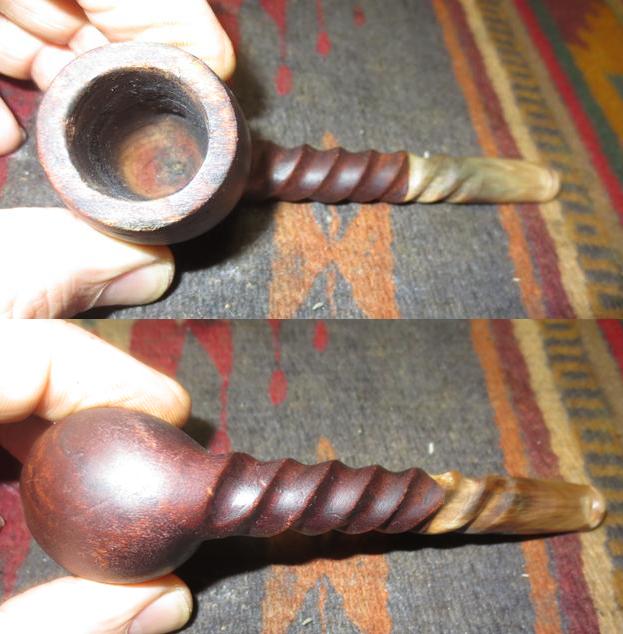
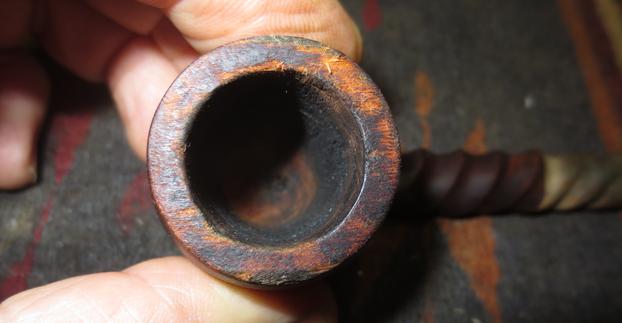
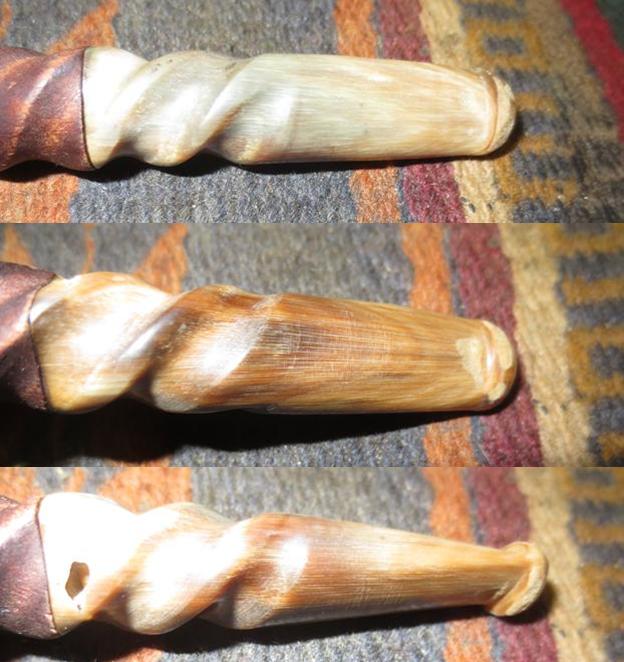
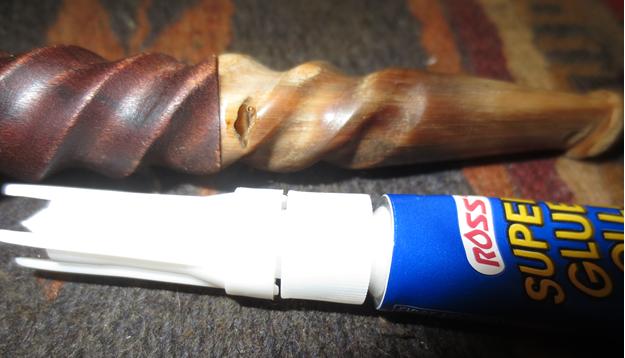
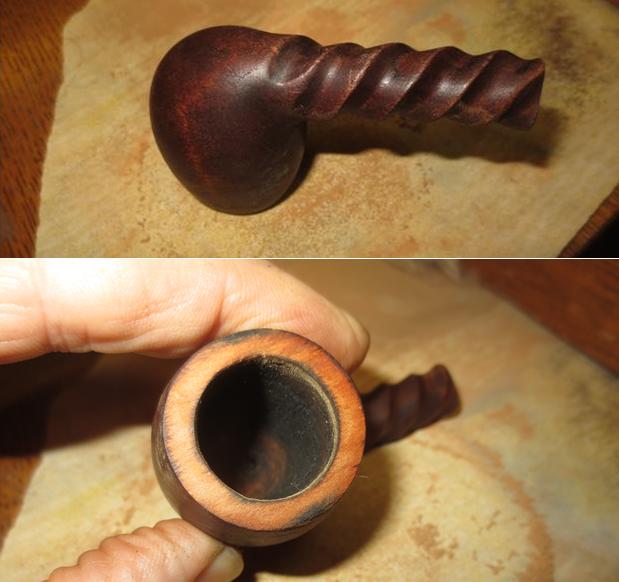
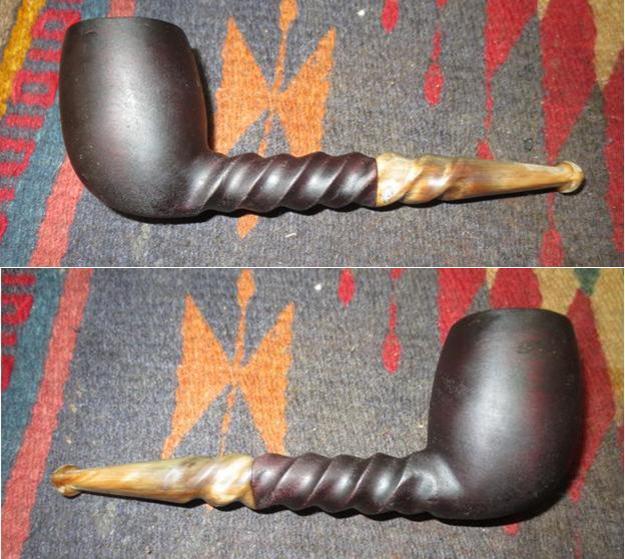
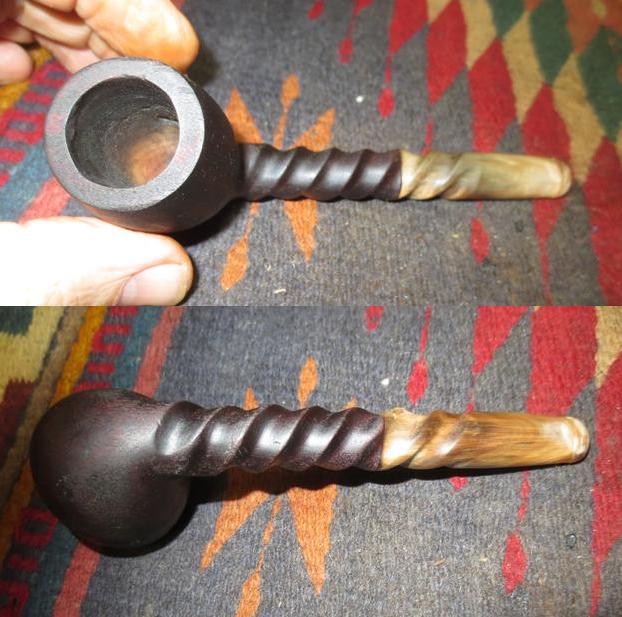
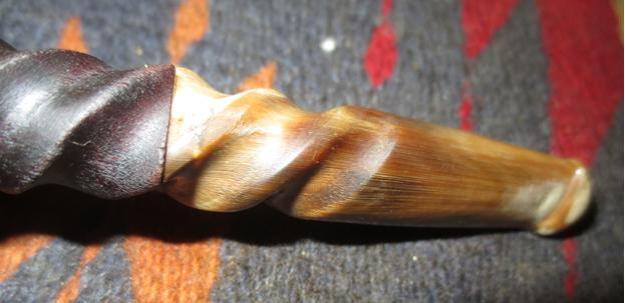
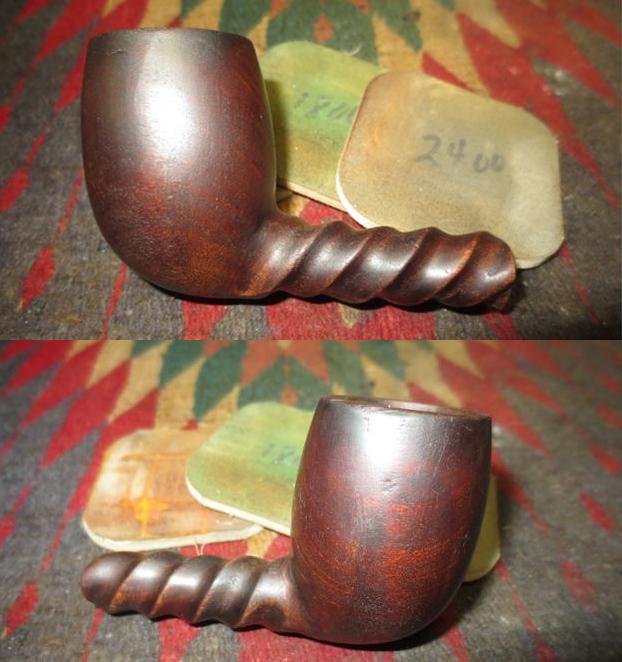
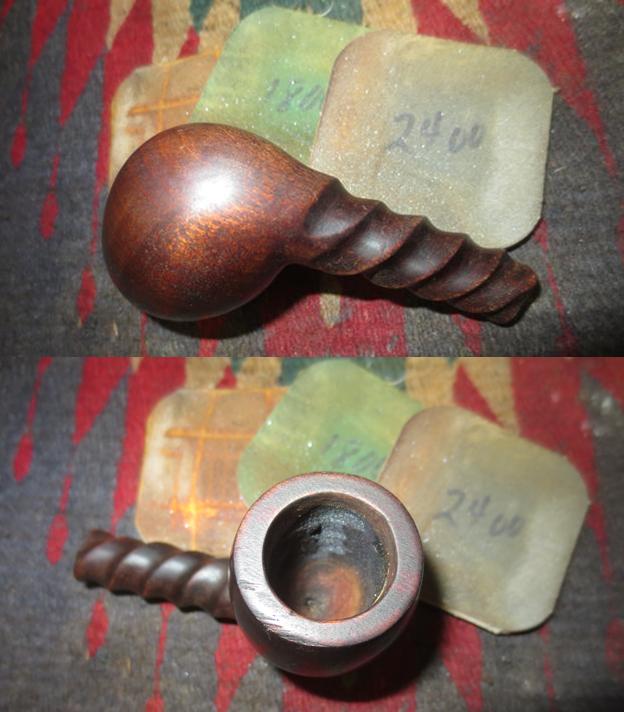
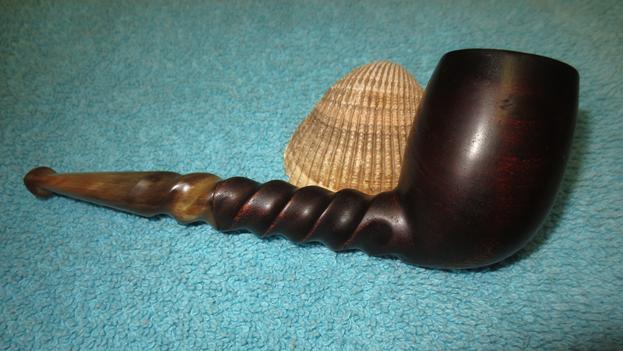
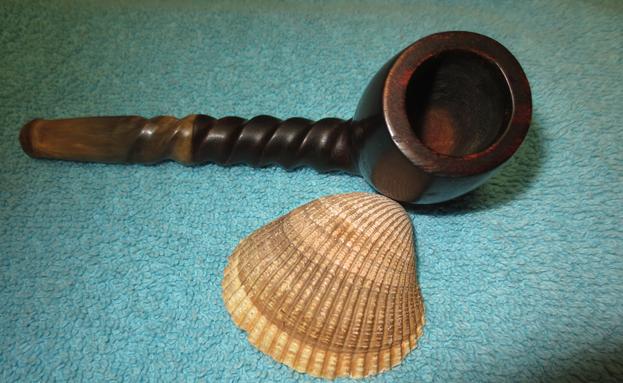
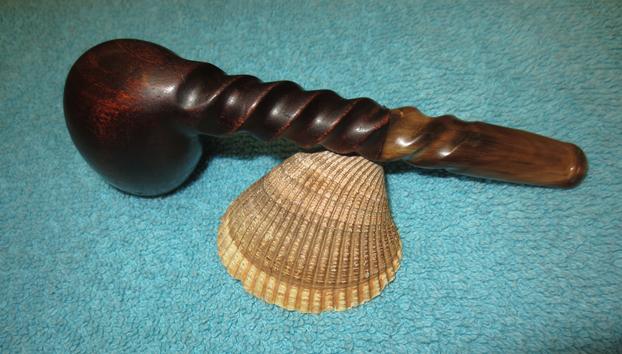
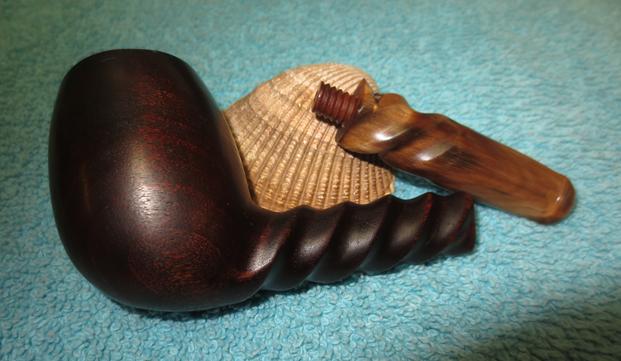
My brother Jeff visited an antique mall in Montana on one of his recent trips and found a lot of older pipes from the 1890s era. There were CPF, WDC and other older brand pipes with amber and horn stems. I wrote about how we used Apple Facetime so that I could be present on the hunt. It was an amazing time “in the shop” for me. The link to the blog on this hunt follows: https://rebornpipes.com/2017/04/26/a-virtual-pipe-hunt-a-new-way-to-experience-the-joy-of-a-pipe-hunt/. The first pipe that I chose to work on from the hunt was the one picture below. My brother took the following pictures of the pipe before he cleaned it up to send to me for finishing. It is a unique and interesting old pipe. The spiral shank continues through the horn stem. The finish on the bowl was worn and tired but the spiral shank and stem were undamaged. There was one deep “worm hole” in the left side of the stem in the bottom of a spiral that would need to be repaired but otherwise it was in pretty decent shape.The photos show the overall condition and look of the pipe. Whoever carved it remains a mystery as there is no stamping on the shank or bottom of the bowl. It is unmarked so it is one of those unknown pipes. The difference is that this is not a homemade pipe it has the marks of a good pipemaker and the drilling is perfect from the stem forward. The bowl was lightly caked and the rim had a tarry overflow on the top. The inside edge of the bowl was in great shape as far as I could see from the photos. The outer edge of the top had been knocked about enough that there was some damage and wear to it. The next two photos show the rim top and bowl. The finish on the outside of the bowl is worn and there are a lot of dents and dings in the surface of the wood. The photos lead me to wonder what kind of wood the pipe is made of because of the way the damaged rim looks. The next photos show the condition of the stem and the drilling in the button. The spiral continues from the shank through the stem seamlessly. The second photo shows the worm hole in the horn stem. It is deep but clean and the areas around it are undamaged. The junction of the stem and the shank is very tight and clean. The transition from wood to horn is smooth to the touch. The last photo shows the orific button on the end of the stem. It is clean, round and centered in the end of the crowned button. This older style button helps me date this pipe as early as I do above. My brother did his usual job reaming and cleaning the pipe. He reamed the bowl with a PipNet reamer and cleaned it with a Savinell Fitsall Pipe Knife. He scrubbed the internals with alcohol, cotton swabs and pipe cleaners to remove the grime in the mortise, shank and airway in the stem and shank. He scrubbed the exterior with Murphy’s Oil Soap and was able to remove all of the grime on the bowl sides and rim. The pipe came to me in great condition. I took a close up photo of the rim top and stem to show their condition more closely. The rim top was worn and there were some spots on the edges that had slivered. The rim would need to be topped to smooth things out and remove the damage.The stem photos show the tooth damage on the top and underside at the button and the “worm hole” in the left side near the shank.I wiped down the area around the hole in the left side of the stem with a cotton swab and alcohol and dried it off. I layered in several fills of clear super glue into the hole. As each layer dried I added more glue to the top of the hole repair. I continued until the file was slightly overfilled then sanded the areas smooth.Billiard16While waiting for each layer of glue to dry I worked on the rim top. I topped it lightly with 220 grit sandpaper on a topping board to smooth out the damage to the rim. I took enough of the damage off to leave the rim top smooth to the touch.I wiped down the bowl with acetone on a cotton pad to remove all of the finish that remained on the bowl. I kept wiping it down until no more stain would come off and the bowl was clean. I could see once it was clean of the stain that the wood was not briar. I was dealing with what appeared to be walnut. It was extremely light weight and the grain was very different from what I expected once the stain was gone. I restained the pipe with dark brown aniline stain and flamed it to set the stain deep in the grain of the wood. I repeated the process until the coverage is acceptable.I put the stem back on the shank and hand buffed the stain with a soft cloth to show what the pipe looked like at this point in the process. The first photo and the last show the repair to the hole in the stem. It is smooth once again. I polished the bowl with 1500-12000 grit micromesh sanding pads. Each successive grit made the walnut bowl shine more and made the stain more and more transparent. I polished the horn stem with micromesh sanding pads – wet sanding with 1500-2400 grit pads and dry sanding with 3200-12000 grit pads. I rubbed the stem down with Obsidian Oil after each pad and when I finished the last pad I gave it a final coat of oil and let it sit and dry. I turned the bone tenon on the stem into the threaded mortise on the shank. I buffed the pipe with Blue Diamond on the buffing wheel to raise a shine. I gave the bowl and stem multiple coats of carnauba wax and buffed it with a clean buffing pad to raise the shine. I hand buffed the pipe with a microfibre cloth to deepen the shine. In the first photo you can see the repair on the lower portion of the horn stem. It is a slightly darkened spot but it is smooth to the touch. Do any of you recognize the style or work on this old pipe? Can you tell me any information regarding the maker or the era? Do you think I am in the ball park with a late 1890s date? What do you think? Thanks for the help ahead of time and thanks for walking with me through this restoration.

A Brigham One Dot Dublin with a Back Story


Blog by Steve Laug

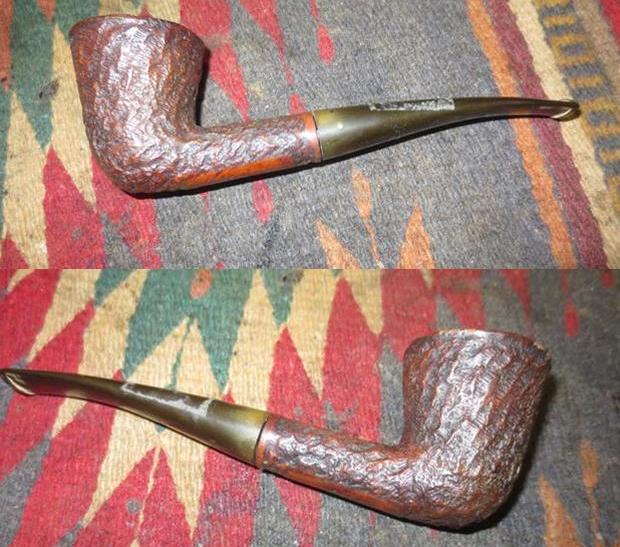
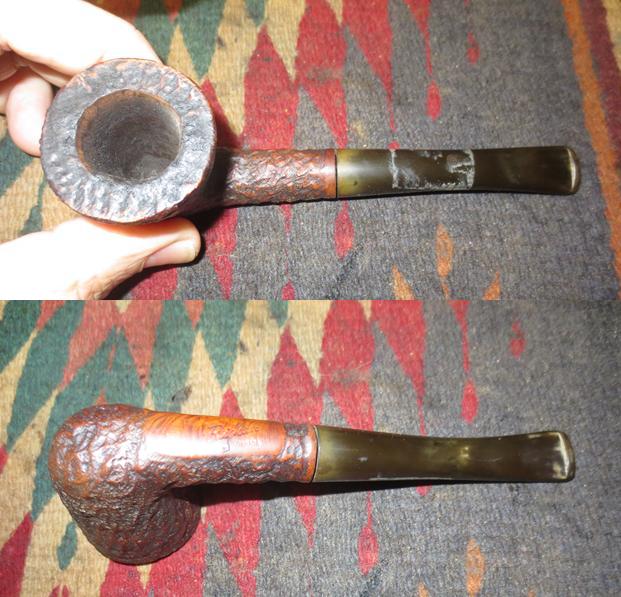
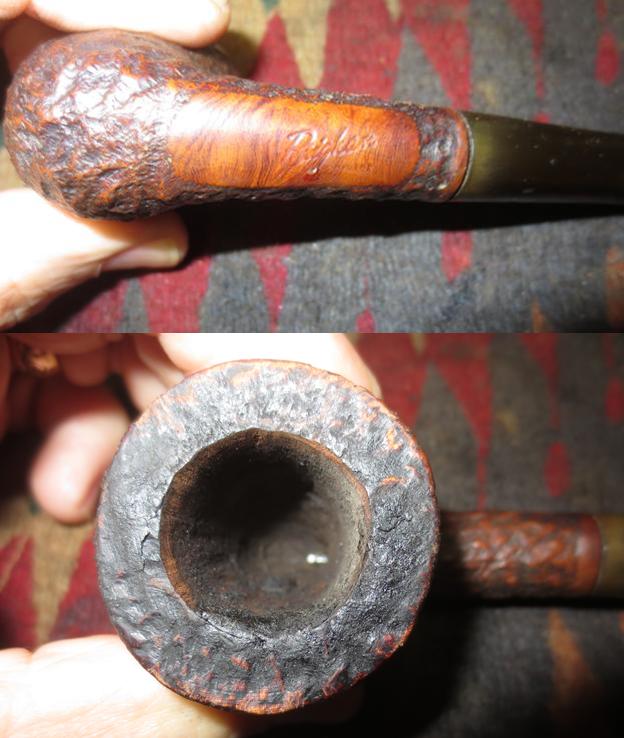
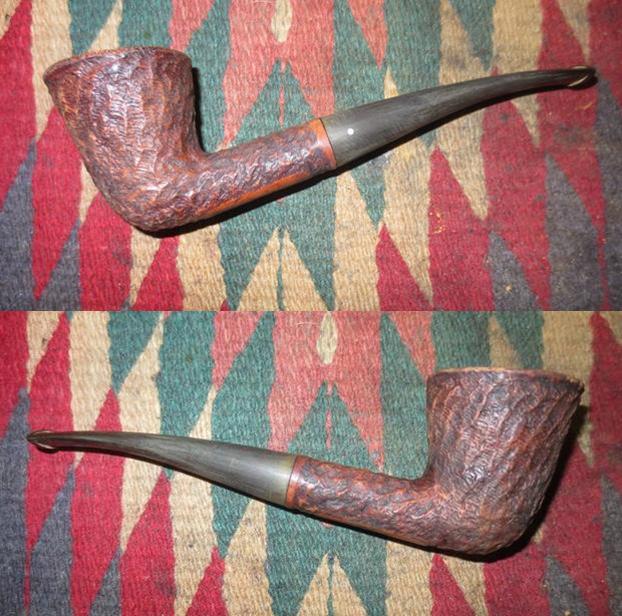
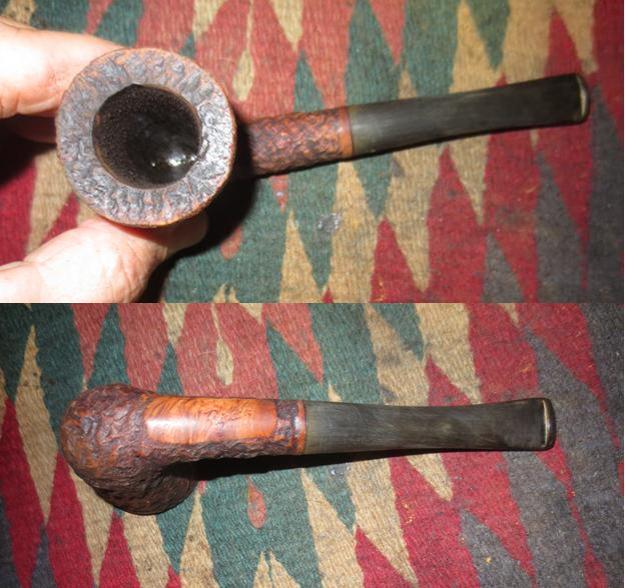
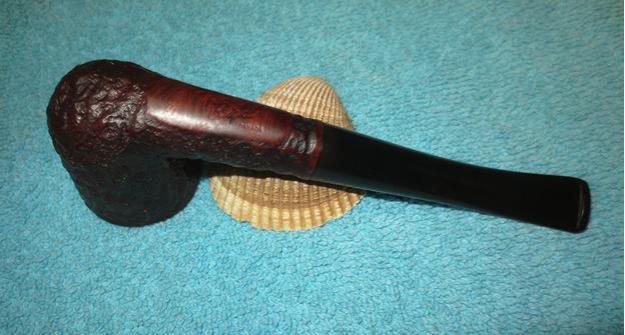
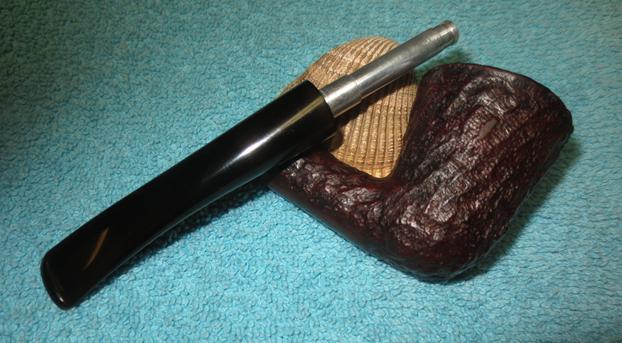
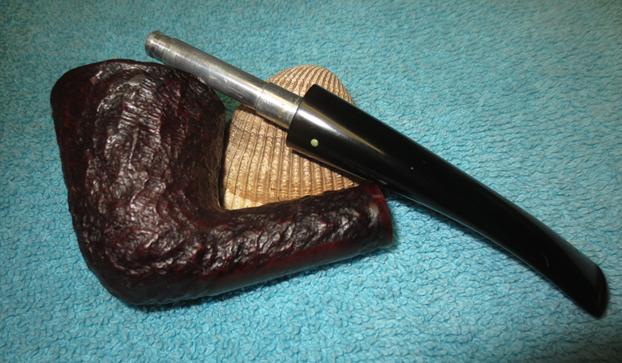
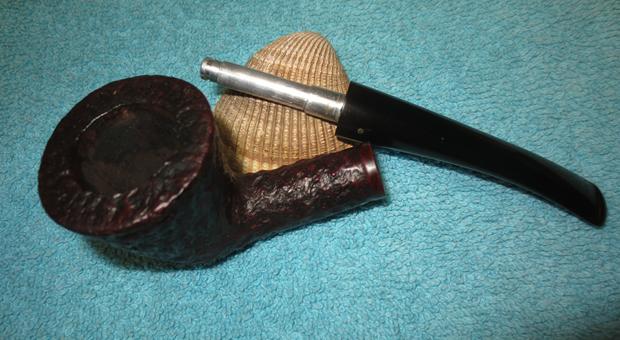
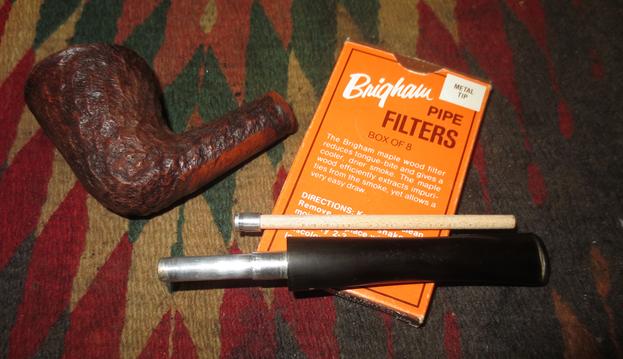
This old Brigham was the next pipe I brought to my work table. I got a message from Greg on Facebook saying he had been reading one of my posts about a box of estate pipes I had received and he was interested in adding this one to his rack. The pipe was a Brigham One Dot Dublin with a slight bend in the stem. It was an older one made before the manufacture of the pipes was moved to Italy. It has the standard aluminum tenon and filter mechanism of the Canadian made pipes. The finish is rusticated with the classic Brigham rustication on the bowl, rim top and shank. It has one smooth patch on the underside of the shank that is stamped Brigham in script over Canada. There is no shape number or other stamping on the shank.

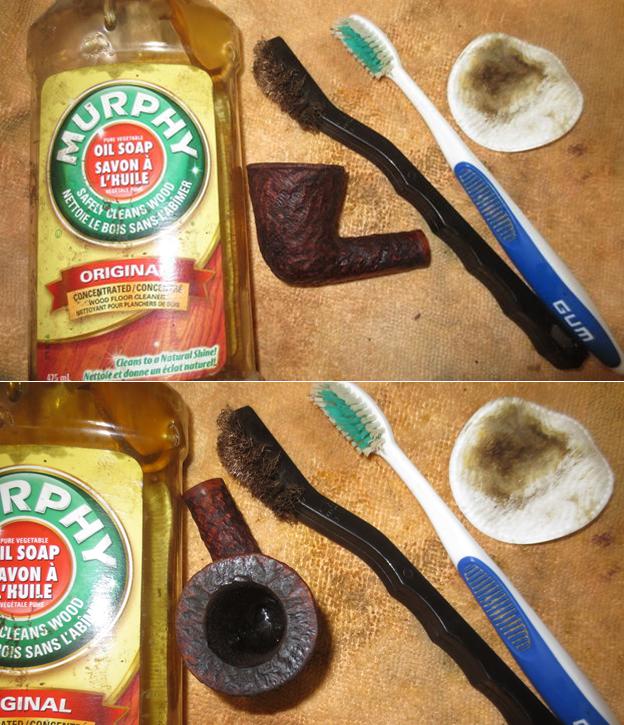
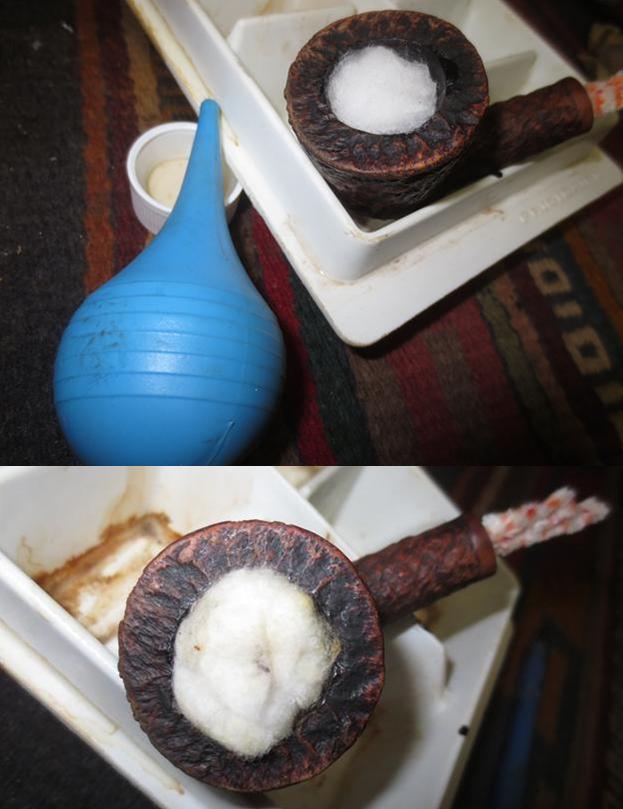
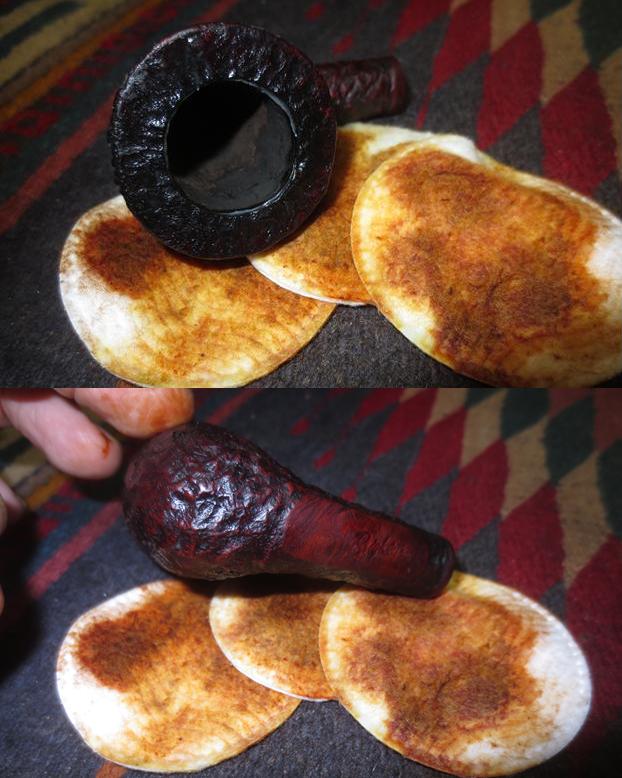
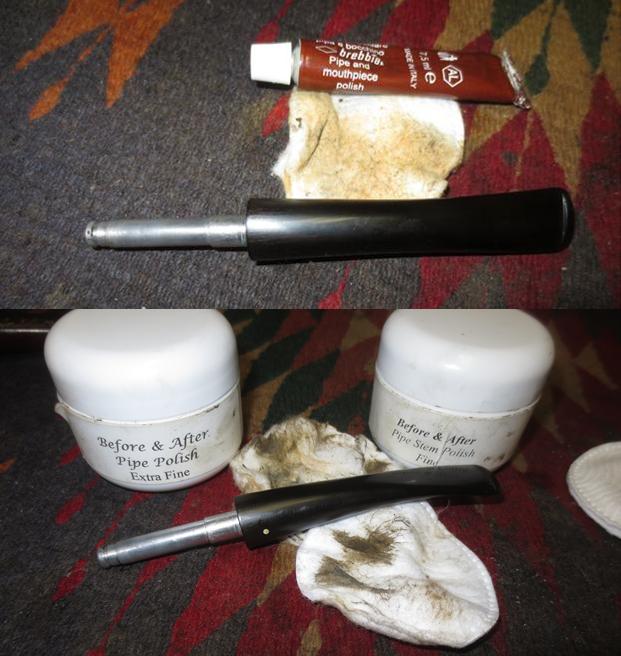
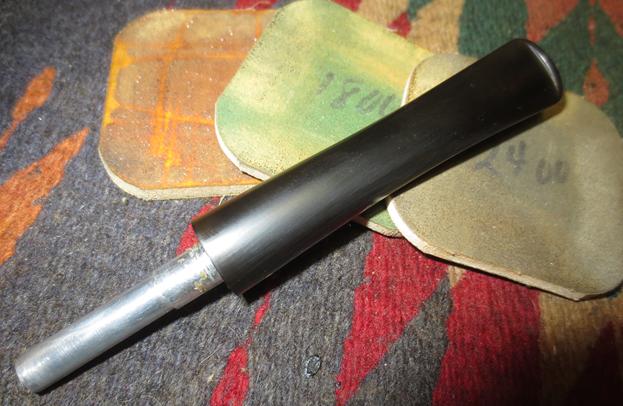
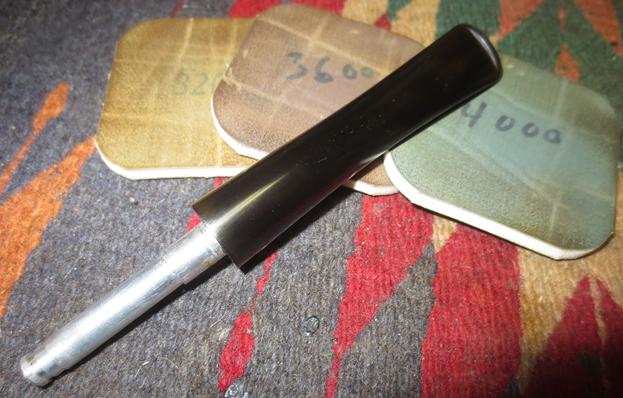
The pipe came to me in a box of pipes that I inherited from a friend in Ontario. He was an old Anglican priest and we had shared a lot about pipes and mutual calling over the 15 years that I knew him. I repaired, restored and sold many pipes for him and have a few of his previous pipes in my current collection. He was a great guy and he is alive in my memory each time I smoke one of his pipes. When the box came I found that there were 70+ pipes in the box and his daughter included a note that said her dad wanted me to restore them pass some of them on to others. This is the first from that lot that I have restored.The finish was very worn and the outer edges of the rim showed wear and damage. The inner edge worn as well but the bowl was still in round. The rim had a thick buildup of tars and oils that filled in the grooves and ridges of the rim top. The rim had some darkening of the finish as well. The stem was oxidized and had a sticky residue left behind by a price sticker. There were no tooth marks on the stem surface on either side next to the button.The stamping on the underside of the shank was clear but slightly worn. It reads Brigham in script at an angle from left to right and block letters, CANADA underneath. Charles Lemon of Dadspipes has written a helpful blog about dating Brigham Pipes by the style of the stamping on the shank. I turned to that blog to look up information on this particular pipe and see if I could identify the time period. Here is the link; https://dadspipes.com/2016/10/03/brigham-pipes-a-closer-look-at-dots-dates-and-markings//. According to that info this pipe comes from the late Canadian Era 1980-2000. The second close up photo below shows the rim and the cake in the bowl. The end of the Brigham system can be seen poking out of the airway in the photo as well.The next photo shows the tenon and system tube. It was incredibly dirty with a lot of tar and oil on the inside. The pipe had been smoked a long time without the filter in place and there was a lot of buildup in the tube and stem. The shank was also very dirty.The next two photos show the condition of the stem. The oxidation pattern and the sticky label gum on the surface are very visible on the stem. The stem is also clear of tooth marks or chatter on the surface near the button.I reamed back the cake with a PipNet reamer and a Savinelli Fitsall pipe knife. I used a brass bristle brush to knock off the tarry buildup on the rim top and clean out the crevices and grooves in the rustication.I decided to clean out the interior of the mortise, shank and airway in the shank and stem before going any further with the exterior. I used alcohol, pipe cleaners and cotton swabs to scrub out those areas and scrubbed until the pipe was clean. I wiped down the surface of the stem to remove the sticky gum left behind by a label on the top side of the stem.I scrubbed the surface of the briar with Murphy’s Oil Soap, toothbrush and a brass bristle brush to clean out the grooves and cleaning off the dirt, oil and debris on the briar. The bowl and the rim looked significantly better once I had rinsed it off with running water. It was dry and the stain was lightened but it was clean. I decided to work on the stem first so while I did I stuffed the bowl with cotton balls and used an ear syringe to fill the bowl with alcohol. I folded a pipe cleaner and plugged the airway so that the alcohol could draw out the oils in the briar. The second photo shows the cotton after it had been sitting for four hours. When I took the cotton balls out at the 6 hour mark they were exactly as they looked at the 4 hour mark. I was a bit surprised that they were not darker. But then again my old friend smoked primarily Virginias – in fact I don’t think he ever smoked aromatics in the time I knew him.I took out a new maple wood Brigham filter for the system and took a photo of the pipe at this point in the process. I still need to stain the bowl but it was looking better and it smelled and looked clean.I stained the bowl with a dark brown aniline stain and flamed it to set it in the grain. The characteristic blue flame that burns the alcohol out of the stain setting it deep in the grain is a beautiful site to my eyes. I repeated the process several times until the coverage was correct.I wiped the bowl down with alcohol on cotton pads to make a bit more transparent. I wanted the contrast that had originally been on these old Brighams to show through. There was enough dark stain in the deep grooves of the finish to contrast nicely with the new stain coats I gave the pipe. I rubbed the stem down with Brebbia Pipe and Mouthpiece Polish and some Before & After Pipe Stem Polish to remove the oxidation in the vulcanite. It lifted a lot of the oxidation and what was left behind was minor.I polished the stem with micromesh sanding pads – wet sanding with 1500-2400 grit pads and dry sanding with 3200-12000 grit pads. I rubbed the stem down with Obsidian Oil after each pad and gave it a final coat of oil after the 12000 grit pad. I set the stem aside to dry. When I finished there still appeared to be a little oxidation at the tenon end of the stem. I was not sure if it was the light from the flash or reality so I took it to the buffer and buffed that area with red Tripoli and repeated the last three micromesh pad grits. I buffed the pipe and stem with Blue Diamond to further polish it. I buffed the stem with carnauba wax and gave the bowl multiple coats of Conservator’s Wax. I buffed the pipe with a clean buffing pad to raise the shine and with a microfibre cloth to deepen it. The finished pipe is shown in the photos below. It is a beautiful pipe and even better in person. Thanks for looking.
 

Dent Steaming a 1932 PATENT DUNHILL T197 Billiard with a VERNON STEM


Blog by Henry Ramirez

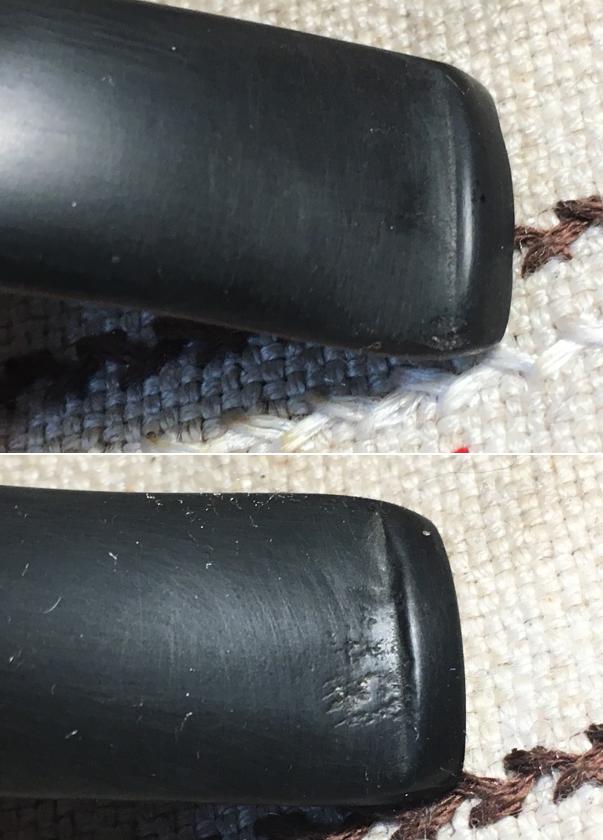
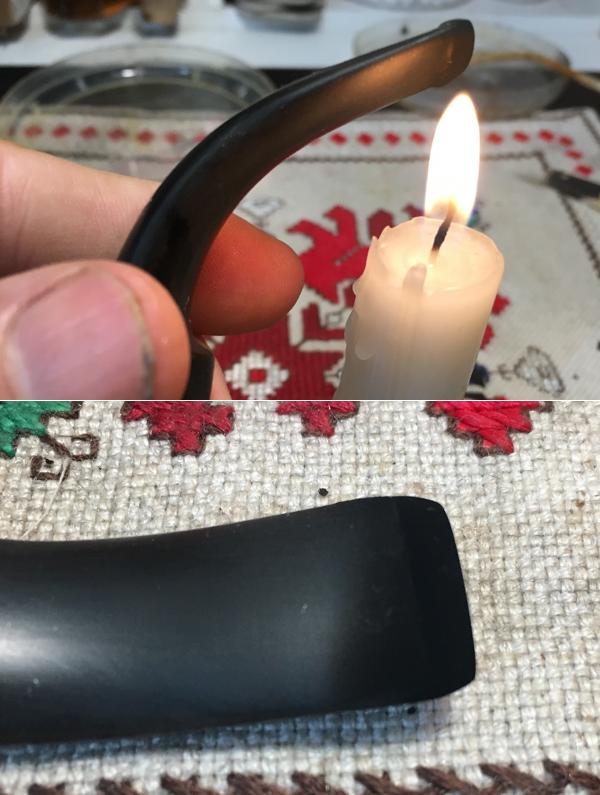
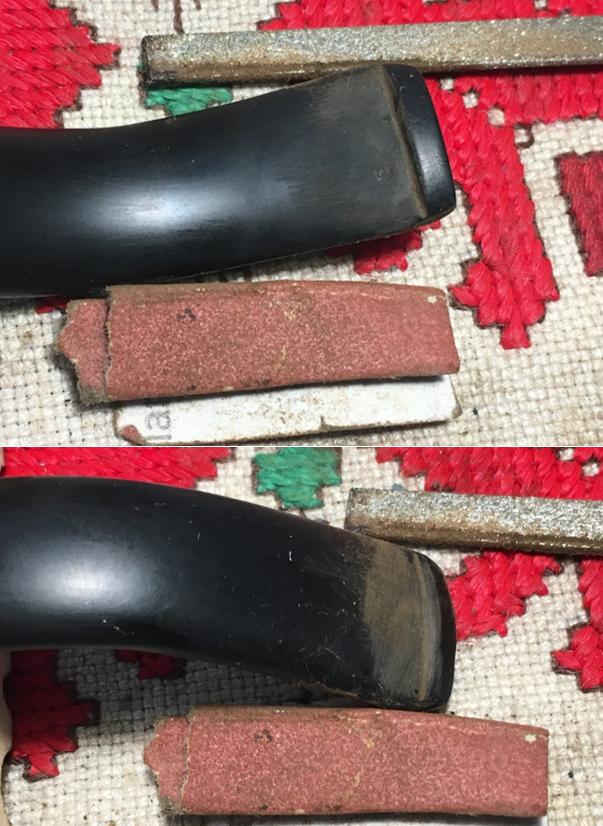
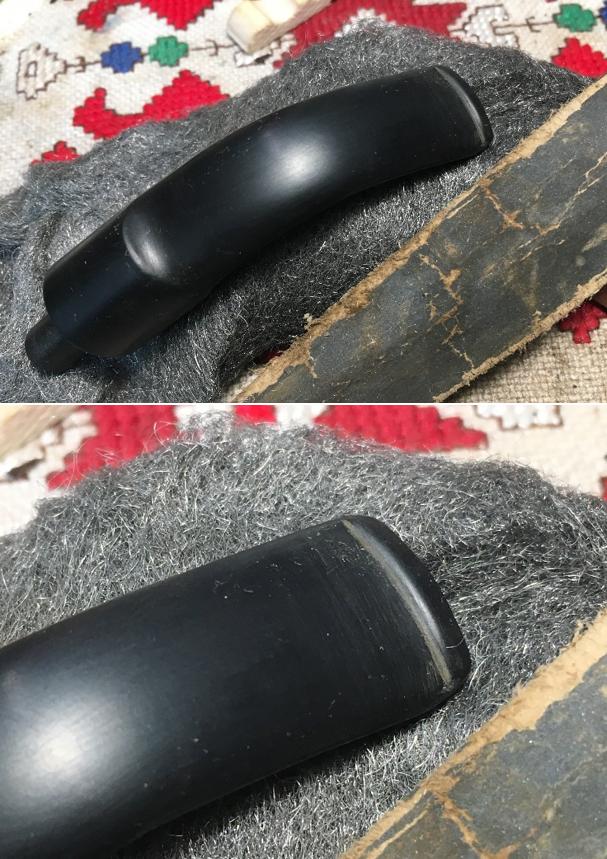
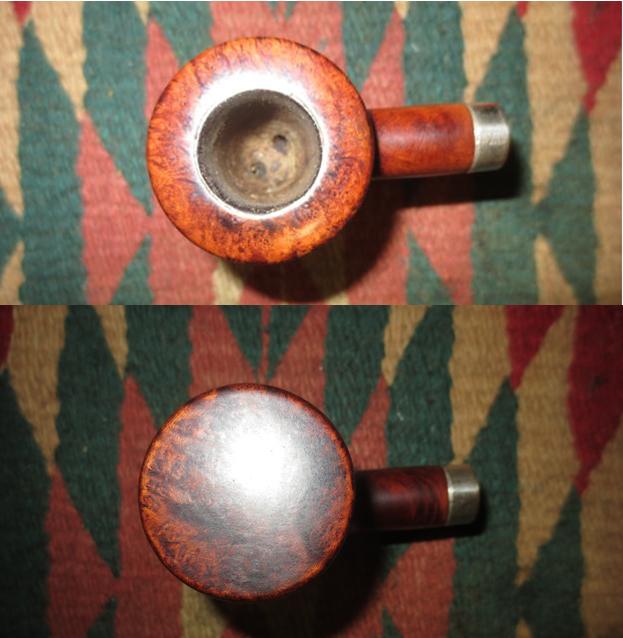
Saw this mousey looking pipe with a clicker stem on EBay.  Nobody seemed to want it so I took it home to practice my dent steaming.  The stem attaches with a loud click and some research told me it was named after Vernon Dunhill, who was responsible for the fitment’s design.  It was designed  to allow the stem to be separated from the bowl even when the pipe was hot from recent smoking.  It had the earlier square tip tube rather than the later angled tip. The stem had a funky downward cant before the button and it strongly resembled my Kaywoodie Allbriars.  Boy they nailed that briar stain to the oxidized Cumberland stem color! The bowl rim was dented/chipped and the surface scratched. The stem and the button were in fine shape so the usual soak in Oxyclean to remove the smegma followed by a trip to the oven to allow the stem to straighten itself.The metal tube is removable from the keeper which is part of the stem.  I have seen examples of the opposite where the keeper is integral to the shank.  These pipes seem to have been mostly billiard Cumberlands but some exceptions exist.  Both the tube and the keeper were polished with fine brass wool.  I did reface the tube with a carborundum disk.The shank stampings were crisp but there seemed to be personalized script on the bottom long polished off.The dent on the bowl’s rim was the major distracting feature.  I didn’t want to top the bowl and the briar dust/CA mixtures never seemed seamless to me.  So I tried to fatten up the cellulose fibers with hot steam using my hand held steamer.  This worked somewhat and had the advantage of pin pointing the area to be steamed. Not satisfied, I decided to fall back on the hot iron on a wet kitchen towel technique.  This did a better job, I think because it affected a larger area.  The problem then became one of restaining this larger area to match the rest of the pipe.
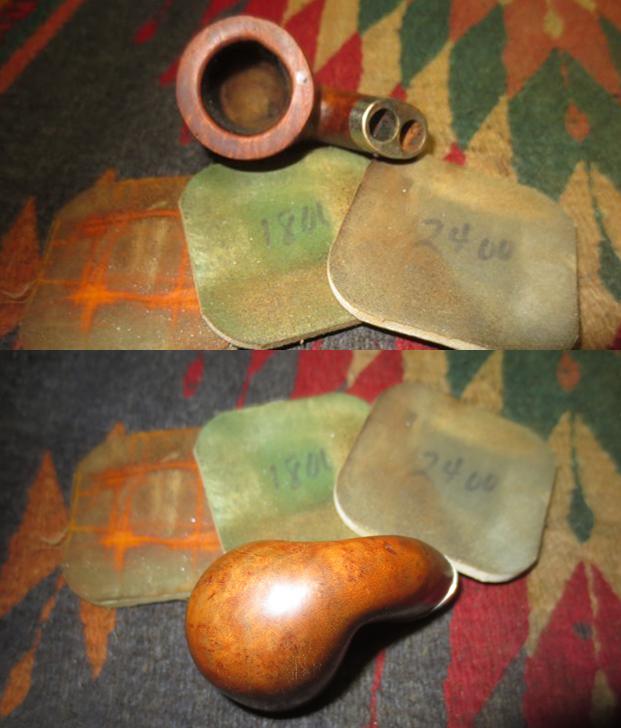
Restaining the pipe became somewhat of a chase your tail love’s labor, trying light brown, medium brown and the finally dark brown in various concentrations followed by isopropyl alcohol on a gauze sponge scrubbings.

So, I think I’m going to someday re-stain the whole pipe dark brown to try to better match the Cumberland stem while learning to love the residual dent on the rim.  The only home run here was the straightening of the stem to its original straight shape.  Thanks for looking, regards, Henry.

Refurbishing an Yves St. Claude Glacier 80 Bent Billiard


Blog by Steve Laug

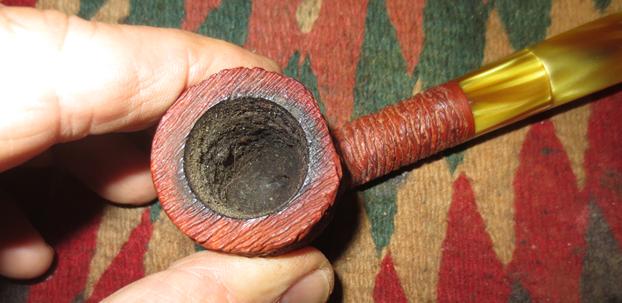
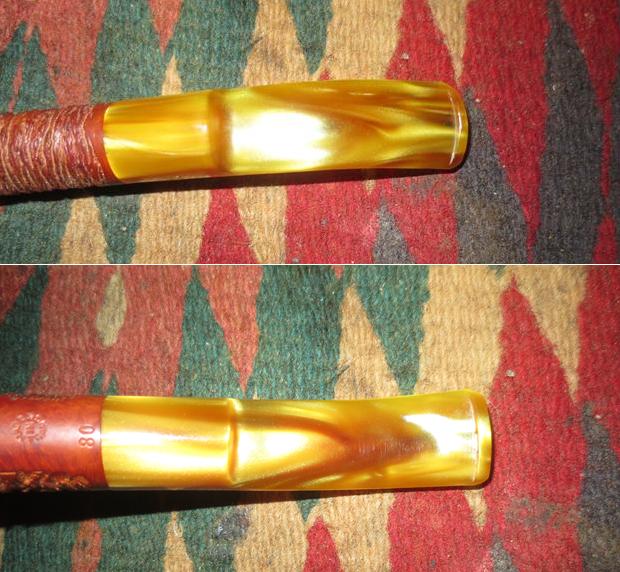
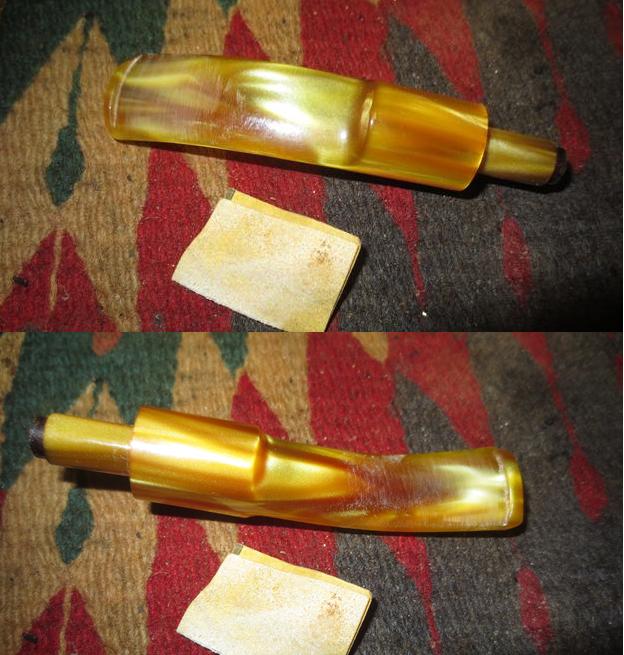
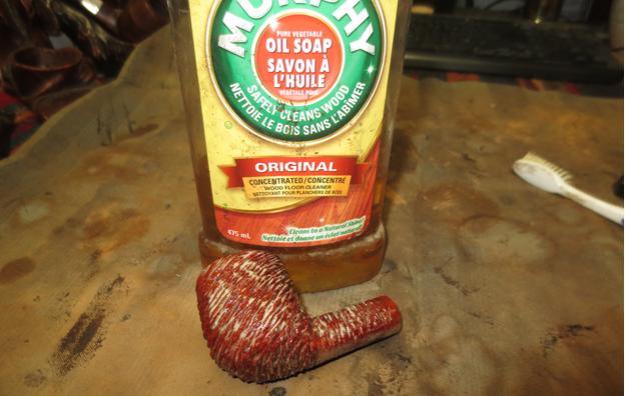
The next pipe I chose to work on today was one that came from the friend of mine who has the pipe shop. He had been given a large number of pipes from a customer’s estate to sell and he had given them to me to clean up. This one is a rusticated billiard that has a slight upward bend to the shank and a Lucite stem with a ¼ bend. It was stamped on the underside of the shank Yves St. Claude in script over Glacier. Next to that it was stamped with a COM circle that read Made in France. At the end of the shank near the stem/shank junction it is stamped with the shape number 80. The finish was very dirty and almost lifeless looking. The striated rustication was well done but the grooves were all filled with grit and grime. The bowl had a light cake and the rim had some darkening and tar on the back side. The stem had some light tooth chatter but no deep tooth marks. The variegated yellow/gold stem went well with the rustication.In searching the web I found several references to Yves Grenard, trained in Comoy’s England factory, purchasing the Chacom plant in St. Claude. He managed the factory and it passed on to his son afterward. I am pretty certain that this Yves St. Claude pipes was made by Chacom in France with the stamping bearing Yves name.I took a close up photo from the top looking into the bowl to show the light cake in the bowl and the darkening to the back side of the rim. The rim top is a bit oddly shaped in that the back outer edge of the bowl slightly flattened and then rusticated over the top of the shape. I also took photos of the chatter on both sides of the stem at the button. I sanded out the tooth chatter with 220 grit sandpaper and it did not take much to smooth out the marks. There were also some marks left behind from when the stem had originally been bent that sanded out quite easily.I scrubbed the bowl with undiluted Murphy’s Oil Soap and a tooth brush to remove the grime. I used a brass bristle brush with the soap on the rim surface to remove the darkening and tars. I rinsed the bowl under warm water to remove the soap and grime. I took photos of the cleaned bowl and included them below. I decided to use a dark brown aniline stain thinned with isopropyl by 50% to make it more of a translucent medium brown. The colour once it was dried, buffed and polished would really look good with the yellow stem. I applied the stain, flamed it and repeated the process until I was happy with the coverage.There were some thick, hard tars on the inside of the mortise walls so I scraped them out with a dental spatula. Afterwards I cleaned out the mortise and the airway in the shank and stem with alcohol, cotton swabs and pipe cleaners. I worked on the stepped tenon with alcohol and cotton swabs to remove the darkening at that point. I wiped down the outside of the stem with a damp pad. I used white acrylic paint to fill in the YSC stamp on the left side of the saddle. Once the paint dried I scraped the excess off and polished it with 1500-2400 grit micromesh sanding pads.I polished the Lucite stem with micromesh sanding pads – wet sanding with 1500-2400 grit pads and dry sanding with 3200-12000 grit pads. I wiped the stem down with the damp pad between each set of three pads. I put the stem on the pipe before taking the photo of the stem after I had finished sanding with the last three pads. The new stain looked really good with the yellow Lucite stem. The contrast worked really well on my opinion.I buffed the stem and bowl lightly with Blue Diamond polish on the buffer. I gave the bowl multiple coats of Conservator’s Wax and buffed it with a shoe brush. I gave the stem multiple coats of carnauba wax. I buffed the entire pipe with a clean buffing pad to raise a shine and finished by hand buffing it with a microfibre cloth to deepen the shine. The finished pipe is shown in the photos below. The dimensions of the pipe are, Length: 5 ½ inches, Height: 1 5/8 inches, Outer bowl diameter: 1 3/8 inches, Chamber diameter: 7/8 inches. The pipe has been thoroughly cleaned and prepared for the next pipeman who wants to add it to their rack. I will be putting on the rebornpipes store shortly but if you want it email me at slaug@uniserve.com or send me a message on Facebook. Thanks for looking.


Fanfare for the Everyman Pretender


Blog by Robert M. Boughton

Member, International Society of Codgers
Member, North American Society of Pipe Collectors
Member, Facebook Gentlemen’s Pipe Smoking Society
Website Roadrunner Restored Pipes
Blog RRP
Falderal About Me
Photos © the Author except as noted

From their inception, Kapp & Peterson’s goal was to make a good smoking pipe that the ordinary, common working man could afford and we believe they have, very admirably, lived up to this.
— From A Peterson Dating Guide: A Rule of Thumb, by Mike Leverette

INTRODUCTION

The restoration this blog recounts has nothing to do with Peterson’s pipes.  Still, the litany of near fabled proportions in pipe lore, that Charles Peterson and the Brothers Kapp, Friedrich and Heinrich, experienced a mutual epiphany of good will toward all, even the less fortunate commoners, still rings forth in perfect, ever-flowing three-part harmony.  The more probable truth, after all – that the good men of K&P had a capital brainstorm in the form of a simple but revolutionary merchandising notion to market early designs of Peterson’s System pipes starting sometime in the last quarter of the 19th century – lacks a certain universal, perpetual attraction, as it were.

Now, I should at least attempt mitigation of the foregoing critique I ’am sure will be perceived by some as an unwarranted attack on one of the last bastions of master pipe craftsmanship, as some readers may misinterpret the kind of remarks I’m prone to make after I’ve spent a good deal of time thinking a matter through.  No kind of disrespect on my part for Peterson of Dublin could be farther from the truth.  One fellow on the Smokers Forums UK who had never met me other than a few cursory cyber comments back and forth once made me the butt of a snarky but harmless jab after I posted a brief description of my restoration of a nice though common System Pipe that I decided to offer for sale given the number of finer samples in my collection.  So far, I’ve bought about 33 Petes I kept, not counting those I passed on to others with the gleam of love in their eyes I know so well.  As I recall the unhappy SF member’s words in typed reply, they were: “Wonders never cease!  I didn’t think I’d live to see the day you would say you could have enough Petersons!”  The member in question warmed up quite a bit after I began flooding his posts with compliments, and they were even genuine.

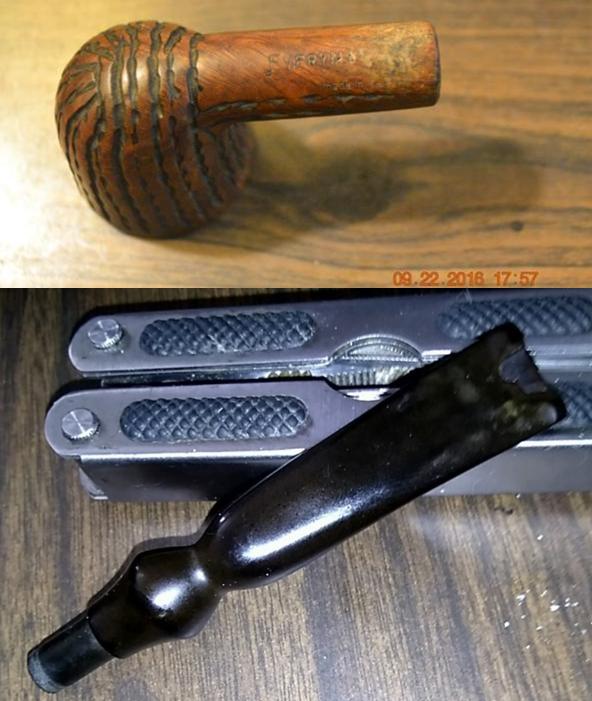
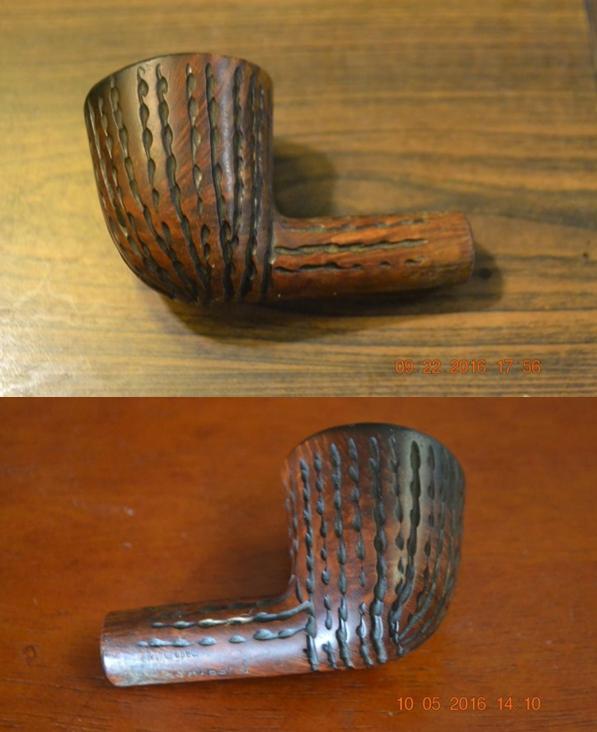
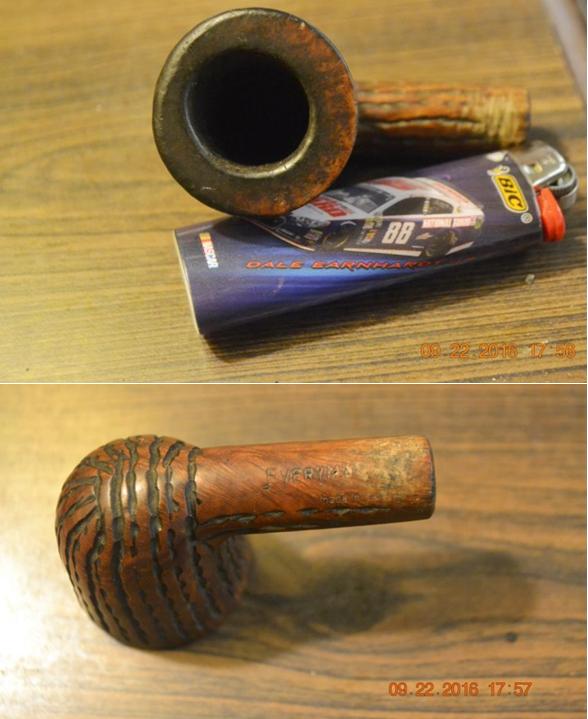
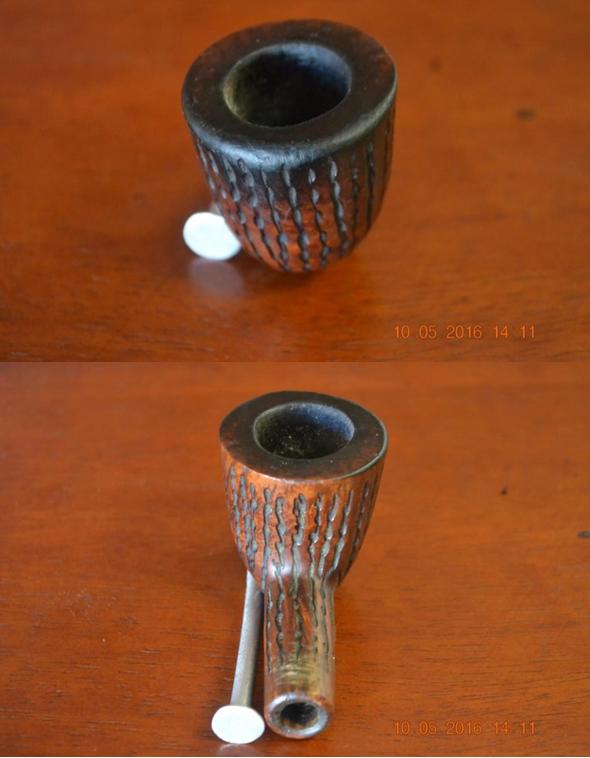
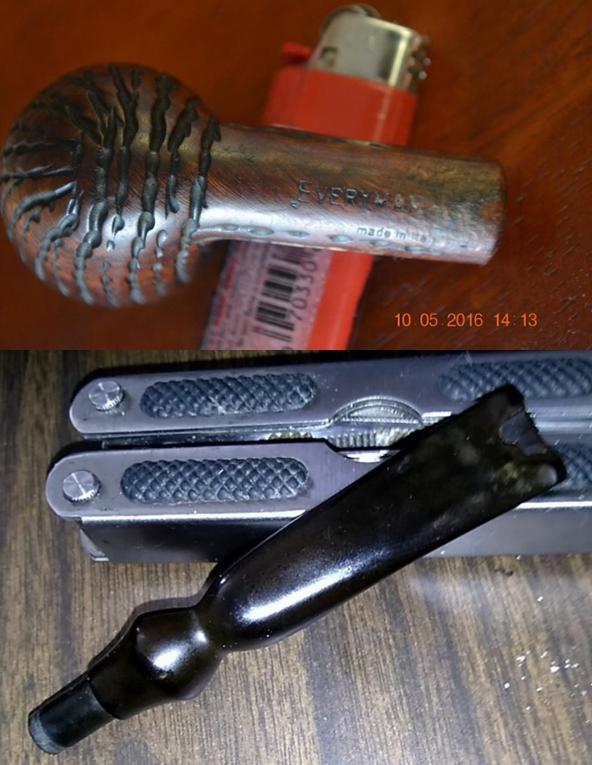
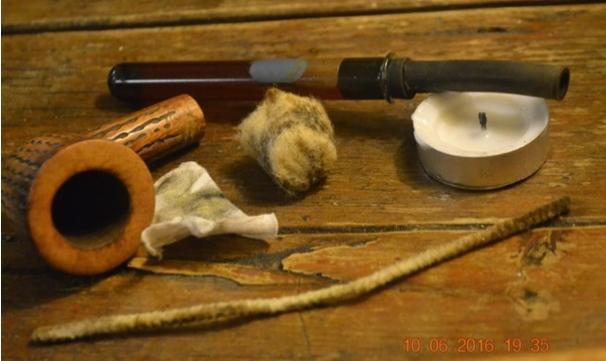
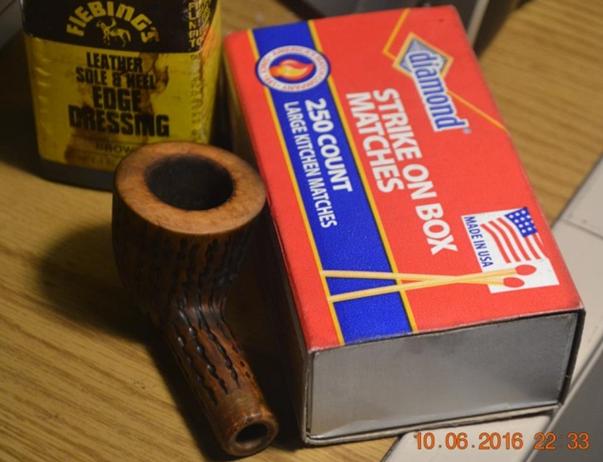
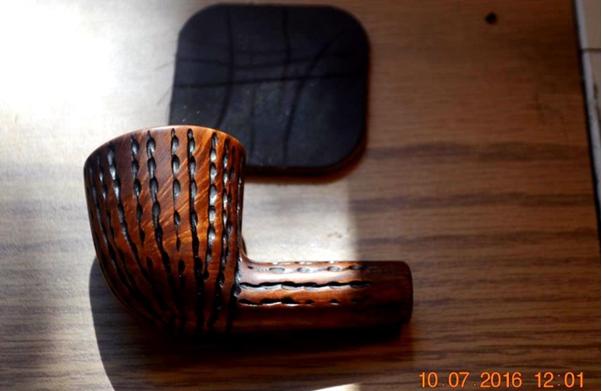
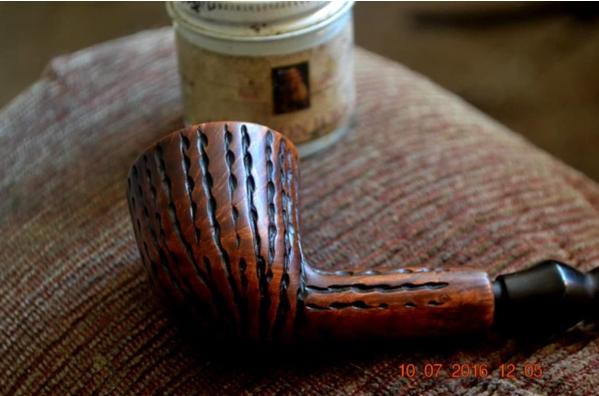
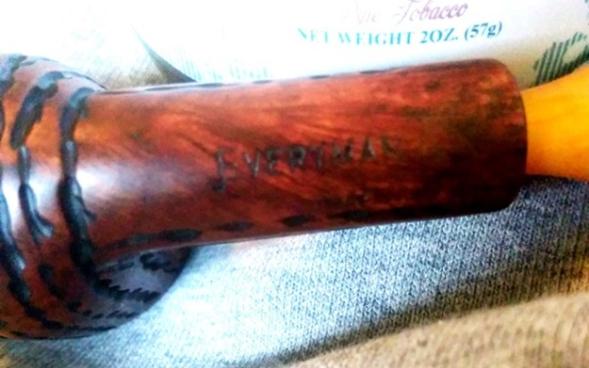
The real mystery of this blog is the single mark of nomenclature on the entire pipe, even counting the original black Vulcanite/Ebonite bit of the style called “fancy,” but which proved to be broken beyond my time and patience if not ability to repair.  Even the relative ease of the kind of work needed by the likes of Steve to mend a gap in the upper lip of the mouthpiece as gaping as that shown below requires, as our host notes in the blog cited under Sources, much practice.  Also – and this is an important factor, not an excuse – I intend to sell the pipe, not keep it for the shop, and at times have different standards for the two choices.See the date and time stamps?  I worked on the infernal bit from then until a couple of weeks ago before settling on the better part of valor.  As can be seen from the stummel, the pipe is called, with somewhat disingenuous simplicity and similarity to the well-known The Everyman London Pipe by Comoy’s of London (with all of that and more stamping packed onto even the sandblasted versions of the latter).  From the beginning, when I acquired the bedraggled waif in an estate lot at least two years ago and sat on it until late September last year, I had one of those uneasy feelings in my stomach at the mere idea of committing myself in print to the conclusion that it was in fact somehow part of the Comoy’s brood.

Before I snapped my habitual first seven shots of the pipe as it presented in O.R.  with more worthy candidates ahead of it in triage, I began my online search that only further clogged the veritable obstruction in my intestines.  Having made some genuinely heroic efforts on real Everyman and Guildhall London Pipes in my limited time learning this wonderful tradecraft, in the combined senses of the words as well as the more clandestine meaning of the singular, I knew just what to expect from Pipephil and Pipedia but visited both once again anyway.  Variations on this theme continued off and on during the interim period until a few days ago when I took the

Google approach of “I’m feeling lucky” and again entered the terms “Everyman Pipes.”  I swear I typed the same simplest of many search terms I had tried for two years, but this time, in one of those inexplicable flashes of serendipity, the top listing was for P&K Everyman Pipes at JR Cigar!

Growing breathless, I clicked on the link and saw, more or less, my pipe in two other shapes but with the same distinctive fancy bits and rugged vertical striations around the bowls, and both were straight.  One was a billiard, the other a pot, and both, marked down $10, were still, to me, listed at an outrageous $31.95.  Despite all that, I was quite pleased with myself to read the blurb at the top of the page:

“A true example of eye-catching yet economical handcrafted tobacco pipes, the P&K Everyman selection by the famed Comoy’s of London promises a premium pipe-smoking experience at prices that can’t be beat.”

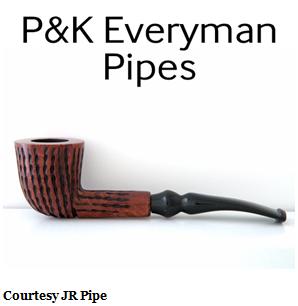
 I scanned further down the search result page, spotting a listing for the same pipe brand at Santa Clara Cigar, possessed of a remarkable resemblance to JR but with the Comoy’s blurb, ahem, omitted.  Nevertheless, at the fourth of five shapes down, there was my pipe, the P&K Straight Rustic #9, a Dublin.  Better later than never, the idea of looking up P&K Everyman pipe images occurred to me and at the top I saw the following, being the perfect factory image of my pipe.

OK, then.  As supremely pleased with myself as I was at this morsel of intel, even if some faiths that consider pride a sin could be right, I am not now nor have I ever been a member of the Nitwit Party, whose followers believe everything they read on the Internet or hear on TV is the truth.  There are many reasons for my worldview, not the least of which being my years as a newspaper journalist and photographer, as opposed to a photojournalist.  I sold my first news article when I was 15, and when I was 17 became credentialed by the Los Angeles County Sheriff’s Office as an official police and justice beat reporter for a community paper.  My publisher, editor and I tried the year before, and although there was no real age clause at the time (1978), the powers-that-were in the L.A.S.O. were too – well – pig-headed to relent until I gave everyone in the issuing bureau a major headache re-applying on the first of every month.

I try, no joke, not to pester Steve with questions to which I can find or – OMG! – figure out on my own using the brain that was between my ears at birth and, operating best on the right side of it, form a working plan to press on.  One of my best qualities is the willingness to admit at once when I am wrong, which in fact is a very good thing because I have had much more experience with that than, say, repairing bits with outlandish holes gnawed through them by people with Intermittent Explosive Disorder or tardive dyskinesia.  And no, I’m not making fun of people with disabilities, in particular schizophrenics, who seem to have been drawn to me all of my life, other than most of those in my family for some reason.  It’s sort of Cole Seer’s dramatic need in The Sixth Sense, having to be like a shrink to dead people. At any rate, Steve is one of the busiest, most productive persons I know, traveling the world almost non-stop, it seems at times,  doing good works while never letting on that his constant other full-time “job” writing and publishing mostly his own pipe restoration adventures and posting those of other contributors online.  All of this last part is by way of a drum roll of sorts.

You see, had I not called and left a brief message on Steve’s phone before emailing him more than the full details, as par for the course, I never would have received back the following concise words of wisdom as to the possibilities of who really made the Everyman Rustic Dublin on which I’m so very close now to describing all of the work I did!  Yes, I am!  Steve’s reply, in pertinent part, read:

I got your message when I got home late last evening and then read the email this morning.  I have not heard of the P&K brand and Everyman pipe does not at all look English to me. I am wondering if it could  possibly be from one of two original makers.
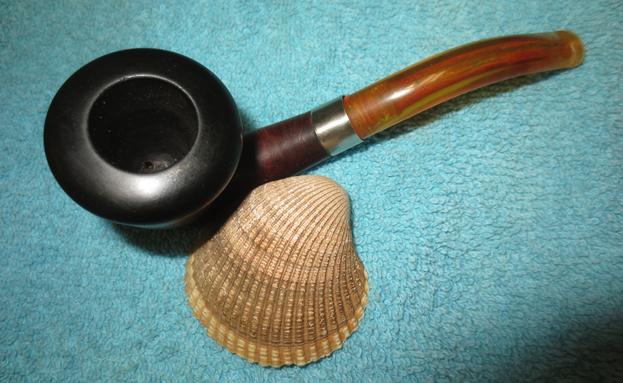
1. Alpha pipes Israel made for the cigar shop – the finish, style of the bowl and the stem make it look very much like many Alpha Israel pipes ) pre-Grabow ownership.

2. Lorenzo pipes Italy as they made many basket pipes for different shops.

That is as much as I would hazard to guess.

If I’ve ever needed Steve’s direction in research for a restore, this was it!  There is no way I would have reached those conclusions with such apparent ease and speed, in fact not ever, no how, no way, because I just don’t have his experience.  I mean, if there were a way I could get him to donate me a spare kidney or maybe his spleen so I could, like, grow all of his knowledge, why, I’d lie down on the table and do it in a heartbeat.  For now I guess I just need to get busy buying up and devouring and going back to again and again all of the great reference books out there, such as Who Made That Pipe?  The bottom line here is that Steve’s tip came back so fast my head spun like Linda Blair’s in The Exorcist, not to overdo the whole movie thing.

All I had to do was figure out how to look up the Lorenzo and Alpha possibilities, which I knew I could manage, and I did a few minutes after reading Steve’s email.  The funniest place the Lorenzo idea led me was to some images of my own restoration of a gigantic Spitfire by Lorenzo Mille I restored and blogged just before Hallowe’en 2014.  The money card turned out to be with the pre-DrG Alphas made in Israel.  I found the following oddly familiar-appearing Burl Briar Freehand Pipes on eBay, complete with the same fancy bits curved just so.

Case closed.

RESTORATION

The bit aside, the only real problem with the pipe, and it was a real problem to be sure, was the rim.  Char and even the worst blistering from a close call with full-blown combustion, which so far I’ve had the opportunity to witness only with homemade corncobs, have often occasioned rise to heated anger but never cold feet.  (I – tender my apologies for all three puns.)  My mother for many years rose in the nursing world and enriched my vocabulary with terms the likes of crispy critter, with all of their brio, and sometimes spread cat cadavers across the dining room table, both extenders in place, on a single large thermo scientific wrap-around cover.  Thus I looked at the “easy” heat damage and the acute and problematic jagged rim edge and unequal width of the bowl’s peak with a logical, methodical approach that began to form.

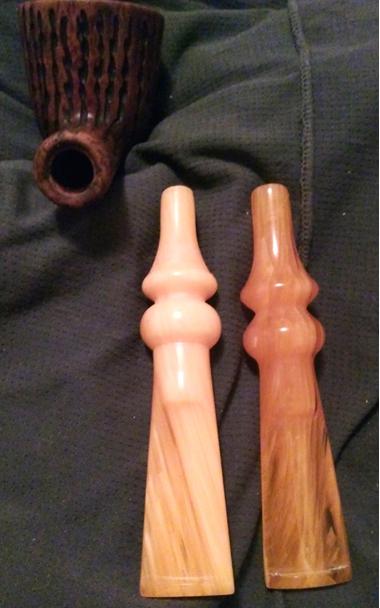
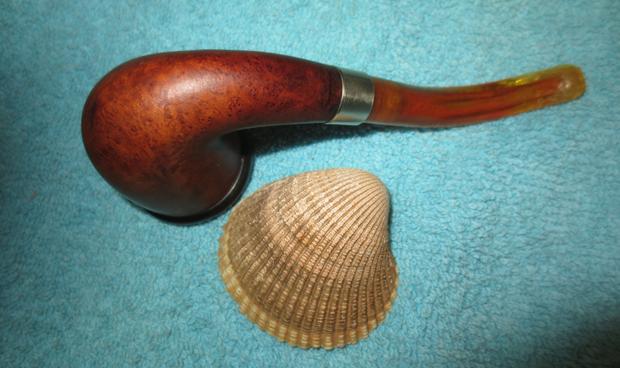
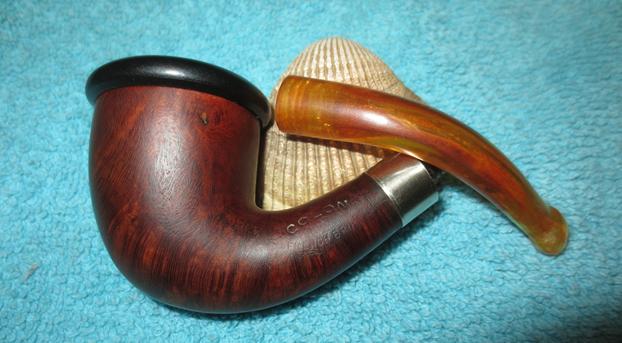
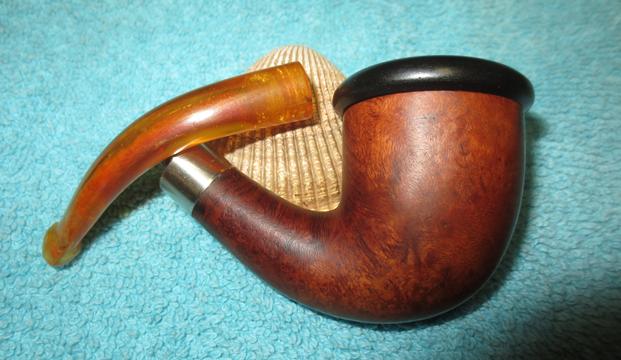
I expect to blog my restores with the methods fresh in my mind.  There are even some of the jobs I hold special from the past few years that I’m sure I’ll never forget a single detail.  Not to suggest this was common or insignificant, but after nine months I can’t remember the specifics of how I accomplished the result of the first shot below.  The chamber had to be reamed, and when I do that I always follow up with 150-, 220- and 320-grit paper, so that’s a given.  I’m guessing I started with micro mesh on the rim just for the sake of trying and found it ineffective.  Then I would have turned to sandpaper and chosen 220 with the same rationale as the micro mesh but opted for 180 with the usual progression up to 400 before starting in on micro mesh and stopping when I realized I would have to solve the other obvious problems with more drastic steps.  Here are the results I just described, and after the drastic measure of a file.Healing the wounds of a procedure I consider radical enough that I have only used it less than the number of fingers I have on a hand (or, rather, considering the thumb is not technically a finger, the same number), in fact is not all that difficult in most cases, and seeing the result of the steps is always a great pleasure.  I used 180-, 220-, 320- and 400-grit paper, and then 1500-12000 micromesh on the rim.Then, I began the rest of the outer stummel.  Starting with super fine “0000” steel wool to lighten the color of the wood and easily get between the grooves, I switched to the full micro mesh.It was time for the retort.  As always, I was glad I did it, because this little stummel was filthy!  I have done as many as six retorts on a single pipe, and this one “only” needed three, all of them clearer.  I had no bit to connect to the shank and therefore had to stretch the rubber connector over the opening.  I show only the first round below.  I also followed the final retort with three cleaners dipped in alcohol alternated with three dry, all of which came out clean.Applying alcohol-based leather stain and flaming it is always fun, and I used Fiebings Medium Brown on all but the rim to leave a definite two-tone.  When it cooled, I wiped away the char and a little extra darkness with 8000 micro mesh. I hand-rubbed a sparing amount of Halcyon II Wax into the wood and crevices of the rusticated pipe for which it is made, not to be frugal but because a little goes a long way.  In most cases, I let it dry or set or whatever as much as it can, in general 20 minutes or so but sometimes a considerable time longer, and wiped the excess off with a soft cotton rag while rubbing more into the pores of the wood.  Other times, I let the setting process go on for a considerable time longer, but not often.  I was then almost finished with the long project and was more than prepared to accomplish the final main task,  filled with joy to tackle (thinking of football) the key part of the  experience: fitting one of two fancy Lucite stems, an orange and a yellow, that arrived in the mail – eight months after I finished the stummel.  In case anyone wondered at my persnickety comments regarding the amount of time I spent on a certain bit of work trying to repair a part of the original Everyman that I will now leave unnamed, in my own way, that’s why.

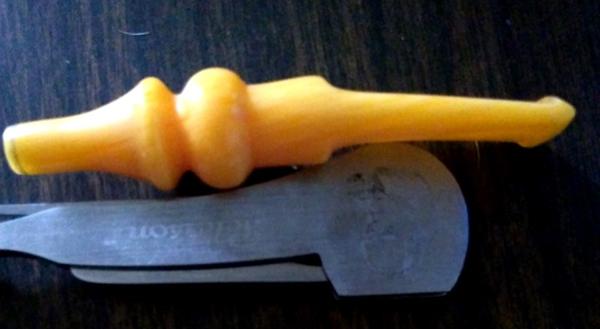
I went with the golden bit to the right.  As a point of interest, the popular online site where I bought a total of three bits in one order listed these two as gold, but the system is a touch odd, to me at least, and also the viewing system for the product you in fact get wasn’t working that day for all items, including the yellow bit.  But I can use it, and it was inexpensive!  Having none of the finer and more expensive equipment for tenon cutting, I hand-sanded the shank insert end down to where it had a nice, tentative fit for the time being.  That task took another day.  Making use /of another of Steve’s blogs, on bending stems, I chose the oven method because it had worked so well on several occasions in the past with Vulcanite.  BTW, I doubt the Lucite was the problem.  I always take a look in the mirror before pointing a finger lest I see three others pointed right back at me.  I say, go figure!  After that mishap, I switched to the boiling water method that worked better but I’m sure was spoiled by already having baked the bit. I repeated the boiling method and achieved the desired bend.  Halcyon II was is meant to be used in place of regular buffing wheel waxes and compounds, but I wanted a slightly brighter finish, and so I ended with spins of Red Tripoli and carnauba.
CONCLUSION

Even regardless of its look, and by that I mean nothing rude, the likelihood of this pipe being of British make – lacking any indication of such origin, whether the city or country of manufacture, a line name, or the often top secret coded markings of which our friends across the Pond are so fond – is so paltry as to end any further debate lacking official admissible documentary evidence.  WikiLeaks might suffice, in particular if the disseminator were to flee his country or be arrested or renditioned or still more conclusively, become the subject of cover page stories of the world’s tabloid toilet wipes.  On the other hand, and here I am not being facetious, if my already stated conclusion that the simple but honorable Everyman is a blast from the past of the pre-Dr. Grabow Alpha days of Israel, made by the Shalom Pipe Factory, and I am in fact wrong, I would as always appreciate input from any authorities or scholars among us.
SOURCES

https://www.jrcigars.com/brand/pipes-accessories/p-k-everyman-pipes

https://www.santaclaracigars.com/brand/pipes-accessories/p-k-everyman-pipes

https://rebornpipes.com/2015/07/18/bringing-new-life-to-a-gift-pipe-a-gasparini-mgm-elegante-brandy/comment-page-1/#comment-21243

https://pipedia.org/wiki/Stanwell_Shape_Numbers_and_Designers

http://www.ebay.com/itm/ALPHA-Burl-Briar-Freehand-Estate-Tobacco-Pipe-Made-In-Israel/332252221412?_trksid=p2047675.c100011.m1850&_trkparms=aid%3D222007%26algo%3DSIC.MBE%26ao%3D1%26asc%3D41376%26meid%3D0c2217f15e5f4850ad0061cb84cc5850%26pid%3D100011%26rk%3D1%26rkt%3D12%26sd%3D121269666970

http://www.ebay.com/itm/Vintage-Shalom-Select-Imported-Tobacco-Pipe-Vintage-smoking/322513288986?_trksid=p2047675.c100011.m1850&_trkparms=aid%3D222007%26algo%3DSIC.MBE%26ao%3D1%26asc%3D41376%26meid%3D0c2217f15e5f4850ad0061cb84cc5850%26pid%3D100011%26rk%3D5%26rkt%3D12%26sd%3D121269666970\

https://rebornpipes.com/2012/07/15/bending-vulcanite-stems/


1967 DUNHILL 197 SHELL BRIAR Clean-up


Blog by Henry Ramirez

When surfing Ebay I noticed a very well smoked Shell billiard whose stem had lost its White Dot. It looked like it could be cleaned up to present an elegant addition to my collection. I anxiously awaited its arrival and immediately dunked the stem in an Oxyclean bath for a nite.

The next morning I pulled it out of the bath and wiped off the smegma for my first real look at the stem. The divots reminded me of a deflated balloon. Just what I was hoping for! Off to the buffer I went to buff off the sulfur discoloration with a wet rag wheel and pumice. Knowing what I know now, I should have popped this baby in the oven to raise the dents but instead I got to cleaning the stem’s airway and tenon. I bonded some shade A2 dental composite in the hole for the White Spot and was dismayed that it refracted the surrounding black vulcanite. Note to self, next time place a layer of opaque before the bulk fill. Luckily, when researching the earlier White Spots I came across examples of dots so dark they were black. I had made a silicone impression of a new pipe’s stem and used that as a mold to create a refurbishment of the button. What a mess! Next time I’ll mix the charcoal in with the composite resin rather than CA. I ended up recreating the button the way Steve has posted here on Reborn Pipes. OK, so now it’s the bowl’s turn. My armamentarium and procedure is pretty routine for cake and gunk removal. The rim’s blast was scorched but luckily, the rest of the pipe’s blast was vestigial. This was an opportunity to try out emulating a blast through rustication. Plus, since the pipe was stained rather darkly, it would help hide a myriad of sins. When polishing the chamber I noticed some alligatoring of the briar. Today I would probably schmeer some JB Weld into the cracks but what I did was a coating of Structural Sour Cream and charcoal. I played around with the button’s internals, polished with the usual green, red and white compounds (thanks Tim West), threw on some wax and called it a day! Thanks for looking, regards, Henry

Jen’s Trove No. 2–Perhaps a LHS London Royal Full Bent Billiard – Oom Paul


Blog by Dal Stanton

I don’t usually begin a blog with an addendum, but just before I sent this to Steve to publish on Reborn Pipes, I sent a picture of this pipe along with a few other pipes with the question, “Oom Paul or Full Bent Billiards?”  Here are the two pictures I sent – the first, Jen’s #2, and two others: This is the fun part of learning the fine art of pipe shape identification!  I was identifying the third pipe, (far right) as definitely an Oom Paul – mainly by the way the shank and bowl merge vertically and then the shank/stem breaks away but stays real tight in a full bend.  The other two, have more of a ¾ bend, but they also have more of a merge between shank and bowl creeping upwardly.  I called the 2 on the left, full-bent Billiards for that reason.  I loved Steve’s response:

Dal

To me they are all variations on an Oom Paul Shape which is actually a full bent billiard. LOL! The joys of identifying shapes.

Steve

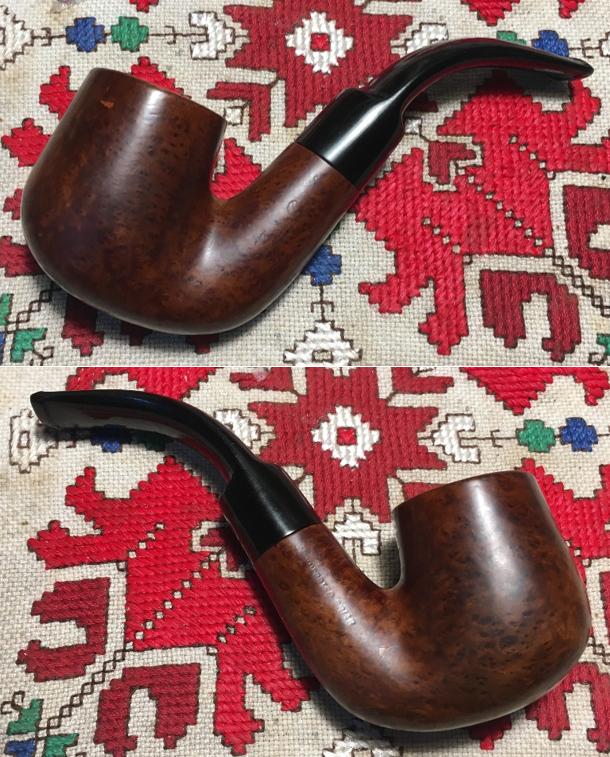
So, with addendum completed, Jen pulled this very nice Full Bent Billiard, (Oom Paul!) out of the ‘Help Me!’ basket and added it to the trove she has asked me to restore for her.  She will be transitioning back to the US at the end of the summer and she will be packing several of The Pipe Steward’s restorations to give as gifts to the special men in her family.  I’m happy to oblige!  Jen’s purchases will benefit the Daughters of Bulgaria, and bring much joy to her family!  I found this pipe on eBay as one in a lot of 13 pipes – I acquired some interesting pipes that await restoration in the basket!  The pictures I saw from the seller in Nevada included Jen’s Oom Paul – at 8 o’clock below and then a closer view following. The seller’s attempt to identify the Oom Paul were helpful and set me on the path:

Unknown – Markings appear to be rubbed out from handling. I think I see the word “London” followed by some indiscernible word.

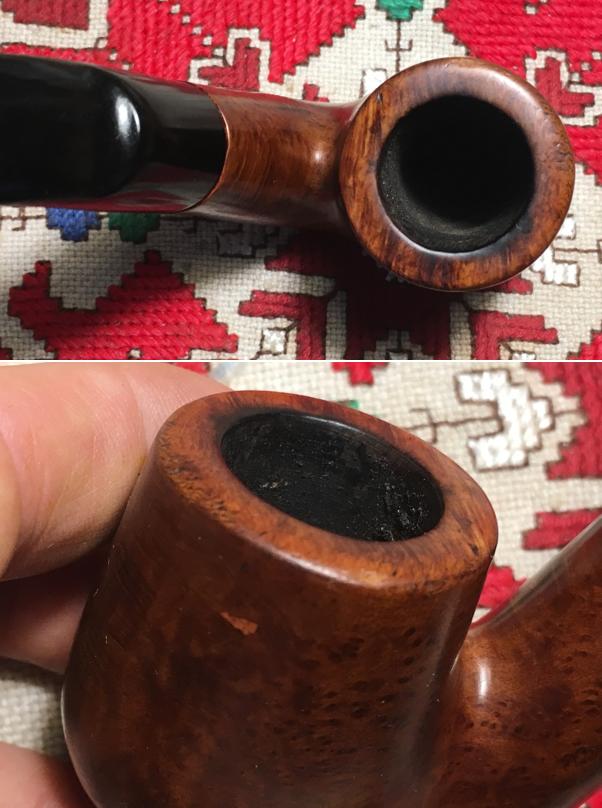
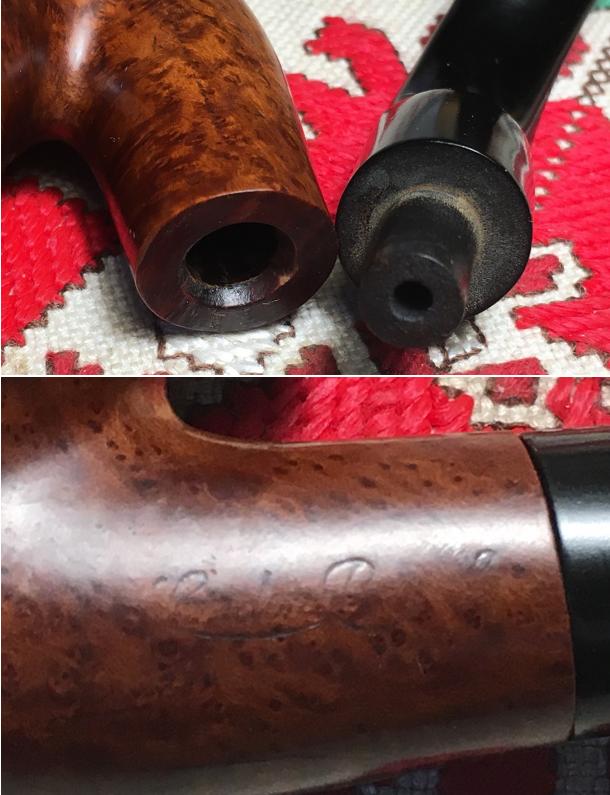
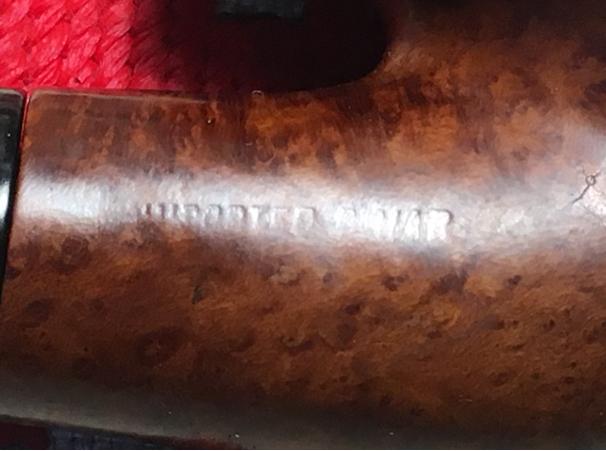
On my work desk in Sofia, Bulgaria, I take some additional pictures to fill in the gaps. Looking at two pictures above and the nomenclature on the left side of the shank, I tend to agree with the seller that the first word appears to be London in a cursive-type script with a flared line underneath.  The second word appears to start with a “P” also in a script with a flare line underneath. To see if I can make a possible identification with a pipe name starting with “London P…” I go to Wilczak & Colwell’s “Who Made That Pipe?” and I find some Comoy contenders – “London Pipe” and “London Pride”.  Neither of these candidates seem likely because the corresponding Comoy stem mark, “C” was absent.  Yet, the pipe could have a replacement stem, but not likely.  I then go to Pipephil.eu and simply search anything starting with “London”.  What I found was very interesting and possibly a match.  The clipping from Pipephil below shows the ‘London Royal’ nomenclature – looking at my specimen, what I thought was a “P” very likely is an “R”.  The flare lines underneath is a convincing indicator as well.  Also matching was the right side “Imported Briar”.  Again, missing is any stem marking – a hat in the specimen below.
While I cannot be 100% sure in the identification, “London Royal” may indeed be on target.  Pipedia gives a short description of the LHS company:

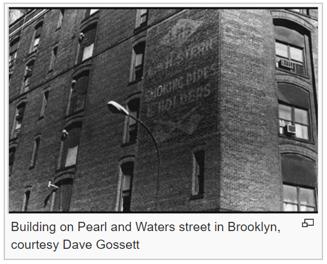
Ludwig Stern, a successful pipe manufacturer since 1893 and closing around 1960, reorganized his company along with his brother Hugo Stern, opening a factory in 1911. They named the company L&H Stern Smoking Pipes & Holders. The newly formed company was moved into a six-story building on the corner of Pearl and Waters street Brooklyn, NY.

The American company produced such pipe names as Sterncrest, Purex, Silvercrest, Barrister, Marwyn, Park Lane, Radmanol and Warwick.

Whether (or not) the Oom Paul (Billiard) before me is a LHS London Royal, it is a very attractive pipe with quality grain movement.  Overall, it is in good shape and I’m hoping an easier than normal clean-up and recommissioning.  There are a few nicks on the rim and some fills that need attention.  The chamber has very mild cake.  The stem bit shows some tooth chatter and no oxidation that I can see.  I begin the restoration of this possible, LHS London Royal by reaming the chamber bringing it to the briar for a fresh start.  I also plop the stem into the Oxi-Clean bath even though there is no visible oxidation.   Starting with the smallest, I use 2 of the 4 blades available in the Pipnet Reaming Kit.  I follow with the Savinelli Pipe Knife to fine tune the ream then sand the chamber using 240 grit paper.  I then wipe the bowl with a cotton pad wetted with isopropyl 95% to remove carbon dust.  The pictures show the progress. Turning now to the internals, I use cotton swabs and pipe cleaners wetted with isopropyl 95% to clean.  I discover the internals are pretty gummed up.  With the hour becoming late I decide to use the stealth method of cleaning.  I use kosher salt and alcohol to soak in the chamber overnight.  I first twist a cotton ball to form a wick to stuff down the mortise to draw out the oils and tars from the briar.  I then fill the bowl with salt and after placing my palm over the top give it a shake to displace the salt.  Then I carefully fill the chamber with the alcohol until it surfaces over the kosher salt.  I put it aside and turn the lights off.  The pictures show the cleaning process.Turning to the stem the next day, I remove it from the Oxi-Clean bath and even though it is minimal, the bath has successfully ‘raised’ oxidation to the surface.  Using 600 grit paper, I wet sand the stem.  Following this, I utilize 0000 steel wool to remove more and begin the polishing of the stem.  I still detect some tooth chatter especially on the lower bit and a small compression dent on the upper.  I use the heating method to raise the chatter by passing the end of the stem carefully over a lit candle.  The vulcanite when heated like this will naturally expand and seek its original place.  The heating helps, but I still need to do some sanding in the upper and lower button area using 240 grit paper.  Using a flat needle file, I use the opportunity to sharpen the upper and lower button lips. Following the 240 grit paper, I use 600 grit to further smooth and polish then conclude with 0000 steel wool.  The pictures show the progress. The stummel has been in a kosher salt/alcohol soak through the night.  Kosher salt is used because, unlike iodized salt, it does not leave an after-taste.  I remove the wick from the shank and it has done its job of pulling oils and tars out of the stummel.  I toss the used salt in the waste and clean the bowl with paper towel and a long-bristled brush.  I also use a brush reaching into the mortise to remove residue salt.  I follow by continuing use of cotton swabs dipped in alcohol and pipe cleaners to finish up the internal clean-up.  The pictures show the progress.With the stummel internals cleaned, I turn to the internals of the stem.  Using pipe cleaners dipped in isopropyl 95% I attack. It did not take long because the pipe cleaners emerged clean.With the internals clean, I now turn to the stummel surface.  I use Murphy’s Soap and cotton pads to clean the stummel surface. As advertised, Murphy’s does a great job cleaning the oils and grime that build up on the surface. After scrubbing, I rinse the excess off using tap water careful to keep water out of the internals. The cleaning reveals two fills on the surface which appear to be solid after I probe them with a sharp dental tool.  The rim has a scorch mark over the 10 o’clock area in the picture below.  There are also scuff marks at the 6 and 8 o’clock areas.  The pictures show what I see.I decide to do a light topping using 240 grit paper on a chopping board.  I don’t need to take off much – only enough to remove the scuffing and surface part of the scorching.  I will make an internal rim bevel which will remove damage along the inner rim edge.  It is a little tricky, because the shank extends beyond the height of the stummel top.  I do the topping on the edge of the board as a result.  After rotating the stummel on the topping board, periodically checking to make sure I’m staying true, I switch to 600 grade paper to smooth the top further.  Using a coarse 120 grit paper, I cut an internal rim bevel to remove damage as well as soften the rim lines.  I follow with 240 grit paper.  On the outside rim edge, I give it a light bevel with 240 followed by 600 paper – again, removing the left-over nicks as well as softening the lines of the rim.  I think bevels add a touch of class to a rim.  The pictures show the rim progress. With the rim repair complete, I move straightaway to the stummel surface.  I’m anxious to see how the briar grain emerges during the micromesh pad process.  I’m careful to stay away from the almost non-existent ‘London Royal’ nomenclature on the sides of the stummel.  I want to preserve what I can. Using micromesh pads 1500 to 2400 I wet sand.  I follow wet sanding by dry sanding with micromesh pads 3200 to 4000 and then finishing with 6000 to 12000.   As hoped and expected, the pictures show the grain emerge.  As I look at the grain, I’m beginning to think that this stummel is a candidate to remain as the natural grain color and not to stain.  There are a few fills that I darken and blend with stain sticks.  It looks good!  I think Jen will like how this Full Bent Billiard (aka Oom Paul) is coming along.  I’ll finish the stem before making the final decision about whether to apply a stain.  Turning now to the stem, I wet sand using micromesh pads 1500 to 2400 then dry sanding using pads 3200 to 4000 then 6000 to 12000.  After each set of 3 micromesh pads, I apply a coat of Obsidian Oil to the thirsty vulcanite stem.  This oil revitalizes the vulcanite.  I love the vulcanite ‘pop’ as the pads do their magic! Moment of decision.  I reassemble stummel and stem to get a look at the big picture.  The possible LHS London Royal Oom Paul is without doubt a handful of pipe.  The grain presents bird’s eye on both sides of the stummel with lateral straight grain in the front and on the shank top and bottom.  A very nice feel to it as well, as I hold it and balance it in my palm.  The rim looks great too with soft beveled lines.  Decision point – do I leave the stummel the natural grain color or do I stain it?  If I stain it, I will use a light brown hue simply to tie together what is already there.  The original appeared to have been leveraged toward the lighter hue as well.  With some input from my wife, who has more color coordination DNA in her gene pool, I decide to stay with the original, natural, saddle, leathery color – leaving it just as it is. With that decision made, I fine tune and bring out the natural finish by using Tripoli compound which applies a fine abrasion, then Blue Diamond compound – more abrasion but finer than Tripoli.  I use a cotton cloth wheel with the Tripoli compound (not my usual felt wheel) because I’m not cutting through the fired crust of a stained stummel.  After mounting the buffing wheel on the Dremel, I set the speed at 2 of 5 (fastest) and purge the wheel to clean it from old compound. I apply the compound over the stummel, rotating the wheel over the surface, not apply a great deal of downward pressure.  I let the compound and the RPMs do the work.  After completing the Tripoli cycle, I attach the Blue Diamond compound cotton cloth buffing wheel, reattach the stem and stummel, and give both the Blue Diamond buffing using the same approach as with Tripoli.  When completed, I hand buff the pipe with a felt cloth to remove the compound dust preparing for the wax.  Then, switching to the carnauba wax cotton cloth wheel, also with Dremel set at speed 2, I apply several coats of carnauba wax to stem and stummel. During the carnauba wax application, I notice that the stem has loosened during the process.  I use a technique of expanding the tenon a bit so that it gains more purchase in the shank from Charles Lemon’s blog site, Dad’s Pipes.  The procedure usually uses a drill bit, where, after gently heating the tenon, a next larger drill bit is inserted into the supple tenon expanding it microscopically.  Instead of a drill bit, I find that a Dremel shaping tool sized up a little better than the drill bit.  After heating the tenon, the shaping tool eased into the tenon.  It did the trick giving the tenon a better fit in the mortise.  The pictures show this procedure.With the tenon now a bit snugger, I complete the application of the carnauba wax. After the carnauba cycles, I mount a clean cotton buffing wheel on the Dremel and do a ‘clean’ buff over the entire pipe.  I do this to assure that no pockets of wax are left on the surface and to raise the shine.  After this, I hand buff the pipe using a micromesh cloth to deepen and raise the shine of the briar grain more.
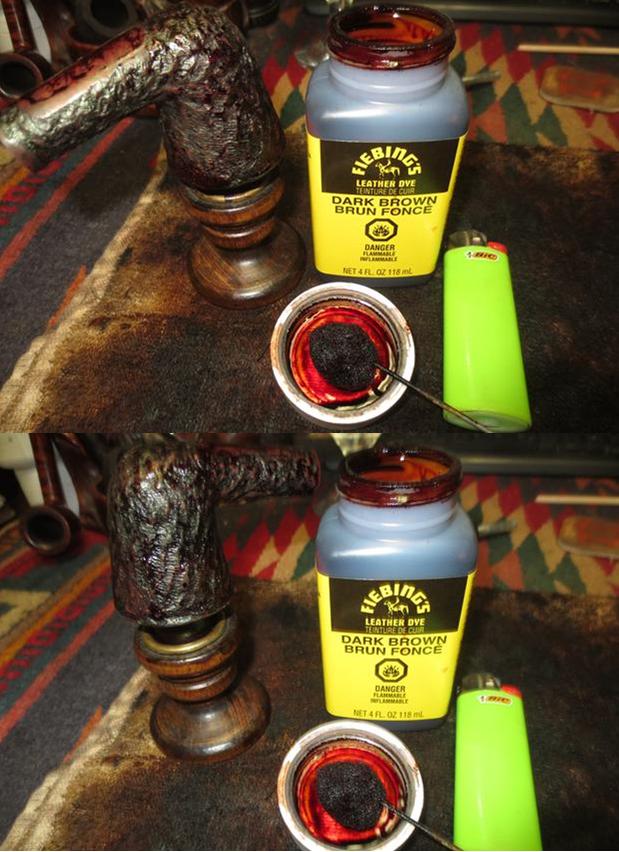
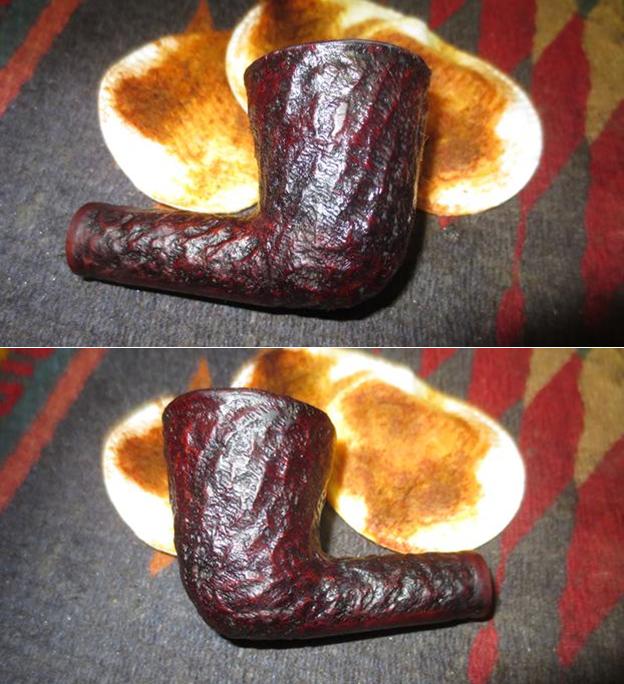
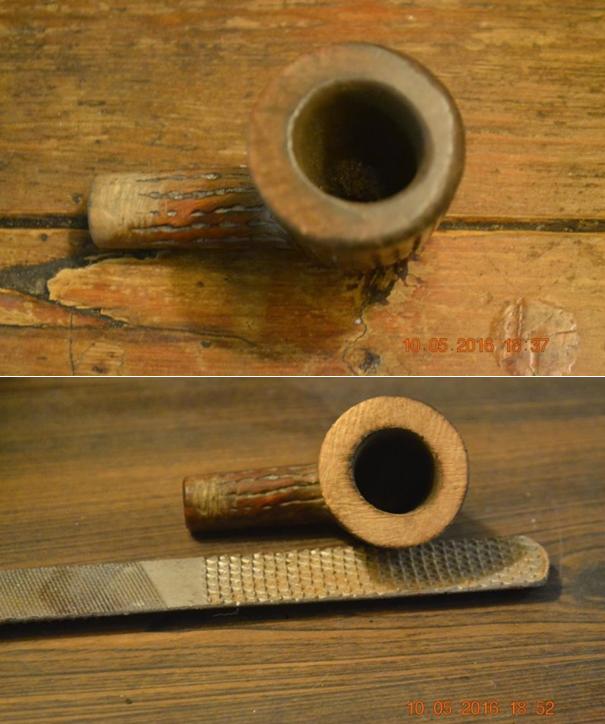
This possible LHS London Royal Full Bent Billiard, Oom Paul has turned out very well.  I think that whichever of Jen’s family of men receives this pipe, he will enjoy it for many years to come as its new steward.  As I said earlier, the profits of this pipe benefit the work we do here in Bulgaria with women who have been sexually exploited and trafficked, the Daughters of Bulgaria.  Check out my blog, The Pipe Steward, for more information about this.  Thanks for joining me!