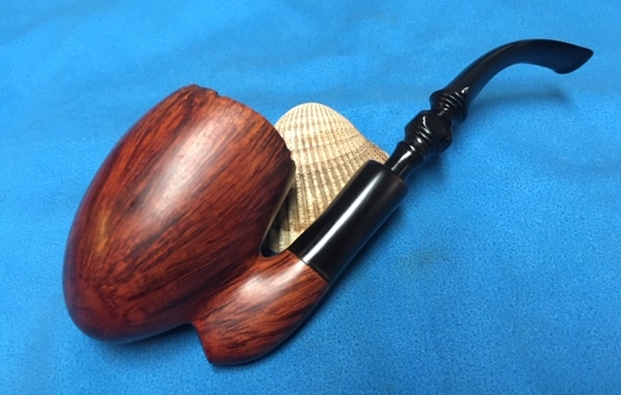
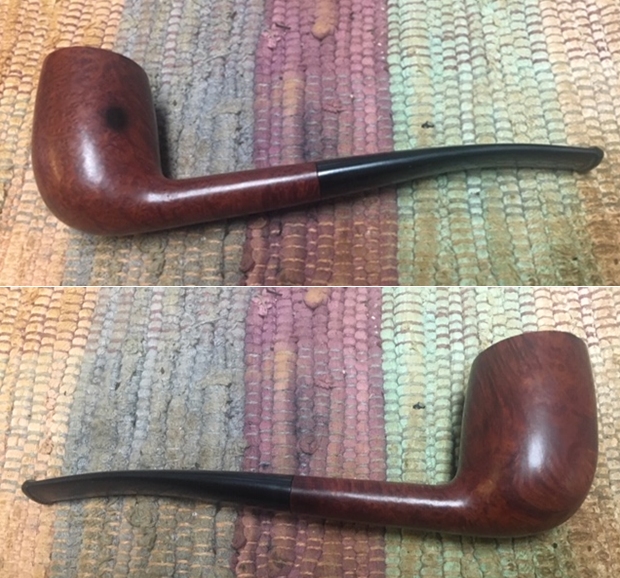
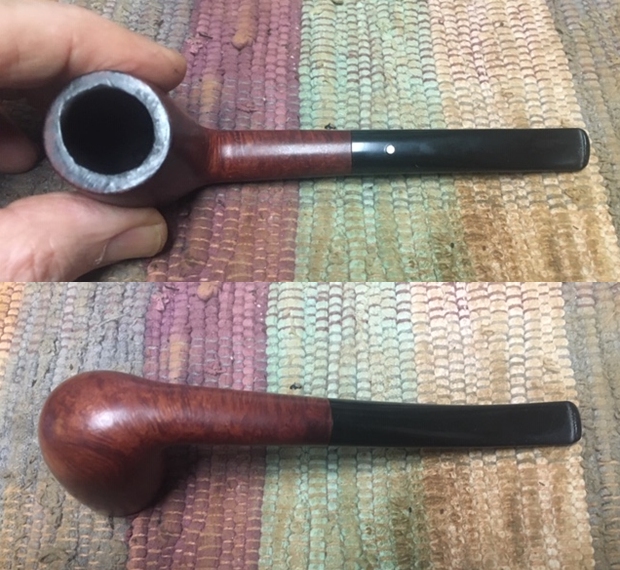
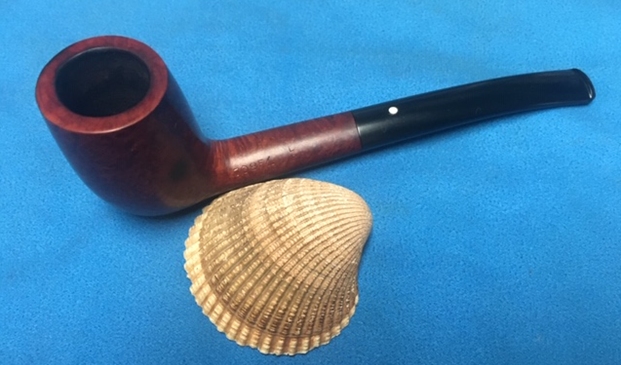
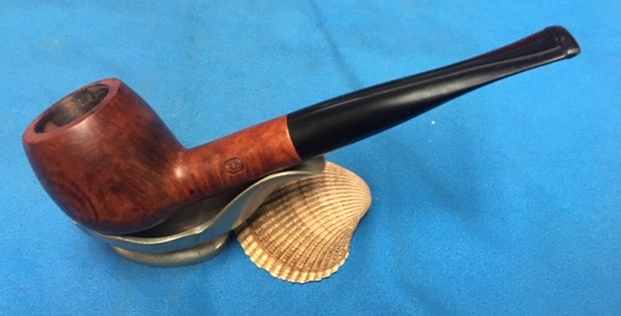
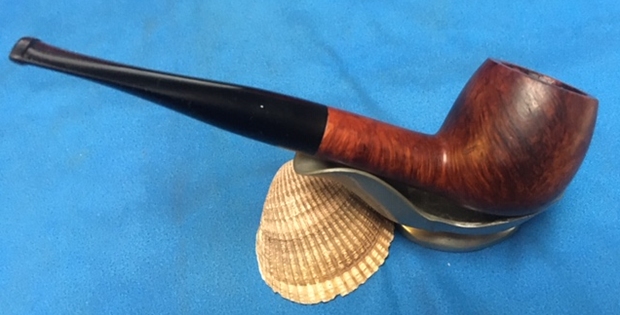
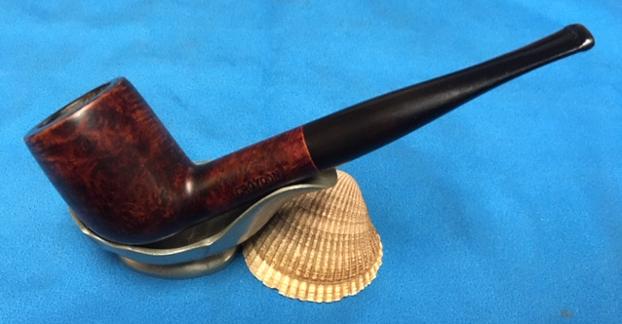
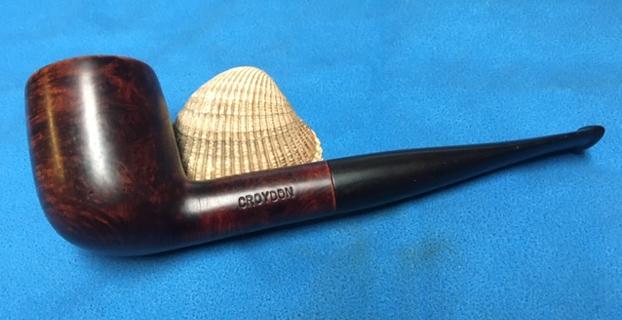
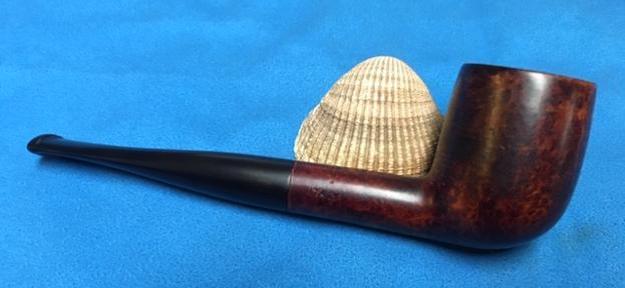
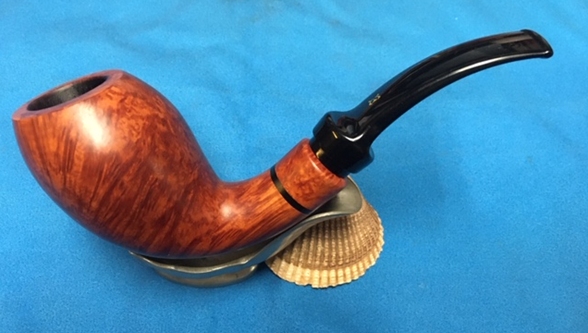
Tag Archives: Bowl – refinishing

Transforming a Hornless Sculpted Bull’s Head into a Churchwarden with Horns


Blog by Dal Stanton

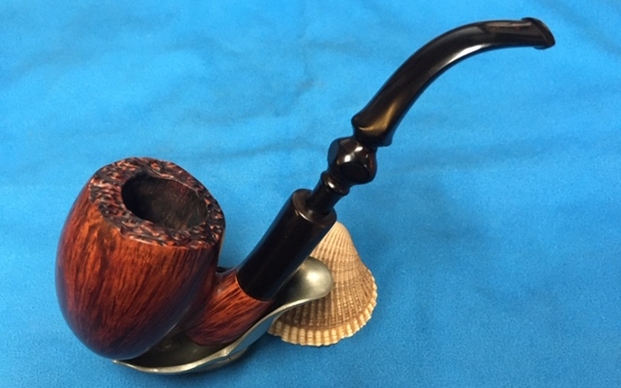
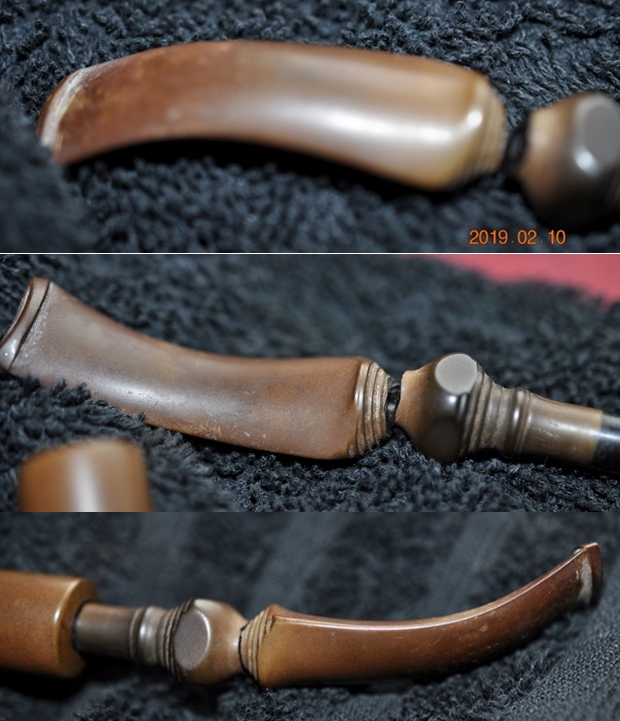
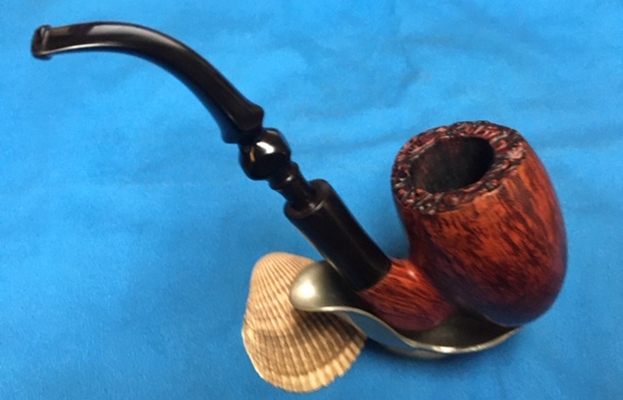
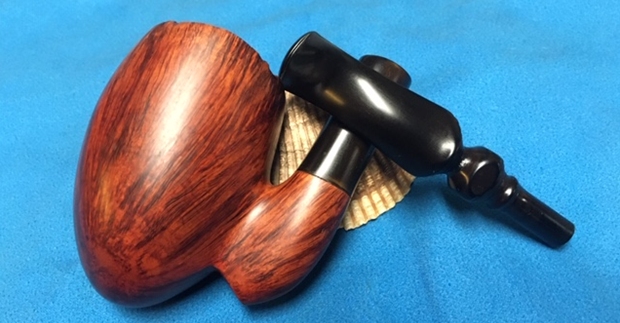
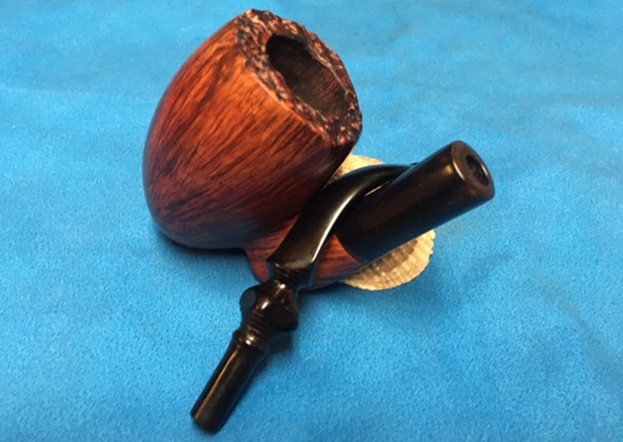
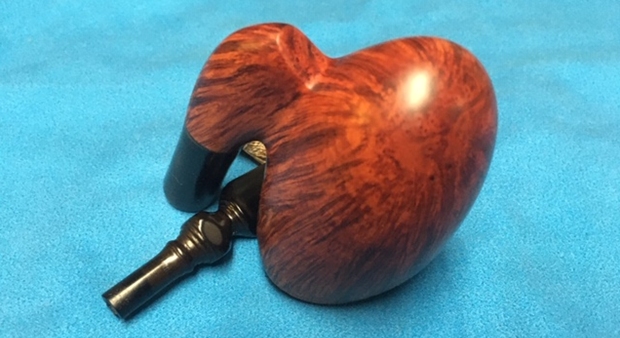
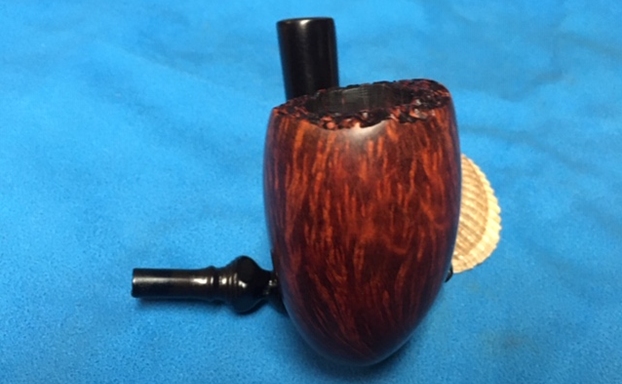
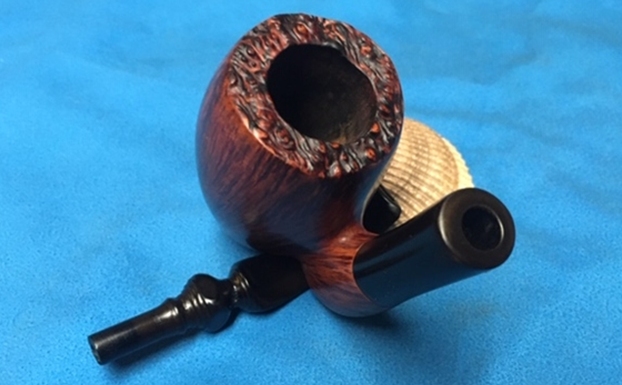
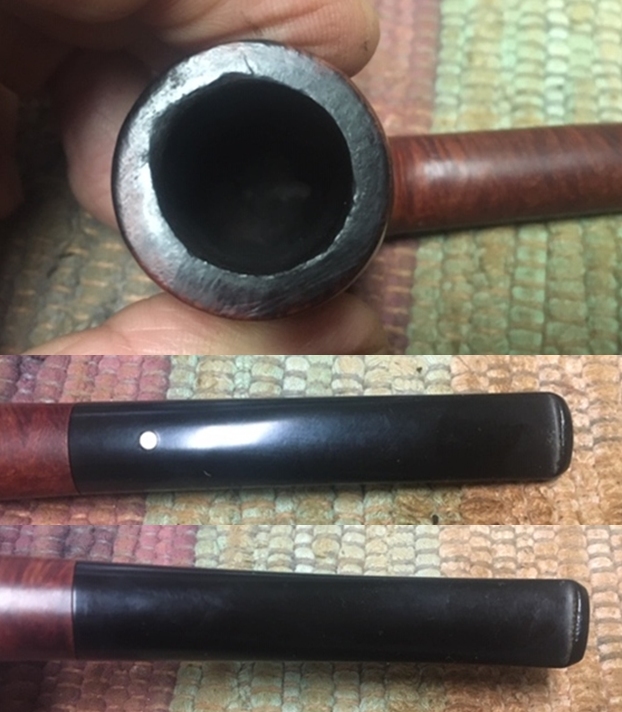
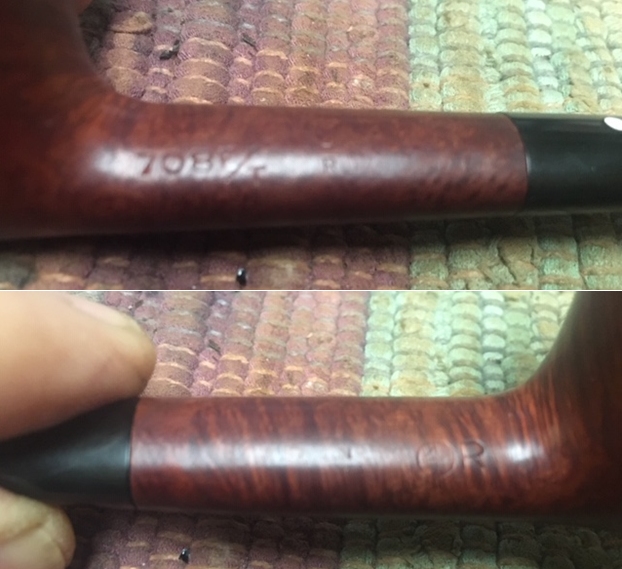
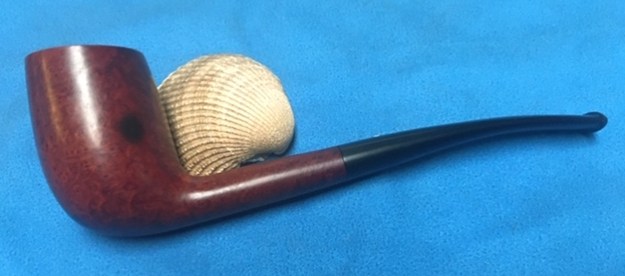
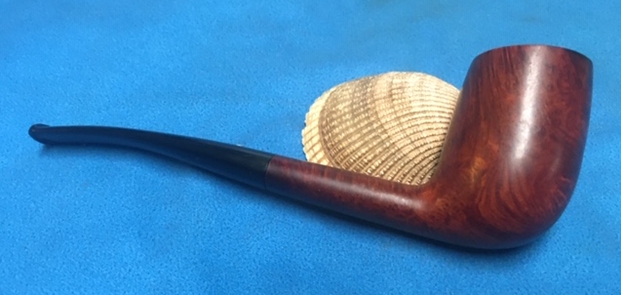
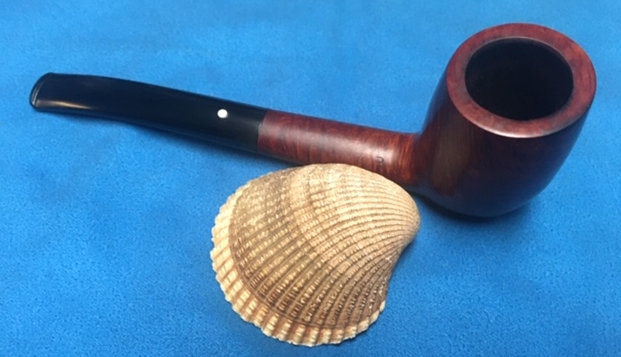
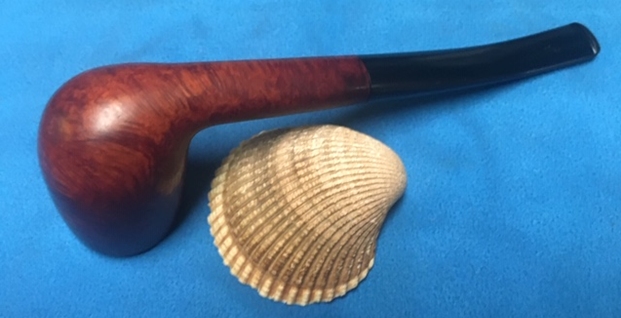
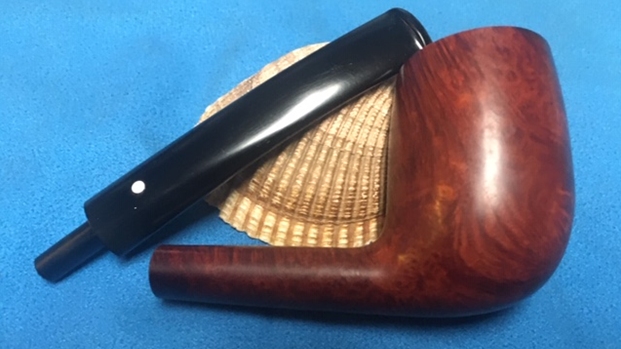
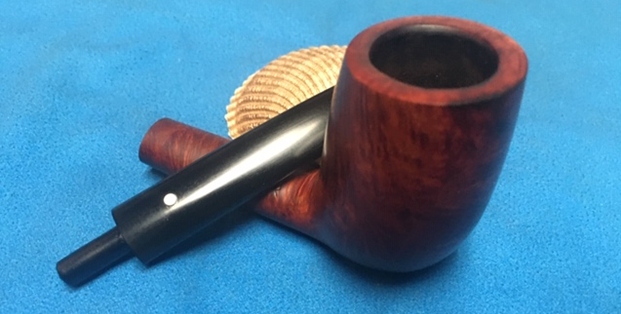
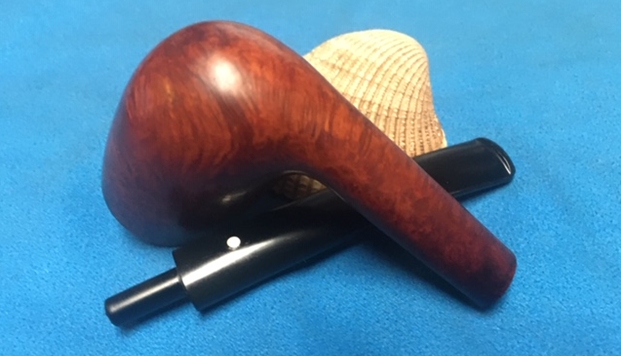
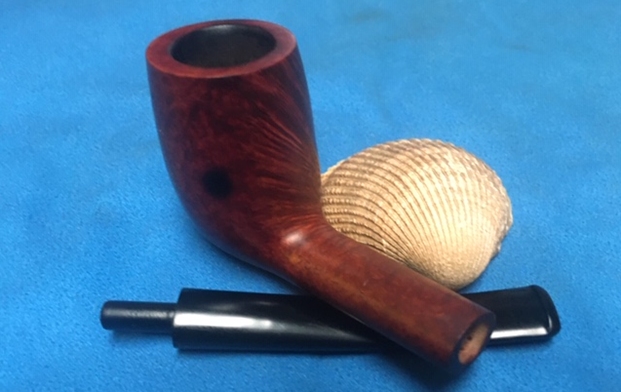
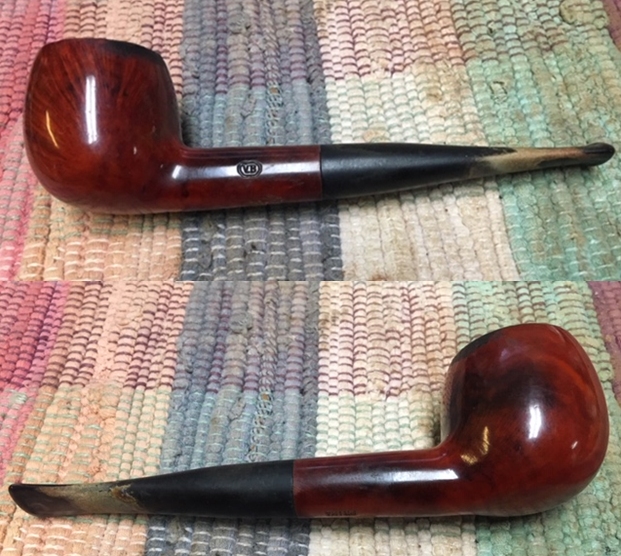
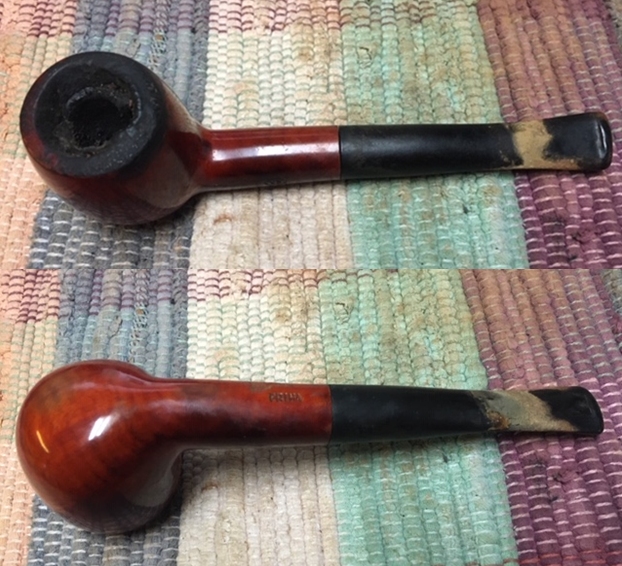
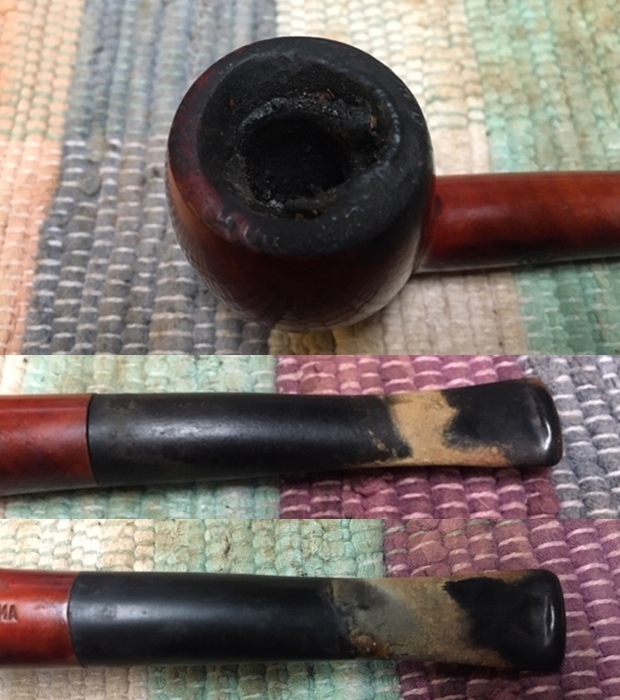
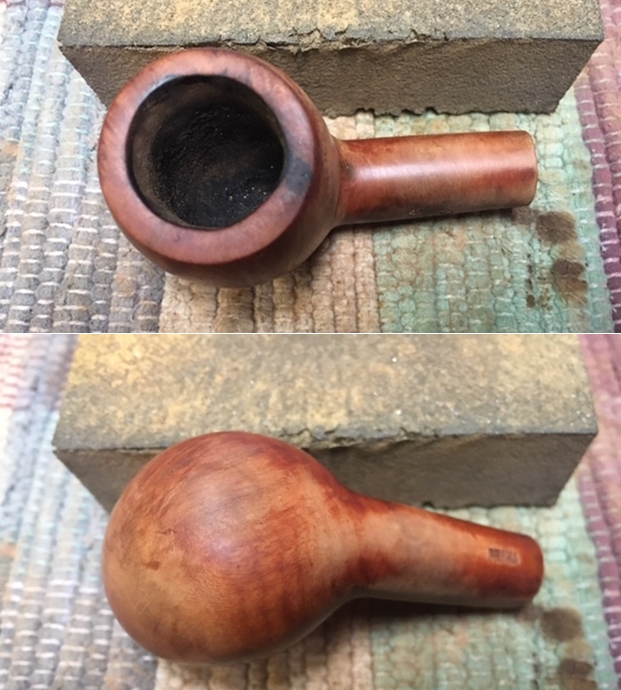
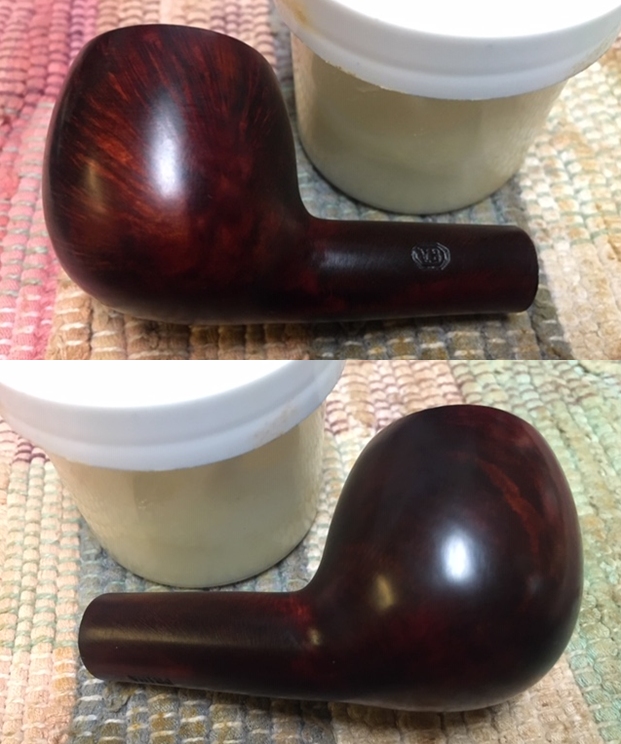
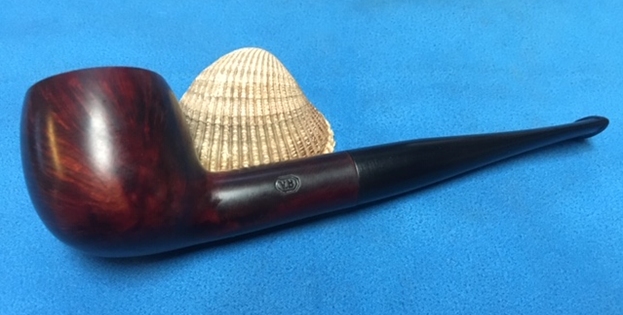
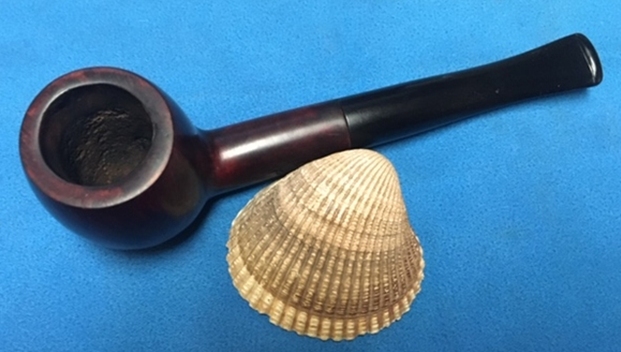
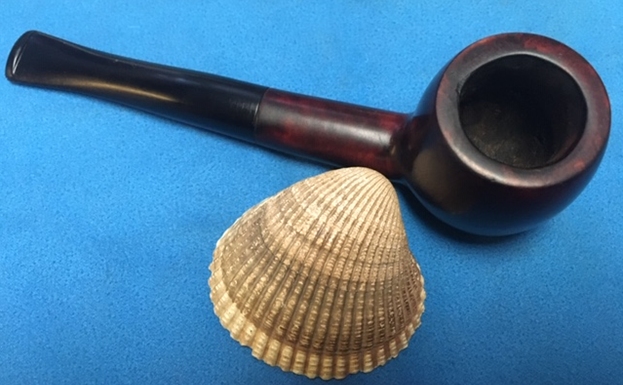
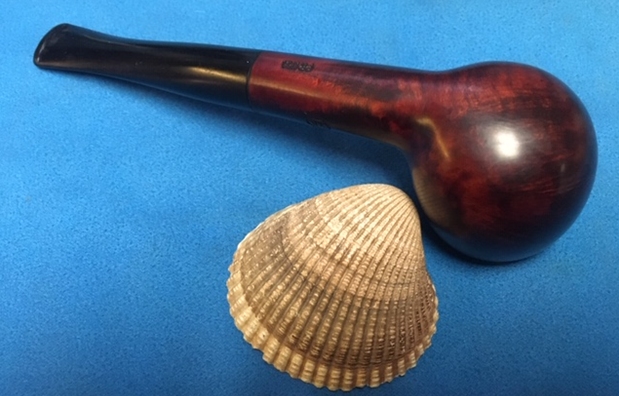
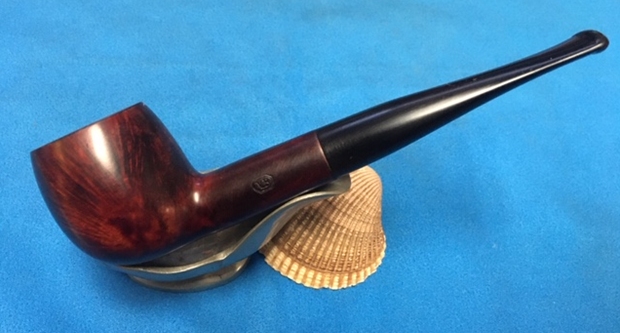
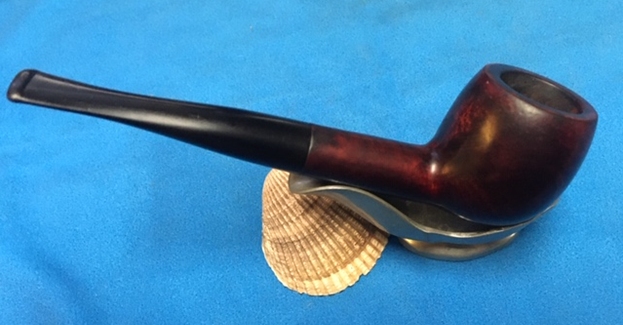
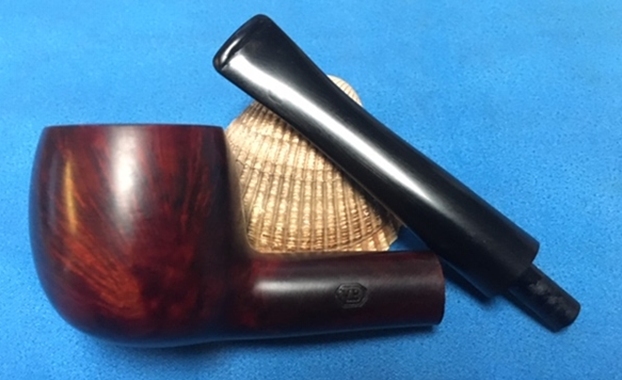
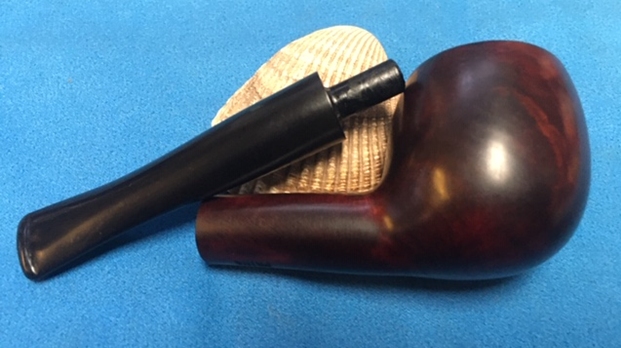
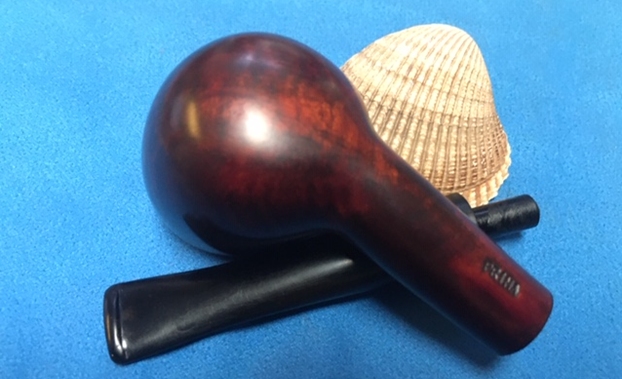
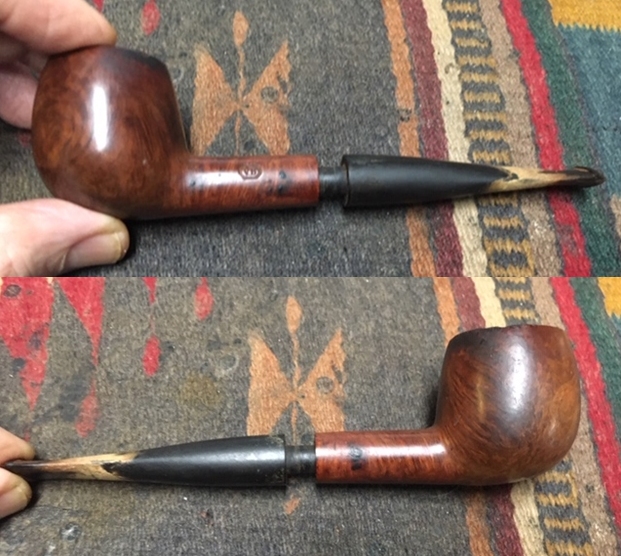
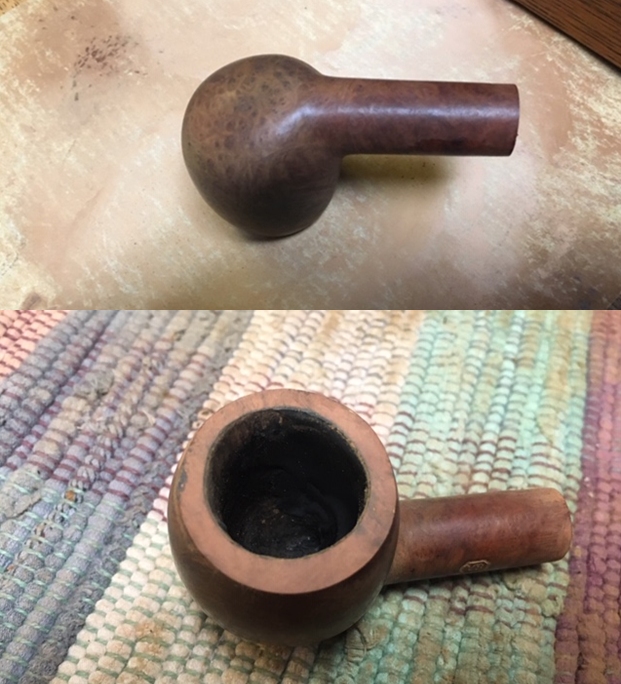
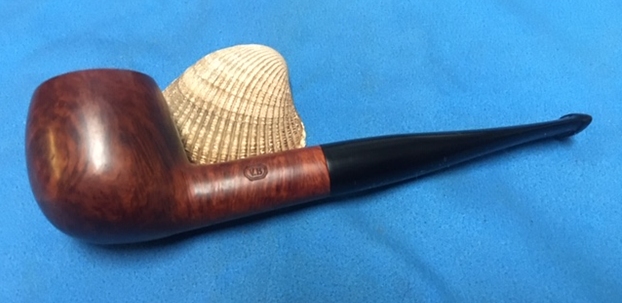
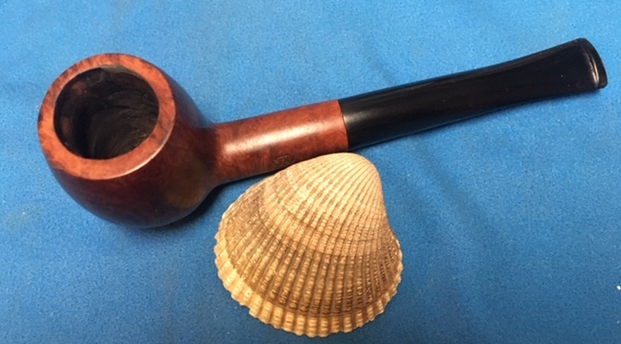
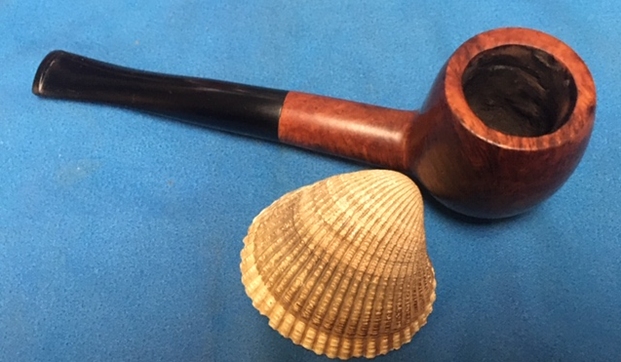
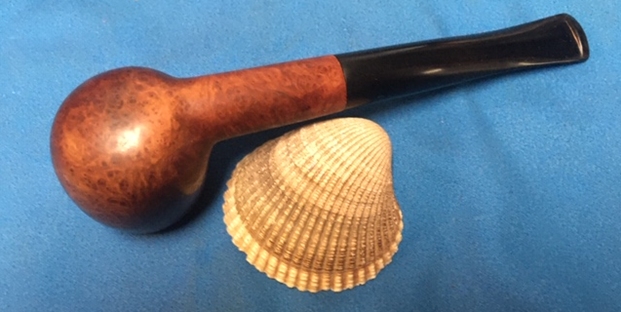
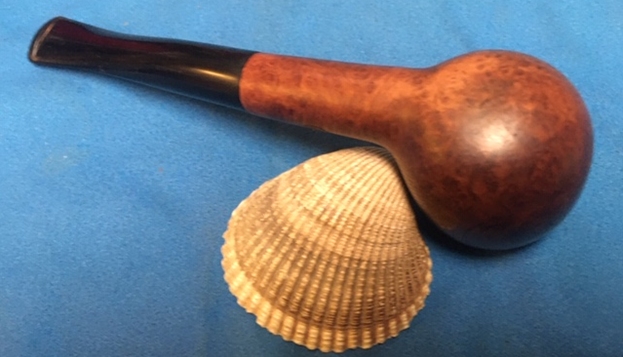
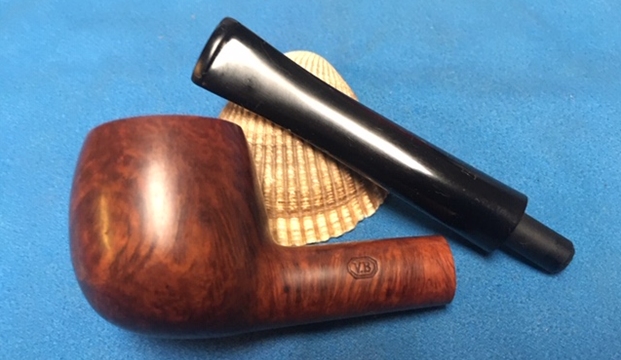
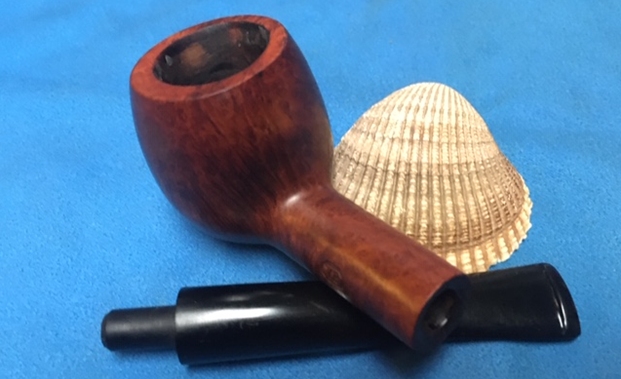
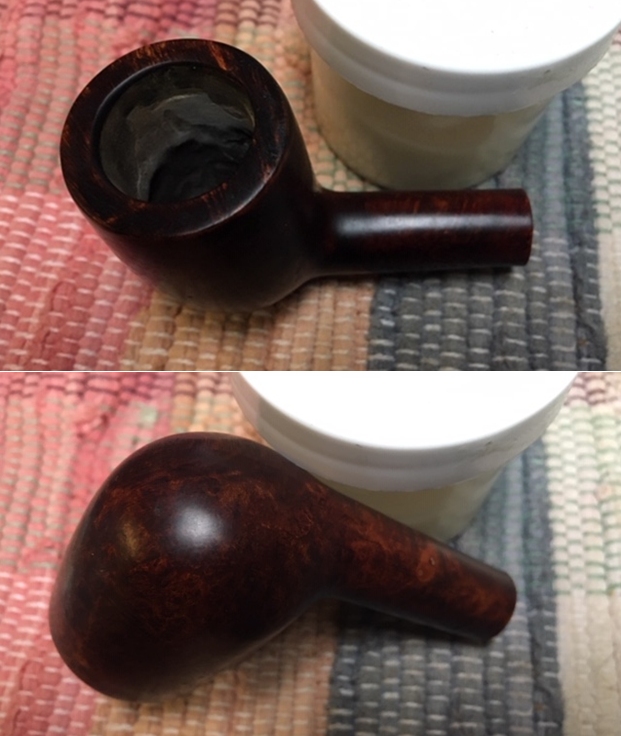
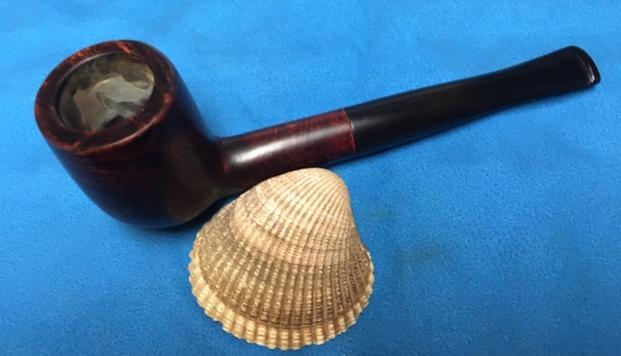
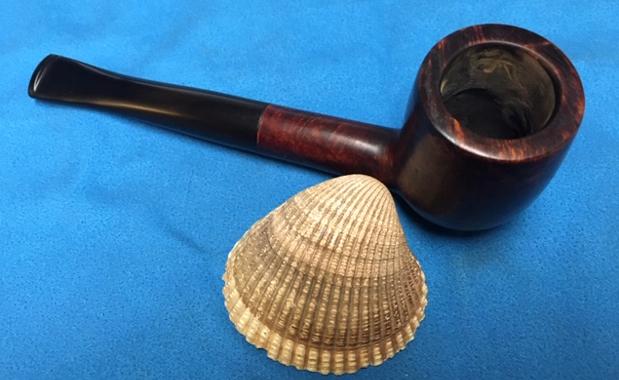
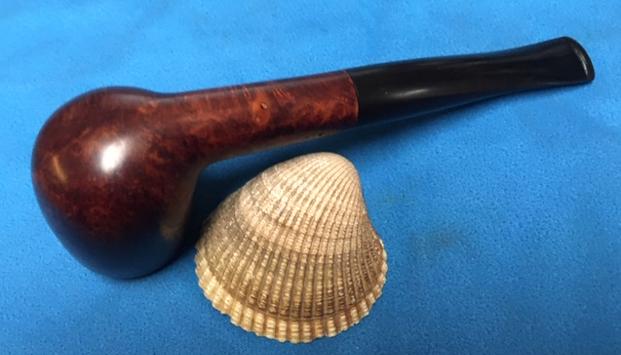
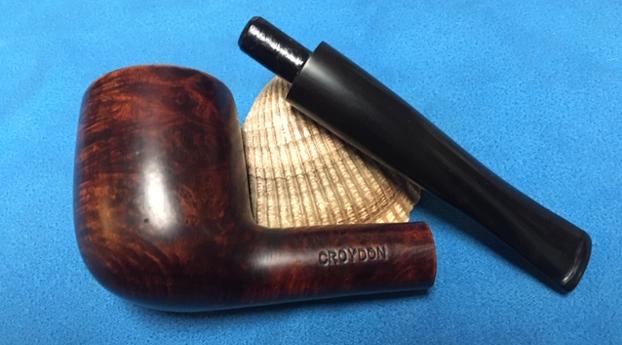
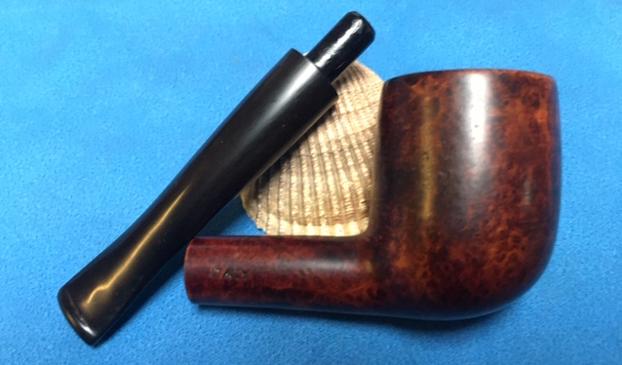
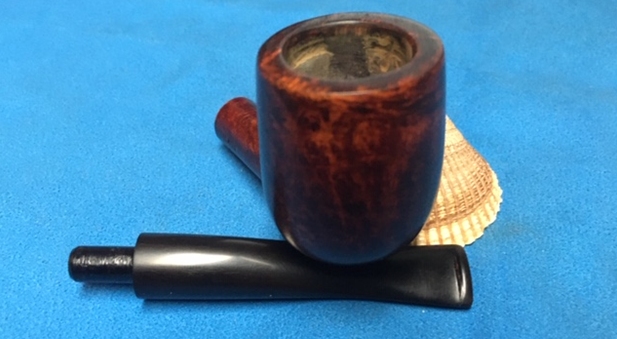
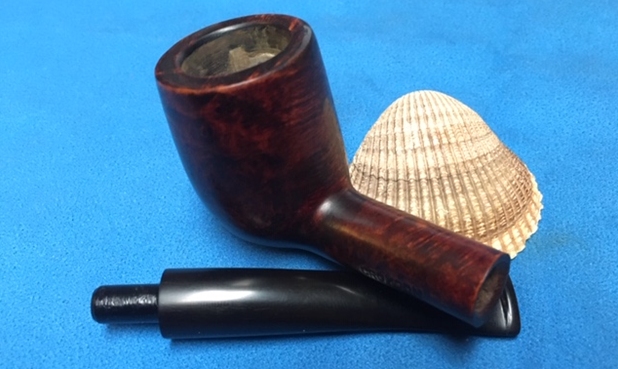
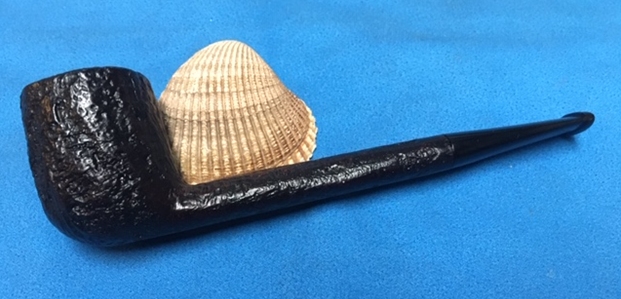
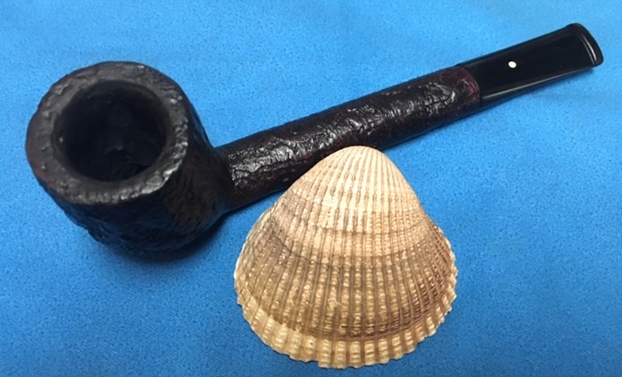
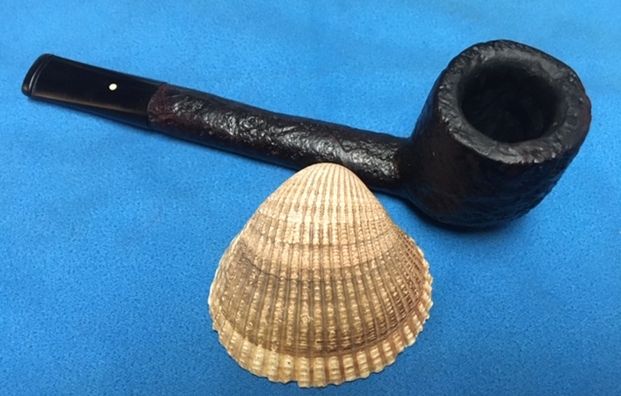
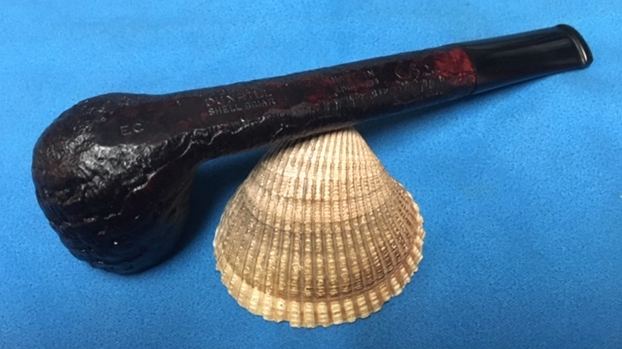
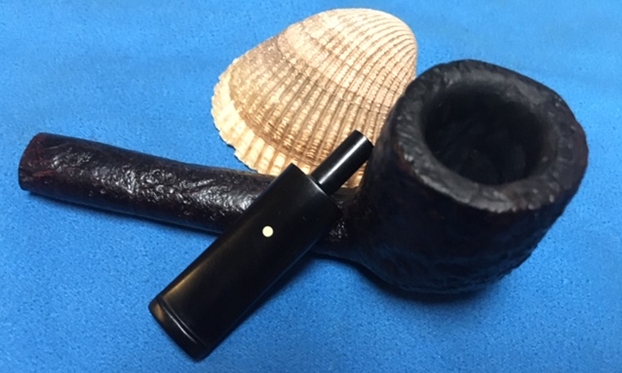
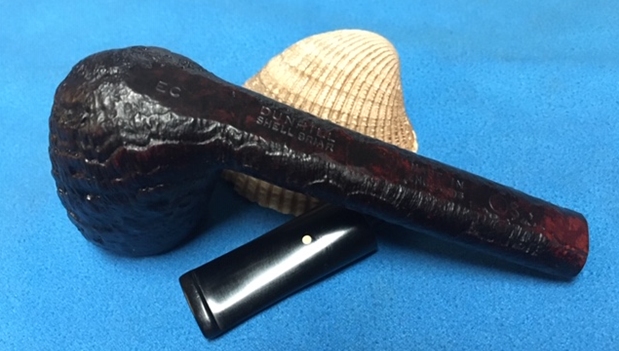
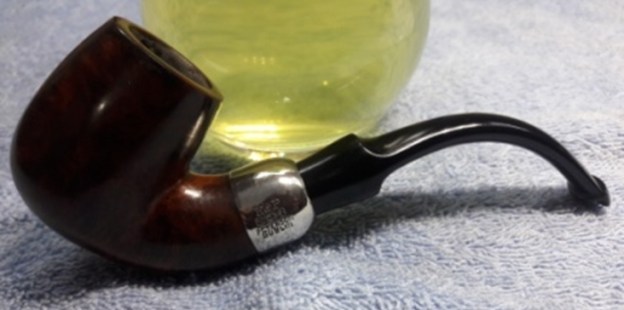
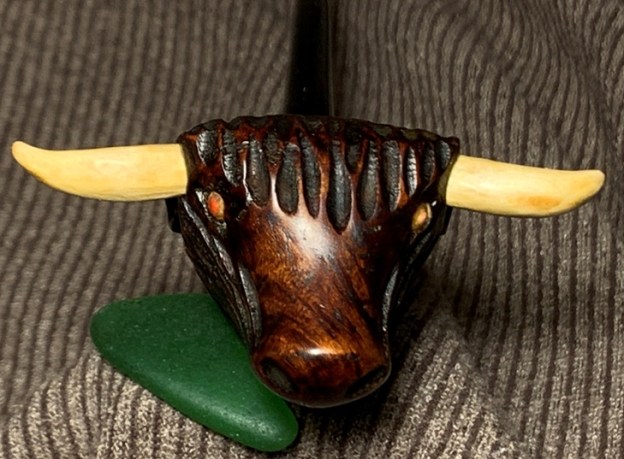
I would have never come up with this on my own.  Seth already commissioned the restoration of a French GEFAPIP 500 Bent Bulldog which he found calling his name in the online collection of pipes I call, For “Pipe Dreamers” Only!.  The Bulldog needed a lot of stem work which included deep oxidation, a button rebuild and re-seating the stem/shank fit.  I was pleased with the results of that transformation pictured below.While I was working on the GEFAPIP Bulldog, Seth emailed me with a question – could he commission a Churchwarden project by repurposing another pipe’s bowl listed in For “Pipe Dreamers” Only!.  A Sculpted Bull’s Head with a bent stem had gotten his attention and with a little ‘dreaming’ applied, Seth could envision the Bull’s Head mounted on a Warden stem.  I found the Bull’s Head in the inventory and pulled it out to look at through Seth’s eyes… Yep!  I could see it, too.  What was missing in the mix were the Bull’s horns.  I responded that we could do this and after working out the details, I added the Bull’s Head CW project to follow the Bulldog project! Here are pictures of the Sculpted Bull’s Head which got Seth’s attention: 
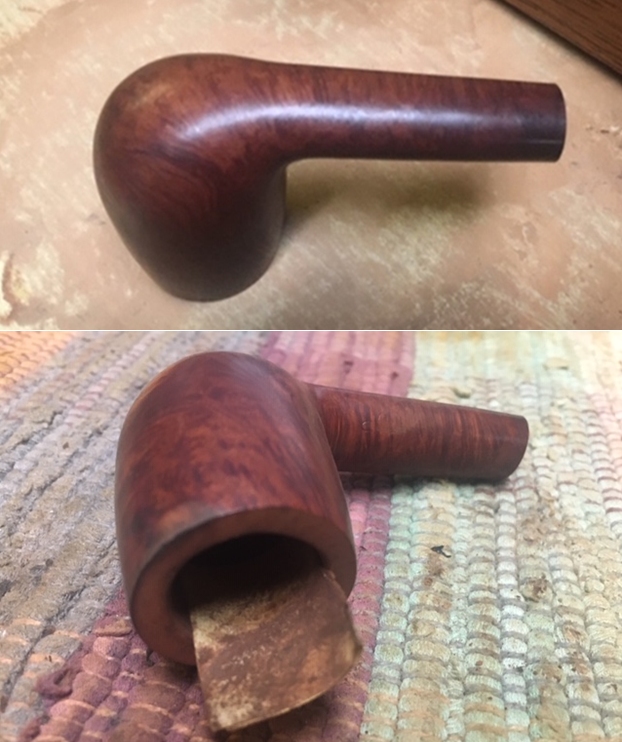
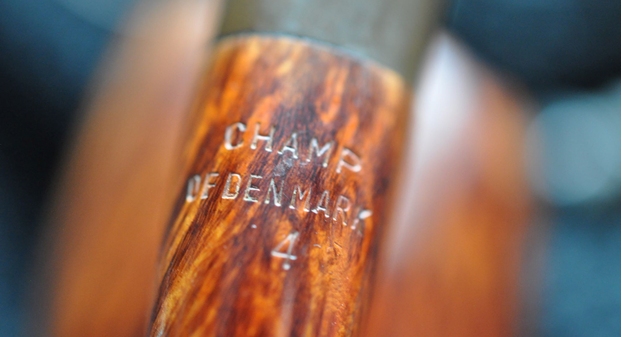
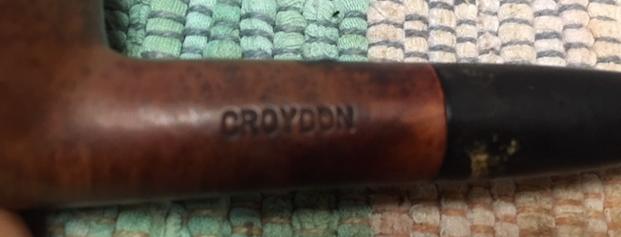
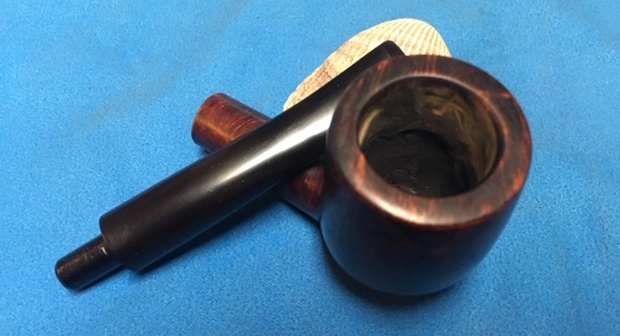
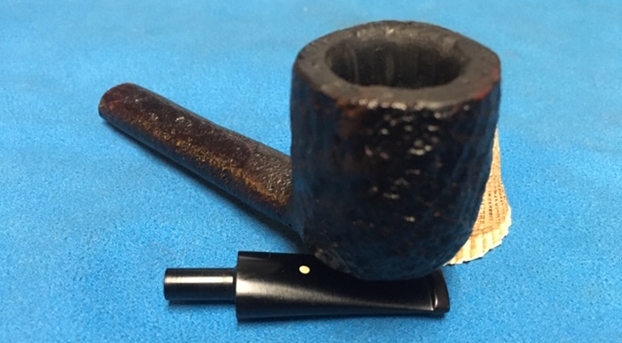
The Bull’s profile is detailed and a bit on the whimsical side, especially with his missing horns.  He seems to be smiling in the picture above.  There are no identifying marks on the pipe.  When the Bull made it to the worktable, the question that came to my mind was how would I fashion the missing horns?  I took this question to ‘Google search’ to find other sculpted bull heads to get some ideas.  I clipped a screen shot of the search results and you can see that the horns are not uniform which is true of real bulls.  I looked through the pictures to see if I could find a bull that resembled Seth’s Bull, but I could not.  The interesting thing was that I found that many bull heads were from Italy.  What I noticed as well, was the similarities and differences between the pipes.  The eyes were made of differing materials and also the shaping of the ears situated behind the horns were distinctive and showed bulls sculpted by the same ‘school’ or carver.  
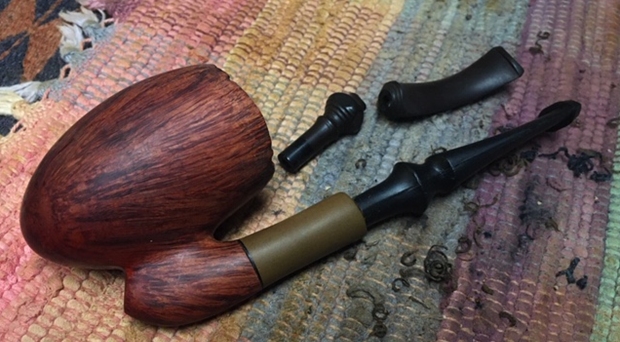
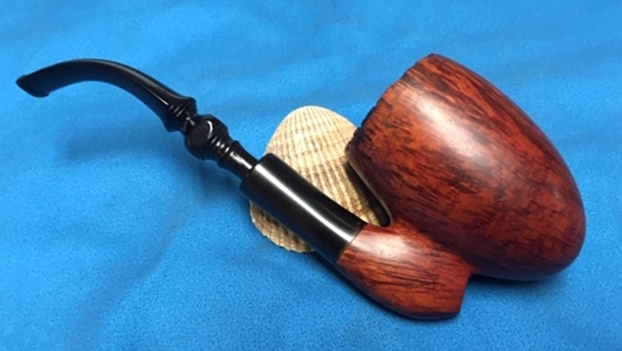
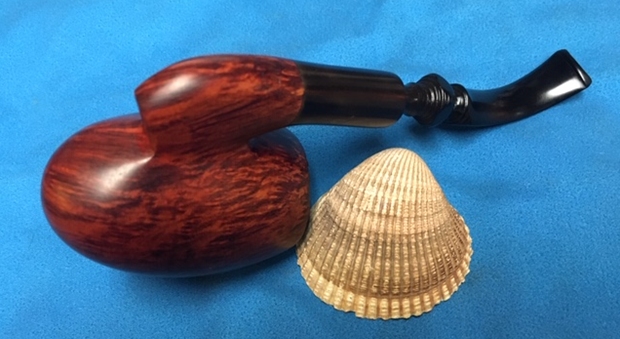
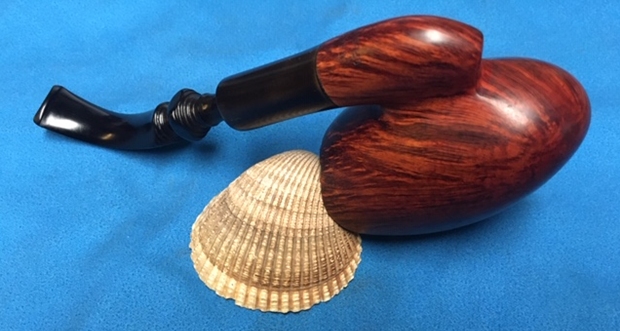
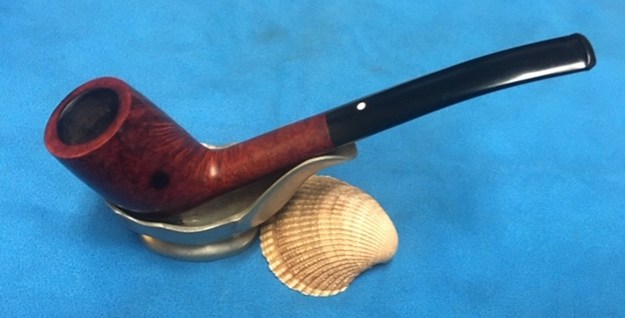
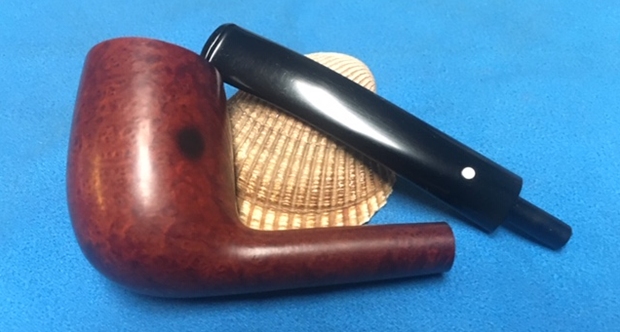
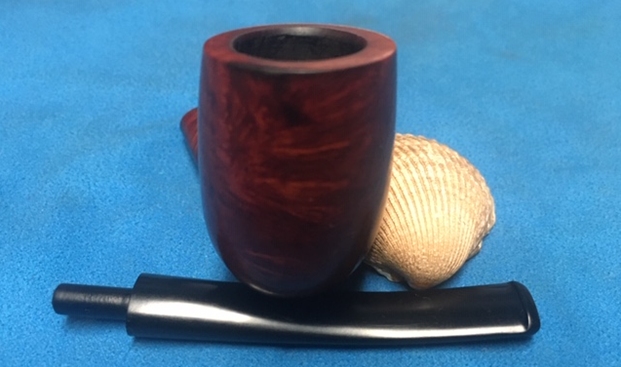
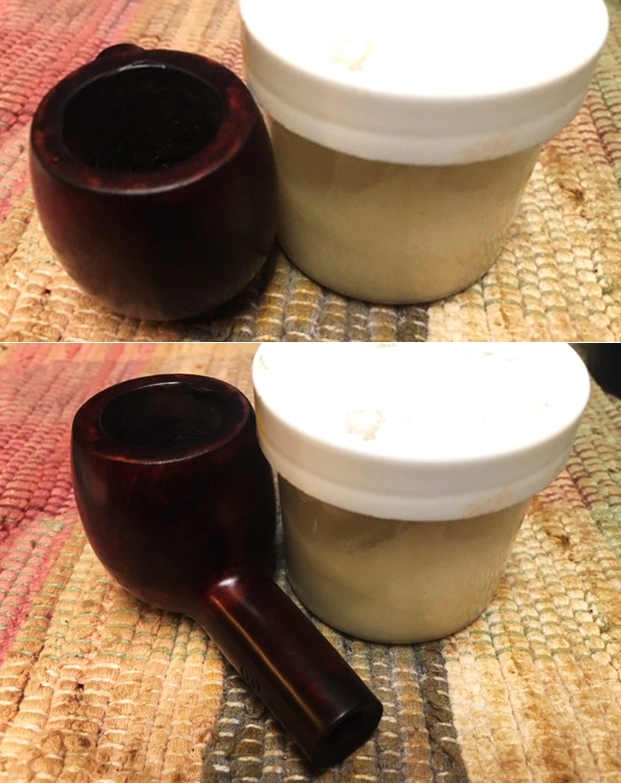
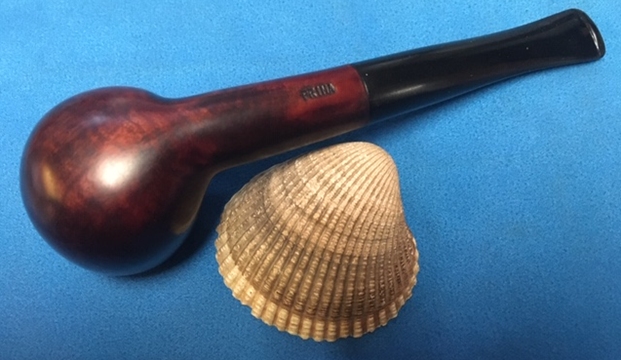
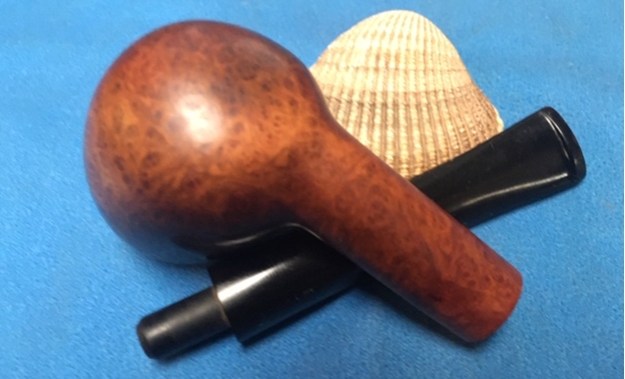
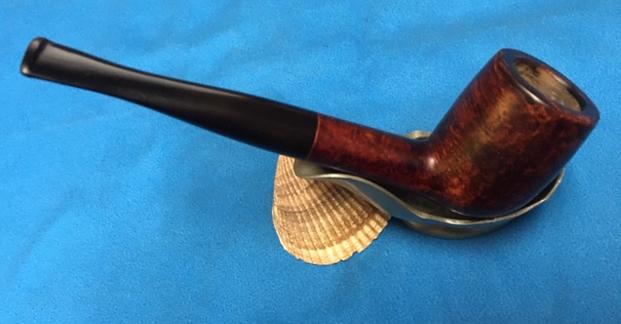
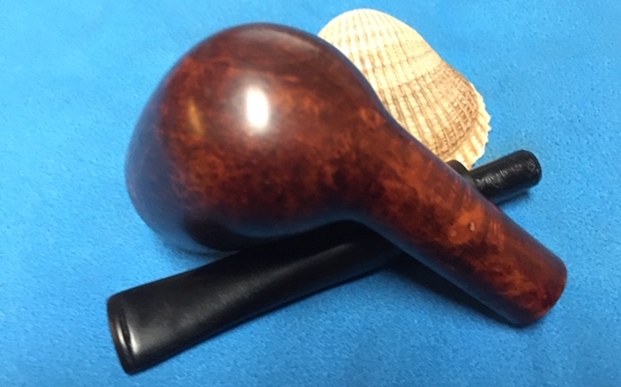
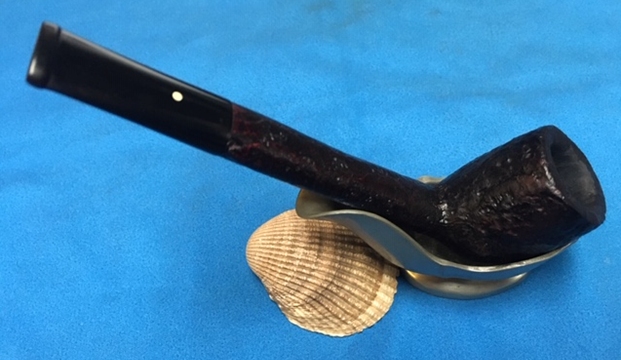
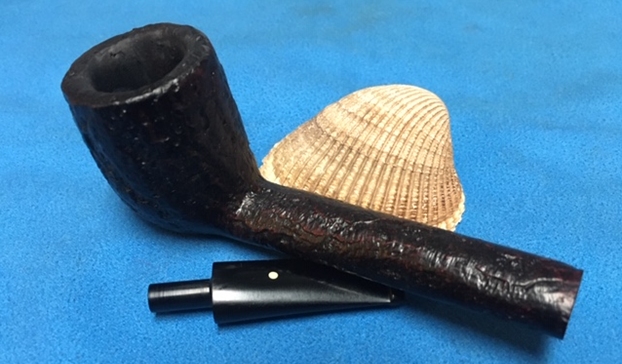
After concluding the online search, I decided that I would send a note to Seth asking him to do the same search and to let me know what horns looked best – with the understanding this Bull’s Head will be mounted at the front end of a Churchwarden stem.  I’m thinking about the balancing and general look.  After sending the email, I place the Bull’s Head stummel with a Warden stem to get an overall sense of proportion.  I like it!
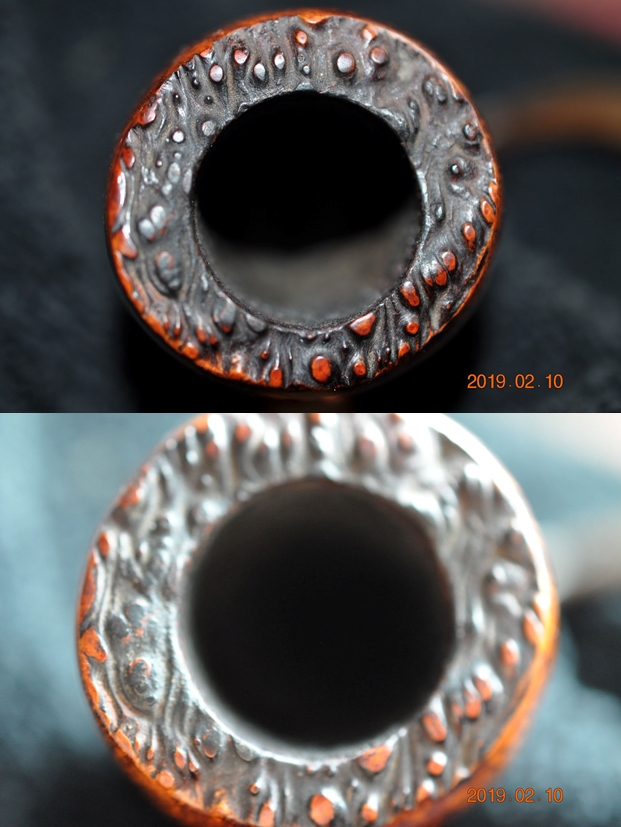
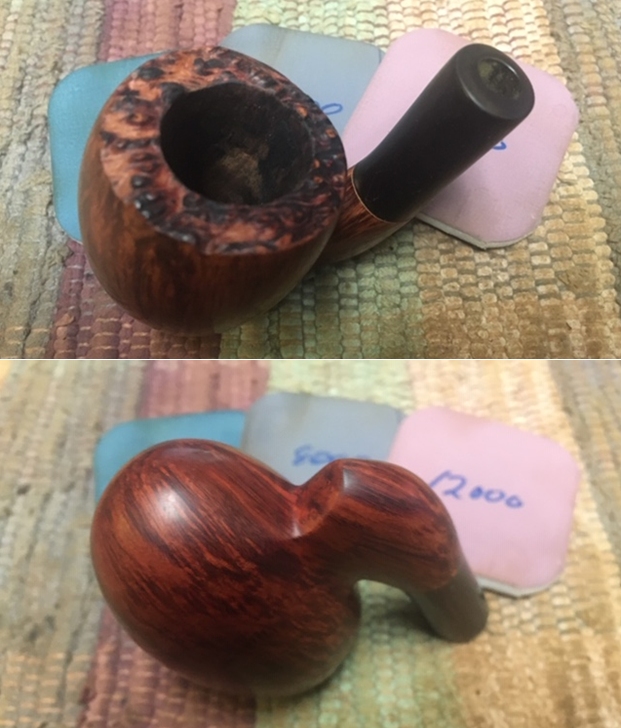
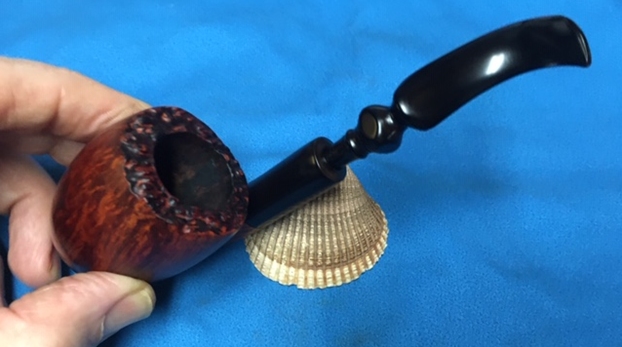
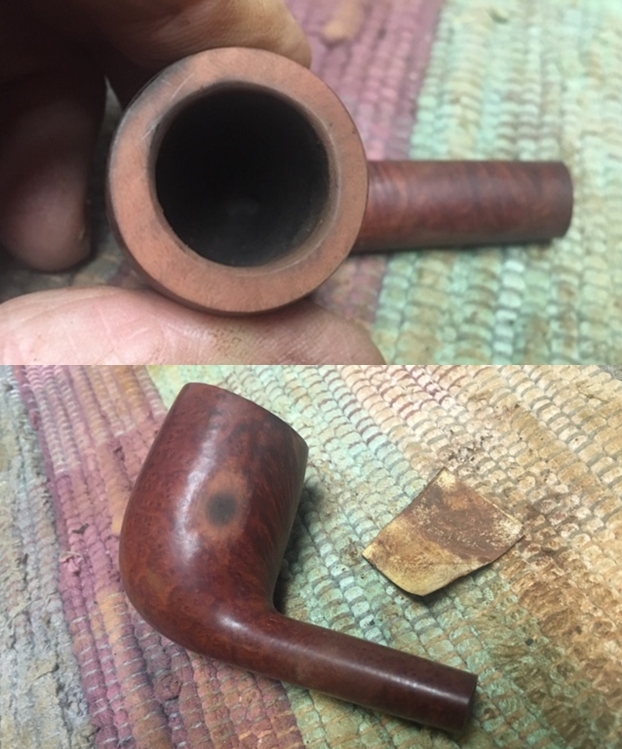
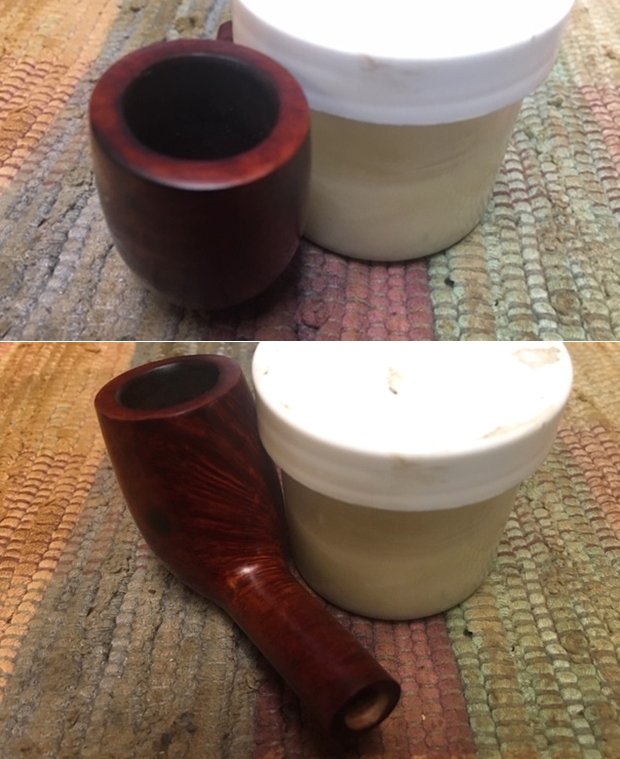
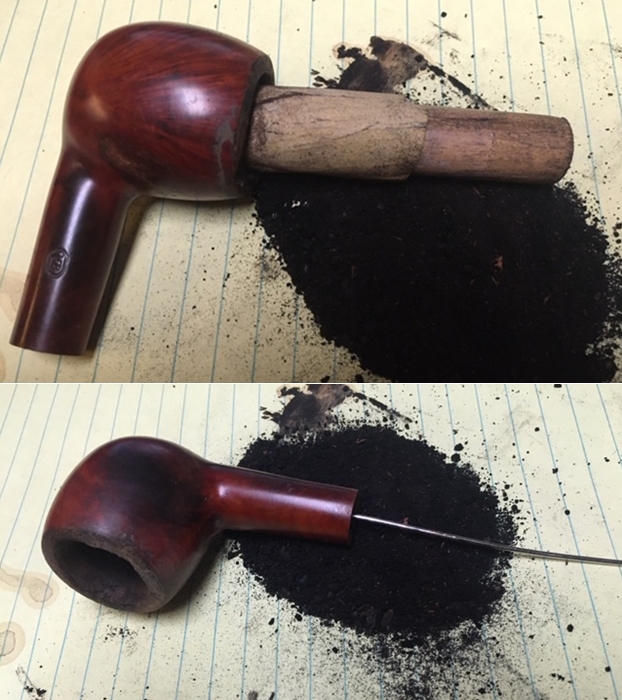
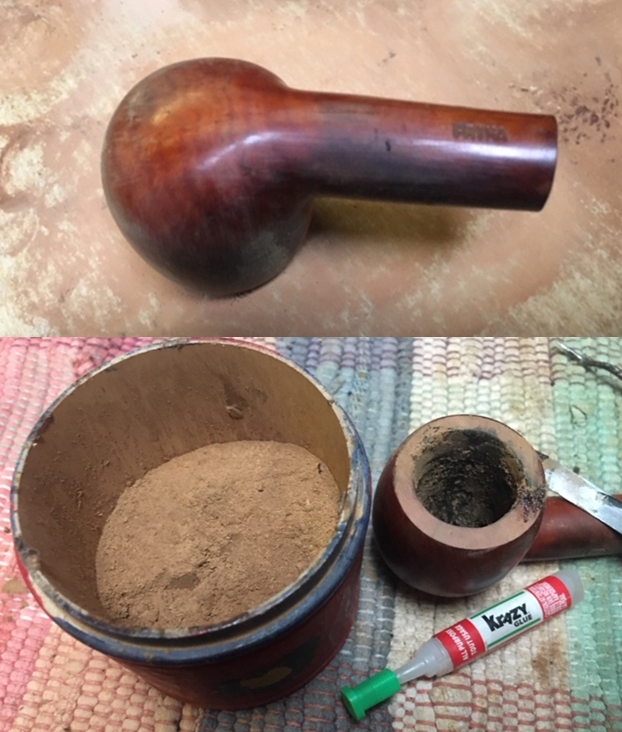
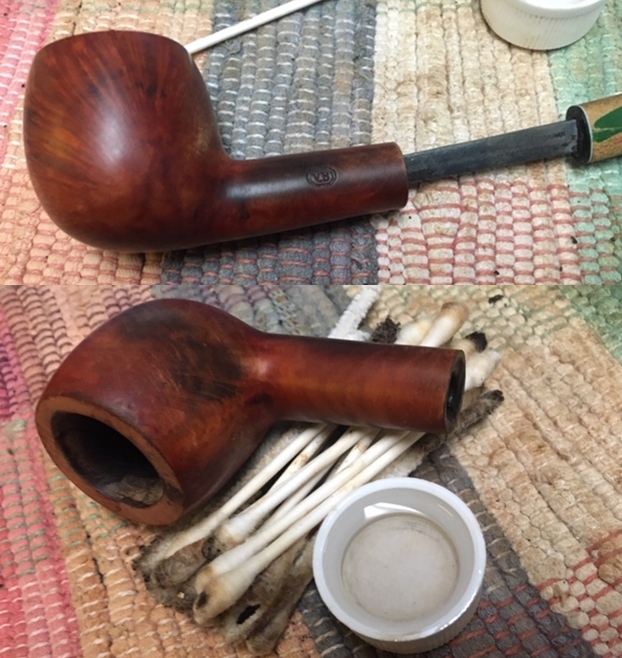
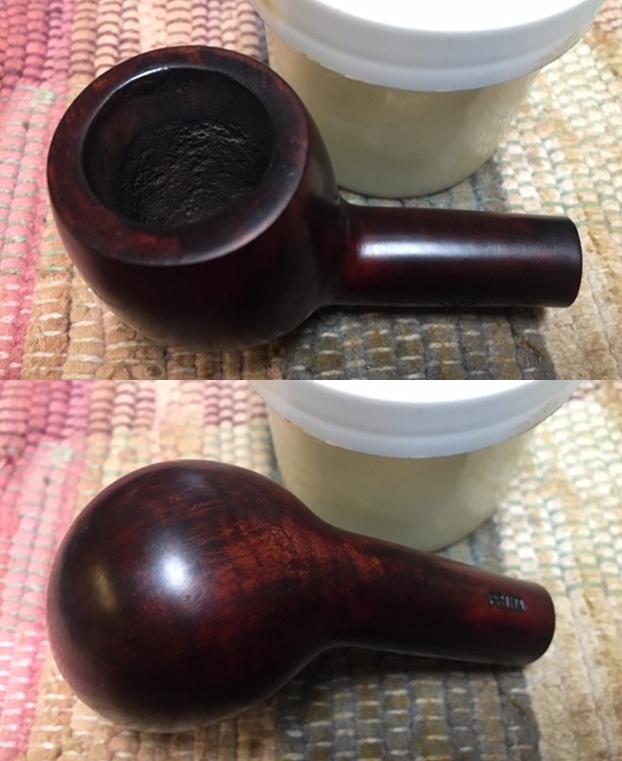
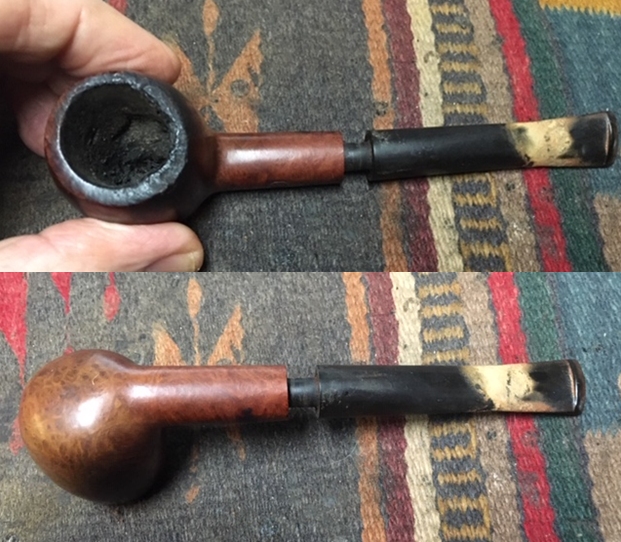
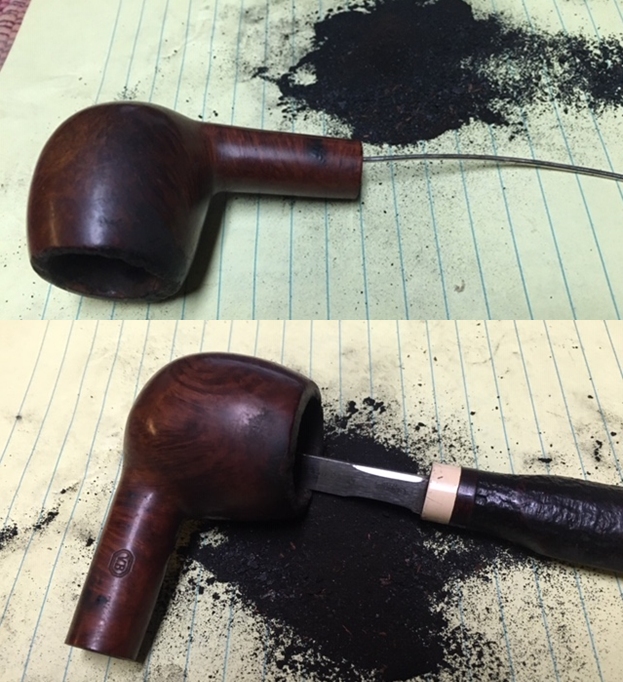
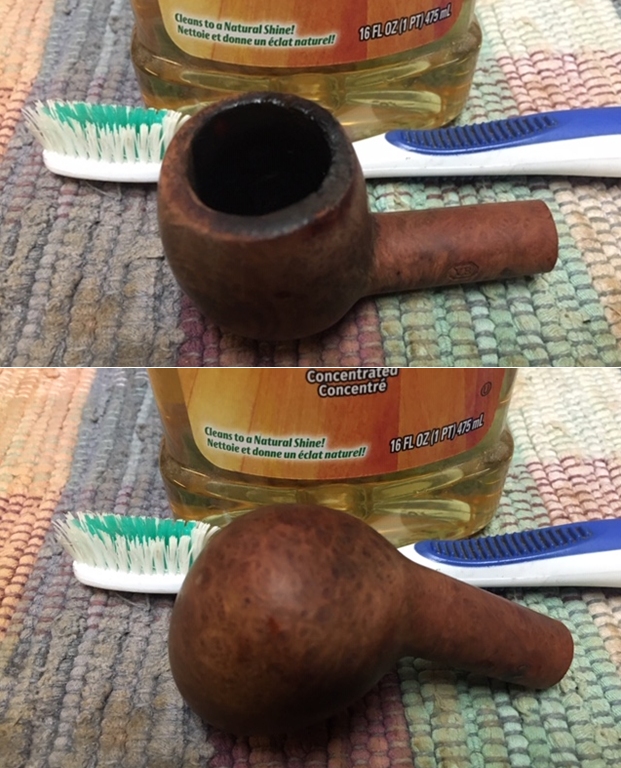
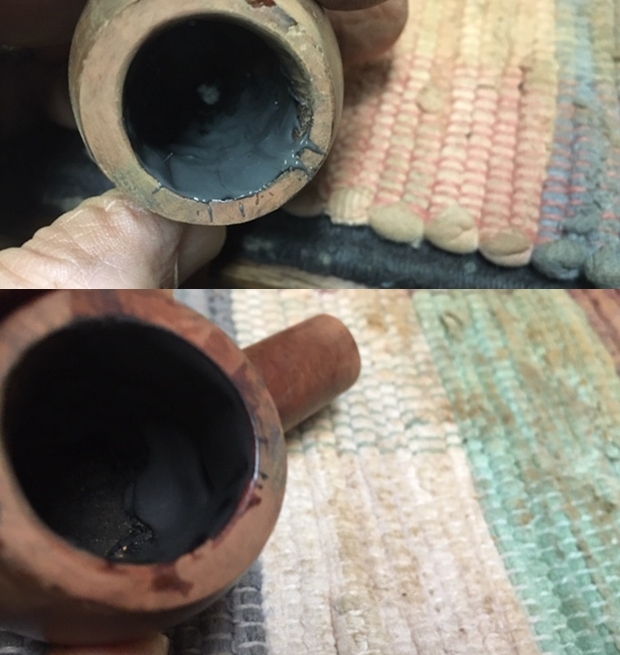
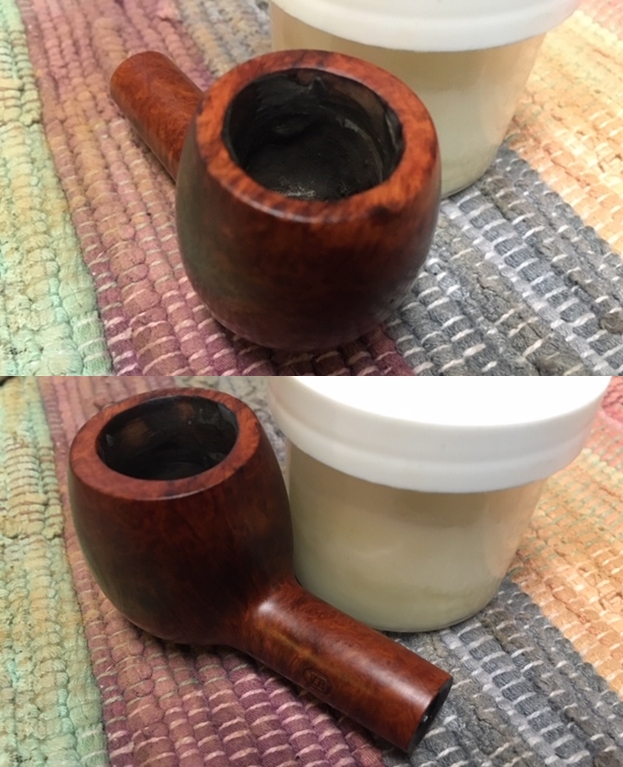
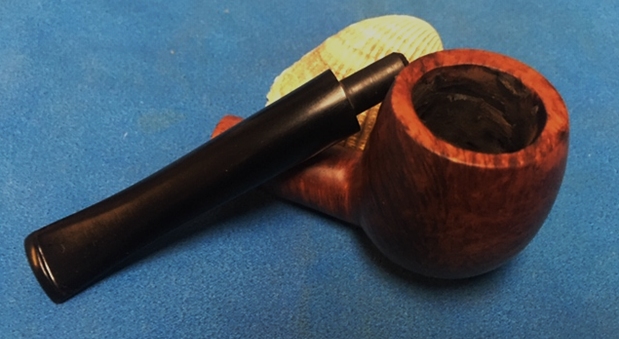
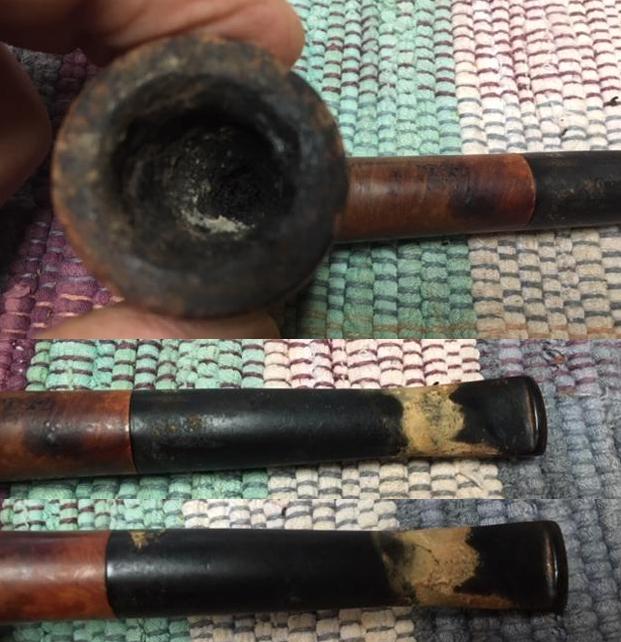
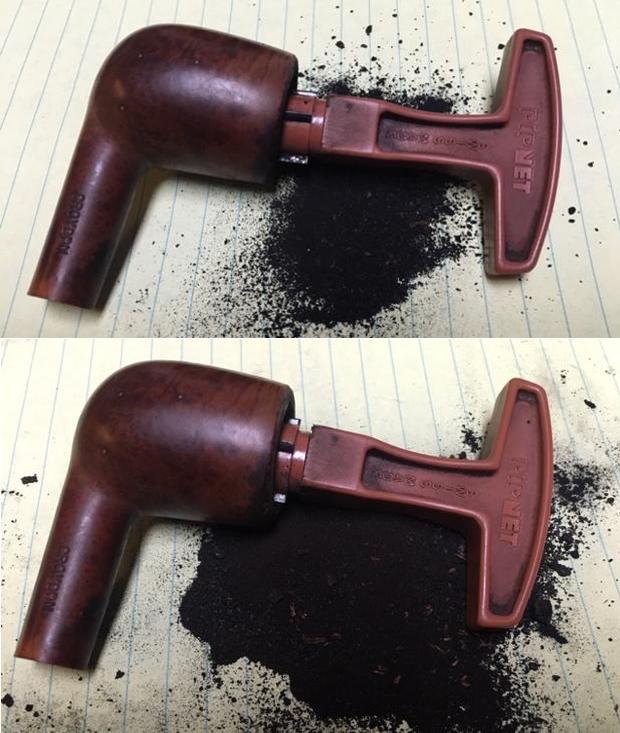
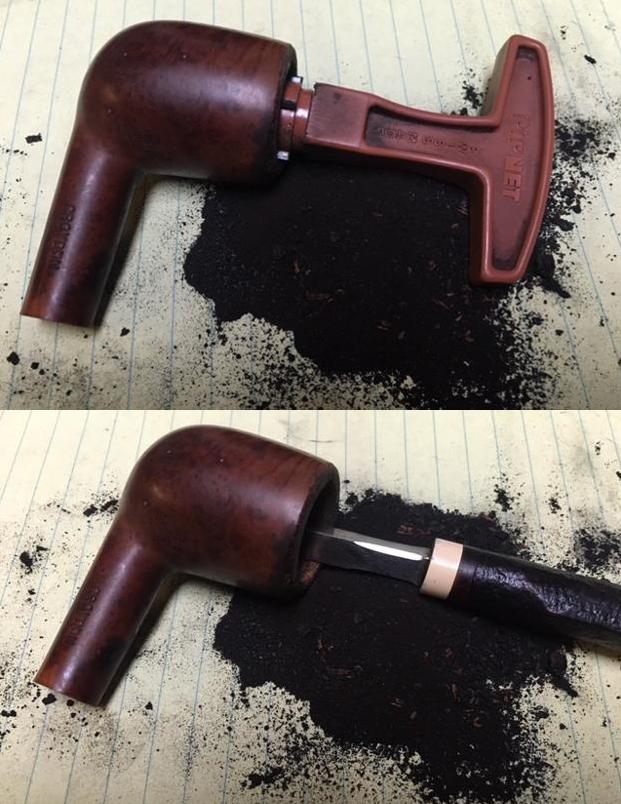
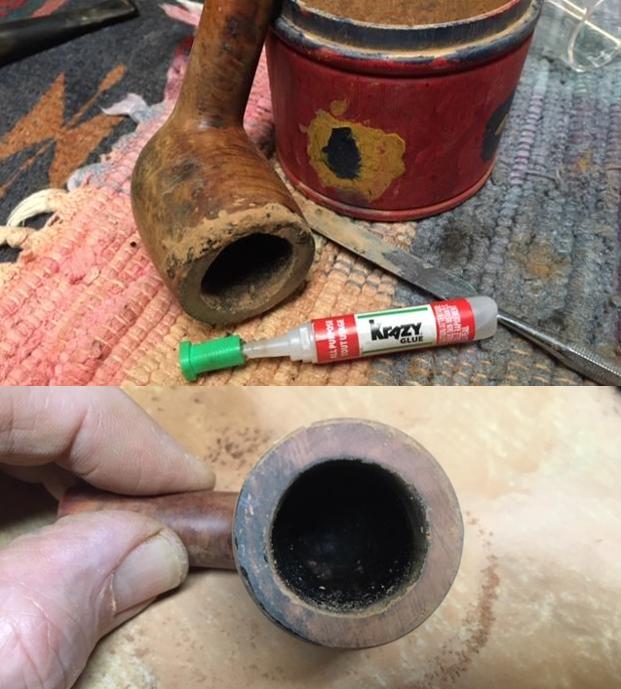
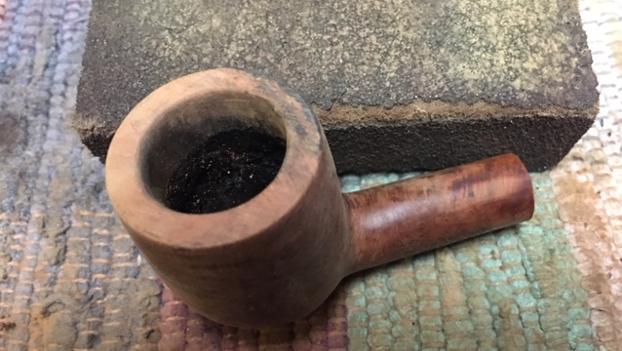
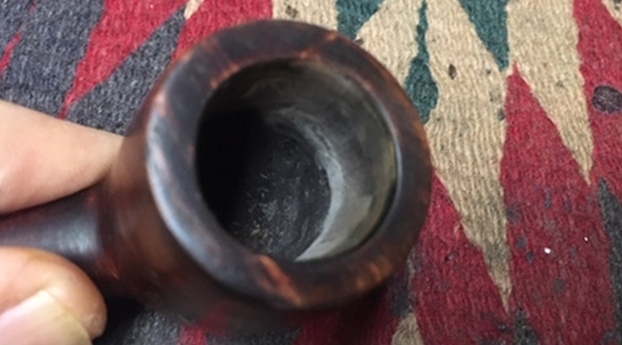
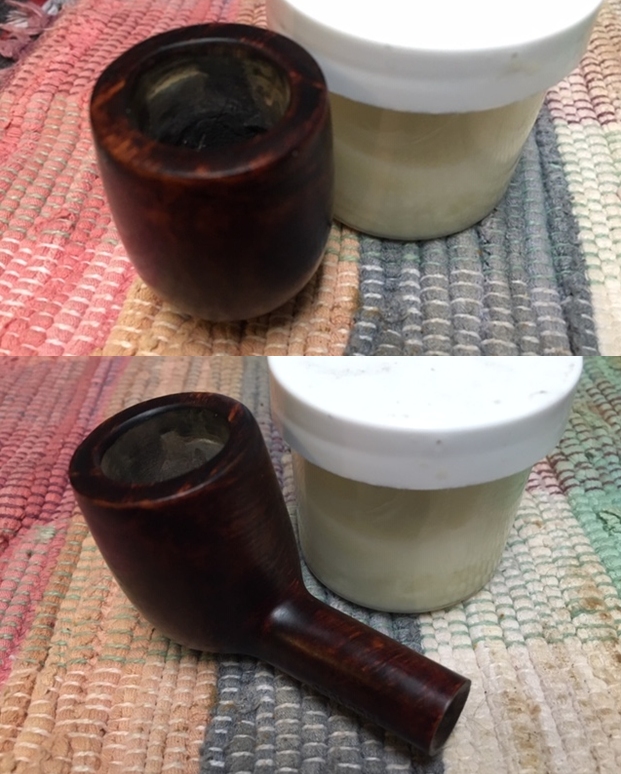
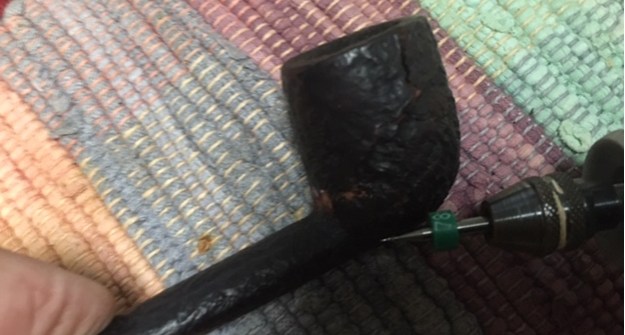
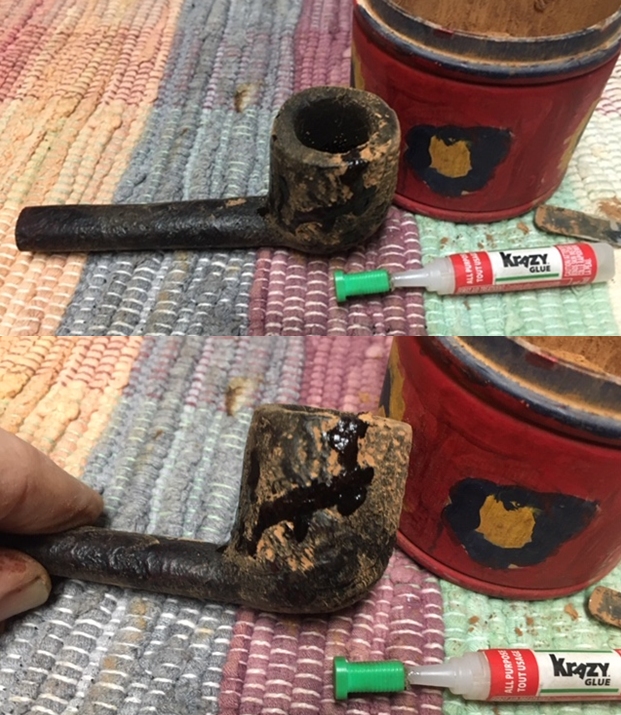
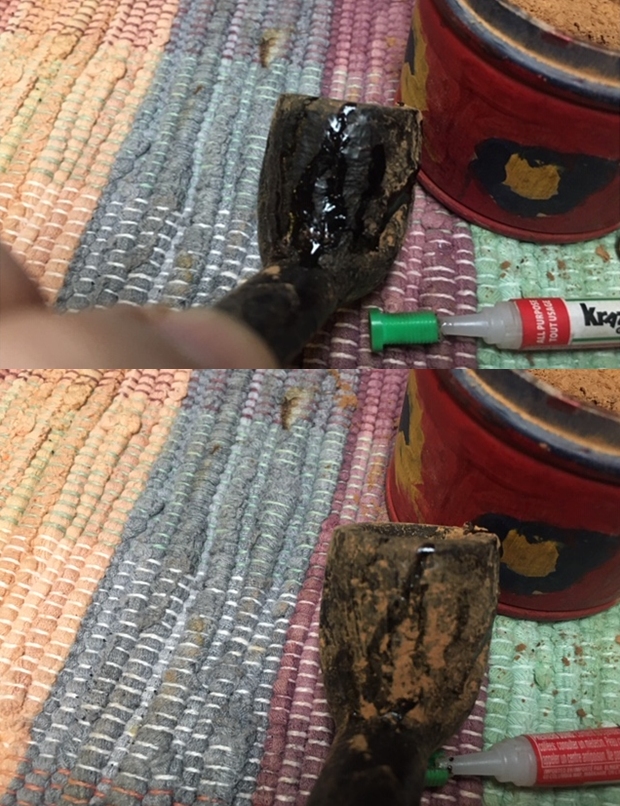
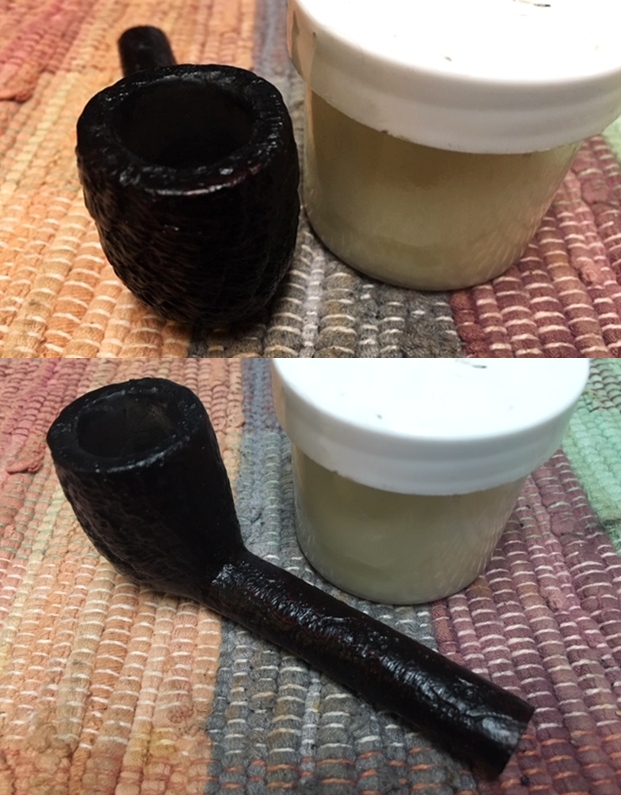
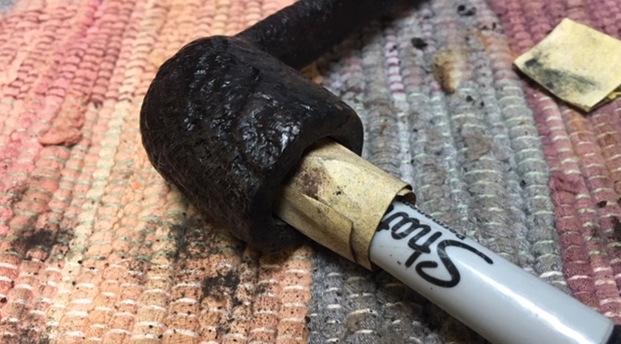
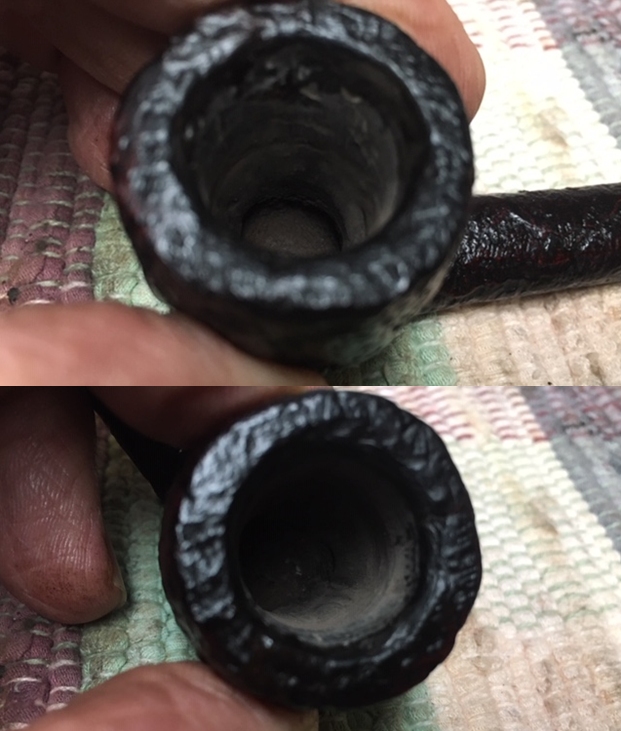
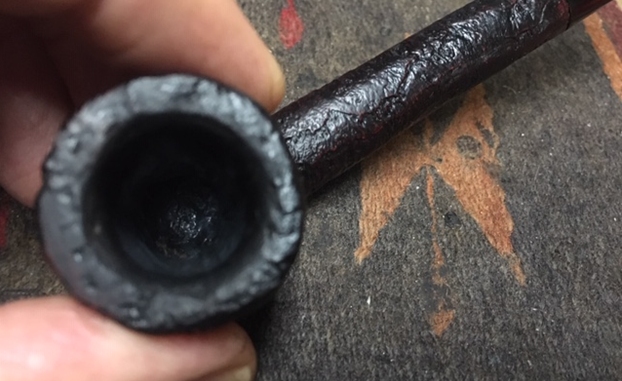
I begin the Sculpted Bull’s Head Churchwarden project with the general cleaning of the stummel before fashioning the stem.  I take a picture of the chamber showing very little cake buildup, but I do see vestiges of the former steward’s tobacco.  I use the Savinelli Fitsall Tool to scrape the walls of the narrower than usual chamber.  After wrapping 240 grade paper around a Sharpie Pen, sanding the chamber removes more carbon.  I finish this phase by wiping the chamber with a cotton pad wetted with isopropyl 95%.  After inspecting the chamber, I determine that all looks good. 
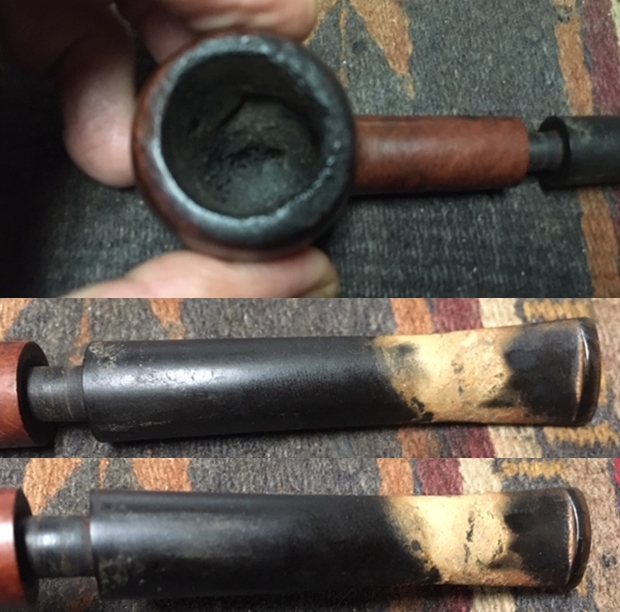
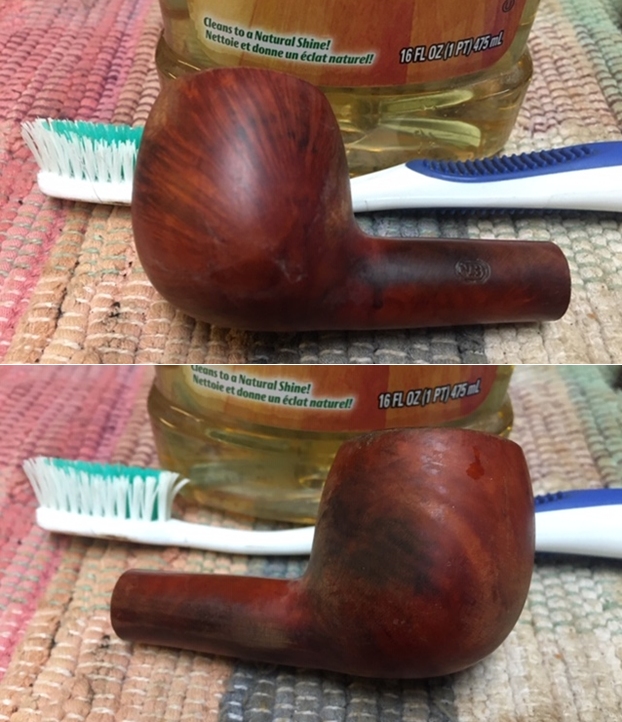
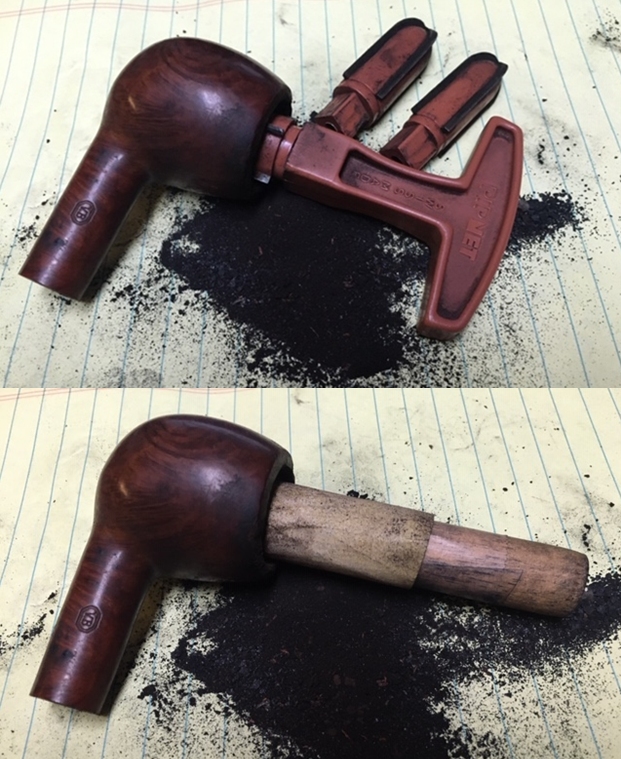
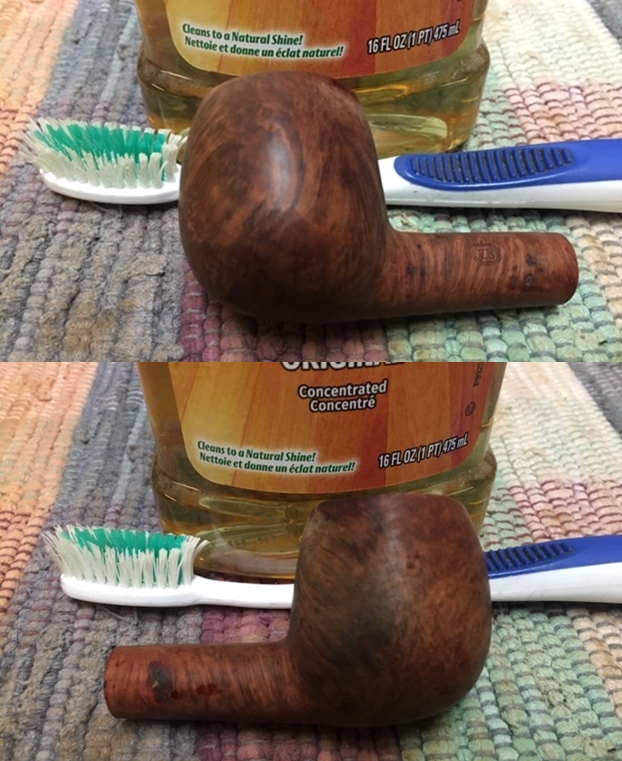
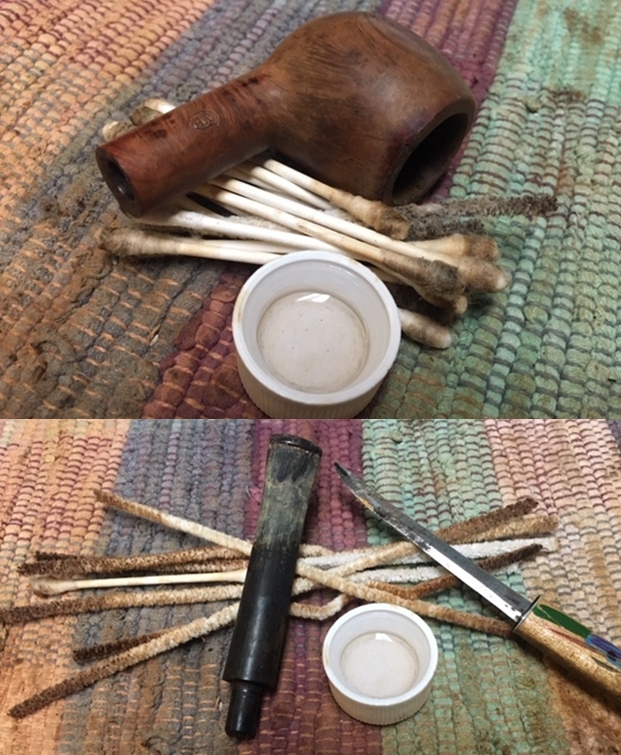
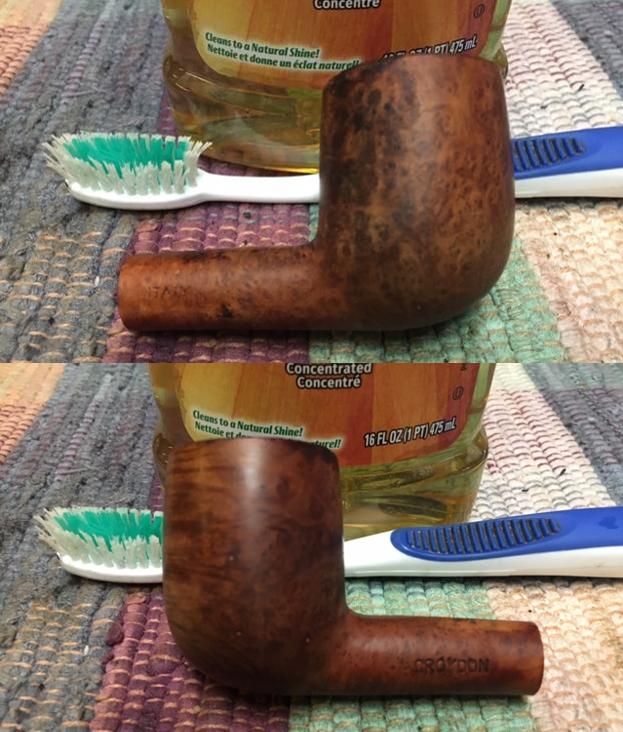
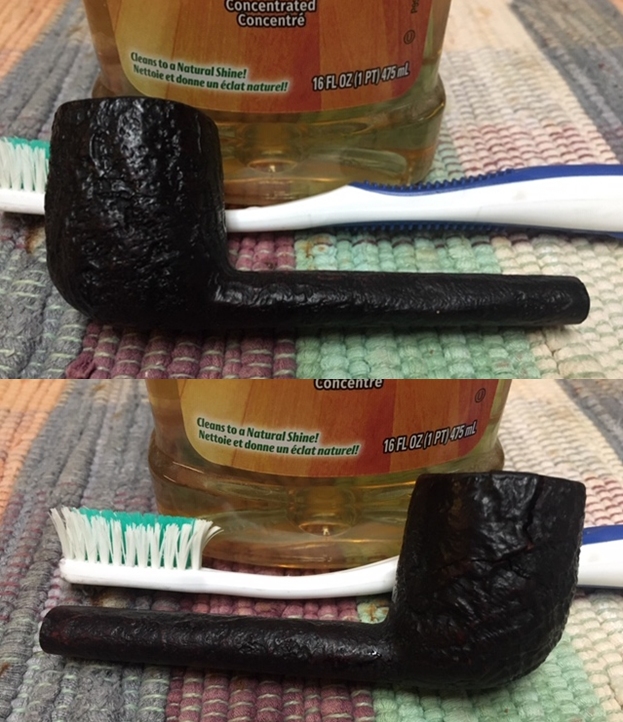
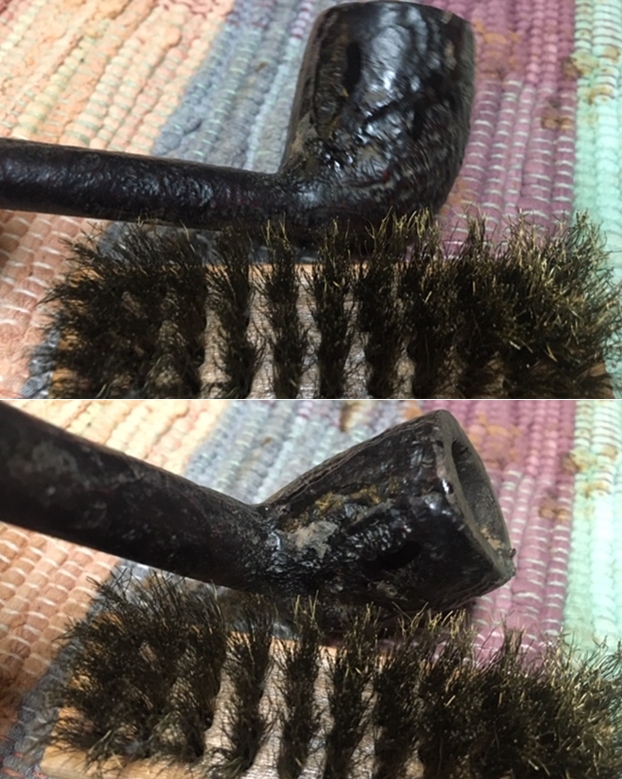
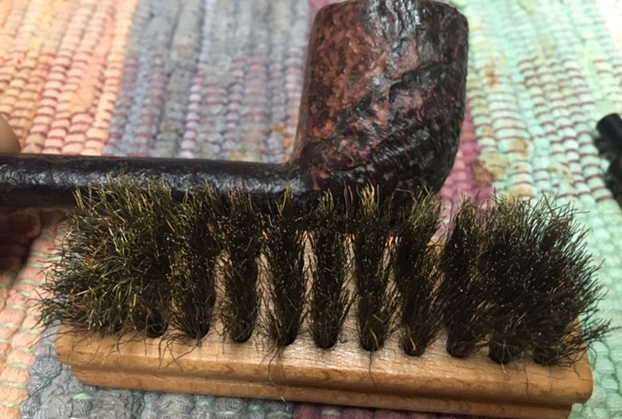
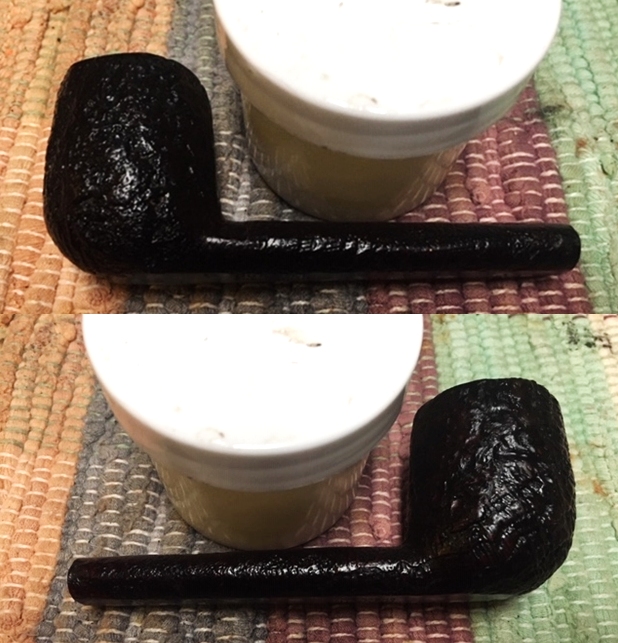
Moving to the cleaning of the external surface, using undiluted Murphy’s Oil Soap and a bristled tooth brush I go to work scrubbing all the crevasses of the sculpting.From the worktable, I transfer the Bull’s Head to the kitchen sink where I rinse the surface with warm water as well as clean the internals.  Using anti-oil dish soap, long shank brushes scrub the internals.  Afterwards, the stummel is rinsed thoroughly – inside and out.
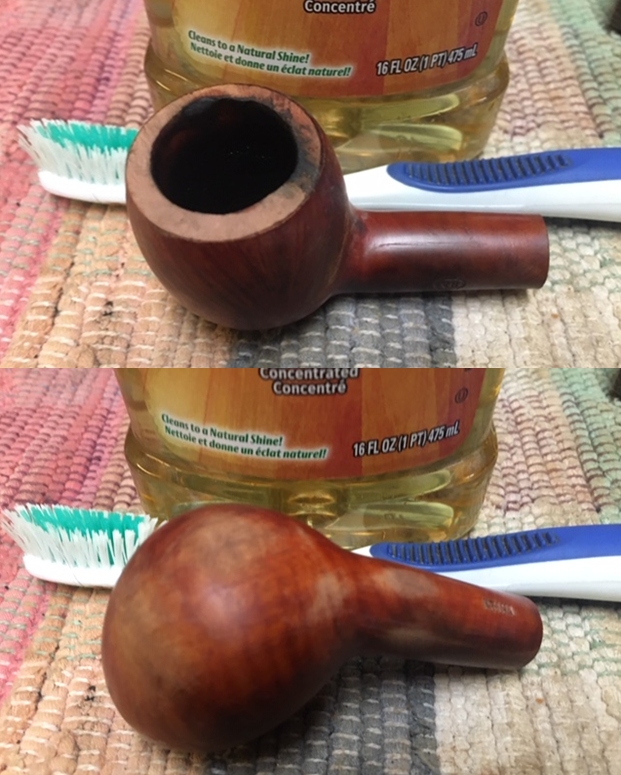
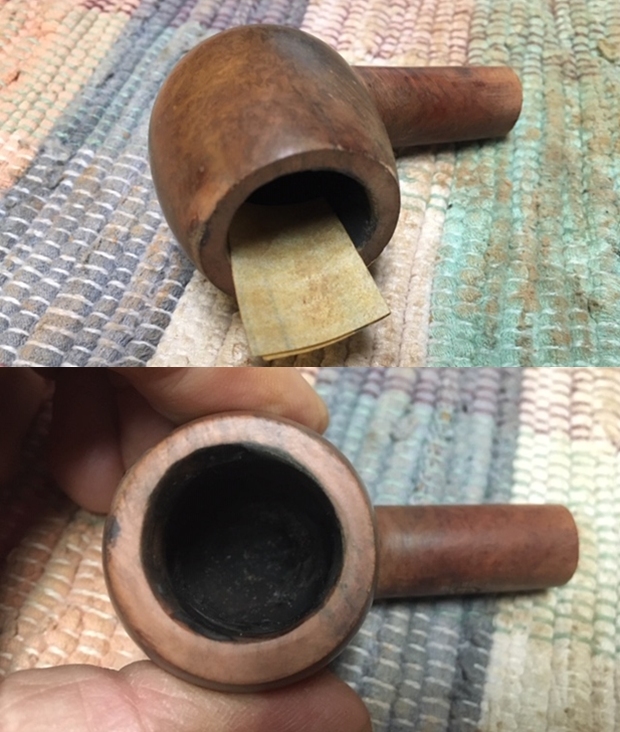
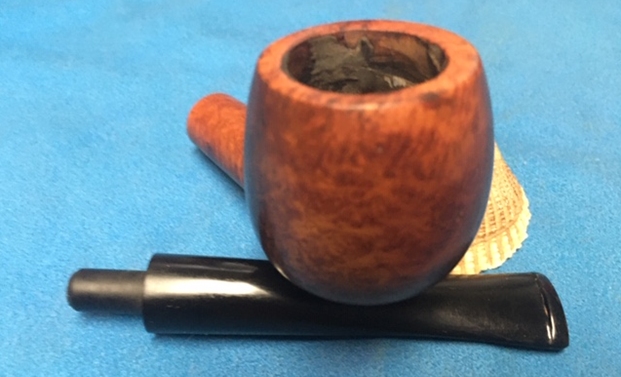
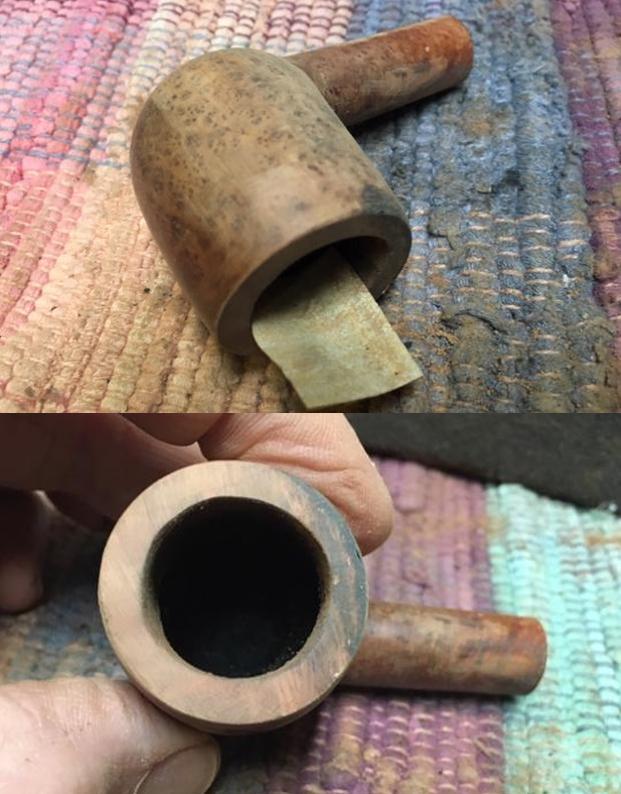
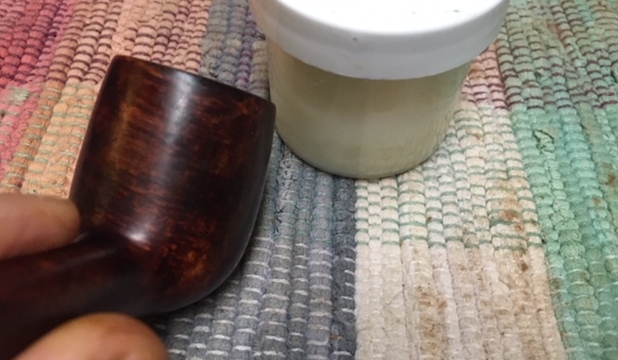
The appearance of the Sculpting is realistic, especially the carving around the eyes. 
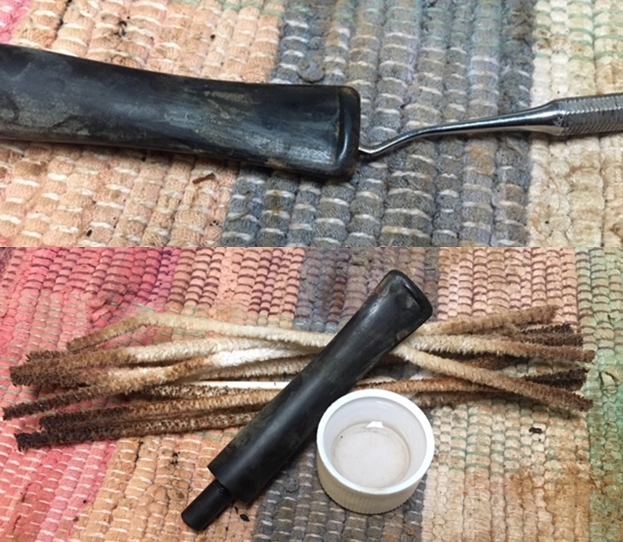
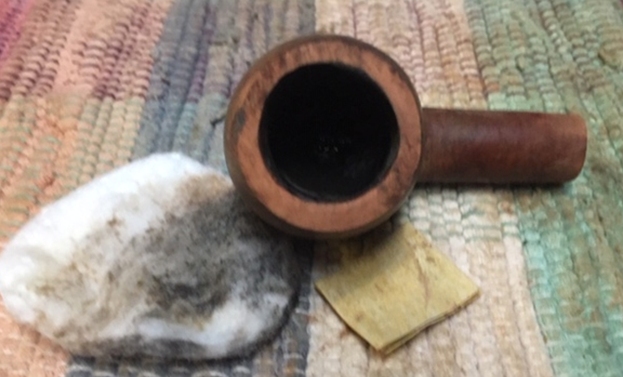
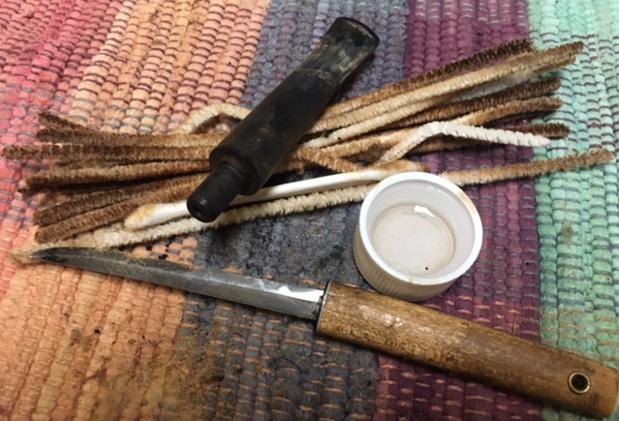
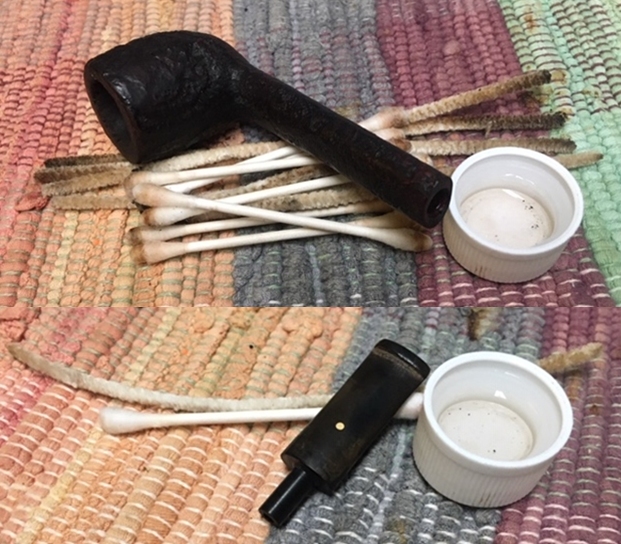
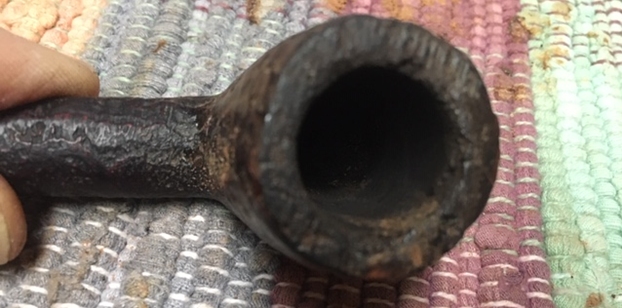
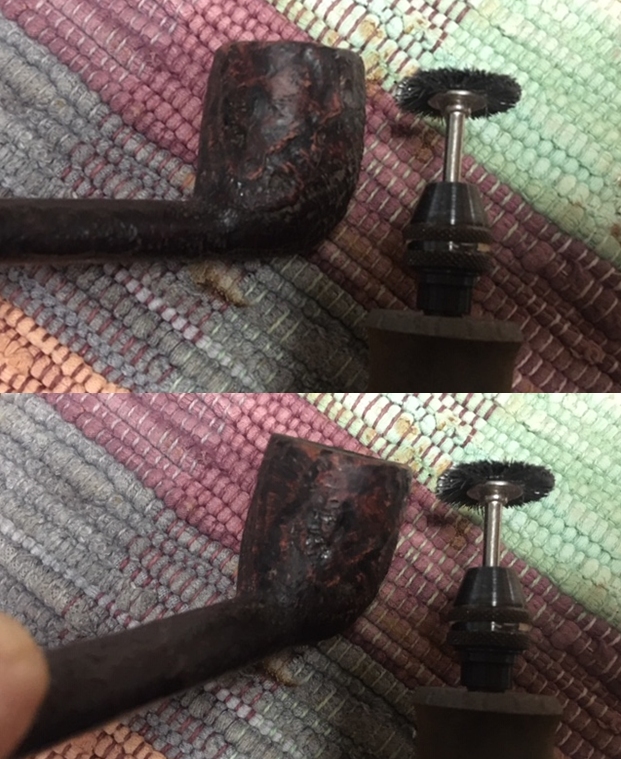
I continue cleaning the internals using cotton buds and a pipe cleaner – all dipped in isopropyl 95%.  The internals are good, and I move on.With the stummel clean, it’s time to begin fashioning the Warden stem.  The first step is to take some measurements using my German made electronic caliper – one of the best additions to the toolbox I’ve made.  I measure the internal diameter of the mortise to establish the target size of the tenon.  The measurement is 6.80mm.  
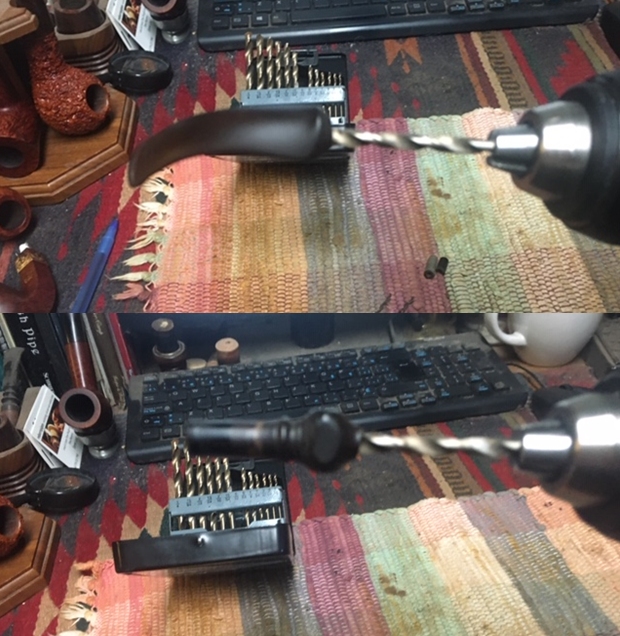
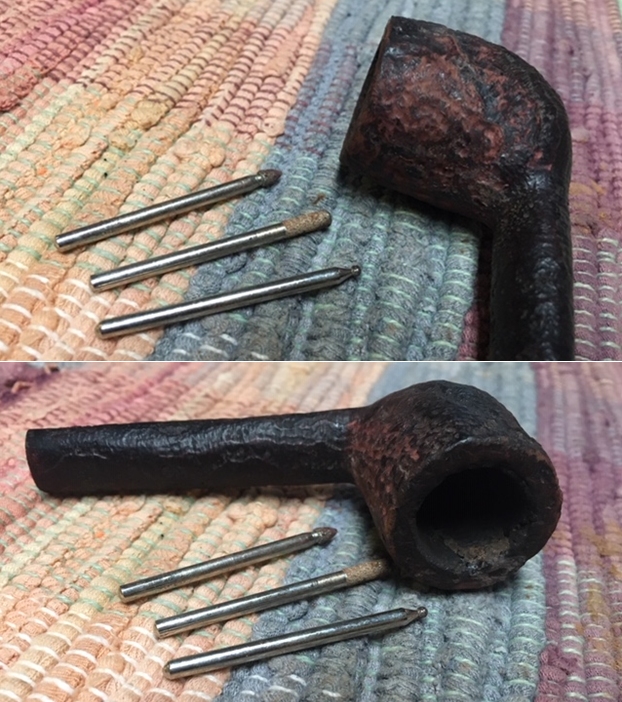
Next, after mounting the drill bit provided by the PIMO Tenon Turning Tool set, the airway is drilled out to receive the Guide Pin of the TTT. 
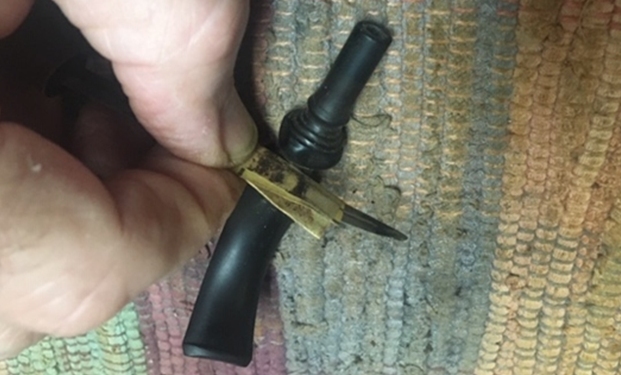
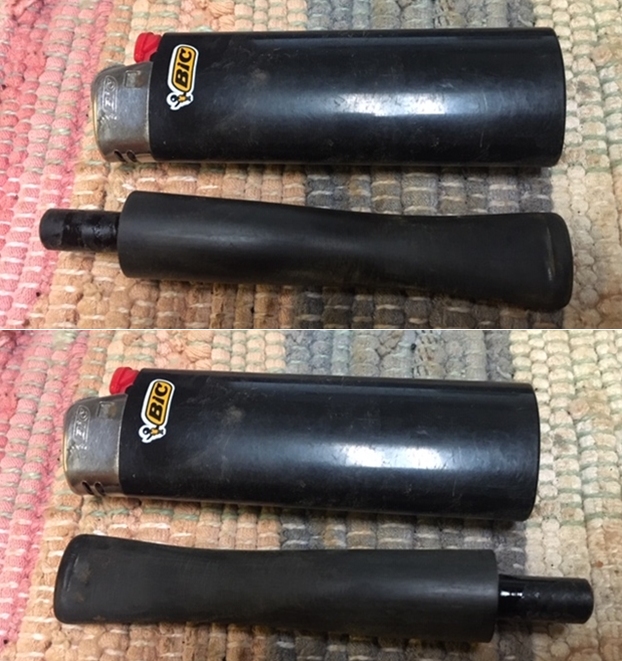
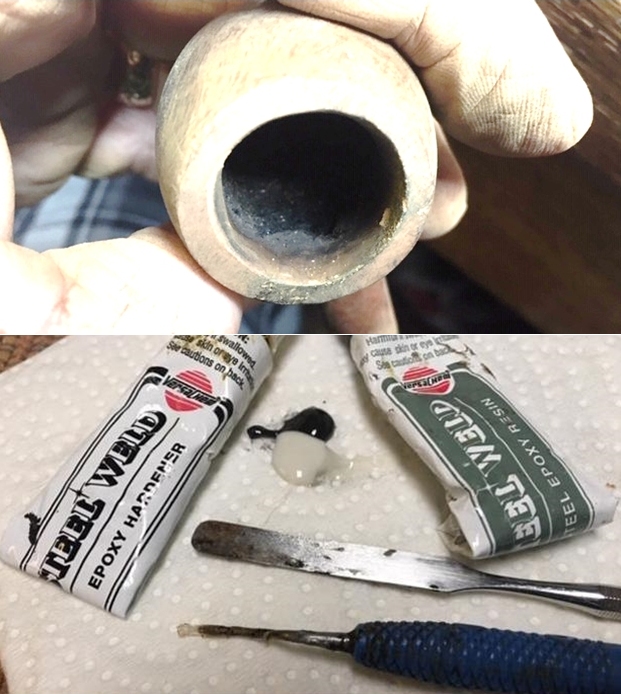
After drilling the airway, the TTT is mounted.  The first cut of the tenon is intentionally larger to act as a starting point for the measurement.  In the picture below the guide pen is in the now enlarged airway.  In the past, I’ve learned the hard way that it’s critically to cut the tenon of the precast Churchwarden stem all the way to and through the raw stem facing.  I’ve put an arrow at the facing that is shouldered coming from the casting.  If this shoulder is not removed, it simply migrates to the pipe which is not good.I do the initial cut of the tenon through the ‘shoulder’ so that a sharp 45-degree angle is left which will be able to seat more exactly with the shank facing.Again, I measure and the tenon after the initial cut and it is 8.92mm.  The difference between the starting cut and the target size of the tenon (6.80mm) is 2.12mm. In order to approach the target size conservatively through sanding, 40mm is added to the target size of the tenon to create a ‘fat’ target – to leave a bit of sanding to be able to customize the fit.  Adding .40mm to 6.80mm gives a fat target of about 7.20mm.  This is what I aim for with the PIMO Tenon Turning Tool before transitioning to sanding the raw tenon.After a few cuts closing in on the ‘fat’ target, I settle for 7.31mm.  I now transition to sanding. Using a coarse 120 grade, I pinch the paper around the tenon as evenly as possible and rotate the stem while holding the paper stationary.  My goal is to size down the tenon evenly so that the whole tenon is maintaining contact snuggly on the mortise walls once seated.  Progress is patient as I sand and test the fit. 
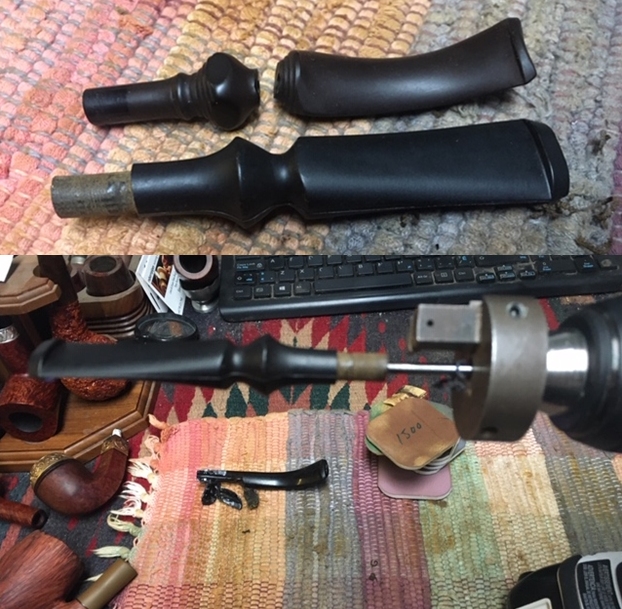
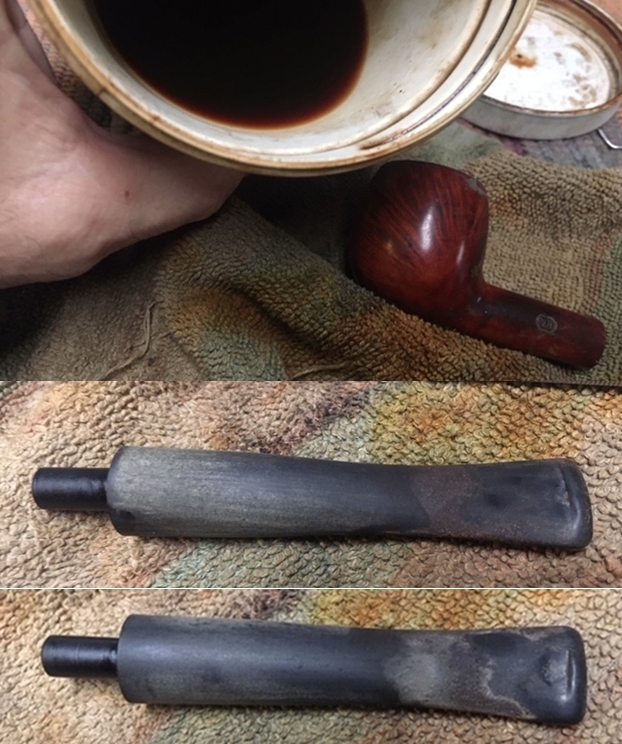
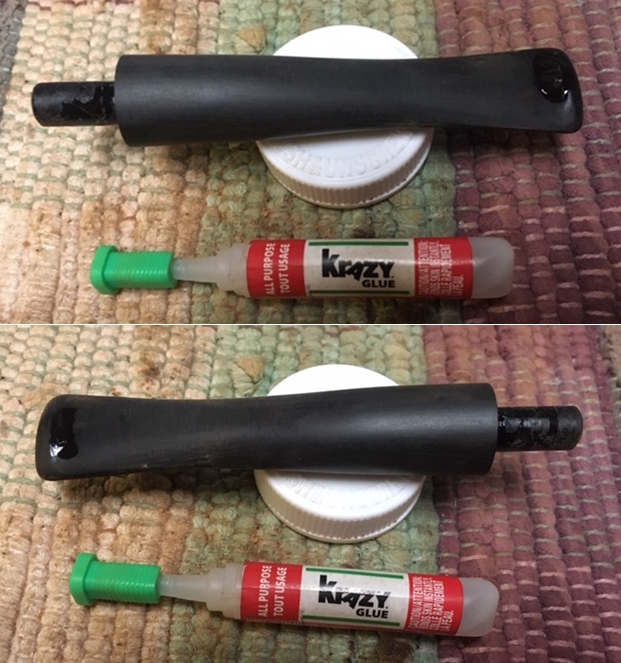
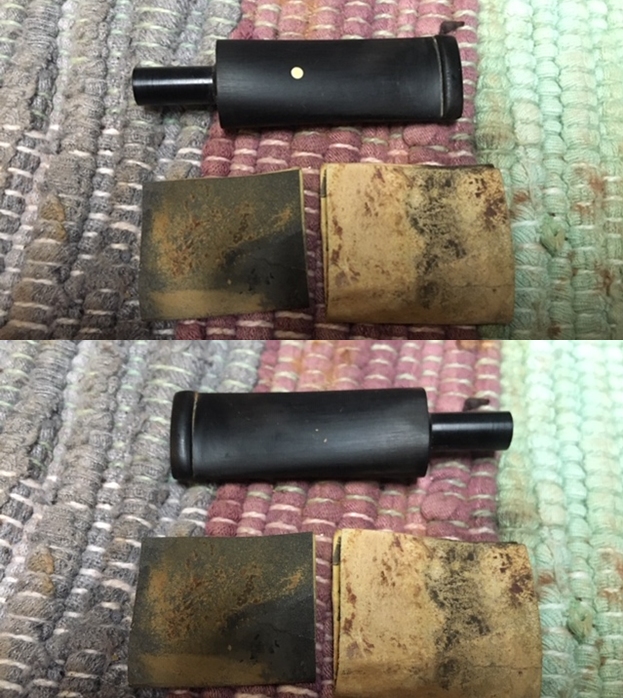
As the progression moves closer to completion, I transition to 240 grade paper to do the final sanding.
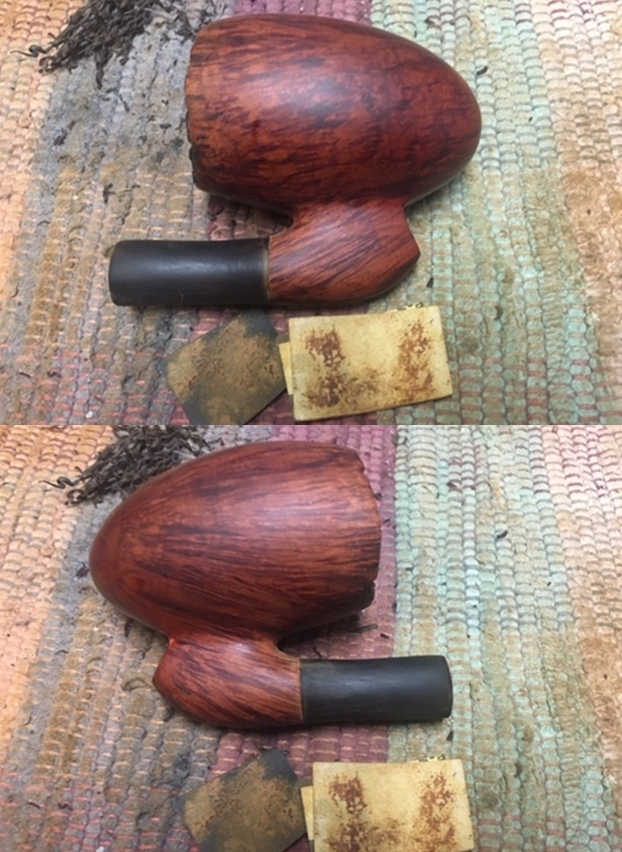
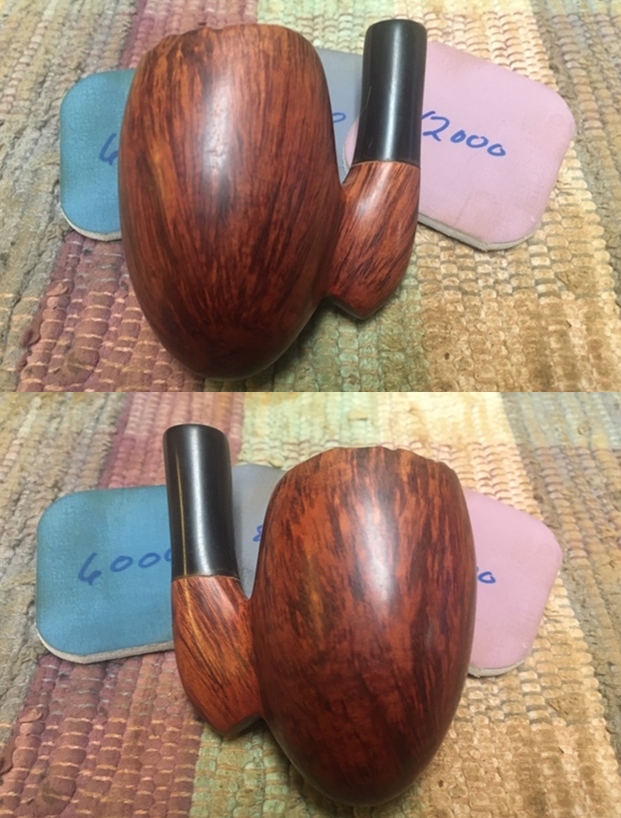
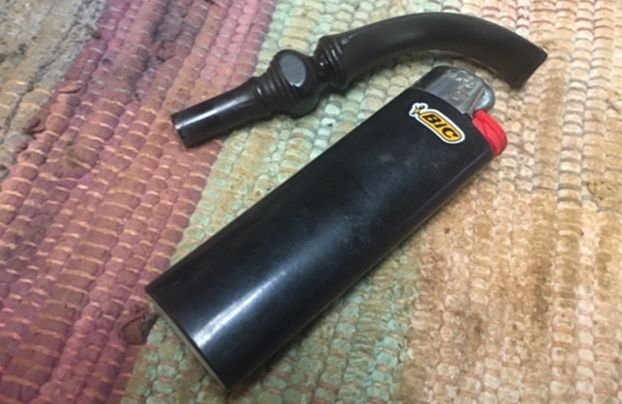
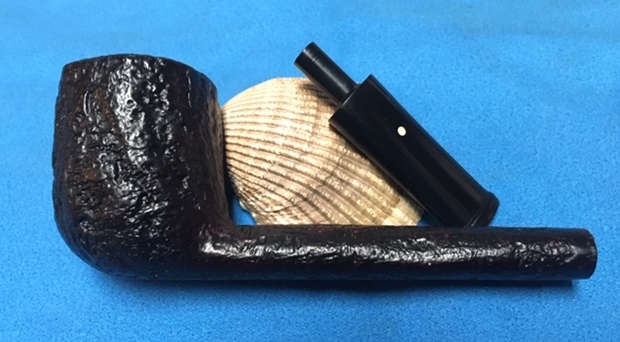
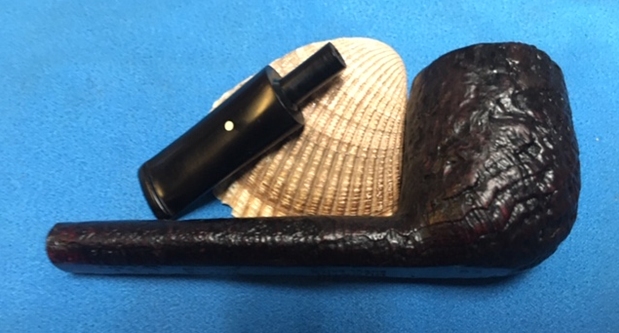
The tenon is fitting well – snug but not too tight.  The pictures below show the seated stem.  The stem is almost perfectly flush with the upper shank, but the stem is fat on the lower quadrant.After taping the shank with a layer of masking tape to buffer the briar from the heavy sanding, I attack the fat lip of the lower stem using coarse 120 grade sanding paper.  The goal is to sand the excess vulcanite to form a uniform shank/stem union.After achieving a good union at the shank, I continue the sanding with the 120 paper over the entire precast Warden stem.  The stem, even though it is new, has the casting seam down both sides that needs sanding and uneven rippling that needs smoothing. After the 120 grade paper, I follow by sanding the entire stem with 240.
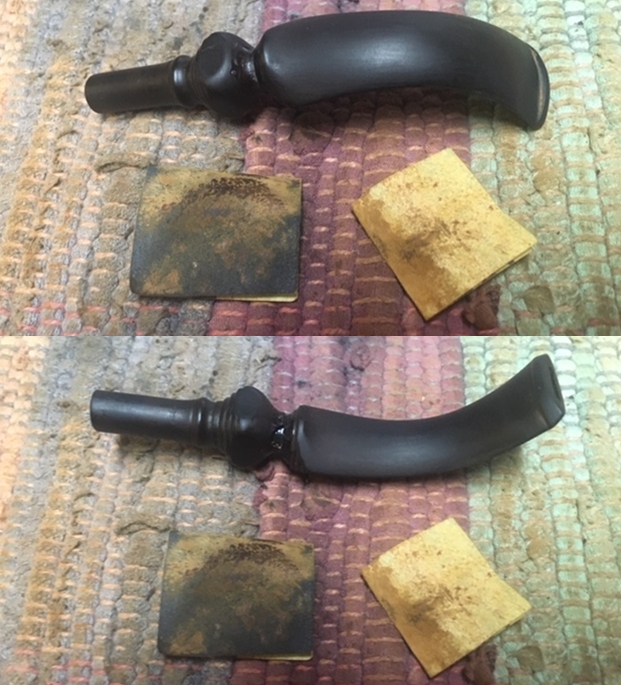
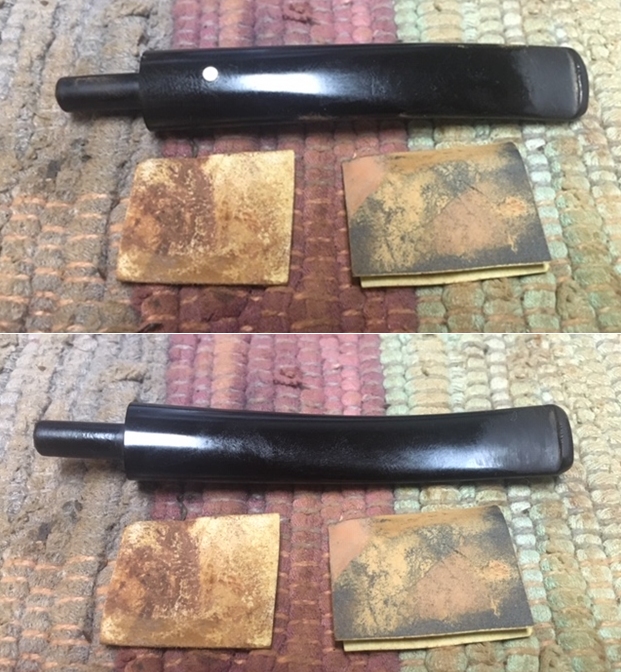
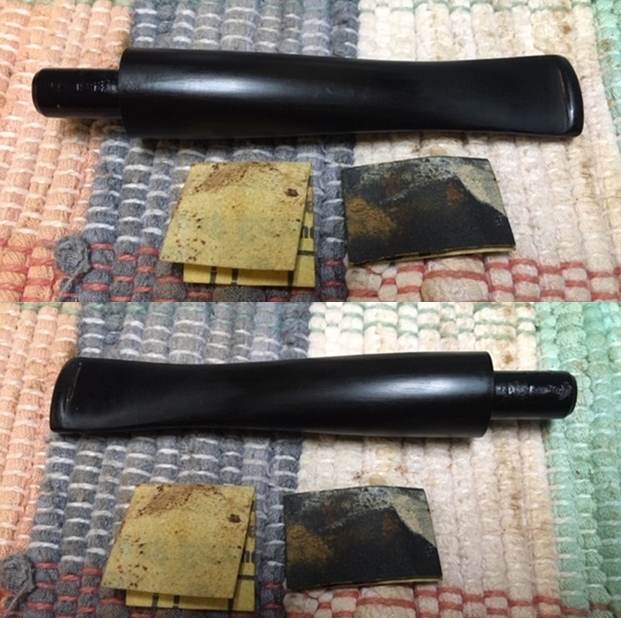
After the stem proper has been sanded, I switch the focus to the rough precast button.  Pictures of the upper and lower raw button show the imperfections that are first filed using a flat needle file.After doing the major shaping with the file, I follow with 120 and 240 sanding papers to fine tune the button shaping.
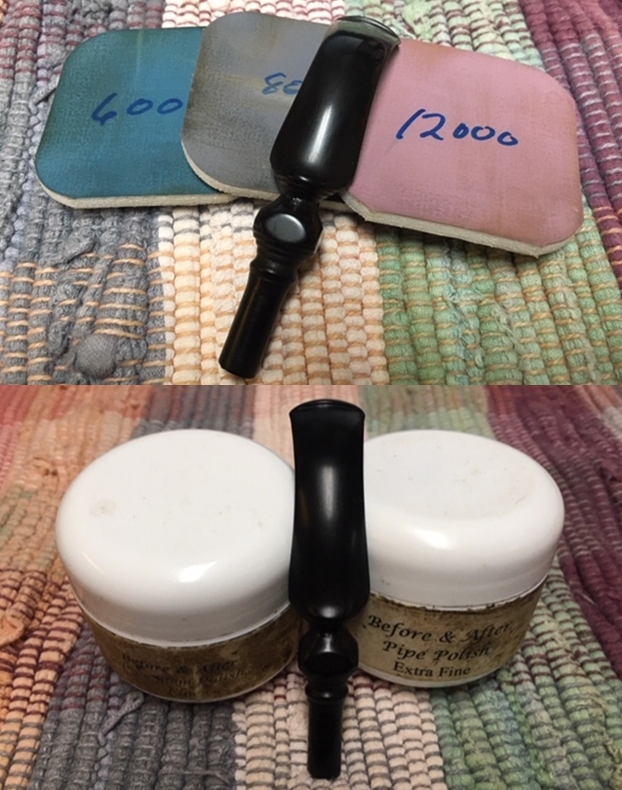
Without a doubt, the least pleasing aspect of fashioning Churchwardens is sanding the stems and dealing with all the rubber dust!  I’m thankful to move to the fine sanding stage by wet sanding with 600 grade paper followed by applying 000 grade steel wool to the entire stem.
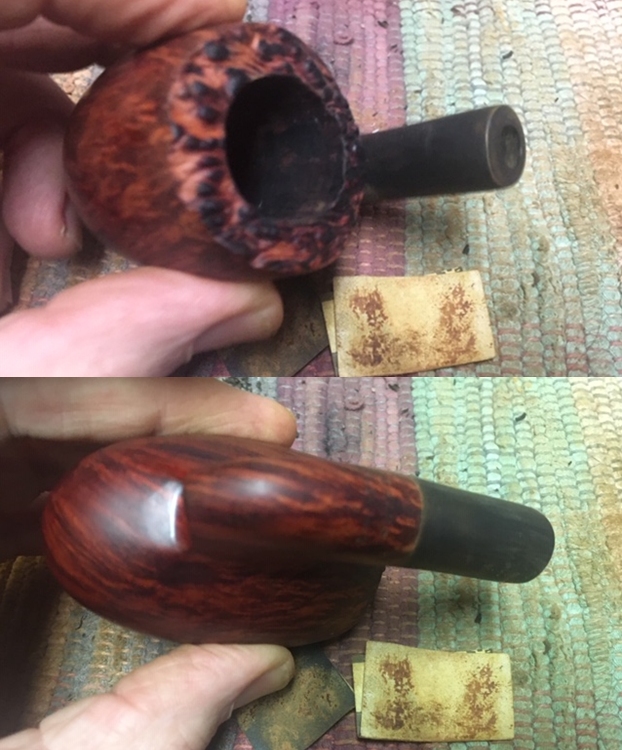
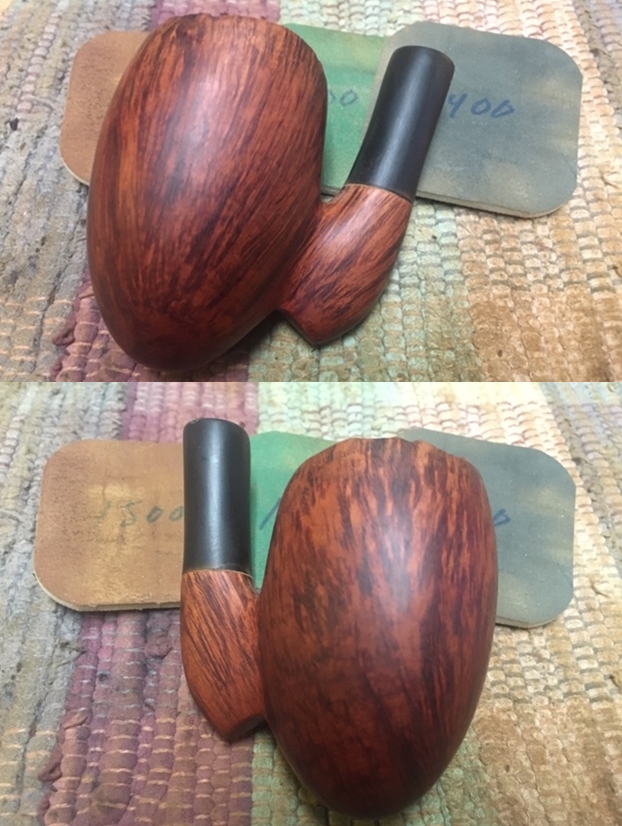
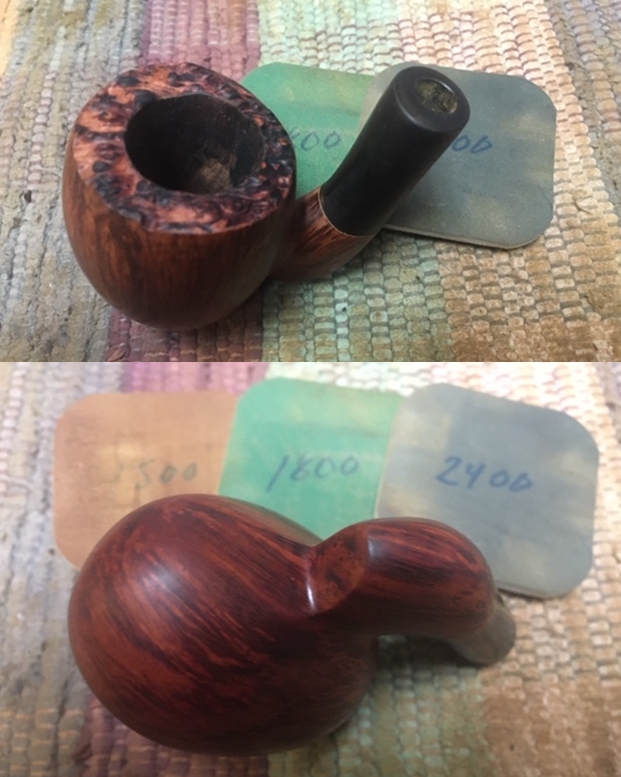
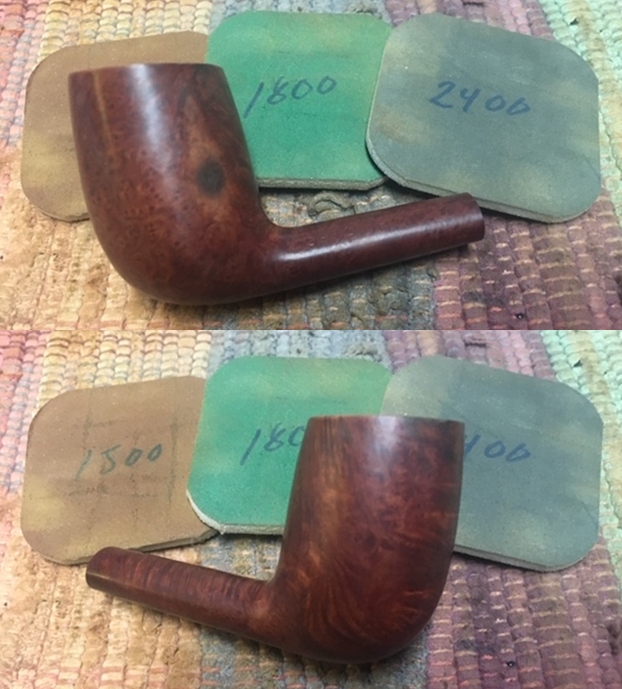
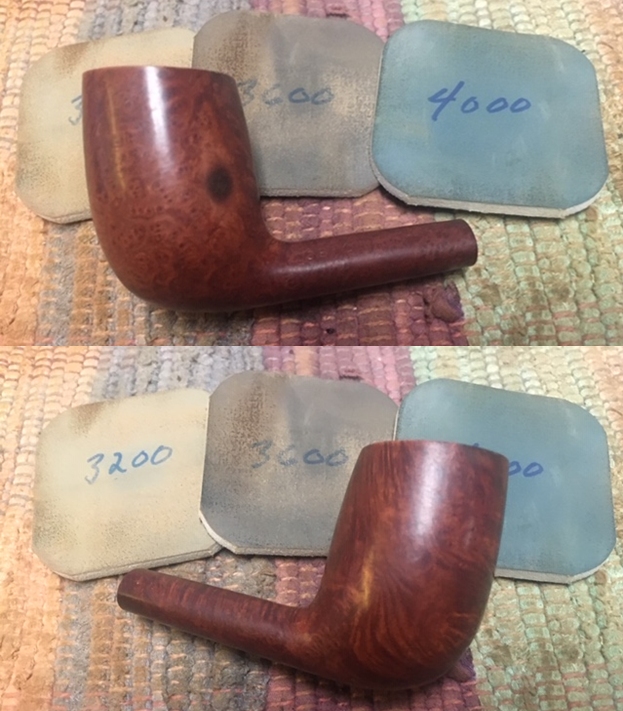
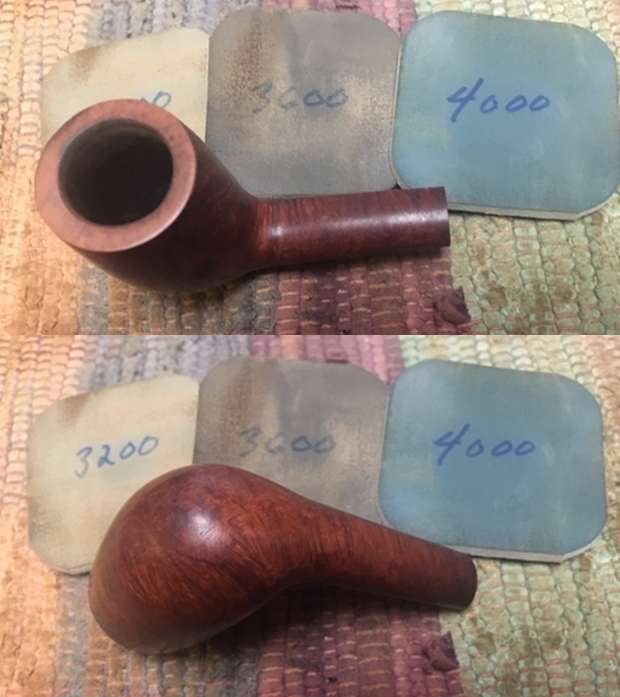
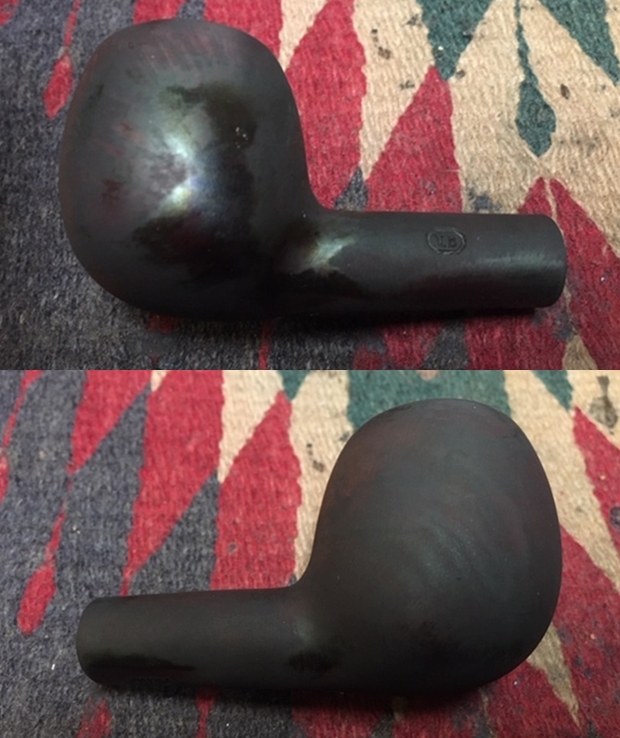
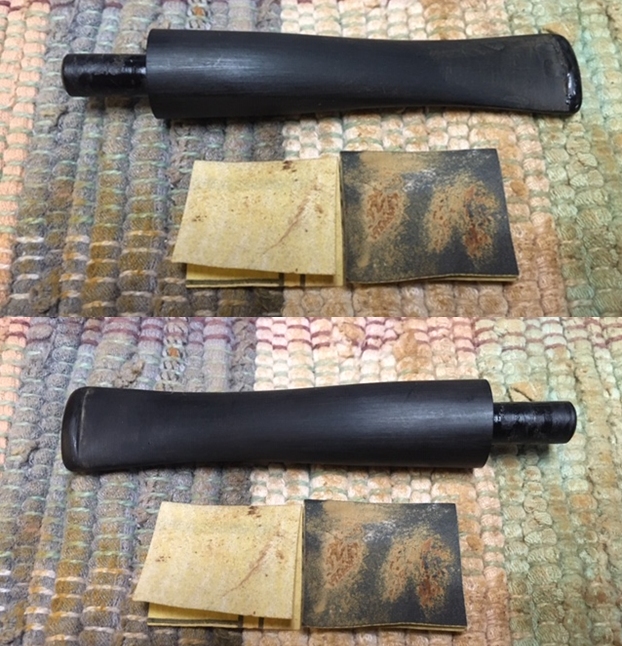
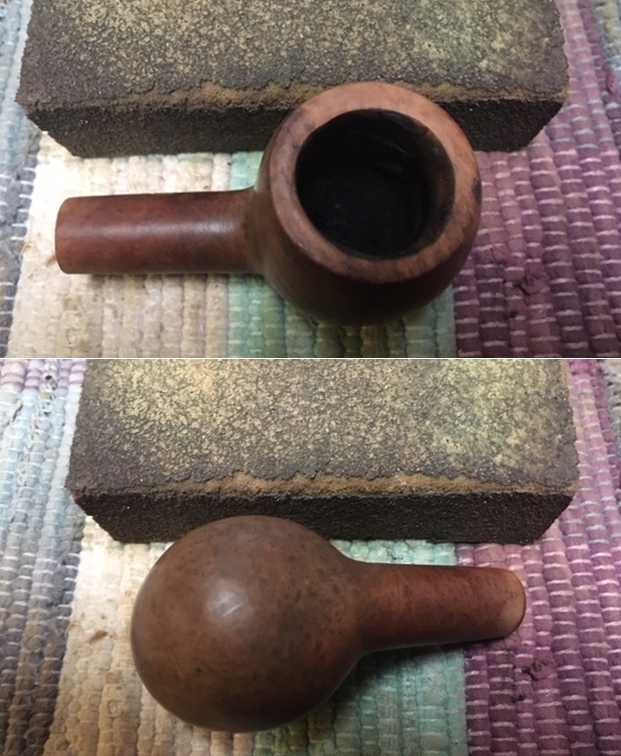
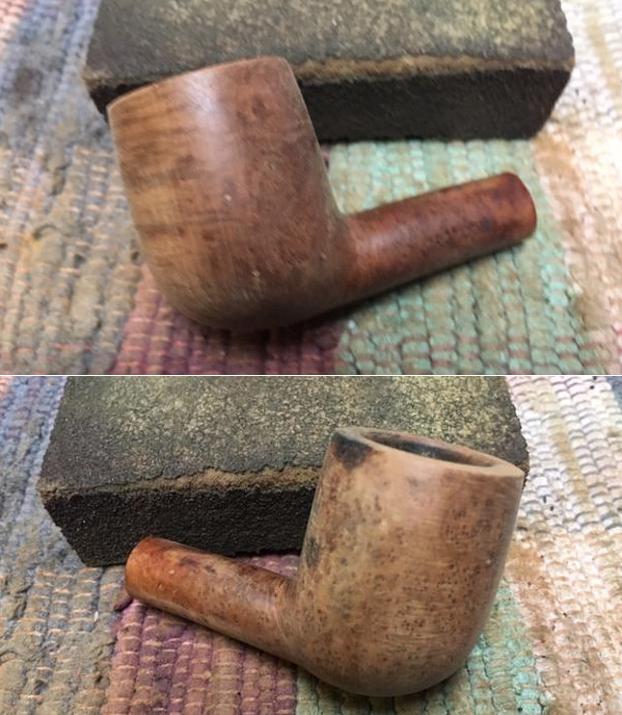
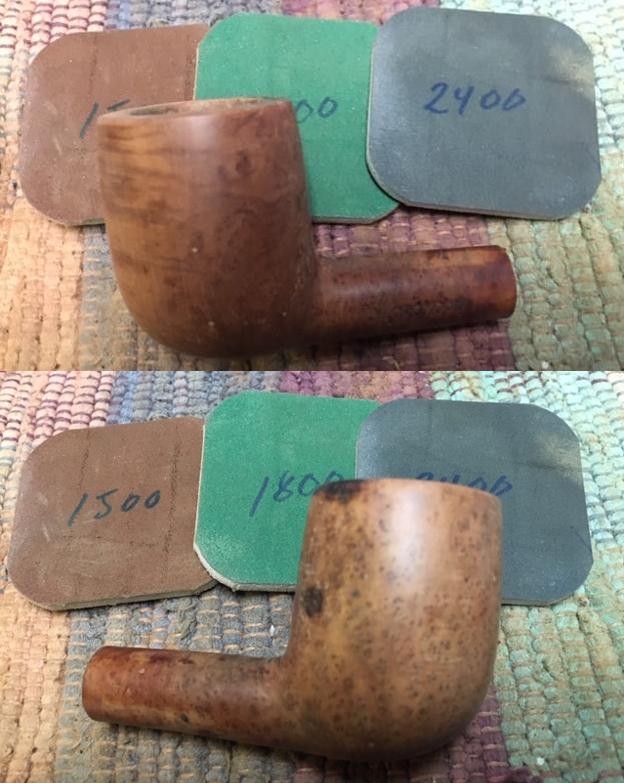
Next, with the stummel and stem united, I remove the masking tape to begin sanding with micromesh pads.  At this point, I focus the sanding on the stem/shank junction and the stummel.  Sanding the shank with the stem engaged keeps the junction edges from shouldering.  I also sand the stummel to clean it up.  There’s no doubt that this Bull’s Head sculpting will remain ‘rough’ and rustic, but I want to sand the smooth briar points of the Bull’s head: shank, underside, muzzle and the high points of the sculpting ridges.  Pictures of the landscape show the smooth briar patches that will be the focus of the micromesh pads. 
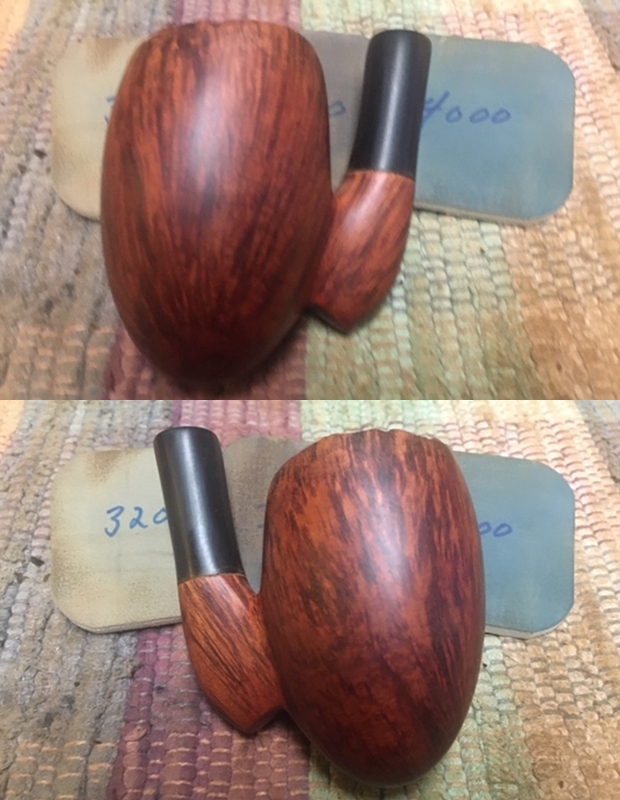
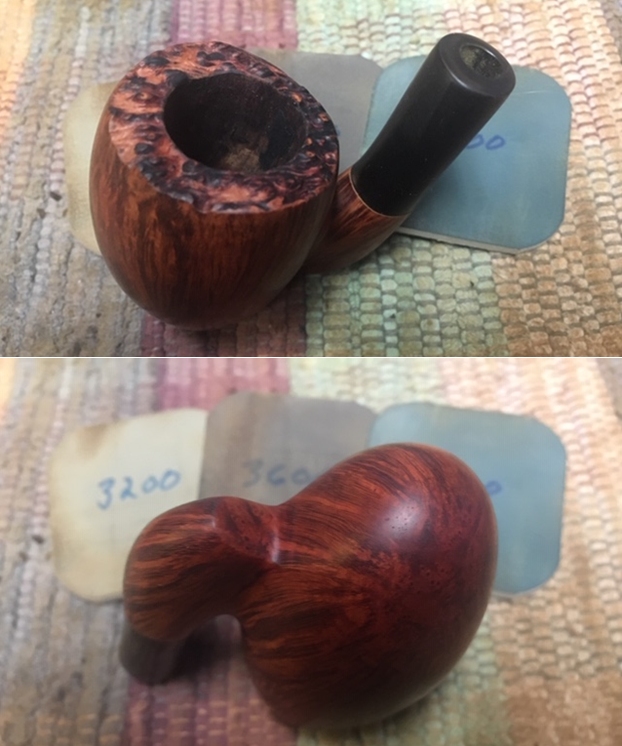
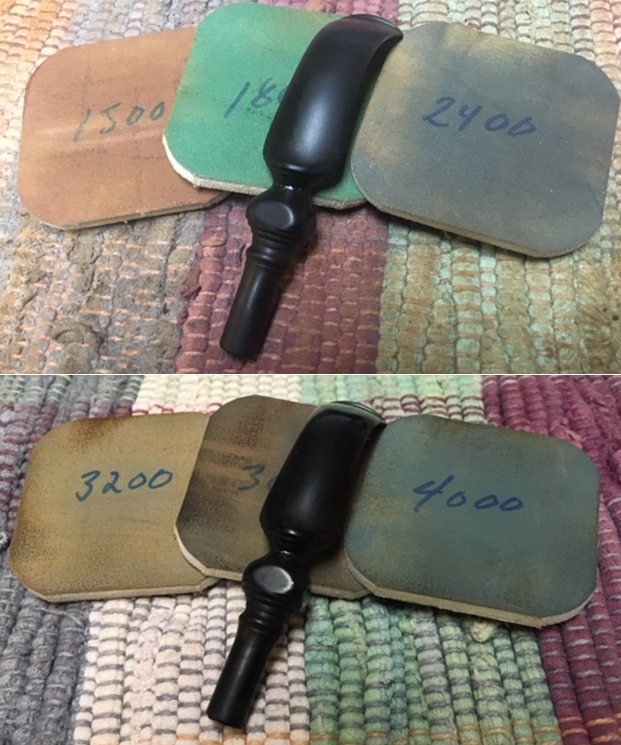
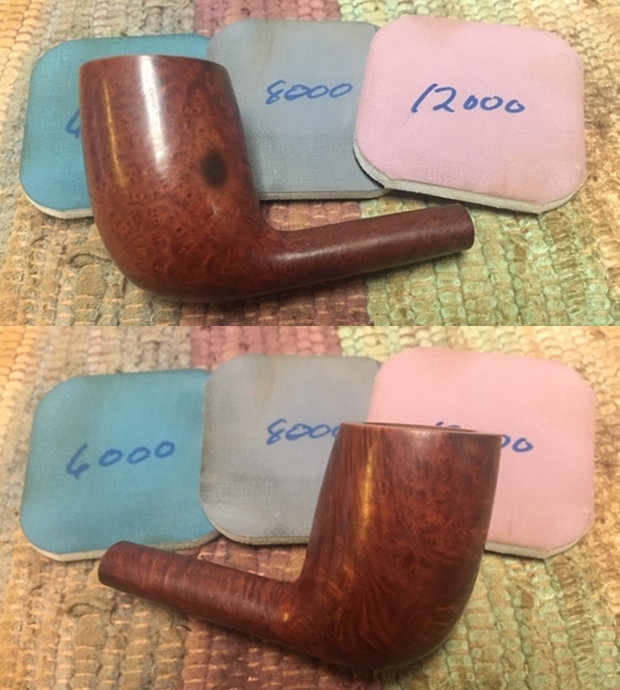
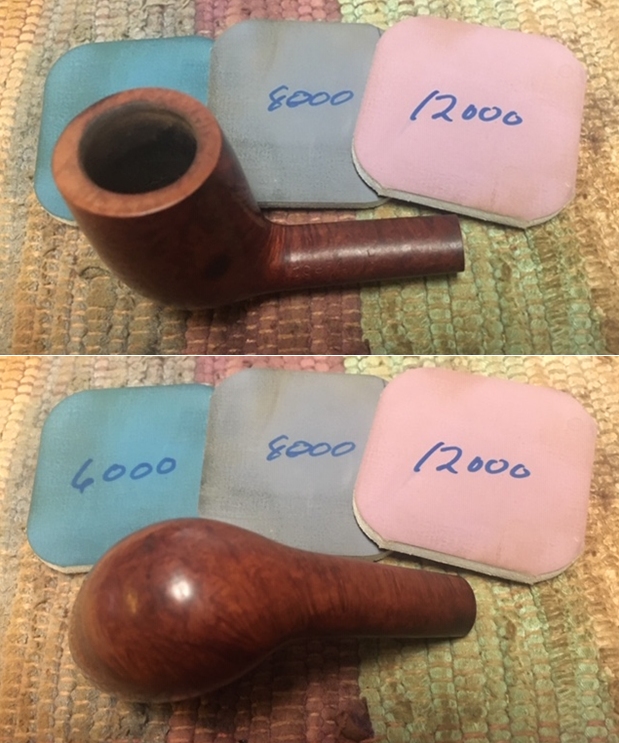
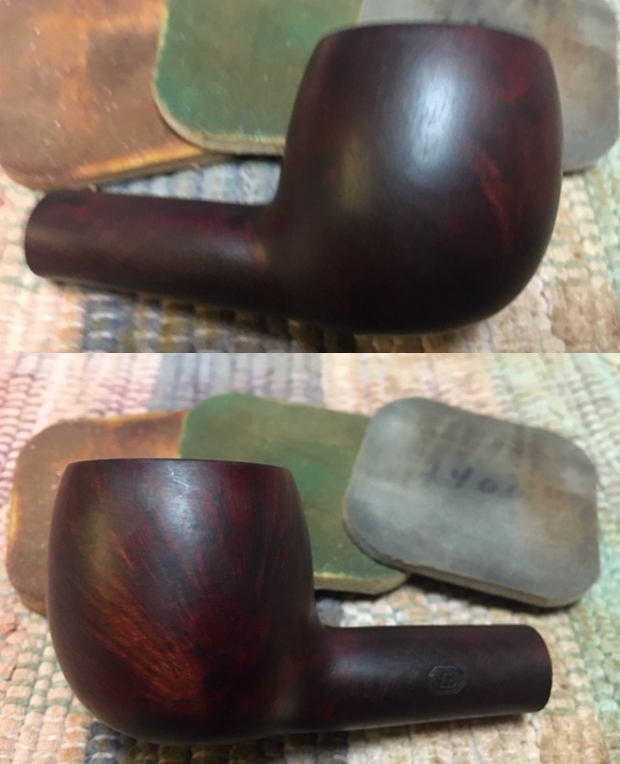
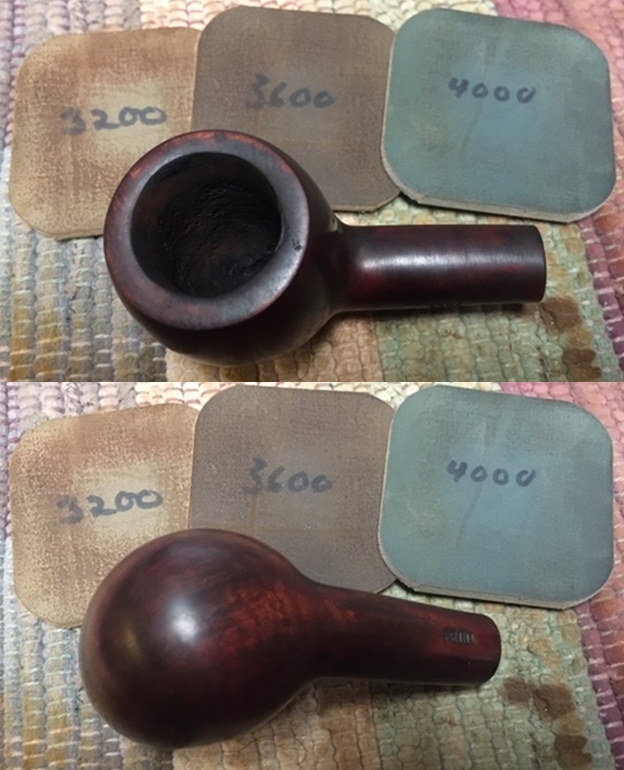
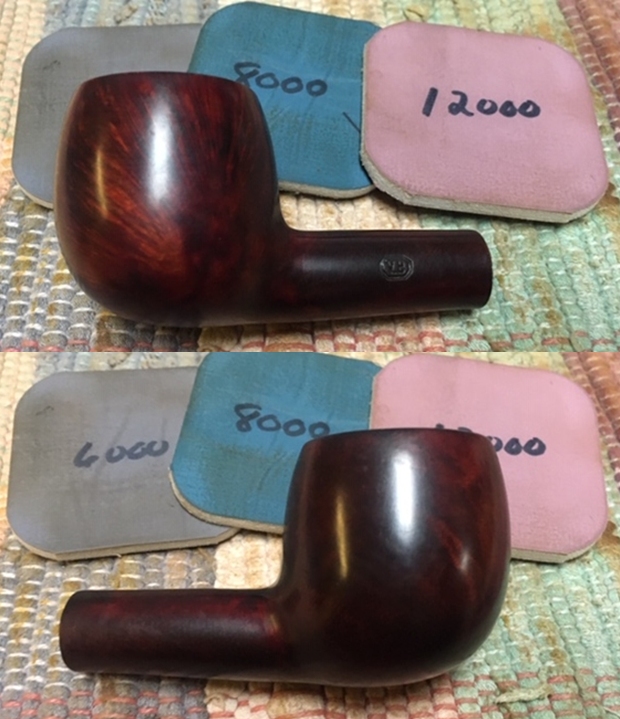
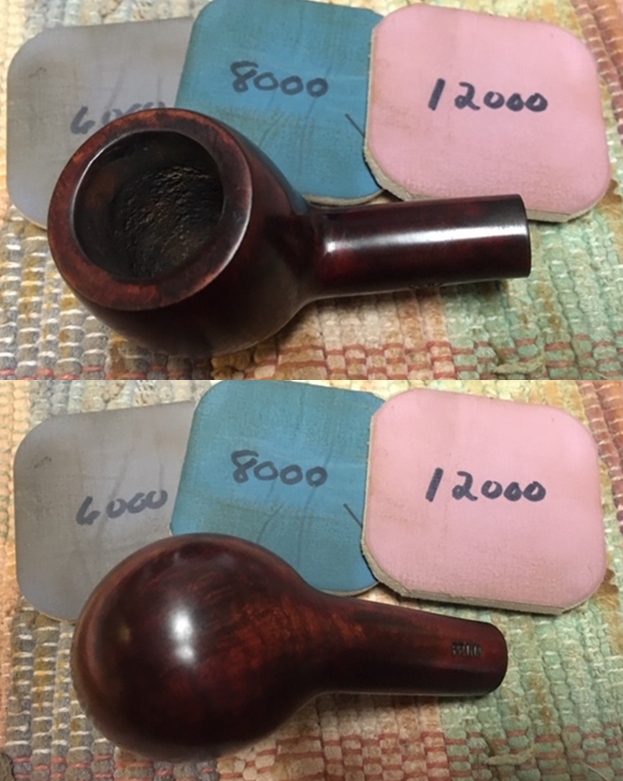
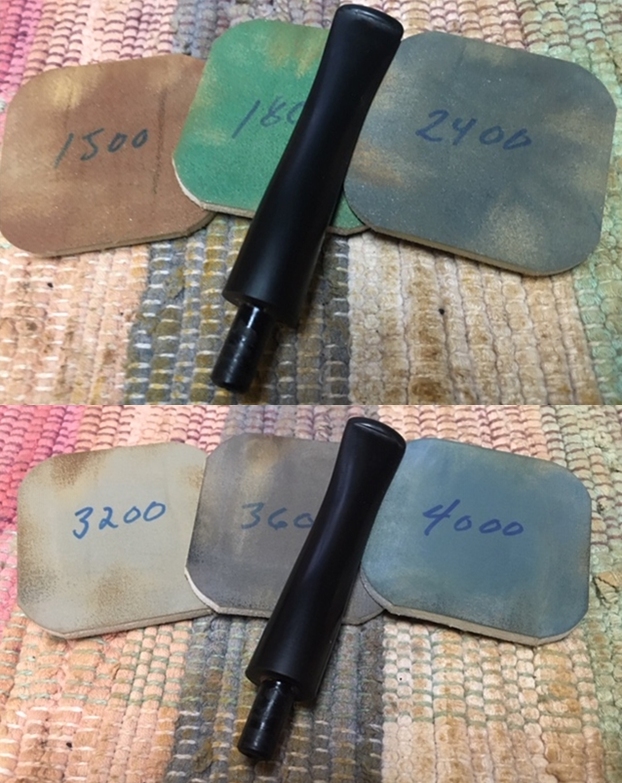
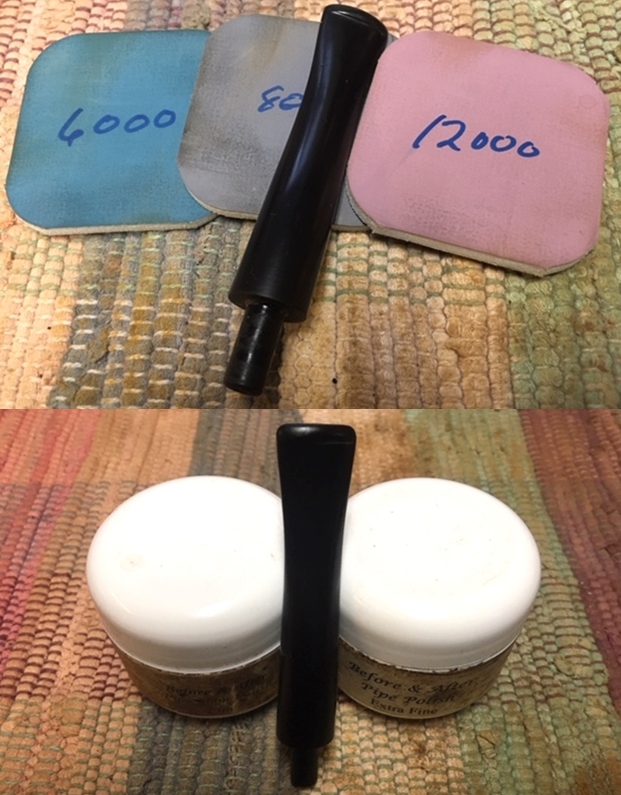
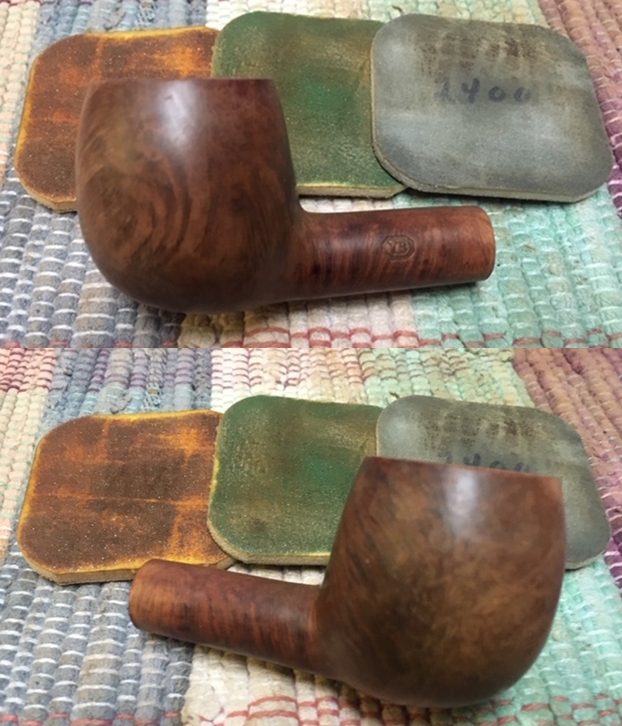
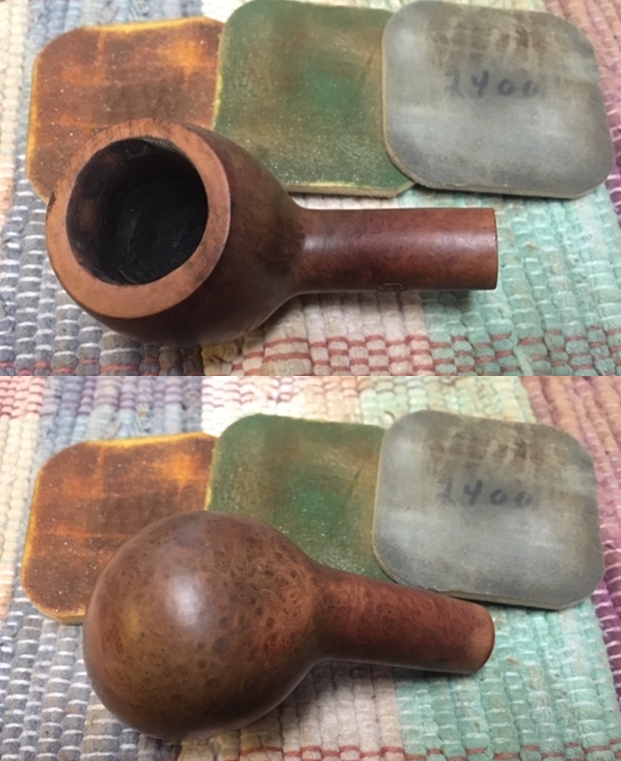
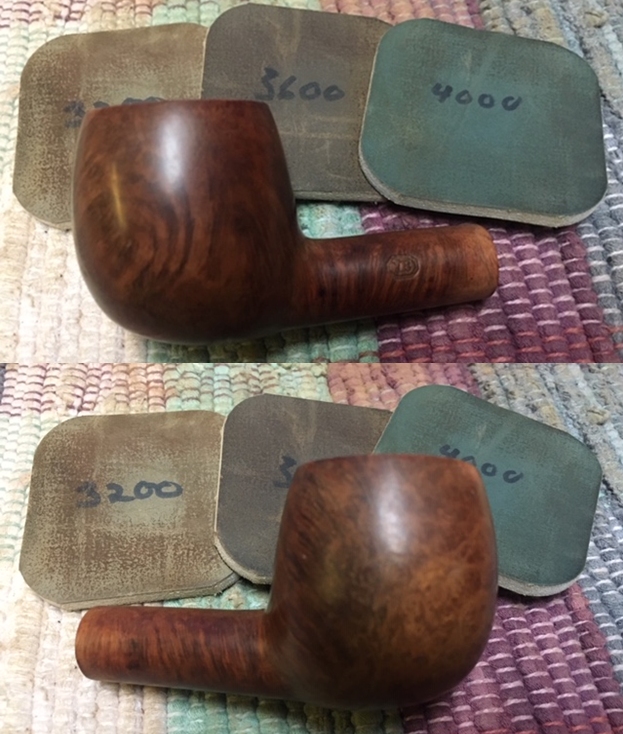
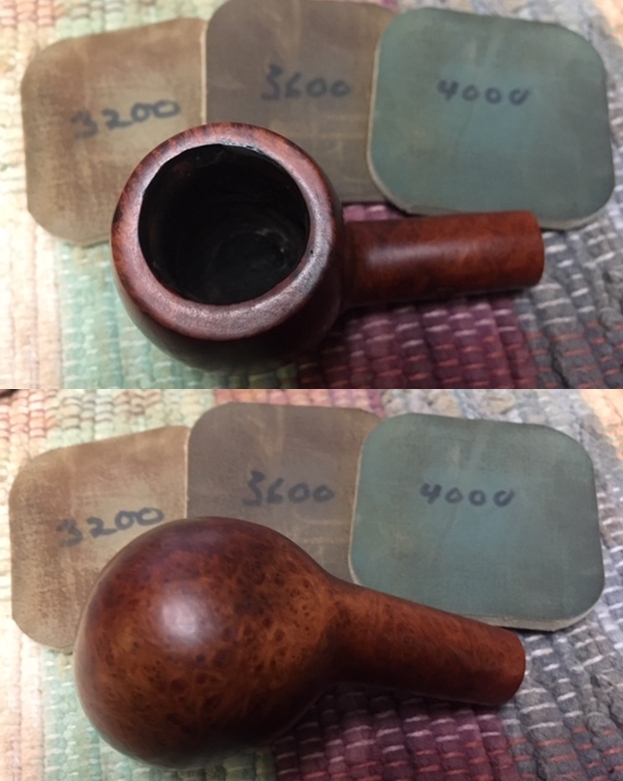
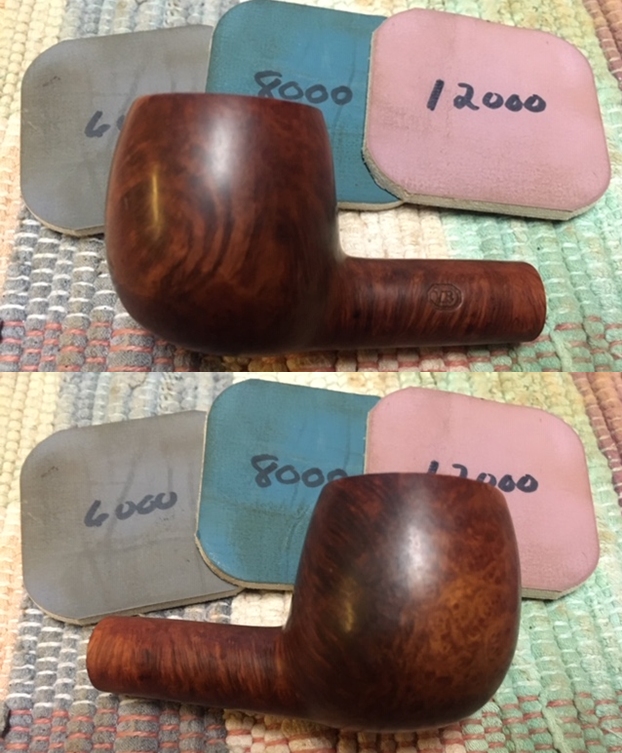
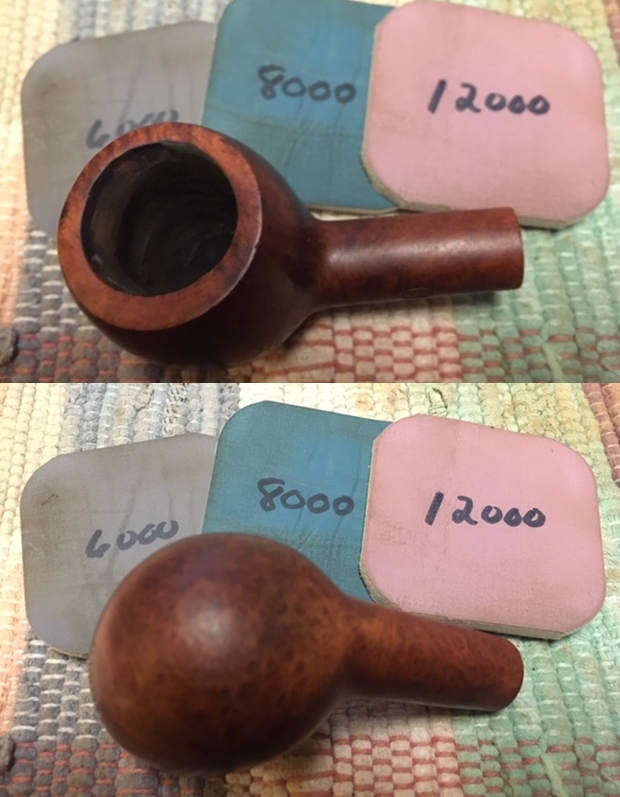
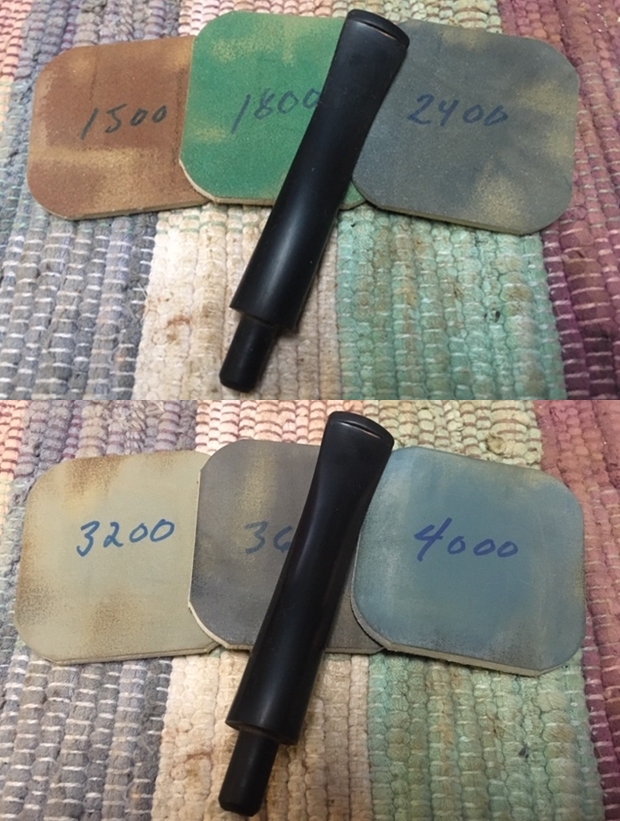
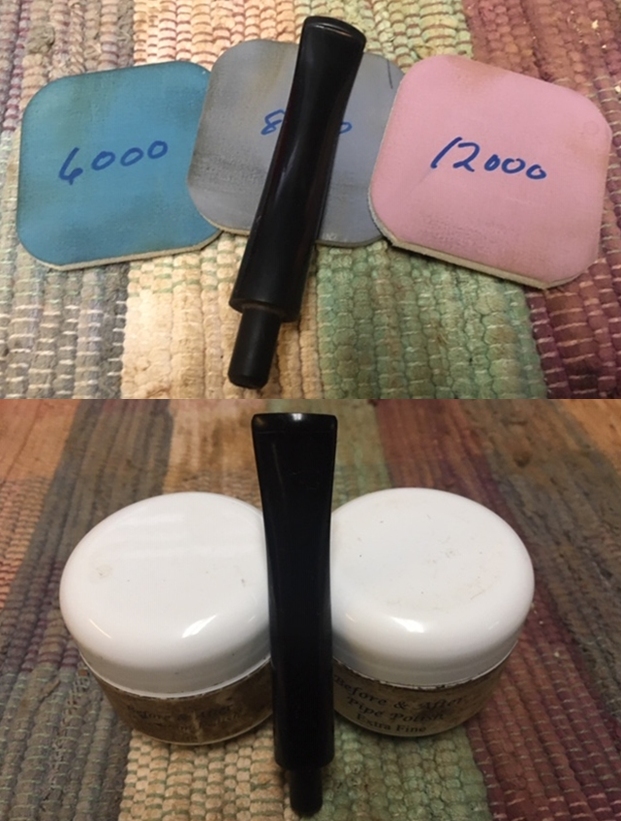
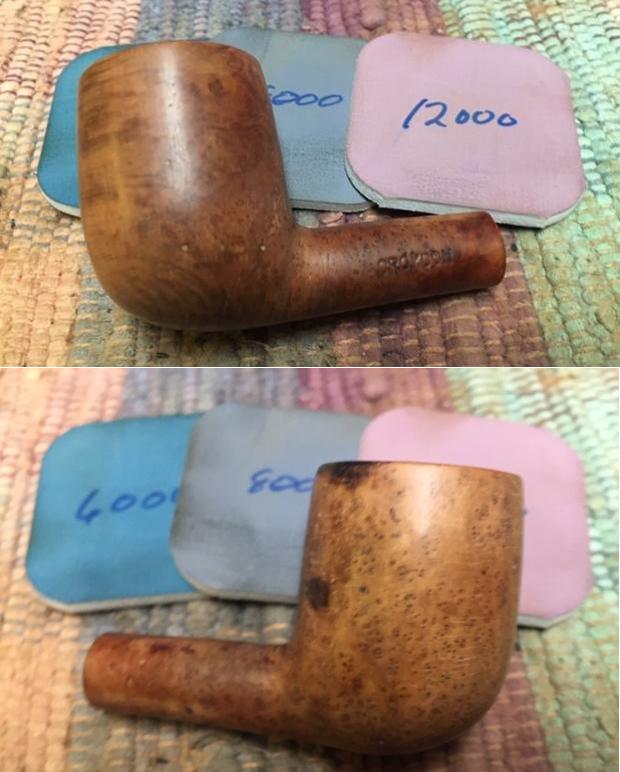
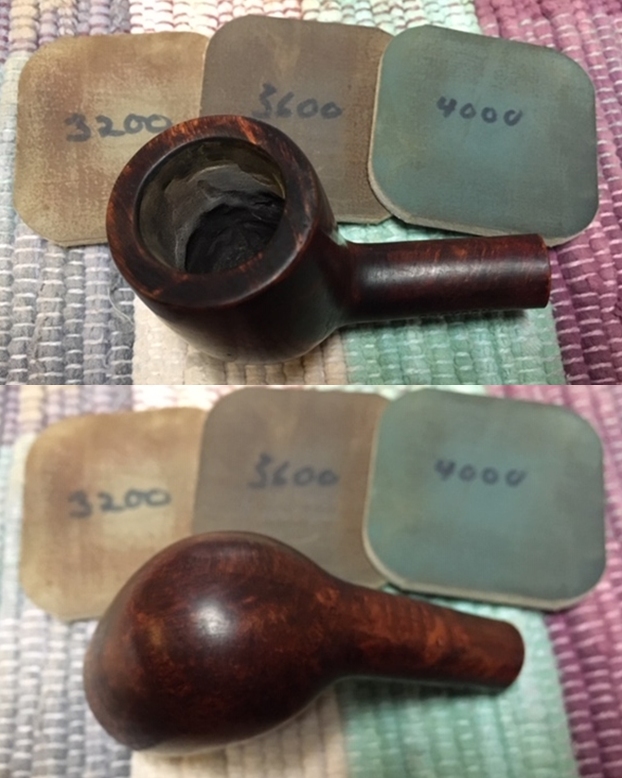
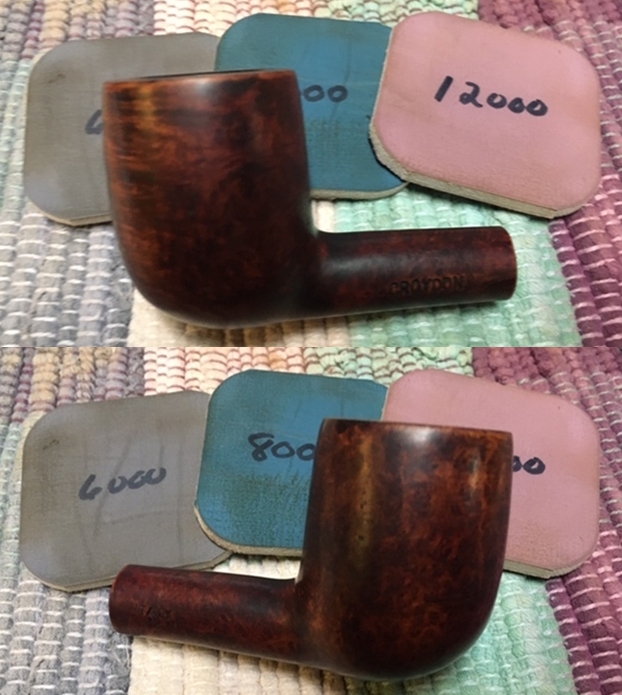
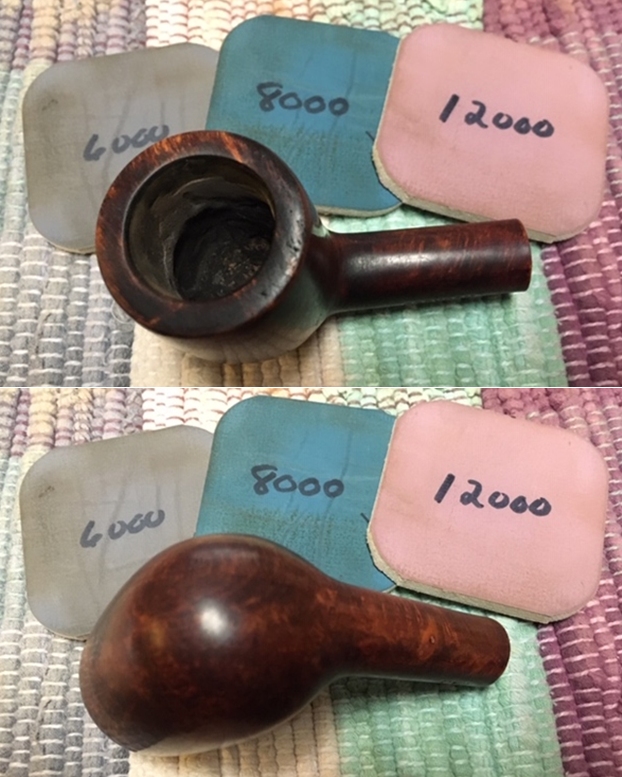
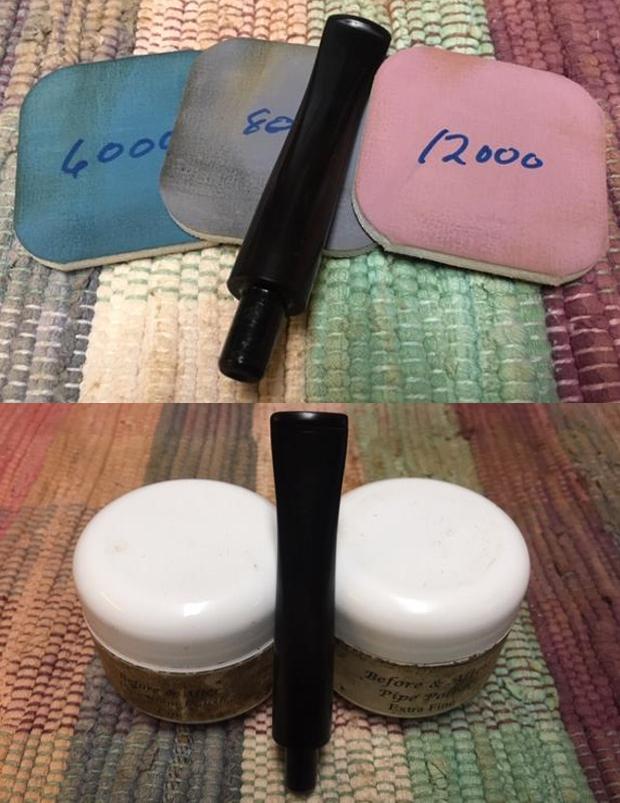
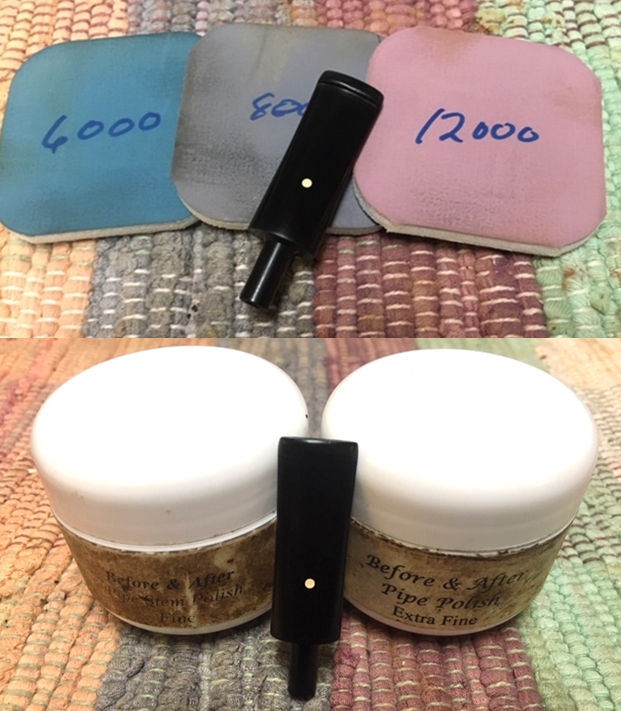
I begin by first wet sanding with pads 1500 to 2400, followed by 3200 to 4000 and 6000 to 12000. 
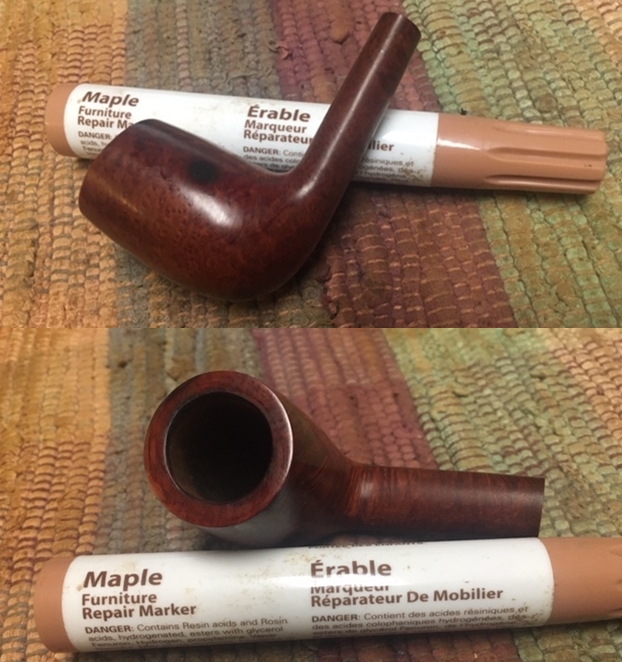
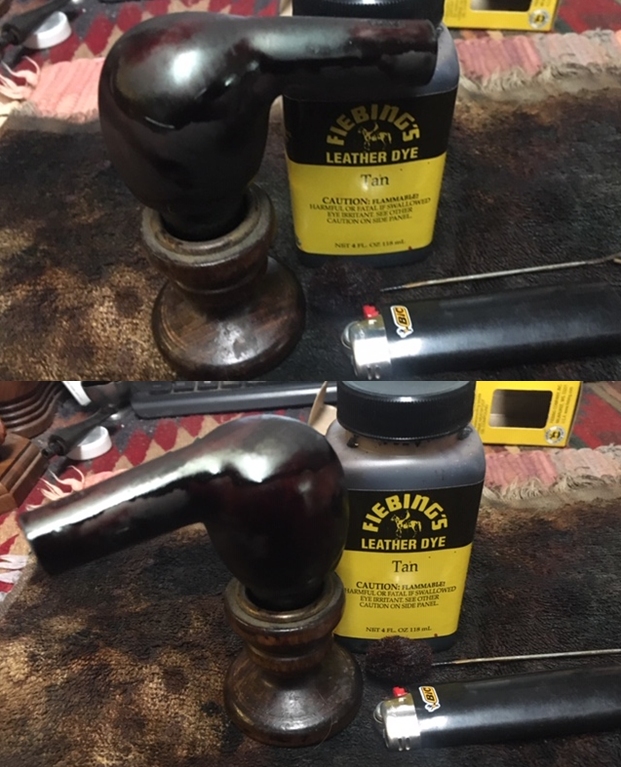
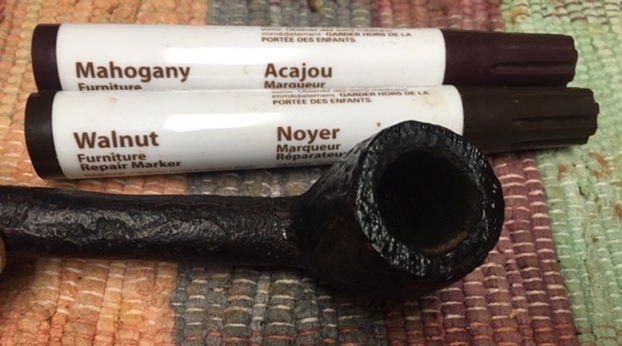
Next, I address the stummel’s hue.  The original pictures of the Sculpted Bull’s Head indicate an original darker stummel.  What I believe will look good is to darken the stummel again and then lightly sand the peaks of the sculpting to bring out highlights giving the overall appearance more depth and contrast. The crevasses of the sculpting will hold on to the darkened hue while the peaks will lighten.  I’ll use Fiebing’s Dark Brown Leather Dye to do the job.  After removing the stem, I clean the stummel using a cotton pad and isopropyl 95%. It takes a bit of time as I get into each crevasse of the sculpting.I assemble the staining station and use the hot air gun to warm the stummel before applying the stain. This opens the briar to help its receptivity to the dye. Unlike my normal approach of flaming the aniline dye after painting it on the briar surface, with the rough texture I apply a simple dye wash and allow it to dry and set. I use the bent over pipe cleaner to apply dye in all the crevasses of the sculpted surface.  After applying the leather dye, I let the stummel rest for several hours.
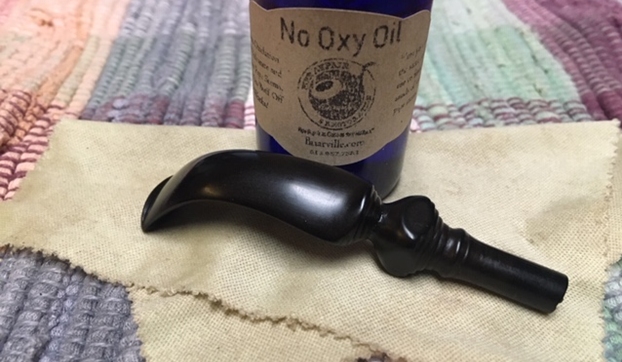
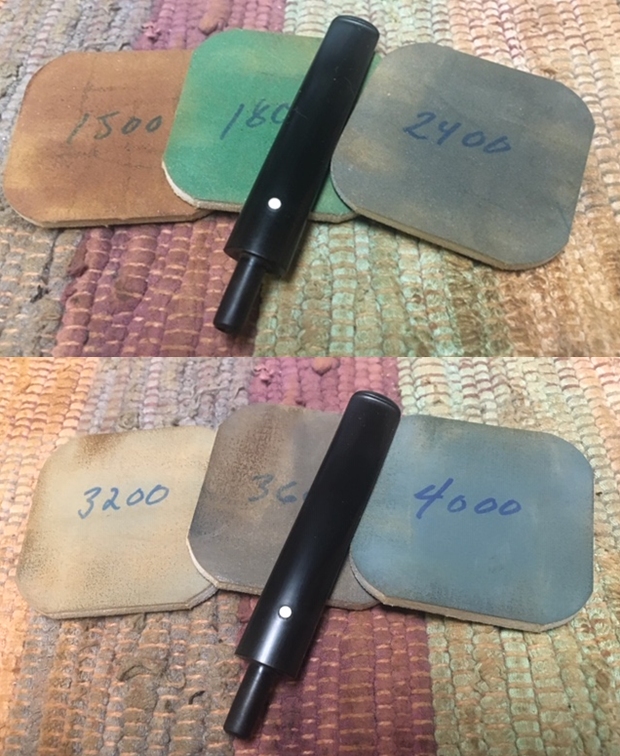
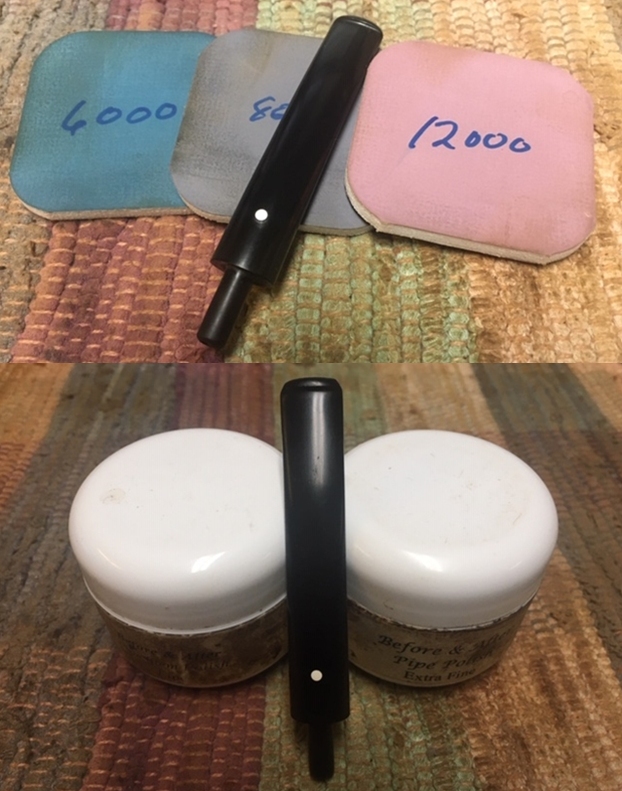
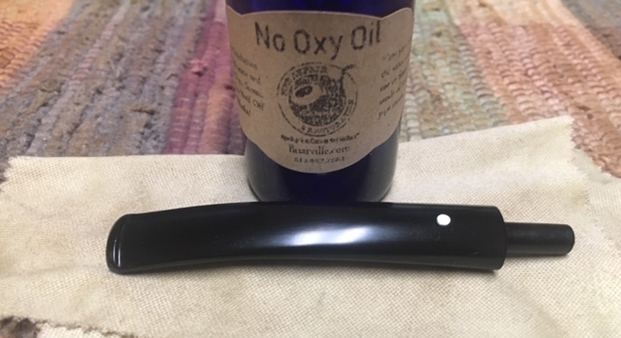
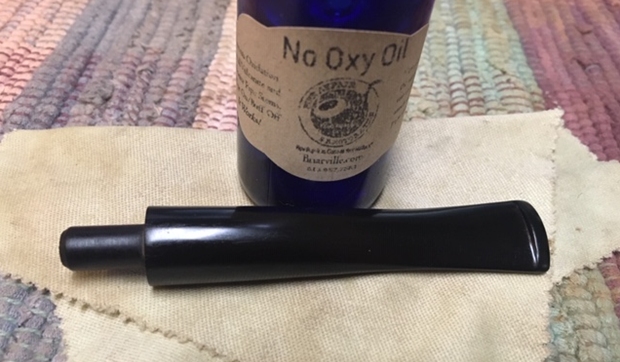
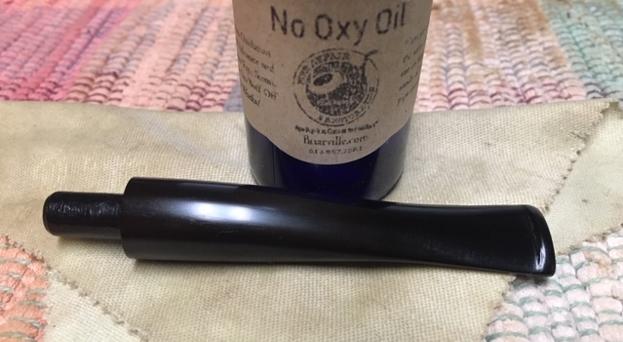
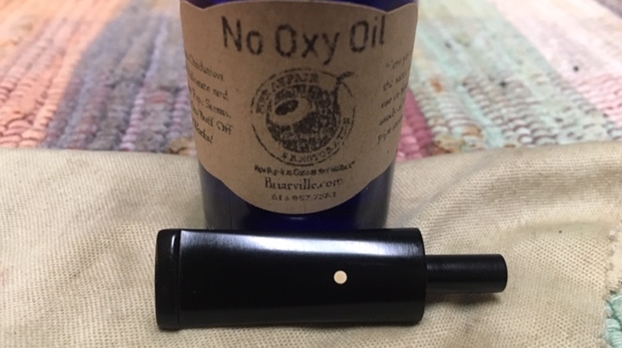
With the stummel resting now, I turn back to the stem.  Before, with the stummel attached, I have already applied micromesh to the junction area.  Now I continue with the rest of the stem starting with wet sanding with micromesh pads 1500 to 2400 then dry sanding with pads 3200 to 4000 and 6000 to 12000.  Between each set of 3 pads, Obsidian Oil is applied to the stem.  Steve did an informative blog on comparing Obsidian Oil with Briarville’s, No Oxy Pipe Stem Oil (See LINK).  His conclusion was that both seemed to be equally good products.  What I didn’t know before reading Steve’s blog was about the anti-oxidation properties of Obsidian Oil.  It doesn’t remove oxidation if already present, but it hinders the growth of oxidation.  As a result, I’ve started using Obsidian Oil for the maintenance of my own pipes in rotation. Putting the stem aside for the time, I take up the stummel which has been resting for several hours after applying the dye.  I use a cotton pad wetted with alcohol to give the stummel a wipe to remove excess dye. Next, I mount a cotton cloth buffing wheel to the Dremel with the speed set at about 40% full power.  I apply a light application of Blue Diamond compound and I intentionally keep the compound light because I want to avoid caking in the crevasses.  My focus is primarily buffing on the smooth briar and the peaks of the sculpting.
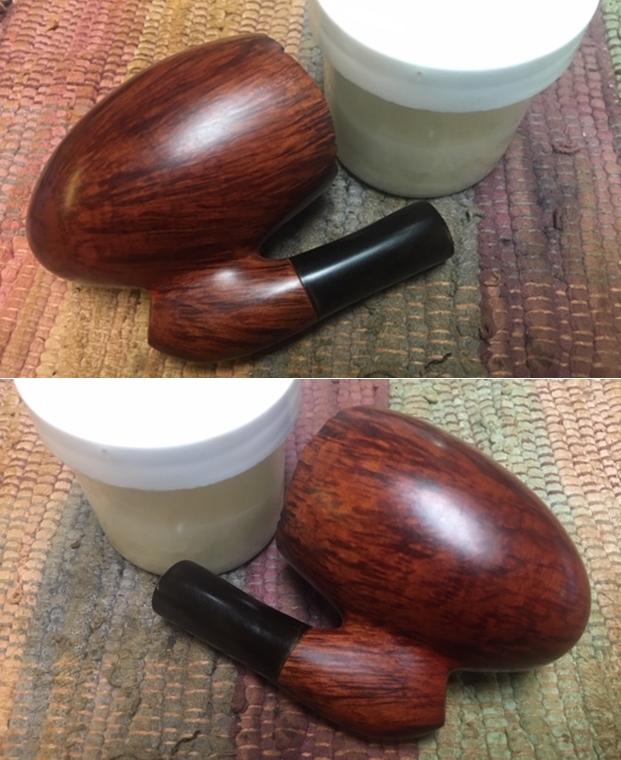
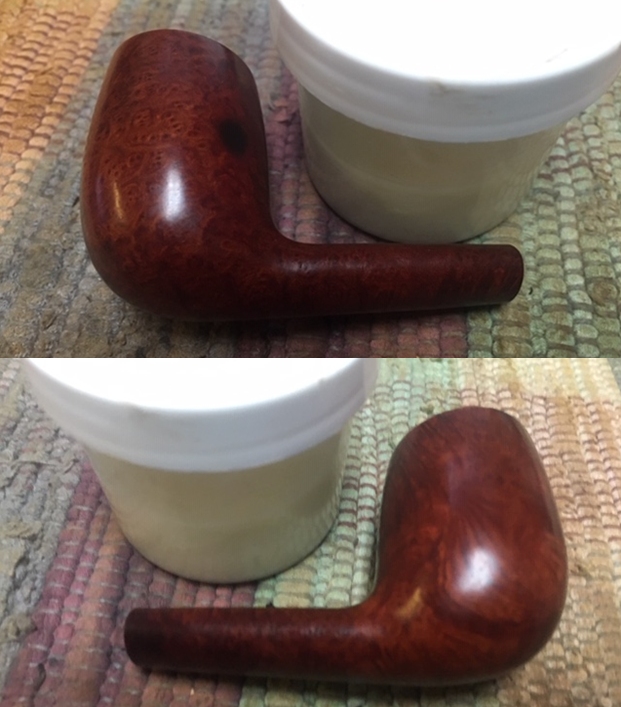
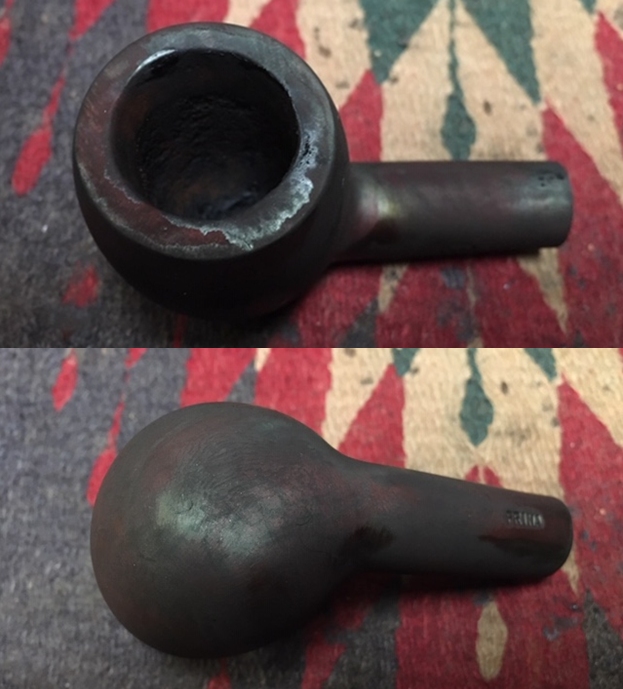
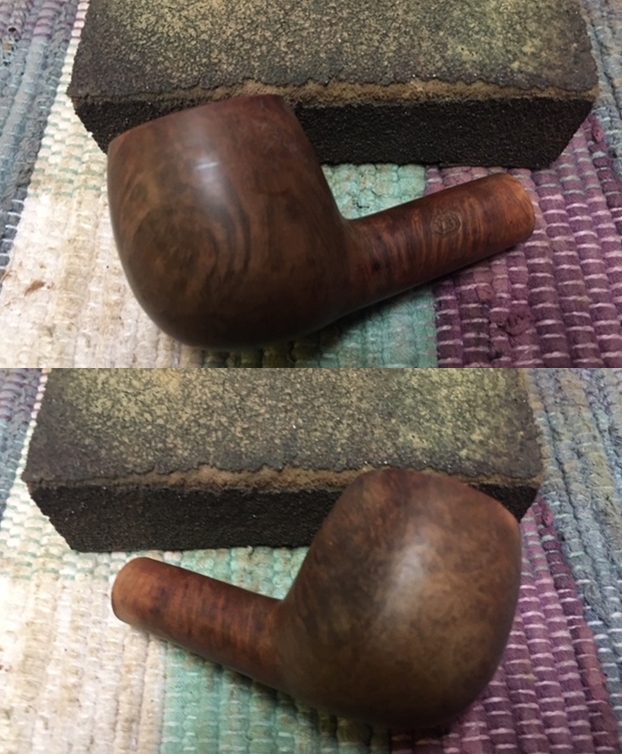
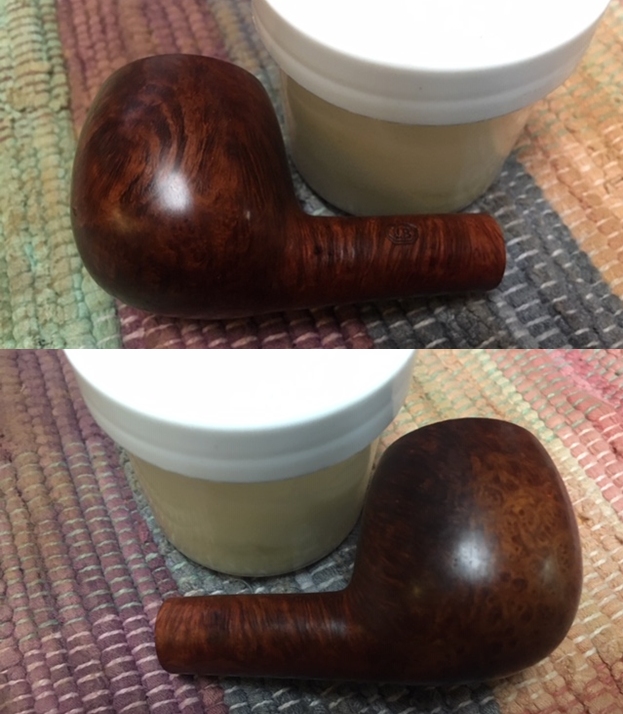
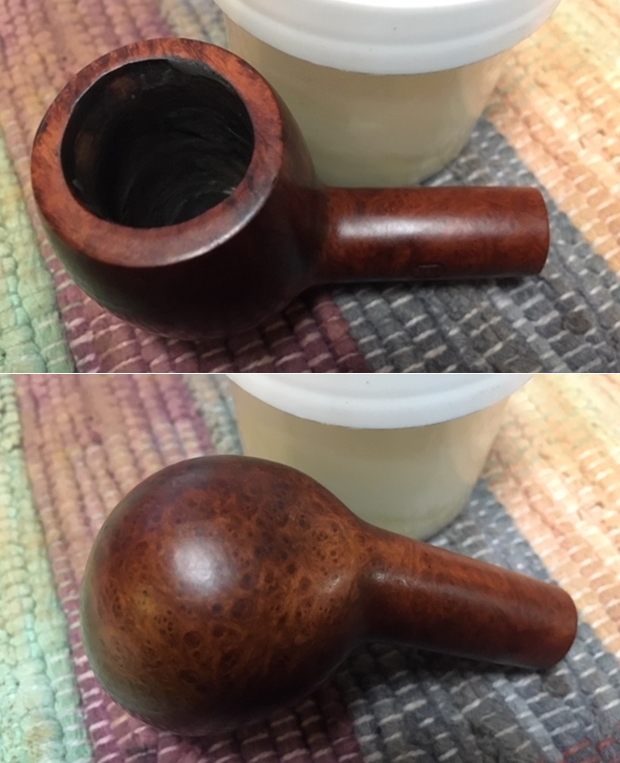
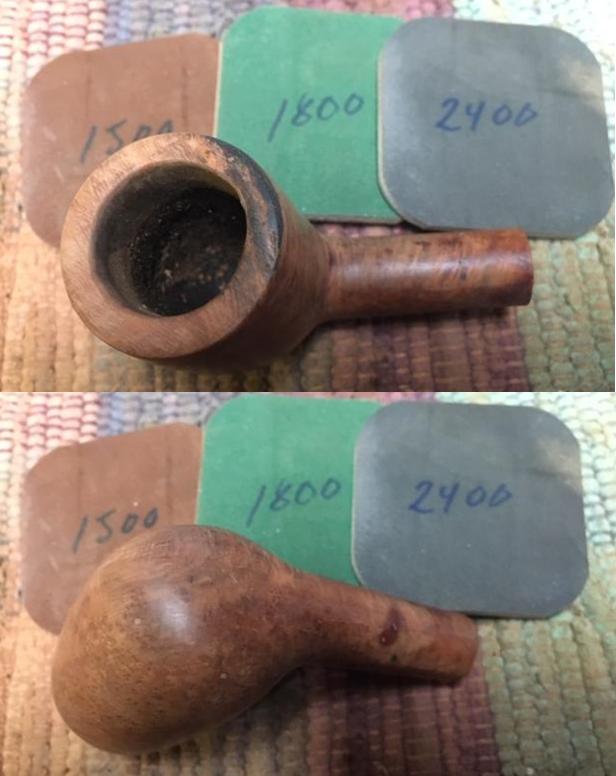
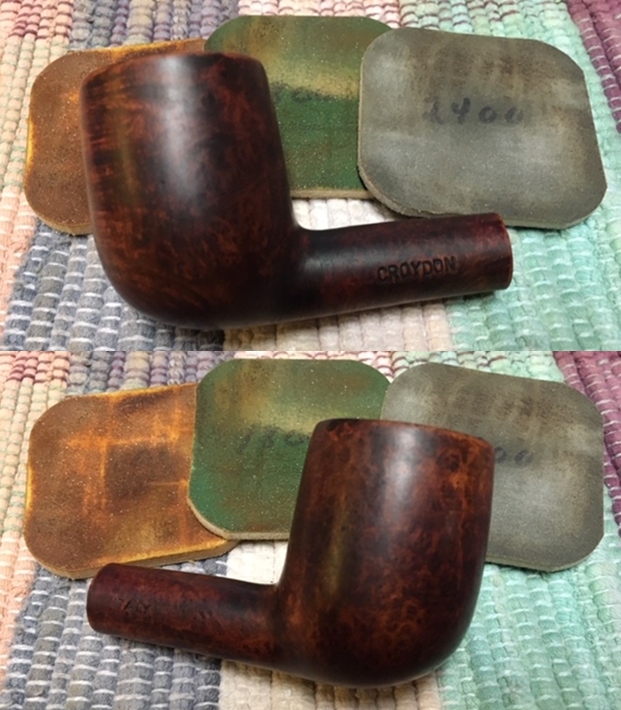
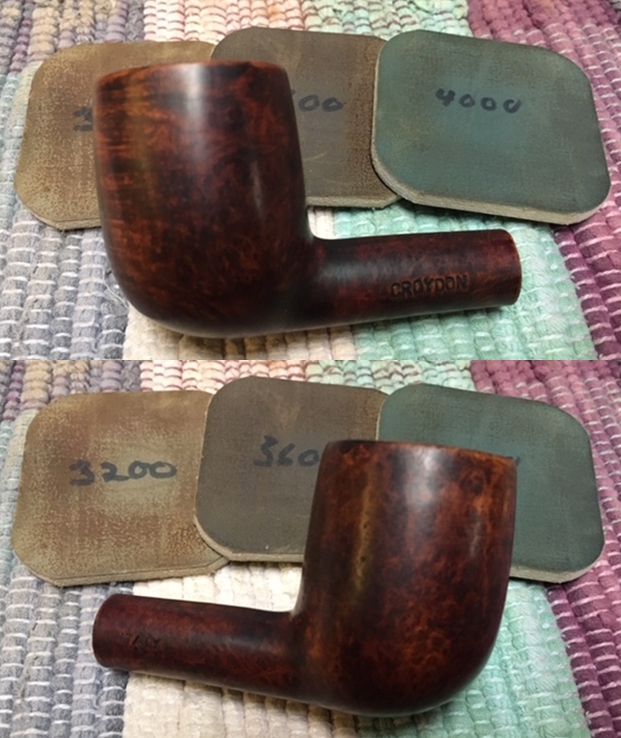
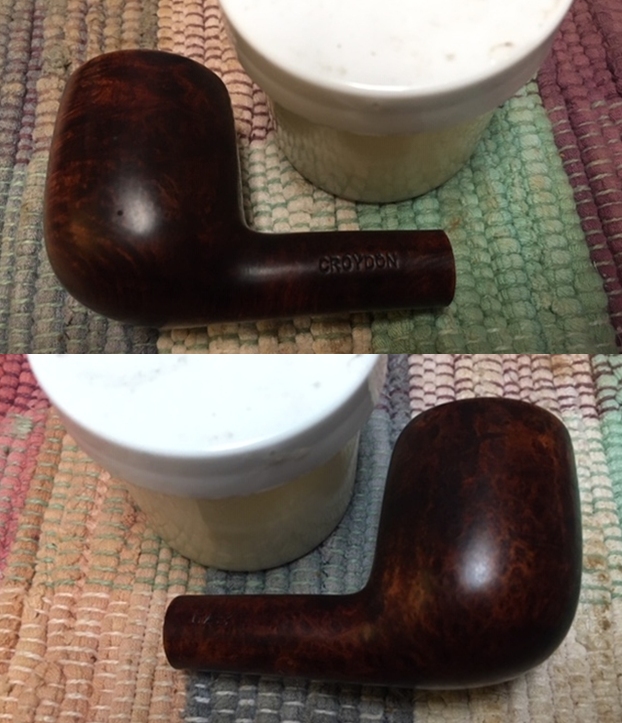
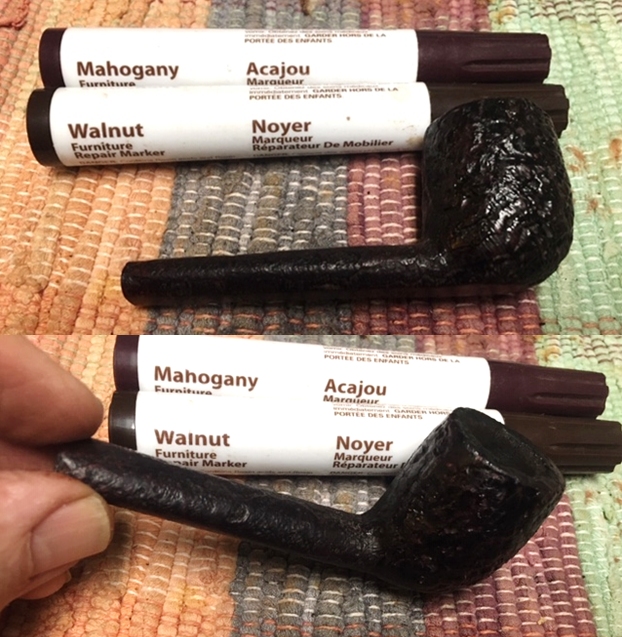
After application of the compound, I use a felt cloth to give the stummel a rigorous buffing to remove the compound dust from the surface.  I very much like the results.  The effect I was shooting for with the contrast between the smooth briar peaks and the darker crevasses is evident. The rough, rustic texture is preserved but the smooth briar pops in comparison.  I’m surprised also by the mahogany leaning hue resulting from the dark brown dye that I applied.  The following pictures show what I see. 
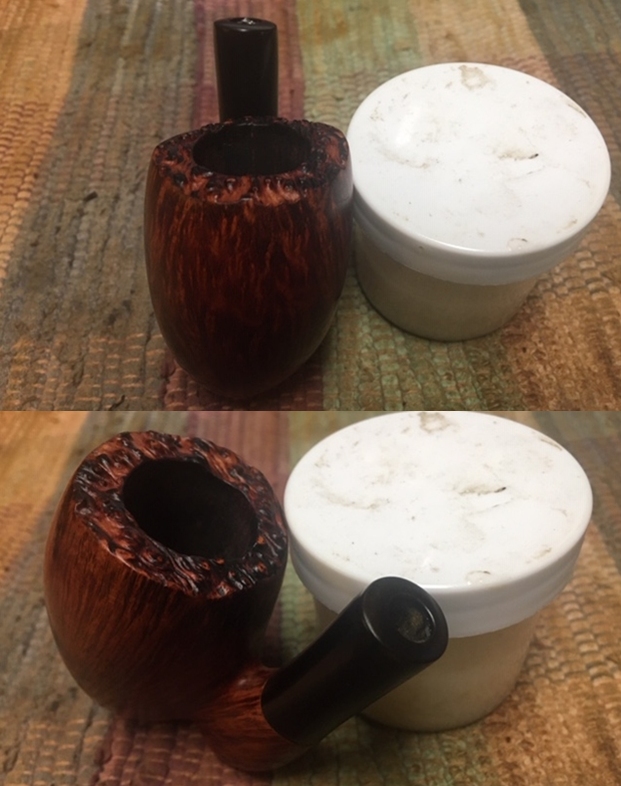
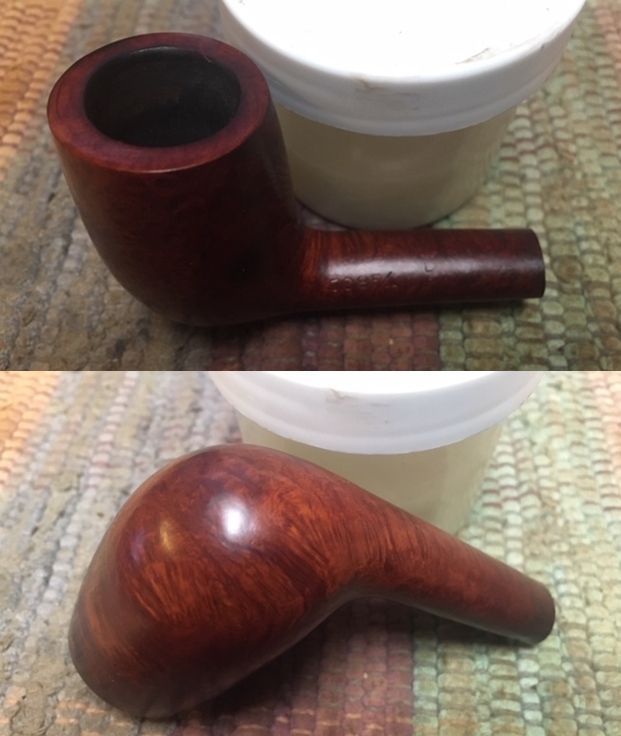
I decide to condition the dried Sculpted Bull’s Head stummel using Before & After Restoration Balm. I place some Balm on my fingers and work it well into the crevasses of the sculpting and over the smooth briar surfaces.  During this process, I note that the dye applied to the stummel earlier is coloring the Balm somewhat as it’s worked into the briar.  I also see some coloring on my fingers.  After working the Balm in well, I place it aside to allow the Balm to do its thing and then I use a cotton cloth that I will discard to wipe the excess Balm which is also colored somewhat with the fresh brown dye that is lifting off the stummel. To address the leaching dye issue, which is normal for newly dyed woods – briar is no exception, is to heat the stummel with the hot air gun which helps the dye to fully leach.  When the stummel is heated, I wipe it first with a cotton cloth and then with a paper towel.  The hopeful result of this is after the pipe reaches his new steward, when the steward fires it up for the first few uses, dye will not leach on his hands from the heated stummel – or be minimized greatly!Next: bending the Warden stem.  After reuniting the stem and stummel I place the pipe on a piece of paper to sketch the angle of curve needed to help as a template.  I first draw a horizontal line to serve as the plane of the plateau.  I use the horizontal shelf behind the angled chamber stack to line up with the horizontal plane.  After outlining the unbent angle, I sketch the bend to bring it into alignment with the horizontal to serve as my template.Even though the bend needed is not great, a pipe cleaner is inserted into the end of the stem to guard the airway integrity during the bend.  Using the hot air gun, the middle of the stem is heated because this is where I want the bend to be so that the end of the stem resolves nicely along the horizontal plane.  I remove the stummel so that I can place the stem flat on the template after it is heated so that the stem is not angled or twisted to the left or right during the vulcanite’s supple stage.As the stem heats, I’m careful to keep ‘up’ up, so that the fit of the stem in the mortise isn’t accidentally flipped!  As the rubber heats, I gently apply pressure to the bend area.  When the heating has sufficiently warmed the vulcanite, I bring the stem to the template and create the bend according to the template and hold it in place for a few minutes as the rubber cools and the bend is held in place.  The first attempt renders perfect results!  I move on.With the stem now bent, I catch it up with the stummel by applying Blue Diamond compound to the entire stem.  After mounting a cotton cloth buffing wheel onto the Dremel and with the speed set at about 40% full power, I apply compound to the stem.  After finishing the application, I wipe/buff the stem with a felt cloth to remove the leftover carbon dust.I’m very pleased how things are shaping up.  Before the final polishing, I have one project left which is a little daunting: the horns.  I’ve been thinking throughout (and even before starting!) the restoration how I was going to address the fashioning of the horns.  The sides of the Bull’s head have holes which provide the diameter of the horn mass.  As I looked at many examples on the internet of sculpted Bull’s heads, I found that there are a several varieties of horn style which is true with real life bulls!  To narrow in on a style, I described sending Seth an email asking him to do some online research.I received his reply stating that he liked the shorter, stockier horns that turn up slightly on the ends.  He also sent a couple pictures to illustrate his desires which were very helpful.  As I’ve thought about this part of the project, fashioning one horn is not the greatest challenge, but fashioning two is!  The challenge is to match the two but in reverse orientation – left and right horns!  The pictures Seth provided are helpful, but there is a contrasting complexity even between the two examples he sent.  The picture on the left shows the horns set on a vertical platform shaped on the side of the bull’s head to allow the visible horn to have more mass with (I’m assuming) a smaller peg inserted into the holes.  Whereas, the example on the right, more like what I have on my worktable, the horn diameter and mass are confined to the diameter of the hole.  It seems to be that the general proportion of the examples Seth sent below and many of the online examples I’ve seen is that the visible horn is about half the width of the bull’s head. Unfortunately, in my 10th floor flat in the formerly Communist period apartment block, I do not possess much in the way of precision wood working equipment, like a lathe!  Shaping the horns will be by hand using a Dremel, files and sanding paper.  I plan to use cherrywood as the material for the horns.  Cherry trees grow almost everywhere in Bulgaria and there are several in the green area in front of our block.  A couple years ago I harvested a couple very straight branches from a cherrywood tree in the front green area to dry out and to use with a project of restoring a French made cherrywood Ropp stummel and stem.  I trimmed them down and they’ve been in my bucket waiting for some time – now, very much dried and ready.  The Ropp project will continue to wait! I begin with horn number one.  First, I cut a length of the cherrywood stem the width of the bull’s head.  I know that roughly half of this will be the horn.  The other half will be what is eventually inserted in the hole which is the ‘peg’ side.In order to give a center orientation for the peg, I use a small sanding drum to trace a guide circle.After drawing a line around the piece of wood to mark the extent of peg shaping, I use a sanding drum in a circular motion around the end  and gradually shape out the peg. As I was progressing on shaping the horn peg, I notice the line of a grain crack – ugh.  I decide to see if it might work after some sanding and filing, but the crack will be a problem.  I’m hoping that this is not characteristic of this wood! I move on and start over.With the second start, I decide not to cut the short piece of cherrywood but to shape the horn peg first.  I do this so that I can save wood if I must cut it off again and restart.  Again, I mark the center horn peg template and use the sanding drum mounted on the Dremel to shape the peg.I sanded and tested the fit a few times until the horn peg finally found home in the side of the bull’s head! Next, I cut off the smaller piece measuring to leave a little more than half the width of the Bull’s head.  I leave extra length to enable me to sand down to a good fit.Next, with the picture that Seth sent to me showing the horn style he likes, I draw a horn template on the cherrywood inserted into the hole.  The most critical thing at this point is to have a guide to help me stay within close parameters of proportion as I shape the horn step by step.Remembering that the first horn is easier than the second, I use the rounded angle of the sanding drum to create a consistent angle for the upswing of the horn tip.  I’ll do the same for the second horn to minimize differences.  With the Dremel set to slow, I press the drum into the wood to create the horn tip upswing angle. I then remove the remaining excess wood on the upper side of the horn bringing the top parallel with the upper side of the peg. Next, I turn the horn shaping over, with the horn tip facing down, to now work on the bottom of the horn. The hand saw cuts the excess off the cherrywood piece so that the cut is very close to the end of the horn.  This saves on sanding.Again, using the sanding drum mounted on the Dremel, I begin to take wood off the lower side of the horn piece.  I start by sanding a horizontal base-line which identifies the horn’s lower side.As the sanding moves toward the end of the cherrywood – toward the horn tip that is facing downwardly, I curve the sanding so that the angled underside of the horn is shaped toward the inverted horn tip.The roughing out of the upper and lower horn is looking good and it resembles a paddle at this stage.  The next 3 pictures show the horn from the different angles and the excess wood on the end identified by the template is still needing to be sanded to better define the horn tip. I insert the rough horn into the bull head to make sure I’m tracking in a good direction.  I’m looking for good proportions. So far, very nice – but again, the first horn is easier!I transition to a smaller sanding drum to begin the removal of the excess wood on the front and back portions of the rough horn.  The horn starts to emerge very nicely during this part of the sanding which is patient – I am very careful sculpting with the sanding drum.  I can’t replace wood!After patient shaping, I test the emerging horn and it looks great!  The proportions are good on both the horizontal and vertical axis.With the challenge of now replicating the roughed-out horn, but in reverse, I try to emulate the same process and patiently move step by step.  I draw the peg template and again use the drum to shape out the peg.When the peg arrives in time with a good fit, I use the finished horn to draw a template on the second horn piece.Again, using the sanding drum, the angle is notched out creating the pitch toward the horn tip.As before, I then remove the excess on the top bringing it roughly parallel to the upper side of the peg.  With this done, I cut the cherrywood for a more manageable piece.
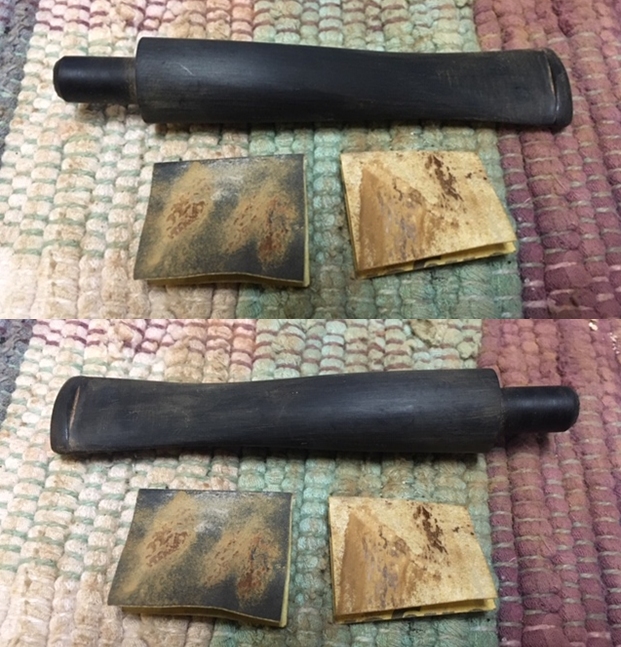
To shorten this part of the write-up, after much careful sanding, shaping and test fittings, I arrive at two roughed-out horns.They aren’t identical but close enough to pass for the real deal!To leave the horns in semi-rough condition with some texture, I sand both with 240 and 600 grade papers.  This smooths the cherrywood but keeps the horns more rustic.I’m not sure what it will do with the raw cherrywood, but I apply Before & After Restoration Balm to see what happens.  After applying the Balm with my fingers, I let the Balm do its thing for about 20 minutes.  The light cherrywood didn’t change much, but there is a more of a ivory-like hue to it now. Not bad.
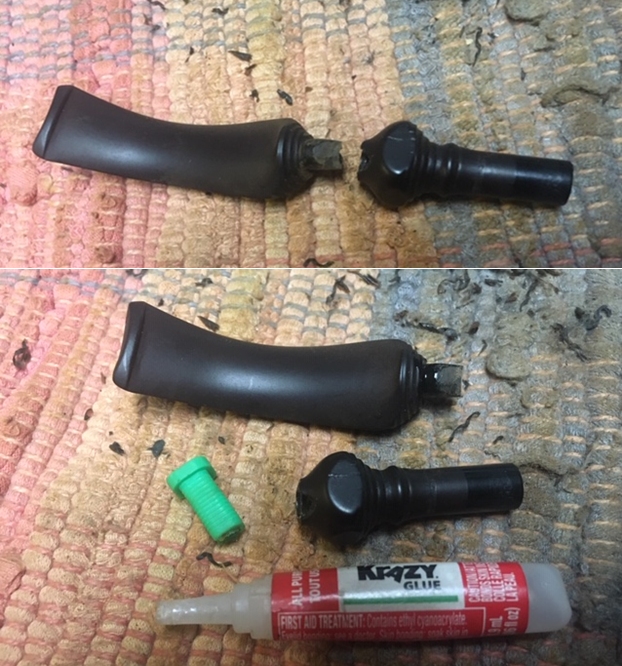
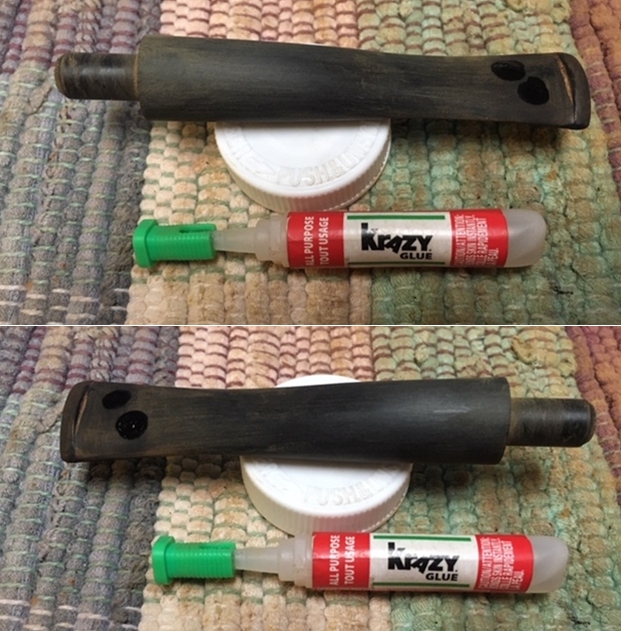
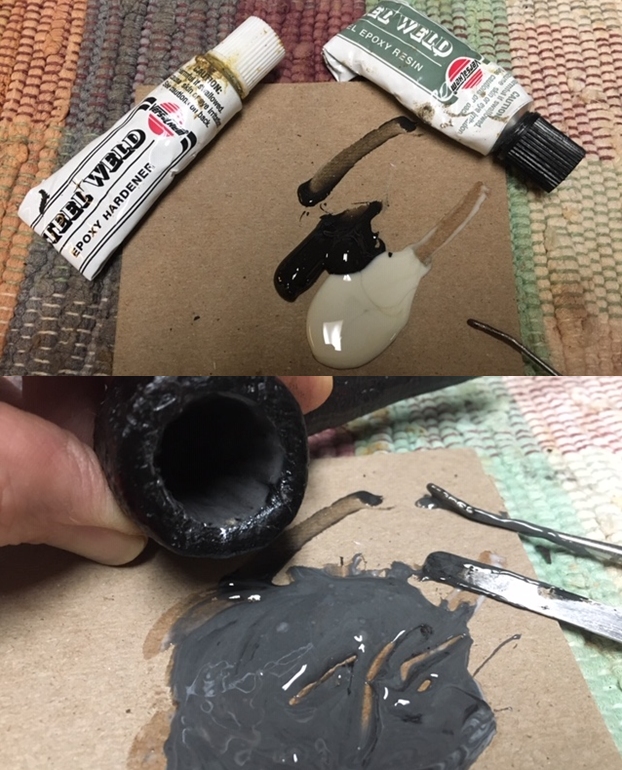
Almost in the home stretch.  Using BSI Maxi-Cure Extra Thick CA glue, I glue the horns in place.  After placing a drop in each hole, with a toothpick, I spread the glue around the circumference of the hole.  I then insert each horn and pitch it up as Seth requested.Now the home stretch.  All that is lacking is applying carnauba wax to the pipe.  After reuniting stem and stummel, I mount a cotton cloth buffing wheel to the Dremel and set the speed to about 40% full power.  I apply carnauba wax to the stem and Sculpted Bull’s Head stummel and horns.  I’m careful to go light on the wax in the sculpting staying primarily on the smooth briar and peaks. After application of the wax, I give the Churchwarden a rigorous hand buffing with a microfiber cloth to raise the shine.Oh my!  I love it, and I trust that Seth will as well.  His idea of turning this Sculpted Bull’s Head into a Churchwarden is a winner hands down.  The sculpting cleaned up nicely and the dark brown dye with the contrast highlighting with smooth briar is attractive, but the rustic air of the pipe is preserved.  I’ve never fashioned horns in a restoration before this project, but I believe the Bulgarian cherrywood looks good and does a good job emulating the horns.  Fashioning the horns wasn’t easy, but I’m pleased with the outcome. As the commissioner of this project, Seth will have the first opportunity to acquire this Sculpted Bull’s Head Churchwarden from The Pipe Steward Store.  This pipe benefits the Daughters of Bulgaria, women and girls who have been trafficked and sexually exploited.  Thanks for joining me!

Rebirthing a Stem for Jennifer’s Dad’s Second Champ of Denmark 4 Freehand


I decided to change things up a bit and work on another of Jennifer’s Dad’s pipes. For the next pipe from the estate of George Rex Leghorn I have chosen a nicely shaped Champ of Denmark Freehand. This one has been sitting for a while now while I debated what to do about the broken stem. I find that sometimes the best solutions come to me when I wait! You may not have read about this estate before, so I will retell the story. I received an email from Jennifer who is a little older than my 64+ years about whether I would be interested in her Dad’s pipes. My brother Jeff and I have been picking up a few estates here and there, so I was interested. Here is the catch – she did not want to sell them to me but to give them to me to clean up, restore and resell. The only requirement she had was that we give a portion of the sales of the pipes to a charity serving women and children. We talked about the organization I work for that deals with trafficking and sexual exploitation of women and their children and she decided that would be a great way to carry on the charitable aspect of her Dad’s character. With some great conversation back and forth she sent the pipes to Jeff and he started the cleanup process on them. Once he had finished cleaning them all he sent them to me to do my work on them.

The Champ of Denmark pipe is stamped on the underside of the shank CHAMP over of Denmark and below that is the number 4. It came to us with a broken stem about an inch, inch and ½ above the tenon. The beautiful straight and flame grain around the bowl and up the shank is visible through the very thick coat of grime. It seemed like it had a dark stain but hard to tell. There were oil stains from George’s hands on both sides of the bowl obscuring the grain. It was so dirty that it was hard to see the colour well. There was a thick cake in the bowl and it had overflowed with lava into the plateau on the bowl top and shank end. It was a dirty and tired looking old pipe. The stem was badly oxidized but there were not any tooth marks or chatter on the surface. The button was in good shape. It had been sitting in boxes for a lot of years and it was time to move ahead with the restoration. Jennifer took photos of the pipes she was sending. I have included two she included from this pipe. I had some decisions to make regarding this stem. Should I replace it or should I fiddle with a repair? I would have to think that through.When the box arrived from Jennifer, Jeff opened it and took photos of each pipe before he started his cleanup work on them. There were two Champ of Denmark Freehands in the box – both were in bags and both had broken tenons and stems. There is something about classic Danish Freehands that is intriguing and I like working on them. The shapes seem to really capture the flow of the grain on the briar and this second pipe is no exception. The briar appeared to be in good condition underneath the grime. The finish looked intact under the grime. The bowl had a thick cake that had hardened with time. The lava overflow on the plateau rim but it could very well have protected the rim from damage. We won’t know what is under it until Jeff had cleaned it off. The stem was broken in the middle between the turned four sided decorative bead and the blade. It looked as if it had snapped when George was trying to remove a stuck stem. But that was a piece of the history of the pipe I would never know for certain. Jeff took photos of the pipe before he started working on it. I include those below.Jeff took photos of the bowl and rim top to show the cake in the bowl and the lava build up on the plateau rim top and on the shank end as well. It was thick and hard but hopefully it had protected the rim and edges from damage. The lava coat looks horrible but it points to a well-used, favourite smoking pipe. George must have enjoyed this old timer and when the stem broke he must have been frustrated.Jeff took photos of the sides and heel of the bowl to show the condition of the finish – the grime and grit all over the sides and flat bottom of the bowl. It is a dirty pipe. Jeff took a photo of the stamping on the underside of the shank. It is very clear and readable. It reads as noted above.Jeff took photos of the top and underside of the broken stem showing the scratching, oxidation and tooth chatter on the stem surface. You can also see where the stem snapped – it is a very clean break and it is totally fixable. I will need to see if I have a small piece of tenon that can serve to join the two parts of the stem.When I worked on the previous Champ of Denmark back in June of 2019 I had done some research on the brand (https://rebornpipes.com/2019/06/22/restoring-jennifers-dads-champ-of-denmark-4-freehand/). I turned to that previous blog and quote that here in full:

I looked on the Pipephil site to get a quick overview of the brand. In the back of my mind I remembered a connection to Karl Erik. I could not remember the details of the connection (http://www.pipephil.eu/logos/en/logo-c4.html). I did a screen capture of the section on the brand that was shown on the site. I have included it below.In summary it says that the brand was distributed by Larsen & Stigart a tobacconist in Copenhagen, Denmark. The warehouse had a workshop that had such famous carvers as Soren Eric Andersen, Karl Erik Ottendahl and others.

I turned then to Pipedia (https://pipedia.org/wiki/Champ_of_Denmark) to see if I could get a bit more information. I quote in full from that site:

“Champ of Denmark” were made for and distributed by Larsen & Stigart by Karl Erik Ottendahl. Larsen & Stigart had some indoor carvers at certain times, too (e.g. Søren Eric Andersen) and among other things they managed to supply Dunhill with wild Danish fancy pipes.

In an endnote under the article on Karl Erik (https://pipedia.org/wiki/Karl_Erik) I found some more information. I quote the endnote in full.

¹ It is almost impossible to draw a sharp line between some of these brands… Larsen & Stigart – once a famous Copenhagen pipe shop, now almost forgotten – offered pipes produced by KE stamped “Larsen & Stigart” as well as pipes stamped “Larsen & Stigart” + “Champ of Denmark” or “Larsen & Stigart” + “Shelburne”. Almost needless to say, there are pipes stamped “Champ of Denmark” or “Shelburne” only. And the only reason is inconsistent stamping??? (BTW Larsen & Stigart employed own indoor carvers for appr. one decade – e.g. Søren Eric Andersen. They even managed to supply Dunhill with wild Danish fancy pipes.)

Now I had the verification of the link to Karl Erik Ottendahl. The pipe was most probably made by him for the pipe shop in Copenhagen. Before I get on to cleaning up the pipe I thought I would once again include the tribute that Jennifer wrote to her Dad for the blog. She also sent some photos and an article that her Dad wrote for Jeff and me to be able to get a feel for him. I have included those below. Note in each of them that he is holding a pipe in his left hand. I asked her to also send me an email with a brief tribute to her Dad. Here is her tribute from an email to me.

Steve, I want to thank you again for accepting my dad’s pipes.  They were so much a part of my dad’s life that I could not simply discard them. But as his daughter, I was not about to take up smoking them either. *laughing* I think my dad would like knowing that they will bring pleasure to others.  I know that I do.

I’m not sure what to say about his pipes. I always remember Daddy smoking pipes and cigars.

First a bit about my dad. Though my father, George Rex Leghorn, was American (growing up in Alaska), he managed to join the Canadian Army at the beginning of WWII, but in doing so lost his American citizenship.  He was fortunate to meet a Canadian recruiting officer who told him the alphabet began with “A” and ended with “Zed” not “Zee”, and also told him to say that he was born in a specific town that had all its records destroyed in a fire.  When the US joined the war my dad, and thousands of other Americans who had made the same choice*(see the link below for the article), were given the opportunity to transfer to the US military, and regain their citizenship.

After WWII, my dad, earned his degree at the University of California Berkeley and became a metallurgist. There is even a bit about him on the internet.

He loved taking the family out for a drive, and he smoked his cigars on those trips. (As a child, those were troubling times for my stomach.)

I most remember my father relaxing in his favorite chair with a science fiction book in one hand and a pipe in the other… Sir Walter Raleigh being his favorite tobacco… and the pipes themselves remind me of him in that contented way.  If I interrupted his repose, he’d look up, with a smile on his face, to answer me.

It seemed he smoked his Briarwood pipes the most, though he had others.  At the time, it was only the Briarwood I knew by name because of its distinctive rough shaped bowl.  And it was the Anderson Free Hand Burl Briar, made in Israel, which I chose for his birthday one year, because I thought he might like that particular texture in his hand.

At least two of his pipes, he inherited from his son-in-law, Joe Marino, a retired medical laboratory researcher (my sister Lesley’s late husband)… the long stemmed Jarl (made in Denmark), and the large, white-bowled, Sherlock Holmes style pipe.  I believe Joe had others that went to my dad, but Lesley was only sure about those two.

The Buescher, corncob pipe my older sister Lesley bought for Daddy while on one of her travels around the States.

A note on the spelling of my sister’s name…

My dad met my mother, Regina, during WWII and they married in Omagh, Ireland.  My mother was English and in the military herself.  The English spelling of Lesley is feminine, and Leslie masculine, in the UK… just the opposite of here in the United States.  I guess my mom won out when it came to the spelling of the name.

I’ll send you photos of my dad soon, along with his WWII experience story.

Jennifer

*https://www.thestar.com/news/world/2013/10/22/the_americans_who_died_for_canada_in_wwii.html

I am getting more and more spoiled on working on pipes that Jeff cleaned up. So much so that when I have to clean them it is a real chore! This pipe was a real mess just like the other ones in the collection. I did not know what to expect when I unwrapped it from his box. He reamed it with a PipNet pipe reamer and cleaned up the reaming with a Savinelli Fitsall Pipe Knife. He scrubbed out the internals with alcohol, pipe cleaners and cotton swabs until the pipe was clean. He scrubbed the exterior of the bowl with Murphy’s Oil Soap and a tooth brush to remove the grime and grit on the briar and the lava on the rim top. The finish looked really good when I got it. The rim top plateau looked lifeless but clean. We were not sure what I would do with the stem so Jeff cleaned the internals and scrubbed the exterior in case I chose to try to repair it. When the pipe arrived here in Vancouver for the second stop of its restoration tour it looked very good. I actually forgot to take many photos before I started my part of the work but I did have one with the pipe and the broken stem. The briar is beautifully grained and clean. The rim top plateau is cleaned as well. It looked good. The shank extension was vulcanite and it was badly oxidized and would need to be sanded and polished.My first thought was to replace the broken stem with another freehand stem. I went through my stems and chose the one that is shown in the photo below. The length was right and the tenon was close. I set up my cordless drill with the PIMO tenon turner and adjusted the diameter of the tenon to fit the shank extension. I put it in the pipe and took a photo of the pipe to get a sense of how it looked. I actually did not like the shape of the stem or the way it looked. I would need to think through how to address the snapped stem. I was not happy with the look of the new stem. It was too think and clunky looking to me to fit the style of the pipe. I decided not to use it so I did not even bother bending it. I turned back to the broken stem and thought long and hard about it. I went upstairs and had a coffee and a short nap before I finally came up with a plan. I headed back downstairs and dug through my parts boxes for broken tenons. I even keep those around when I pull them from a shank. I have a good assortment of them in various diameters. I picked two possibilities and laid them out. From the two I chose the smaller one. Now the plan was beginning to take shape. I was going to drill out the two parts of the stem and rejoin them together with the piece of tenon. (Forgive the blurry photo but you get the idea. I would drill a hole in each end and use the tenon to rejoin them.I started opening the airway in both halves of the stem with a drill bit slightly larger than the airway. I worked my way up to the bit that is shown in the photos. It was the slightly smaller than the piece of tenon that I was going to use for the joint.I reduced the diameter of the short tenon piece with a Dremel and sanding drum. I worked on it until the fit in the drilled airway was perfect. Once that was done I used the Dremel and sanding drum to take down the diameter a bit more on the second half of the tenon. I topped it on the topping board using the blade side as a handle. Once the fit was right on both sides I glued it in the blade side with clear Krazy Glue and pressed it into the hole.  I cleaned up the end of the tenon and coated it with a layer of clear Krazy Glue. I pressed the second half of the stem in place on the tenon insert and aligned the four sided bulb on the tenon end of the stem.I set the stem aside to let the repair cure and turned my attention to the oxidized shank extension. I sanded the oxidation off with a folded piece of 220 grit sandpaper. I started the polishing with 400 grit wet dry sandpaper. The third photo shows the plateau top and how the nooks and crevices look on the rim top. I polished the bowl and rim with micromesh sanding pads. I wet sanded it with 1500-12000 grit pads and wiped it down between pads with a soft cotton cloth. You can see the progress in the shine as you go through the photos. I worked some Before & After Restoration Balm into the finish of the bowl and the plateau on the rim top and shank end with my fingertips and a horsehair shoe brush to clean, enliven and protect it. I find that the balm really makes the briar come alive again. The contrasts in the layers of stain really made the grain stand out. I let the balm sit for a little while and then buffed with a cotton cloth to raise the shine. The pipe really looks good at this point. I am very happy with the way the pipe is looking at this point in the process.  Jeff’s clean up of the rim top looked very good. I decided to leave the darkened areas and darken the remaining valleys in the plateau with a Black Sharpie Pen to give the rim top a contrast look with the high smooth spots. It also gives the plateau more definition and gives it a clean look. The finished rim top looks very good.I set the bowl aside and turned my attention to the stem. I inserted a pipe cleaner in the stem to protect the airway from collapsing when I heated it. I painted the surface of the stem with the flame of a BIC lighter until the vulcanite was soft. Once it was pliable I bent it to match the angle of the bowl top. I held it at that angle and cooled it under cool water to set it.I sanded the stem with 220 grit sandpaper and 400 grit wet dry sandpaper to smooth out the repair in the middle of the stem and to remove the oxidation that remained on the stem surface. I smoothed out the repair in the mid-section of the stem with a piece of 220 grit sandpaper on the edge of my pen knife blade. I followed that with the 400 grit wet dry sandpaper.  I rubbed the stem down with Denicare Mouthpiece Polish and a cotton pad to remove remnants of oxidation and to further blend in the sanding. The stem was showing some promise at this point in the process.I polished the stem with micromesh sanding pads – wet sanding it with 1500-12000 grit pads. I polished it further with Before & After Pipe Stem Polish – both fine and extra fine. I finished by wiping it down with Obsidian Oil after each pad and set it aside to dry. I carefully buffed the stem with Blue Diamond on the buffing wheel and did the same for the bowl and vulcanite shank extension. I gave the bowl and the stem multiple coats of carnauba wax separately as the angle of the stem and shank made buffing this a bit tricky. I buffed the pipe with a clean buffing pad to raise the shine. I hand buffed it with a microfiber cloth to deepen the shine. The polishing of the briar makes the grain really pop. The polished black vulcanite bit seemed to truly come alive with the buffing. This Freehand feels great in my hand and is what I would call and Egg/Oom Paul. It is one that could be clenched and smoked while doing other things as it is very light weight for a pipe this size It must have been a fine smoking pipe judging from the condition it was when we received it from Jennifer. There should be a lot of life left in this Champ of Denmark by Karl Erik. Have a look at it with the photos below. The dimensions are Length: 6 ¼ inches, Height: 2 ½ inches, Outside diameter of the bowl: 1 ½ inches, Chamber diameter: 7/8 of an inch. This is one that will go on the rebornpipes online store shortly. If you want to carry on the pipe trust of George Leghorn let me know. Thank you Jennifer for trusting us with his pipes. Thanks to each of you who are reading this blog. Remember we are not pipe owners, we are pipemen and women who hold our pipes in trust until they pass on into the trust of the next pipeman or woman.

Refreshing a Dunhill Root Briar 708 F/T Oval Shank Canted Stack for Alex


Blog by Steve Laug

Around Christmas time I got together with Alex to enjoy some great hot cocoa, smoke our pipes and talk about all things pipes. I always have a great time when we get together and this time was no exception. He greeted me at the door with slippers and an old smoking jacket. I took my seat in the living room among his latest pipe finds and was handed a great cup of cocoa. I set it down and we both loaded out pipes with some new Perretti’s tobacco that he had picked up. We touched the flame of the lighter to the tobacco and sat back and blissfully enjoyed the flavour. As we did Alex walked me through his latest finds. There were some amazing pipes to look at and savor. He had found several really nice pipes – 3 different Dunhill pipes that he wanted me to work on for him. I have already written a blog on the Dunhill Wanghee Tan Shell Briar with a Bamboo shank (https://rebornpipes.com/2020/01/08/refreshing-a-dunhill-tanshell-w60-t-1962bamboo-lovat-for-alex/). I have also written a blot on the reconstruction of a nice little Shell Briar Lovat(https://rebornpipes.com/2020/01/11/breathing-life-into-a-worn-and-beat-up-dunhill-shell-briar-ec-canadian-for-alex/). The third Dunhill he had picked up is a shape number I could find little information on – a shape 708F/T Root Briar. For lack of a better title for the shape I have called it a canted stack.

Alex had reamed the pipe and cleaned the pipe very well. The bowl was clean. The rim top had a lot of damage including burn marks and dents. The bowl was also very far out of round with damage around inner edge. There were burn marks on the inner and outer edge toward the right front side of the bowl. The finish looked very good around the bowl other than the burn mark on the left side where it looked like the bowl had been laid in an ash tray against a hot ash. He had already enjoyed smoking it and was hooked on it. He asked if I could take it home with me and see what I could do about the rim top damage and the burn mark on the bowl. I told him I would take it home and have a go at it. The pipe was stamped on the left side of the shank with the following nomenclature: 708F/T at the bowl shank junction followed by Dunhill over Root Briar. The Dunhill Root Briar stamp is faint but readable with a lens and light. The right side reads Made in England followed by what looks like a 2 (another 1962?) and a Circle 4 A. The 4 is the size of the pipe and the A is the designation for Root Briar. The stamping on the right side of the shank is also faint.

When I got home I laid it aside and today took it up to work on it. I examined the pipe to see what I was working with and took some photos. You can see from the first photo below that there was a burn mark on the left side mid bowl. It was a cosmetic burn marks in the finish but not too deep. It was like the pipe had been laid down in an ashtray. The rim top had significant darkening and damage. The stem was in good condition other than tooth chatter on both sides just ahead of and on the top of the button. Overall the pipe was in good condition. I took a close up photo of the rim top. You can see the darkening on the rim top and the damage on the front inner and outer edge of the bowl. The inner edge was hacked up like it had been poorly reamed with a pocket knife. There were also nicks and deep scratches in the rim top. It was in rough shape. The stem looked pretty good. There was tooth chatter on the top and underside of the stem and on the button surface itself. Otherwise the stem was in very good condition.I took a photo of the stamping on the underside of the bowl. You can see that it reads as noted above. It is indeed faint but with a lens and light it is very readable.I decided to start the refurbishing by addressing the issues with the rim top and inner edge of the bowl. I lightly topped the bowl on a topping board with 220 grit sandpaper. Once it was smooth I worked on the inner edge of the bowl with a folded piece of 220 grit sandpaper. I also cleaned up the burned outer edge on the rim front. I sanded the burn mark on the left side of the bowl with the 220 grit sandpaper and was able to minimize the burn a bit. It was deeper than I initially thought. I polished the rim top and bowl with micromesh sanding pads – wet sanding it with 1500-12000 grit sanding pads. I wiped the bowl down after each sanding pad with a damp cloth to remove the dust and debris left behind by the sanding. I used a Maple Stain Pen to blend the sanded area on the side of the bowl and the rim top with the rest of the finish on the bowl. I have found that this particular stain pen works well to match the stain on the Root Briar.With the finish cleaned I rubbed it down with Before and After Restoration Balm. It is a product developed by Mark Hoover to clean, enliven and protect briar. I worked it into the briar with my fingertips. I let it sit while I went and had some lunch. When I came back I buffed it off with a cotton cloth. You can see the results below. While the burn mark did not disappear it is significantly lighter than when I started. The rim top also looks much better. I set the bowl aside and turned to address the tooth chatter on the stem surface. The stem was in excellent condition other than that so it did not take a lot of work. I used a folded piece of 220 grit sandpaper to sand out the tooth marks and then started the polishing with 400 grit sandpaper.I polished it further with Denicare Mouthpiece Polish – a red paste that does a great job in removing the oxidation remnants in the crease of the button and also polish out some of the lighter tooth chatter.I finished the stem with micromesh sanding pads – wet sanding it with 1500-12000 grit pads and wiping it down after each pad with a damp cotton pad to remove the dust. I polished it with Before and After Pipe Polish – both fine and extra fine. I finished by wiping the stem down with some No Oxy Oil that I received from Briarville Pipe Repair to experiment with. Once I finished I put the stem back on the shank and carefully buffed the pipe and stem with Blue Diamond polish. I wanted to polish out the minute scratches in the briar and the vulcanite. I gave the bowl and the stem several coats of carnauba. I buffed the pipe with a clean buffing pad and hand buffed it with a microfiber cloth. The finished Root Briar pipe is shown in the photos below. It is a great pipe and certainly looks better than when I began the process. The dimensions of the pipe are Length: 5 ½ inches, Height: 1 7/8 inches, Outer Bowl Diameter: 1 1/8 inches, Chamber Diameter: ¾ of an inch. The pipe will soon be heading back to Alex so he can continue to enjoy it. This is a beauty that he can enjoy as he carries on the trust of these Dunhill pipes. Thanks for walking with me through the restoration.

Cleaning Up a Third Wrecked Pipe for a Fellow Pastor in Vancouver – A VB Apple


Blog by Steve Laug

Lately I am not taking on more work for repairs from email or online requests as I am just too busy. I still get the odd referral from the local cigar and pipe shop that I feel obligated to repair or restore. They tend to be spread out a bit so I can fit them in among the other work that I am doing for estates. Earlier this week I received a phone call from a fellow who had been referred to me by the shop. In our conversation he said that he had some pipes that the stems were all loose on and he wanted to know if I would be able to help him. I have learned to not make any arrangements until I have the pipes in hand and have examined them. He came over Friday afternoon to let me have a look at the pipes. He handed me a bag and inside there were four or five extra stems that he had brought for my use. There were also three old and tired pipes. They were in very rough shape. Two were apple shaped pipes stamped VB and one was a Croydon billiard. The stems were indeed loose on two of the pipes and stuck on the third pipe. The bowls were clogged with a thick cake to the degree that I could not even get my little finger in them. The stems had a thick layer of calcification and some tooth marks. They needed a lot of work.

We talked about the pipes and that he had held them for a long time hoping for a repair. He had spoken with the cigar and pipe shop and they had led him to me. Now he could actually have a hope of smoking them again. In the course of the 30 minute or so conversation he asked me what I do for work. I told him I was a Presbyterian minister working with an NGO dealing with the sexual exploitation and trafficking of women and children in 7 countries and 12 cities around the world. We talked about that a bit then he laughed and told me he was a United Church Minister who had taught in a variety of schools as well as pastored various parishes. We had a great conversation and I took the pipes and told him we would connect again once I had them finished.

The last pipe from the threesome is on the table now. It was probably in the best shape of the three pipes. It was in rough condition but not as bad as the previous two pipes. The bowl was clogged in precisely the same manner – a thick hard cake and no air would pass through the shank. The finish was shiny with varnish and worn and spotty with blackening on the right side of the bowl and both sides of the shank. It appeared to be an oily black not a burn. The rim top was a real mess with thick hard lava overflowing all around the bowl onto the rim. The stem was loose in the shank and was oxidized with calcification extending for about an inch up the stem from the button. In the midst of the calcification were the same deep tooth marks that appeared to be rounded rather than sharp so I may well be able to lift them out with a lighter flame. The slot in the button was plugged with a pin hole sized airway going through it. This third pipe is exactly like the others and I honestly do not know how this pipe was smoked the last time it was used. This was another of those pipes that I really dreaded working on because I just sensed that one thing would lead to another and the restoration would be almost endless. I took photos of the pipe before I started to record this anxious moment! I took some close up photos of the bowl and stem to show what I was dealing with on this pipe. You can see the density of the cake. It is not totally clear in the photo but the bowl is filled on the second half of the bowl and packed solid. This bowl appeared to be the only one that he had not reamed with a knife. The bowl was not slanted and the cake was evenly heavy all the way around the bowl. The rim top is rough as noted above and looking at the photos it too appears to have been used as a hammer. It is very rough to touch. The stem is a mess as can be seen. There is some oxidation and a thick coat of calcification from the button forward. That too is rock hard. Both the stem and the shank are plugged with no air passing through them.I took a photo of the stamping to show the brand on the pipe. It is a brand I have never heard of or worked on. There is little information available on it. It is stamped VB on the left side of the shank and Prima on the underside.Fortunately it was the same brand as the second pipe that I worked on. The only difference was the stain and the PRIMA stamping on the underside of the shank. I did some digging on the brand to see what I could find out with this additional information and there was nothing more to be found. I am including what I found on the previous VB pipe on Pipephil’s index page (http://www.pipephil.eu/logos/en/index-en.html) I found my first and only clue. Under the section called logos with two letters I found the VB listed. It took me to a listing under Holiday pipes. There was no further information on the country of origin or on the maker other than Holiday. I checked on pipedia as well and there was nothing. I have included a copy of the screen capture of the listing on Pipedia (http://www.pipephil.eu/logos/en/logo-h3.html#holiday).After posting the first VB pipe I received two comments on the blog regarding the stamping. I really appreciate getting information like this so if you ever have info please do not hesitate to send it. Here is what the first commenter, Liebaart sent me:

The VB logo is from the Vinche Company, a Belgian distributor. See their page: https://www.v-k.be/documents/catalog.xml?lang=en&open=NAV%5CPIJPEN%5CVINCHE&from=0

The second commenter, Joris D. Sutter (may be the same gentleman) sent the same information. The V.B logo refers to the company Vinche, a Belgia distributor. Have a look at their website here : https://www.v-k.be/documents/catalog.xml?lang=en&open=NAV%5CPIJPEN%5CVINCHE&from=0

This was very definitive information for me. I now knew that the pipe was from the Vinche Company a Belgian distributor. I am still wondering though if the pipe was made in Holland as suggested previously… the new information does not negate that possibility!

Once again I could no longer postpone starting the work on this old pipe. It was the last of threesome and I could return them to the old pastor. And besides that this is what I do – I am a pipe refurbisher. It was time to get started on this beast. I learned from the previous two pipes in the lot that the cake and calcification were very hard. I dropped the stem in a Oxyclean bath and the bowl in an alcohol bath. I figured while I worked on other pipes the cake and calcification would begin to soften a bit.When the pipe and stem had been soaking for about 4 hours I pulled them out of the respective baths. The bowl looked better externally. The alcohol had cut the shiny finish and removed some of the grime on the bowl. The cake in the bowl was definitely softer so I think it would be easier to remove. The stem came out and the bath had removed much of the oxidation and calcification. It had also softened what remained. The photos below show what I saw.The alcohol bath had softened the hard cake enough that I could directly ream it with the PipNet pipe reamer using the third cutting head. It easily worked through the cake and I was able to take it back to the bare walls of the bowl. I wanted to check and see if there was damage like there had been on the other two pipes. The good news was it was free of damage. I cleaned up the edges and bottom of the bowl with a Savinelli Fitsall Pipe Knife. I sanded the inside of the bowl with 220 grit sandpaper wrapped around a piece of dowel to further smooth out the bowl. I broke through the clogged airway in the shank with a piece of stiff wire. I topped the bowl on a topping board with 220 grit sandpaper and removed the damaged areas on the surface. Once I had finished the rim top was flat now I could deal with the edges of the bowl. I filled in the damage on the edges of the bowl with clear Krazy Glue and Briar dust. Once it dried I cleaned up the topping once again and then used a folded piece of 220 grit sandpaper to smooth out the inner and outer edge of the bowl. With the bowl reamed and the rim top repaired and clean I decided to work on the exterior of the bowl. It was unbelievably grimy and sticky. I scrubbed it with a tooth brush and undiluted Murphy’s Oil Soap. I rinsed it under warm running water to wash away the soap and debris. I repeated the process until the exterior was as clean as I was going to get it at this point. I dried it off with a cotton cloth and took photos to show the result. I cleaned the mortise and the airway in the shank and stem with pipe cleaners, cotton swabs and alcohol. I used the drill bit on a KleenReem tool to clean out the “crud” (hardened tars and oils) in the airway in the shank. I scraped the inside of the mortise with a pen knife. I opened the slot in the button with a dental pick and pushed pipe cleaners through the debris in the stem. I scraped away the majority of the calcification with the pen knife while I was cleaning the stem. Once I had finished – many pipe cleaners and cotton swabs later the airway was unobstructed to the bowl and the pipe had begun to smell clean. I sanded the exterior of the bowl and rim with a medium grit sanding sponge to remove the nicks, scratches and remnants of the original finish. I sanded the strange dark stains on the right side of the bowl and both sides of the shank at the same time. While I w not able to remove them I reduced them enough that I was hoping the stain I was going to use would cover them. I stained the bowl and shank with a Fiebing’s Tan Stain. It has a nice reddish tint to it that shows up once I have buffed and sanded it. I applied the stain, flamed it with a lighter and repeated the process until I was happy with the coverage. I would carry on with the bowl in the morning. The stain would dry overnight.In the morning when I got up I took photos of what the bowl looked like after the stain had cured all night. There are wet looking patches but they are not wet…just shiny! I wet sanded with 1500-12000 grit sanding pads to smooth out the finish on the bowl and prepare it for staining. I wiped the bowl down after each pad with a damp cloth to remove the dust and debris from sanding. I worked some Before & After Restoration Balm into the finish of the bowl, the rim top and shank with my fingertips to clean, enliven and protect it. I find that the balm really makes the briar come alive again. I let the balm sit for a little while and then buffed it with a cotton cloth to raise the shine. The pipe really looks good at this point. It looks much better than when I took it out of the bag. I set the bowl aside and turned my attention to the stem. I “painted” the surface of the stem with the flame of a Bic light to raise the tooth marks. It raised them all some but two small dents remained on both sides of the stem.I filled in the remaining tooth marks with clear Krazy Glue and let it cure. I like the clear glue on this kind of stem as it dries clear and the black of the stem shows through making for a very good blend with the existing material.Once the repairs cured I reshaped the button edge with a needle file. I flattened out the repaired spots at the same time. The stem was beginning to take shape.I sanded the repaired areas on both sides of the stem with 220 grit sandpaper to blend them into the surface of the stem. I followed that by sanding them with a folded piece of 400 grit wet dry sandpaper to begin the polishing.I polished the stem with micromesh sanding pads – wet sanding it with 1500-12000 grit pads. I polished it further with Before & After Pipe Stem Polish – both fine and extra fine. I wiped the stem down with Briarville’s No Oxy Oil to preserve and protect the stem. This was another challenging pipe to work on and I did the heavy work without Jeff. I put the stem back on the bowl and polished the bowl and stem with Blue Diamond polish on the buffing wheel. I gave the bowl and the stem multiple coats of carnauba wax. I buffed the pipe with a clean buffing pad to raise the shine. I hand buffed it with a microfiber cloth to deepen the shine. The grain pops through enough to let us know it is there and my repairs to the rim of the bowl blend in really well. I am pleased with the look of the pipe. It really has exceeded my expectations for it when I first took it out of the bag it was in when dropped off. The contrast between the reddish, tan stain of the briar and the polished black vulcanite stem look very good together. The pipe feels great in my hand and I am sure that it will feel even better radiating the heat of a good smoke. It must have been a fine smoking pipe judging from the condition it was when I received it from the pipeman who dropped it off. Have a look at it with the photos below. The dimensions are Length: 5 ¾ inches, Height: 1 ¾ inches, Outside diameter of the bowl: 1 ¼ inches, Chamber diameter: ¾ of an inch. I am looking forward to what the old clergyman thinks of his second “new” pipe. I think he will enjoy it for many years to come and perhaps it will pass to the next pipeman who will hold it in trust. Thanks to each of you who are reading this blog.

A Button-Rebuild Helps Reclaim a Beat Up French GEFAPIP 500 26 S Bent Bulldog


Blog by Dal Stanton

I acquired this Gefapip 500 26 S Bent Bulldog in the acquisition of what I call the ‘St. Louis Lot of 26’.  My son, Josiah, found the Lot for sale in an antique shop in St. Louis where he was doing his Masters work on a counseling degree.  He texted to me in Bulgaria the details with the proposal that we split the cost of the purchase – that I would choose one of the pipes as a gift from him and the remainder would go into the For “Pipe Dreamers” Only! online collection for pipe men and women to commission to benefit the Daughters of Bulgaria – our work here in Bulgaria with women and girls who have been trafficked and sexually exploited.  It was a win/win proposition and the HUGE Champion Churchwarden in the center became my gift from Josiah.  I made out like a bandit!Several of these pipes have already found their way to new stewards and another is on deck for restoration.  Seth saw the St. Claude produced Bent Bulldog (arrow in picture above) and sent me this note:

Hi Dal, first of all, I just want to say that I’ve been checking your website pretty frequently since you spoke at our church’s (Faith PCA in Cumberland, MD) mission conference a year or two ago. Since hearing about the work you and Beth do through the Daughters of Bulgaria, I knew I wanted to donate in some way and have been waiting to find the right pipe to get.

My wife and I visit many churches in the US when we’re there talking about our life and work in Bulgaria.  Seth was at one of these conferences and I love getting notes like this.  One of the pipes he had in mind was the Bulldog.  Later, Seth added another commission project to the GEFAPIP Bulldog, by asking me to fashion a new Churchwarden from a Sculpted Bull’s Head – I’m looking forward to this one!  His biggest challenge is the missing horns which I will need to fashion!I’m grateful for Seth’s patience in waiting for his commissions to reach the worktable.  Here are pictures of the Bent Bulldog.The provenance of the pipe is found on the lower left panel of the diamond shaped shank.  The nomenclature is GEFAPIP [over] 500 [over] FRANCE.  Running parallel to the shank facing to the right is what I’m assuming is a shape number: ’26 S’.  The ‘500’ and ‘FRANCE’ stampings are very thin, so I need to be careful to safeguard these.A quick look in Pipedia reveals pertinent information about the French origins of this GEFAPIP.  The information is brief but helpful.

Gefapip was a French brand from the St Claude region. Their products appeared in the 1979 Tinderbox catalog, with prices ranging from $17.50 to $62.50.

The following catalog page (1979 Catalog page, courtesy Doug Valitchka) was included with the text and it added helpful information that the GEFAPIP name was started by a group of master carvers in the St. Claude region.  The production line pictured in the catalog page are examples of shapes smoked in the Saint Claude region in the 1890s according to the caption.A visit to Pipephil.eu did not produce new information but gave some additional examples of GEFAPIP pipes. The stem stamping of a ‘modernistic’ pipe shape shown in the panel unfortunately is not visible on the Bent Bulldog’s stem.  I don’t know if it was ever there or was worn away over the years.Looking more closely at the Bulldog itself, reveals that it has been smoked hard and put out to pasture.  The rim has lava flow along with a thick carbon cake buildup in the chamber. The briar surface is covered with a darkened film of grime and oils that need cleaning.The stem is deeply oxidized to the point of what I believe is calcium buildup on the surface concentrated in the bit area.  The bit has been chewed severely with the upper button bite caving in on the slot.The underside also has a severe tooth hole almost puncturing through to the airway.  The entire button will need rebuilding to address these issues.The shank junction seems to be in good shape at first glance, but I see that former sanding and wear has created some shouldering on the corners of the stem facing.The restoration of the French GEFAPIP Bent Bulldog begins with the needy stem to address the deep oxidation.  I first clean the airway with pipe cleaners dipped in isopropyl 95%.Trying to get a jump on breaking up the oxidation in the vulcanite, I apply a 00-grade steel wool to the surface before putting the stem in a soak of Before & After Deoxidizer.  This seems to help.I’ve purchased a new batch of the Deoxidizer from Mark Hoover (lbepens1@gmail.com), but I wanted to give the current batch one more use before tossing it!  Generally, I like the Before & After Deoxidizer’s performance except when deep oxidation is present.  Consistently, I find that it doesn’t remove this deep oxidation but perhaps masks it and generally I find that following the Before & After Treatment sanding to remove the oxidation is needed.  The stem of the GEFAPIP Bulldog joins other pipes in the queue (Longchamp, Danish Freehand, Kaywoodie Standard, Italian Billiard and Brewster) for a soak in the Deoxidizer.I give the soak several hours, though I don’t believe the additional time adds more cleaning, and after fishing out the Bulldog’s stem and draining off the excess liquid, I run another pipe cleaner wetted with isopropyl 95% through the airway to clean away the Deoxidizer.  I also rigorously wipe off additional oxidation raised through the soak process using cotton pads wetted with isopropyl 95%.After this, to help revitalize the vulcanite stem, I wipe paraffin oil on the stem.  Paraffin oil is a mineral oil I can find easily here in Bulgaria.With the help of the setting of the camera on my iPhone X, the remnant of deep oxidation remaining in the vulcanite is visible.  I will need to fully sand the stem to clean it thoroughly.Putting the stem aside for the time, I take a closer look at the stummel with a fresh picture of the chamber.  The picture below is difficult to discern the canonical shape of the chamber as the cake thickens toward the floor of the chamber.I also do a quick inventory of the briar surface in need of cleaning.  The dark spots of oils and grime hide the beautiful grain peeking in from underneath. After laying out paper towel to minimize cleanup, to clean out the carbon cake buildup in the chamber I use the Pipnet Reaming Kit to get down to the fresh briar.  I use two of the four blade heads available in the kit.  Then, switching to using the Savinelli Fitsall tool, scraping the chamber walls continue.  Finally, after wrapping a Sharpie Pen with 240 grade paper, the chamber is sanded to finish the reaming process.  After cleaning the chamber of carbon dust with a cotton pad wetted with isopropyl 95%, inspection of the chamber shows some minor heating veins, but healthy briar now has a fresh start.  I move on.Transitioning now to the external cleaning, undiluted Murphy’s Oil Soap is used with a cotton pad to scrub the briar surface.  A dental probe is helpful in cleaning the pair of parallel dome grooves separating the upper and lower Bulldog bowl.  A brass bristled brush helps to clean the lava flow on the rim as well.  Brass bristles are used because they are gentler on the briar surface yet provide some abrasive cleaning action. From the cleaning on the worktable, the bowl is transferred to the kitchen sink and rinsed with hot water.  Using long shank brushes, the internal cleaning starts by using anti-oil liquid dish soap.  After a thorough rinsing, back on the worktable the results of the cleaning are examined.The surface cleaned up very well.  The dark spots that were especially evident at the shank/bowl junction were cleaned away very nicely.The rim shows continued darkening, but this will be addressed with some sanding to clean the briar.The nice quality of this block of briar is evidenced by the emerging grain and that I found only one, very small fill on the right upper shank panel.  There’s a slight ridge where the fill has shrunk after being wet, a normal phenomenon.  I may touch it up with some clear CA glue.Switching now to the internal cleaning proper, cotton buds and pipe cleaners are employed after wetted with isopropyl 95%.  The internals are grungy.  Using a smaller pointed dental spoon, I excavate huge amounts of tars and oils scraped off the mortise walls.  My first effort at pushing a pipe cleaner through the draft hole is frustrated by a blockage.  With the help of a stiff piece of wire, the blockage is pushed through – a hunk of gunk! With a lot of effort expended, the buds and pipe cleaners start emerging in a lighter state until I call it a truce!  I’ll continue the internal cleaning later with a kosher salt/alcohol soak.  The pictures show the first assault. I decide to move straight away to the kosher salt and alcohol soak.  I first twist a cotton ball by pulling and twisting it to form a ‘wick’ that is inserted into the mortise with the help of the stiff wire.  Then, after filling the bowl with kosher salt which leaves no aftertaste and placing the stummel in an egg carton for stability, using a large eye dropper, the chamber is filled with isopropyl 95% until it surfaces over the salt.  After a few minutes, the alcohol is absorbed into the pipe and I top it off again and set the stummel aside for several hours allowing the soak to do the work. Switching focus now to the stem, I take a few pictures to take a closer look.  With the residual oxidation remaining in the stem, it is a given that the stem will be fully sanded to address this.  The upper bit has compressions including damage to the button lip.  In the picture, after inserting a pipe cleaner, the split in the button becomes more visible.  The lower bit is so damaged that no amount of sanding will resolve these issues.  With the upper bit, I’ll first use the heating method to expand the vulcanite to lessen the amount of sanding needed.I note that the button doesn’t have a slot but simply an airway hole. To begin, I use a Bic lighter to paint the upper bit to lessen the severity of the compressions before rebuilding the button.  I take a picture to mark the start and another picture to show the progress.  The second picture does reveal that the vulcanite expanded some and this is good.Next, the entire button needs to be rebuilt using a mixture of activated charcoal and Extra Thick CA glue.  To begin, I wrap a piece of Scotch tape around the end of a pipe cleaner then rub Petroleum Jelly over the tape.  I then insert the pipe cleaner into the airway and position the tape so that it straddles the air hole in the button.  This is to guard the integrity of the airway so that the patch material doesn’t seal it.I then clean the upper- and lower-bit area with alcohol.With a plastic disk serving as a mixing pallet, scotch tape is used to help in the cleanup.  I mix on a non-porous surface to provide consistency in the way the CA glue mixes with the activated charcoal.  That is, I do not mix on card stock or something like this because it absorbs moisture out of the glue and causes the glue to behave less consistently while mixing.  I use an activated Charcoal Capsule to provide the charcoal – it is pure and is not lumpy.After removing the charcoal from the capsule, I add a small puddle of the Extra Thick Maxi-Cure CA glue produced by BSI.  It works well for me.I use a toothpick to mix the CA glue and charcoal by drawing the charcoal into the glue as I mix.  When it thickens enough so that it’s not running off the toothpick, I then trowel the mixture onto the button – upper and lower.  The patch mounds should be more than what is needed so that sanding brings the newly fashioned button down to the right size and shaping. After the patch material sets, just like it should work, the petroleum jelly coated pipe cleaner was removed with a few small tugs.After several hours the patch material is fully cured.  The long patient process of filing and shaping the button begins with a flat needle file.  The following pictures show the gradual progression on the upper button lip. Next, transitioning to the lower button lip and the patch to bit. The filing phase is completed as the pictures show the upper and lower bit and views of the airhole – upper and lower orientation. Transitioning to 240 grade paper I begin sanding which continues the smoothing and shaping of the button but also expands the sanding to the entire stem to address the deep oxidation.  I employ a plastic disk to sand against to avoid shouldering the stem facing.  It is no surprise to see the emergence of air pocket pits in the patch material as the sanding continues.  I would like to figure out how to minimize this! The upper and lower stem is shown. The sanding with 240 paper is completed and I wipe the button off with a cotton pad wetted with isopropyl 95% to get a closer look at the patch pitting in the rebuild button. To address this and to fill the pits, I use regular clear CA glue.  I put a small amount of CA glue on the lip of the button and then spread it over the lip to create a thin layering of glue over the surface.  This layering of CA glue fills the pits.  I spray the glue with an accelerator to hold it in place and to quicken the curing time. Next, after taking the stem to the kitchen sink, the whole stem is wet sanded with 600 grade paper and after the sanding, 000 is applied to the entire surface of the stem to smooth it further – including the newly rebuilt button with the CA glue painting of the button.  The results are looking good for the upper and lower stem. I put the stem to the side for now and turn again to the stummel which has been undergoing a kosher salt/alcohol soak for several hours to continue cleaning and refreshing the internals.  The salt and mortise ‘wick’ are soiled revealing the passive activity of drawing out the tars and oils from the internal mortise walls.  After tossing the expended salt into the waste, I wipe the bowl with paper towel and blow through the mortise to remove salt crystals.To make sure all is fully cleaned, I use one pipe cleaner and cotton bud to confirm this.  I also take a whiff of the chamber and it is smelling sweet and ready for its new steward!  Moving on!I continue with the stem applying the full regimen of micromesh pads.  First, with pads 1500 to 2400 wet sanding is followed by dry sanding with pads 3200 to 4000 and 6000 to 12000.  Between each set of 3 pads, Obsidian Oil is applied to rejuvenate the vulcanite stem and to retard future oxidation development.  The stem looks great and the button rebuild does as well. Continuing to help in the revitalization of the vulcanite stem, I apply Before & After Fine Polish and then Extra Fine Polish in that order.  After each application by working the polish into the vulcanite with my fingers, afterwards wipe the excess with paper towel.  The stem looks good.After completing this phase of the stem restoration, to get a look at the overall progress, I reunite the stem and GEFAPIP Bent Bulldog stummel.  Two issues emerge after reuniting the stem and stummel.  First, the tenon/mortise fitting has loosened as a result of the cleaning processes.  This often is the case.  The seating of the tenon needs tightening.  The second issue is that the shank/stem alignment is off slightly creating a gap between the stem and shank on the left side – right side of the second picture below. This gapping is enhanced somewhat by the rounded corners of the stem facing that I identified earlier. Before addressing the gap, to tighten the tenon’s fit in the mortise, I find a drill bit one size larger than what will fit into the airway. Then, using a Bic lighter to heat the tenon until the vulcanite softens; the drill bit is forced into the airway gradually.  After inserting the very beginning of the bit, I re-heat the tenon with the Bic lighter to again soften the vulcanite.  I then force the bit into the airway further.  With each advance of the slightly larger drill bit into the airway, the vulcanite is expanded thus increasing the diameter of the overall tenon resulting in a tighter fit in the shank.After the bit has reached the end of its journey expanding the tenon, I take the stem to the kitchen sink and cool the tenon with the drill bit remaining inserted.  This cools the vulcanite and it hardens resulting in holding the expanded tenon diameter.  Back at the worktable, to remove the bit, which is now stuck, I grip the end of the drill bit with plyers and while holding the bit stationary, I rotate the attached stem so that gradually the bit is released from the tenon’s grip.The procedure works very well so that the tenon is now too large to fit after a test fitting.  Using 240 grade paper wrapped around the now expanded tenon, while holding the sanding paper stationary, I rotate the entire stem so that the sanding on the tenon moves toward a custom fit and is sanded uniformly.After some sanding, another test shows progress, BUT the tenon is never forced into the mortise which increases the dreaded shank cracking noise to be heard!Finally, the tenon is seated into the mortise and I examine the fit.  The truth is that the stem fitting is not good, and it appears that this was a factory issue or is it a replacement stem?  I don’t think so, but it looks like the drilling was off some so that the stem and shank facing are not perfectly flush.  The resulting gaps are easily seen in the pictures below. To address this issue, since the gapping is in the lower quadrant of the stem/shank facings, I fold a piece of 240 sanding paper and insert the now two-sided edge of the paper in the upper quadrant sandwiched between the stem and shank.  Sanding the folded paper like a hand saw – back and forth – has the effect of removing the material equally on both sides which has the hoped result of closing the gaps in the lower quadrant.This takes some time – ‘hand saw’ sanding and testing – to see very gradual progress.  Re-fitting a catawampus stem/tenon/shank junction is not easy in general, but when one is dealing with a diamond or squared shank, it’s much more difficult.  Why?  A rounded junction is much easier to blend the opposites coming together.  With the corners and edges of a diamond shank, it is much easier to see problems stand out.  The following pictures show progress, but perfection is not found in this life!The other thing that is troublesome with this junction is that the corners have been rounded or shouldered.  I noted this before and this picture brings attention to this.  The next two pictures show this as well as a lingering gap that my OCD tendencies will not ignore!To help remove the shouldering and hopefully provide more movement toward a better fitting, I bring out the stem topping board.  With a hole drilled in the board, I place 240 paper over the hole and force the tenon through the paper into the hole.  With the tenon inserted into the hole, I then rotate the stem carefully to sand down the stem facing – thus, removing the shouldered edge and creating a sharper facing – hopefully!After the topping, I cover some of the stem with masking tape and sand the junction with 240 then 600 grade paper to bring things into a tighter alignment removing the edges I can feel as I rub my finger over the junction.  I’m avoiding the lower left panel which holds the nomenclature.This sanding and the topping have worked very well.  Not perfection, but a much better union is evident.I continue sanding the junction with the addition of 000 grade steel wool avoiding the nomenclature panel altogether.  Satisfied, I move on!After putting the stem to the side, I turn to the stummel and take a closer look at the Bulldog’s scratched and nicked rim.  It’s not in terrible shape but shows signs of normal wear and tear.  I take it to the topping board for a light topping to refresh the Bulldog rim. I first turn the inverted stummel several rotations on 240 sanding paper placed on top of a chopping board.  This does well as a portable topping board.The topping progression is shown in the next few pictures as the scratches are removed and the rim lines re-established.  The first picture concludes the 240 topping and the second after changing to 600 grade paper. Moving now to the stummel surface, as with the rim, it shows scratches and nicks from general usage. To address these minor issues, using sanding sponges cleans the surface but are not too invasive.  I first use a coarse grade followed by medium and light grades.  The transformation is stark as the grain begins to emerge and I like what I see! From the sanding sponges, I transition to applying micromesh pads to the stummel.  Using pads 1500 to 2400, I wet sand followed by dry sanding with pads 3200 to 4000 and 6000 to 12000.  The grain is very nicely teased out through the process.Detour – After the first set of 3 pads which wetted the stummel.  I took a closer look at a fill on the upper right shank panel.  This is the most noticeable fill I’ve detected, and the fill has remained solid, but is lightened in contrast to the surrounding briar.  Before moving to the next set of micromesh pads, I darken the fill using a mahogany dye stick.  This does a good job of darkening the fill.  The continued sanding helps to blend the fill. Before moving on to the finishing phase, the dome grooves receive a cleaning using a sharp dental probe to remove packed briar dust and such.With the grooves cleaned of debris, I next apply Mark Hoover’s (www.ibpen.com) Restoration Balm to the stummel.  I like this product because it brings out the subtleties of the natural briar grain.  After putting some of the Balm on my finger, I apply it to the stummel surface and work it into the briar.  I then set it aside for 20 minutes or so allowing the Balm to do its magic.  I use a cloth dedicated to removing the excess Balm after it has set.  I then buff the stummel with a microfiber cloth.  Nice!  The picture shows the Balm on the surface doing its thing.The home stretch – after mounting a cotton cloth buffing wheel to the Dremel, setting the speed at about 40% full power, Blue Diamond compound is applied to the entire pipe – stem and stummel.  Following this, a felt cloth is used to buff removing compound dust from the surface in preparation for applying wax.  I run a dental probe around each of the dome grooves to remove caked compound.  After changing to another cotton cloth buffing wheel, carnauba wax is applied to the stem and stummel at the same speed as the compound. Finishing the restoration, a microfiber cloth works well to give a rigorous hand buffing to disperse any wax build up and to raise the shine.

The most daunting challenges in bringing this GEFAPIP 500 S Bent Bulldog back into service was the stem work – rebuilding the button and helping the tenon/mortise fitting.  The oxidation was stubborn as well.  In the end, it was worth the effort.  The classic Bulldog shape is to me a pipe with attitude.  This Bulldog, a product of St. Claude, France, is no exception.  The vertical grain encompassing most of the dome resolves on the underside of the bowl in bird’s eye grain and swirls very pleasing to the eye.  The stem’s quarter bend is nice for resting in the palm in a relaxed way for reflecting on life and family.  Seth, from Maryland, will have the first opportunity to claim this Bulldog from ThePipeSteward Store which benefits the Daughters of Bulgaria.  Thanks for joining me!

Cleaning Up a Second Wrecked Pipe for a Fellow Pastor in Vancouver – A VB Apple


Blog by Steve Laug

Lately I am not taking on more work for repairs from email or online requests as I am just too busy. I still get the odd referral from the local cigar and pipe shop that I feel obligated to repair or restore. They tend to be spread out a bit so I can fit them in among the other work that I am doing for estates. Earlier this week I received a phone call from a fellow who had been referred to me by the shop. In our conversation he said that he had some pipes that the stems were all loose on and he wanted to know if I would be able to help him. I have learned to not make any arrangements until I have the pipes in hand and have examined them. He came over Friday afternoon to let me have a look at the pipes. He handed me a bag and inside there were four or five extra stems that he had brought for my use. There were also three old and tired pipes. They were in very rough shape. Two were apple shaped pipes stamped VB and one was a Croydon billiard. The stems were indeed loose on two of the pipes and stuck on the third pipe. The bowls were clogged with a thick cake to the degree that I could not even get my little finger in them. The stems had a thick layer of calcification and some tooth marks. They needed a lot of work.

We talked about the pipes and that he had held them for a long time hoping for a repair. He had spoken with the cigar and pipe shop and they had led him to me. Now he could actually have a hope of smoking them again. In the course of the 30 minute or so conversation he asked me what I do for work. I told him I was a Presbyterian minister working with an NGO dealing with the sexual exploitation and trafficking of women and children in 7 countries and 12 cities around the world. We talked about that a bit then he laughed and told me he was a United Church Minister who had taught in a variety of schools as well as pastored various parishes. We had a great conversation and I took the pipes and told him we would connect again once I had them finished.

I chose the second pipe from the threesome to work on. The stem was stuck in the shank and it was locked tight. It was in rough condition but not as bad as the previous billiard. The bowl was clogged in precisely the same manner – a thick hard cake and no air would pass through the shank. The finish was worn but nowhere near as bad as the Croydon billiard. The rim top looked was in better condition with damage to the top and the inner and outer rim but still better. I put the pipe in the freezer for several hours and was able to easily remove the stem from the shank. The stem was oxidized with calcification extending for about an inch up the stem from the button. In the midst of the calcification were the same deep tooth marks that appeared to be rounded rather than sharp so I may well be able to lift them out with a lighter flame. The slot in the button was plugged with a pin hole sized airway going through it. I honestly do not know how this pipe was smoked the last time it was used. This was another of those pipes that I really dreaded working on because I just sensed that one thing would lead to another and the restoration would be almost endless. I took photos of the pipe before I started to record this anxious moment! I took some close up photos of the bowl and stem to show what I was dealing with on this pipe. You can see the density of the cake. It is not totally clear in the photo but the bowl is filled on the second half of the bowl and packed solid. The bowl also has a slant toward the rear from reaming with a knife. The rim top is rough as noted above and looking at the photos it too appears to have been used as a hammer. It is very rough to touch. The stem is a mess as can be seen. There is some oxidation and a thick coat of calcification from the button forward. That too is rock hard. Both the stem and the shank are plugged with no air passing through them.I took a photo of the stamping to show the brand on the pipe. It is a brand I have never heard of or worked on. There is little information available on it. It is stamped VB on the left side of the shank.I did some digging on the brand to see what I could find out. Finally on Pipephil’s index page (http://www.pipephil.eu/logos/en/index-en.html) I found my first and only clue. Under the section called logos with two letters I found the VB listed. It took me to a listing under Holiday pipes. There was no further information on the country of origin or on the maker other than Holiday. I checked on Pipedia as well and there was nothing. I have included a copy of the screen capture of the listing on Pipephil (http://www.pipephil.eu/logos/en/logo-h3.html#holiday).Once again I could no longer postpone starting the work on this old pipe. Since I am a pipe refurbisher I had to get started on this beast. I began the work by reaming the bowl. The old fellow had chipped away enough of the carbon to smoke a little toward the end but he had done so at an angle so there was a nice concave cup in the back wall of the bowl. I had to work carefully with the Savinelli Fitsall Knife to start the process. I poke through the clogged airway into the bowl early on because honestly I could not see where it entered the bowl. I wanted to make sure I knew where it was while I cut through the cake. I worked through the first three cutting heads of the PipNet to straighten out the walls of the bowl. I took photos to chronicle that work. You can see the growing mound of carbon under the pipe in the photos. It was quite unbelievably hard. I cleaned up the edges and bottom of the bowl with a Savinelli Fitsall Pipe Knife. I sanded the inside of the bowl with 220 grit sandpaper wrapped around a piece of dowel to further smooth out the bowl. It was yet another of the worst cakes that I have worked on. With the bowl reamed I decided to work on the exterior of the bowl. It was unbelievably grimy and sticky. I scrubbed it with a tooth brush and undiluted Murphy’s Oil Soap. I rinsed it under warm running water to wash away the soap and debris. I repeated the process until the exterior was as clean as I was going to get it at this point. I dried it off with a cotton cloth and took photos to show the result. I cleaned the mortise and the airway in the shank and stem with pipe cleaners, cotton swabs and alcohol. I opened the airway into the bowl with a sharp straightened paper clip and used the drill bit on a KleenReem tool to clean out the “crud” (hardened tars and oils). I scraped the inside of the mortise with a pen knife. I opened the slot in the button with a dental pick and pushed pipe cleaners through the debris in the stem. I scraped away the majority of the calcification with the pen knife while I was cleaning the stem. Once I had finished – many pipe cleaners and cotton swabs later the airway was unobstructed to the bowl and the pipe had begun to smell clean. I topped the bowl on a topping board with 220 grit sandpaper and removed the damaged areas on the surface. Once I had finished the rim top was flat now I could deal with the edges of the bowl.I used a folded piece of 220 grit sandpaper to smooth out the inner and outer edge of the bowl. The outer edge cleaned up really well. I was quite happy with how the rim top and edges were beginning to look.I decided to address the hollowed out back inner wall of the bowl before I called it a night. The first photo shows the damaged area before I repaired it. I mixed up a small batch of JB Weld. I blended the two parts together to a dark grey paste and used a dental spatula to apply it to the back wall of the bowl. In the morning I used a Dremel and a sanding drum to take down the excess JB Weld in the back of the bowl. I ground it down until the inside was smooth. I wiped the inside of the bowl down with alcohol on a cotton pad to remove the sanding dust.I sanded the exterior of the bowl and rim with a medium grit sanding sponge to remove the nicks, scratches and remnants of the original finish. I scraped and sanded the strange dark stains on the shank at the same time. I wet sanded with 1500-12000 grit sanding pads to smooth out the finish on the bowl and prepare it for staining. I wiped the bowl down after each pad with a damp cloth to remove the dust and debris from sanding. I worked some Before & After Restoration Balm into the finish of the bowl, the rim top and shank with my fingertips to clean, enliven and protect it. I find that the balm really makes the briar come alive again. I let the balm sit for a little while and then buffed it with a cotton cloth to raise the shine. The pipe really looks good at this point. It looks much better than when I took it out of the bag. I set the bowl aside and turned my attention to the stem. I “painted” the surface of the stem with the flame of a Bic light to raise the tooth marks. It raised them all some but two small dents remained on both sides of the stem. I forgot to take a photo of the stem after the heating. I filled in the remaining tooth marks with clear Krazy Glue and let it cure. I like the clear glue on this kind of stem as it dries clear and the black of the stem shows through making for a very good blend with the existing material.I sanded the repaired areas on both sides of the stem with 220 grit sandpaper to blend them into the surface of the stem. I followed that by sanding them with a folded piece of 400 grit wet dry sandpaper to begin the polishing.I polished the stem with micromesh sanding pads – wet sanding it with 1500-12000 grit pads. I polished it further with Before & After Pipe Stem Polish – both fine and extra fine. I wiped the stem down with Briarville’s No Oxy Oil to preserve and protect the stem. This was another challenging pipe to work on and I did the heavy work without Jeff. I put the stem back on the bowl and polished the bowl and stem with Blue Diamond polish on the buffing wheel. I gave the bowl and the stem multiple coats of carnauba wax. I buffed the pipe with a clean buffing pad to raise the shine. I hand buffed it with a microfiber cloth to deepen the shine. The grain pops through enough to let us know it is there and my repairs to the rim and back of the bowl blend in really well. I am pleased with the look of the pipe. It really has exceeded my expectations for it when I first took it out of the bag it was in when dropped off. The contrast between the natural browns of the briar and the polished black vulcanite stem look very good together. The pipe feels great in my hand and I am sure that it will feel even better radiating the heat of a good smoke. It must have been a fine smoking pipe judging from the condition it was when I received it from the pipeman who dropped it off. Have a look at it with the photos below. The dimensions are Length: 5 ¾ inches, Height: 1 ¾ inches, Outside diameter of the bowl: 1 ¼ inches, Chamber diameter: ¾ of an inch. I am looking forward to what the old clergyman thinks of his second “new” pipe. I think he will enjoy it for many years to come and perhaps it will pass to the next pipeman who will hold it in trust. Thanks to each of you who are reading this blog.

Cleaning Up a Wrecked Croydon Billiard for a Fellow Pastor in Vancouver


Blog by Steve Laug

Currently I am not taking on more work for repairs from email or online requests as I am just too busy. I still get the odd referral from the local Vancouver cigar and pipe shop that I feel obligated to repair or restore. They tend to be spread out a bit so I can fit them in among the other work that I am doing for estates. Earlier this week I received a phone call from a fellow who had been referred to me by the shop. In our conversation he said that he had some pipes that the stems were all loose on and he wanted to know if I would be able to help him. I have learned to not make any arrangements until I have the pipes in hand and have examined them. He came over Friday afternoon to let me have a look at the pipes. He handed me a bag and inside there were four or five extra stems that he had brought for my use. There were also three old and tired pipes. They were in very rough shape. Two were apple shaped pipes stamped VB and one was a Croydon billiard. The stems were indeed loose on two of the pipes and stuck on the third pipe. The bowls were clogged with a thick cake to the degree that I could not even get my little finger in them. The stems had a thick layer of calcification and some tooth marks. They needed a lot of work.

We talked about the pipes and that he had held them for a long time hoping for a repair. He had spoken with the cigar and pipe shop and they had led him to me. Now he could actually have a hope of smoking them again. In the course of the 30 minute or so conversation he asked me what I do for work. I told him I was a Presbyterian minister and was now working with an NGO dealing with the sexual exploitation and trafficking of women and children in 7 countries and 12 cities around the world. We talked about that a bit then he laughed and told me he was a United Church Minister who had taught in a variety of schools as well as pastored various parishes. We had a great conversation and I took the pipes and told him we would connect again once I had them finished.

I decided to start with the Croydon billiard. It was in very rough condition. The bowl was clogged with a thick hard cake and no air would pass through the shank. The finish was shot with burn marks and darkening about ½ inch down the back of the bowl. The rim top looked like it had been used for a hammer with the worst damage on the back portion of the bowl and rim top. The darkening was in the chewed up area on the back of the bowl so it would be interesting to see what I could do with that part of the pipe. The stem was oxidized with calcification extending for about an inch up the stem from the button. In the midst of the calcification were deep tooth marks that appeared to be rounded rather than sharp so I may well be able to lift them out with a lighter flame. The slot in the button was plugged with a pin hole sized airway going through it. I honestly do not know how this pipe was smoked the last time it was used. This was one of those pipes that I really dreaded working on because I just sensed that one thing would lead to another and the restoration would be almost endless. I took photos of the pipe before I started to record this anxious moment! I took some close up photos of the bowl and stem to show what I was dealing with on this pipe. You can see the density of the cake. It is not totally clear that the second half of the bowl is packed solid. The bowl also has a slant toward the rear from reaming with a knife. The rim top is the disaster mentioned above. It is very rough to touch. The stem is a mess as can be seen. There is some oxidation and a thick coat of calcification from the button forward. That too is rock hard. Both the stem and the shank are plugged with no air passing through them.I took pictures of the sides of the bowl and rim to give you an idea of the condition of the pipe. I could not believe the old fellow had said that the bowl were in “great shape”! I have no idea how he could call this “great shape”. What do you think? I took a photo o f the stamping to show the brand on the pipe. It is a little known brand with little information. This one reads Croydon on the left side of the shank and Italy on the right side. Sources I have found have hinted at it being from the Netherlands and others from Great Britain. I think the country of manufacture will remain a mystery for now. I have worked on other Croydon pipes in the past and never really been that impressed with them. They have seemed like lower end basket pipes that have a lot of putty fills in the briar and are generally finished with a varnish coat. At least with this one I could start from basically scratch. I did a bit of searching to find the maker of Croydon pipes and came across a short reference to the brand on Pipedia (https://pipedia.org/wiki/Croydon). There was no other information on the brand other than it was made in the Netherlands (does not help explain why this one is stamped Italy, but oh well). There was also a link to Don Bernard pipes in Amsterdam, Netherlands (https://pipedia.org/wiki/Don_Bernard_Pipes. On that link there was the name of the maker and an address for the company. It is Bernard Myburgh, Sumtrakade 1195 1019 RJ Amsterdam, The Netherlands. The website www.donbernardpipes.com did not work for me so I am not sure if it is still a valid company. There was also an email address listed for them (donbernard@upcmail.nl) so I sent an inquiry to them regarding the brand. The email bounced as the contact was no longer valid. At least I now have a connection to the Netherlands but it still does not help me with the Italy stamp on this pipe.

I could no longer postpone starting the work on this old pipe. Since I am a pipe refurbisher I had to get started on this beast. I began the work by reaming the bowl. I started with the smallest PipNet Reamer cutting head so as not to damage the bowl. The old fellow had chipped away enough of the carbon to smoke a little toward the end but he had done so at an angle so there was a nice concave cup in the back wall of the bowl. I had to work carefully through the cutting heads to straighten out the bowl. I used the first three cutting heads to get it reamed out. I took photos of each cutting head to chronicle that work. You can see the growing mound of carbon under the pipe in the photos. It was quite unbelievably hard. I cleaned up the edges and bottom of the bowl with a Savinelli Fitsall Pipe Knife. I sanded the inside of the bowl with 220 grit sandpaper wrapped around a piece of dowel to further smooth out the bowl. It really was one of the worst cakes that I have worked on. Once I was finished reaming it the airway was still clogged going into the bowl because of the tars and oils. I cleaned the mortise and the airway in the shank and stem with pipe cleaners, cotton swabs and alcohol. I opened the airway into the bowl with a sharp straightened paper clip and used the drill bit on a KleenReem tool to clean out the “crud” (hardened tars and oils). I scraped the inside of the mortise with a pen knife. I opened the slot in the button with a dental pick and pushed pipe cleaners through the debris in the stem. I scraped away the majority of the calcification with the pen knife while I was cleaning the stem. Once I had finished – many pipe cleaners and cotton swabs later the airway was unobstructed to the bowl and the pipe had begun to smell clean. With the internals clean it was time to work on the exterior of the bowl. It was unbelievably grimy and sticky. I scrubbed it with a tooth brush and undiluted Murphy’s Oil Soap. I rinsed it under warm running water to wash away the soap and debris. I repeated the process until the exterior was as clean as I was going to get it at this point. I dried it off with a cotton cloth and took photos to show the progress. I knew that topping the bowl would only start to address the issues with the rim top and edges of this pipe. I wanted to have a flat surface to work with and to flatten the edges before addressing the damages. I topped the bowl on a topping board with 220 grit sandpaper and removed the damaged areas on the surface. Once I had finished the rim top was flat now I could deal with the edges of the bowl.The topping had removed much of the damage to the front and sides of the bowl. The slight damage that remained would be taken care of when I gave the rim a slight bevel. I decided to build up the damaged edge on the back of the bowl with Krazy Glue and briar dust. It would dry black but the edge would be smooth and the rim top even once I was finished. I would have to blend the transition with a dark brown stain. I layered the build up on the edge – glue then dust and repeating it until the edge was built up. The first photo below shows the repair before I shaped it with sandpaper and files. I sanded the edge and topped the bowl again to smooth out the rim top and edges. The second and third photo show where the pipe stands at this point. There are still a few spots on the outer edge of the rim but it is looking much better. I used a folded piece of 220 grit sandpaper to smooth out the inner and outer edge of the bowl. The outer edge cleaned up really well. I was quite happy with the finished look. The inner edge would take a bit more work once I had repaired the inside damage to the bowl.I sanded the exterior of the bowl and rim with a medium grit sanding sponge to remove the nicks, scratches and remnants of the original finish. There was still a lot of work to do to finish the pipe as there were also some strange dark stains on the briar and a few fills that I wanted to smooth out. With initial sanding of the bowl finished it was time to address the damage to the inside of the bowl. There were some heat fissures mid bowl on the right side and the backside mid bowl had been carved out and there were fissures there as well. I mixed up a batch of JB Weld. I did not need too much as the damaged areas were very specific and I would not need to coat the whole bowl with the mixture. I blended the two parts together to a dark grey paste and used a dental spatula to apply it to the affected areas of the bowl. I have included two photos of the bowl repair to show the nature of the repair. Remember the majority of the patch will be sanded off leaving just the fissures filled in with the repair mix. I let the repair harden for about 10 minutes before moving on to sand the exterior of the bowl and rim with micromesh sanding pads. I wet sanded with 1500-12000 grit sanding pads to smooth out the finish on the bowl and prepare it for staining. I wiped the bowl down after each pad with a damp cloth to remove the dust and debris from sanding. I used a Dremel and a sanding drum to take down the excess JB Weld in the bowl. I ground it down until the inside was smooth and the weld was in the fissures in the bowl sides. You can see the ring of weld around mid-bowl. That is where the most damage was on the bowl walls.With the scratches smoothed out and the repairs minimized a bit I decided to stain the pipe with a Dark Brown Feibings stain. The stain goes on very dark and covers a multitude of issues but when it is buffed and sanded the colour still allows the grain that is present to shine through clearly. I applied the stain and flamed it to set it in the grain. I repeated the process until I was happy with the coverage on the bowl.In the morning one the stain had cured I sanded the bowl with micromesh sanding pads to remove the excess stain and make the stain coat more transparent. I wet sanded it with 1500-12000 grit pads. I wiped the bowl down with a damp towel after each sanding pad. Each set of three pads brought the transparency to what I was aiming for and still masked the repaired areas on the bowl. I worked some Before & After Restoration Balm into the finish of the bowl, the rim top and shank with my fingertips to clean, enliven and protect it. I find that the balm really makes the briar come alive again. I let the balm sit for a little while and then buffed it with a cotton cloth to raise the shine. The pipe really looks good at this point. I am very happy with the way the pipe is looking at this point in the process. The pipe is looking much better than when I took it out of the bag. I set the bowl aside and turned my attention to the stem. I “painted” the surface of the stem with the flame of a Bic light to raise the tooth marks. It raised them all some but the two on the underside were too deep to come up very much. Overall the stem was looking better.I filled in the remaining tooth marks with clear Krazy Glue and let it cure. I like the clear glue on this kind of stem as it dries clear and the black of the stem shows through making for a very good blend with the existing material.I sanded the repaired areas on both sides of the stem with 220 grit sandpaper to blend them into the surface of the stem. I followed that by sanding them with a folded piece of 400 grit wet dry sandpaper to begin the polishing.I polished the stem with micromesh sanding pads – wet sanding it with 1500-12000 grit pads. I polished it further with Before & After Pipe Stem Polish – both fine and extra fine. I wiped the stem down with Briarville’s No Oxy Oil to preserve and protect the stem. This was a challenging pipe to work on and I did the heavy work without Jeff. I put the stem back on the bowl and polished the bowl and stem with Blue Diamond polish on the buffing wheel. I gave the bowl and the stem multiple coats of carnauba wax. I buffed the pipe with a clean buffing pad to raise the shine. I hand buffed it with a microfiber cloth to deepen the shine. The grain pops through enough to let us know it is there and my repairs to the rim and back of the bowl blend in really well. I am pleased with the look of the pipe. It really has exceeded my expectations for it when I first took it out of the bag it was in when dropped off. The contrast between the dark brown stain of the briar and the polished black vulcanite stem look very good together. The pipe feels great in my hand and I am sure that it will feel even better radiating the heat of a good smoke. It must have been a fine smoking pipe judging from the condition it was when we received it from the pipeman who dropped it off. Have a look at it with the photos below. The dimensions are Length: 5 ½ inches, Height: 2 inches, Outside diameter of the bowl: 1 ¼ inches, Chamber diameter: ¾ of an inch. I am looking forward to what the old clergyman thinks of his “new” pipe. I think he will enjoy it for many years to come and perhaps it will pass to the next pipeman who will hold it in trust. Thanks to each of you who are reading this blog.

Restoring a Karl Erik Ekstravagant Handmade In Denmark Tulip


Blog by Steve Laug

Every so often I receive pipes from pipemen and women who want them to be sold and the proceeds go to the NGO I work for in my real job! It is an organization called the SA Foundation Canada (www.safoundation.com) and it provides long terms housing, recovery and skill development for women and their children escaping sexual exploitation and trafficking. The organization is based in Vancouver, Canada but has projects in 7 countries and 12 cities globally. It is an organization that is cutting edge in the recovery process for these women and their kids with a success rate of over 70% globally. That simply means that out of every 100 women who enter our program 70 do not go back to their previous lifestyle. It is an amazing organization to work for and it has big vision and a commitment to thinking globally and acting locally. The admin and fundraising costs are 10% meaning that of every dollar donated $.90 goes to the work of providing for the recovery, care and training of the women and their children.

I am posting four pipes that have been donated for this cause. I am donating the restoration work on them and the individuals are donating the income generated by the sale of the pipes. This is the third of those pipes – first was a Nording Brandy 13, second was a Chimera Churchwarden and now this Karl Erik Ekstravagant Tulip. It is a beautiful pipe that has stunning grain. The stamping on the shank reads Karl Erik in a circle over Handmade in Denmark with Ekstravagant underneath that. The pipe is in excellent condition. There was some damage and burn marks on the rim top and inner edge as well as some darkening on the rim edges. The stem is acrylic with a golden fancy KE on the top. It has some light tooth chatter and marks near the button. There was also a long scratch on the underside of the stem running mid stem toward the button. The bowl and shank were dirty from light use but there was no cake in the bowl. I took some photos of the pipe before I started working on it. It really is a stunning pipe and feels great in the hand. I took photos of the rim top to show the damage that is present on the top and on the inner edge of the bowl. It almost looked as if the bowl had been knocked out against concrete. I took photos of the stem as well to try to capture the condition of the stem. The top side was dirty and dull but there were no tooth marks or chatter. The underside looked good other than a deep scratch that ran from the button edge forward on the stem for about an inch. I took a photo of the COM stamp on the underside of the shank and it reads as noted above. It is clear and readable with the stamp running around the circle.I wanted to know a bit more about the Ekstravagant stamping on this pipe. I have worked on quite a few pipes from Karl Erik (Karl Erik Ottendahl) over the years but this was the first with the Ekstravagant stamping. I turned to the Pipedia article on KE pipes for help with this (https://pipedia.org/wiki/Karl_Erik). From there I learned that these pipes were large pipes entirely handmade by Karl Erik Ottendahl.

I quote in part from that article below.

During all periods he had made some of his own handmade pipes, but he felt that the responsibility of managing the factory did not give him the freedom he wished he had. Accordingly, in 1990, he went back to work on his own. He believed that he could produce better work if he worked alone, though his principle reason was simply that he missed the quiet, pleasant atmosphere that a one man shop afforded him. According to him, he has been much happier since he returned to make pipes all by himself. Certainly, the results reflect his rediscovered happiness with the pipe making craft.

Though Karl Erik’s favorite briar mostly came from Morocco or Greece, but he frequently purchased elsewhere, too. He didn’t consider the briar origin to be particularly important provided the briar was well cured. Therefore, he simply purchased the best briar he could find, rather than purchasing from only one or two regions.

Concentrating on more classical influenced shapes Karl Erik’s style emphasized the wood over all other contributing factors by allowing the grain to determine the ultimate shape of the piece. He further emphasized the natural, organic, flowing shape of his bowls with hand cut stems and a broad variety of decorating materials.

Now it was time to work on the pipe. I decided to address the issues with the rim top first. I chose to use the least intrusive method first. I steamed the nicks and dents to no effect. I sanded it with a folded piece of 220 grit sandpaper to try to remove the damage. You can see the effectiveness of this in the first photo below. I carefully worked on the inner edge of the rim with a folded piece of 220 grit sandpaper. I worked slowly so as not to damage the rim top. It took a little work but I was able to remove some of the burn damage that marred the inner edge but there were some deep burns on the back edge of the bowl that would require stronger methods. I turned to stronger measures and carefully top the bowl on a topping board with 220 grit sandpaper. I needed to address the deep nicks in the surface and the edges – both inner and outer and this was the means I chose. It took care of the majority of the issues and minimized the burn mark at the front and back of the bowl. It was not gone but it looked better. I used a folded piece of 220 grit sandpaper to work on the inner edge. I wanted to give it a slight bevel to clean up the burn damage. While it was not perfect it was much better. I did not want to sacrifice the roundness of the bowl to do more work on it so I left it.I polished the rim top and edges of the bowl with micromesh sanding pads. I wet sanded it with 1500-12000 grit sanding pads and wiped it down with a damp cloth after each pad. The rim top came out looking very good. The darkening was lessened and the damage was smoothed out. The rim was looking very good at this point.  I stained the top of the bowl with a blend of Oak and Cherry stain pens. This combination matched the stain on the rest of the bowl perfectly. I am pretty happy with the look of the rim top at this point in the process.I worked some Before & After Restoration Balm into the surface of the briar with my fingertips and let it sit for about 10 minutes. I buffed it off with a soft cloth. It is a product that I have really come to appreciate. Mark Hoover crafted it to enliven, clean and protect briar. I use it on every pipe I work on and find that with a single application the briar comes alive with deep glow. Because the pipe looked so clean I forgot to clean out the internals. I went back and cleaned out the mortise and the airway in the shank and stem with alcohol, cotton swabs and pipes cleaners. The shank was quite dirty but the airway in the stem was pretty clean. I repeated the scrubbing until the cleaners came out clean.I set the bowl aside and turned my attention to address the deep scratch in the stem. It was really a gouge that had carved a line from the button forward. It was not a crack lest you might think so. I examined it in detail with a lens and the stem was solid. I wiped down the area with a cotton swab and alcohol and then filled in the gouge with clear Krazy Glue. Once the repair cured I used a folded piece of 220 grit sandpaper to blend the repair into the stem surface. I polished the area I had sanded with 400 grit wet dry sandpaper.Denicare Mouthpiece Polish is a gritty read paste that I have been using as a pre-polish for the mouthpieces. It removes a lot of very minor scratches and works well in removing the hard to get area in the crease of the button. I work it on with my fingers and then scrub the stem with a cotton pad and wipe it off when finished.  I avoided the gold stamping on the topside to protect it from over buffing.I polished the acrylic stem with micromesh sanding pads – wet sanding it with 1500-12000 grit pads and wiping it down with a damp cloth between each set of pads. The stem began to take on a deep shine. I used Before & After Pipe Polish – both Fine and Extra Fine to finish the polishing. By this point the stem looks great and the gouge is gone! Once I finished I put the stem back on the shank and carefully buffed the pipe with Blue Diamond polish using a lightly loaded pad and a soft touch. I wanted to raise a shine and buff out some of the small scratches in the briar and the acrylic stem. I gave the stem a vigorous polish being careful around the stylized gold KE on the stem top. I gave the bowl and the stem several coats of carnauba. I buffed the pipe with a clean buffing pad and hand buffed it with a microfiber cloth. The finished pipe is shown in the photos below. It is a great looking Karl Erik Ekstravagant Tulip shaped pipe whose sale price is going for a great cause. The dimensions of the pipe are Length: 6 inches, Height: 2 ½ inches, Outer Bowl Diameter: 1 ½ inches, Chamber Diameter: ¾ of an inch. The pipe will soon be on the rebornpipes store and you can purchase it and support a very worthy cause. Thanks for walking with me through the restoration.

Breathing Life into a Worn and Beat up Dunhill Shell Briar EC Canadian for Alex


Blog by Steve Laug

In a previous blog I mentioned that around Christmas time I got together with Alex to enjoy some great hot cocoa, smoke our pipes and talk about all things pipes. I also gave him a batch of pipes that I had finished from his stash and he gave me a few more to work on for him. I always have a great time when we get together and this time was no exception. He greeted me at the door with slippers and an old smoking jacket. I took my seat in the living room among his latest pipe finds and was handed a great cup of cocoa. I set it down and we both loaded out pipes with some new Perretti’s tobacco that he had picked up. We touched the flame of the lighter to the tobacco and sat back and blissfully enjoyed the flavour. As we did Alex walked me through his latest finds. There were some amazing pipes to look at and savour. I already wrote about the Dunhill Bamboo Tanshell with a lot of nice colour happening around the bowl. I refreshed that pipe for him and wrote about it here – https://rebornpipes.com/2020/01/08/refreshing-a-dunhill-tanshell-w60-t-1962bamboo-lovat-for-alex/.

He also pulled another Dunhill from the pile of new pipes that he wanted me to work on. It was the exact opposite of the Bamboo in terms of condition. The Bamboo was relatively clean and he had already enjoyed a few bowls through it so it was a quick and easy refresh. This one was a real mess! It was another sandblast. This time it was a Shell Briar Canadian. I carefully took it in my hands and examined it. It was in very rough shape with many cracks in the briar. Alex knew the issues with the pipe but he wanted to know if I could repair it. I assured him that of course it could be repaired and the current cracks stopped. But all repairs to the cracks would essentially be cosmetic and though he could not see them they were still present. The ones going through into the bowl would need to be treated as well. I have repaired many of the pipes that I smoke in this manner and they continue to serve me undamaged for many years after the repair so I was just giving him the facts. He was fine with that and said to go ahead. So I took it home with me.

When I got home I laid it aside and tonight took it up to work on it. I examined the pipe to see what I was working with and took some photos. You can see from the first four photos below that there was something redeeming about the pipe. I think that is what Alex saw. It is a really nicely shaped Canadian. The right side of the bowl was dirty but looked very good. The back of the bowl and right side were full of cracks that went virtually the length of the bowl from the rim top to at least shank height. The rim top had significant damage to the inner edge and the crack on the right side went through to the interior and on top. The stem was pockmarked, dirty and oxidized with tooth chatter and marks on both sides just ahead of the button. Overall the pipe a wreck. I took photos of the pipe before I started my cleanup and restoration. Look closely at the second and third photos. You will see the cracks. I took a close up photo of the rim top and the back and right side of the bowl to show the crack damage. I have pointed out the cracks with red arrows for easy identification. The inner edge of the rim also shows burn and poor reaming damage. I took photos of the stem as well. The vulcanite was pitted, oxidized and calcified in the crease of the button. There were some tooth marks and chatter on the stem near the button but otherwise it looked pretty good. The pipe was stamped on the heel and underside of the shank with the following nomenclature: EC (the designation for a Canadian) followed by Dunhill over Shell Briar. That is followed by Made in England with a number 3 in superscript next to the D. This tells me that the pipe was made in 1963. After that there is a circle with a 4 in it designating the size of the pipe followed by the letter S which is the designation for Shell Briar pipes. The stamping was clear and legible which actually surprised me given the condition of the rest of the pipe.I think Jeff has spoiled me with working on clean pipes so I decided to start by cleaning up this one. I wanted it clean even before I began to work on the repairs. I find that the cleaning also helps me see things in the finish that I would otherwise miss. I scrubbed the exterior of the bowl with Murphy’s Oil Soap and a tooth brush to remove the debris from the nooks and crannies of the sand blast as well as from the inside of the cracks. I rinsed the bowl with warm water and dried it off with a cotton cloth. Once that was done the cracks were very clear but so was the natural beauty of this Canadian shape! With the exterior clean I worked on the interior. I reamed the bowl with a Savinelli Fitsall knife. I did not want to risk the pressure that is put on the bowl sides by the PipNet reamer. I scraped the cake out until the walls were clear. I sanded them smooth with a dowel wrapped in 220 grit sandpaper.I cleaned out the mortise and the airway from the shank to the bowl with pipe cleaners, cotton swabs and alcohol. I worked on it until the airway was clean and the pipe smelled clean! I cleaned the stem at the same time working around the buildup on the tenon and stem face as well as the airway and the slot. I used alcohol, pipe cleaners and cotton swabs for this as well. I was surprised at how clean the internals of the stem were. I expected it to be horrid.With the bowl clean it was time to begin the reconstructive surgery on the bowl. I used a lens to trace the cracks to their end. All of them began at the rim and worked downward. I marked the end with a correction pen (thanks for the tip Paresh). Once I had them marked I used a Dremel and microdrill bit to drill a small hole in the end of the crack to stop it from spreading. Once I had the holes drilled I filled them in with briar dust and clear Krazy Glue (CA Glue). The cracks were numerous so I took a few photos to show the extent of the repairs. My method is a bit different from Dal’s due to my glue. I fill in the crack with the glue and press the parts together. It dries quickly and with no internal pressure holds together well. I go back and fill in the cracks in the bowl with briar dust. I use a dental spatula and pick to work them into the cracks. I put a top coat of Krazy Glue to seal it. I repeat the process until the repair is complete. In the case of the large crack that goes into the interior of the bowl I pressed dust into it as well and the glue from the outside held it in place. I will give it a coat of JB Weld to protect it once I finish the bowl. Once the repairs cure I work over the repaired areas with a brass bristle brush to knock of the loose dust and bits of glue that are on the surface. I used my Dremel and sanding drum to smooth out the interior walls of the bowl and the repair to the crack on the right side of the rim top. I think that the repair is starting to look pretty good.With the repairs cured and the interior and high spots smoothed out it was time for some artistry to bring the Shell finish back to the bowl sides and rim top. I started the process by working over the repaired areas with a wire wheel on my Dremel. I worked over the areas around the sides of the bowl and the rim top. It was starting to look right. The shininess of the repairs was reduced and the finish began to show through. Now it was time to etch the surface of the briar with the Dremel and burrs. The photos that follow show the three different burrs that I use to cut the grooves to match the sandblast. The burrs worked to cut a pretty nice match in the briar.I used the wire brush again to clean off the dust left behind by the burrs. It is hard to tell from the photos but the pattern is really close to the surrounding areas of the briar bowl and shank. With the carving done approximating the sandblast finish under the repairs it was time to stain the bowl. I have found that with a Shell Briar finish I have to use a Mahogany and a Walnut stain pen to match the rest of the bowl. I streak on the Mahogany first and fill in the Walnut around the rest of the finish. I blend them together and the finished look is hard to distinguish from the original stain. I moved on to round out the inner edge of the rim and minimize the damage. I used a folded piece of 220 grit sandpaper to carefully give the inner edge a very light bevel. Once I was finished with the shaping I ran a Walnut Stain Pen around the freshly sanded edge to blacken it.With the finish repaired and restained I rubbed it down with Before and After Restoration Balm. It is a product developed by Mark Hoover to clean, enliven and protect briar. I worked it into the briar with my finger tips and a horse hair shoe brush. I let it sit for about 10 minutes and buffed it off with a cotton cloth. You can see the results below. With the exterior finish and the repairs completed it was time to mix up a batch of JB Weld to coat the inside of the bowl and protect the walls where the cracks went through. I mixed the Weld and put a pipe cleaner in the airway to keep the weld from sealing off the airway in the bowl. I applied the mixture to the walls with a dental spatula. Once had the walls covered around the area of the cracks I set the bowl aside to cure. I did not put the mixture in the heel of the bowl as it was solid and had no issues. I set the bowl aside and turned to address the oxidation, tooth marks and chatter on the stem surface. The stem was in good condition with some minor pitting. I used a folded piece of 220 grit sandpaper to sand out the tooth marks, chatter and oxidation. I started the polishing with 400 grit sandpaper. The stem is starting to look very good.I have been using Denicare Mouthpiece Polish as a pre-polishing agent. It is a gritty, red paste that does a great job in removing the oxidation remnants in the crease of the button and also polish out some of the lighter scratches in vulcanite. I rub it on with my finger tips and scrubb it with a cotton pad. I buff it off with another pad.I finished polishing the stem with micromesh sanding pads – wet sanding it with 1500-12000 grit pads and wiping it down after each pad with a damp cotton pad to remove the dust. I polished it with Before and After Pipe Polish – both fine and extra fine. I finished by wiping the stem down with some No Oxy Oil that  received from Briarville Pipe Repair to experiment with. Once the JB Weld repair had cured I sanded the walls of the bowl to remove the excess material and to make sure the mixture was primarily in the damaged areas of the bowl walls. The repair looked very good. I mixed a batch of pipe mud composed of sour cream and charcoal powder and applied a coat of it to the bowl to protect the walls while a cake formed. I know Alex hates bowl coatings as much as I do but this one is essential given the nature of the cracks. It is just a precautionary step and the coating dries neutral and imparts no taste to the tobacco. After a few bowls you do not even know it is there. After mixing it well I applied it to the walls of the bowl with a folded pipe cleaner. I aim for a smooth coating that will dry dark and black and be almost invisible. When it dries the mixture does not have any residual taste. Once it was coated I set the pipe aside to dry. The mix does not take too long to dry. In about an hour it is dry to touch and almost black. After 24 hours it is black and smooth. The last photo below has been drying about two hours. The only remaining damp spot is in the bottom of the bowl. Once I finished I put the stem back on the shank and carefully buffed the pipe with Blue Diamond polish using a lightly loaded pad and a soft touch. I wanted the shine but not the grit filling in the crevices of the sandblast bowl. I gave the stem a vigorous polish being careful around the white spot. I gave the bowl several coats of Conservator’s Wax and the stem several coats of carnauba. I buffed the pipe with a clean buffing pad and hand buffed it with a microfiber cloth. The finished pipe is shown in the photos below. It is a great resurrection pipe for Alex and looks better than when I began the process. The dimensions of the pipe are Length: 5 ½ inches, Height: 1 5/8 inches, Outer Bowl Diameter: 1 ¼ inches, Chamber Diameter: ¾ of an inch. The pipe will soon be heading back to Alex so he can continue to enjoy it. Thanks for walking with me through the restoration.

A Challenging Restoration of a Peterson’s System 3, Irish Free State Stamped Pipe


Blog by Paresh Deshpande

This pipe had been on my ‘to do list’ for long but since it came without a stem and as I did not have one, this project was kept pending since long. Now that I have received my large consignment of estate vulcanite and bone/ horn stems, including one Pete System P-lip stem, I couldn’t help but fish out the Pete stummel again to work on.

Most of my fellow pipe restorers would have turned away from this project that I had decided to work on next. To be honest, I would have led the pack in just consigning this pipe to history, but for the provenance of this Peterson’s System pipe. This pipe had once belonged to my grandfather and from the condition that it was in; it was apparently one of his favorite pipes!!

Well, the pipe that is now on my work table is in a pretty badly battered condition and came without a stem. There are ample signs of this pipe having been repaired earlier and extensively smoked thereafter. The stampings are all but worn out and can be seen under a bright light and under a magnifying glass. The left side of the shank bears the stamp “PETERSON’S” over “SYSTEM” over an encircled # 3. The pipe bears the COM stamp of “IRISH” over “FREE STATE” that is stamped perpendicular to the shank axis in two lines and very close to the shank end. The ferrule has the usual three cartouche with first having Shamrock, the second a Prone Fox and lastly a Stone Tower. Stamped above the cartouche are the letters “K & P” and is stamped below as “PETERSON’S” over “DUBLIN”. Having worked on quite a few old Peterson pipes from my inheritance and few from my Mumbai Bonanza, I was pretty sure that this pipe dates to 1920- 30 time period. To confirm this and also refresh my memory, I turned to my favorite site rebornpipes.com and to a write up “A Peterson Dating Guide; a Rule of Thumb” by Mike Leverette, here is the link (https://rebornpipes.com/2013/08/11/a-peterson-dating-guide-a-rule-of-thumb-mike-leverette/)

Here is what I have found and I reproduce it verbatim from the write up:-

The Irish Free State was formed on 15 January 1922. So the Free State Era will be from 1922 through 1937. Peterson followed with a COM stamp of “Irish Free State” in either one or two lines, either parallel or perpendicular to the shank axis and extremely close to the stem.

Thus, it is confirmed that this pipe is from the period 1922 to 1937 and this has to be one of the earliest Peterson’s pipes that was in my grandfather’s rotation and probably one that was his favorite.

INITIAL VISUAL INSPECTION
The stummel is covered in dirt and grime. All that catches your eyes is the dirty darkened upper portion of the stummel something like a flume, but not quite like it!!! Closer examination confirmed my worst fears….. CRACKS!! Yes, crack with an ‘s’. There are a couple of major cracks, one to the front of the stummel in 11 o’clock direction and the second major crack is at the back of the stummel. It is from the end of this big crack that three smaller and fine lined cracks emanate creating a web of cracks at the back and extending to the sides of the stummel. These cracks appear to have been repaired at some point in the past, definitely more than 40 years back, and these repairs have been camouflaged under a blotchy coat of black stain. The exact extent of damage can be assessed only after the external surface of the stummel had been completely cleaned and under magnification. The foot of the stummel has a number of dents and dings which needs to be addressed. In spite of all the cracks and its subsequent repairs, this pipe had been in continuous use as is evidenced by the thick layer of cake in the chamber. It seems that my grandfather even took the efforts to keep the thickness of the cake to a dime, not successfully though and so unlike him!! The rim top surface is completely out of round with the cracks extending over the rim top in to the chamber. The extent of these cracks in to the chamber and damage to the walls will be ascertained only after the chamber is cleaned off the complete cake. The rim top is covered in a thick layer of lava overflow. The ghost smells are ultra-strong, I say.The mortise, shank and especially the sump are chock-a-block with old oils, tars, grime and residual flecks of tobacco. The air flow through the draught hole is laborious and will require a thorough cleaning.There being no stem with this pipe, the biggest challenge will be to find one that fits. Nonetheless, this particular pipe, though I desire to restore and preserve, I am not sure what the real condition of the stummel would be under all the dirt and grime and even if it’s worth the efforts that would be needed.

THE PROCESS
The first obvious issue that I wanted to address was to find a correct stem, preferably original P-lip stem, for the pipe. I rummaged through the parcel of estate pipe stems that had only recently reached me and I knew it contained a Pete System P-lip stem. I fished it out and tried the fit of the stem in to the mortise. Here is what I saw. Though the fit appears to be good in pictures, that is not so!! There are these following issues which are difficult to gauge from the pictures:

(a) The stem does not seat firmly into the mortise. There is a play between the tenon and the walls of the mortise; this, in spite of the rubber packing that the tenon came with. Or is this play a result of the rubber packing?

(b) The seating of the stem is too high. The tenon end does not reach anywhere near the draught hole, let alone reach slightly below it for the system to work.

(c) The stem, if pushed further in to the mortise would put additional pressure on the walls of the mortise, subsequently resulting in cracks at the shank end.

(d) The plane of the bowl and the bend of the stem are not aligned. The stem is too straight making for an awkward appearance.

With certain modifications to the stem, I feel confident that I could make the stem work efficiently in a system pipe. The saddle is deeply gouged all around. The upper and lower surface of the stem has significantly deep tooth indentations in the bite zone. The button edges are badly deformed with deep bite marks. Following pictures show the condition of the stem as I received it. The tenon is clogged with heavy accumulation of oils and tars which is seen through the tenon opening. The rubber packing cap is also covered in dirt and grime.With a sharp knife, I removed the rubber cap by separating it from the tenon end, expecting to find a chipped or badly damaged tenon. However, the tenon is intact and apart from being clogged the stem is in decent condition. After I had removed the rubber cap, I rechecked the seating of the stem in to the mortise. The seating was still loose and too high!! Next I moved ahead and reamed the chamber with a Castleford reamer head size 2 followed by size 3. With my sharp fabricated knife, I removed the cake from the chamber where the reamer head could not reach and gently scrapped away the lava overflow from the rim top surface. Thereafter, using a folded piece of 180 grit sand paper, I sanded out the last traces of cake and exposed the walls of the chamber and wiped the chamber with a cotton pad dipped in isopropyl alcohol to remove the carbon dust left behind by all the reaming and sanding process. Even though there are no heat fissures/ lines along the chamber walls where the cracks do not extend (a big solace, I say!!), the stummel cracks are a different story which I shall come to subsequently. The chamber ghosting is still significantly strong which may further reduce once I clean the sump/ reservoir and the mortise. The two major cracks (marked in red arrows) that were observed in the external stummel surface extend well in to the chamber with the old repair fills in these cracks in plain view. Further sanding and close scrutiny of the walls confirmed my gut feeling that the minor cracks originating from the major cracks will also be seen as heat fissures in the chamber walls. These have been marked in yellow arrows. As I was contemplating my further course of action to address the chamber issues, I set the stummel aside and decided to work on the stem. I cleaned the internals of the stem using hard and normal bristled pipe cleaners and isopropyl alcohol. With a pointed dental tool, I scraped out the entire dried gunk from the tenon end.I decided that I would first undertake the cleaning, both internal and external, of the stummel before proceeding with further repairs. This cleaning will not only give me a clear picture of the extent of damage but also the efforts that would be needed are justified or otherwise.

I cleaned out the internals of the shank and mortise. Using my dental tool, fabricated knife and specifically modified tool, I scraped out all the dried oils, tars and gunk that had accumulated in the draught hole, airway and sump. The amount of crud that was scrapped out and the condition of the pipe cleaners that were used leaves no surprise why the air flow through it was restricted. I finished the cleaning by running a few pipe cleaners dipped in isopropyl alcohol. I also wiped the sump with cotton buds and alcohol. I gave a final cleaning to the sump with a paper napkin moistened with isopropyl alcohol. This, however, did not address the issue of ghost smells in the stummel.I decided to address the issue of old odors in the chamber and shank by subjecting it to a cotton and alcohol bath. I wrapped some cotton around a folded pipe cleaner, keeping the tip of the pipe cleaner free of wrapped cotton as this would be inserted through the draught hole in to the chamber. This would form the wick for the shank. I tightly packed the chamber with cotton balls and filled it with 99% pure isopropyl alcohol using a syringe and set it aside. By next day, the cotton and alcohol had drawn out the all the old tars and oils from the chamber and max from the shank. With my dental tool, I further scrapped out the loosened gunk from the sump and mortise. I cleaned the external surface using a hard bristled toothbrush and Murphy’s Oil Soap. With a soft bristled brass wired brush, I removed the overflowing lava from the rim top surface and cleaned the internals of the shank with a shank brush and dish washing soap to remove what little crud remained in the shank. I rinsed it under running tap water and wiped the stummel dry with an absorbent soft cotton cloth. Fortunately for me, the blotchy coat of black stain that was applied to mask the repairs came off with use of Murphy’s Oil Soap and dish washing soap. Had this not worked, an alternative method of removing this coat would be to wipe the stummel with pure acetone and/or isopropyl alcohol on cotton swabs. With the stummel nice and clean, the damage is now all too apparent and it did not present an encouraging picture. The major cracks are quite deep and the secondary minor cracks emanating from the major crack are restricted at the back of the stummel. Here is what I saw. I shared these images with Steve and sought his opinion if this project was even worth the effort. A few minutes later, Steve responded in his characteristic manner. I reproduce the exact exchange that took place between us

Steve: What a mess

Me: What is the best way ahead? Worth the effort? Grandpa collection…

Steve: That was my question… is it worth it? With the Grandpa connection, I would probably work on it. I would thoroughly clean the inside and outside. Once that is done, I would line the bowl with J B Weld to completely bind the inside together. Once that is done, then fill and repair the outside with glue and briar dust.

Me: This is the condition of the shank and stummel joint…emotions dictate restoration while practical experience says it’s a gonner…

Steve: I have been there…go with emotions on this one…it will take time and be a real resurrection!!

Now that clarity has been established and hints for the way ahead have been spelt, I decided to complete this project.

I decided to address the stem issues first.

As noted earlier, the seating of the stem in to the mortise was loose and too high for the Pete’s famed system to work efficiently. I inserted a pipe cleaner in to the mortise and up to just below the draught hole, bending the pipe cleaner at this point to mark the depth that I desired. Next, I mark the same depth on to the saddle of the stem with a white correction pen. I wound a scotch tape along the marked white line extending towards the button end. This gave me a reference line beyond which sanding needs to be avoided. With this initial preparation completed, I next mount a 180 grit sanding drum on to my hand held rotary tool, set the speed at half of the full speed and proceeded to sand down the portion of the stem towards the tenon end. I frequently checked the fit of the stem in to the mortise to ensure a snug fit and avoid excessive sanding of the stem. Making steady progress, I was satisfied with the stem modifications at this stage. The tenon was just below the draught hole and there was no play in the seating of the stem in to the mortise. Next, using 150 grit sandpaper, I sanded the entire stem, especially being diligent around the saddle portion that was shaved off to achieve a snug fit of the stem into the mortise. Though I had to spend a considerable time, I was happy with the blending to a smooth transition at the edge which was sanded down. I wiped the stem with Murphy’s oil soap on a cotton swab to remove the sanding dust and oxidation. The stem looked good and should function as it is supposed to, making me very pleased with the fruits of my efforts at this stage.Just a word of caution here for all the first timers using the sanding drum and rotary tool; firstly, ensure that the rotary tool is set at 1/3 or ½ of the full rpm of the tool as too high a speed will fling the stem away from your grip and may result in excessive sanding of the stem surface. Secondly, keep the stem turning evenly at all times to achieve as evenly sanded surface as possible and avoid deep gouges. Thirdly, frequently check the progress being made and remember the mantra “LESS IS MORE”! Fine tuning is best achieved by eyeballing and working with hands and sandpapers.

Staying with the stem repairs, I mixed CA superglue and activated charcoal, filled all the deep tooth chatter and indentations and also over the button edges and set the stem aside for the fills to cure. I shall blend these fills and also sharpen the button edges once the fill has hardened considerably.Now with the stem set aside for the fills to cure, it was time for me to work the stummel. I topped the rim on a piece of 220 grit sand paper to even out the rim surface dents and dings and also to reduce the charred rim surface. The repairs to the cracks, marked with red arrows, are all too apparent now as can be seen in the following pictures. The rim top surface is charred and thin in 10 o’clock direction which have been marked in blue circle. The rim top repair towards the front of the bowl has resulted in thinning of the rim top. This is marked in a yellow circle. This stummel has some serious issues that need to be addressed. I preceded the stummel repairs first by coating the walls of the chamber with a slightly thick layer of J B Weld. J B Weld is a two-part epoxy Cold Weld in two tubes; hardener and steel which are mixed in two equal parts (ratio of 1:1) with hardening time of 5-6 minutes and complete curing time of 6-8 hours. I poured the contents of the two tubes and mixed it well. I applied this mix, as evenly as possible, over the entire chamber wall surface. I worked fast to ensure an even coat over the chamber walls before the weld could harden. I set the stummel aside for the application to harden and cure overnight. By the next afternoon, the J B Weld had cured and hardened considerably and will now be able to hold the stummel together as I move along with drilling counter holes, refreshing the fills in the cracks and further sanding and polishing processes. I gouged out the old fills from the cracks. I was careful not to apply too much pressure or dig deeper than absolutely necessary to remove the old fills. Using a magnifying glass and a white correction pen, I marked the points for the counter holes at the start, the turning and the end points along the extent of all the cracks seen on the stummel, and mark my words all Readers, there were plenty and then some more!! After I was done with my markings, the stummel appeared more like a mosaic of white dots!! Next, I drilled counter holes with a 1mm drill bit mounted on to my hand held rotary tool deep enough to serve as a counter hole while taking care that I did not drill a through and through hole. These counter holes arrest and prevent the spread of the cracks further. The importance of these counter holes cannot be underestimated. In fact, this pipe had been repaired previously and the repairs were solid enough, though without counter holes, that the pipe was smoked by my grandfather for many years. However, in my scant experience in pipe restoration I have seen that the extensive spread of the cracks towards the back of the stummel is a result of lack of drilling a counter hole to arrest the spread!!

I filled these cracks and counter holes with a mix of briar dust and CA superglue using the layering method (layer of superglue followed by sprinkling of briar dust and repeated it till desired thickness of fill was achieved) and set it aside for the fills to cure. I ensured that I filled the thin outer edge of rim top surface that I will subsequently sand down to match with the rest of the rim surface.While the stummel was set aside for curing, I decided to correct the geometry of the stem in relation to the plane of the bowl. The stem was too straight and was awkward to clench. After inserting a pipe cleaner through the stem, I heated the stem with a heat gun till the vulcanite became a little pliable. Holding the tip of the pipe cleaner, I gave the stem a bend, eyeballing it to suit the bowl. Once I had achieved the desired bend, I held it in place under cold running water till the stem had cooled down sufficiently to retain the shape. The stem was now comfortable to clench. Here are the pictures of the stem before (on the left side) and after (on the right side) the bend. Now that the seating of the stem into the mortise and the bend to the stem had been sorted out, I proceeded to sand/ blend the fills and impart a nice black glossy shine to the stem. With a flat head needle file, I sanded these fills to achieve a rough match. I further fine tuned the match by sanding the filled area with a folded piece of 220 grit sand paper pinched between my thumb and forefinger. I followed it up by sanding the entire stem surface using 400, 600, 800 grit sand papers and finally with a piece of 0000 grade steel wool. This serves to remove the deep seated oxidation and also reduces the sanding marks of the more abrasive sand papers. I also sharpened the button edges while sanding. I wiped the stem with a cotton swab and alcohol to remove all the oxidation and sanding dust from the surface. I applied a little Extra Virgin Olive oil over the stem and set it aside to be absorbed by the vulcanite. The stem has turned out amazing and now I felt upbeat about completing this project.I wet sand the stem with 1500 to 12000 grit micromesh pads. Next I rubbed a small quantity of extra fine stem polish that I had got from Mark and set it aside to let the balm work its magic. After about 10 minutes, I hand buffed the stem with a microfiber cloth to a nice shine. I rubbed a small quantity of olive oil in to the stem surface to hydrate it and set it aside. The stem now had a nice deep black and glossy shine.With the stem completed, I turned my attention to the stummel. In the intervening time when I worked the stem, the stummel crack fills had hardened and cured well. Using a flat head needle file, I sanded these fills to achieve a rough match with the rest of the stummel surface. I further fine tuned the fills by sanding the entire stummel surface with folded pieces of 220, 400 and 600 grit sandpapers. The stummel was now clean and even. On close scrutiny of the cleaned stummel surface, I observed a small crack which I had missed out earlier. I will need to drill counter holes to arrest the spread and extending of these cracks. Under a magnifying glass and bright light, I marked the ends of the now observed cracks with a white correction pen. I mounted a 1mm drill bit on to my hand held rotary tool and drilled counter holes. I filled these counter holes and cracks with a mix of briar dust and superglue. I also took this opportunity to touch up and refill those areas which required further fills and set the stummel aside to cure. Once the fills had cured, I went through the complete cycle of sanding with a flat head needle file followed with 220 grits sandpaper. The fills are all solid and have naturally blended in quite nicely with the entire briar surface. The rim top surface is now evenly thick and with folded piece of 220 grit sandpaper, I created a slight bevel to inner and outer edges of the rim top. I am happy with the appearance of the stummel at this stage of restoration. I polished the stummel with micromesh pads, wet sanding with 1500 to 12000 pads. I polished the freshly topped rim surface and the newly created inner rim bevel. I wiped the surface with a soft cloth at the end of the micromesh cycle. The stummel looked amazing with a deep shine and beautiful grains popping over the stummel surface. I was surprised that the rim top surface has the same deep brown coloration as the rest of the stummel surface even though the repairs to the cracks were still sticking out like sore thumbs through the shining stummel surface, I was not overly perturbed having made peace with myself regarding the repairs showing, still I shall attempt to mask them by staining the stummel subsequently. I massaged a small quantity of “Before and After Restoration Balm” with my fingers into the briar. The immediate and incredible transformation that takes place is a worthy reward for all the efforts!! I let the balm sit on the surface to be absorbed in to the briar for about 20 minutes. The bowl now looked fresh and attractive with the grains popping out any which way you look at the briar. Even the repairs to the stummel are a lot less visible what with the briar taking up a deep dark and vibrant brown hues. I polished off the balm with a soft cloth to a lovely shine. Next, with a folded piece of 150 grit sandpaper, I sanded the coat of J B Weld from the internal walls of the chamber keeping just a thin layer of coat along the walls. The coat appeared uneven at this stage but once it was coated with pipe mud, the chamber walls would become even and smooth. I decided on giving the stummel a stain wash with a Feibing’s Dark Brown leather dye. I diluted the Feibing’s Dark Brown leather dye in 99.9% isopropyl alcohol in approximate ratio of 1:4 and with a cotton swab, I dabbed the diluted stain over the stummel surface, letting it set for a few moments and thereafter wiping it off with a dry clean cotton swab. I repeated the process till I had achieved the desired coloration. I was pleased with the color of the stummel which highlighted the grains while the stummel repairs were masked nicely. This time around, even the fills had absorbed the stain and blended in nicely with the rest of the stummel. In order to ensure that the stain wash sets in to the briar, I warmed the stummel with a heat gun while being careful that I did not overheat the crack repairs/ fills.Now on to the home stretch… To complete the restoration, I re-attached the stem with the stummel. I mounted a cotton cloth buffing wheel to my hand held rotary tool, set the speed at about half of the full power and applied Blue Diamond compound to the entire pipe to remove all the minor scratches that remained. I wiped/ buffed the pipe with a soft cotton cloth to clear it of any leftover compound dust. With a cotton buffing wheel earmarked for carnauba wax, I applied several coats of carnauba wax. I worked the complete pipe till the time all the wax was absorbed by the briar. The pipe now boasted of a beautiful and lustrous shine. I vigorously rubbed the pipe with a microfiber cloth to deepen the shine and also clean away any residual wax that had been left behind. I vigorously buffed the nickel ferrule with a jeweler’s cloth and brought it to a nice shine. I was very happy with the way this beauty had turned out. The following pictures speak of the transformation that the pipe has undergone. There was only one more issue that needed to be addressed and one that could not be ignored, being a functional issue. After I had lined the walls of the chamber with a thin coat of J. B. Weld, it was necessary to prevent the walls from coming in to direct contact with the burning tobacco. I addressed this issue by mixing activated charcoal and plain yogurt to a thicker consistency, just enough that it would spread easily and thereafter applied it evenly all along the chamber walls after inserting a folded pipe cleaner through the draught hole to keep it open. Once dry and set, this will not only protect the walls but also aid in faster buildup of cake.P.S.: This project was one with many challenging issues that needed to be addressed, the first and biggest being finding an original Peterson’s system P-lip pipe stem, ensuring a snug fit in to the mortise, modifying the stem to function as it is supposed to and finally addressing, fixing and masking all those cracks. But now that the project is completed and the pipe is definitely smoke-able and gorgeous looking, I cannot but thank Steve who goaded me in to working on this pipe in the first place and for all the input/ suggestions rendered during the process to help me preserve memories of ancestor.

I wish to thank each one for sparing their valuable time to read through this write up and sharing this journey with me while I enjoyed working on this treasured inheritance.