
Blog by Steve Laug
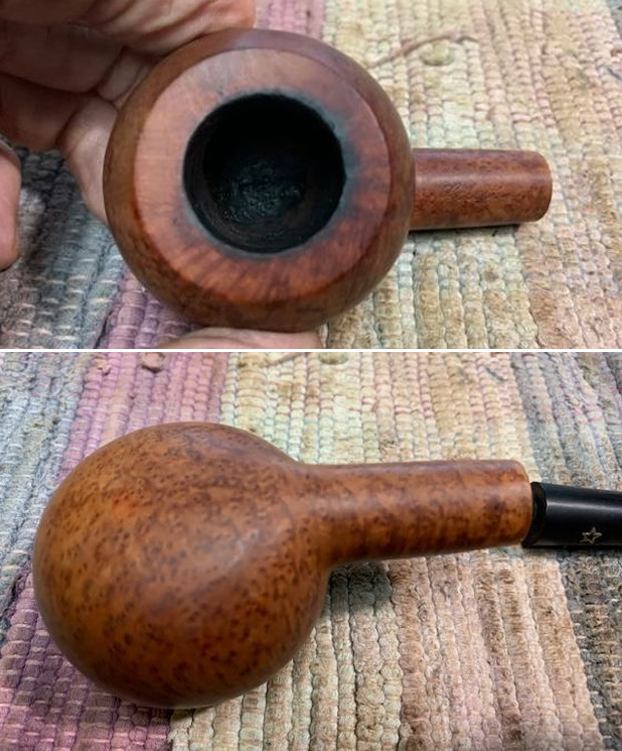
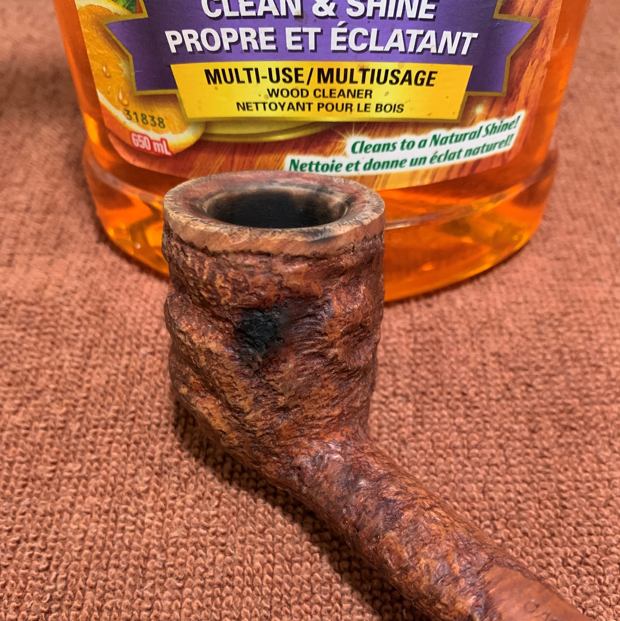
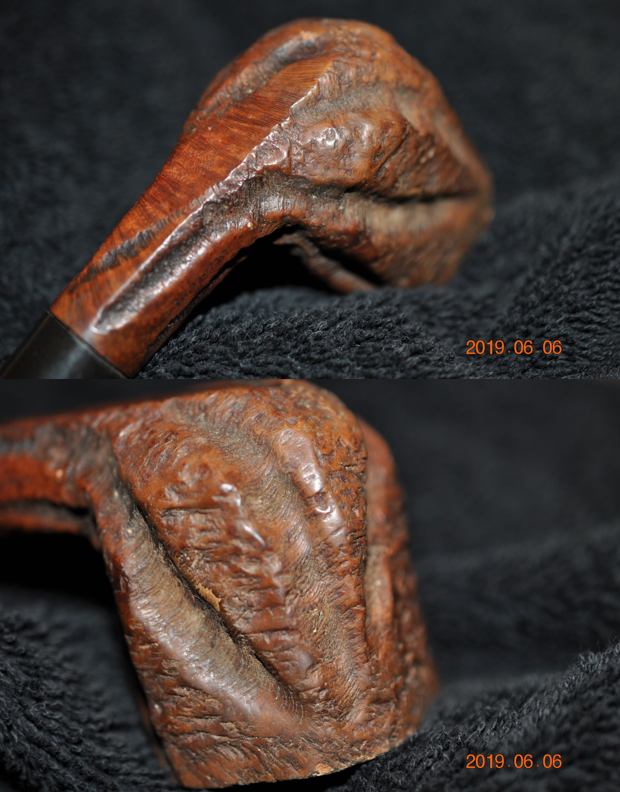
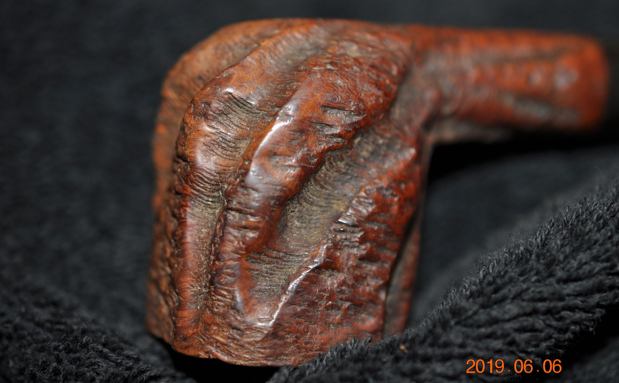
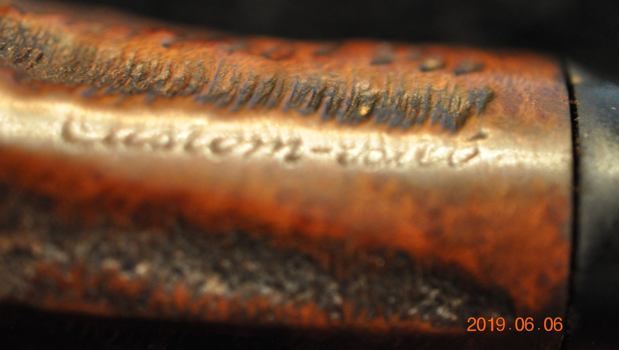
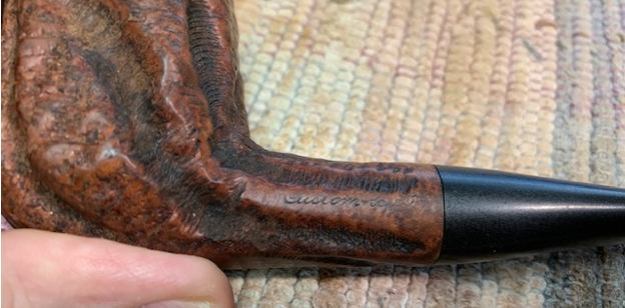
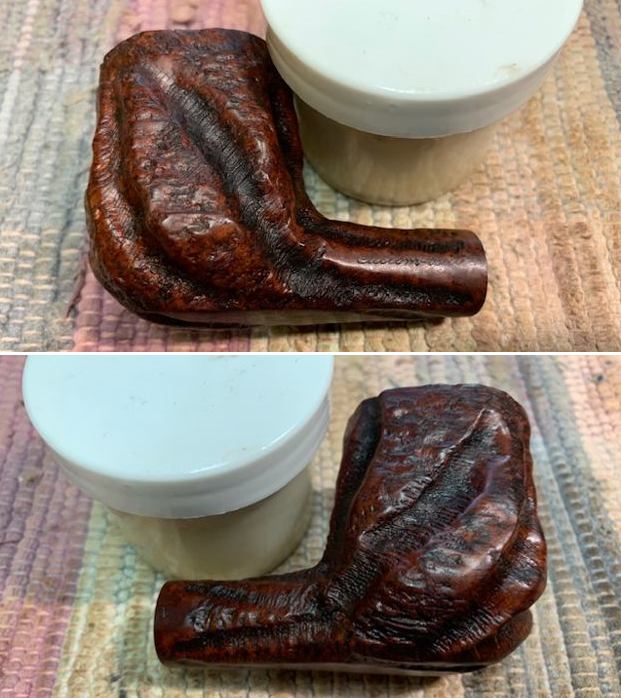
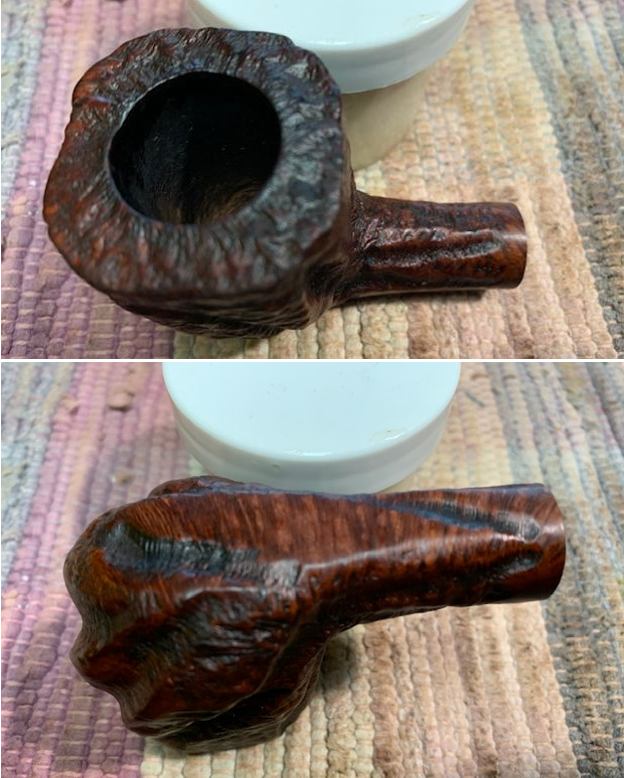
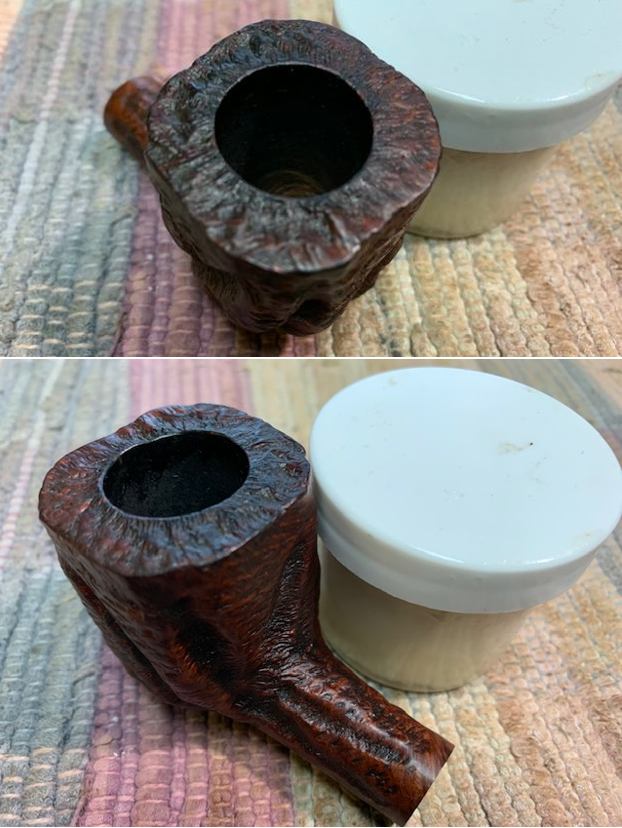
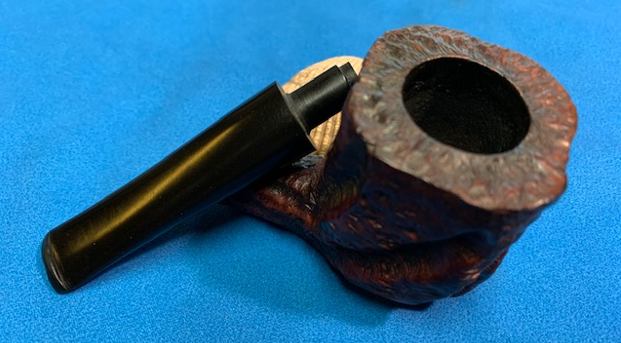
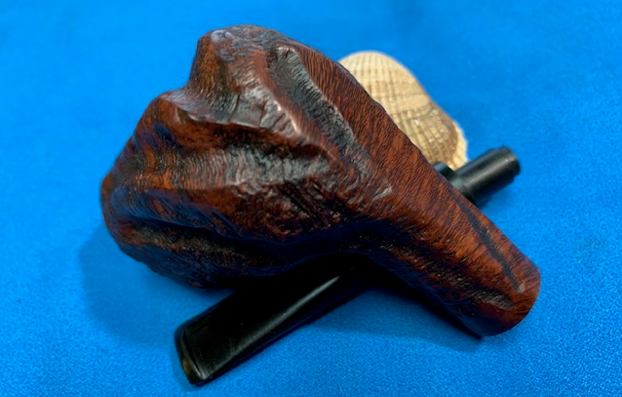
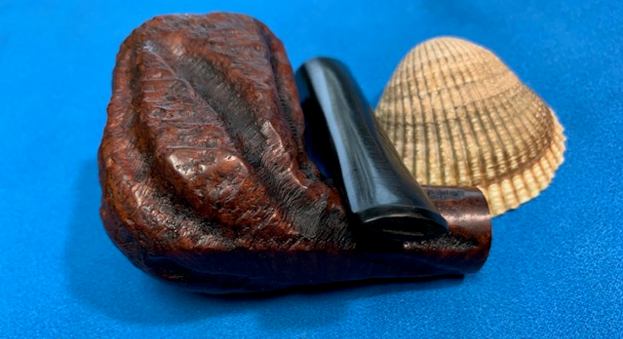
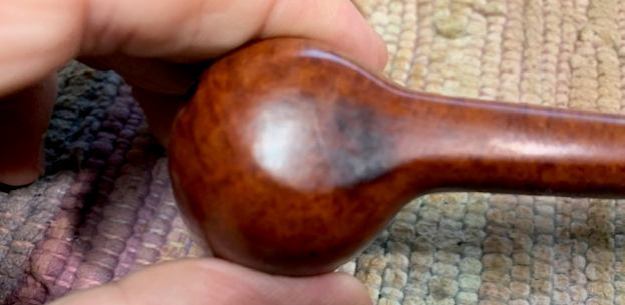
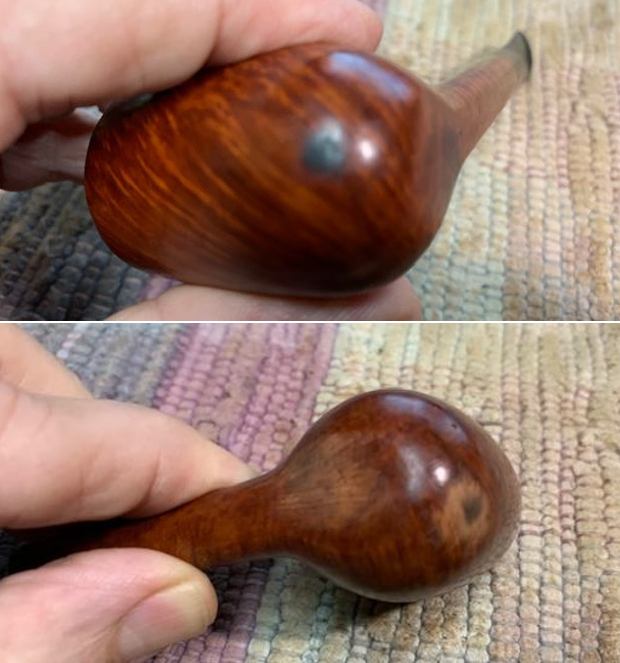
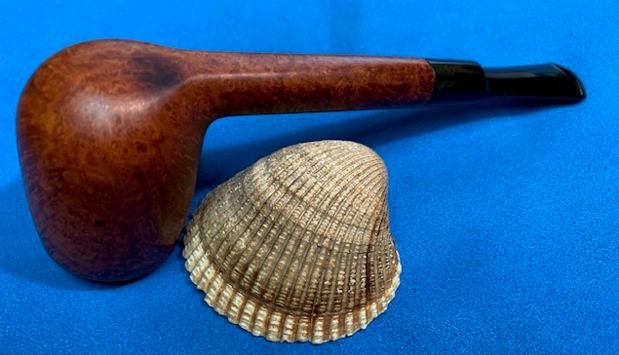
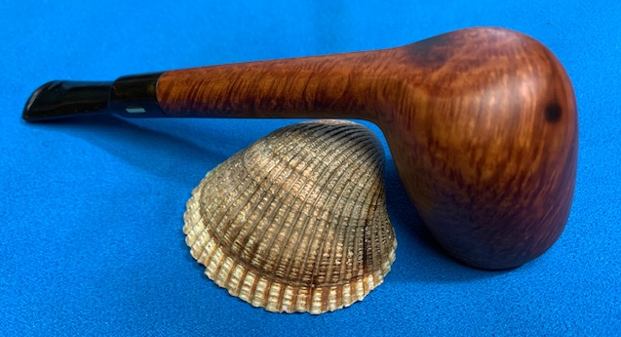
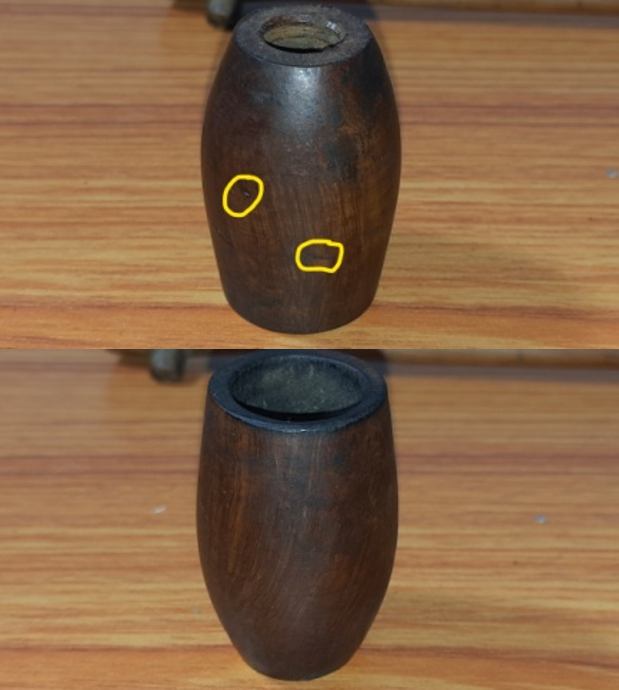
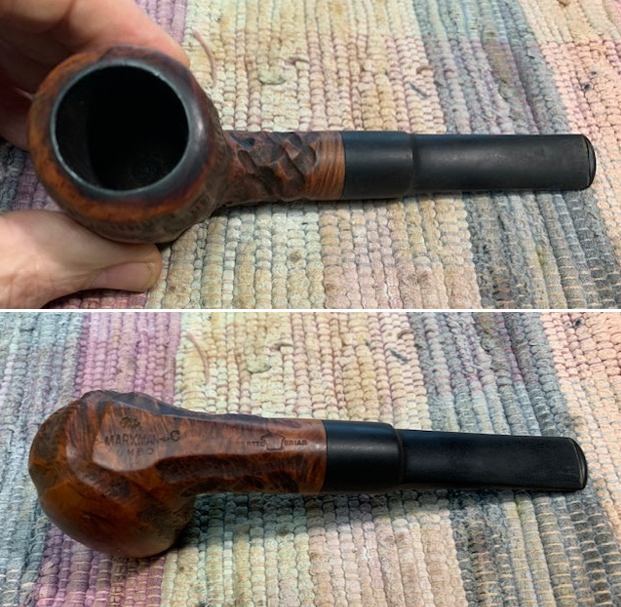
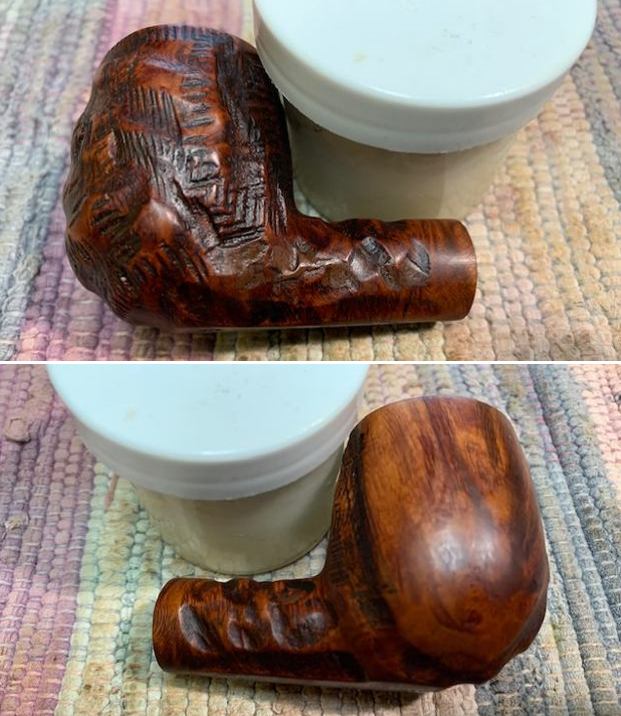
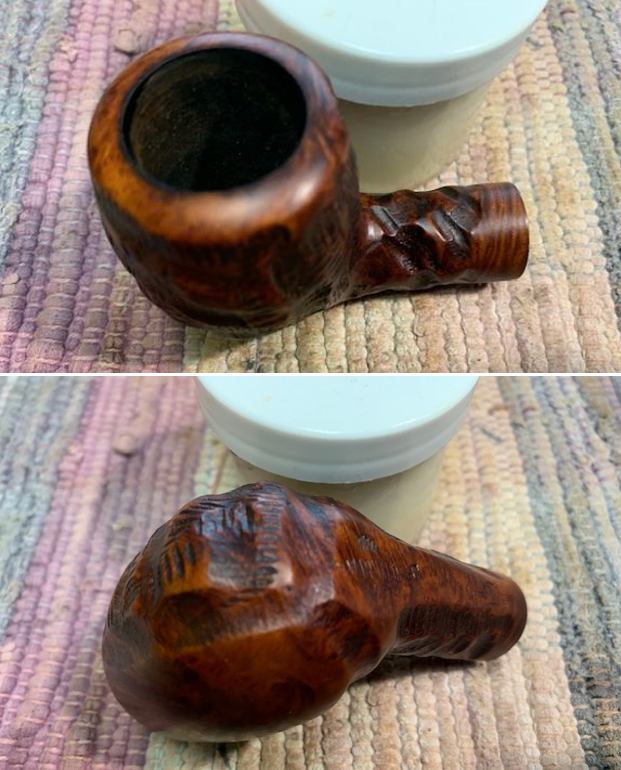
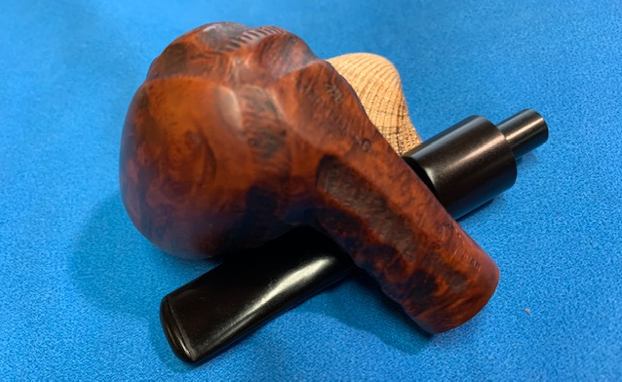
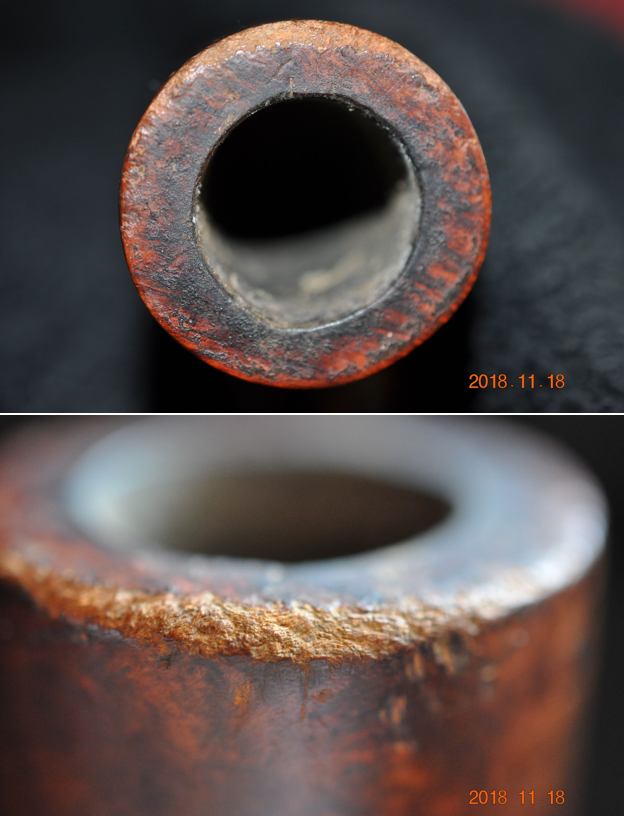
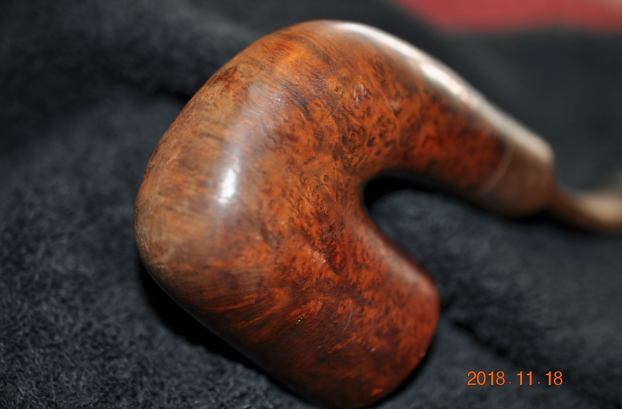
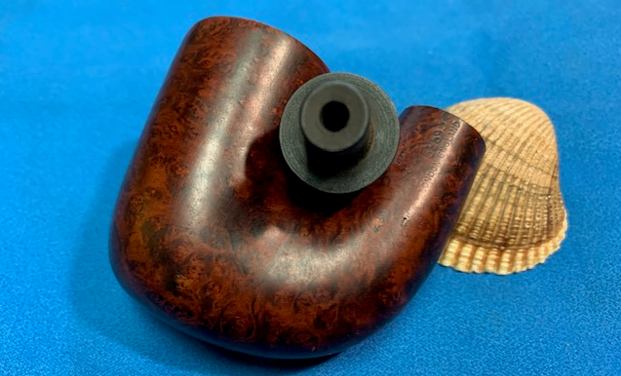
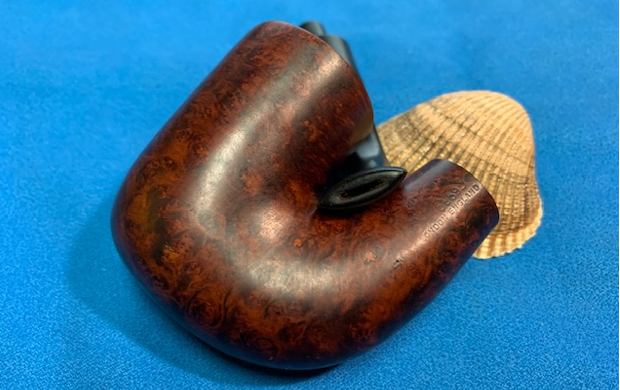
The next pipe I chose to work on has been sitting in a box for several years now. It was in a sandwich bag to keep the parts together. It was a huge bowl, a veritable war club with a relatively slender stem and to be honest it never really grabbed me. I passed over it repeatedly when I went through the box of pipes that I have to complete. That changed a few days ago when I opened the box and the pipe just stood out. Strange how that works! I wrote Jeff and asked for pictures of the pipe before he cleaned it. The bowl was stamped on the top of the shank and read Colossus. Below that on the left side it read City Deluxe [over] London Made. On the right side of the shank it read Made in England. The stem has the silver star insert on the left and on the right it is stamped Hand Cut. Jeff sent these photos and told me that he purchased it (plastic bag with dirty bowl and broken tenon) from an antique mall in Ogden, Utah, USA on 04/28/19. The pre-cleanup photos show what a mess this pipe was when he found it. But don’t miss the amazing grain under the grime. The finish was a mess with scratches and grime ground into the smooth briar. The bowl had a thick cake and a fair share of cobwebs inhabiting the depths. The rim top had a thick coat of lava so it was hard to know what the inner edge looked like. The stem was covered with calcification and oxidation and the tenon was cleanly snapped off and stuck in the shank. There was light tooth chatter and marks on the surface of the stem near the button but even that was hard to see with the debris on the stem. The bag had preserved all the debris in the bowl and the stem and it was very visible.  Jeff took some photos of the bowl sides and heel – it is a really nice piece of briar.
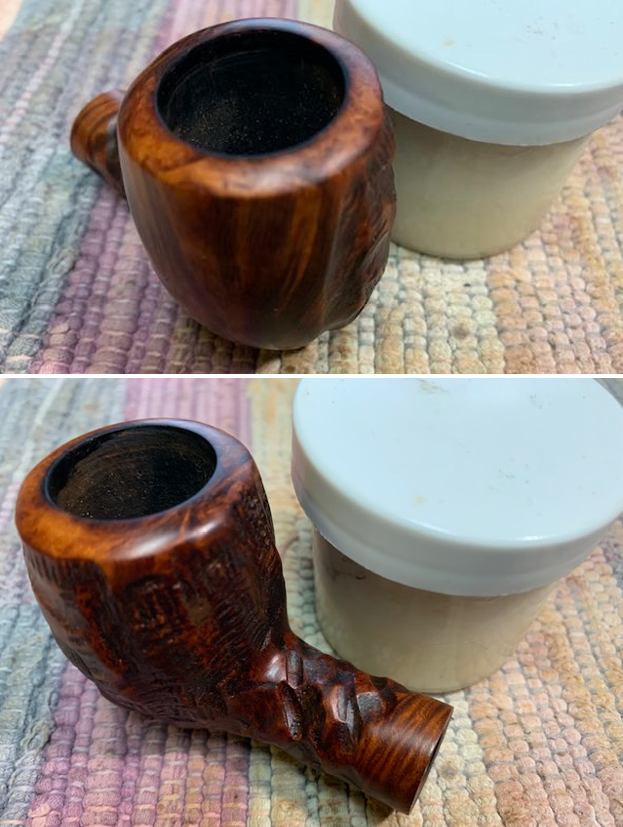
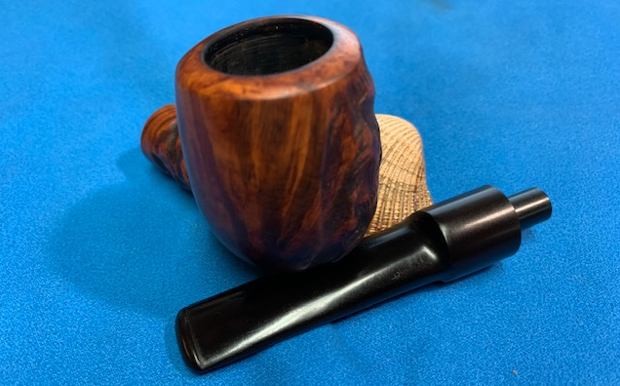
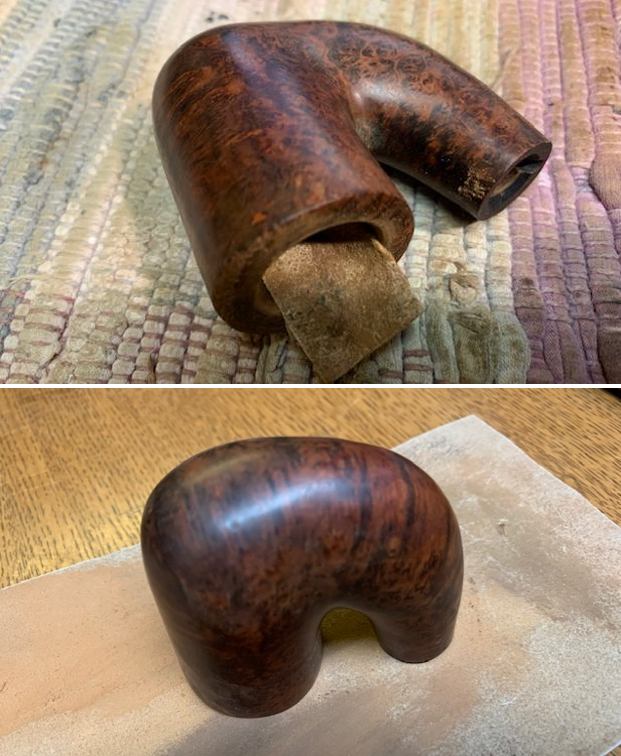
 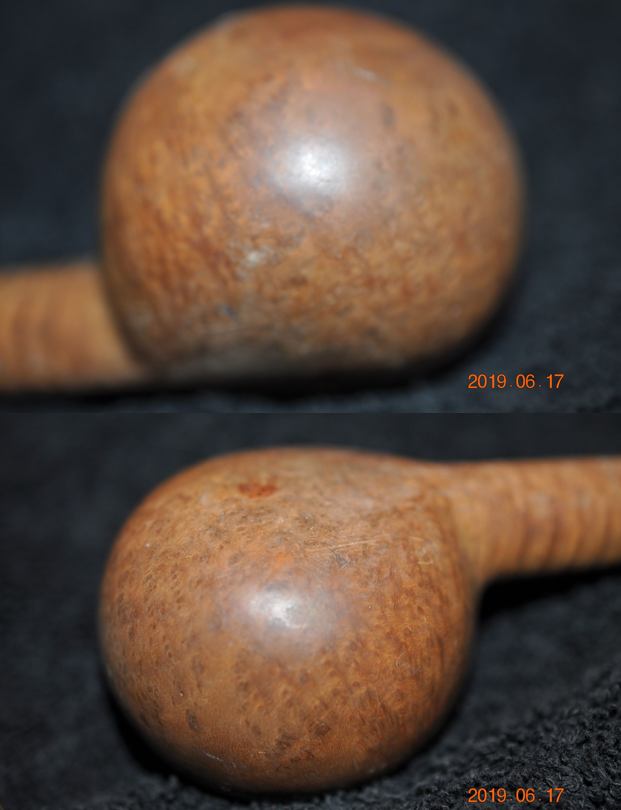 The next photos show the cake and cobwebs in the bowl. What a mess! You can also see the stem with the broken tenon in the second photo.
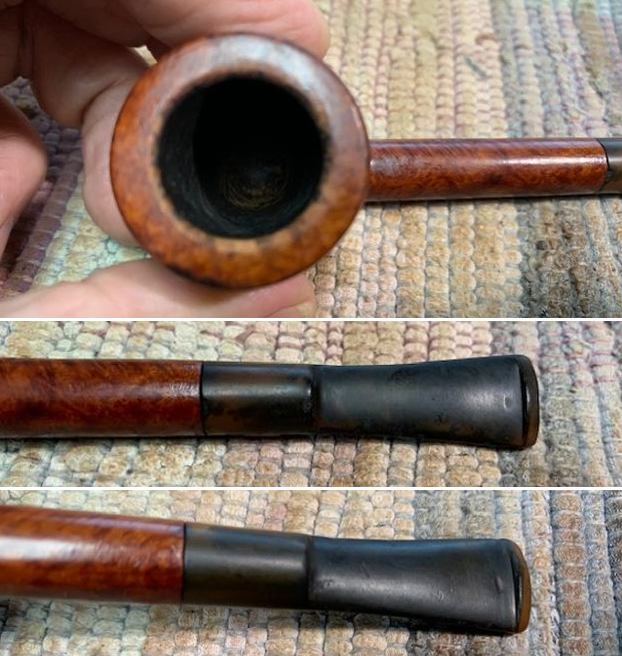
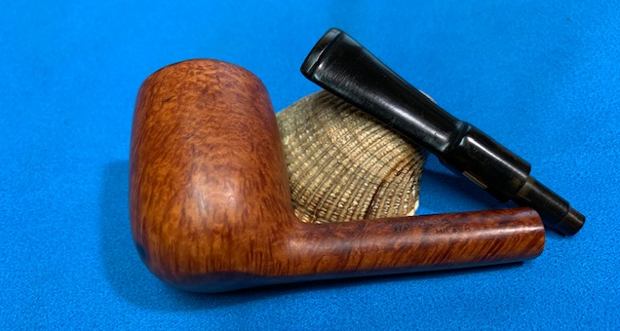
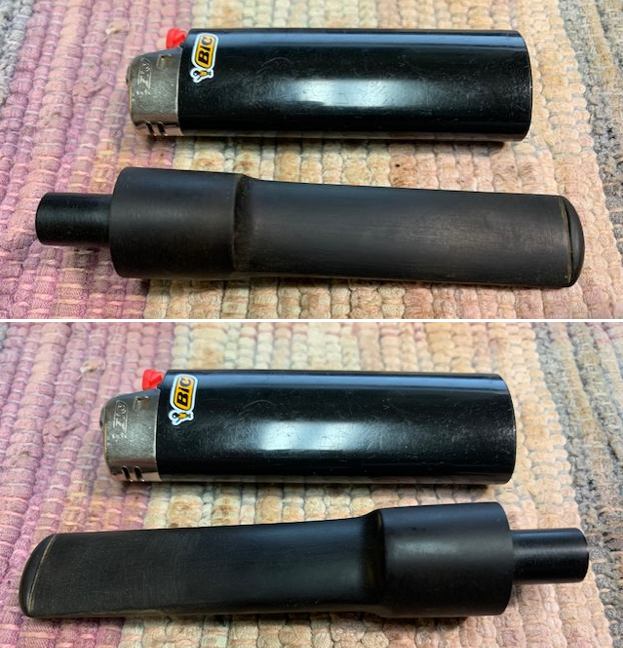
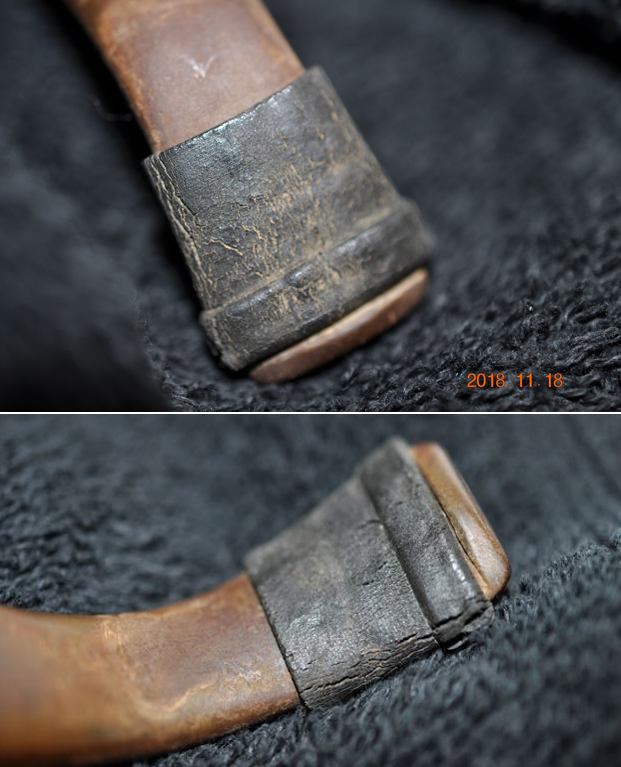
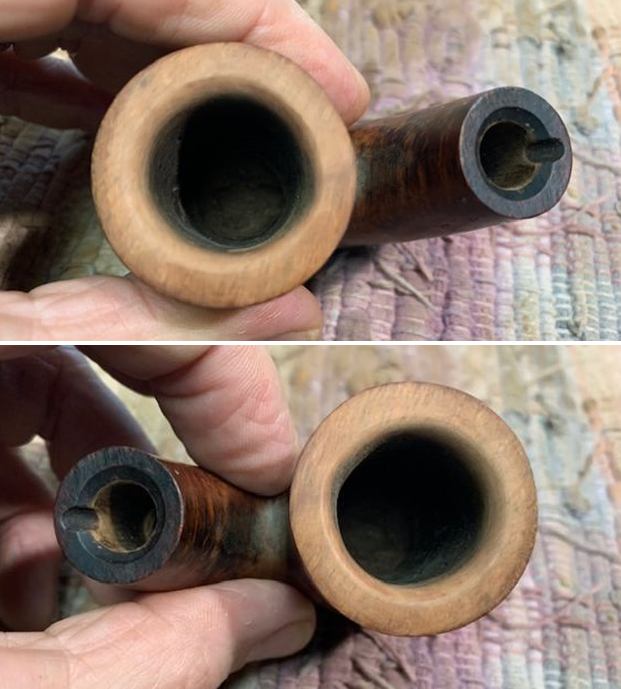
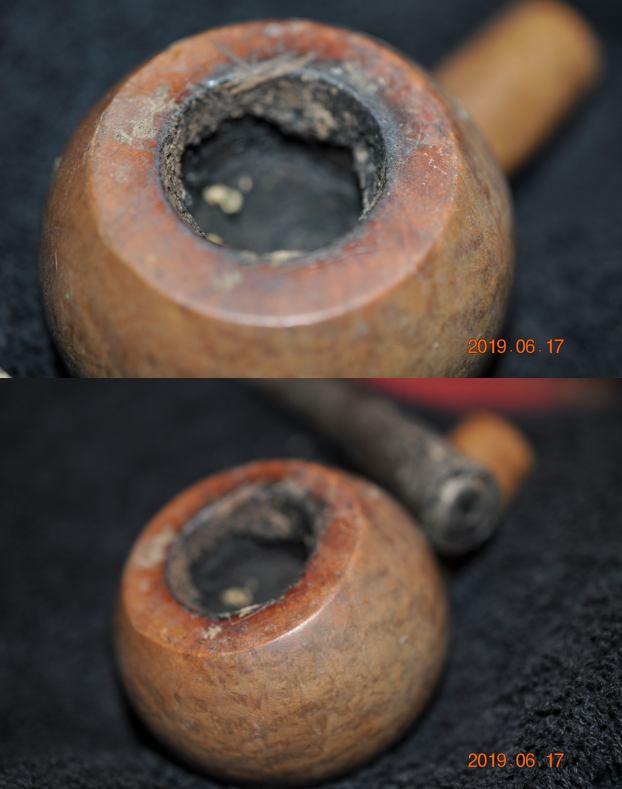 He took close up photos of the broken tenon and stem to show the clean break and the condition of them both!
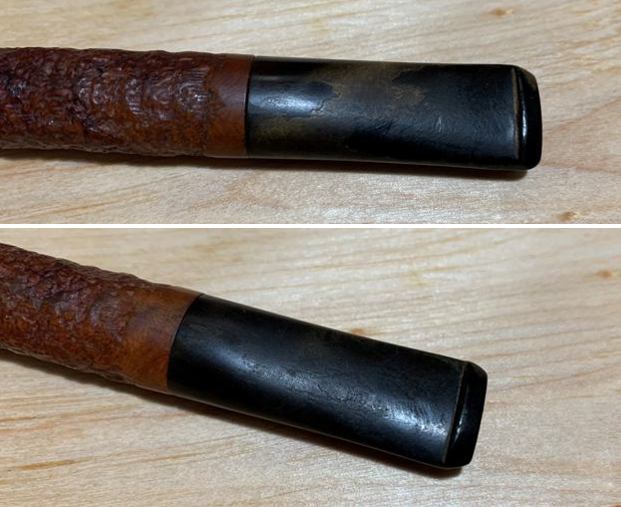
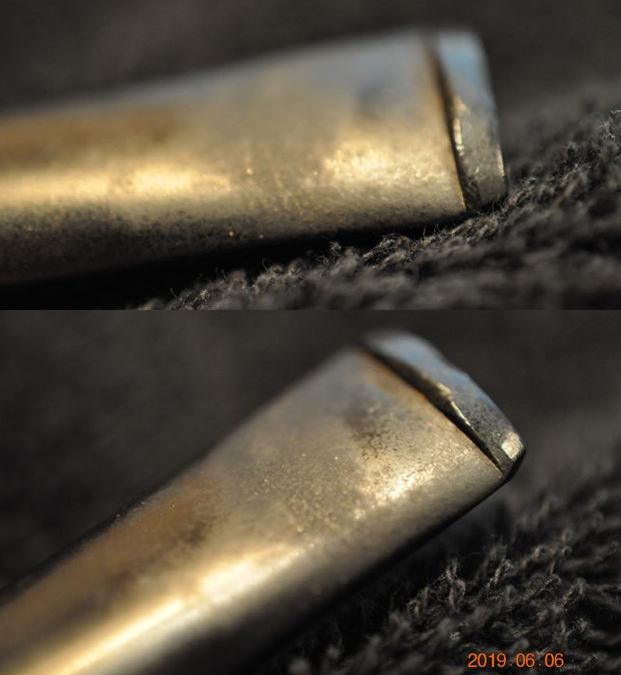
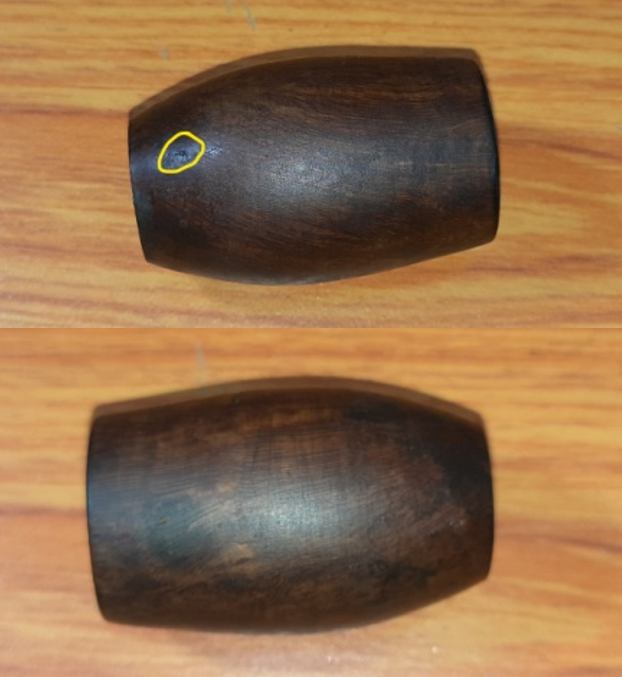
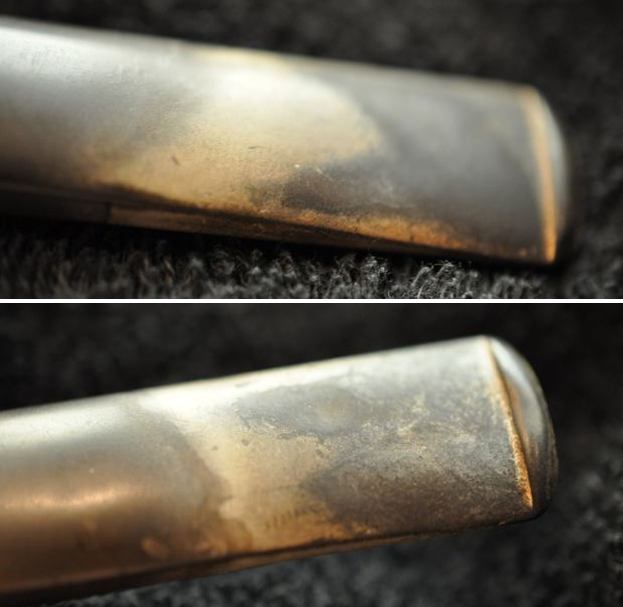
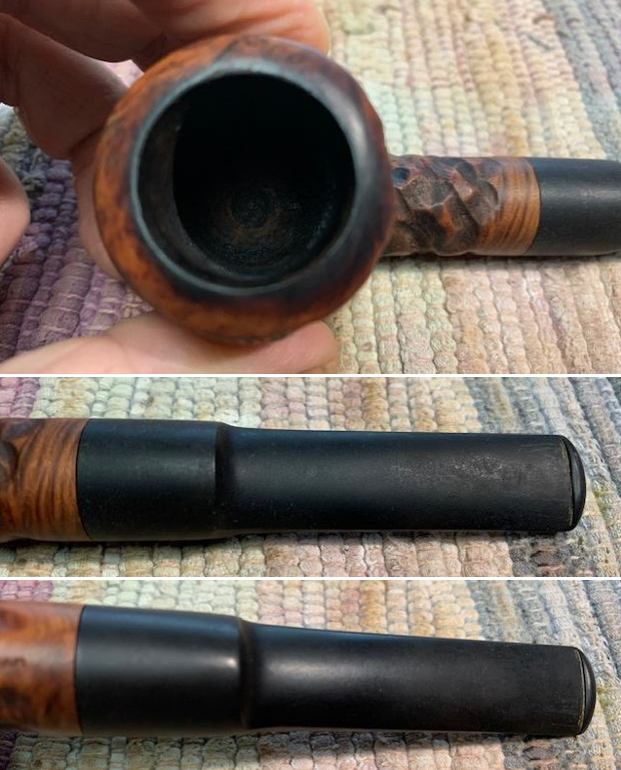
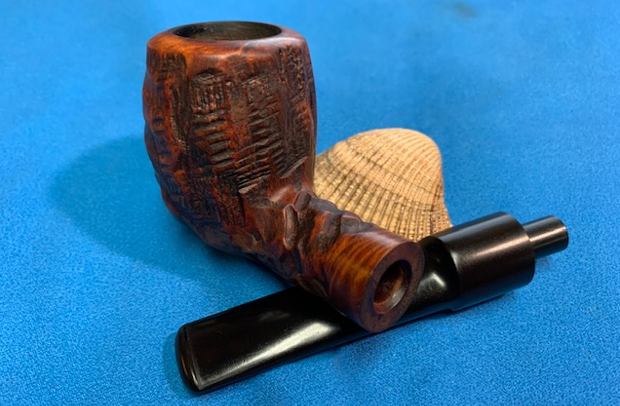
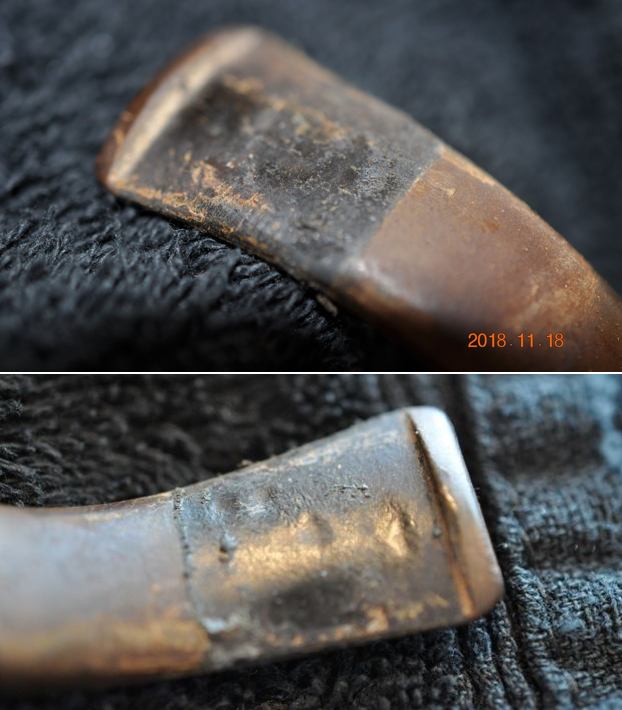
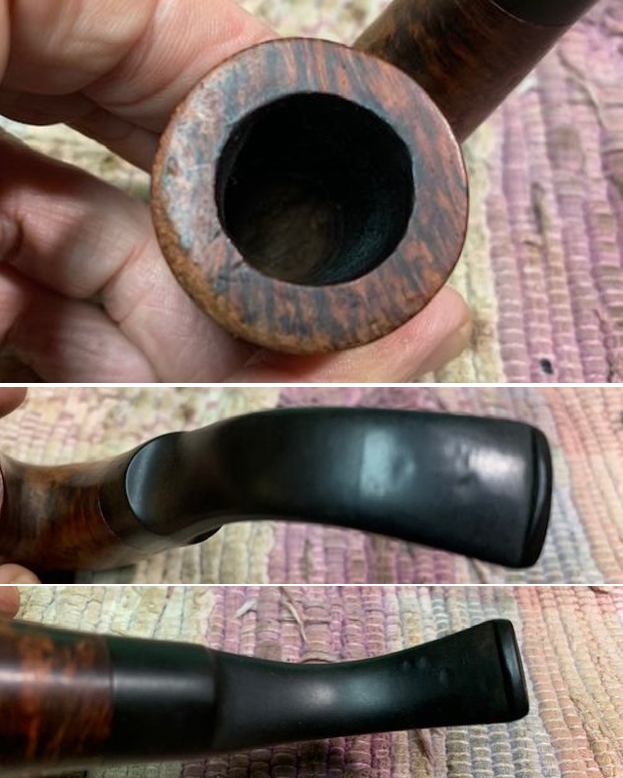
  He took photos of both sides of the stem ahead of the button to show the general condition. It is hard to tell if there is tooth damage or marks due to the calcification and debris on the stem.
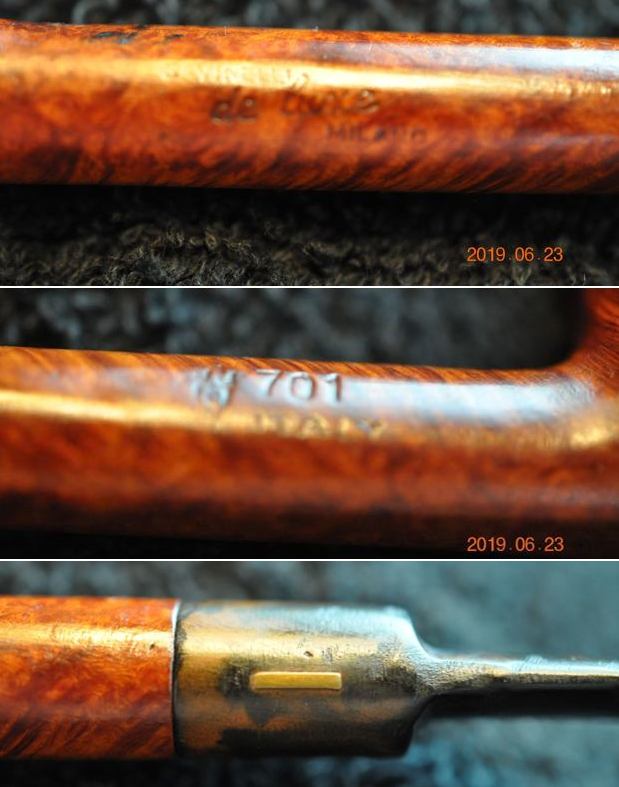
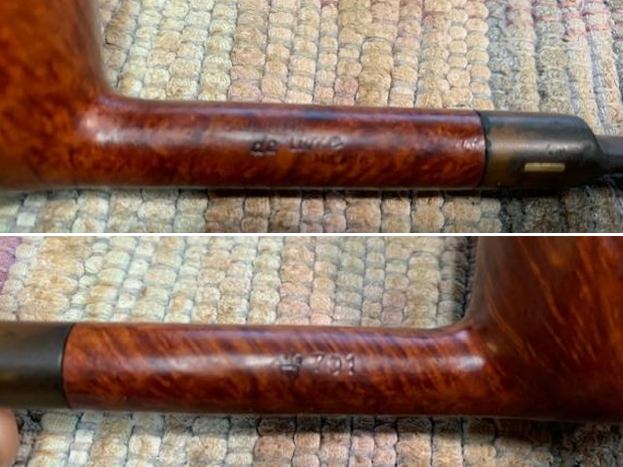
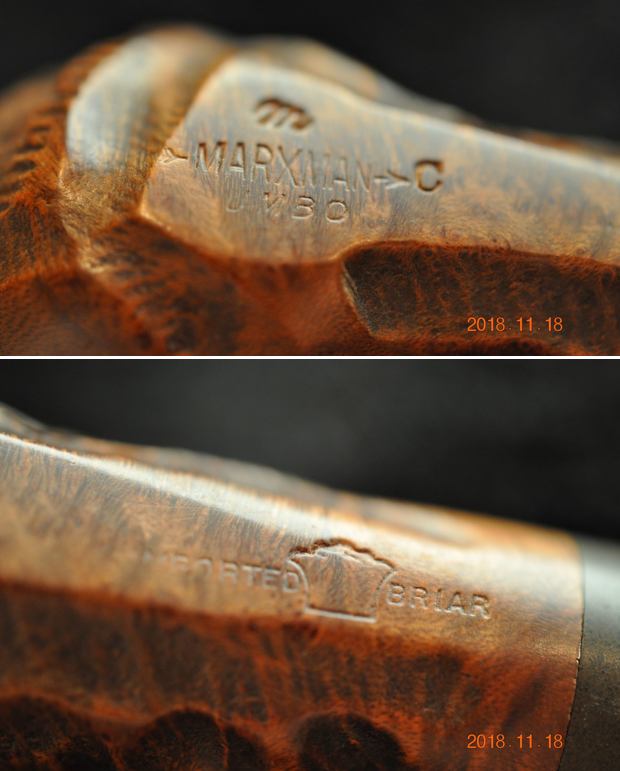
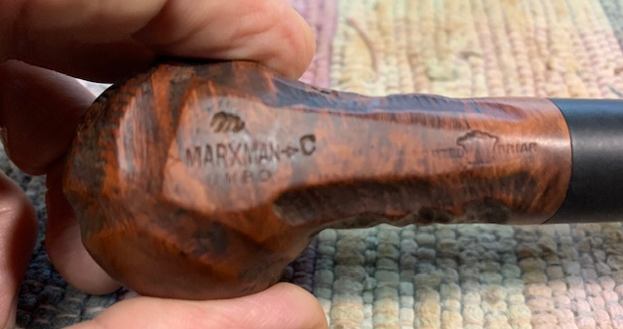
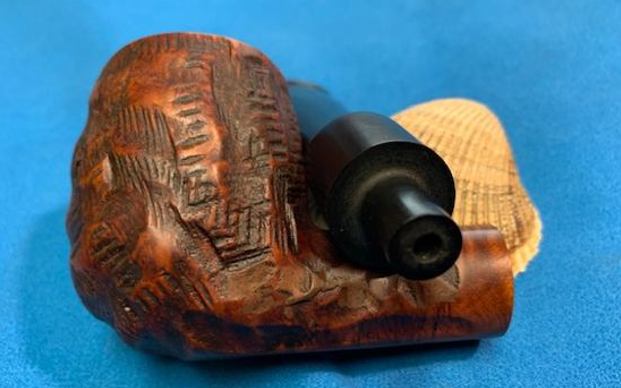
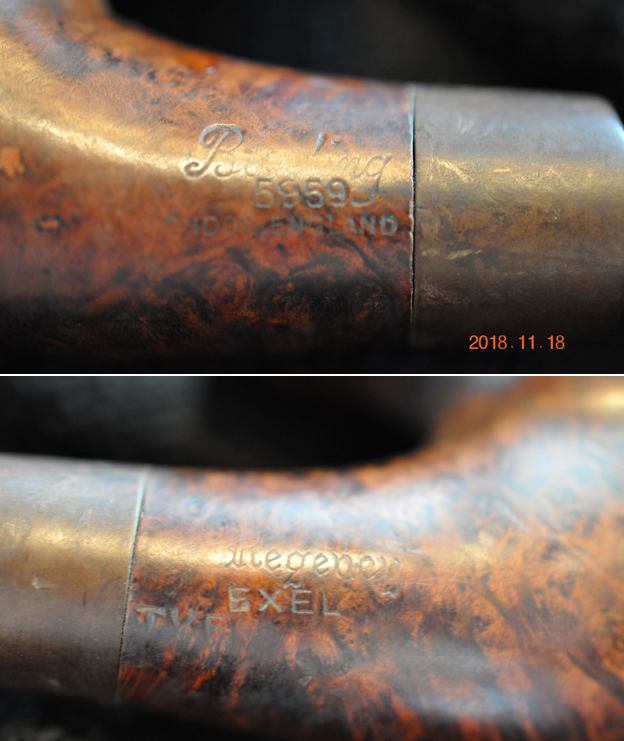
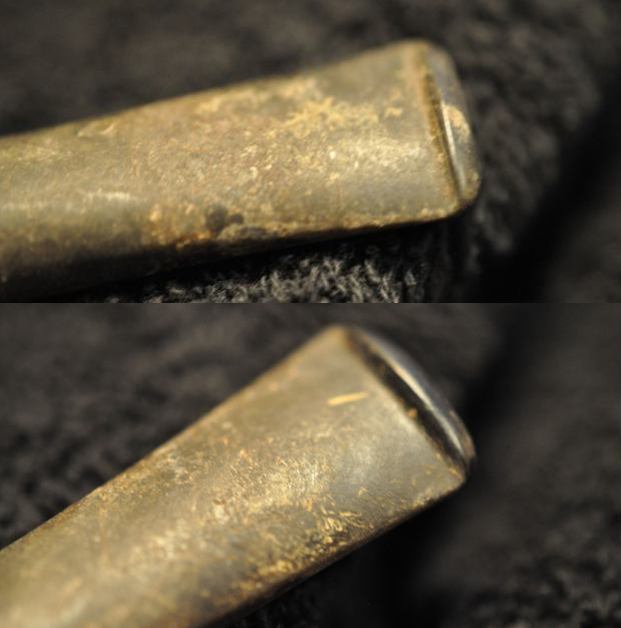 The stamping on the shank is readable and reads as noted above.
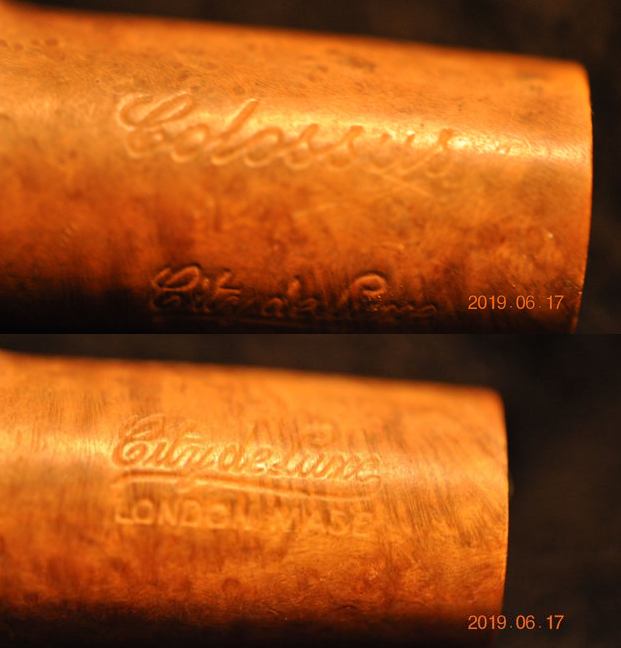 The City Deluxe is a GBD Second’s line that was released to expand the brands reach into the European market (http://pipephil.eu/logos/en/logo-c5.html). I have included a screen capture from Pipephil to show his information. The pipe I am working on is stamped like the first and second one in the photo below.
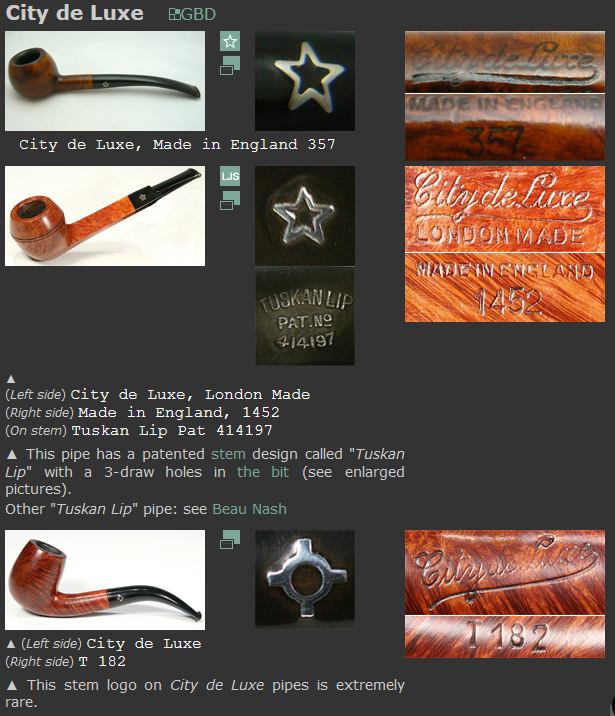 I turned then to Pipedia’s article on GBD pipes (https://pipedia.org/wiki/GBD). The history of GBD pipes is very well spelled out in multiple articles on Pipedia. I would encourage you to give them a read as they are well written and very readable. It is truly a grand old brand spanning France and England. I have included the section on the section of the article on the City Deluxe brand and have highlighted it in red for ease of reference.
The solid demand for GBD pipes also encouraged the management to introduce a number of sub brands designed to win new buyers. We can list such sub brands as follows:
- The City de Luxe (1921) had an inserted star on the stem as trademark and were marketed in England and in France. These pipes were the bestseller of the 5½ Shilling class in the 1930s in Great Britain.
- Reserved for the French market remained the even more favorable GBD brand Marcee, a derivative of Marechal Ruchon & Co. Ltd. that was offered until the 2nd World War and for another one or two years afterwards.
- The Camelia – made in London as a 2½ Shilling line – was only around for a few years.
- Important to mention is also the Riseagle—completely produced in Paris before the wartime for England’s smokers who wanted “a cheap but dependable British made pipe”… one of the most successful 1 Shilling pipes until 1939! The introduction of the luxury impact on the excise tax for pipes after the war put an end to this cheap brand.
I then turned to Pipedia’s article on GBD’s various models to seek further information on the Colossus stamp (https://pipedia.org/wiki/GBD_Model_Information).
The second stamping on the top of the shank was Colossus. I knew that this stamp was used on larger or what GBD called “plus sized pipes”. I read through the above link and found the information below.
Plus Sized Pipes
In addition to the pipe line and shape information stamped on the pipe GBD also had codes for plus sized pipes. These codes in ascending order of size were…
- Conquest
- Collector
- Colossus
From this I know that the pipe is a larger, plus sized pipe that was at the top of the plus sizes – a Colossus. The City Deluxe was started in 1921 and had an inserted star on the stem as trademark and were marketed in England and in France. These pipes were the bestseller of the 5½ Shilling class in the 1930s in Great Britain.
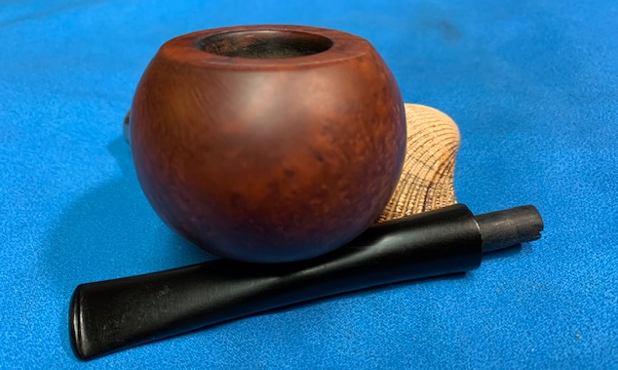
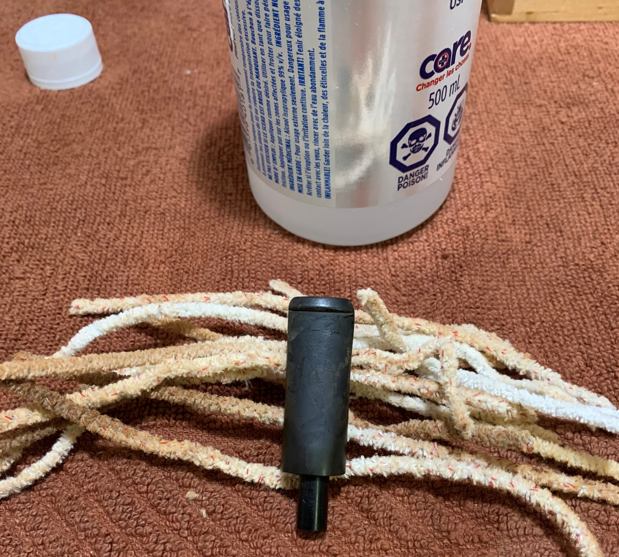
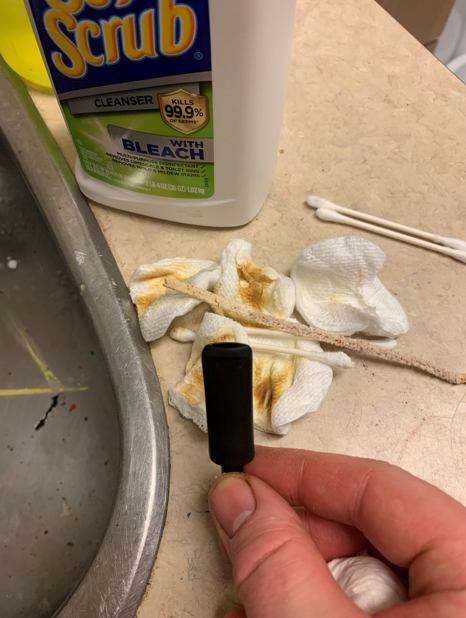
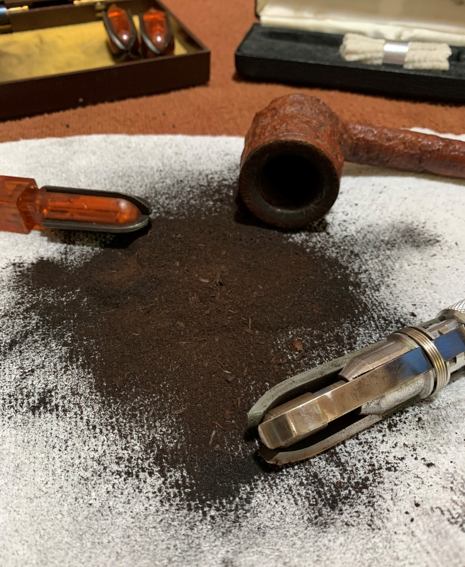
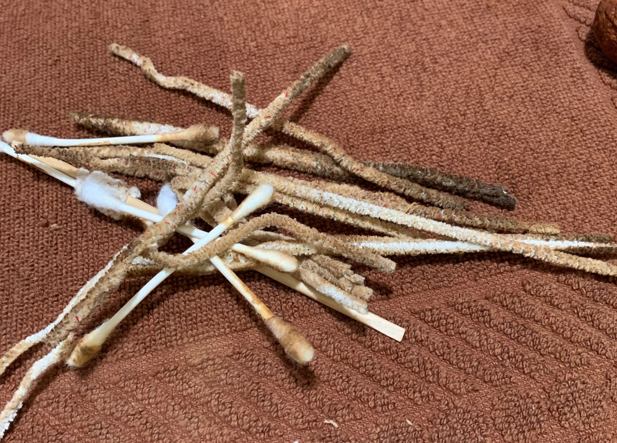
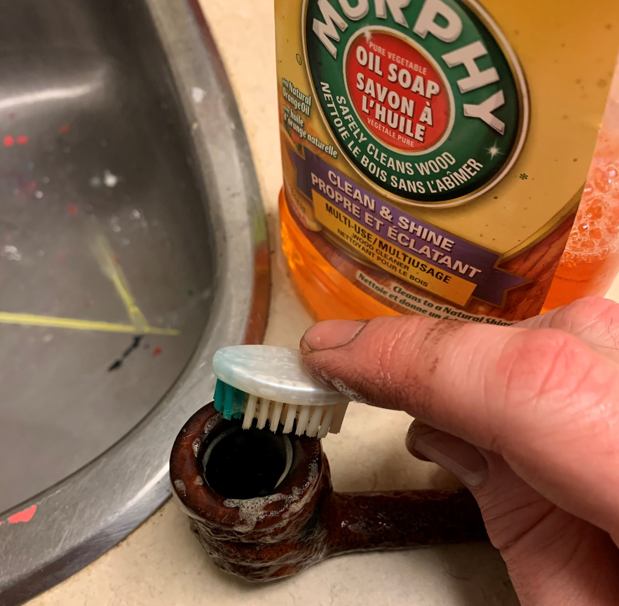
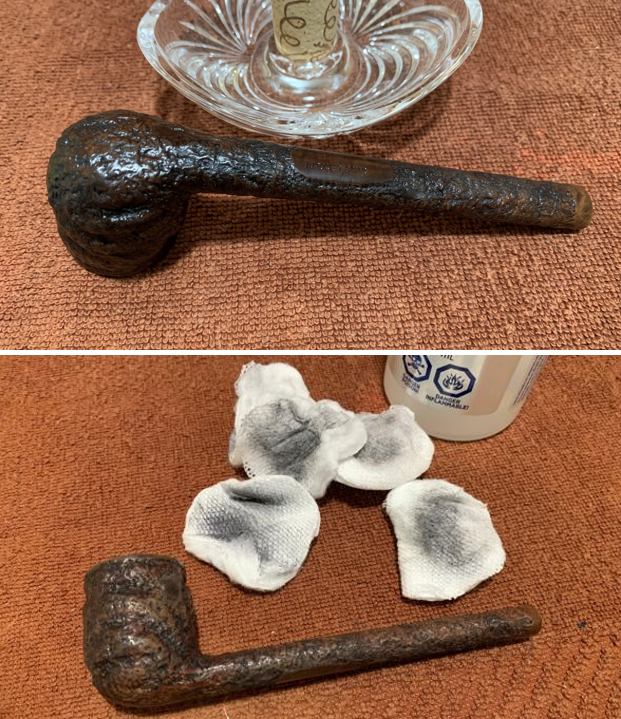
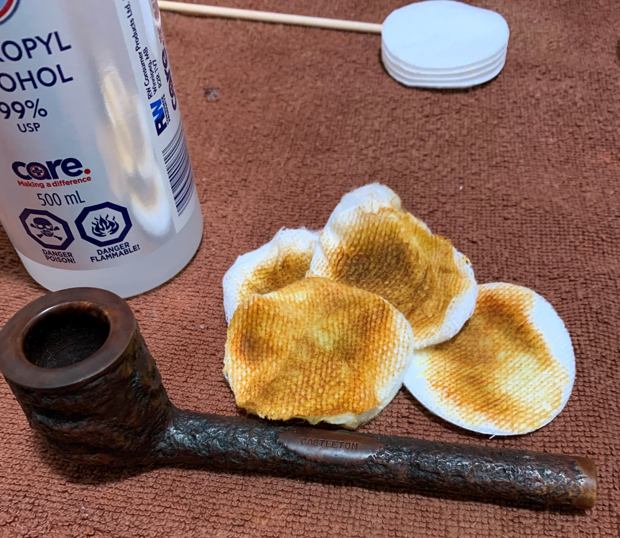
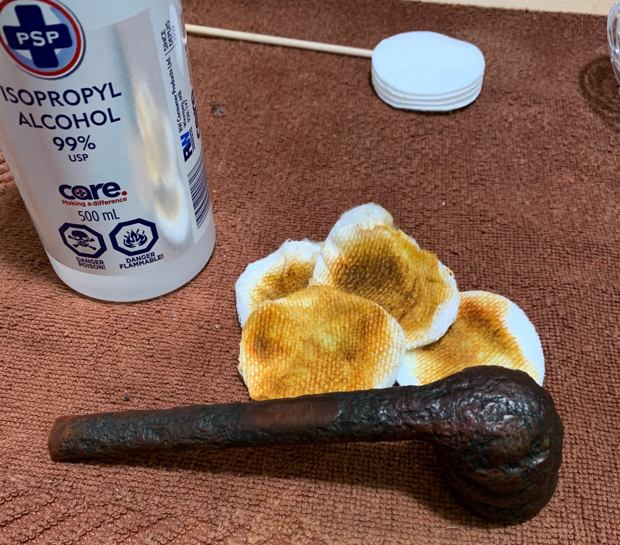
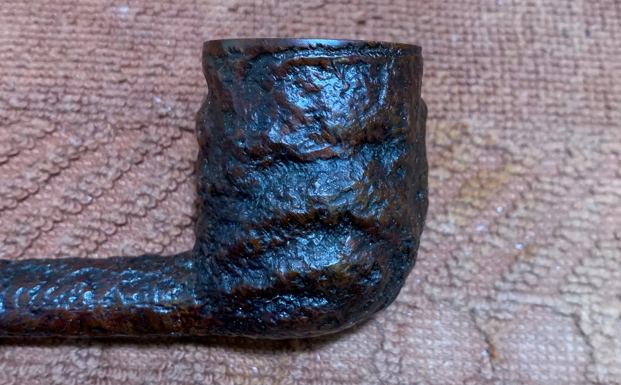
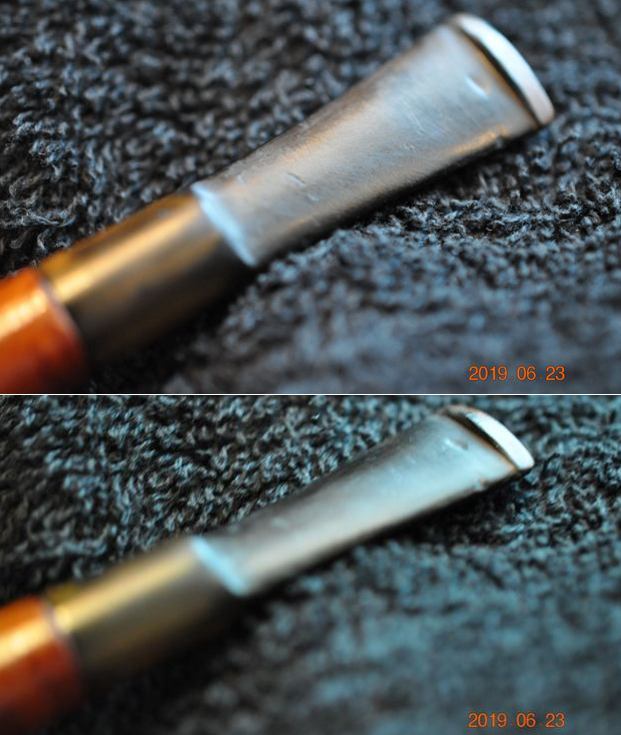
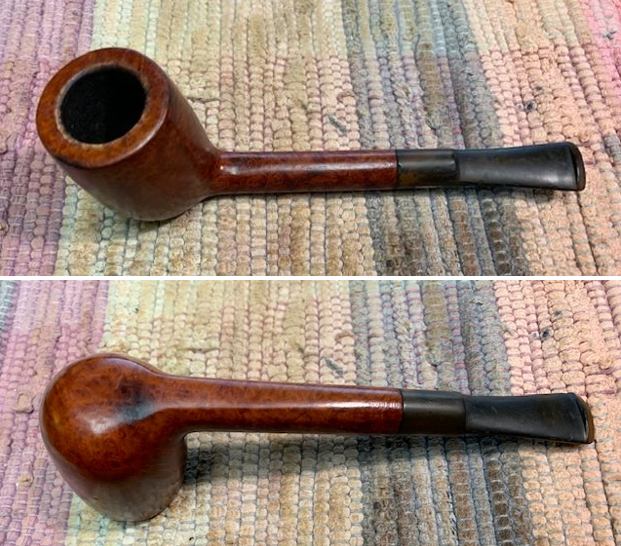
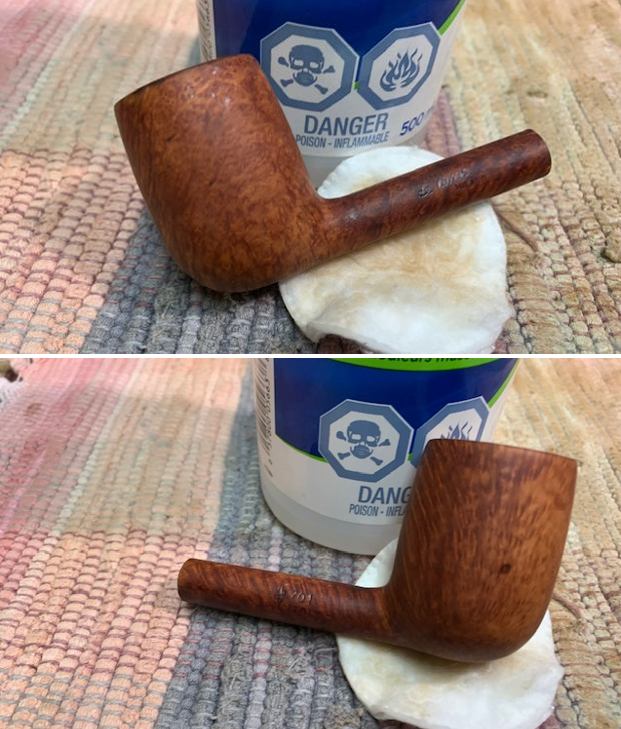
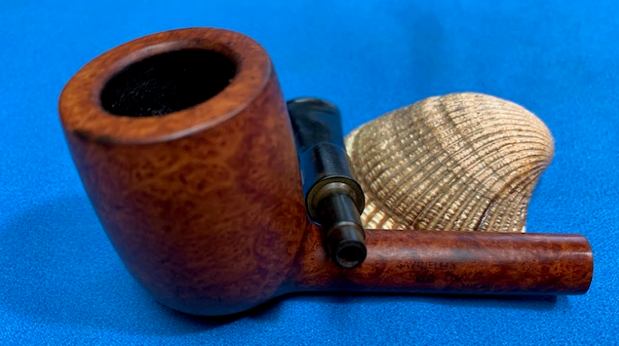
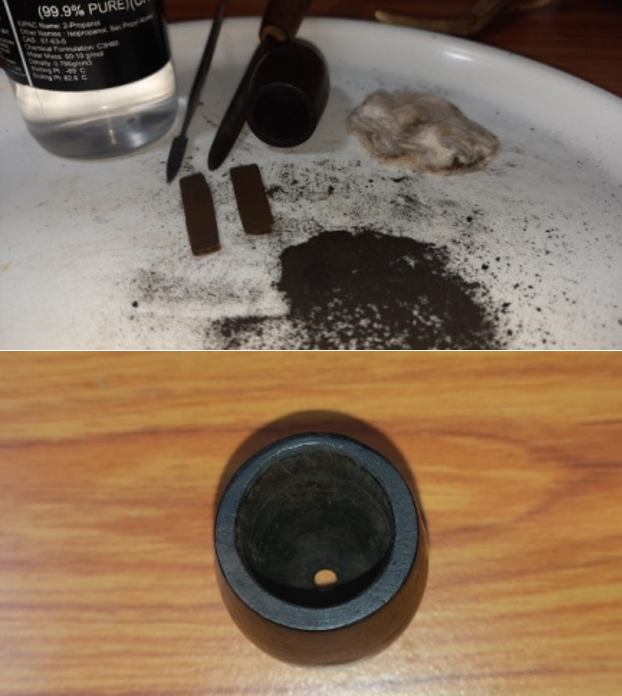
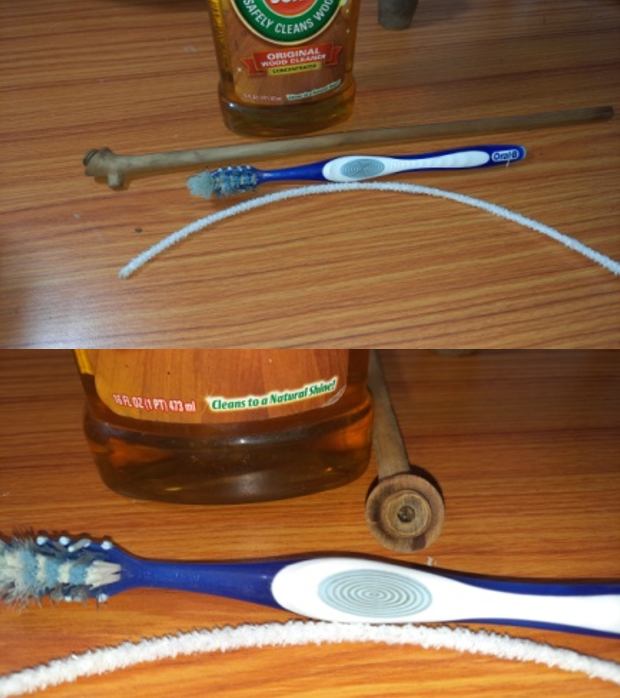
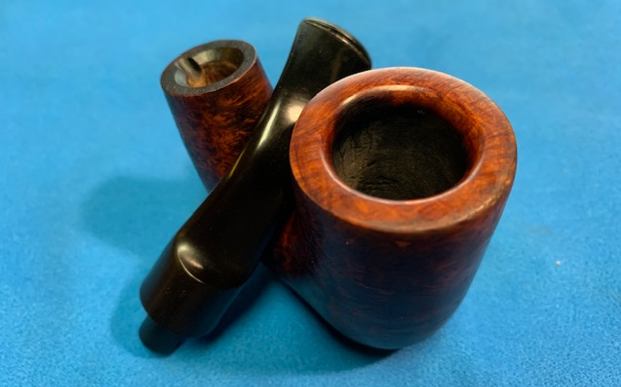
Armed with that information I turned my attention to working on the pipe itself. Jeff had done an amazing job cleaning up the bowl and the stem. He had reamed it with a PipNet pipe reamer and followed that with a Savinelli Fitsall Pipe knife to scrape away the remaining debris. He scrubbed the exterior of the bowl and stem with Murphy’s Oil Soap and a tooth brush to remove the grime and calcification. He scrubbed out the internals of the bowl, shank and stem with 99% Isopropyl Alcohol, pipe cleaners and cotton swabs until it was very clean. He scrubbed the stem surface with Soft Scrub and then put it in a bath of Before & After Pipe Stem Deoxidizer to deal with the oxidation. He rinsed it with warm water and dried it off. I took photos of the parts when I received them. It looks amazingly clean.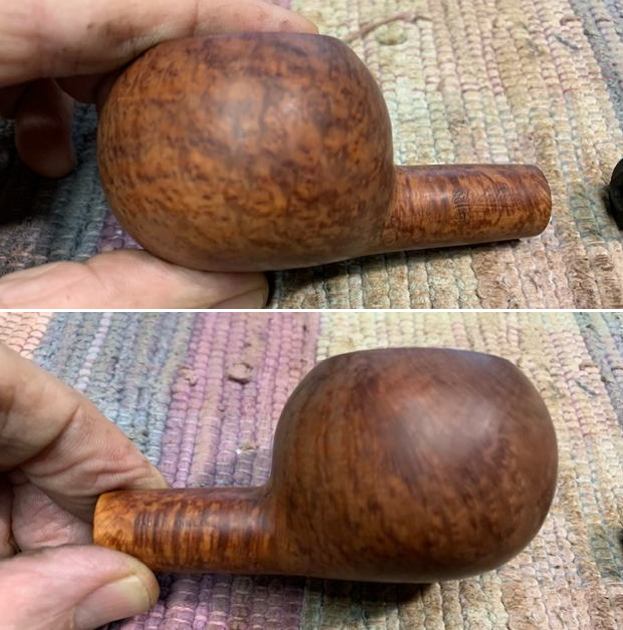
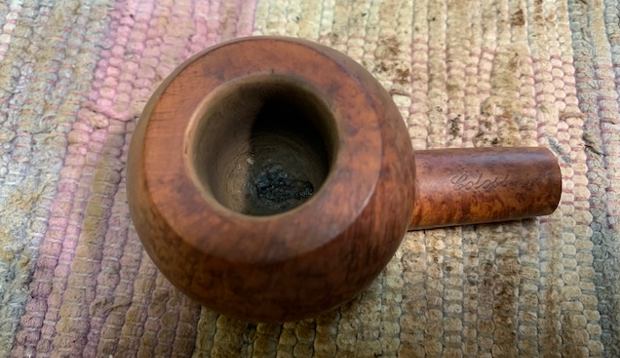
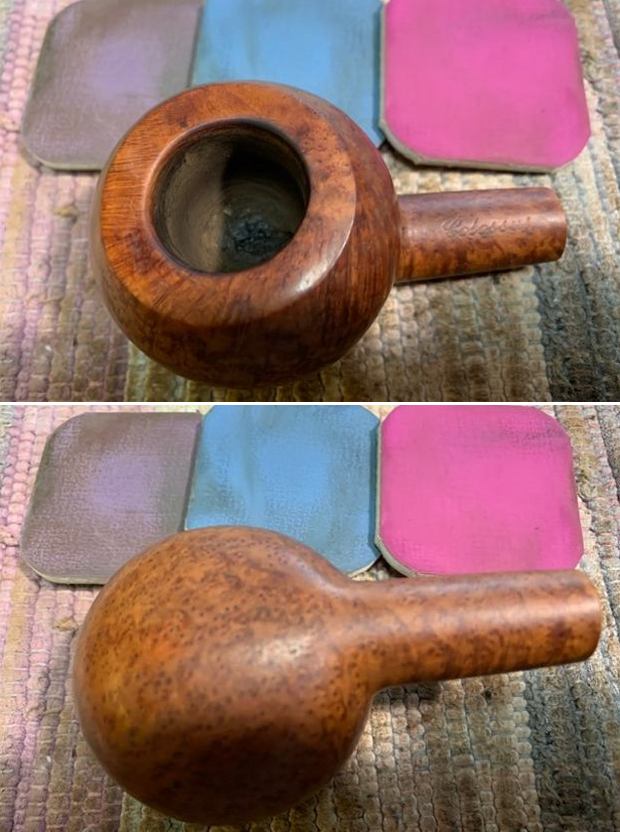
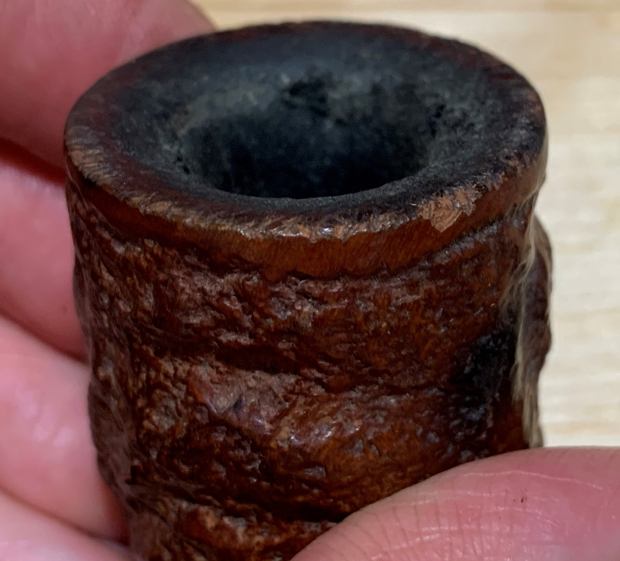
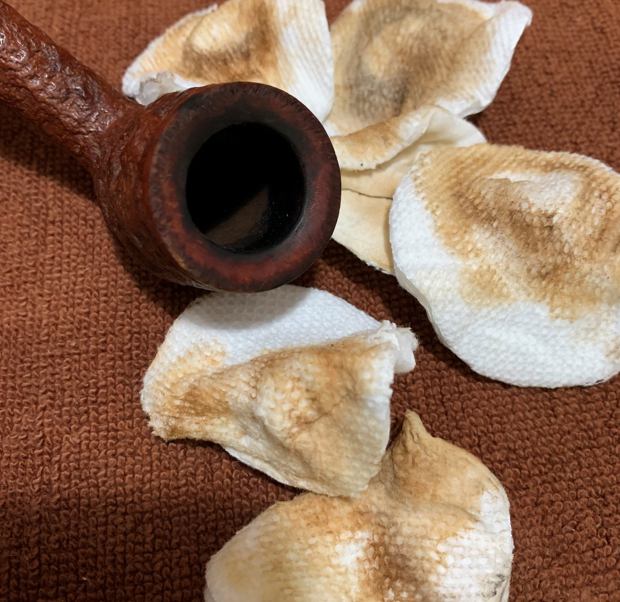
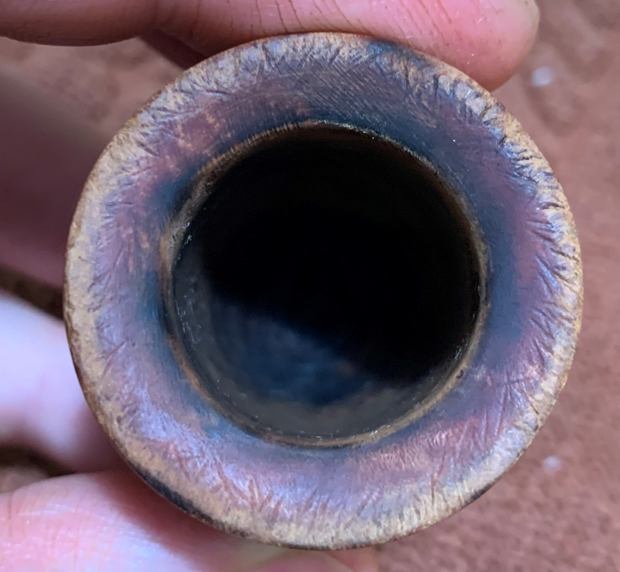
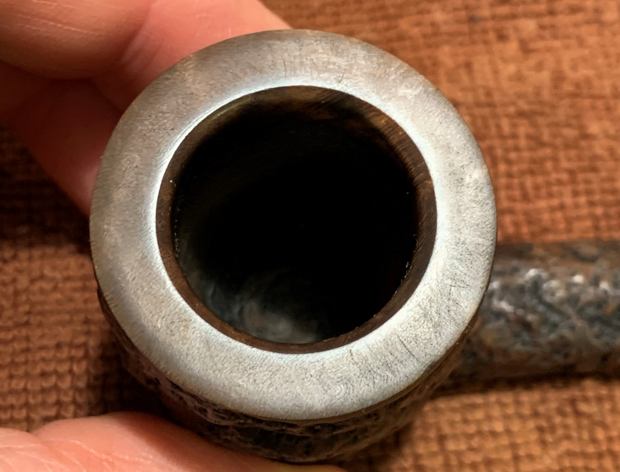
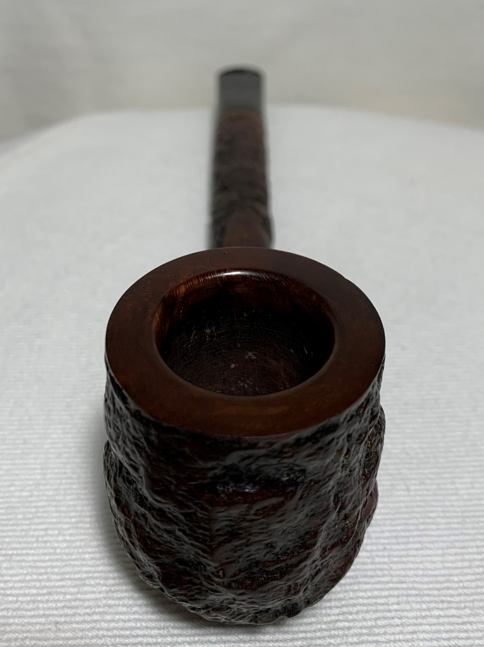
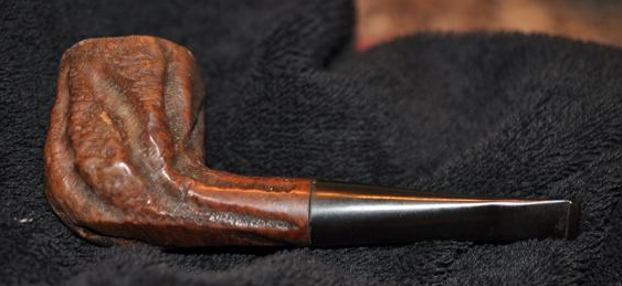
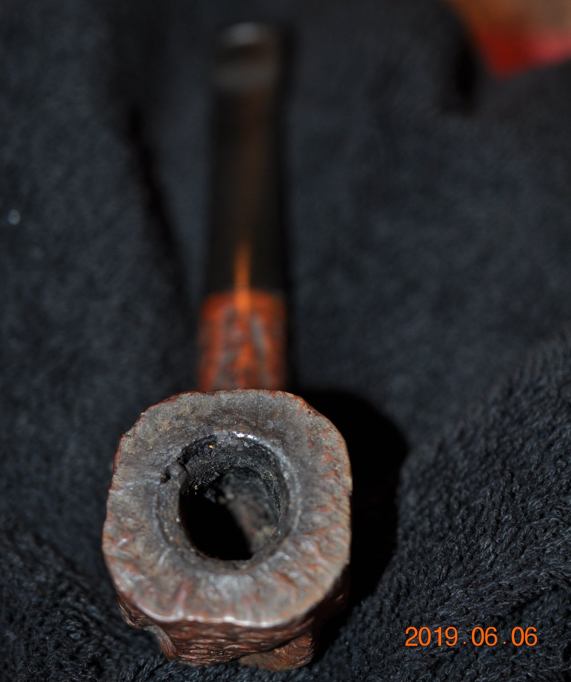
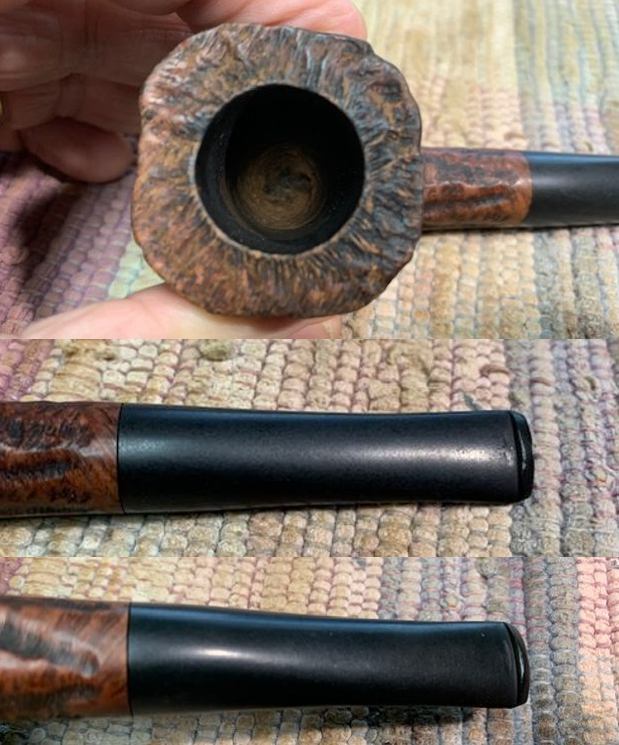
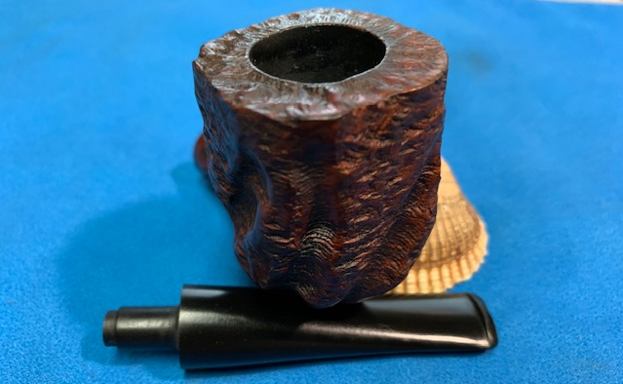
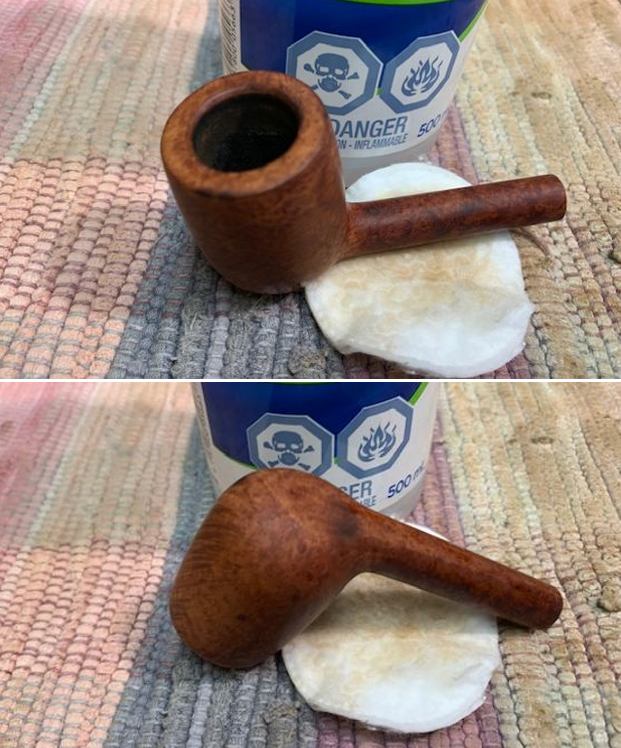
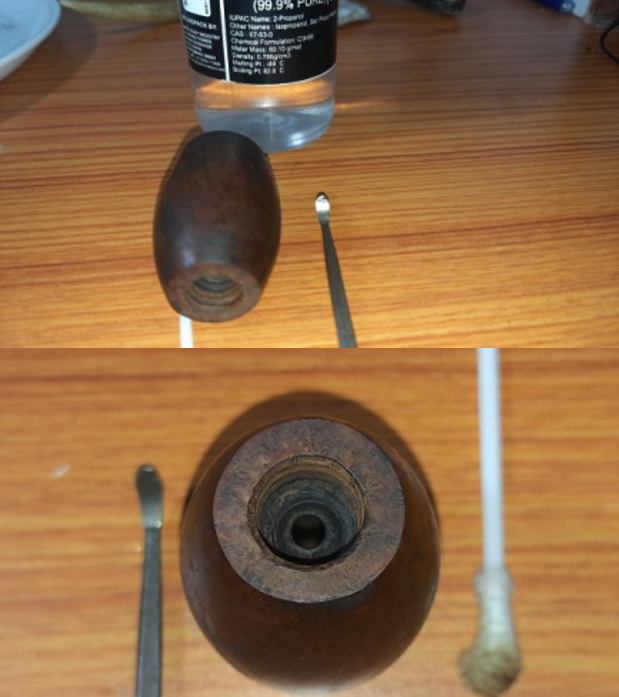
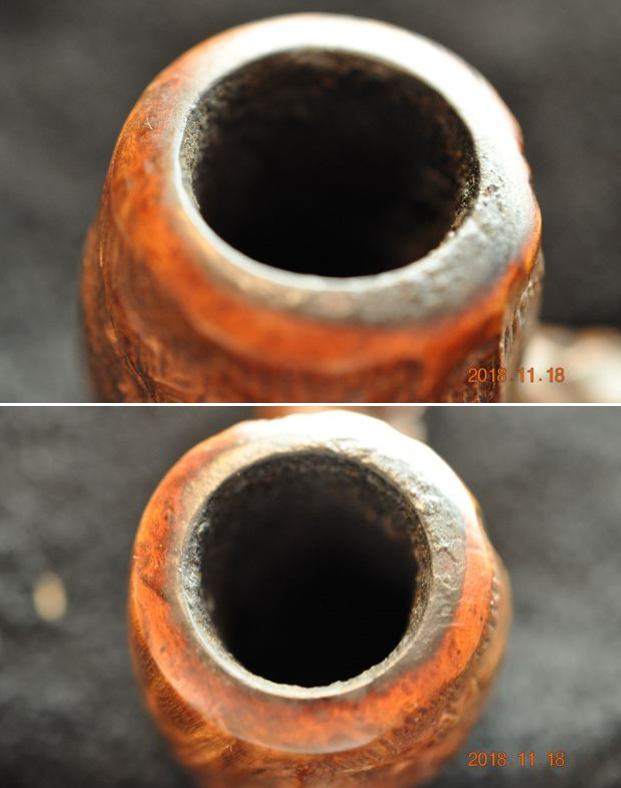
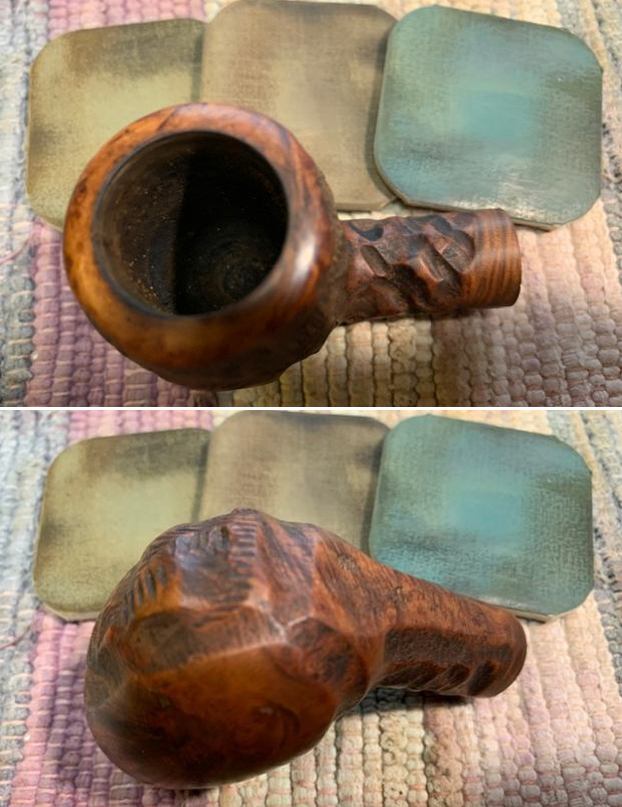
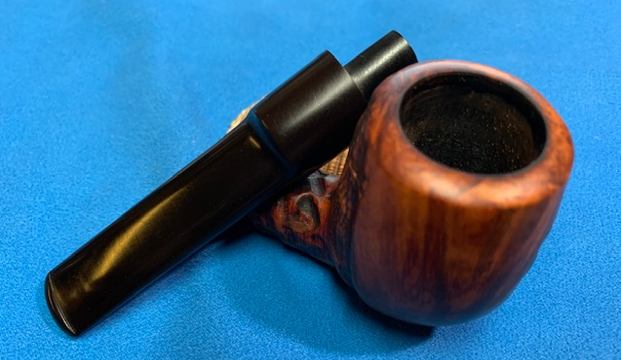
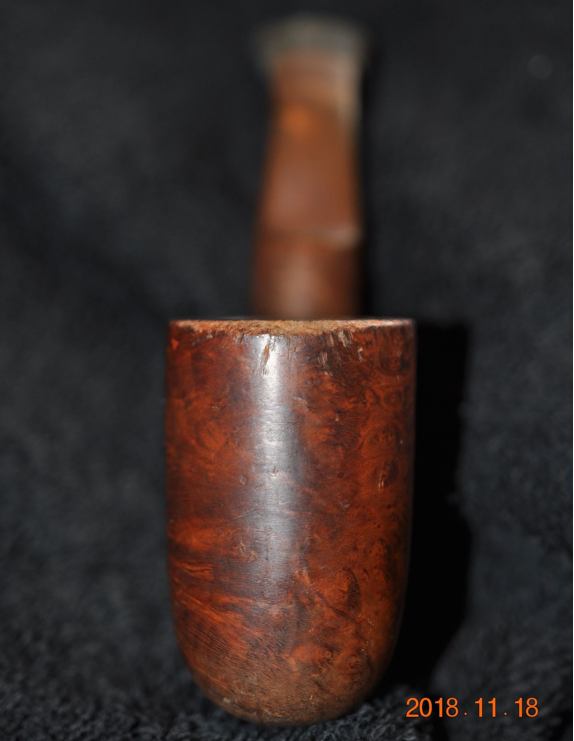
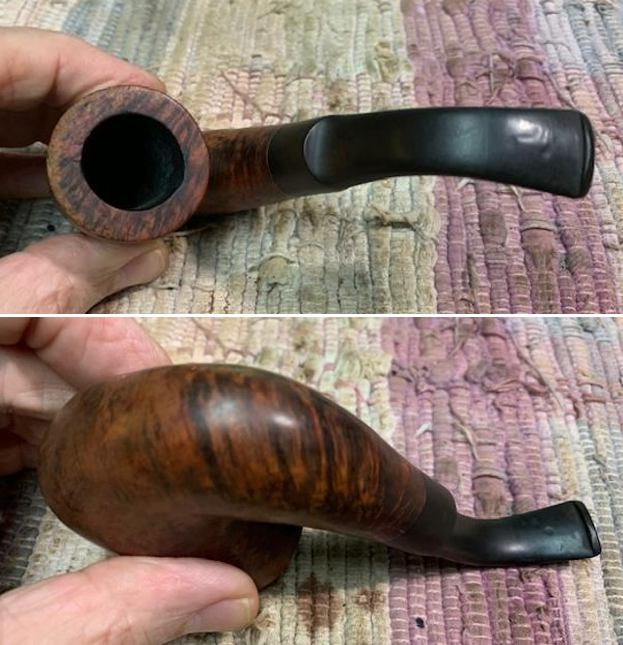
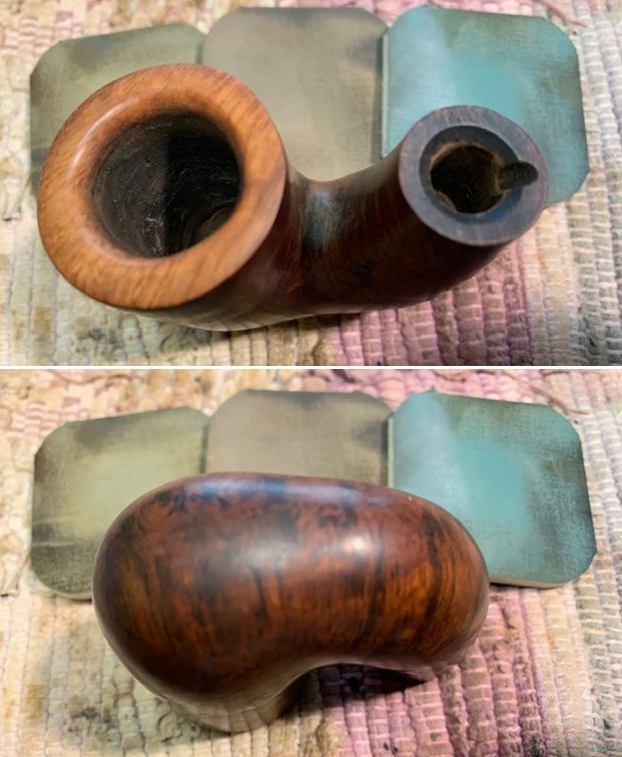
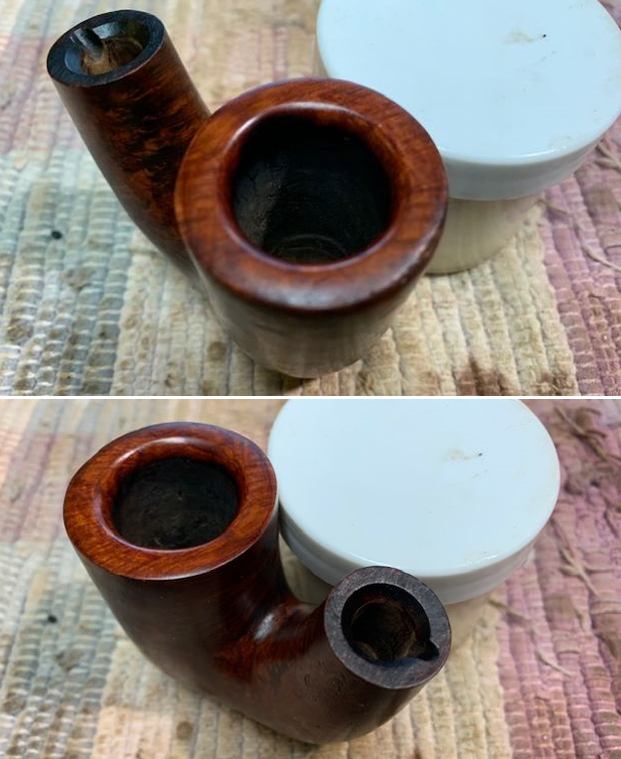
 I took a photo of the rim top to show the darkening and damage to the inner edge of the bowl. It was a little rough but should clean up well. I also took photos of the stem to show the surface of the stem and how well it had cleaned up. I also wanted to show the light tooth marks on the stem surface.
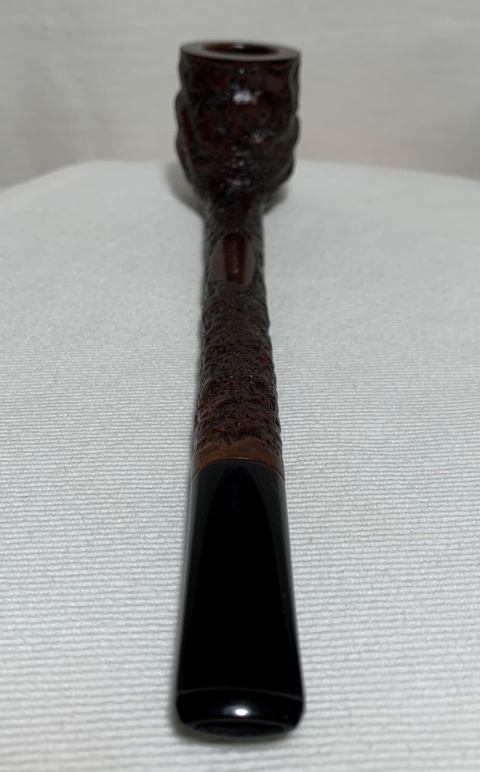
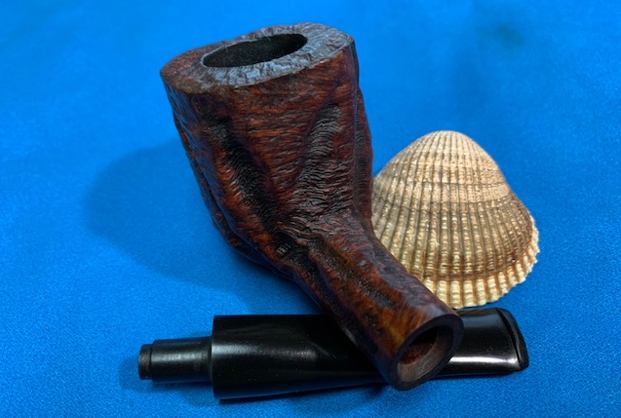
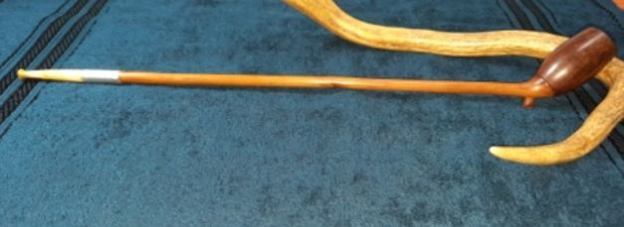
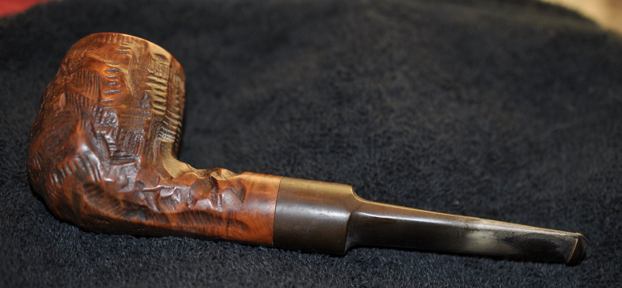
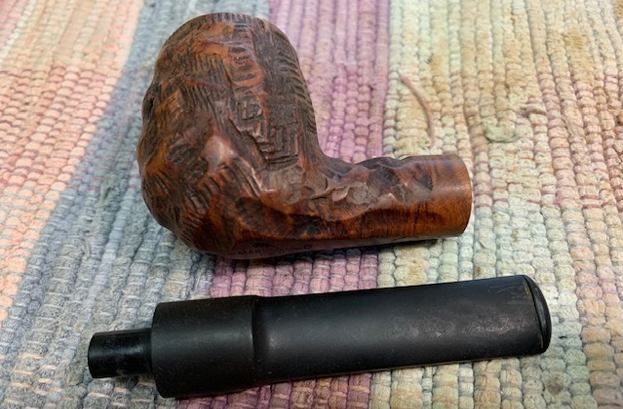
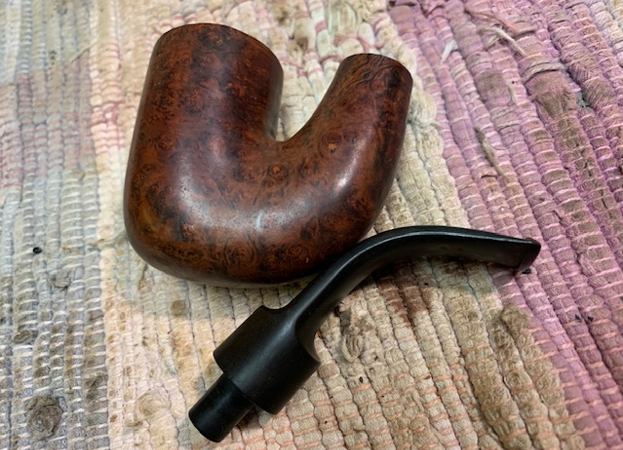
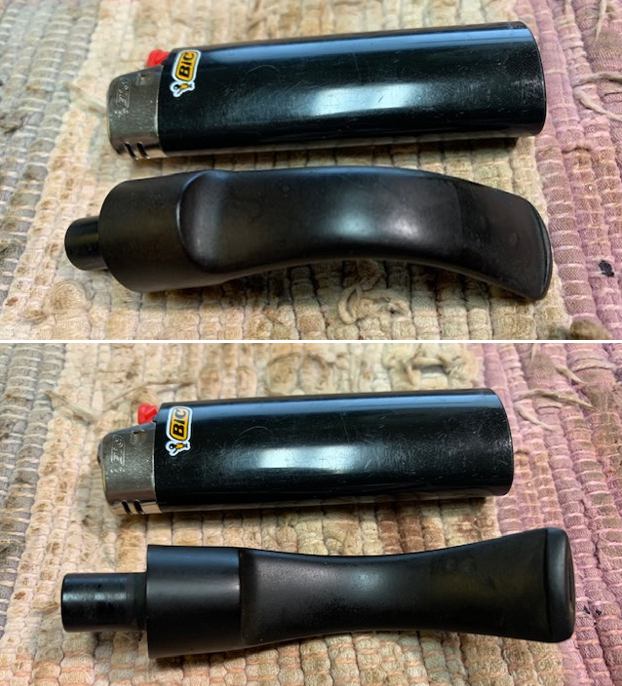
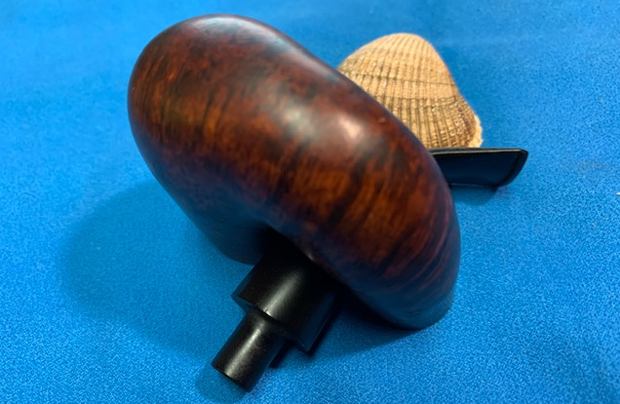
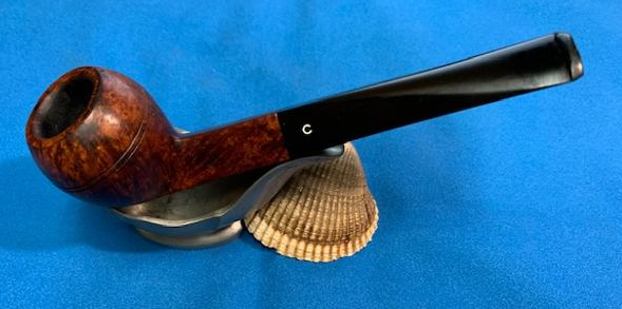
 I put the stem against the shank and took some photos to have some idea of how the pipe must have looked before it broke. It is an interesting looking war club of a pipe!
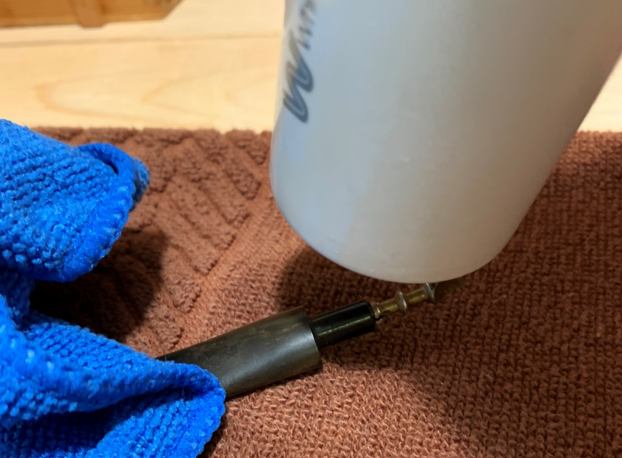
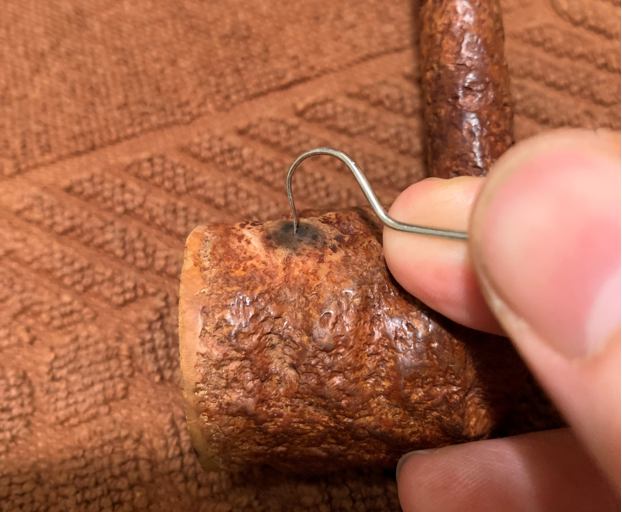
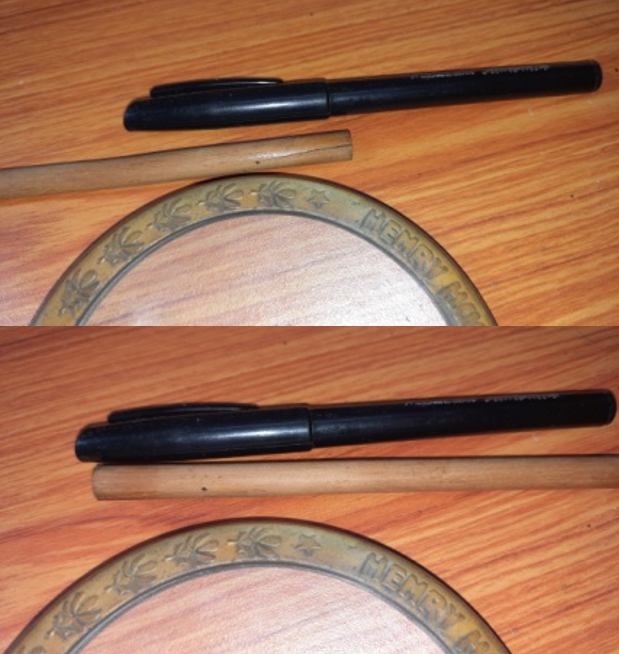
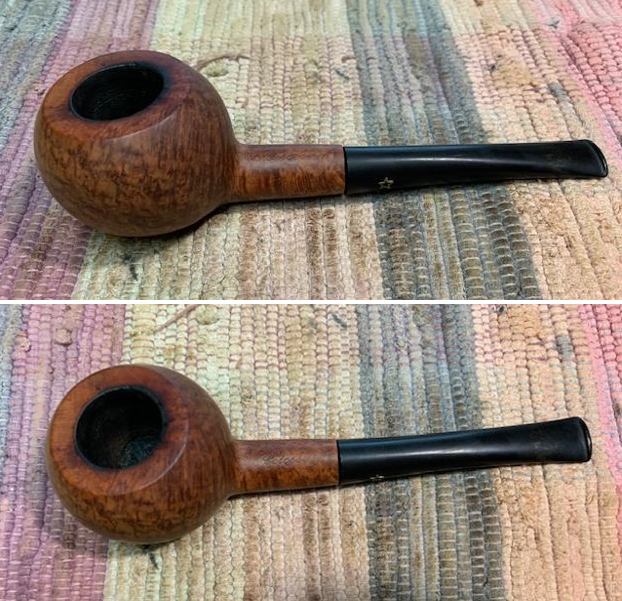 With that I put the bowl in the freezer for ten minutes to loosen the stuck tenon. When I took it out of the freezer I used a dry wall screw to thread into the airway on the broken tenon and wiggled it free of the shank.
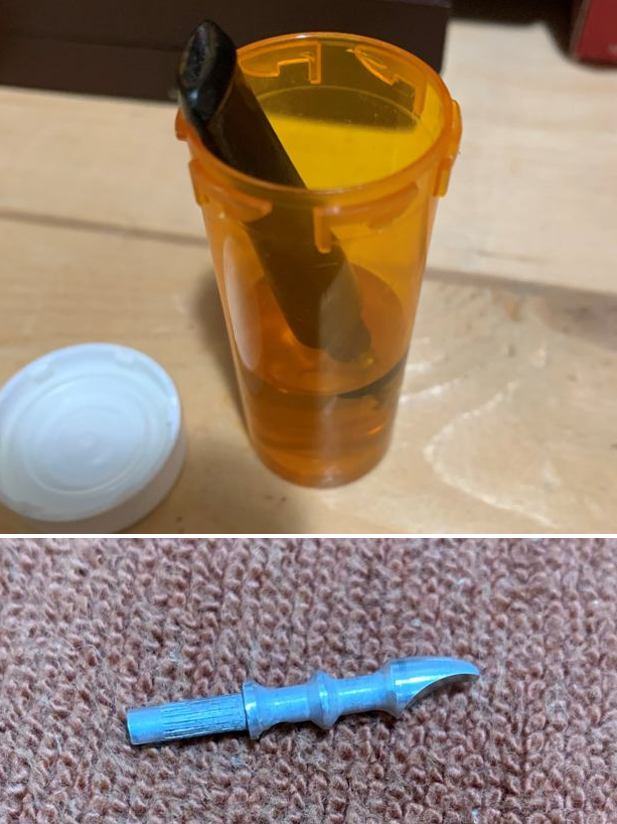
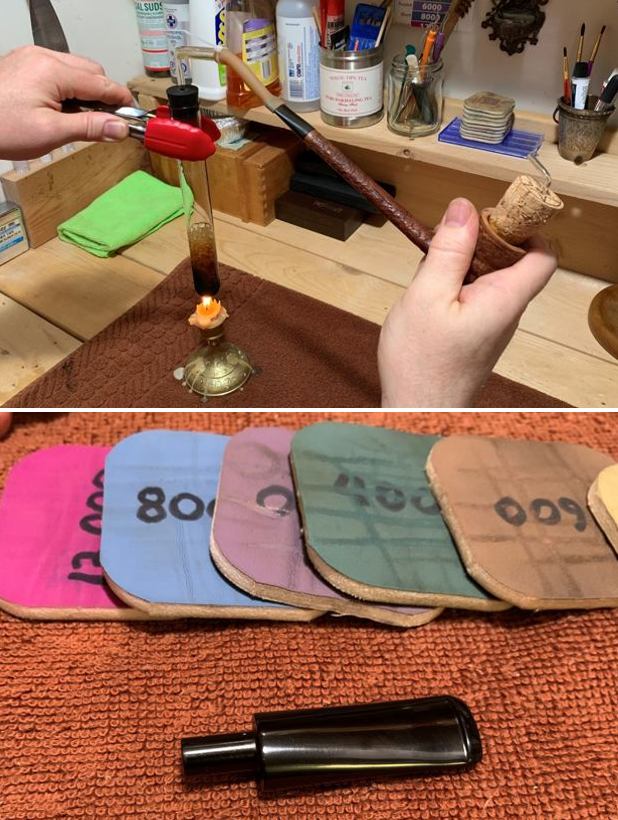
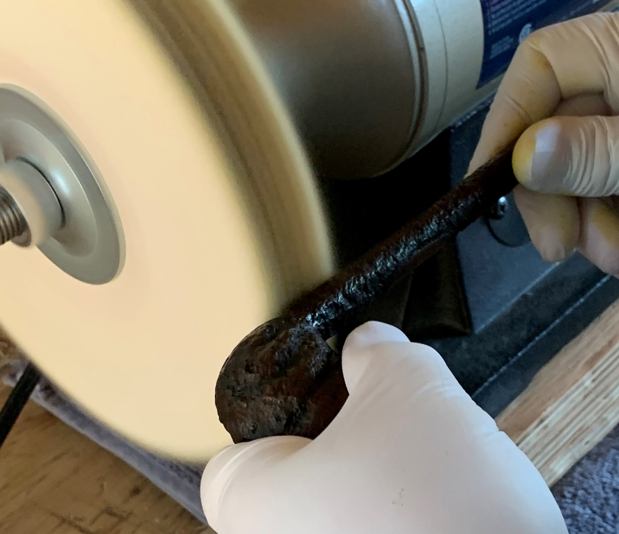
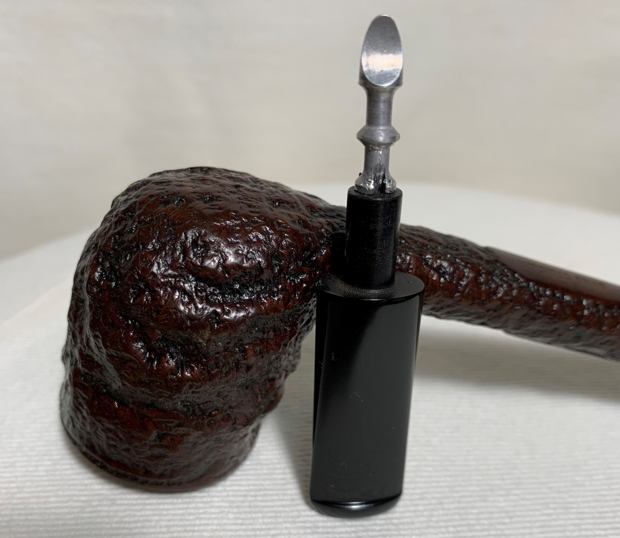
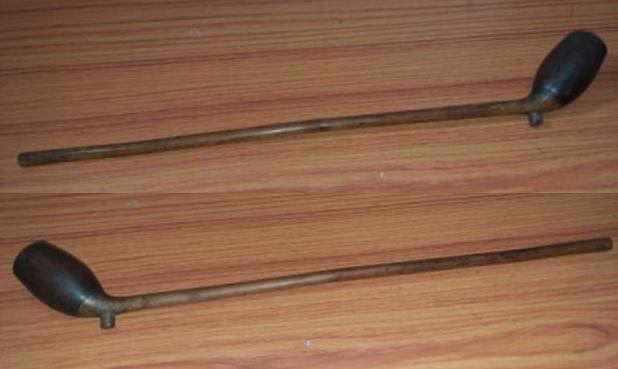
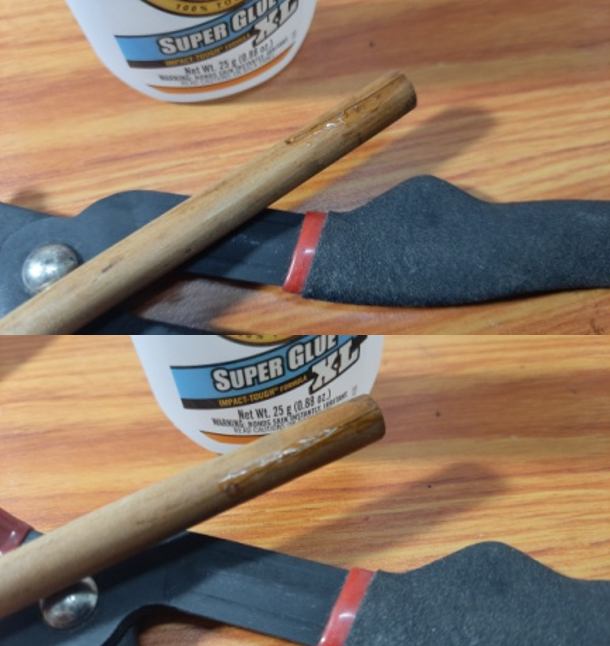
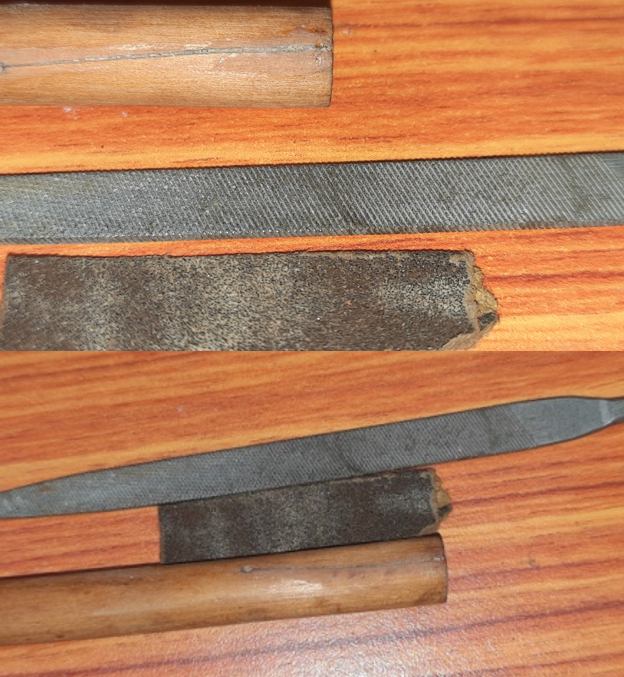
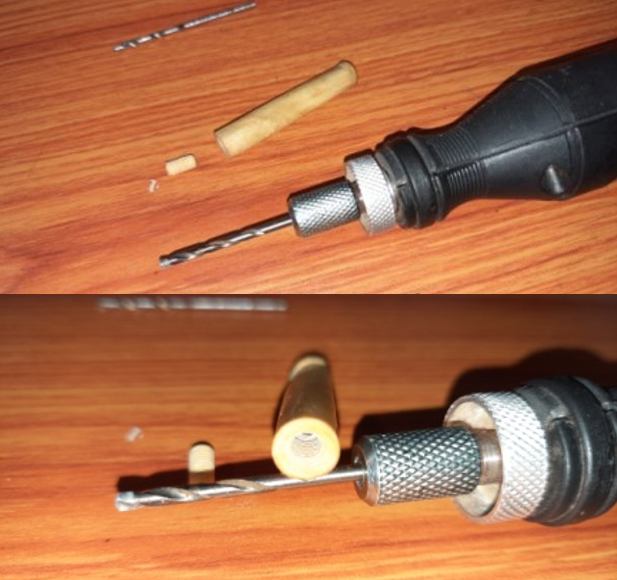
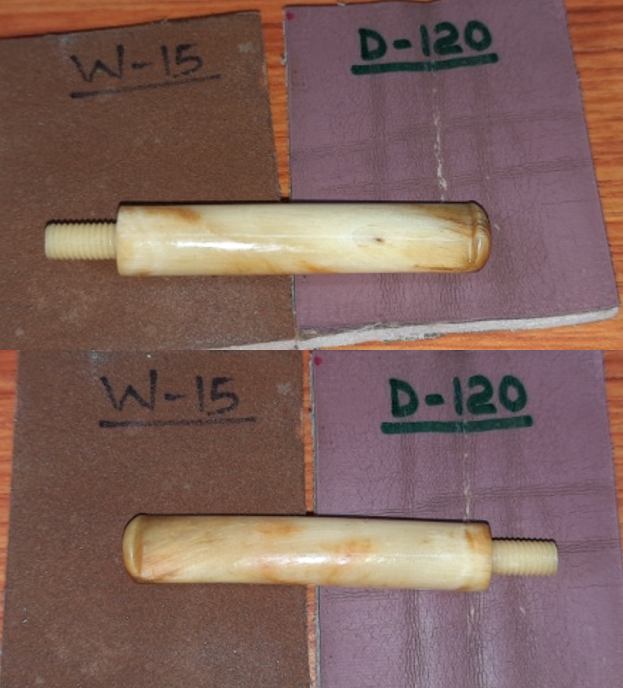
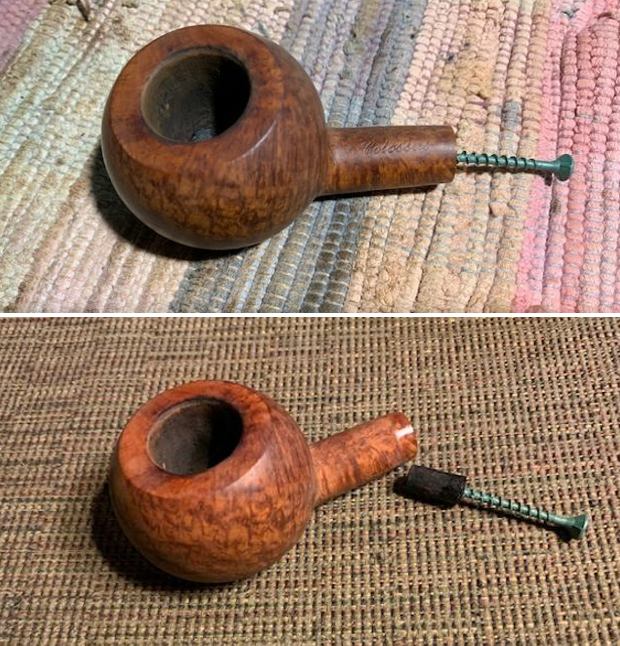 With the broken tenon pulled it was time to make a new tenon for the stem. I started out by going through my can of tenons and finding one that would work. It is a threaded tenon that is shown on the left in the photo below (A). I took off the lip at the threads and reduced the diameter with a Dremel and sanding drum as shown in the photo below (B). It was the same diameter as the broken original shown below (C).
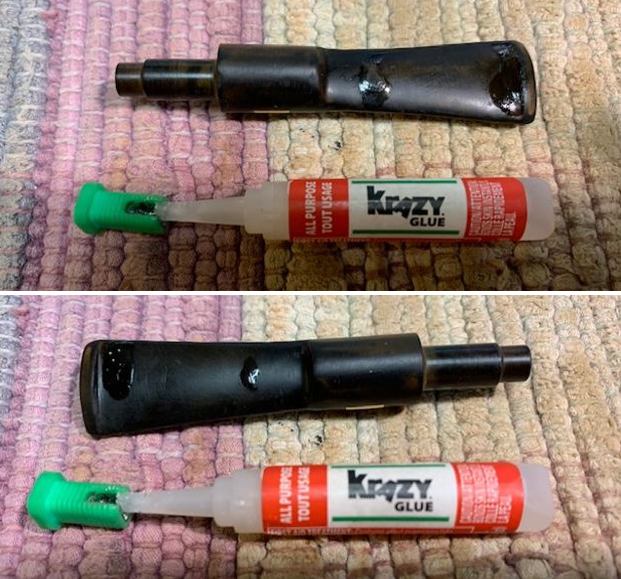
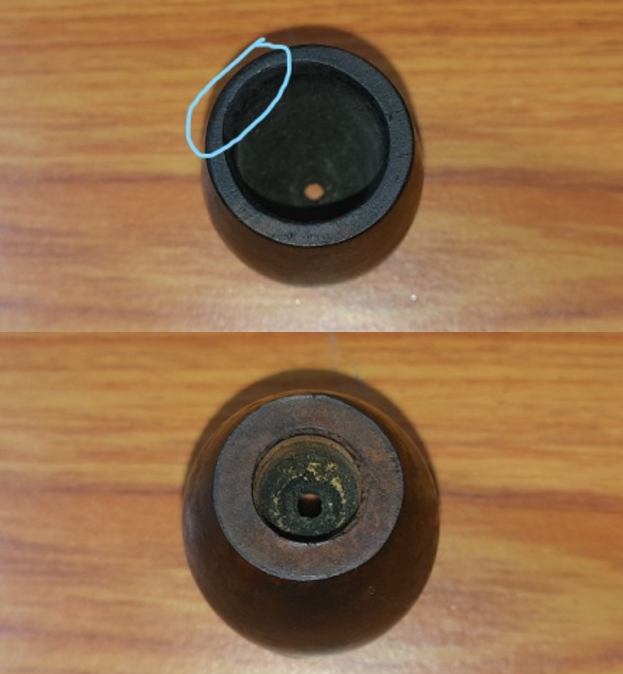
 I drilled out the airway in the stem to accommodate the new tenon. I started with a bit slightly larger than the airway and worked up to the one shown below. It was the same diameter as the threaded tenon end.
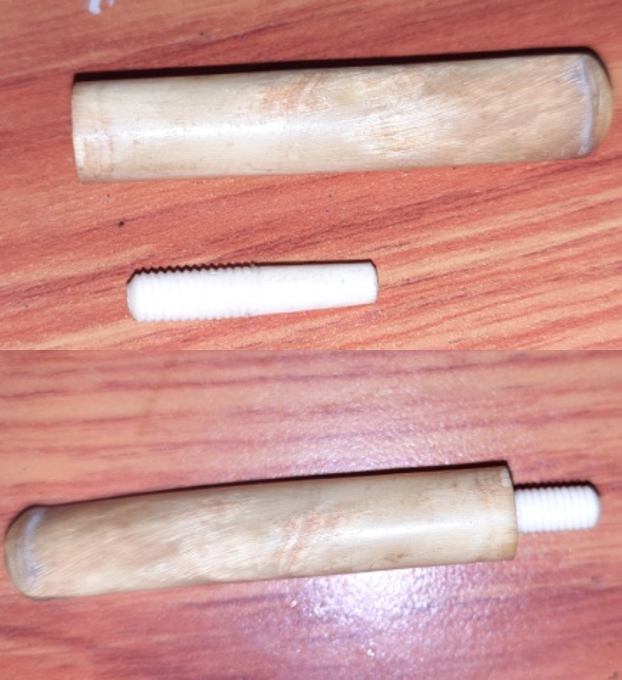
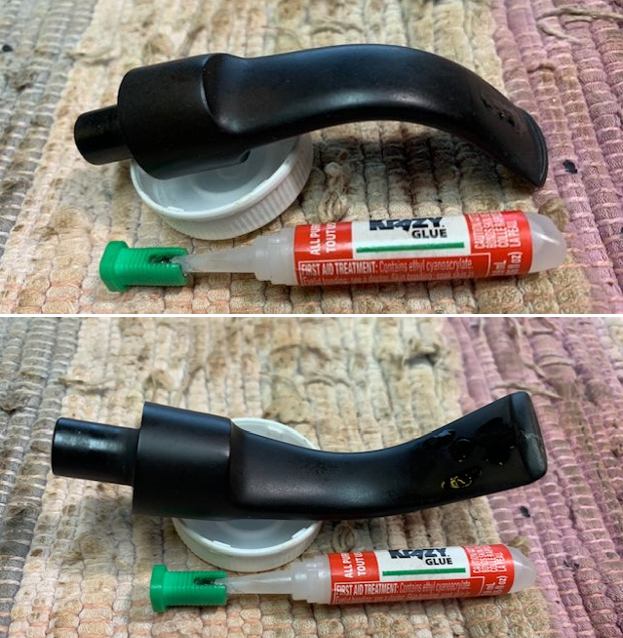
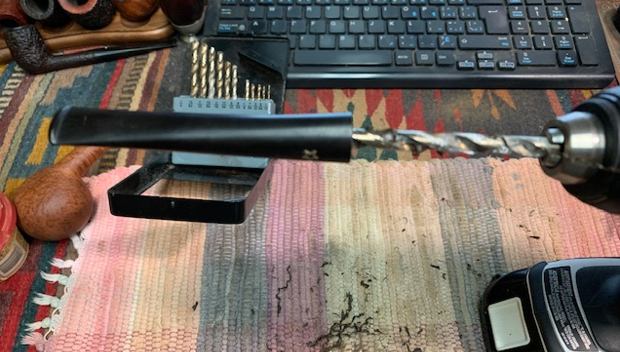 I sanded the threads to reduce the diameter of the threaded portion of the tenon. I coated it with some black superglue and inserted it in the stem. I set it aside to let the glue cure. I would still need to fine tune the fit in the mortise but it was looking good.
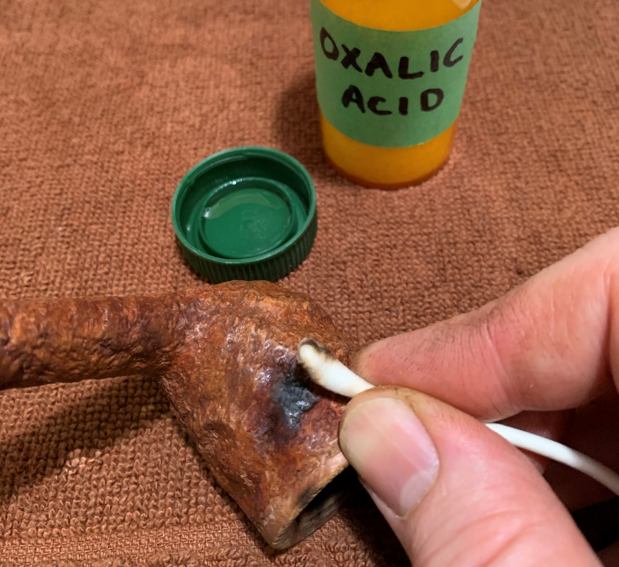
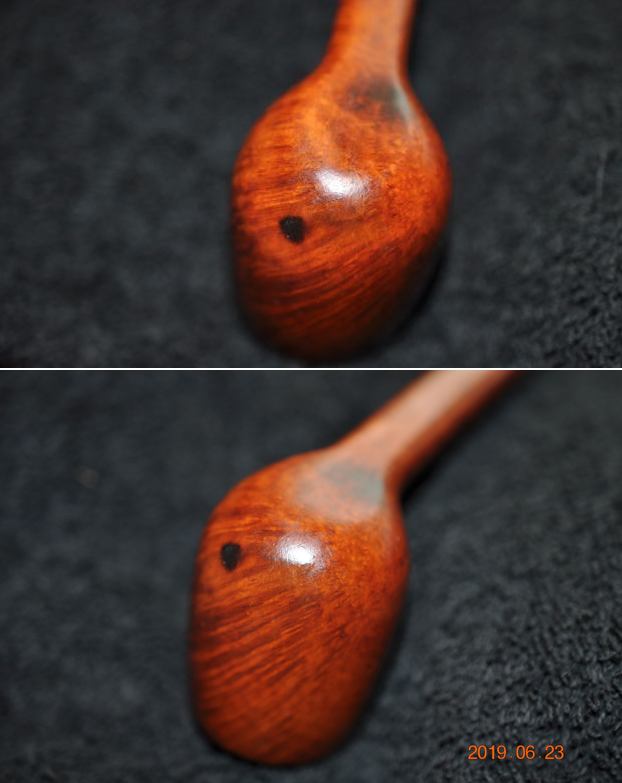
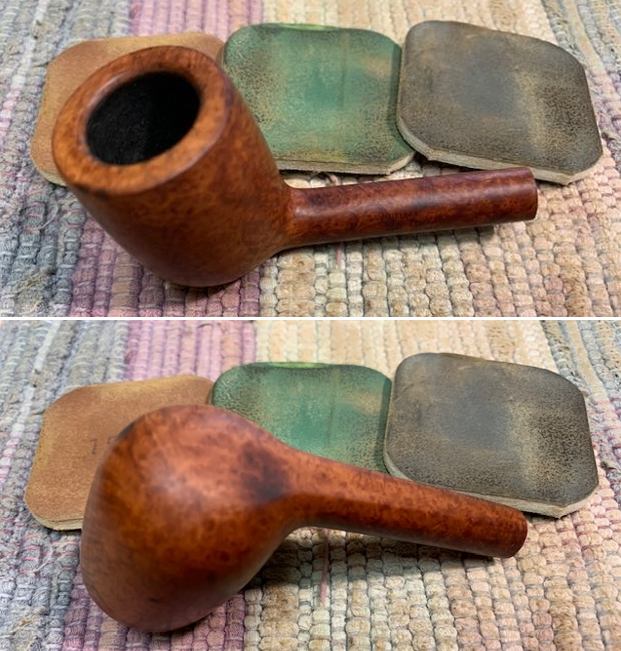
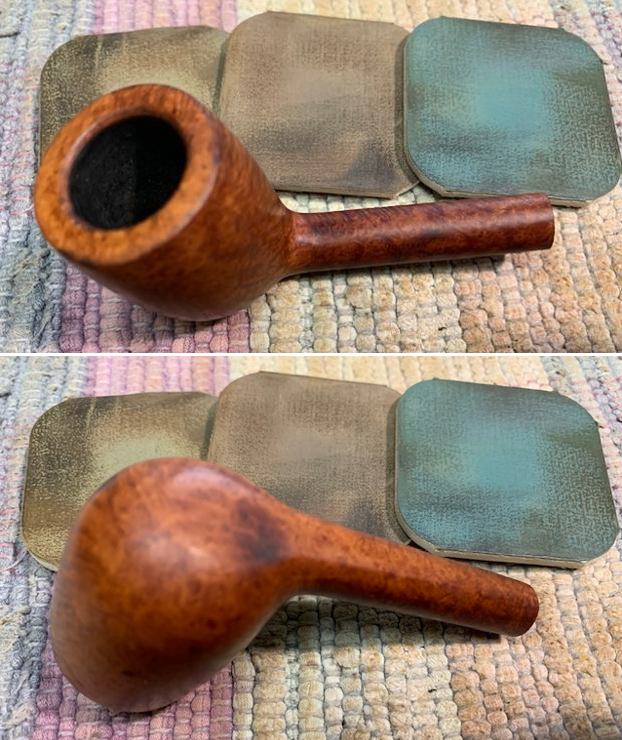
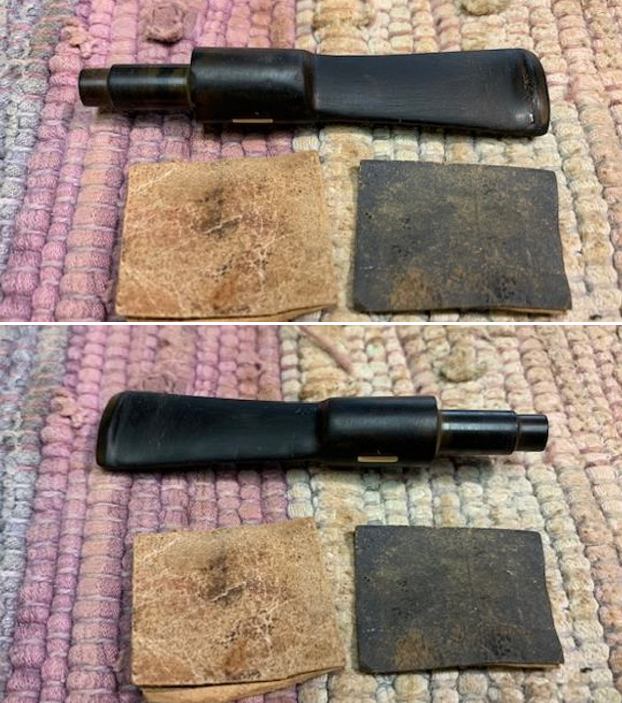
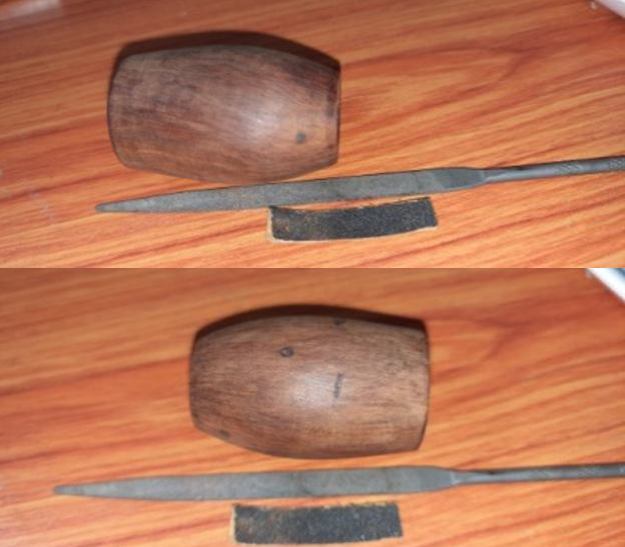
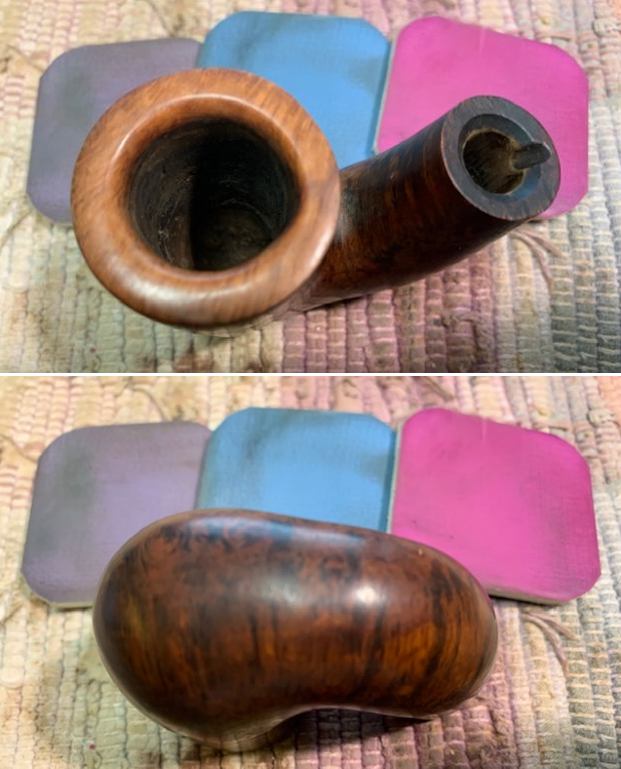
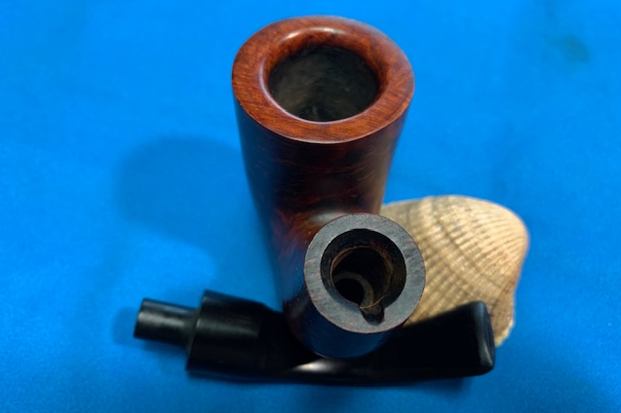
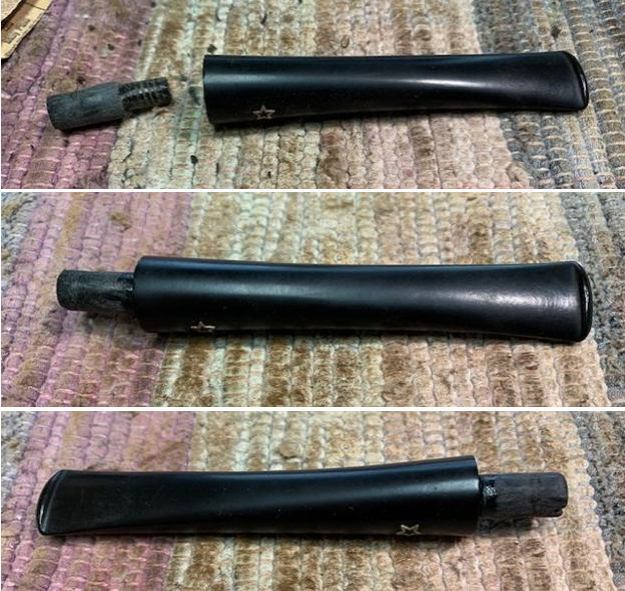 While the tenon repair cured I turned my attention to the bowl. I started by addressing the damage on the inner edge of the rim. I used a folded piece of 220 grit sandpaper to give a slight bevel to the edge and remove the darkening. I smoothed the edge further with a piece of sandpaper wrapped around a dowel. The rim came out looking much better.
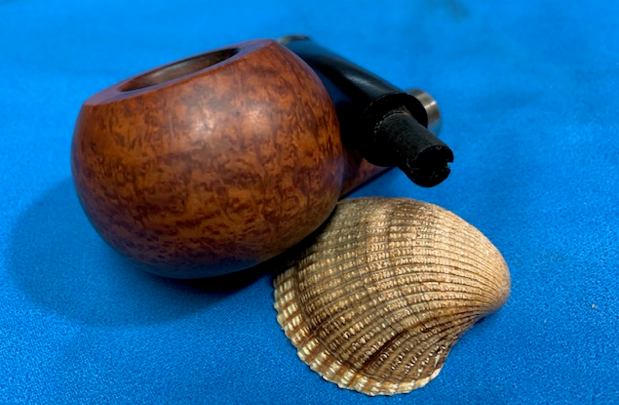
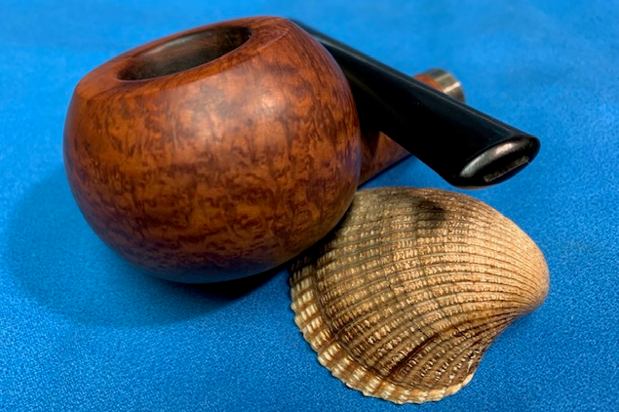
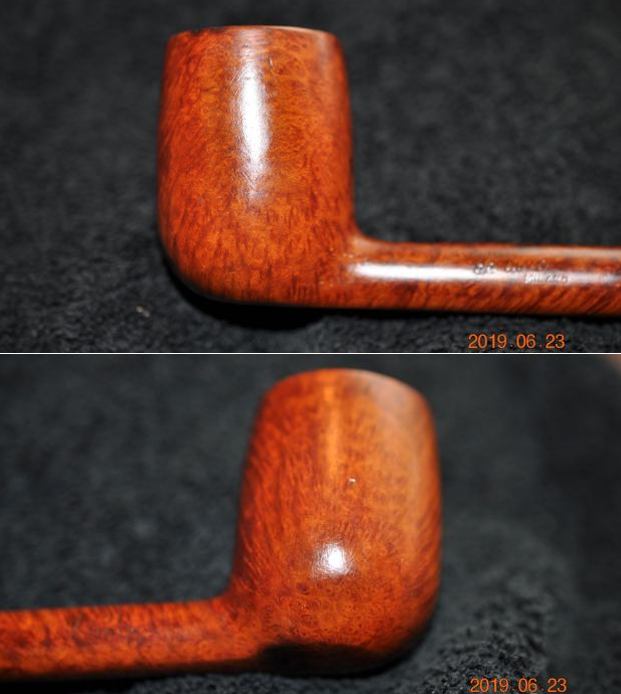
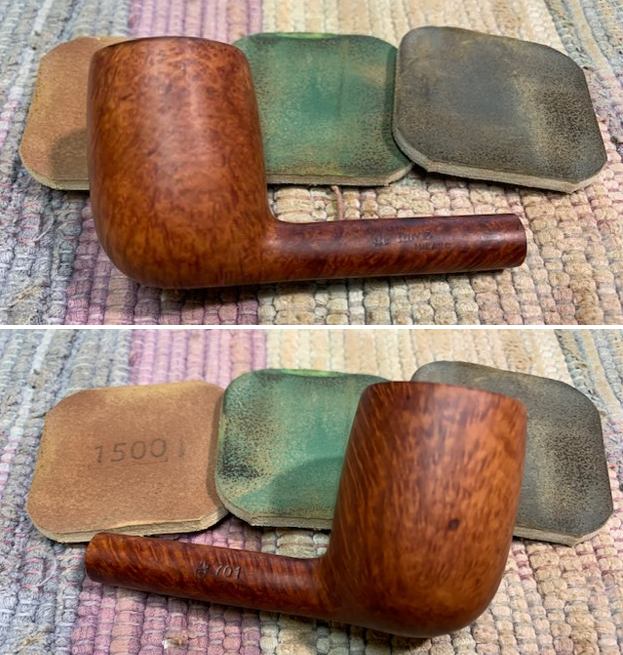
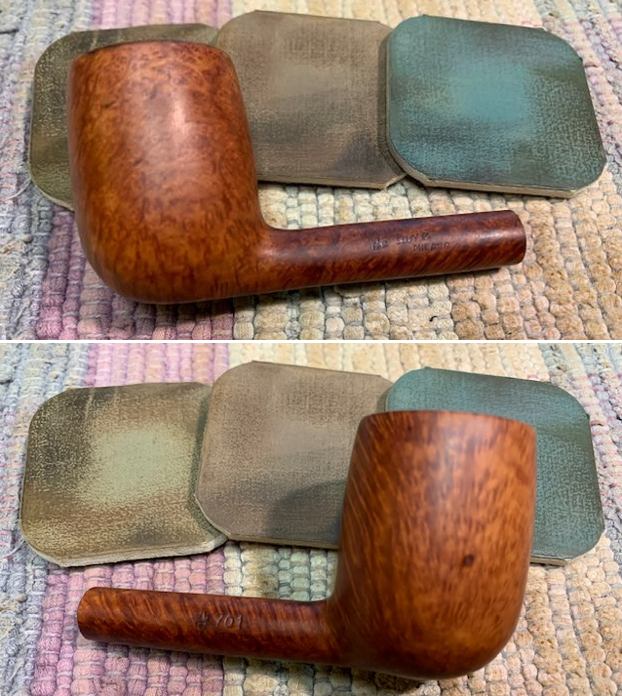
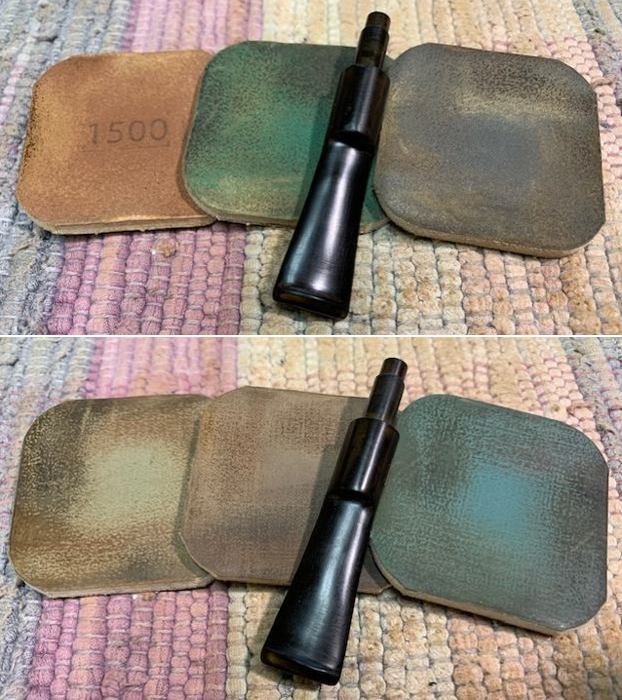
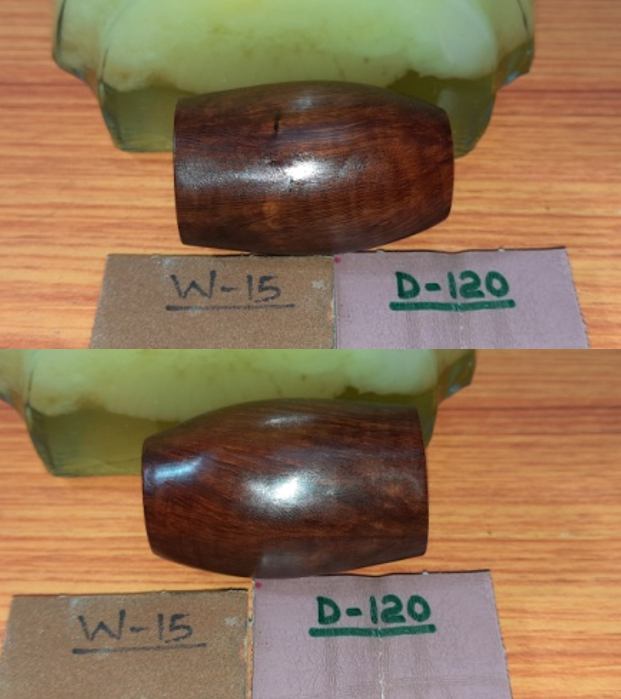
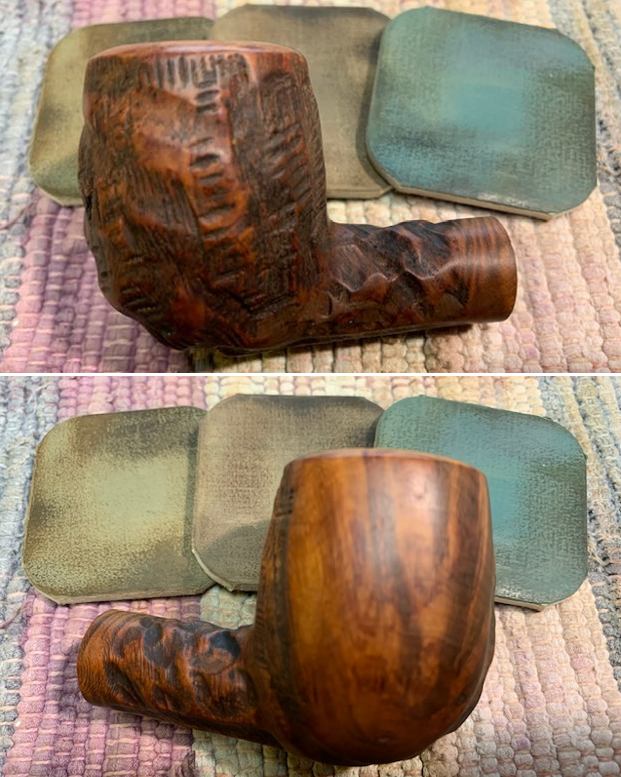
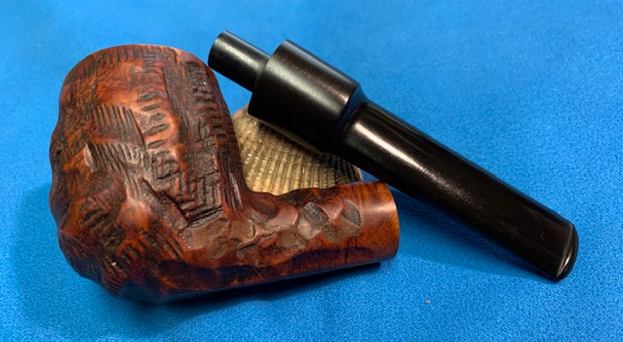
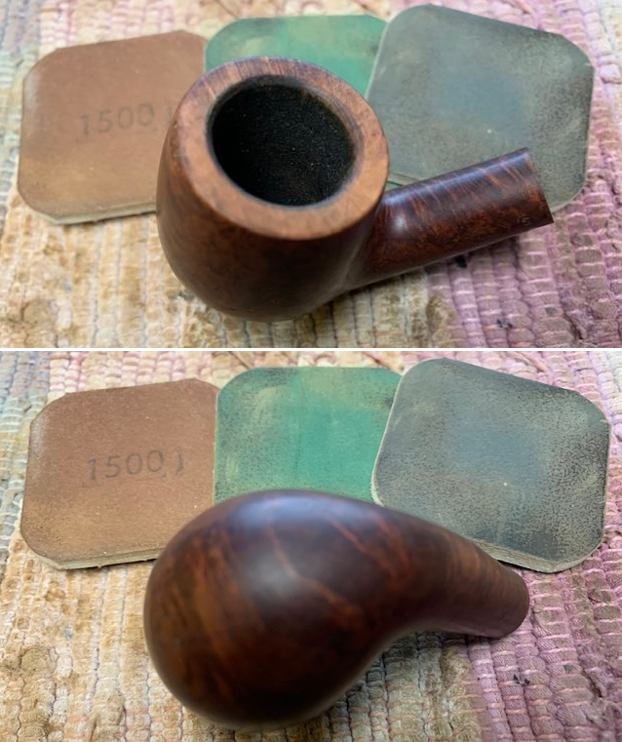
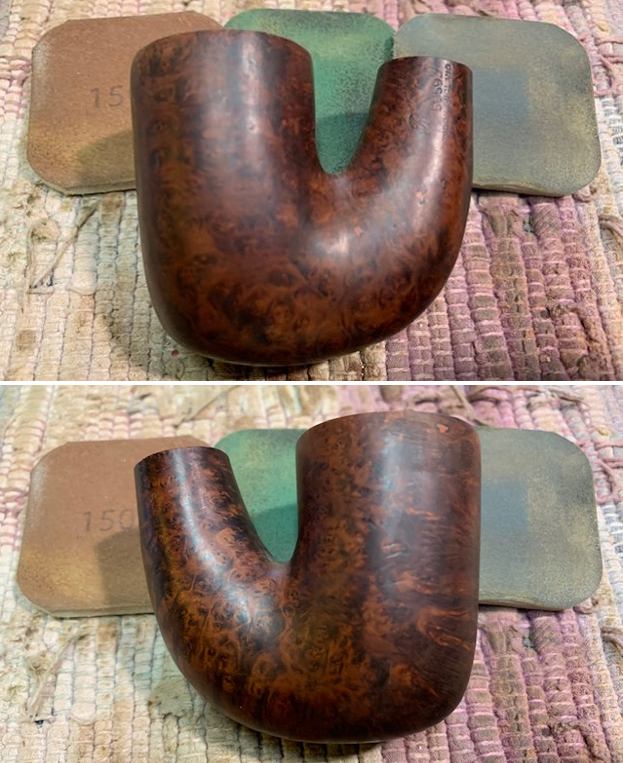
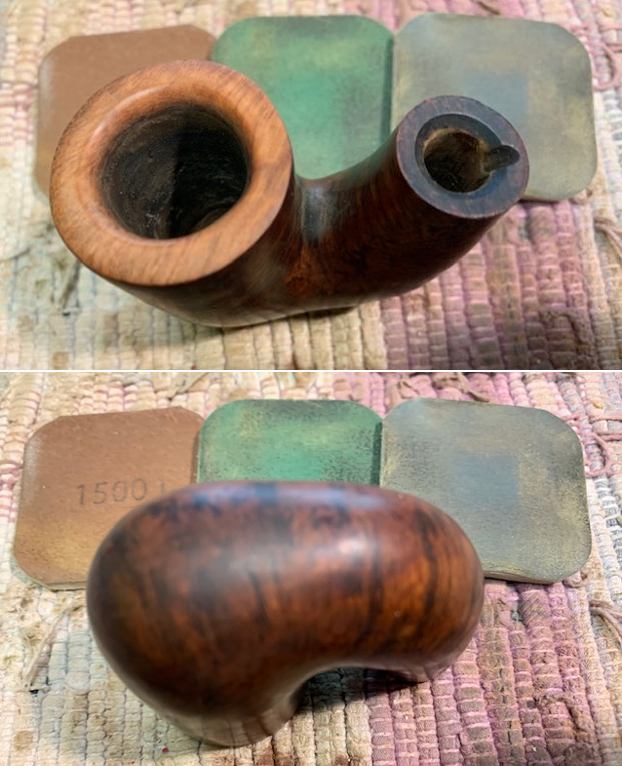
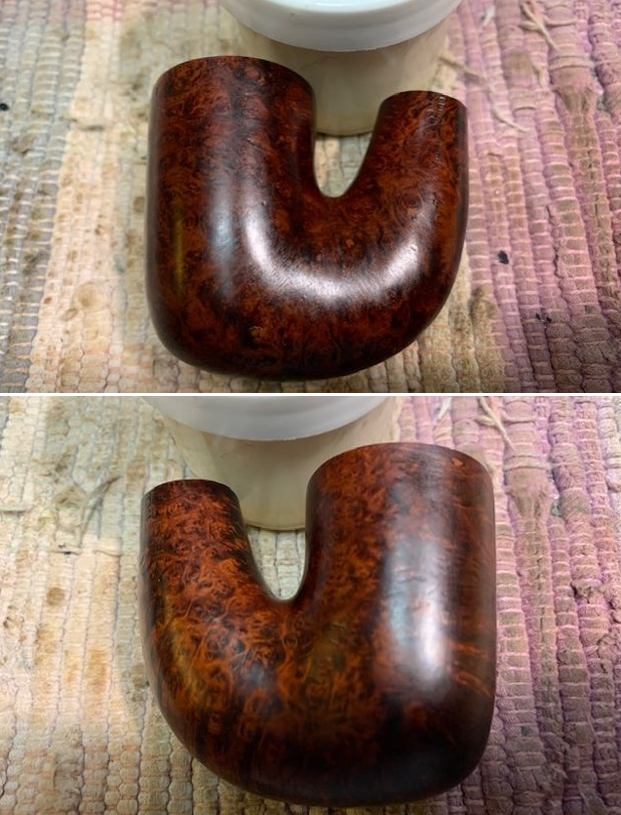
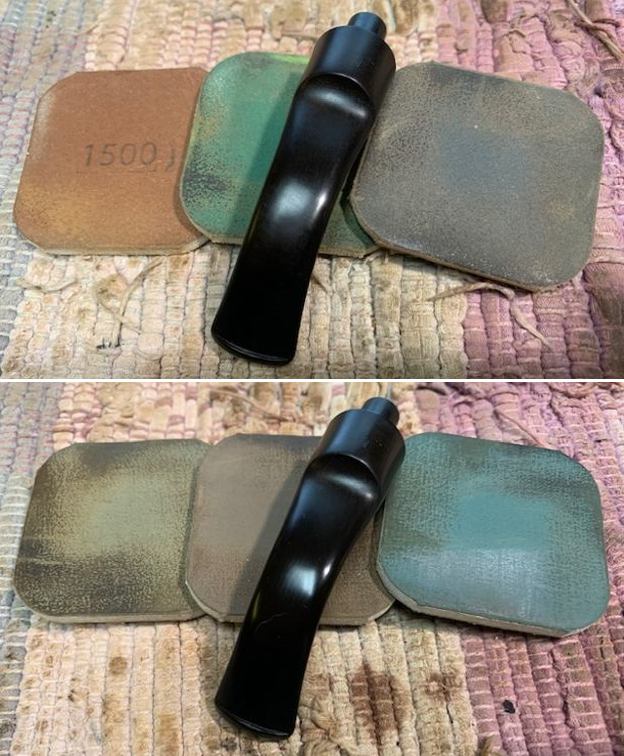
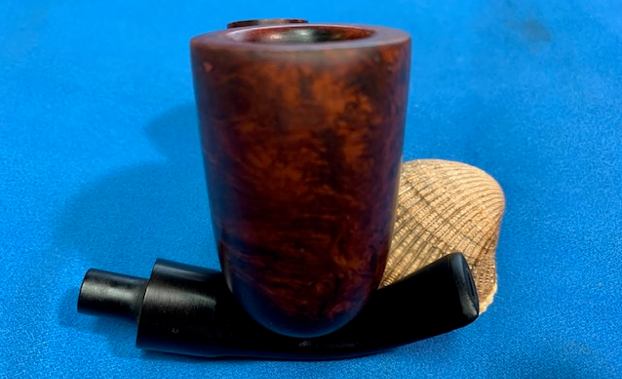
 I dry sanded the briar with micromesh sanding pads – 1500-12000 grit sanding pads. I wiped the bowl surface down with a damp cloth after each sanding pad to remove the sanding dust. Once I finished the exterior of the briar was clean and the grain really stood out.
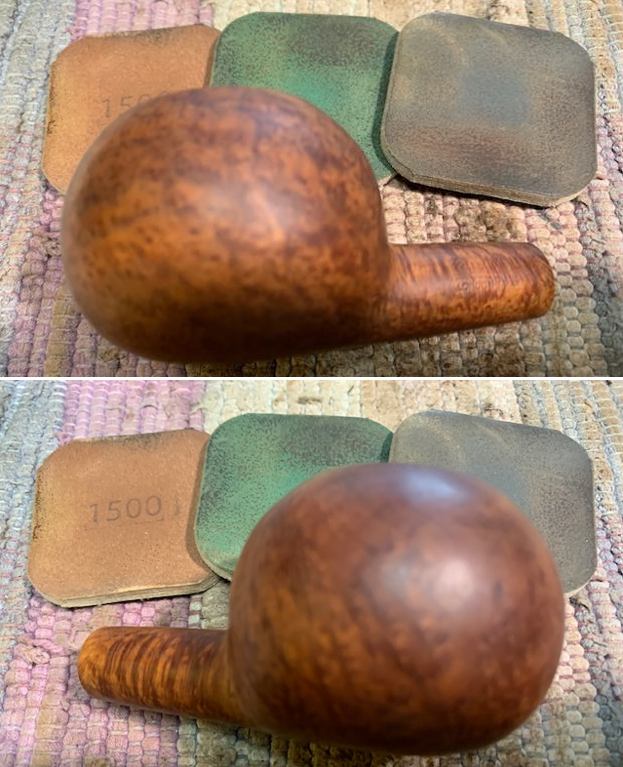


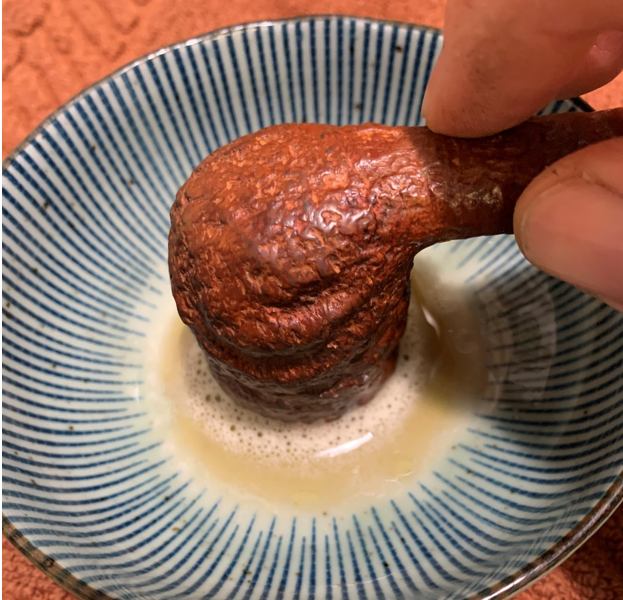
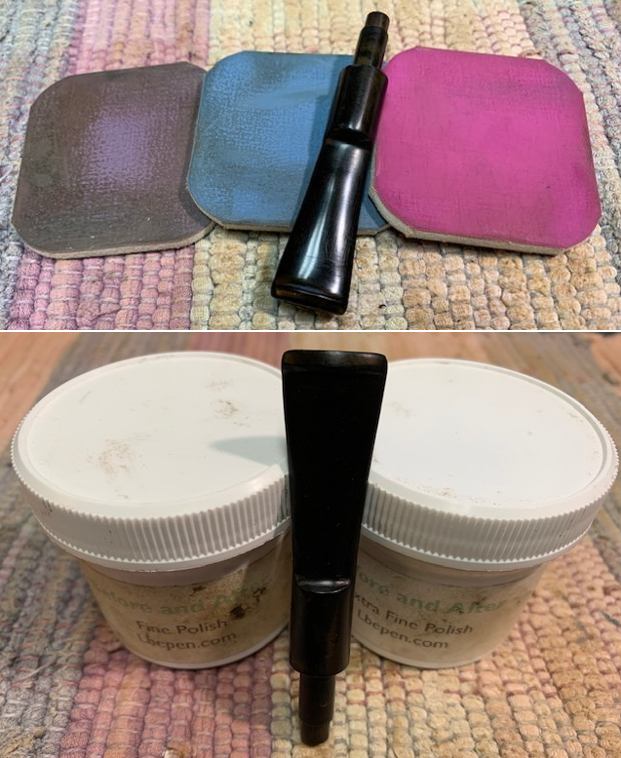
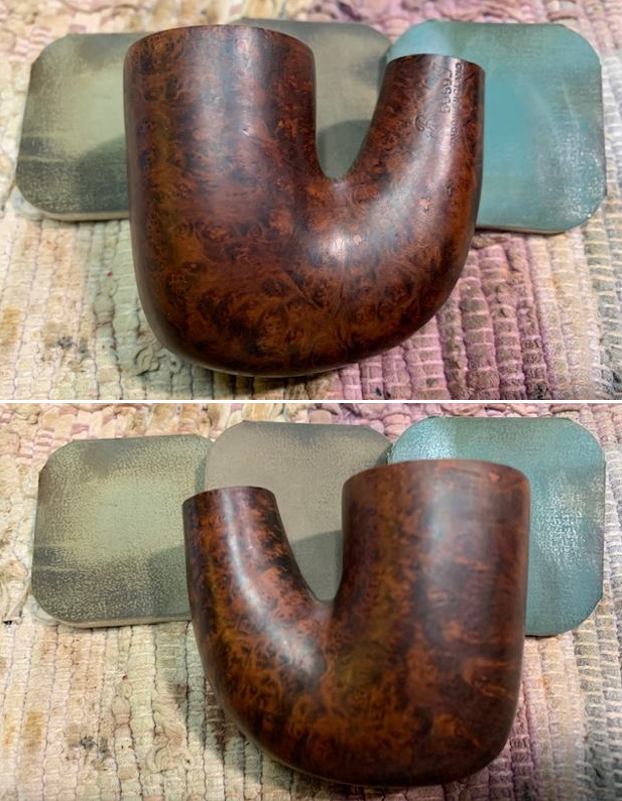
 I rubbed the bowl down with Before & After Restoration Balm. I worked it into the surface of the briar with my fingertips to clean, enliven and protect it. I let the balm sit for 10 minutes then buffed the pipe with a cotton cloth to raise the shine. Mark Hoover’s Balm is a product that I have come to appreciate and one I use on every pipe I have been working on.
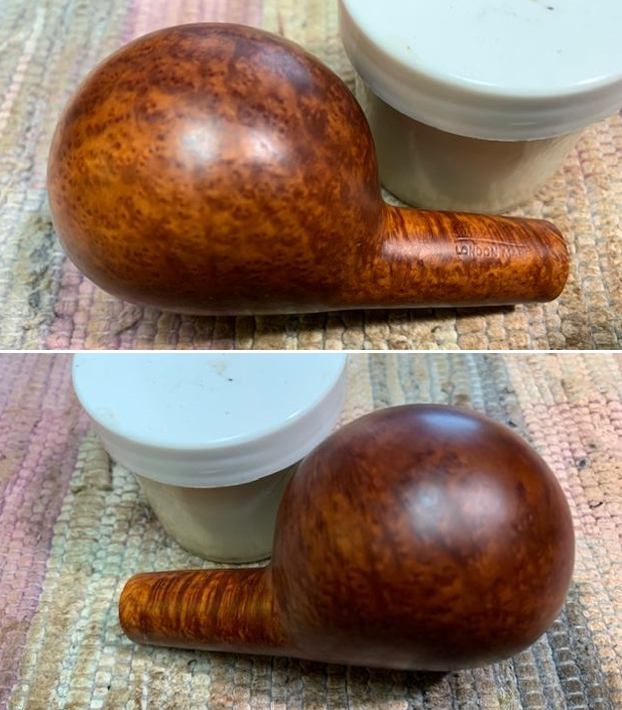

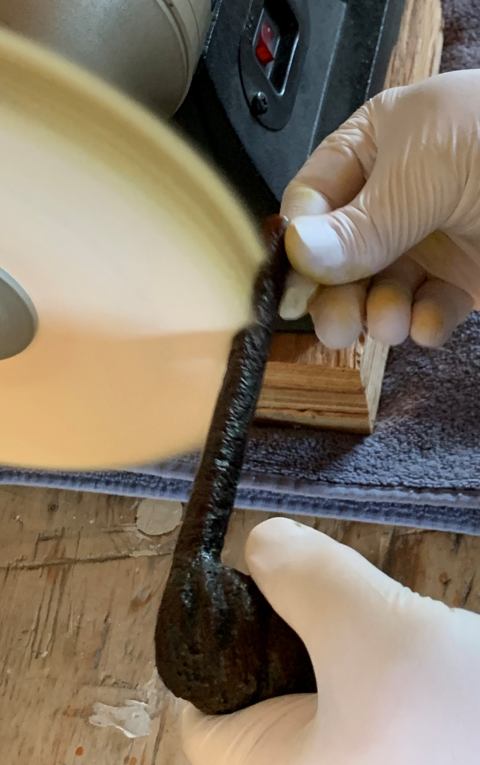
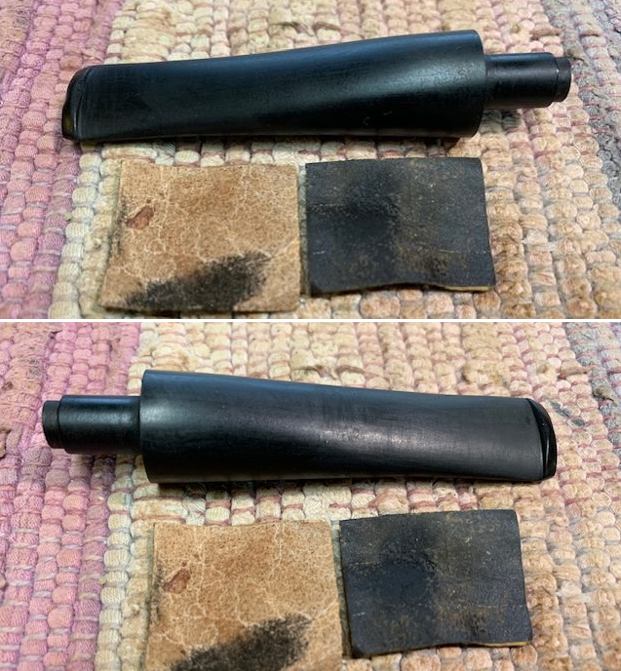
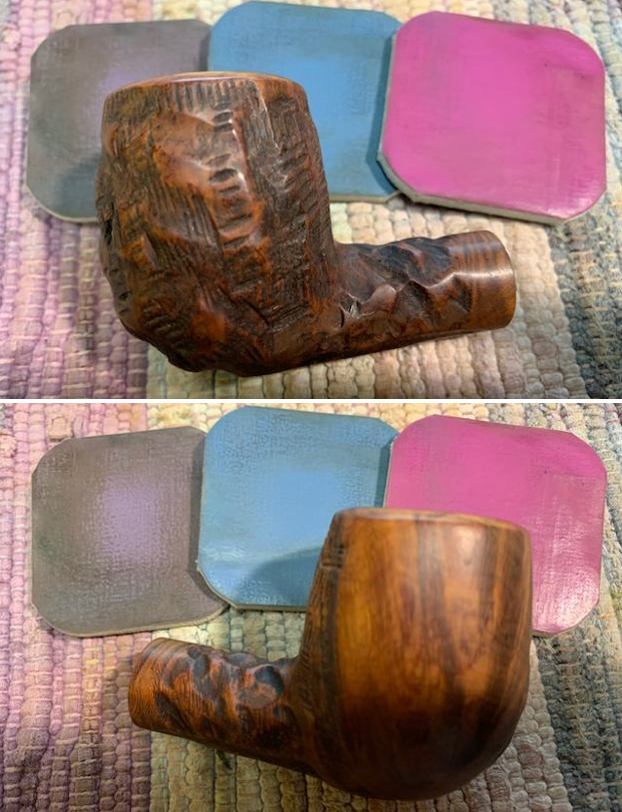
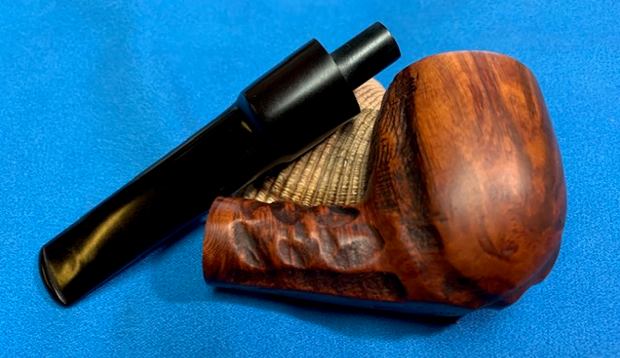
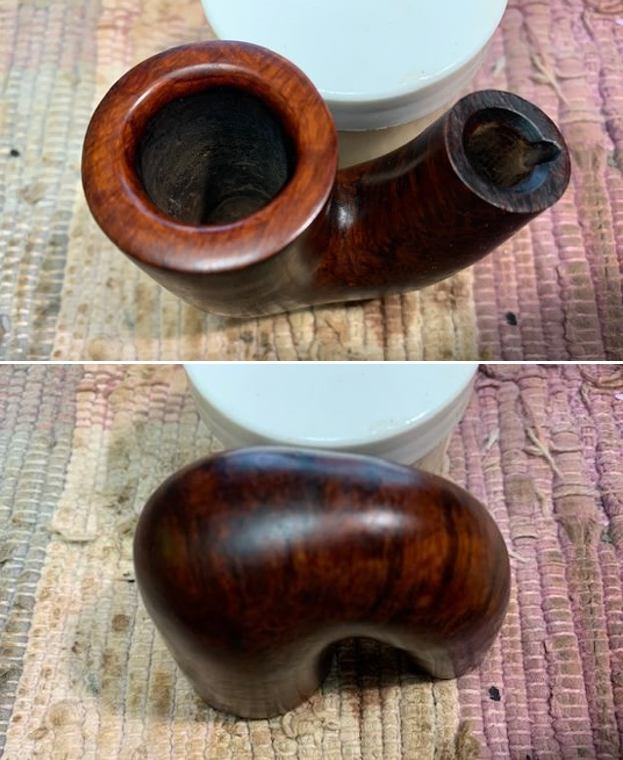
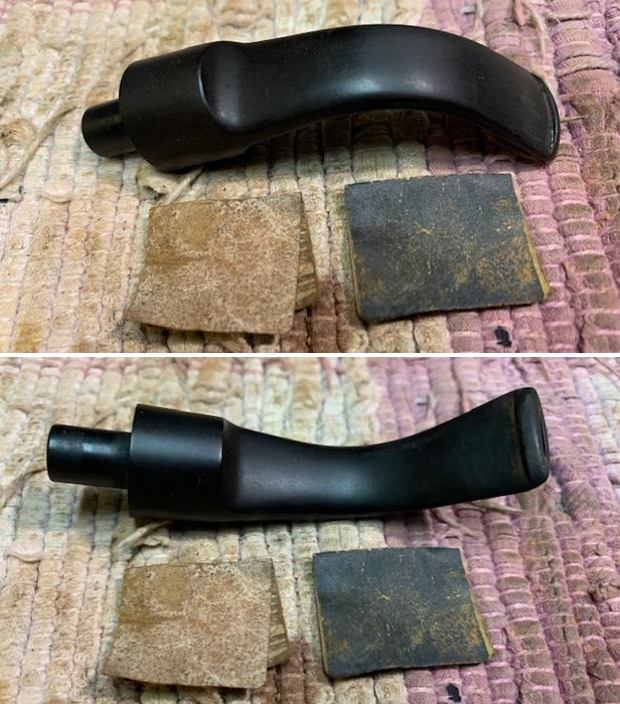
 I set the bowl aside and turned my attention to the stem. The tenon had set in the stem so I sanded the tenon smooth with 220 grit sandpaper. I still need to polish it a bit but it is looking pretty good at this point.
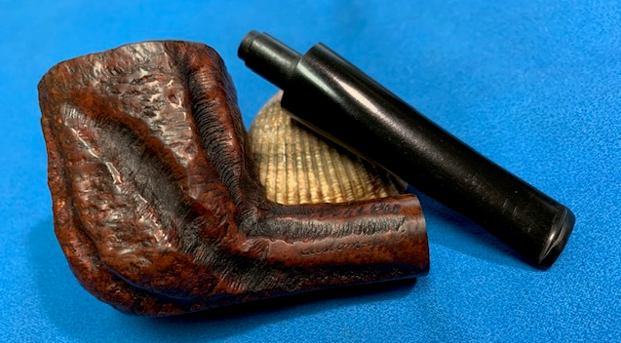
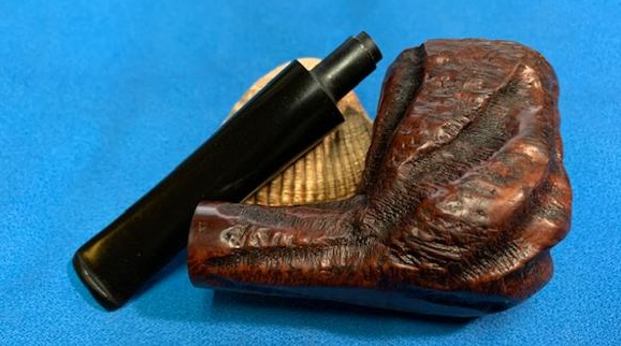
 I fit the stem on the shank and took some photos of the pipe. I liked the looks of it but it felt like it was missing something to me.
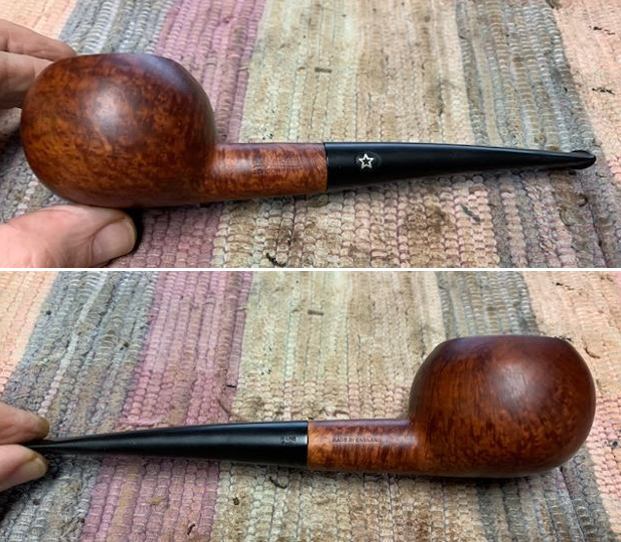
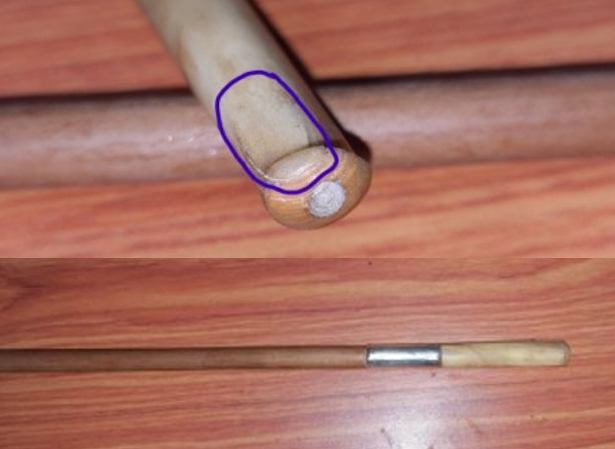
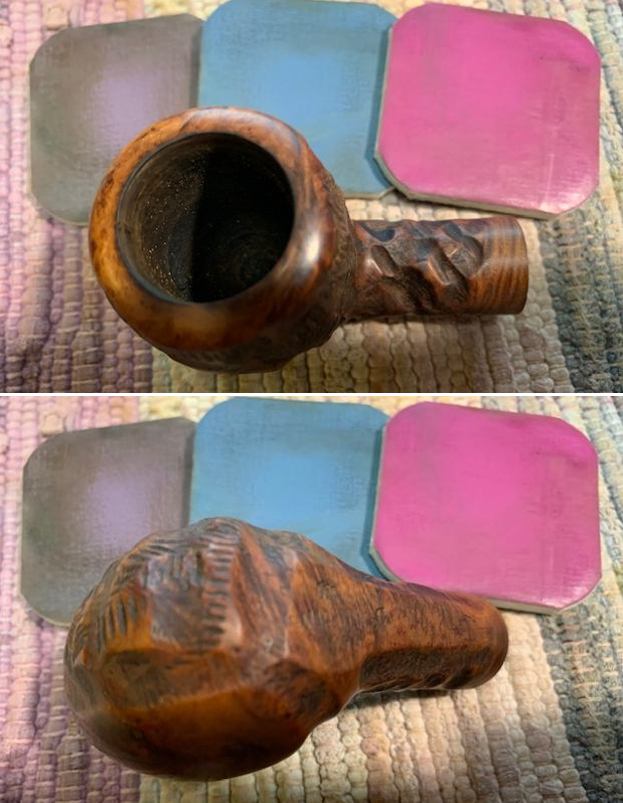
 I went through some silver bands that Jeff and I had purchased and there was one that was perfect for the diameter of the shank. It was a little deep for my liking so I worked on the depth of the band on a topping board with 220 grit sandpaper. I took it down until the depth was half of what it was when I started.
 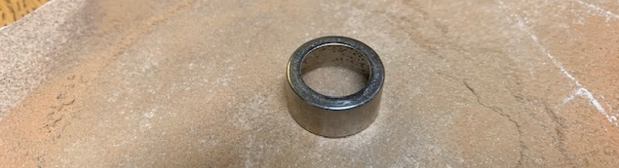 I removed the stem and worked on fitting the band. I heated the band with my lighter and then pressed it in place on the shank end and it was perfect. It did not cover any of the stamping and added the missing touch for me. I took some photos of the bowl with the band and I liked the look.
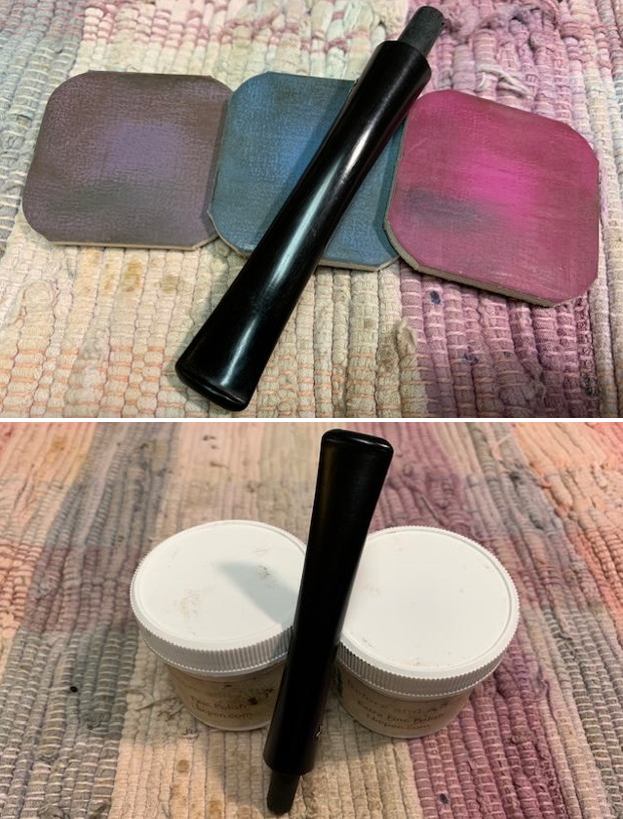
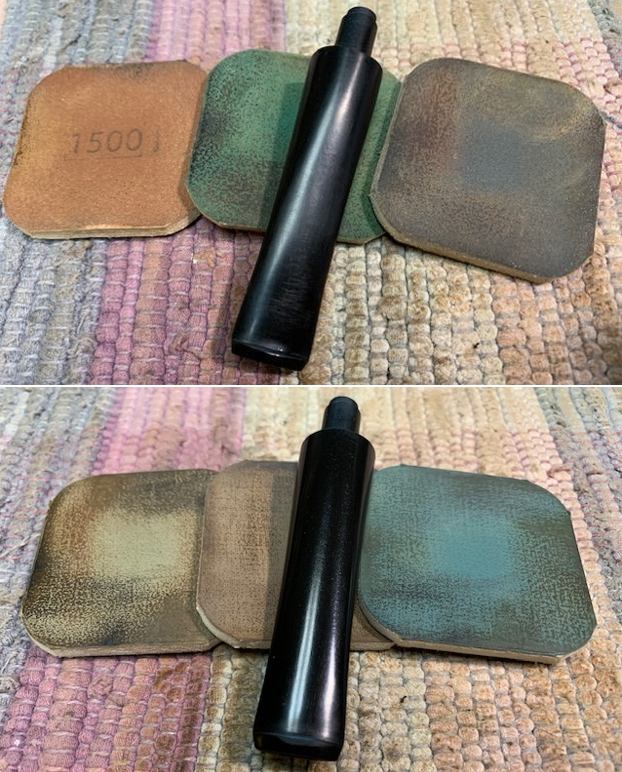
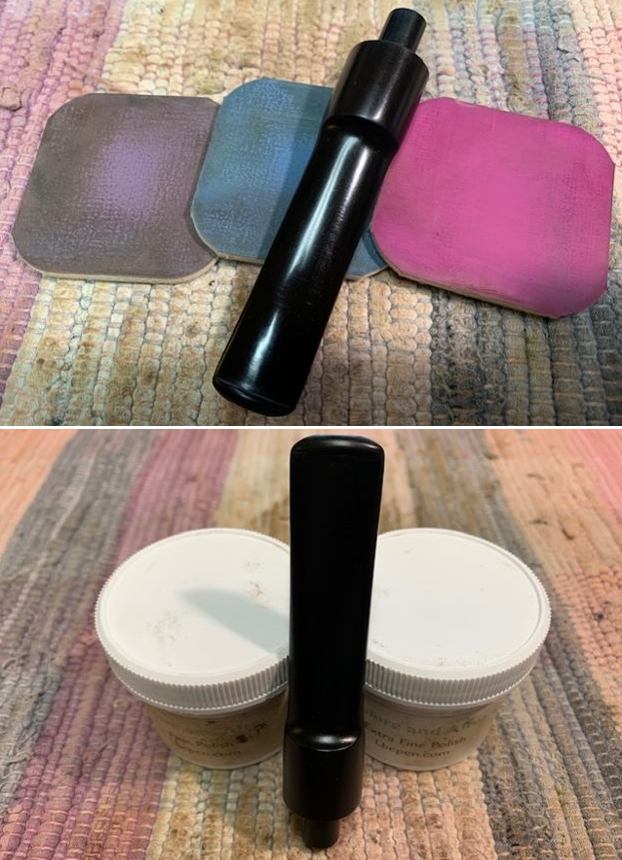
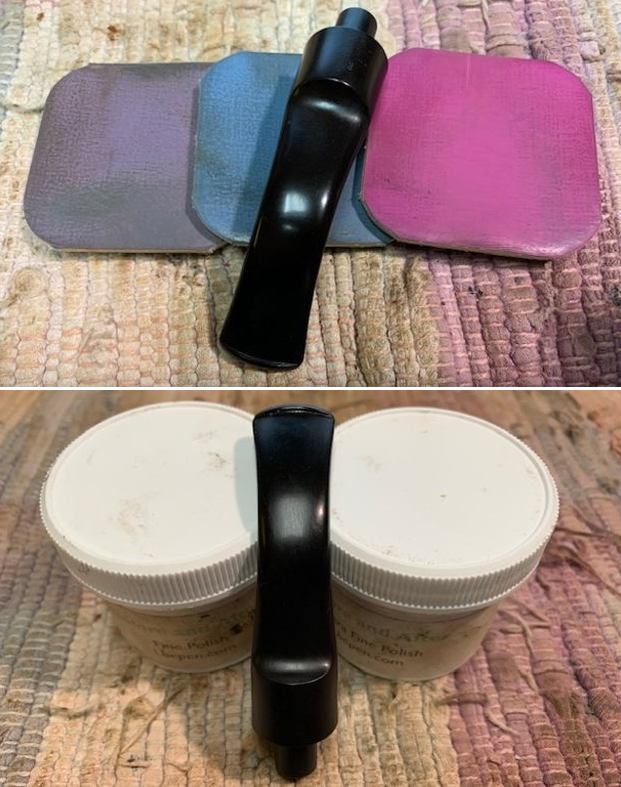
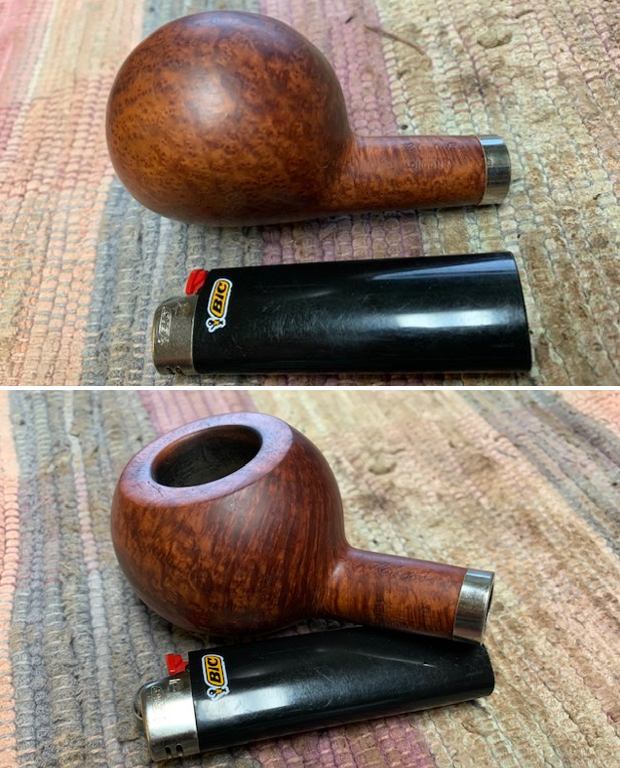 I set the bowl aside once again and worked on the stem. The tooth chatter was very light so I polished the stem with micromesh sanding pads – wet sanding with 1500-12000 grit pads. I wiped the stem down after each sanding pad with Obsidian Oil. I polished it with Before & After Pipe Stem Polish – both Fine and Extra Fine. Once I had finished the polishing I gave it final coat of oil and set it aside to dry.
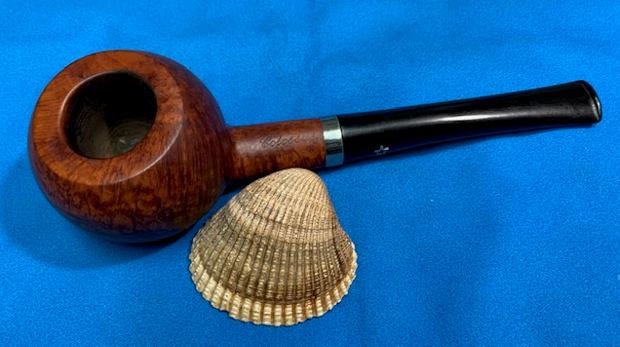
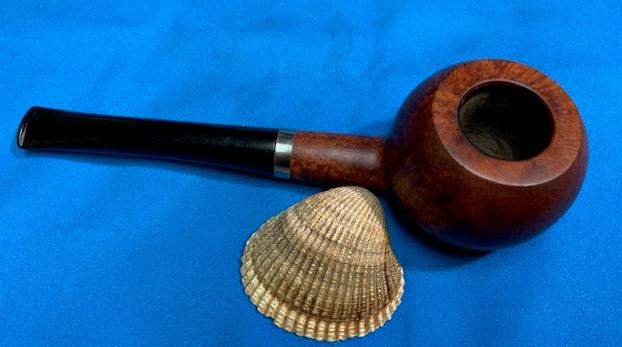
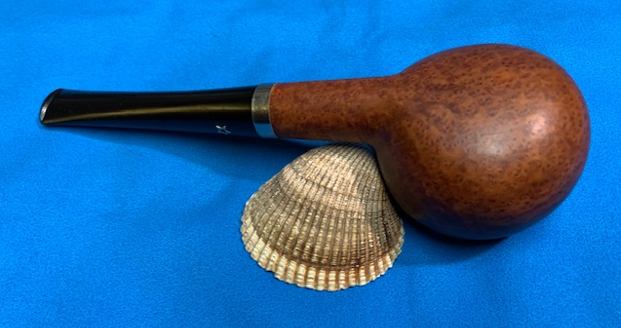
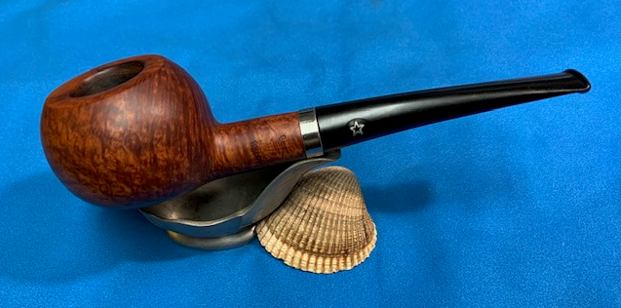
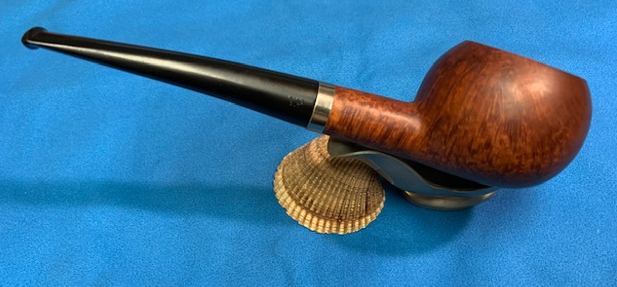
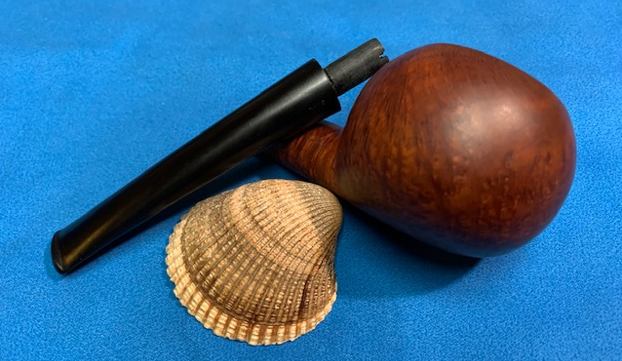
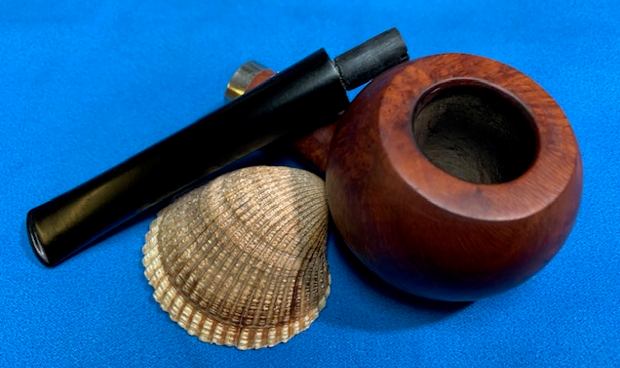
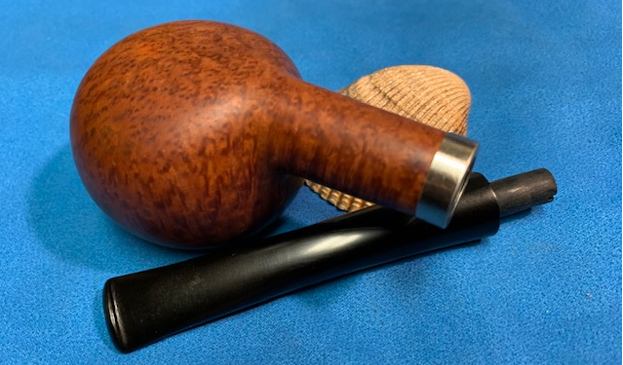
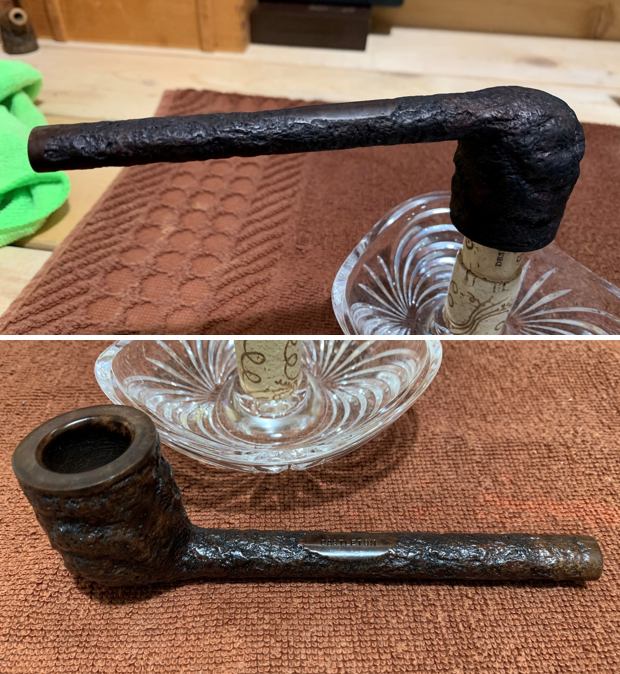
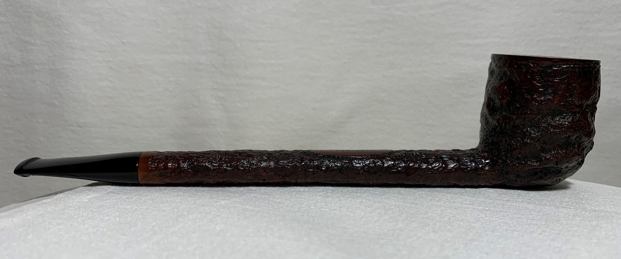
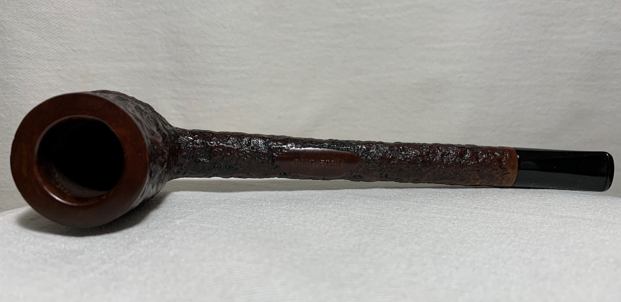
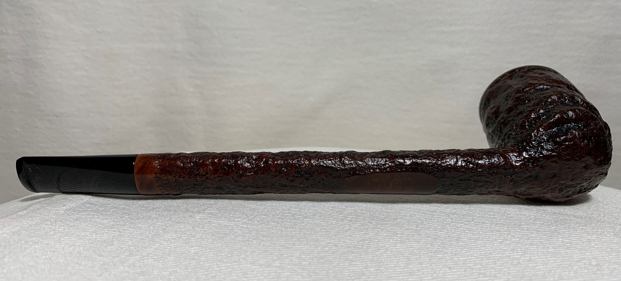
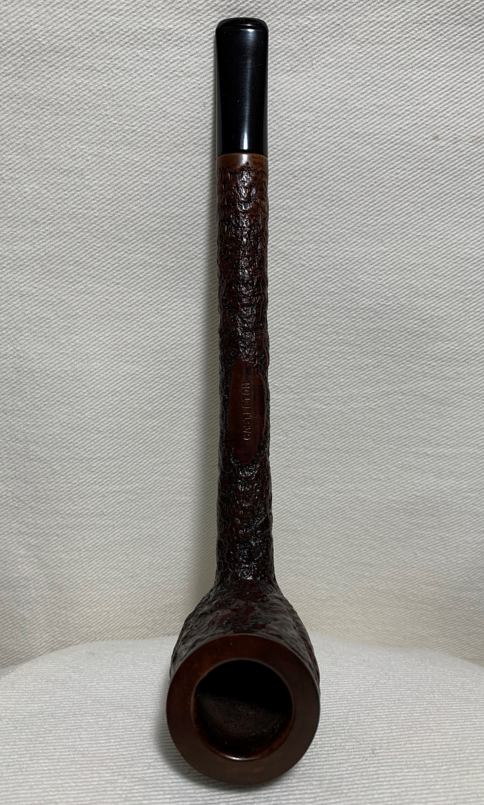
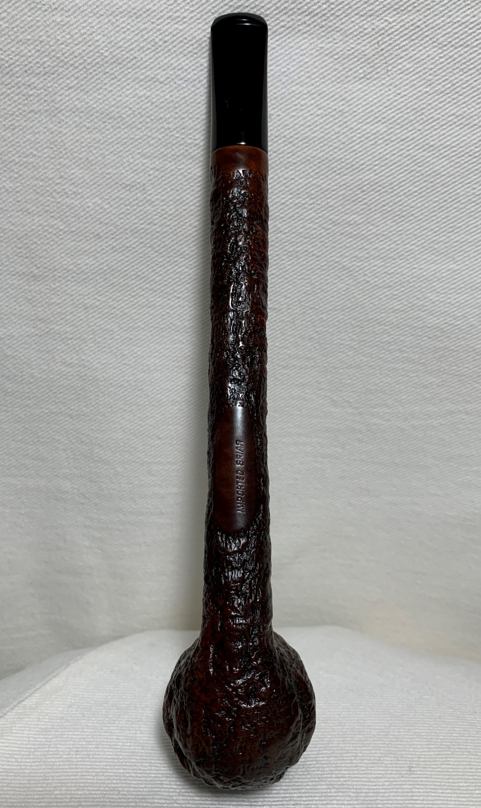
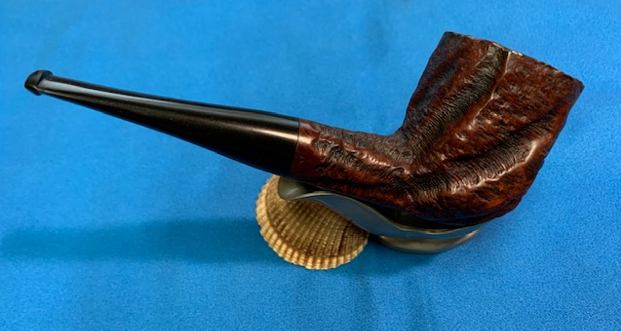
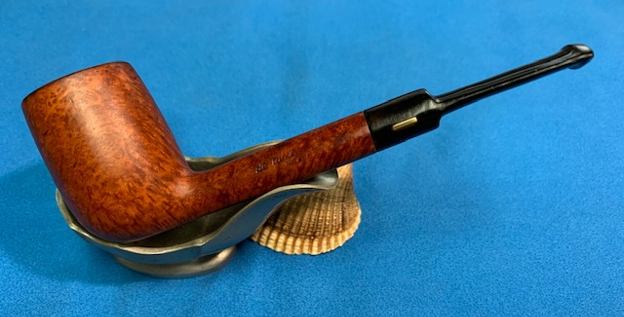
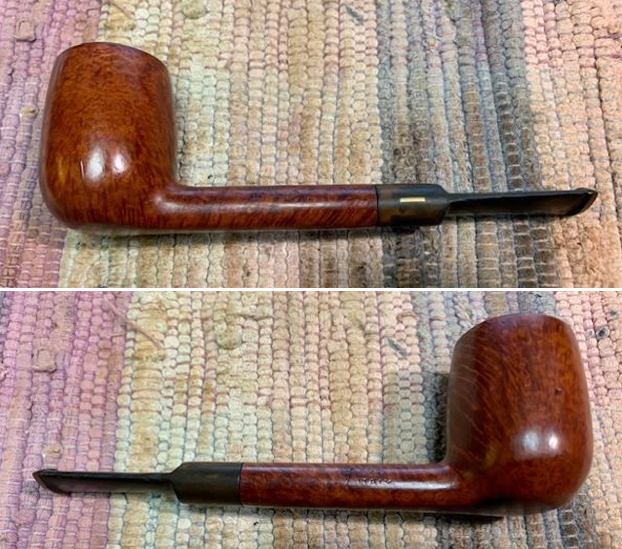
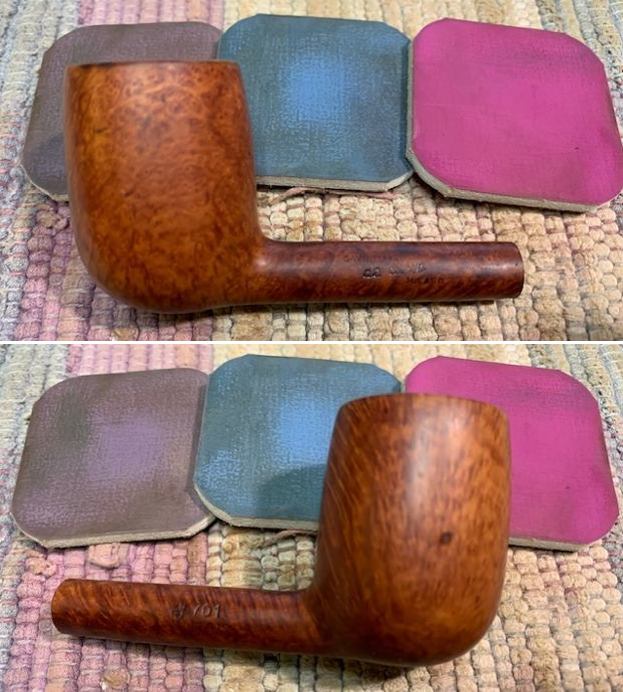
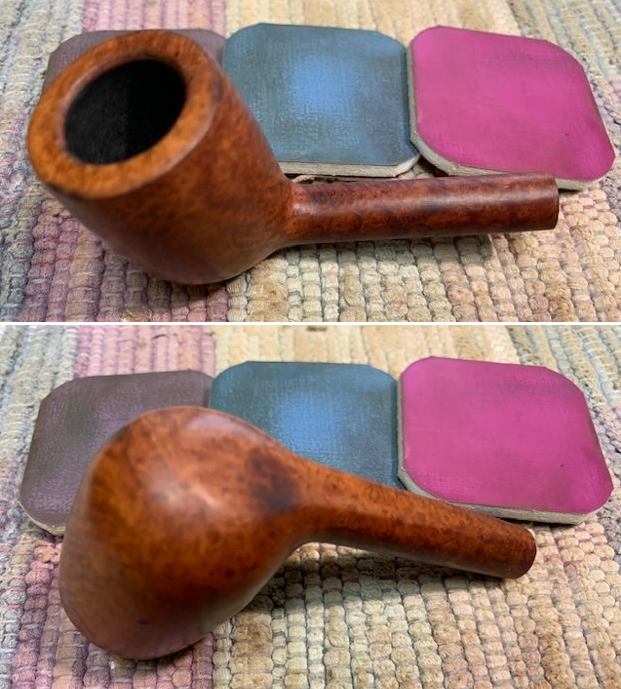
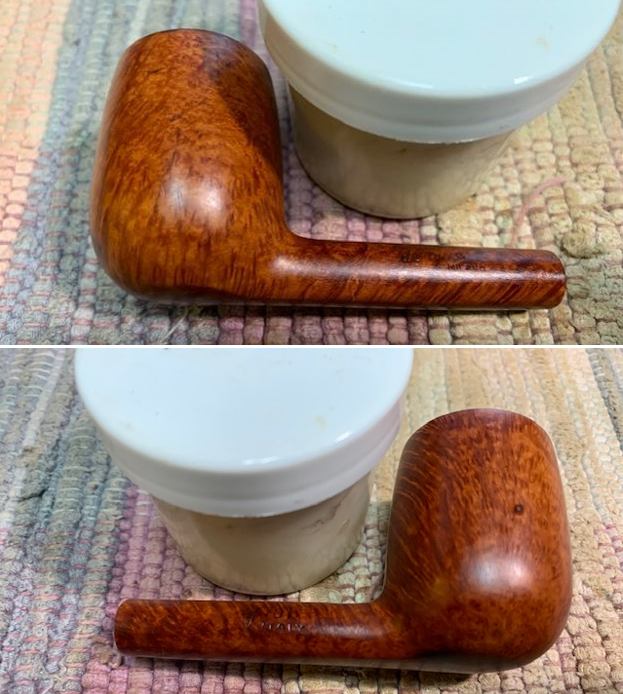
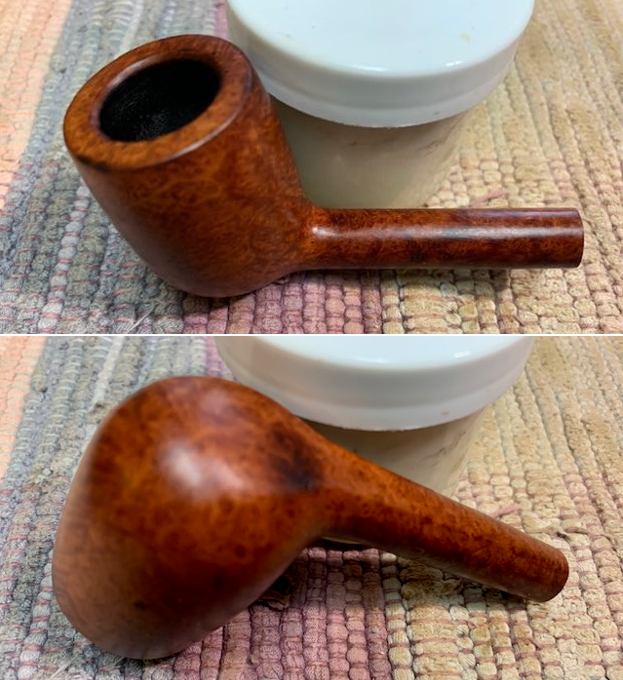
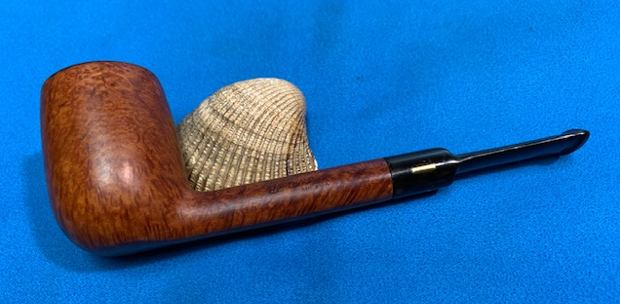
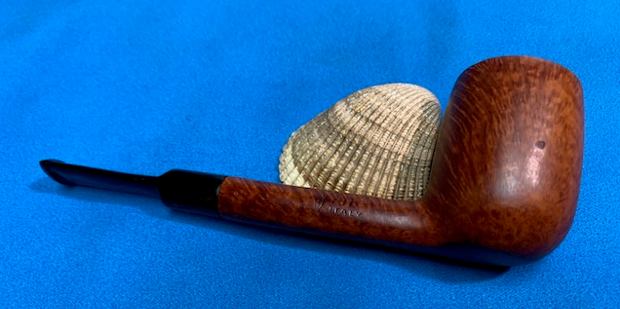
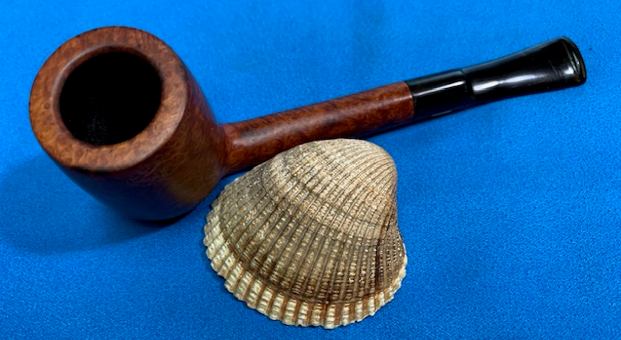
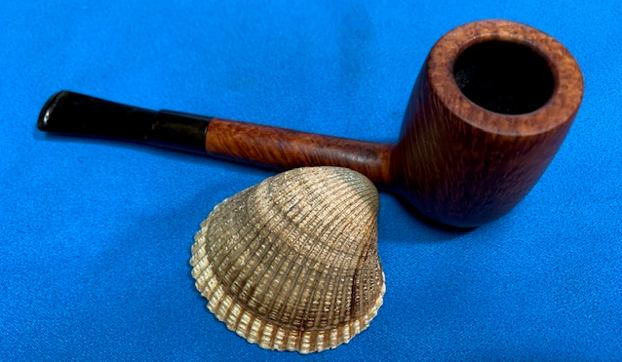
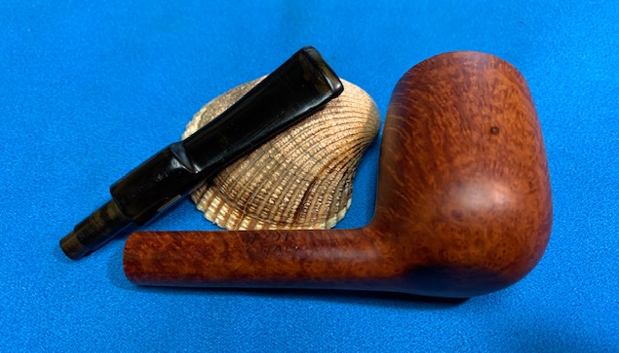
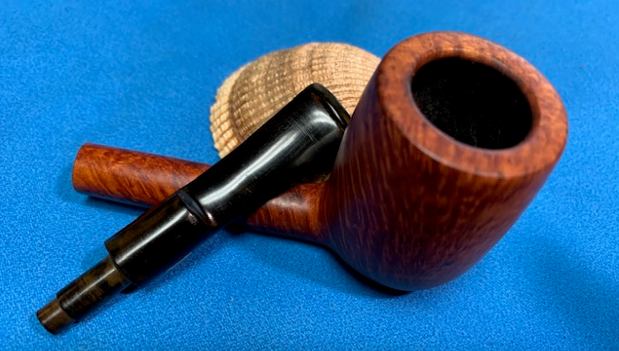
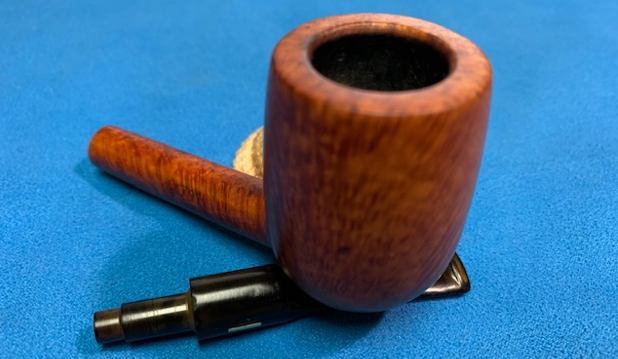
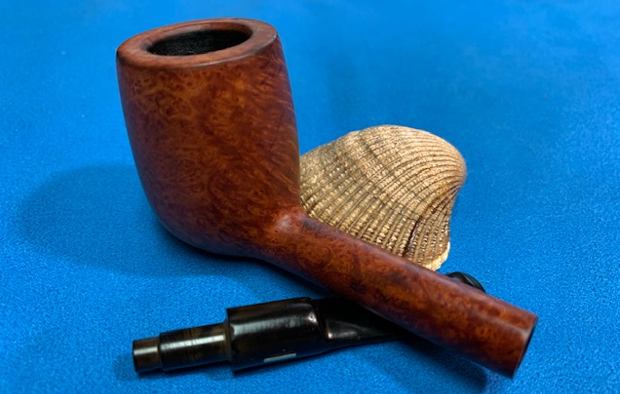
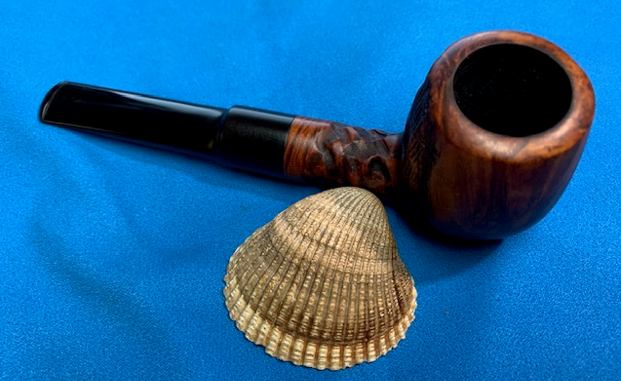
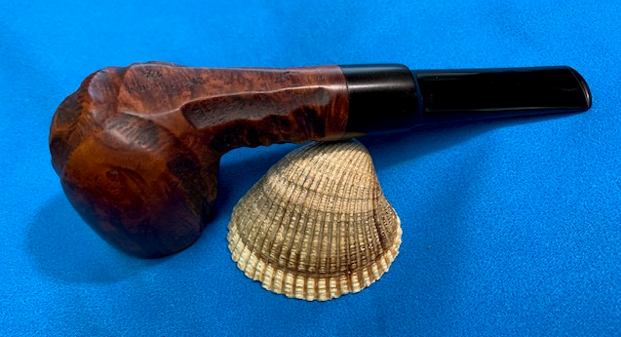
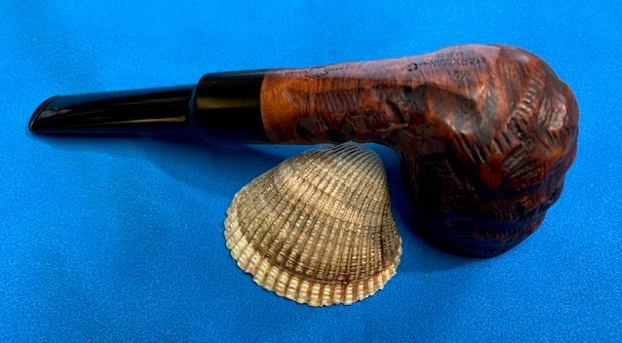
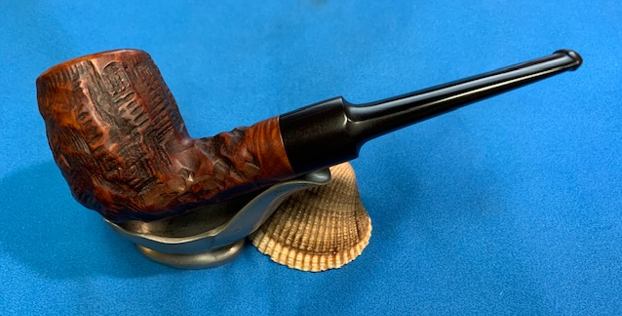
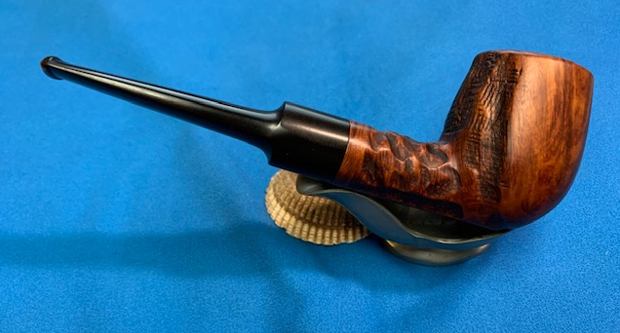
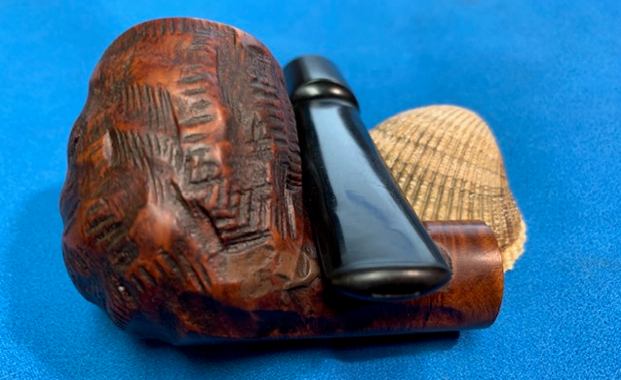
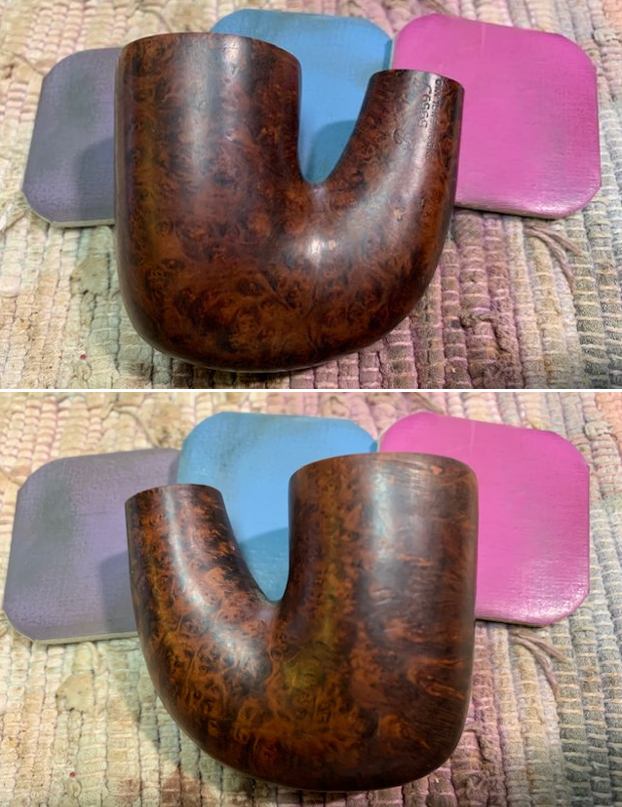
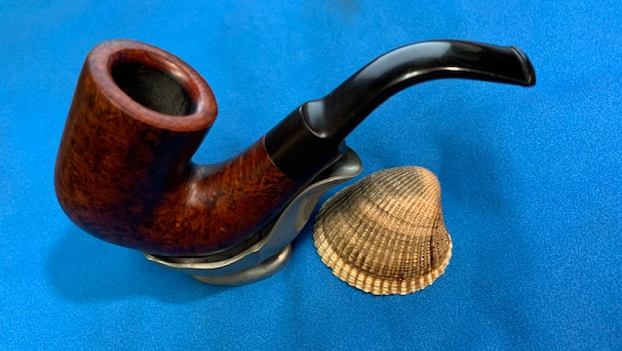
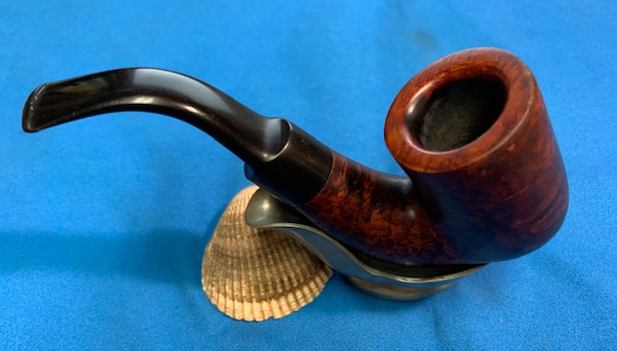
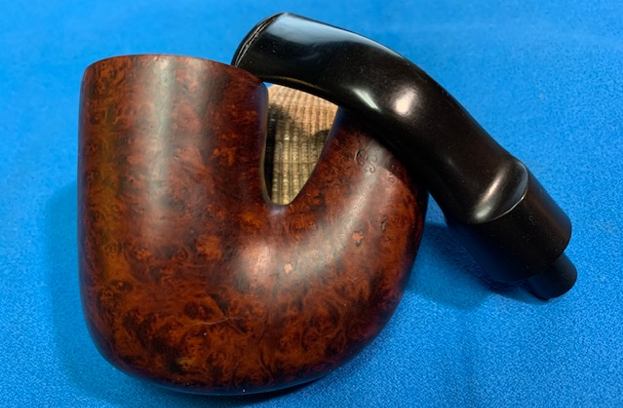
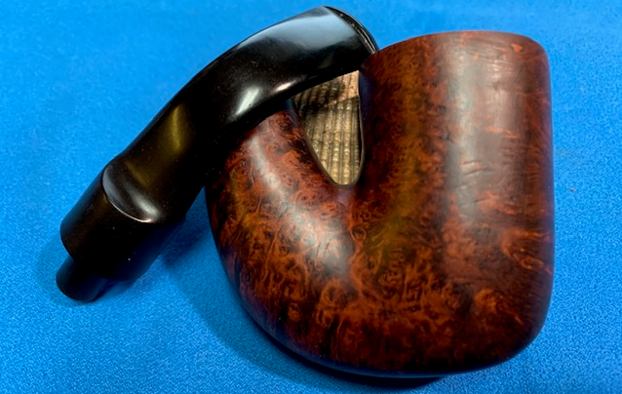
 I put the stem back on the bowl and took a picture of the pipe next to a Dunhill Shell Briar Group 4 Billiard. You can see that it is mammoth in comparison to a rather large Dunhill.
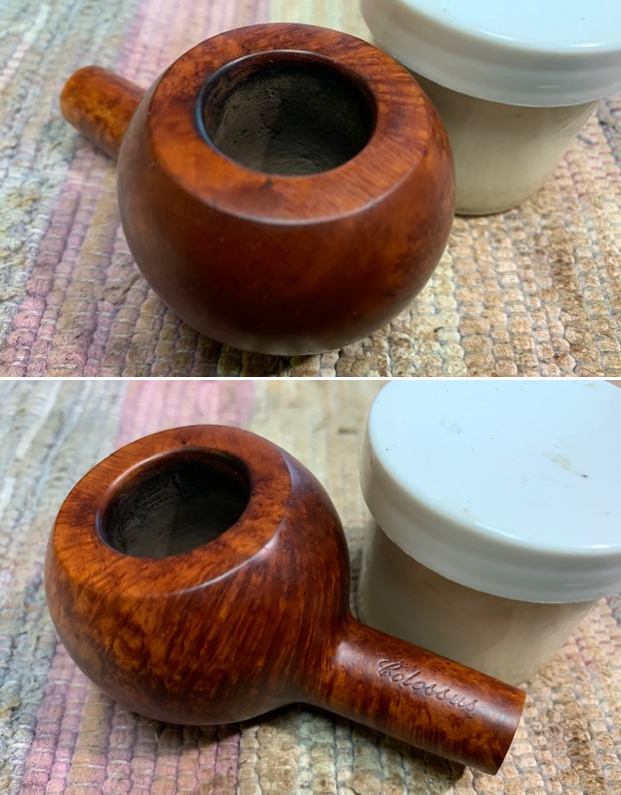
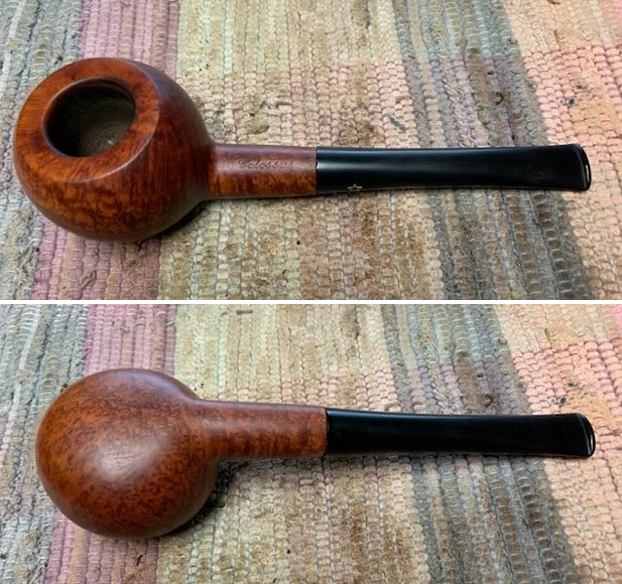
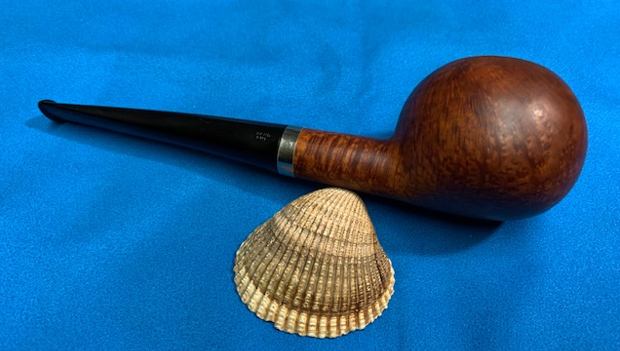
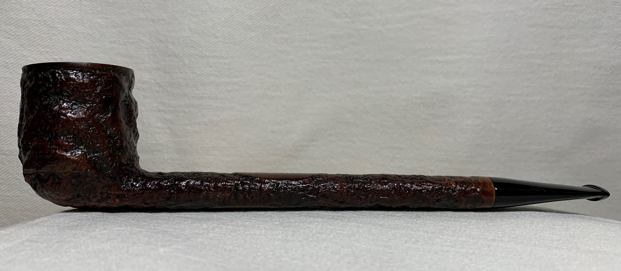
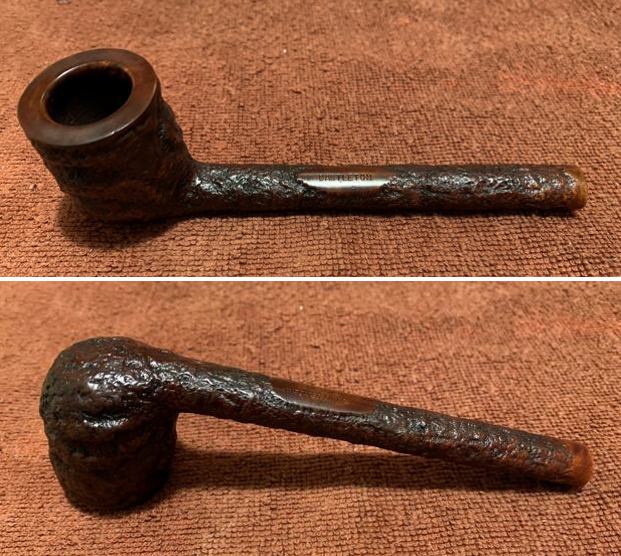
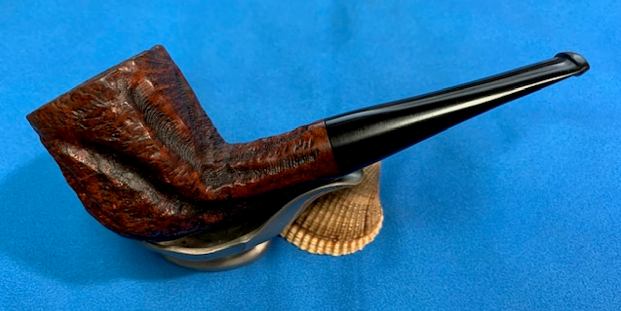
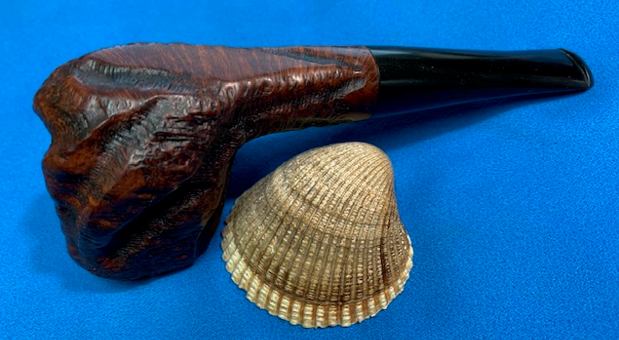
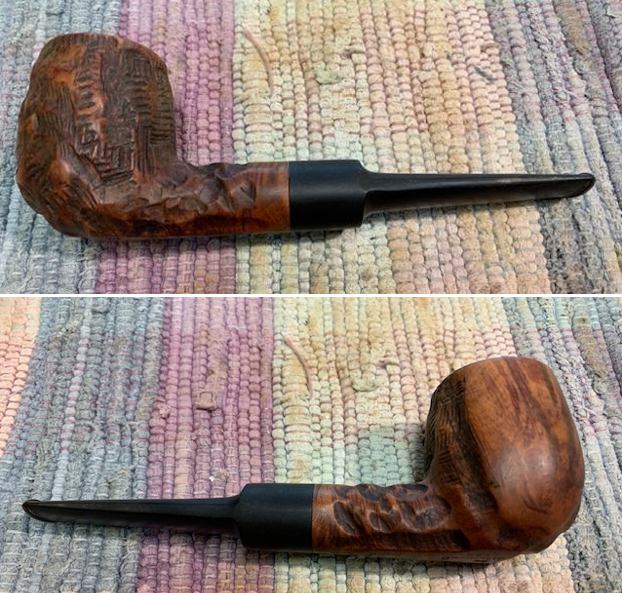
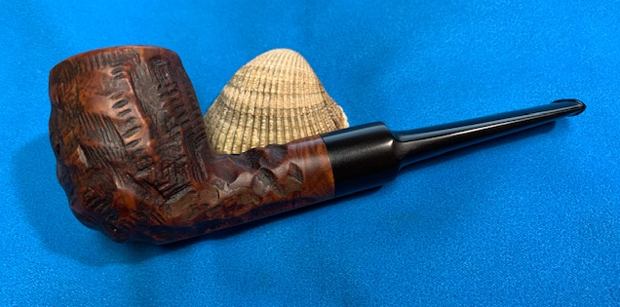
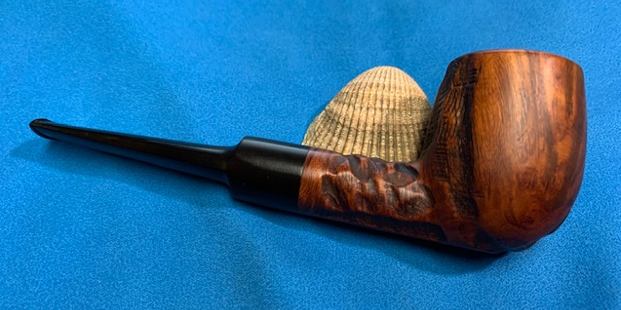
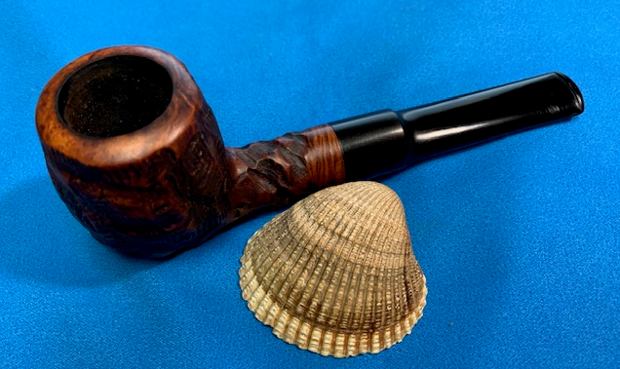
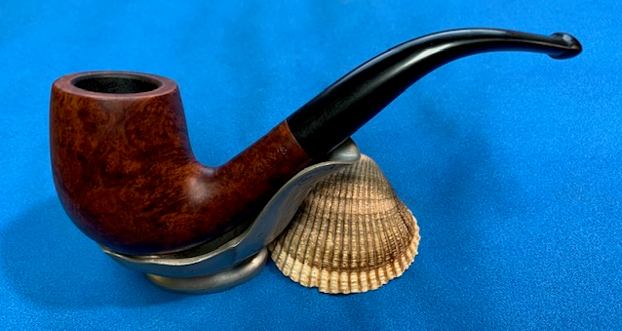
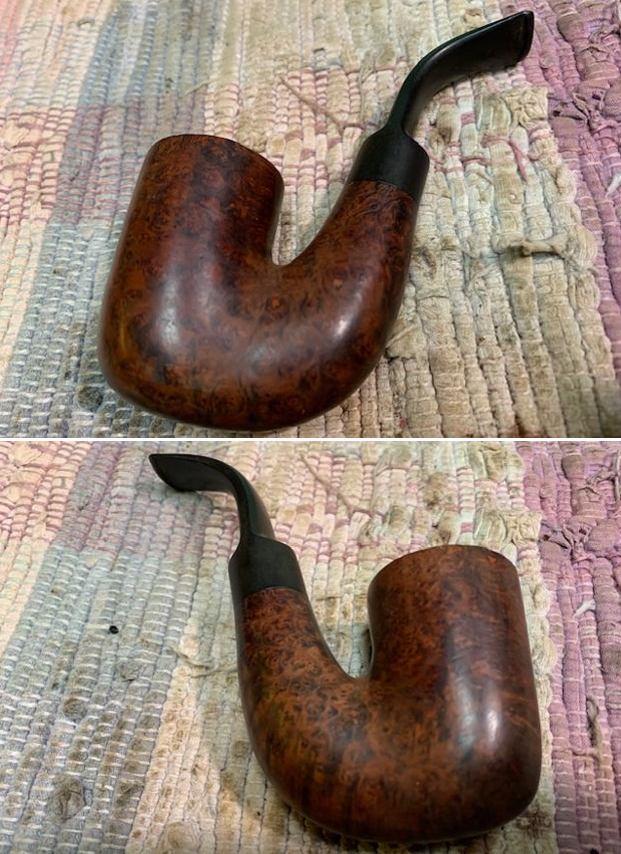
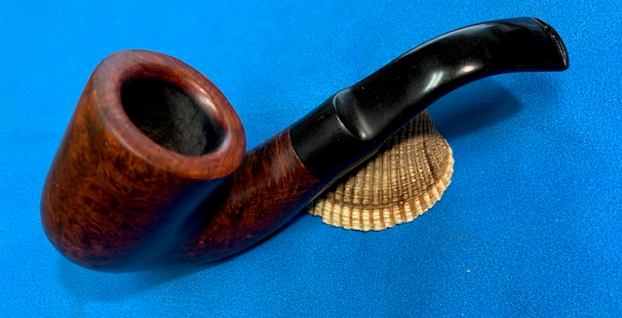
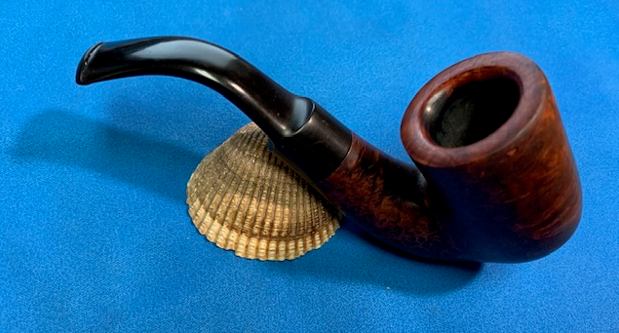
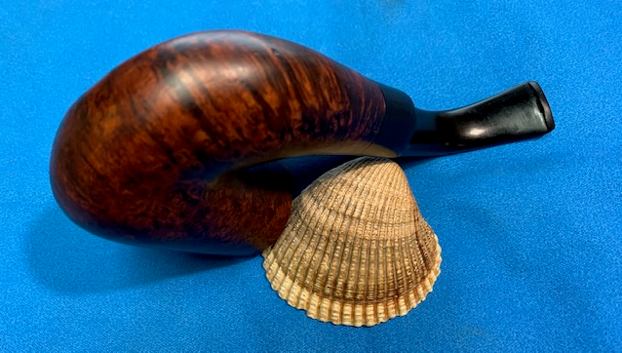
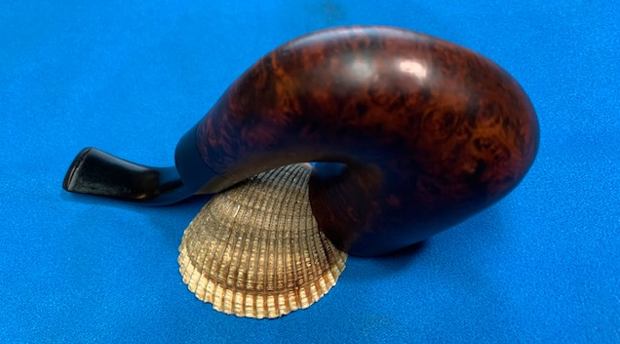
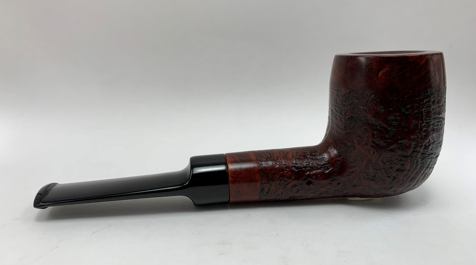
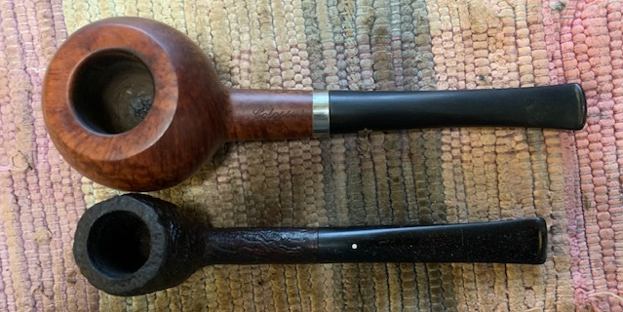 I am excited to be on the homestretch with beautiful GBD Made Colossus City Deluxe Large Apple. This is the part I look forward to when it all comes back together, polished and waxed. I put the bowl and stem back together. I polished the bowl and stem with Blue Diamond to polish out the scratches in the briar and the vulcanite. I gave the bowl and the stem multiple coats of carnauba wax. I buffed the pipe with a clean buffing pad to raise the shine. I hand buffed it with a microfiber cloth to deepen the shine. The pipe polished up pretty nicely. The beautifully grained finish looks really good with the interesting grain patterns standing out on the shape. I have to say Jeff called this one correctly. It is probably a pipe I would have left in the shop in the sandwich bag he found it in. But he saw promise and he was right! The grain, the silver band and the polished black vulcanite went really well together. This Colossus City Deluxe was another fun pipe to work on and though it was ugly to begin with it came out looking amazingly graceful. It is a large pipe but it is a comfortable pipe to hold in the hand. The finished pipe is shown in the photos below. The dimensions of the pipe are Length: 7 inches, Height: 1 ½ inches, Outside diameter of the bowl: 1 ¾ inches, Chamber diameter: 1 inch. The weight of the pipe is 83 grams/ 2.89 ounces. If you are interested in adding this pipe to your rack it will be on the rebornpipes store in the American Pipe Makers Section soon. Thanks for reading this blog and my reflections on the pipe while I worked on it.
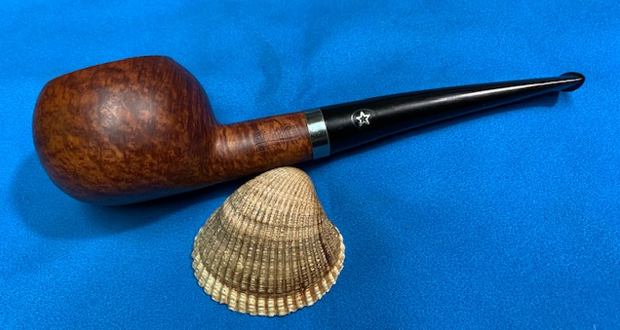


