Blog by Steve Laug
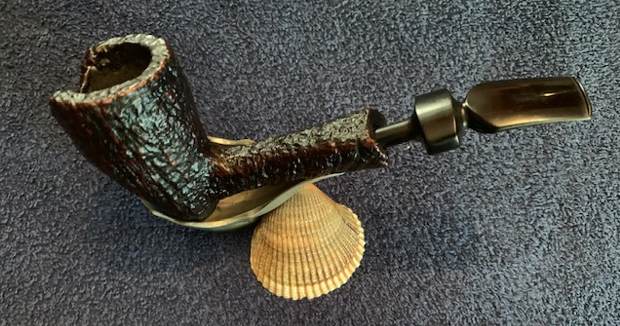
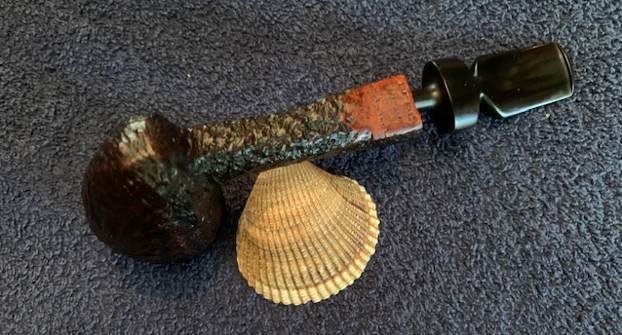
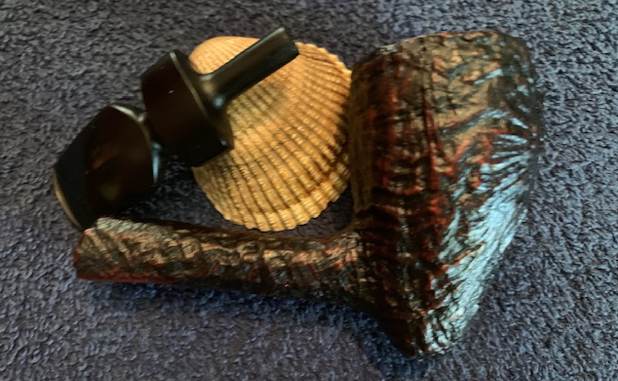
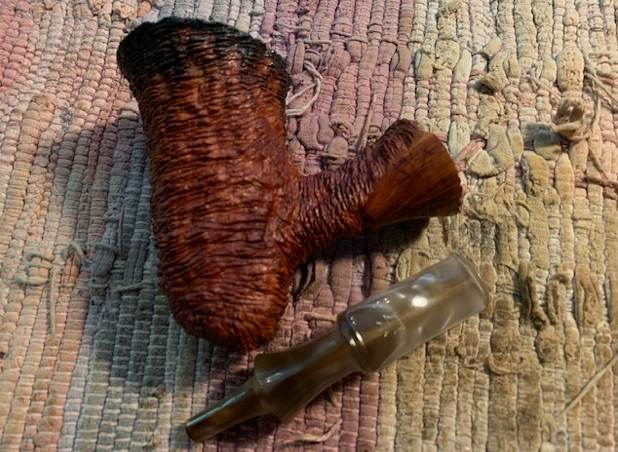
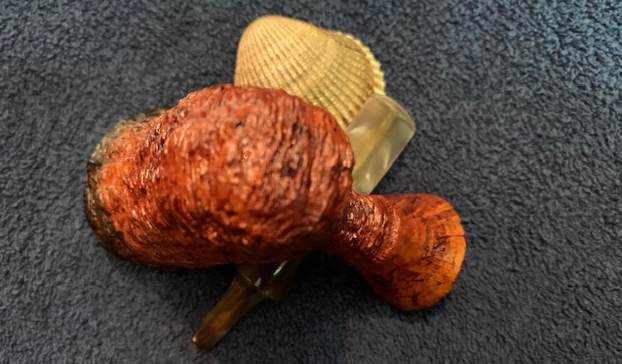
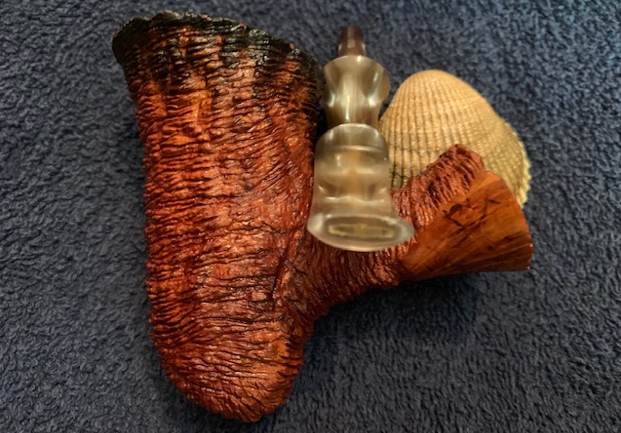
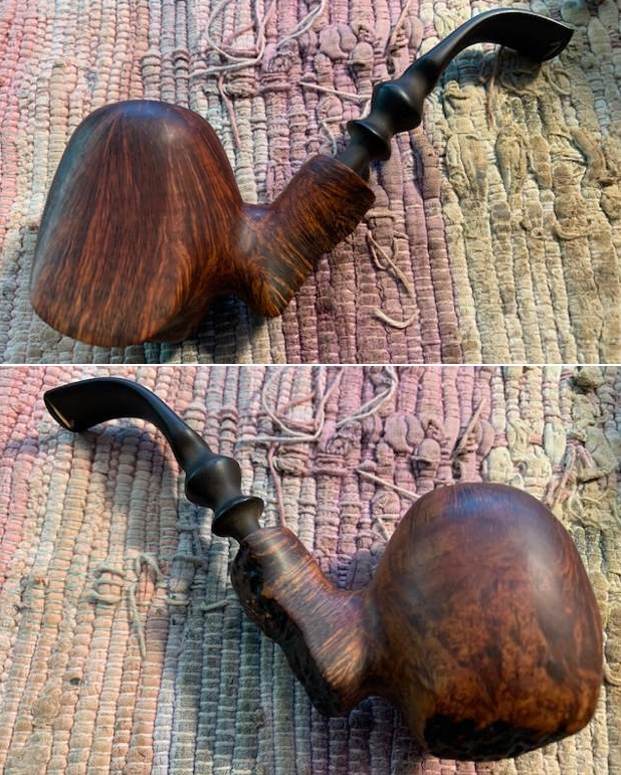
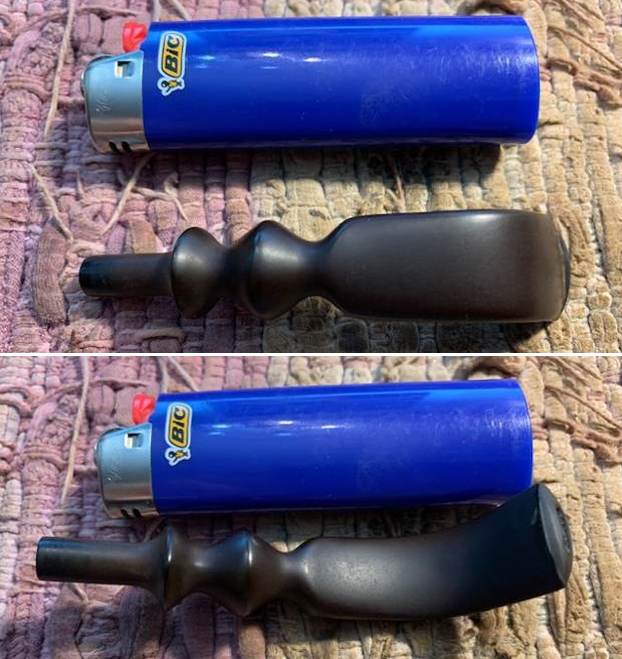
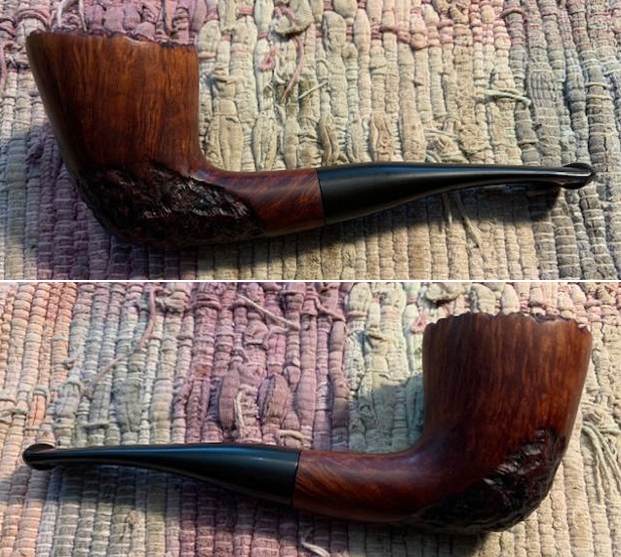
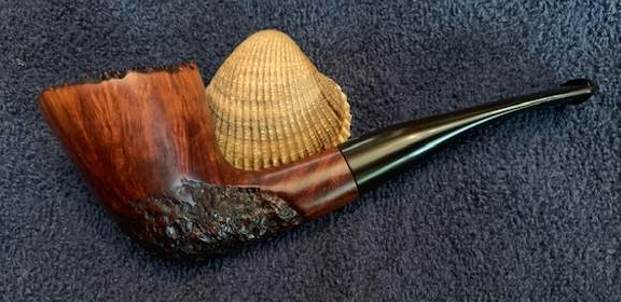
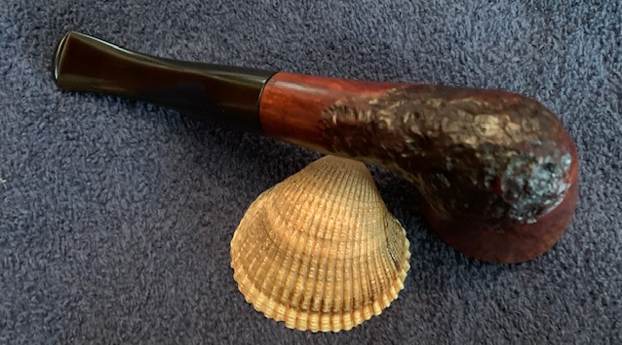
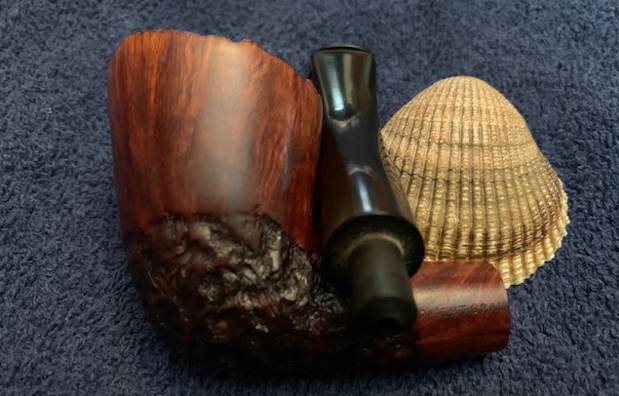
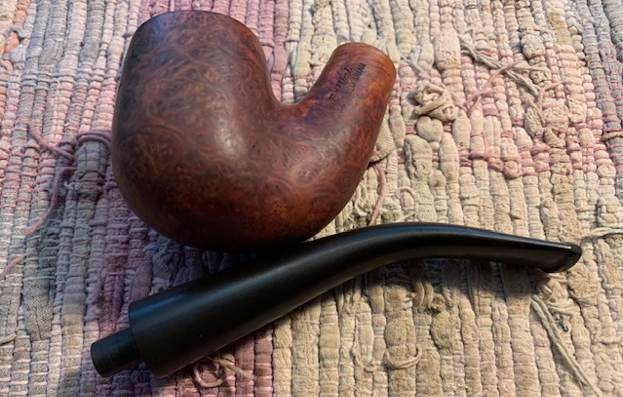
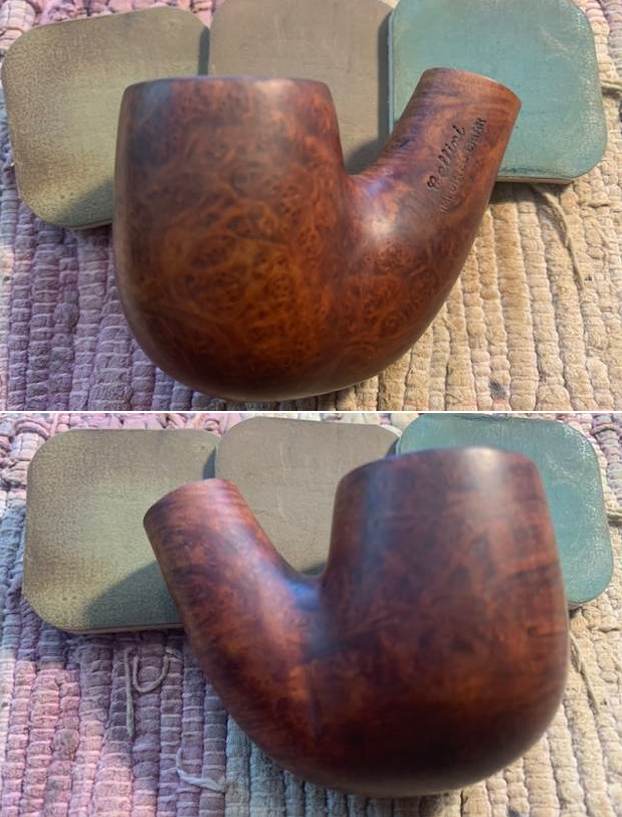
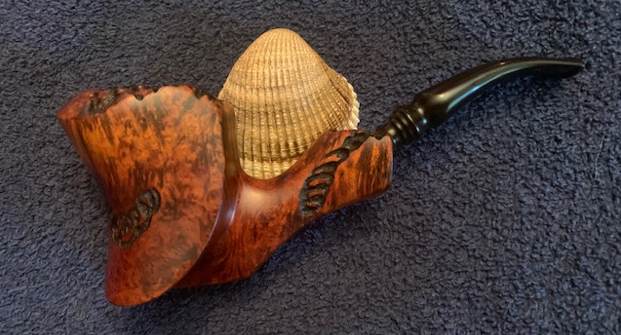
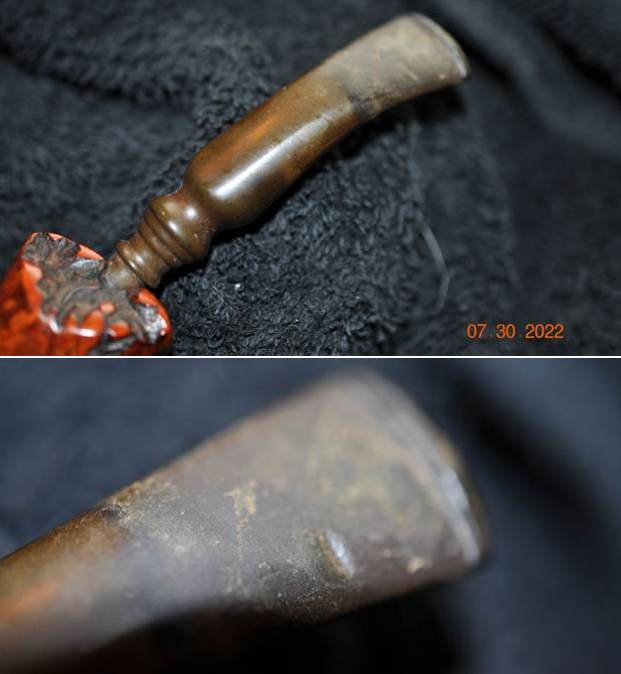
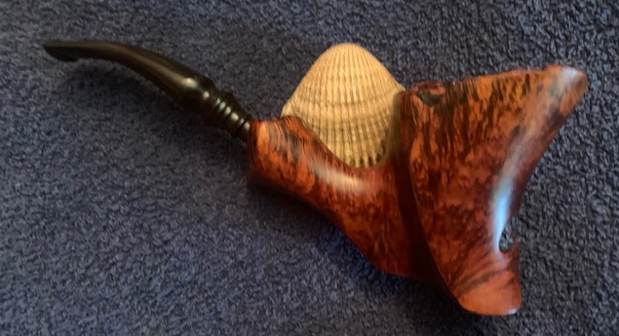
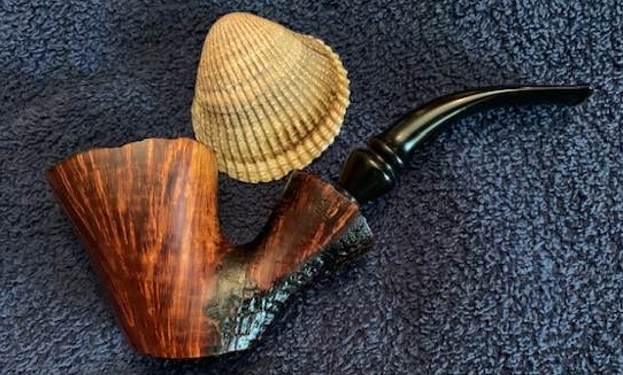
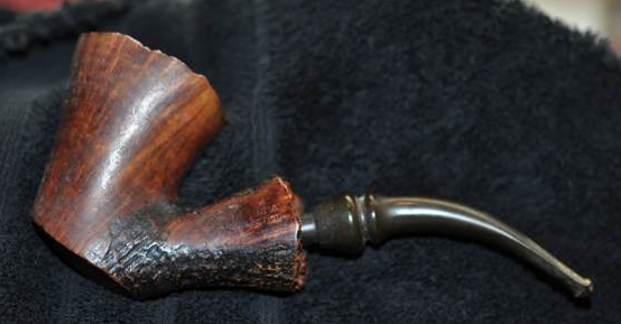
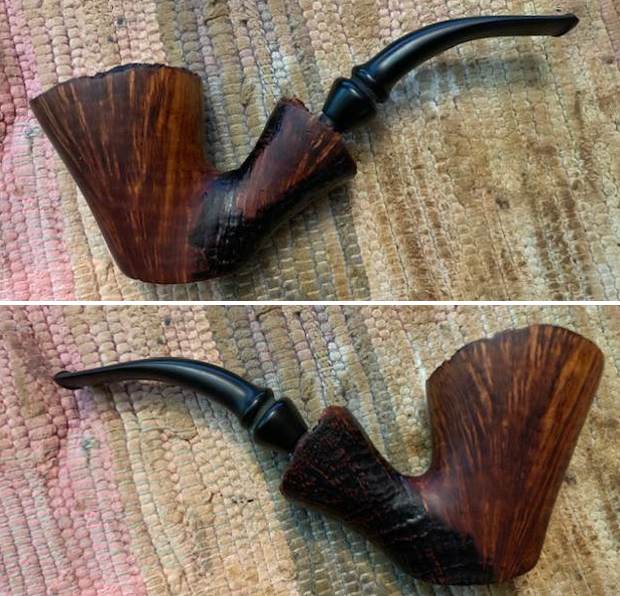
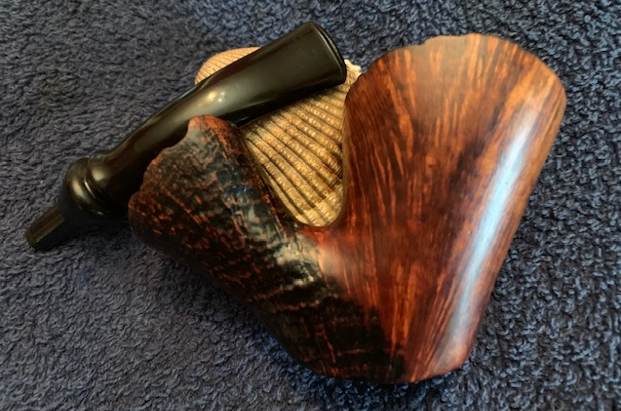
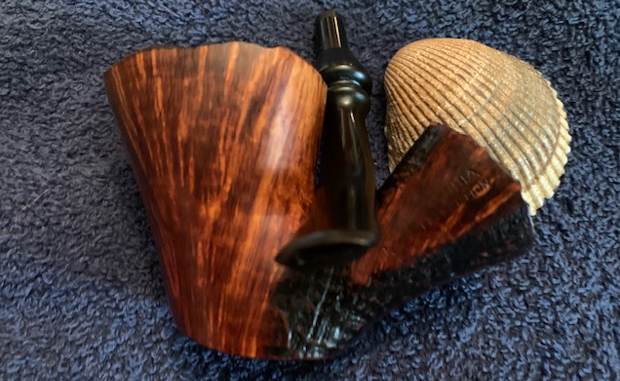
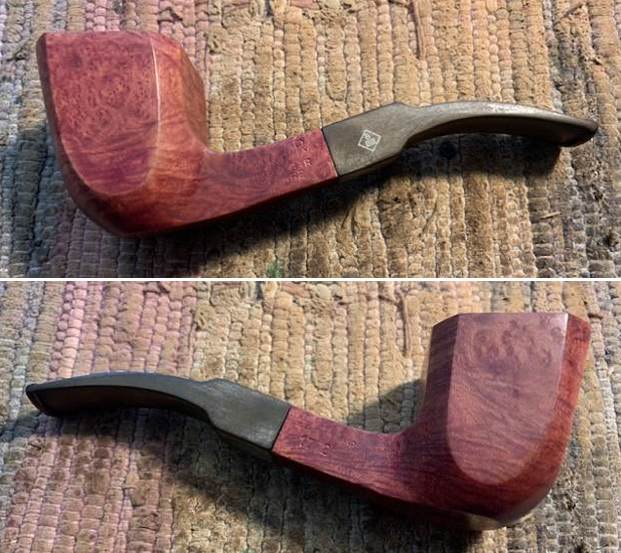
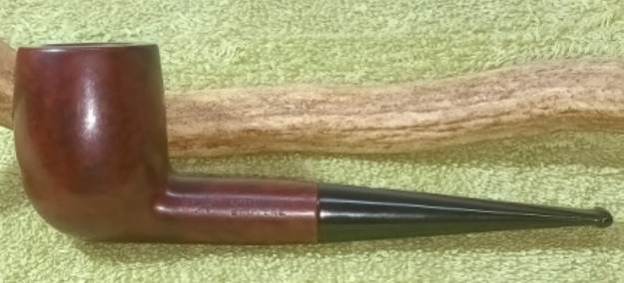
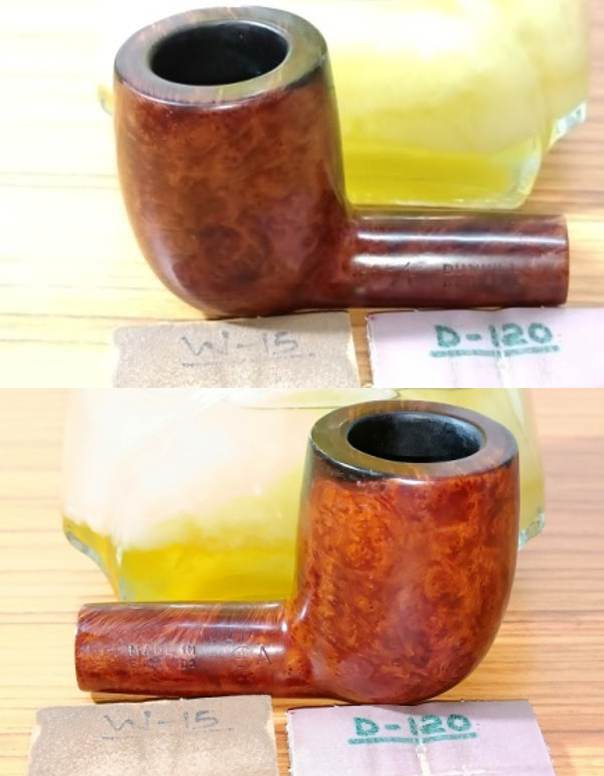
There is something about this strangely beautiful sandblast long shank Freehand says that is it another Preben Holm pipe. The unique shape that really chases the grain to give a sense of vertical and horizontal grain of the sandblast says Holm to me. The style of the stem is a bit of an oddity to me but it is the same width as the shank so it probably is original. This pipe was purchased on 06/13/22 from an estate in Fort Myers, Florida, USA. It is stamped Hand Made [over] In [over] Denmark [over] Westminster [over] IIS. The shape of the bowl with the angles of the carving are unique and the depth of the sandblast give a sense of fluidity to the pipe. The finish is stained with dark colours – black and brown that make it have a depth to its finish. It was filthy and the plateau rim and shank end was the same. The dust and debris is quite heavy around the sides of the bowl. The plateau rim top has a heavy lava overflow on the top and edges coming from a thick cake in the bowl. There is also a crack in the underside of the shank end that extends straight through the stamping. The oddly shaped turned vulcanite stem was heavily oxidized and calcified with light tooth marks and chatter on both sides ahead of the button. When I first saw it I was not even sure if it was the right stem but it is growing on me. Jeff took photos of the pipe before he started working on it. It really is a beauty.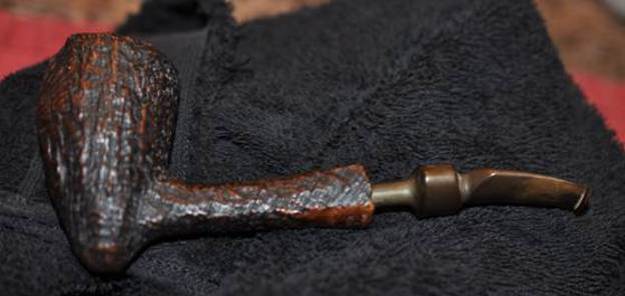
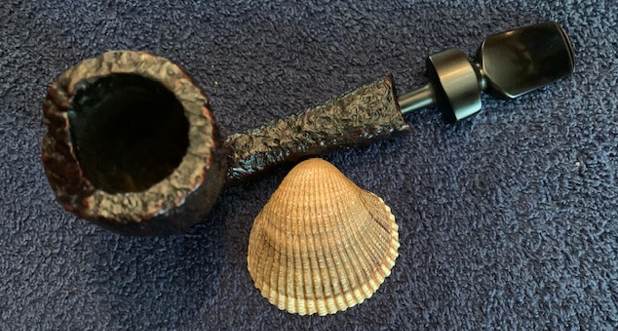
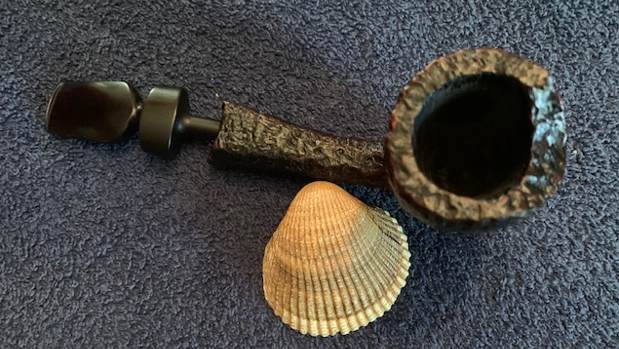
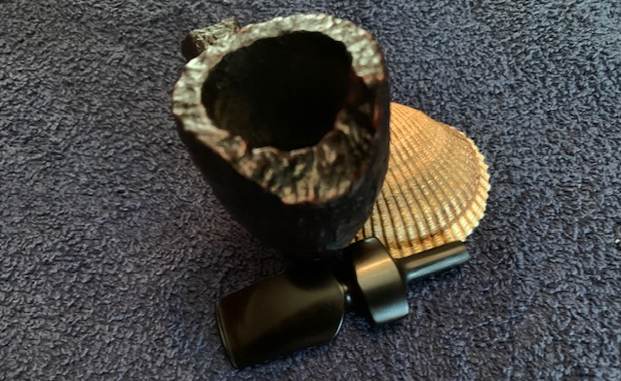
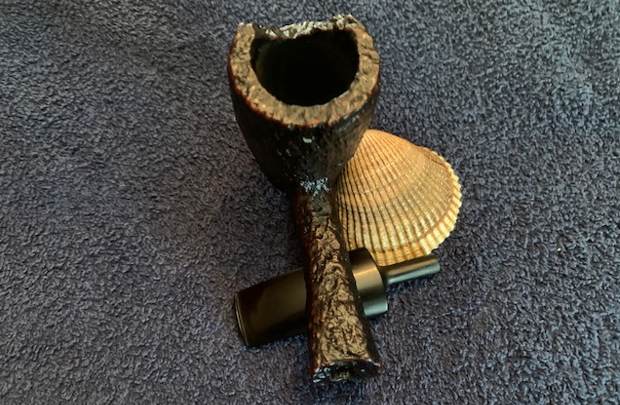
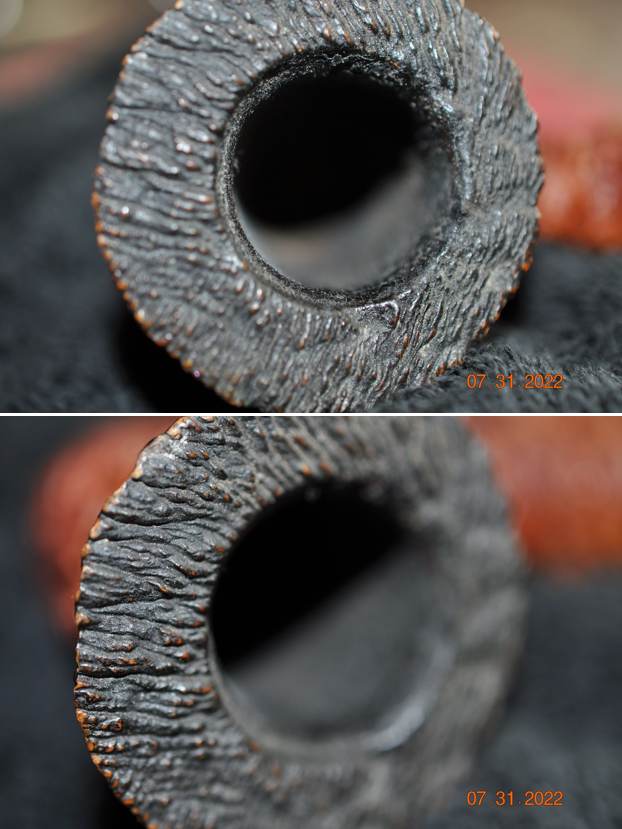
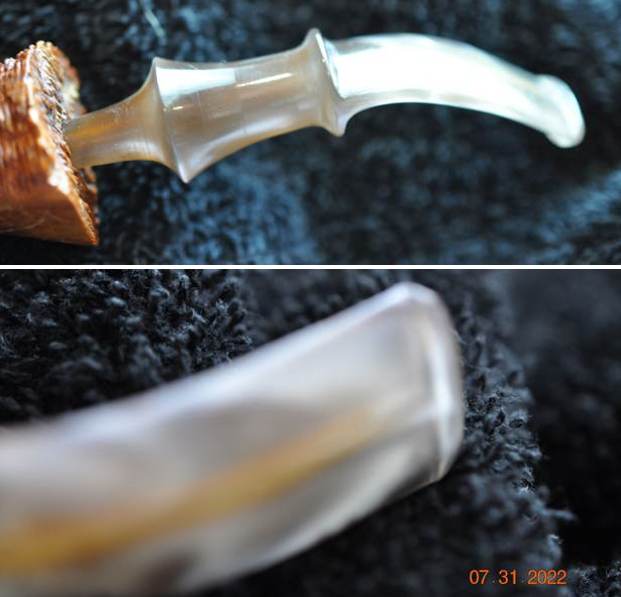
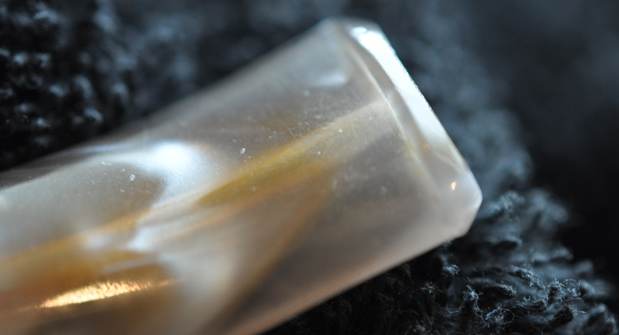
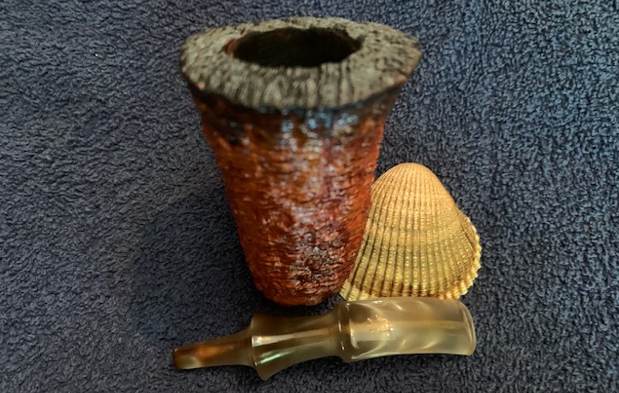
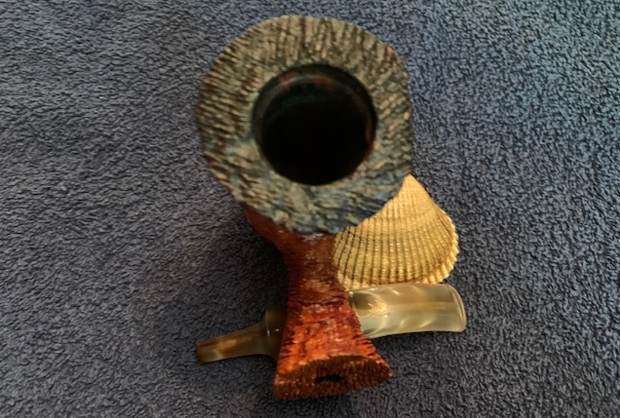
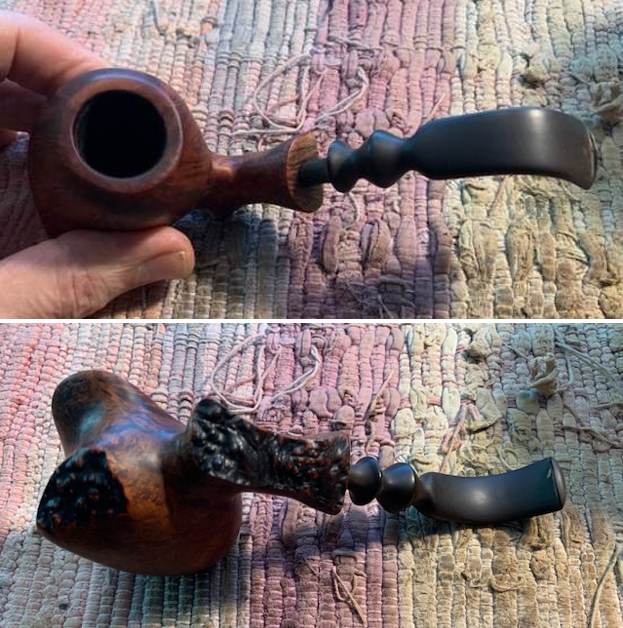
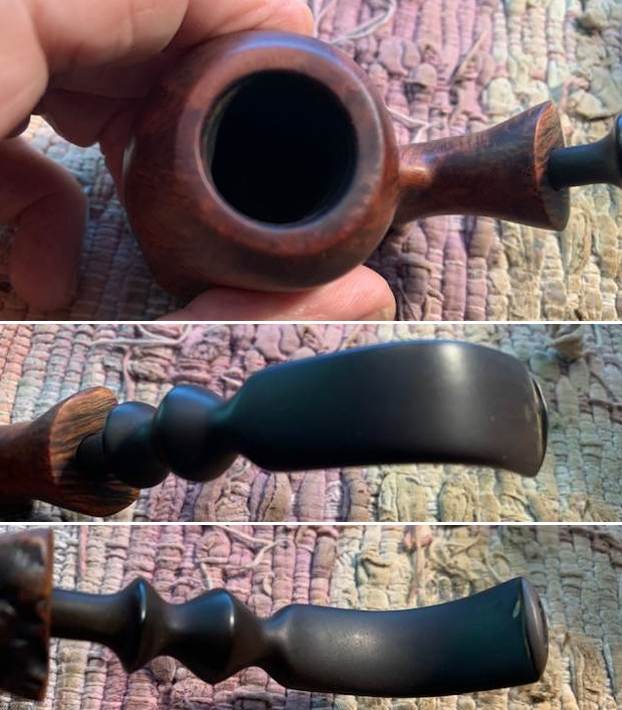
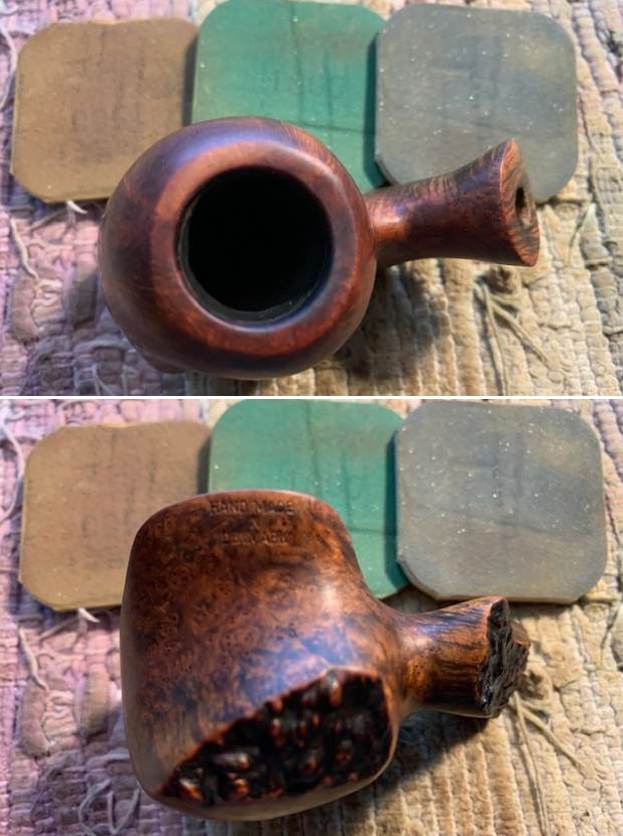
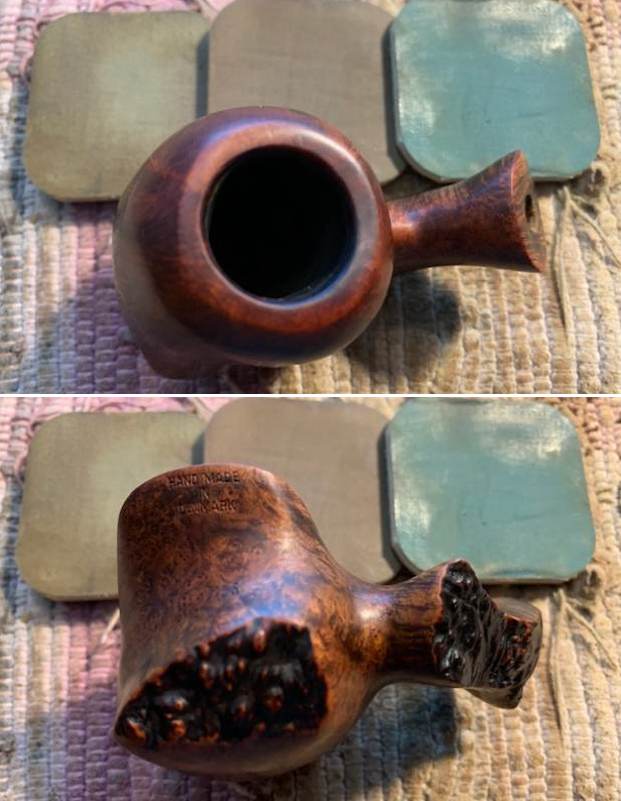
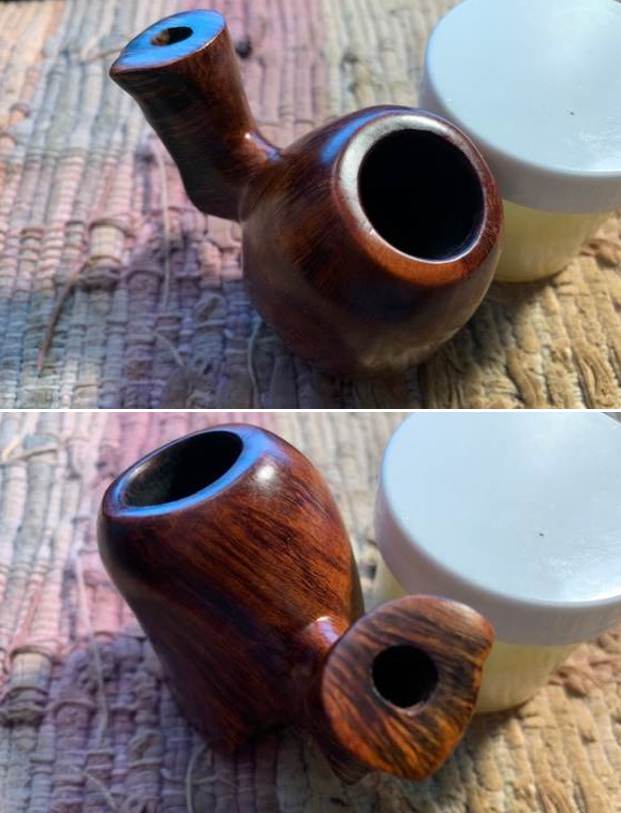
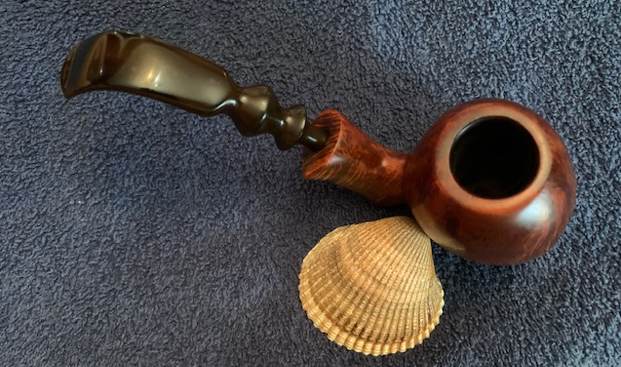
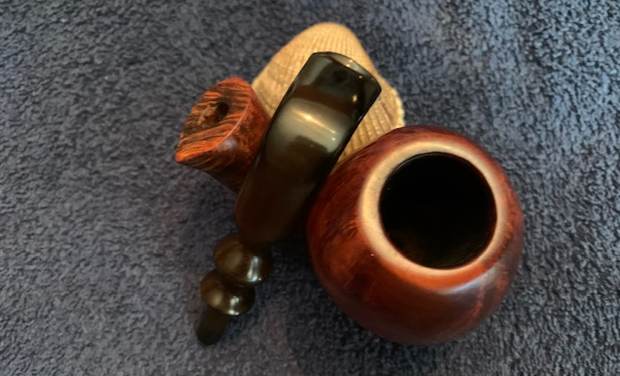
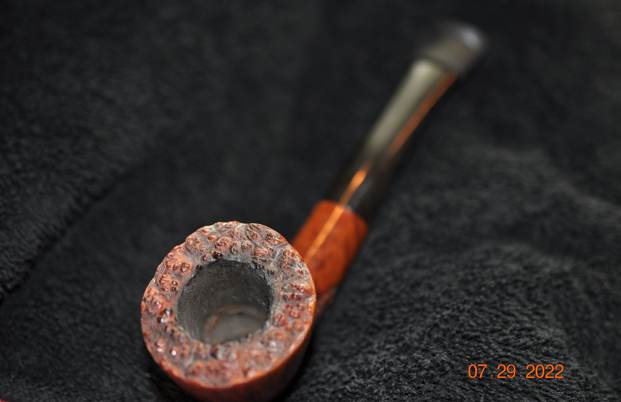
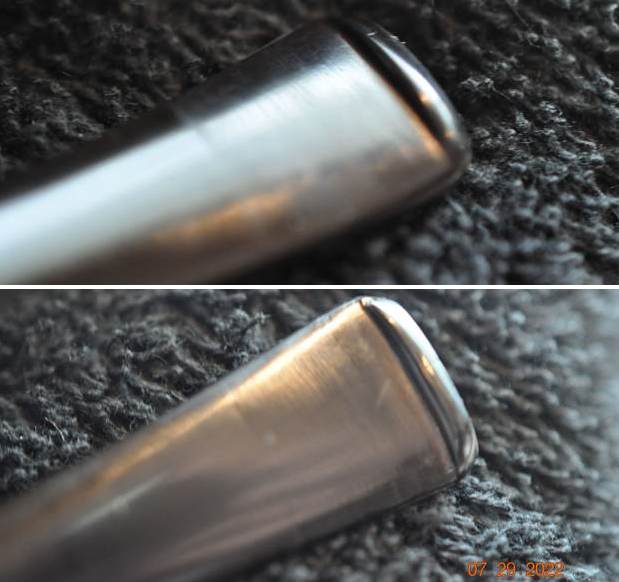
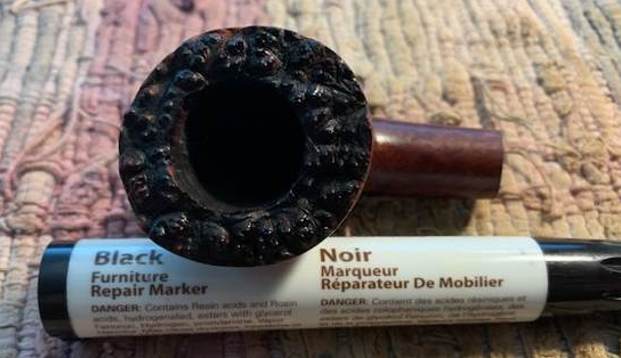
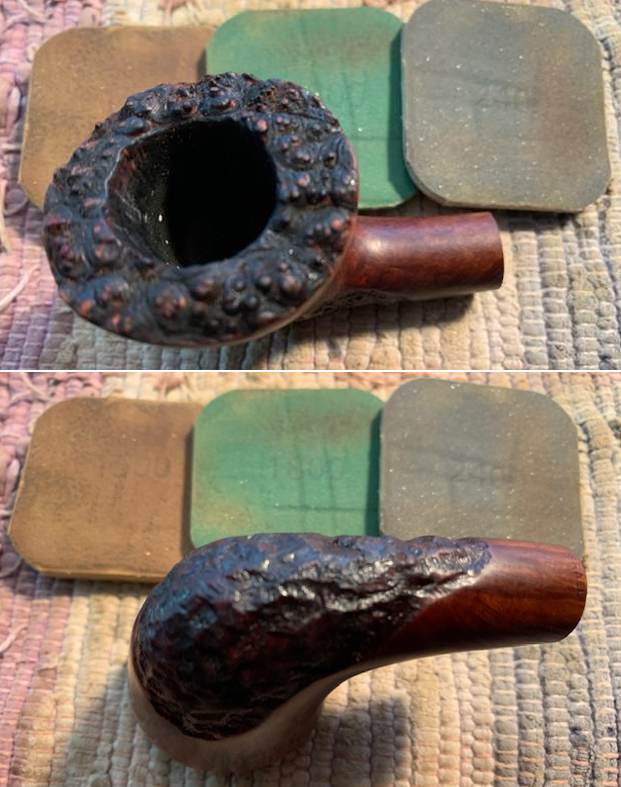
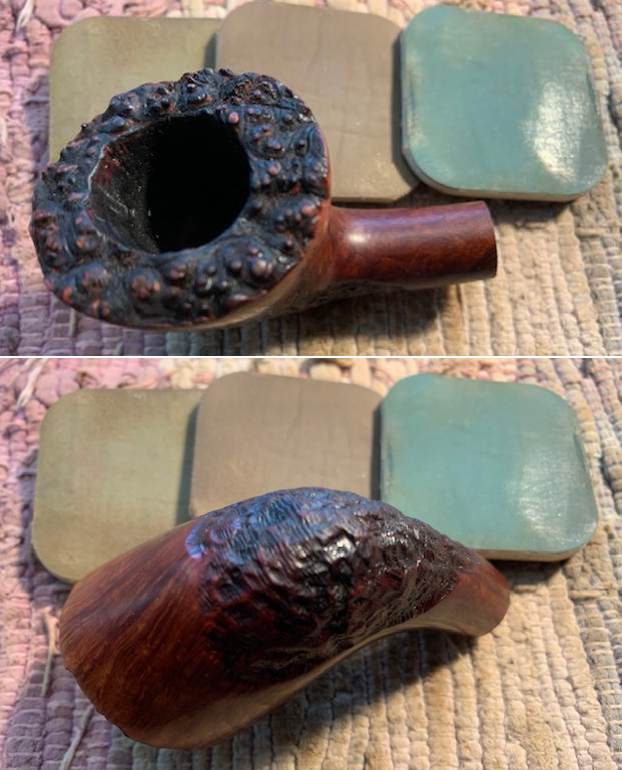
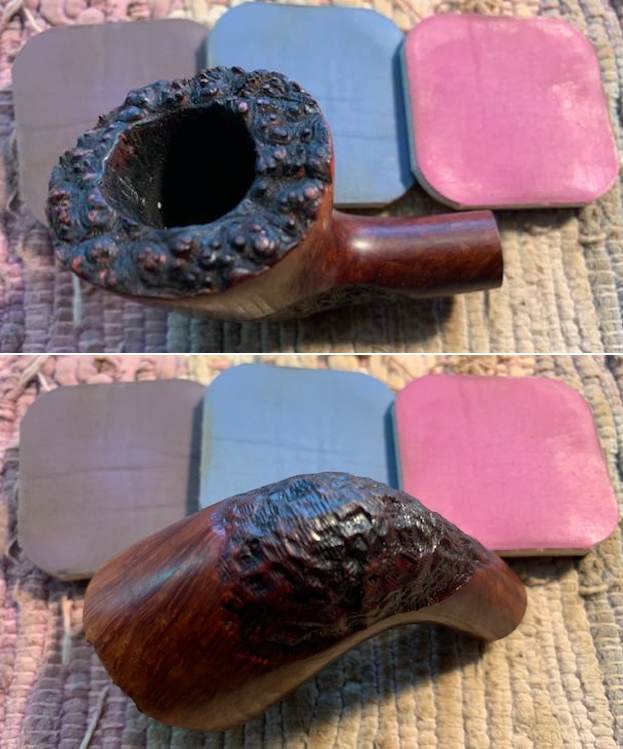
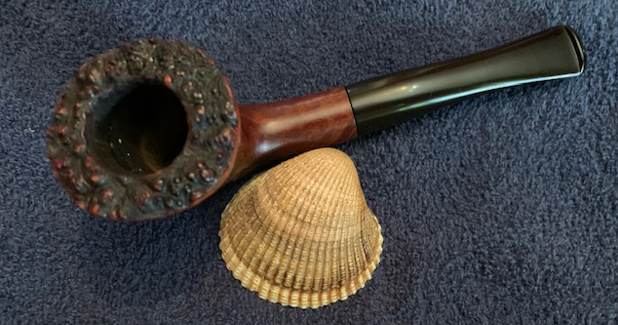
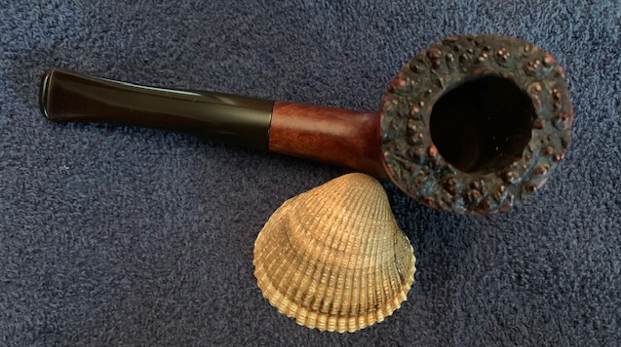
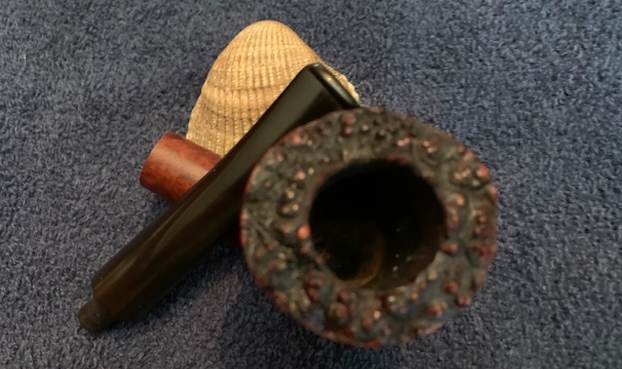
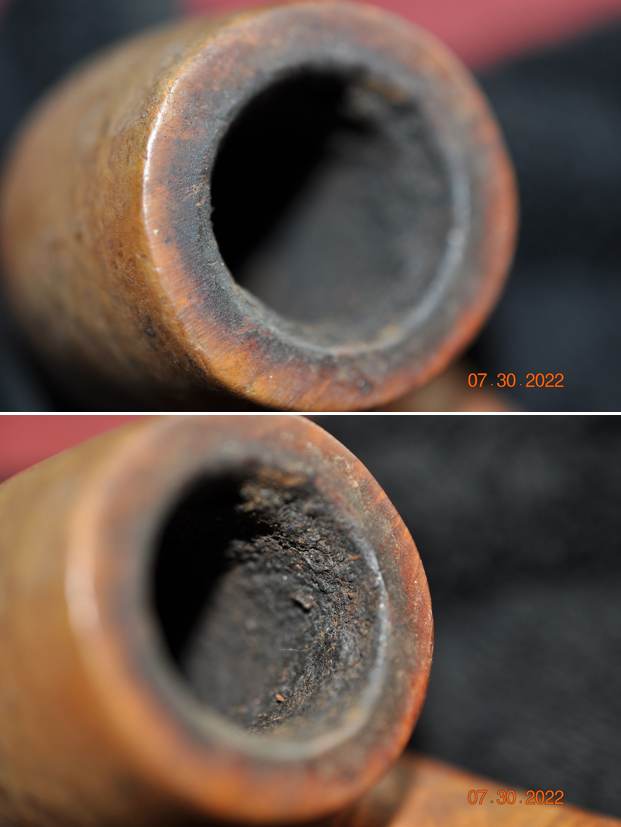
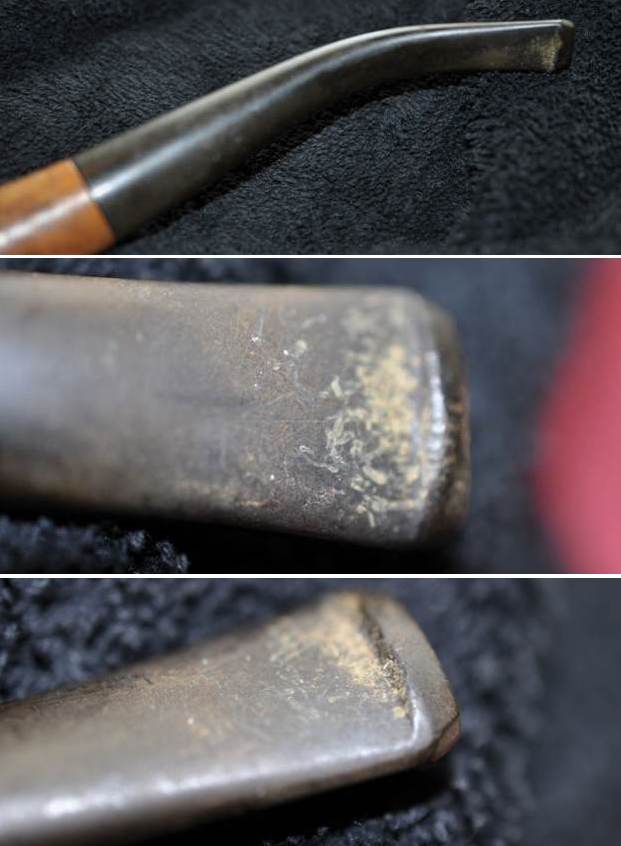
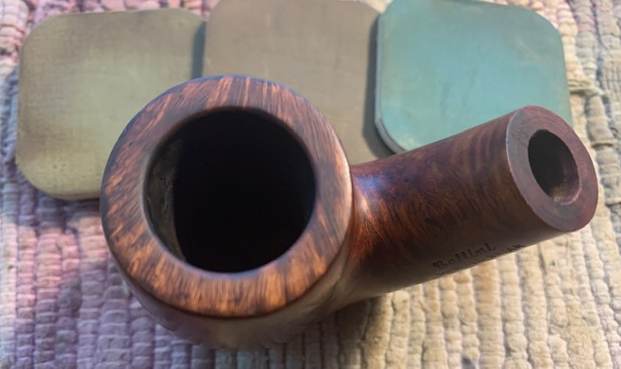
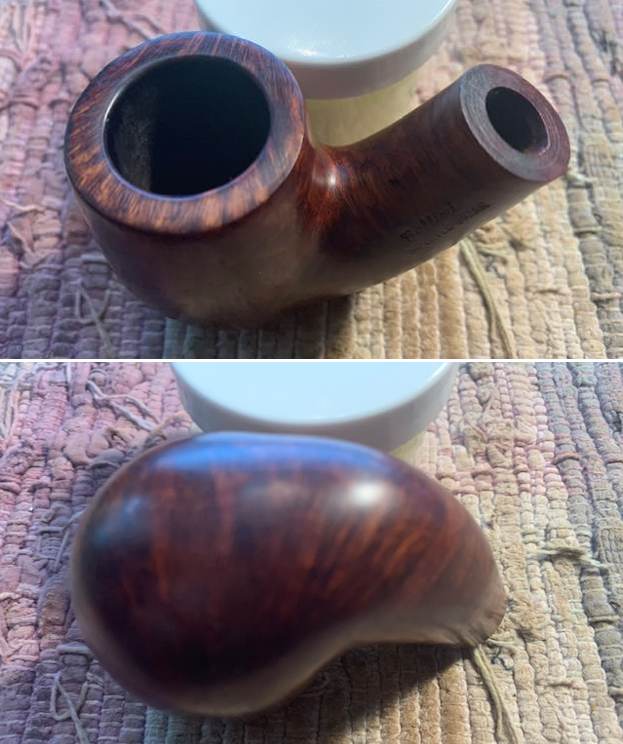
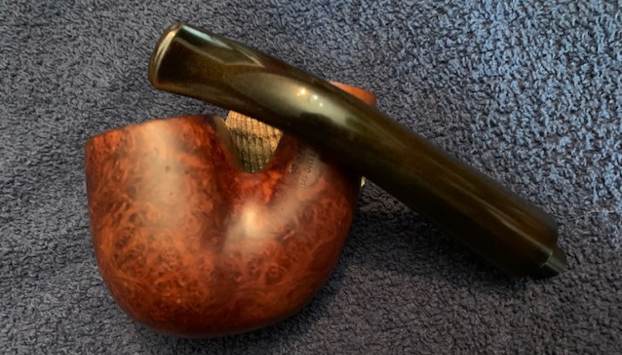
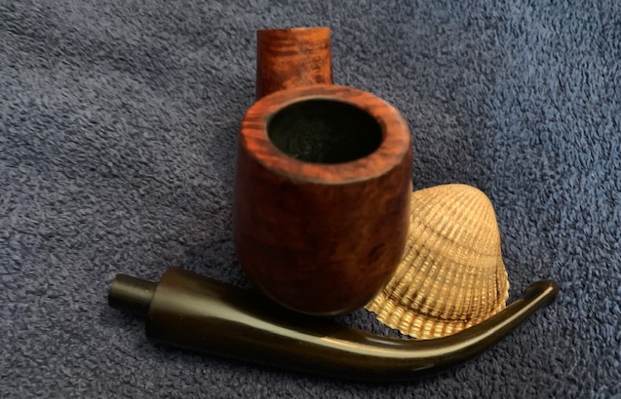
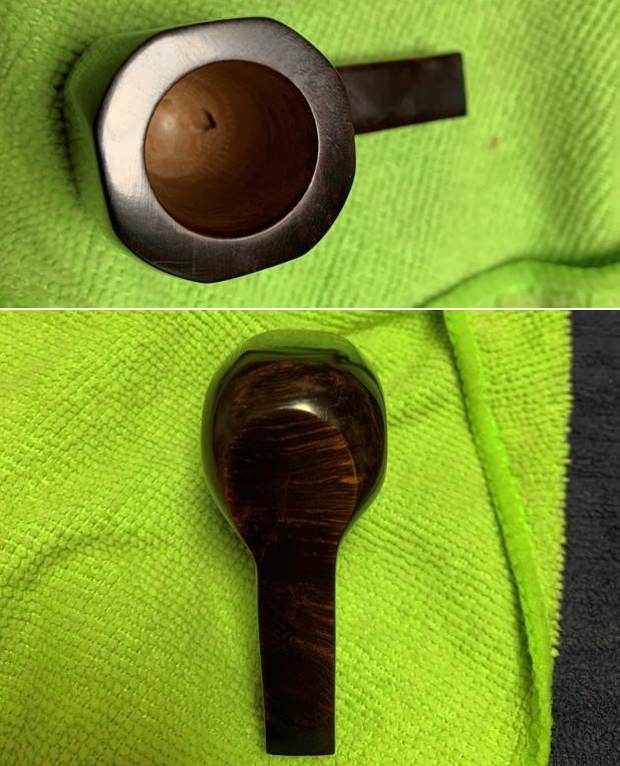
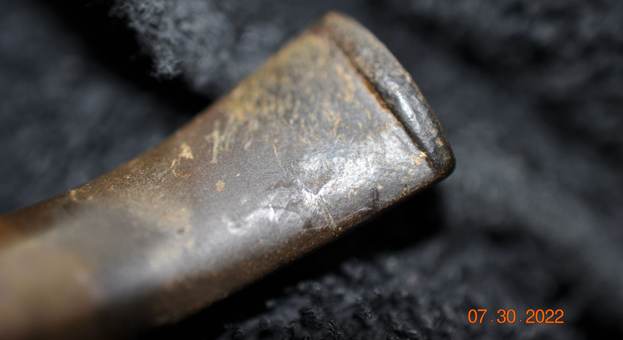
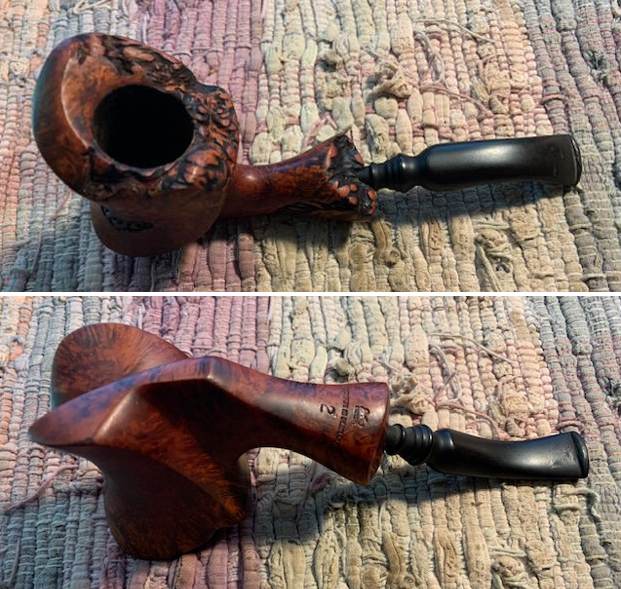
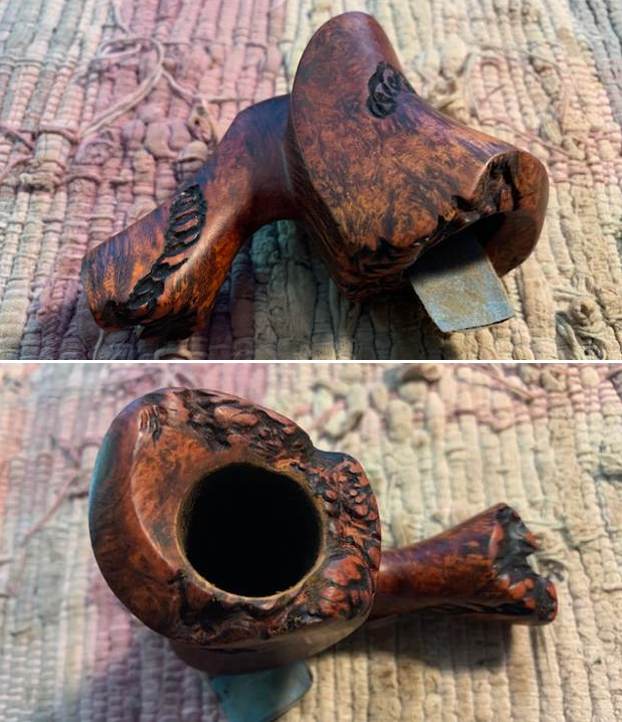
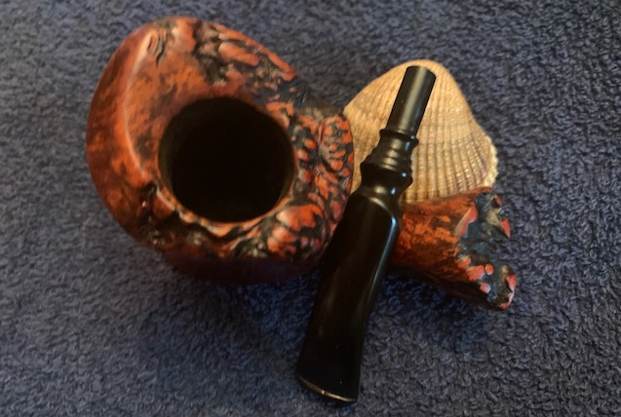
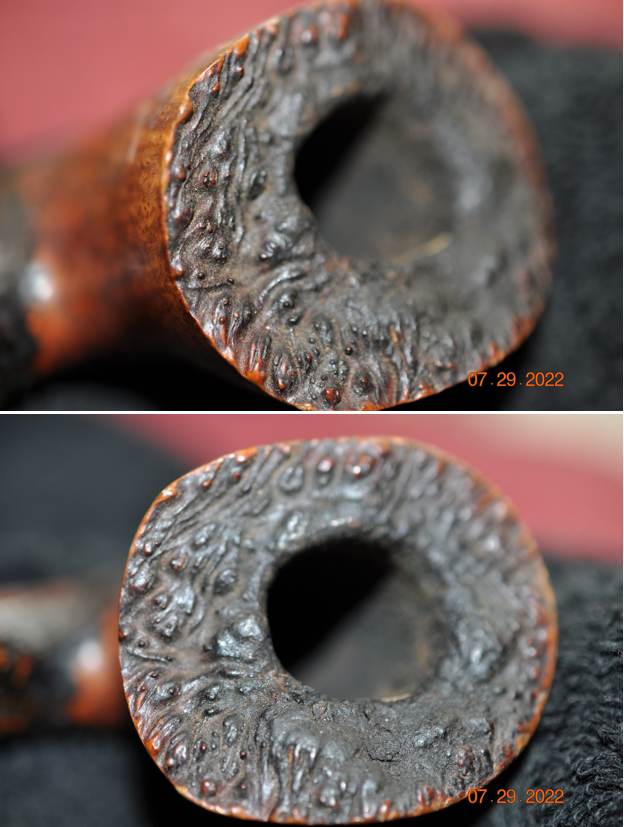
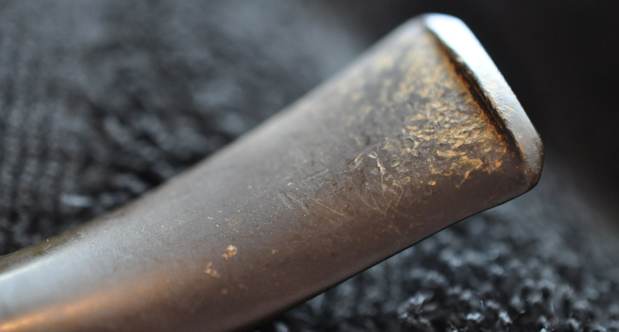
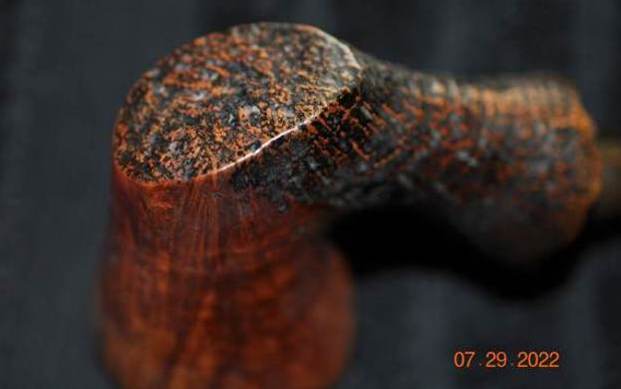
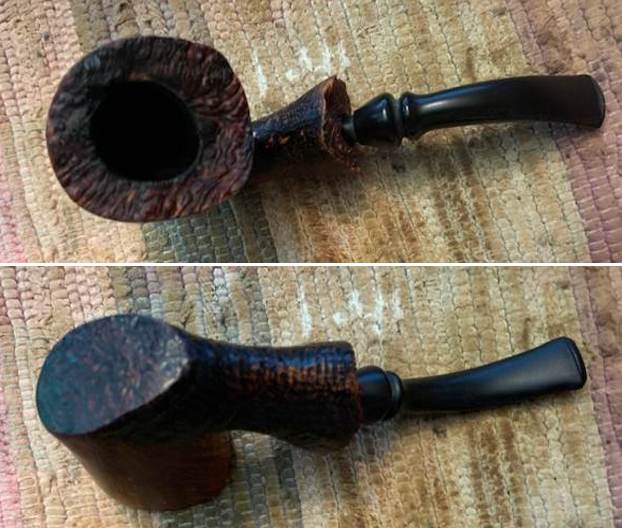
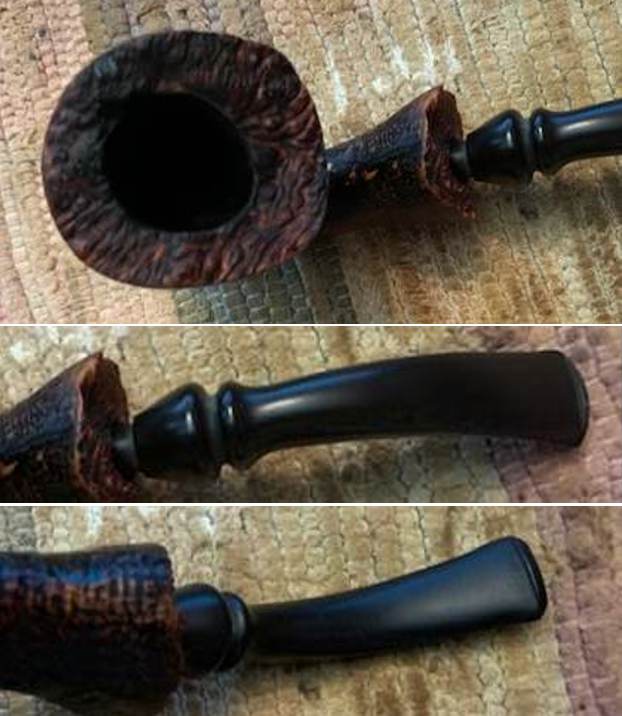
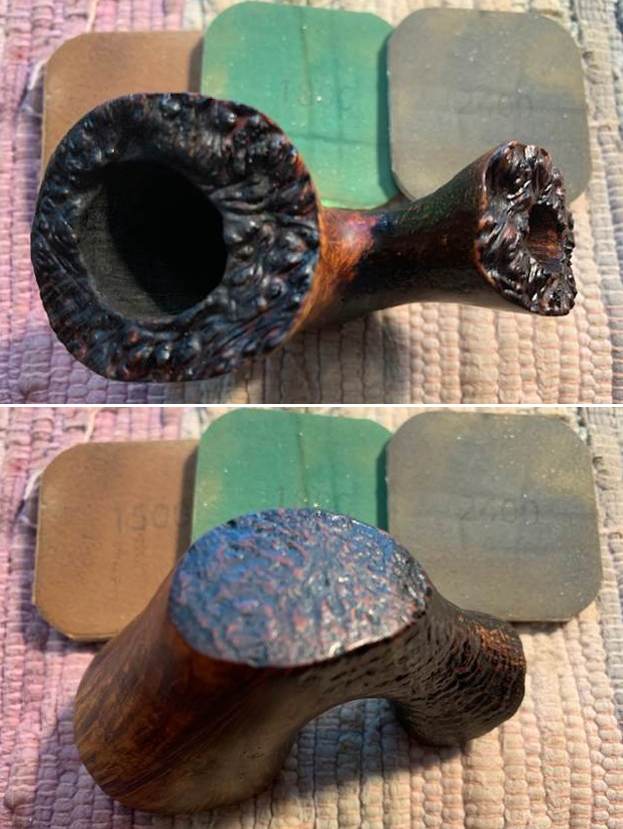
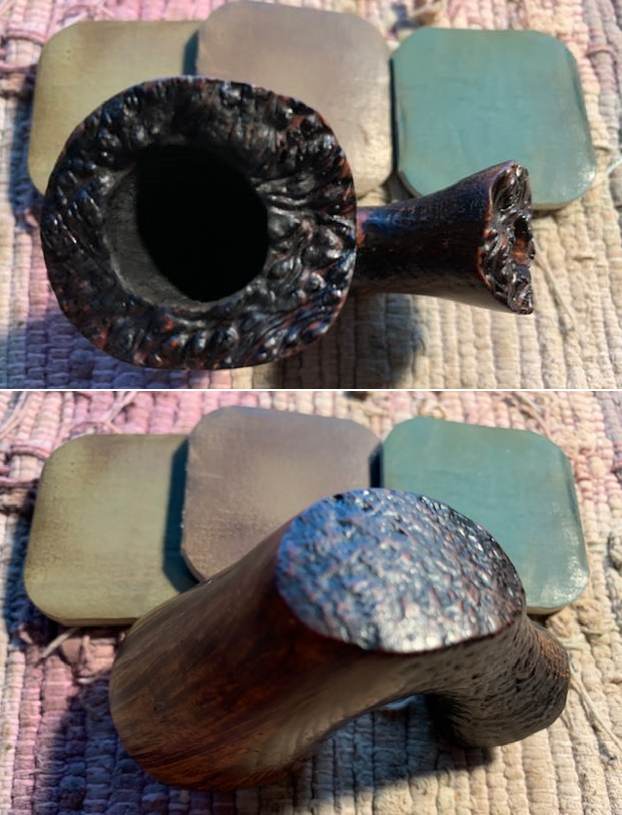
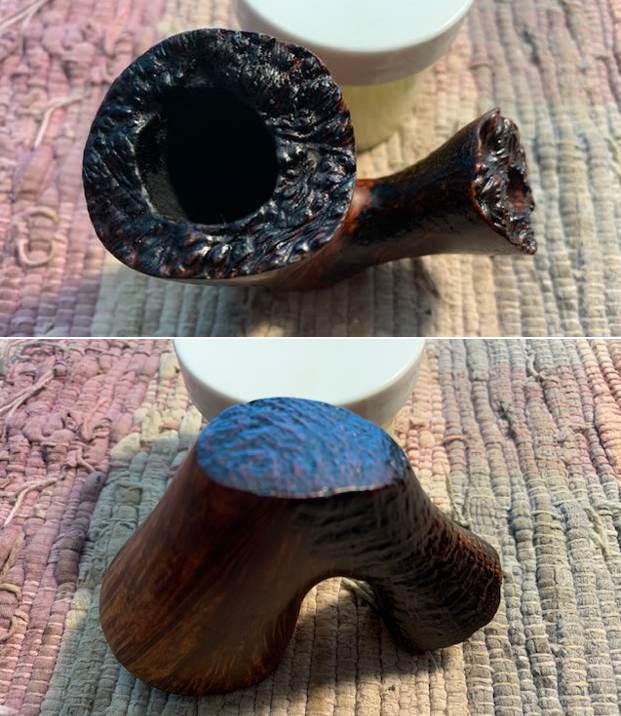
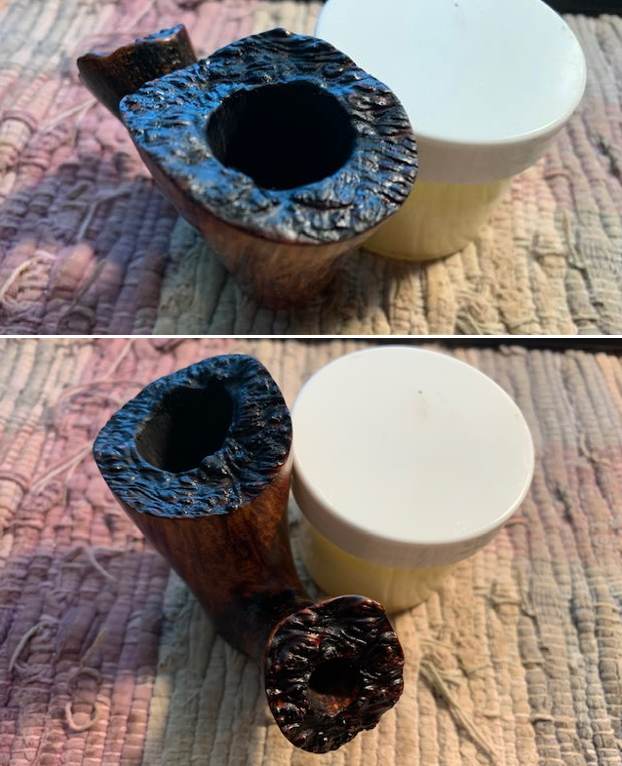
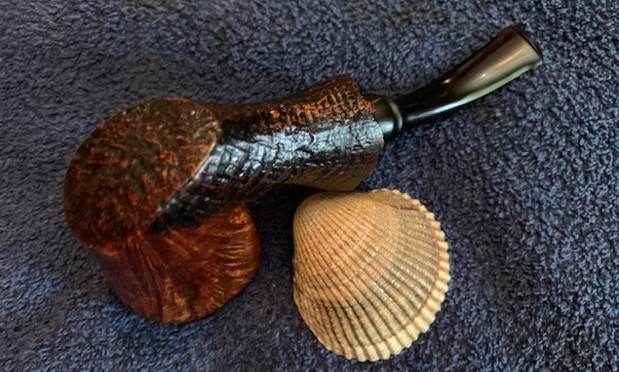
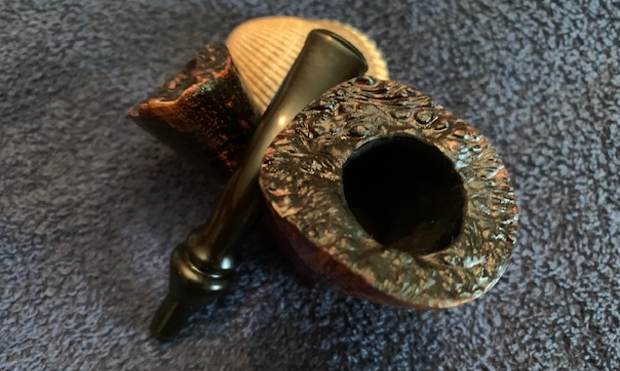
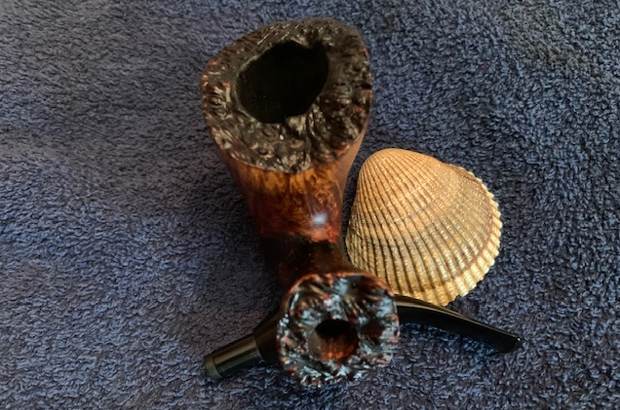
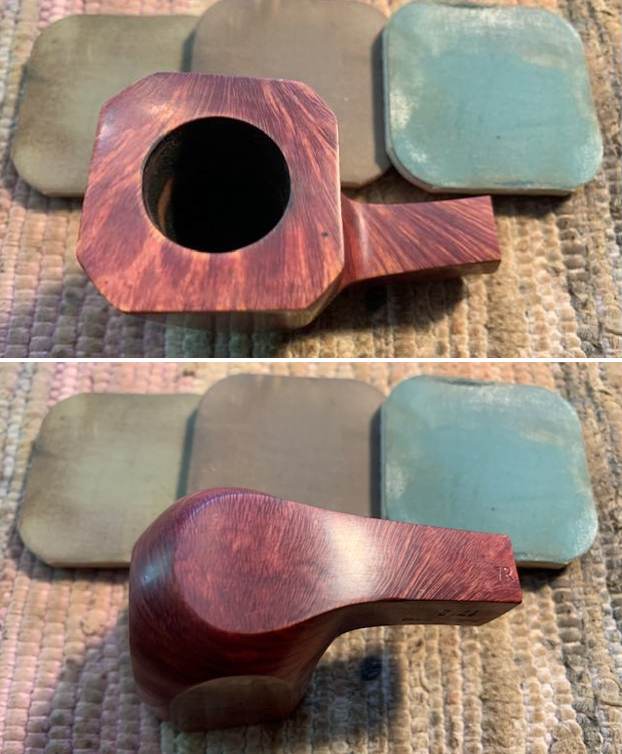
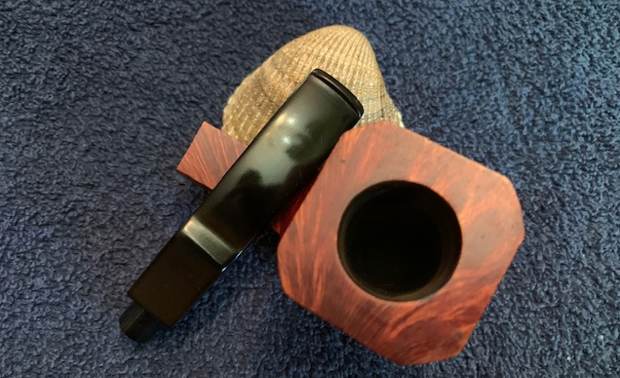
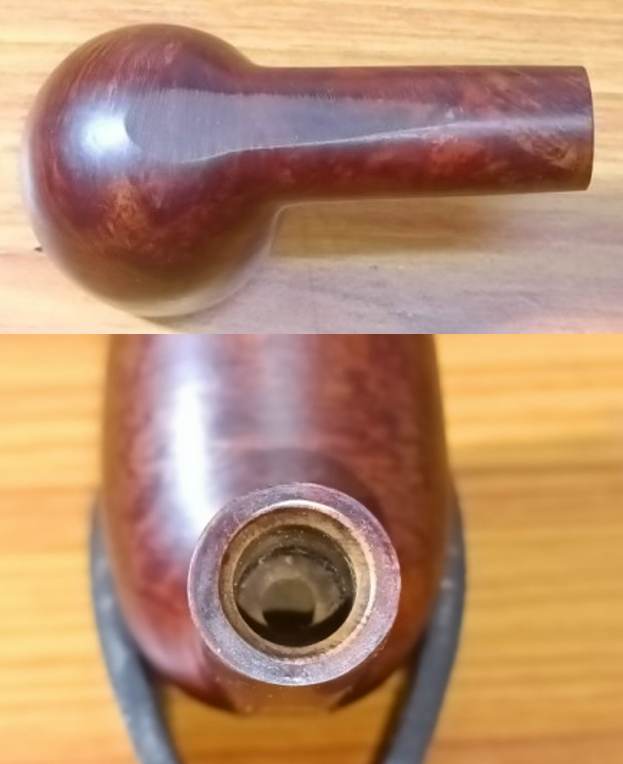
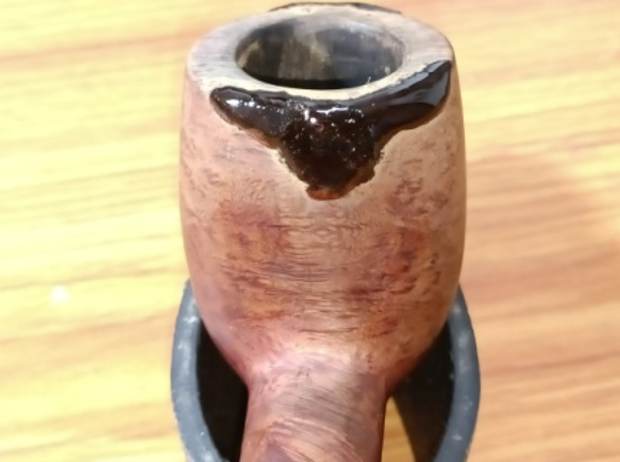
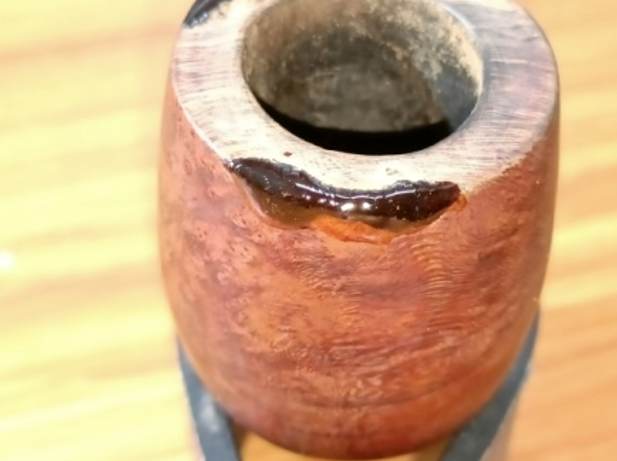
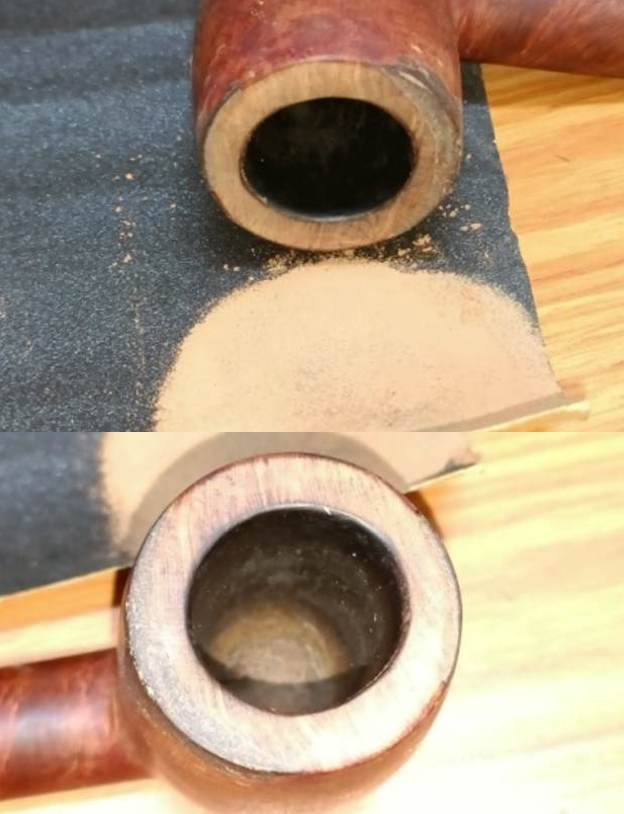
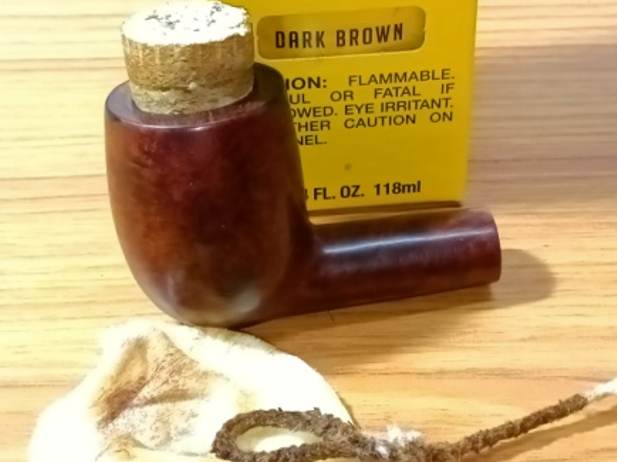
 He took close up photos of the uniquely shaped bowl and rim top from different angles to show the condition of the bowl and the plateau rim top. You can see the thick cake in the bowl with the flakes of tobacco stuck to the walls. You can also see the overflow of lava on the rim top and on the inner edge of the bowl. He took photos surface of the vulcanite stem to show the oxidation, calcification and tooth chatter and marks on both sides ahead of the button.
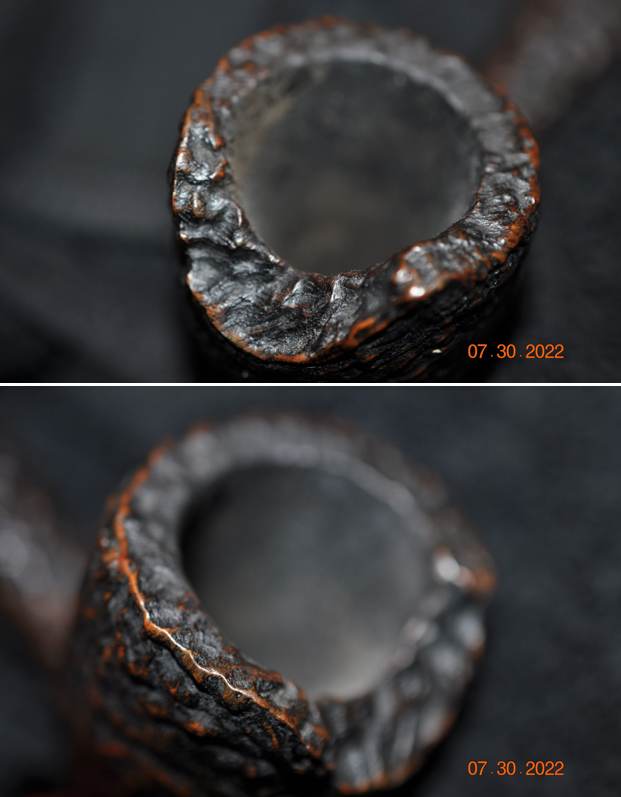
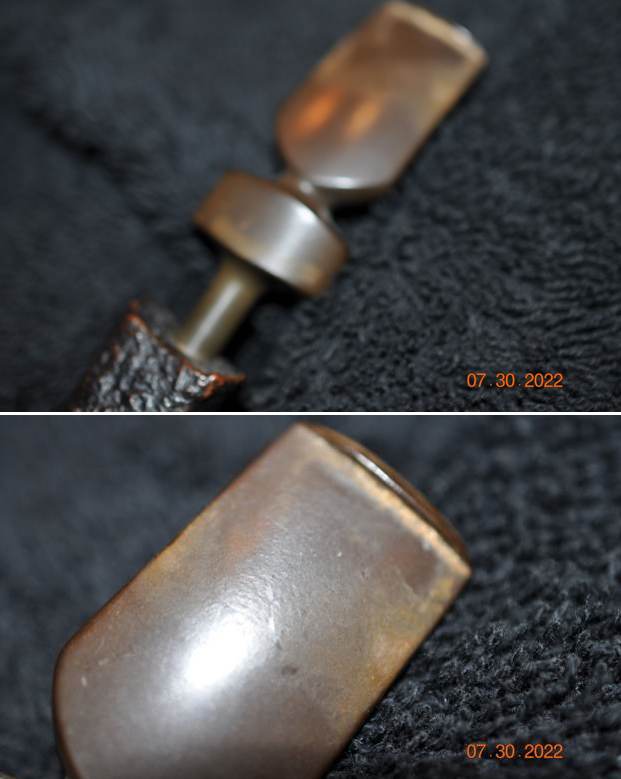
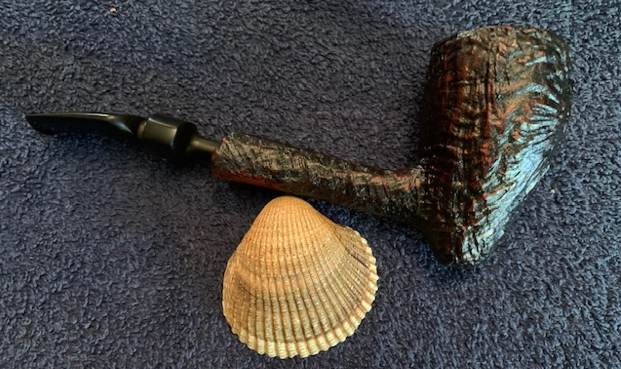
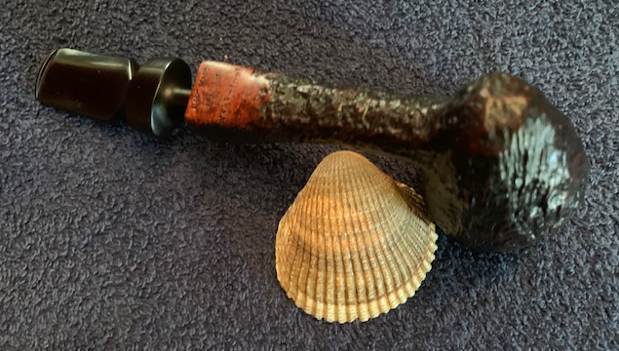
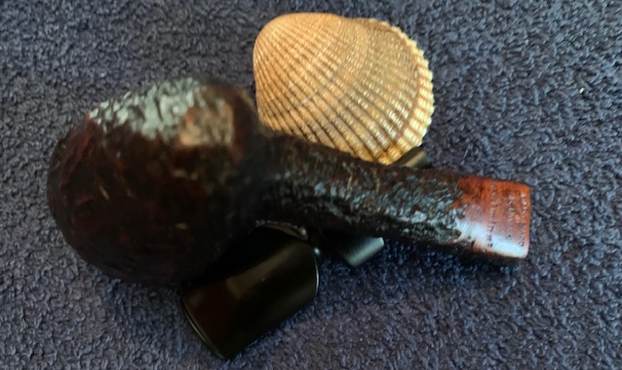
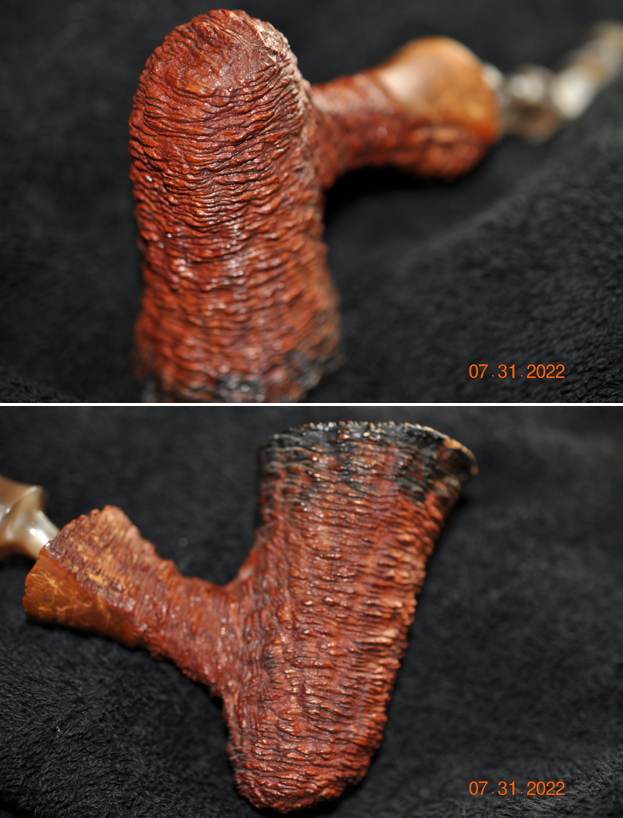
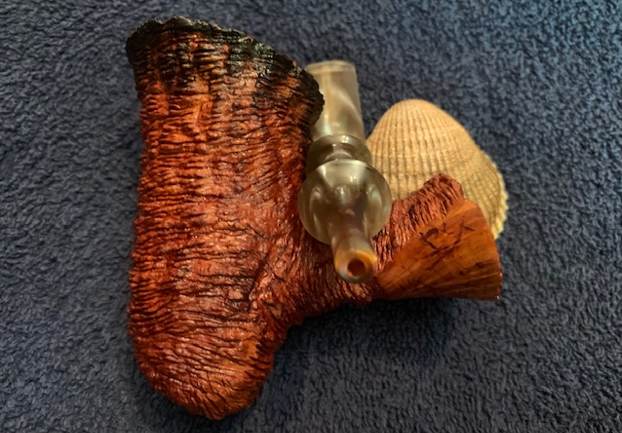
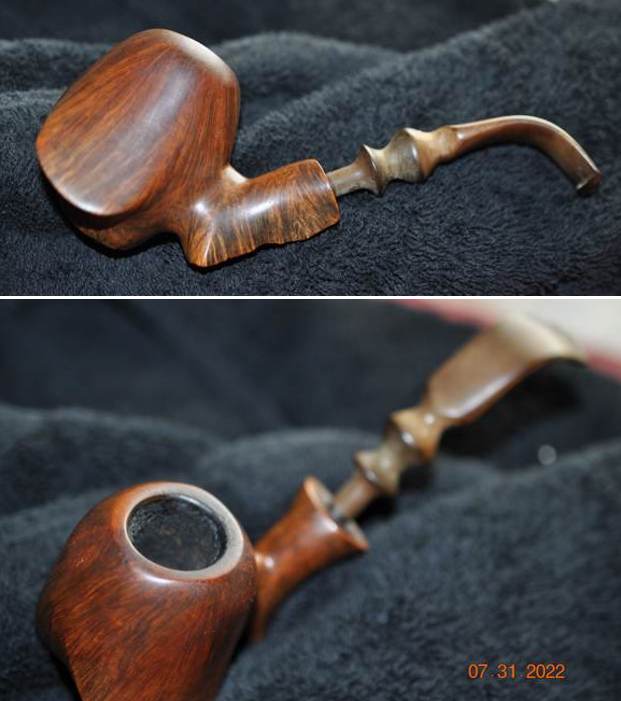
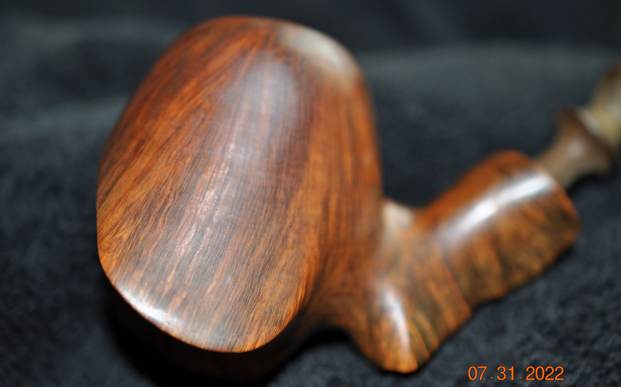
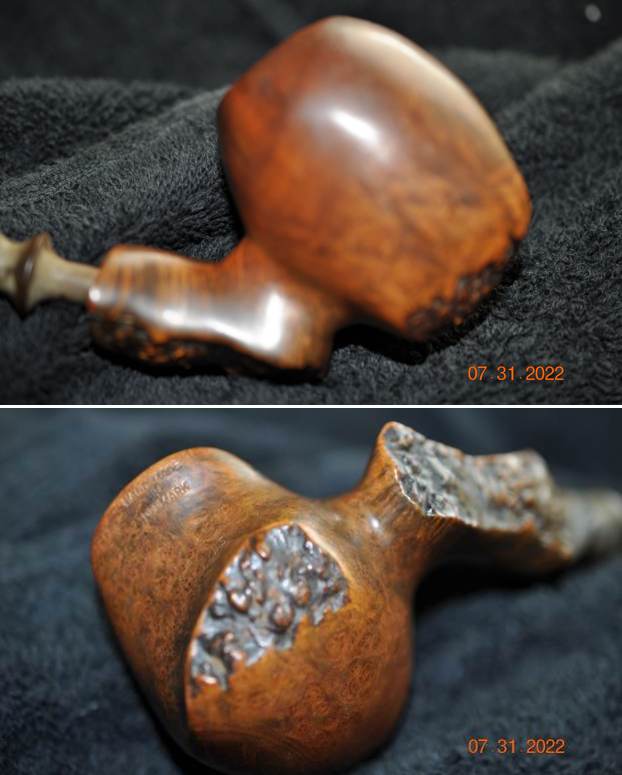
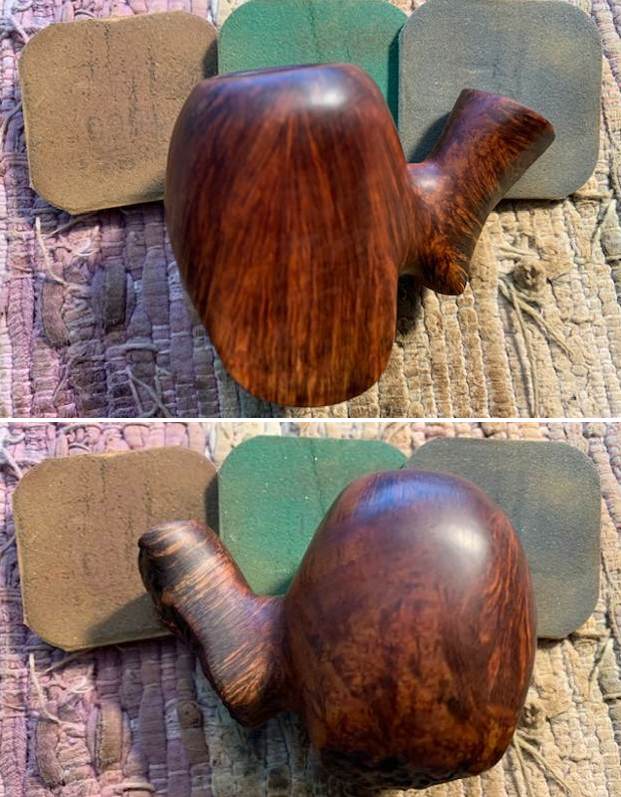
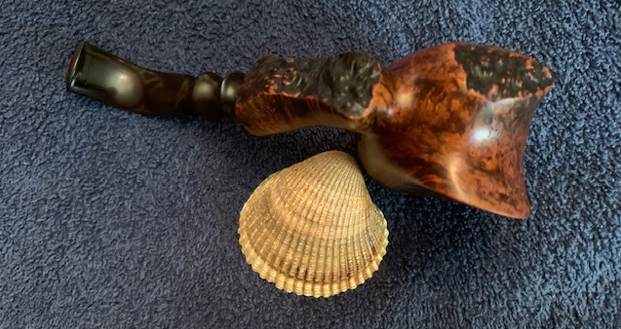
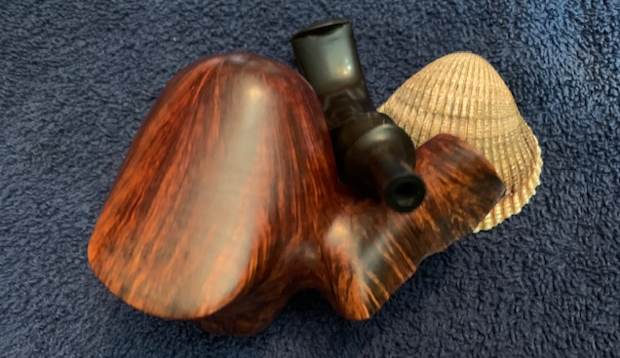
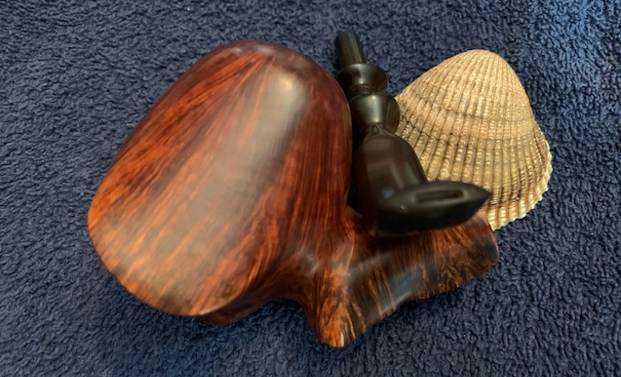
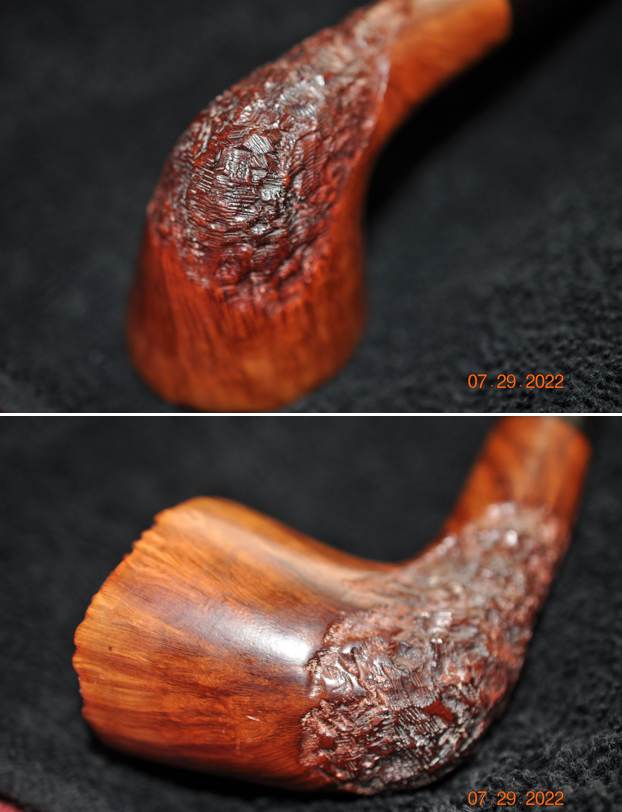
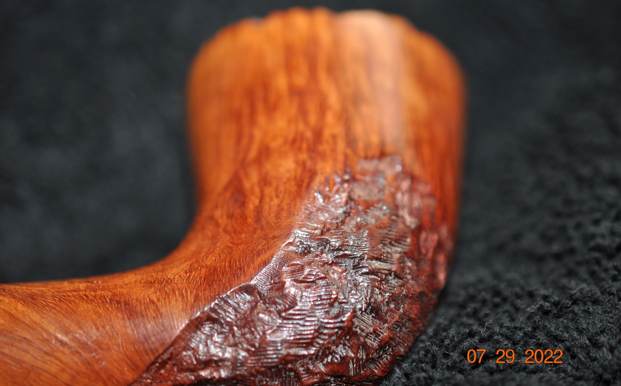
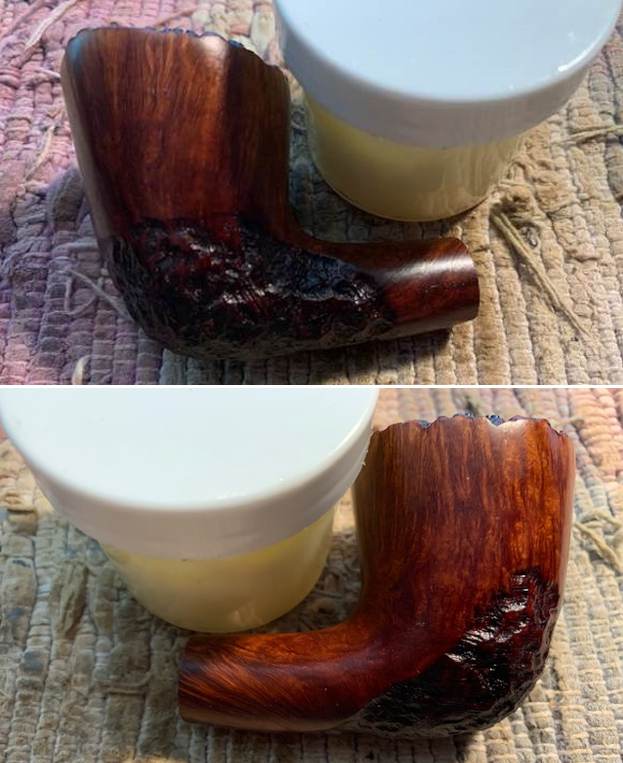
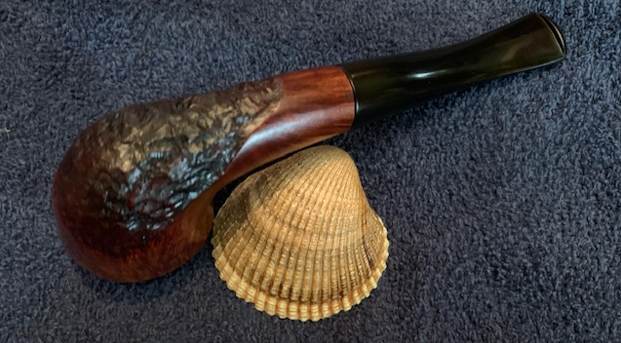
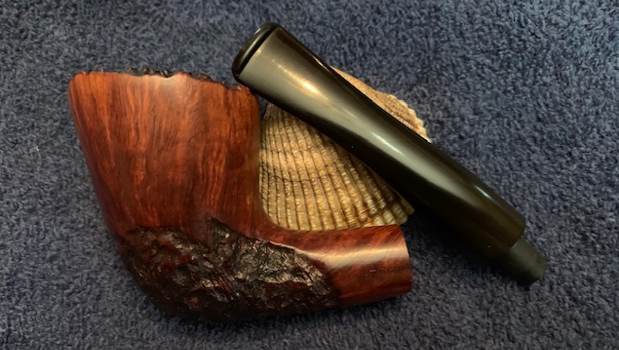
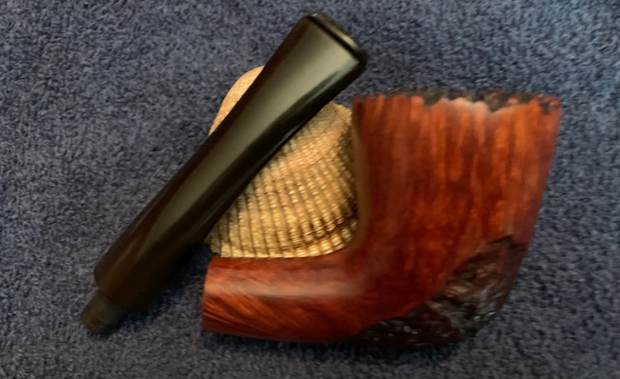
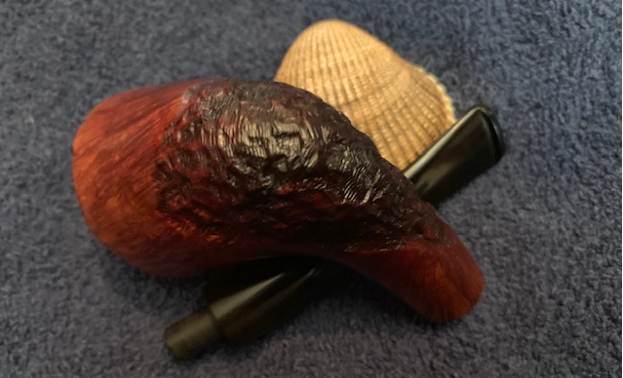
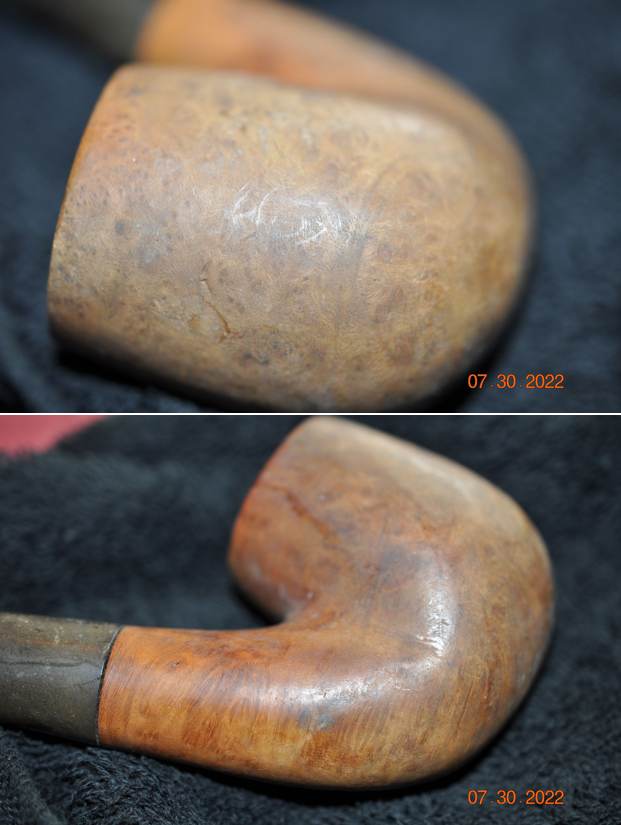
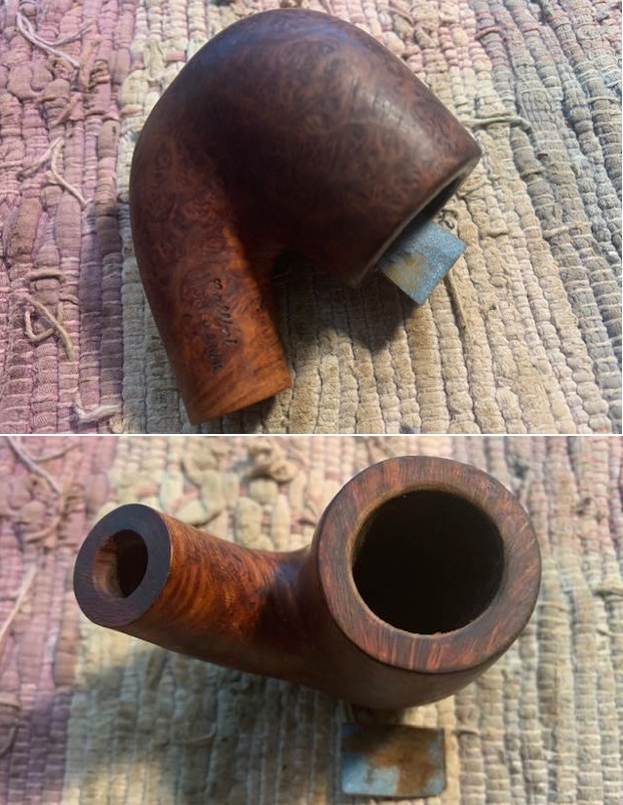
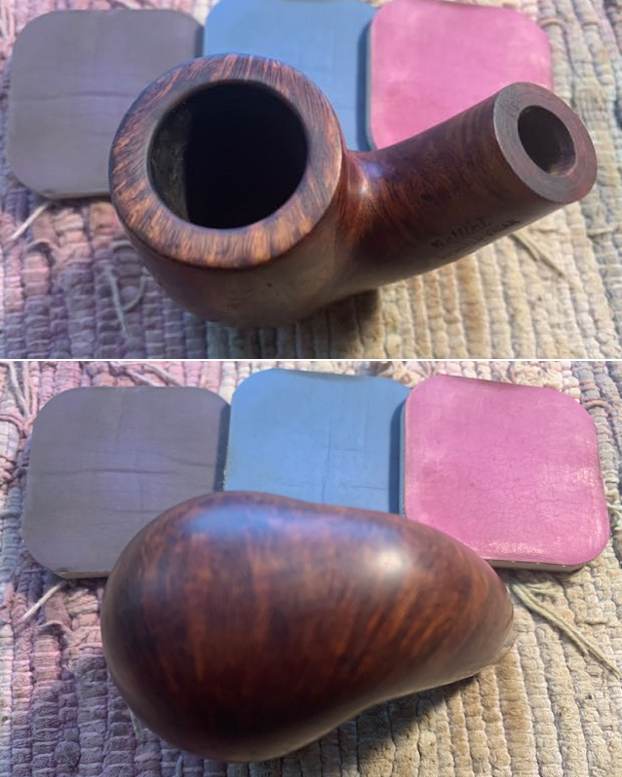
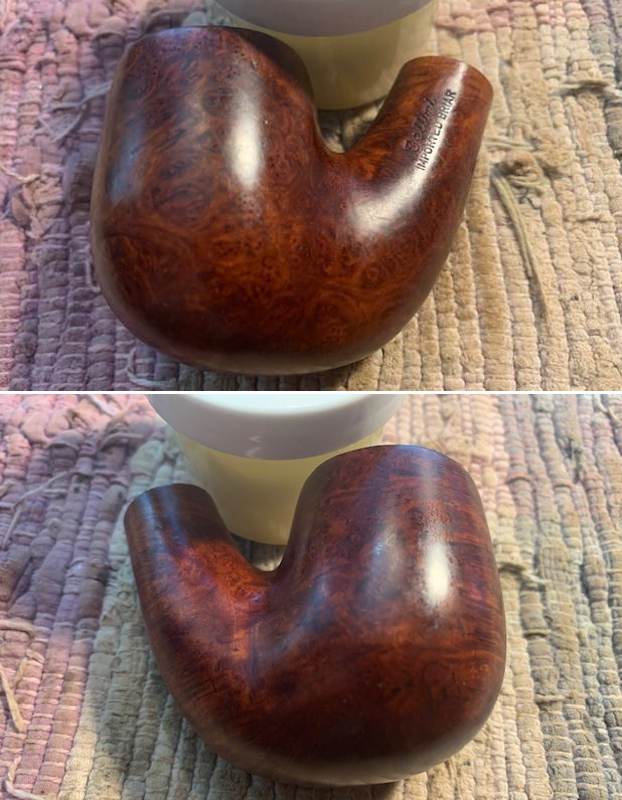
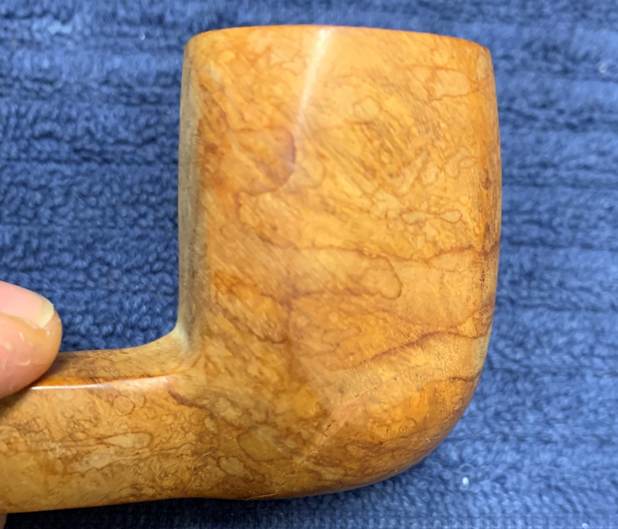
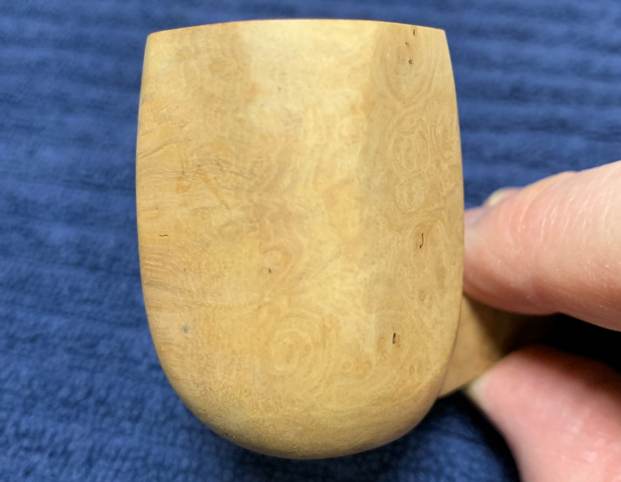
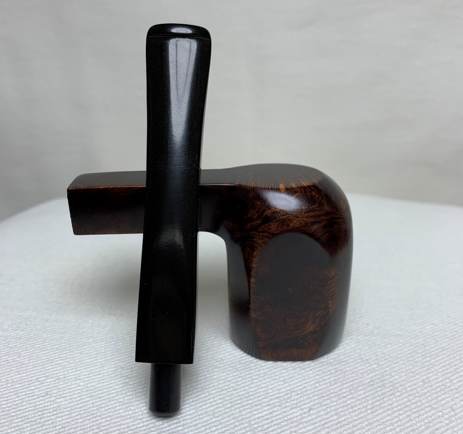
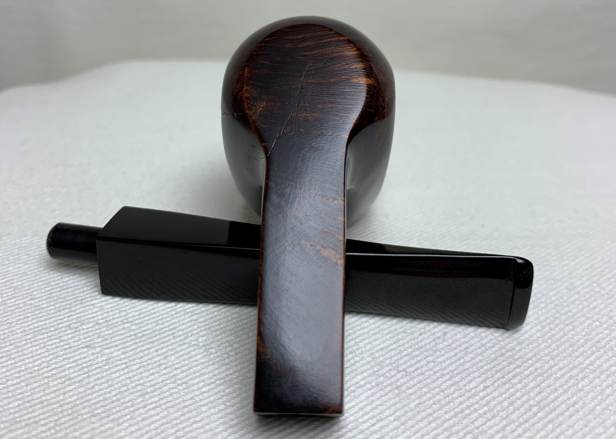
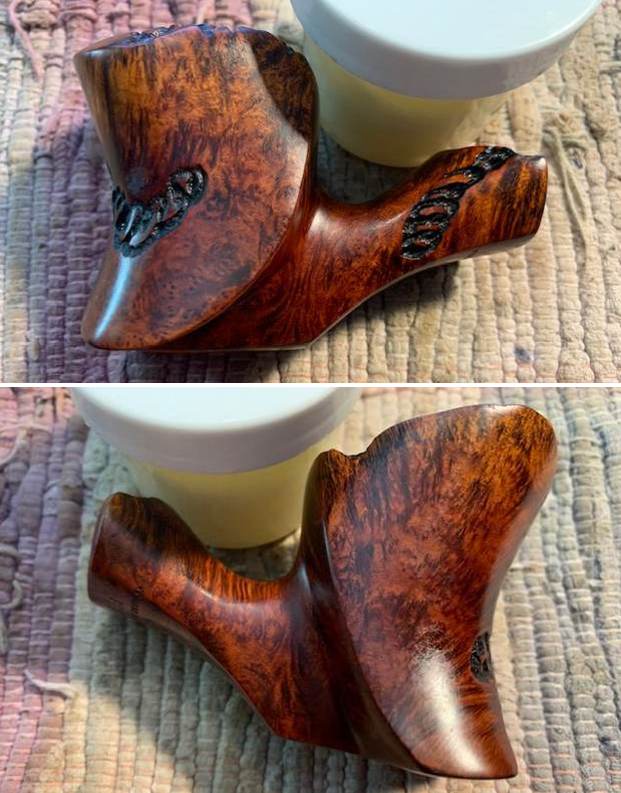
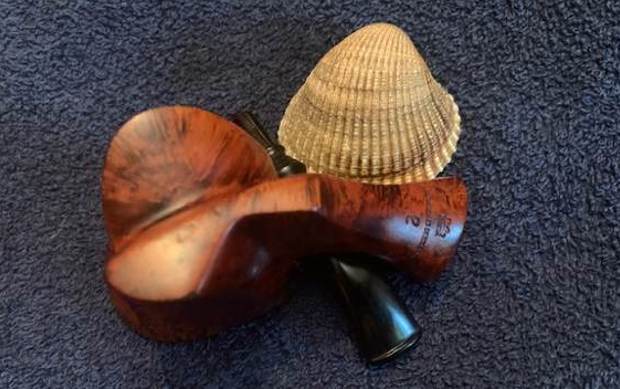
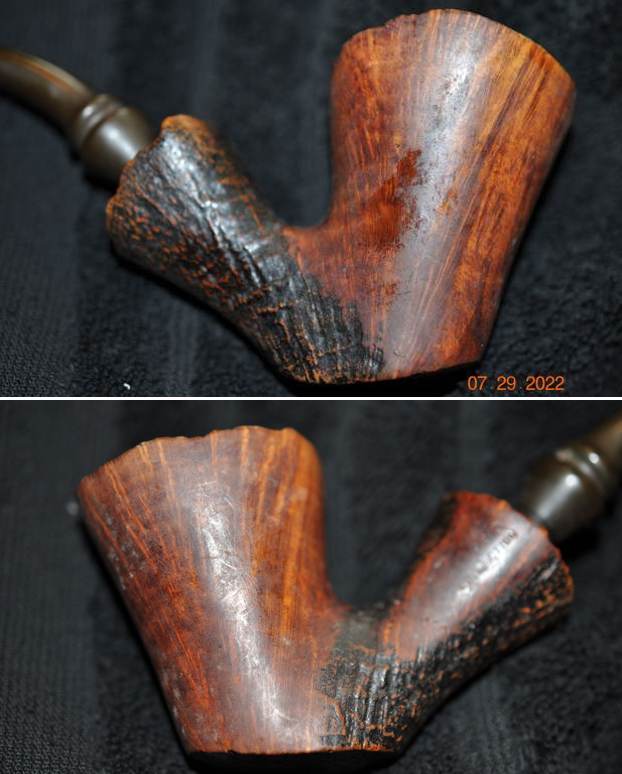
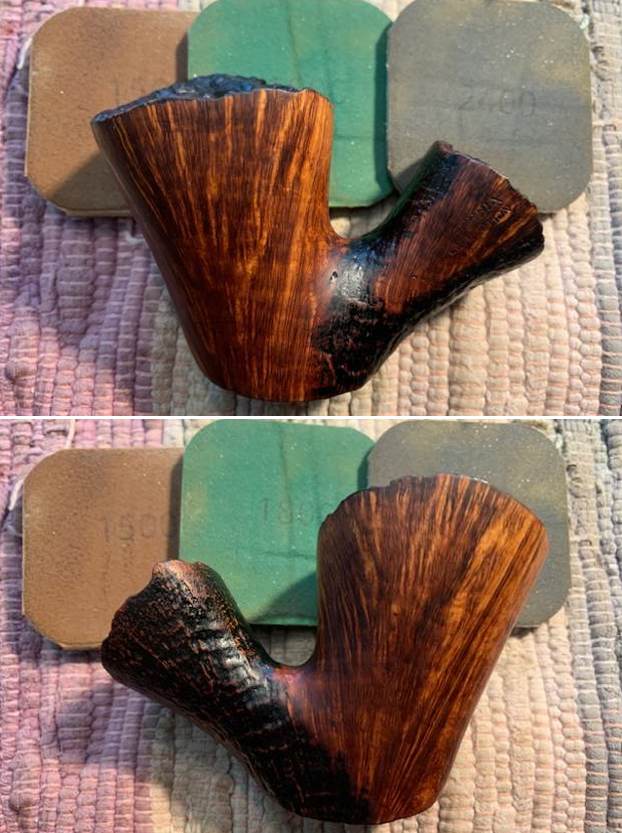
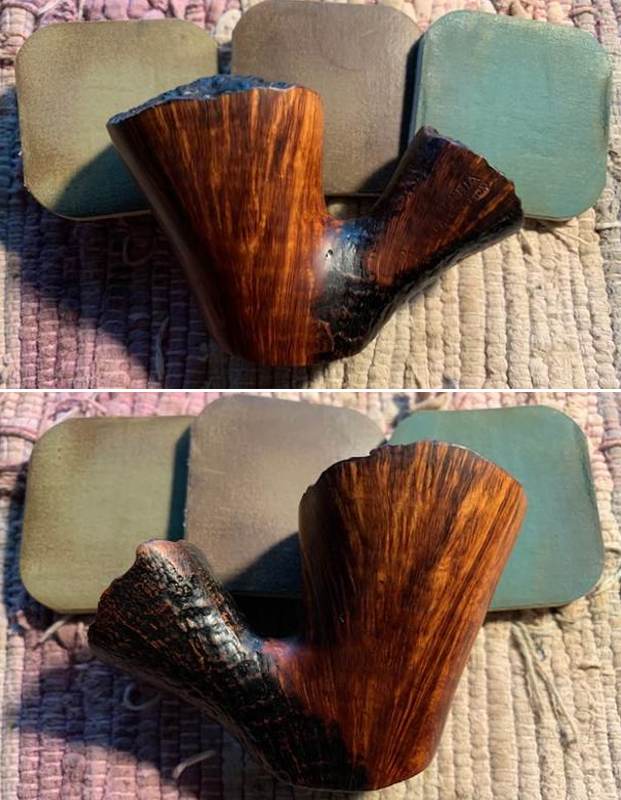
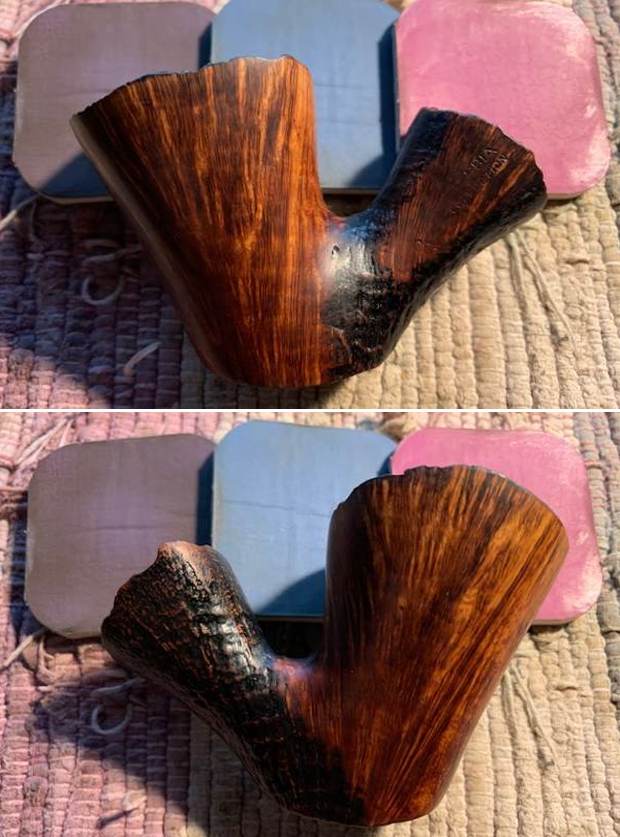
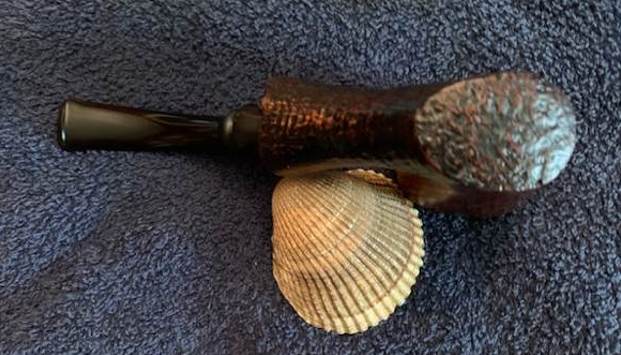
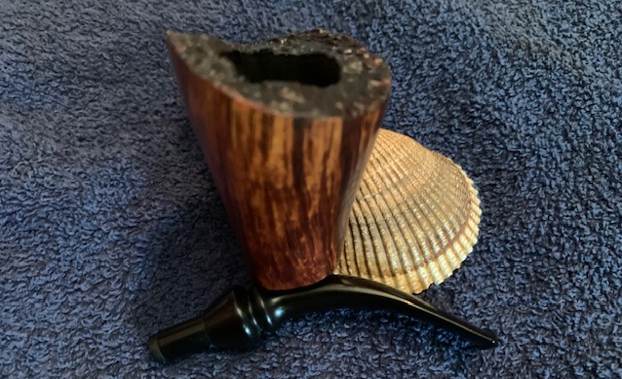
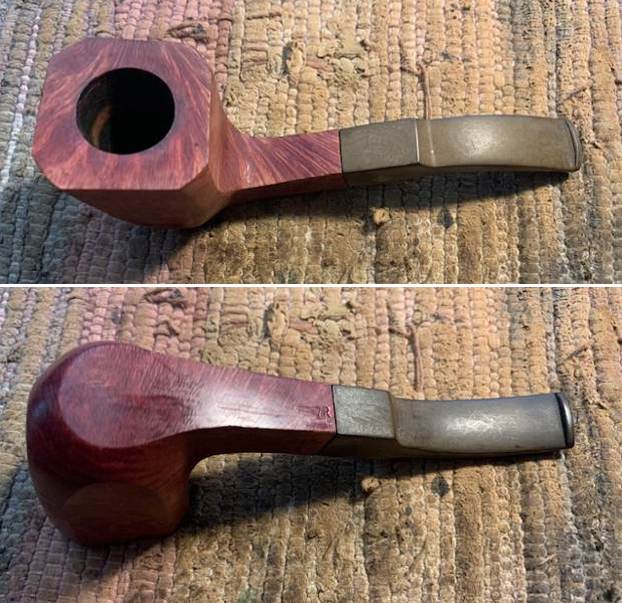
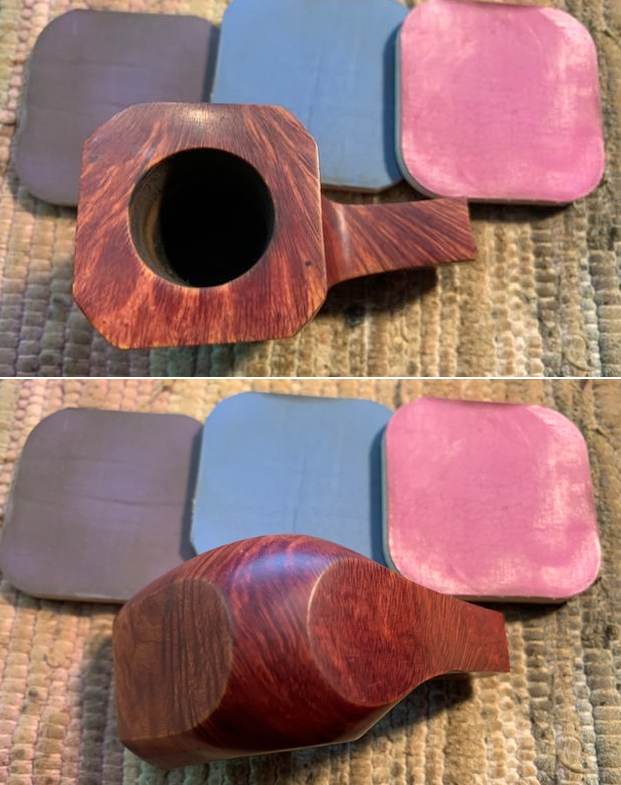
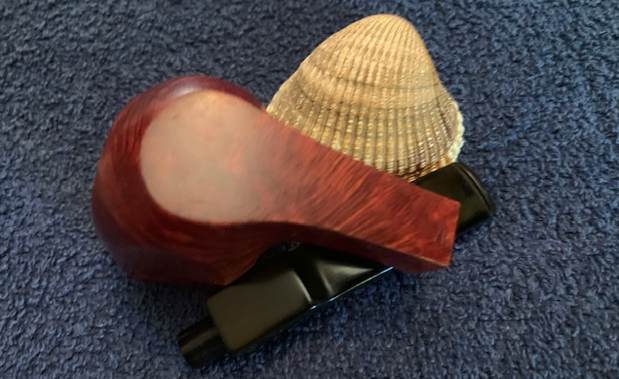
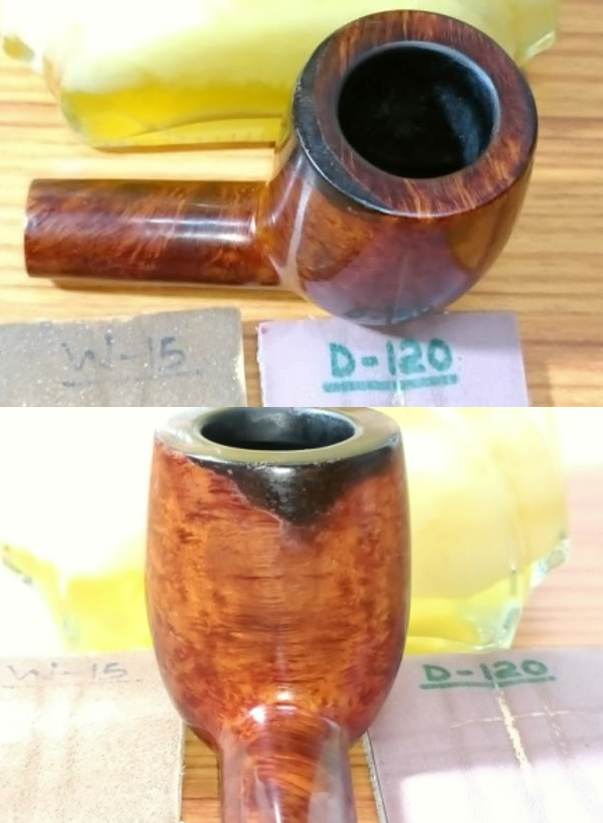
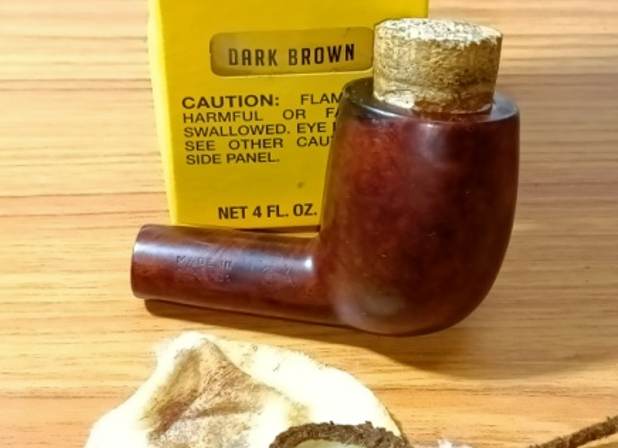
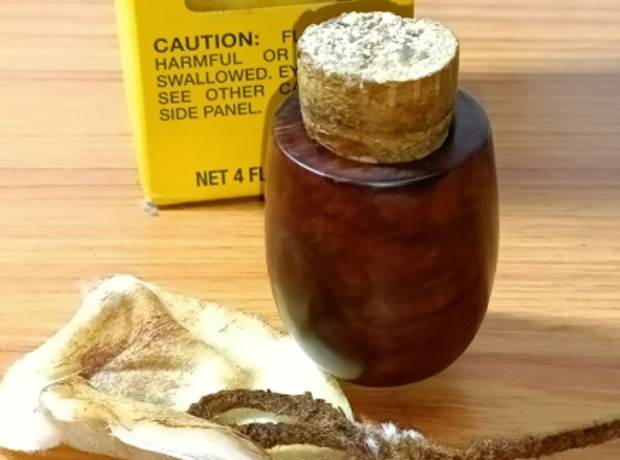
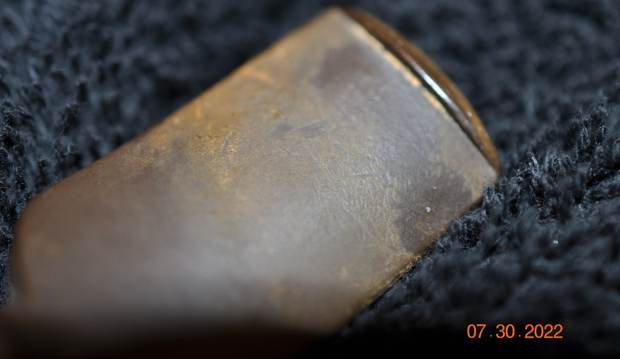 He took photos of the sides and heel of the bowl to show a deep and rugged sandblast that really makes the mix of grain stand out through the grime on the shank and the sides of the bowl. The geometric angles of the bowl shape are really quite stunning and interesting.
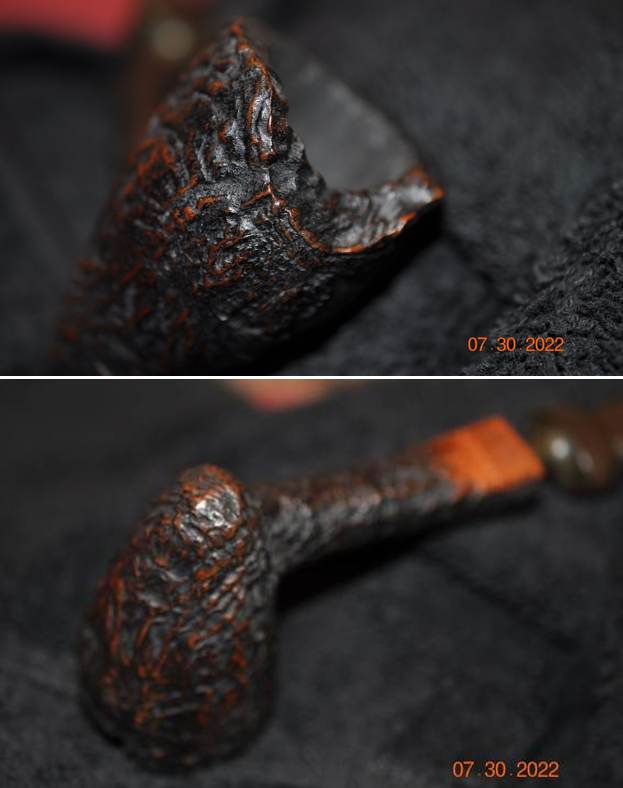
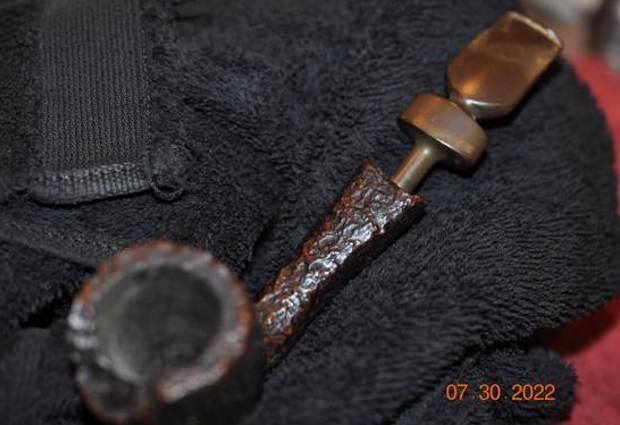
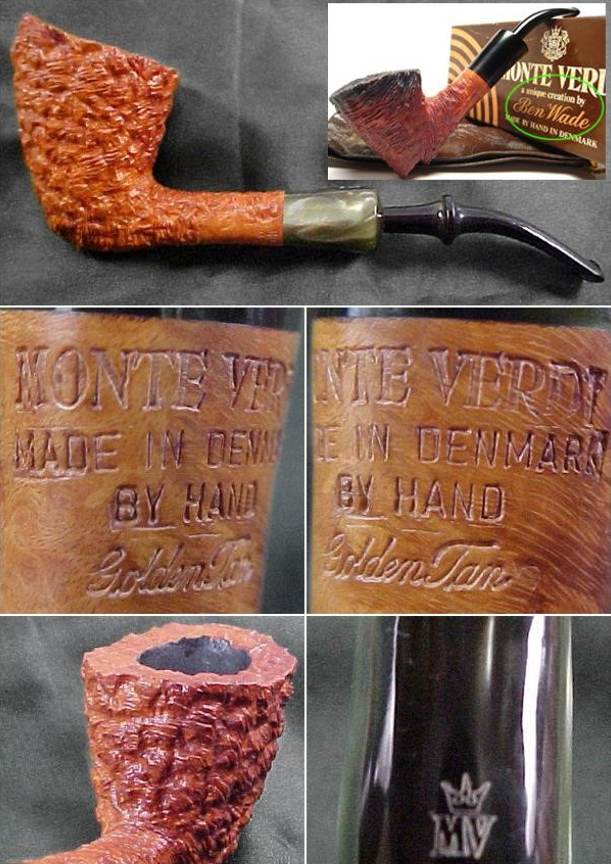
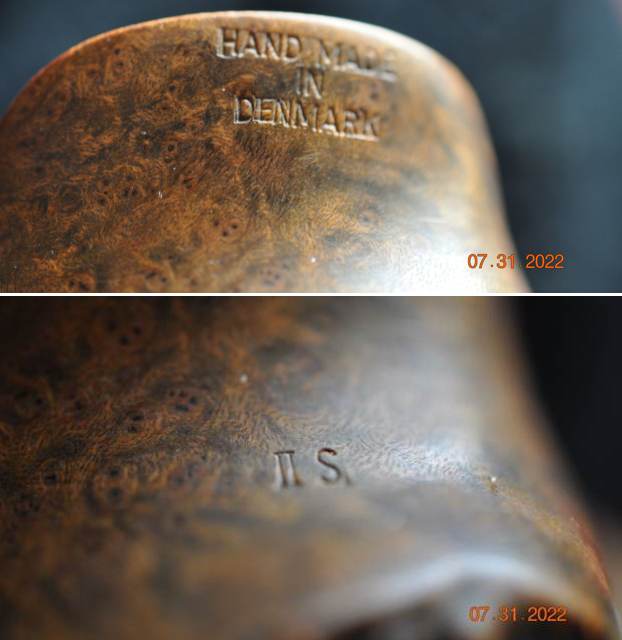
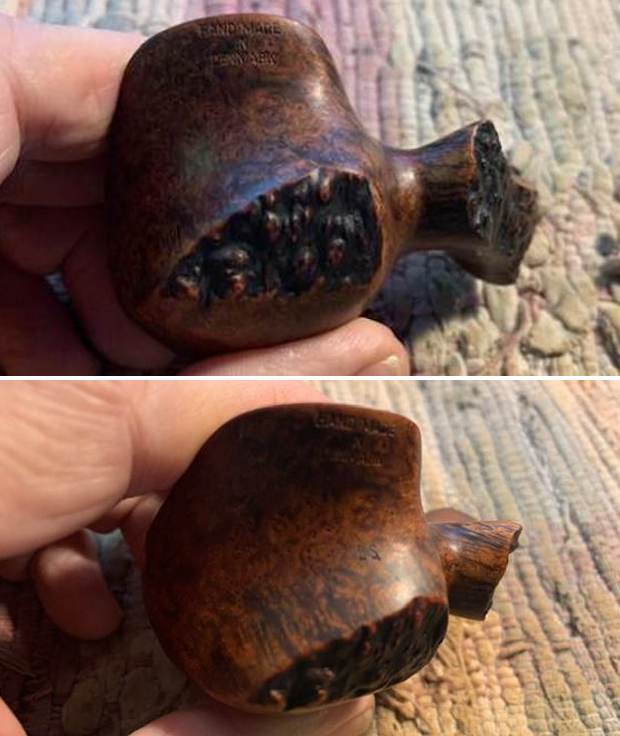
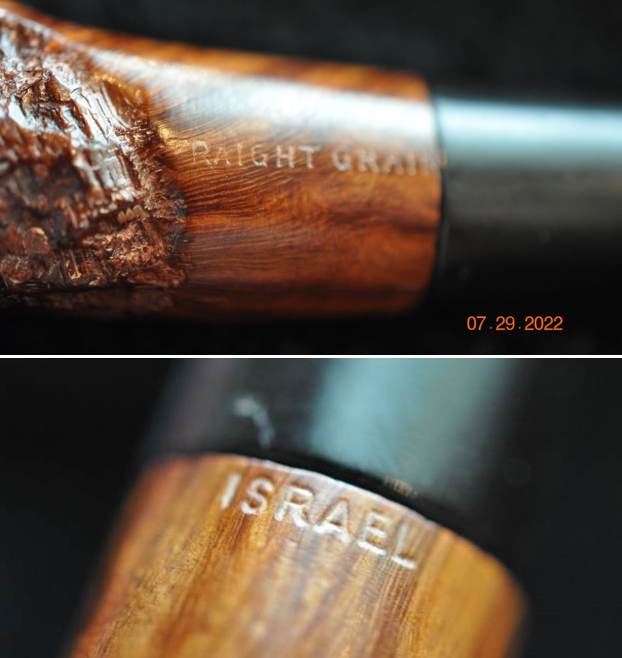
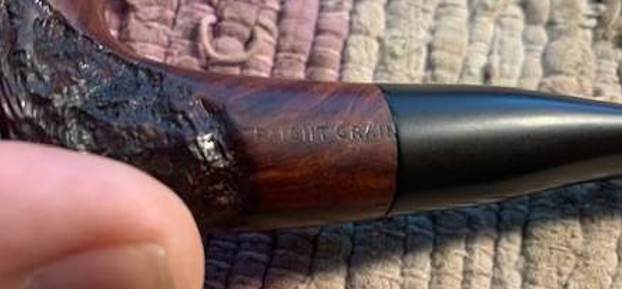
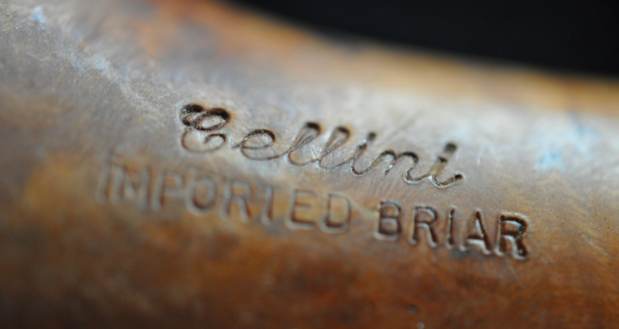
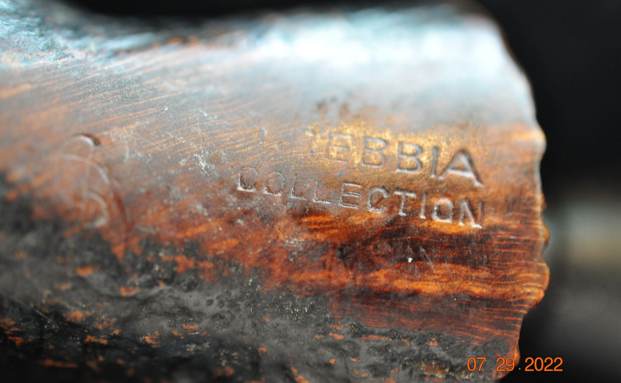
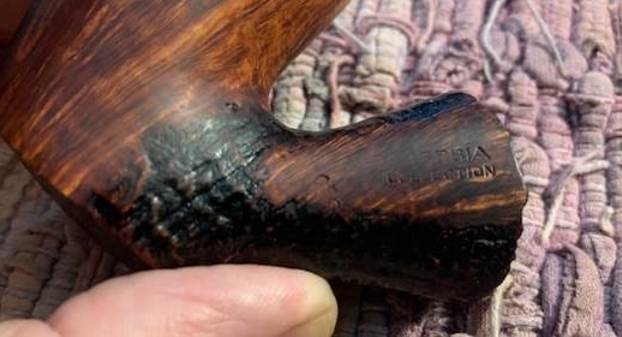
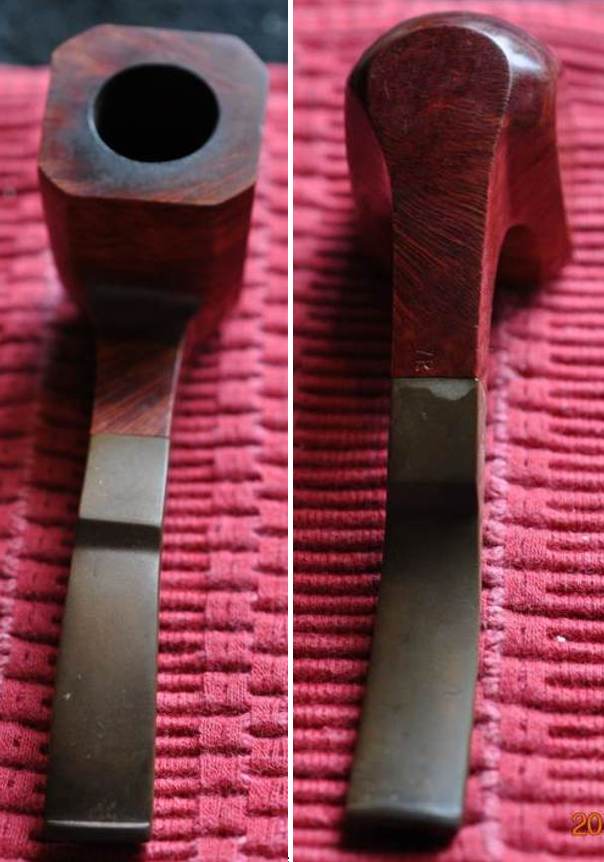
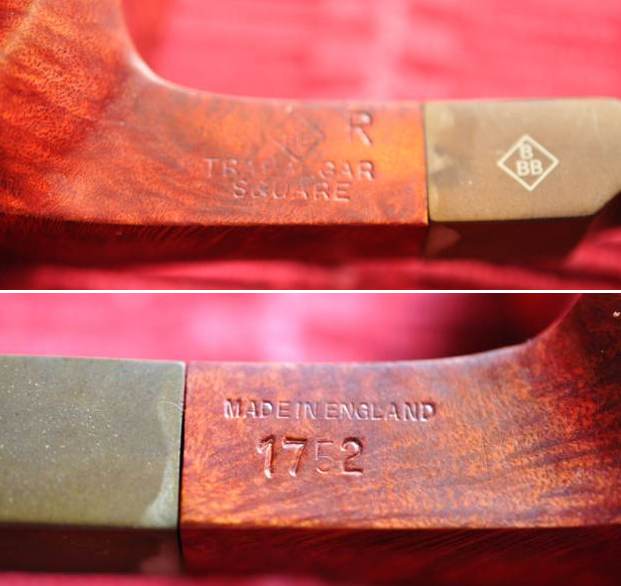
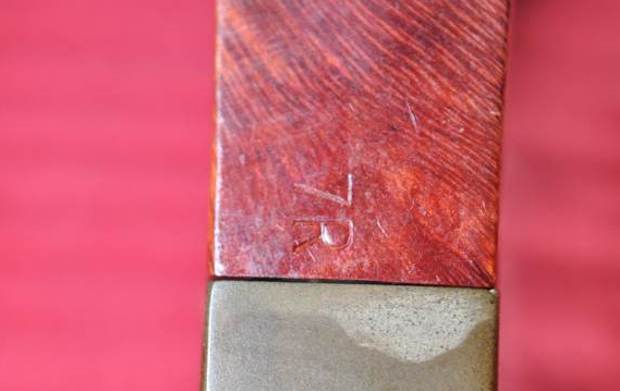
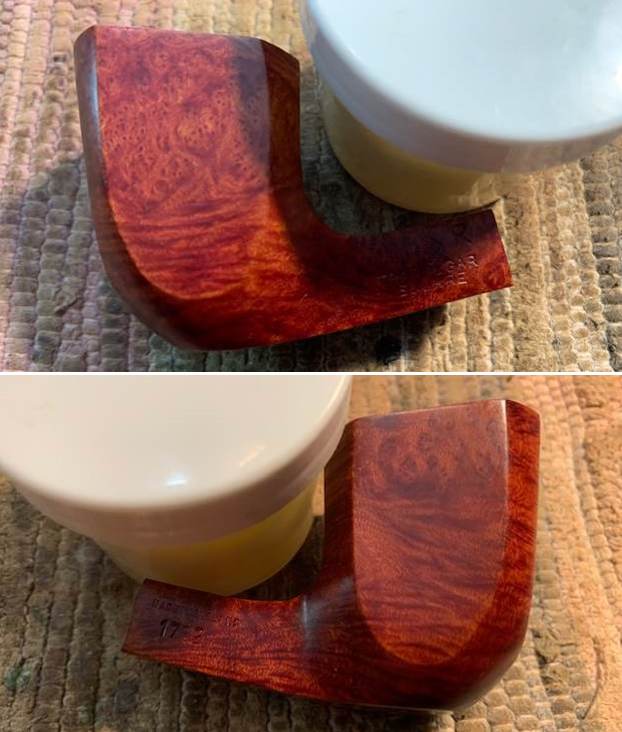
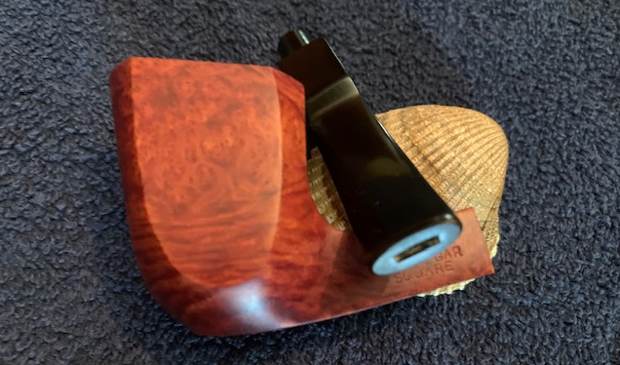
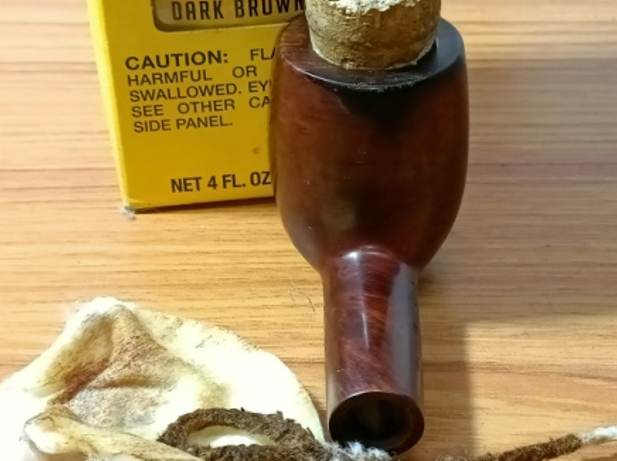
 Jeff took photos of the stamping on the underside of the shank to capture it. It was clear and readable as noted above. You can also see the crack in the underside of the shank that goes through the N in Hand Made and E in Denmark in the stamp.
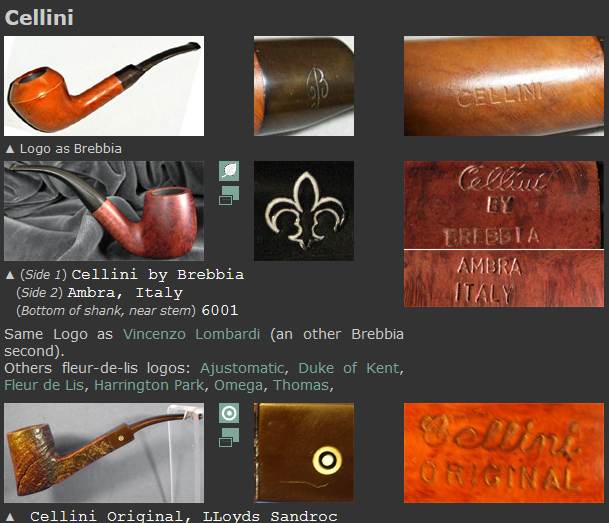
 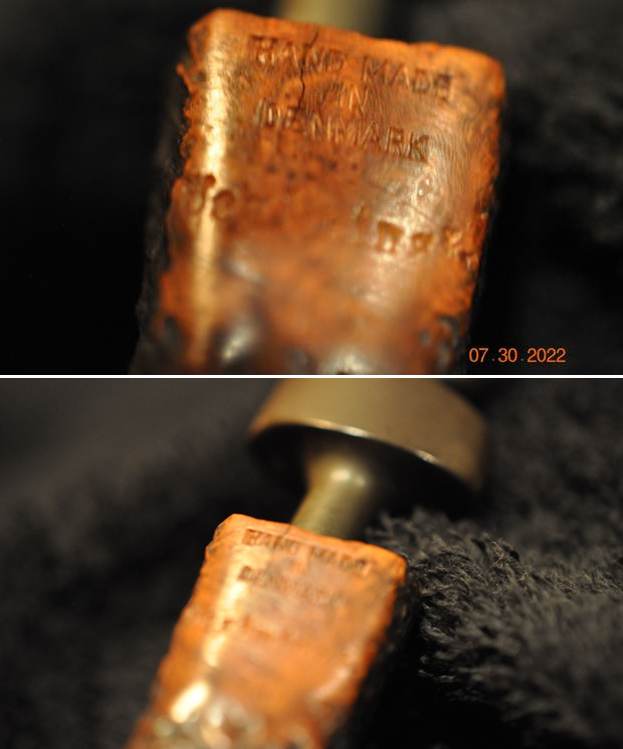 I turned to Pipedia to see what I could find out about the IIS brand (https://pipedia.org/wiki/IIS). The article there was shrouded in mystery and gave several options on the maker. I quote:
Pipes marked with IIS and sometimes IS are reported to be made by Karl Erik, and can be found on many private label pipes, such as the one below, marked “John Crouch” for the Scottish Merchant & Tobacconist out of Alexandria Virginia. Others have reported pipes marked IIS, or perhaps the IS in particular, were seconds made by Preben Holm.
I googled for further information and found a pair of IIS pipes on etsy that were sold with notes by the maker (https://www.etsy.com/listing/504709353/ii-s-hand-made-in-denmark-tobacco-pipes). I found it interesting and quote part of it as follows:
There are some mixed ideas about the II S trademark. Spoke to a few about it and than searched the web. Could have been made by Karl Erik while employed by Preben Holm, or sold in US only pipes or could have been made by Preben Holm. In any case they are a very unique pair. Nice works of art. Here is some info that was shared with me and I will include to help solve any mysteries.
KE’s old grading used numbers ascending from 4 to 1. The entirely hand made one of a kind pieces were stamped “Ekstravagant”. Quite simple.
But then there are the II S stamped pipes! (And furthermore seen so far II SM, I S, I M and I B.) Three fairy tales, often told:
- II S stands for the initials of a pipe maker who worked for Preben Holm before he changed to KE. (Karl Erik)
- II S pipes are a second brand of KE. Nonsense comparing the quality of II S and normal KE pipes!
- II S was used when there was no space for stampings otherwise.
I believe that the pipe was made by Preben Holm during the height of his work on pipes. I wonder if it is possible that they were made in the period before he changed from stamping them with his name and to Ben Wade due to issues with his importer in the US. I am not sure but I think that works well in terms of the data.
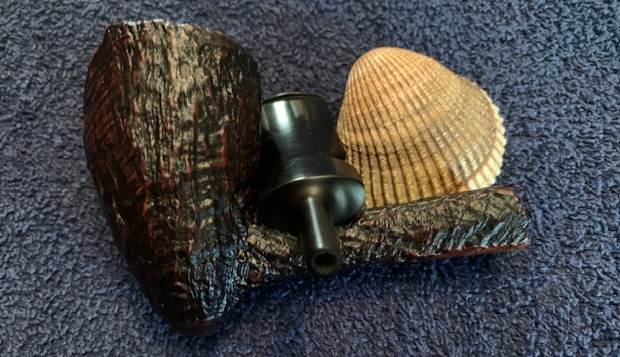
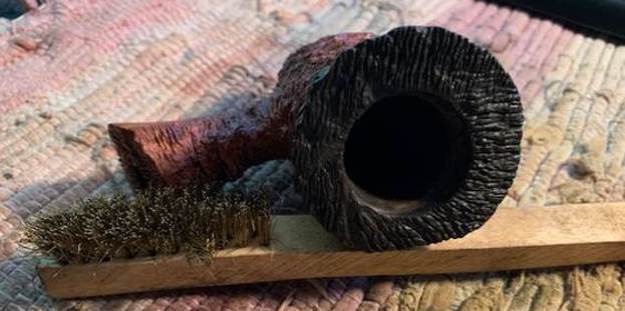
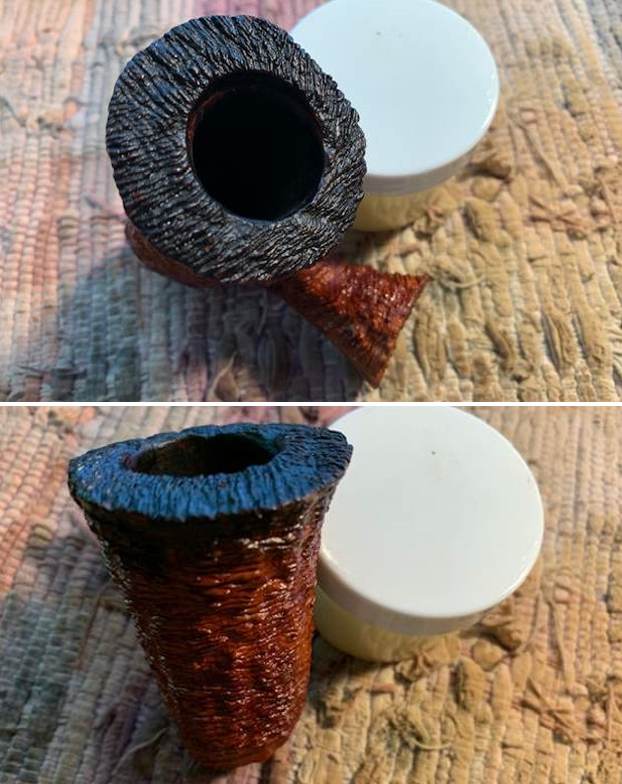
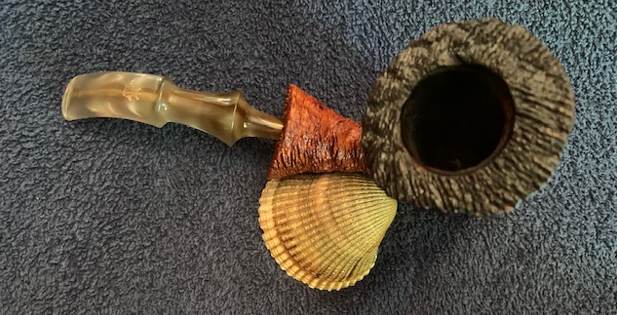
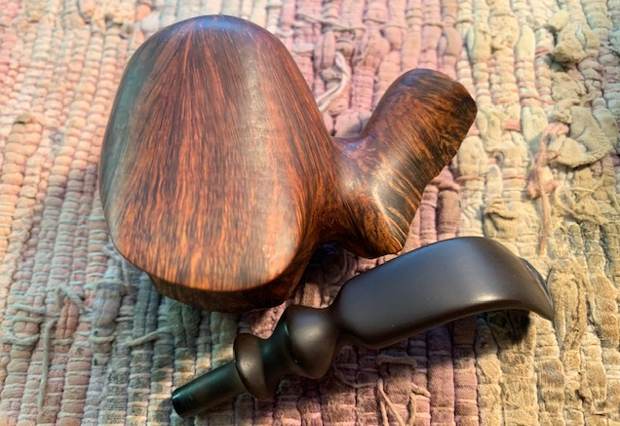
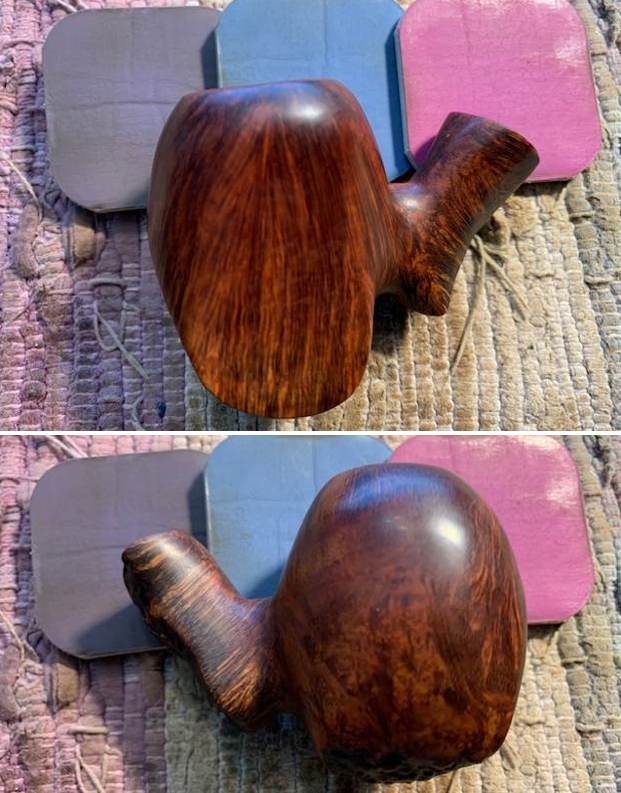
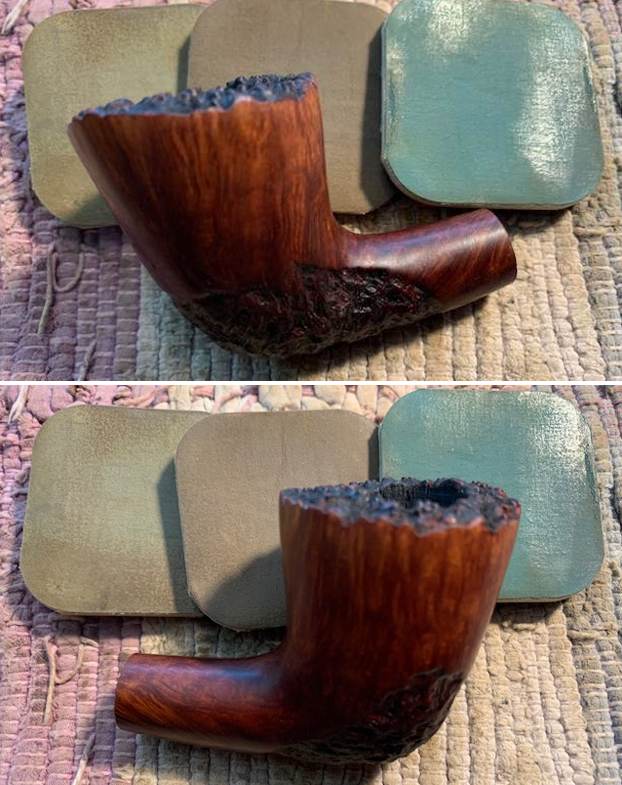
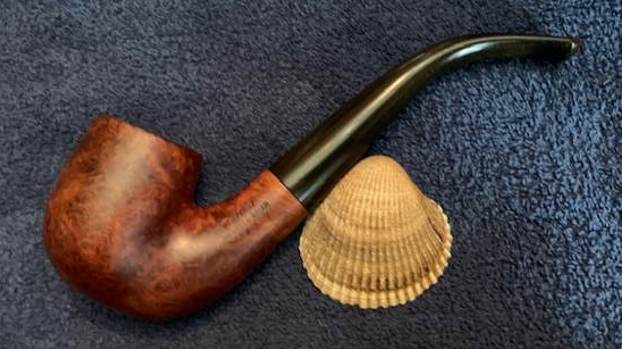
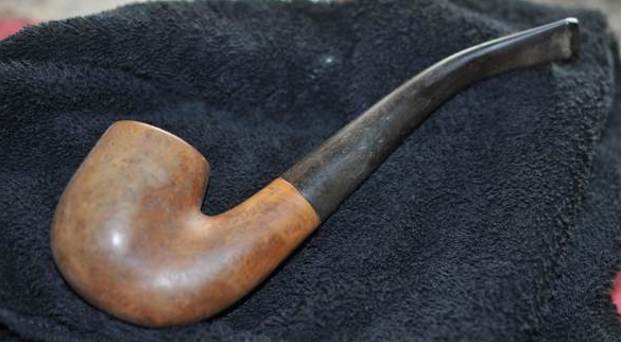
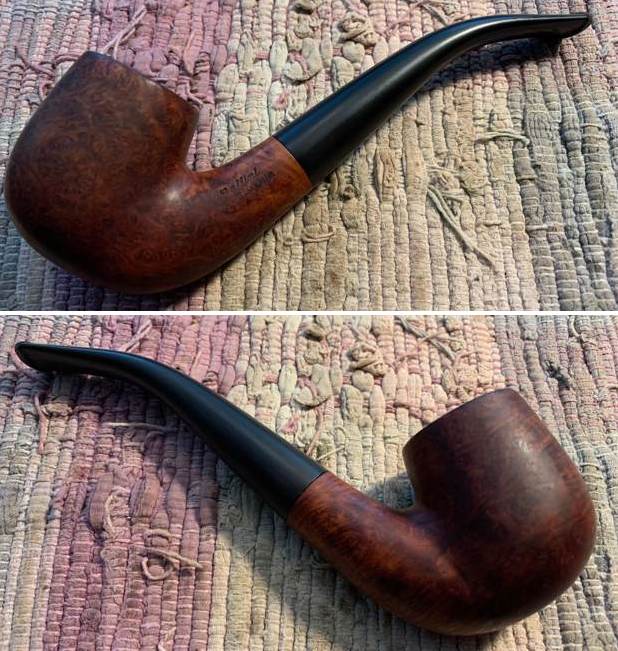
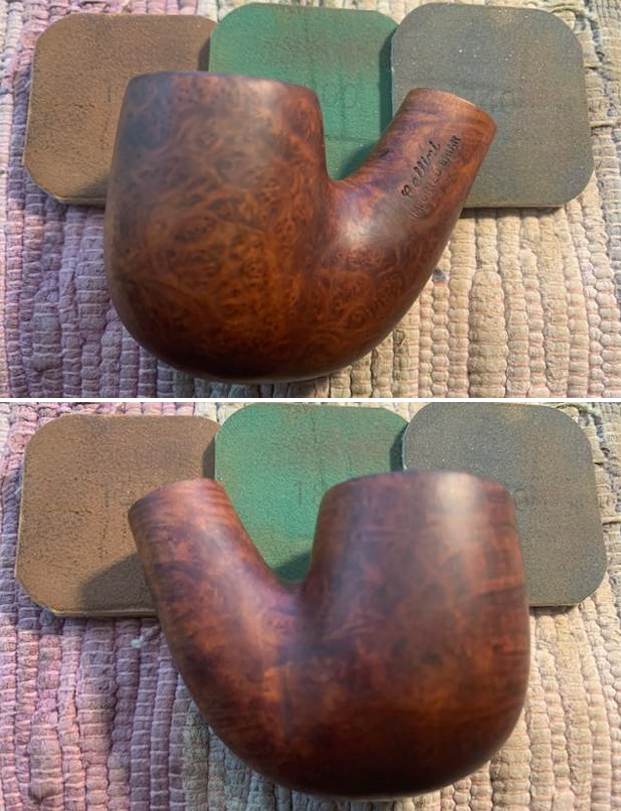
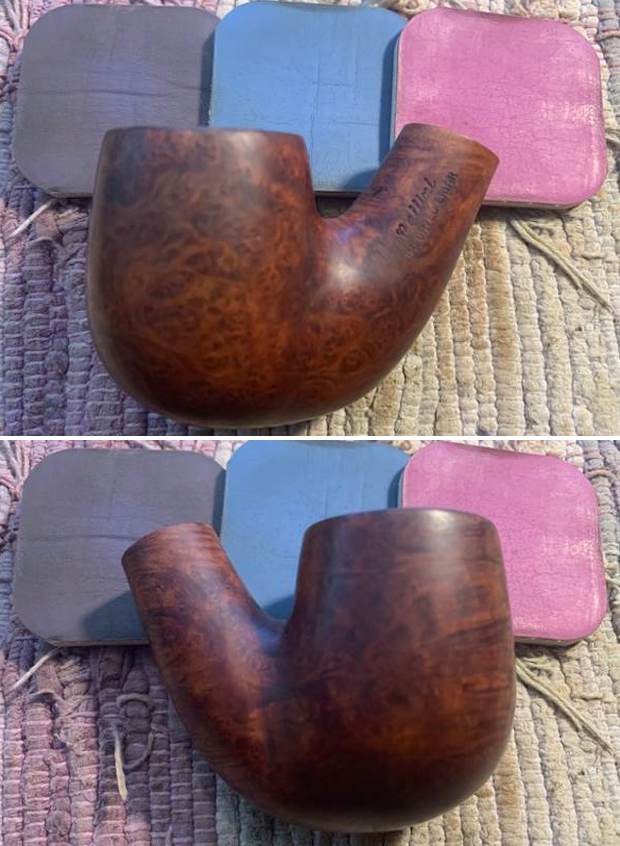
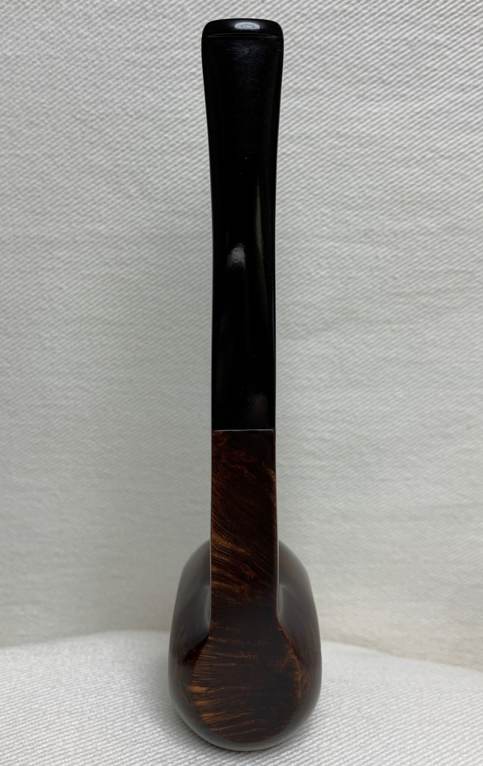
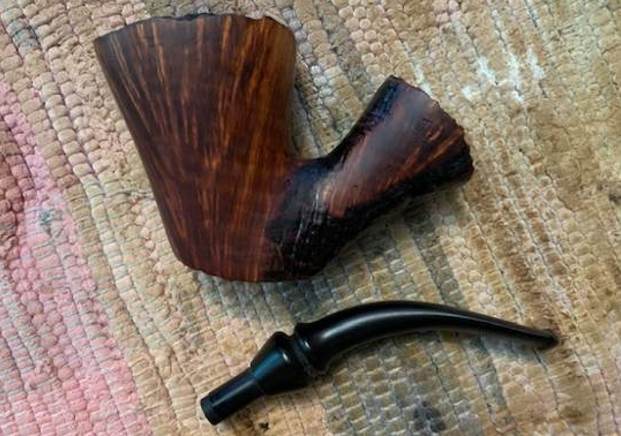
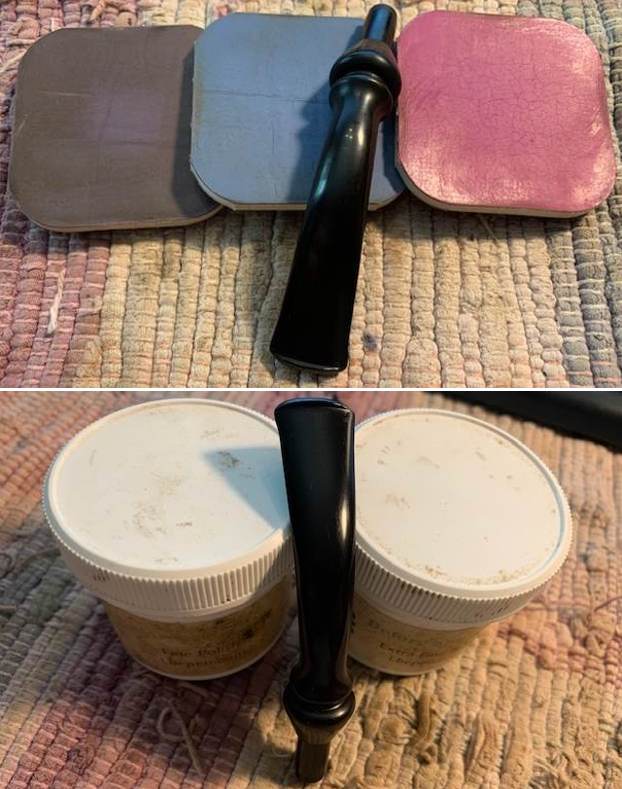
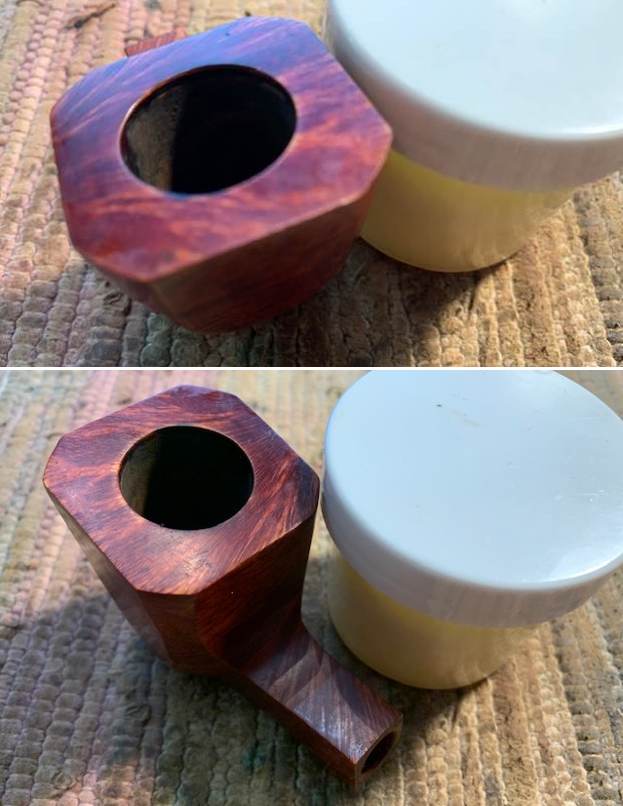
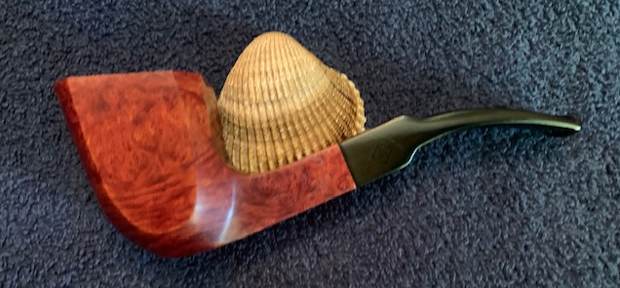
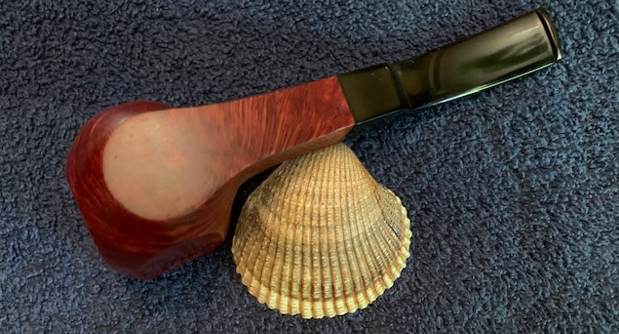
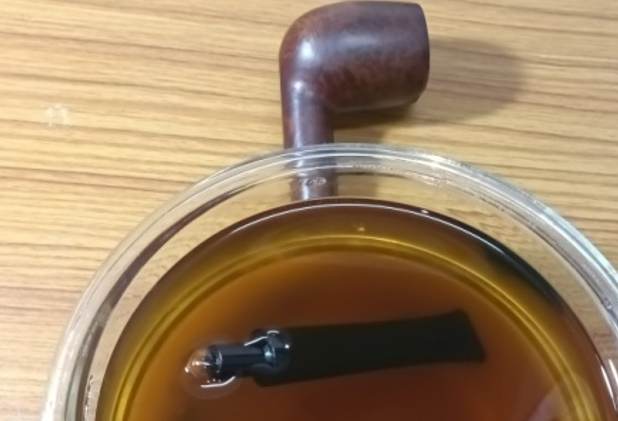
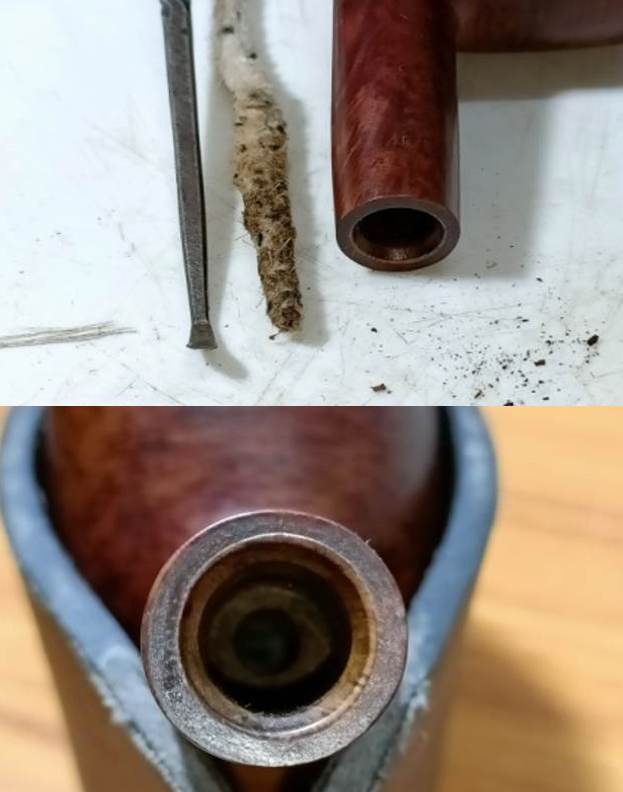
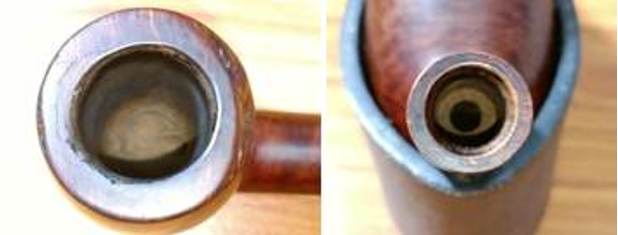
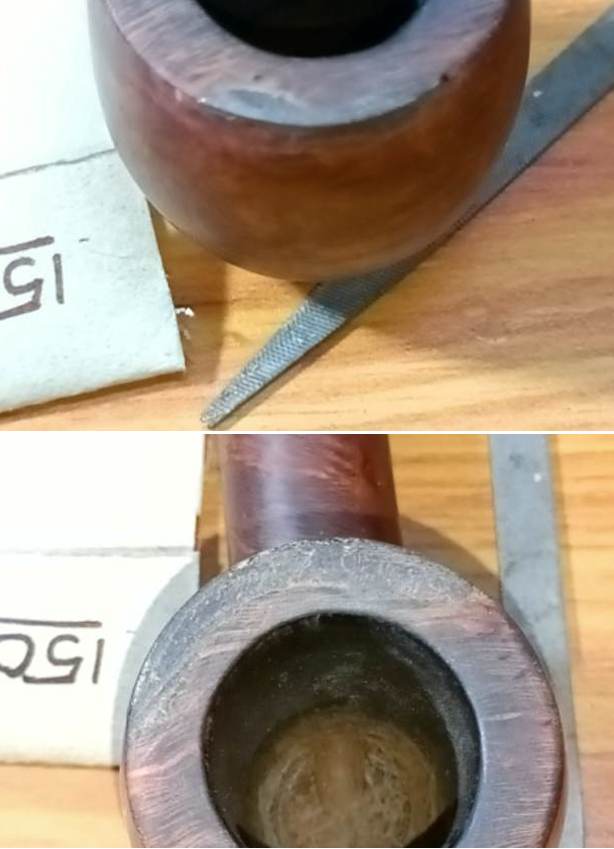
When I received it from Jeff this past week it did not look like the same pipe. It was clean and the finish had life. He reamed it with a PipNet pipe reamer and got rid of the cake. He cleaned up the reaming with a Savinelli Fitsall Pipe Knife so that we could see the walls of the bowl and assess for damage. It was in good condition. He cleaned the internals of the shank and stem with cotton swabs, pipe cleaners and alcohol. He scrubbed the exterior with undiluted Murphy’s Oil Soap and a tooth brush. He rinsed the pipe under warm water. He dried it off with a cloth and then let it air dry. He removed the Softee Bit and then scrubbed the stem with Soft Scrub and soaked it in Briarville’s Stem Deoxidizer. He rinsed it with warm water and dried it off with a soft cloth. It came out looking very good. The finish on the bowl and the rim top cleaned up nicely. I took pictures of the pipe to show how it looked when I unpacked it. 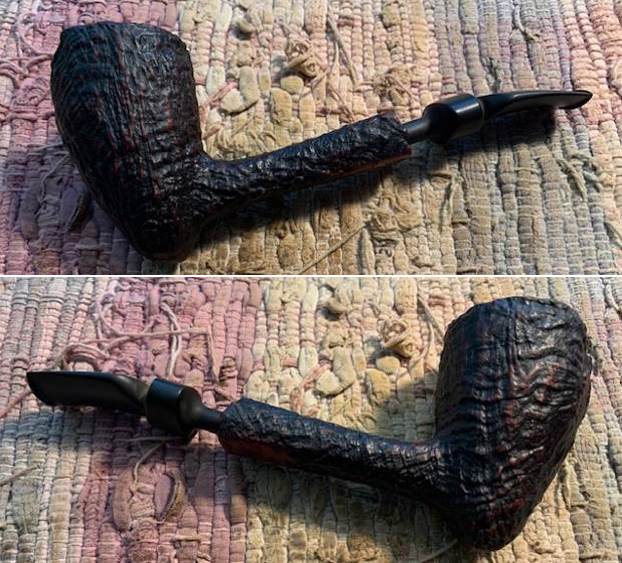
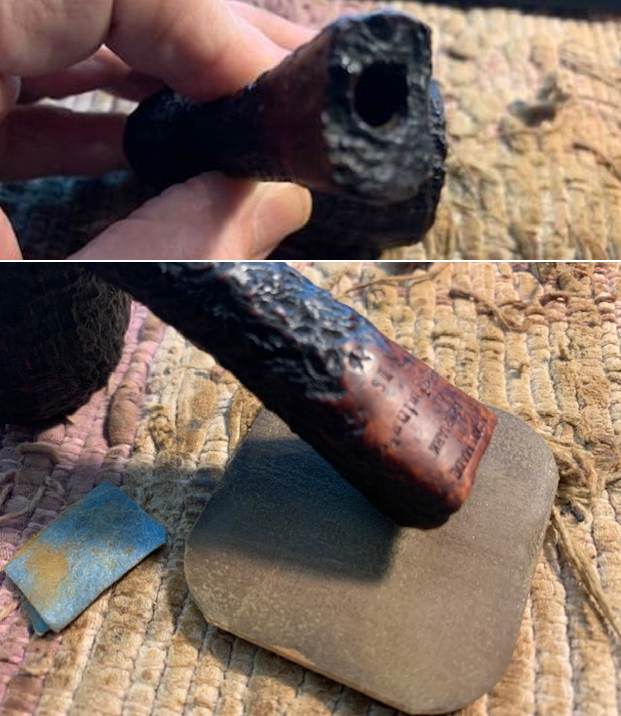
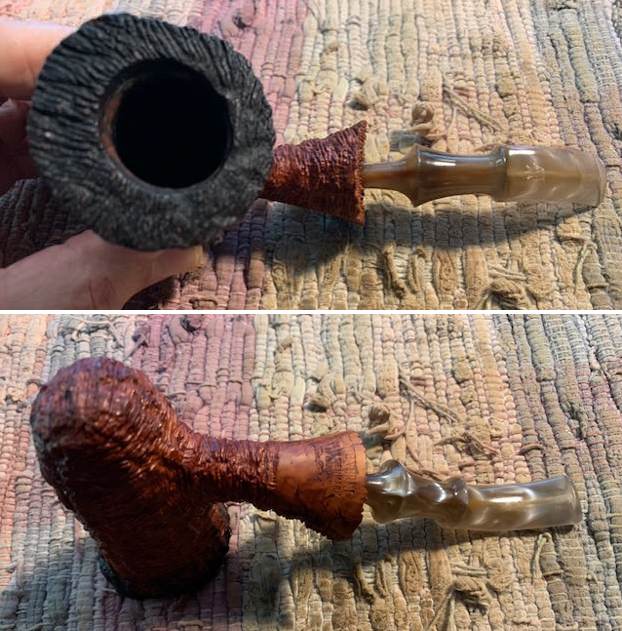
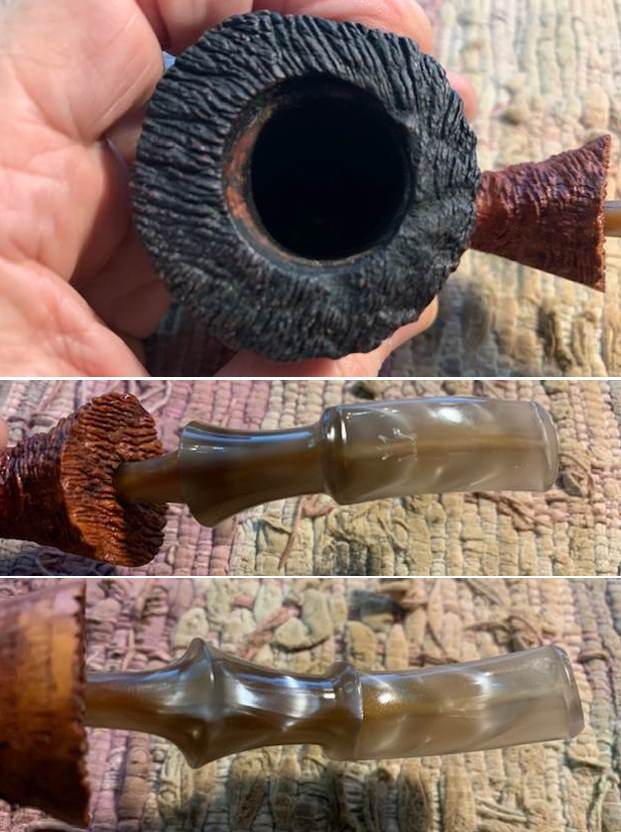
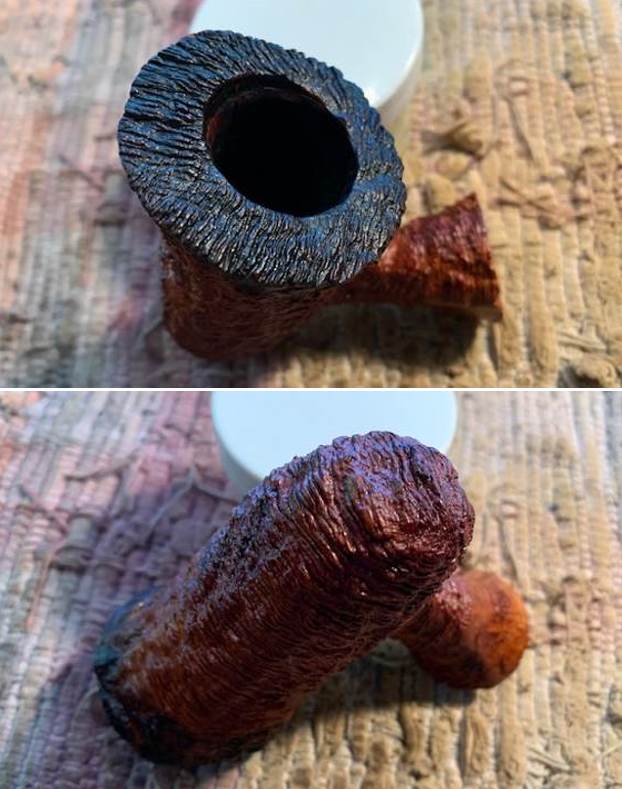
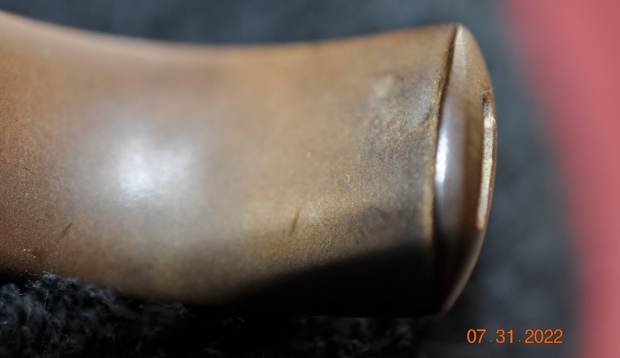
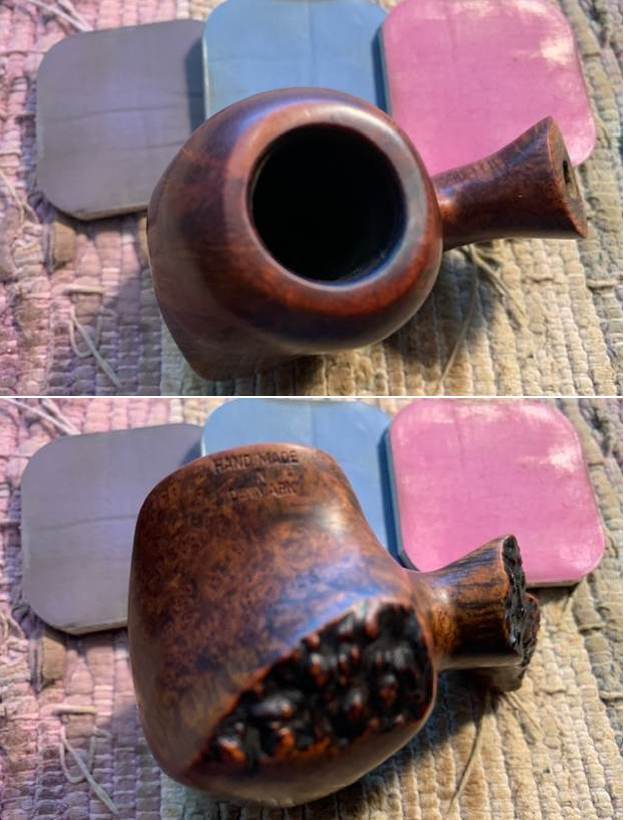
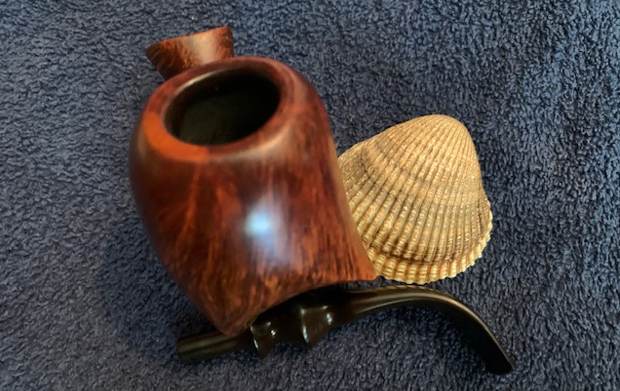
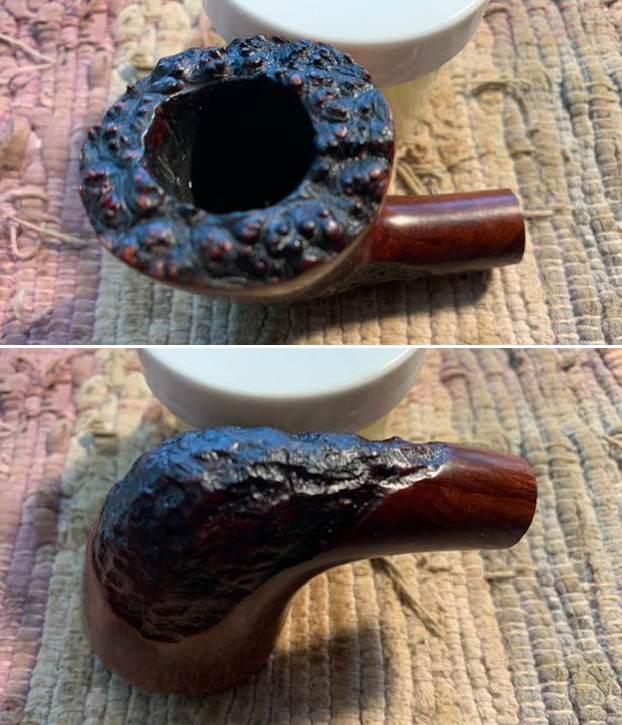
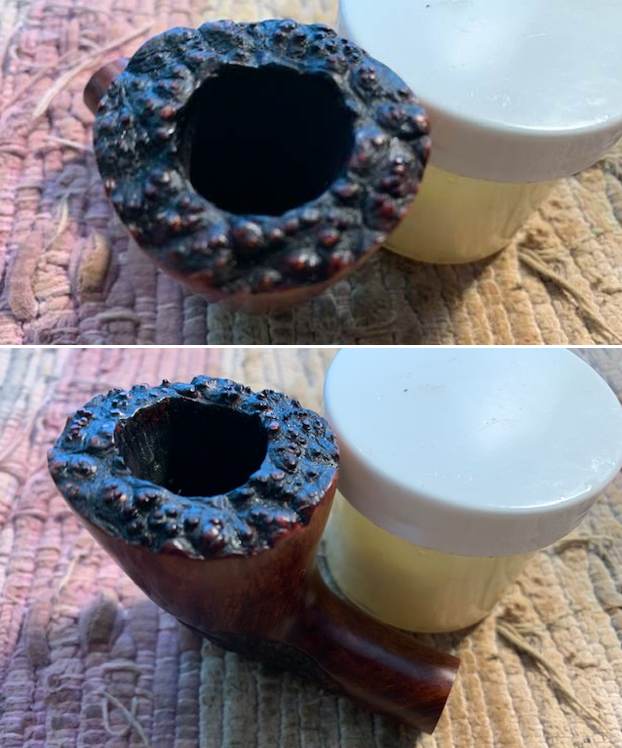
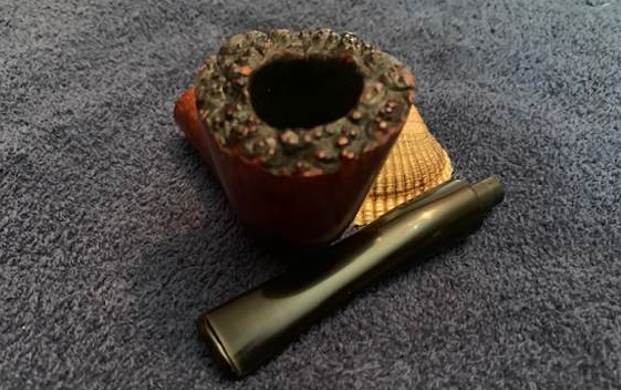
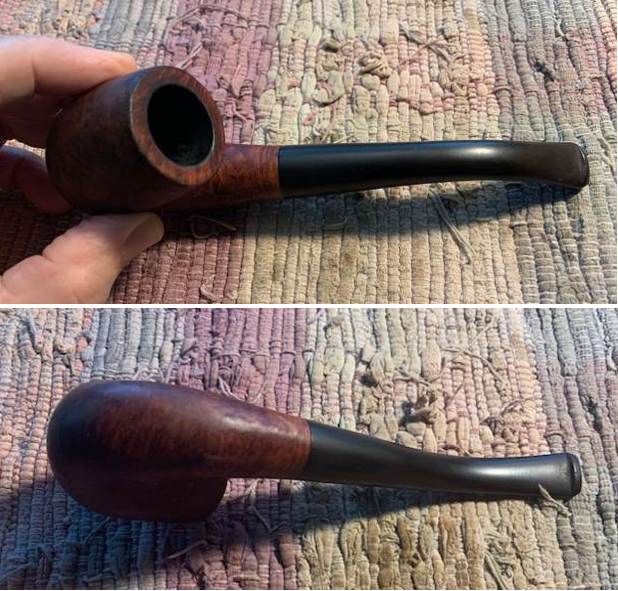
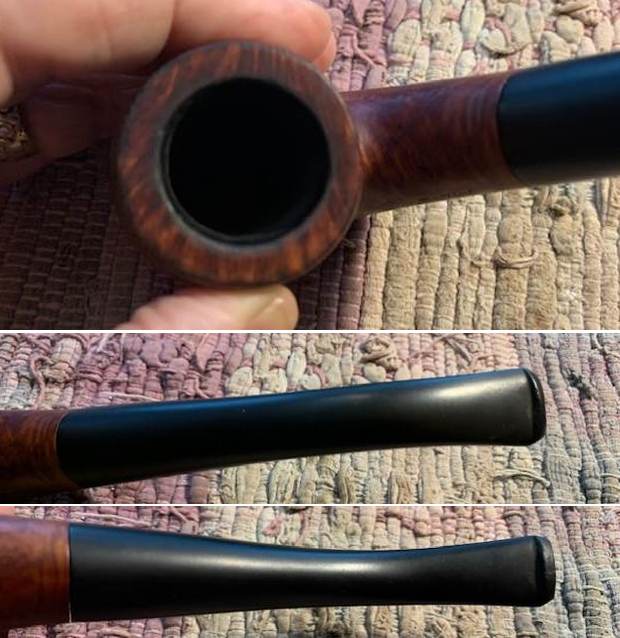
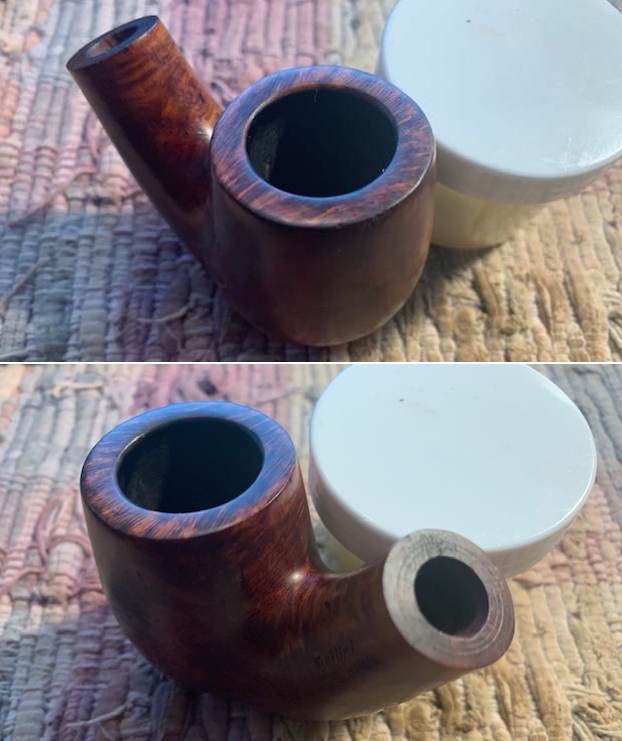
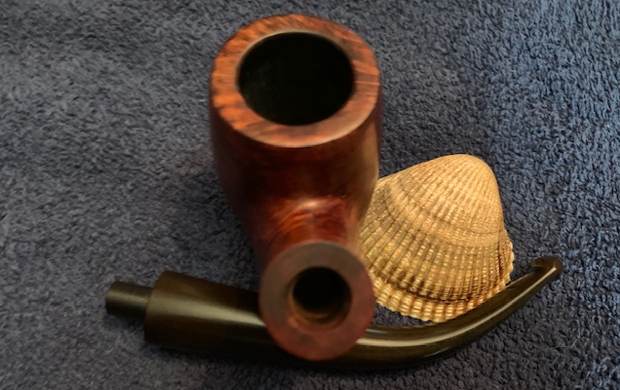
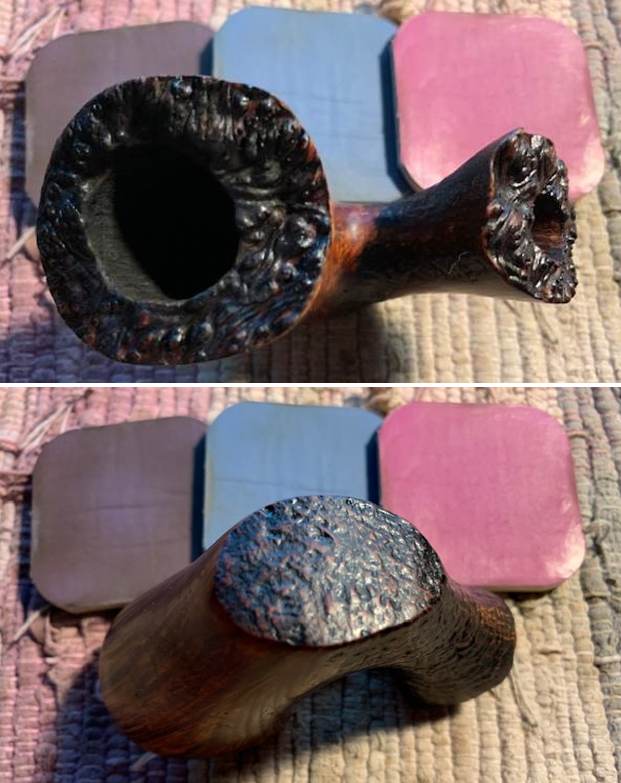
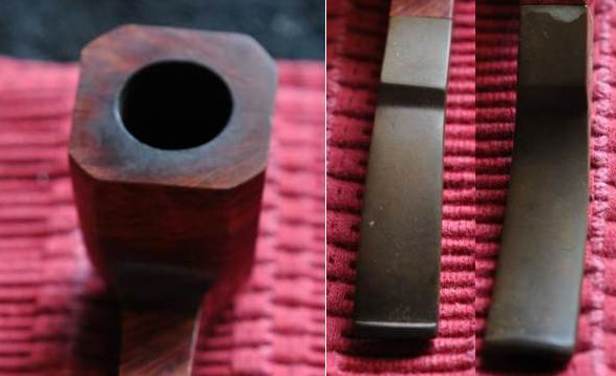
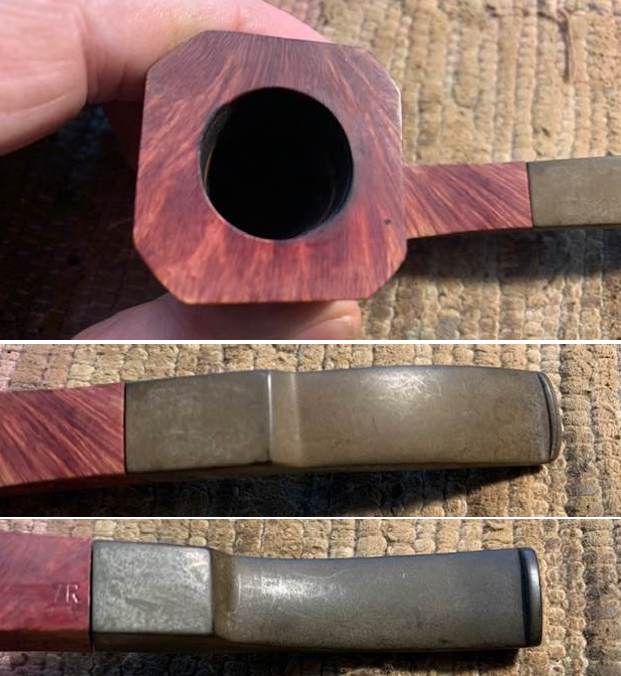
 I took some photos of the rim top and stem to show the condition of them both when the pipe arrived. Overall it looked good. The oxidation on the stem had come off very well and the tooth marks and scratches in the finish were visible.
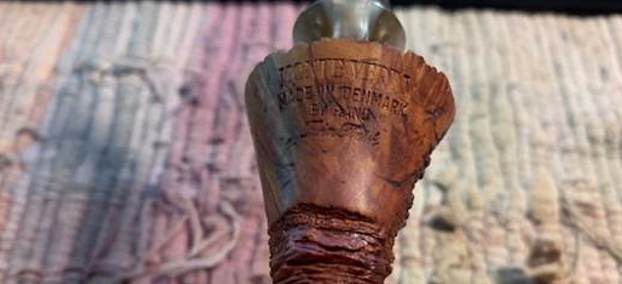
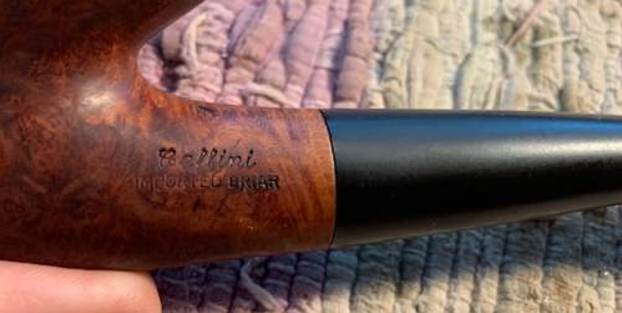
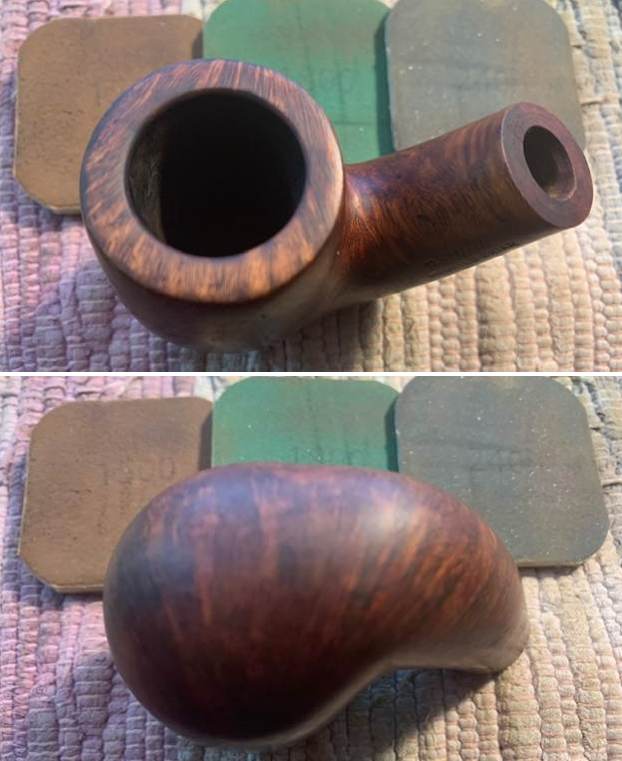
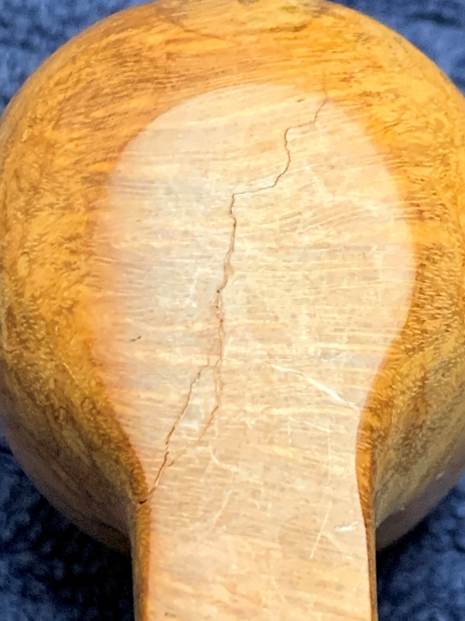
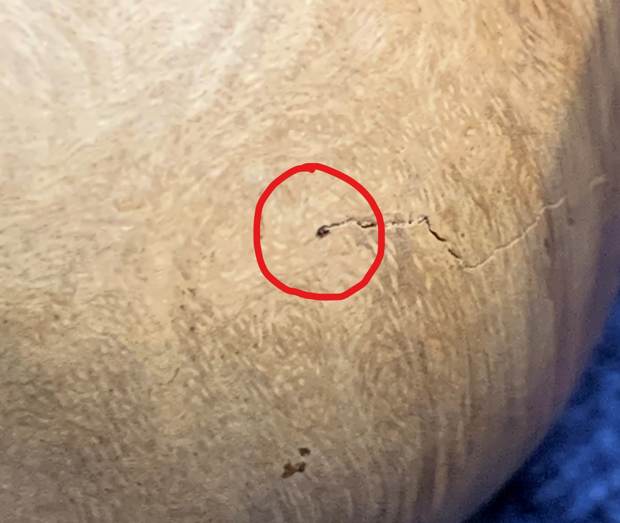
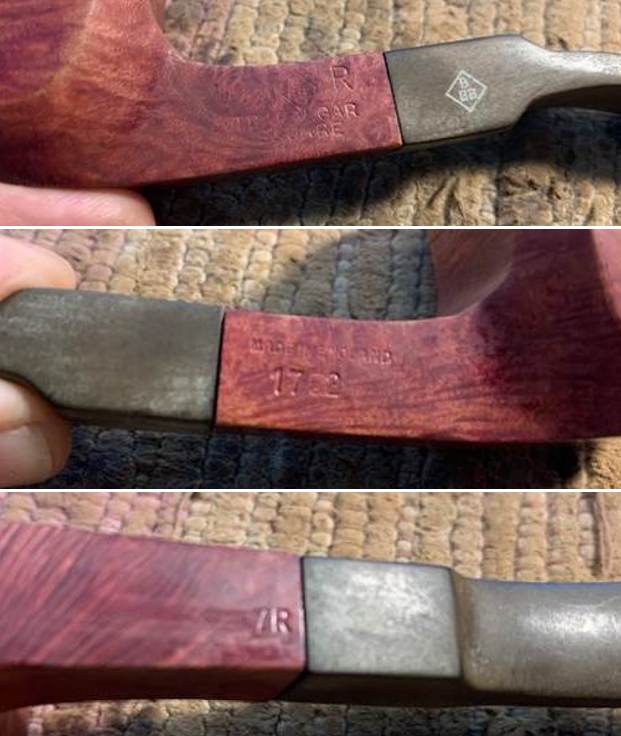
 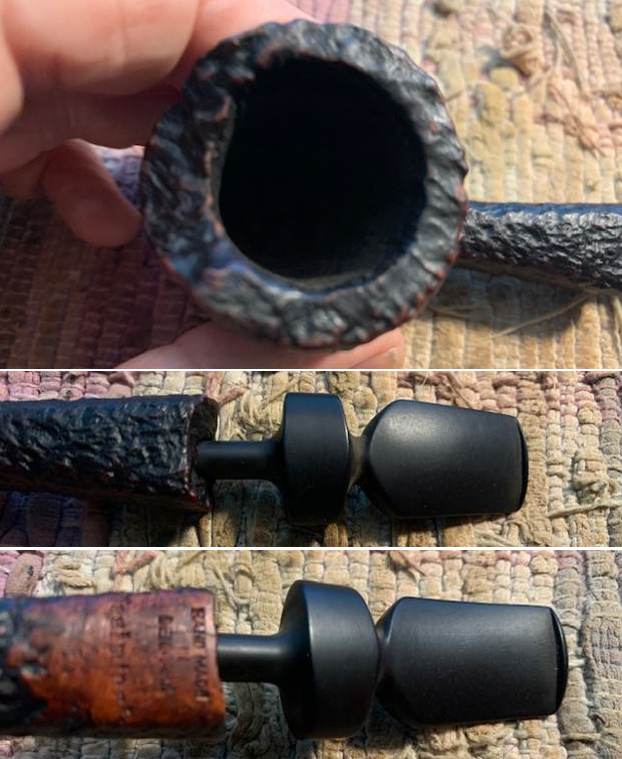 I took a photo of the stamping on the underside of the shank. It was clear and readable as noted above. I have drawn a red circle around the crack in the shank to help identify it.
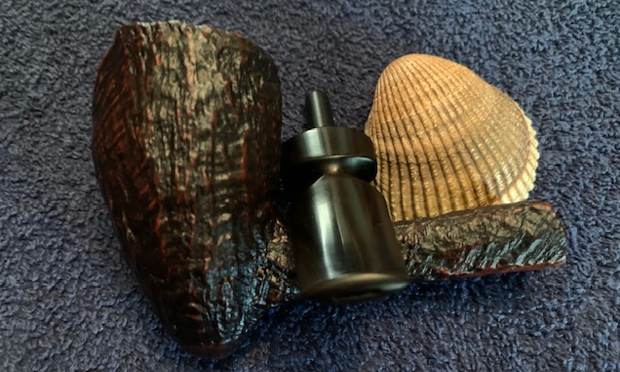
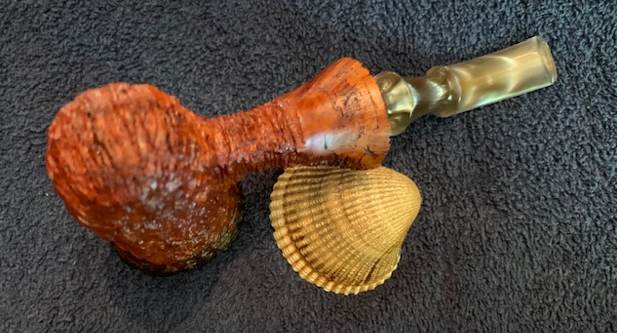
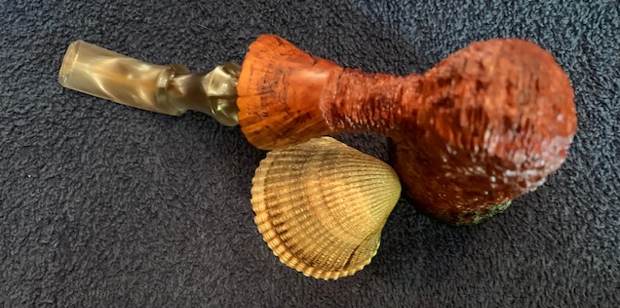
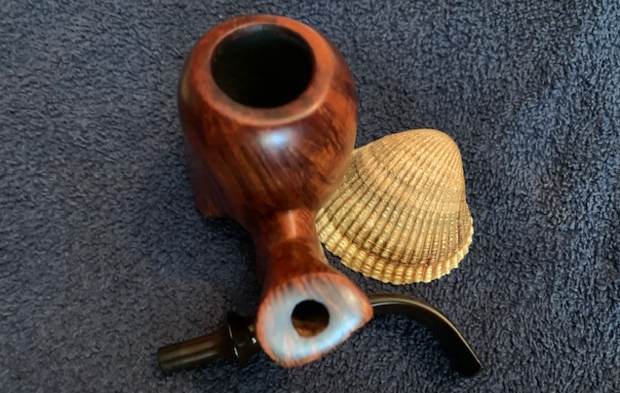
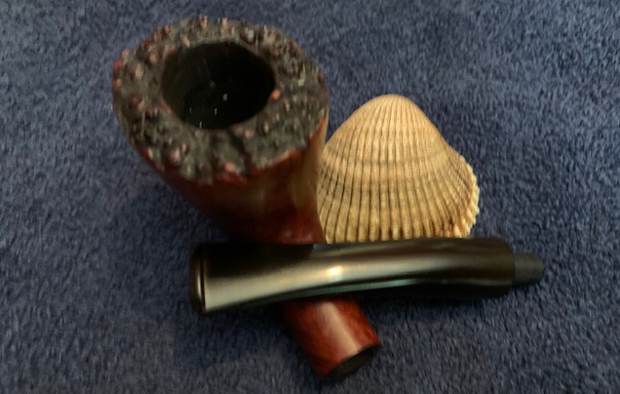
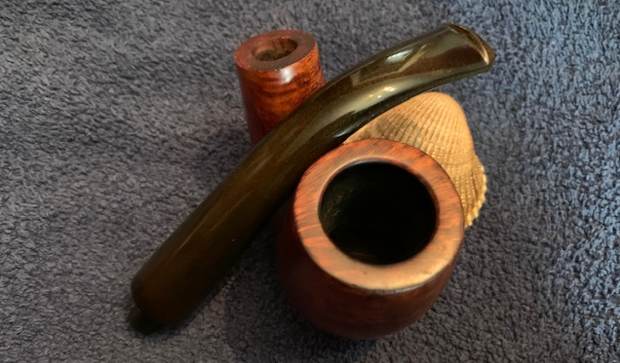
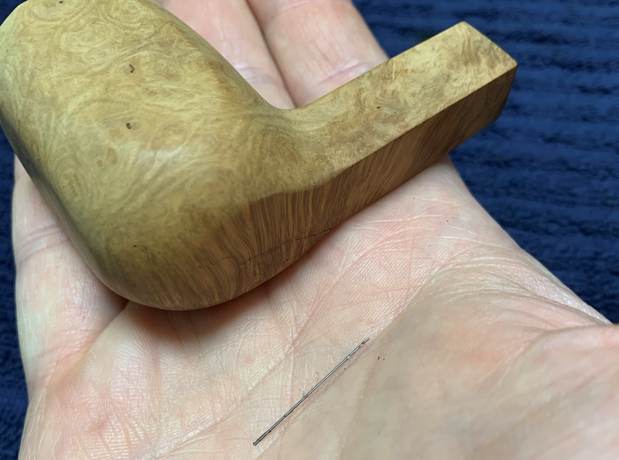
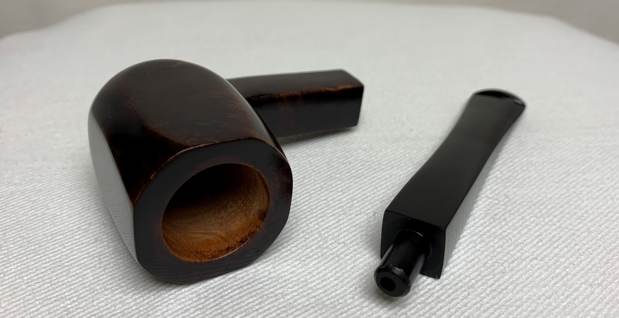
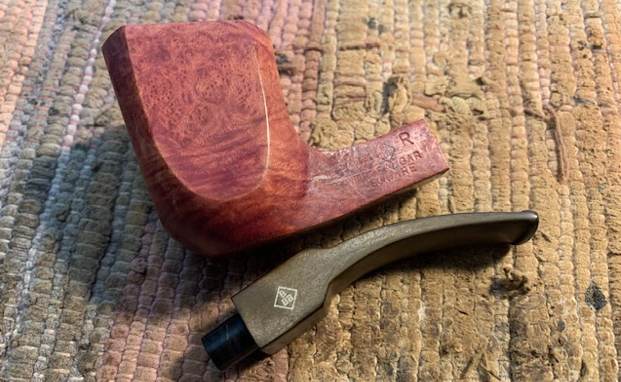
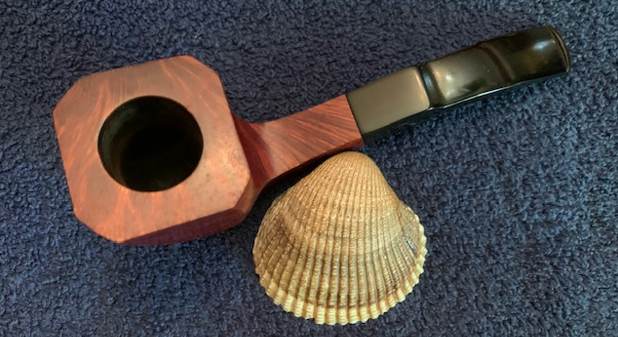
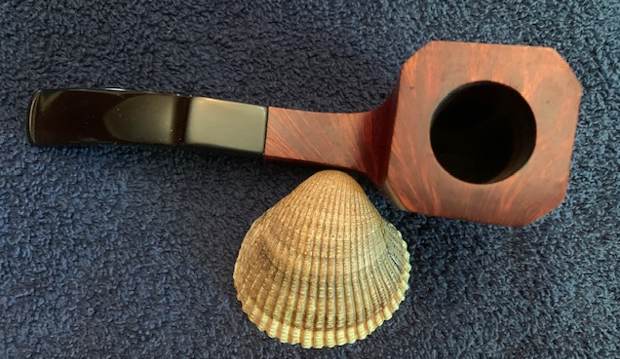
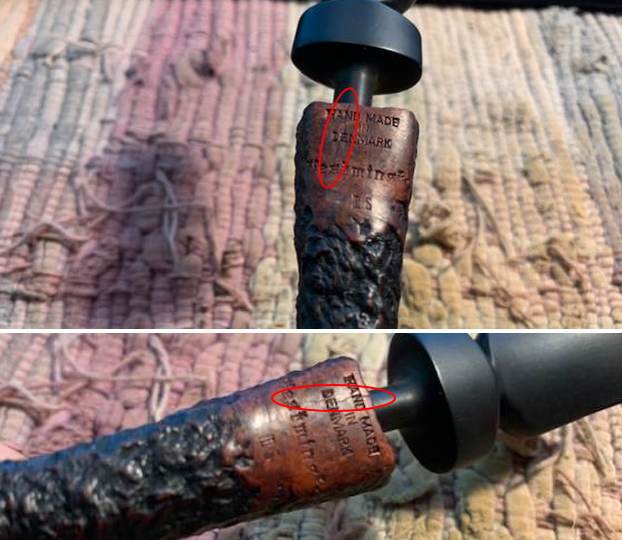 I removed the stem from the shank and took a photo of the appearance of the parts. You can see how large the pipe is in the photos.
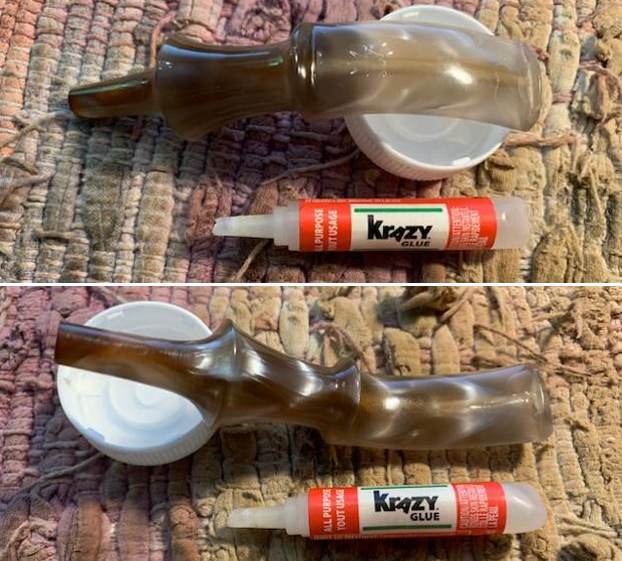
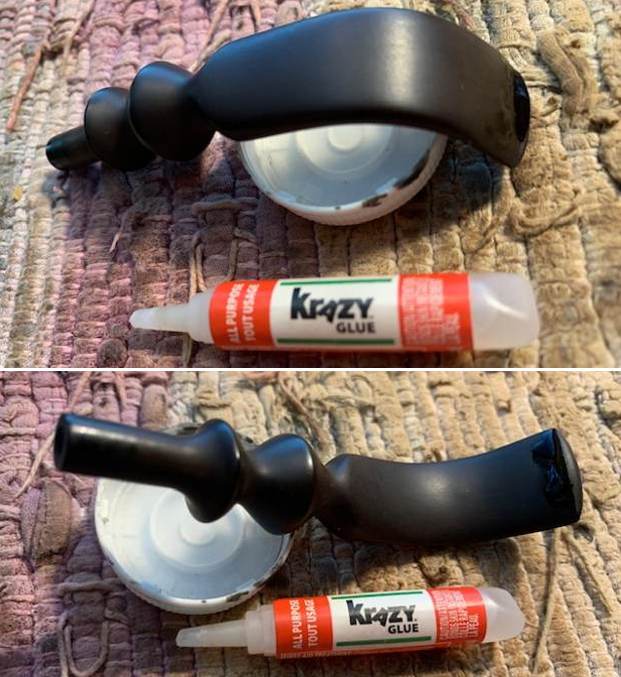
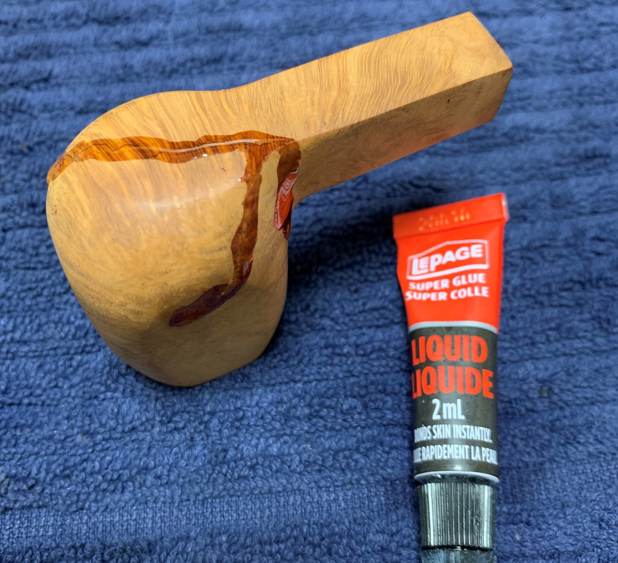
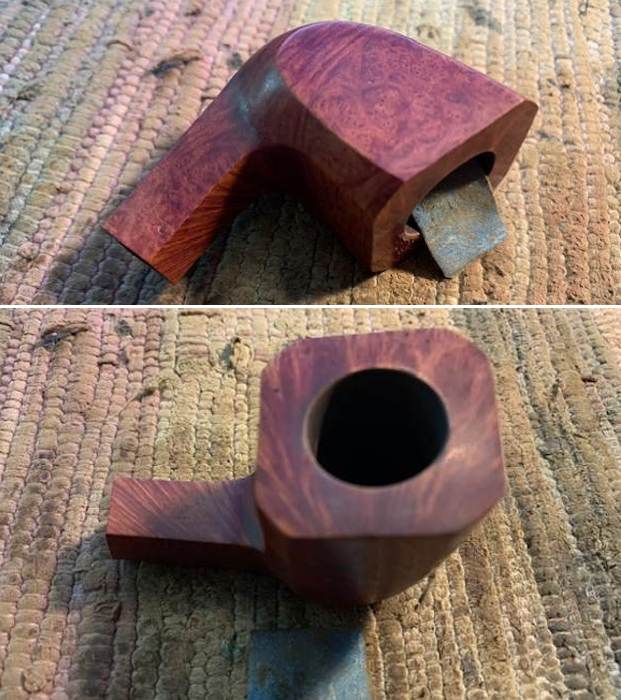
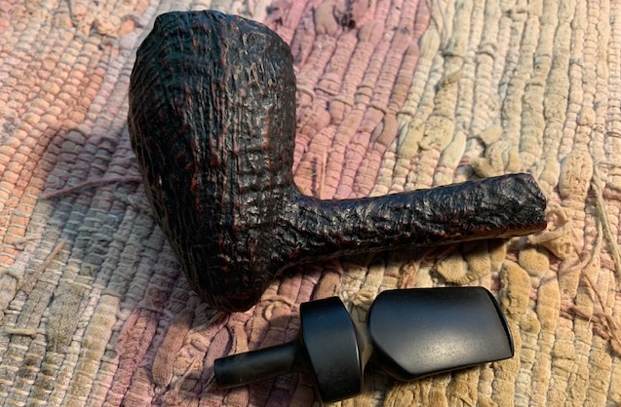 I started my work on this pipe by dealing with the crack in the underside of the shank. It is a tough one in terms of placement and not being able to band it as I normally would. I opened the crack slightly and spread some thin, clear CA glue into the crack in the shank and squeezed the crack together until the glue hardened. I carefully sanded off the repair with 220 grit sandpaper and then polished it with 3200-3600 grit micromesh to blend it in. It looked very good. I reduced the diameter of the tenon to relieve any pressure that it might put on the mortise when inserted.
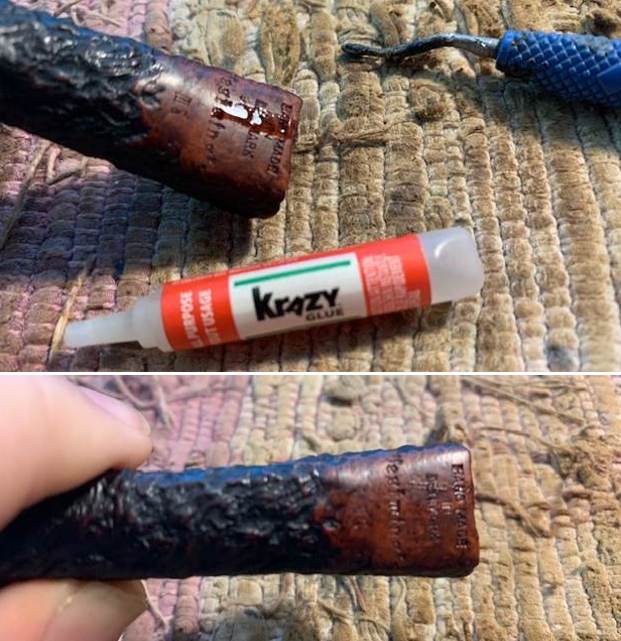
 I know that a solid repair would have been the insertion of a tube in the shank – brass/stainless or Delrin. In the future that may need to be done but for now the repair I did actually looks very good and the reduction of the tenon a slight bit reduces the pressure it puts on the shank. Time will tell for sure.
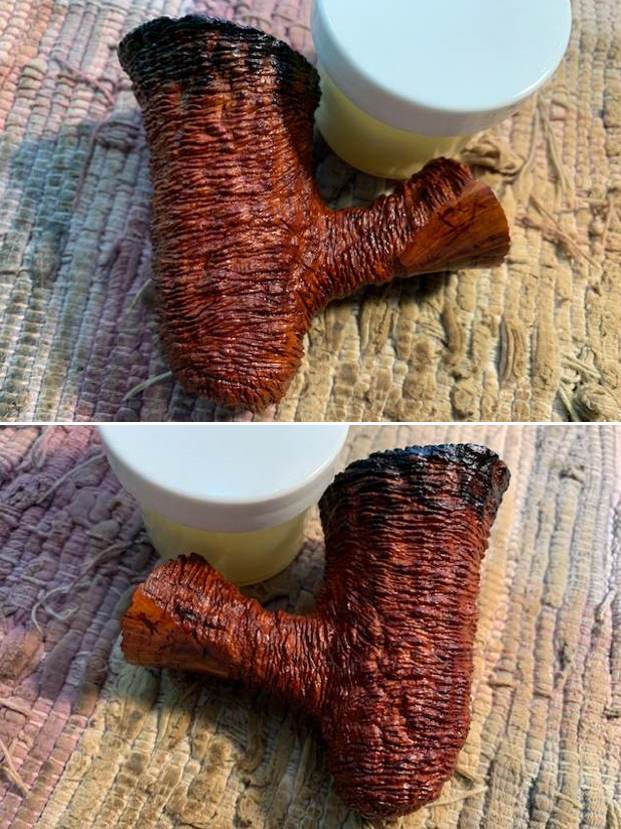
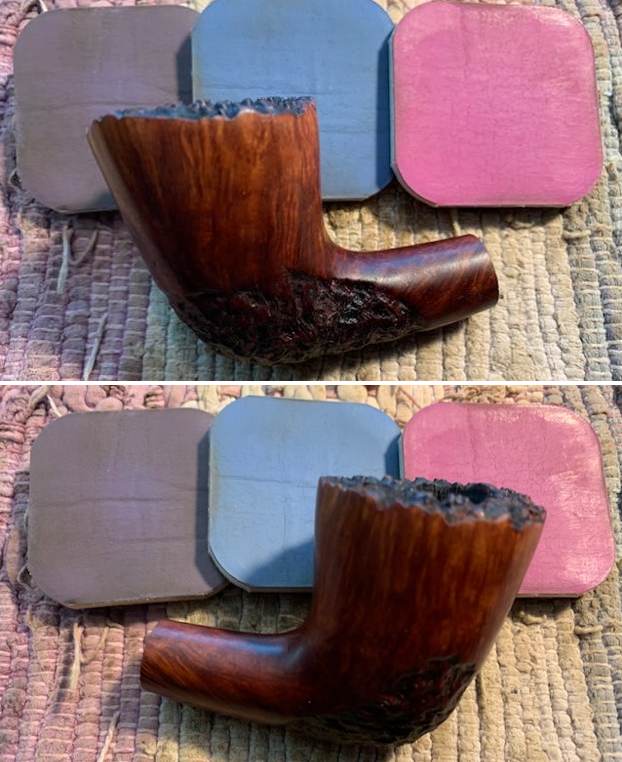
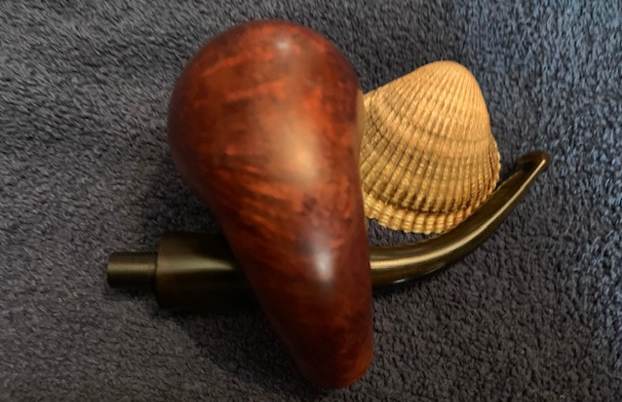
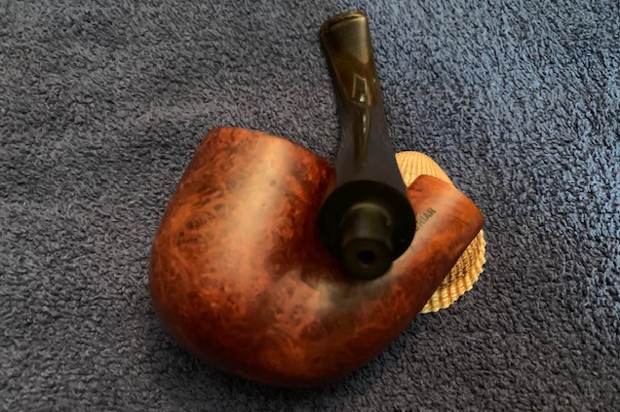
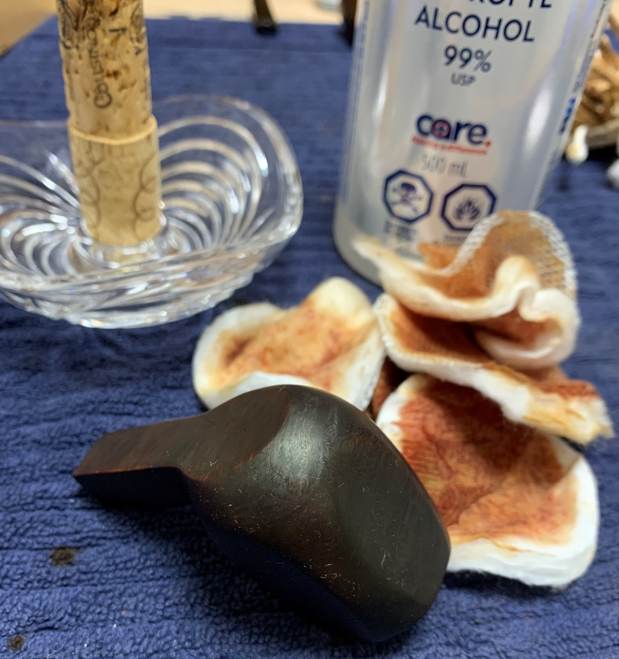
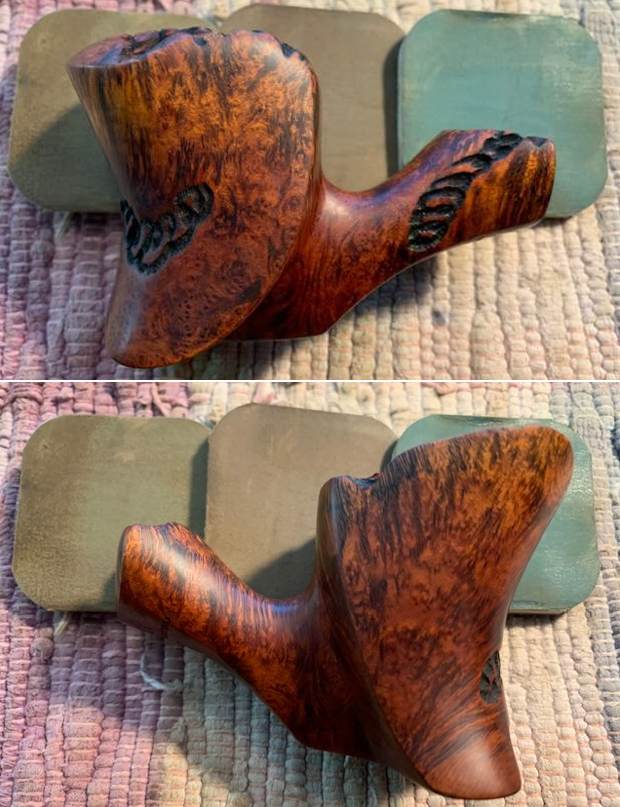
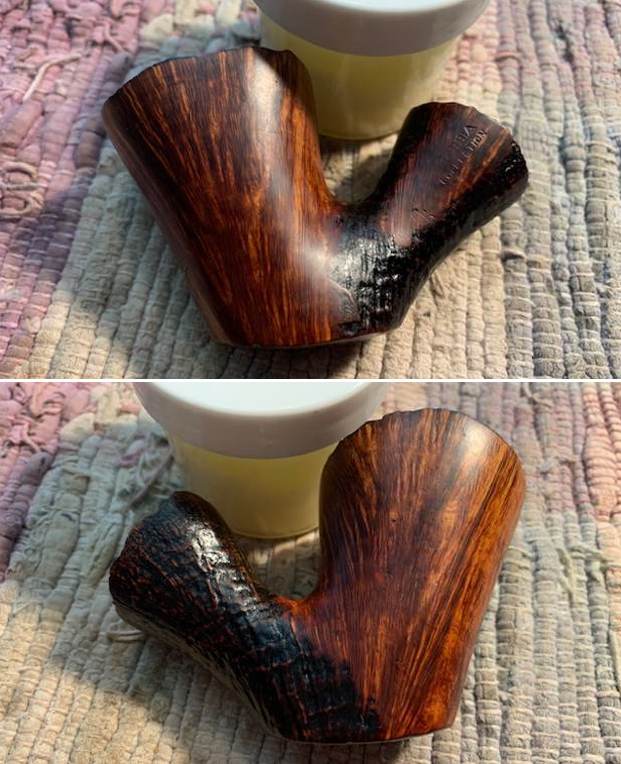
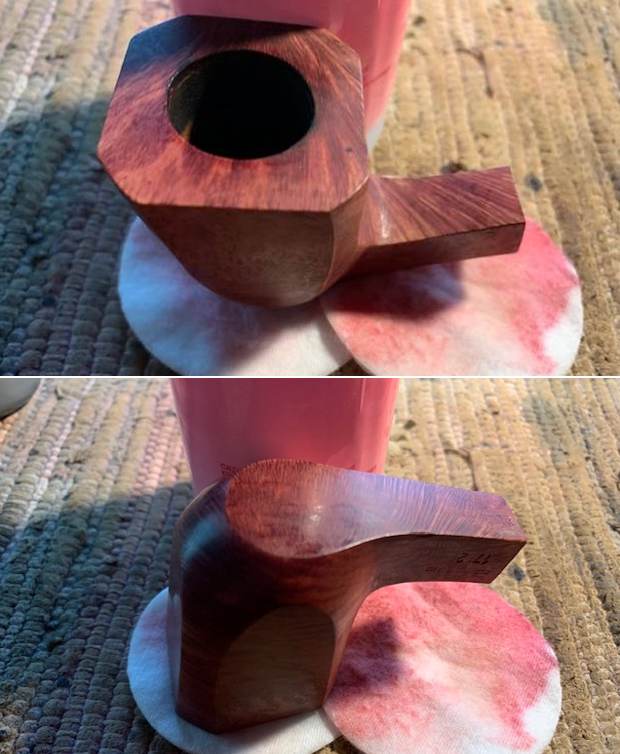
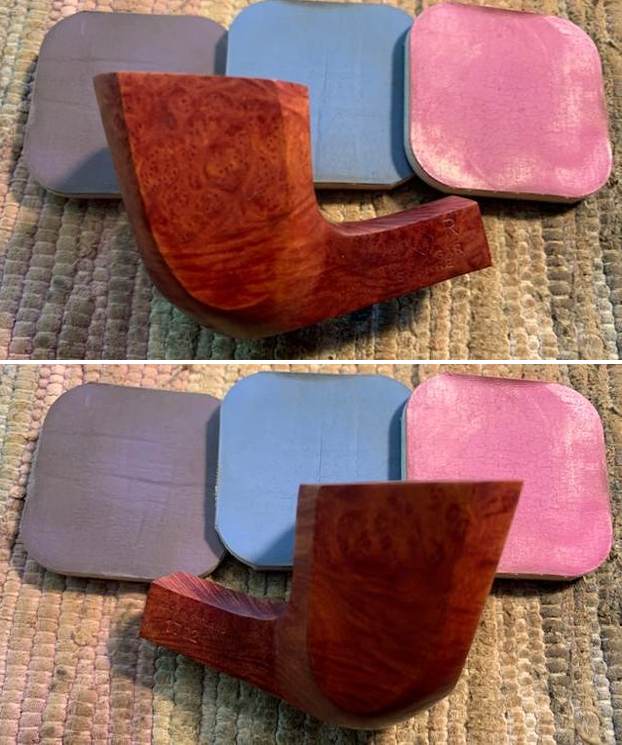
Once the repair cured I worked some Before & After Restoration Balm into the surface of the briar. To get it into the nooks and crannies I used a shoe brush and worked it deeply into the grooves. The balm works to clean, enliven and preserve the briar. I let it sit for 10 minutes then buffed it off with a soft cloth. It is a beautiful pipe. 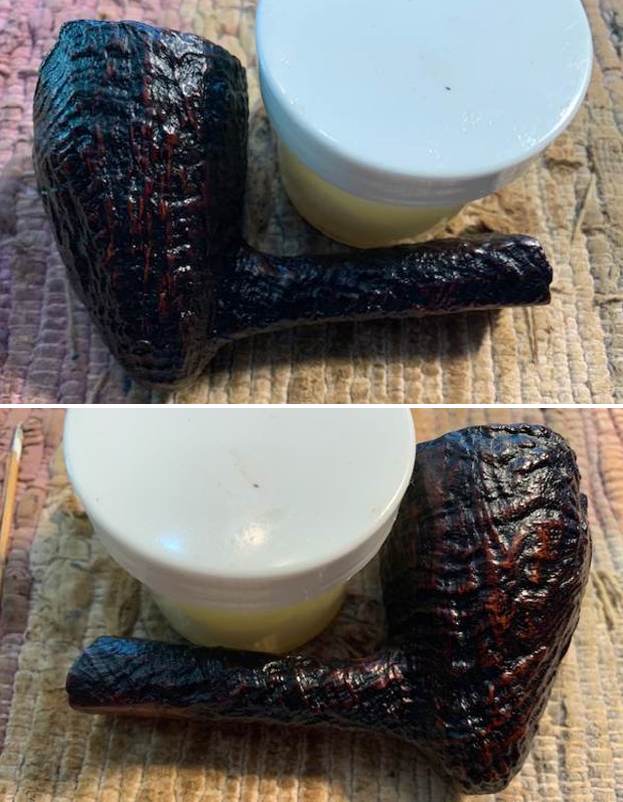
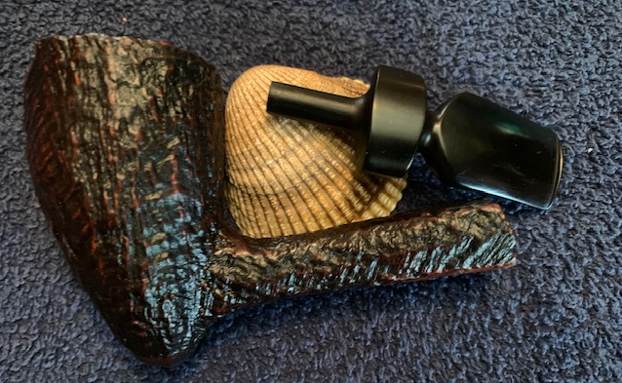
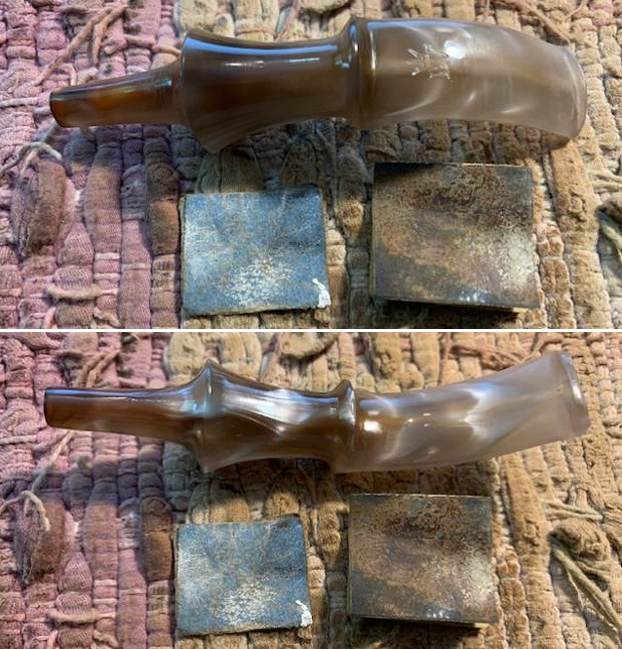
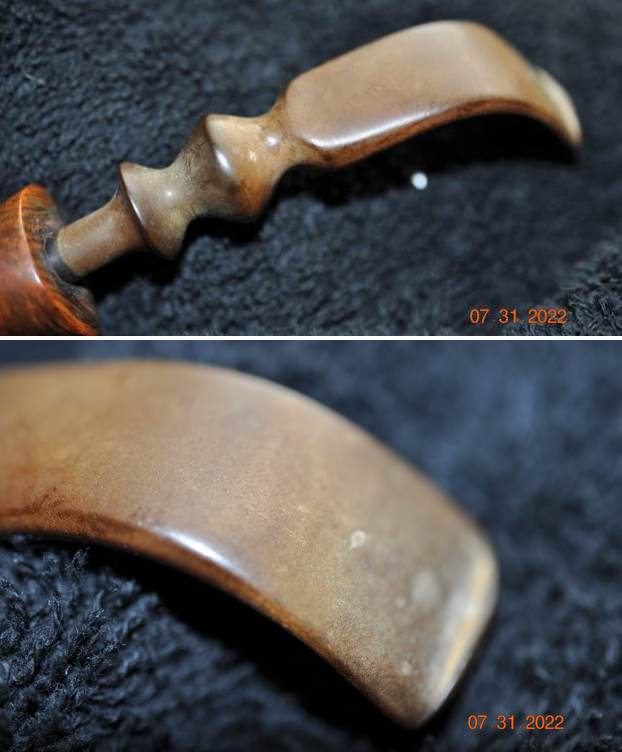
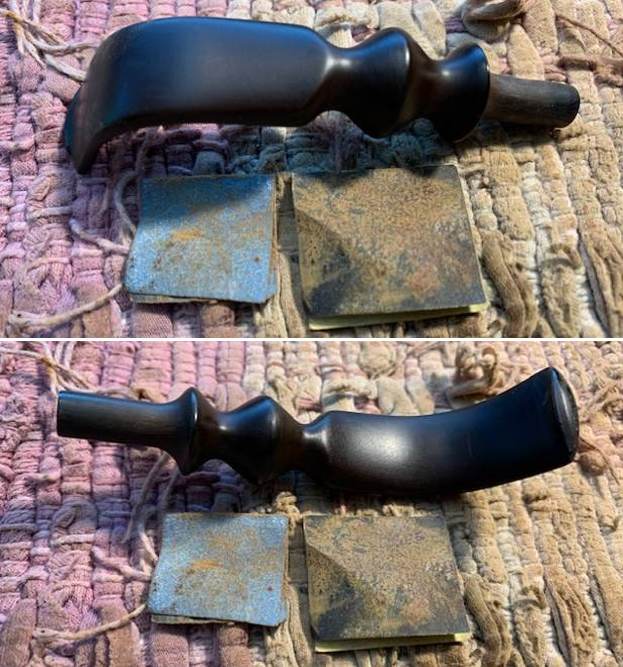
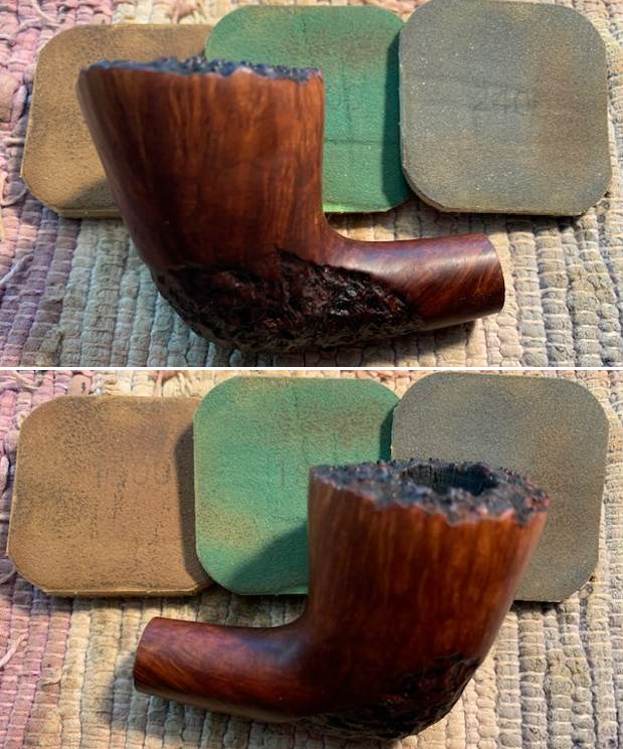
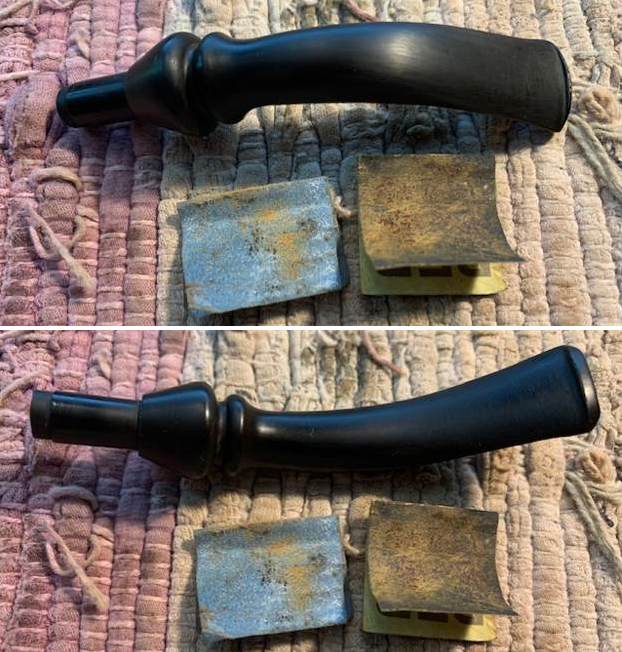
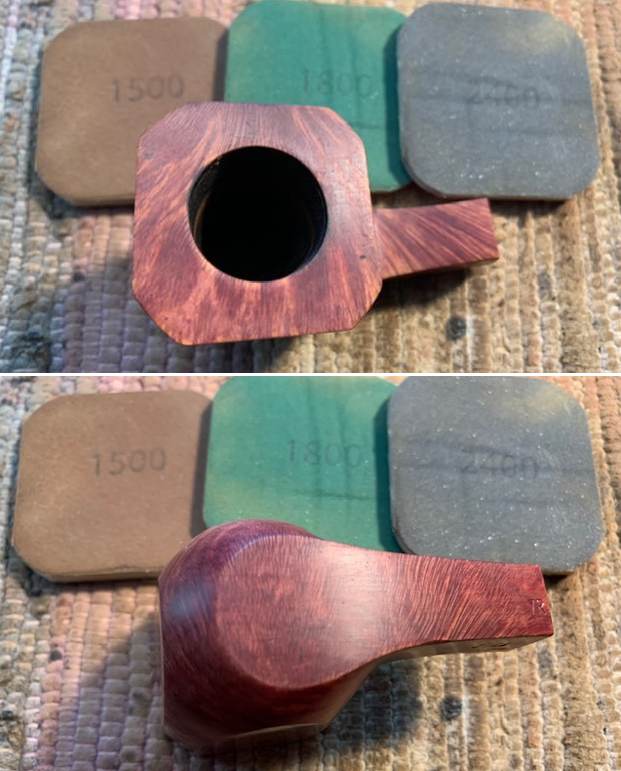
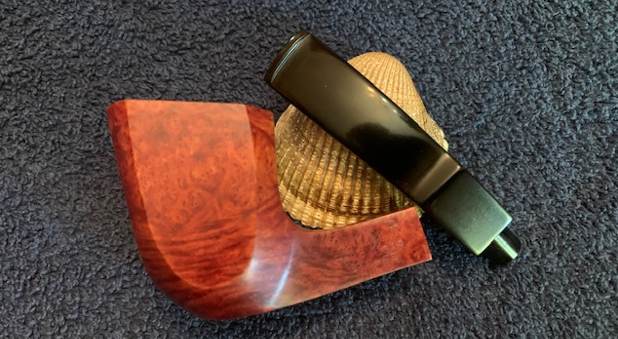
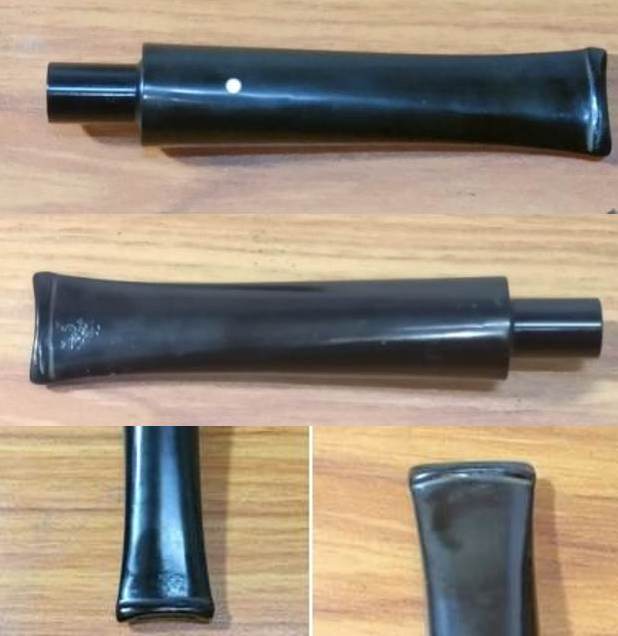
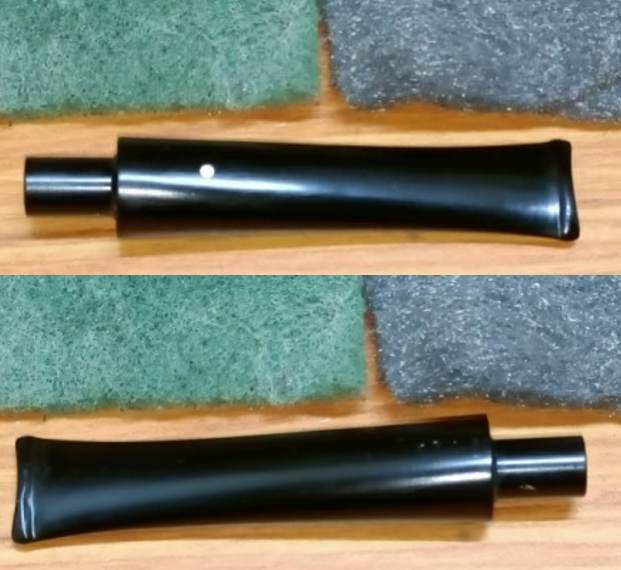
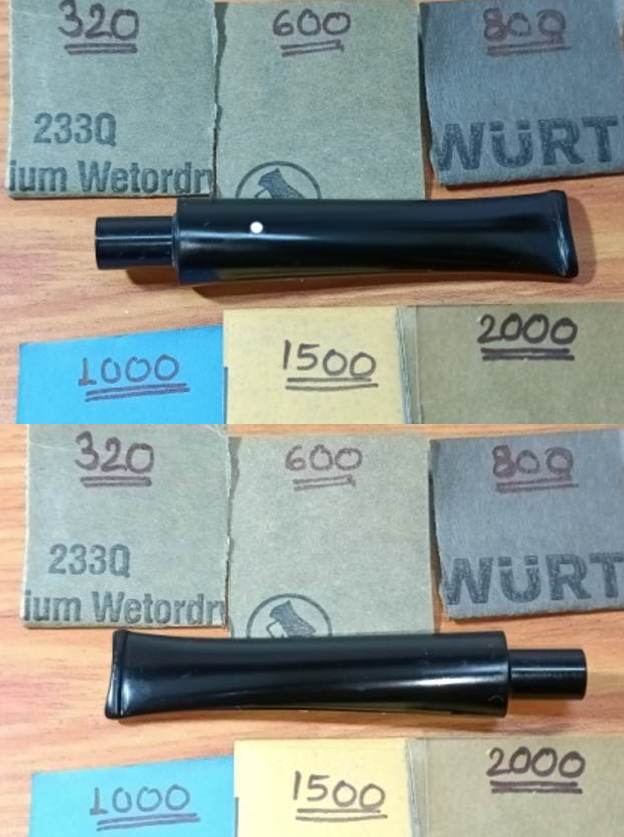
 The rugged finish on the bowl looks amazing. It is a beautiful pipe. I set the bowl aside and turned my attention to the stem. I decided to square out the rounded edges of the stem sides on the saddle with 220 grit sandpaper. I flattened them out to match the flat sides on the shank. I think it actually worked very well.
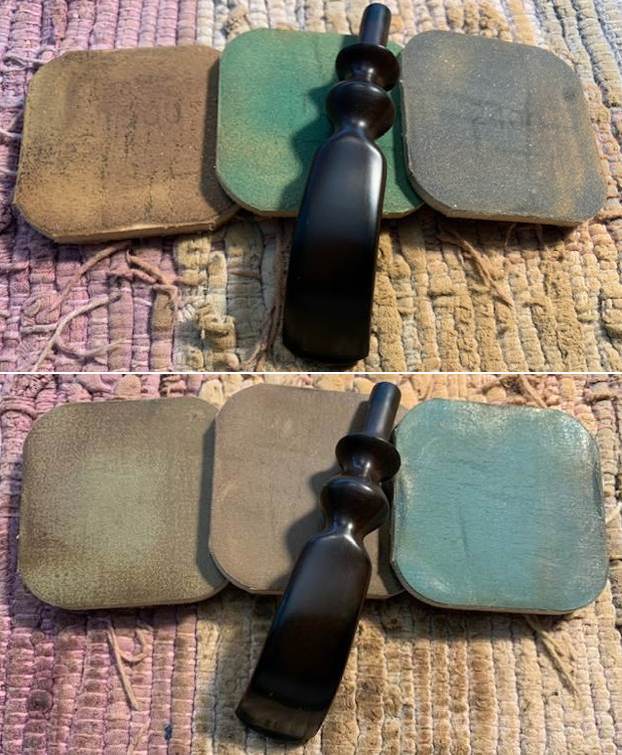
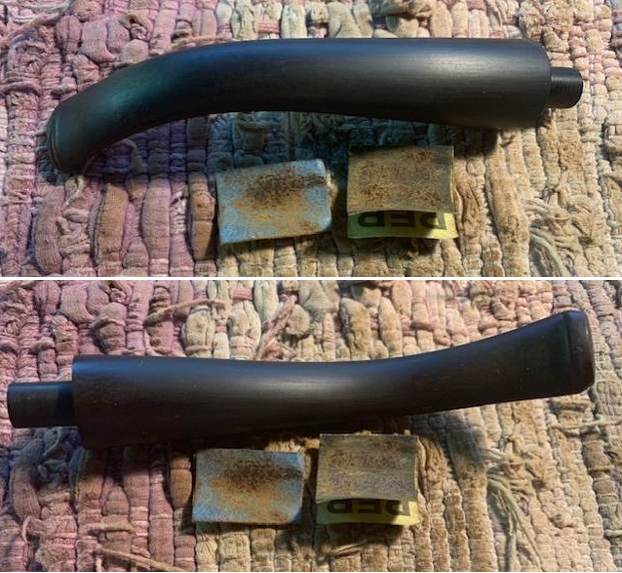
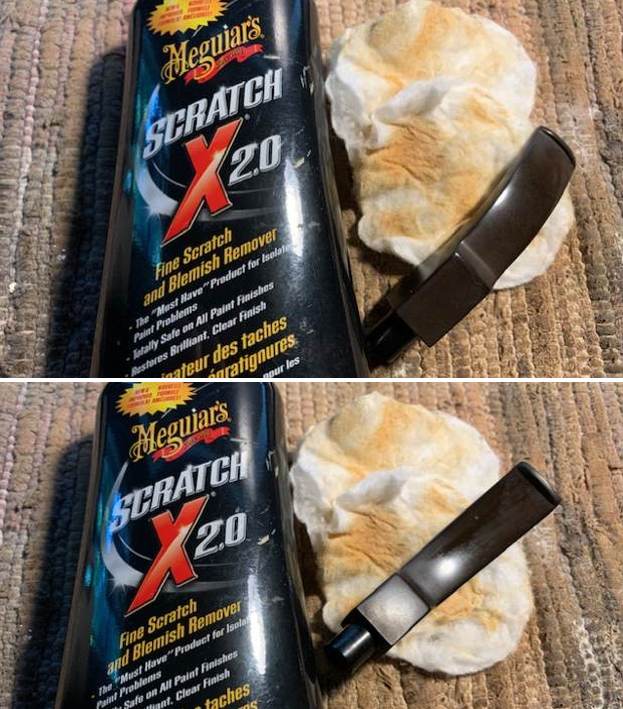
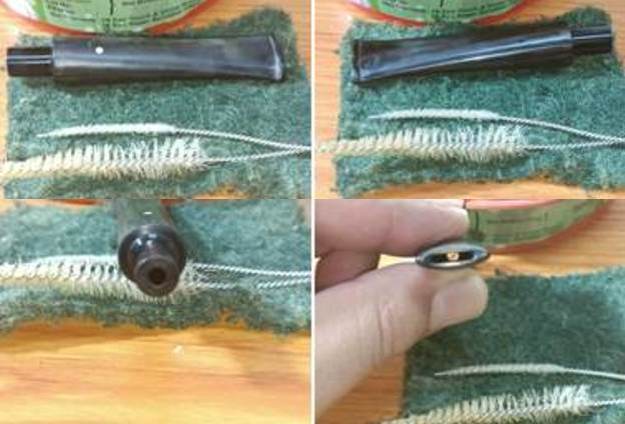
 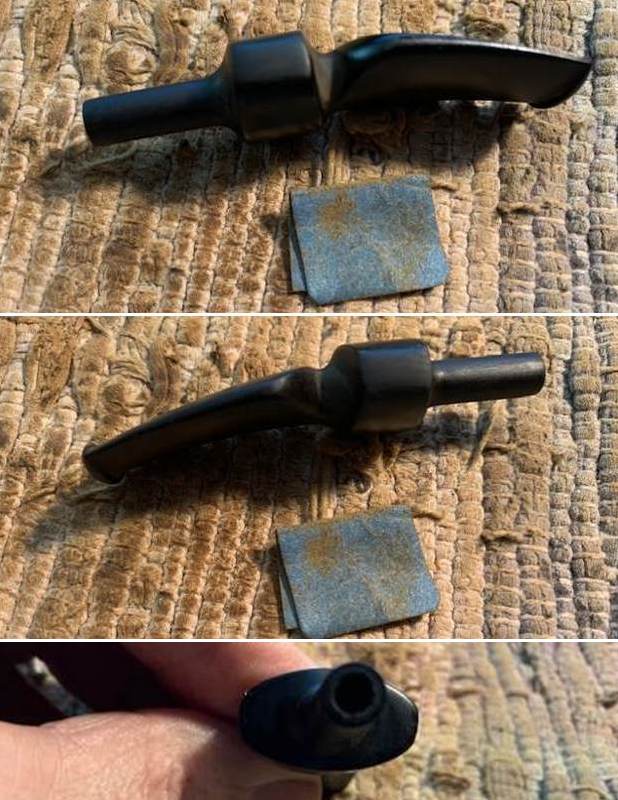 I sanded out the tooth marks and chatter on the stem surfaces with 220 grit sandpaper and they blended in quite well. I started the polishing of the stem with 400 grit wet dry sandpaper. I wiped it down with some Obsidian Oil and the stem was looking quite good.
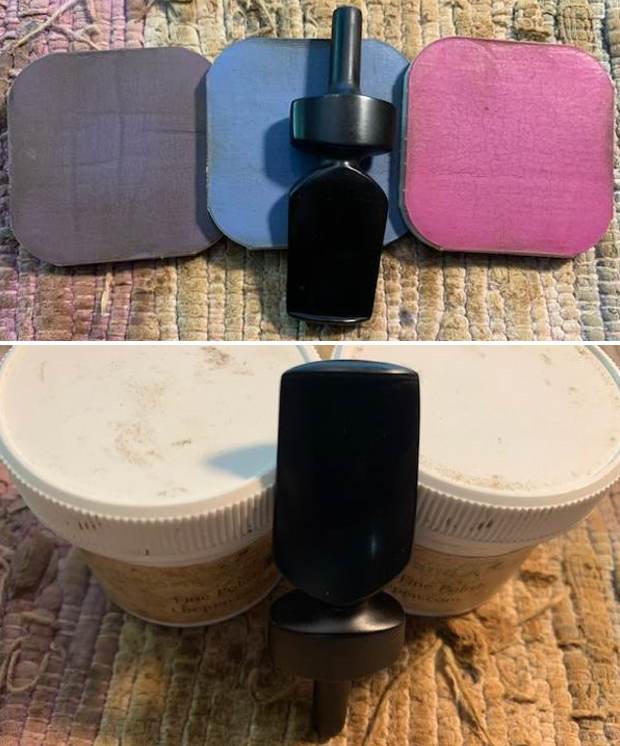
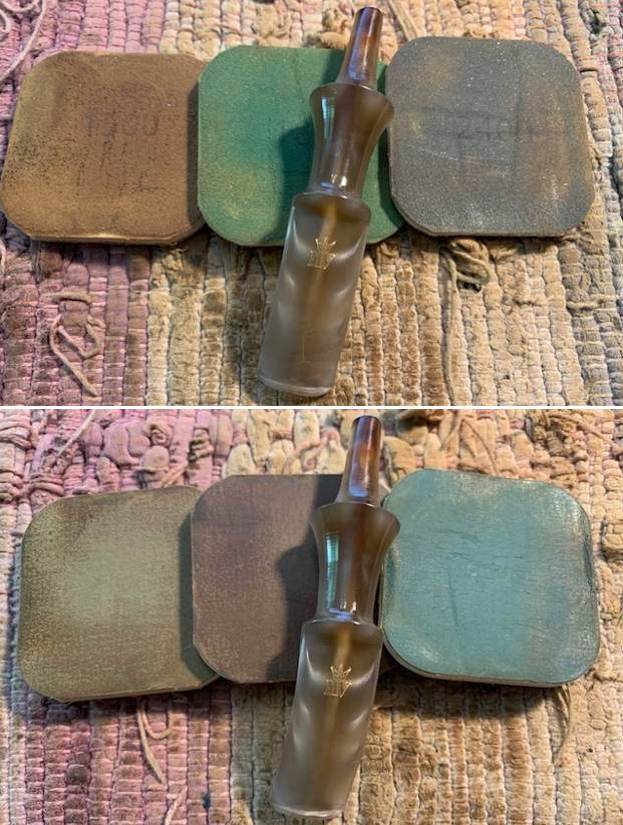
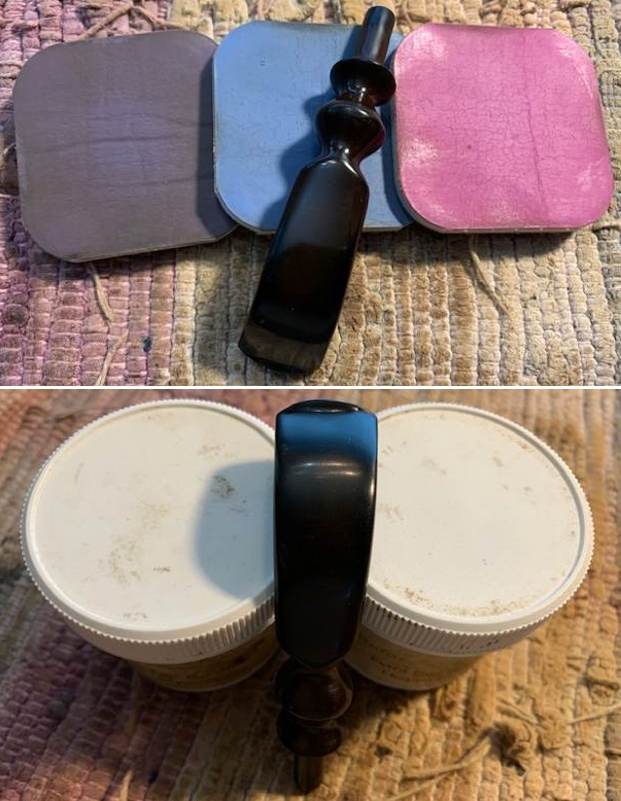
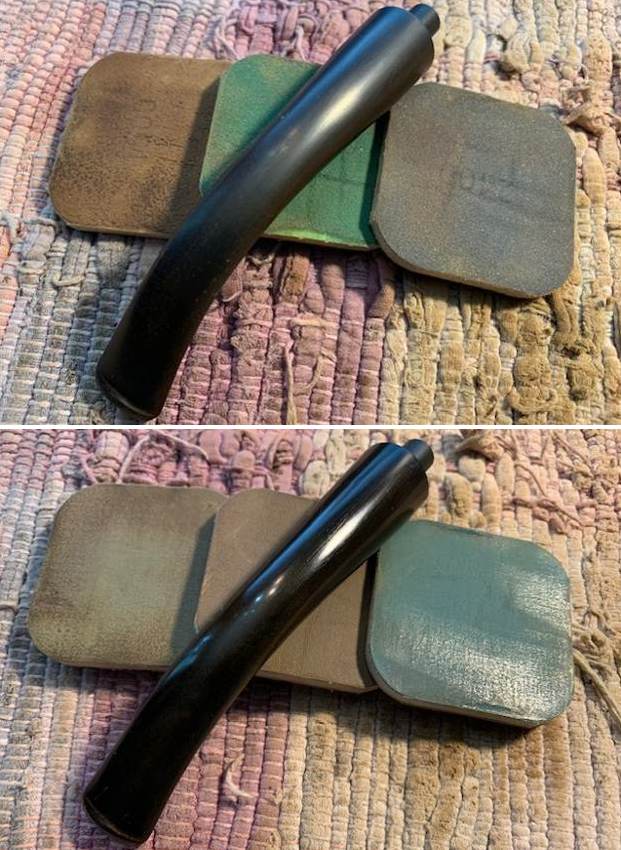
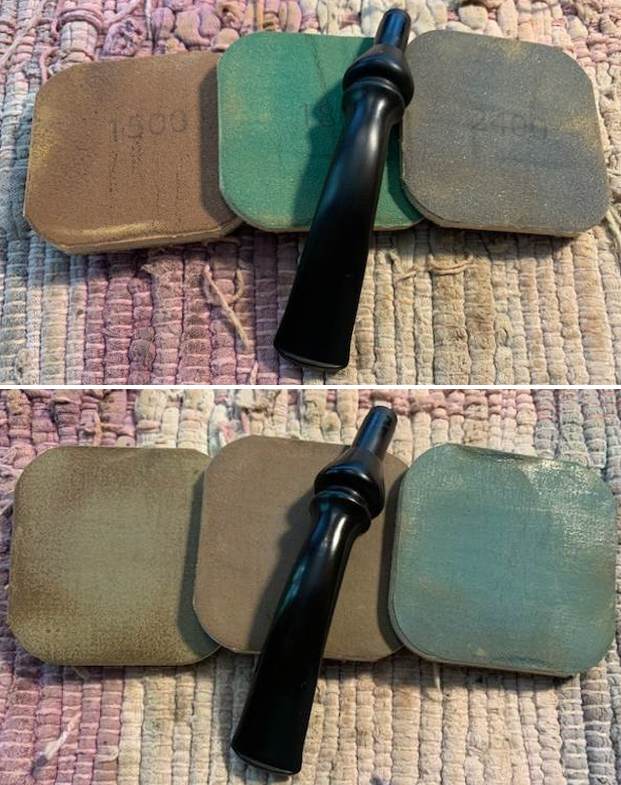
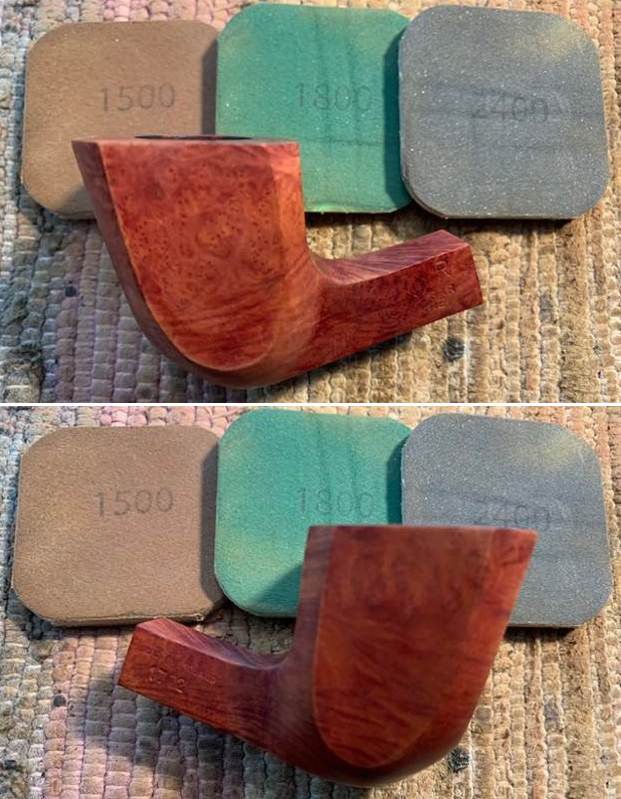
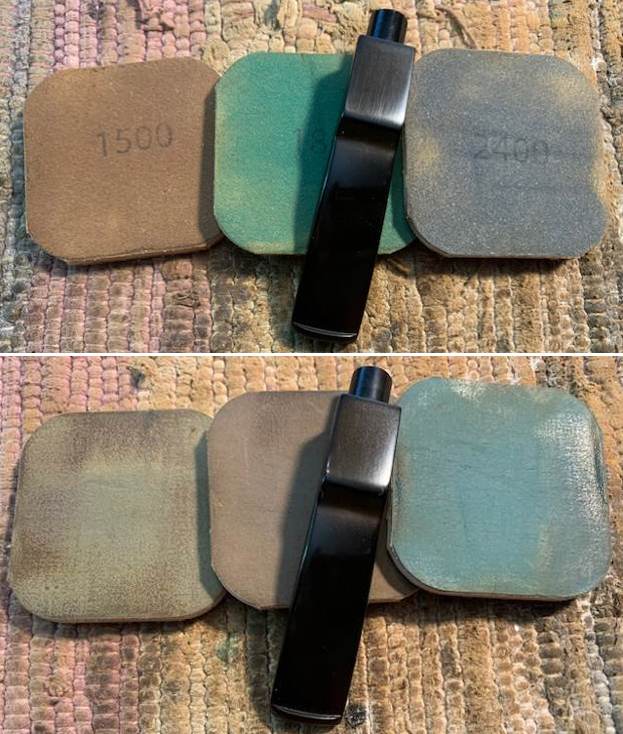
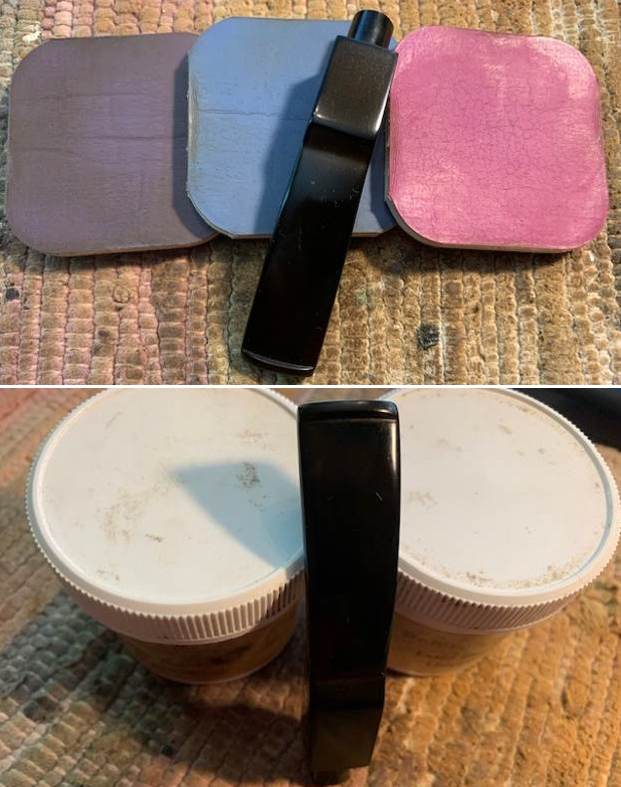
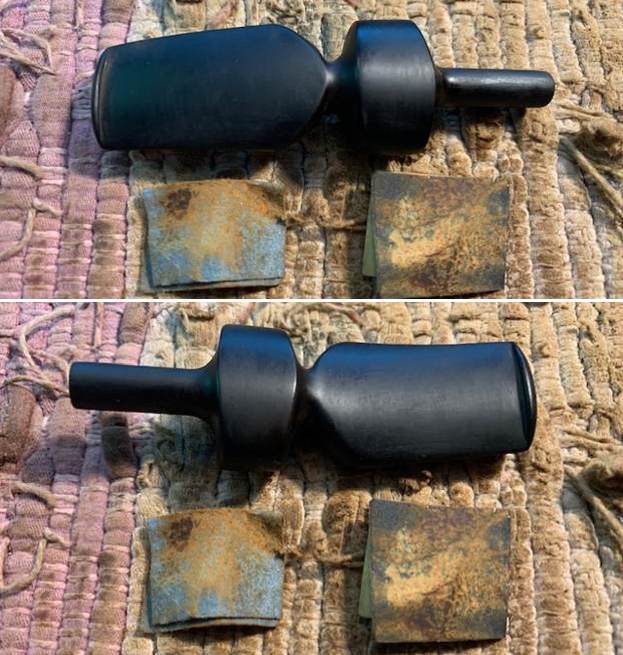 I polished the stem with micromesh sanding pads – dry sanding with 1500-12000 grit pads. I wiped the stem down after each pad with some Obsidian Oil. I finished hand polishing it with Before & After Pipe Stem Polish – Fine and Extra Fine. I rubbed it down with another coat of Obsidian Oil and let it dry. The stem really was beginning to look very good.
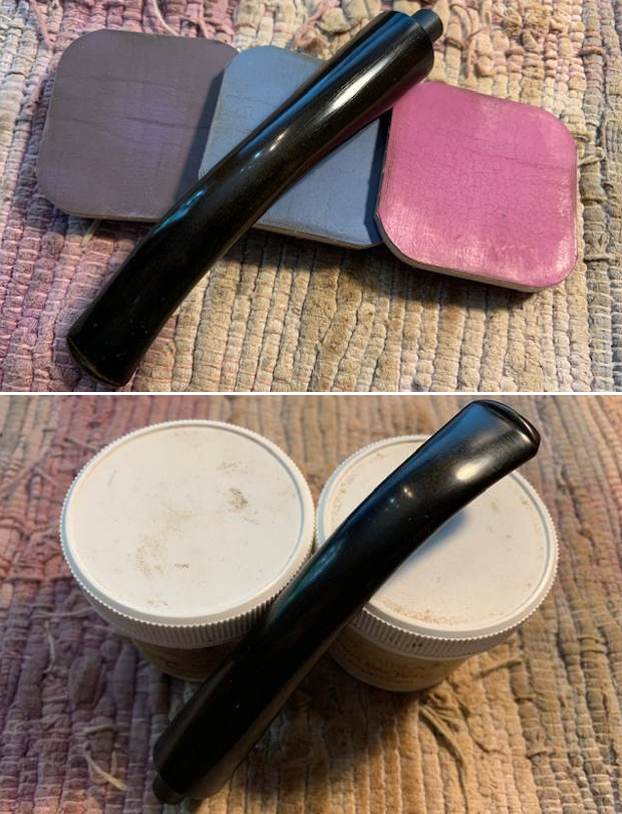
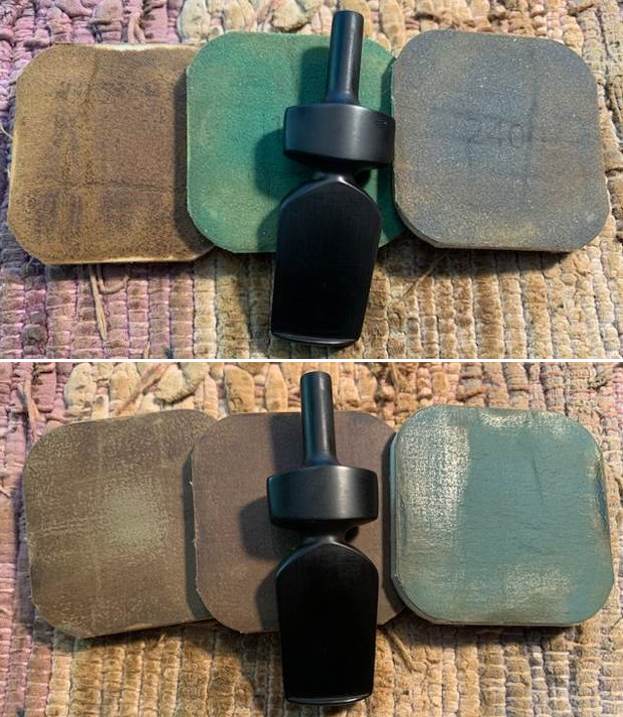
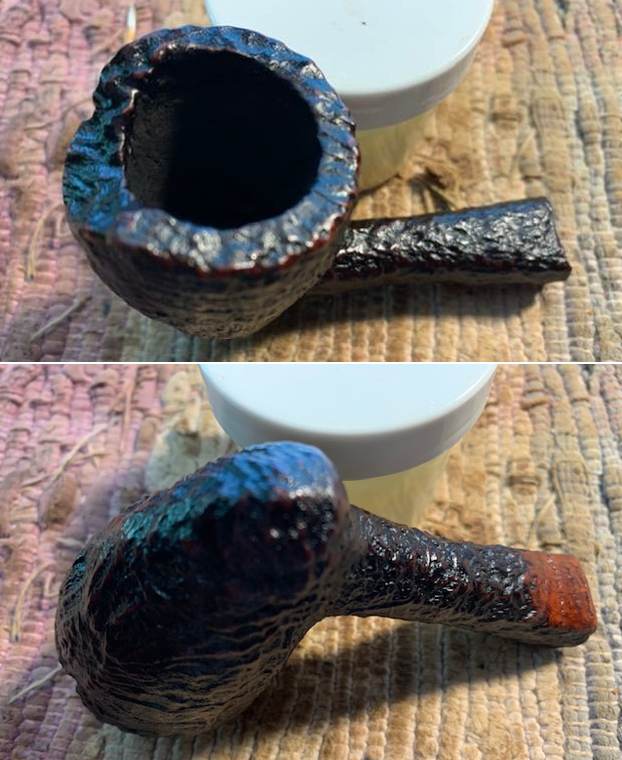
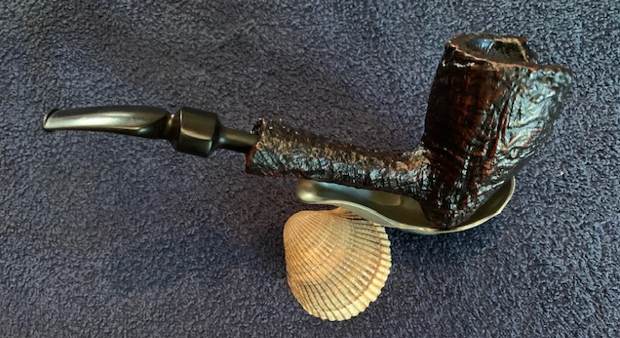
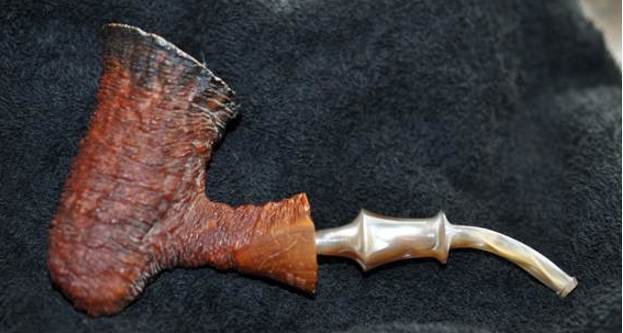
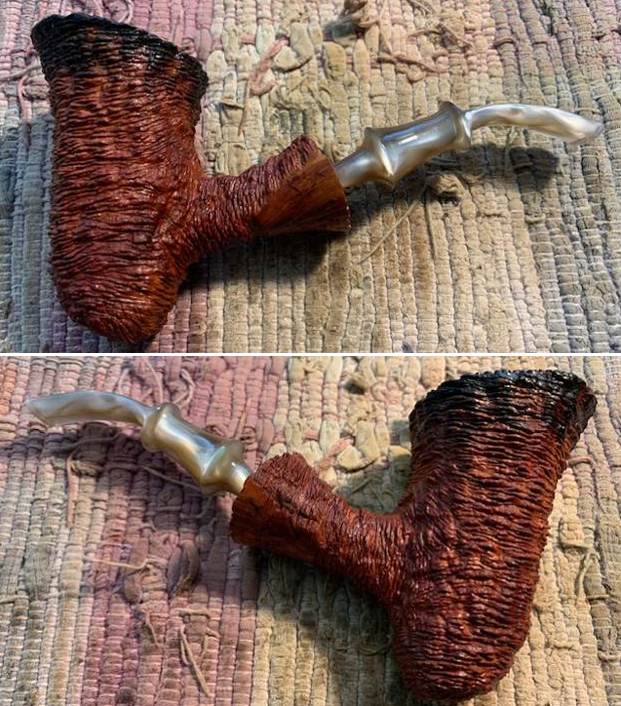
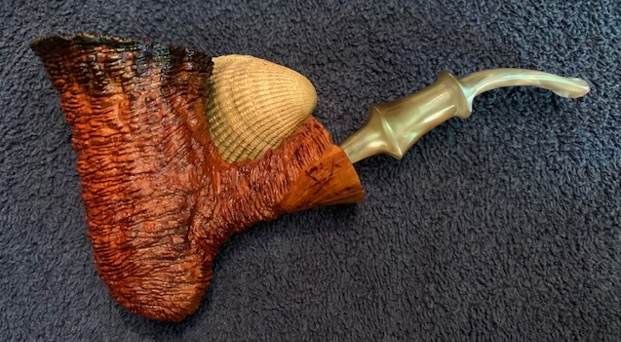
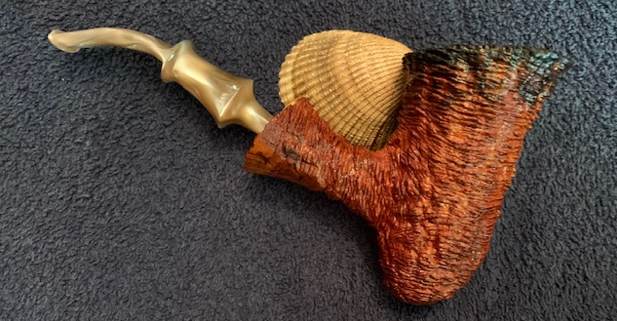
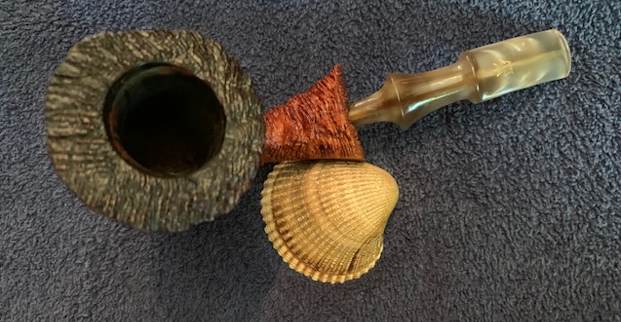
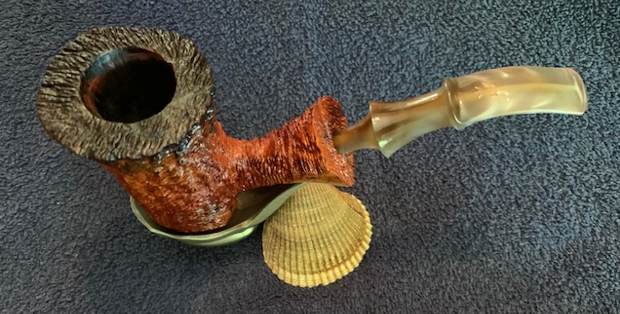
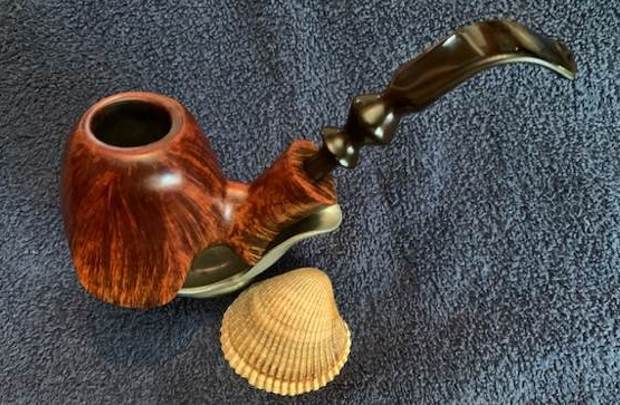
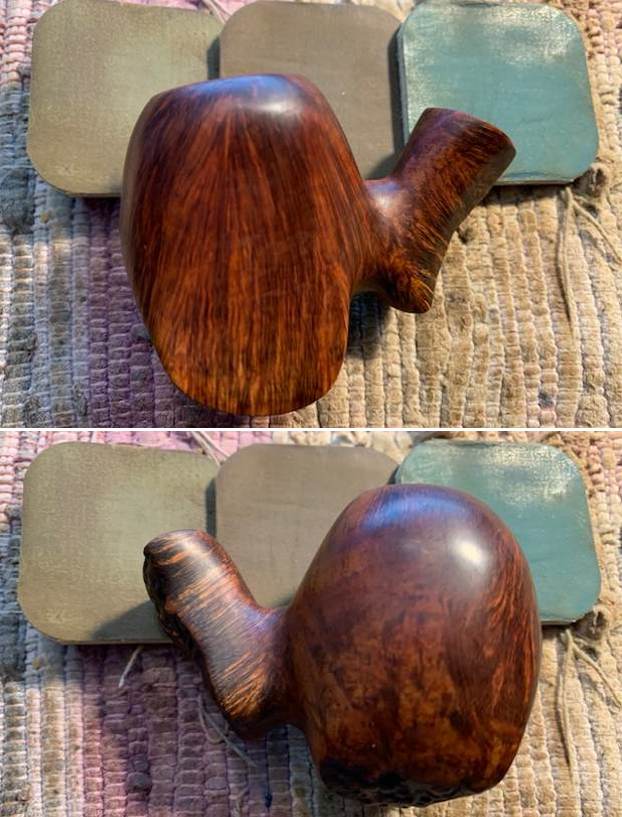
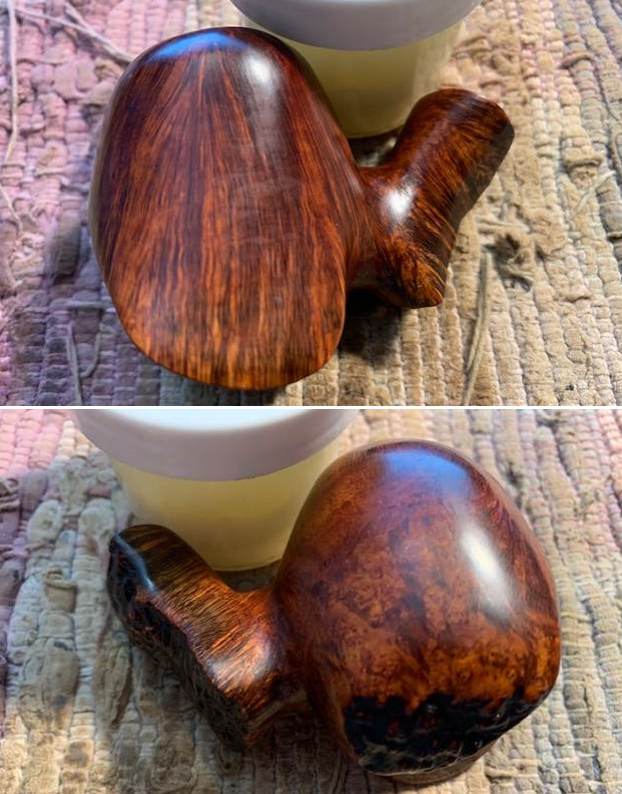
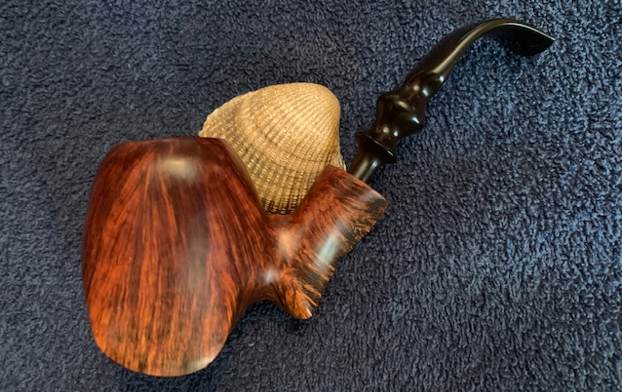
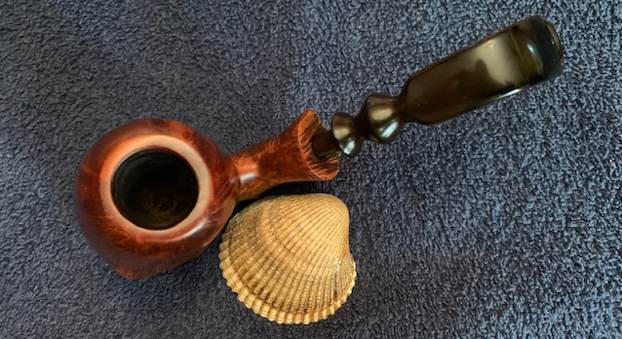
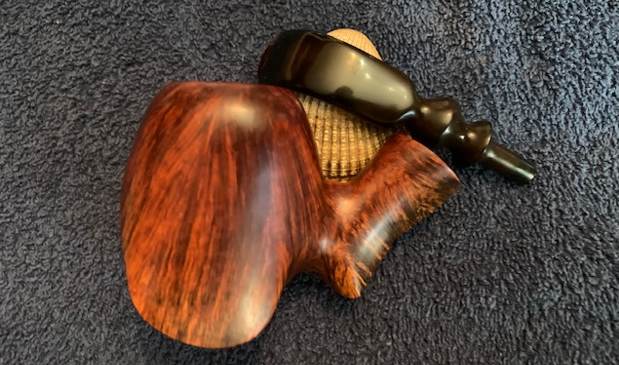
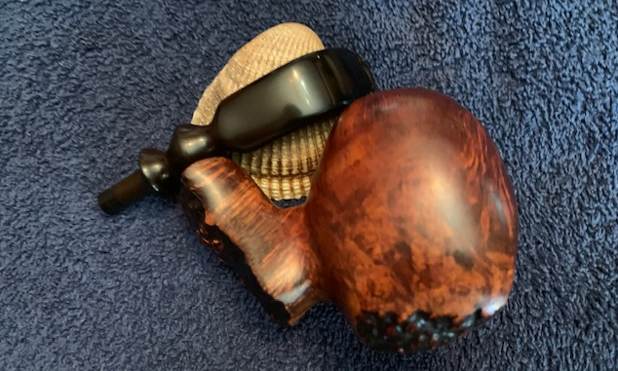
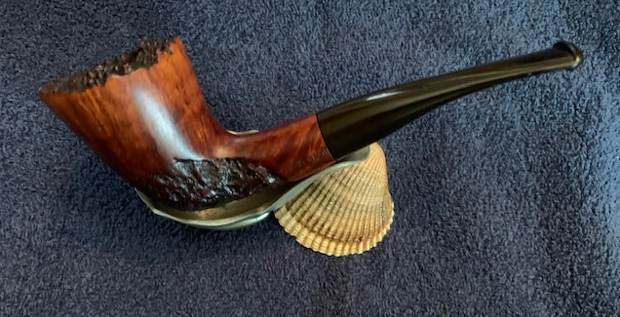
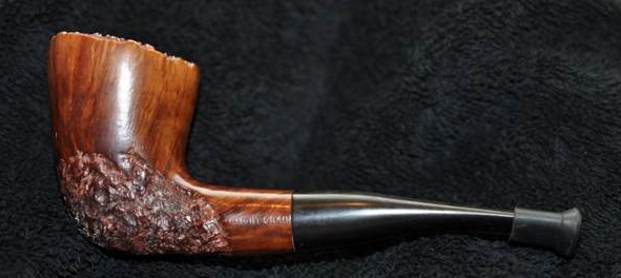
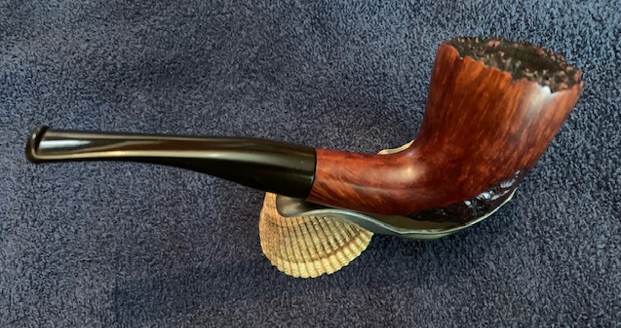
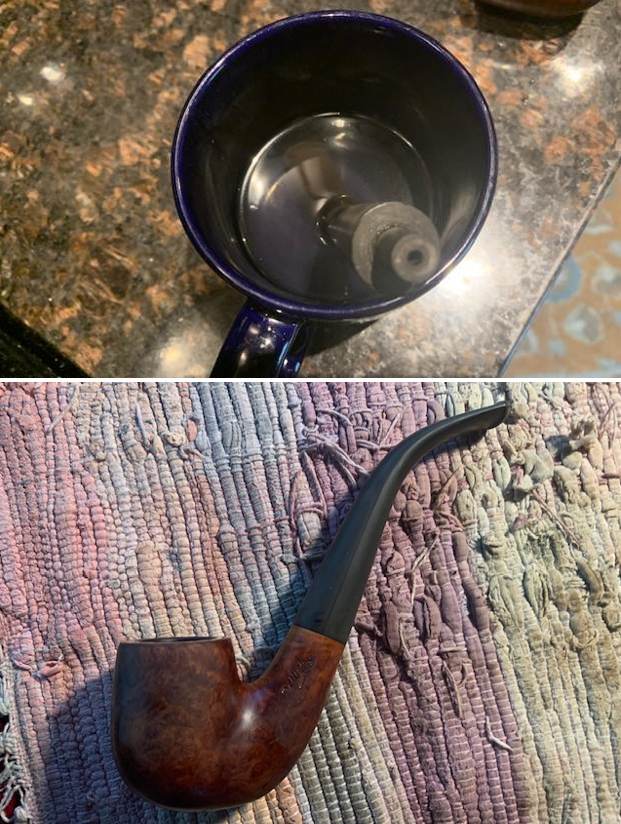
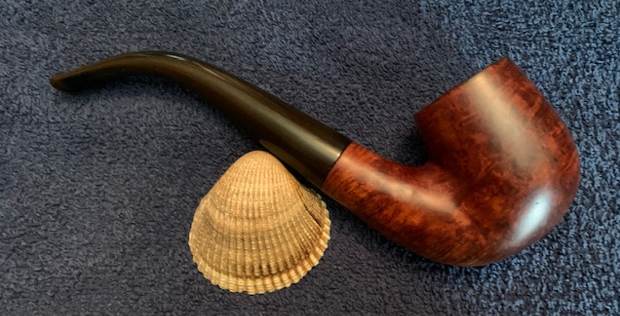
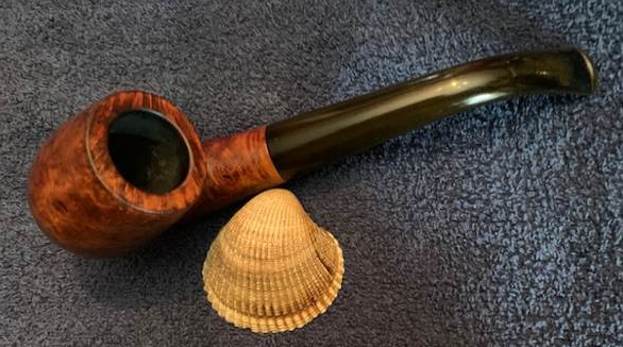
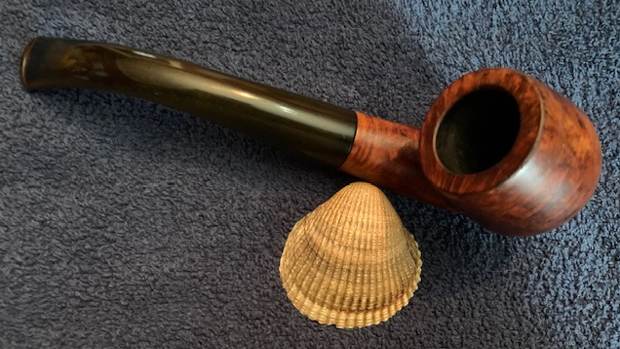
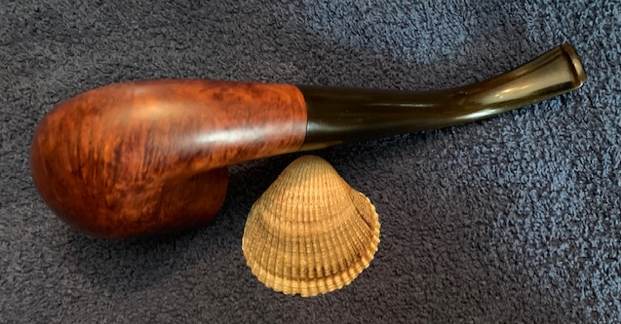
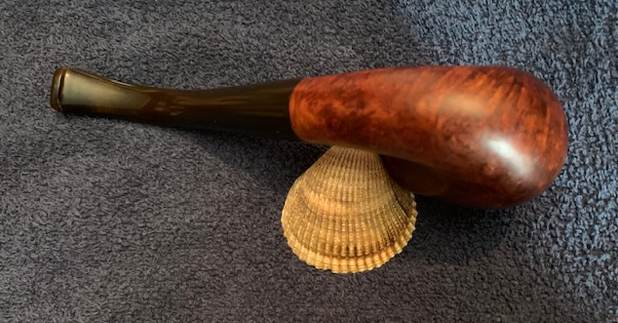
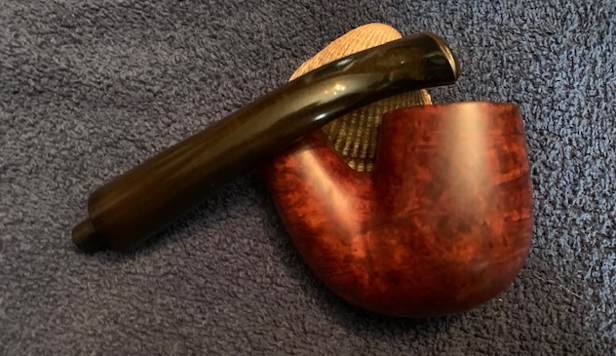
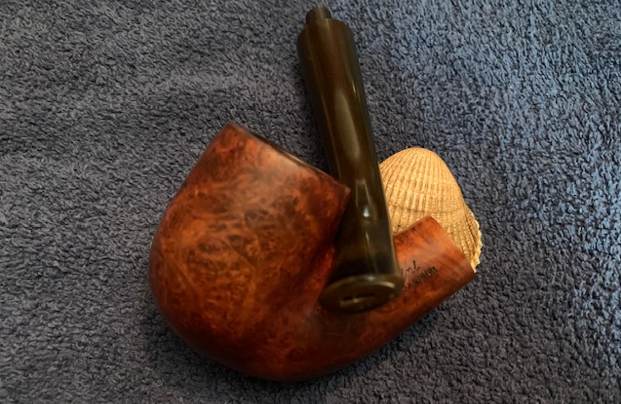
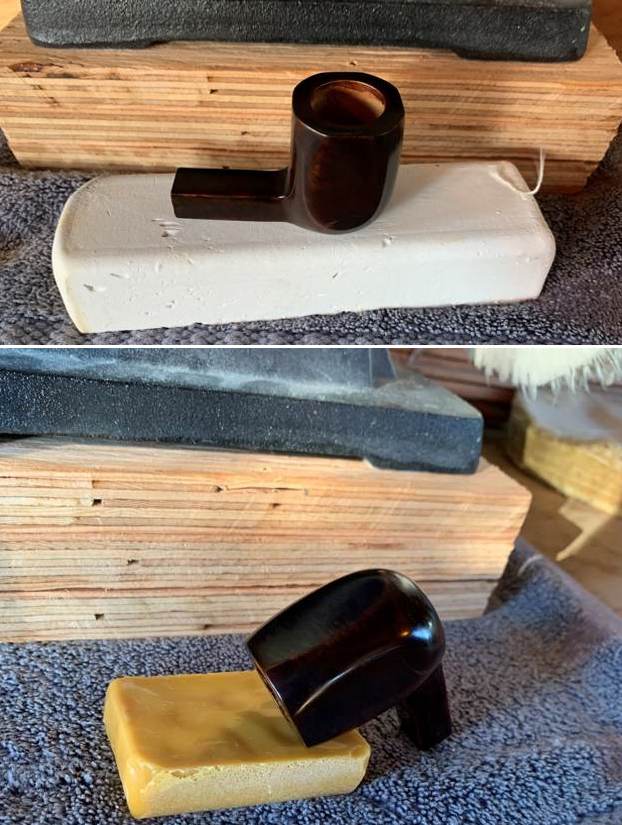
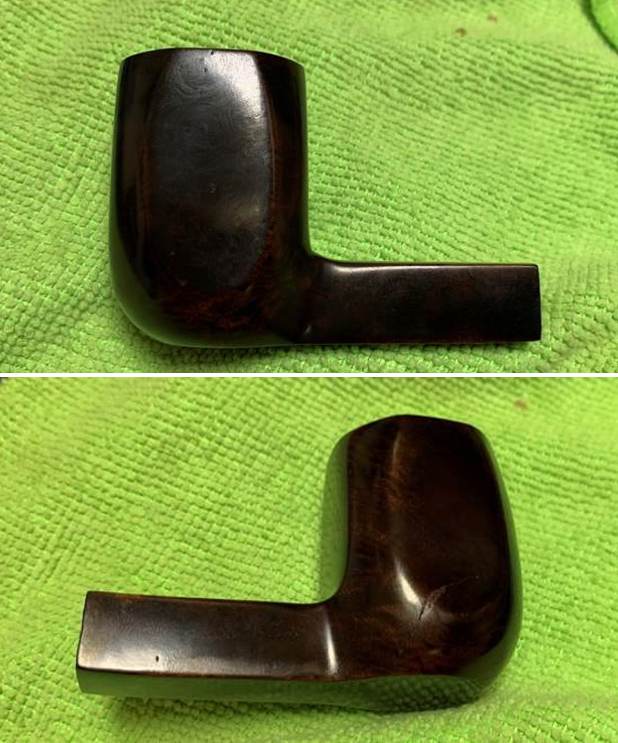
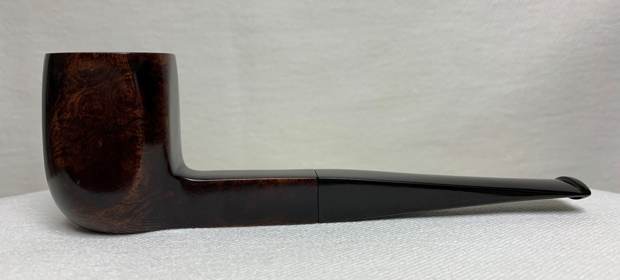
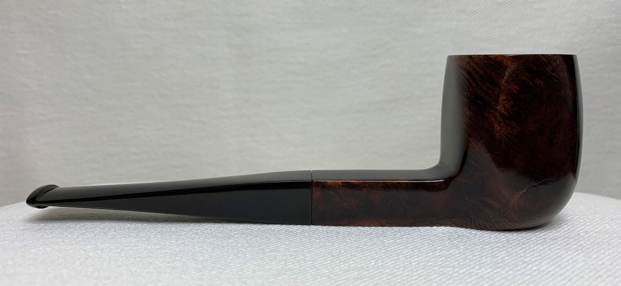
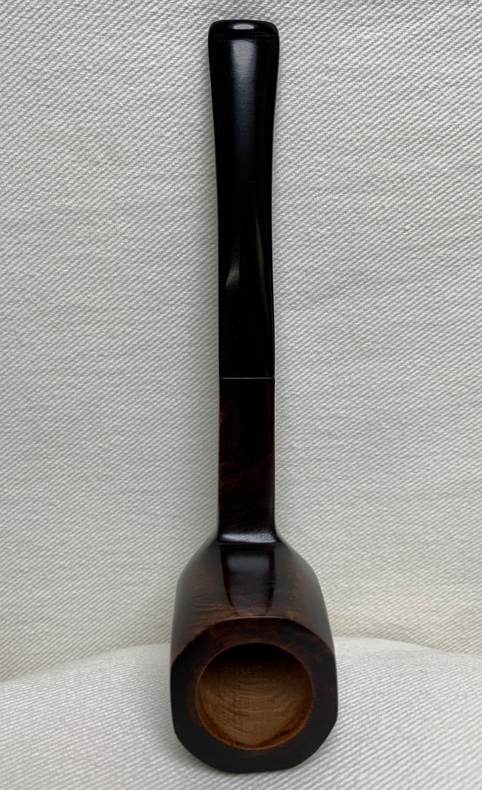
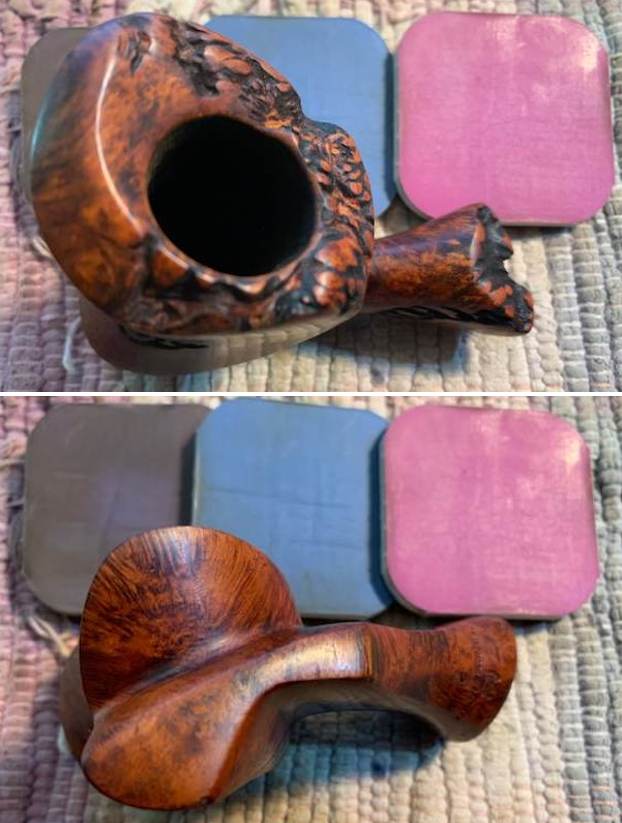
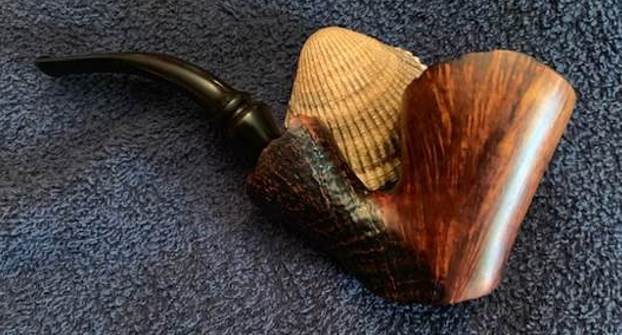
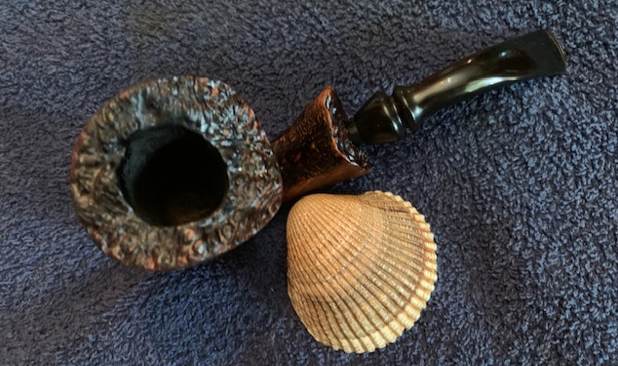
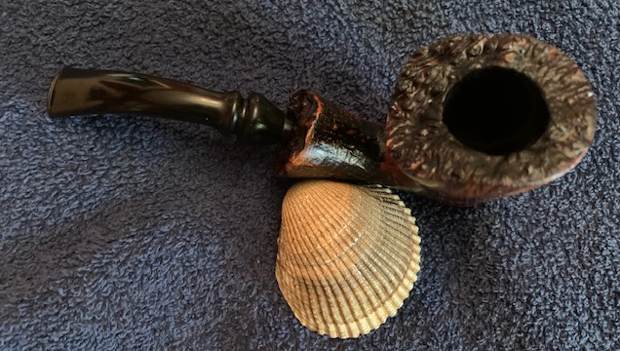
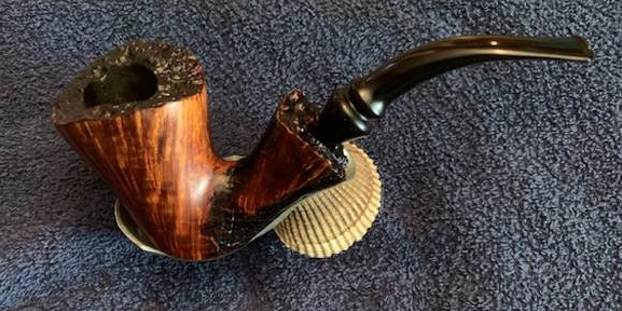
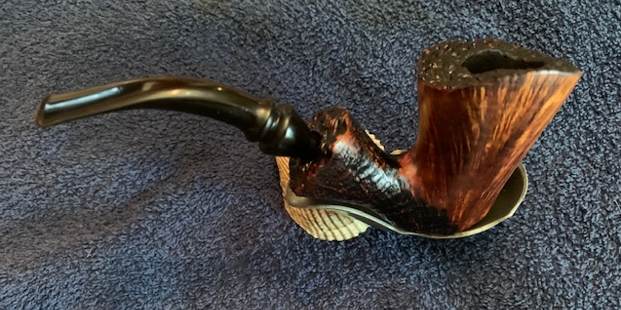
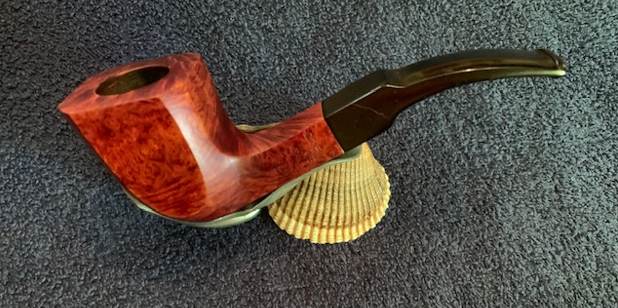
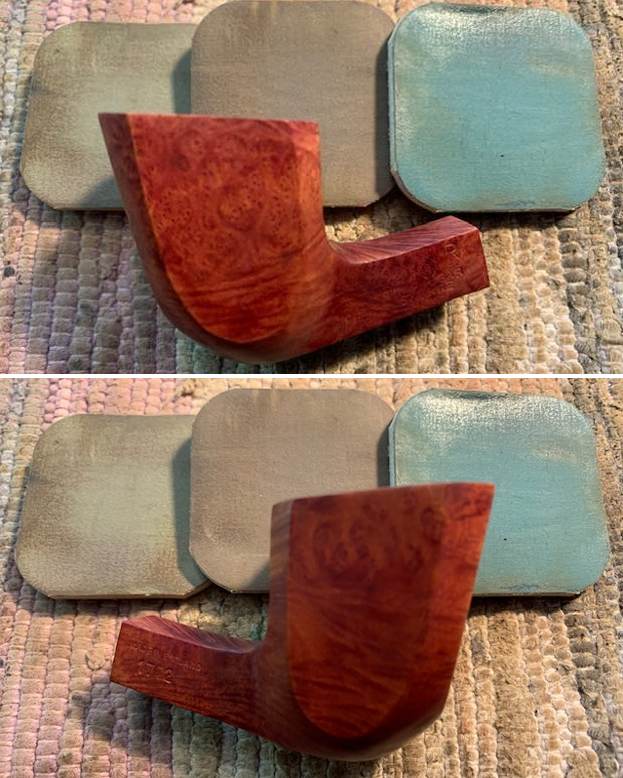
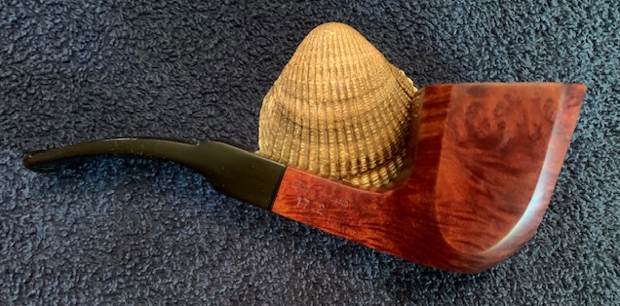
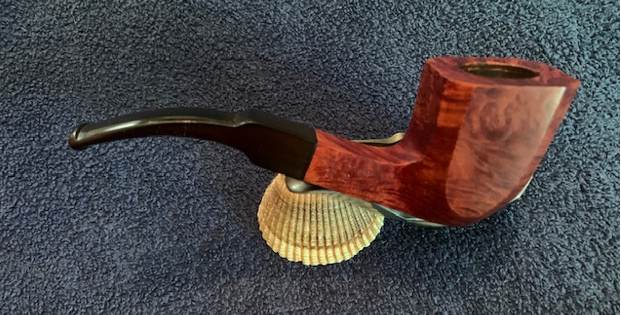
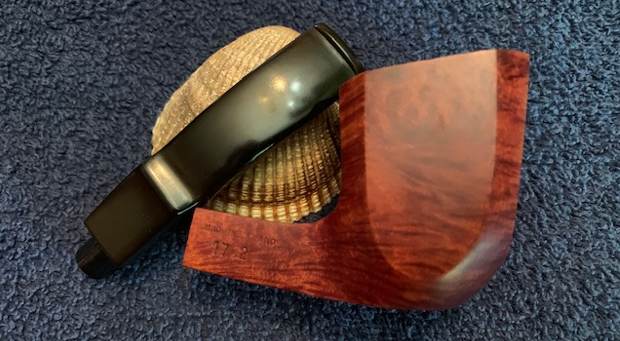
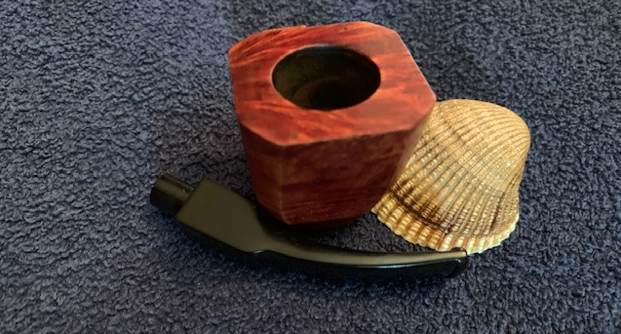
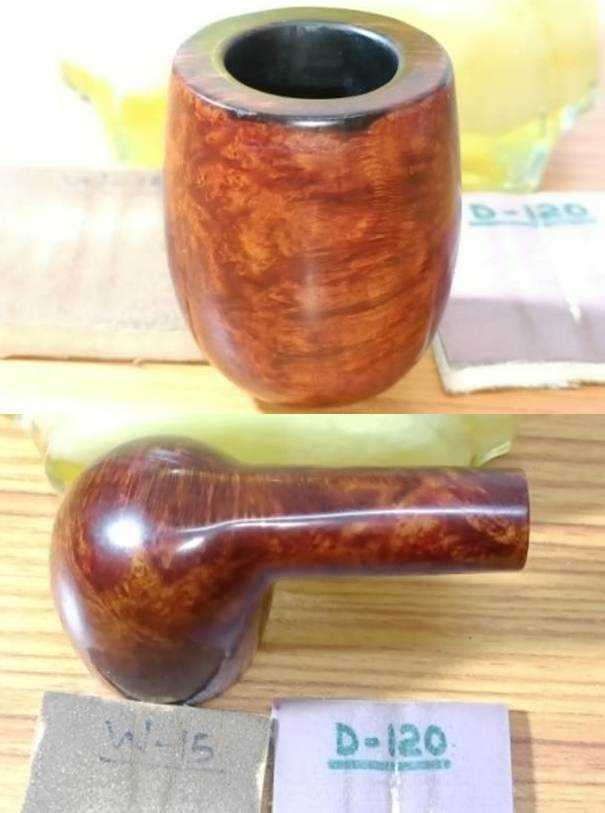
 This is a beautiful Hand Made in Denmark Westminster IIS by Preben Holm with a unique oval shaped black vulcanite stem. I flattened out the curved edges of the oval stem to match the flat sides of the shank. It has a great look and feel. The shape fits well in the hand with the curve of the bowl and shank junction a perfect fit for the thumb around the bowl when held. I polished stem with Blue Diamond polish on the buffing wheel. I gave the sandblast bowl and plateau on the rim top and shank end multiple coats of Conservator’s Wax. I gave the stem multiple coats of carnauba wax. I buffed the pipe with a clean buffing pad to raise the shine. I hand buffed it with a microfiber cloth to deepen the shine. The pipe polished up pretty nicely. The rich combination of black and brown stains gave the sandblast and plateau depth. The pipe took on life with the buffing. The rich colour of the briar works well with the polished vulcanite stem. Have a look at it with the photos below. The shape, finish and flow of the pipe and stem are very well done. The dimensions are Length: 6 ½ inches, Height: 2 ¾ inches, Outside diameter of the bowl: 1 ½ inches, Chamber diameter: 1 inch. The weight of the pipe is 53 grams/ 1.87 ounces. This Danish Freehand is a real beauty. Thanks for walking through the restoration with me as I worked over another beautiful pipe. This one will be staying here for awhile so I can assess the effectiveness of the shank repair. Thanks for your time.
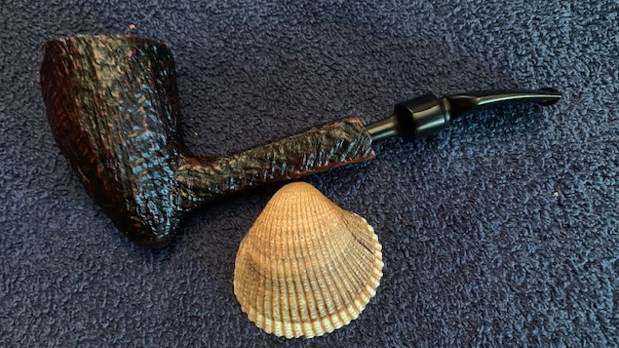


