Blog by Steve Laug
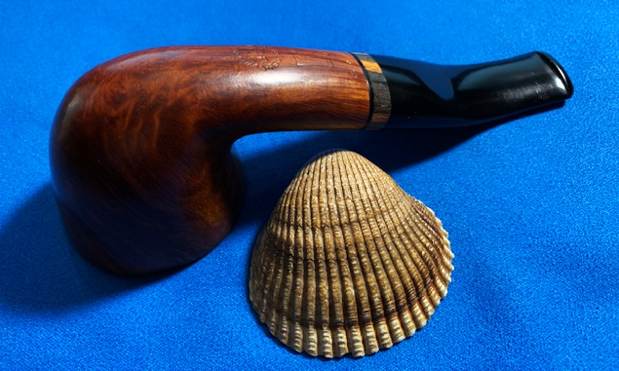
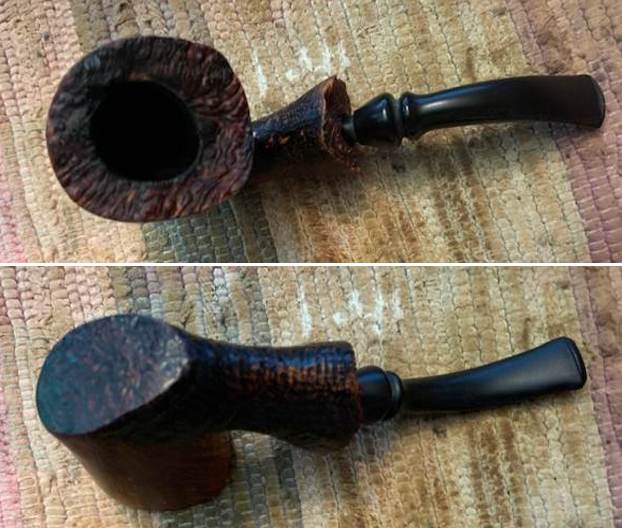
The next pipe on the table is one that Jeff purchased on 5/25/22 from an antique store in Portland, Oregon, USA. While I have worked on a Brebbia Pura before this one was far more like a Danish style Freehand. It is stamped on the a smooth panel on the left side of the shank and has the signature (initials) of Enea Buzzi followed by Brebbia [over] Collection. It is a beautiful mixed finish freehand pipe that includes a sandblast finish around the shank sides and the heel of the bowl and a smooth finish on the bowl sides. Brebbia calls it a Demisandblasted Pipe. There was plateau on the rim top and shank end. The finish was very dirty with grime ground into the smooth briar and also the sandblast. It was dusty and tired looking but it had great grain shining through. The bowl was heavily caked with a thick overflow of lava on the plateau rim top filling in the nooks and crannies of the finish. It was very hard to tell the condition of the inner edge of the bowl. The fancy turned, saddle stem was oxidized, calcified and had tooth marks and chatter on both sides ahead of the button. It was a great looking pipe that showed a lot of promise. Jeff took photos of it before he started his clean up work. If you ignore the stamping you would almost surely say it was a Karl Erik or Preben Holm pipe. But it is not! It’s just a very Danish looking Italian made Freehand.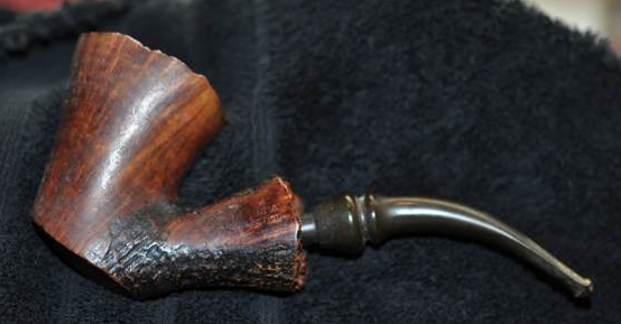
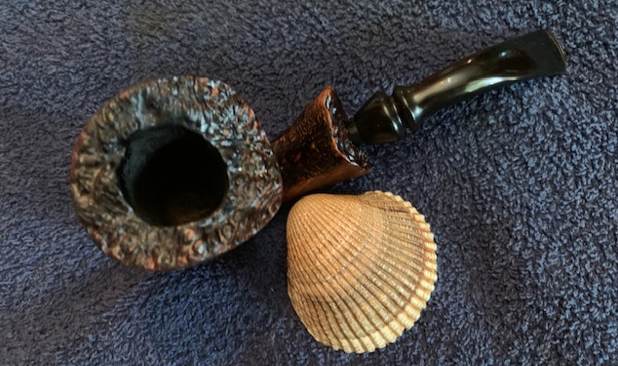
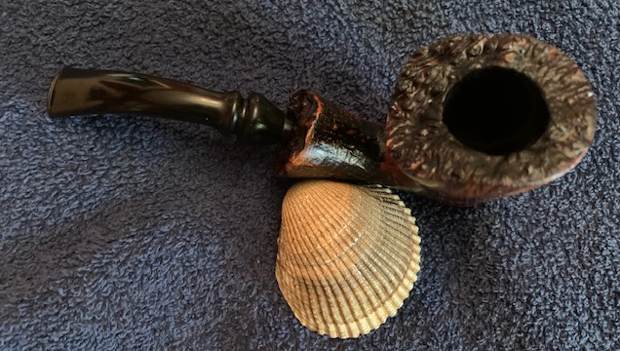
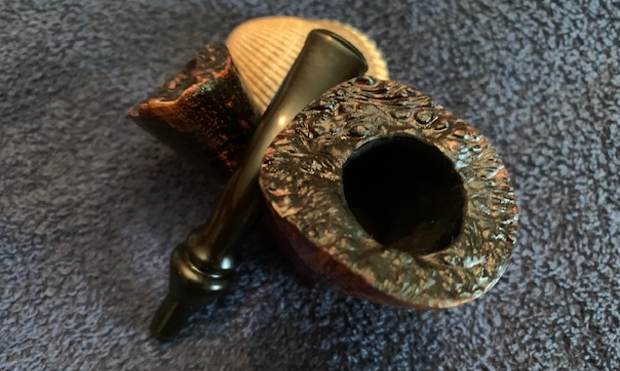
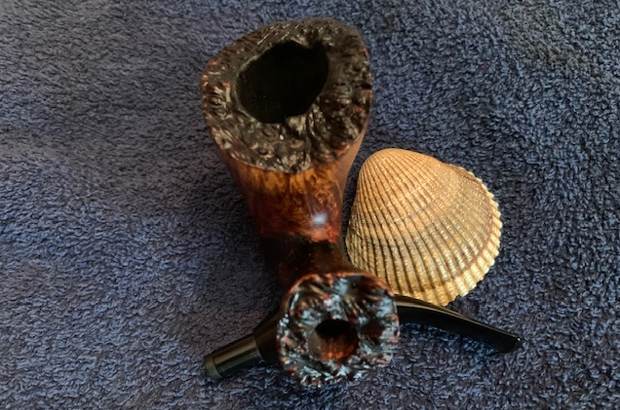
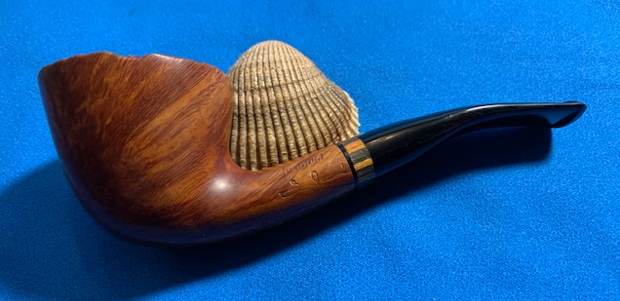
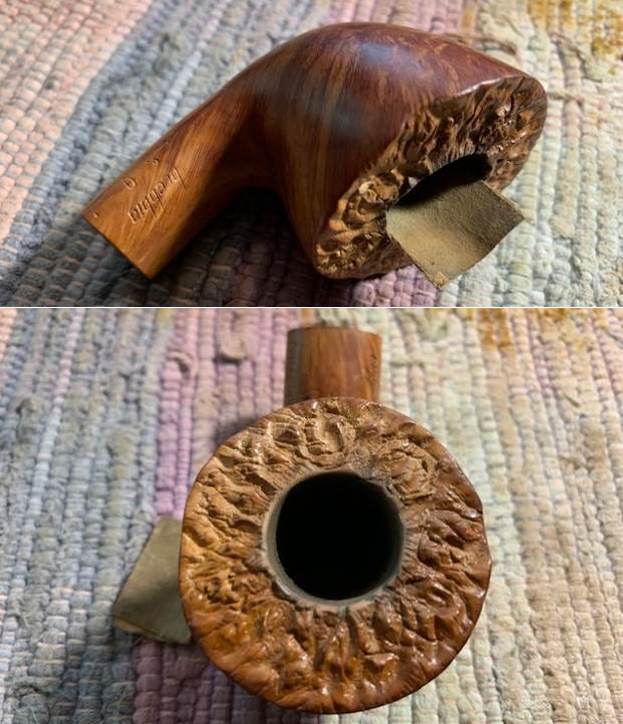
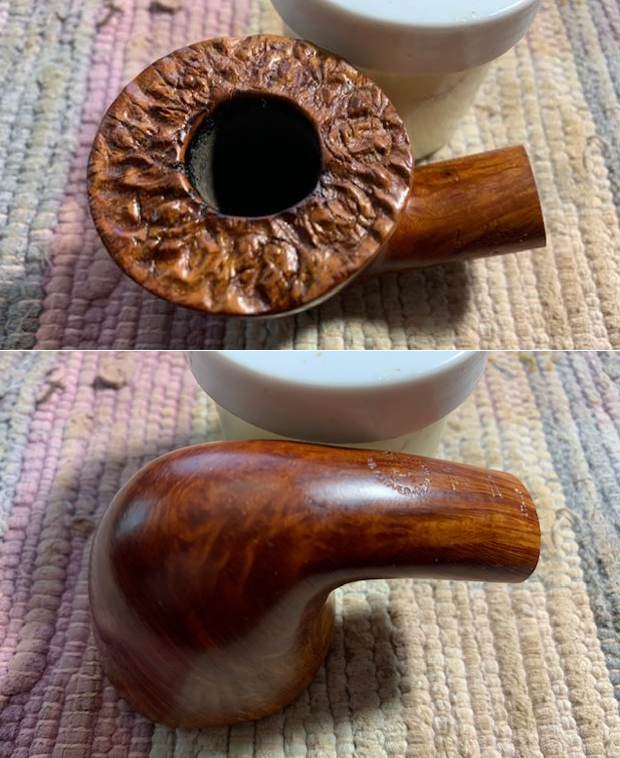
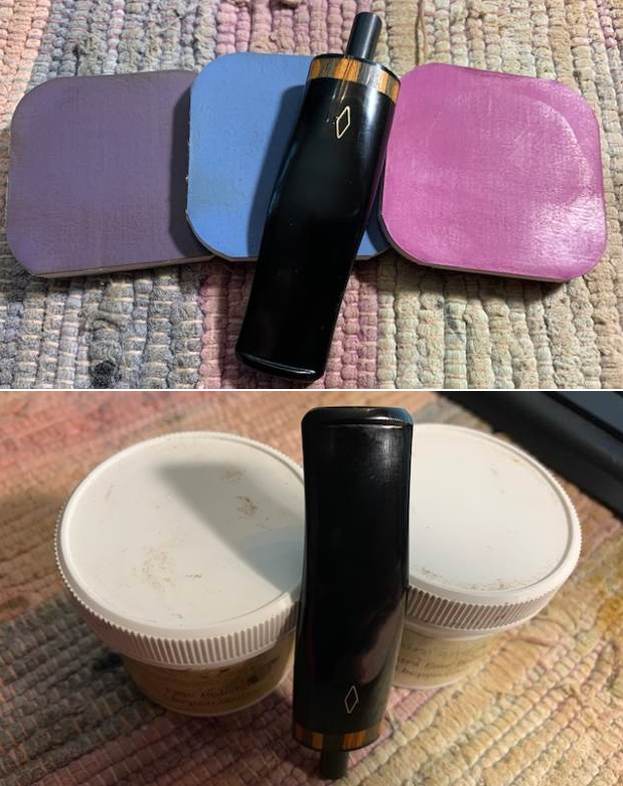
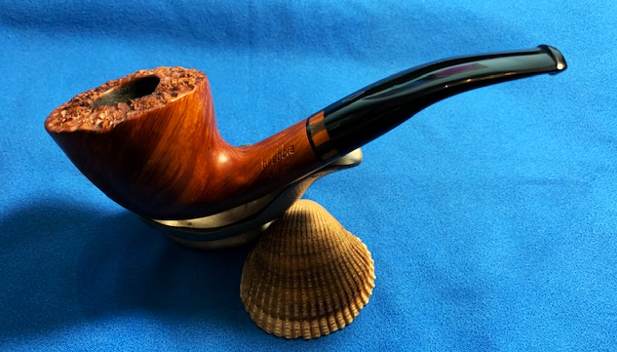
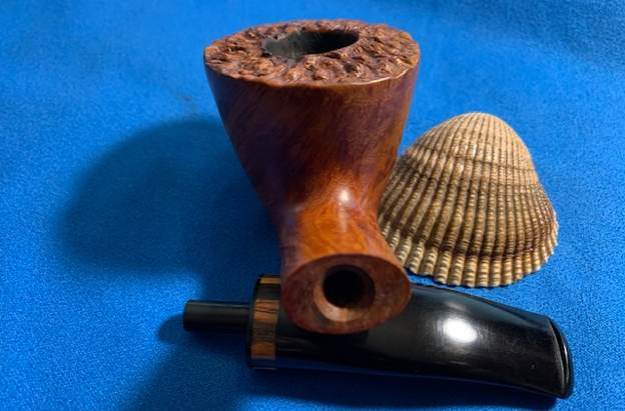
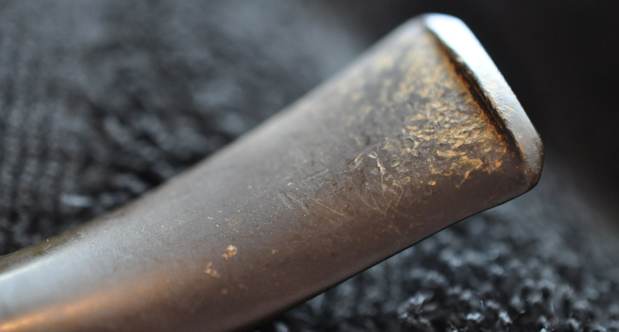
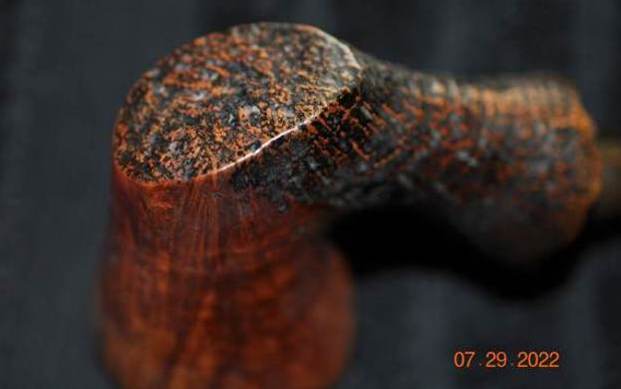
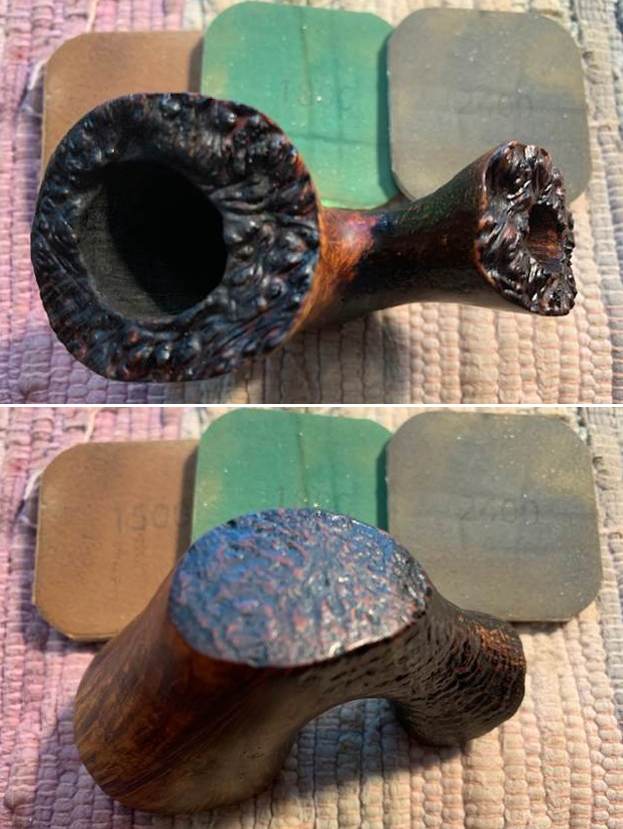
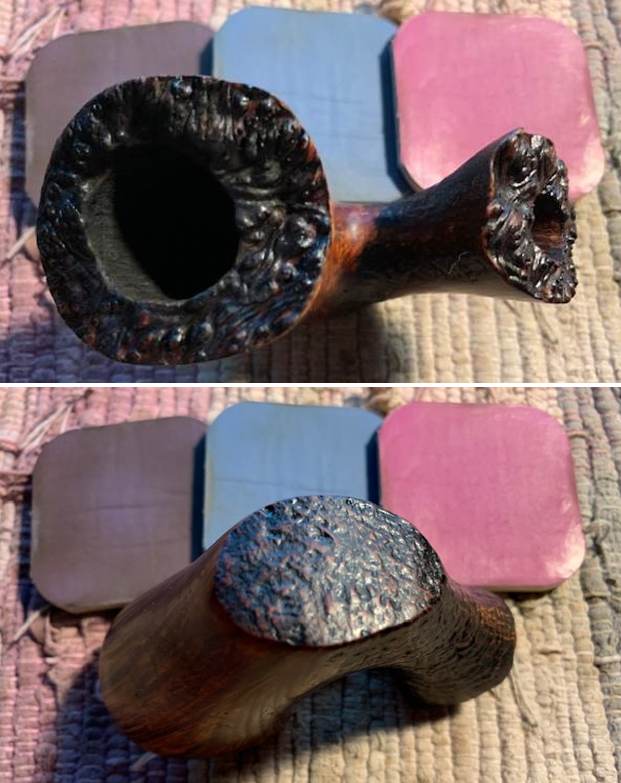
 He took close-up photos of the bowl and rim top from various angles to capture the condition of the bowl, rim top and edges of the bowl. The cake was very thick and the bowl overflowed in thick lava on to the rim top filling in much of the valleys in the plateau. He also captured the condition of the top and underside of the stem. You can see the tooth marks and chatter on both sides ahead of the button. It was a well used, dirty pipe.
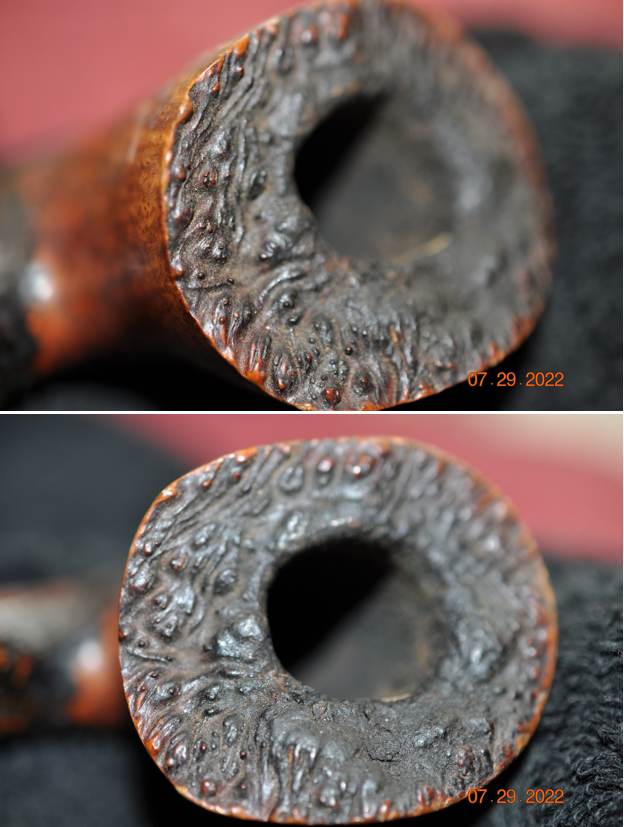

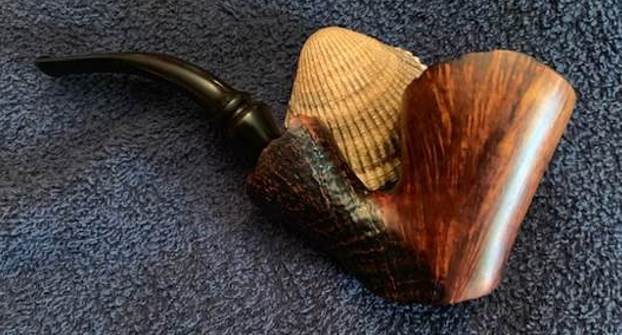
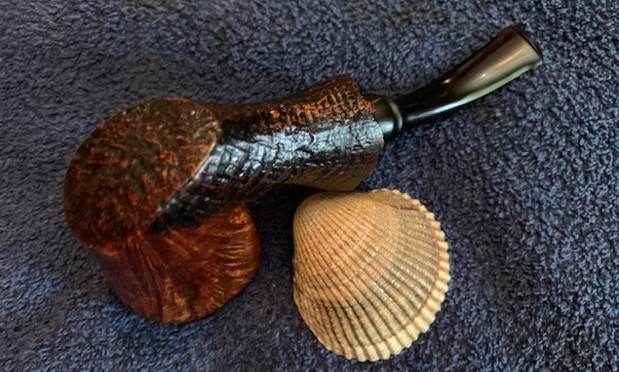
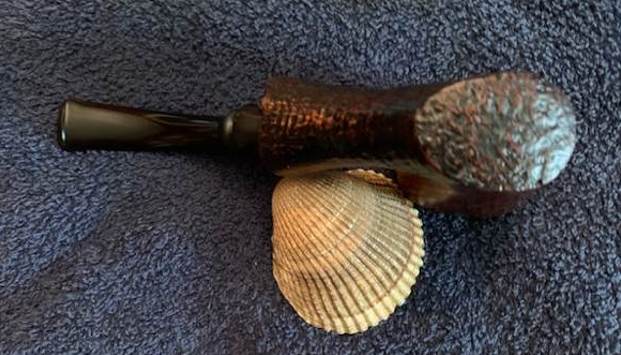
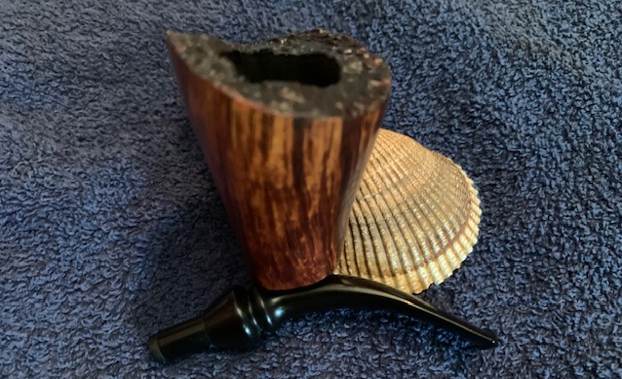
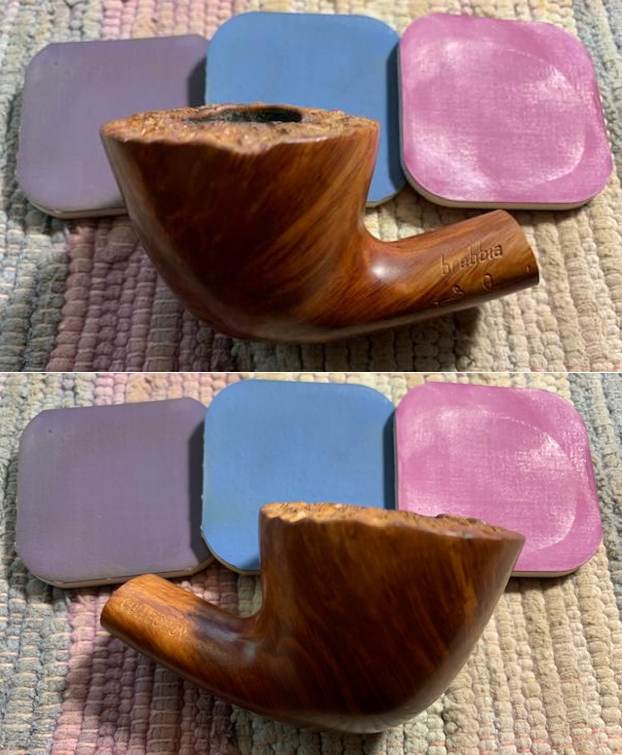
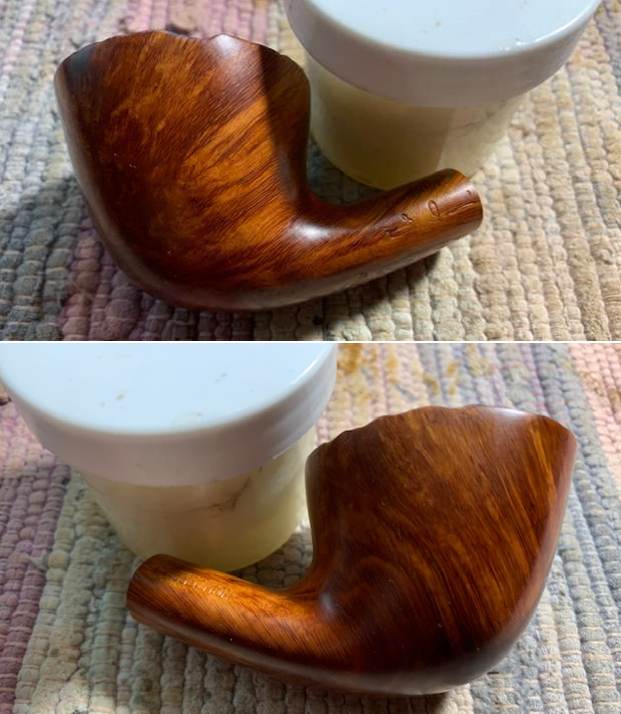
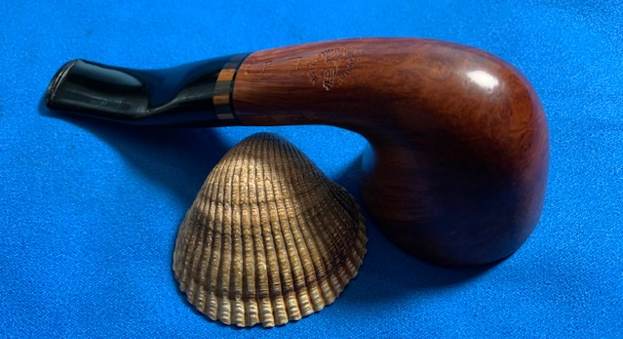
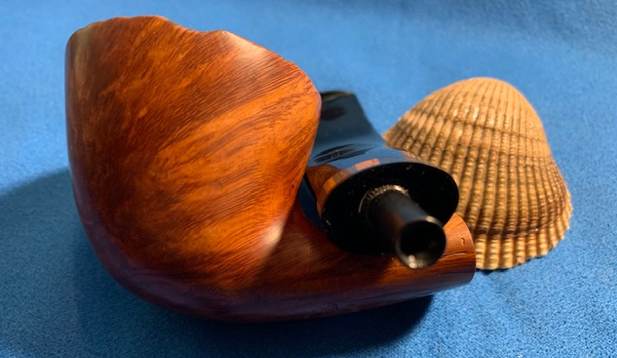
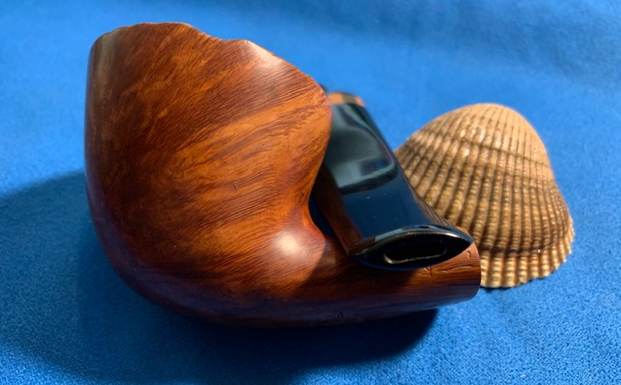
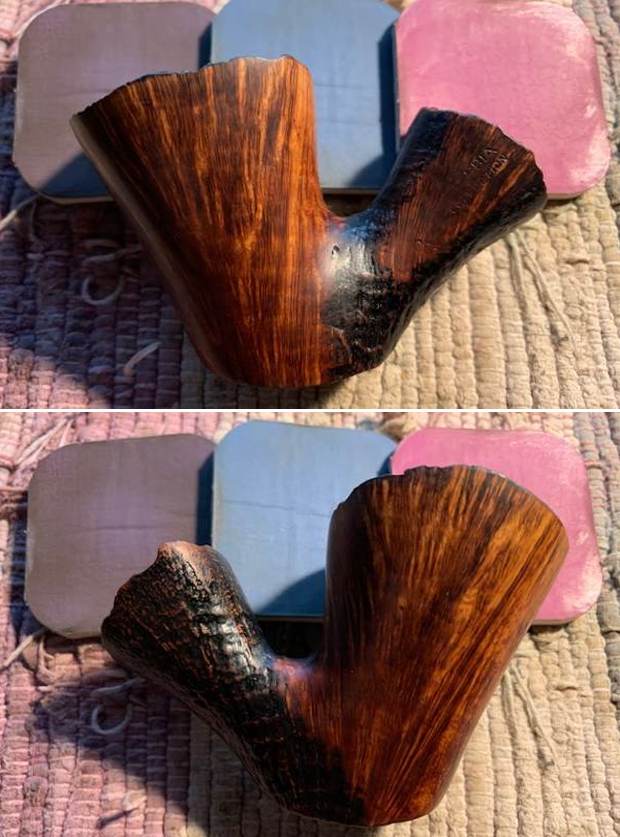
 He took photos of the sides and heel of the bowl to show the condition of the beautiful sandblast around the shank and the heel of the bowl. You can also see the smooth bowl sides with great grain shining through the grime and debris of time ground into the finish.
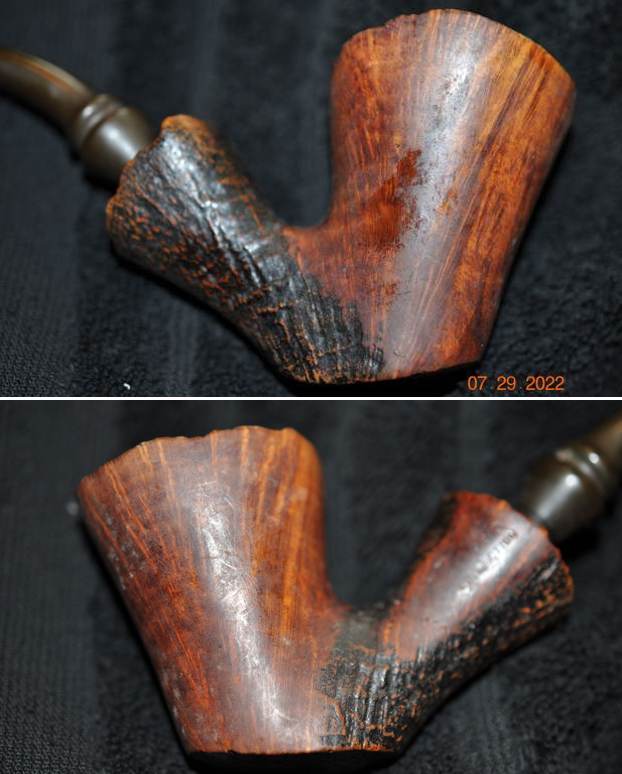
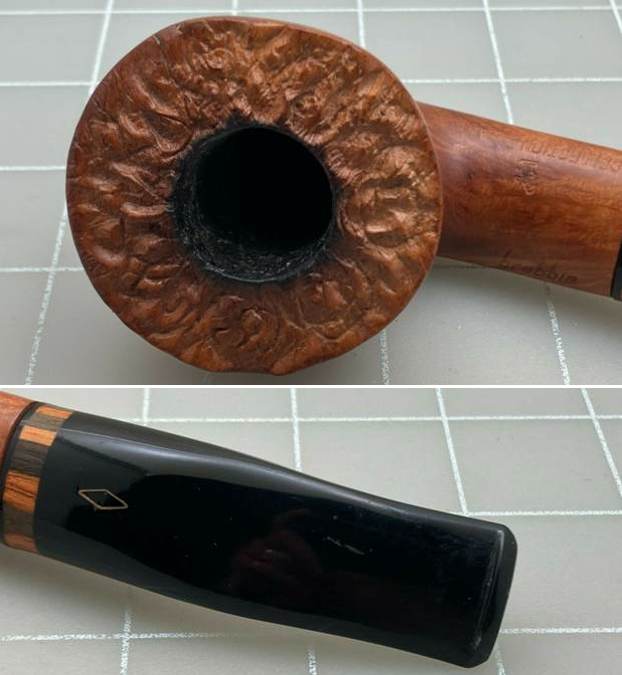
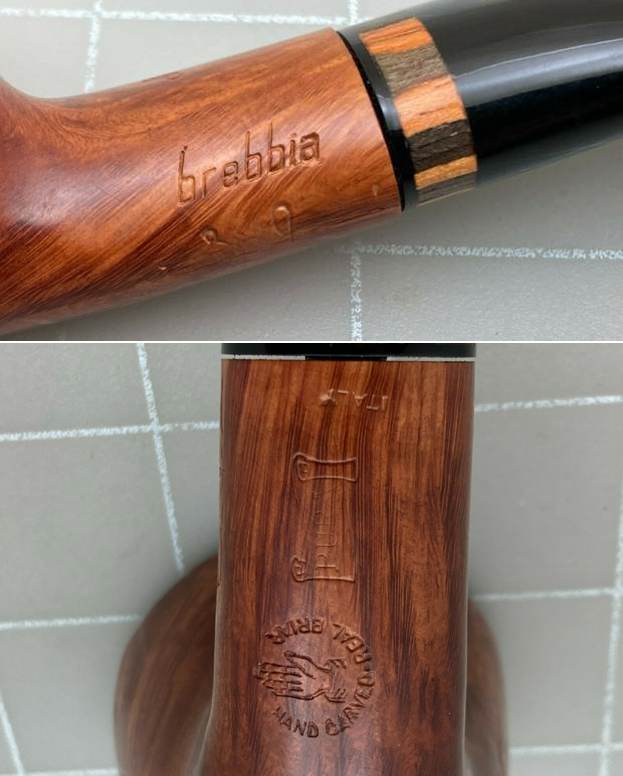
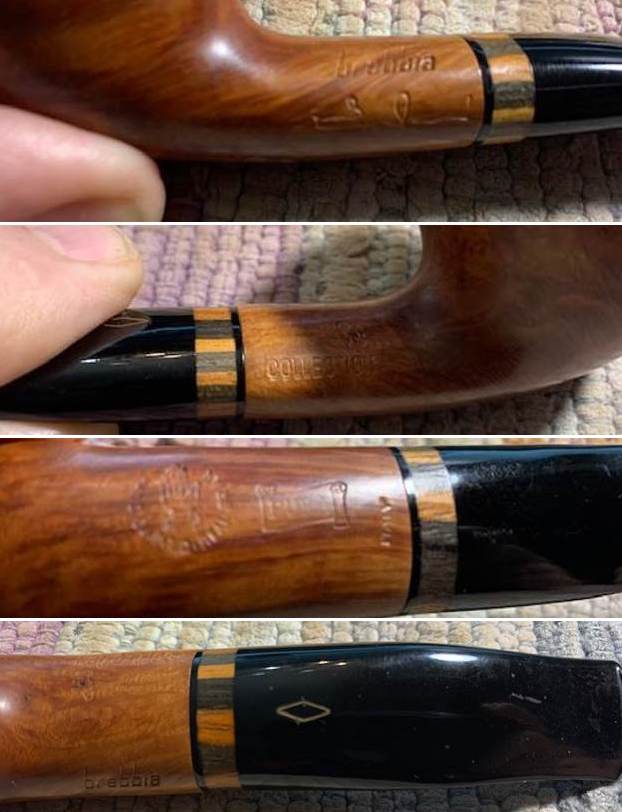
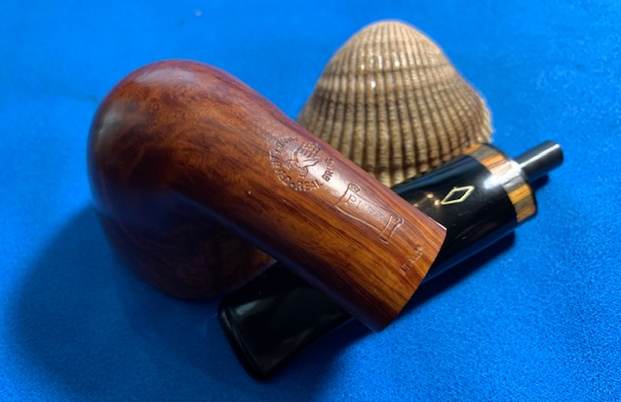
 Jeff took a photo of the stamping on the smooth panel on the left side of the shank. It is clear and readable as noted above.
 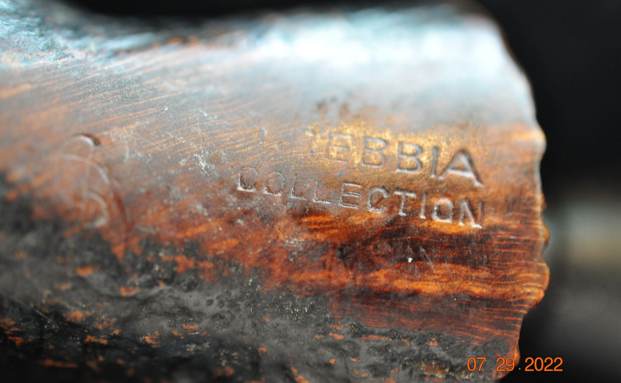 Now I wanted to find out about the brand and particularly the specific Collection line. I wanted get the details on this pipe before I carried on with my work. I had worked previously on a Brebbia Collection Pura so I have included the link on that pipe for you to read. It is quite different from this Danish looking Freehand with true plateau on the rim top and shank end. It is quite fascinating to read about (https://rebornpipes.com/2022/05/06/breathing-new-life-into-a-brebbia-collection-hand-carved-pura/).
 I then turned to Pipephil’s site to get a quick summary on the brand and to see if there was any information on the Collection line (http://pipephil.eu/logos/en/logo-brebbia.html) I have included photos of the Buzzi’s – Enea and his son Luciano to the left. I quote the sidebar below.
The Brebbia brand Brebbia Pipe is named after the locality of Bosco Grosso di Brebbia (Prov. Varese, Reg. Lombardia). A first corporate was founded by Enea Buzzi and Achille Savinelli in 1947. They split in 1953. Buzzi ketp the factory and created the MPB brand (Maniffatura Pipe Brebbia). After 1968 the brand was shortly called “Brebbia”. Luciano Buzzi son of Enea manages the company since the 1990s. Italy
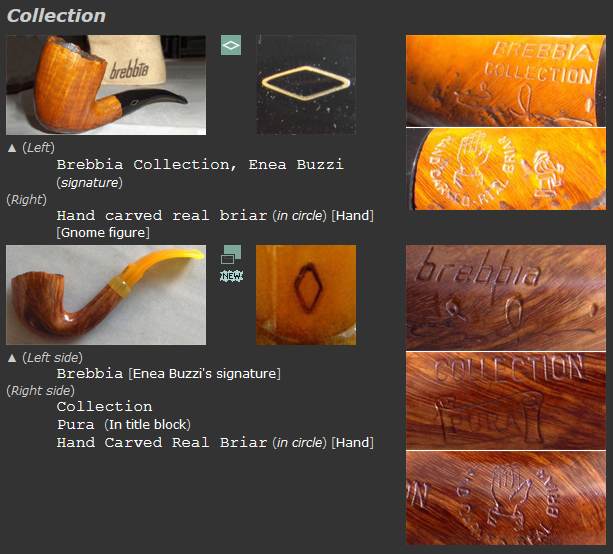
I have also done a screen capture of the pertinent section on the Collection line below. It is a fascinating piece of information. The pipe I am working on has the stamp on the left side that is parallel to the first one below. It has the signature or initials carved near the shank bowl joint. It does not have he stamp that is shown on the right side below. It does not have the carved hand made in a circle nor the gnome figure. It makes me wonder when this one was made.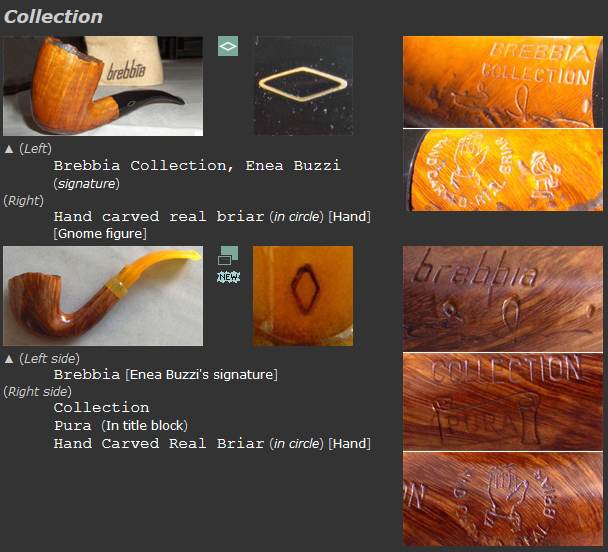 I then turned to Pipedia to read some more detail on the brand (https://pipedia.org/wiki/Brebbia). There was nothing specific there about the Collection Line/Series but some great history. The connection with Savinelli is fascinating. I quote below.
Pipe Brebbia Srl, or better the M.P.B. (Manifattura Pipe Brebbia) was born in 1953 from the denouement of the association between Achille Savinelli and Enea Buzzi in 1947, where the first was employed in the marketing and the second in manufacturing of pipes under the name of Savinelli. It was made in exclusive up to 1953 and extended without further rights up to 1956.
The production, which is always careful and perfect, has continued in a traditional way for 60 years, using old lathes for the first steps, but finishing every piece by hand.
The secret of their manufacture, if we may put it this way, is the respect for the traditions with the experience acquired in several years of successful work, which could be summed up in two words: high quality.
The factory is currently managed by Enea’s son, Luciano…
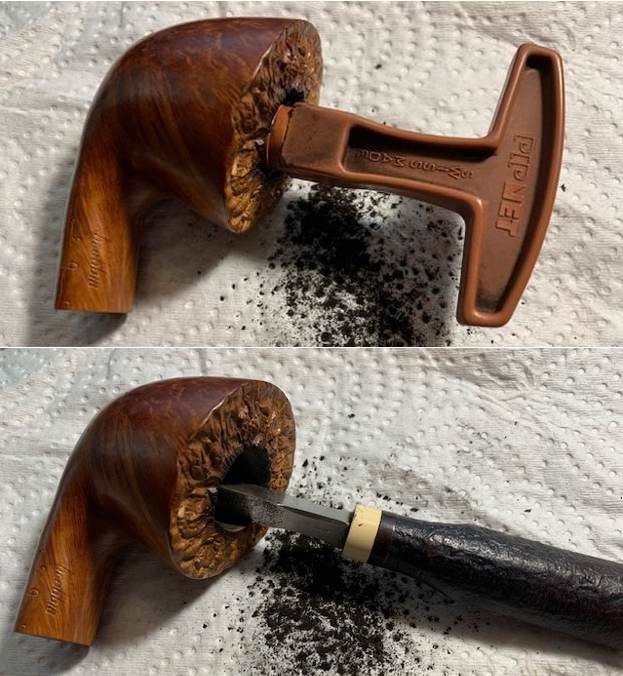
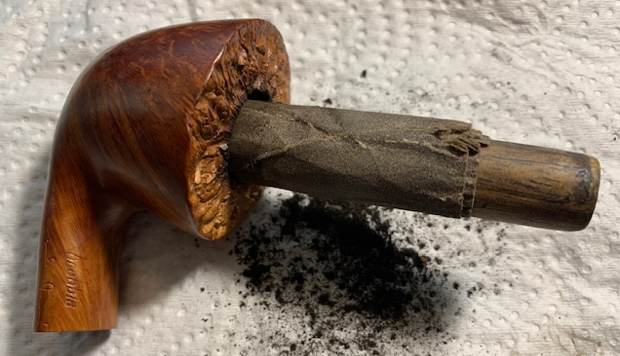
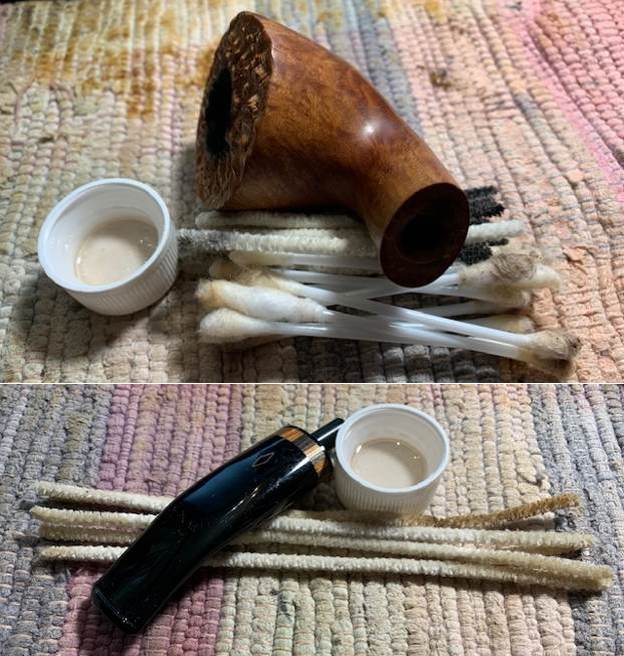
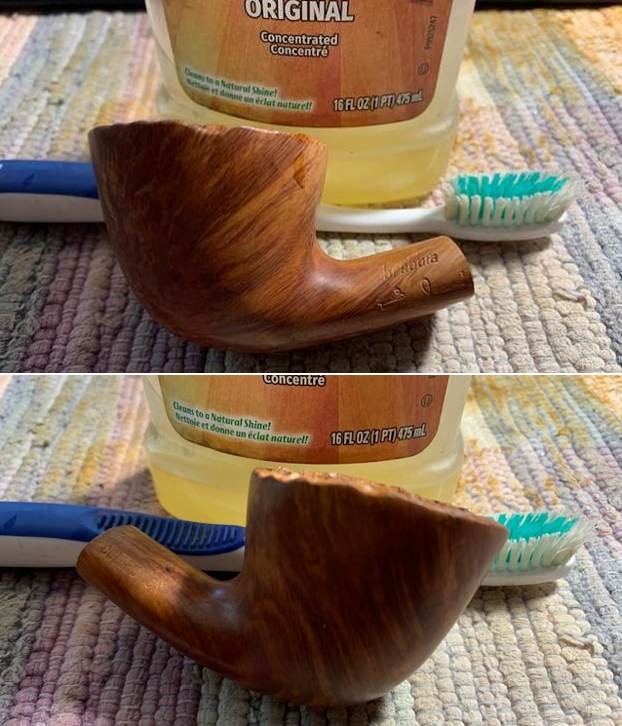
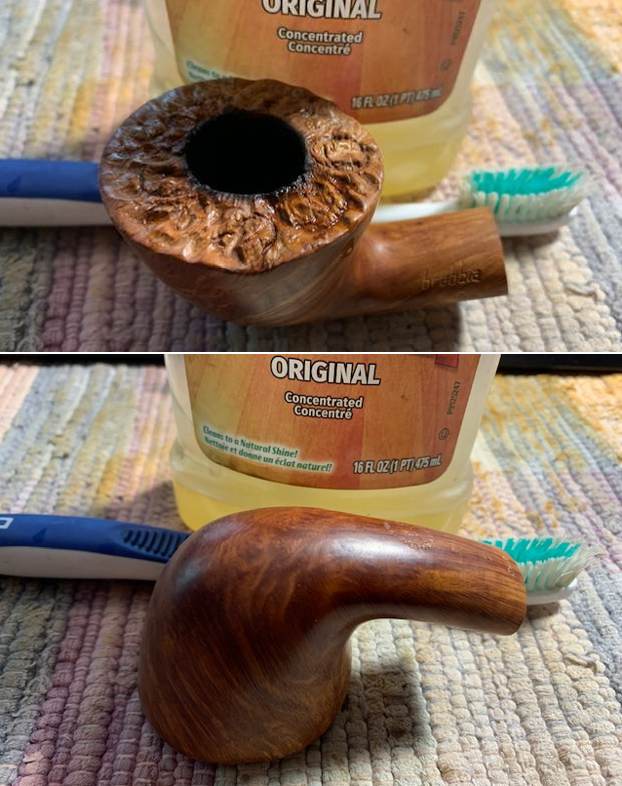
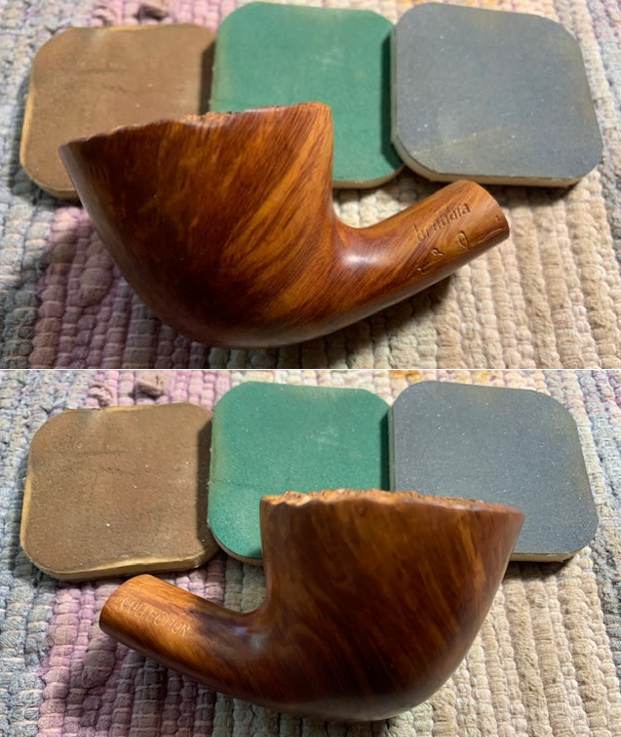
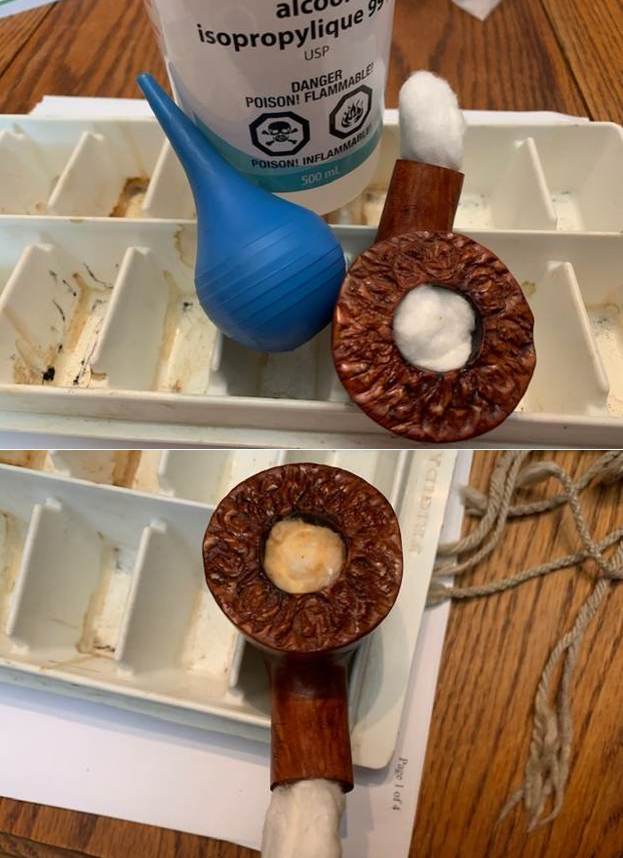
Jeff had reamed the pipe with a PipNet pipe reamer and cleaned up the reaming with a Savinelli Fitsall Pipe Knife. He scrubbed out the internals of the shank and stem with alcohol, pipe cleaners and cotton swabs until the pipe was clean. He scrubbed the exterior of the bowl with Murphy’s Oil Soap and a tooth brush to remove the grime and grit on the briar and the lava on the plateau rim top. The finish looks much better but there is still some darkening on the rim top and inner edge of the bowl. Jeff scrubbed the stem with Soft Scrub to remove the grime on the acrylic stem surface. When the pipe arrived here in Vancouver for the second stop of its restoration tour it looked a lot better. I took photos this morning before I started my part of the work. That is one of the benefits of being an early riser. 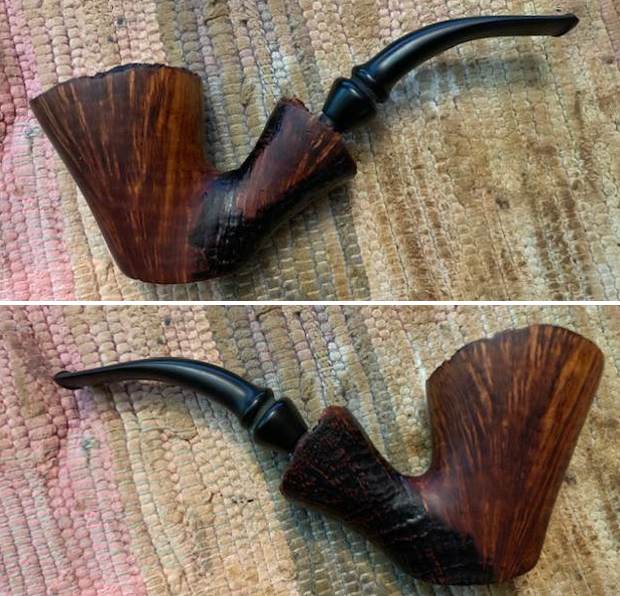
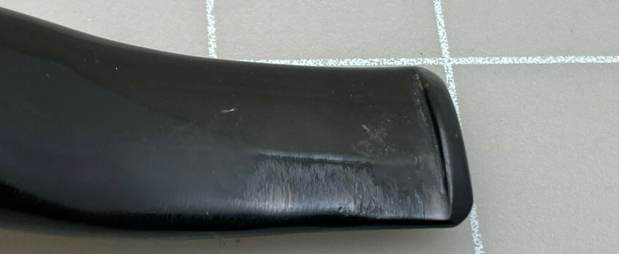
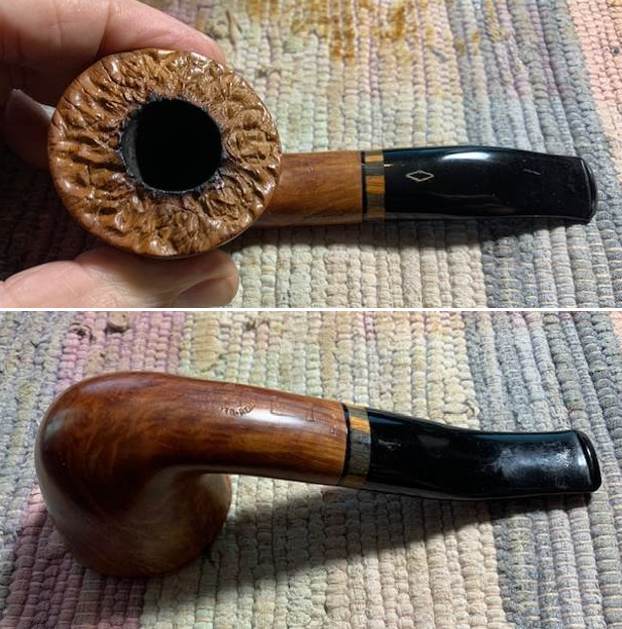
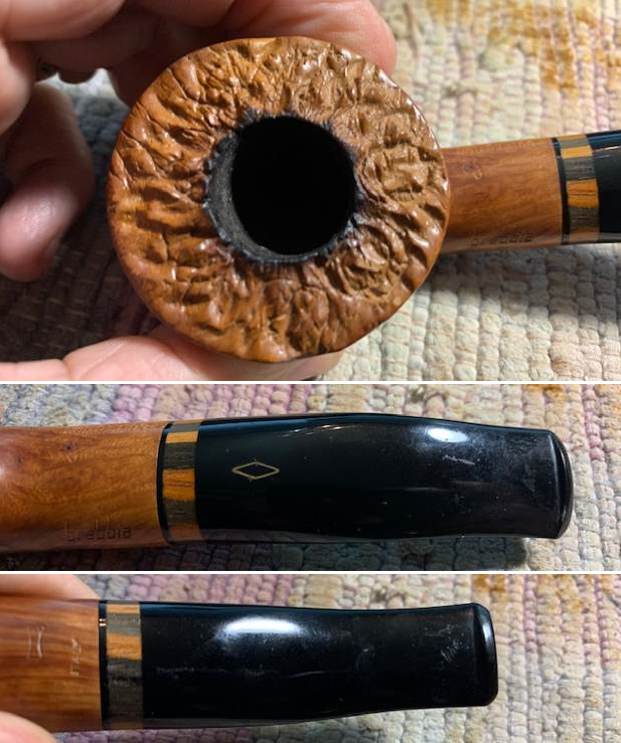
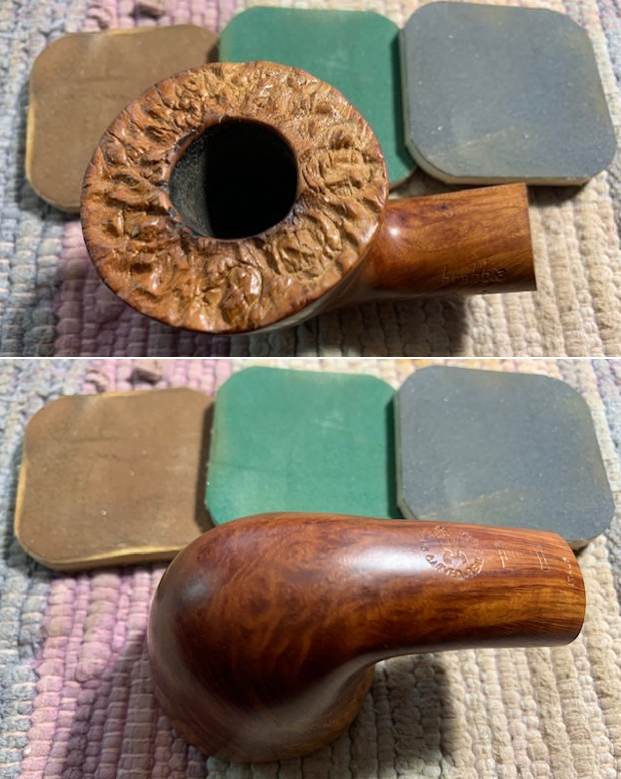
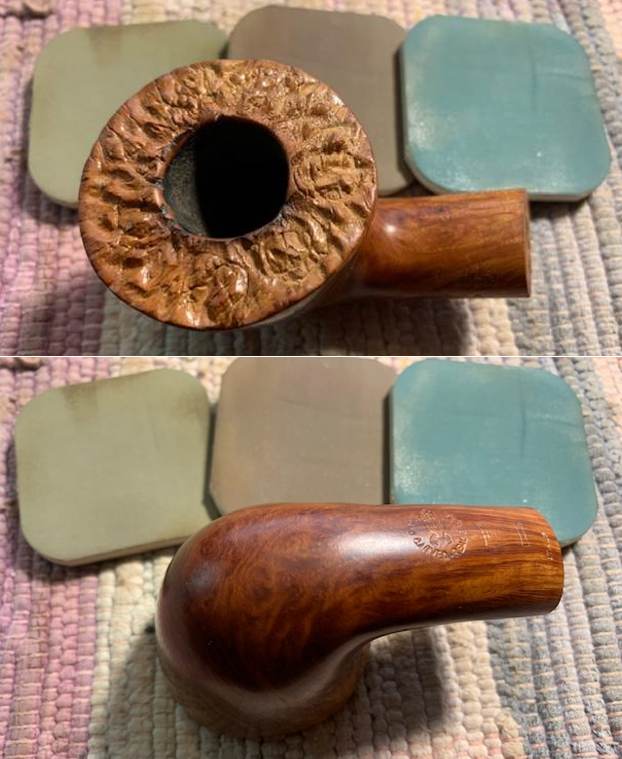
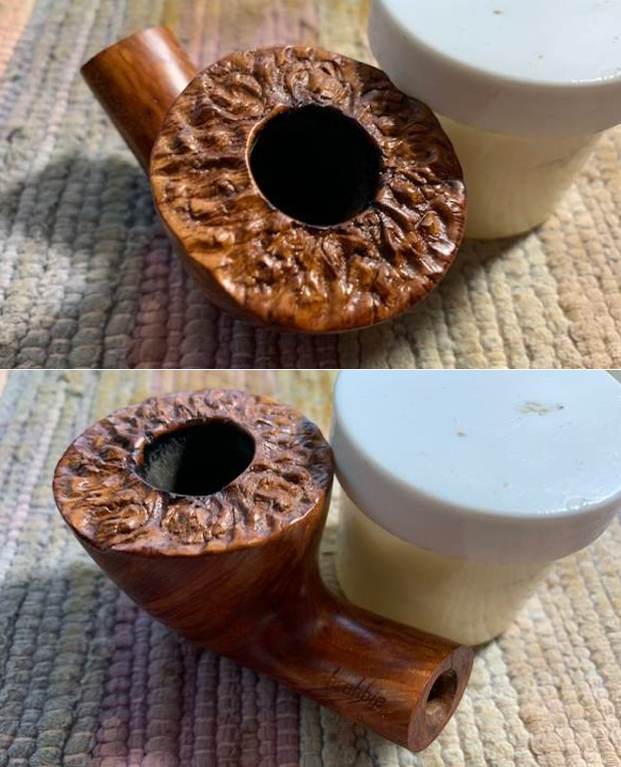
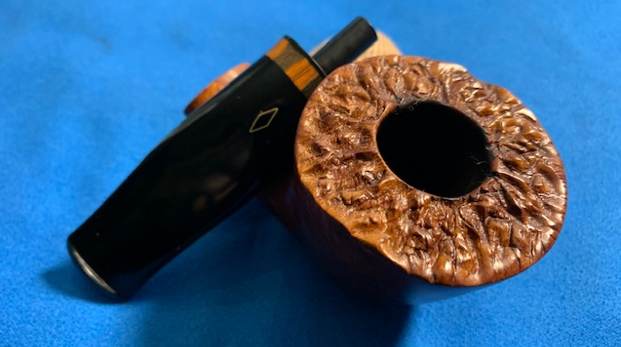
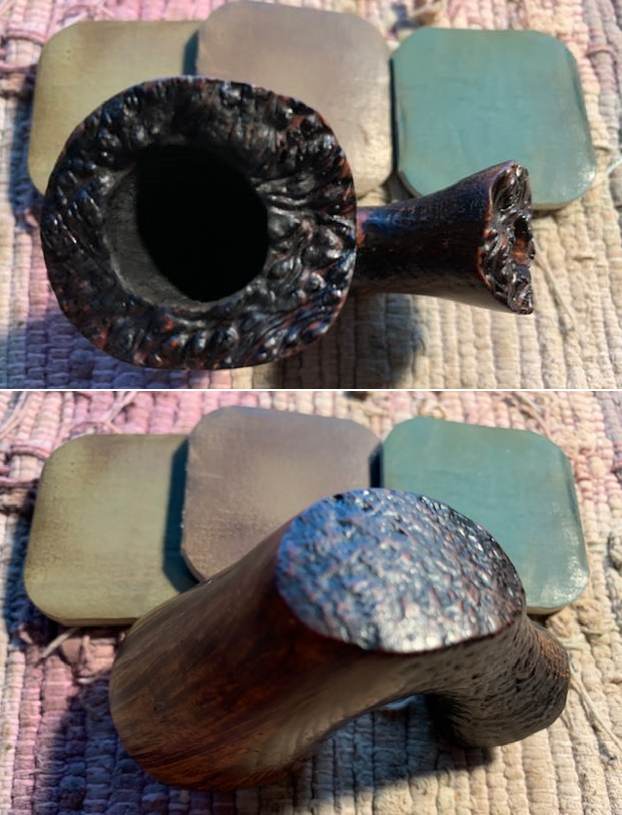
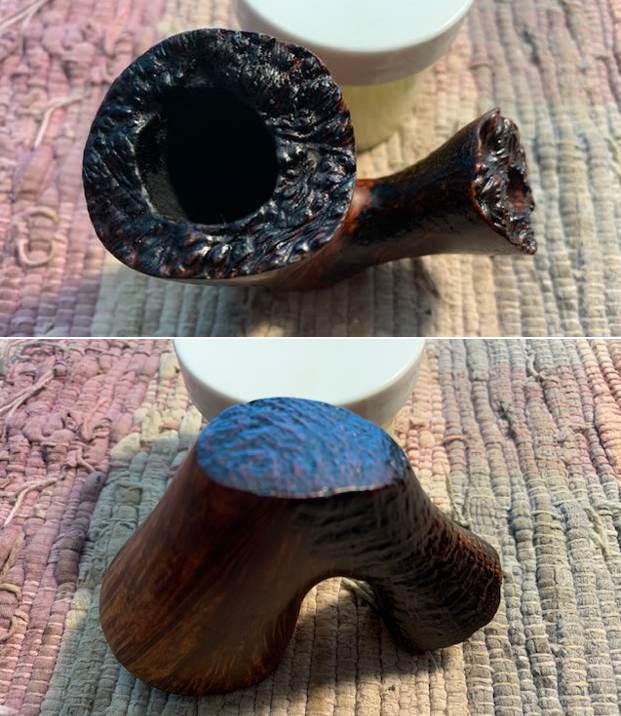
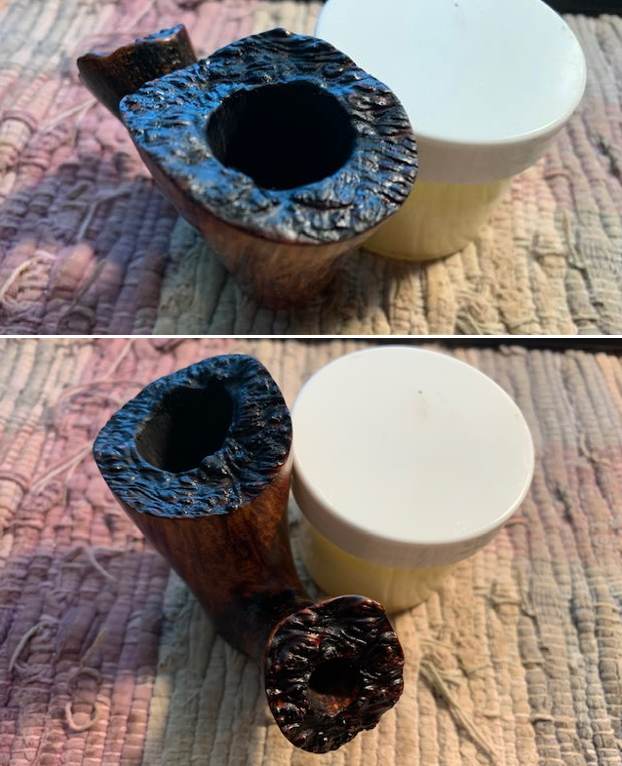
 I took some close up photos of the rim top and the stem surface. I wanted to show the cleaned bowl and rim top. The rim top and the inner and outer edges of the bowl were in excellent condition. There was some stain remaining in the deep grooves of the plateau rim and shank end. I also took close up photos of the stem to show the tooth marks on the stem surface.
 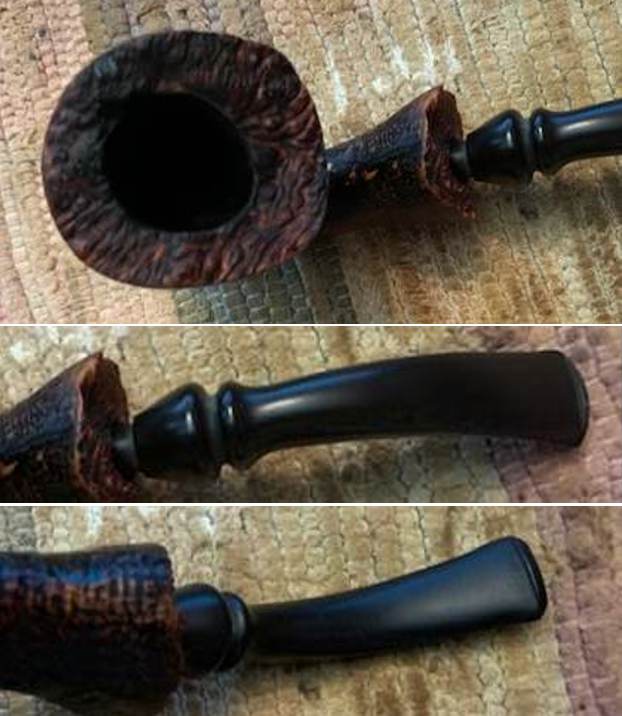 I took a photo of the stamping on the left side of the shank and it is readable as noted above.
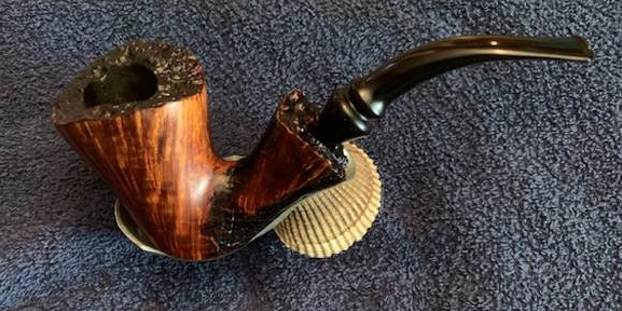
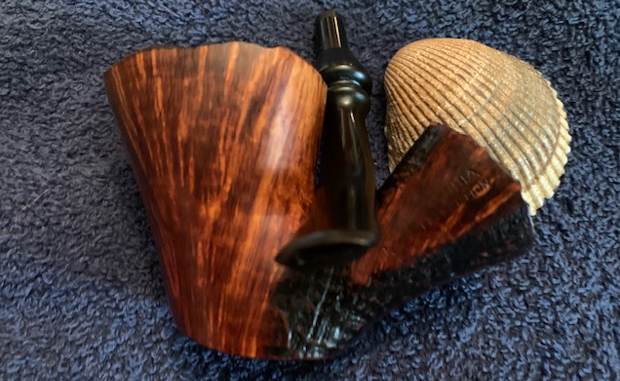
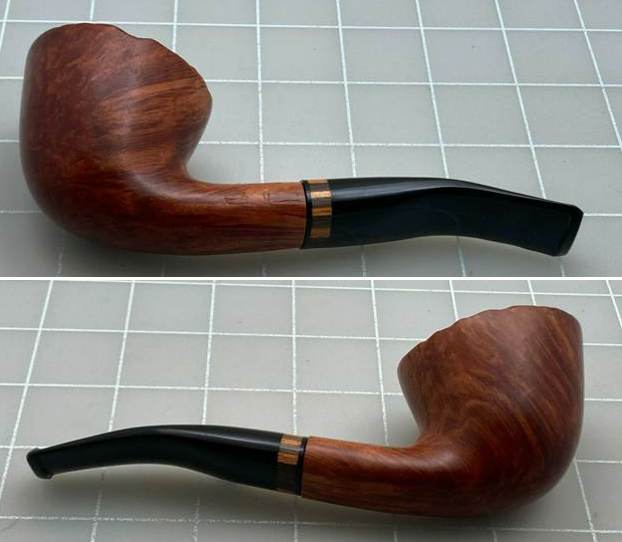
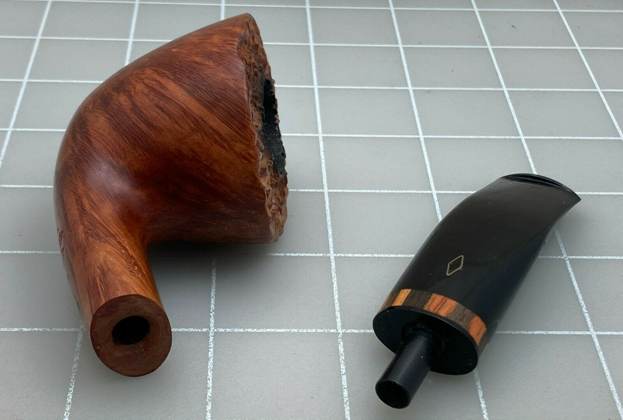
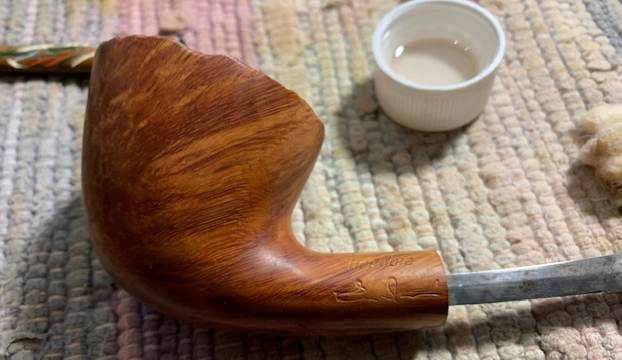
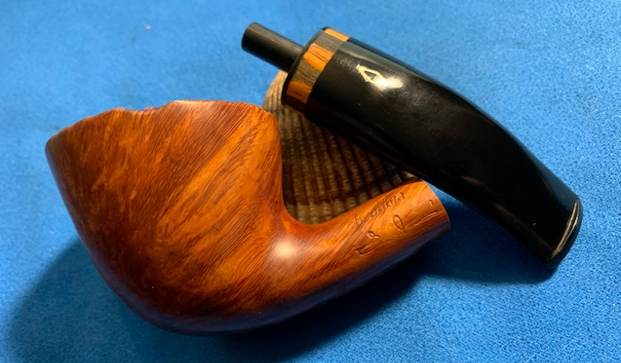
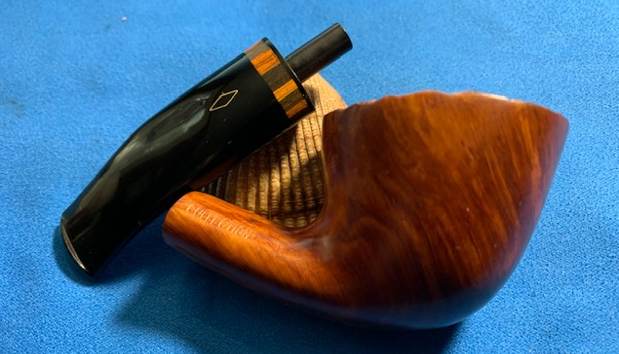
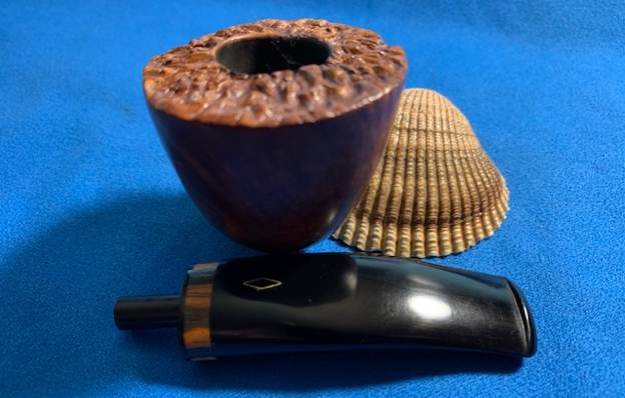
 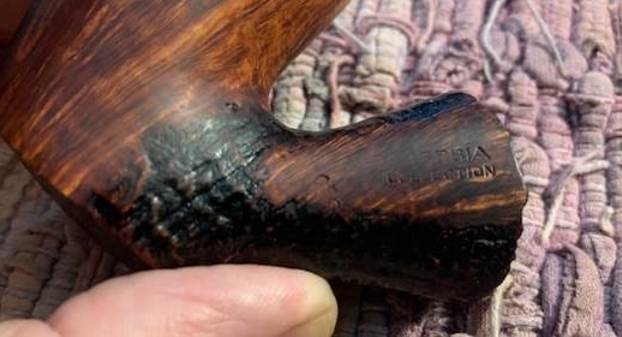 I removed the stem for the shank and took a photo of the bowl and stem to give a picture of what it looked like. The pipe is really quite beautiful.
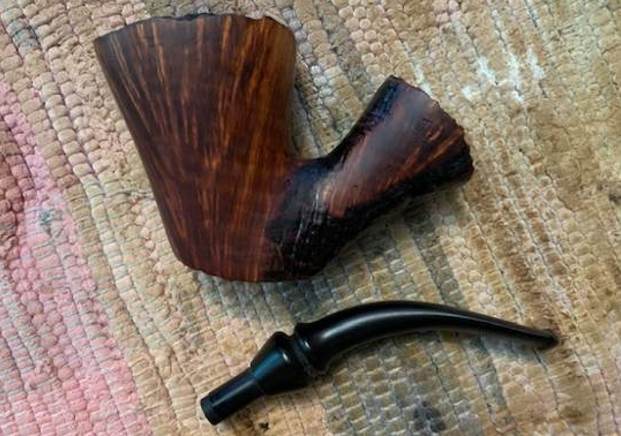 Jeff had done a good job on the rim top so I used a black stain pen to fill ins the grooves in the plateau on the rim top and shank end. Though the photo is a little dark you will see the results in the following photos below. It is looking quite stunning.
 I polished the smooth briar around the bowl with 1500-12000 grit micromesh sanding pads to raise the shine and make the grain pop. I wipe the briar down after each pad with a damp cloth to remove the sanding debris. Using the higher grits of micromesh from 3200-12000 I also polished the sandblast areas and the plateau on the rim and the shank end. It is really starting to have a rich glow in the briar and the stunning grain looks amazing.
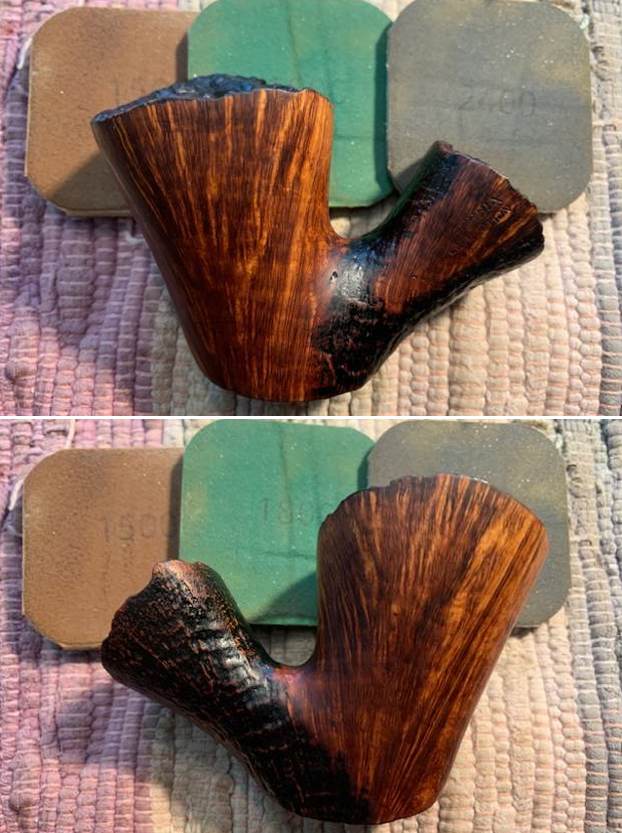
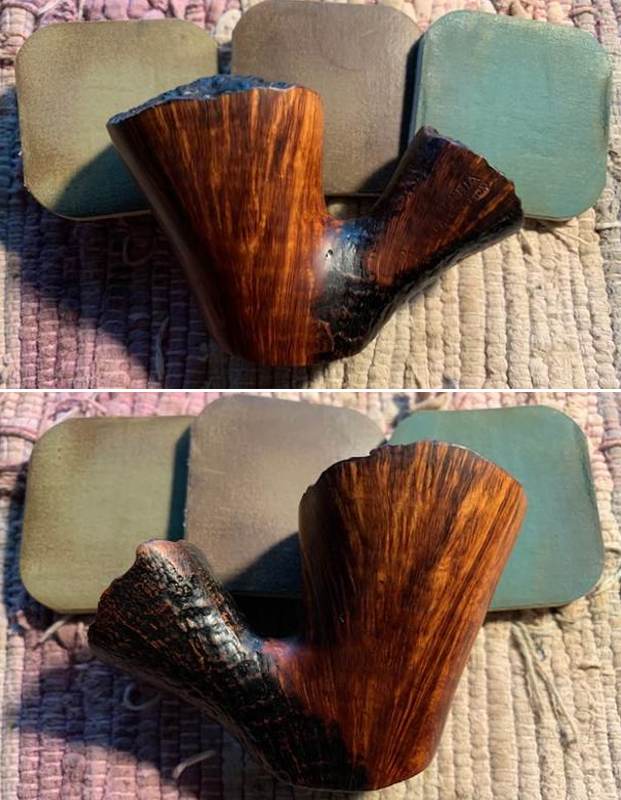
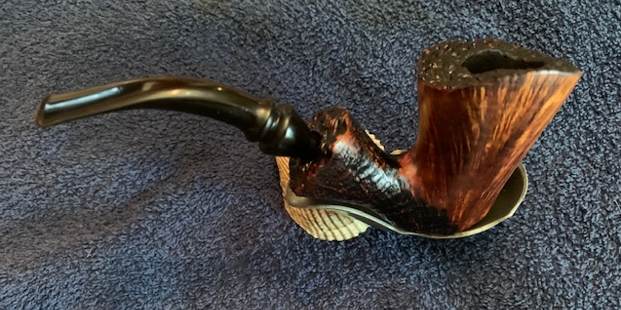
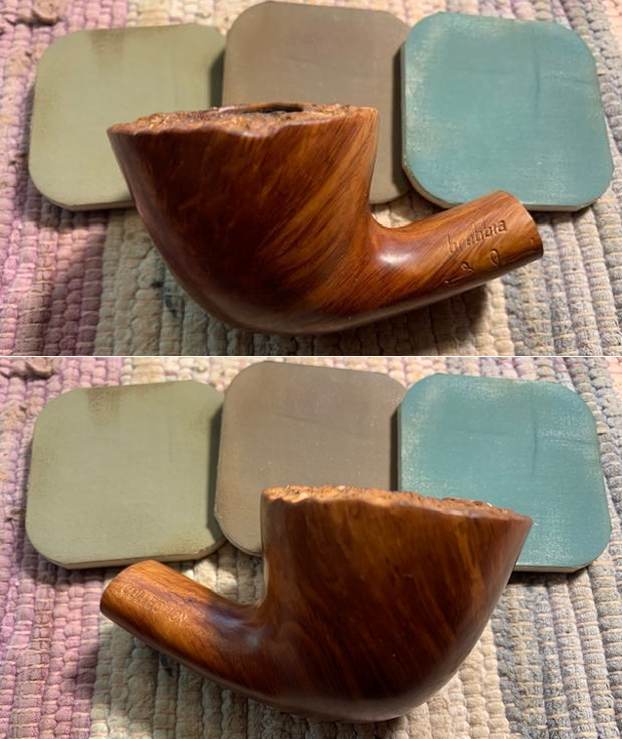
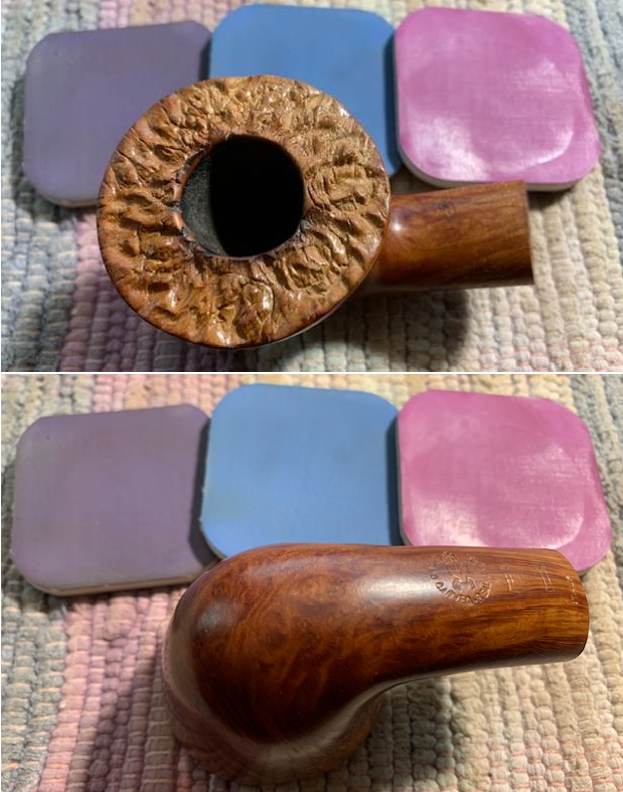
 I rubbed the bowl and shank down with Before & After Restoration Balm to deep clean the finish on the bowl and shank. The product works to clean, enliven and protect the briar. I worked it in with my fingertips on the smooth portions and a horse hair shoe brush to get it into the nooks and crannies of the sand blast finish and the plateau on the rim and shank end. I let it sit for 10 minutes to let it do its magic. I buffed it with a soft cloth. The briar really began to have a rich shine. I took some photos of the bowl at this point to mark the progress in the restoration. The finish – both straight and flame grain along with the sandblast is rich and shows depth.
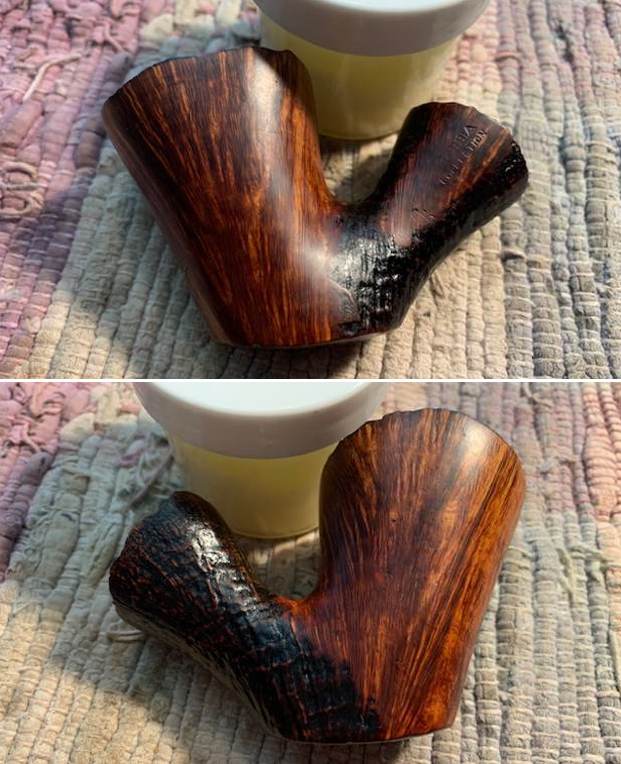
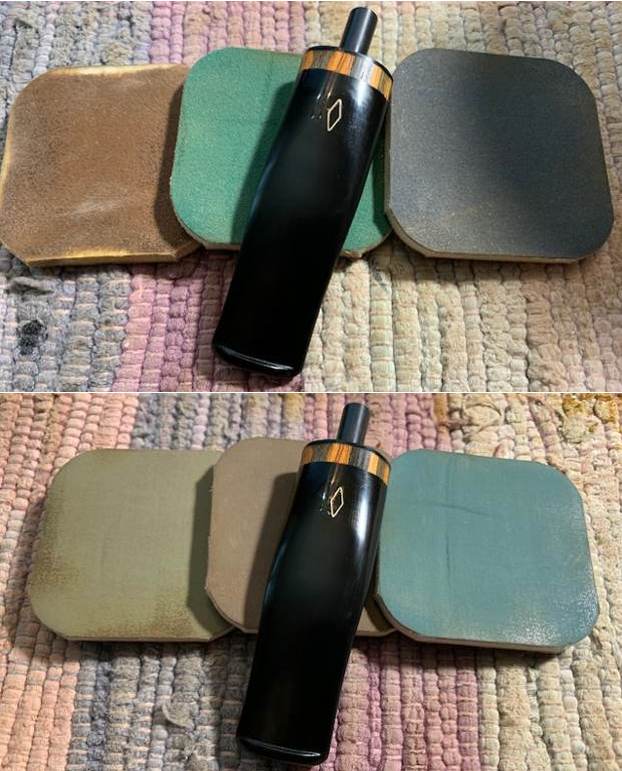
 I set the bowl aside and turned my attention to the tooth marks and chatter in the stem. I sanded the stem surface with 220 grit sandpaper and removed the chatter and marks against the button edge. I started polishing the stem with 400 grit wet dry sandpaper.
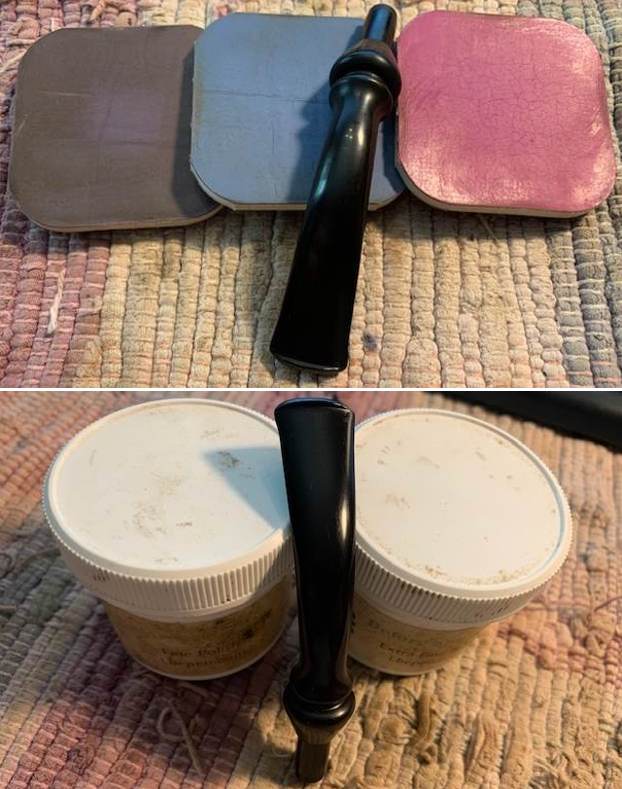
 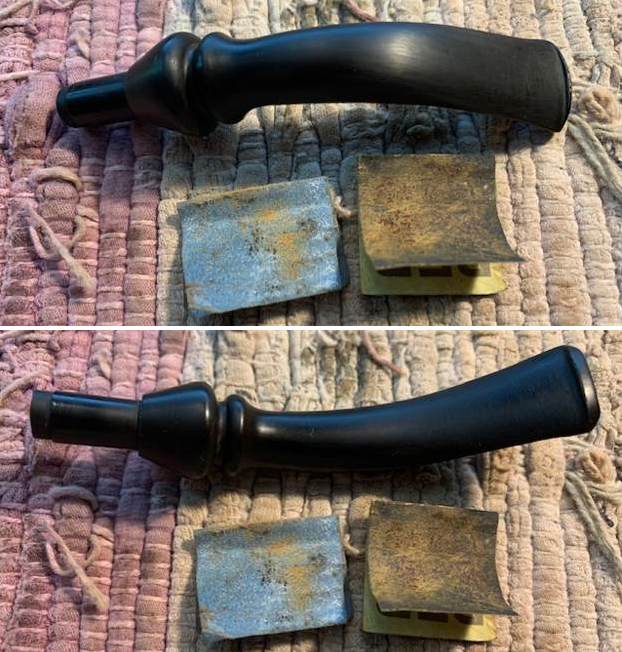 I polished the stem with micromesh sanding pads – dry sanding with 1500-12000 grit pads. The stem took on a rich glow and the marks are gone. I polished it with Before & After Stem Polish – both Fine and Extra Fine and wiped it down with some Obsidian Oil.
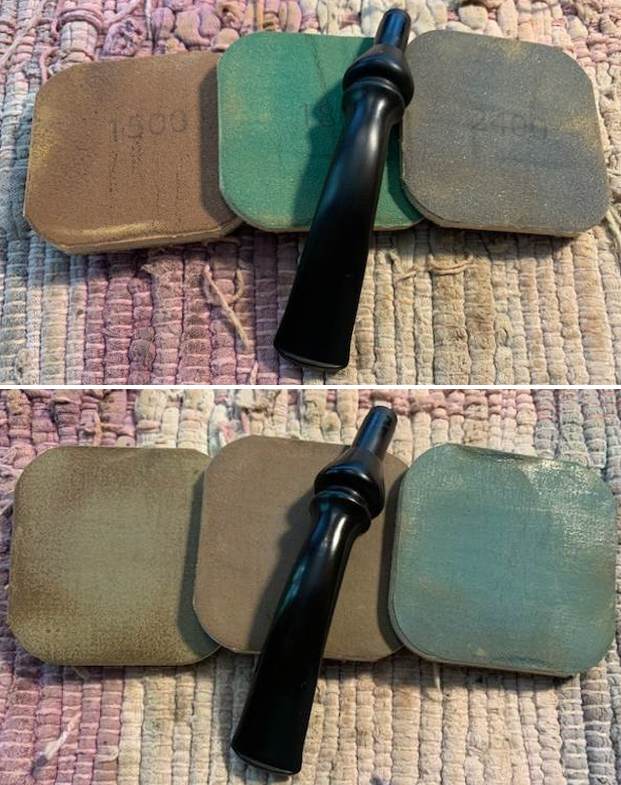
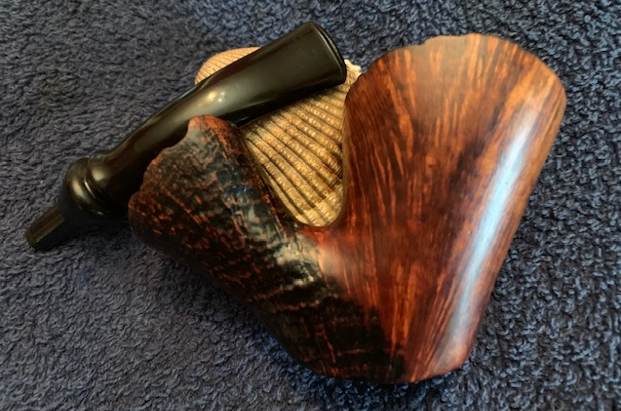
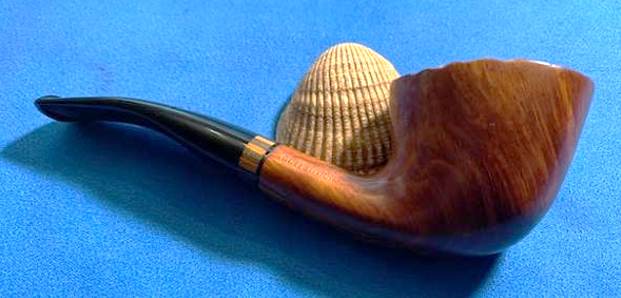
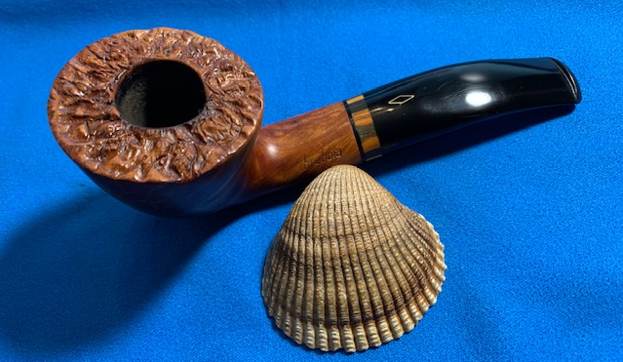
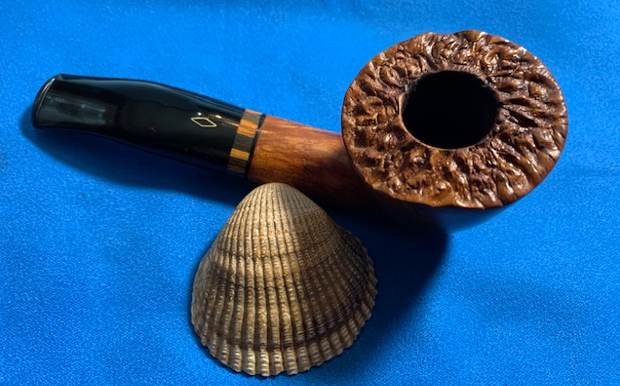
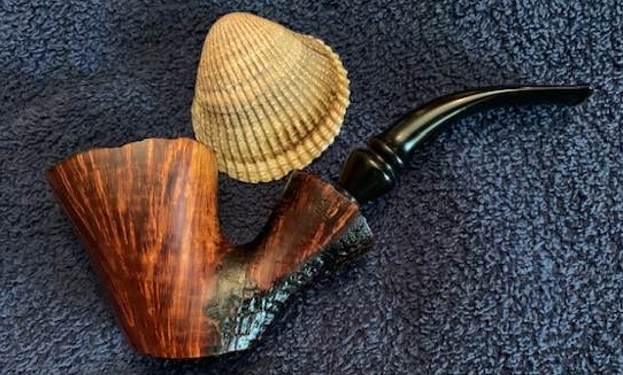
 I put the Brebbia Collection Danish Style Freehand back together and buffed it on the wheel with Blue Diamond. It polished out the tiny scratches remaining in the acrylic and the smooth briar. I gave it multiple coats of carnauba with the wheel. I buffed it with a clean wheel on the buffer and hand buffed it with a soft cloth to deepen the shine. The finished pipe looks very good. The Demisandblast/smooth finish highlights the grain both on the smooth portions and the sandblast ones and it is a stunning pipe. The pipe feels great in the hand and is comfortable and light weight for its size. The finished Brebbia Freehand is shown in the photos below. The dimensions of the pipe are Length: 6 inches, Height: 2 inches, Outside diameter of the bowl: 1 ½ x 2 inches, Chamber diameter: ¾ of an inch. The weight of the pipe is 1.83 ounces/ 52 grams. I will soon be adding this pipe to the rebornpipes store in the Italian Pipemakers Section so if you are interested in adding it to your collection please let me know. Thanks for reading this blog and my reflections on the pipe while I worked on it.