Blog by Steve Laug
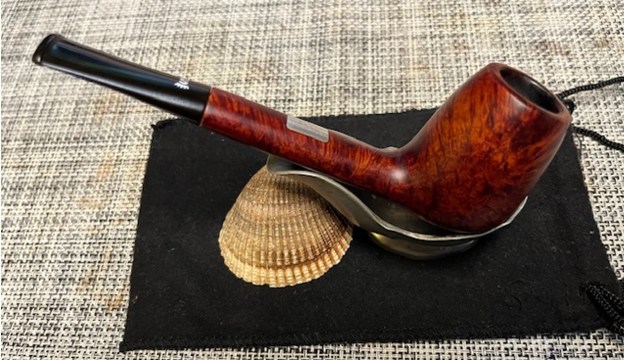
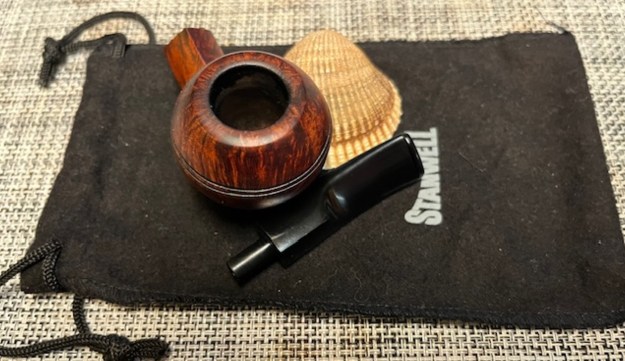
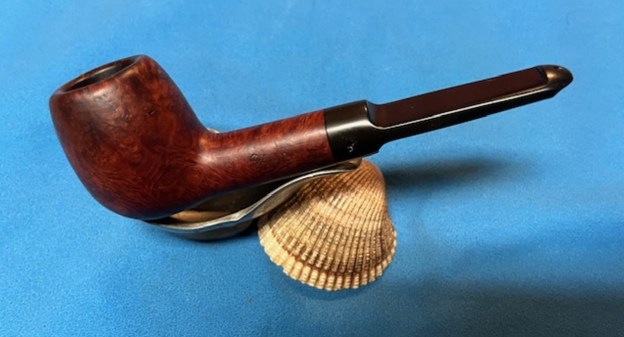
 I moved on to work on another pipe. The next one I chose was another Stanwell in a Pipe Sock that came to us from our connection in Copenhagen, Denmark 01/26/2023. This is another one that might be your birth year pipe is you were born in 2001 when this Danish City Pipe was made. The stamping on the pipe was very clear and readable. On the topside of the shank is an engraved brass plate that reads Rødovre [over] 2001. On the underside of the shank it is stamped with a shape number 148 mid-shank. Next to the shank/stem joint it reads Stanwell [over] Made in Denmark. The stem had a brass Crowned “S” Stanwell logo inlaid on top of the saddle stem. The bowl had a moderate cake and there was some lava, dust and debris on the rim top and inner edges. The finish was in okay condition with oils and grime ground into the briar around the bowl sides. There is a small fill on the heel of the bowl that is blended in quite well. There is a thin brass decorative band on the shank. The saddle stem was acrylic and there were light tooth marks on the top and underside next to the button. It showed a lot of promise through the grime. Jeff took photos of the pipe as he saw it at this stage of his clean up.

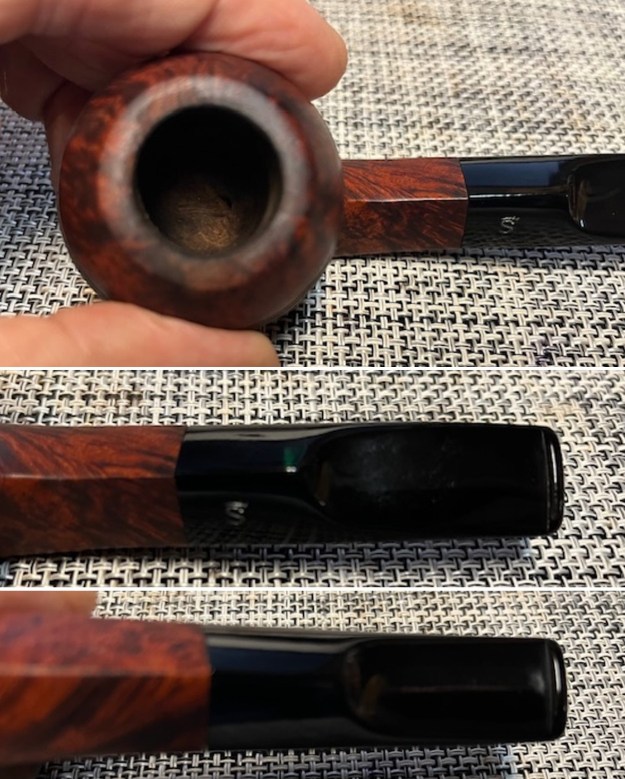
 The next photos of the rim and the shank show the condition of the pipe at its arrival in Idaho. You can see the cake in the bowl and the thick lava on the rim top and inner edge. The stem looked good with light marks on the top and underside at the button edge.

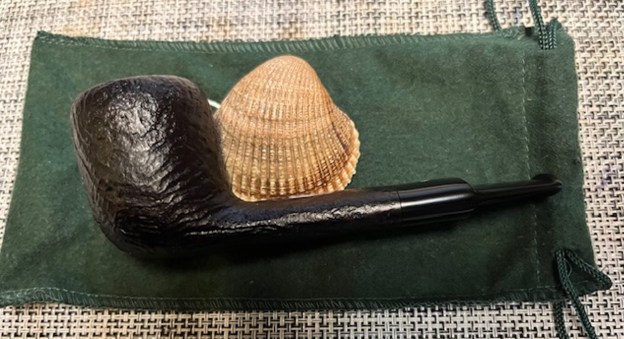
 Jeff took photos of the rich stain highlighting the grain on the sides and heel of the bowl. It really is a stunning piece of briar. The contrast stain really makes it stand out clearly. In the last photo of the heel of the bowl you can see the fill. It is solid and undamaged.
 The next photos show the stamping on the shank top and bottom. It is clear and readable as noted above. The stamping on the brass insert is clear and readable. He also captured the Brass Crown “S” Stanwell logo on the topside of the taper stem.
 I had spent a fair bit of time trying to figure out the Stanwell City pipes when I was working on the Esbjerg Canadian. I did a quick check and found nothing more. The best I can find is that they were made for a pipe show or a slow smoking competition in those particular cities. I have several of them here that I have to work on. I do know that Rødovre is another city in Denmark.
Last evening, I had an idea about how to gather some information on the pipes. I thought that Jesper (a friend and blog reader) in Randers, Denmark perhaps would have information on the city pipes. I wrote him a message on FaceBook. This morning I read his reply. As usual he was extremely helpful. Thank you Jesper!
Hi Steve,
The city POY pipes were made (rather customized) for individual tobacco shows all over Denmark. The tobacconist chose a model and Stanwell would make them and do the engravings. So a Viborg 1995 might be a Bulldog while the Vejle 1995 is a Lovat.
I have no idea about how many tobacconists/cities did that but they were quite popular 20-30 years ago. When I worked at FF Pipes here in Randers around 200 we usually bought 3-4 dozens each year and they sold well for Christmas.
Cheers, Jesper
Thanks to Jesper, I now knew that the City POY pipes were customized for individual tobacco shows all over Denmark. The tobacconist would choose the model and Stanwell would to the do the engraving on them. I also learned that they were quite popular 20-30 year ago so I was dealing with a pipe at least that old.
I turned to Pipedia and looked at the Shape Numbers and Designers article to see if there were any specifics (https://pipedia.org/wiki/Stanwell_Shape_Numbers_and_Designers) that could help. This is what I found there, the 148 shape was a Canadian with a short saddle mouthpiece and was designed orginally by Jess Chonowitsch. Now it was time to work on this interesting pipe with a great designer attached and a unique and fascinating pipe history also attached.
Jeff had done a great job cleaning up the pipe as usual. He reamed the pipe with a PipNet reamer and cut back the cake back to the bare briar. He cleaned up the walls with a Savinelli Fitsall Pipe Knife. He scrubbed the interior of the bowl and shank with pipe cleaners, cotton swabs and alcohol to remove the tars and oils. He scrubbed the exterior of the pipe with Murphy’s Oil Soap and a tooth brush to remove the grime from the finish. He worked on the rim top lava and darkening with the soap and tooth brush. He scrubbed the inside of the stem with alcohol and pipe cleaners. He scrubbed the exterior with Soft Scrub and then soaked it in Briarville’s Pipe Stem Deoxidizer. He washed it off with warm water to remove the Deoxidizer. The pipe looked far better when it arrived.
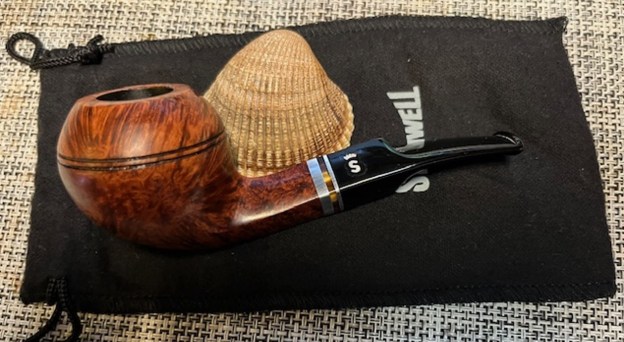
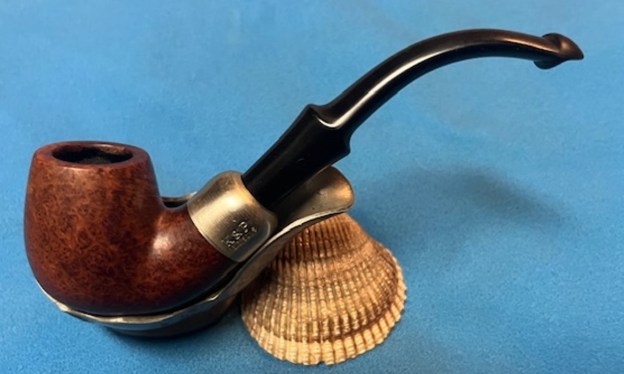
 I took photos of the bowl and rim top as well as the stem to show how clean they were. You can see that rim top and edges look very good. There is some slight darkening on the rim top that should come off with polishing. The stem is clean and the tooth and chatter on both sides ahead of the button is very light.
 I took photos of the stamping on the sides of the shank and on the brass plaquette. The stamping is readable as noted above.
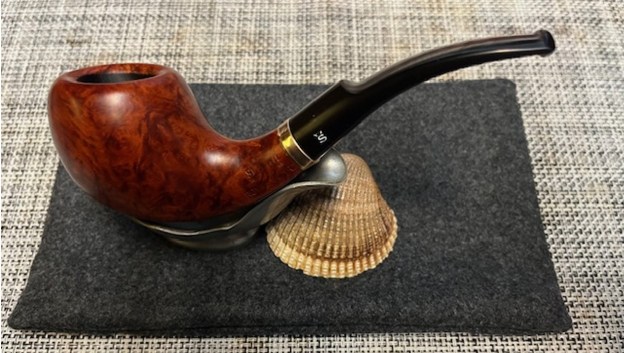
 I took the stem off the shank and took a photo to give a sense of the flow and proportion of the pipe. It is a beautiful looking pipe with a bowl Stanwell describe as Canadian even though it has a saddle stem.
 I started my work on the pipe by polishing the briar with 1500-12000 grit micromesh sanding pads. I wiped the bowl down after each sanding pad with a damp cloth.


 I polished the brass plaquette with a jewellers cloth to restore the shine and remove the tarnish. It really glows now. I rubbed the briar down with Before & After Restoration Balm. I worked it into the briar with my fingertips. The product works to clean, enliven and preserve the briar. I let it sit for 10 minutes while I worked on the stem. After the time passed I buffed it with a cotton cloth to deepen the shine. The briar really comes alive with the balm.

 I set the bowl aside and turned my attention to the stem. I sanded out the tooth marks on the acrylic stem surface near the button with a piece of 220 grit sandpaper. I was able to remove them all. I started polishing the stem with 600 grit wet dry sandpaper.
 I polished the stem with micromesh sanding pads – dry sanding with 1500-12000 grit pads. I wiped the stem down after each sanding pad with Obsidian Oil.
 I polished it with Before & After Pipe Stem Polish – both Fine and Extra Fine. I gave it a coat of Obsidian Pipe Stem Oil. I know that an acrylic stem does not need this but I like to use it anyway as it seems to protect the stem surface even on acrylic. I set it aside to dry.
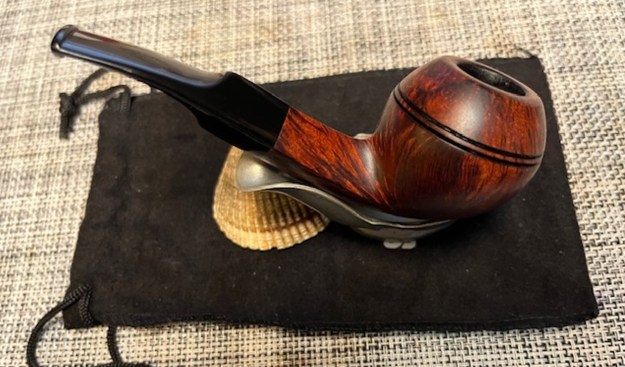
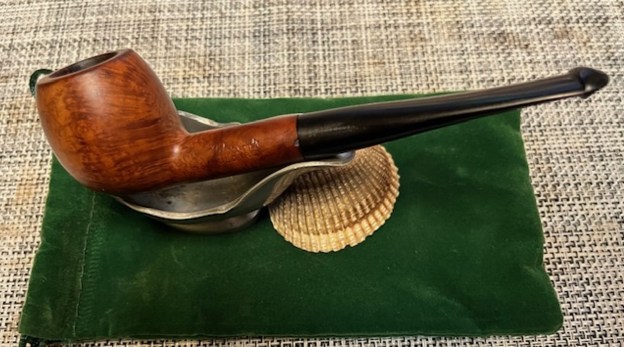
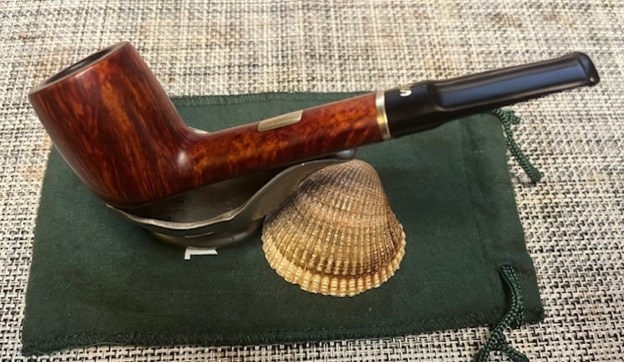
  I am excited to put the finishing touches on this 2001 Stanwell City Pipe Rødovre Made in Denmark Canadian designed by Jess Chonowitsch. I put the pipe back together and buffed it with Blue Diamond on the buffing wheel. I gave the bowl and the stem multiple coats of carnauba wax. I buffed the pipe with a clean buffing pad to raise the shine and hand buffed it with microfiber cloth to deepen the shine. It is fun to see what the polished bowl looks like with the silver plaquette and the polished acrylic stem was beautiful. This Stanwell Made in Denmark Rødovre 2001 Canadian 148 is nice looking and the pipe feels great in my hand. It is light and well balanced. Have a look at it with the photos below. The dimensions are Length: 5 ½ inches, Height: 1 ½ inches, Outside diameter of the bowl: 1 ¼ inches, Chamber diameter: ¾ of an inch. The weight of the pipe is 1.34 ounces/38 grams. It is a beautiful pipe and one that I will be putting in the Danish Pipemaker Section on the rebornpipes store. Thanks for walking through the cleanup with me as I worked over this pipe.
As always, I encourage your questions and comments as you read the blog. Thanks to each of you who are reading this blog. Remember we are not pipe owners; we are pipe men and women who hold our pipes in trust until they pass on into the trust of those who follow us.