by Kenneth Lieblich
Next on the chopping block is this charming Ropp Grand Luxe 49. It is another pipe in my ongoing “French Collection” and it comes from a group of pipes I purchased recently. I have a particular interest in French pipes and pipeworks, and I grabbed this one to restore since I thought it was quite handsome. This is an old timer with a few wounds and needs just a little help to come back to life.


 This pipe was made by the venerable French pipe company, Ropp. Ropp has been around for a long time and their early pipes are really quite wonderful. The markings on the left-hand side of the shank read Ropp [over] Grand Luxe. The right-hand side of the shank reads 49, the shape number. There are no other markings.
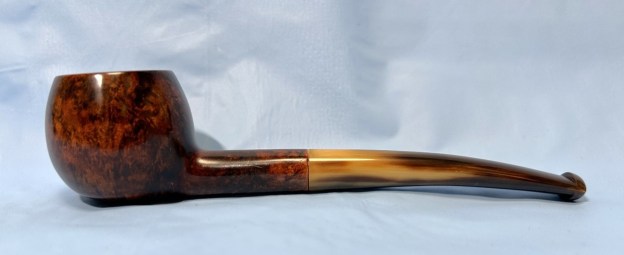
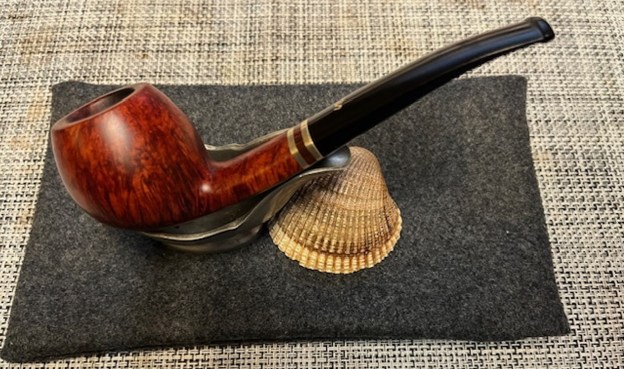
 This pipe shape is a prince – a shape I love. This is a really pretty pipe and feels very comfortable in the hand. The stummel is a very nice piece of briar and the stem is made of buffalo horn – which tends to suggest an older piece. The stem has a tenon made of metal – not bone – and a cork-lined mortise. I remember Steve telling me that the fact the tenon is in metal (instead of bone) suggests a date around World War II. The stem has a normal, wide button – not an orific button. This all fits the date quite well.
 From Pipedia, here is a very brief history of the Ropp company:
Eugène-Léon Ropp (1830–1907) acquired a patent for the cherrywood pipe in 1869. In 1870, he established a workshop to manufacture such pipes in Bussang, in the Vosges mountains. Around 1893, his business moved into the former mill of Sicard (part of the community of Baume-les-Dames in Upper Burgundy. The pipes were a big success in export as well. Shortly before 1914, Ropp designated A. Frankau & Co. (BBB) to be the exclusive distributor in the UK and its colonies. Probably in 1917, a workshop in Saint-Claude in the rue du Plan du Moulin was acquired to start the fabrication of briar pipes. In 1923, another small building in Saint-Claude, serving as a workshop for polishing, was added. Cherrywood pipes were the mainstay of Ropp until the company finally closed down in September 1991. The company was taken over by Cuty-Fort Entreprises in 1994. I have been working on figuring out the dates of Ropp pipes, based on their logos. This is an ongoing project and I am far from done. However, the logo on this pipe suggests a date that in the interwar period.
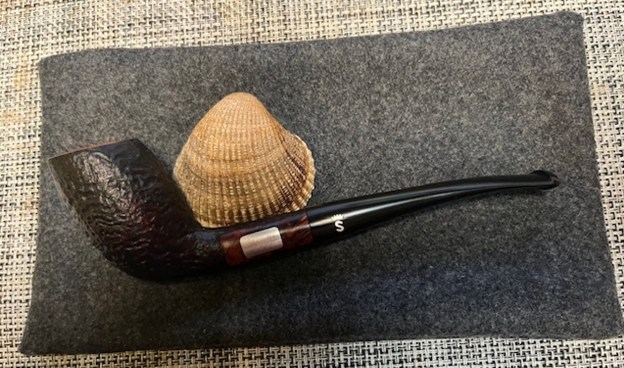
On to the pipe: it was in decent shape, but it had a few issues. The stem had a few bite marks, top and bottom. It also has a natural hole in the horn. The stummel also had a few issues. The rim and the outside of the bowl had some serious scratches. There was lava on the rim and some minor scorching. The inside was pretty dirty too – it would need a thorough cleaning. 

 The stem was first on my list. This stem has a stinger in it – and it was being quite stubborn about coming out of the tenon! I opted to warm the stem and stinger with my heat gun and this didn’t work, surprisingly. I stuck it in the freezer for 20 minutes or so and that didn’t work either. I went back to the heat gun and tried again. Ugh. I successfully managed to break the stinger. Obviously, this wasn’t great, but it’s hardly the end of the world. I took a miniature file, shaped like a cylinder and sanded the hole in the tenon. I wanted to open the aperture a bit and remove the rough metal. Came out perfectly.
 I wiped down the outside of the stem with Murphy’s Oil Soap on some cotton pads. Then, I cleaned out the insides with pipe cleaners and isopropyl alcohol. It took an awful lot of work to get this clean! In fact, I also used some Castille soap and tube brushes on the inside of the stem. Not something I usually do.

 I built up the worm hole and tooth marks on the stem with some clear cyanoacrylate adhesive and let them fully cure. I then sanded the adhesive down with 220- and 400-grit sandpapers to meld seamlessly into the stem. I then used all nine Micromesh pads (1,500 through 12,000 grit) to bring out the lovely grain of the buffalo horn on the stem. I also used Obsidian Pipe Stem Oil in between each pad scrubbing.

 On to the stummel, and the usual cleaning procedures were in order for this pipe. This stummel was a bit of a mess inside, so I first decided to ream out the bowl. I used the KleenReem to remove the built-up cake and followed that with 220-grit sandpaper to eliminate as much as I could. I took the bowl down to bare briar, as I wanted to ensure there were no hidden flaws in the walls of the bowl. Fortunately, there none.
 I then proceeded to clean out the insides of the shank with Q-tips, pipe cleaners, and isopropyl alcohol. There was considerable filth inside this stummel and it took a lot of cotton to get it clean. I followed that up by cleaning the insides with some Castile soap and tube brushes. One of difficulties I encountered here was that this pipe had a cork-lined mortise and it was in very rough shape. Despite my best efforts, the cork was disintegrating and could not be saved. I took a wire drill bit and, but hand, scraped out the remaining bit of cork with it.
 I used some Murphy’s Oil Soap and some cotton pads on the outside of the stummel. That removed any latent dirt that blighted the wood. I moved on to de-ghost the bowl. I thrust some cotton balls into the bowl and the shank and saturated them with 99% isopropyl alcohol. I let the stummel sit overnight. This caused any remaining oils, tars and smells to leach out into the cotton.
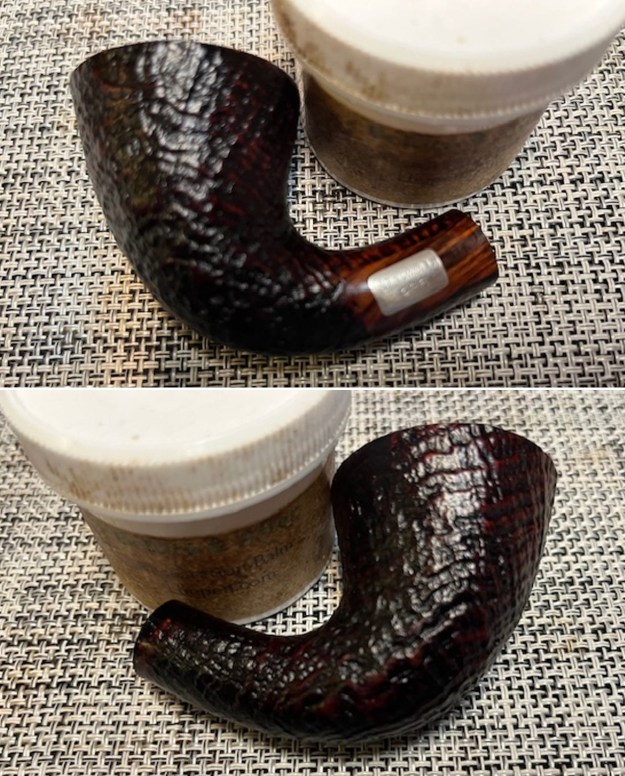
 As the photos show, there were some rough scratches on the rim of this pipe. In order to remove them, I “topped” the pipe – that is to say, I gently and evenly sanded down the rim on a piece of 220-grit sandpaper. This effectively removed the damage, without altering the look of the pipe.
 There were a couple of very tiny pinholes in the wood. I dabbed a bit of cyanoacrylate adhesive and let them cure. I sanded the repairs down with 400-grit sandpaper. I also sanded out the scratches with the same.

 I felt that this pipe’s wood needed some revivification. In order to accentuate the external beauty of this pipe, I opted for aniline dye. I applied some of Fiebing’s Black Leather Dye. I applied flame from a BIC lighter in order to set the colour. I didn’t want to make the pipe black – I wanted the dye to accentuate the grain of the wood. So I used all nine Micromesh pads (1,500 through 12,000 grit) on the stummel to sand off the majority of the dye and then smooth the wood.
 I then added a coat Fiebing’s Light Brown Leather Dye to act as a beautiful contrast. I wiped it down with isopropyl alcohol to lighten it a bit. What a difference that made! It looked so much better with a fresh coat of stain.
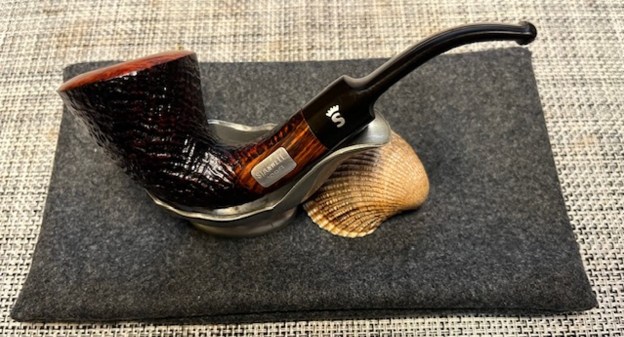
 After that, I applied some Before & After Restoration Balm and let it sit for 15 minutes before polishing with a microfibre cloth. There is some beautiful wood after all. It is a lovely pipe!


 Before finishing up, I needed to address the mortise. Having removed the disintegrated cork, the tenon no longer fit in the mortise. Thanks to Steve’s advice, I fashioned a new cork lining from an old wine-bottle cork. I drilled out a hole through the middle of the cork and then used my Dremel to whittle down the cork until it fit – very tightly – in the mortise. I tested the tenon and it fit perfectly. I was delighted!
 Then it was off for a trip to the buffer. A dose of White Diamond and a few coats of carnauba wax were just what this pipe needed. The lovely shine made the wood very attractive. This is a very handsome pipe and will provide many years of smoking pleasure.
 This is a wonderfully crafted pipe and has a very elegant feel to it. It took some work, but I am proud of it. I am pleased to announce that this pipe is for sale! If you are interested in acquiring it for your collection, please have a look in the “France” pipe section of the store here on Steve’s website. You can also email me directly at kenneth@knightsofthepipe.com. The approximate dimensions of the Ropp Grand Luxe 49 Prince are as follows: length 6 in. (153 mm); height 1½ in. (36 mm); bowl diameter 1⅝ in. (40 mm); chamber diameter ¾ in. (20 mm). The weight of the pipe is 1⅛ oz. (36 g). I hope you enjoyed reading the story of this restoration as much as I enjoyed restoring it. If you are interested in more of my work, please follow me here on Steve’s website or send me an email. Thank you very much for reading and, as always, I welcome and encourage your comments.


