Guest Blog by Robert M. Boughton
Member, International Society of Codgers
Member, North American Society of Pipe Collectors
http://www.naspc.org
http://www.roadrunnerpipesnm.biz
http://about.me/boughtonrobert
Photos © the Author
“You will never learn enough looking for only the good things in life; you will always be a pupil.”
― Japanese proverb
“Ay, now the plot thickens very much upon us.”
― Bayes, a playwright within the play “The Rehearsal” (1671), a satirical mockery of heroic plays, by Sir George Villiers (1628-1687), 2nd duke of Buckingham, de facto King of England during the end and the beginning of two rightful monarchs, debaucher, poet, playwright
INTRODUCTION
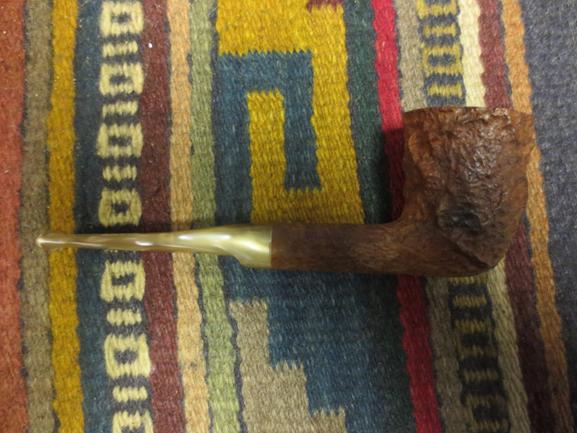
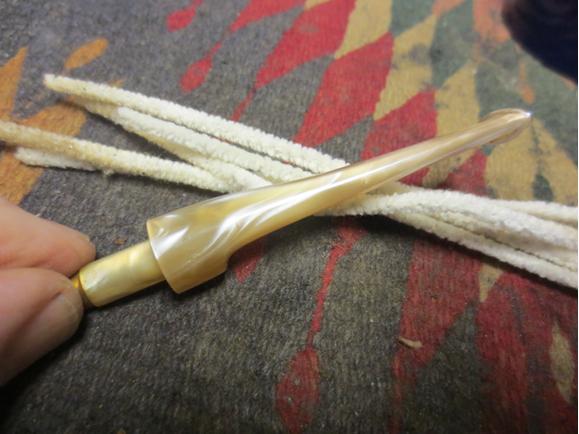
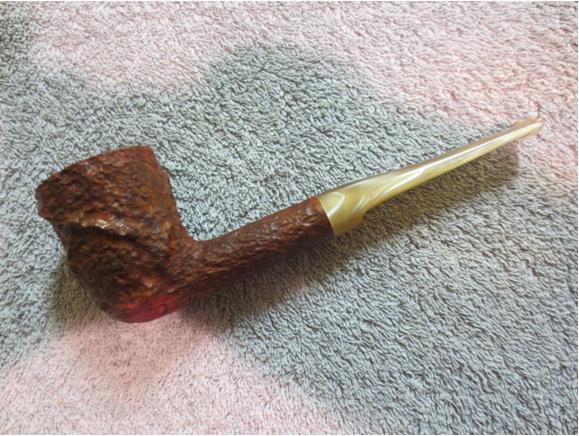
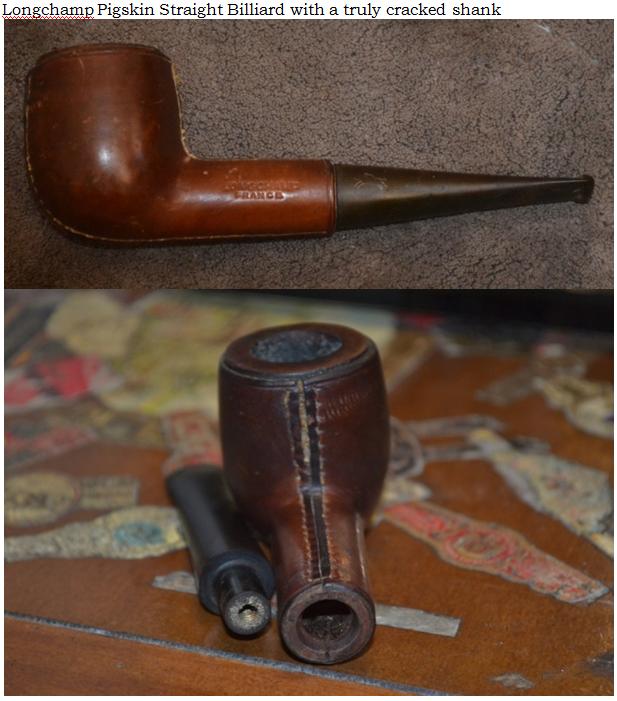
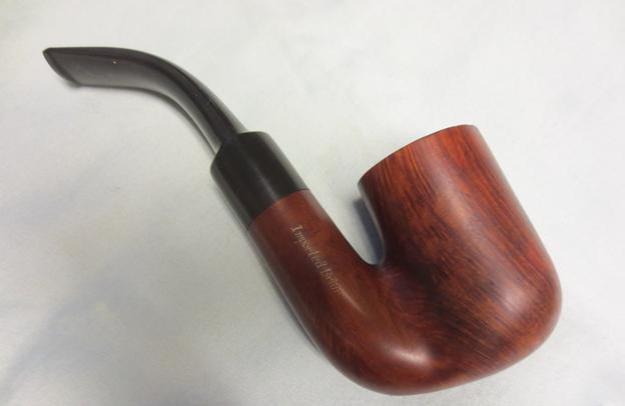
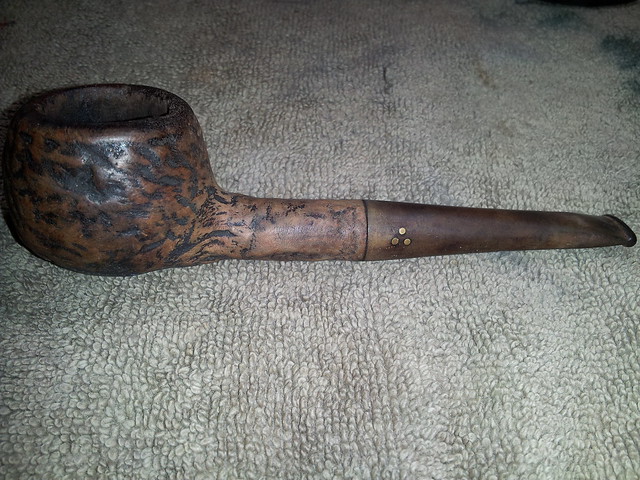
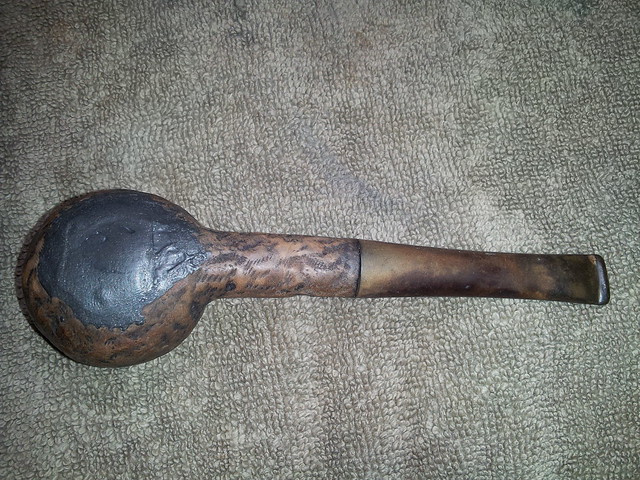
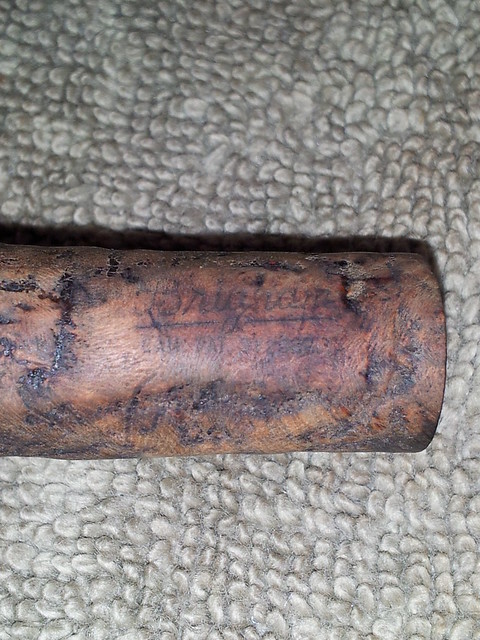
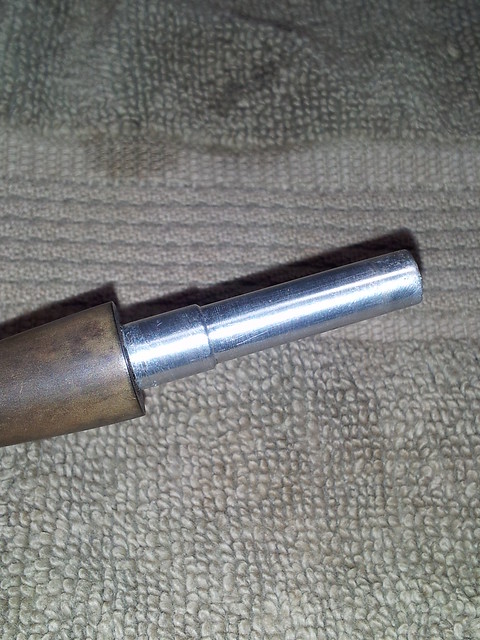
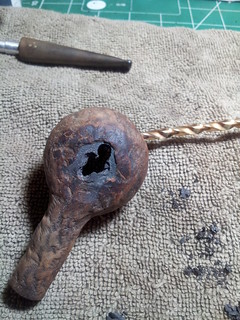
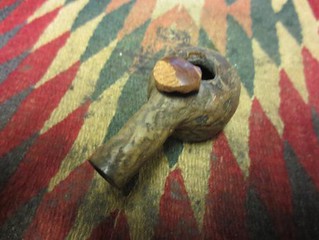
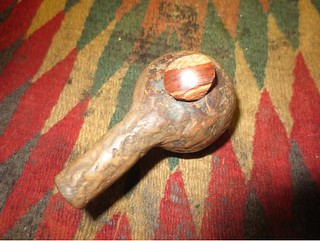
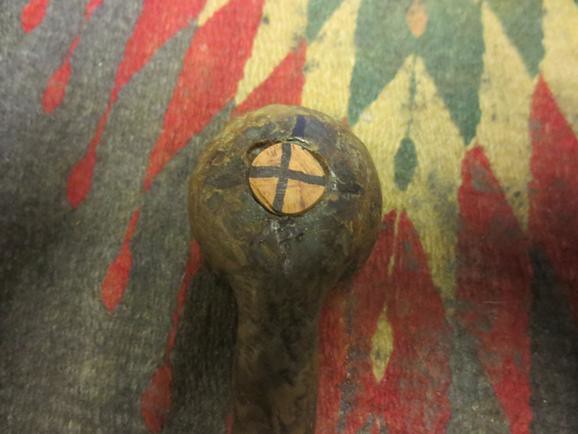
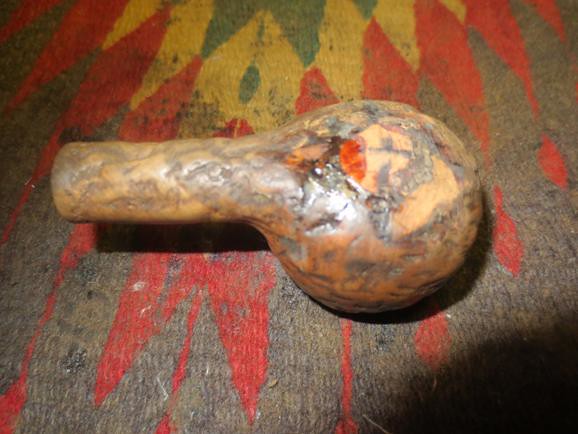
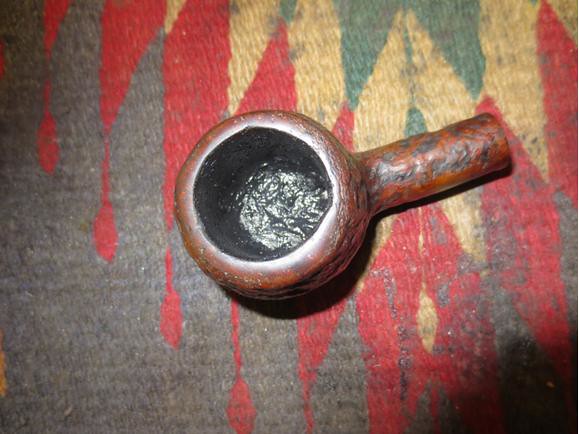
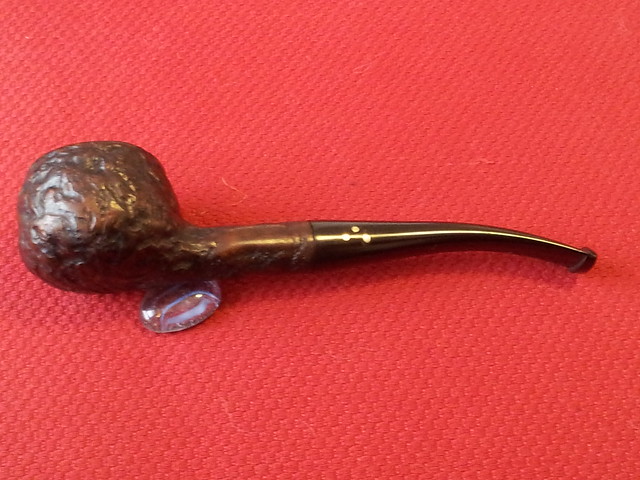
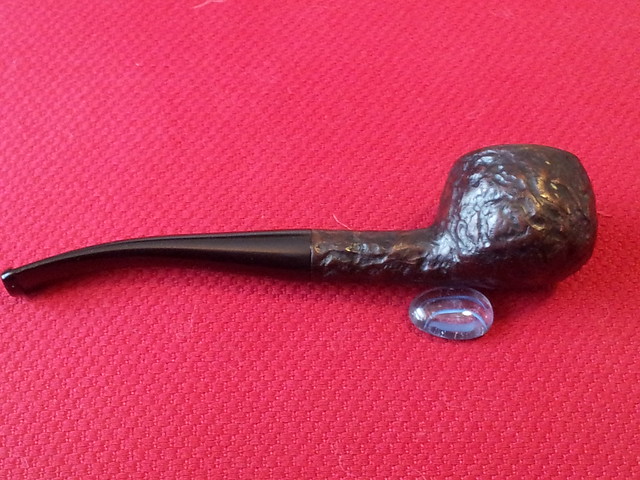
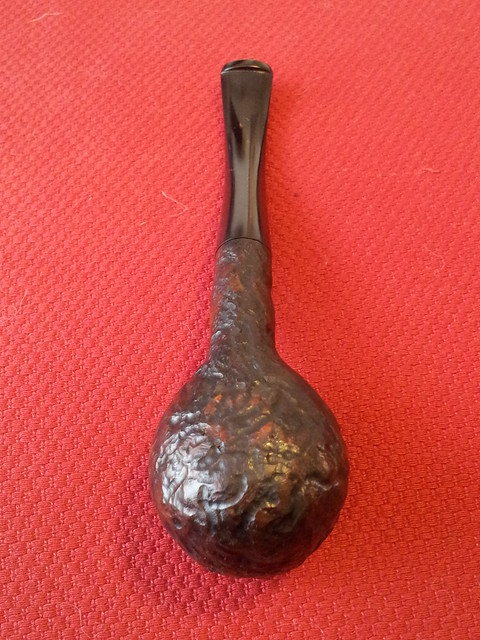
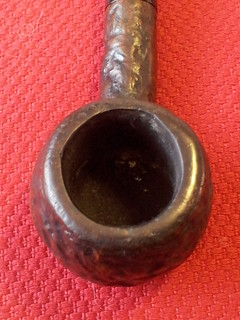
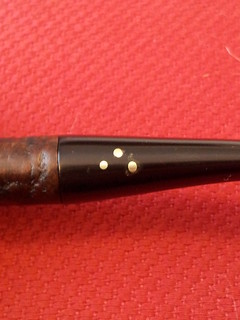
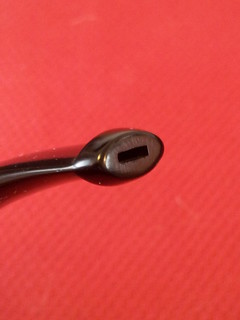
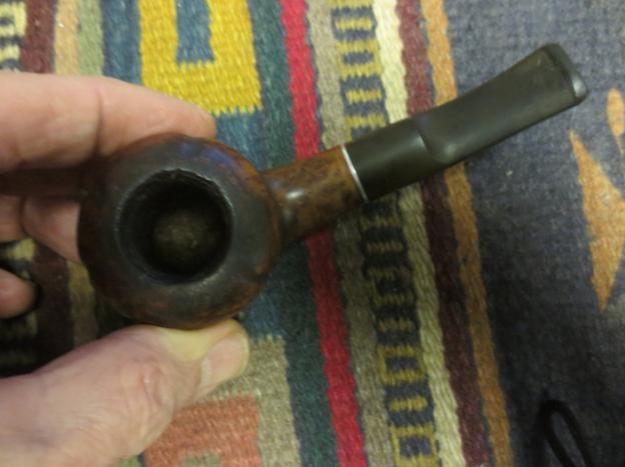
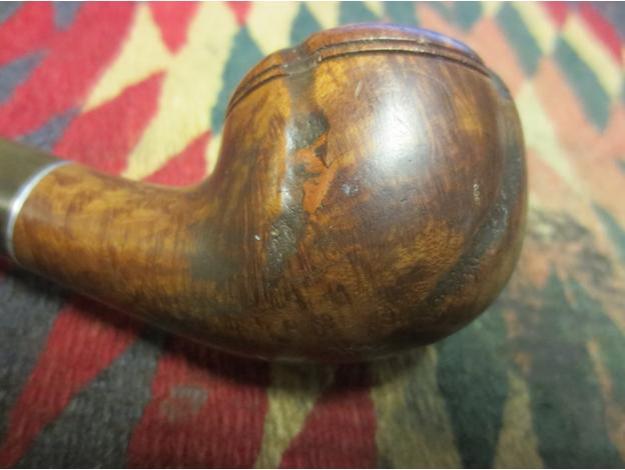
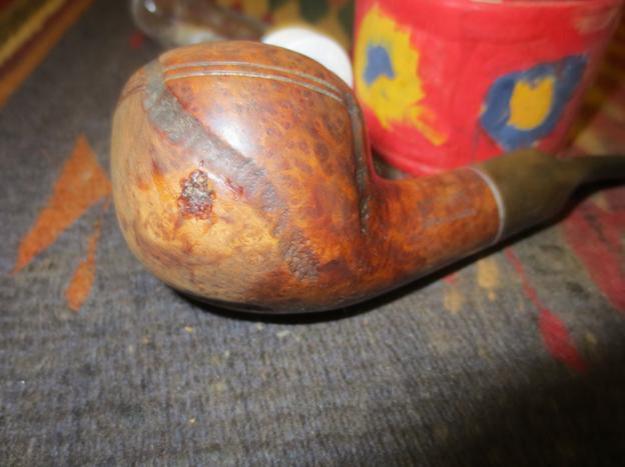
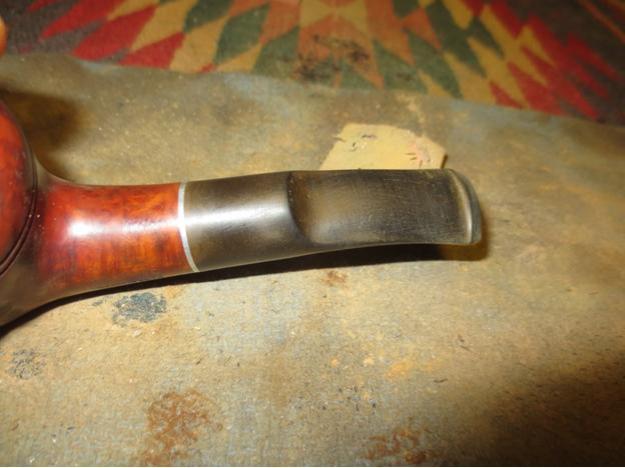
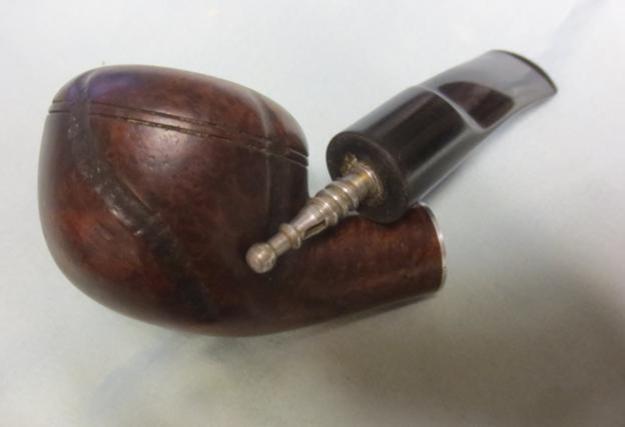
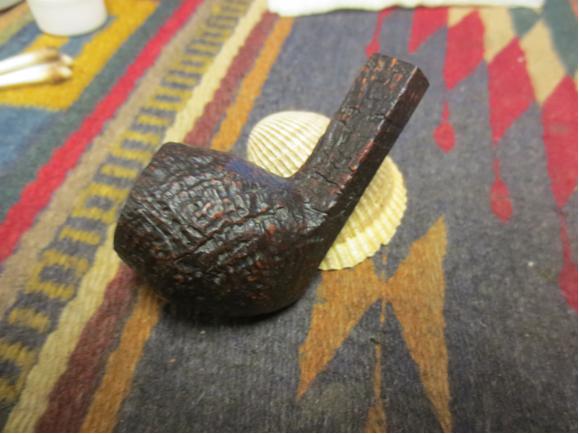
This Esterd silver banded small billiard with a bone bit that screws onto a metal shank insert was another inexplicable find on eBay. The seller had listed it as a vintage hand-carved pipe with a silver band and horn bit, and believed it might have been made in the Philippines. The starting bid was $9.99, with nobody biting. Tempted to enter the fray based only on the elegant design – intricate, carved images of an old, Oriental-style house or palace on the left side, mountains on the front, another landscape of some sort on the right with four tiny marks that could be a language, and two reversed images on the back, maybe symbolic – I exercised control over my index finger that likes to click the Place Bid Now button on its own and opened a new window to browse to pipephil.eu.
Pipephil is good, but it doesn’t list every brand. Although Esterd is but one of thousands of names of which I have never heard, I was prepared not to find a match. Nevertheless, there it was: Esterd, Tsuge second. Here’s where the inexplicable, if not outright spooky, aspect of the find comes in. I reviewed one of the Tsuge non-aromatic lines of pipe tobaccos not long ago on the Smokers Forums UK. Tsuge Pipe Company of Japan, having ultimate control over its tobaccos, nixed milder, less flavorful versions of the blends that are made by “Drew Estate, Tsuge and Daughters & Ryan in North Carolina…[e]xclusively for Tsuge.” The operative name in the list is D&R, and it was Mark Ryan’s blend that was approved by Tsuge.
Looking into the tobacco brand, I discovered the existence of the Tsuge Pipe Company, founded in Japan in 1936 after a grueling 25-year apprenticeship in pipe crafting by Kyoichiro Tsuge. The company makes very fine, hand-crafted pipes of various designs and using different materials. Some of them are priced in what I consider the middle range ($200-$300), but many excellent examples of the craftsmanship that goes into their construction are on the end that is more affordable to most of us. Tsuge, translated to English, means box tree or boxwood, and is also the name of an old Samurai family from which the father of Kyoichiro was descended.
 Of course, I returned to eBay, where I had no further qualms bidding for the wonderful pipe at such a low price. At the time, two days remained for bidding, but no one else seems to have gotten past the seller’s unfortunate description of the pipe’s construction and origin with a simple Google search for the brand. As a result, I won it for $14 with S&H.
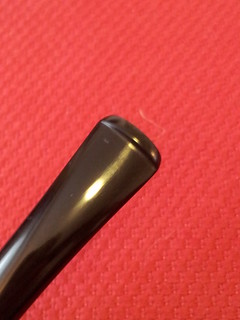
I was aware of the evil crack on the bottom of the bit, but figured I had nothing to lose at that price. I expected to list it on my site for $100 after restoring and fixing the crack that my friend and mentor, Chuck Richards, assured me could be repaired with an unusual process that would leave the bit looking like new. Instead, I made my first ever sale of a pipe before I restored it, to a friend in my pipe club who held the Esterd in his hands with an unmistakable flush of longing on his face, in particular the eyes that were fixed on the delicate beauty. Ah, how well I know that look!
Familiar with the deserved reputation of Tsuge pipes, my friend, Stephen, said he has always wanted one but never found any he could afford. He asked in a somewhat faltering voice how much I would sell it for. Teasing him, perhaps with a bit too little shame, I mentioned the anticipated list price, and watching his eyes saw I could get that much from him. But Chuck’s unparalleled generosity in offering his restored pipes at fantastic deals rubbed off on me, and I told Stephen he could have the work of art (I didn’t put it that way) for $50. He was so surprised that he looked to his wife, Ashley (of course), for approval. She just said, “You have the card, don’t you?” Stephen reached in his pocket to get it, amazing me with his clear intention to buy it right there. [Ashley, by the way, was in my first blog on Reborn Pipes, about a unique Chinese churchwarden that I found in a – ahem – head shop. When the cheap bit broke as I was savoring the great taste of my first chamber-full in it, I was not yet aware I could buy a replacement bit and instead chose a replacement for the pipe, which in fact was cheaper, anyway. But that bit broke also, leading to a friendly competition between Chuck and me, although there was little doubt his restore of one for me would be better than mine, which I gave to Ashley.]
I reminded Stephen it still needed a light cleaning and serious restoration, but he wanted to make sure it would go to him when it was ready and insisted on paying up front. And so I reached for my cell phone, which I had left at home since it is not working, and then attempted to find a way to download the PayPal Here app onto my laptop. This endeavor failed. Therefore, I went to my website editor and listed the pipe so that he could purchase it online. I encountered yet another obstacle when I found that my store, set up to accept PayPal, for some reason only allowed members to use it, unlike my previous site which permitted guests to use the service. Stephen drew the line at having to sign up for PayPal.
Therefore, the transaction was not finalized until two days later, last Saturday, after I copied and pasted the necessary HTML code into my site’s store page and got ahold of Stephen using my friendly neighbor’s cell phone. I would not have been so eager had I not needed the money to buy the key material in Chuck’s instructions to make the bit like new, not to mention less important things like food and gas. I told Stephen to let me know by email if he had any problems navigating the PayPal system to the newly-added guest mode, but before I read his reply saw that the payment had gone through on PayPal. In his email, Stephen told me not to rush the restore for him. I replied that my desire to start it right away was for my own eagerness to see Chuck’s promise of excellent results come true. This blog, therefore, will show the real-time steps I need to take to prepare the lovely Tsuge second to a condition worthy of handing over to its buyer.
RESTORATION
SATURDAY
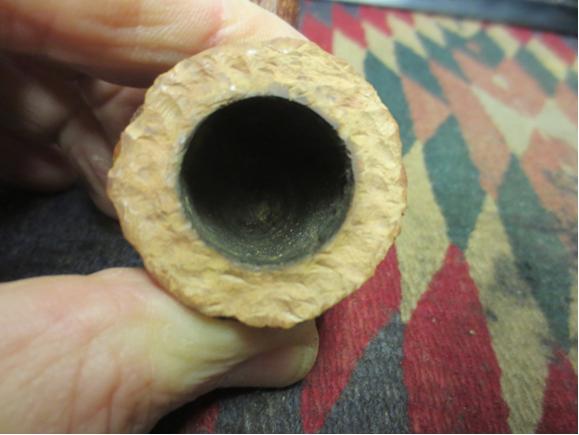
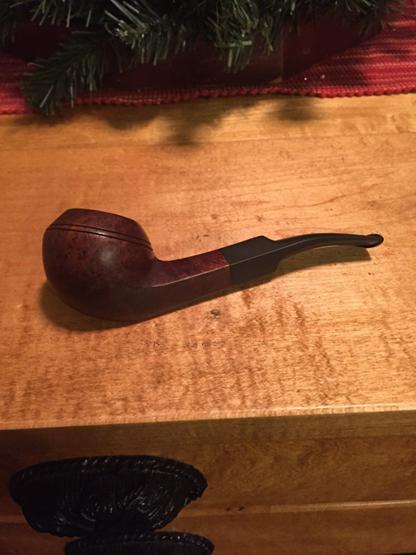
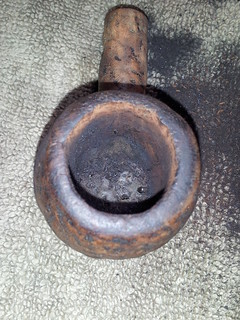
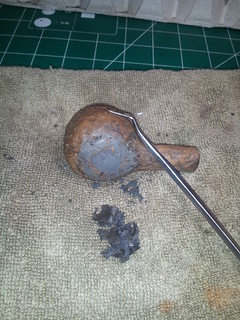
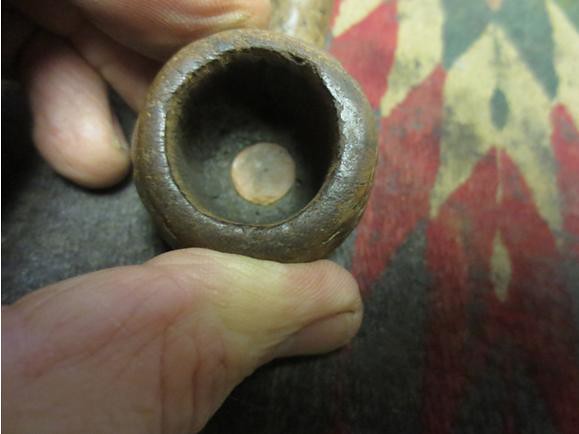
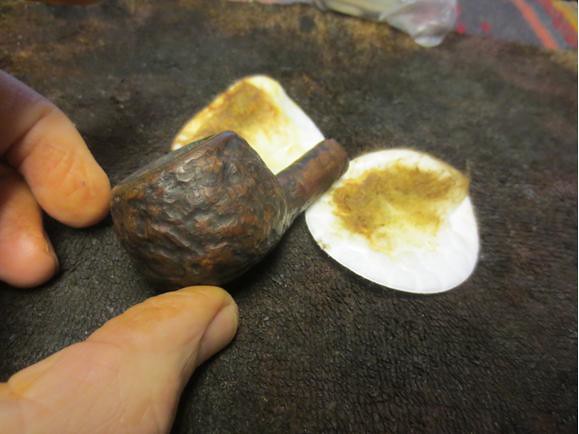
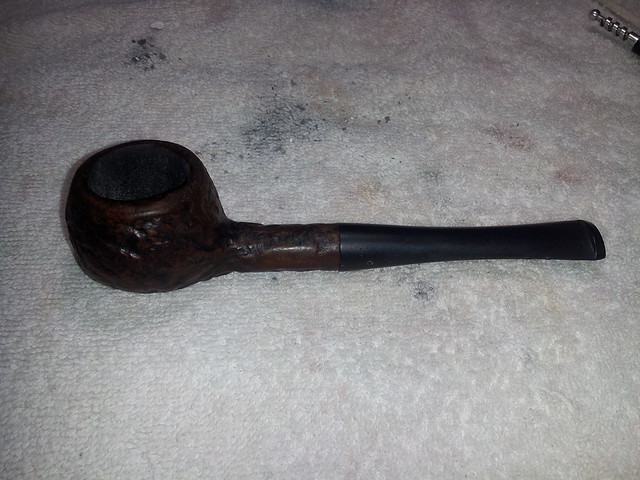
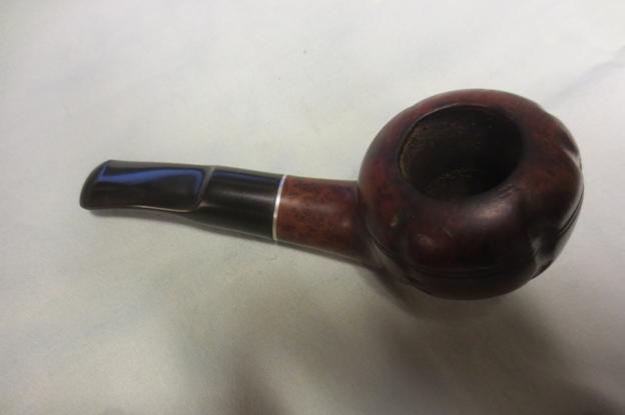
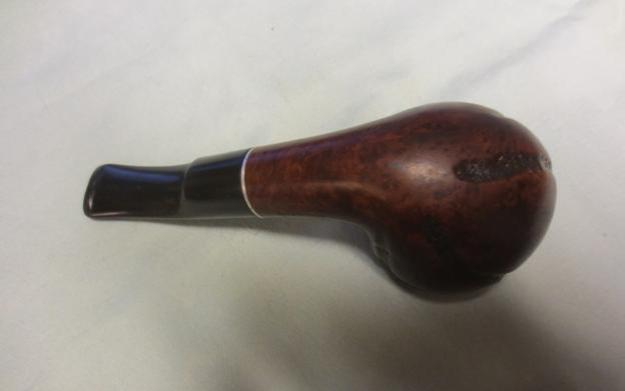
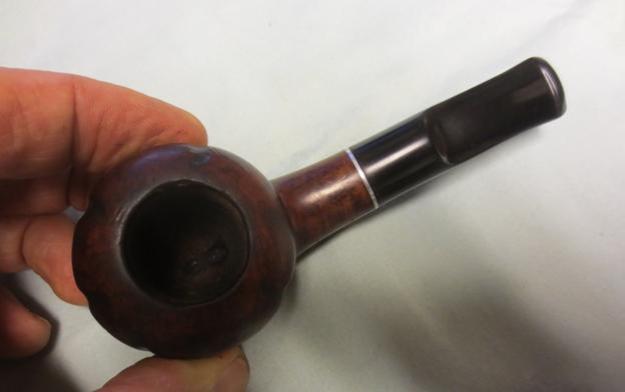
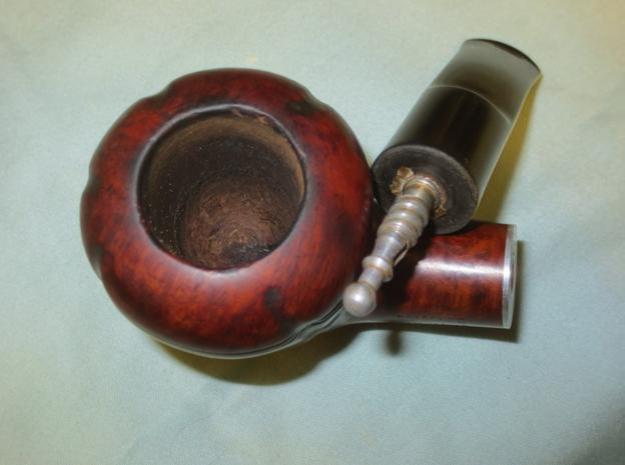
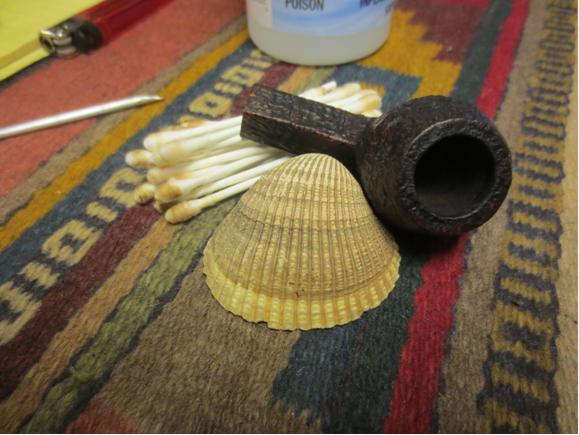
I place an order on eBay for the uncommon special something I will need for the completion of this task I am about to begin. The much anticipated package is due to arrive, via First Class Mail, in several days if I’m lucky and literally God knows when if the USPS conducts business as usual. Therefore, I await it with all of the patience and faith I have, and open my photo files to the Esterd folder, where I find the original shots of it I took at my favorite tobacconist when it came in the mail, far faster than usual with Priority Mail 1-Day Delivery.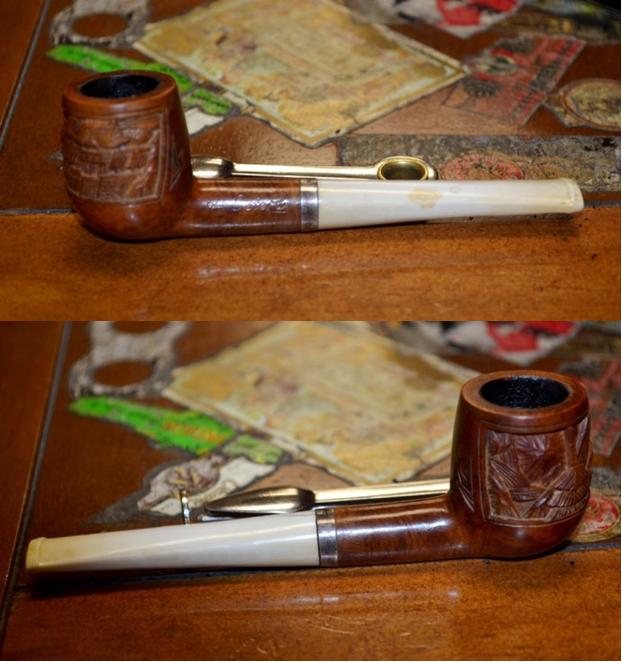


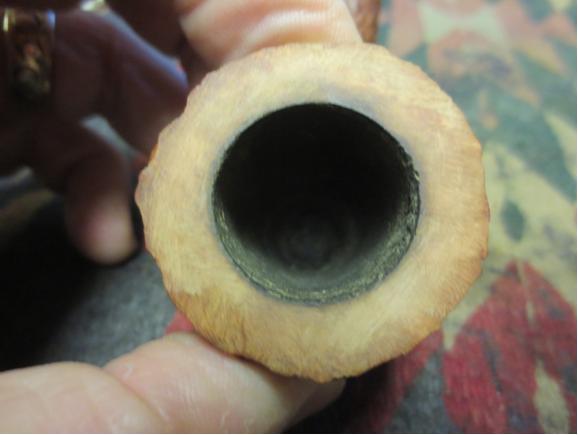
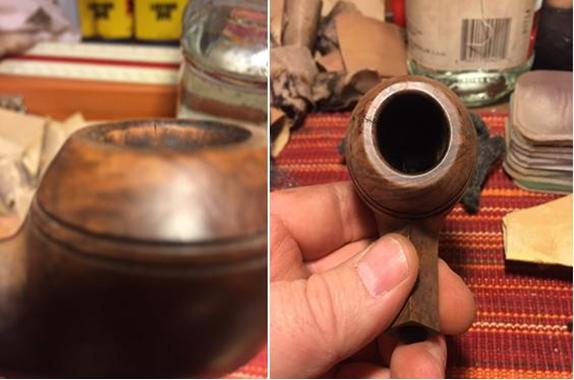
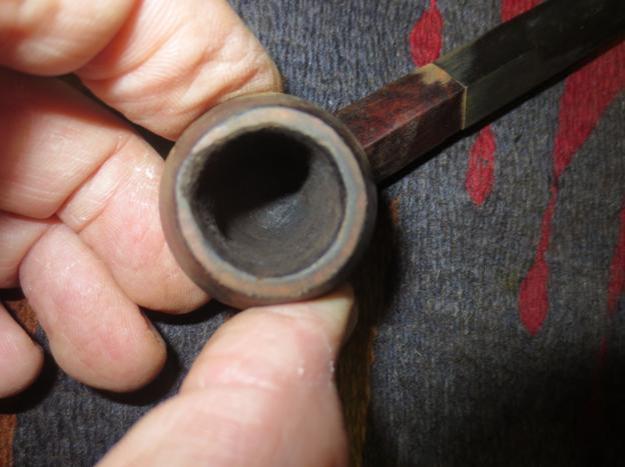
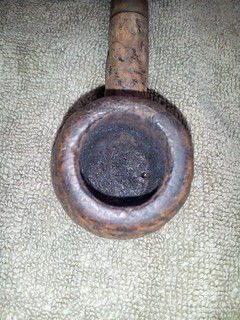
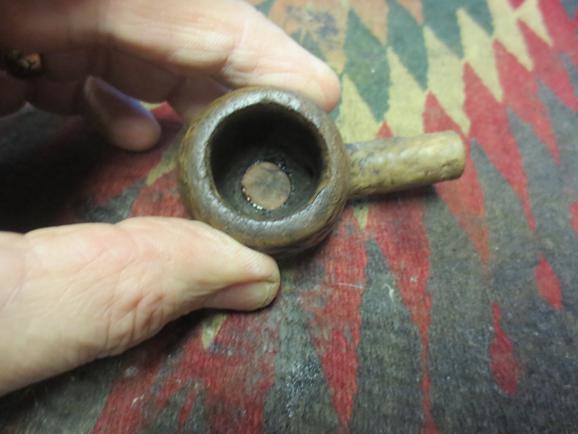
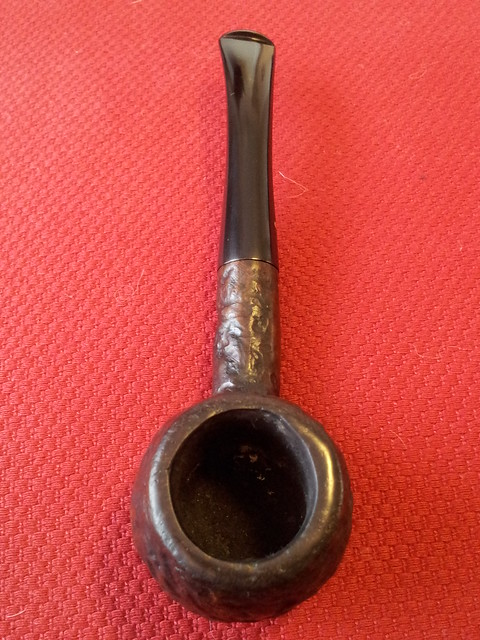
 Clearly, as shown by the presence of tobacco in the chamber in the third photo above, the Esterd was so clean upon arrival that I was forced to sample some good tobacco in it – and then, amazed by the mellowness and great flavor of the one tobacco, I had to test it with another. Both tries get the highest rating I can give any pipe.
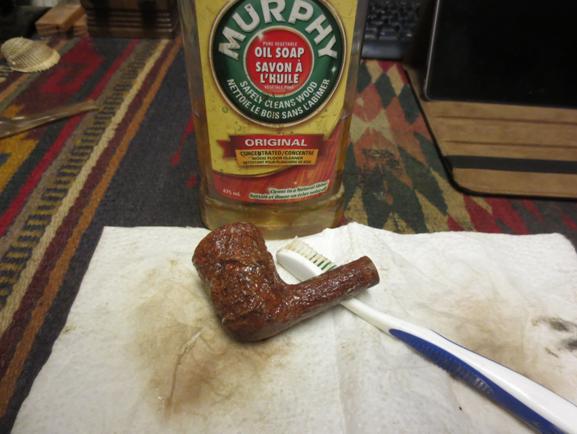
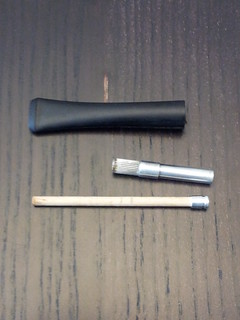
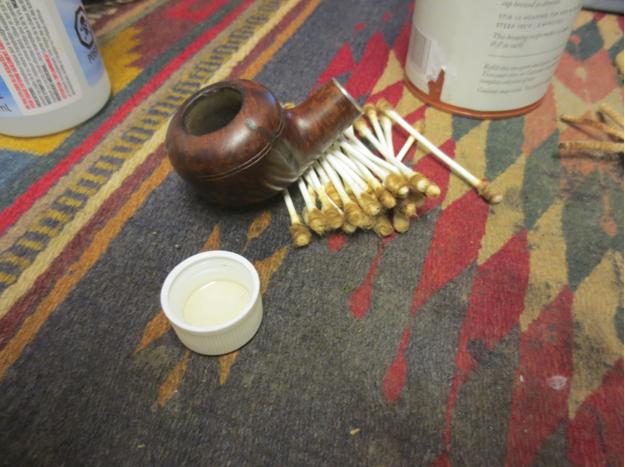
As the bit is the only difficult part of this restore, I start with it. Chuck has already talked me through the peculiar process for fixing the bit, telling me to soak it in a solution first to clean it, inside and out. Knowing he has his own formula, I asked if the OxiClean I use would be okay. He said that would be fine but emphasized that the entire pipe had to be thoroughly clean before the bit repair could begin.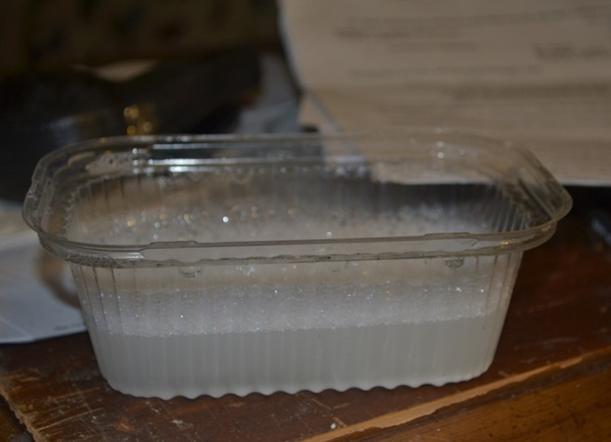 I remove the bit from the OxiClean after a long bath, rinse and wipe it dry, run a bristly cleaner through the air hole and let it dry more.
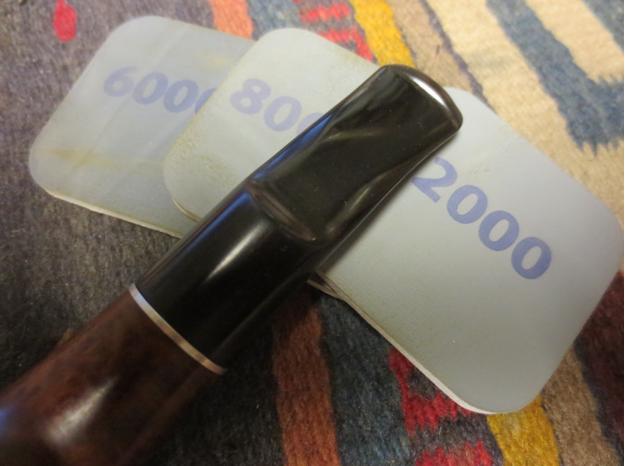
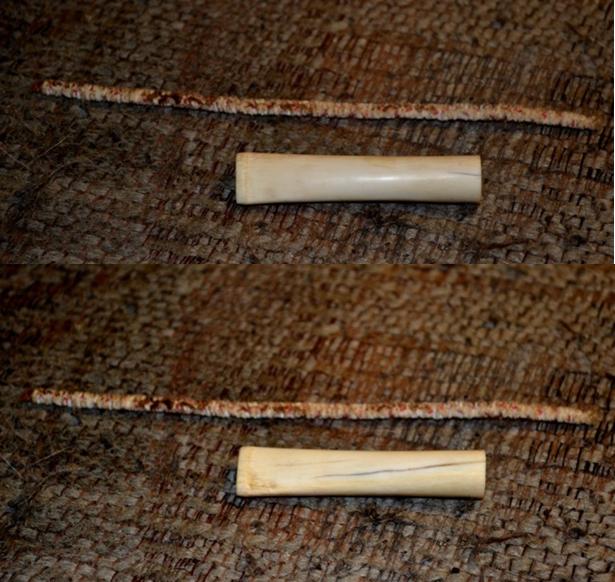 The next step is to use an old toothbrush on the crack. I am uncertain how to go about this, but I give it the old college try, deciding on two toothbrushes, one firmer than the other, and also to employ a very fine fingernail file from an old, unused package of every kind of device for nail care. I throw in a 12000 micromesh pad as an afterthought.
 After alternating between both brushes, trying from every direction to work the little pieces into the big crack on the bottom of the bit and where they extend to the open end, I begin to be able to see all the way through the wider part of the crack. I use the fingernail brush on the more difficult dental chatter on the lip and below it – as well as to remove as much of the nice patina that has developed considering the ultimate mystery step I will need to take to put the final touch on this project – and then clear the fine dust from the soft bone with a toothbrush again. I finish this step with the micromesh to make the entire surface ultra-smooth again. By George, the old fart was right!
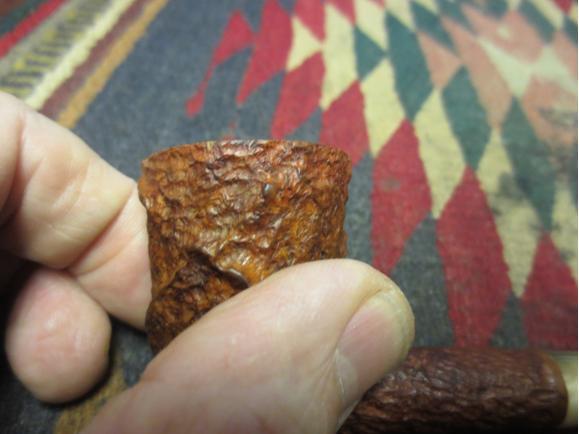
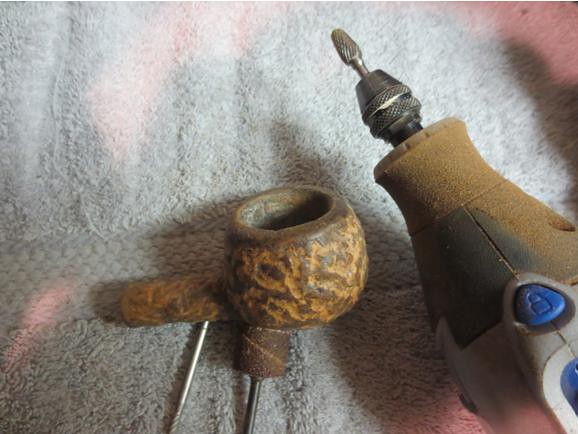
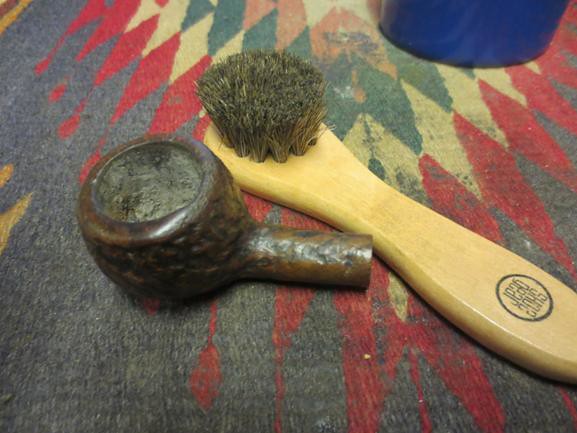
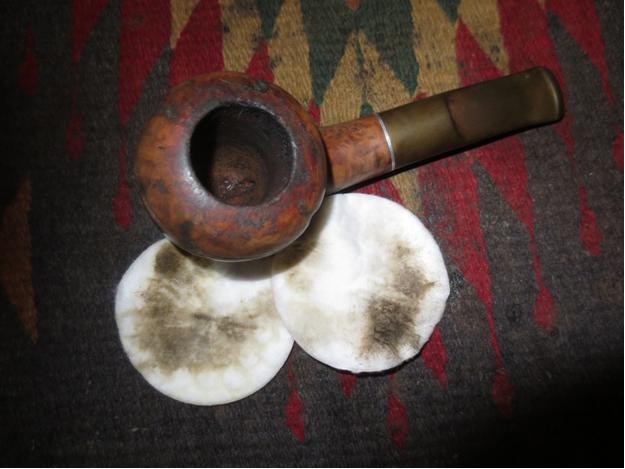
 Instead of proceeding to the next of Chuck’s stated steps with the bit, I switch to the easy stummel cleaning and preparation. I wipe a miniscule amount of dirt from the outside of the briar with a couple of soft, white, cotton gun cleaner cloths and purified water. Next I use a tiny piece of superfine steel wool on the rim, which has minor scratches, and the full range of micromesh pads on the entire wooden surface. Finally, I clean the chamber with 320- and 500-grit paper and remove the excess carbon with alcohol-soaked cotton cloths.
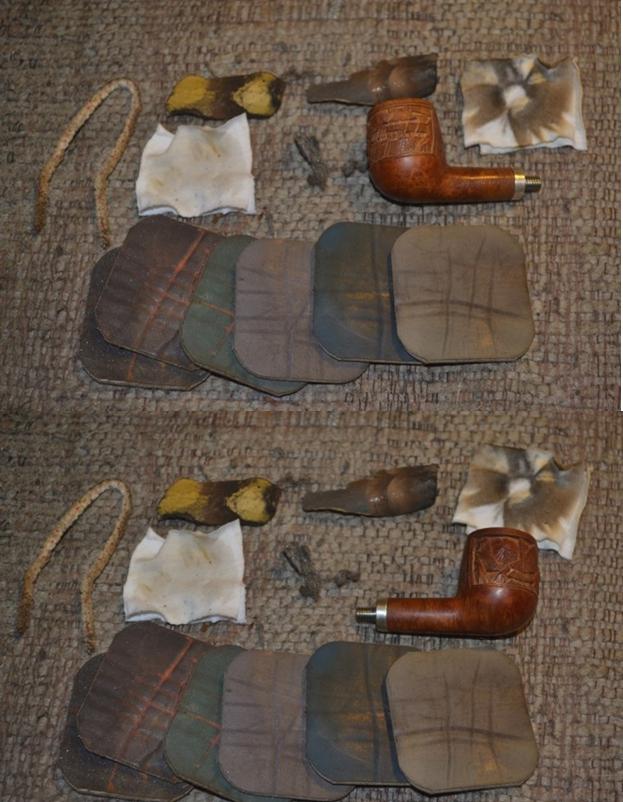


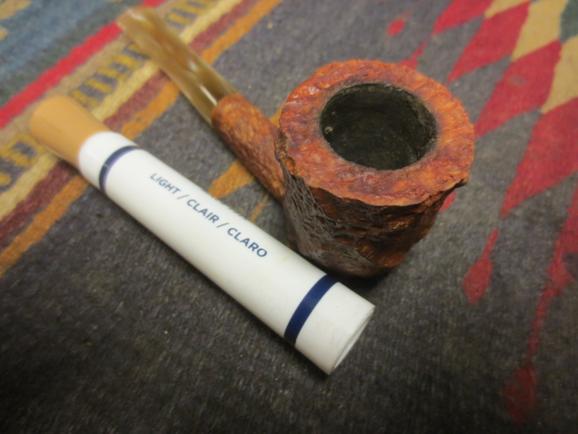
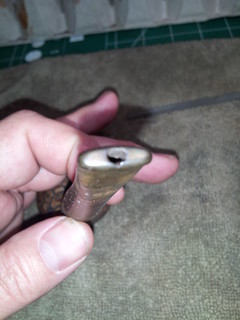
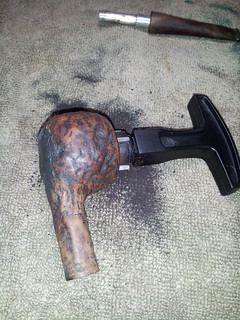
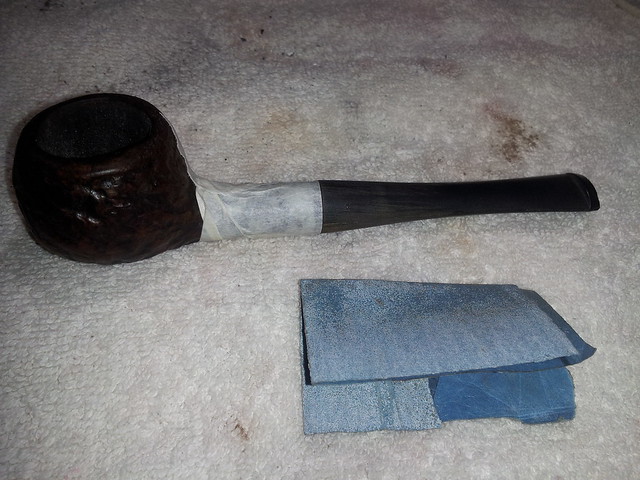
 The retort of this pipe is going to be very difficult as I cannot, under and circumstances, run Everclear through the bit, as usual, and I possess no other that will connect to the unique threaded shank connector. I must do something. But what? Aha! My synapses snap, and I devise a scheme to make a try at it without a bit at all – filling the test tube with Everclear, plugging it with the rubber tube, and then placing the small open end of the tube over the metal shank connector just-so. I set everything down for a moment to get my big cotton cloth and wrap a corner of it over the rubber tube-covered shank connector. Pinching it as tightly as I can with three fingers, no matter how hard I try (and believe me I did my darndest), I can’t manipulate a fourth finger to hold the final side of the tube, under the cloth, shut. Go ahead and try it. Oh, well, I’m not about to give up now. Never surrender!
In this bizarre fashion, I flick my Bic with my free hand and light the flame of a small candle. With both hands occupied beyond their design, I hold the rounded end of the test tube above the flame, having to contort still more to balance the side of my left arm against the small table in order to stop the shaking of the Pyrex tube that keeps almost snuffing out the flame. At last I have it under full control. If anyone believes that, as George Strait sings it, I’ve got some ocean front property in Arizona for sale. Honestly, I’m reminded of certain scenes from “Fear and Loathing in Las Vegas,” with Johnny Depp as the late great though drug and alcohol synergized Hunter S. Thompson, and, I am forced to admit, a memorable scene or two from the 1931 classic “Frankenstein,” with Colin Clive as the unstable doctor and of course Boris Karloff as his Monster.
My only regret is that I have but two hands to give to this effort at snapping a shot of the spectacular scene! In my fervor to record the feat, I even consider asking my good neighbor with the cell phone to come in and catch the unprecedented event with my Nikon – but it is a bit late, and he might not appreciate the request, not to mention what he should think of me if he catches sight of what I am doing in my living room.
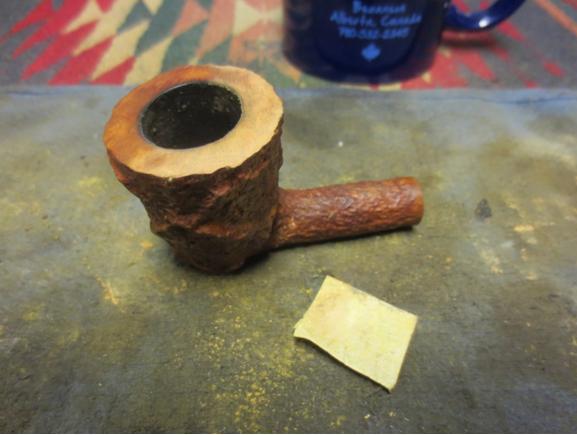
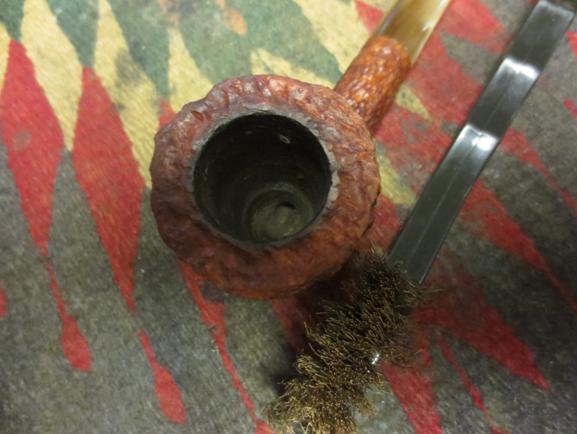
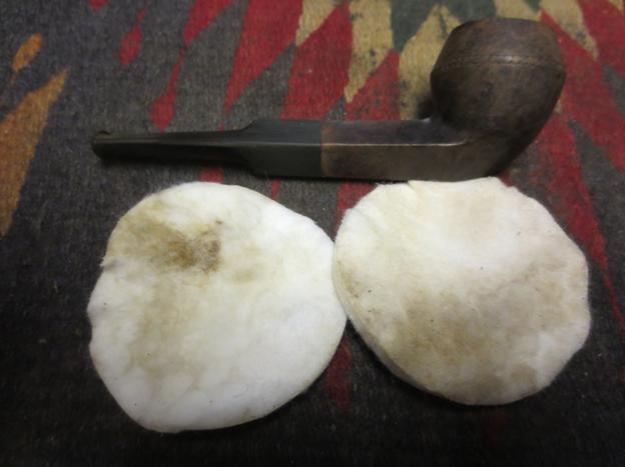
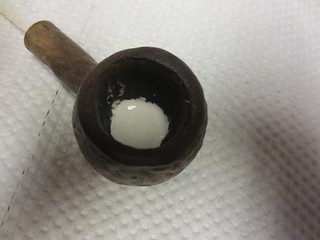
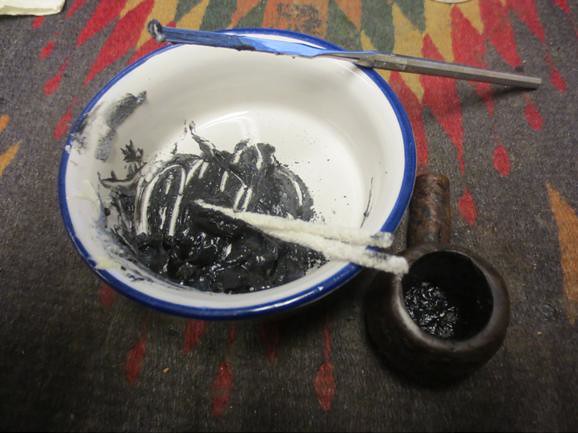
Thus, two test tubes full of Everclear later, the rag somewhat wet with alcohol that didn’t reach its destination, the ordeal of the Retort of the Esterd is behind me, and the stummel is clean.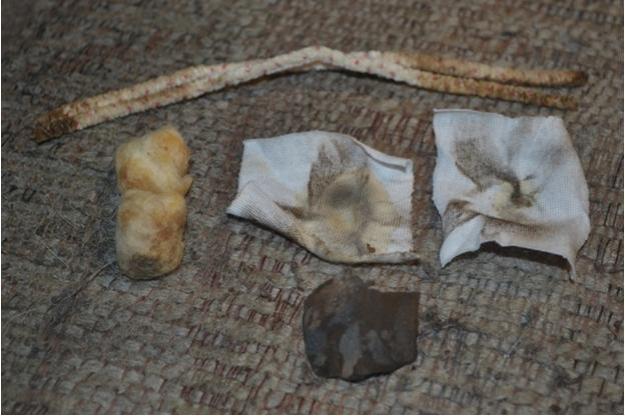 Yes, there are still times in life when even I am flabbergasted by my ruthless determination to do something. I have not sold a briar pipe un-retorted since I learned my lesson on that score the hard way some time ago, and I’ll be tarred and feathered and run out of town on a rail if I ever will. I rest my case on this point with the above photo.
I seem to recall writing something earlier about the easy clean-up of the stummel. Perhaps I was mistaken a tad.
Now, I can sleep.
SUNDAY
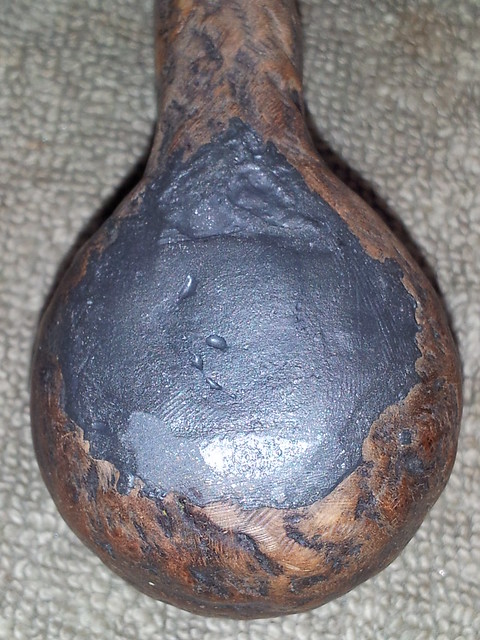
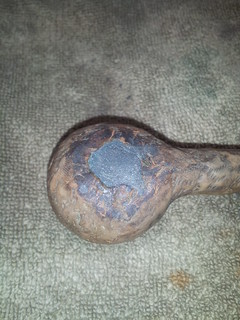
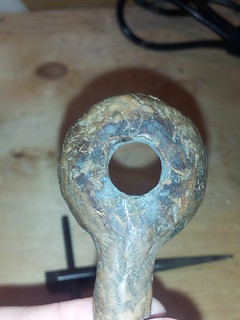
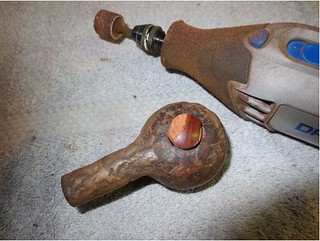
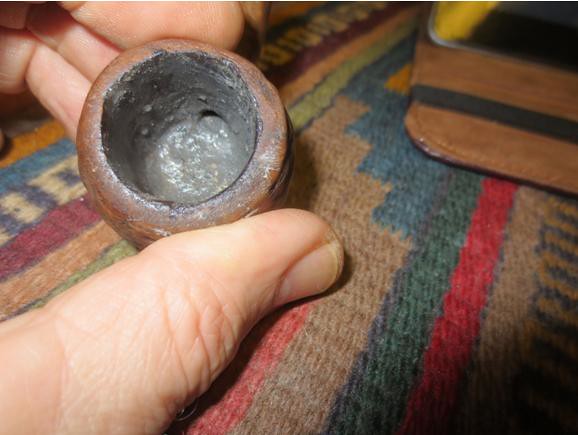
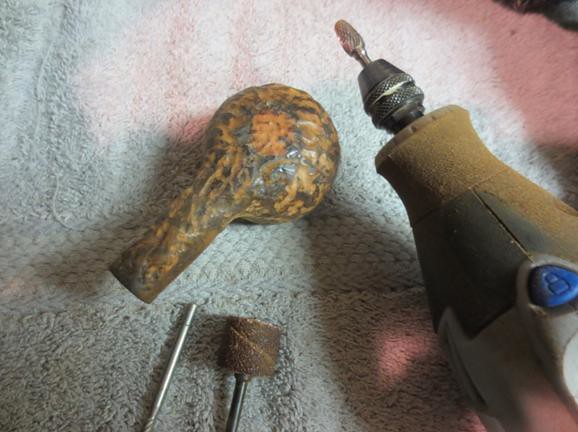
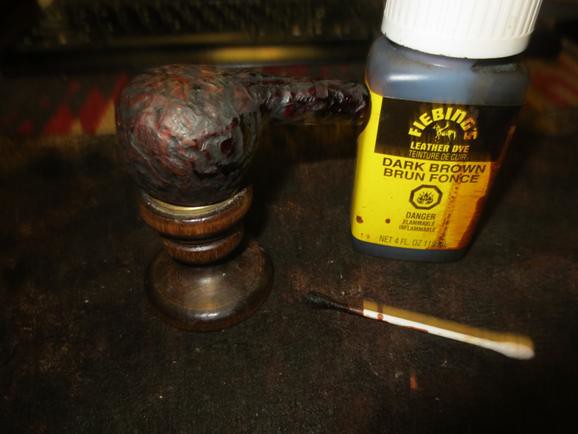
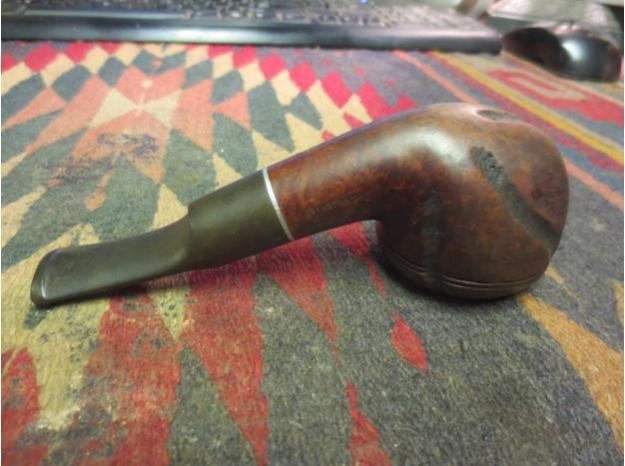
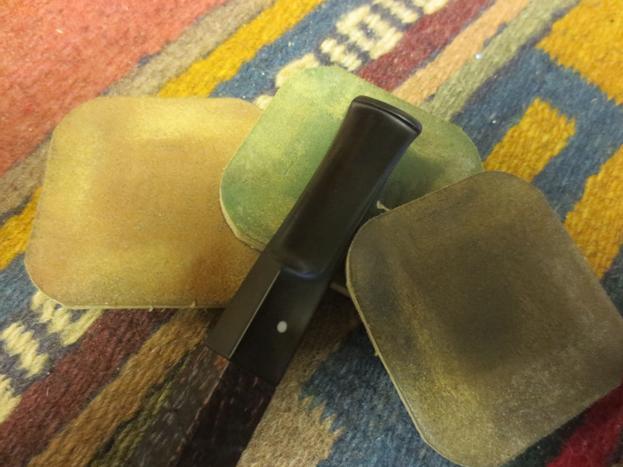
Regarding the dainty stummel, deftly crafted by loving hands unknown years ago, I see that the carved areas are all faded. I’ve been mulling over what I thought might turn into an option between re-staining or not and now know I’ll have to do the former, but what color? I dismiss Lincoln burgundy as too dark almost before the thought occurs to me, and consider lighter or darker brown. Mentally flipping a coin, I choose the darker, Lincoln Medium Brown, and apply a coat, brushing it with special attention into the tiny grooves of the carving. I flame it straight away, enjoying the puff of blue flame that envelops the stummel and dissipates, fixing the color into the wood and leaving only a light, even coat of char behind. I set it aside to cool.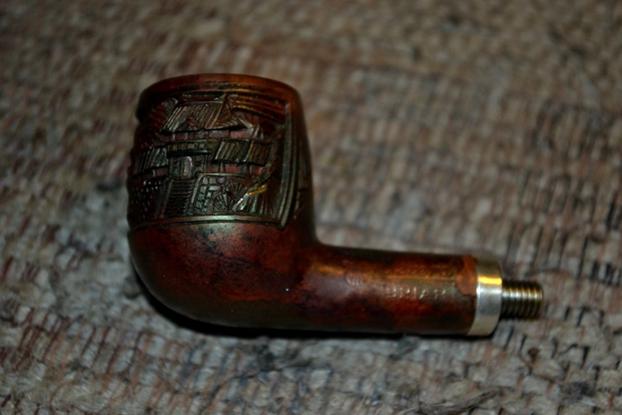 A few minutes have passed. I choose 8000 and 12000 micromesh for the gentle removal of the char and use first the lower number, then the higher. Still, the color is too dark. I take out the 3200 pad and rub the smooth surface of the stummel, which lightens nicely, and for the artwork use another small piece of superfine steel wool, first over the raised areas and then focusing with necessarily more pressure into the difficult grooves. It’s amazing how many there are in this testimonial to the mastery Japanese artists have over such detailed work.
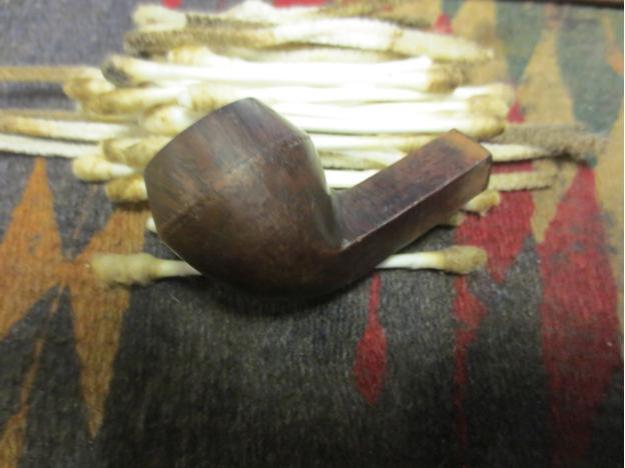
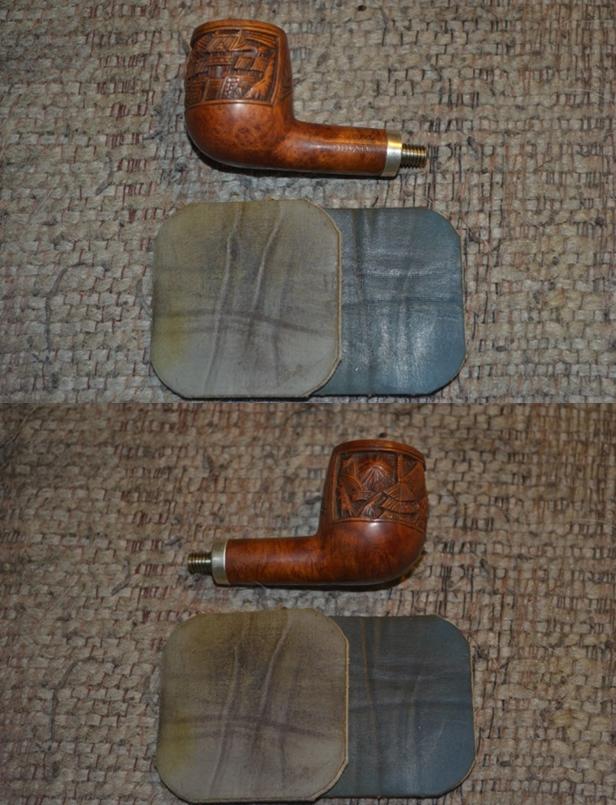

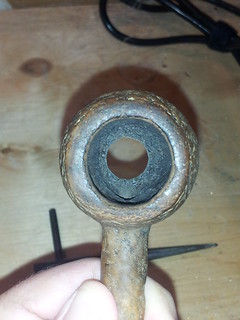
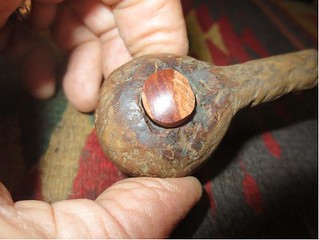
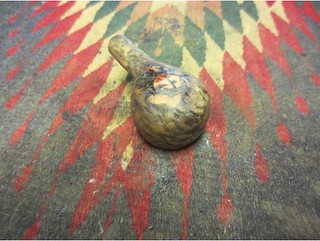
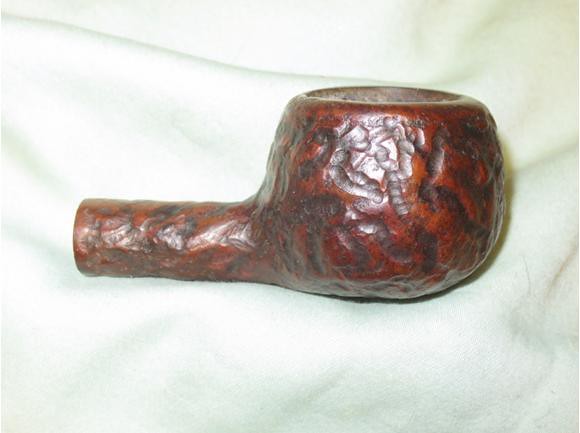
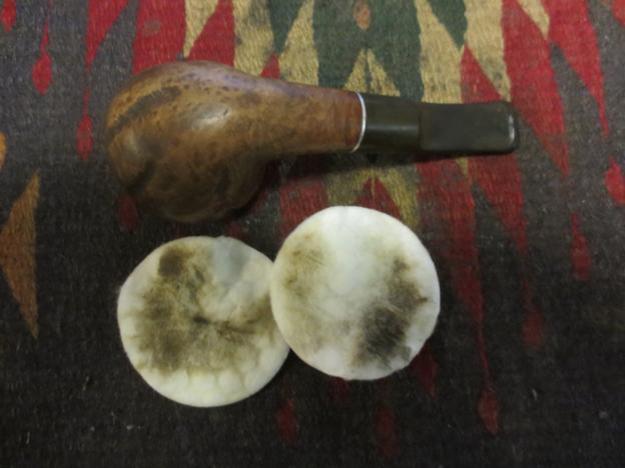
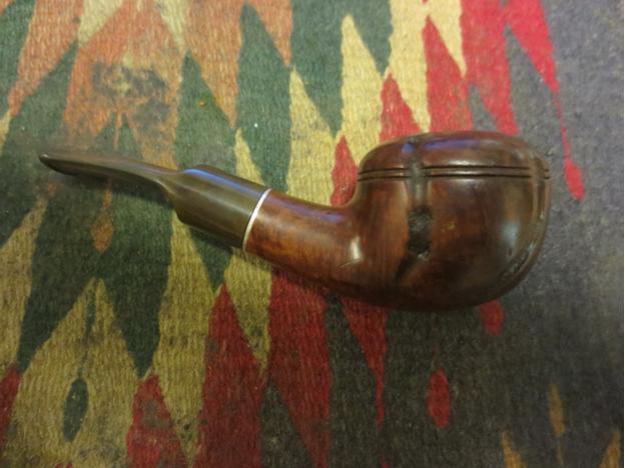
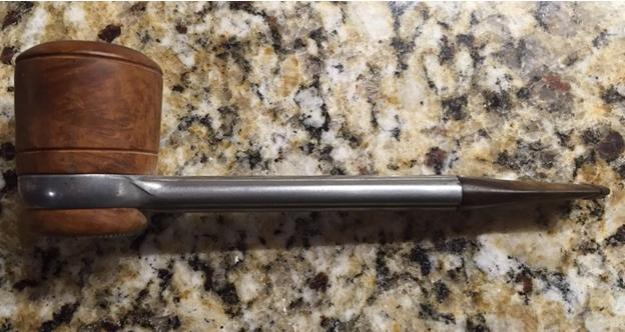
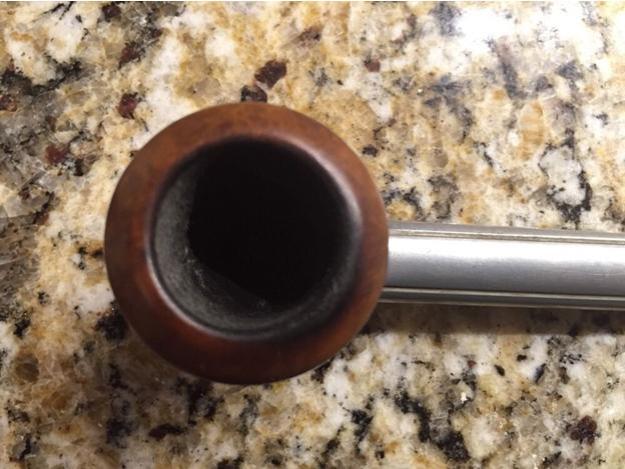
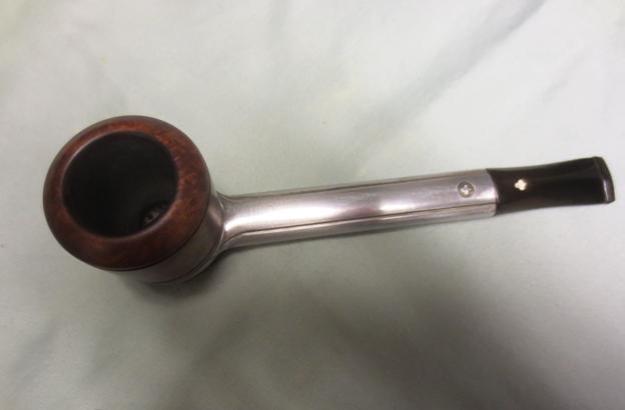
 I must have put away the steel wool for the photos above, but trust me, I didn’t make the carved parts of the stummel so light without it. It is time to coat the briar with a small finger of Halcyon II wax and set it aside awhile to dry.
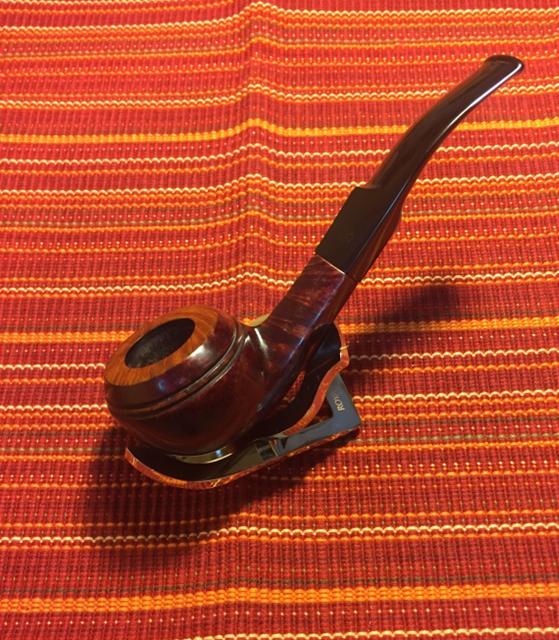
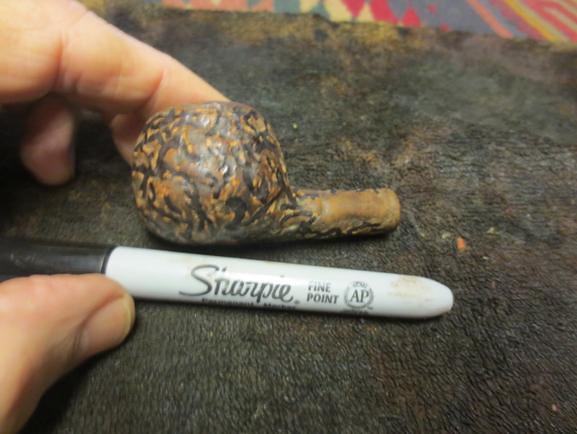
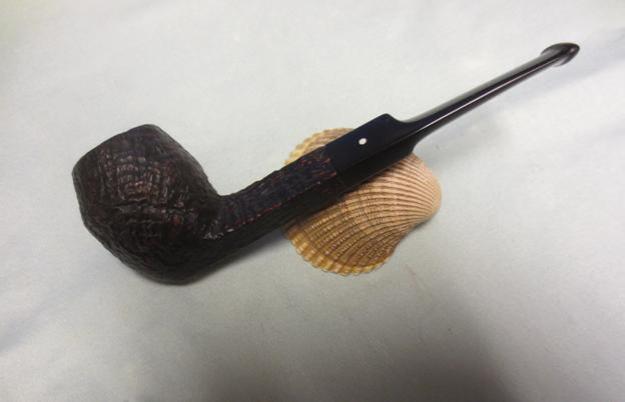
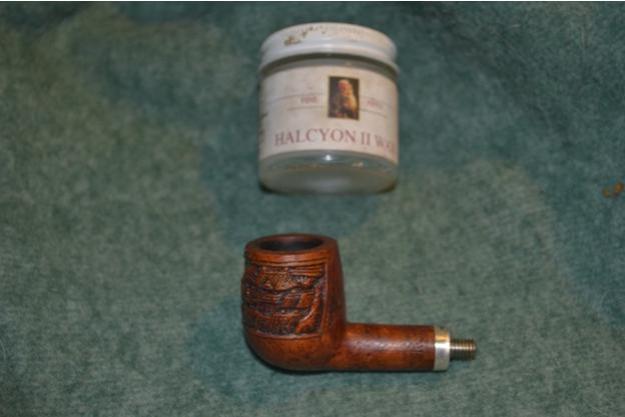 When the Halcyon II has set into the smooth and carved areas of this excellent small billiard (it measures 4¾” in length with a chamber diameter of ⅝” x 1”), I buff it by hand with a clean cotton rag and set it aside, with the utmost care, where the cats will not disturb it. I will wait until later to photograph the finished pipe as a whole. I have completed the stummel and now have only the bit to restore to vibrant life.
Only the bit! Again I have reached a critical stage of this wholly strange process that hinges on the successful “removal,” or more aptly, mending and covering of the creeping cracks in the shank. I freely confess my justified fear of blowing this all-important feature of the restoration. After all, it is the only real challenge I face with the Esterd, and if I botch it, I will have to reverse the next step and try again, a prospect I do not at all relish. Ultimate failure is not possible, I know, because I will do it as many times as it takes to get it right.
I take a break. After a moment’s thought I choose, with a weird and flippant flair I do not begin to feel in my stomach, the GBD Prestige Apple, which caused so much heartache and twisting difficulty in my previous, dubious trip through the sometimes treacherous and bewitched path of pipe restoring. I decided to keep the GBD as much as a reminder of my mistakes as anything else. I savor some Gawith Bracken Flake, an intact tin of which I bought about two years ago and put in my cellar after rehydrating and trying two tins that were popped open at my occasional secondary tobacconist here, and which the young son of the owner, the heir to the family operation, had the business acumen to give to me. At my preferred tobacco shop, I like to refer to the competition as “the Tobacconist that Must Not Be Named” when it needs to be mentioned at all.
Not impressed with the first two tins that rehydrated well enough but still had something missing, like Frankenstein’s Monster reanimated, I have many times almost donated the last tin to my pipe club for the monthly raffle. Something stayed the urge, and when I at last popped the tin open and uncovered the moist, rich, dark brown Kentucky burley and Virginia flakes, the flecks of crystallized white sugar suggested it was packaged well before I bought it two years ago. This break, it appears, is a desperate attempt to chill out, as my generation calls the often difficult discipline of relaxing.
Nevertheless, the magic that is the essence of pipe enjoyment begins to pervade my body and mind as the rich flavor and pleasant wreaths of smoke envelop me. My mind drifts to the meaning of bracken. In terms of the tobacco in my GBD, it is a reference, not to the wild ferns that grow freely in some places of the world, but to the “shade of brown resembling the colour of turning brown; a warm orangey-brown.” (I like the repetition there and have looked it up in the OED to be sure.)
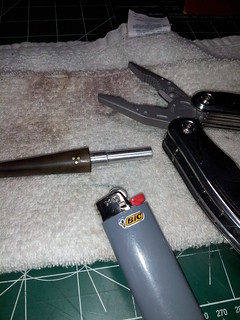
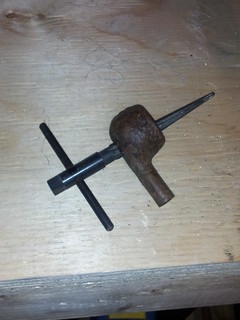
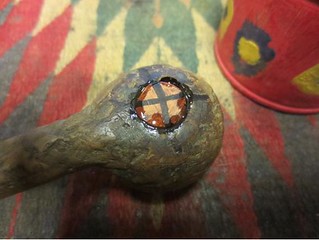
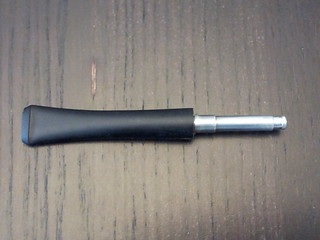
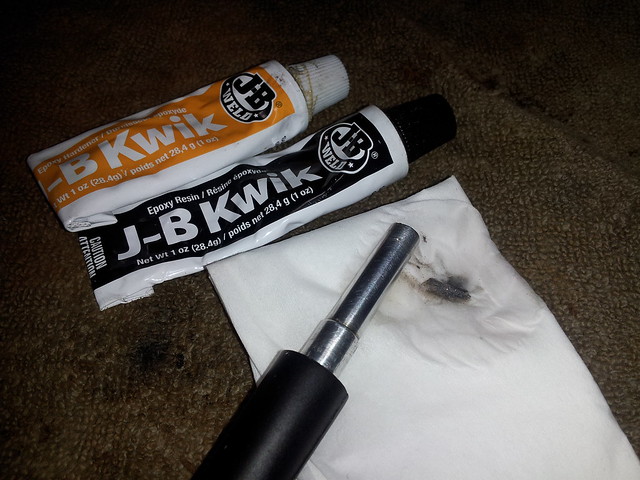
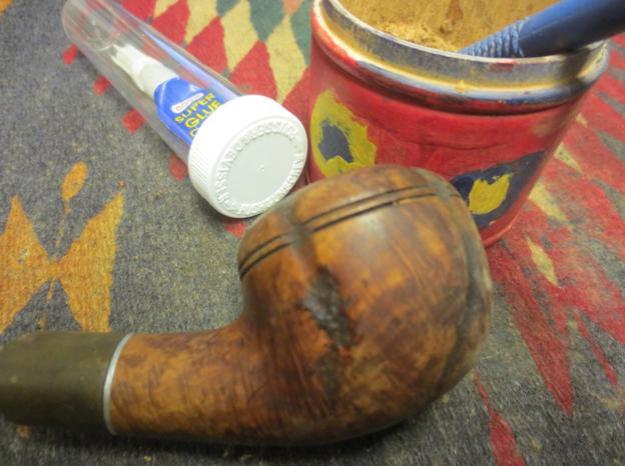
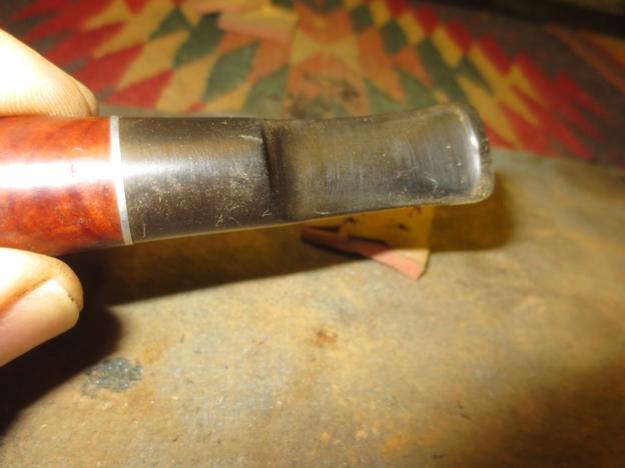
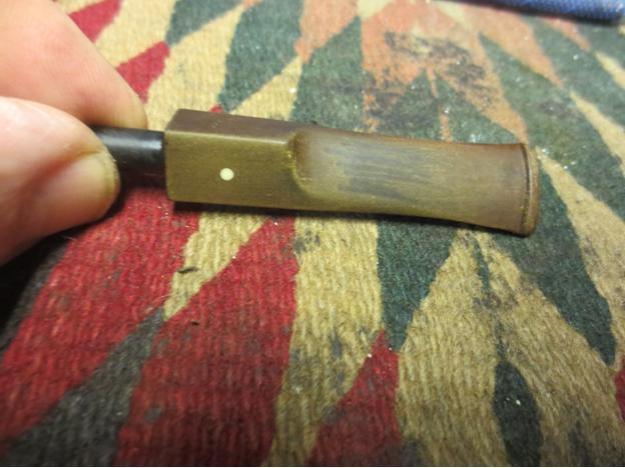
Okay, then. With that thought, I am heartened to return to the bit. I should get on with the next and cardinal phase of the Esterd restoration. I collect the tools I will need.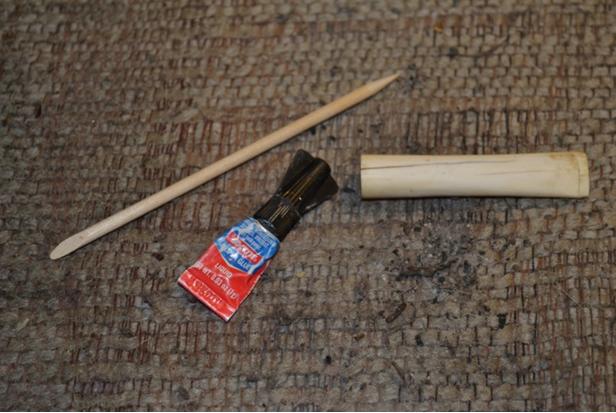 Indeed, the plot thickens, so to say. Here is the first true step in repairing the pipe: applying regular, clear Super Glue into the large crack on the bottom of the bit and over the smaller one on the top that is just forming, as well as both of their beginnings on the open end of the bit. Although the task may sound easy, it is not. Aware of the risk of smearing the quick-drying stuff where it is not needed – beyond the lines of the cracks – and the equal need to avoid, above all, allowing the glue to seep inside the threaded opening, I did procrastinate the unavoidable step as long as I could.
And so, facing the music – another interesting phrase probably originating from the centuries old practice of disgraced officers being drummed out of their regiments – I approach my duty with the soldier’s wise combination of trepidation and exhilaration. I choose the single weapon that seems best suited for the battle, a short wooden fingernail care pick with one pointed end and the other chisel-edged. I feel somewhat as a young boy with a tiny toy quarterstaff harkening back to medieval England.
First addressing the primary targeted weakness of the bit, the long crack in its armor, using the pointed end of my pick tipped with a small squeeze of the Super Glue, I lay down a line of the sticky stuff, following as closely as I can the uneven course of the wound. Then, spinning the pick around to its dry, chisel-edged side, I poke it deftly into the widest part of the gap at the open end of the bit and scrape the excess glue from the sides of the fissure and running down into the still-sealed but breaching length to halt any future attack from that end. I survey the inner bit, focusing on the corresponding fault along the threads, and note that light no longer shows through, but it is still not sealed.
Daring not to venture inside the bit, I opt for a compromise, adding more glue to the pointed edge of the pick and capping off both short lines on the round end of its entrance. Returning to the front line, I repeat the same process as before, and in checking the interior of the bit am gratified by the apparent victory within sight. The glue has crept all the way to the inside boundary of the threads and halted, already firming up against any future onslaught by the enemy.
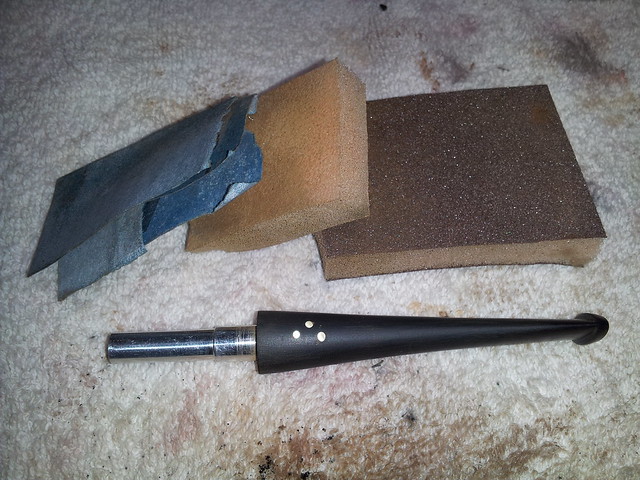
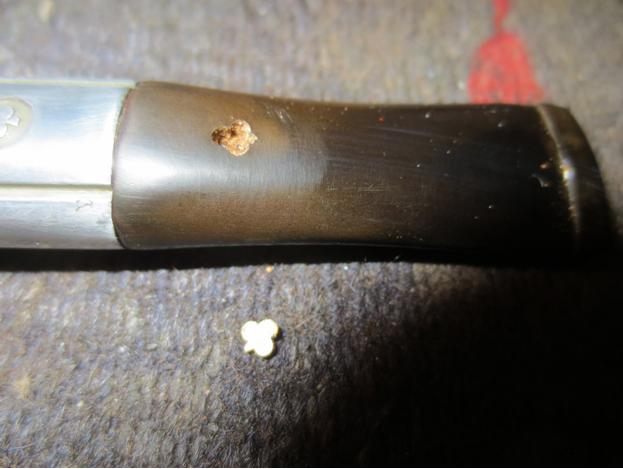
I turn the bit top up to coat the short, closed line of early crack formation there with a preemptive strike against further growth. The Super Glue seal is almost imperceptible in the photos below, but it is looking strong to my eyes.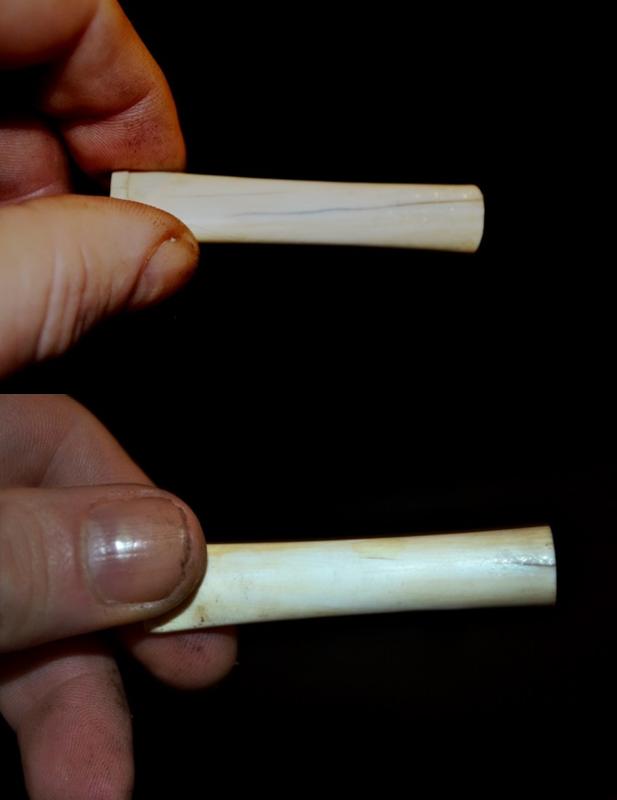 Now begins the two-day siege as I must wait and see if my blows to the enemy fortify and take hold.
TUESDAY
The clear instructions from Chuck, my warlord, were to retreat and wait a full 48 hours after the Super Glue assault before returning to the scene of the battle. I followed his orders to the letter and briefed him on the situation earlier tonight at his HQ. He reaffirmed the last step I must take before the final death blow, the ammunition for which still has not arrived in the mail. This time, however, when I mention making the bit pure white, Chuck added, “You do the best you can.” Ignoring this modifier at the moment, I return home and with stealth take the bit in hand to gloat over the impending unconditional victory.
In final preparation for the extreme but morally justified coup de grâce I hope to deliver tomorrow, should the required reinforcement arrive by then, I clean up the battlefield, again using the very fine fingernail smoother to remove the minimal amount of Super Glue that has dried and hardened on the top and bottom of the bit, over and surrounding the sealed cracks.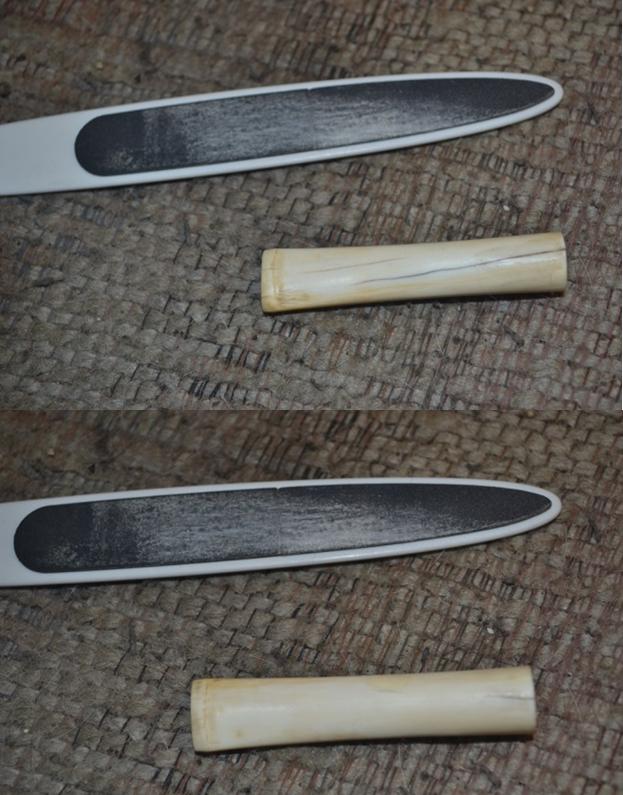
 For the last, uncertain time, I can only await the arrival of the final weapon. War, indeed, is not Hell, but Purgatory.
THURSDAY – 4:30 p.m.
The state of the USPS being as it is, the package I have awaited, I see online by checking the Tracking Number, has arrived this day. I pick it up and make a pit stop at my tobacconist. The special weapon: white jeweler’s rouge, which Chuck tells me – and I confirm online, not with unbecoming doubt of my mentor’s knowledge but so that I can cite a second authority in my table of Sources below – is vital because of its lack of oils used in regular pipe waxes. Oil-based waxes will not hold to the surface of the bone, and thus, with my anxious hope, render the bit pure white again and remove any appearances of cracks. We shall soon see, together.
8:00 p.m.
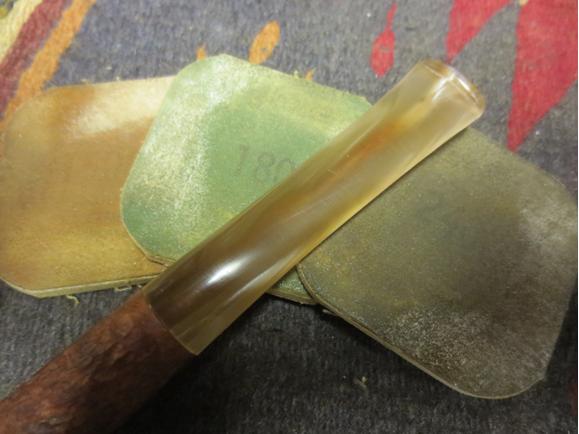
Vancouver, there’s been a problem here. I have turned on my electric buffer with the so-called “clean wheel” and applied enough of the jeweler’s rouge to make it nice and white. This is not what Chuck told me to do. Aware of my barely adequate set-up, he said gently, “You will probably want to clean one of your buffers if not get a new one entirely before you put the rouge on.”
I have already admitted that is not what I did and prefer not to dwell on it. Needless to say, when I buff the bit, the jeweler’s rouge does the best it can by bringing most of the bone to an intense white shine. But despite my frantic attempts – extending to using every angle and side of the buffer, turning the small bit lengthwise and doing the same (in the process almost burning my fingers on the high-speed cloth), and even going so far as to rub the block of rouge by hand directly to the bit and then pressing it in with a cotton cloth – of course I am unable to cover the Super Glued and micro-meshed seals of the cracks completely.
This, I confess to myself, is what I deserve for trying to do something my own way. And so I am forced, almost at the point of kicking and screaming, to delay this paramount stage of my progress at least another day as I give the “clean buffer” a soak in hot water before removing it, squeezing out as much of the wetness as I can and placing it near the bottom of the single gas heater in my living room.
FRIDAY
The buffer, amazingly enough, is clean and dry by late morning. With baited breath I return to my office/workshop proper and reattach the cloth to the machine. I plug it in again, having taken the prudent precaution of disconnecting the electrical source lest some crazy but in my experience still possible freak accident occur. I am not willing to risk losing part of a finger or worse for this or any other pipe.
Taking another of many deep breaths in this project and exhaling, I push the switch that restores life to the machine and apply the white jeweler’s rouge to the cloth spinning in a blur on the wheel. With confidence, I first pick up the little stummel to polish the silver band still more, as I noticed in the description of the polishing compound its usefulness in working on metals as well. This task ends well with a lustrous band.
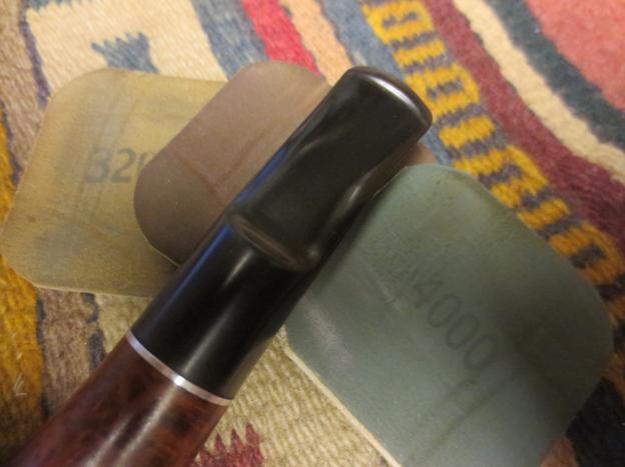
Now the ultimate moment of truth has arrived. I put the elegant and fragile piece of bone to the buffer once more, aspiring for the best results but emotionally prepared for a lesser return on my attempts.
My late roommate, who possessed an unwavering confidence in the supernatural that I truly admired, would have blamed the ensuing conclusion on my incomplete conviction. I want to believe, as Mulder’s poster on “The X-Files” reads, but it is not enough. The bone bit, though strengthened by my meticulous best efforts to make it so, is indeed structurally sound again and burnished. Nevertheless, the cracks still show. The harshest analysis reveals the bit’s integrity, but the ensured durability is still betrayed by faint traces of its incorrigible flaws.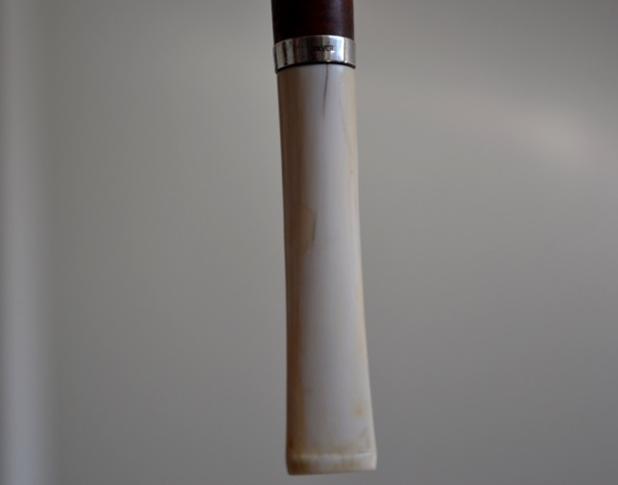


CONCLUSION
I am disappointed, to say the least, with the less than perfect closure of this arduous restoration, but I take solace from the Japanese tradition in artwork, which they call Wabi-Sabi, to leave one flaw in any endeavor. The Buddhist author, Taro Gold, describes it as “the appreciation of the value and beauty of imperfection.” Okay, so my work shows more than one flaw. No doubt the Japanese would do better. This is not Chuck’s fault. Maybe he could make it right, also, but I am at peace.
A distant part of my brain assumes someone, surely, must have expressed the same thought I wrote at the close of Tuesday, about war not being Hell but Purgatory. I Google the words and find I am correct. Drat! Keith Staskiewicz of “Entertainment Weekly,” reviewing Kevin Powers’ Iraq War novel, “The Yellow Birds,” wrote: “Powers effectively shows how, for these soldiers, war isn’t hell. It’s purgatory.” So he didn’t capitalize hell and purgatory and put a period in between. Ah, well! All’s fair in love and war. I’ll have to read that book. Or maybe I’ll see the movie, due out this year.
SOURCES
http://www.slate.com/blogs/browbeat/2014/03/12/_the_plot_thickens_the_phrase_s_etymology_and_origin_at_the_request_of_grand.html
http://www.enotes.com/topics/george-second-duke-buckingham-villiers
http://www.pipephil.eu/logos/en/logo-e4.html Esterd
https://translate.google.com/translate?hl=en&sl=ja&tl=en&u=http%3A%2F%2Fwww.tsugepipe.co.jp%2F Tsuge Pipe Co.
http://www.ebay.com/itm/RARE-Collectible-Vintage-TSUGE-Signed-Carved-DRAGON-Tobacco-Pipe-/351638968227?hash=item51df50d7a3:g:lOIAAOSw4HVWEv6T Tsuge Dragon Gold Band Bent Billiard
https://www.smokingpipes.com/pipes/new/tsuge/ Tsuge Pipes
https://avaiaartisticjewelry.wordpress.com/2011/08/07/how-to-care-for-organic-bone-jewelry/ Polishing bone materials
http://www.phrases.org.uk/meanings/face-the-music.html
http://www.medievalwarfare.info/weapons.htm Re: quarterstaves
http://www.imdb.com/title/tt3739110/ Yellow Birds movie
http://www.tarogold.com/2008/02/13/living-wabi-sabi/
UPCOMING RESTORES


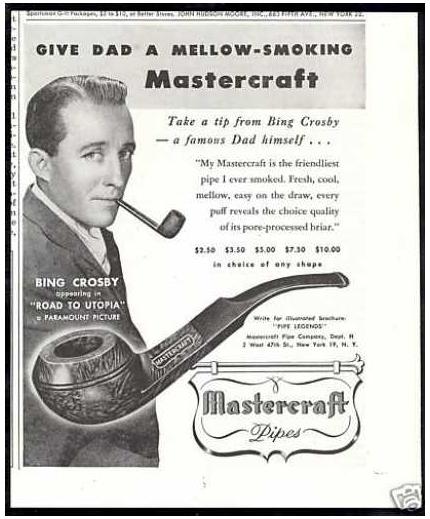 Over the years I have cleaned up quite a few Mastercraft pipes. My brother picked one up on Ebay for me recently. It looked like a good one when he sent me the photos of the pipe. I could not wait for it to arrive and I could begin to work on it. In one of my earlier blogs I wrote a bit about the history of the brand (https://rebornpipes.com/2014/06/22/learned-a-bit-of-american-pipe-history-mastercraft-executive-choice-pot-restored/). In that article I made the connection of the brand to Bing Crosby. I posted this old advertisement for the pipes with the old crooner himself.
 My guess, judging from the previous advertisement and the 1949 RTDA Almanac clipping above, is that the pipe I have is from the period between the beginning of the company and the publication of this catalogue (1941-1949). After that period in the 50’s and 60’s the names of the pipes changed and I was not able to find the Mastercraft Standard in later catalogues.
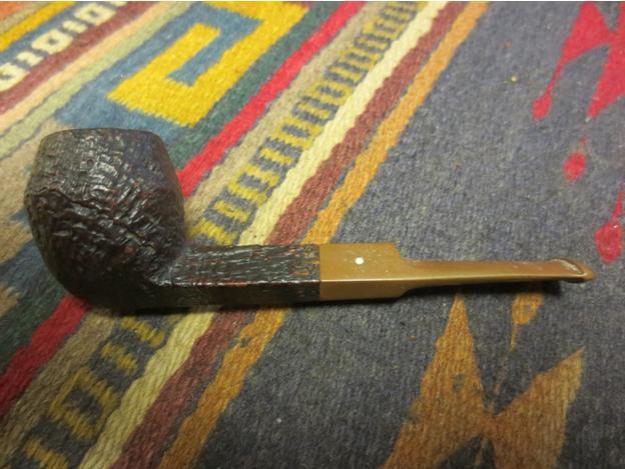
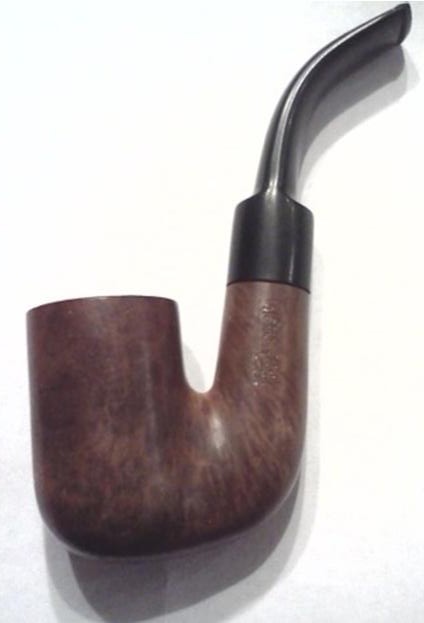 The photo to the left and the next two photos that follow are the ones my brother sent to me before I received the pipe. They give a good idea of the condition of the pipe when I received it. The pipe had a natural finish, no stain on the briar. Over the years the briar takes on a richer colour. This one had taken on a reddish tint. The stamping on the left side still showed the gold stamping in some of the grooves. There were specks of white paint on the bowl, shank and stem. There was also some darkening on the sides at the shank junction with the bowl from oils and soiling from the previous pipe man’s hands. The rim was thickly tarred with lava overflow. The bowl had a thin cake on the top 2/3 and the bottom 1/3 was still fresh briar showing raw briar. The pipe obviously had not been smoked to the heel. The stem was quality rubber and did not show signs of metal fragments in the mix that seem to appear in many of the war year pipes. There was little oxidation but there were tooth marks on the top and underside of the stem near the button. There was tooth chatter on both sides. The stem did not fit tight against the end of the shank.
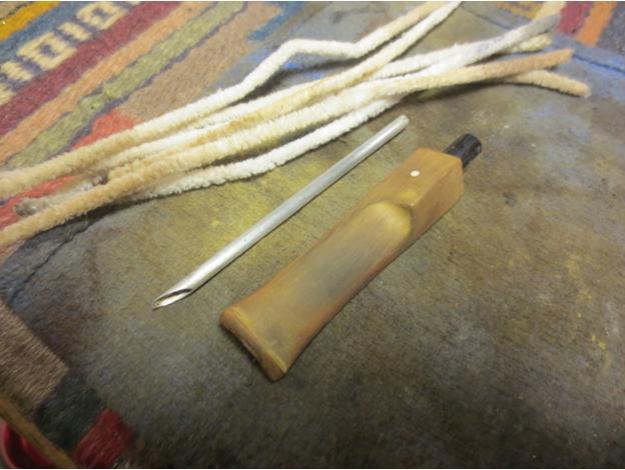
 When the pipe arrived I put it in my refurbishing box and would eventually get to it. Today I took it out of the box to work on it. I removed the stem and was a bit surprised to see the interesting and unusual stinger apparatus in the end of the tenon. It had a flat blade that ended in a point. It was almost a spear point. It sat down in the sump of the shank. It ended at a spiral cylindrical piece with a slot in the last half of the cylinder. It fit into tenon by pressure and was easily twisted free.
 I scrubbed the bowl with acetone on cotton pads to remove the grime and soil in the briar and the white flecks of paint on the bowl and shank. I scrubbed the rim with the acetone as well to try to remove the lava overflow that was present. I used a pen knife and scraped at the lava between wipes of acetone and was able to remove the buildup without damaging the finish on the rim. I did not need to top the bowl!
 The acetone removed the grime from the briar and all of previous coats of wax that had given it a dull finish.
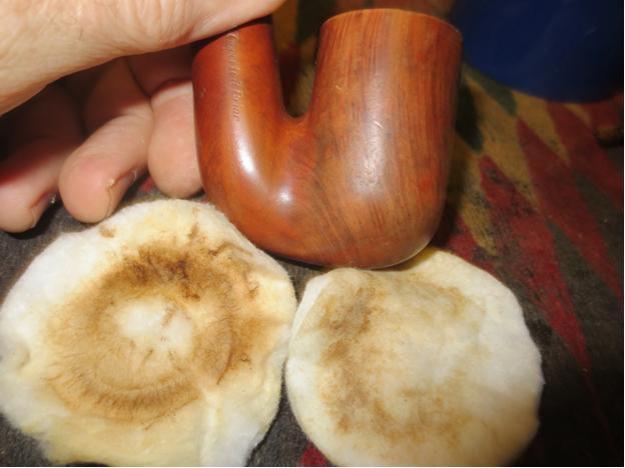

 Once I had cleaned the finish of the bowl and shank with the acetone I washed it down with alcohol and dried it off. I used some antique gold Rub ‘n Buff to restore the stamping to its previous look.
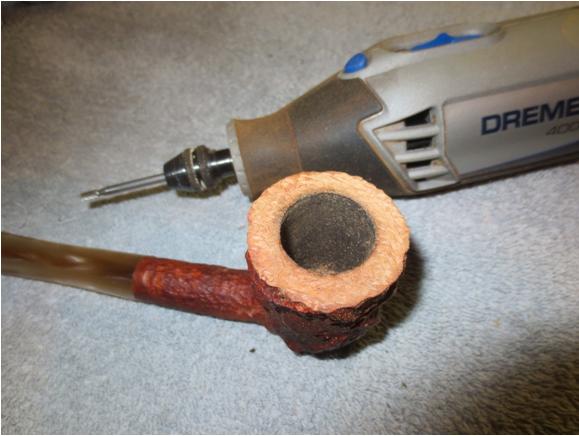
 I hand buffed the bowl with a shoe brush and a little Conservator’s Wax to protect it during the rest of the clean up. Though I probably should have done the next step before the work on the stamping I did not do so. But such is the way things go. I reamed the bowl with a PipNet reamer using the third cutting head to take back the cake to bare briar. Since the bottom 1/3 of the bowl was uncaked I wanted the transition between the sides of the bowl from top to bottom to be smooth.
 I scrubbed the stinger with alcohol and cotton swabs to remove the grime. I also scrubbed it with a brass tire brush.
 I cleaned out the airway in the stem with pipe cleaner, cotton swabs and alcohol to remove the tars and oils. I was surprised to find that the tenon was lined with an aluminum tube. The stinger pressed against the sides of the tube when it was inserted. I think it was also an attempt to strengthen the tenon.
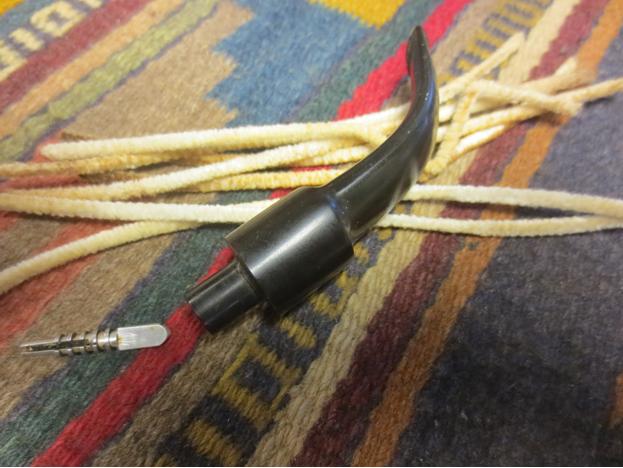 I scrubbed out the mortise, sump and airway on the bowl with cotton swabs, pipe cleaners and alcohol until they came out clean.
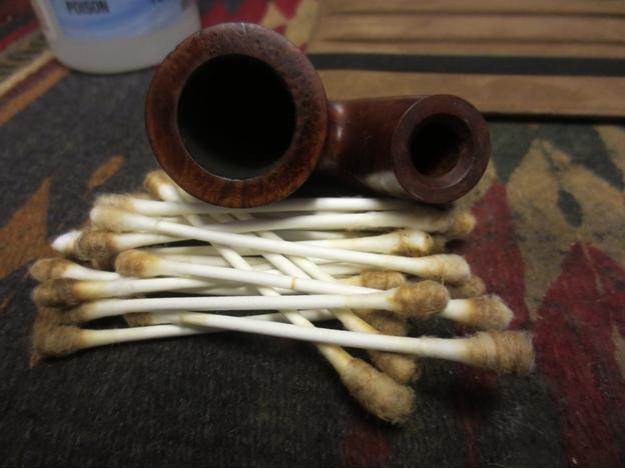 I sanded the tooth chatter and tooth marks on the top and bottom of the stem with 220 grit sandpaper to remove them as they were not too deep.
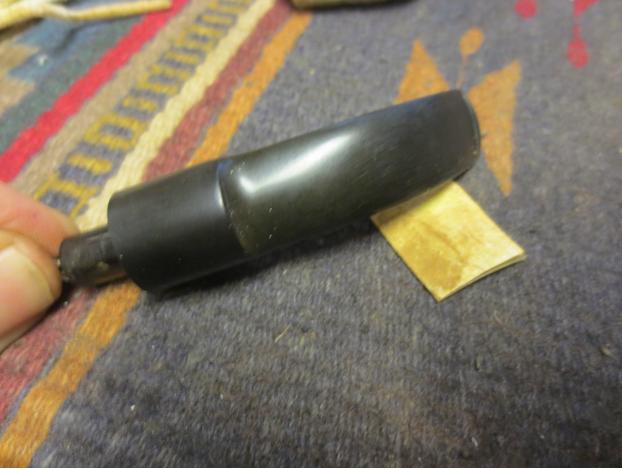
 I wet sanded the stem with 1500-2400 grit micromesh sanding pads and rubbed the stem down with Obsidian Oil. I dry sanded it with 3200-4000 grit pads and gave it another coat of oil. I finished sanding it with 6000-12000 grit pads and gave it a final coat of oil, then left it to dry.
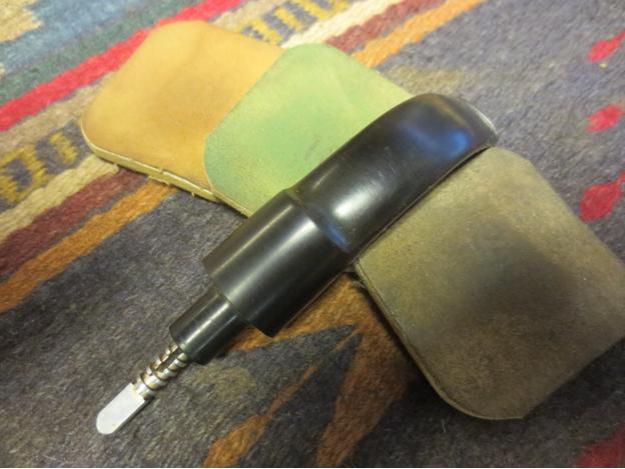

 I rubbed down the bowl with a light coat of olive oil and then buffed it with Blue Diamond. I gave the bowl and stem multiple coats of carnauba wax and then buffed it with a clean buffing pad. I gave it a final buff with a microfiber cloth to raise the shine. The finished pipe is shown in the photos below. It should provide many years of service to the next pipe man whose rack it graces. It will likely outlive both that pipe man and me and be passed on it trust to the next person who will enjoy it companionship for the years that they have it in trust. These old pipes always outlive the pipe man who keeps them company if they are well cared for (and even sometimes when they are not!).


 I received this photo last night of the pipeman who found this Dunhill. The mail delivered the pipe to him yesterday and he loaded it up and enjoyed a smoke. I don’t often get to see this end of the story! Thanks Ryan.