Blog by Dal Stanton
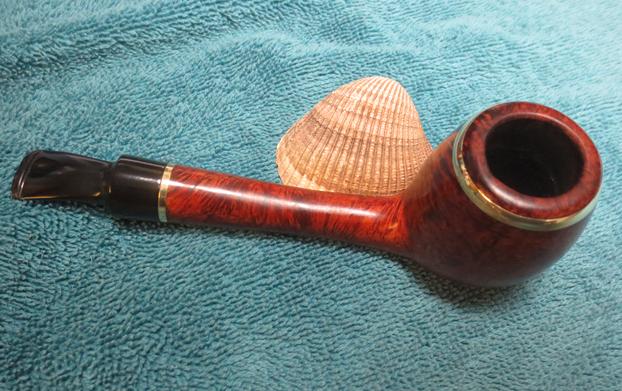
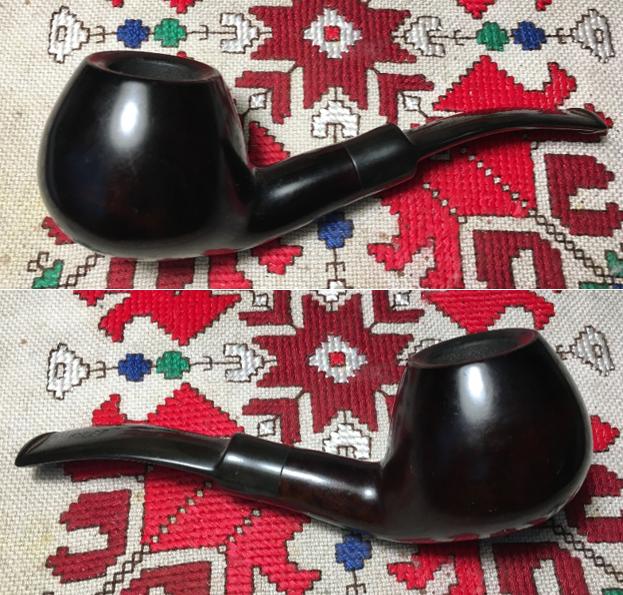
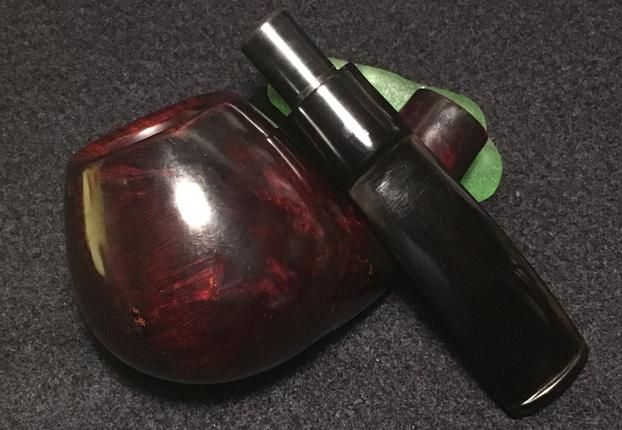
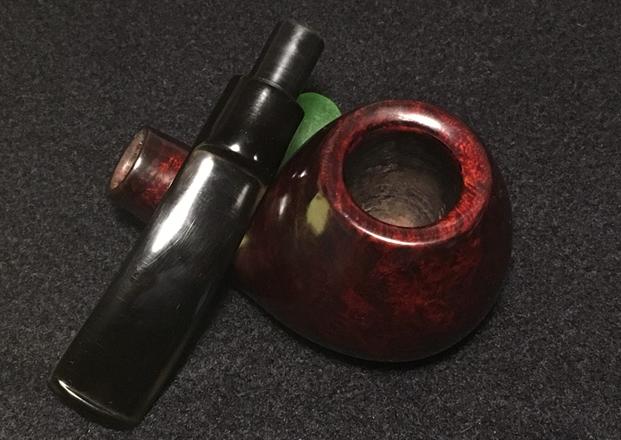
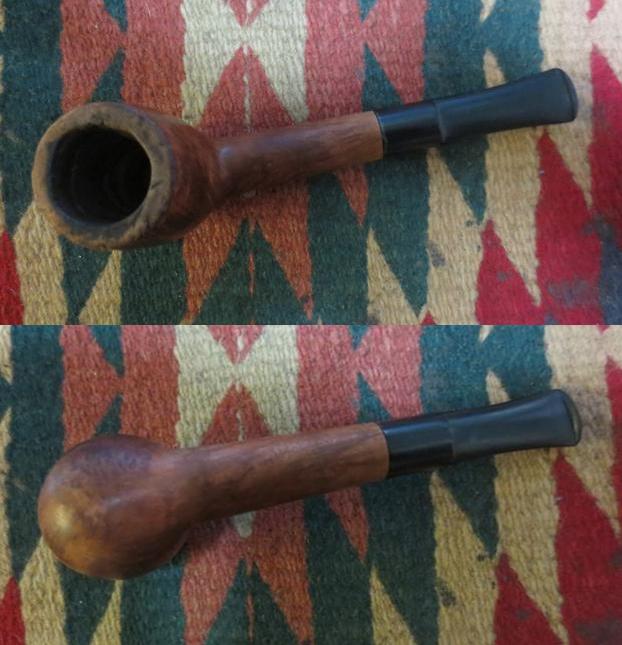
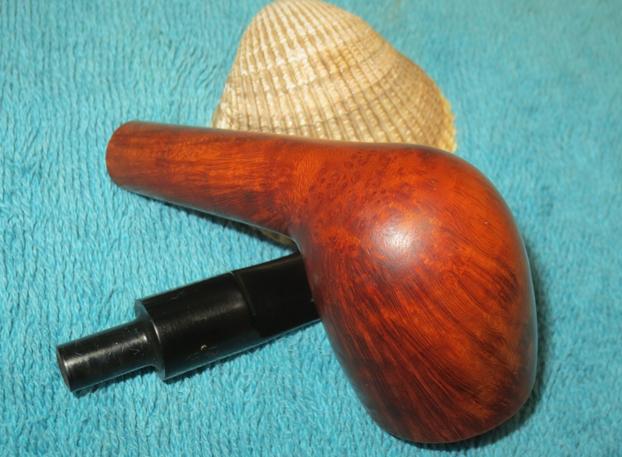
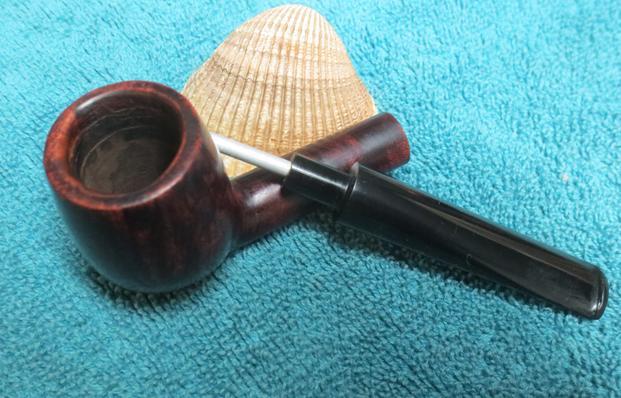
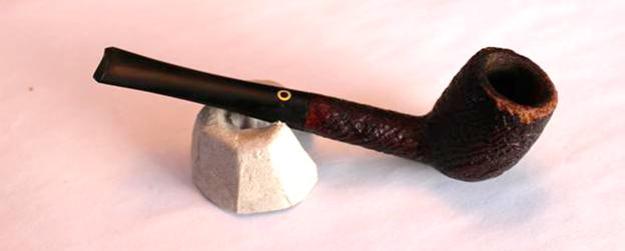
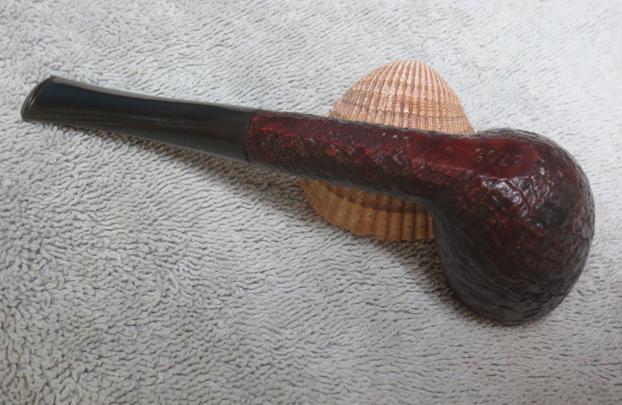
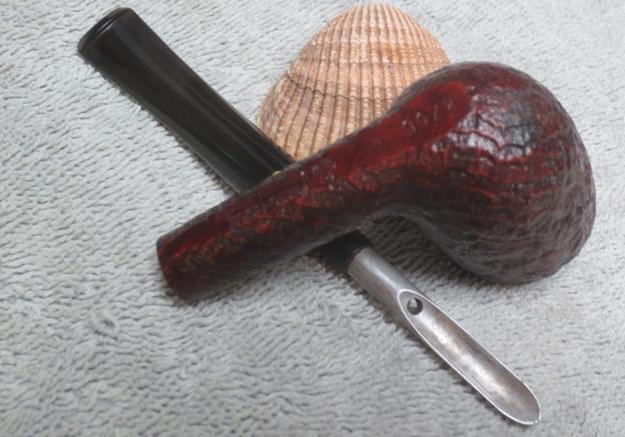
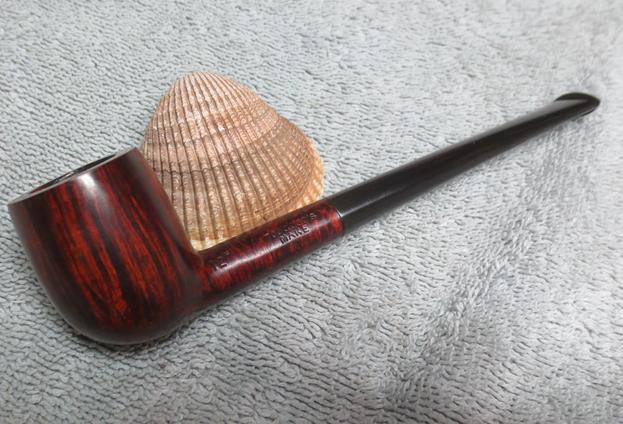
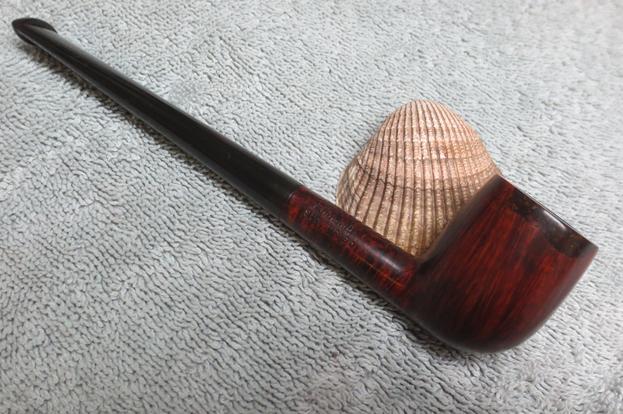
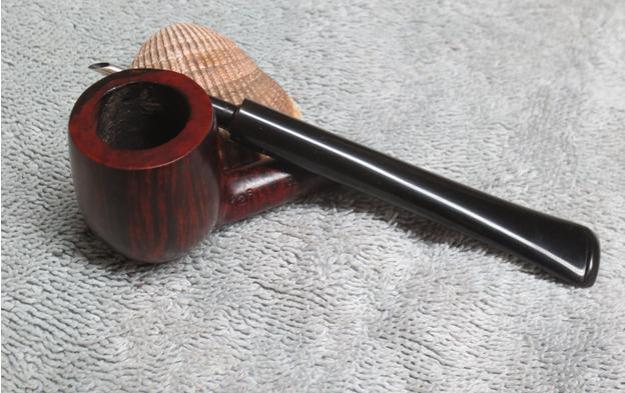
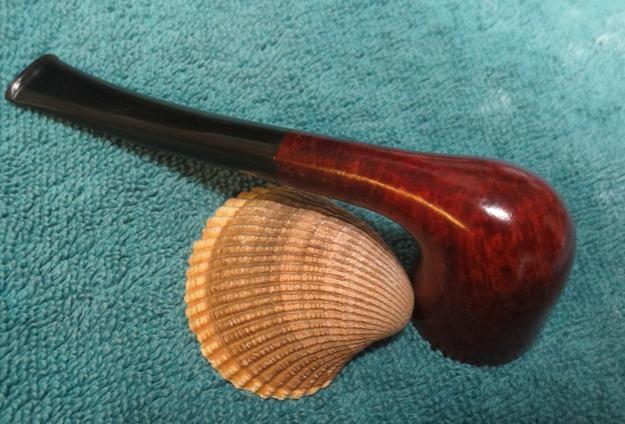
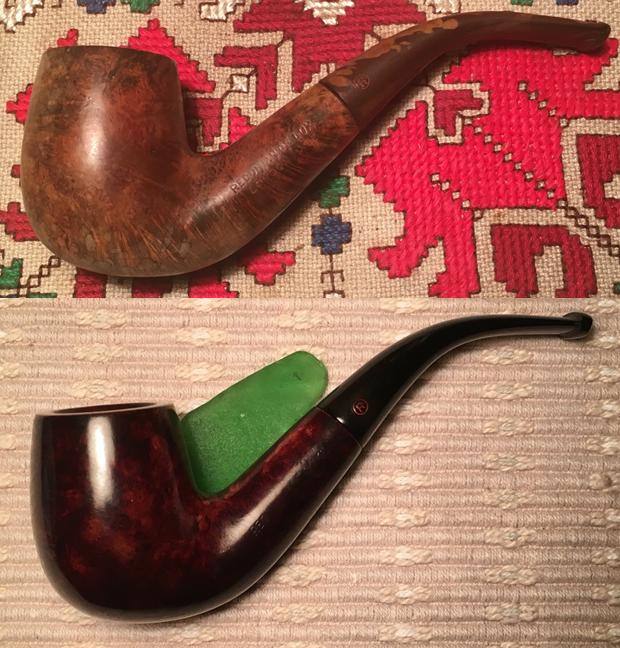
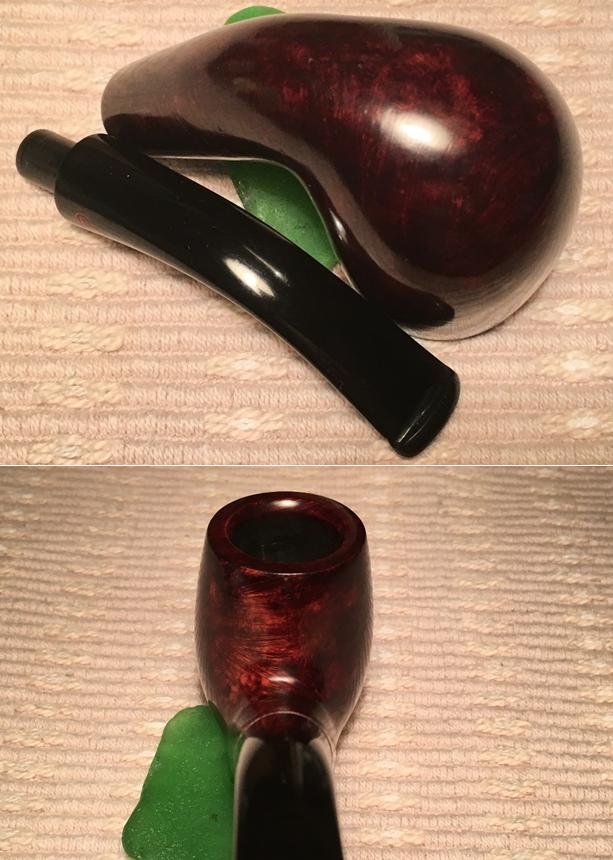
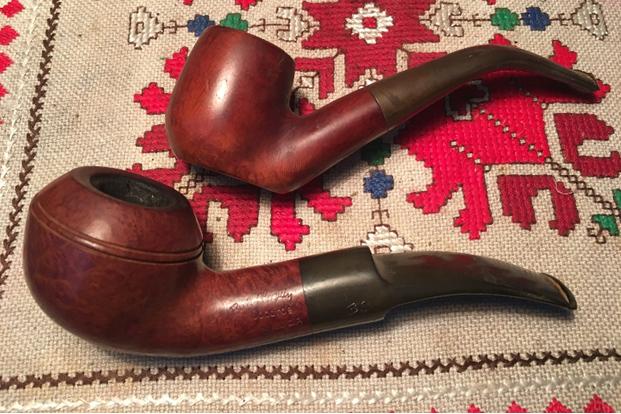
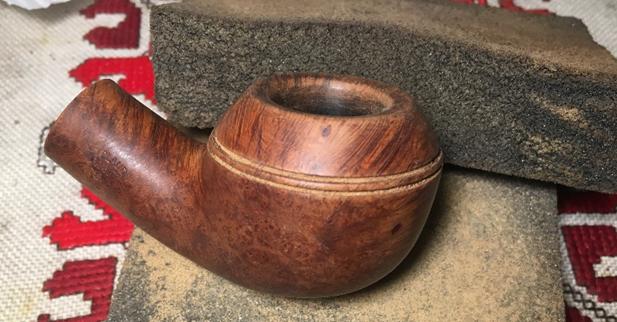
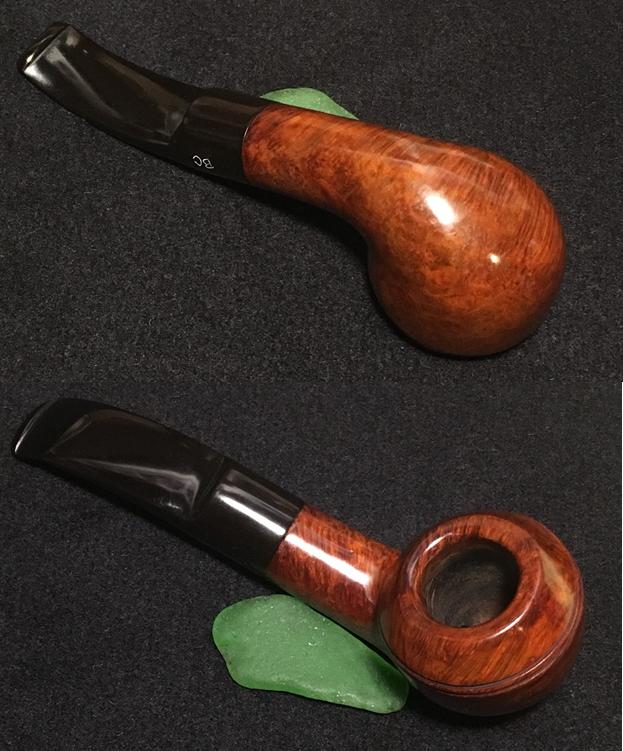
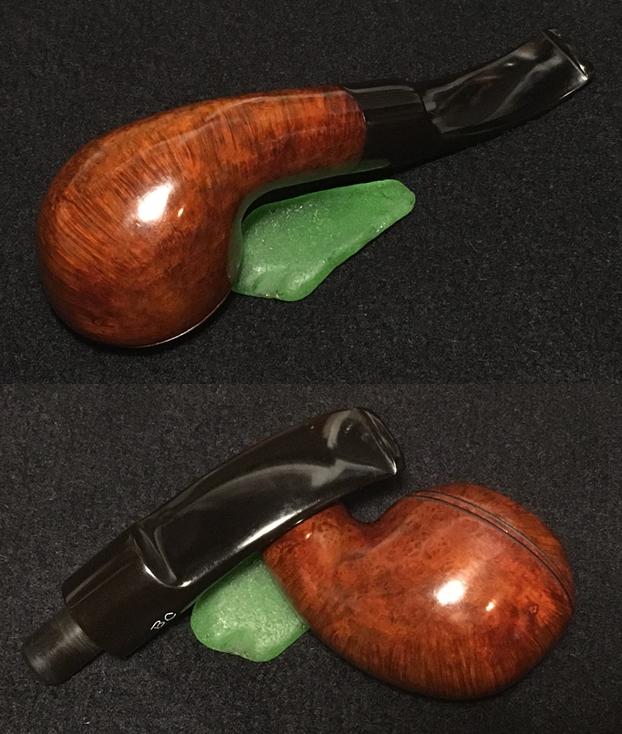
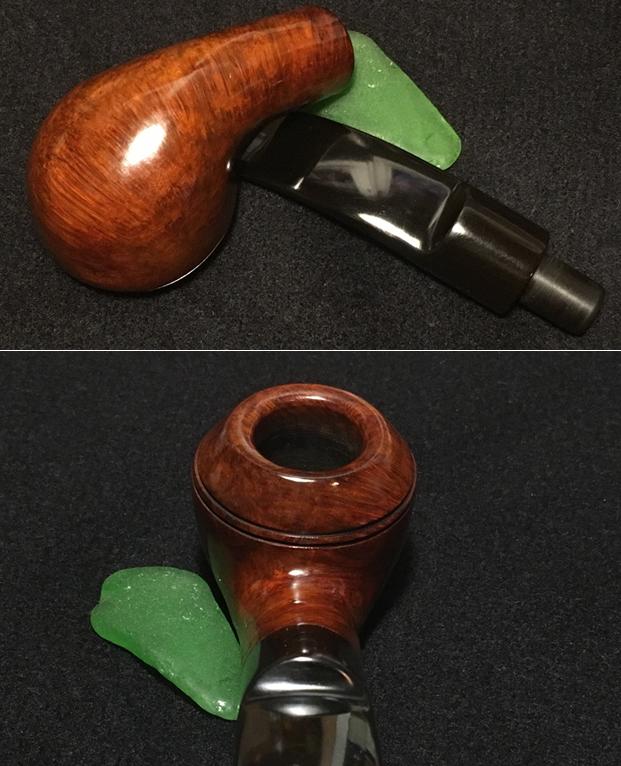
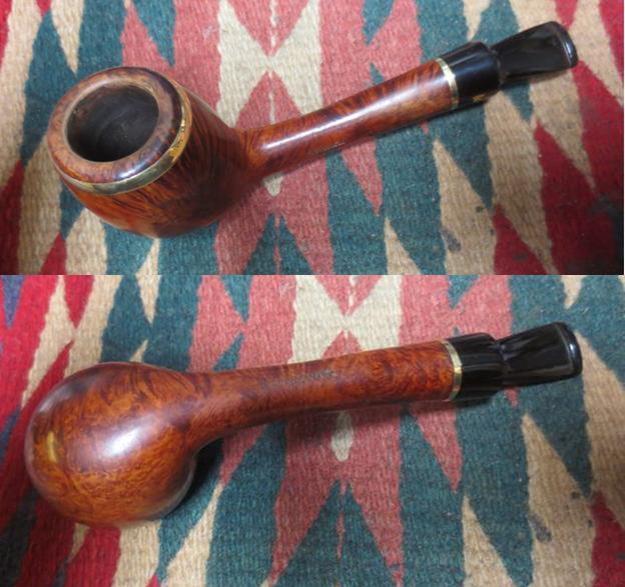
Even though it was a snow trudging kind of day, making it to the ‘Hole in the Wall’ paid off again. I mentioned this visit before when I was writing up the restoration of the Stanwell Silver Mount. On this visit, I saw the Stanwell for the first time, but didn’t bite. The next time I would! On this visit, I found another very nice example of St. Claude, France’s claim to fame as an historic center of pipe production – rivaling the UK for market share in Europe. When I saw the Butz-Choquin Cocarde Major in the pipe basket on the cluttered Hole in the Wall shelf, my initial reaction was its size – a hefty guy. My first assessment was that it was a Bulldog shape, then I noted the large rounded shank – a Rhodesian or a Bullmoose? This one is going home with me regardless! I looked in the basket for a good pipe to bundle and I saw an attractive, diminutive, Bent Billiard Sitter with a swan neck stem – unmarked, but a very nice looking pipe. When I got home I took a quick picture of the bundled pair and put them in the ‘Help Me!’ basket for later attention.
 When I take the BC Cocarde Major out of the basket, I am anxious to recommission this nice-looking Rhodesian, I decide. The first thing I do is pull up Google Translator and insert Cocarde Major in the French to English machine. I did not study French in school so help is appreciated. I want to know if special meaning is attached to this St. Claude BC. Cocarde translated into English as the word, ‘Cockade’ which was defined as, a rosette, roundel or knot of ribbons worn in a hat as a badge of office or party, or as part of a livery. With a little looking on the internet, I found these interesting French examples of Cocardes.
 With this meaning for ‘Cocarde’ it put doubt in my mind regarding my original thought that ‘Major’ referred to large or big. Attaching Major to the idea of the French symbol of national pride, it is most likely pointing to a level of rank, or when ‘Major’ is attached to another rank (e.g., sergeant-major) it denotes the ranking of one superior among those of the same rank. I emailed a colleague living and working in Toulouse, France, whose command of the language could help. His comments confirmed what I was thinking:
The word cockade refers to a national symbole for the French, like “cocarde tricolore’ refers to the French flag which is, of course, one of the most important symbols of the French people and national pride. It has many meanings, but for example official cars or planes have this symbol on it. You are right about the word Major, refering to a military grade. Used as an adjectif, “majeur” it means big. I would conclude that this is simply the name of the pipe. You can’t translate it literally. The pipe’s name implies in my opinion that it is a symbol of French pride, like the French insignia for a general in the military.
With the symbols of French pride stamped on this BC Rhodesian, I have a greater appreciation for the pipe when I take more pictures now on my worktable.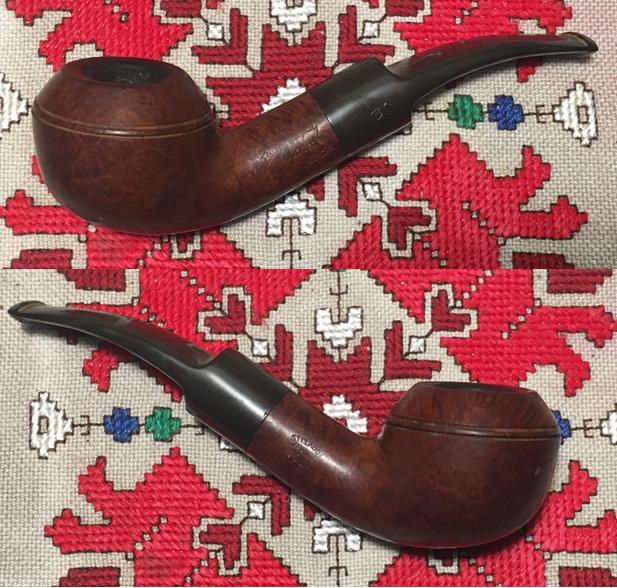

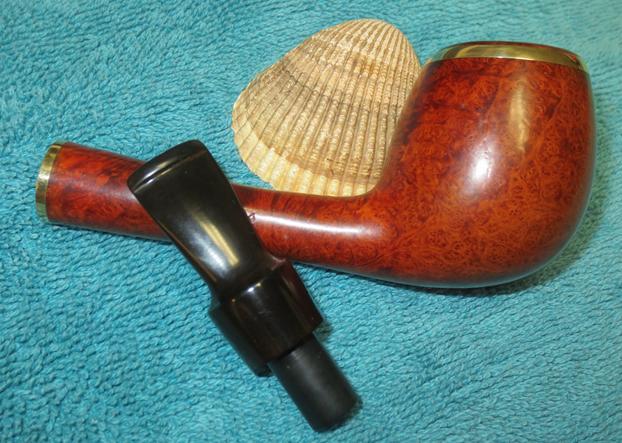
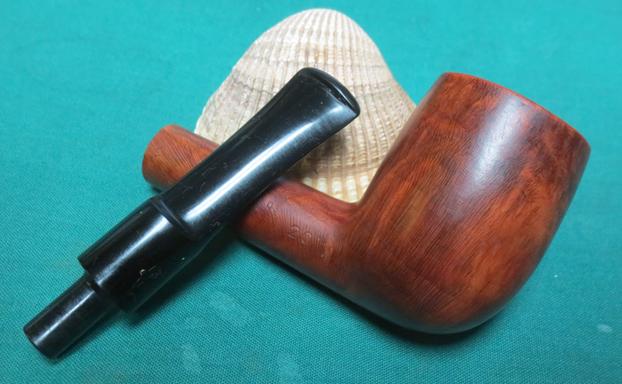
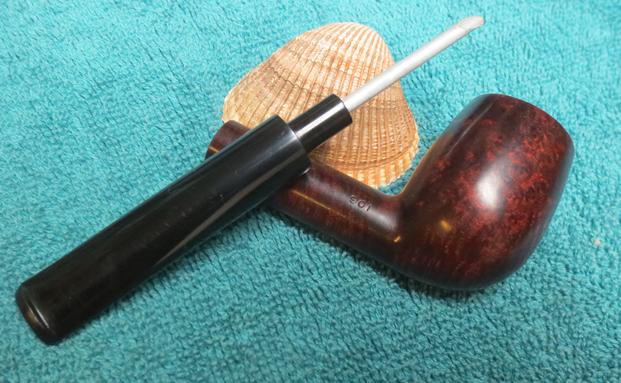
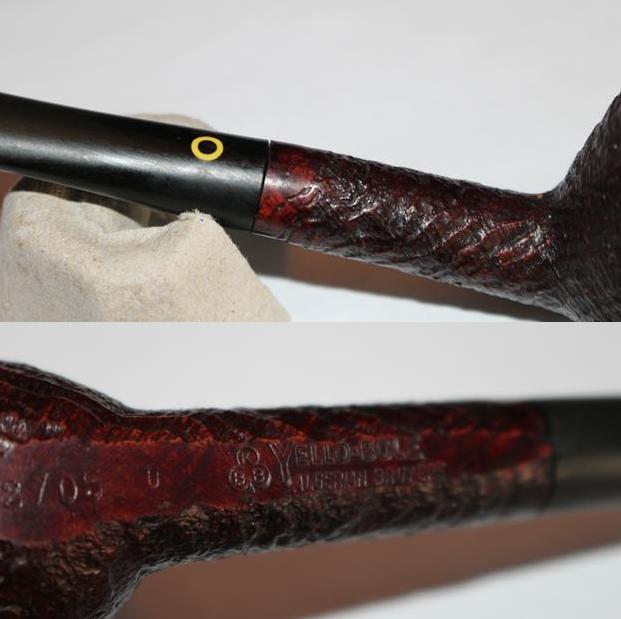
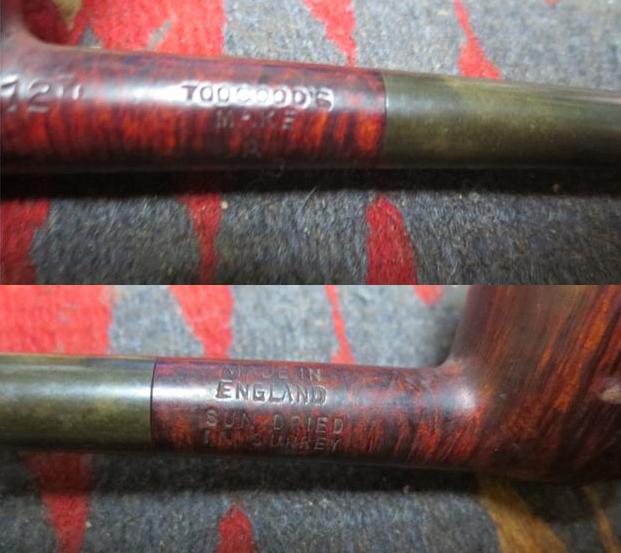
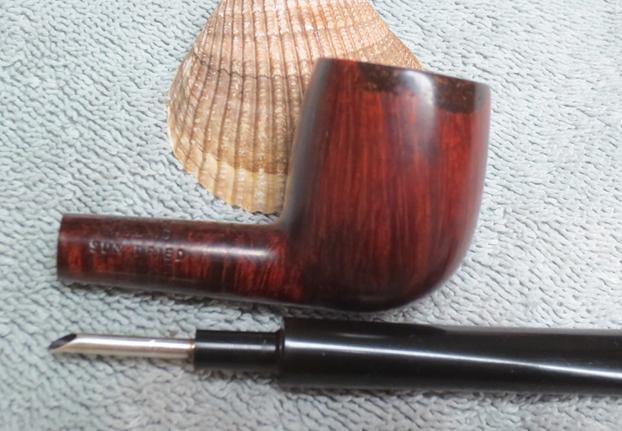
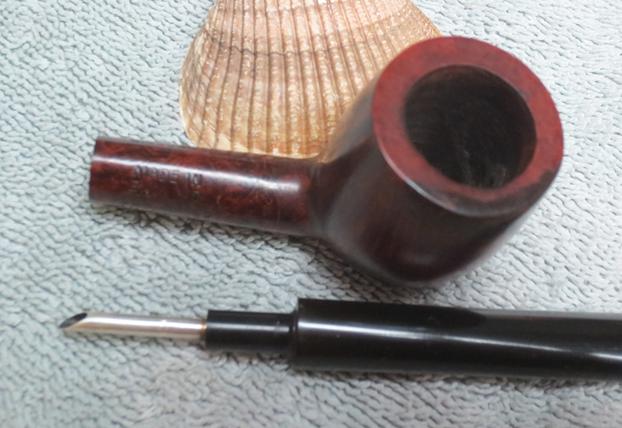
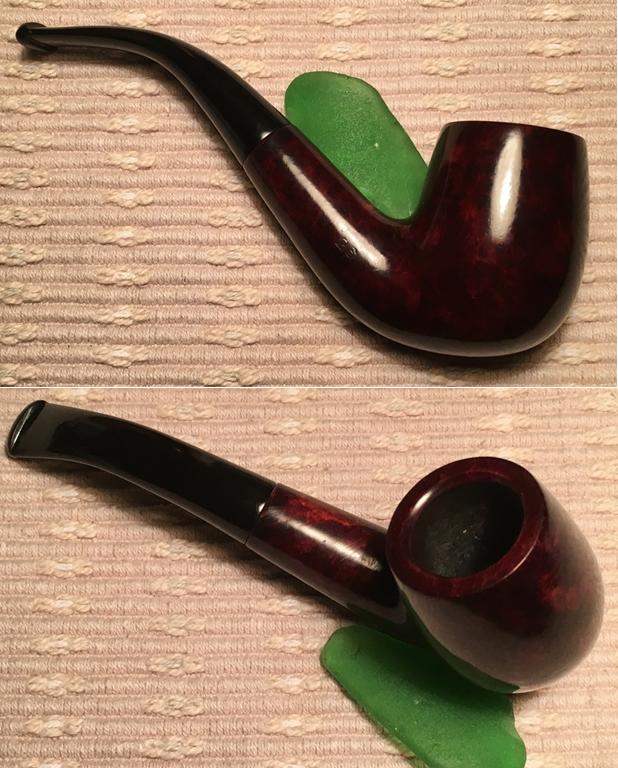
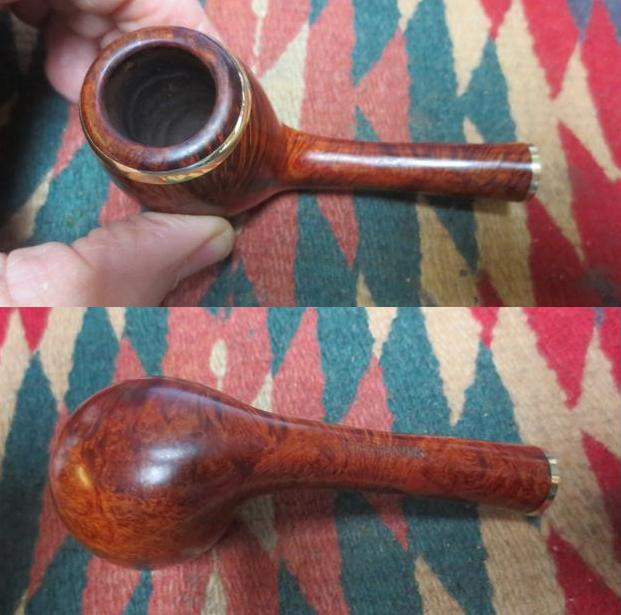
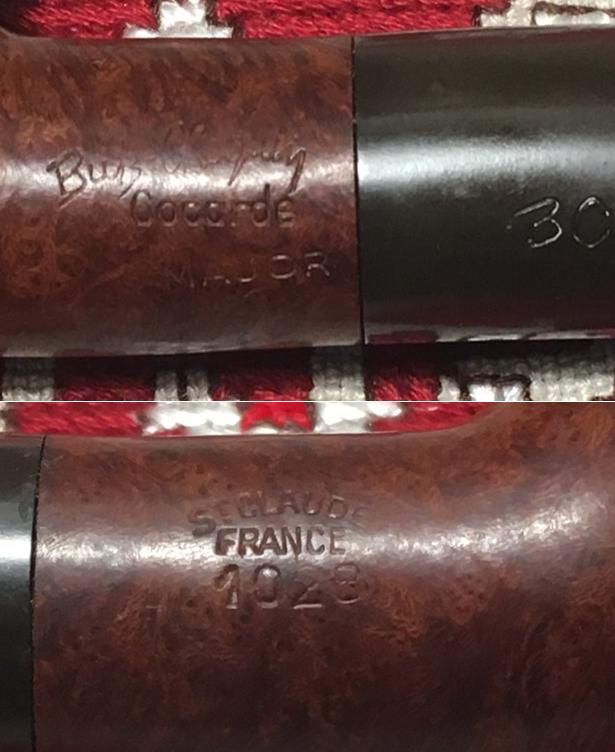 The stampings on the left side of the shank are “Butz-Choquin” in an arched script over “Concarde” over “Major”. On the right side is, “St Claude” arched over “France” over “1028”, the BC shape number. Per Pipedia’s history of the name, when Jean-Baptiste Choquin of Metz, started out as a tobacconist and the business prospered. In 1858, one of his employees, one Gustave Butz, fell for his boss’ daughter and they were married. That same year, Butz and Choquin came together to form the enterprise that is now known as Butz-Choquin, and eventually moved the operation from Metz to St. Claude, known as “the world capital of the briar pipe”. Looking on the internet, I found another BC shape ‘1028’ but was called a ‘Bourbon Major’. The shape was that of a Bulldog, with the diamond shank. I know there is debate regarding the difference between Bulldog and a Rhodesian classification, but I am happy with Bill Burney’s descriptive difference in the Pipedia shapes Chart, that the difference between the two is, the Rhodesian has a round shank and the Bulldog, a diamond.
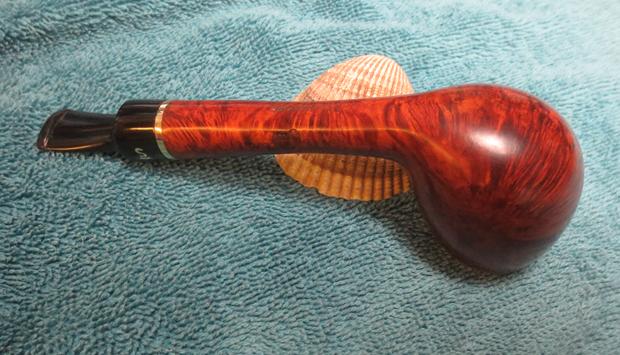
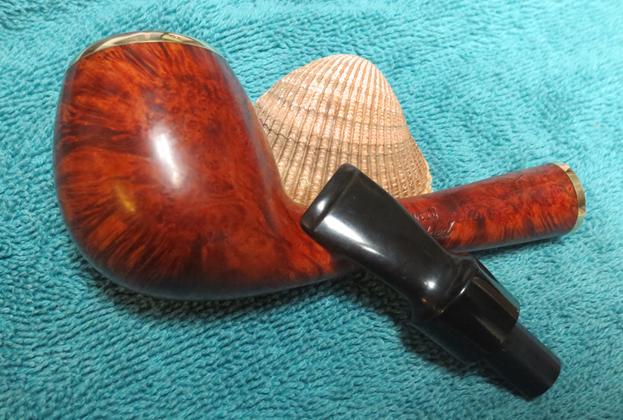
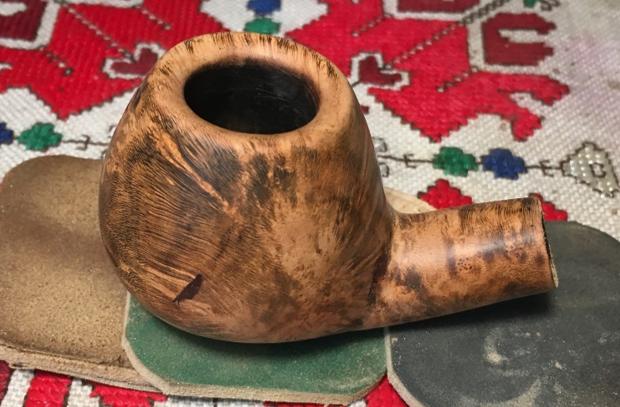
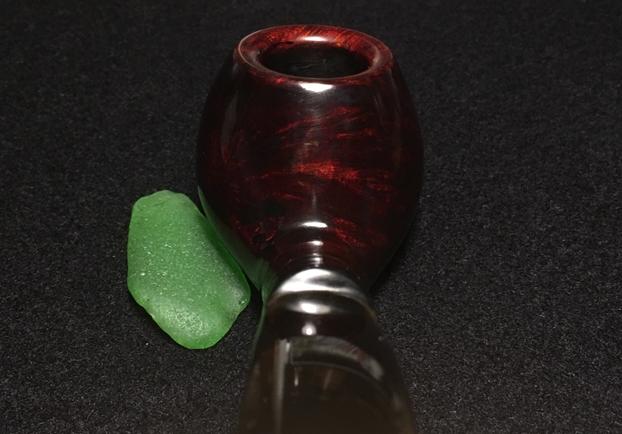
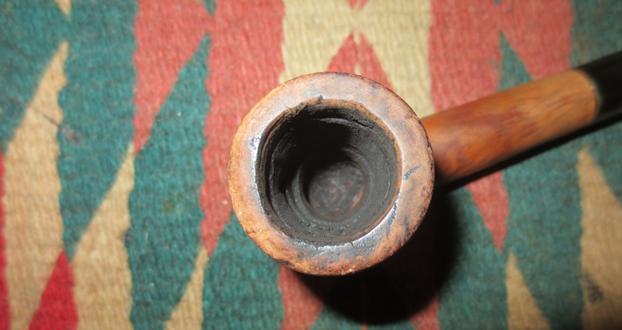
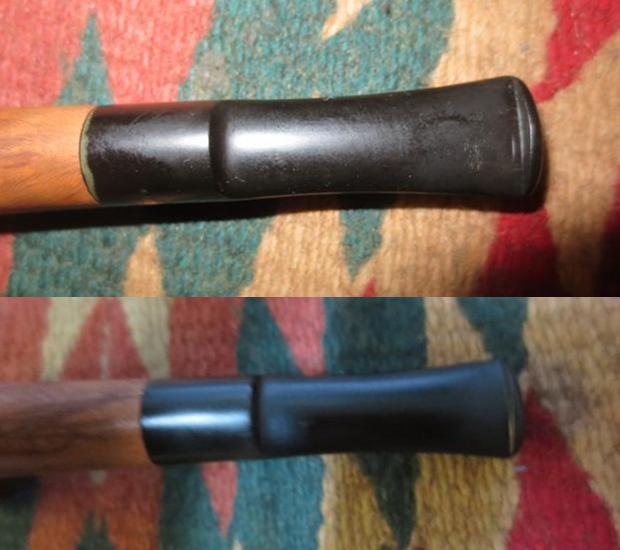
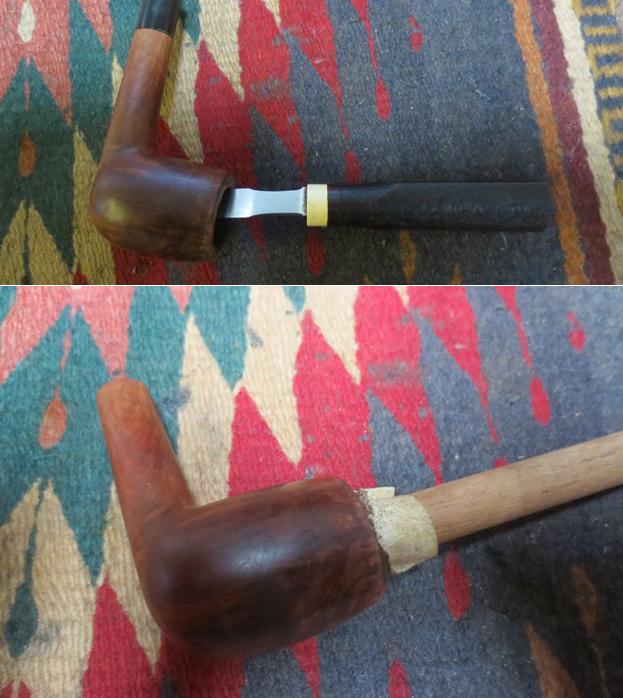
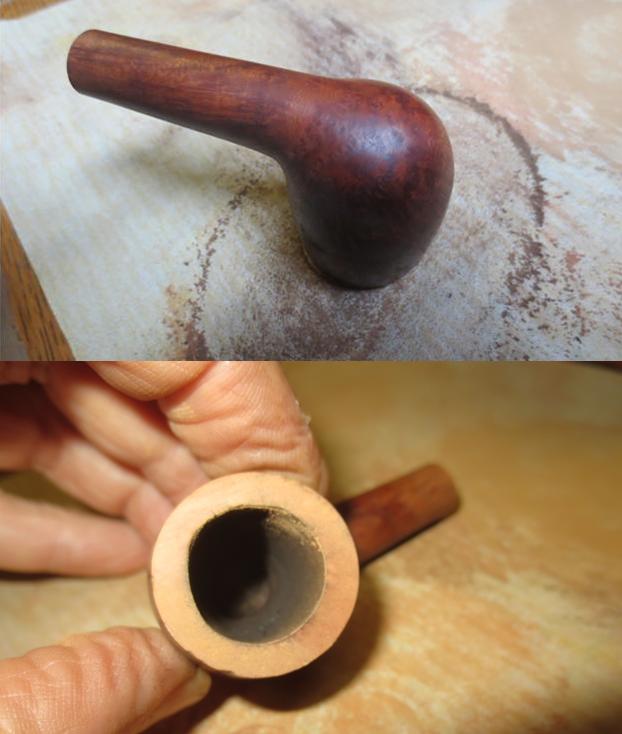
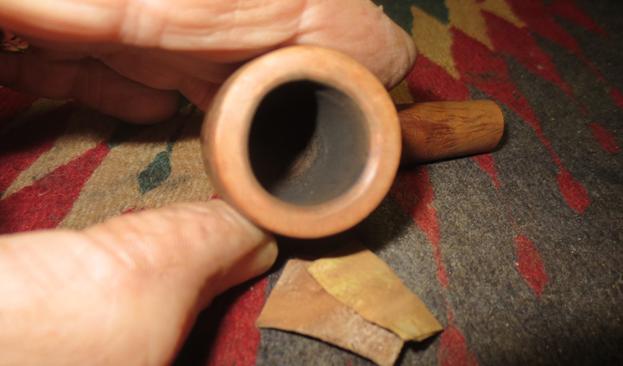
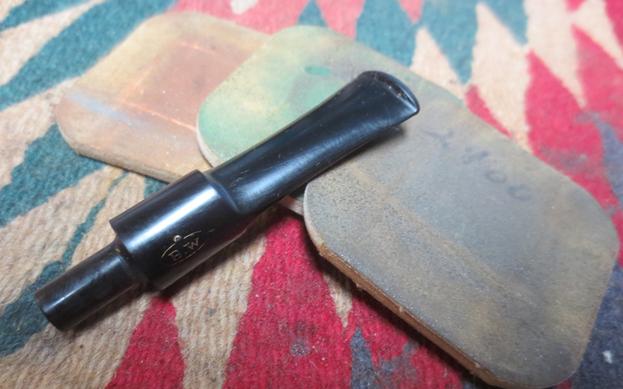
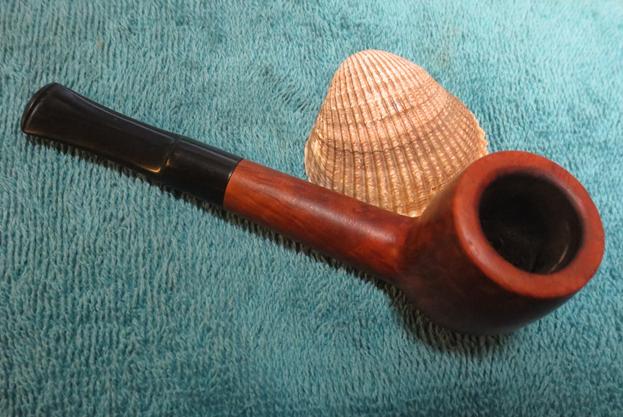
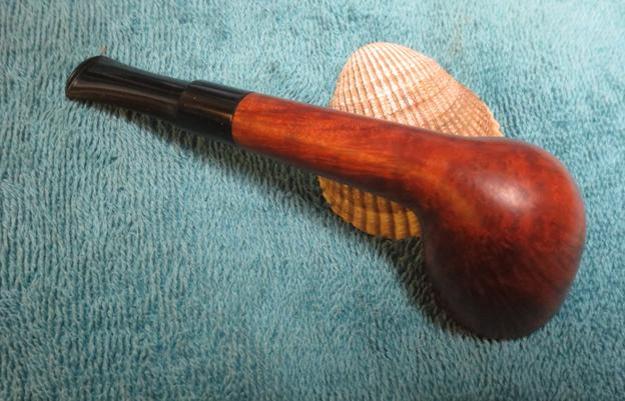
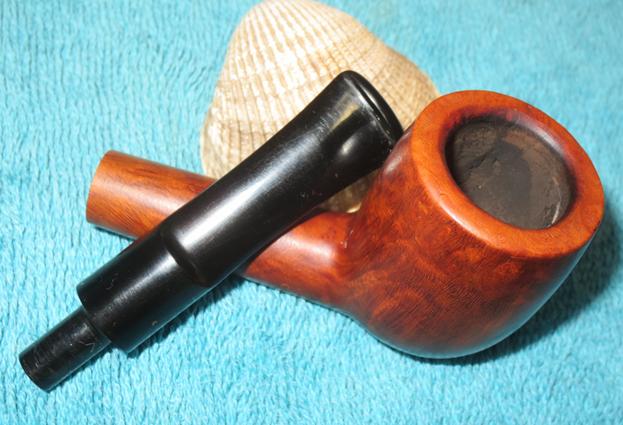
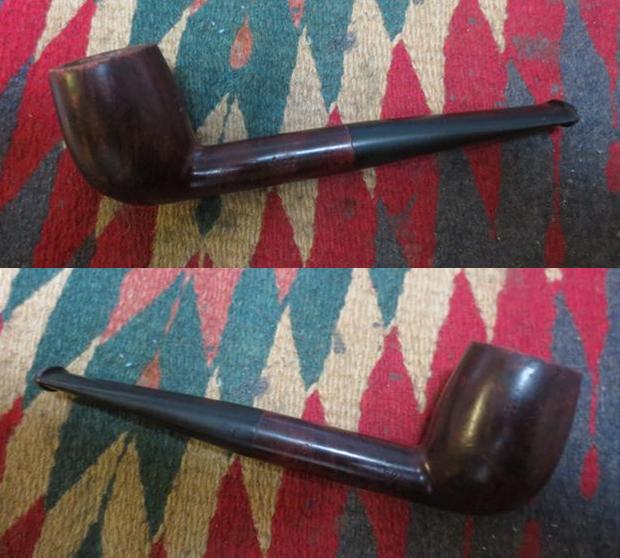
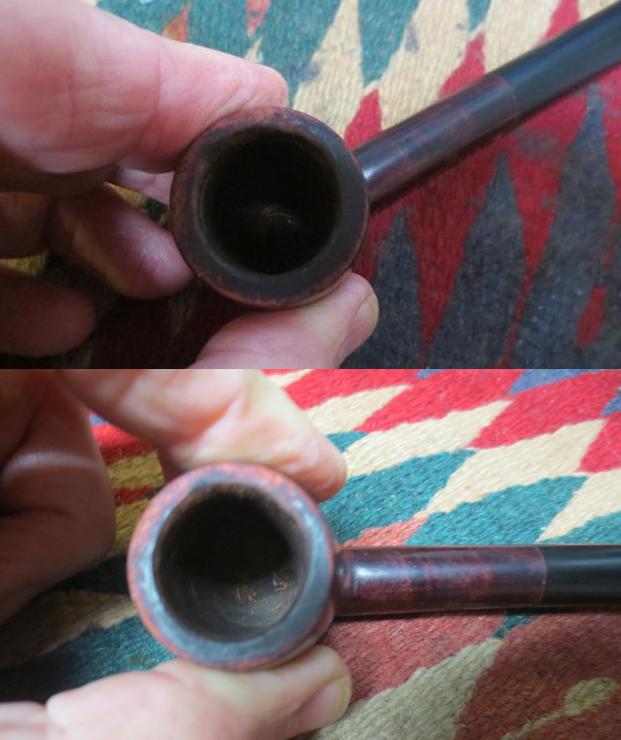
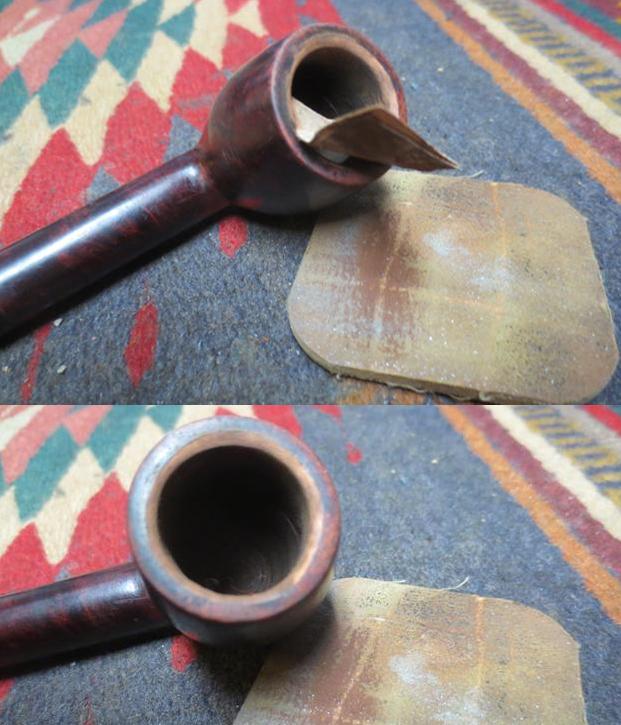
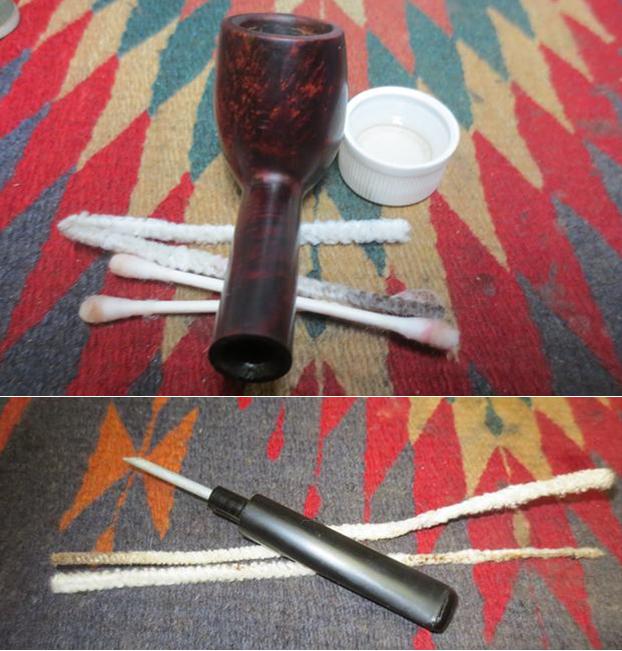
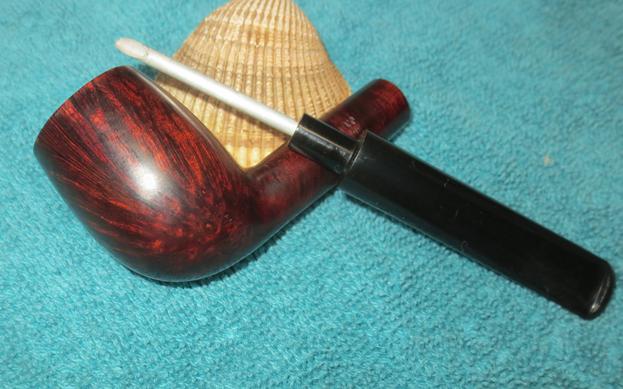
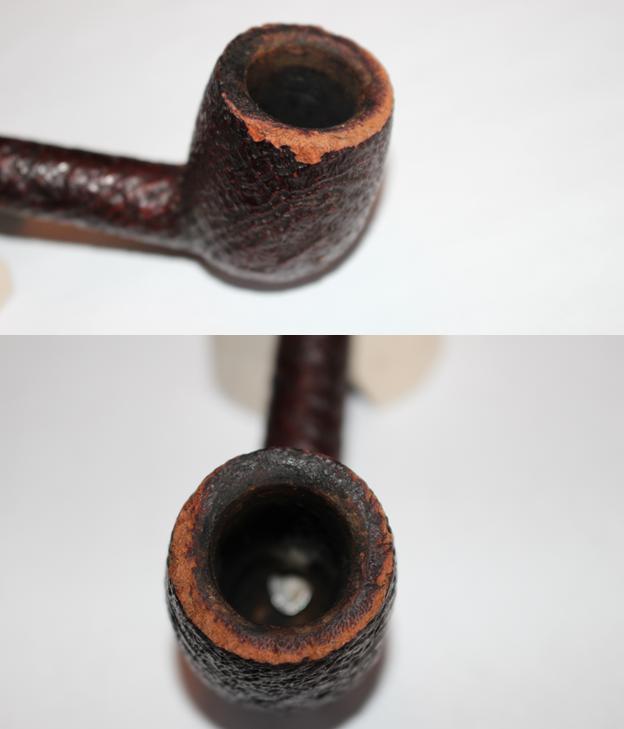
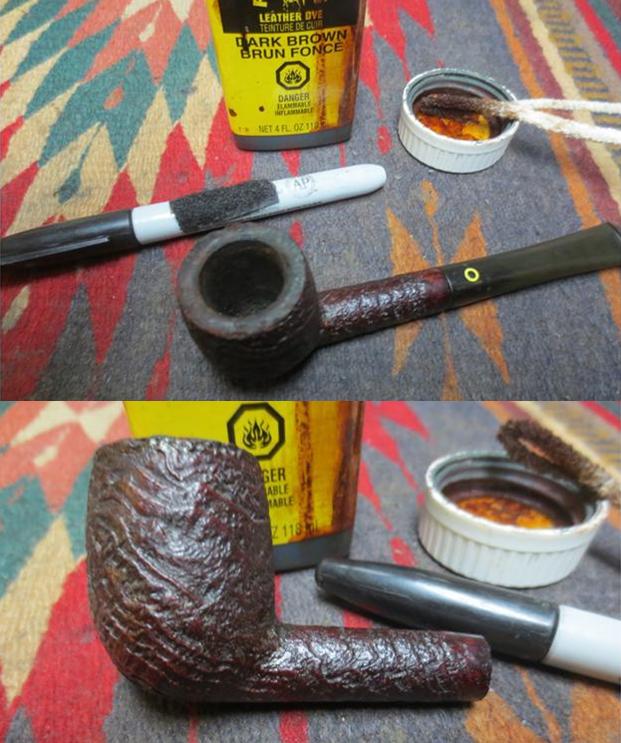
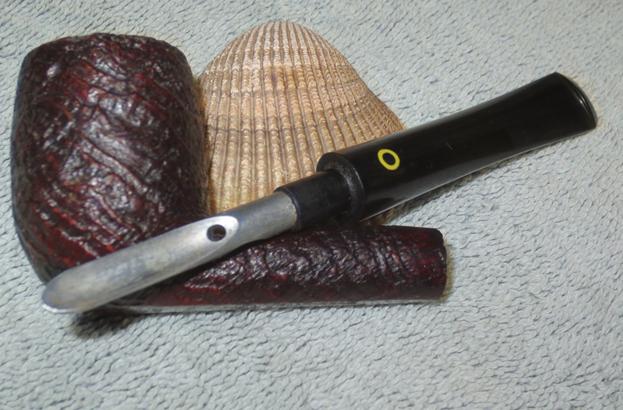
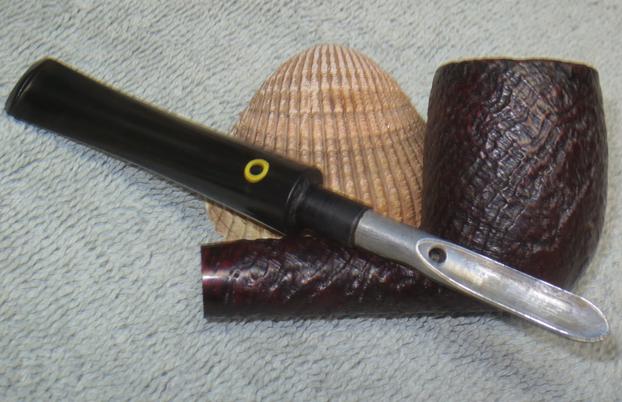
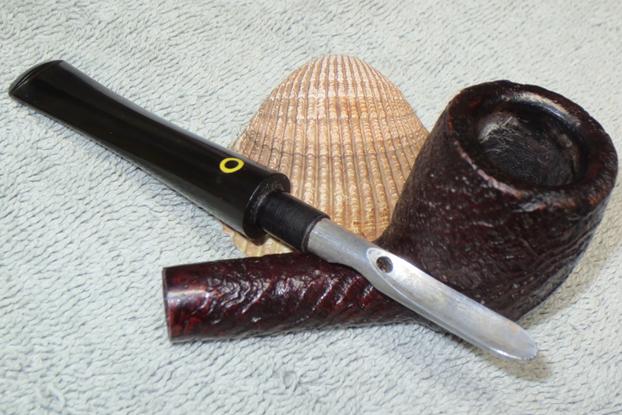
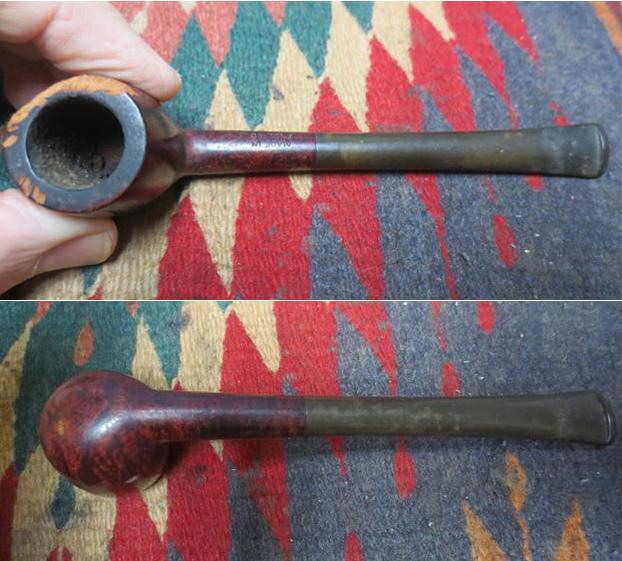
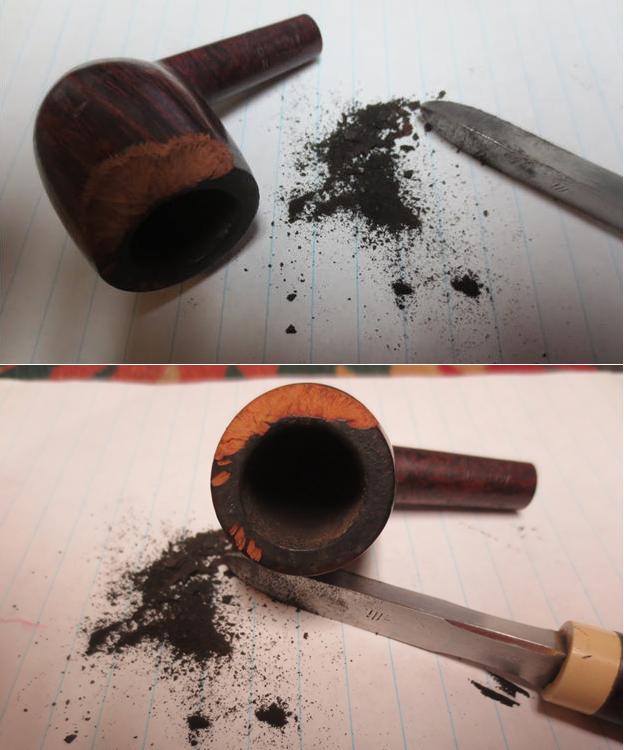
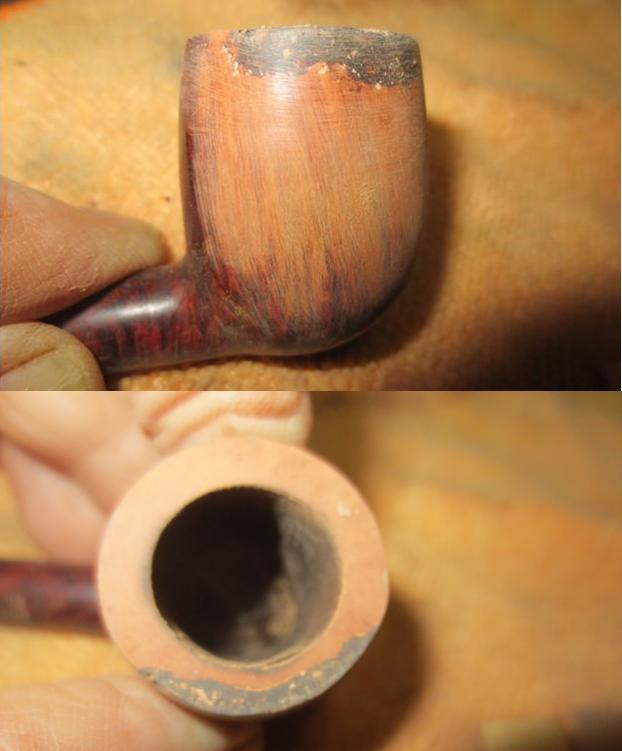
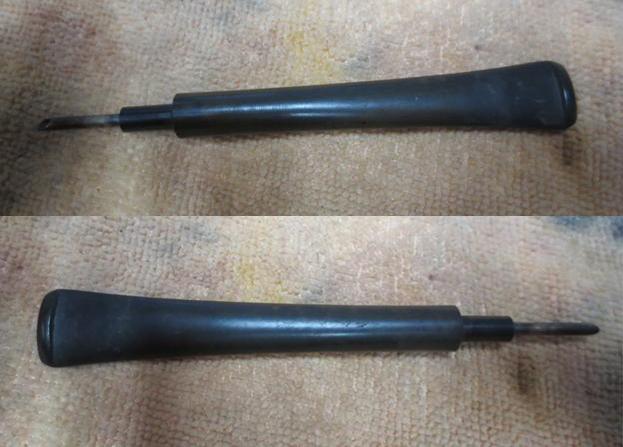
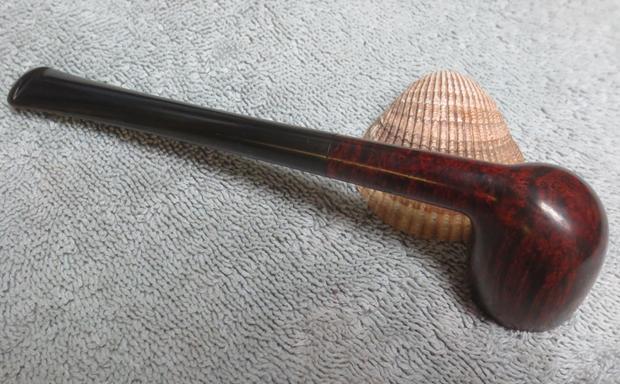
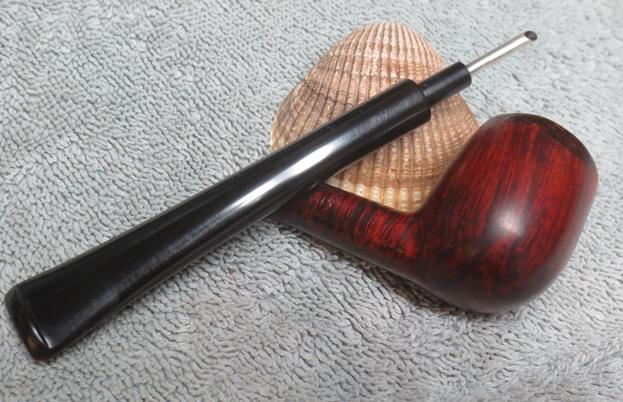
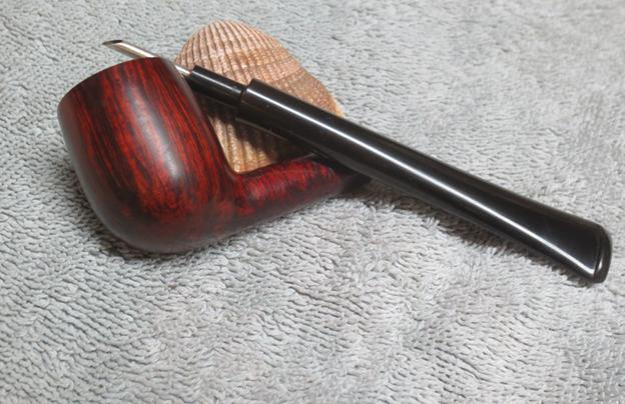
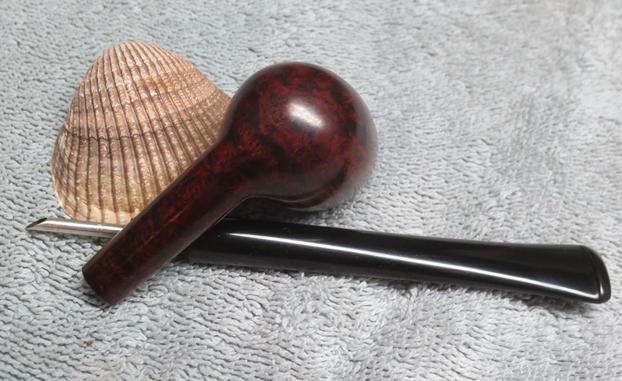
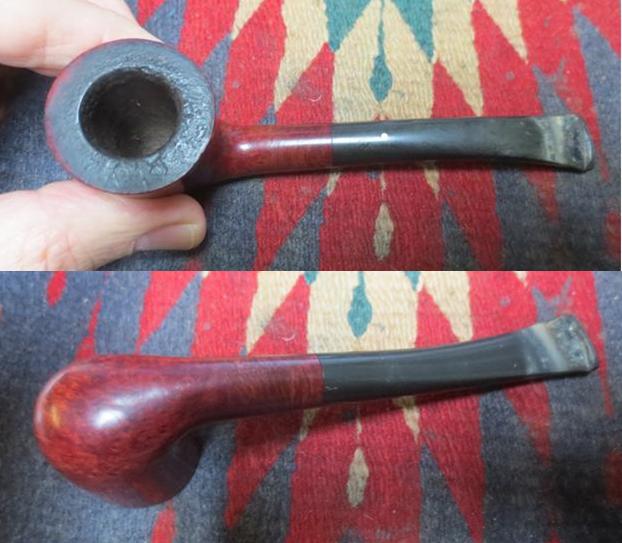
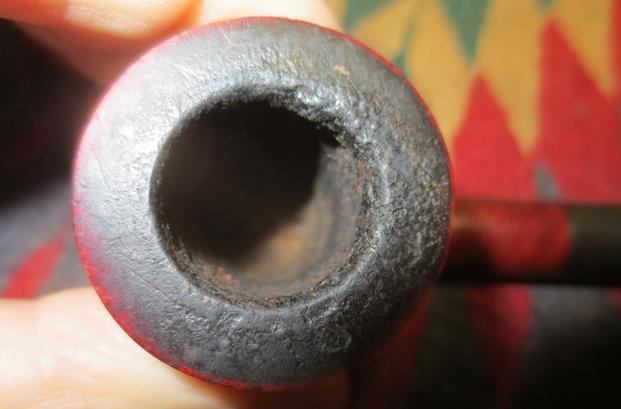
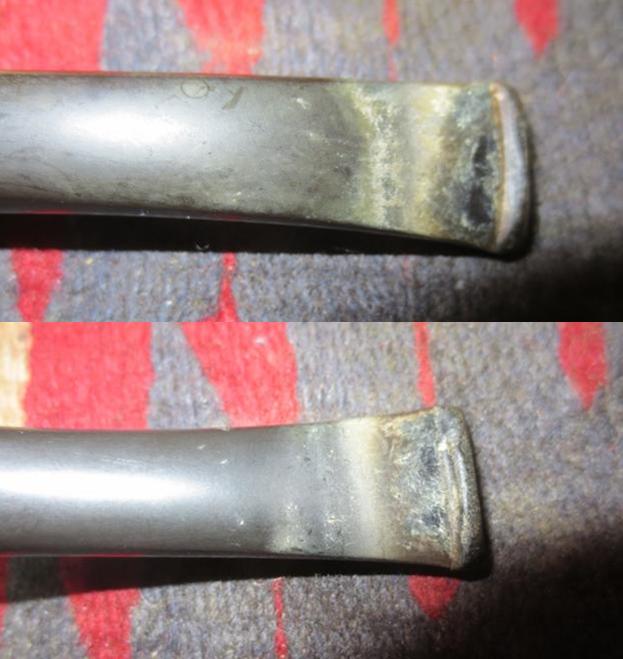
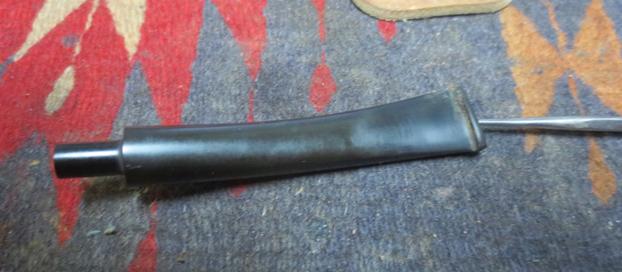
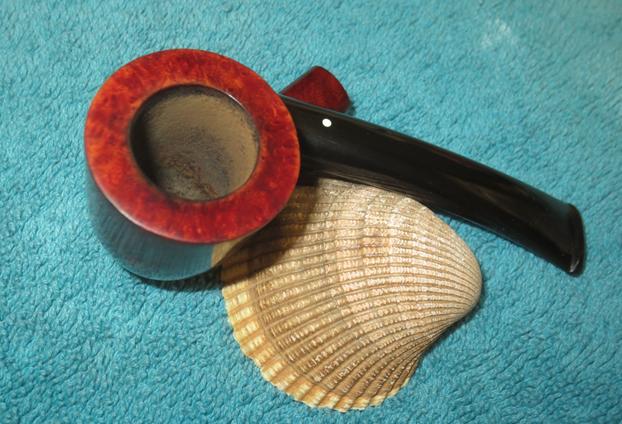
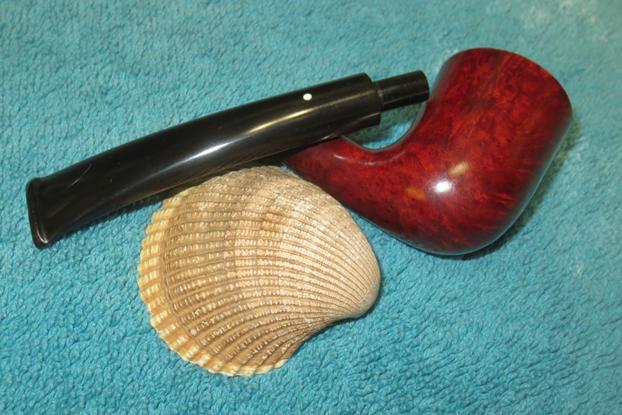
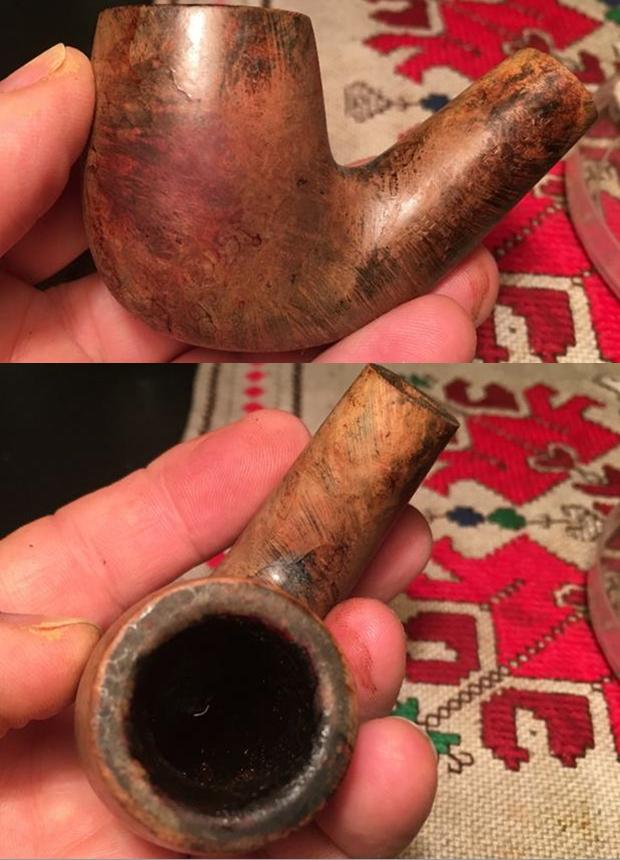
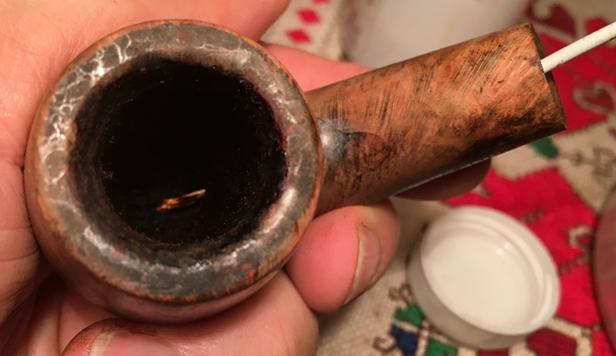
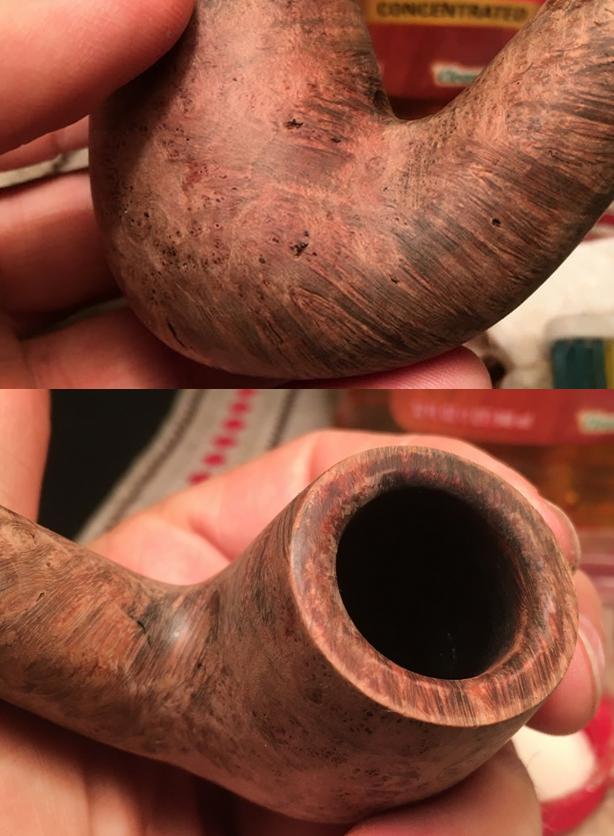
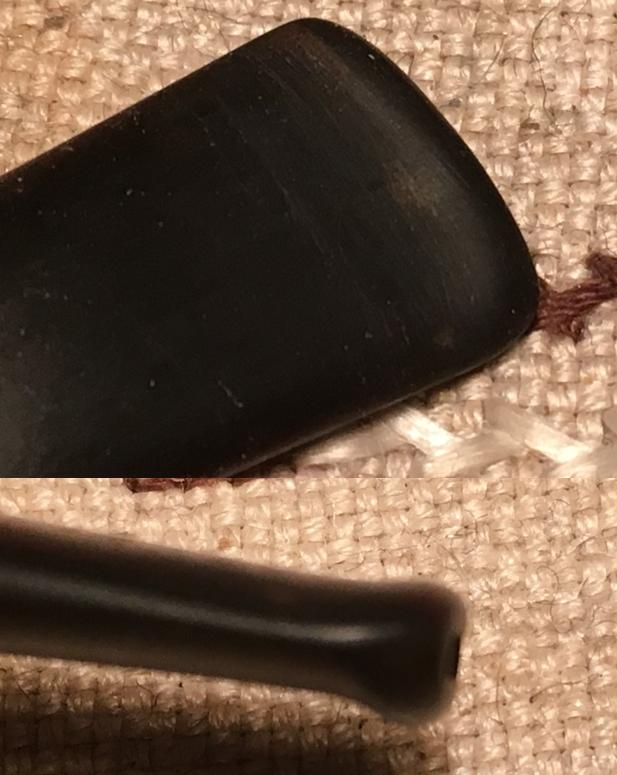
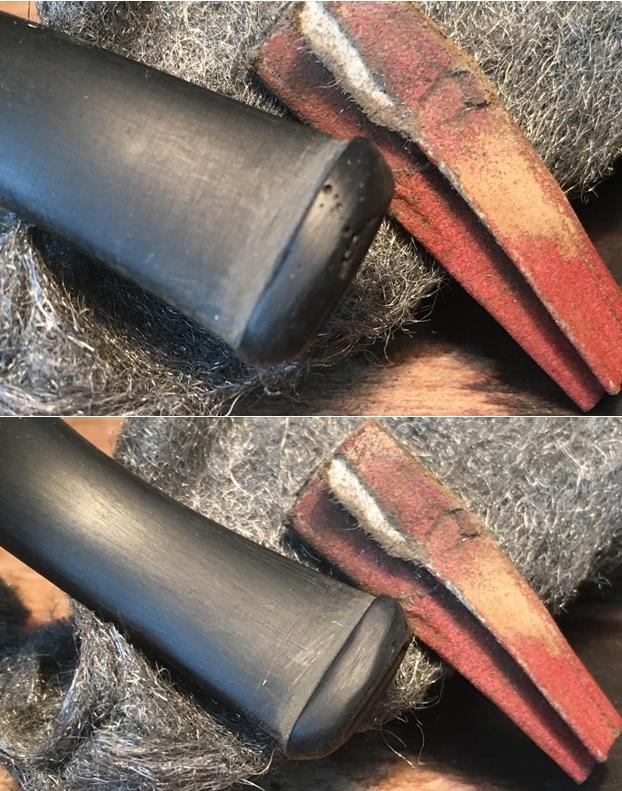
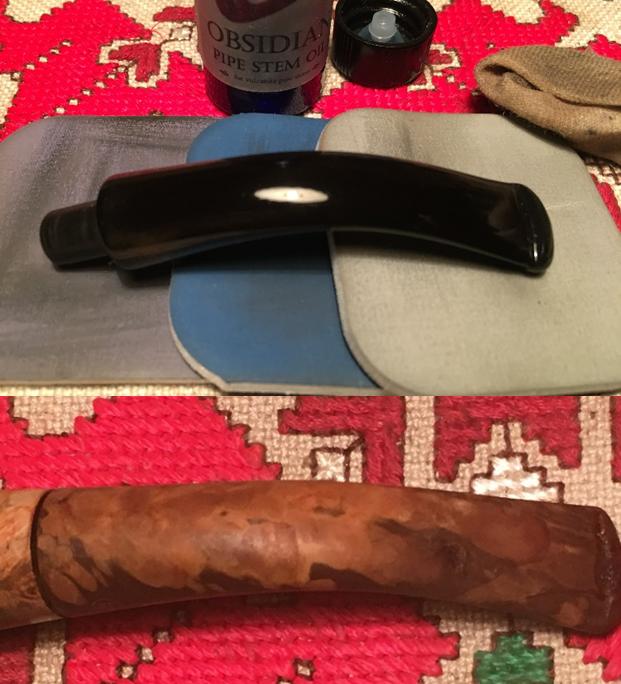
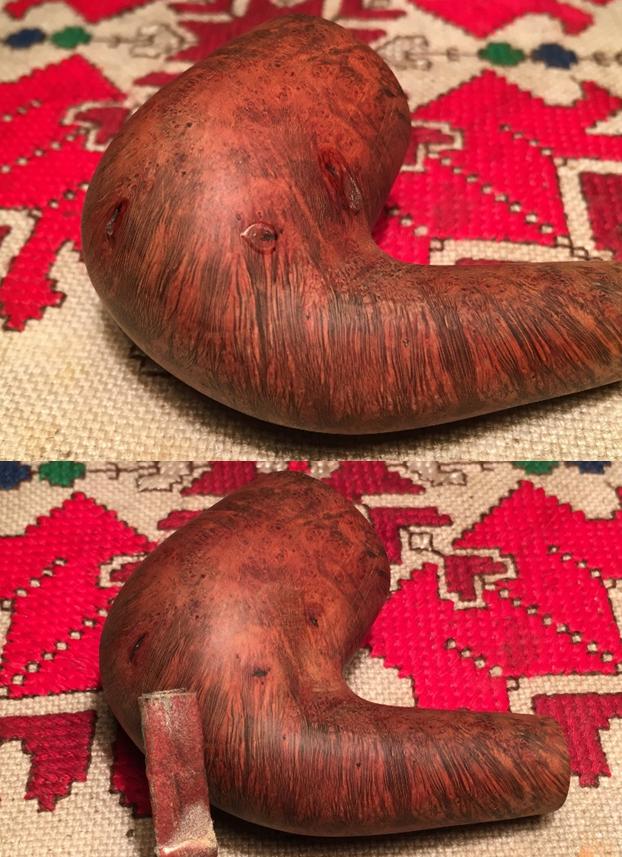
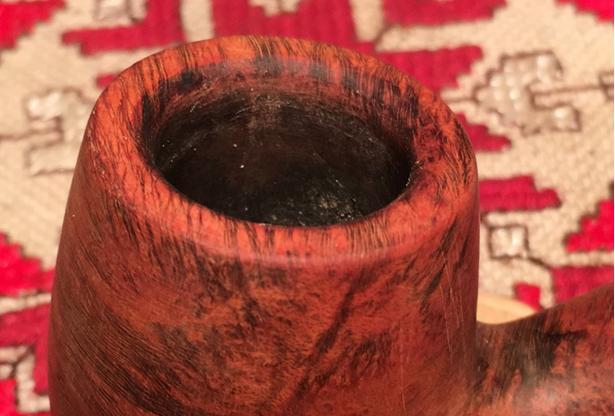
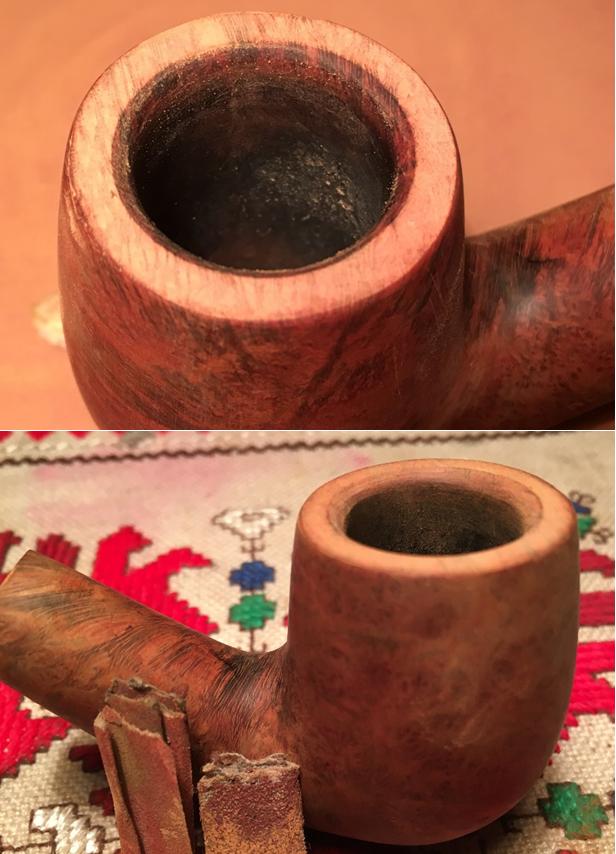
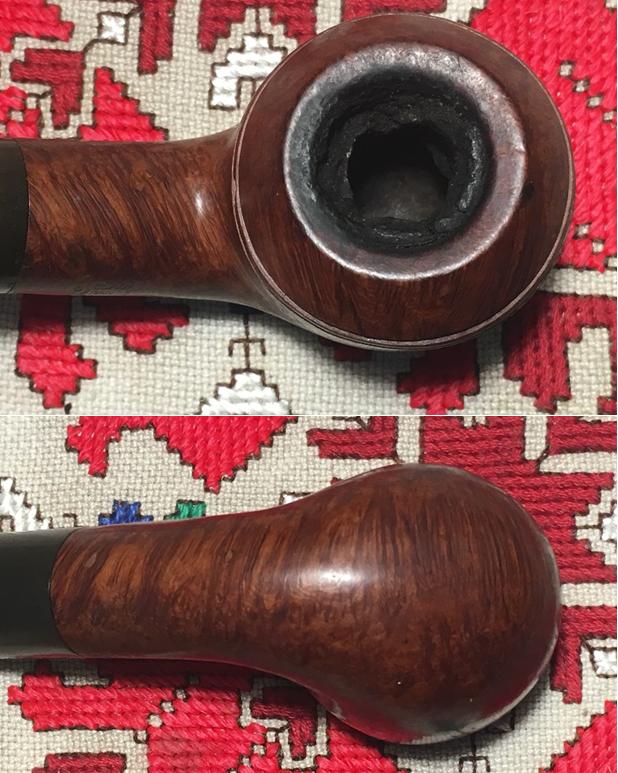
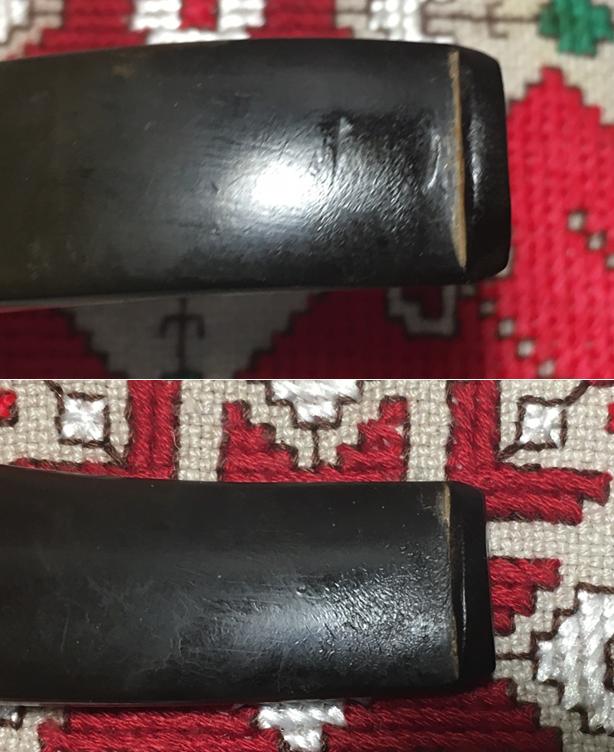
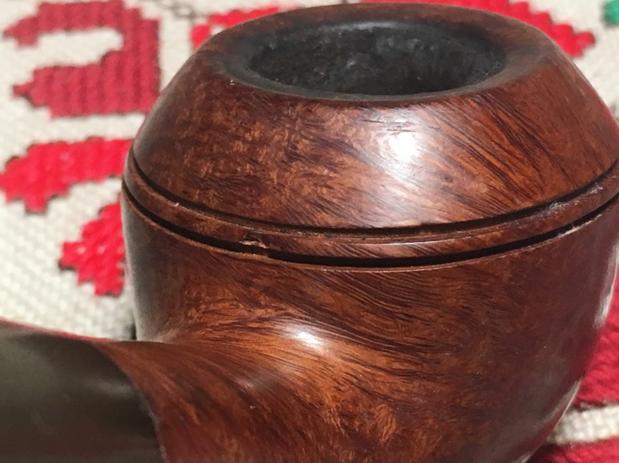
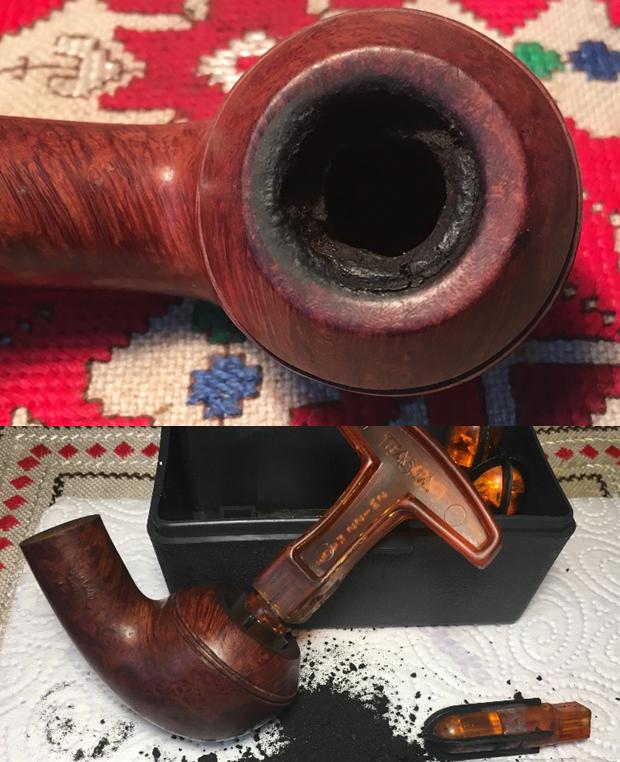
So, looking more closely at the BC Rhodesian in front of me, I see that the surface is generally in good shape – striking grain patterns. There are two noticeable fills that need addressing. There is also a chip over the shank, where the double grooves meet – the grooves forming the border between the upper and lower cones of the Rhodesian stummel. The chamber has thick carbon cake buildup and needs removal down to the briar for a fresh start. The stem has very little oxidation and a couple distinct clincher tooth marks on the top bit and chatter above and below. The stamped ‘BC’ stem marking is in good shape but the white color needs touching up. The following pictures show the question areas on the stummel – mainly fills and the chip.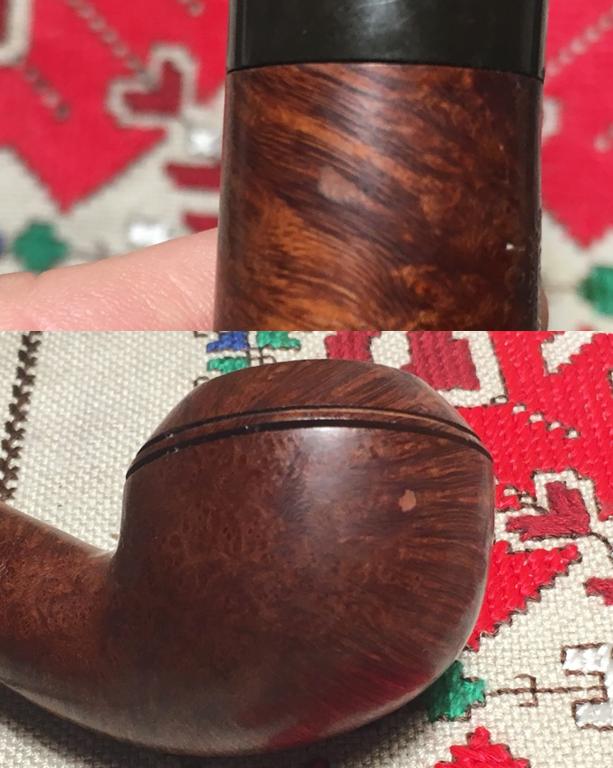
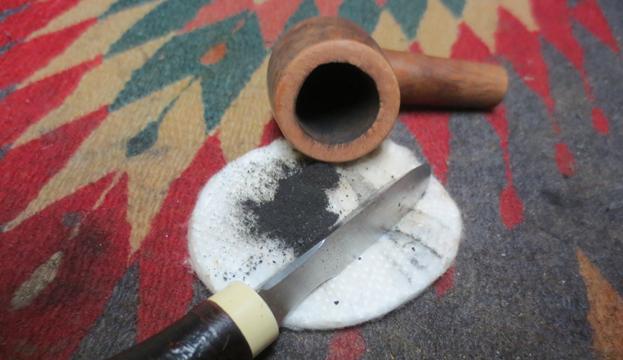
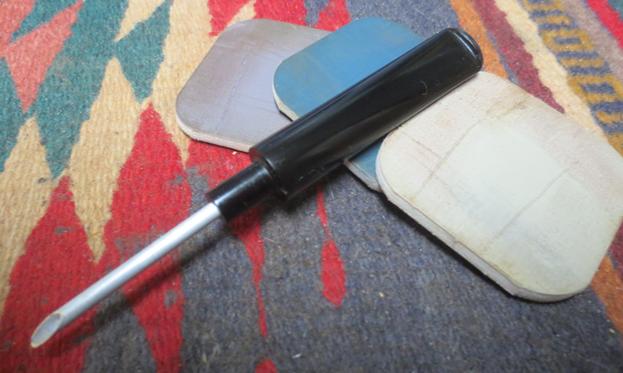
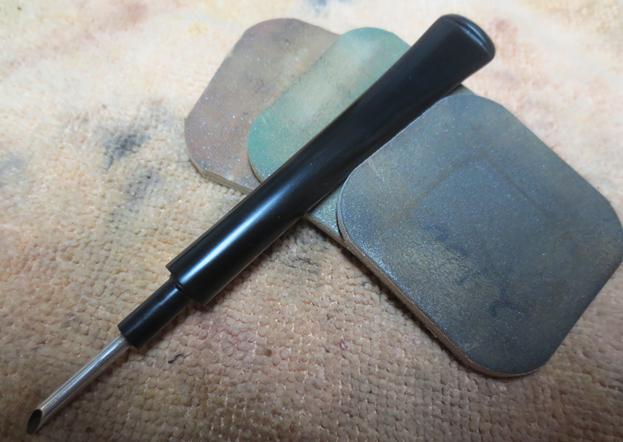
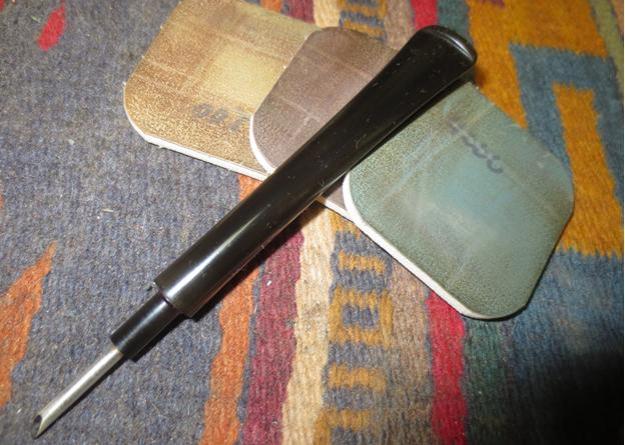
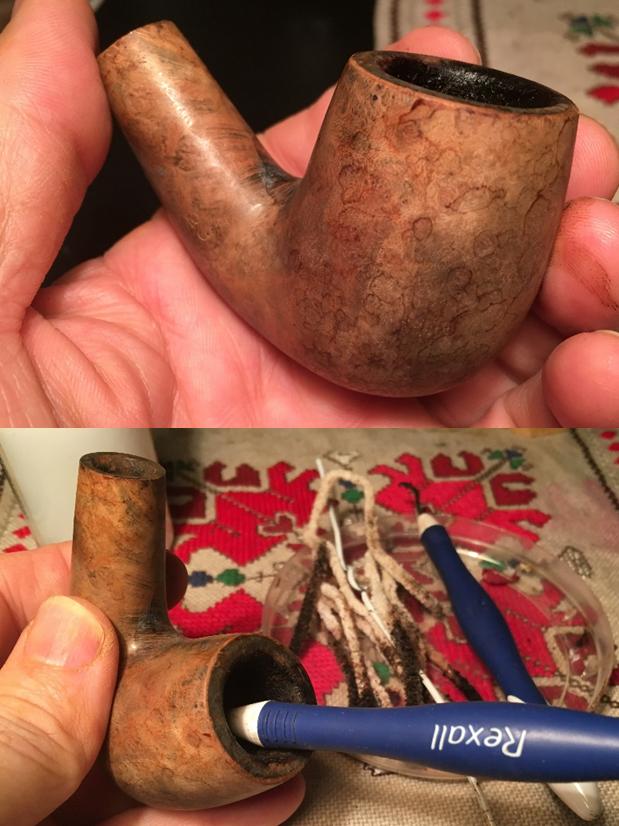
 Even though the oxidation is minor, I put the stem in an Oxi-Clean bath for a few hours to raise the oxidation to the surface. I first cover the stem ‘BC’ stamp with petroleum oil. Turning to the stummel, I take the Pipnet Pipe Reamer kit and use the two smaller blades of the four available and remove the cake using first the smallest, then graduating to the next larger when the blade stops meeting resistance. This cake is hard and crusty but vacates in short order. I fine tune the reaming with my Savinelli Pipe Knife. I’ve grown to like this handy tool. What The Pipe Smoker blog says about it is spot on:
Basically, a three-sided scraper, it can be placed in the chamber exactly where it needs to be placed and then cake is scraped off with a simple movement of the wrist. It allows full control over where the cake is being reduced. It has a rounded tip, which means that it will not damage the bottom of the bowl. It makes no difference, whether the chamber is straight or conical, I can use the same tool on either. It requires no adjustment.
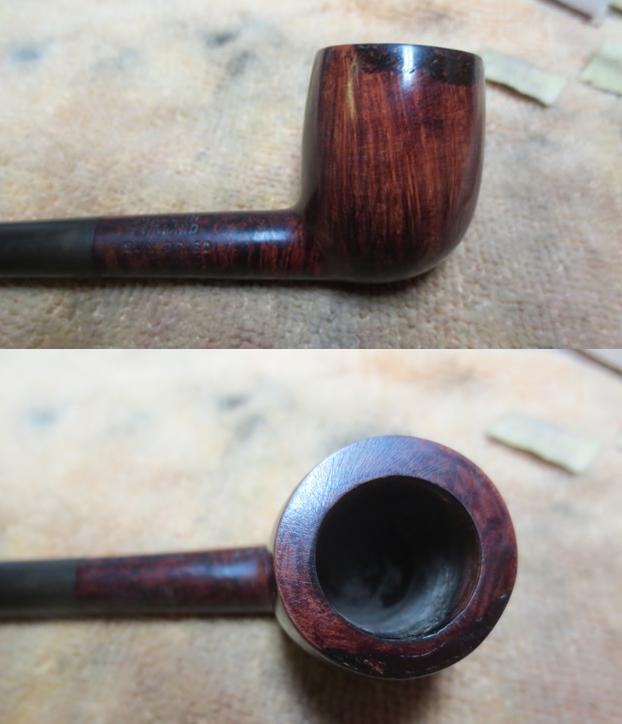
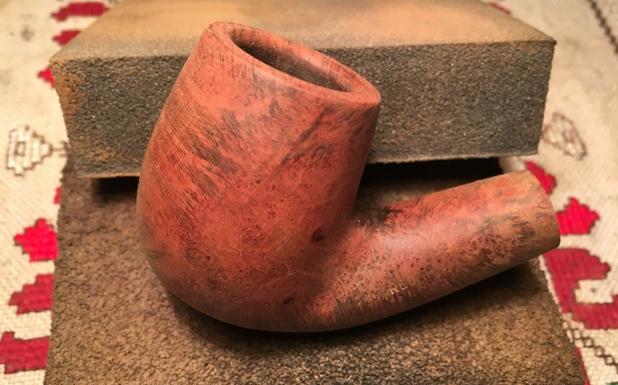
After the Savinelli pipe knife scrapes the chamber wall, I wrap 240 grit paper around a Sharpie pen and sand the chamber removing the last vestiges of carbon. I then wipe the bowl with a cotton pad wetted with isopropyl 95%. The chamber looks great. I fold up the paper towel and my work station is clean again. Pictures show the progress.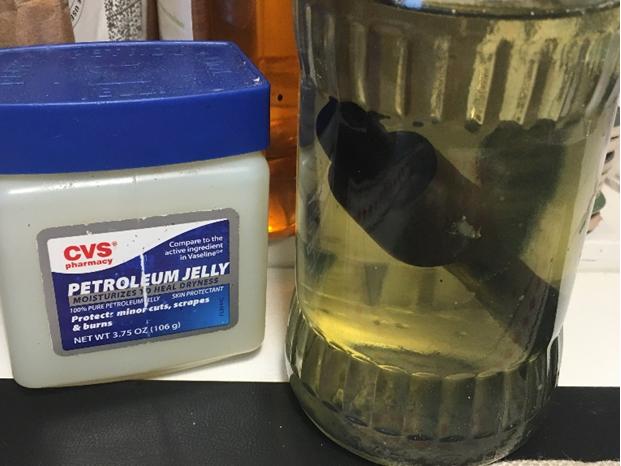

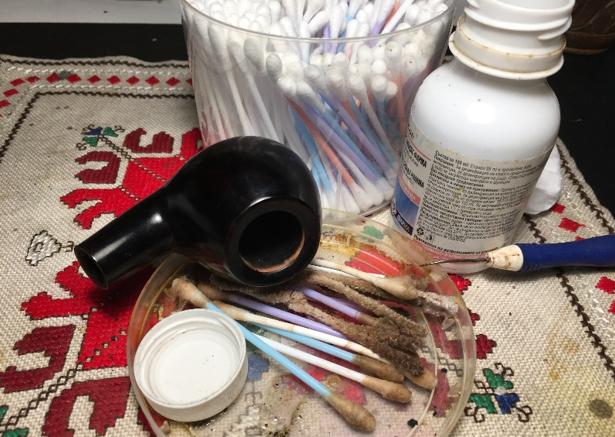
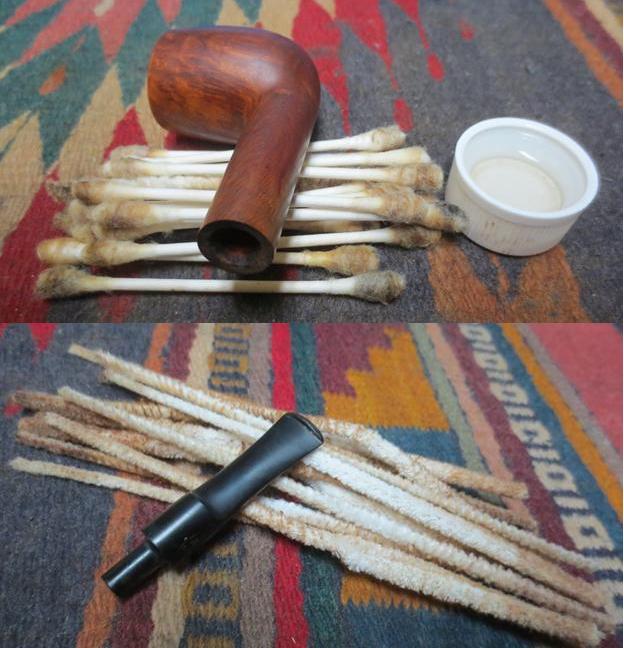
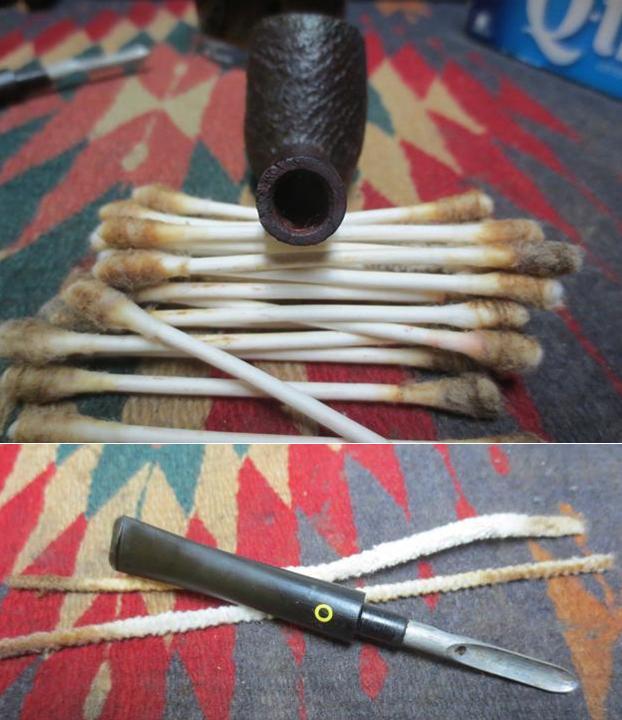
 I then switch to the internals of the stummel and clean the mortise and airhole with pipe cleaners and cotton swabs dipped in isopropyl 95%. After some extended effort, pipe cleaners and cotton swabs are coming out clean. Later, I’ll add another measure of cleaning by giving the stummel a kosher salt and alcohol soak. I like to go the extra mile when I’m preparing a pipe for a new steward. The picture shows the progress.
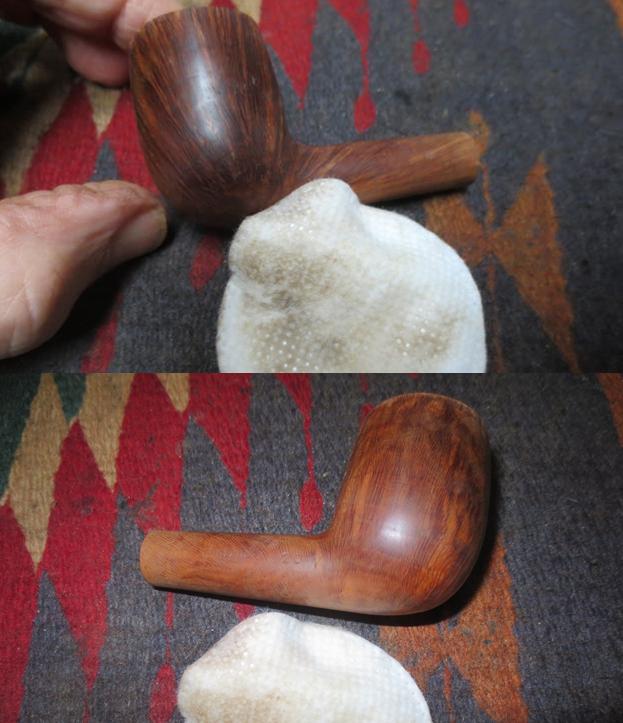
 Turning to the stummel externals, I remove the grime on the surface and clean the rim. I use undiluted Murphy Oil Soap with cotton pads. I use a bristle tooth brush as well to clean the double grooves circling the cone. I also employ a brass brush to clean the lava and grime off the rim. The pictures show the progress.
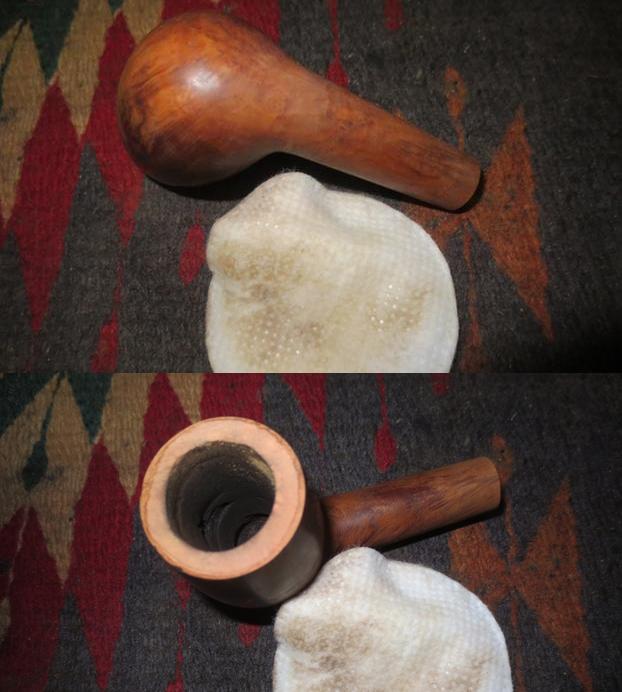
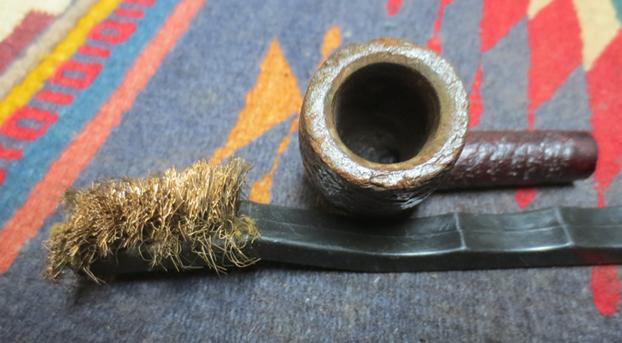
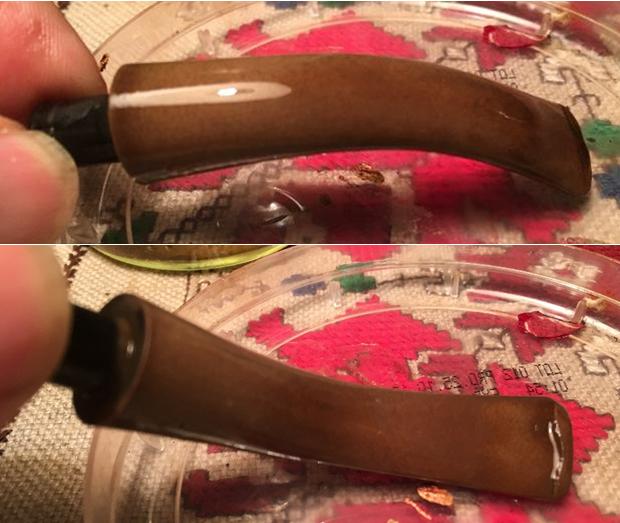
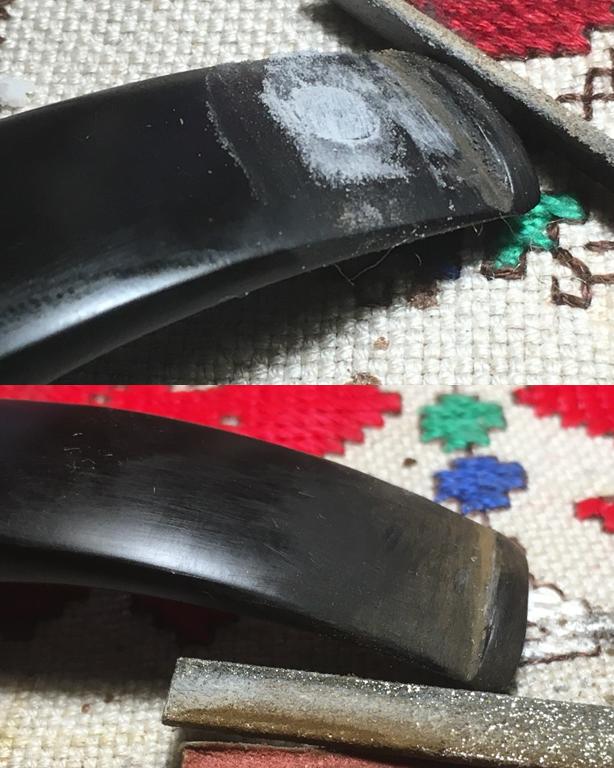
 Time to fish the stem from the Oxi-Clean bath. It’s amazing that even when the stem looks to have little oxidation, the Oxi-Clean bath raises the oxidation to the surface. I wet sand with 600 grit paper to remove the bulk of the oxidation from the vulcanite and then follow-up using 0000 steel wool. Throughout this process, I give care to work around the ‘BC’ stem stamping. Pictures show the progress.
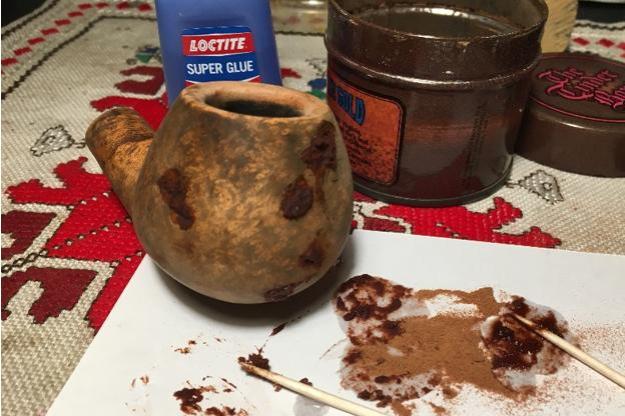
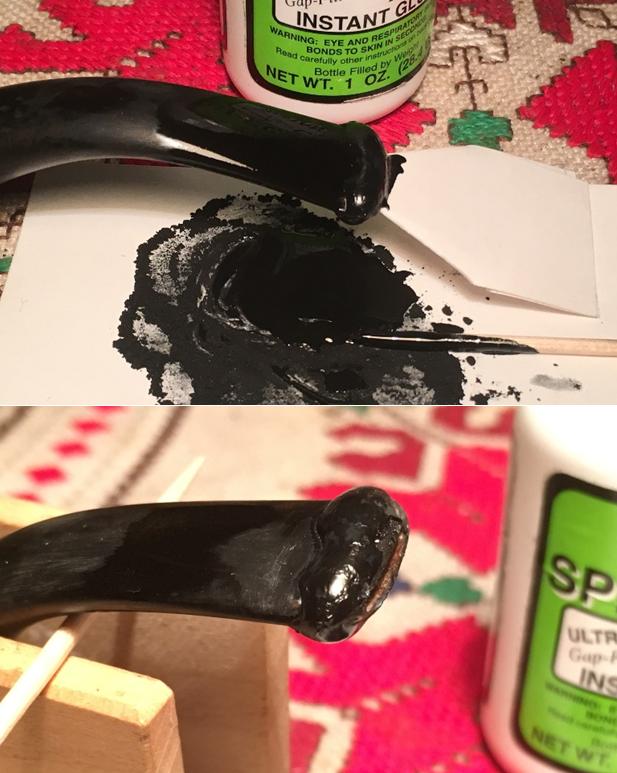
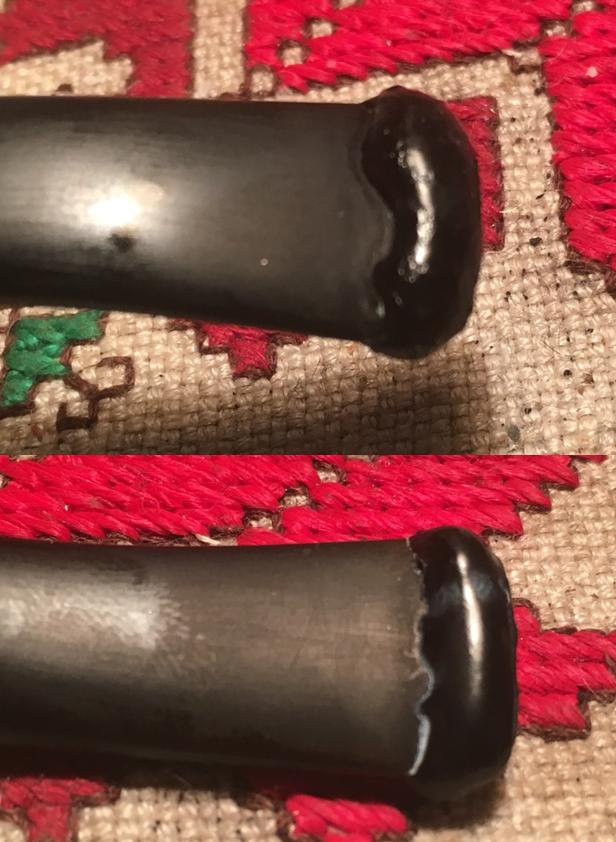
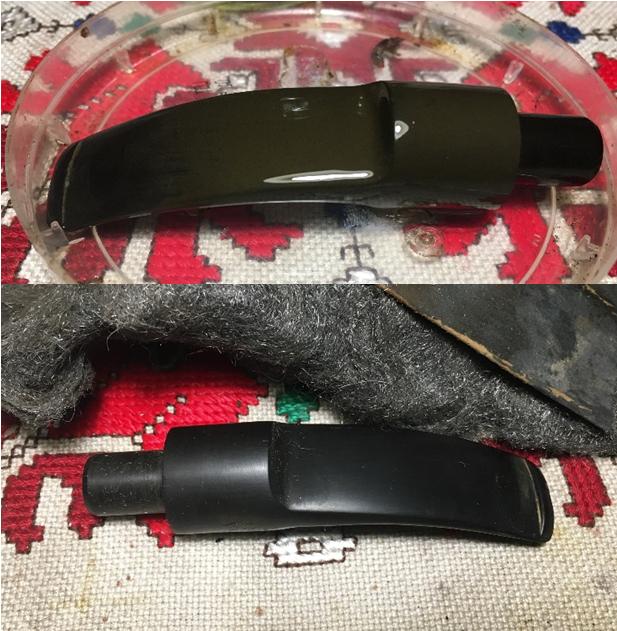 With the tooth dents on the upper bit, I attempt to remove by using a lit candle’s heat to raise the indentations by expanding the vulcanite but it wasn’t working well. So, I apply a small drop of super glue to the spots and then apply an accelerator to cure the glue. After a few minutes, I use the flat edge needle file to file down the superglue patches to the vulcanite surface. While I have the file out, I file the button lip, upper and lower, to give them more definition. I follow with applying 240 grit paper to remove the file marks and to fine tune and blend the superglue patches. I follow with 600 grit paper and then 0000 steel wool. The pictures show the progress.
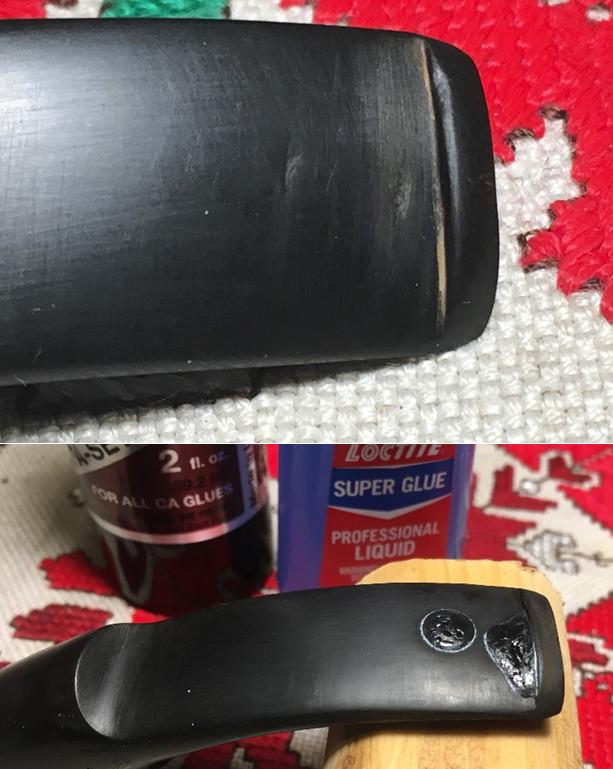
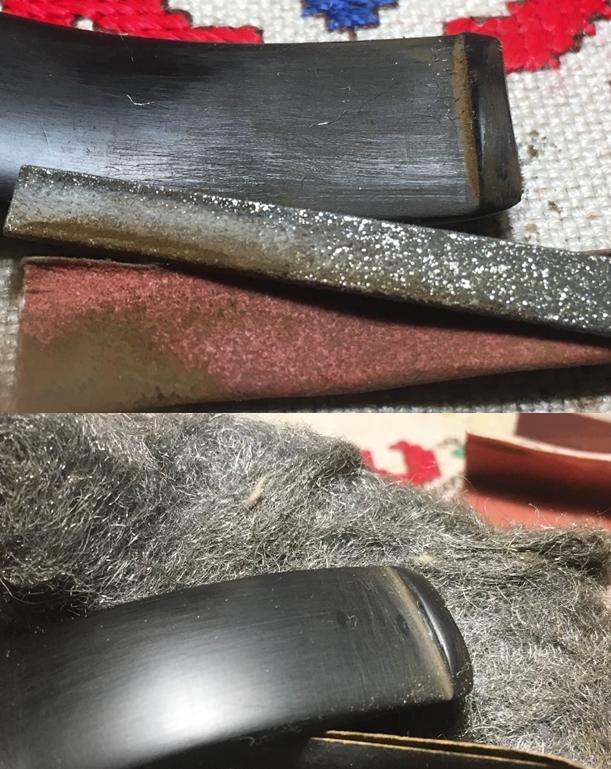
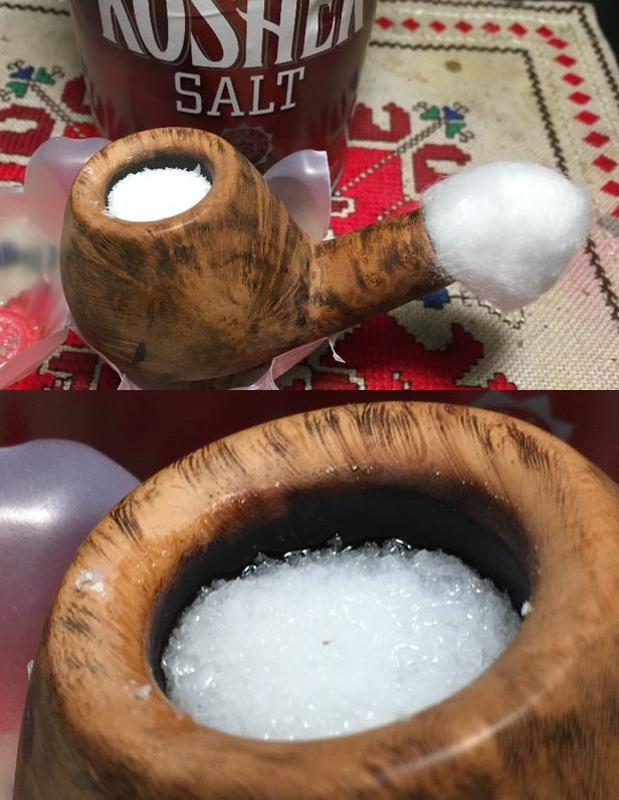
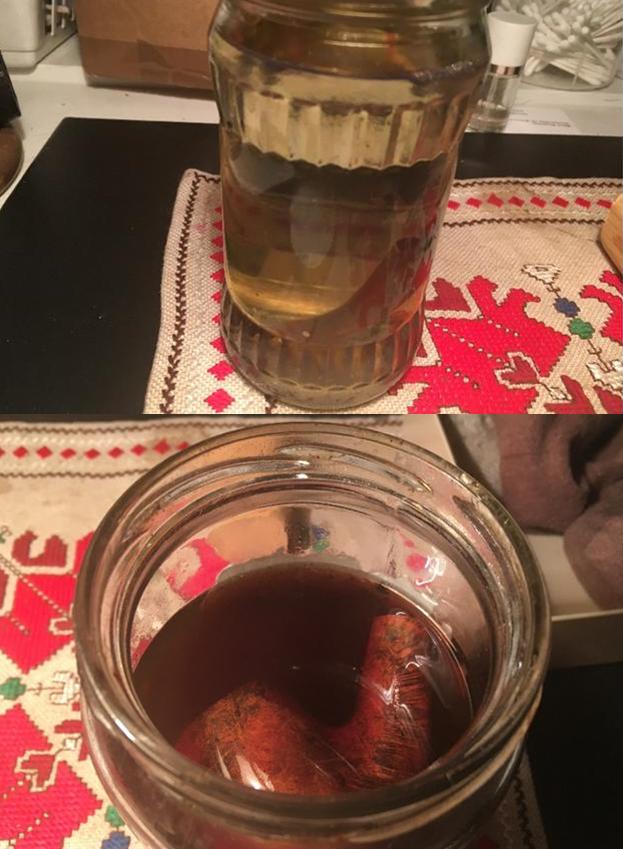
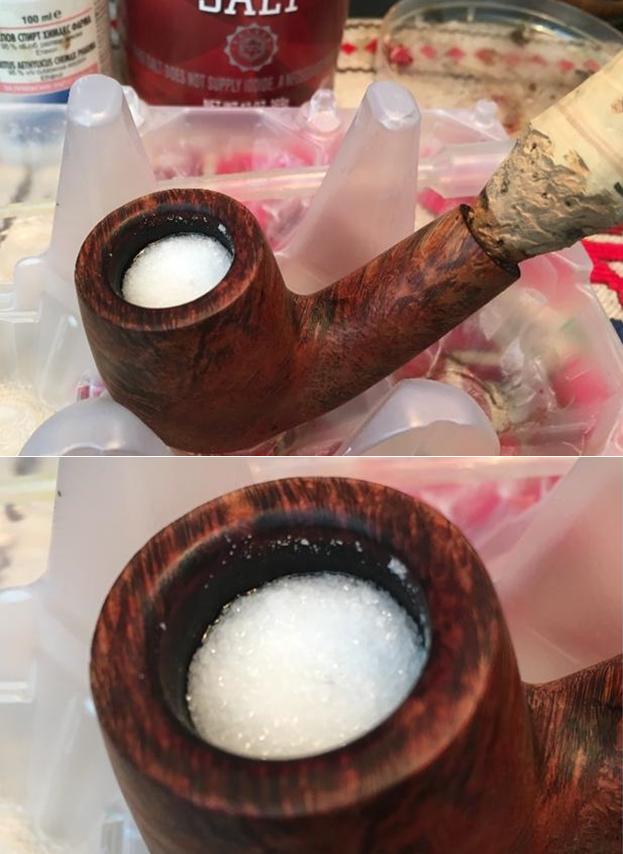
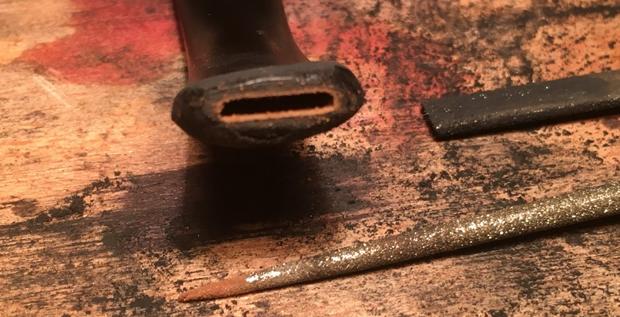
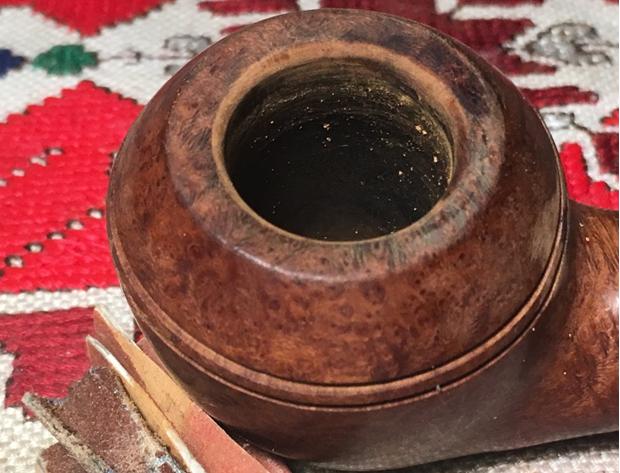
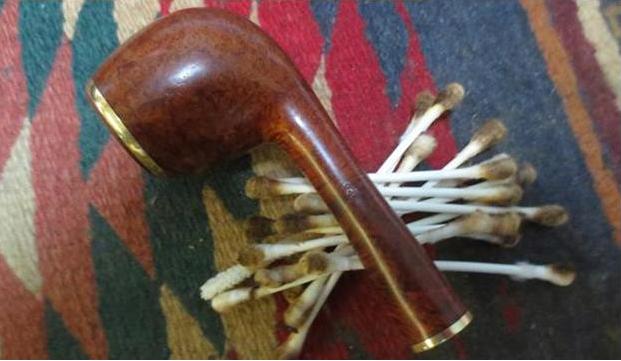
 I clean and freshen the internals of the stummel further with a Kosher Salt/alcohol soak for several hours. I set the stummel in a sturdy egg carton and twist a cotton ball and feed it into the mortise, pushing it in with a straight wire. I then fill the chamber with kosher salt which is not iodized – which can leave a taste. Then, I fill the chamber with isopropyl 95% until it surfaces above the salt. The pictures show the process.
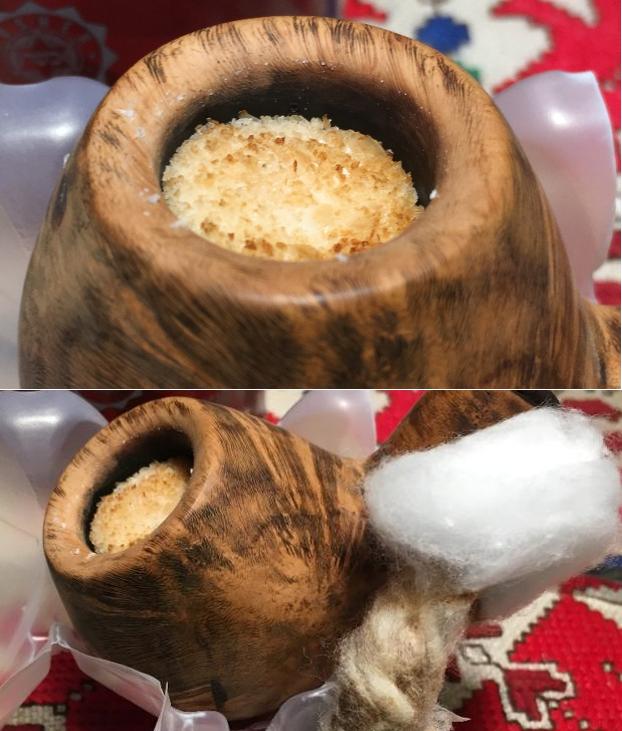
 The next morning, the salt/alcohol soak had run its course and from the darkening of the salt and the cotton wick, the process effectively cleaned and freshened the stummel internals even after the plethora of pipe cleaners and cotton swabs. I dump the old expended salt and thump the stummel on my palm, then use a paper towel and wipe the bowl. I use bristle brushes to clean the mortise and again, pipe cleaners through the airway to finish the cleanup. As billed, the soak works. Pictures show the soak results.
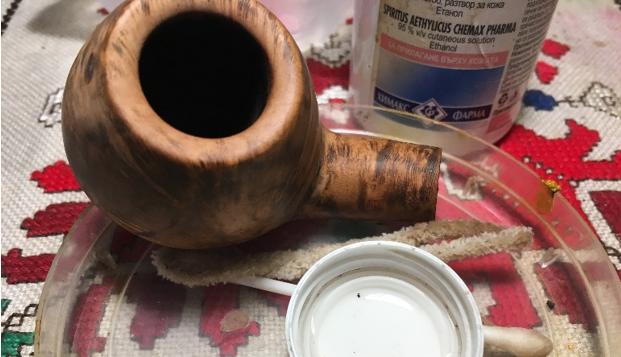
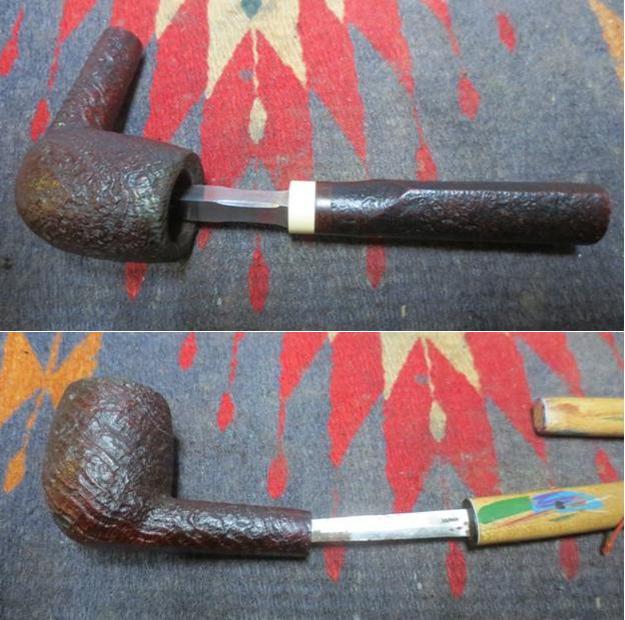
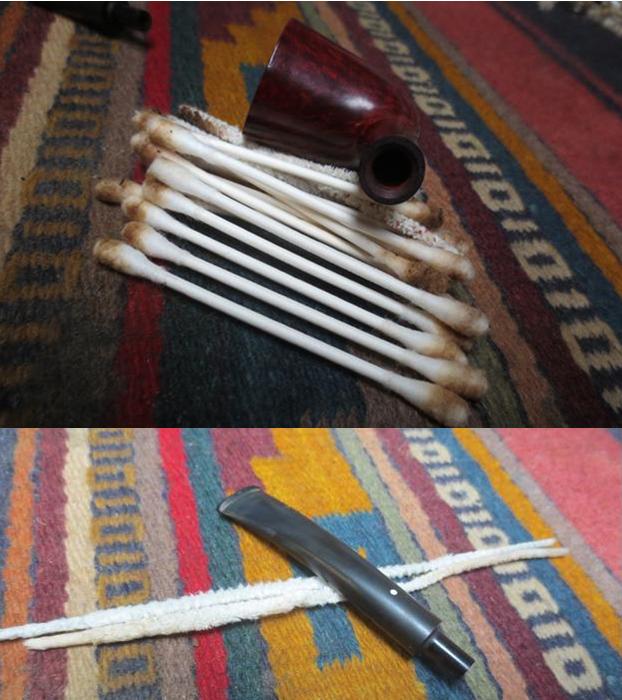
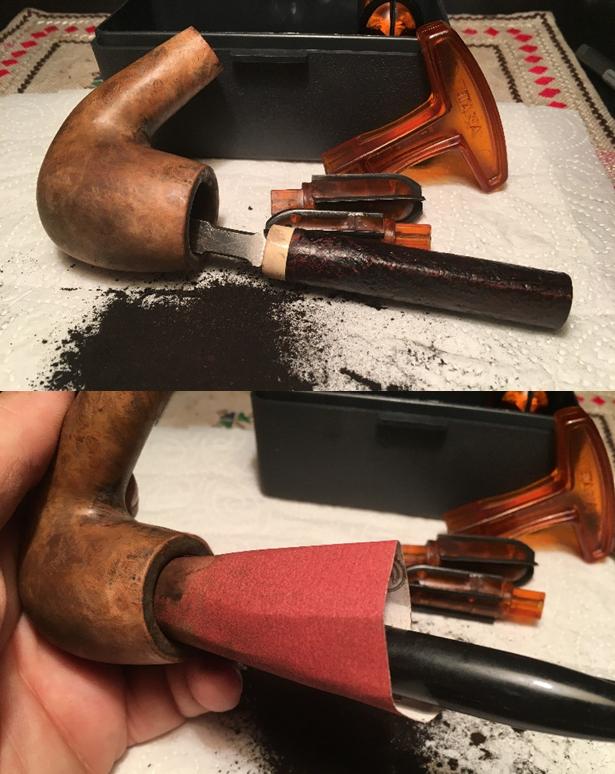
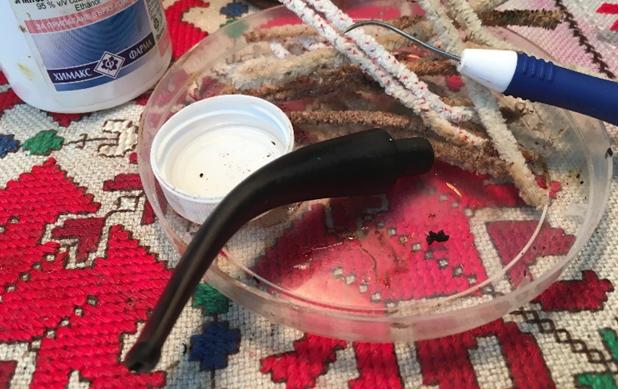
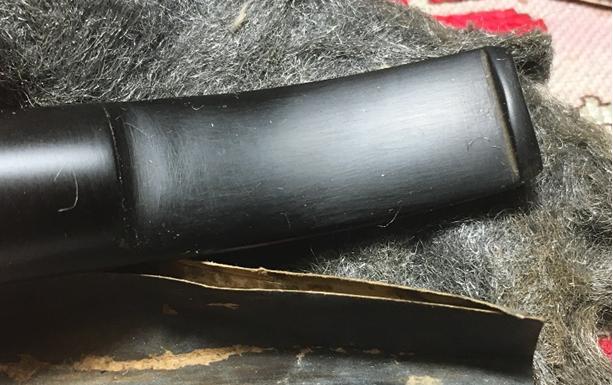
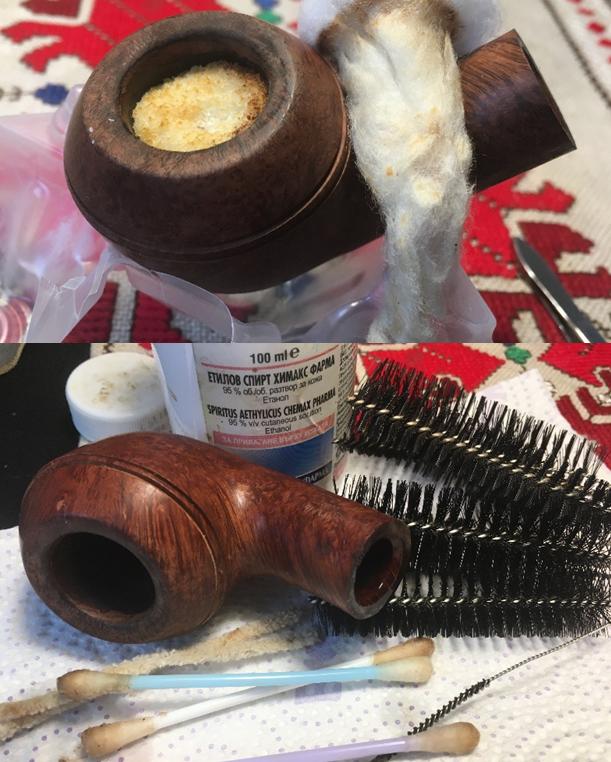 With the internals of the stummel clean, I clean the internals of the stem. Using pipe cleaners dipped in isopropyl 95% I work on the stem. After I begin, even though the ¼ bent saddle stem is not an extreme bend, I’m surprised that I am not able to move a pipe cleaner through the stem without difficulty. Finally, I pass a bristled pipe cleaner through and move it back and forth, hoping that it loosens up the passageway. It doesn’t. I decide to use the technique that Charles Lemon used on Dad’s Pipes (See here: Link) of expanding the airway by heating the stem and moving a pipe cleaner through. Just to be on the safe side, I draw an outline of the stem’s bend to use as a template for a comparison after I re-bend the pipe back to the original. I first straighten the stem by warming it with a heat gun until the vulcanite becomes pliable. After inserting a pipe cleaner through the stem, I then reheat the stem and return the stem to the ¼ bend. Now, back to the original curve comparing to the template, without difficulty I complete the cleaning of the stem using isopropyl dipped pipe cleaners moving freely through the airway. I also clean the crud out of the slot with a dental probe. Pictures show the process.
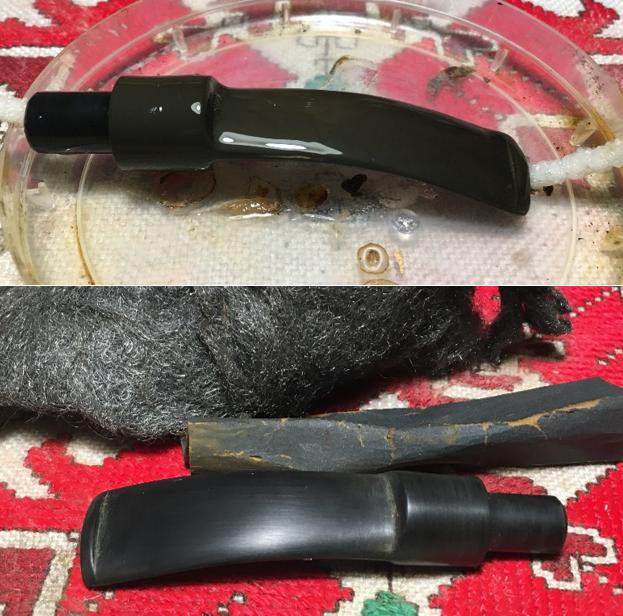
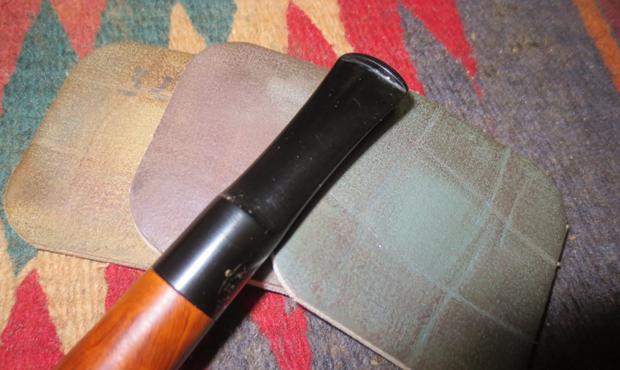
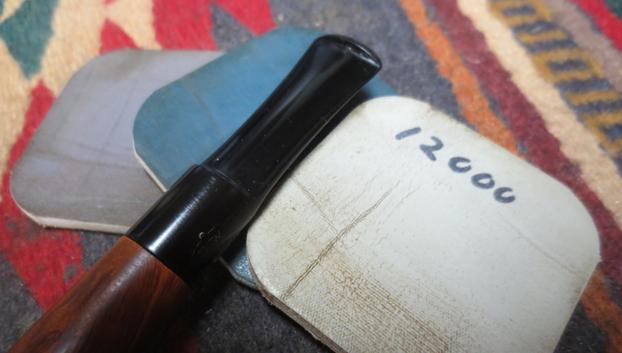
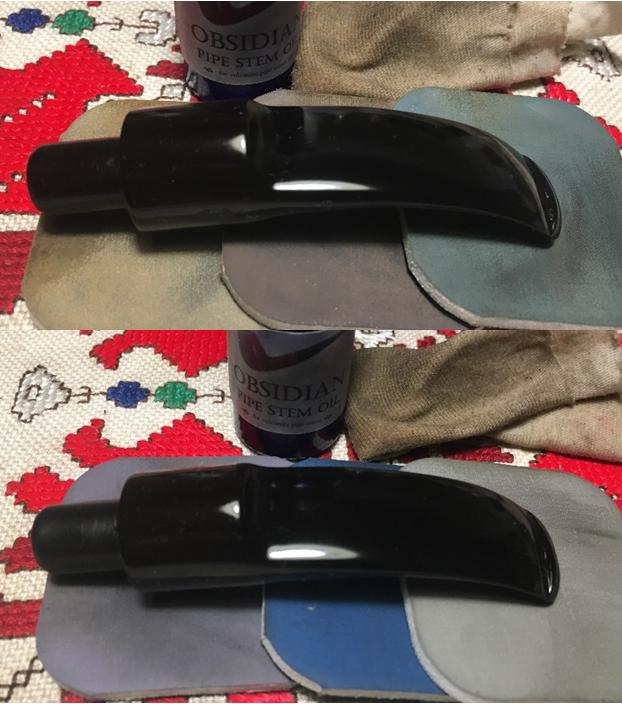
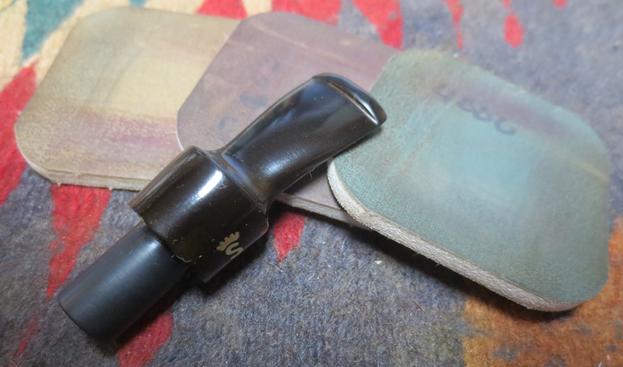
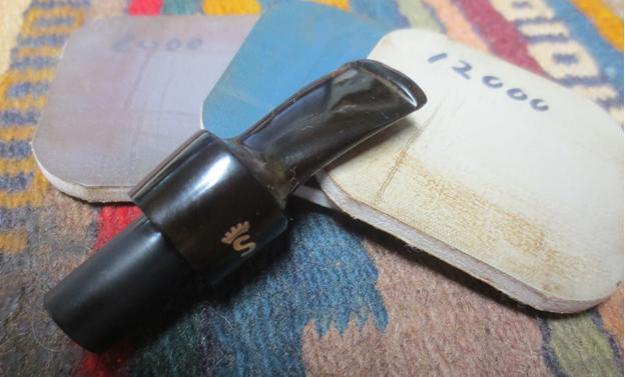
 Before starting the micromesh phase to raise the luster of the BC bent stem, I use Miracle Eraser on the ‘BC’ stem stamp to remove the oxidation without applying an abrasive to the stamp. It does seem to help. Then, I wet sand the stem using micromesh pads 1500 to 2400, followed by dry sanding with 3200 to 4000, then 6000 to 12000. I complete each set by applying Obsidian Oil to revitalize the vulcanite. To watch the stem gradually pop, is an amazing process. This Butz-Choquin is cleaning up nicely. I set the stem aside to dry.
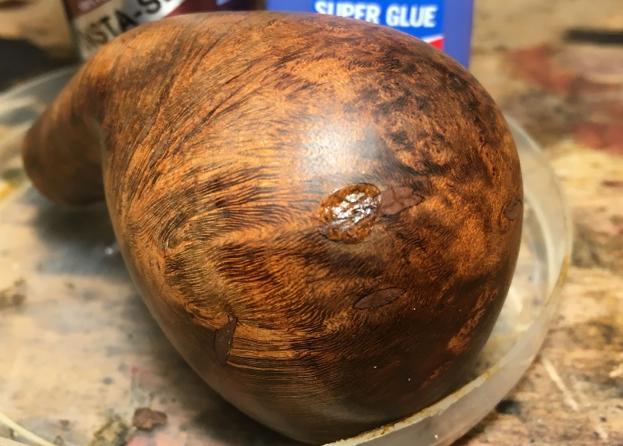
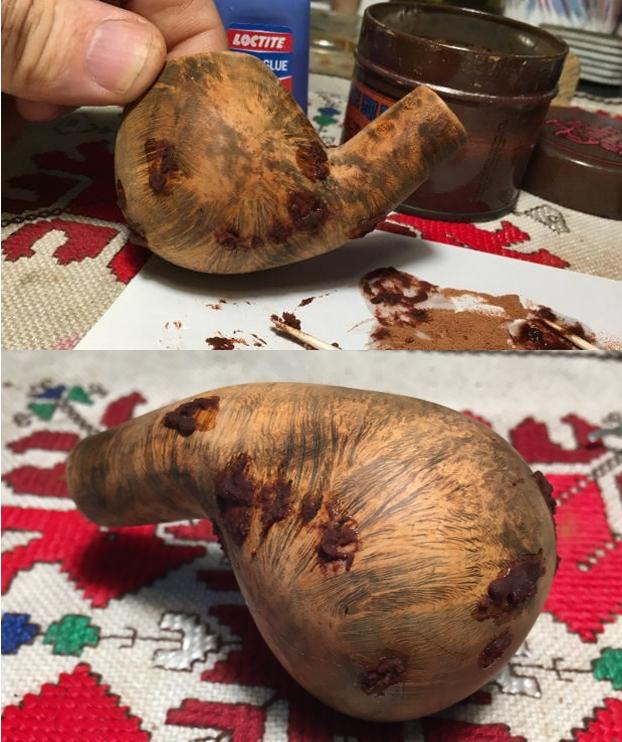
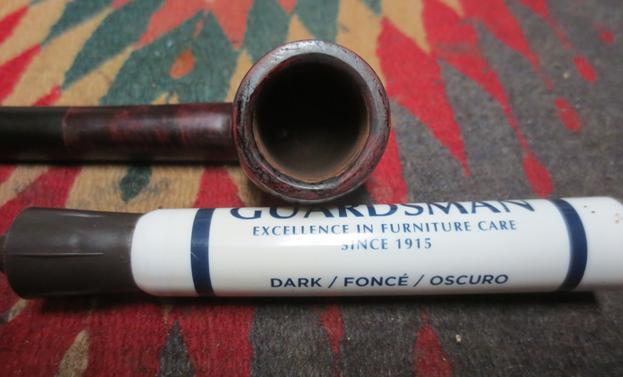
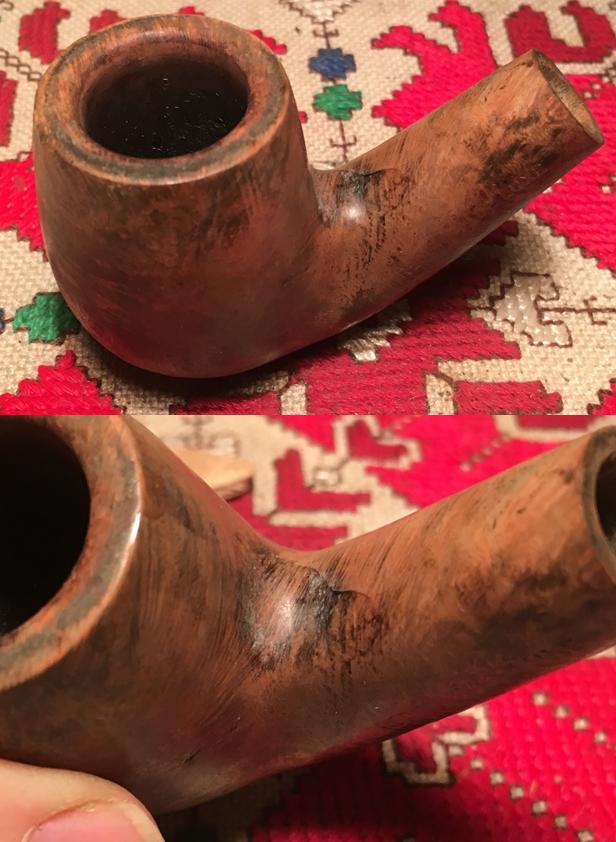
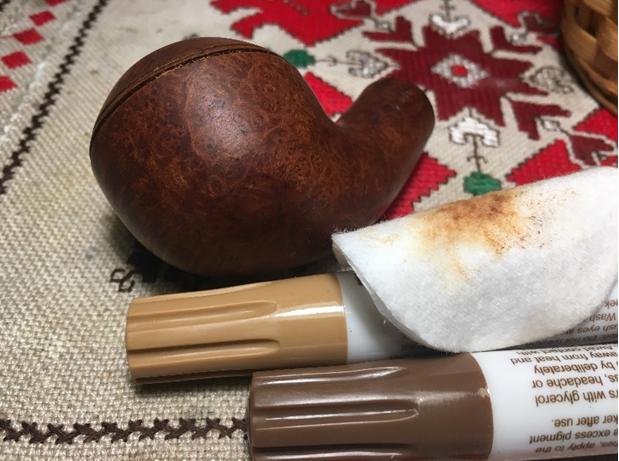
 Now I return to the stummel and take a close look. After cleaning with Murphy’s Soap, I detect about 4 or 5 fills on the surface that need addressing. The fills are solid but with some, I’m able to scrape of the upper layer of the fill. There is also a chip in the double grove going around the stummel. With the smaller fills, that are not pitted, I use dye sticks, starting with a lighter hue and graduating to a darker hue, until the blend is best. I then use a lightly dampened cotton pad with isopropyl 95% to dab the areas to blend further with the surrounding briar. The pictures show the progress.
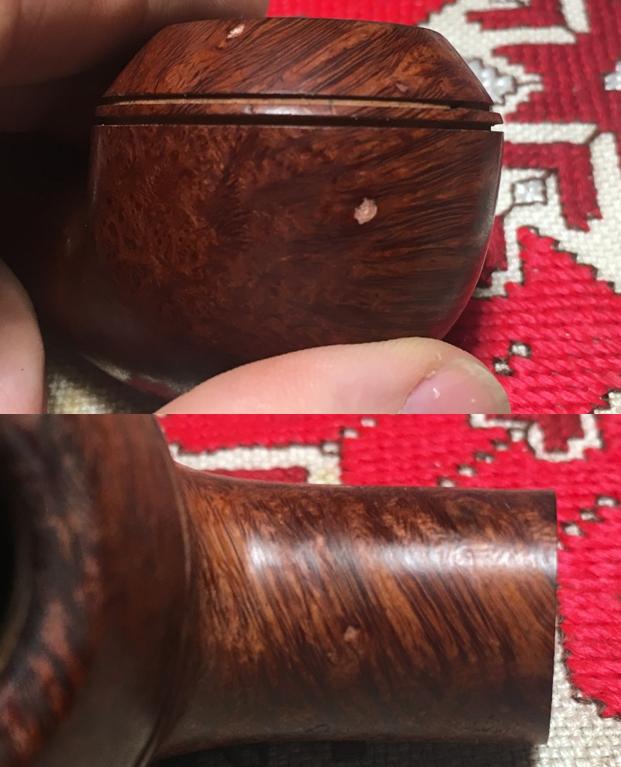
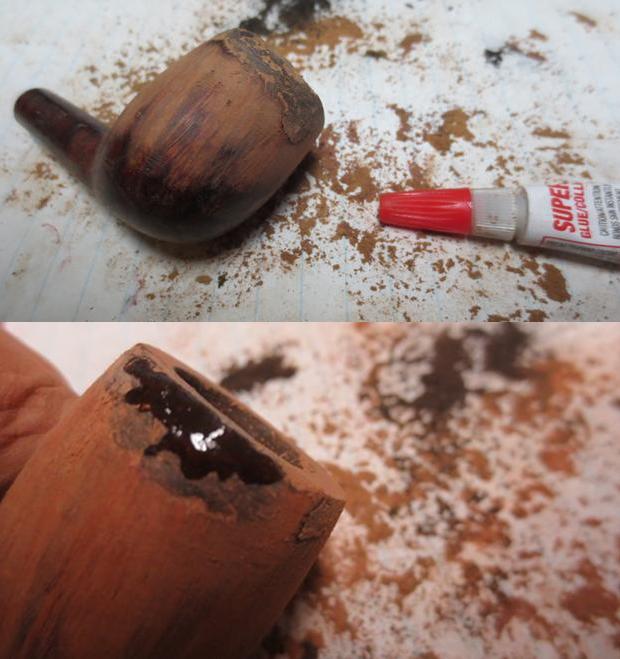
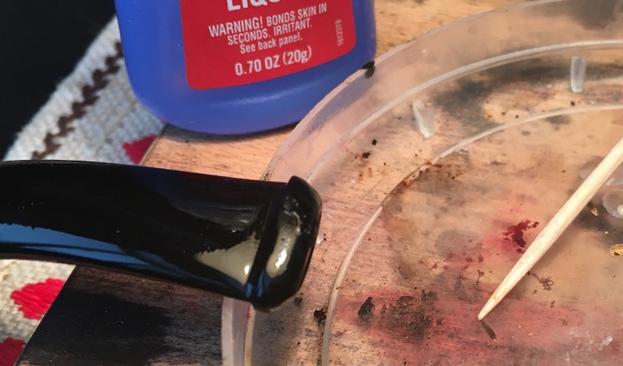
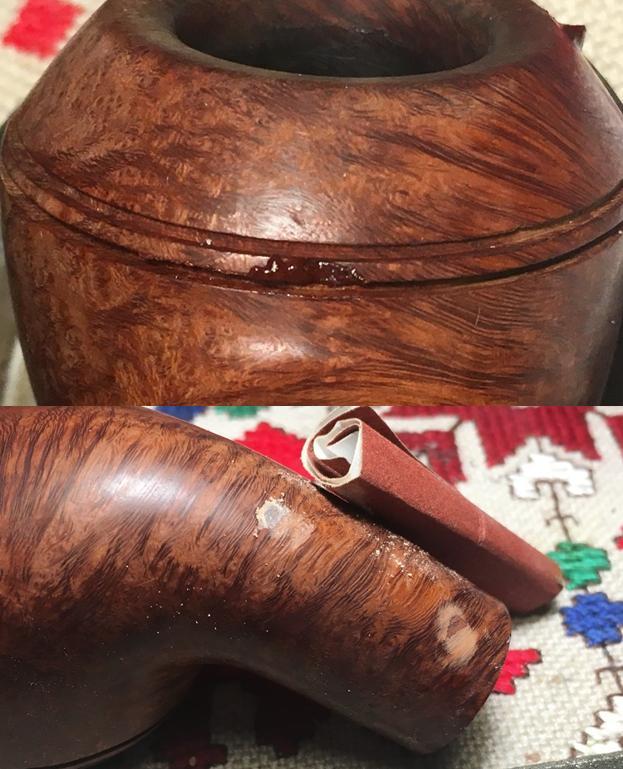
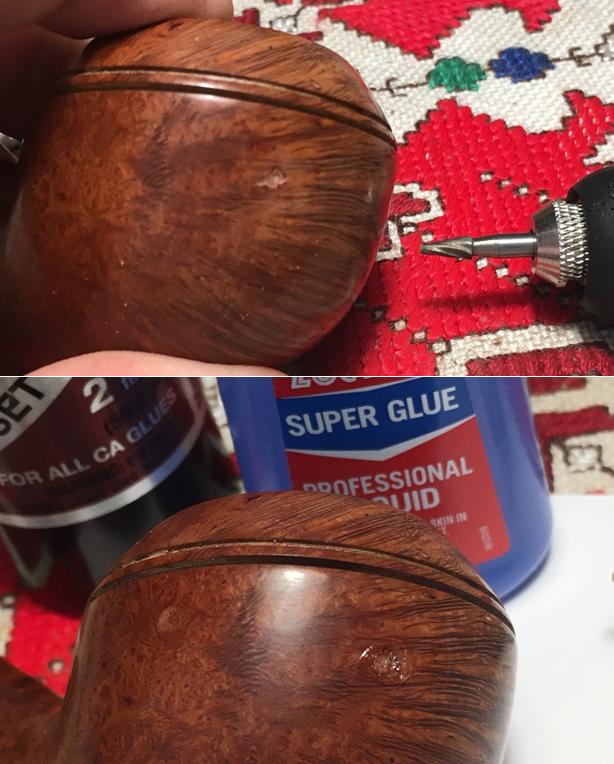
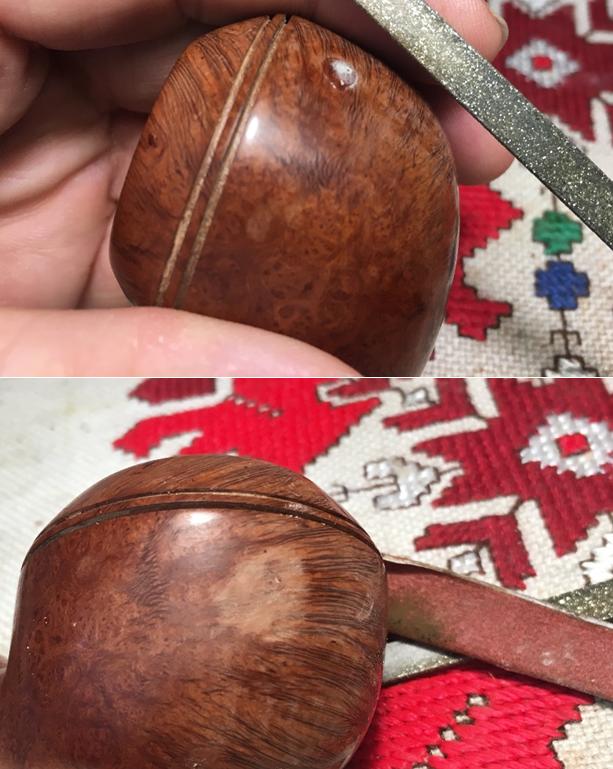
 With those more pitted, I mix a bit of superglue and briar dust to form a putty and apply on the pitted fills. Carefully, I also paint the groove chip and before the putty start hardening, I clear overflow putty from the grooves with a sharp dental probe. I use an accelerator to cure the briar dust putty patches more rapidly. After a short time, I sand each putty fill to bring it to the briar surface. I first carefully use a flat needle file to work the putty hills down to almost surface level then I use 240 grit paper to sand to the surface level.
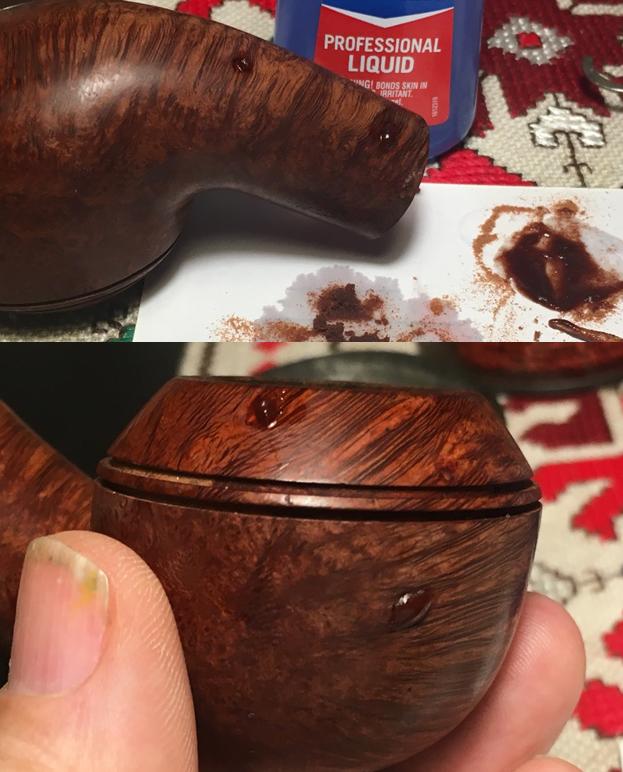
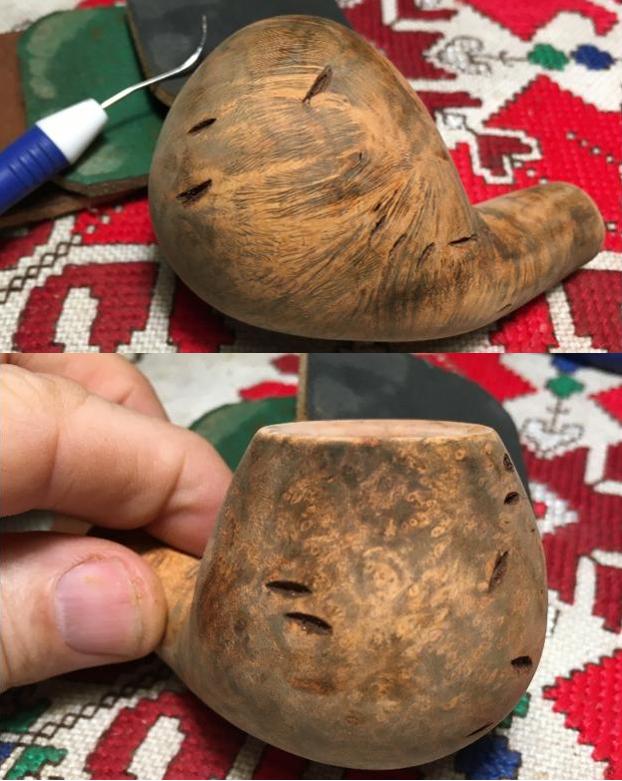
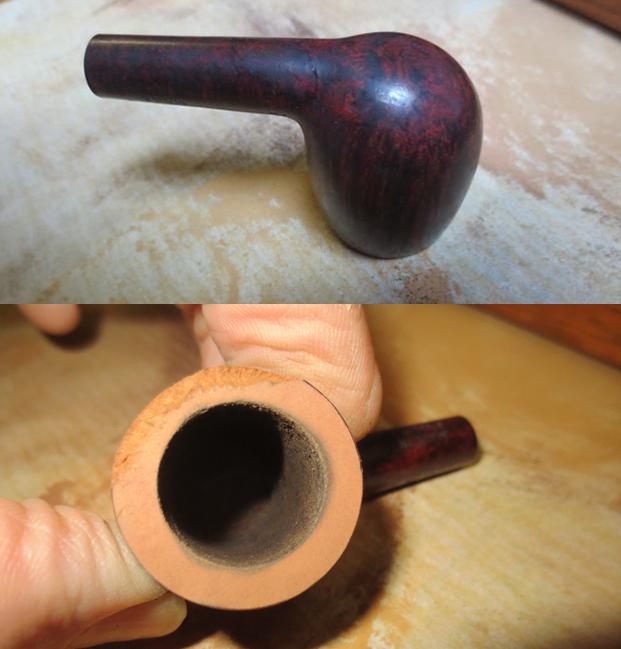
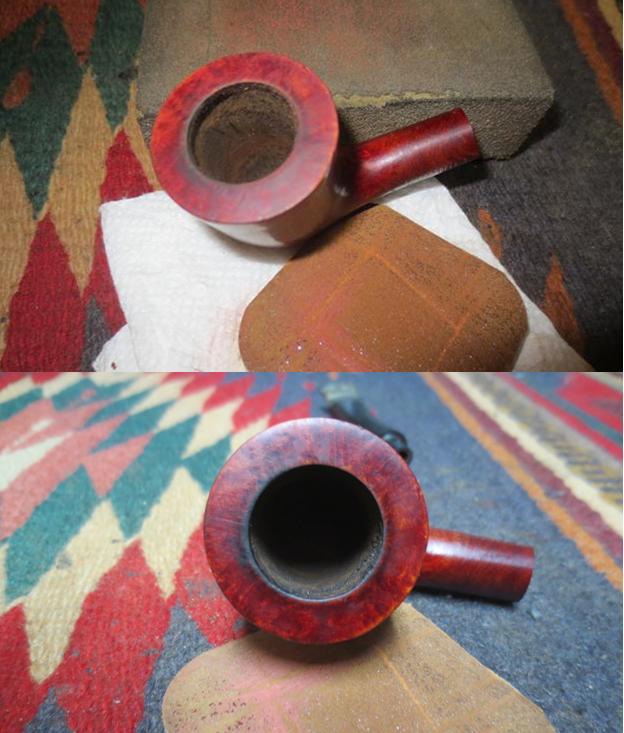
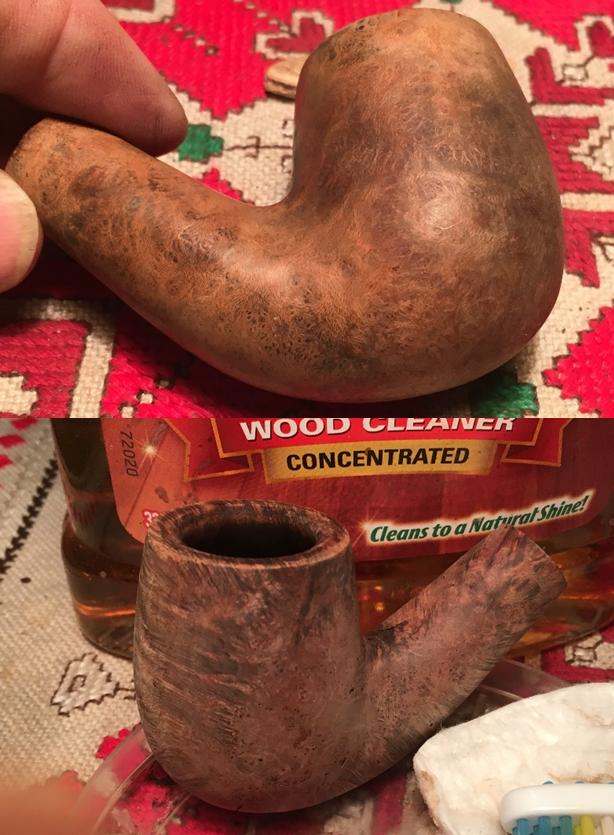
 Decision time. I want to restore this Butz-Choquin as close to the original shade as I can. I discovered on TobaccoPipes.com a BC in the same shape group as the Cocarde Major – 1028. In the picture below, the shade of the stummel is light and I think I can achieve this by simply sanding the stummel and restoring the briar to its original natural luster – MINUS what appears to be an acrylic finish below. I can still decide to apply a stain at the end of the sanding process after I have a better idea of the briar as it emerges. The shape below is a BC Cocarde 1025 – the only difference I detect is the tapered stem versus the saddle stem.
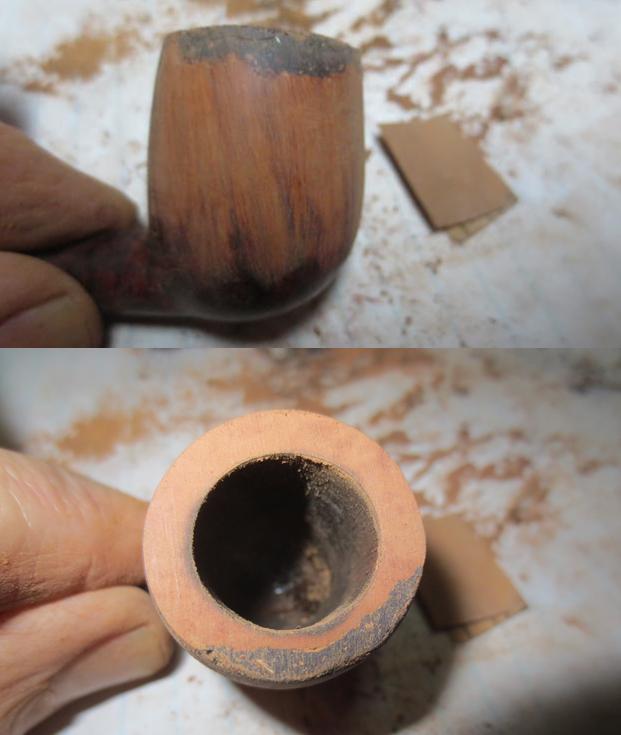
 First, I want to freshen the rim lines and re-cut an inner bevel which will look better and remove discoloration on the inner rim edge. The rim has a subtle slant toward the chamber. I cut the initial bevel using a coarse 120 grip paper rolled tightly. When I reestablish the bevel, I follow by sanding with 240 grit sanding paper. I then sand the stummel using a medium grade sanding sponge, followed by a light grade sanding sponge. I am careful to work around the stampings on the sides of the shank. Before I move on to the micromesh sanding, I use dye sticks to help blend the fill patch areas that are not yet blending. After applying the dye stick, I then lightly dab the area with a cotton pad slightly wetted with alcohol. This helps blend with the surrounding briar. The pictures show the progress.
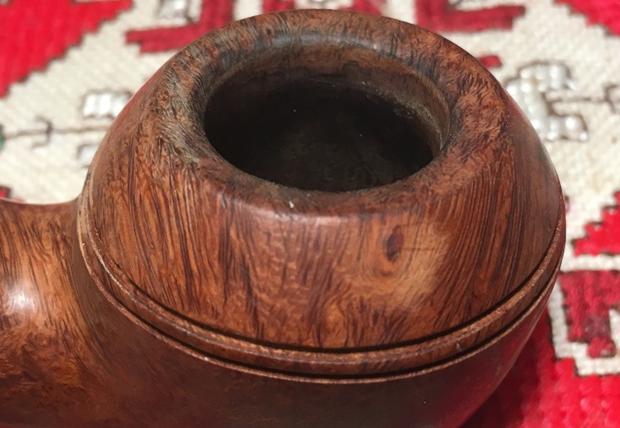
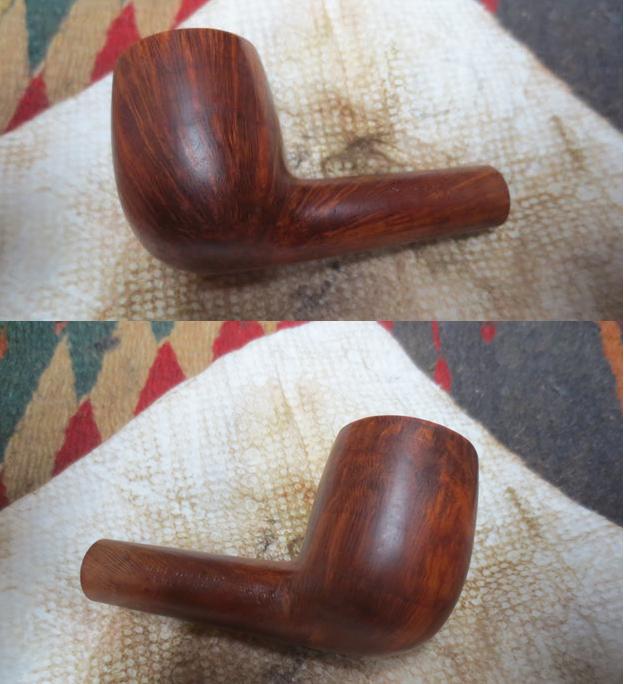
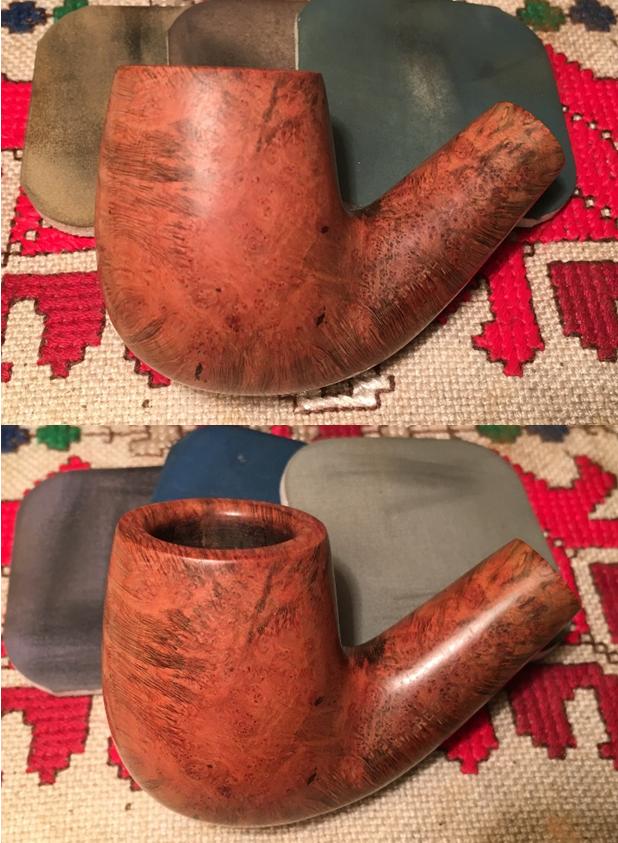
 I follow by using micromesh pads 1500 to 2400 and wet sand the stummel. After this, I dry sand using 3200 to 4000 then finish with pads 6000 to 12000. I then run a toothpick through both grooves connecting the upper and lower domes of the Rhodesian to remove residue remaining from the sanding process.
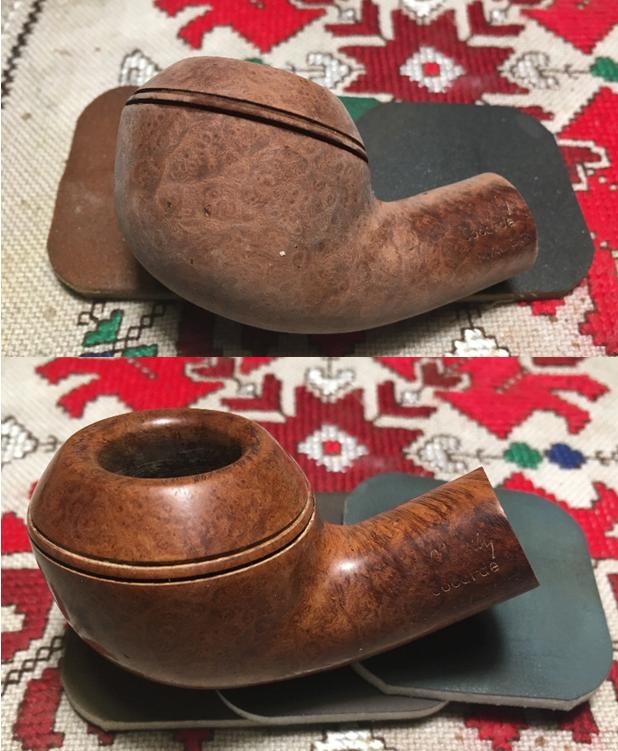
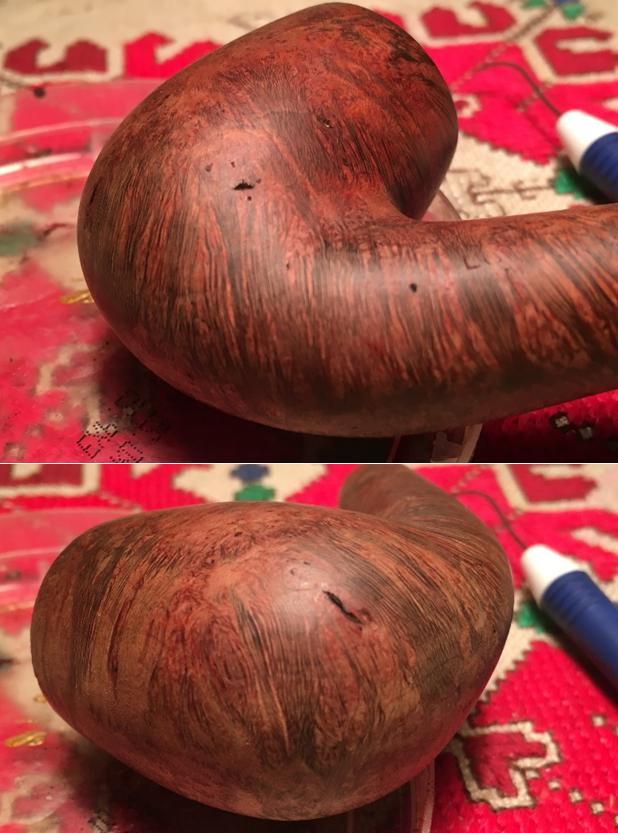
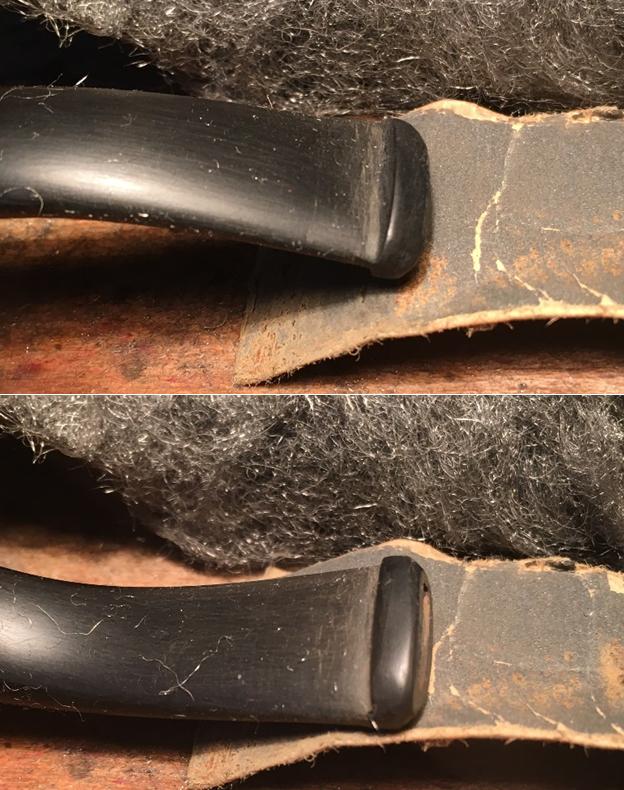
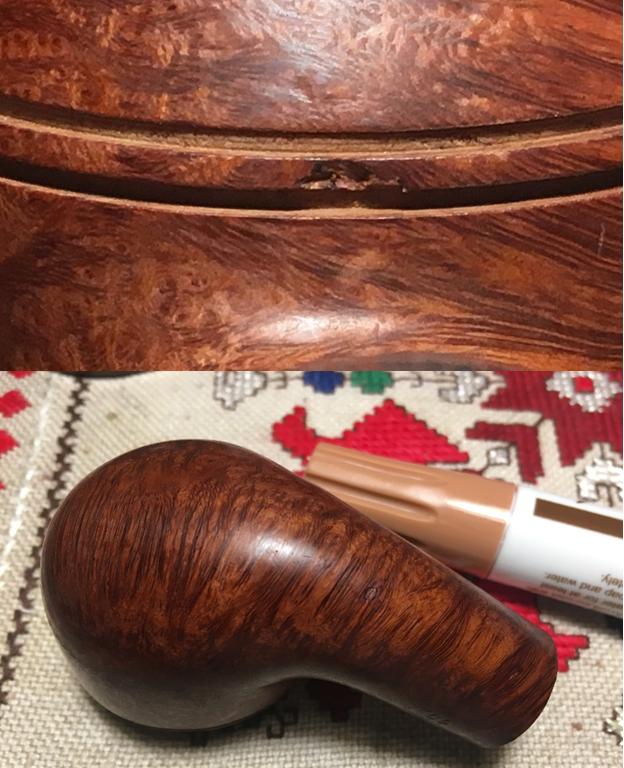
 To step back and take in the big picture, I reunite stem and stummel and take a picture. I see two distinct briar dust putty fills that are looking like I should have used a clear superglue fill instead. They are darker than the surrounding grain environment – not an ideal situation.
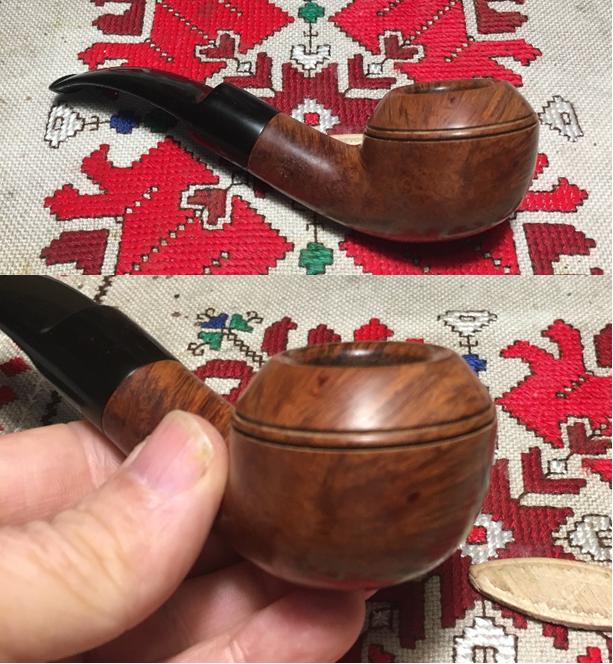 I decide I can live with the fill on the upper cone, next to the rim. It is smaller and I hope that it will blend after applying a light brown stain which is looking like will be needed. With the larger lower fill, I will delicately try reaming the fill with the point of a Dremel tool to remove the putty. Depending on how that goes, the next step will be to shape the fill somewhat so that the shape is less circular and flows more with the surrounding grain pattern. Then, I will fill the new hole with clear superglue, sand and again be back to where I am now – hopefully with better blending. Phase one seems to go well – very carefully. With the Dremel tool I clean the putty fill and shape the pit circle to flow with the grain. I then spot-glue and use accelerator to cure the new clear patch. Looking good so far. I use a flat needle file to remove the superglue fill mound almost to the briar surface, then I use 240 grit paper rolled, to strategically stay on top of the glue to bring it down to surface. I follow with 600 grit, then steel wool, then the full array of 9 micromesh pads, 1500 to 12000. I touch up a bit with a light dye stick and blend with a cotton pad with a bit of alcohol. I am now back to where I was at the beginning of the detour. The fill is still visible, but doesn’t jump out proclaiming, “Here I am, Boys!” The pictures show the detoured progress.
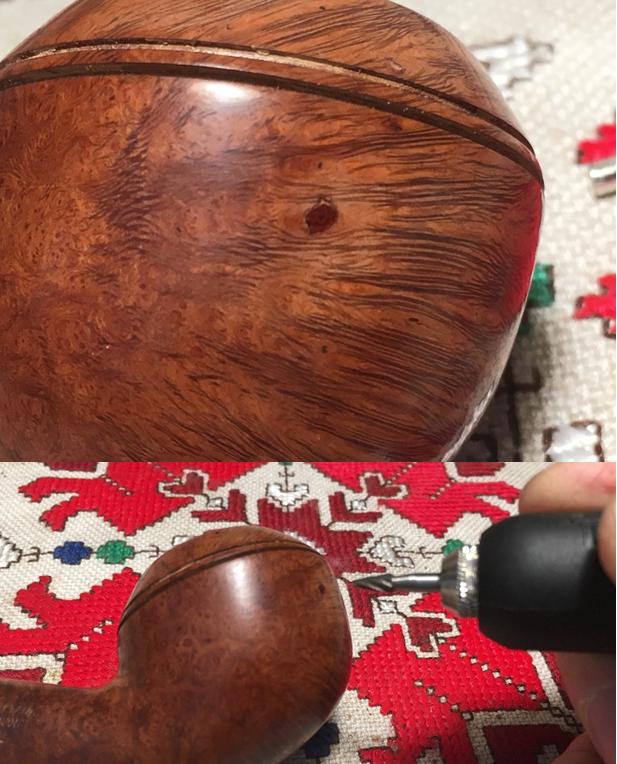
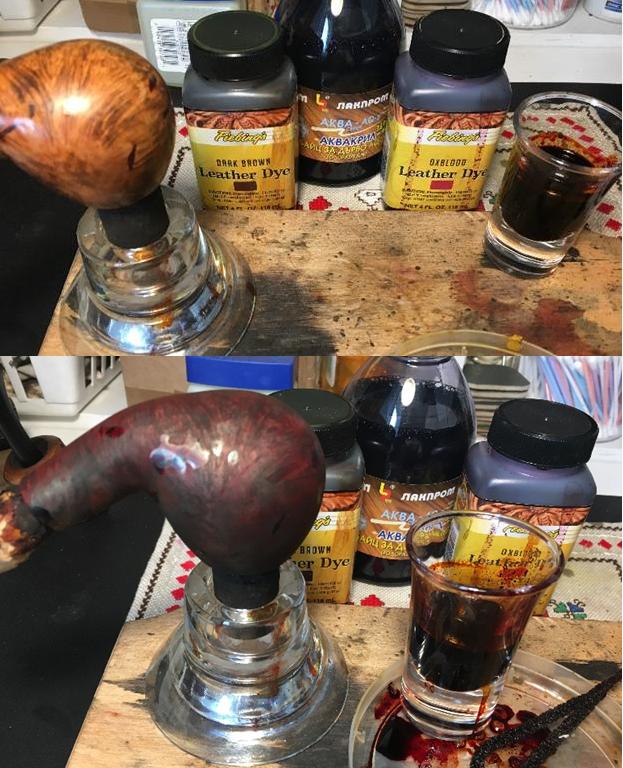
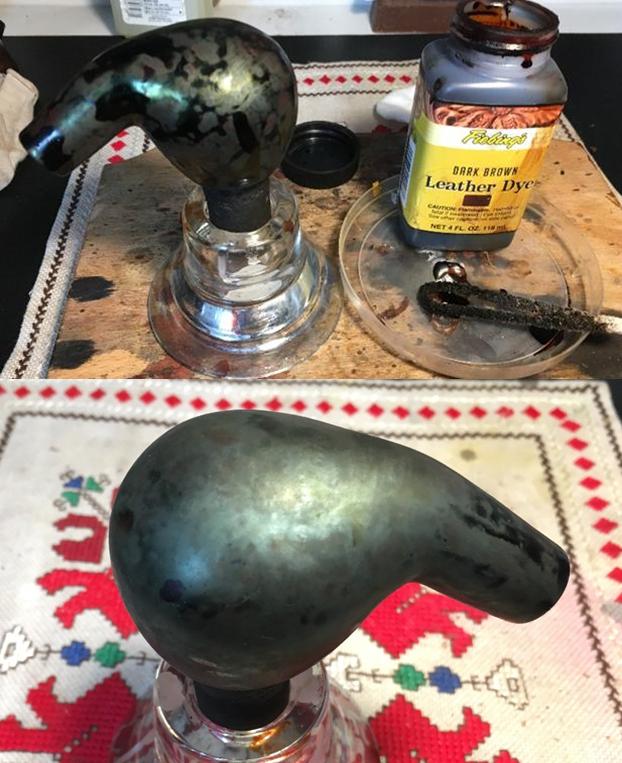
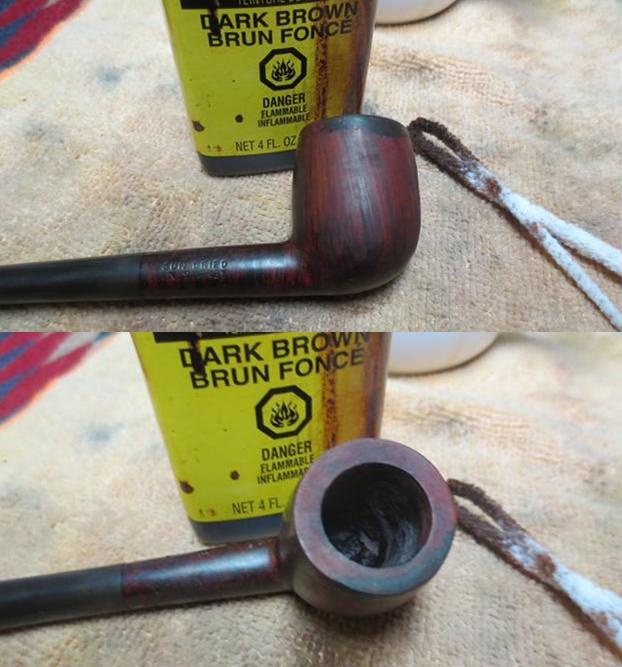
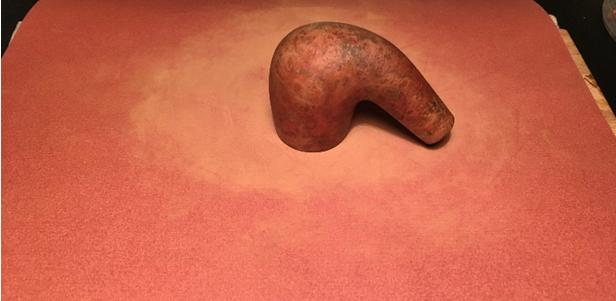
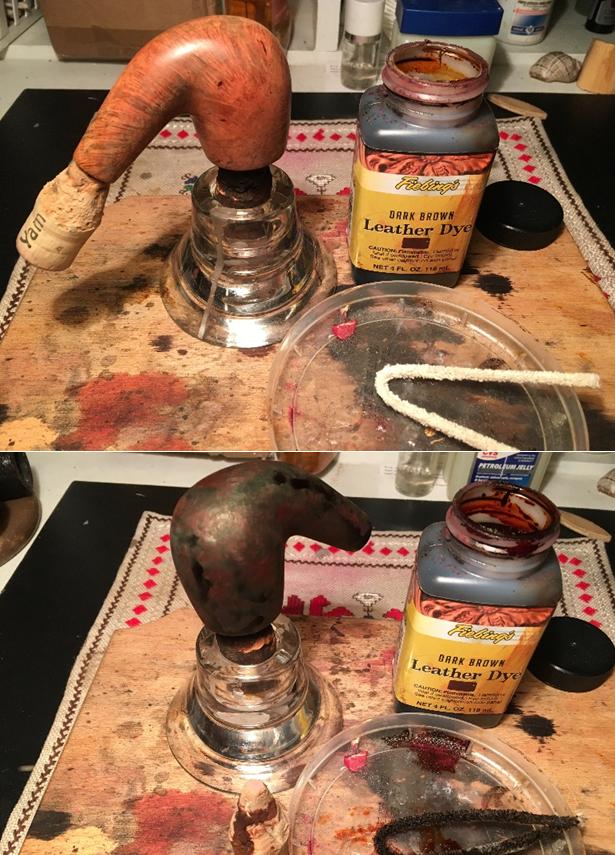
 Now, to promote blending throughout the entire stummel, I use Fiebing’s Light Brown Leather Dye. I warm the stummel to open the grains to receive the dye. Using a doubled-over pipe cleaner I liberally apply the dye over the stummel careful to achieve full coverage, rim and grooves. I then flame the aniline dye with a lit candle and the alcohol immediately burns off, setting the dye in the grain. To achieve total coverage, I repeat the process above after a few minutes, complete with flaming. I put the stummel aside to rest and I’ll return to it after work this evening.
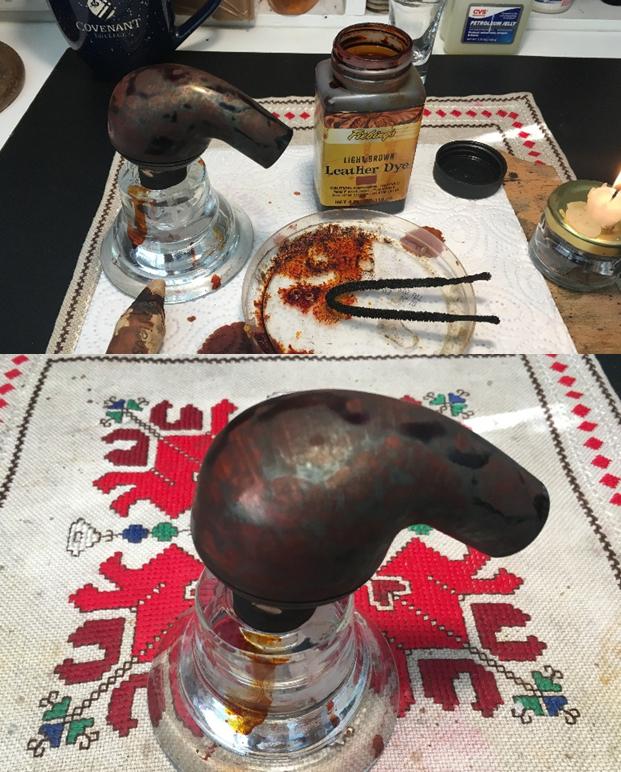 One last task to do before heading to work. I want to freshen the ‘BC’ stem marking with white acrylic paint. I put a small dab of paint over the ‘BC’ and then use a toothpick to spread the paint, making sure the marks are fully covered. Tonight, after the paint is fully cured, I’ll scrape off the excess leaving a fresh Butz-Choquin stem.
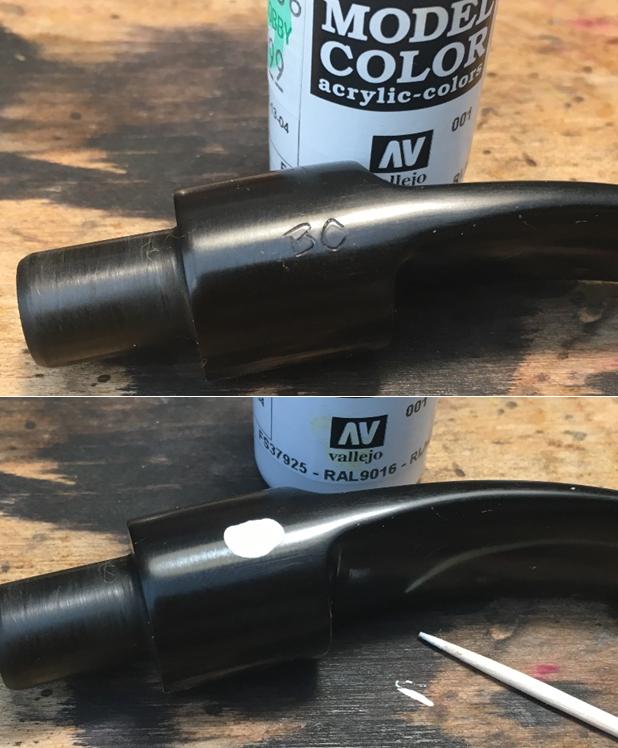 Back home and ready to go. The white acrylic paint has fully cured on the stem marking. I take a toothpick and gently scrape the excess paint away using the side of the toothpick. Doing this, the toothpick passes over the top of the stamping leaving the indentations fully renewed.
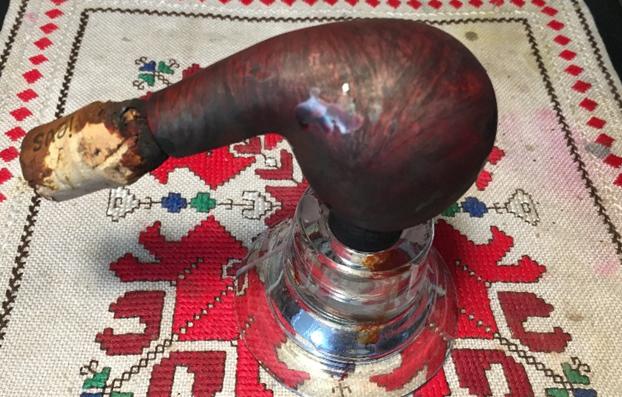
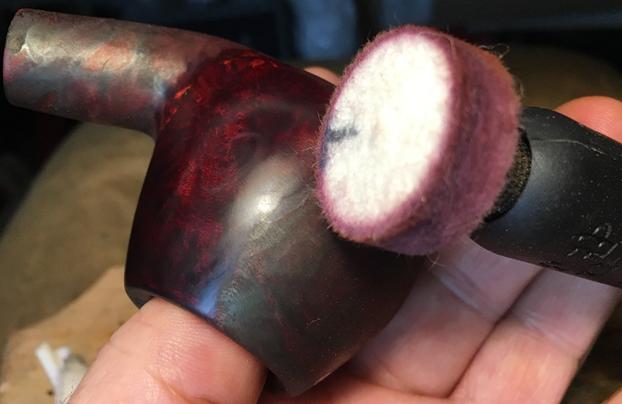
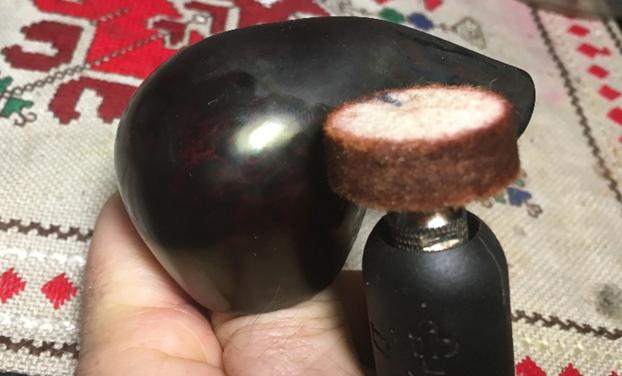
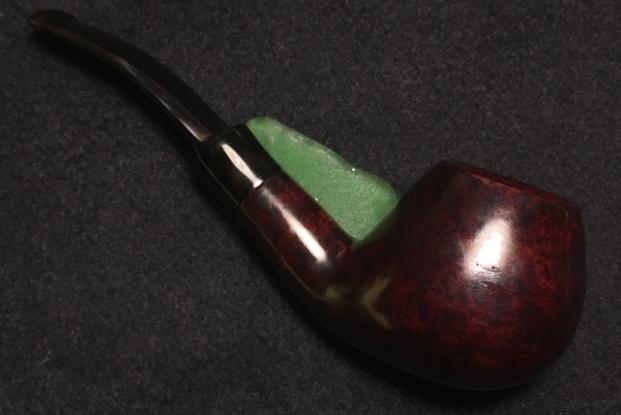
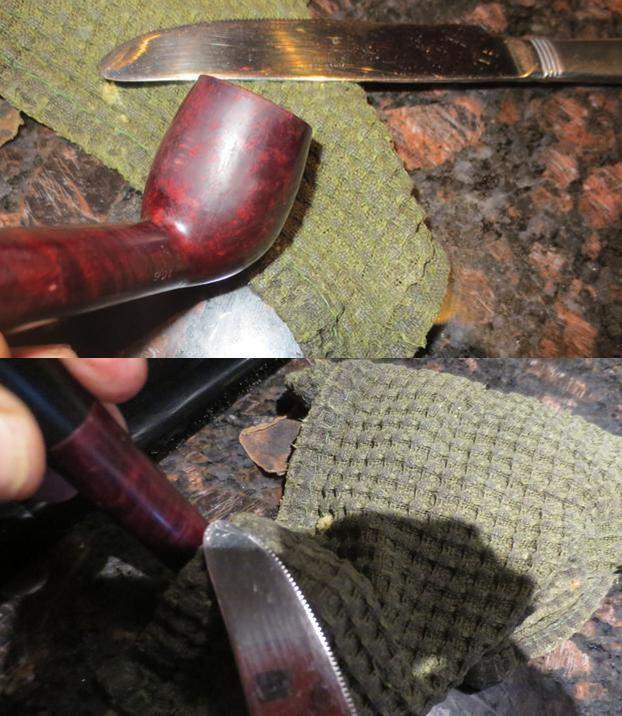
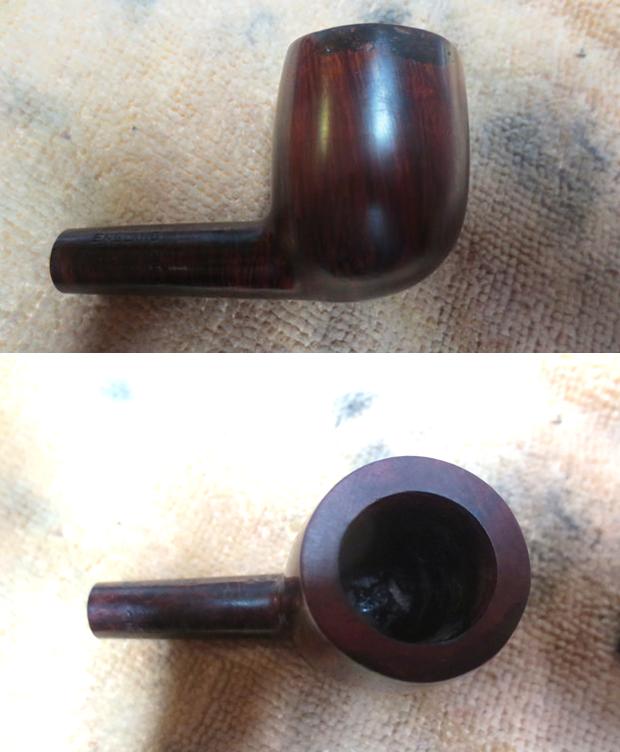
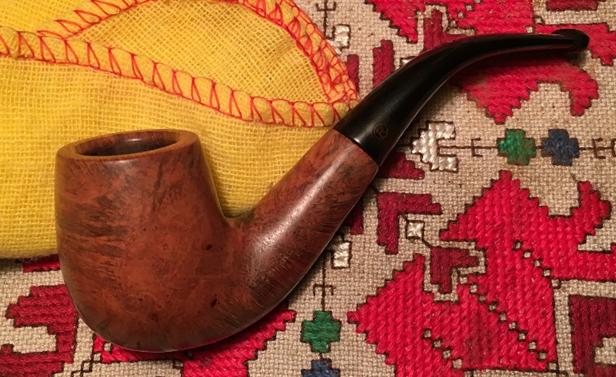
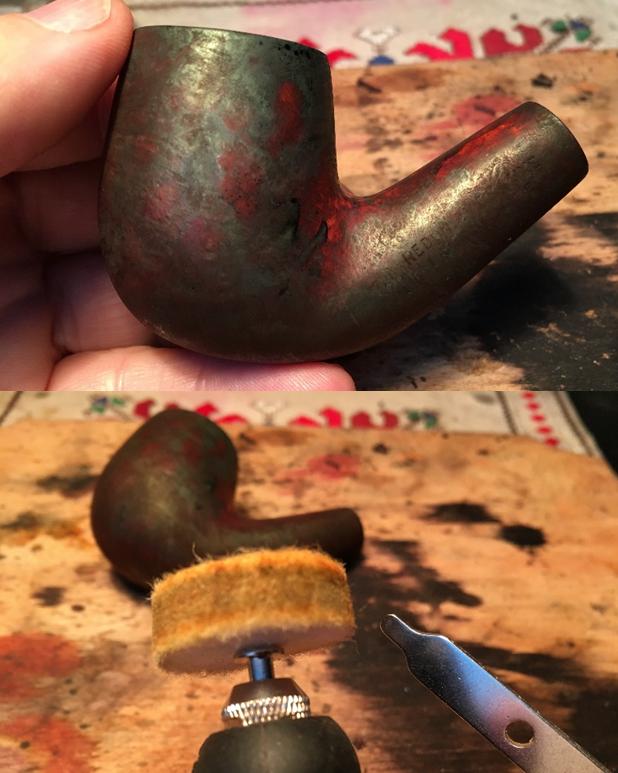
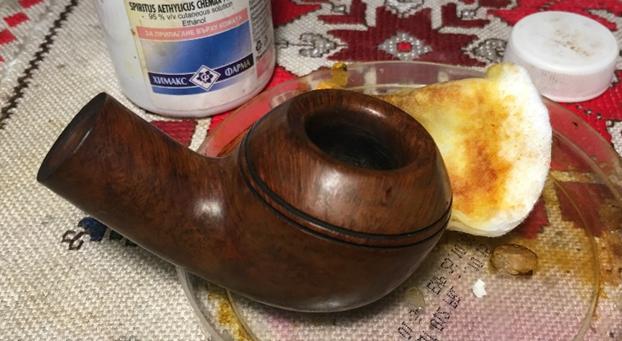
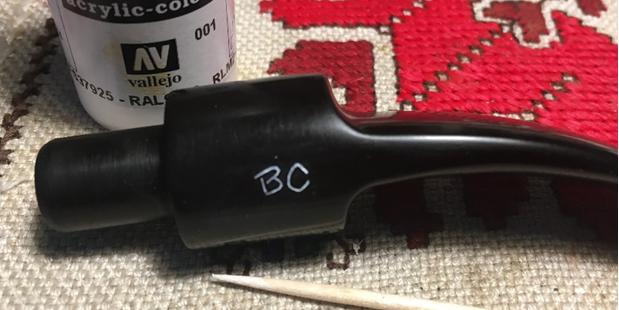 Time to ‘unwrap’ the fire crusted stummel after applying Fiebing’s Light Brown Leather Dye. Using the felt wheel, I set the speed of the Dremel to the slowest possible and using Tripoli compound, after purging the wheel of old compound with the sharp edge of the Dremel’s adjustment wrench, I remove the crust from the stummel. I take a picture to show this process. After the crust is removed, I use cotton pads wet with isopropyl 95% to wipe down the stummel. I lighten the stummel’s hue a good bit aiming for the original as closely as possible and to blend the dye across the grain. When I reach the hue that looks good, I switch to a cotton cloth wheel mounted on the Dremel, and after reuniting stem and stummel, I apply Blue Diamond compound both. I’m loving watching the grain on this BC Cocarde Major Rhodesian start popping – it is truly an amazing process and the components of such fine abrasion produce such a result in the briar. When completed with Blue Diamond I give the pipe a buff with a felt towel, not so much for shining but to remove residue compound before I apply the wax. After mounting the cotton cloth wheel on the Dremel, I increase the speed to the second slowest speed and apply several coats of carnauba wax to stem and stubble. When finished, I rigorously hand buff the pipe with a micromesh cloth.
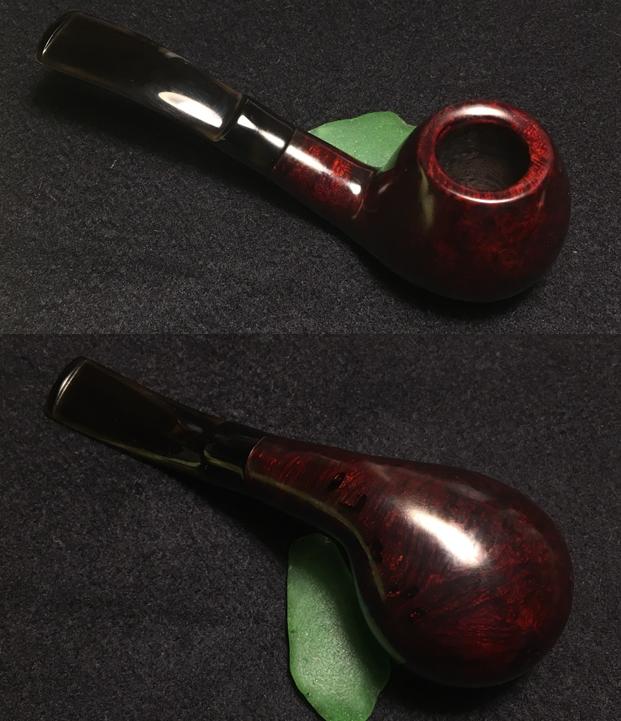
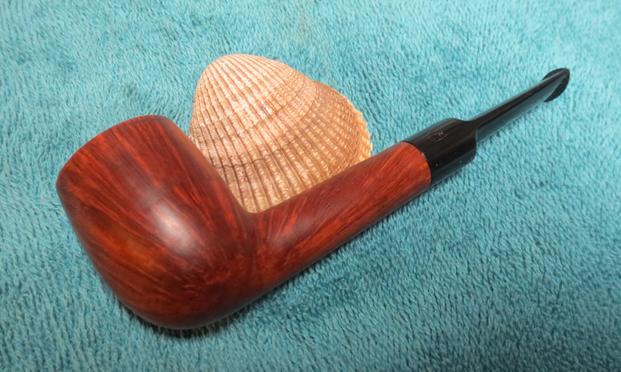
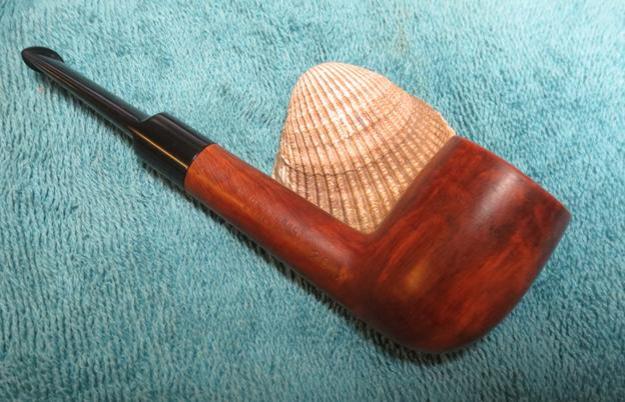
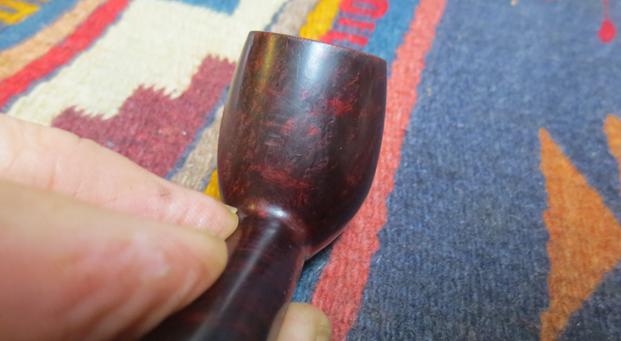
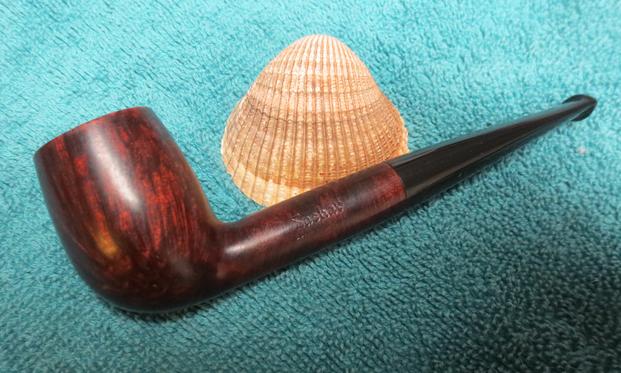
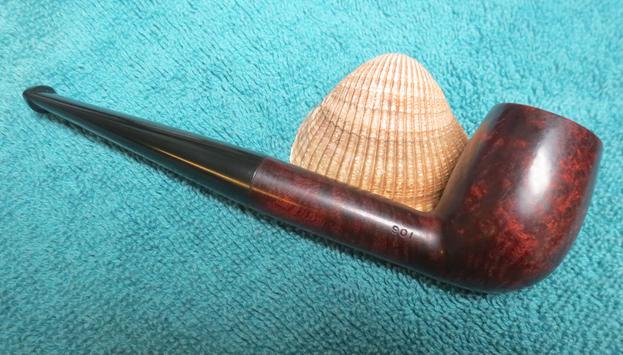
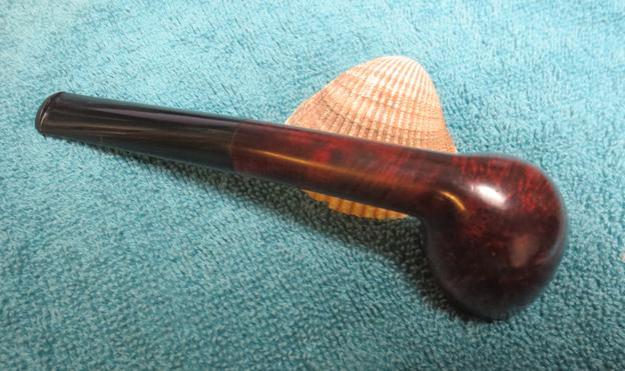
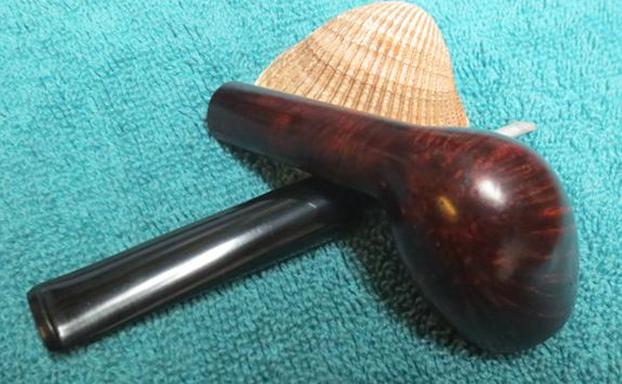
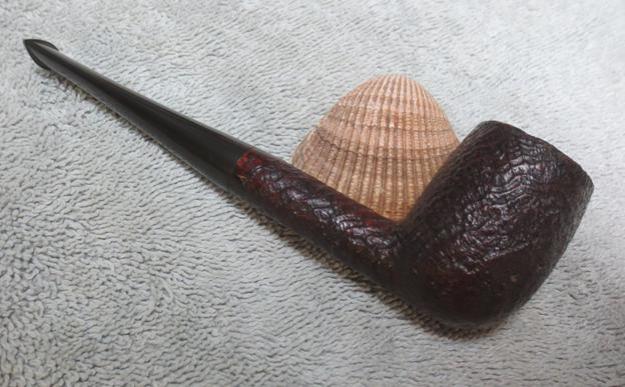
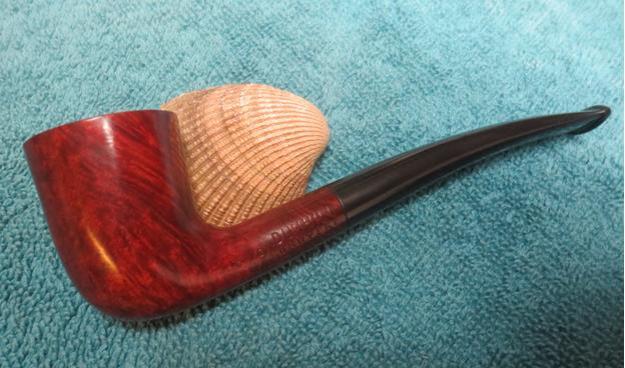
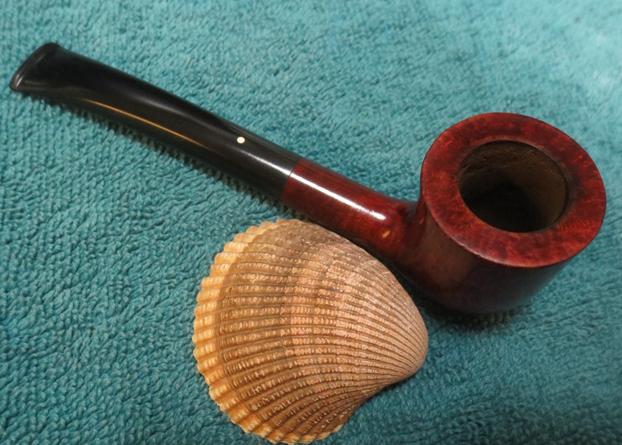
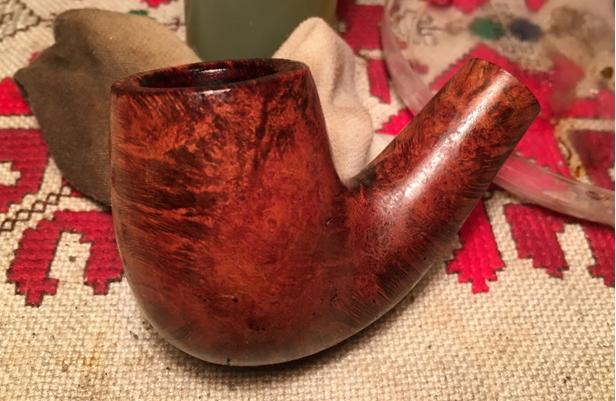
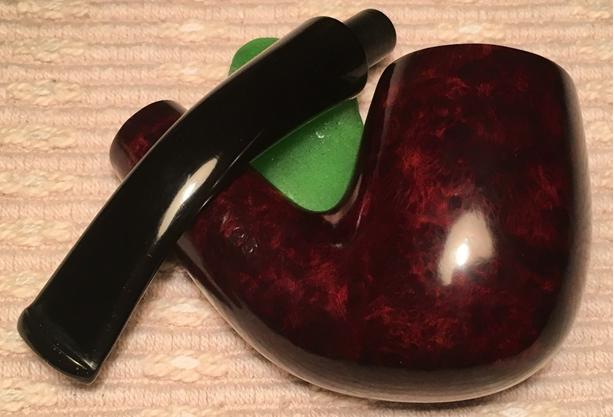
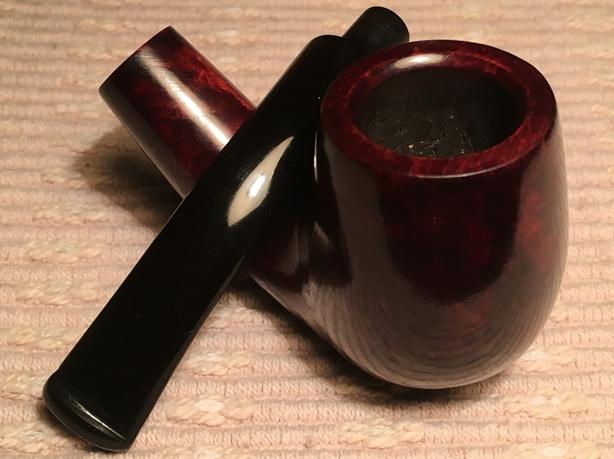
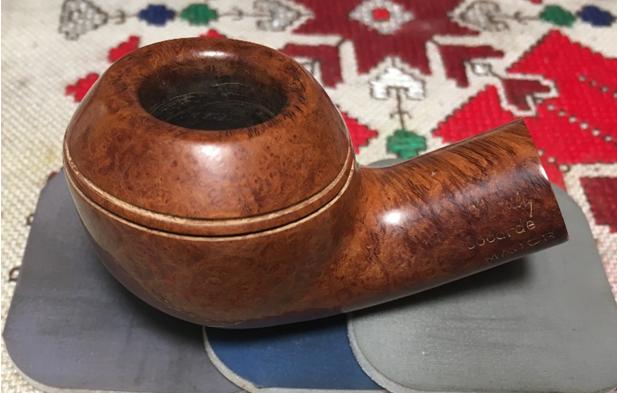
 The grain on this Rhodesian is placed perfectly to enhance the proud, chin forward carriage of the stummel. The horizontal flame grain crosses the heel of the stummel and flows to the sides terminating in bird’s eye – a beautiful showpiece of briar that is well-suited to bear the name of French pride – Cocarde Major. This Butz-Choquin Rhodesian, another traveler from St. Claude, is looking for a new steward. I sell the pipes I restore and give the profits to benefit the work we do here in Bulgaria with the Daughters of Bulgaria – rescuing women and children who have been trafficked and sexually exploited. If you are interested in adding this Butz-Choquin Cocarde Major Rhodesian to your collection, you can find it at the store at my blog site, The Pipe Steward. Thanks for joining me!


 The second photo shows the shank end of the pipe. The band wraps over the end of the shank which was a plus to my mind. The band was tight on the shank according to the seller. My thinking was that the band would hold the crack together and it would be easier to work with. (The tenon on the stem is also a 9mm filter stem).
 I wrote back and told him I would be glad to work on it. He wrote back when the pipe arrived at his place. As he looked it close up he wrote that the crack did not look as bad as he had expected. It appeared to be possibly a flaw in the briar. He also wrote that the end of the flaw near the band did extend to the edge of the band. He packed up the pipe and sent it to me in Vancouver. When it arrived I loved the look and shape of the pipe. The long shank and the shape of the bowl work well together. The gilt ring around the outer edge of the bowl and around the shank is what gave the pipe its name. It is stamped Stanwell of Gilt Edged on the left side of the shank. On the underside it reads Made in Denmark. On the right side of the shank it reads 124 which is the Stanwell Shape number. According to information compiled by the late Bas Stevens regarding Stanwell shapes the 124 is a freehand, long conical shank, with a short saddle mouthpiece. It was designed by Sixten Ivarsson. Here is the link to the full blog post that Bas gave permission to post on rebornpipes: https://rebornpipes.com/2013/09/03/stanwell-shapes-compiled-by-bas-stevens/
 There was some tar and oil on the top of the rim so I wiped it off with a cotton pad and took the following close up photo. It is hard to see but there were light dings in the rim top and the damage at the rear which I have circled in red.
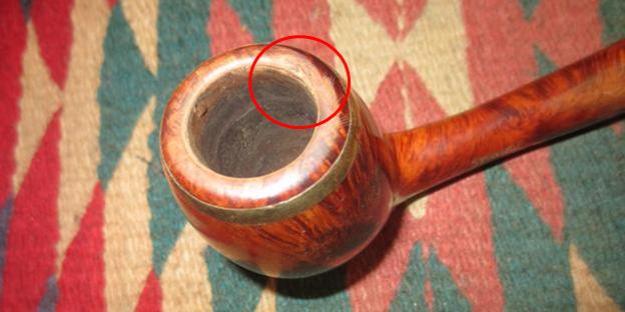 The stem was clean on the surface but there were ripples and ridges from buffing as well as some slight tooth indentations on both sides near the button and on the button.
 I sanded the damaged/flawed area on the top of the shank and probed it with a dental pick. Interestingly if it was a crack it was sealed tightly and there were no soft spots in the surface. It also appeared that the top finish had run slightly leaving a sag mark on the shank. I examined it with a bright light and lens and could see that the flaw ended a good 1/8th inch before the band and that the other ended. I decided to not drill the ends of the crack because it was a tight fit and also because when I looked at the inside I could see no trace of the crack coming through. I filled it in with clear super glue and when it dried I sanded it smooth with 220 grit sandpaper.
 I cleaned up the rim top with 220 grit sandpaper and lightly beveled the inner edge to clean up the burned spot. I did not want to bevel it too much but only enough to match the rest of the rim bevel. When I finished shaping it I sanded it with 1500-2400 grit micromesh sanding pads to remove any scratch marks. I steamed out the dents on the top of the shank and polished them and the repair with micromesh sanding pads. I stained the rim edge and repair with a medium brown stain pen. I used a black Sharpie pen to continue the grain marks through the repair on the shank.
 I buffed the pipe with Blue Diamond on the buffing wheel and hand buffed it with a microfibre cloth. I took the following photos of the pipe and sent copies to Mario. We are both really pleased with the way the pipe has come out to this point.
 Here are some close up photos of the shank repair and the rim clean up. It looks much better than when I began the work.
 I set the bowl aside and started to work on the stem. I sanded both sides with 220 grit sandpaper and took the photos to show the marks, ripples and dents on the surfaces.
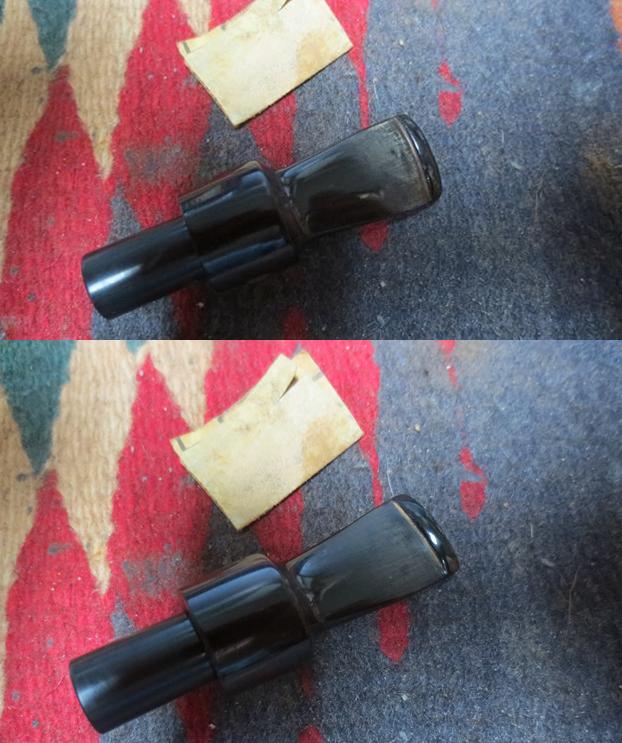 I cleaned out the tenon area with alcohol, cotton swabs and pipe cleaners to remove all of the oils and tars in airway and the area where the filter would have been. It took a lot of pipe cleaners and cotton swabs to remove all of the debris. The next photo shows about half of the cotton swabs and pipe cleaners that I used on the stem.
 I examined the inside of the mortise and airway with a pen light and could see that the shank was thickly caked with a hard coat of tars. I used a dental spatula to scrape away the debris in the mortise. It took a lot of scraping to remove the buildup to see the briar. I cleaned out the shank and airway with alcohol, cotton swabs and pipe cleaners until it was clean. The pipe smelled much cleaner though still smoky.
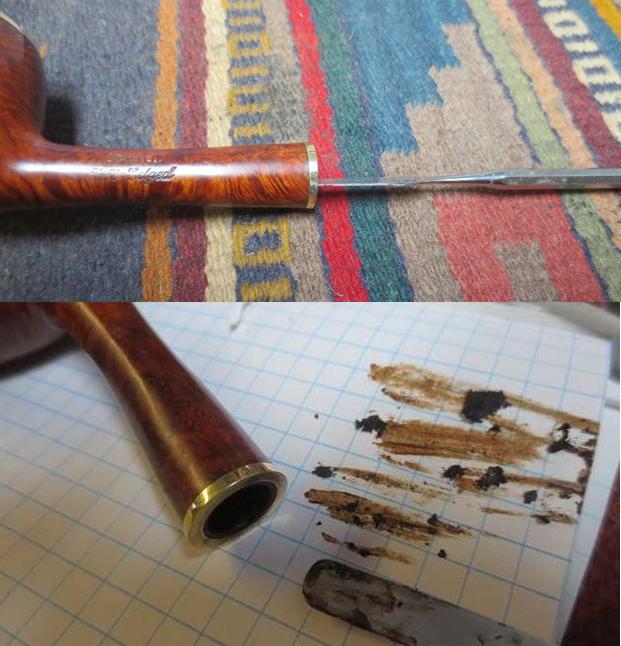
 I pressed cotton balls into the bowl and rolled a cotton pad and inserted it in the shank. I used an ear syringe to fill the bowl with alcohol. I tipped it so that the alcohol ran into the shank. I filled it until the cotton was covered in the bowl. I set the bowl aside to let the alcohol do its work in drawing the oils out of the briar. I set the bowl aside and turned to the stem.
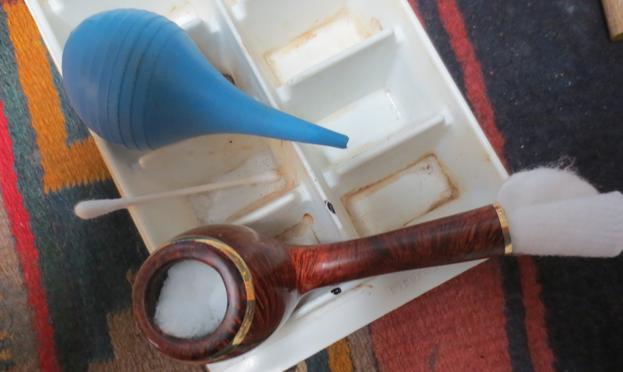 I finished sanding it with the 220 grit sandpaper to remove all of the ripples and dents in the stem surface. I polished the stem with micromesh sanding pads – wet sanding it with 1500-2400 grit pads and dry sanding it with 3200-12000 grit pads. After each set of three pads I rubbed the stem down with Obsidian Oil. After the last rubdown of oil I set the stem aside and let it dry.
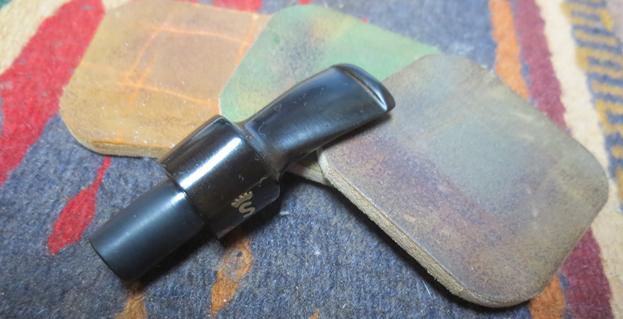
 I let the cotton balls and alcohol sit in the bowl for 6 hours. I took the following photo of the darkened cotton balls. I removed the cotton balls and cleaned out the shank, airway and bowl with cotton swabs and pipe cleaners. I was able to remove a lot more of the tars in the shank.
 Once the shank was clean and the walls were clean and had dried I put the stem in place on the shank. I buffed the pipe and stem with Blue Diamond on the buffing wheel. I gave the bowl and stem several coats of carnauba wax and buffed it with a clean buffing pad. I hand buffed the pipe with a microfibre cloth. The finished pipe is shown in the photos below. The stem is smooth and glassy, the rim is much better and looks smooth, and the flaw/crack in the shank is smooth to touch and virtually invisible. It will be heading back to Mario this week and I look forward to hearing what he thinks of his pipe now. Thanks for walking along with me through this restoration.