Blog by Paresh Deshpande
This pipe has attracted the attention of my wife, Abha, since the time I had received three huge boxes of pipes that once belonged to my Grandfather. So when she took the plunge of helping me in restoring all these inherited pipes, this was one of the first she had earmarked for cleaning up. After she had done the initial cleaning up, this pipe languished at the bottom of the pile of around 50 plus pipes that she had cleaned up. And it was during the period of my stay at home on compulsory leave due to the countrywide lockdown to contain the spread of CORONA VIRUS (COVID-19) that this pipe came up for restoration.
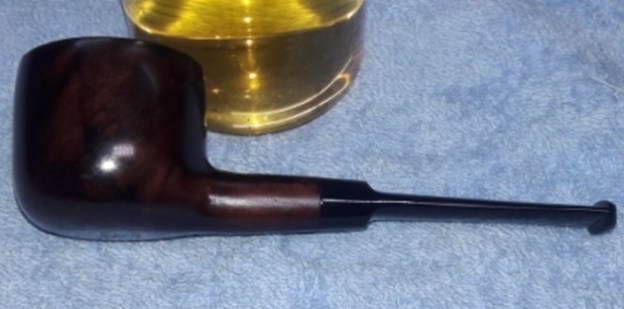
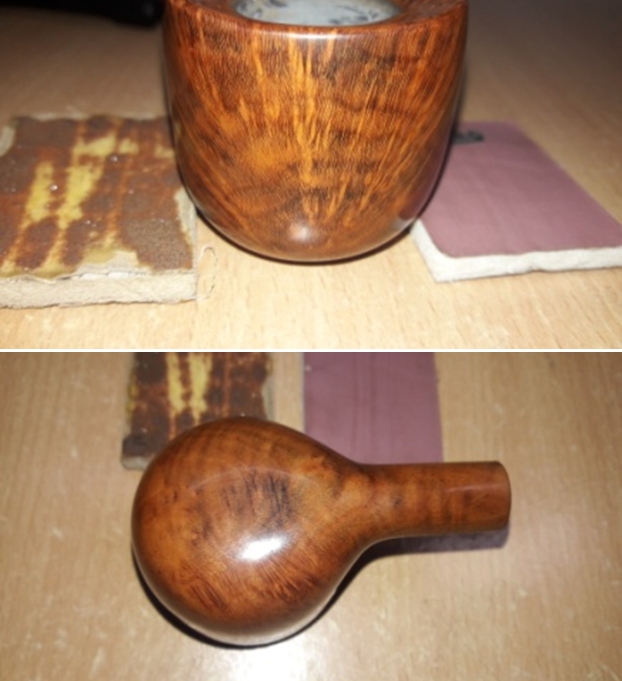
The pipe with its forward canted Horn shape with a long military mount vulcanite stem has a delicate feel and look to it. It has beautiful and deep sandblast with some astonishing grain patterns that are seen over the stummel surface. The shank end is adorned with a gold ferrule that adds a touch of classy bling to the appearance of the pipe. It is stamped at the foot of the stummel as “PREHISTORIC” in Gothic hand followed by “GBD” in an oval over “XTRA”. The gold ferrule is stamped as “GBD” in an oval over four different shaped cartouches bearing the stampings, from left to right, numeral “6 (or is it 9 ?) in a rhombus followed by purity grade number “.375” in a rectangle followed by date code letter “F” and lastly the symbol of the city Assay Office that has worn out but I guess it appears like a LION HEAD with protruding lines from the four corners. The vulcanite stem is stamped, not very deeply, on the left side as “GBD” in an oval over “XTRA” in a slight upturned arch. The stampings, save for the Assay Office, is crisp and clear.
 There is plenty of material available on pipedia.org on the brand GBD that makes for an interesting read. The link below should take you to the relevant page on pipedia.org. For the sake of brevity, I have reproduced only the relevant portions that are related and of interest with respect to the pipe that I am working on (https://pipedia.org/wiki/GBD).
Early GBDs were made only in one single grade concerning the wood’s quality, later supplemented by a second one, and there was only a very limited number of finishes. But toward the end of the 19th century, the demand changed. For example the Britons preferred darker stainings. More differentiated customer’s wishes made the introduction of additional markings necessary. GBD Xtra and GBD Special were very early models who’s names indicated special final treatments and / or fitments. The standard quality was stamped simply with GBD.
There is a very simple explanation for GBD’s program to turn more “British”: GBD became a British company soon after the turn of the century! In 1902 Marechal and Ruchon sold GBD to A. Oppenheimer & Co. in London.
The claims after the 1st World War demanded further distinctions. First of all was the London Made, which became the Standard London Made, followed by the New Era— in 1931 the top model asking 12½ Shilling. The Pedigree, although sketched around 1926, was not produced until the later 1930s. The New Standard was introduced in order to give the popular Standard of the 20s a higher rank in value. The Prehistoric, a deeply sandblasted black pipe, that still carried the small GBD Xtra stamp, was entirely new and unusual.
Dating GBDs
Xtras haven’t been made since the 1930’s.
That this pipe currently on my work table was made from 1918 to 1930s can be inferred from the information gleaned above:
(a) GBD Xtra and GBD Special were very early models whose names indicated special final treatments and / or fitments.
(b) The ferrule stamping of AO points to the fact that the pipe is post 1902 as Marechal and Ruchon sold GBD to A. Oppenheimer & Co. in London in 1902.
(c) The Prehistoric, an entirely new and unusual line that still carried the small GBD Xtra stamp, was introduced after WW I.
(d) Xtra hasn’t been made since 1930s.
To pinpoint the year of make of this pipe, I decided to follow the stampings on the ferrule. Here, I was not very sure about the Assay Office hallmark as it was pretty buffed out and the numeral could have been a 6 or a 9. But having worked and researched a few silver hallmarked pipes, I guessed that the Assay Office hallmark should be a lion head. I visited https://www.gold-traders.co.uk/hallmarks/
This site is a step-by-step guide to help identify the carat/ purity, Assay Office and year of hallmark on all things gold. All things matched up perfectly and I have included a screen shot of the final result. From the above, it can be conclusively indentified that this GBD Prehistoric Xtra was made in England (London Assay Office) in 1921, give or take a year as the ferrules were always sent to the Assay Office in bulk to be used over a period of time, usually a year.
Initial Visual Inspection
As I have mentioned above, this pipe was initially handled by Abha and she is not in a habit of taking many pictures as she works on each piece of briar. There are not many pictures to give the readers an idea about the condition of the pipe before she had worked her magic and presented me with a nice clean canvas to carry forward my repair and refurbishing tasks. I have included a description of the initial condition of the pipe as documented by her.
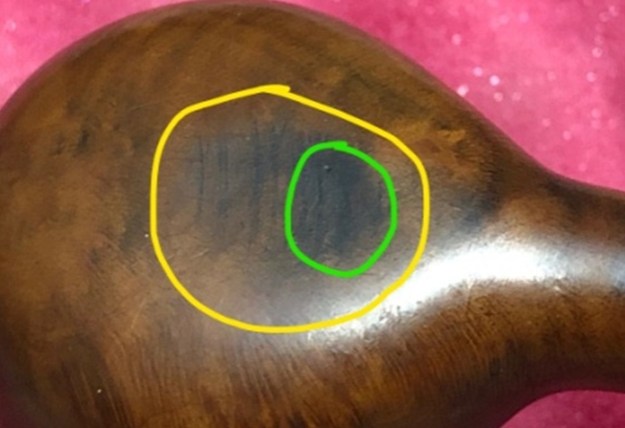
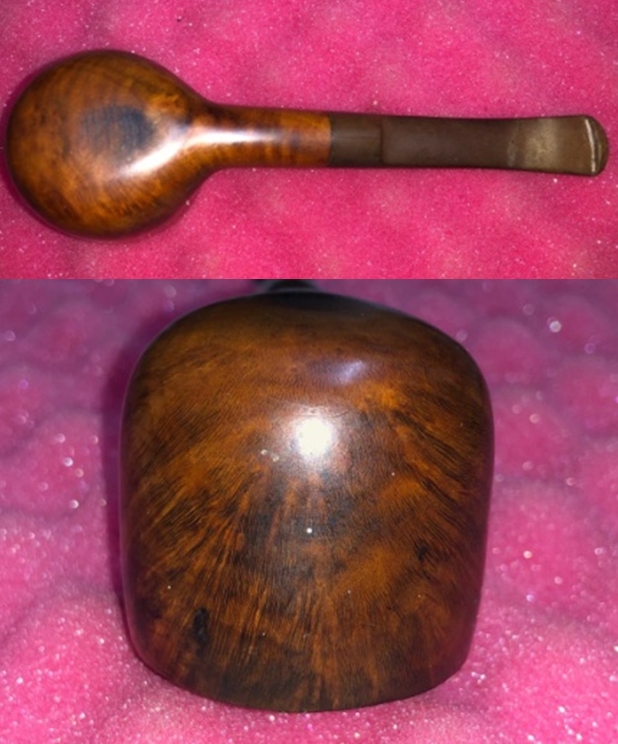
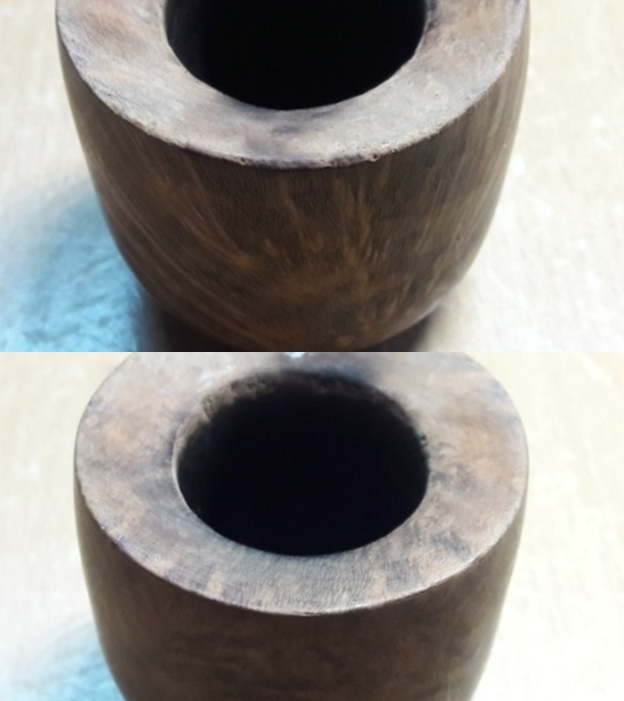
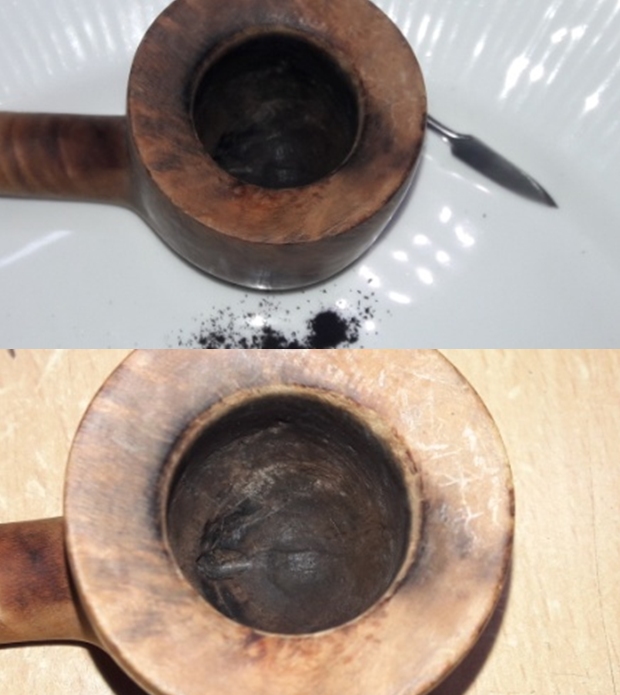
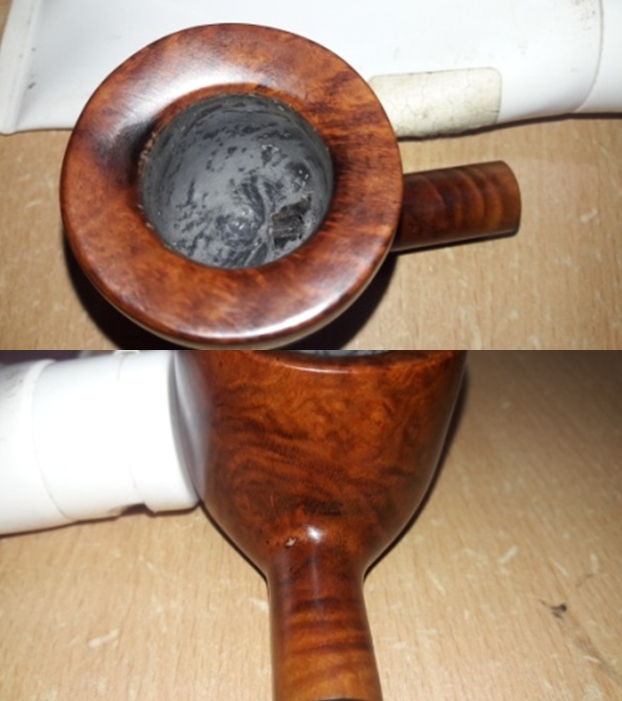
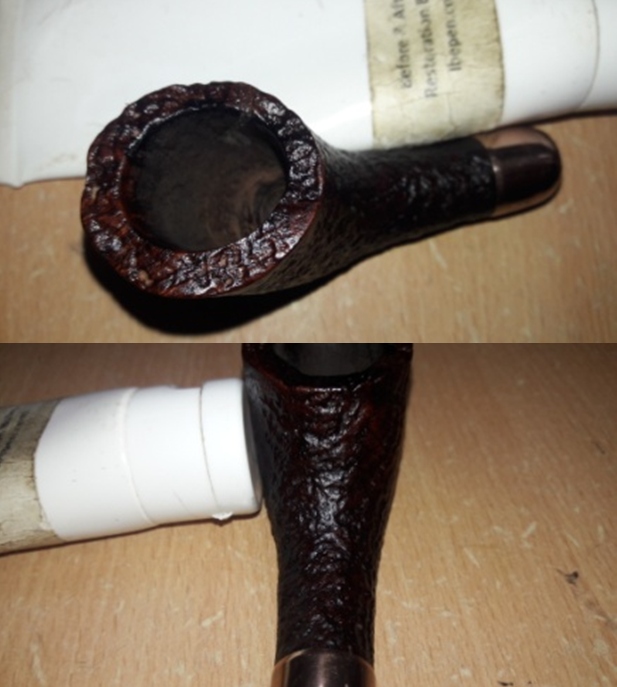
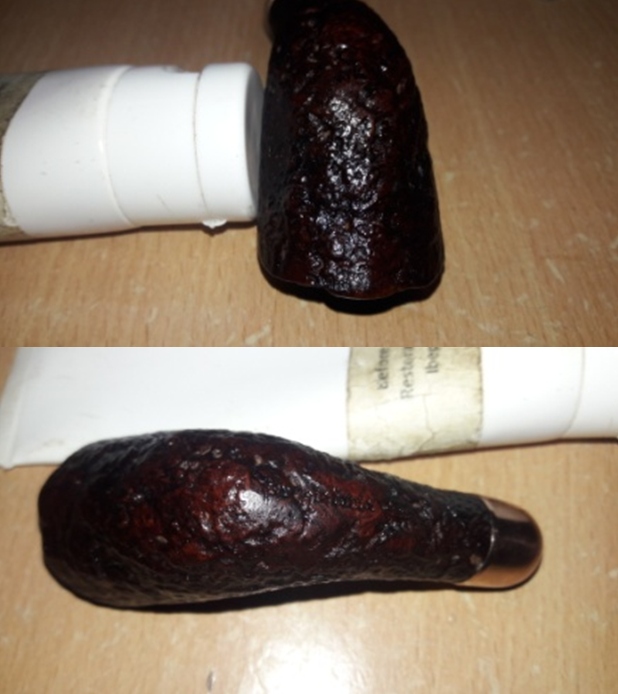
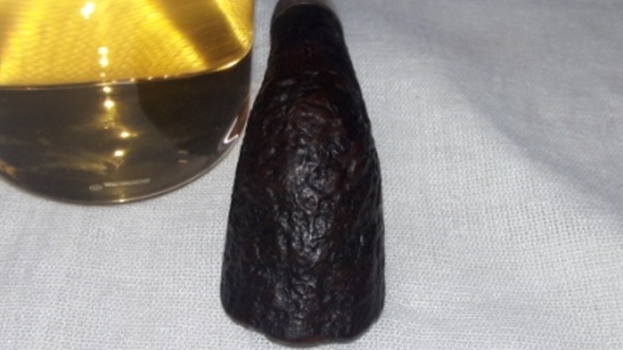
This pipe has a rather small and narrow bowl in a classic Dublin shape with a pronounced forward cant. The chamber tapers towards the foot and has a chamber depth of about 1 ¼ inches. The chamber had an even layer of thick hard cake. There was a heavy overflow of lava over the rim top surface. Through this thick layer of lava, a crack is clearly visible over the rim top (marked with yellow arrows) that extends over both the inner and outer stummel surface on the right side in the 5 o’clock direction. The rim top was darkened considerably and I had suspected a charred inner rim edge in 6 o’clock direction (marked in green). The condition of the inner walls of the chamber can be commented upon after the cake has been taken down to the bare briar. The ghost smells in the chamber are not very strong. The deeply sandblasted stummel surface has very beautiful grain patterns and is covered in dust and grime. The fact that the sandblasted patterns are dusty and filled with dirt is accentuated more due to the contrast of dark and medium brown stains on the stummel and the shank. The briar was looking lifeless and bone dry and had taken on black dull hues. The mortise was full of oils, tars and gunk and air flow was restricted.
The high quality vulcanite stem was deeply oxidized. Some minor tooth chatter and calcified deposit were seen on both the upper and lower stem surfaces in the bite zone and at the bottom of the button edge respectively. The tenon end had accumulated ash and oils/ tars that had dried out on the inside as well as on the outside. The horizontal slot has scratch marks which will have to be addressed.  Initial Cleaning By Abha…
The initial cleaning on this pipe was done by Abha, my wife (she has cleaned up around 40-50 pipes and these have now reached me for further restoration). She reamed out the complete cake and further smoothed out the chamber walls with a folded piece of 220 grit sand paper. She cleaned out the internals of the shank with pipe cleaners and alcohol and cotton buds. She followed the internal cleaning of the shank with external cleaning of the stummel using Murphy’s Oil soap and hard bristled tooth brush and dried it with paper napkins and cotton cloth.
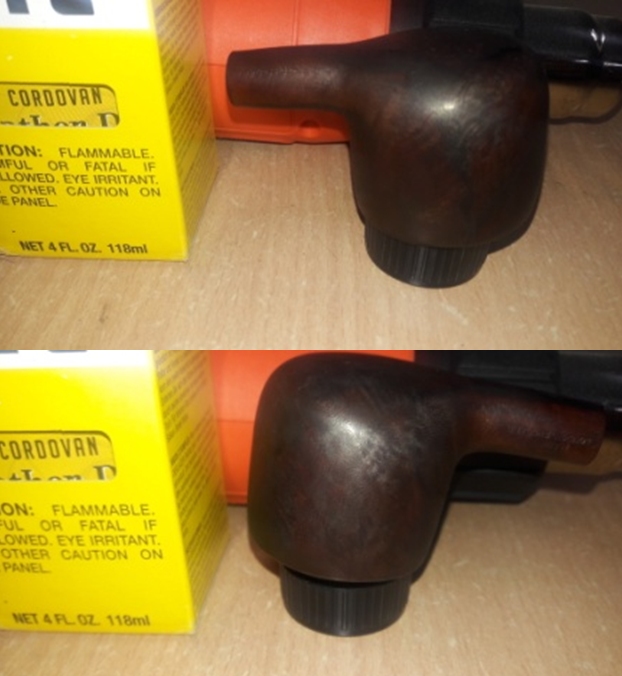
Next she cleaned out the internals of the stem air way and immersed it in “Before and After Deoxidizer” solution along with the stem of other pipes in line for restoration. Once the stem had soaked overnight, she cleaned the stem under running warm water and scrubbed the raised oxidation from the stem surface using scotch brite pad. She further removed the oxidation by scrubbing the stem with 0000 grade steel wool and applied a little olive oil to rehydrate the stem.
The Process
The stummel crack was something that would essentially require materials and equipment that are available to me at my work place; therefore, I had no option but to relegate the stummel repairs to a later date.
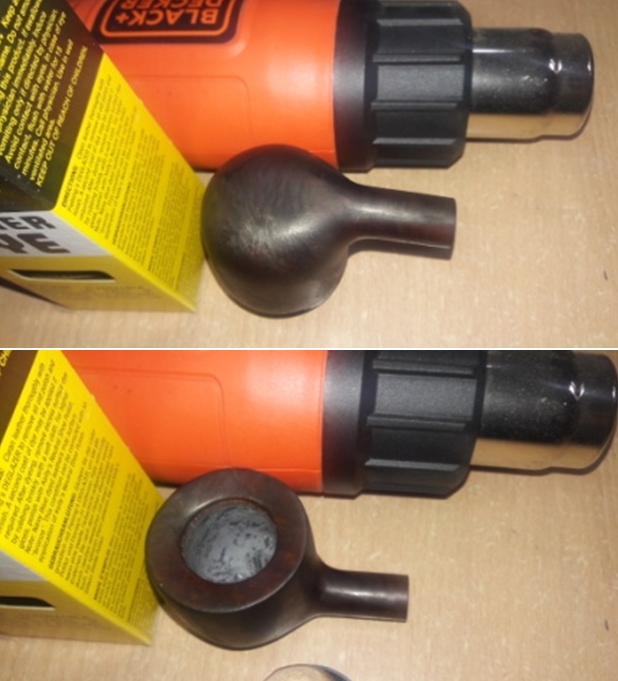
I start this project by addressing the tooth chatter on either surface in the bite zone. Since vulcanite has a property to expand and regain its original shape when heated, I heat the bite zone with a candle flame to raise the tooth chatter to the surface. The deeper bite marks were filled with a mix of CA superglue and activated charcoal and set aside to cure.
 Once the fills had cured, using a flat needle file, I reshaped the button and roughly matched the fills with the rest of the stem surface. I further fine tuned the match by sanding the filled area with a folded piece of 220 grit sand paper pinched between my thumb and forefinger. I followed it up by sanding the entire stem surface using 400, 600, 800 grit sand papers and finally with a piece of 0000 grade steel wool. This serves to remove the deep seated oxidation and also reduces the sanding marks of the more abrasive sand papers. I also sharpened the button edges while sanding. I wiped the stem with a cotton swab and alcohol to remove all the oxidation and sanding dust from the surface. I applied a little Extra Virgin Olive oil over the stem and set it aside to be absorbed by the vulcanite.
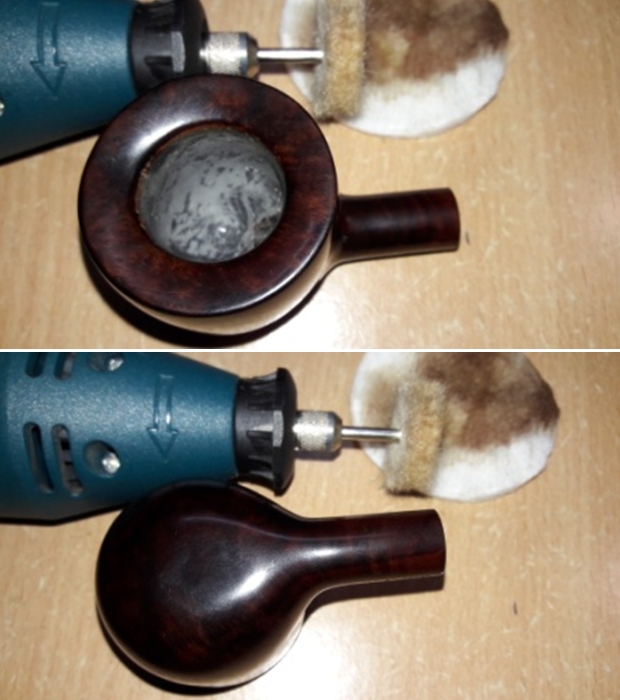
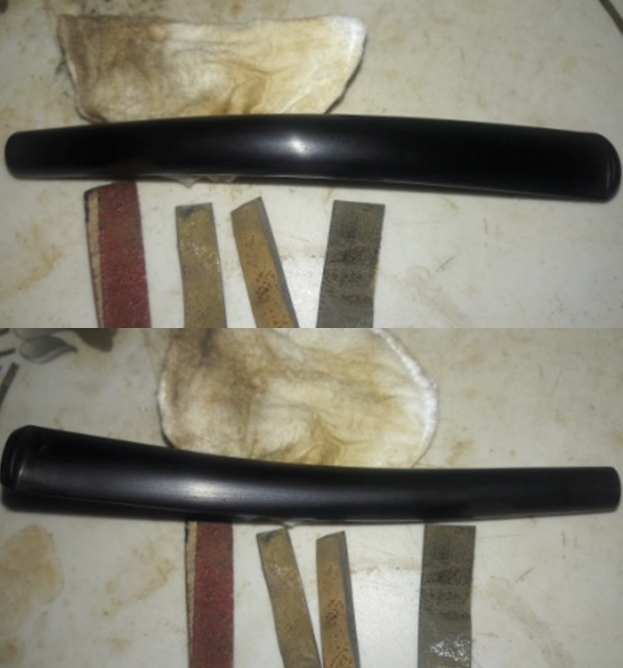 To bring a deep shine to the vulcanite stem, Abha polished it by wet sanding with 1500 to 2000 grit sandpapers followed by further wet sanding with 3200 to 12000 grit pads. She wiped the stem with a moist cloth after each pad and rubbed it down with Extra Virgin Olive oil to rejuvenate the vulcanite. The finished stem is shown below.
  Further repair and refurbishing work would have to be put on hold till I rejoin my work place.
Part II
Finally back at my work place…… After enjoying a compulsorily extended leave of three months with family and having honed my culinary and domestic chores skill set, I was happy to rejoin my duty and get back to completing the pending pipe restorations.
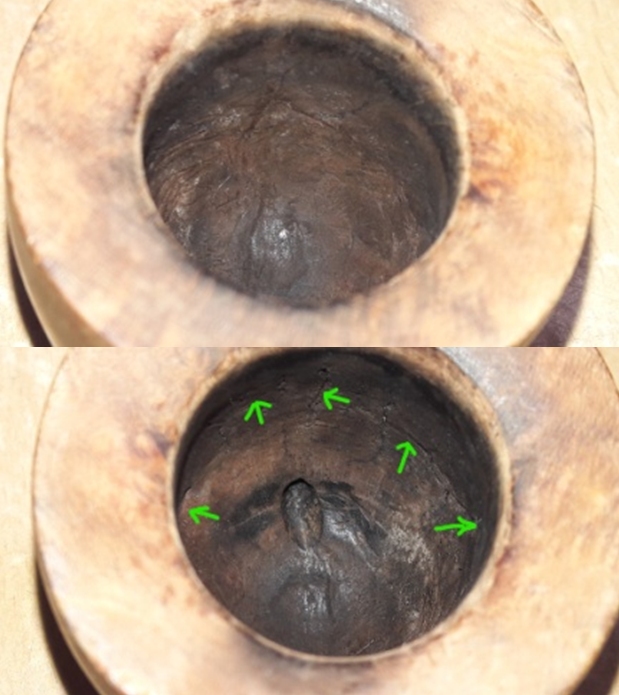
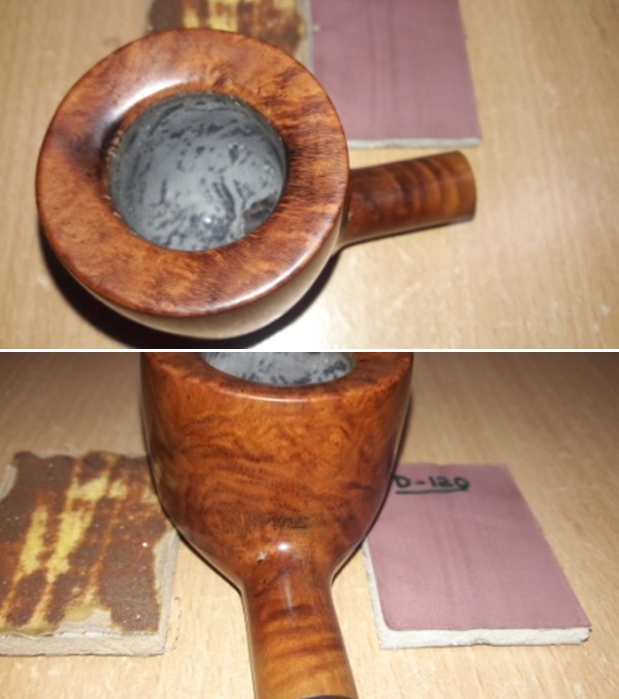
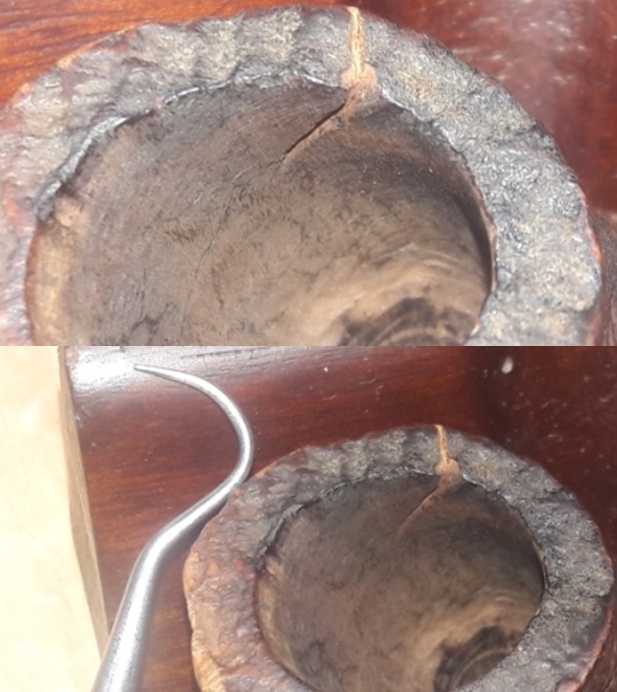
I took a closer look at the crack on the right side of the stummel in the 5 ‘O’ clock direction. This crack extends over the rim top surface and in to the chamber. With my sharp dental pick, I probed and removed all the charred briar wood from the crack and also dislodged the entire lava overflow that had embedded itself in to the crack over the rim top. It was a big relief to note that the crack did not go all the way to the outside of the stummel. Here are a couple of close up pictures of the crack to the chamber wall and outer stummel surface at this stage. I conferred with my Guru and mentor, Steve, over Face Time video call and after seeing the crack, he concurred that it was best to fill just the crack inside the chamber with J B Weld followed by a coating of activated charcoal and yogurt to the entire chamber for further protection. 
 Before proceeding with further repairs, I decided to thoroughly clean the rim top and the stummel again to remove all the dirt and dust that had accumulated since last one year and also to completely remove the lava overflow from the rim top surface. I cleaned the stummel using Murphy’s Oil soap and a hard bristled tooth brush. With a brass wired brush, I cleaned the rim top to remove the lava overflow. The stummel and the rim top have cleaned up nicely.
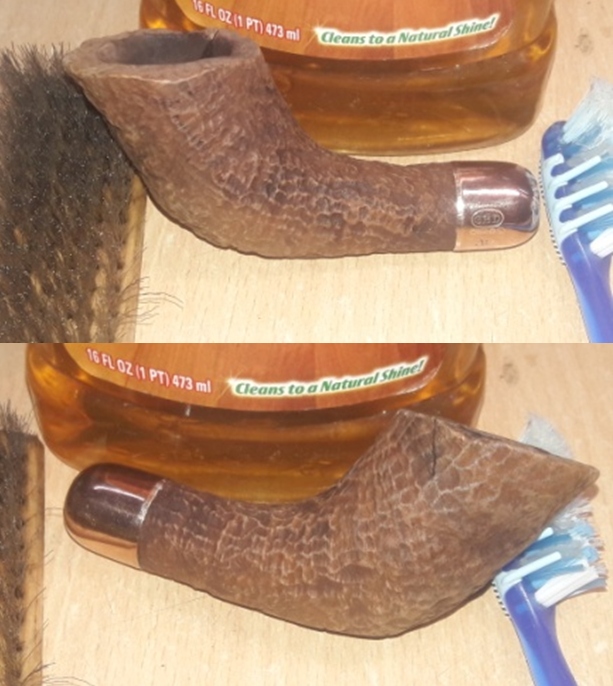
 Next I decided to address the crack to the stummel surface. I marked the end point of the crack on with a sharp dental tool under magnification. This helps to identify the end point later with naked eye and also provides initial traction for the drill bit to bite in. With a 1 mm drill bit mounted on to my hand held rotary machine, I drilled a counter hole at the end of the crack, taking care not to go too deep and end up drilling a through-hole. I had to mark and drill a second counter hole as I later realized that the crack extended slightly below the first one that I had drilled. I ran the sharp dental tool along the crack to remove the dirt and debris that may have been lodged in the crack.
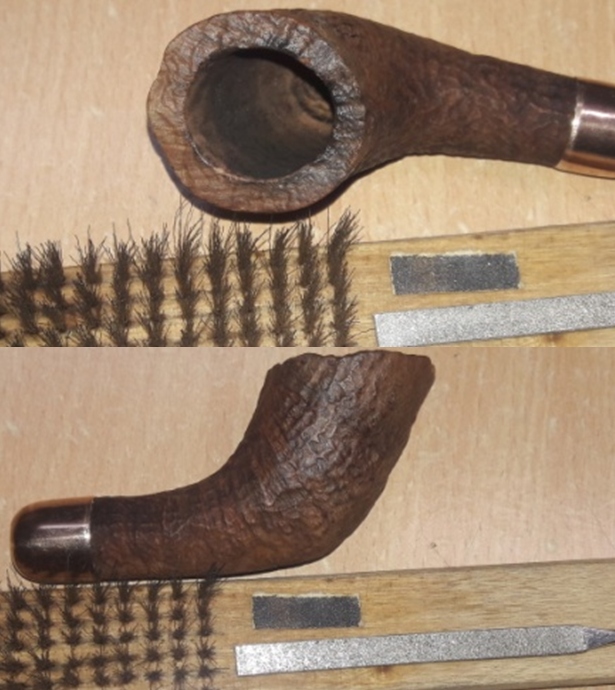
 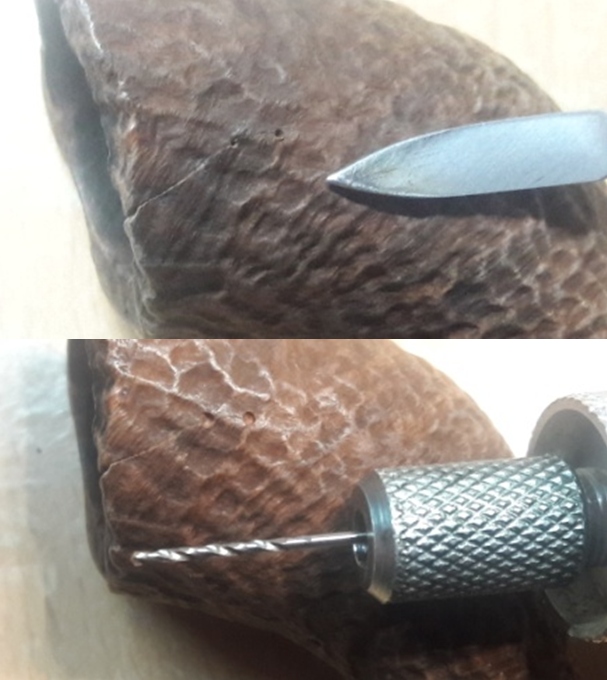 I filled the drilled holes and the crack to the stummel surface with a mix of CA superglue and briar dust. I also filled the crack at the rim top surface with the mix of superglue and briar dust and set the stummel aside for the fills to cure. A few hours later, the fills had hardened completely. I sand them down with a flat head needle file to achieve a rough match with the rest of the stummel. I fine tuned the match with the rest of the surface by further sanding with a piece of 180 grit sandpaper. I used a tightly folded 180 grit sand paper to sand the fills and had carefully moved along the ridges of the sandblast to achieve a near perfect match. I vigorously brushed the rim top with a hard bristled brass wired brush to further blend the fill with the rest of the rim top surface.
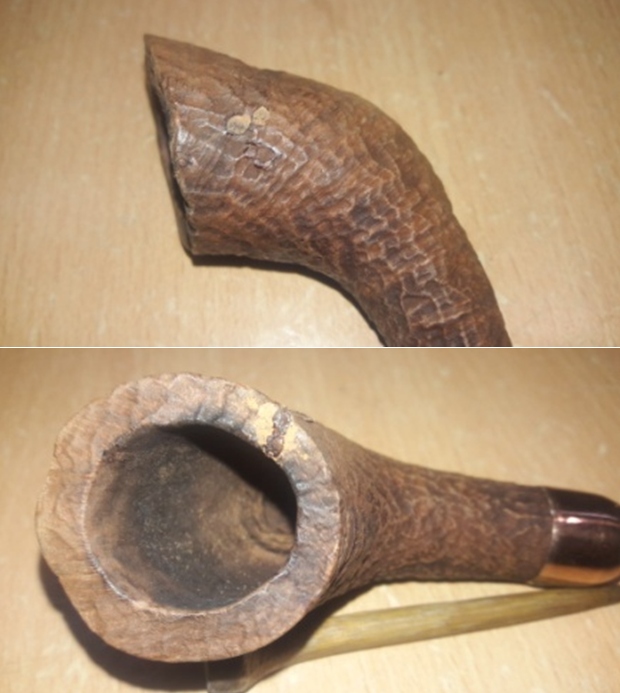
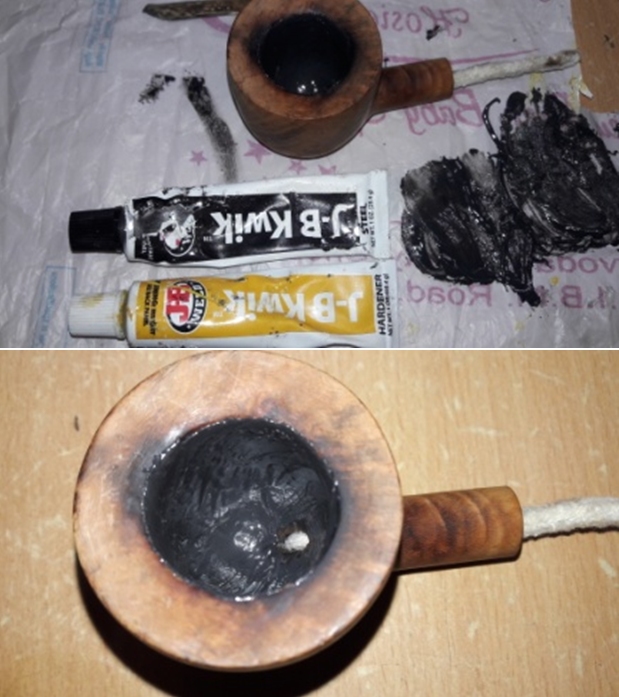
 Now that the external repairs are done, I decided to address the crack to the wall of the chamber. To protect the crack from coming in to direct contact with the burning tobacco and also to prevent the heat from reaching the external crack to the stummel and causing a burnout, I plan, firstly, to fill only the crack of the chamber with J B Weld followed by a second coat of activated charcoal and yogurt to the entire chamber which would assist in faster cake formation. J B Weld is a two-part epoxy Cold Weld that consists of two parts; hardener and steel which are mixed in equal parts in a ratio of 1:1 with hardening time of 5-6 minutes and complete curing time of 6-8 hours. I poured the contents of the two tubes and mixed it well. With a flat bamboo frond, I applied this mix and filled the intended crack. I worked fast to ensure a complete and even filling of the crack and set the stummel aside for the J B Weld to harden.
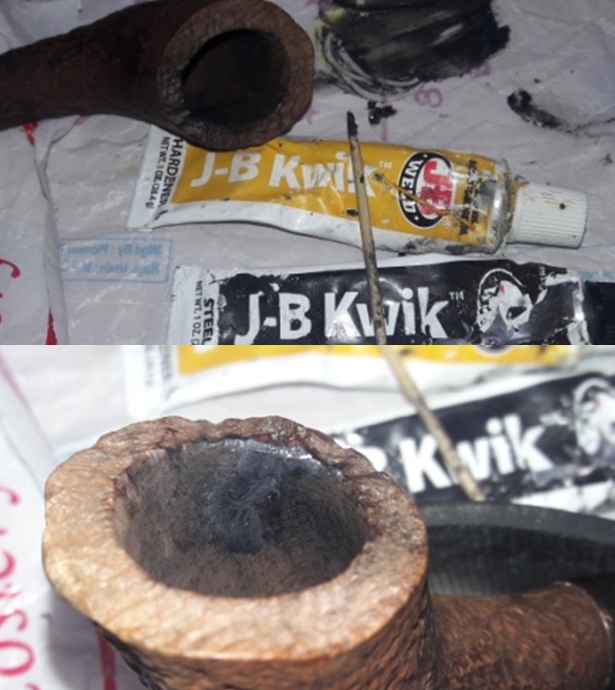 By the next afternoon when I got back to working on this pipe, the J B Weld coat had completely cured and hardened considerably. With a folded piece of 150 grit sandpaper, I sand the weld coating to a smooth surface till I had as thin a coat as was essential to protect and insulate the crack from the direct heat of the burning tobacco. The Weld coat has completely covered only the crack which can be seen as a thin line. I am very pleased with the repairs at this stage.
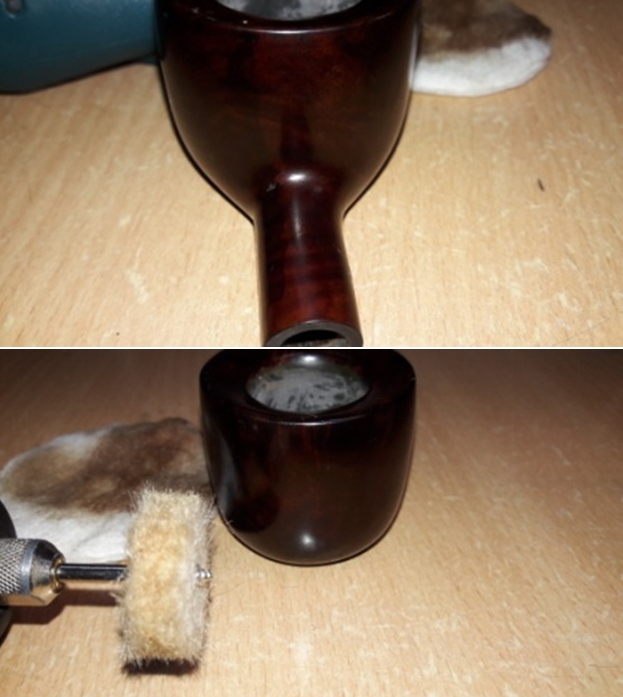
 I refreshed the stem logo by first coating the logo with a white correction liquid and once it had dried, I wiped it lightly with a cloth. I polished the stem surface with “Before and After Extra fine” stem polish developed by Mark Hoover. This polish helps in removing the minor scratches left behind due to sanding while imparting a nice shine to the stem.
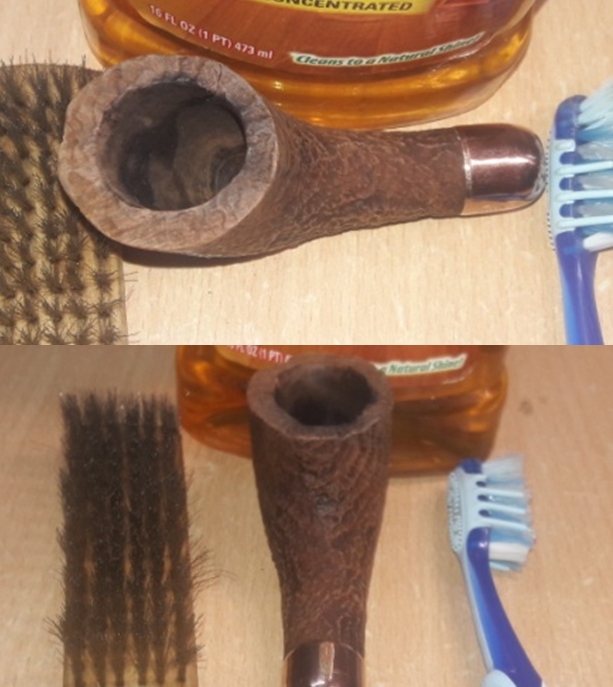
 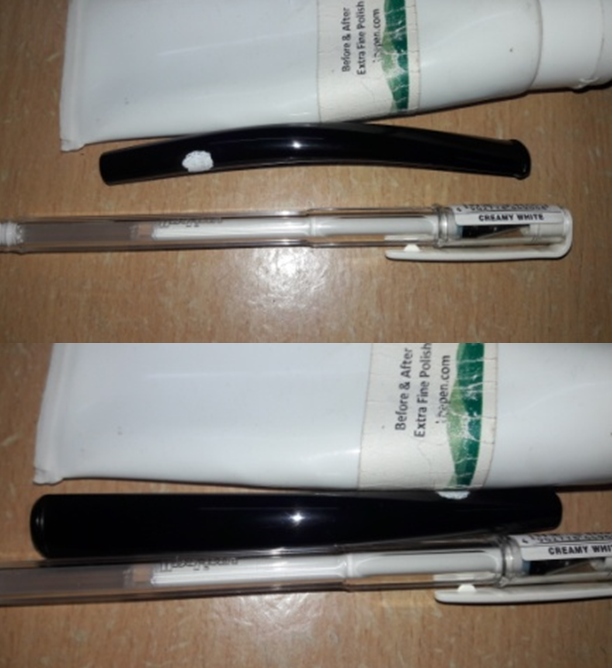 Next, I rubbed a small quantity of “Before and After Restoration Balm” deep in to the briar with my finger tips and let it rest for a few minutes. The balm almost immediately works its magic and the briar now has a nice vibrant appearance with the beautiful grain patterns displayed in their complete splendor. I further buffed it with a horse hair brush. The dark browns of the raised portions of the sandblast contrasts beautifully with the rest of the dark stummel and makes for a visual treat. It really is a nice piece of briar.
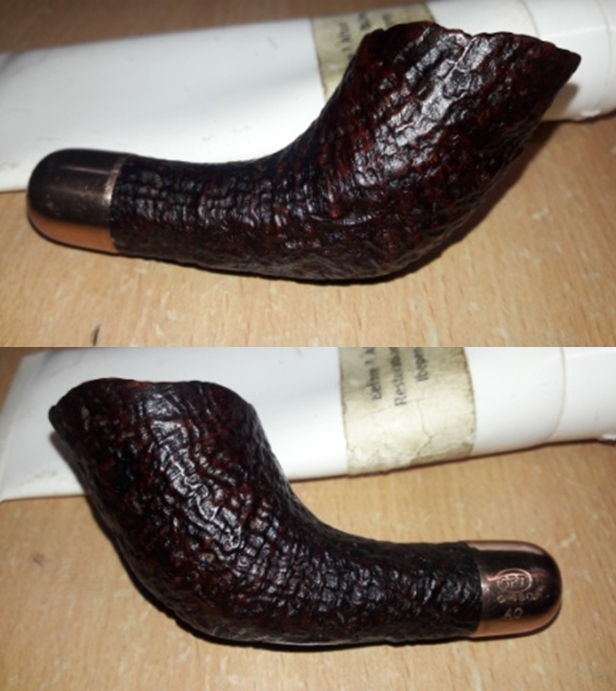
 Now that the cosmetic aspects of this pipe have been dealt with, all that remained was the functional aspect that needs to be taken care of. The J B Weld coated crack needs to be protected from the direct heat of the burning tobacco and for this; I coat the complete chamber walls with a mix of activated charcoal and yogurt and set it aside to harden naturally. The mix has to be of the right consistency; neither too thick nor too runny. It should be of a consistency that is thick enough to spread easily, evenly and stick to the walls. Also the coating should not be very thick. A thin film is all that is required. Another important aspect to remember is that it is essential to insert a pipe cleaner in to the mortise and through the draught hole for two reasons; first is obviously to keep the draught hole from getting clogged and secondly, the pipe cleaner absorbs all the moisture from the mix and helps in faster and even drying of the coat.
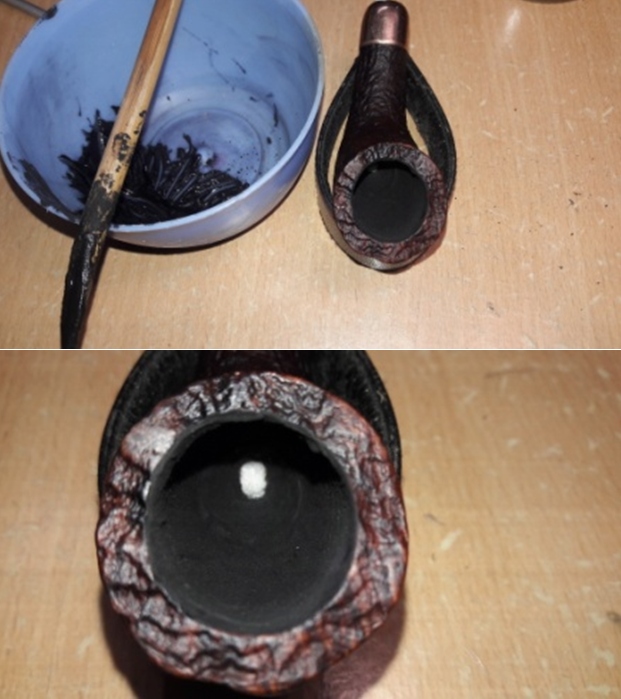 To put the finishing touches, I mount a cotton cloth buffing wheel on to my hand held rotary tool and polished the stem with Blue Diamond compound. This compound helps to remove the minor scratch marks that remain from the sanding.
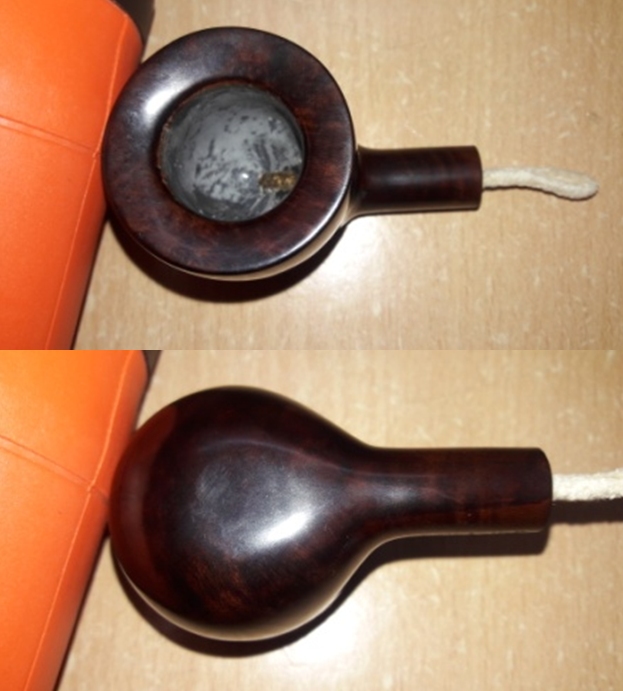
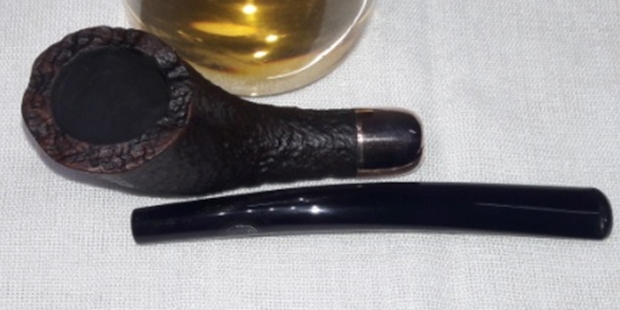
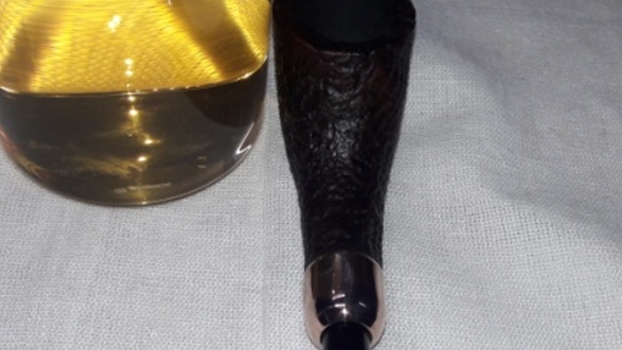
 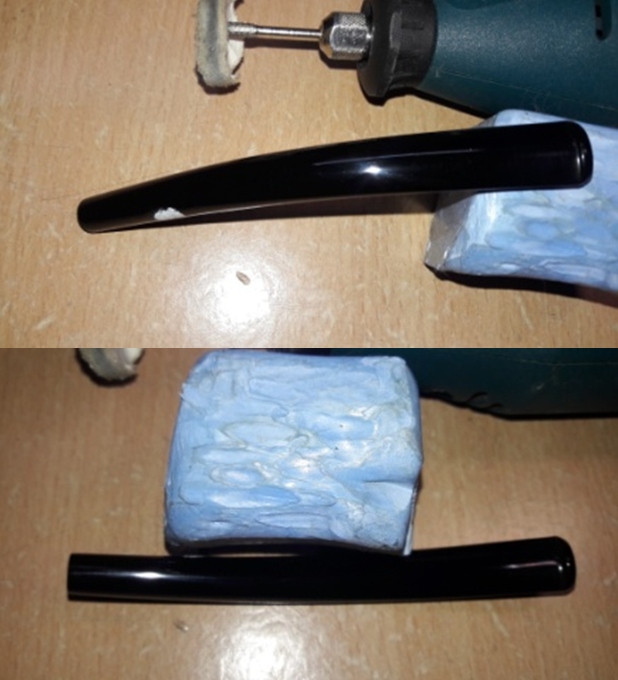 Next, I mount another cotton buffing wheel that I have earmarked for carnauba wax and applied several coats of the wax. I finished the restoration by giving the entire pipe a rigorous hand buffing using a microfiber cloth to raise the shine further. Lastly, I polish the 9 carat gold ferrule with a jeweler’s cloth to a nice and radiant shine. The blast pattern on this finished pipe looks amazingly beautiful and coupled with the vintage, shape rarity and the contrast that the gold ferrule imparts, makes it quite a desirable pipe. This pipe shall be joining my small collection of GBDs to be admired and be happy that I have restored it to its former beauty and functionality.


 P.S. In one of my previous blogs, I wrote that the question “Why do I enjoy bringing these old battered and discarded pipes back to life?” had popped up in my mind. I gave my third reason in my last write up and in all my subsequent write ups I intend to share with you, my readers my reasons as to why I really love this hobby.
The fourth reason is that every restoration project that I undertake is a new challenge for me. It sets my adrenaline pumping as I see the beauty of the pipe being unraveled before my eyes as I progress through each process of restoration. It helps me keep myself motivated and I wake up to each morning with enthusiasm to address the challenges that any project throws at me. Upon successful completion of repairs and refurbishing of a pipe to make it beautiful and most importantly FUNCTIONAL, gets me to a nice peaceful sleep at night… isn’t that what we all strive for?
I wish to thank each one for sparing their valuable time to read through this write up and each one is in my prayers. Stay home…stay safe!!