Blog by Dal Stanton
 The Greek mythological Phoenix is a long-lived bird that cyclically regenerates or is otherwise born again, according to Wikipedia. It is regenerated out of its own demise, from its own ashes. The images that come to mind are Harry Potter-esque – the Phoenix’s name is Fawkes and “as stated by Dumbledore, they are extremely loyal creatures, and are capable of arriving to the aid of beings who share a similar devotion. This was how Fawkes arrived to assist Harry in slaying the Basilisk in the Chamber of Secrets during his second year at Hogwarts” (LINK). The tear of the Phoenix could also bring healing and recovery from near death.
What does the Phoenix have to do with pipes and Billiards? True confession: I enjoy immensely working on vintage pipes with well-known and sought names like Dunhill, Savinelli, Comoy’s, Stanwell, GBD, Jeantet and BBB. But truth be known, I LOVE taking the throwaways, the discarded, the ‘only good for the waste heap’ pipes – that make most people cringe and reach for latex gloves – to take these pipes and see what I can do to help. There is a satisfaction at the end of such projects that translates into, ‘Wow! Who could have imagined…!” The discovery of hidden beauty that was always there, but no one took the time to help it emerge. I guess, at the core of it is the sense that sometimes people are treated in such a way or may view themselves in such a way that does not reflect the often hidden value that people intrinsically have. Helping is seeking to bring new life out of the ashes of the past.

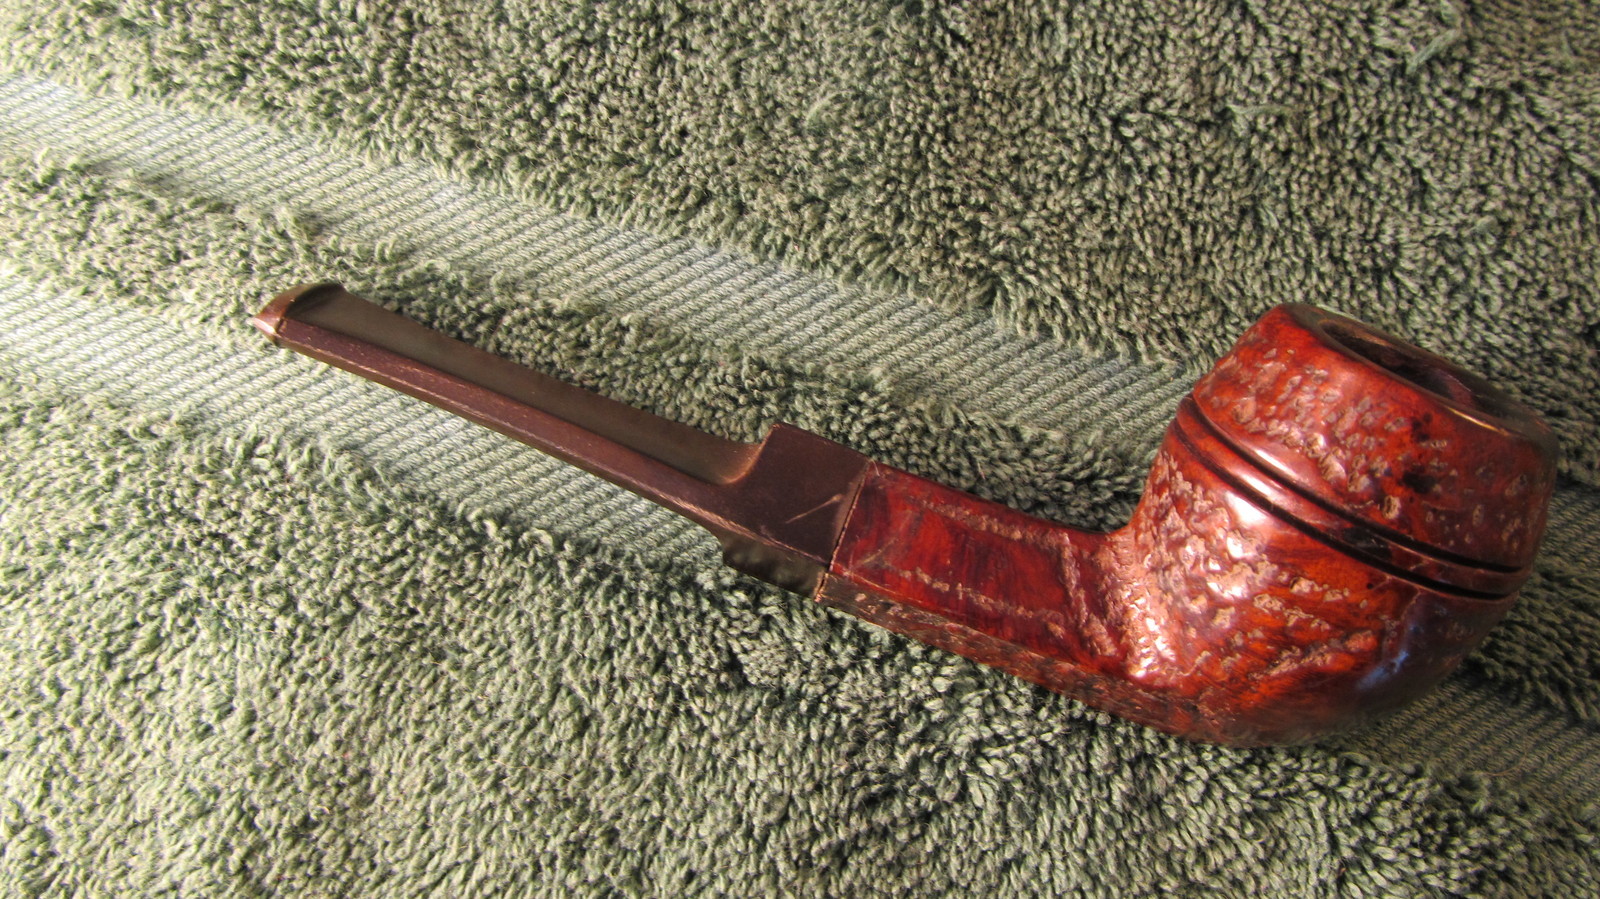
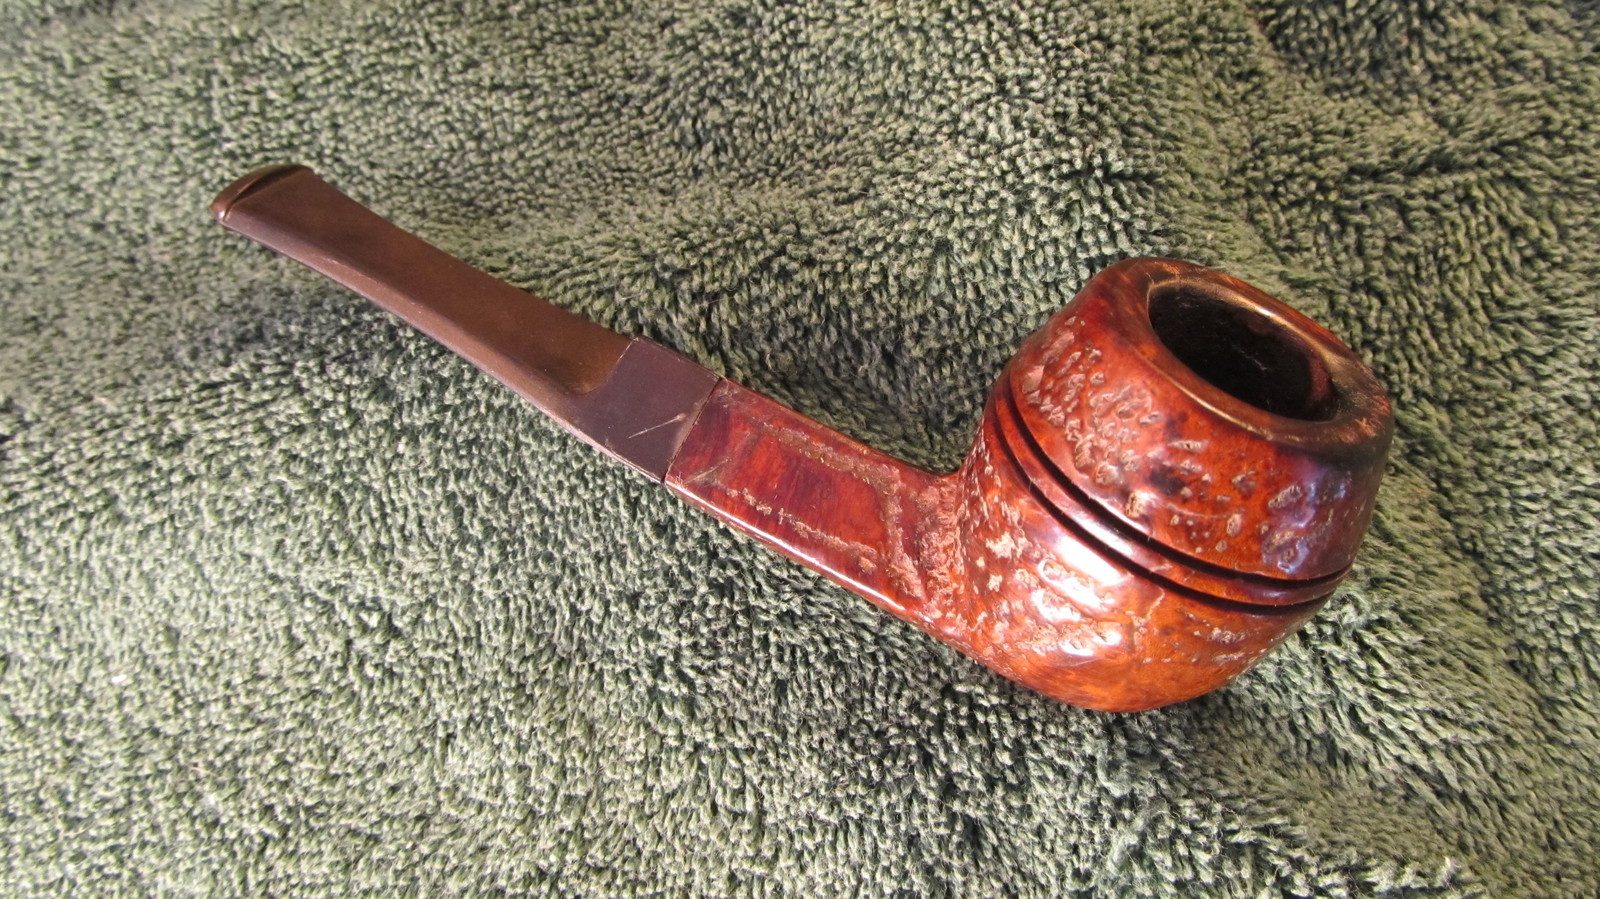
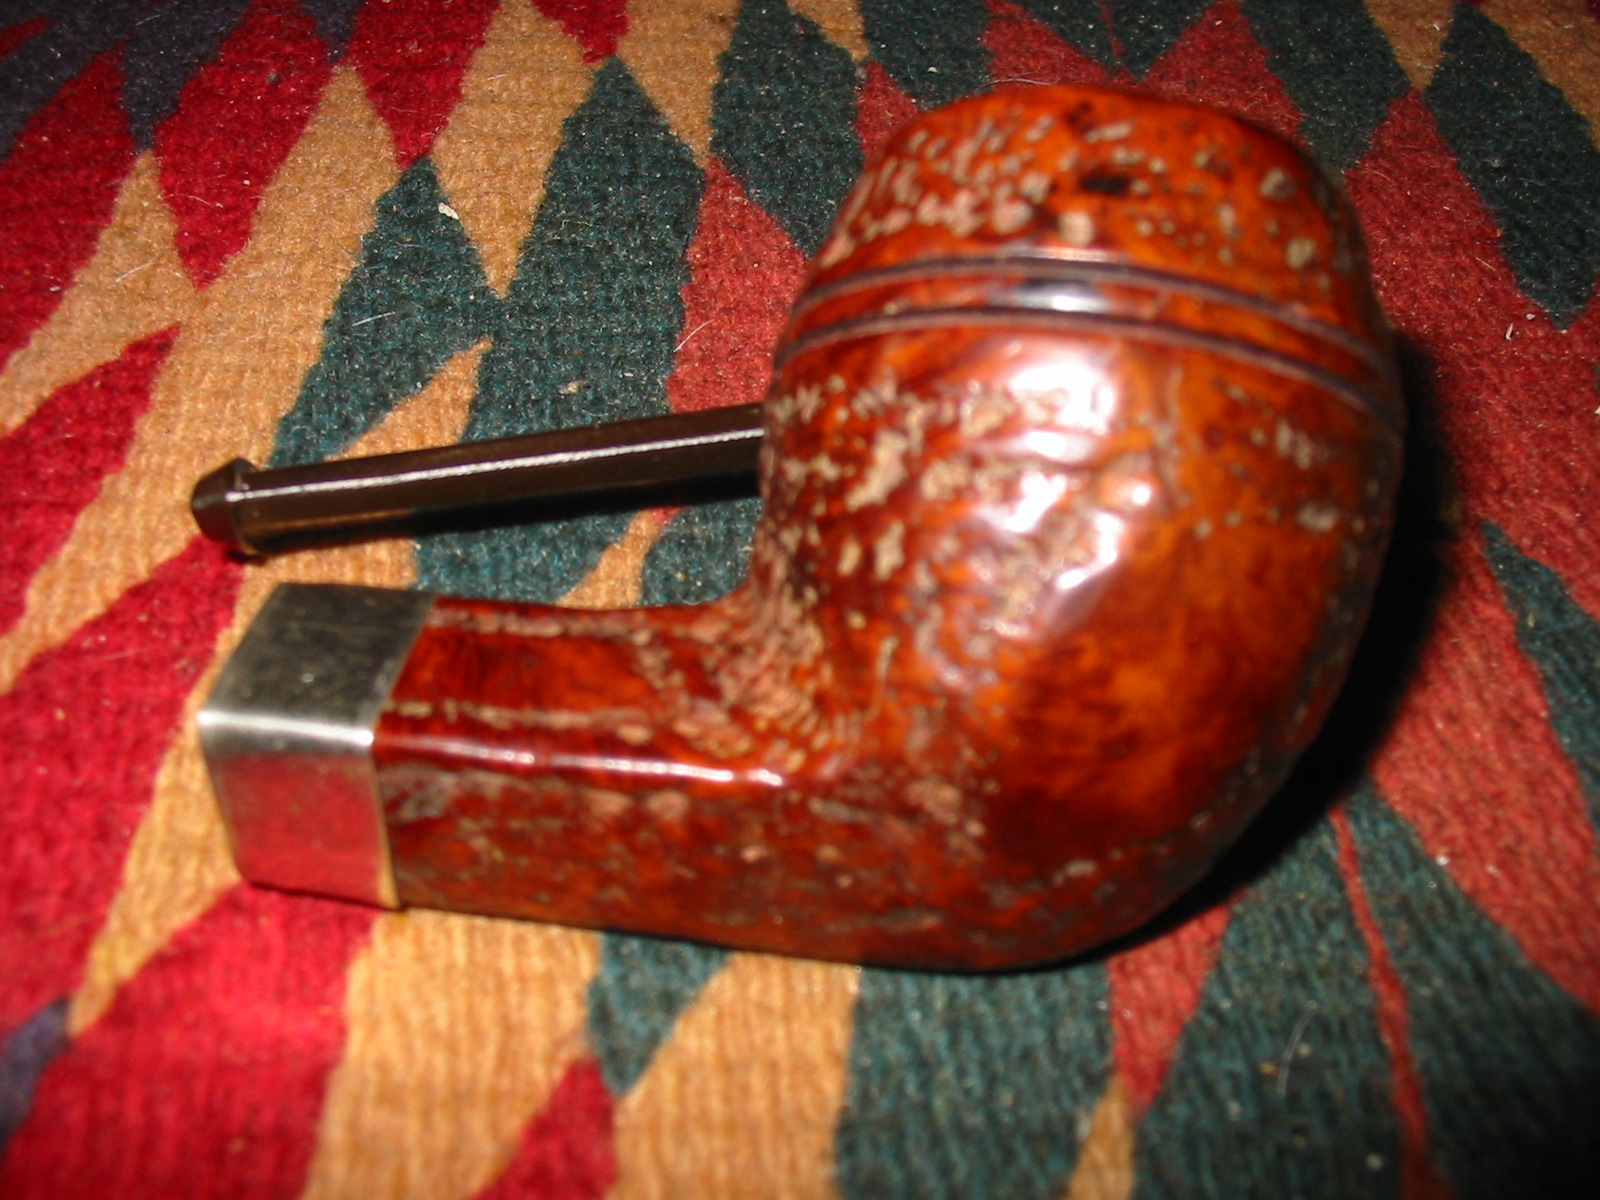
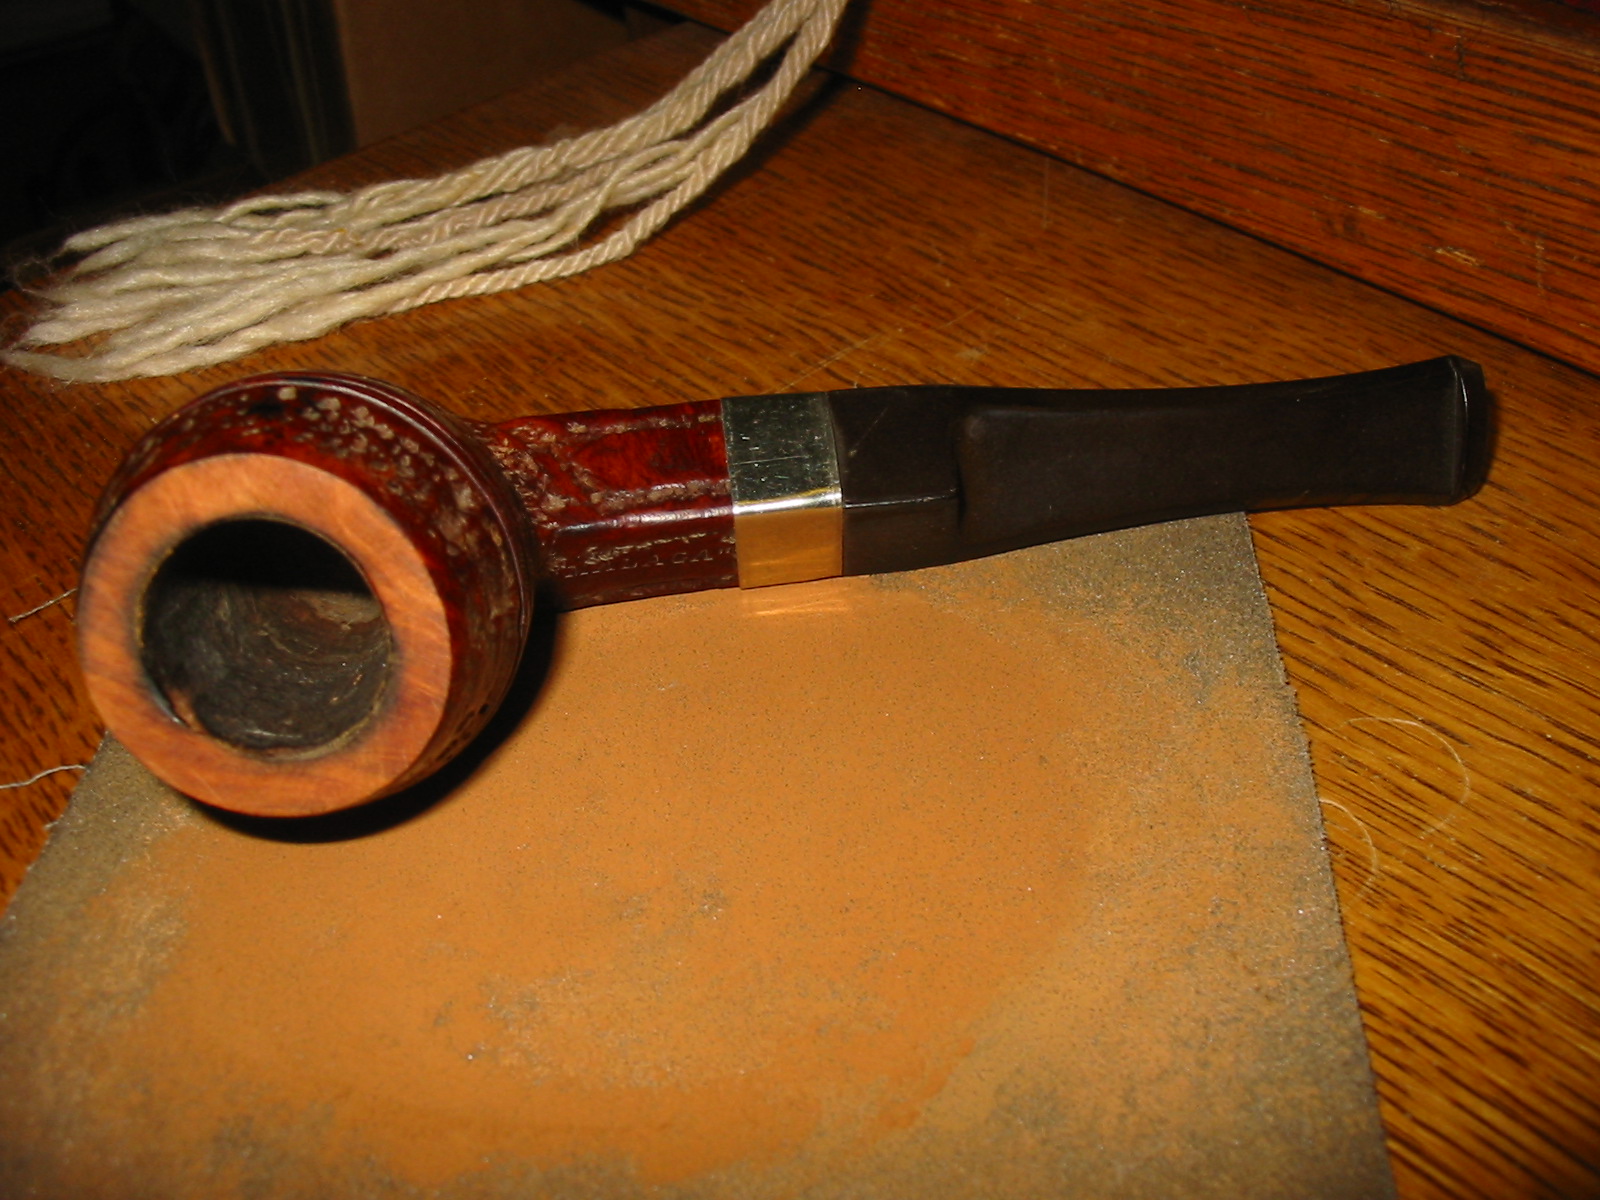
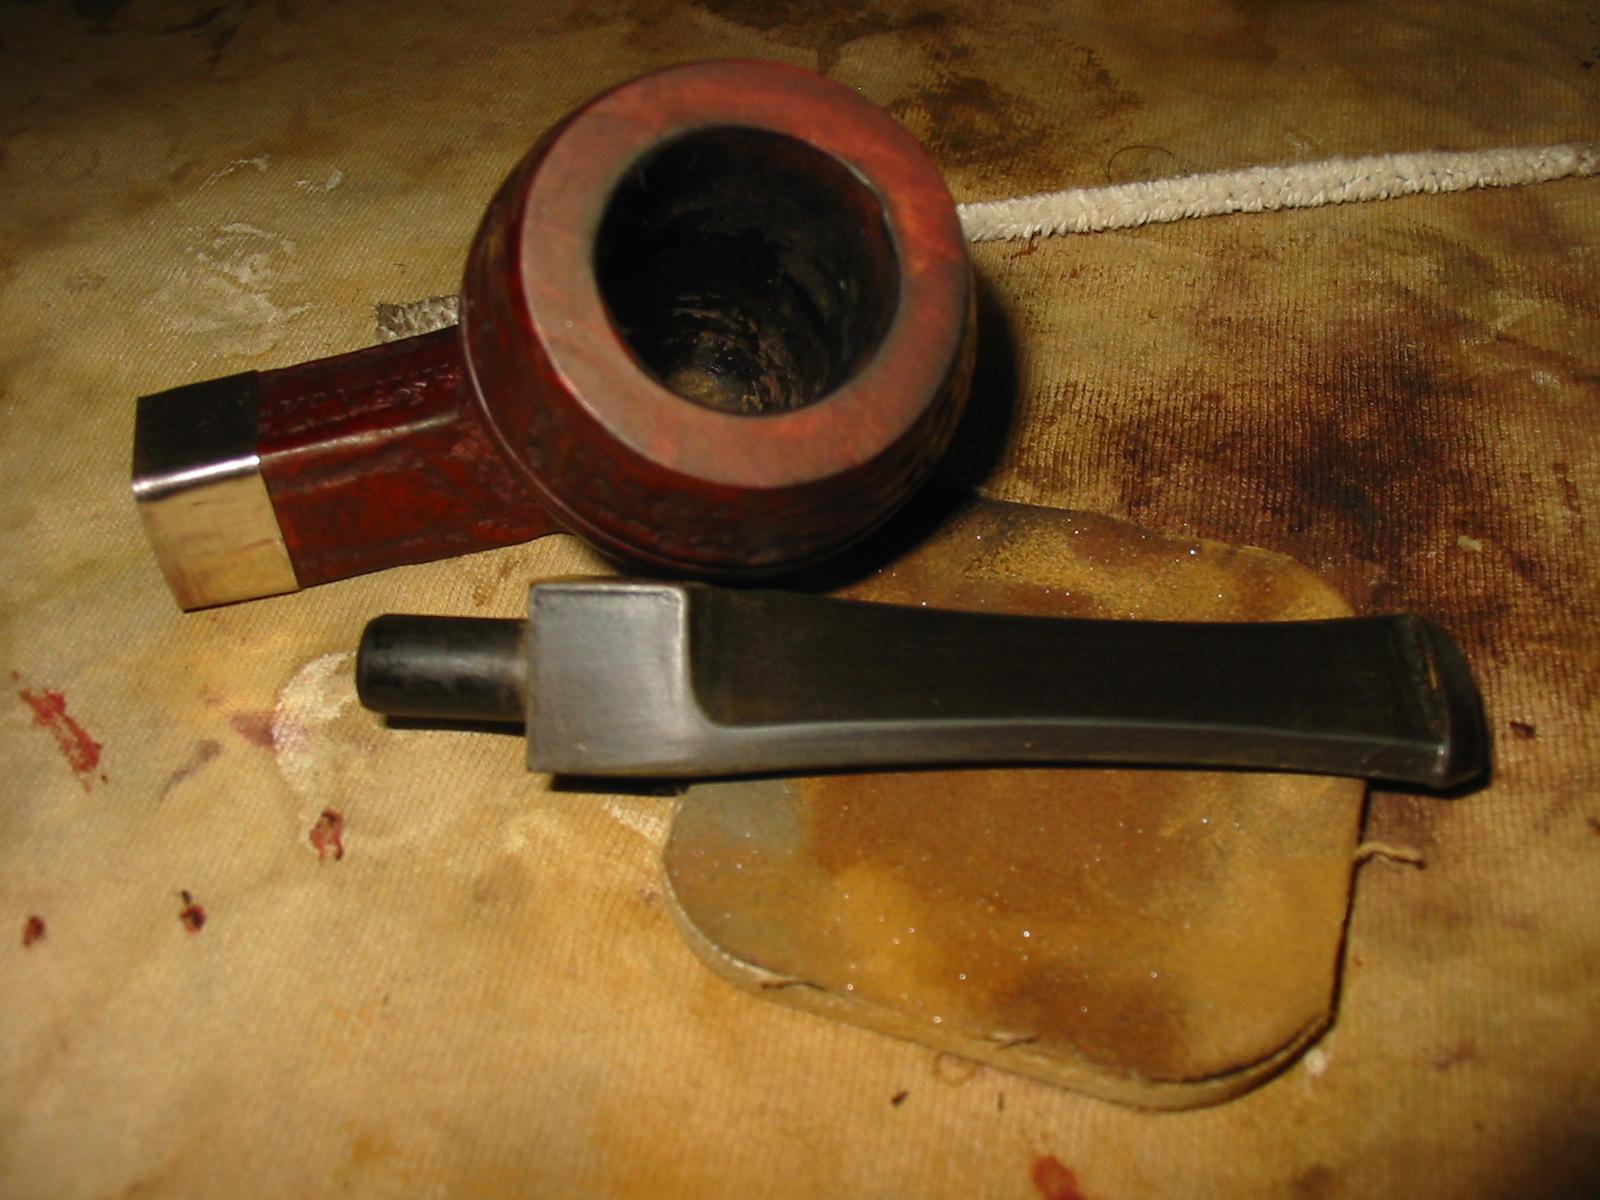
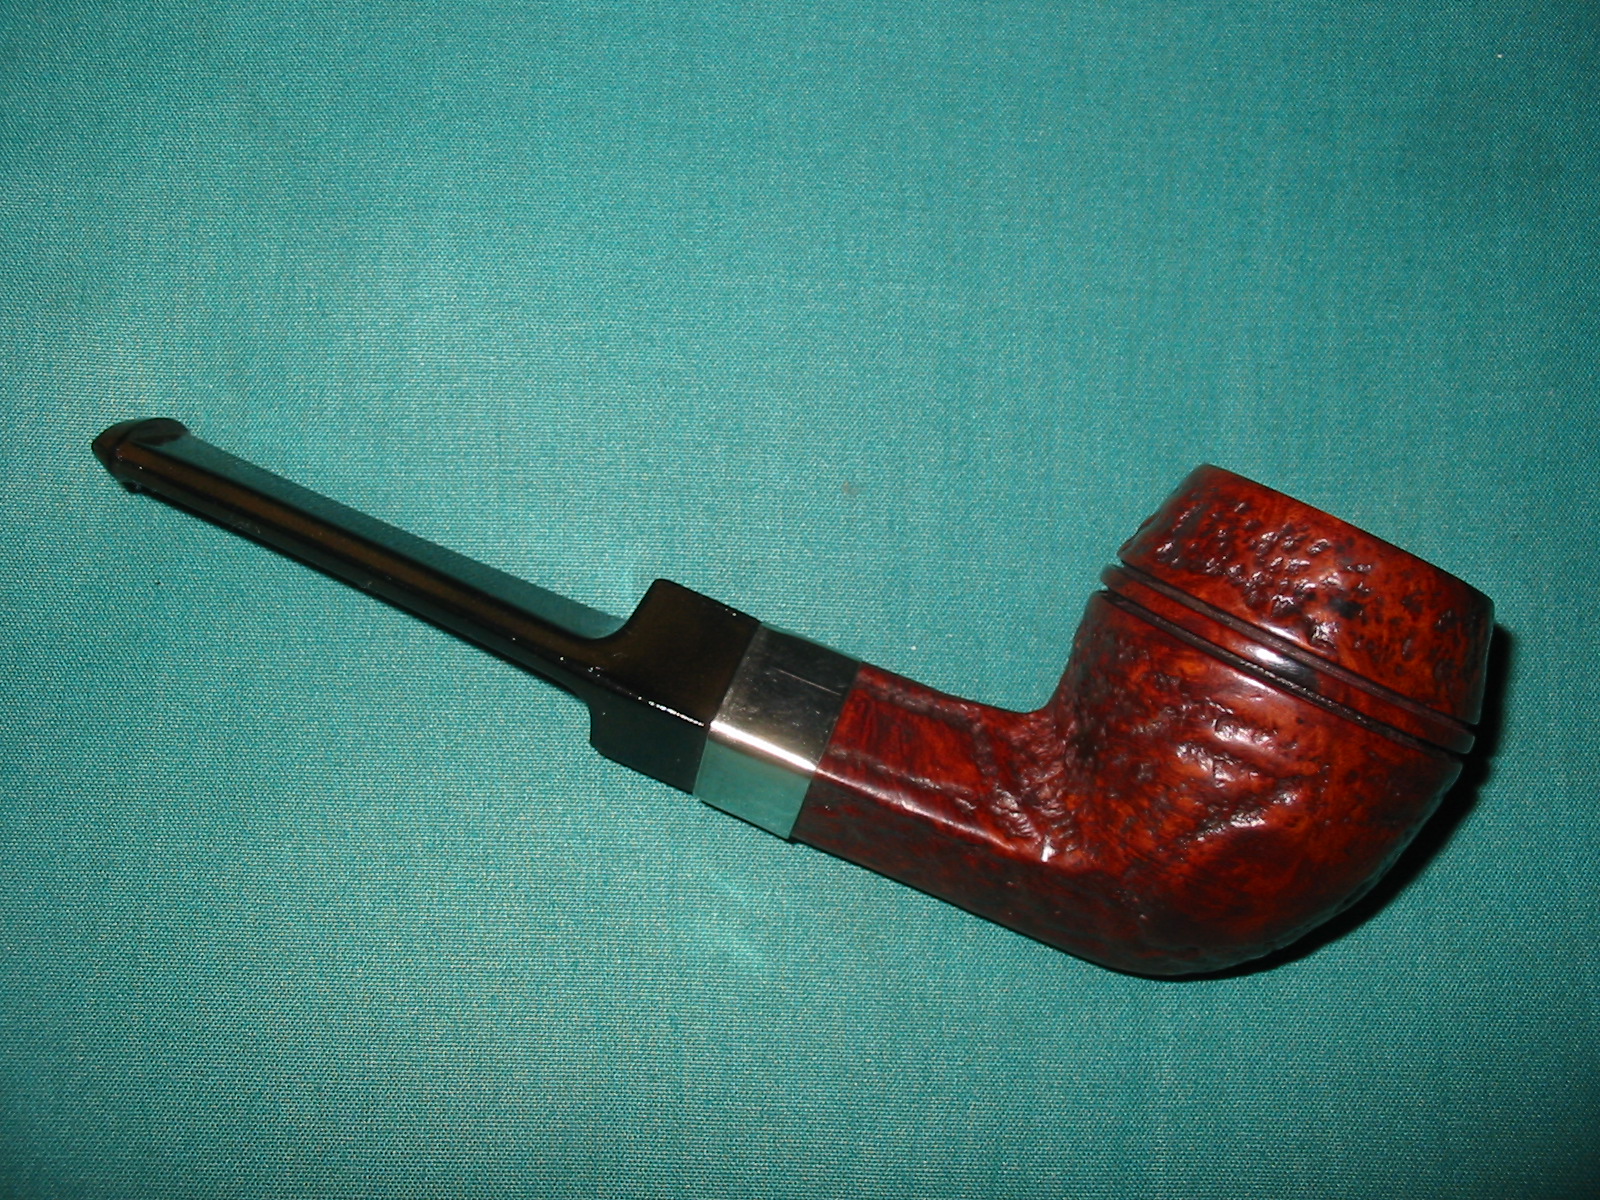
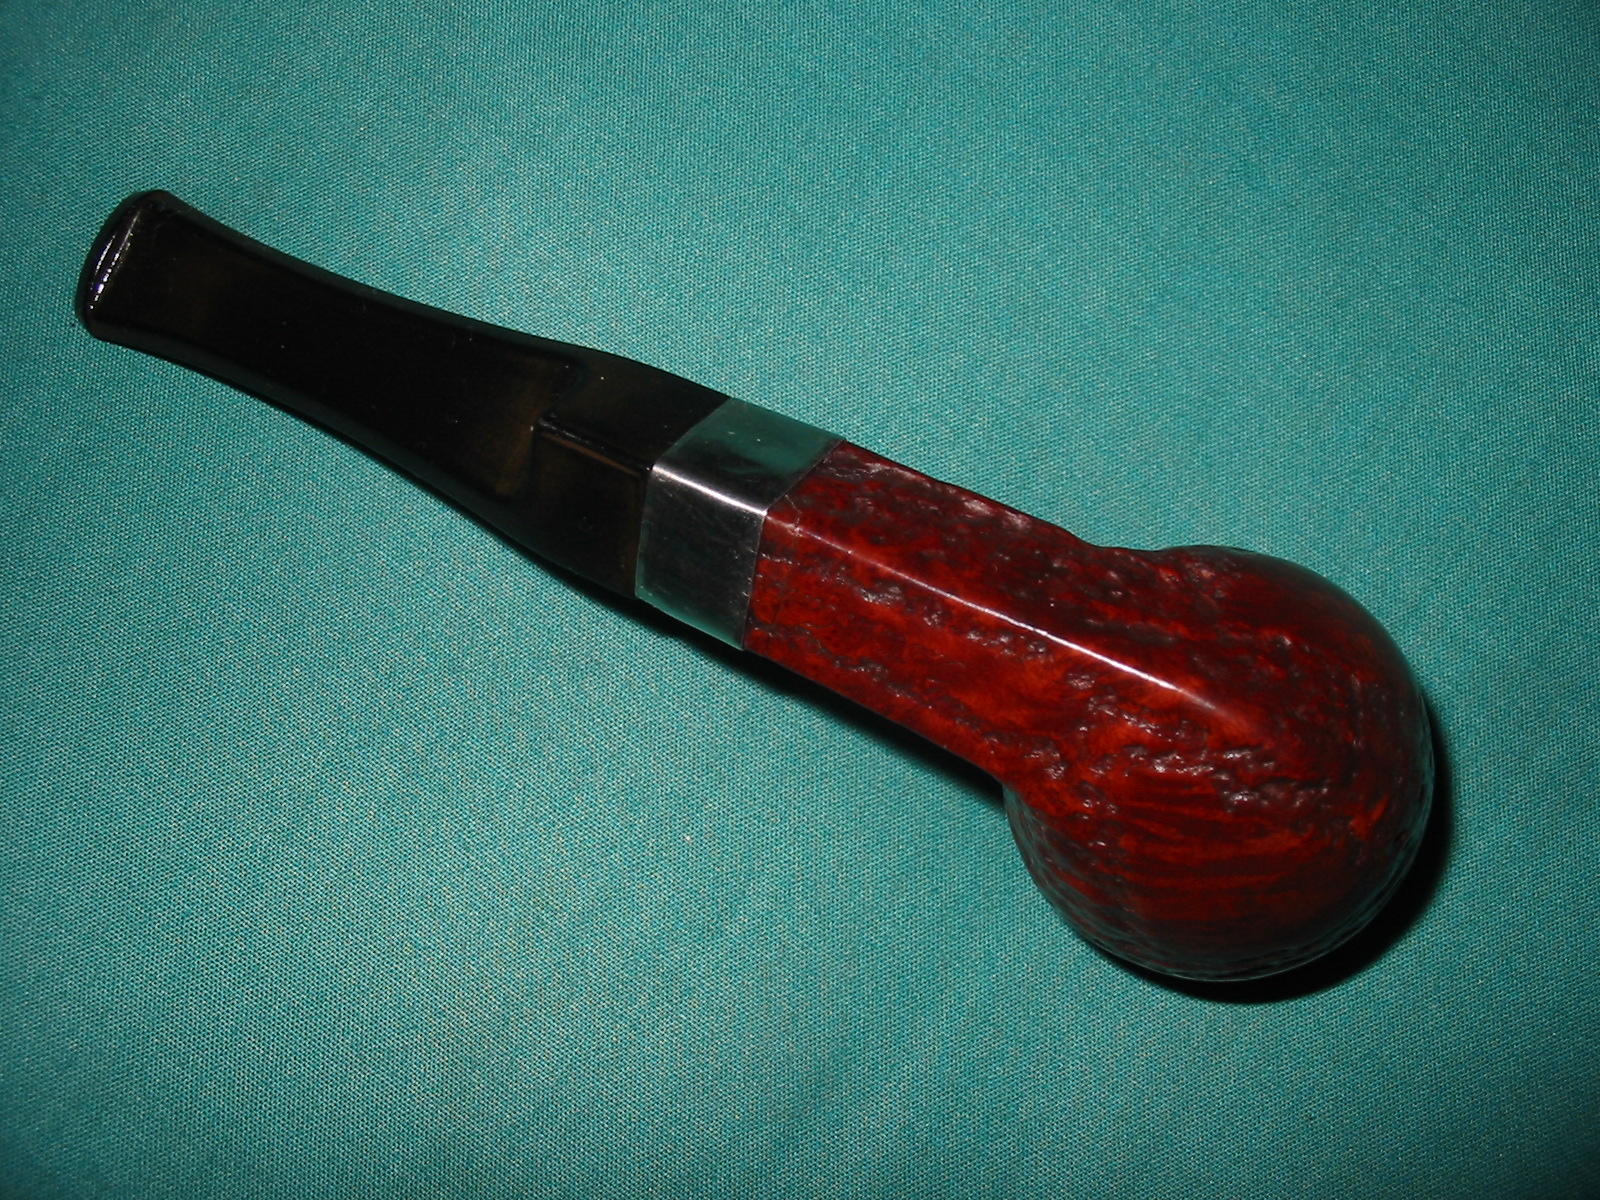
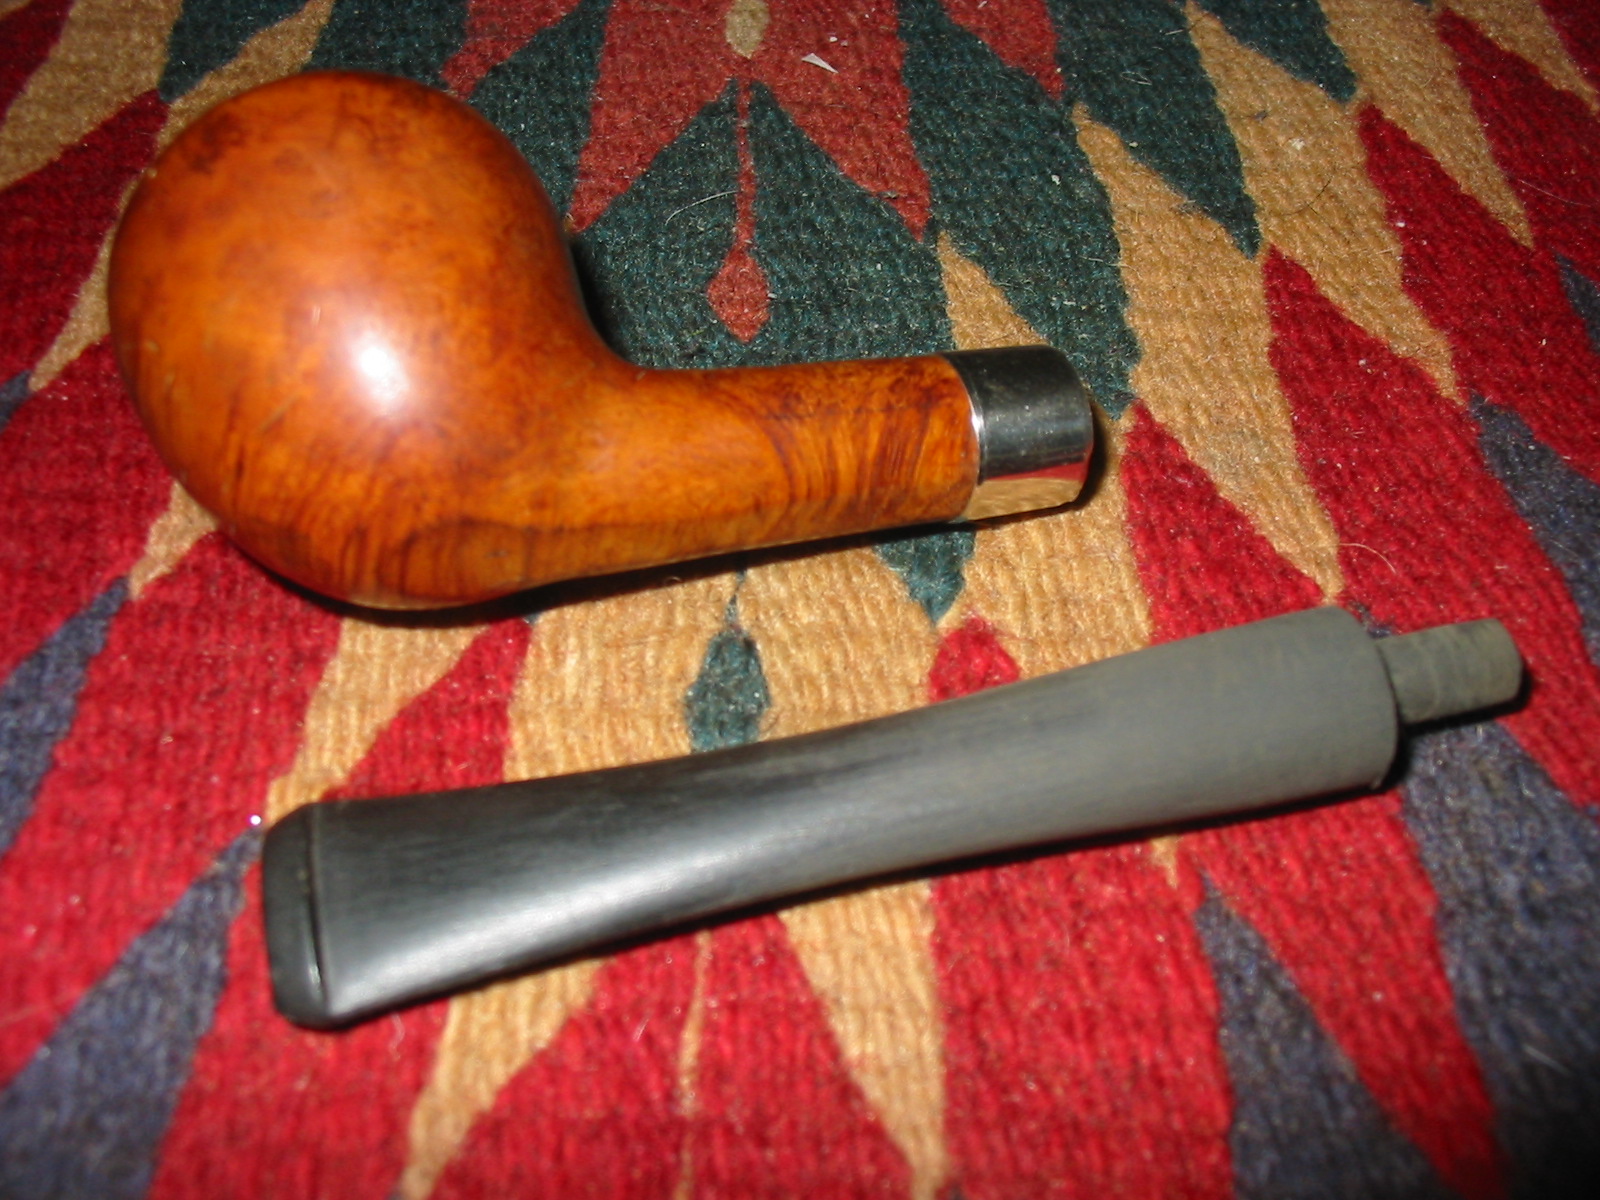
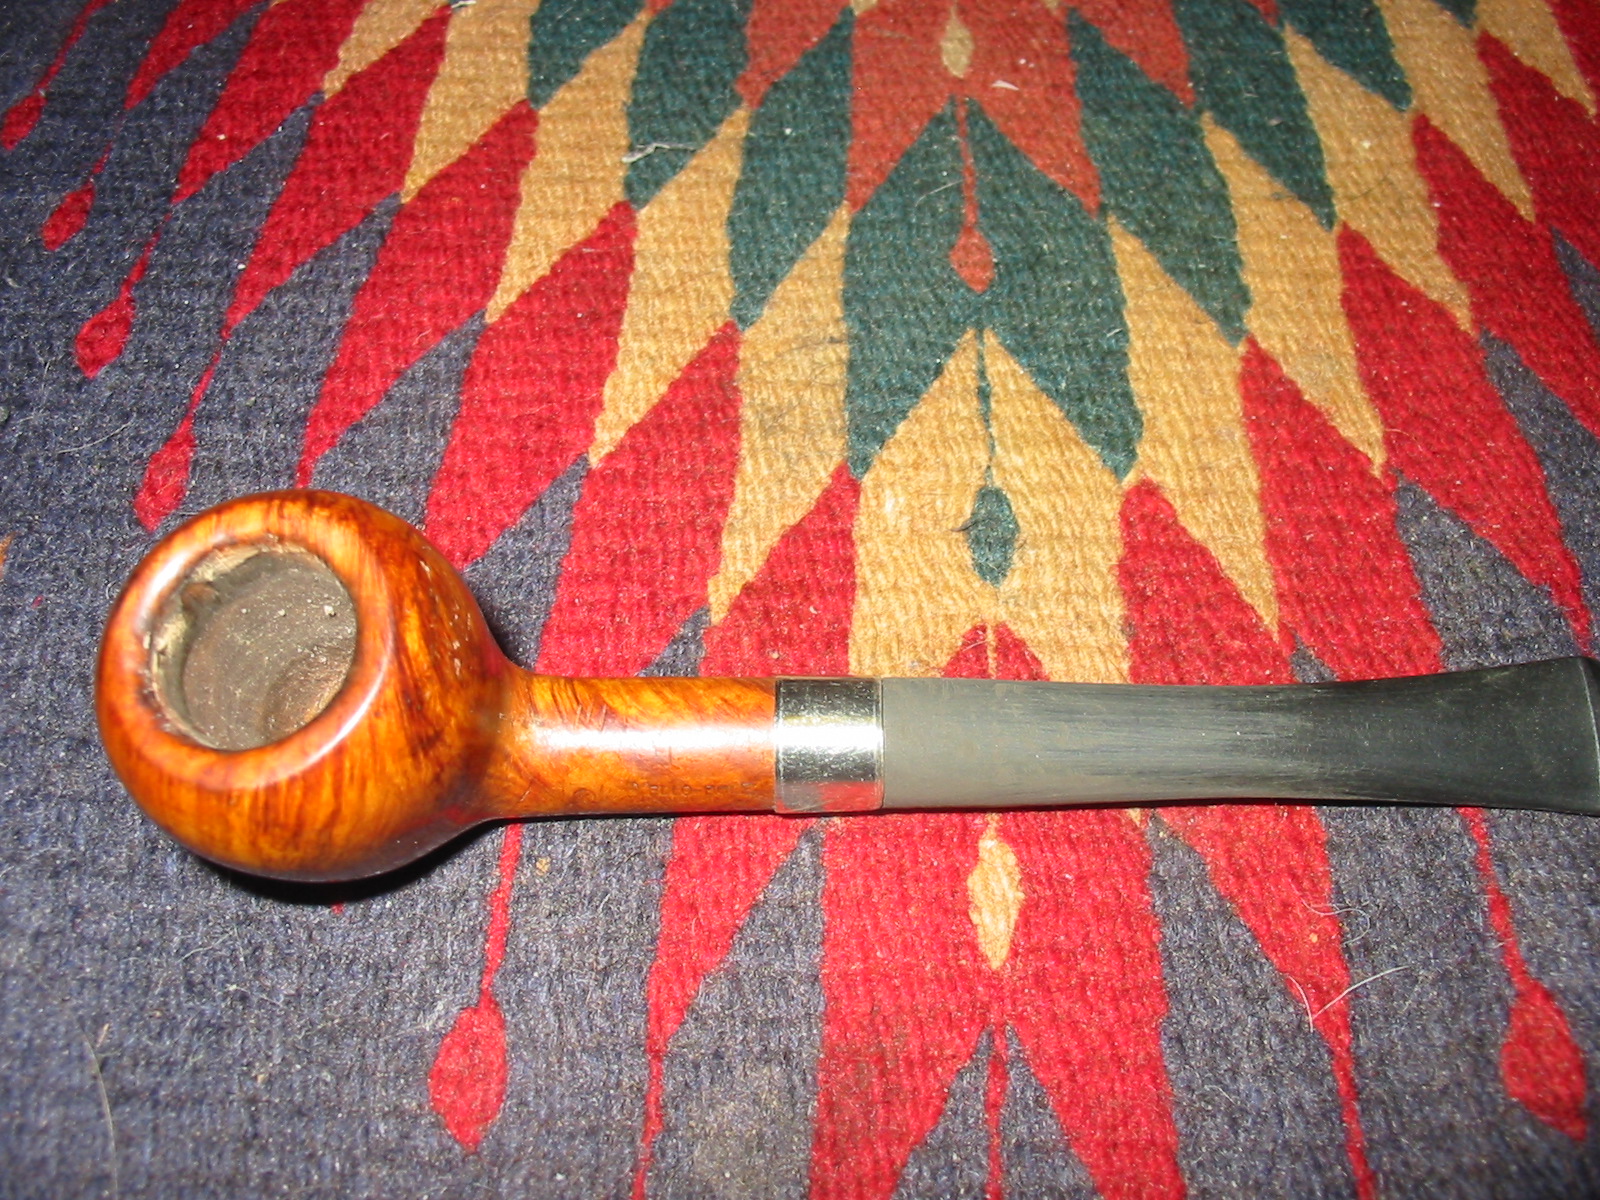
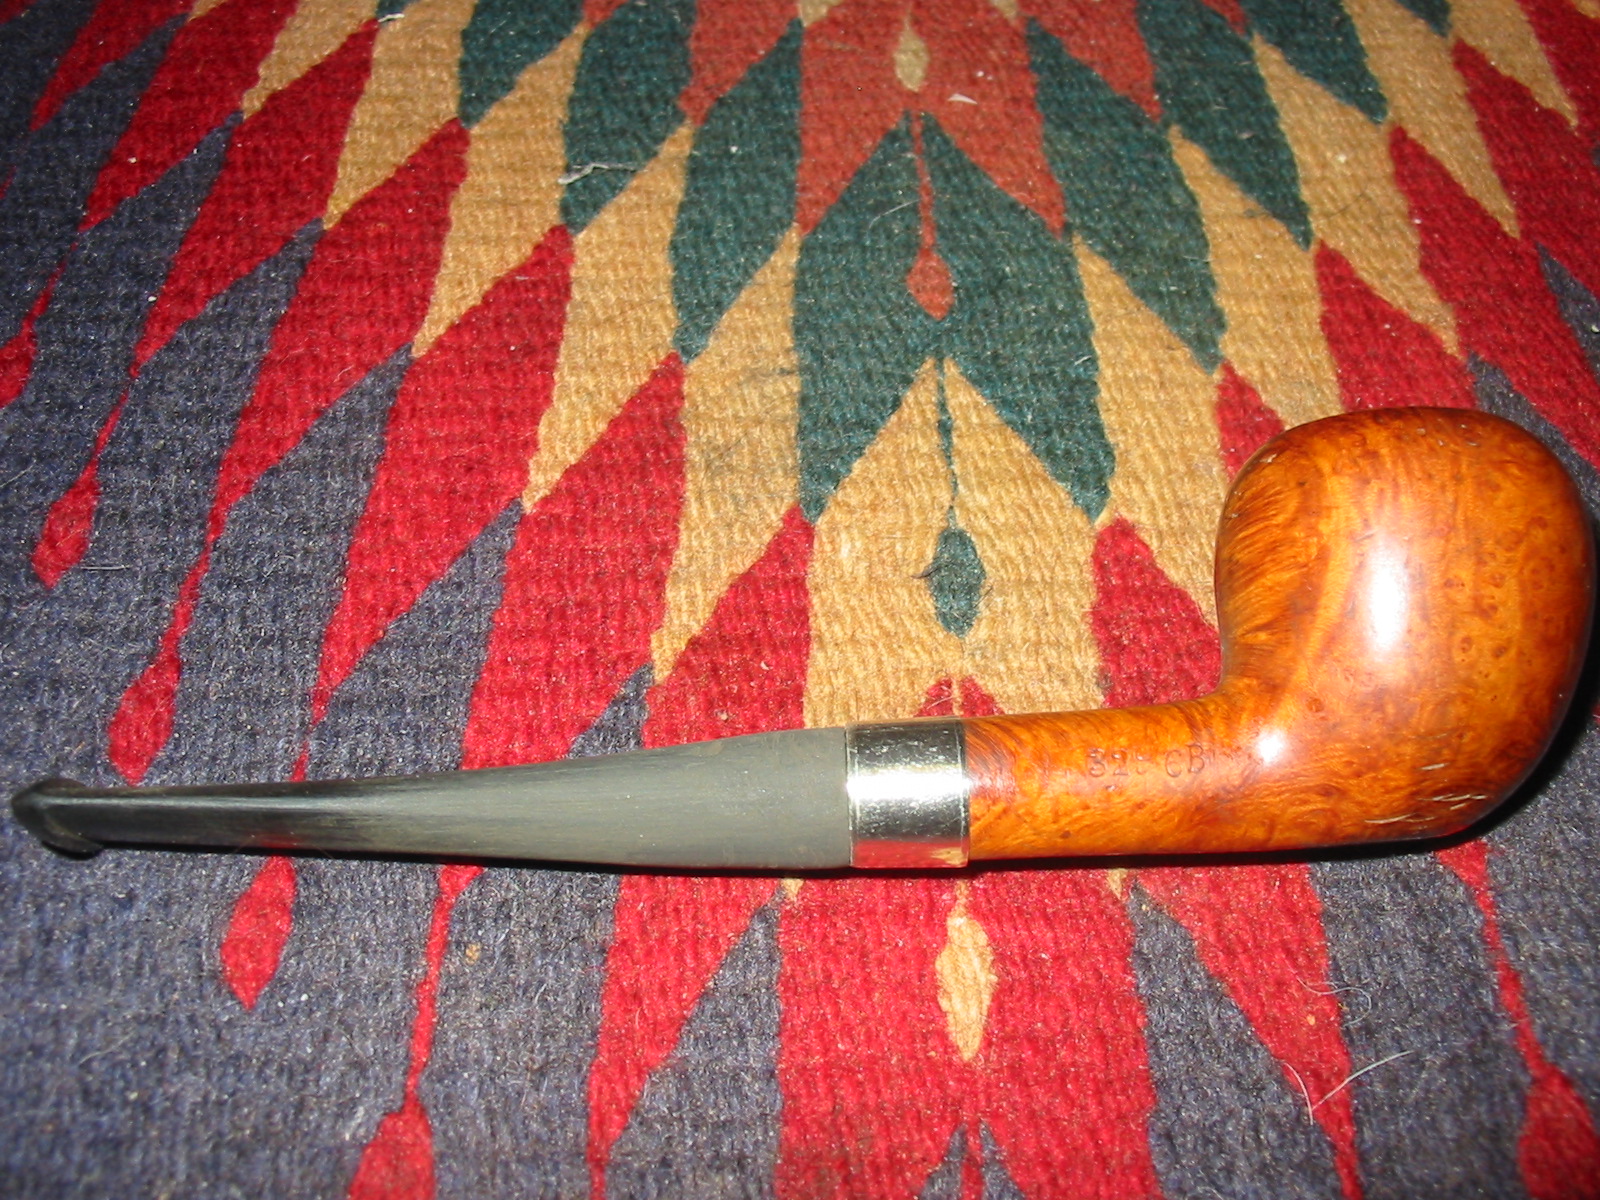
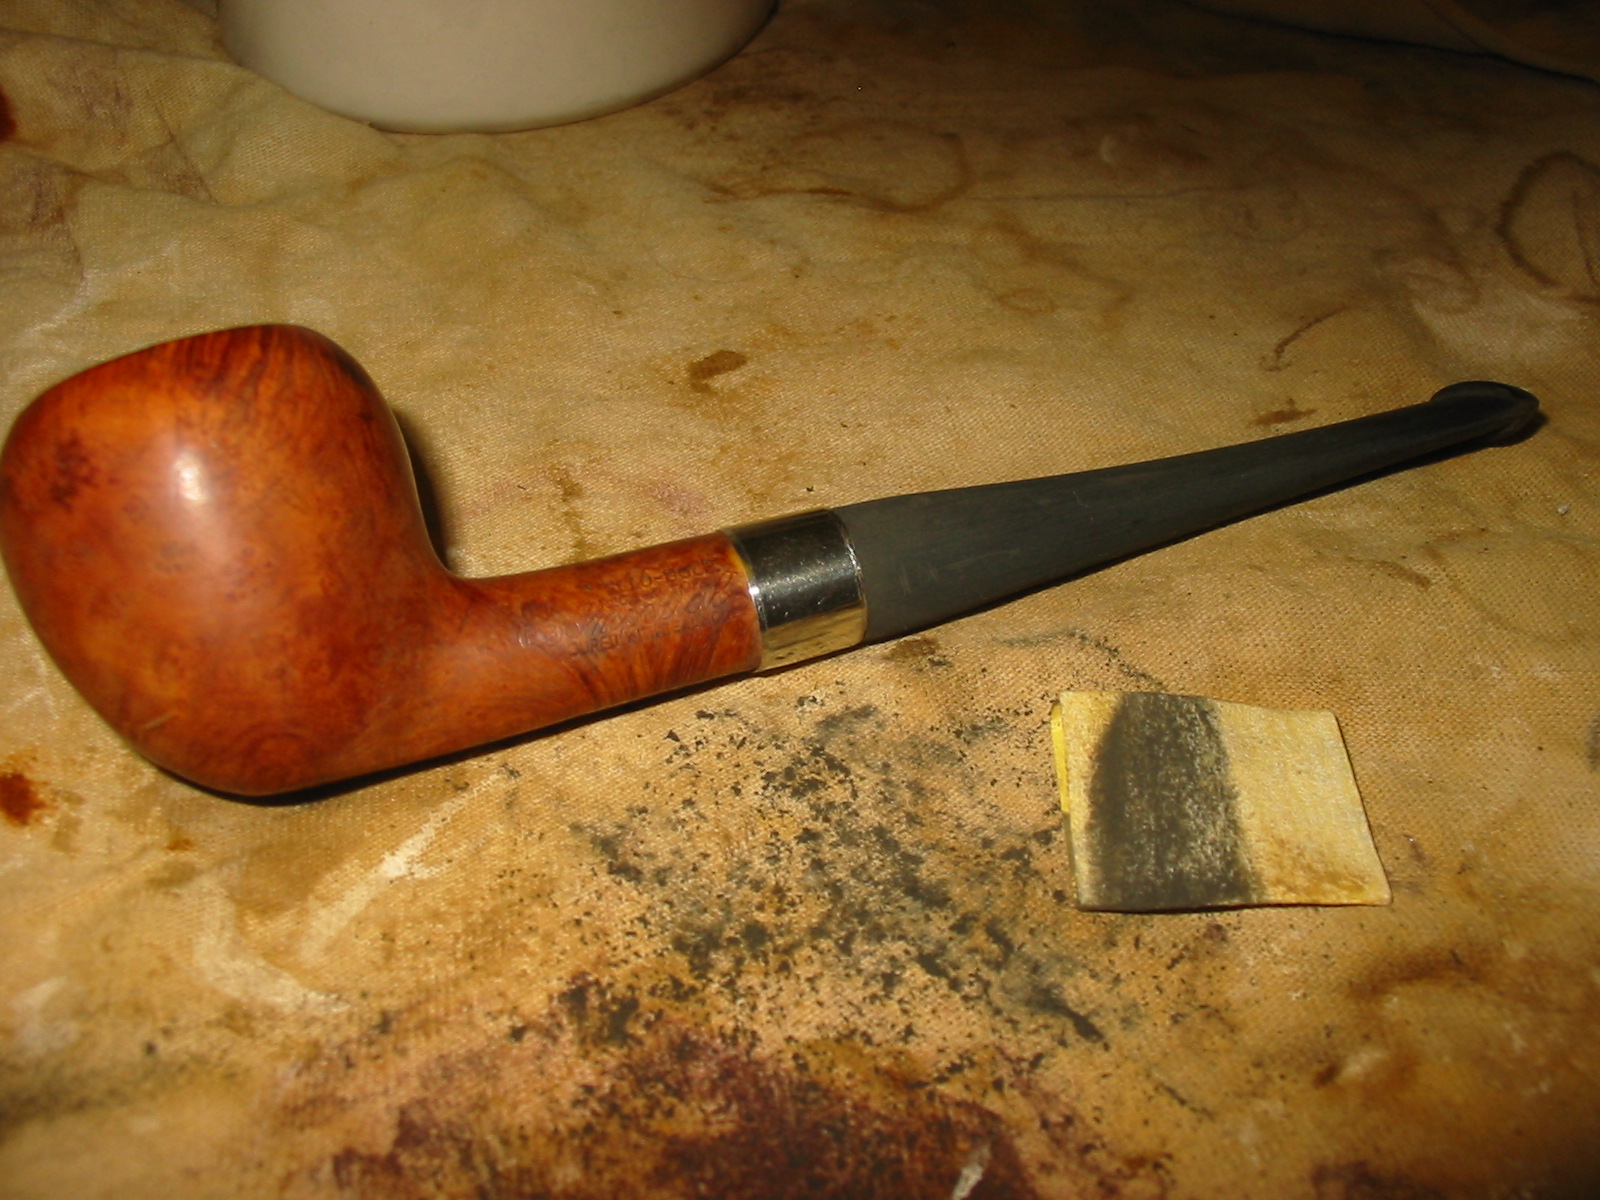
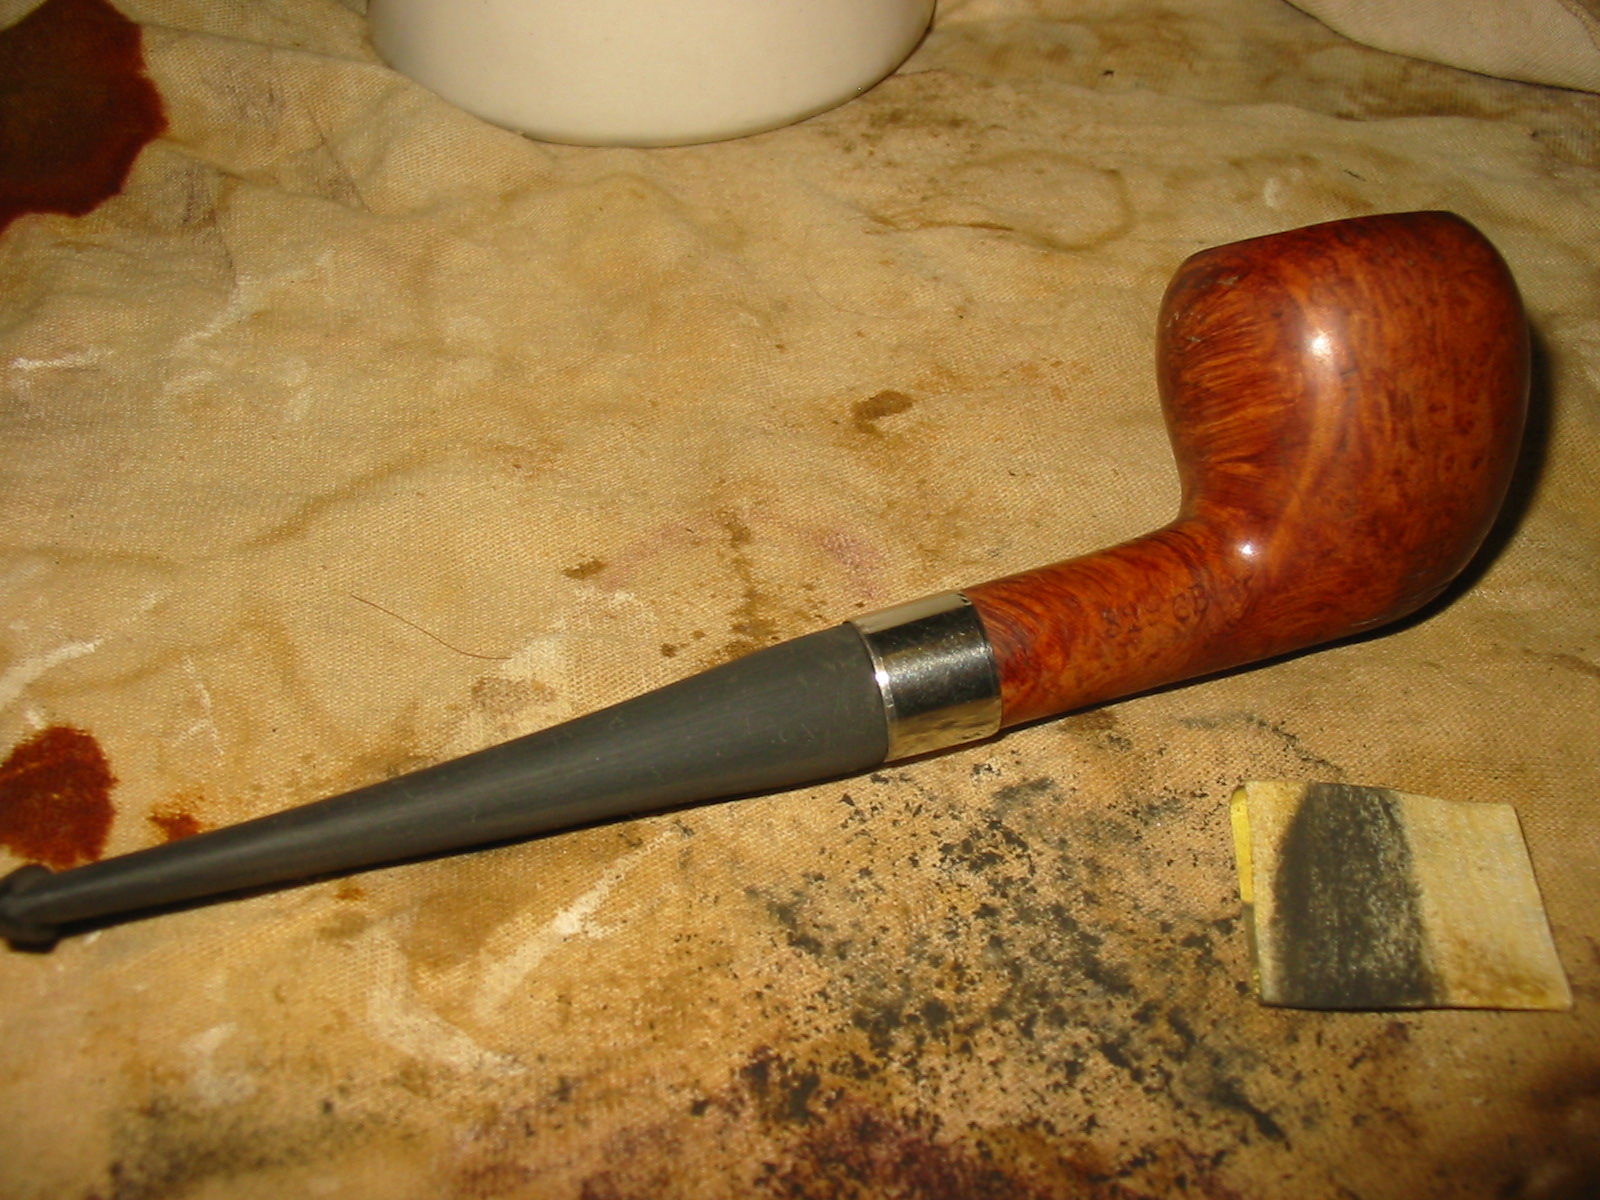
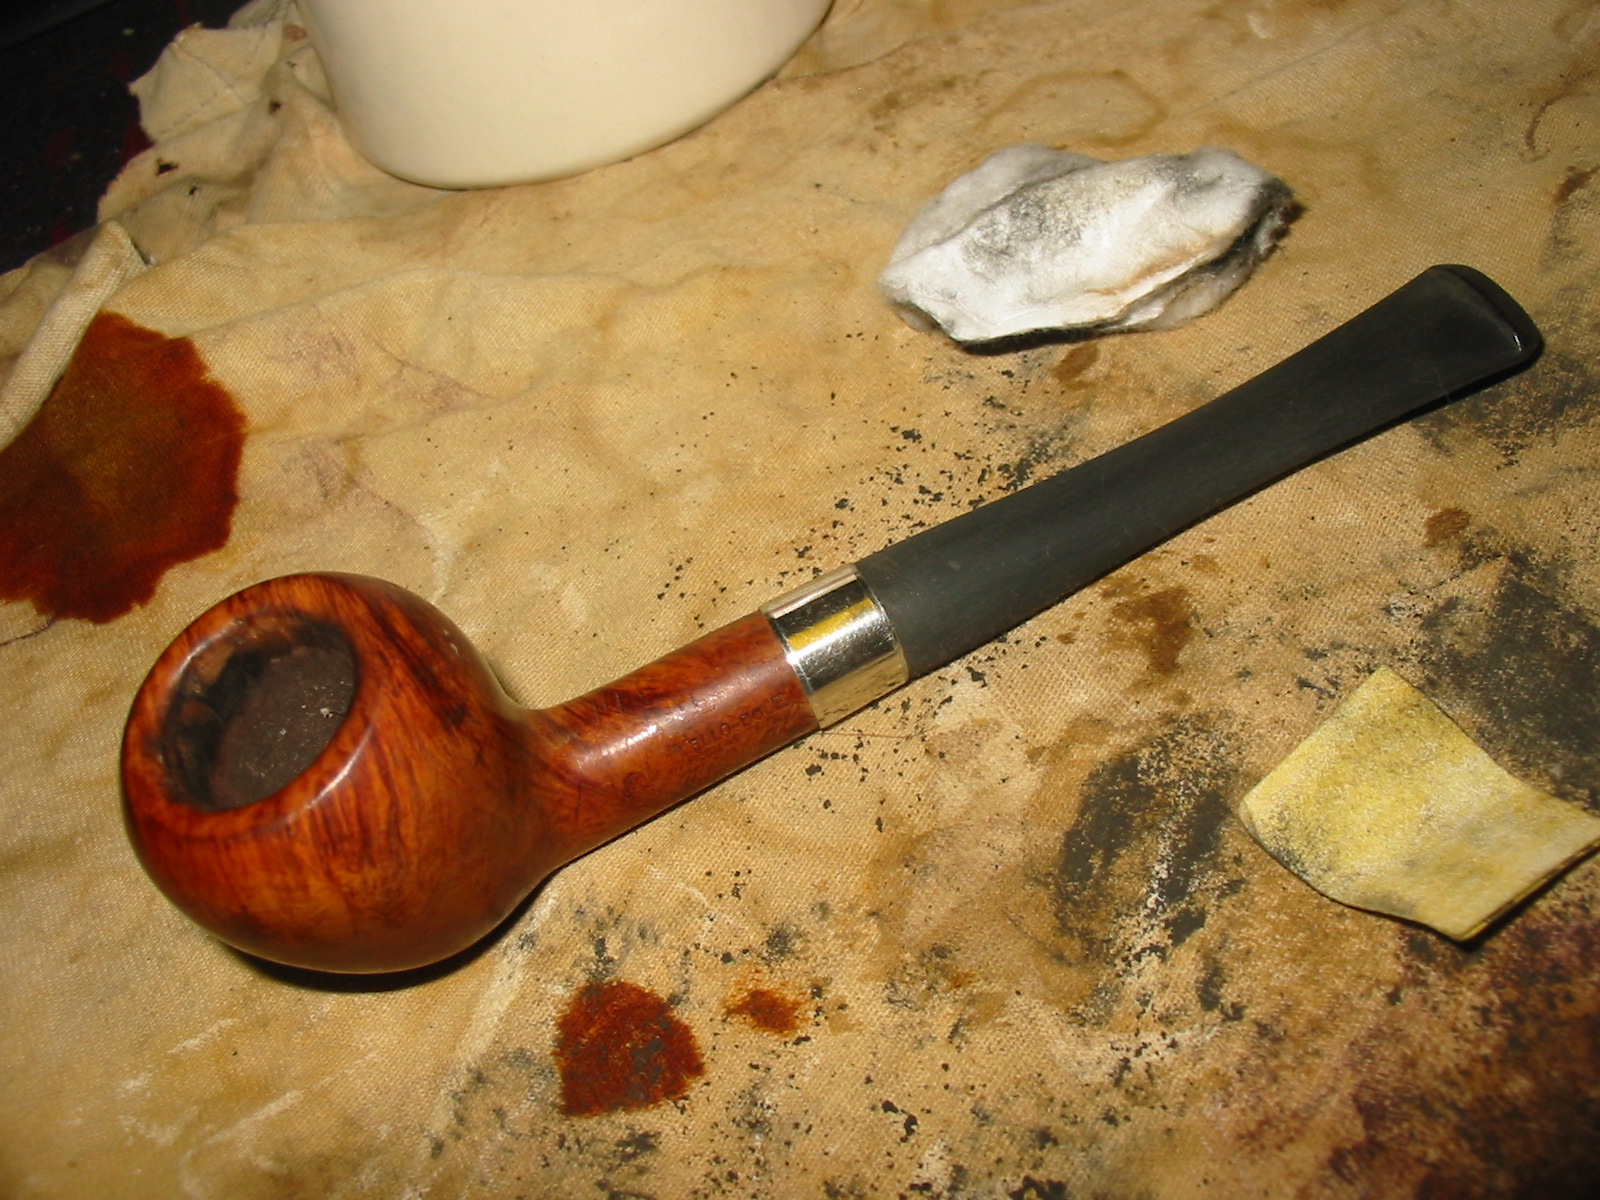
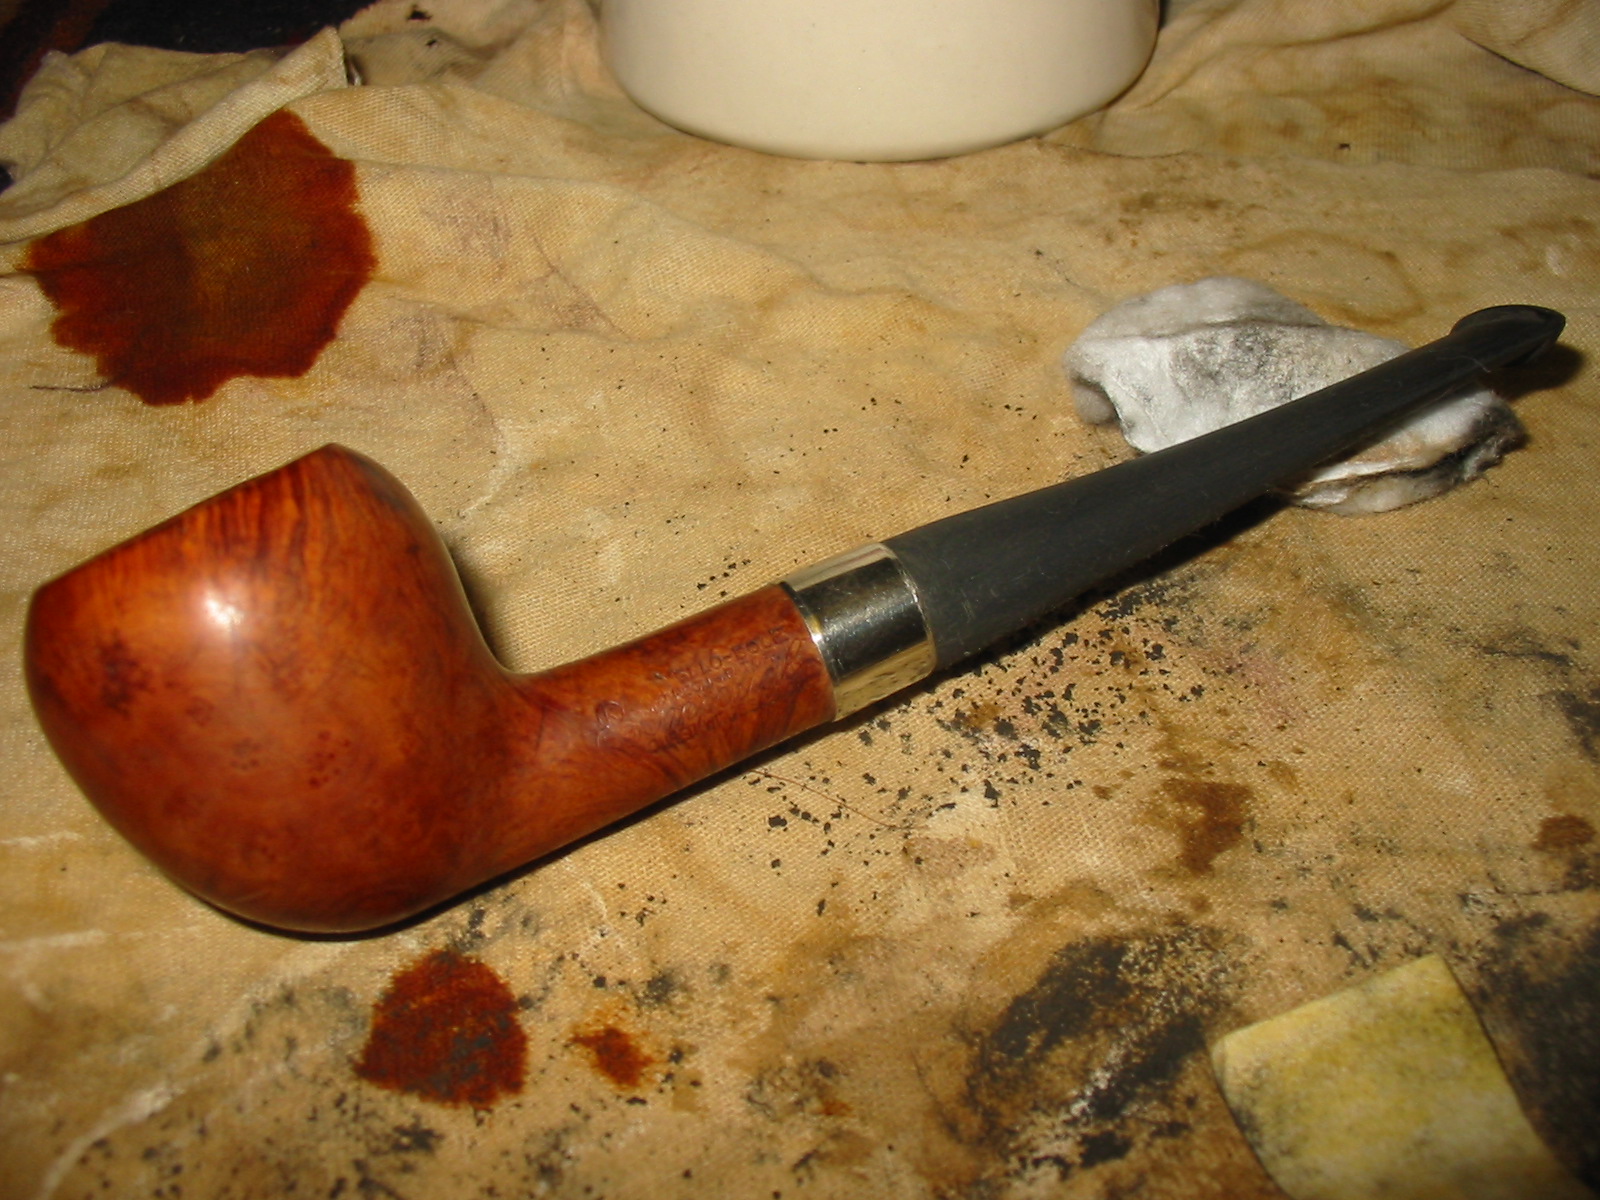
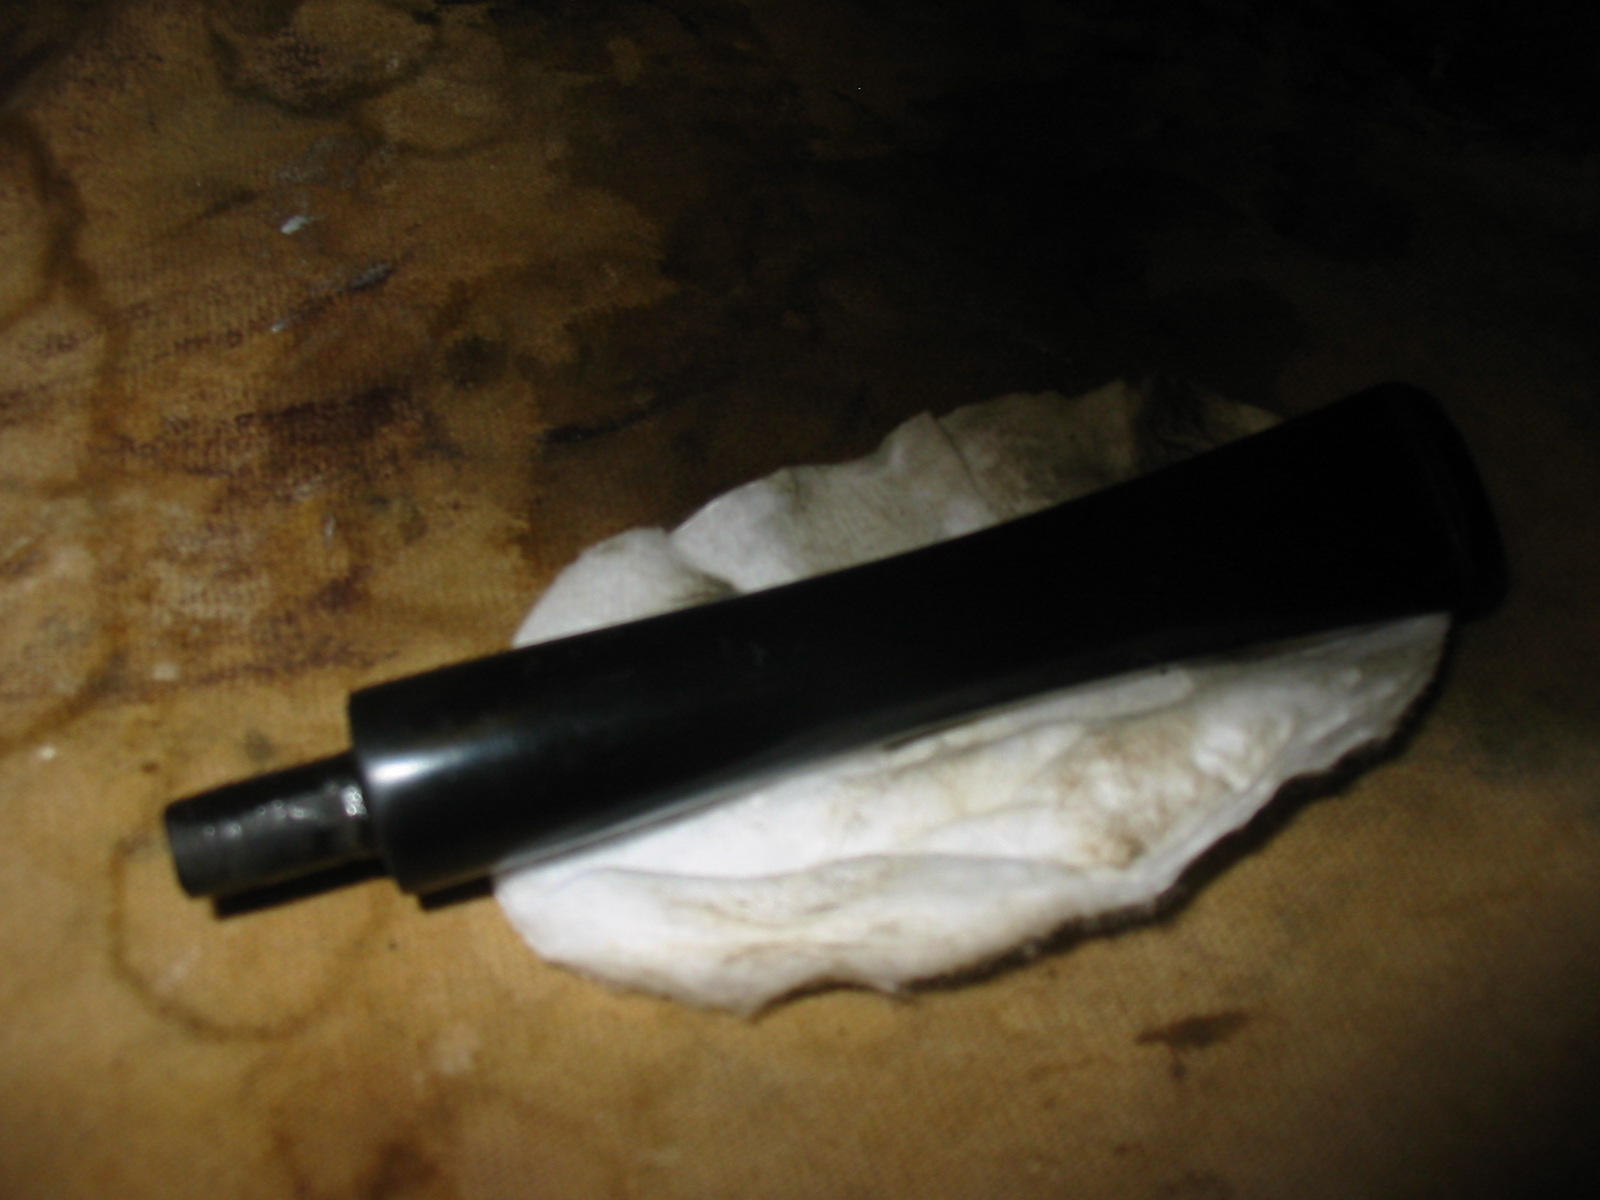
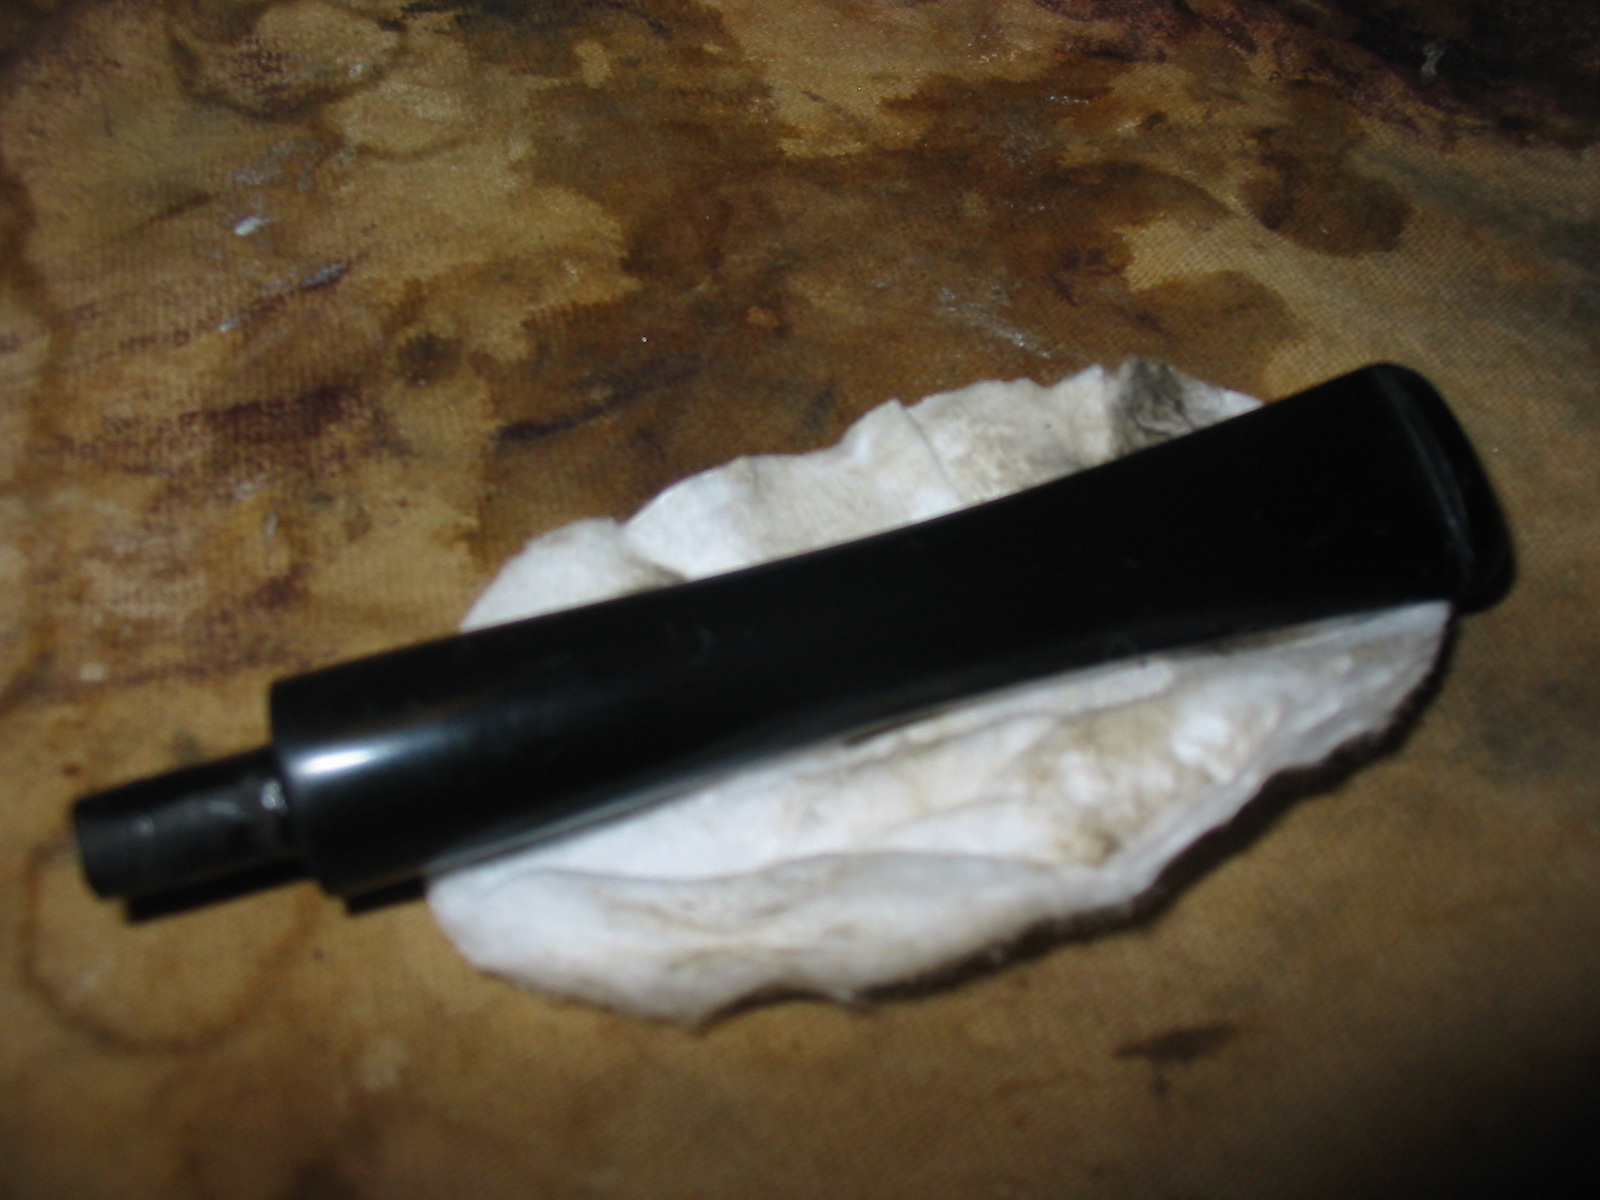
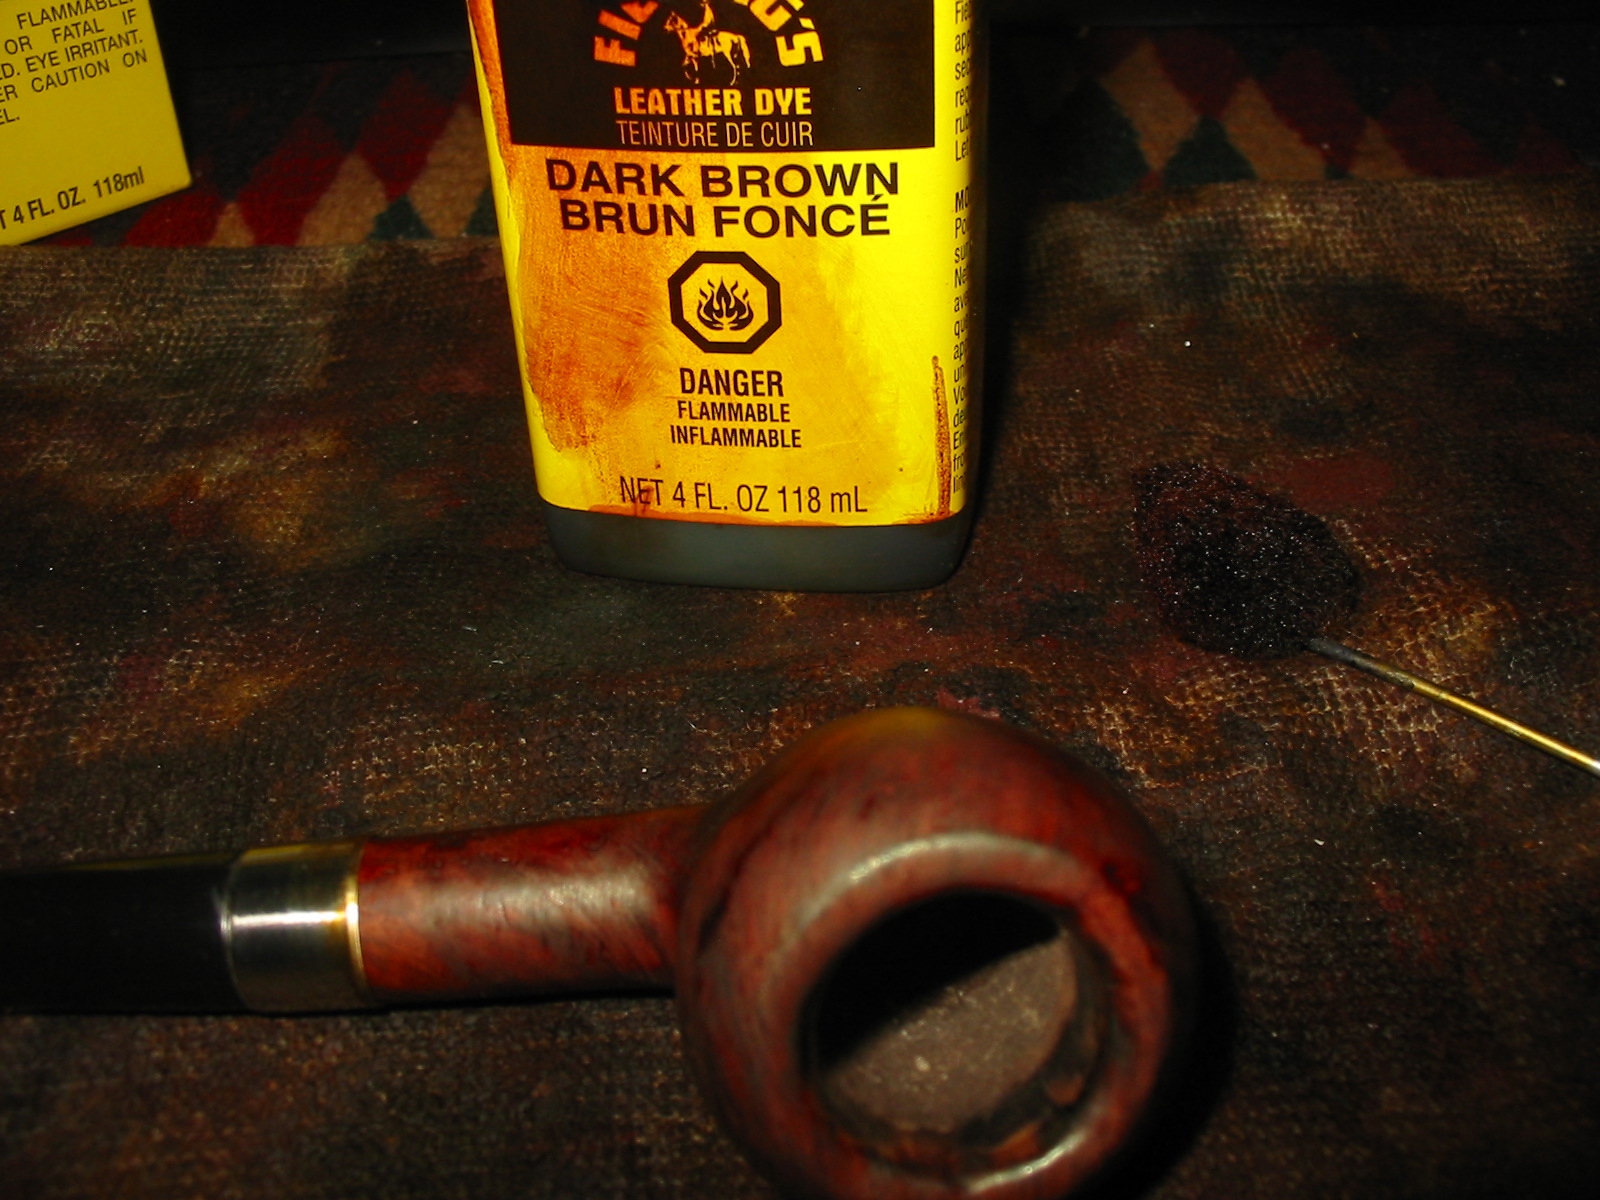
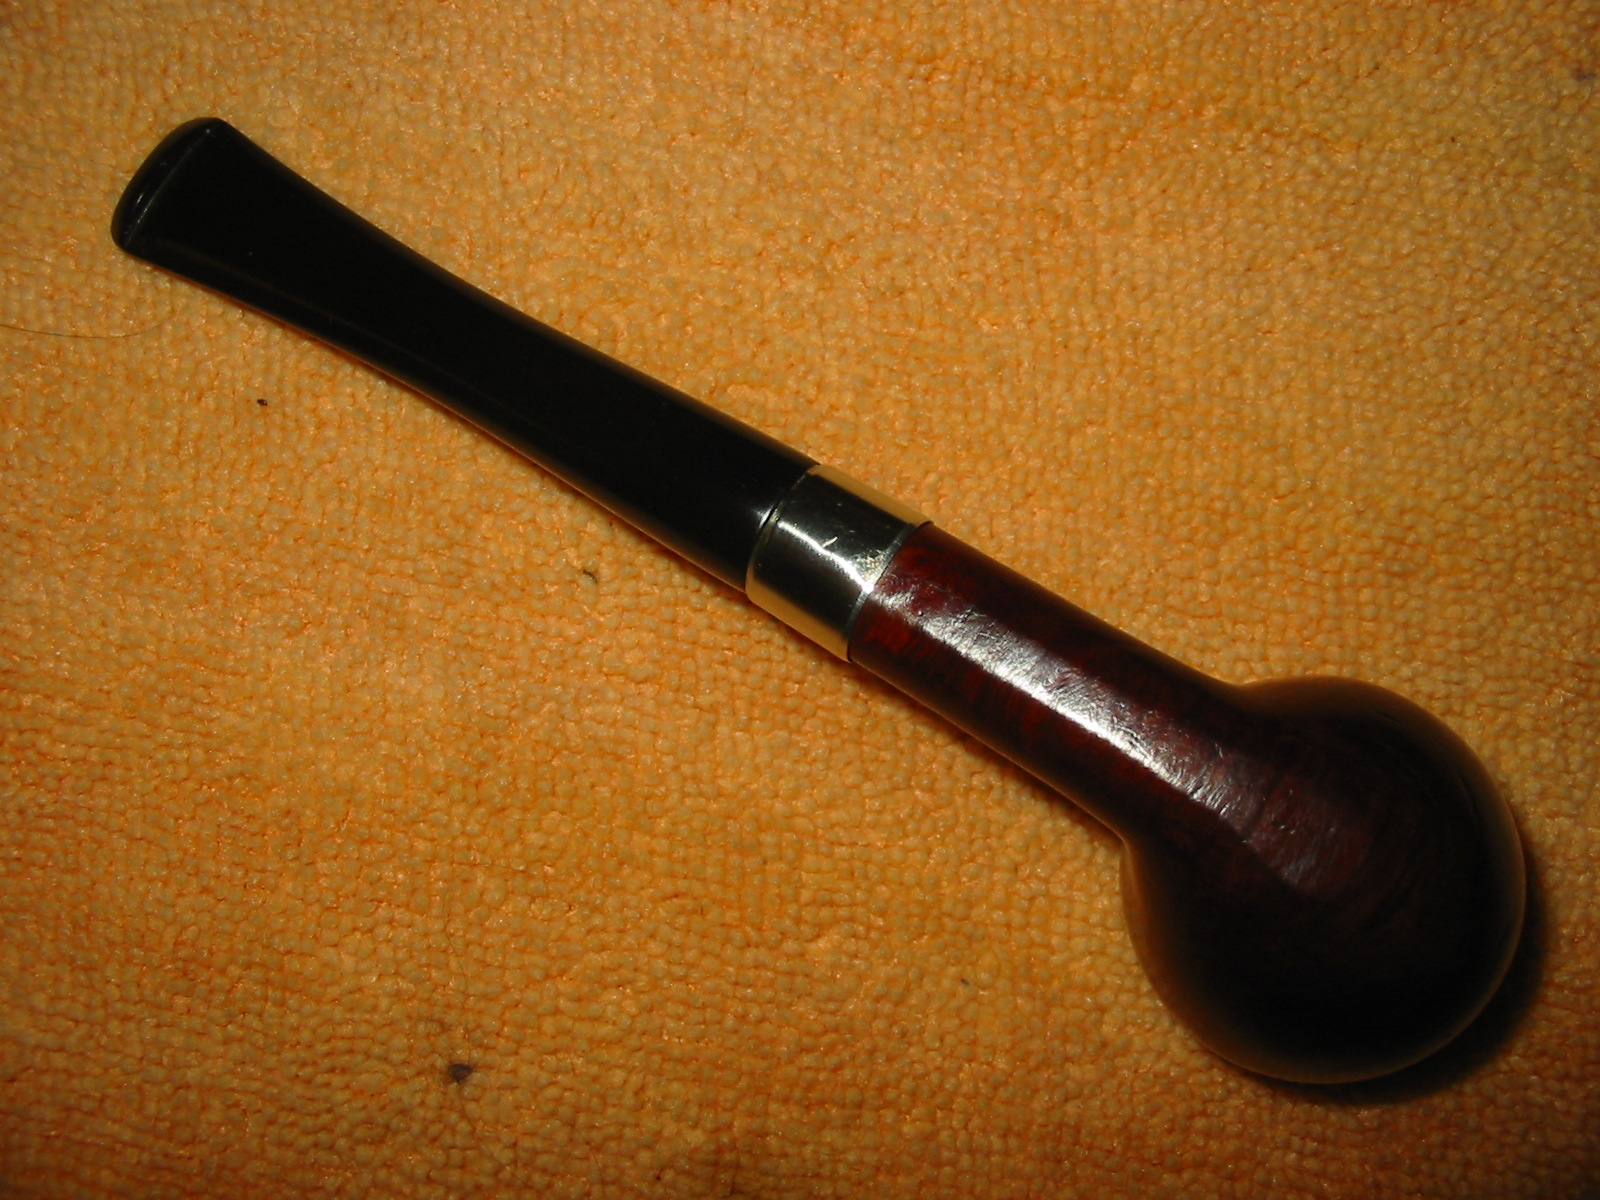
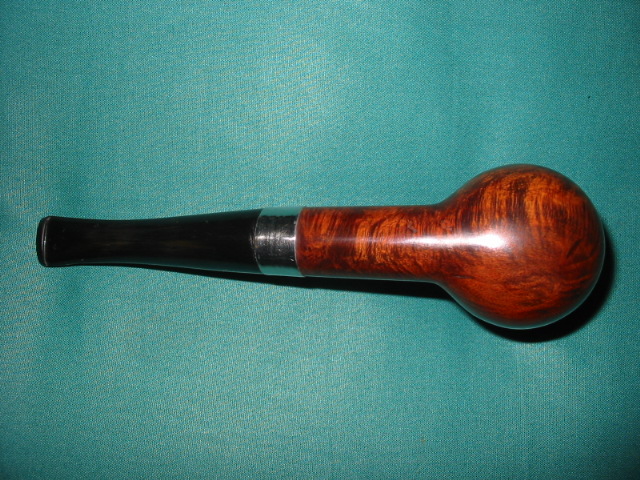
I want you to meet my forlorn Billiard stummel. I’m sure that one past day he enjoyed the attention of a steward. He proudly was settled on the rack with other proud pipes of The Rotation. One day something happened, and he lost that favored position, and everything changed. I found him in a bag of a second-hand/antique vendor in Sofia, Bulgaria’s ‘Antique Market’ in the city-center. The bag was full of broken and discarded stems, stummels and other things unrecognizable. He had no stem. I plucked him out of the bag along with a few other pieces, paid the vendor a very small sum for what had no value to the vendor or to anyone else. The small Billiard stummel was marked with the most generic of all markings, ‘Real Briar’. Absolutely nothing special. Here are pictures of the redeemed Billiard on my worktable.


 I just completed the restoration of a Monarch Pat. 1989069 – 1074H Bent Ball for Andy, a pipe man living in Maryland, who attends the church where I was formerly the pastor on the Eastern Shore – the peninsula created by the Chesapeake Bay and Atlantic Ocean east of Washington DC. Andy commissioned the Monarch from the ‘For Pipe Dreamers Only!’ section on my blog. He told me he was also hoping to land a Peretti Oom Paul and a Churchwarden someday. He had seen several of the Peretti Lot of Oom Pauls that I had already restored and recommissioned for new stewards and was hopeful. I had no more Perettis to share, but I proposed that I could fashion a Churchwarden from repurposed stummels. I also had one 8-inch Warden stem left in my stores. Not long ago, I completed a fun restoration I called ‘A Tale of 3 Church Wardens’ – where I fashioned 3 Churchwardens that all found new stewards in Germany. I directed Andy to check out the post to decide what he wanted to do. It didn’t take long and he decided to add a Churchwarden to his Monarch Bent Ball – each of these pipes benefit the work we do here in Bulgaria with the Daughters of Bulgaria – helping women and girls who have been trafficked and sexually exploited to find a new life and hope. The next question for Andy was what stummel would mast the Warden stem and rise from the ashes like the Phoenix? Here were the options I sent to Andy with a warning not to be distracted by the color or condition – to look only at the shape. Here’s what he saw.
 From the top, his choices were a Rhodesian, a Panel, a carved Apple and the forlorn Billiard. Andy chose the classic Billiard shape, influenced mainly by the longer shank which will add a bit of flow to the Churchwarden he would become when transformed. The interesting factoid that I reported before, in my writeup of the 3 Churchwardens, was from Bill Burney’s Pipedia Pipe Chart. It provides the framework for forlorn bowls to rise as the Phoenixes. What brings this power? A Churchwarden stem:
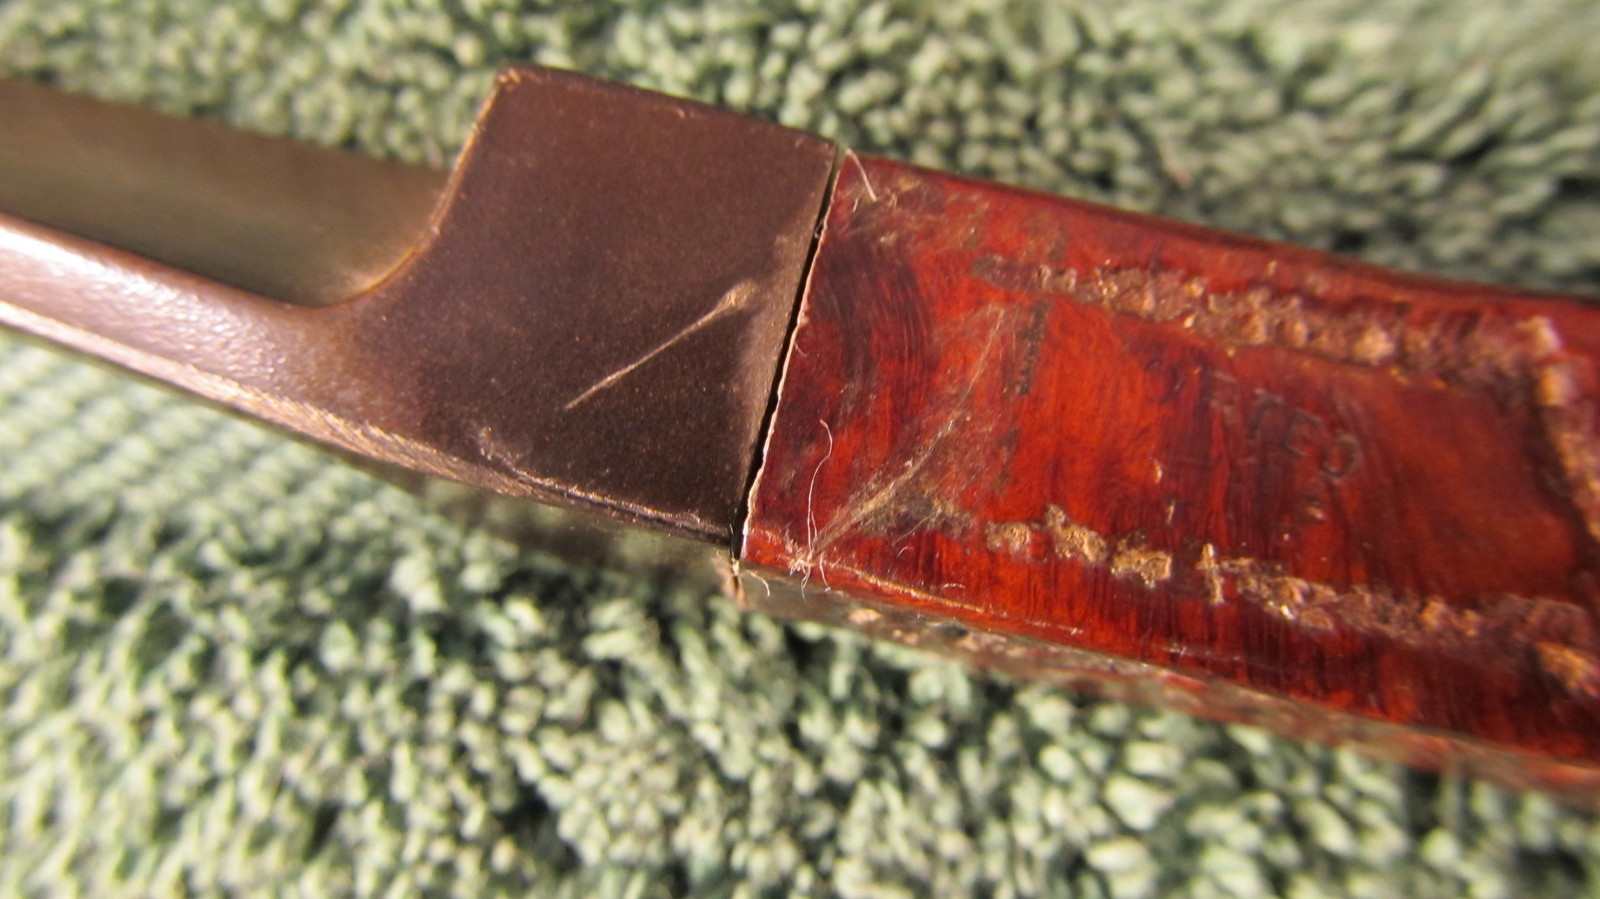
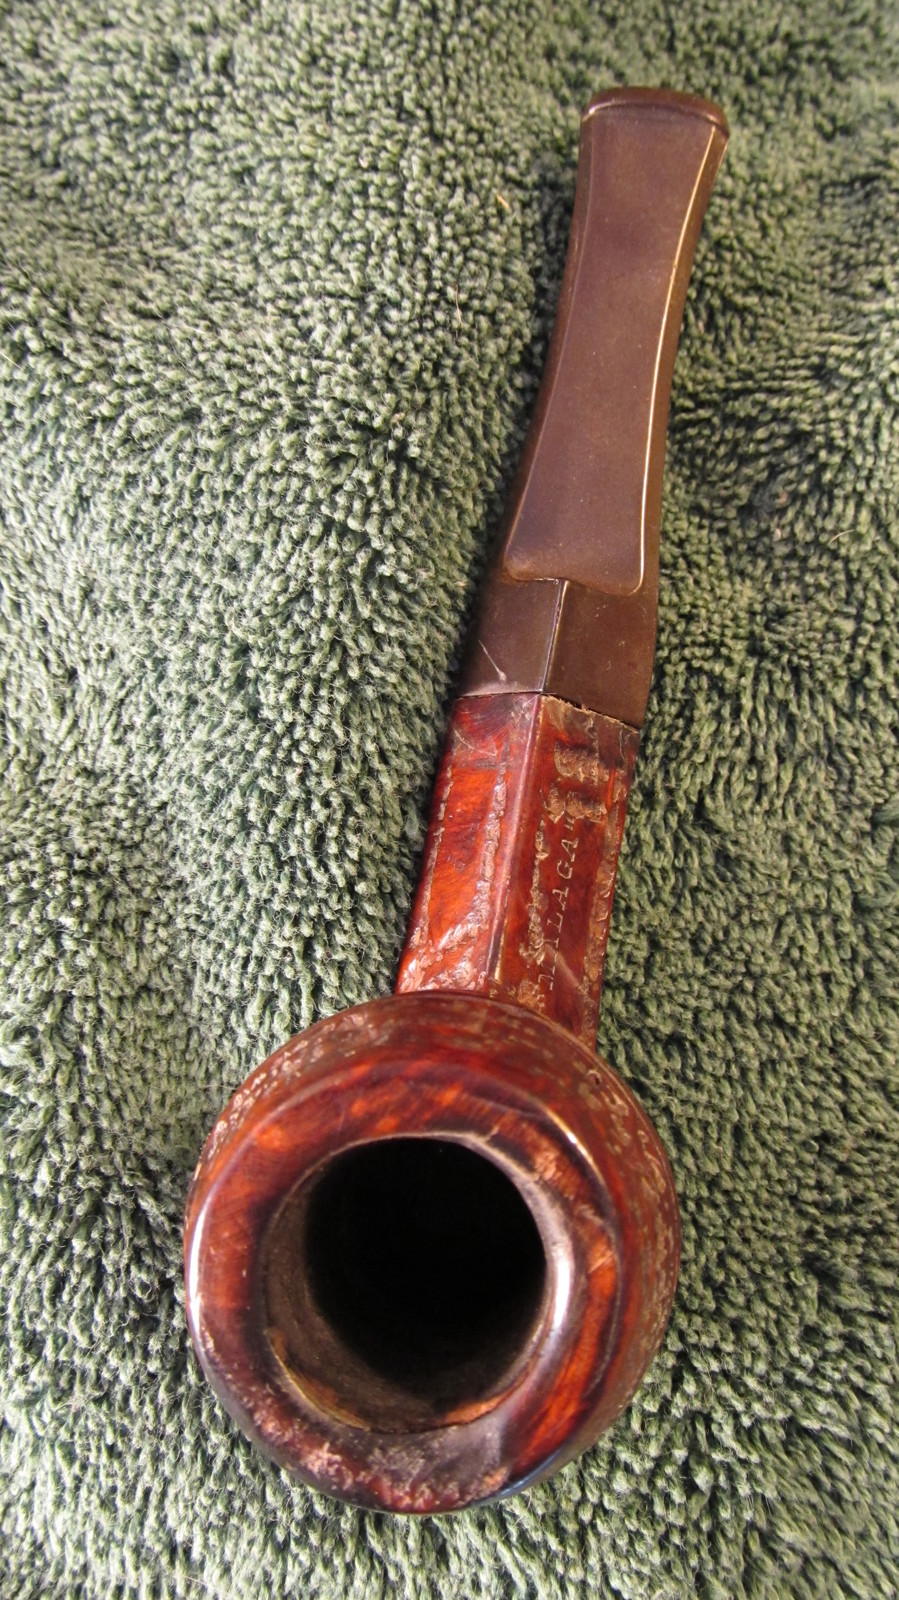
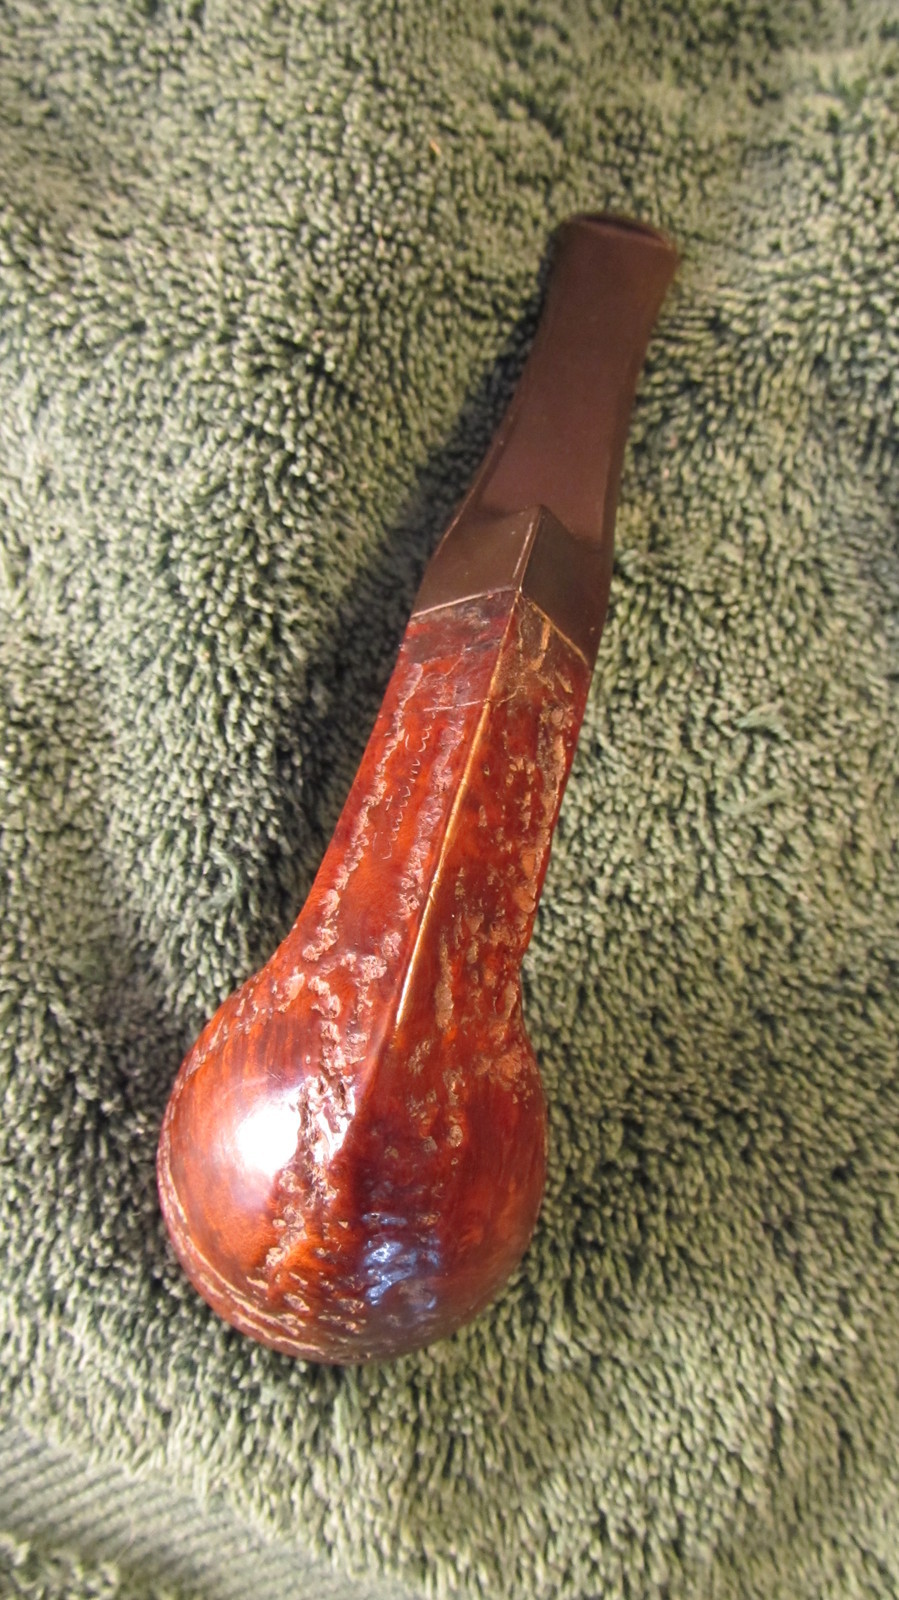
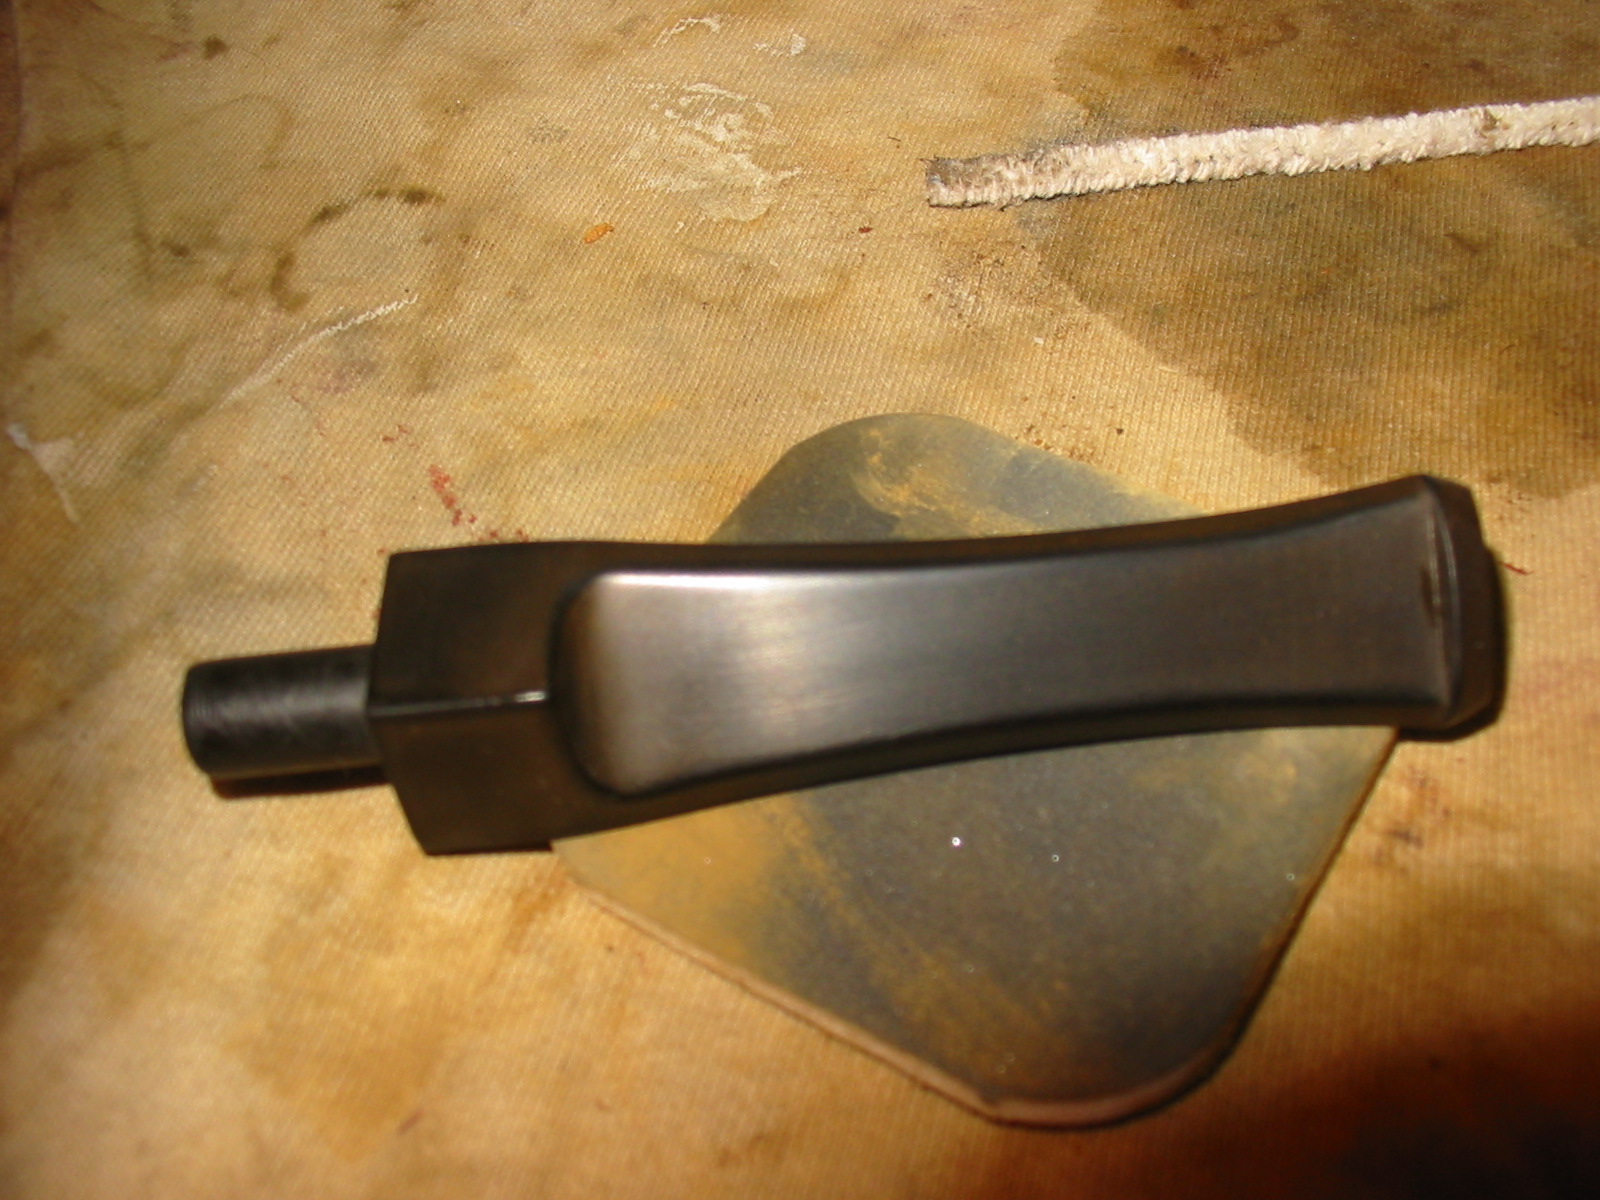
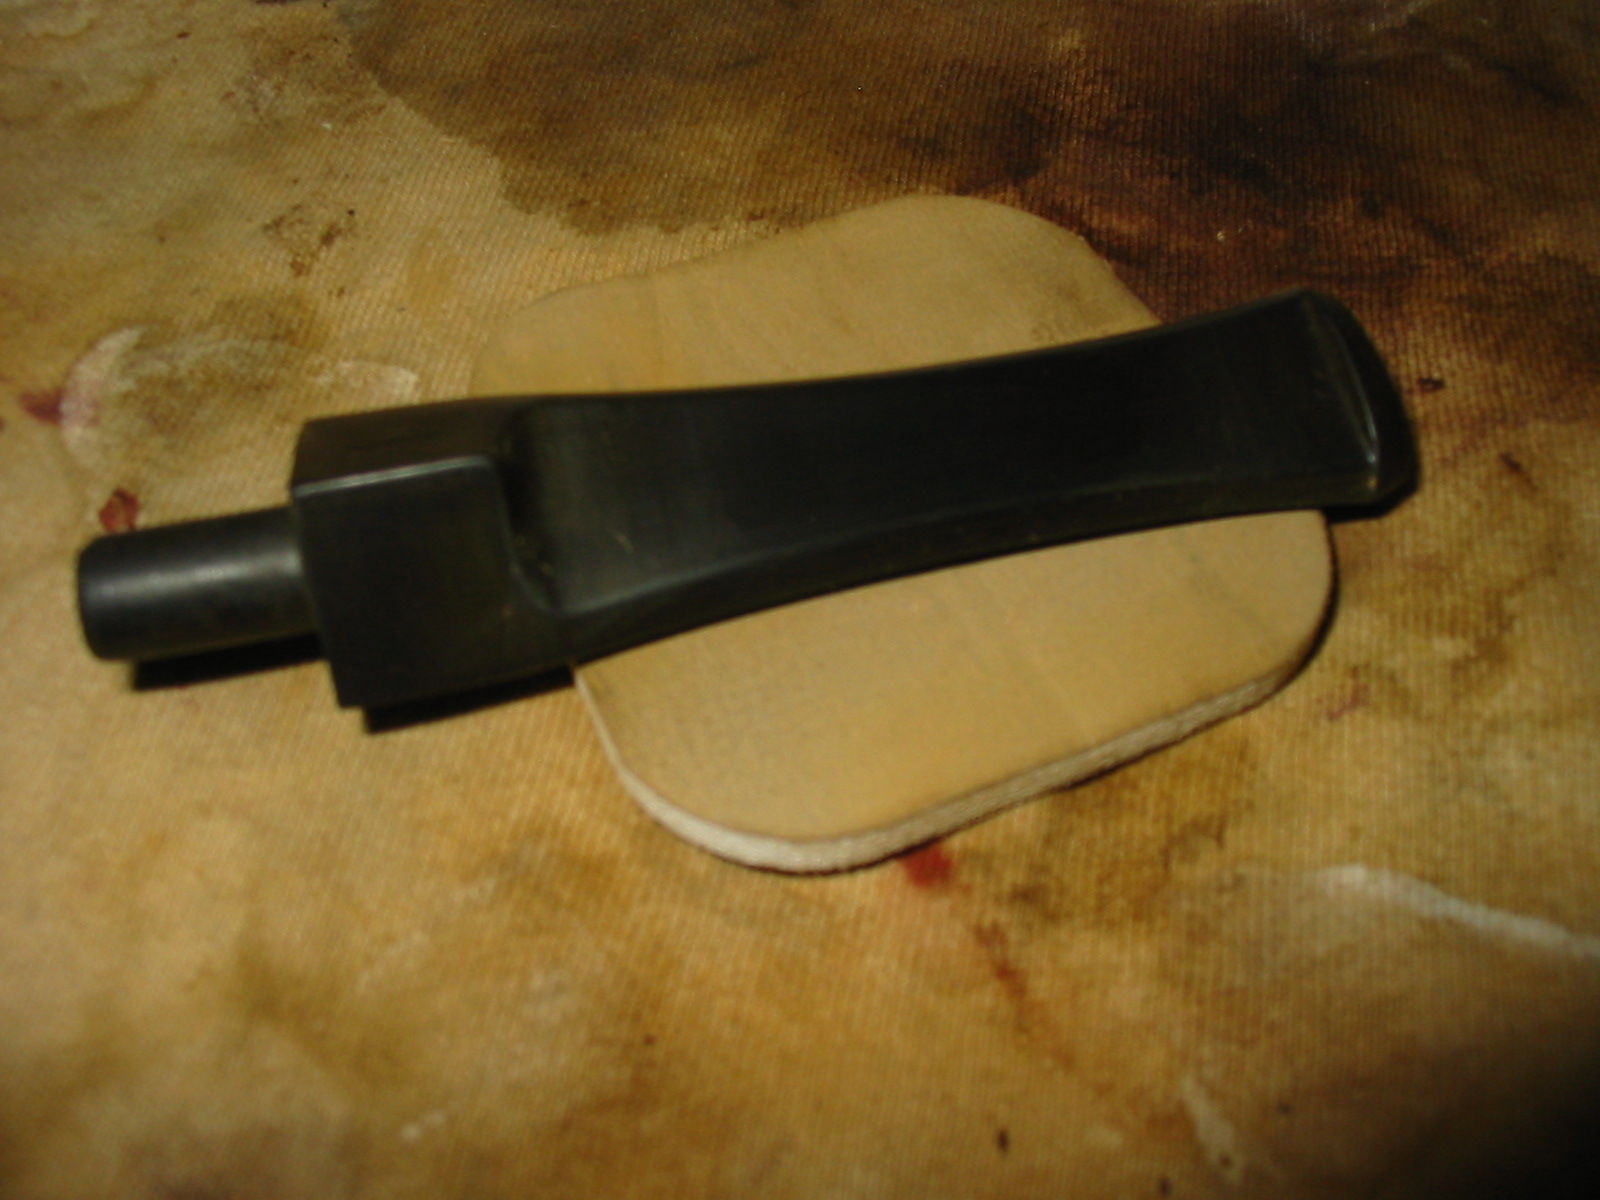
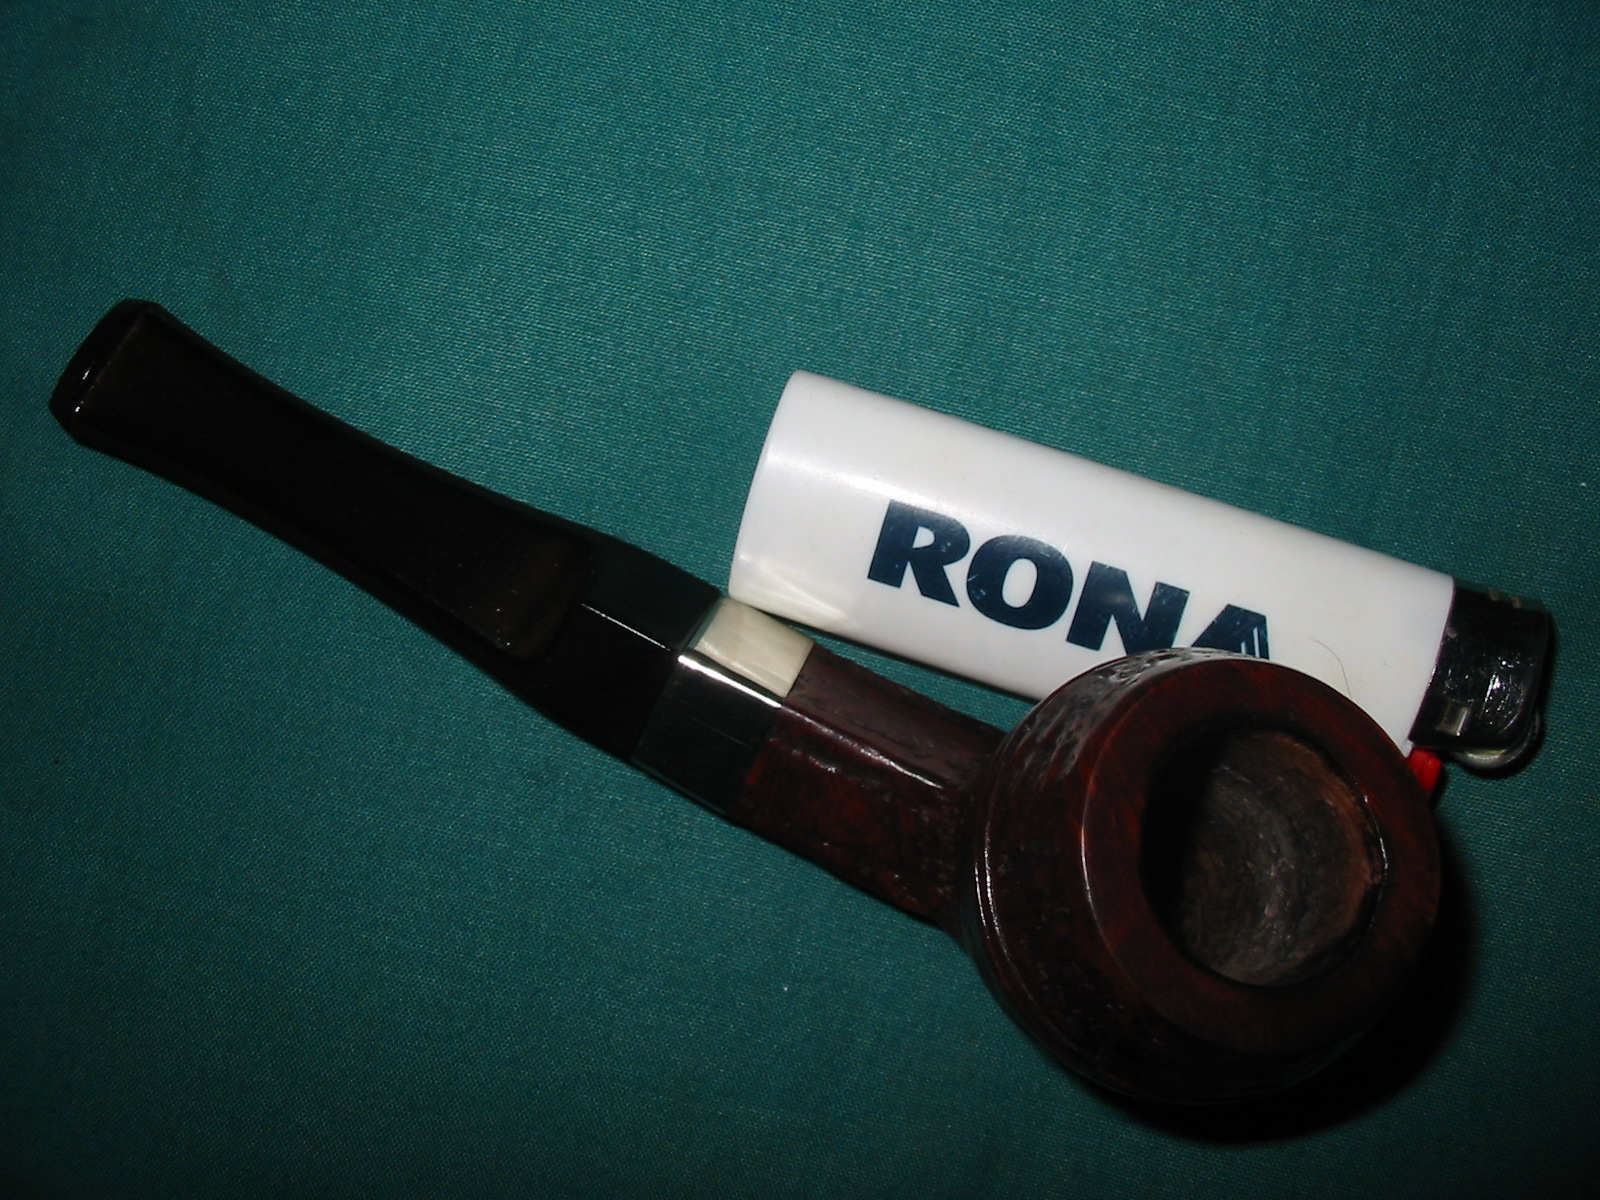
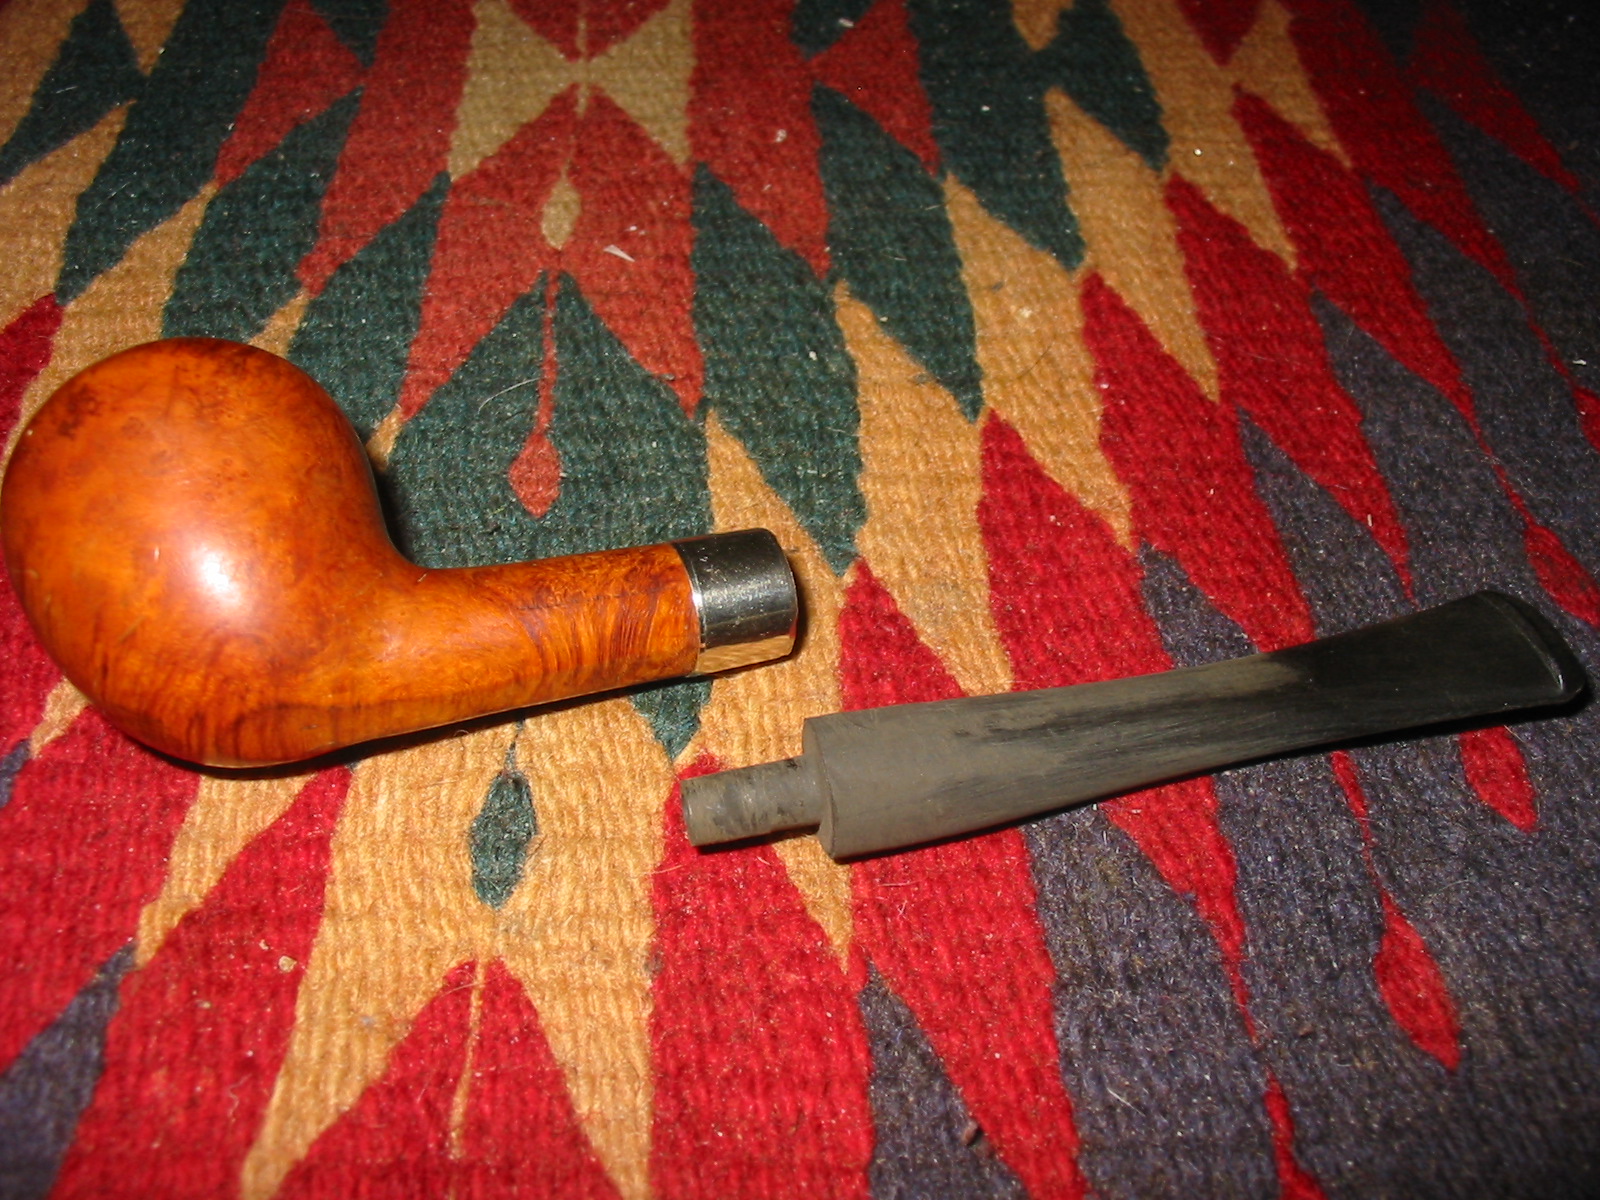
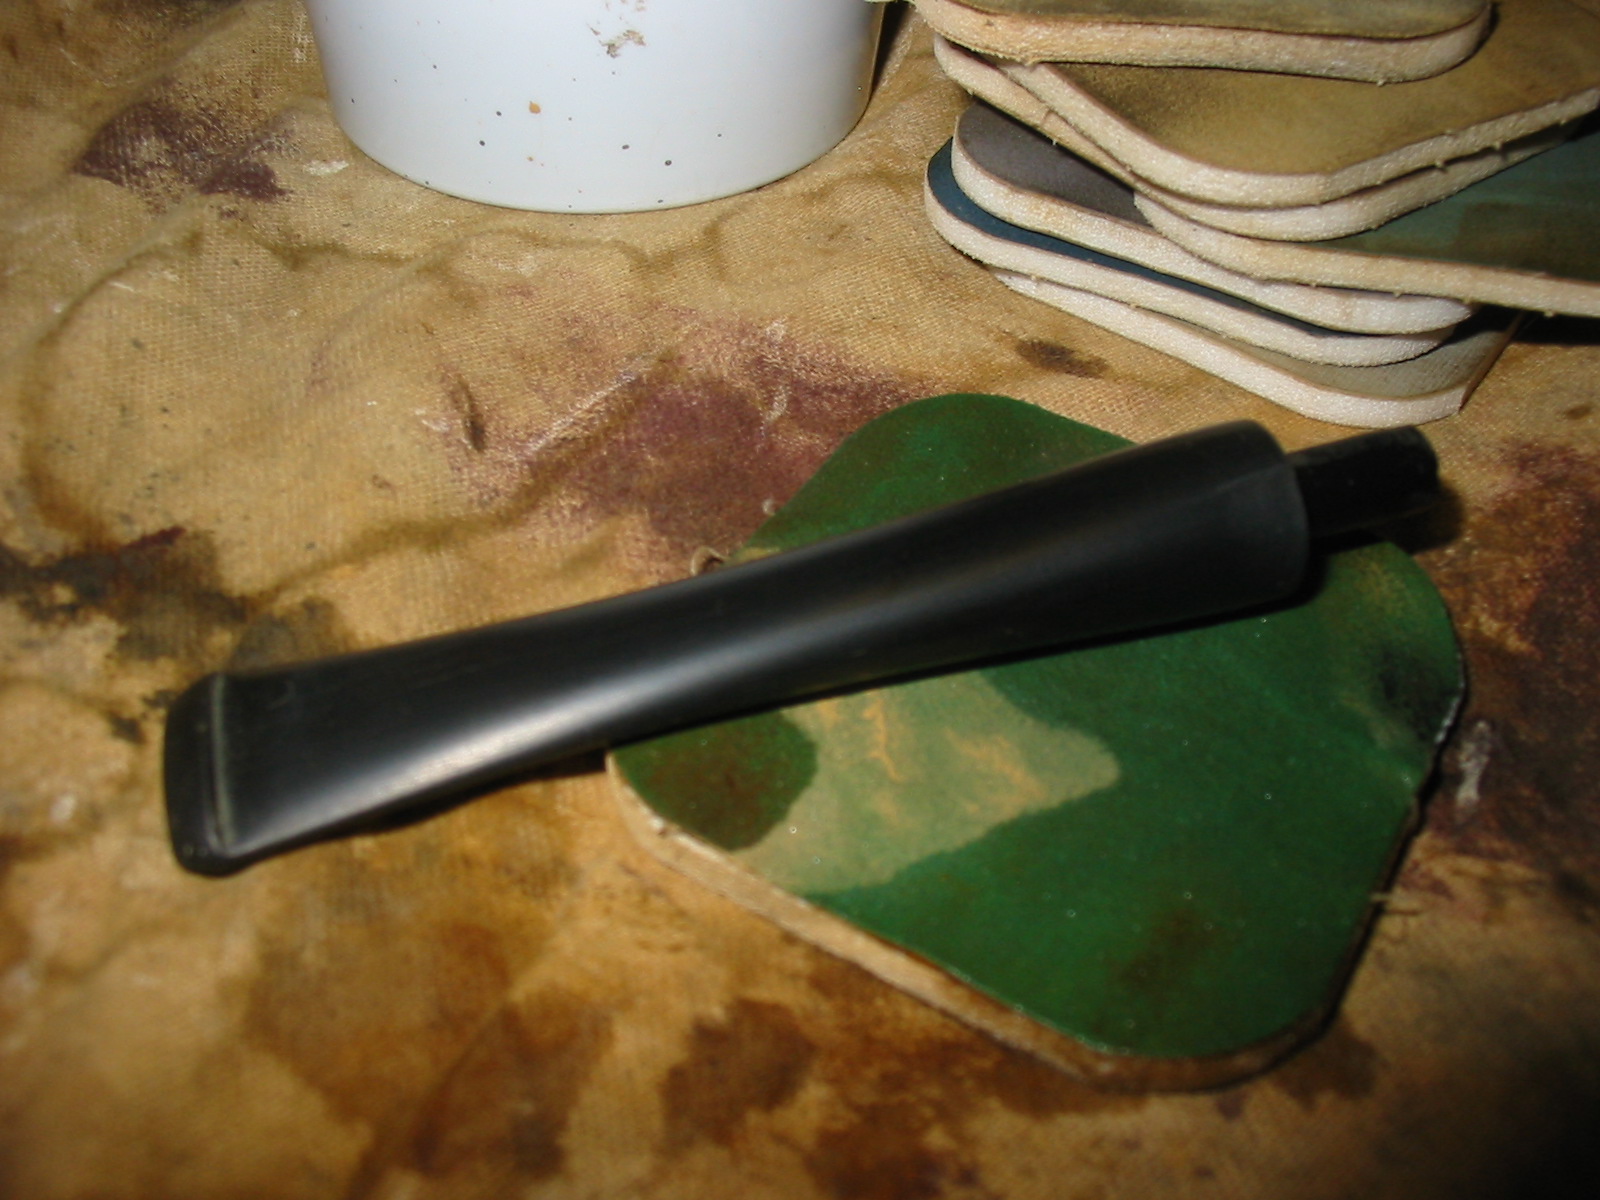
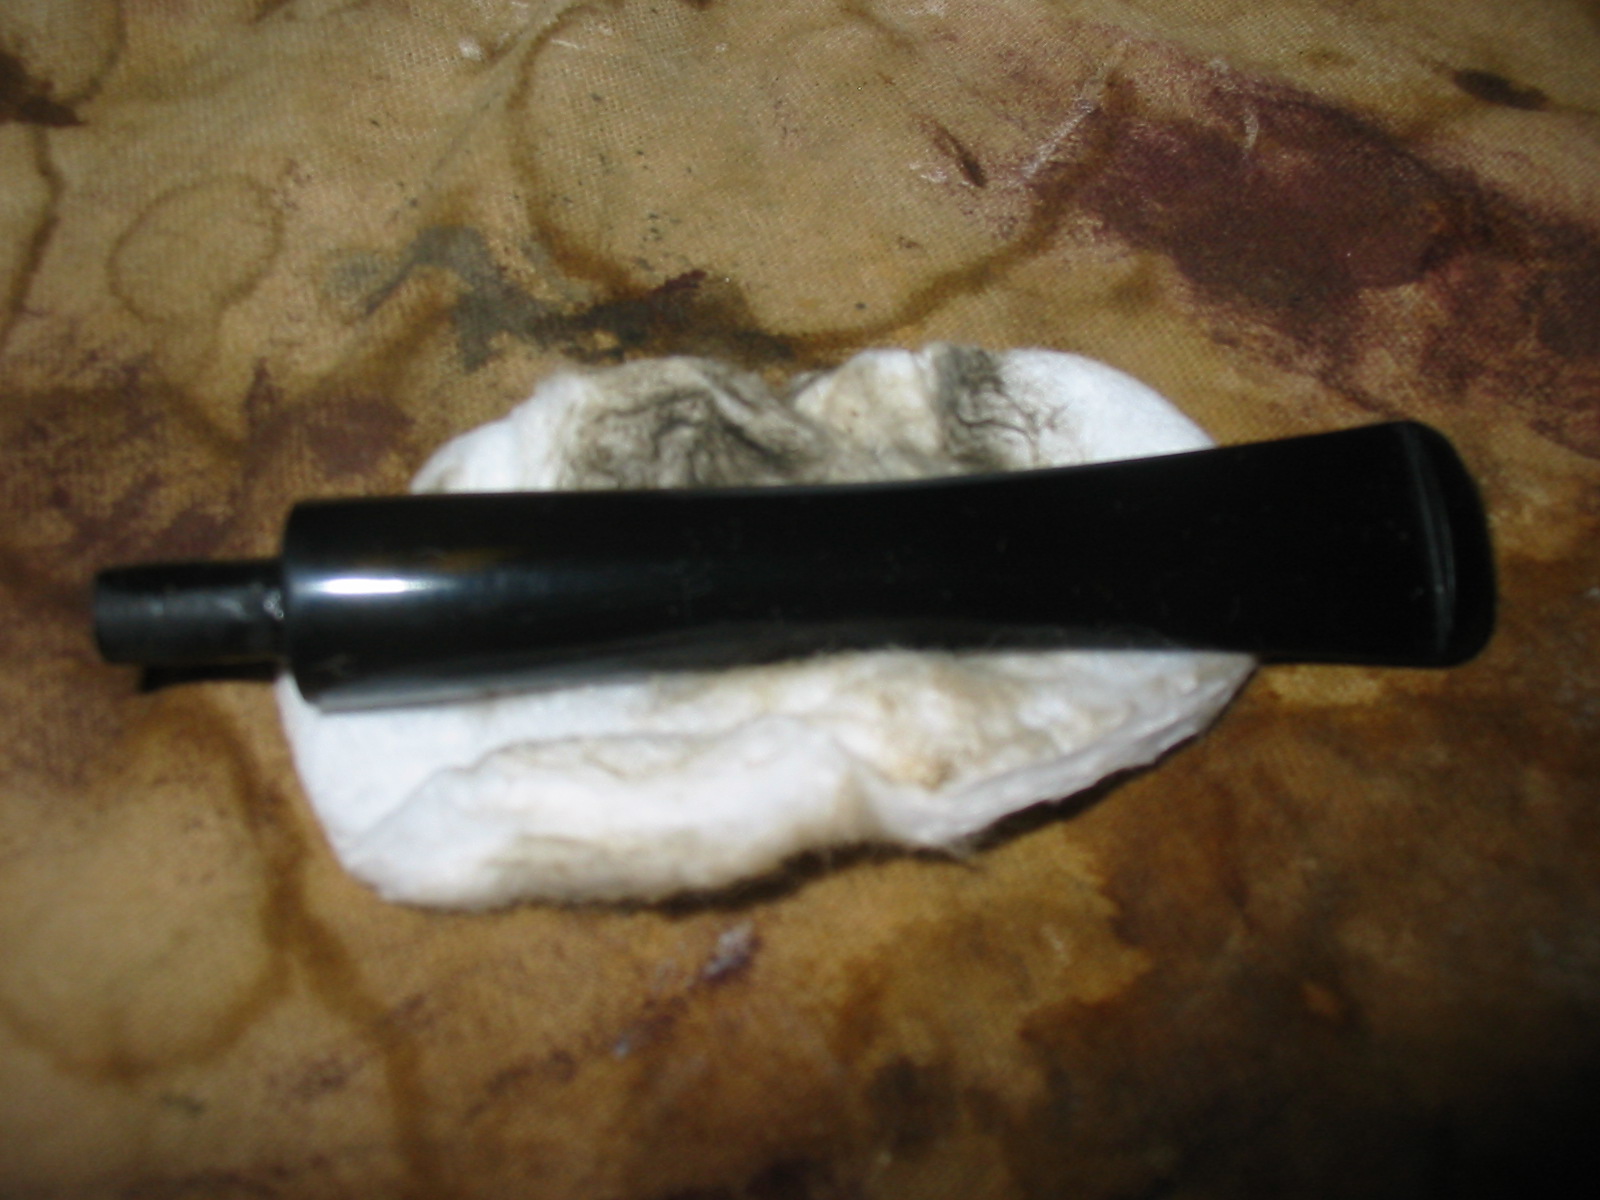
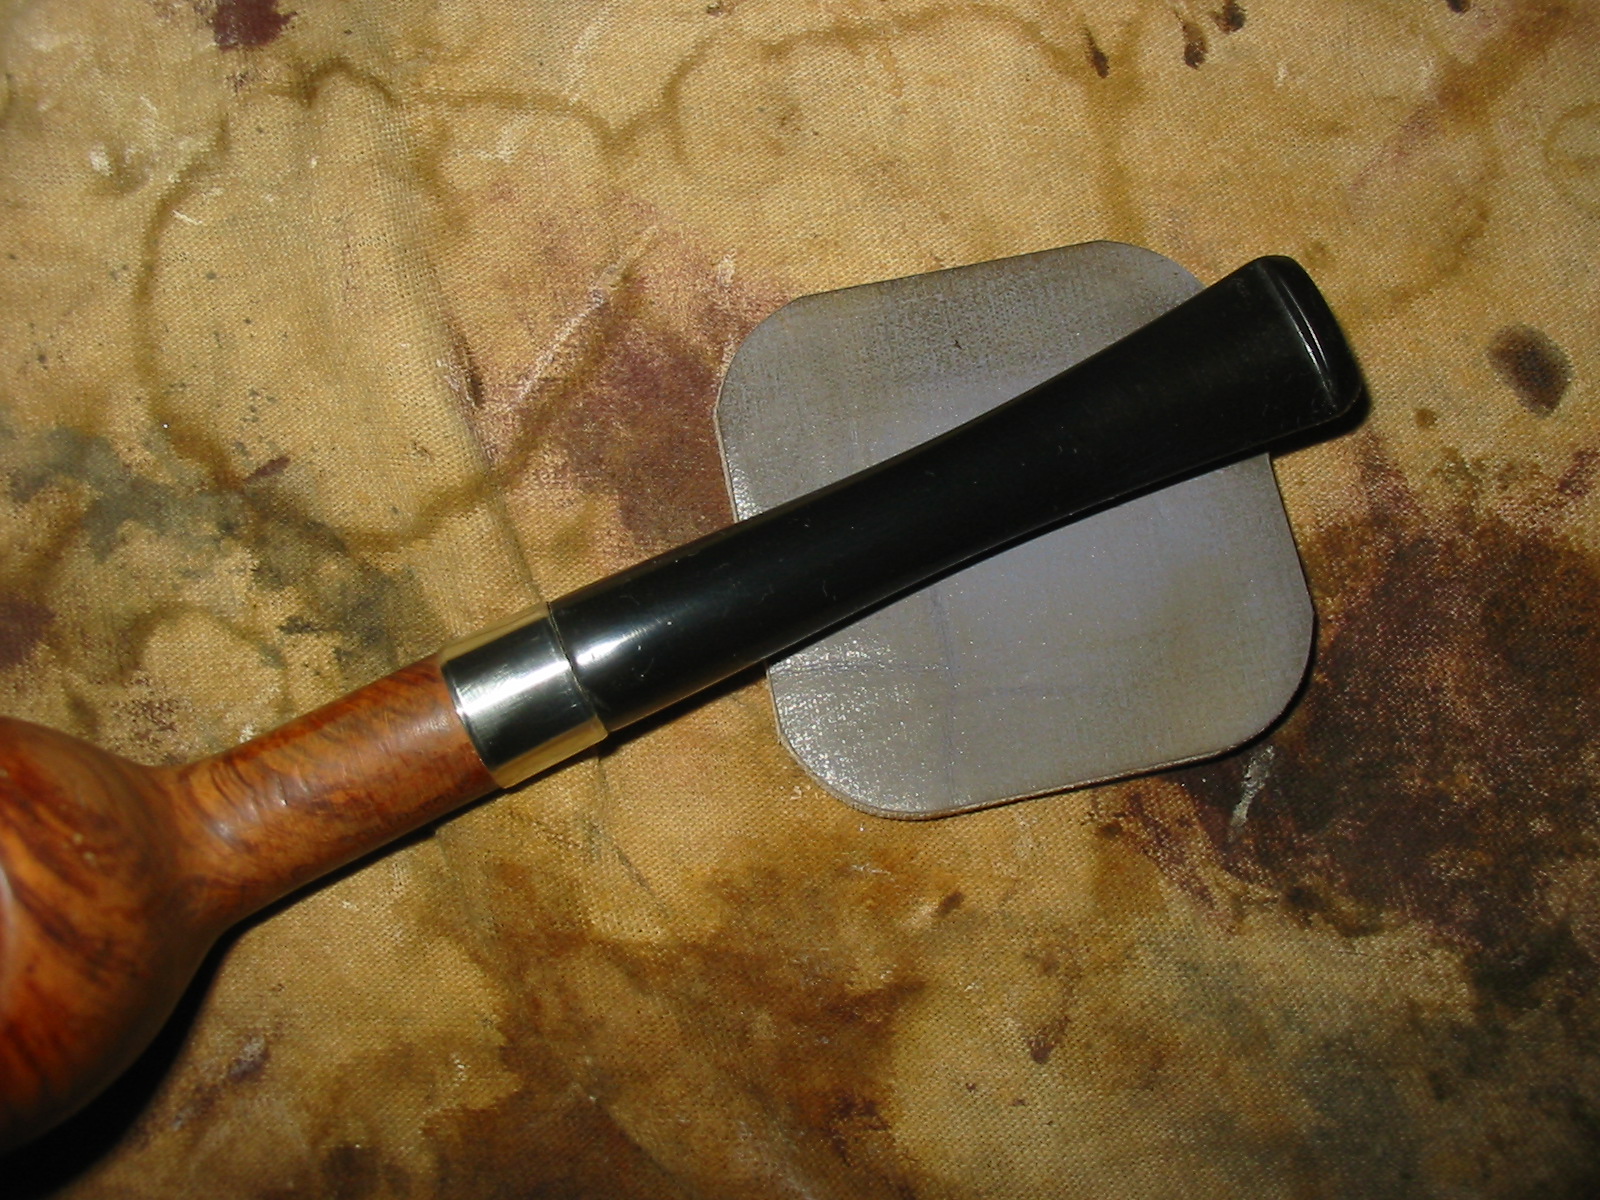
 As you would expect, our Billiard that Andy chose has many challenges. The worst of his obvious problems is the rim which has been chewed and gnarled! It has a large divot on the internal lip over the shank. Also, on the shank side, the rim slopes away having endured a ‘skinned knee’ experience. The old finish is totally old and the stummel has some small fills that need checking. Yet, underneath the grime and tired finish – where there is finish, is briar grain with potential. I begin the story of this Billiard hoping to rise as a Phoenix by doing the basic cleaning of the stummel before fashioning the precast Churchwarden stem. To mark the beginning of the restoration, I take a picture of the Billiard stummel with the Warden stem – the place where Pipe Dreamers begin!
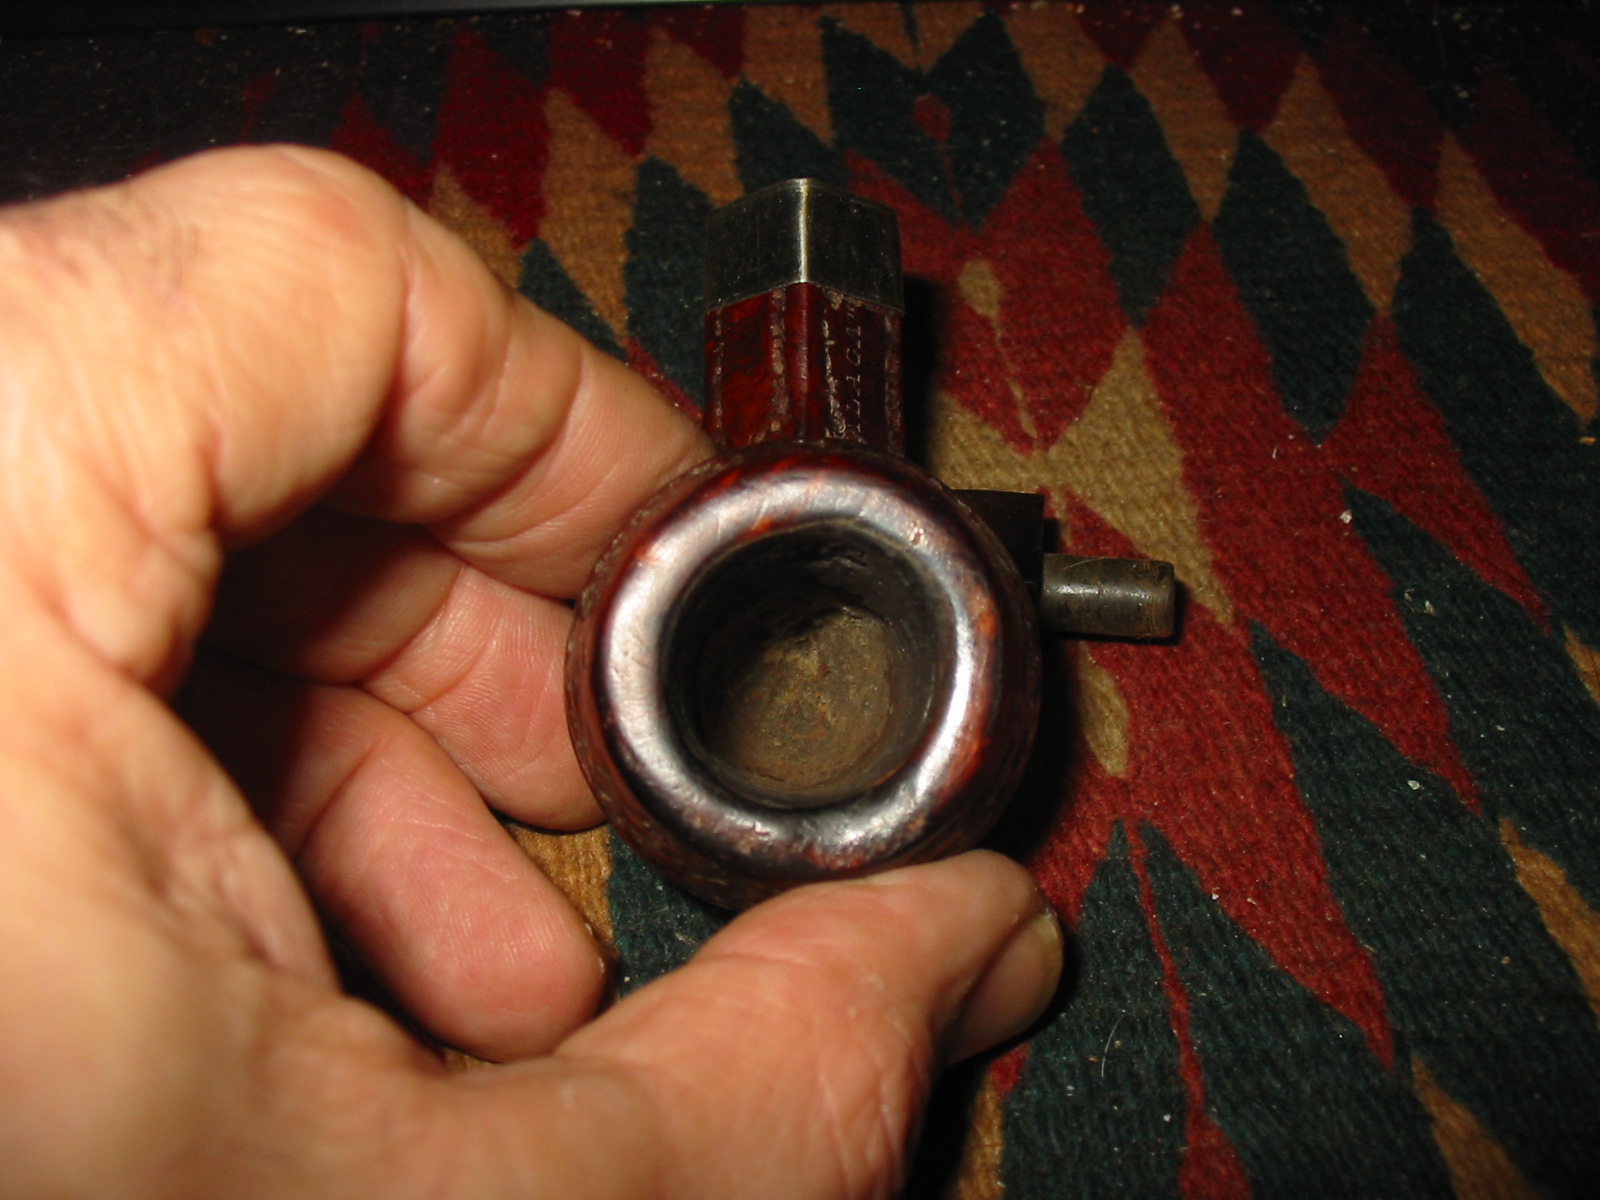
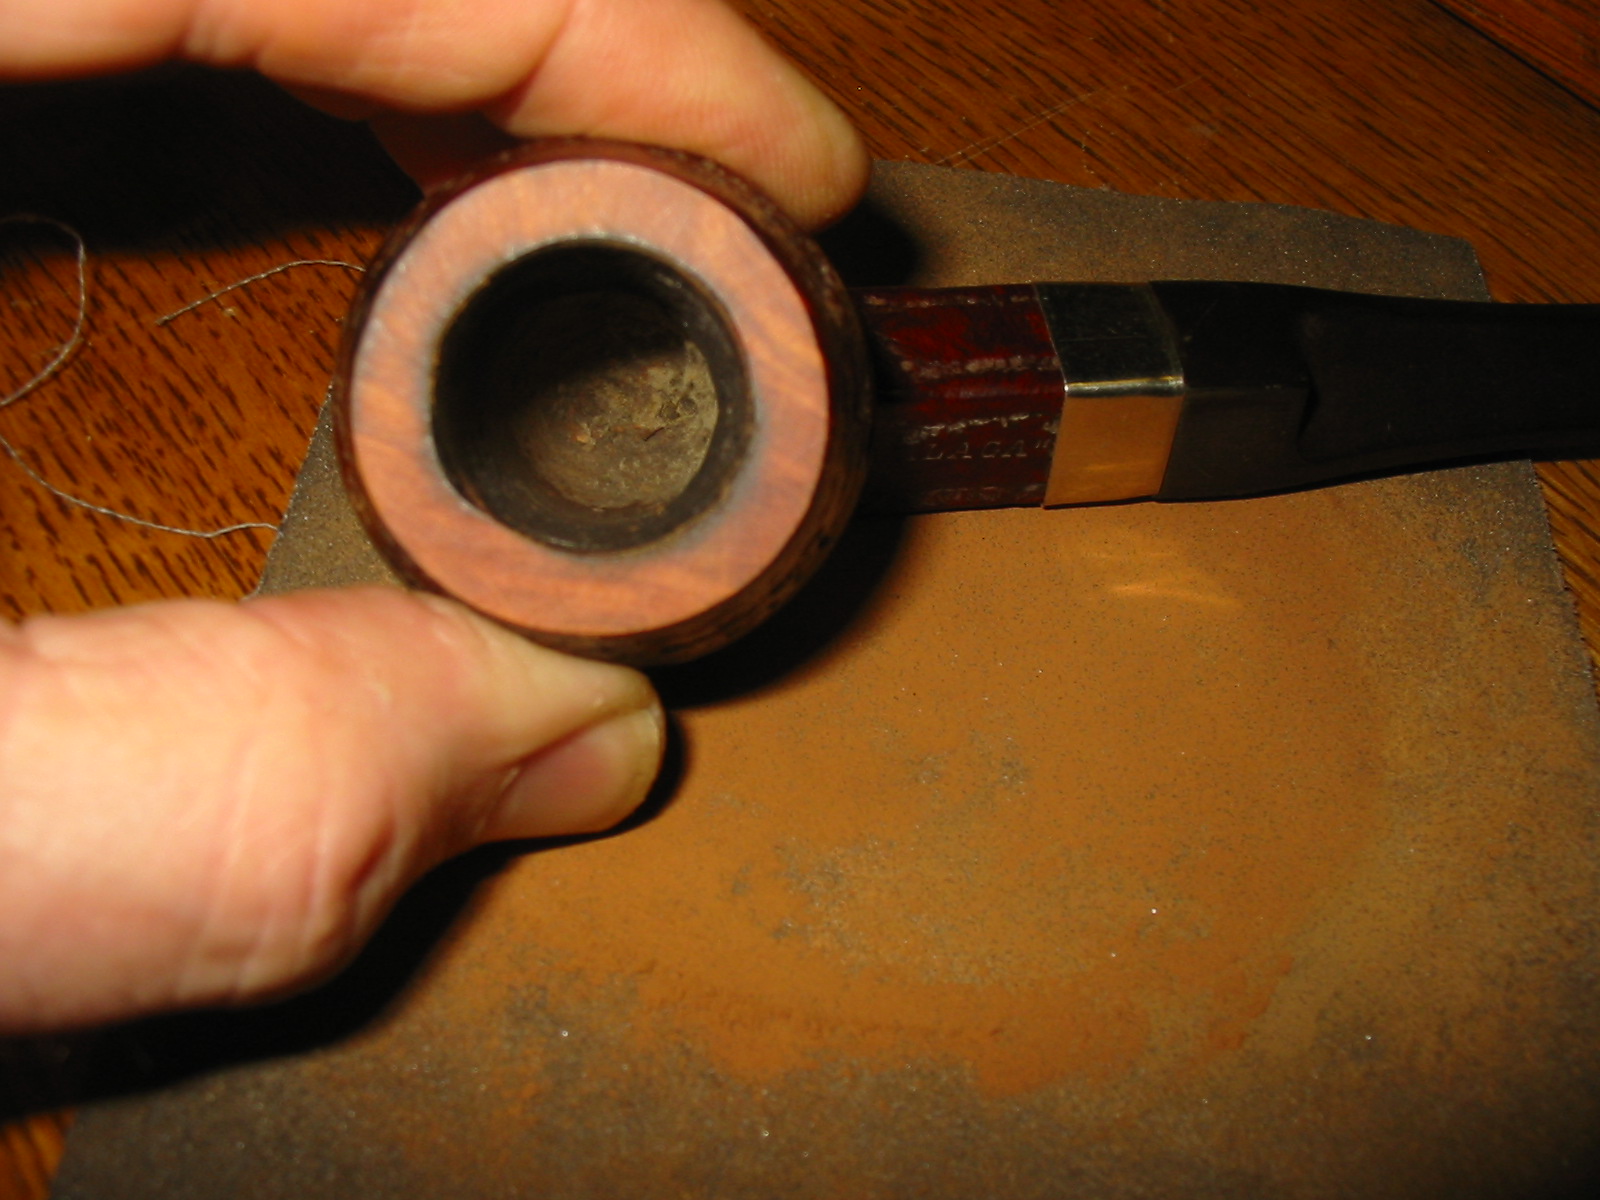
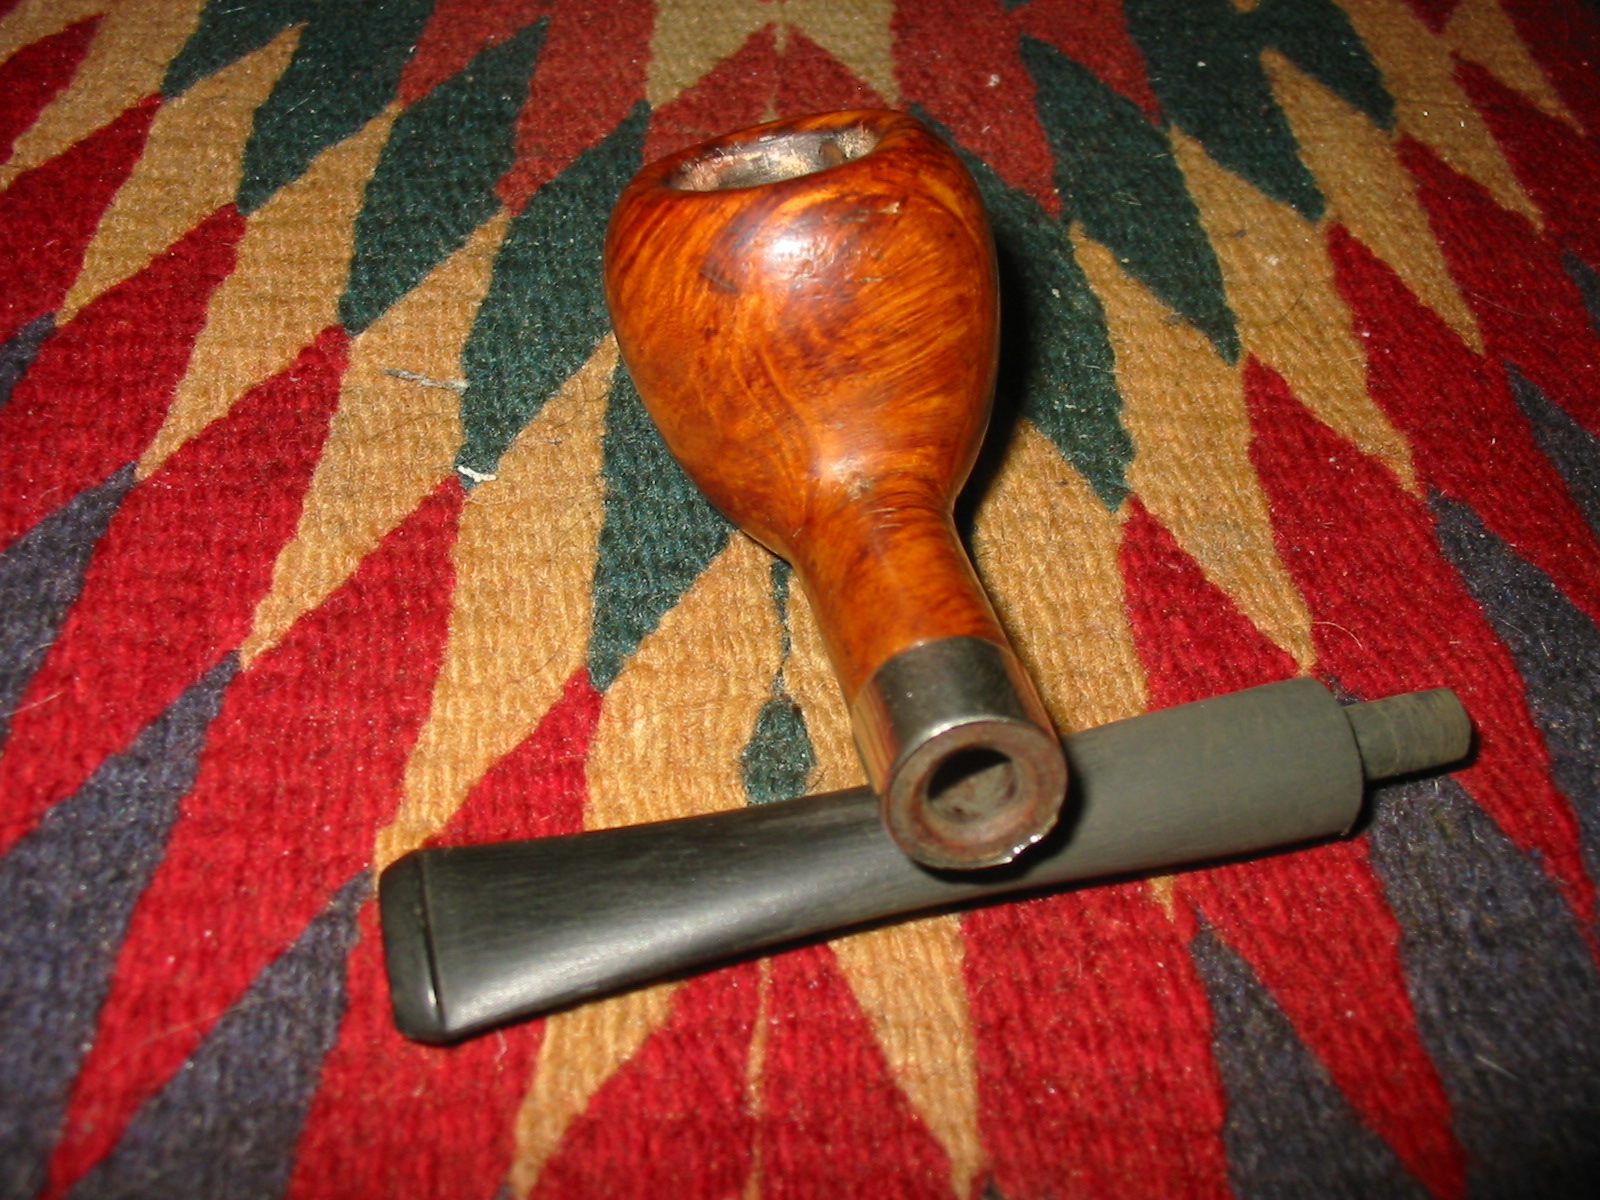
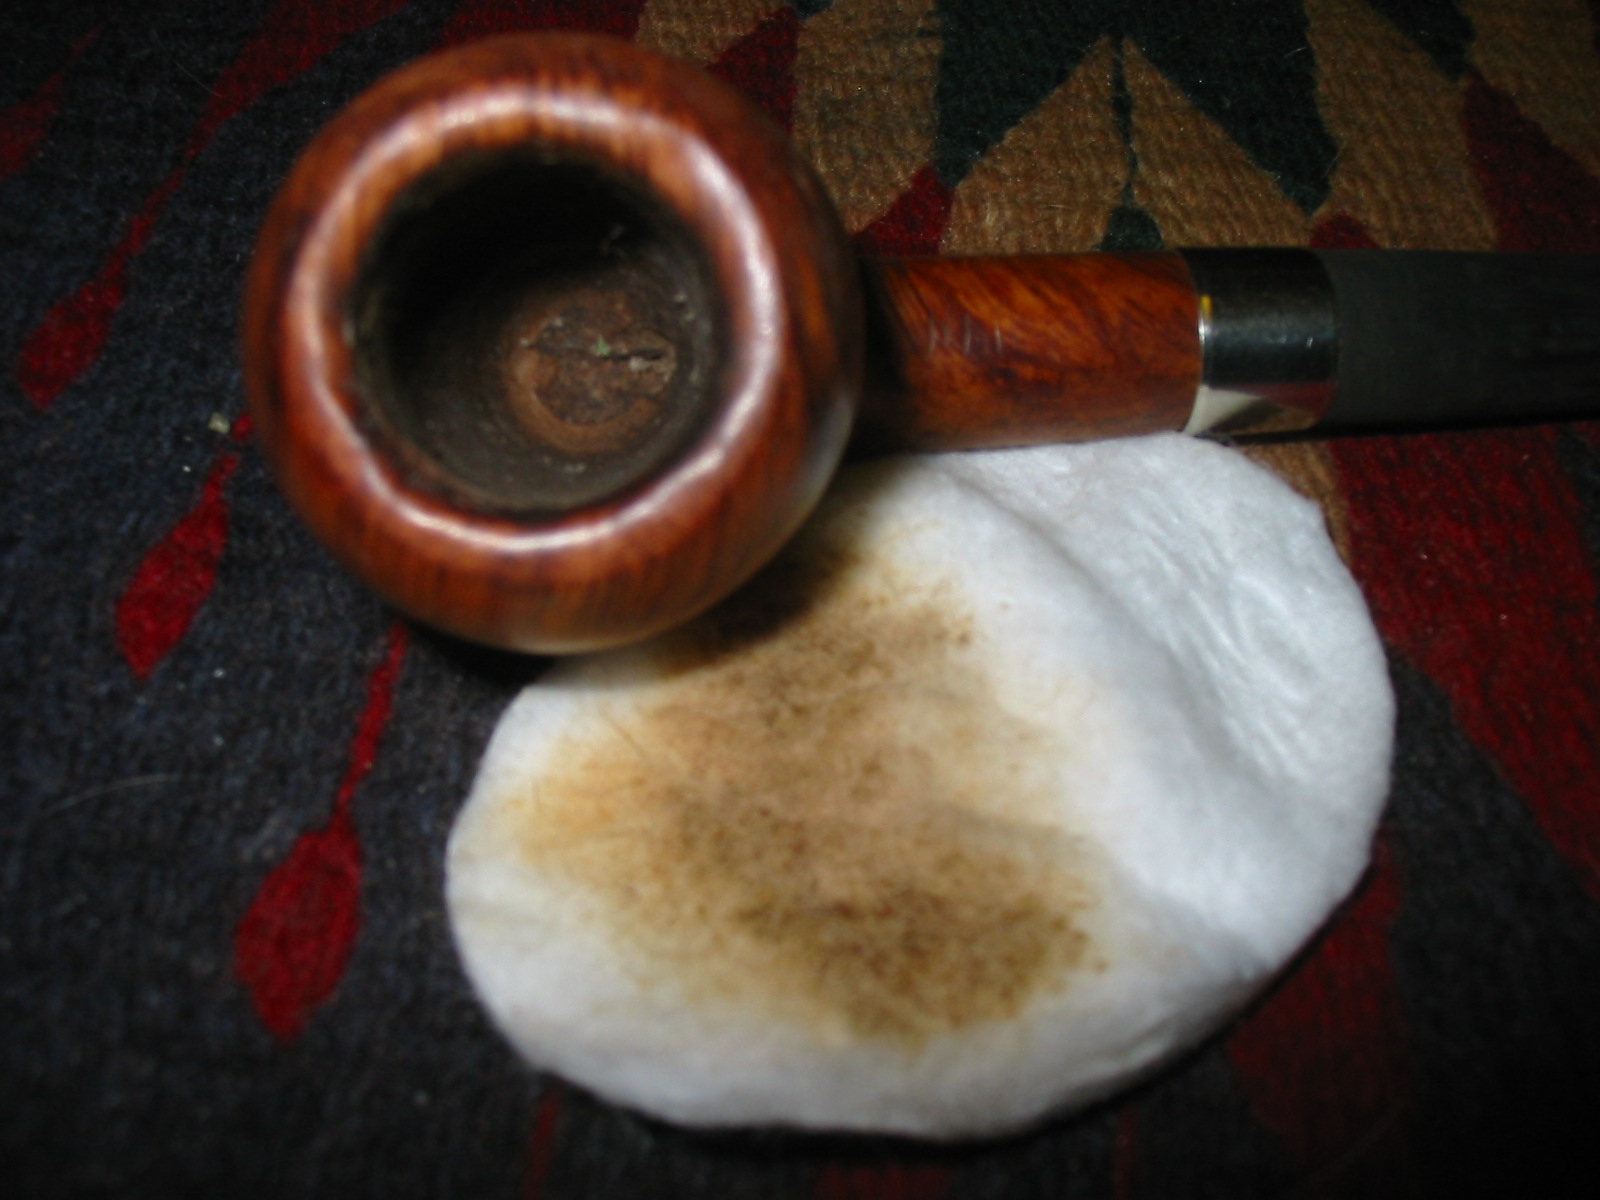
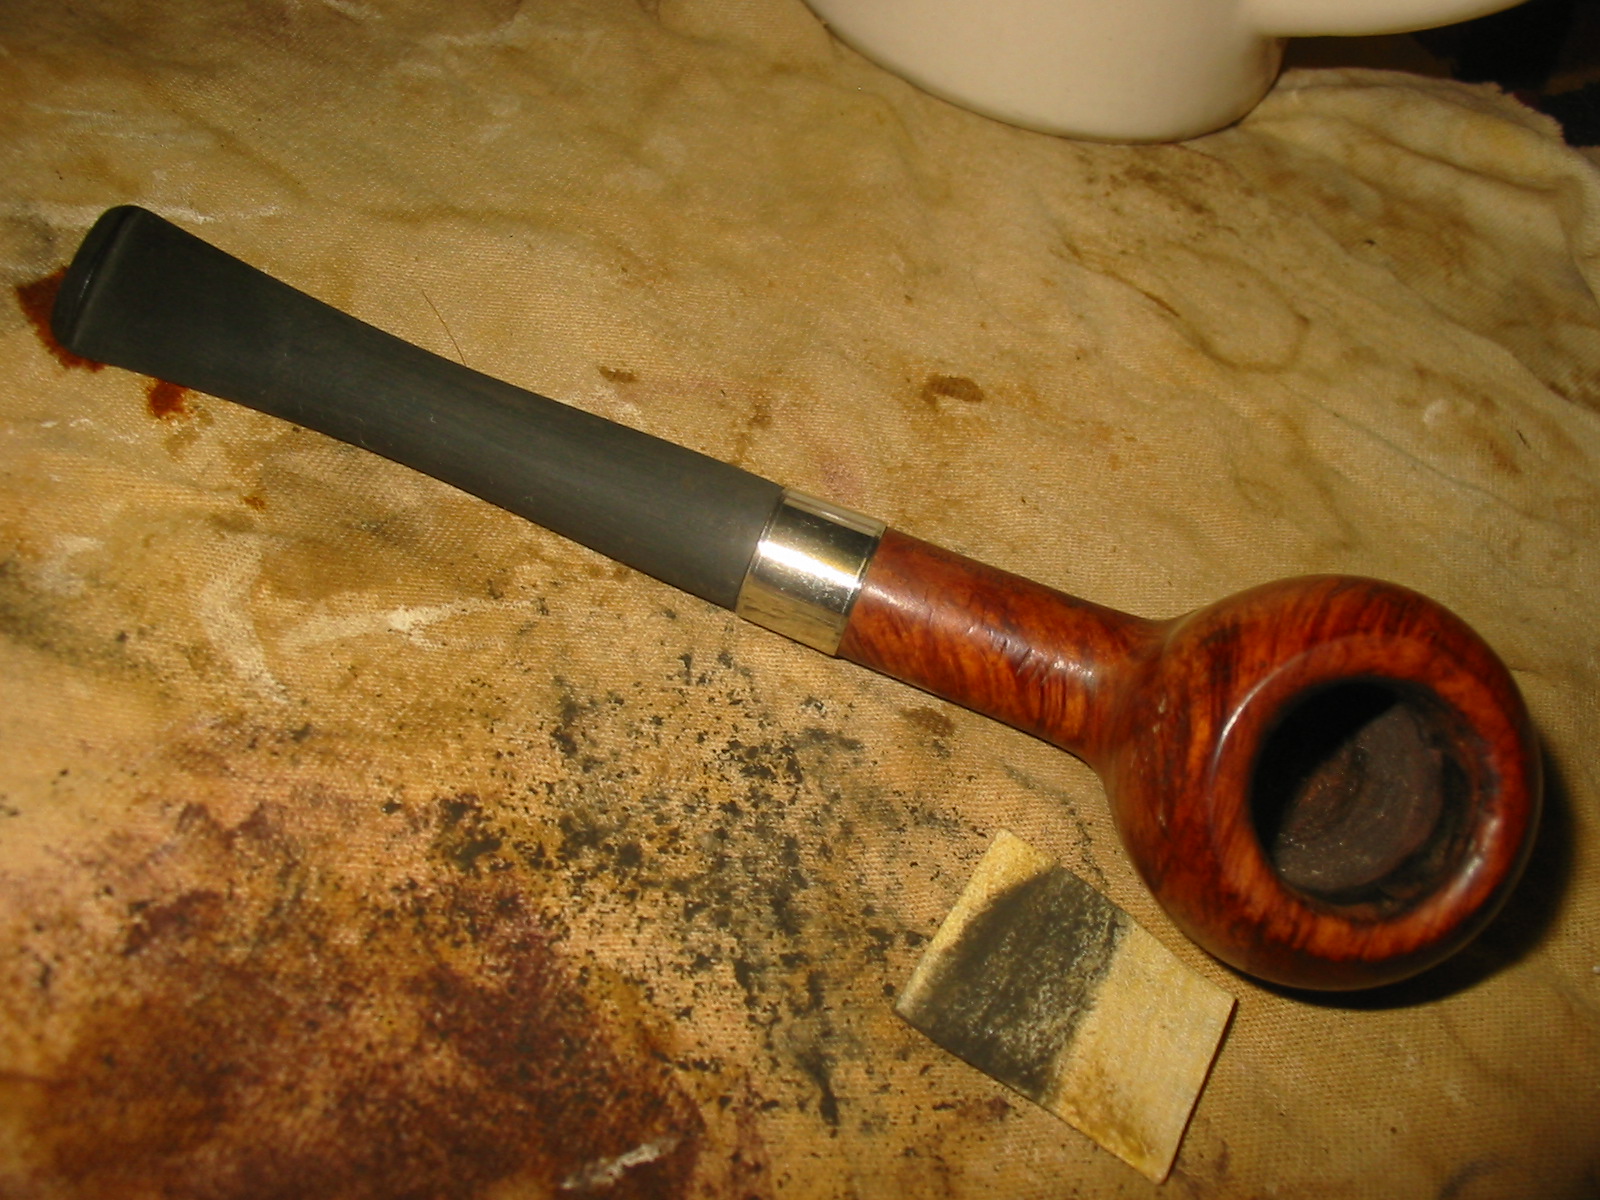
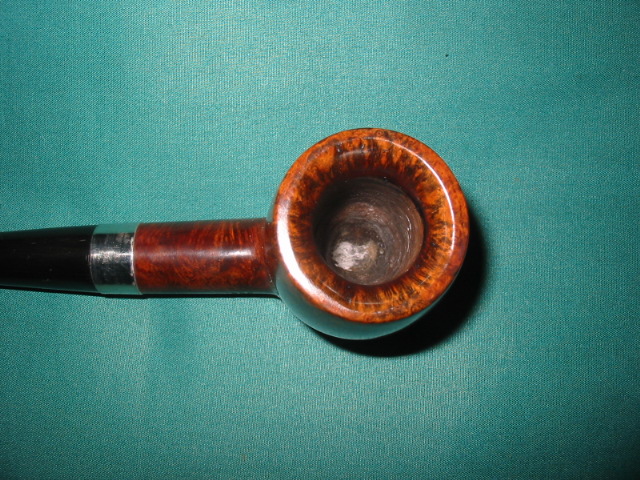
 I take a picture of the chamber and see that there is very little cake build up, but I also see that it appears someone took a pocket knife to the chamber in the past – with little care. I take the Savinelli Fitsall Tool and I ream the bowl of residue carbon. Following this, I sand the chamber with 240 grit paper by wrapping the paper around a Sharpie Pen seeking to clean it but also to smooth the top of the chamber where knife marks were. I then clean the chamber with a cotton pad wetted with isopropyl to rid it of carbon dust. The chamber wall seems to be in good shape – no cracks or heat fissures are visible, but I will need to do a bit more sanding – I’ll wait to do this along with the rim repair.

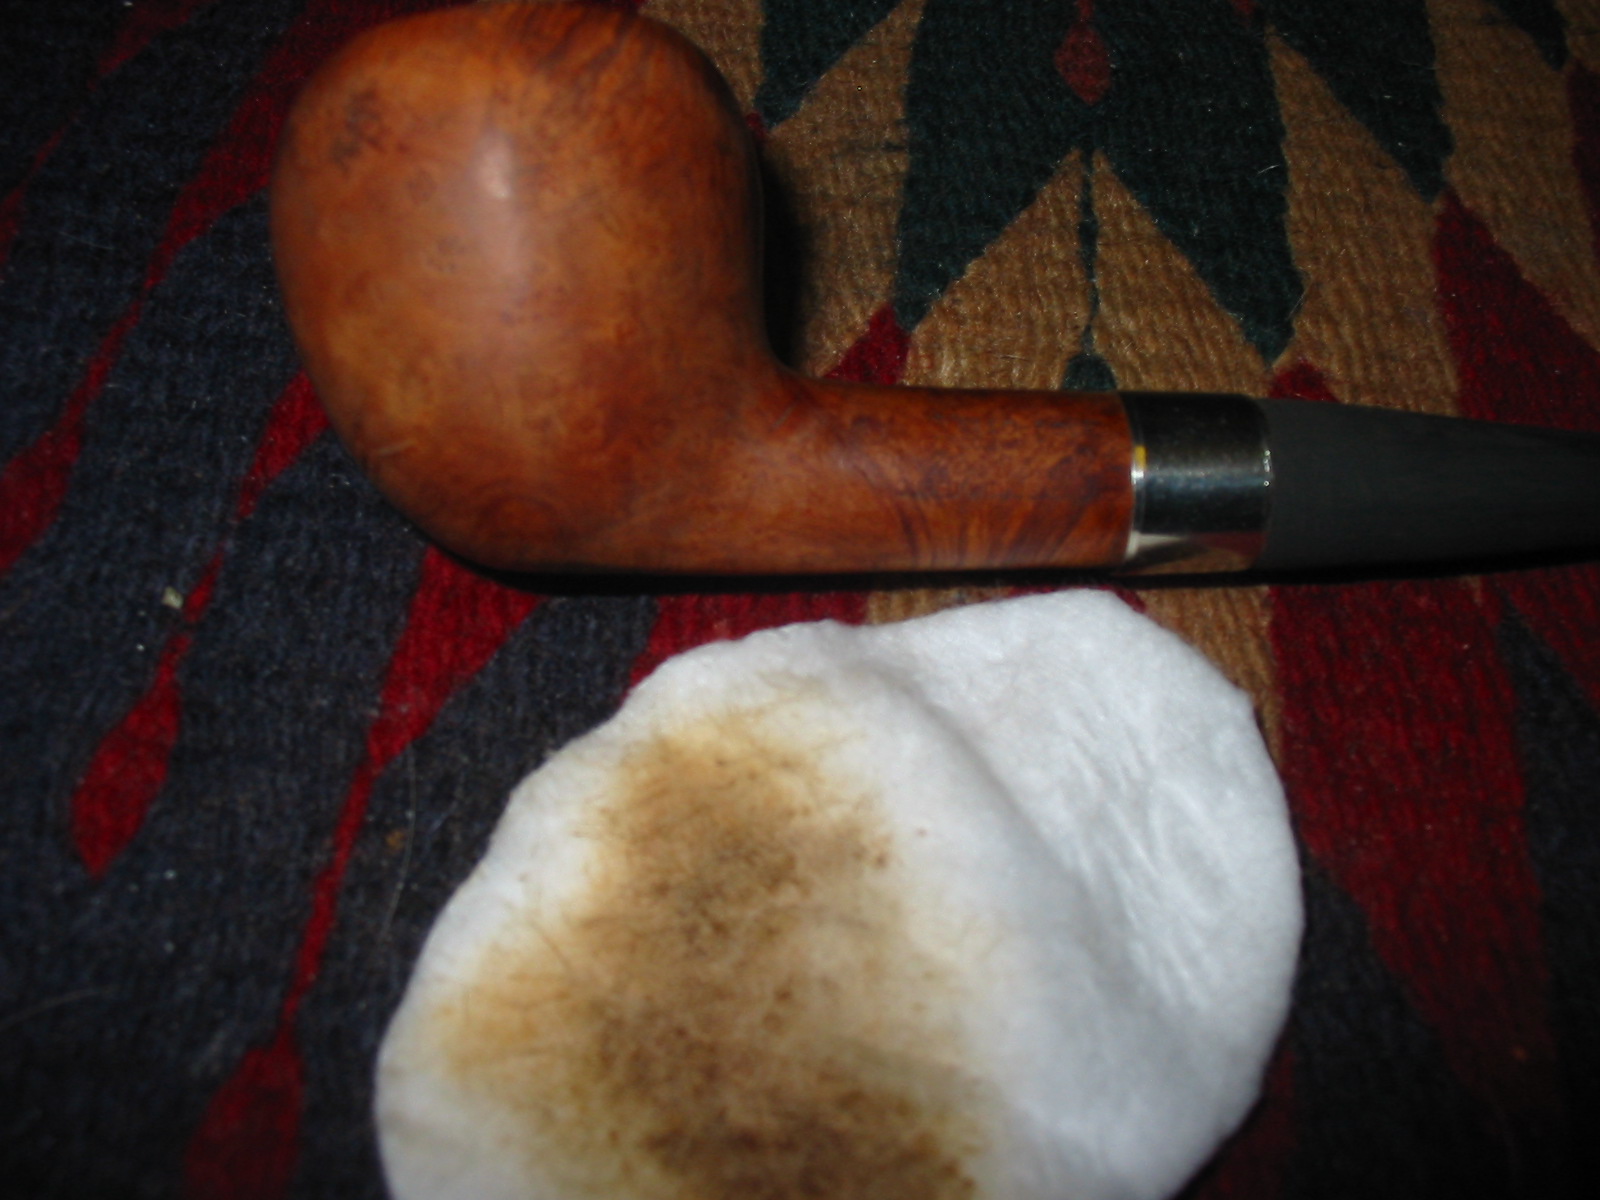
 Now I turn to internal cleaning of the stummel. Using cotton buds dipped in isopropyl 95%, I realize very quickly that the grunge in this mortise and airway was thick. I put the cotton buds down for a time and start scraping the mortise walls with dental spatulas. I also insert a drill bit the size of the airway and hand turn it to excavate the tar and oil buildup. In time the cotton buds started coming out less soiled. I plan to give the stummel a kosher salt and alcohol soak through the night to clean the internals further and freshen the stummel for the new steward. The pictures show the grunge warfare!
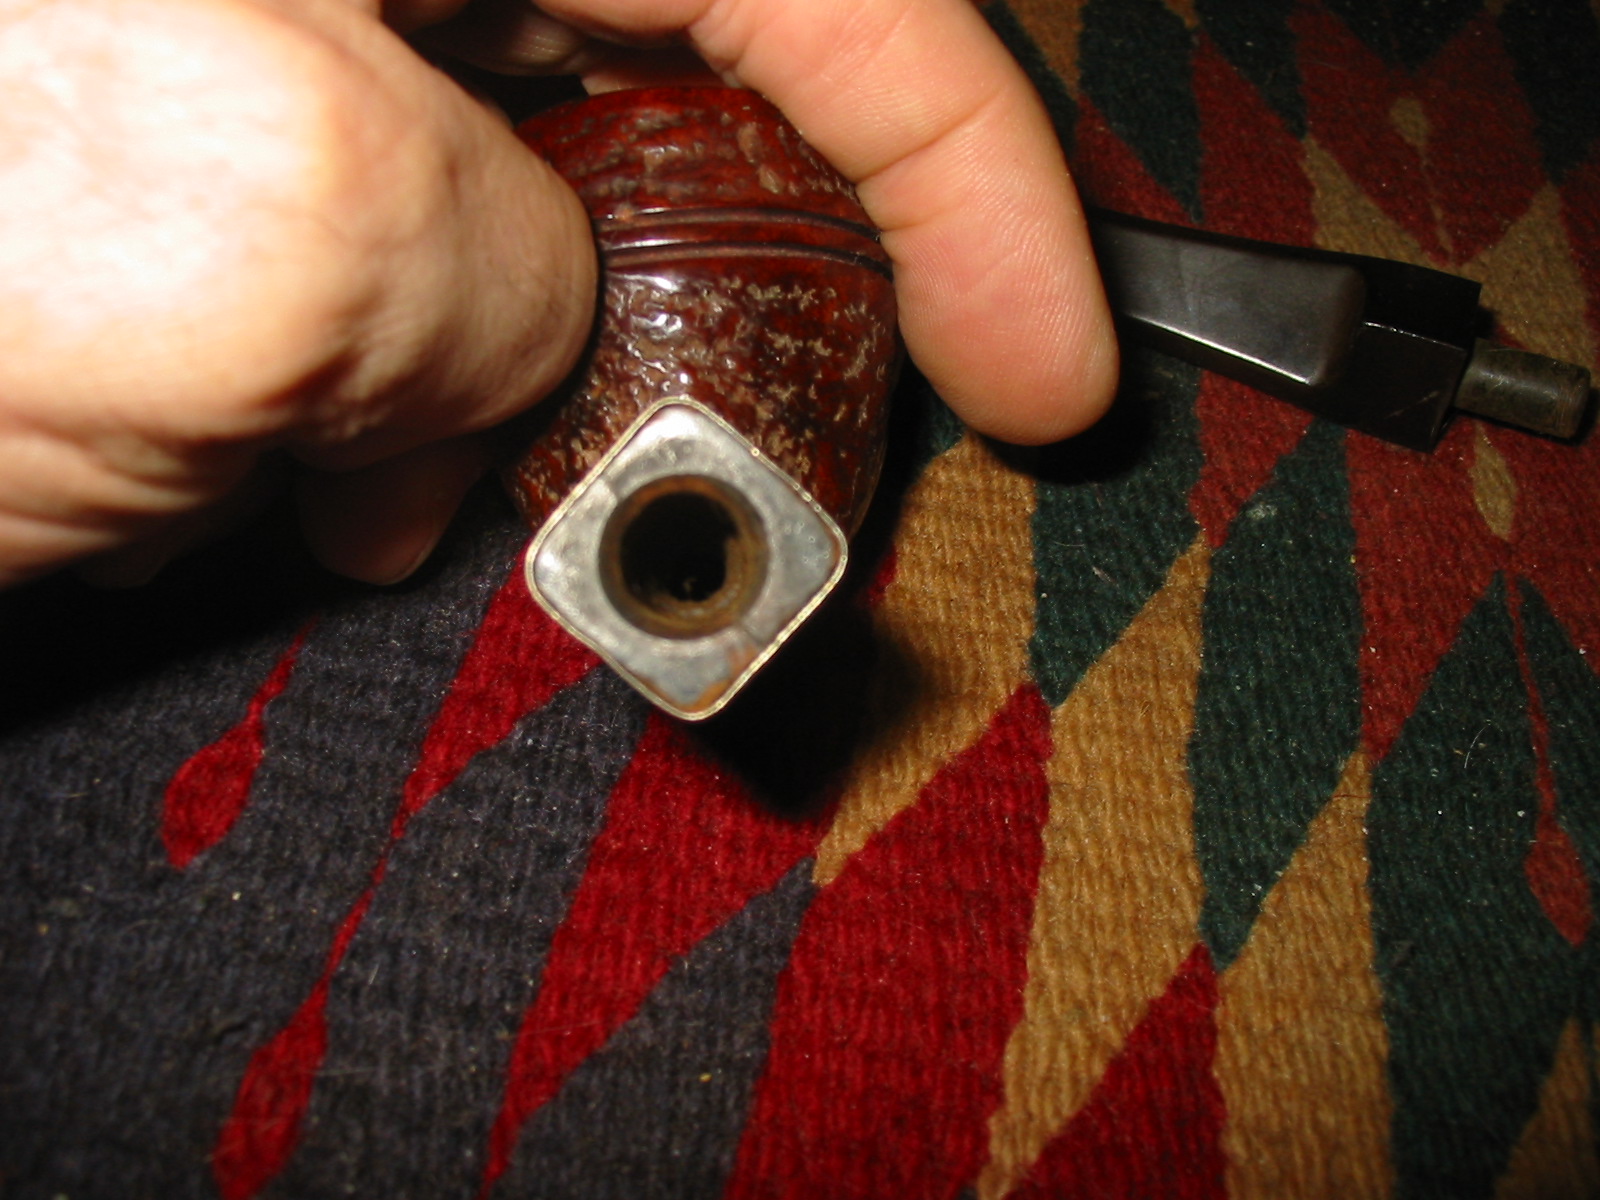
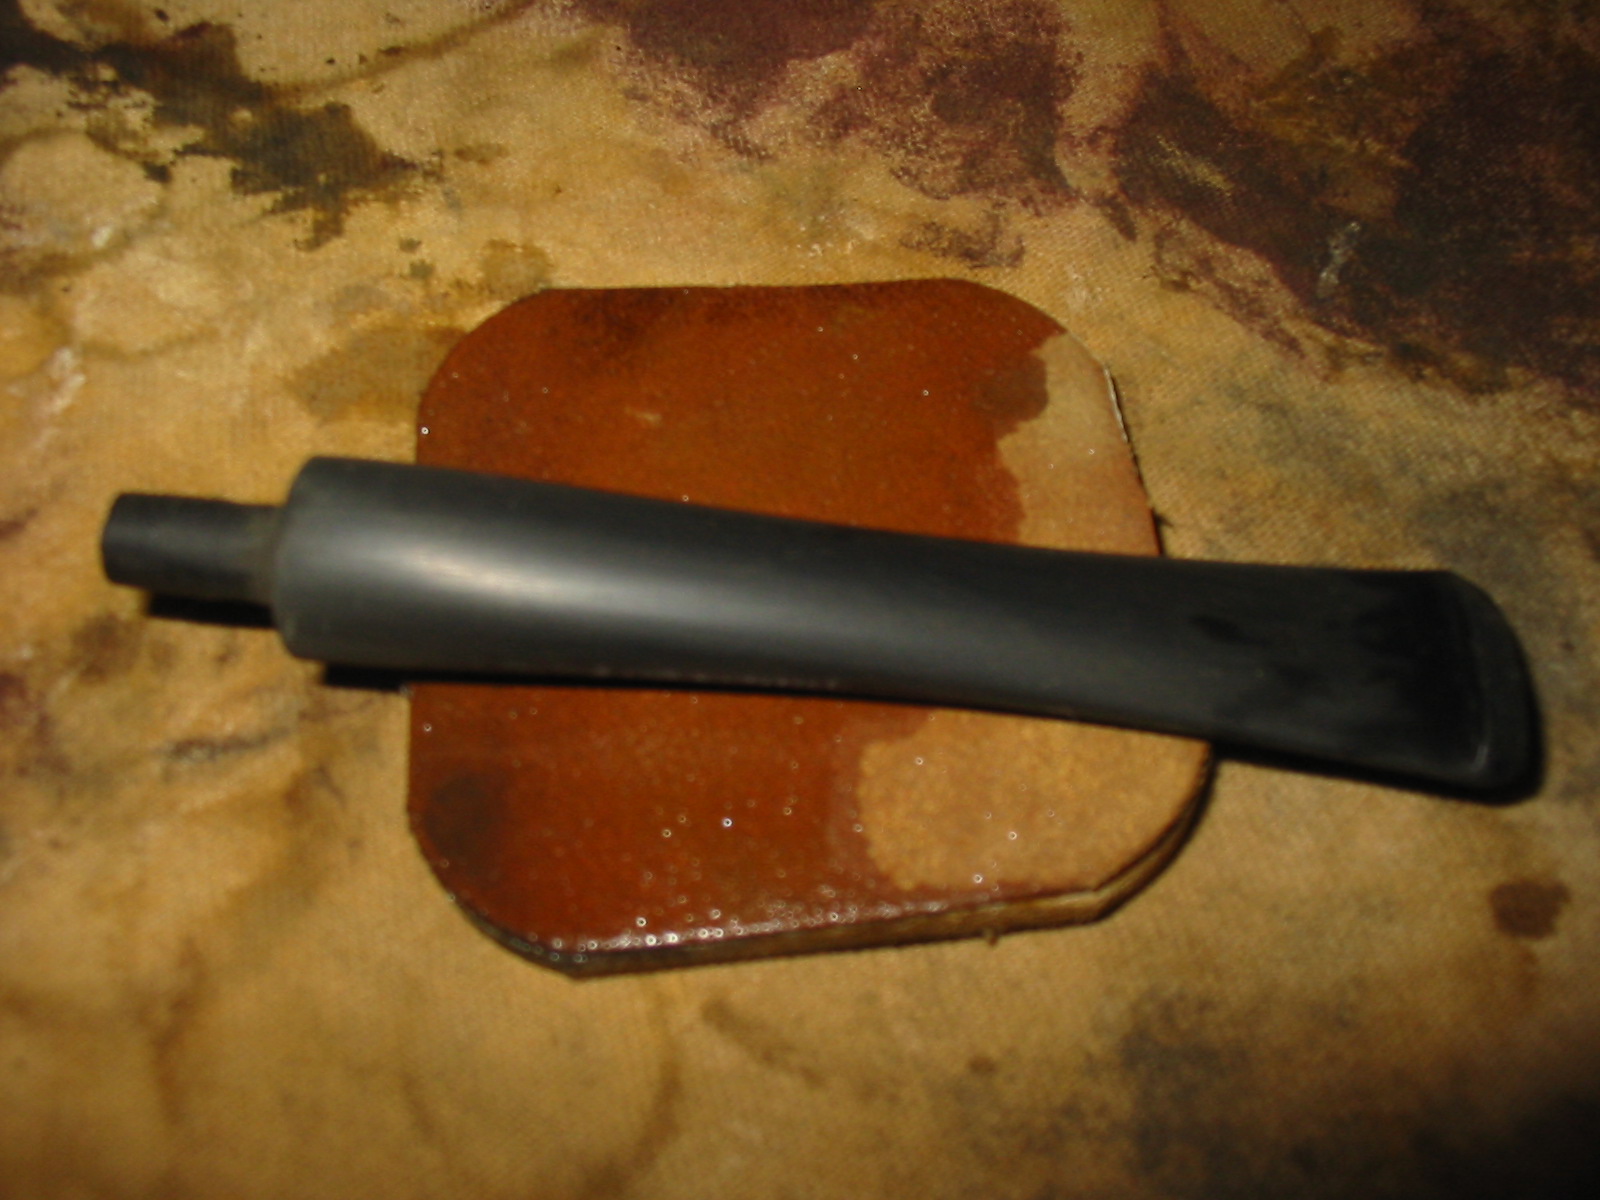
 With the stummel cleaned, I now turn to the precast Churchwarden stem. I begin by pulling out my new electronic caliper that I acquired when I fashioned the 3 Churchwarden stems before. I take an internal measurement of the Billiard’s mortise, which is the target. The reading is 8.13 mm. For a conservative target in shaping the new tenon on the precast Warden stem, I add .40 mm to the 8.13 which gives me a conservative target of 8.53 mm.
  I now mount the drill bit to drill the tenon’s airway enlarging it to receive the guide pin for the Pimo Tenon Turning Tool, which I also just added to my tools. I mount the Pimp Tenon Turning Tool into the drill chuck and cut a conservative practice cut on the tenon to get an initial measurement.
 The practice cut measurement is 8.96 mm which means I need to remove around .43 mm to arrive at the conservative target of 8.53 mm. The purpose of the conservative target is to get close to the exact size of the mortise, but not quite. This leaves room to sand the tenon to fashion the custom size because every mortise is different. The fit between the newly fashioned tenon and the mortise must be snug but not too tight.
  I crank down the blade on the Tenon Turning Tool a bit and make another practice cut and remeasure. Now, I have a perfect example of why doing practice cuts is a good idea! The next measurement was 8.23 – only .10 mm off the actual mortise size – too close for comfort. I don’t want to risk taking off too much. I back the blade off a little and recut. I come to an 8.49 mm which is good.
  Using a flat needle file, 120 and 240 grit papers I gradually bring the size of the tenon down. After MANY filings/sanding and testing the fit in the mortise, I can seat the tenon snugly into the mortise.
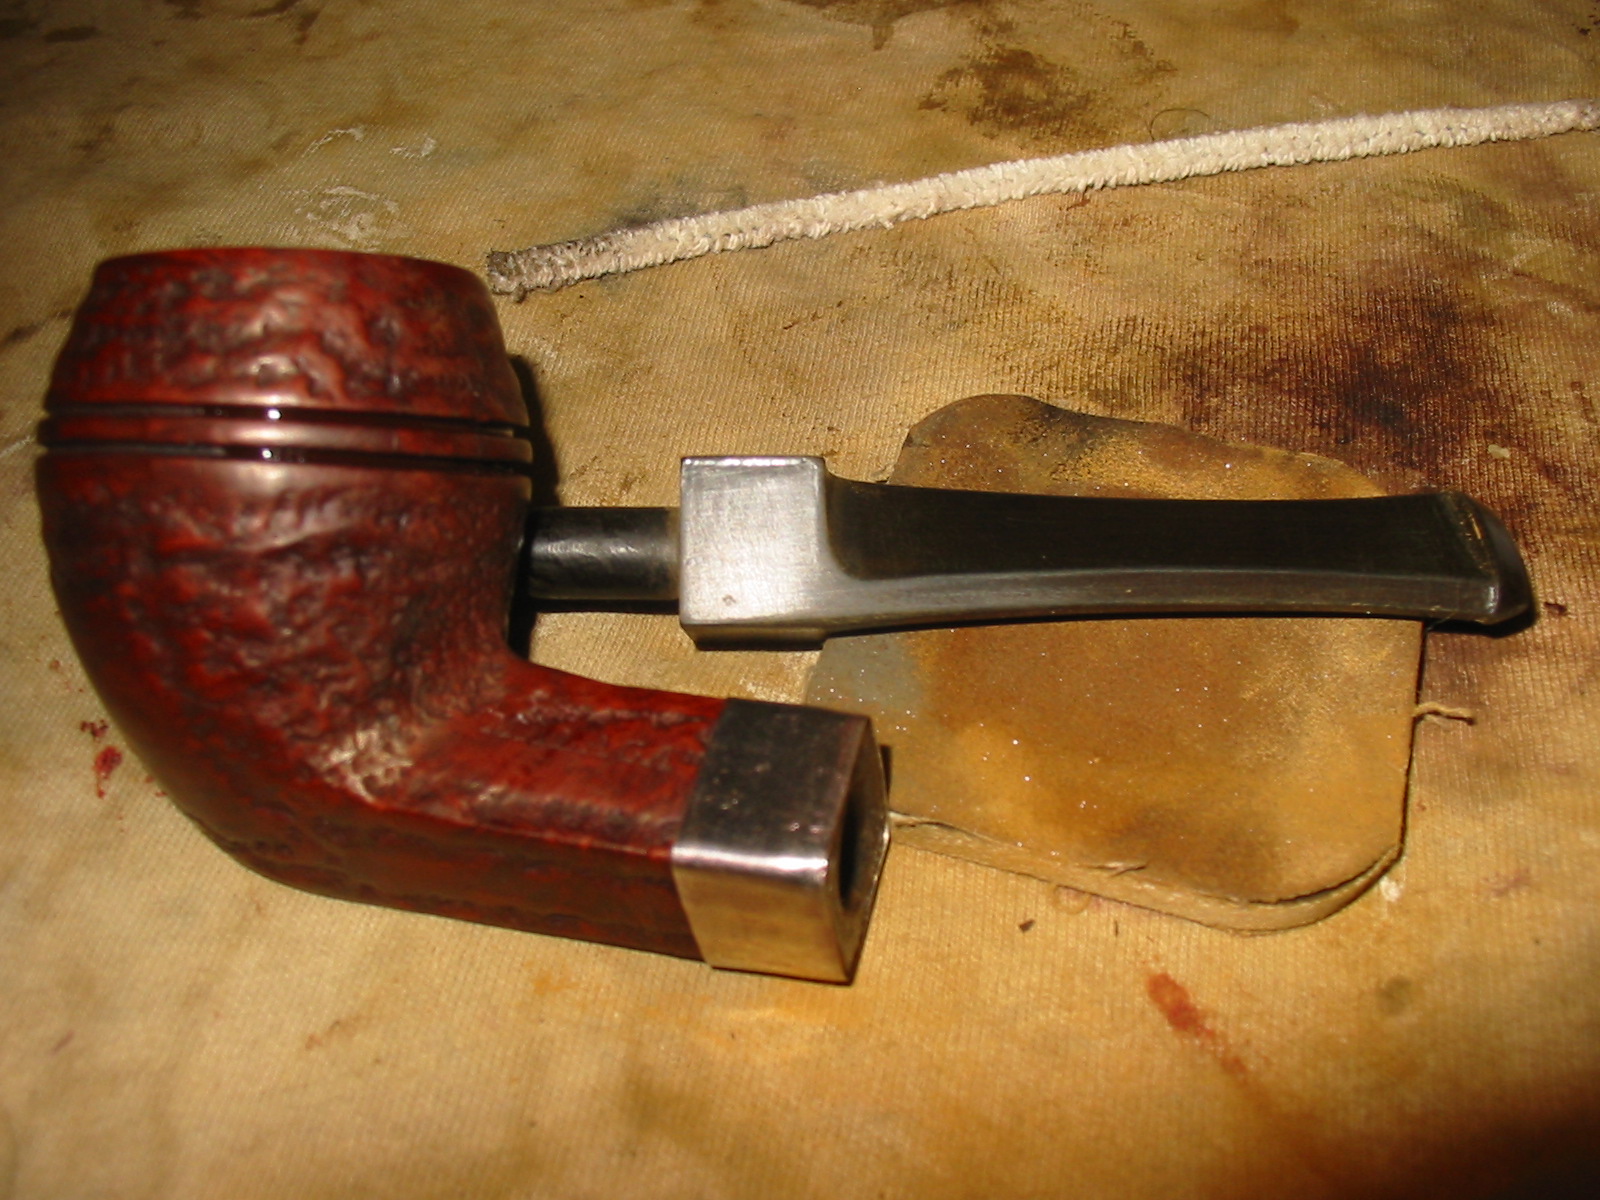
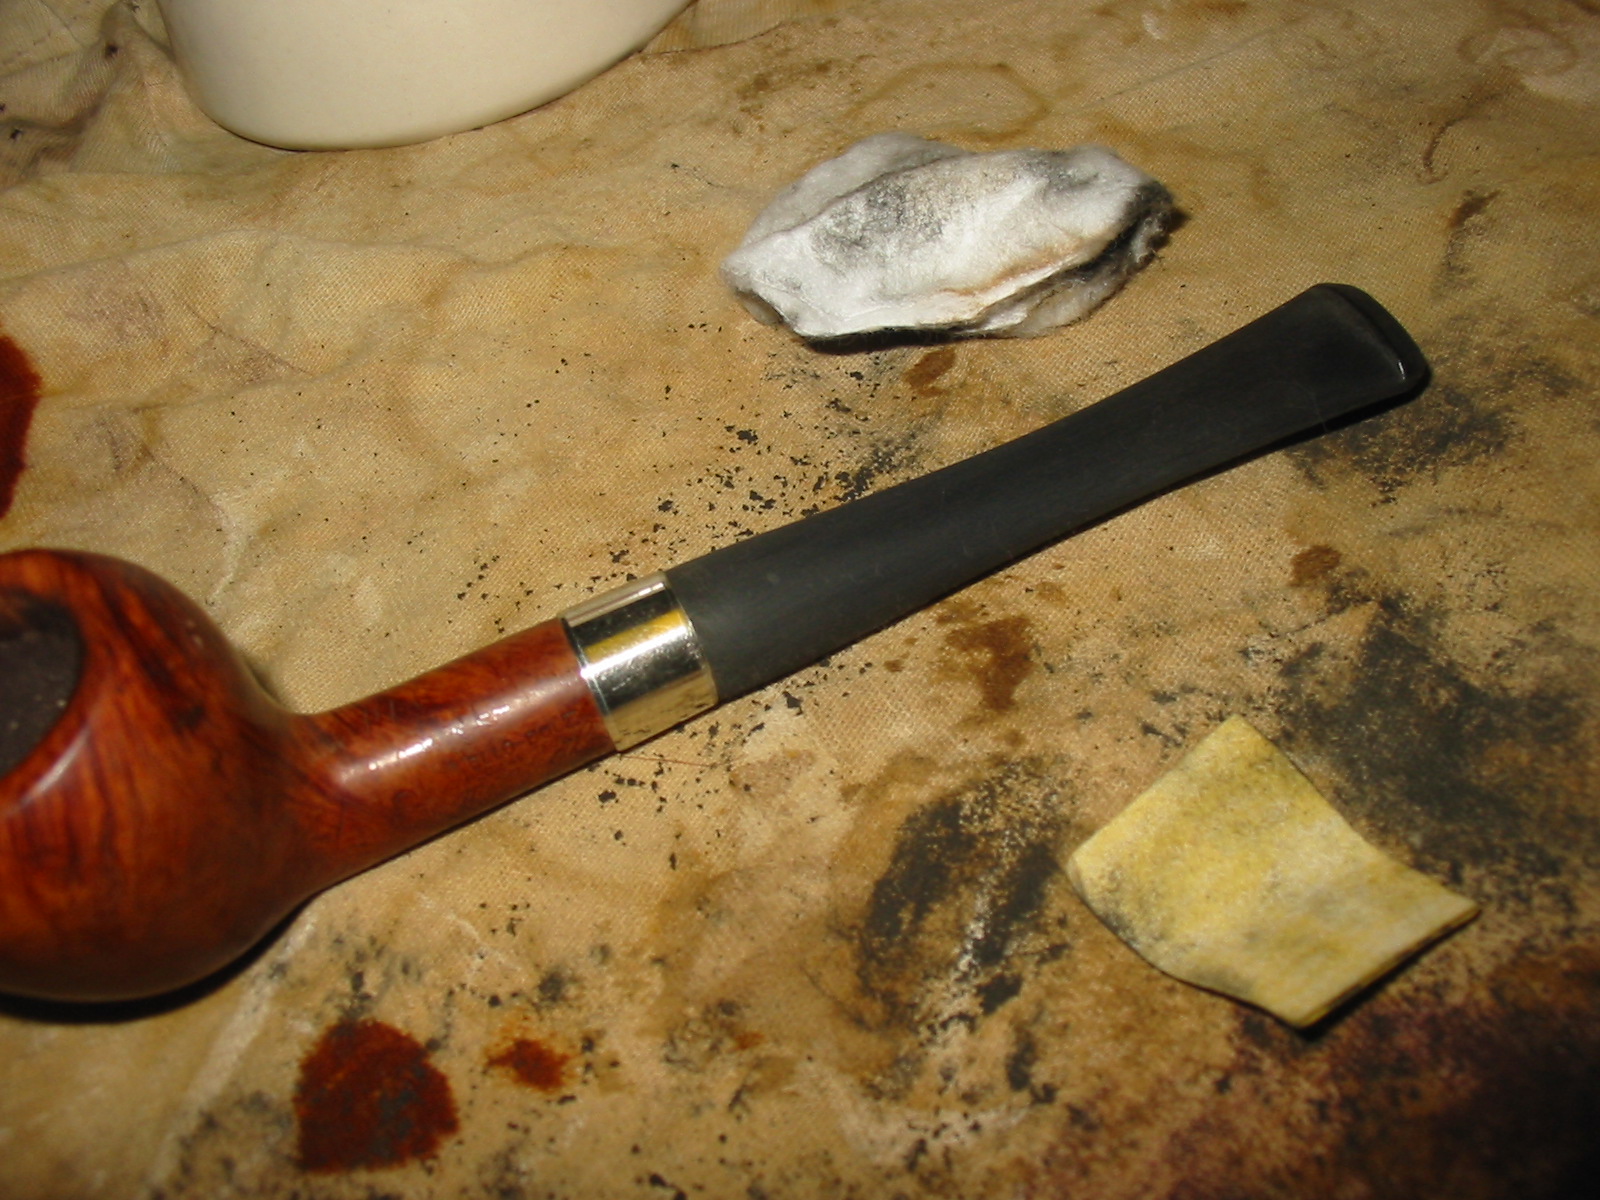
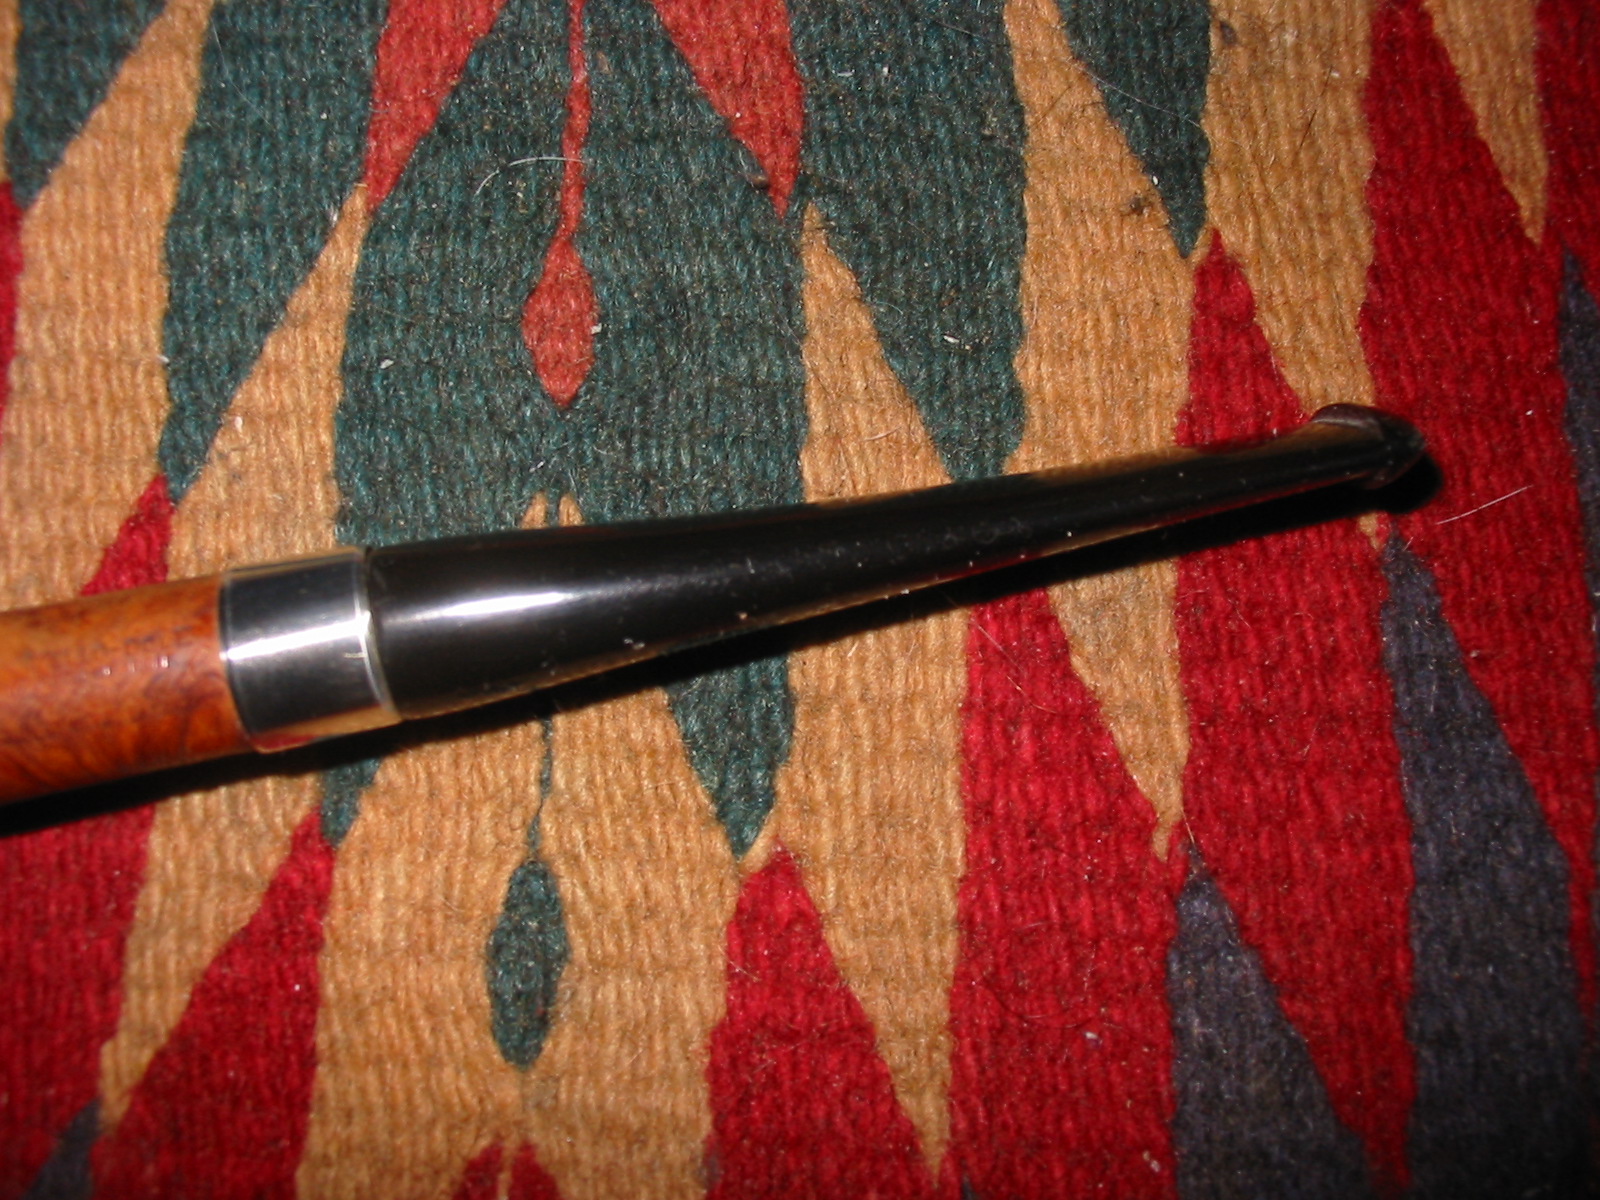
  The shank is slightly larger than the diameter of the stem when the stem is inserted into the mortise. The picture below shows how the briar is extending at this point, but as I look around the shank, the amount of overhand is not the same. I use the flat needle file to start bringing the briar overhang flush with the Warden stem.
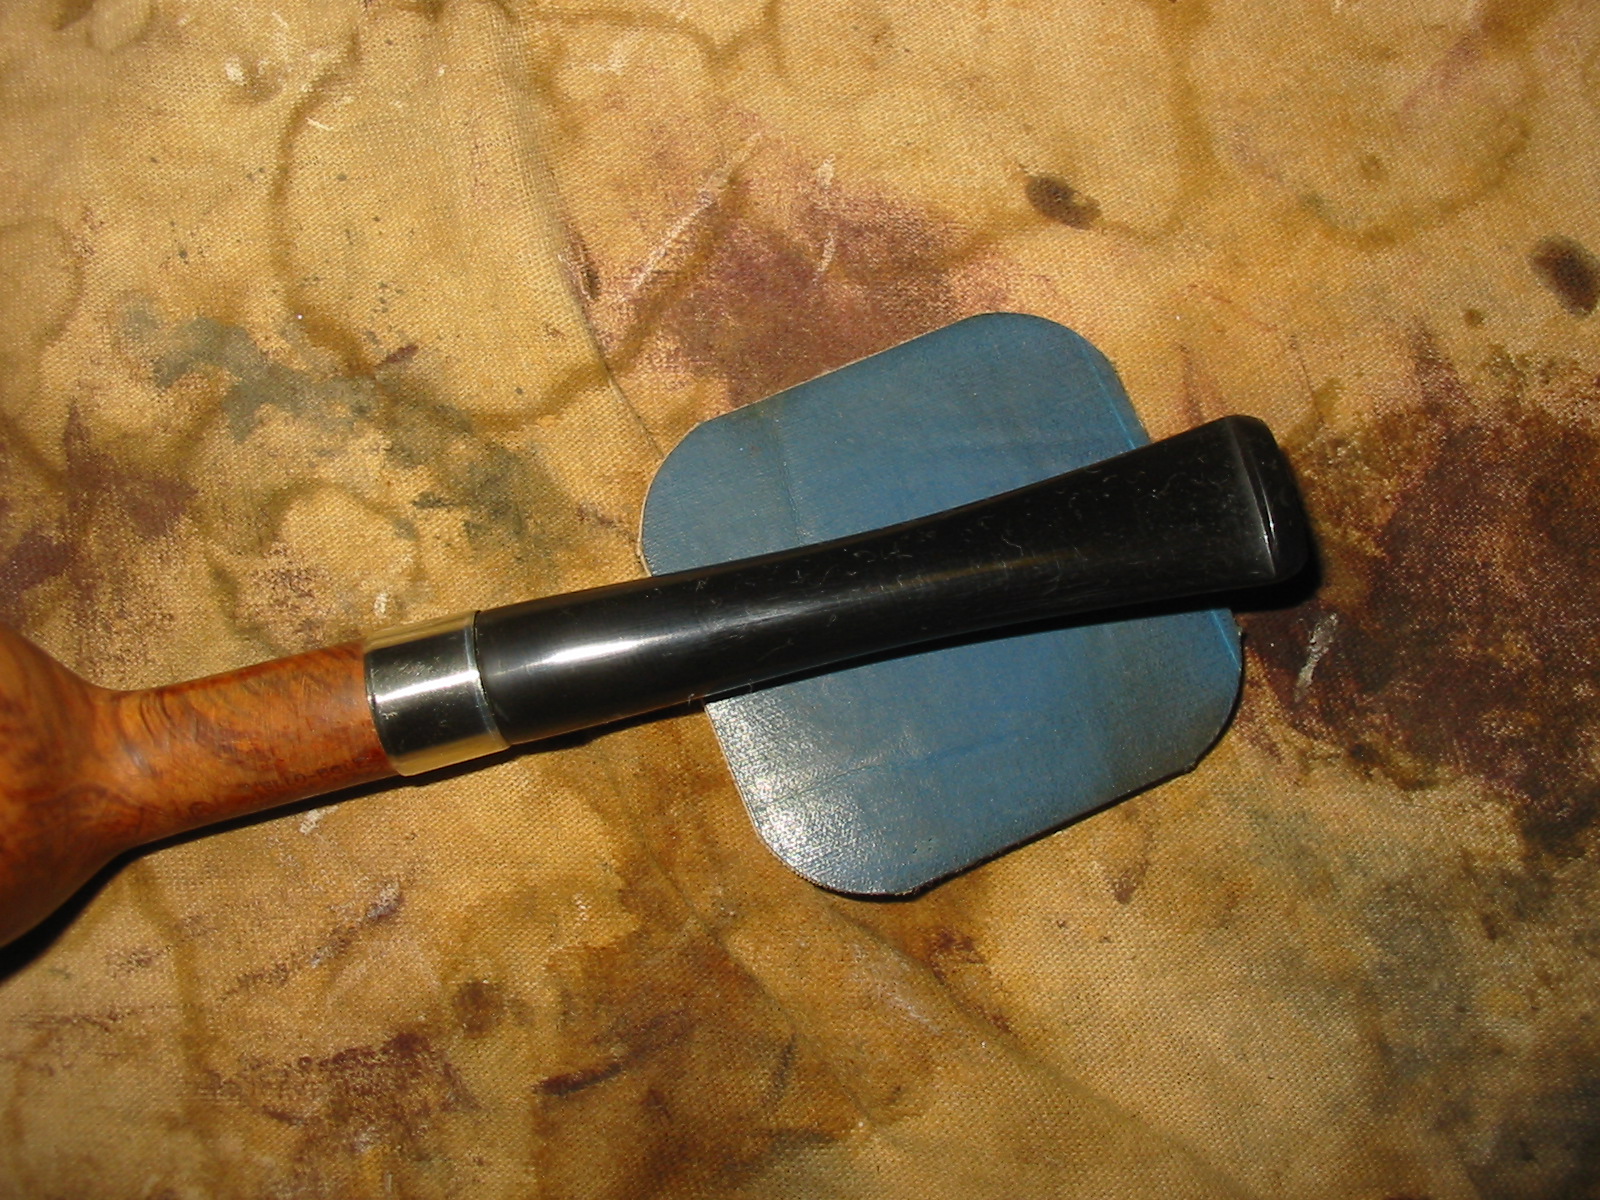
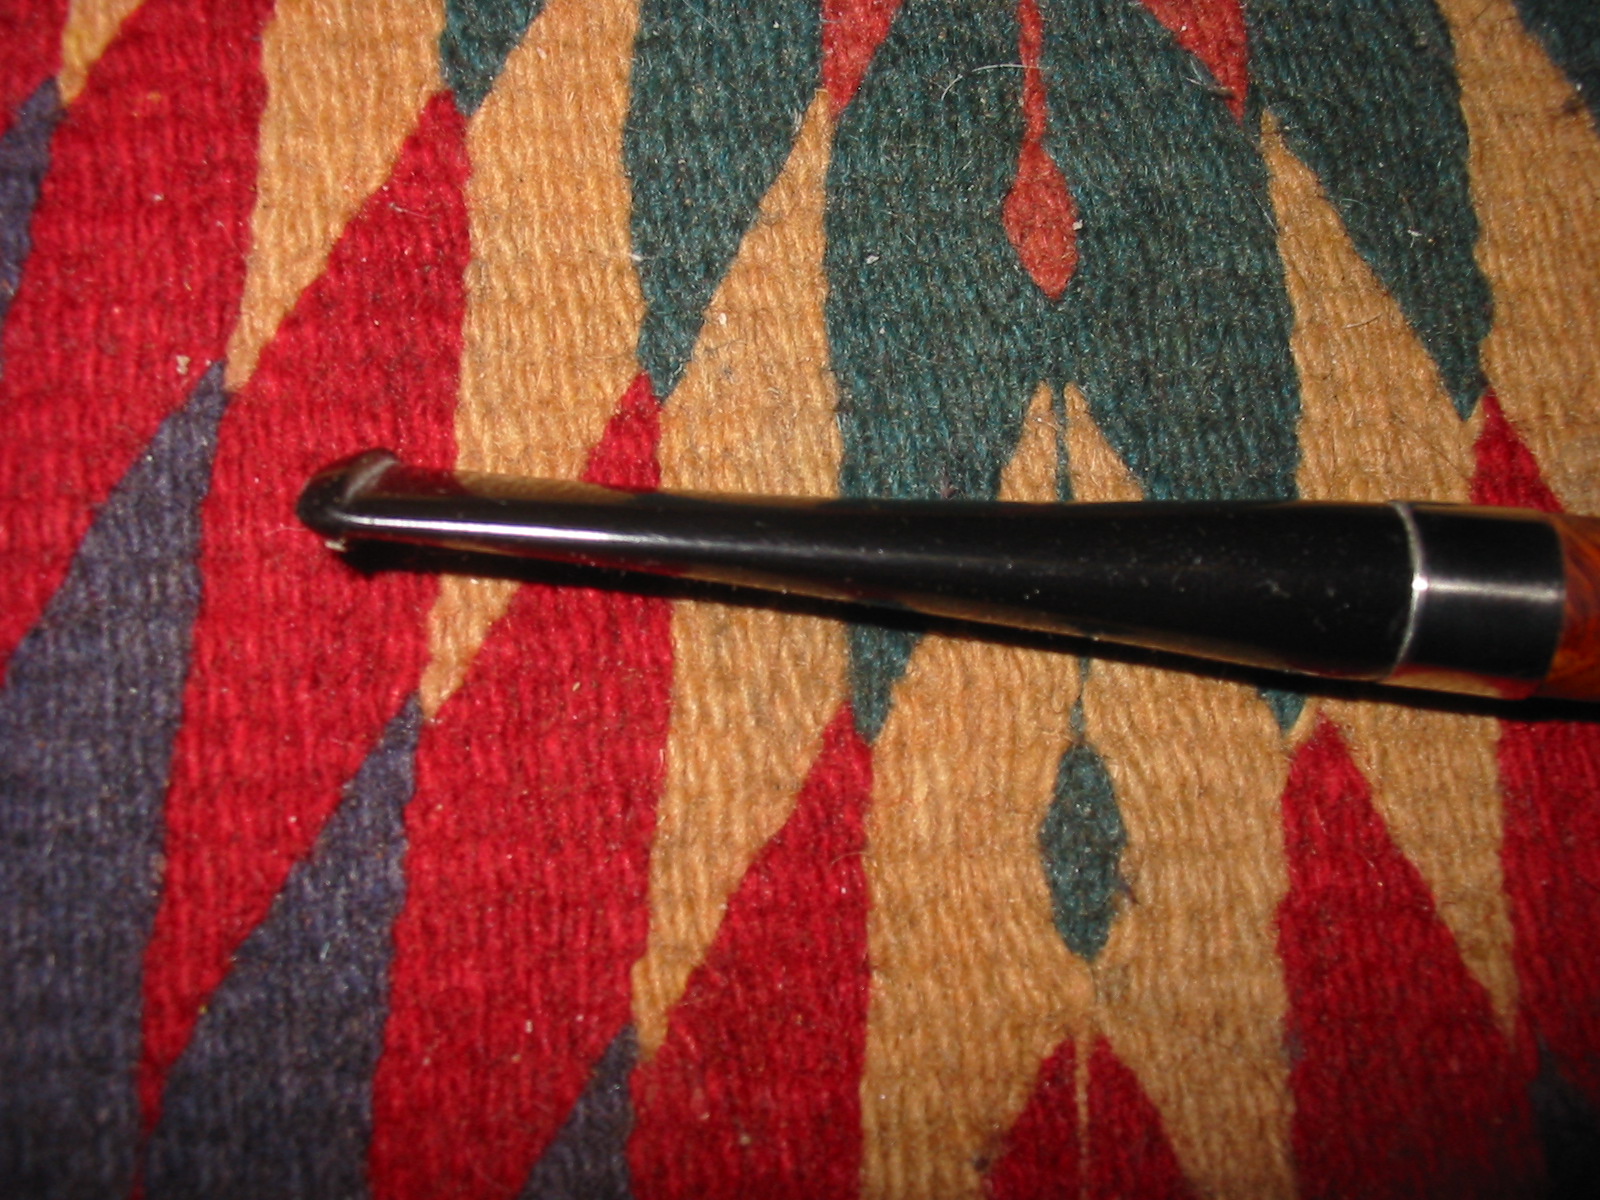
  The picture below shows the shank having that ‘stuff pants look’ as the taper of the shank to the stem is not gradual. To address this, I file and sand around the shank to create a more gradual tapering from the bowl through the shank to the Warden stem. Most of the briar bulging was on the shank sides not on the upper and lower areas which look pretty good.
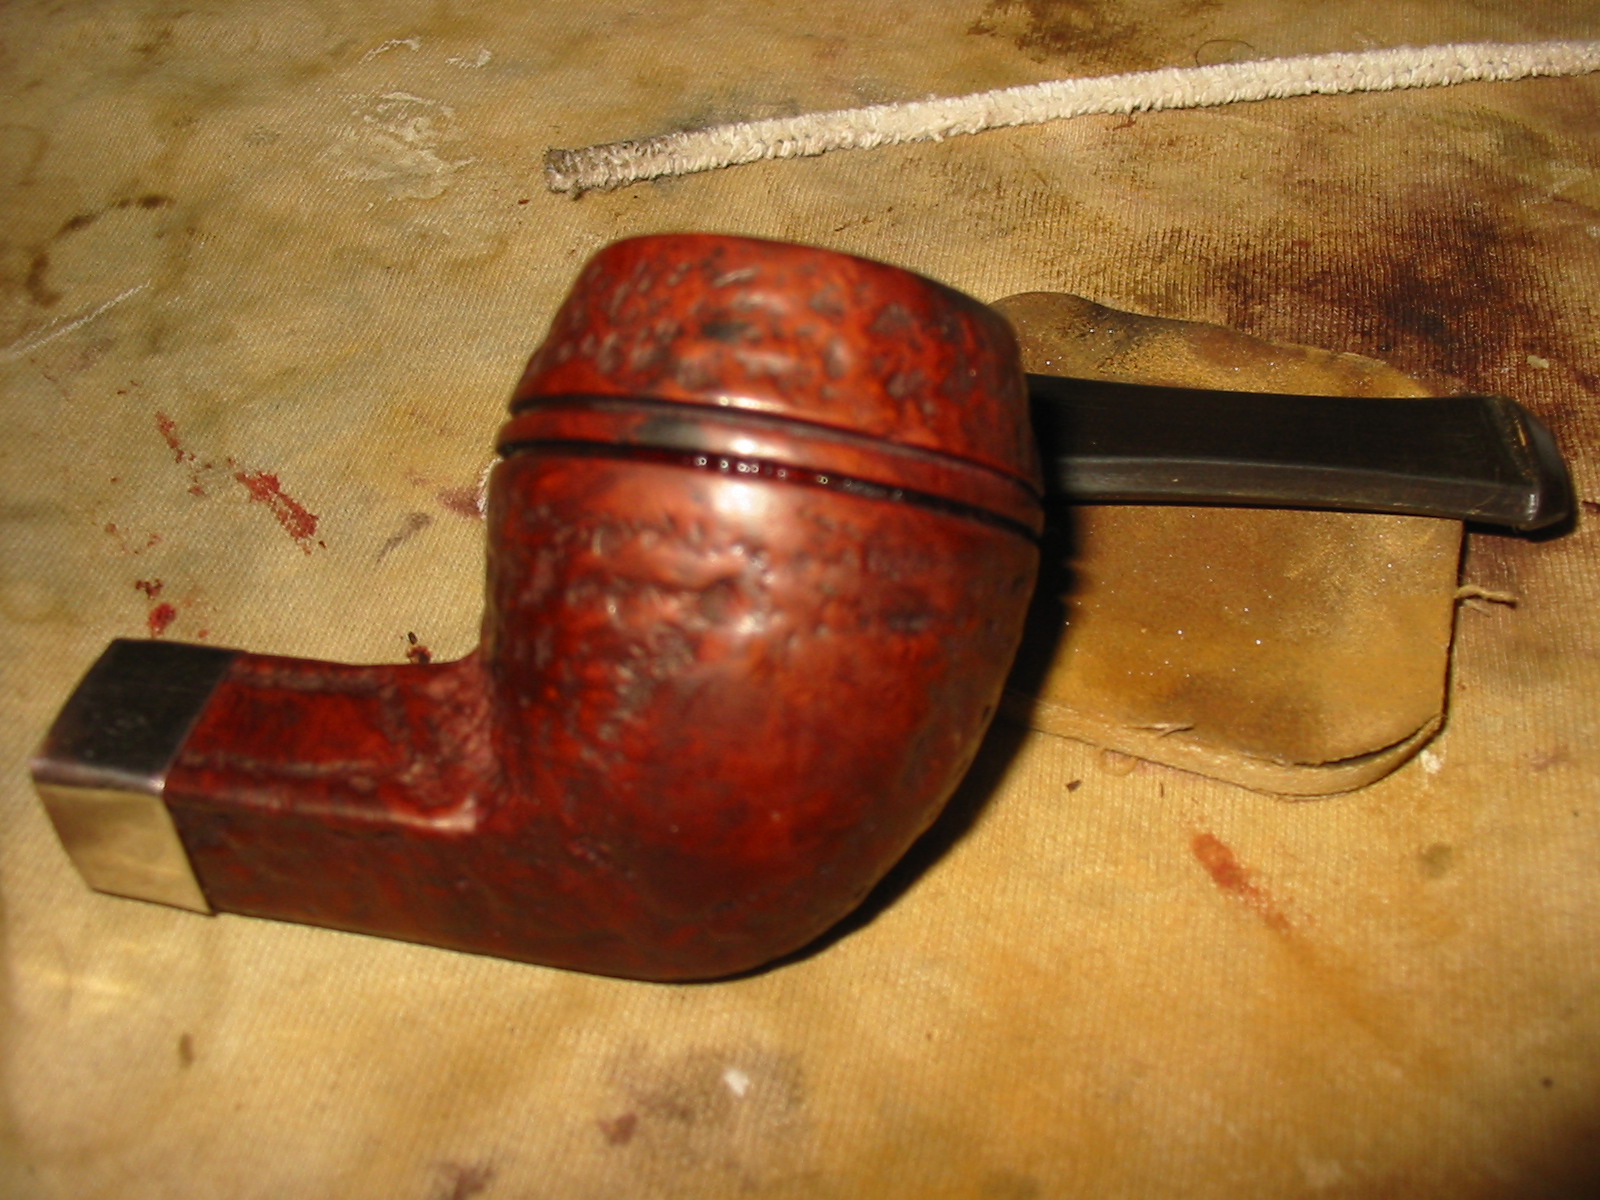
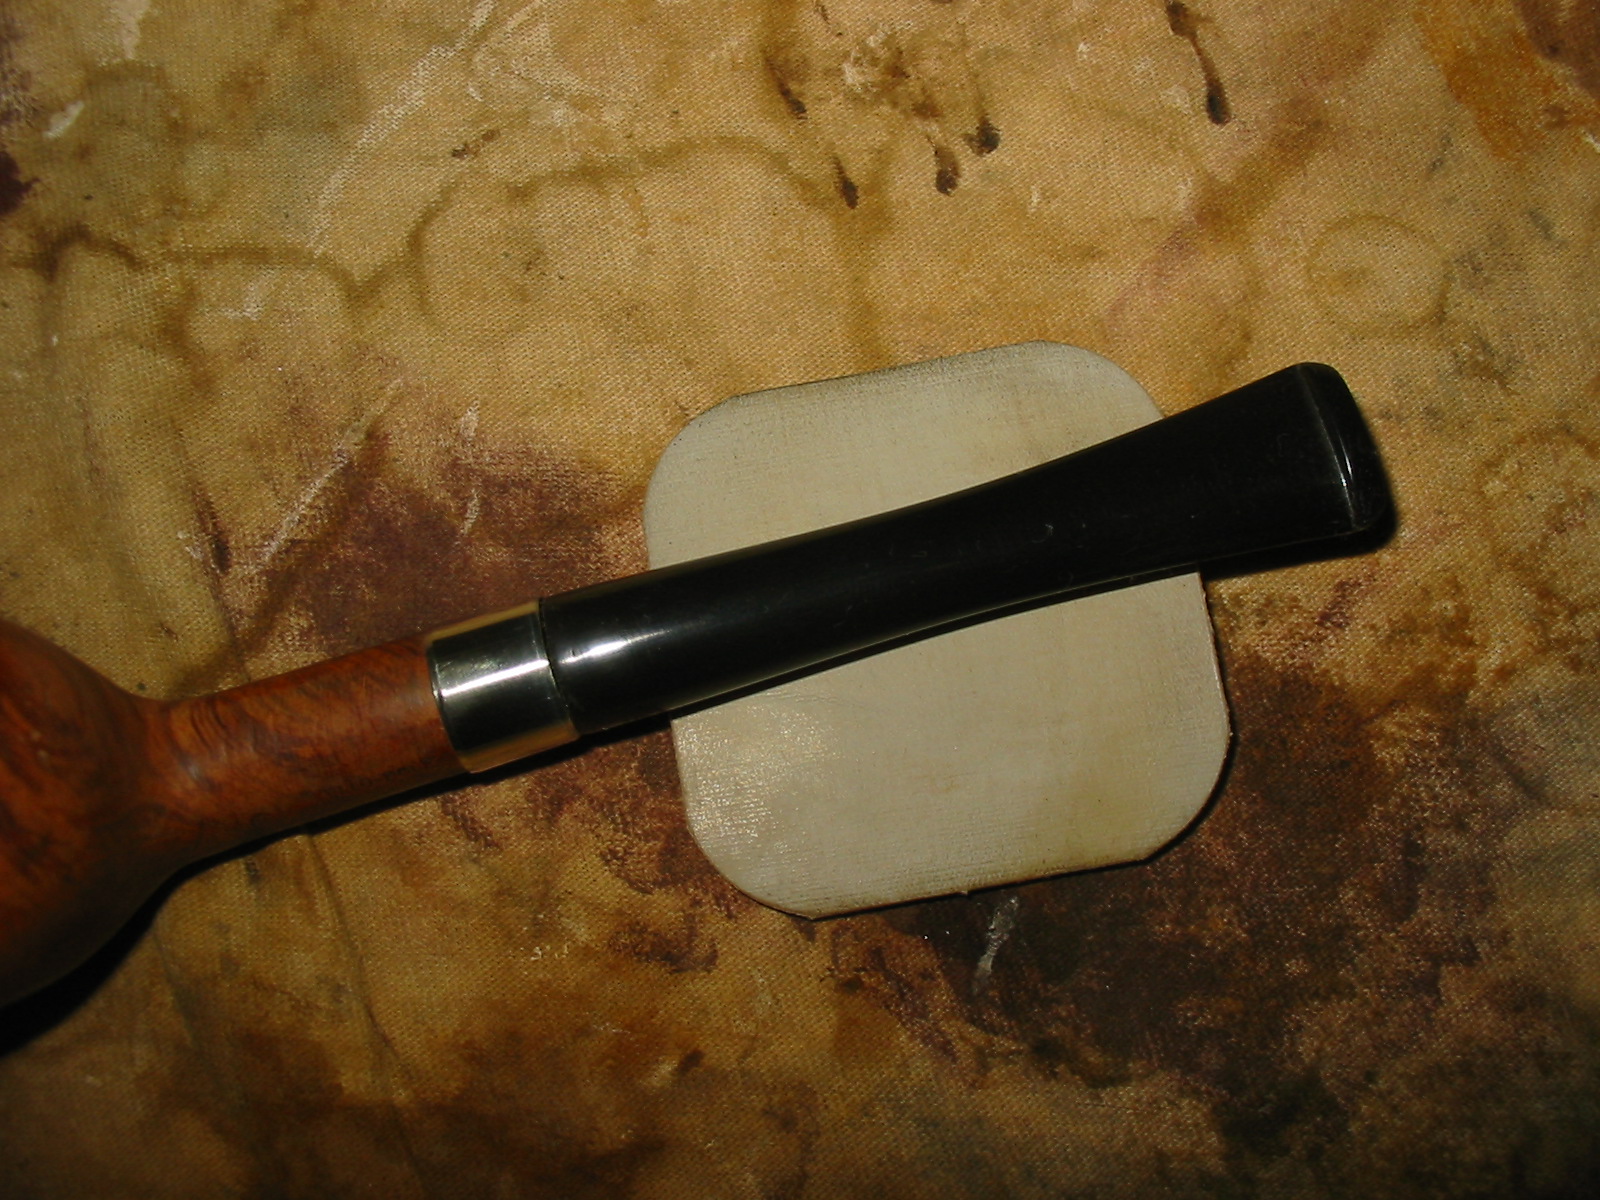
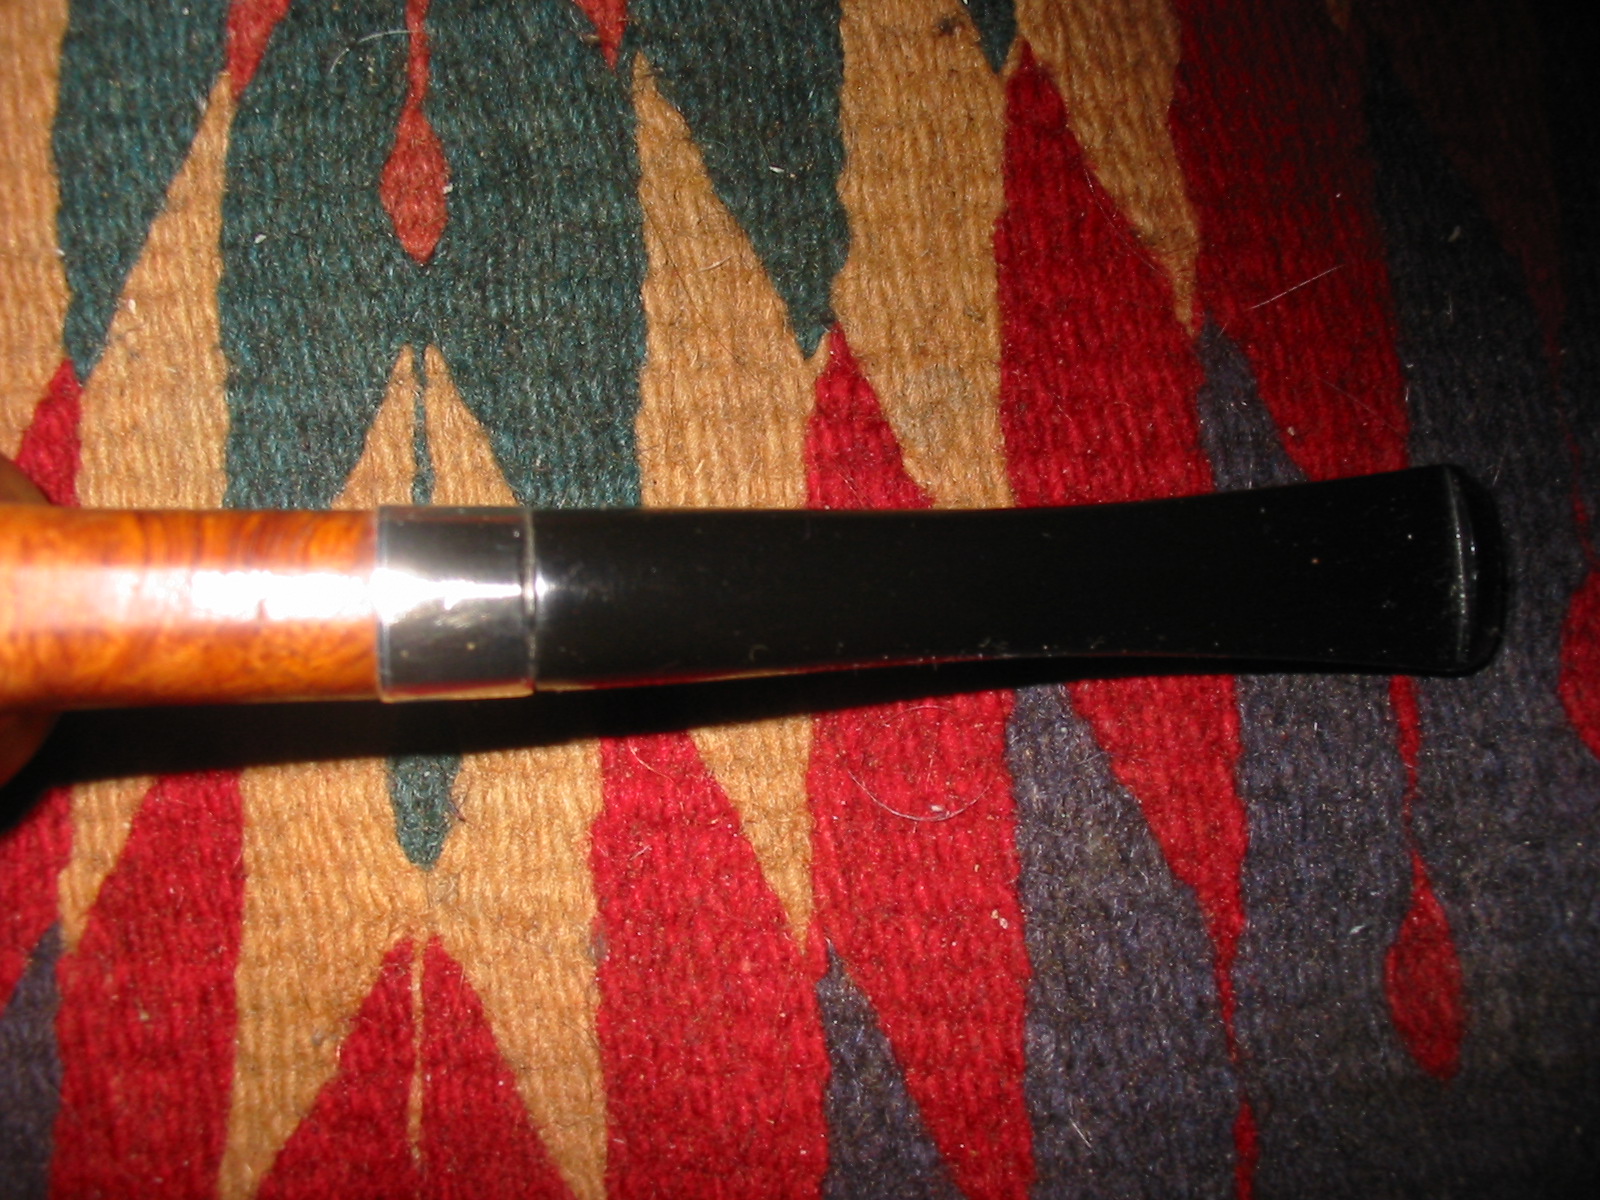
  After a lot of sanding with a flat needle file, 120 and 240 papers, I arrive at a nicer tapering from shank to stem. I sacrificed the ‘Real Briar’ stamping on the left side of the shank for the more balanced look on both sides of the shank. I thought about it for a few minutes, and sanded away in favor of a reborn Phoenix! The shank overhang has been sanded out and the shank/stem junction is flush. I like the flow from bowl, through the shank, and into the stem. Before bending the stem, while still in the same customized position, I also file and sand down the sides of the precast stem to remove the seams created by the casting halves. I aim for rounding the stem.
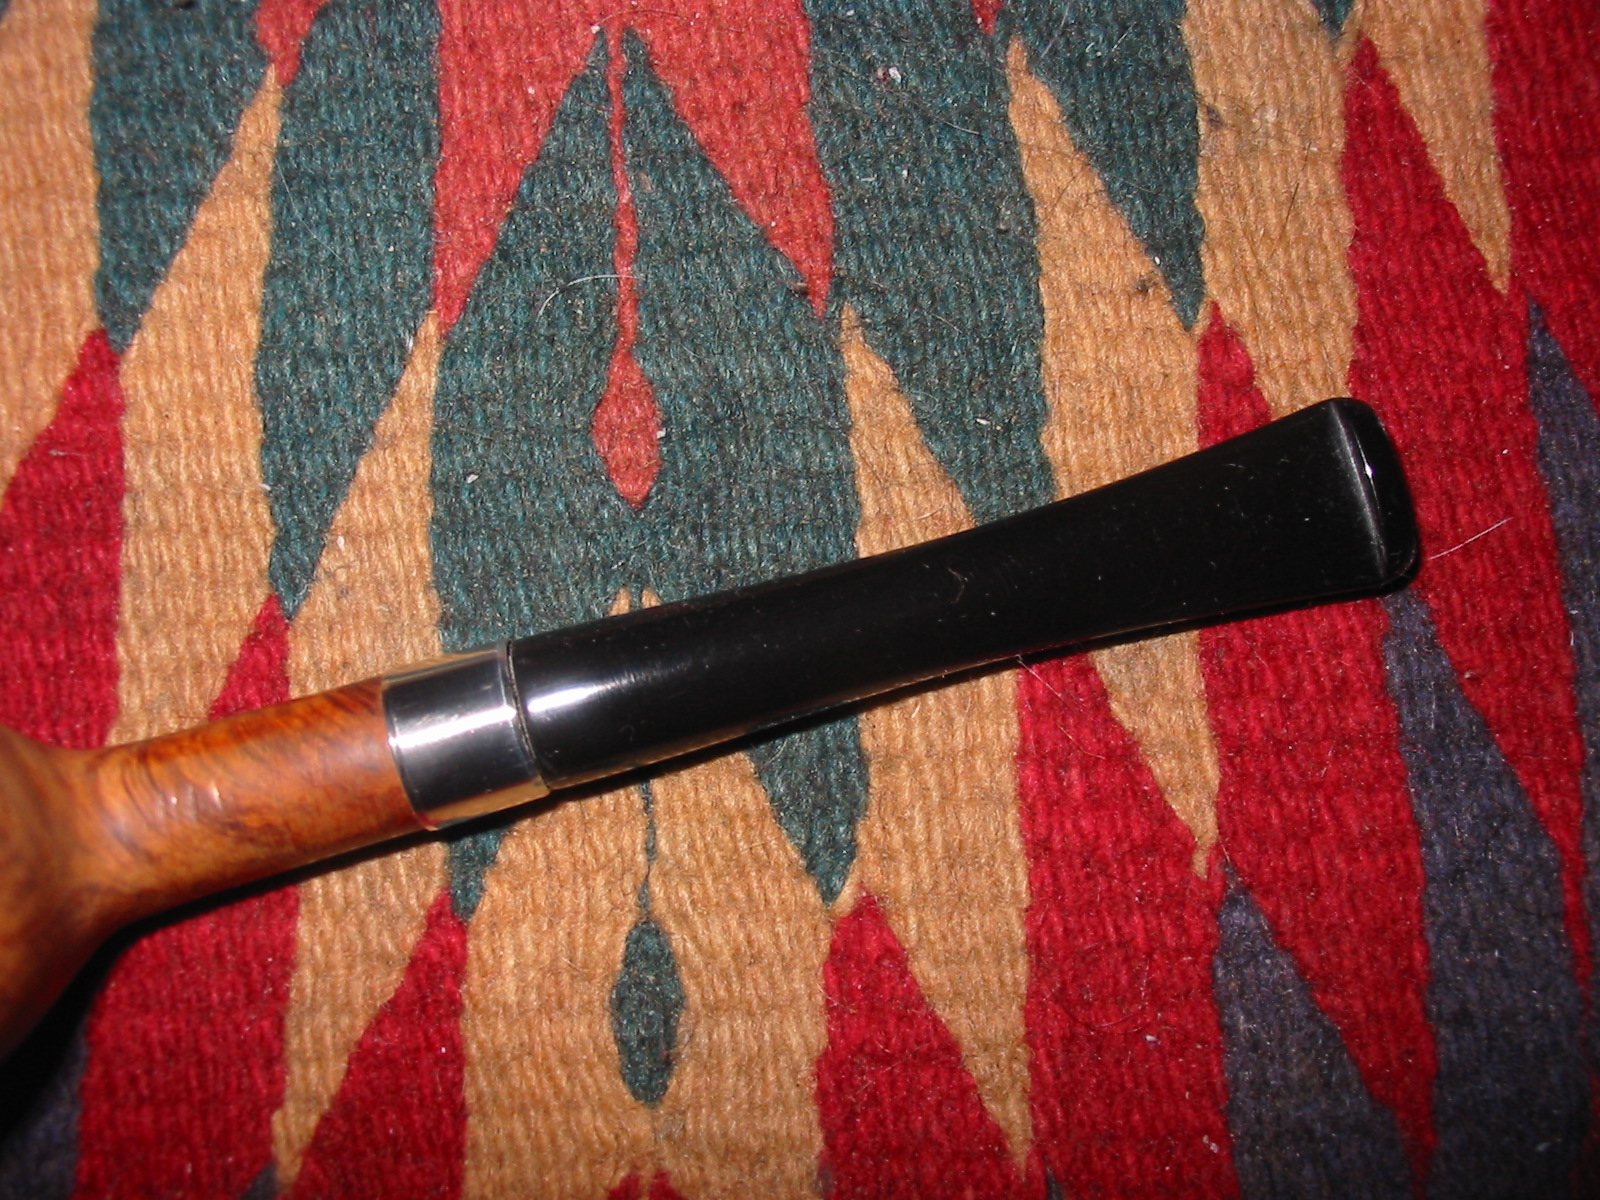
 With the Billiard’s straight shank, the bend will be very small and subtle. Last time I fashioned Churchwarden stems I found that I was consistently overbending the stem and then I would need to back off the bend for the best look. I place pipe cleaners in the stem at both ends to maintain the integrity of the airway during the heating and bending process. I use a hot air gun and warm the vulcanite in the area where I make the bend. As it warms, the vulcanite, a rubber compound, becomes supple and is fashioned easily. After making the bend, by simply eyeballing it, I take the heated stem to the sink and cool it with tap water to set the bend. I remount the bent stem and I like it. It has a gentle bend, not too much. The Phoenix is coming to life!
 Looking now to the stummel, I use a sharp dental probe to test the very small fills on the stummel. They seem to be solid. I then look at the gnarly rim. The next step is to remove the damage by utilizing the topping board. Using a chopping block, I place a sheet of 240 grade paper on it. After inverting the stummel on the board, I begin to rotate the stummel over the paper. I’m thankful for the fact that Churchwardens typically have smaller bowls. That’s good news because I’m taking a bit of briar off the top. After a while, there is still a divot on the inside of the rim over the shank which I will address by creating a bevel. After the 240 grade rotation, I then use 600 for a bit and finish the topping.

 Using 120 grit paper, I start carving a bevel on the inside lip of the rim. I follow by moving to the outside edge of the rim. I create the bevel by pinching the rolled piece of sanding paper under my thumb and then methodically move it around the rim putting pressure on the paper. The continuous movement is what keeps the bevel consistent. I then follow with 240 paper for both the inside and outside edges of the rim. I think it looks good – what an improvement!
 To address the stummel surface to remove the top surface and scratches and old finish, I start by using a coarse sanding sponge on the entire stummel. I follow the coarse sponge with medium and then light sanding sponges.
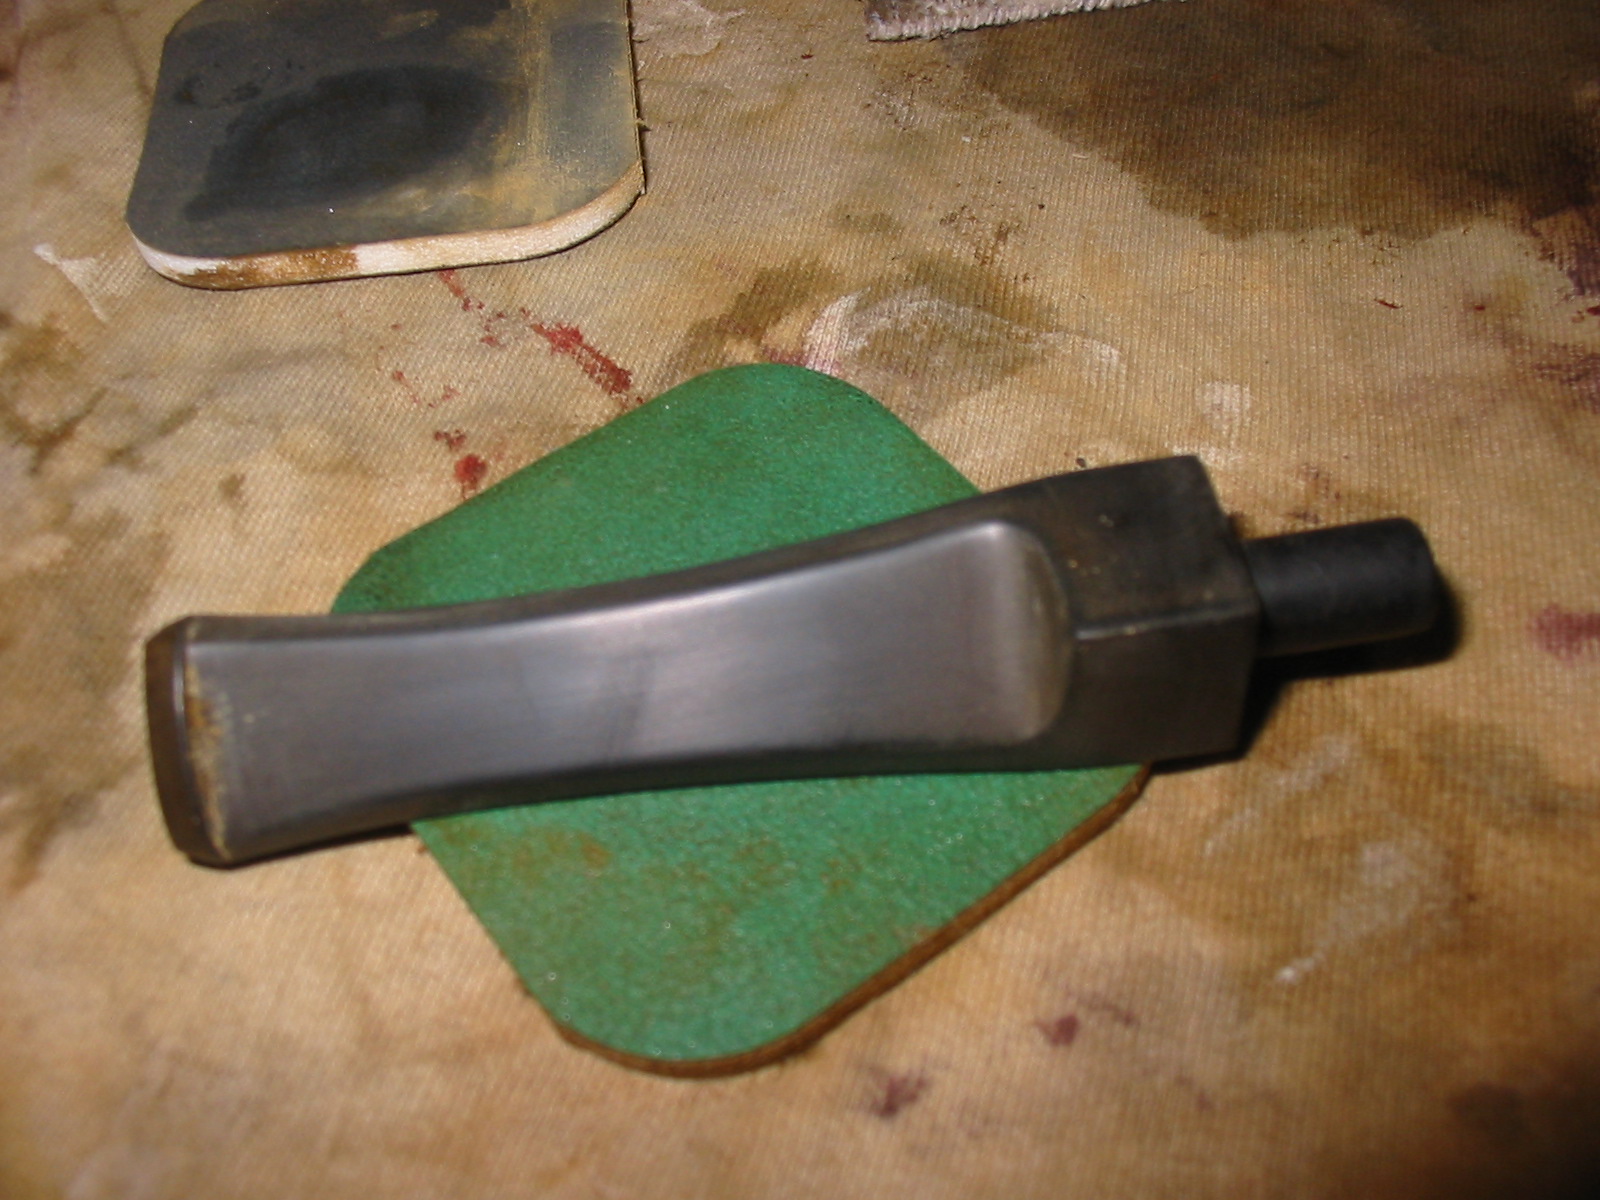
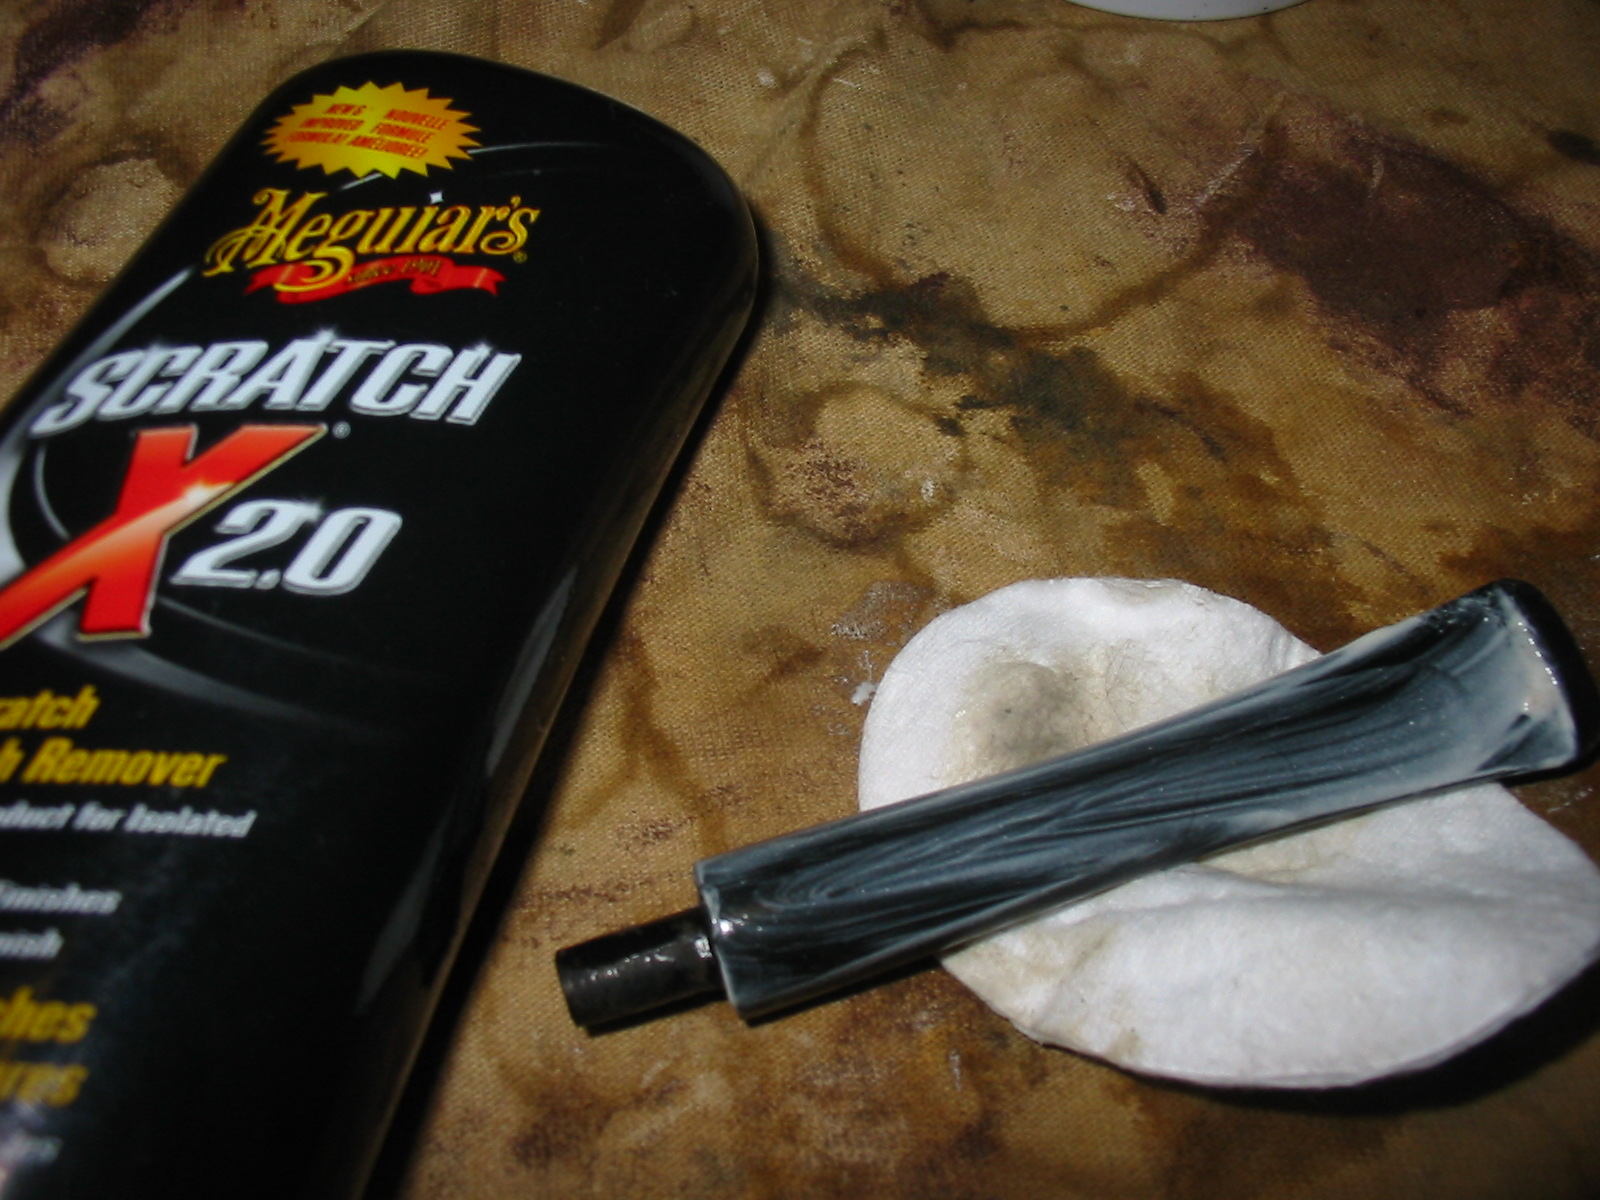
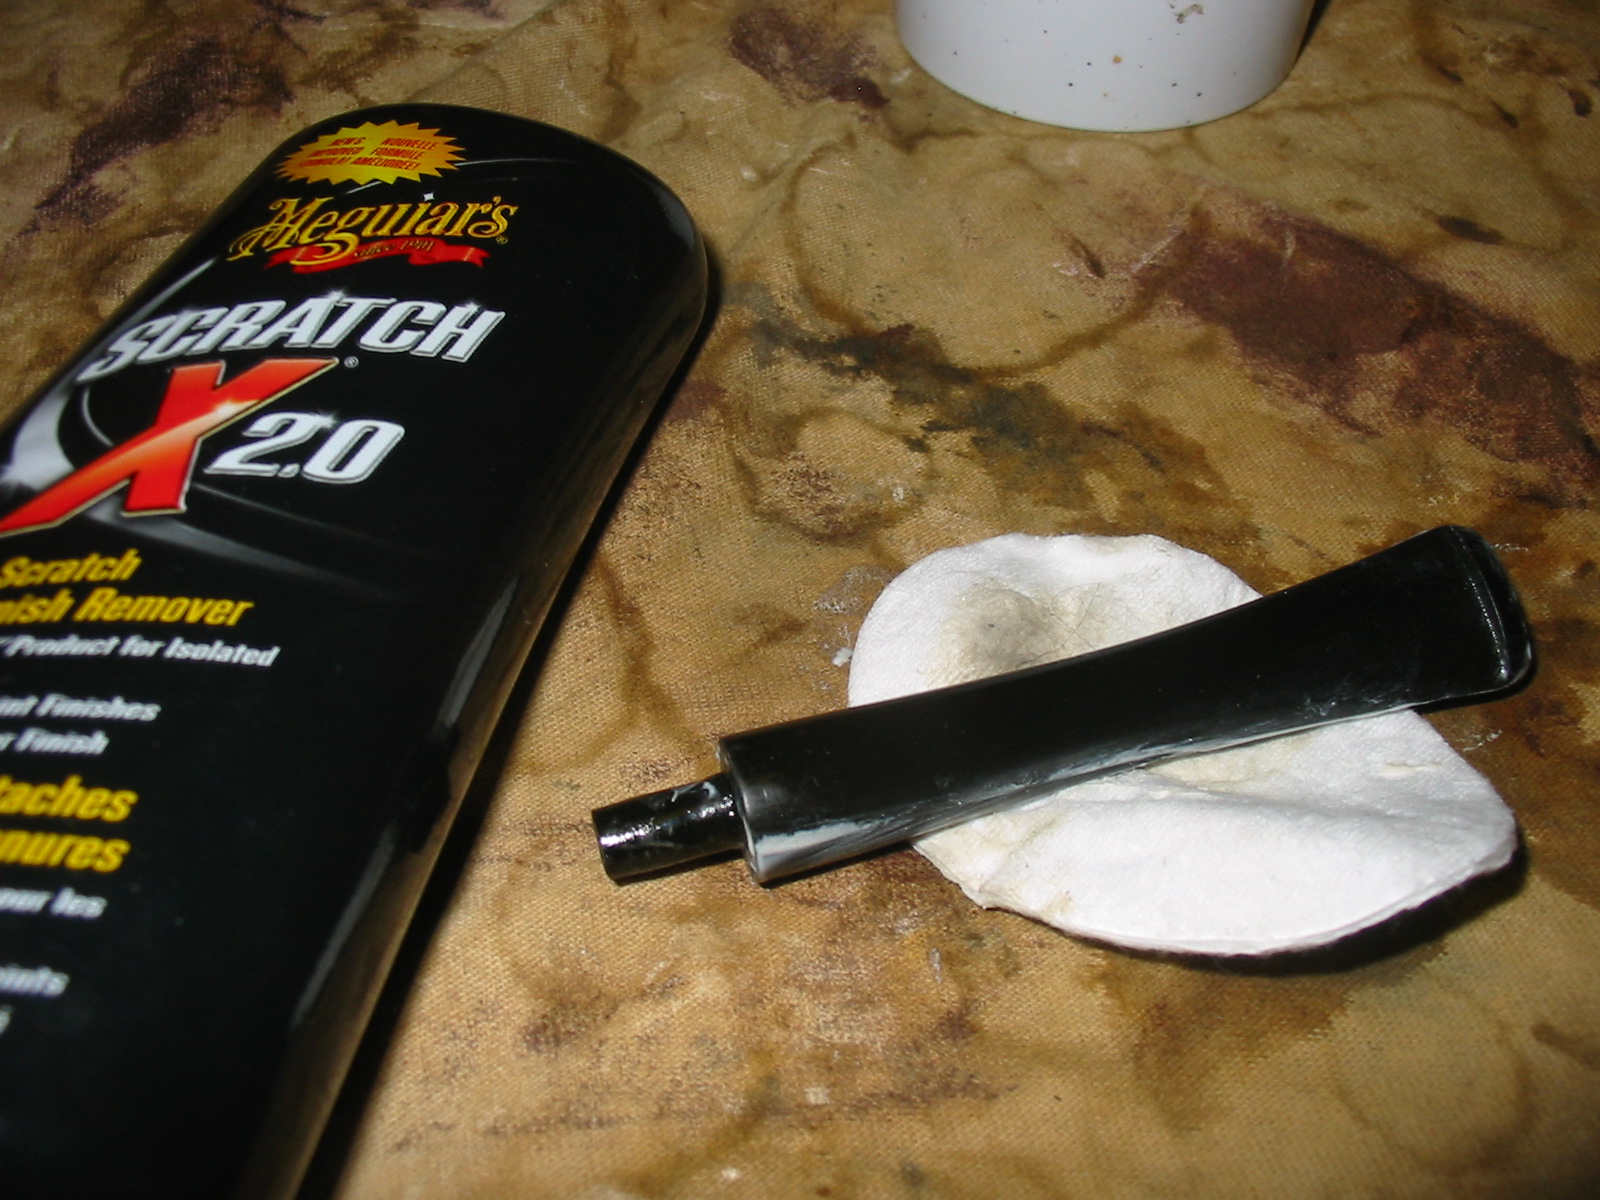
 I decide now to continue working on the stem. Using a flat needle file and 240 grit sanding paper I continue smoothing and shaping the stem. I work on the rough button with the file to shape it with the file. I sand the entire stem with 240 grit because, even though the stem is new, the vulcanite contains ripples and ribs from the casting process. I work the stem with sand paper so that it’s smooth and the stem is rounded. From filing and 240 grit, I sand the entire stem with 600 grade paper. I finish this sanding phase by sanding/buffing the stem with 0000 grade steel wool. The pictures show the progress.


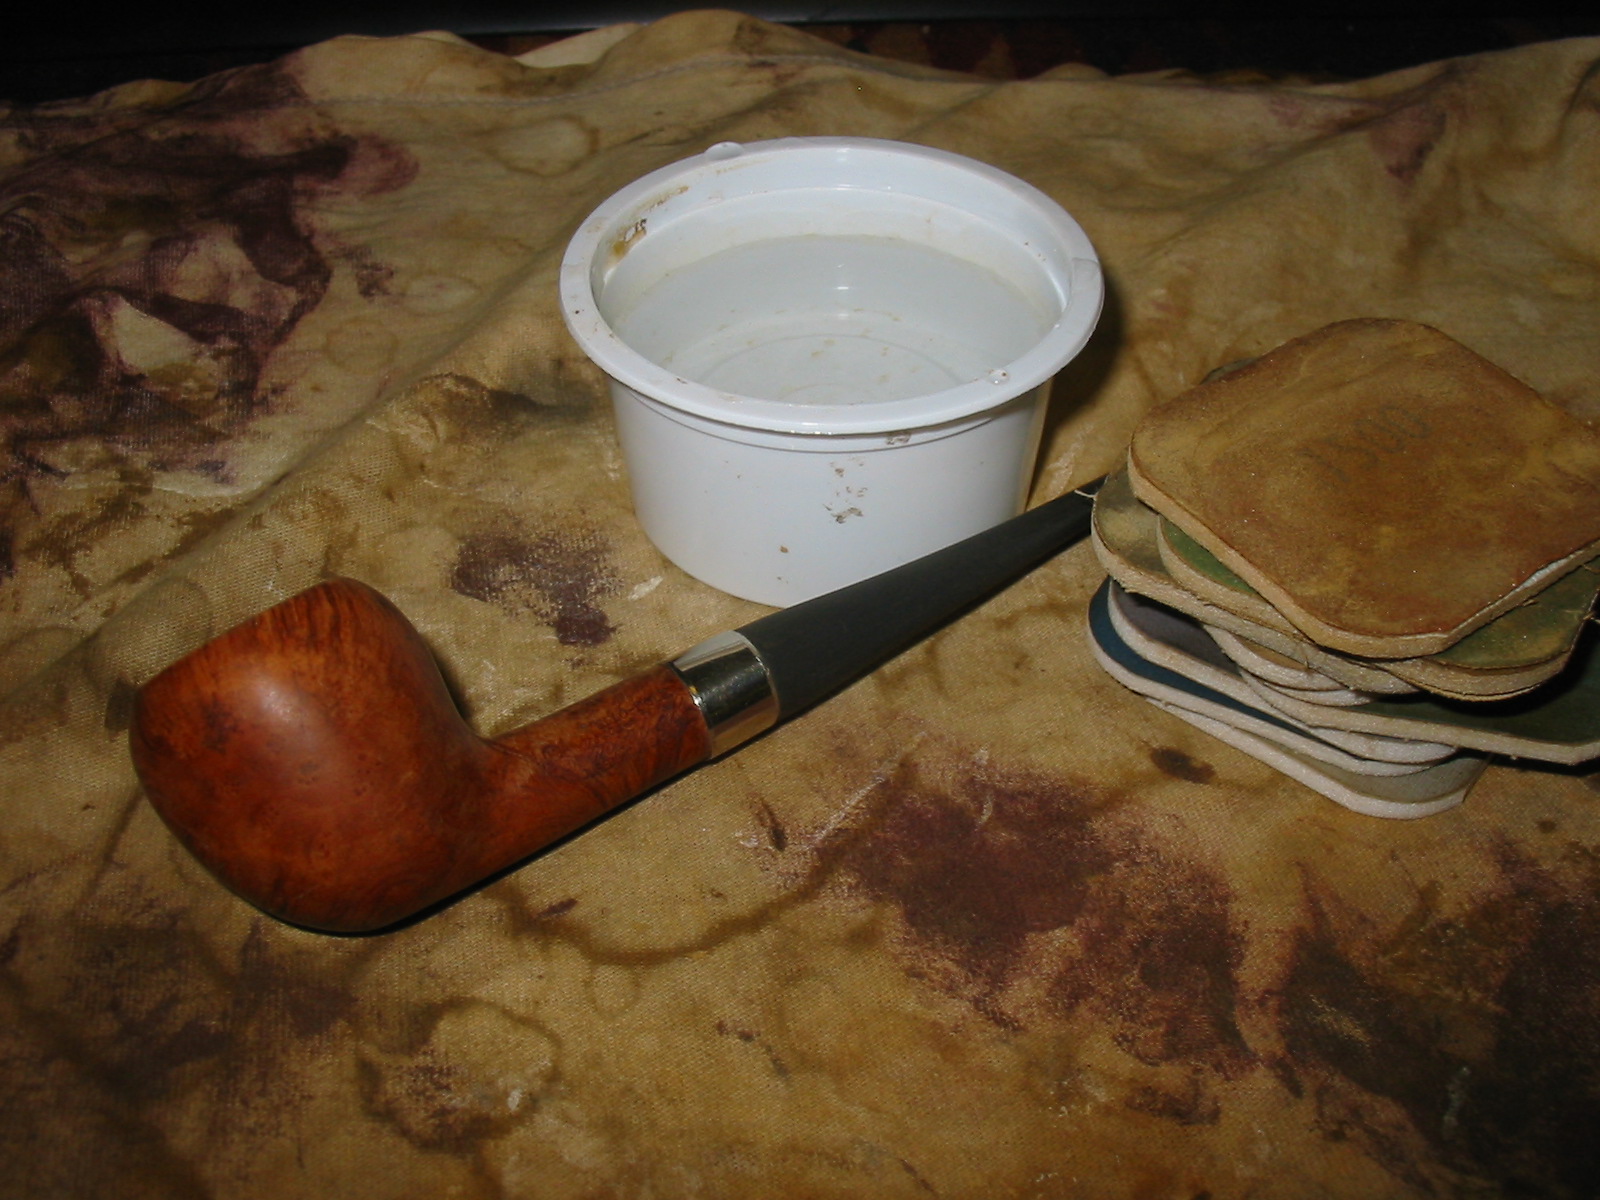
 My day is ending and I finish at the worktable with a kosher salt and alcohol soak to further clean and refresh the stummel. I create a wick from a cotton ball by stretching and twisting the cotton. I then insert/stuff the wick in the mortise and airway. I then put the stummel in an egg crate to stabilize it and fill the bowl with kosher salt which leaves no after taste as does iodized salt. I then use a large eye dropper to fill the bowl with alcohol until it surfaces over the salt. After a few minutes I top off the alcohol. I set the stummel aside and turn out the lights.
 The next morning the kosher salt and alcohol soak did the job – the salt and wick are soiled by drawing out more tars and oils from the mortise and airway. After dumping the expended salt, I wipe the chamber with paper towel to remove the old salt. I blow through the stummel as well to clear out the left overs. To make sure all is clean, I run a few more cotton buds dipped in isopropyl 95% through mortise. Moving on.
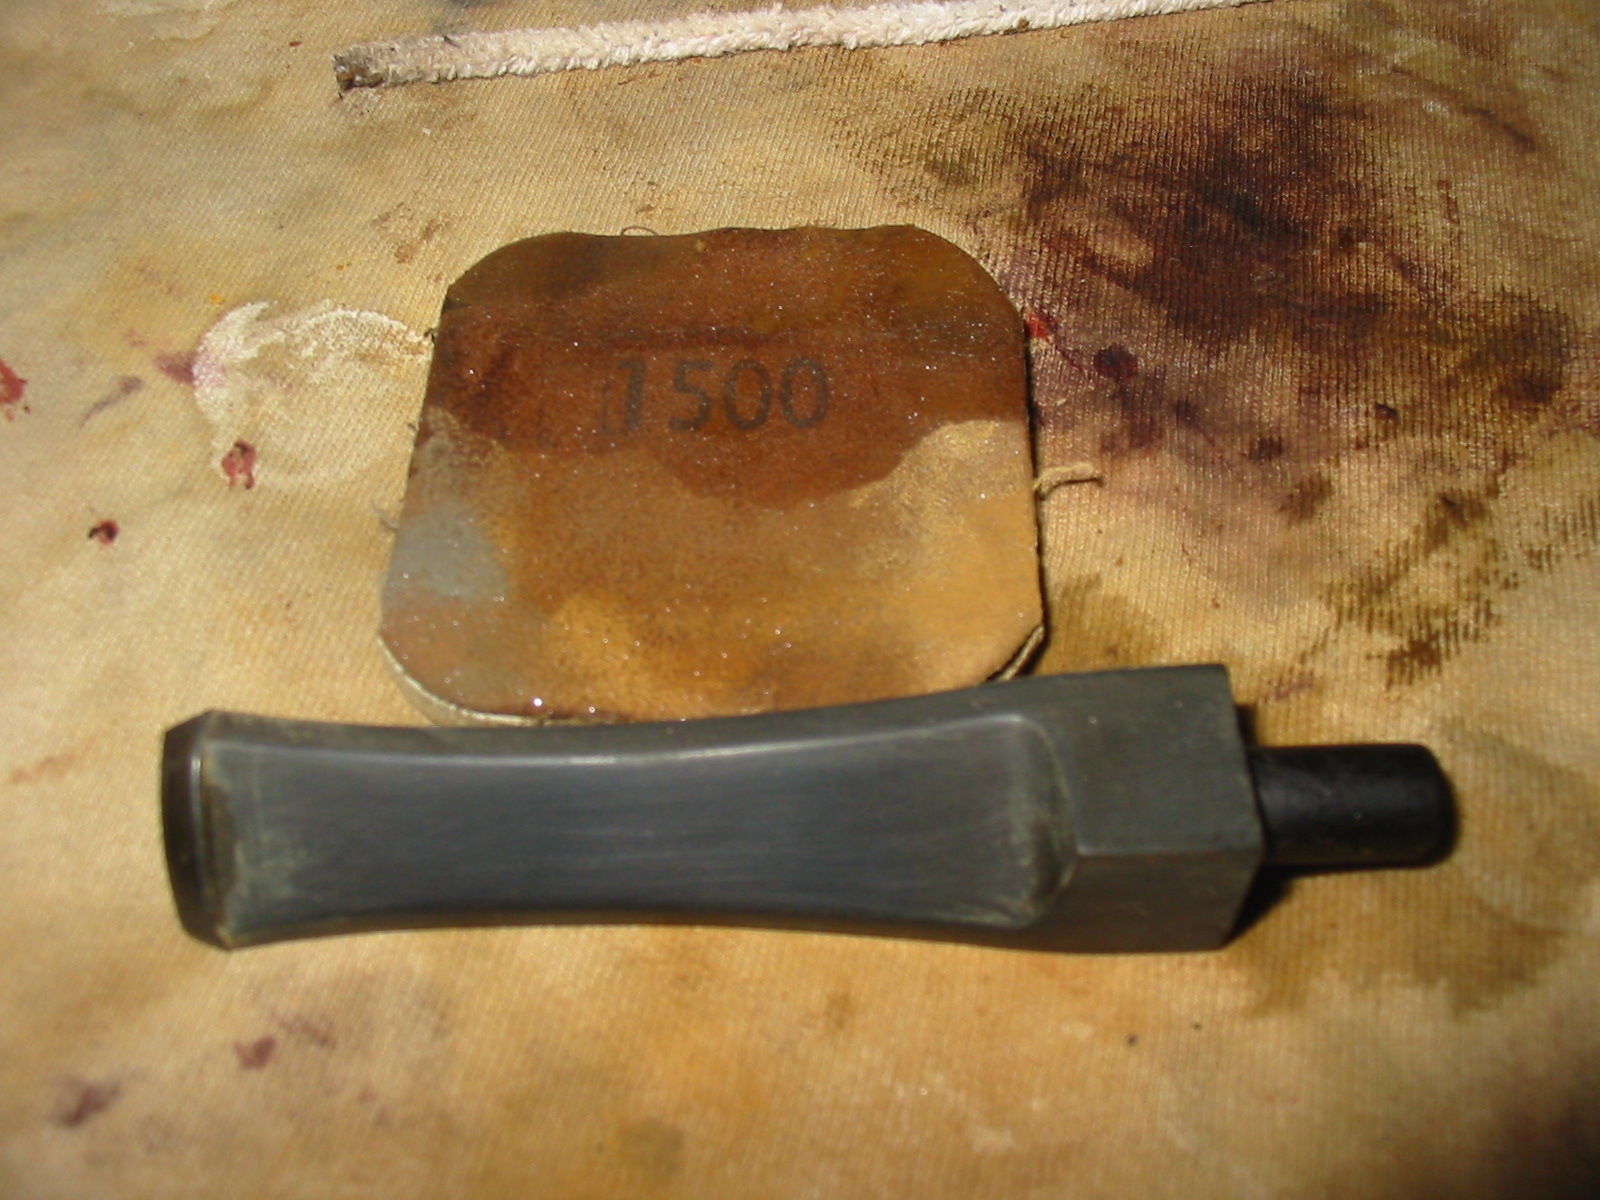
 Time to micromesh the Churchwarden stem. Using pads 1500 to 2400 I wet sand the stem. Following this, I dry sand using pads 3200 to 4000 and then, 6000 to 12000. After each set of 3 pads, I apply Obsidian Oil to the stem to enrich the new precast Warden stem. I take only one picture at the end because it’s difficult enough to see the detail of black vulcanite with regular sized stems, with the Churchwarden stem, the picture is from orbit!
 With the stem drying, it’s time to begin the micromesh sanding of the stummel. Using micromesh pads 1500 to 2400 I wet sand the stummel. As has happened on previous restorations, the wetting of the stummel during the wet sanding process spelled the end of the once solid fills that I saw before. The fill material must be made of a water-soluble material – not sure what it is, but it isn’t anymore! The fills fully disintegrated.
 The detour means that I need to apply patches to the pits – I mix briar dust and thick CA glue to form a putty that I apply to the holes. I first use a sharp dental probe to make sure the pits are free of debris. I use an index card to do the mixing by placing some dust in a pile. I then place some of the CA glue next to the briar dust. Using a toothpick, I gradually draw a bit of the dust into the glue while mixing it with the toothpick. I continue to do this until the putty reaches a molasses-like consistency.
  I then apply the putty to the places needed – there are a few. After applying the briar dust putty, I spray the patches with an accelerator to cure the patches more rapidly.

 Then, using a flat needle file, I begin filing down the patches to near the briar surface. Then I use 240 grit paper to remove the remaining excess patch material bringing the fill flush with the briar surface. Following the 240 paper, I use 600 grit paper on each of the patch areas. Finally, I return to the initial micromesh pads and sand the patches with 1500 to 2400 grade pads. The detour is complete, back on track. The pictures show the patch repairs. These patches will blend very well.
 I pick up again by dry sanding using pads 3200 to 4000 and then 6000 to 12000. The pictures show the finished result. I enjoy so much watching the grain emerge during the micromesh process. This lonely stummel just may be a Phoenix after all!
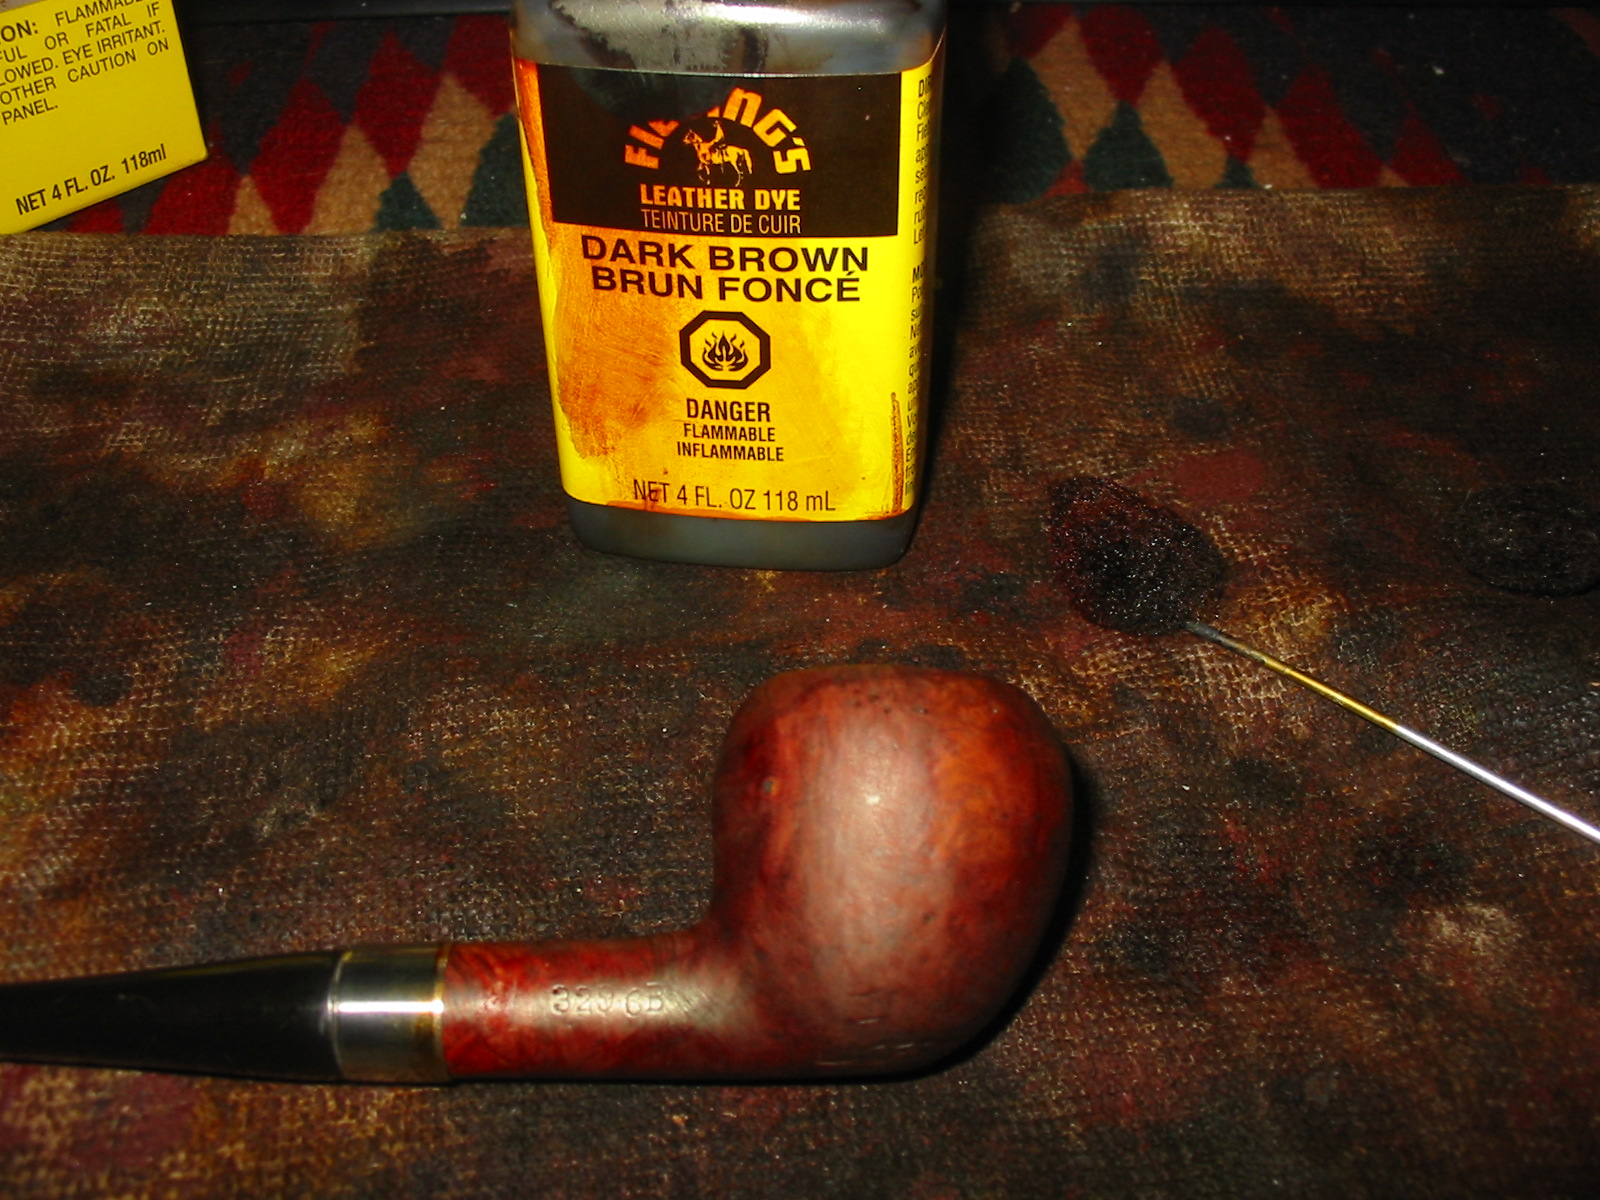
 At this point, aiming for the color preferences Andy described when he commissioned the Billiard, I will stain the stummel using the base as Fiebing’s Saddle Tan Pro Dye but add to it just a bit of Fiebing’s Dark Brown Leather Dye to darken it a bit. I believe this will add more depth to the grain contrast – or I hope! After mixing the dyes in a shot glass, and inserting a cork into the shank to act as a handle, I then warm the stummel using a hot air gun. This expands the briar making the wood more receptive to the dye. After warmed I apply the stain using a folded pipe cleaner. After the stummel is completely covered, I flame the aniline stain using a candle. The alcohol in the dye immediately combusts leaving the dye set in the grain. After a few minutes, I repeat the same regimen including flaming. I then set the stummel aside to rest and settle through the night.
 The next morning, after an early 5AM trip to the Sofia Airport to drop off a summer intern who was returning to the US, I returned to the worktable ready to ‘unwrap’ the Billiard that had been dyed the night before. I enjoy this a lot! I mount a felt wheel on the Dremel, set to the lowest speed, and begin removing the flamed crust encasing the stummel. I use the coarser Tripoli compound to do this. As I work the buffing wheel methodically over the surface, I avoid applying too much downward pressure but allow the felt wheel, speed and compound to do the work. During the process, I purge the wheel often to clean it and keep it soft.
  After finishing with the felt wheel, I switch to a cotton cloth wheel and apply Tripoli to the crook between shank and stummel which the felt wheel is unable to reach. After the Tripoli, I wet a cotton pad with alcohol and wipe down the stummel to blend the new stain and to lighten it a bit.
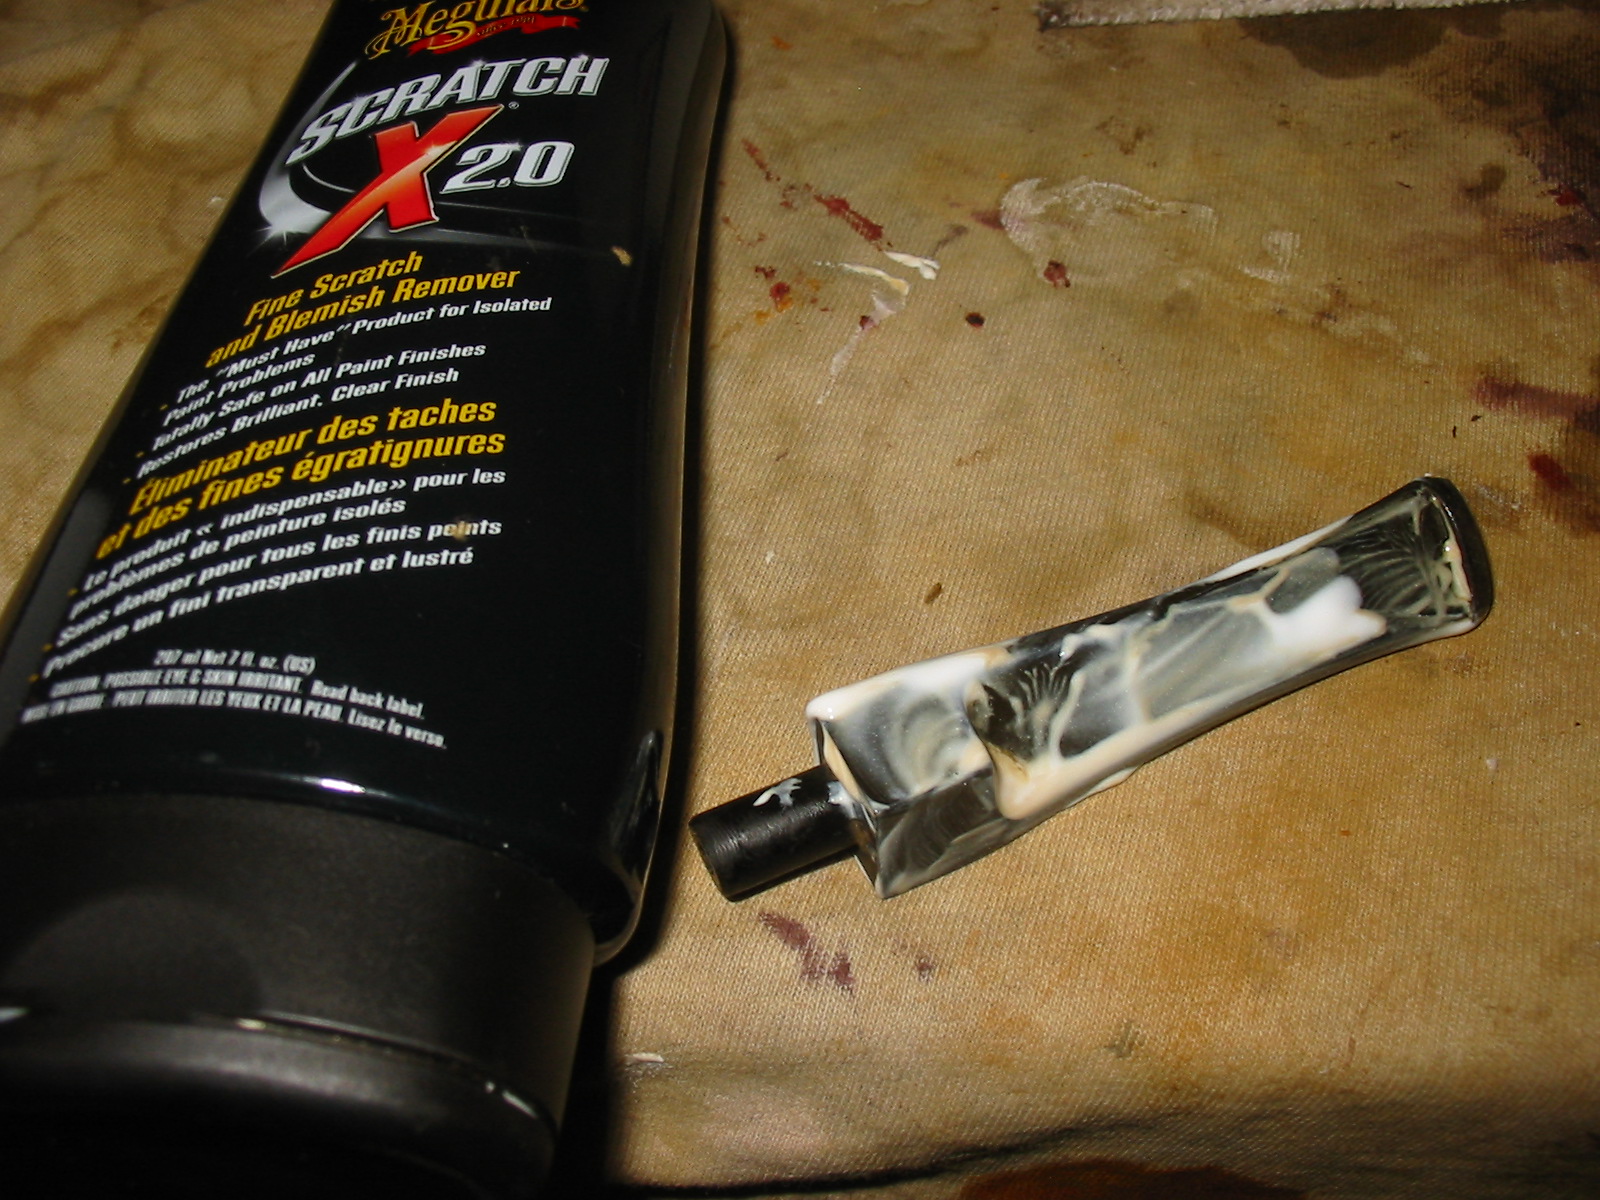
 In the same manner as the Tripoli compound, I apply Blue Diamond, a finer compound. I mount another cotton cloth wheel on the Dremel, increase the speed to about 40% of full power. I apply the compound to both stem and stummel. After I finish, I wipe down both stem and stummel with a felt cloth to remove compound dust in preparation for applying the carnauba wax.
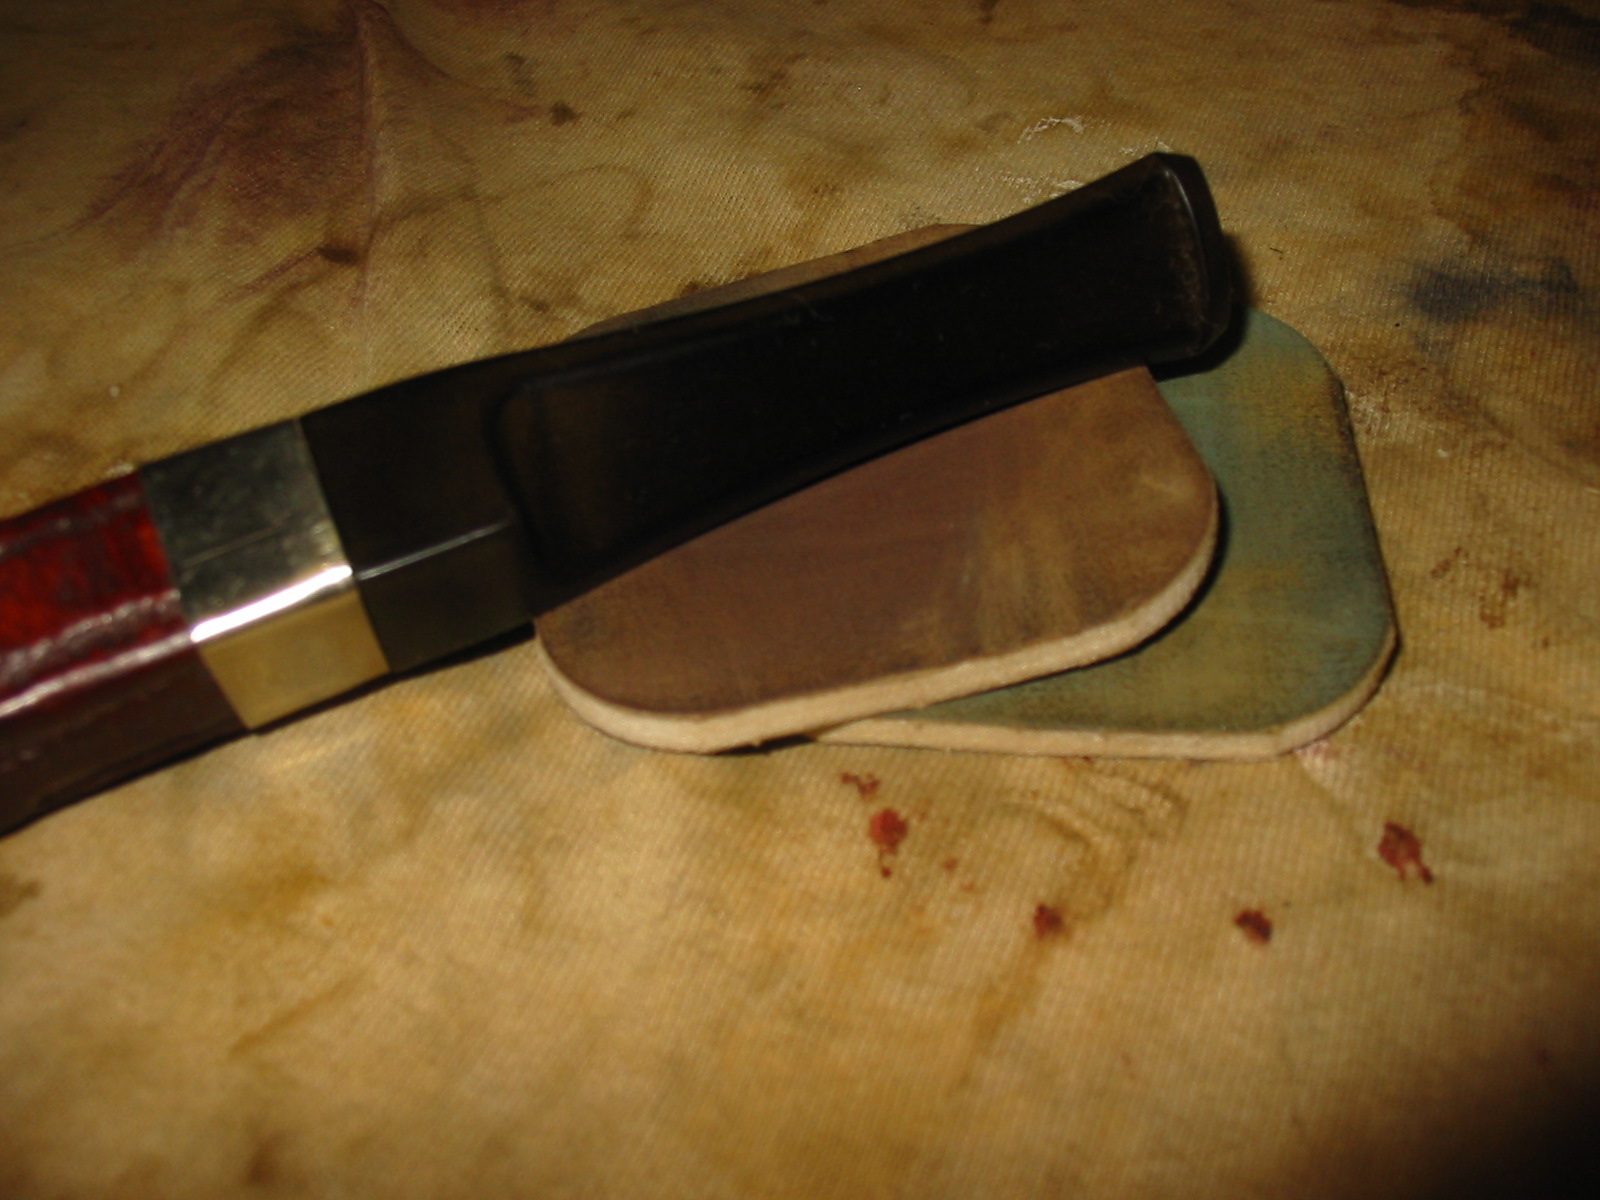
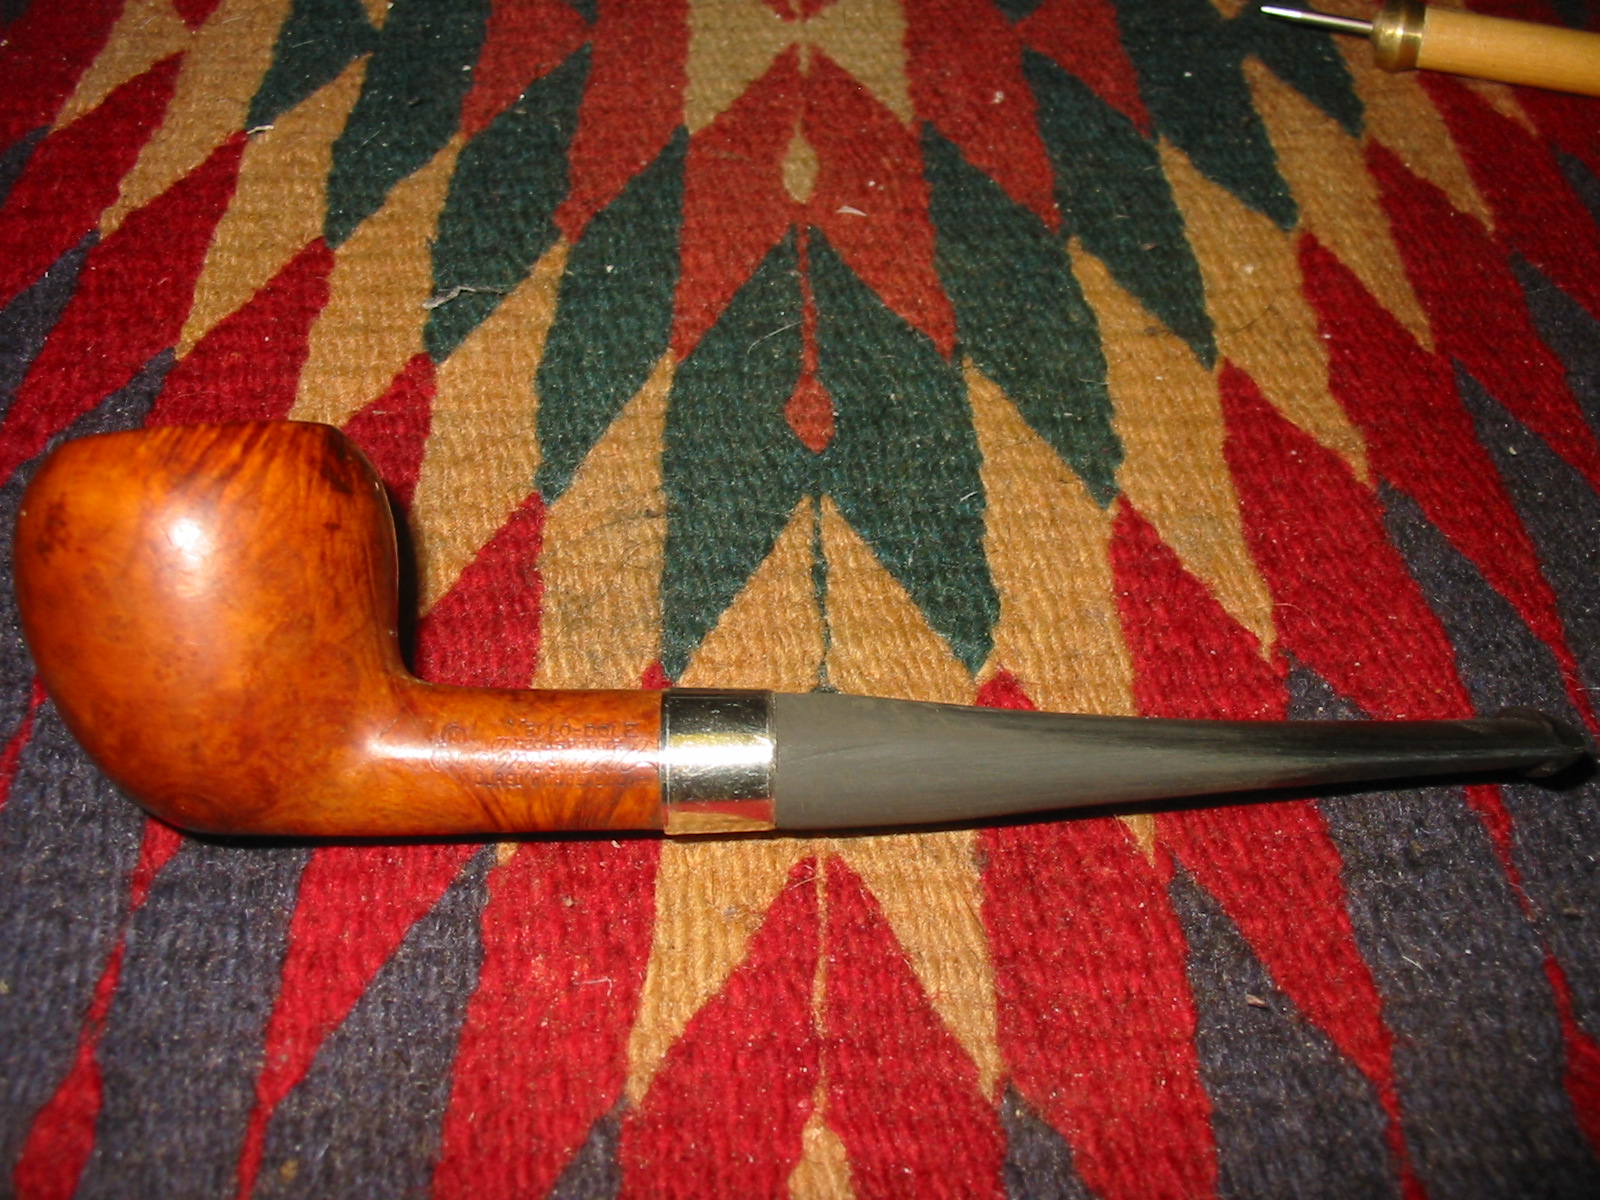
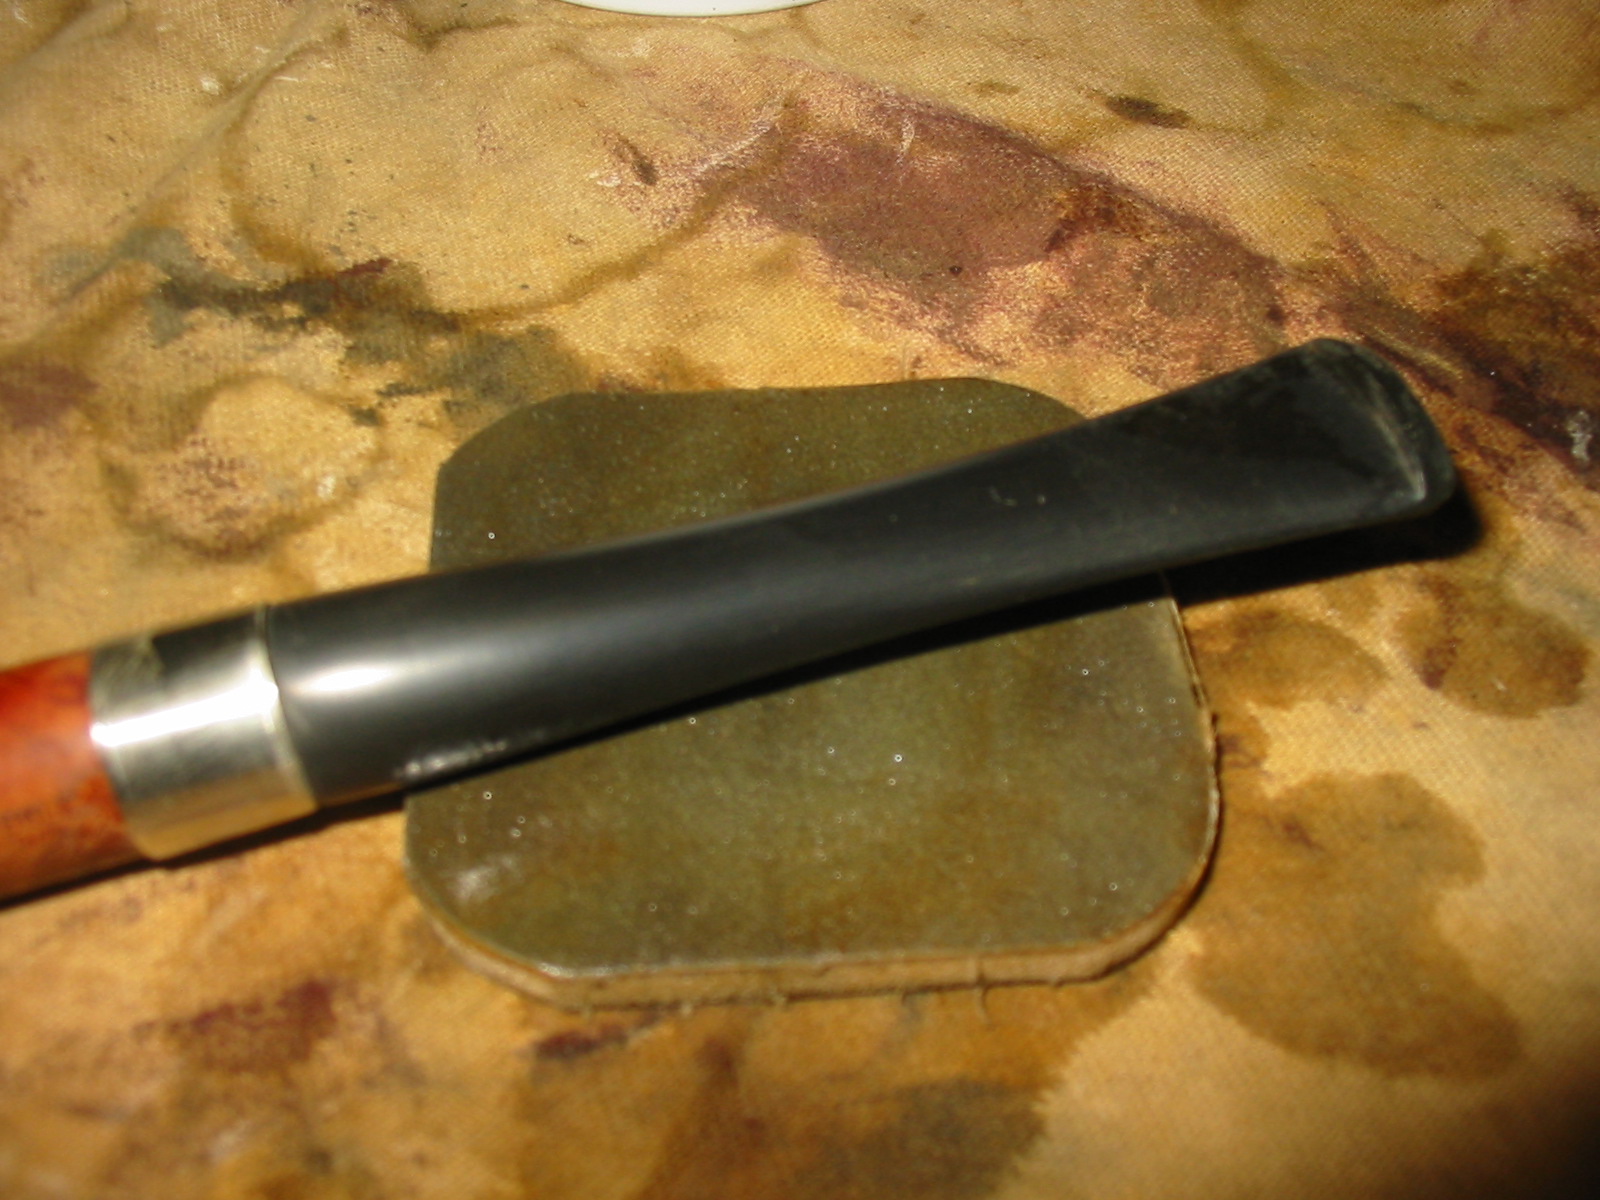
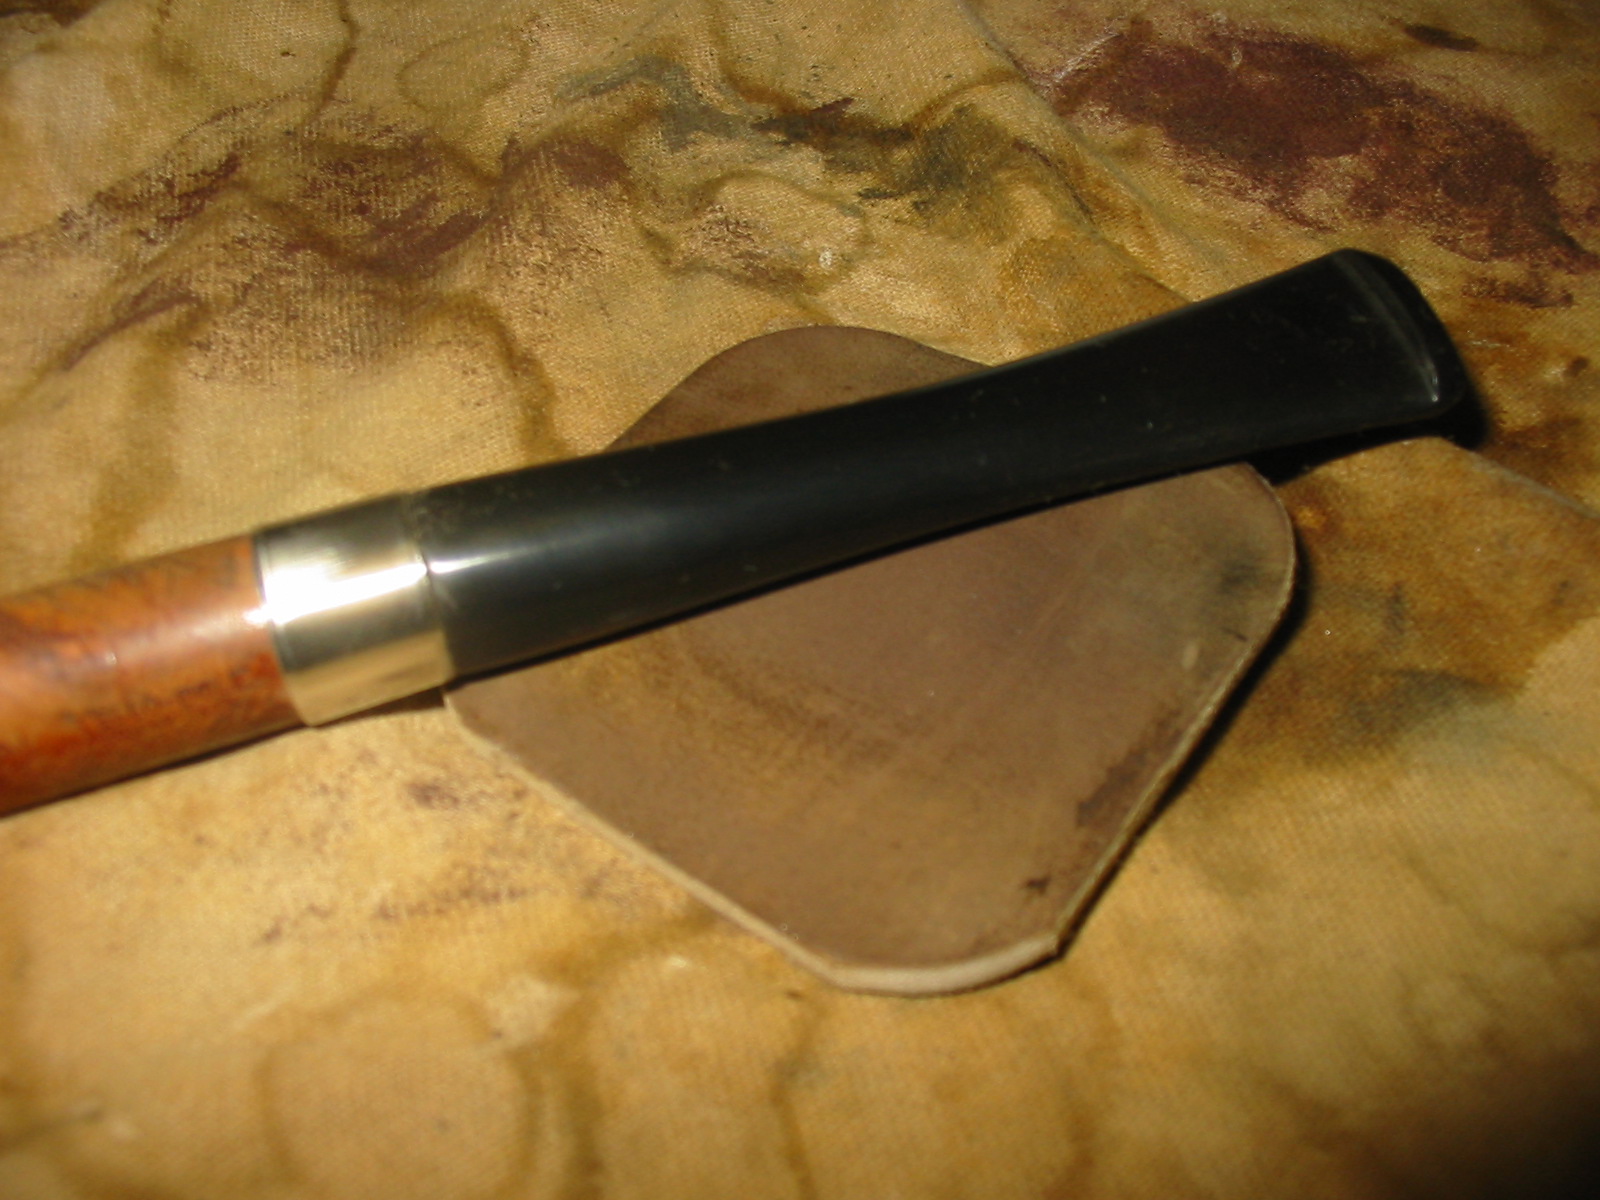
  Before applying the wax, I want to add a special touch to this reborn Phoenix Billiard Churchwarden. I decide to band the shank – always a nice touch. I pull out my collection nickel bands and find one that fits over the shank but leaves about a 1/4 inch slack between the end of the shank and the end of the band.
  To slide the band safely up the shank I heat the band with a hot air gun while on the shank at the tension point. As the band heats, it will expand microscopically. After a time of heating, I turn the shank downward and gently but firmly press down against a thick cloth on the hard wood surface. This pressure moves the band up the shank a few millimeters and the cloth cushions the end of the band so it doesn’t bend with the pressure. If one presses too hard and tries to expand the band too quickly, the nickel can rip – that is not good. I got through the heating and pressing cycle a few times and the band is seated well. I remount the stem and eyeball the band placement. It looks good and I think the new steward will like this touch of class a lot for this Phoenix Billiard Churchwarden.
 Before I wax the pipe, I mount a cotton cloth buffing wheel on the Dremel that I use exclusively on nickel. I want to shine the band up before applying wax. I set the speed at 40% and apply White Diamond compound to the band. I’m careful not to run the buffing wheel over the band to the briar as it can discolor the wood. I learned this the hard way in the past. I’m not sure what the chemical process is, but when polished at high speed, a dark residue is produced. You can see it on the White Diamond bar as well as on the wheel. This is another reason why each compound and use have a dedicated wheel. After finishing with the White Diamond buffing, I buff the band with a microfiber cloth and, oh my! How it shines!
 Now, the home stretch. Time to wax the pipe. Again, I change to another cotton cloth wheel dedicated to carnauba, maintain a 40% speed on the Dremel, and apply a few applications of the wax to the stem and stummel. I finish the polishing by hand buffing the Churchwarden with a microfiber cloth to raise the shine.
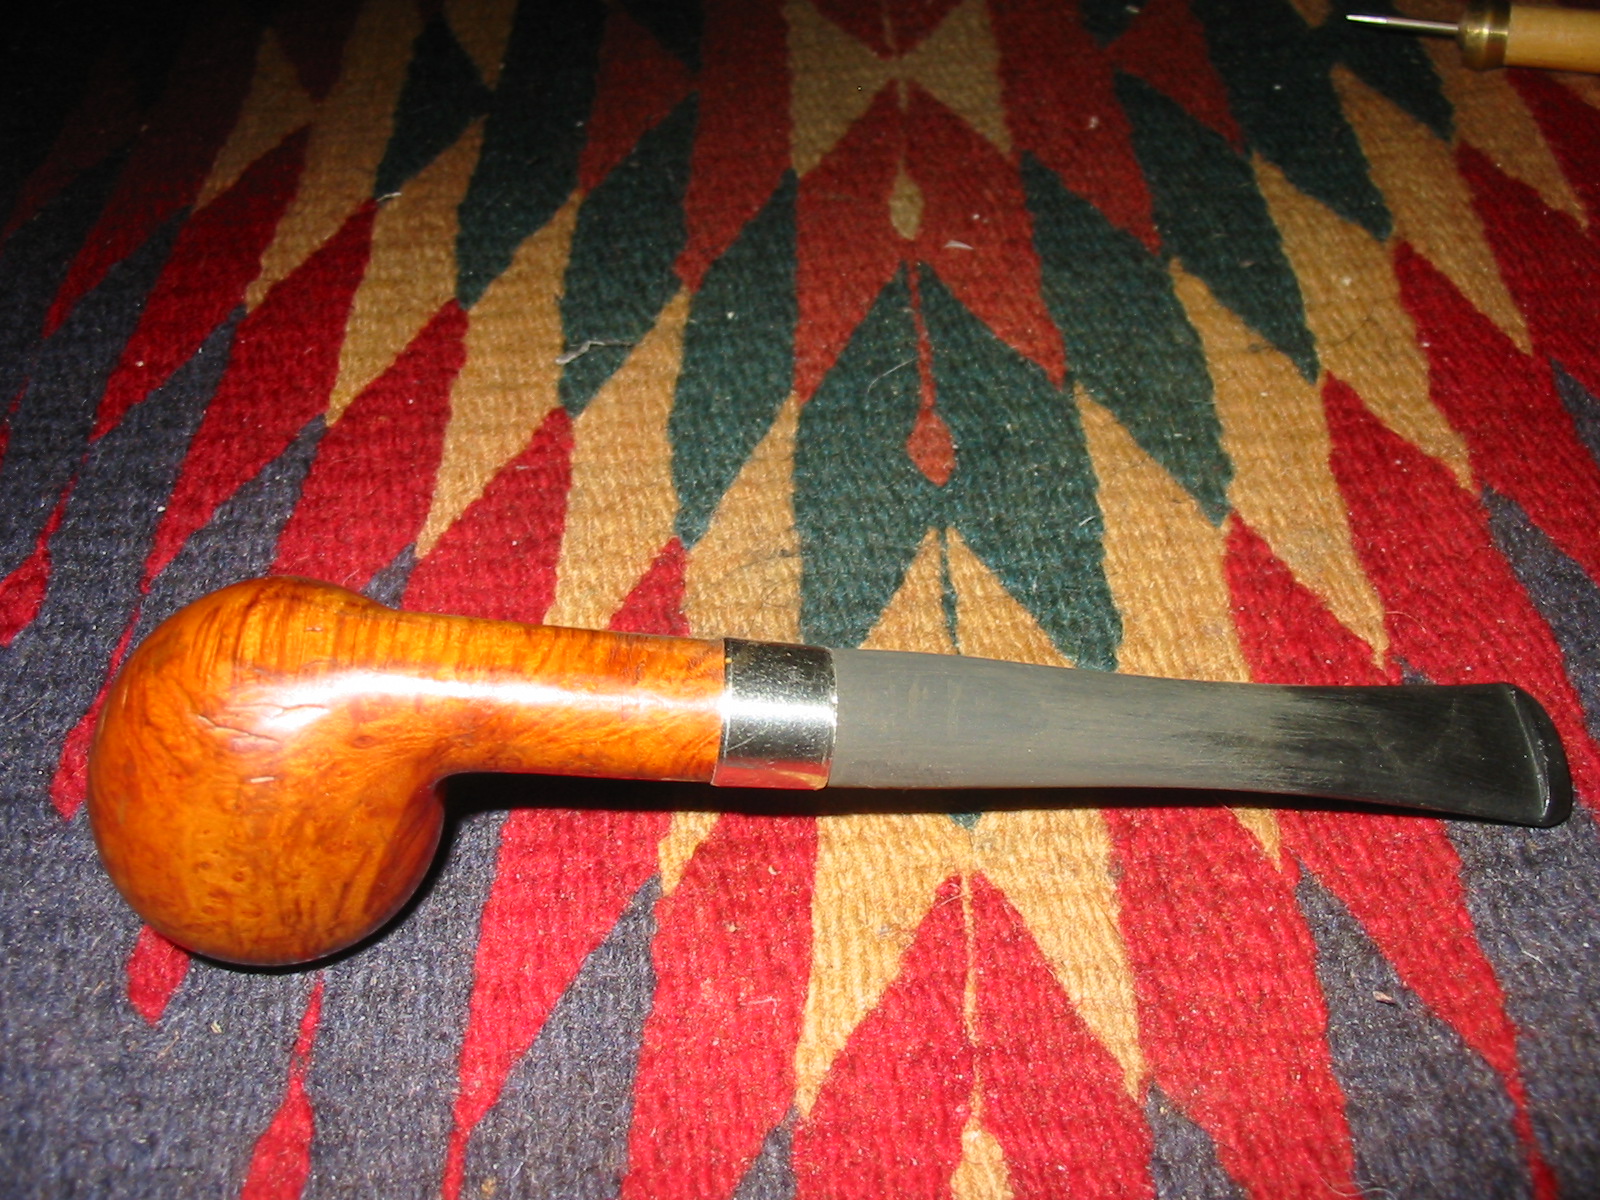
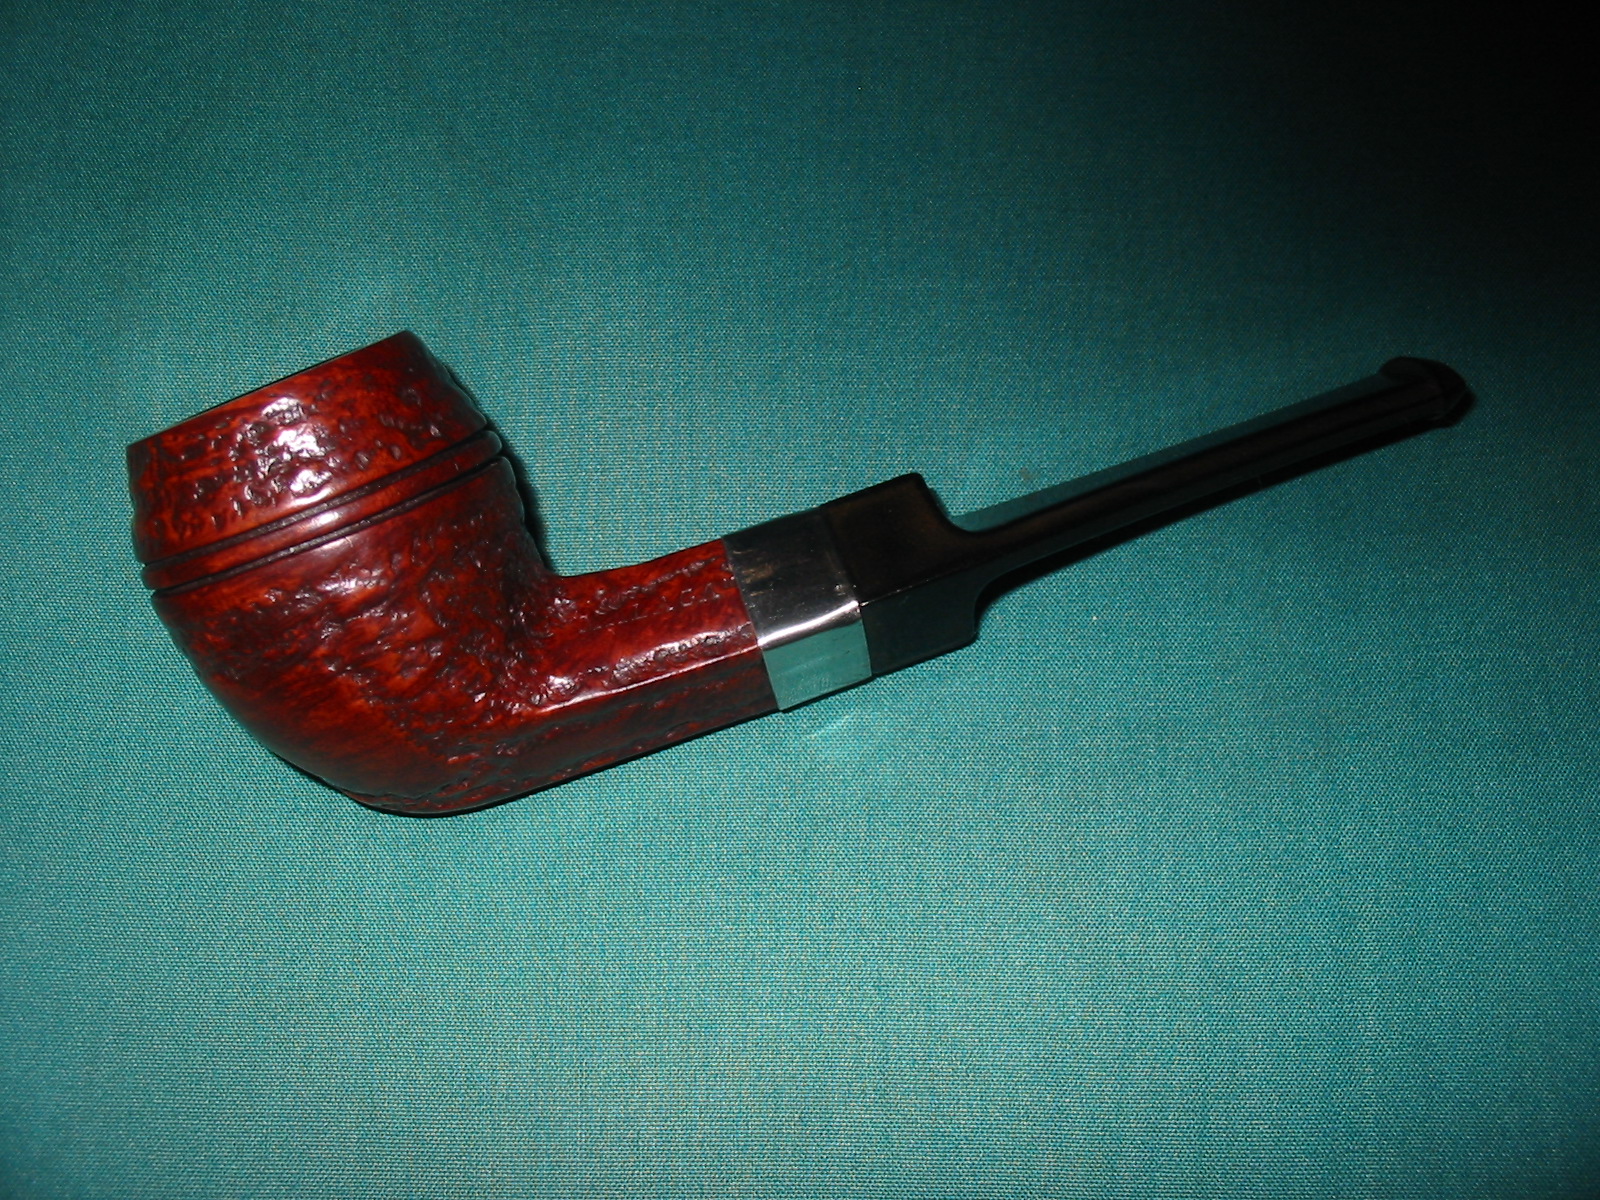
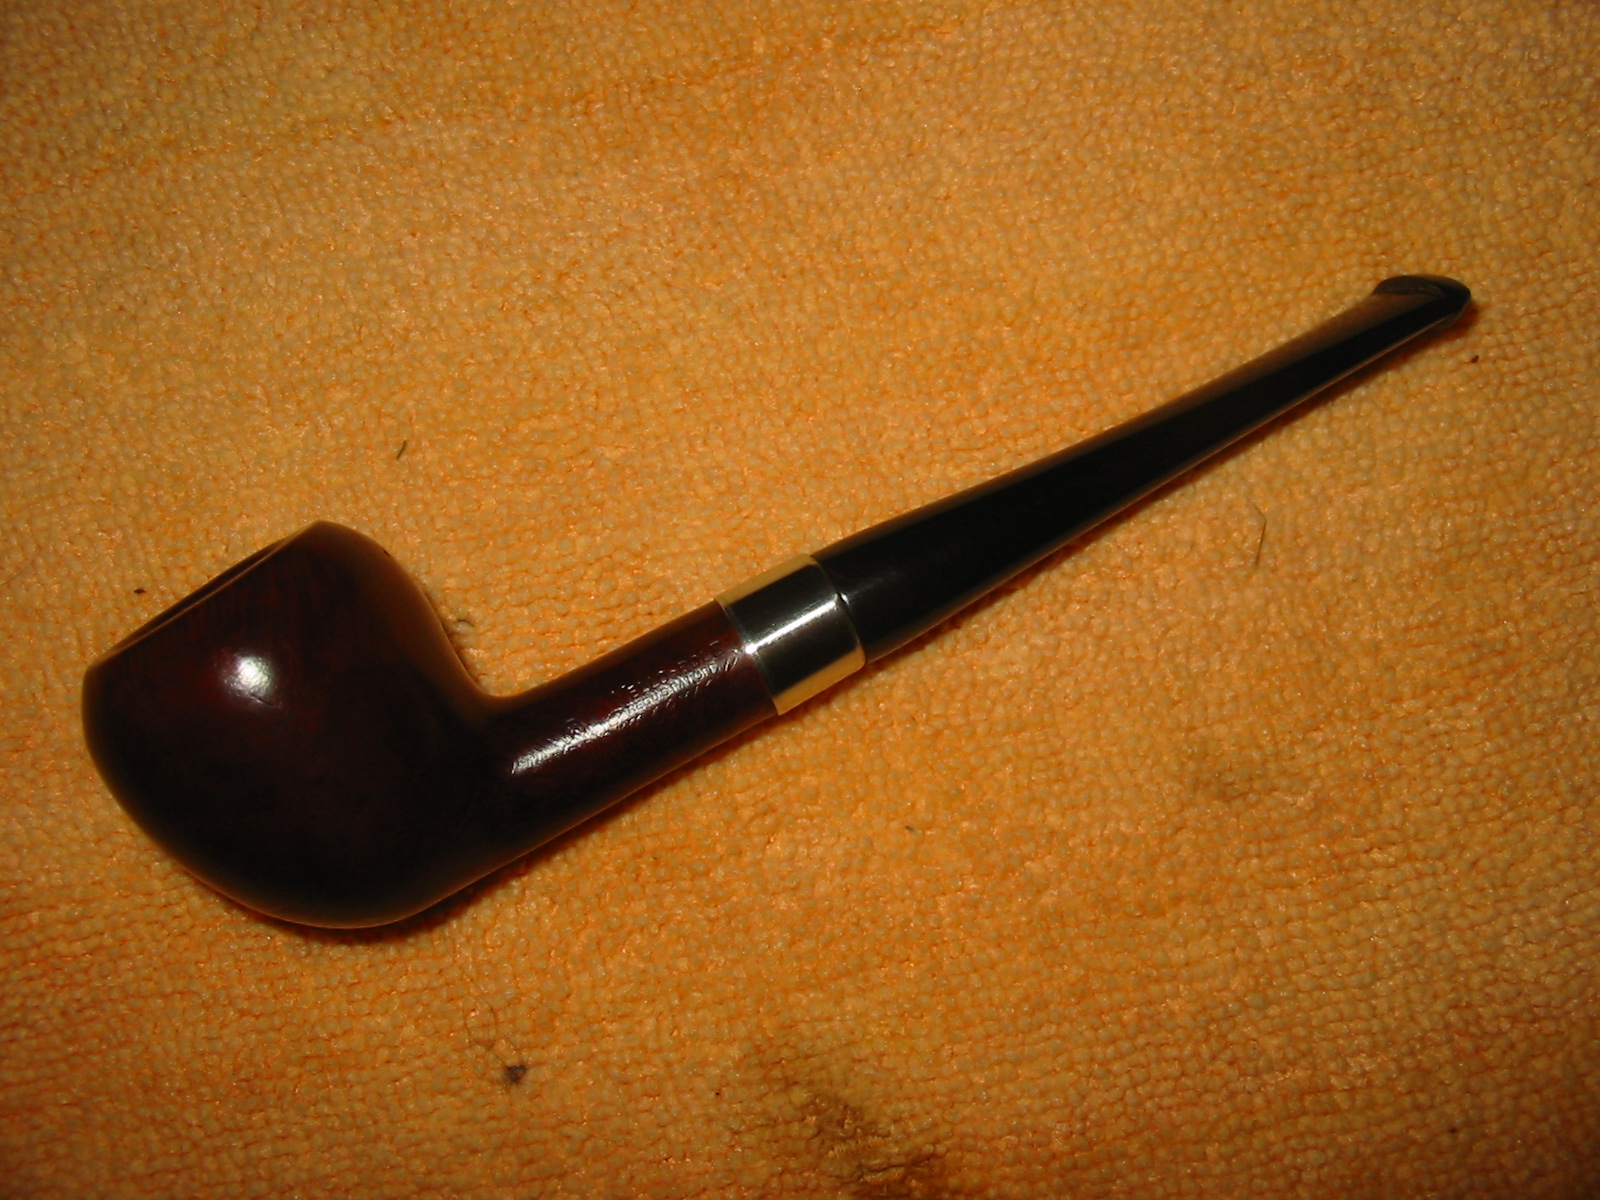
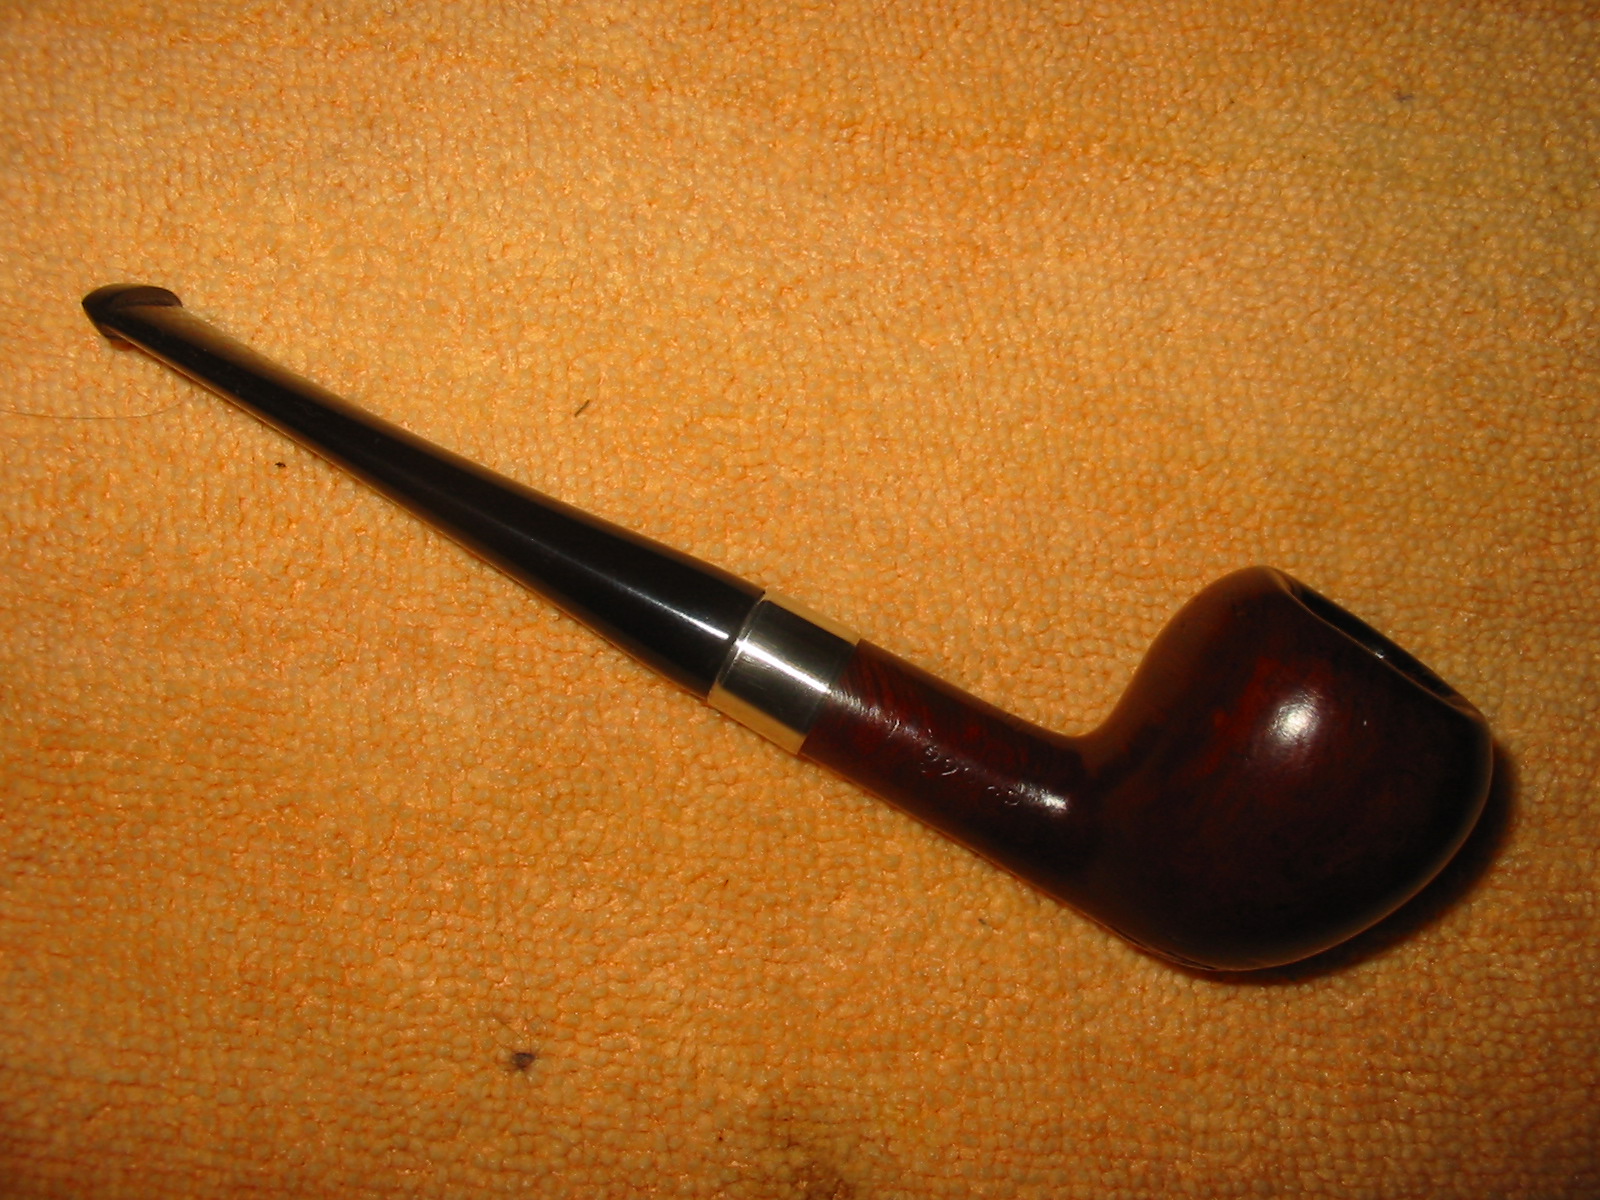
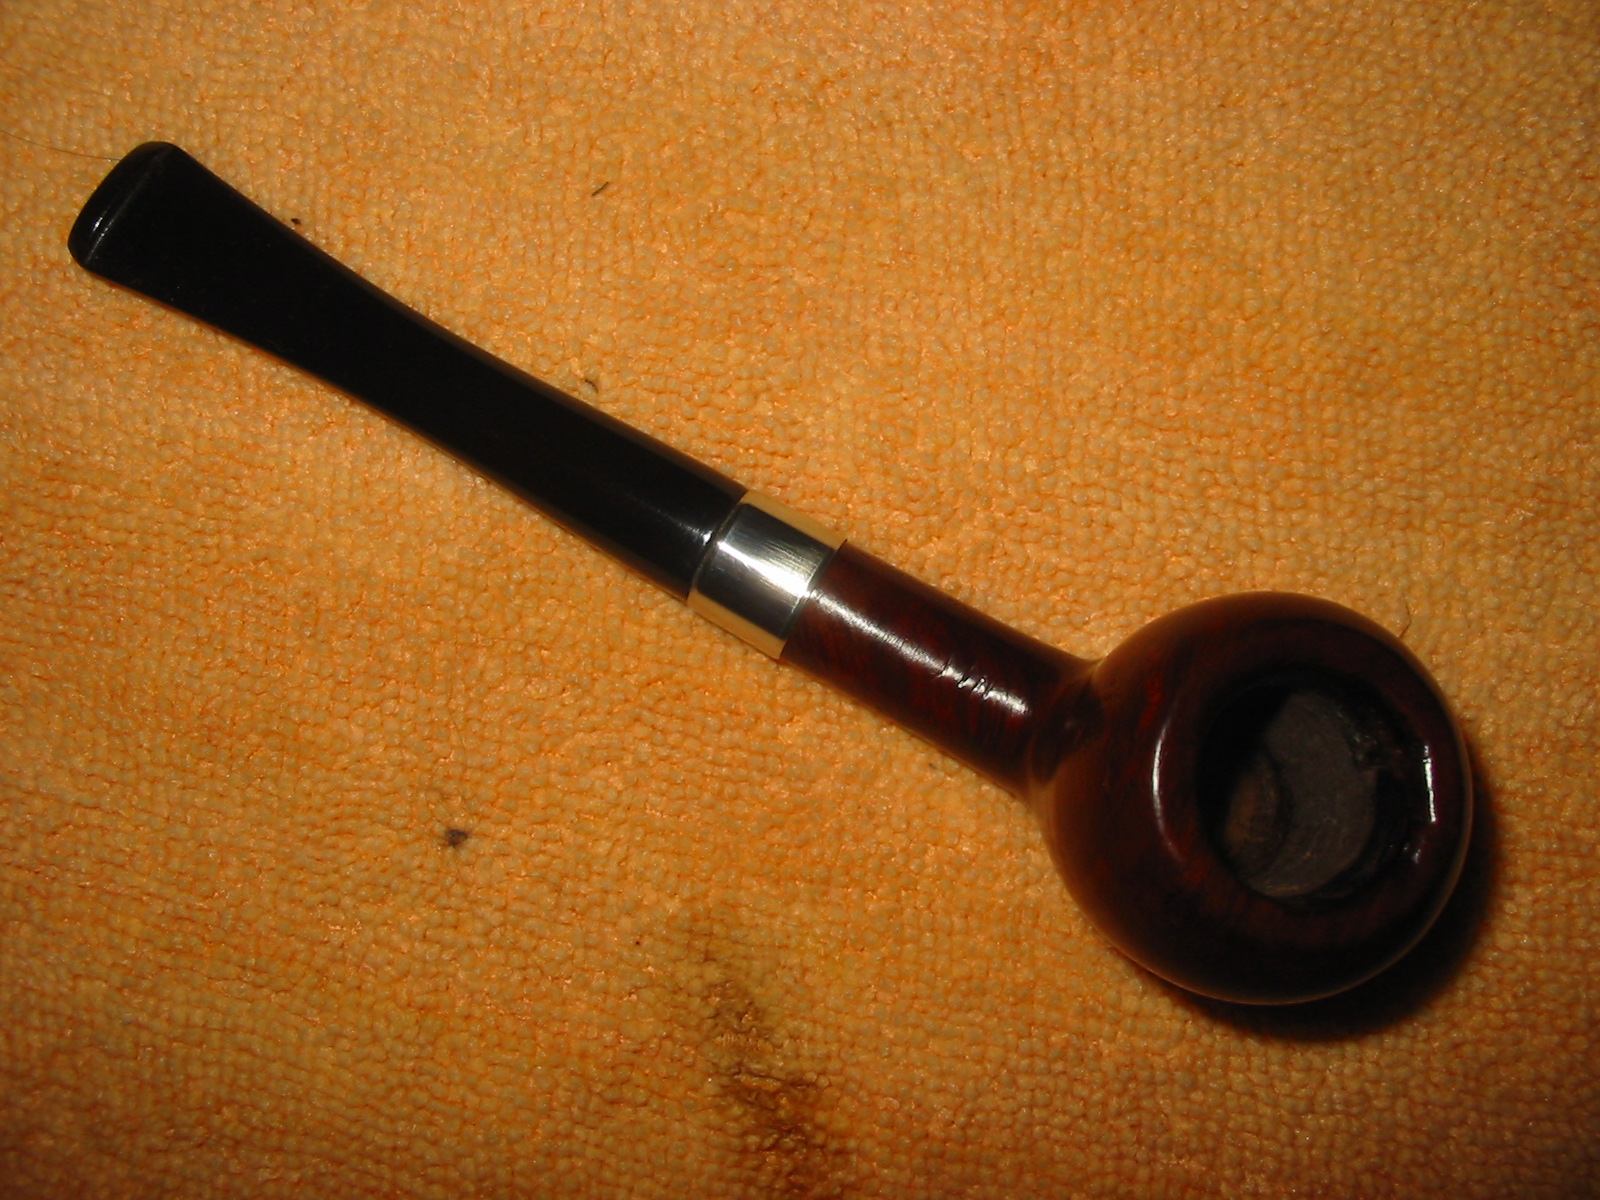
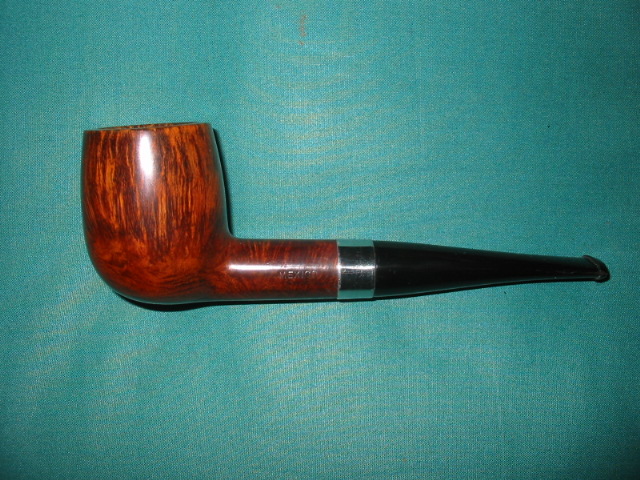
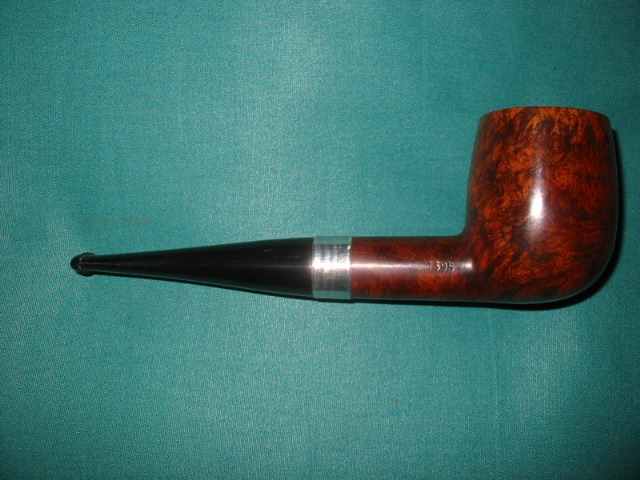
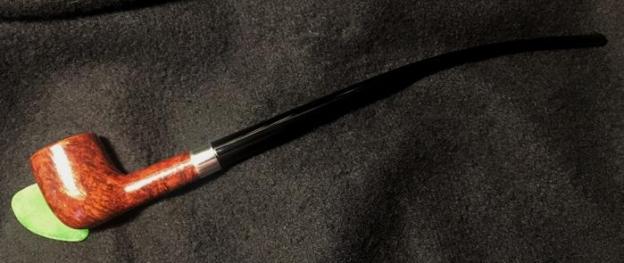
Few words describe the transformation of this lonely Billiard into a Phoenix. Again, I’m amazed at the beauty in what God has created, even that which we often pass by with the shrug of the shoulders. The gain revealed in the Billiard is beautiful. The rim, gnarled as it was, looks great and is not diminished by the briar I was forced to take off. As I look at it, the slightly squatter bowl works very well as the mast of the long, flowing Churchwarden stem. The band mounted on the shank simply rocks, what can I say. Andy commissioned this Billiard now Phoenix Churchwarden and he will have the first opportunity to acquire it in The Pipe Steward Store. This pipe benefits the Daughters of Bulgaria – women and girls trafficked and sexually exploited. Thank you for joining me in the telling of the story of the Phoenix!