Guest Blog by Robert M. Boughton
Member, International Society of Codgers
Member, North American Society of Pipe Collectors
http://www.naspc.org
http://www.roadrunnerpipes.net/ (Opening soon)
http://about.me/boughtonrobert
Photos © the Author
INTRODUCTION
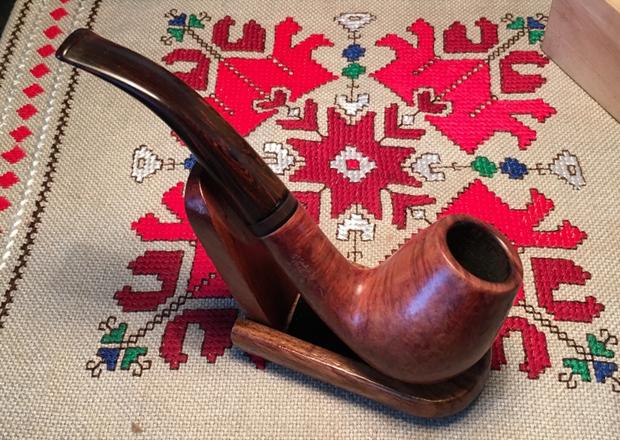
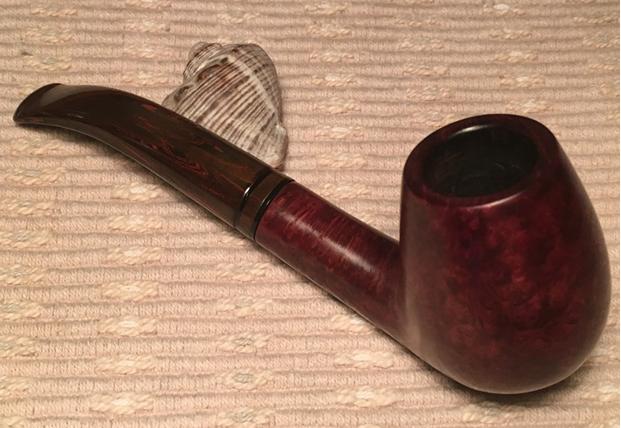
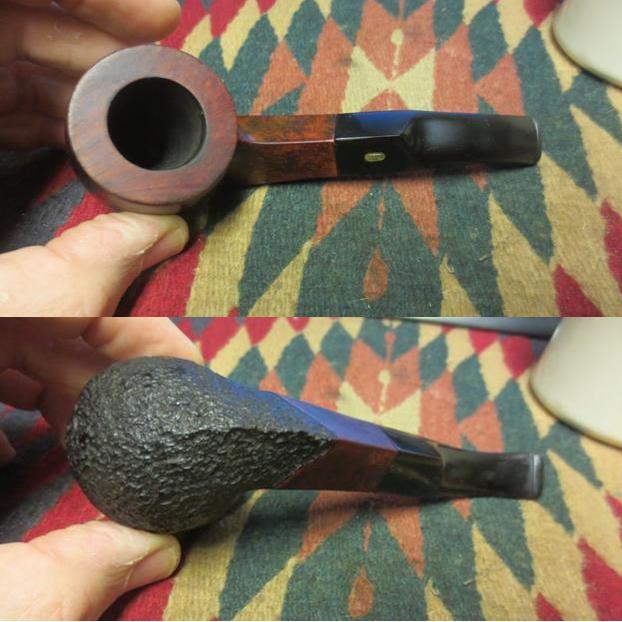
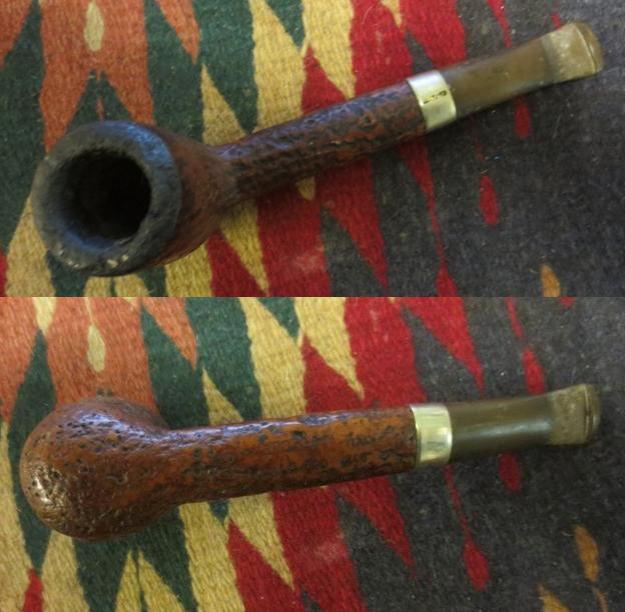
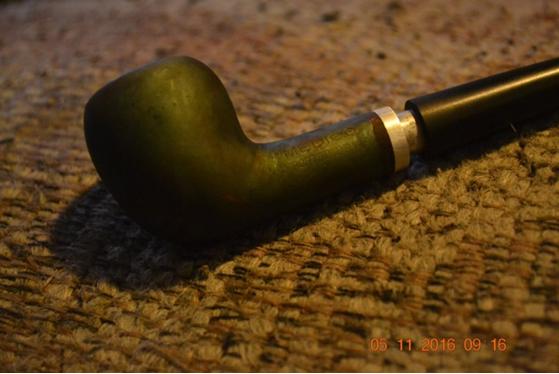
In late October of 2014, I wrote a blog here about a Lorenzo second with the name Spitfire Mille (Italian for thousand, just as Starbuck’s large drinks are designated by Venti, meaning 20 – for the number of ounces, including the ice in my With Room Raspberry Iced Americano right now). Lorenzo, an Italian brand that has been around since 1946, makes an assortment of traditional shapes and styles but is, among my local pipe friends at least, best known for its lines of, well, enormous proportions. Take this Spitfire, not all versions of which are so large.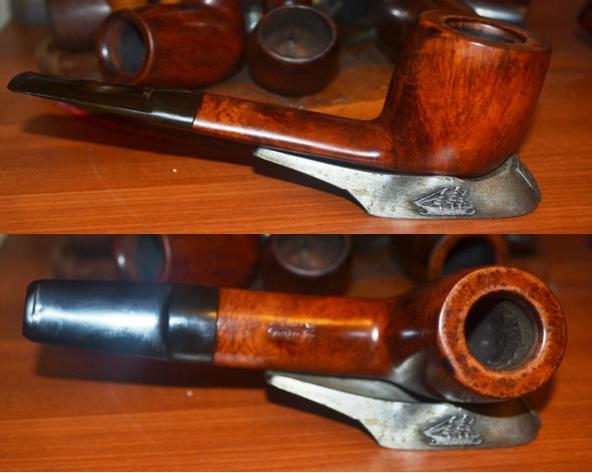


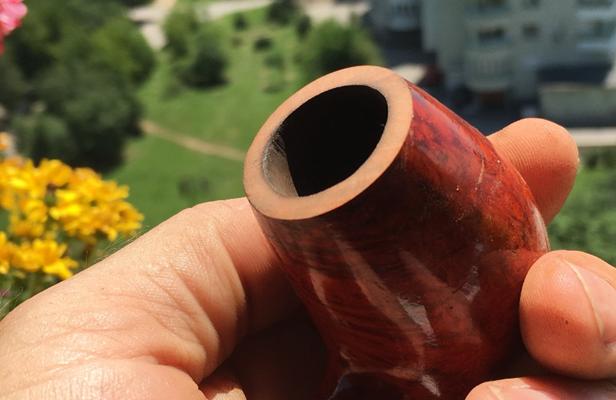
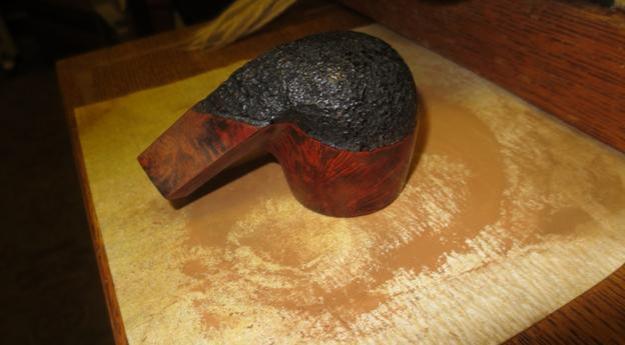
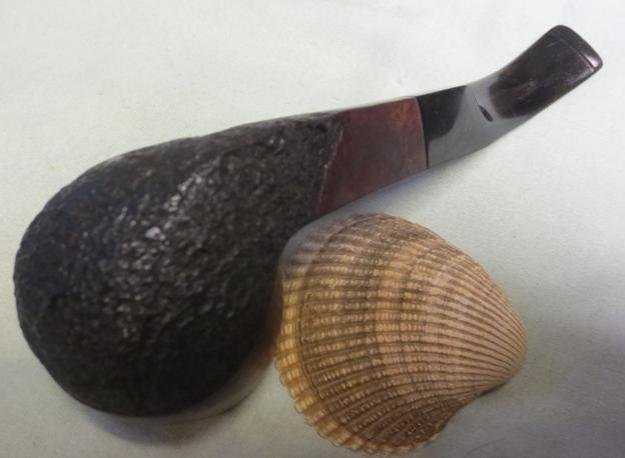
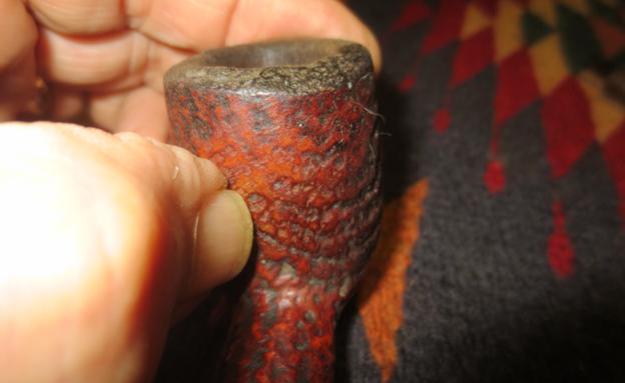
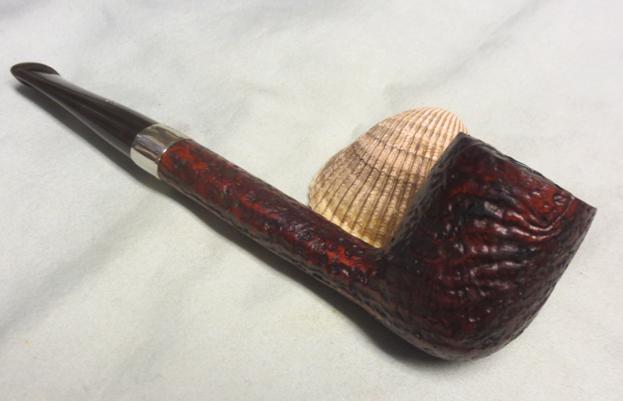
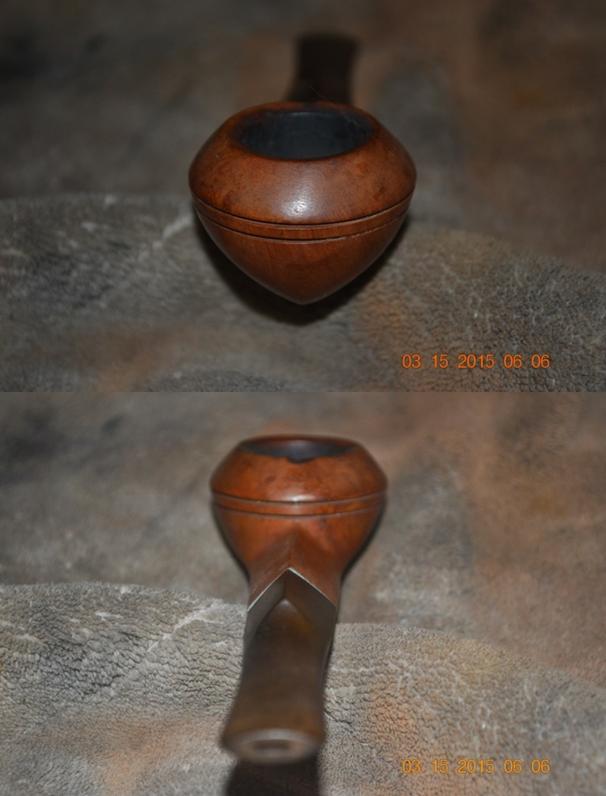
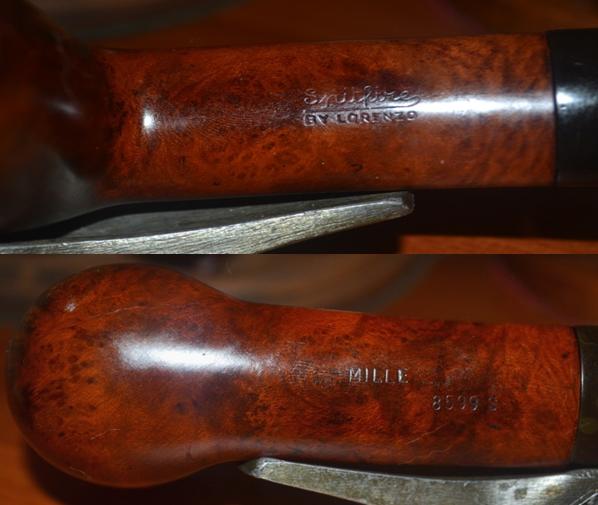 You can’t tell by these pictures, but although the length was near the limit of the norm at about 6”, the chamber diameter was something like 1” x 2” when I checked before adding the Spitfire to my old business website. That’s about 6/8 (¾”) x 1” larger than usual. Then I measured less common specifications, including the diameter of the entire rim across, bowl height and the top half of the shank leading into the bit. Here is where the numbers became astounding: from one side of the rim to the other was a little under 2”; the height of the bowl was close to 3”, and the shank was 1” across.
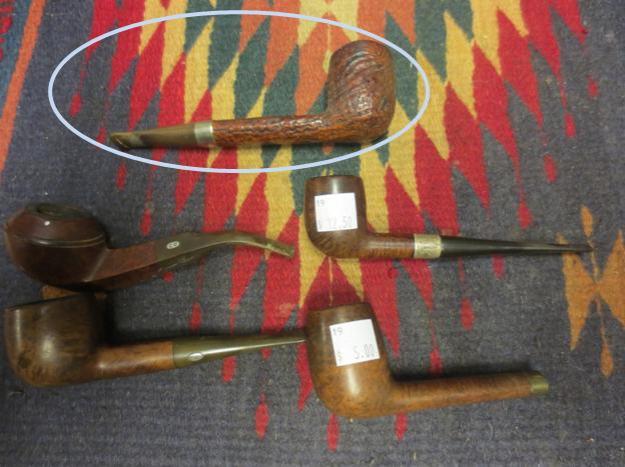
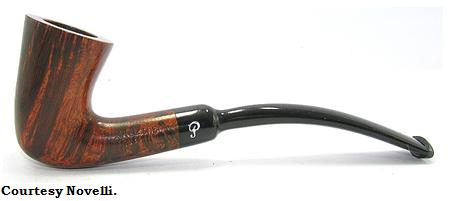
If those numbers don’t sound impressive, consider three of my largest pipes, the Peterson 150th Anniversary smooth bent billiard, the Digby Six-Panel and the Soborg Danish Panel.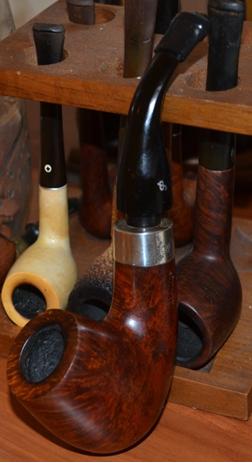
 The Pete’s length is 7”; chamber diameter is ⅞” x 1¾”; the full rim is 1⅜”; the bowl height is 2¼”, and the shank is 1½”. The Digby’s length is 5¾”; chamber 1” x 1¾”; rim 1½”; bowl height 2½” and square shank 1” at the halfway point. The Soborg’s length is 7”; the chamber is ¾” x 1½”; total rim is 1¼”; bowl height is 2”, and the shank is 1”.
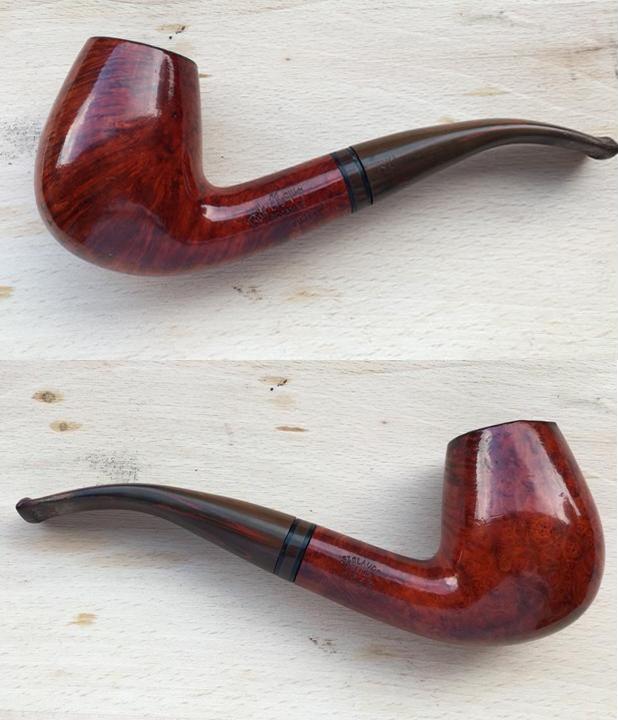
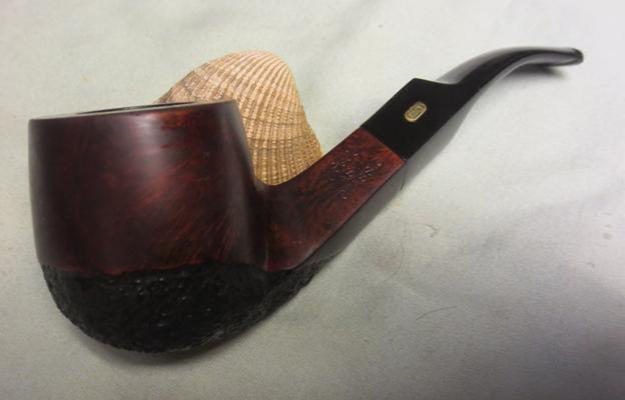
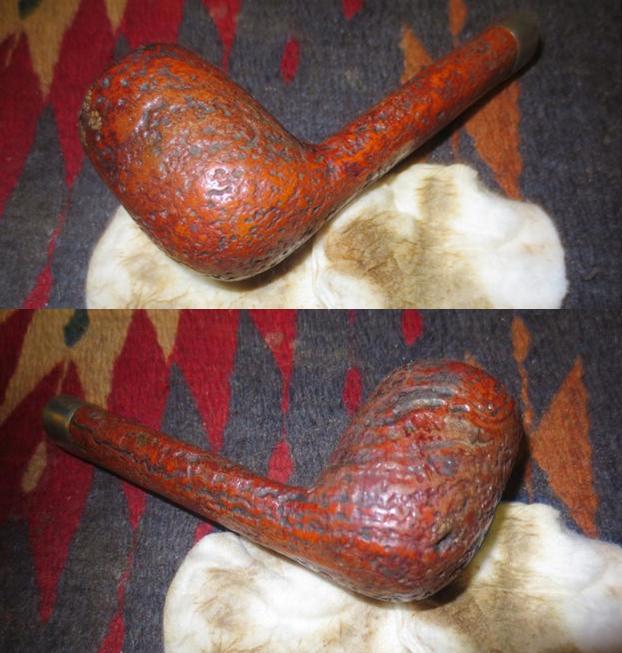
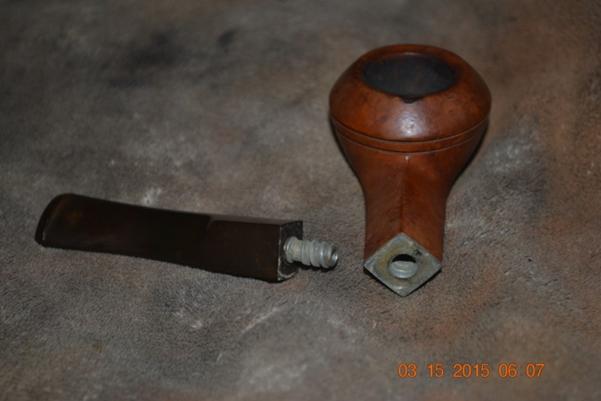
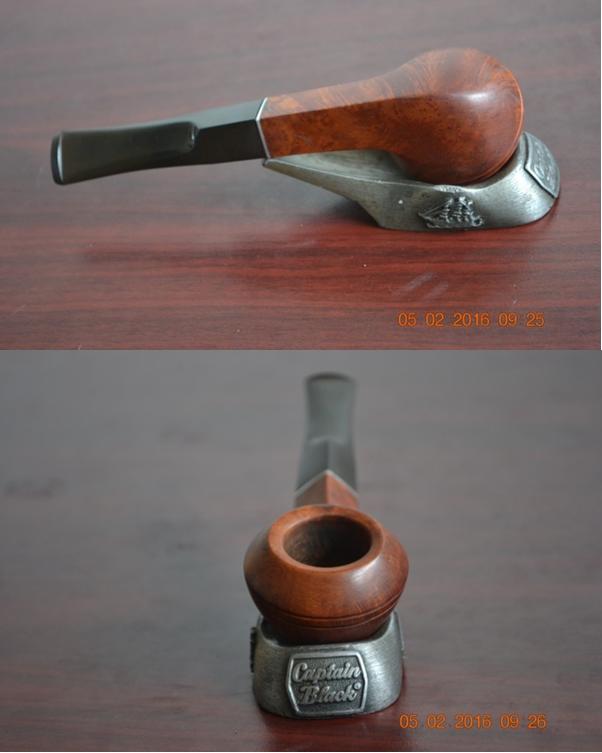
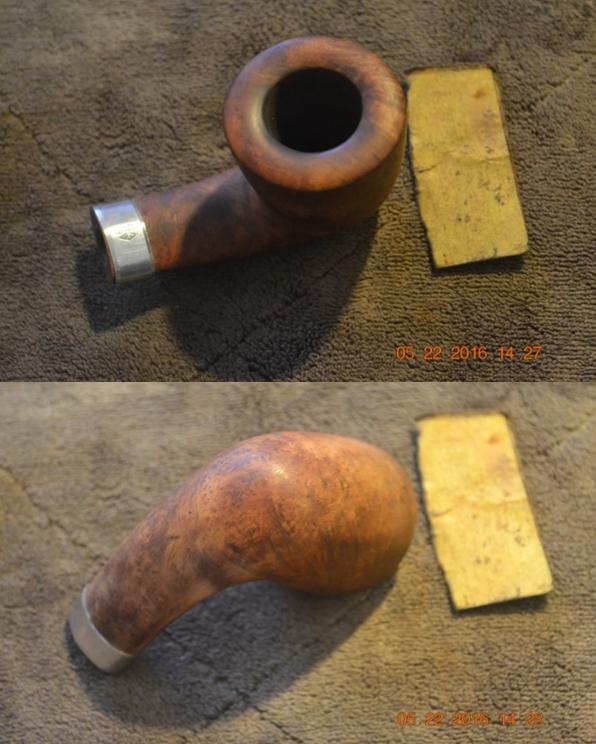
And so, it seems, not counting the length, the Spitfire is the overall “winner,” if size really counts. All of this is to introduce the no-name Italian Dublin XM (by way of indicating extra monster, for lack of a better description). This pipe without a name, perhaps the more so for that most unfortunate social status, has all the earmarks of a Lorenzo reject. It looks like a Lorenzo; comports itself like the portlier brothers, sisters, uncles, aunts and so on and on of its fertile familia, and as it was stamped with the single word “Italy” to boot, so it must be a Lorenzo by birth if not legitimacy.
RESTORATION

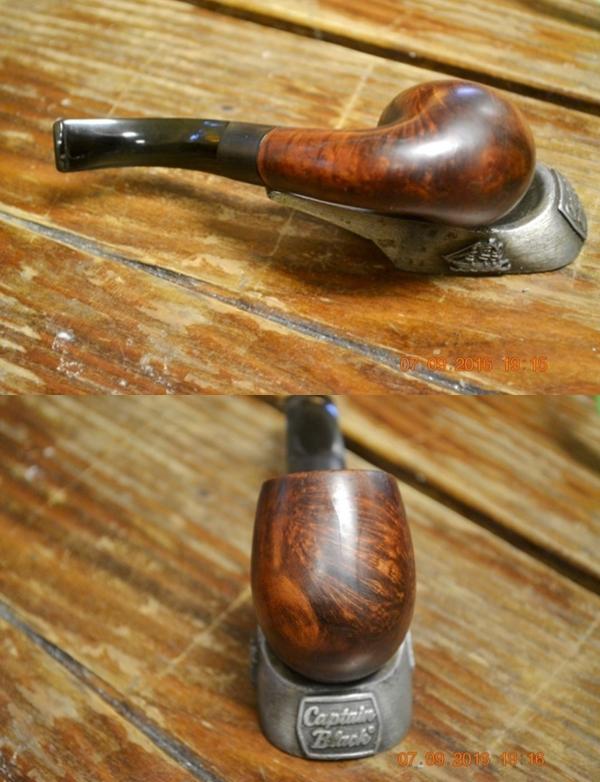
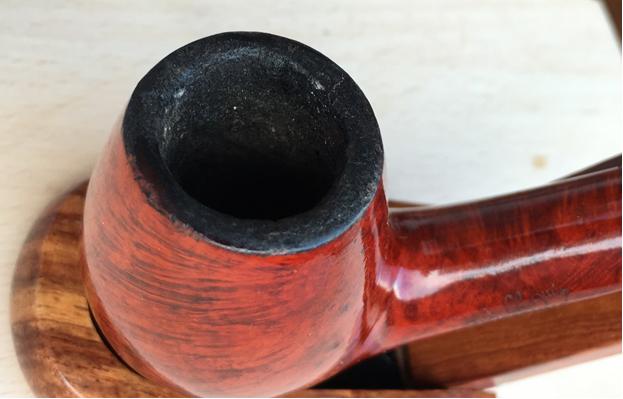
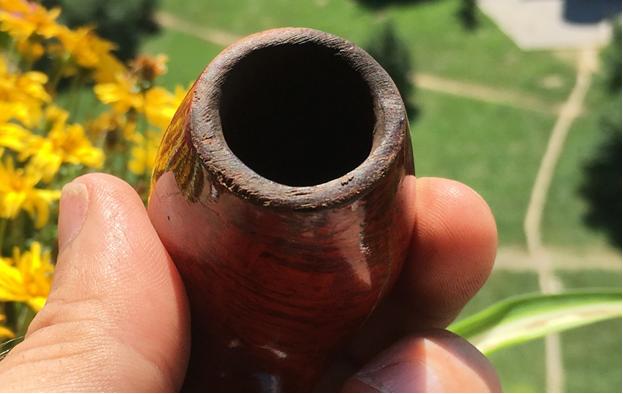
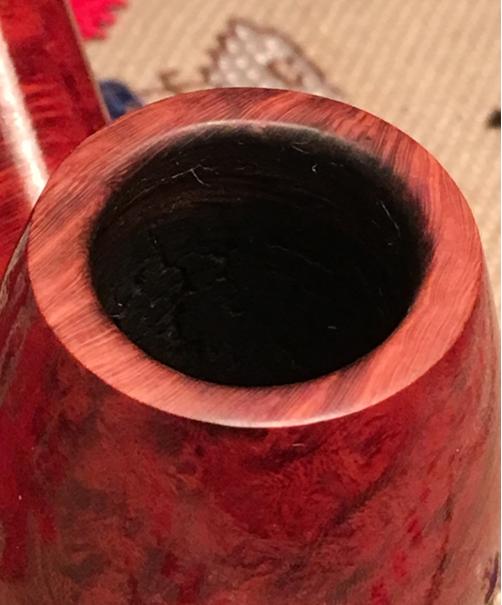
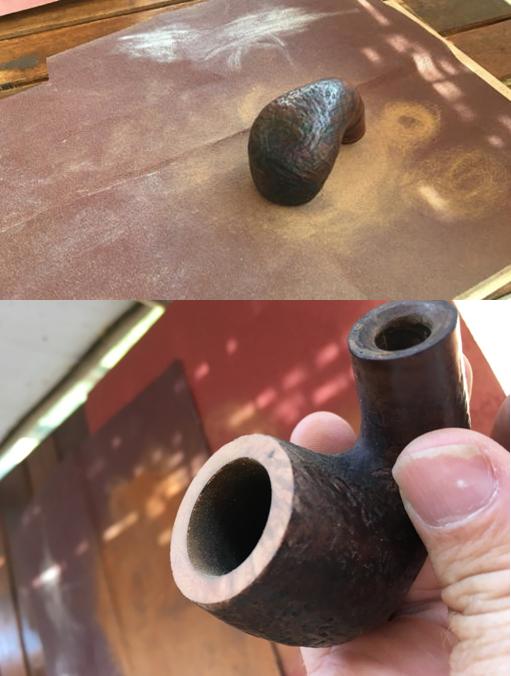
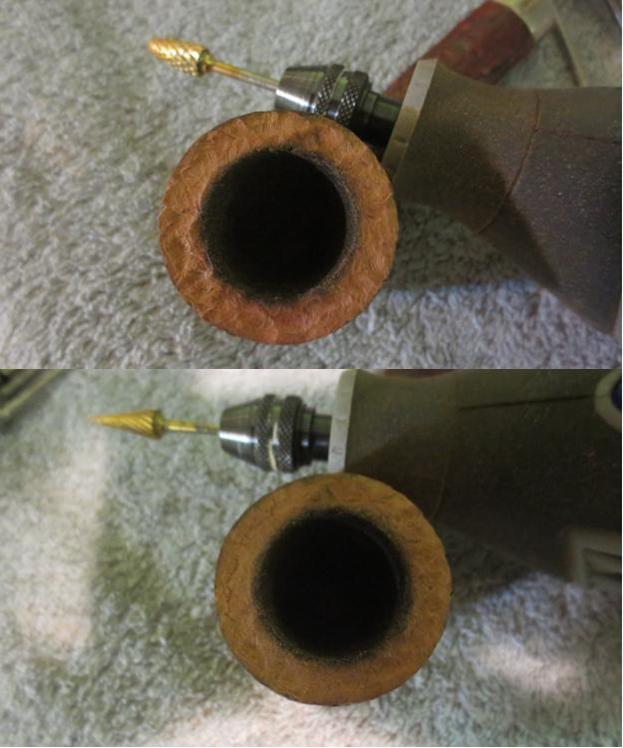
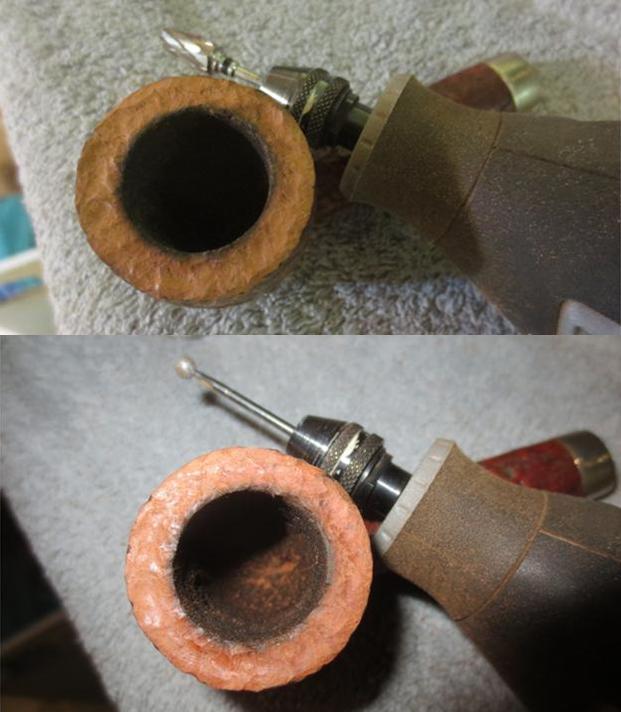
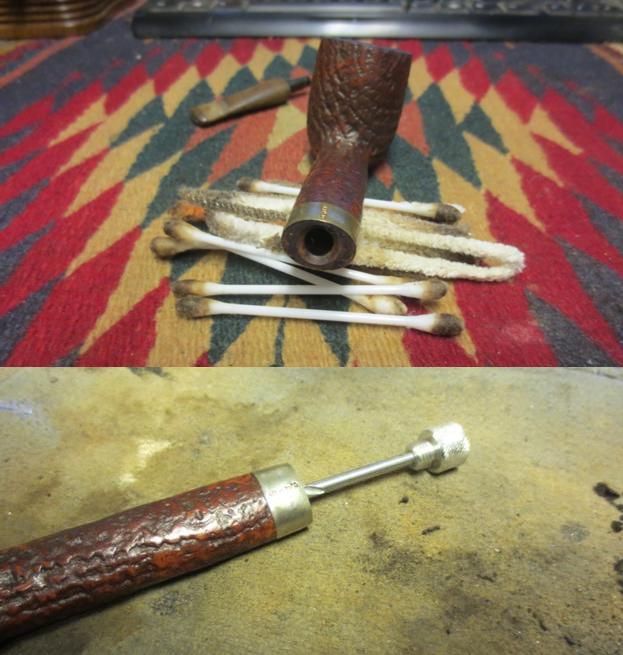
 Once again the troubles the marvelous pipe faced before it could be presented to a new owner who would cherish it were greater than met the casual eye. The rim was just a tad crusty and therefore offered itself as the place to begin. I chose super fine 0000 steel wool to commence the task. Most times now I have at last embraced more popular techniques such as the wet micro mesh method, but on this occasion I did it with steel wool before I performed a little sanding with 320-grit paper with the goal of ridding the fair and rounded rim of scratches attendant to burning. There are still other means to this end. Yet with gentle ministration, I have found the finest steel wool an excellent first step in the process in some situations. This was one of them.
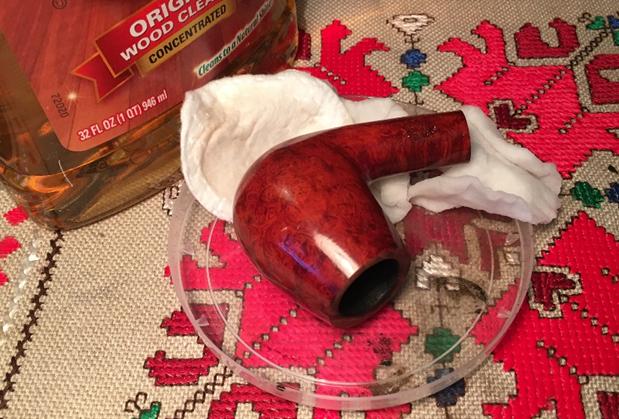
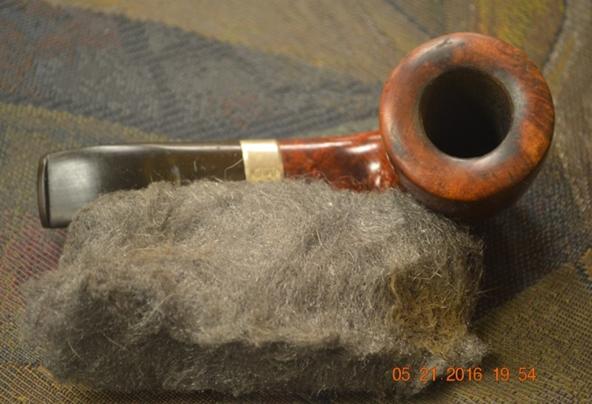 At that juncture of the growing adventure, I considered the dull state of the bit and the small but numerous scratches and dings through the original stain to the excellent Mediterranean briar beneath. Perceiving an unusual thickness to the lovely red coating, I arrived at the clear and positive efficacy of an OxiClean bath for the bit and a concurrent but somewhat longer soak of the stummel in Everclear.
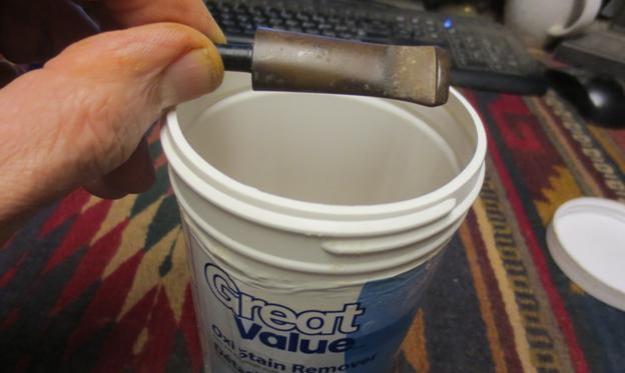
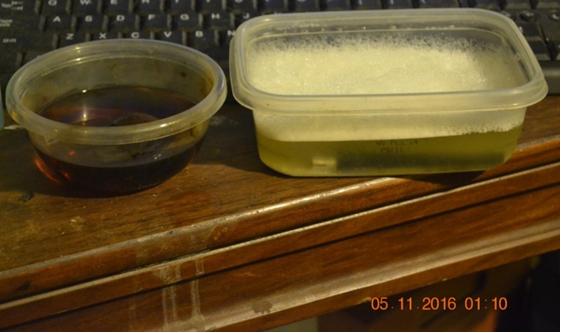
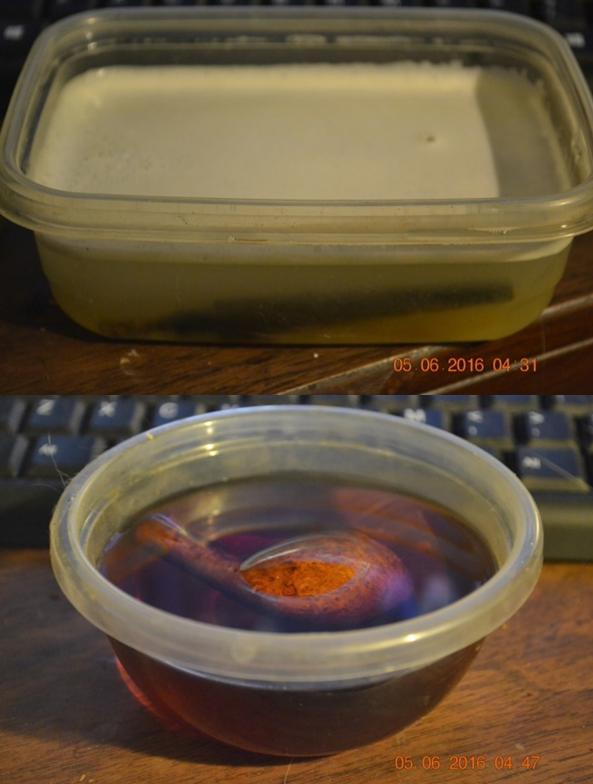
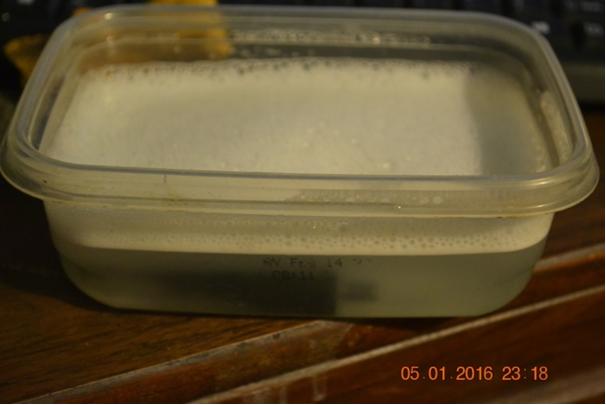
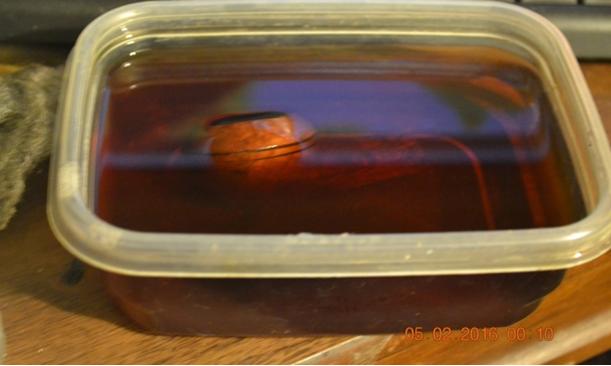
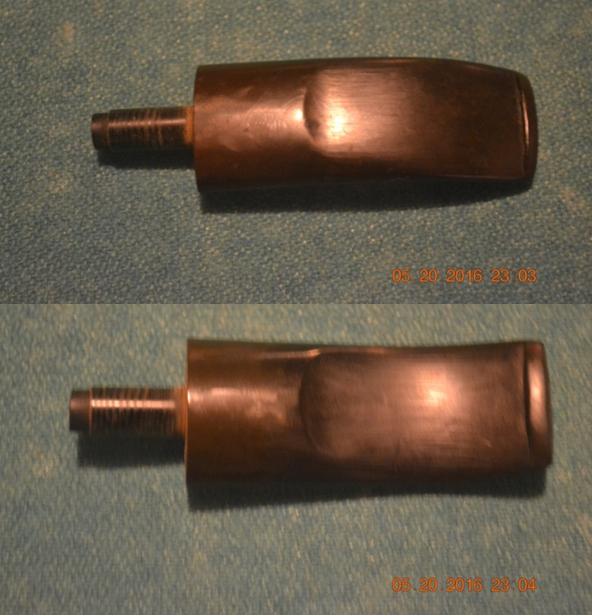
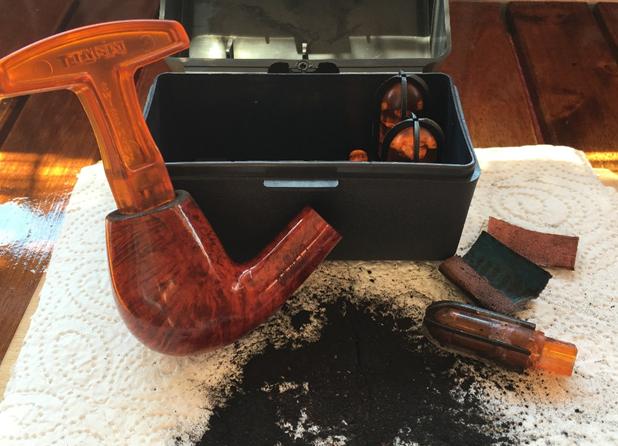
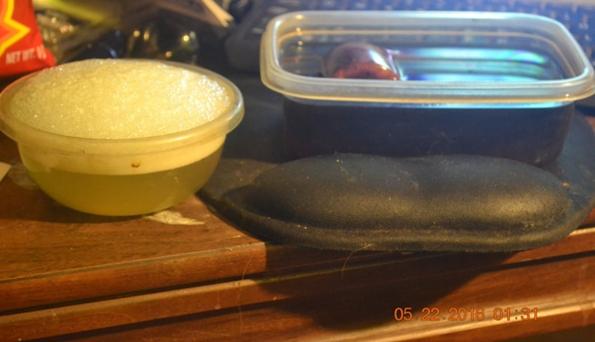 I slipped the bit and stummel into their respective Tupperware containers and the sequel to the prequel of the not only continuing but never-ending adventures of the Starship Enterprise (“Into Darkness”) in the desktop PC’s DVD player to watch – once again for me – with my new roommate. He had somehow managed never before to see the movie, and we had some time to relax and smoke our pipes. The roommate, Darren, became convinced by someone that he could give up the doubly negative costs of cigarettes with the far lesser expenses and greater merits of a good tobacco pipe. Of course, he will gladly pay me tomorrow, figuratively speaking, for the pipe he savors today.
Furthermore, no less, his eyes became misty and enamored at the sight of the Albertson Belgian black rustic small bent billiard that is scheduled to be the culmination of my seven part series on ladies pipes and, despite his professions to the opposite, I knew he had to have it – oh, how I know that dewy look! Picture this: a guy who looks and dresses and has tats like a gang banger, getting misty for a tiny little pipe that, although not specifically made for ladies, certainly fits the bill! The fantastic sci-fi epic aside, I could only imagine what Darren must have thought of the no-doubt perplexing acts I surely appeared to be perpetrating against the once whole but weathered Dublin XM.
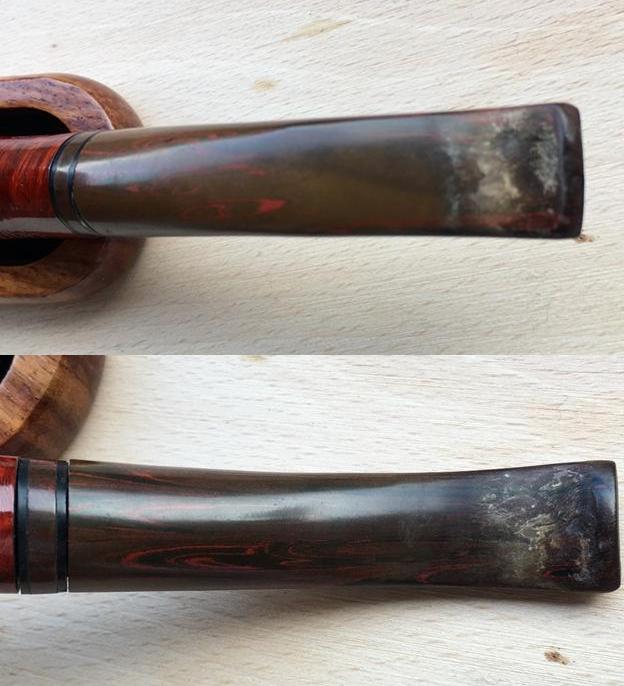
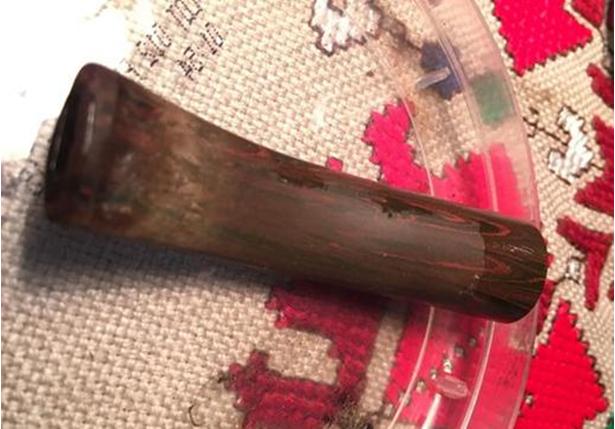
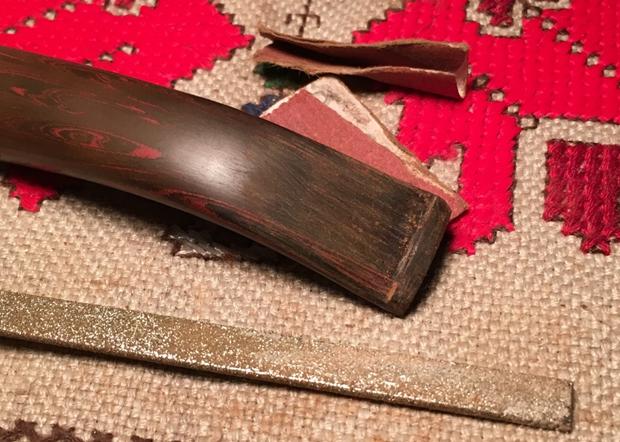
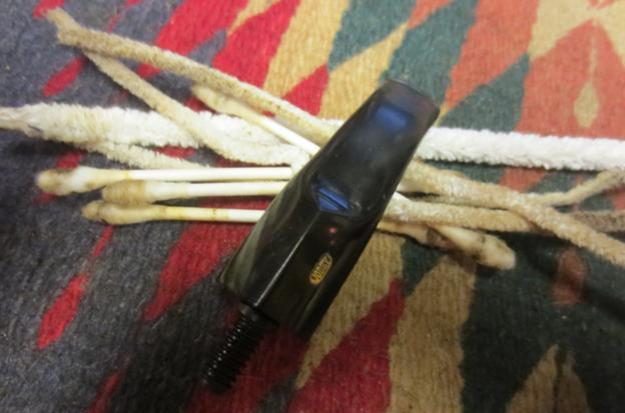
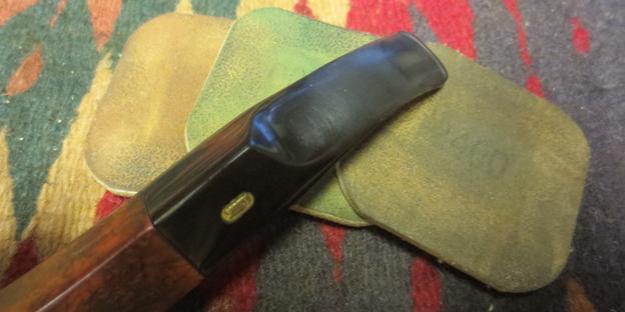
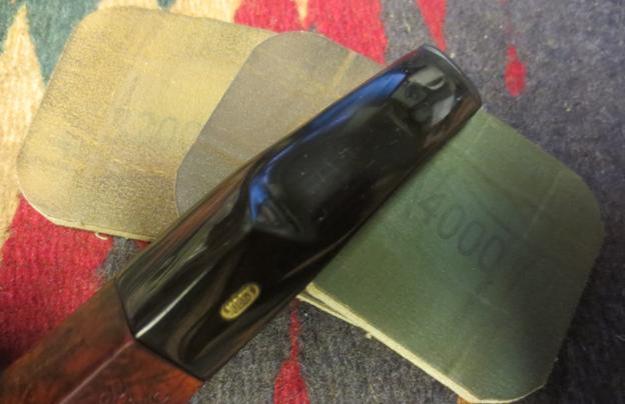
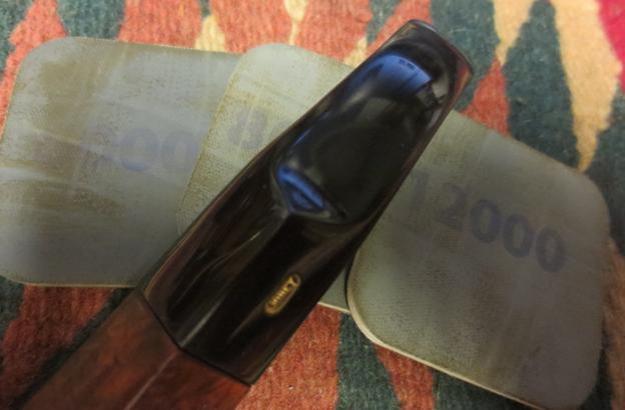
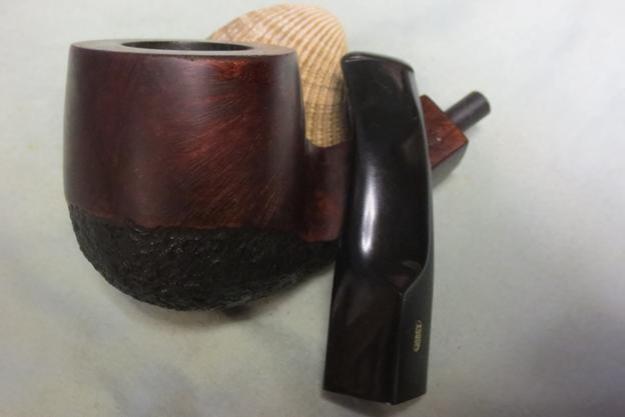
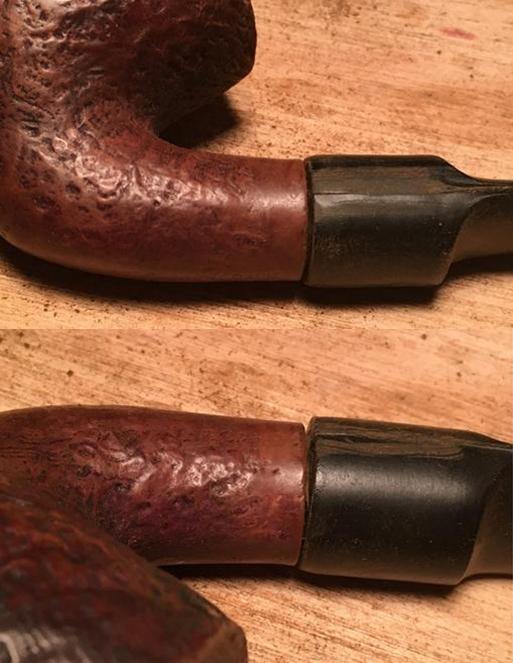
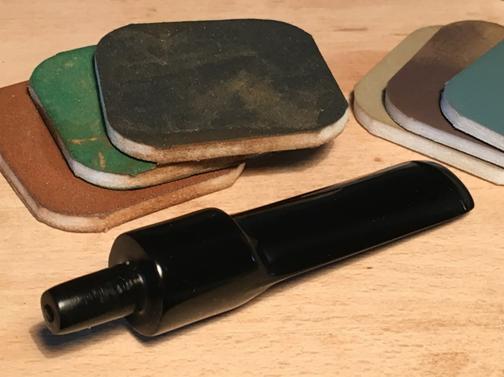
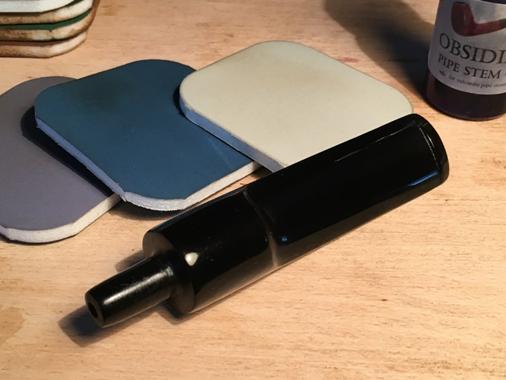
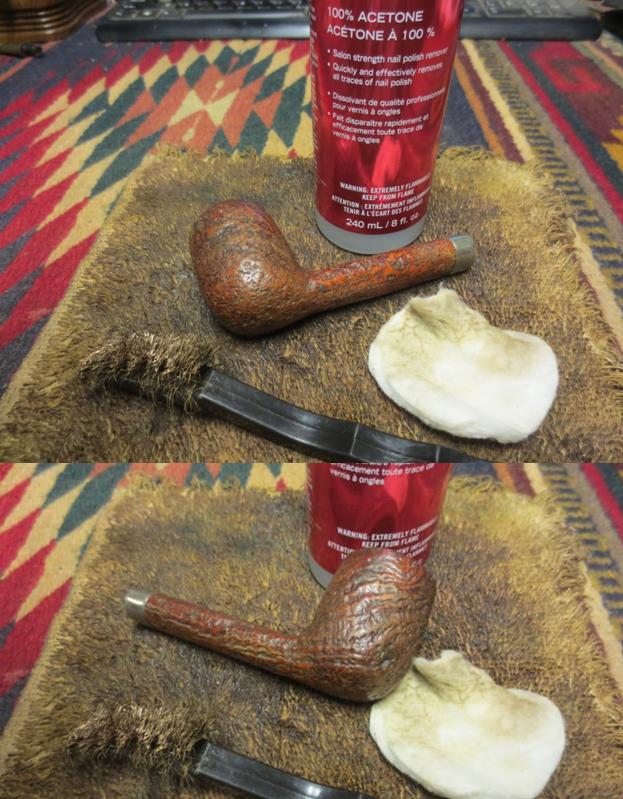
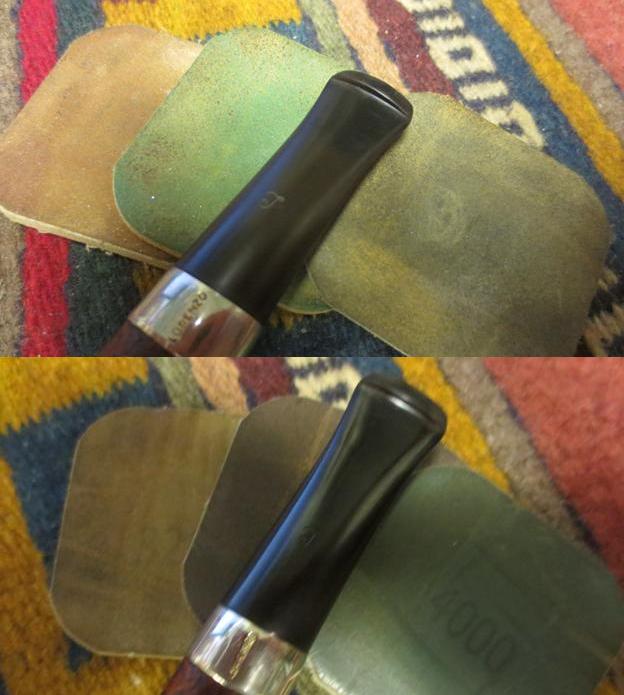
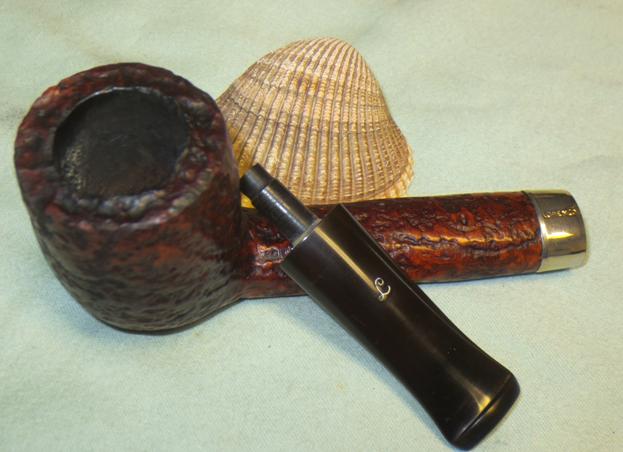
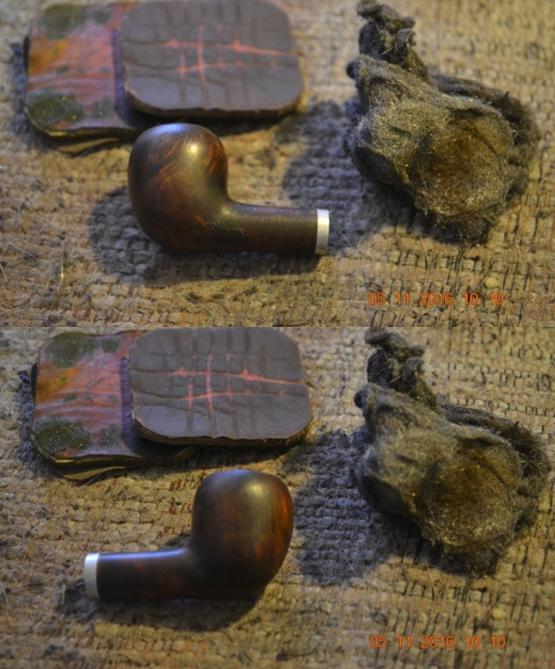
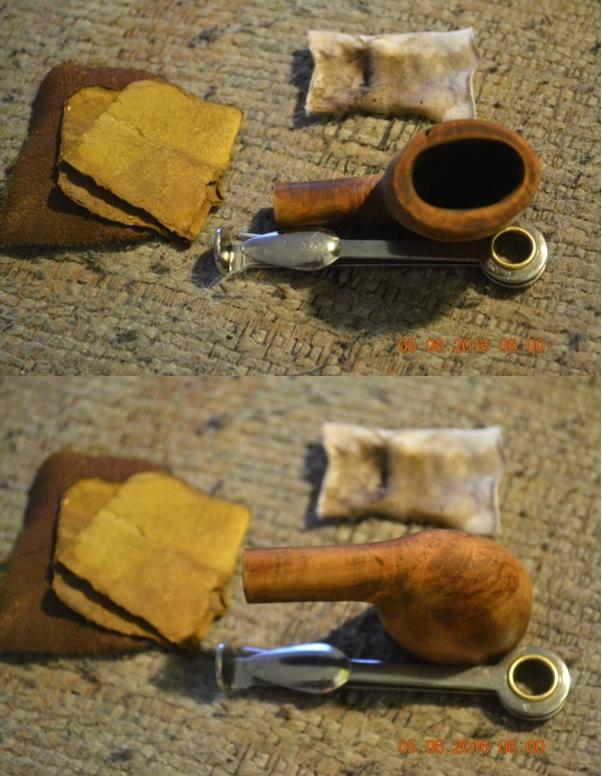
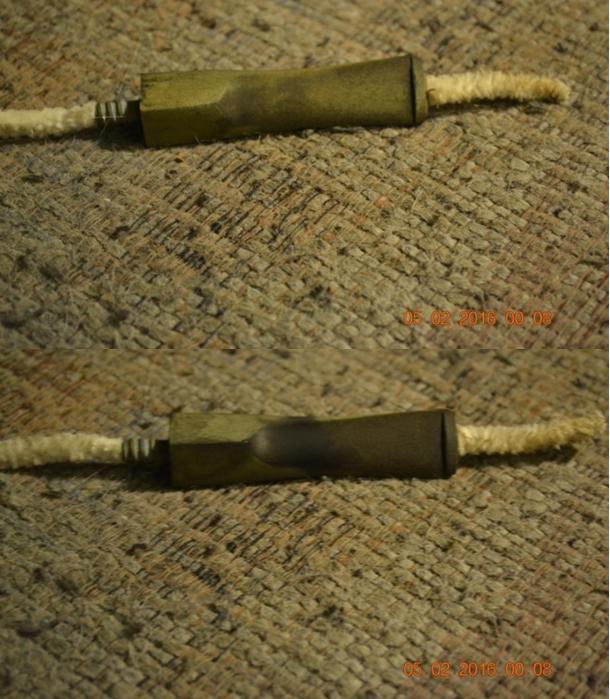
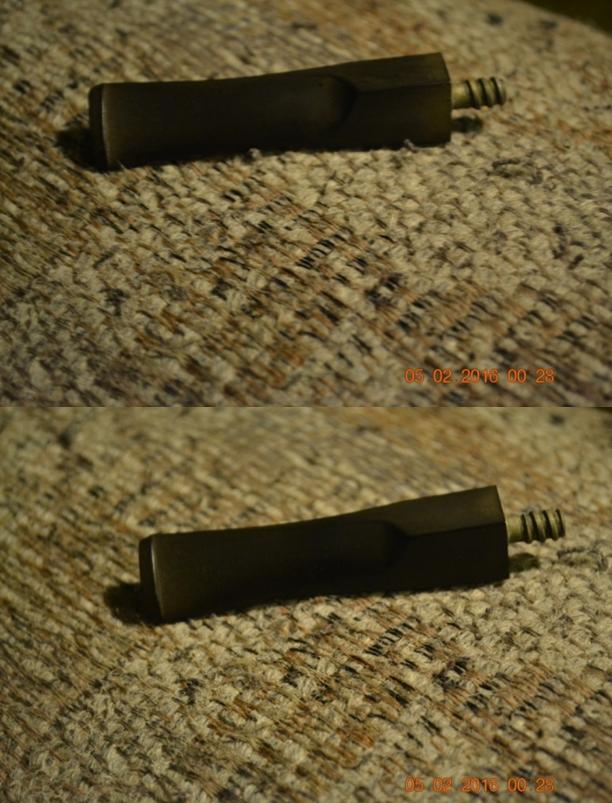
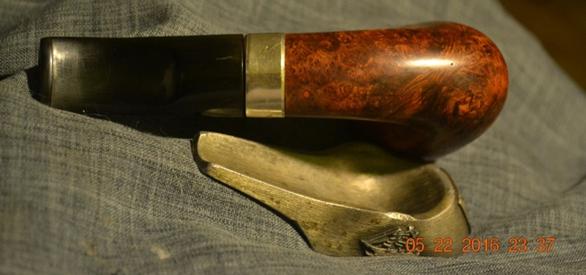
Here is the bit following its bath and then after sanding with 220-grit paper and wet micro meshing all the way from 1500-12000.
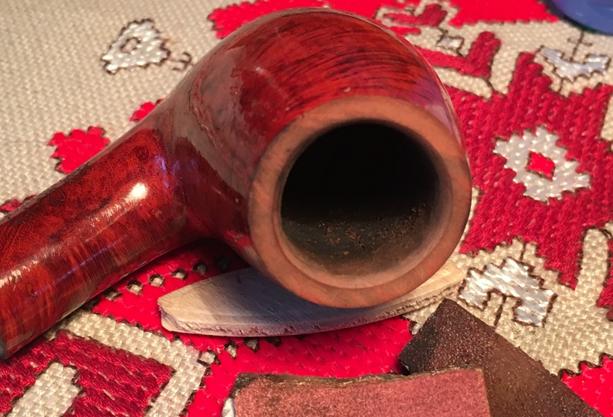
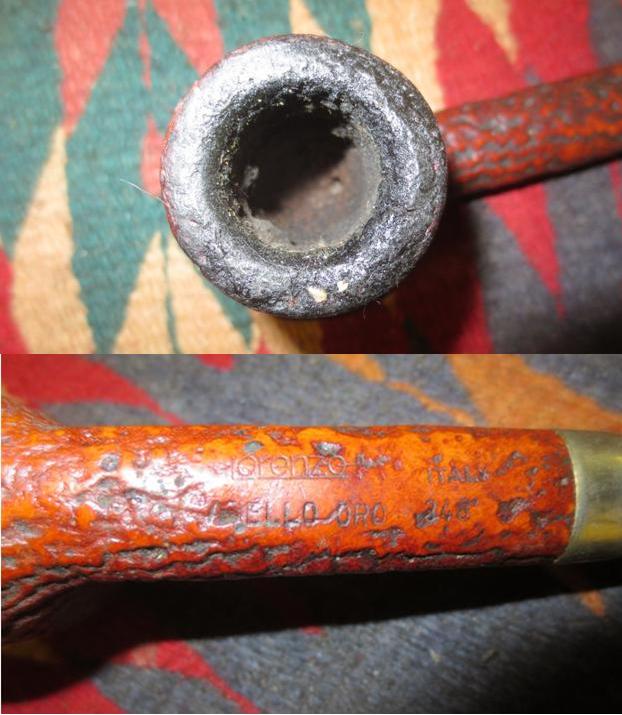
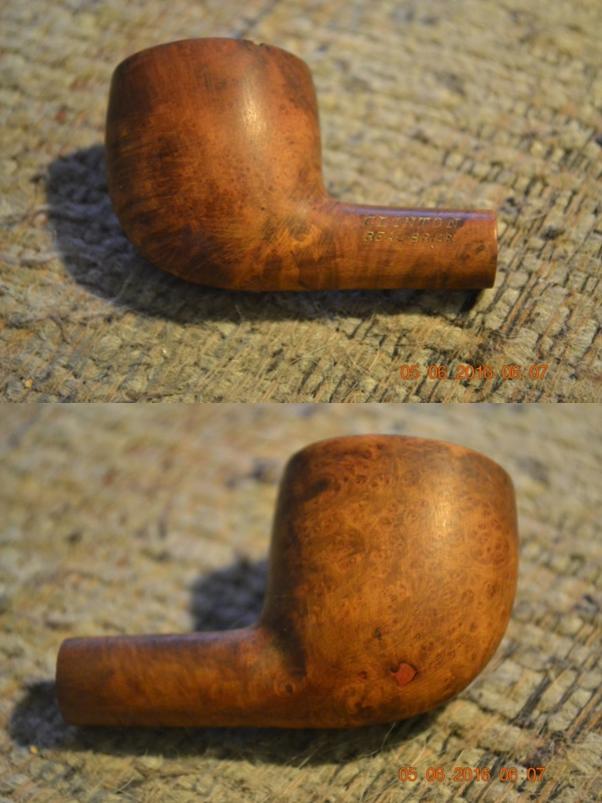
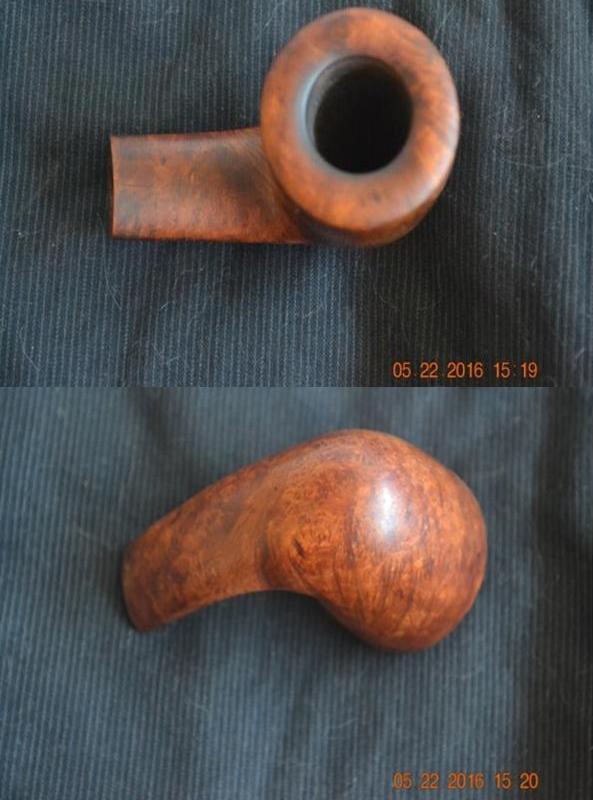
 The stummel had the thickest stain I have ever encountered other than with some Chinese pipes on which I’ve labored. It took longer than the 2 hr. 12 min. movie, with Darren or me (he’s decided he wants to learn about this esoteric occupation) flipping the big piece of briar over in the alcohol now and then to keep it soaking evenly, for the Everclear to eat through the barrier enough to sand the stummel lightly, also with 220. I only found one small spot where a hole was filled. In an email later, Steve, who had expressed some doubt that the pipe was a Lorenzo reject but suggested it might be a second, wrote that Lorenzo seconds are known for fills. To me, given the similarity of style, stain and huge proportions of the ostensible Italian no-name (the single word ITALY was stamped almost flush with the steel band, on the underside), my theory of a Lorenzo connection was cinched in my mind at least.

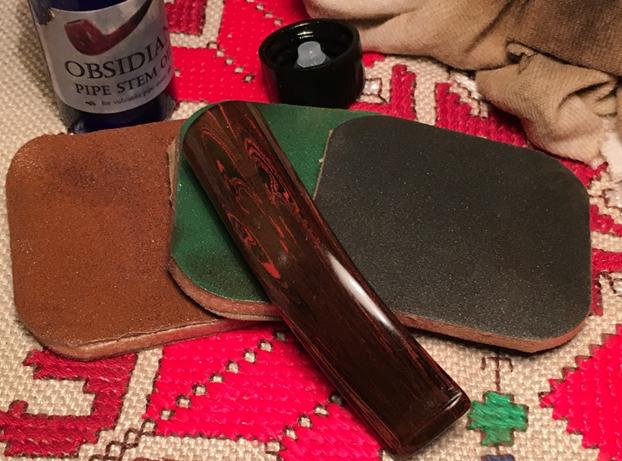
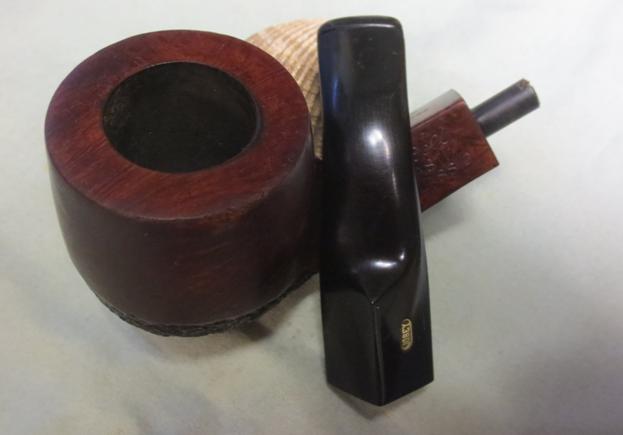
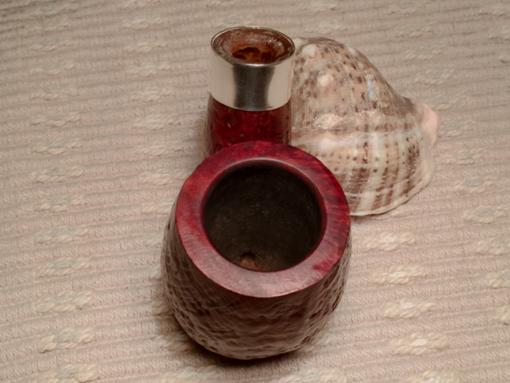
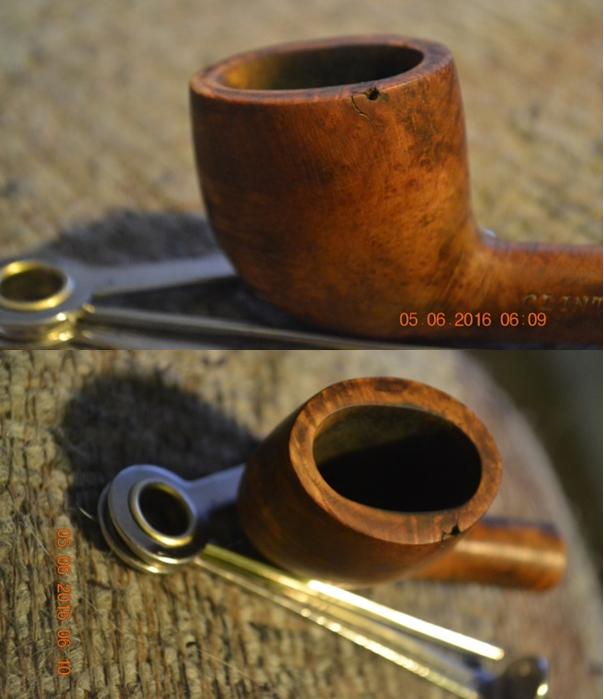
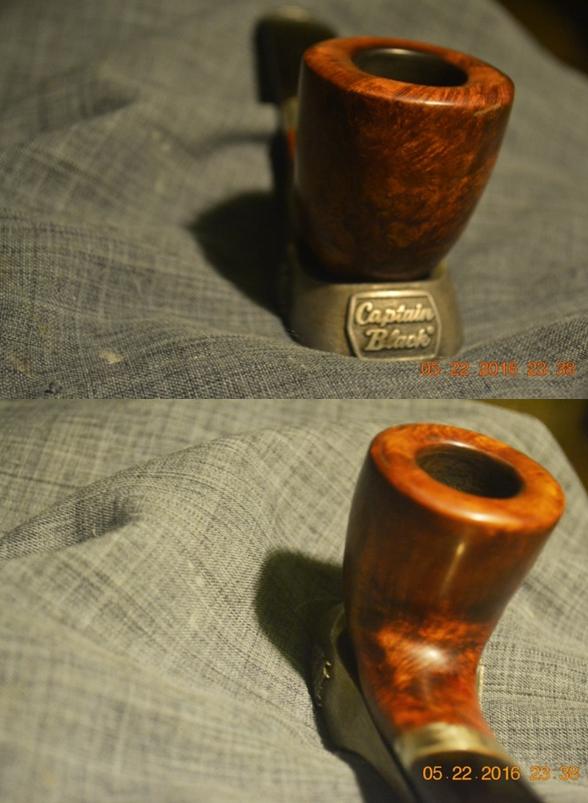
 By a stroke of good luck, as I always see it, the band came off at the end of the sanding, and I was able to make the area under it match the rest. I got on with the next step, micro meshing from 1500-12000.
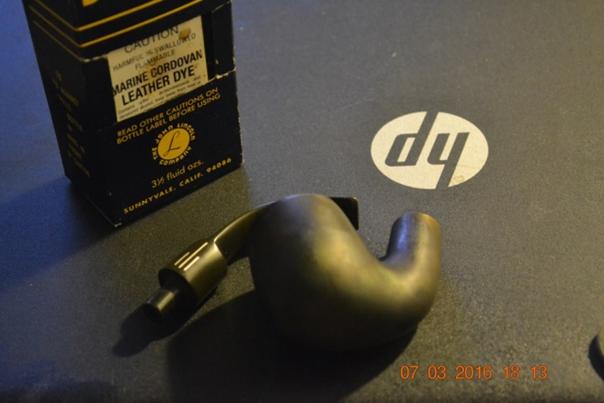
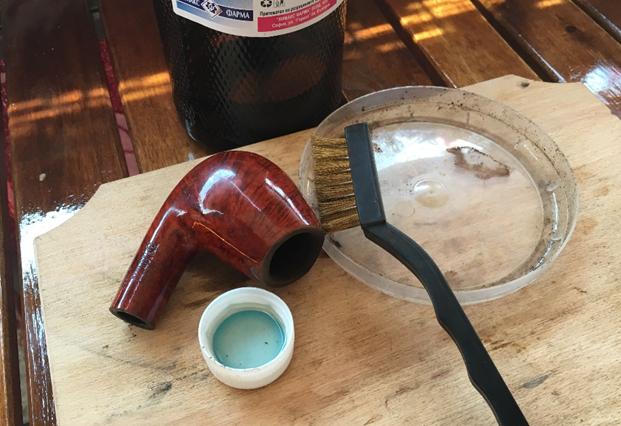
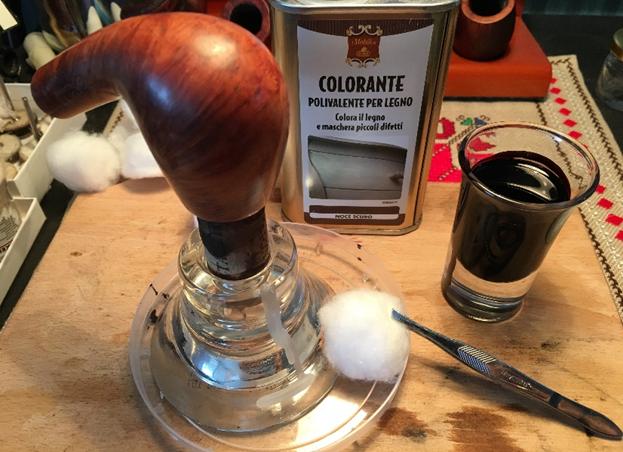
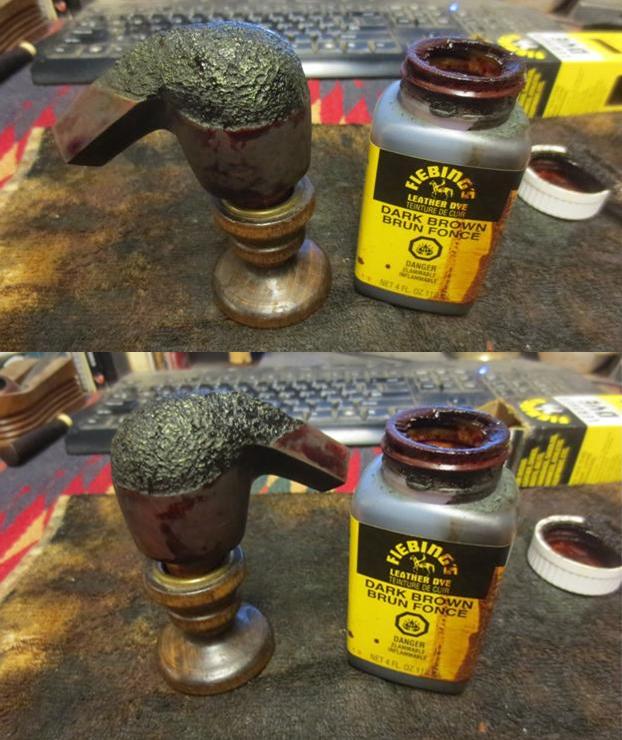
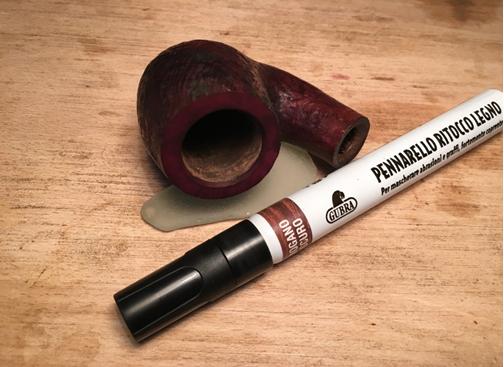
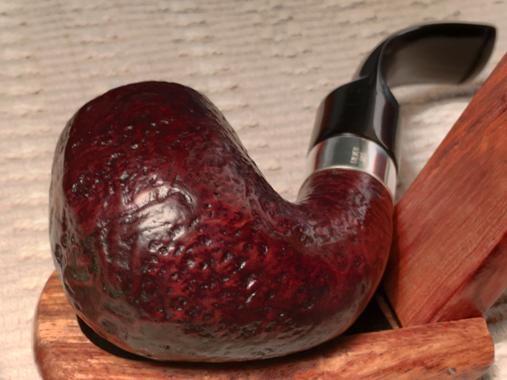
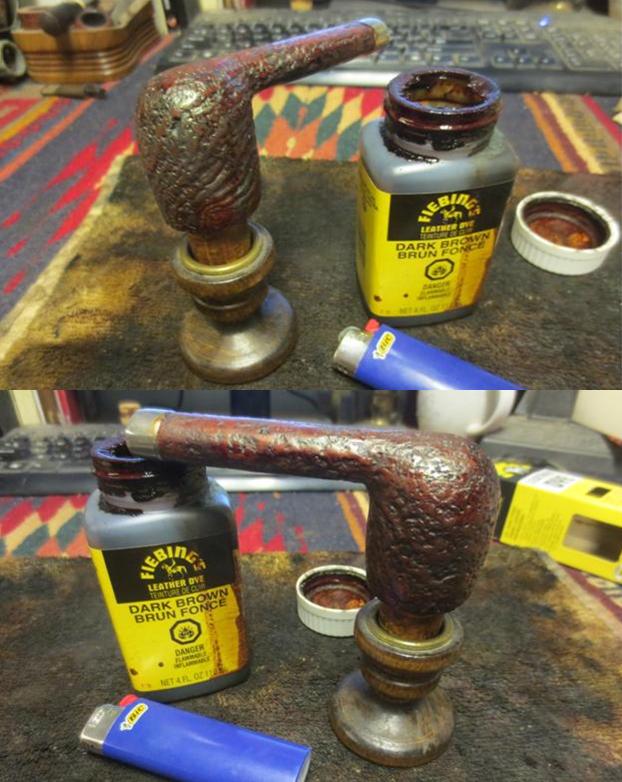
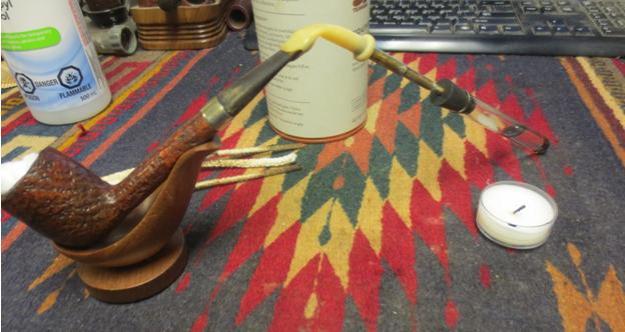
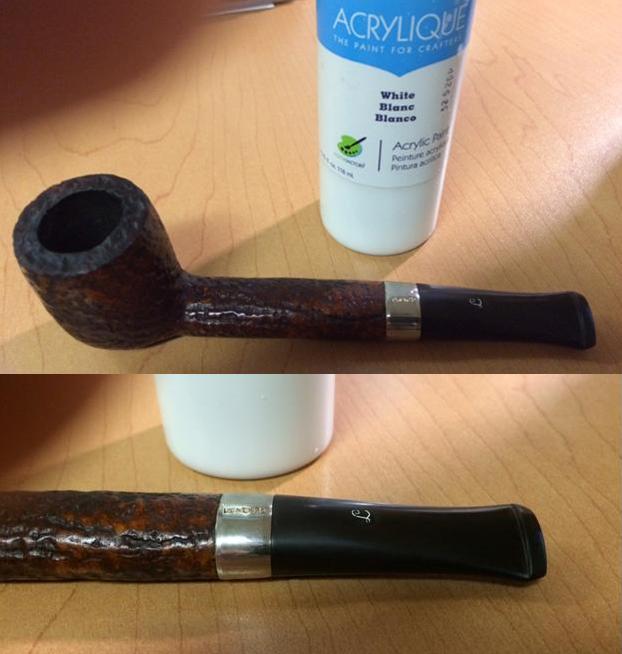
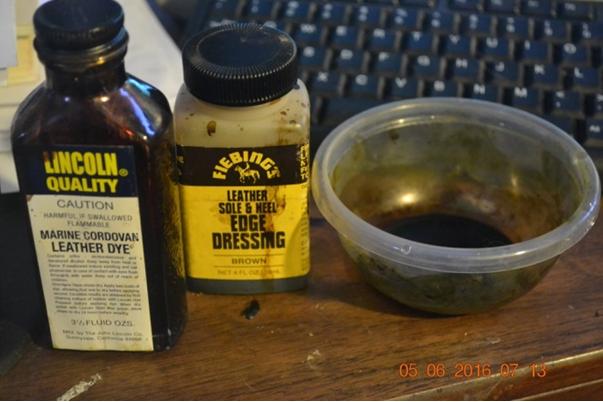
 This is where the real challenge came. Forced to strip the stummel of its original stain to get at the scratches without creating more damage using sandpaper, I wanted to re-stain the wood as close as possible to the bright reddish tone it had, knowing that was impossible with the stains I had on hand. I opted to mix Lincoln Marine Cordovan about three-to-one with Fiebing’s Brown alcohol-based boot dyes. When flamed with a lighter or matches, the stain is fixed to the stummel without running as the light char is micro meshed off and again later with waxes and compounds buffed on.
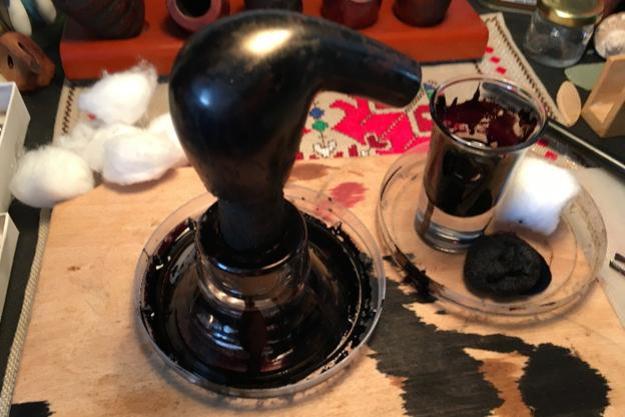
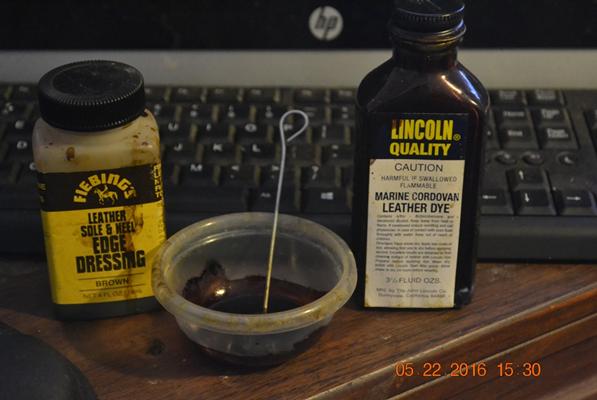 I also knew this combination, or even using only the burgundy color, would be so dark that none of the grain would show through. Applying the mix liberally, I used a couple of good strong wooden kitchen matches from a box of 250 I bought at Walmart for about a dollar to flame the pipe, but the result was not the usual impressive blue flash I expected. Still, it did the trick. I think the alcohol in my liquid stains is evaporating with age. I told Victor Rimkus, a successful pipe crafter/engineer here, how I needed to buy a new supply as well as other colors. He said I could mix what was left with alcohol, which sadly only struck me as obvious when I heard the idea, or, as he does, buy the powder and mix it as needed with alcohol. I had never heard of this powder stain before but found it online at a very affordable price. There are even some great discounts for buying the complete kit with every color made – and the variety of colors and shades is staggering. You know I can’t pass up a good discount.
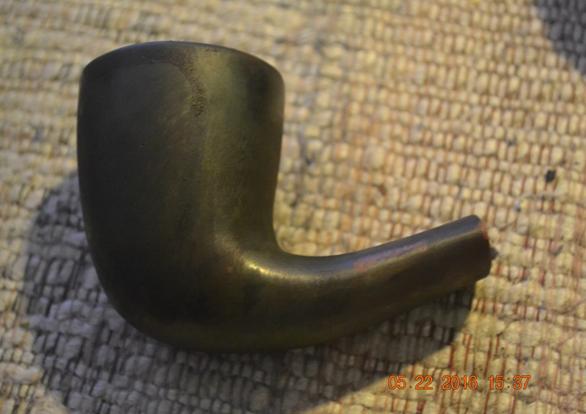 The light coat of residual char came off with 2400 and 3200 micro mesh. Super fine 0000 steel wool gradually lessened the dark combination of stains until I concluded the color mix was still a bit off. I deliberately took the stain down a notch lighter to add another quick layer of the brown, and when it cooled after flaming again I wiped off the char as before. The result was much better.
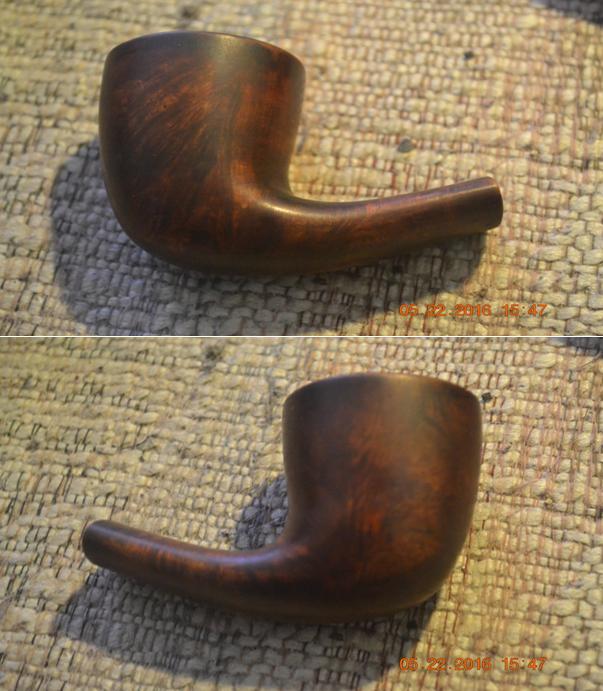

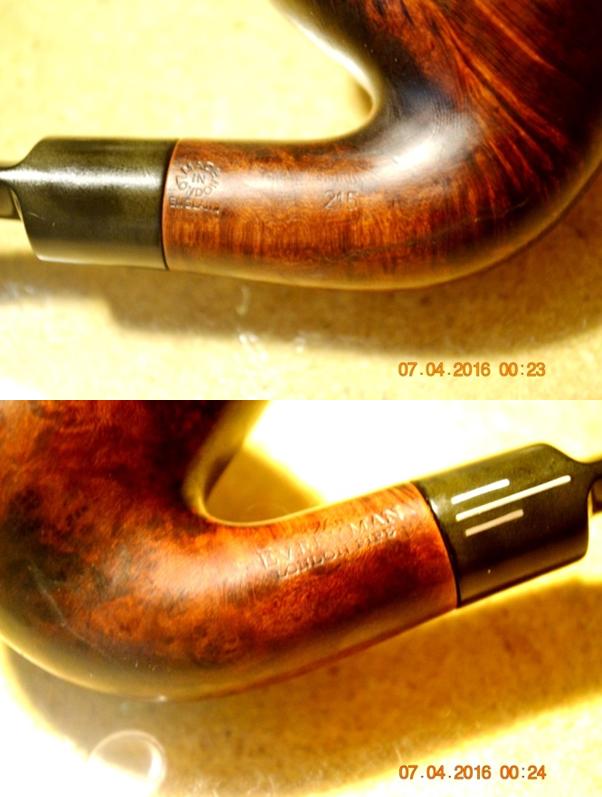
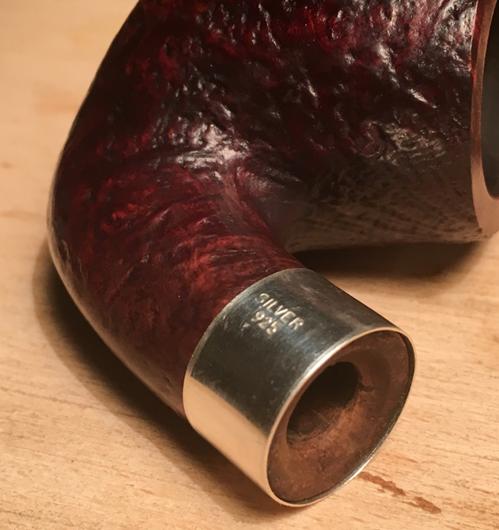
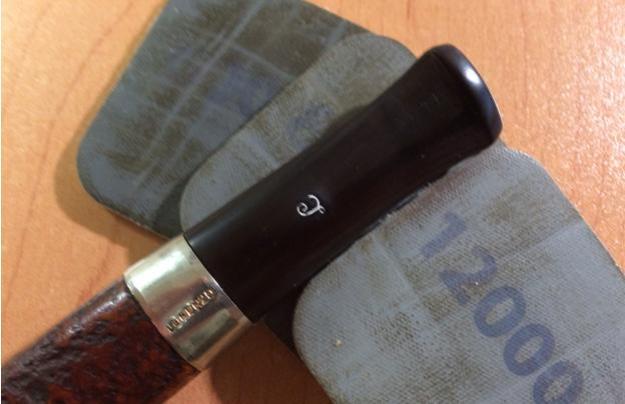
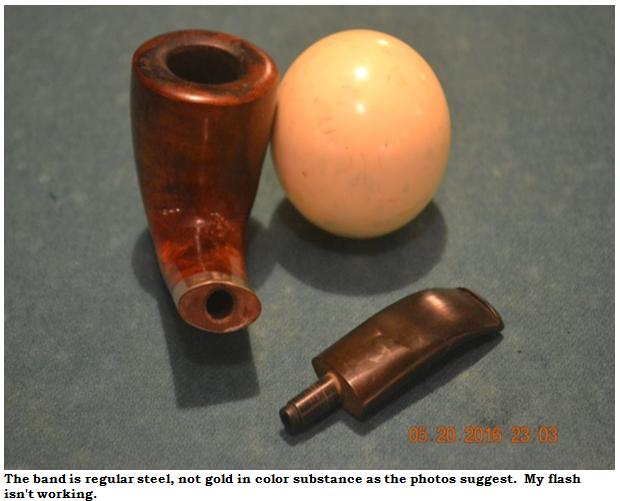
 I used a couple of dabs of Super Glue spread thin around the inside of the band to reattach it. In one of the emails I exchanged with Steve regarding the chance of this pipe being a Lorenzo relative, he pointed out that in the photo of the band I attached with a plea for help in identifying the hallmarks, the band had been placed unevenly. Trying first to determine the meaning of the marks on my own, I had found a site that was clearly not the best. The closest I came was a reference to a pair of brothers named Edwin and John Power, known naturally as Power Brothers, who ran a tobacconist shop and seem to have made pipes in 1900. They marked their bands with an EP in an oval which, given the site’s other shortcomings, I considered might be – but given the year, likely was not – a misnomer for the diamond on this band. Steve identified it as an Electro-Plate band that he thought could be an after-addition. Studying the band and the one item of nomenclature on the bottom side of the shank – the block lettered word ITALY near the opening but above the band – I was doubtful it was indeed an afterthought.
But by that time, the restoration had progressed to the point where I had already corrected the problem.
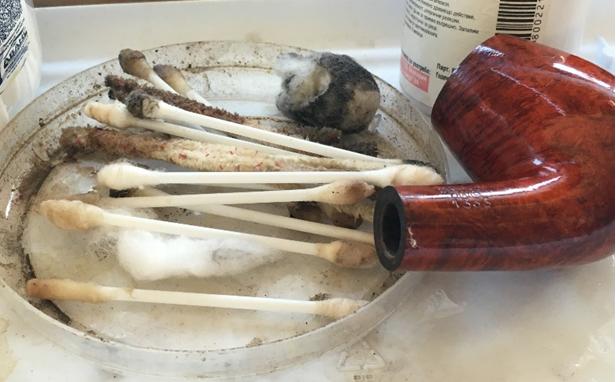
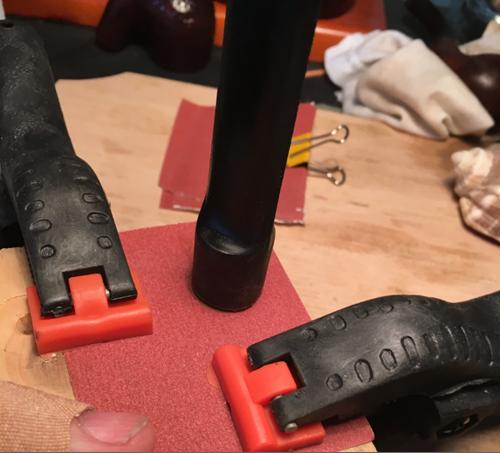
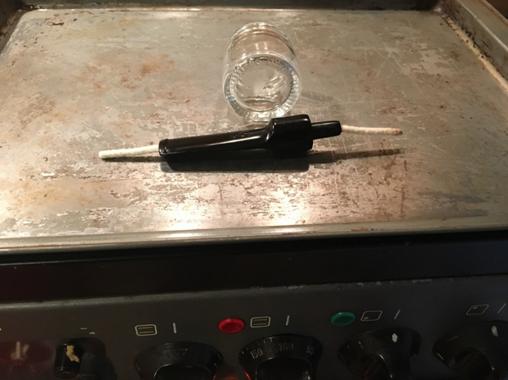
The time to retort the odd Dublin had come, but looking at the wider than wide mouthpiece of the bit, I knew that of the three rubber tubes I have, none would work. And so, as I have done in past situations like this, I rummaged around my spare bits until I found one from a Ropp natural cherry wood that matched the tenon size – at least halfway in. As always, I was happy I retorted the pipe thoroughly, as this one had more than usual use on it. I had to run six alcohol soaked regular cleaners through the shank before the last came out clean.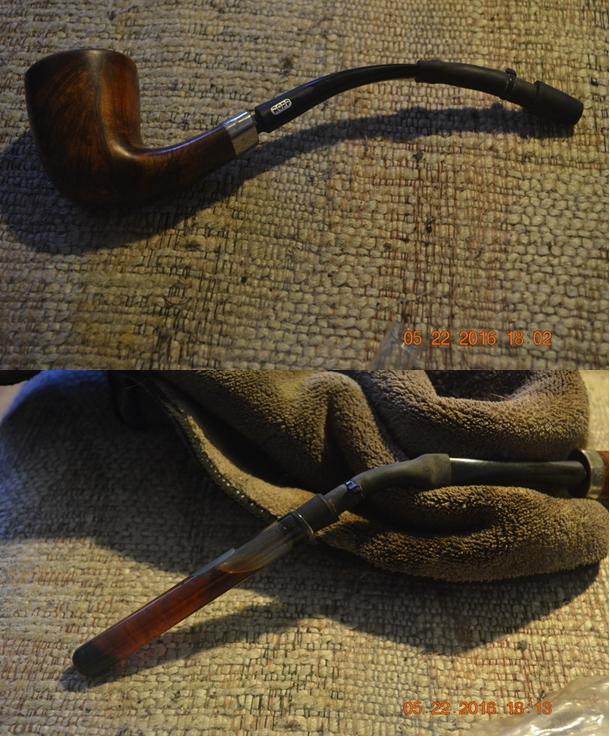
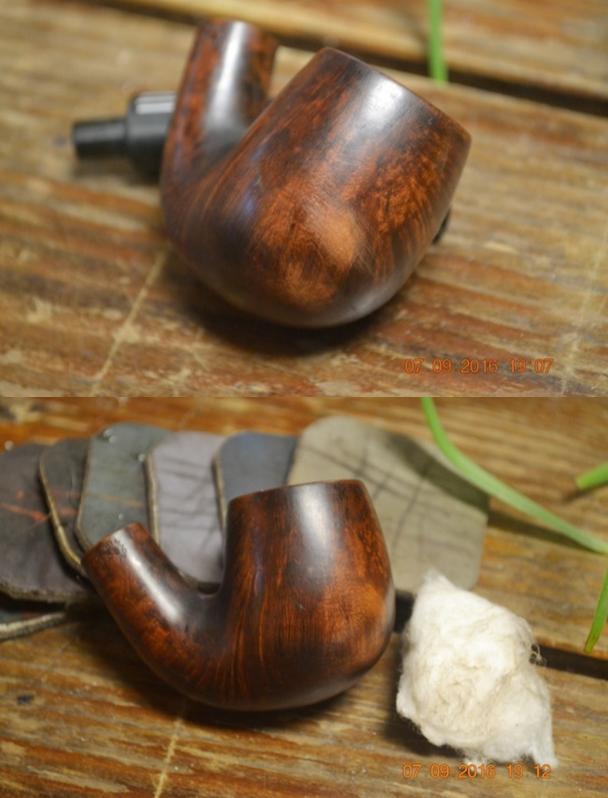
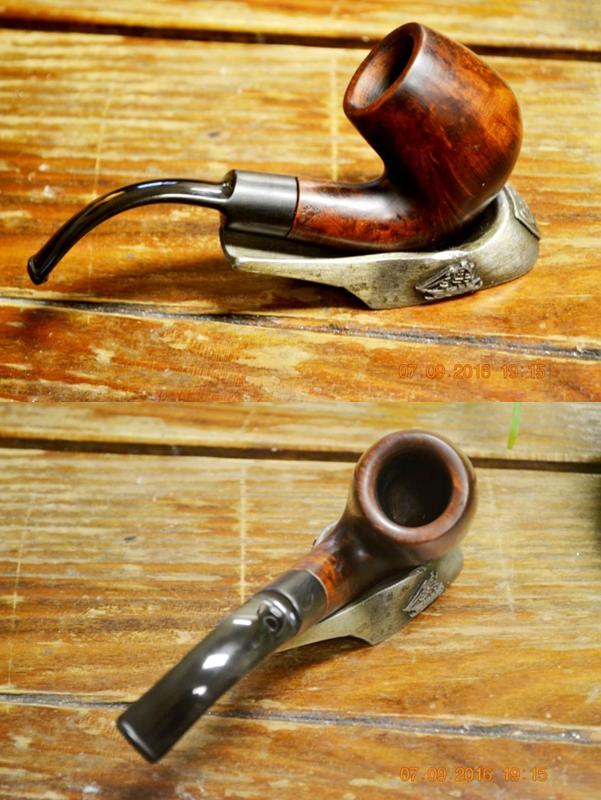
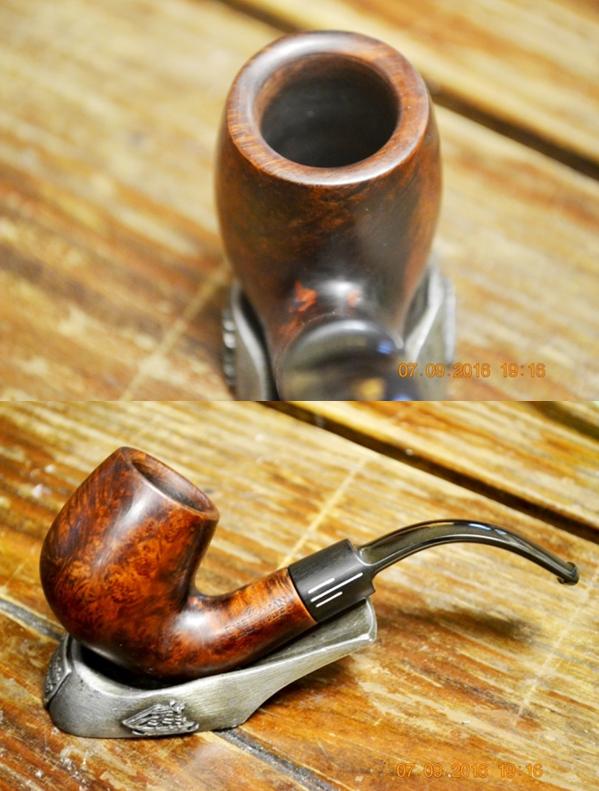
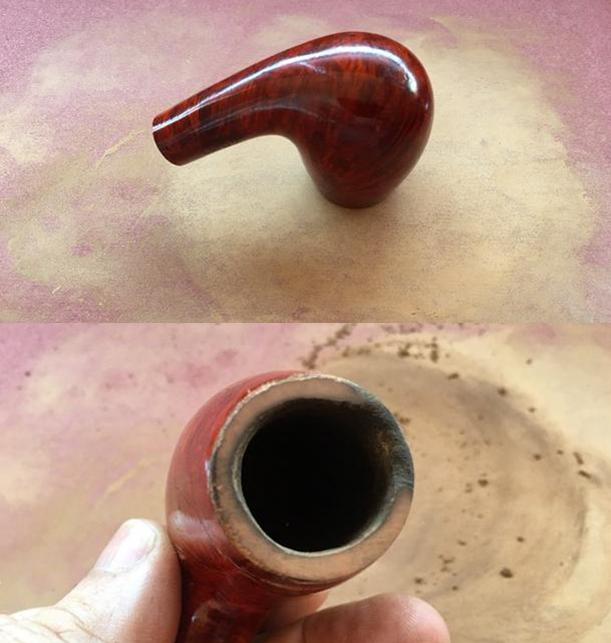
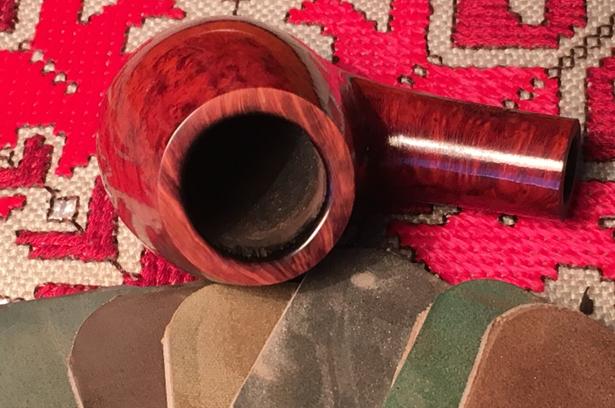
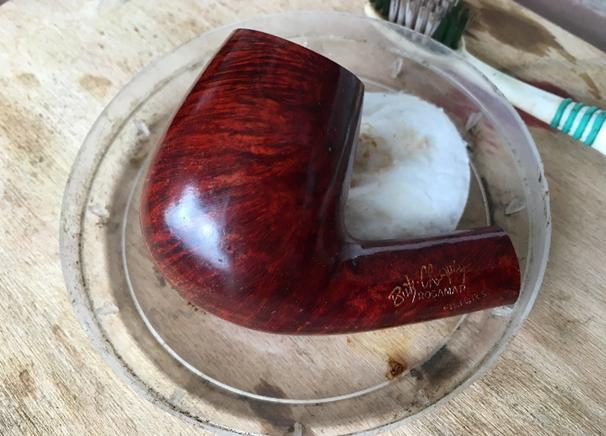
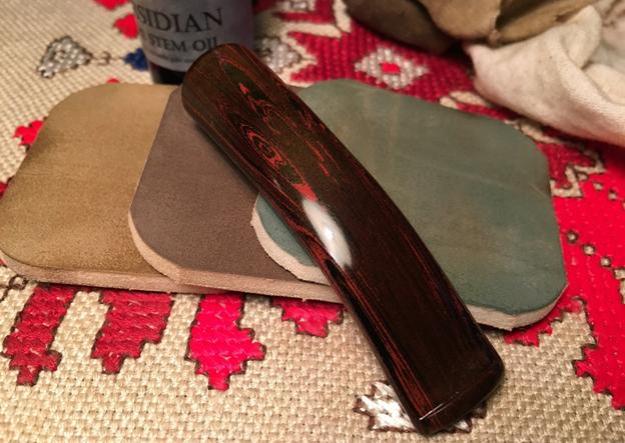
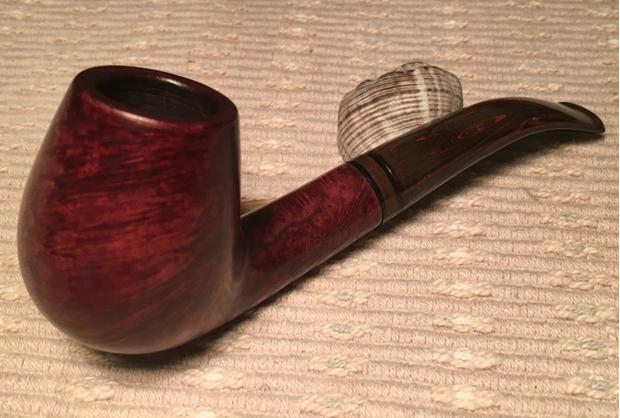
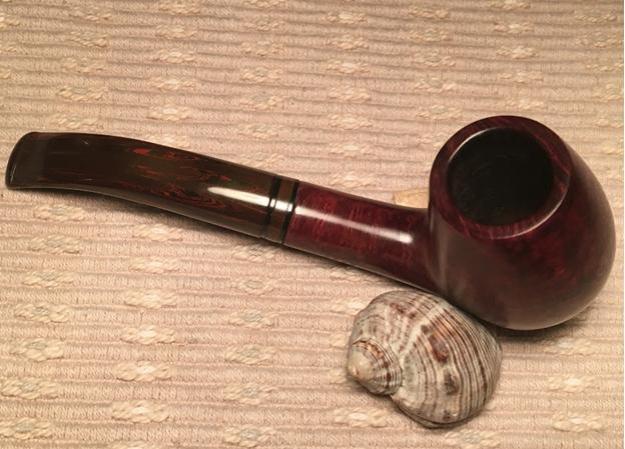
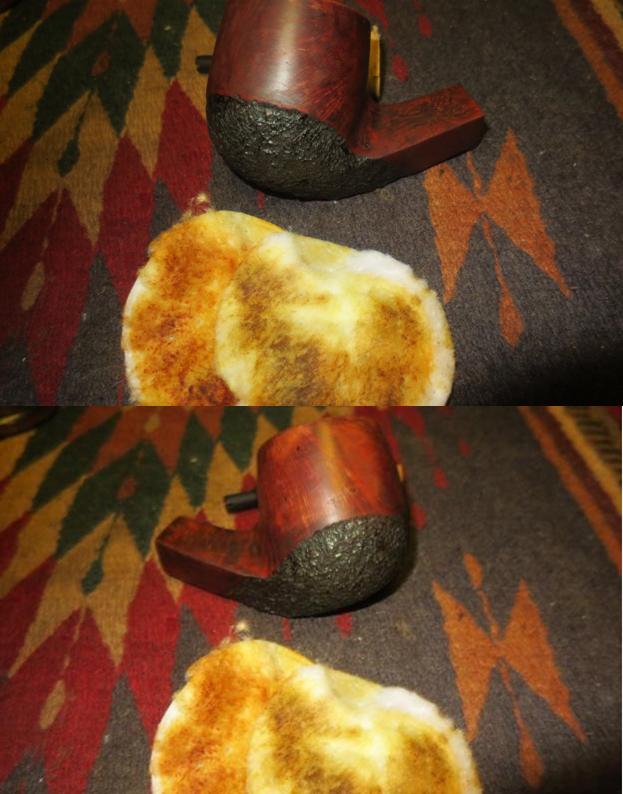
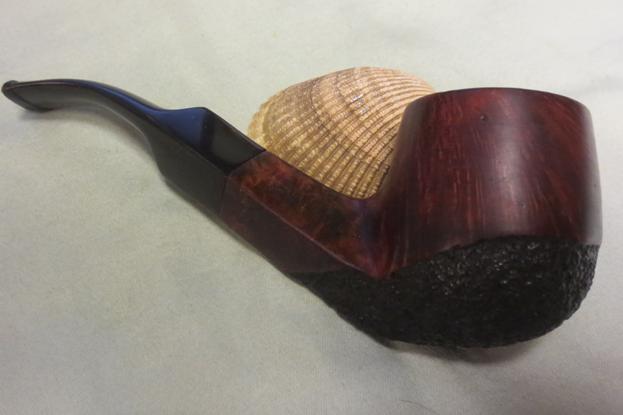
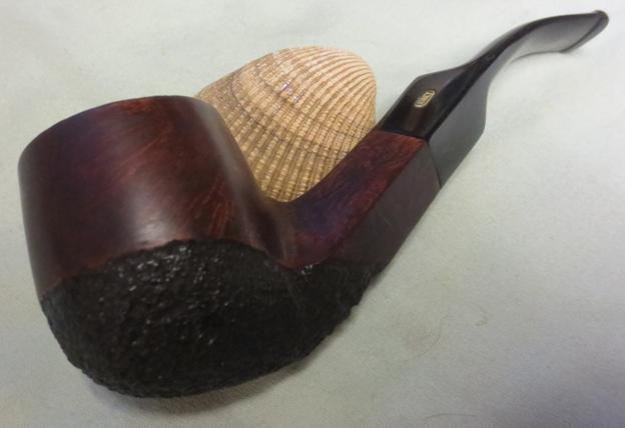
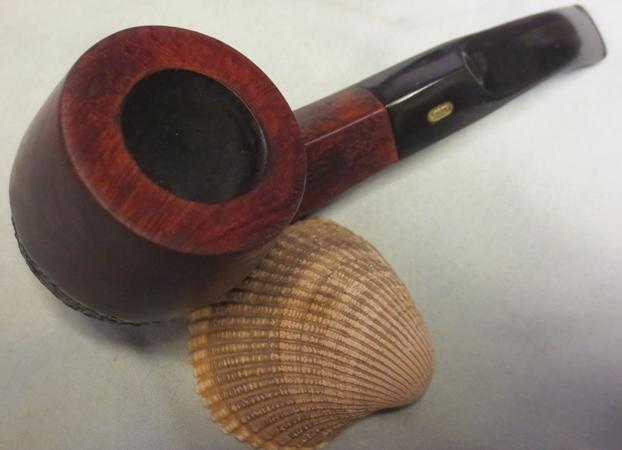
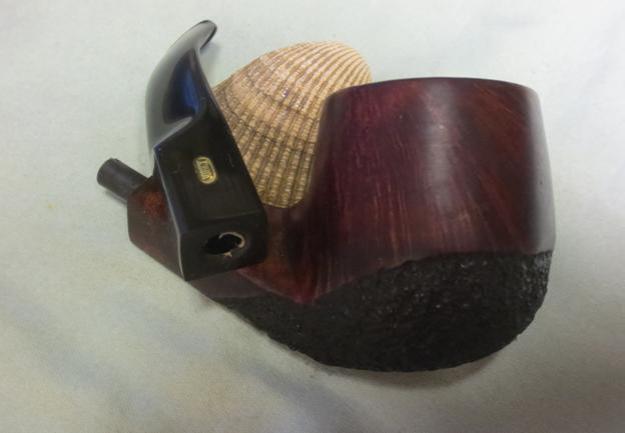
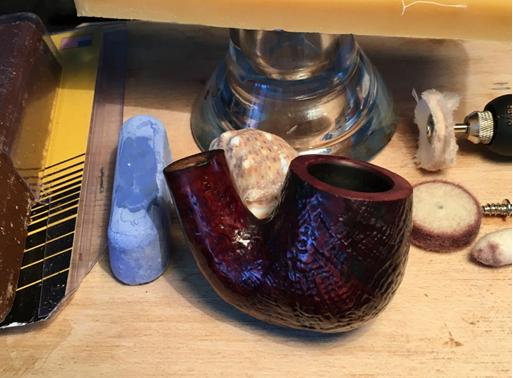
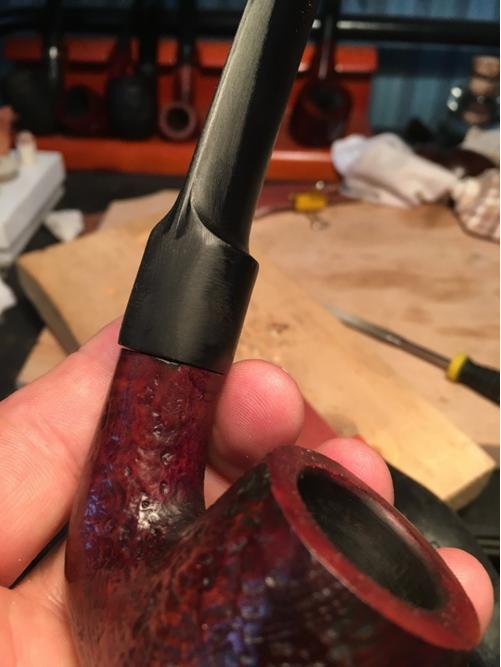
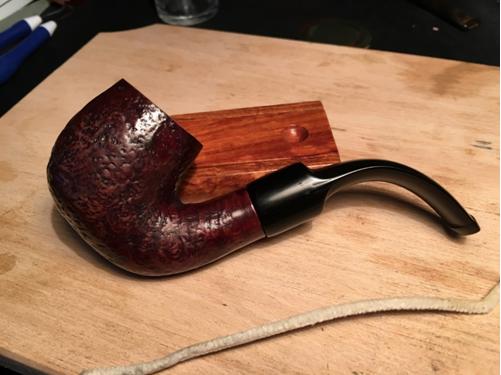
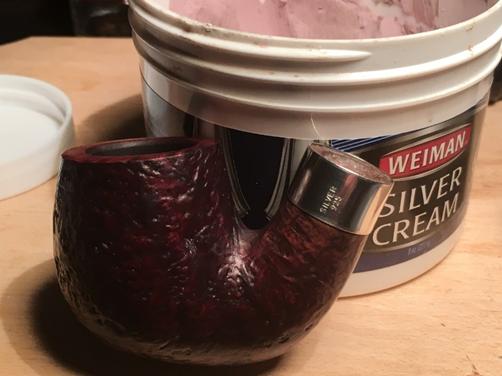
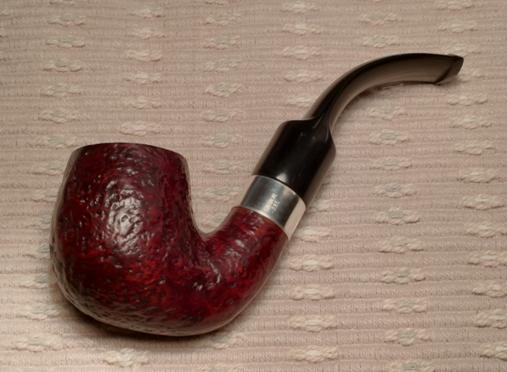
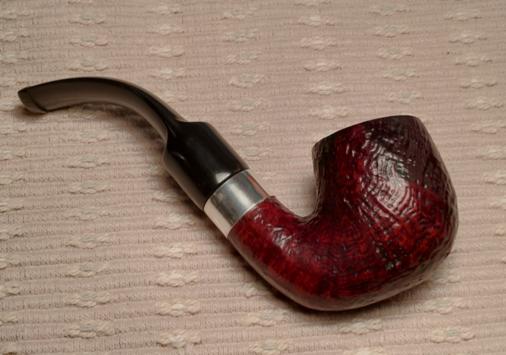
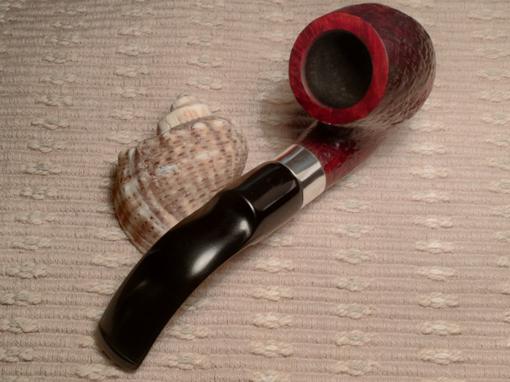
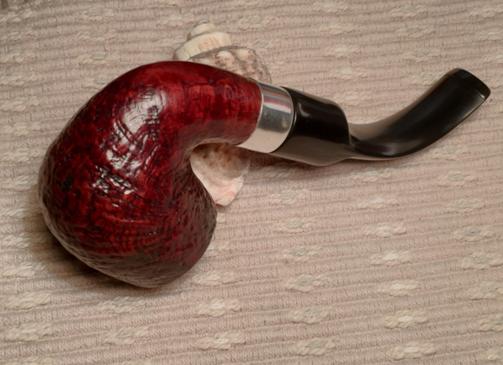
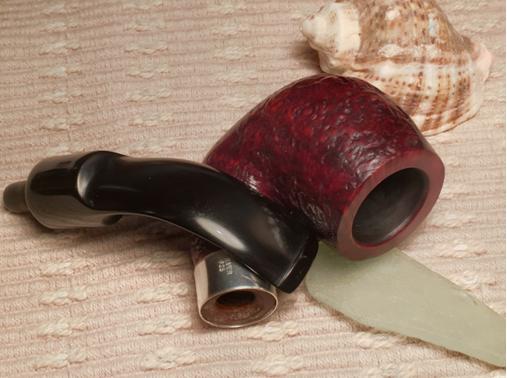
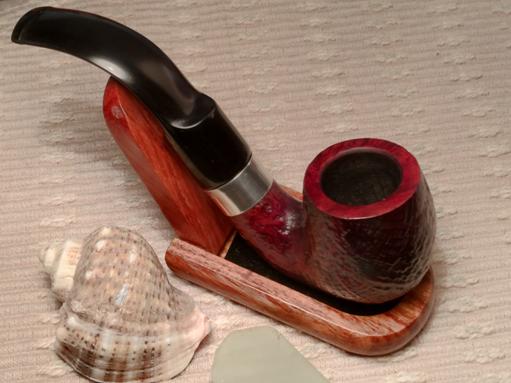
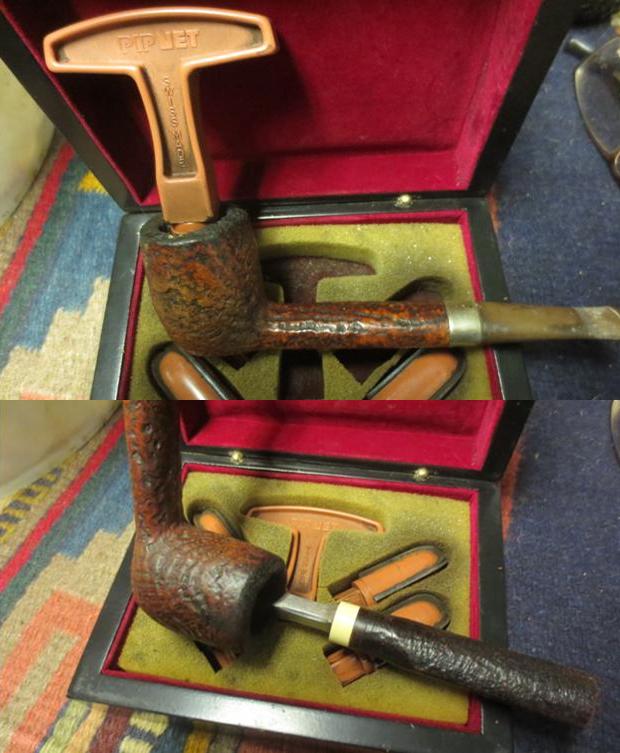
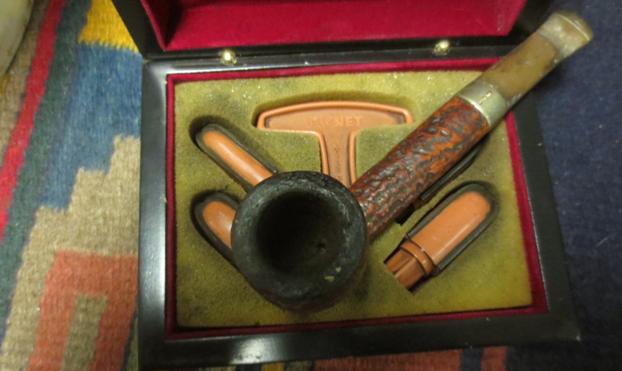
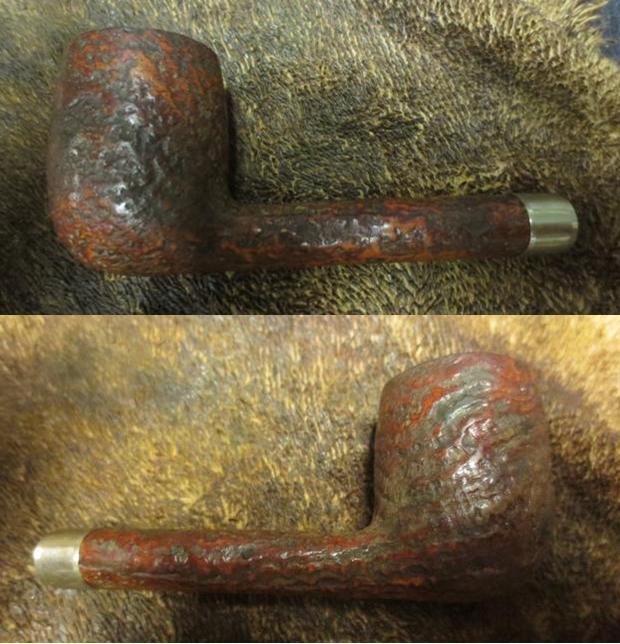
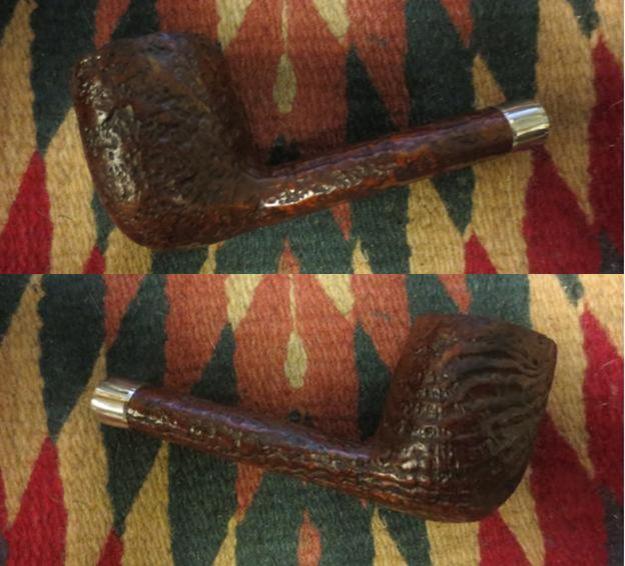
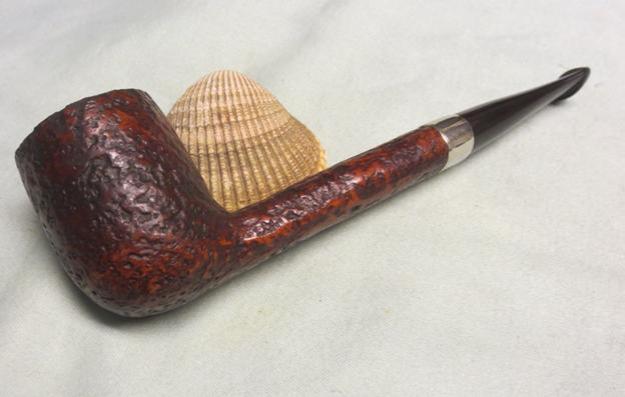
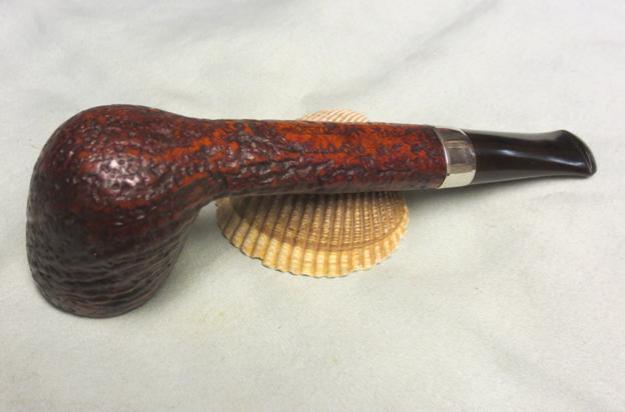
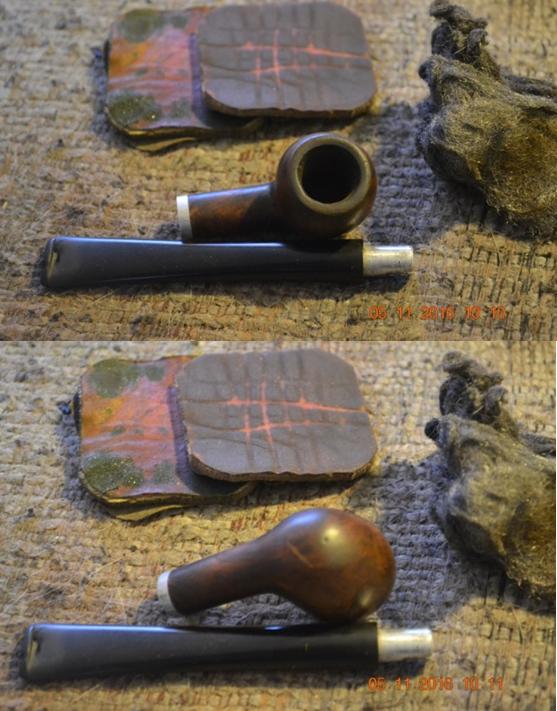
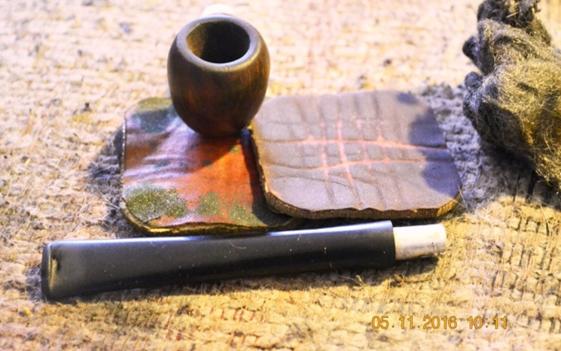
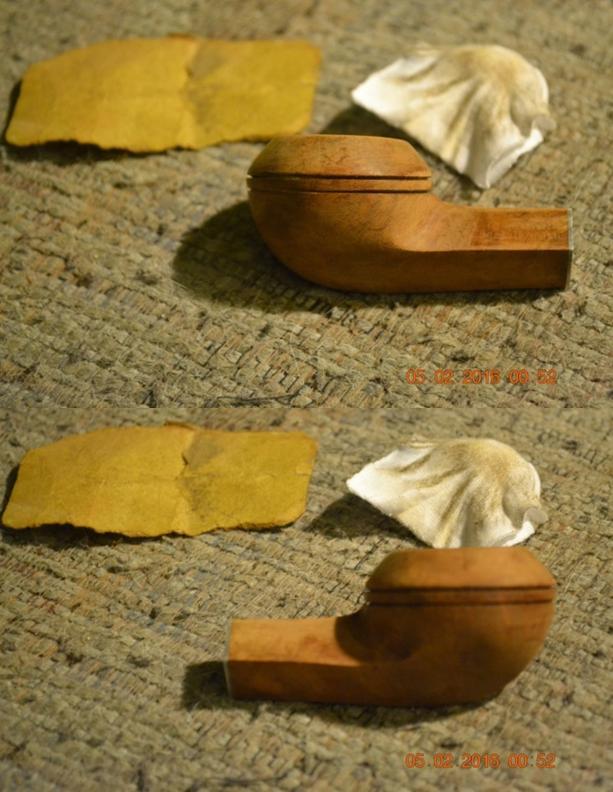
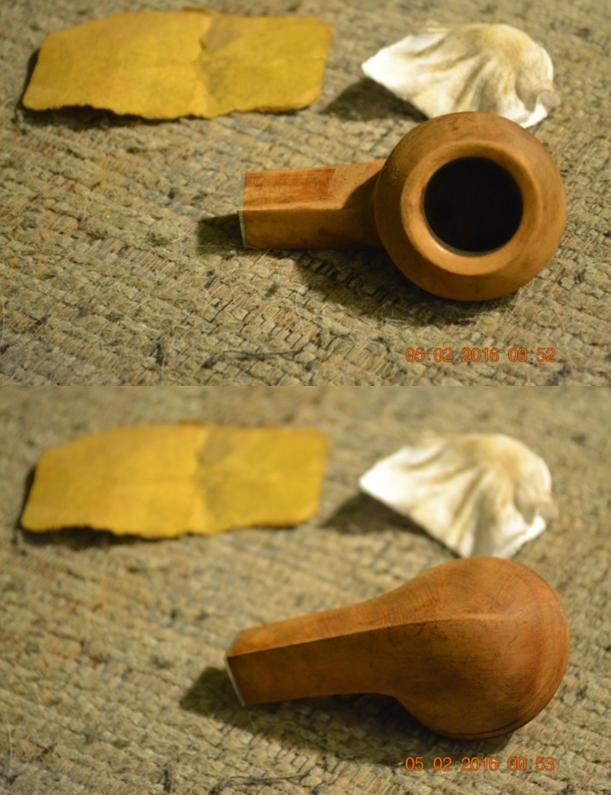
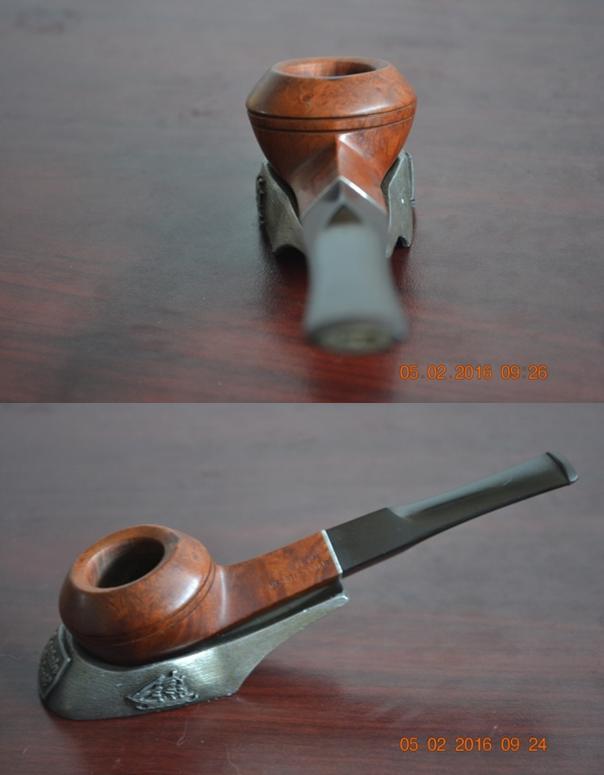
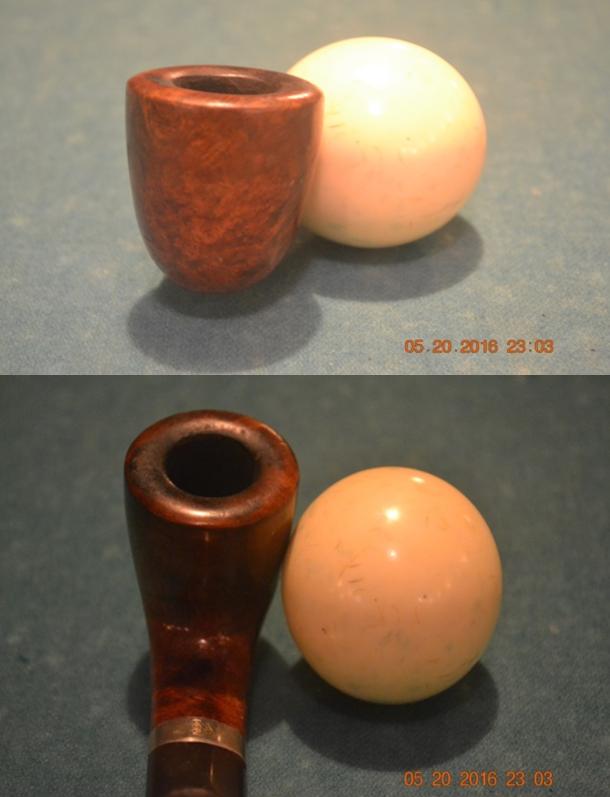
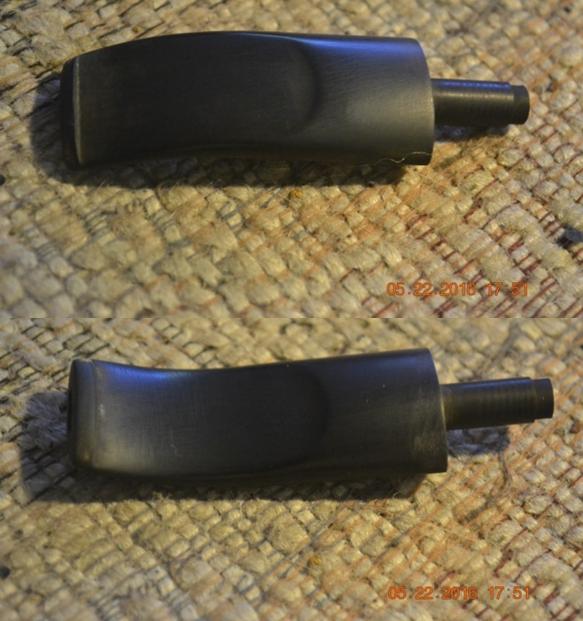
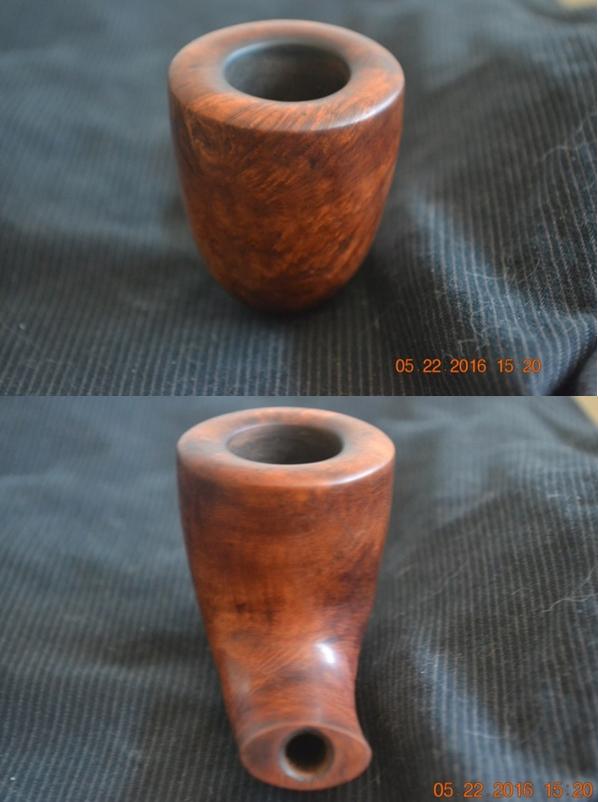
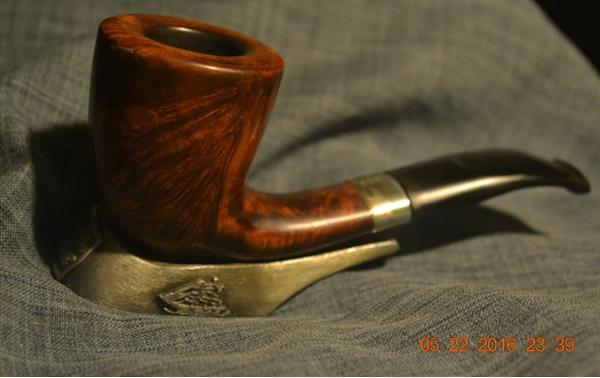
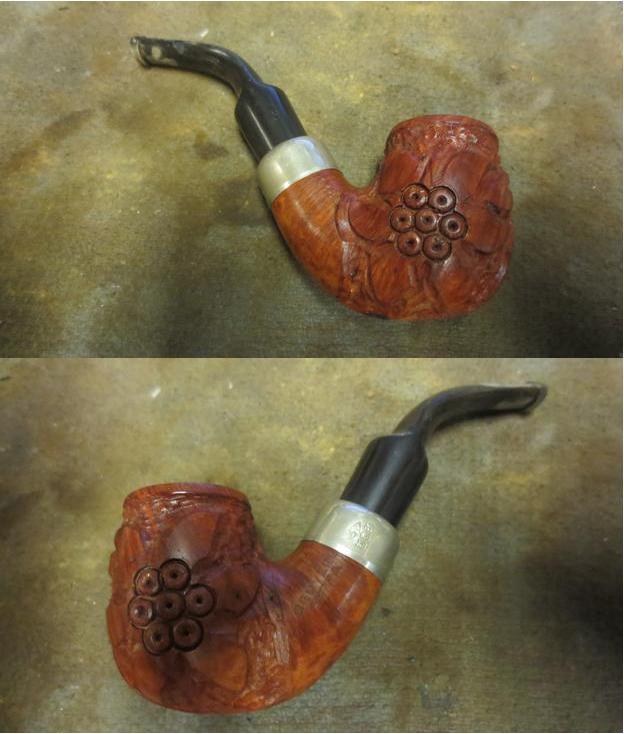
 After buffing the bit with red and white Tripoli, White Diamond and carnauba, and the nice smooth reddish-brown wood with the same progression (I laid on a heavy coat of the red Tripoli to approximate the original color somewhat closer), here is the result.
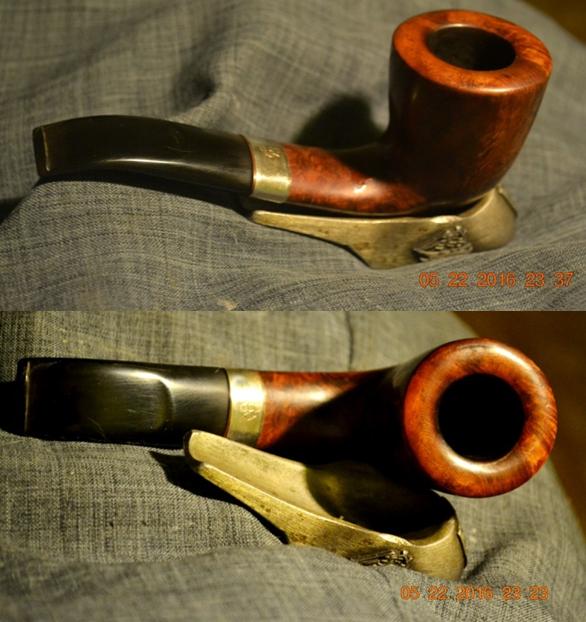
CONCLUSION
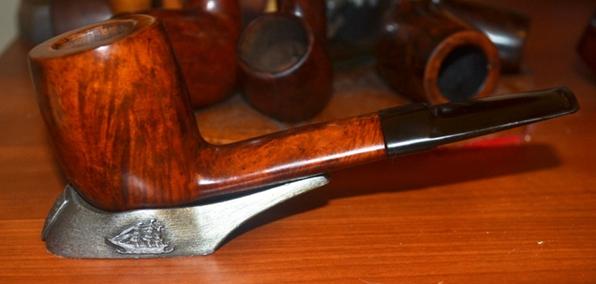
I have to say, this was nowhere near the most difficult restore I’ve ever done, but the research into Lorenzo, in my attempt to establish whether or not it is one of their rejects or a second of some sort, made the process one of the most exciting of my projects. In my mind now, there is no doubt this conundrum of a pipe, is in fact a Lorenzo reject. This conclusion is not based on an overwhelming desire to make the pipe more than it may be. It is based on the evidence: the undeniable similarity of design between the Spitfire by Lorenzo Mille second; the identical color of each that has the appearance of being created specially by the maker, and the presence of somewhat erratic grain and even the single fill I found after stripping the original stain, given that Steve wrote of Lorenzo seconds tending to be known to present these defects. Although, with due respect to Steve, I doubt this is a second because of the lack of any such nomenclature, the same standards would apply to outright rejects. I did my best to make it once more the beautiful pipe it was when first created, but the grain certainly is less than perfect, and there is one place where briar shavings were mixed with some clear bonding element to fix a ding. But now, neither of these facts detracts from the pipe’s allure and good fit in a large hand, which its new owner certainly has.
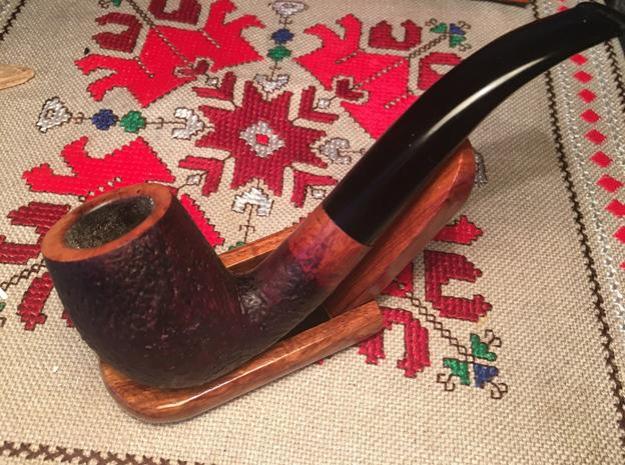
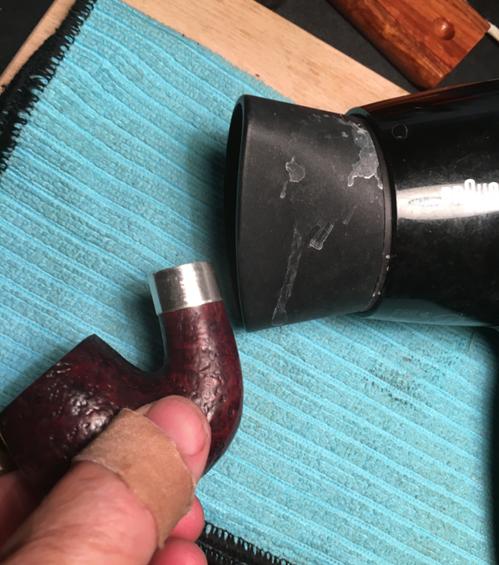
The Spitfire awaited a new home for months after I finished the restoration, and in the end was purchased by a New World gentleman, from Raymore, Missouri to be specific, who read my blog of another pipe and found the massive Lorenzo (second) on my site. The lovely example of Italian flair and craftsmanship in this blog, on the other hand, was reserved prior to its restoration by a visitor to my pipe club’s monthly meeting. His name is Evan, and here he is at the tobacco shop with his “new” pipe. See how snug it is in Evan’s big mitt. 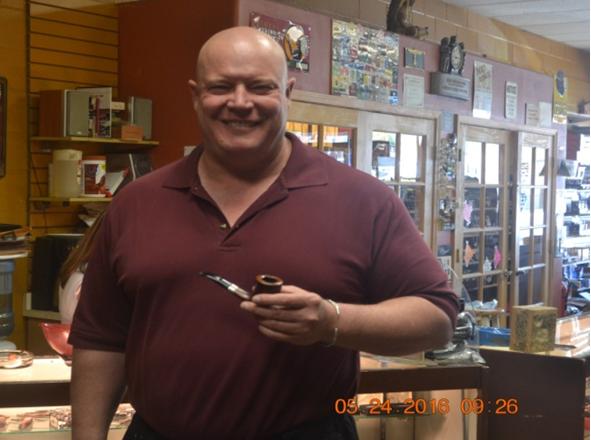 When Evan, who resides in the much smaller town of Placitas about a half-hour’s drive from the relative metropolis of Albuquerque (close enough to commute to and from where he works here), talked to me alone in the big back room of the Moose Lodge where our official monthly pipe meeting is held, I asked if he had seen any of my pipes he found interesting. I assumed he had not located one he wished to buy but also wanted to get an idea of what he looks for in a pipe, other than the Dunhill with its distinctive dot on the bit he enjoyed for the meeting. I admit to thinking I might have something I put off restoring that I could perhaps expedite.
Evan was courteous enough to tell me the truth: none of the pipes I had displayed was big enough for his general taste. That remark turned out to be the exact sort of intelligence I hoped to receive from my question, for I knew I had just what he was looking for, at my humble home and small business, waiting to be cleaned up. I inquired if he had heard of Lorenzo pipes and added that I had restored and sold one but had another pipe like it that I believed was a reject by that company, although there was nothing wrong with its looks or quality. Evan had not heard of Lorenzo but was intrigued by my description of the large pipe.
After getting a look at the photos I emailed to him showing the restored Spitfire and the no-name as it was before cleaning up, the good man replied with considerable enthusiasm. In fact, considering the low price I offered him, he asked me to name the time and place he could pick it up! I had the pleasure of presenting Evan with the finished Lorenzo or second or whatever it is Monday morning at the tobacconist shortly after the comfortable little shop opened at 10. With any sale, online or in person, and in particular when the buyer has requested a pipe that was not yet restored, I always wonder if it – or, rather, I – will match the new owner’s expectations. I observed at once that Evan had pondered his reverse version of the same scenario from his reaction of unconcealed surprise. In short, the pipe was just the kind he loves most – big enough to fit in his large hand, solid, possessed of an unusual shape and beautiful to behold. I add the last part not to pat myself on the shoulder but due to Evan’s appraisal. To my way of thinking, pipe restoration is very much the same as newspaper editing, with which I have had more experience than working on pipes: the flaws in the pipe or article are unimportant so long as all of the necessary information is there to put in order. The best word to describe Evan’s reaction to his latest acquisition – which went on for close to a half-hour – is effusive.
SOURCES
https://www.smspipes.com/index.cfm/fuseaction/catalog.listProducts/catId/4/Lorenzo_Pipes.htm
http://vermontfreehand.com/product/powdered-dye/
http://www.pipes.ws/Lorenzo
http://www.silvercollection.it/DICTIONARYTOBACCONISTE.html Power Bros. hallmark
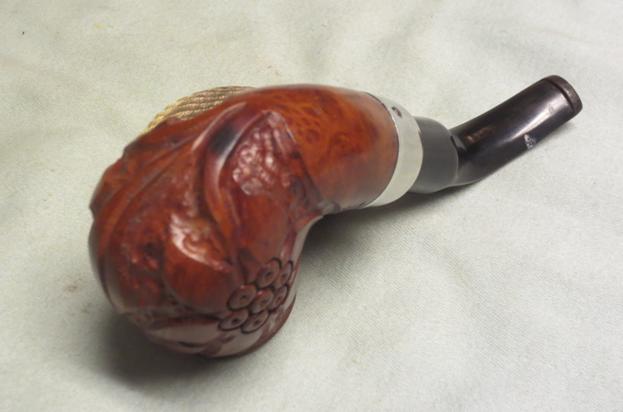
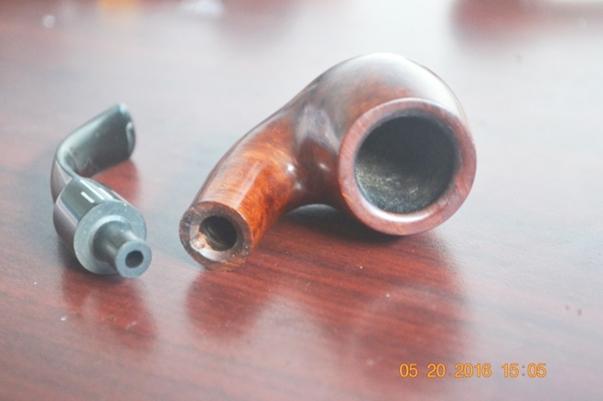
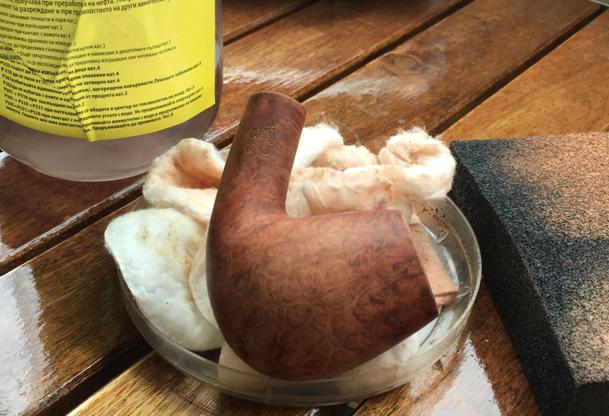
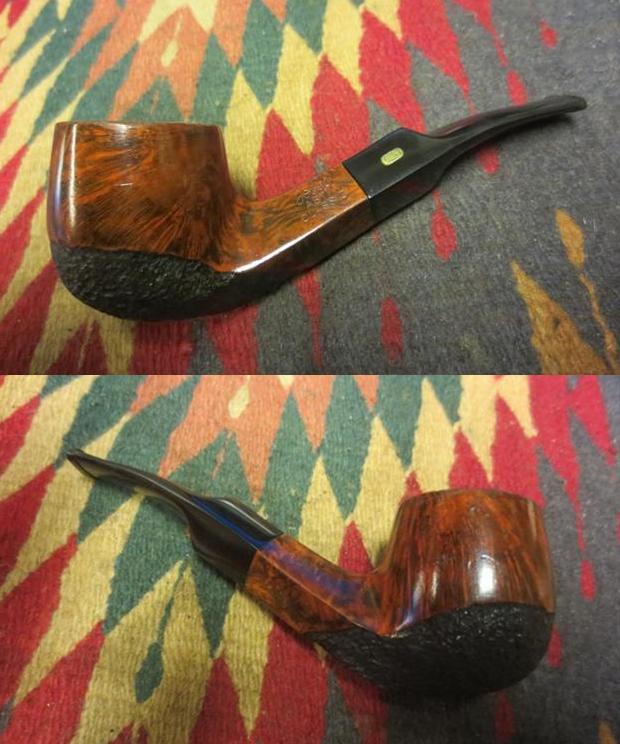
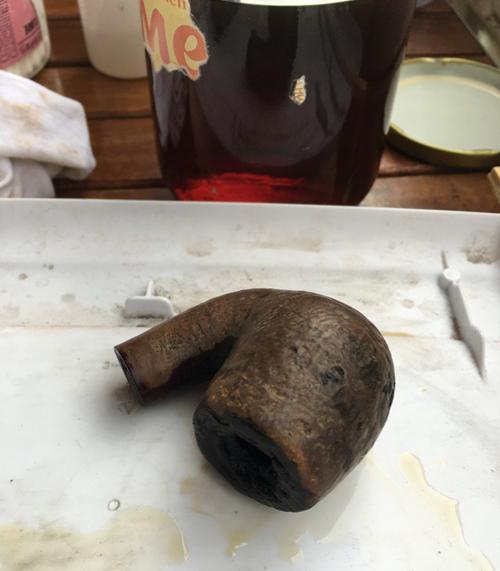
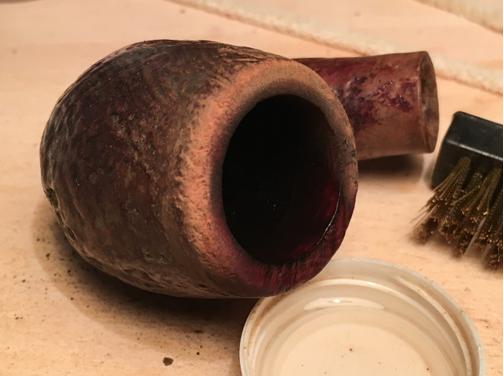
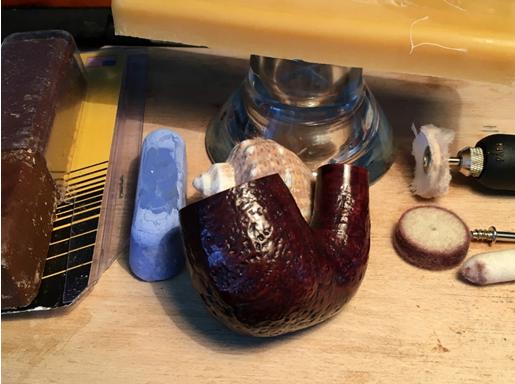
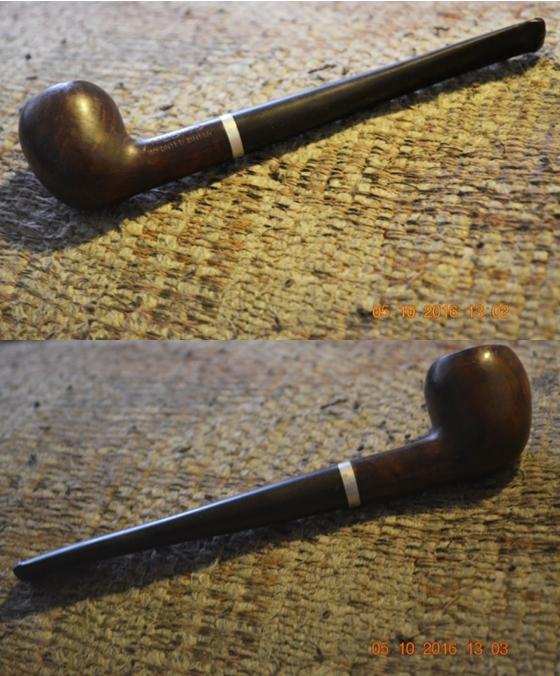
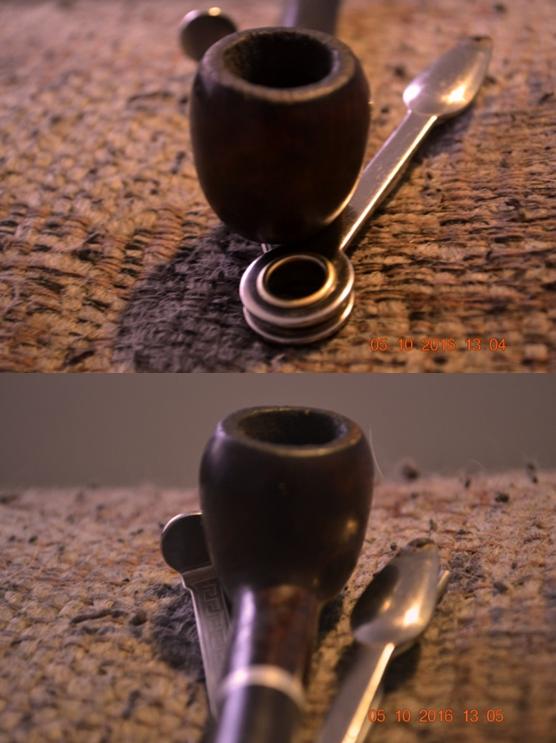
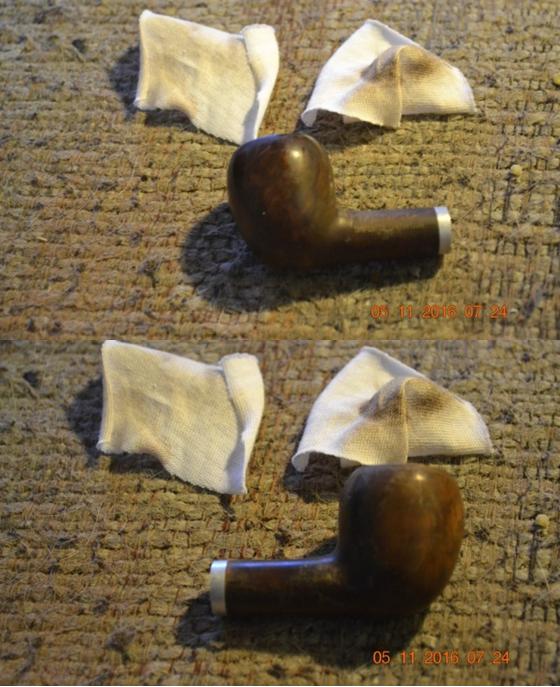
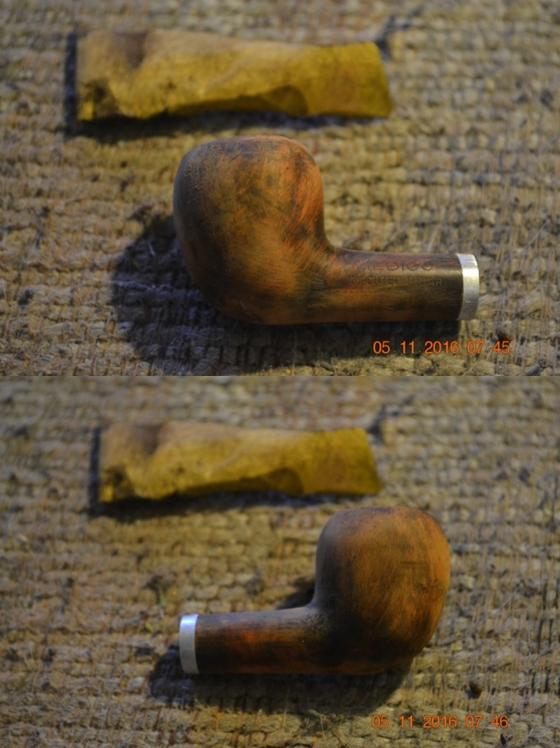
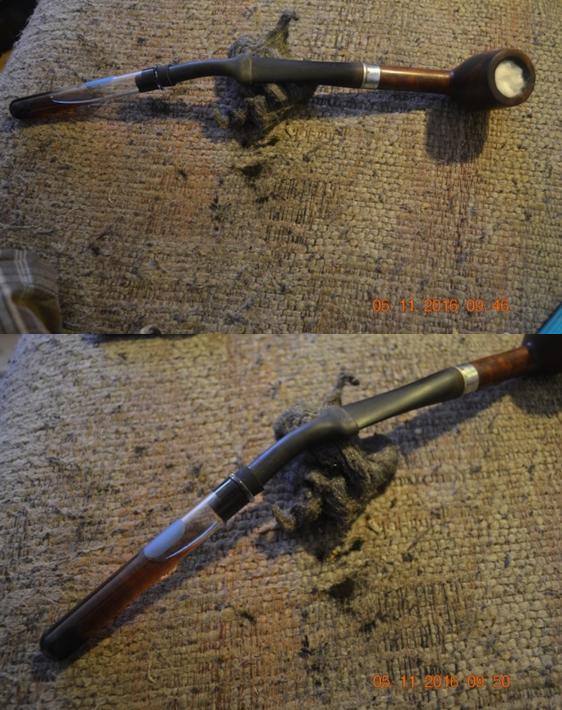
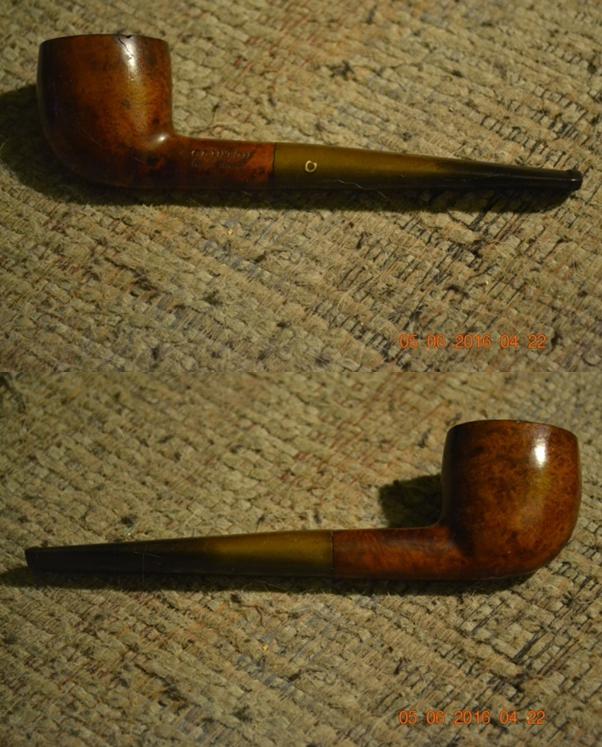
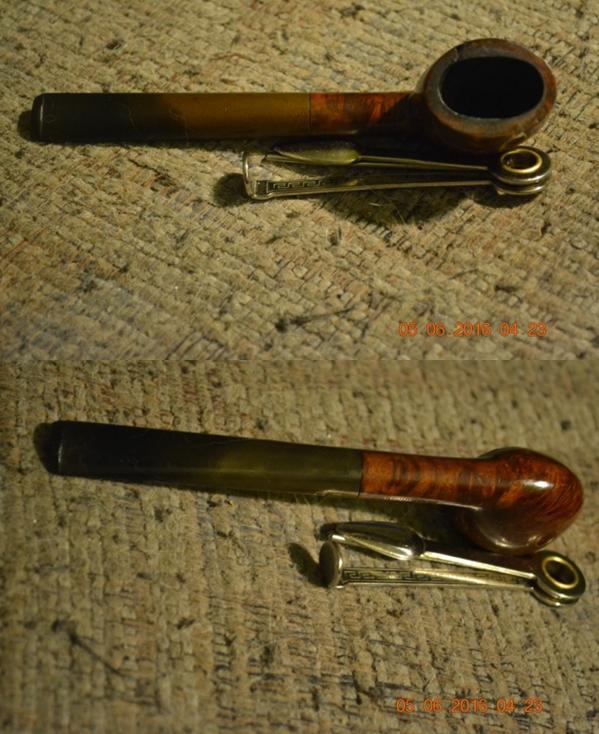
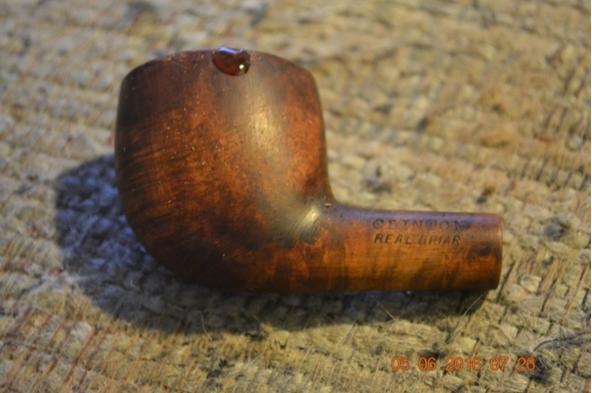
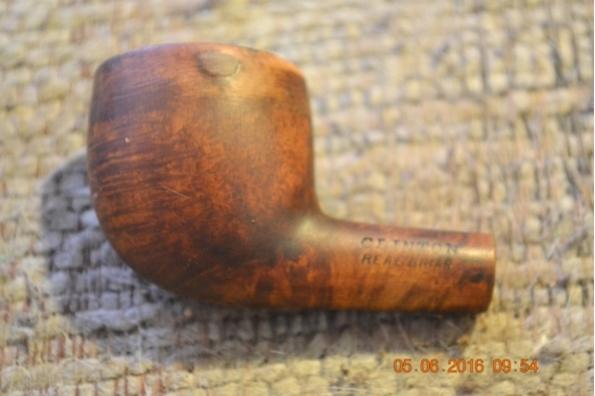
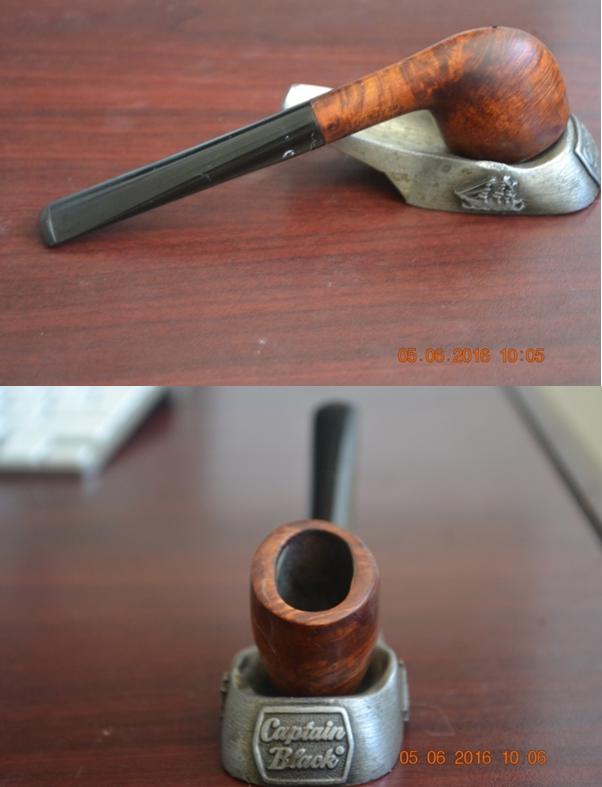
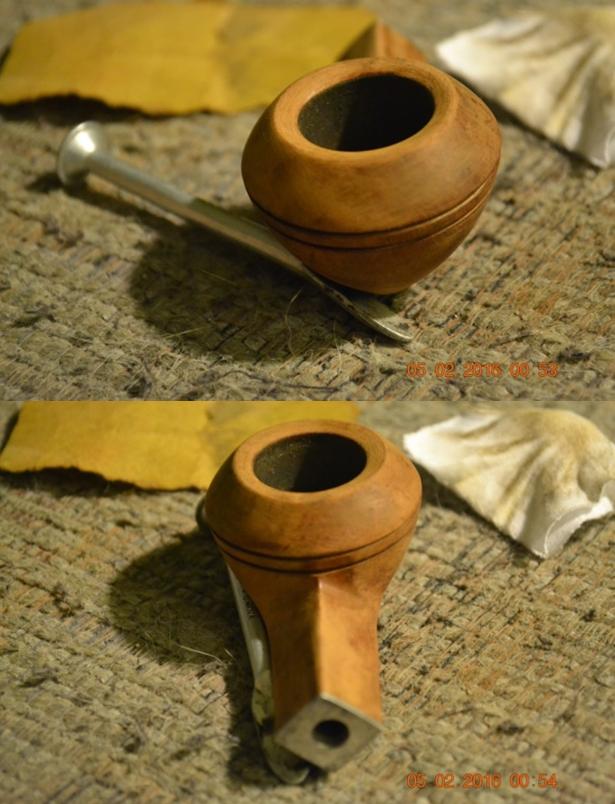
 My brother Jeff had reamed the bowl and done the initial clean up. He had scrubbed the surface of the bowl and the shank. It is great that he is doing that part of the job for me as it speeds up the process that I do in the restoration. The rim had some hard cake built up on the surface. There was a burn spot on the bottom of the shank that is visible in the second photo below.
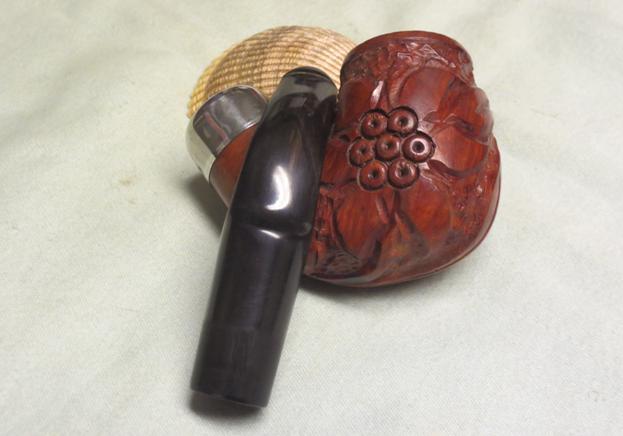
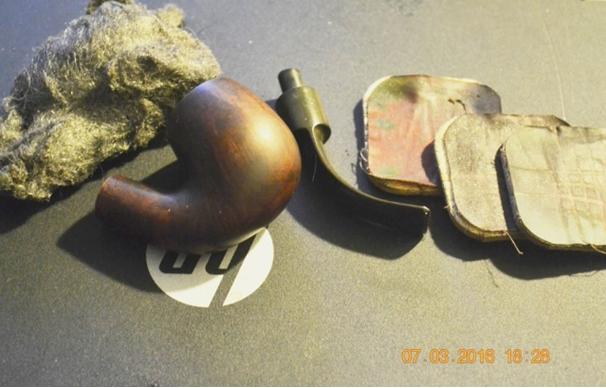
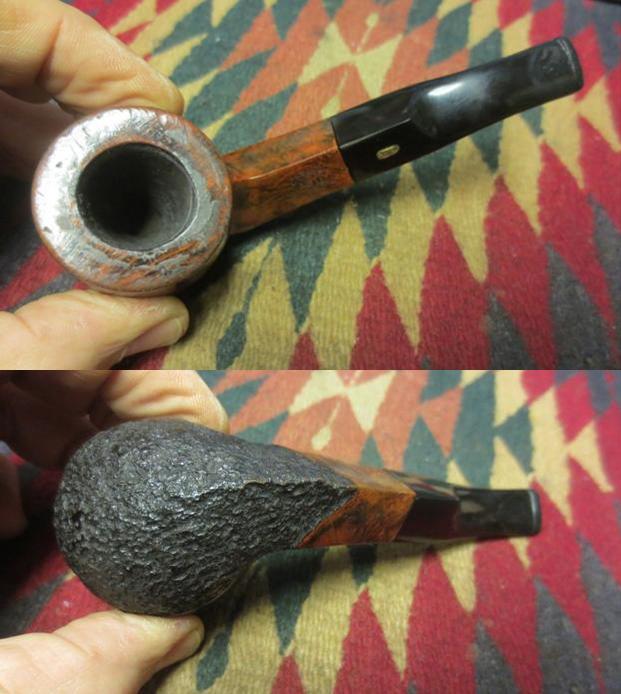
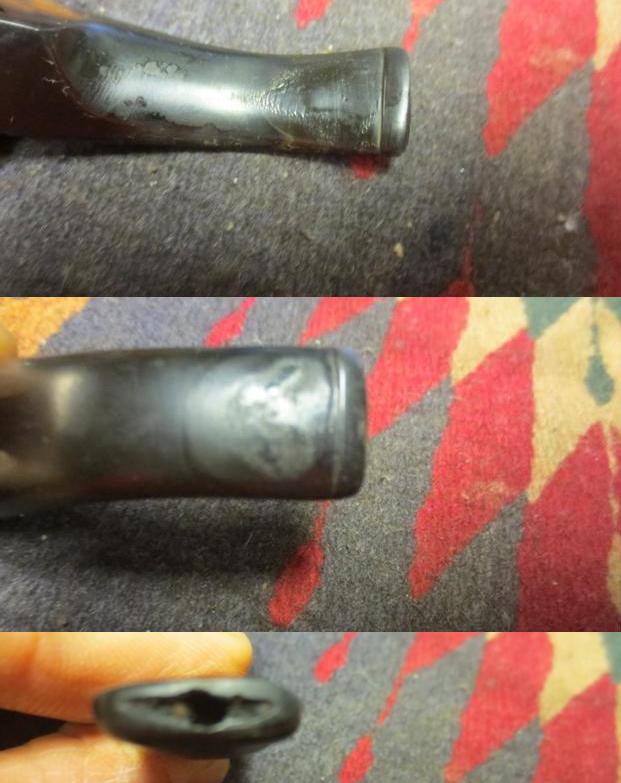
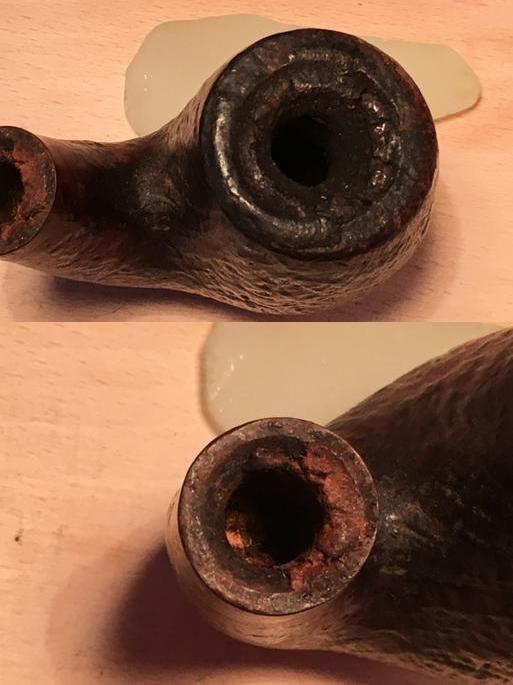
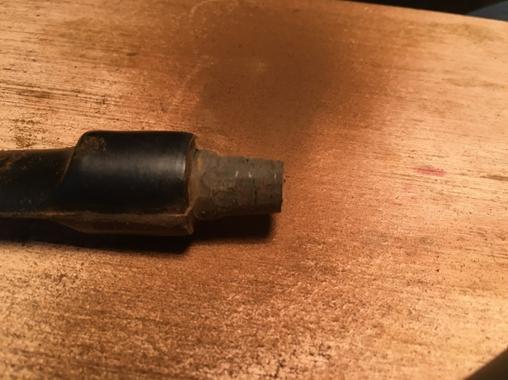
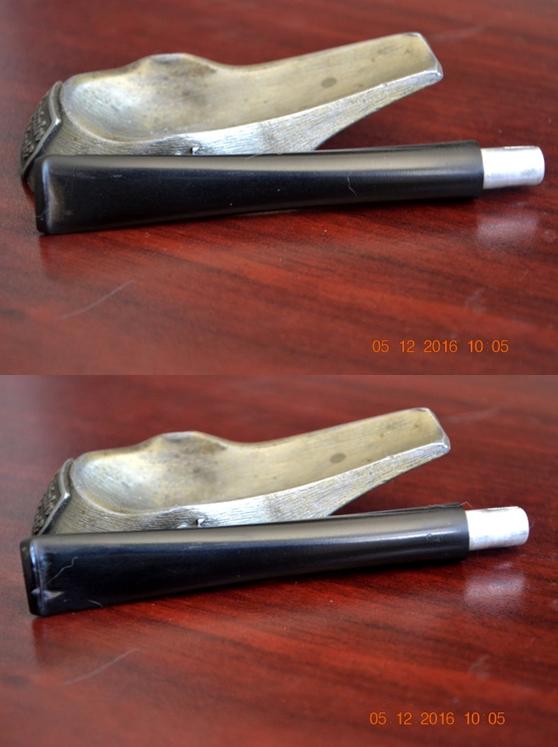
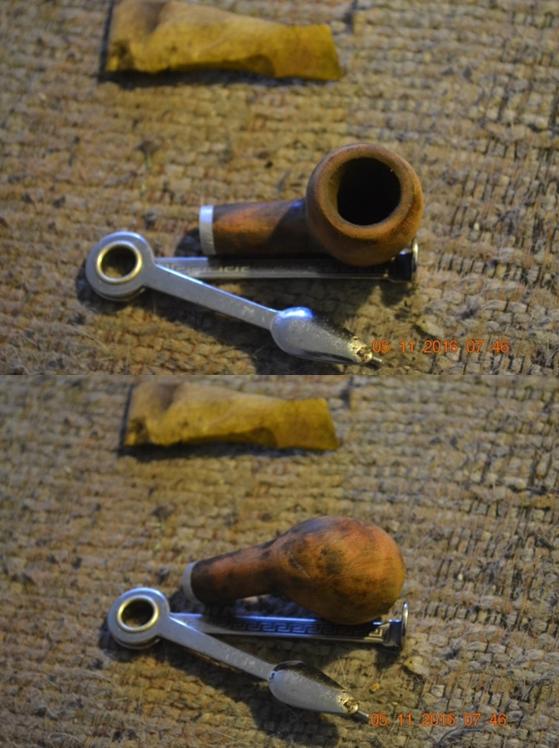
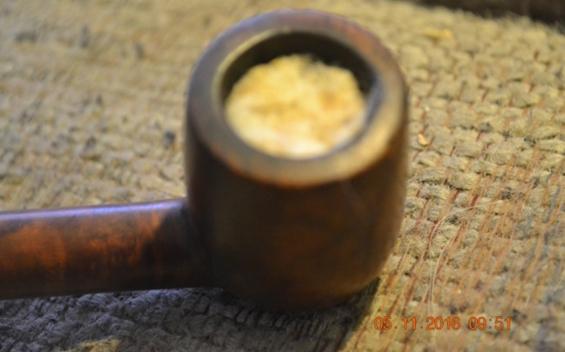
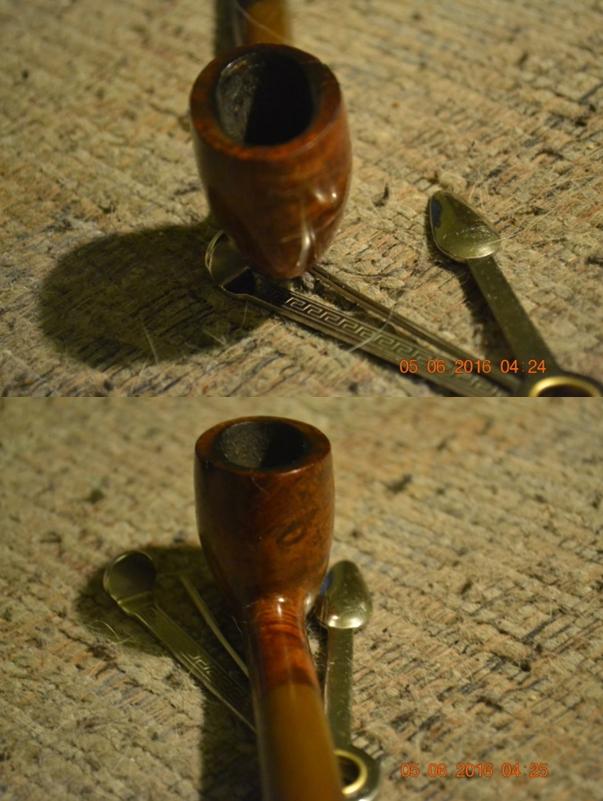
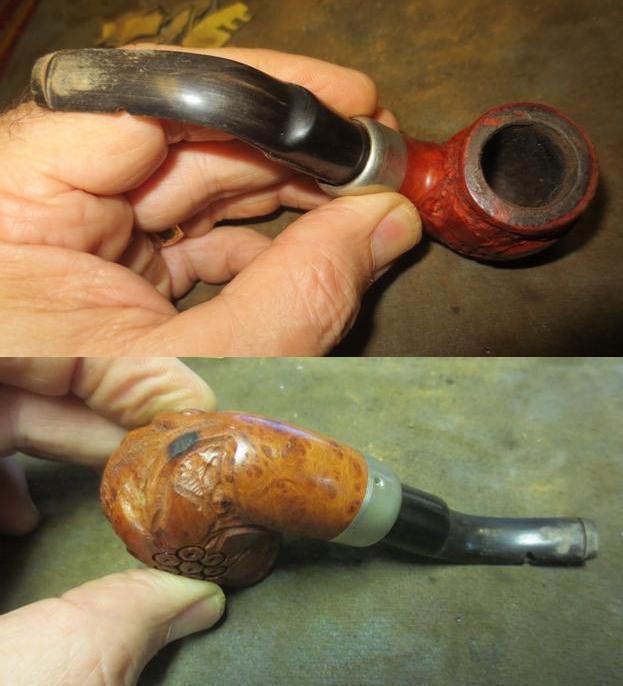 I took some close up photos of the areas that needed work. The first photo shows the burned spot. Fortunately the burn had not softened the wood too much. It was hard when I probed it with a dental pick. The second photo shows the hard cake on the rim. It is quite thick but the rim appears to be undamaged and the inner and out edges of the rim are in great shape. The third photo shows the damaged portion of the right edge of the stem. I have seen these often on horn stems and have always wondered if it was not damage done by a worm eating the horn.
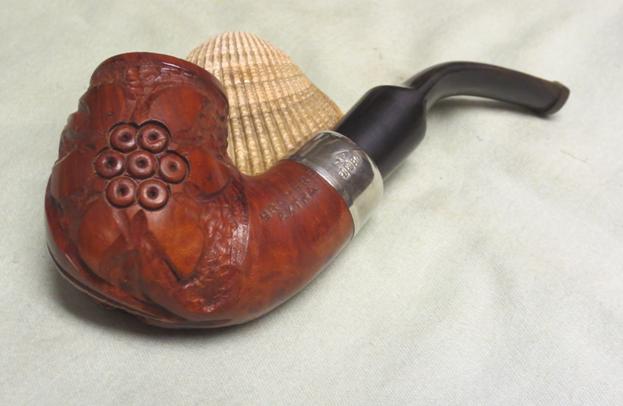
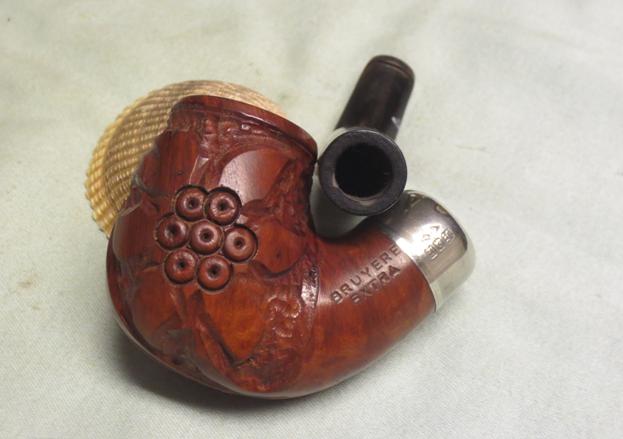
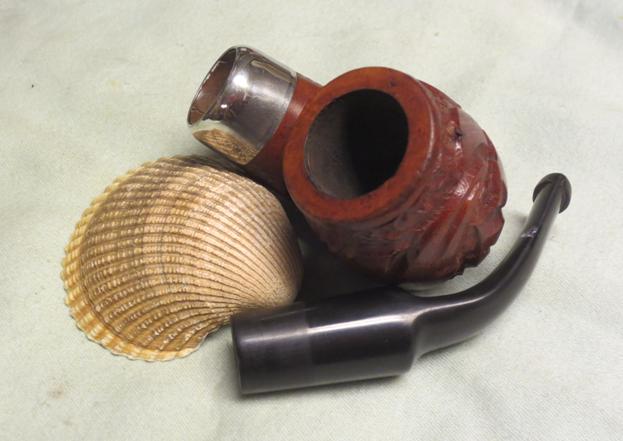
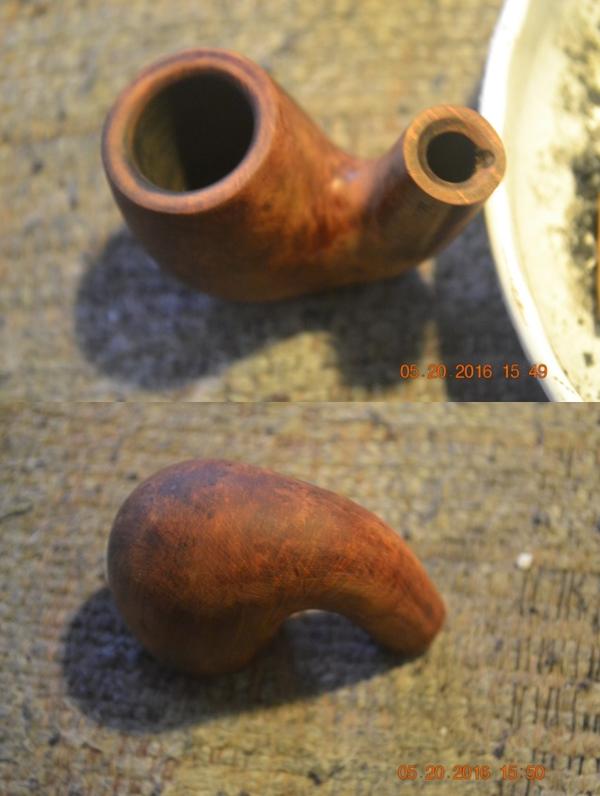
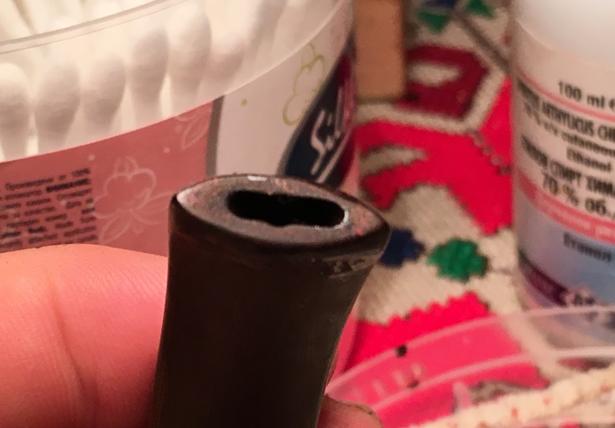
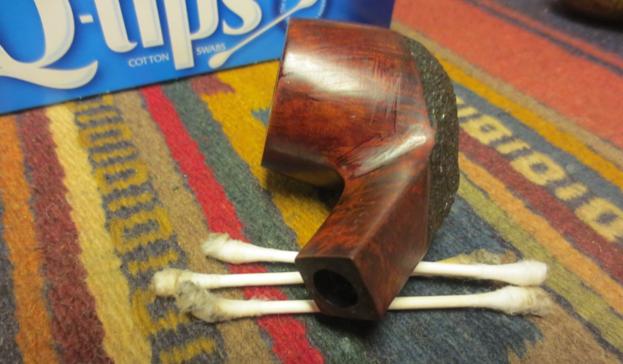
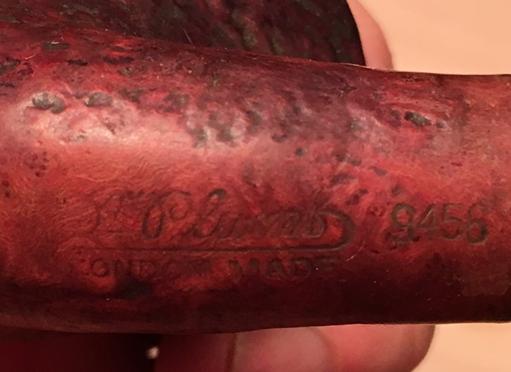
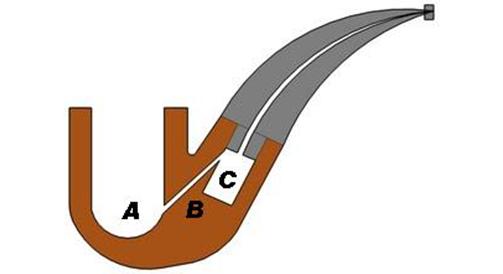
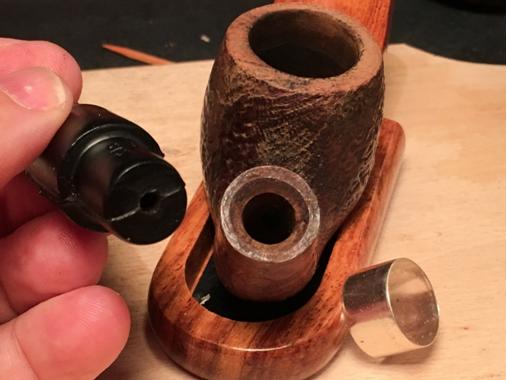
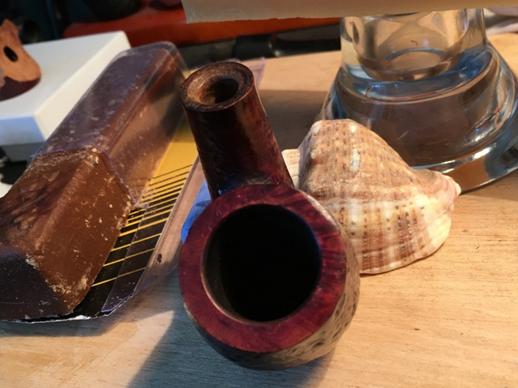
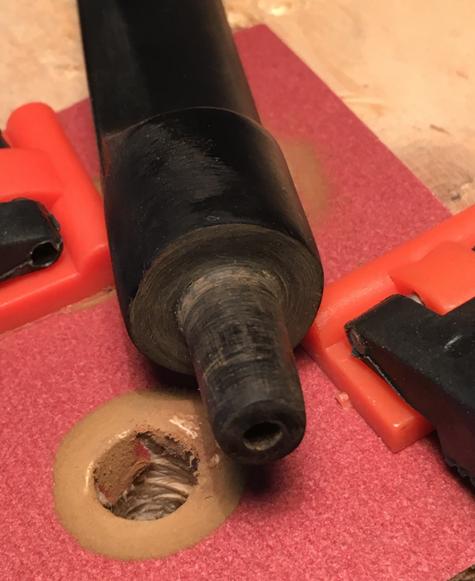
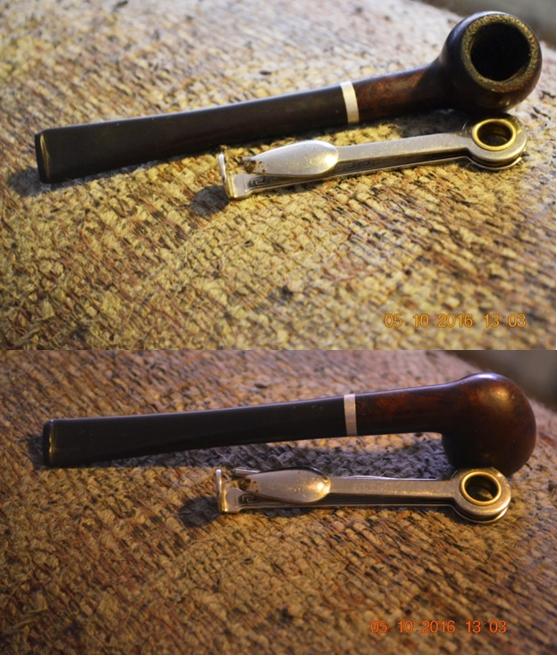
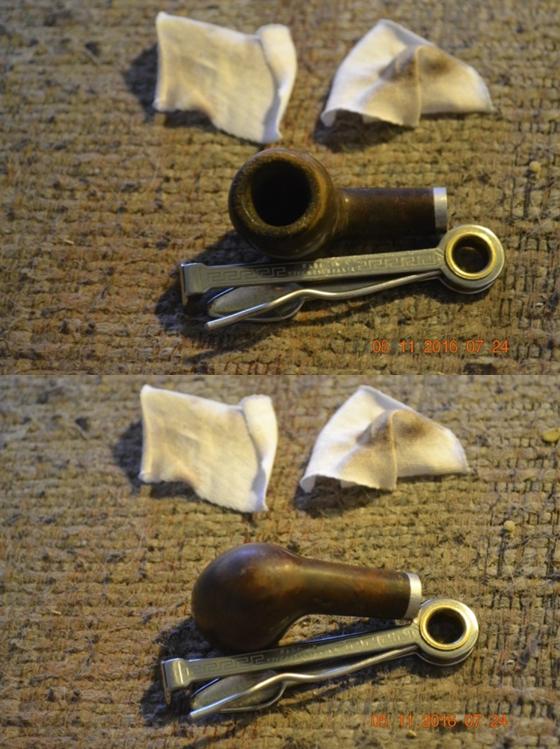
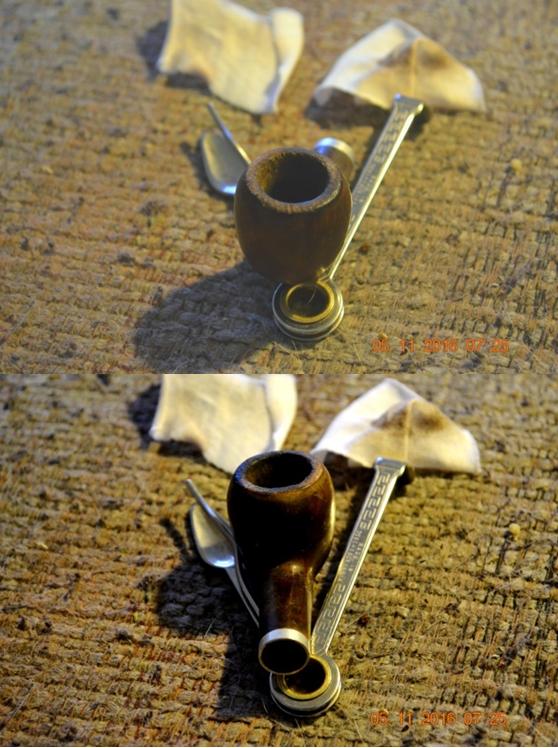
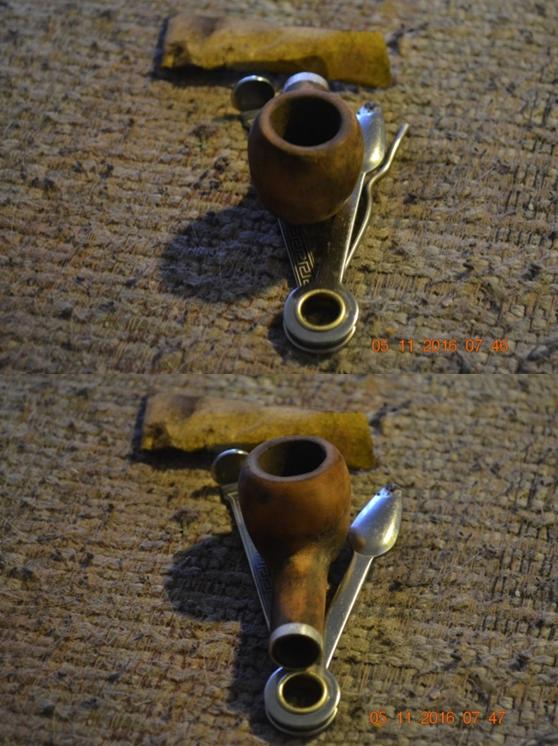
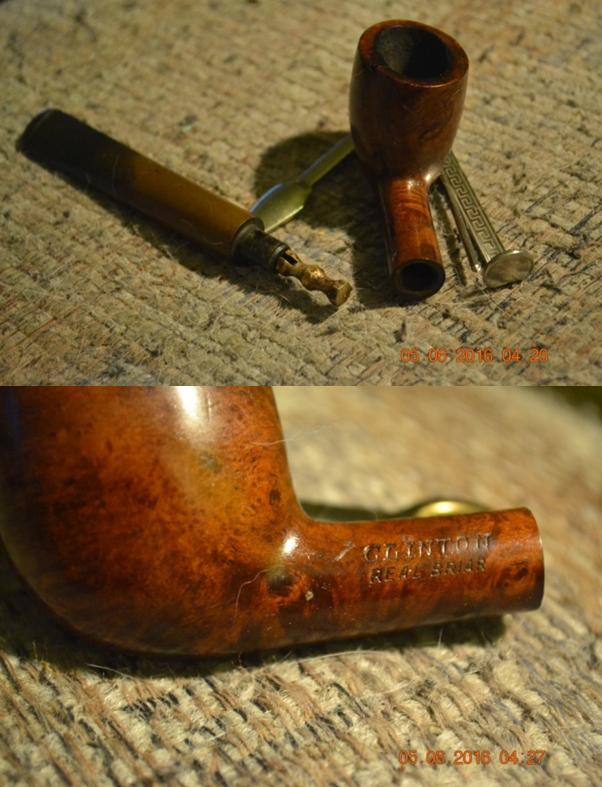
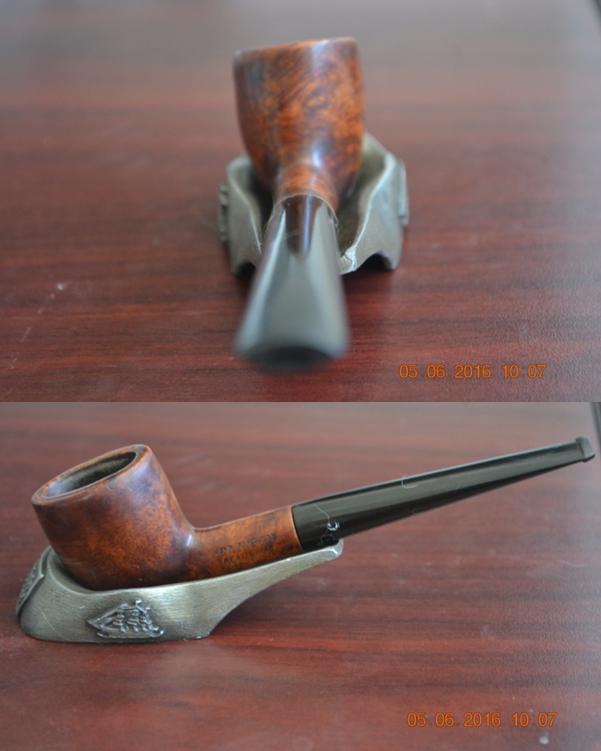
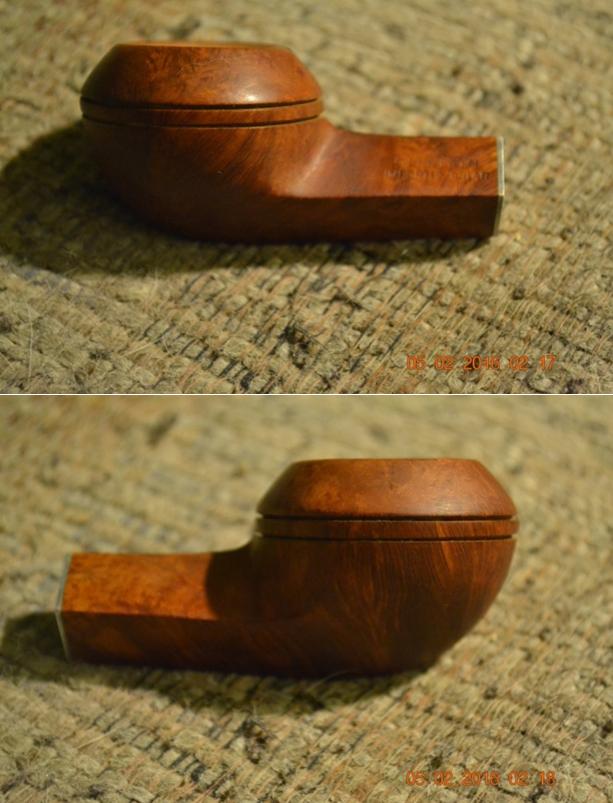
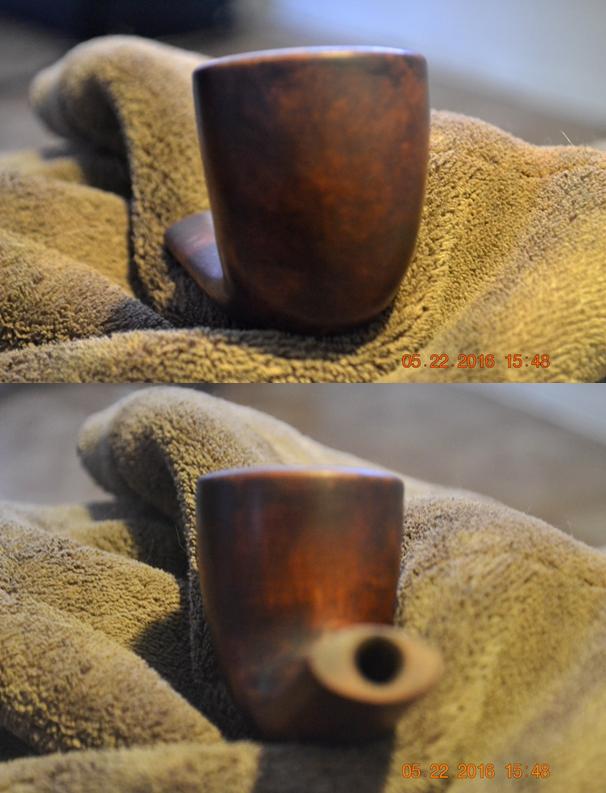
 I took several more close up photos. The first photo shows the two inner tubes that enter the bowl in two spots at the bowl bottom. It is a twin bore airway. The second photo shows the stamping on the left side of the shank – it reads Bruyere Extra. The right side of the shank is stamped with the shape number 6185. The band has three hallmarks and EP in a diamond. The hallmarks are letters, each in a car-touche. My guess is that these signify the maker.
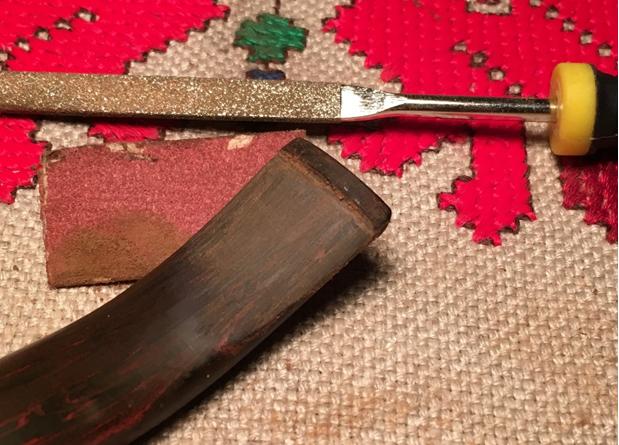
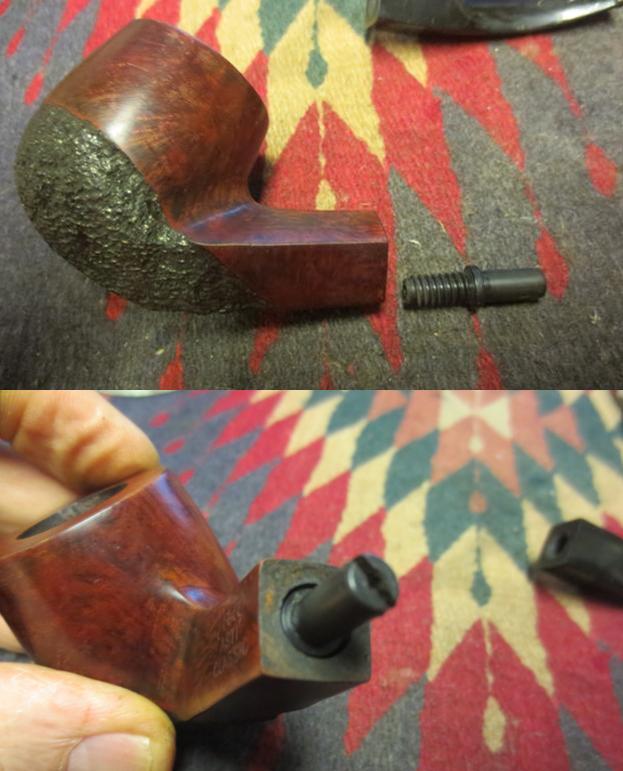
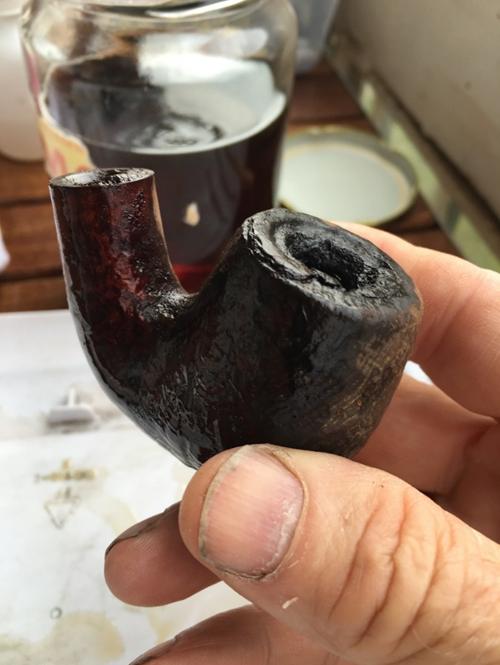
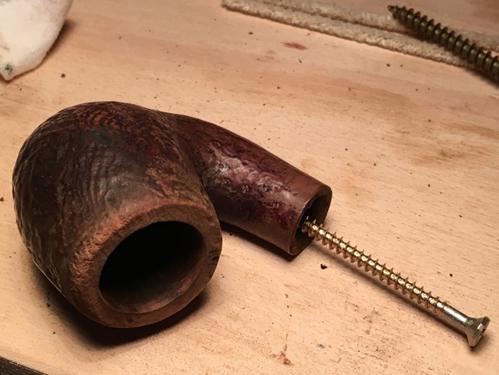
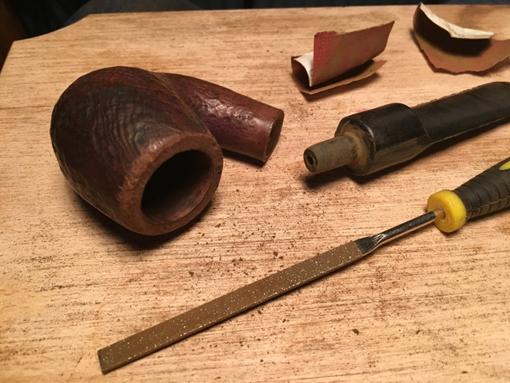
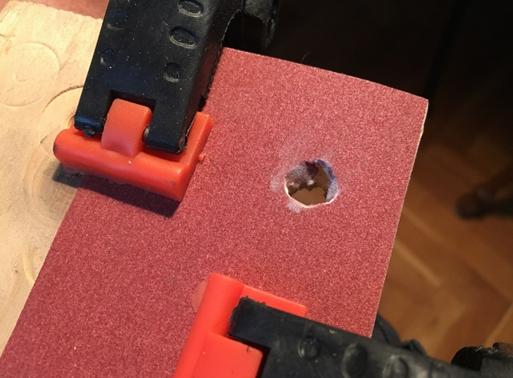
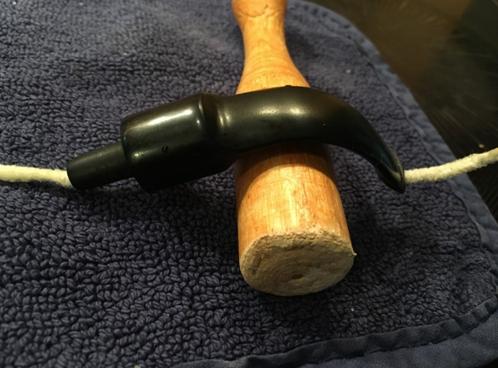
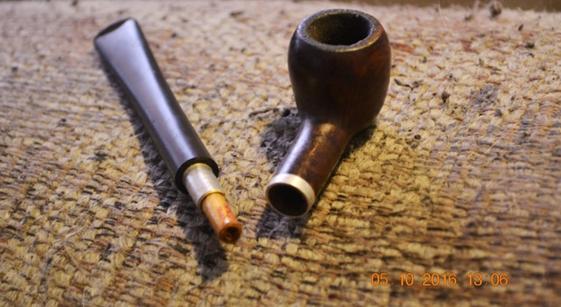
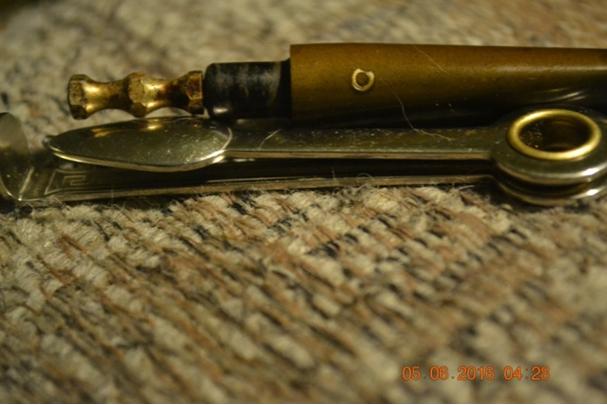
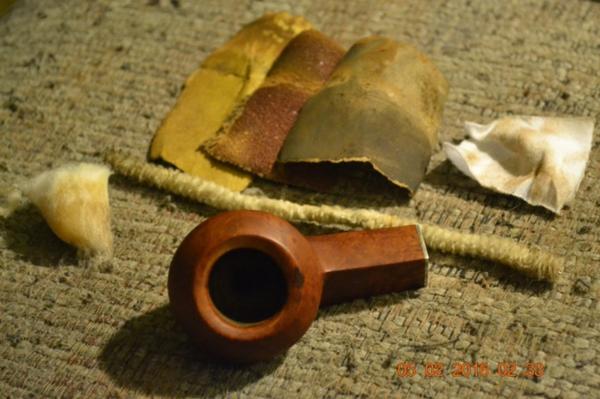
 The inside edge of the briar was thin in several spots. The two that were the most problematic can be seen on the bottom edges of the shank on the right side of the photo below. I have circled the two spots in red. The top one was missing a wedge of briar and the bottom was a half circle of briar. Both were repairable with briar dust and wood glue.
 I decided to work on the stem repair first. I cleaned the area on the horn with alcohol and a cotton swab and then filled it in with clear super glue. For some reason this time around the repair turned white. That has never happened for me. Generally the glue dries clear and the underlying colour of the horn shines through. I set the stem aside to let the glue cure.
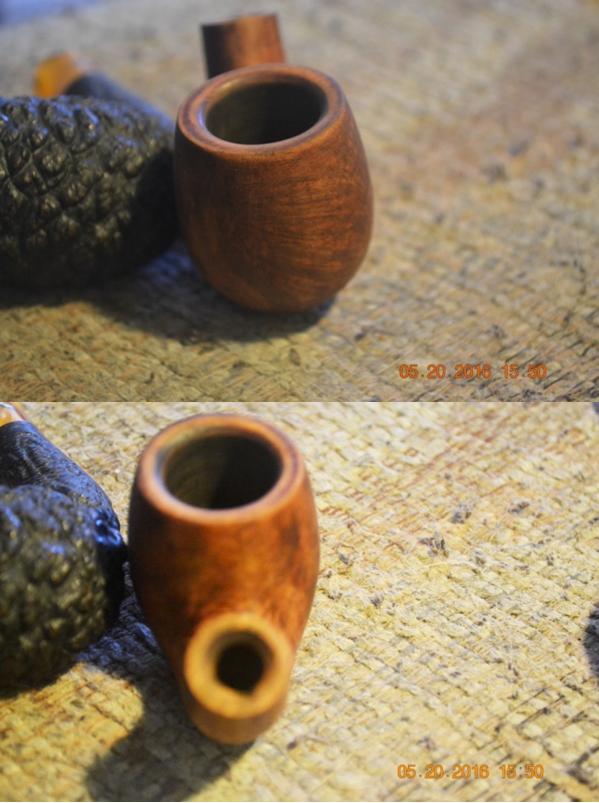
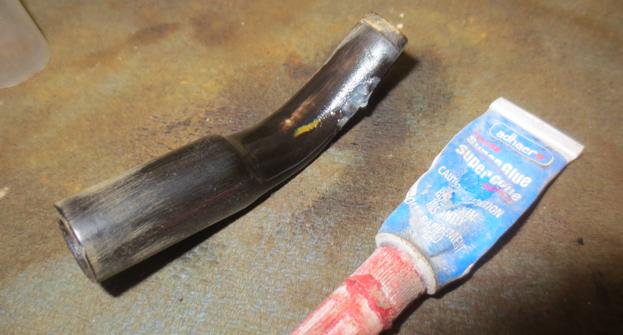 The tars and oils were almost petrified on the top of the rim. I had soaked the rim with alcohol to try to soften them with no success. I decided that the best option was to lightly top the bowl until the hard tars were gone. I used a topping board and 220 grit sandpaper to remove the buildup. I sanded the burned area on the bottom of the shank at the same time to remove the surface damage to the briar. I sanded it until the briar was darkened but solid.
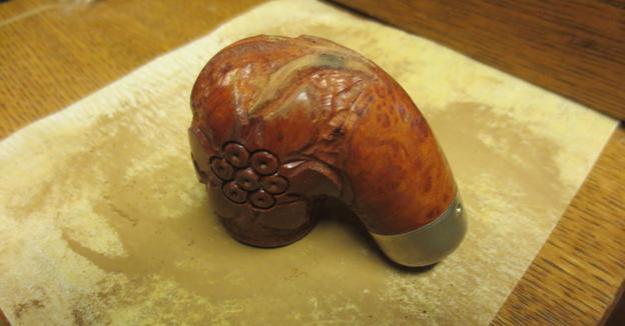 Once the rim was clean I sanded it with 1500-3200 grit micromesh sanding pads to smooth out the scratches left behind by the topping of the bowl. I scrubbed out the sump and the open mortise with cotton swabs and alcohol until it was clean. I cleaned out the twin bore tubes with pipe cleaners and alcohol. I used an all purpose wood glue and briar dust to build up the two spots on the inside of the shank and sanded them smooth. They are circled in red in the photo below.
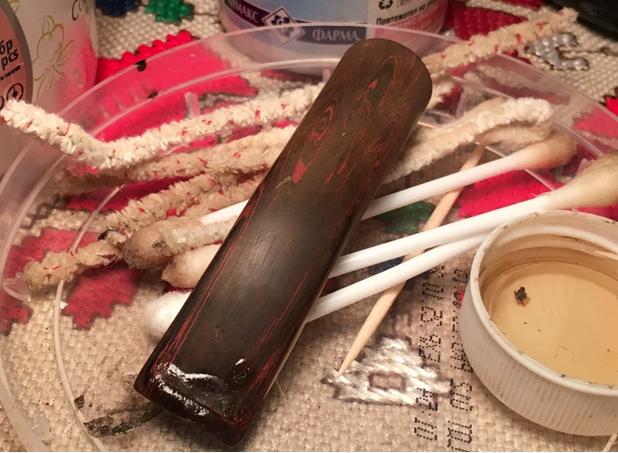
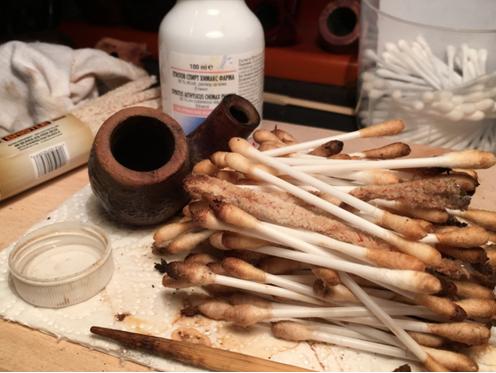
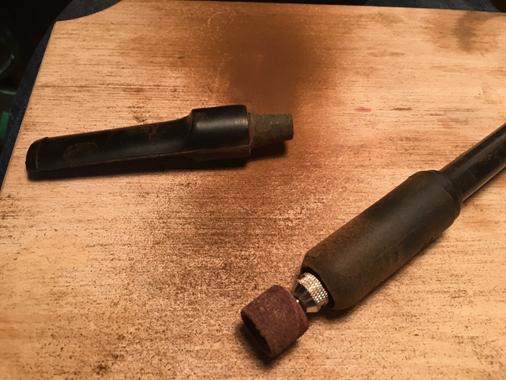
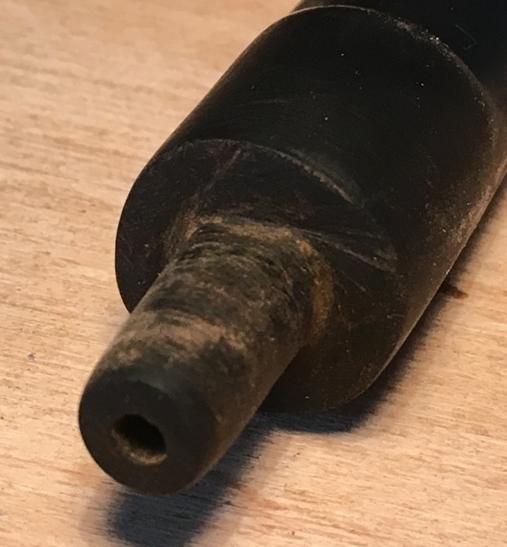
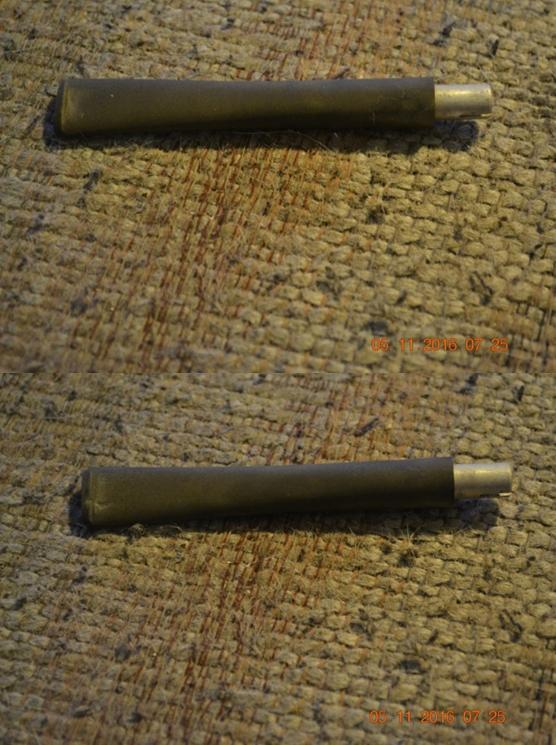
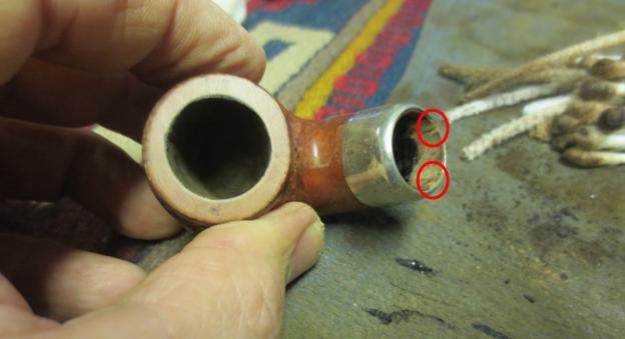 I sanded the repair to the horn with 220 grit sandpaper and sanded the tooth marks and chatter on the top and bottom of the stem until it was smooth. I cleaned out the chamber in the stem with pipe cleaners, cotton swabs and alcohol until it was clean. I had to do two full cleanings remove the tars in the chamber. The first photo below shows the stem after the first cleaning. The second photo shows the second cleaning. It took a lot of cotton swabs to clean out the chamber. I don’t like to boil hot alcohol through horn stems with the retort as I do not want to damage the stem.
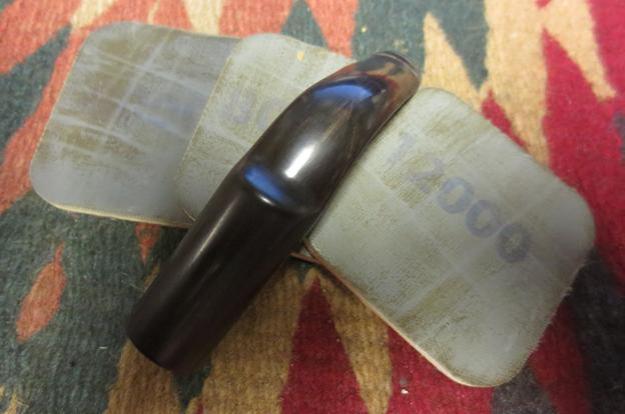
 With the inside of the stem clean I sanded the exterior with micromesh sanding pads. I wet sanded it with 1500-2400 grit pads and rubbed it down with Obsidian Oil. I dry sanded it with 3200-4000 grit pads and gave it another coat of oil. I finished sanding it with 6000-12000 grit pads and gave it a final coat of Obsidian Oil.
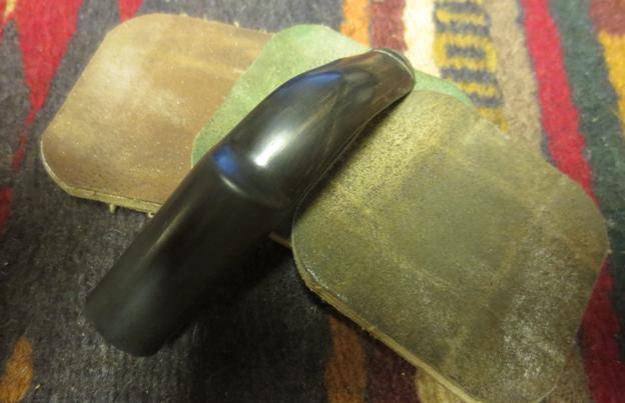

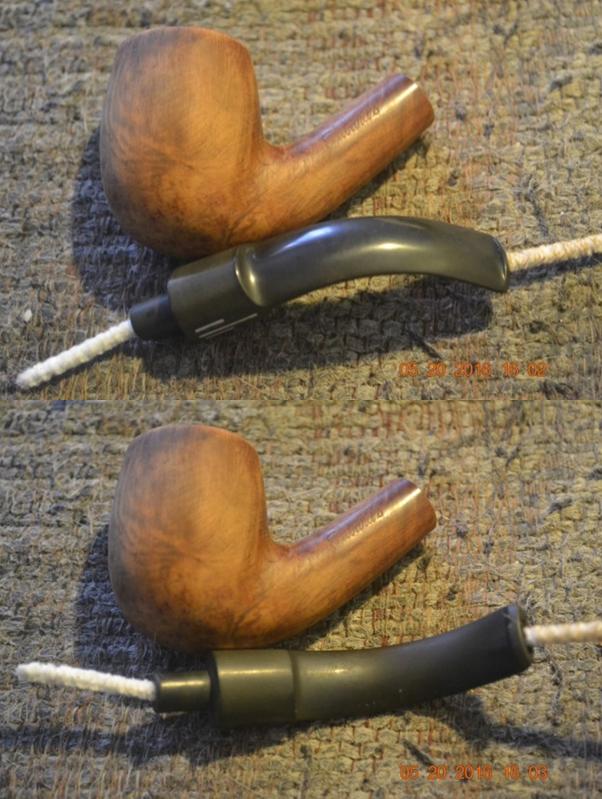
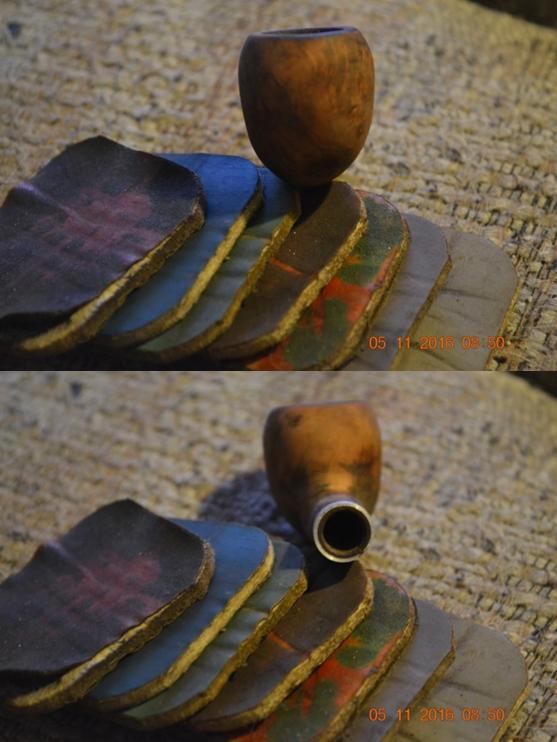
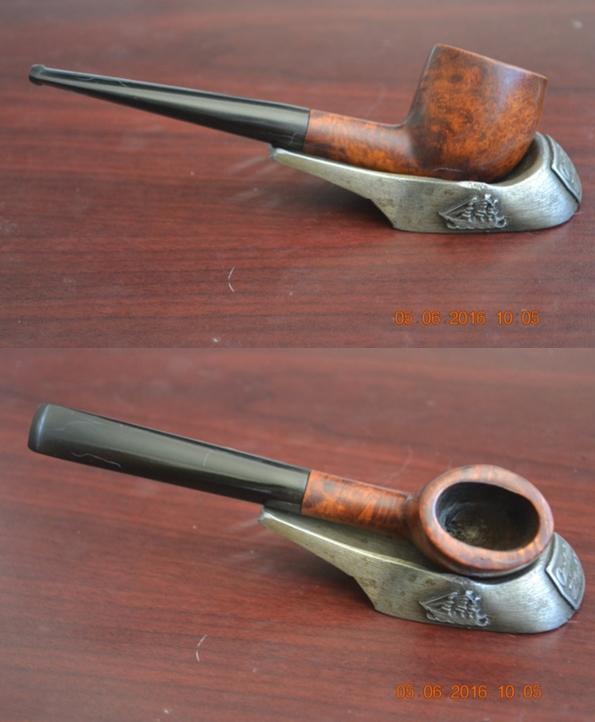
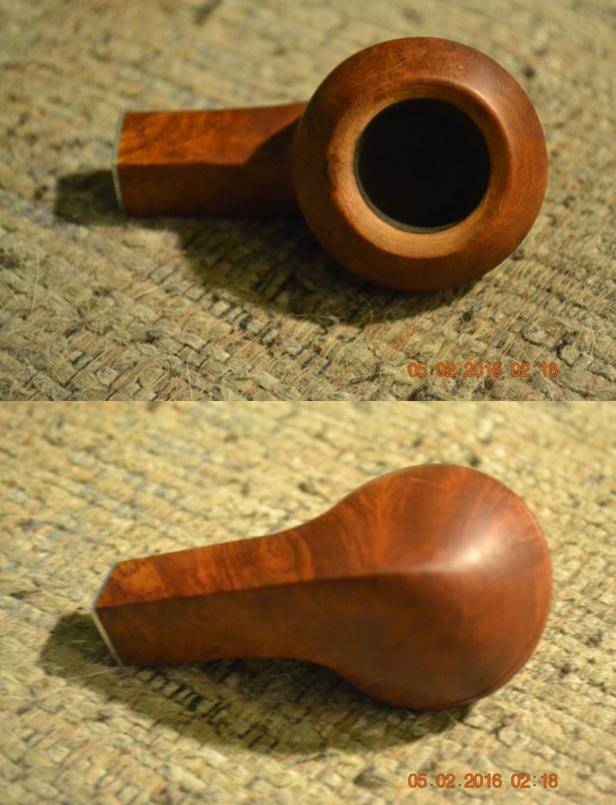
 I polished the Electro-Plated silver end cap with silver polish to remove the tarnish and restore the shine. I stained the rim with a light brown stain touch up pen to match the colour of the rest of the bowl.
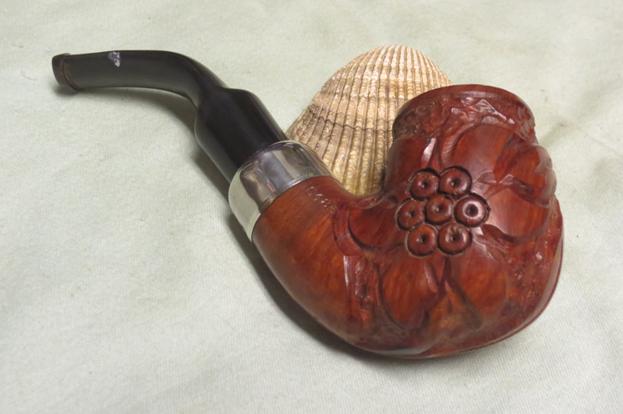
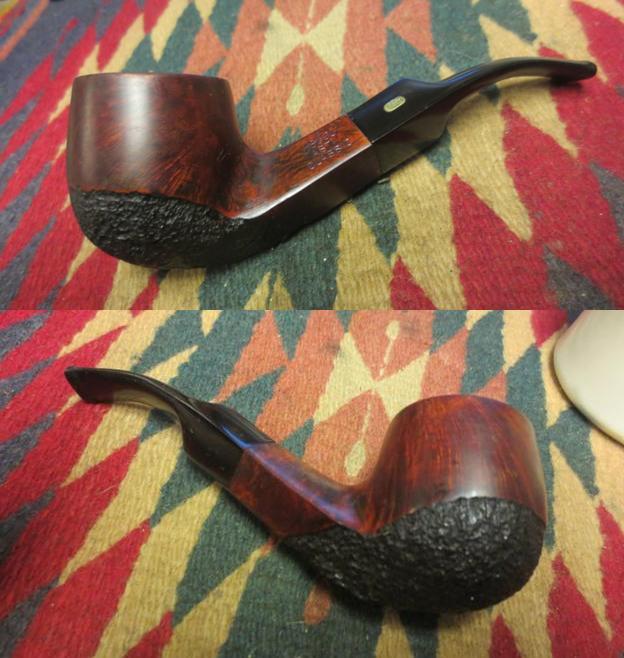
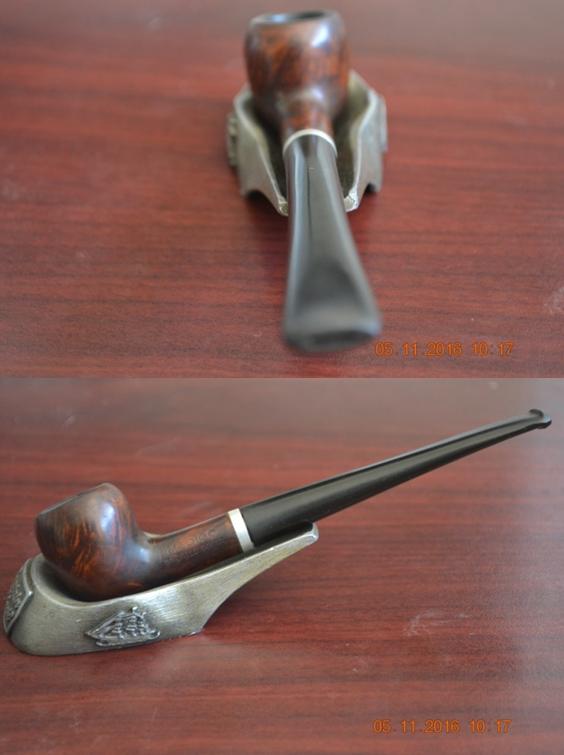
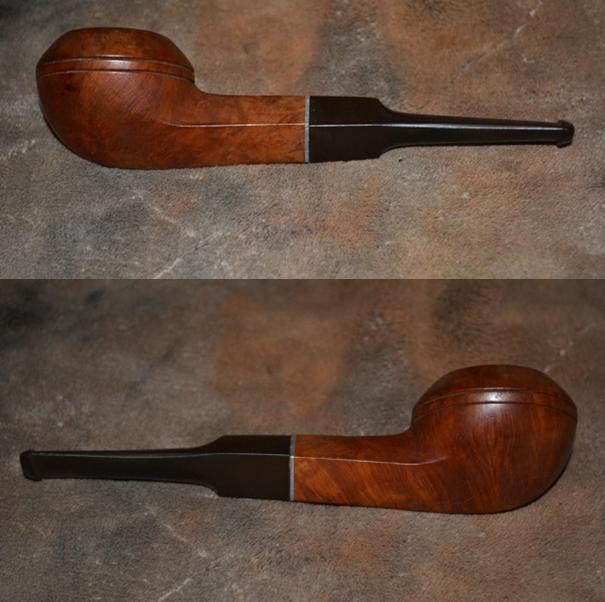
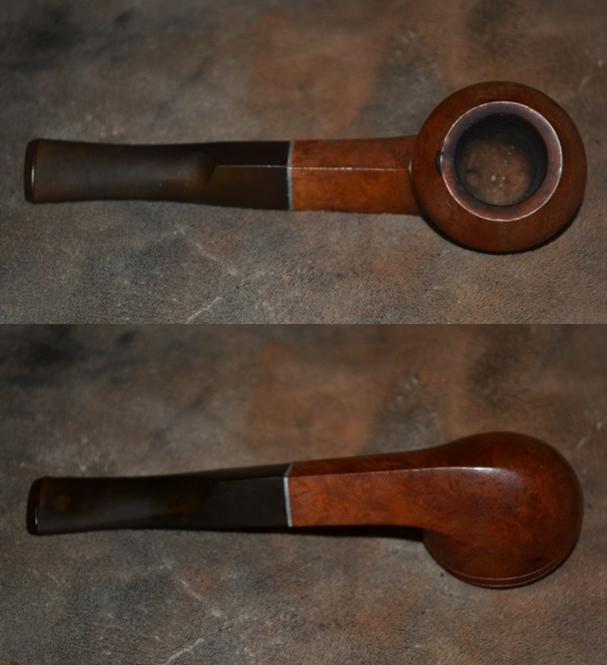
 I gave the bowl several coats of Conservators Wax and hand buffed it with a shoe brush. I buffed the stem with Blue Diamond on the wheel and then gave the bowl and stem several coats of carnauba. I had a light touch on the bowl so it did not clog up the carvings. I buffed the pipe with a clean buffing pad to shine it and then hand buffed it with a microfibre cloth. The finished pipe is shown in the photos below. Have any of you seen a pipe with plumbing like this one? Do you recognize the hallmarks or the brand or shape number? Let me know as I am curious. Thanks for looking.