Tag Archives: Al Jones

Father Tom’s Briar – Reborn – by Al Jones


Blog by Al Jones

Followers of this blog are no doubt very familiar with Steve Laug’s wonderful “Father Tom” short stories. For those not familiar with Father Tom, he is fictional well seasoned, pipe smoking minister.

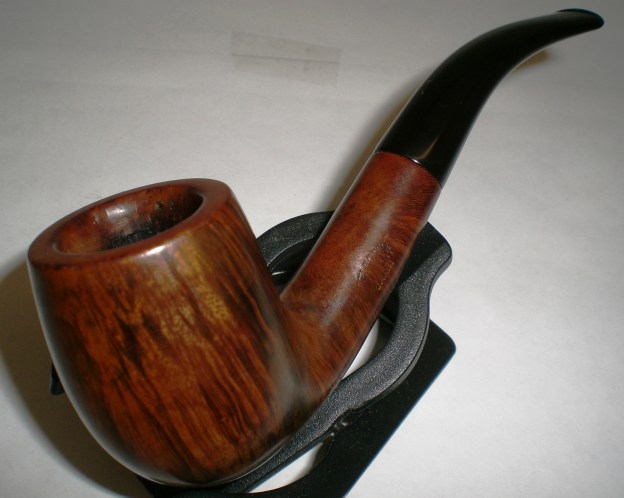
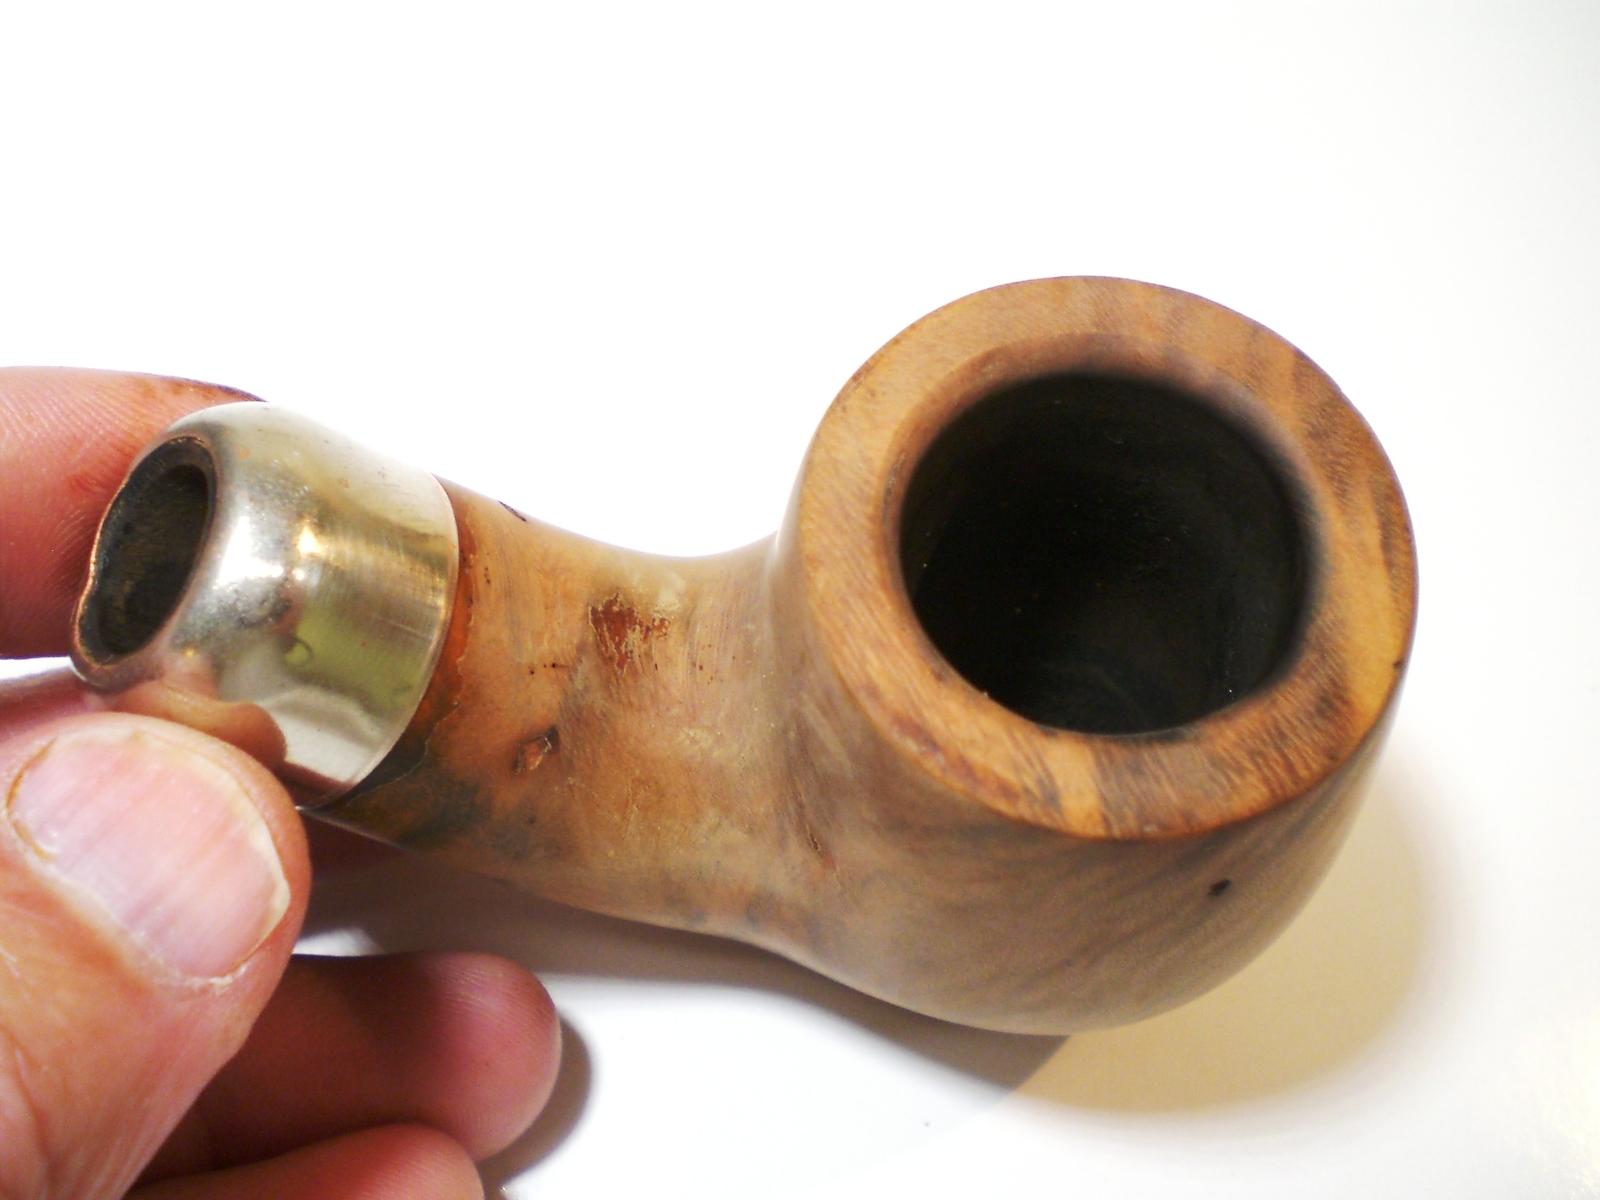
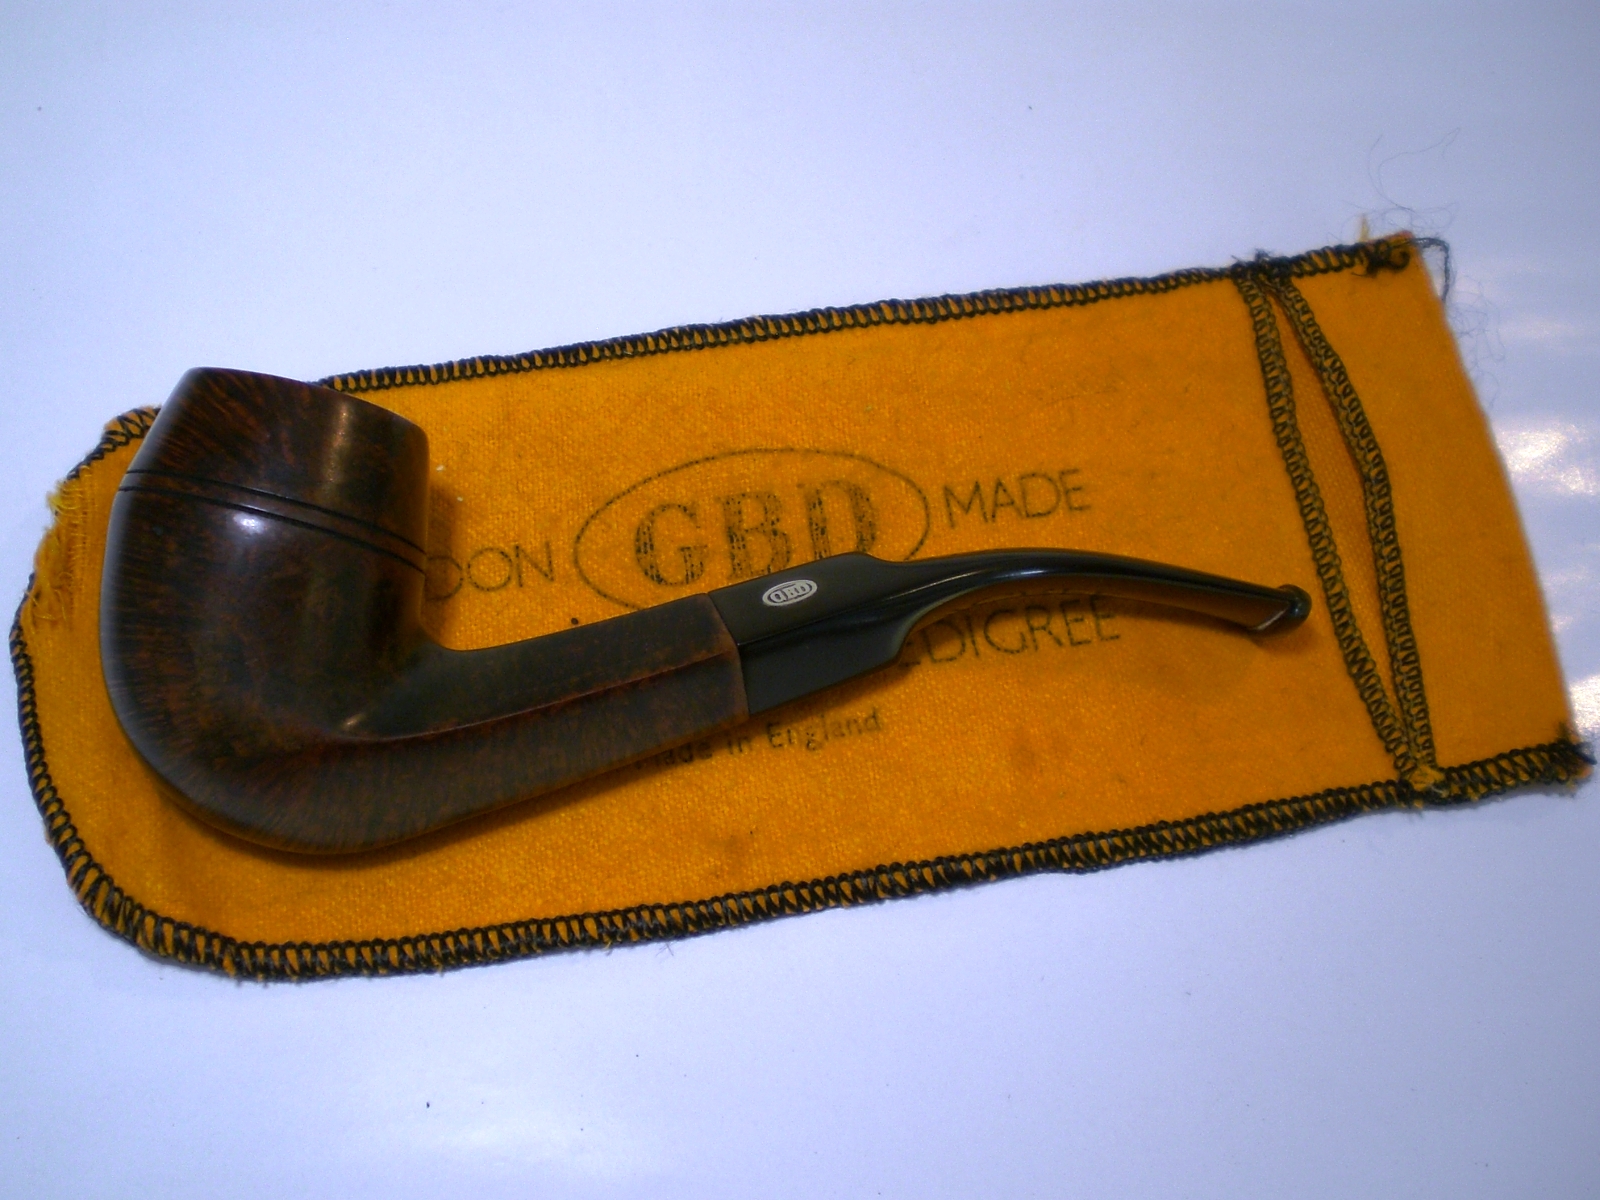
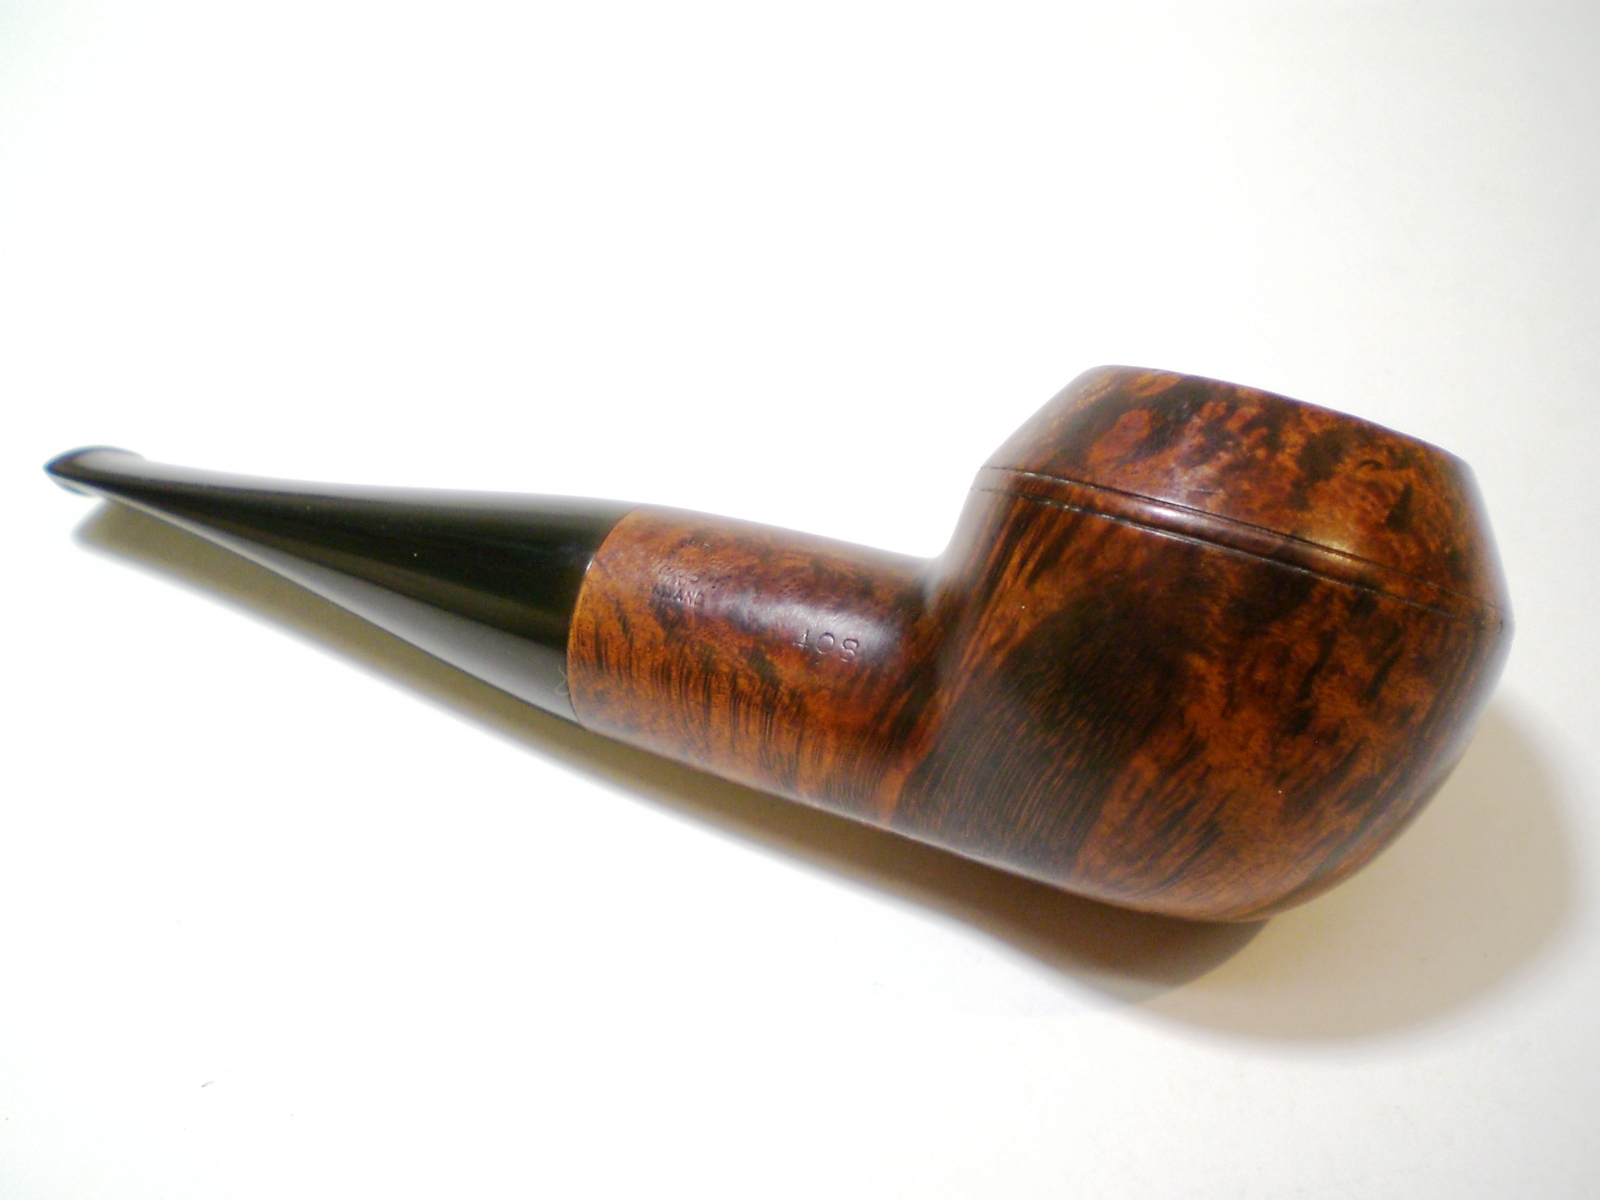
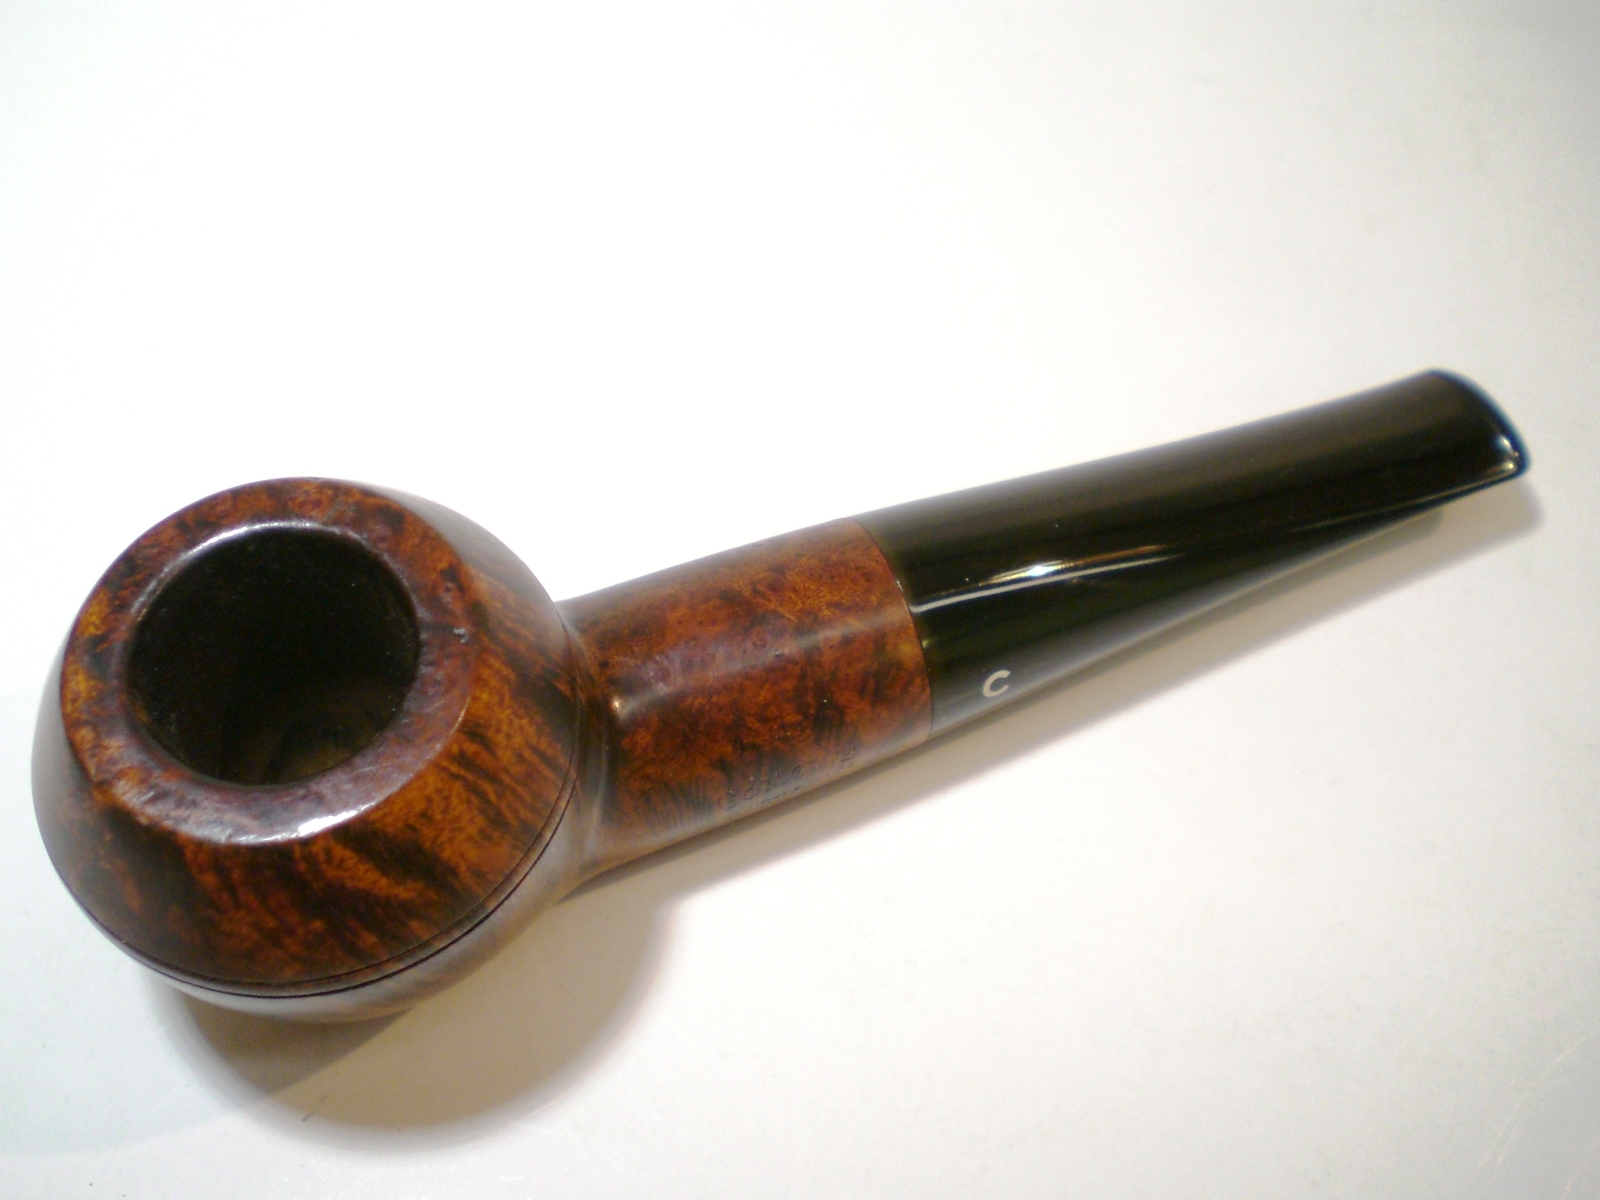
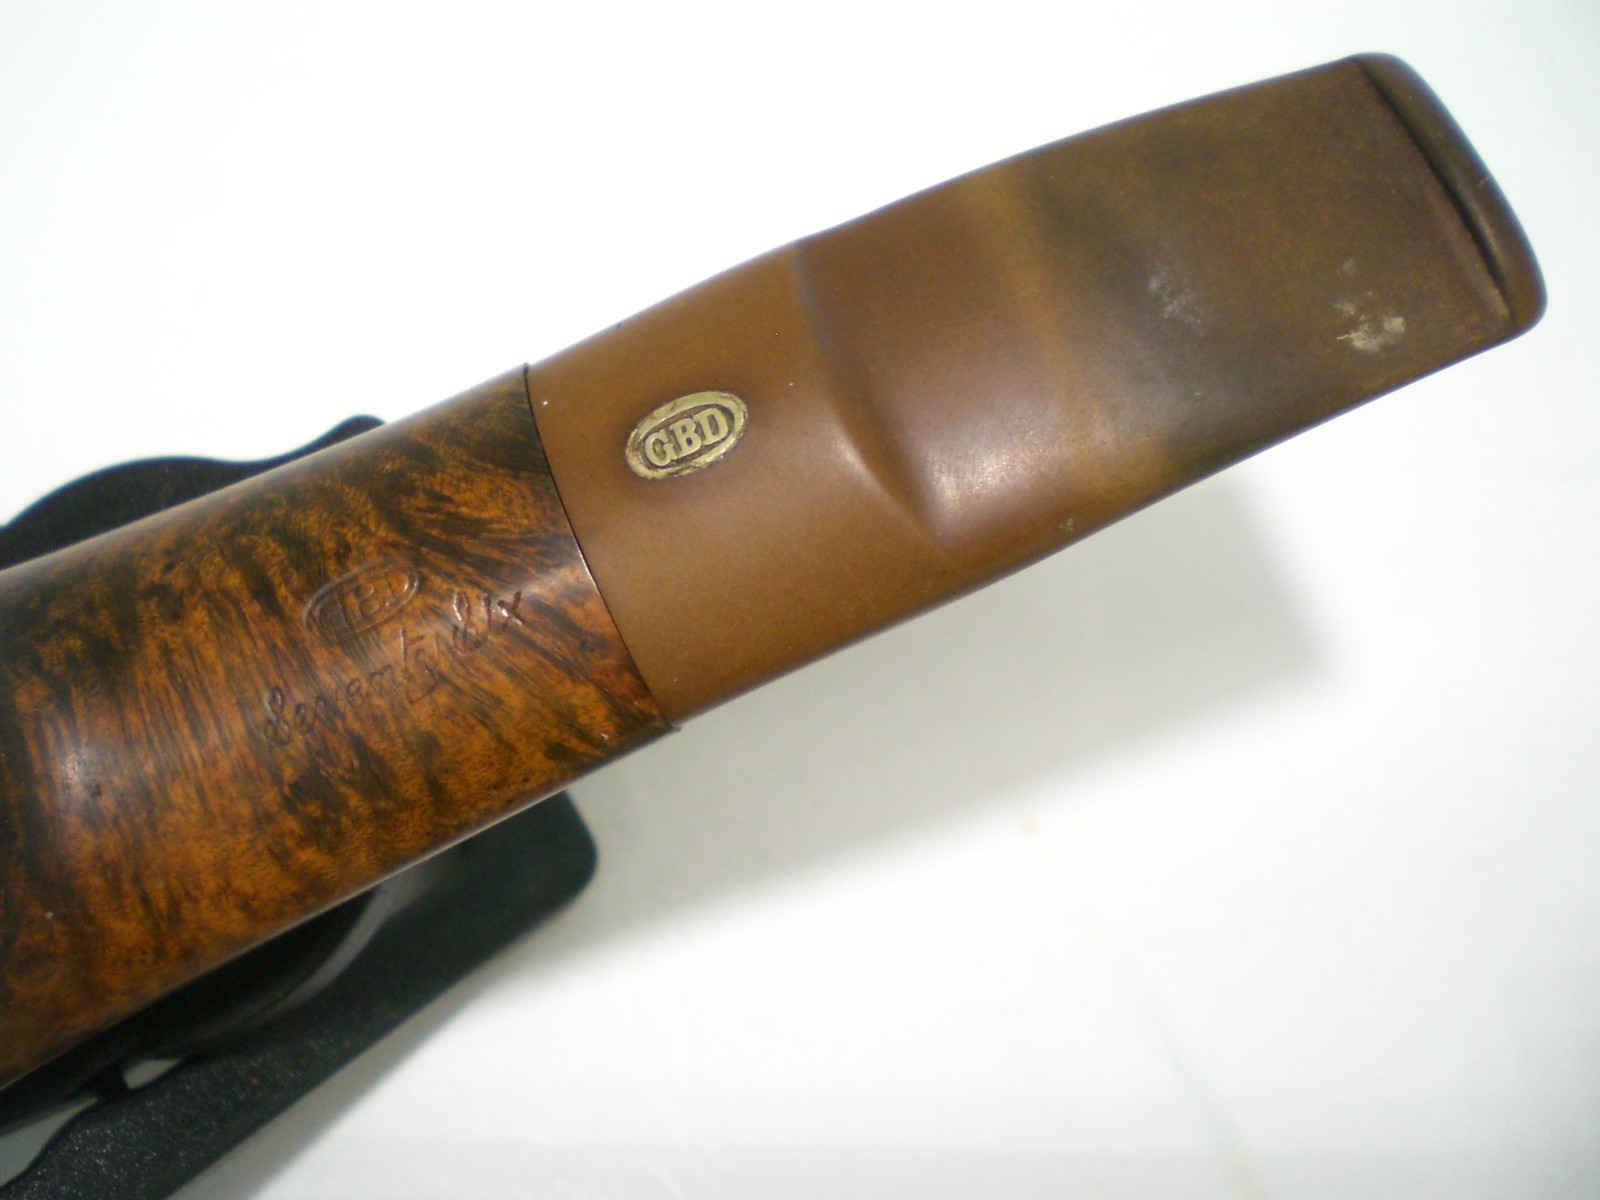
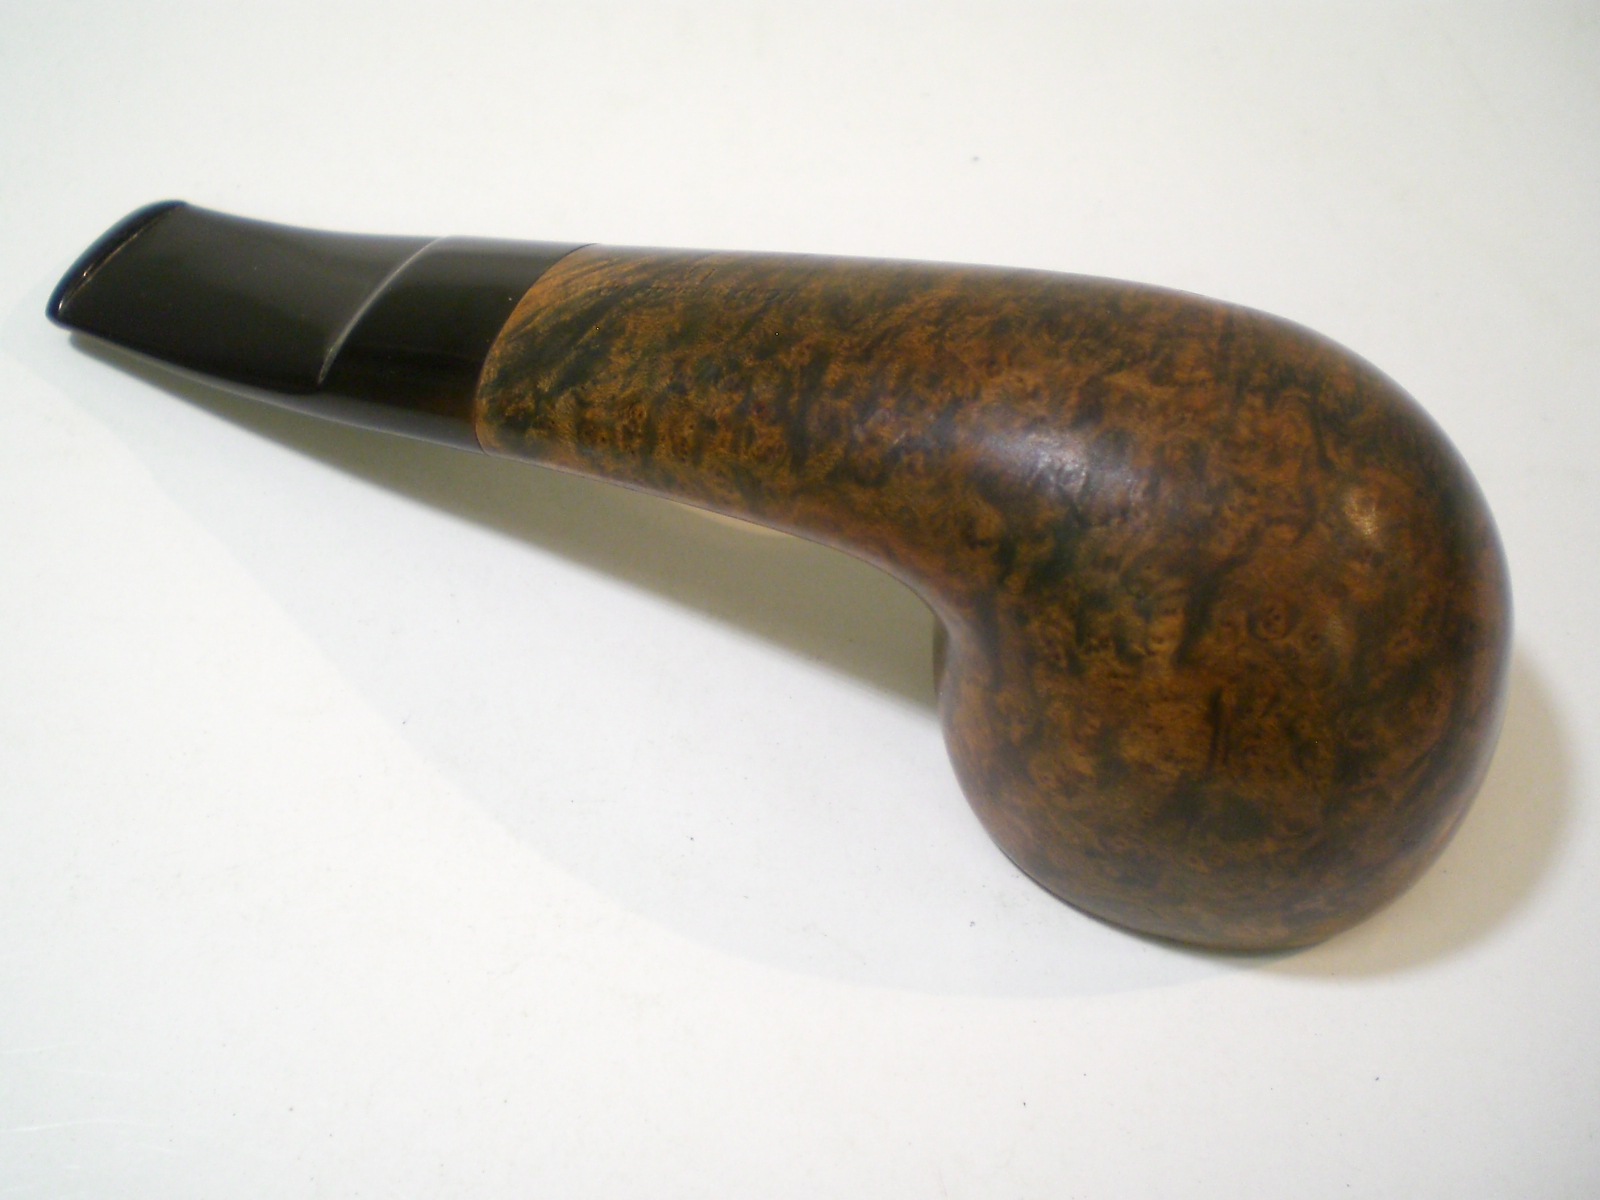
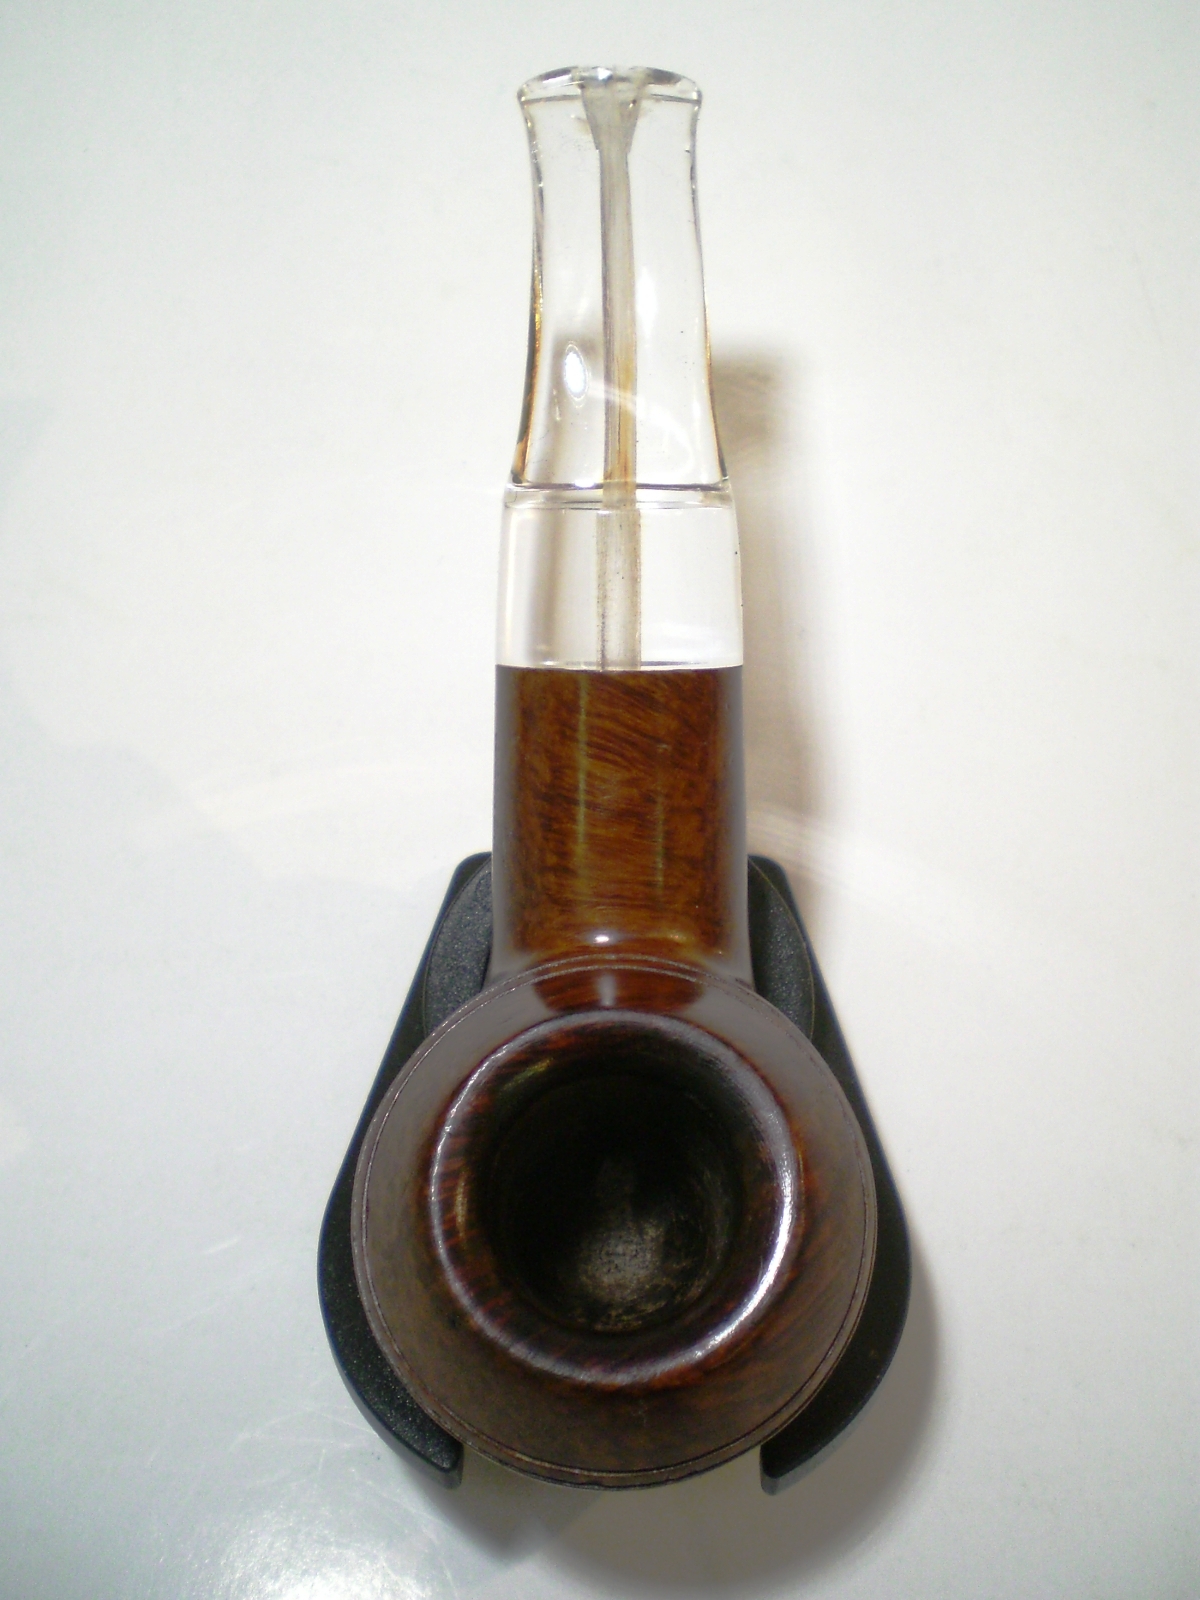
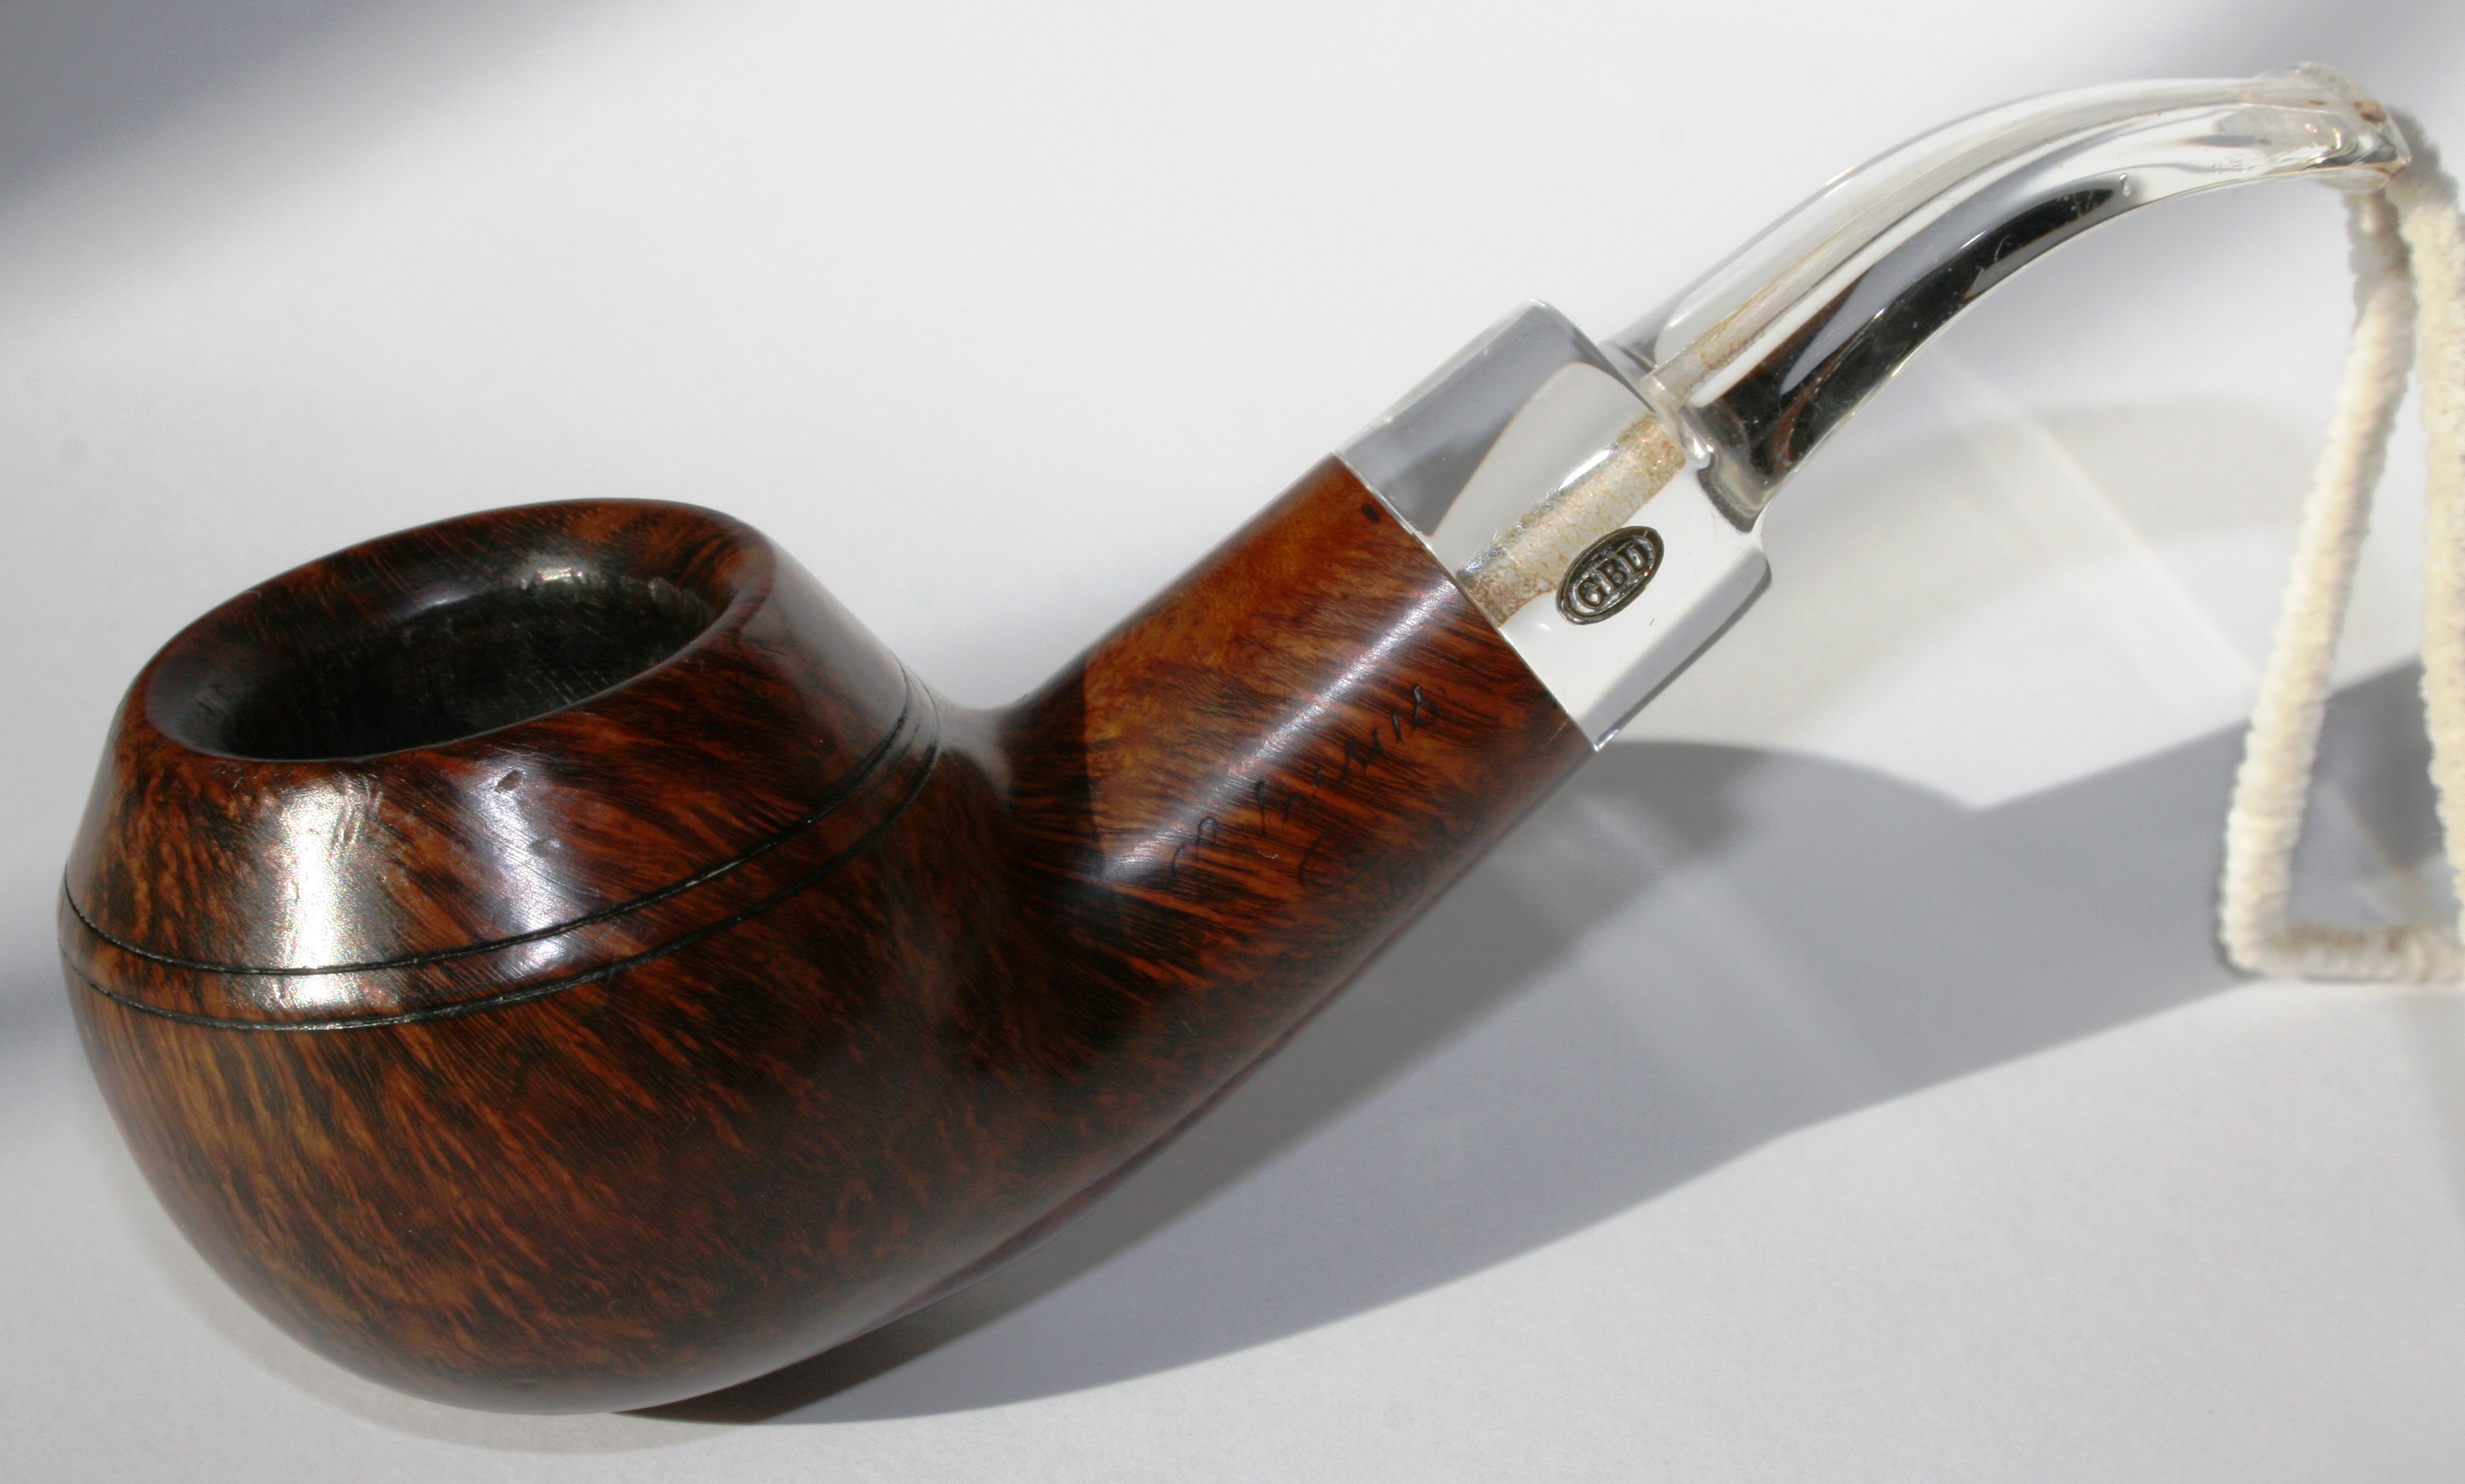
On the “Brothers of Briar” pipe forum and we are fortunate to have a real life “Father Tom” as a member. Father Tom is an Episcopal priest in Northern Indiana. He taught for 32 years before leaving the classroom for full-time parish work. He has been a pipe smoker since college, and most of his college pipes are still in the rotation. The pipe is one he bought in the late 70’s in South Carolina. Tom posted a picture of this pipe earlier this summer on the forum and wondered if the finish could be restored. Tom had recently returned from a church assignment to the Honduras. The pipe was very much well-loved and the varnished finish was worn off in the handling areas. The stem was also heavily oxidized. Tom reported that it smoked Granger quite well. Here is the pipe as it was delivered.

Fr_Tom_Before (3)

Fr_Tom_Before

Fr_Tom_Before (1)

Fr_Tom_Before (2)

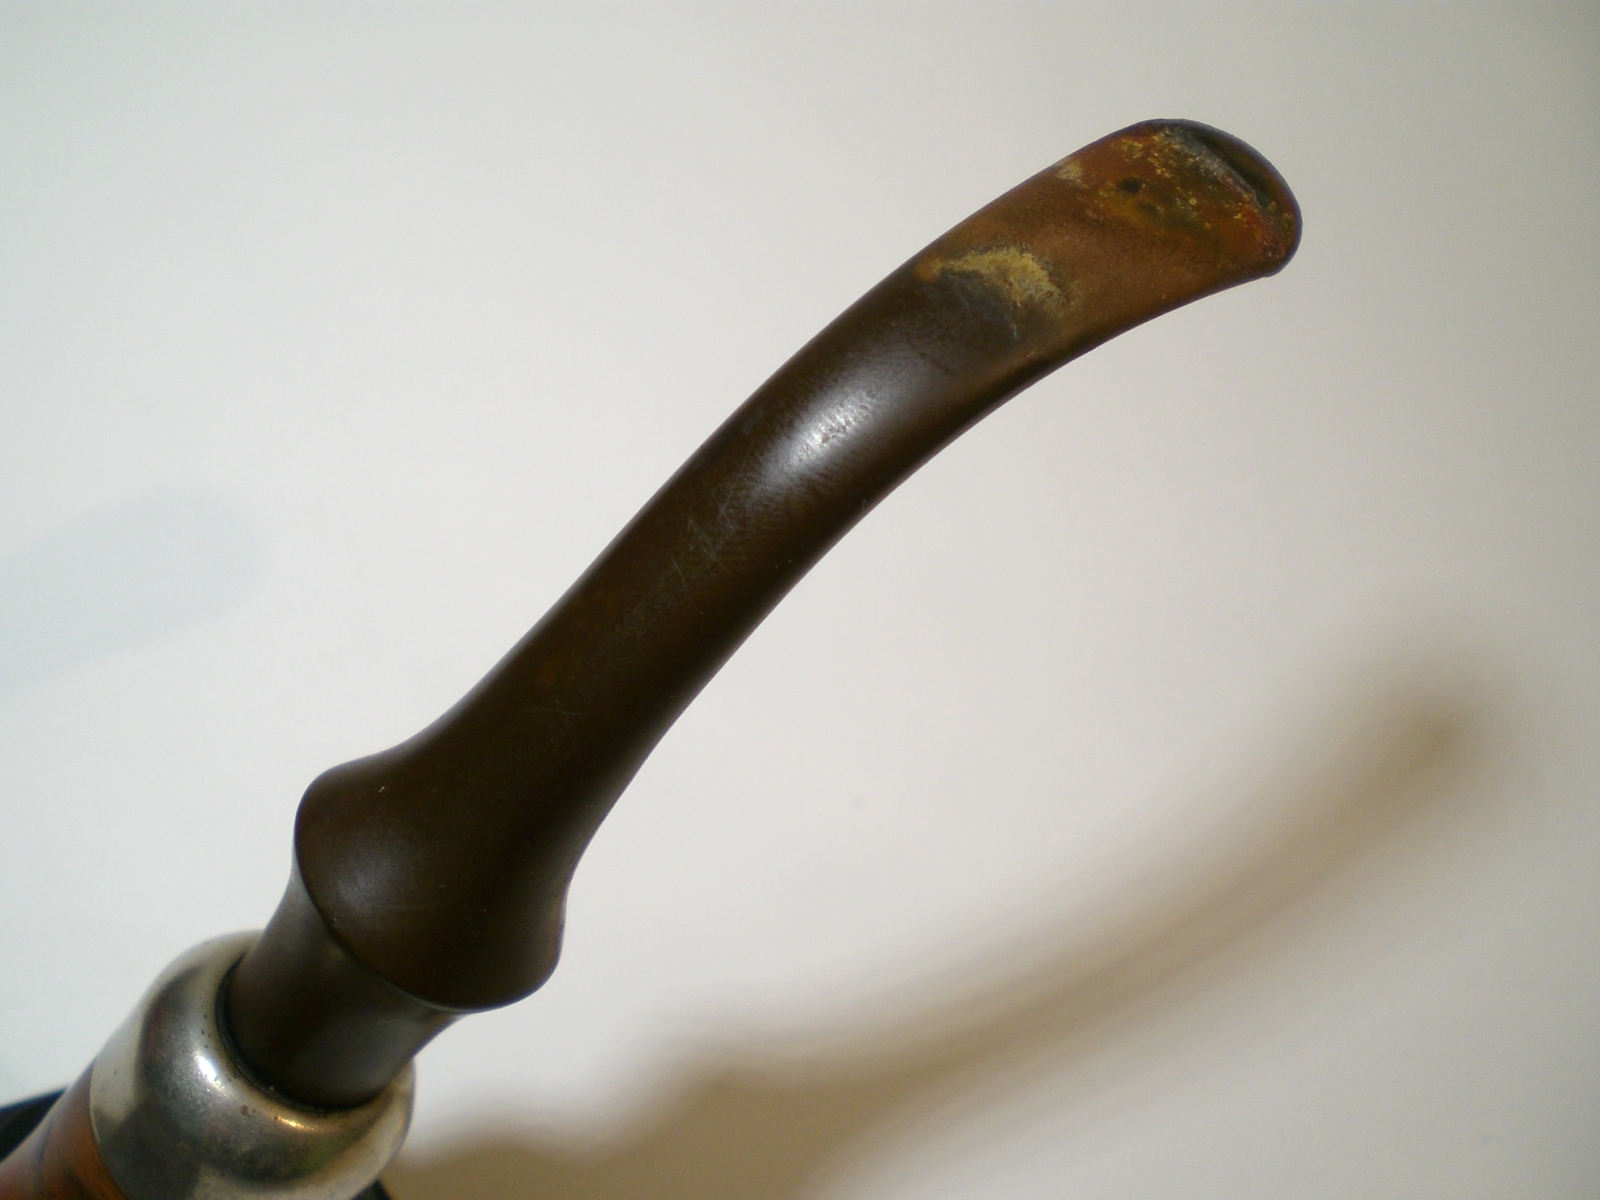
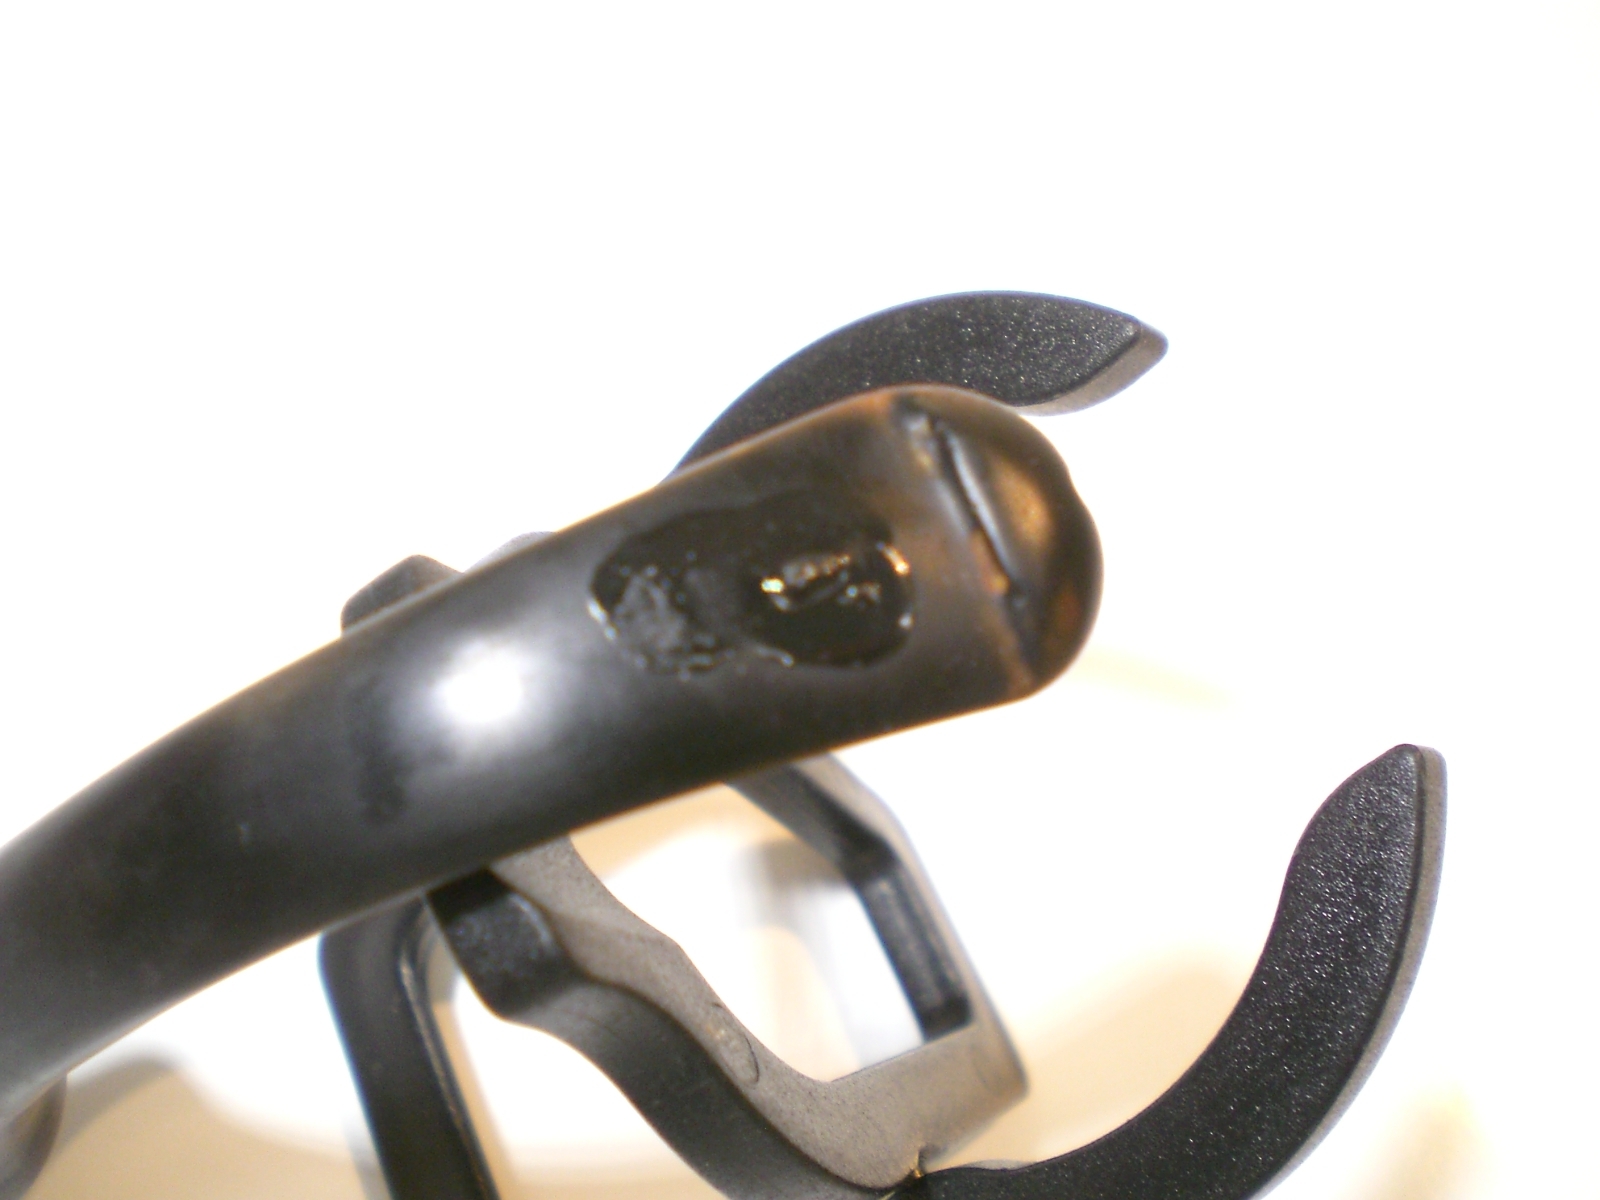
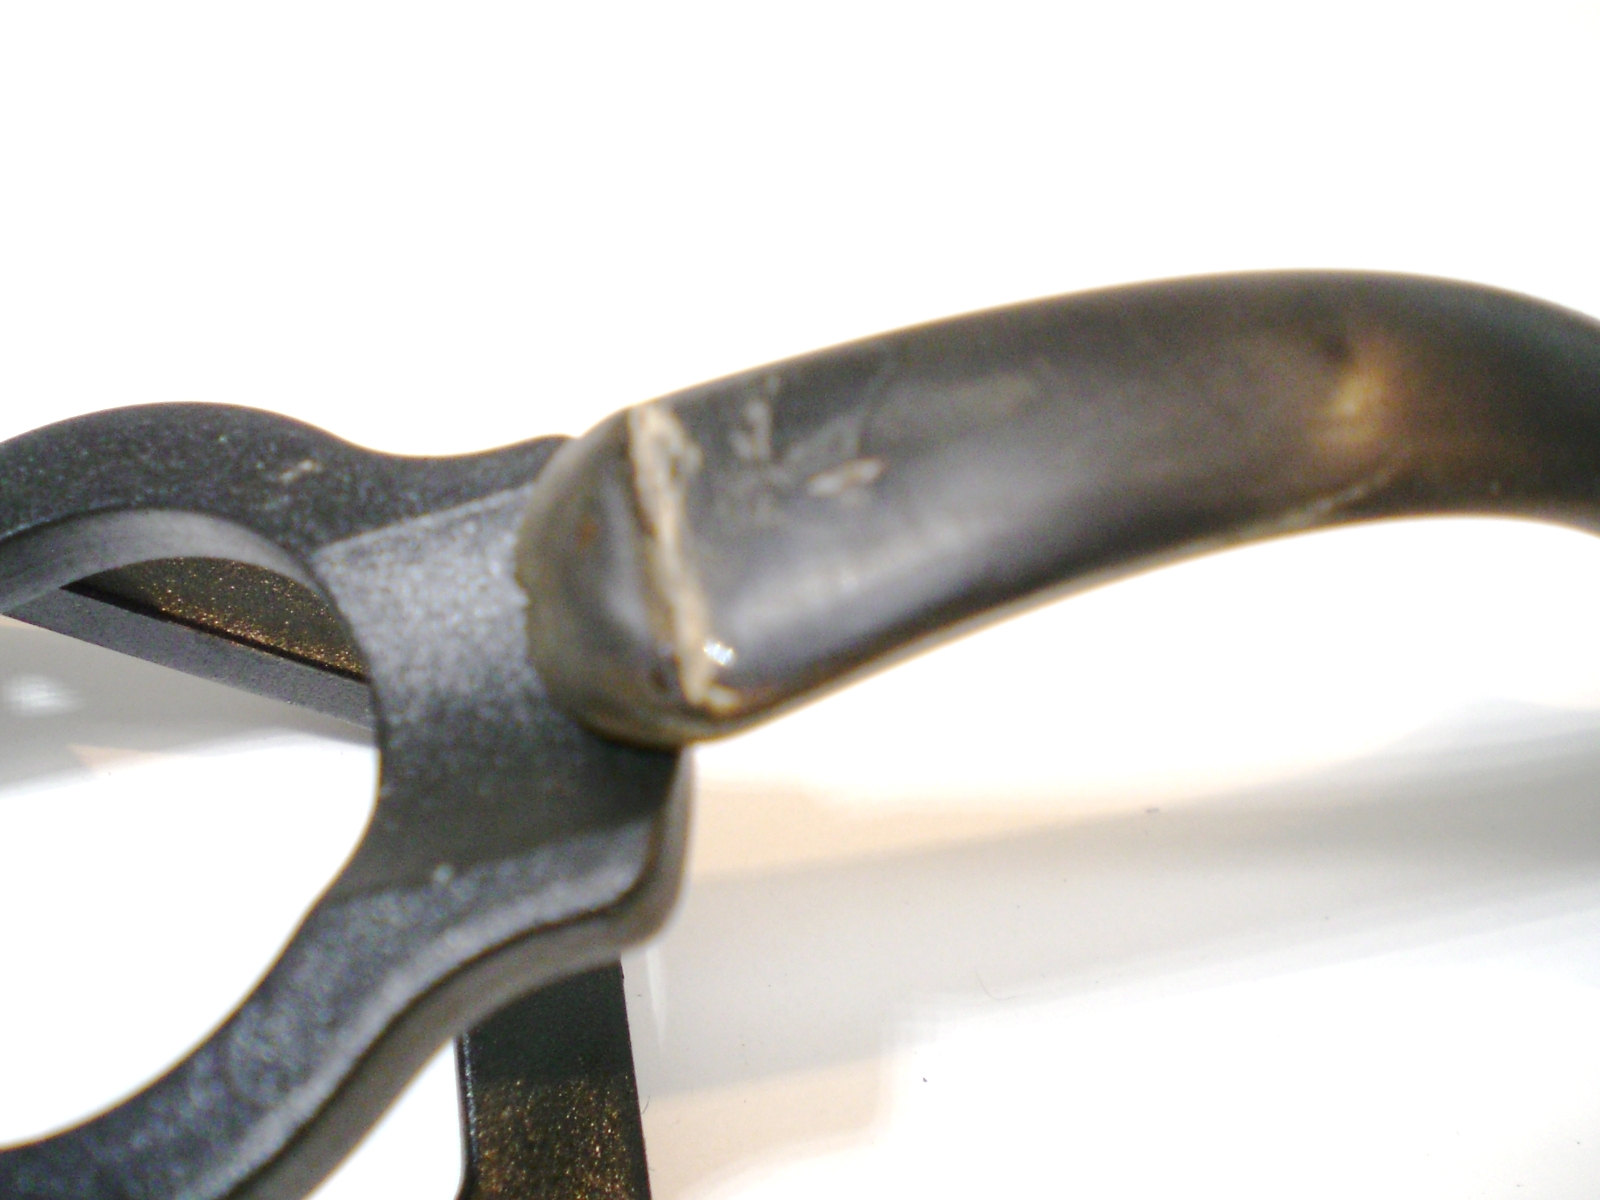
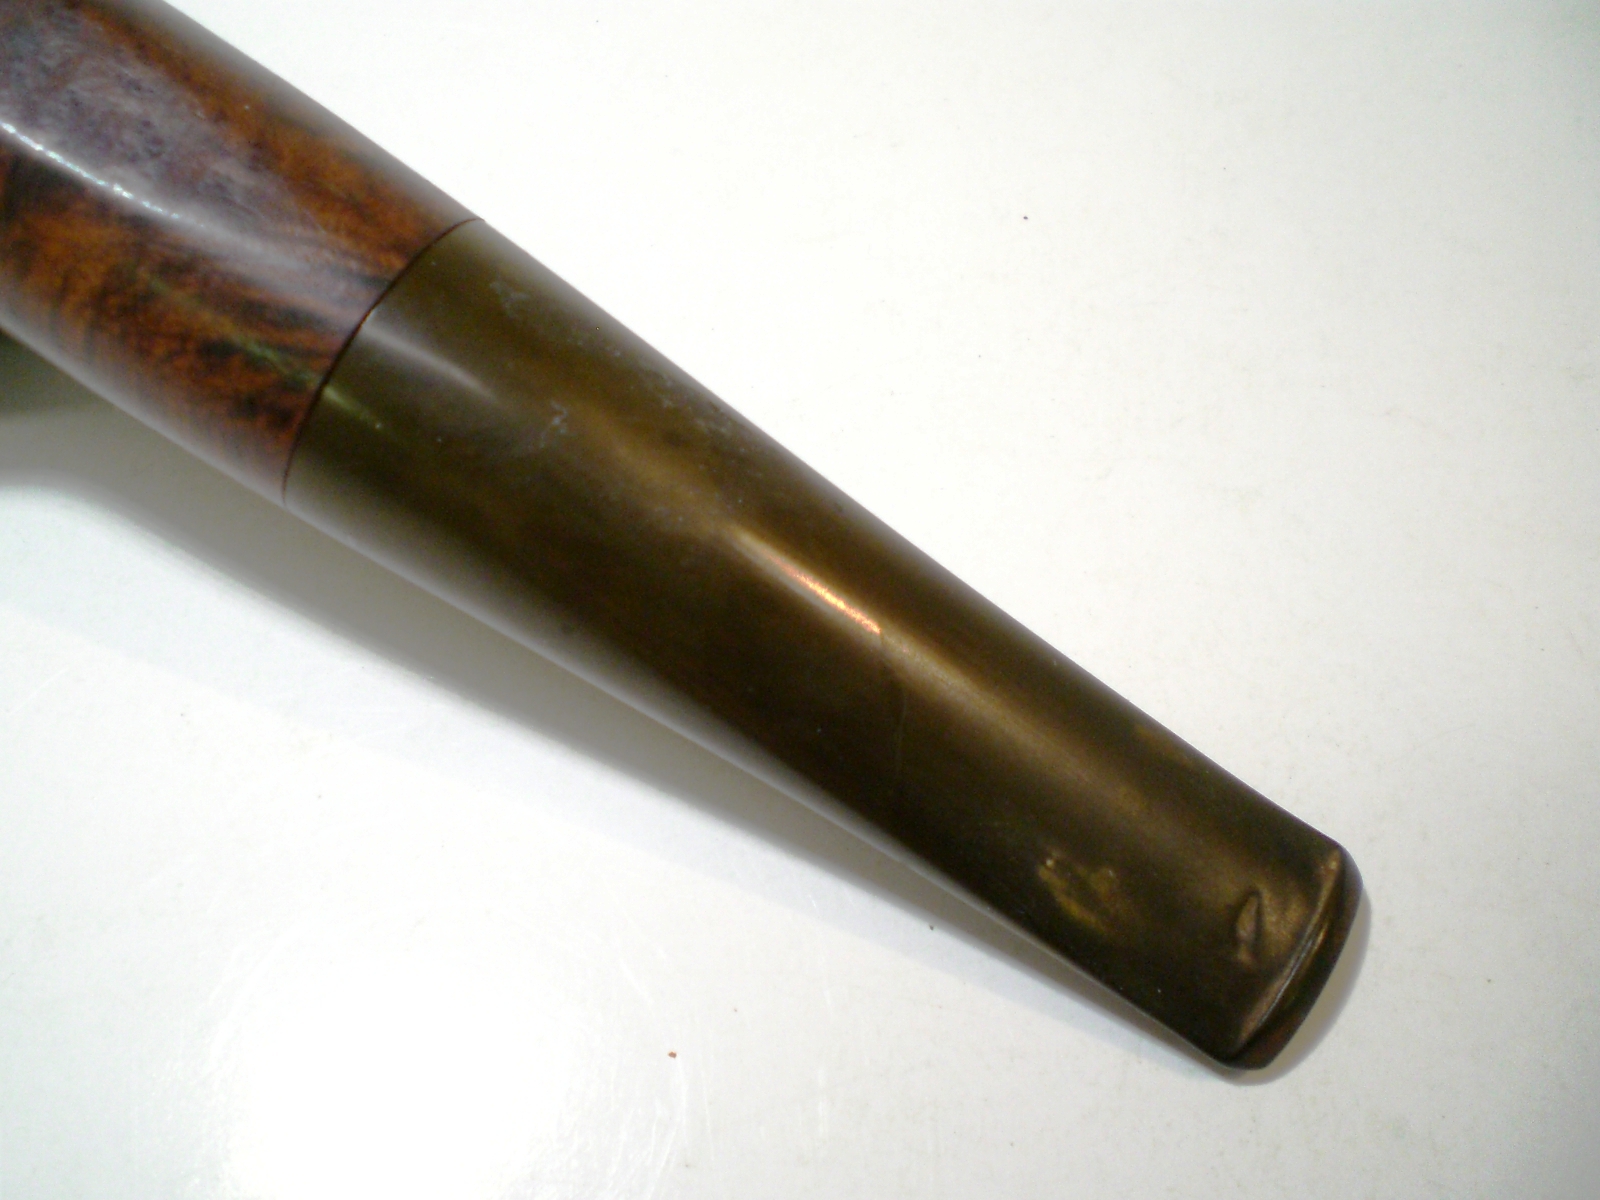
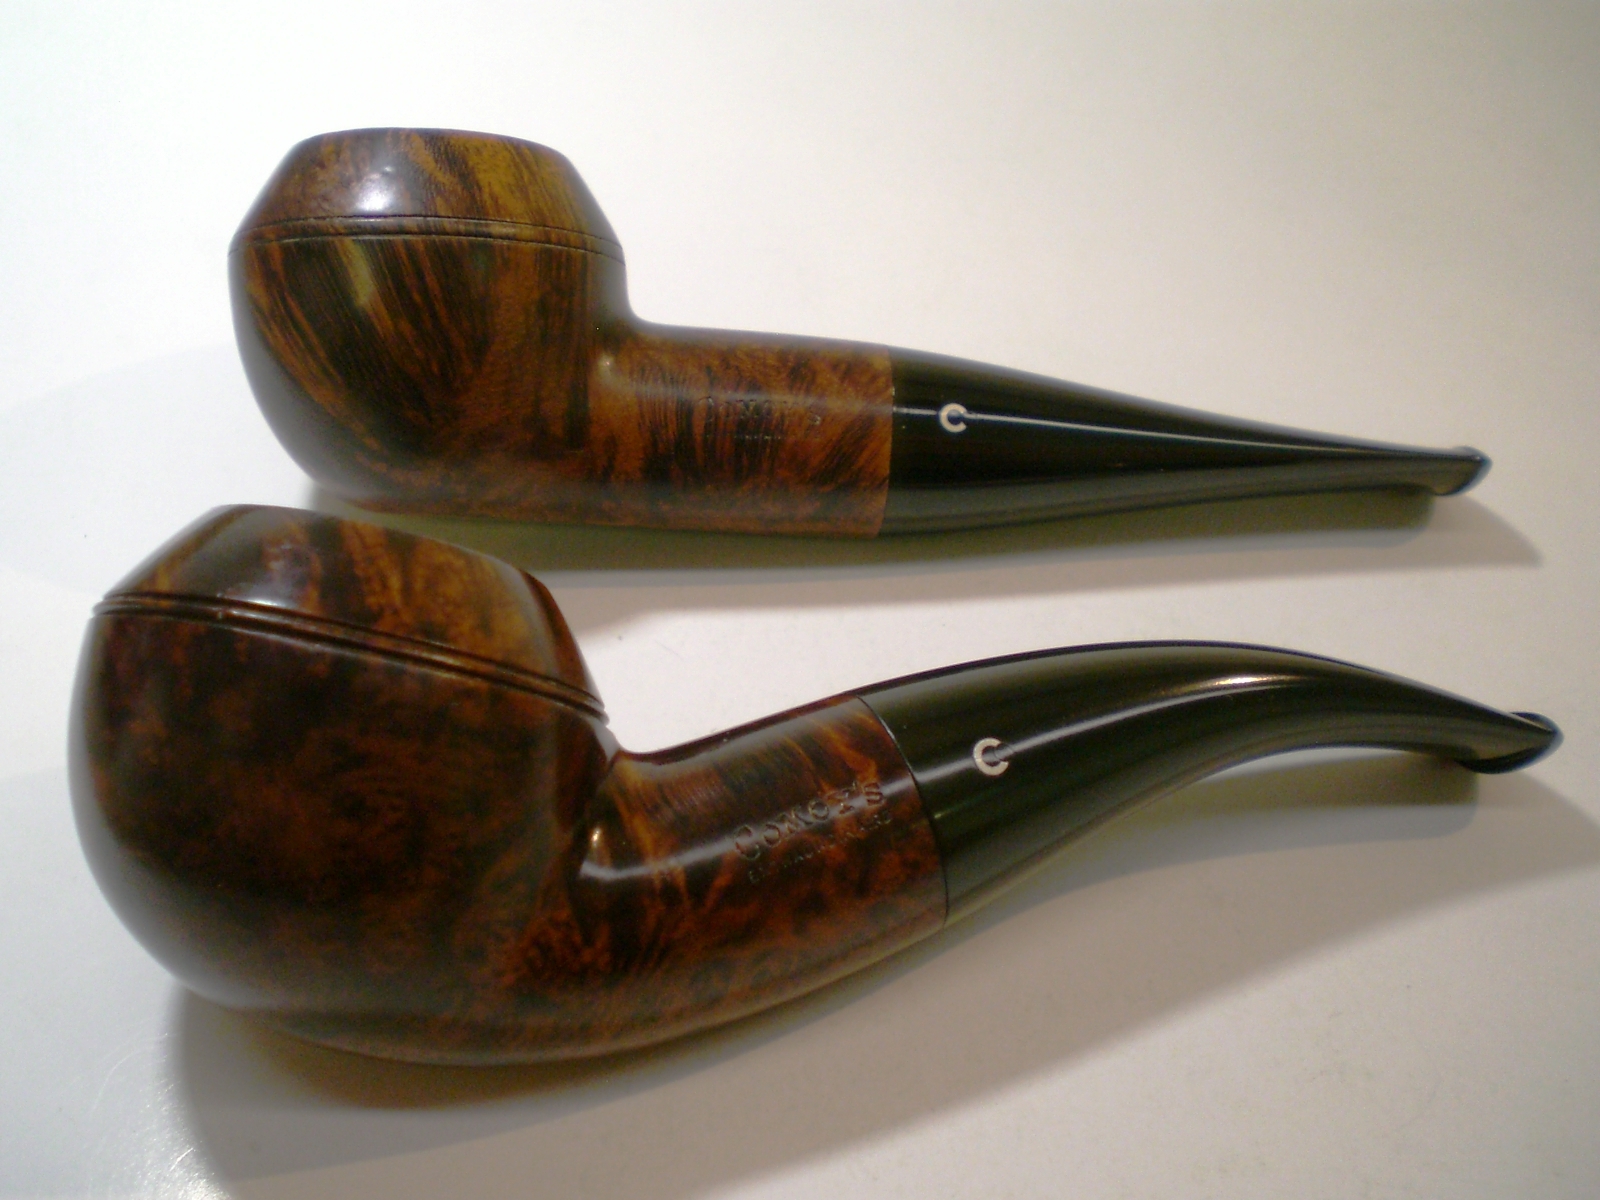
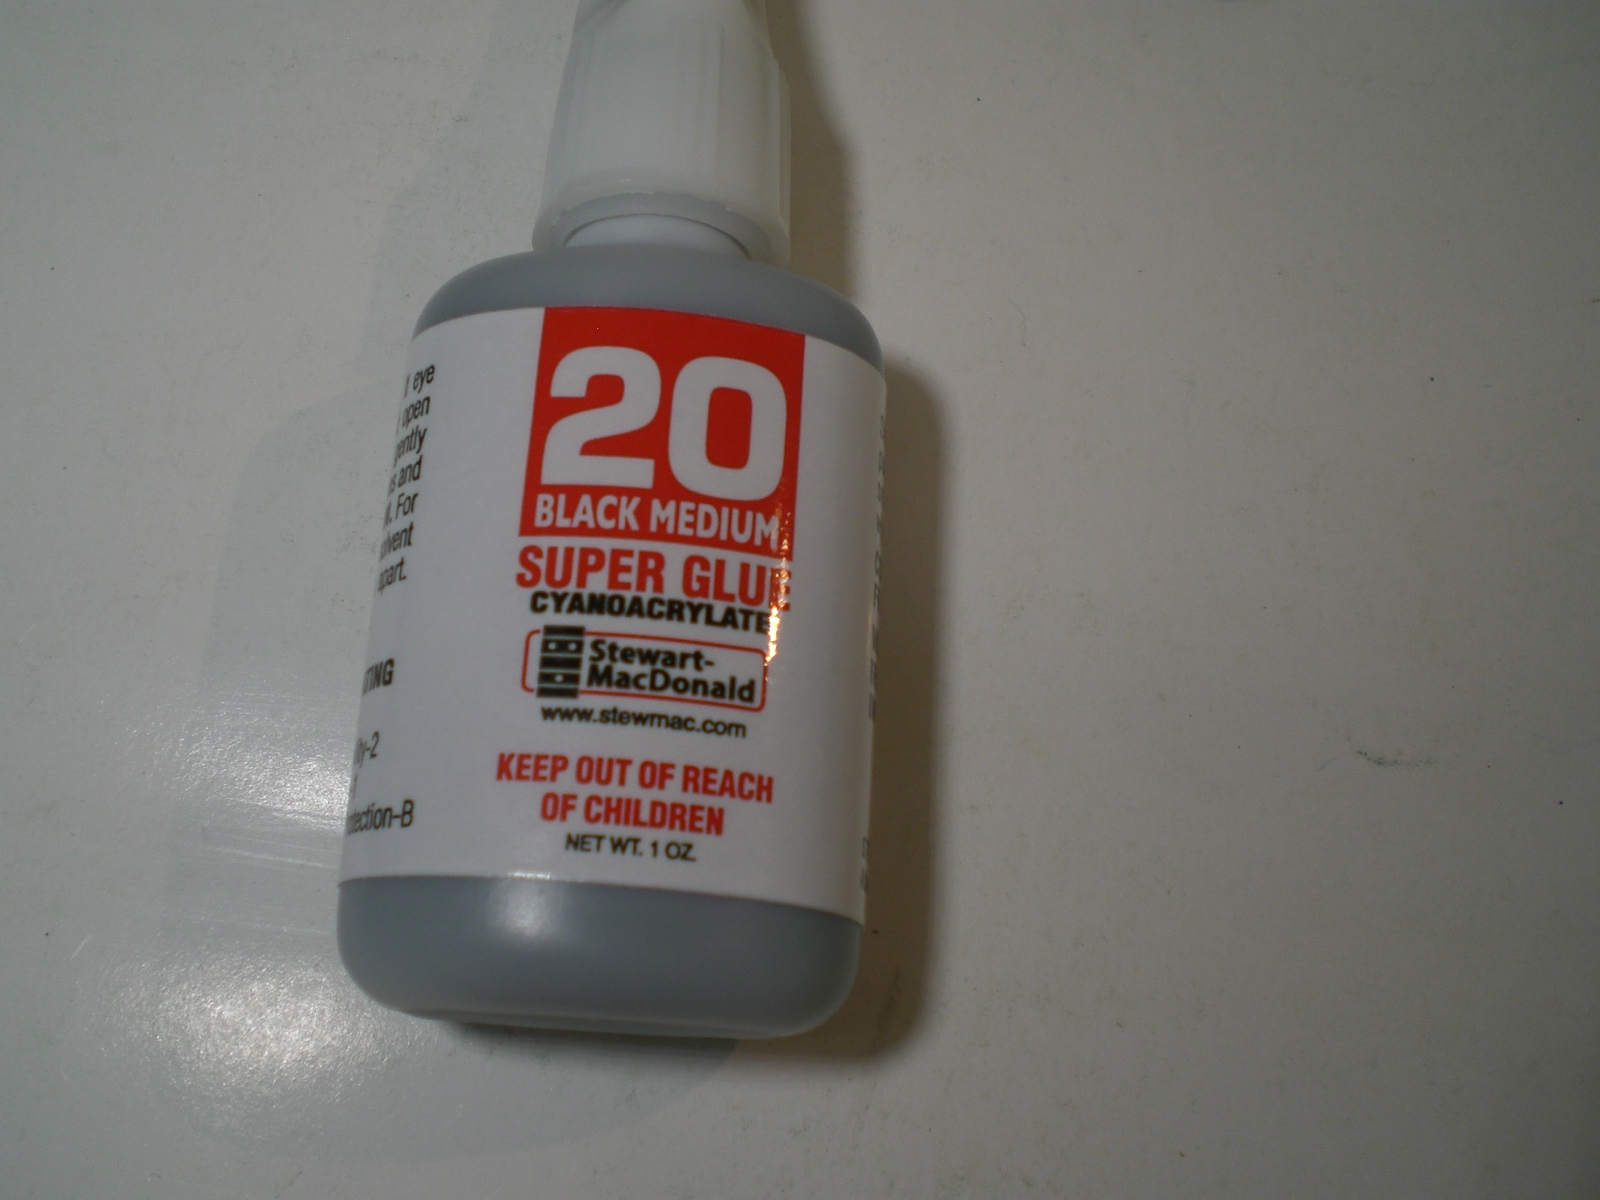
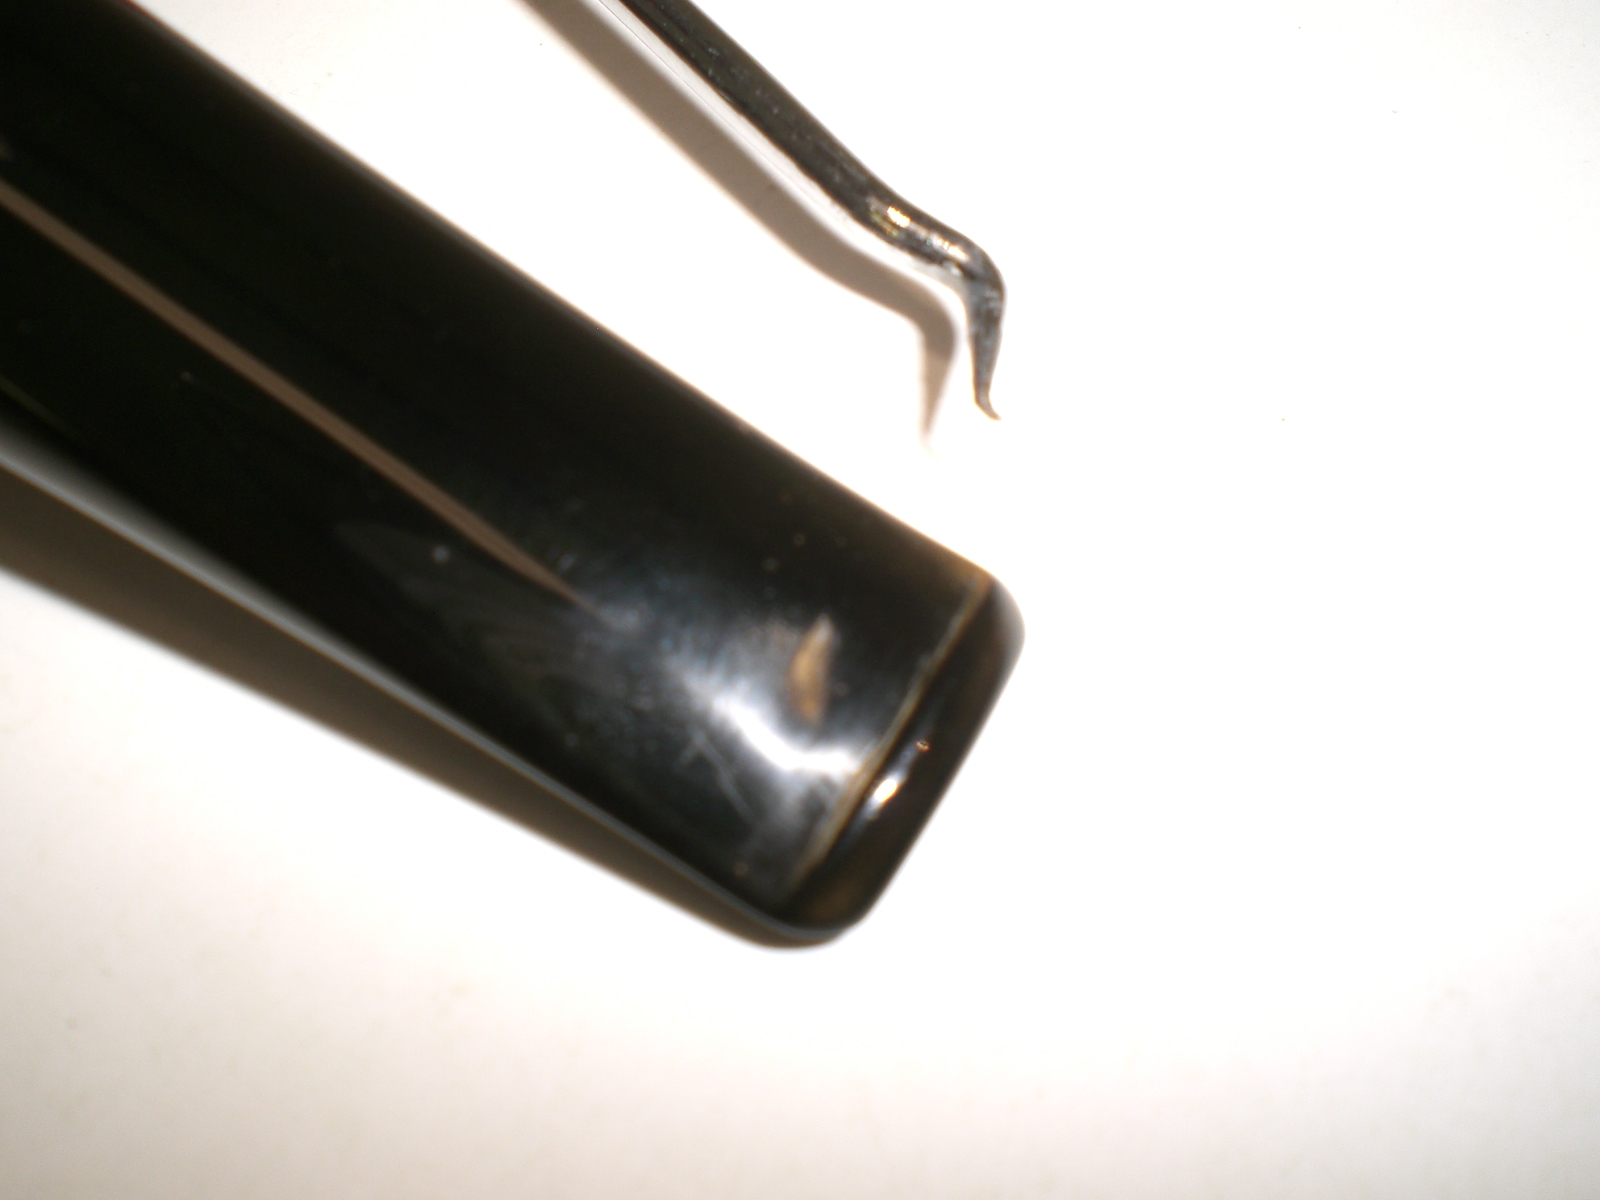
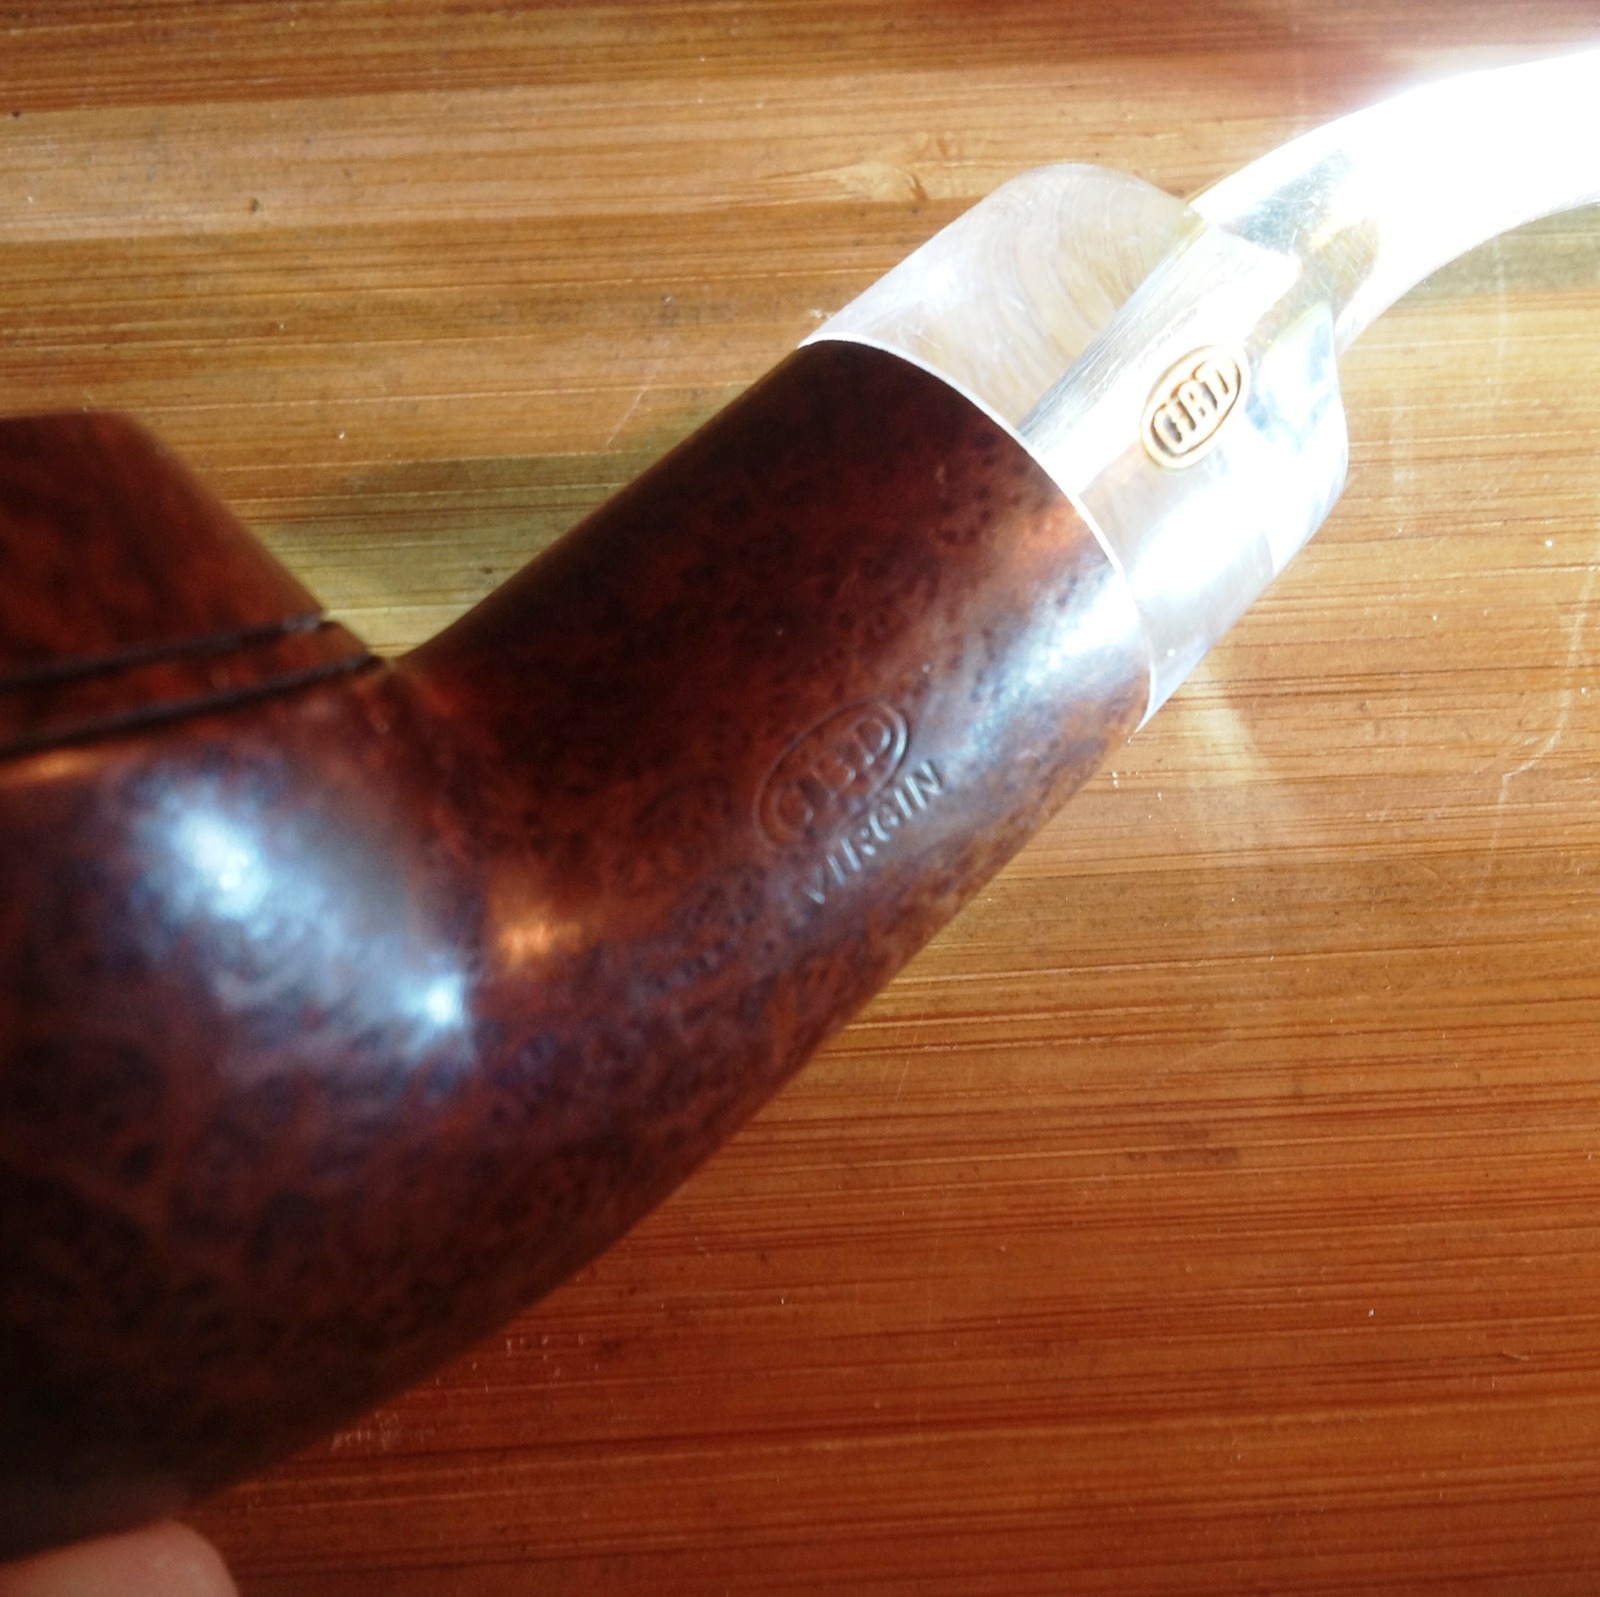
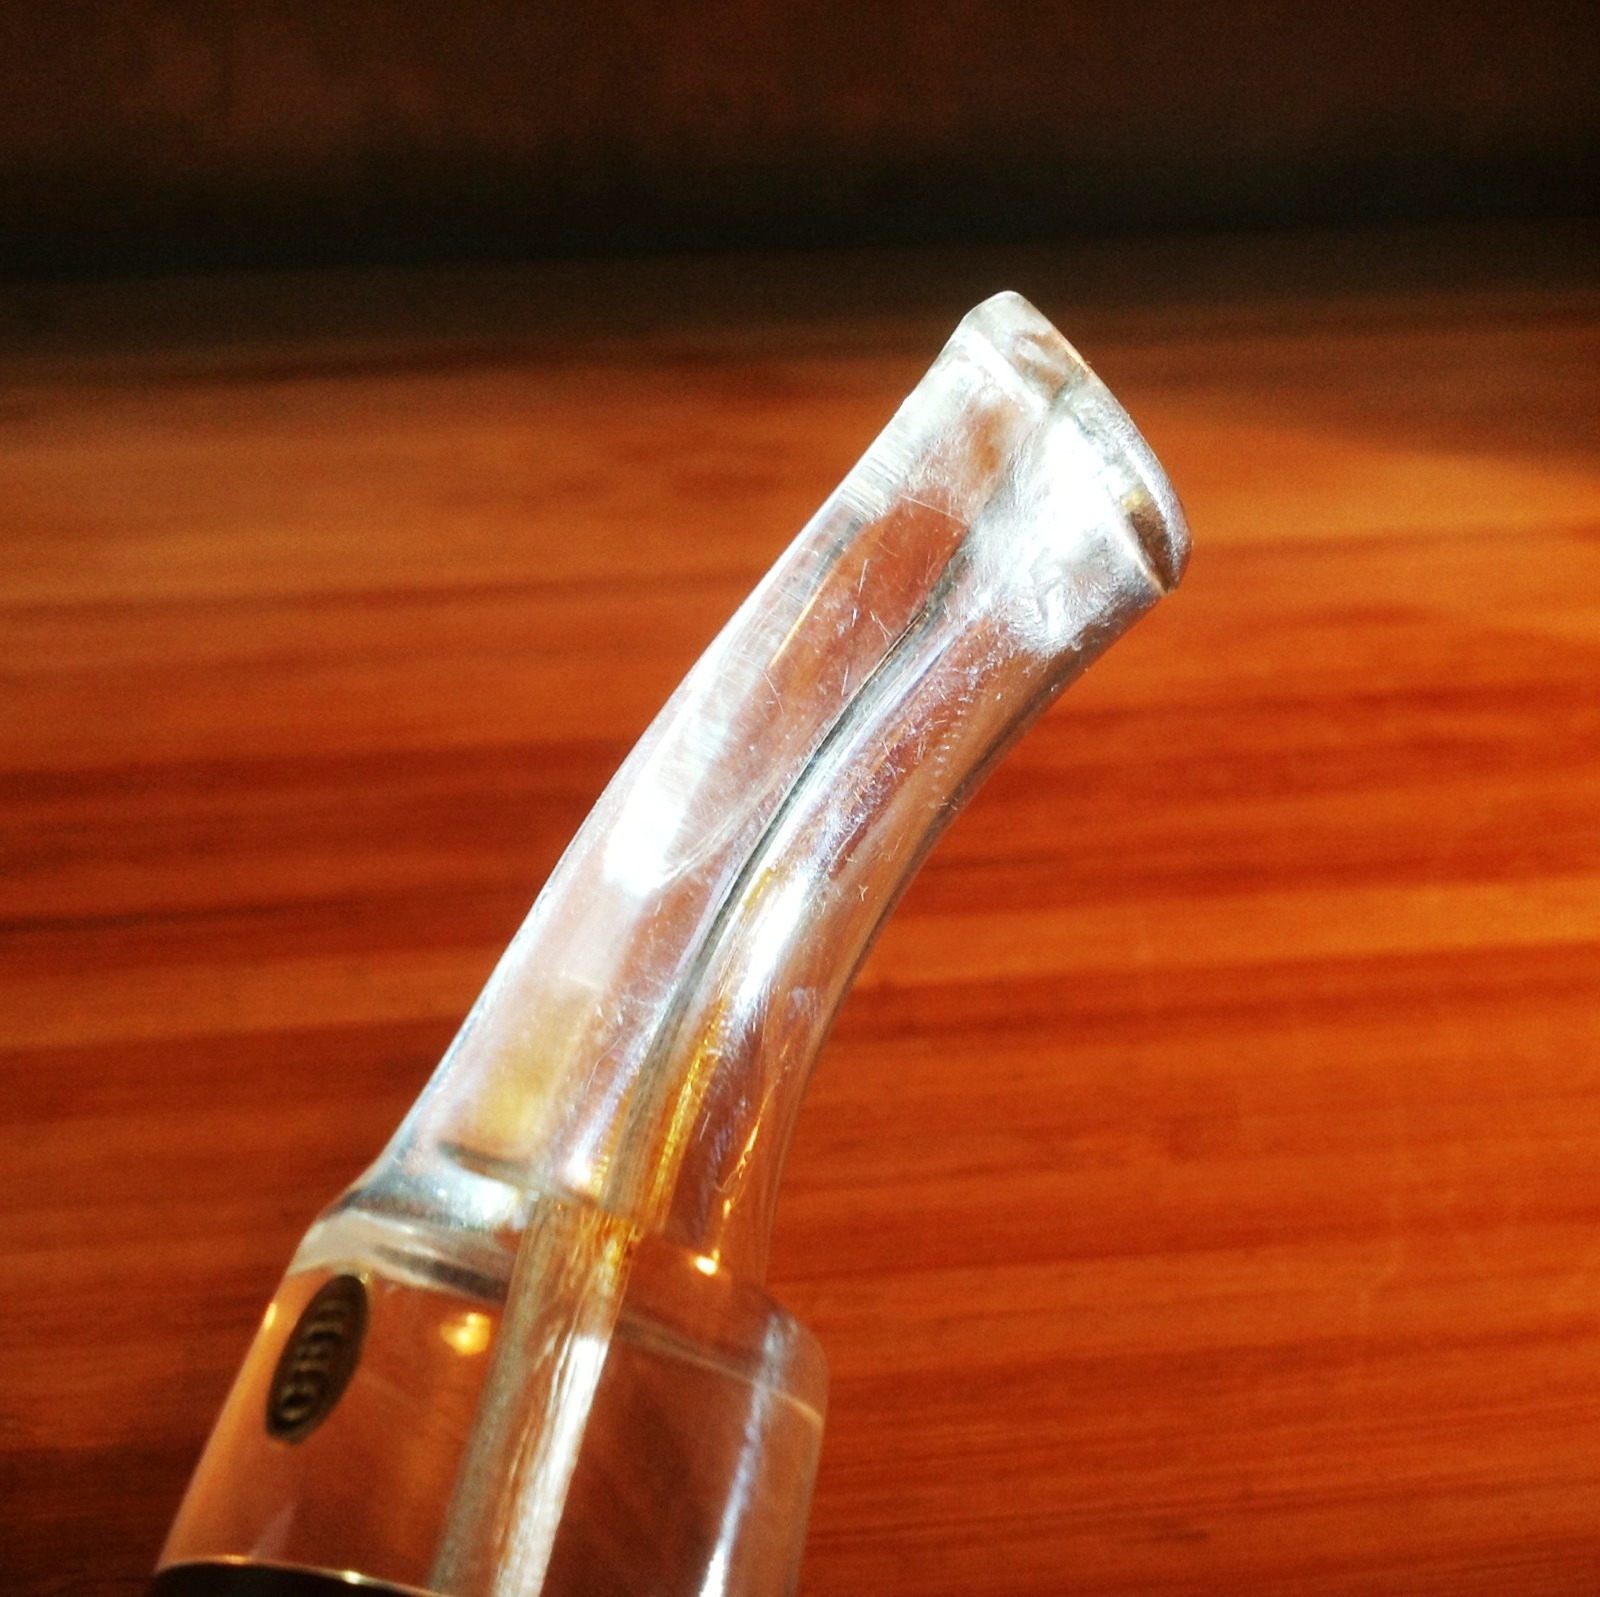
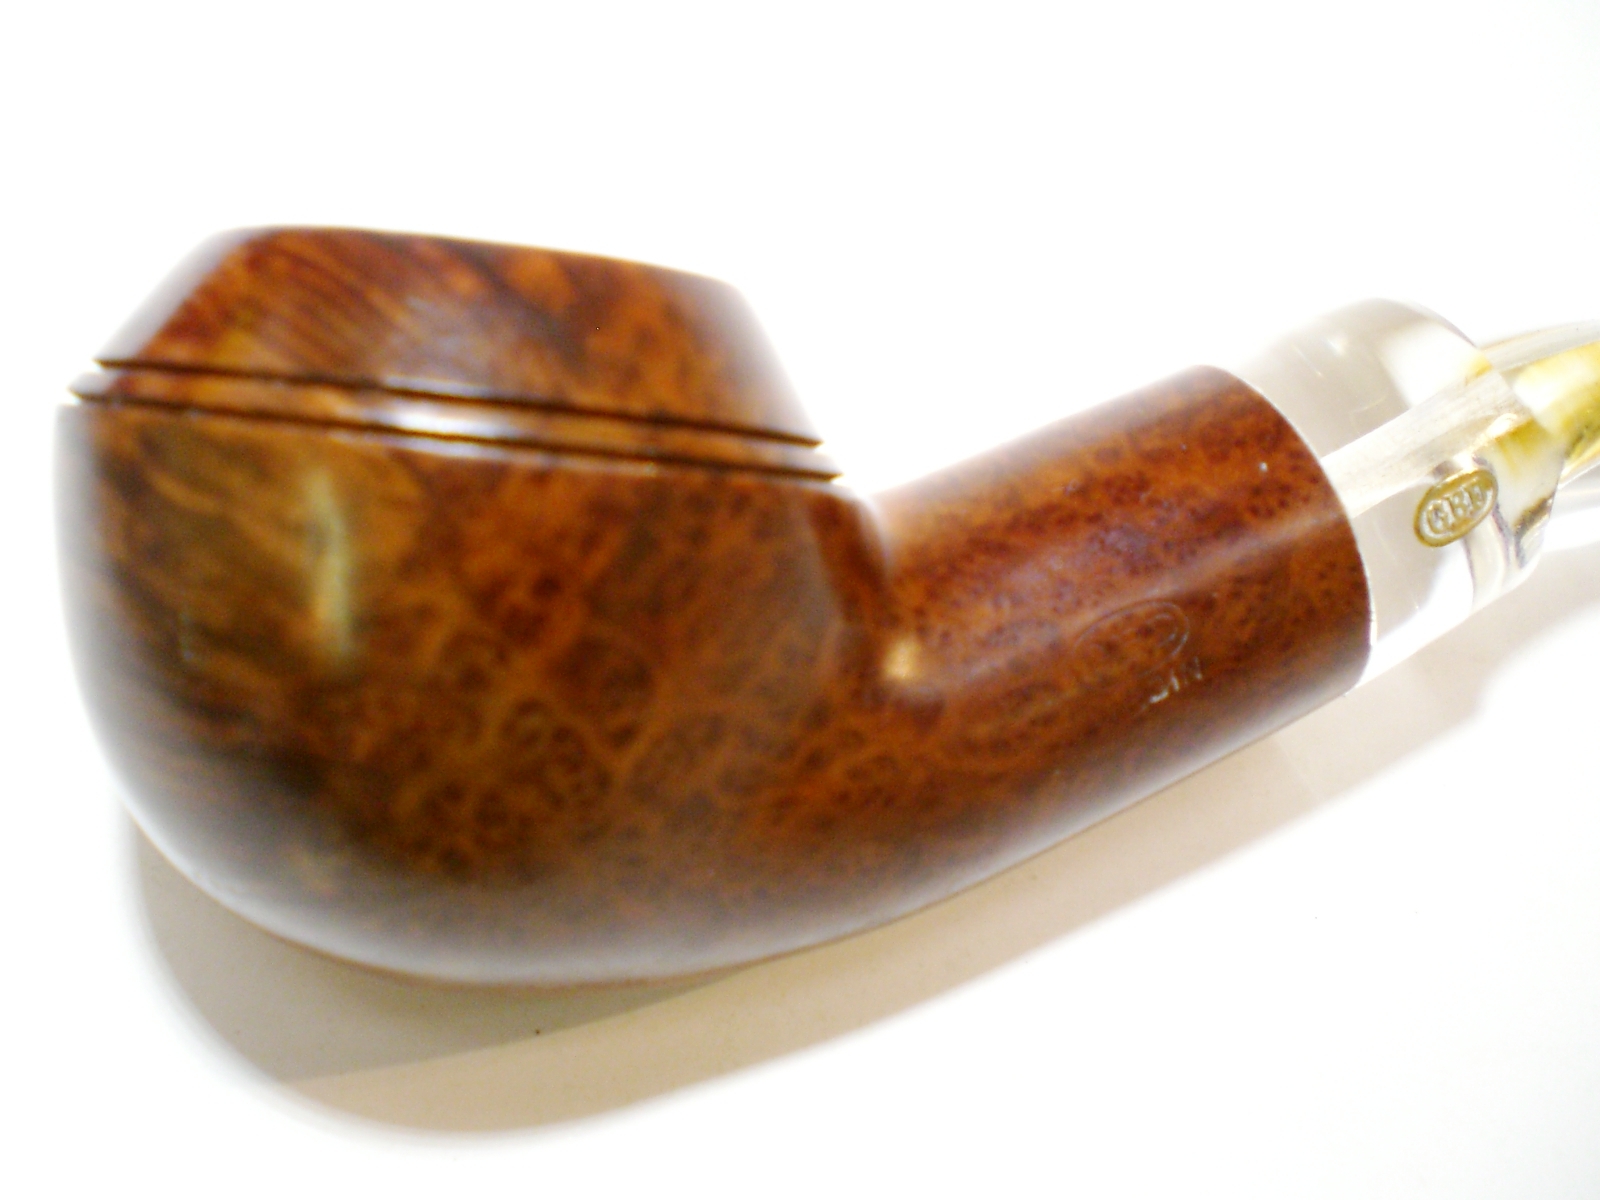
Steve sent me some information on a Wellington brand pipe and this one appears to be a reproduction of that and the Peterson system pipe, including a p-lip military stem. The pipe is stamped “Pietro”. Steve told me that these stems had a reputation of being drilled close to the edge of the stem near the bend. As such, over time, the use of a pipe cleaner wears the stem material thin. Sure enough, after I started to remove the oxidation, there was a small hole and crack on the top of the stem bend. I wasn’t sure the stem could be saved but I thought that perhaps several layers of black superglue blended in would rebuild that area. In total, I applied four light coats of the superglue, raising the surface about 1 mm and covering the hold. The crack still shows thru the material but I think it should hold up to some use. But, I advised Father Tom to be careful clenching that one. At some point a new stem will have to be made for the pipe.

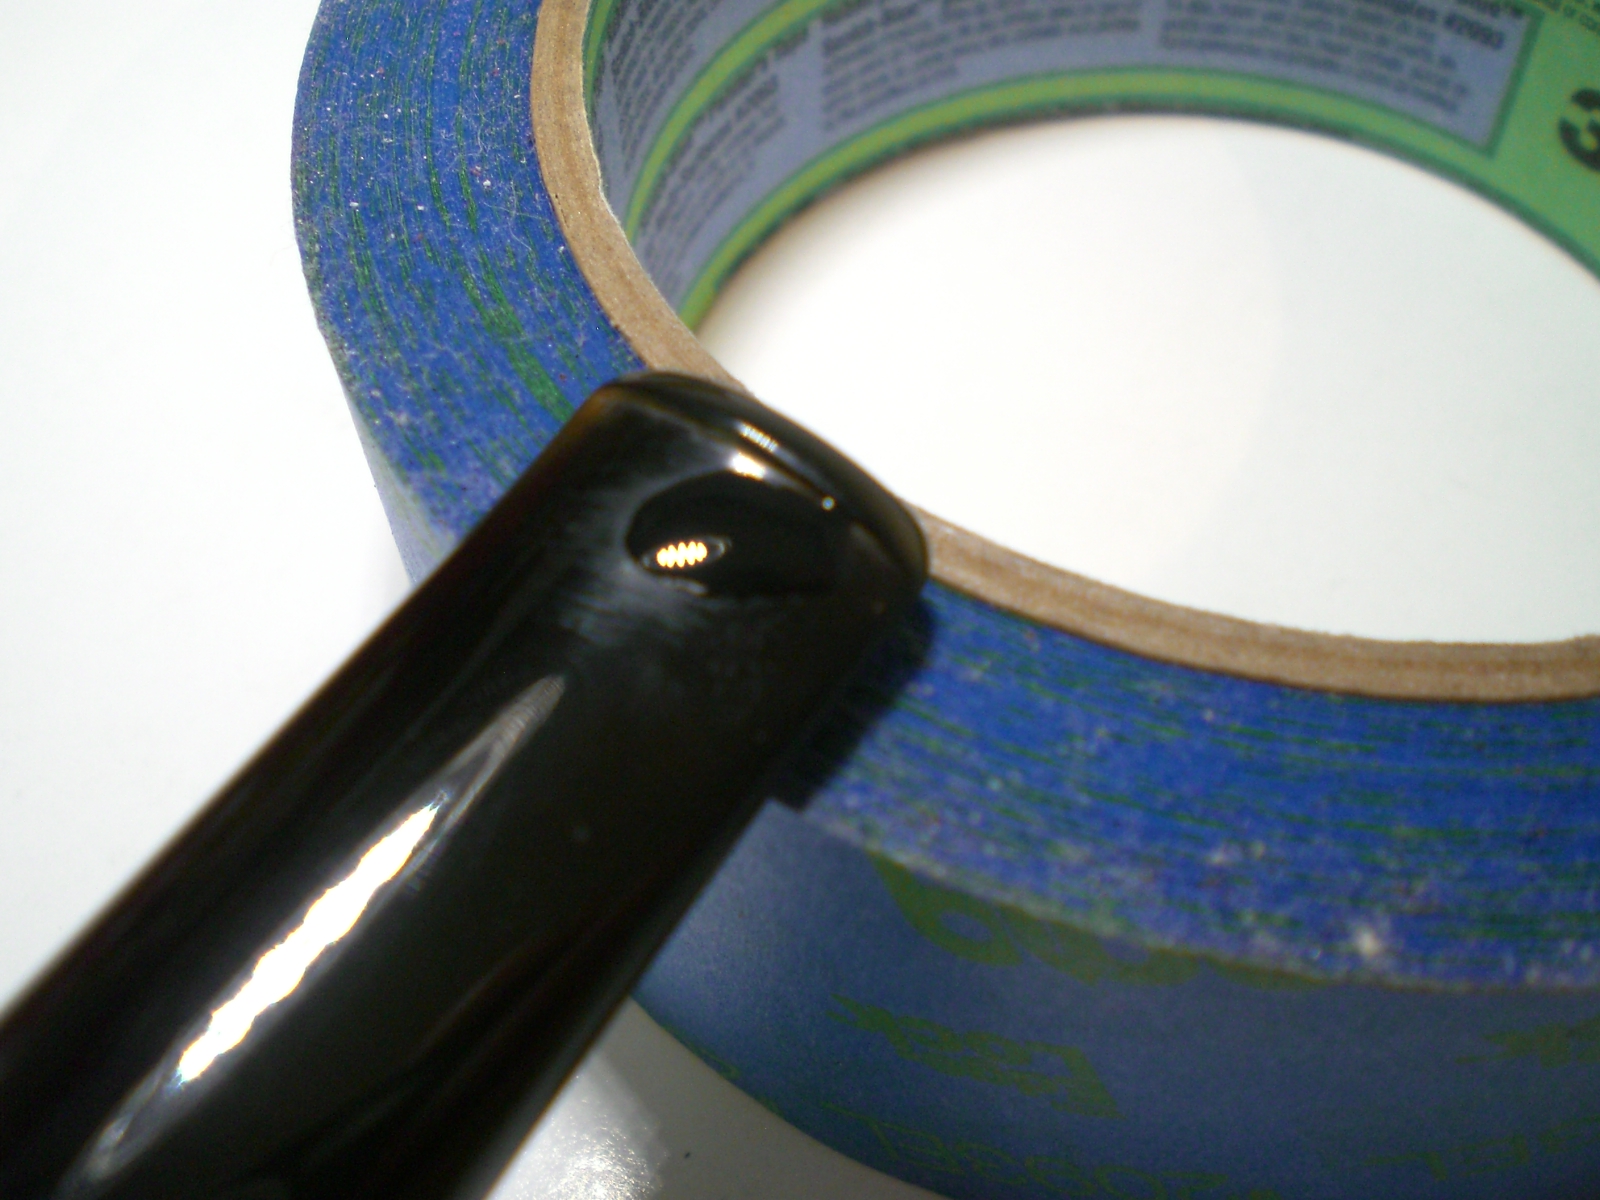
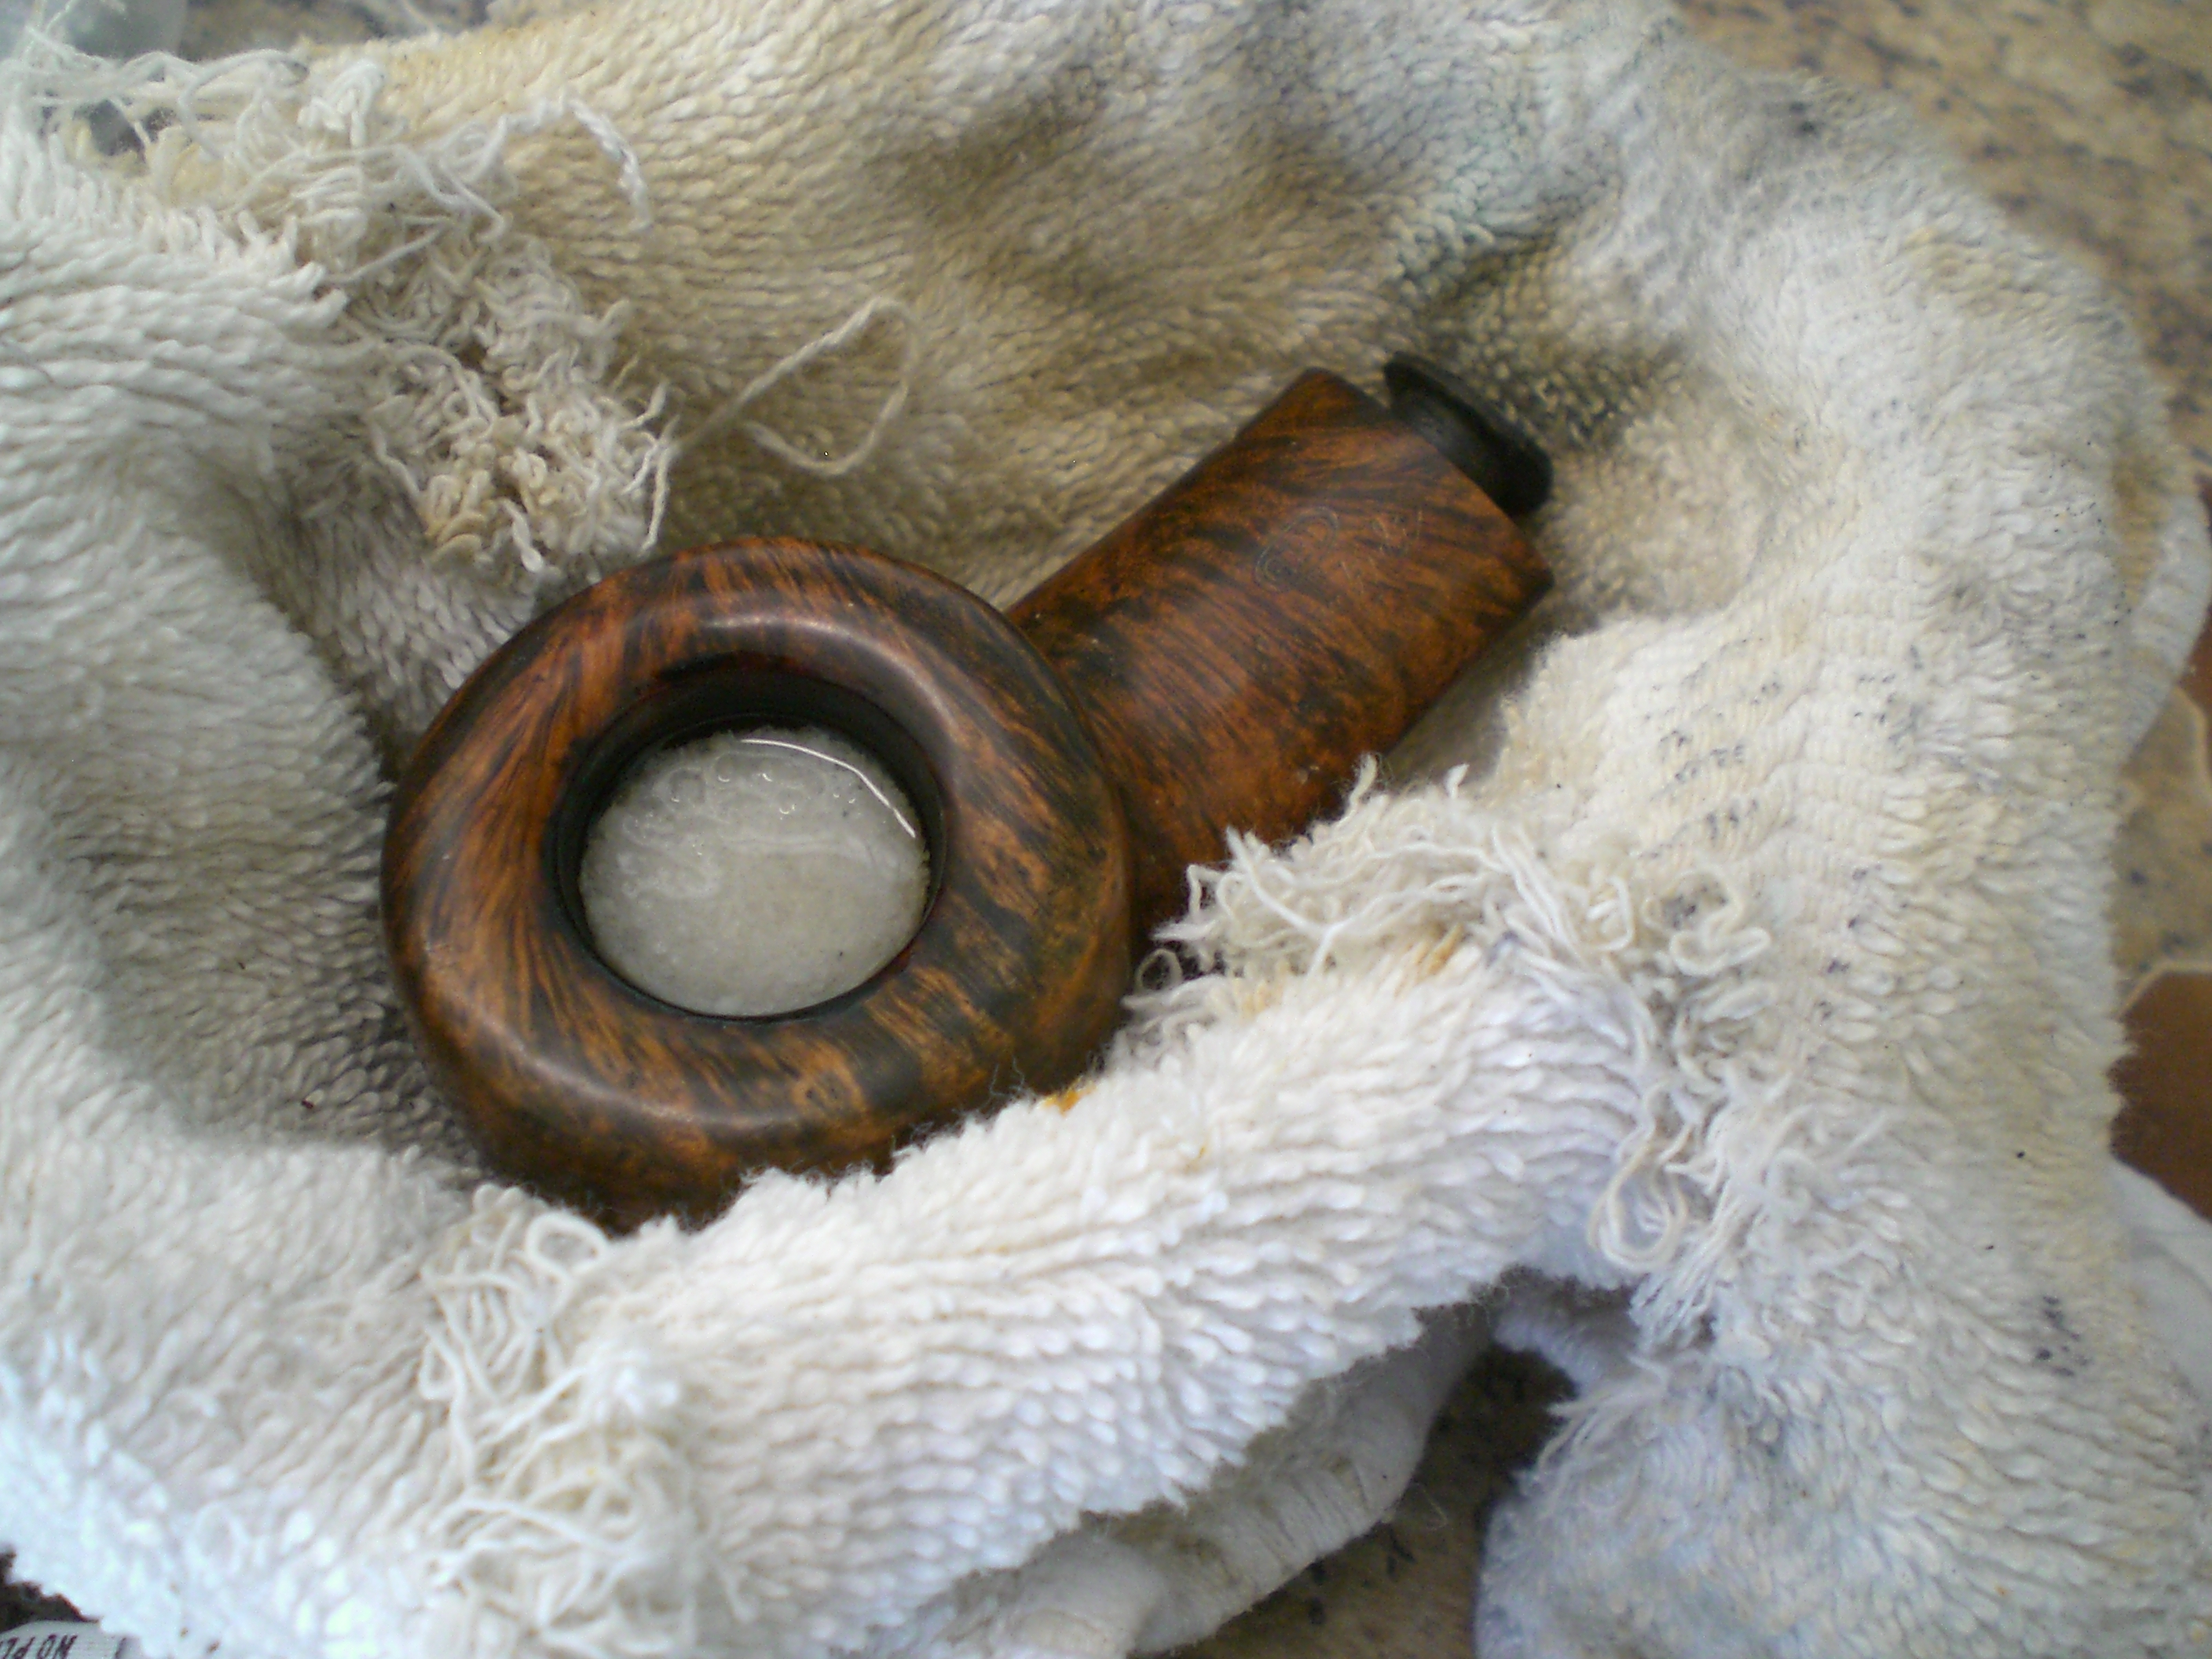
This shows the repair in progress with the black superglue (purchased from Stewart-Mac, a guitar repair supply house).

Fr_Tom_Process_Stem2

Fr_Tom_Stem3

Fr_Tom_Stem4

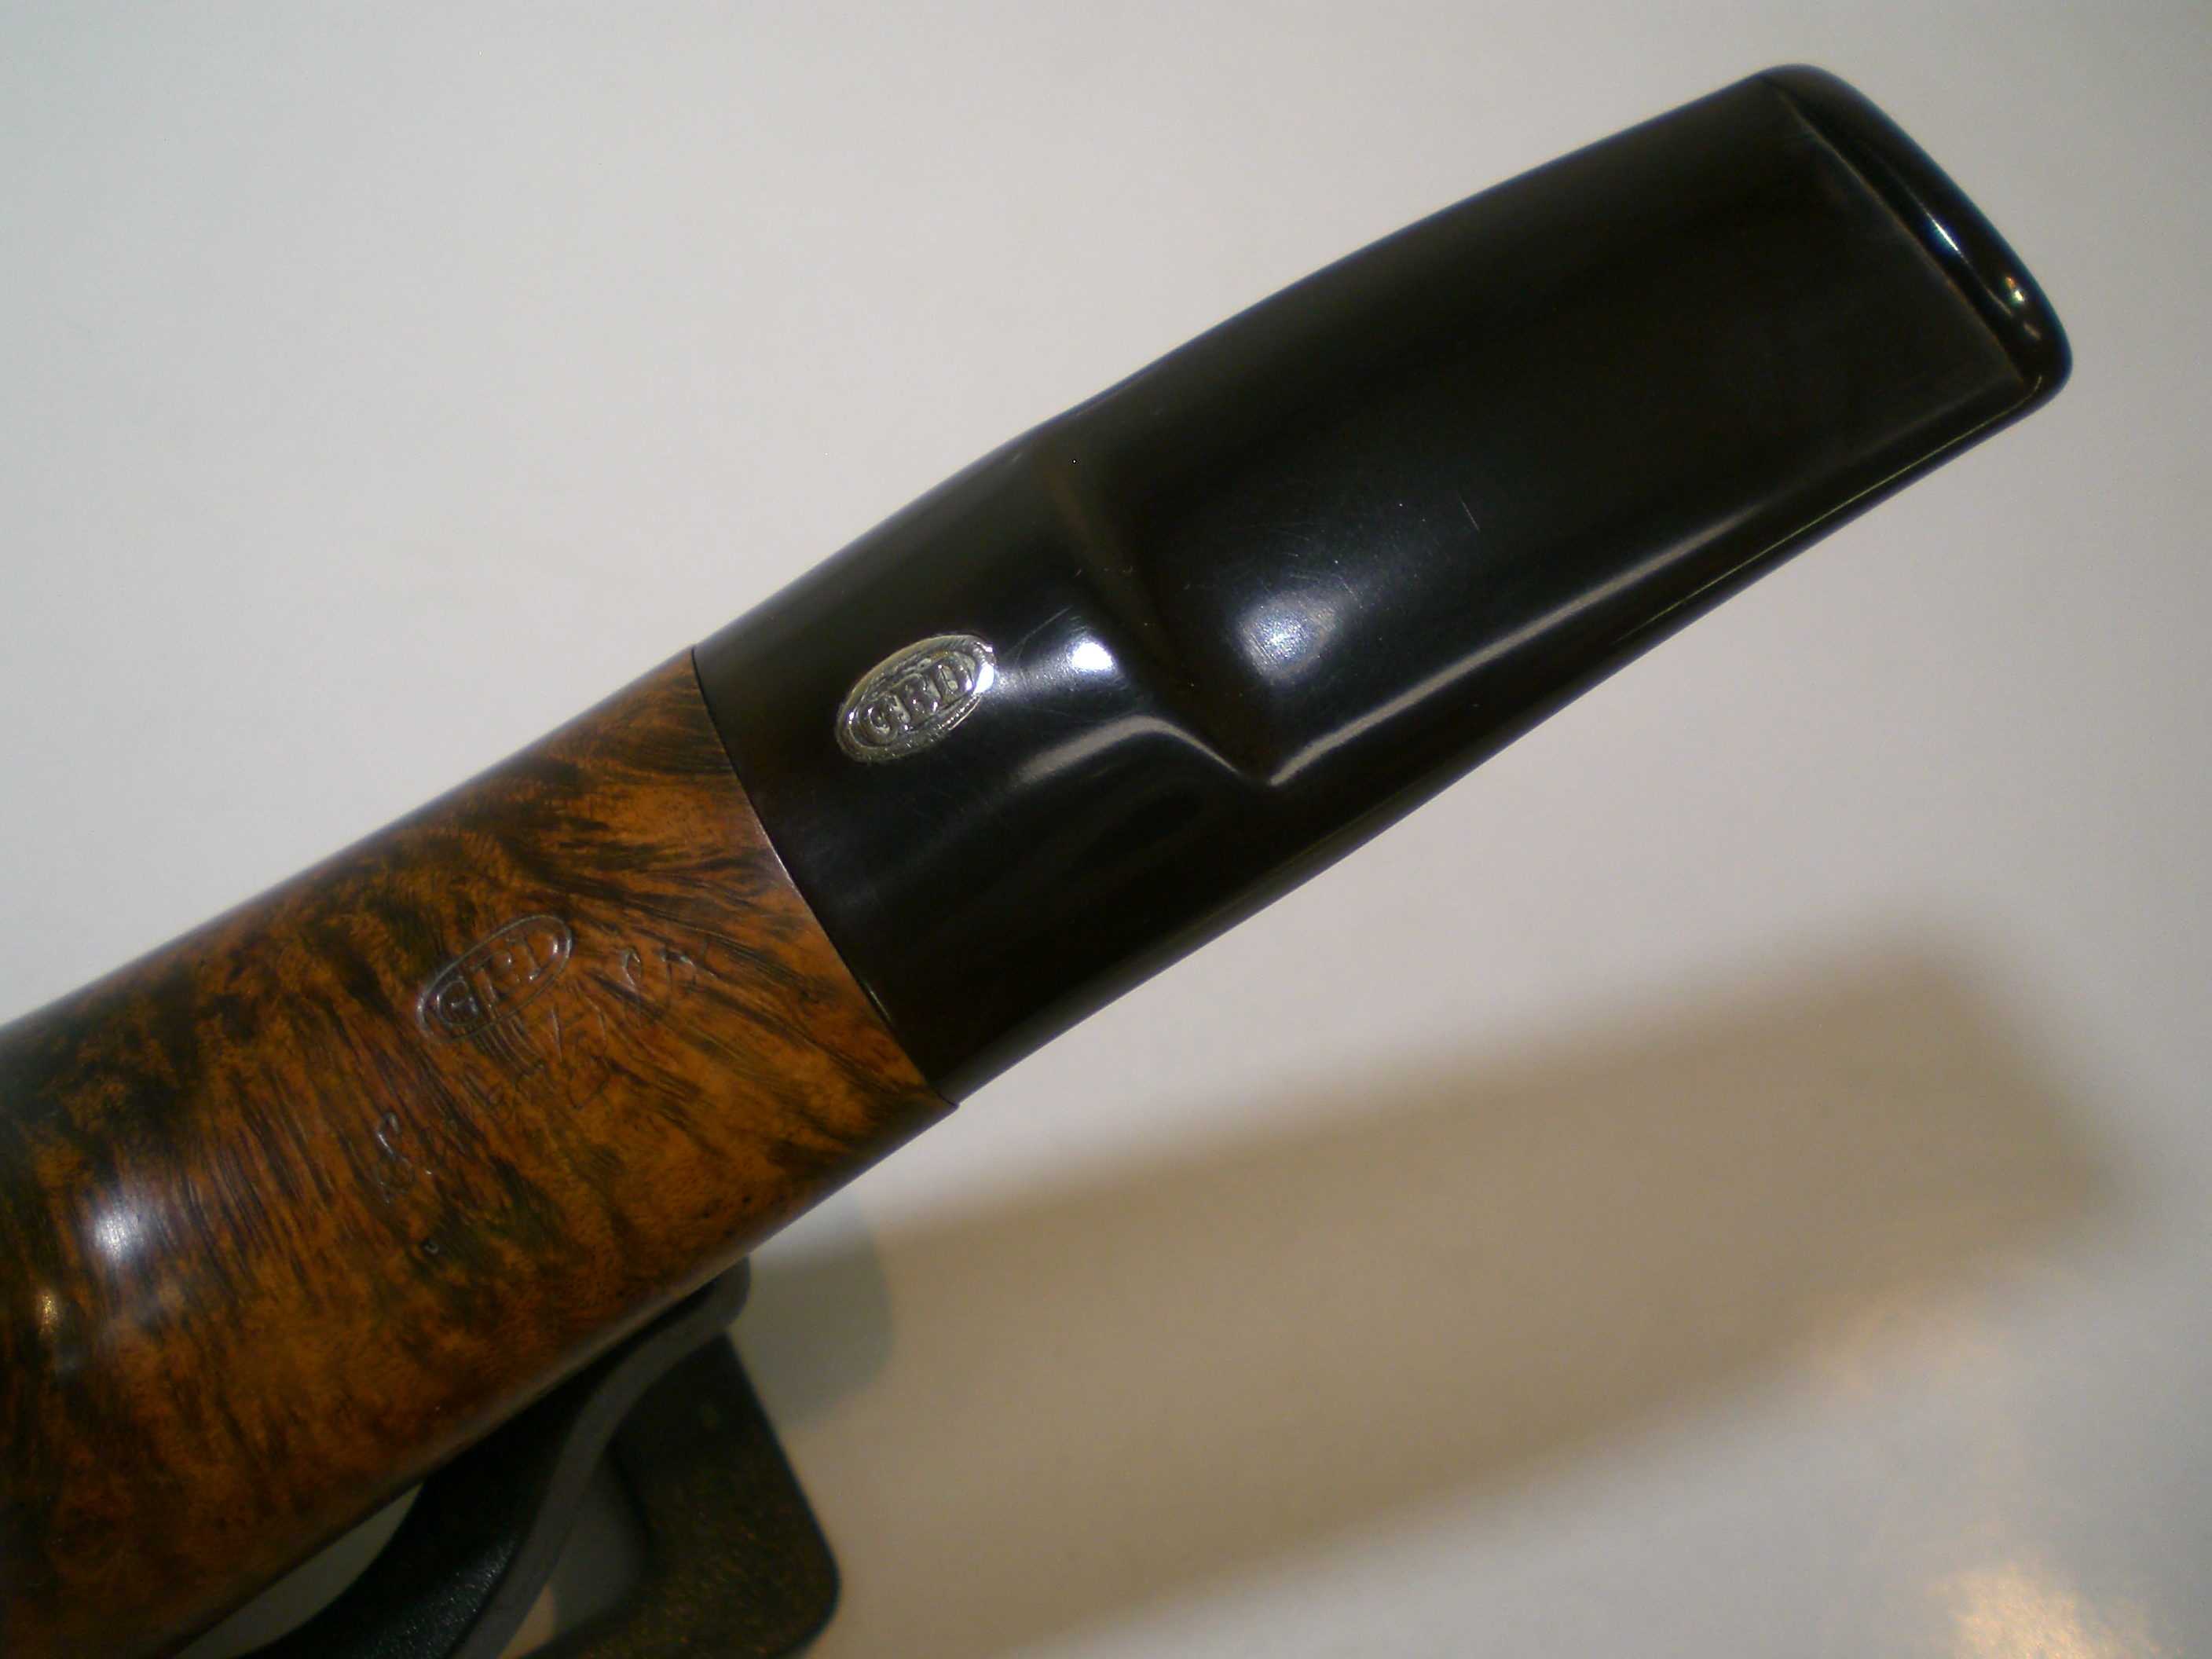
I finished the stem by removing the heavy oxidation first with 600 grit wet sandpaper, than moving to the 800, 1000, 1500 and 2000 grades. I used 8000 and 12000 grades of micromesh to complete that step. Than, with the stem mounted in the briar, it was buffed with white diamond rouge, than a automotive plastic polish.

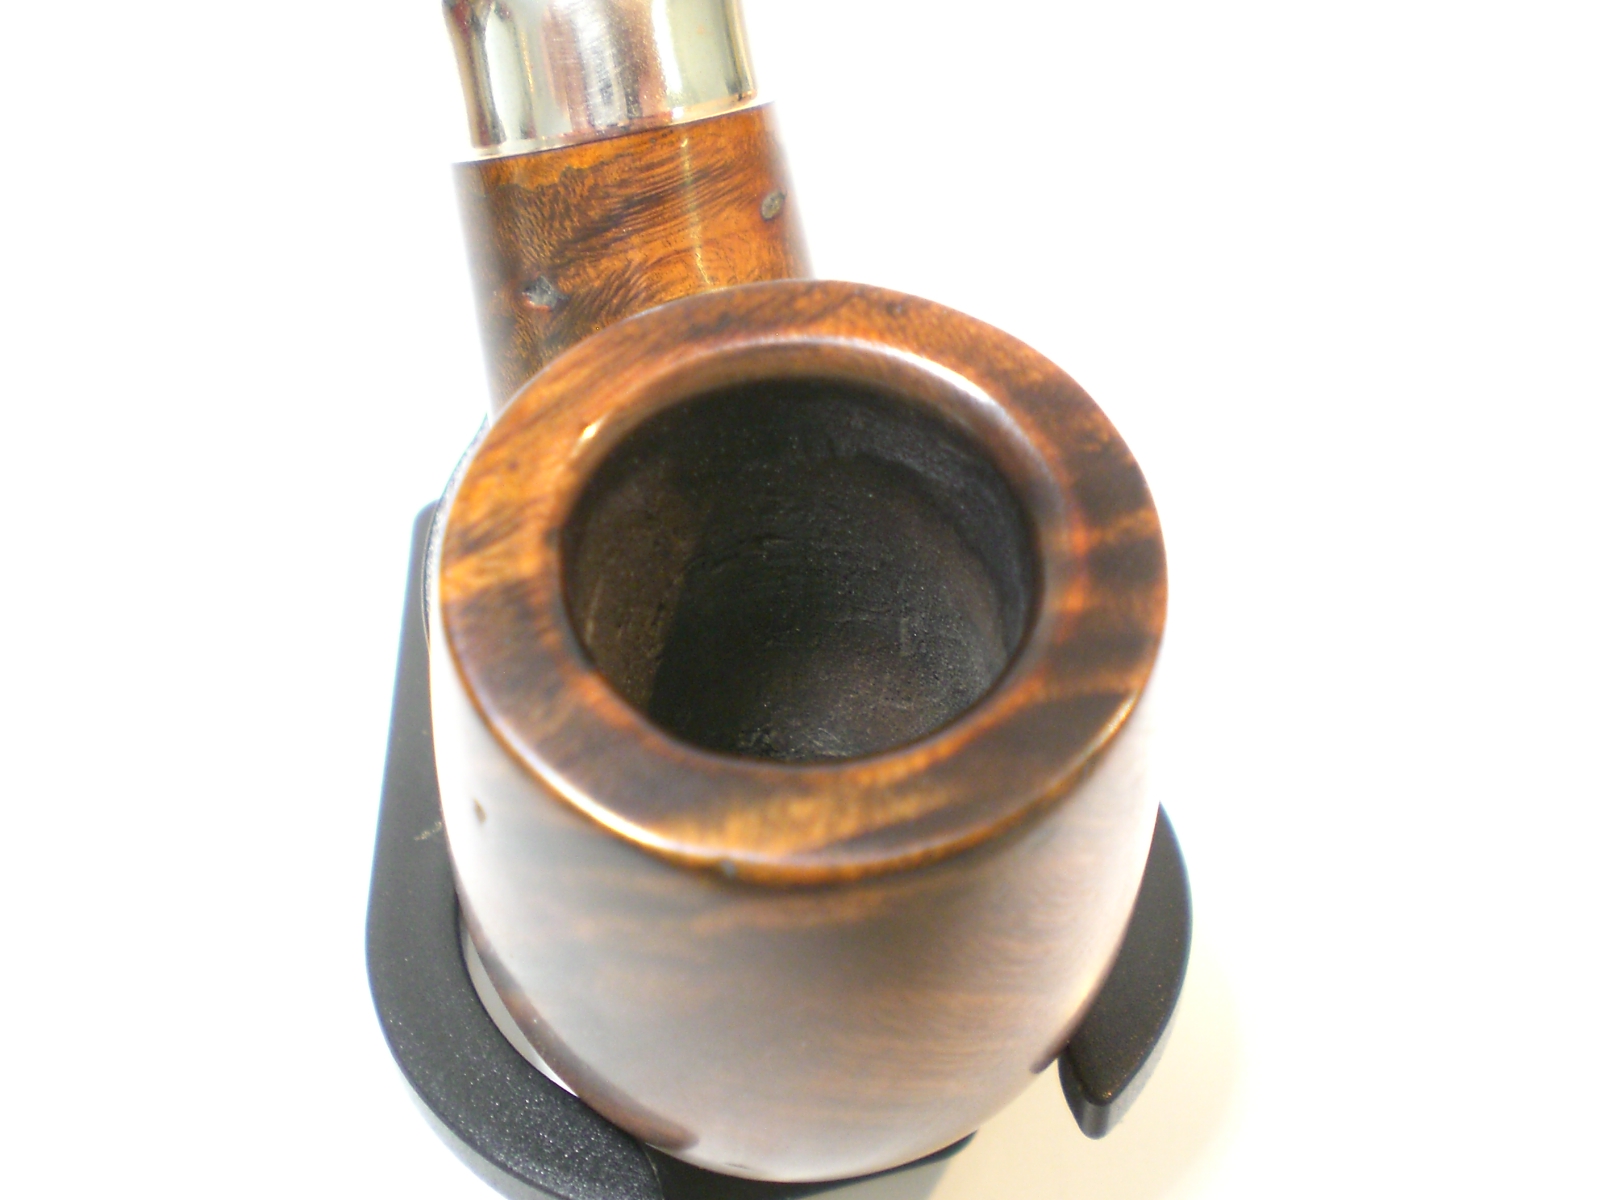
I then moved my attention to the briar. I first soaked the briar in an alcohol bath in an attempt to soften the varnished finish. That had some effect, but it was necessary to sand most of the shiny varnish off by hand. I used 600 grit paper and progress up to 1500 grade wet paper. There was one large gash on the bottom of the bowl and one large fill spot, where the putty had fallen out. Not surprisingly, there were other fills on the briar under that finish. I was able to lift out the dent using a heated kitchen knife and steam. I repaired the fill hold with some of the black superglue. Sometimes I think covering the fills looks worse than leaving them and I thought the others lent some character to the pipe that Tom had given the briar (they might have also been handling dings, etc.)

Fr_Tom_Process4

Fr_Tom_Process1

Fr_Tom_Process2

Fr_Tom_Process3

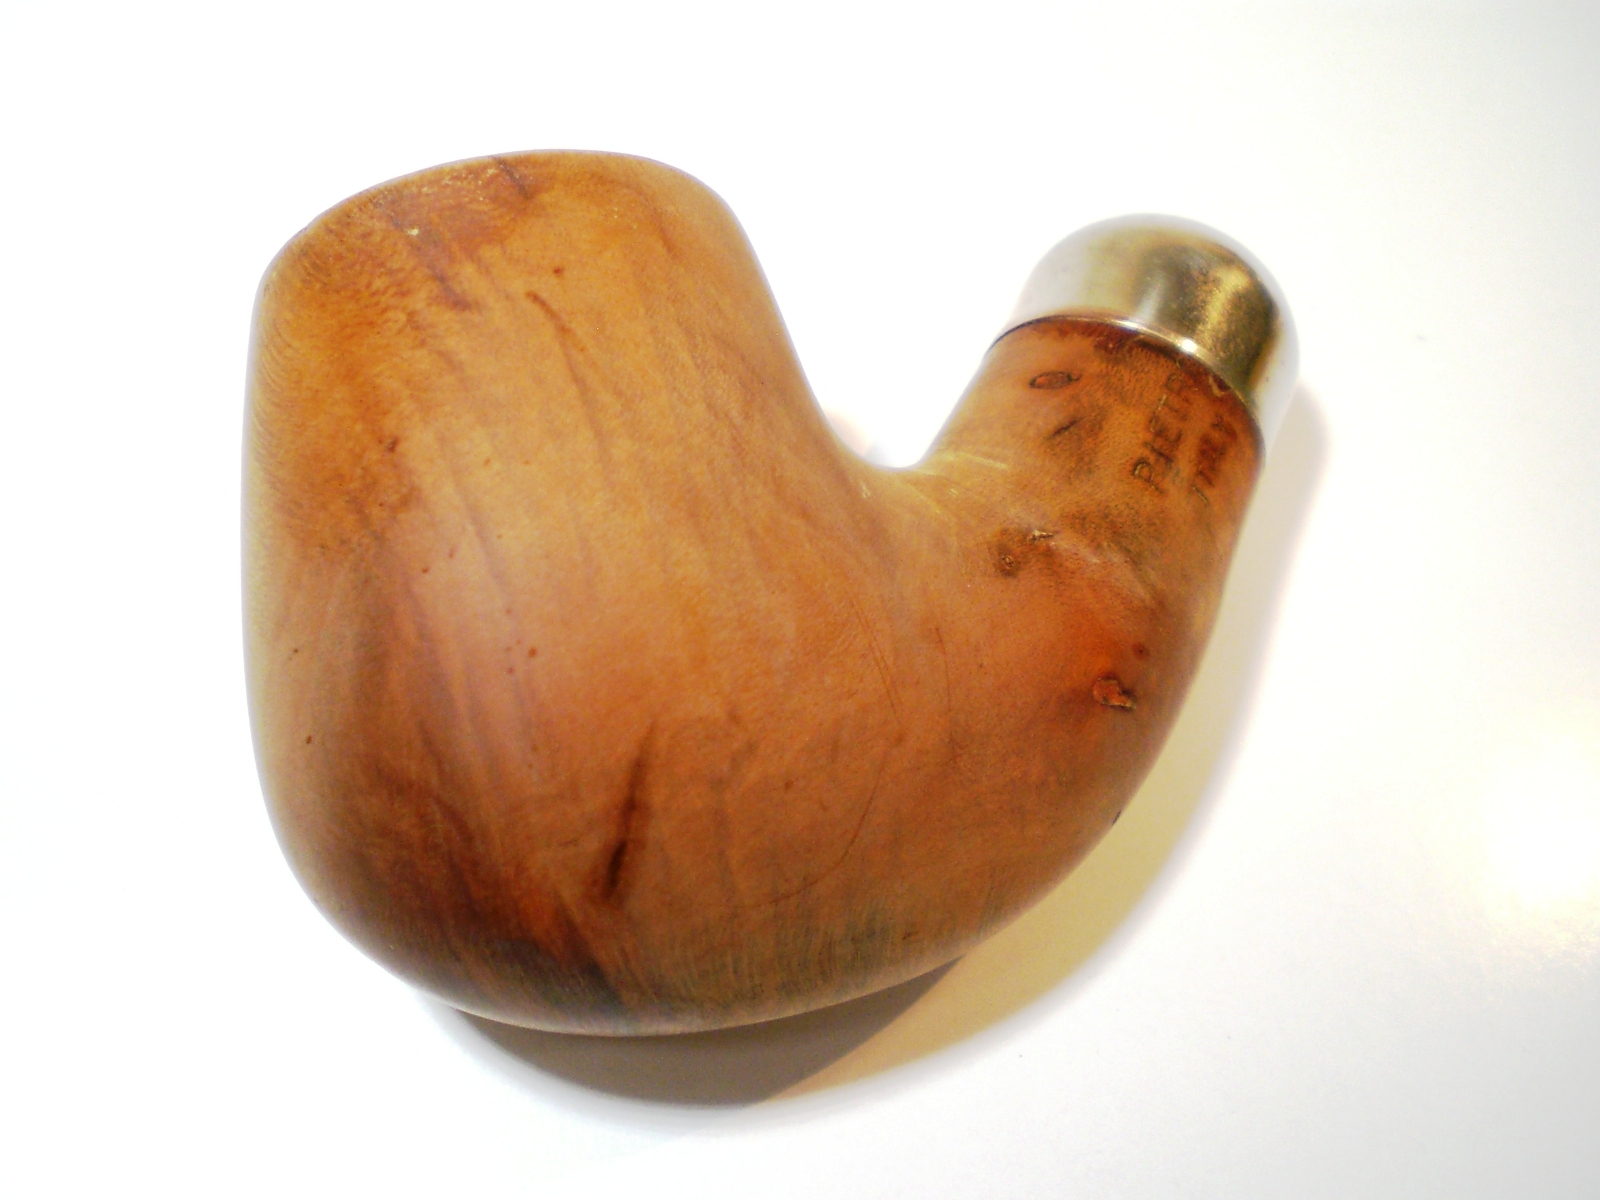
I used a two step process to apply the stain to the briar. First I warmed the bowl with a hair dryer and then brushed on a coat of black stain. I lit the stain with flame to set it into the grain. The black stain was then sanded off with a series of sandpaper, starting again at 800 grit. I then applied a very light, almost neutral brown stain over the black. The bowl was then buffed with white diamond rouge and several coats of carnuba wax. While hand buffing the carnuba wax, I almost had a tragic accident with the pipe – it slipped out of my hands and bounced off my concrete workshop floor. I was horrified but was somewhat relieved to see no visible damage. It was only in the final hand polishing did I notice that the fall had put a dent in the metal cap. Steve shared with me a technique to heat the cap (once removed) and use a wooden dowel shaped into the half-circle to work out dents. Unfortunately, even using heat, I was unable to remove the cap. After discussion with the gracious Father Tom, it was decided to leave well enough alone. I will be picking up a padded piece of carpet to place in front of my work bench.

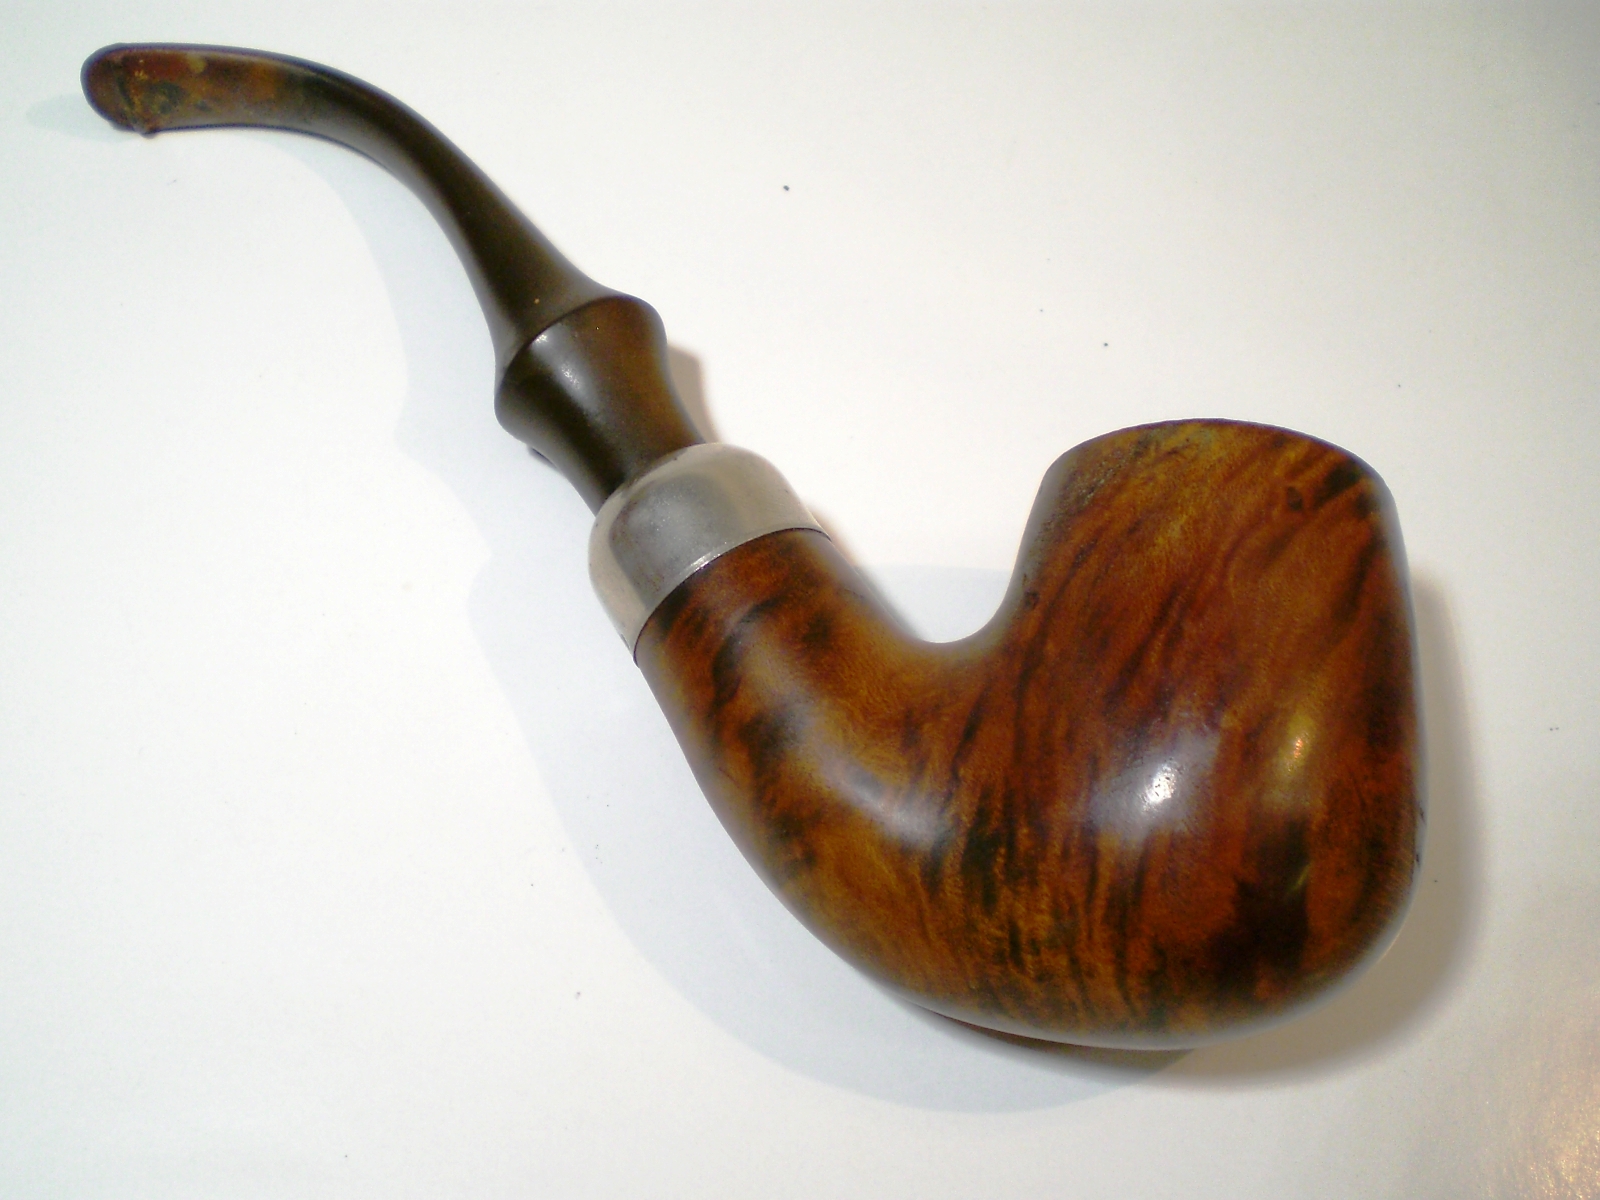
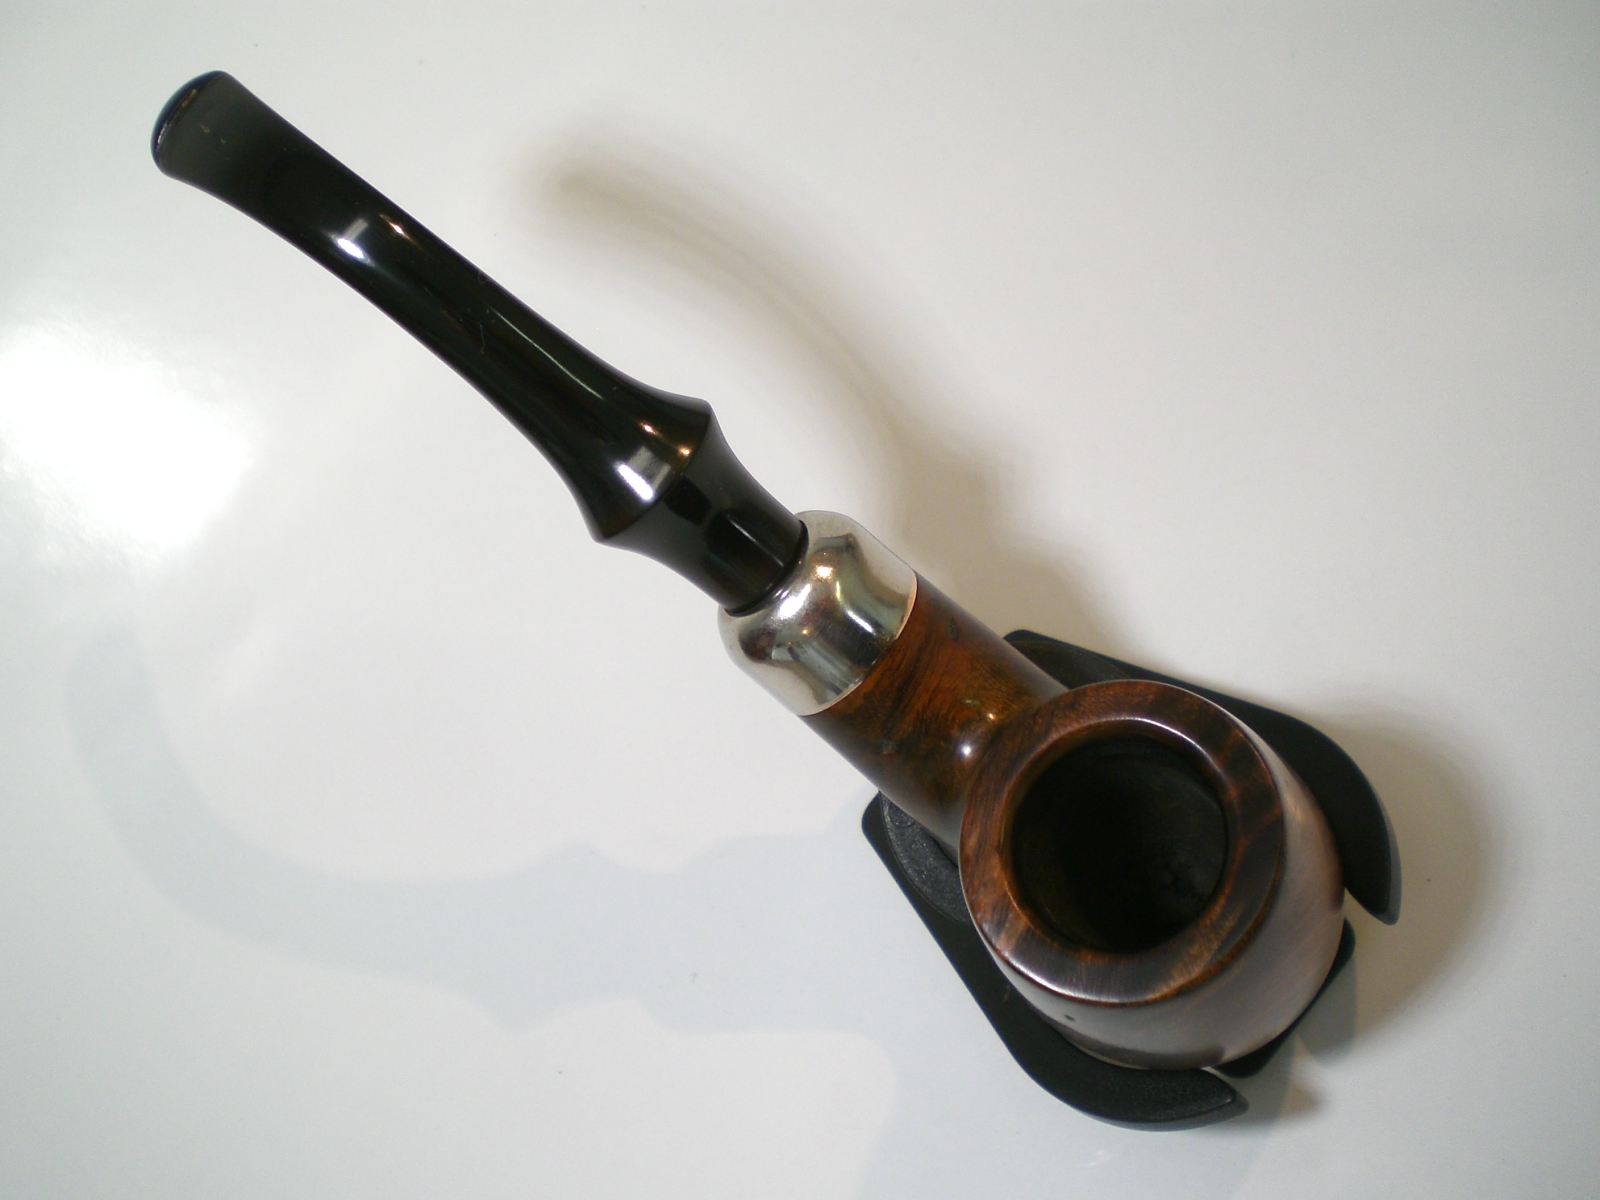
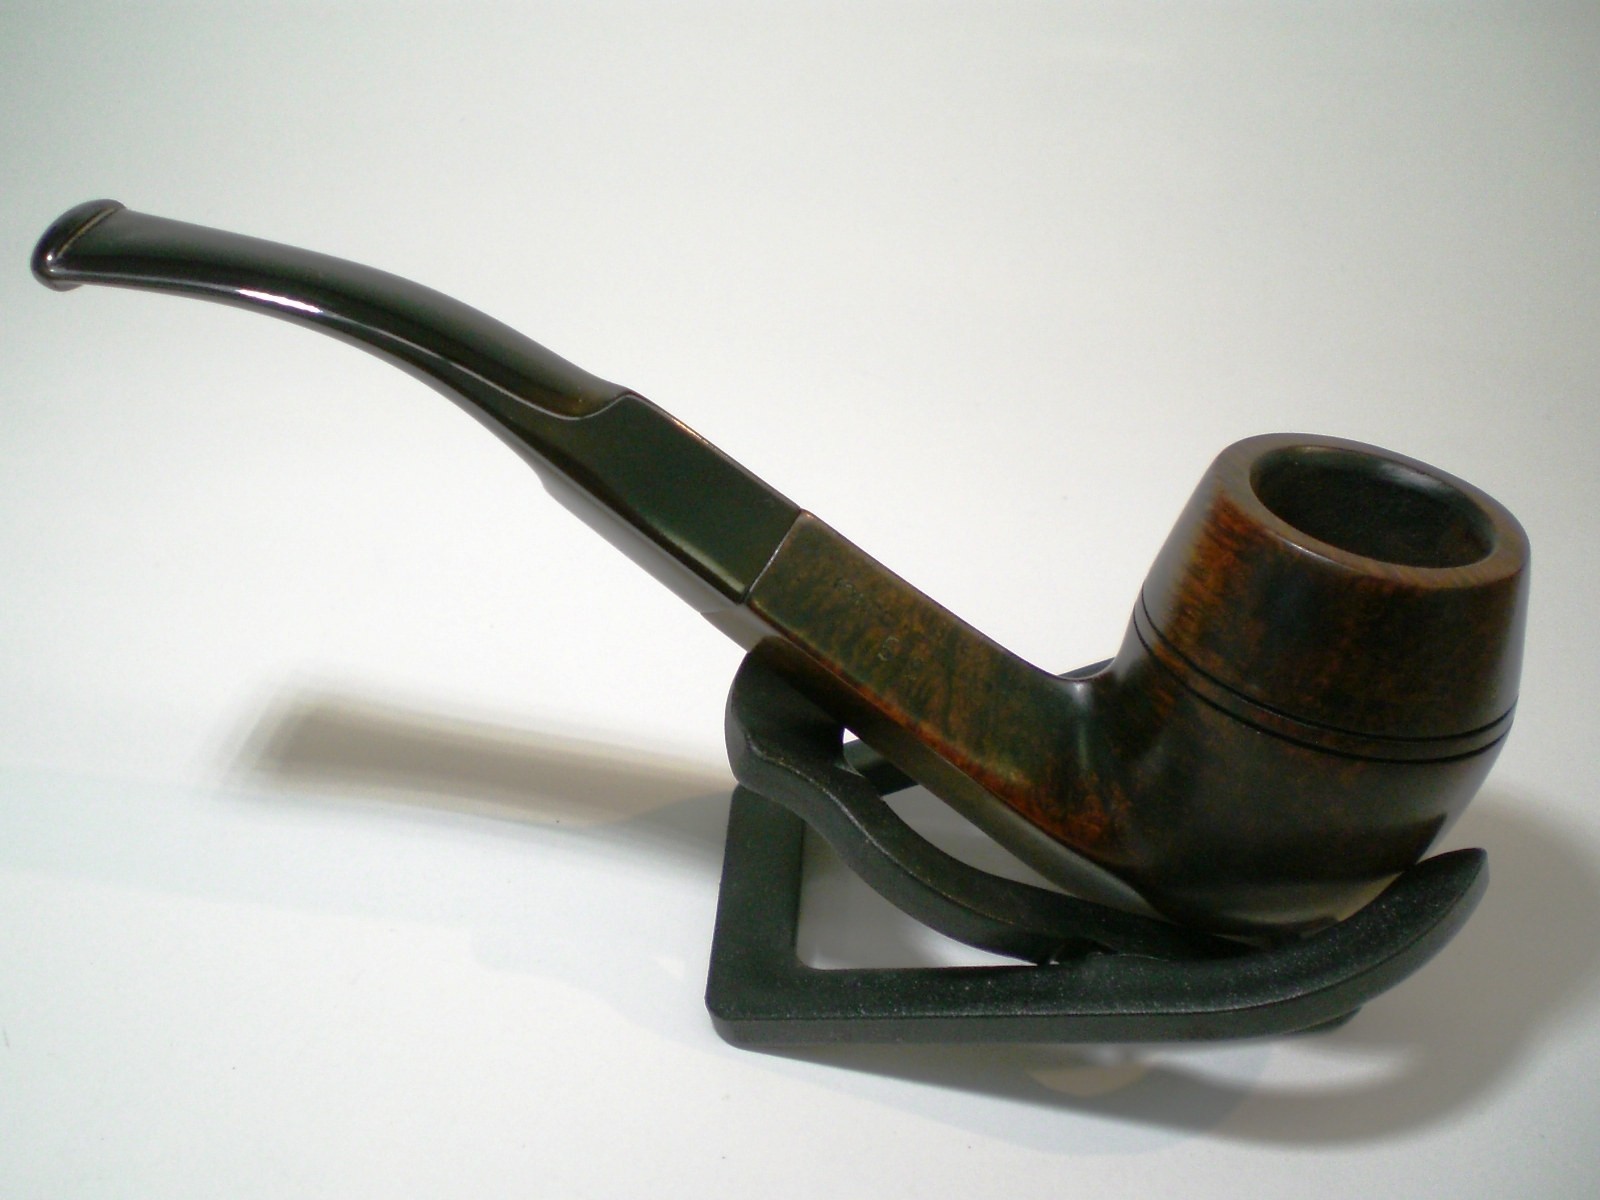
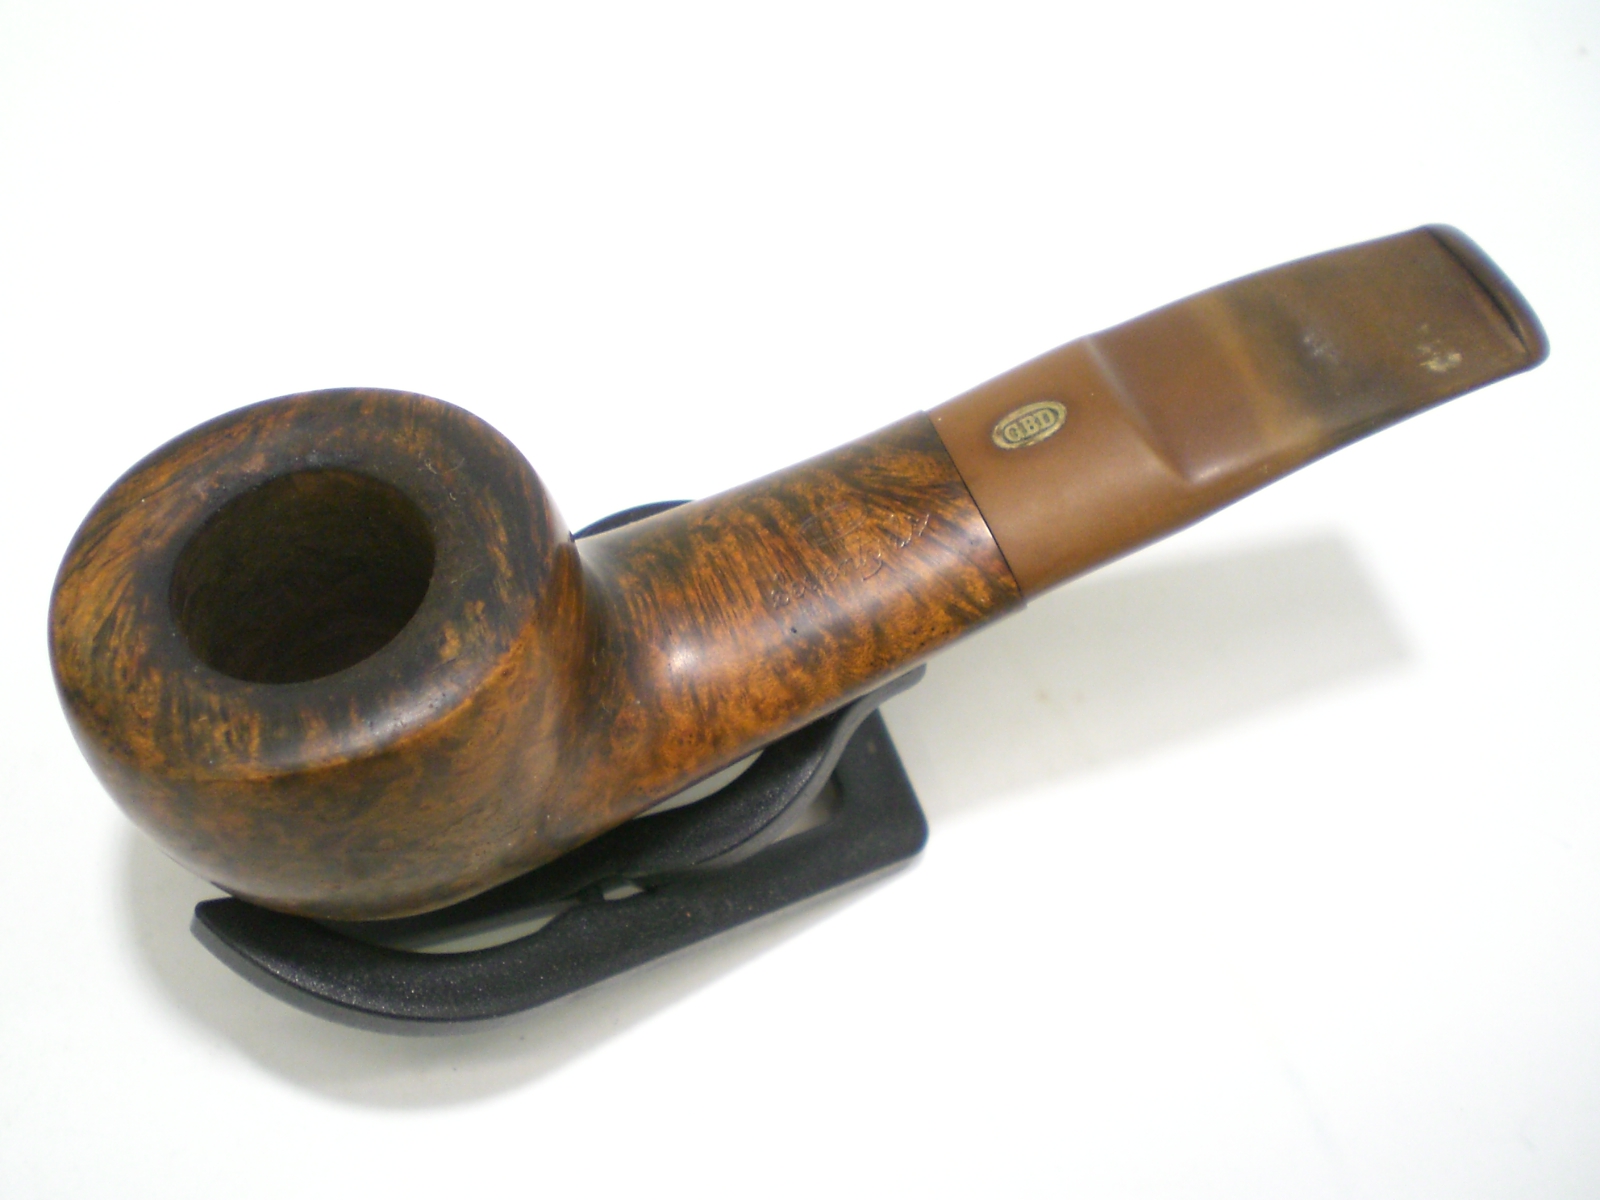
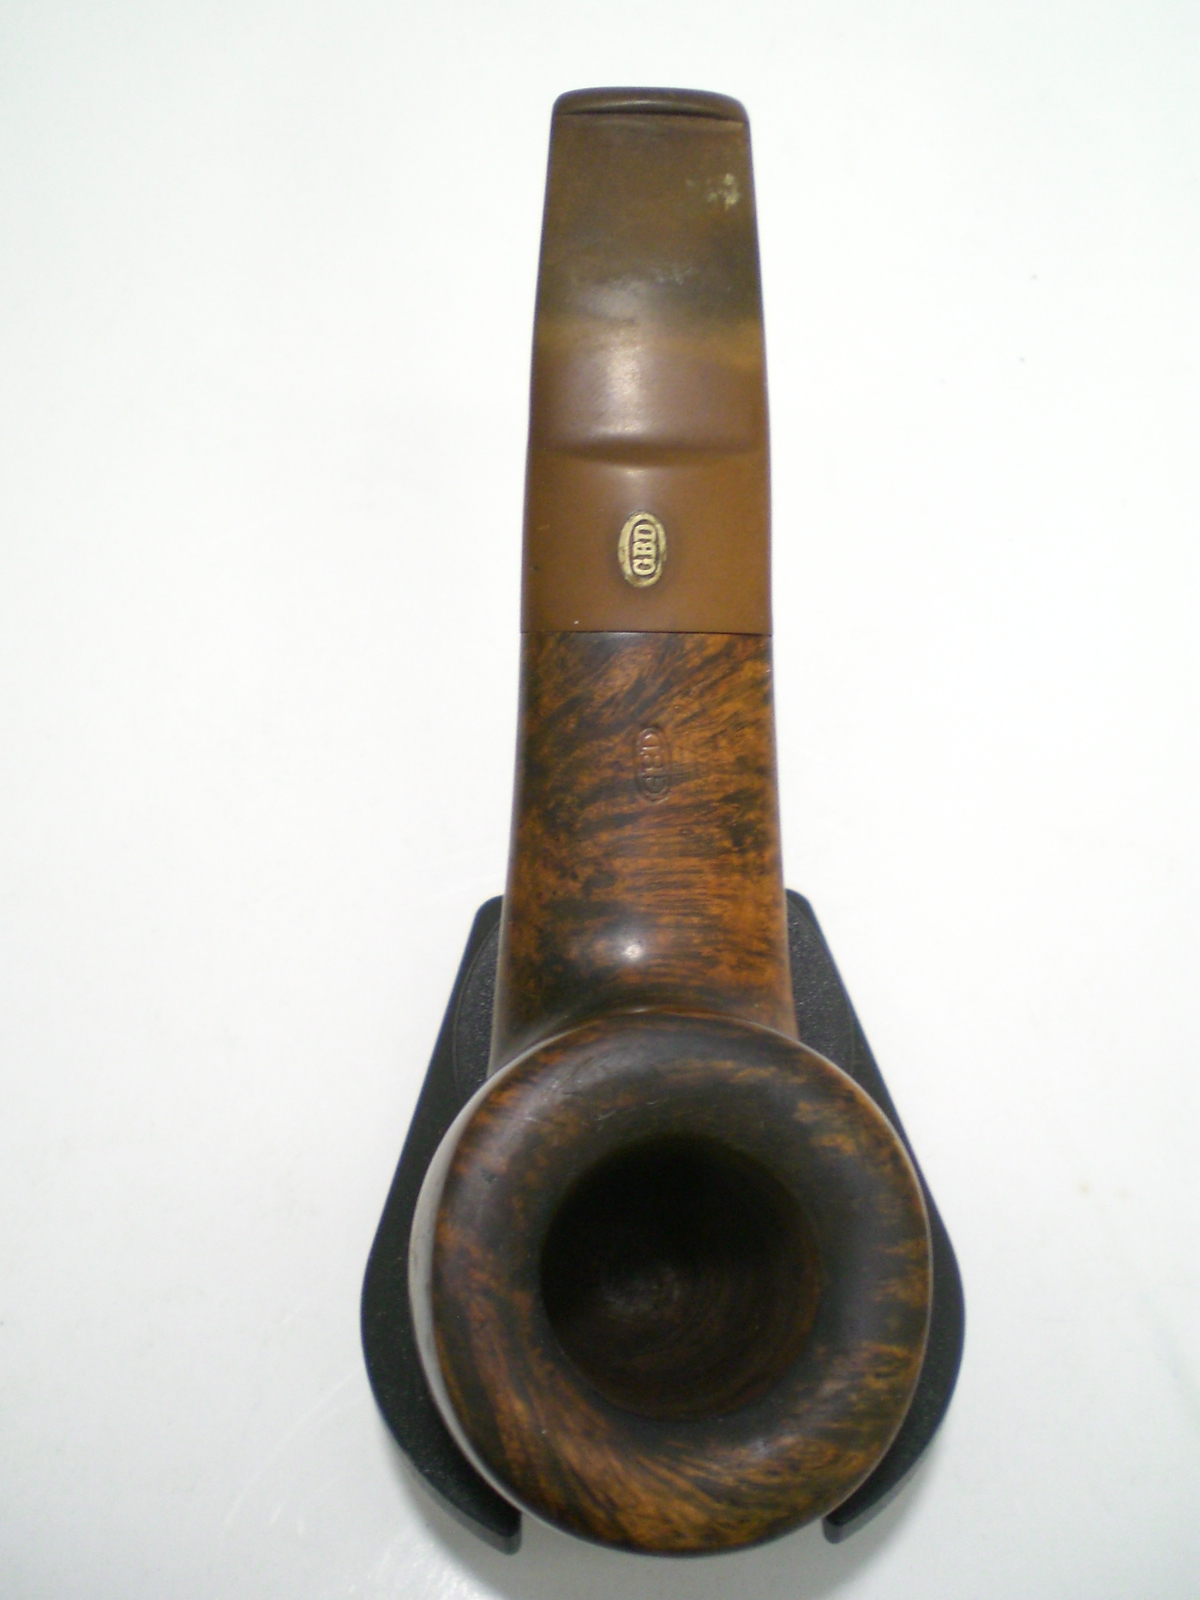
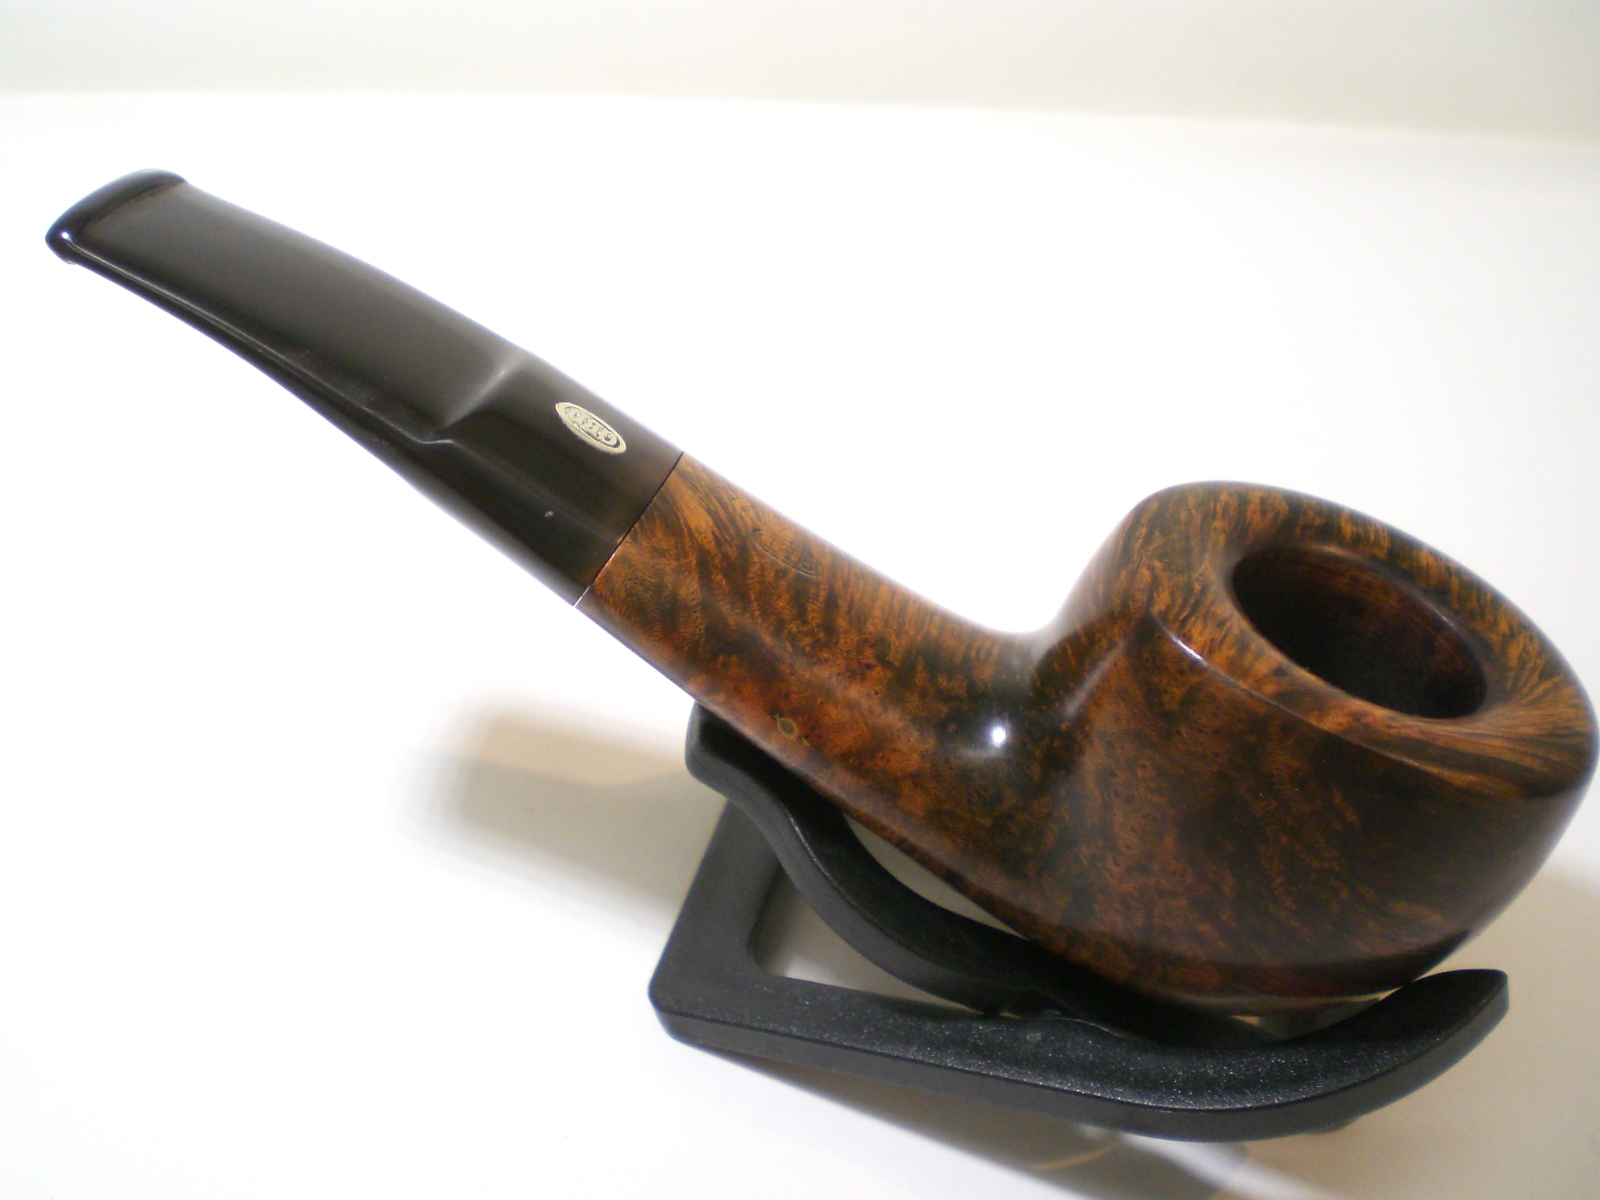
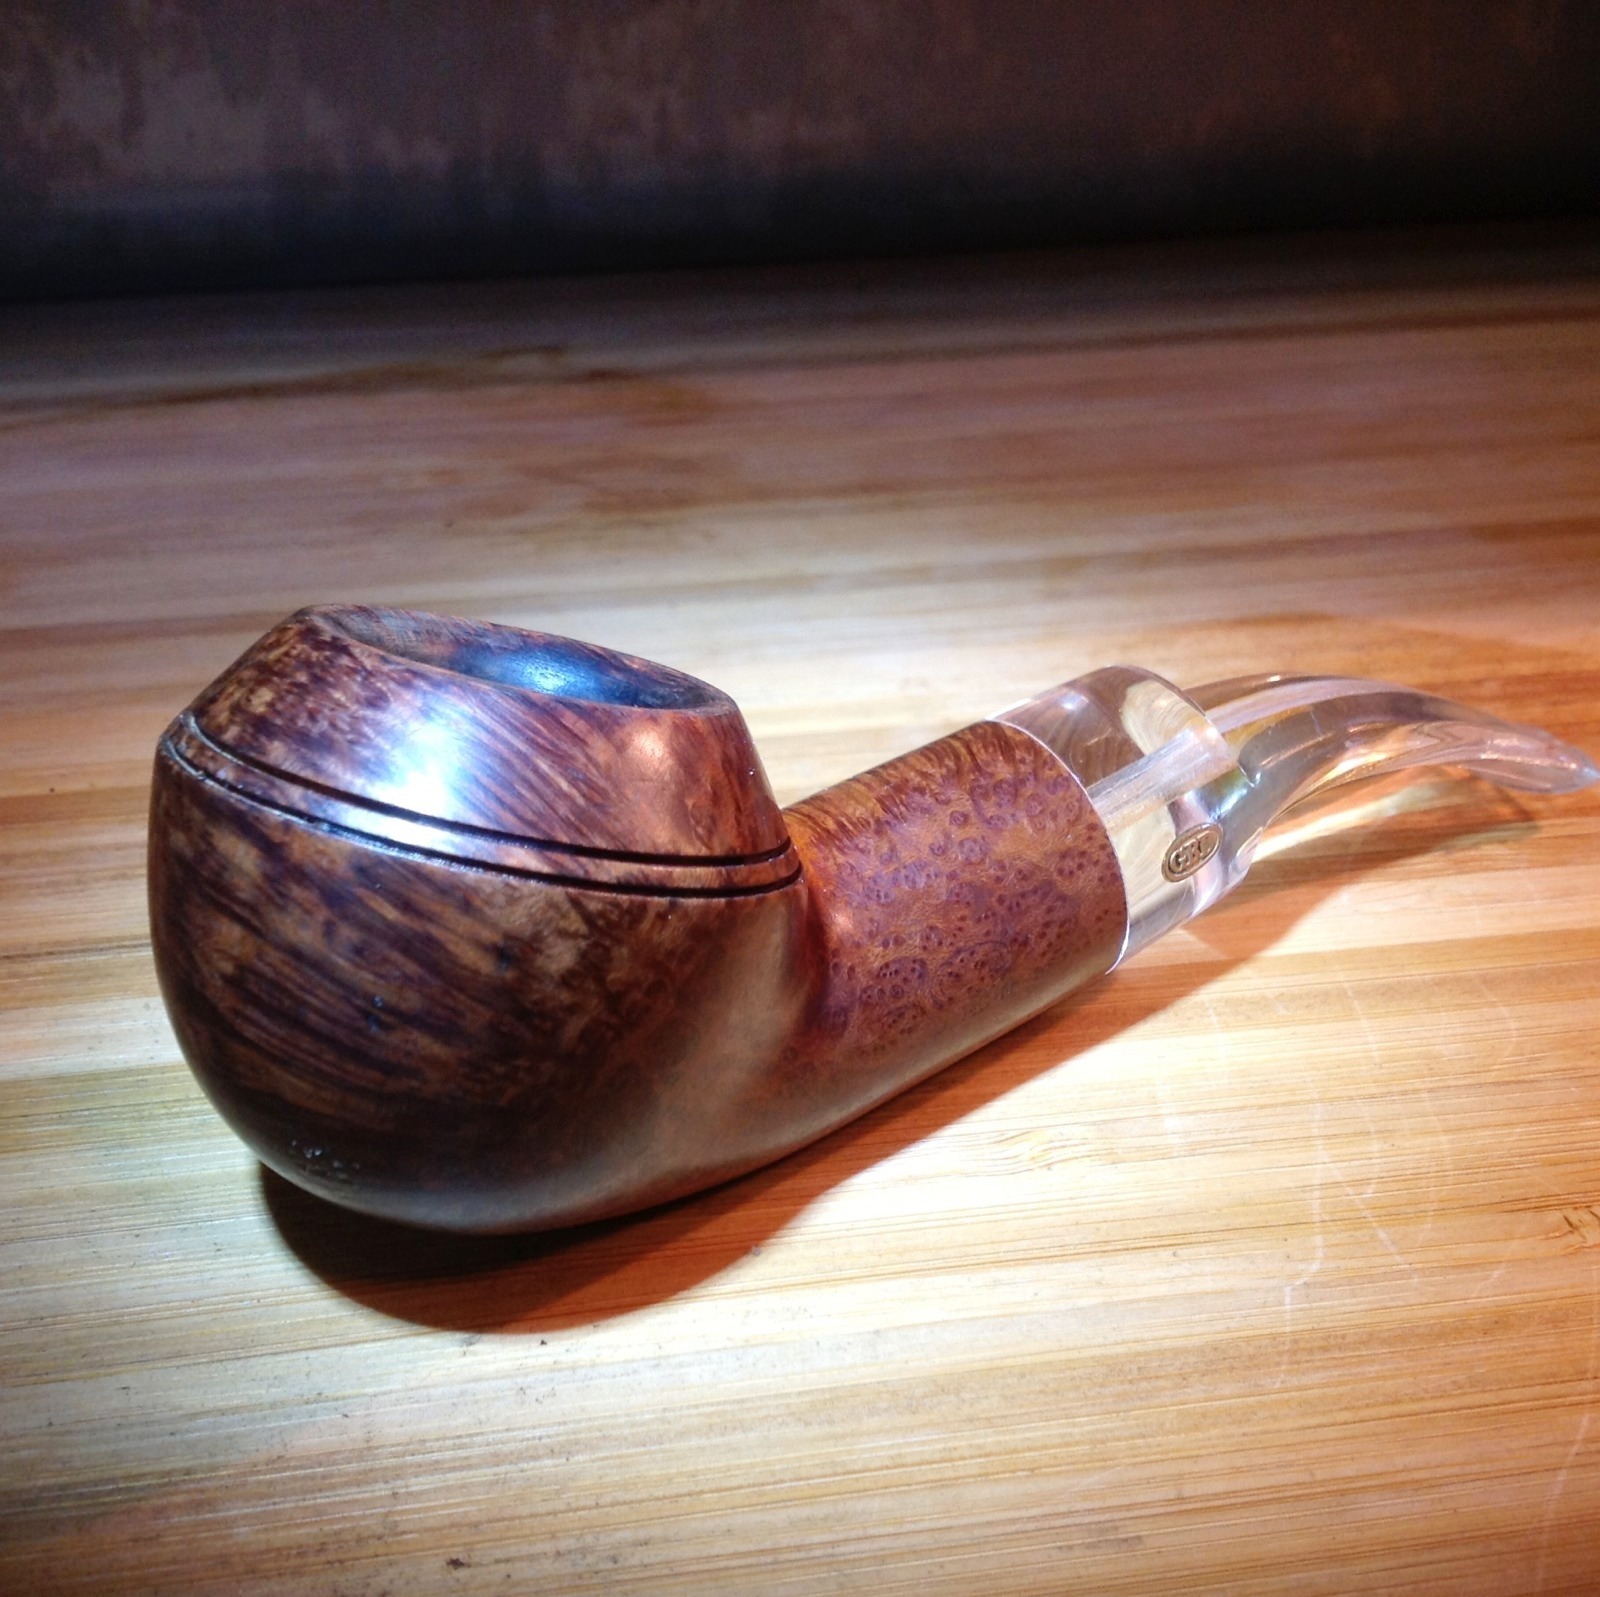
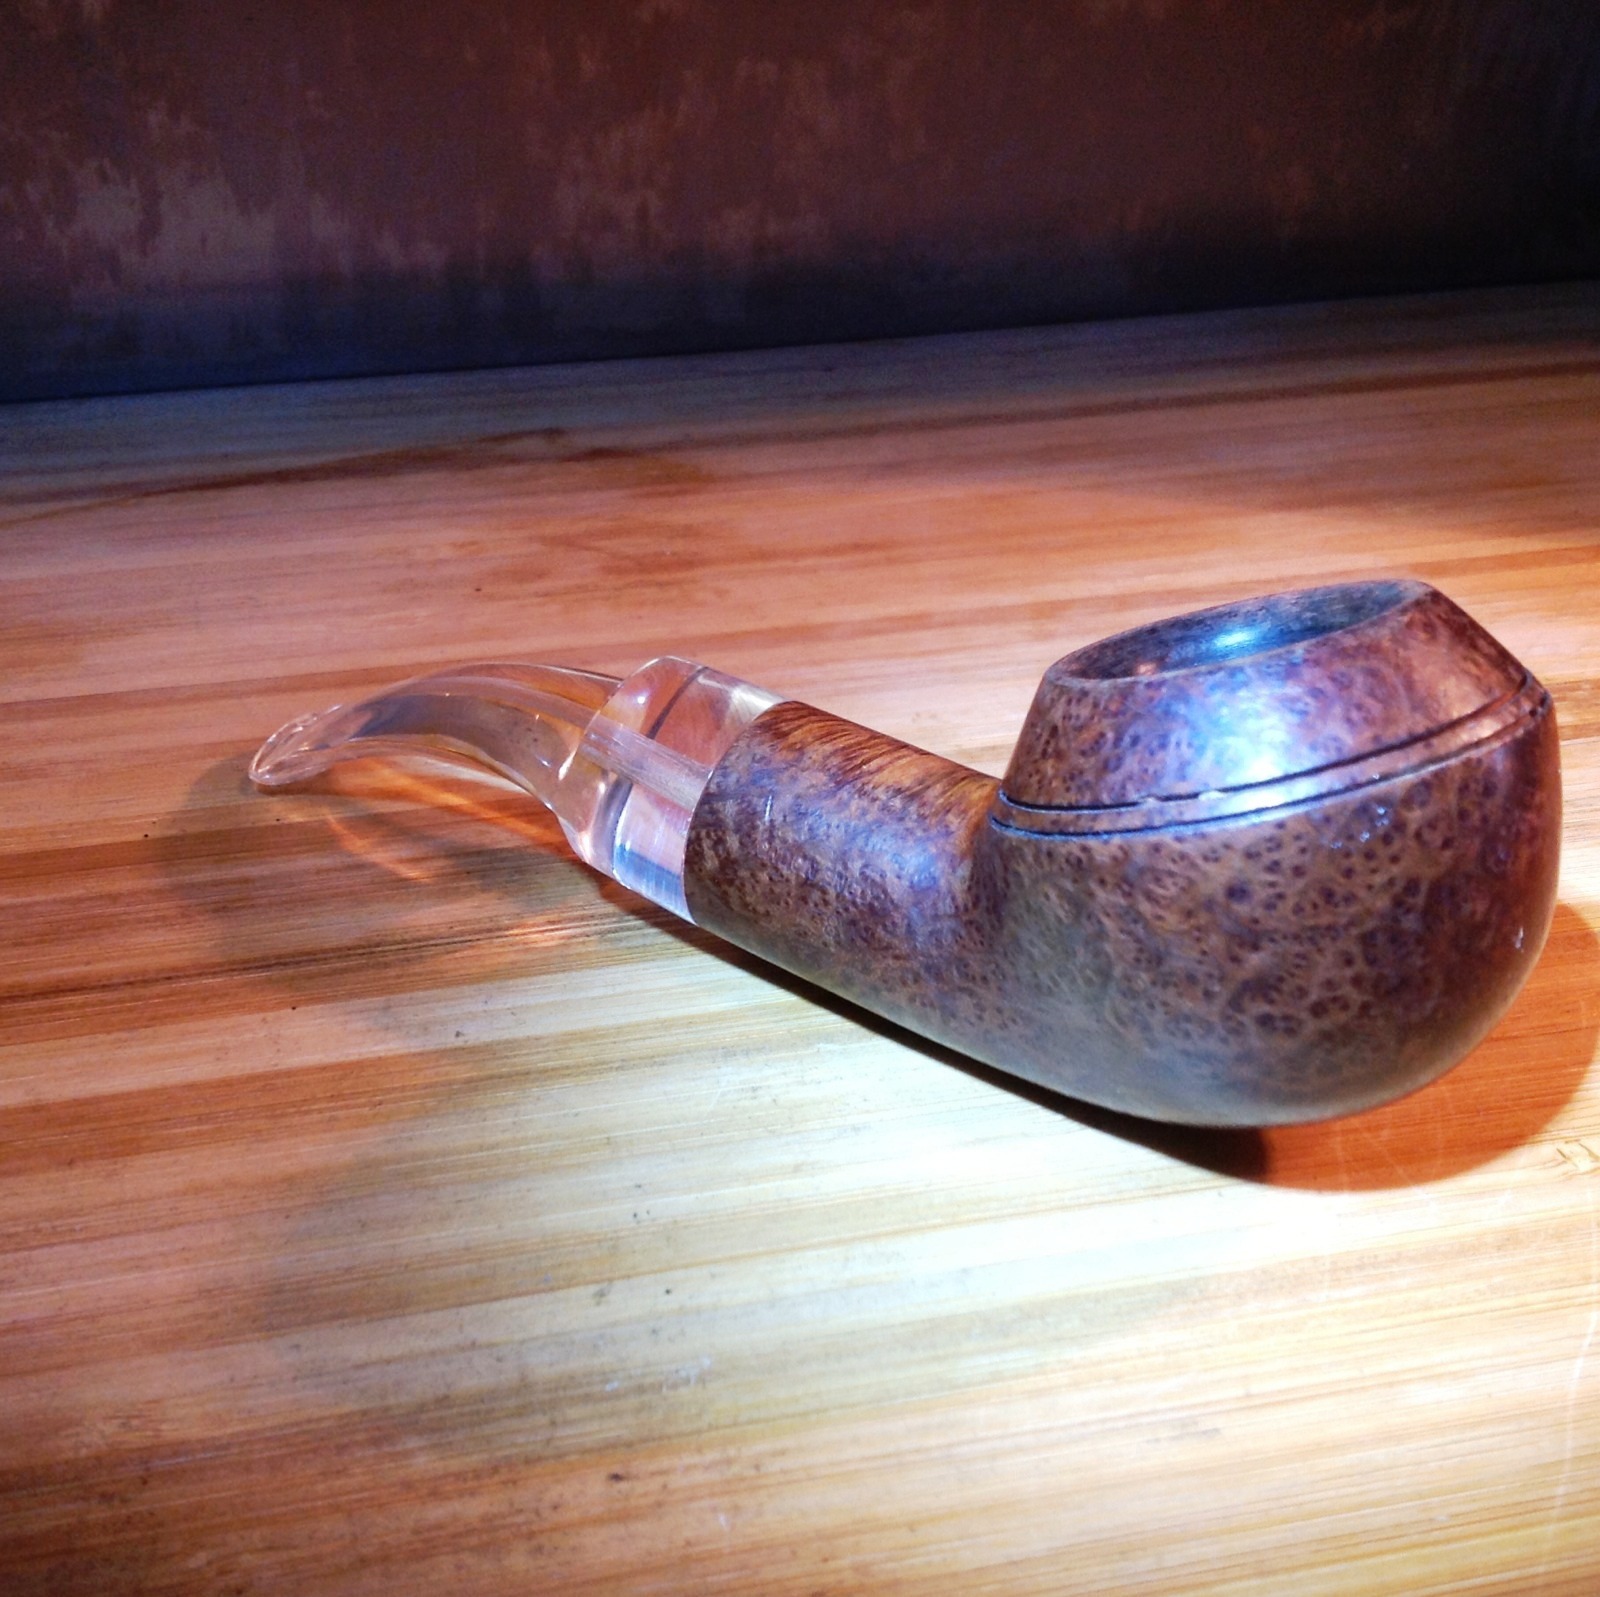
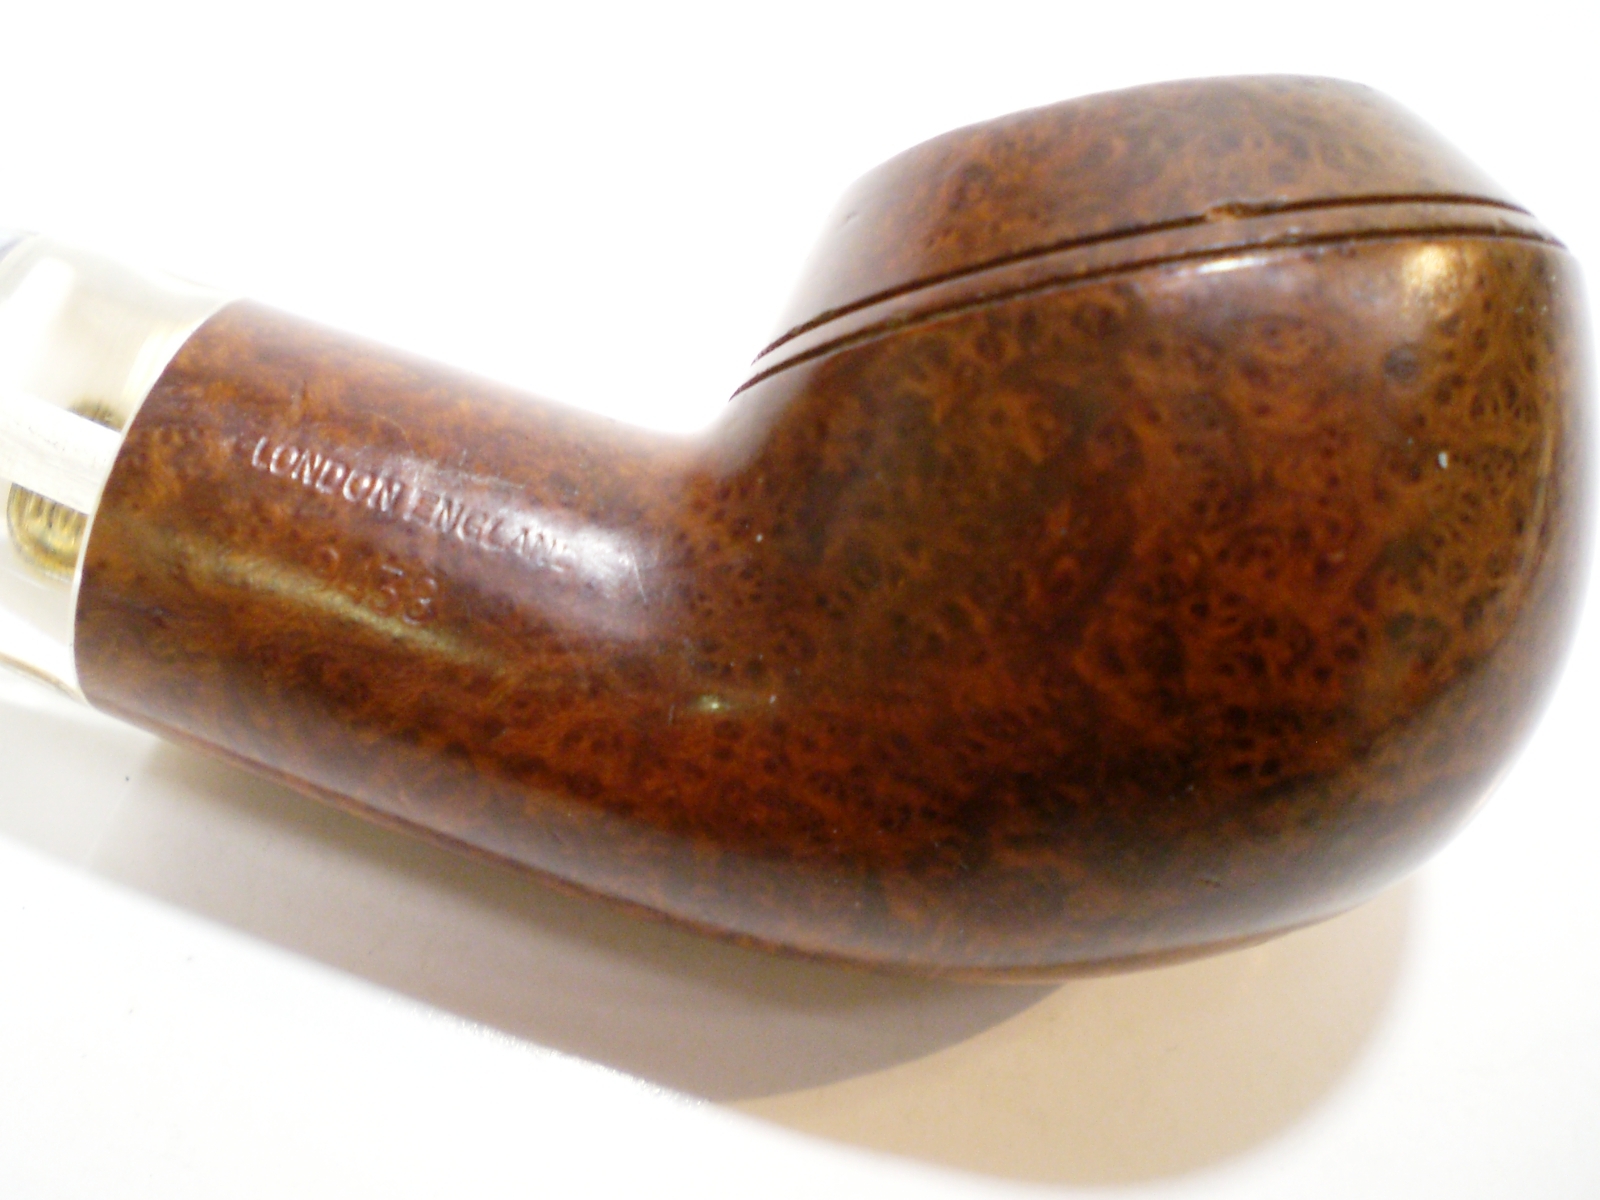
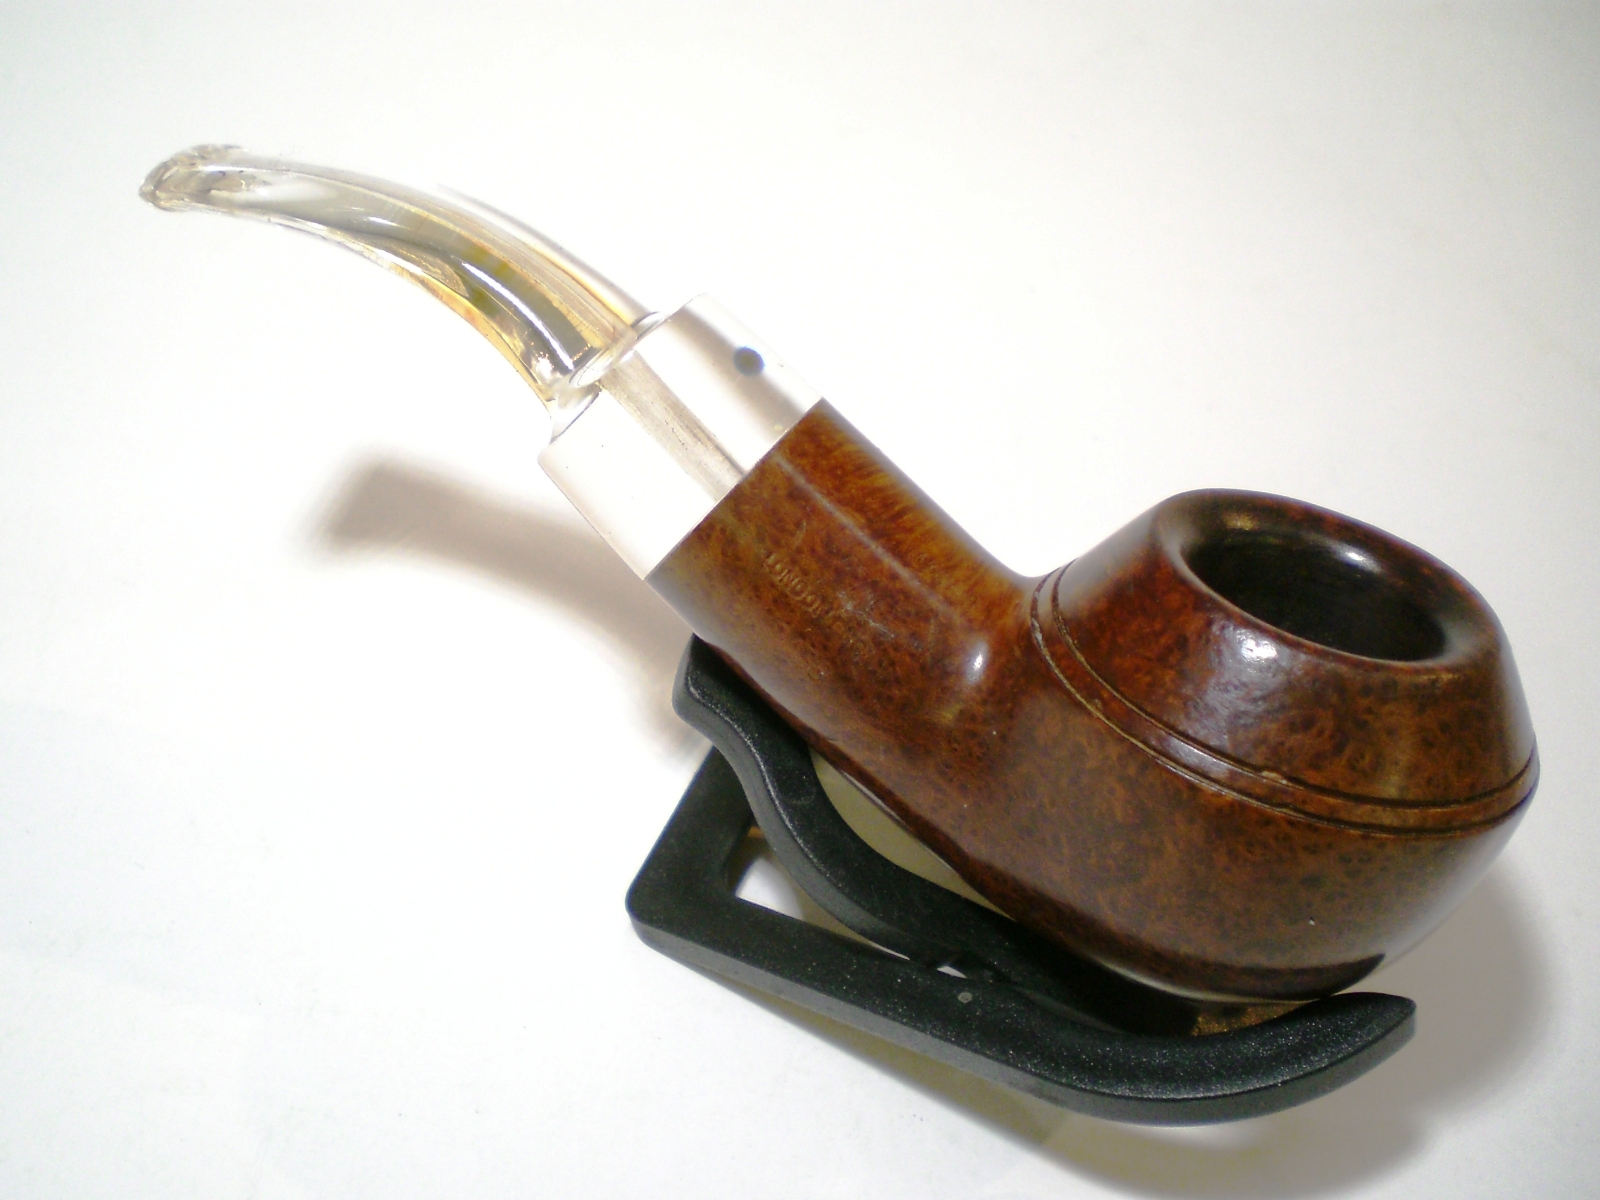
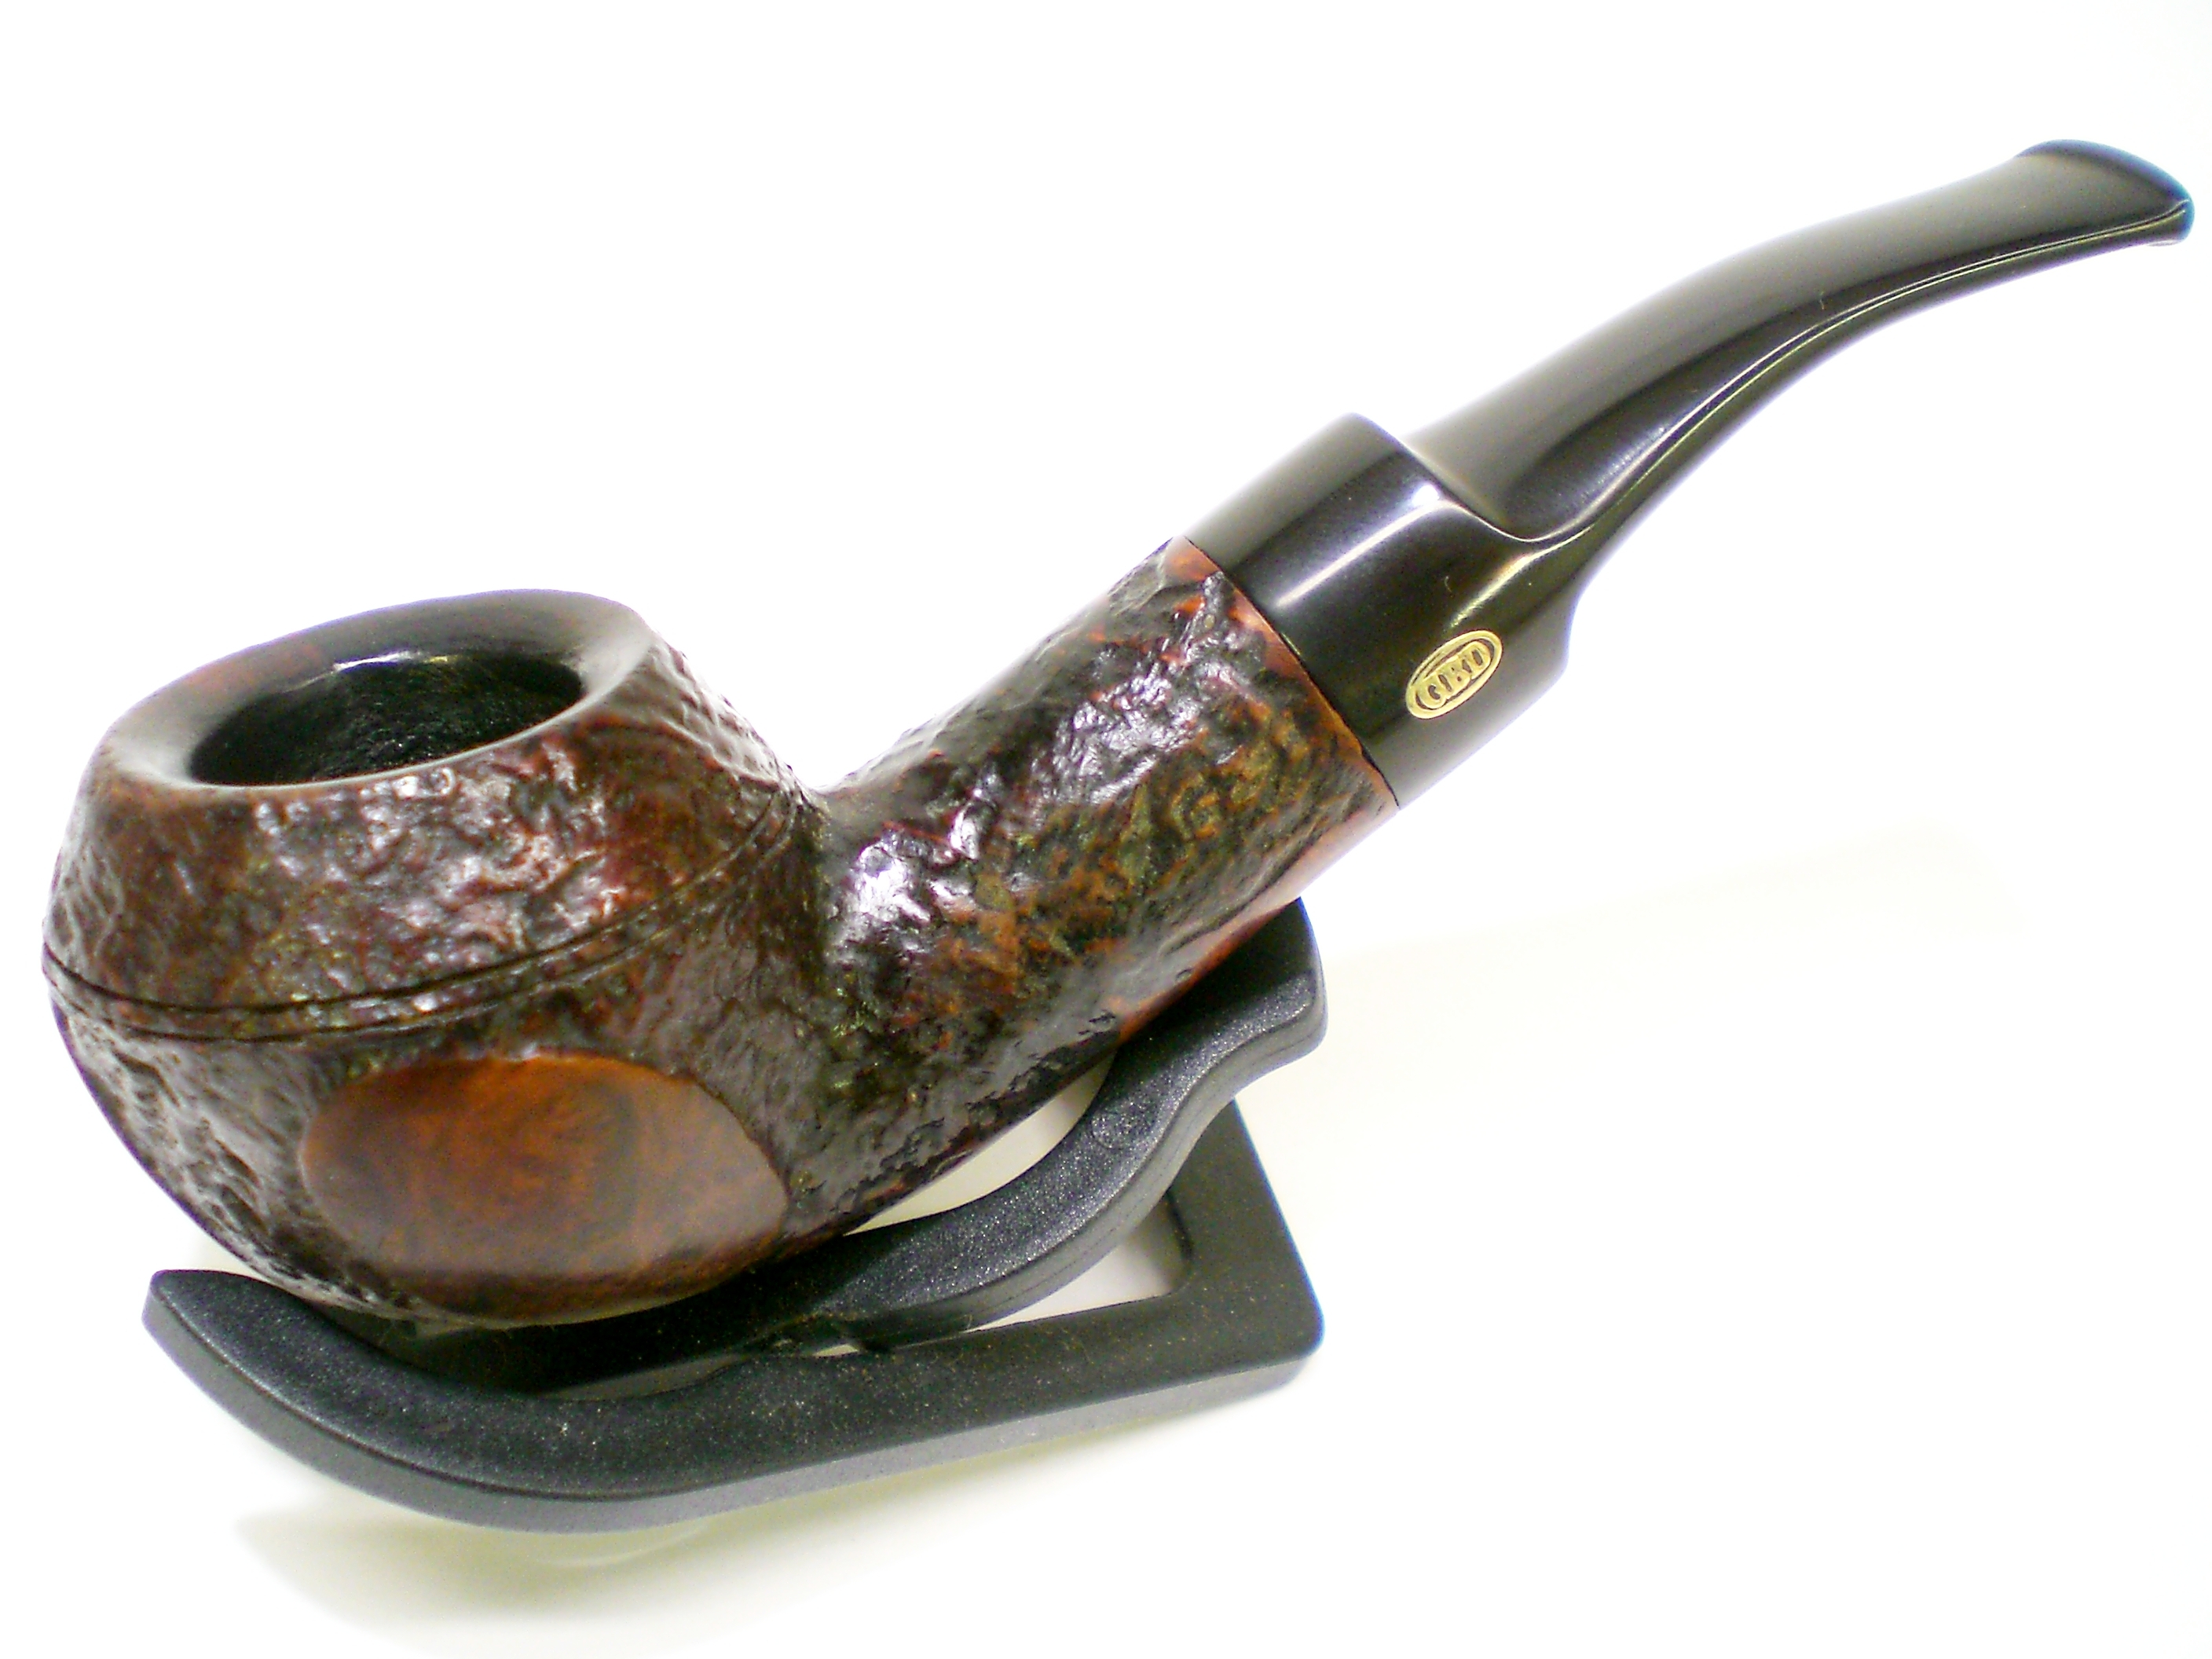
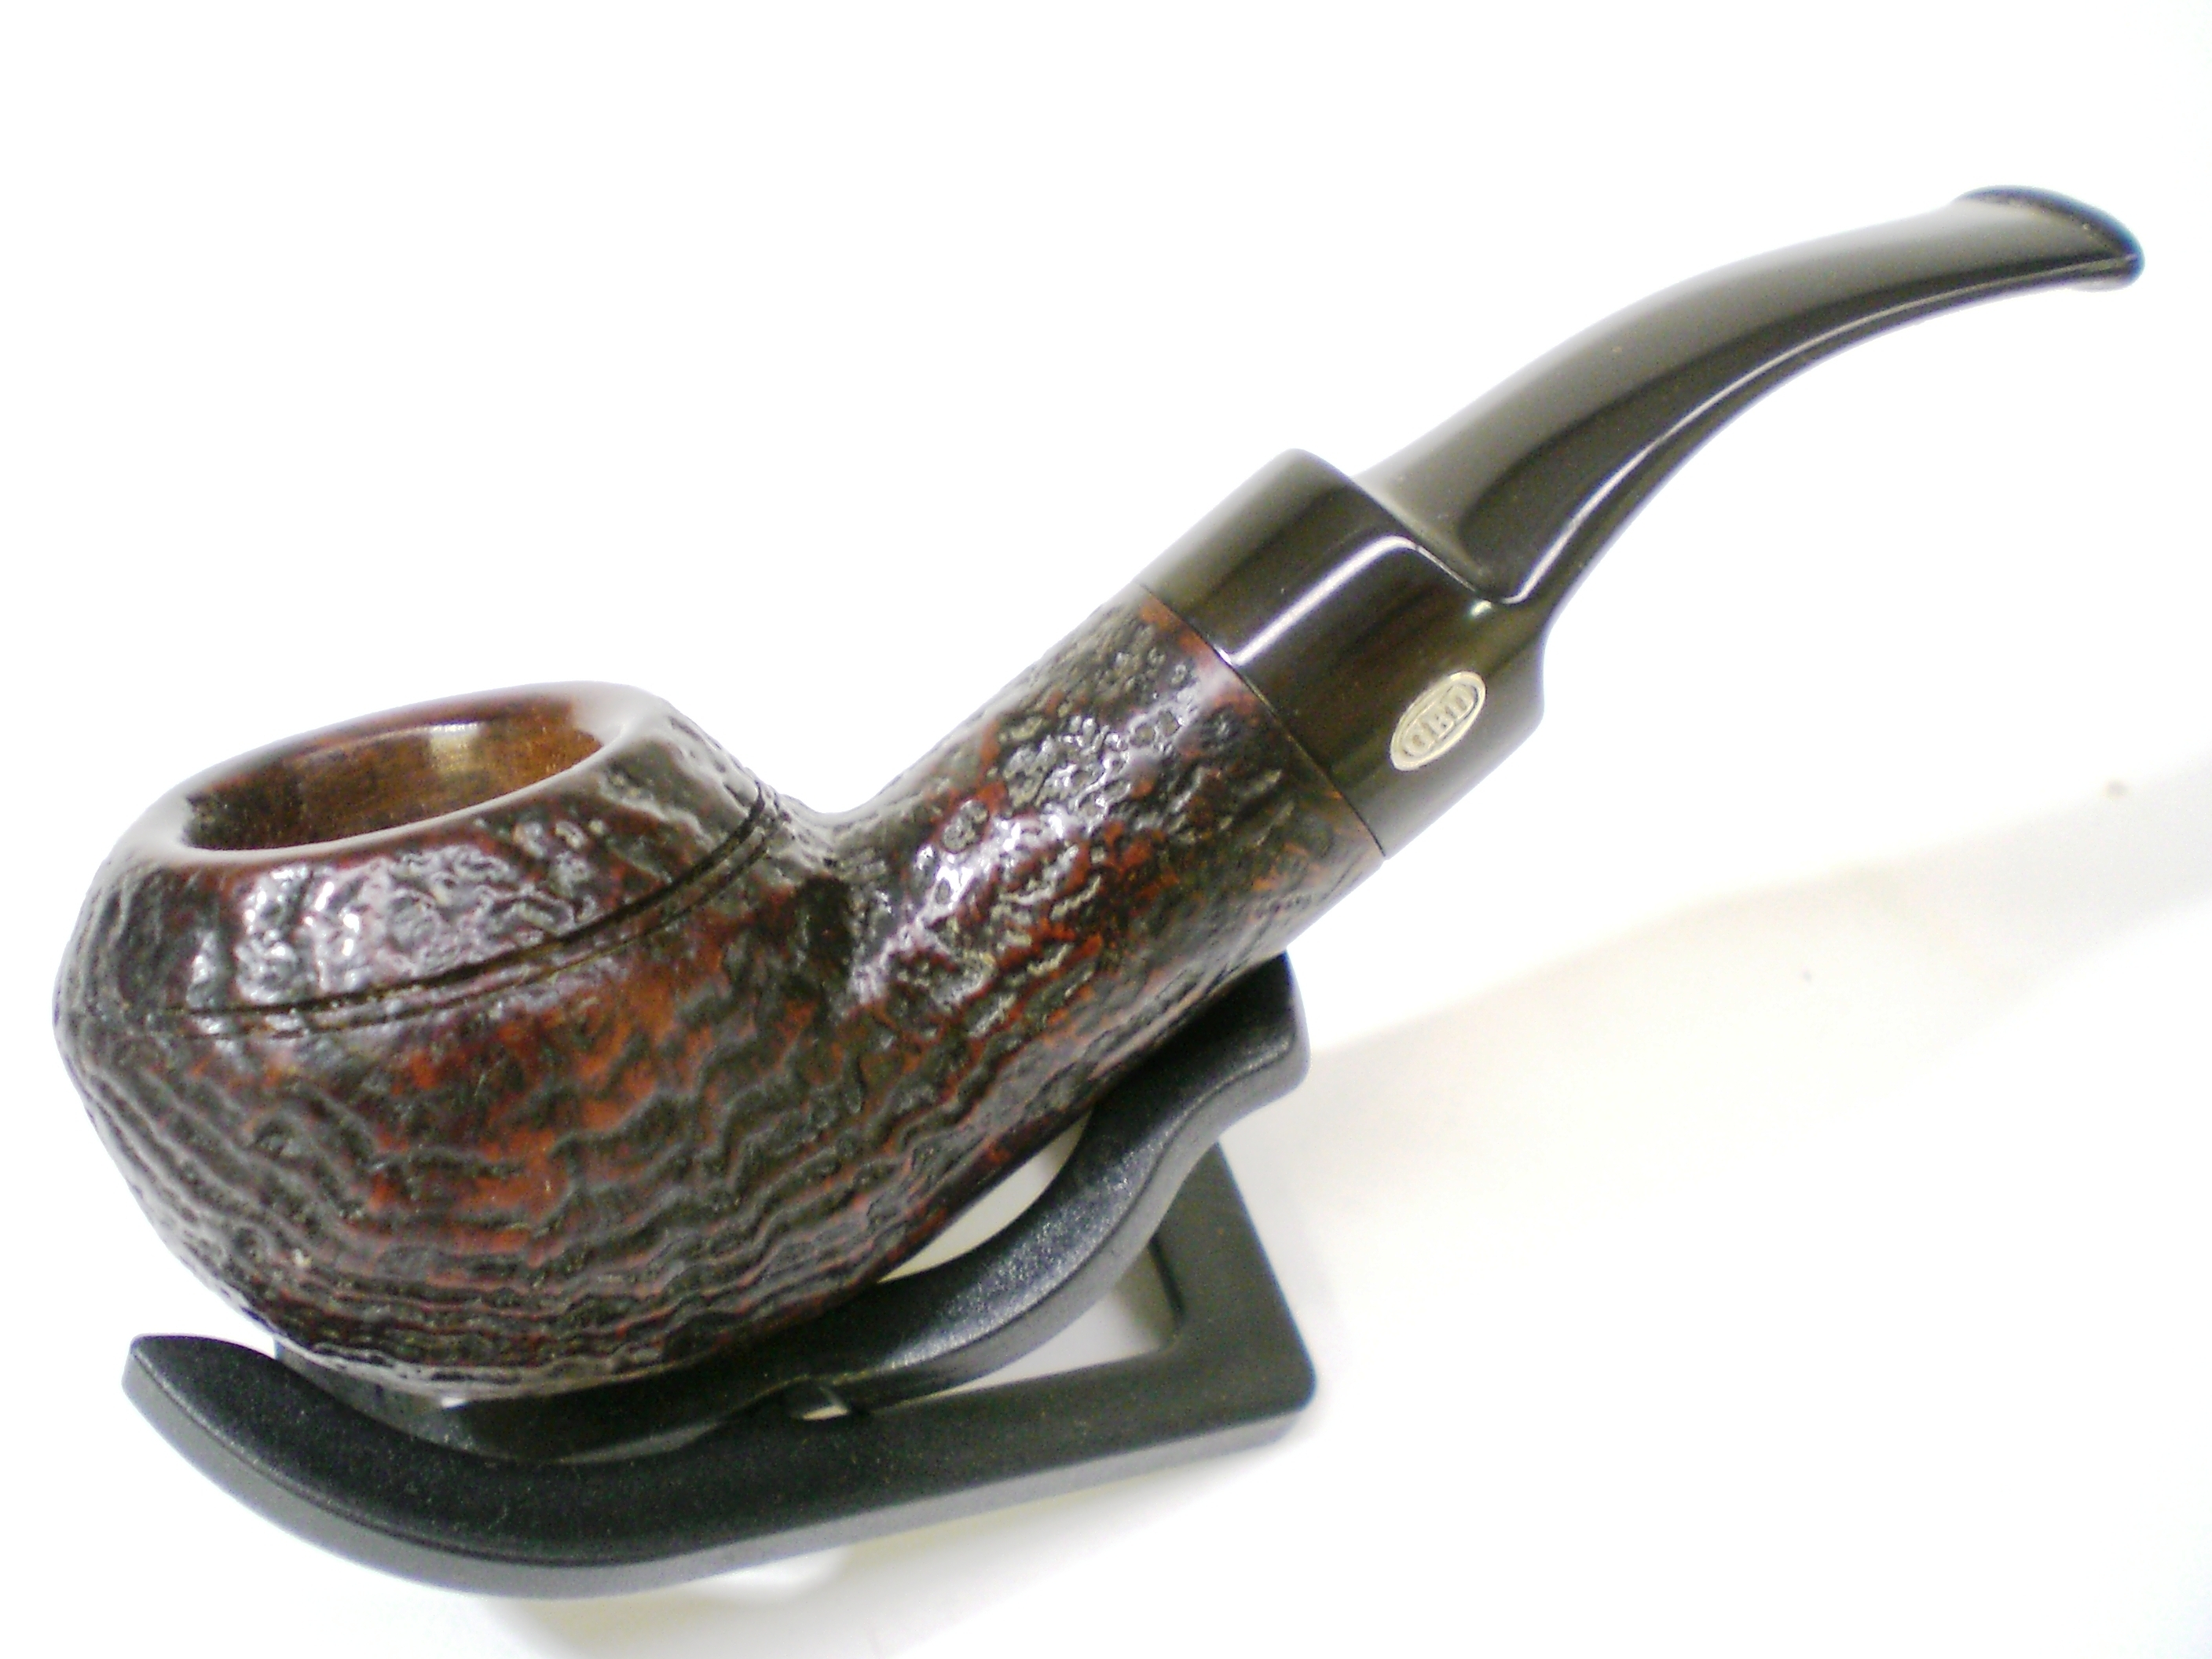
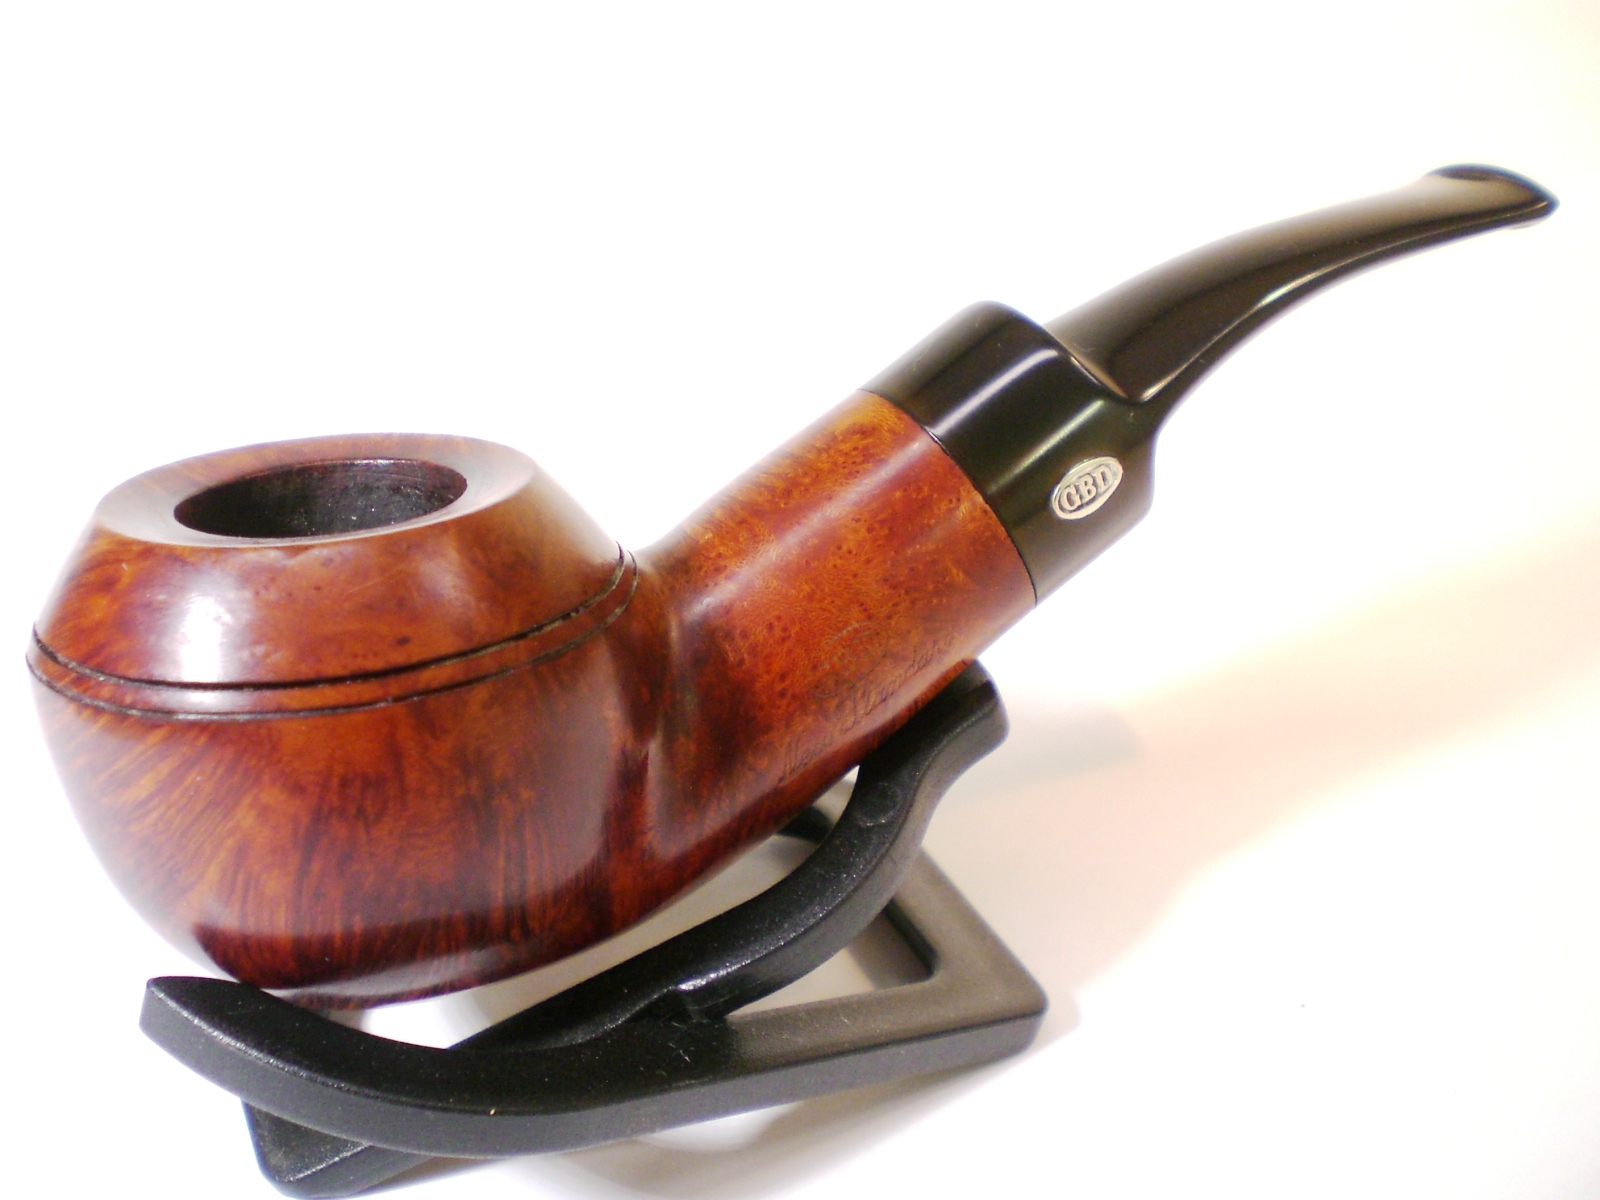
Below is the finished pipe. My grandfather was also a minister, but didn’t smoke a pipe. I would often watch him in his study poring over notes for his next sermon or wrestling with the day-to-day issues that a pastor faces. While working thru this restoration, I could picture Father Tom thoughtfully puffing on pipe as he completed his pastoral duties. I imagine it has been with him thru many weighty challenges faced by a modern minister. I hope this reborn pipe will be with him for many more years and help work thru the challenges of that endeavor.

Fr_Tom_Finished (9)

Fr_Tom_Finished

Fr_Tom_Finished (1)

Fr_Tom_Finished (2)

Fr_Tom_Finished (4)

Fr_Tom_Finished (5)

Fr_Tom_Finished (6)

Fr_Tom_Finished (7)

Fr_Tom_Finished (8)

An Engagement Pipe (GBD 548 Seventy-Six)


My family had a pretty big life event here last week. My daughter came home from New Orleans for a week of vacation, with the boyfriend of two years in tow again. He had called us a few weeks prior to ask permission to marry her, the first of our daughters to get engaged. This young man is quite a gentleman, as you might have guessed (who knew guys still ask for permission?). He and I share a number of interests, including pipes. I enjoyed my week with him and we were able to spend some time in the shop where I shared with him some estate pipe restoration techniques. He left here with a few briars that he cleaned. I miss him and her already.

As they were getting ready to depart, I found this GBD Seventy-Six, shape 548, on Ebay. I later learned it was sold by our own Bob Landry. The pipe had some issues and I was a bit skeptical that a good outcome could result. I’m a fan of the Seventy-Six line and I liked the tall bulldog shape. The bowl top had some chips on it but the tall bowl looked like there was plenty of briar there to top it just a bit. The stem was in great shape, just oxidized and I rationalized that if it didn’t work out, at least I had a brass rondell for the parts box. The big concern was the two burn marks on the briar (photographed and described well by Bob). I knew it would require a restain. Here is the pipe as it was received.

GBD_584_76-Before

GBD_584_76-Before (1)

GBD_584_76-Before (2)

GBD_584_76-Before (3)

GBD_584_76-Before (4)

I reamed the bowl and found it to be in great shape. I used a sheet of 800 grit paper on my flat work bench to top the bowl and work past the damaged area. That fix came out great and the tall bowl definitely lent itself to that repair. Next up, I soaked the bowl in alcohol to remove the stain. This really exposed the burned areas. I tried to sand past them, but that was not possible and I was afraid of putting a flat spot on the bowl, particularly on that right side. This work exposed some other nicks on the bottom of the bowl. I was able to buff/sand out most of those.

GBD_548_76_Work (4)

GBD_548_76_Work (3)

GBD_548_76_Work

GBD_548_76_Work (2)

The GBD Seventy-Six line used a two stain process that I really like, much like Comoys used. I stained the bowl black but must have put it on too heavy, as I had a hard time getting the black off. The plan was to sand off the black, leaving it to highlight the grain and then apply a very light brown stain. I mulled over just leaving it black, but that didn’t set well with me either. I was a bit frustrated at this point and almost bagged the whole project and save the stem for a future project. I left it on the bench for the better part of a week, working on other projects. I decided to soak off the black stain and left it in an alcohol bath for several days. That finally did the trick and afterwards, I sanded the briar smooth with some 2000 grit paper and then 8000 grit micromesh.

GBD_548_76_Work (5)

GBD_548_76_Work (6)

GBD_548_76_Work (9)

GBD_548_76_Work (8)

GBD_548_76_Work (7)

I then applied a very light brown stain using Feiblings Medium Brown heavily diluted with alcohol (20:1 ratio or so?) The combination of the black and brown stain finally hid the burn marks rather well and I was pleased with the outcome. The bowl was then polished with White Diamond and then several coats of carnuba wax was applied.

With the bowl completed, I turned my attention to the stem, which didn’t require nearly as much work. Using a piece of plastic, cut into a round shape I inserted it as a shield between the stem and the briar for the sanding work. I sanded the stem with 800, 1500 and 2000 grit paper, all wet. I then moved to 8000 and 12000 grit micromesh sheets. The stem was then buffed with White Diamond and an automotive plastic polish.

This shows the plastic shield.

GBD_584_76_Work (10)

As I was finishing the pipe and thinking about my daughters marriage, it struck me that there were some similarities in this pipe project and a successful marriage. Like a marriage, at times things don’t always go the way you anticipated and being patient with your spouse or a project always pays off. I sent the pipe off to my future son-in-law with a note welcoming him to our family. I hoped when smoking the pipe, he would remember the week he spent here and his proposal to my daughter.

GBD_584_76-Finished (4)

GBD_584_76-Finished (3)

GBD_584_76-Finished (2)

GBD_584_76-Finished (1)

GBD_584_76-Finished

Comoys 498 Extraordinaire Restoration


Many pipe smokers or collectors (I consider myself both) have a “Holy Grail” list of pipes they would like to own. My list totals five and this year I was fortunate to have acquired two from that list within six months. My five are highly sought after and fully restored examples are most likely beyond my meager pipe fund budget. My best bet to acquire any of these models is to find a pipe in need of restoration. Even then, I’m competing with collectors all over the world.

Two pipes on my list are Comoys Extraordinaire models. The Extraordinaire line is described in Pipedia as:

Extraordinaire. This designation was given to any pipe that was out of the ordinary in size or grain. The E/O was introduced in the 1930s, and “Extraordinaires” can be found with no other designation or also stamped, for instance, “Blue Riband” or “London Pride.”

My first Extraordinaire is a 499 that has been dated to the 1930’s, from the “football” stamp and drilled “C” logo. I bought this one from a pipe friend and it was in the condition you see pictured below. (originally purchased at Fine Pipes) I found this 498 Extraordinaire listed on Ebay and was able to make a deal with the seller to acquire it before the auction continued. It was listed as a “283/Blue Riband”, both of which I knew it was not. The nomenclature isn’t as sharp as on my 499 but it is legible. The stamping style and C logo are identical to my 499, so I assume this one is also from the 1930’s. There were plenty of dings on the bowl, including some on the top. The stem was in pretty good shape, but heavily oxidized with one tooth indention on the bottom. Here is the condition of the pipe as delivered.

Comoys_498_Before

Comoys_498_Before (1)

Comoys_498_Before (2)

Comoys_498_Before (3)

Comoys_498_Before (4)

Comoys_498_Before (5)

There was a moderate cake in the bowl, which I reamed and then filled the bowl and shank with Sea Salt and Everclear for an overnight soak. The alcohol and salt didn’t leach much tar from the bowl, so hopefully it will be ghost free. The bowl was previously reamed slightly out of round and the Comoys beveled bowl top has been dimished over the past seven or so decades.

The next step was to steam the dents and marks from the bowl. I heated an old kitchen knife tip with a propane torch. A wet cloth, doubled over was applied to the area with a dent, then the hot knife tip was pressed over the dent. The steam eventually causes the dent to rise and I was able to remove or diminish most of the dents. You have to be careful on this step not to scorch the wood, so keep your cloth wet. I was able to reduce the dents on the bowl top to much smaller marks. Fortunately, the bowl top was not scorched by previous smokers

Removing the oxidation from the stem took several hours. I first soaked the stem in mild Oxy-clean solution to loosen the oxidation. I put a dab of grease on the “C” logo to protect it. I then used 1500 wet paper and then 2000 wet paper to remove the brown oxidation. I buffed the stem lightly with white diamond rouge (with the stem mounted to avoid rounding the edge). Next I sanded the stem with 8000 and then 12000 grade micromesh sheets. The stem was then buffed again with white diamond rounge and finally with Blue Magic automotive plastic polish.

I tried to raise the tooth indention on the bottom of the stem, but it could not be raised much. I ordered a tube of black superglue that luthiers use for repair on stringed instruments. I’ve previously used regular superglue mixed with a little black vulcanite dust but this pipe seemed worthy of the investment ($15 delivered…). I’ll update the photos after the black superglue is used.

Below is the finished pipe along with my other Extraordinaire 499. I’m thrilled and fortunate to have acquired this one before it went thru the auction process. It makes a terrific stablemate to my 499.

Comoys_498_Finish

Comoys_498_Finish (3)

Comoys_498_Finish (2)

Comoys_498_Finish (1)

Comoys_498_Finish (4)

Update – Stem Tooth Indention Repair:

My order of Black Superglue was delivered this week from Stew-Mac. I forgot to order the accelerant, but Steve Laug told me to let the glue set overnight to dry.

I cleaned out the tooth mark using a small pick, to allow the glue to have a good clean suface.

Comoys_Stem_Stem_Repair (2)

Comoys_Stem_Stem_Repair (1)

The glue is a little thicker than regular Superglue, but it can still run, so the pipe stem must be kept level. Cut the tube open with the smallest opening possible. The bottle does have a tight fitting cap, so hopefully it does not dry out between uses.

Comoys_Stem_Stem_Repair (3)

After the glue dried overnight, I sanded it smooth with some 400 and then 800 grit wet sandpapers. I followed this with 1500 and then 2000 grit wet papers.

Comoys_Stem_Stem_Repair (4)

I then moved to the final two grades of micromesh, 8000 and 12000 grade papers, followed by a buff on the machine with White diamond rouge. I always do a final buff with automotive plastic polish. I’m pleased with how the repair came out and the black superglue does blend in better than the clear. I’m not a clencher, but I suspect the repair section would last longer then the original stem material.

Comoys_Stem_Stem_Repair

Comoys 215 “The Guidall” Restoration


This Comoys “Guildhall” came with an Ebay estate lot that held my recent GBD Seventy-Six project. It is a stamped “C” logo pipe but the briar is nice and it should make a decent smoker. I suspect given the stamped logo and nomenclature, that this one is from the 1980’s.

The stem was heavily oxidized and it took a lot of elbow grease to get it shiny again. The bowl was reamed and soaked with an alcohol and sea salt mixture, as is my usual practice. There was a chip on the bowl top, around the 7 o’clock position. That spot was sanded lightly with a piece of 6000 grit micromesh which mininized the mark and didn’t require the bowl top to be restained. The beveled edge, a common Comoys styling element, is still intact with some darkening.

Comoys_215_Guidall_Before (3)

Comoys_215_Guidall_Before (4)

Comoys_215_Guidall_Before (5)

Comoys_215_Guidall_Before (6)

I put a dab of grease on the “C” logo stamp and soaked it in a mild Oxy-Clean solution. It took a lot of sanding with a piece of 1500 grit wet paper to remove the oxidation. The logo has to be avoided, which is tricky. I then moved to 2000 grit wet paper. The stem had a pretty decent level of shine at that point and I finished the hand work with 8000 followed by 12000 grit micromesh papers. The pipe was then buffed on a machine with White Diamond followed by Blue Magic plastic polish.

The bowl was buffed lightly with Tripoli rouge followed by White Diamond and finally several coats of carnuba wax.

Here is the finished pipe. This one will most likely be sold via pipe forum classifieds or Ebay.

Comoys_215_Finish_B

Comoys_215_Finish_B (1)

Comoys_215_Finish (8)

Comoys_215_Finish_B (4)

Comoys_215_Finish_B (5)

GBD Oval-Shank Pot “Seventy-Six” Restoration


In 1976 GBD introduced a series called the “Seventy-Six” to commemorate the United States Bicentennial.  I was in Sophomore in high school during 1976 and the year-long celebration had a big impact on me.  The Seventy-Six model remained in the GBD catalog until 1981.  From the 1976 Catalog:

“The GBD “Seventy-Six” is our contribution to the Bicentennial celebrations.  We have really pushed out the boats for “the colonies” in launching this new series that will be remembered by its proud owner long after the celebrations are forgotten.”

My first “Seventy-Six” model was a 1976 Coloussus and I’ve since added three more, including this Shape 1353.  I would call this a banker, but in a Smokers Haven sales ad, it is referred to as a “bent oval-shank pot”.

The pipe was in decent shape, with a moderate coating tars on the bowl top, along with a few nicks and dents.  The stem, while heavily oxidized still had the brass rondell.  The rondell along with the “London, England” stamp indicated a pre-Cadogan era GBD.  The stem was also free of any serious teeth marks.  Several of the nicks were very noticeable and I wasn’t sure they could be removed or hidden easily.

GBD_1353_76_Before GBD_1353_76_Before (1) GBD_1353_76_Before (2) GBD_1353_76_Before (3)

I reamed the bowl and soaked it for six hours with some Everclear and sea salt.  Prior to soaking, I buffed the pipe lightly with some Tripoli and White diamond followed by a buff with carnuba wax.  I like to leave the wax on the pipe during the soaking process in the event some alcohol is splashed on the briar bowl top and I believe the wax gives it some protection from lifting the stain.  While the bowl was soaking, the stem was also soaked in a mild solution of Oxy-clean.  I put a dab of grease on the brass rondell.  The oxidation was so heavy, part of the rondell was obscured and at first I thought it was just worn heavily.   That turned out not to be the case.

GBD_1353_76_Restore (13) GBD_1353_76_Restore (5)

After the bowl was soaked, I emptied the salt and alcohol solution.   I heated a kitchen knife with a torch and applied that to the dents with a wet towel.  The steam generated allows the dents to pop back out most of the time.  In this case, the dents did spring back to shape and I was able to reduce the depth of some of the nicks.  Next I buffed the briar bowl again, using separate wheels of Tripoli, White Diamond and several coats of carnuba wax.  I was able to diminish all of the nicks, in particular the one on the right side of the oval stem.

Next I went to work on the stem, which I re-attached to the bowl in order not to round off the crisp edge.  I removed the oxidation with 1500 grade wet paper (dipped in my oxy-clean solution) followed by 2000 grade paper.  Next I moved to the Micromesh sheets, using 8000 and finally 12000 grade paper.  I then buffed the stem with white diamond and Blue Magic brand plastic polish.

A wire bristle brush dipped in Everclear was used to clean the shank.  It took approximately 25 swabs with the bristle cleaner until the brush came out clean.    I’ll let the briar dry out for a few days before smoking the pipe.   Below are some pictures of the finished pipe.

GBD_1353_Gallery2 GBD_1353_Finished (1) GBD_1353_Finished2 (3) GBD_1353_Finished (3) GBD_1353_Finished (5) GBD_1353_Finished (4)

GBD 9438 Virgin Restoration


Blog by Al Jones

If you have followed my previous posts, you’ve noticed that I am a fan of the GBD 9438 shape. There is just something about the chubby Rhodesian shape that appeals to me. All of the 9438’s in my collection are excellent smokers and feel great in the hand. For the past two years, I’ve been on the lookout for one of the highest grades in that shape, the Virgin. I found this somewhat tattered 9438 Virgin with a Perspex stem on Ebay.

The pipe showed some bruising and nicks on the bowl, but the top looked in decent shape as did the Perspex stem. Photographing details of a Perspex stem is never easy, but this seller had plenty of good photographs.

Below are the pictures posted by the seller.  You can see the handling marks on the bowl in the first shot.

GBD_9438_Virgin-Before (10)

GBD_9438_Virgin-Before

GBD_9438_Virgin-Before (1)

GBD_9438_Virgin-Before (2)

GBD_9438_Virgin-Before (5)

GBD_9438_Virgin-Before (6)

The bowl had a light cake, which I reamed close to the briar with my Castleford reamer. I soaked the bowl overnight with Everclear and sea salt. I use a champagne cork to plug the shank end and try to work a little of the salt/Everclear slurry into the shank.

The stem was in pretty good shape, but had a tooth indention on the lower side and some scratches. I tried to lift the tooth mark with some heat, but the Perspex isn’t as resilient as Vucanite. I removed the scratches with some 1500 then 2000 grit wet 3M automotive grade wet sandpaper. Next I completed the stem work with 8,000 and then 12,000 grit micromesh sheets. I buffed it lightly with some automotive plastic polish. The draft hole isn’t heavily stained, which is a fortunate find on a Perspex stem. The tooth mark is on the bottom and the clear Perspex hides it nicely. (and makes it difficult to photograph)

My biggest concern about the briar was what appeared to be handling pinprick marks in several spots, probably from banging around in a drawer/box for a few decades. Using a torch, wet cloth and a pirated kitchen knife, I was able to lift a majority of the marks. The nomenclature was light, so I carefully buffed the bowl with first White Diamond then two coats of carnuba wax. That helped even out the color and hide some of the bruising. It’s not perfect, but has a nice level of patina.

GBD_9438_Virgin_Finished (6)

GBD_9438_Virgin_Finished (1)

GBD_9438_Virgin_Finished (2)

GBD_9438_Virgin_Finished (3)

GBD_9438_Virgin_Finished (4)

GBD_9438_Virgin_Finished (5)

GBD_9438_Virgin_Gallery

With this addition of this Virgin, I now have five different grades of the 9438 shape.

Fantasy

GBD_9438_Fantasy_Gallery 3

Tapestry

GBD_Tapestry_9438_2nd_Gallery

Prehistoric

GBD_9438_Prehistoric_Gallery

New Standard

GBD_9438_New_Standard_Gallery

I include this Seventy-Six Colossus as it is an oversized 9438 (stamped 9676) and clearly the 9438 chubby Rhodesian shape.

GBD_Colossus_76_Gallery

GBD Tapestry 9438 Re-boot


Earlier this year I refurbished a GBD 9438 in Tapestry finish and vowed never to touch a chair-leg stem again. That pipe proved to be a wonderful smoker and is a frequently used pipe in my rotation. A few weeks ago I found the identical pipe on Ebay and won the auction. This second 9438 was in a little better shape and the stem was not nearly as oxidized. The Rondell appeared to be damaged.

The bowl was in terrific shape, with very crisp nomenclature. There is an “E” stamp just at the end of the stem. If anyone has an insight as to what that means, please comment. The bowl was lightly reamed, then soaked with Everclear and sea salt. After the bowl was soaked, I buffed the briar with some Tripoli, White Diamond and finally a few coats of Carnuba wax. The briar is in really nice shape and the polished top is unmarred.

My attention then went to the stem. From the Ebay picture, I thought a piece of the brass rondell was missing. But that proved to be only grime. These rondells now appear to be unattainable, so I was pleased to discover this. The stem was soaked in an oxyclean solution. It was then cleaned with 2000 grit wet paper, than the last few grades of micromesh. After sanding, I buffed the stem with white diamond and then plastic polish.

I’m very pleased with the finished pipe. The briar a bit nicer than my first 9438 Tapestry. I bought it with the intention of giving to a family member as a Christmas gift, but now.….

Perspective of the pictures makes it appear the pipes are different sizes. However, they are identical in size. The tenon on the recent addition is curiously a bit longer than my first 9438.

Before:

The fisnished pipe and some shots with the sister 9438 Tapestry:

Al Jones aka “Upshallfan”

Dr. Plumb Bulldog Restoration


My daughter’s boyfriend found this neat little Dr. Plumb bulldog at a New Orleans shop and sent it to me for restoration. I thought Dr. Plumb had a connection to GBD and I believe they are now owned by the Cadogan group. The stem was in terrific shape, save for a heavy coat of oxidation. The top of the bowl was scorched and it had some dents and scratches.

Before:

I reamed the bowl with both my Castleford and Senor reamers. Someone in the pipes past had reamed it a little out of round, but it wasn’t too bad. I removed some of the dents with a knife heated by a flame and a wet towel. Most of the major ones popped back out nicely. The bowl has some fills, but they are hidden well by the factory finish. In order to remove the scorched top, it would have required a restain. I was afraid with the numerous fills, it would look better with the factory finish. “Character” as they say. I buffed the bowl with some Tripoli, White diamond and with a final buff using Carnuba. The stamping is very legible.

The stem was soaked in an Oxyclean solution overnight to soften the brown coating. Unfortunately, the stem logo proved very problematic. I could not get the oxidation off this part of the stem without removing the logo. The owner opted for me to leave the logo and brown patch.

Here is the finished product.

The pipe sure looks like it would be a good smoking piece and I hope the young man enjoys it for many years.

Selected Straight Grain (Comoys) Restoration


By Al Jones

Several months ago, a thread on the SmokersForum.uk about the Comoys “Selected Straight Grain” pipes piqued my interest. Member Dirigo (Tom) was kind enough to share with me how to identify these interesting pipes. I was able to grab this Shape 13 via Ebay last week, which corresponds with the Comoys shape chart. That shape looked to be in decent shape, with the exception of one putty fill. I assume this flaw made the pipe unworthy of the Comoys stamping. There were only the slightest tooth marks and no pesky stem logo to worry about.

From the Ebay picture, you can see the ugly fill.

There was only minimal cake inside the bowl so it was lightly reamed and soaked with Everclear and sea salt. The top of the bowl was scarred, so that was going to take some work.

While the bowl was soaking, I started on the stem, which had been soaking in a Oxyclean solution. I went thru my usual 1500/2000 grit wet paper that onto the final four micromesh grades. The stem was then buffed with white diamond and a final plastic polish. Removing the light chatter was pretty straight forward. The button was worn, so I used a needle file to slightly reform the edges.  Unfortunately, I was unable to remove the oxidation without making the edge of stem slightly rounded.  I need to learn how to avoid this issue.

Once the bowl was done soaking it was moved to an alcohol bath to remove the stain. I spoke to Steve prior to this step and he recommended the fill be corrected using the superglue & briar technique he recently posted on Reborn Pipes. That solution worked well and I used two steps to fill in the pit. After restaining, the fill is just slightly visible, a big improvement from the factories solution using the bubble-gum putty.
The Super-Glue and briar dust patch.

I used a two-step stain process to highlight the grain, also a recommendation from Steve. First I “painted” on some black stain, after the bowl was warmed to open the grain. Then, the bowl was sanded with micromesh and a very diluted application of Medium Brown stain was applied. The bowl was than buffed with Tripoli and white diamond, followed by a final buff with Carnuba wax. I was careful on all steps not to diminish the stamping, which is quite legible.

Thanks to Steven Laug for his help with this one and Tom for information on this interesting Comoys niche.