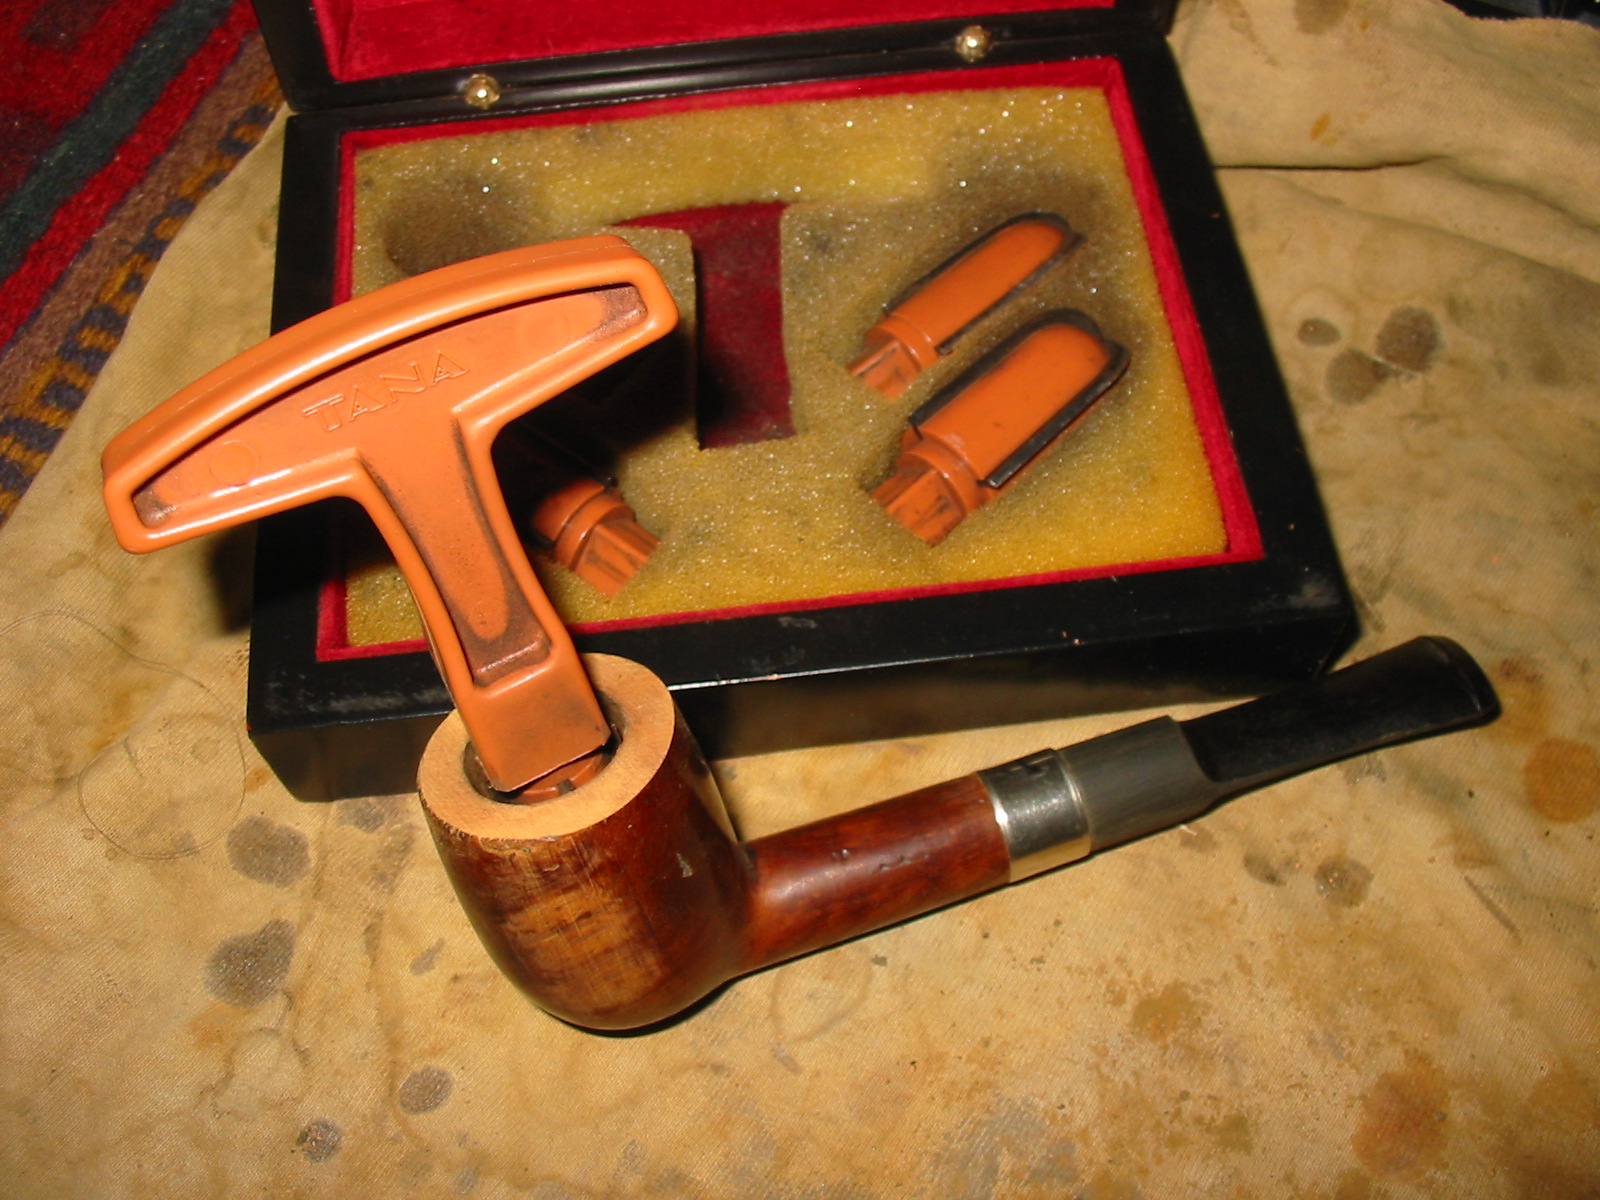
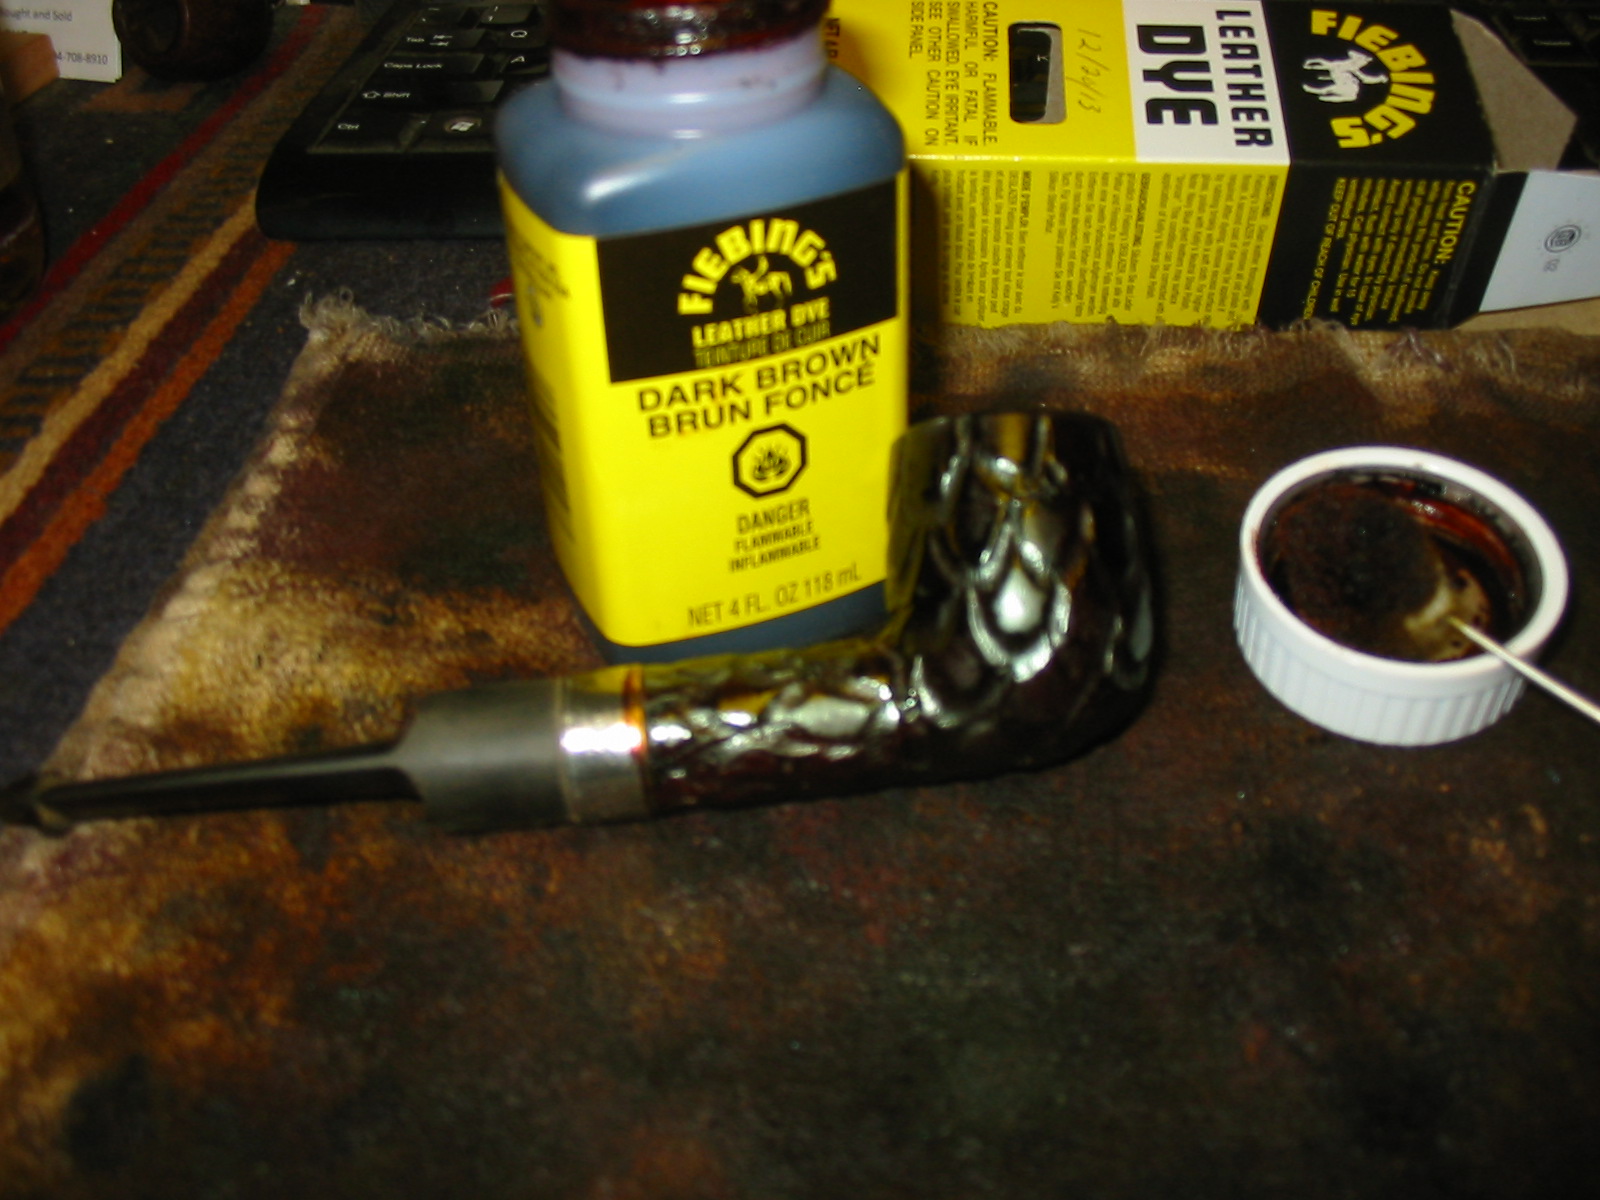
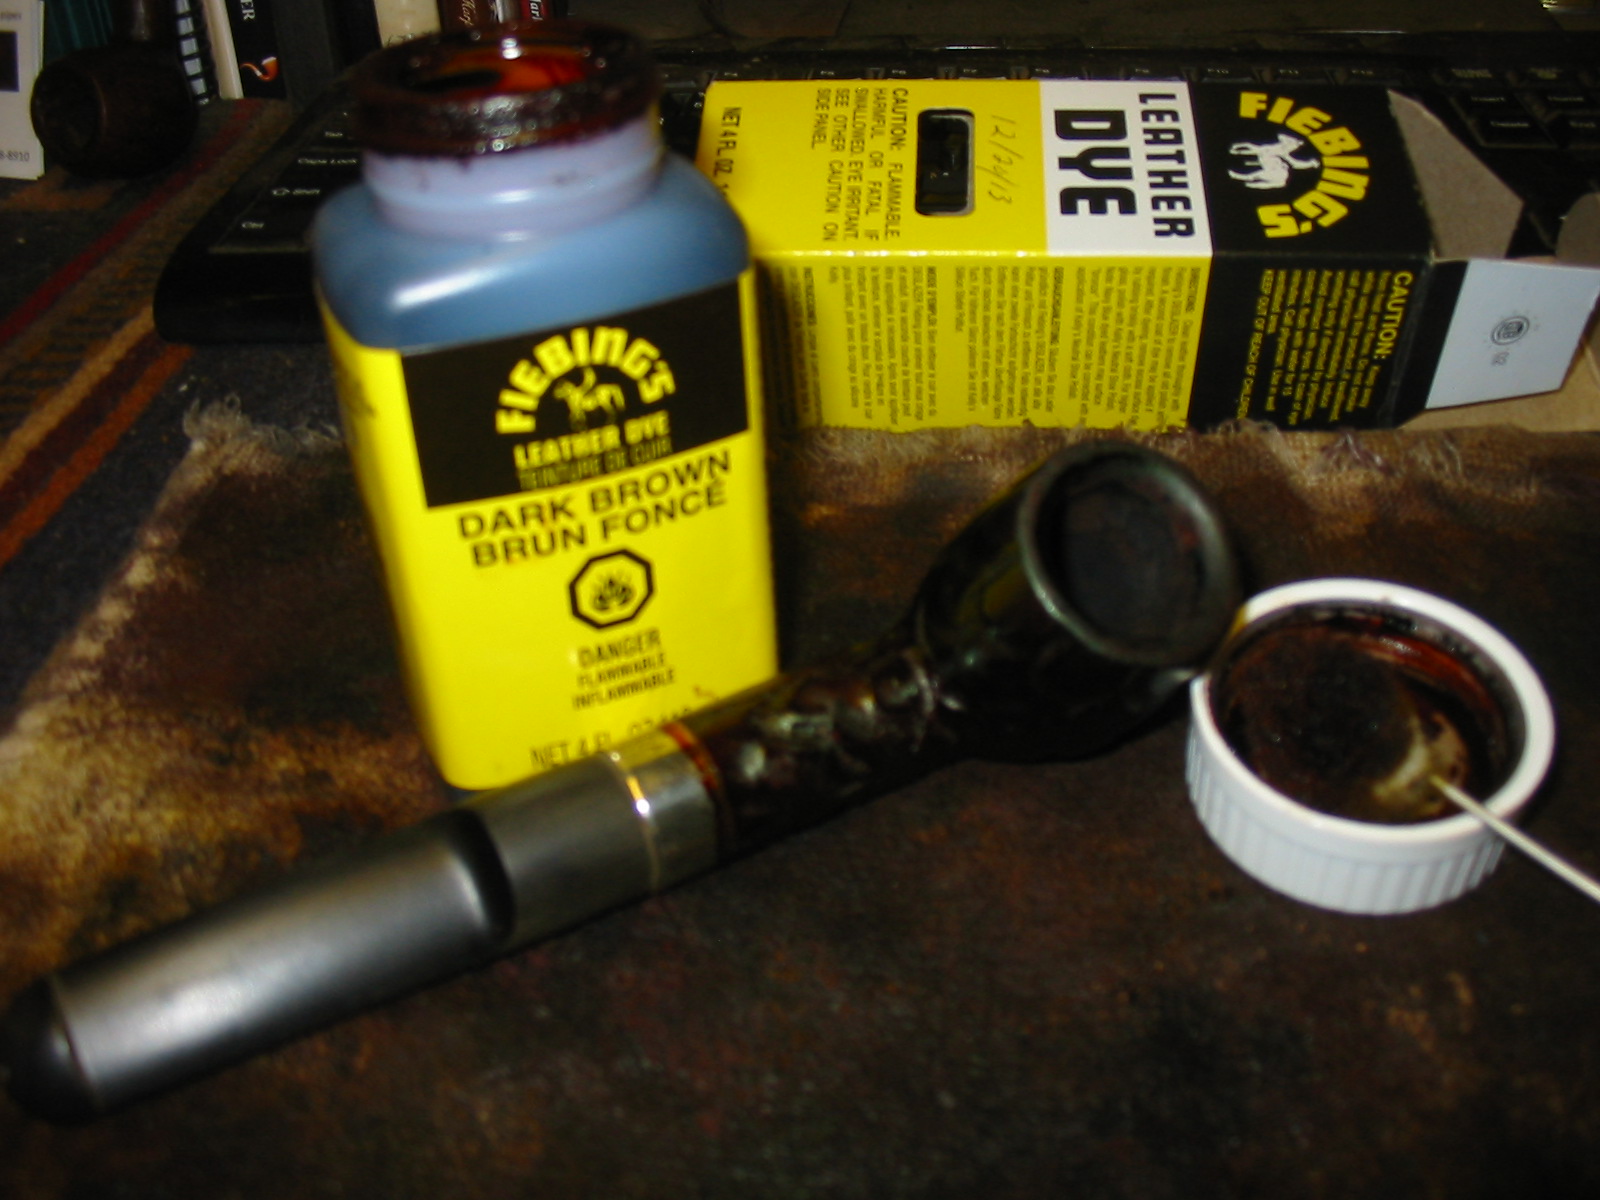
It looked like someone took a saw to the bowl on this one – A Bruyere Garantie Lovat Restored


This bowl came to me showing a lot of promise but also a lot of damage. It was like someone had sawed at the bowl on the side near the shank. The cuts were more than mere flaws in the briar as they were very jagged and broken inside the cuts. There were what looked like tooth marks in the grooves. I debated on rusticating it but there was something about the challenge that made we work at ways to make it smooth once again. The inside of the bowl was in great shape. There was one damaged spot on the inside edge of the rim on the right side of the bowl. The bowl had tobacco still in it and the top of the rim was tarred and caked. There were multiple nicks in the finish all the way around the bowl but the majority of those were in line with the deep grooves. The bowl came without a stem and the shank had a nick out of the end making a clean fit almost impossible. There were no cracks in the shank so no damage in that way. The stamping on the pipe is Bruyere in a curved banner – unfurled in an arch on the left side of the shank and underneath it is stamped Garantie. The banner also seems to go across a three pointed crown that is visible underneath the banner.
IMG_5612

IMG_5613

IMG_5614

IMG_5615
I found a precast stem in my can of stems that was close to the right diameter to the shank and turned the tenon with a PIMO Tenon Turner and then fit it in the shank. I used a Dremel to remove the excess rubber along the edges and end of the cast.
IMG_5616

IMG_5617

IMG_5619
I sanded the stem and the shank to achieve a good smooth transition between the two. In the process I was curious as to what the shank would look like with a band so I slid a band part way on and fit the stem in place to have a look.
IMG_5620

IMG_5621
I liked the look of the band so I removed it and sanded the stem to fit smoothly against the shank. I sanded it with 220 grit sandpaper. (I have found that lower grits, courser sandpaper just makes for more scratches and is counterproductive when I am working toward refinishing the bowl.
IMG_5622

IMG_5623

IMG_5624

IMG_5625
Once I had the fit right and the transition smooth I cleaned off the shank with isopropyl alcohol and then rubbed on some white glue I heated the band and pressed it in place. With the band in place I took the bowl back to my work table and did a light topping as the outer edges of the bowl were more damaged than I thought. I wanted a good clean rim to go with the pipe once I had stripped and refinished it.
IMG_5626

IMG_5627
I reamed the bowl with a PipNet reamer and took it back to bare wood all the way to the bottom of the bowl.
IMG_5629
I wiped down the bowl with acetone on cotton pads to remove the finish. I wanted it clean of debris and grime as well as stain so that I could do the repair. I used the dental pick to clean out the edges of the two large cut marks and the smaller chatter in the briar as well. None of them actually were fills but rather gouges in the briar. I roughened the edges and wiped it down a final time with the acetone and cotton pads.
IMG_5632
I packed the cuts and nicks with briar dust and tamped it into place with the curved head or a pipe nail and also with the dental pick. Once they were full I dripped super glue into the grooves. I then packed more briar dust into the grooves, over filling them. I always put far more briar dust in the grooves than necessary to get good tight fills in the holes. I figure I can pack once and sand it back to the surface of the bowl instead of doing the pack two or three times. At this point in the process the photos show the pipe as a serious mess. I always wonder if I will be able to clean it up or if I had just made it a mess for nothing.
IMG_5633

IMG_5634

IMG_5635
I sanded the repairs and the bowl with 220 grit sandpaper to remove the excess material on the surface of the bowl. I followed that by sanding with a medium grit sanding block. The repairs are visible in the photos below as a solid dark brown/black coloured fill.
IMG_5636

IMG_5637

IMG_5638
I sanded the bowl further with medium and fine grit sanding sponges to remove the scratches in the surface of the bowl. I wet sanded with 1500-2400 grit micromesh sanding pads to smooth things out even more. I wanted the surface of the repairs to be smooth with the rest of the briar on the bowl. Once the sanding was finished I wiped the bowl down with some isopropyl alcohol on a cotton pad to clean off the dust.
IMG_5639

IMG_5640

IMG_5641

IMG_5642
I decided to give the bowl several coats of an oxblood stain that was slightly more opaque than my normal aniline stain. It is a stain that is used on kitchen cabinets and surfaces that food comes into contact with so I believe it is safe once it is dry.
IMG_5643

IMG_5644

IMG_5645
I wiped the bowl down with a soft cotton cloth to remove the excess stain and then restained it a second time. I repeated the staining until the coverage was even and clear.
IMG_5646

IMG_5647

IMG_5648
I worked on the stem some more with medium and fine grit sanding sponges and then with micromesh sanding pads. I wet sanded with 1500-2400 grit pads and dry sanded with 3200- 12,000 grit pads.
IMG_5724

IMG_5725

IMG_5726
I rubbed the stem down with Obsidian Oil and let it soak in. I looked over the bowl again and decided to give it a top coat of a walnut brown stain. I felt that it might add some darker highlights to the repaired areas and make them less noticeable. I applied the stain, flamed it, restain and reflamed it and then buffed the bowl and the stem with White Diamond on the buffing wheel. I gave the whole pipe multiple coats of carnauba wax and then a final buff with a soft flannel buff to add a polish. The next four photos show the finished pipe. While the flaws/cuts are still visible they are no longer deep gashes in the wood. Rather they give a sense of character to the pipe and overall it is ready to go and last a long time delivering a quality smoke.
IMG_5727

IMG_5728

IMG_5729

IMG_5730
I took the final photo to give a close up view of the repaired gashes on the bowl. Though visible they are now smooth to the touch and solid and unmovable.
IMG_5731

Looking Over My Metal, Nylon and Bakelite Pipes with Threaded Bowls


Blog by Steve Laug

It is funny how the number of pipes one has seems to grow exponentially. It is almost as if they are breeding in the drawers I keep them stored in. This afternoon I thought I would take out assorted metal stemmed pipes and then added the Nylon and Bakelite pipes as well. All of them have threaded bowls that are interchangeable within the brand of pipes. None of them are interchangeable with each other.

The first photo below shows my two Dr. Grabow Vikings. I have two of them and one of them I restemmed. They do not have any stamping on them but the base and the design of the stems matches other Vikings that I have had.
IMG_5716
The next photo shows my three Falcon Bents. All of my Falcon pipes were made in England including the straight shank one in the second photo. The bowls are interchangeable among the Falcons but not on the Grabows. I have refinished all of the bowls. The second and third bowl below were unfinished when I bought them on Ebay so I sanded them and finished them.
IMG_5715
The next photo shows my only Falcon straight. I have had many of these over the years and sold or gave them away. I refinished the bowl on this pipe as well.
IMG_5717
The next photo shows a unique metal pipe – a Dr. Plumb Peacemaker – Made in England. This pipe has a very narrow shank from the top view but a wide shank from the side. The bowl is threaded and only fits the Peacemaker pipes.
IMG_5719
The next two pictured below were made by Kirsten in Seattle, Washington, USA. The top one was a silver barrel and stem I picked up on Ebay. I carved and fitted the meerschaum bowl to fit the barrel. The second one is a Kirsten Mandarin. I bought this pipe in the 80’s brand new. It is a lightweight pipe and has a large diameter bowl. The stem is a thick Lucite and not particularly comfortable.
IMG_5720
The next two photos show a two bowl Bryson metal pipe. I did a write up on the blog on refurbishing this old pipe. It was a challenge. The bowls are actually compressed briar dust – almost like particle board. The grain on the smooth one was a decal. The rustication on the other hides the nature of the material.
img_2416

IMG_5718
The pipe pictured below has a Nylon stem and base. The bowl is not briar but an alternative wood. It has the appearance of maple but I am uncertain of the wood. It is extremely lightweight. I wrote a blog post on the refurbishing of this pipe as well. If you are interested do a search for Nylon pipes among the posts and you can read about it.
img_2213
The final photo shows some of my Bakelite Pipe stems and bases with interchangeable bowls. Three of them are made by WDC. I reworked the bowls and restemmed two of them. The Bakelite stem and base are hard and quite resilient. The bottom pipe in the photo has no name stamped on it and is a Bakelite bowl and stem. I have not seen one of these before and enjoyed refurbishing it.
IMG_5721
These pipes hold a unique place in my collection. I find that I do not smoke any of them that often. The Falcons and Grabows are kept for their uniqueness and their place in pipe and tobacco history. I enjoy working on them. They tend to pass through my collection quite often. Today I have the ones pictured but they may well be gone in the months ahead and replaced by others. The Brylon and the Peacemaker are kept for their uniqueness and will probably remain with me. The Kirstens I smoke and enjoy infrequently but find that I pick them up several times a year to have the dry smoke they offer. The final photo of the WDC pipes and the Bakelite bowled pipe pictures pipes that will remain with me and not be traded or sold unless I find better versions of them.

Reflecting on My Collection of Rad Davis Pipes


Blog by Steve Laug

In my ongoing cleanup of my pipes in the cupboard I decided to photograph and take time to revisit another group of pipes that I have. This group is made up of eight very unique and distinct shapes. They come from another American Pipe Maker that I have collected pipes from – Rad Davis. Rad is well-known to most people and is a very creative pipe maker who is also a great human being. I have spoken with Rad several times in Chicago when I have attended the pipe show there and had great conversations with him. He is a gentleman and a pleasure to talk with. I have a number of unique smooth finished pipes that Rad carved as well as sandblasts and one rusticated pipe. The shapes vary from classic shapes to some very uniquely Rad Davis pipes. I thought I would take time to show them here and give my history with these pipes and a few words on their finish and stamping.

The first pipe in the group is a classic Rad Davis shape – a squashed or flattened tomato. The finish is smooth and flawless. The bowl is proportionally quite large in comparison to the shank and stem. The grain is well laid out with birdseye on the bottom of the bowl and in the curve of the rim down to mid bowl and on the top and bottom of the shank. There is also some flame grain around the sides of the bowl and on the sides of the shank. The stem is a green Cumberland and is inset into the end of the shank. This is a very comfortable pipe to hold and to clench in the mouth while doing other things. It is very light weight.

This pipe was a gift to me from a friend of mine. It was one that I had admired over the years when we got together and traded stories and tobaccos. One day as we were visiting he was telling me he was downsizing his pipe collection. Not necessarily in terms of numbers but literally in terms of size. He was going for much smaller pipes – group 1 and 2 sized pipes. This Rad was too big for him so he handed it to me in its pipe bag. Each time I smoke it I remember the moment of its gifting and thank my friend as I light the bowl.
IMG_5691

IMG_5692
The stamping shows that it was made in 2006. It is stamped as follows:
RAD DAVIS
Hand Made
USA
06
IMG_5693
The second pipe in my collection is another signature tomato shape. It is not as squashed and has a more rounded look to it. The finish is smooth and flawless. The bowl is proportionally quite large in comparison to the shank and stem. This one has a rounded shank rather than the flared shank in the above pipe. Again the grain is well laid out with birdseye on the bottom of the bowl and in the curve of the rim down to mid bowl and on the top and bottom of the shank. There is also some flame grain around the sides of the bowl and on the sides of the shank. The stem is a classic Cumberland and instead of an inset has more of a Danish style saddle look to it. Where the green one was straight from the saddle to the button this one has a definite flare. This is also very comfortable to hold and to clench in the mouth while doing other things. It is very light weight.

I bought this pipe from one of the tables at my first Chicago Pipe Show. I remember walking around the show floor, overwhelmed by the sheer number of pipes available and feeling in a daze when I saw this pipe on one of the sale tables as an estate I had to have it. I took out the cash I had brought with me and bought it. In doing so I had purchased my first Rad Davis pipe. Little did I know that I would purchase others over the years that followed. It is a great smoking pipe and the reason that I have added others to my collection.
IMG_5697

IMG_5698
This pipe does not have a date stamp on it. It is stamped as follows:
RAD DAVIS
Hand Made
USA
IMG_5699
The third pipe in my collection is a nose warmer billiard. It has a definite cant to the bowl and is very Danish looking in terms of the execution of the billiard shape. The finish is the same colour brown as my other two smooth Rad pipes and is just as well done with no visible flaws. The grain on this one is different. If you put a pinpoint in the bottom of the bowl the grain flares out to all sides and along the shank flowing from that point on the bottom of the bowl. The rim is chamfered inward slightly and gives the pipe a classic look. The stem is a Cumberland taper and is straight from the sides of the shank to the end of the button. It is also light weight and is a great smoker.

I remember when this one came up on Briar Blues website. I received the email notice that Mike had posted new pipes and went to have a look. I was taken by this little pipe and quickly made the deal. I have smoked it quite a bit since I purchase it and still reach for it.
IMG_5694

IMG_5695
It is stamped as follows:
RAD DAVIS
Hand Made
USA
06
IMG_5696
The fourth Rad pipe I purchase was one of my favourite shapes. It seems that the ball/apple or Rhodesian has a big place in my collection. This beauty is the only rusticated Rad pipe that I have. It has a smooth band around the end of the shank, on the underside of the shank for the stamping and a smooth rim. The rustication while tactile and pebbly is also smooth. The two colour stain gives it a great look. The grain on the band and the rim just pops with the staining job. This one has a vulcanite stem that is a taper and very comfortable in the mouth. When the bowl warms as it is smoked it feels great in the hand. I purchase this one from a fellow on one of the online forums that I frequent. It is larger than the previous three pipes and is like Mark Tinsky’s size 4 pipes.
IMG_5700

IMG_5701
It is stamped as follows:
RAD DAVIS
Hand Made
USA
06
IMG_5702
The thing that drew me to purchase this next pipe was the unique shape and finish. The shape is almost bulbous like the old seaweed bulbs that we used to use as whips when walking the Pacific coast beaches. There is something about the shape that grabbed me. The bowl almost sits on top of the shank. There is a ridge on the bottom of the bowl that goes up into the shank. The shank itself is round and quite delicate. The finish on this pipe is also varied. The majority of the bowl is finished in similar brown tones as my other smooth Rad pipes. It has cross-cut grain running along the sides of the shank running into a beautiful weblike sandblast on the bottom of the bowl revealing rings and grain radiating from the centre of the bottom. The rest of the bowl has marvelous birdseye grain from the top of the blast to the tip of the rim. The stem is Cumberland with a tapered saddle bit with a flare toward the button. I believe I purchased this one on EBay for a decent price. Its style, though not for everyone, certainly grabbed my attention and still does. I can easily get lost in the grain and the sandblast as I am smoking it. Thanks Rad for making this unique beauty. I have not seen another one like it!
IMG_5703

IMG_5704
It is stamped as follows:
RAD DAVIS
Hand Made
USA
06
IMG_5705
The next pipe is a classic shape – a chubby shank pot. It has a marvelous sandblast finish that has been stained in such a way that the vertical grains in the blast are variegated while at the same time showing a ring grain that is highlighted by the blast and the stain. The blast is vertical on the bowl and the shank radiating from a birdseye blast on the bottom of the bowl. The rim is smooth with a slight bevel inward and there is a smooth band around the end of the shank and a patch for the stamping on the underside of the shank. The stem is Cumberland with a taper flowing out of a saddle. Well cut and comfortable in the mouth. I bought this one online through EBay as well and have enjoyed handling and studying the blast since the day it arrived. It is fascinating to look at and again I can get lost in the grain and patterns of the blast.
IMG_5706

IMG_5707
It is stamped as follows:
RAD DAVIS
Hand Made
USA
07
IMG_5708
I don’t know what to call the shape of the next pipe. On one hand it is a brandy with an arched/domed shaped shank. On the other hand it could be an egg of some sort. Whatever the shape is called this one is a beauty. The blast is similar to the blast on the pot I spoke of above. The bottom is birdseye grain that has been blasted and looks like many tiny eyes looking out at you from the bottom of the bowl. These radiate out into straight grain up the side of the bowl and the shank. The ring grain is also visible across the bowl giving the blast a multidimensional look incorporating both vertical and horizontal patterns in the blast. There is a cocobolo end cap on the end of the shank that highlights the arched shape of the shank. It is sunk so that the Cumberland stem is inset into the cap. It look and feel is a lot like the green Cumberland stem on the squashed tomato above though it flares out from the saddle to the button. I bought this one on Ebay as well and could not wait until it arrived. It is just my size of pipe. It is just over 5 and ¼ inches in length with a slight bend to the stem. It sits well on the desk or table while I am working but is light enough to have in my mouth. The bowl is a group 4 sized bowl and holds a good amount of tobacco.
IMG_5709

IMG_5710
It is stamped as follows:
RAD DAVIS
Hand Made
USA
07
IMG_5711
The last of my Rad pipes is one I bought directly from Rad as the Smokers Forums Pipe of the Year for 2008. It is a Poker/sitter with an angled base that holds it upright on whatever surface it is left on. The stem is vulcanite. The pipe is well-balanced and though I rock it –it always returns to the upright position. The sandblast on this one is just as well done as the rest of my Rad blasts. The rim and the bottom of the bowl are a blast birdseye while the sides of the bowl and shank incorporate the vertical and horizontal look to the blast that Rad achieves. It is a well made pipe with the taper stem fitting tightly against the shank and snuggly in the mortise. It has a stain that gives a variegated appearance in the light – red and brown hues seem almost to move in the light.
IMG_5712

IMG_5713
The stamping on this one is unique as it is the Smokers Forum Pipe of the Year. It is stamped as follows:
Smokers Forums in an oval
RAD
USA
2008
IMG_5714
I have enjoyed Rad’s pipes since I smoked the first one many years ago now at the Chicago Pipe Show. I have added them over the years and from what I can see, will continue to add them as I am able. The only pipe of Rad’s in my collection that needs more attention is the Smokers Forum Pipe of the Year 2008. I have not smoked it as much as it deserves as it is not even broken in. I am going to have to remedy that.

Reflecting on my Dunhill Collection


Blog by Steve Laug

I am currently in the mode of cleaning up pipes in my collection. I have been polishing and giving them attention as well as taking the time to enjoy them by looking at them and handling each one. I have shown my John Calich and my Mark Tinsky pipes. This morning I am working through my Dunhills. As I went through them I have to say I am a bit surprised that I have so many of them. I figured there were a half-dozen or so but have never really looked at them all in one place. Laid out together there are eleven of them. I used to have a dozen I guess, but I sold one to a friend’s wife for her husband’s birthday – a 1973 Tanshell. So here are my eleven pipes.

The first group is the Shell or Shell Briars – I have five of them. They are beautiful sandblast pipes with a two-tone finish of dark and medium brown (or maybe dark brown with the high portions buffed lighter). The first of them is an old-timer. It is a bent billiard whose blast has been worn smooth over the years. I have had it dated to various times from mid 30’s to 1943.
IMG_5661

IMG_5662
The stamping is quite weak but under a bright light with a lense it reads as follows:
DUNHILL SHELL Made in England 3 (this three is the questionable issue – overstamped)
N52 PATENT NO. 417574/34
IMG_5666
It is in good shape regardless of the age. The blast on the rim is worn but the stem is in good shape with minor tooth marks on the stem and the button surface. The white spot is darkened and appears to possibly be ivory though I am not sure.

The next two are Birth Year Pipes for me. They are both made in 1954. The first one is a Canadian that I picked up on EBay. I had been looking for a birth year pipe for quite a while and contacted Mike Hagley regarding one. I had heard he might have one that I could purchase. He sent me the link to this one on EBay. It was not in good shape and had a stem with a missing white spot. I bid and won the auction. I sent it to Dave Wolf at Walker Briarworks for cleaning and repair. Dave did a great job cleaning it up and repairing the stem for me. I have had it for quite a few years now and enjoyed smoking it on my birthday. The ultimate pleasure was smoking this 1954 Dunhill Canadian with some 1954 Dobie Four Square Green on my 54th birthday a few years ago.
IMG_5658

IMG_5659
The stamping on this one is:
EC F/T DUNHILL Made in England 4 with a 4 in a circle and an S
SHELL BRIAR Patent No. 417574/34
IMG_5660
It is in great shape since Dave worked on it. The finish is beautiful and the blast has a mix of birdseye and cross grain. There are some deep craggy places in the blast and the blast on the oval shank is also well done. It is one of my favourite pipes in the collection.

The second birth year pipe is a billiard. I bought this one on EBay as well. Its condition is good. The finish on the bowl and shank is excellent and the blast is deep and craggy. Somewhere along the way I believe someone topped this pipe so it has a smooth, restained rim. One day I may send it out and have the rim reworked to match the rest of the pipe. Or maybe one day I will attempt it myself. The time just has not been right for me to do either one. The stem is in good shape with a few small tooth marks on the surface. It is also a pleasure to smoke. I find though that the smooth rim just makes me reach for it less than my other birth year pipe.
IMG_5655

IMG_5656
The stamping on this is:
K F/T DUNHILL SHELL Made in England 4 with a 4 in a circle
Patent No. 417574/34
IMG_5657
The fourth Shell in my collection is moving into another decade. I have two Shells from the 1960 era. The first one is a Billiard that is in good shape. The finish on the bowl and shank is excellent though this pipe is nowhere near as craggy as the 1954 billiard. The blast is nice but not deep. Like the 1954 billiard this one has seen some work on the rim. It appears to have been lightly topped so much of the blast on the rim is gone leaving behind a few deeper spots. I found this pipe in a Value Village Thrift Shop (Rummage Shop) in a display case and bought it for the paltry sum of $12 CNDN. It has some ripples on the top of the vulcanite stem and some tooth marks on the underside.
IMG_5652

IMG_5653
The stamping on this one reads:
60 DUNHILL Made In 4 in a circle and S
SHELL BRIAR England 1
IMG_5654
The last Shell is bent bulldog shaped pipe from 1966. It is actually one of my favourite Dunhill shapes. I have one in almost the exact shape that is stamped Parker. This pipe has an amazing deep blast that hearkens back to the earlier blasts on the Shells. The finish is in excellent shape with even the rim showing the blast. The diamond shank with a flattened bottom transitions nicely into the stem. The stem was in excellent shape, or at least I thought it was when I bought it off of Ebay. When I received it the top and sides of the stem were oxidized and there was a light tooth mark on top. When I turned it over there was a bite through on the underside next to the button. I cleaned it up and repaired it with a black superglue patch. The pipe stem looks quite clean and new now and there are not any bite through marks or tooth marks.
IMG_5649

IMG_5650
The stamping on this one reads:
P DUNHILL Made in 4 in a circle and S
SHELL BRIAR England 6
IMG_5651
I have one Tan Shell in my collection. It is a little group 1 sized billiard with a saddle stem. I picked this up in an Antique Mall in Washington State. It was hidden stem down in a jar of old Dr. Grabows that were in rough shape and a few old corn cobs. I saw the sand blast and the shape and colour and could not believe it. I took the pipe out of the jar and sure enough it was a Dunhill. The price on it was $10 – an unbelievable deal. It was clean and the finish was slightly soiled. The rim had some darkening but the bowl was clean. The stem has a great fish tail look to it and was only oxidized. I have smoked this one quite a bit since the day I found it and it is a great smoking little pipe. It is on the small side for me but I reach for it for a quick smoke.
IMG_5667

IMG_5668
The stamping on it reads:
576 F/T DUNHILL Made in 1 in a circle and T
TAN SHELL England 3 and slightly lower and offset 4
The date stamping makes me think that the pipe was made in 1963 and stamped or issued in 1964. I am never sure about the meaning of the double date numbers. I remember reading though something along what I mentioned above.
IMG_5689
I have two Root Briar pipes both from 1961. The first of those is a large billiard that I purchased on Ebay with a burned through in the bottom of the bowl. Because of the damage it was very cheap. When it arrived I drilled out the burn through and repaired it with a briar plug. I have written about that repair on the blog earlier. The finish other than that burn through was in good shape with some cross grain on the sides of the bowl and birdseye grain on the front and back sides. The stem was clean except for some tooth marks on the top and bottom of the stem near the button. The pipe cleaned up well and is a good smoking pipe.
IMG_5670

IMG_5671
The stamping is on both sides of the shank. It reads:
On the left side:
59 F/T DUNHILL
ROOT BRIAR
On the right side:
Made in 4 in a circle and R
England 1
IMG_5673

IMG_5674
The second Root Briar is a 1961 straight shank bulldog. I picked this one up in a trade. It is a beautifully executed pipe. Dunhill makes some stellar bulldogs. The finish on this one was in excellent shape when it arrived. It matches the finish on the billiard exactly. There was some rim darkening but no serious damage to the rim. It has a mix of grains with nothing that truly stands out. The stem was in excellent shape with slight oxidation but no tooth marks or chatter. It is another great smoking pipe.
IMG_5675

IMG_5676
The stamping is on both sides of the shank. It reads:
On the left side:
OXS F/T DUNHILL
ROOT BRIAR
On the right side:
Made in 4 in a circle and R
England 1
IMG_5677

IMG_5678
The next pipe is a bit of a mystery. It does not have any date stamping on the shank. The shank is also repaired at the factory as the stamping goes over the shank splice. The shank is a separate piece of briar from the bowl. A response by Jacek Rochacki on a post I wrote yesterday on the addition of a shank extension made me think that possibly this pipe was made during the war years when briar was hard to come by. The factory thus spliced together two pieces of briar to make this pipe. The omission of the date stamp is still a puzzle so I may never know when the pipe was made. I have written previously about this pipe on the blog. It is a straight stemmed prince shape. It is definitely not one of my favourite shapes. I picked it up at an Antique Mall in BC quite a few years ago now. The seller had it priced at $20 Cndn so I did not ask questions and bought it immediately. The bowl finish was worn and the rim was badly beaten. I steamed the rim, topped it lightly and reshaped the bowl accordingly. The stem was in excellent shape with little oxidation. There were minor tooth marks near the button on the top and bottom sides of the stem.
IMG_5679

IMG_5680
The stamping is deep and legible on both sides and reads:
On the left
FET DUNHILL
BRUYERE
On the right
Made in 4 in a circle A
England (no date stamp following the D in England)
IMG_5681
The last two pipes in my Dunhill collection are more current production models. The first is a bent Rhodesian with a Shell finish. This one does not have the old characteristic rich contrasting stain on the blast. It is stained black. It is well executed and comfortable to hold. The shank and the stem are on the chunky side, which I like. It is a nicely made taper stem. I bought this from a pipe dealer in Washington who had close out stock that he was moving.
IMG_5682

IMG_5683
It is stamped:
3108 dunhill in an oval Shell Grain over Made in England 01
The stamping dates this pipe as a 2001. I smoked it quite a bit and it is a great size for putting in my jacket pocket when I am out on a walk about.
IMG_5684
The last pipe is an Amber Root apple. I loved the finish on this one when I saw and had to have it. I purchased it from the same dealer as the little Rhodesian above. It has a reddish finish and some stellar grain. The sides of the bowl and shank have straight or flame grain. The rim, top of the shank and the underside of the bowl and shank have beautiful birdseye grain. The stem is well made and comfortable. This pipe is also a great size for the pocket and smokes well.
IMG_5685

IMG_5686
It is stamped on both sides of the shank.
On the left it reads:
3101 dunhill in an oval
On the right it reads:
AMBER ROOT
Made in England 05
The stamping makes this a pipe made in 2005. As such it is the newest Dunhill pipe in my collection.
IMG_5687

IMG_5688
That is my entire Dunhill collection as it stands today. It spans a large part of history from either 1937/1943 to 2005. It has pipes with a variety of Dunhill finishes – Shell, Shell Briar, Tan Shell, Root Briar, Bruyere and Amber Root. Each pipe in itself is a well made factory pipe. The earlier pipes have some stunning blasts and finishes while the two newer ones also have some beautiful finishes that are unique to the newer lines. I cannot say that I am a Dunhill fanatic but having these pipes in my collection make me a small time collector that is for sure. I think the thing I enjoy about the Dunhill pipes is that they can generally be dated to a period of history. As one who enjoys knowing that kind of detail regarding the pipes I smoke I have to say that I am drawn to them. To this day I continue to check the display cases at thrift shops and antique malls in hopes of finding yet another old Dunhill. But I guess that finding four of them that way is not to bad a record.

Reflecting on my collection of Tinsky Pipes


Blog by Steve Laug

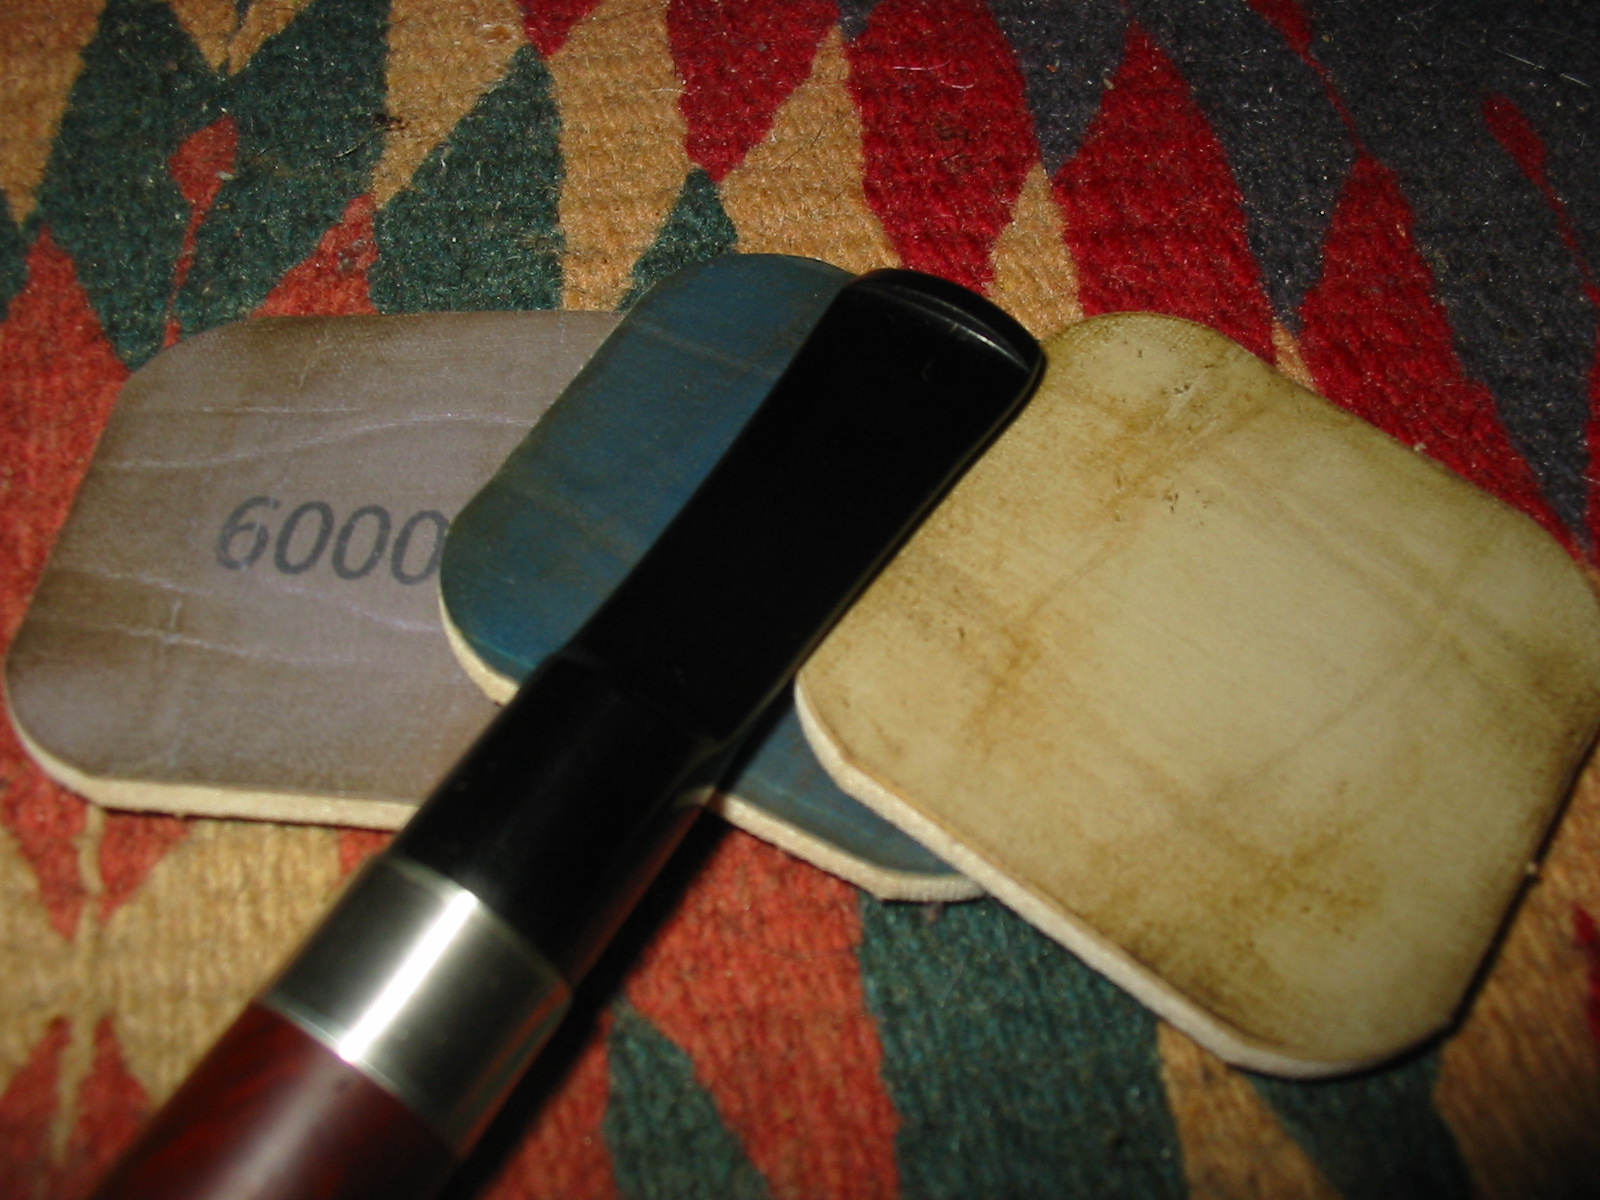
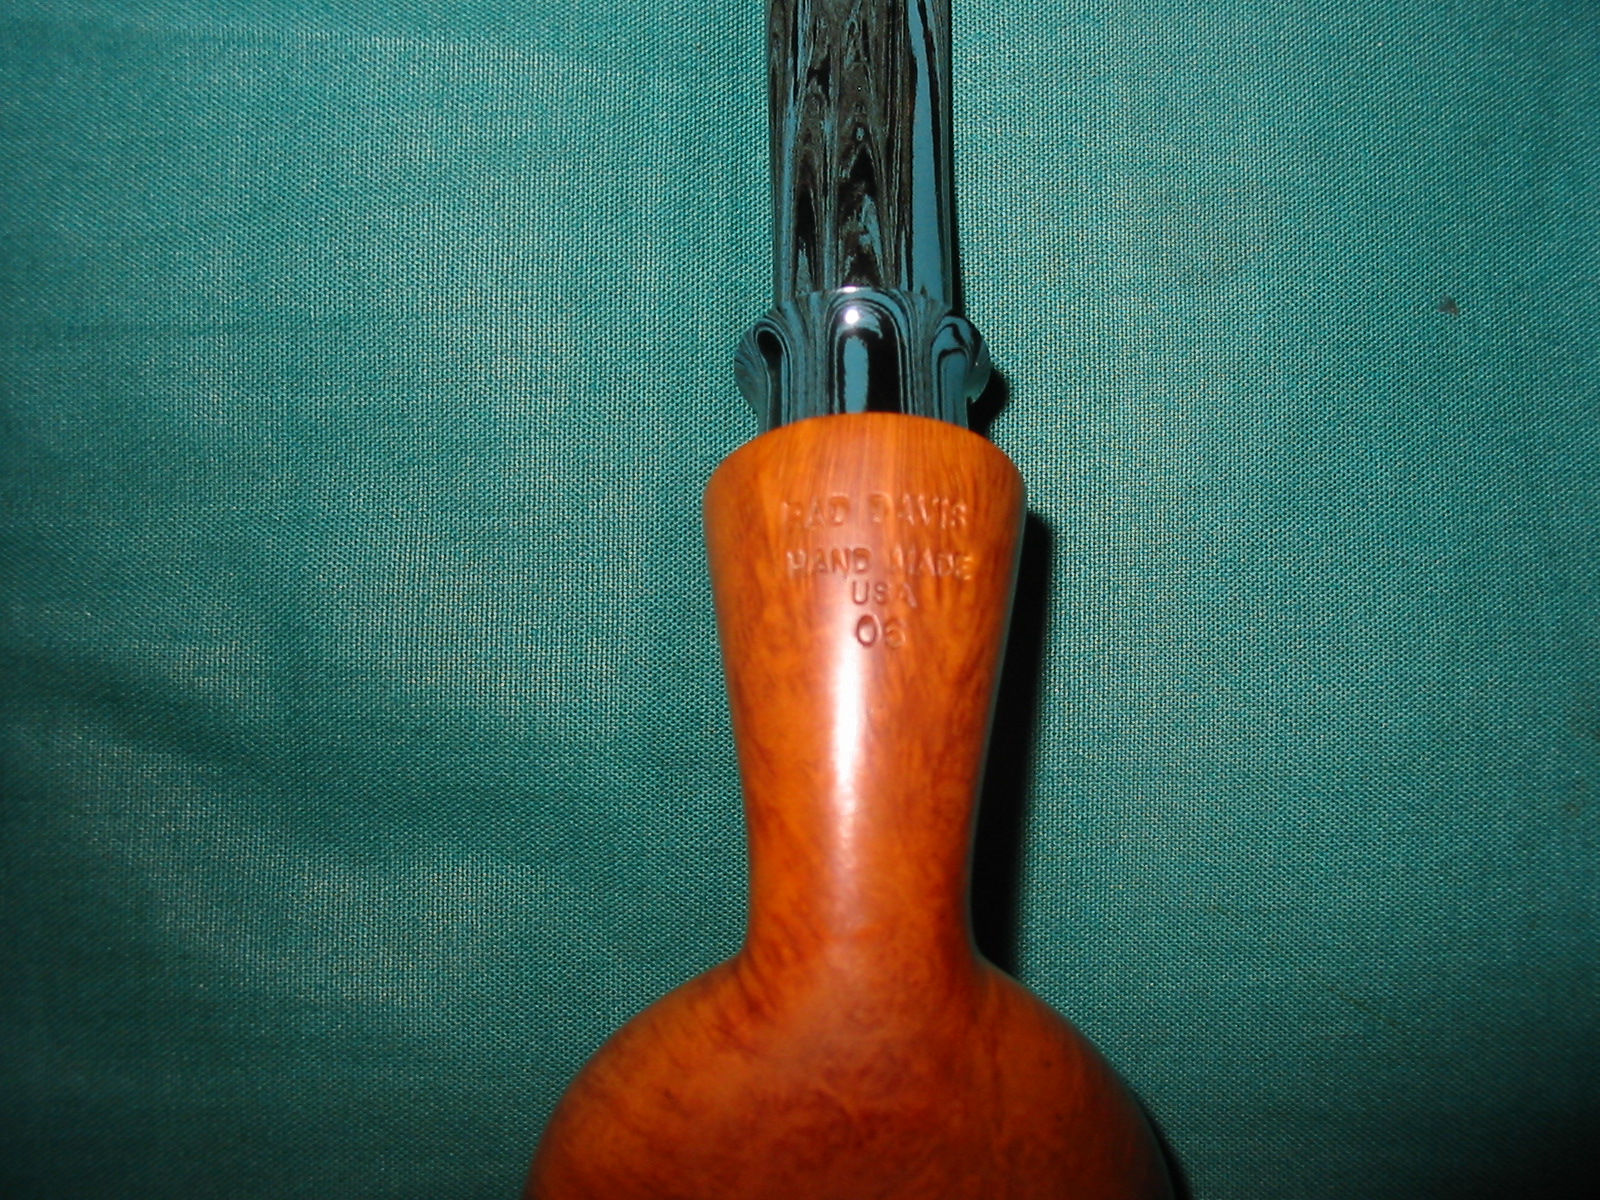
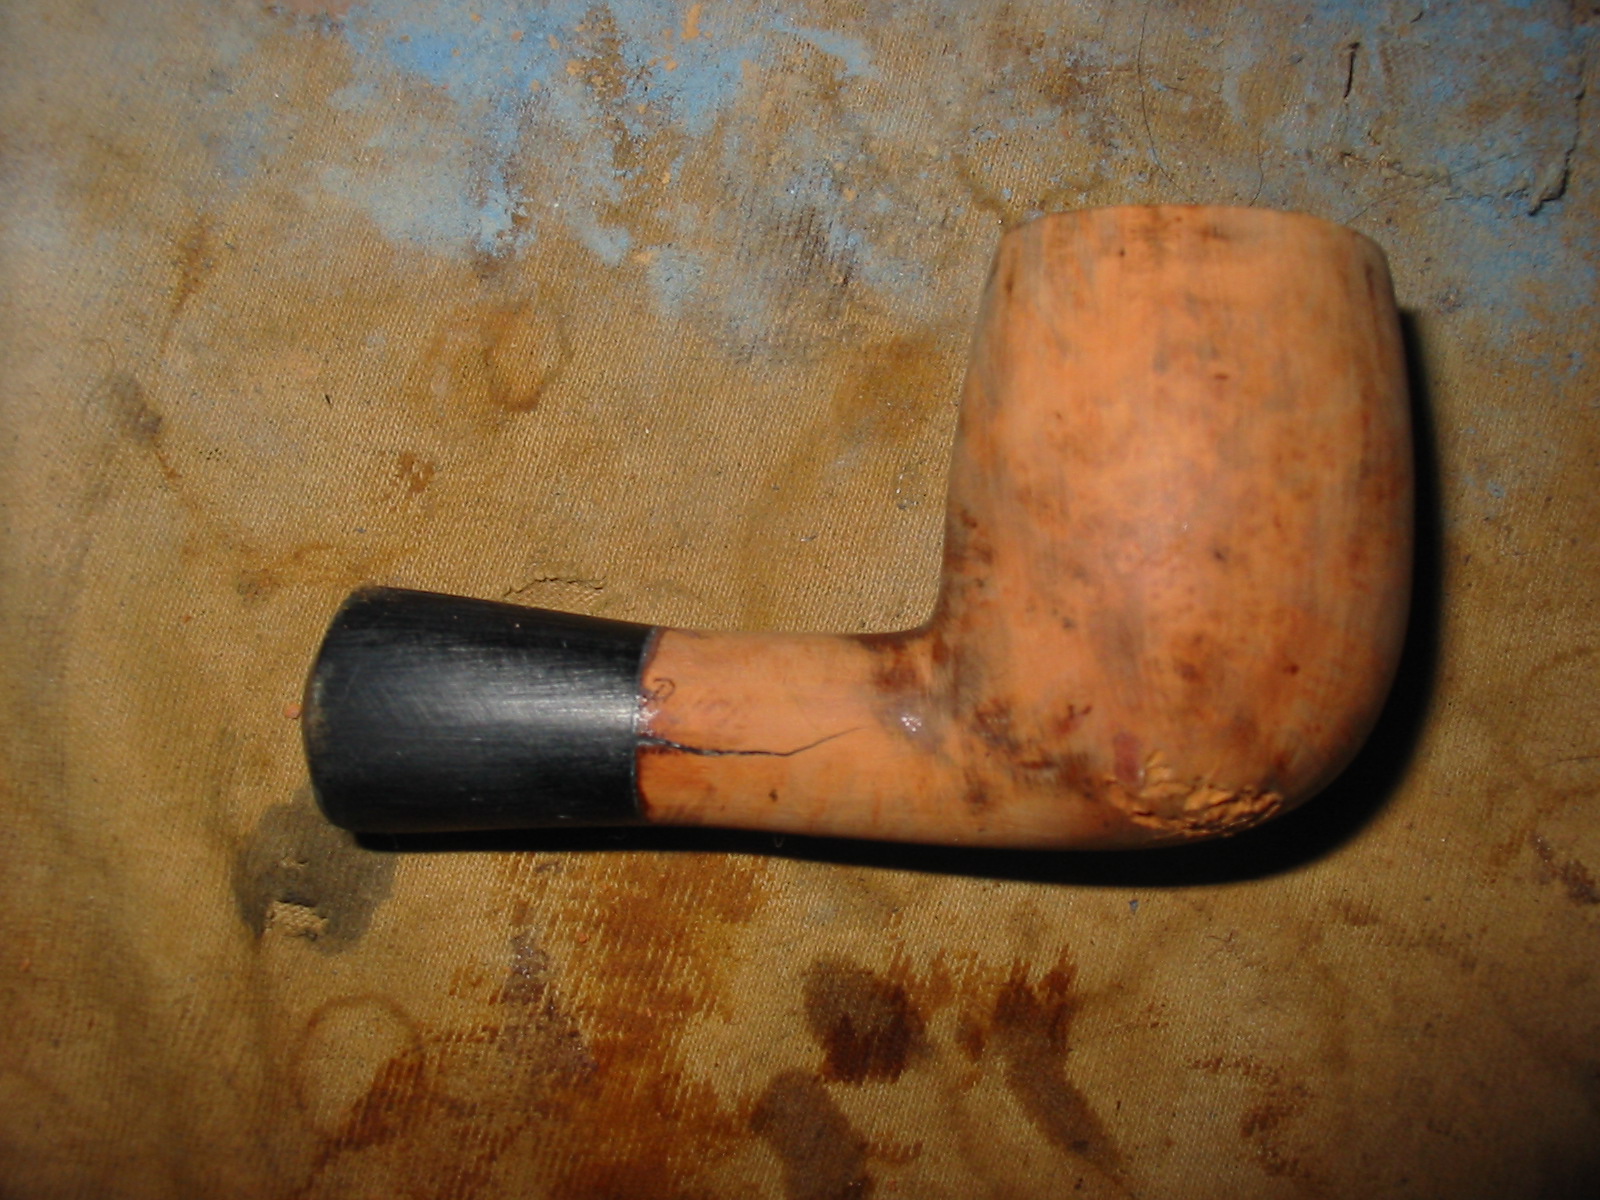
I don’t recall when I bought my first Tinsky pipe. But I do know which one it was – a nice Coral finish Billiard with a taper stem. It has a contrast stain on it – a dark brown and a walnut combination. The rim and a band around the top of the bowl and the end of the shank are smooth and sport the walnut finish. I have had the pipe at least 15 years or more and have thoroughly enjoyed smoking it. In fact it was the pipe that got me buying Tinsky’s pipes over the years. I have bought maybe two of them directly from Mark and the others have come through EBay or from friends. I have fourteen of Mark’s pipes to date with one new one on the way. These all vary in shapes and styles but all are fine smoking machines. Only one of the pipes in this collection remains unsmoked. I really can’t tell you why, but I will break it in one day in the near future.

I thought it might be interesting to give a brief history of the brand for those on the blog who may still be unfamiliar with Mark’s work. Most of this material is taken from his website http://www.amsmoke.com/ and from Pipedia which has an article on the brand and quotes many of Mark’s own words.

The American Smoking Pipe Co. was formed in 1978 by Mark Tinsky and Curt Rollar. Both started making pipes for Jack Weinberger (JHW Pipes) while in high school and throughout college. Determined to blaze their own path, they formed their own company – its goal to create unique pipes, lightweight and comfortable, where attention to detail was the rule not the exception. Exulting in their new freedom, they carved out new shapes that were balanced between the radical freehand era of the 70’s and the board pipe look of other conservative companies. Hungry for recognition, they stormed the Eastern and Southern shops looking for markets to sell their pipes. Many hidebound retailers refused to try something new; preferring to sell, well, what has always sold before. However, their pipes did take root in many shops and the business thrived.

They continued expanding their pipe making capabilities, adding employees to help finish the pipes. In 1990, over a disagreement over how much to expand, Curt Rollar left the company. This put a break on expansion and coupled with a U.S. recession and rising anti-smoking fervor served to limit production to supplying existing retailers, thus ending a decade of growth. With pipes sales in decline, we turned to pipe repair as a way to supplement revenues. Finding that we liked fixing things, American concentrated on pipe repair. While working hard at repair and manufacture American is ready once again to expand its markets through its existing network of shops serviced by pipe repair.

With the advent of the Internet, we are exploring marketing pipes directly to consumers in markets not covered by retail accounts. Feel free to e-mail us at MT@MT.NET

Mark can also be reached by mail at:
American Smoking Pipe Co.
PO Box 13
Wolf Creek, MT 59648

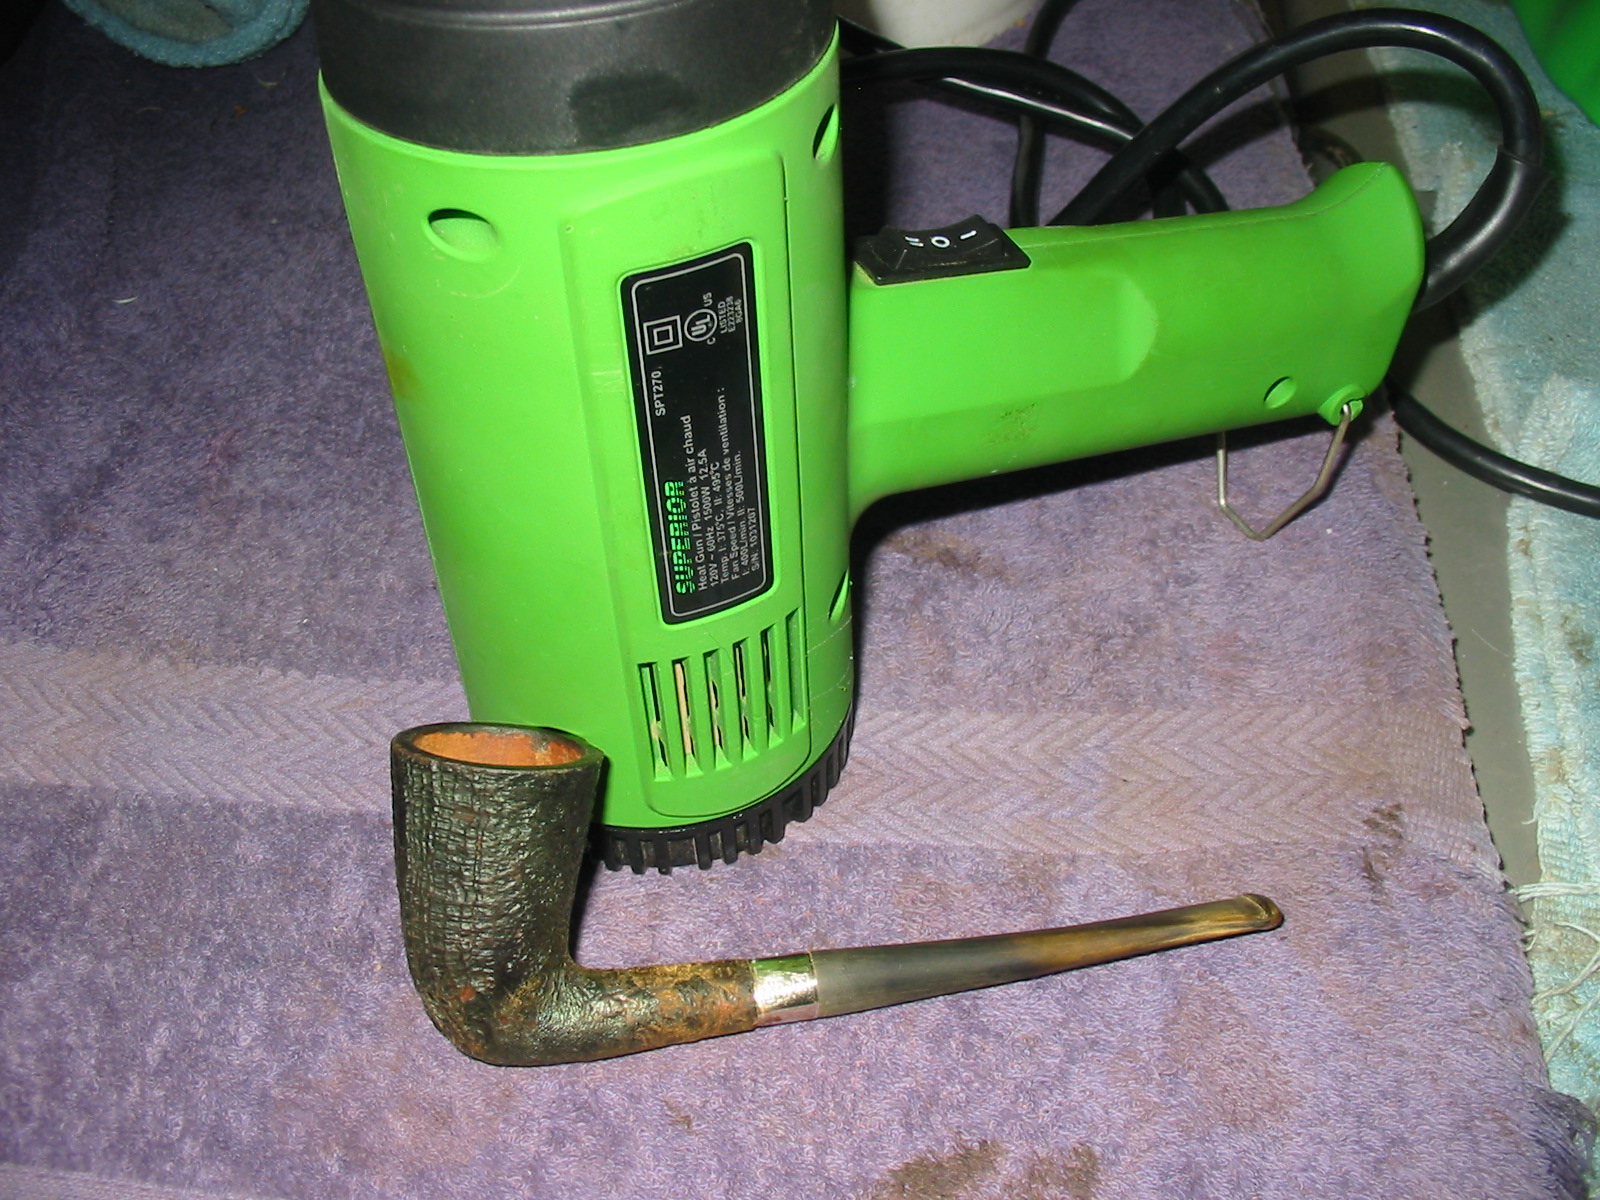
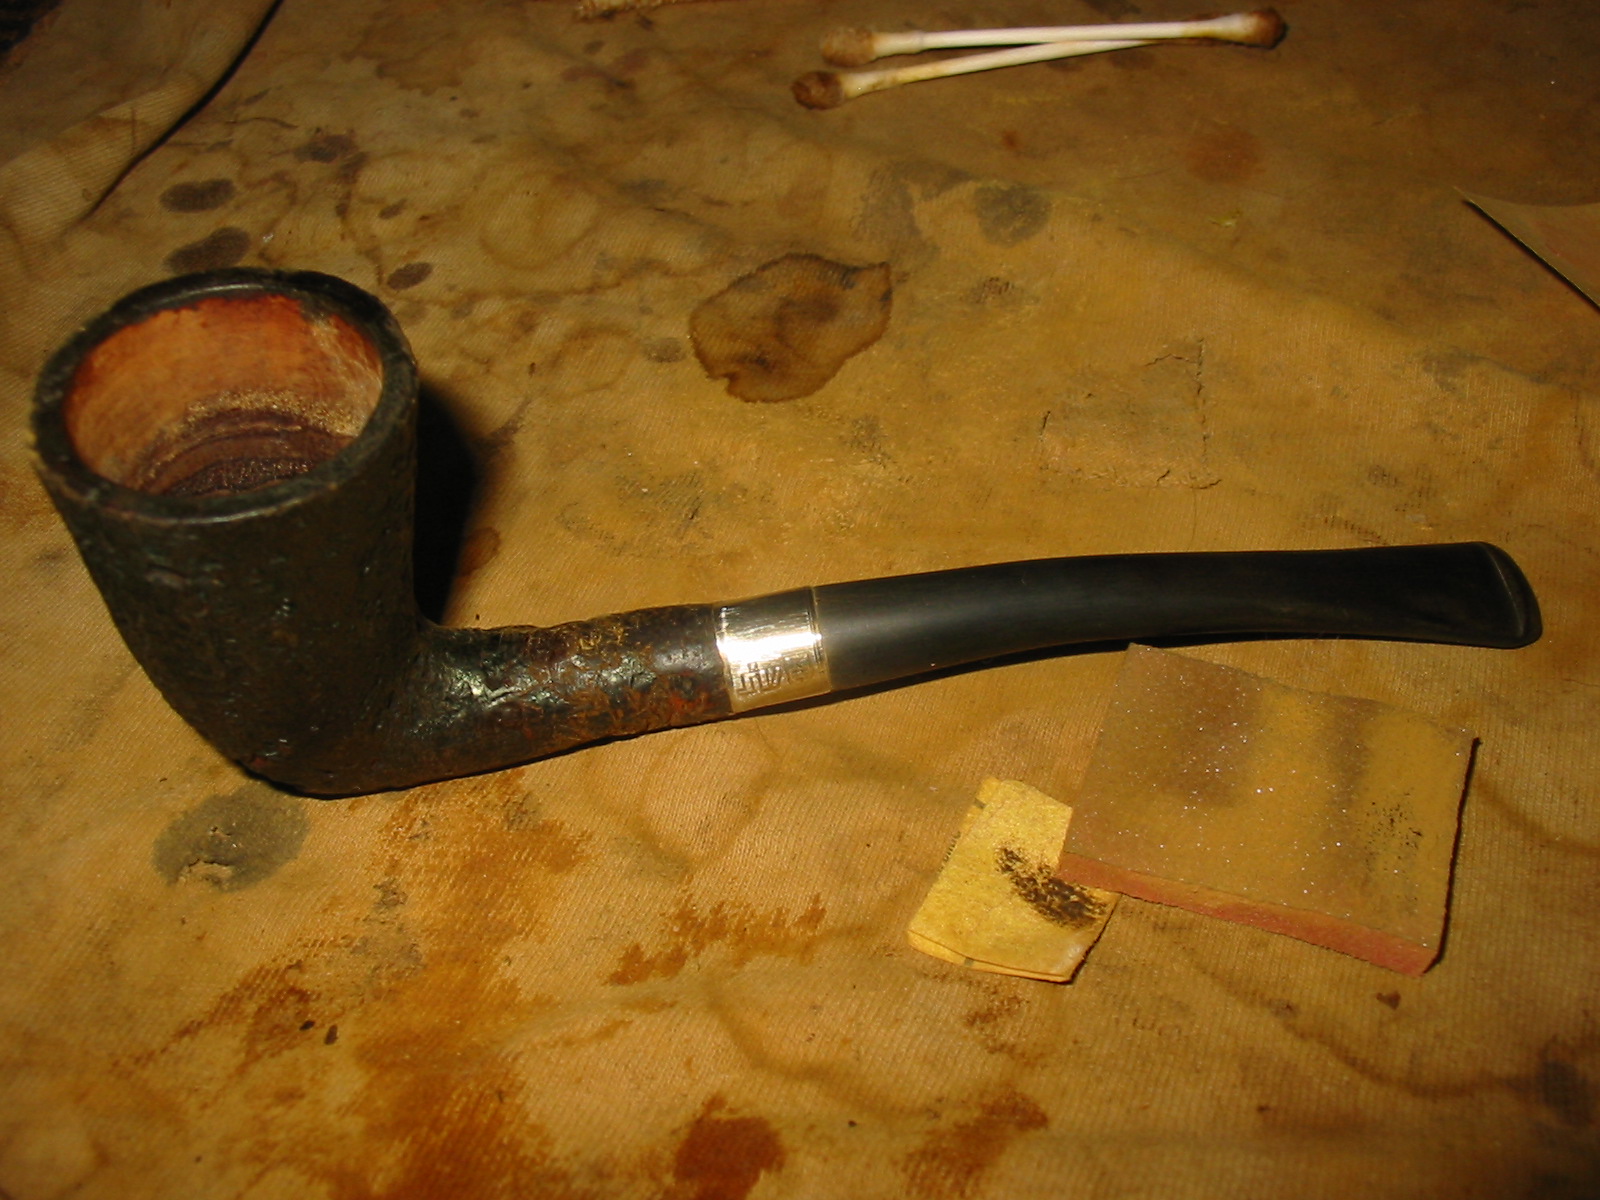
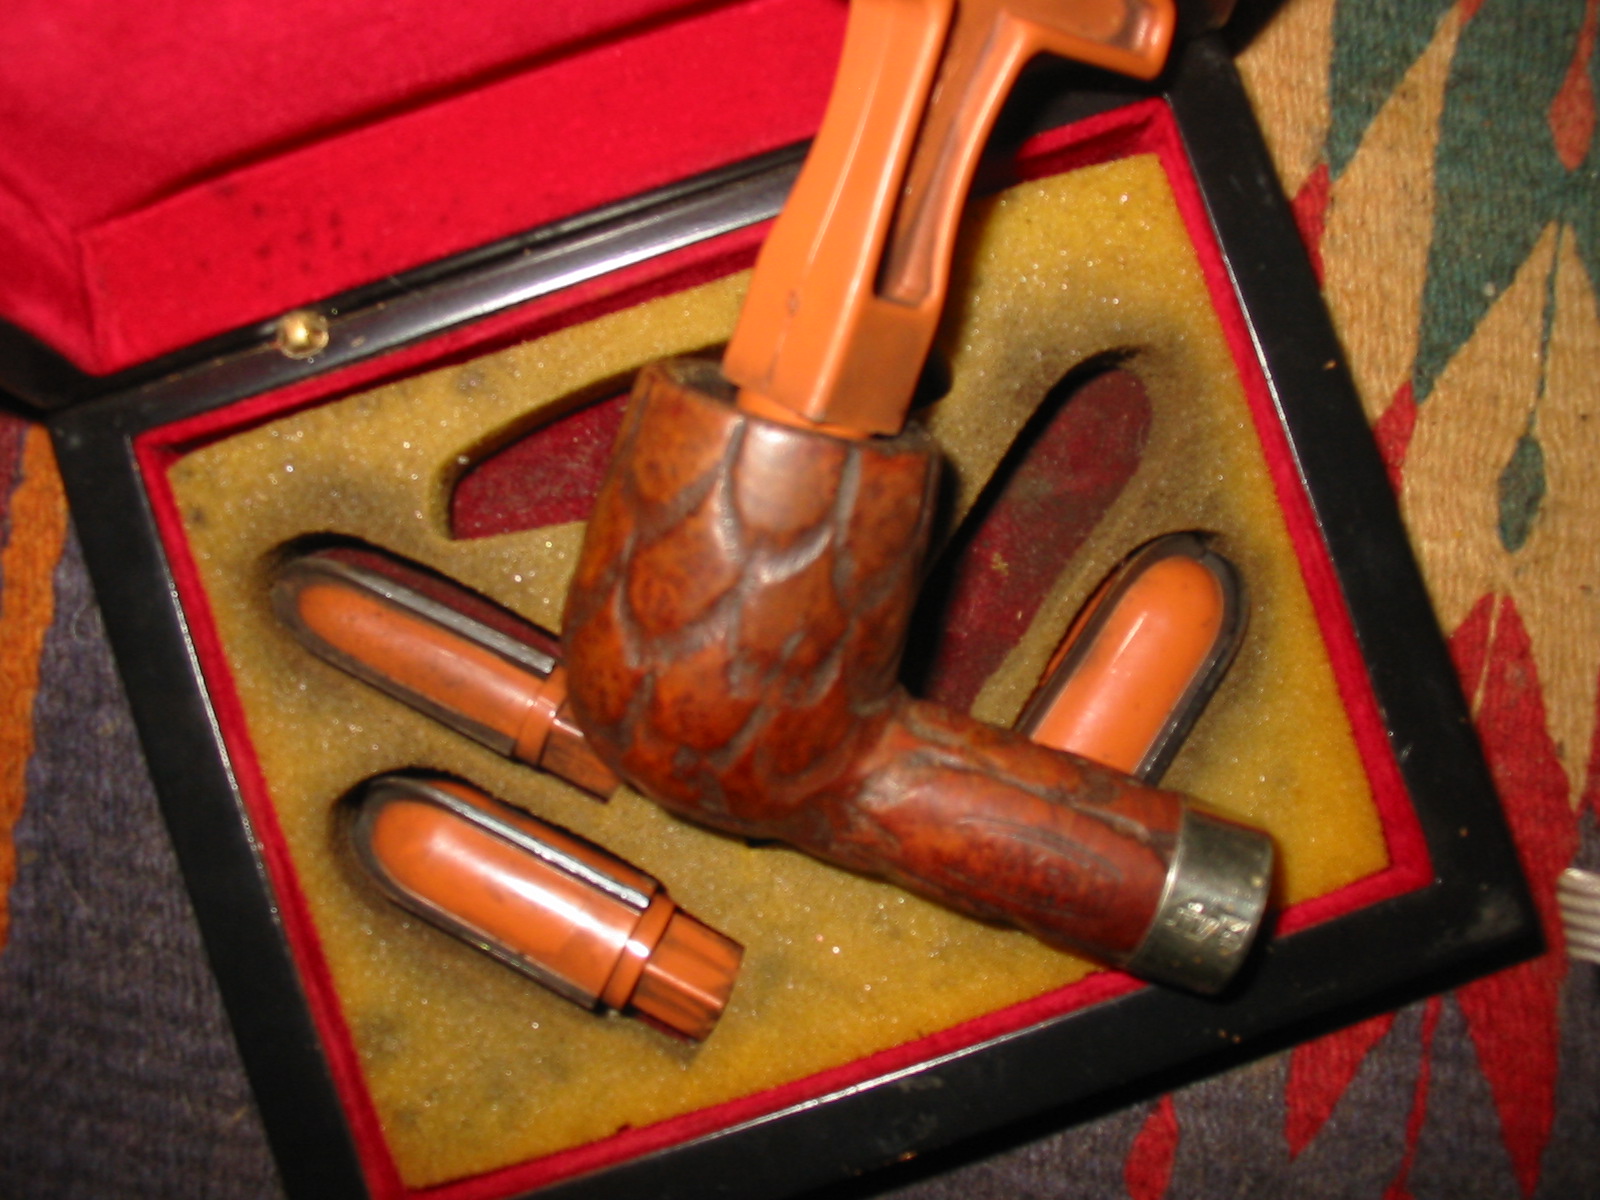
Over the years I have collected quite a few Tinsky’s. I have pipes from the time he and Curt Rollar set off on their own and others that are singularly Mark’s from his time in New England and then newer ones from his workshop in Montana. All the pipes I have are made by Mark other than one that was a collaborative work of Mark and Curt. The rest of this article will be a short reflection on the Tinsky pipes in my collection. Looking them over this afternoon as I photographed them I am again struck by the workmanship in Mark’s pipes. They are all exceptionally well made with fits and finishes well done. From the Coral finishes, the Blasts, the Black and Tans and the Smooth finished pipes I have come to expect nothing but the best smoke. They are truly bread and butter pipes in my collection. They are well made utilitarian pipes that have provided many years of service to me and if the oldest in the collection (a 1984) is any reflection on the whole lot they will last far longer than I will.

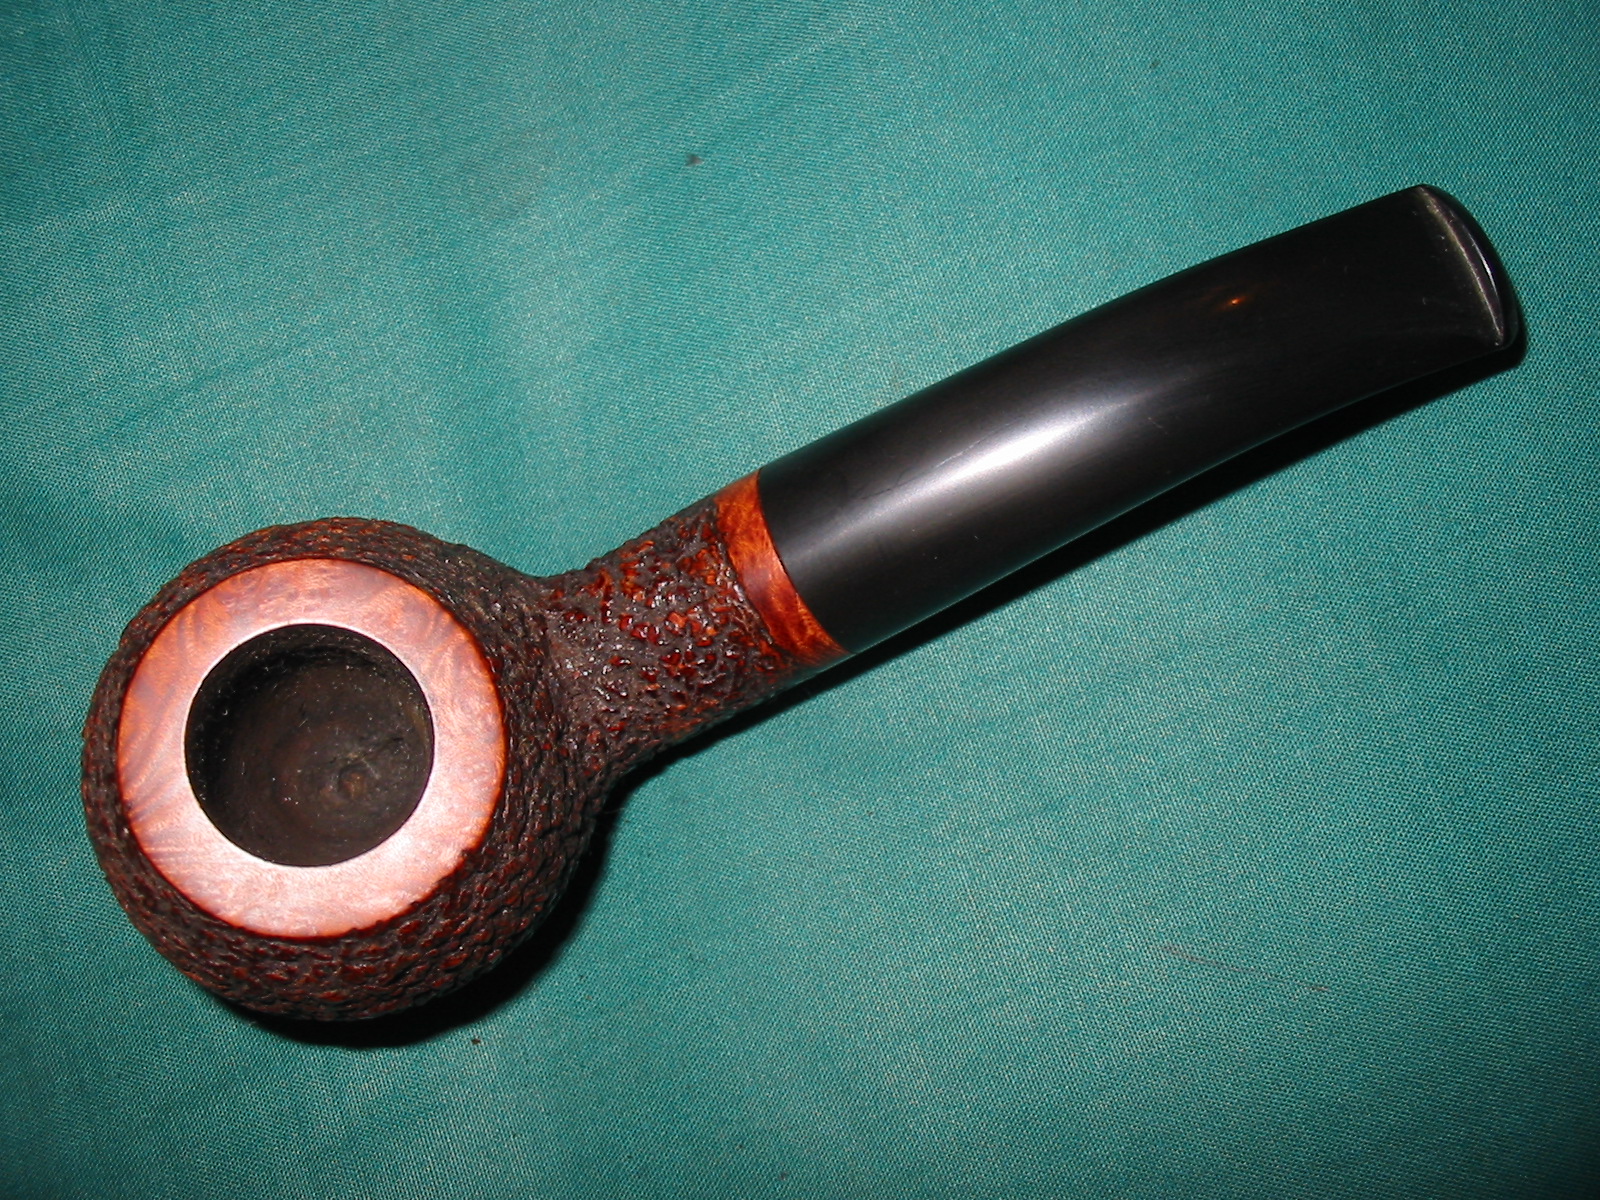
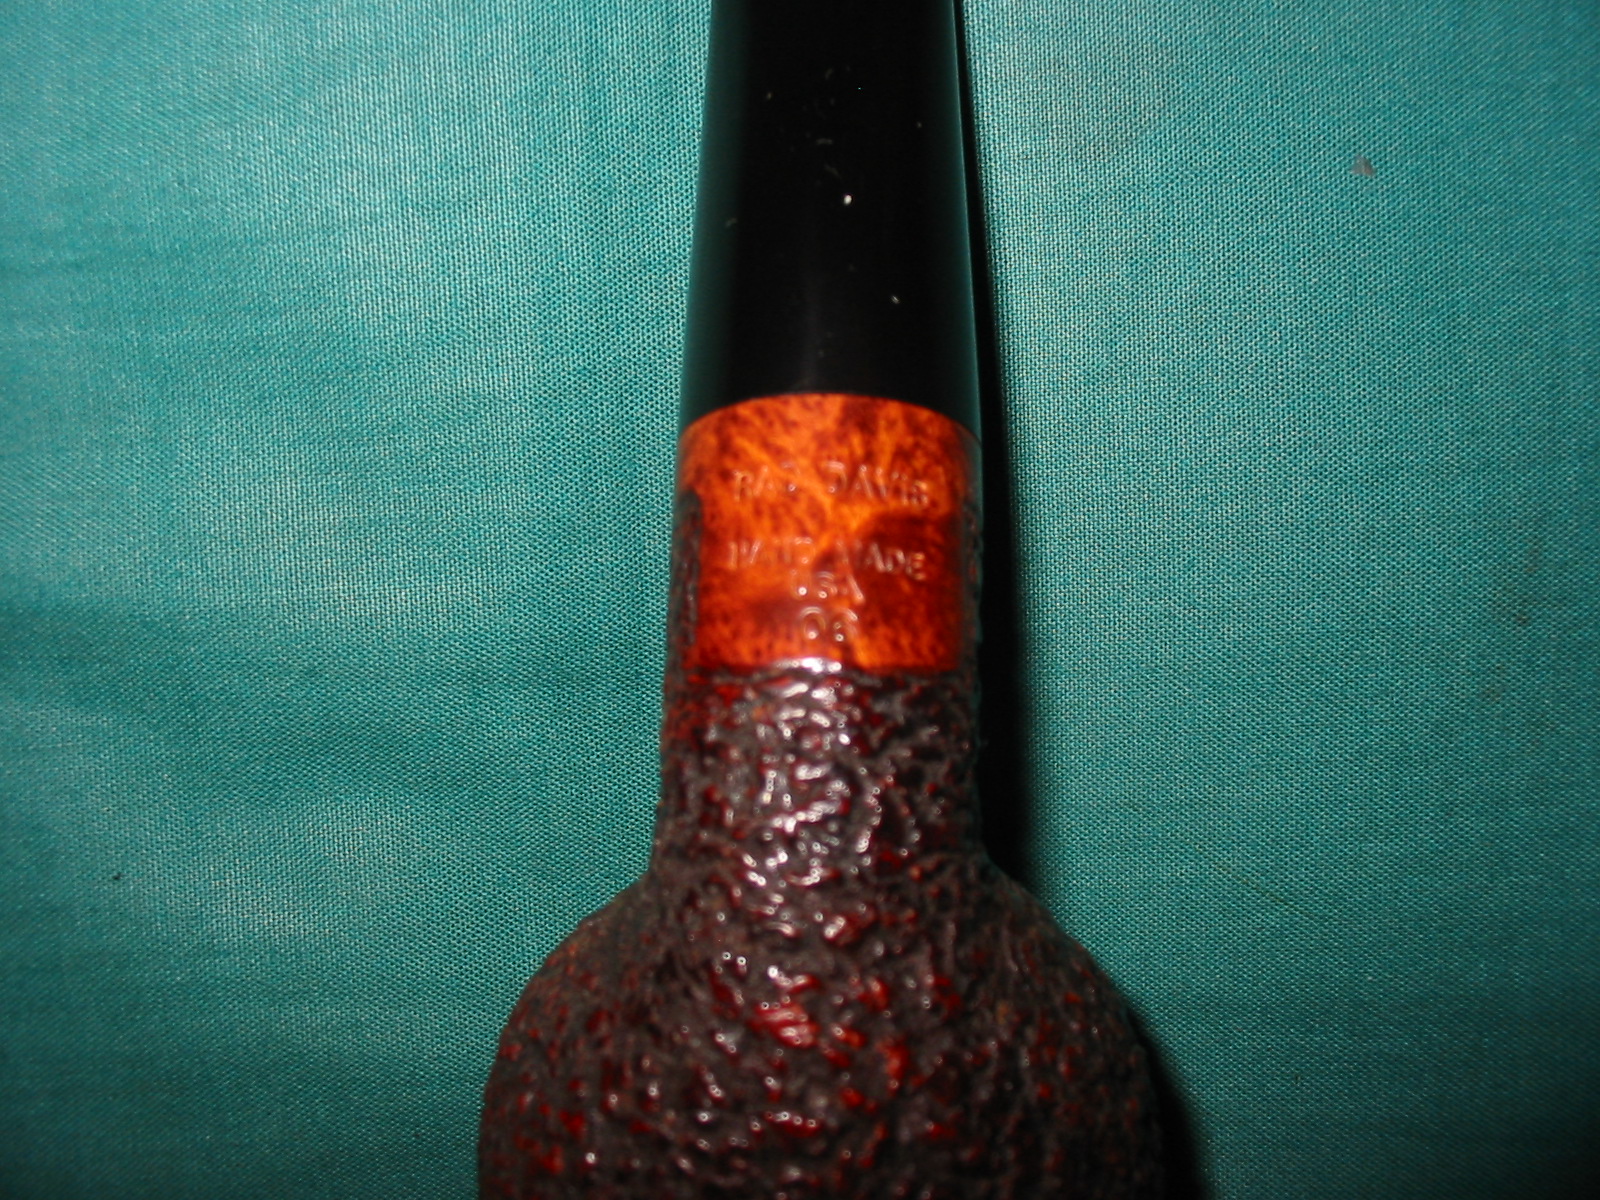
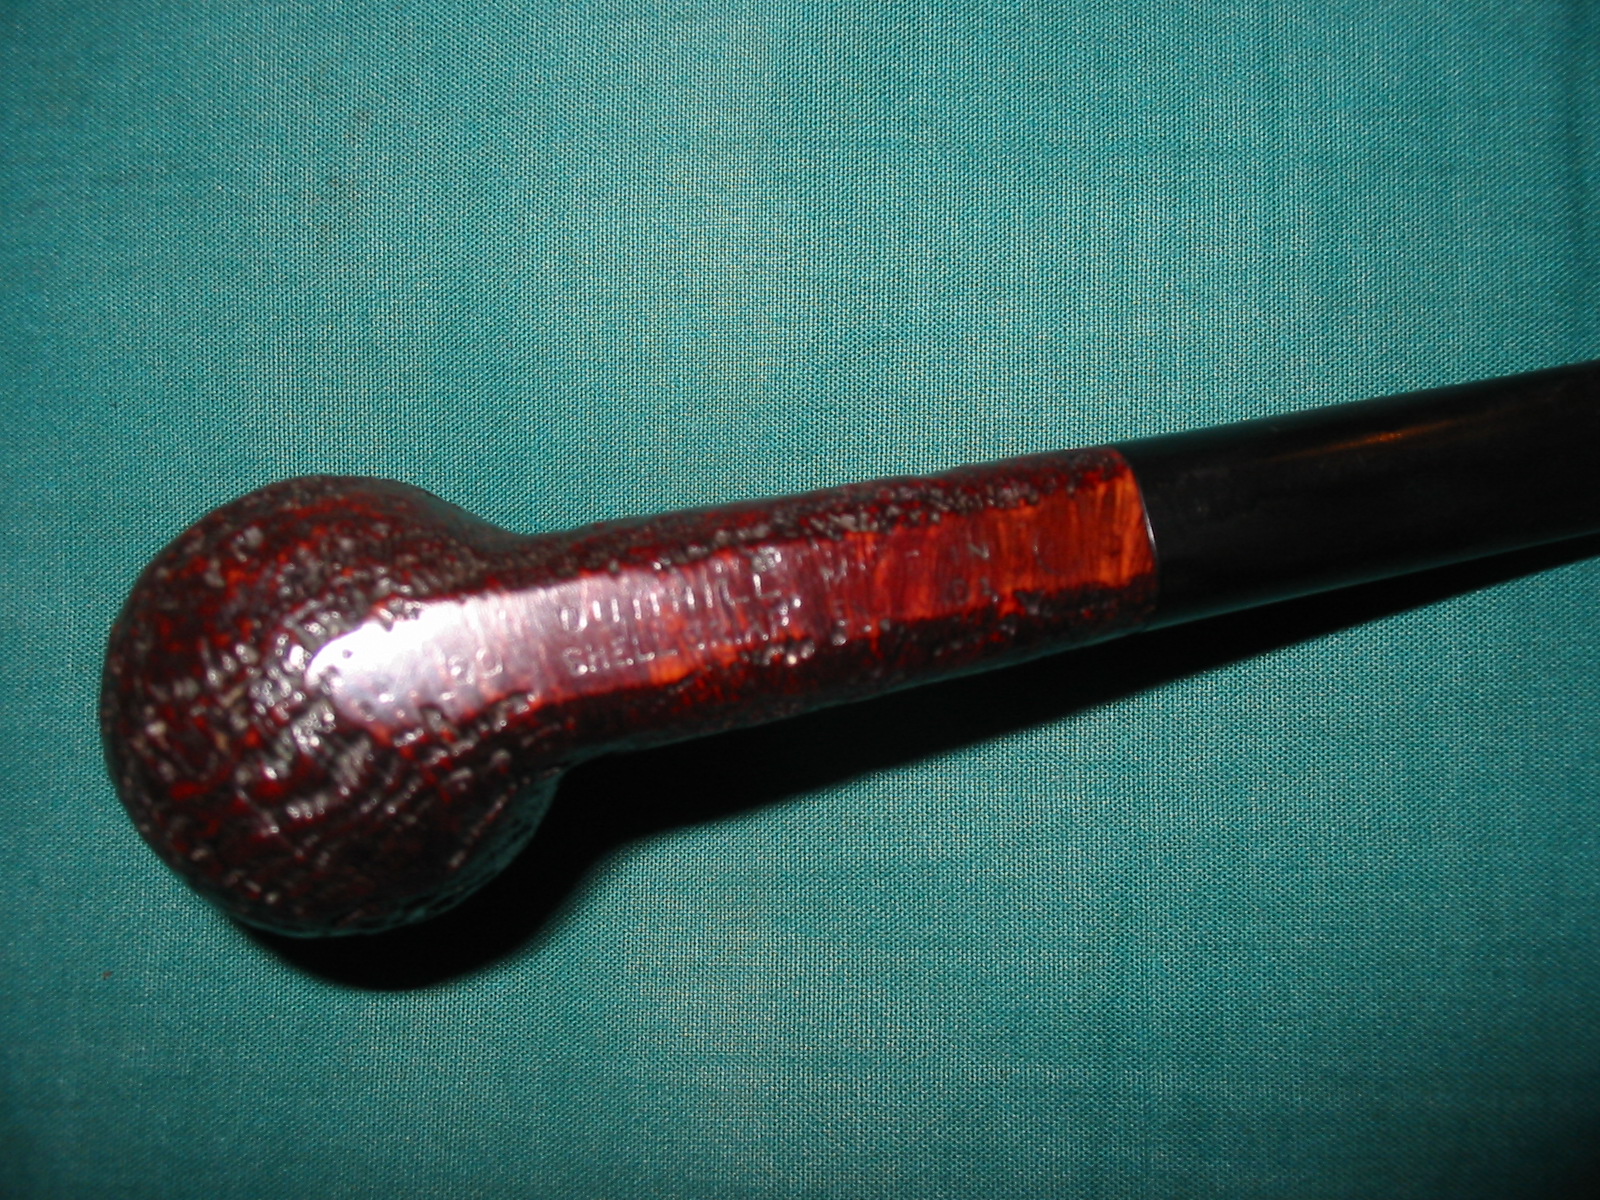
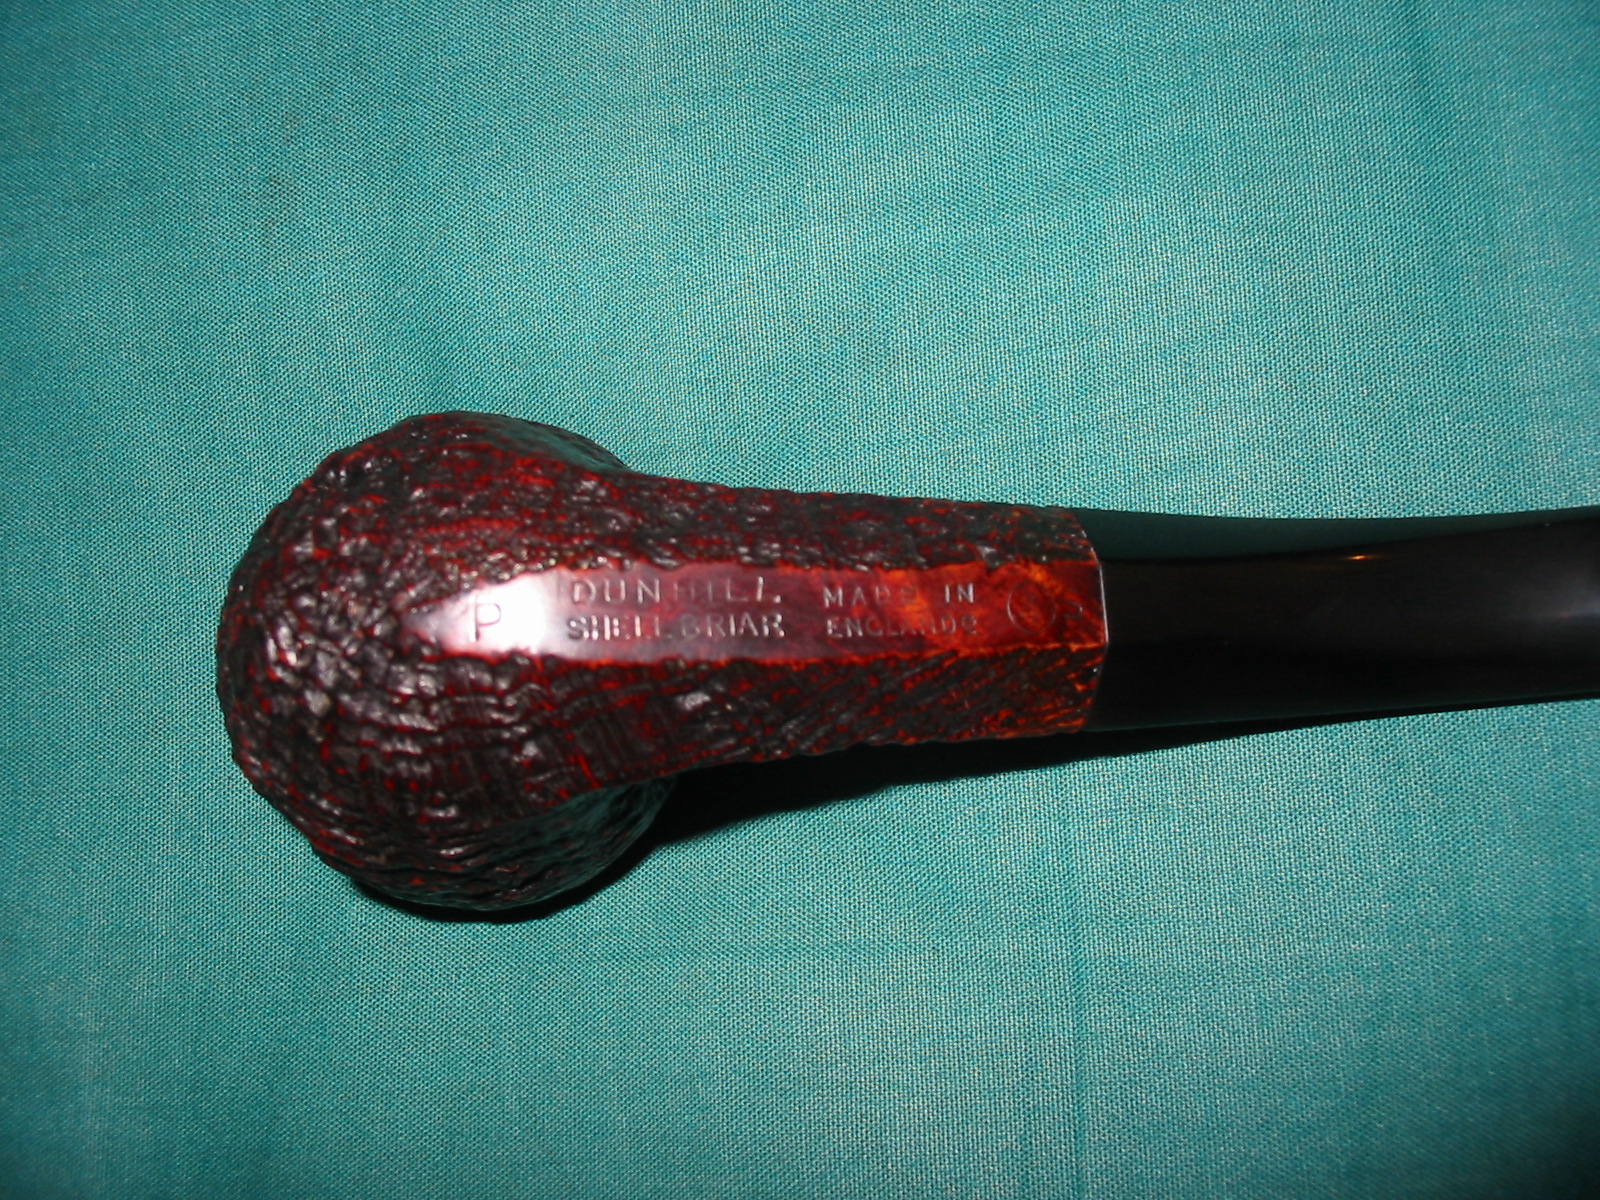
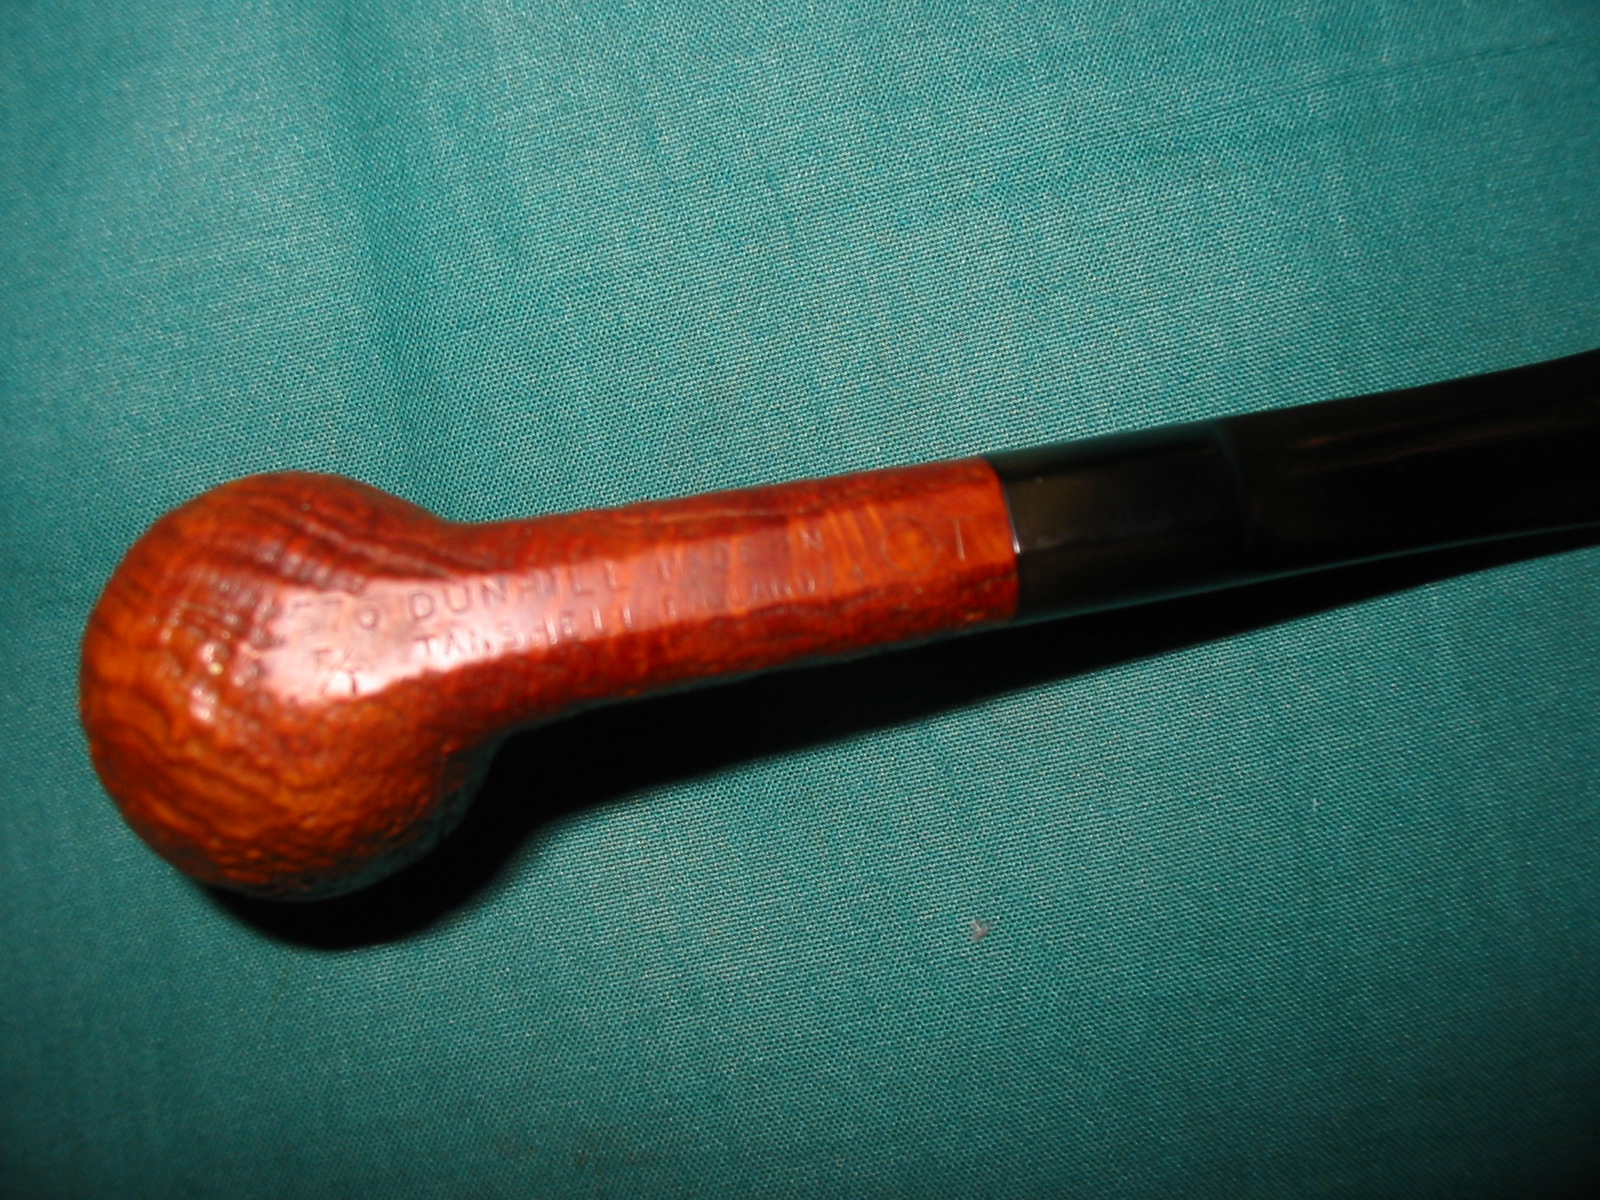
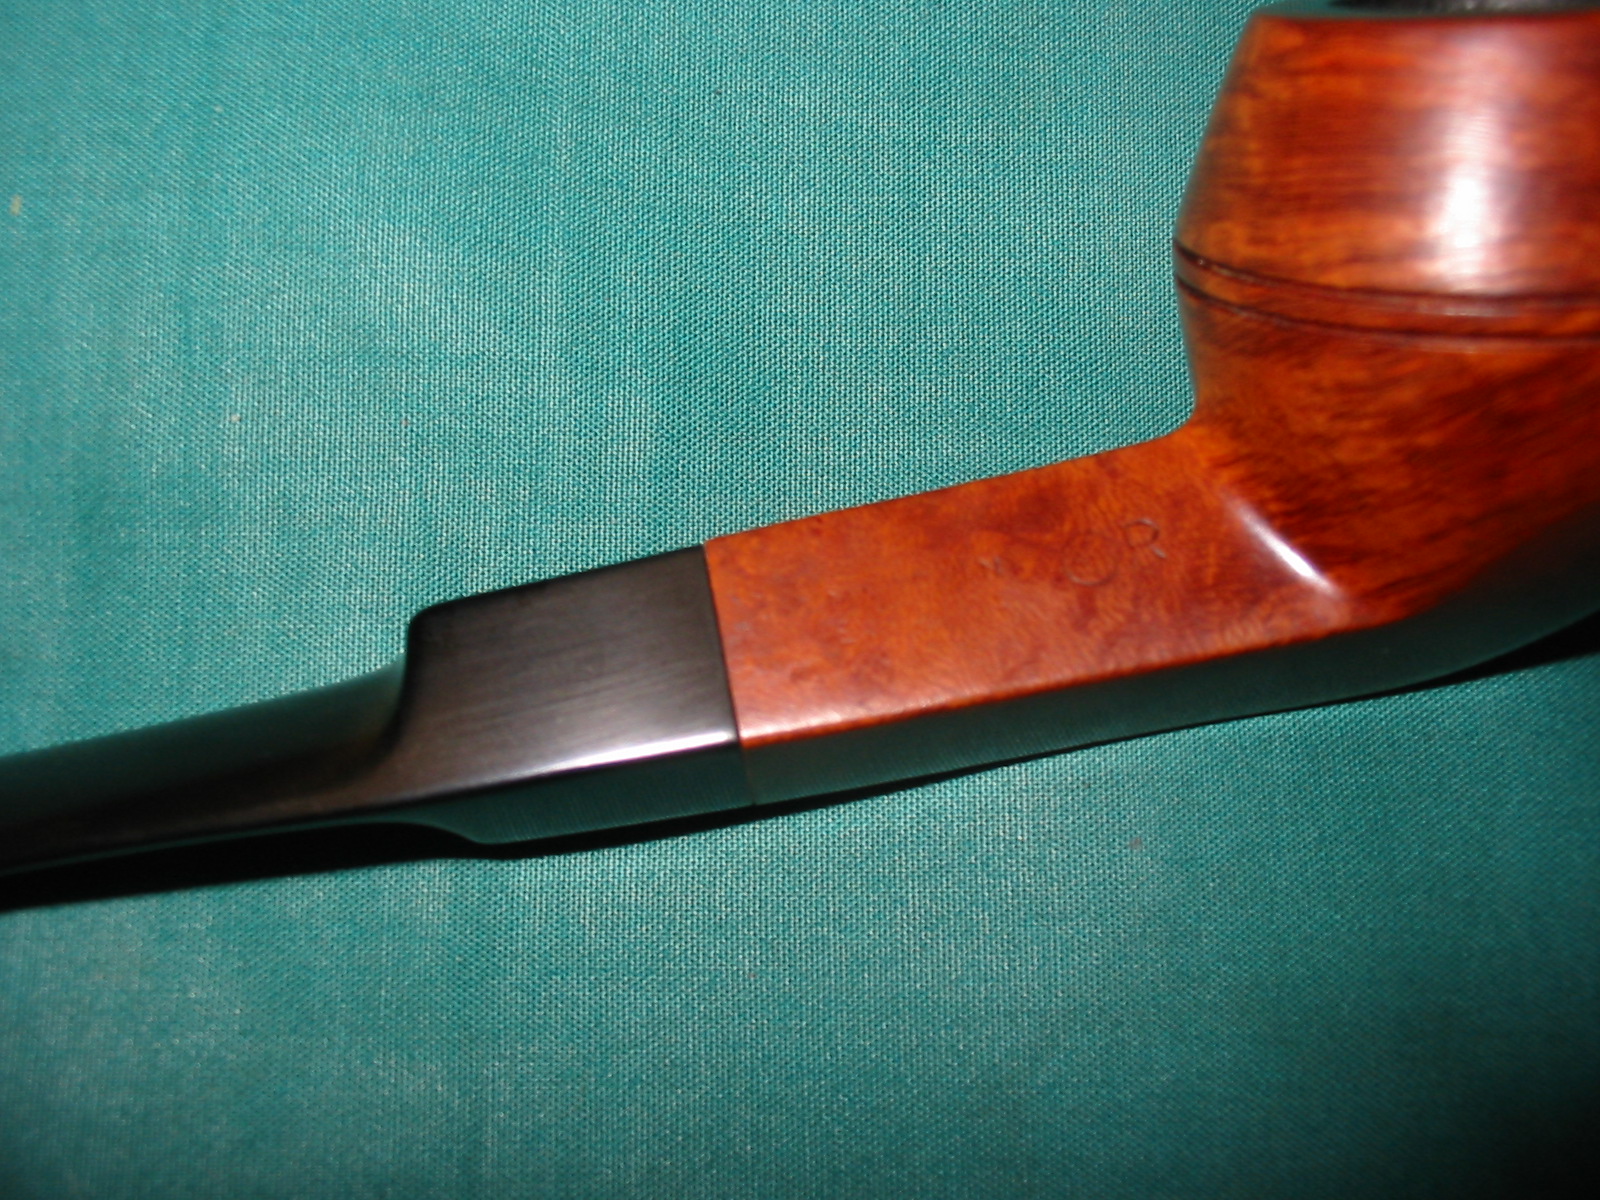
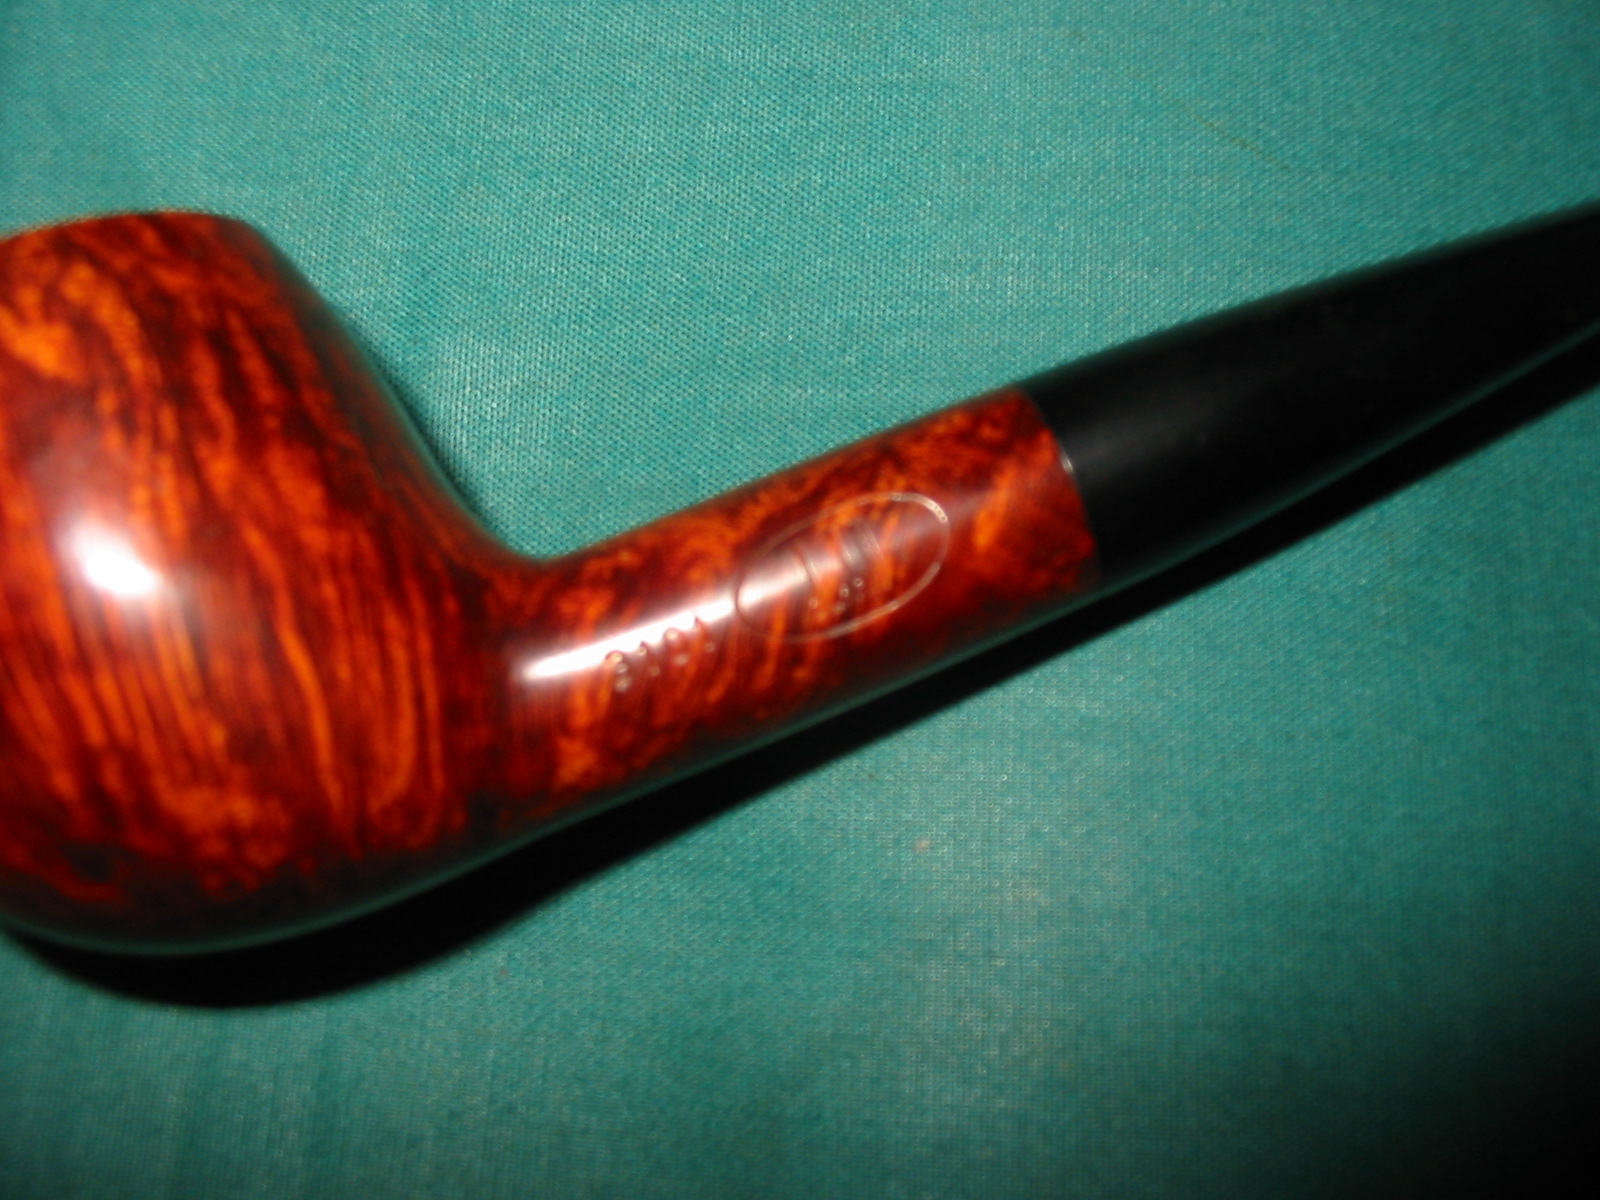
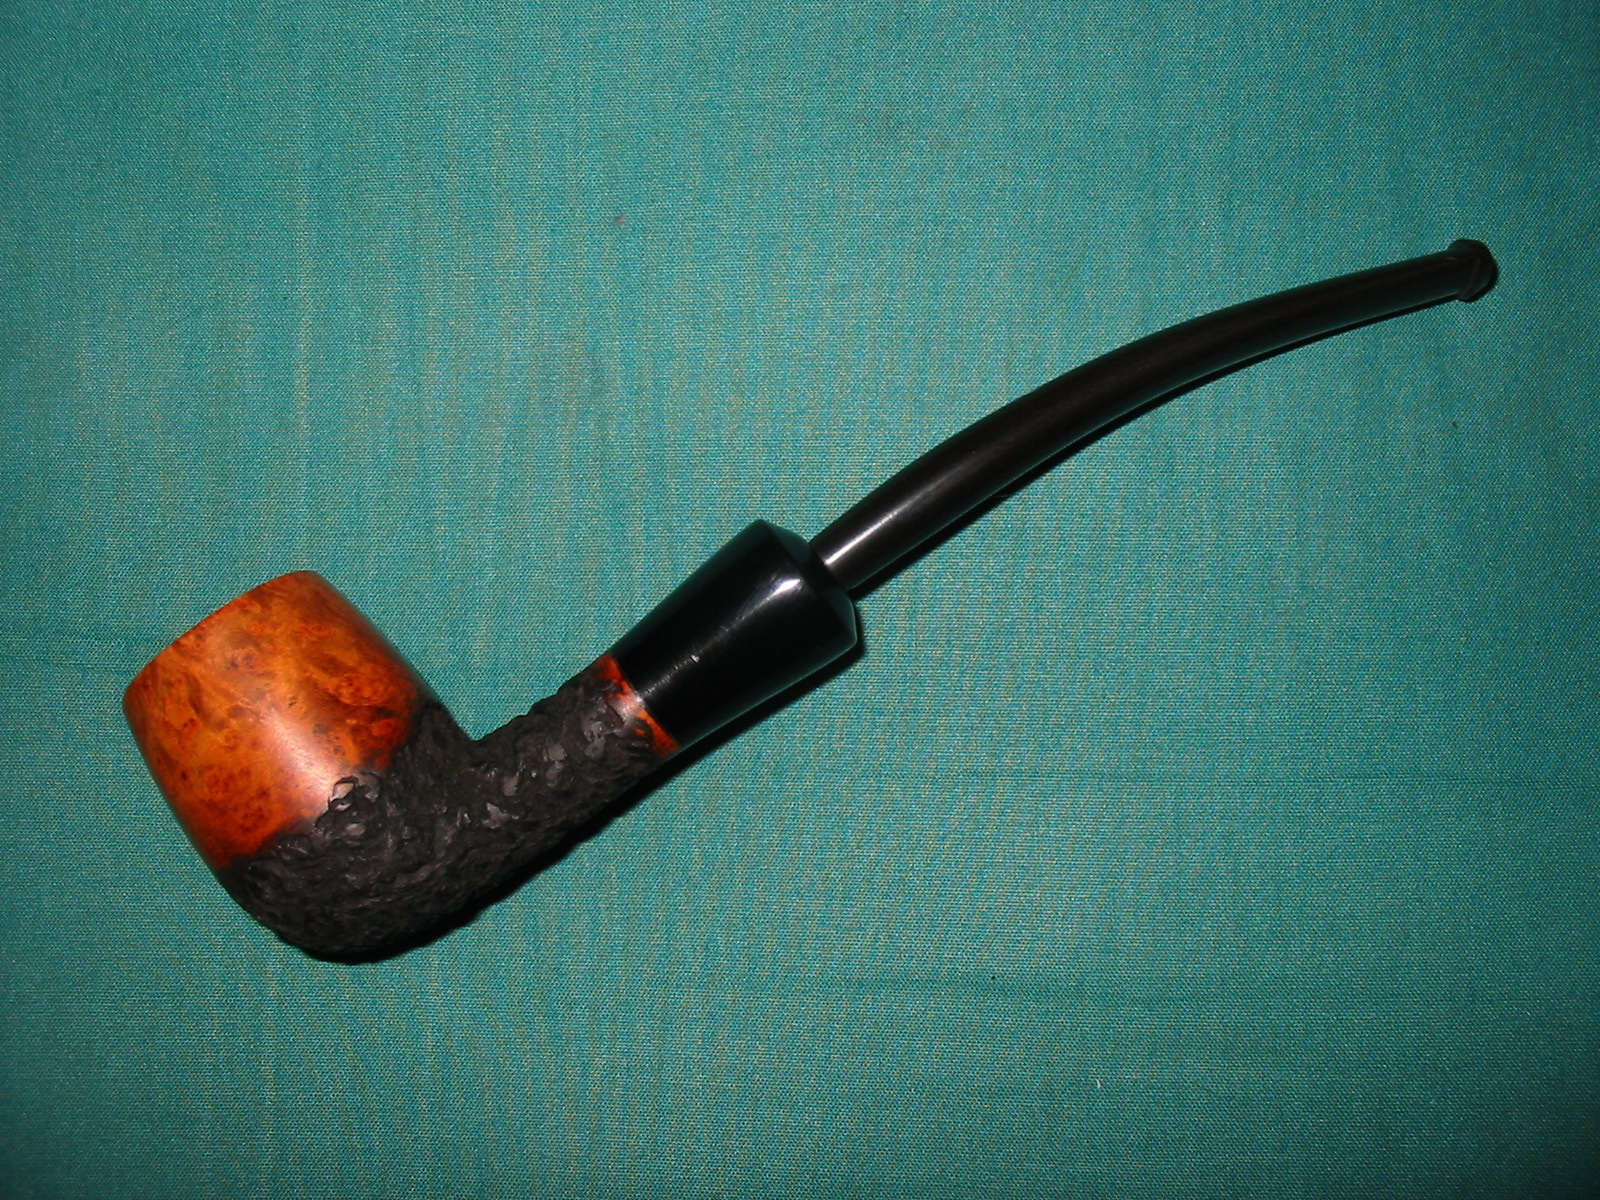
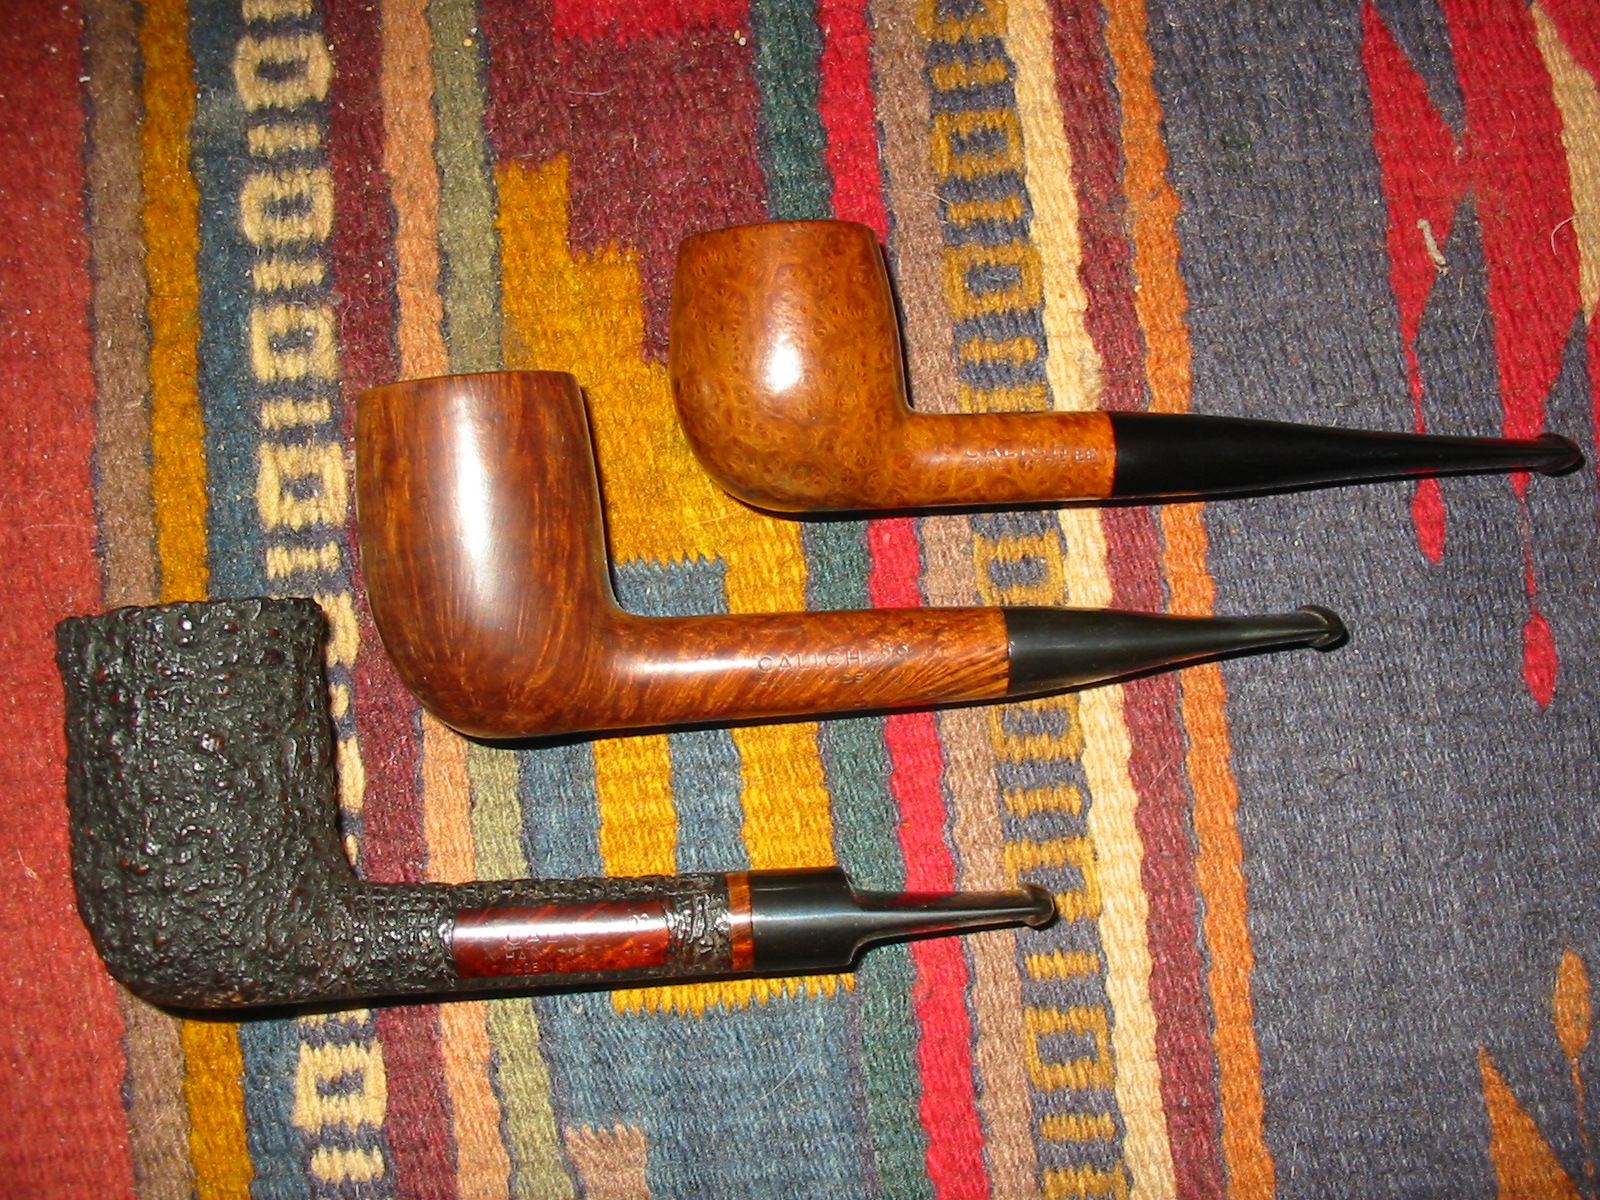
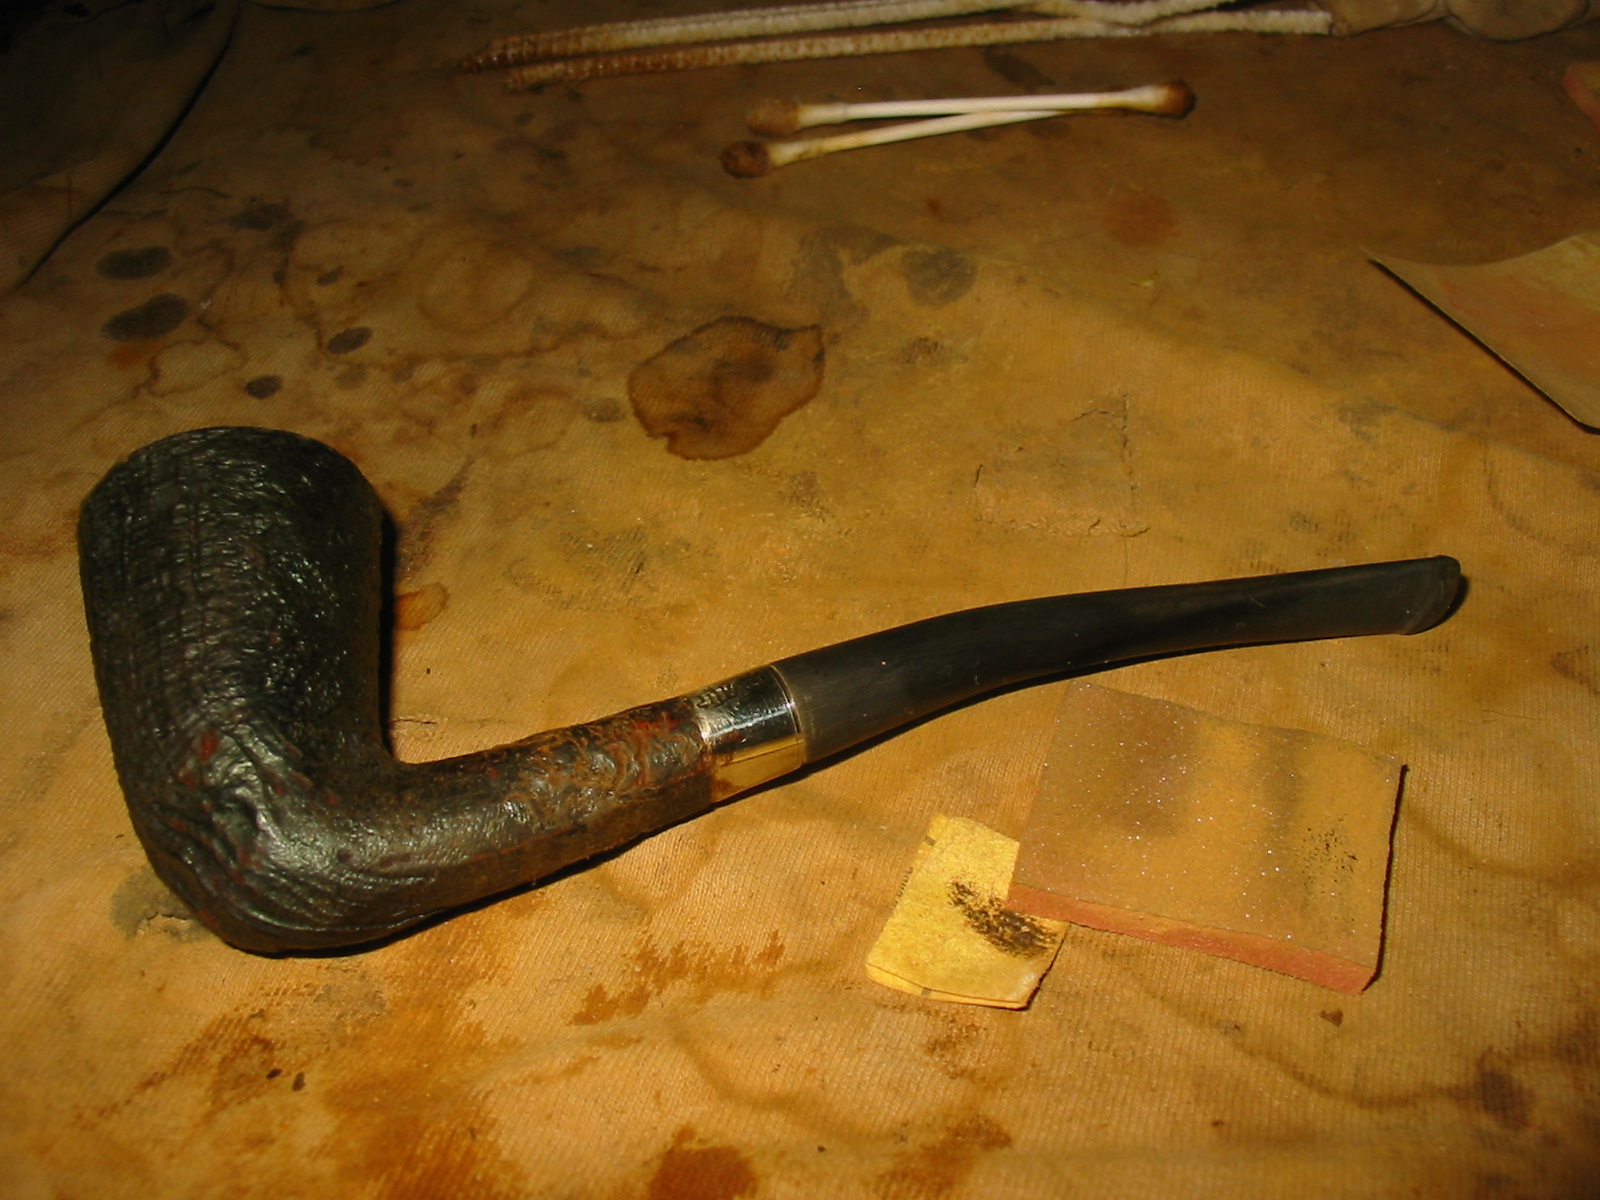
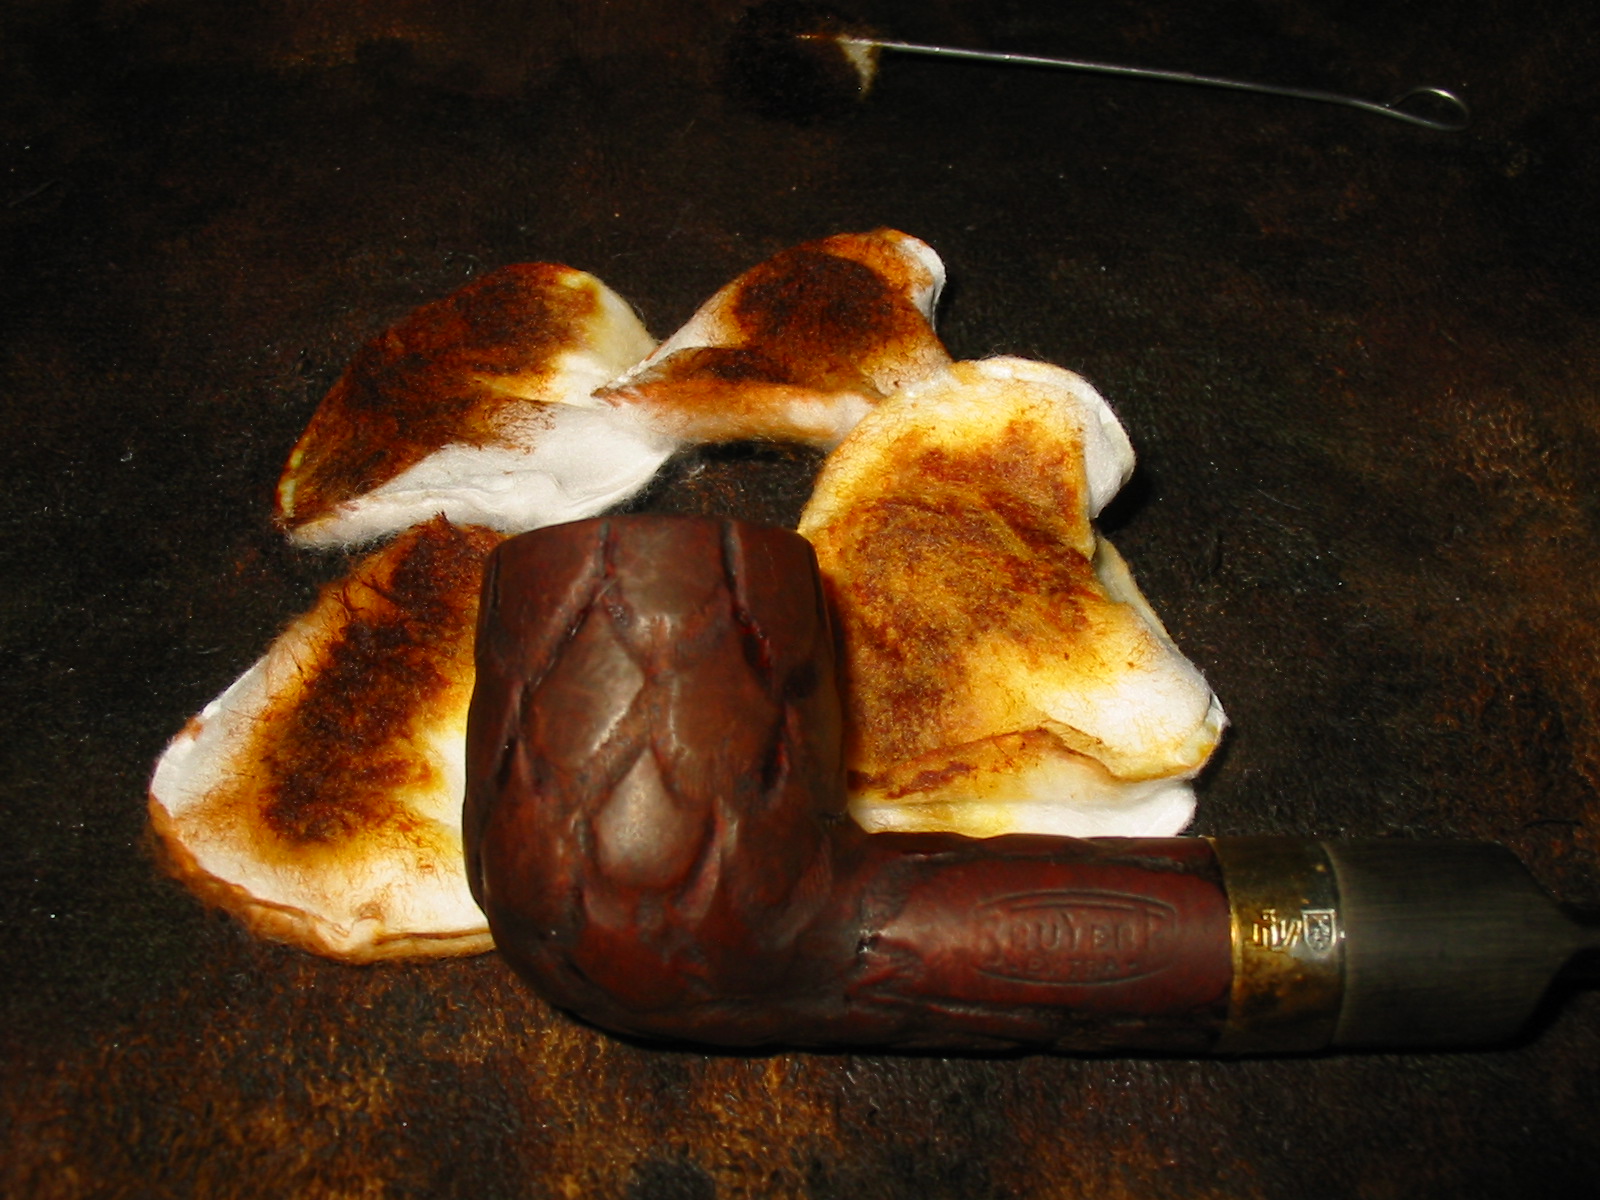
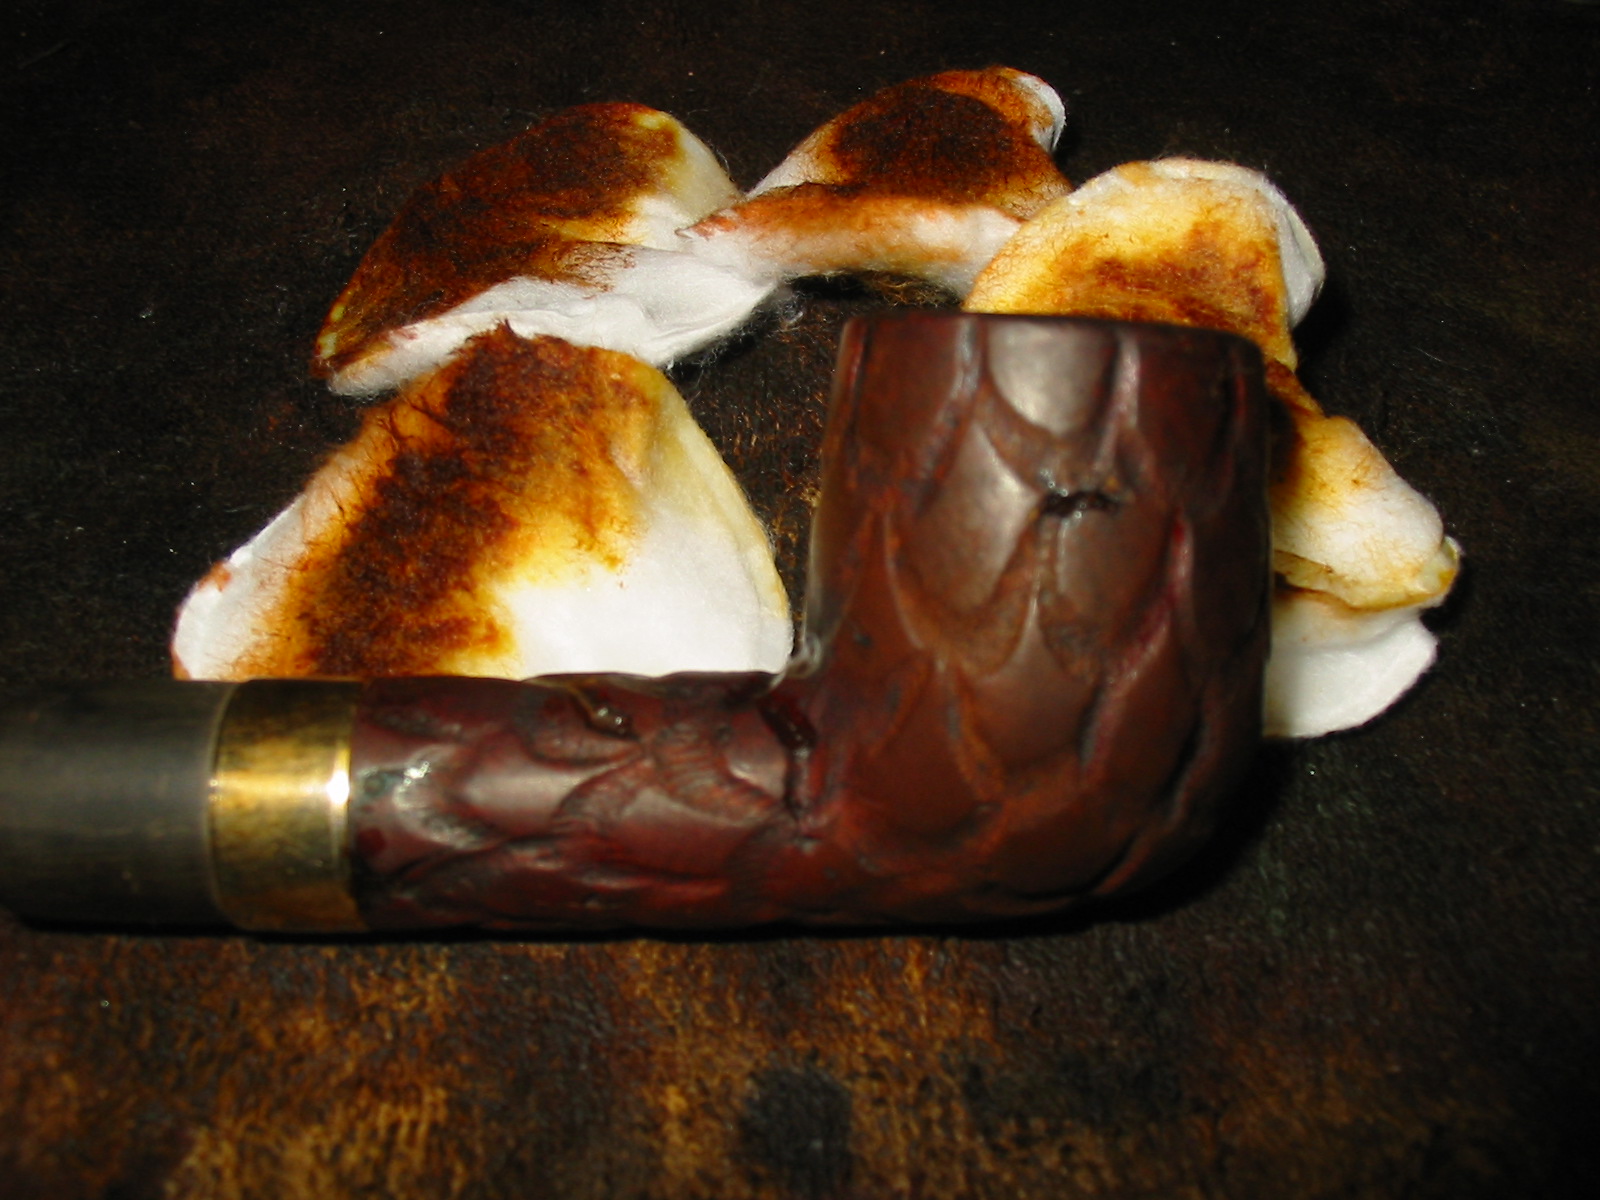
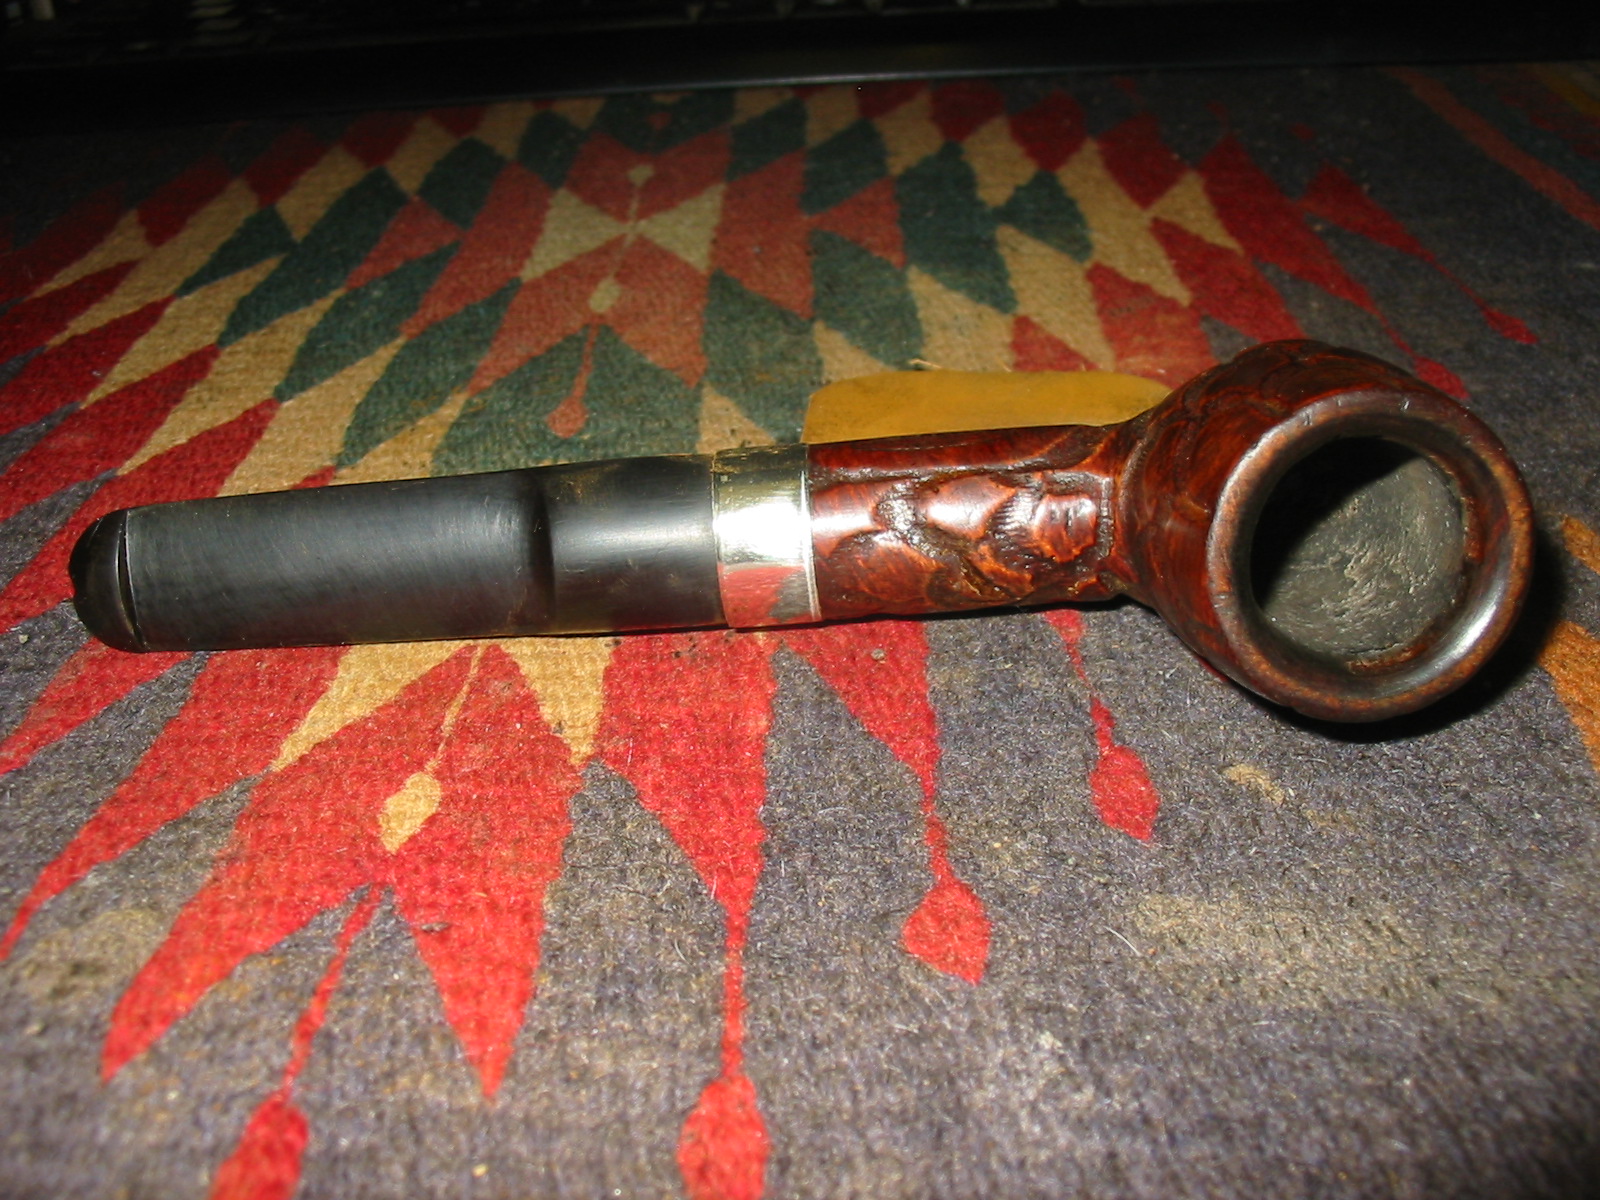
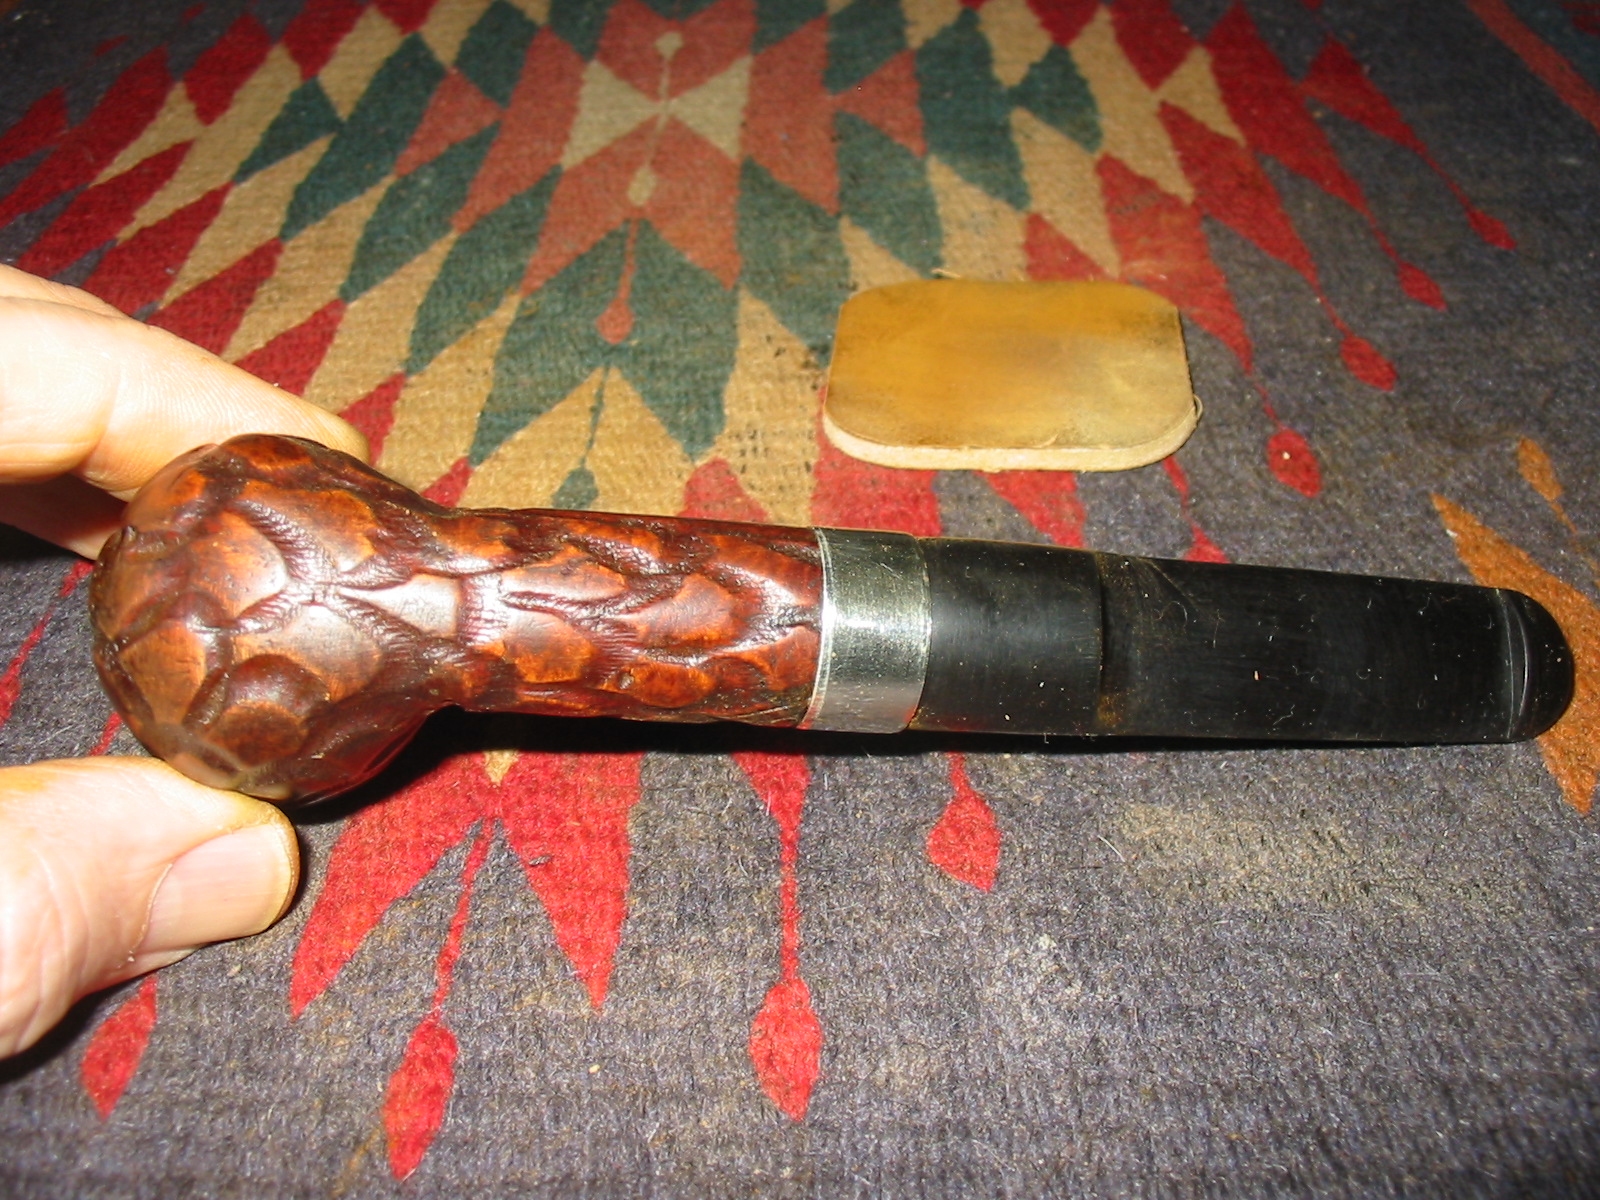
The first part of the collection that I want to visit with you is the Cauldron and Dublin shaped pipes. I have three pipes in this lot. The first pictured below is from 1988 and is a smooth cauldron that is stamped American in an oval over Reg. No. 88.CR-MT over The Berkshire over the number 37. If my read of these stampings is correct the pipe was made in 1988 and is a collaborative effort between Mark and Curt. The Berkshire is the name of the finish on this pipe. The familiar logo on Mark’s pipe stems has always been a five point star – in this case it is white star surround by a briar circle set in a clear acrylic and inlaid in the stem.
IMG_5554

IMG_5556
The second cauldron is a slightly older pipe. It is from 1984. It is stamped Sandblast over American in an oval over Reg. No. 0184/*7 and a 5 in a circle. Interpreting these stampings the pipe is from possibly January of 1984. I am not sure of what the *7 means but the 5 in the circle is the size – thus a group 5. It is the same size as the Berkshire above. The blast covers the bowl and shank. The rim is smooth and circumscribed with a ring mid rim. There is a smooth band around the end of the shank and a smooth area for the stamping. The stem has a white five point star set in clear acrylic inlaid into the surface.
IMG_5558

IMG_5560
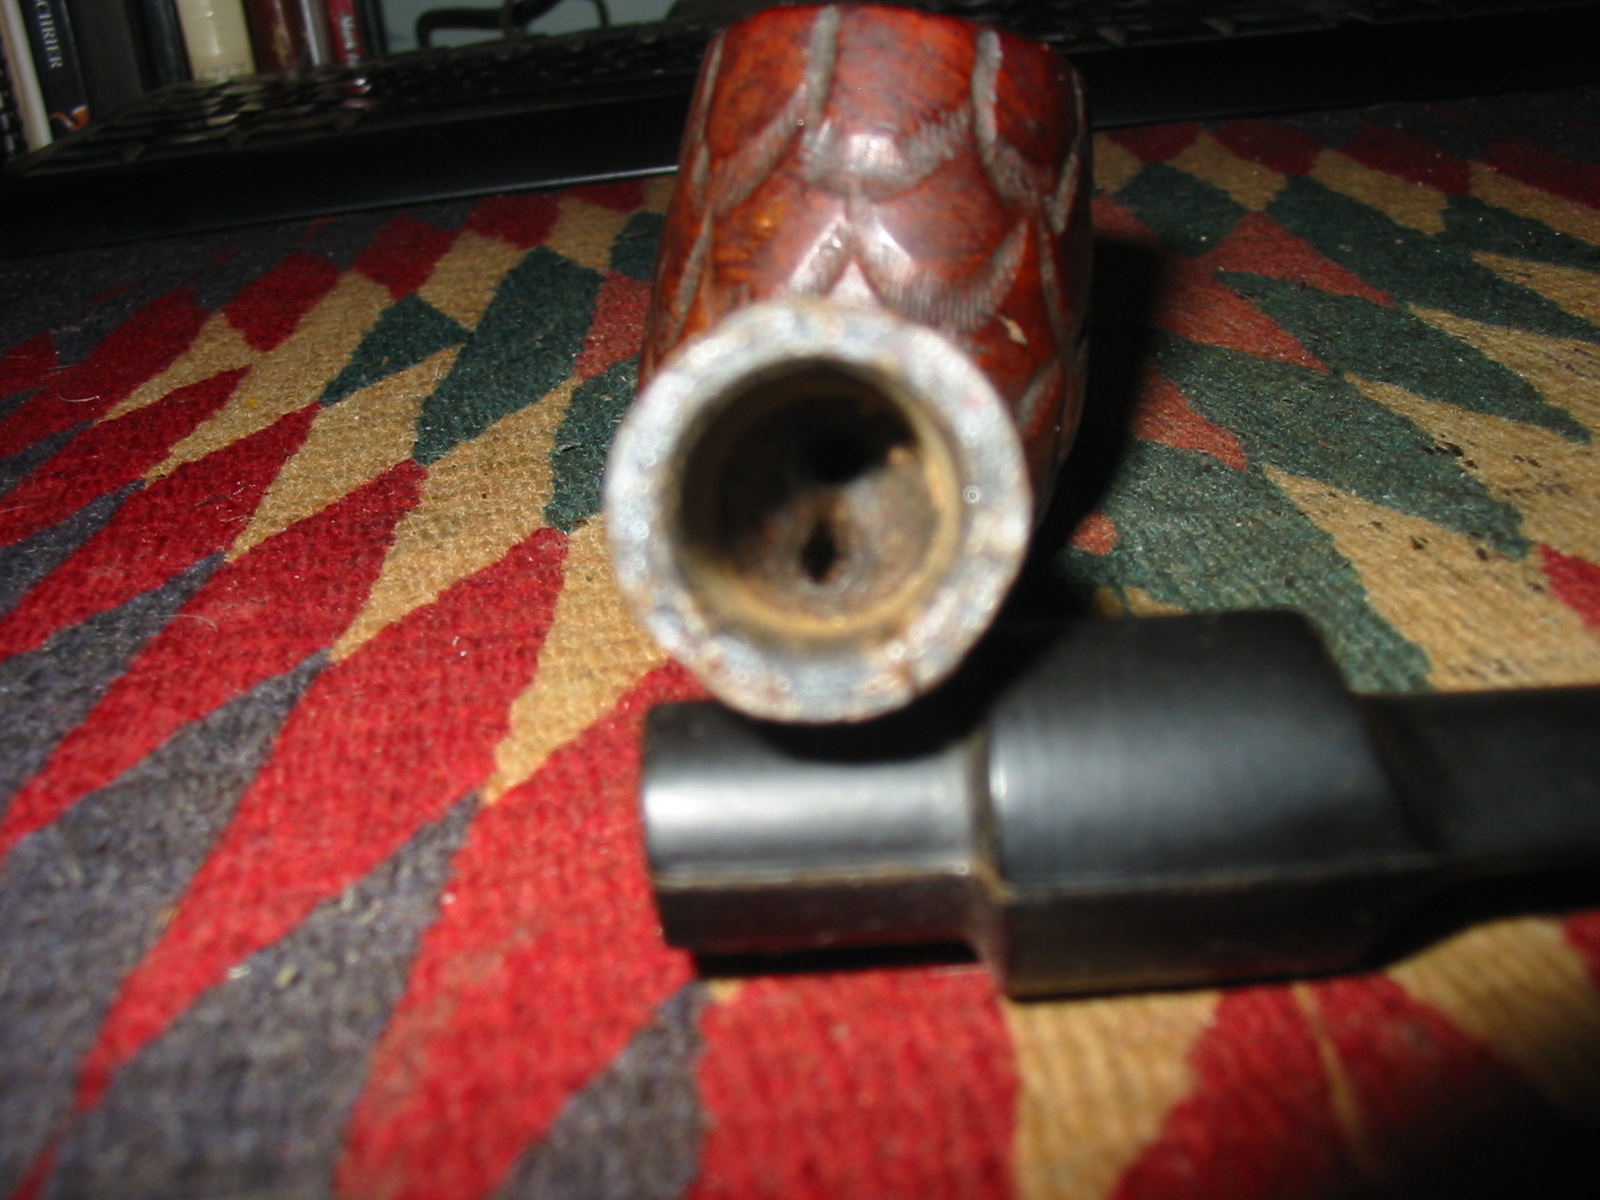
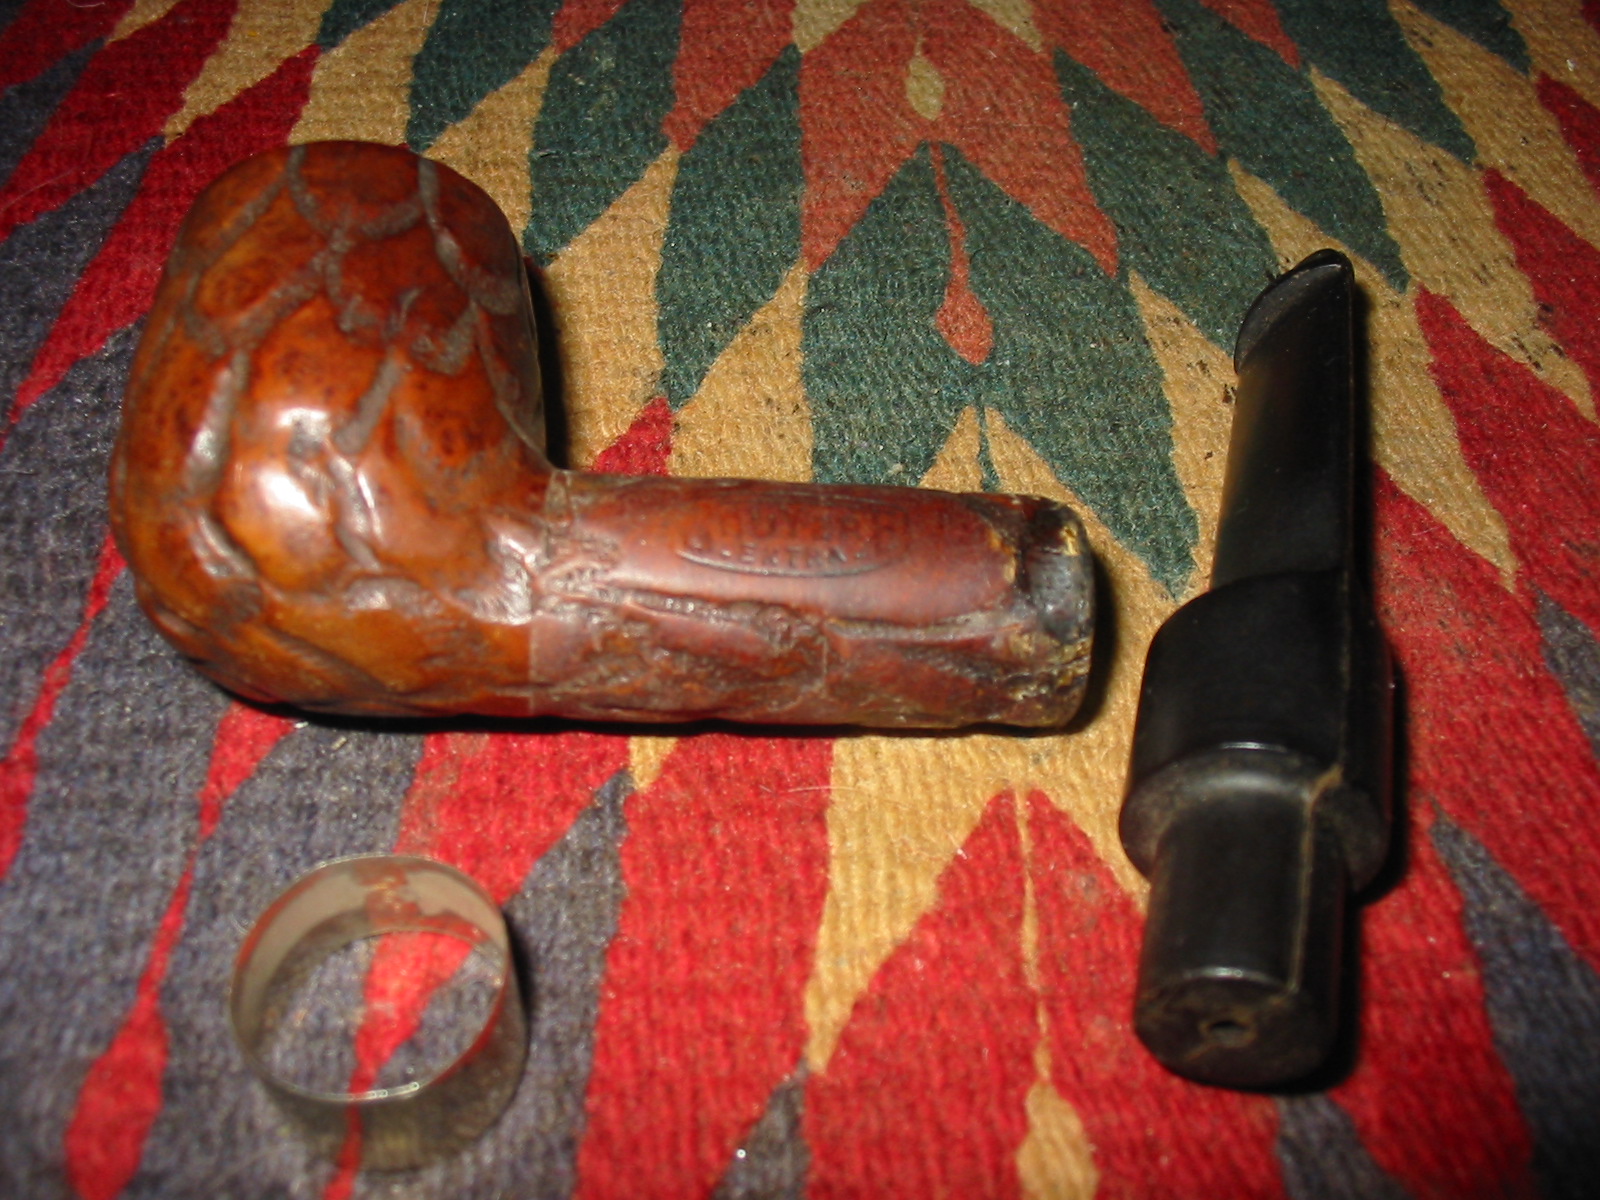
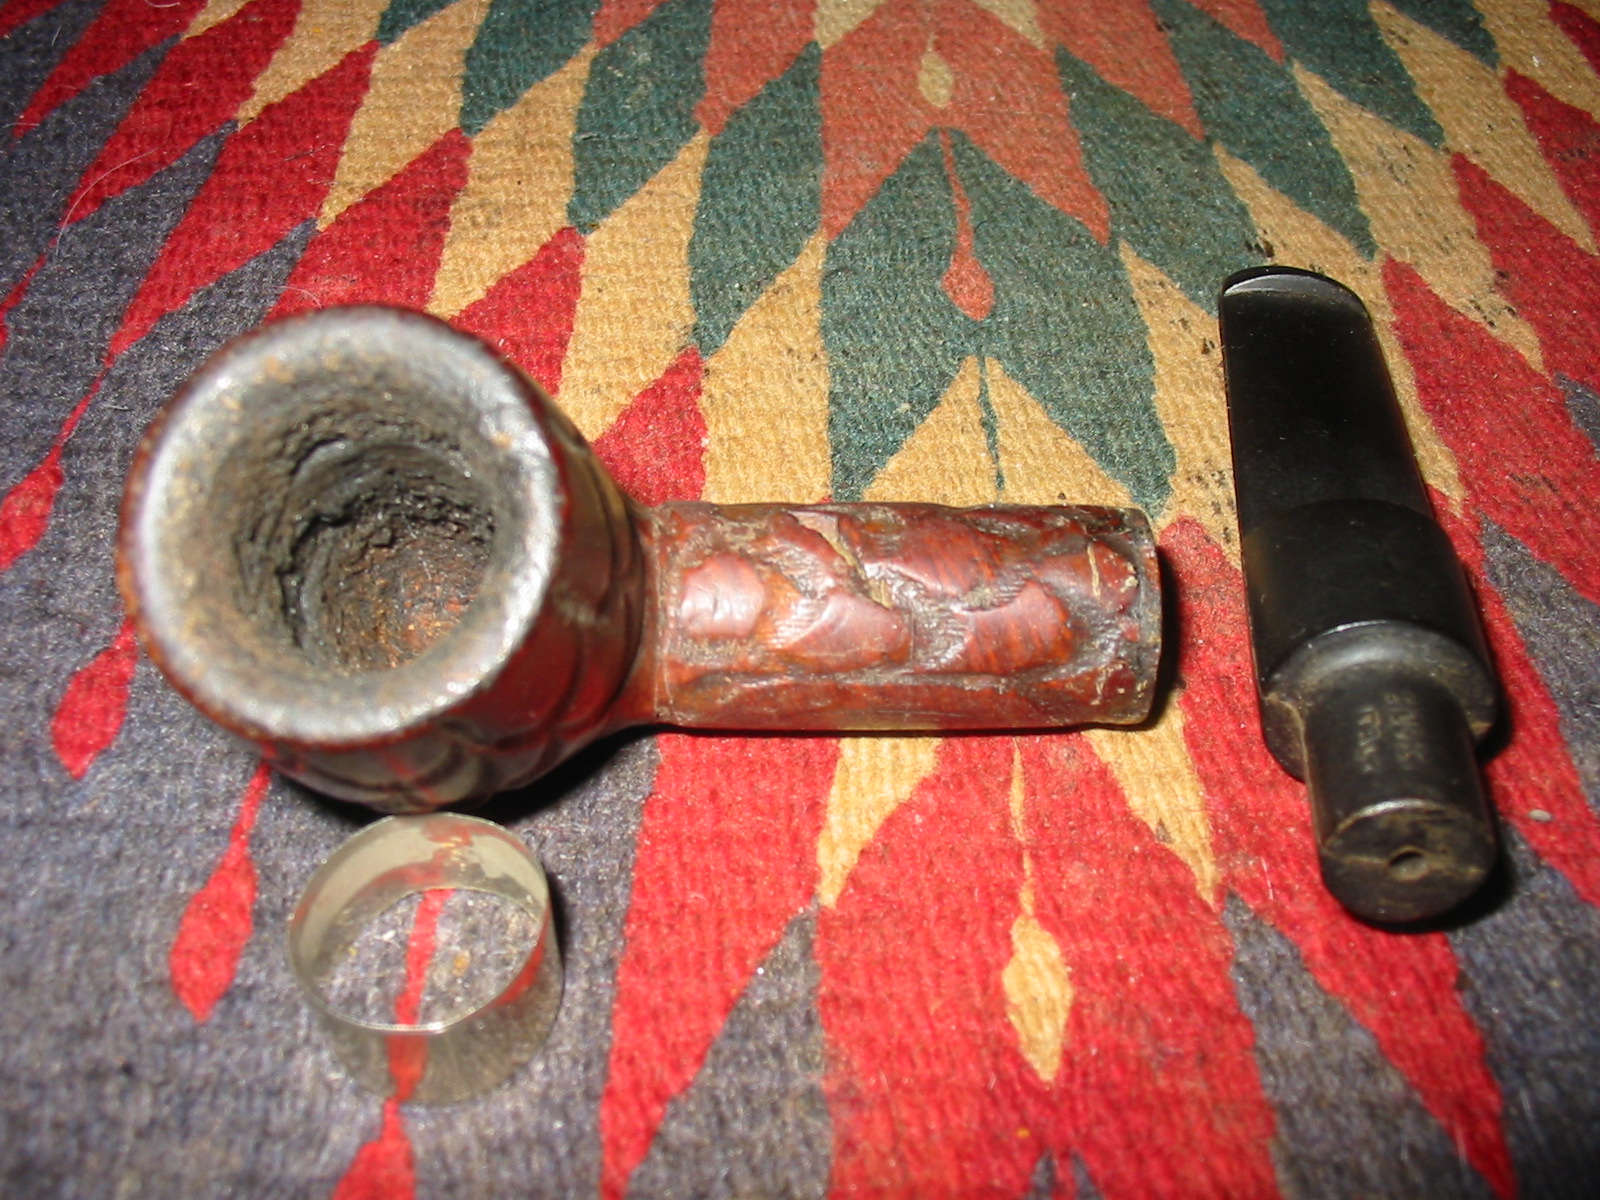
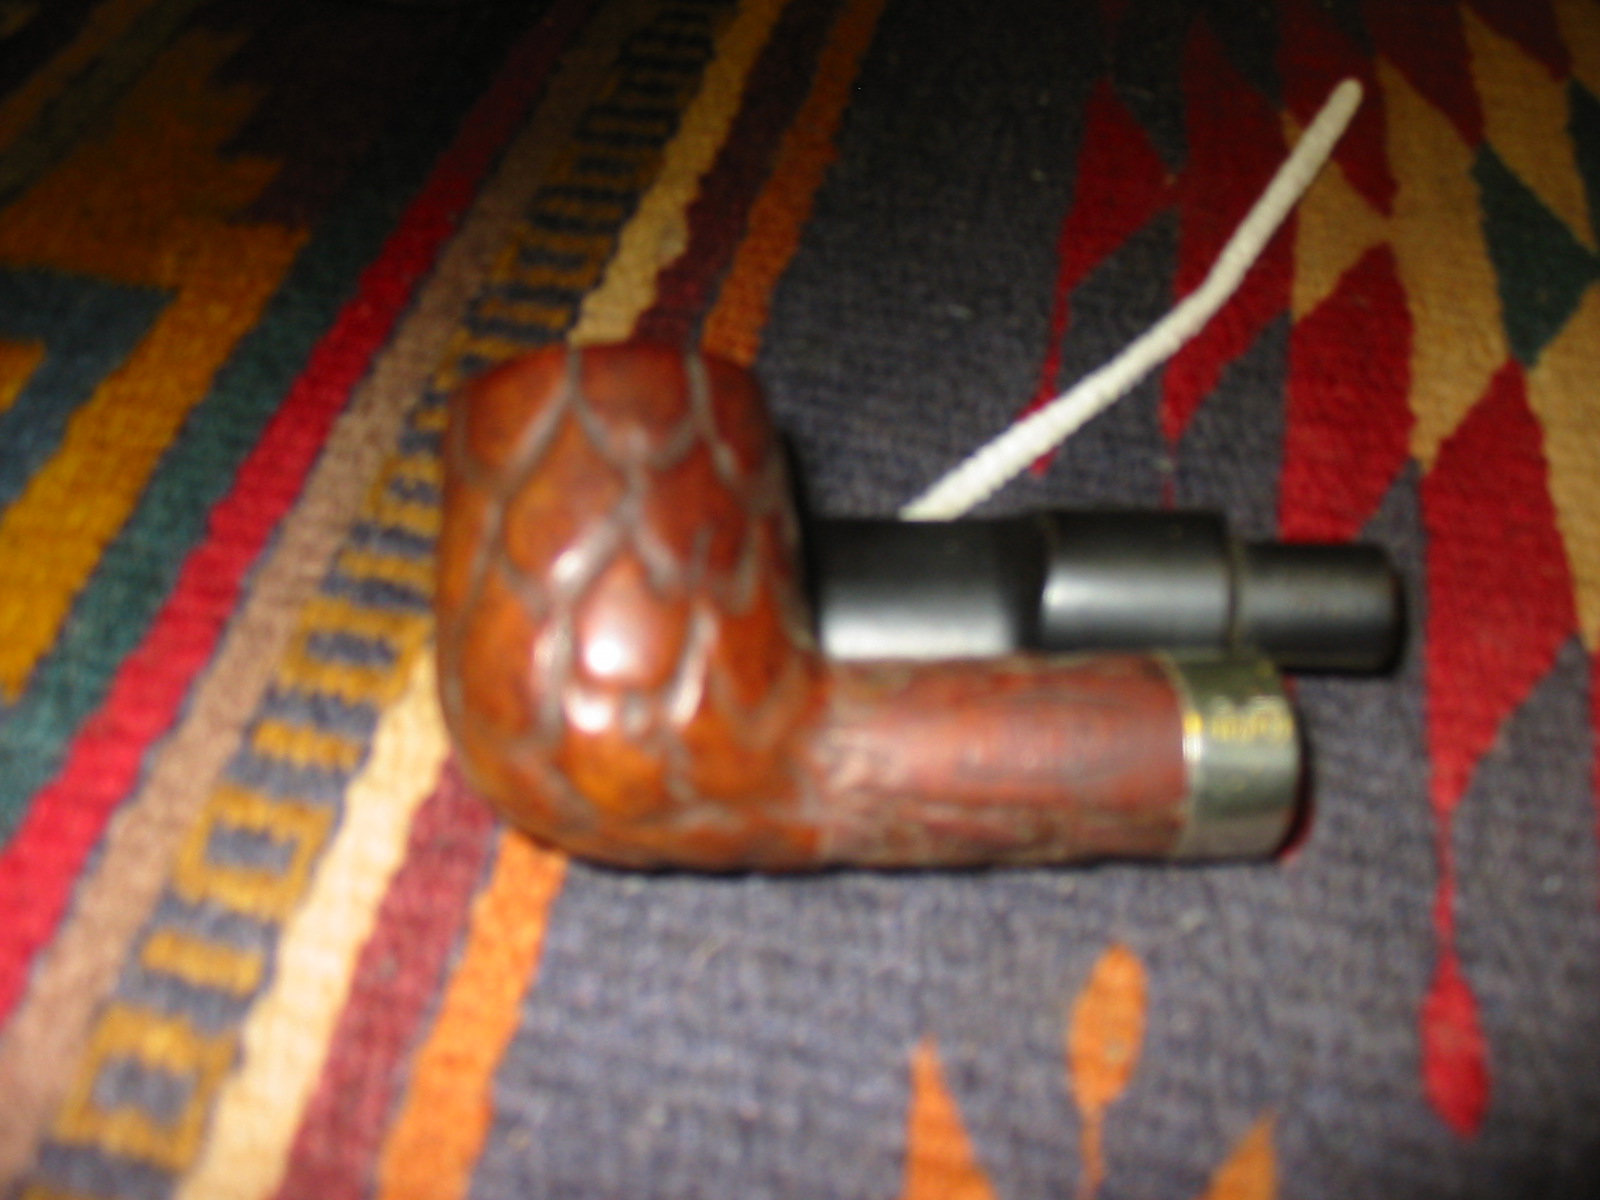
The third pipe in this lot is a Dublin and was the first Christmas pipe I was able to purchase. I believe I bought or traded it from a fellow on one of the online forums that I frequent. It is a nice sandblast pipe. The Dublin shape has an oval shank with a slight forward cant to the bowl and slight bend to the stem. It is a comfortable pipe to smoke. It is stamped Tan Blast over Christmas 2004 and a single star. This pipe has the customary metal inset star in a circle set in the stem.
IMG_5562

IMG_5564
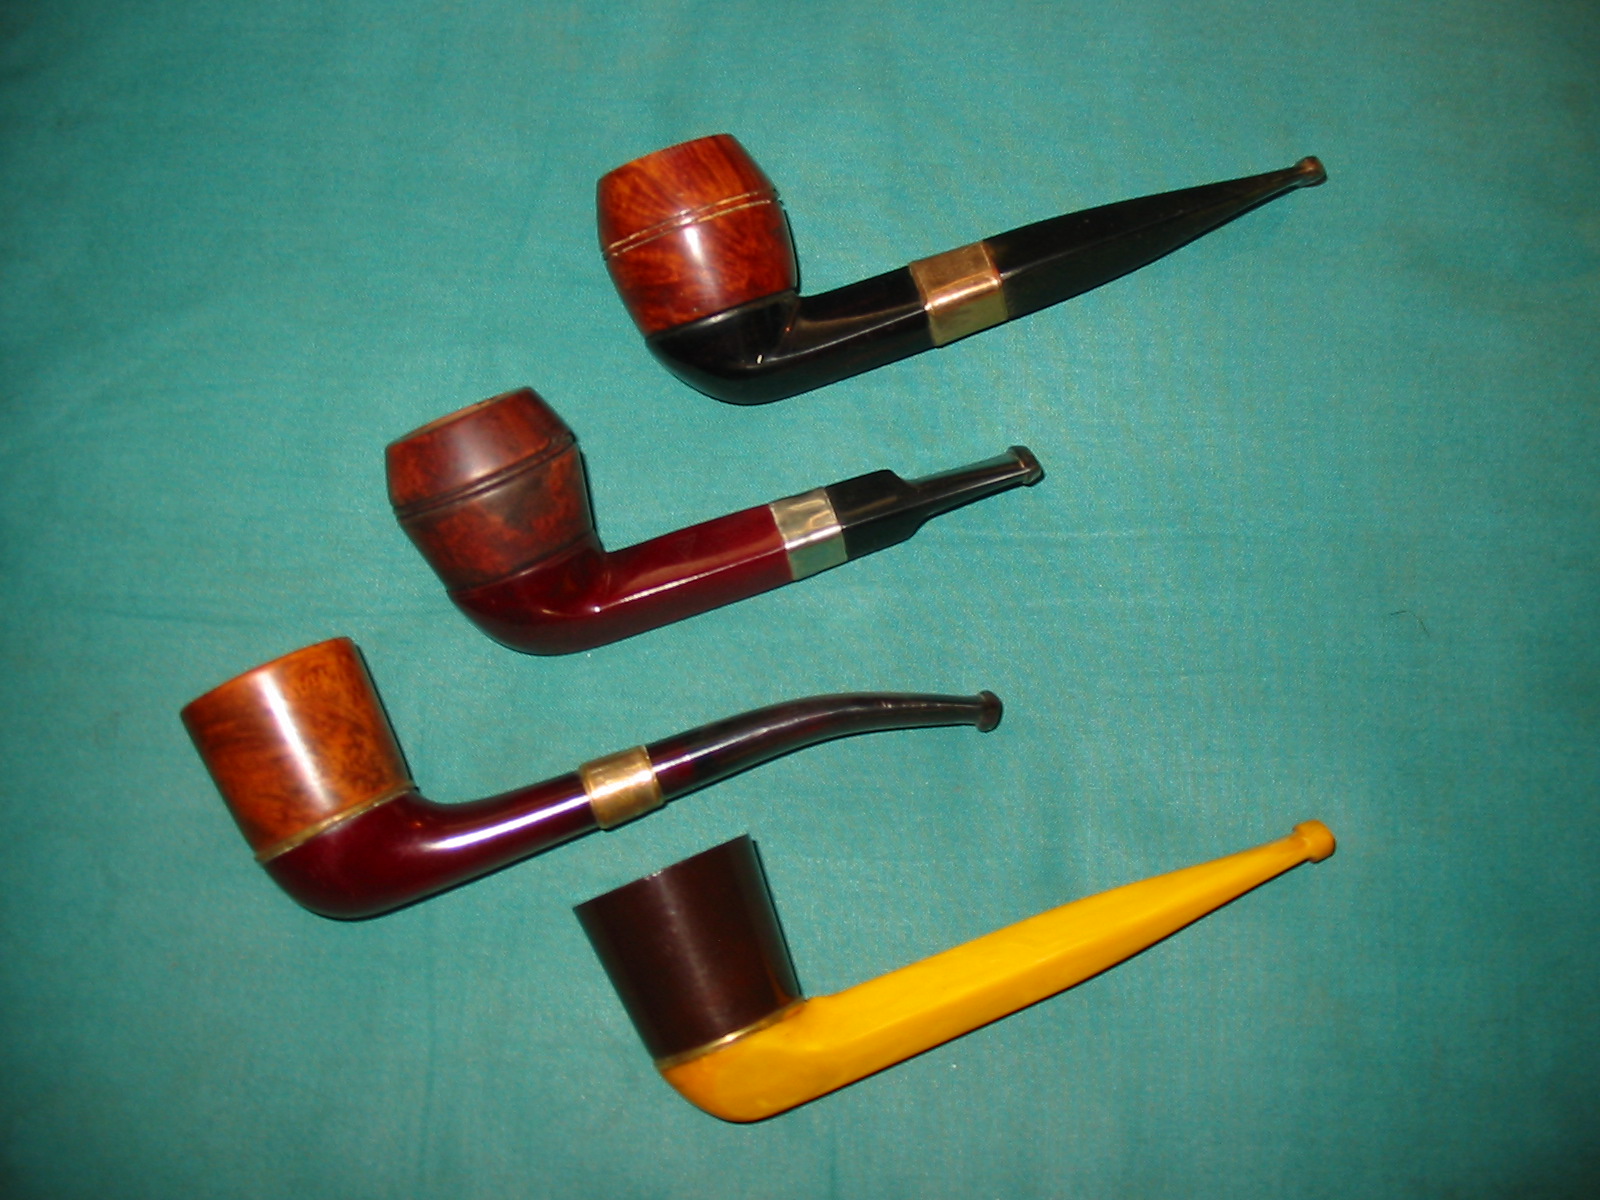
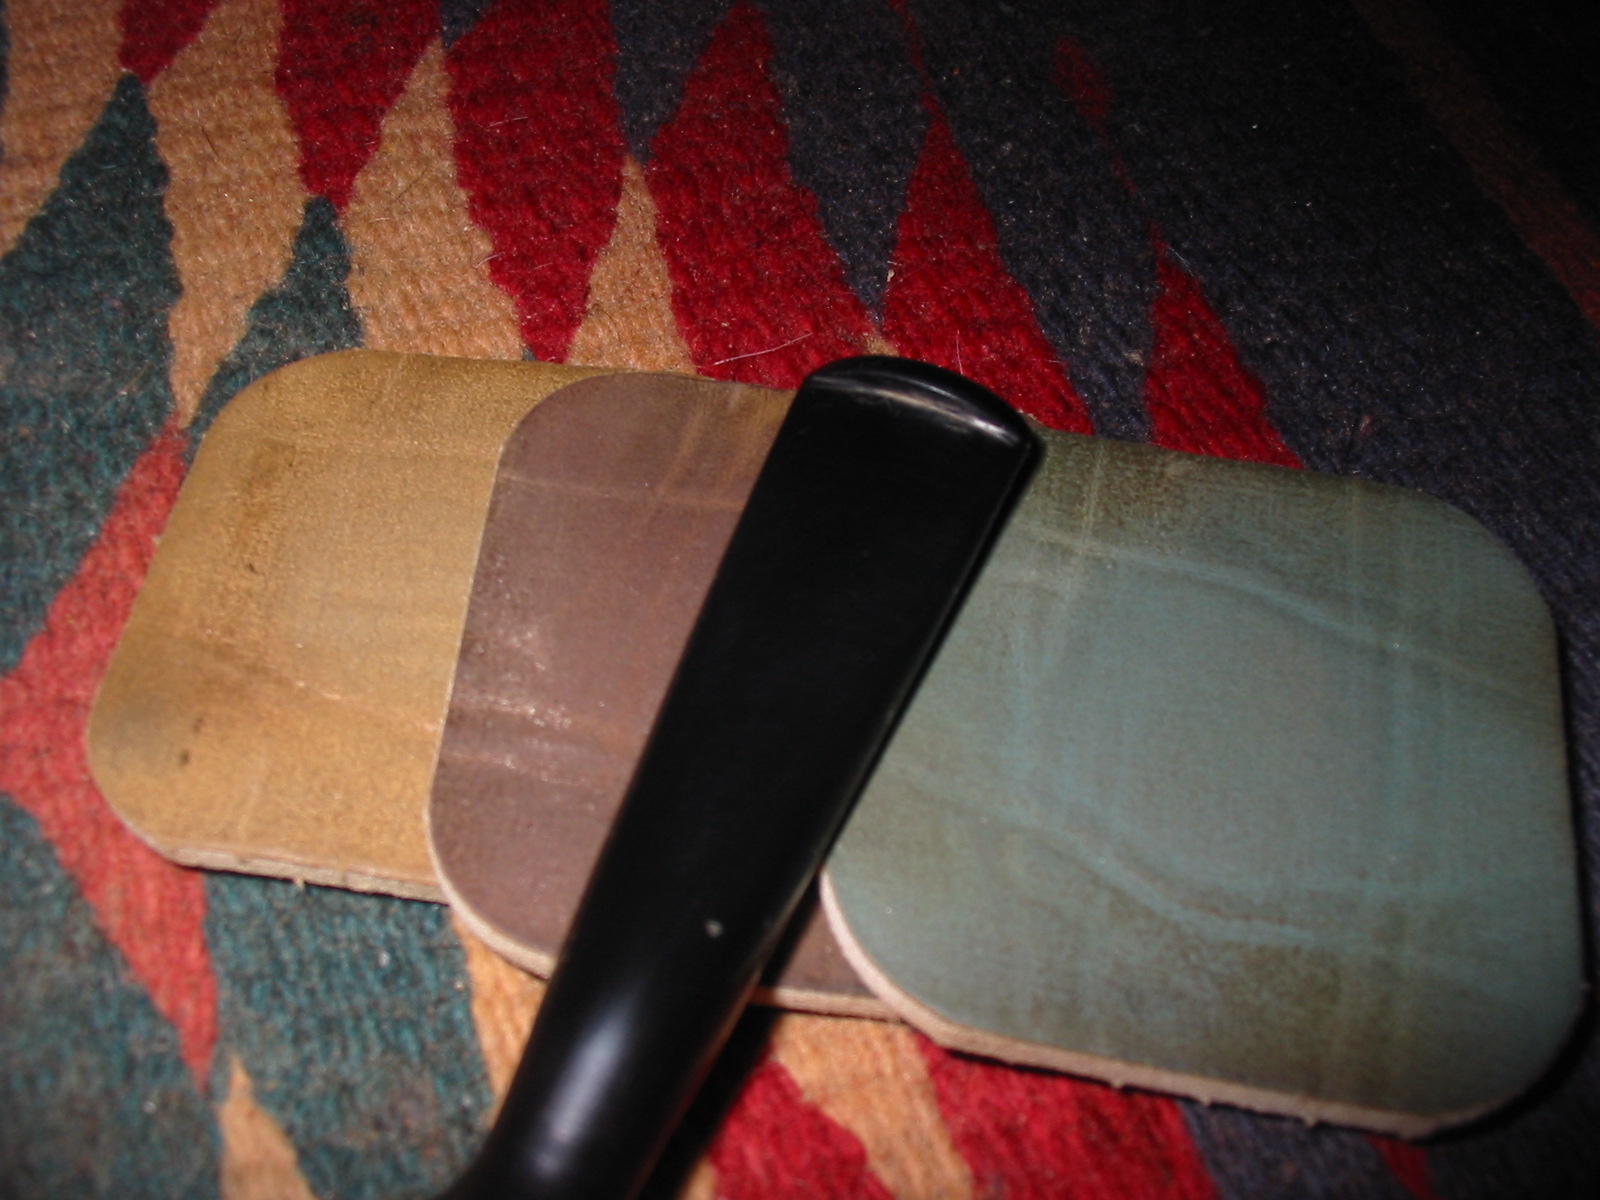
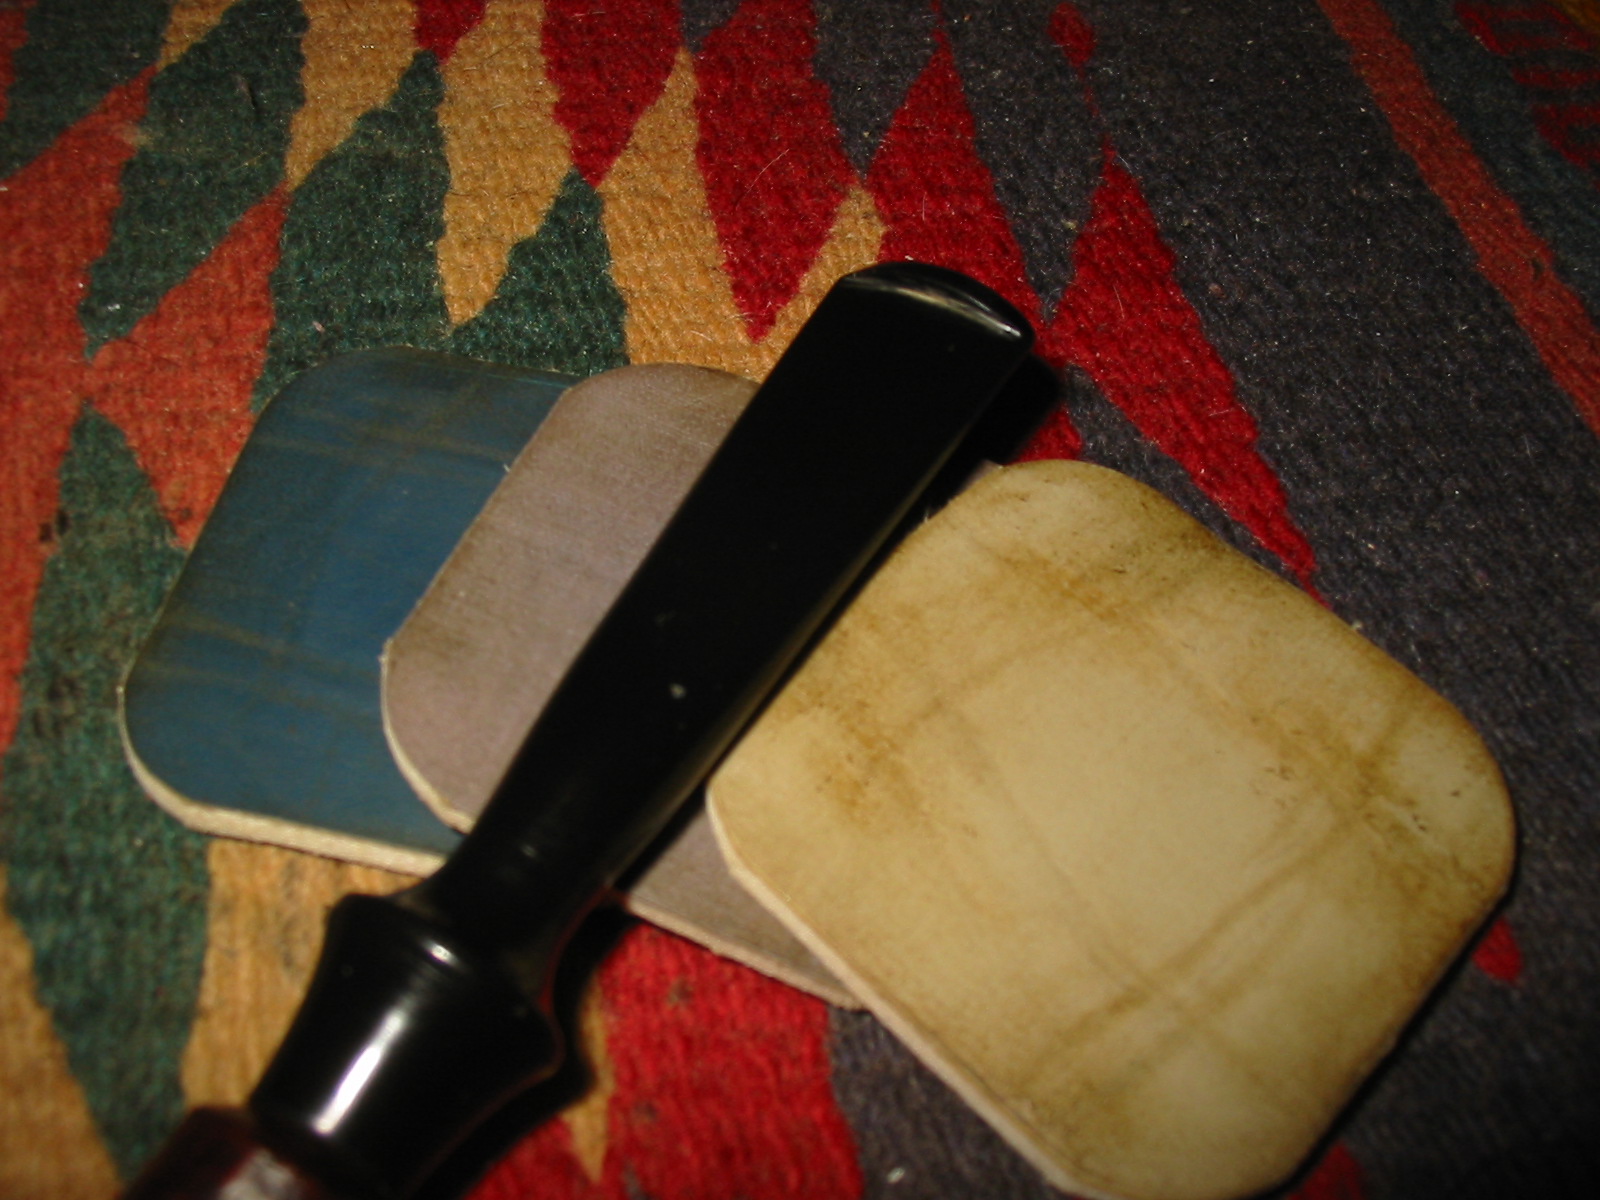
The next group of Mark’s pipes in my collection are Coral finish pipes. In the photo below I have grouped this lot together. There are five Coral finish pipes and one with a Black and Tan finish.
IMG_5566
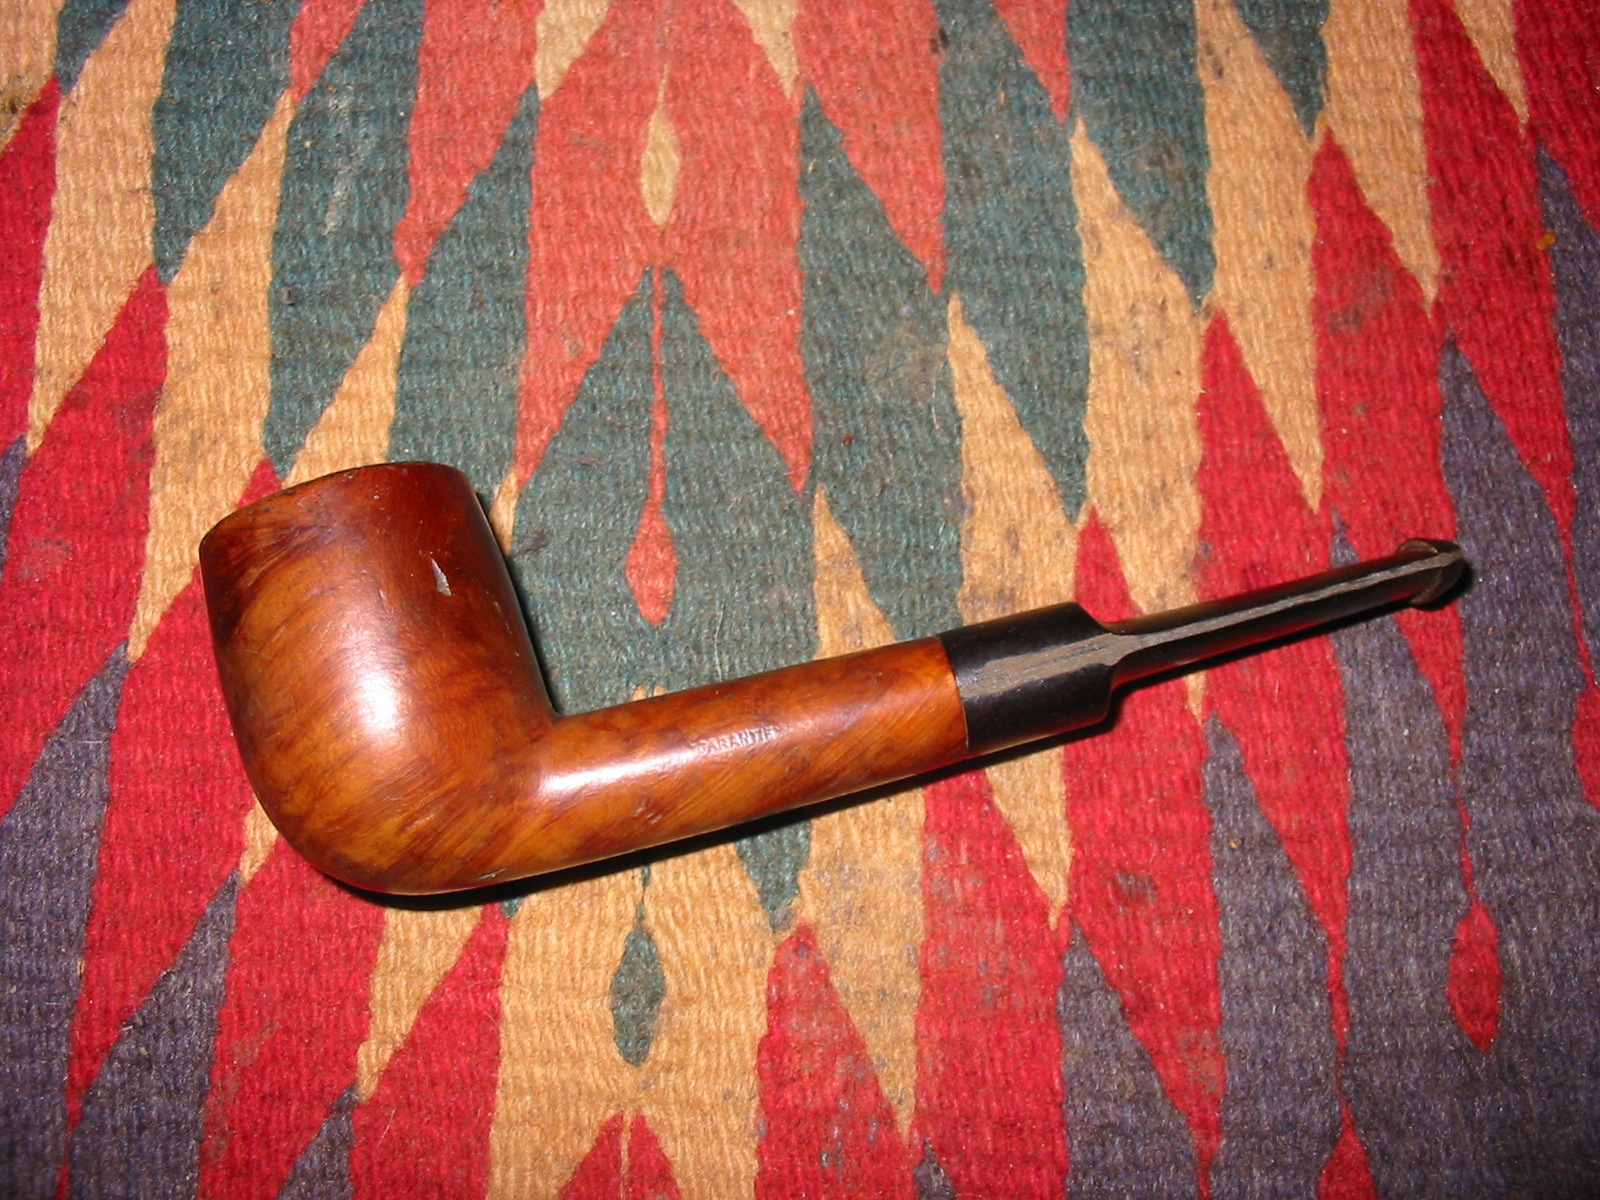
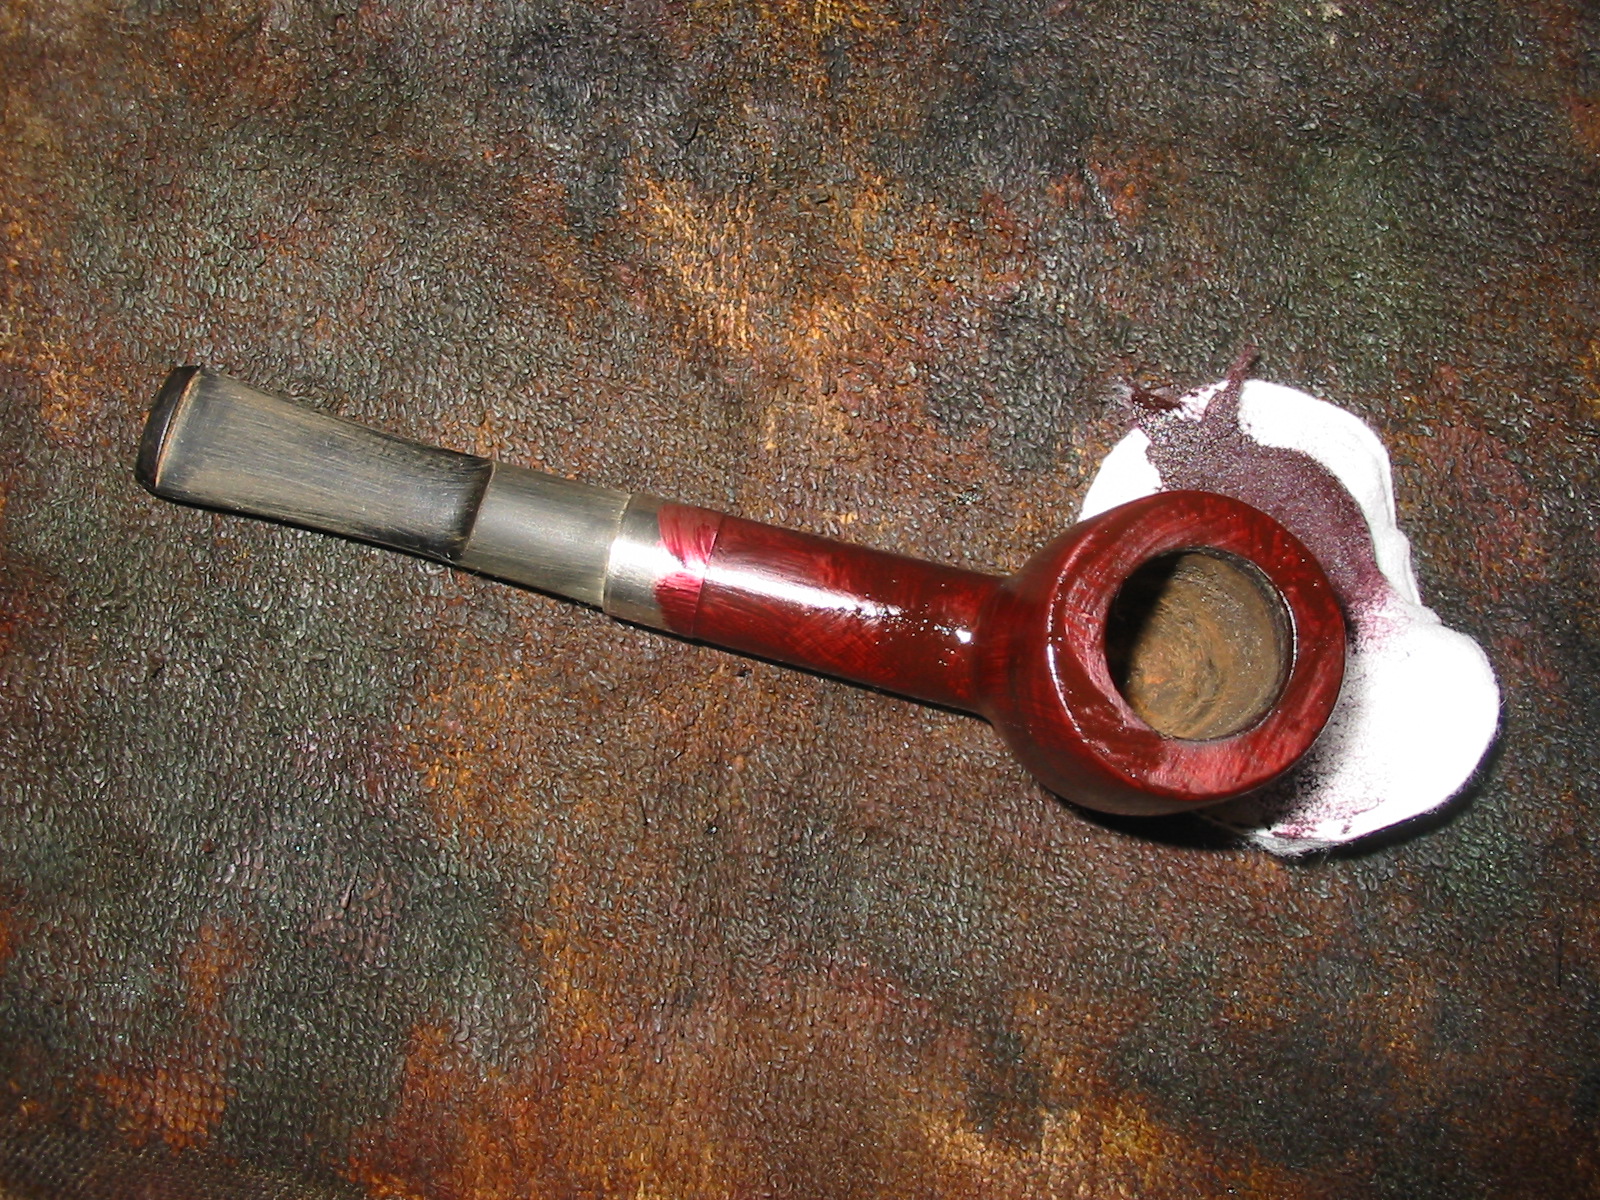
The first of these is a Christmas pipe. It is a square shank billiard that is stamped with Mark’s signature (Mark Tinsky) on the smooth panel on the left side and on the underside smooth area Christmas 2005 over Coral. The stain on this one is a contrast between a dark brown deep in the grooves of the finish and a reddish stain on the high points of the finish. The contrast is well done. The smooth portions of the shank are also a dark brown in colour. It bears the same metal star in a circle inset into the stem as the logo. It is probably a Group 5 size pipe but does not have a size stamp.
IMG_5581

IMG_5582
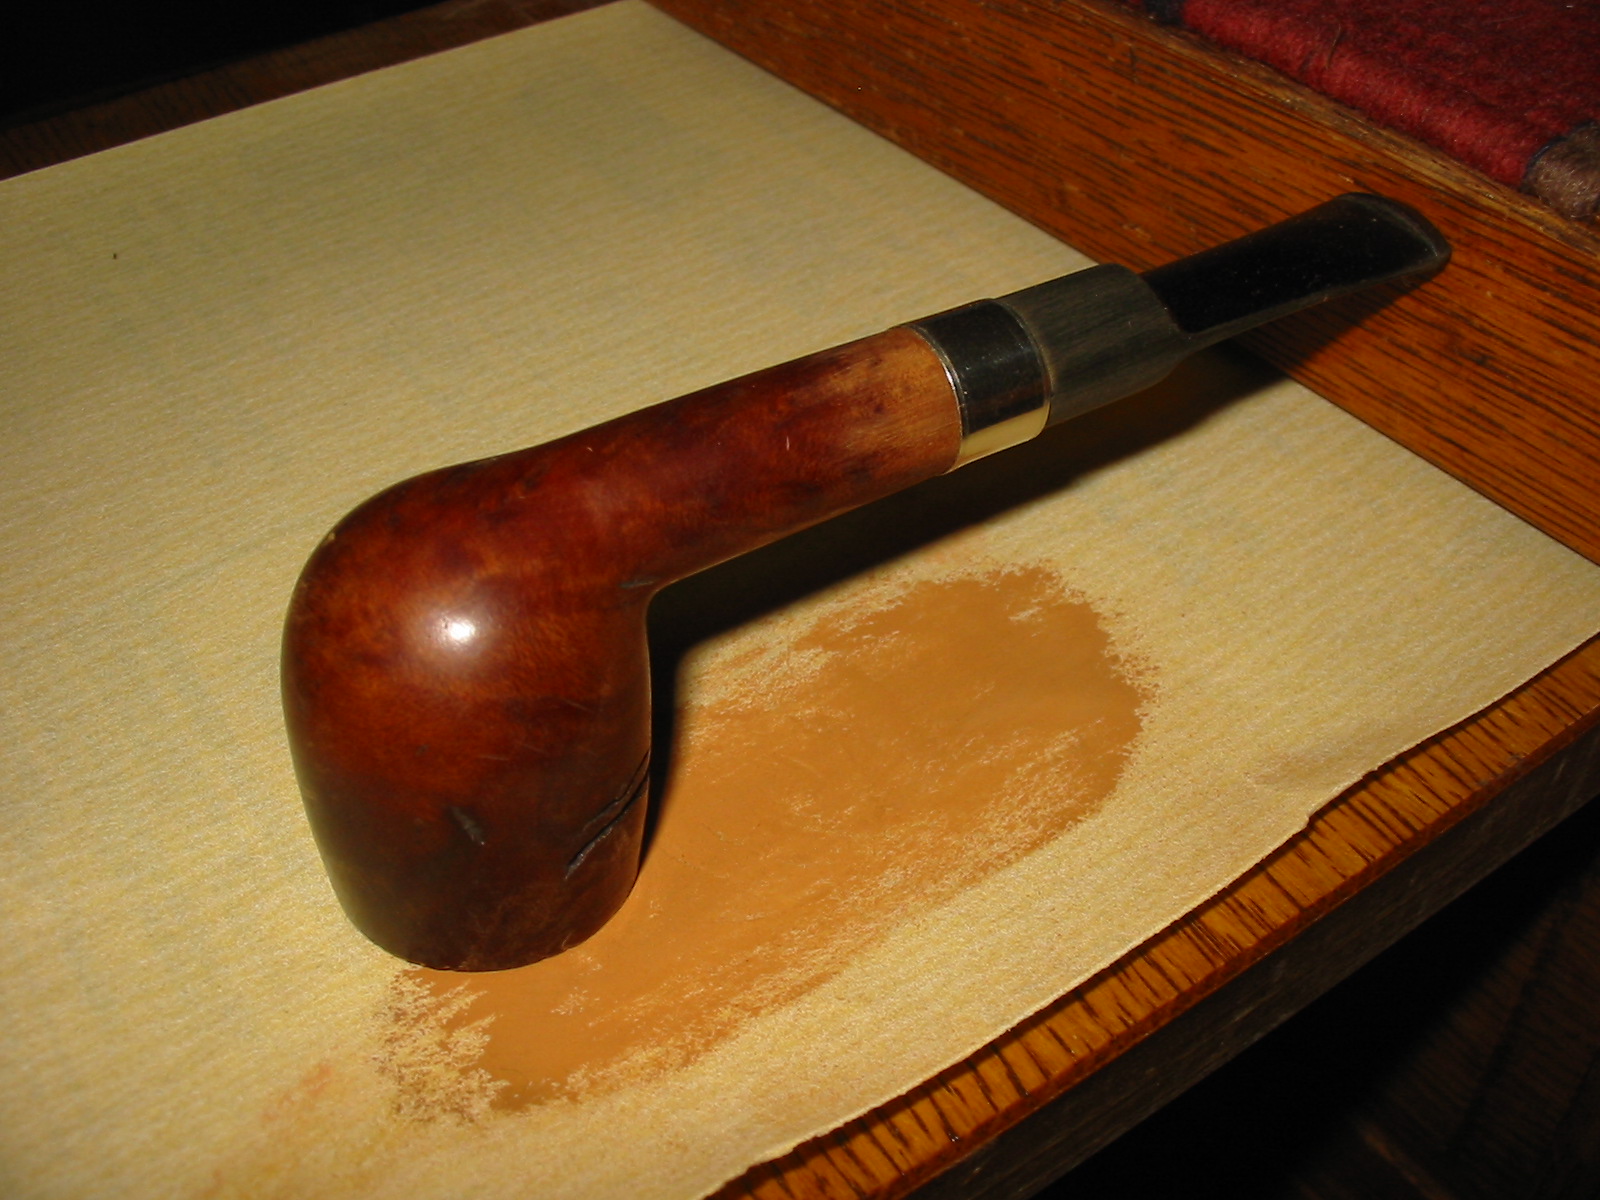
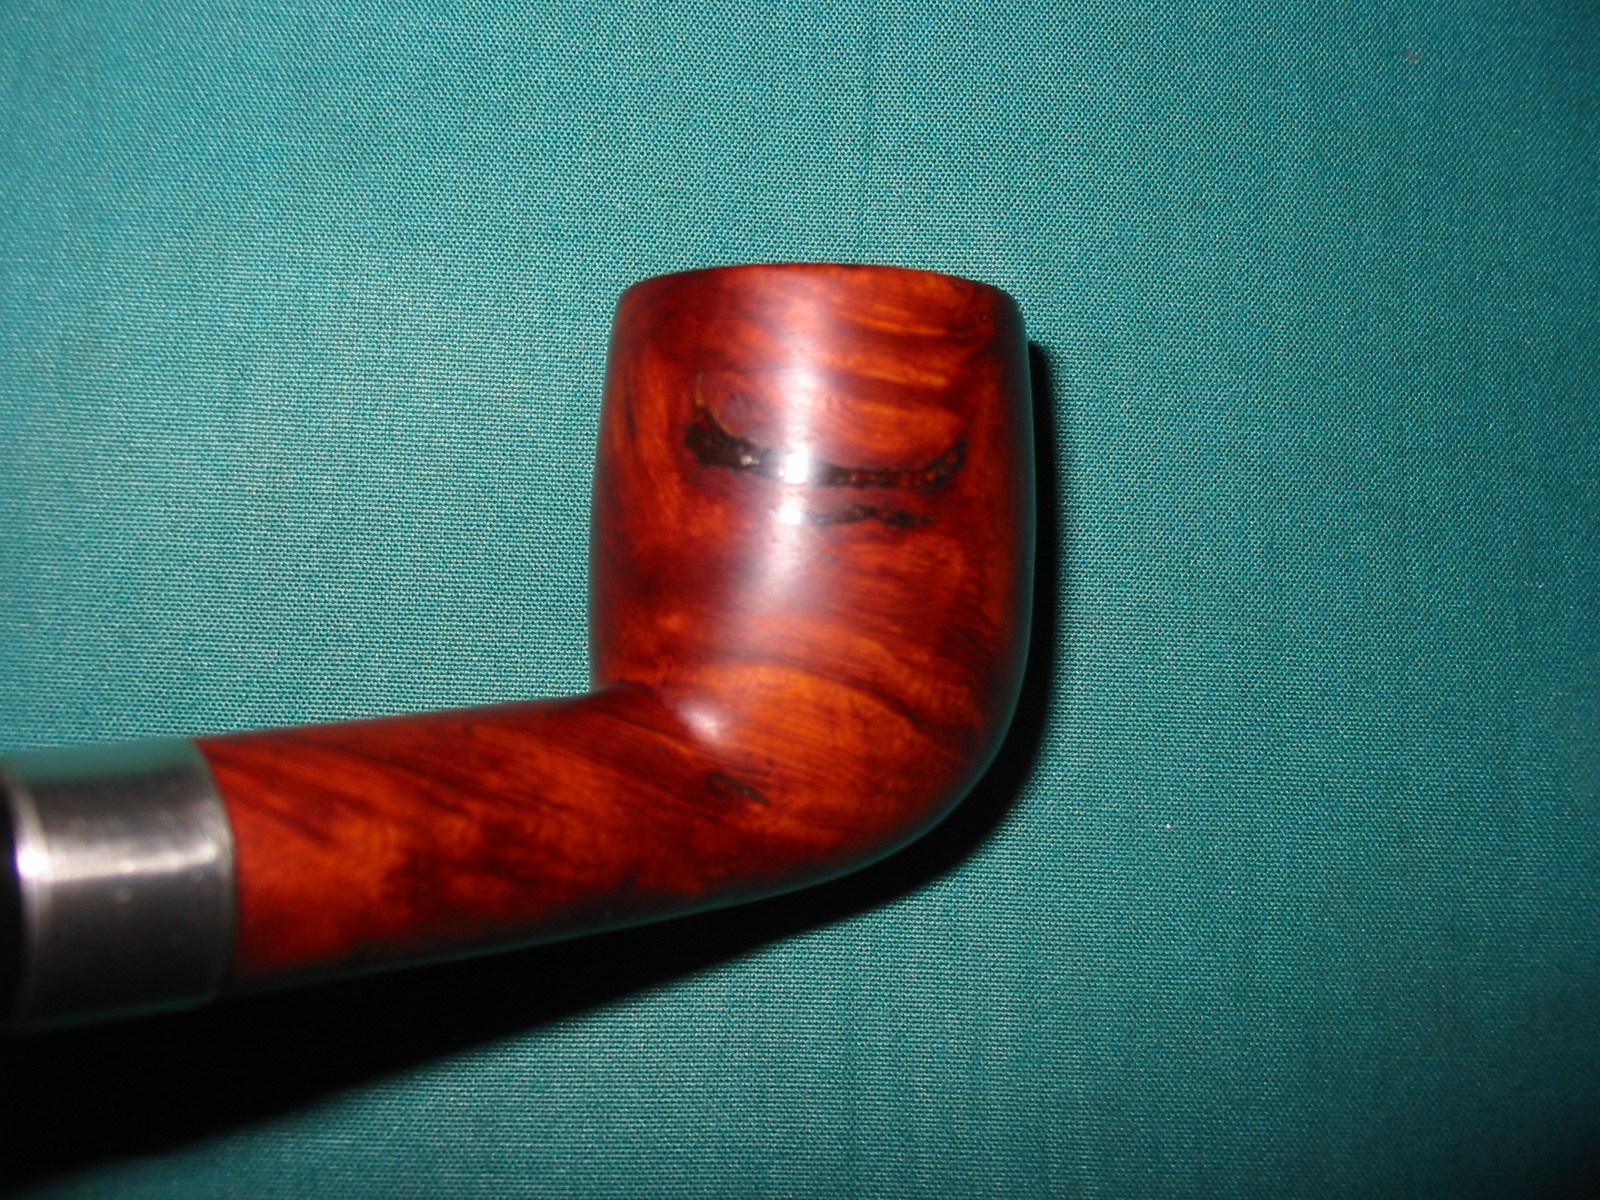
The second Coral finished pipe in the above group photo is a thick shank apple. It is probably one of my favourite shapes that Mark makes. I have three of this shape – two Coral finished pipes and a Sandblast. It is stamped American in an oval over Coral with 5 in a circle. The finish feels great in the hand and as it heats up the tactile feel is comfortable. The smooth rim and band around the end of the shank are attractive additions. The underside of the shank is also smooth and provides a place for the stamping. The stain on this one is a combination of dark brown and walnut. The grooves are dark and the high points and smooth portions are a walnut stain.
IMG_5571

IMG_5573
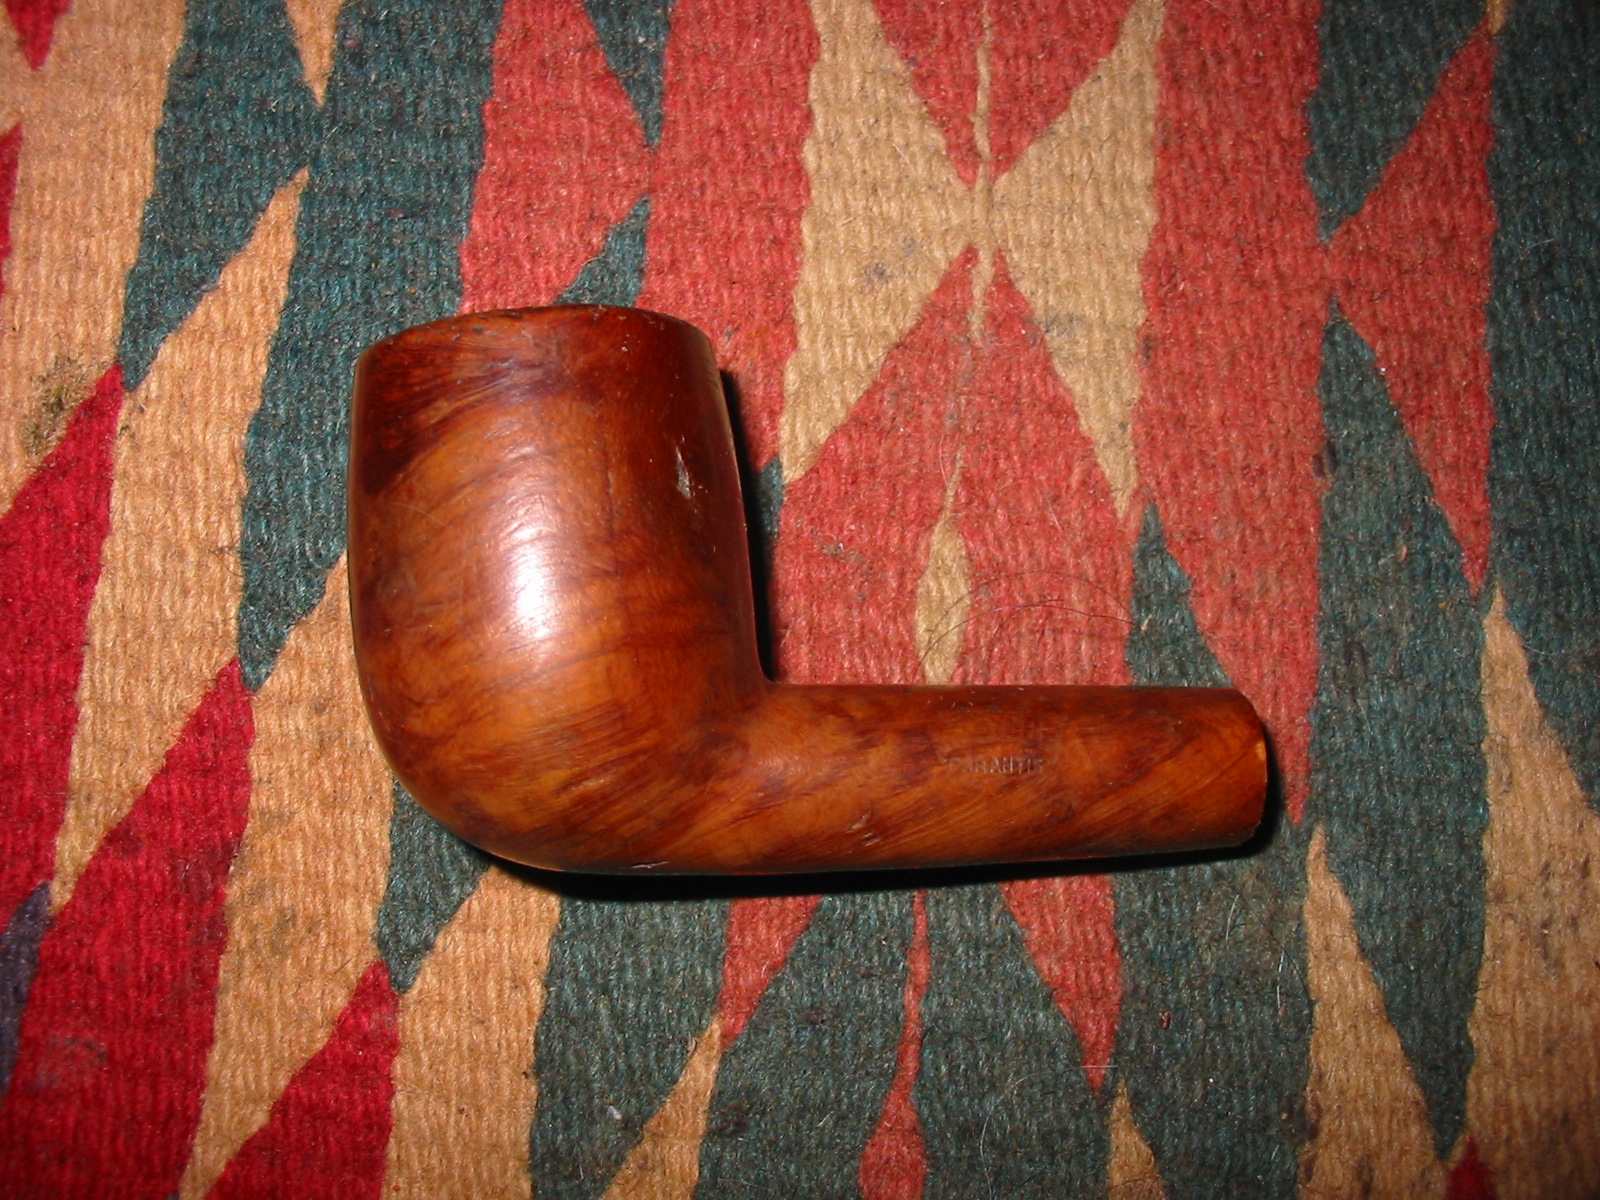
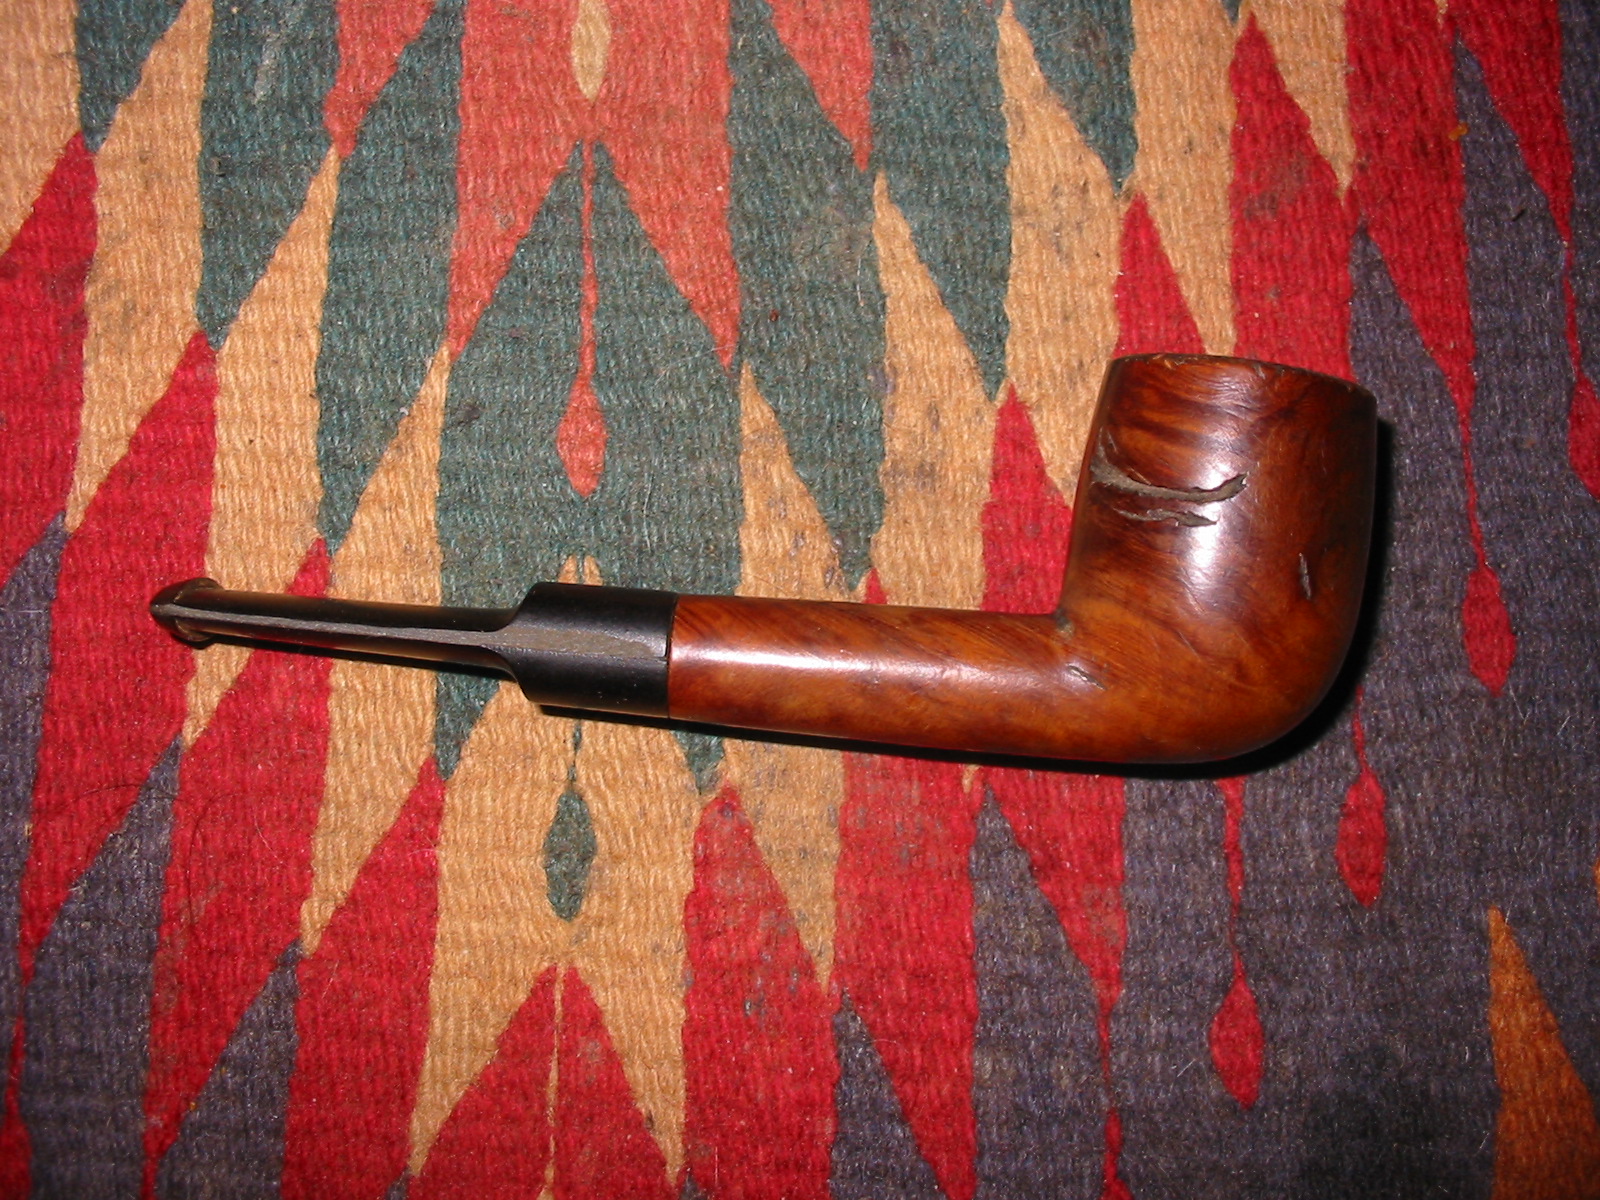
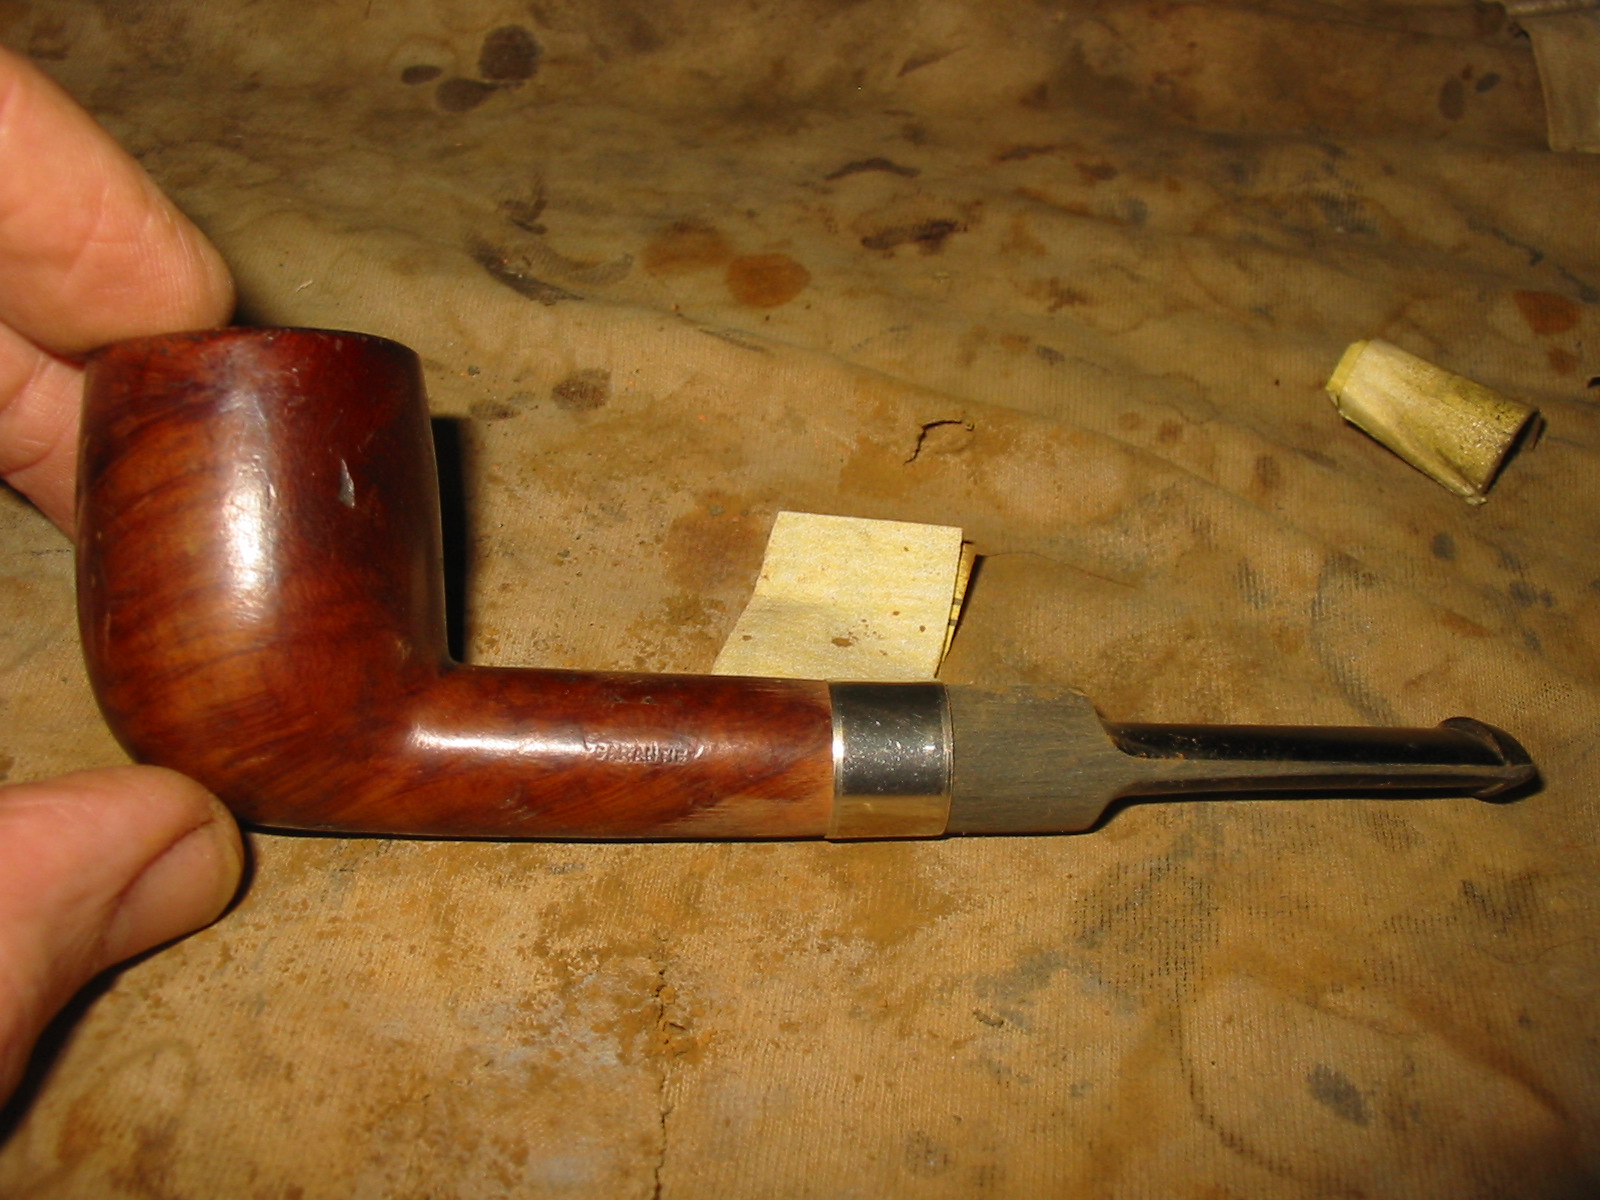
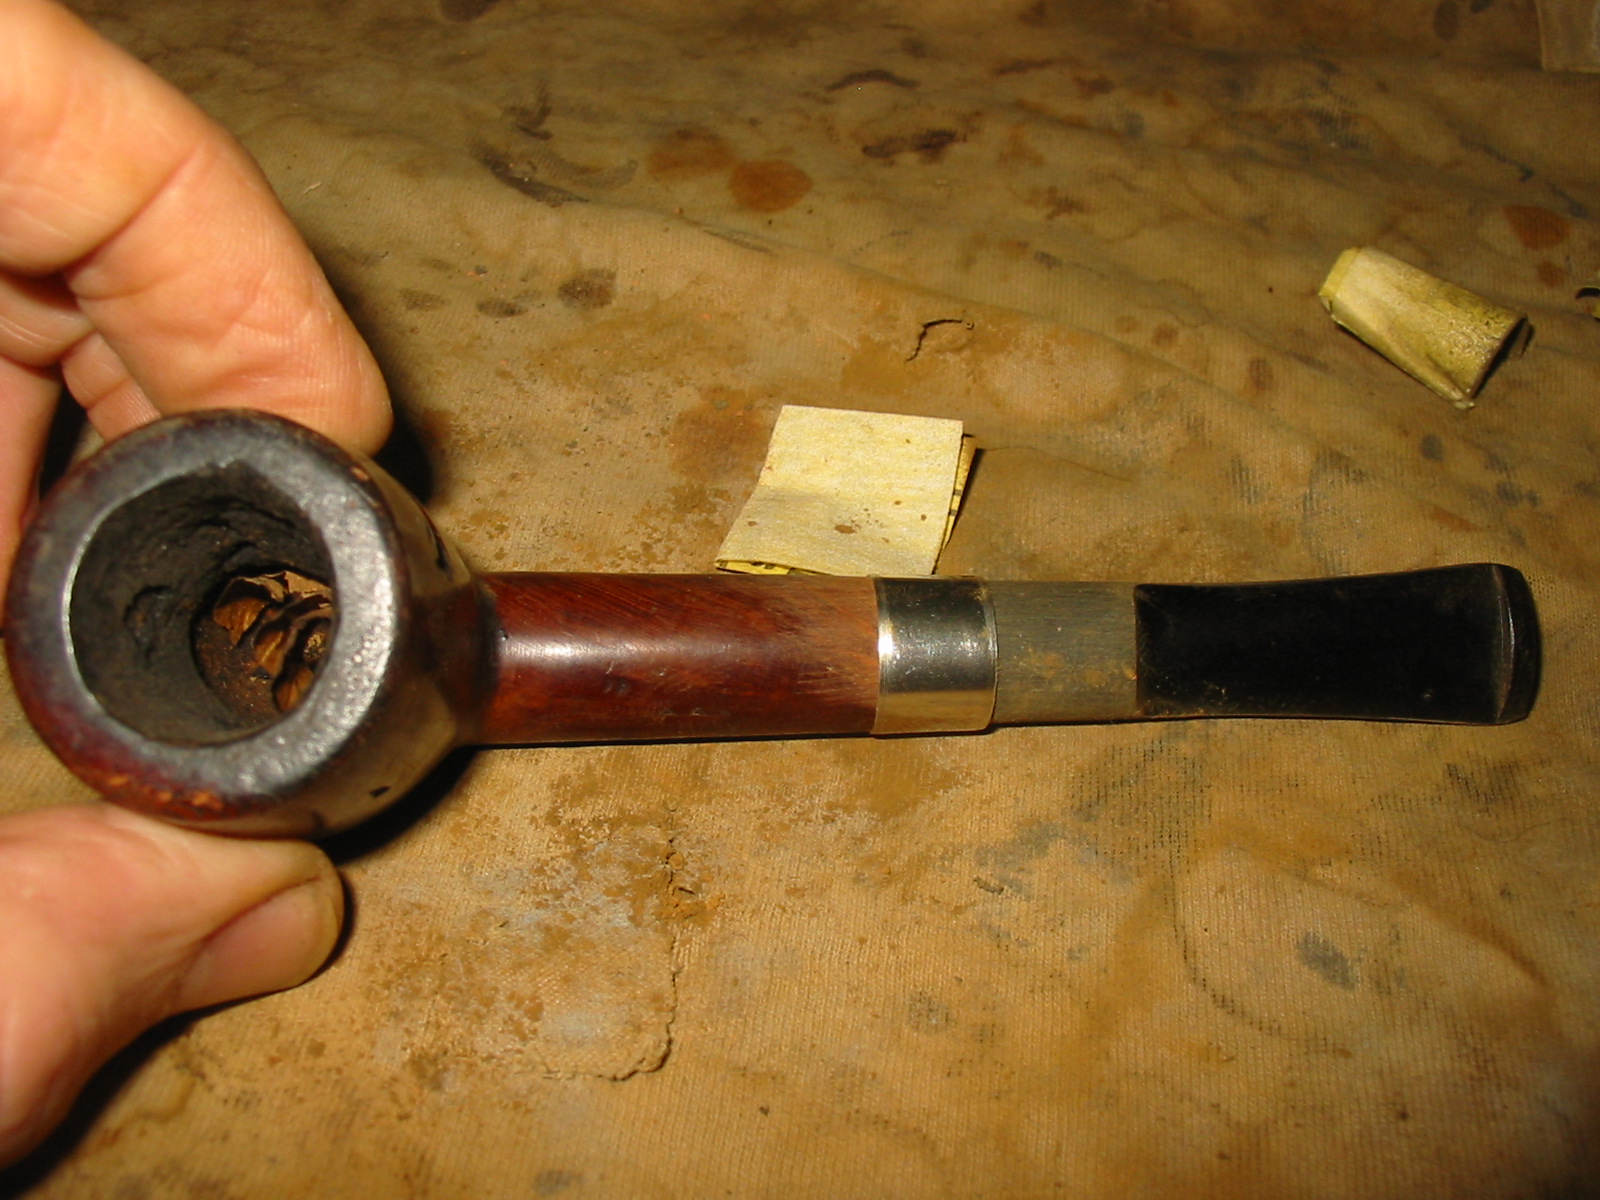
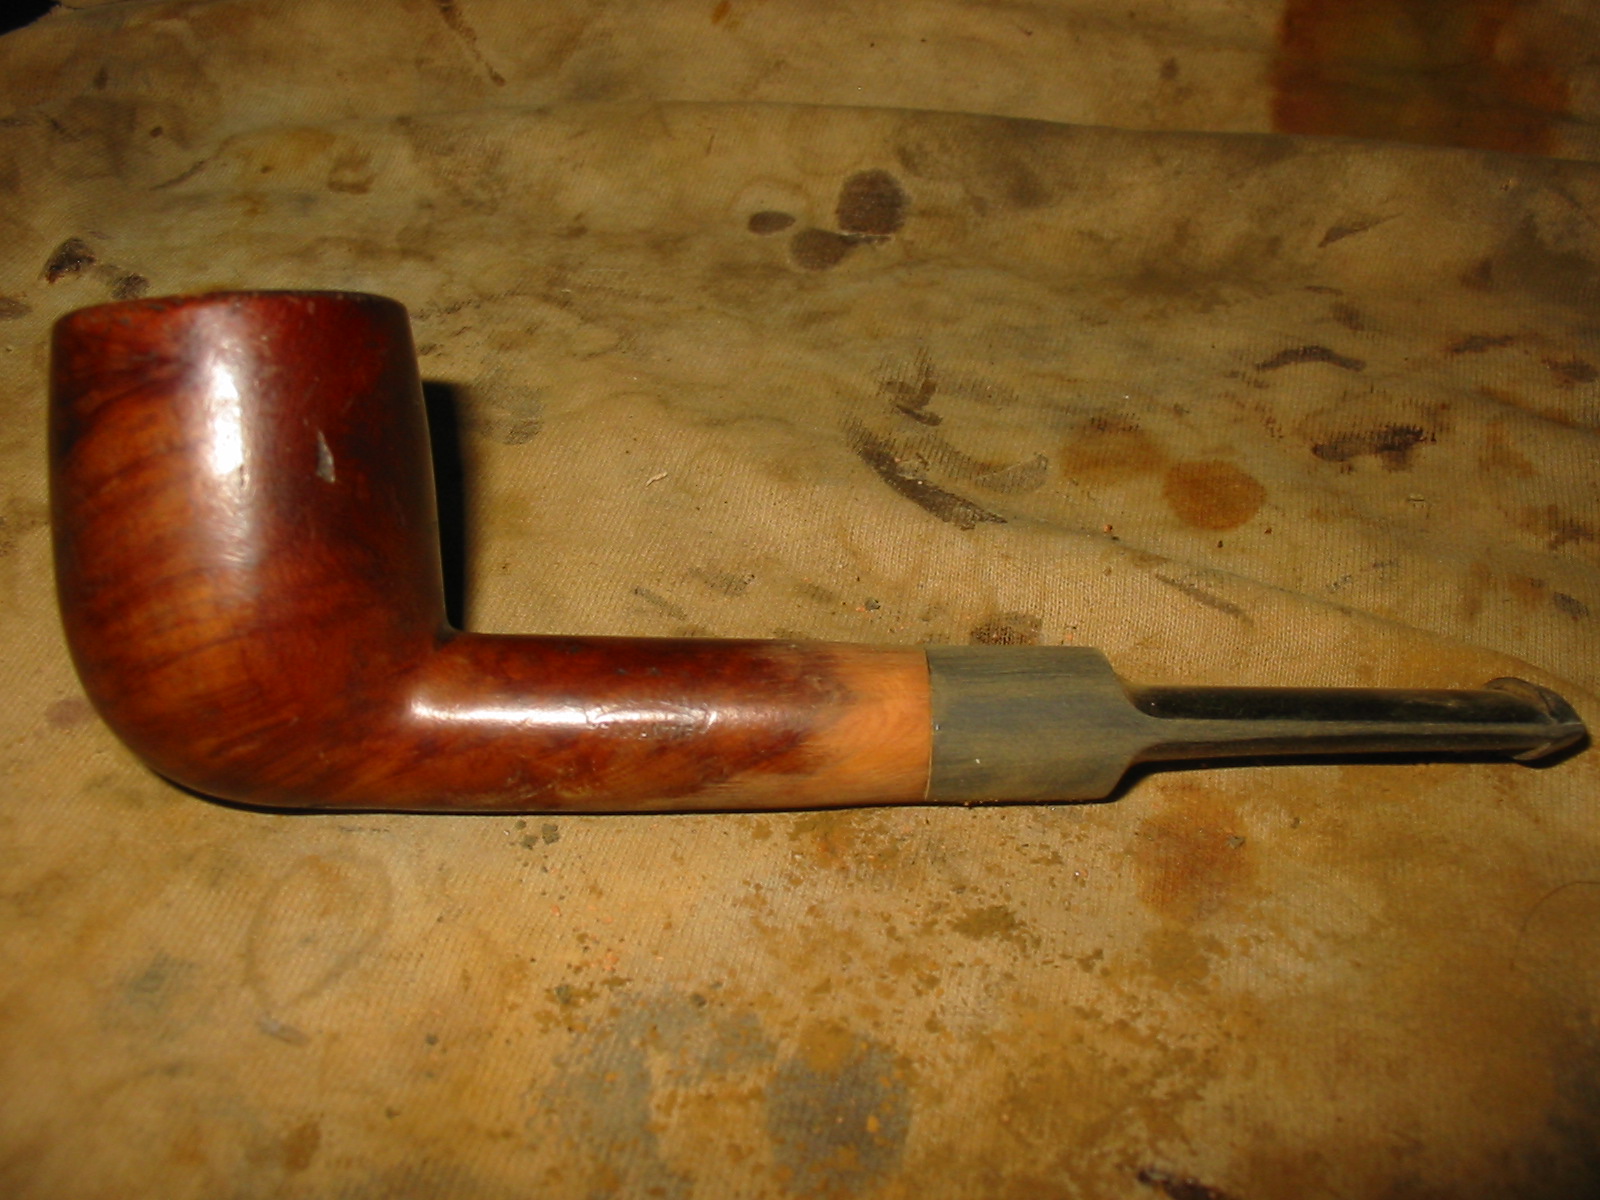
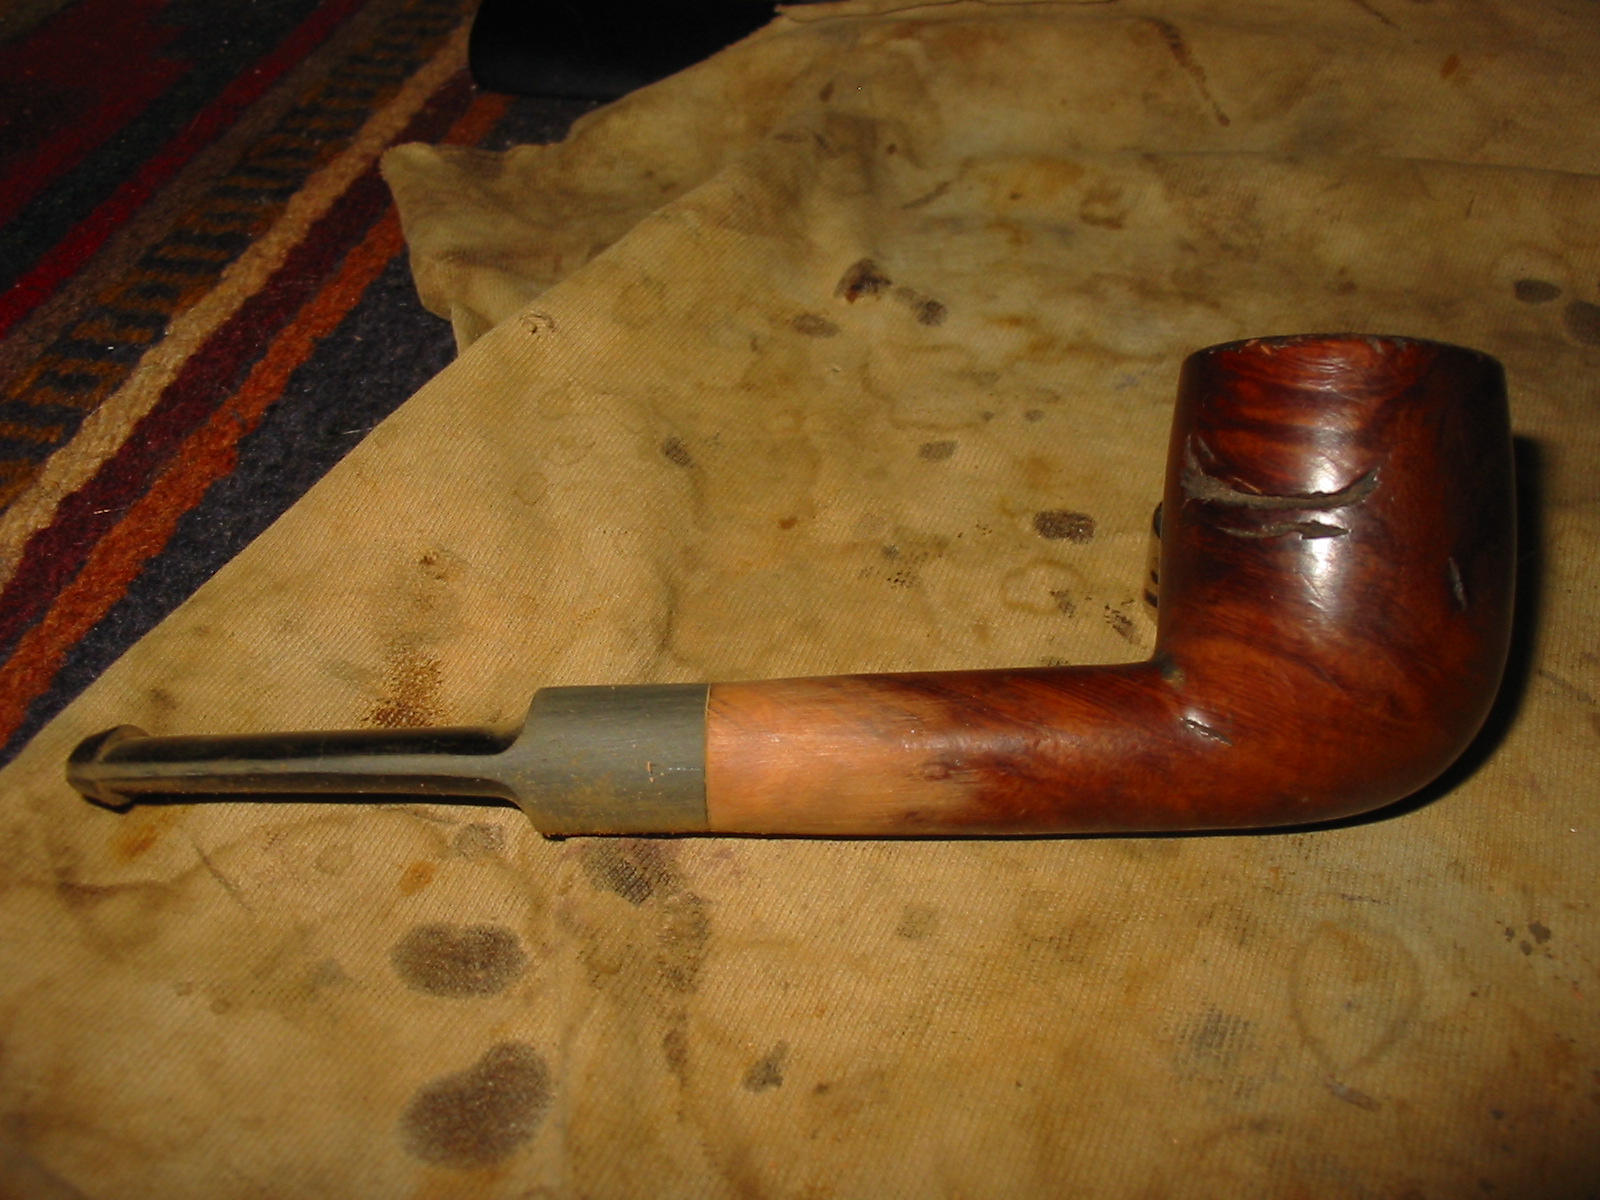
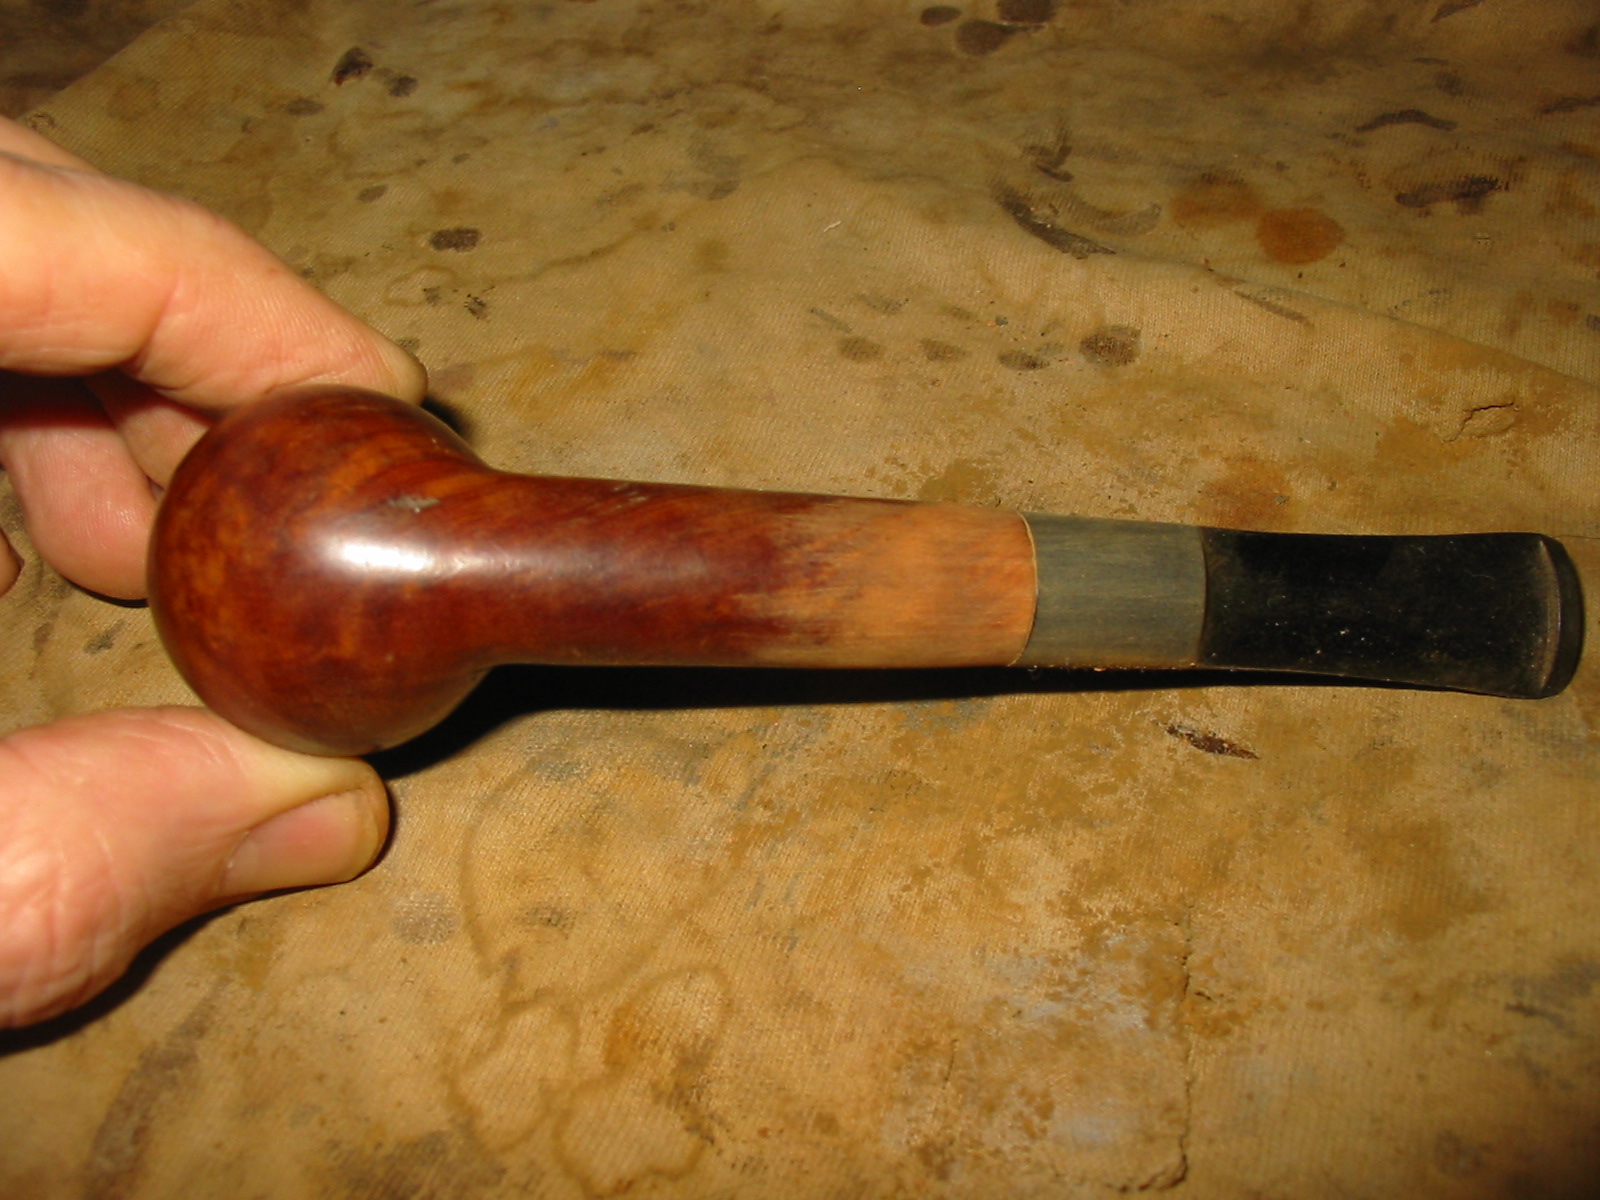
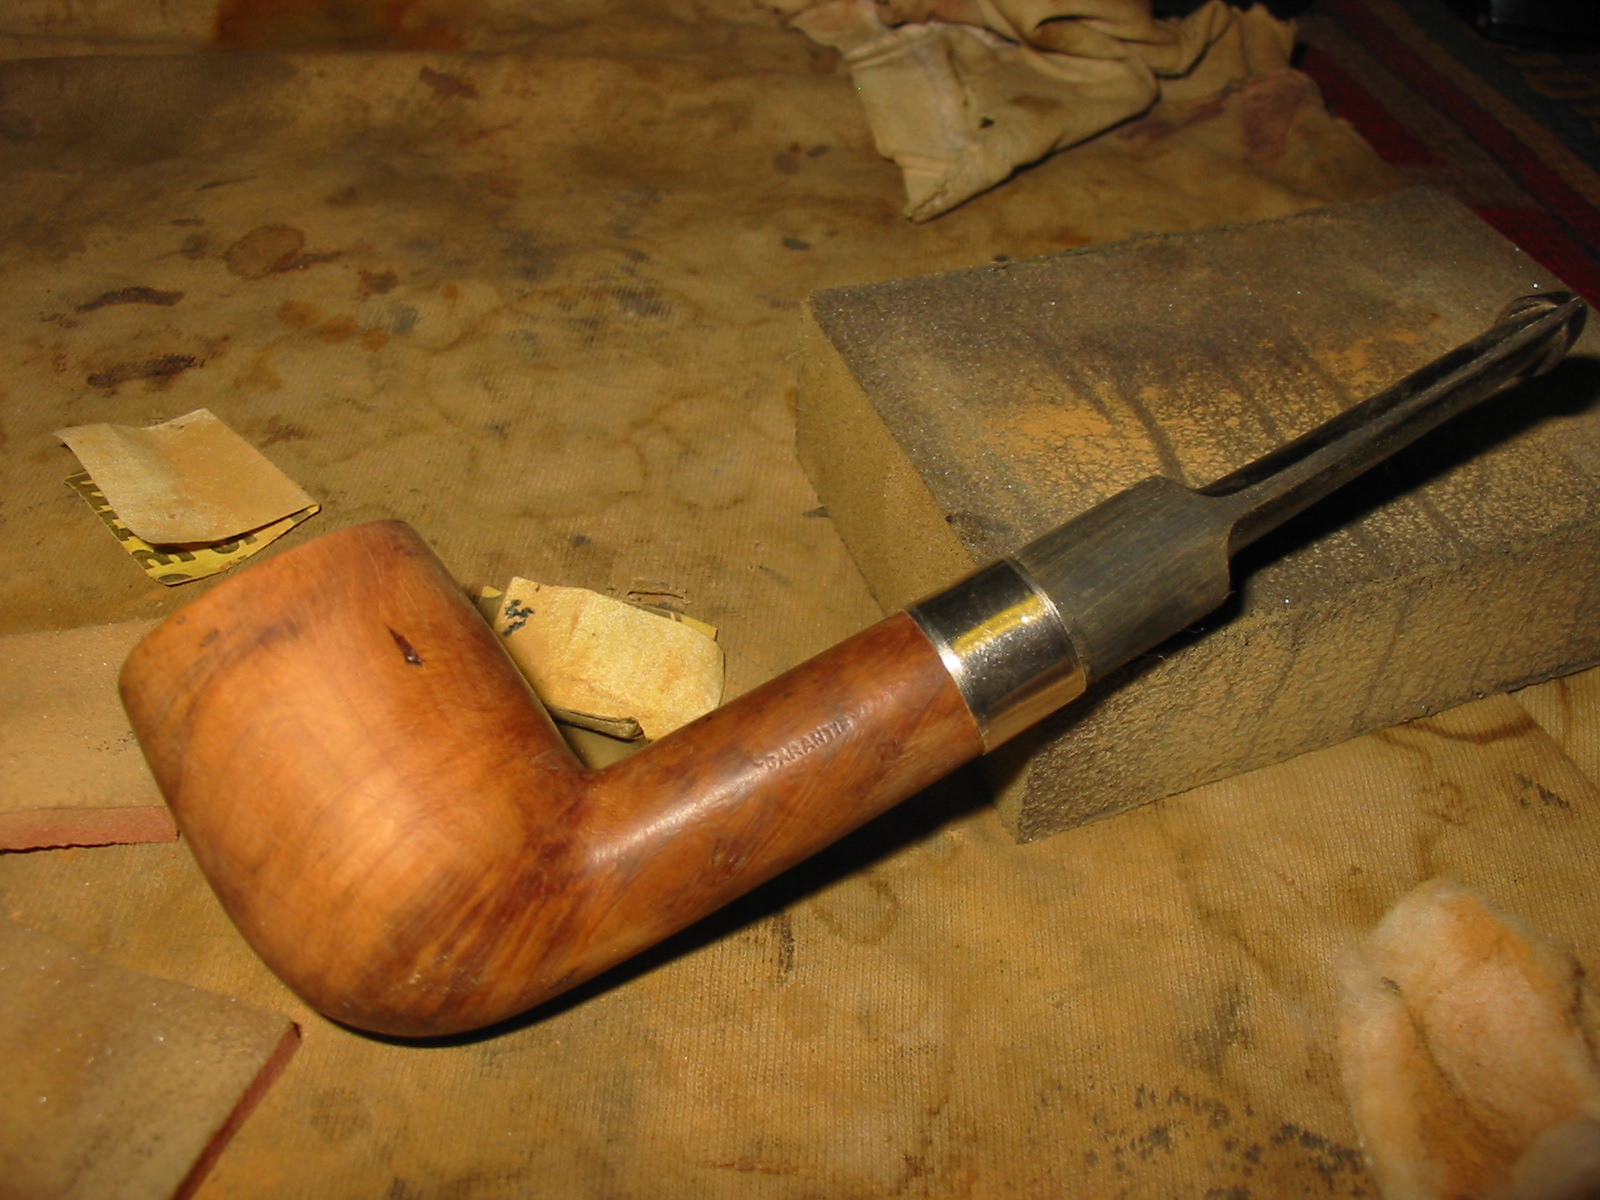
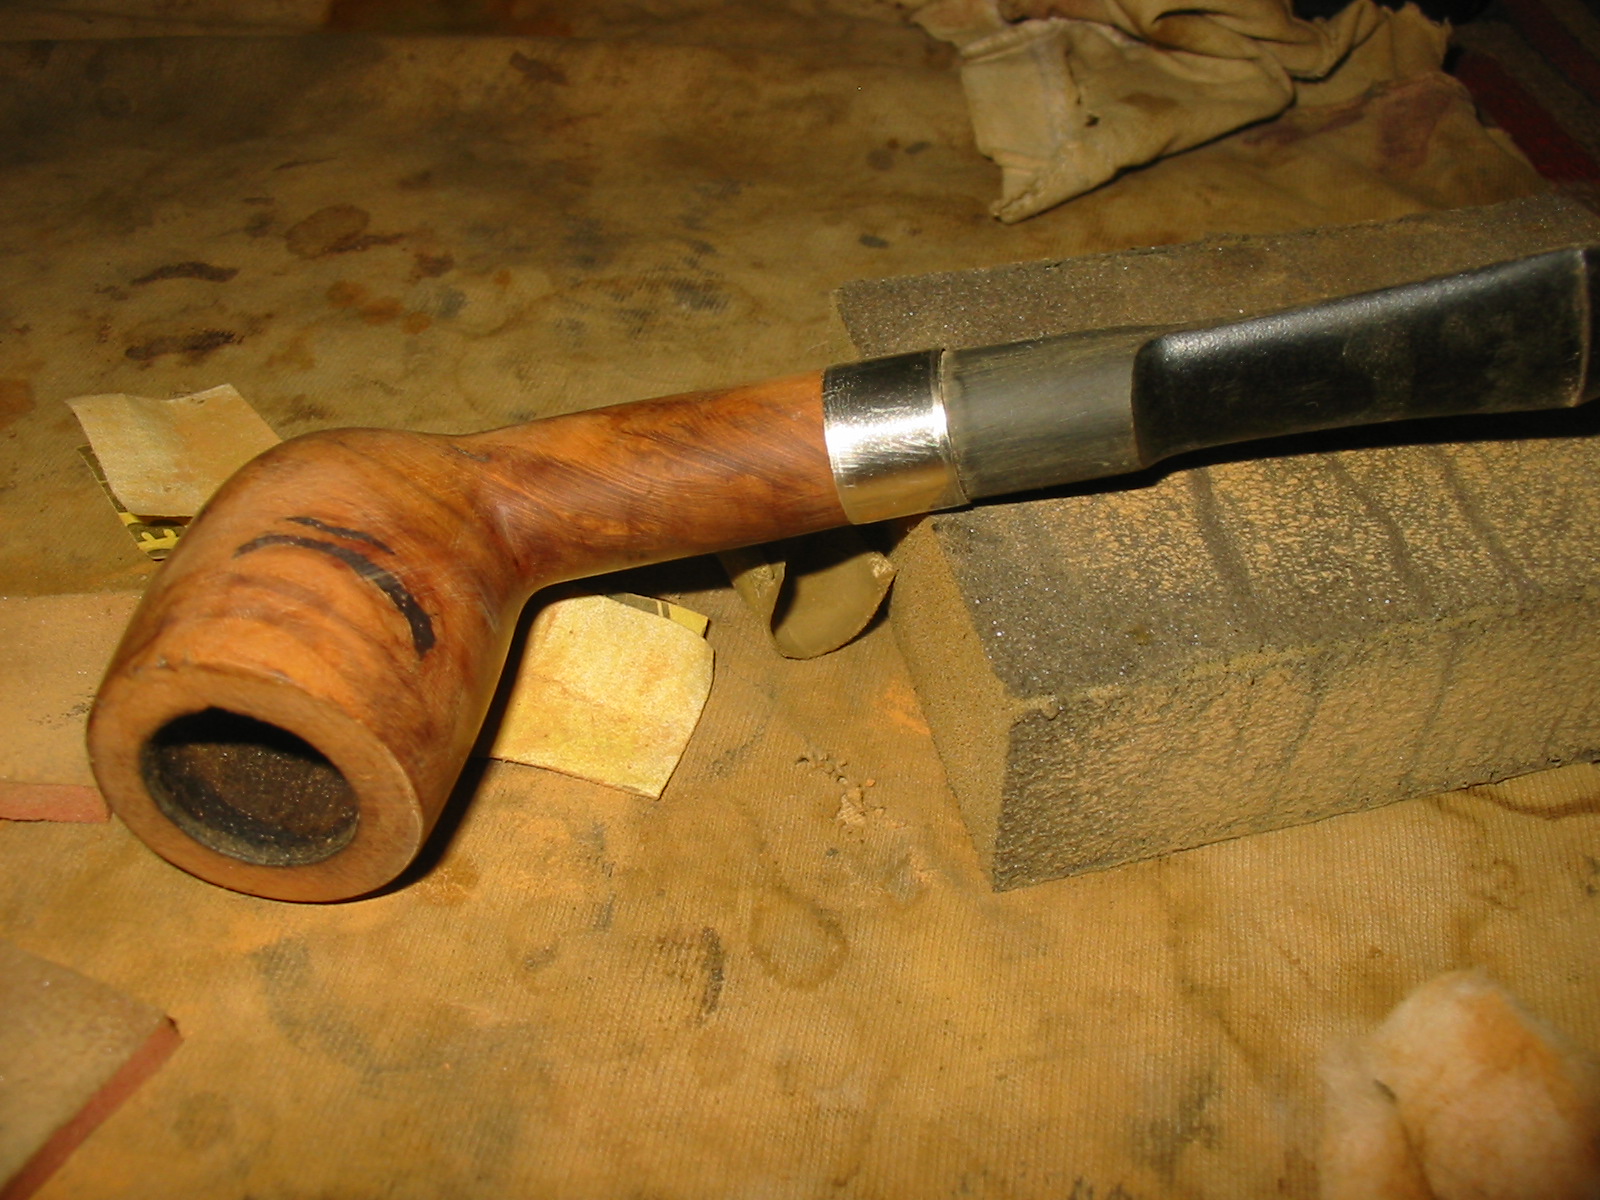
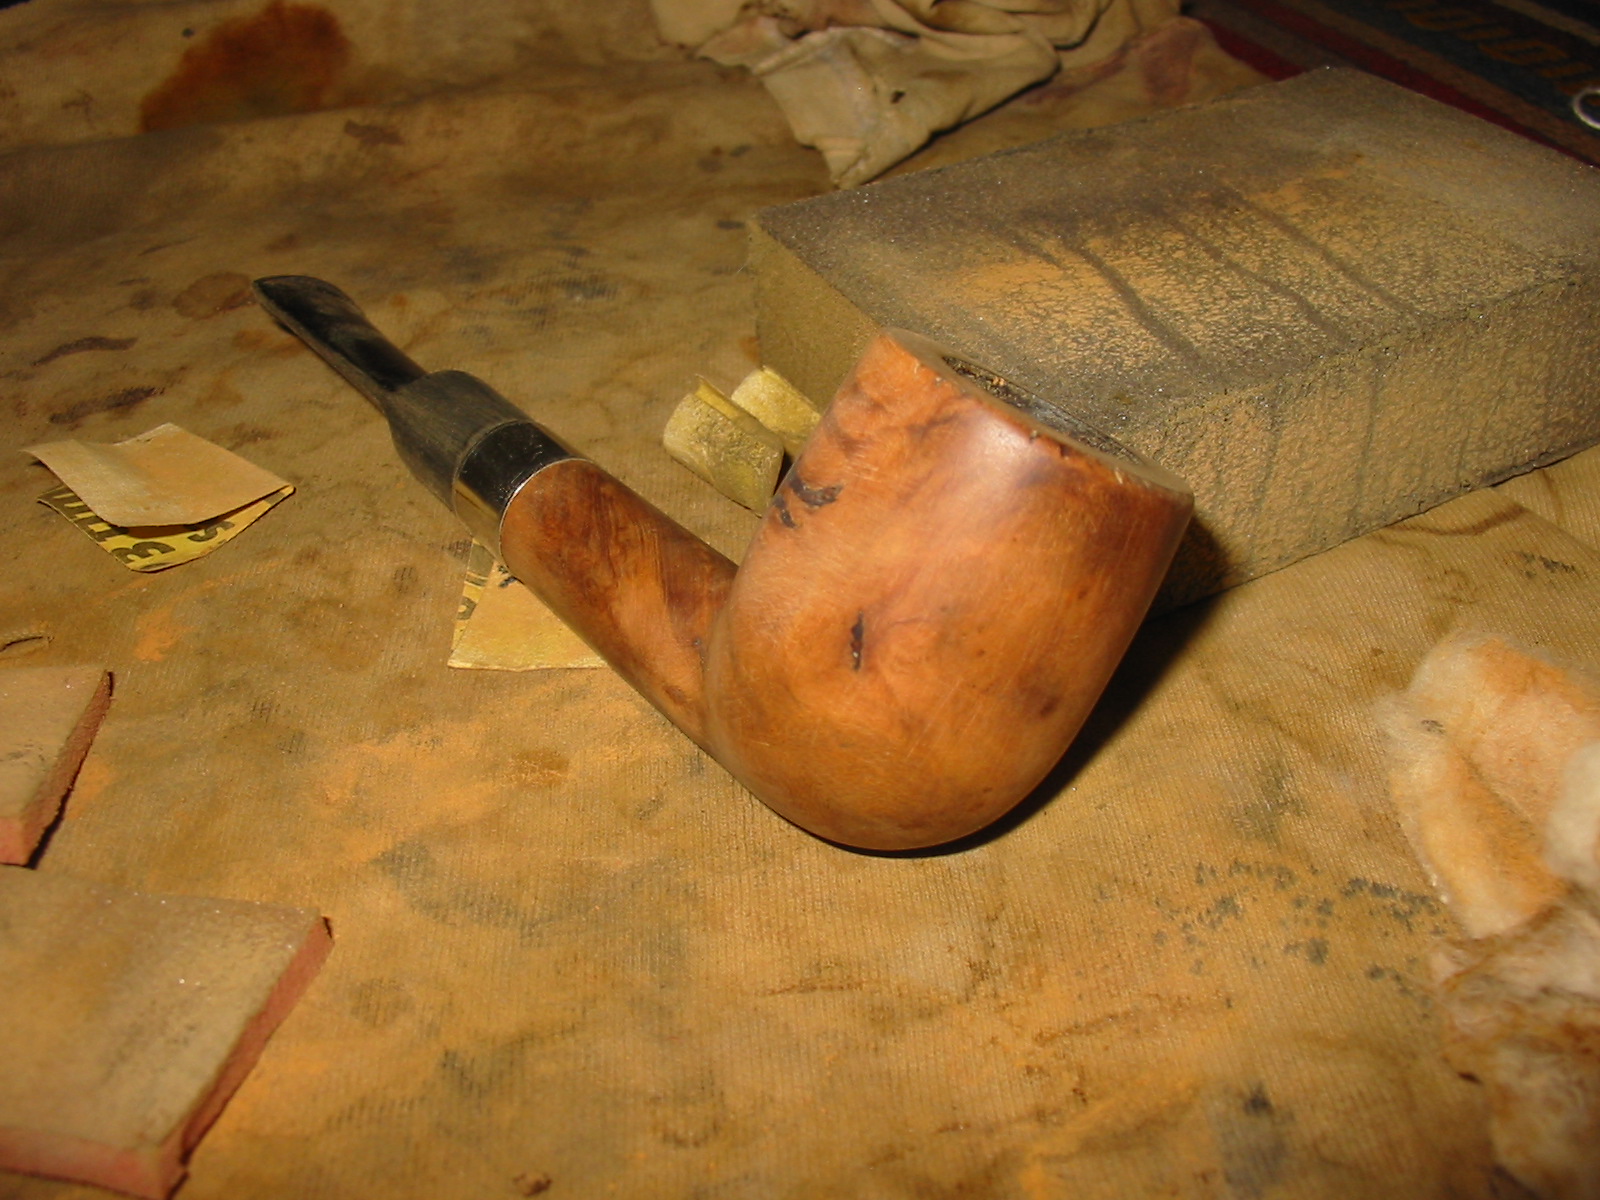
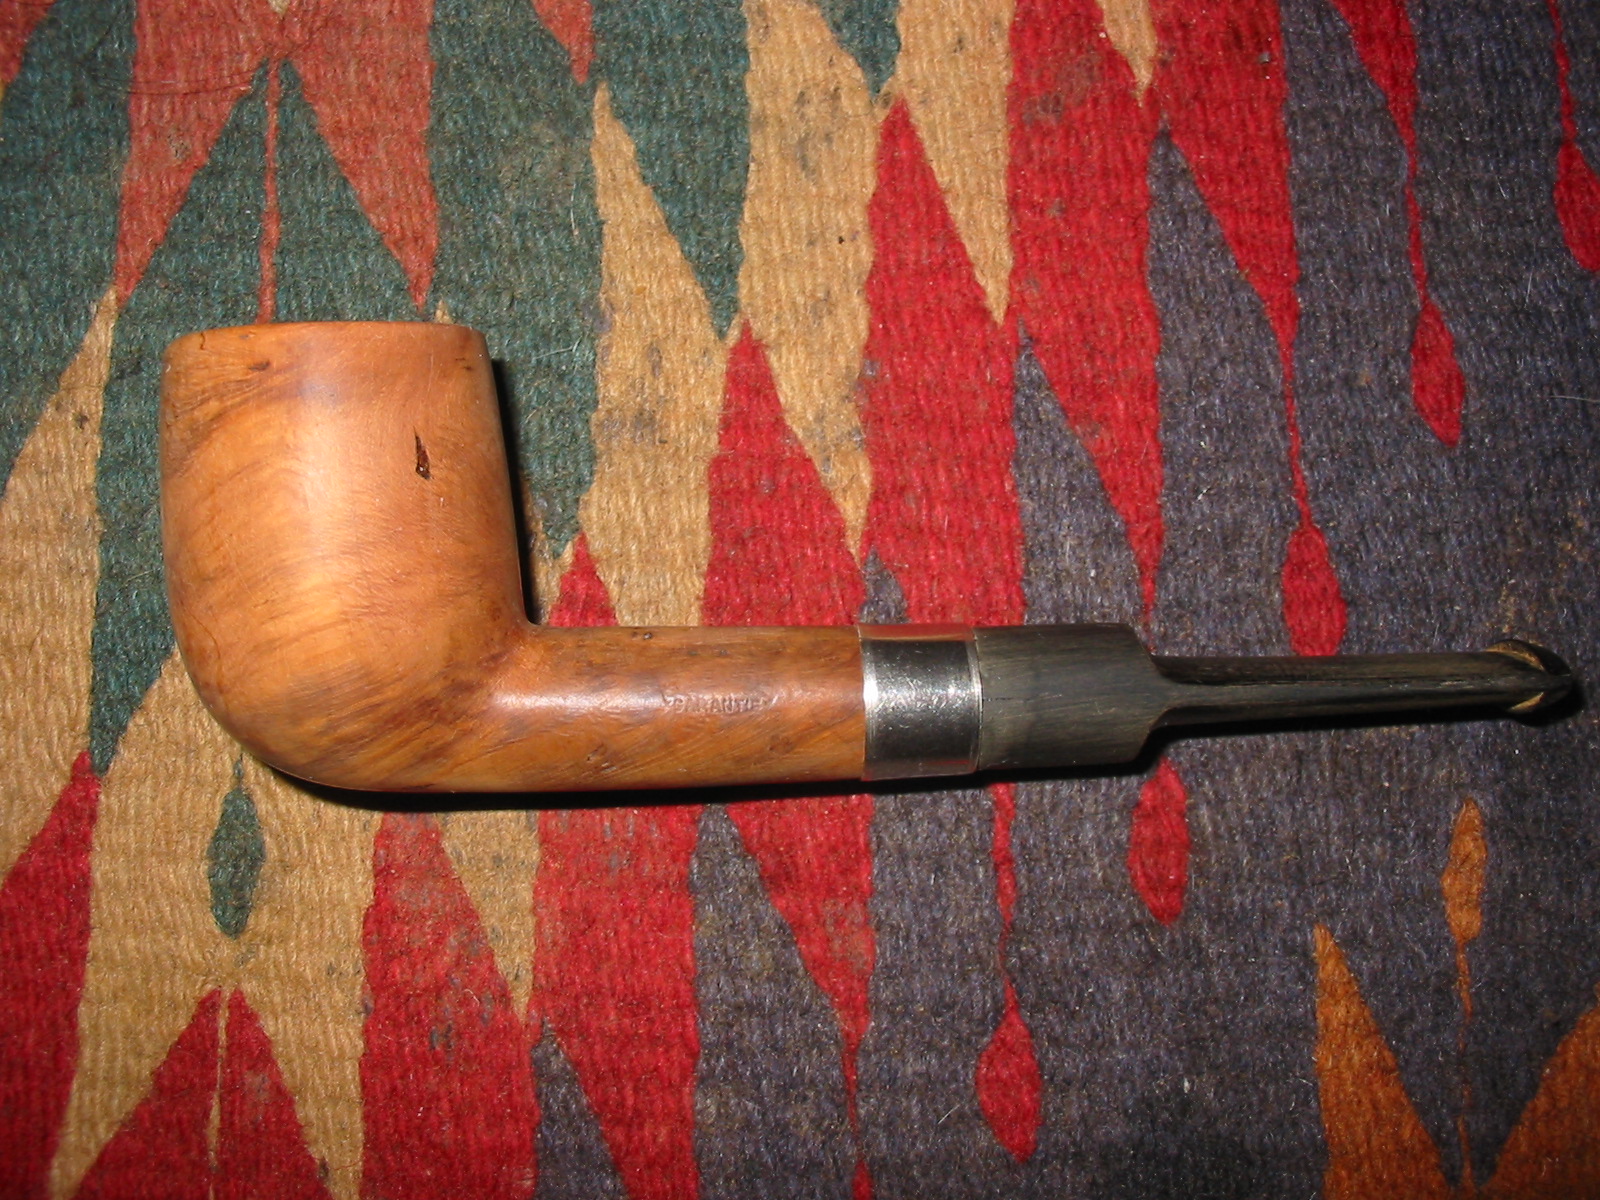
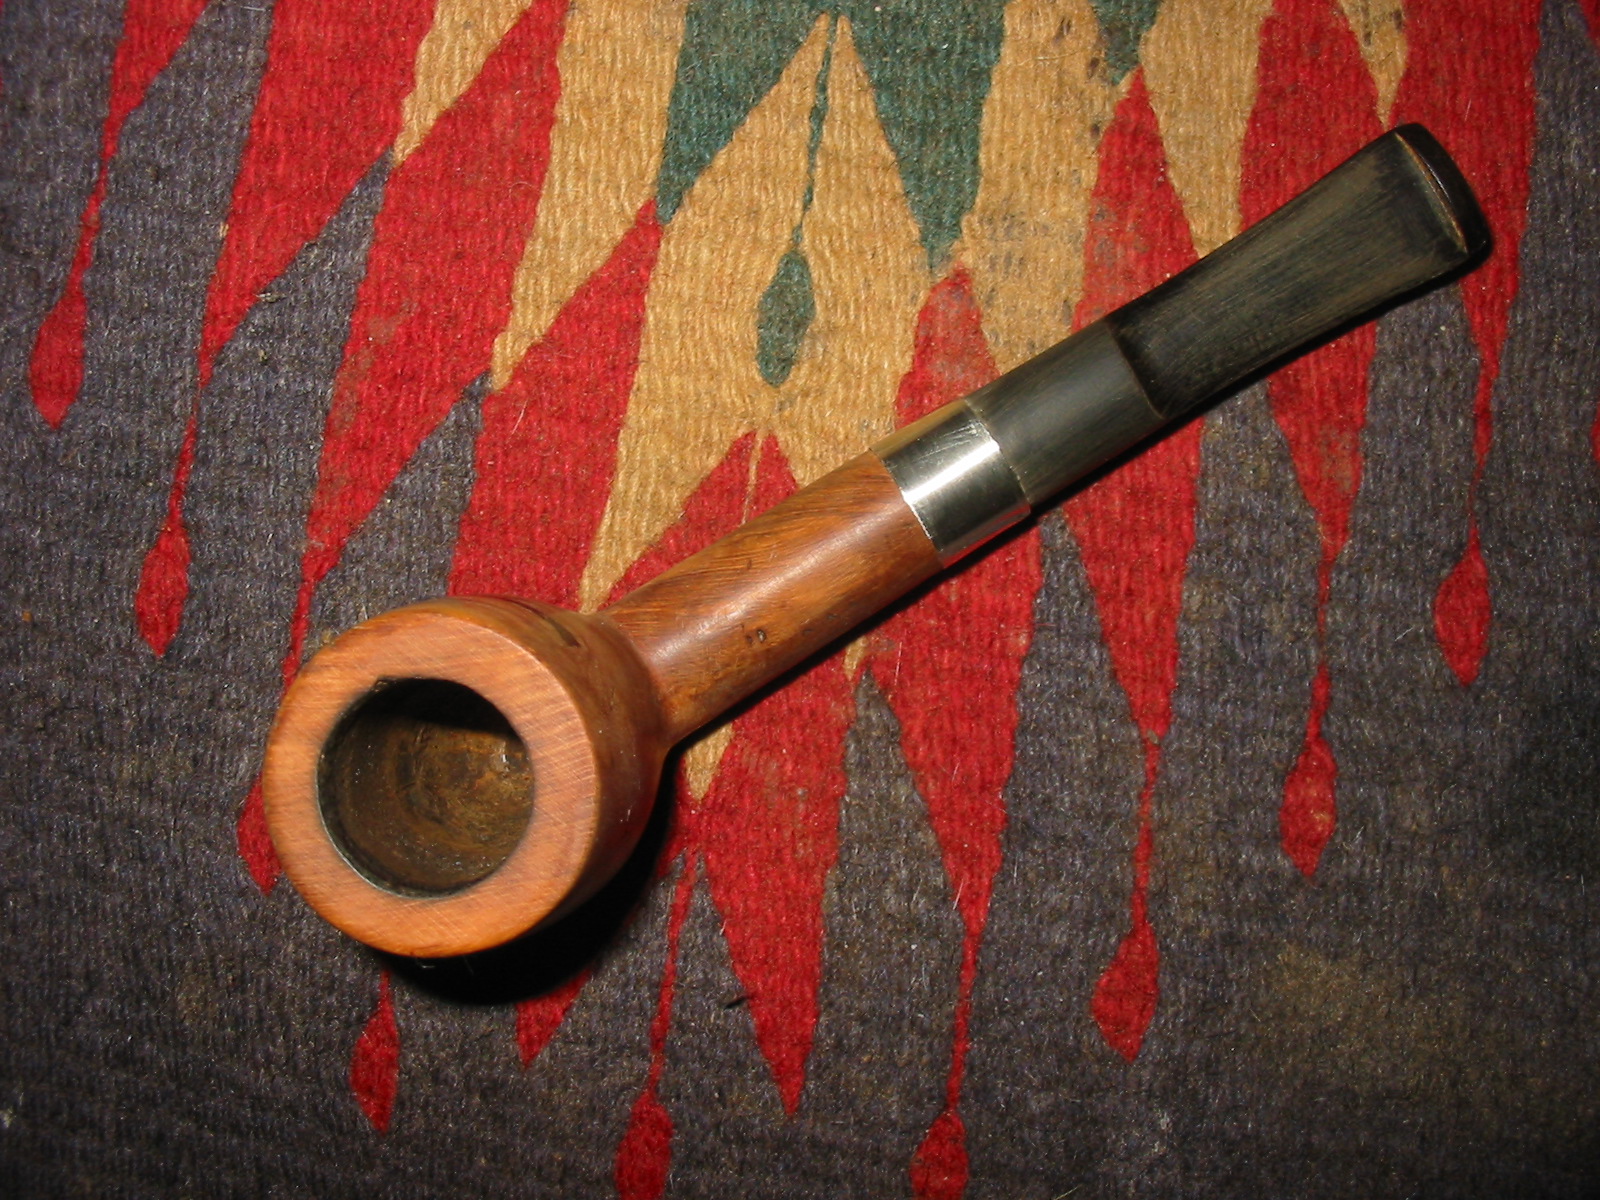
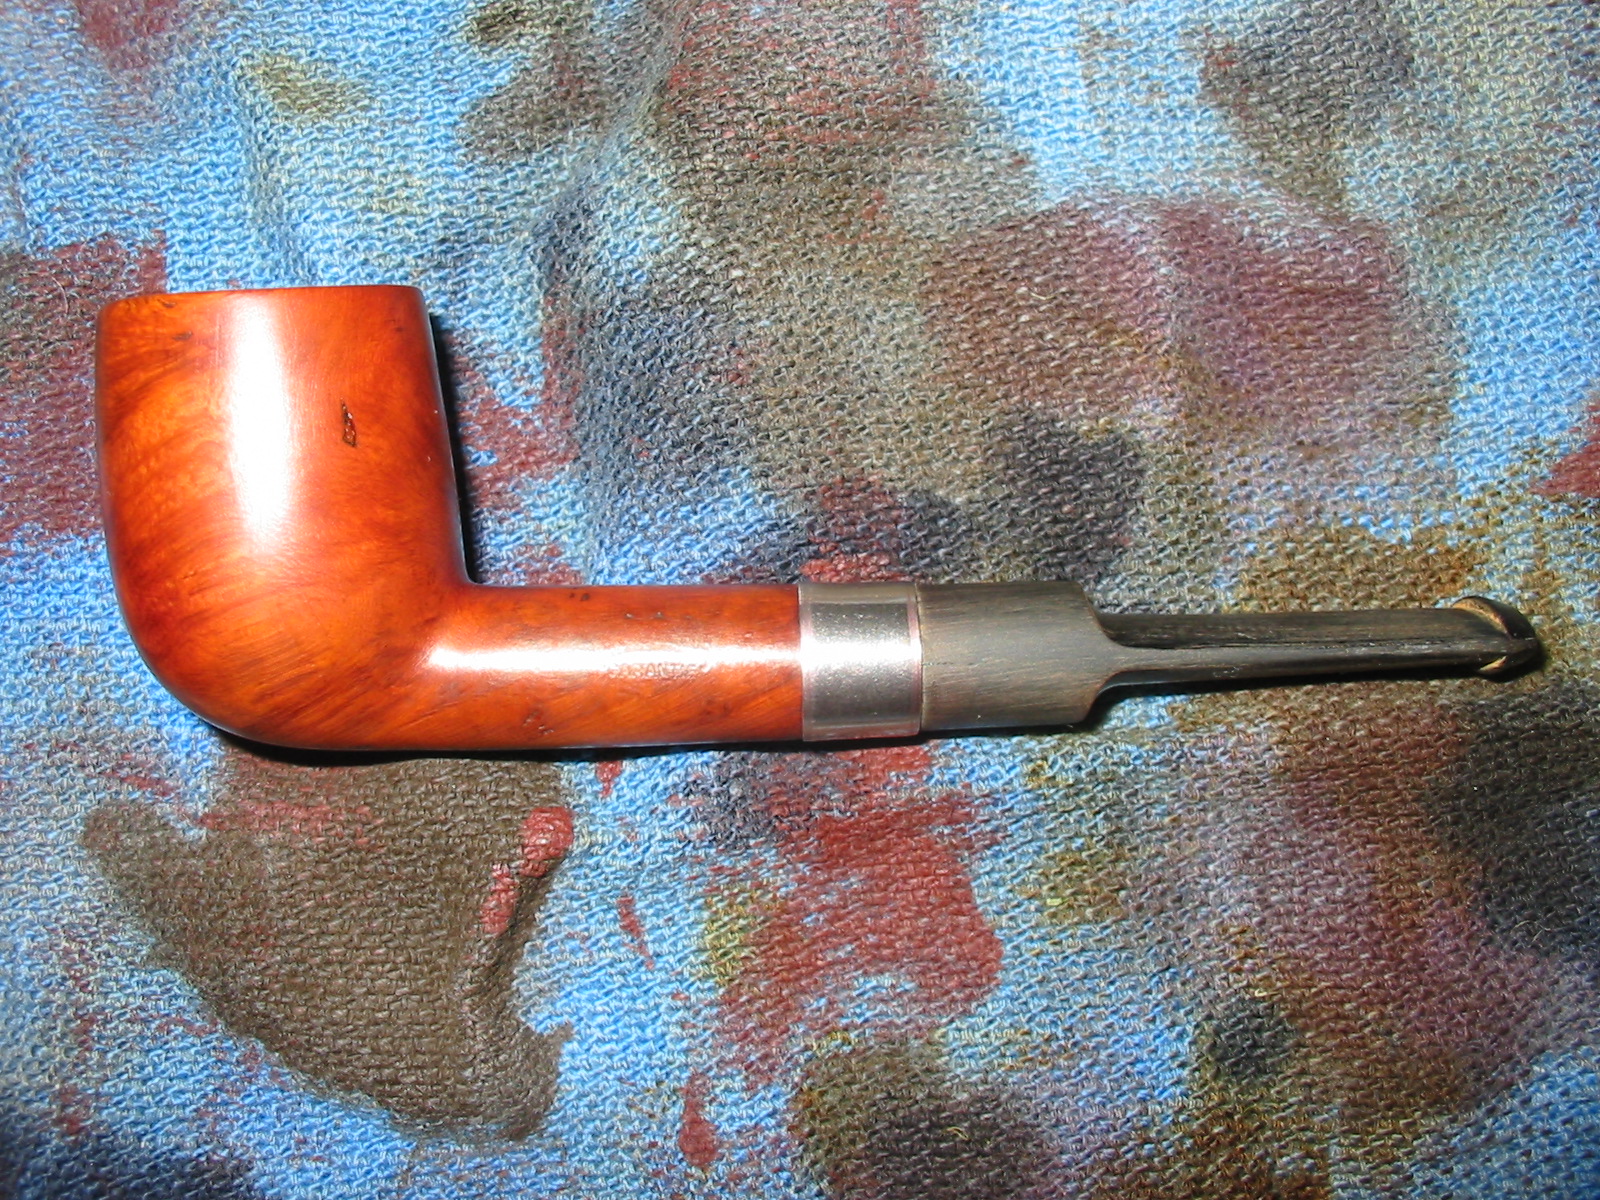
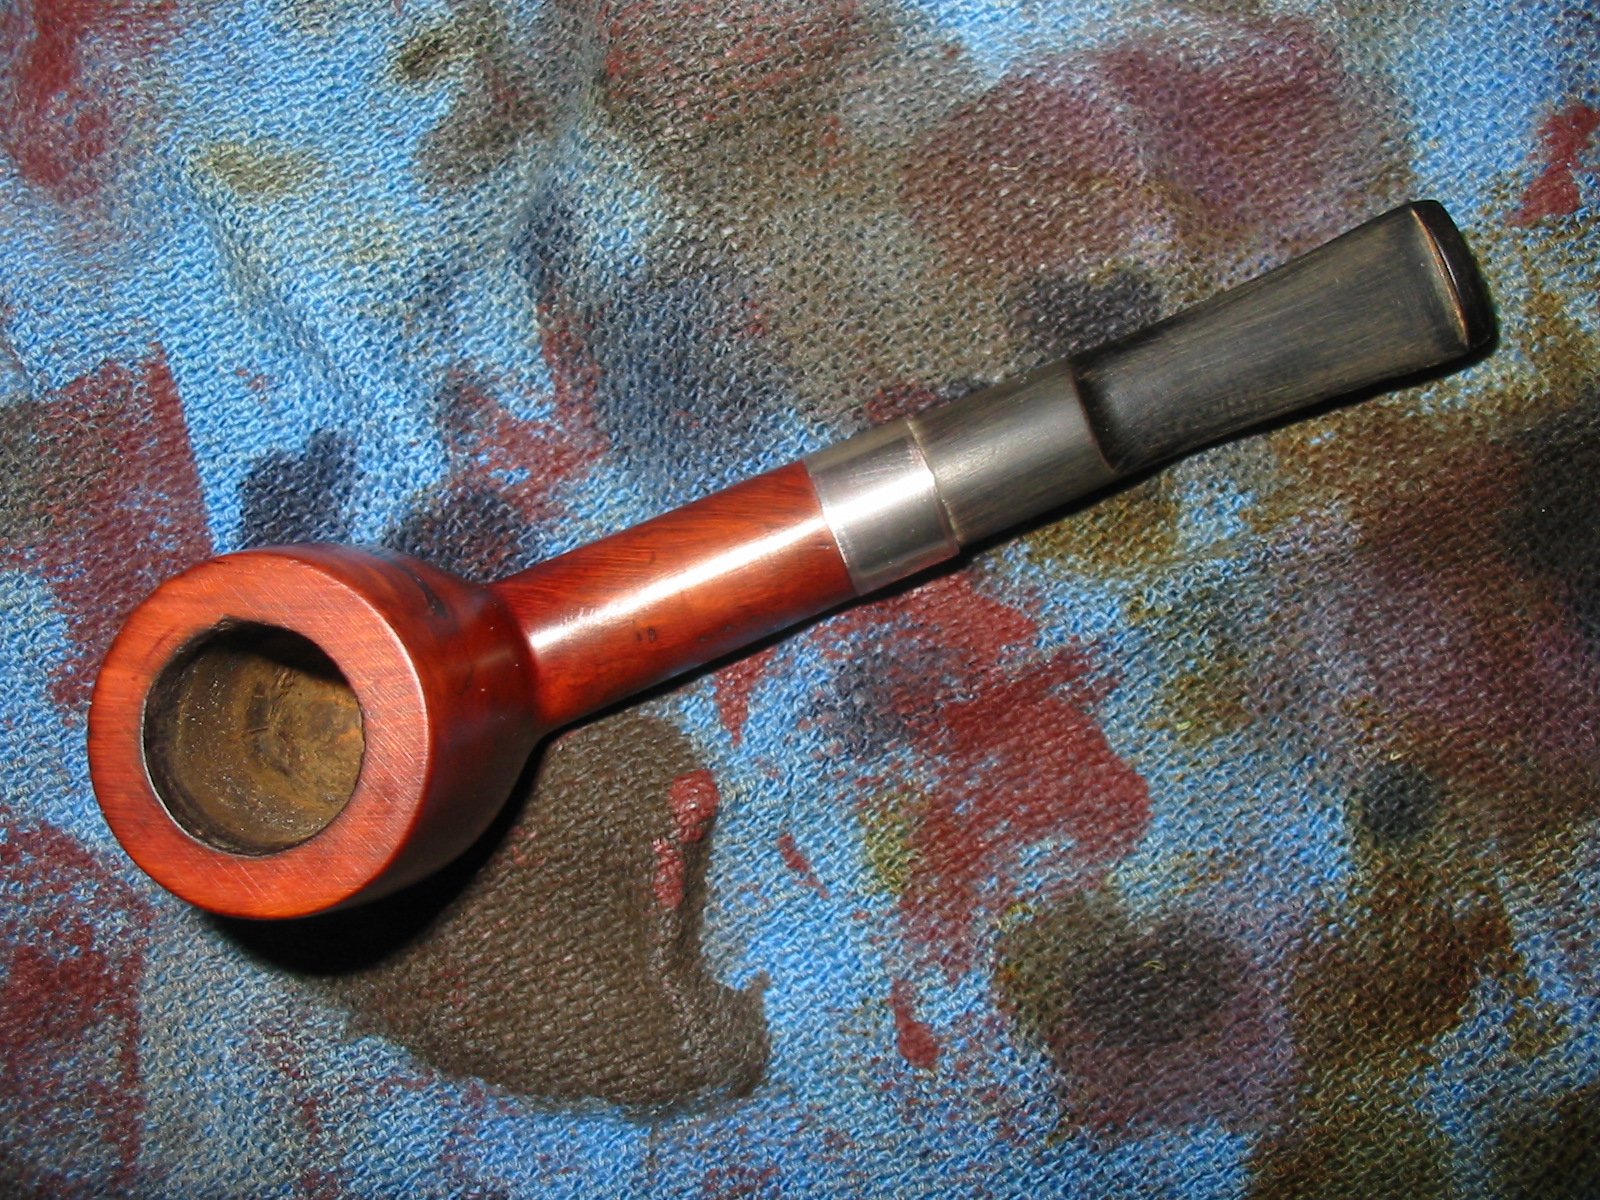
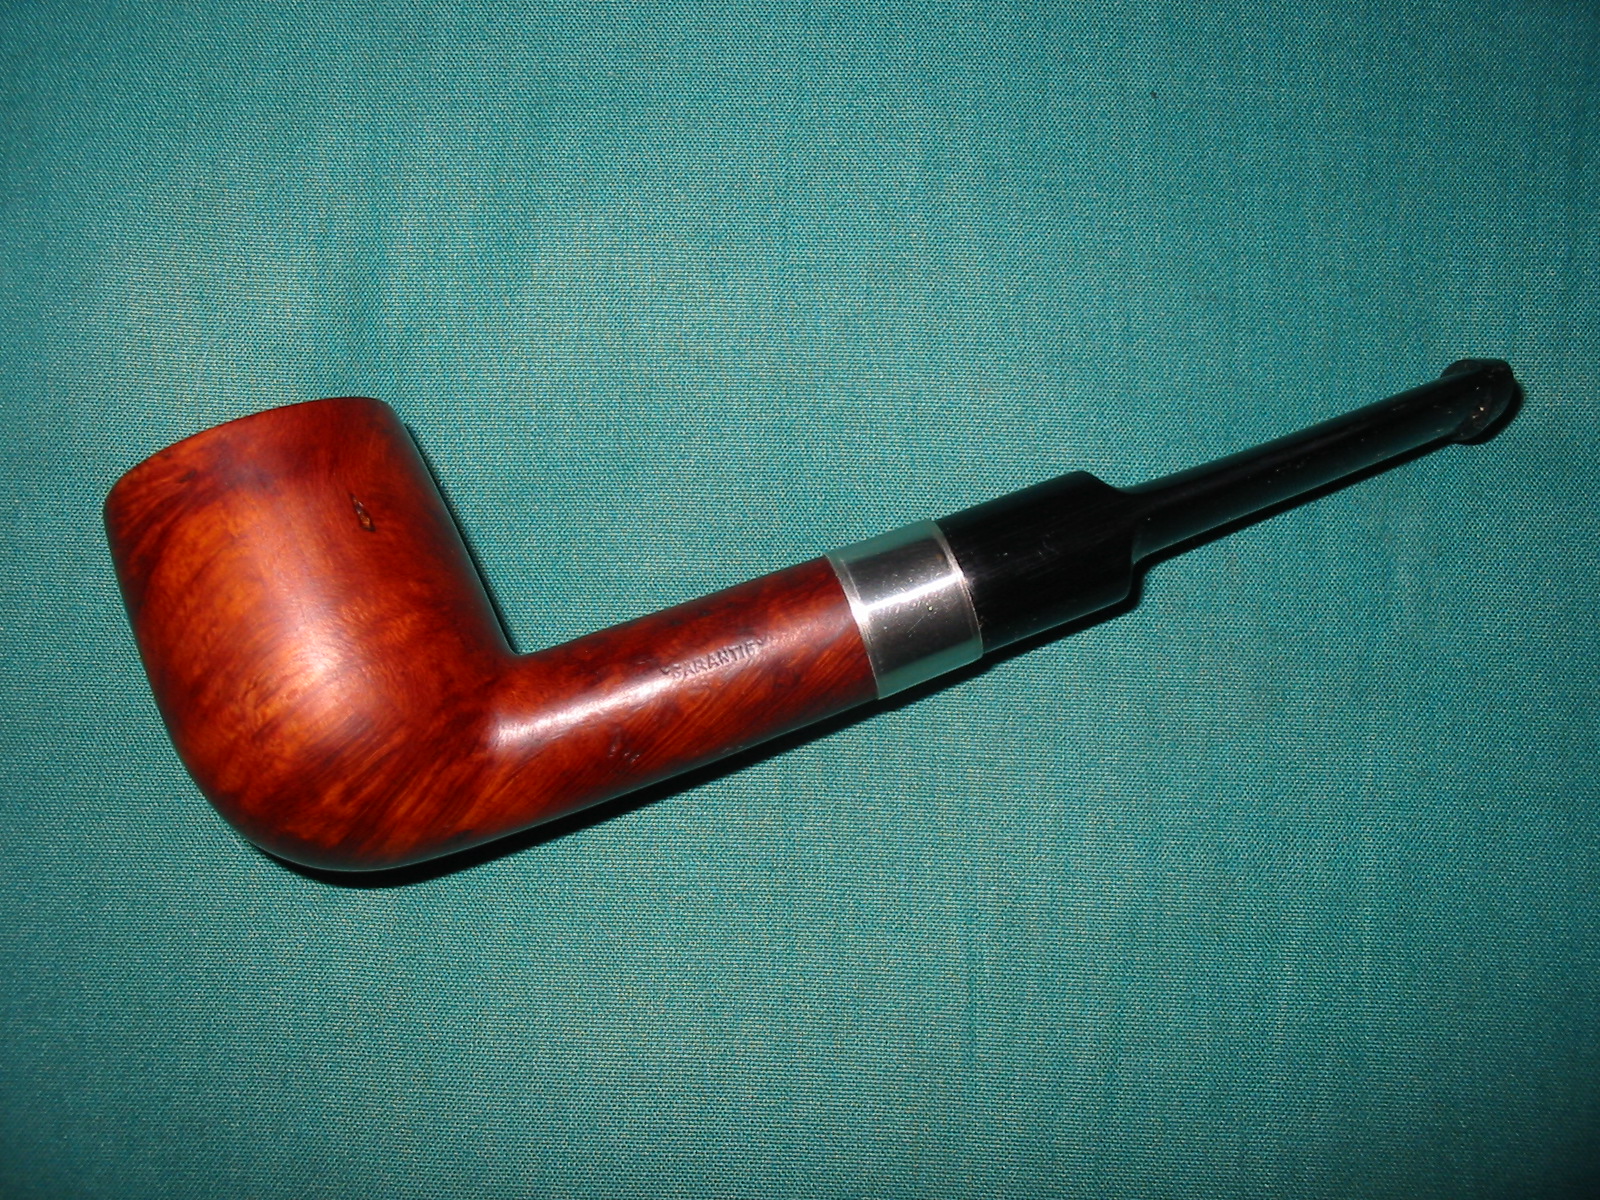
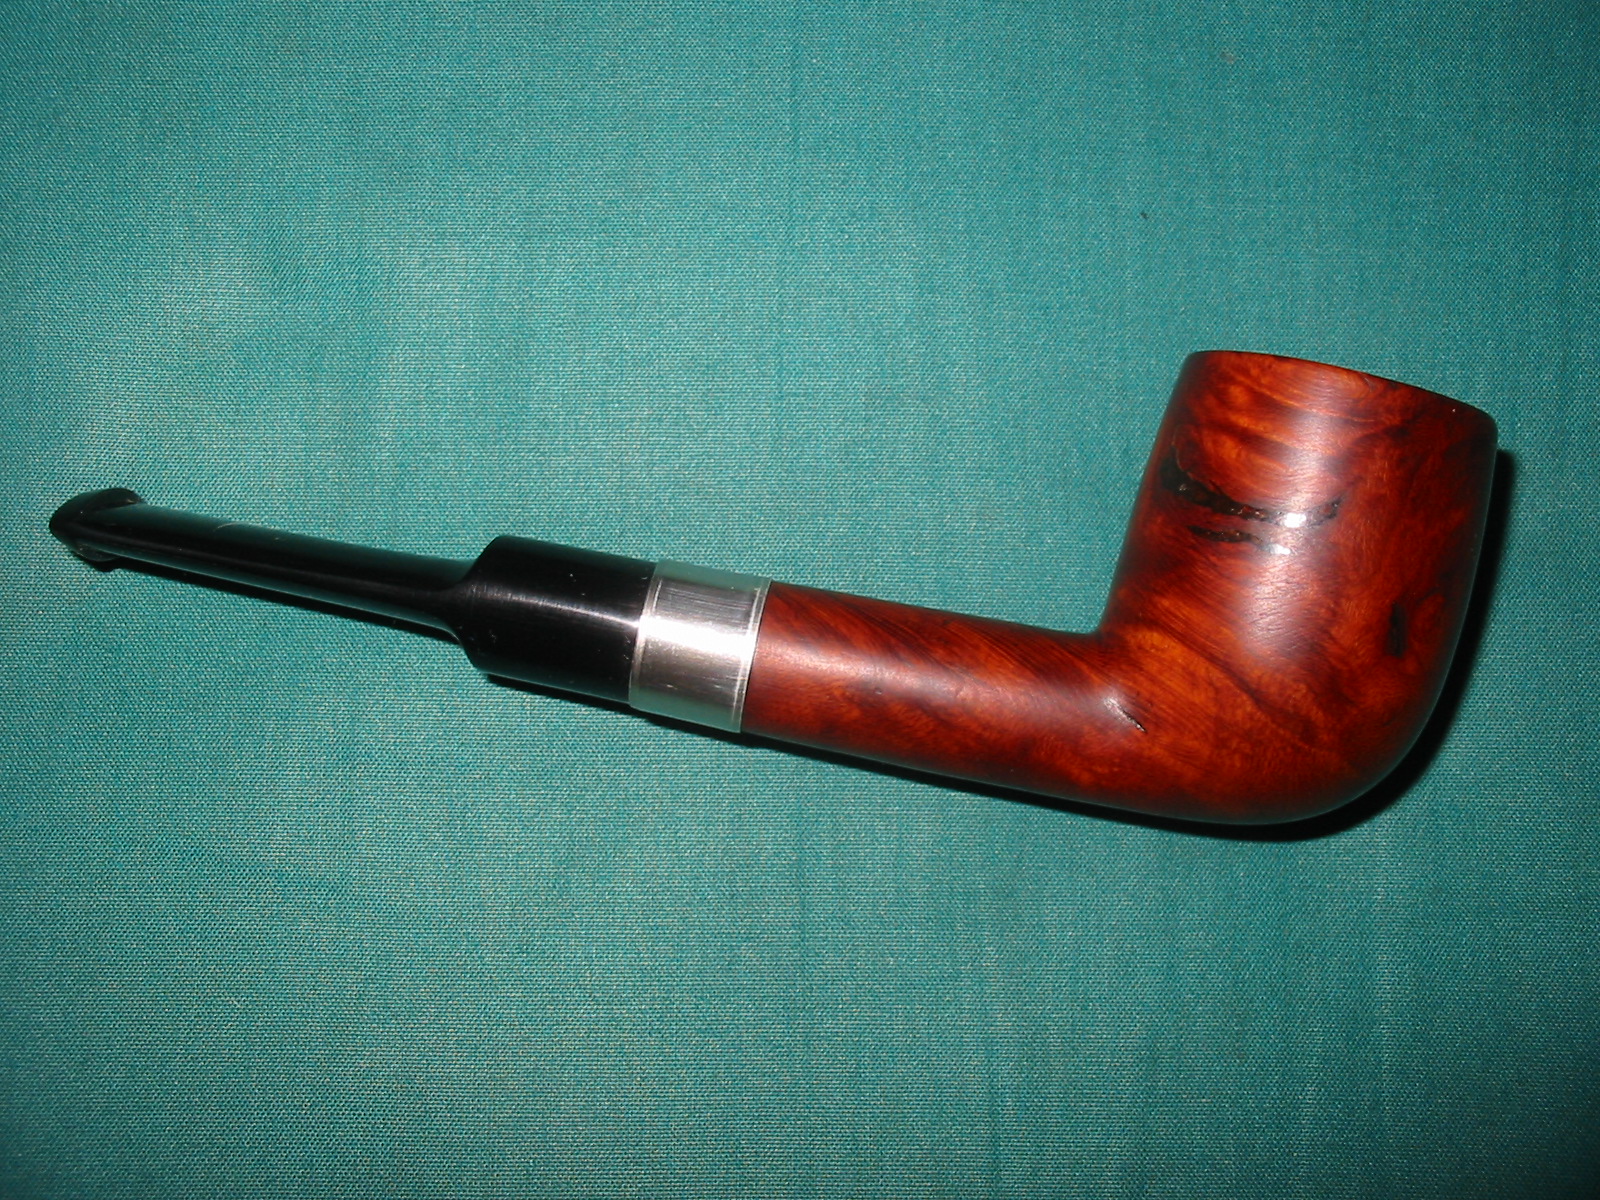
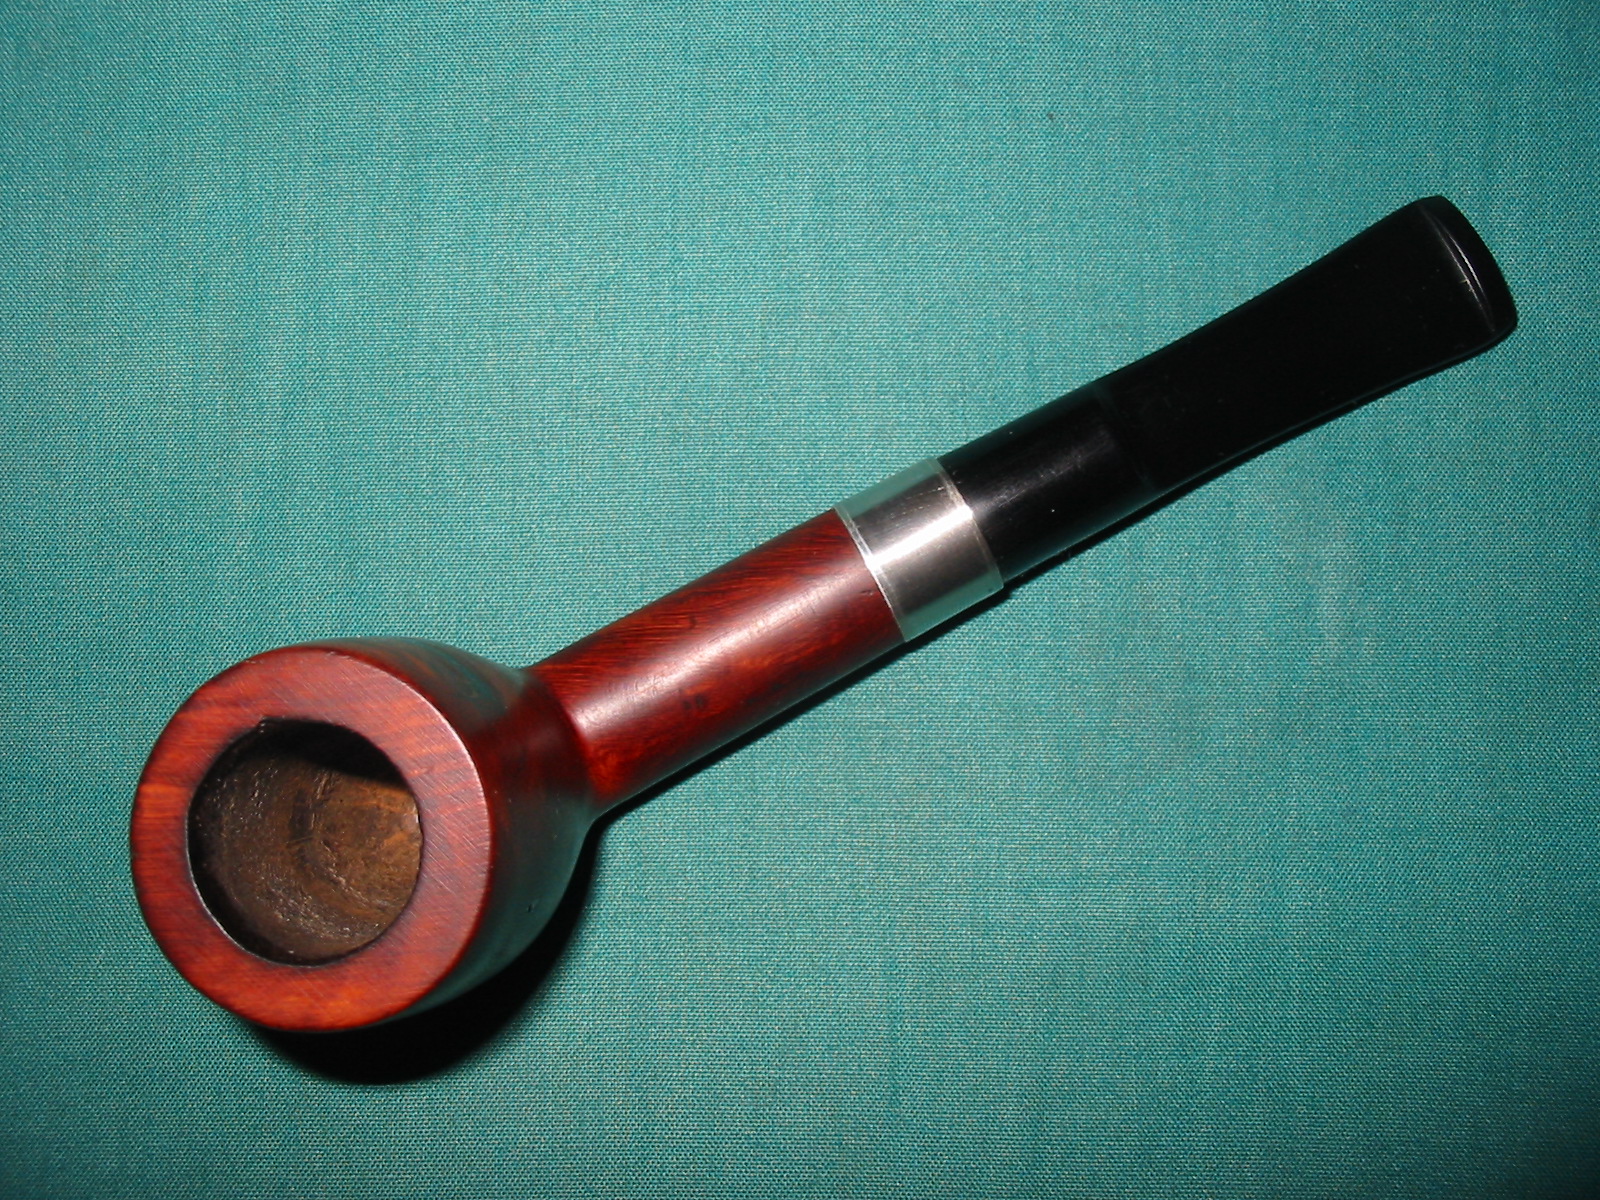
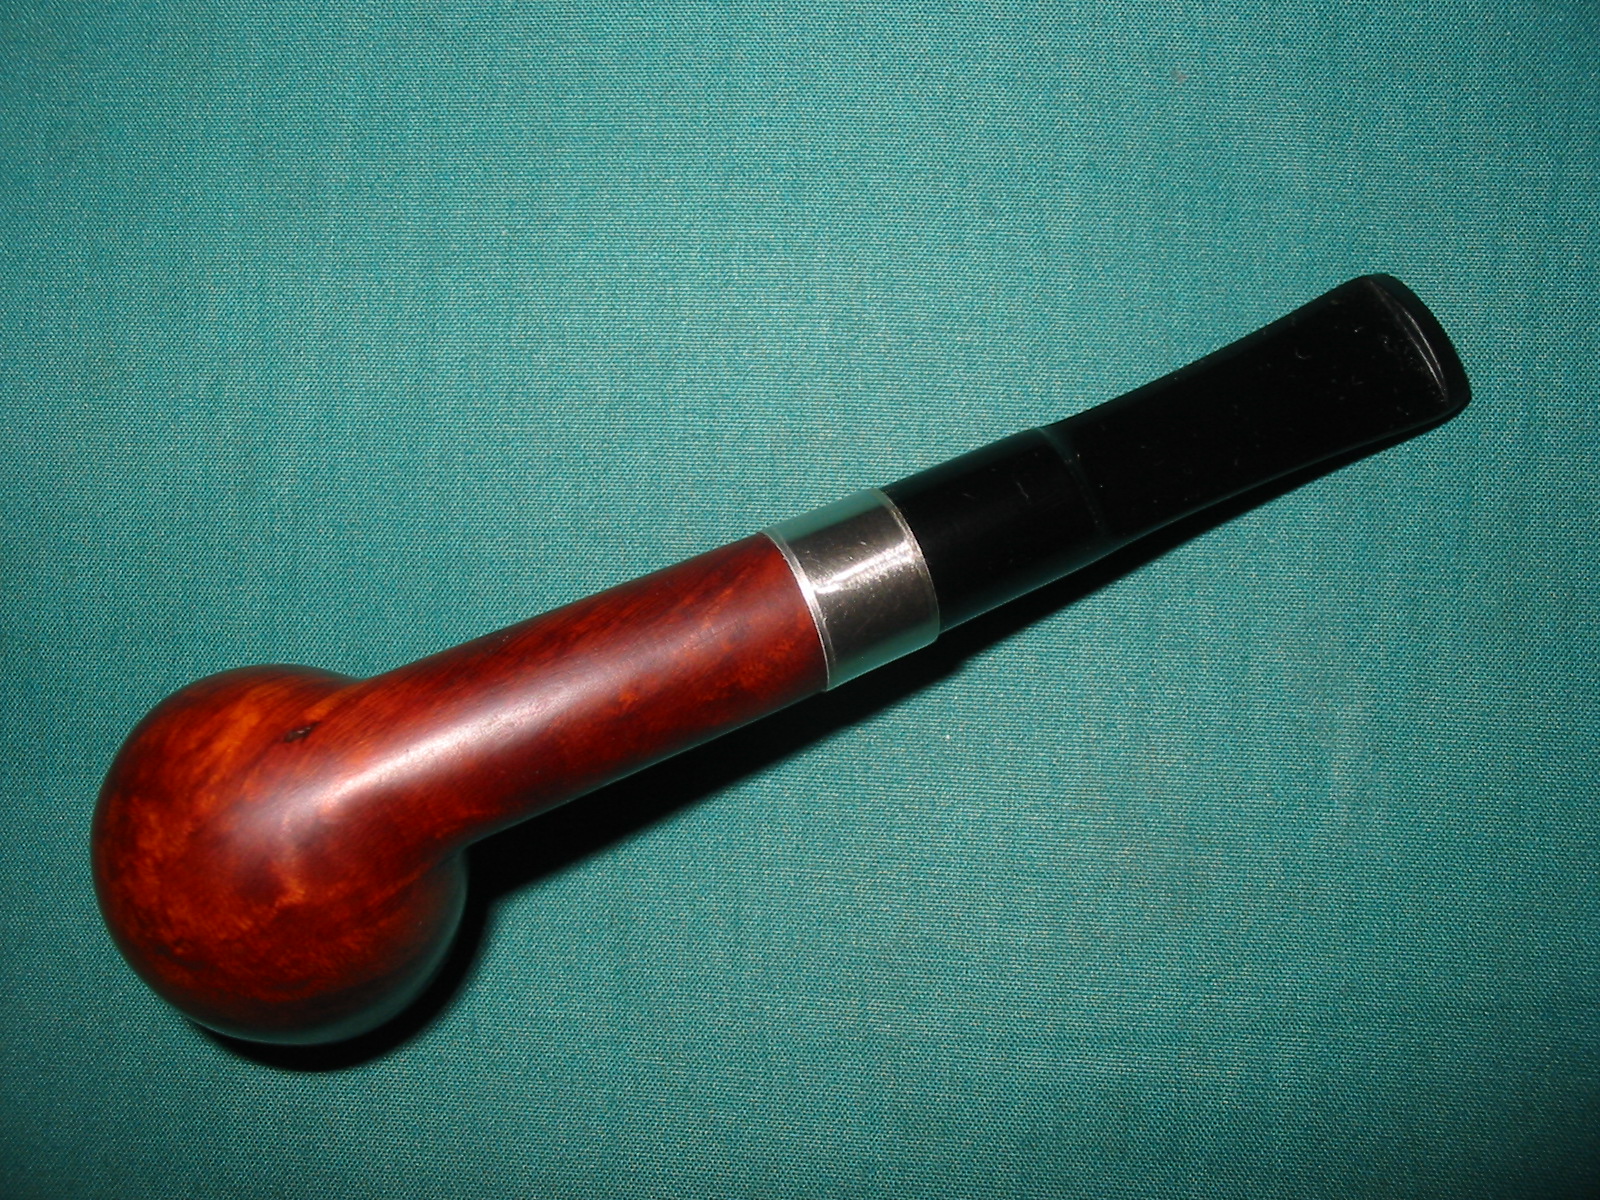
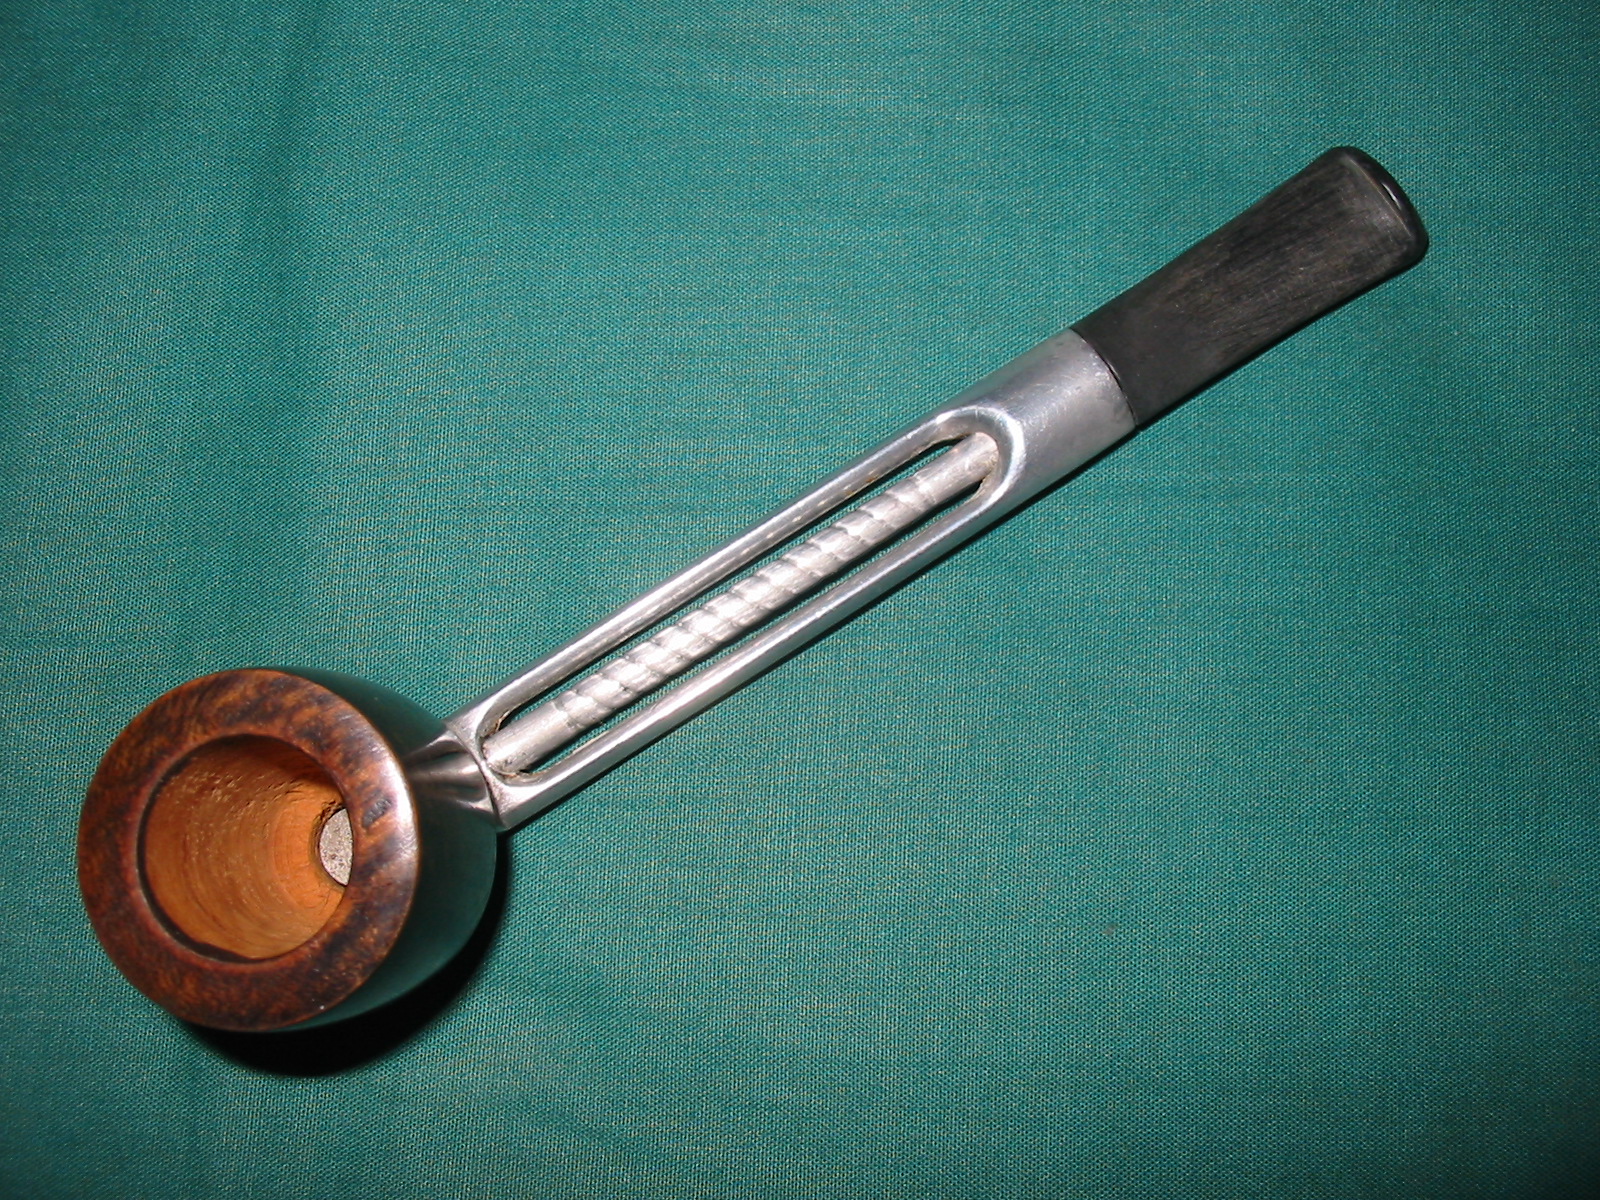
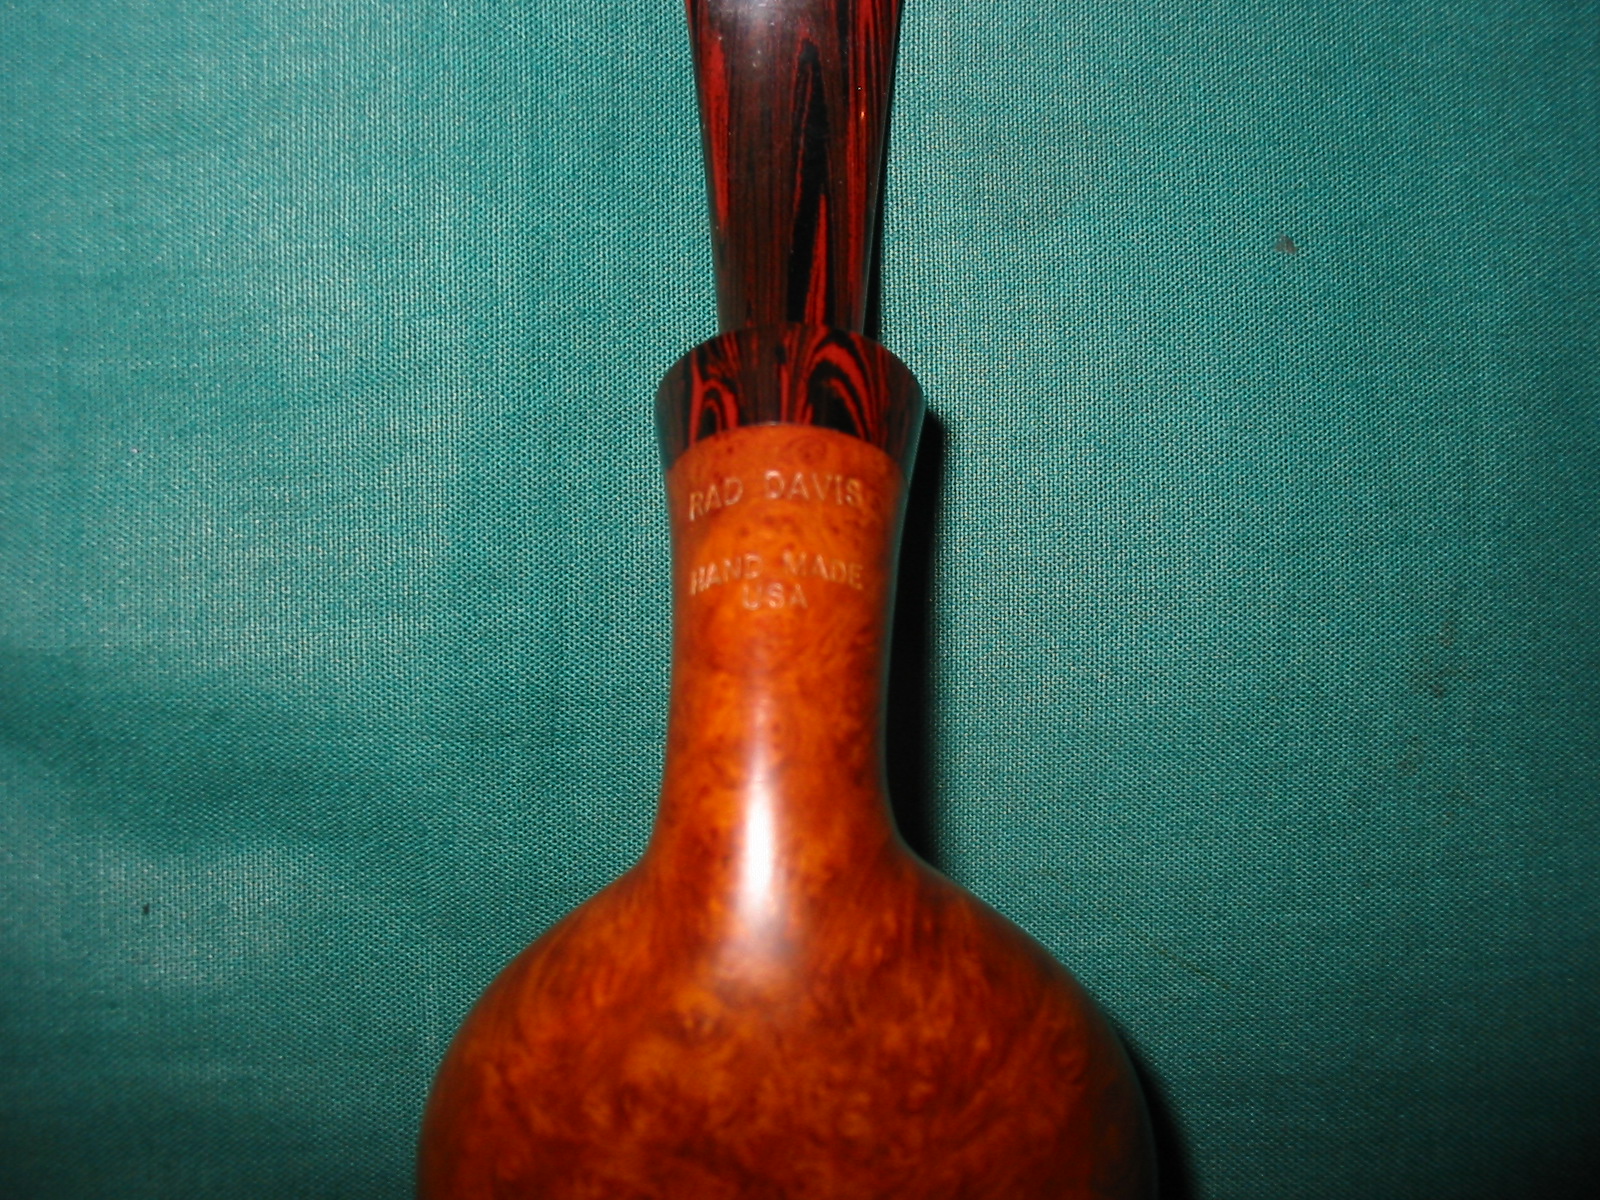
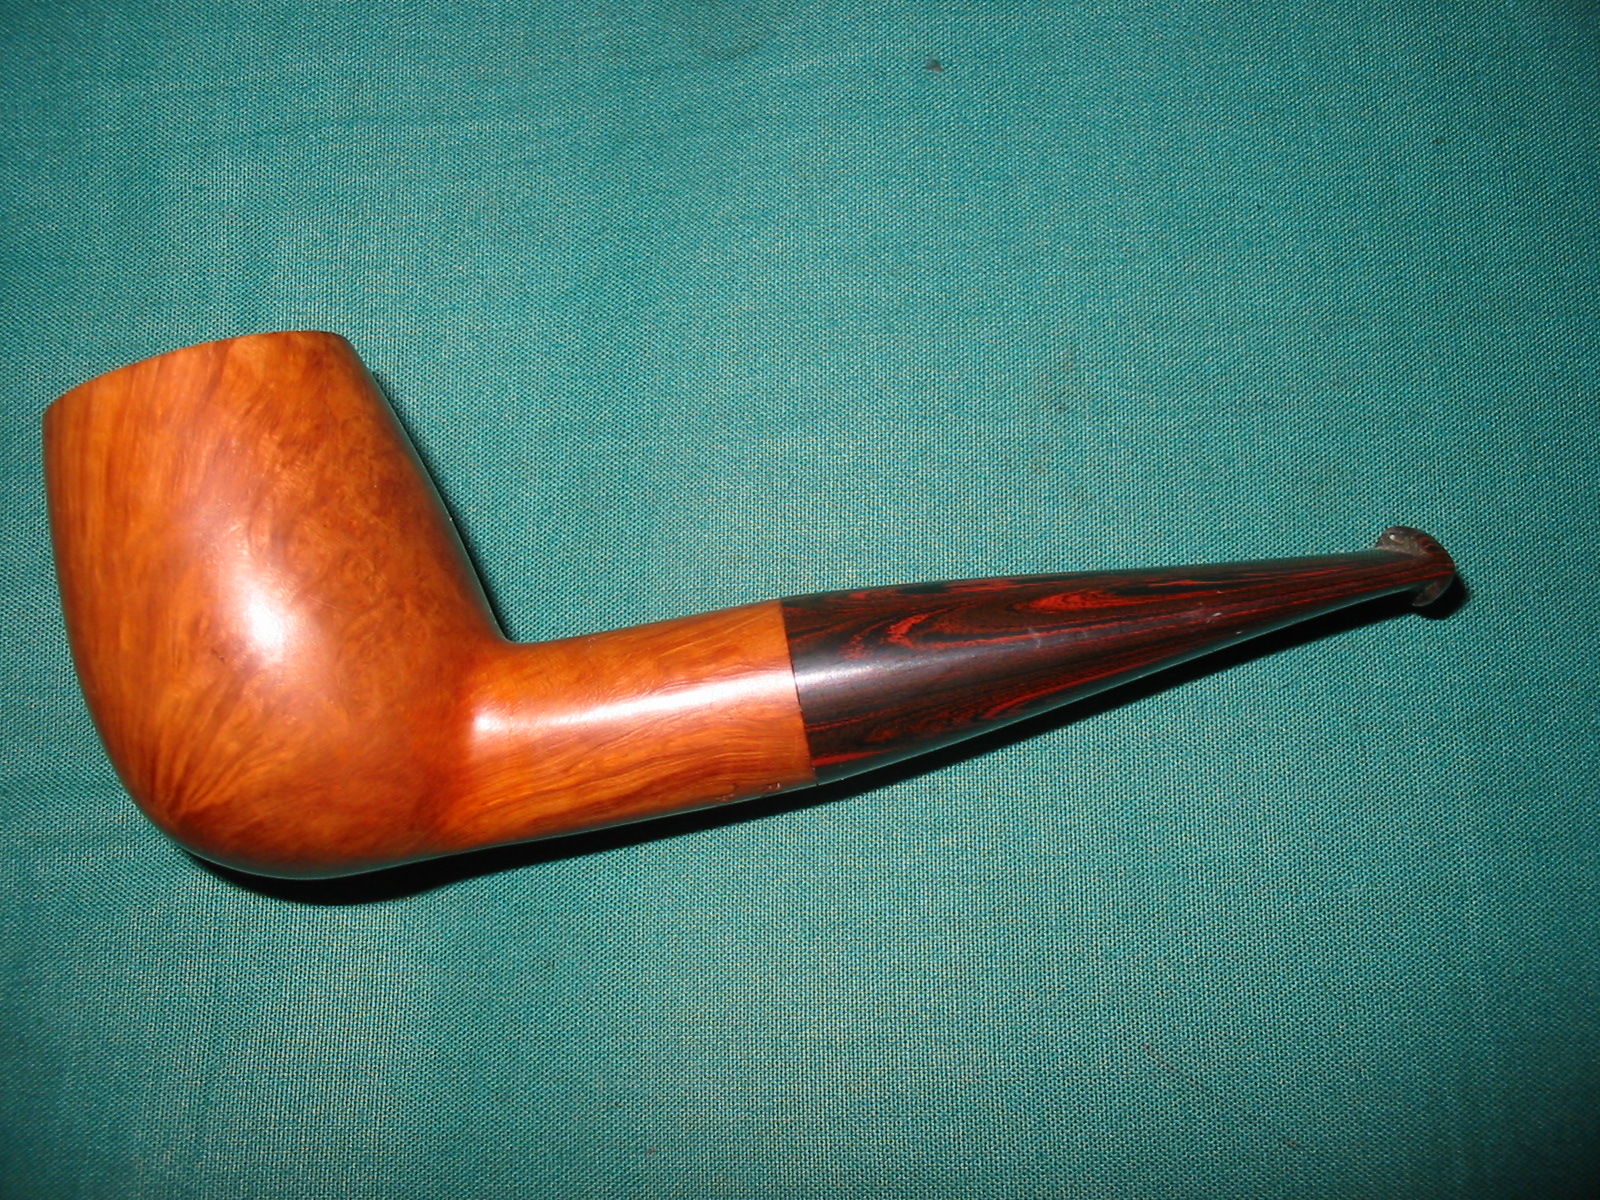
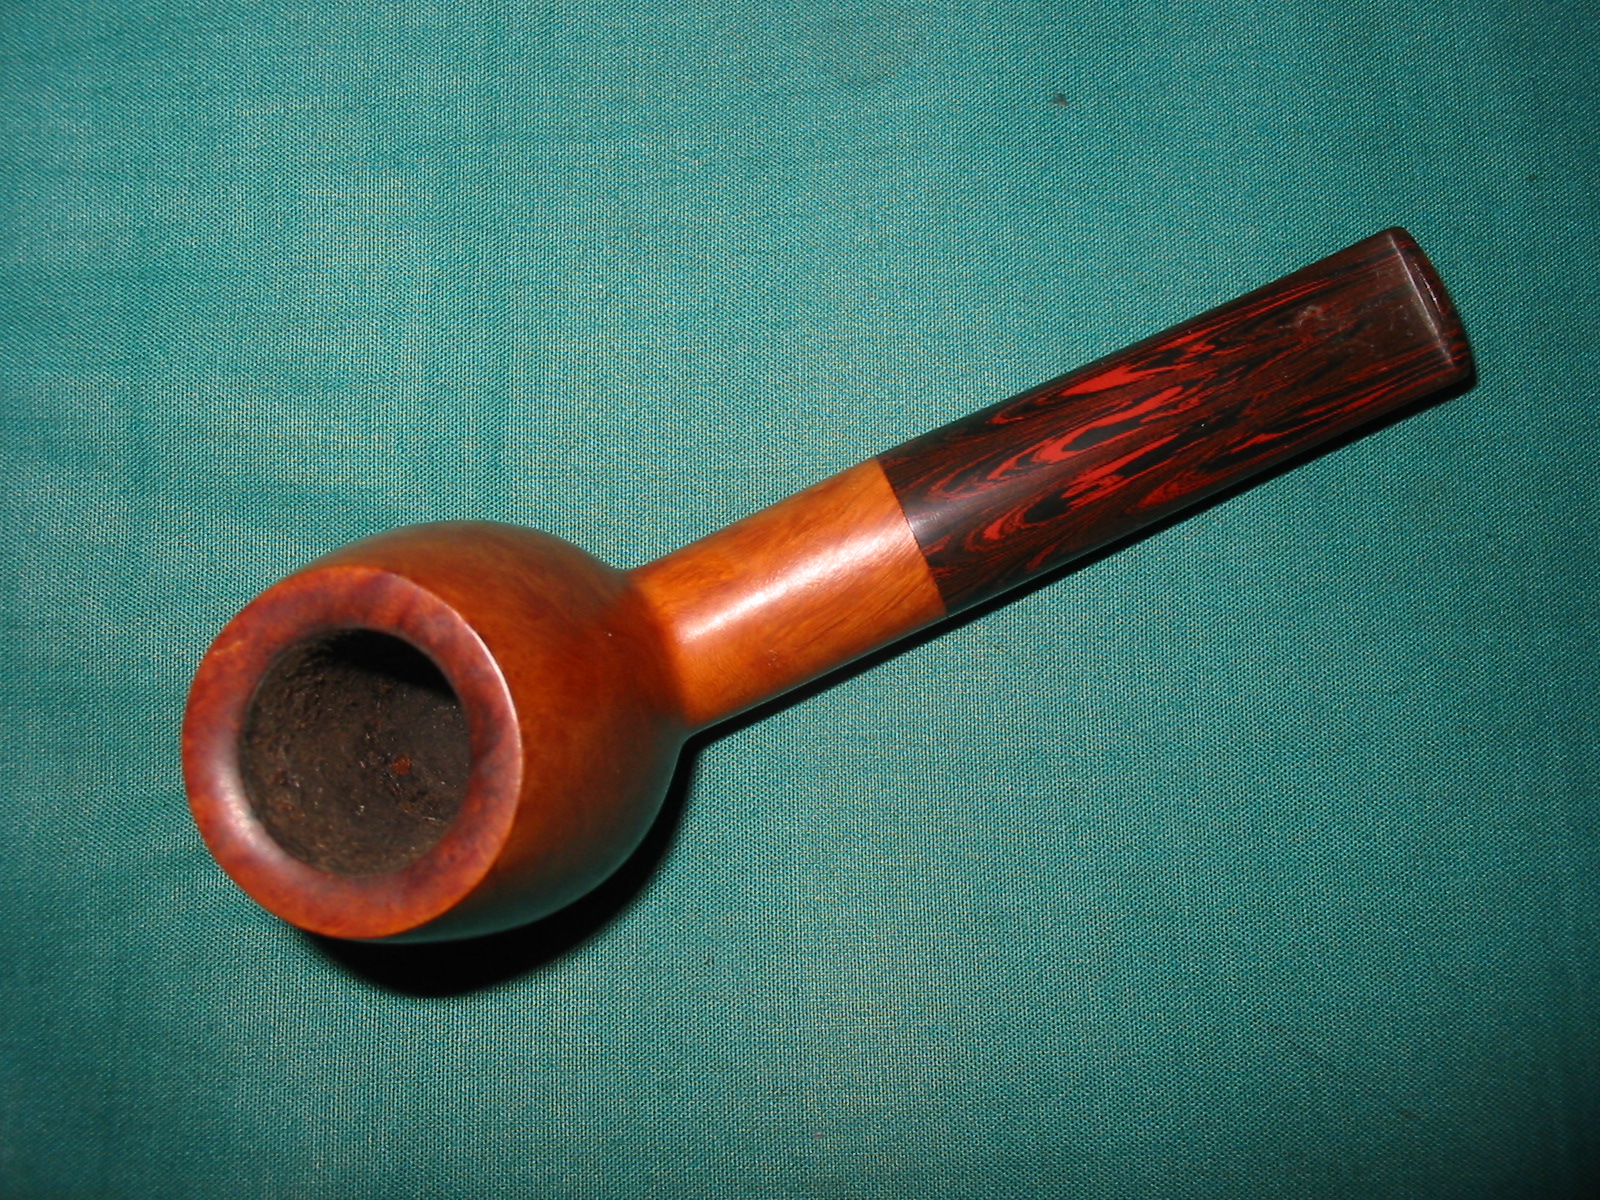
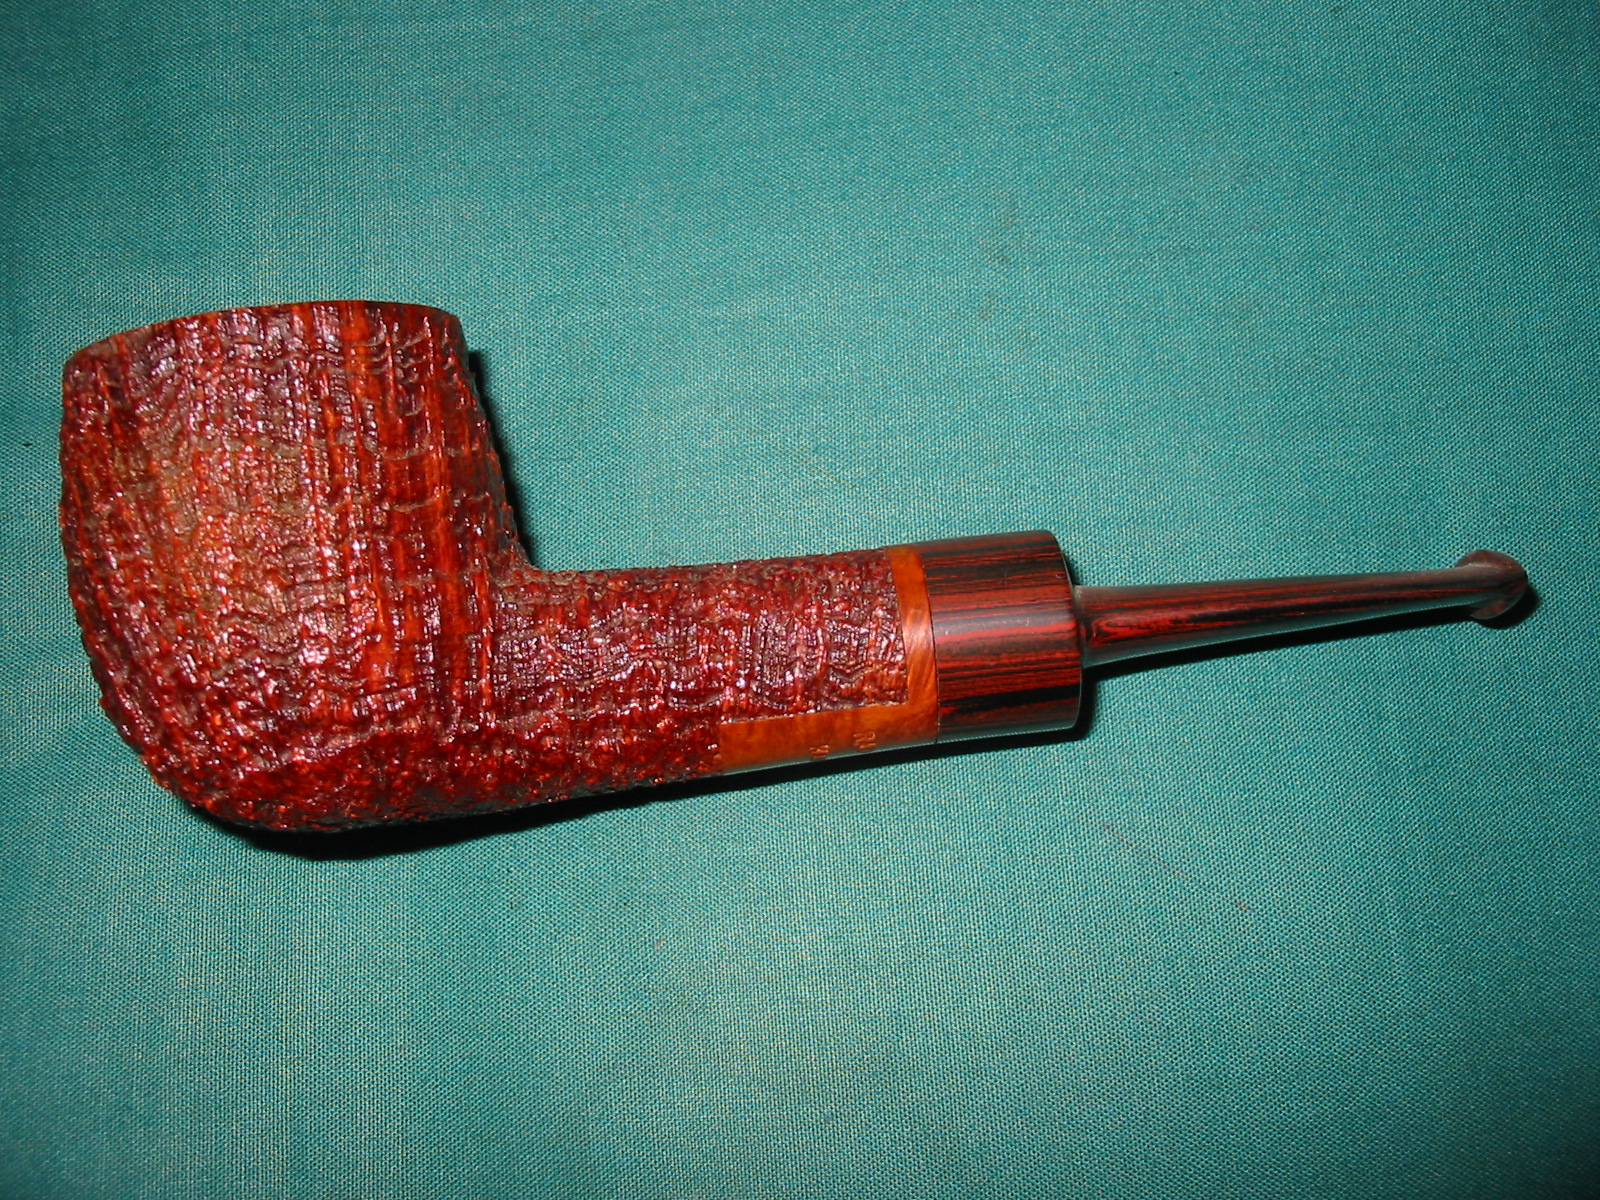
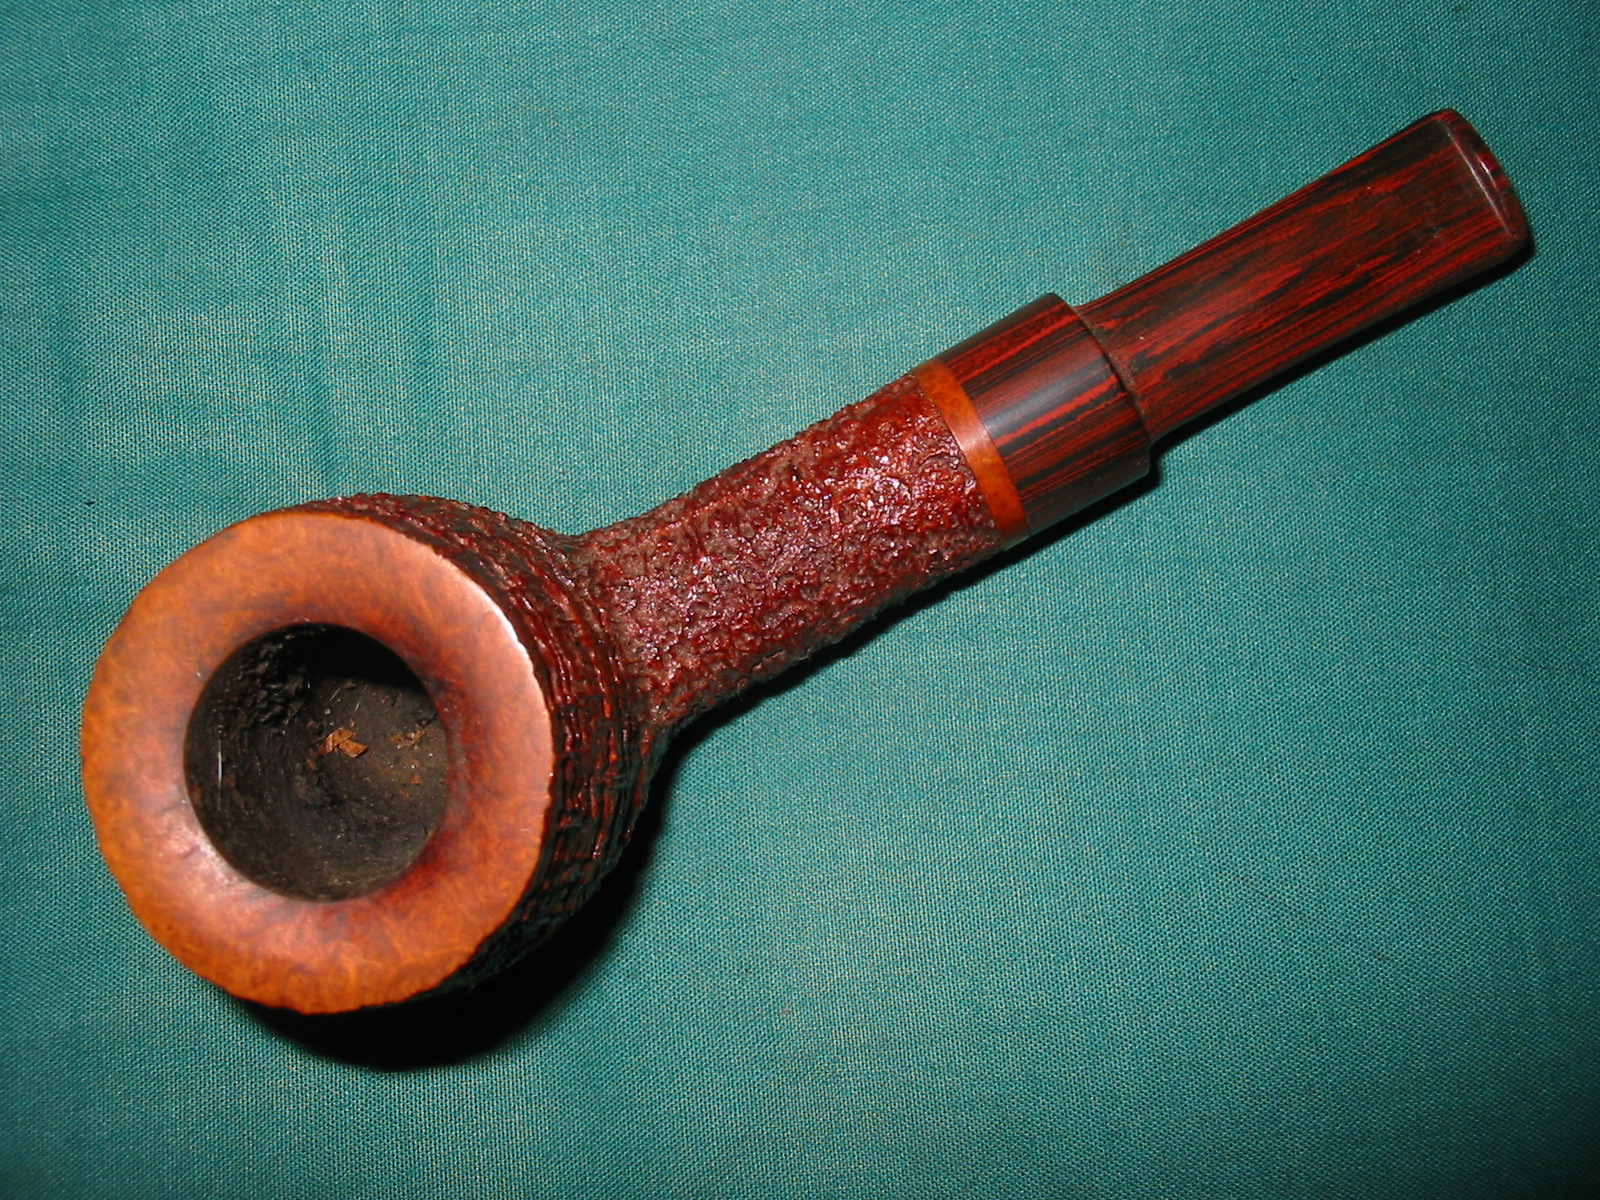
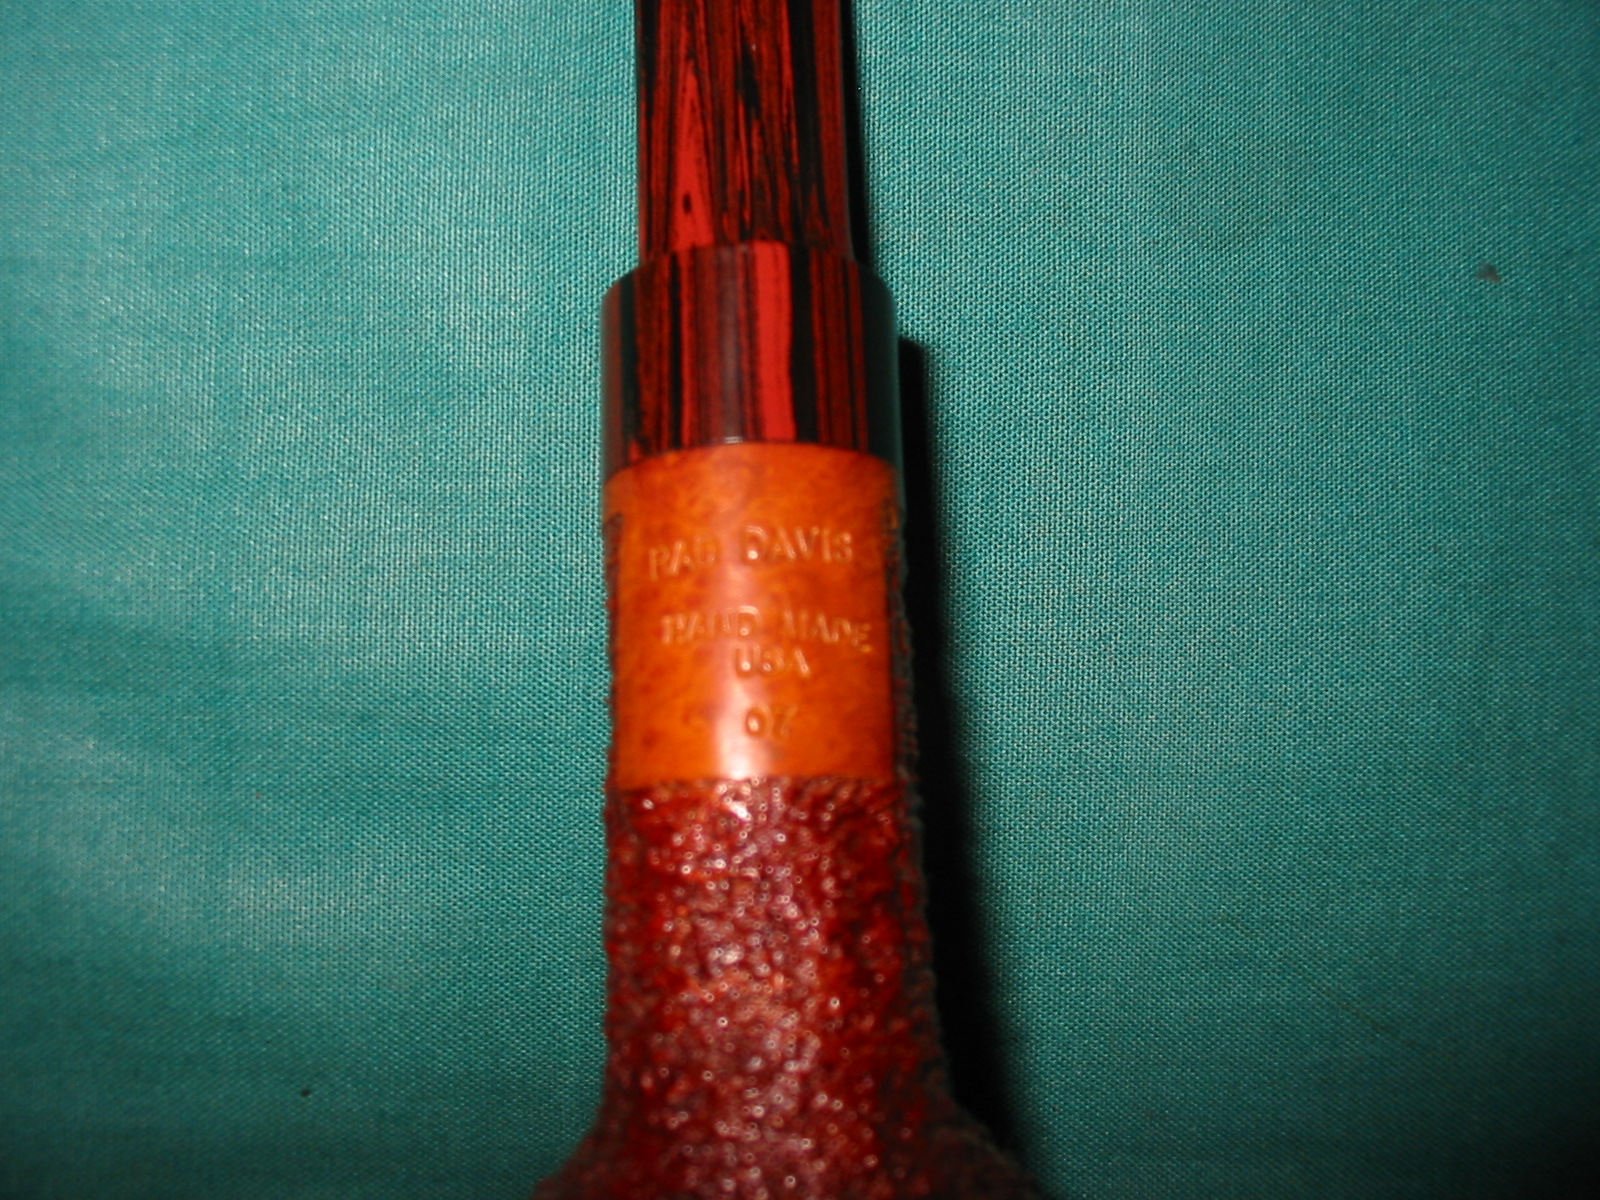
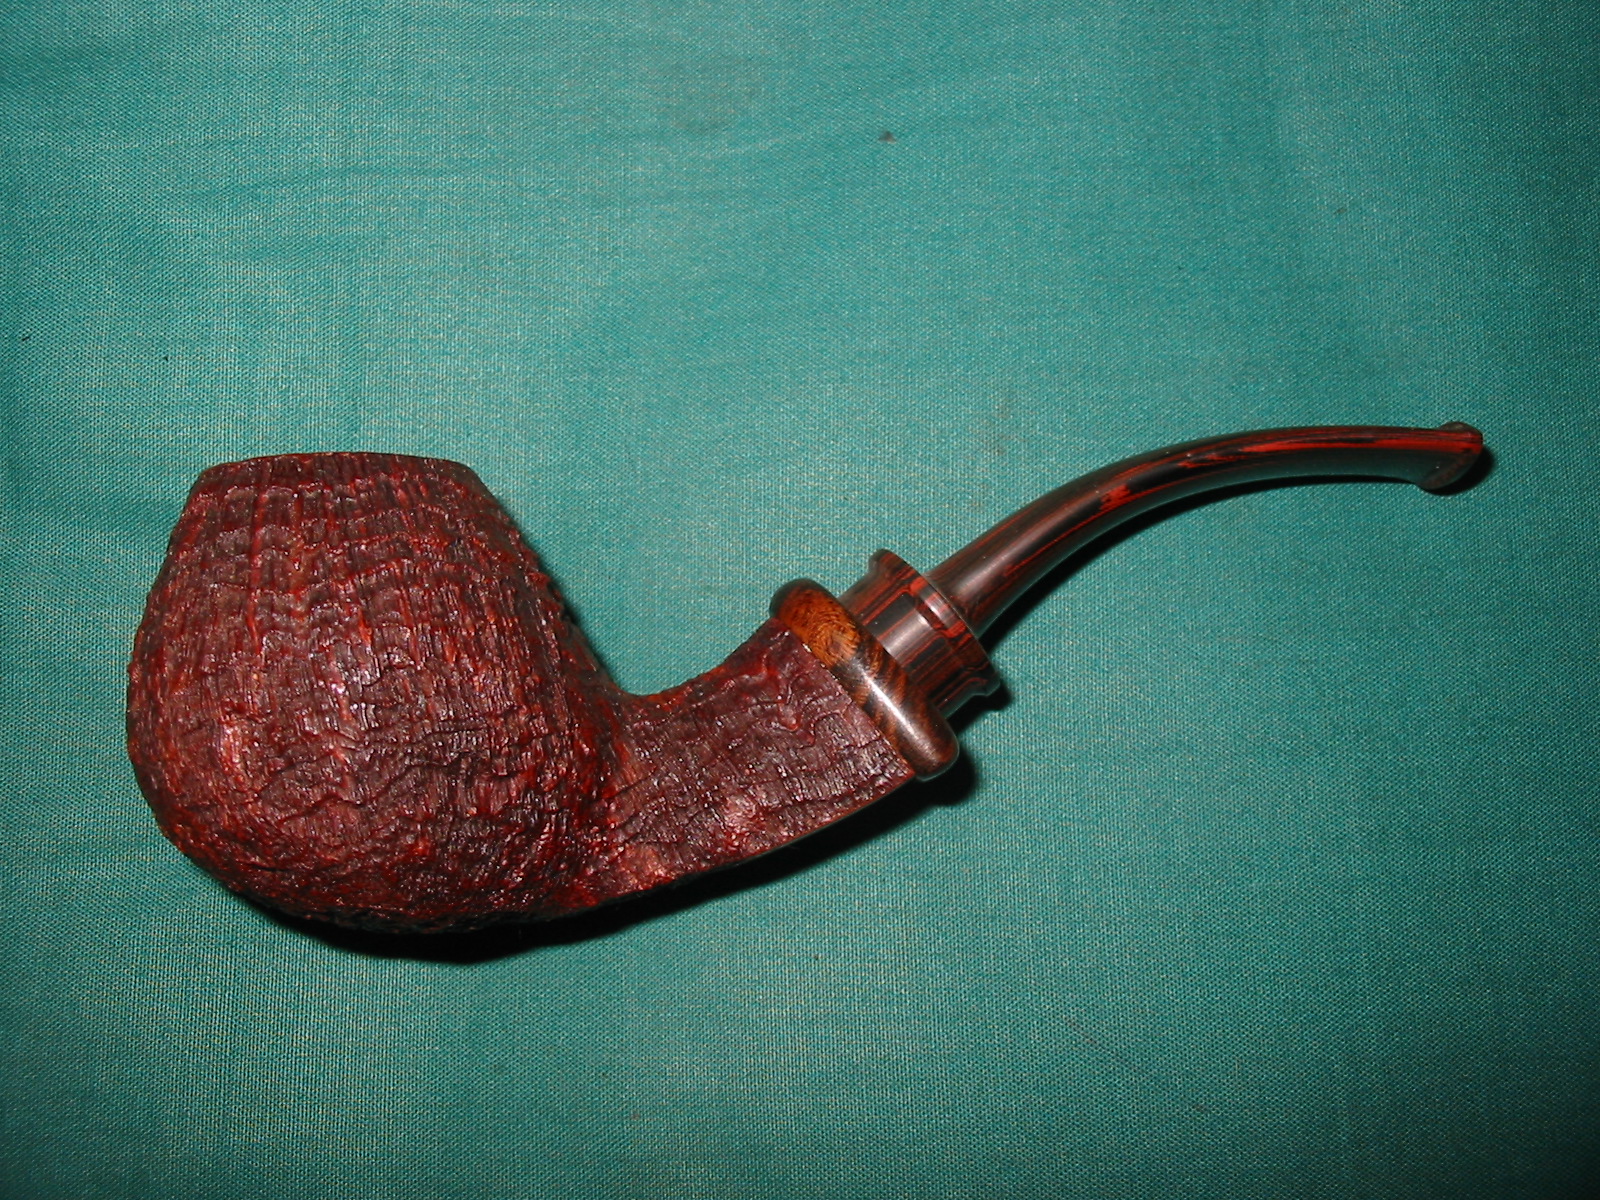
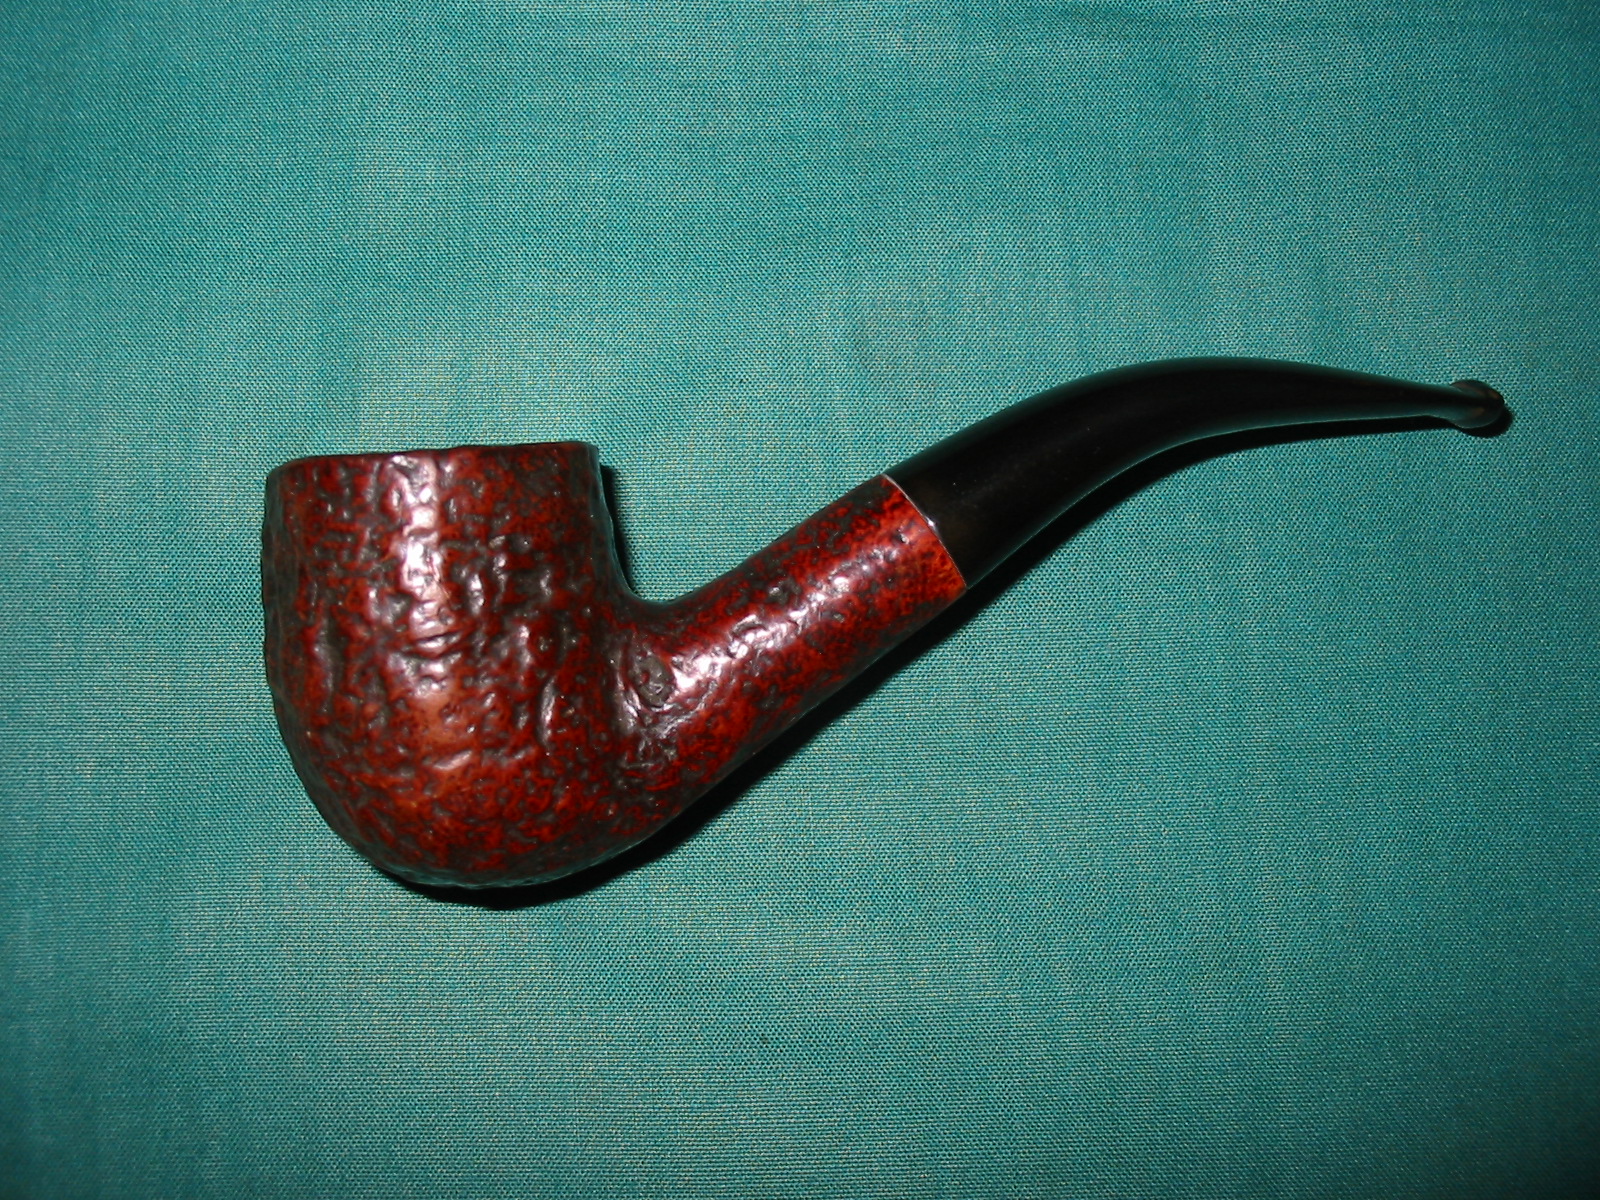
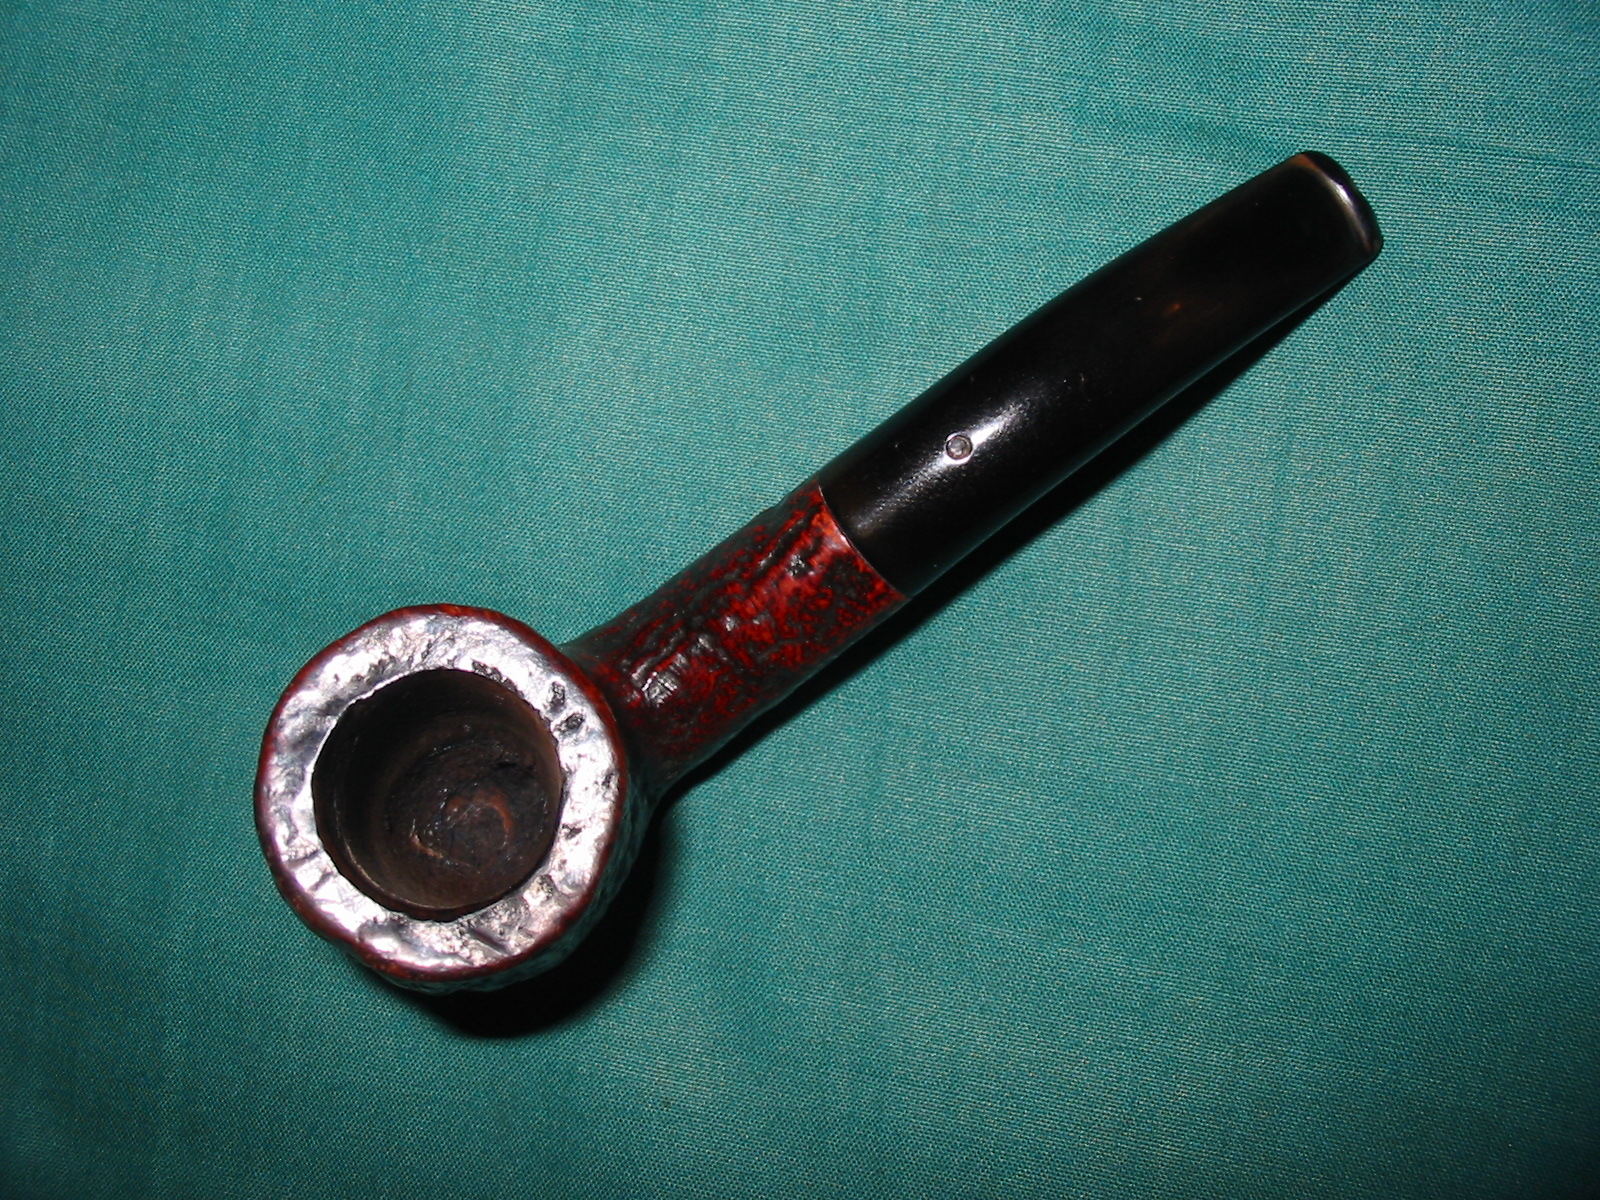
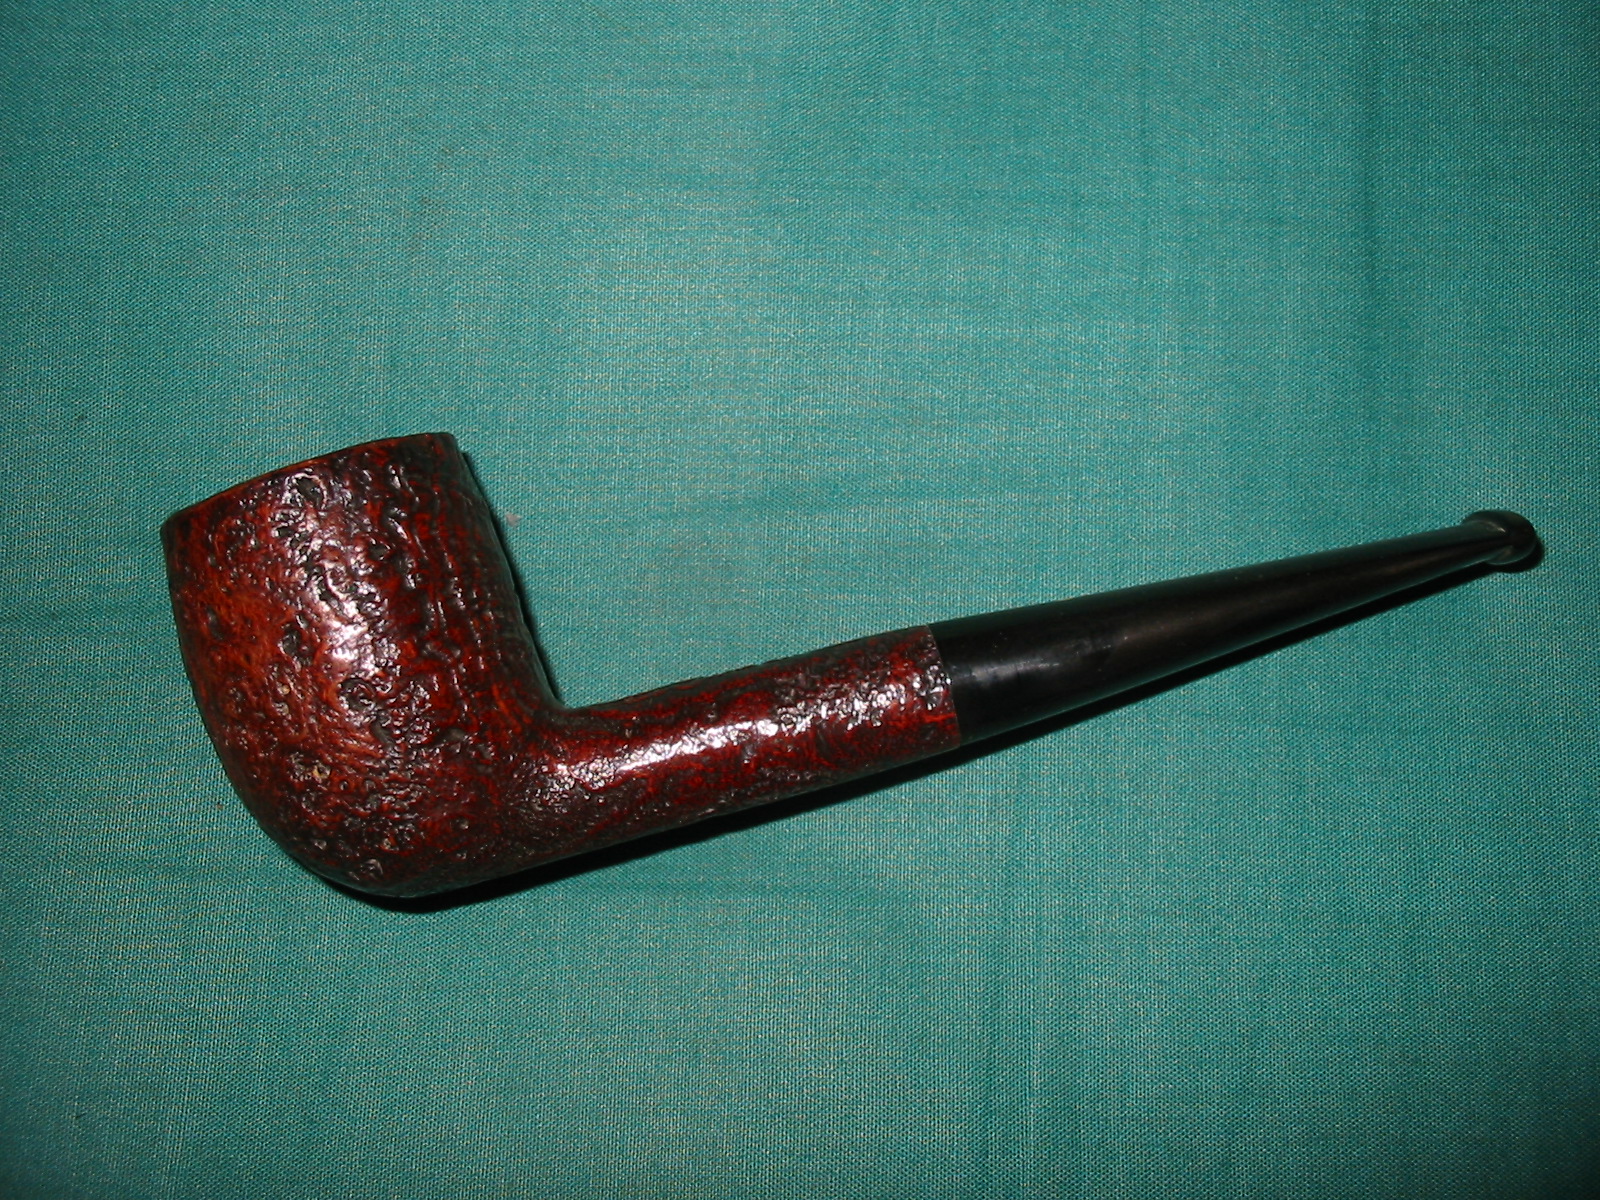
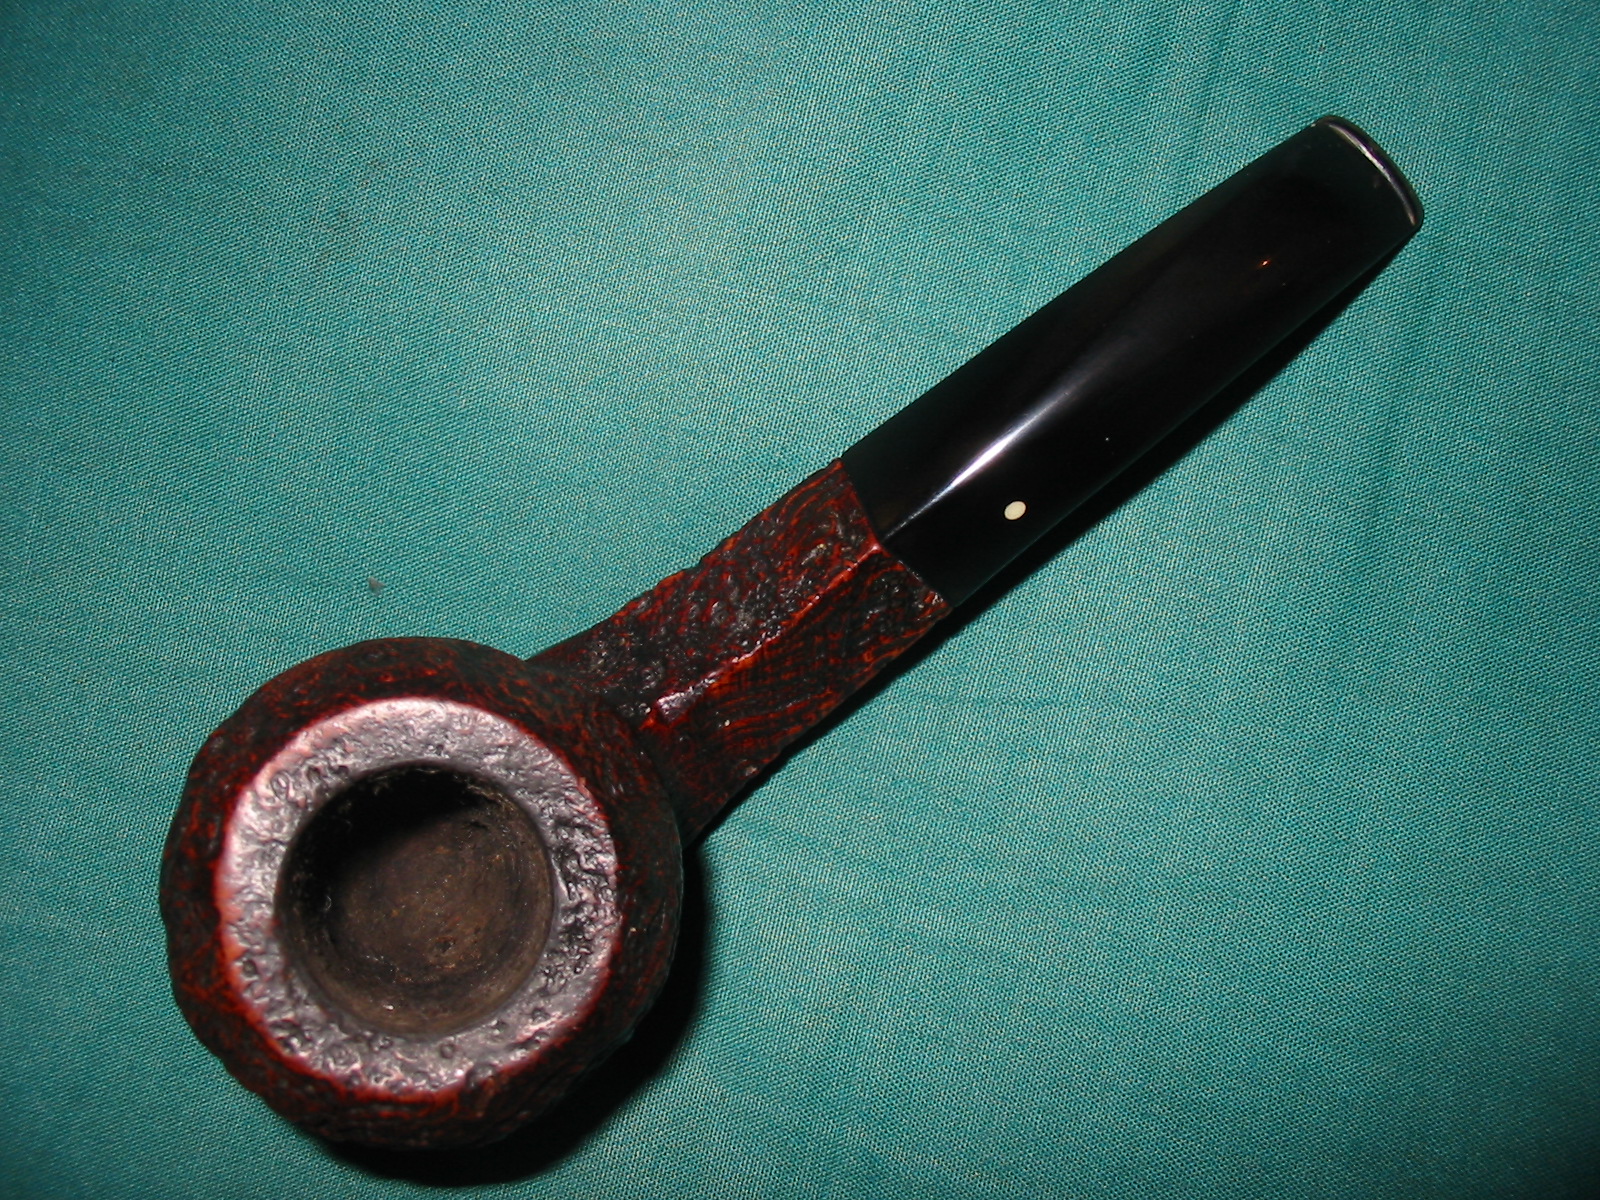
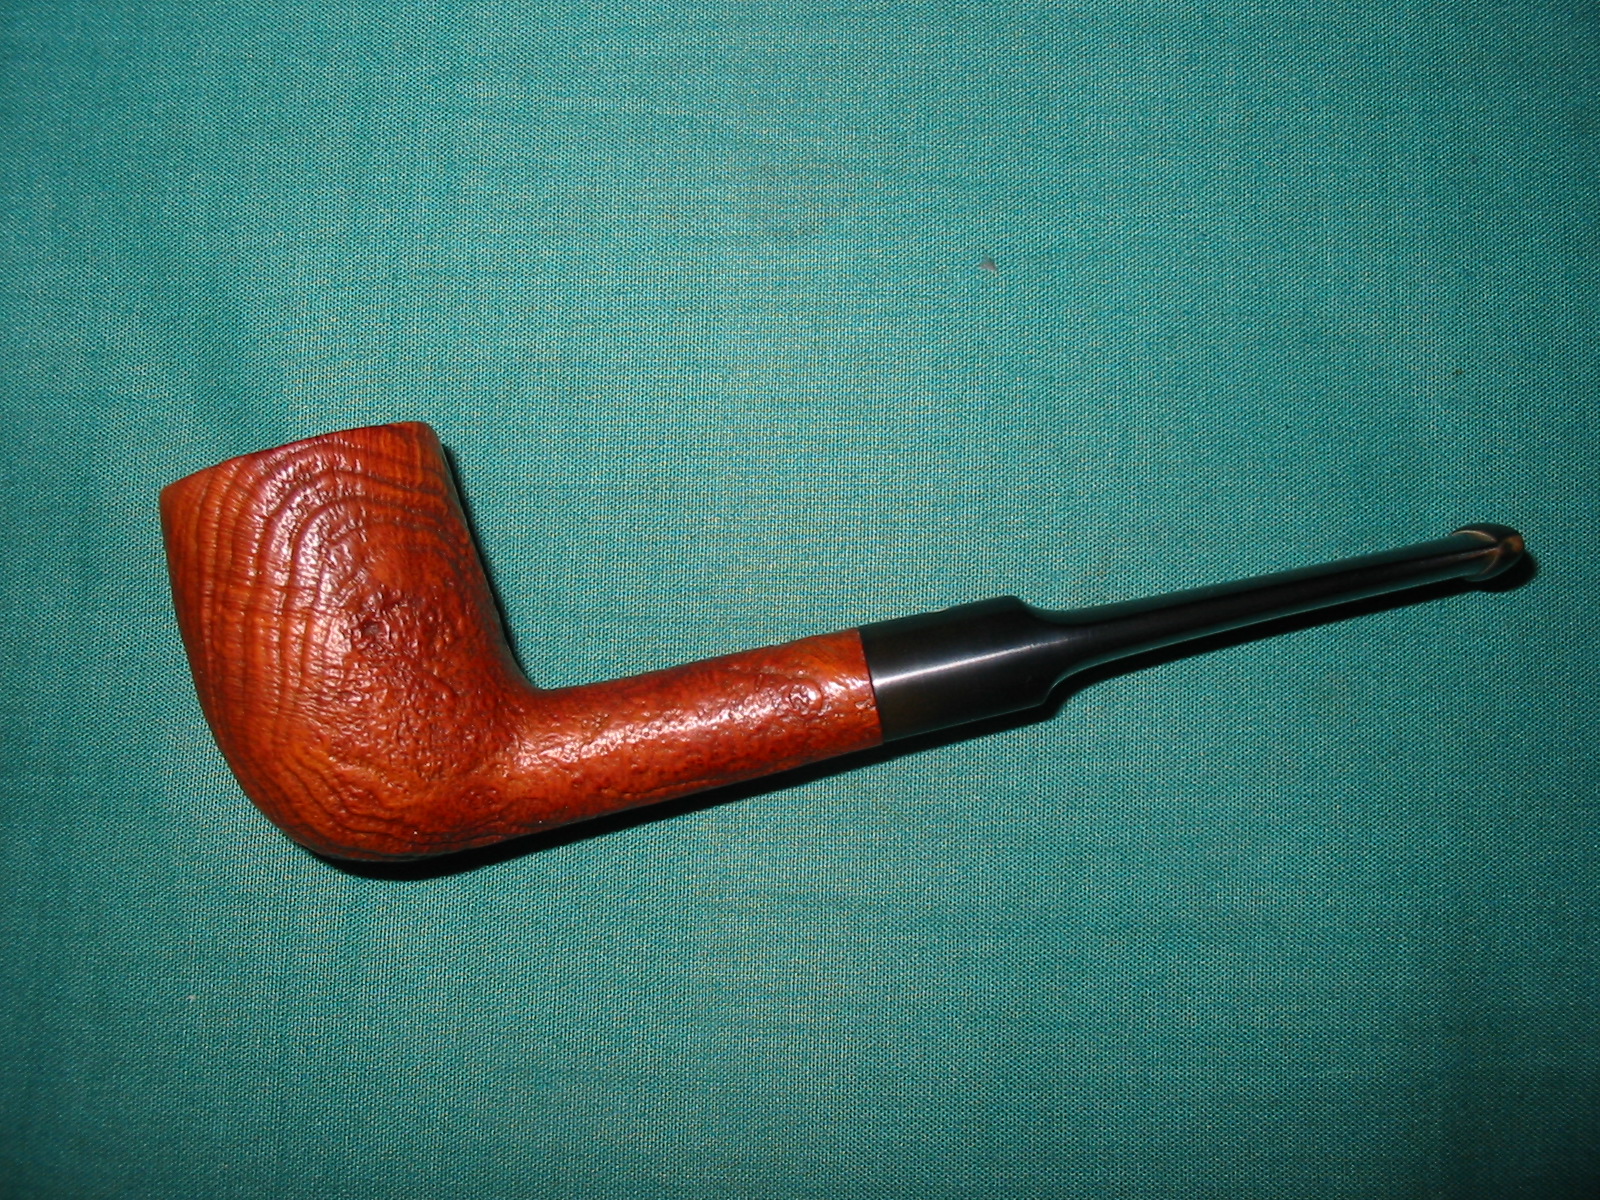
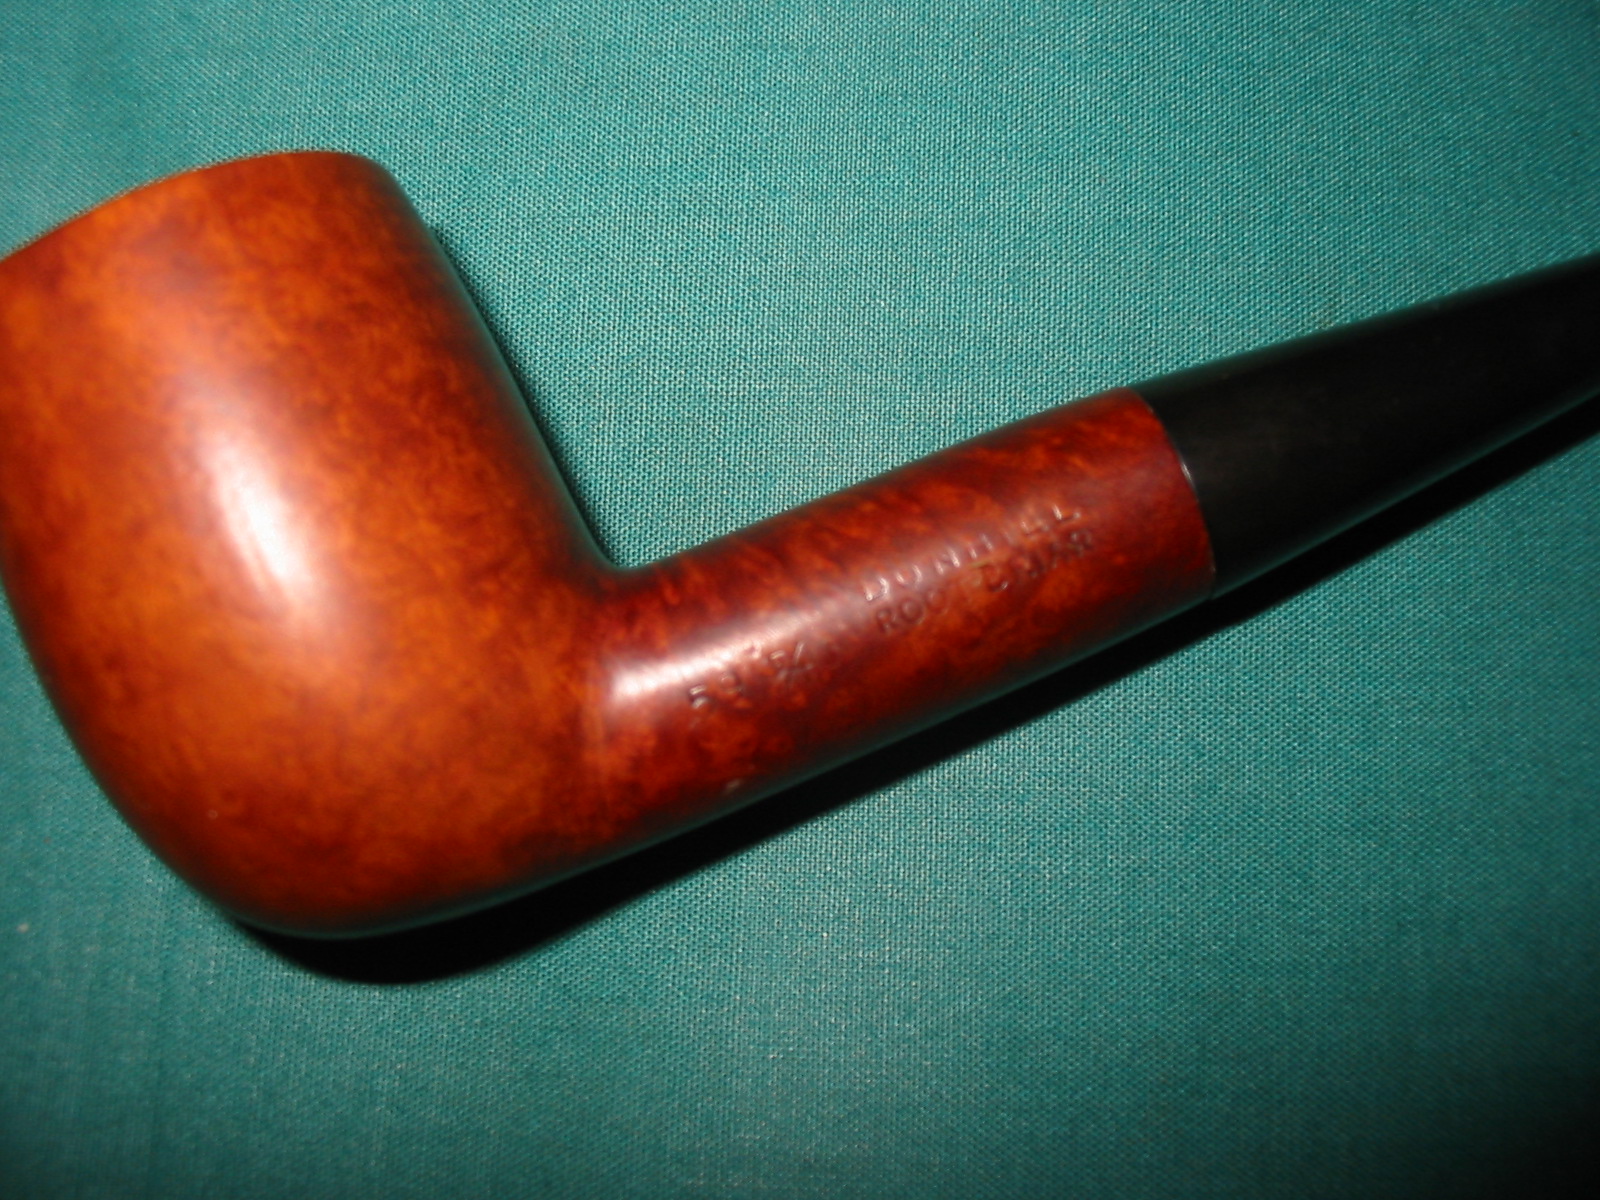
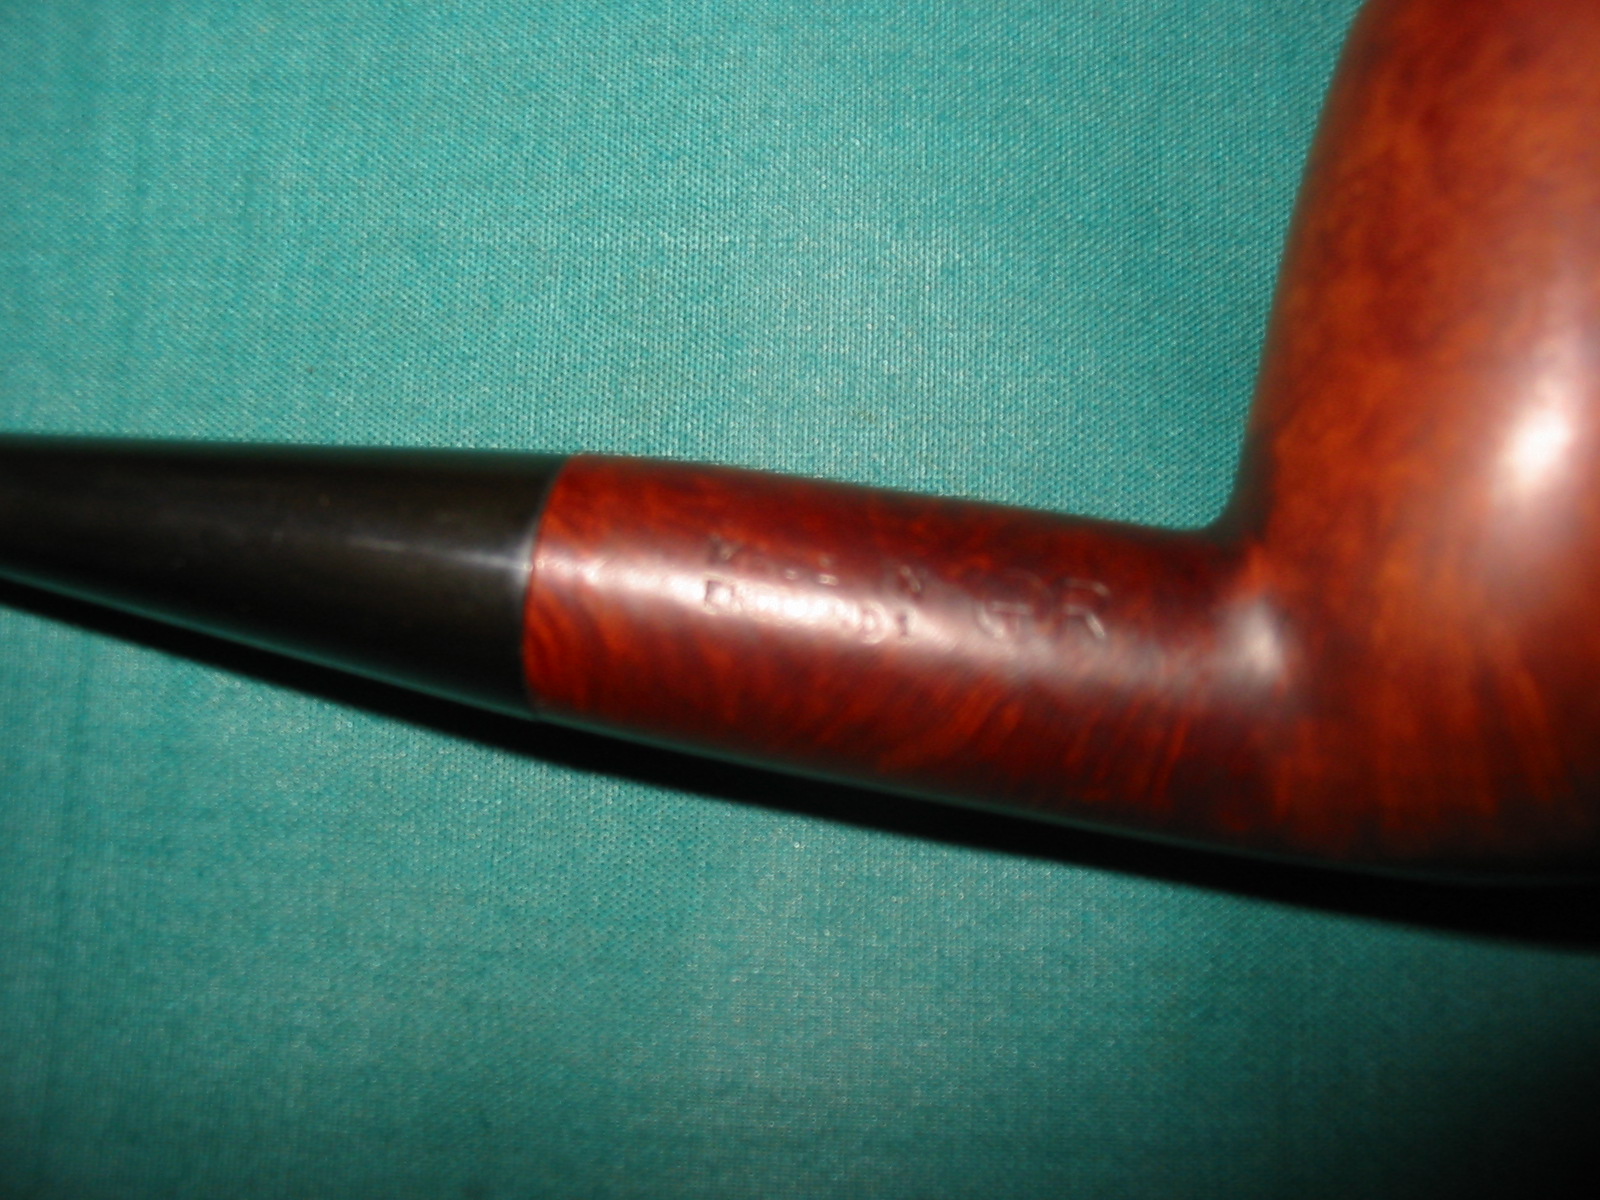
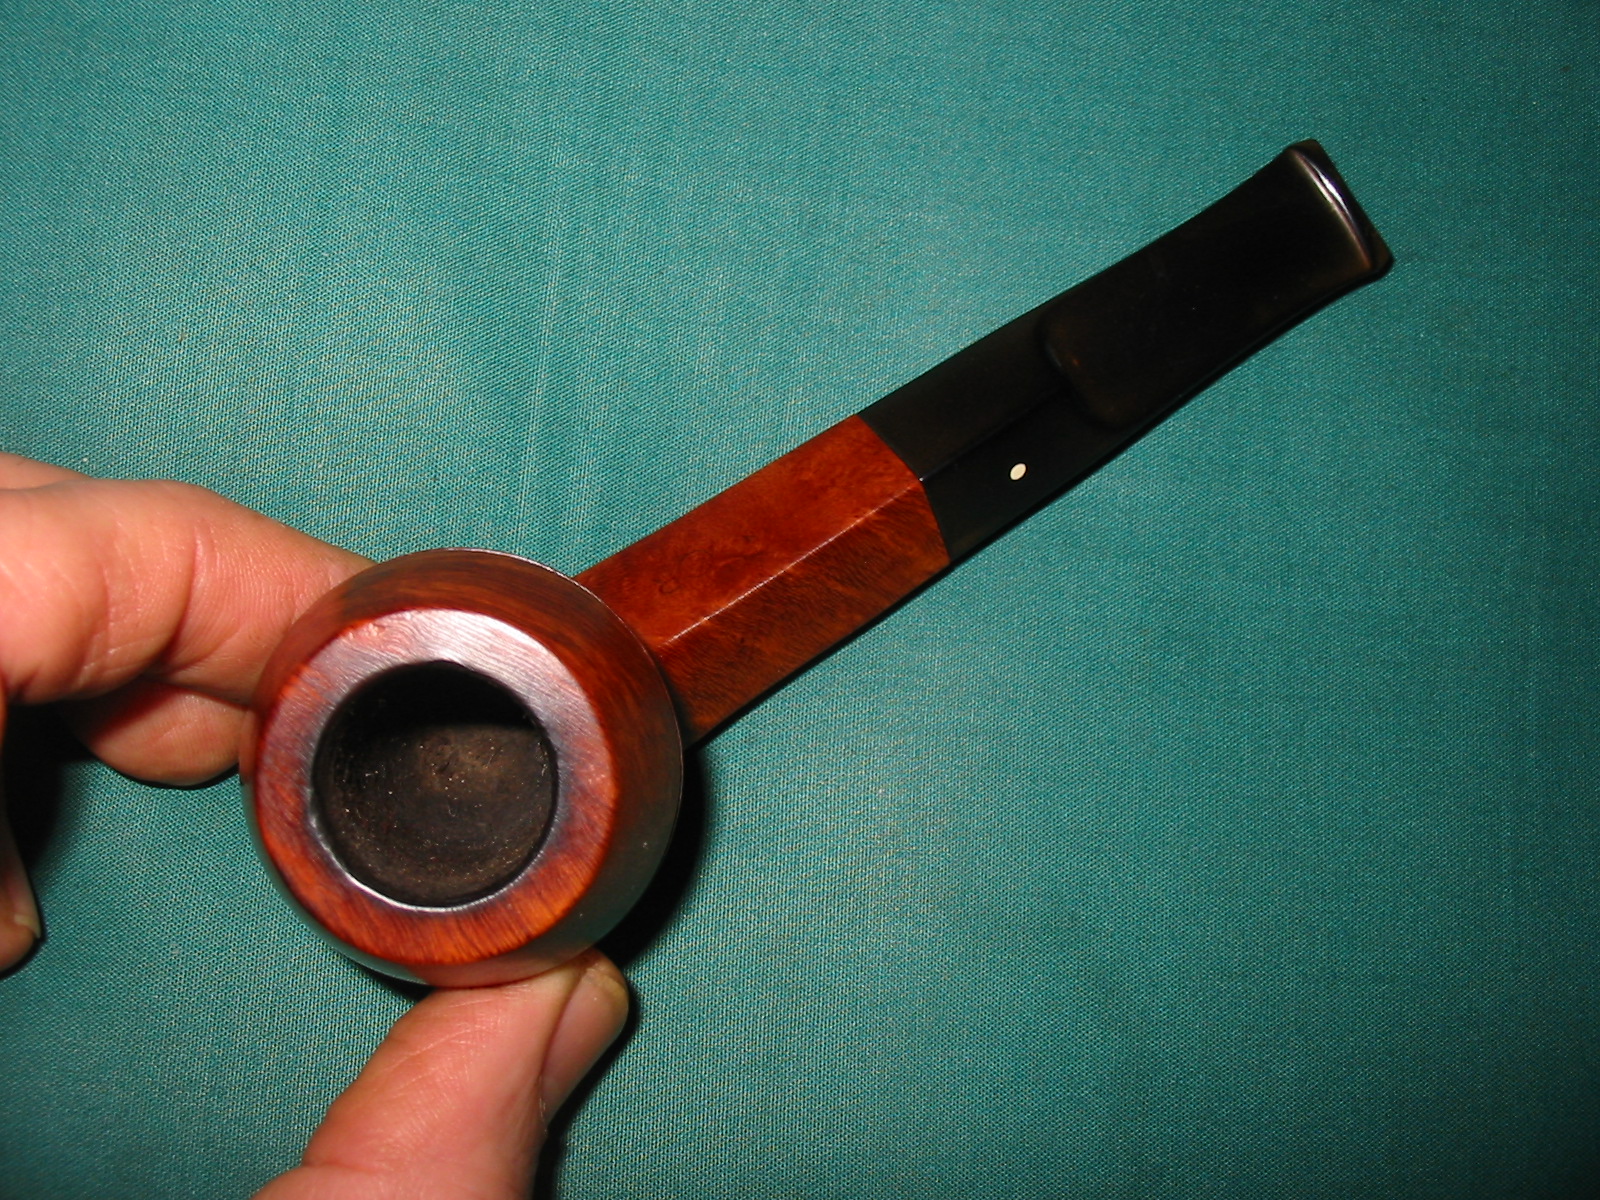
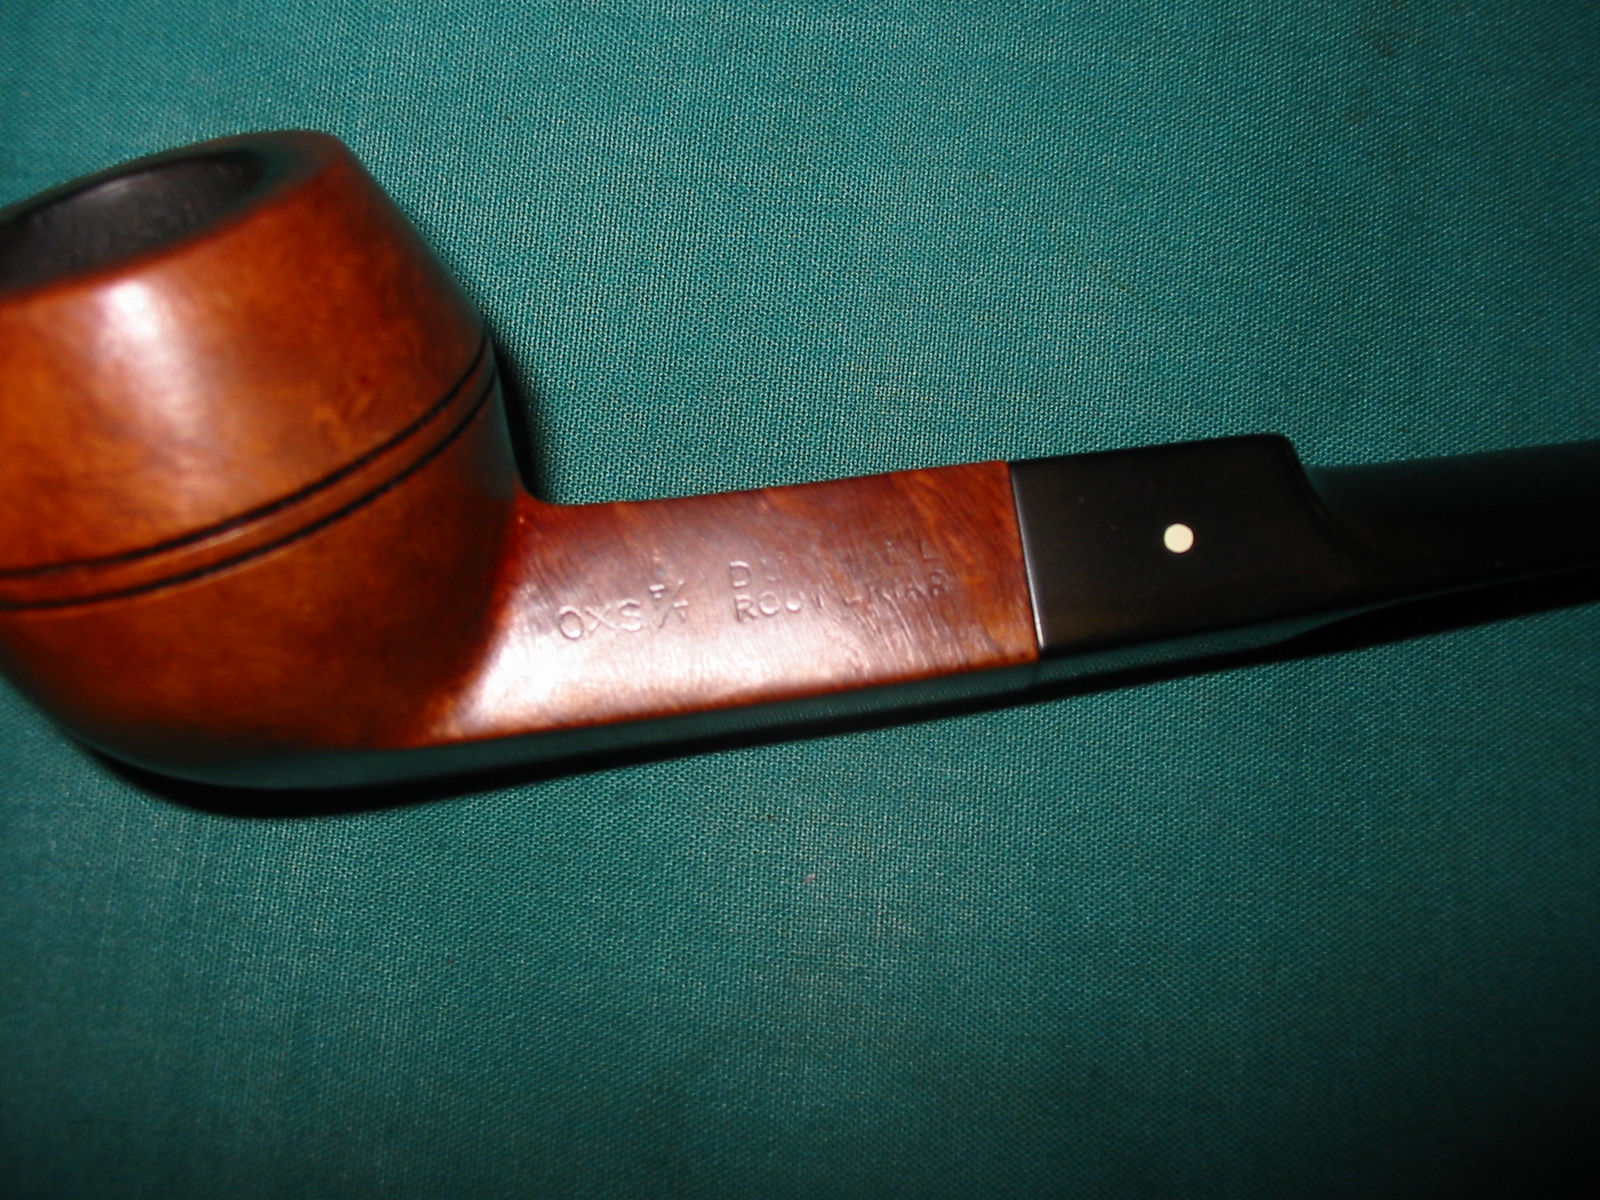
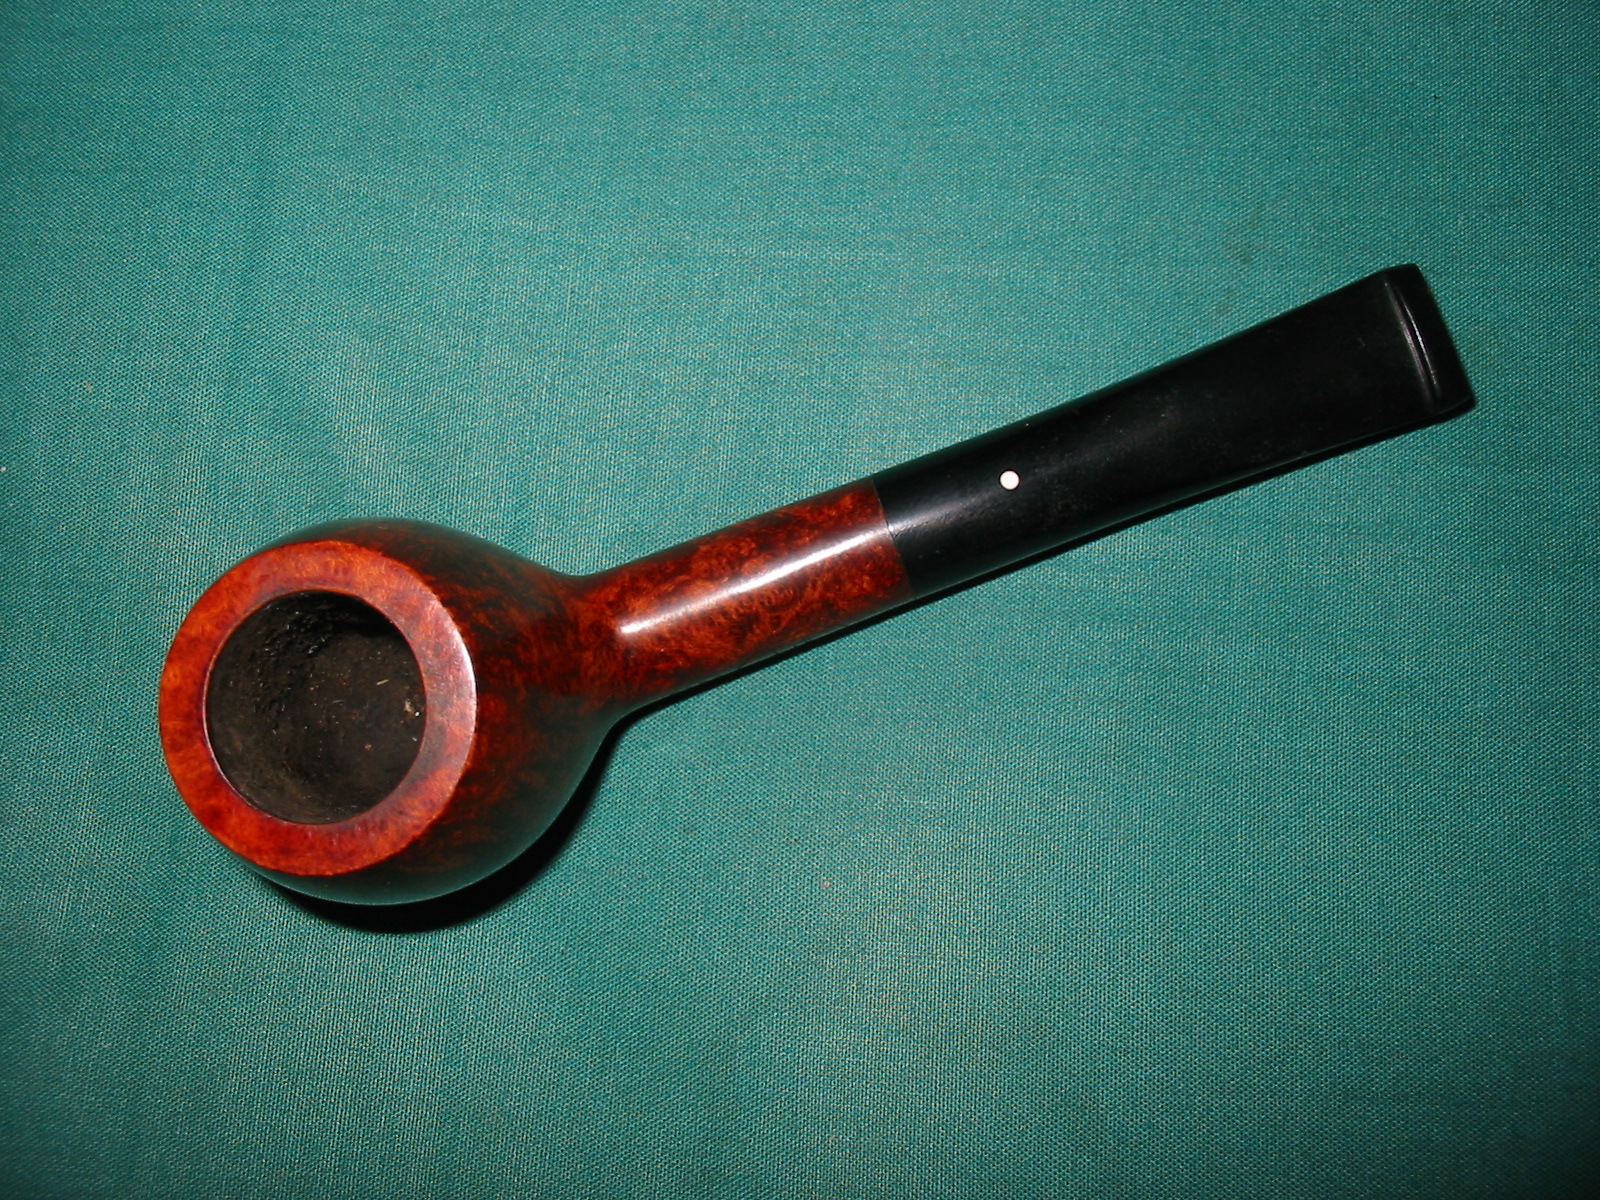
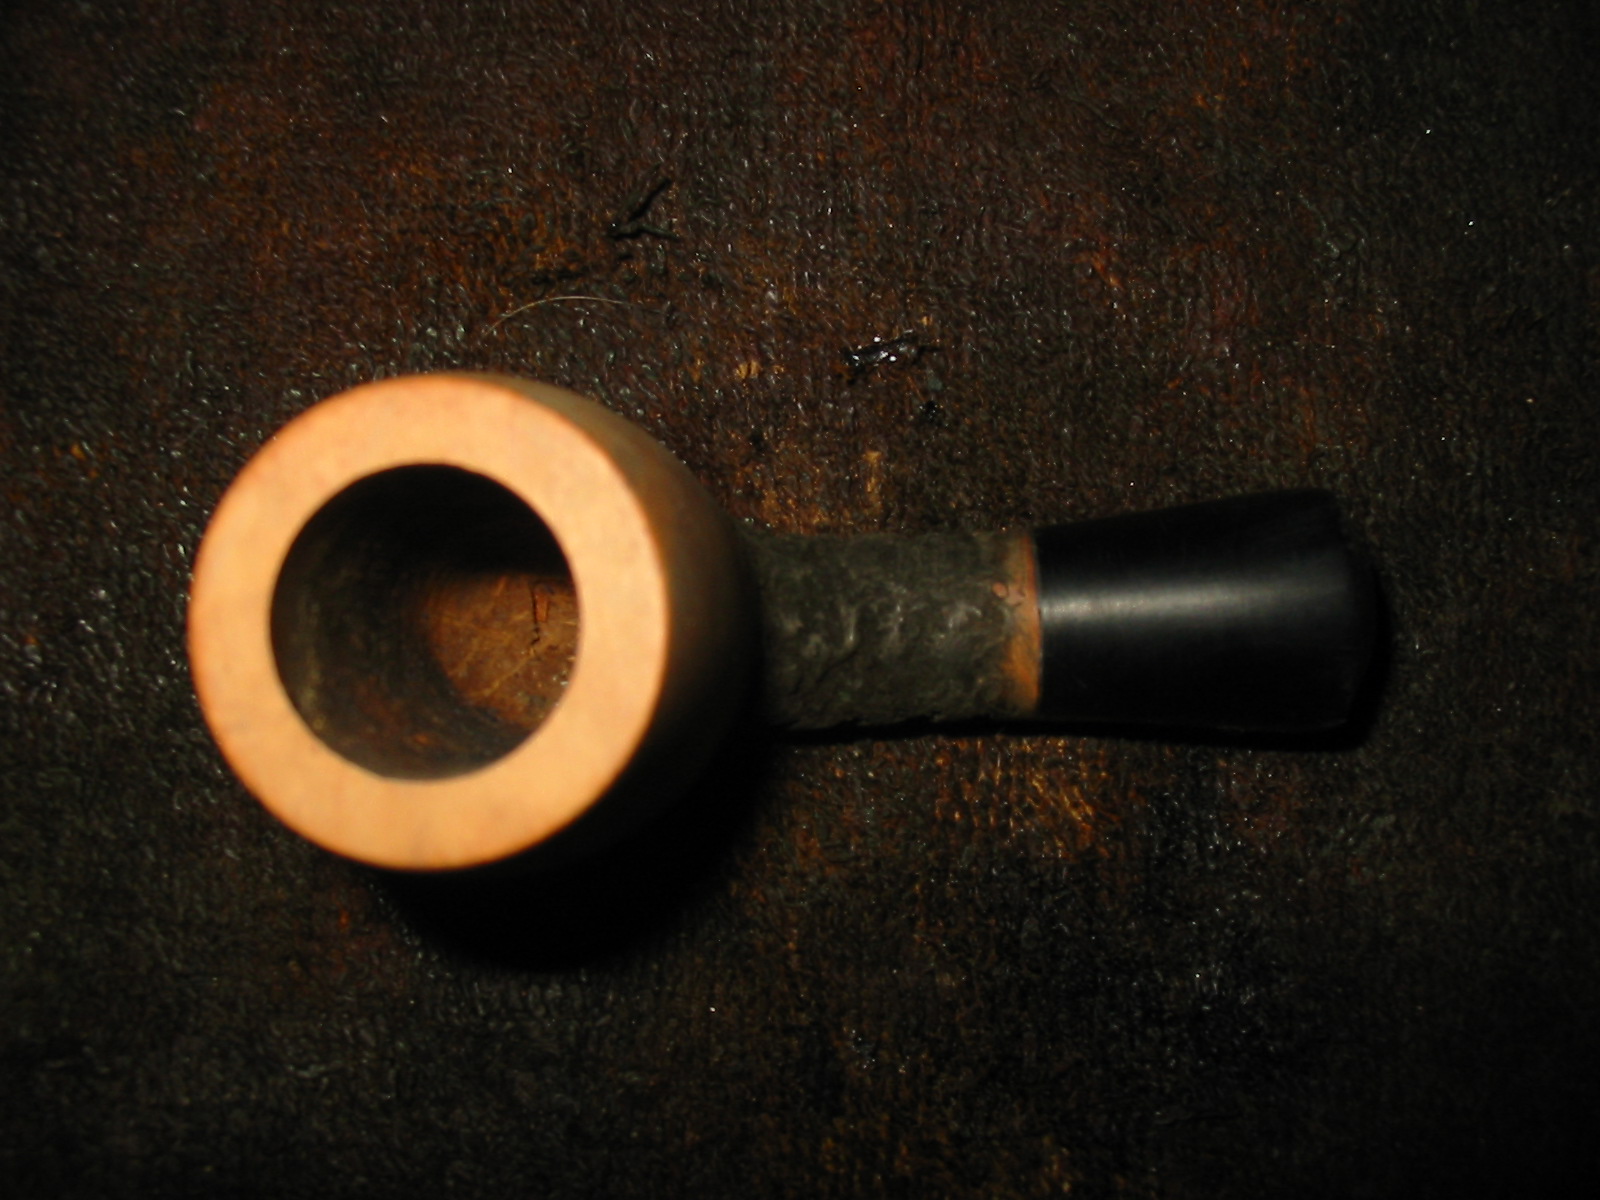
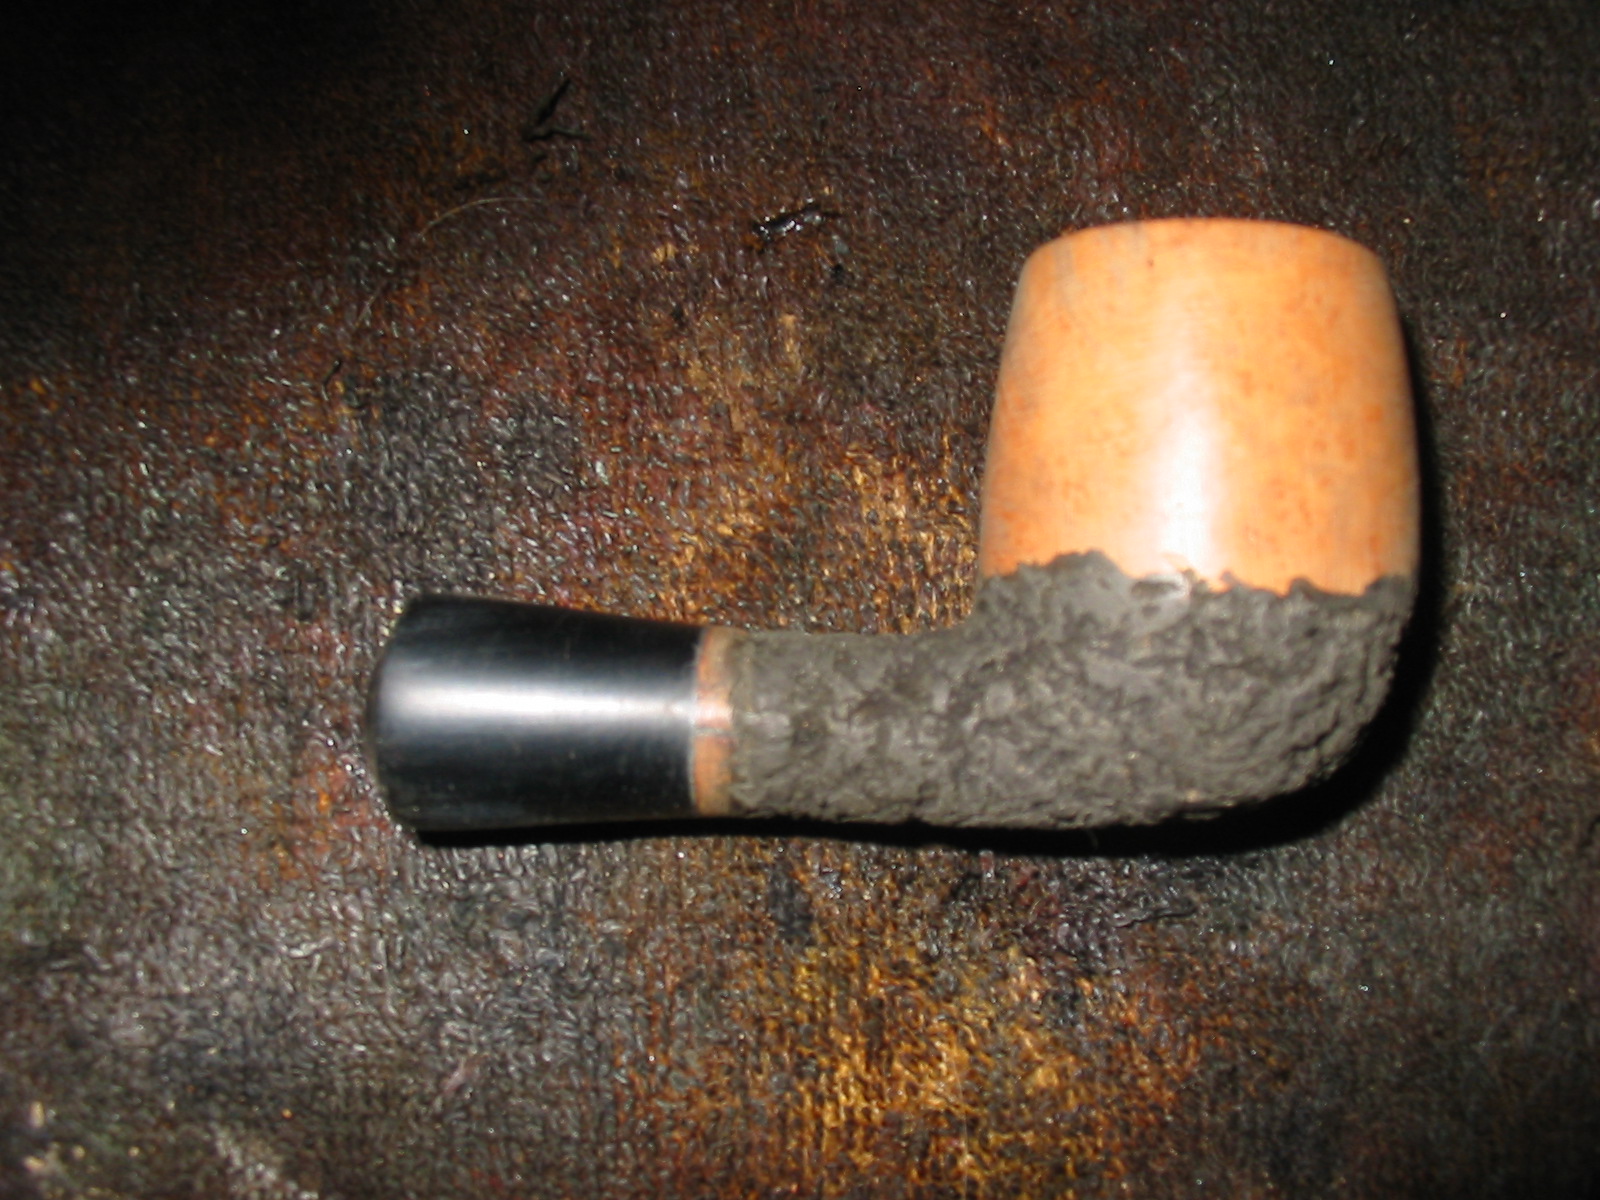
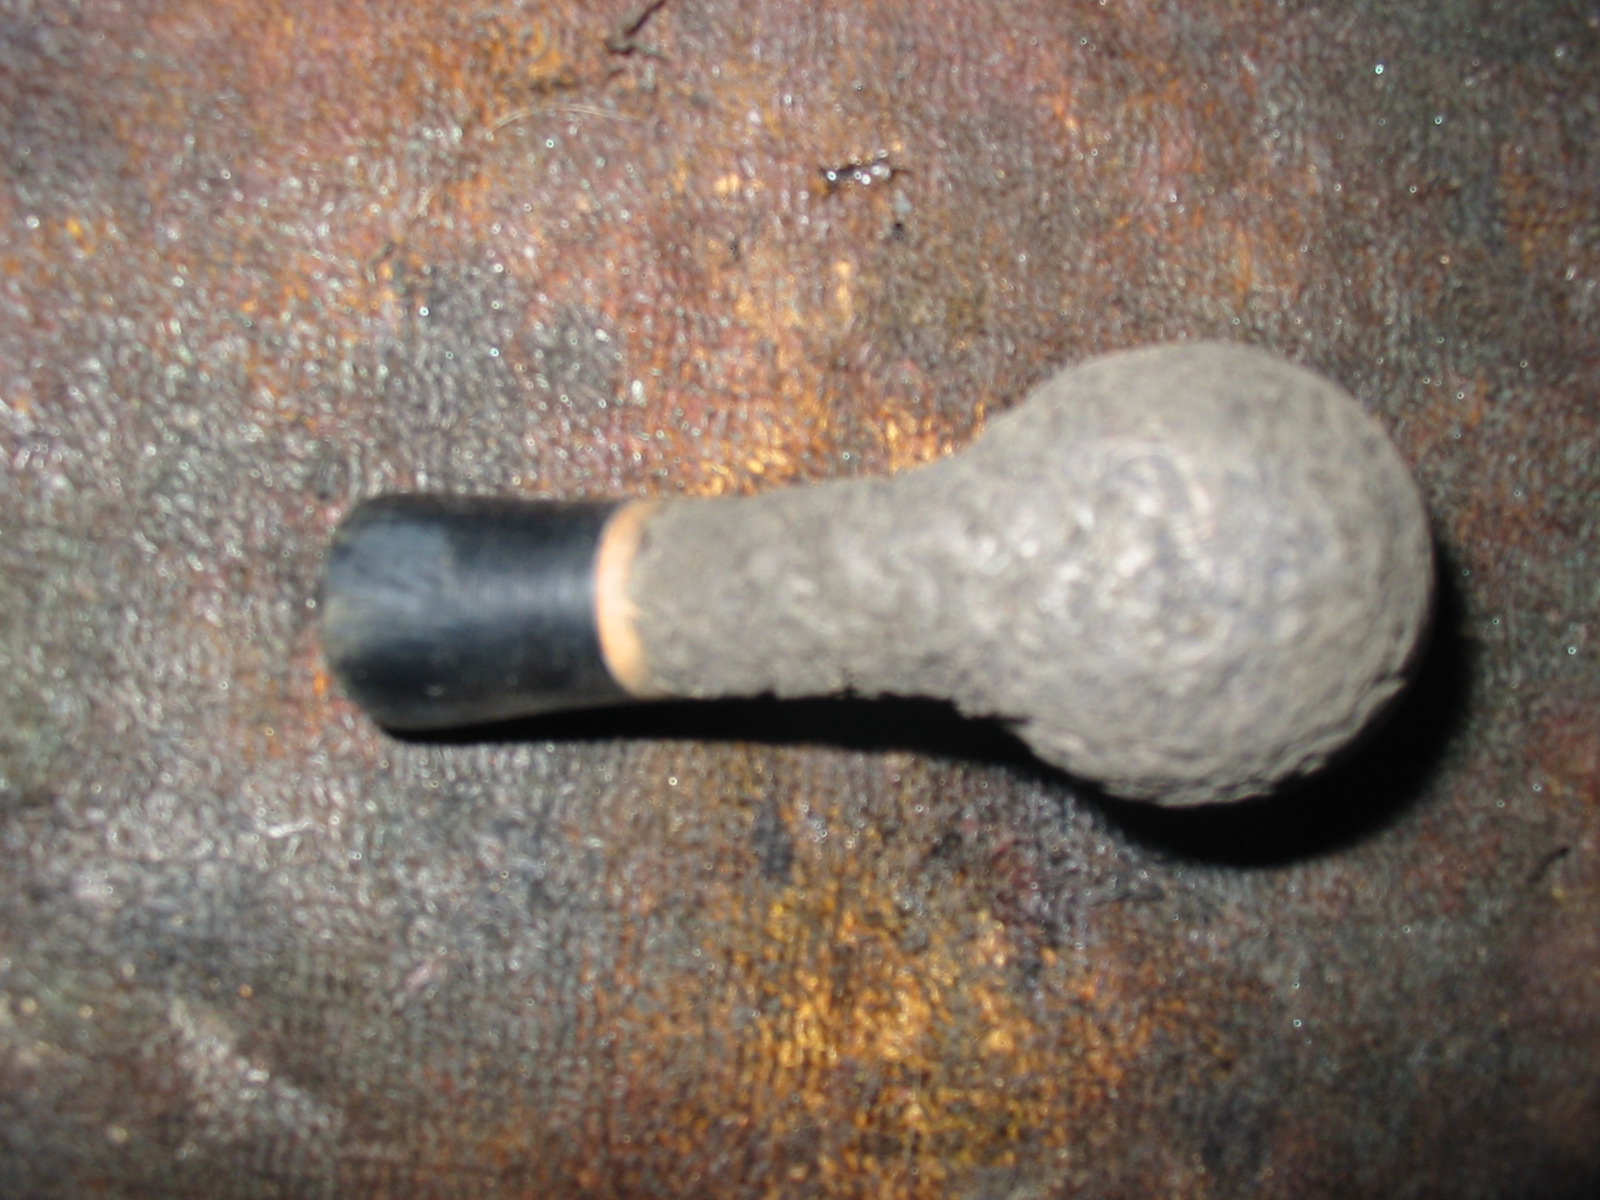
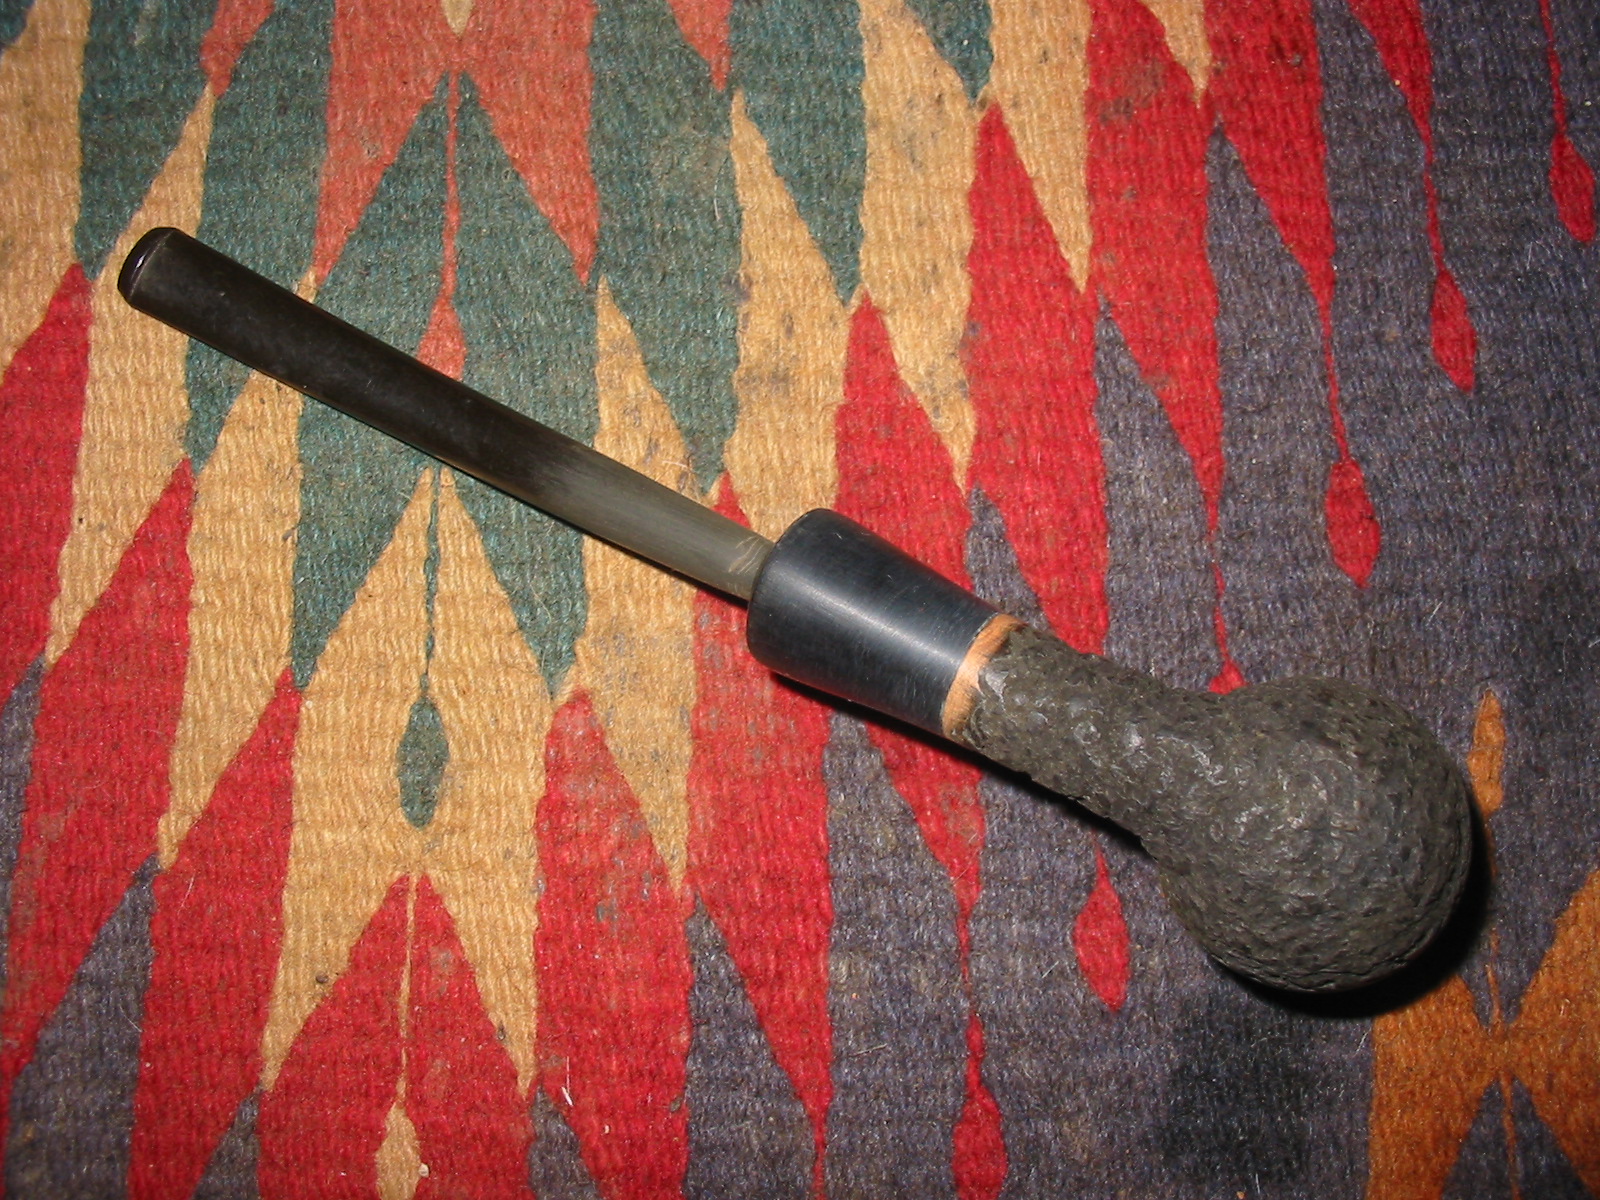
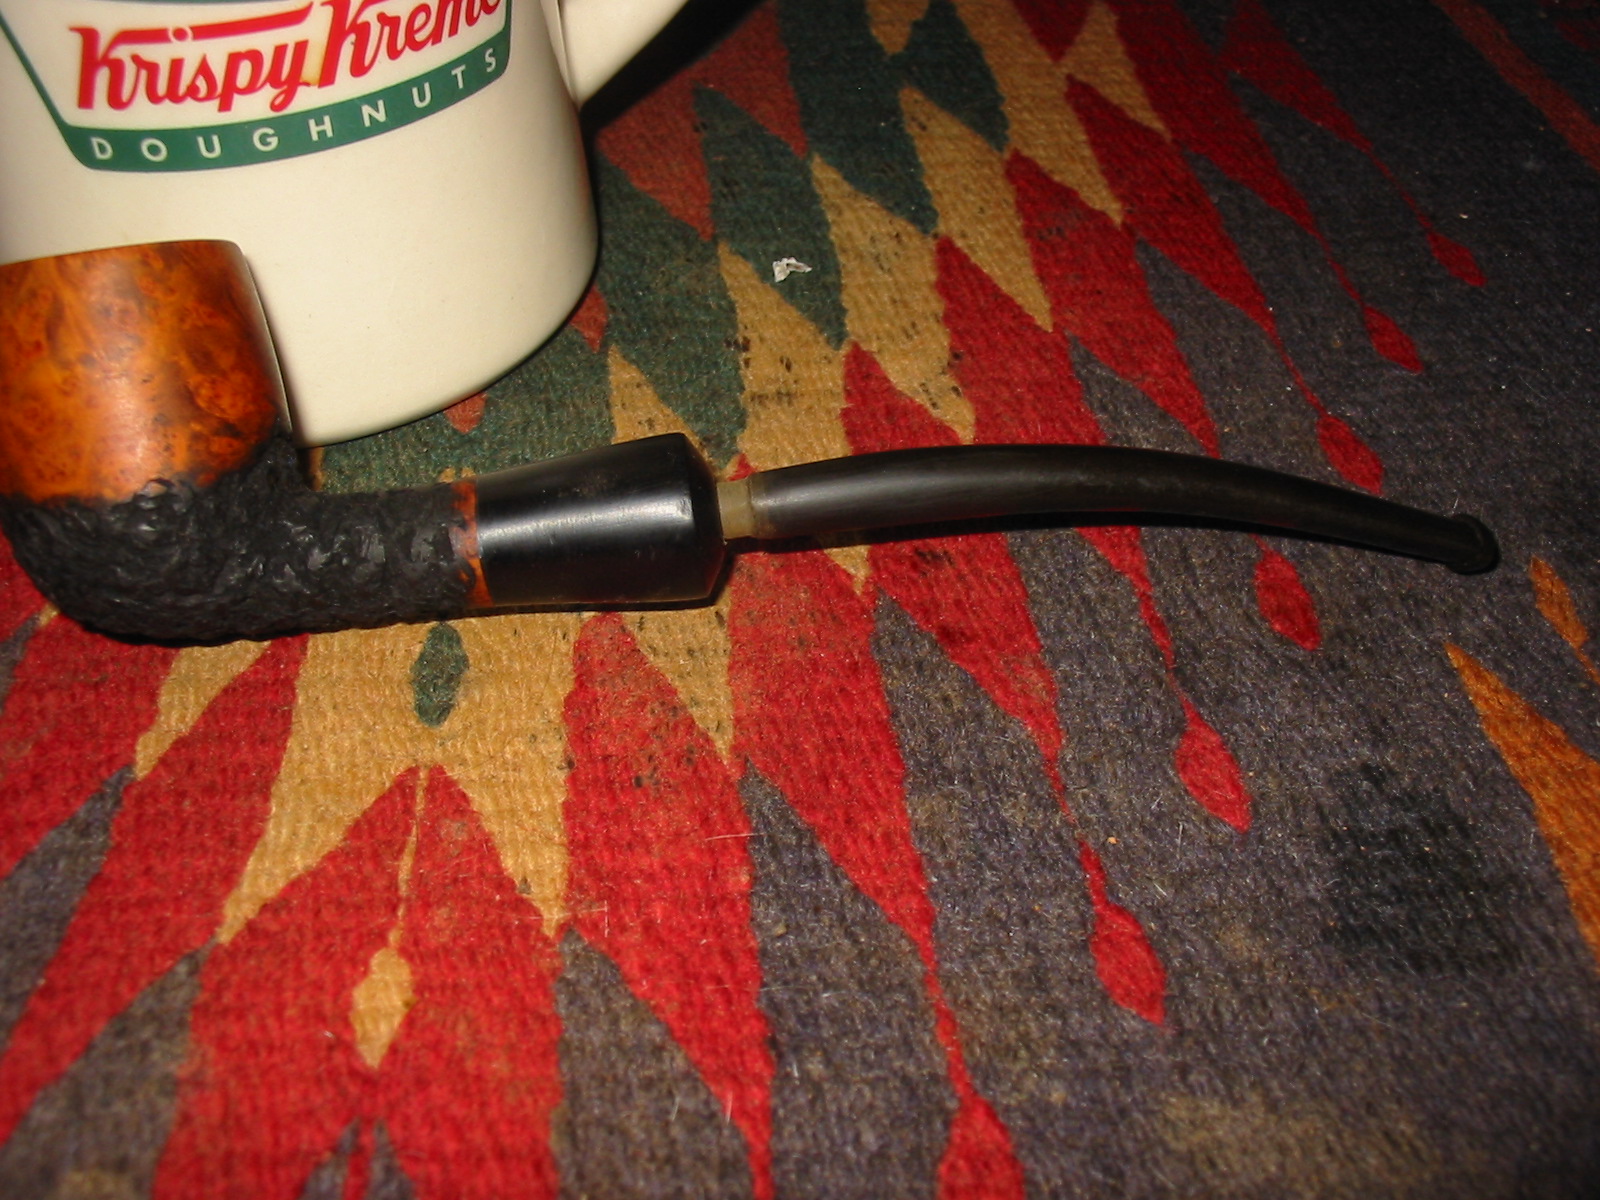
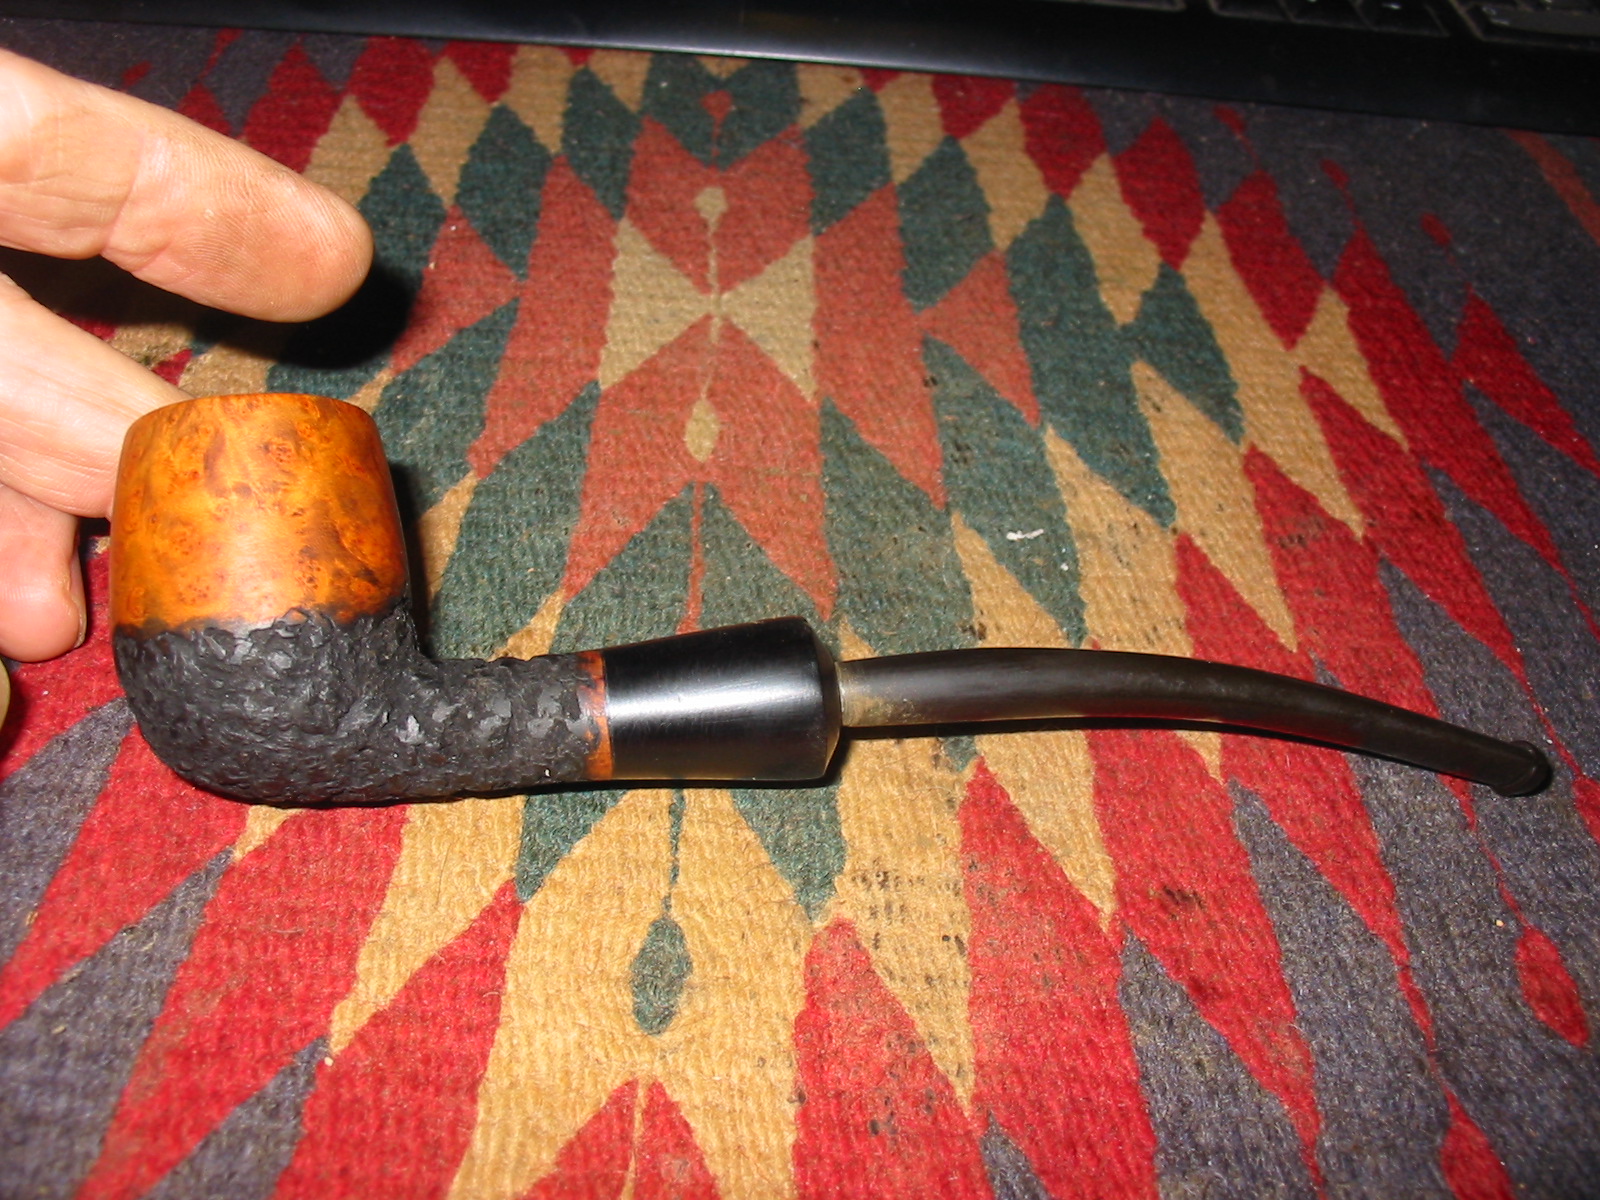
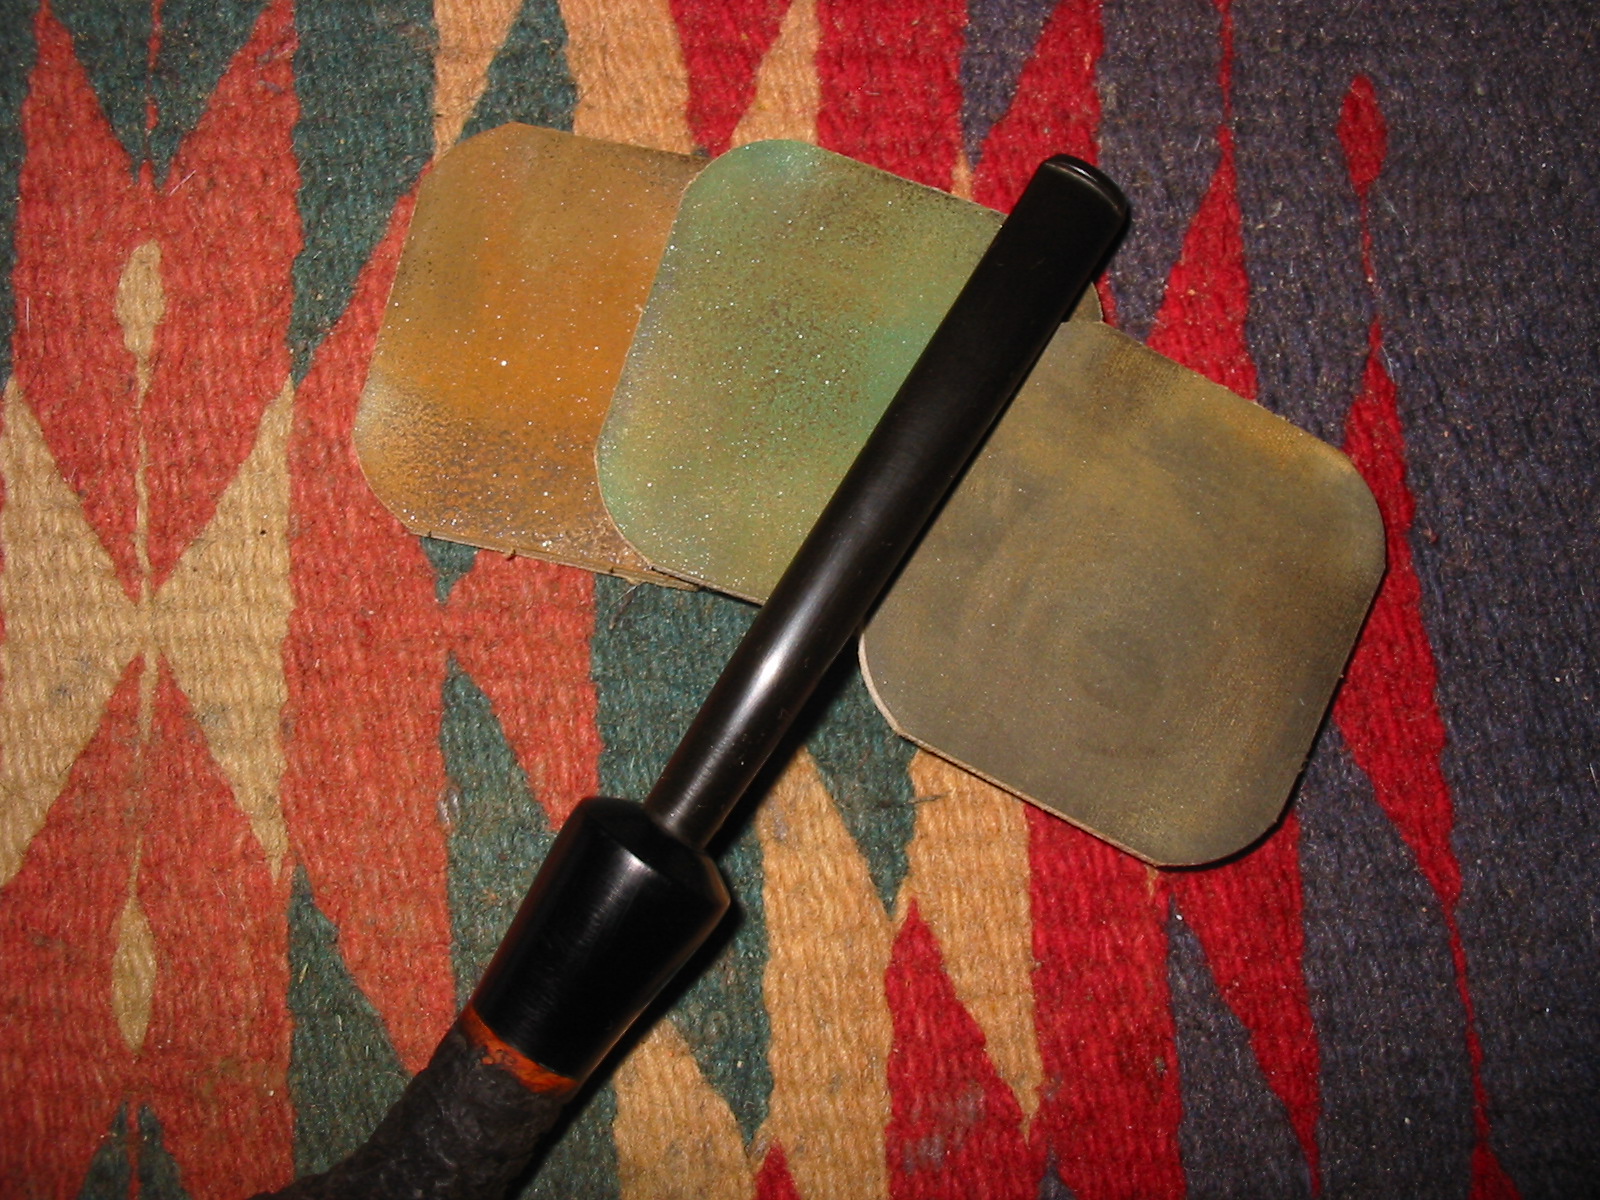
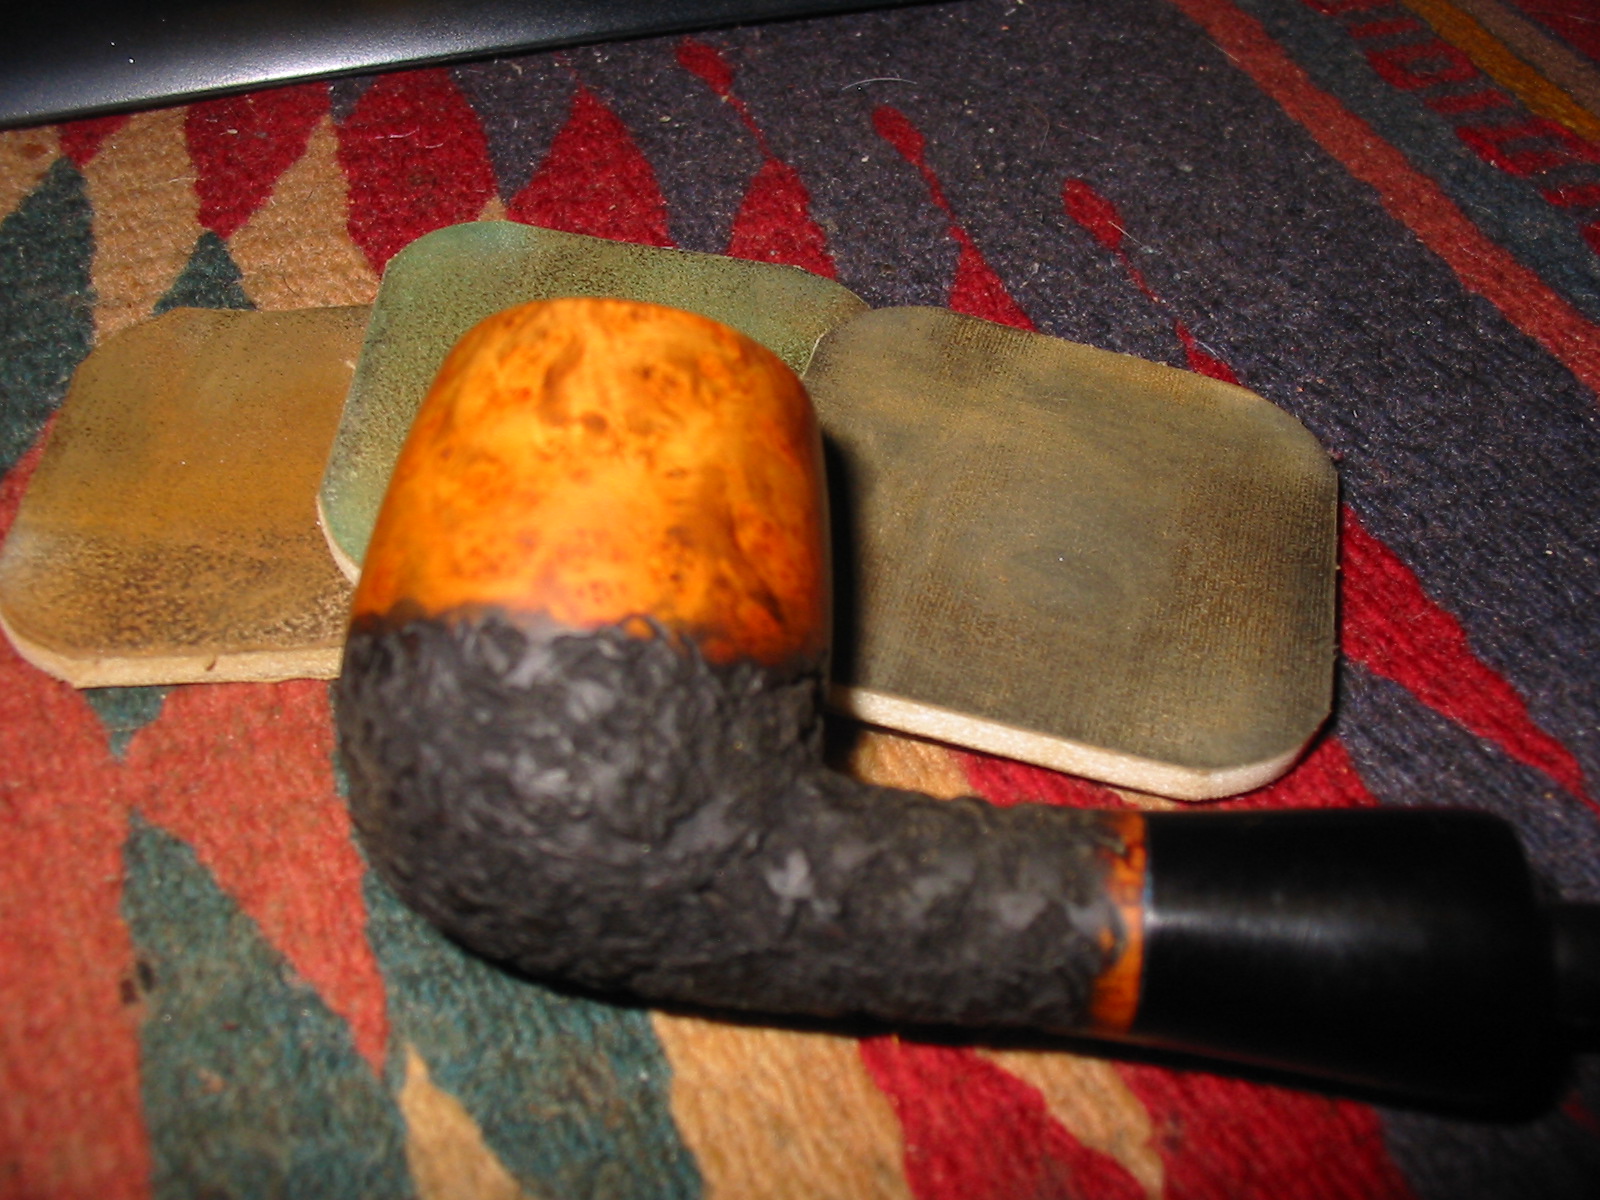
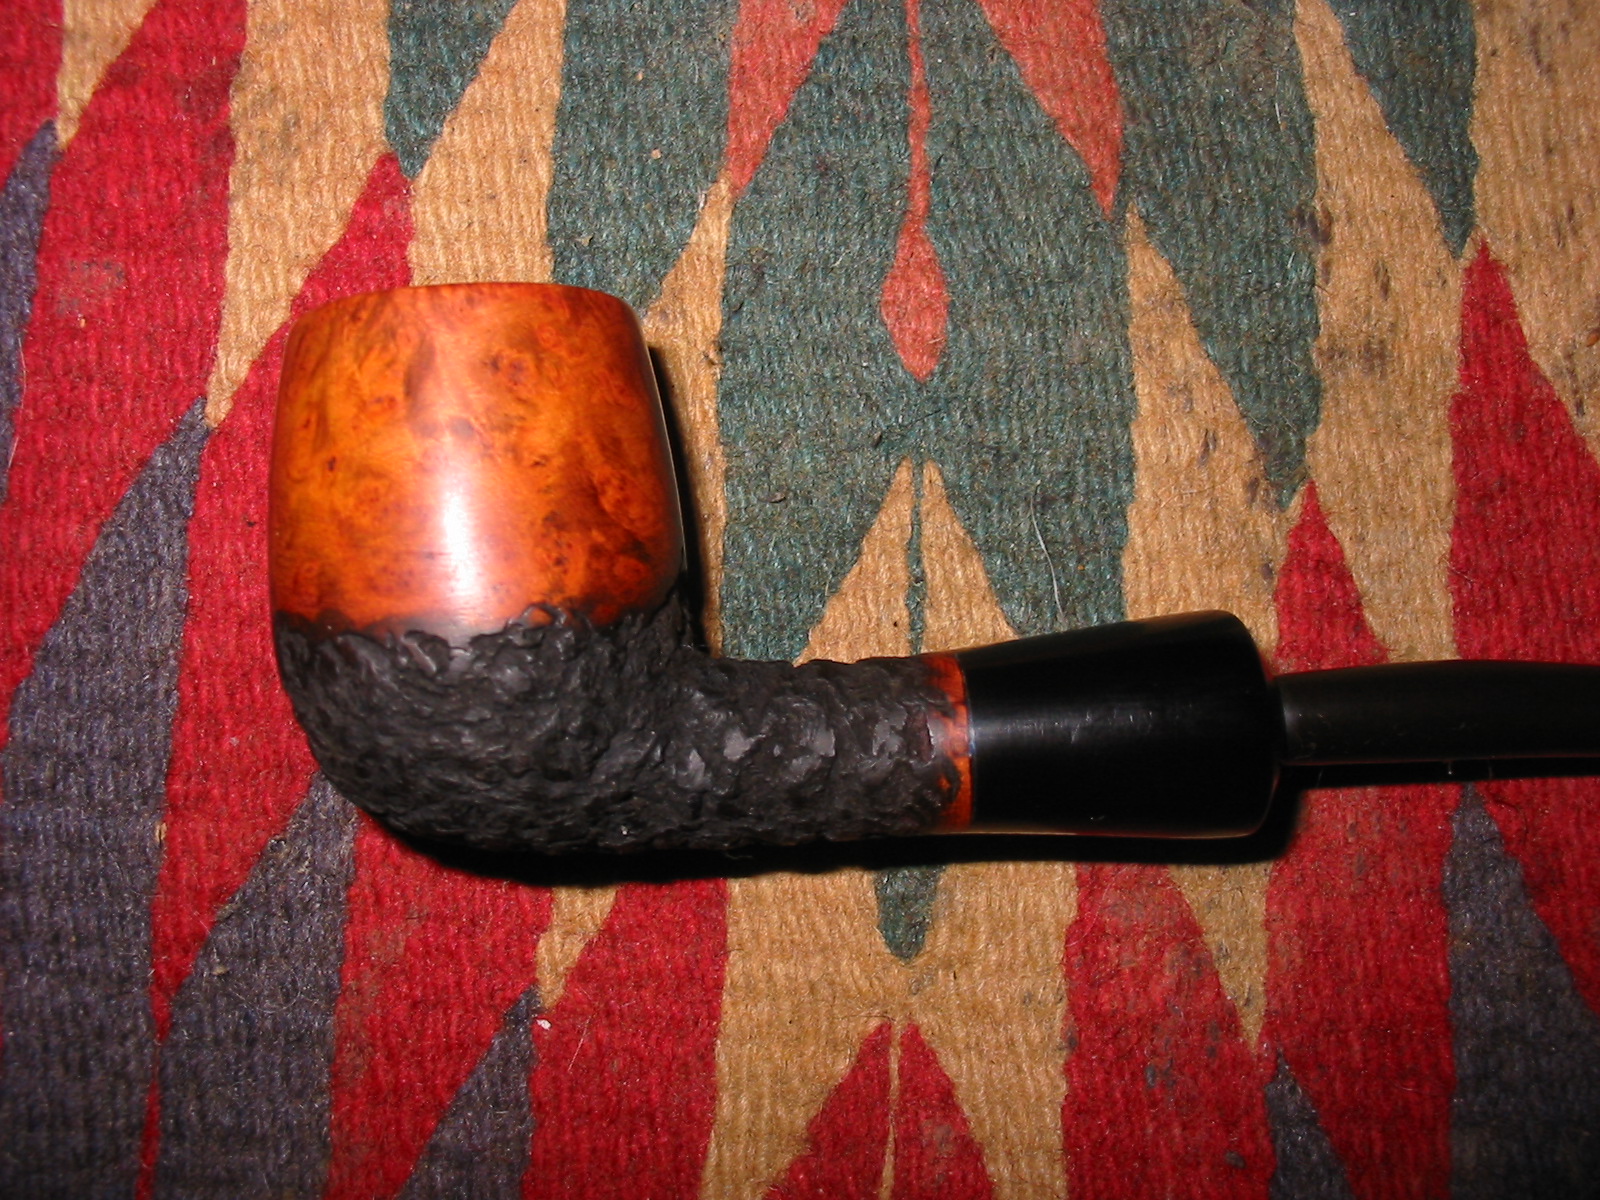
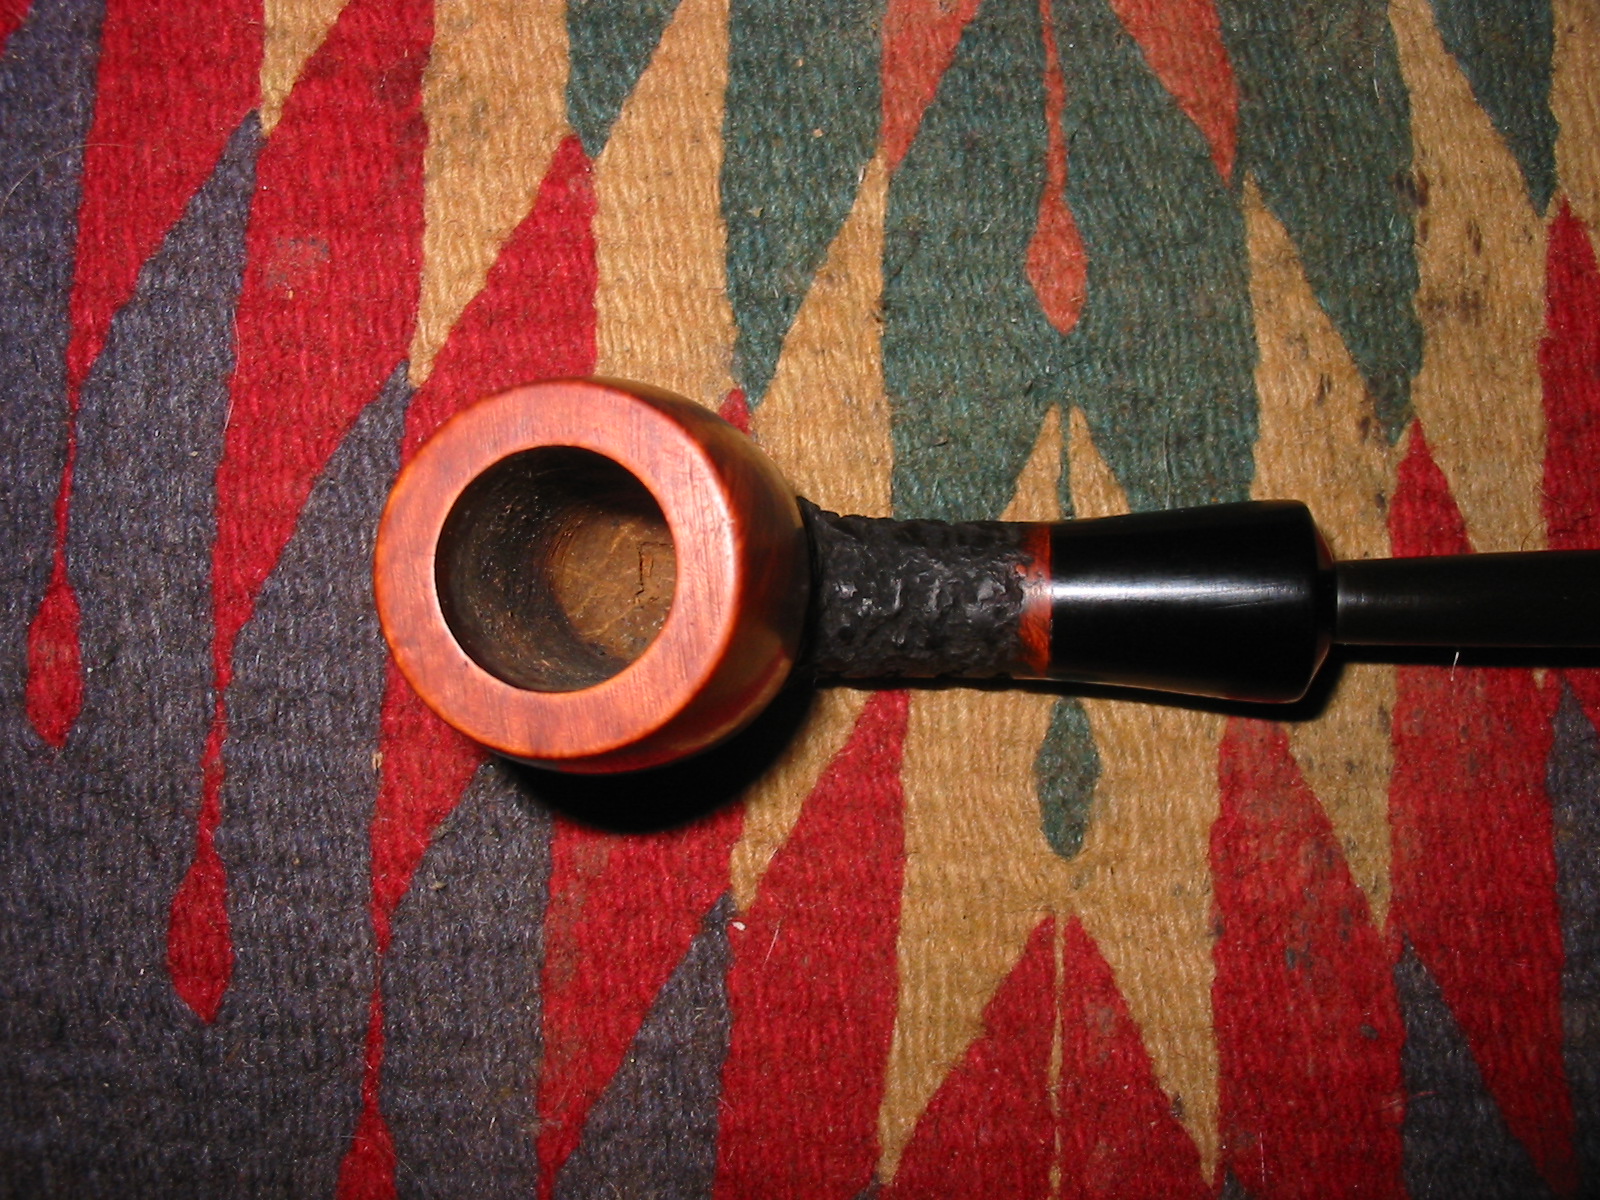
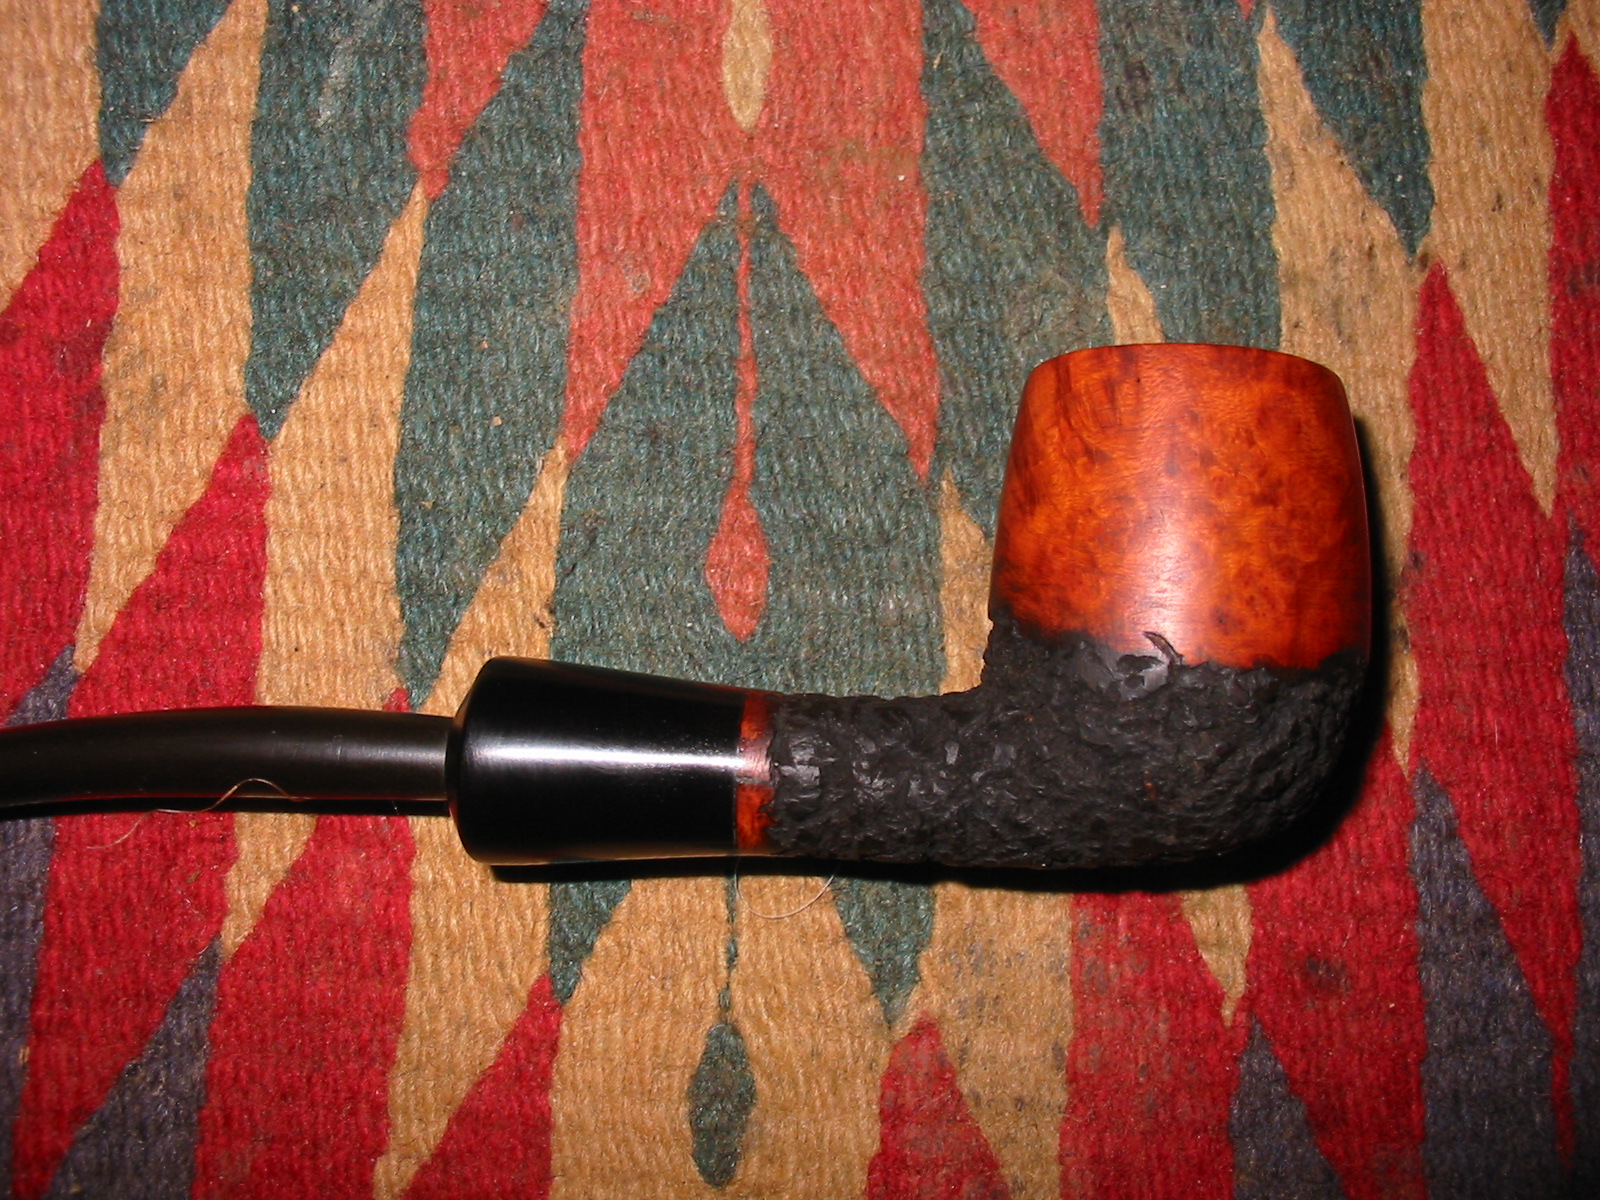
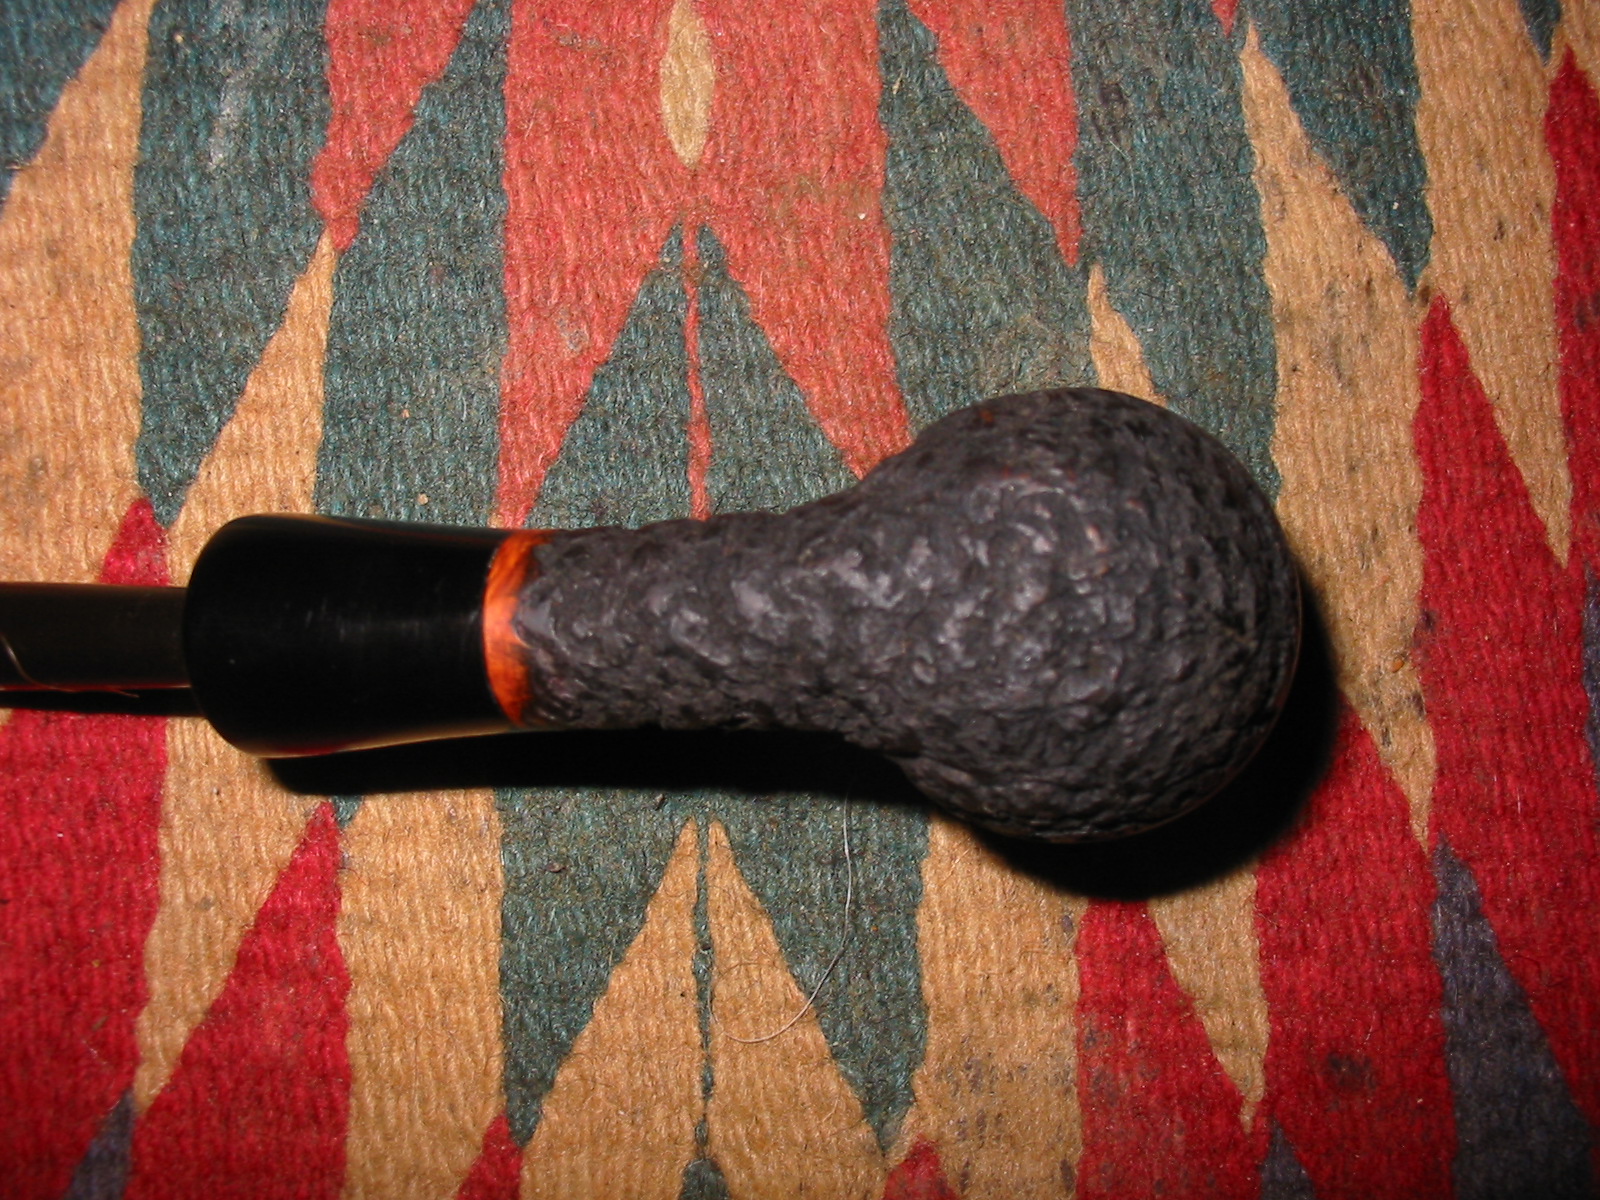
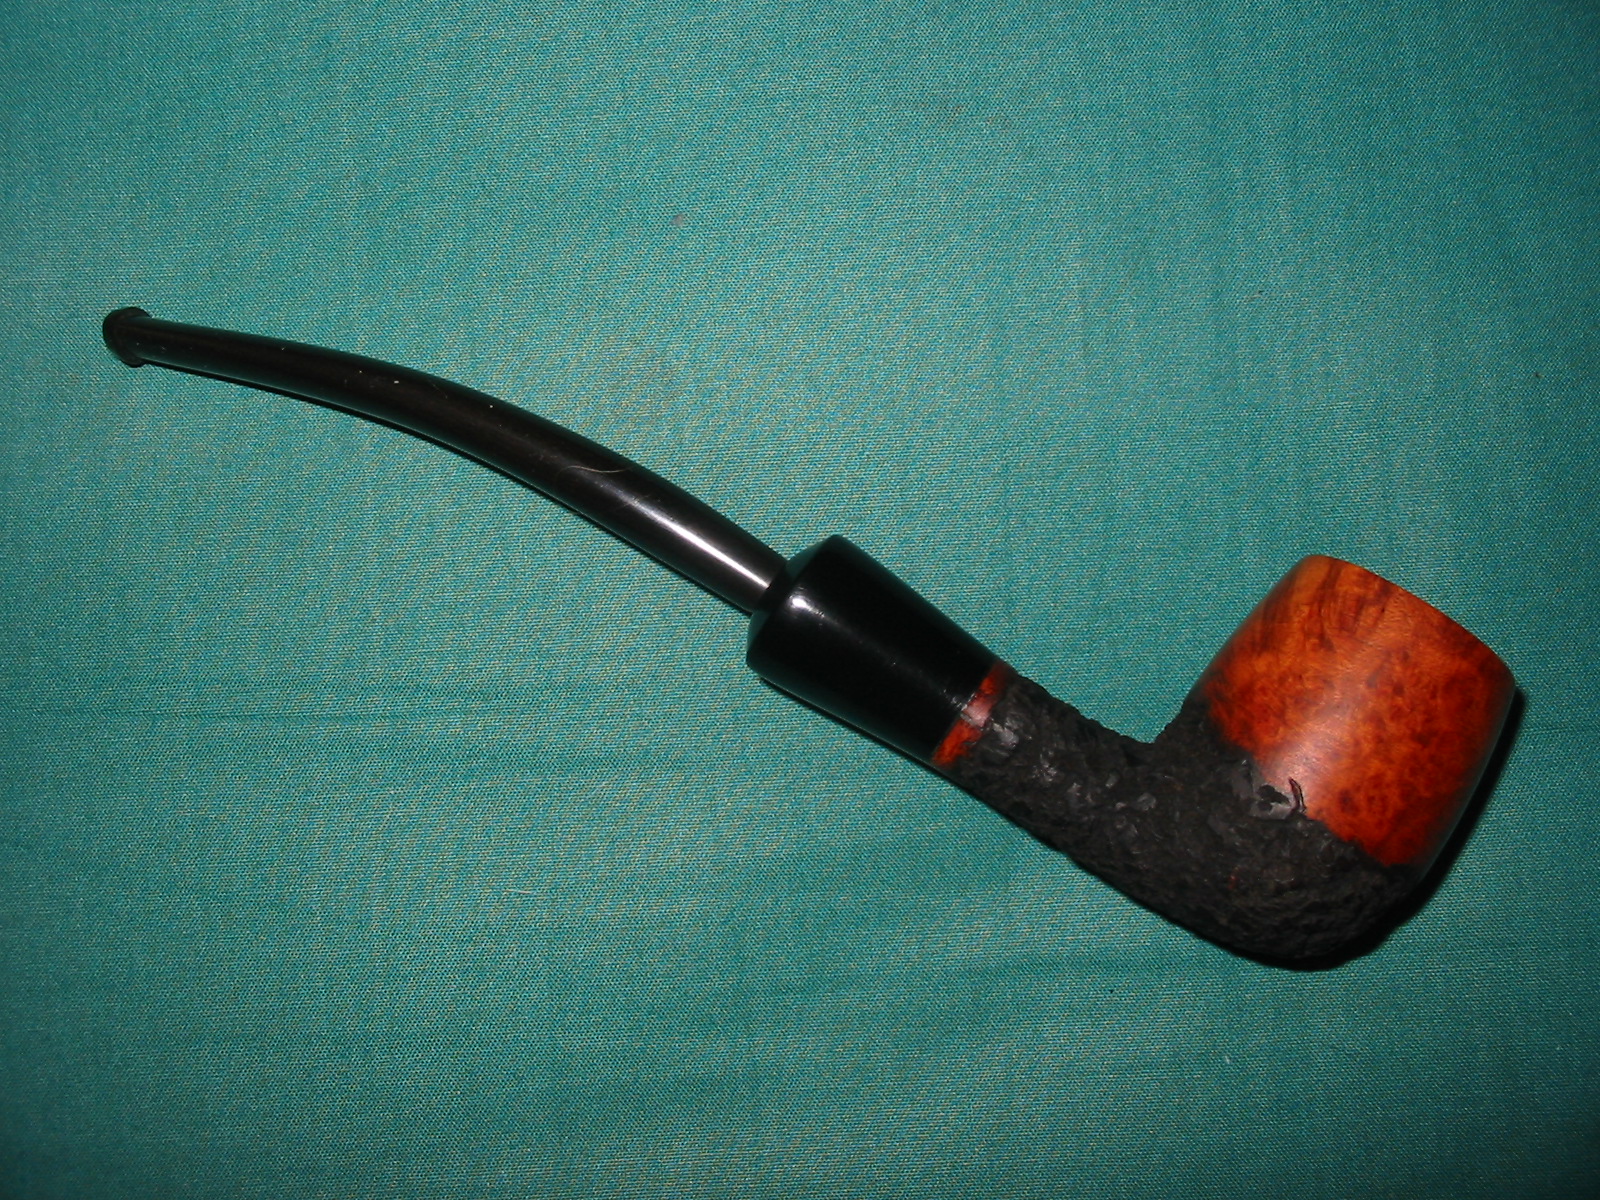
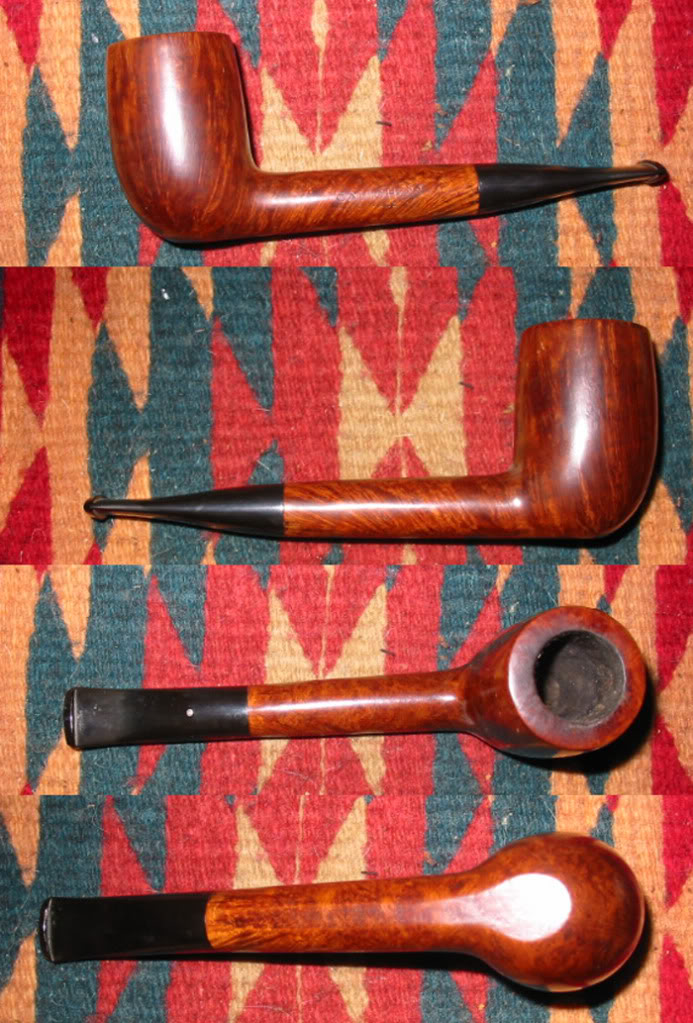
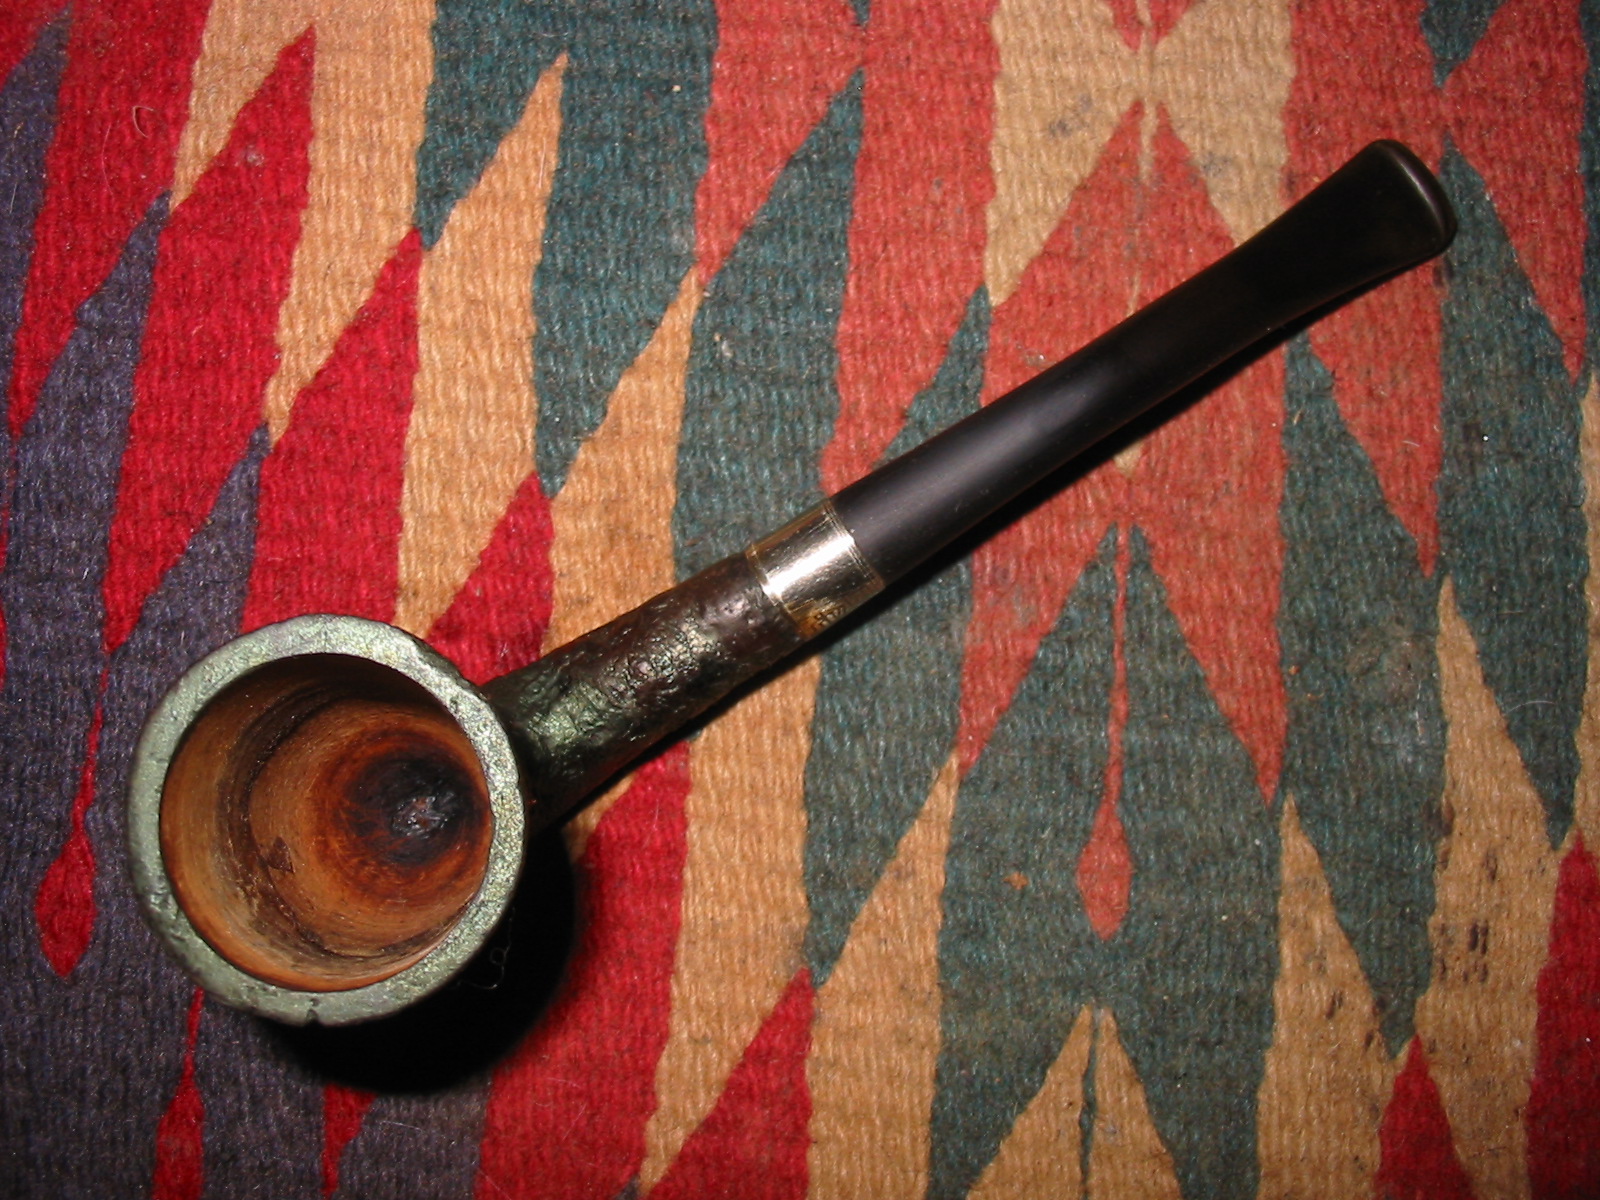
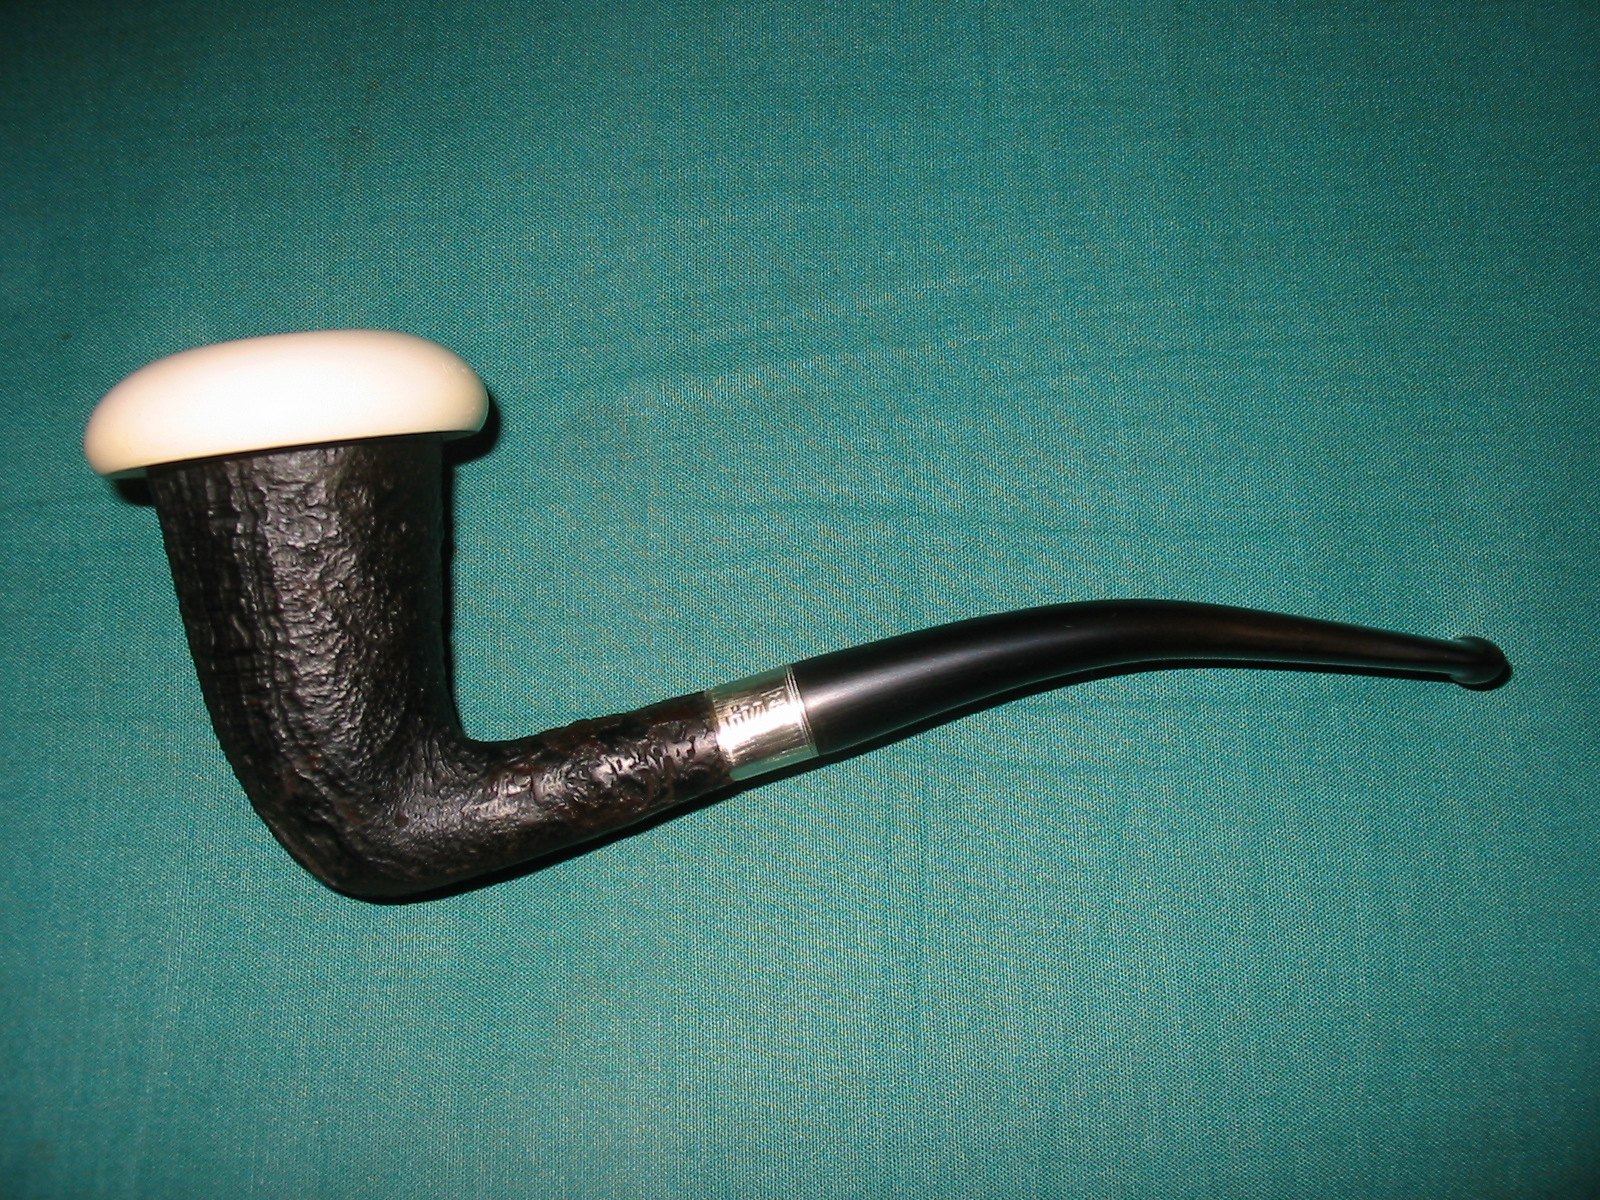
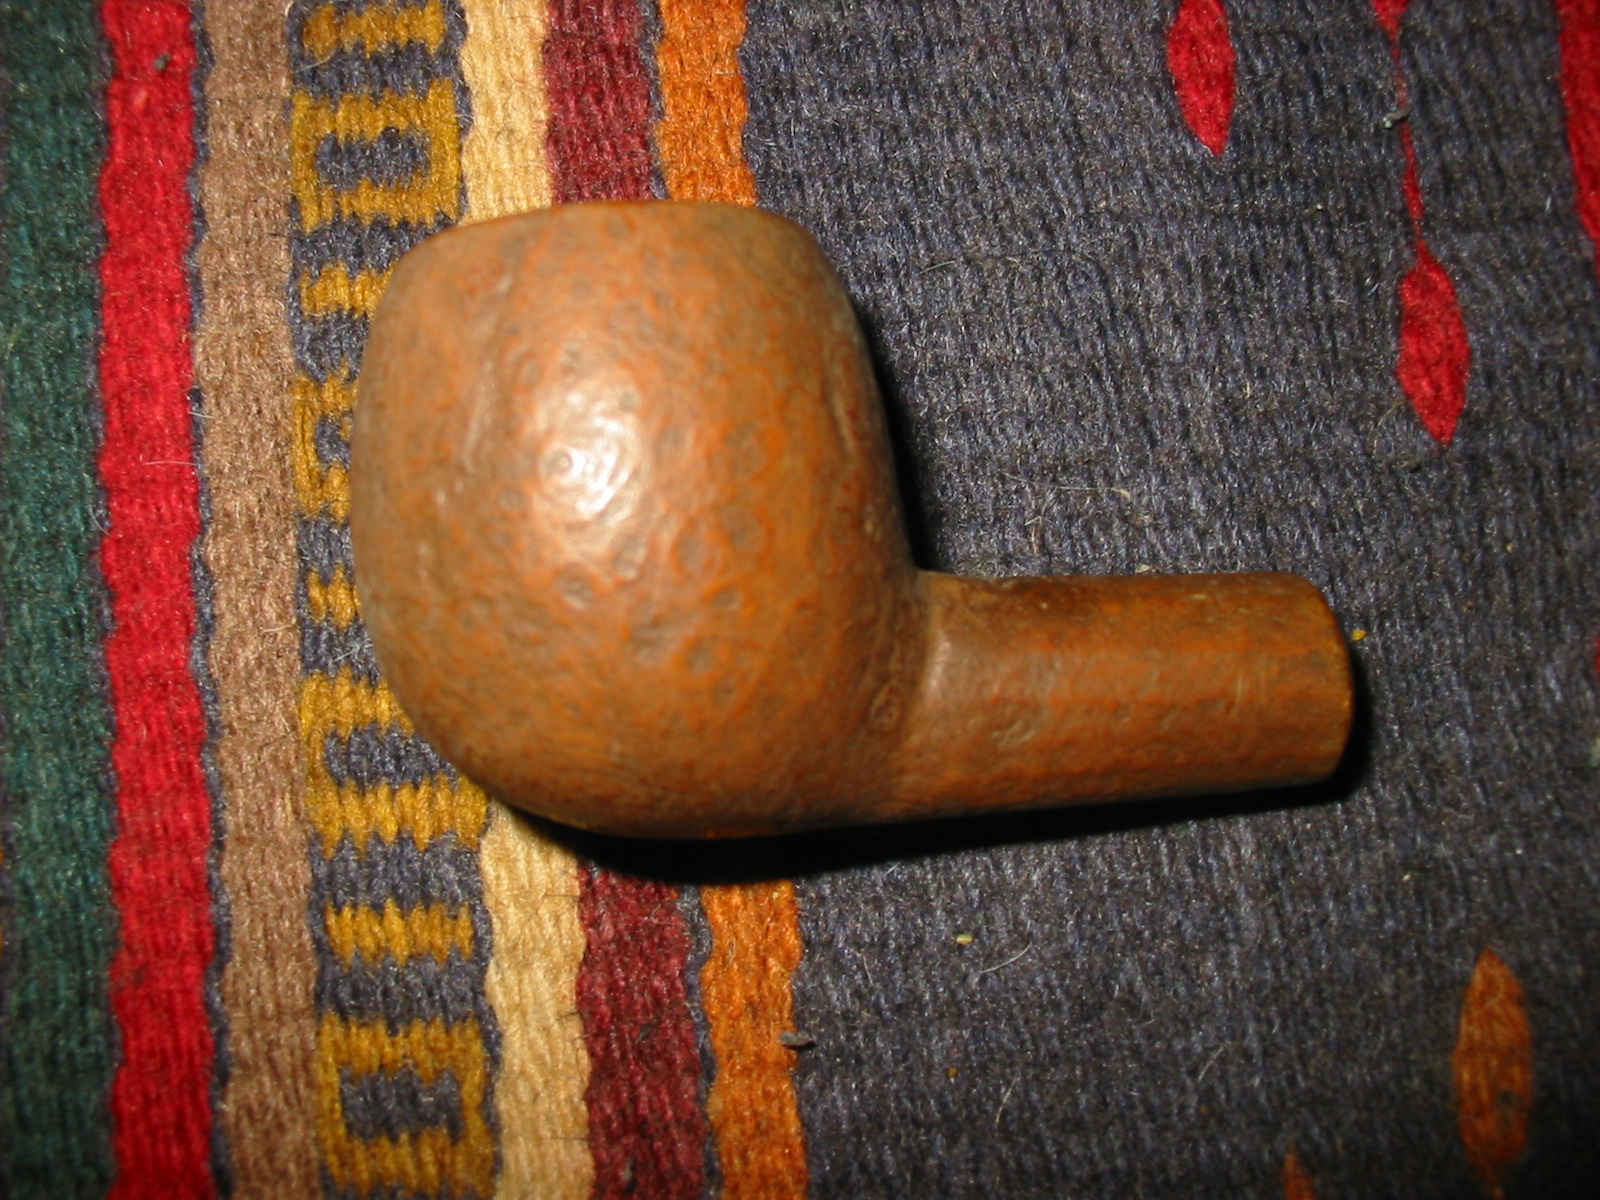
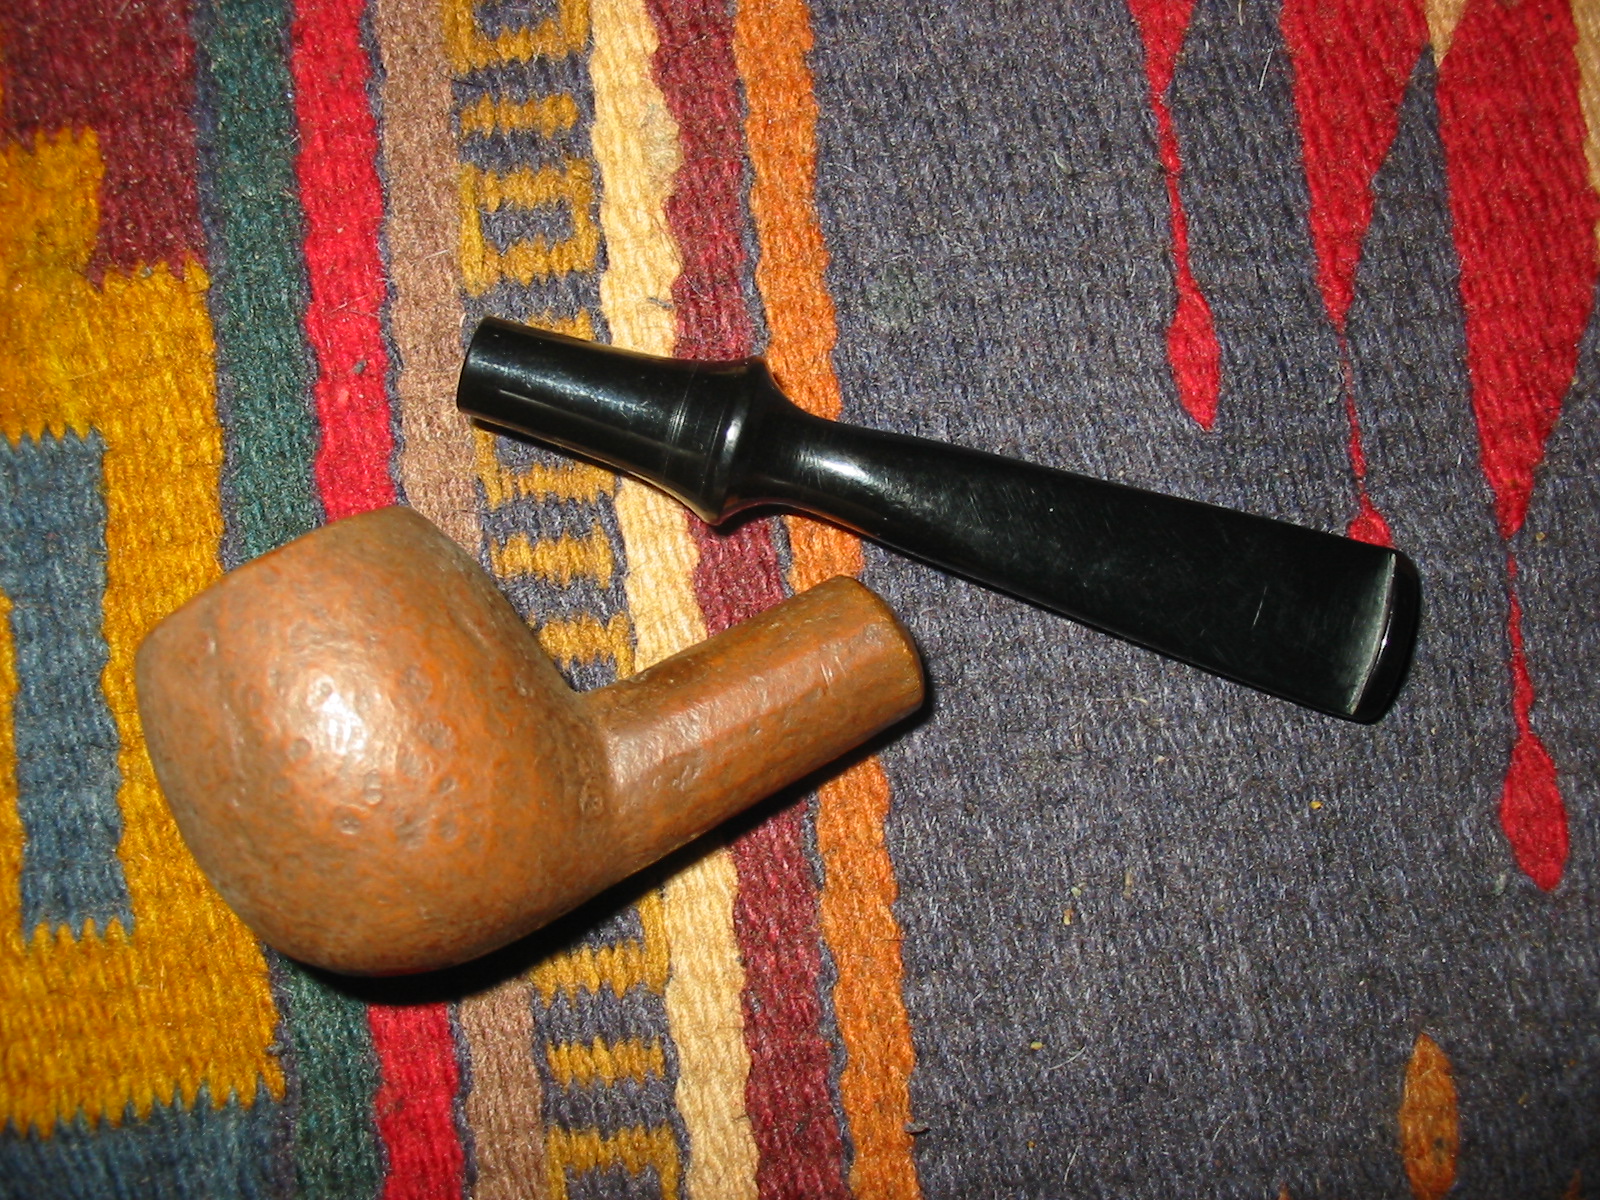
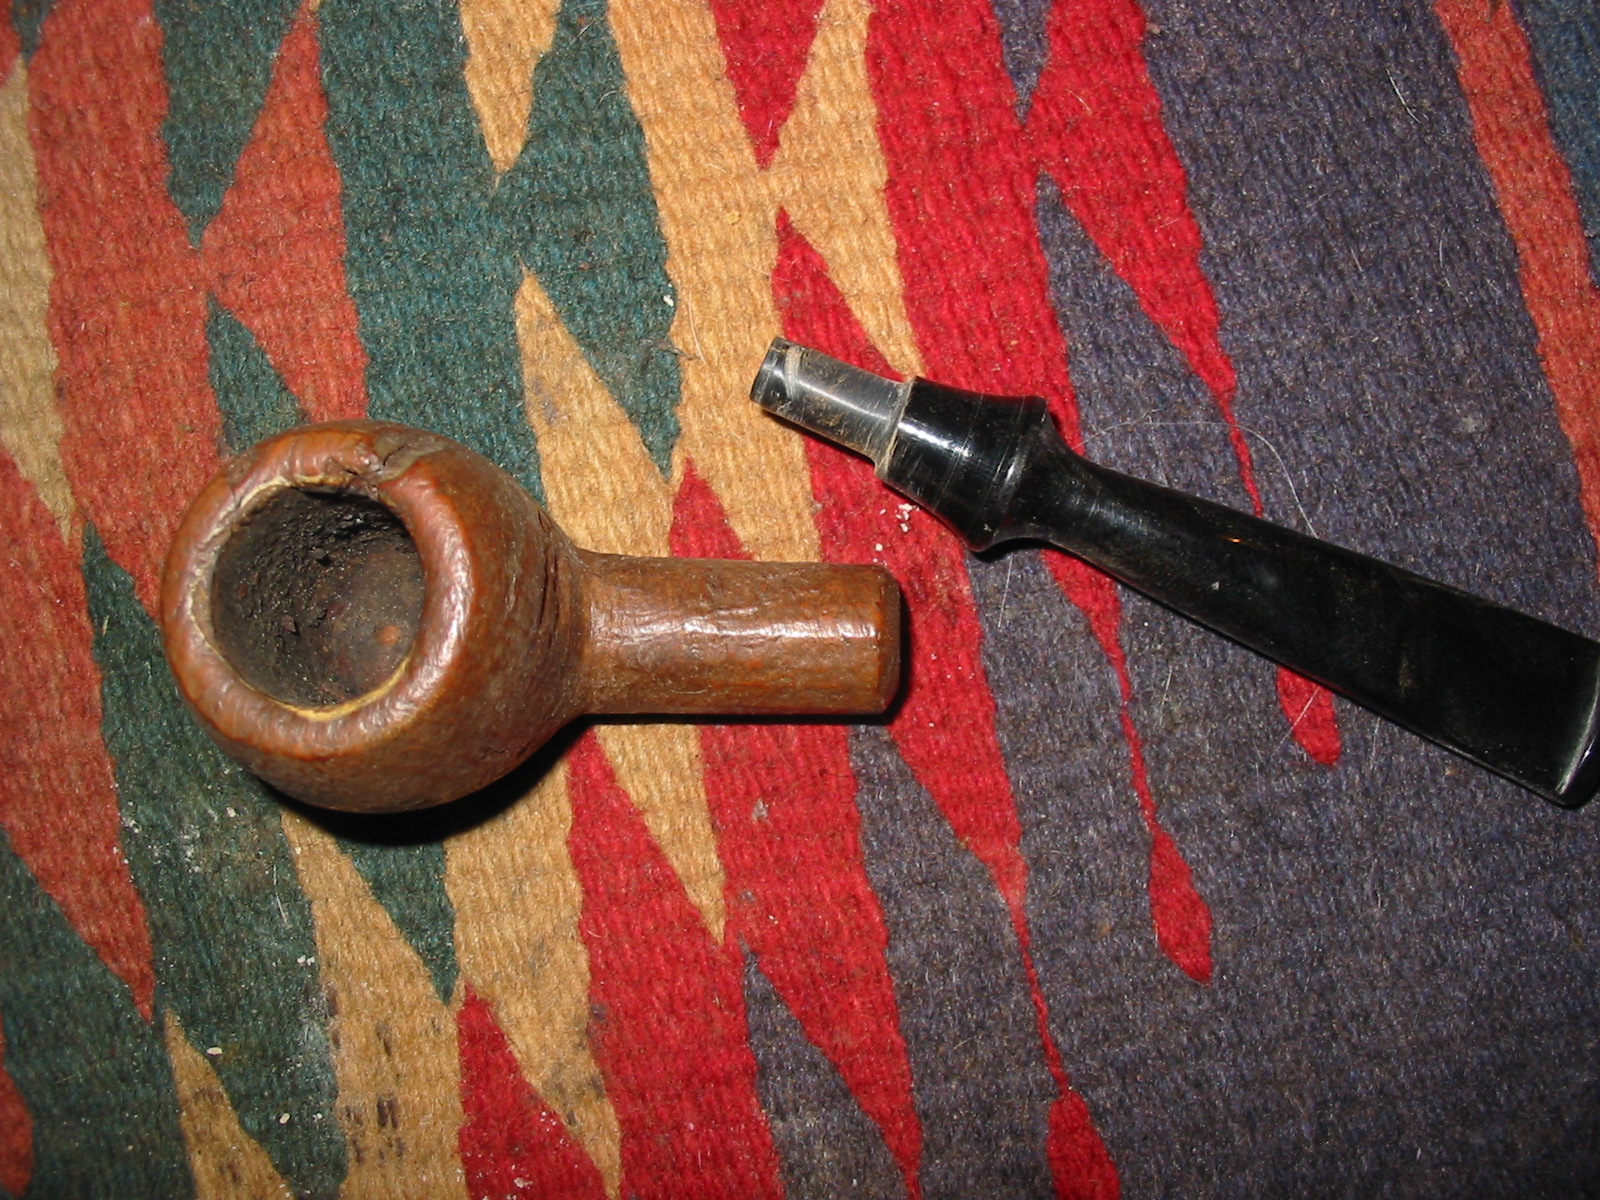
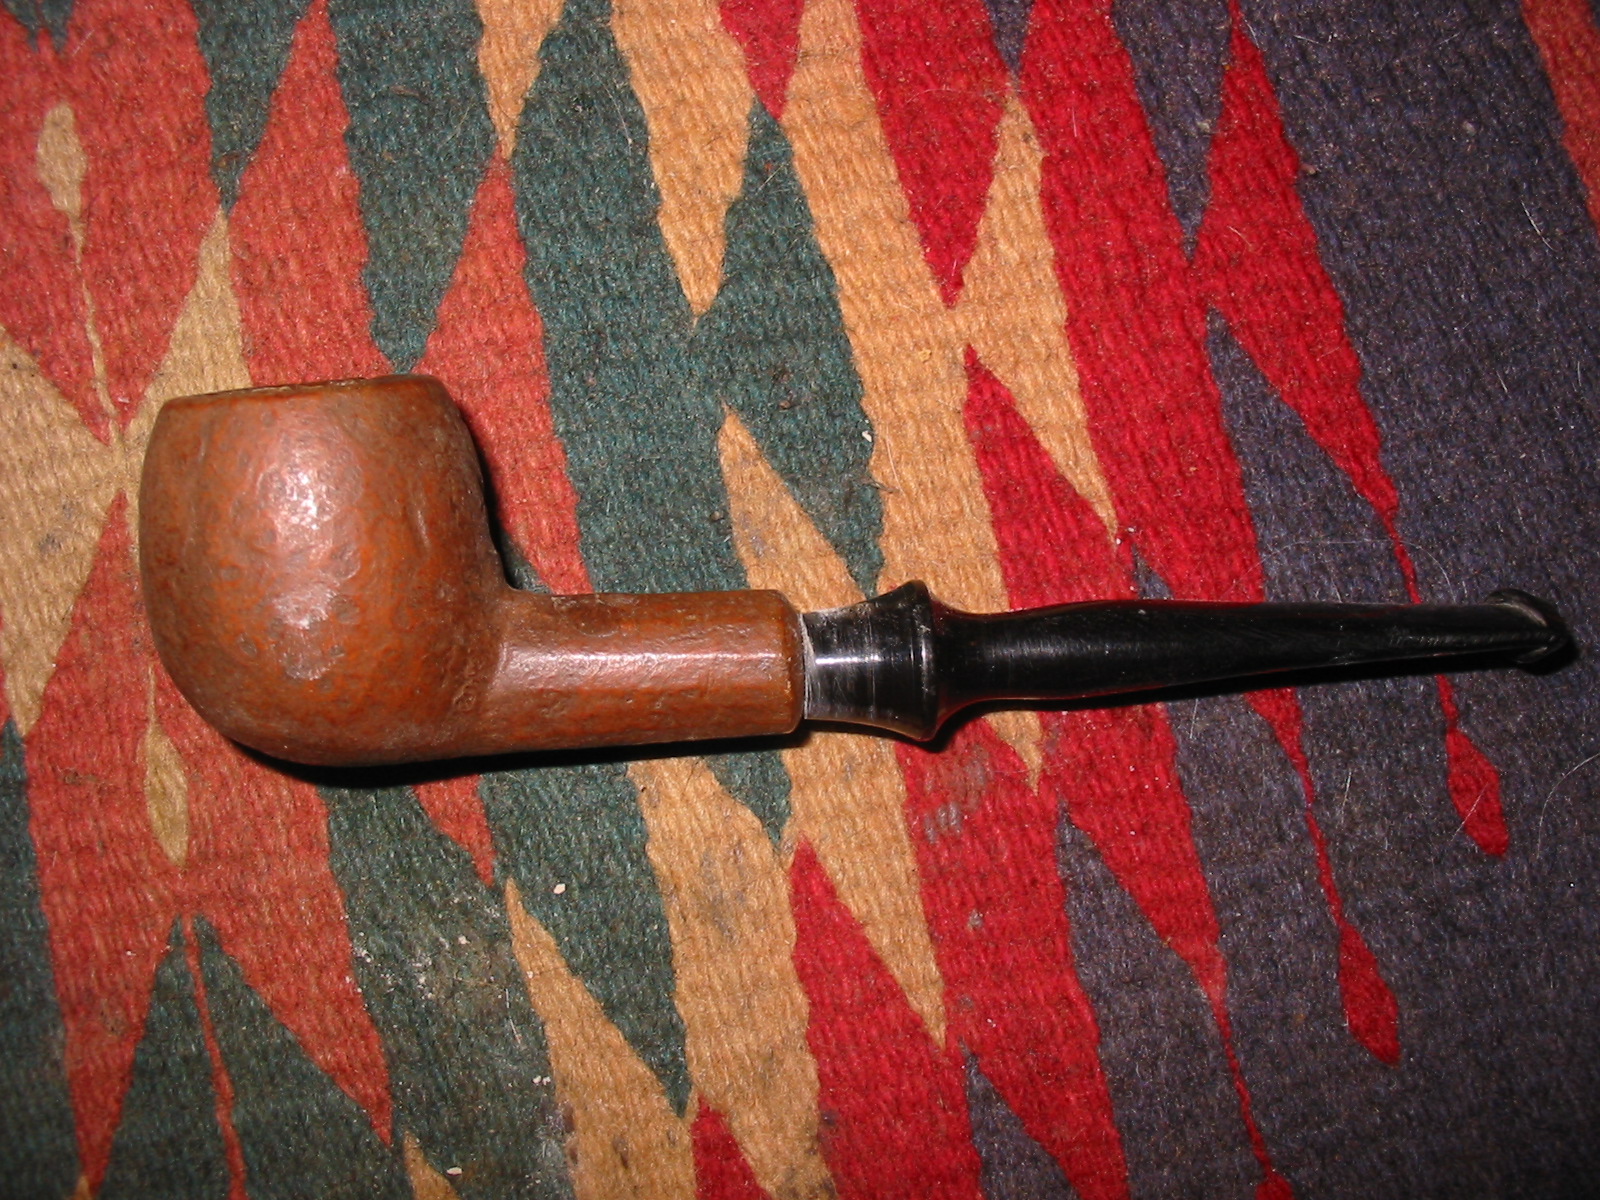
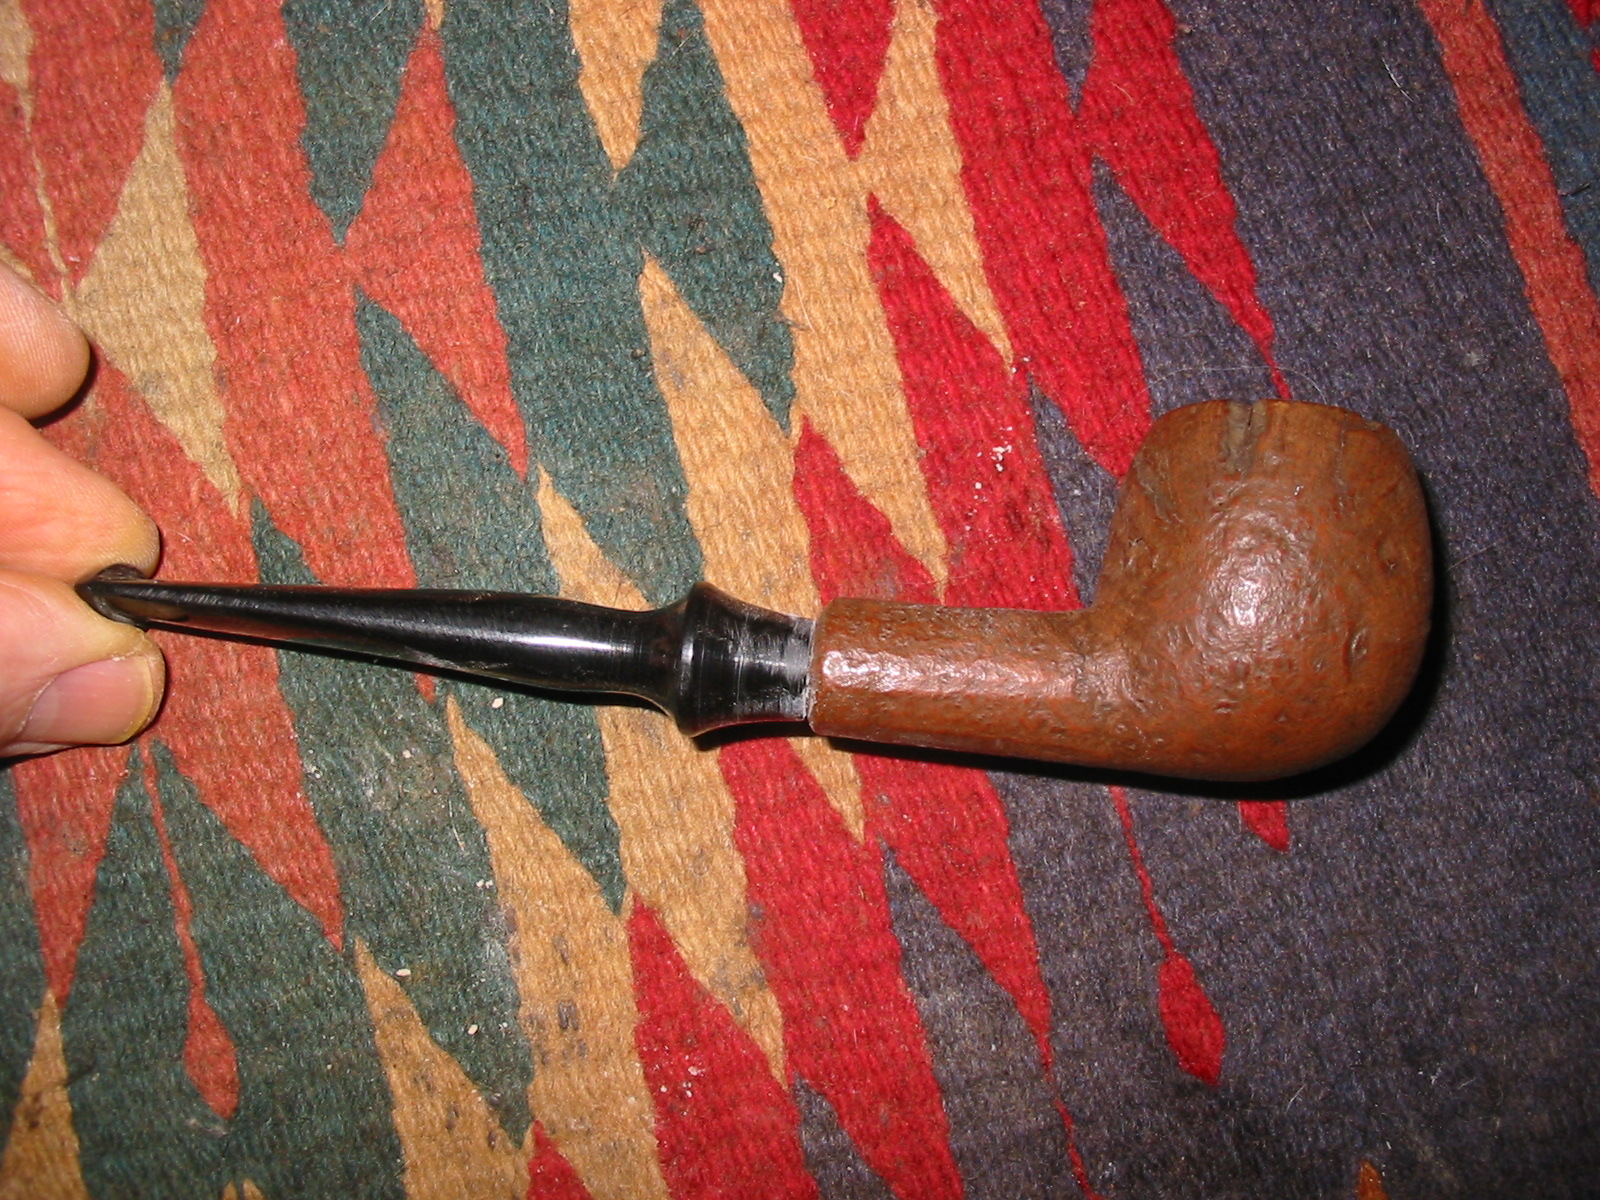
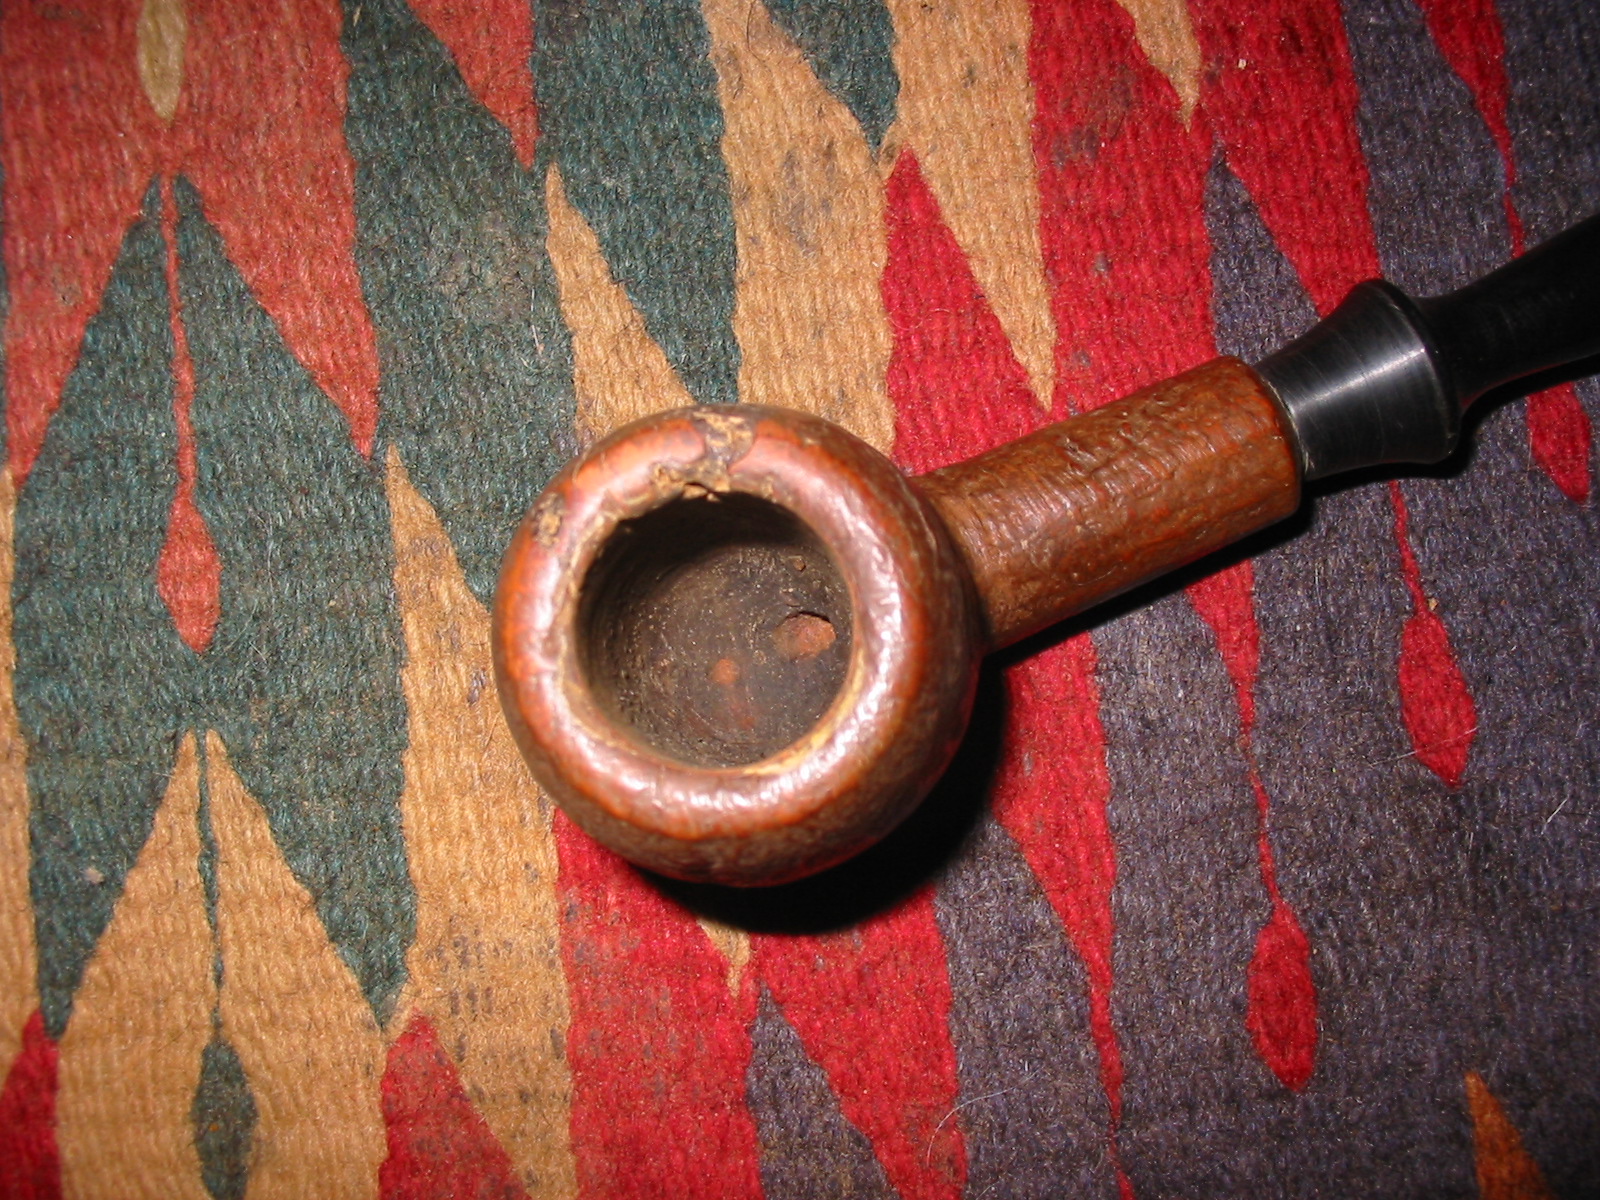
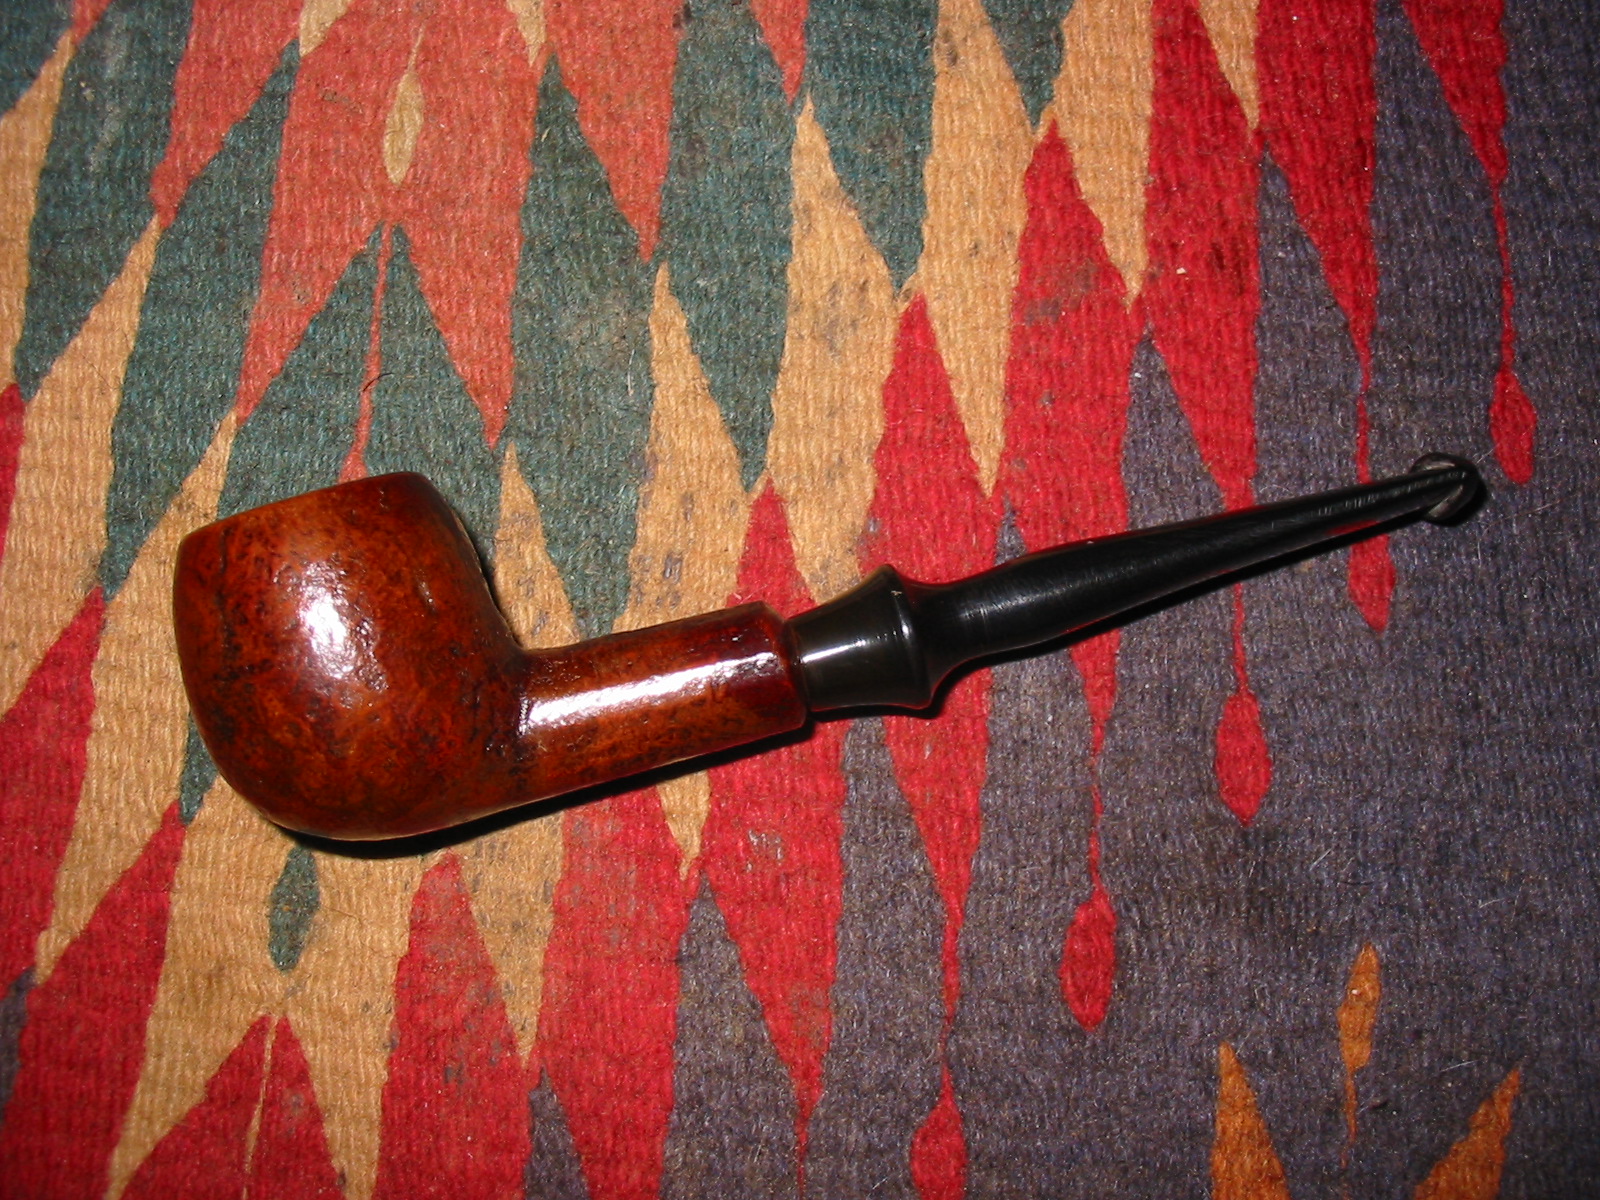
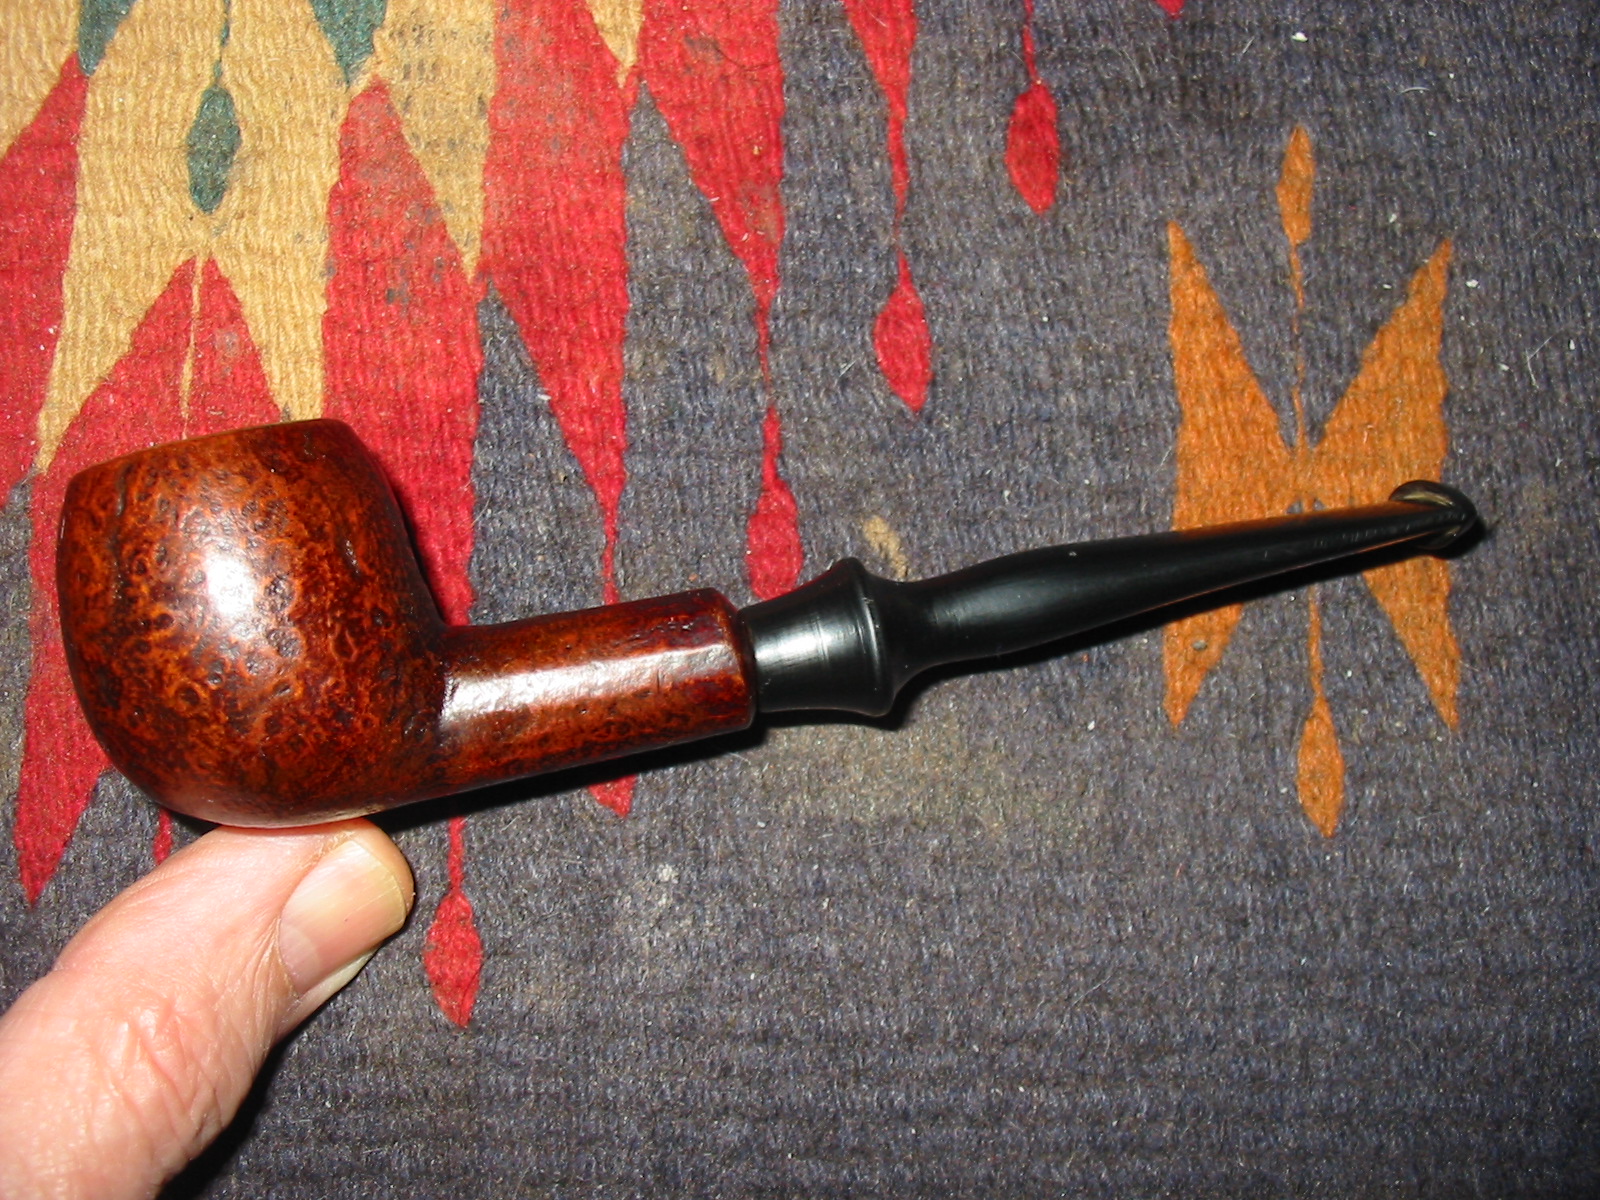
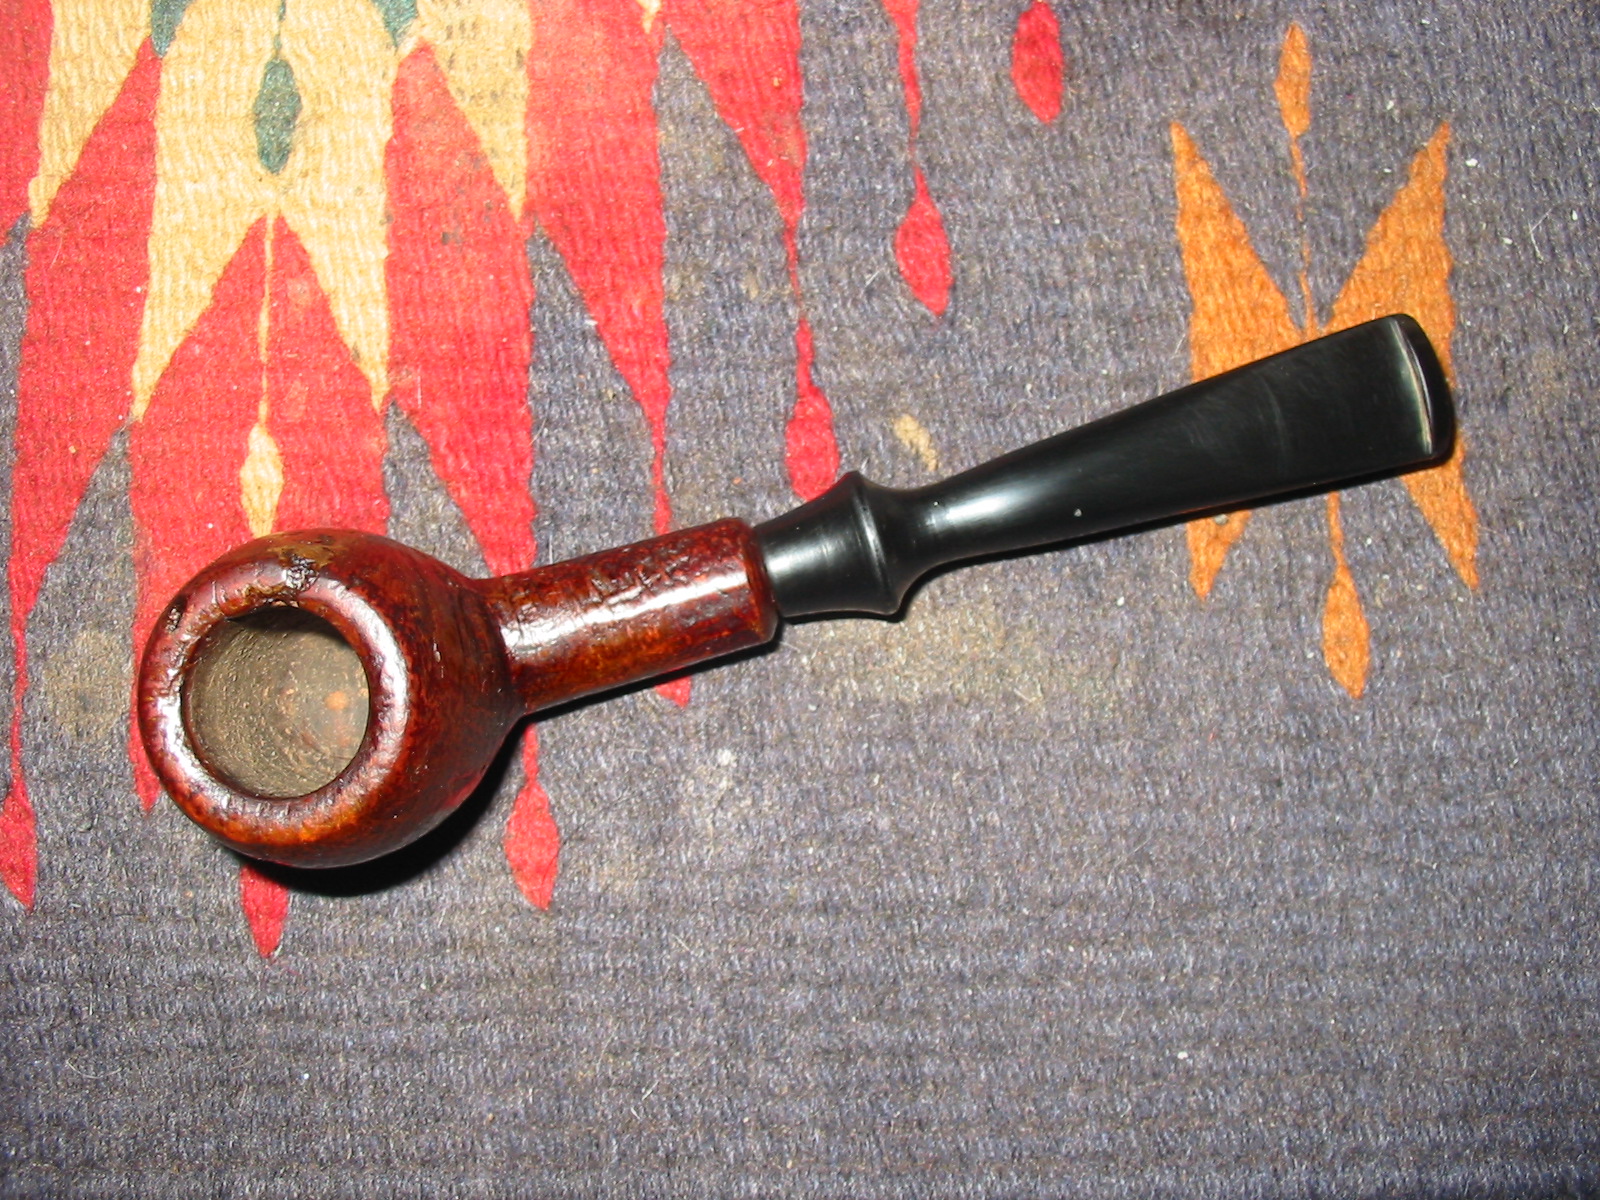
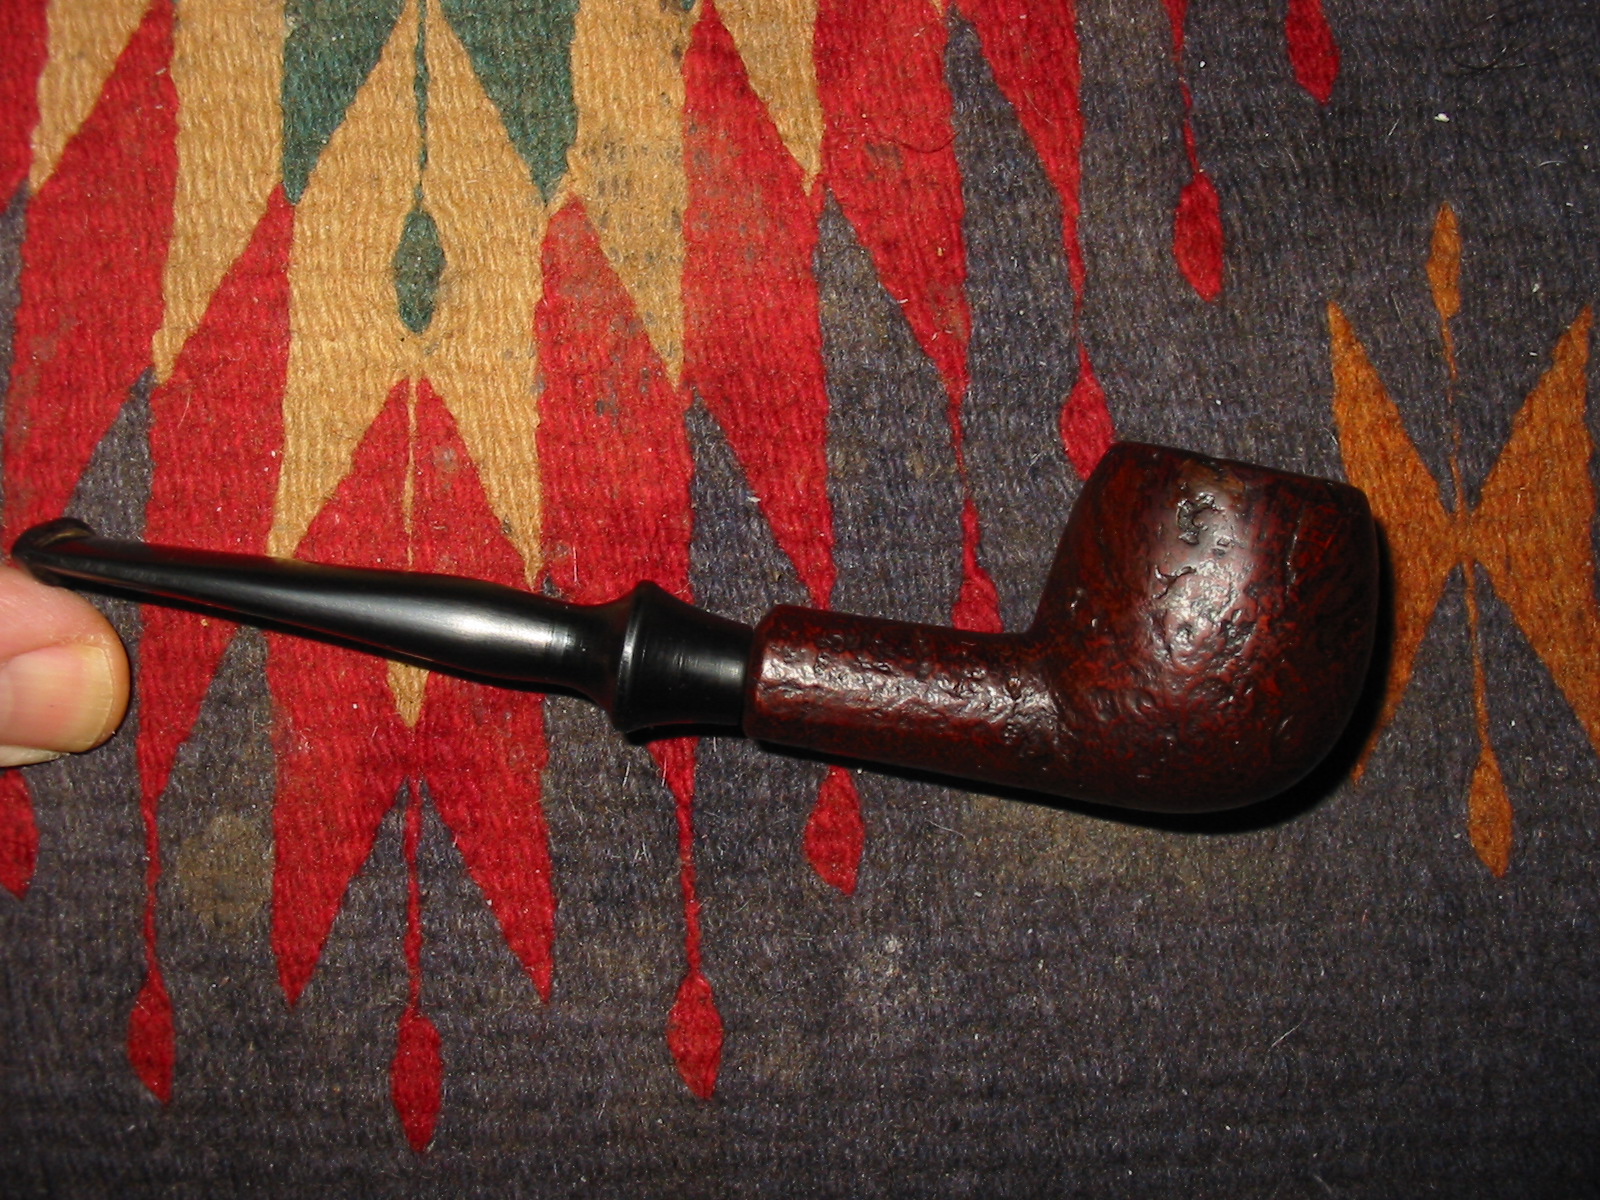
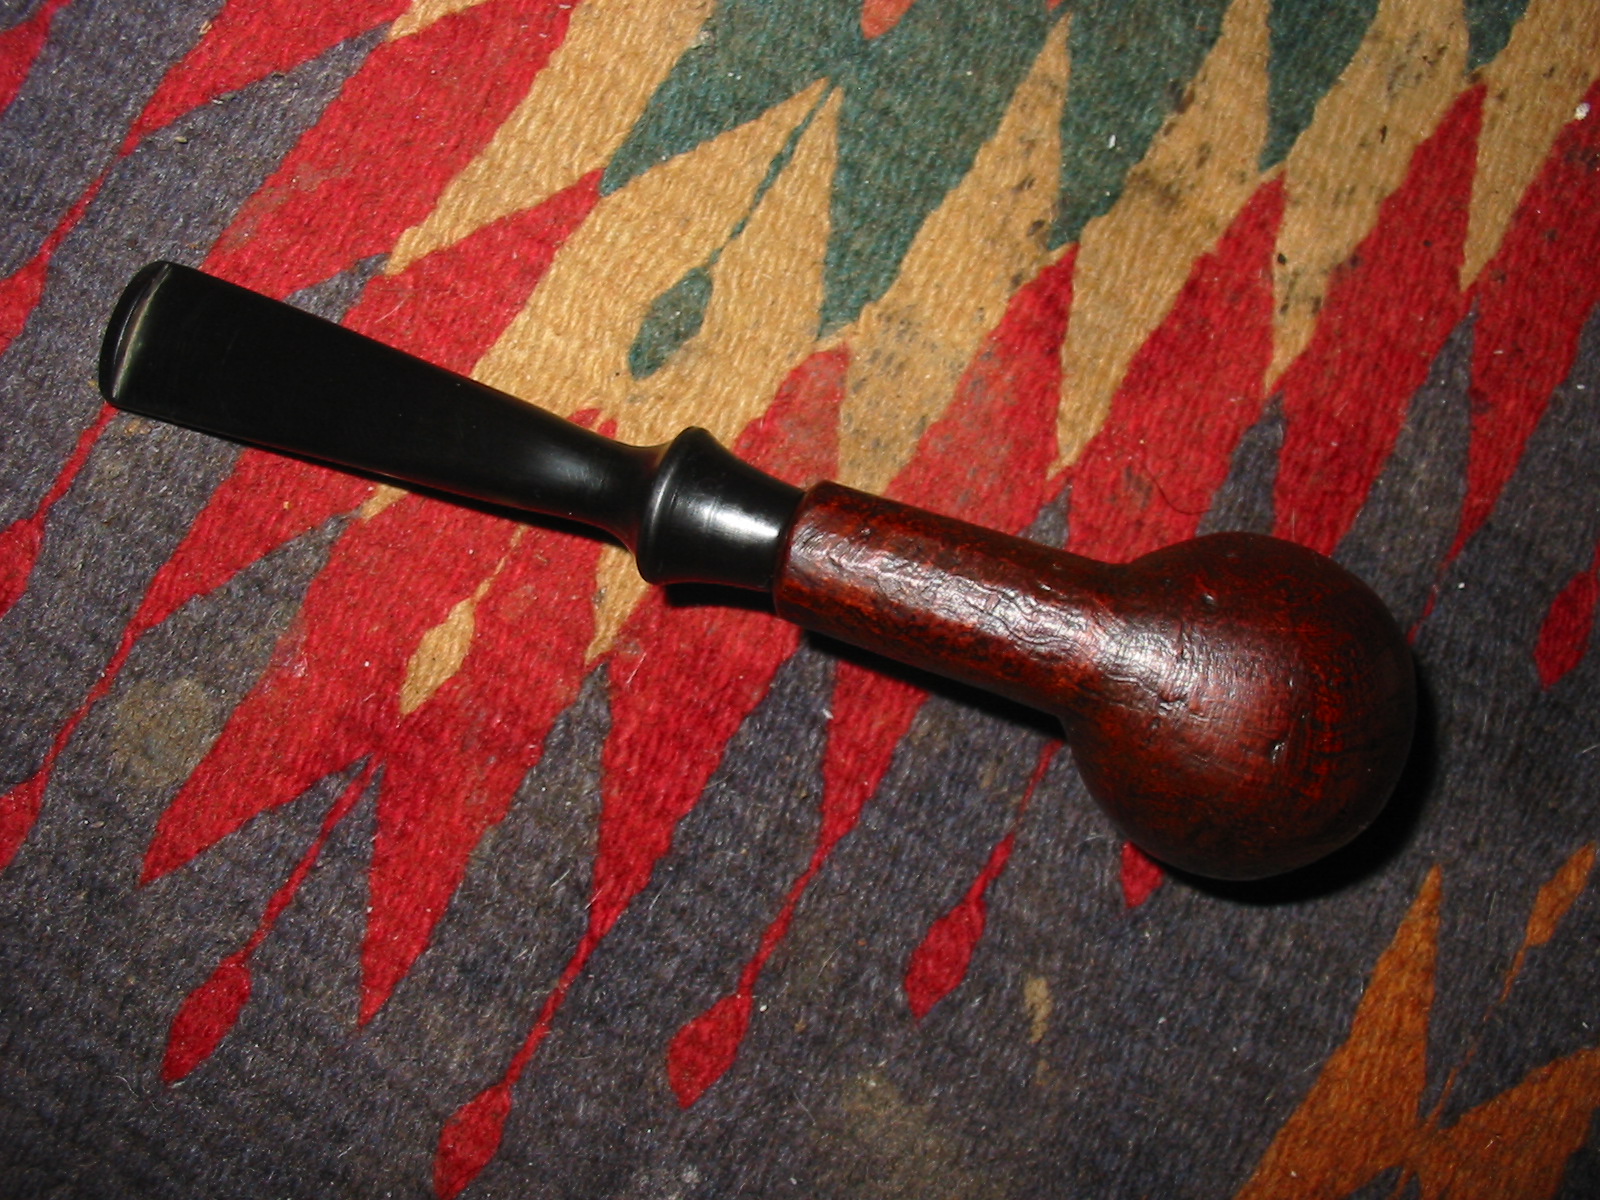
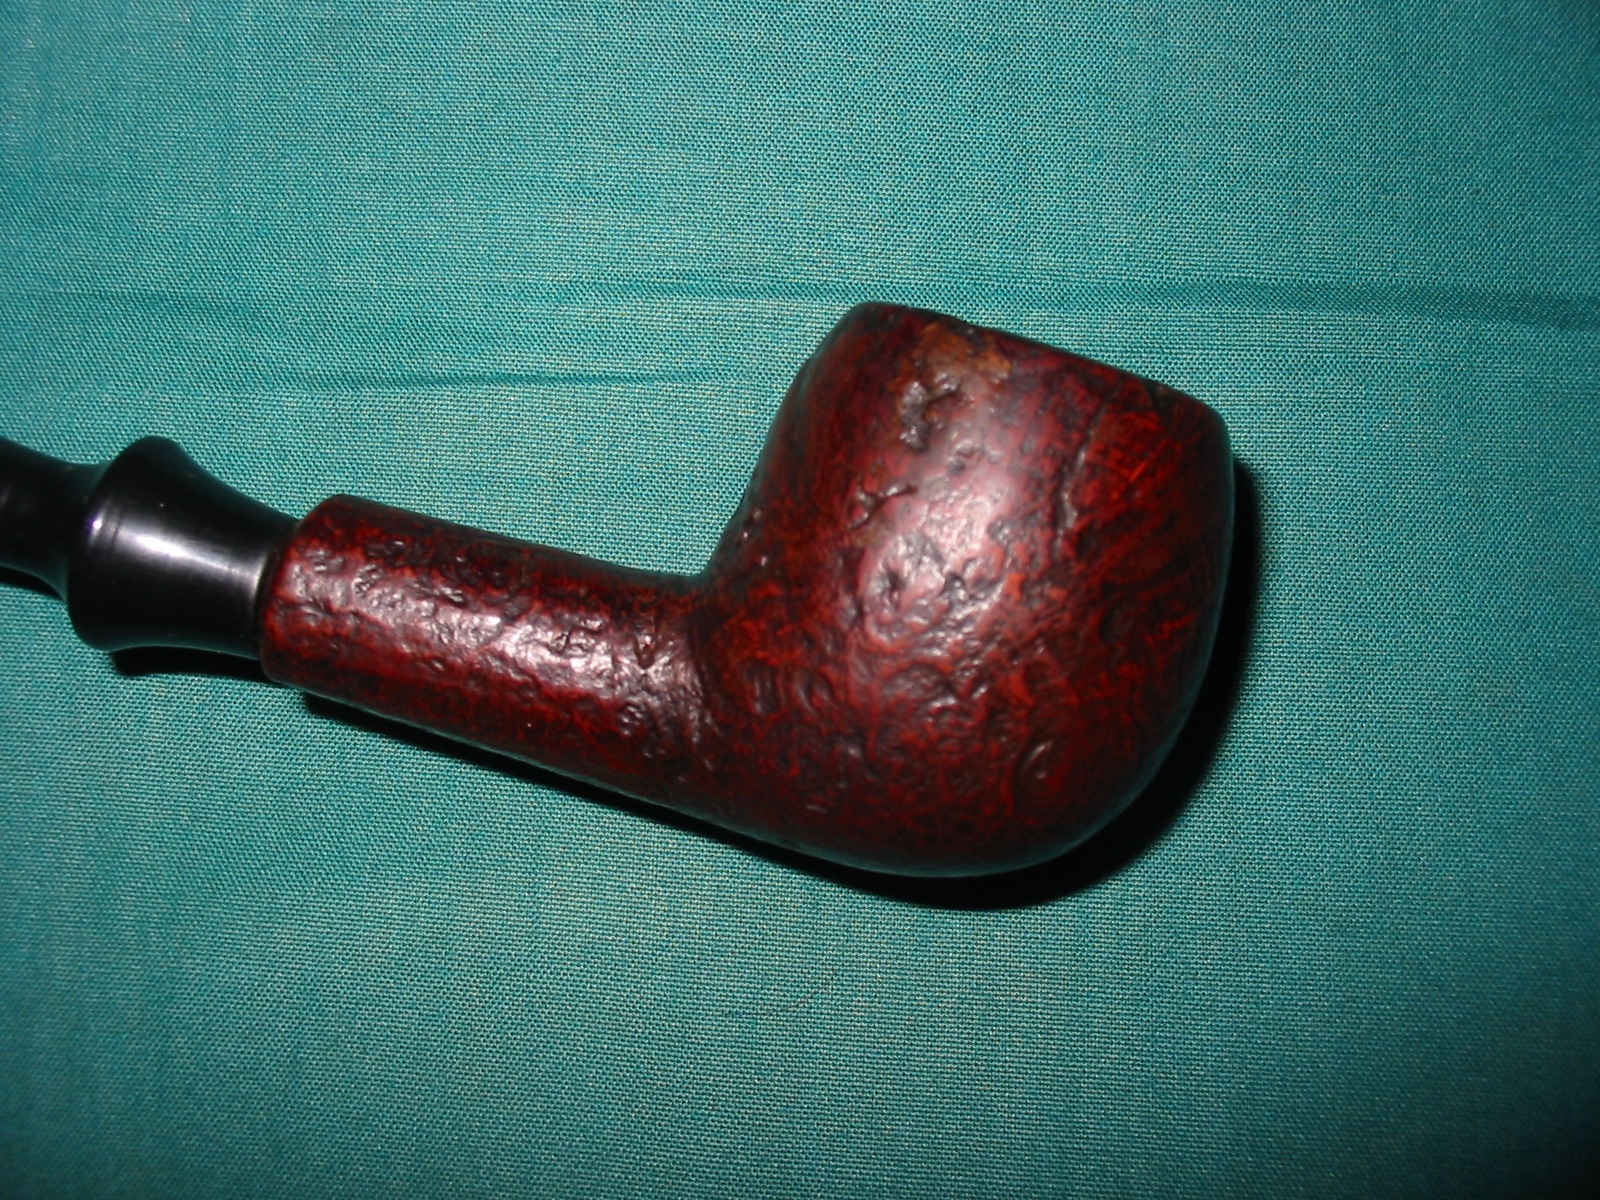
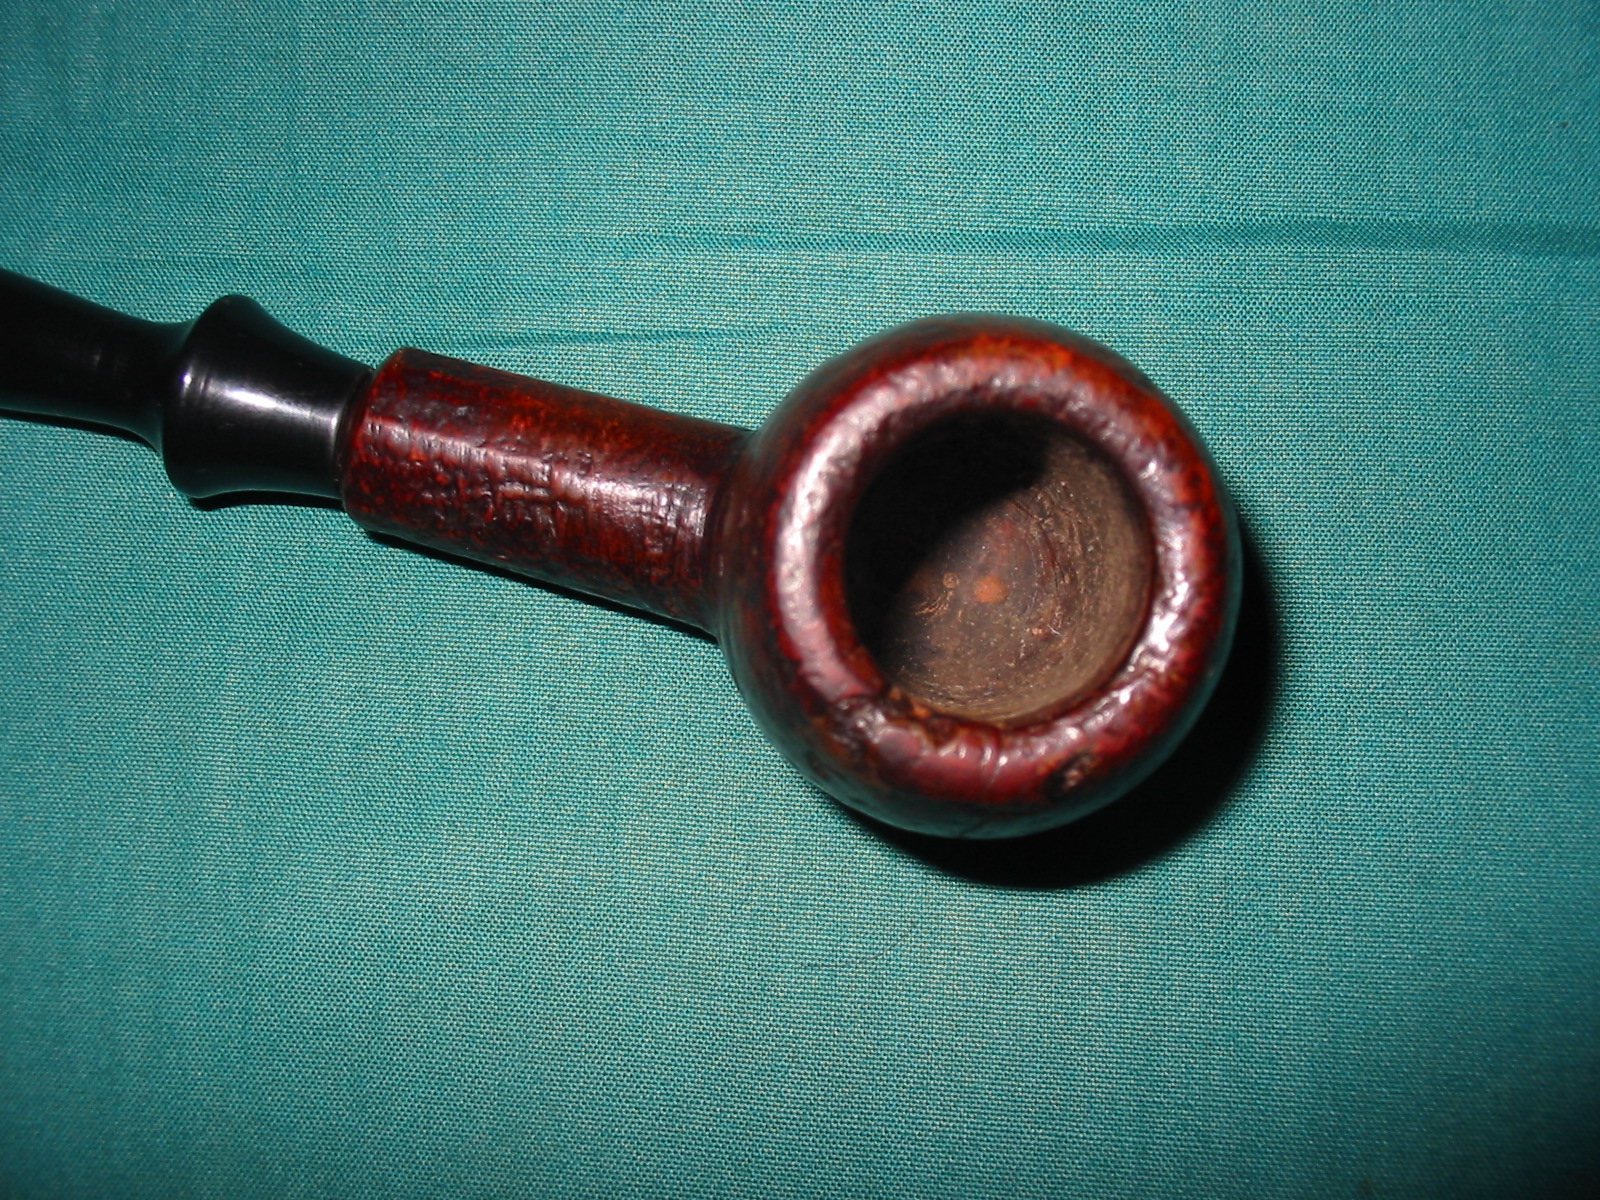
The third Coral finish that I picked up was also my first Tinsky pipe. It is a beautiful group 4 sized billiard with a dark brown and walnut contrast stain. There is a smooth ring around the top of the bowl and a smooth rim. There is also a smooth band and area for the stamping at the end of the shank. It has been with me for a long time now and is one that I have smoked again and again. It never disappoints in delivering a great smoke. I use it for only Virginias and it literally makes them sing. It is stamped American in an oval over Coral over 4 in a circle. On the smooth left side of the shank it is stamped with the Mark Tinsky signature. The stem bears the metal star in a circle inset.
IMG_5576

IMG_5583
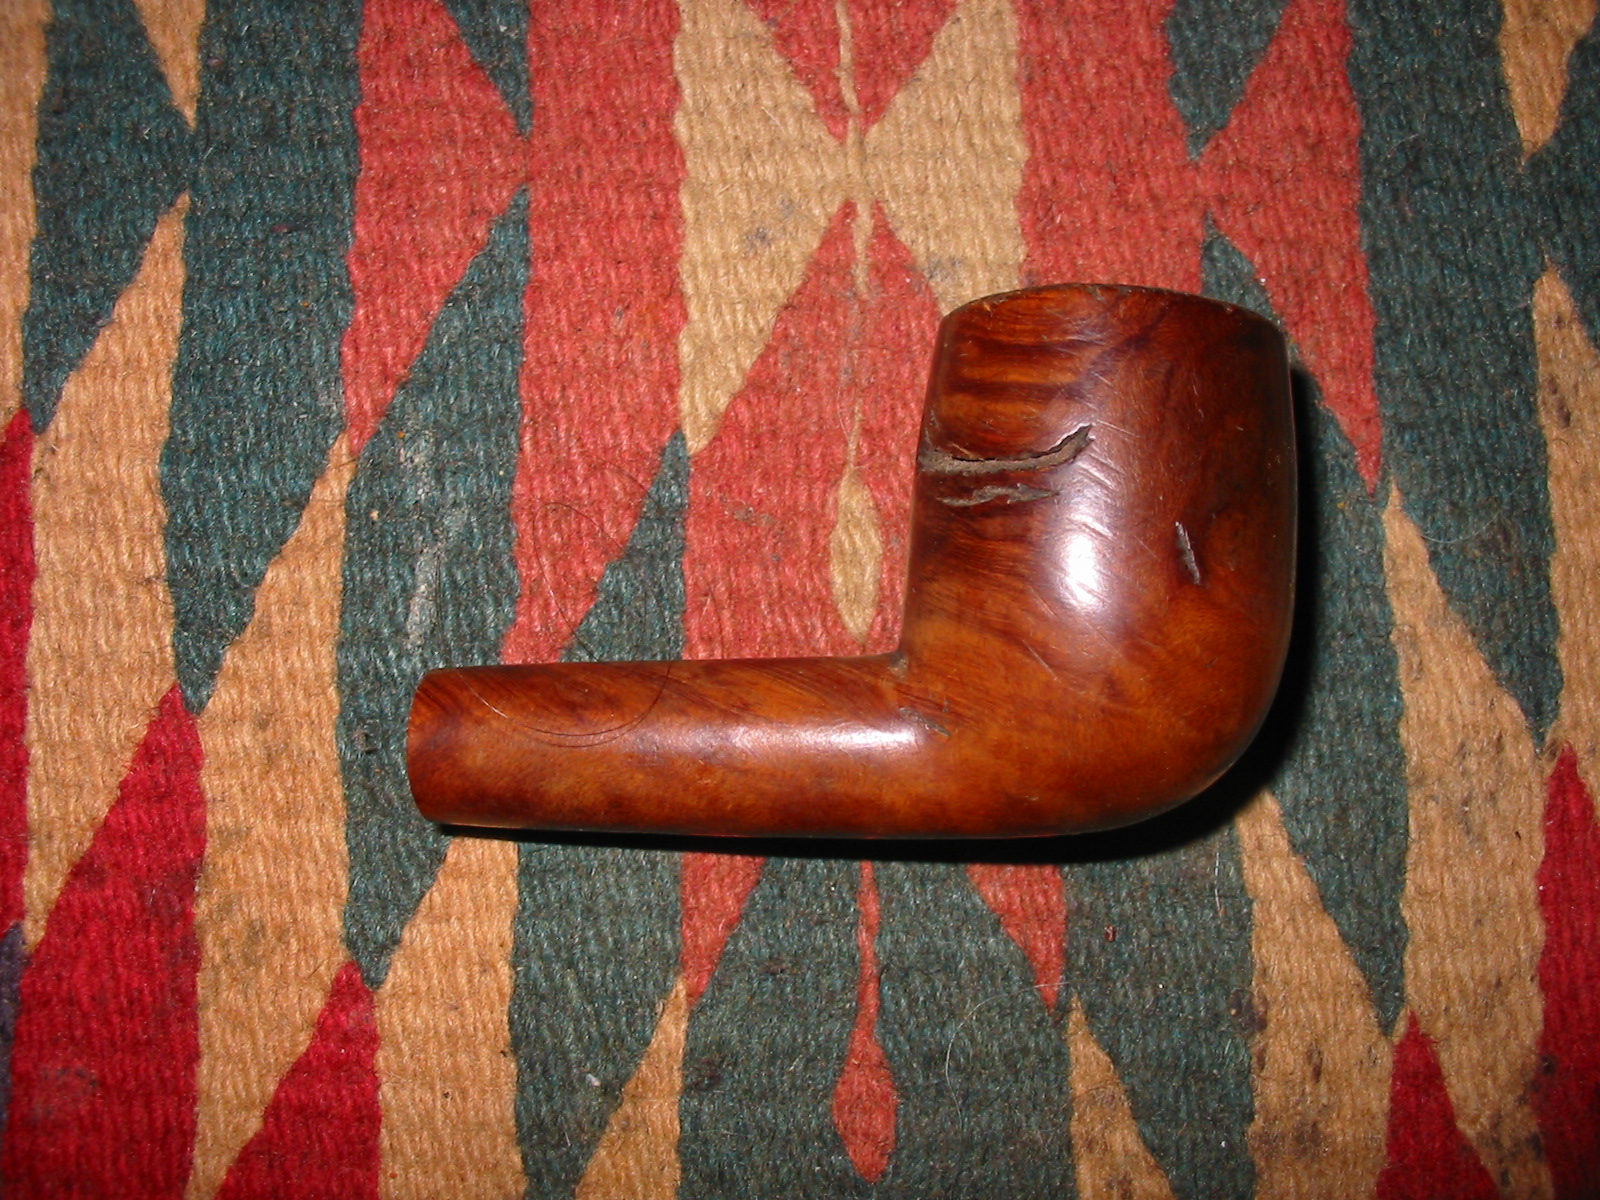
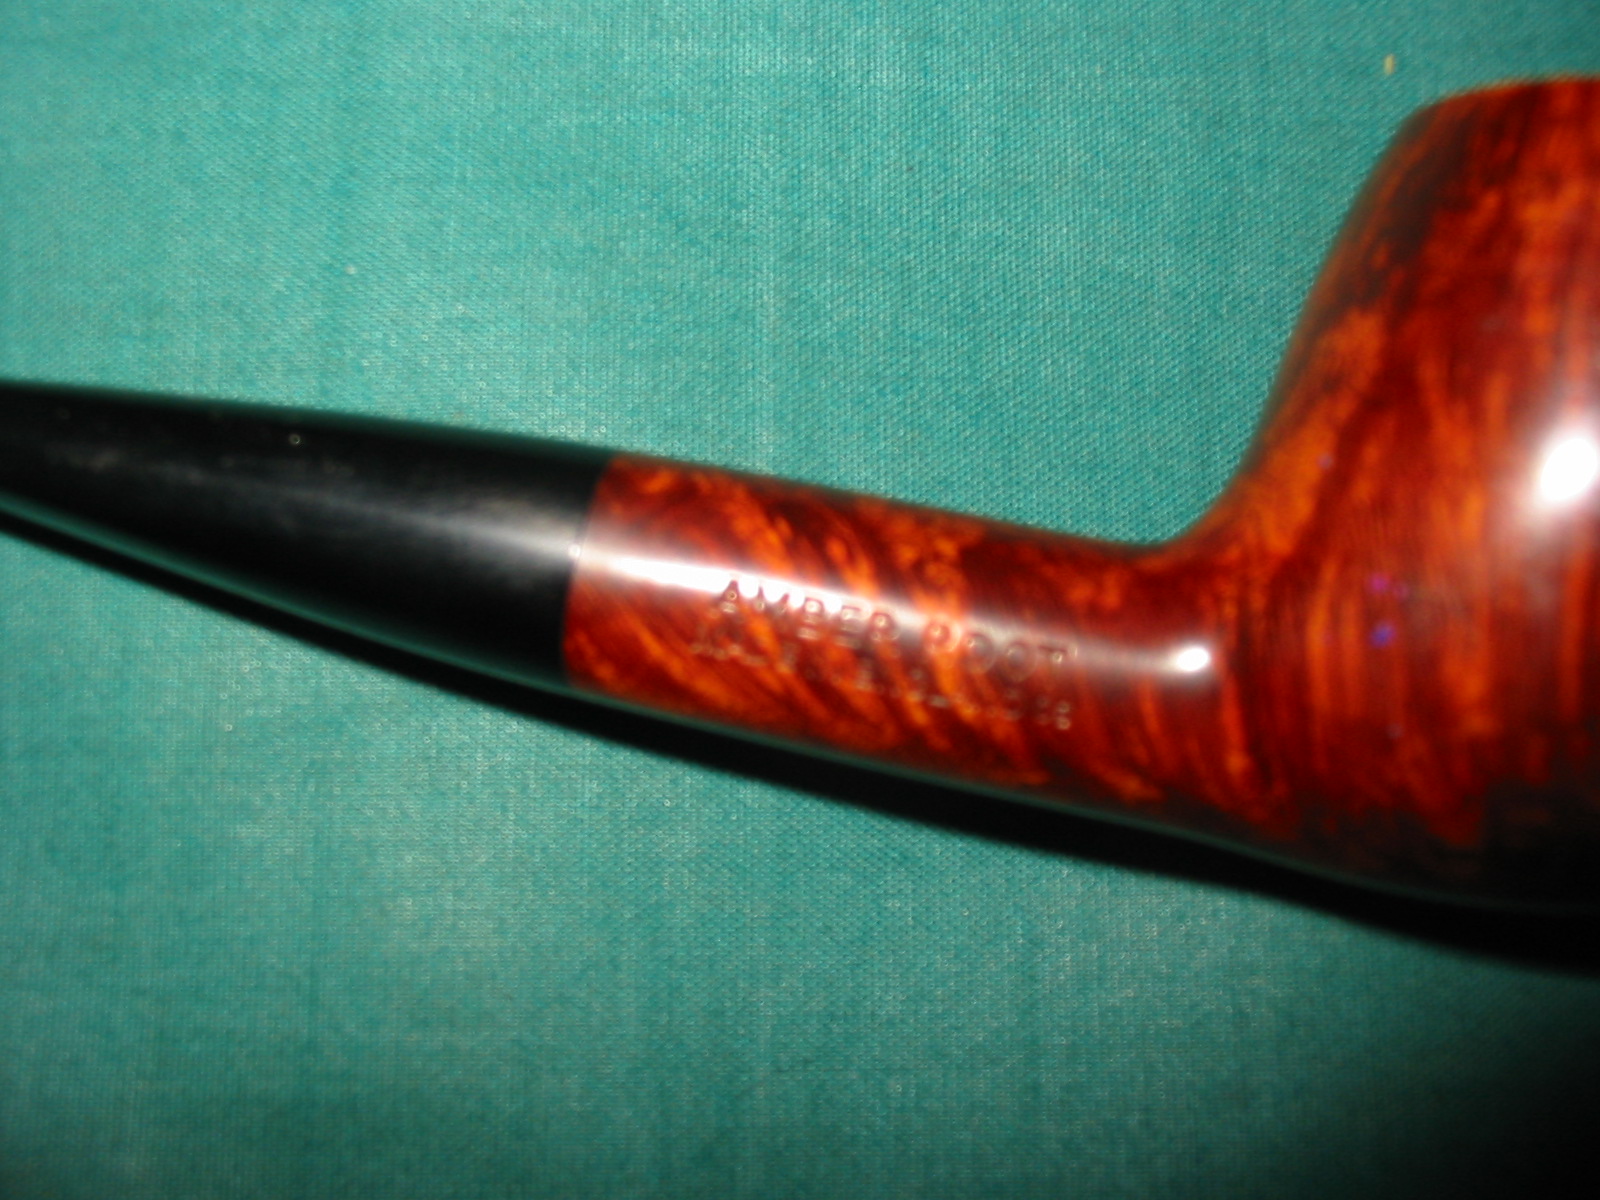
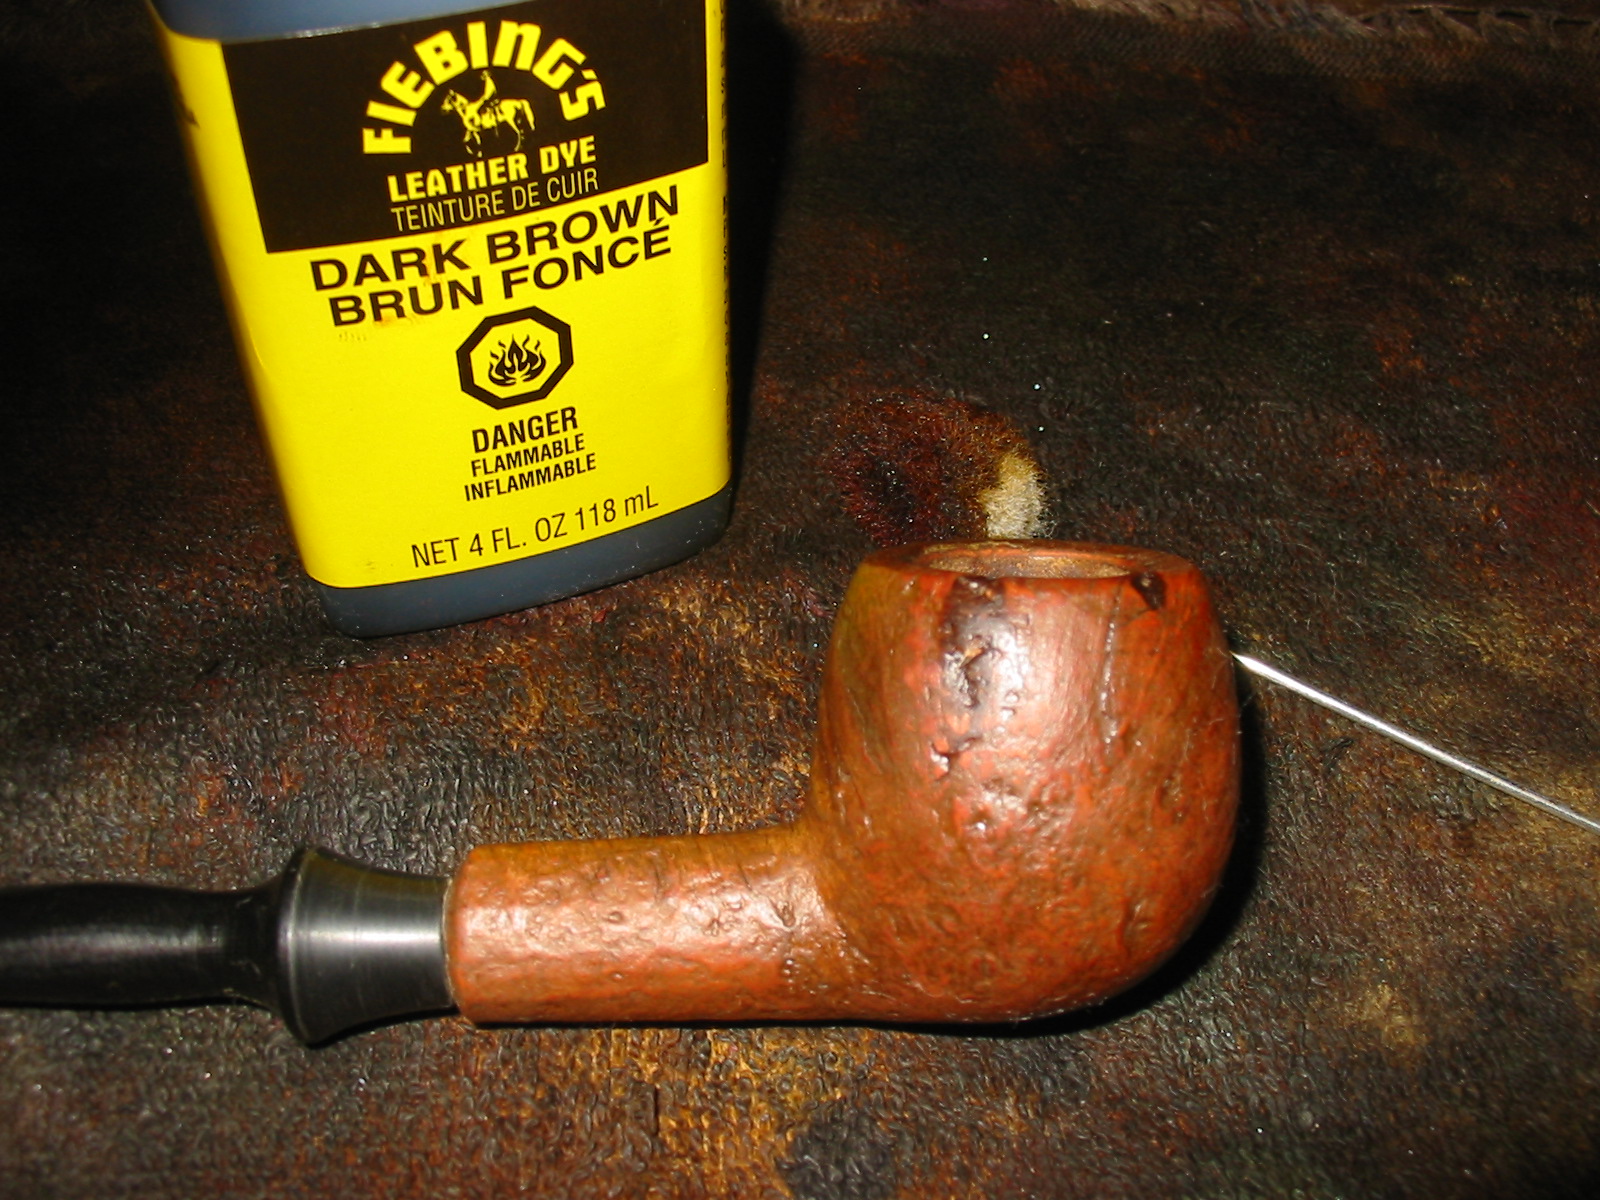
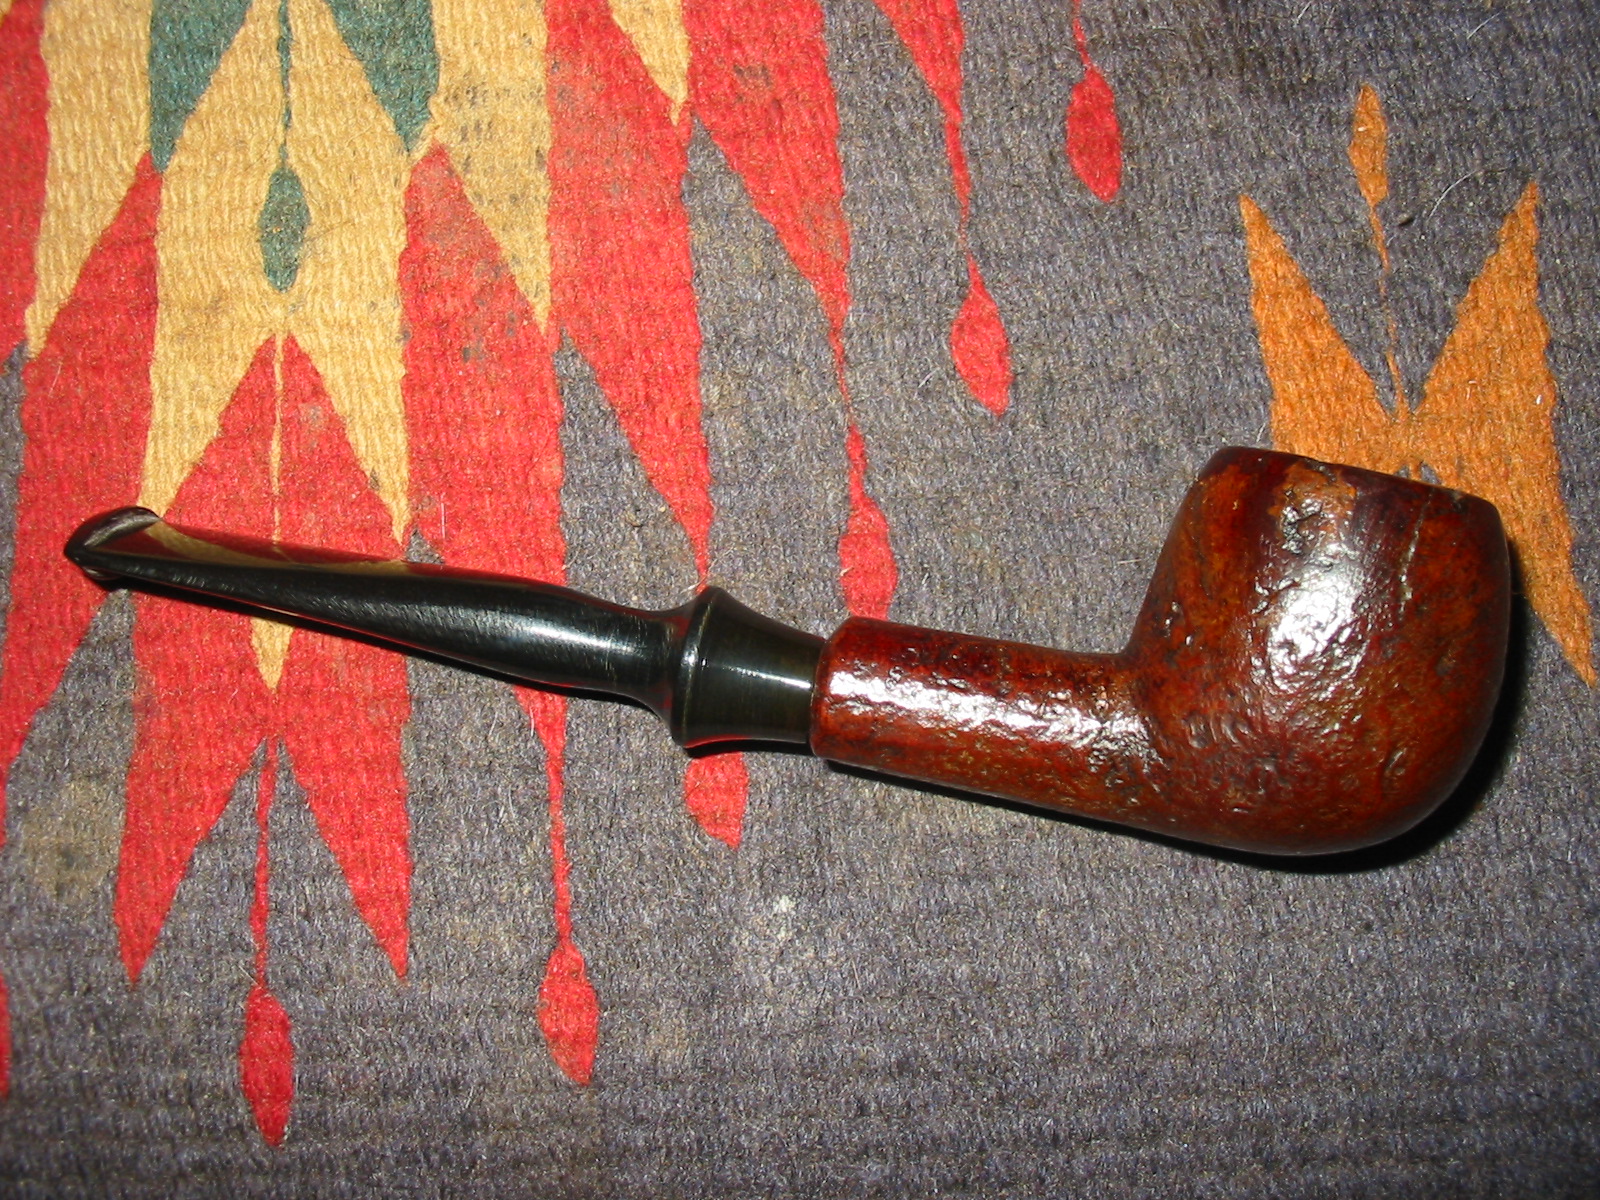
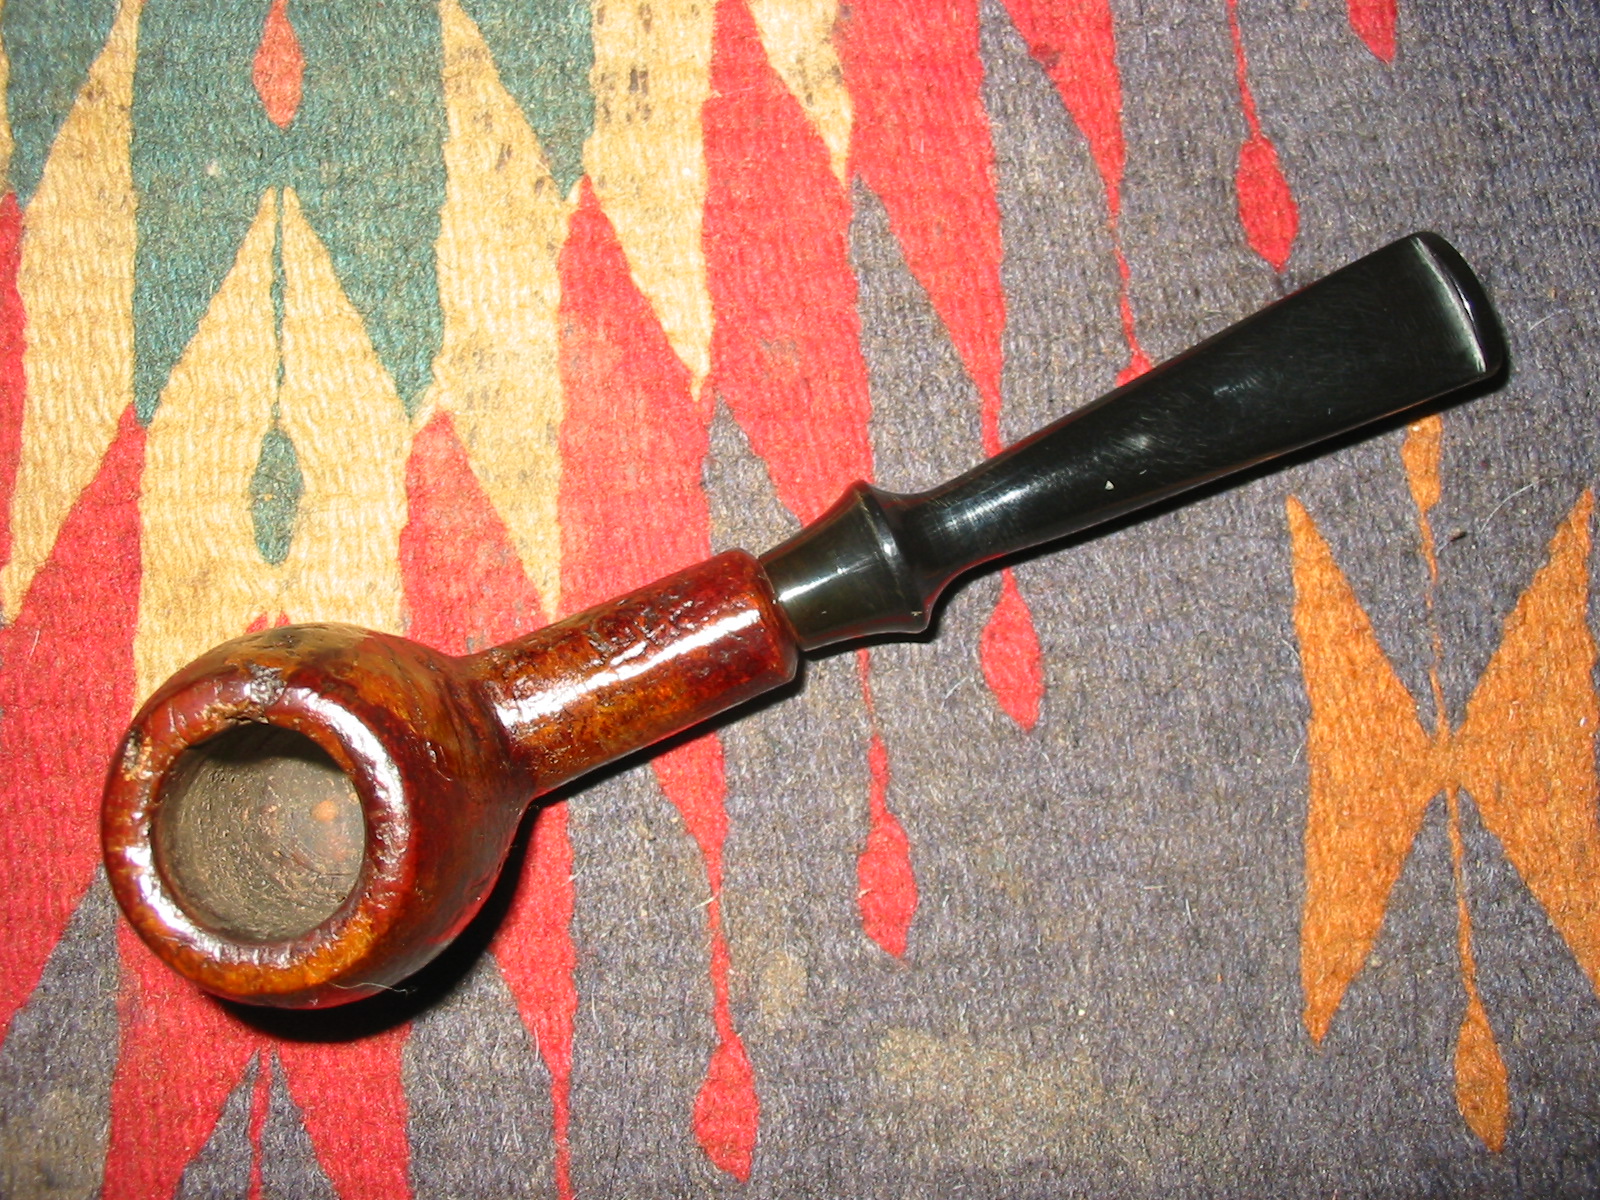
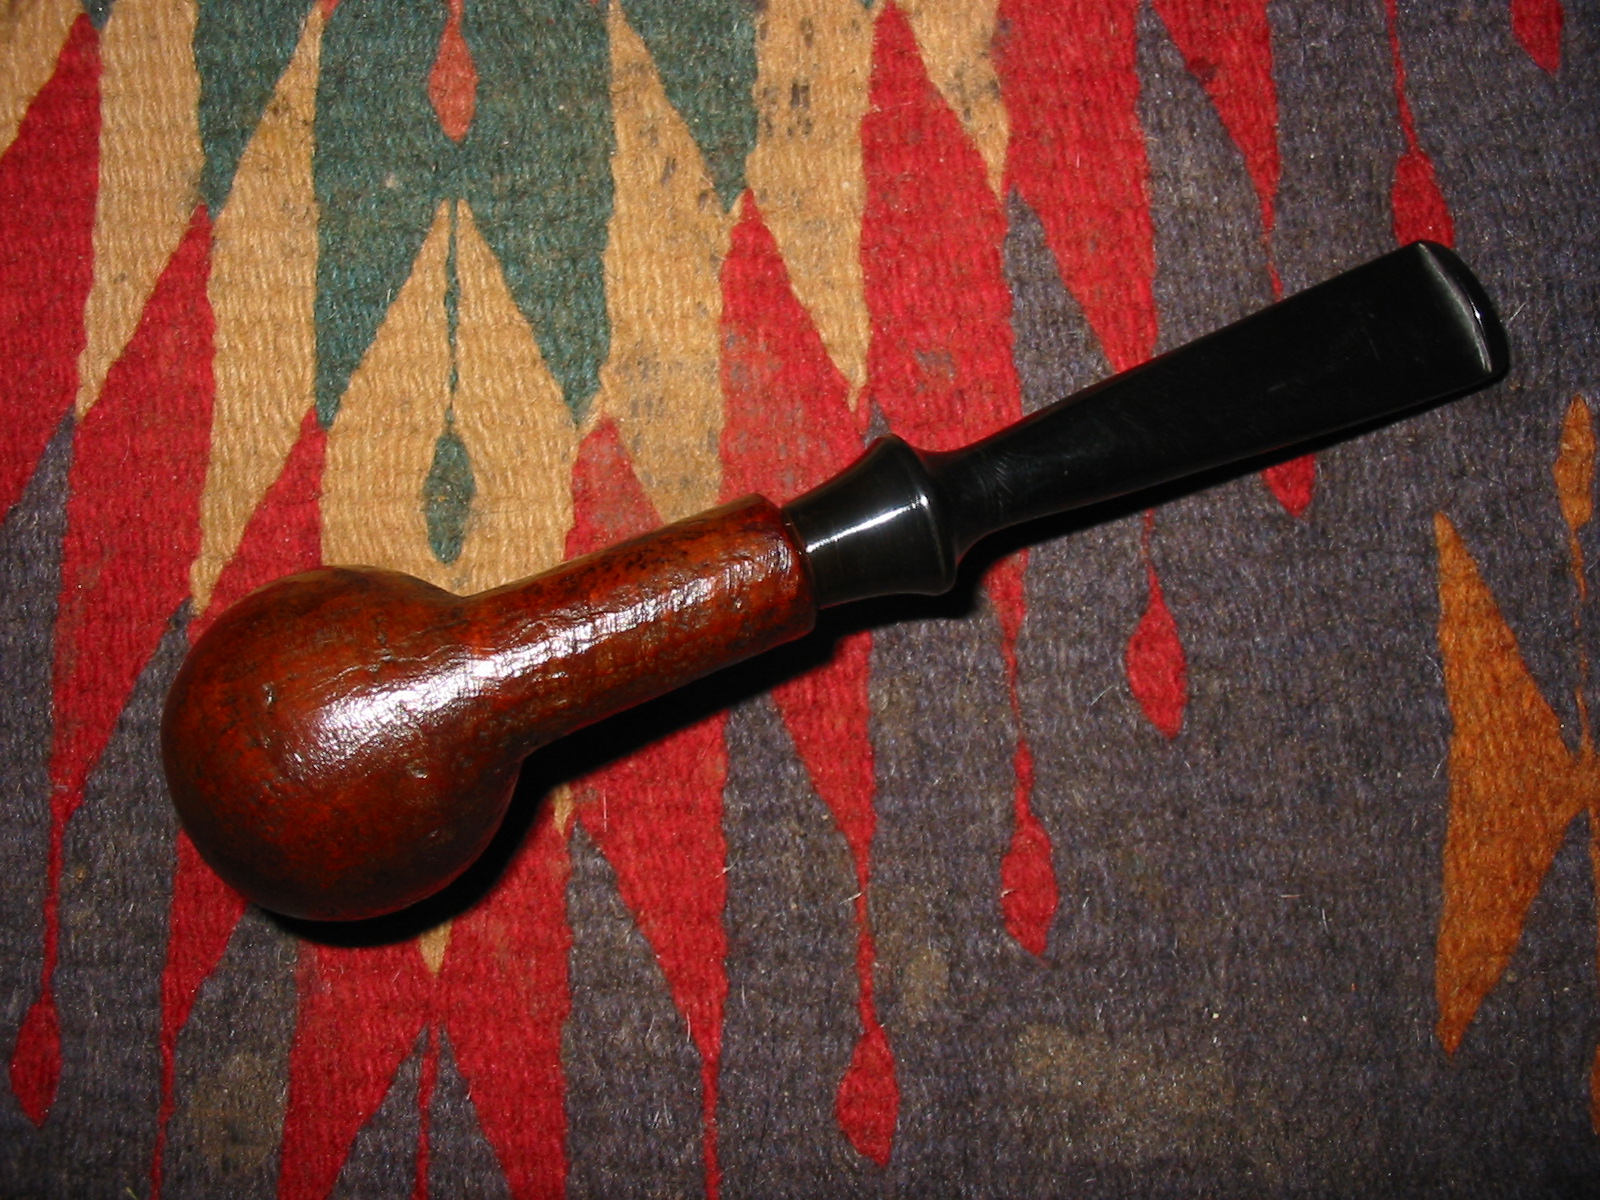
The fourth Coral finish is another thick shanked apple. I traded for this one and when it came the finish was virgin though it had begun to darken. Through the years the darkening has continued and it shows a lightening in the grooves and the high spots are darkening. It has a rusticated rim and the only smooth portion of the pipe is a thin band around the end of the shank and a smooth patch on the underside of the shank for the stamping. It bears the stamping Coral over Christmas 2003 and the customary metal star in a circle inset in the stem. There is a part of me that wants to give this bowl a good coat of stain to even things out a bit and make it look cleaner. I have restrained myself from doing that until now but who knows what the future holds in that regard.
IMG_5585

IMG_5586
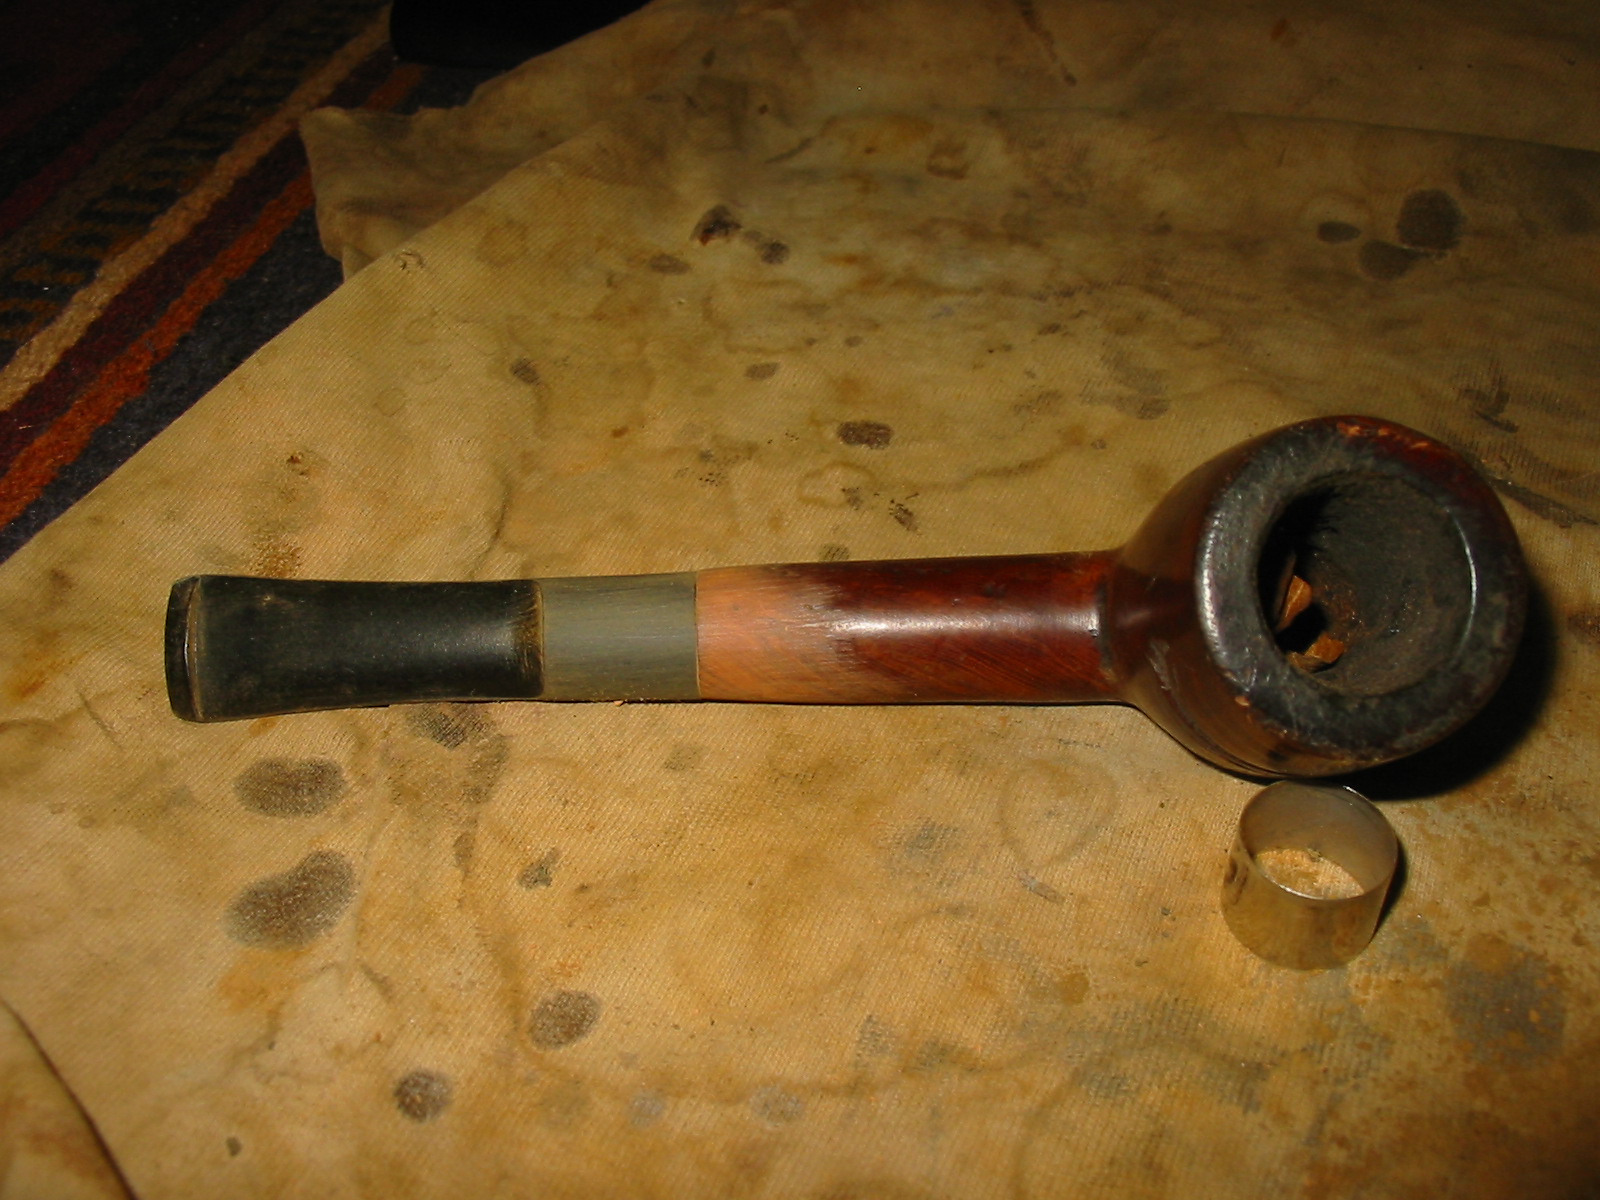
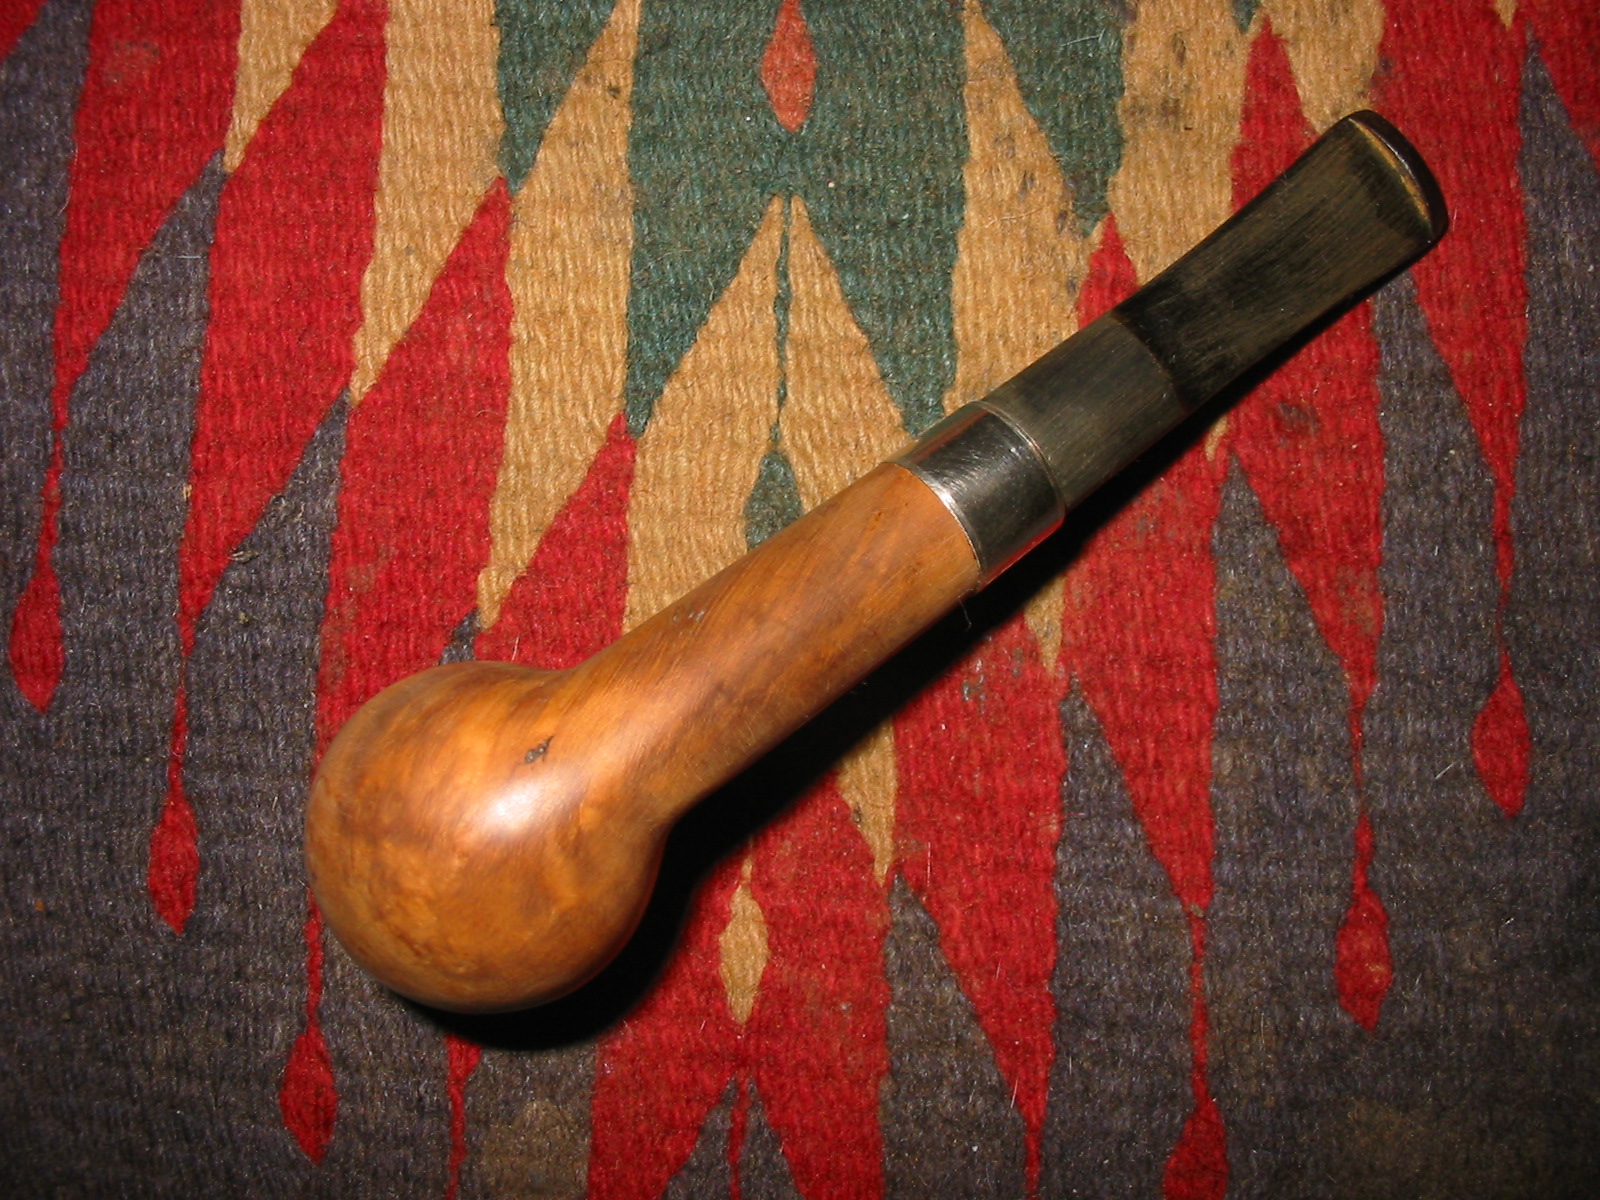
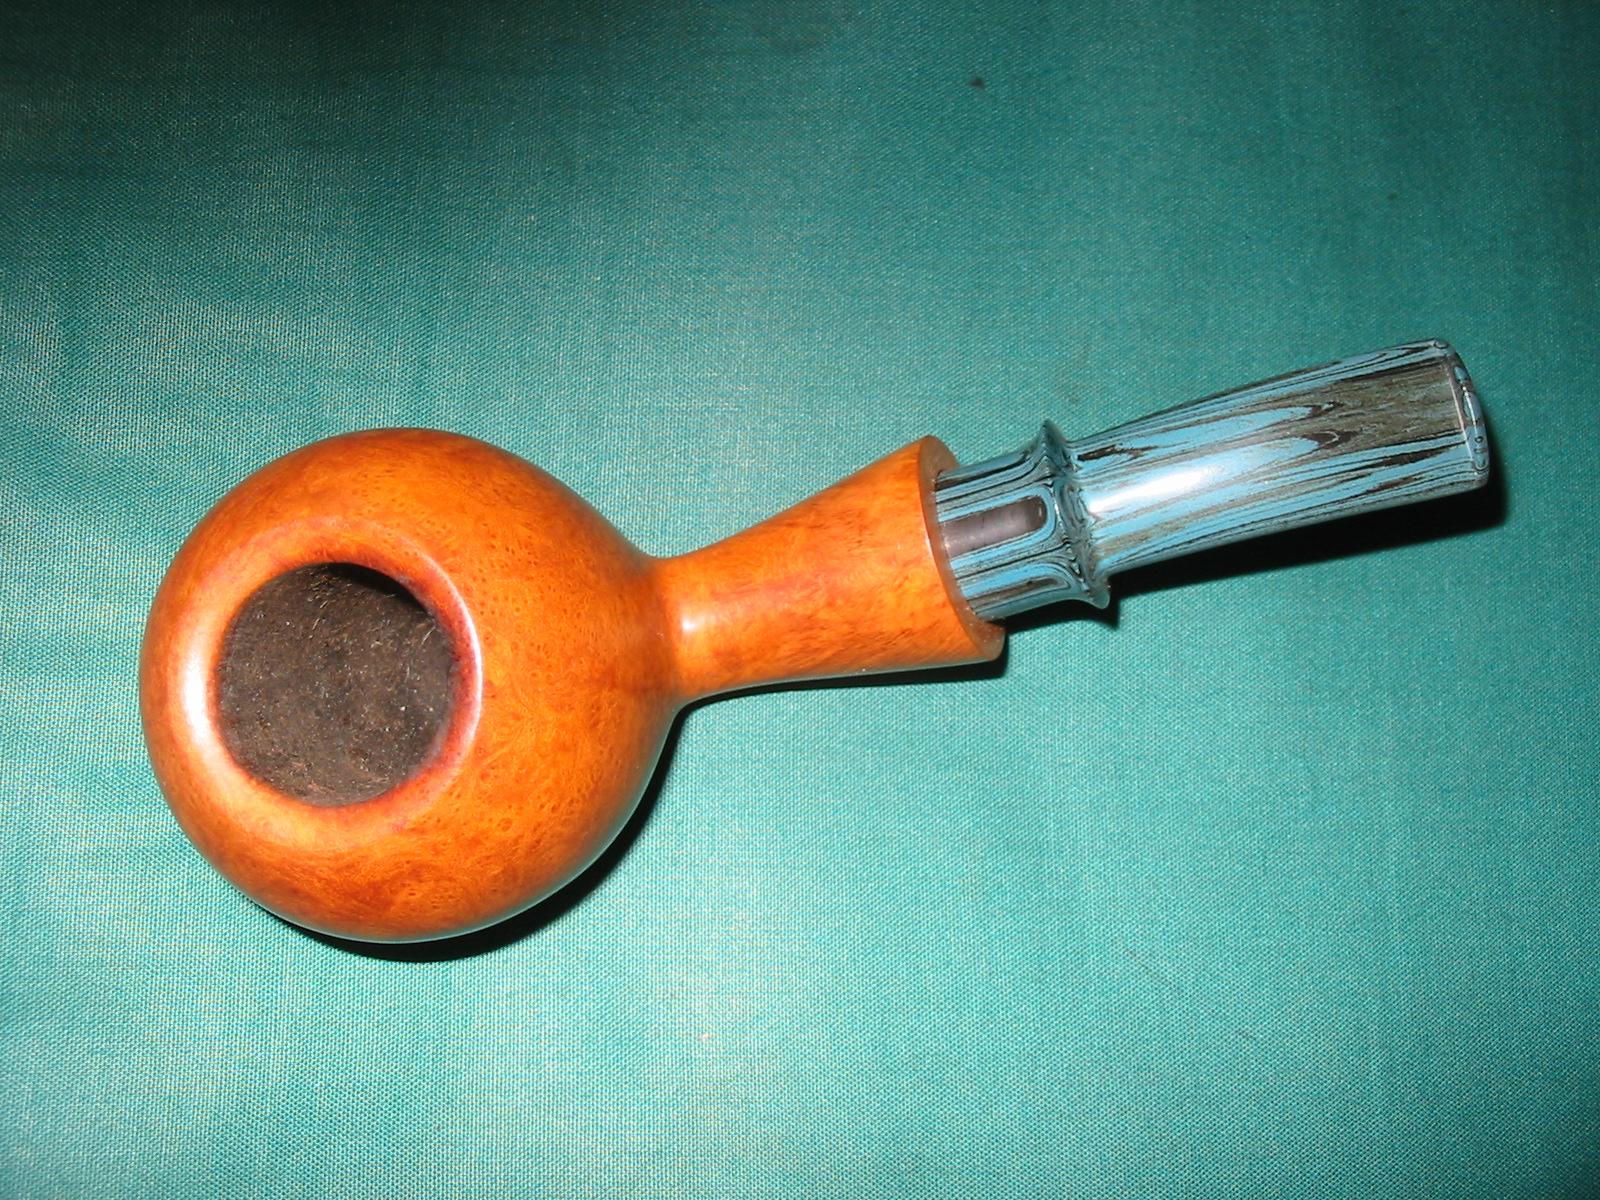
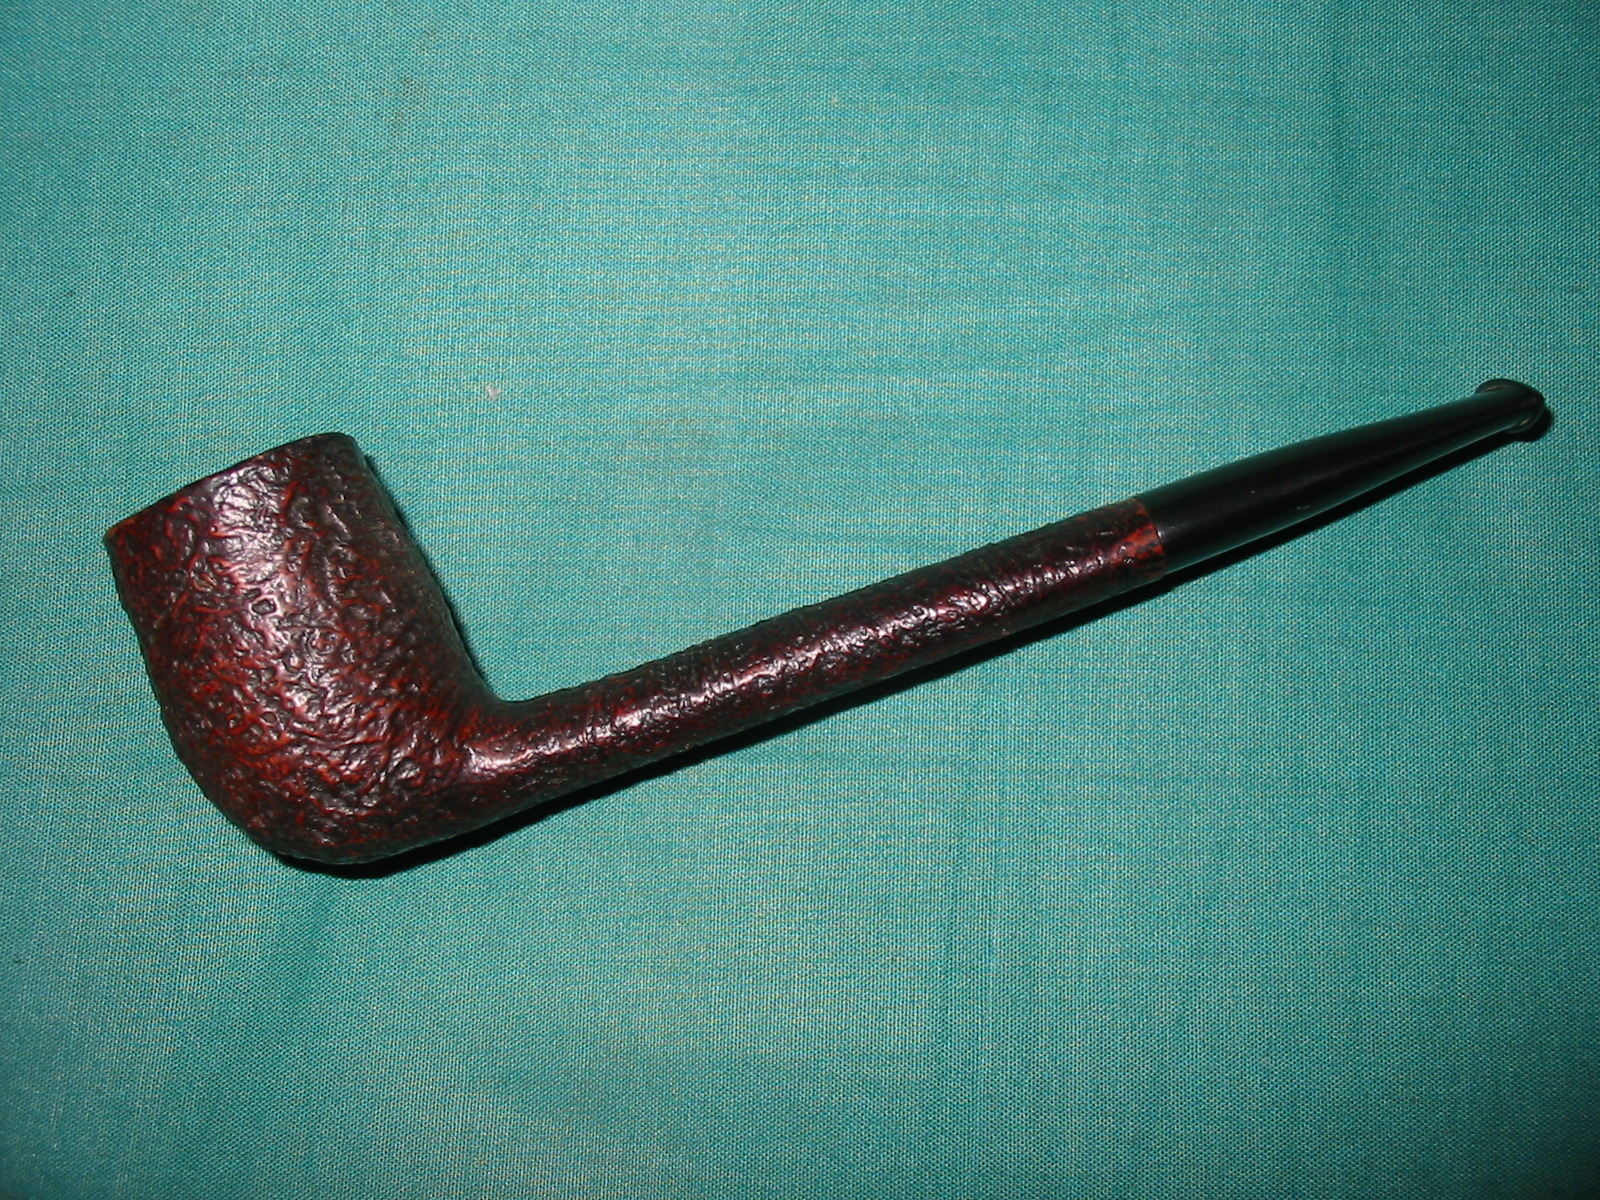
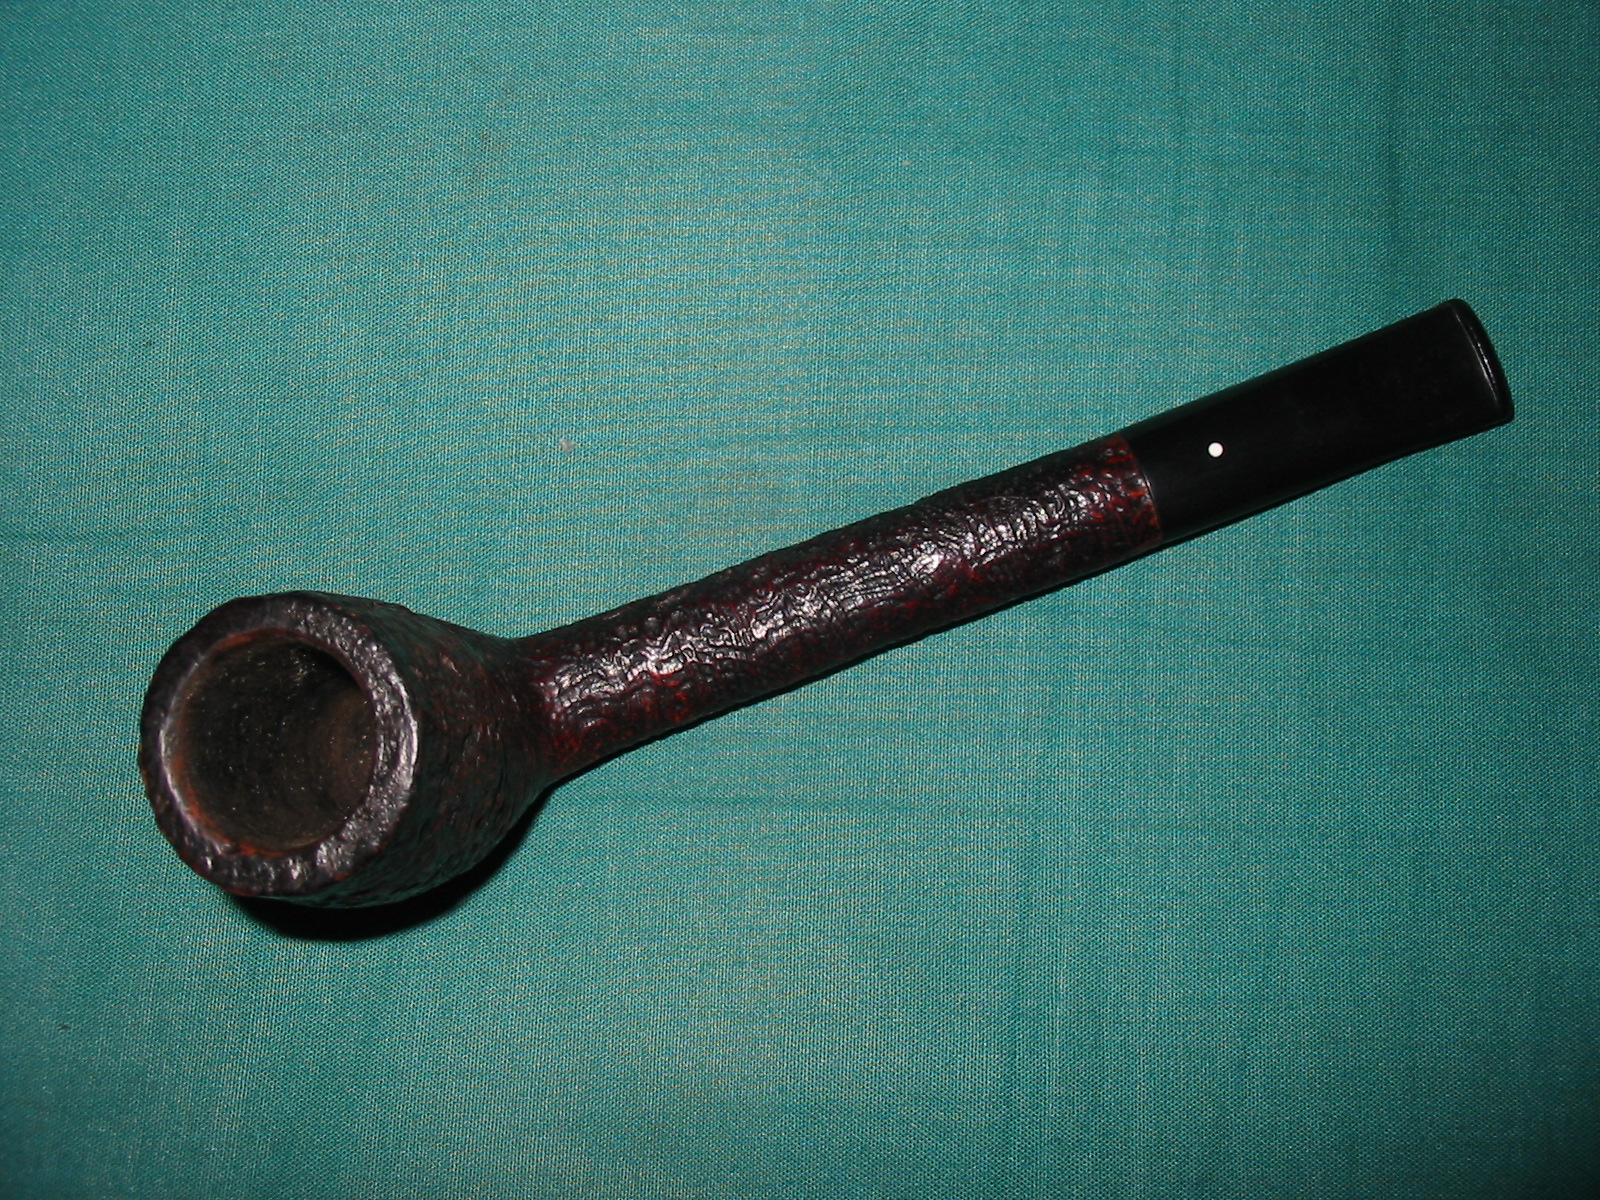
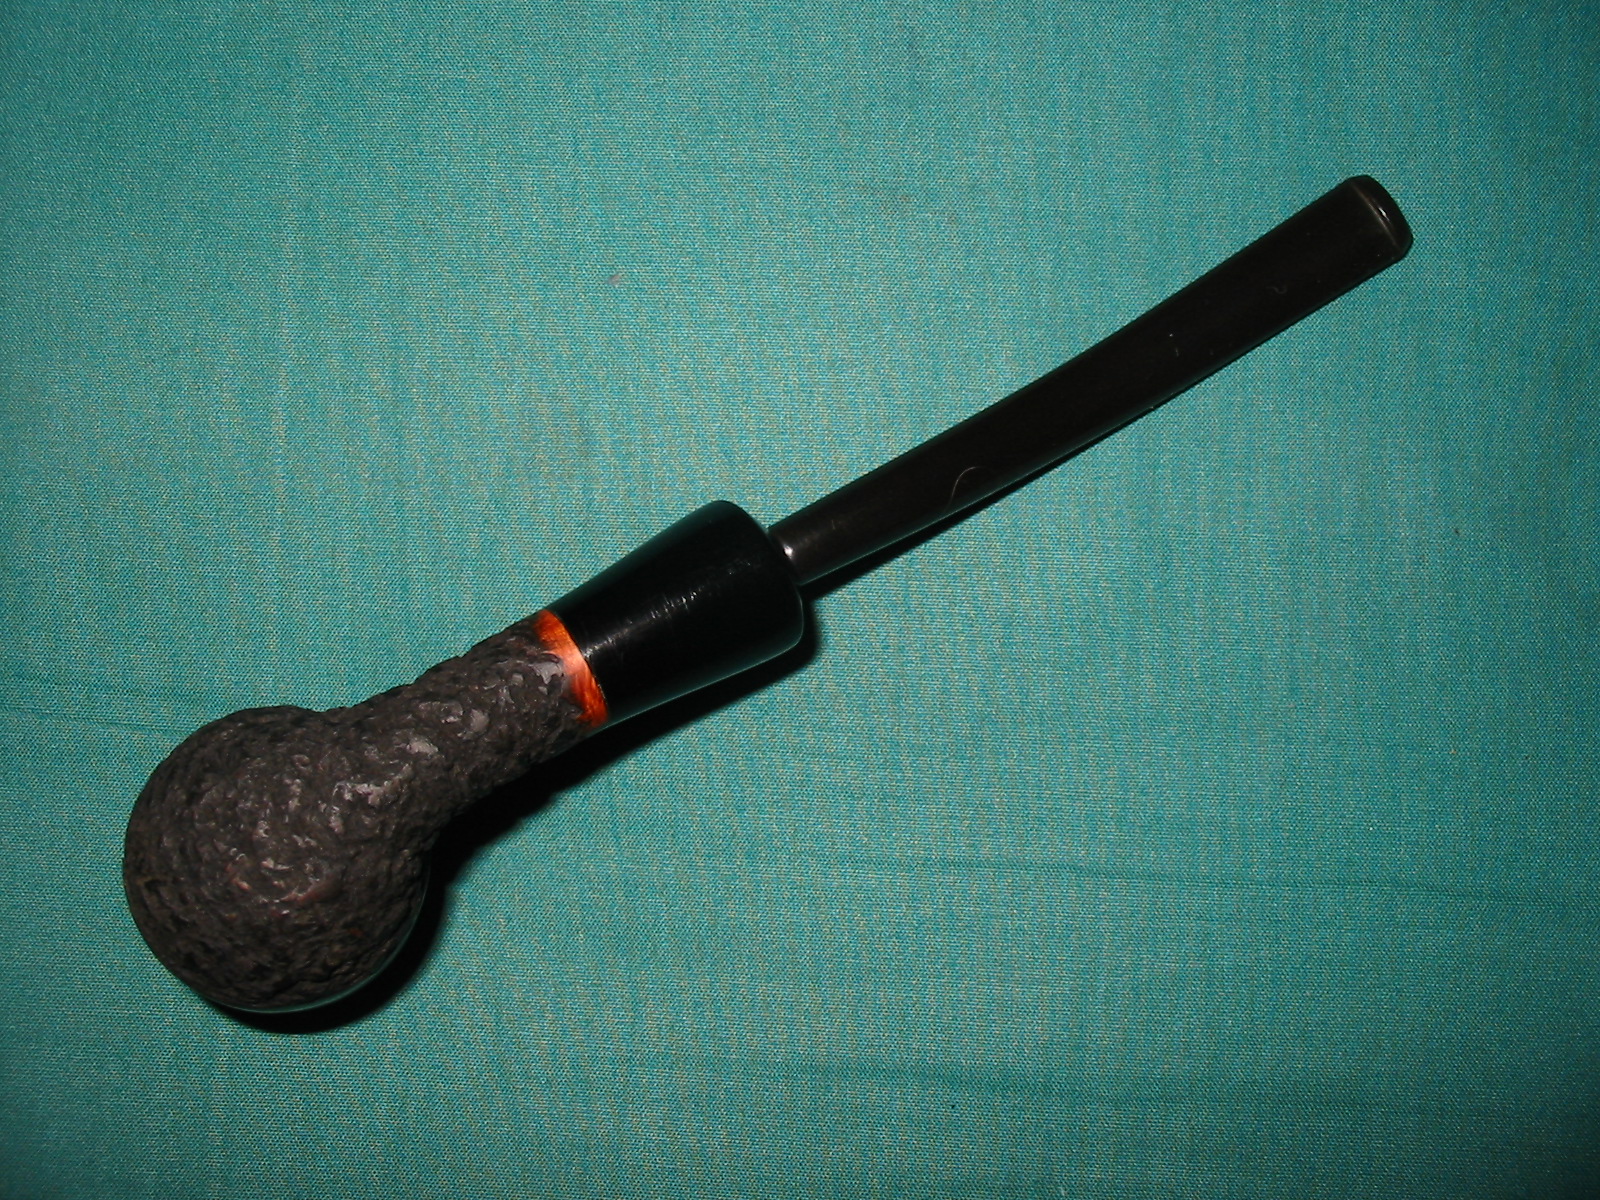
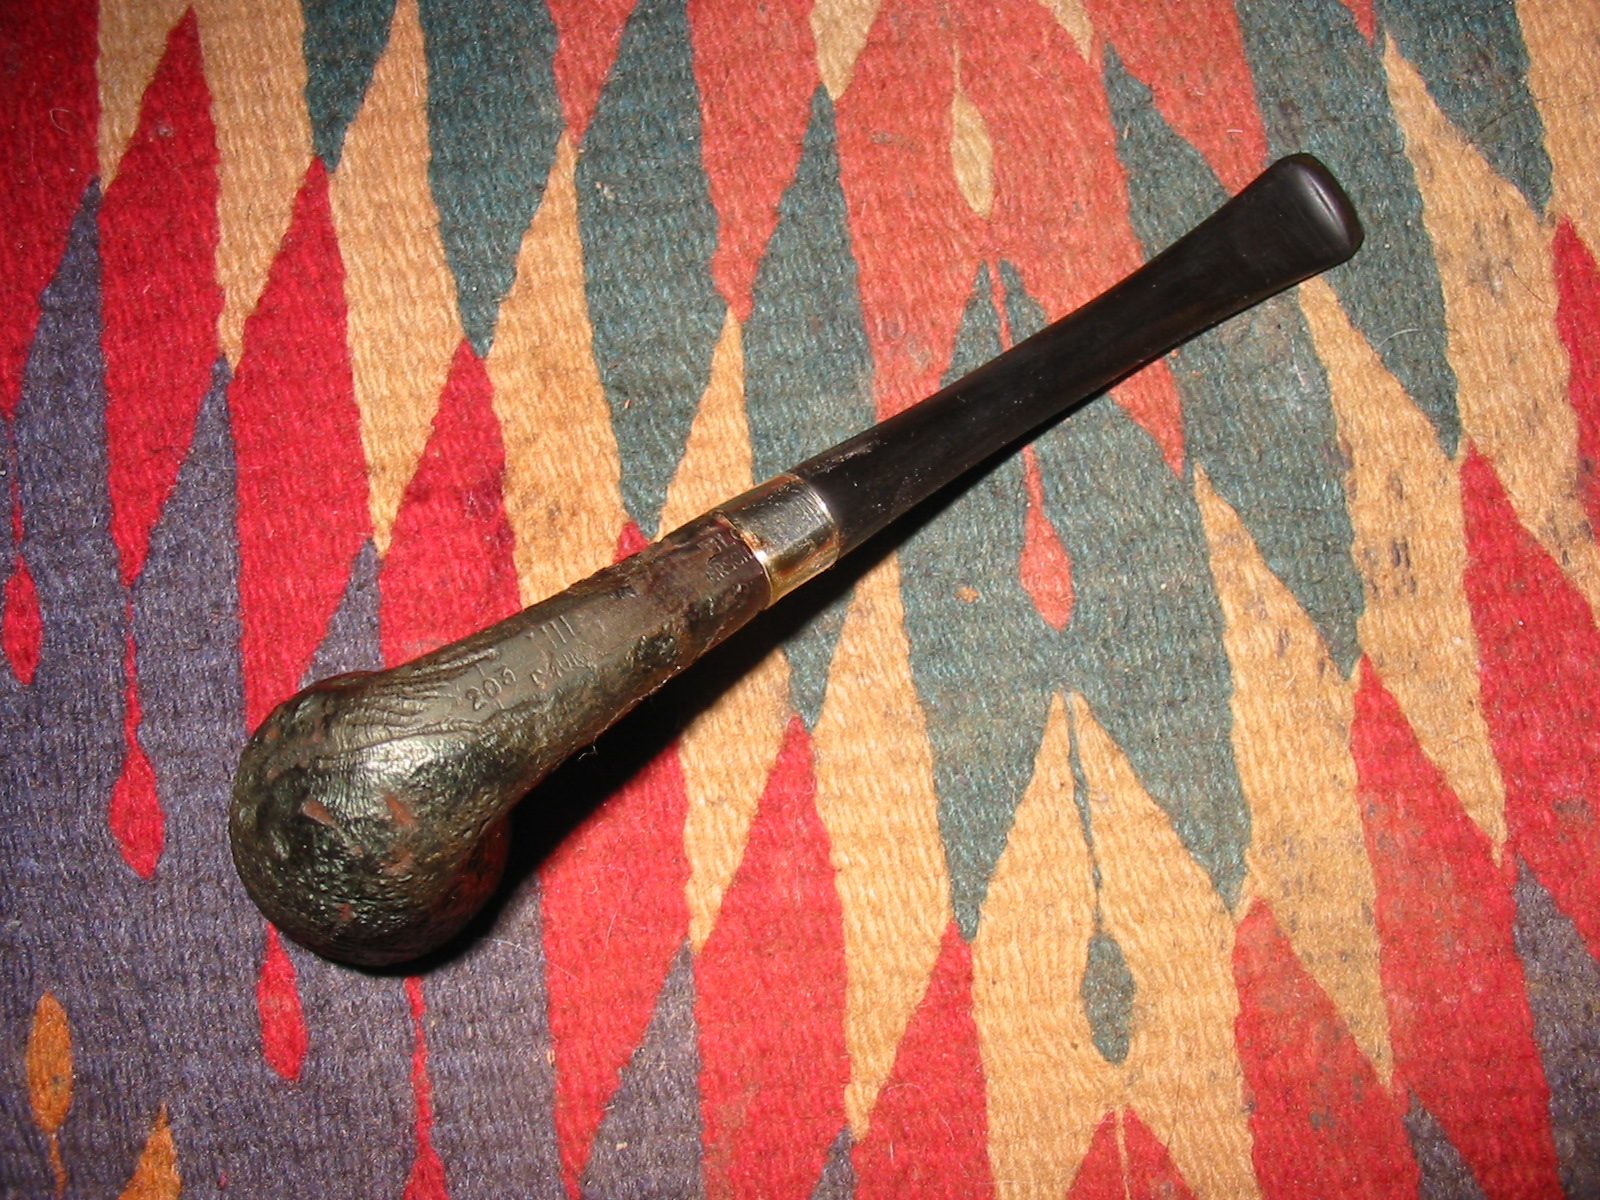
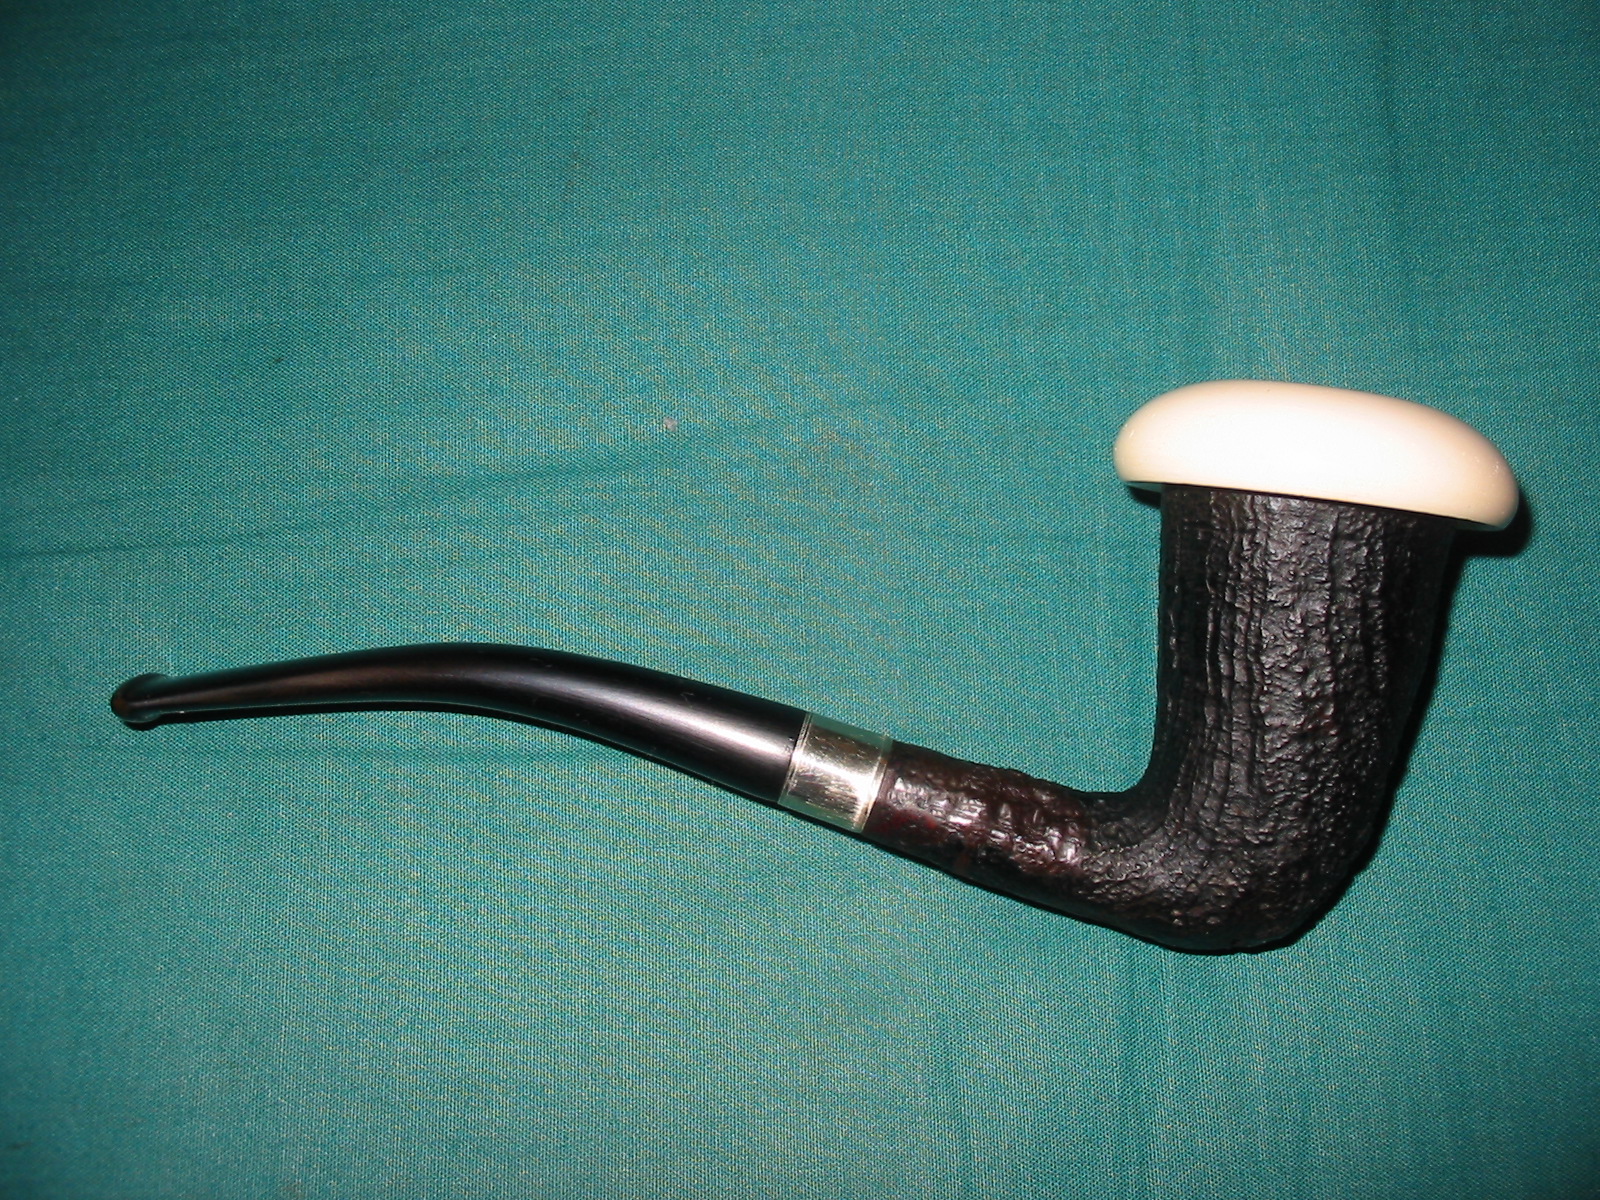
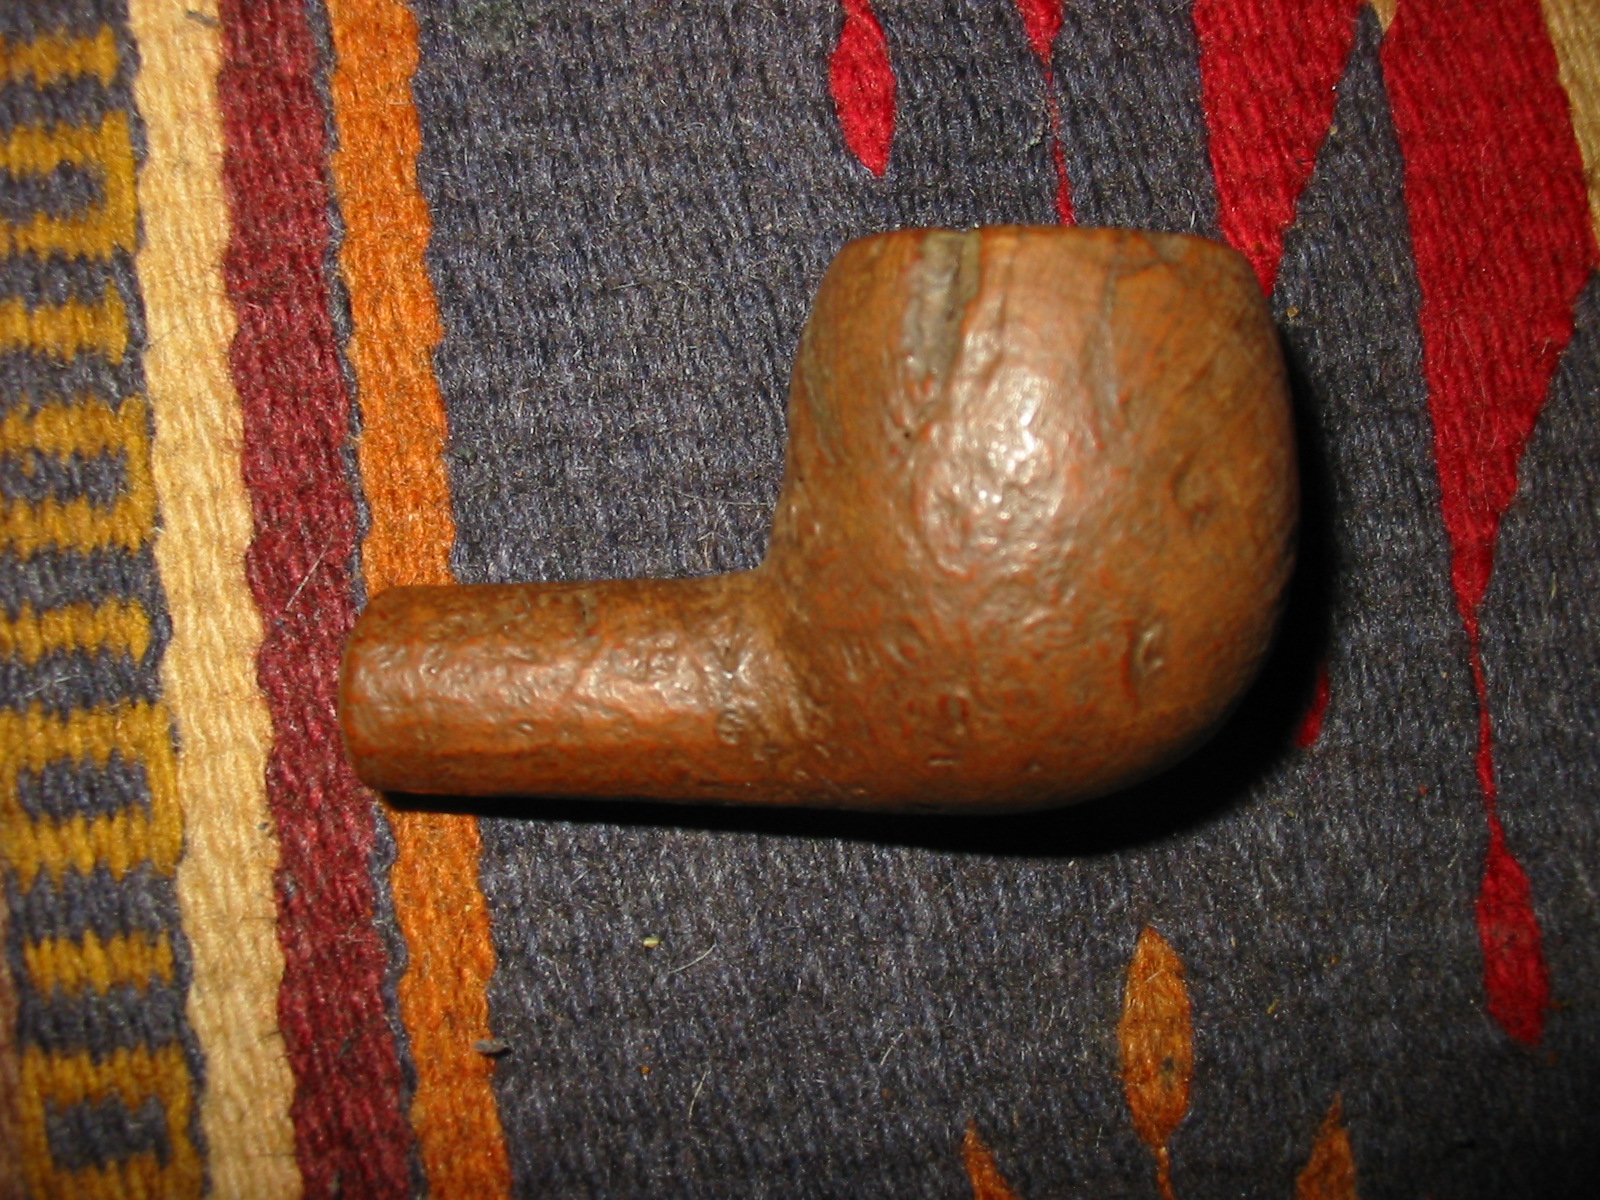
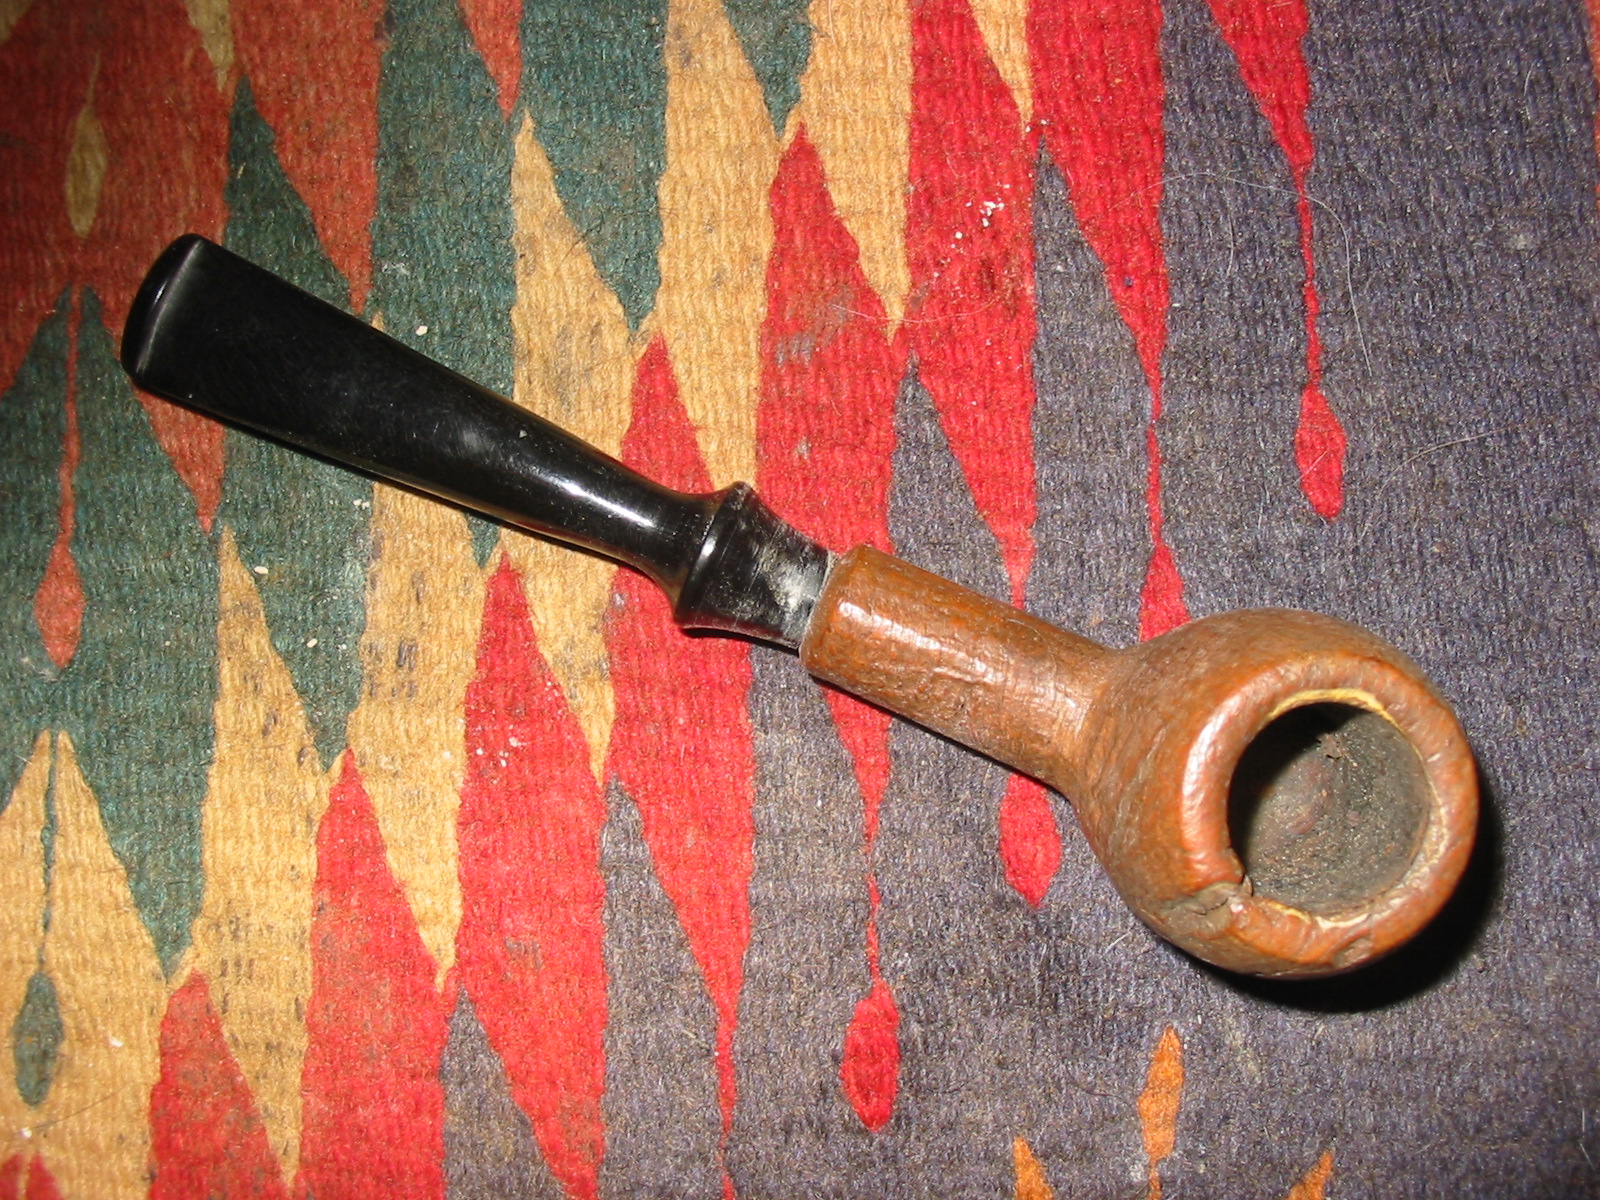
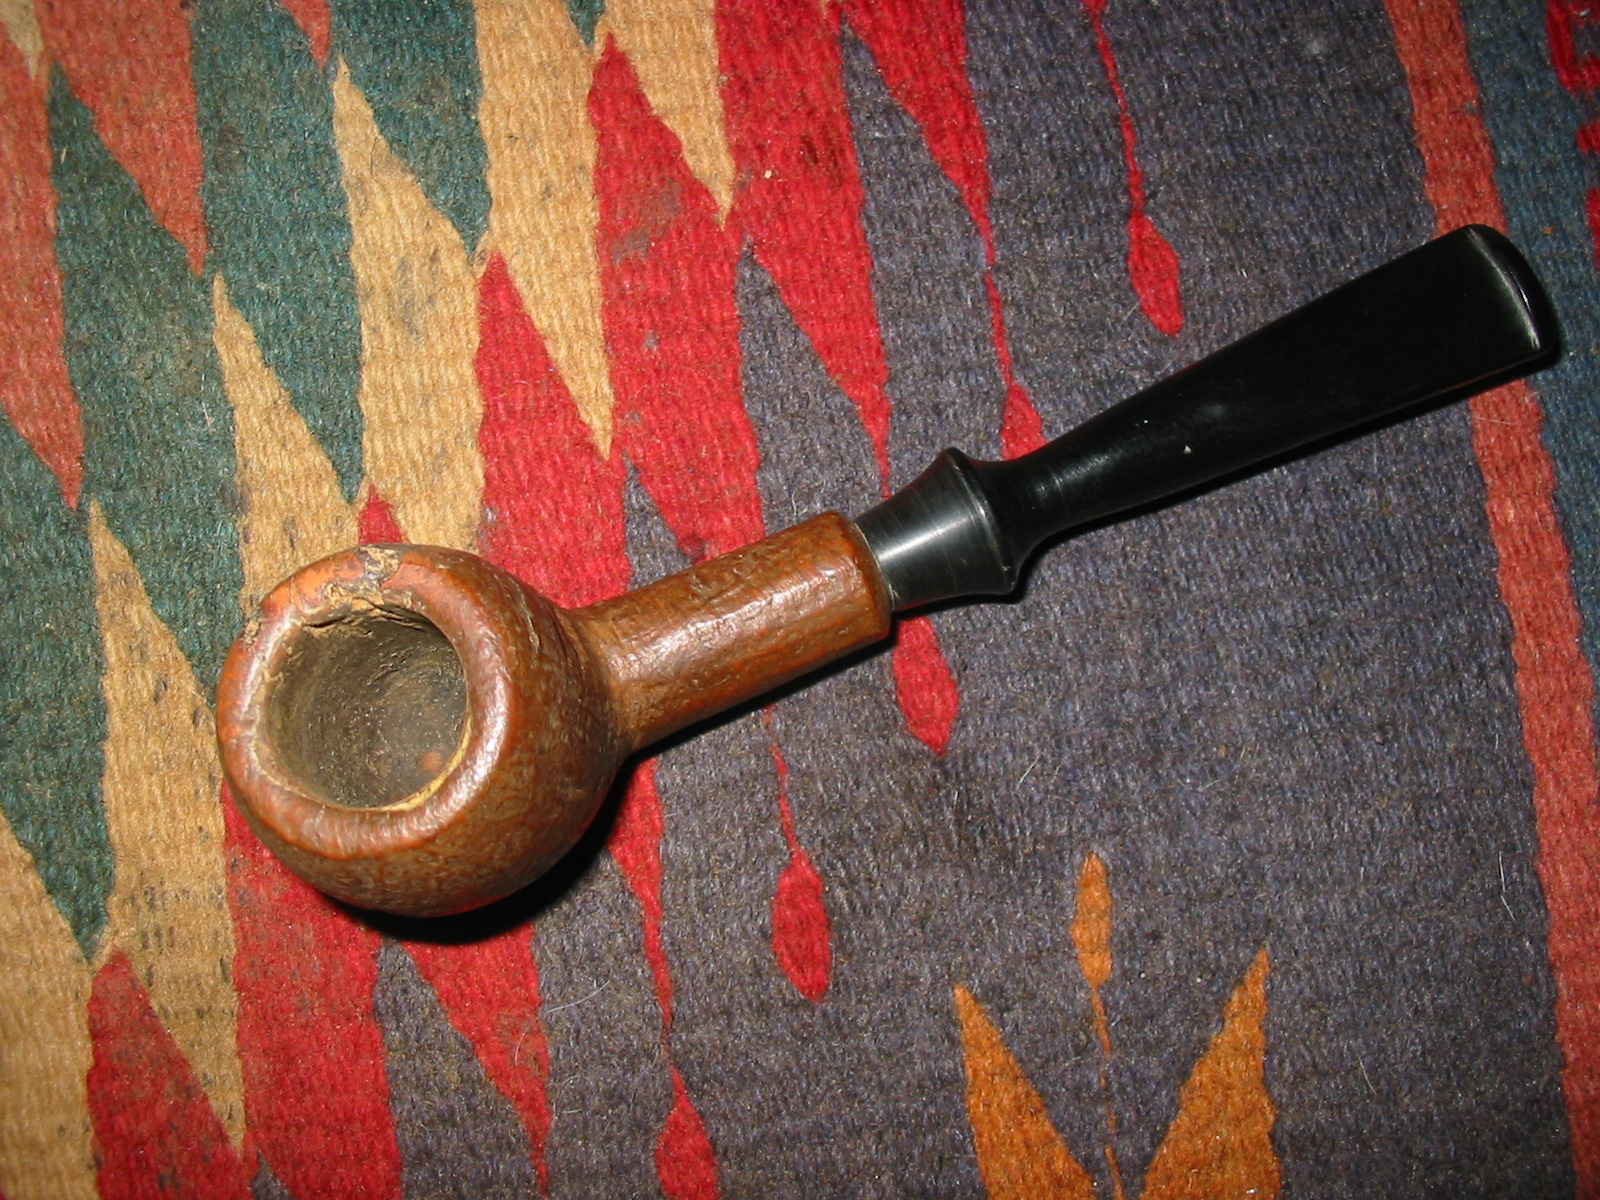
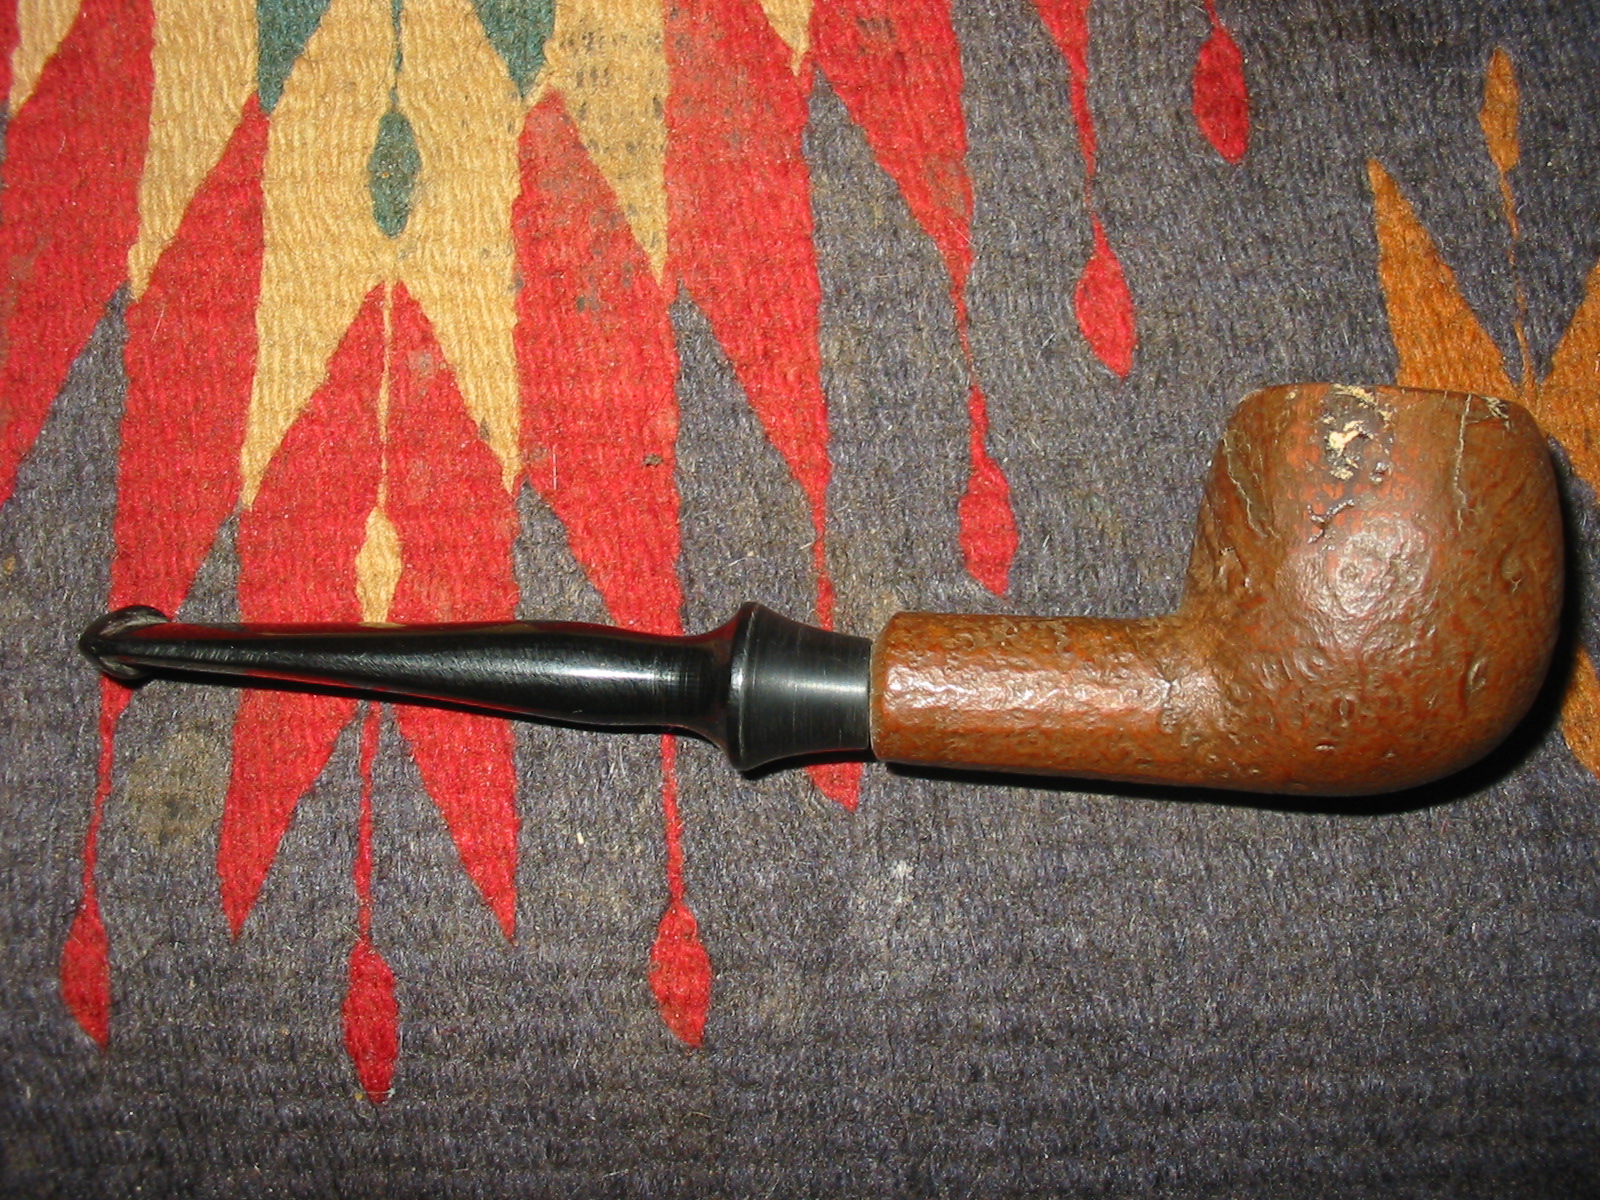
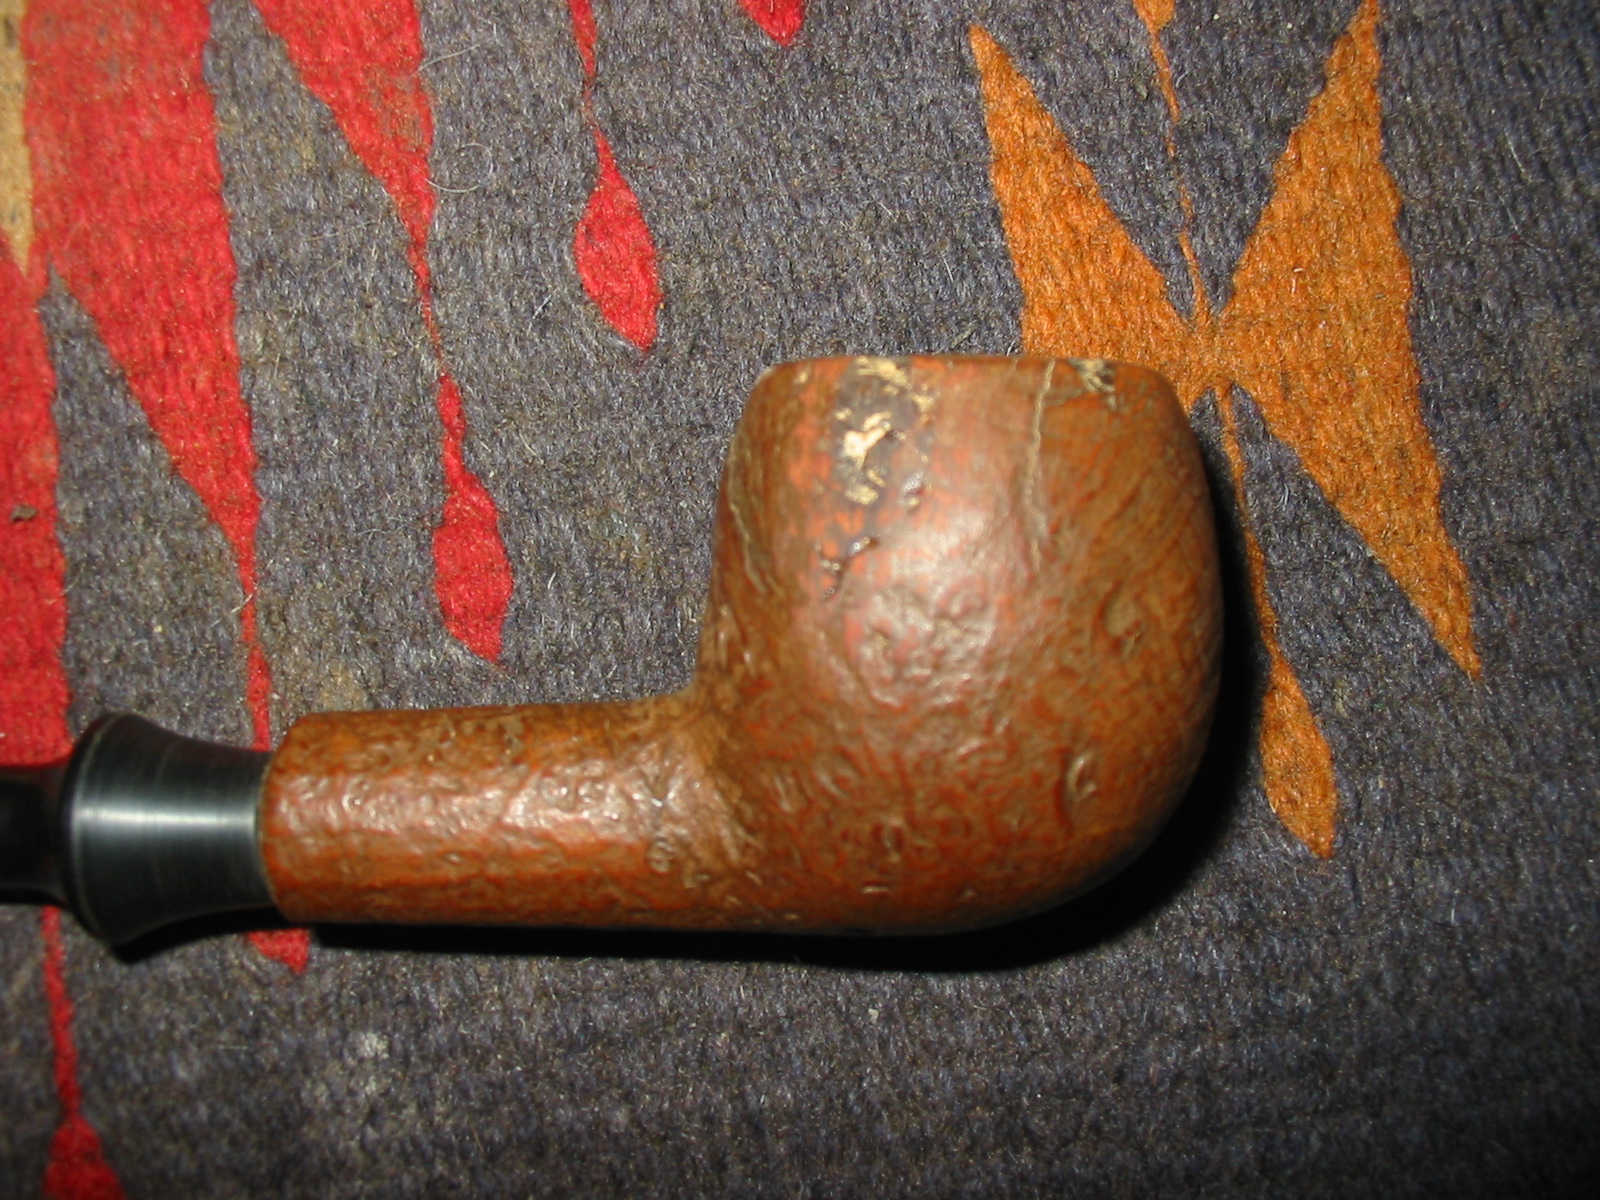
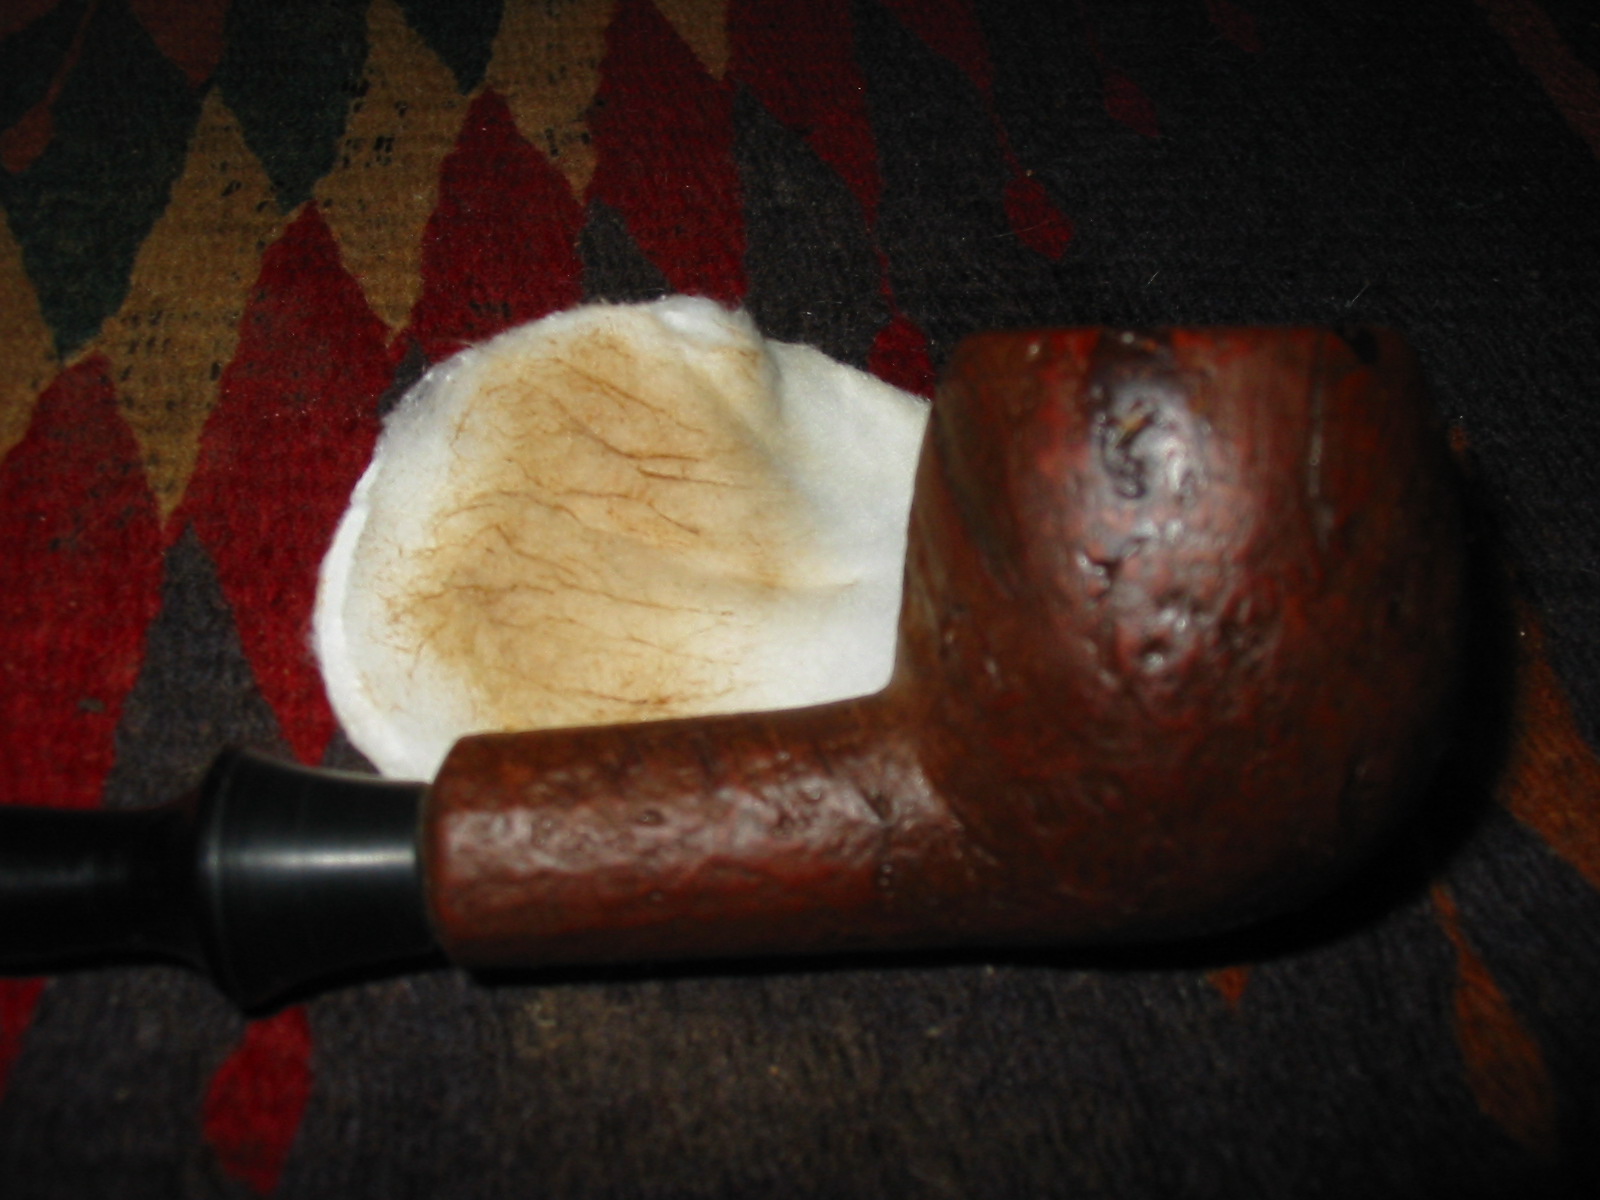
The final Coral finish pipe is kind of a tadpole shaped pipe. It has the same stain combination on it as the first Coral Christmas 2005 pipe. It is the only pipe of Mark’s that I have that I have yet to smoke. I am not sure why but it sits in my pipe cupboard waiting for the right moment. It is stamped Mark Tinsky in script over Coral over American in an oval. It also bears a 5 in a circle for it size. It is quite a large pipe. The rim is smooth and crowned and there is a smooth band around the end of the shank and patch on the underside of the shank for the stamping. The stem bears the metal star in a circle inlay but it is slightly different from my other Tinsky’s in that the star is pewter coloured rather than the brass that is characteristic of the others.
IMG_5587

IMG_5588
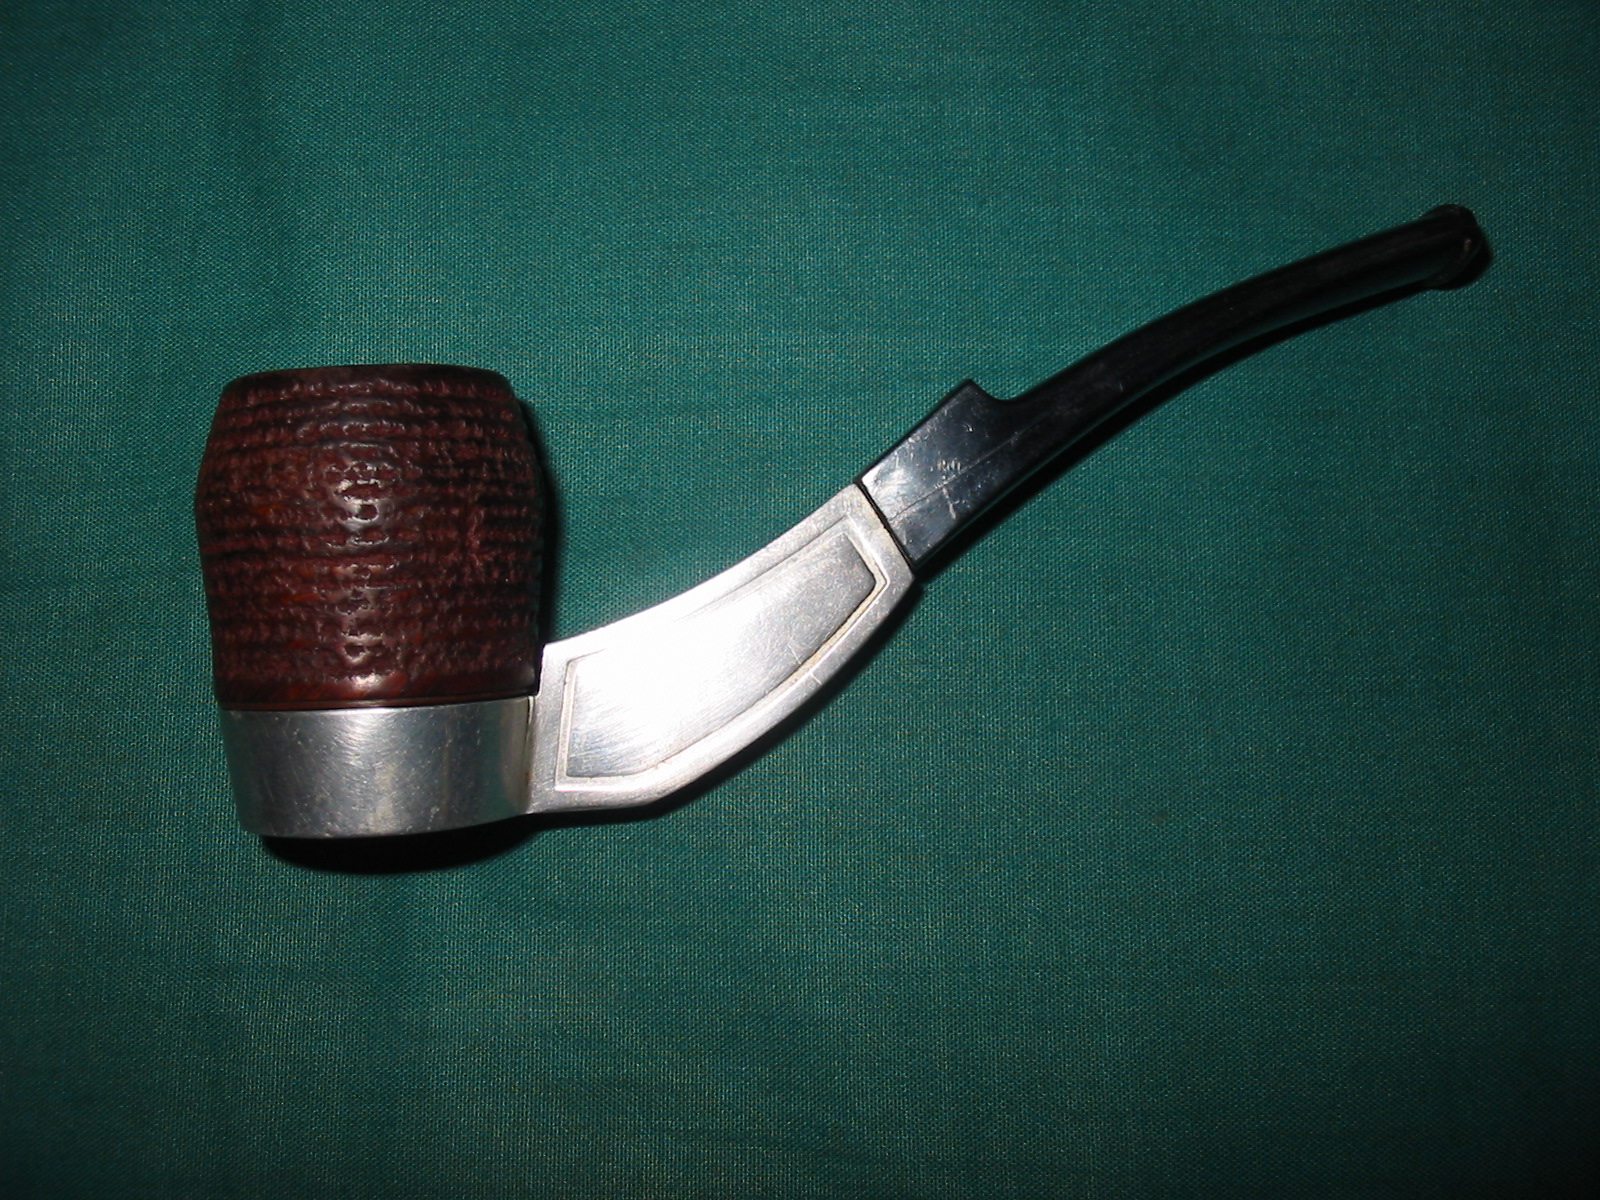
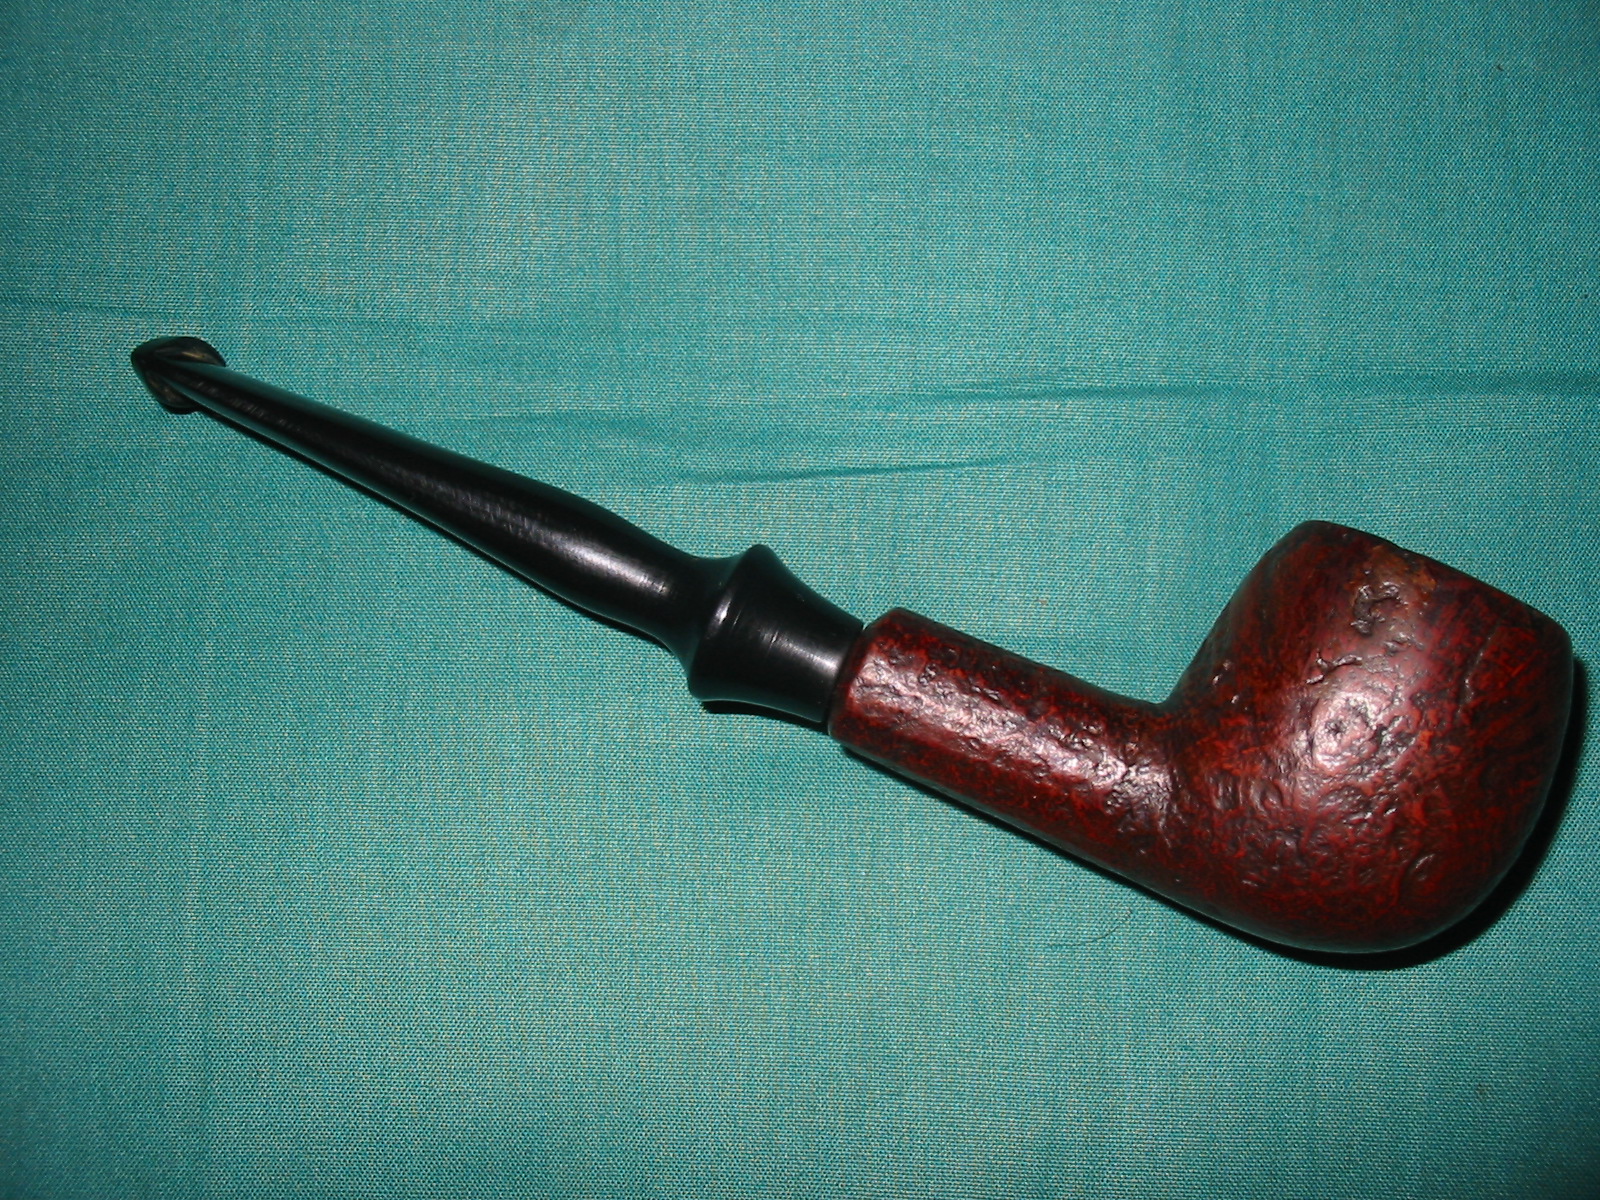
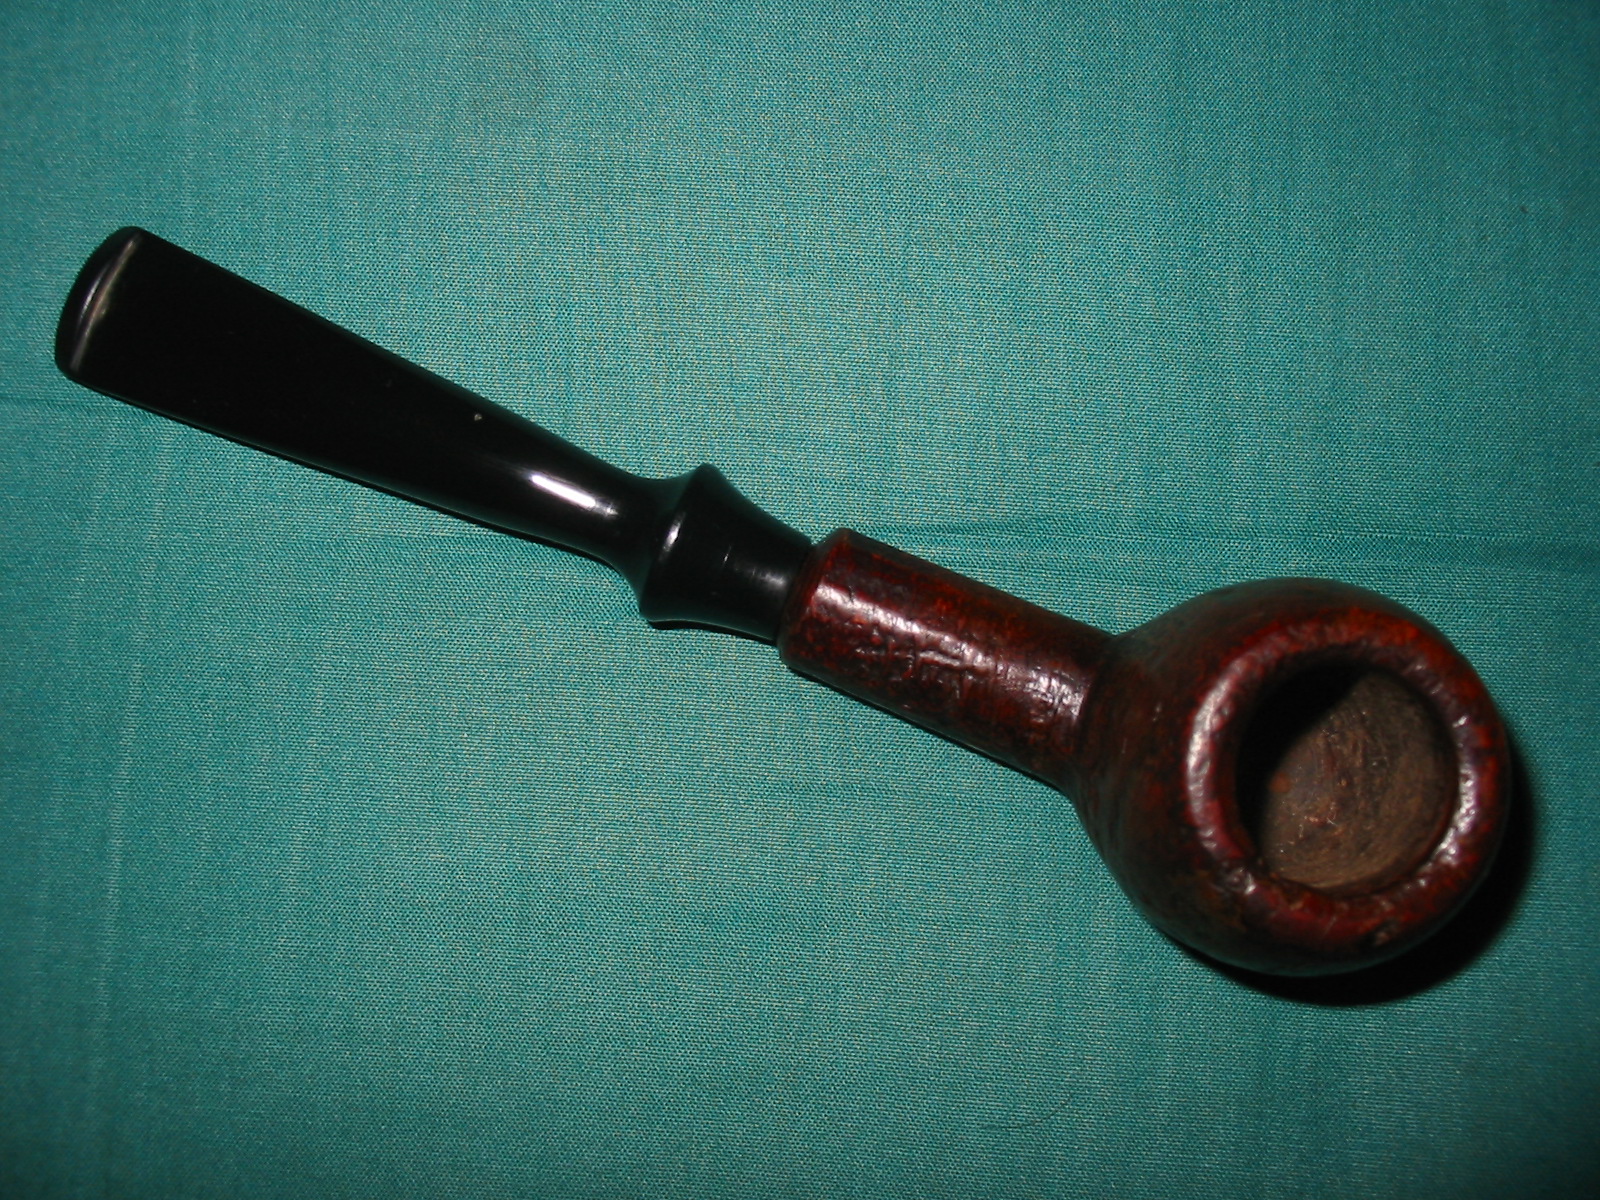
The final pipe in the group photo above is the only Black and Tan finished pipe that I have of Mark’s. It has almost a Danish flair to the Rhodesian shape. The crowned bowl top is set apart by two concentric rings and the finish is a tan smooth. The rim is slightly rounded. There is also a thin smooth band around the shank end and a smooth plate on the bottom of the shank. It is stamped American in an oval over Black & Tan over Christmas 2000. The stem has the characteristic brass star in a circle inset.
IMG_5589

IMG_5590
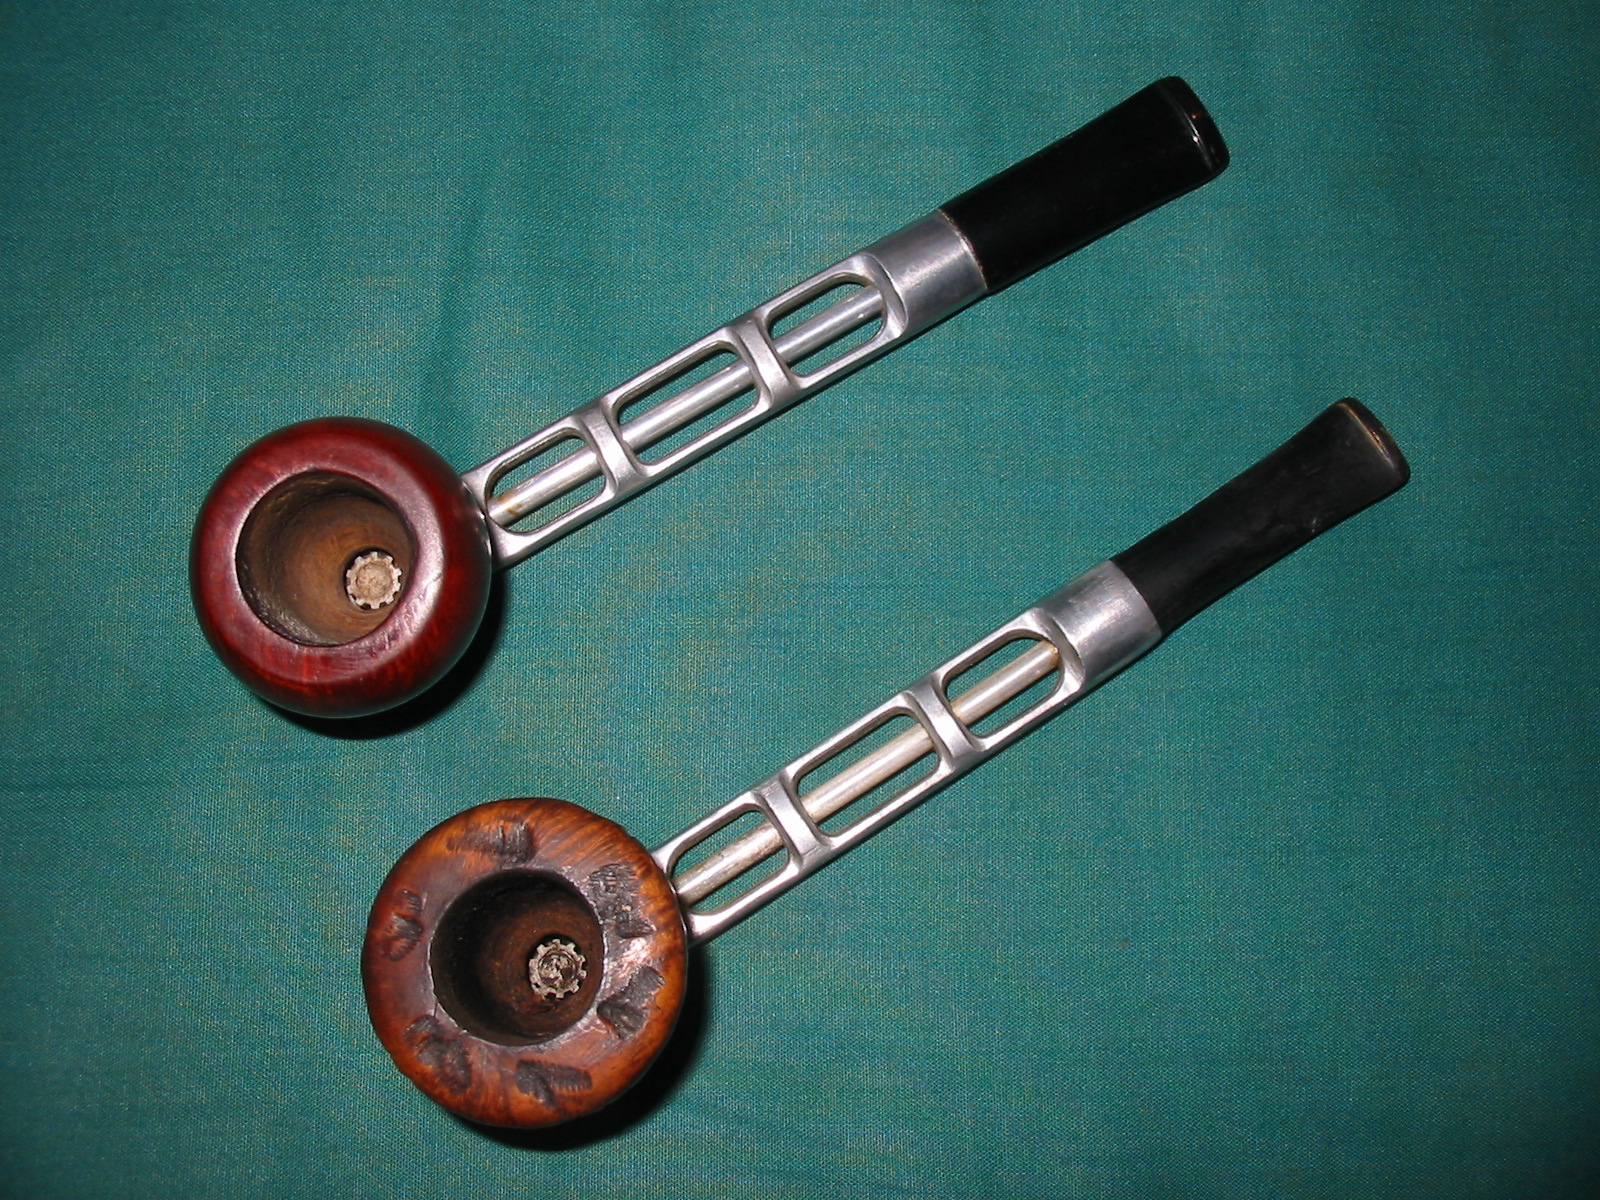
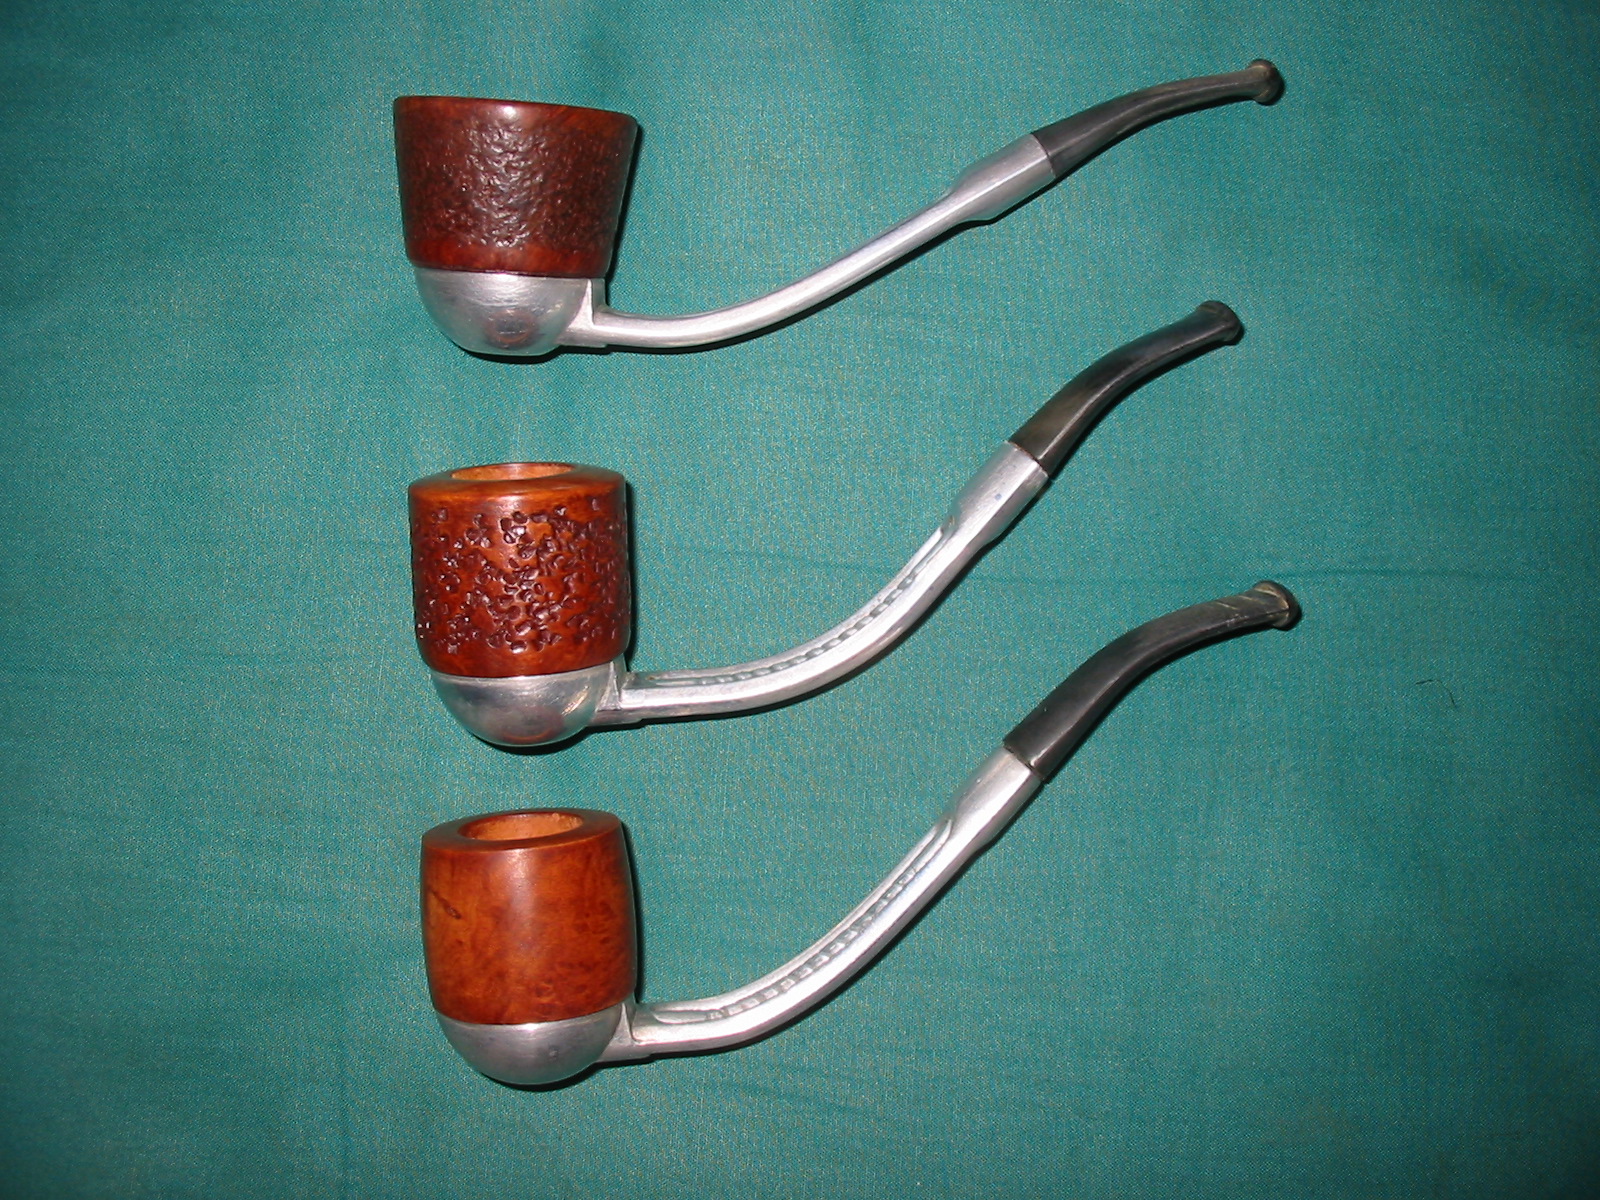
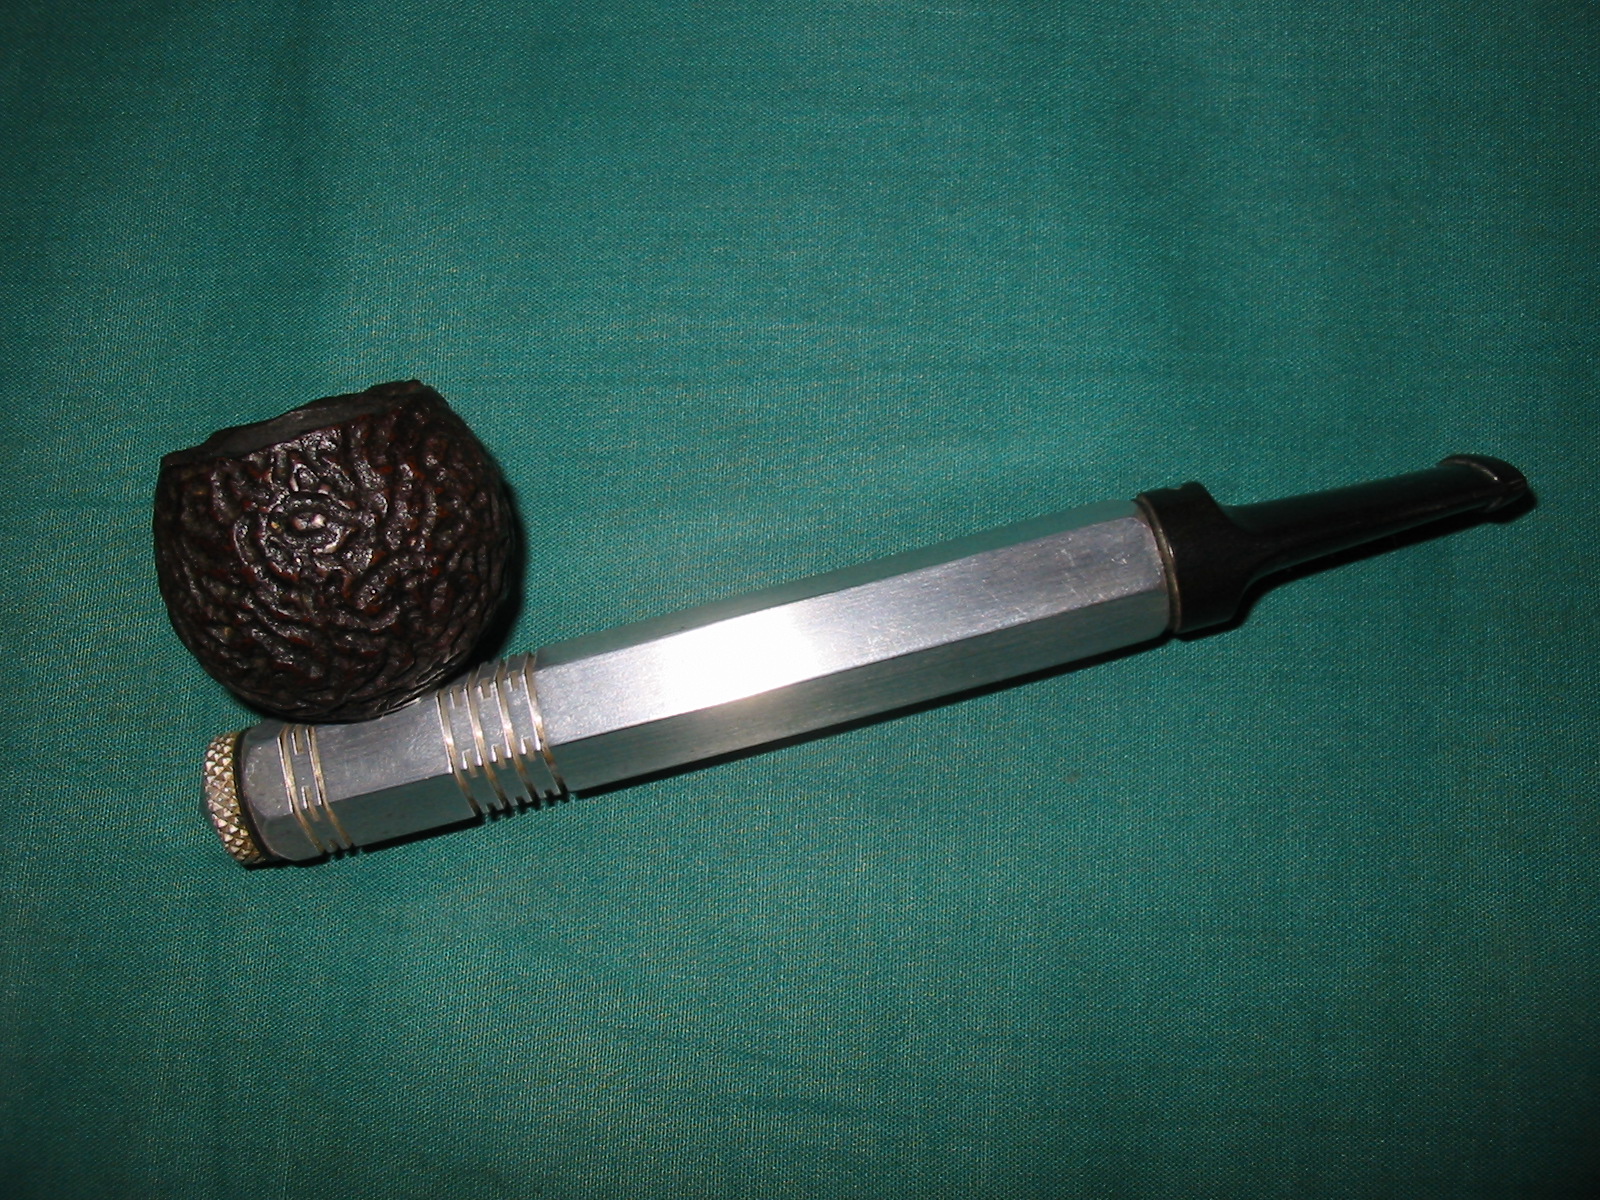
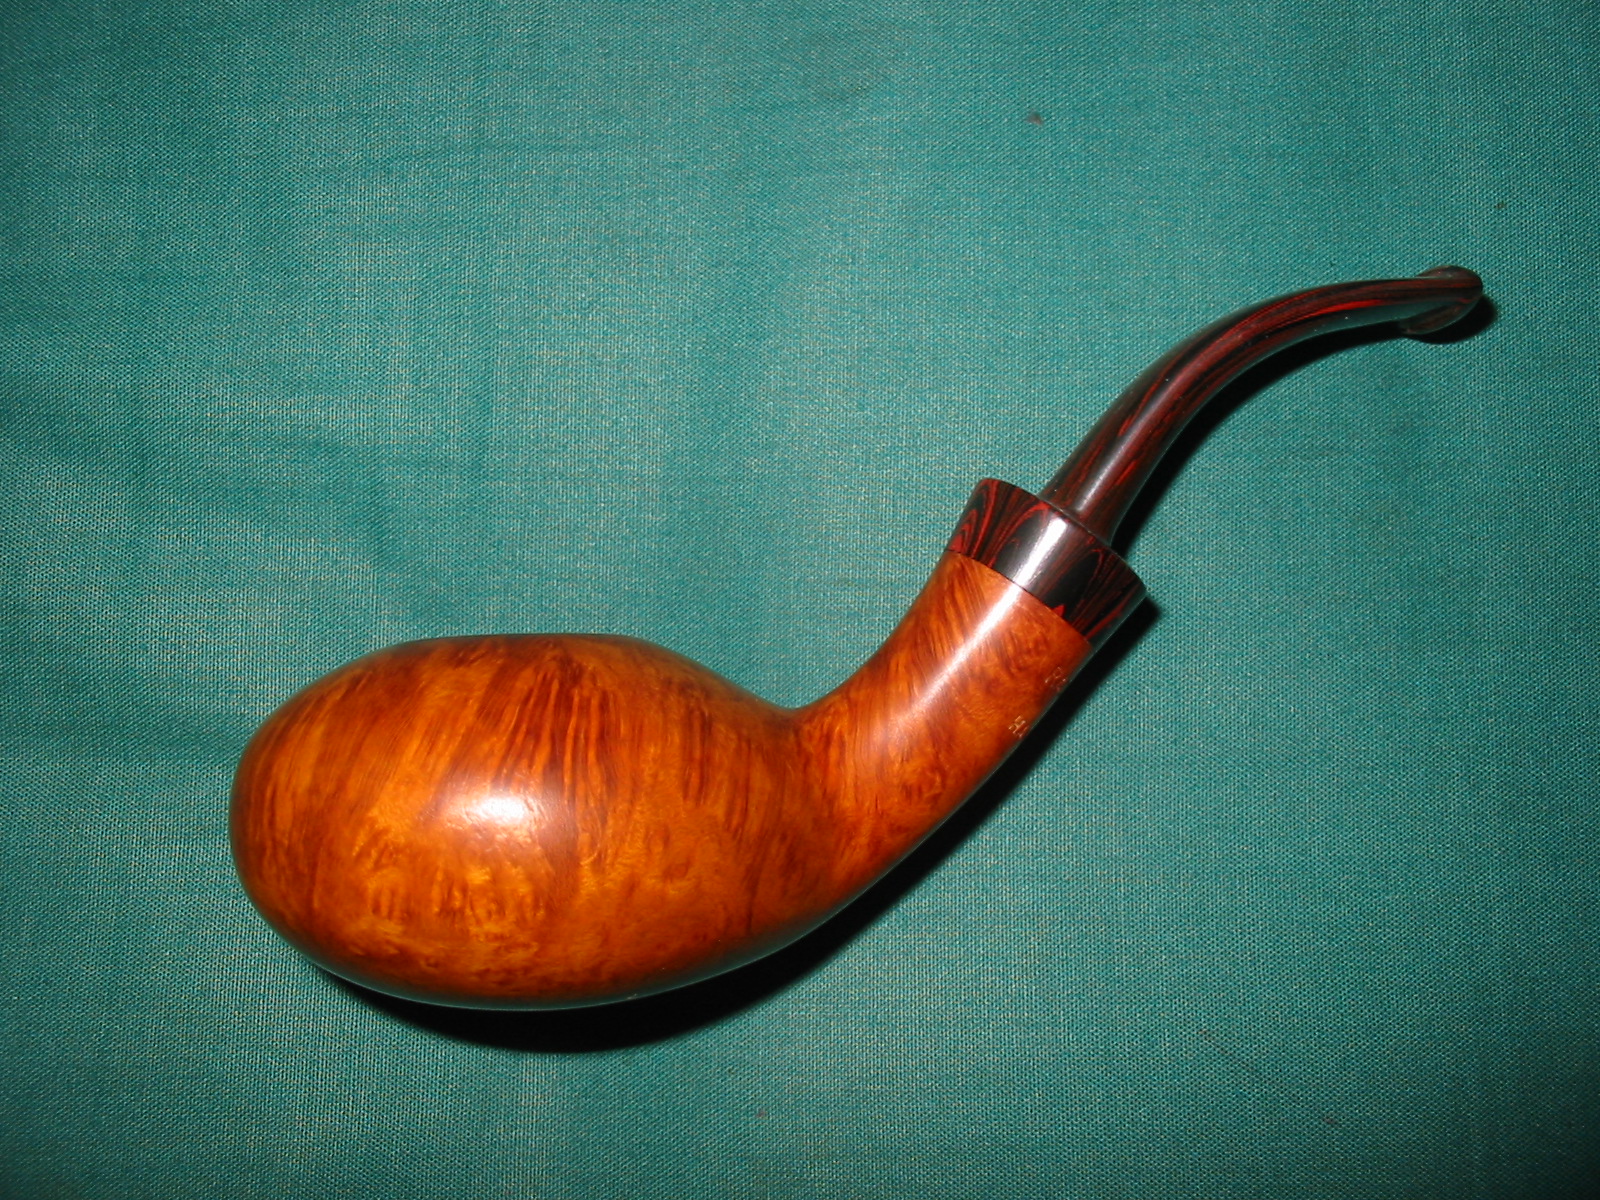
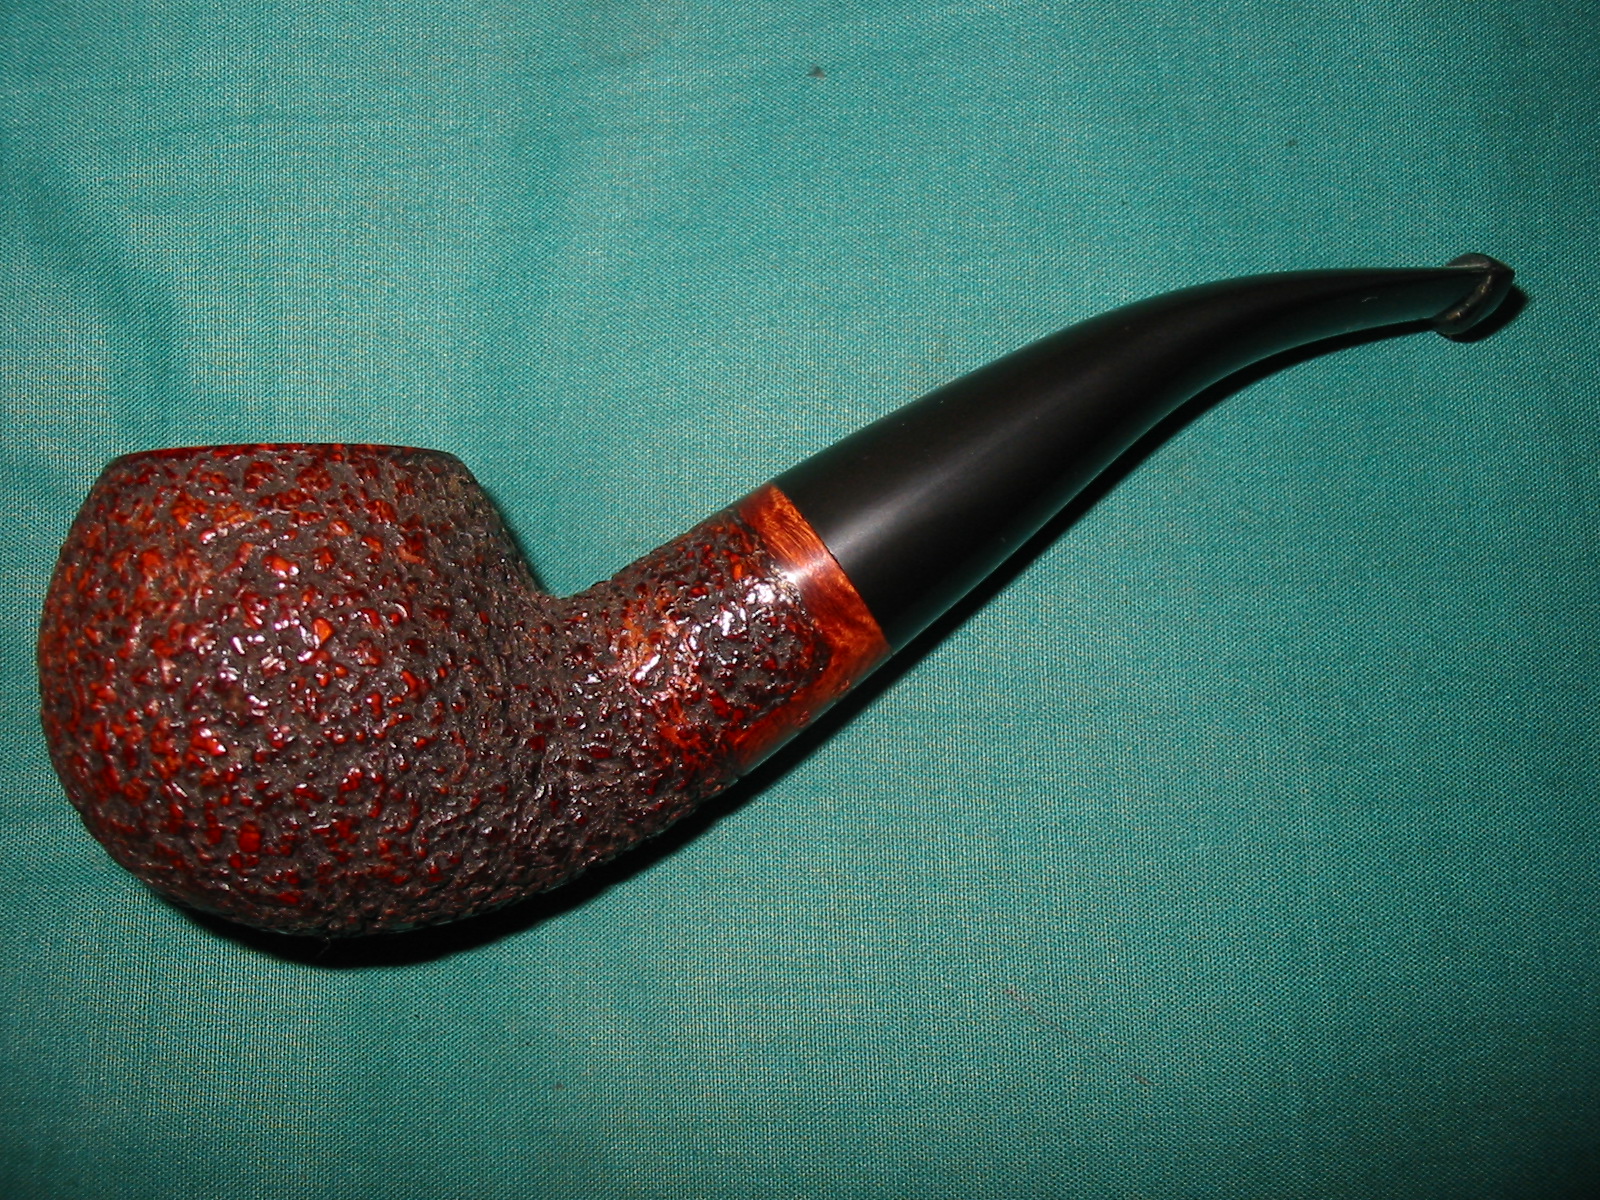
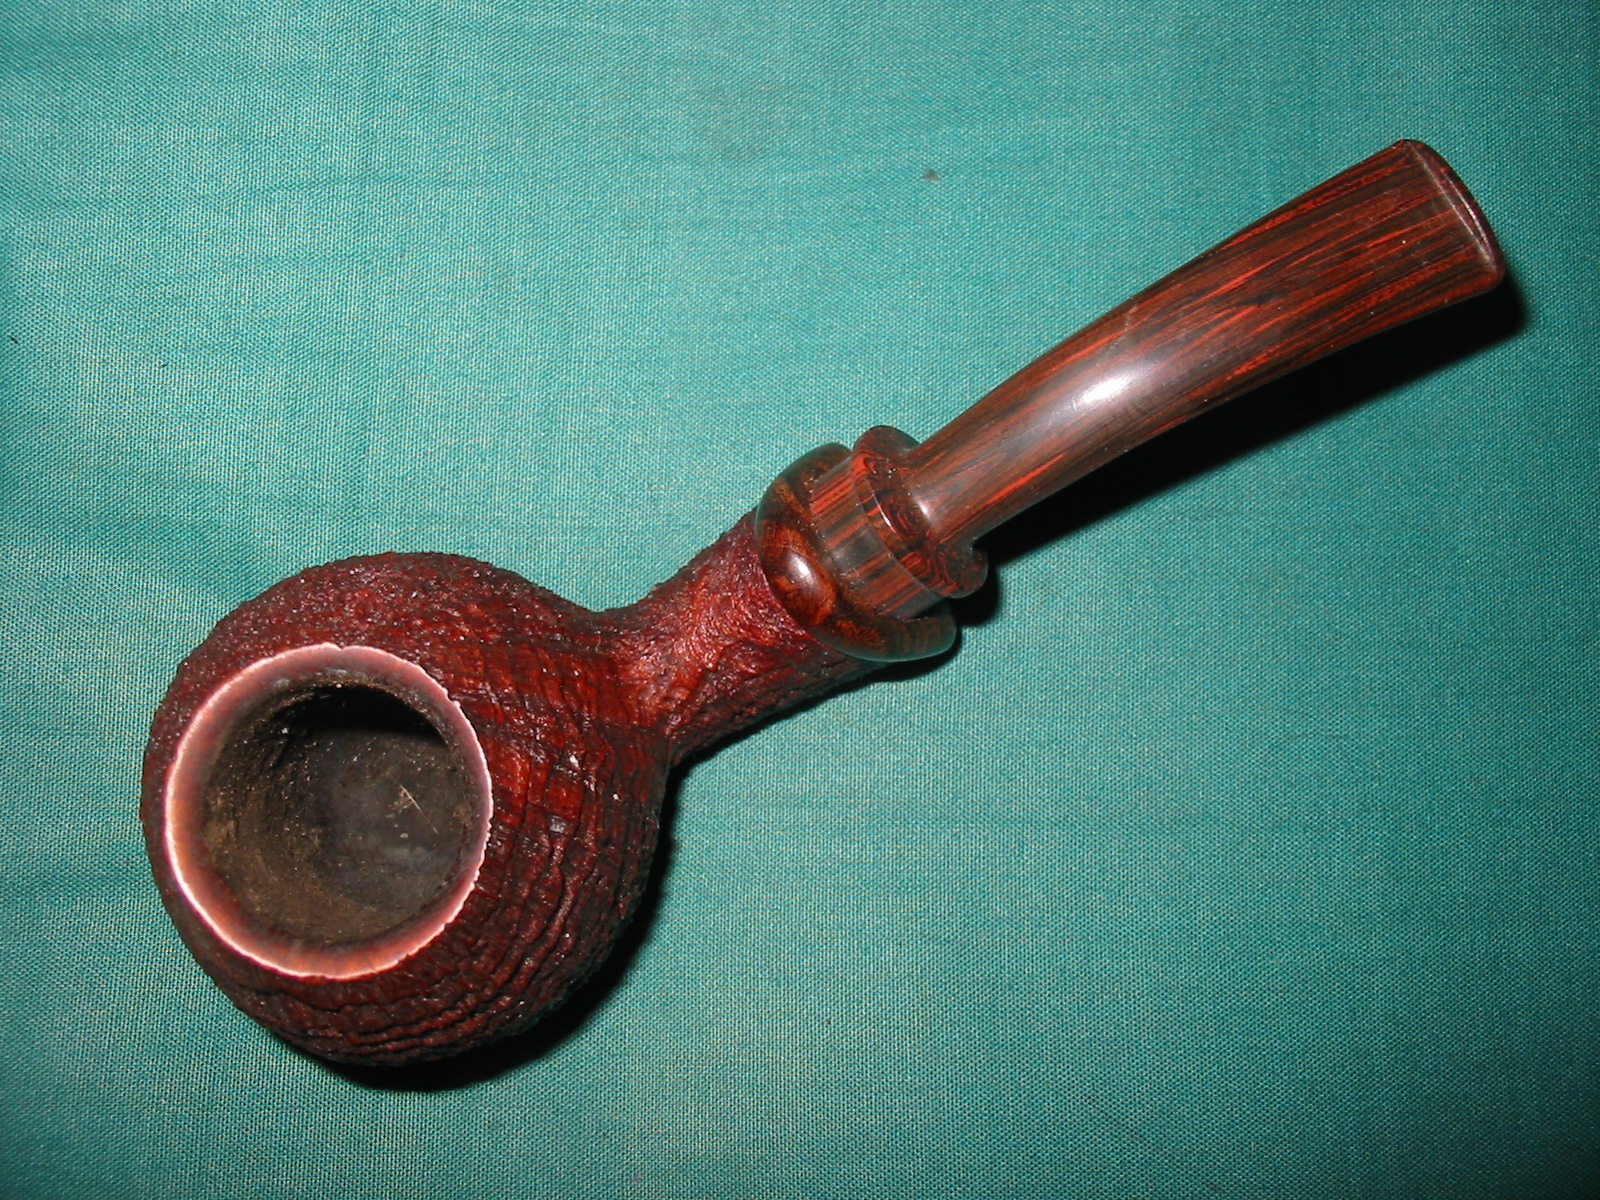
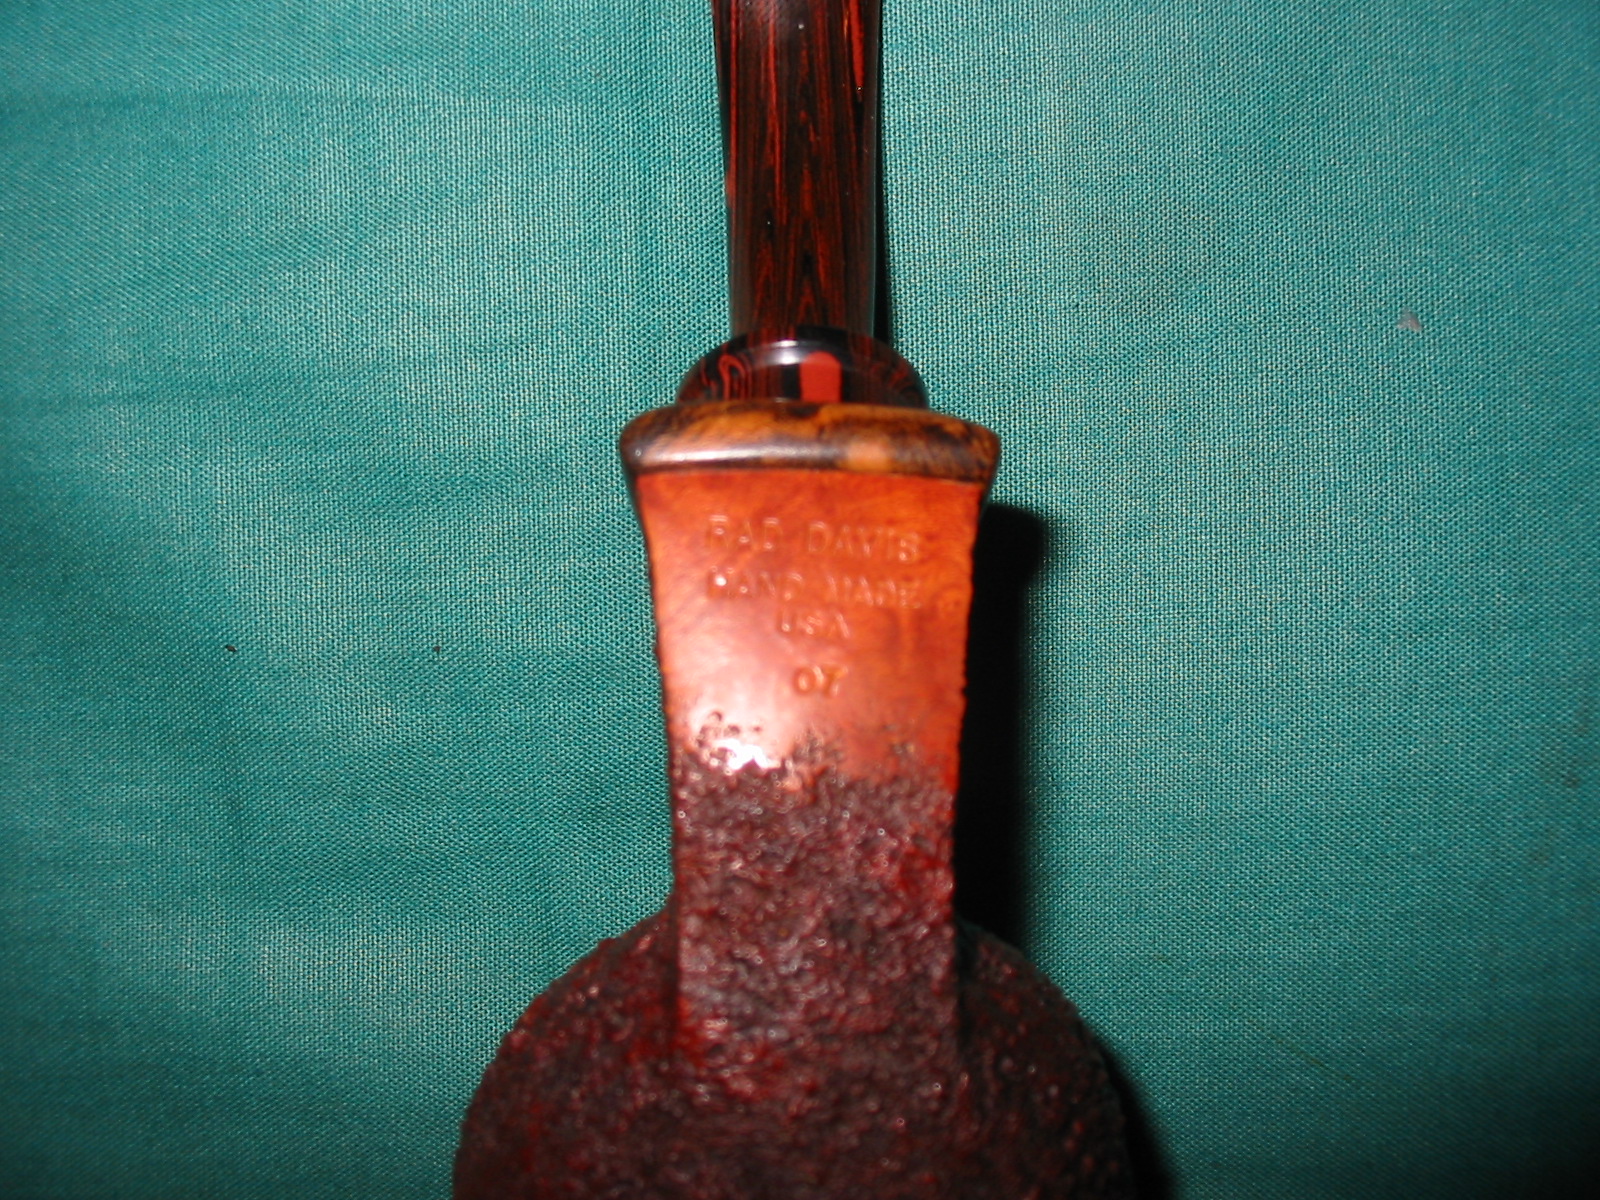
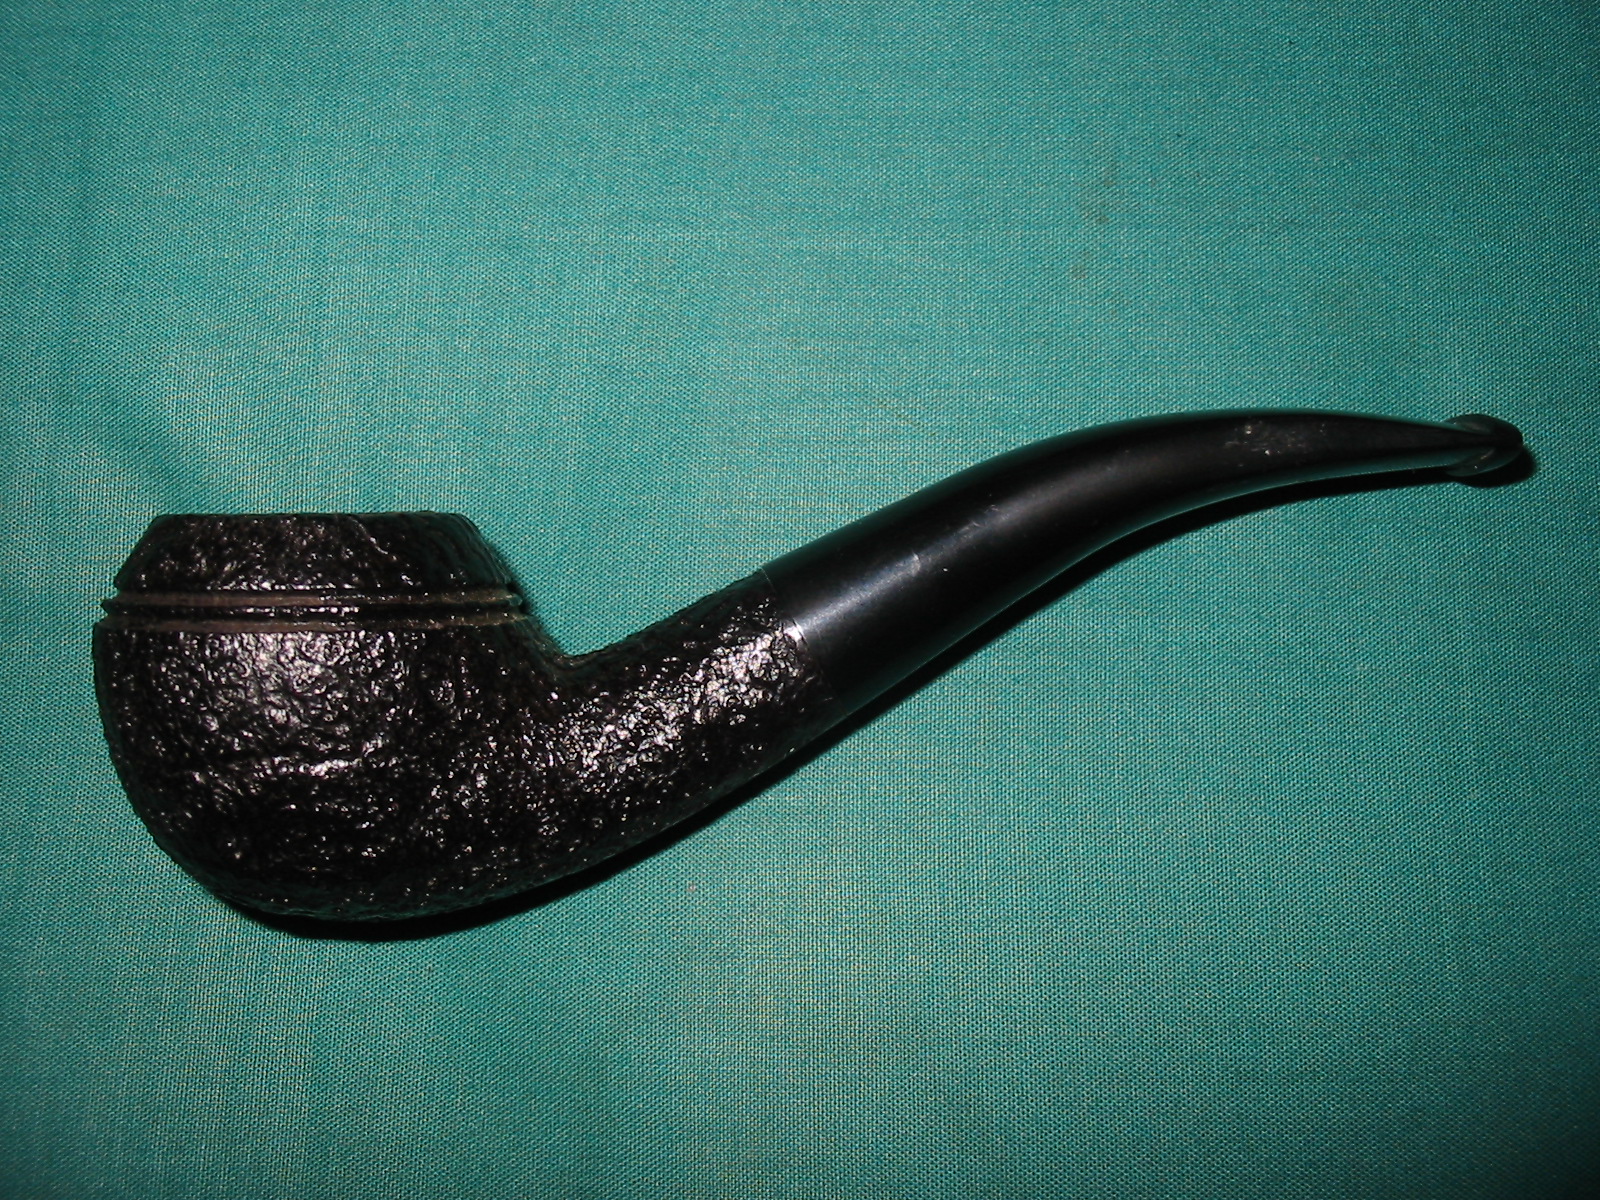
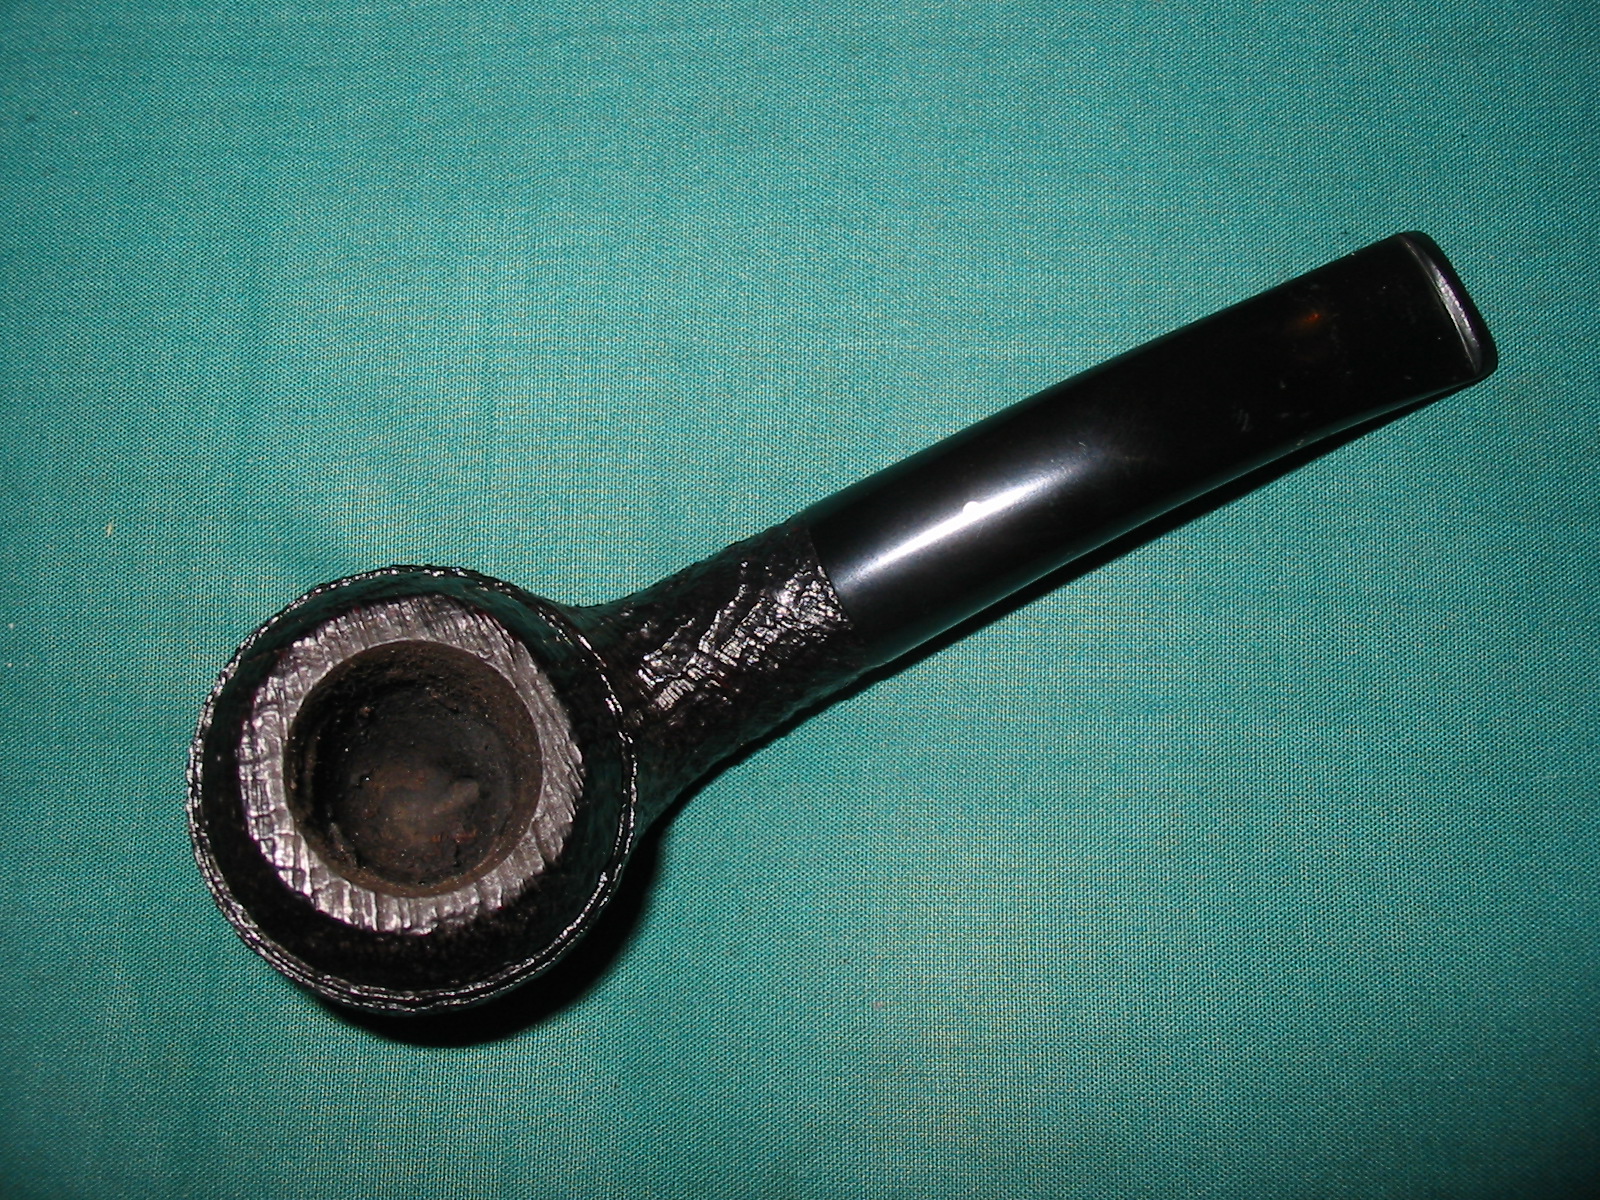
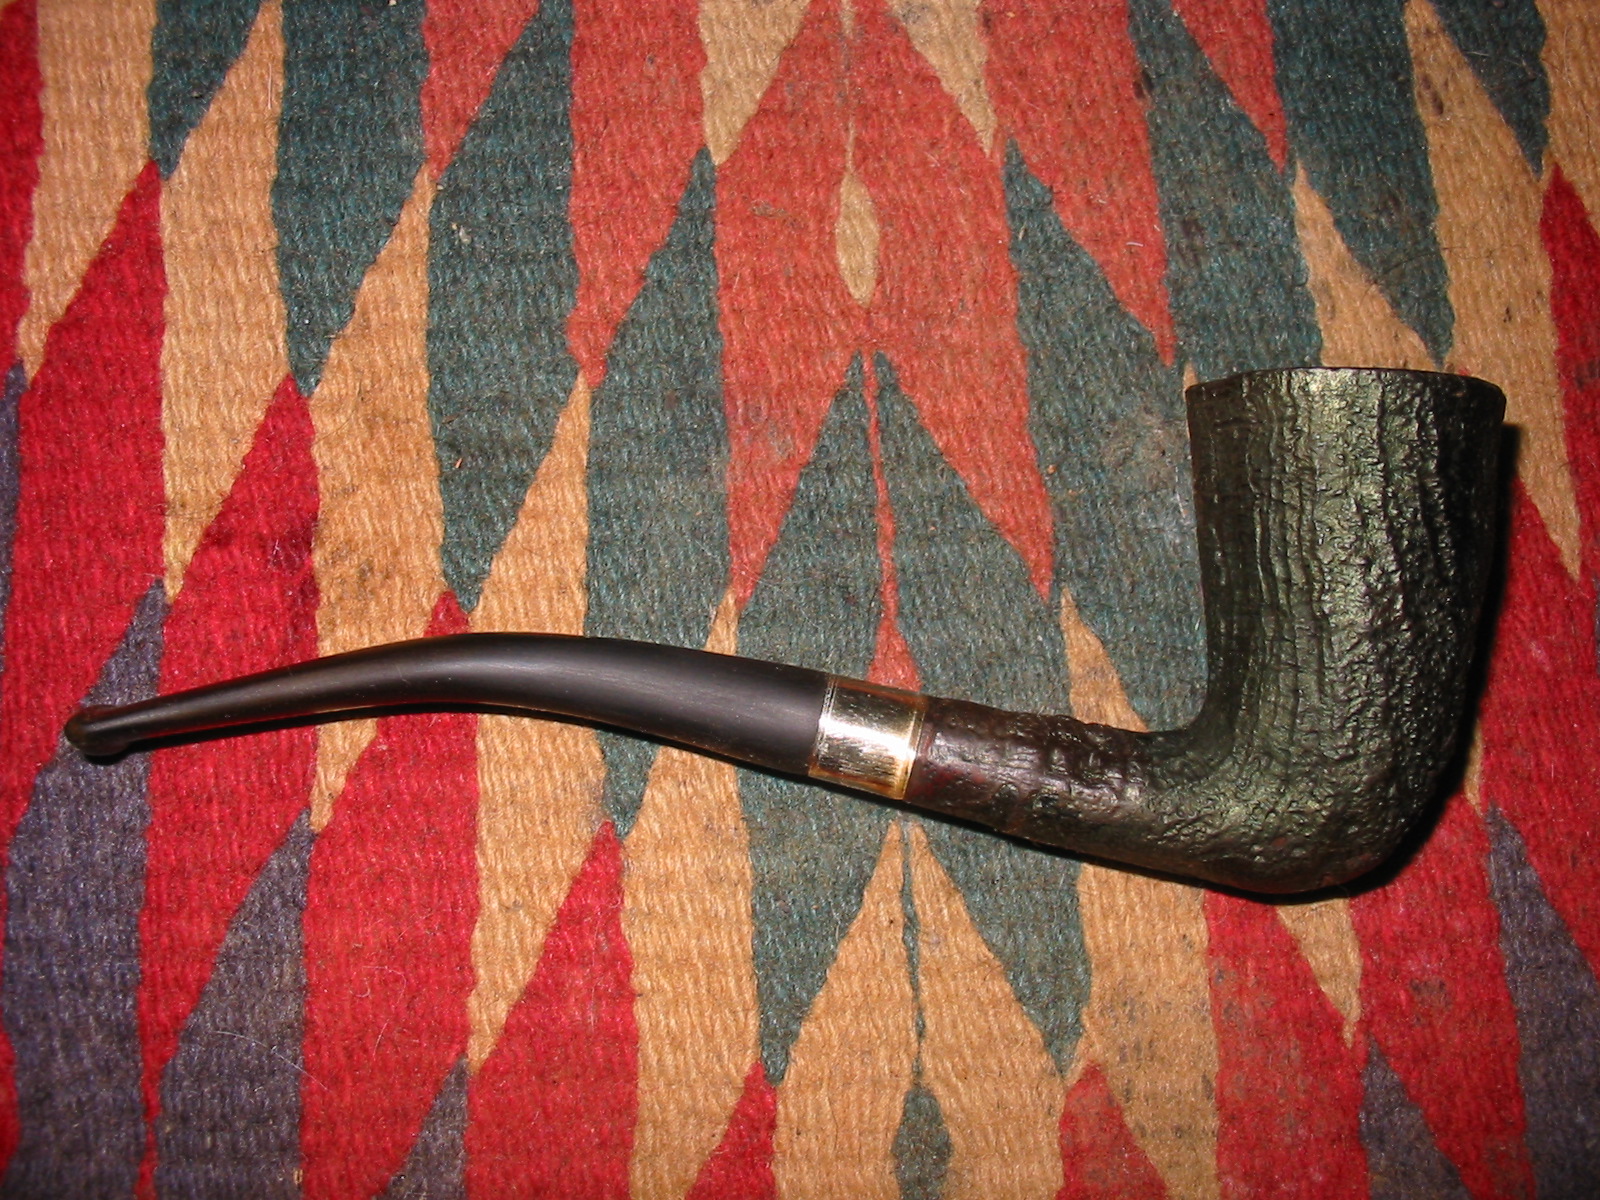
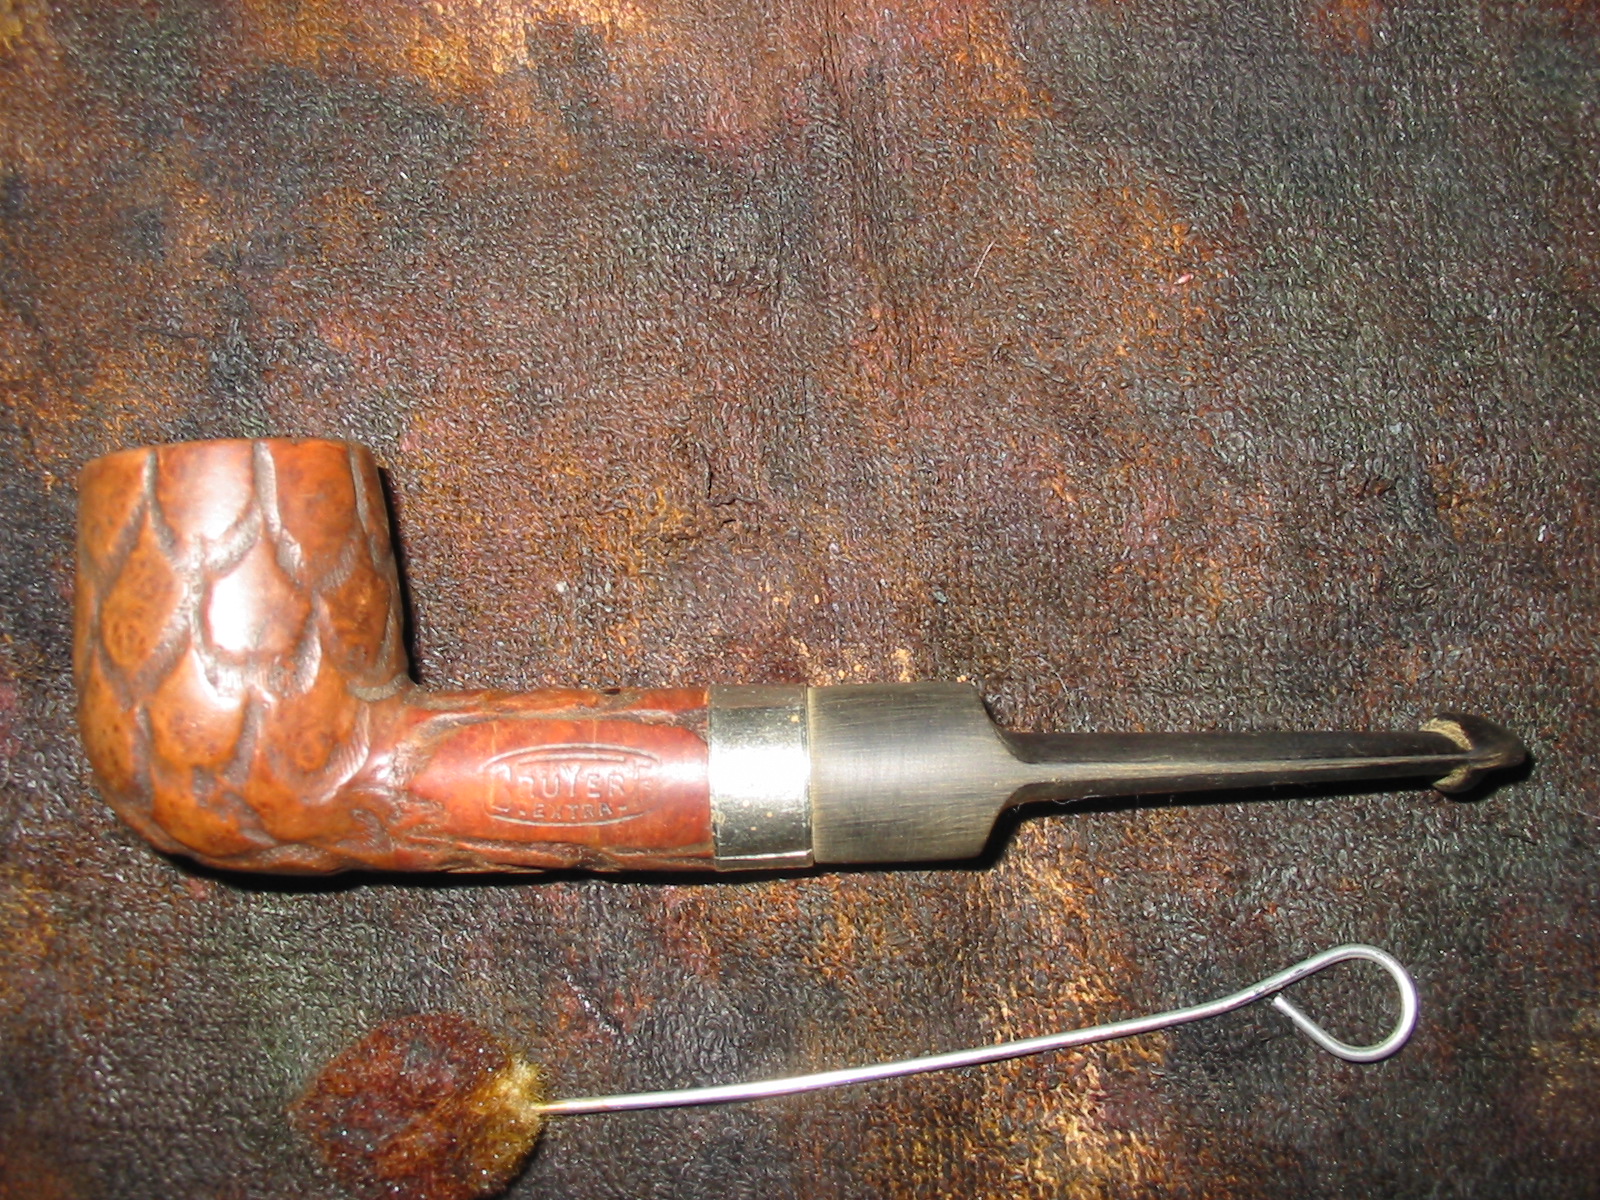
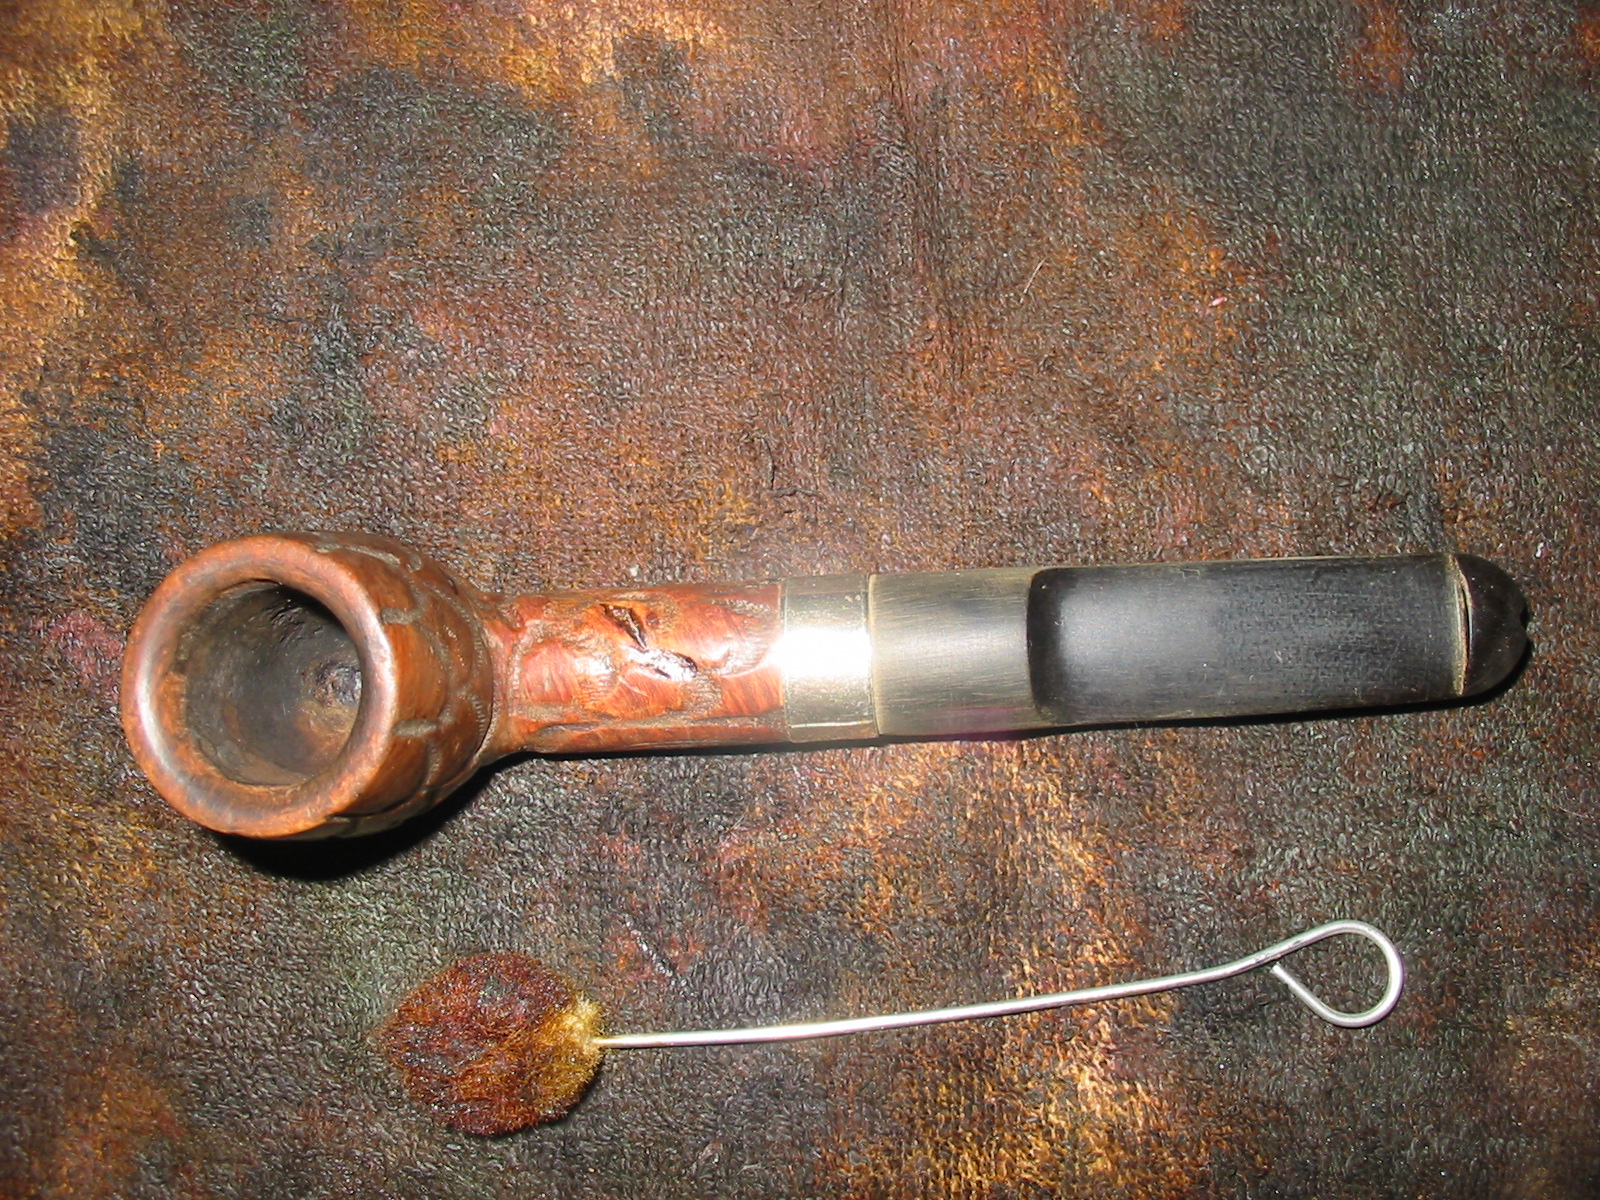
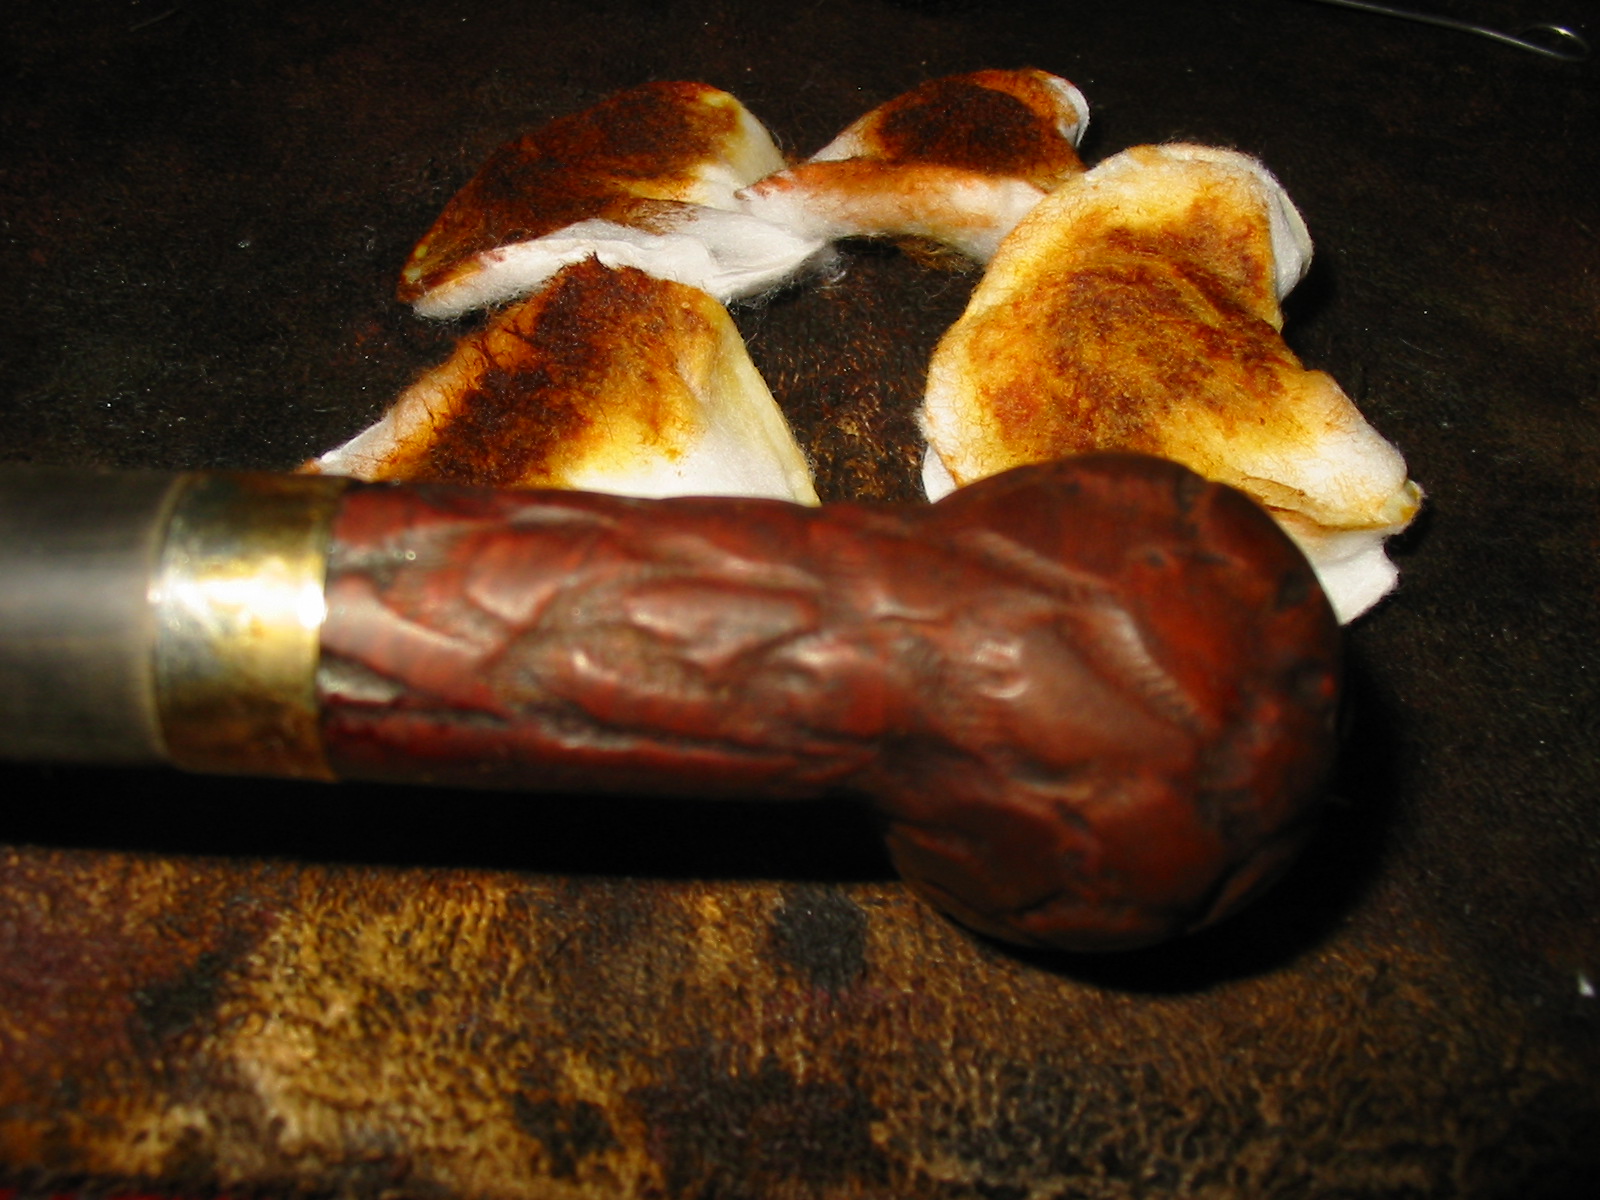
The third group of pipes in my Tinsky collection is the Sandblast finished pipes. I have three Sandblasts. The first of these is probably my favourite Tinsky. I have carried it around the world with me on various trips. It has been smoked quite globally in all of my travels. It is a custom-made pipe that I bought as an estate from Mike Glukler of Briar Blues. It is a bent apple of sorts with a vulcanite ring on the end of the shank. The stem is a faux stick bit with a saddle. The grain on this one must have been a flame grain and the blast flares up evenly from birdseye on the bottom of the bowl. The rim is smooth as is a band around the end of the shank and a panel on the bottom of the shank for the stamping. It looks to me like Mark used a fine rustication pattern around the band and the panel to give it a more defined shape. It is stamped American in an oval over the Mark Tinsky signature over Blast with a 4 in a circle. Each line of the stamping is separated by a finely cut rustication. The stem does not have the typical star inlay as there is not a surface that would hold it.
IMG_5591

IMG_5592
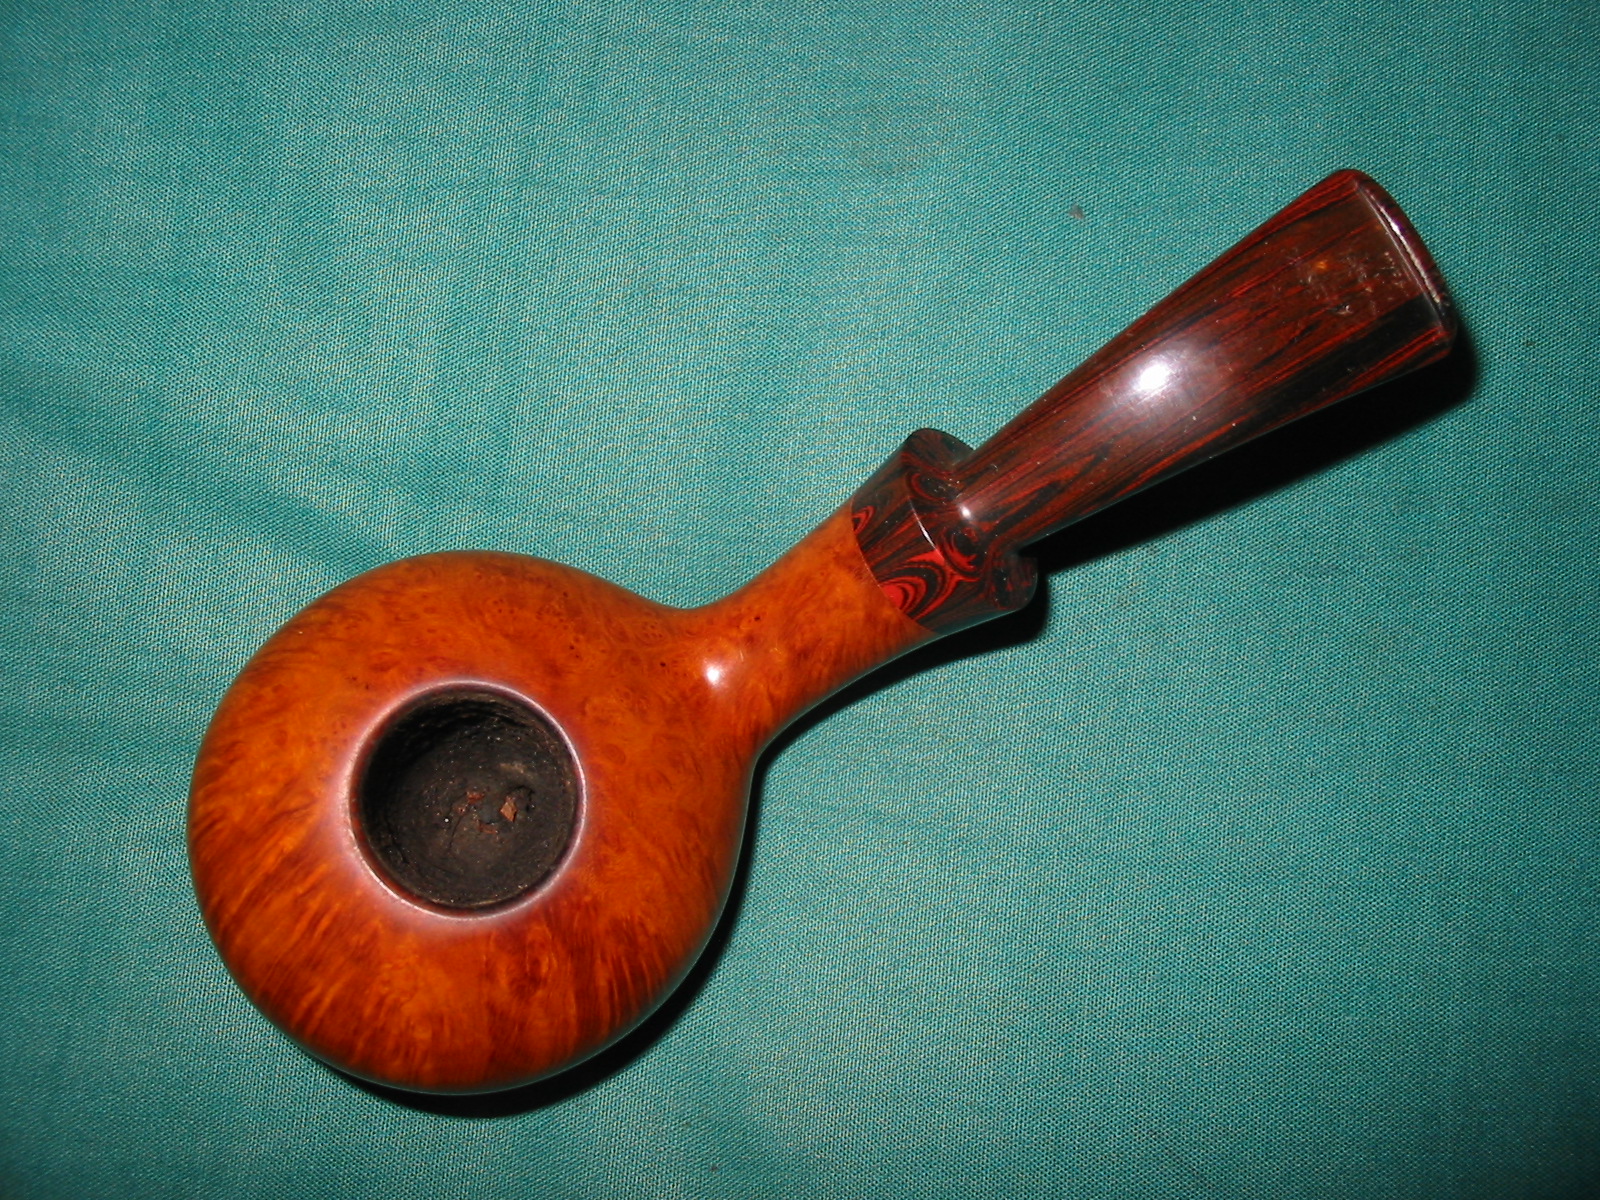
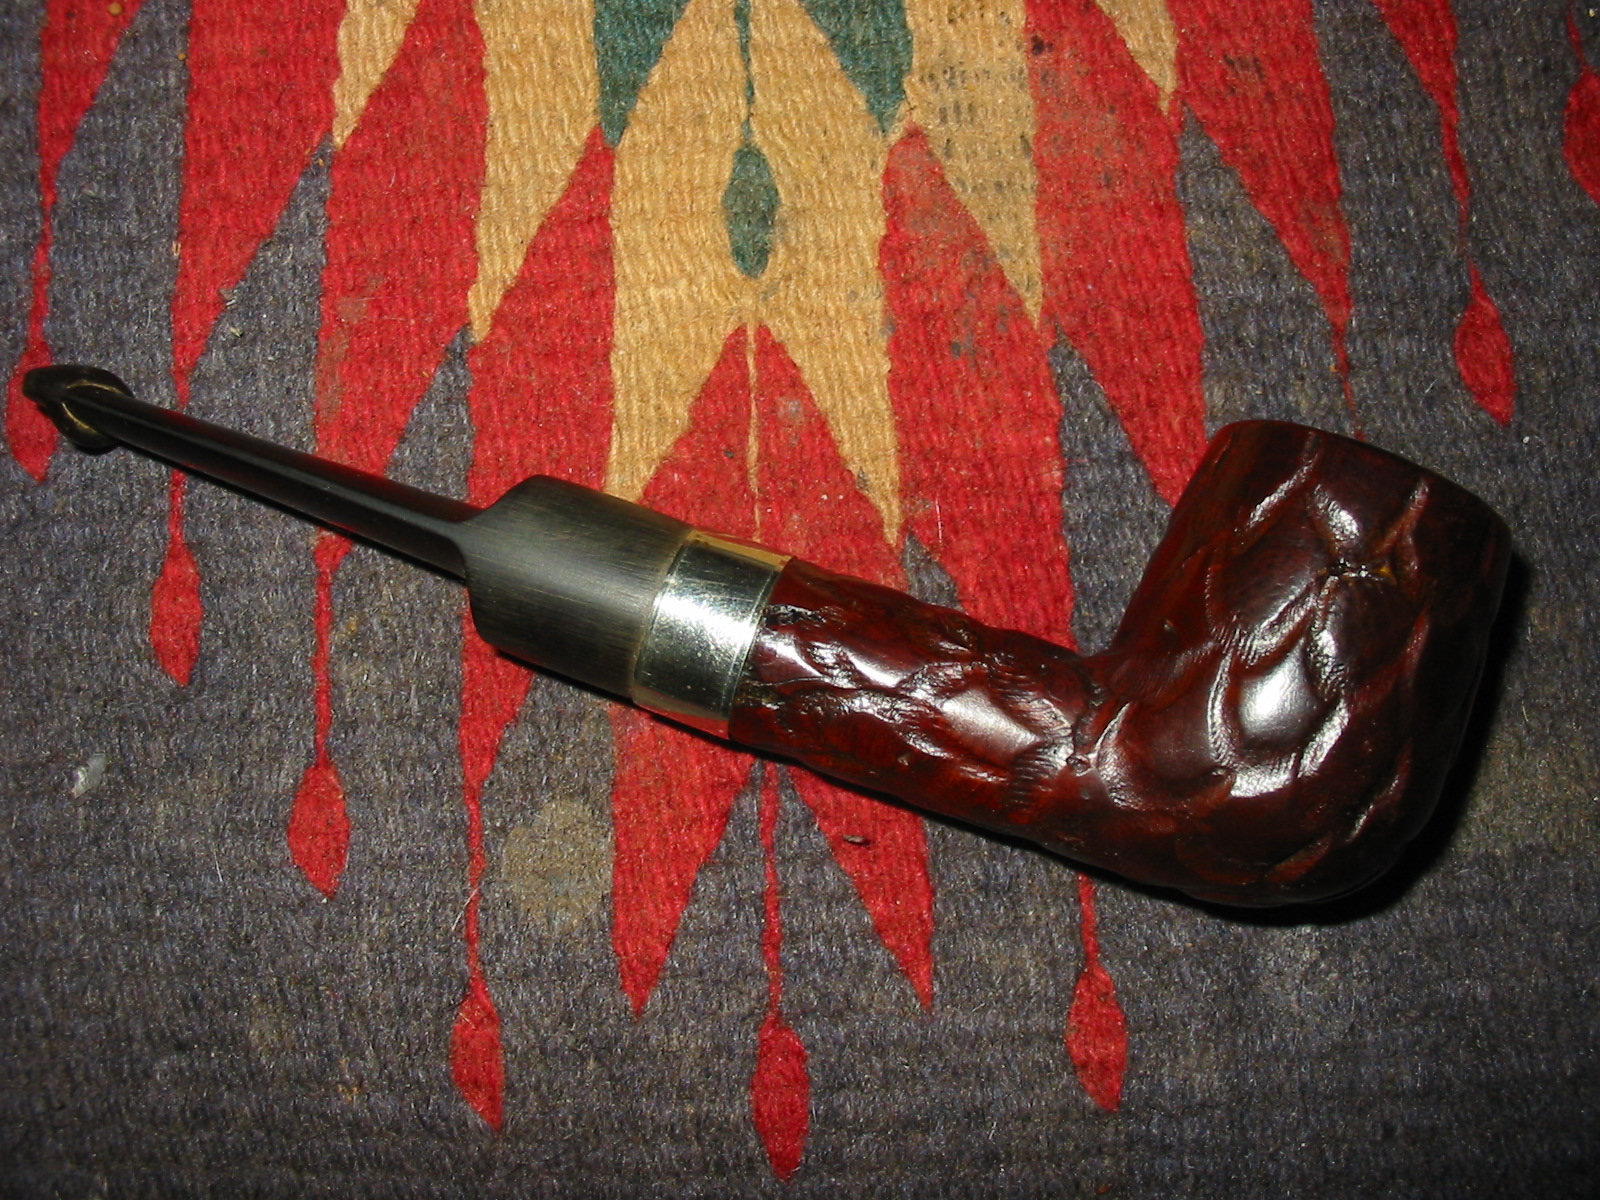
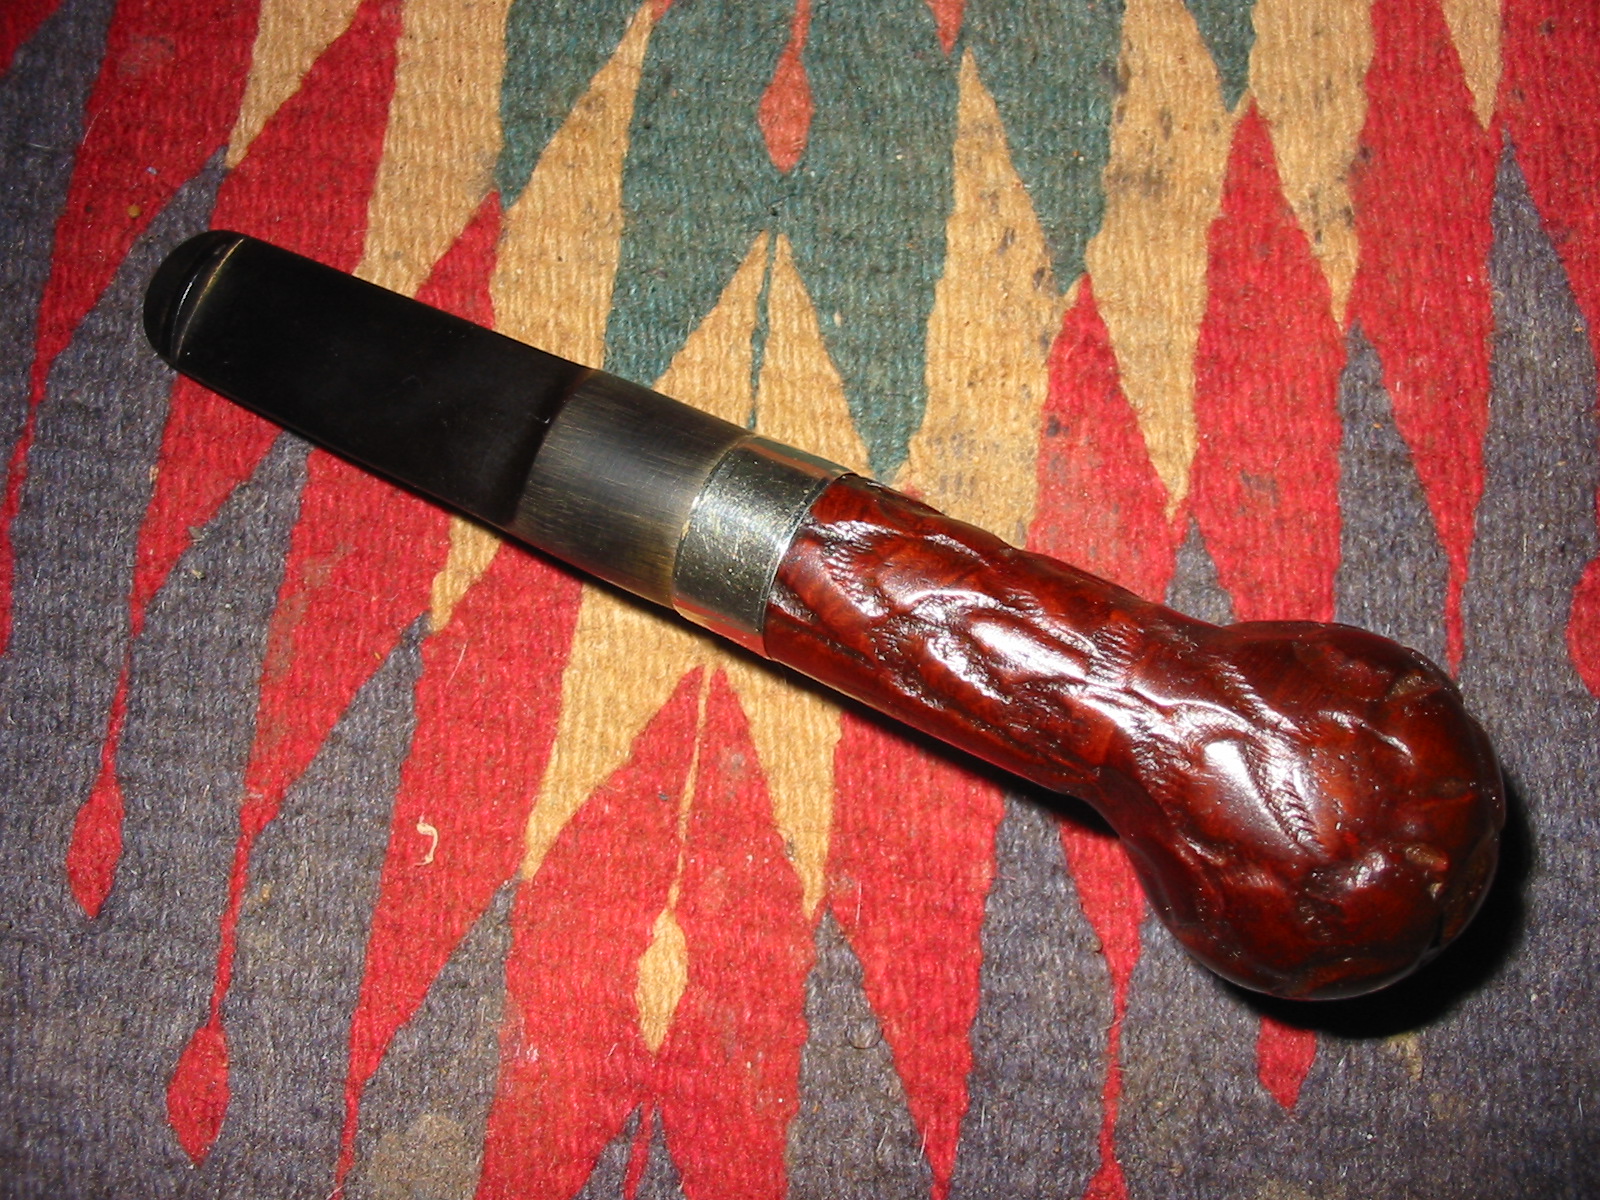
The second Blast is a thin shank apple or ball. It has a deeper more craggy blast than the previous pipe. It is smaller in terms of the bowl and size though it is still a group 4 bearing the 4 in a circle stamping. The rest of the stamping reads Mark Tinsky in script over Tan Blast on the side of the smooth patch on the left side of the shank. On the underside of the shank it is stamped American in an oval over 4 in a circle. The bowl ascends to the rim leaving a thin rim that is also blasted. There is a smooth band around the end of the shank and a smooth patch that runs up both sides and on the underside of the shank. The stem bears the customary brass star in a circle inlay.
IMG_5593

IMG_5595
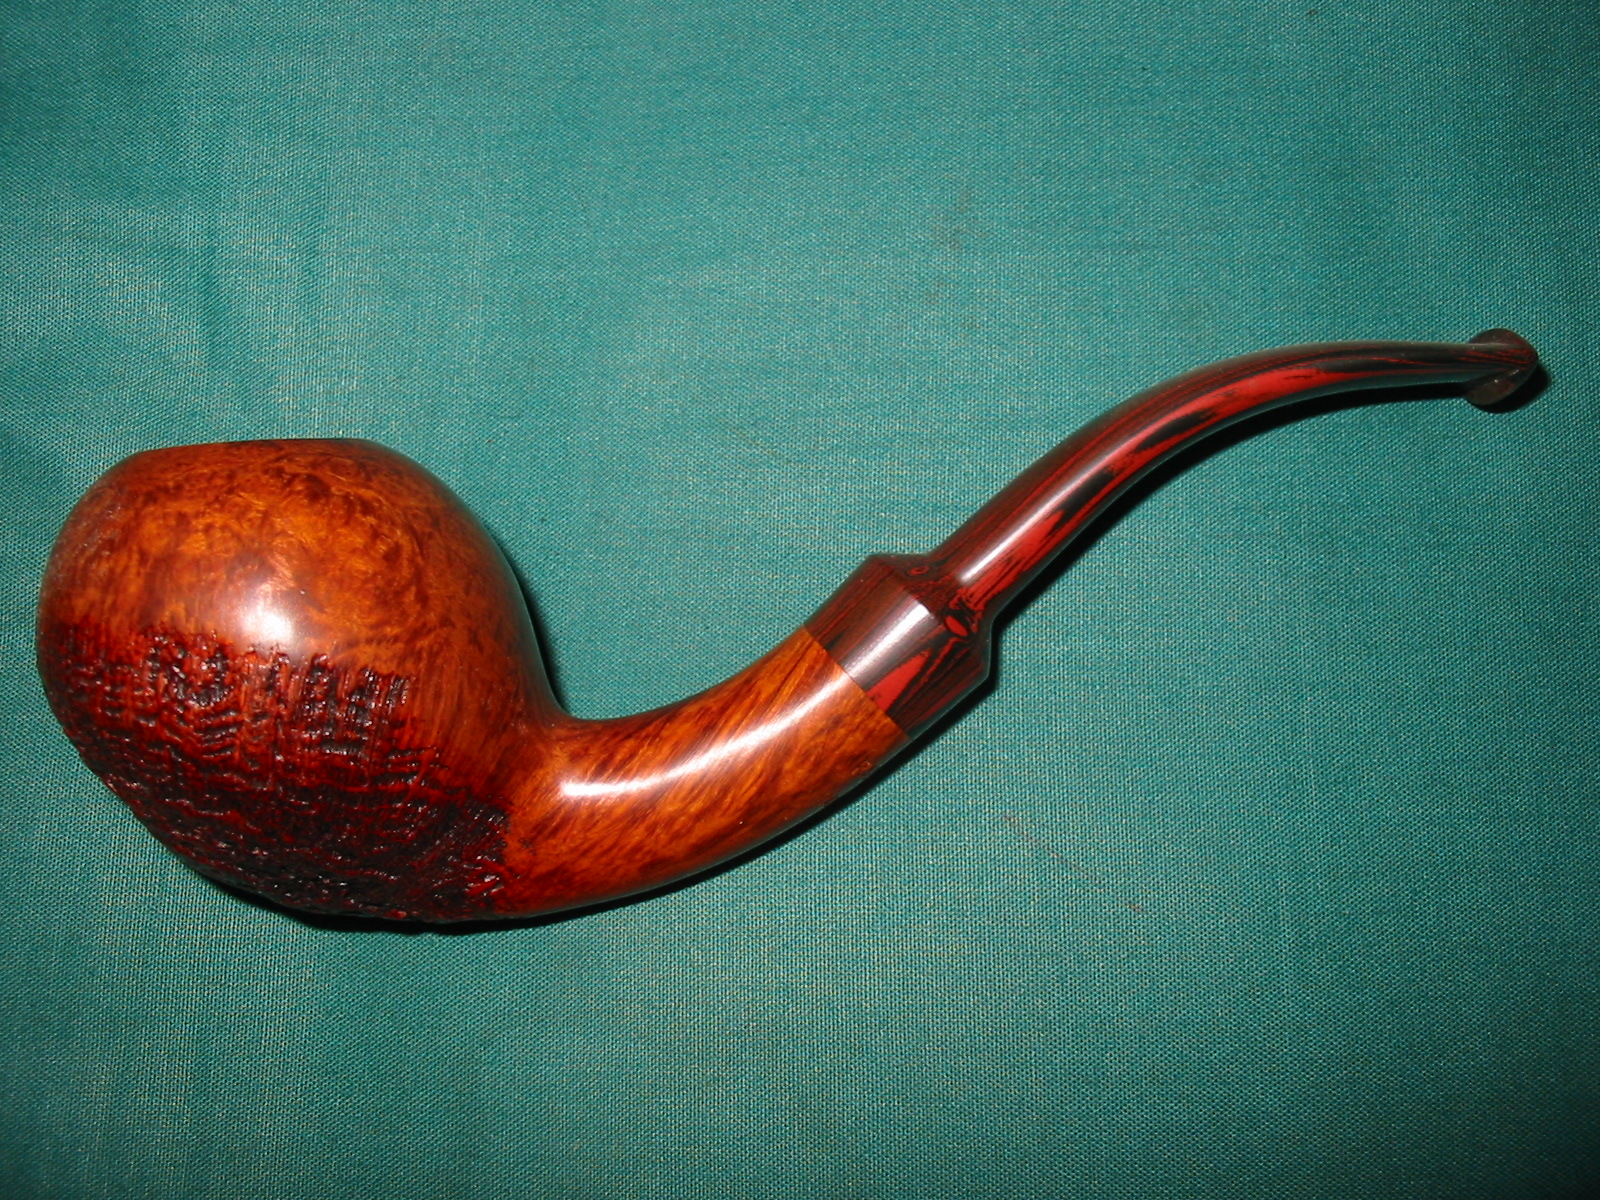
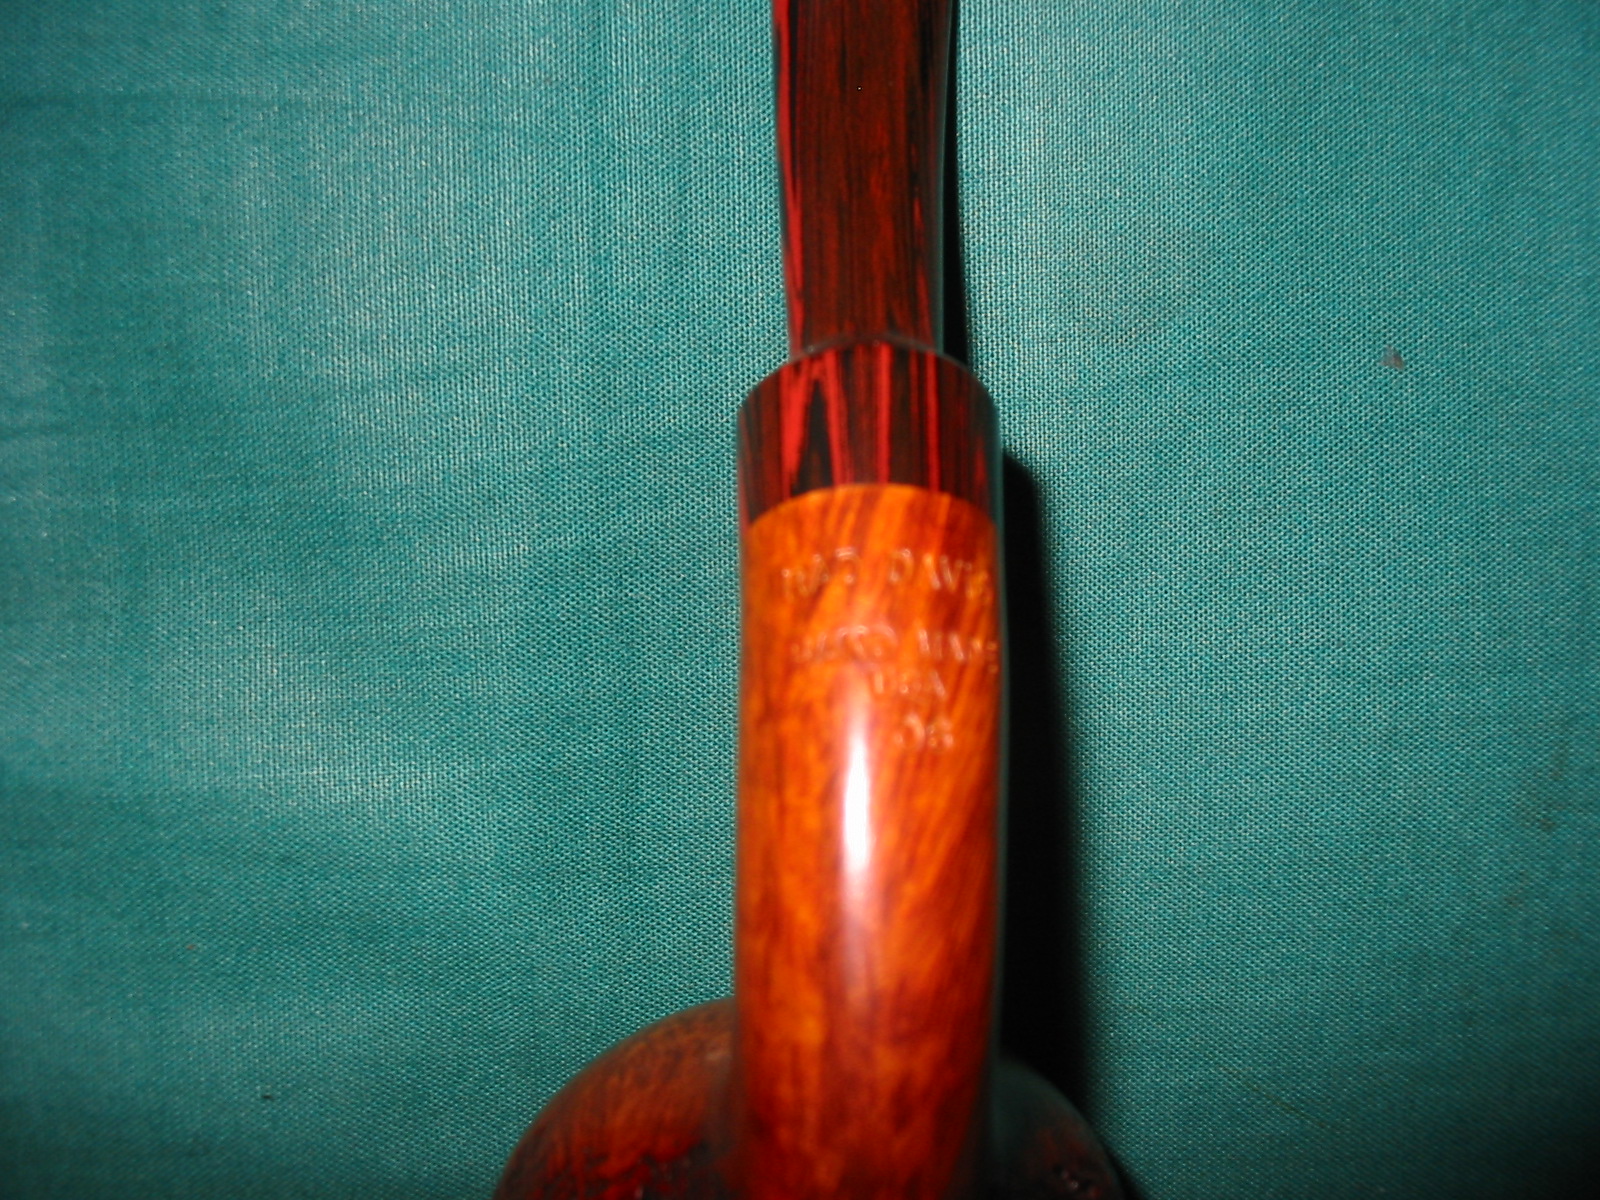
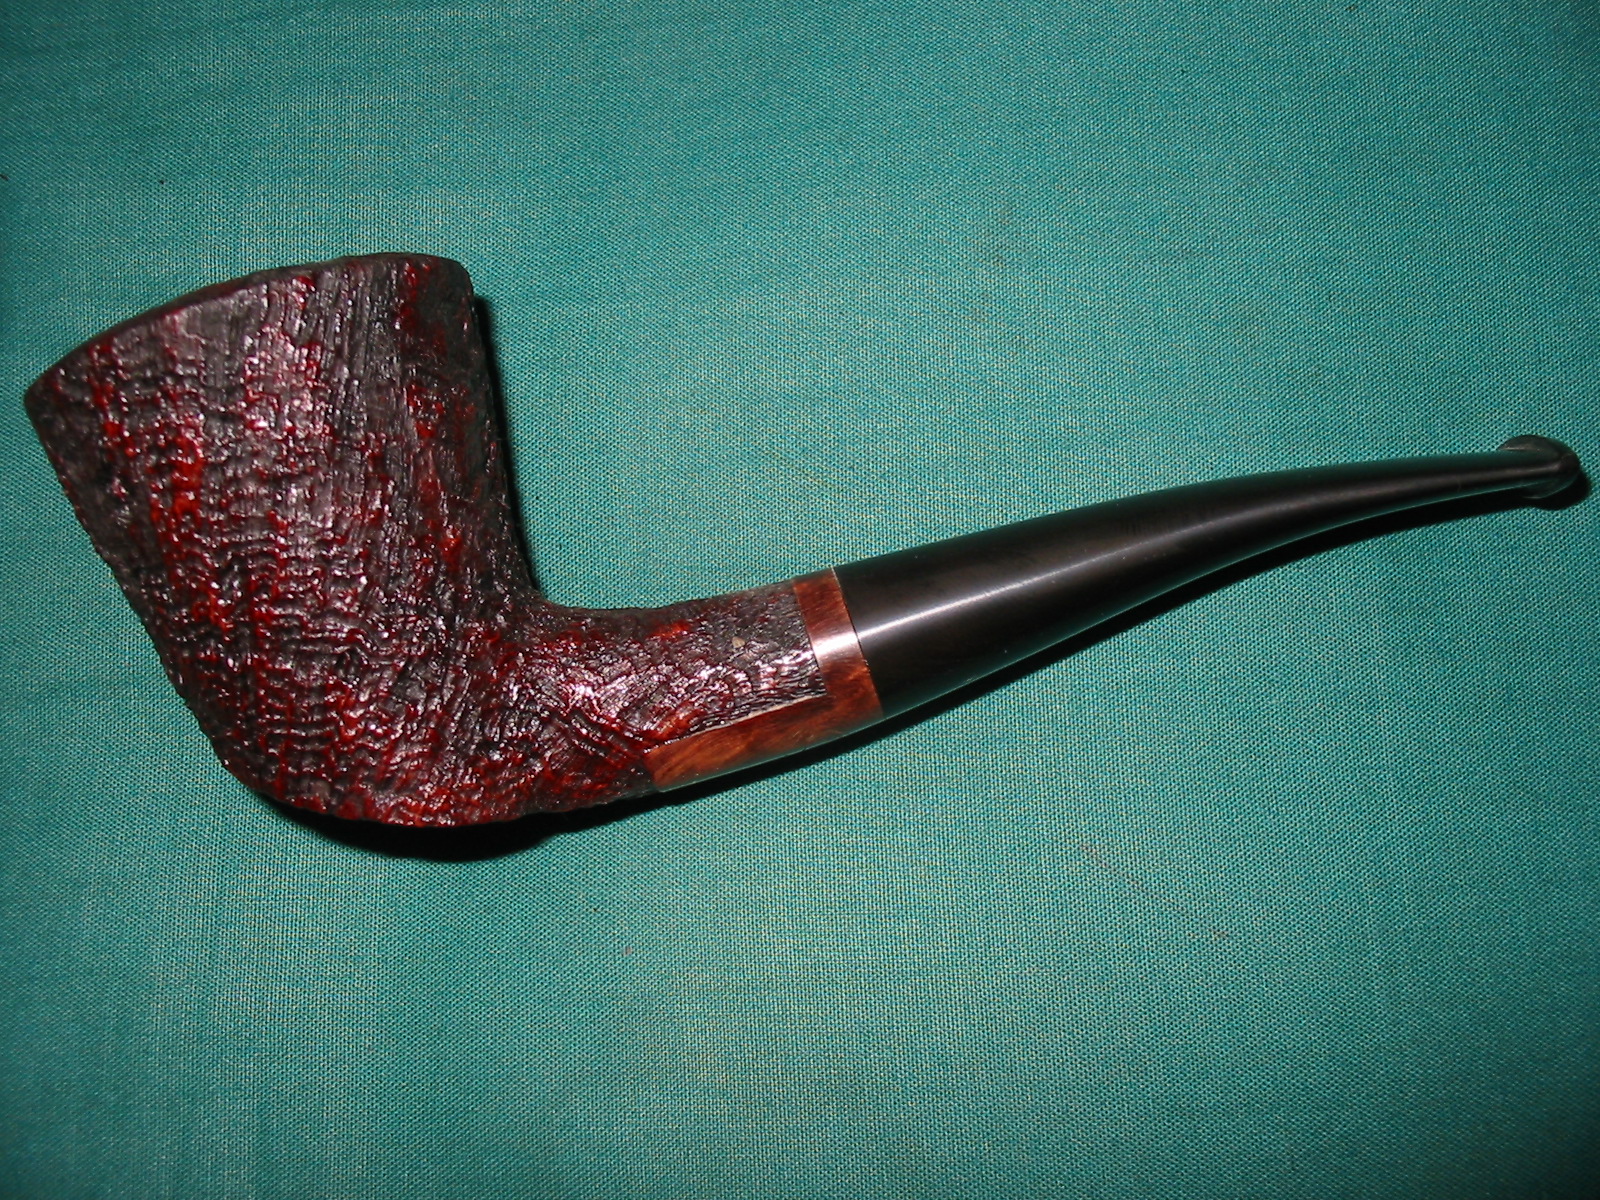
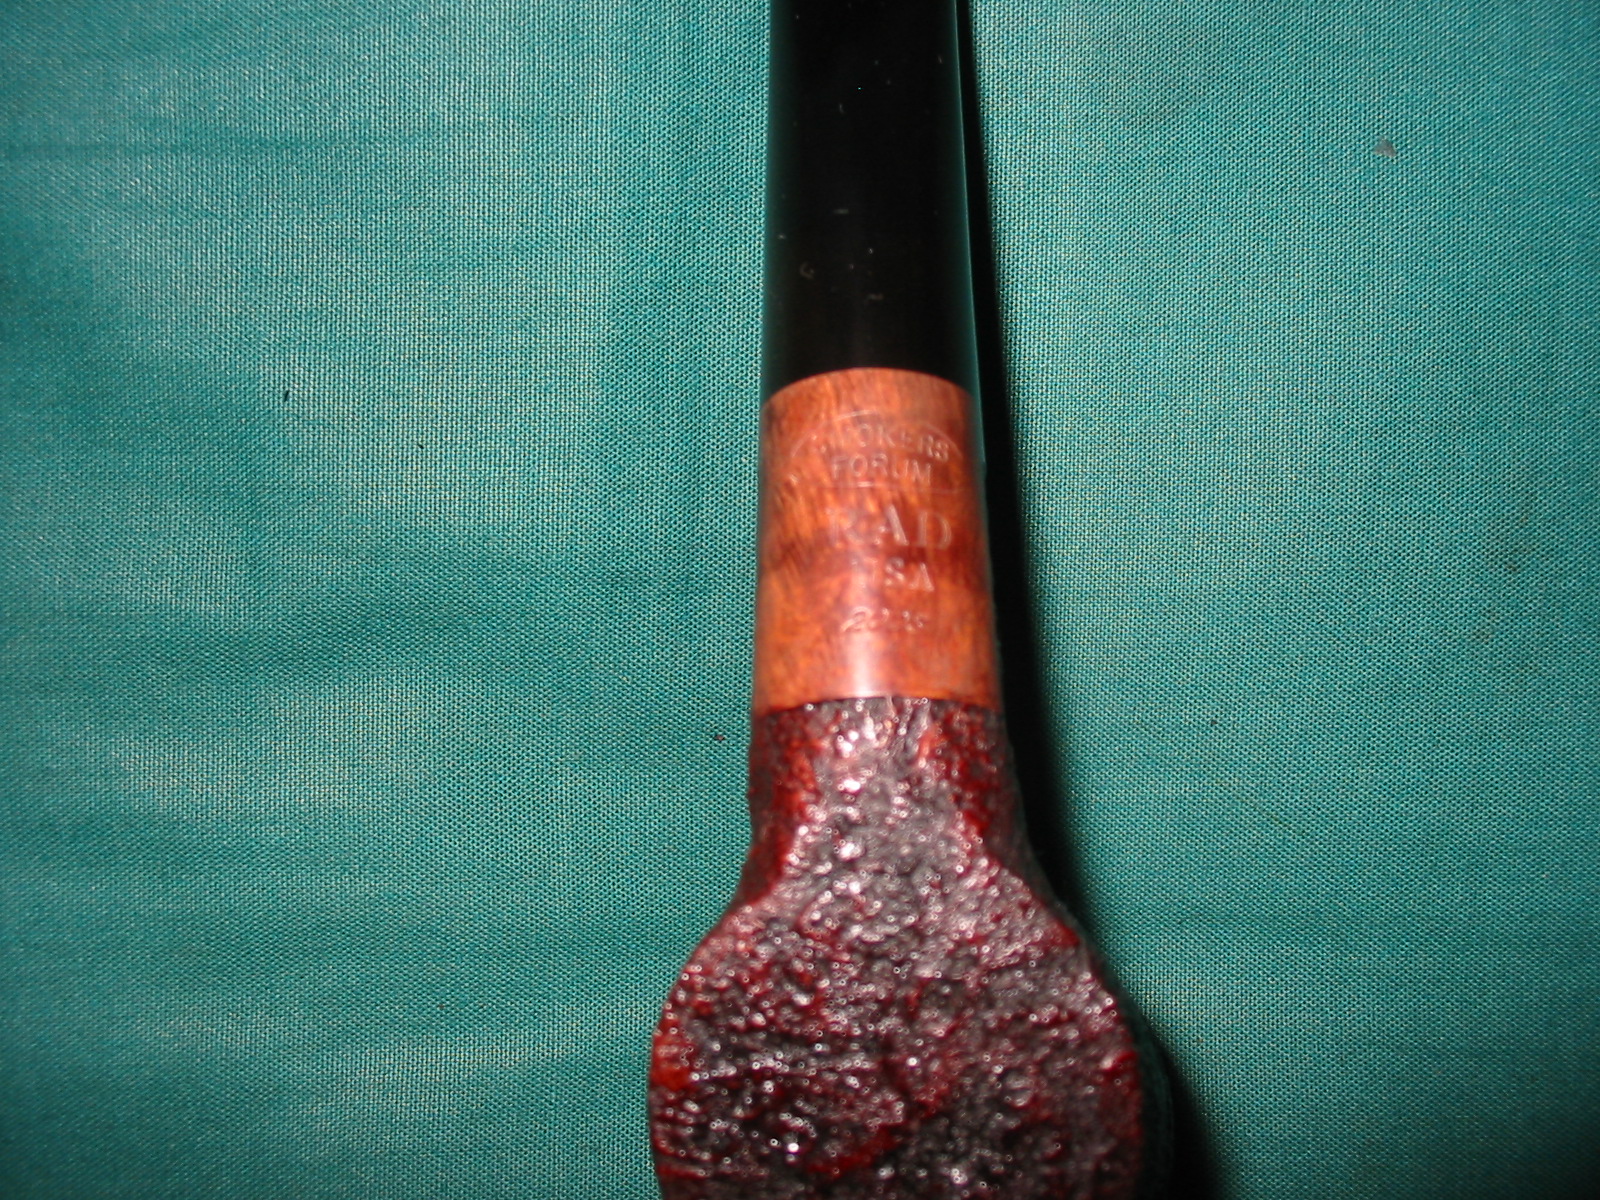
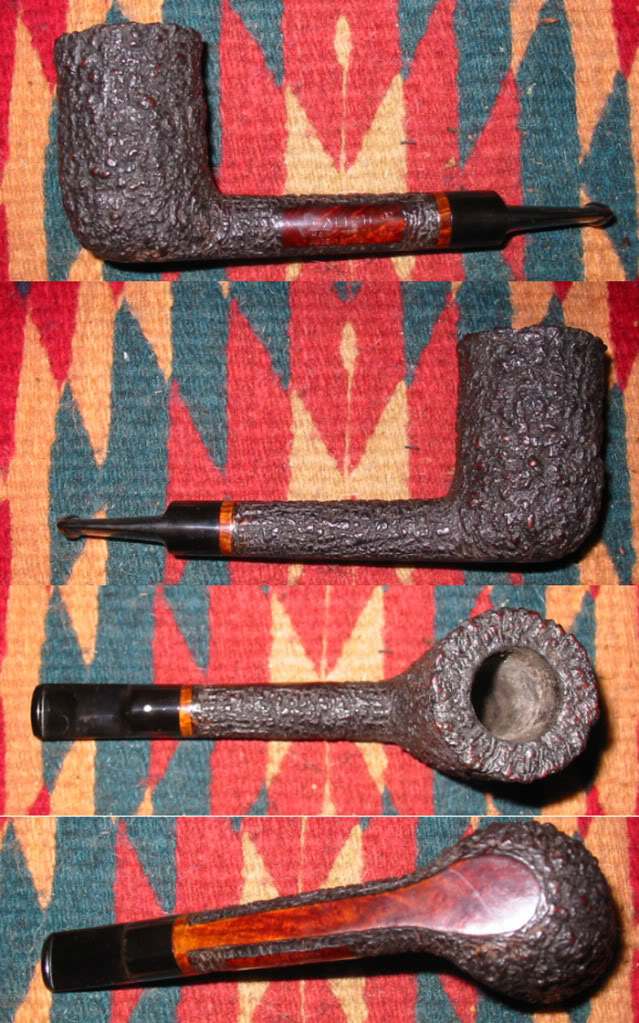
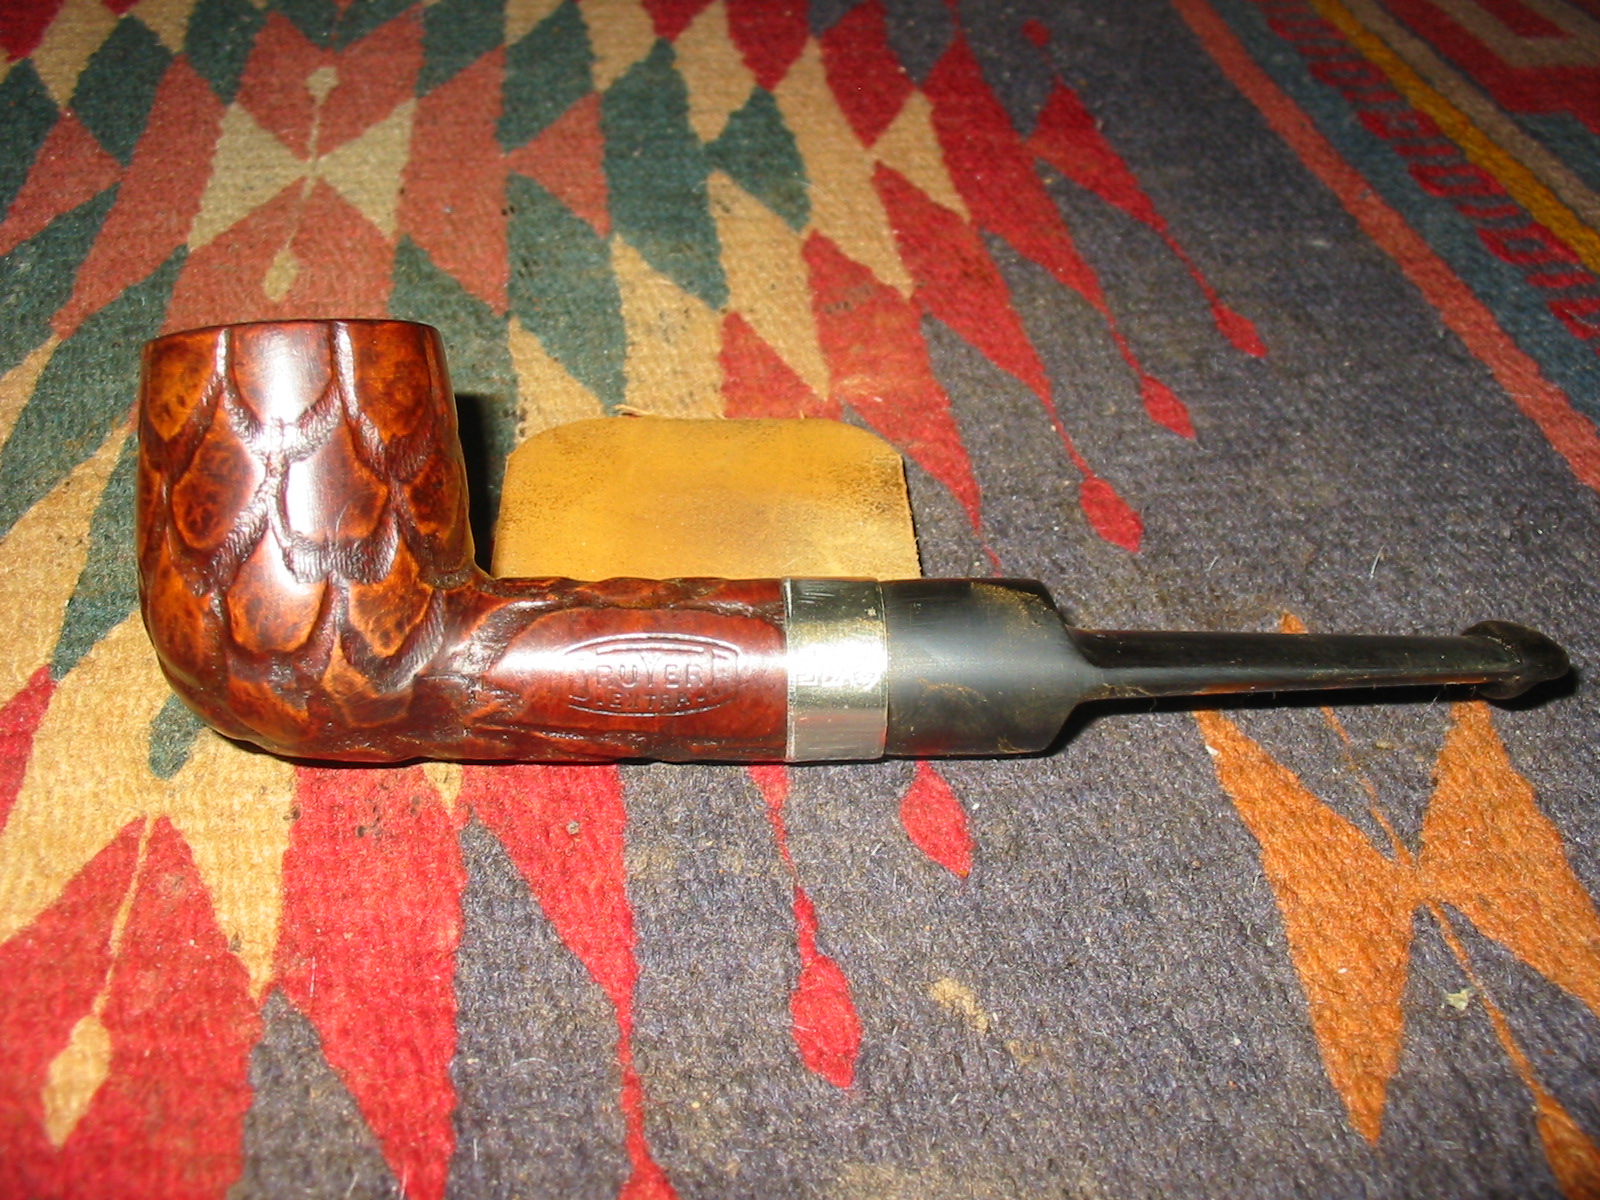
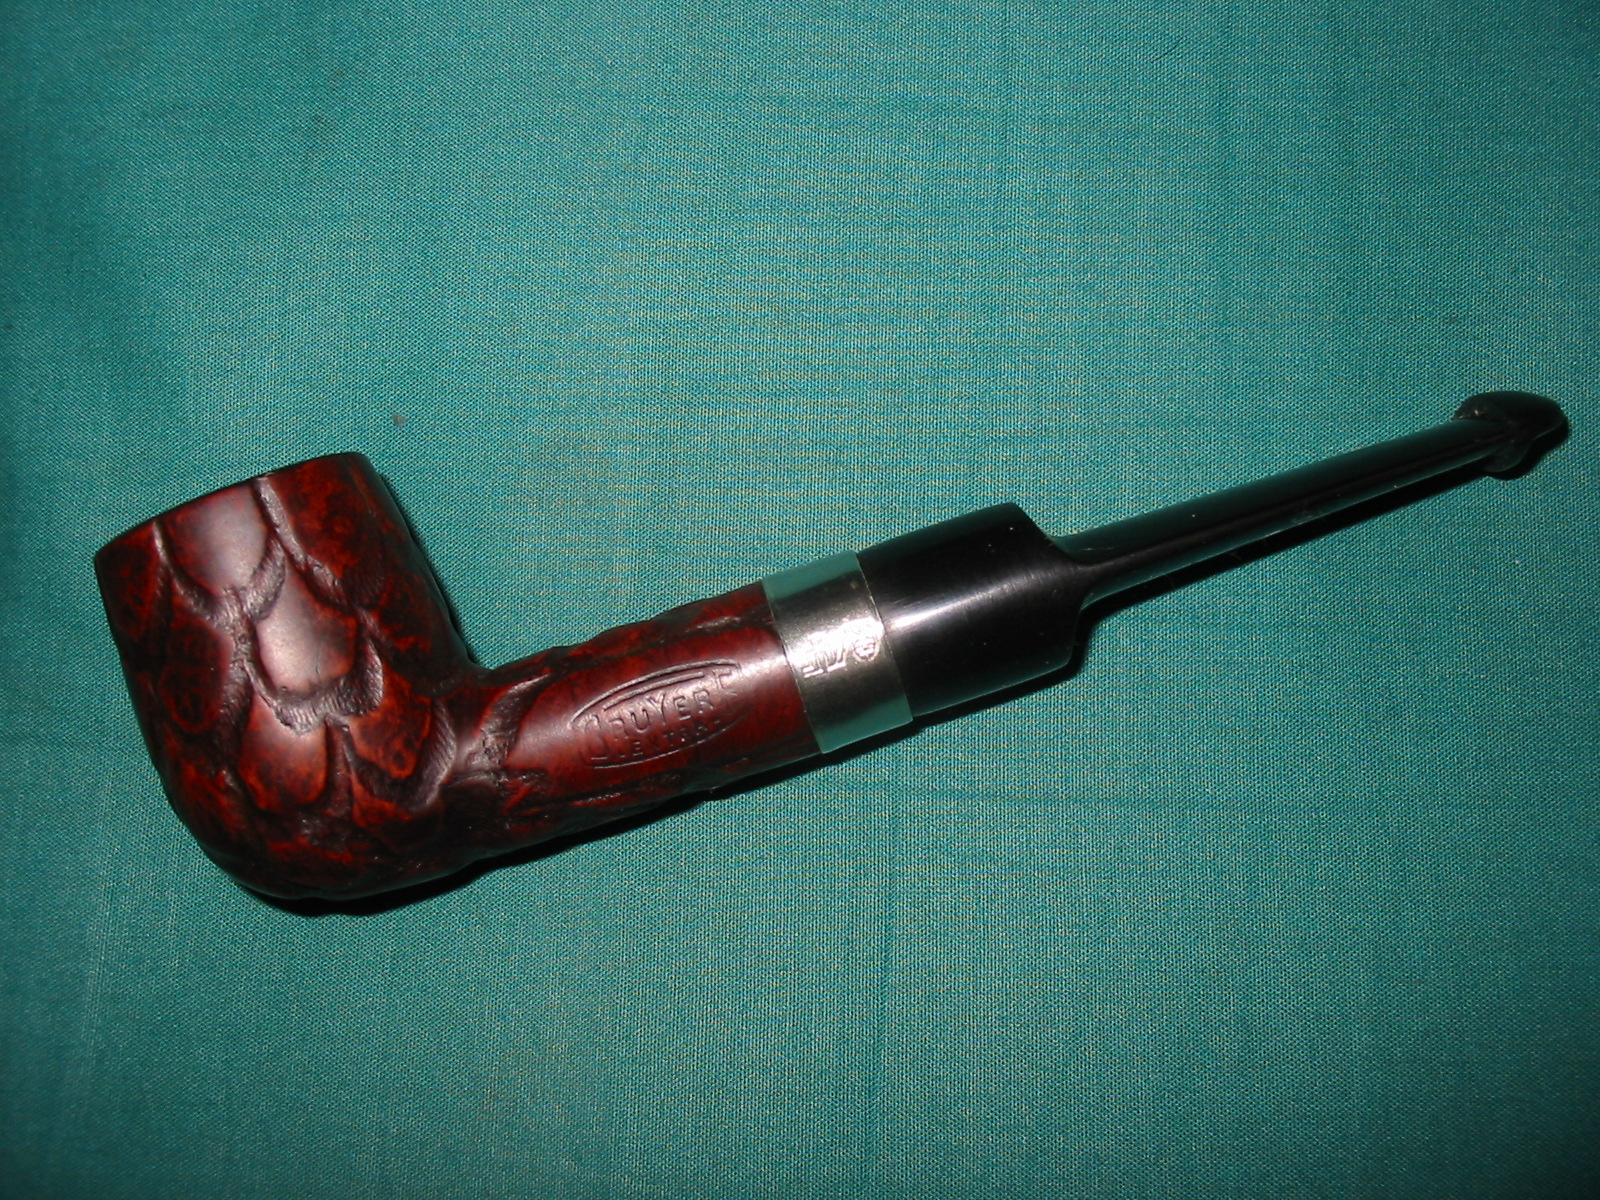
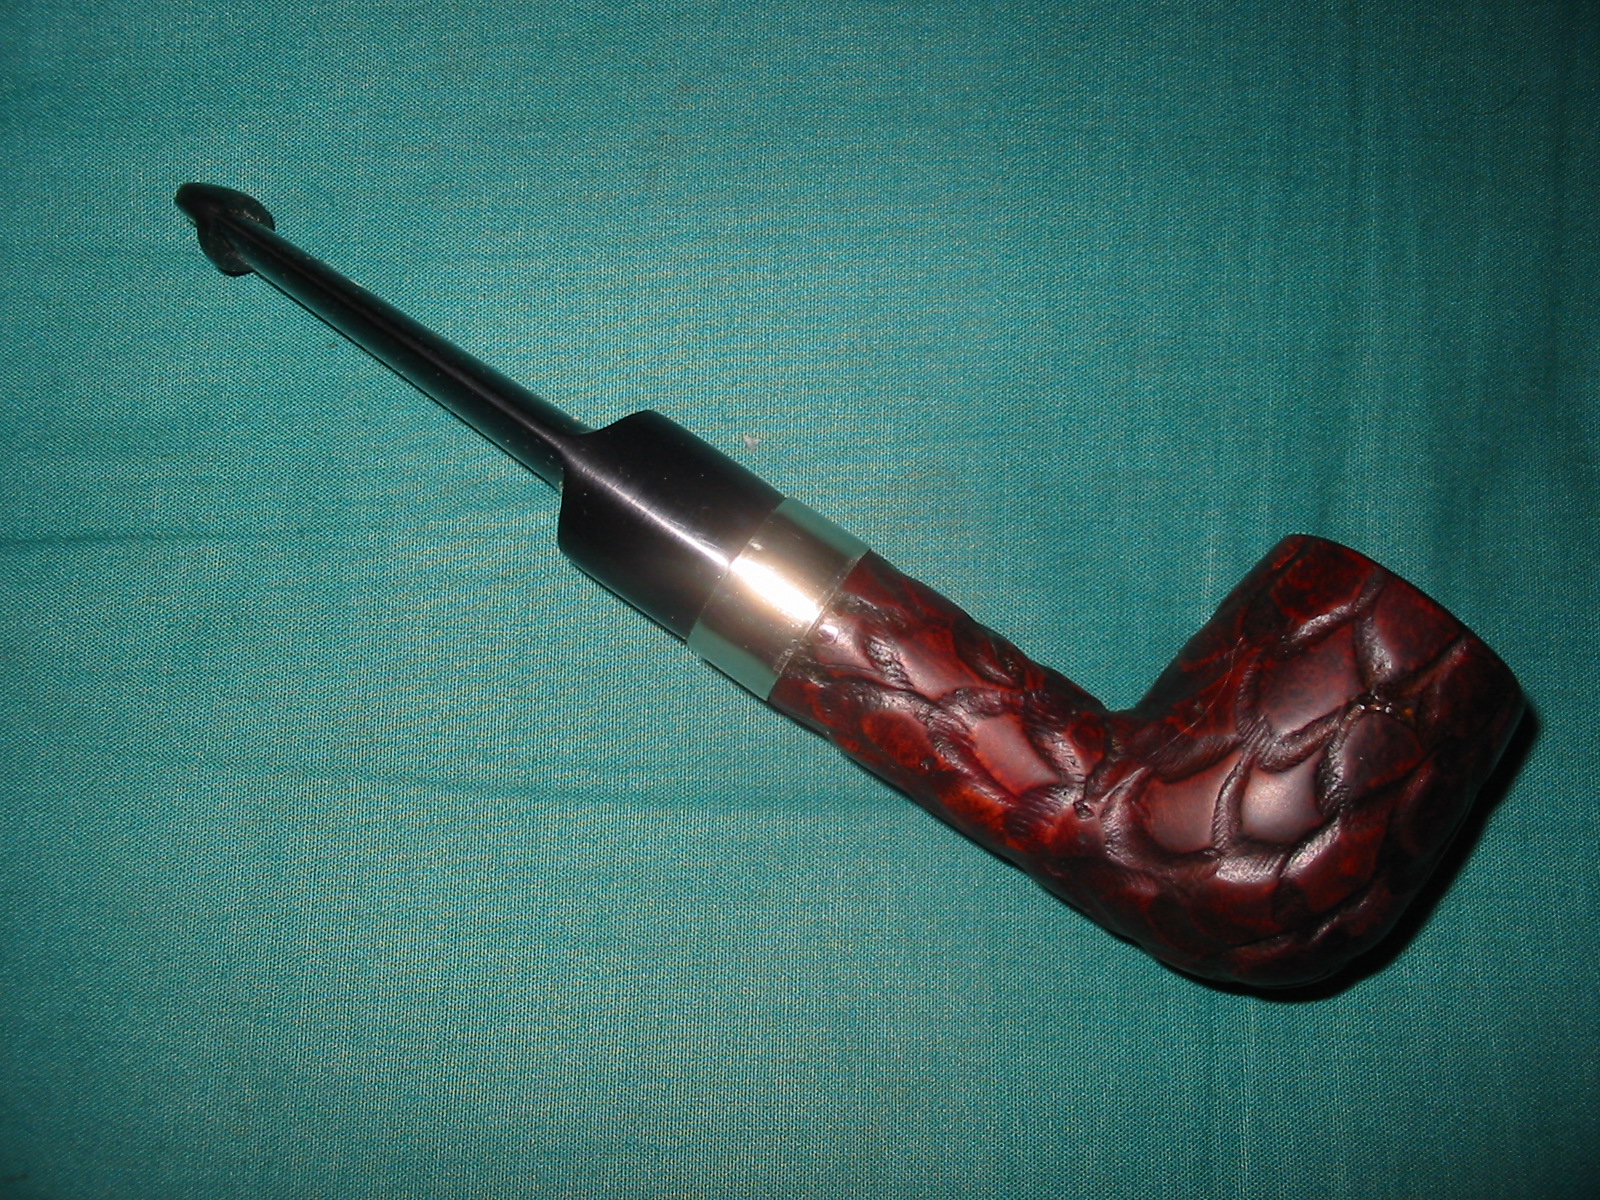
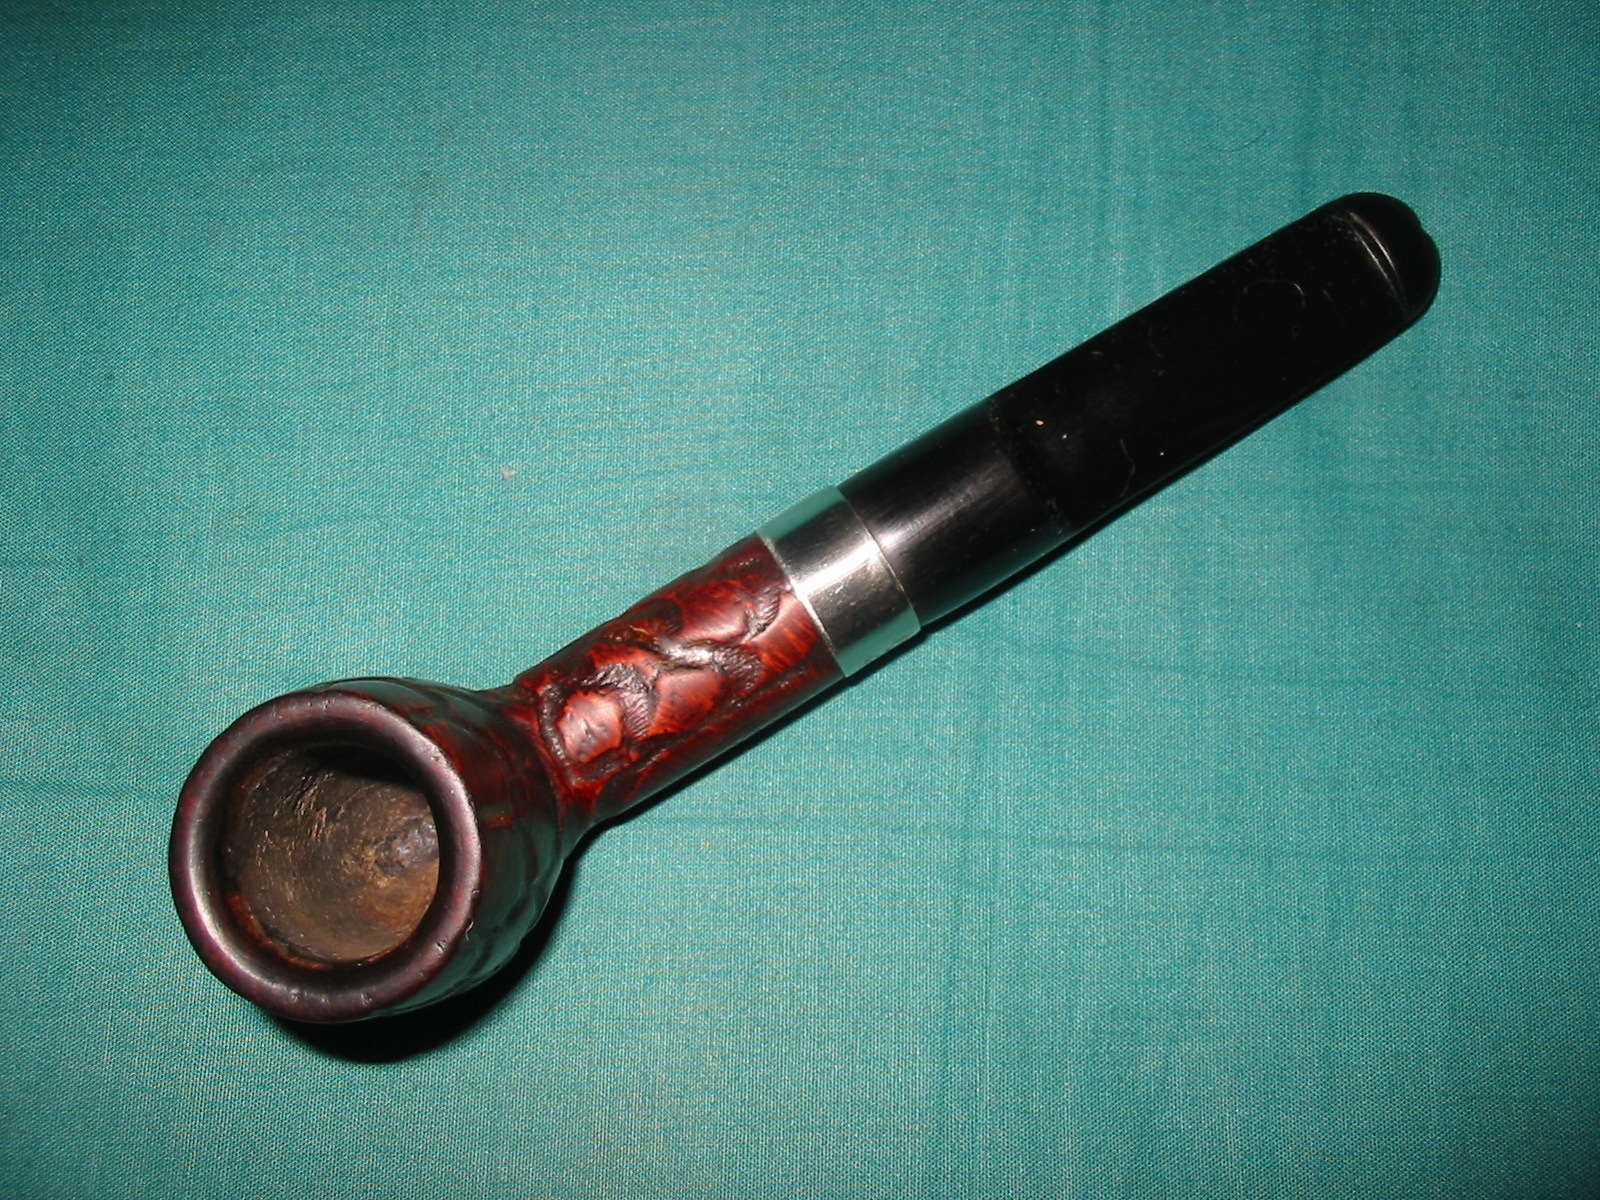
The third Blast is a Rhodesian that I also really like as it has become almost a signature shape for me. It is a thick shank Rhodesian with a dark and medium brown stain over the blast. The darker brown has settled into the grooves of the blast and the medium brown on the high parts of the blast. The majority of the bowl is covered with a blasted birdseye that is really interesting. There are a few spots where there are small portions of flame grain. The fascinating part of this blast is that you can also see the rings of grain under the top blast. It is a beautiful pipe. The twin concentric rings setting apart the crown on the bowl were cut before the blast and the centre between the rings also shows the blast well. The stamping on this one is on the smooth patch that runs up the sides and underside of the shank. It is stamped Mark Tinsky in script on the left side of the shank and on the underside it is stamped American over /6 in an oval over Blast and 5 in a circle.
IMG_5597

IMG_5598
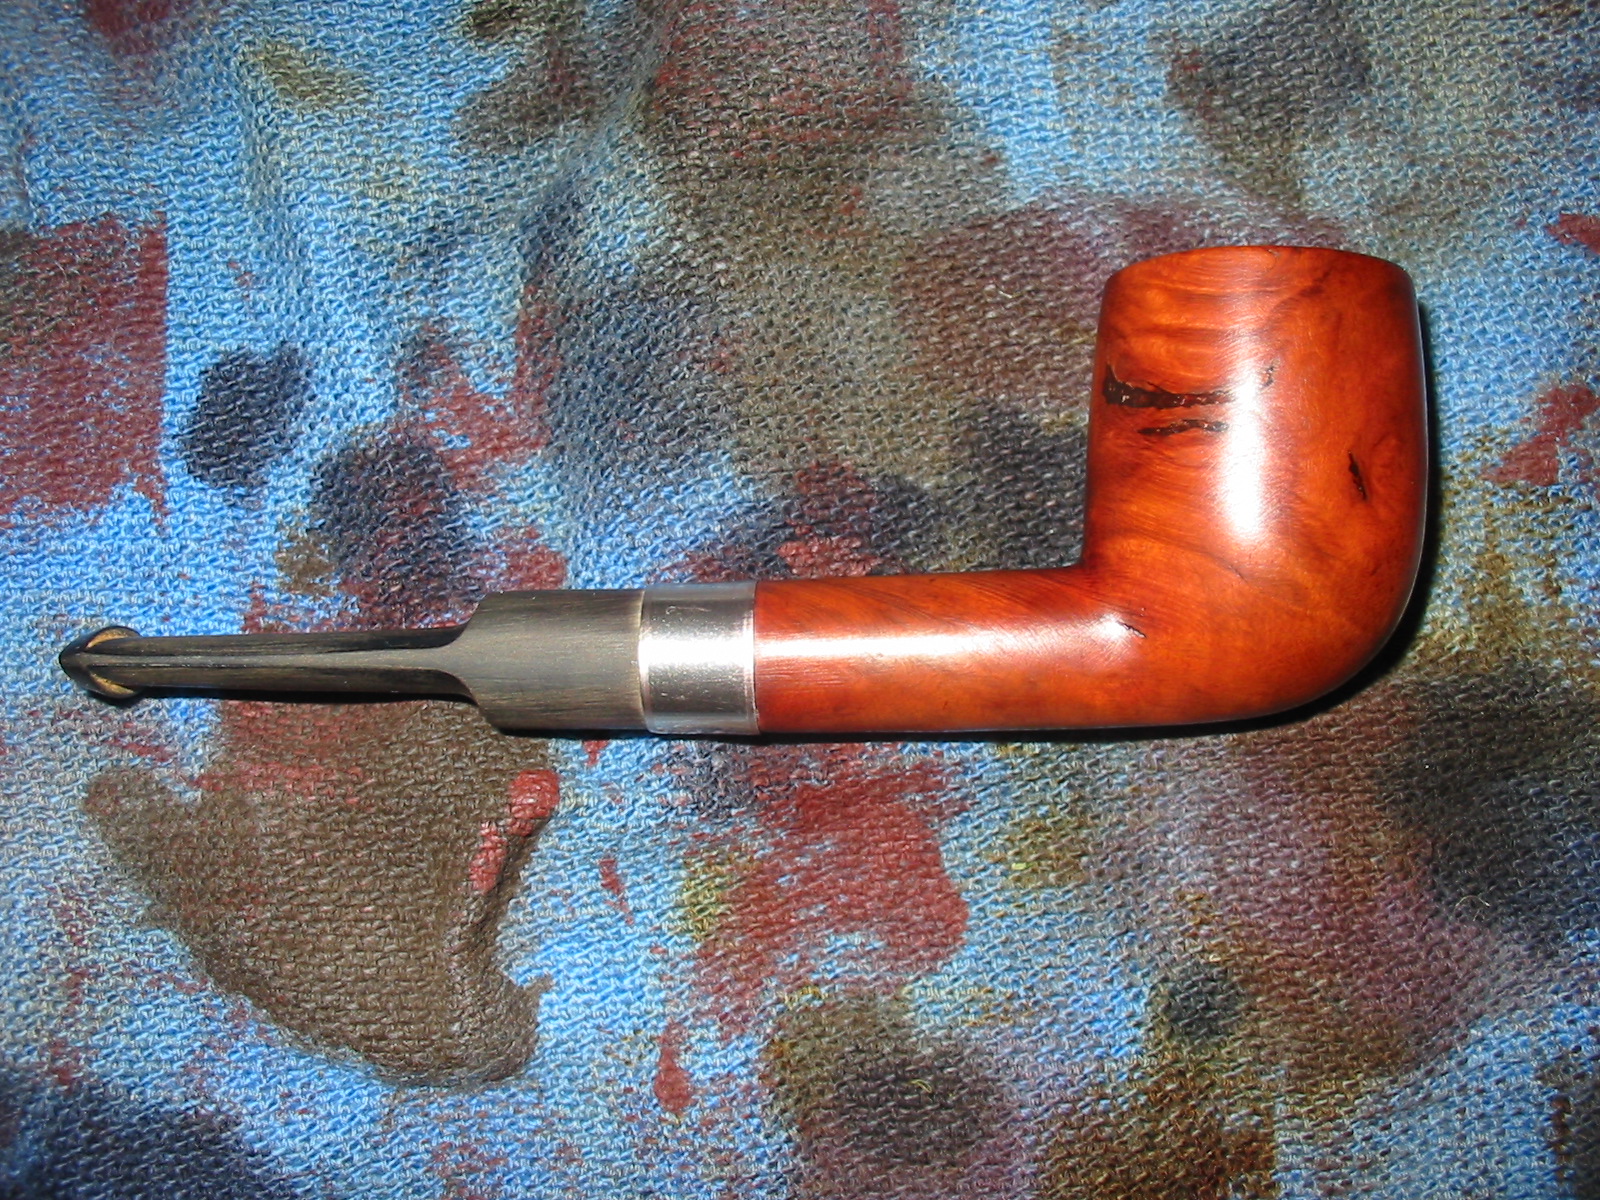
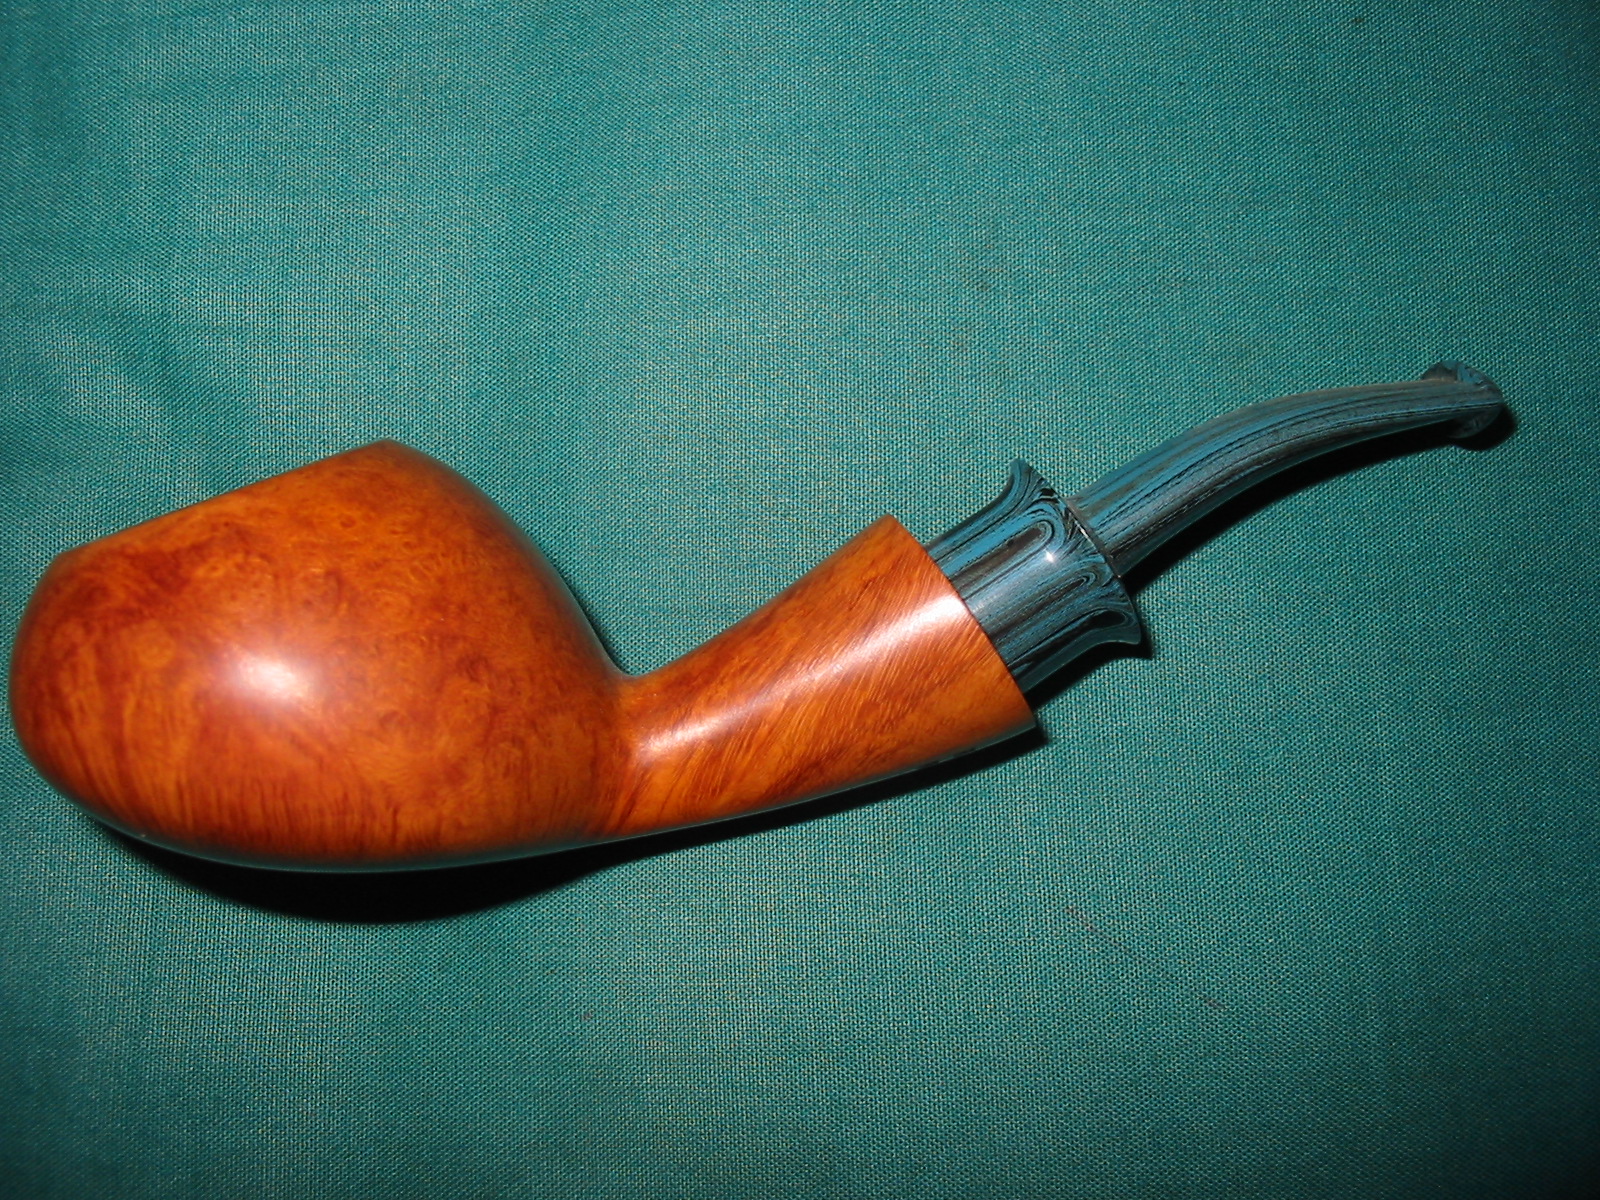
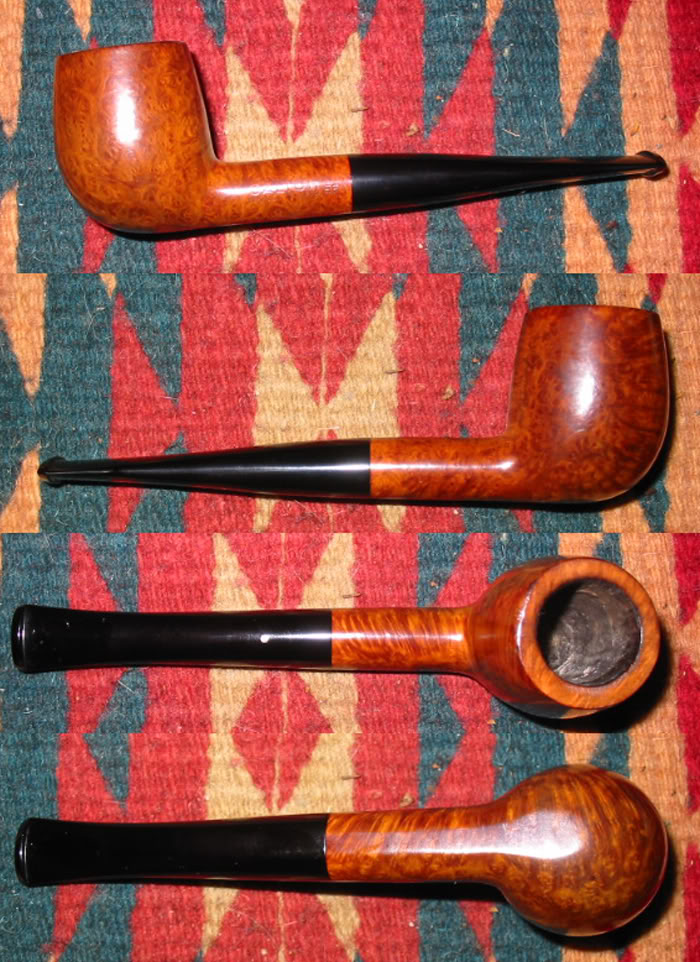
The last two pipes in my Tinsky collection have smooth finishes. The first is a beautiful pipe that is by far the largest of my Tinsky pipes. I was gifted this by a good friend one evening while we were at his apartment in downtown Vancouver enjoying a fine cup of tea and smoking aged tobaccos together on his 7th floor balcony. It has some stunning straight grain all around the bowl and birdseye on the underside of the bowl and the shank. The medium brown stain really sets off the grain. The shape is a thick shank brandy. It is stamped on the left side of the shank with the Mark Tinsky signature. On the underside it is stamped with American 2/ in an oval over Sunrise over a 6 in a circle and a single five point star.
IMG_5599

IMG_5608
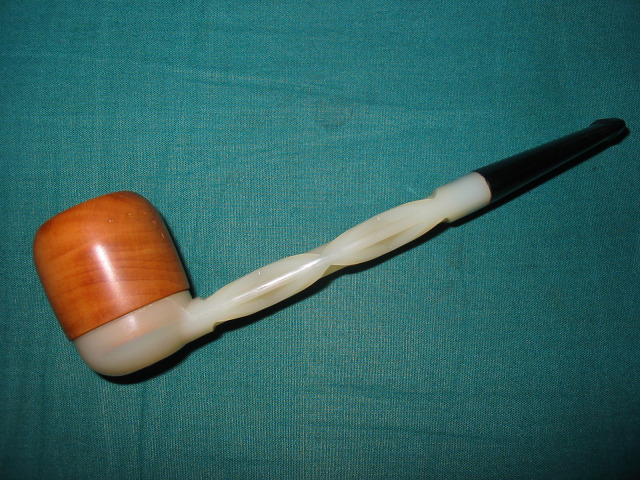
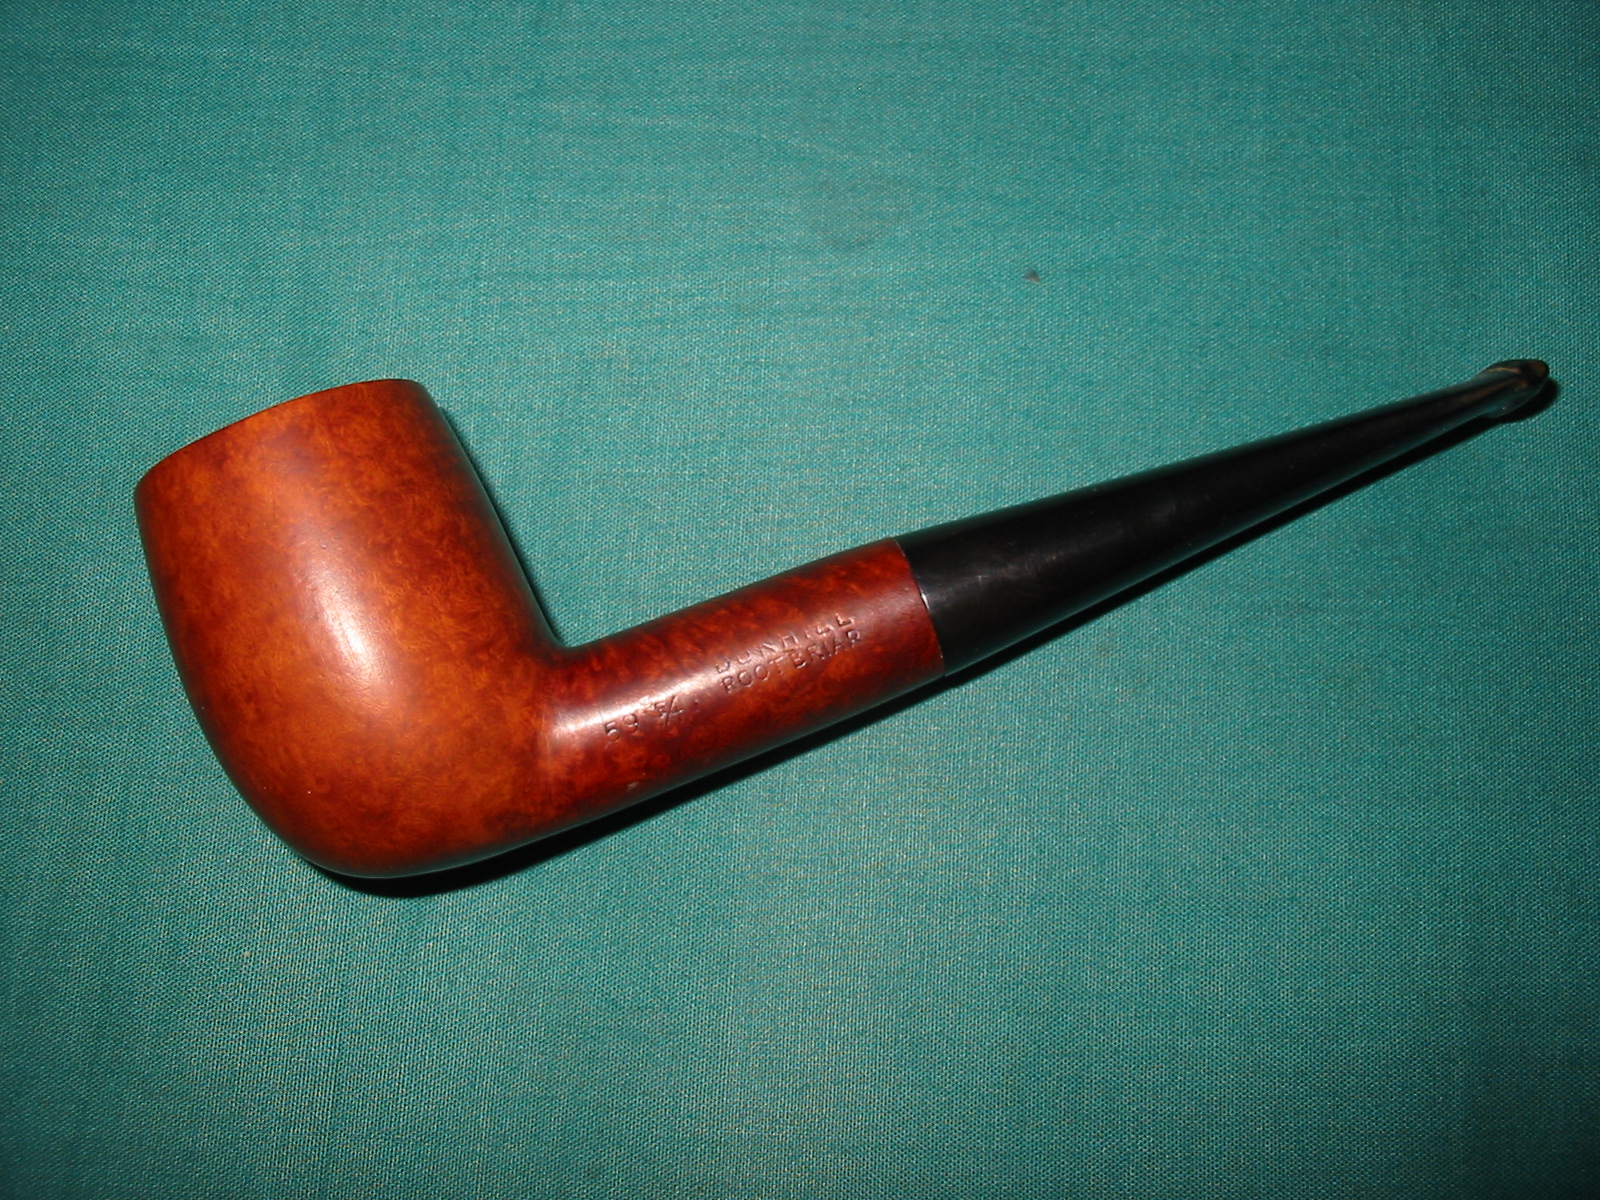
The second smooth finished pipe is an older Liverpool shape. I picked this one up on EBay for an amazingly low price as it did not have a stem on it. The bowl was in good shape but the finish was shot. It looked like it was not worth buying from the photos that the seller included in the advert. Because of that I got it for cheap. When it arrived I reamed and cleaned it. I polished the bowl and then called Mark to see if he would be willing to restem it for me. He agreed and I sent off for restemming. I expected Mark to use a current stem and brass star in a circle logo inset on the new stem but he did not. When it returned it had the appropriate aged inset of a star in a briar ring inset in acrylic. The difference between this inlay and my other early Tinsky is that the star inside the acrylic is brass in colour rather than white. The pipe is stamped on the underside of the shank American in an oval over Reg. No. over 7/93 – MT thus dating the pipe to July of 1993. The MT stamping differentiates it from the pipes made by Curt Rollar in that period which bore the stamping CR after the date stamp.
IMG_5603

IMG_5606
Looking over my collection of Tinsky pipes this afternoon I have been struck yet again by their beauty and by the good quality work that Mark does in his pipe making. My pipes cover a time period of thirty years and the quality remains impeccable. The finishes remain constant. The Coral finishes of the early years are almost identical to those of the more modern era pipes that I have. The sandblasts are consistently the same and the Black & Tans remain constant. The smooth finished pipes are consistent from the early 90’s pipe I have to the more modern 2000’s era Sunrise. I am impressed by that fact. It is not often that in the evolution of a craft that the craftsman maintains his signature finishes even as he progresses in his skill. Thank you Mark for creating these fine pipes that I have taken great pleasure in owning and smoking. I look forward to adding more to my collection.

Learning something new while repurposing this damaged pipe bowl – adding a shank extension.


Blog by Steve Laug

One of the pipe bowls I was recently gifted was an unsmoked Mastercraft Drysmoke bowl that had the shank cut back to half of its original length. The cutback was done poorly – crooked cut with a dull saw. It had cut right through the stamping on both sides of the shank and was crooked.
Dry smoke
The bowl had a very heavy coat of urethane on it as well. There was some nice grain on part of the bowl but the bottom had some hack marks where it looked like the saw had jumped. I took some time to look it over and try to figure out what I was going to do with it. I was not sure and looked at the end of the cut off. I knew I would have to face the end of the shank to even things up no matter what I did with it. I could easily have just drilled the mortise large and cut a new stem for it. It would have ended up a short shank billiard and that would have been fine. However in the midst of the review I decided that it was time to learn something new. I have always wanted to learn how to do shank extensions so I figured this was a great candidate for my schooling. I flattened the end of the shank squaring it like I do when topping a bowl. I had an old vulcanite shank extension I scavenged somewhere. I had played around with it and sanded away part of the end that faced on the shank of the pipe before I threw it in my parts box. It was a mess as it was but it might just work. I also had some white Delrin tenon material that would work well. I had already turned it almost to the correct size with my Dremel and sanding drum. Maybe these parts would all come together and help me craft something different. What the heck it was worth a try and I would learn a lot in the process.
IMG_5514
The photo above shows all the parts laid out for the connection. I faced the end of the shank using a sanding board in the same manner I used to top a bowl rim. It took a bit of work and focus to get it flattened out and perfectly horizontal. (Oh to have a lathe to do this kind of thing.) I used the Dremel with the sanding drum to fine tune the diameter of the Delrin so that it would fit well in both the end of the cut of shank and the vulcanite extension. I wanted the two parts to face smoothly against each other. I put it together to make sure I had the fit right
IMG_5515
I put glue on the end of the tenon and pressed it into the shank and then repeated the process and pressed the extension in place. The fit against each other was exactly what I wanted. I ran some superglue in the joint between the two materials and when it dried I would sand it down. I had an old stem that had the right tenon size and inserted it to have a look. I wanted to see what the newly glued shank extension would look like with a stem in place. The joint looked good and a stick bit stem would work well when I got to that point in the process.
glued shank
I removed the excess material of the extension with the Dremel and sanding drum and a lot of hand sanding with 220 grit sandpaper. I wanted to make the extension slightly flared and the transition between the shank and the extension smooth and seamless. I was going for a taper back from the bowl to the end of the shank. I also wiped the bowl down with acetone on cotton pads to remove the urethane finish. It was a tough go so I sanded the bowl and shank. I decided to not worry about sanding the partial stamping that was left on the shank as it was no longer a Mastercraft pipe at this point.
IMG_5518
In the process of adding the Delrin I noticed that there was a crack in the shank on the right side of the pipe. It was present before I inserted the tenon, but the insert opened it up. I dripped some super glue in the crack before I put the Delrin insert in place. I knew that the insertion of the tube in the shank from the cut end to the end of the airway would give strength to the repair and also remove the pressure on the shank. I also knew that there would no more stress on the crack once the extension and tube was in place. After sanding the shank and extension I did some cosmetic work on the crack and filled it with superglue and briar dust. Once it was dry I sanded that area of the shank until it was smooth.
IMG_5519

IMG_5520
With the crack and repair being very visible and knowing that it would not disappear in the stain I decided to rusticate the shank and the bowl bottom. I did not worry about the visibility of the repair as the entire pipe is a repair job. I have been reading a lot about John Calich and his use of rustication and smooth finishes in the same pipe and the contrast stains to highlight the transition between finishes so I decided to try that out with this bowl. I wanted a thin band of smooth briar around the joint so I taped off the area and did the rustication with my modified Philips screwdriver. I rusticated the shank and the bottom of the bowl. I used a brass bristle tire brush to go over the rustication and knock off the rough areas. I buffed it with red Tripoli to further smooth out the rustication slightly.
IMG_5522
I stained the bowl bottom with black aniline stain and flamed it. I repeated the staining and flaming until I had a good even coverage on the rusticated portion of the bowl. I cleaned up the smooth areas next to the stained rustication with sandpaper to remove the slight bleed from the black stain. I wiped those areas down with acetone on a cotton swab to clean the transition areas.
IMG_5523

IMG_5524

IMG_5525

IMG_5526
I found the stem I wanted to use in my can of stems. It was a slender military bit with a slight taper. I liked the look of the stem. I put it in place for the next photos. It is not stuck deeply enough into the mortise because of the taper to the end of the stem. It will need to be turned down slightly to get a good snug fit deep in the mortise.
IMG_5527

IMG_5528

IMG_5529

IMG_5531
Before going to bed last evening I rubbed down the bowl and stem with Olive oil. I wanted it to penetrate the vulcanite extension, stem and the bowl (smooth and rusticated portions) to give a bit more life to the rubber and the briar. This morning when I got up I worked on the end of the stem to get a deeper fit into the mortise. I used the PIMO tenon turning tool adjusted as small as possible and turned the first inch of the stem to get a tenon. I sanded it with 220 grit sandpaper to bring it down to the diameter of the inside of the mortise. The next two photos show the stem sanded enough to go half way into the mortise. It would take a lot more sanding before it sat against the end of the mortise.
IMG_5532

IMG_5533
Ah progress! Got the stem fit right – it is snug and deep in the mortise now. I sanded the tenon until it fit well. I also sanded the transition from the end of the tenon to the taper on the rest of the stem. I wanted the fit against the shank extension to be snug without the edges of the tenon showing when the stem was in place. This pipe has turned out to be a great lesson for me in the school of pipe repair up to this point. I am looking forward to “graduating” from this project at this point.
IMG_5534
I sanded the bowl, the smooth band at the union of the extension and the briar and the vulcanite of the stem and extension with micromesh sanding pads. I wet sanded with 1500-2400 grit pads to remove any scratches in the briar and the shank extension from sanding with the fine grit sanding sponges. The photos below show the bowl and stem after I had sanded them with the early grits of micromesh. I wiped down the bowl and the stem with a cotton cloth and then rubbed Obsidian Oil into the vulcanite extension and stem.
IMG_5535

IMG_5536

IMG_5537
I stained the smooth parts of the bowl and shank with a cherry stain using a cotton swab and wiped it off with a soft cloth. I hand buffed the bowl and shank with a shoe brush to give it a quick polish.
IMG_5539

IMG_5540

IMG_5541

IMG_5542
Once that was finished I continued to sand the stem with the micromesh sanding pads. I had already wet sanded the extension and the stem with the earlier grits of pad so now it was time to dry sand them with the remaining pads – 3200-12,000 grit.
IMG_5543

IMG_5544

IMG_5545

IMG_5546
When I finished sanding with the micromesh sanding pads I rubbed the vulcanite extension and stem down with Obsidian Oil and when it was dry gave the stem, extension and smooth portions of the pipe a buff with White Diamond. I gave the smooth areas of the pipe and the vulcanite multiple coats of carnauba wax. I buffed with a soft flannel buff to give it a shine. The finished pipe is shown in the photos below. It has come a long way from the cut off bowl that I started with in the beginning of this restoration. I think rather than restoring this one I have actually repurposed a bowl – a phoenix rising from the ashes. Now I have another new pipe to fire up and try out later today.
IMG_5547

IMG_5548

IMG_5549

IMG_5550

Reflecting on My Collection of John Calich Pipes


I don’t remember when I first became familiar with Calich pipes. They were not a brand that I had heard of or seen. I do remember that the first time I saw one of his pipes was when I was visiting Mike Glukler of Briar Blues and he had a John Calich pipe for sale. It had to have been before 2003 because of health issues that tied me up from 03-04. I know that I was immediately drawn to the rusticated finish it had and the two tone stain that Calich had used to accent the rustication and the smooth portions of the pipe. He used a dark brown stain as an under stain with an oxblood top stain. The contrast was well done. The pipe was a large Lumberman shape. The stem was vulcanite with a small tooth mark on the top of the stem. It was stamped CALICH 02 over Hand Made 4E over Made in Canada. I had no idea of the age of the pipe or the meaning of the stampings but I paid for it and it became mine. It smoked very well so I began to keep an eye open for John’s pipes.
Calichstack
From my research I found that John’s pipes are graded 3E – 8E. Retail prices range from$ 145.00 to $ 500.00. Each pipe is stamped “CALICH” and the E grade. His earlier pipes were graded from 3-14, and a single, tiny silver dot is applied to the top of the stem. http://pipedia.org/wiki/Calich Armed with that information I found that the first pipe I purchased was a newer pipe of John’s and was stamped 4E which made it a mid-grade pipe.

Soon after that I found two more of his pipes on EBay. This was a time when you could still pick up good deals on relatively unknown pipe makers. The first pipe I picked up was a nice billiard that obviously had seen some use and had a replacement stem. The fit of the stem was poor and the gap and space between stem and shank was large. The scratches in the vulcanite made the stem a real mess. The pipe had beautiful grain under the grime and was stamped CALICH EE over Hand Made. I bid on it and won. The EE stamping did not fit the grading information that I had found on the internet.

I wanted the seller to send it directly to John for a new stem. This put a bit of hurry into the equation so I hunted down John’s number to see if he would be willing to make a replacement stem for this pipe. I called him and we had a great conversation on the phone. We talked about all things pipe and pipe making. It was delightful to talk together and we did so for quite a while before I got around to asking him if he would make a stem for the old billiard.

I still remember the conversation. He asked about the stamping on the pipe and within a short few moments he told me when he had carved the pipe. For the life of me I wish I had written it down because today I cannot remember what he said. He said to go ahead and have the pipe sent to him and he would make a new stem for it. I emailed the EBay Seller and asked him to send it directly to John Calich in Mississauga, Ontario. He gladly did so and the pipe was on its way to John.

It was not too long before John called me and told me the pipe was finished. He packed it up and sent it to me. I was excited because I had not even seen the pipe in person yet. I had no idea about the real size of the pipe or the actual condition though it looked a bit rough in the photos. I couldn’t wait to see it. When it arrived in the mail I opened the package and unwrapped the pipe. John had not only restemmed the billiard but he had cleaned it up and polished it so that it shone like new. It did not even look like the same pipe. It was a cross cut piece of briar with stunning birdseye on the sides of the bowl and shank with cross grain on the front and the back of the bowl.

I did a bit more digging on the internet to find out some information on the dating of Calich pipes as the information on Pipedia was not complete. What I found was very helpful. His early pipes were graded with numbers from 3 – 14. By the late 1980’s Calich introduced 15, 16, and even one 17. In the mid-90’s the grade system changed employing a number of E’s. The more EE’s the higher the grade. This helped me understand the stamping on the billiard. Thus the pipe was a double EE grade and was made in the mid-90’s.

The last gradings that were used on the pipes were a number and an E. For example the stamping went 3E – 7E (10E was the top level but levels exceeding 7E or 8E seemed never to have been used). This information came from http://www.pipephil.eu/logos/en/logo-c1.html and has been edited for my use.
CalichBilliard
The third Calich I bought was also on EBay. It is a Liverpool with a very nice flame grained tall bowl. This one is stamped CALICH 83 over Hand Made 10. It was dirty and the bowl was caked and the rim covered with tar and oils. The stem was original, bearing the silver dot on top. The vulcanite was oxidized and had small tooth marks on the top and underside of the stem. It cleaned up very nicely and is a great smoking pipe. From the information above it is clear that the pipe stamping means that the pipe is the earliest one I have – made in 1983 and a grade 10 pipe.
Calichlum
Thus the three pipes I have in my collection by John Calich come from the three different periods of his carving. The first I purchased, the Lumberman 4E, was the latest Calich. It was made in the third period of his classification numbers. The second one, the Billiard EE was from the middle period where the classifications were multiple E’s. The third pipe, the Liverpool 10 is the oldest pipe from the first period of stamping when Calich used just numbers 3-14. I had not realized that my pipes covered most of the years that he was carving.

Here are two photos of the threesome together. I took these photos to give an idea of what the size of the pipes were in comparison to one another.
IMG_5512

IMG_5513
I learned from my reading that John was a full time pipe maker for over 40 years. His pipes were mostly traditional shapes. His signature style was rustication and smooth on the same pipe along with a unique skill to stain a pipe in contrasting colors. He used only top quality Grecian and Calabrian briar. The mouthpieces are hand finished Vulcanite “A”. Each pipe was entirely made by hand. John Calich was featured in the summer 2005 issue of Pipes & Tobacco.

John Calich died in 2008. From my limited exposure to John I have to say that he was a gentleman and a great pipe maker. He was known as one of Canada’s finest carvers. I conclude this article about John’s pipes with a tribute written by Maxim Engle on John’s passing in 2008. Maxim says it very well in my opinion and his words match the various interactions I had with John over the phone.

John Calich – Pipemaker 1928-2008.

John passed away late last week as a result of cancer and heart failure. His cancer was caused by exposure to asbestos many years ago. John originally worked in the sheet metal and the air balance industries. In his early forties, he decided to become a pipe maker. He was largely self taught and developed his unique two tone staining on his own. He travelled widely in the US and Canada seeking pipe knowledge. He went to New Orleans to find out about the manufacture of Perique. He drove on his motorcycle to visit JT Cooke in Vermont. There his bike fell over in slow motion as the asphalt melted under the stand on a hot summers afternoon as he and Jim looked on and laughed. He continued to drive his bike into his late 60’s.

John shared his knowledge and enthusiasm with colleagues and member of the Burlington and Toronto pipe clubs. He was always encouraging to younger pipe makers and new pipe smokers. John’s pipes were mostly sold in and around Toronto. I was privileged to have been able to give John’s pipes a wider audience through the web site and always sold all he could supply me with. His pipes were extremely popular in Japan.

I will miss smoking a pipe with him in his workshop while he either showed some me restoration technique or we just sat and talked. During his brief illness, before he passed away, many of you conveyed to him your best; I knew he really appreciated that. The pipe smoking community will miss him.

If you own one of his pipes light it up with your favorite tobacco in memoriam. He would like that.
Be Well, Smoke Well
Maxim
http://www.pipes2smoke.com/

A Hilson Meerlined Tall Dublin Reborn into a Briar Calabash


Blog by Steve Laug

I received this old briar bowl from a friend and decided to see what I could do with it. It was in pretty rough shape. The shank had been damaged and repaired with some kind of epoxy as the gel surface of the crack was hard as rock. The repair was actual the most substantial part of the bowl. The bowl had an amazing deep and craggy blast to it but the finish itself was worn. Fortunately the wear was not deep and the cragginess was not too badly affected. The rim was smooth but the edges were slightly worn. The bottom of the exterior of the bowl showed the most nicks and damage to the finish. There were marks from looked to be a band on the shank. The inside of the bowl was quite clean. Originally it looked as if it had a meerschaum lining and the glue that had held that bowl in place was gone and just a small remnant of the glue was on the interior walls of the bowl. The bottom of the bowl was stained with tobacco so evidently the meerschaum lining must have crack and seepage darkened the bottom of the bowl.
IMG_5393

IMG_5394

IMG_5395

IMG_5396

I cleaned out the inside of the bowl with cotton swabs and isopropyl alcohol. Once I had it clean I worked on the resin on the shank repair. I sanded it until it was flush with the surface of the rest of the shank so that it did not bulge. I continually checked to see if I was weakening the repair but the shank was solid. I used the dental pick and my modified Philips screwdriver rusticator to rusticate the area around the resin repair. I also found a band in my box that fit the shank perfectly and pressed it into place. The band was more for bling than as the shank was not cracked or damaged. I also went through my stem can and found a stem that fit the diameter of the shank, turned it with the PIMO tenon turning tool and fit is in place. It would need to be reduced slightly in diameter to fit well with the band. I wiped down the bowl and shank with isopropyl alcohol on a cotton pad. I did not want to chance acetone as I was worried about it dissolving the resin on the shank repair. As I did not know what was used in the repair I did not want to chance further damage.
IMG_5397

I stained the bowl with a dark brown aniline stain. I applied it, flamed it, applied it again and flamed it again. To get an even coverage on the sandblast finish it would take more than three applications and flamings to make the stain even. The photos below show the bowl after three coats of the stain. It would need to be repeated later in the process to get the rough places stained.
IMG_5398

IMG_5399

IMG_5400

IMG_5401

I sanded the stem with 220 grit sandpaper and with a medium and fine grit sanding sponge to make the fit against the band work well. Once the shape and the fit of the stem were correct I used a heat gun to bend the stem to an angle that worked well with the look of this pipe. For the angle I used the curve of my buffer to press the softened stem over. When I had it bent I held it as it cooled and then set the bend with cool water.
IMG_5402

IMG_5403

IMG_5404

IMG_5406

IMG_5407

After bending I resanded the stem with the sandpaper and sanding sponges. Once the majority of the scratches were gone it would need to be sanded with the micromesh sanding pads but I wanted to do some more work on the bowl and shank before finishing the stem.
IMG_5408

IMG_5409

IMG_5410

IMG_5411

I roughened the shank some more to give it a closer look to the sandblast of the bowl. I heated the bowl with the heat gun to warm up the briar before giving the bowl and shank yet another coat of the aniline stain. I gave it the fourth coat of the stain, flamed it and the coverage was finally what I was looking for on the pipe. The shank and the bowl bottom took the stain this time and matched the rest of the bowl.
IMG_5412

IMG_5413

I hand buffed the bowl with a shoe brush and then gave it a light buff with White Diamond on the buffing wheel. I took it back to the work table and gave it several coats of Halcyon II wax which works well on sandblast and rusticated finishes. I buffed it with the shoe brush to bring up the shine. The next three photos below show the bowl after the final stain and light buff.
IMG_5415

IMG_5416

IMG_5417

At this point in the process I used a cotton swab dipped in stain to touch stain the places on the shank the underside of the bowl that were lighter than the rest of the bowl. I let it dry completely over night and then hand buffed the bowl.

In a phone call with Tim West of J.H. Lowe Pipe Repairs I discussed the possibility of making this pipe a Briar Calabash. I gave Tim the dimensions of the bowl and he happened to have a bowl that was originally made for Pioneer Calabash pipes that was the correct dimensions. He sent along several strips of cork that would be used for making a gasket to give the meerschaum cup a snug fit in the briar bowl.
IMG_5501

I cut a strip of cork and glued it to the bowl with super glue. I used a small piece of the cork to fill the gap between the ends of the strip. Once the glue dried I sanded the cork gasket until it was the proper diameter for the briar bowl.
IMG_5502

IMG_5507

I used some Vaseline and lubricated the cork gasket and then used my finger to coat the inside edge of the briar bowl where the cork would sit. I then pressed the meerschaum cup into place in the briar bowl. The finished Briar Calabash pipe is shown in the photos below. The polished gloss of the white meerschaum bowl looks great against the sandblast dark brown briar bowl. The silver band gives a bit of contrast to the pipe. The draught on the pipe is perfect and the feel of the new Calabash in the hand is great. The pipe is still light in weight and the thin pencil shank and stem work well. Now all that remains is to load it up and have the inaugural smoke.
IMG_5508

IMG_5509

IMG_5510

IMG_5511

Restoring an old Bruyere Extra Chubby Billiard


Yet another gift pipe is on the worktable. It is an interesting bowl. The exterior is carved with what looked like scales. There were several sandpits in the trails surrounding the scales. The shank had several cracks and looked as if it had previously sported a band. By appearances the band that was missing looked like it had been original rather than an addition for repairs. But the repairs were there nonetheless. The bowl was caked and the finish very dirty. It was worn away to a large degree. The fascinating part of the bowl was the drilling of the airway. The end of the mortise, which is quite large, is concave. At the end of the concave mortise there are two holes drilled looking like a colon “:”. The top hole is the airway leading into the bowl and the bottom hole is about a ½ inch deep and ends. With a stem in place the mortise looks to serve as a second chamber for cooling the smoke. The shank is stamped Bruyere over Extra in and oval with the ends flattened. There is no other stamping on the shank.
IMG_5462

IMG_5463

I went through my box of bands and found one that would work well on the cracked and repaired shank of the pipe. I also found a stem in my can of stems that would work well with this pipe. The tenon needed to be quite large in diameter to fit the large mortise. The stem I had was a faux Peterson stem. The airway was directly in the end of the button not on the top. Thus the look was Peterson like but the stem was actually a straight airway from tenon to button.
IMG_5460

IMG_5461

IMG_5464

I added some wood glue to the area of the shank that the band would be pressed on and then heated the band and pressed it onto the shank. I reamed the bowl with a PipNet reamer to take the cake back to bare wood. I also scrubbed the rim down as it had a chamfered inner edge around the bowl.
IMG_5466

IMG_5467

I wiped down the bowl with acetone on cotton pads to remove the remnants of the finish and to clean up the debris and dust in the carved trails between the scales on the bowl and shank. I picked out the debris in the flaws in the trails, scratched the surface surrounding the flawed areas and then packed in briar dust with a dental pick and dripped superglue into the dust. I lightly sanded the areas of the fills and wiped the bowl down again with acetone on the cotton pads.
IMG_5468

IMG_5474

IMG_5476

IMG_5477

IMG_5478

With the repairs completed, the band in place and the stem fitted to the shank it was time to stain the bowl. I wiped it down a final time to remove any remaining dust and debris before staining. I decided to use a dark brown aniline stain and applied it with the dauber that comes with the Feibings Shoe Dyes. The dauber works well on the wider grooves between the carved scales on the finish. I applied the stain, flamed the finish, reapplied the stain and flamed it again until the coverage of the stain was even.
IMG_5479

IMG_5480

I wanted a contrast to the finish – dark stain in the grooves of the trails and a bit more opaque stain on the surface of the scales so I wiped the bowl down with isopropyl alcohol to reduce the stain colour on the smooth surfaces of the finish.
IMG_5481

IMG_5483

IMG_5484

IMG_5485

I buffed the bowl with Red Tripoli and White Diamond on the buffing wheels to polish the bowl and give me an idea of the look of the finish once polished.
IMG_5486

IMG_5487

IMG_5488

IMG_5489

I sanded the smooth surfaces of the bowl with a 1500 grit micromesh sanding pad to further lighten the stain and allow the grain to pop through. The smooth surfaces had birdseye on most of them and I wanted that to stand out on the pipe.
IMG_5490

IMG_5491

IMG_5492

IMG_5493

I sanded the stem with 220 grit sandpaper to make the fit the shank even around the circumference of the saddle portion of the stem. I sanded it with medium and fine grit sanding sponges to remove the deeper scratches on the stem. I then used my normal line of micromesh sanding pads – wet sanding with 1500-2400 grit pads and dry sanding with 3200-12,000 grit pads. I also sanded the nickel band to polish it and remove the small scratches that were present in the finish.
IMG_5494

IMG_5495

IMG_5496

I rubbed the stem down with Obsidian Oil and once it was dry buffed the bowl and stem with White Diamond. I gave the pipe and stem multiple coats of carnauba wax and polished it with a clean flannel buff to finish the process. The old pipe has a new look and a great feel. I look forward to giving it a try to see how the second chamber – the reverse calabash actually works on this pipe. The photos below show the finished pipe ready to use!
IMG_5497

IMG_5498

IMG_5499

IMG_5500

Giving New Life to a no-name Sandblast Apple


I was gifted this old apple bowl. It was a nicely shaped apple with a light sandblast finish. There were some significant problems with flaws and crevices in the bowl. The major flaw was on the right side of the bowl toward the top and on the top of the rim itself. It extended into the bowl for about a ¼ inch. There was no cake or build up and the bowl seemed clean and lightly smoked if smoked at all. It had a rounded shank so it was clear that the original stem had been a stick bit of some sort – though sadly it was lost. I had it sitting in my box of pipes to be refurbed for awhile while I worked on other pipes. Its turn finally came up.
IMG_5419

IMG_5422

IMG_5421

IMG_5420

I went through my can of stems and found the kind of stick bit free hand style stem I thought would look good on this pipe.
IMG_5418

I turned the tenon end of the stem with a PIMO tenon turning tool and then used the Dremel and sanding drum and finally some hand sanding with 220 grit sandpaper to get the stem to fit well in the mortise of the shank. With the fit nice and snug I would need to sand the saddle area and clean up the tenon to make it shine.
IMG_5426

IMG_5427

IMG_5428

IMG_5429

IMG_5430

I cleaned up the crevices with a cotton swab and dental pick and isopropyl alcohol. I then packed some briar dust into the filled crevices and dripped super glue into the briar dust. I repeated the process until the flaws were filled and the surface of the bowl and rim bulged slightly. I sanded the rim and the fill on the side with 220 grit sandpaper to remove the excess fill. I scratched the surface with the dental pick to give it a similar texture to the surround sandblasted bowl. I sanded the saddle on the stem at the same time with 220 grit sandpaper. I finished the repair and the saddle area with a medium and a fine grit sanding sponge.
IMG_5431

IMG_5432

IMG_5433

Once the area was filled and the texture finished it was time to stain the pipe. I decided to use a dark brown aniline stain that I would later wipe down with alcohol to give more transparency and aid in a contrast on the surface of the bowl. I wiped down the surface of the bowl with isopropyl alcohol before staining the bowl to remove the dust. I applied the stain and flamed the bowl and repeated the process until the coverage was even.
IMG_5434

IMG_5435

IMG_5436

IMG_5437

I wiped the bowl down with isopropyl alcohol on cotton pads to give the stain some more transparency and to lighten it.
IMG_5440

IMG_5441

IMG_5442

I buffed the bowl with a light touch on the buffer using White Diamond. I took it back to the work table and hand buffed it with a shoe brush to give it a shine. There were spots on the shank and the bowl where I would need to touch up the stain as it was too light and shiny.
IMG_5443

IMG_5444

IMG_5445

IMG_5446

Once the coverage looked good I gave the bowl a coat of oxblood aniline stain to build a contrast. In the photos below you can see the way it worked to highlight the blast and show the grain. The birdseye grain under the blast on the left side of the bowl showed up with a nice contrast look.
IMG_5447

IMG_5448

IMG_5449

IMG_5450

I worked over the stem with micromesh sanding pads using the 1500-2400 grit pads to sand the surface of the bowl and give it more contrast with the crevices in the blast. I polished the stem with my usual pattern of micromesh pads – wet sanding with the 1500-2400 grit pads and dry sanding with the 3200-12,000 grit pads. I rubbed the stem down with Obsidian Oil and let it soak in. When it had dried I hand buffed the stem.
IMG_5451

IMG_5452

IMG_5453

I buffed the pipe and the stem with White Diamond and then gave it multiple coats of carnauba wax. I buffed it with a clean flannel buff to raise the shine on the bowl. The finished pipe is shown in the photos below.
IMG_5454

IMG_5455

IMG_5456

IMG_5457

In closing I include two photos of the repaired areas of the bowl to show the finished repair. The super glue and briar dust repair worked well and is quite hidden by the stain and finish work. The trick was not to overfill the areas surrounding the crevice so that the filled area would blend into the texture of the bowl. I am pleased with the finished product.
IMG_5458

IMG_5459