Guest Blog by Robert M. Boughton
Member, North American Society of Pipe Collectors
http://www.roadrunnerpipes.com
http://about.me/boughtonrobert
Photos © the Author
“What is the real purpose behind the Tooth Fairy, the Easter Bunny and Santa Claus? They seem like greater steps toward faith and imagination, each with a payoff. Like cognitive training exercises.”
— Author Chuck Palahniuk, in a Seattle Times interview, November 18, 2005
INTRODUCTION
Attention, working memory, processing speed, long-term memory, visual processing, auditory processing, logic and reasoning are the primary aspects of cognitive thinking, or the ability to learn. That’s why I kicked myself, in the figurative sense of course, the other day when I finished this restoration project and discovered I had deviated from my normal habit of photographing each part of the project – in this case, the pipe before it was restored. I mean, that’s not really an important step, after all, only the key to understanding the significance of the end product.
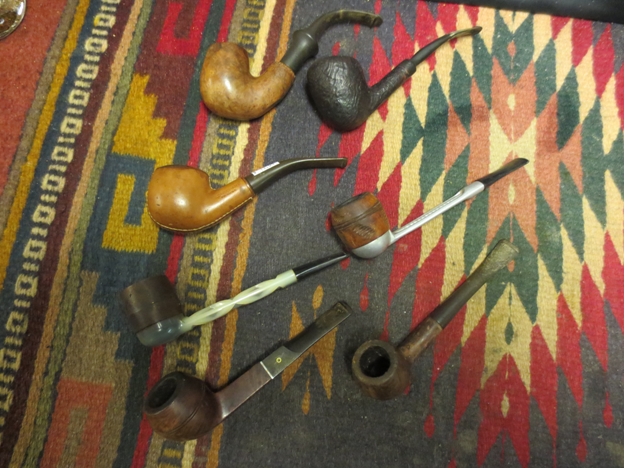
My excuse is that I bought a lot of eight pipes on eBay, knowing they were in foul condition but rather desperately needing more ware for my online store, and in the repetitious task of documenting all of their original conditions from every angle, the one slipped past me. However, being more attentive by nature, I have managed to forgive myself, if not without some wicked self-chastising.
Anyway, I bought that particular set for several reasons: nobody seemed to see what I did, that hidden in the apparent wreckage (at least to someone with an eye to get past all of that) were an unusual Savinelli huge billiard, a Ropp cherry wood, a smooth and well-colored old meerschaum bulldog and a Longchamp pigskin billiard, all of which appeared to be vintage; the bidding was low, I thought – I won for $32.50 with free shipping, more than the price for any one of them with careful work – and I was determined to have them, without sniping, at a sane cost I was confident of achieving by scaring off the competition with a max bid that had to seem outrageous to the others who were watching. I wonder if any of the unfortunate amateurs even took another look to see who won. And, oh, the thrill of victory in the best example of the open market that is eBay, even at its downright dirtiest.
Only one of the eight, a very old corncob, was burned out. In fact, that is putting it over nicely, for there was a glaring hole in the bottom that I confirmed with a poke from my pocket three-in-one pipe utility tool, but even it offered an excellent age-browned stem and gold-colored shank plate that fit an old restore with a crack I’ve been working on. The beautiful Savinelli Punto Oro marked “Herman Marcus” – which the eBay seller misidentified in the ad as a “Neiman Marcus” – on the right shank is very badly caked like the others and has an original short stem that for whatever hair-brained reason was bent up and back and not surprisingly has a chunk out of the lip. Call it foolhardiness or even plain arrogance, but I think I can fix the chunk. The other six pipes are finished, but this account concerns only one.
THE PIPE RESTORATION
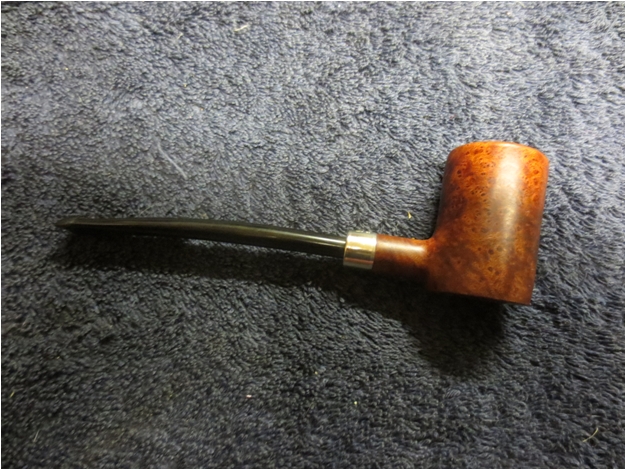
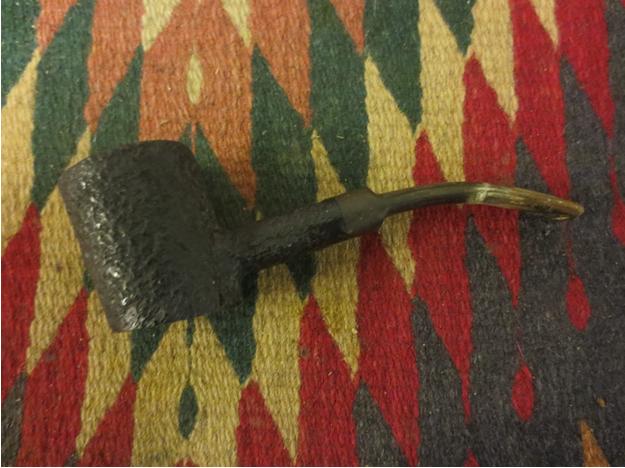
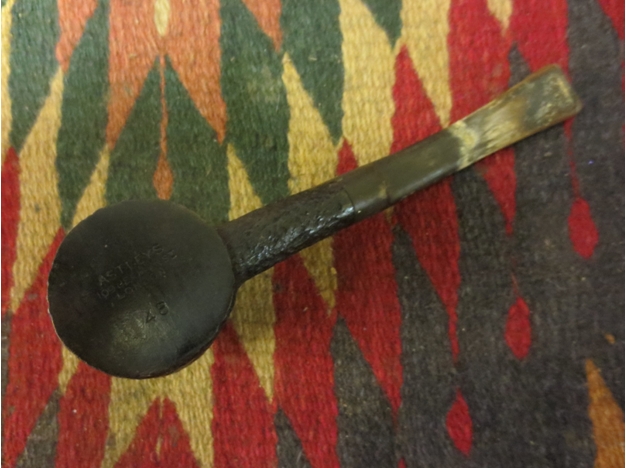
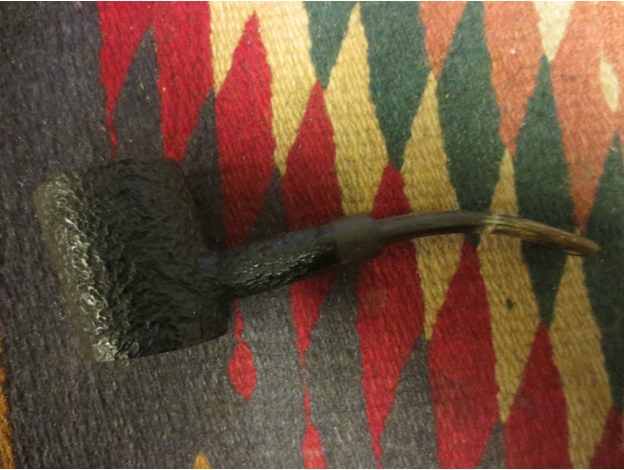
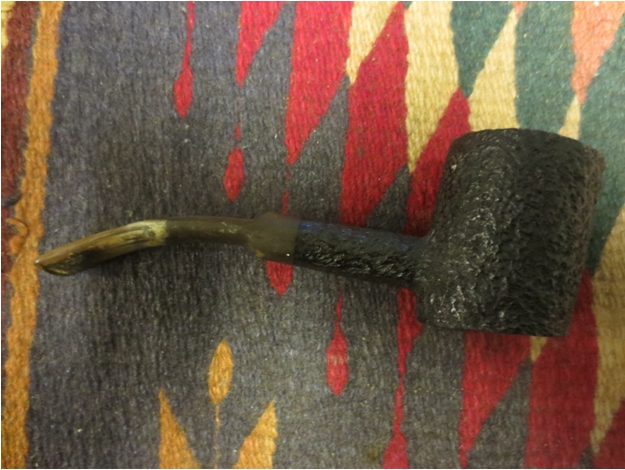
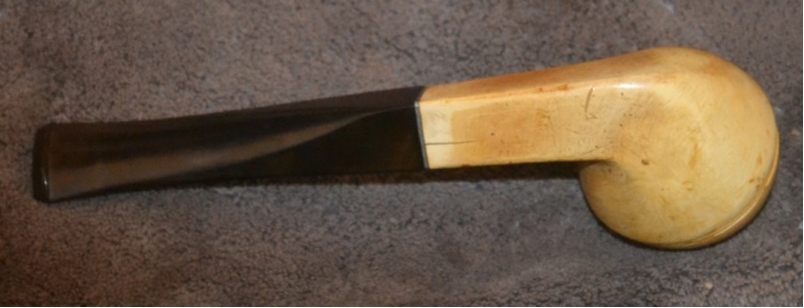
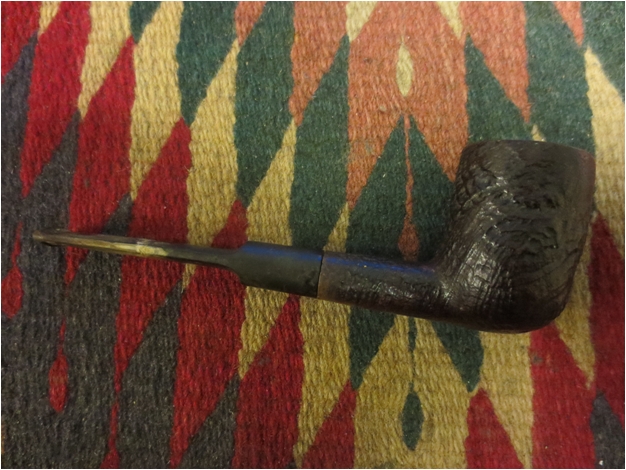
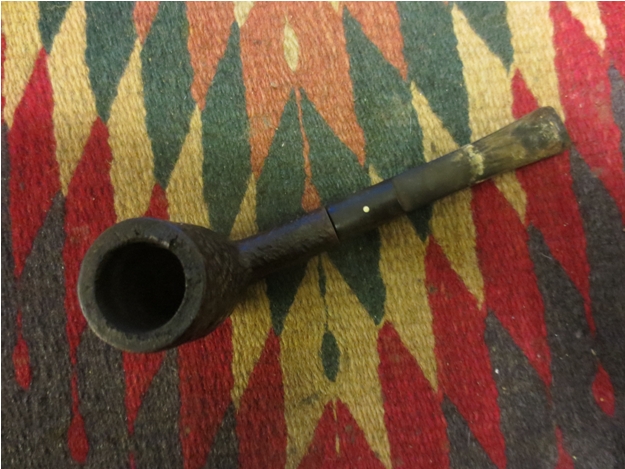
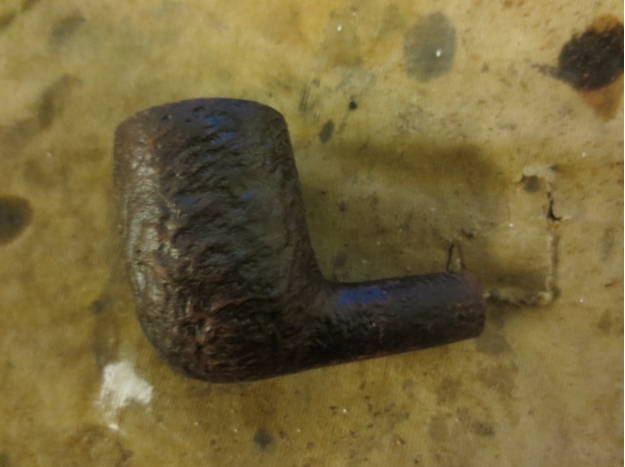
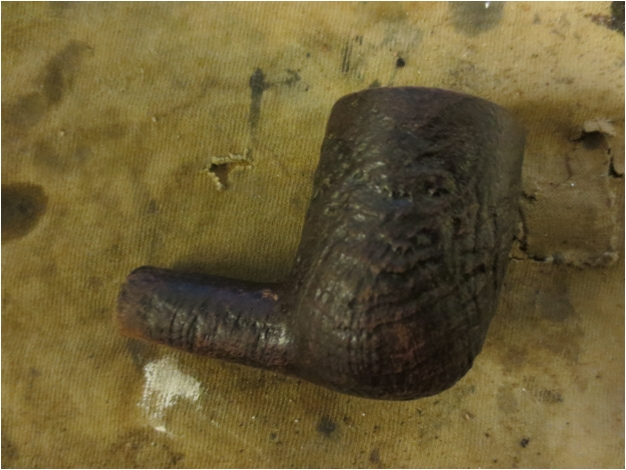
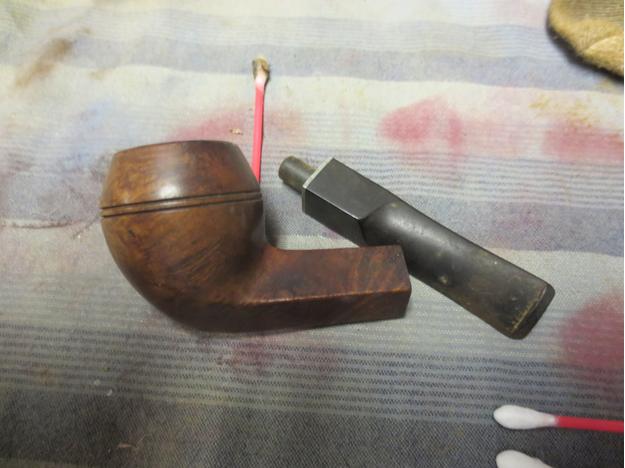
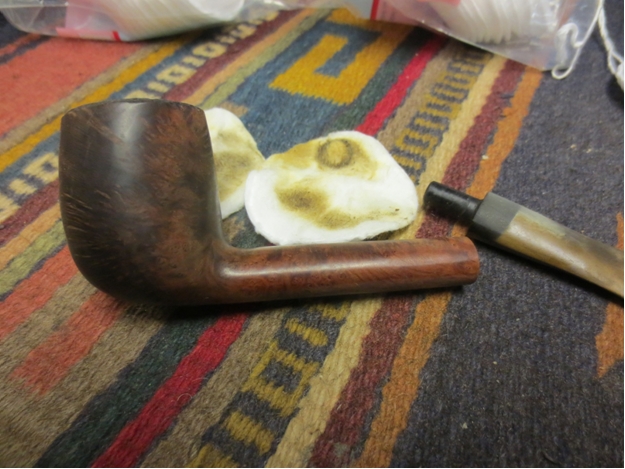
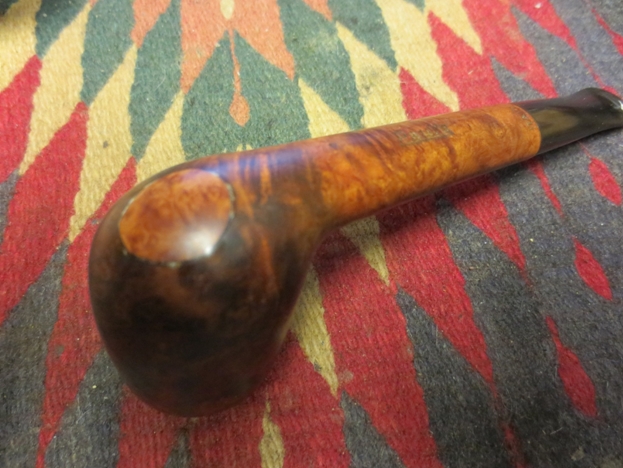
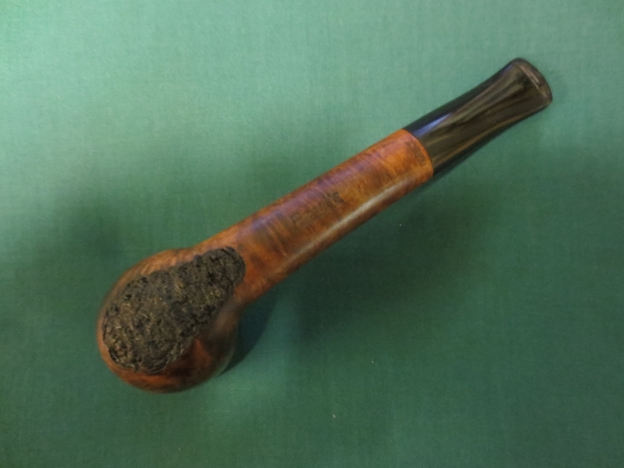
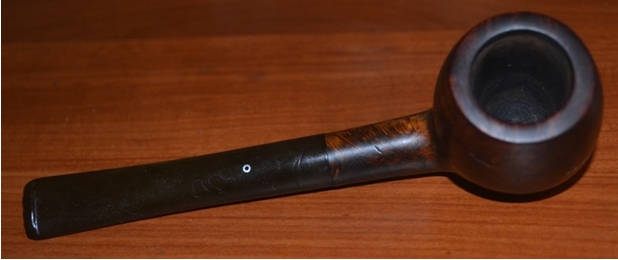
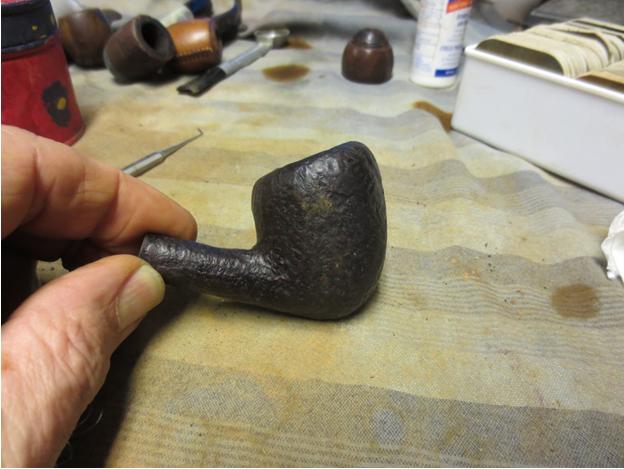
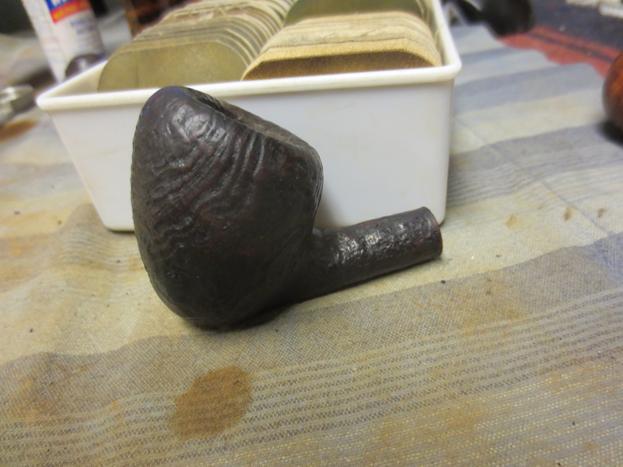
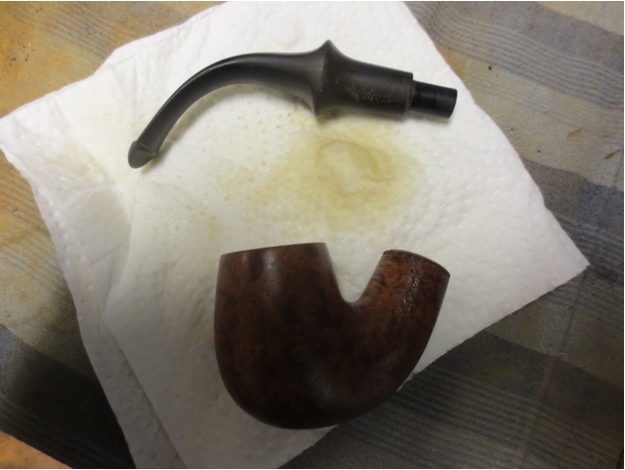
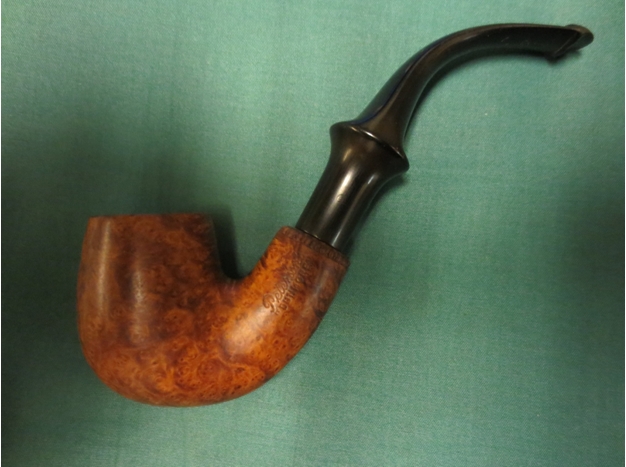
My blog today is about a lesser-known pipe brand called Monarch, which was established in Hartford, Connecticut in the 1930s and also distributes the Carey Magic Inch and Aerosphere pipes. Specifically, this concerns an apple shaped sitter with a bizarre patented tenon that screws into the shank. Once inserted with great difficulty, the tenon leaves a jet engine-like protrusion with a tiny piece of the rod that snaps onto the stem.  At the time I believed my greatest problem would be disassembling the pipe, as something within the complex tenon system went awry and left the stem and cap spinning out of control with no purchase whatsoever. Naturally, I consulted my friend and mentor, Chuck Richards, first. He examined the pipe, sighed, made a doubtful face and suggested I give the whole thing a hot alcohol flush to see if that might loosen things up. But he was making no promises. And so, just for backup, I emailed our host, Steve, and posed my question. He said he had encountered the same problem once or twice in the past, and the only way he was able to get the pieces apart was to wiggle the stem carefully back and forth for as long as it took to do the job. Steve suggested the process could take some time and be quite tiring.
And so I decided upon a course of compromise. I gave the pipe a normal cold alcohol flush just to remove some gunk, which it did, and as I was quick to wipe up the overflow, it cleaned the bowl and shank well also. Then I commenced the wiggling. Steve was correct. The darned thing wanted to put up a fight. But maybe I lucked out, or the pipe just felt the negative vibes beginning to emanate from my psyche, because after about a half-hour of this nonsense the stem popped off. I was sure I had broken it!
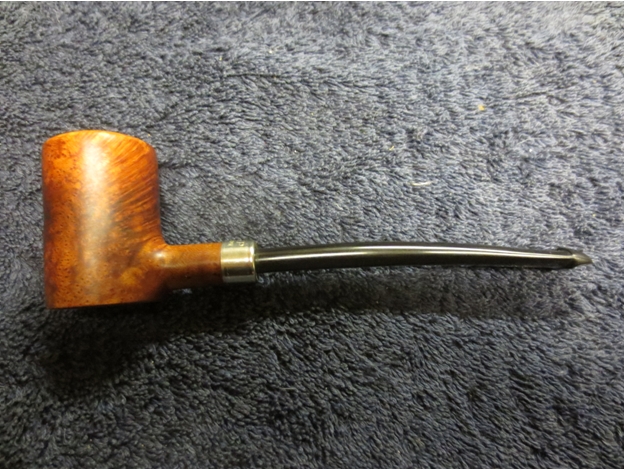
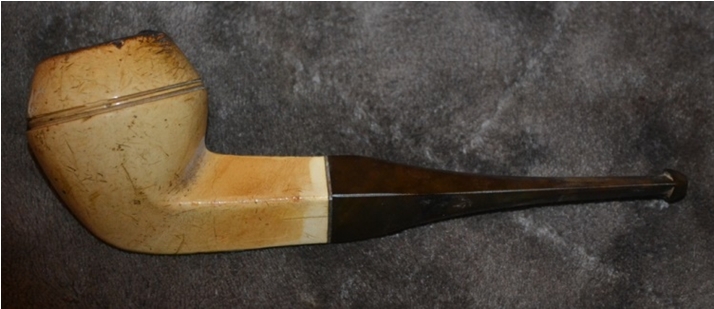
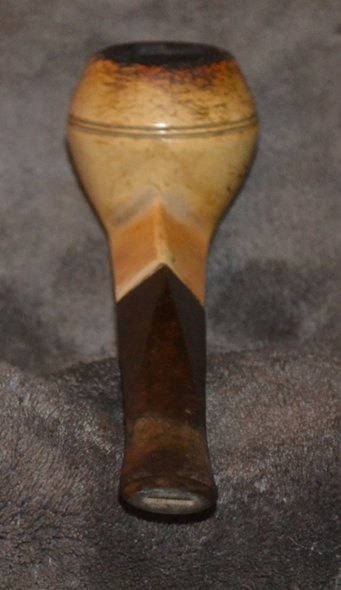
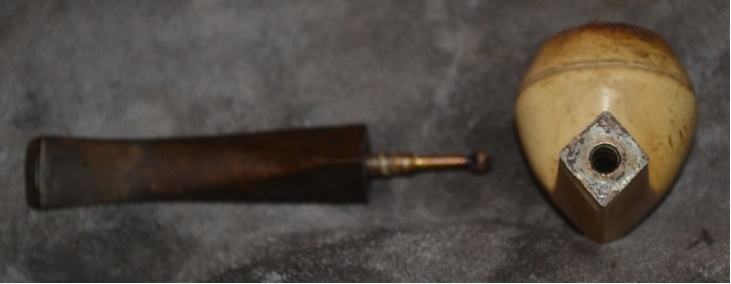
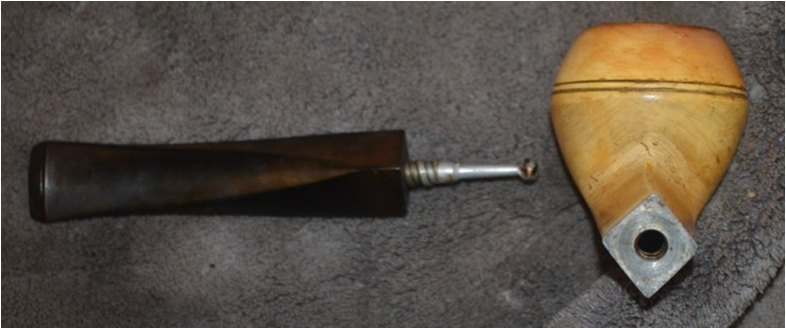
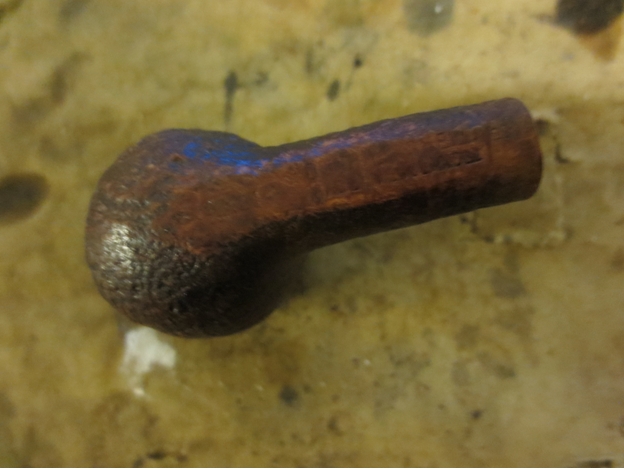
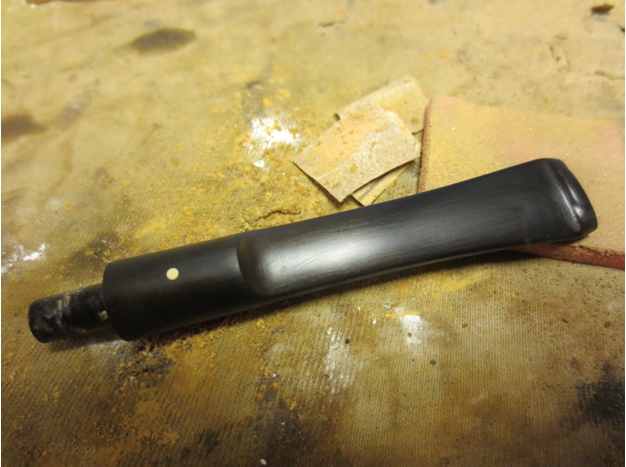
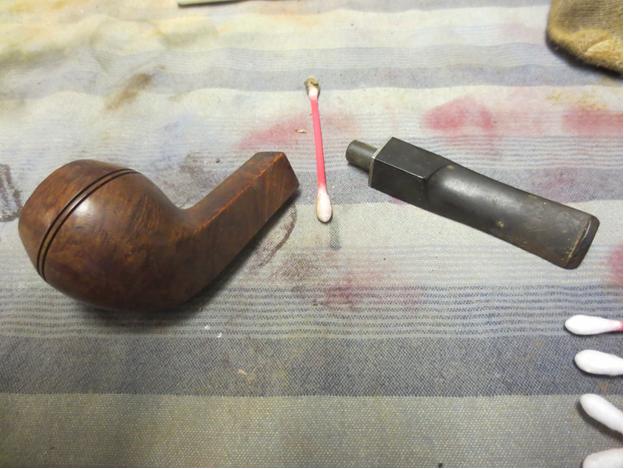
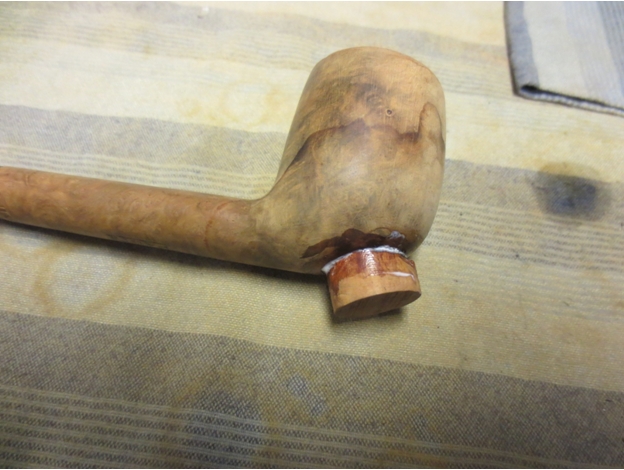
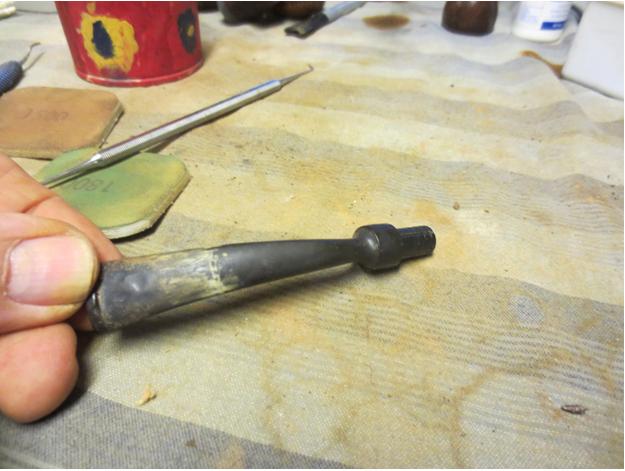
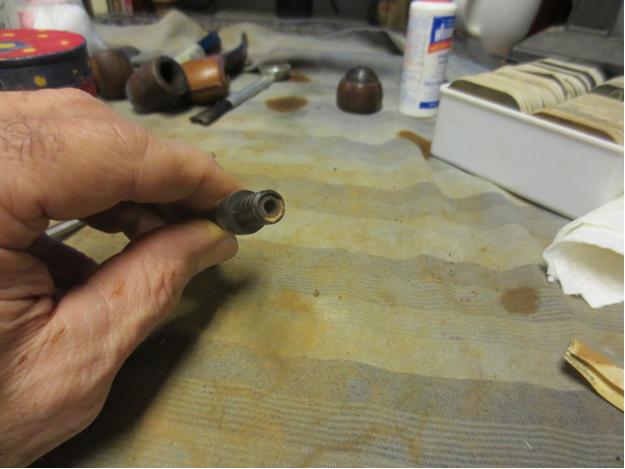
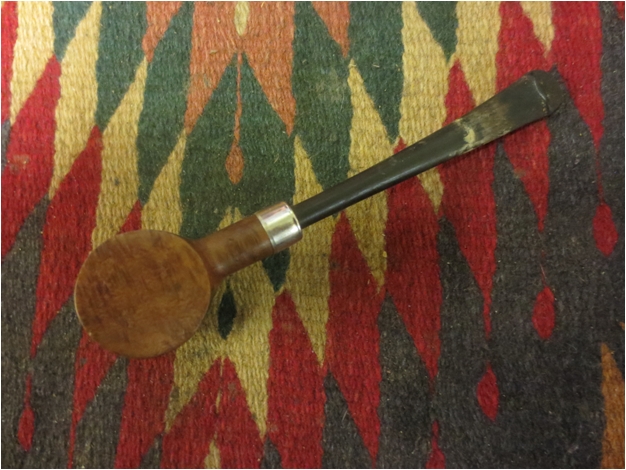
Uncovering something out of a sci-fi comic book from back in the day, before anyone from Earth at least had ever traveled into space, or perhaps more like a diagram one might see in an old tech manual on airplane engines, I grasped the bowl and shank firmly in one hand and seized the curious bulb with two fingers of my free one and tried my hardest to twist. This approach got me nowhere but hot and sweaty.
Acutely aware of how easily I might demolish the entire pipe with one fell move but needing in the worst way to get that thing out of the shank, I wrapped the extending end of the tenon in a few small pieces of cotton and found some pliers. I started with the least necessary force and worked my way up a few notches before thinking better.
Sitting down and applying all of that processing (in particular visual), logic and reasoning I mentioned in the beginning, I noted the small opening in the exposed end of some sort of rod as yet unknown to me but most certainly to become so. And I remembered something (learning) I had done before to extract similar parts jammed in admittedly more sturdy objects. Rummaging through my toolbox, I found a small screw and screwdriver and with all due respect for the frail pipe, not to mention the unknown integrity of the odd tenon, forced the screw a short distance into the hole, where it jammed as I had intended.
Reversing the turn of the screw, no pun intended, I was rewarded almost at once with movement of the rod. Soon it became loose enough to finish by hand, and then the whole, approximately two-inch, grimy rod, along with the bulbous end and the stem cap, were in my hands. I know pride is supposed to be a sin, but not in all cases, and at any rate, there it is.
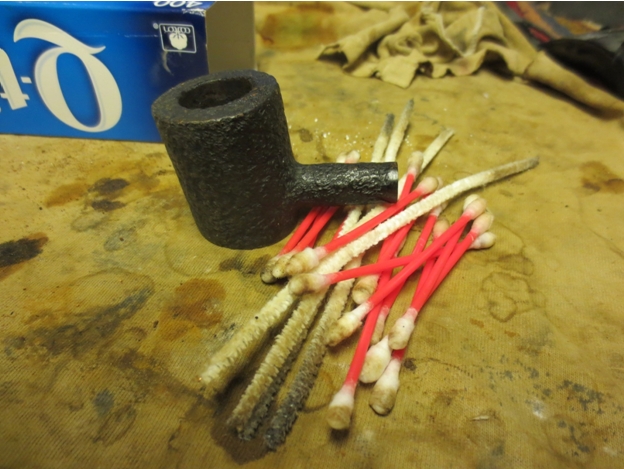
The patented supertenon, which appeared not to be intended for removal in order to accomplish such trivial tasks as cleaning the pipe now and then, suddenly told me, as clearly as if it spoke the words, why I found it and the inner shank coated with vile muck accreted over the decades. Intense alcohol scrubbing with stem cleaners corrected that problem.
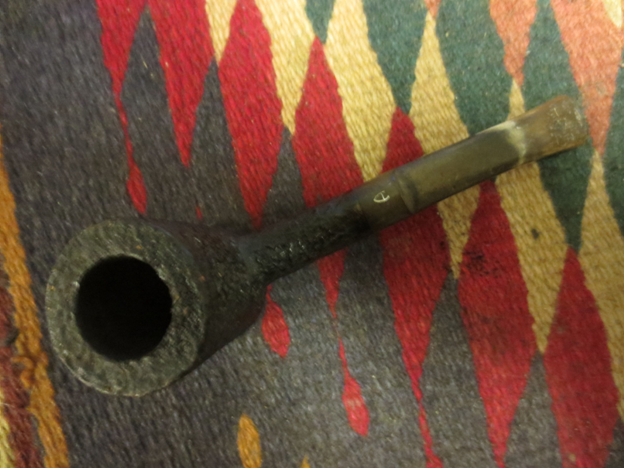
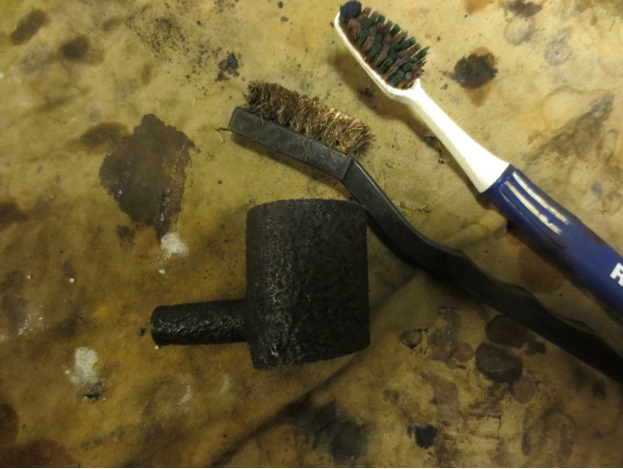
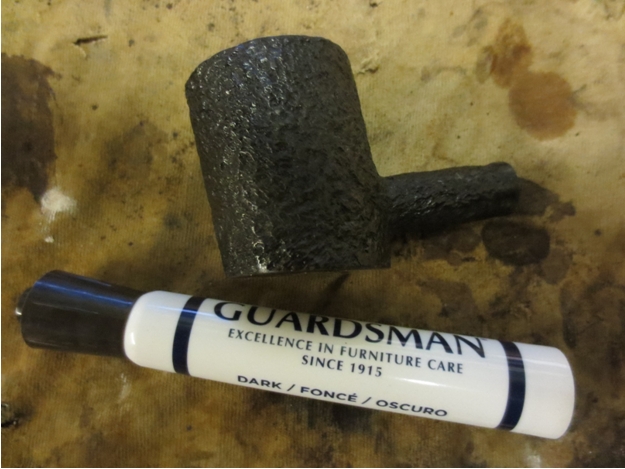
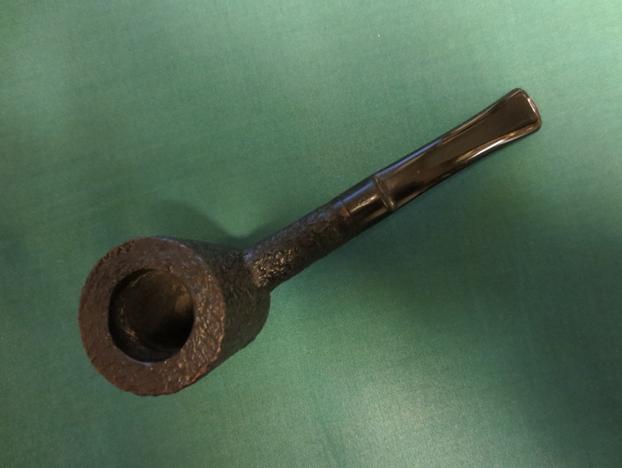
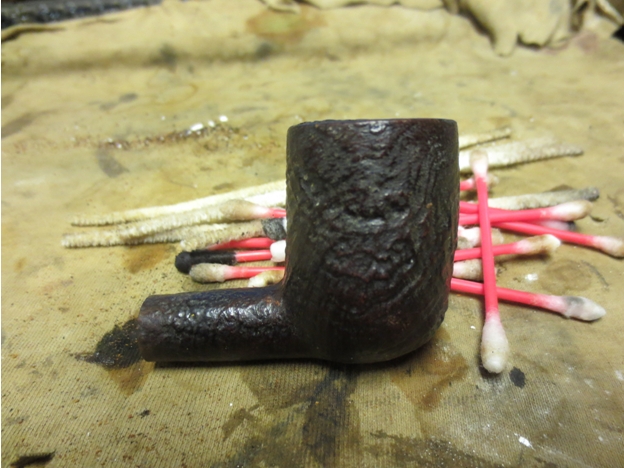
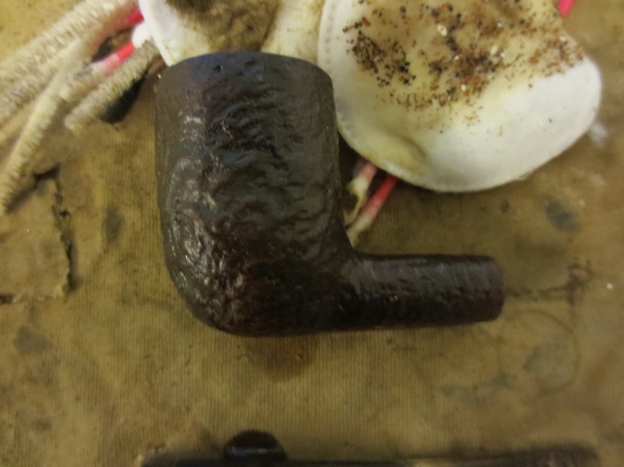
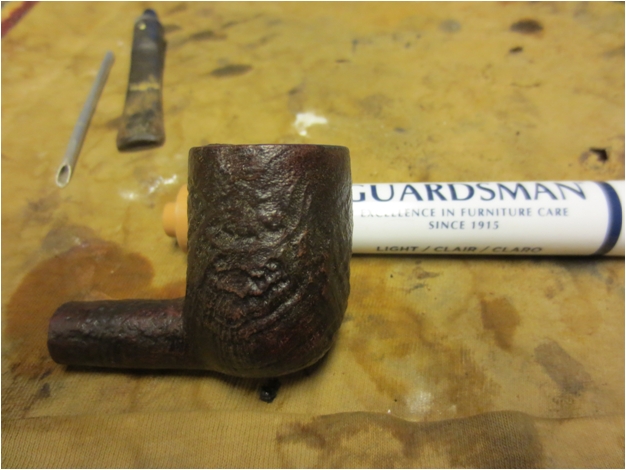
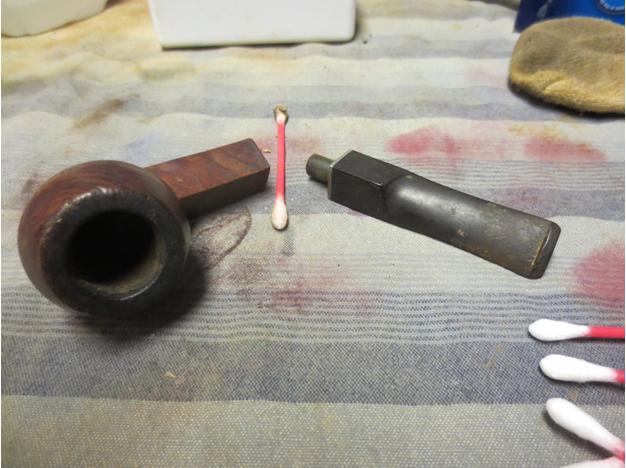
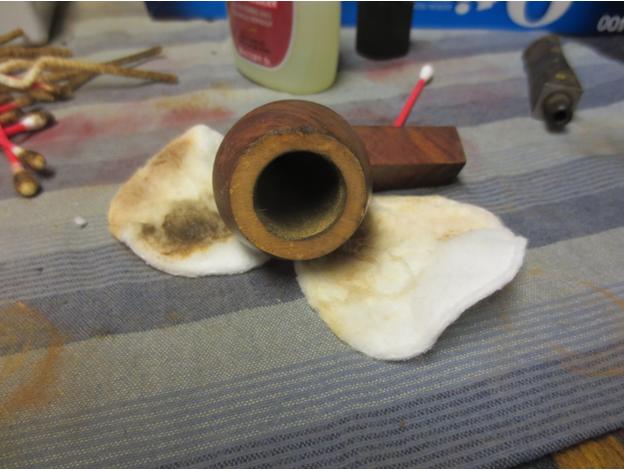
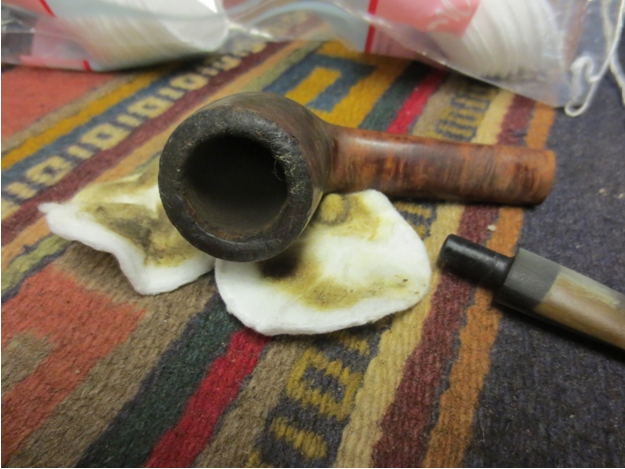
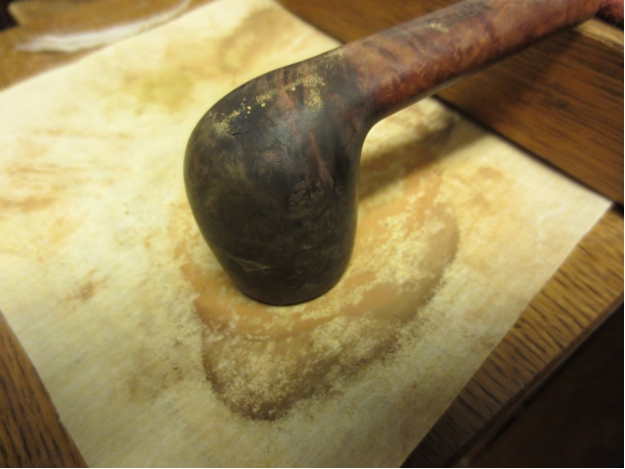
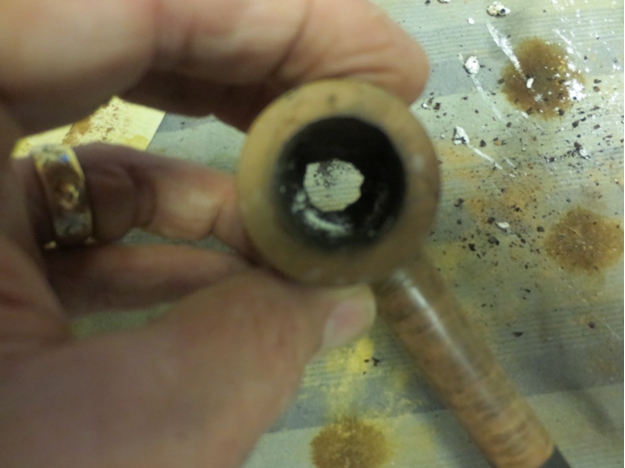
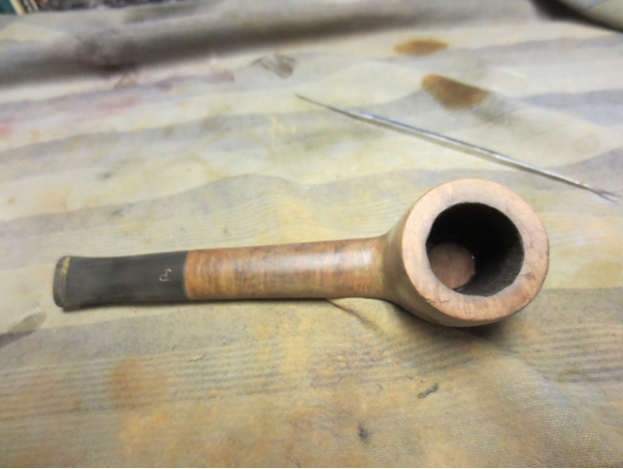
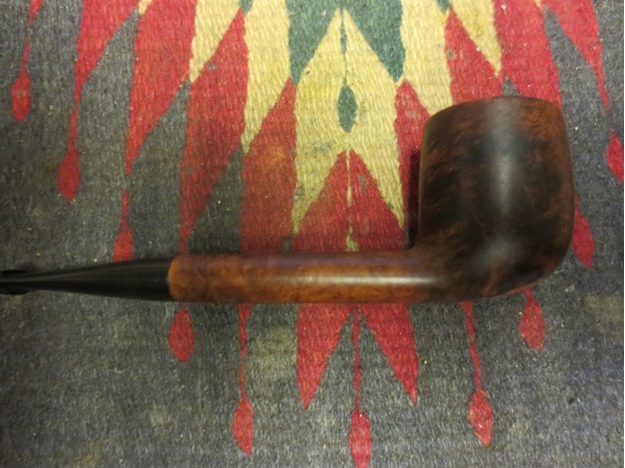
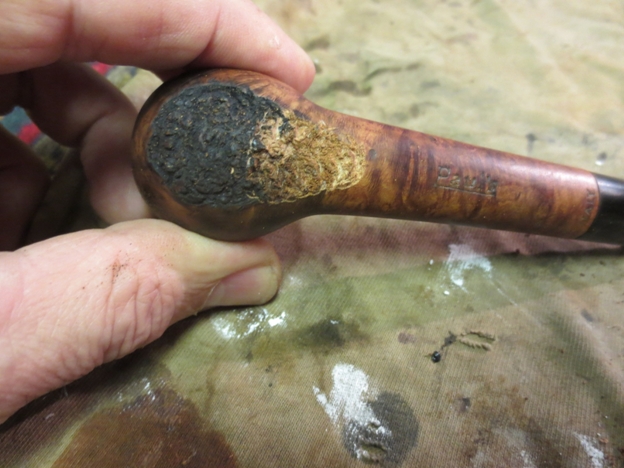
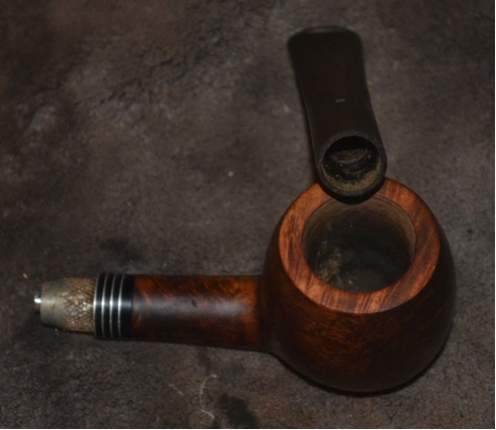
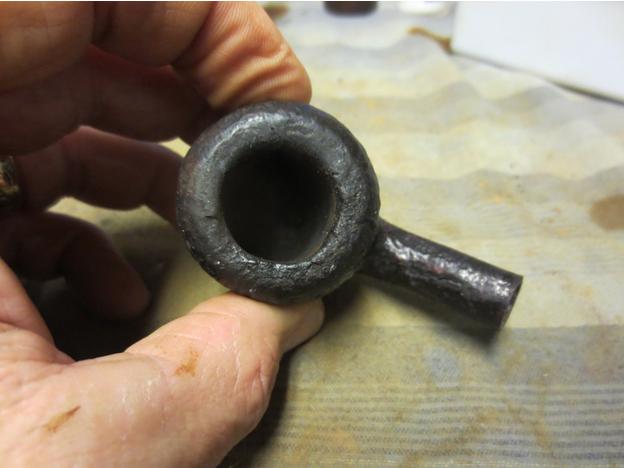
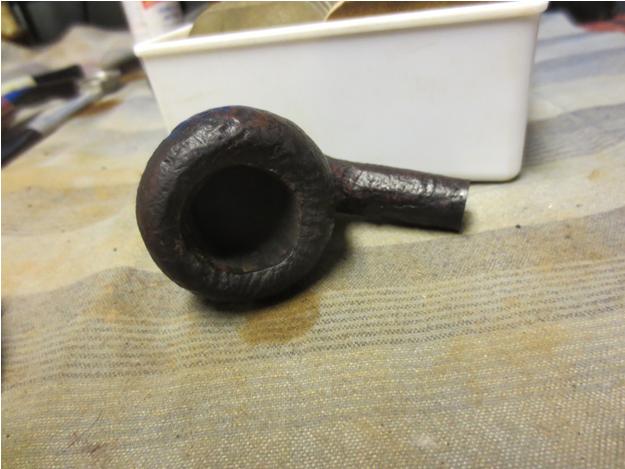
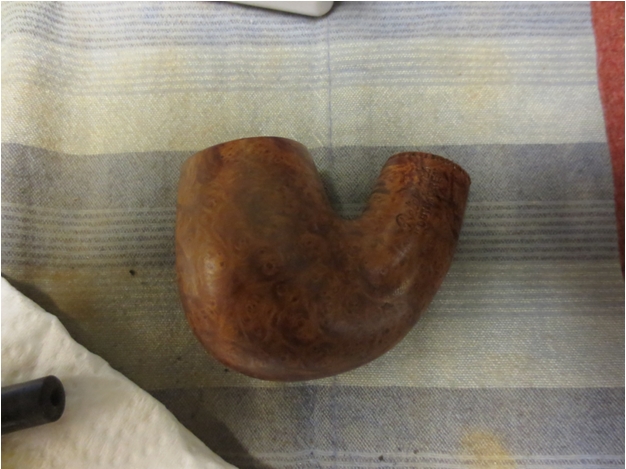
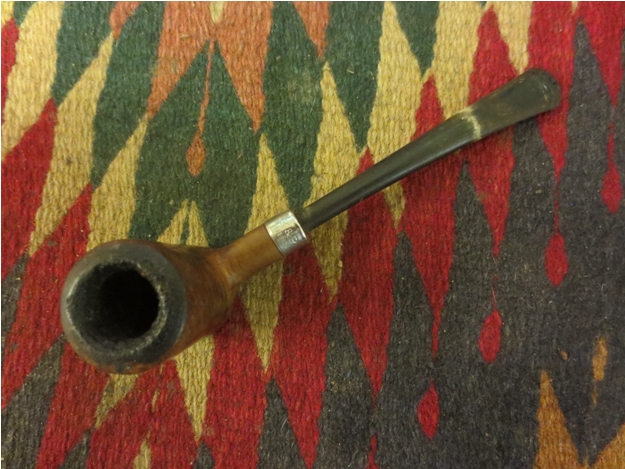
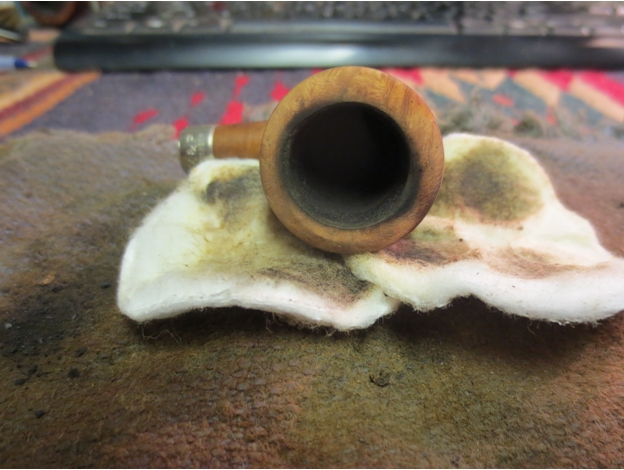
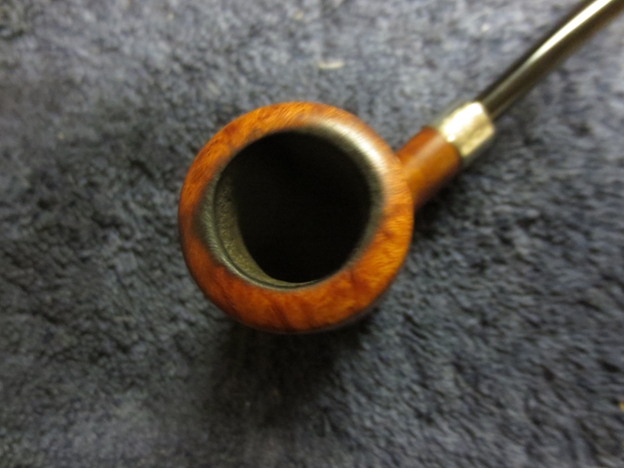
But then there were the bowl and rim to make right again, and I emphasize that term. The iniquitous conditions of the two, un-photographed as they may be, can be approximated by a shot I took of those areas of another pipe from the same lot: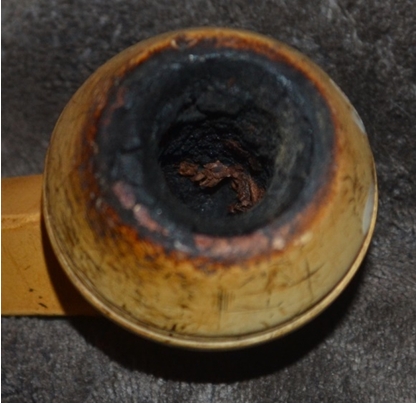 Although clearly not even the same material as the Monarch apple, the rim scorching and cake buildup in the bowl are for all intents and purposes identical.
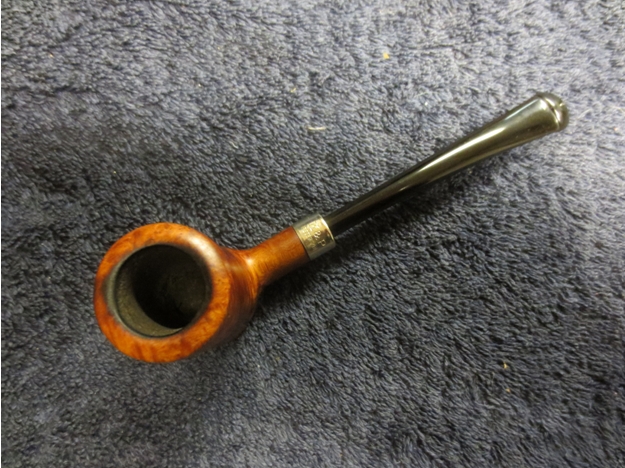
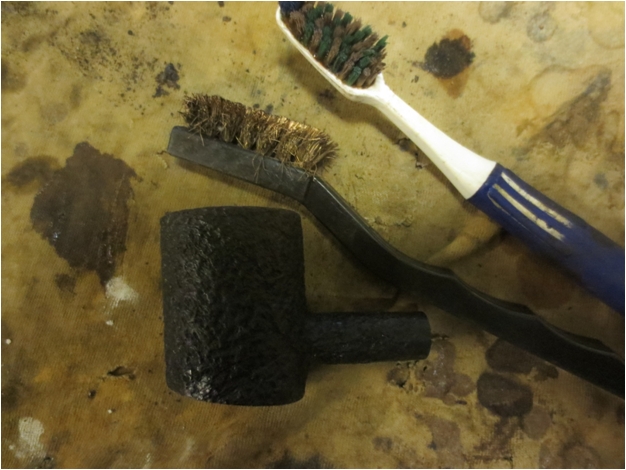
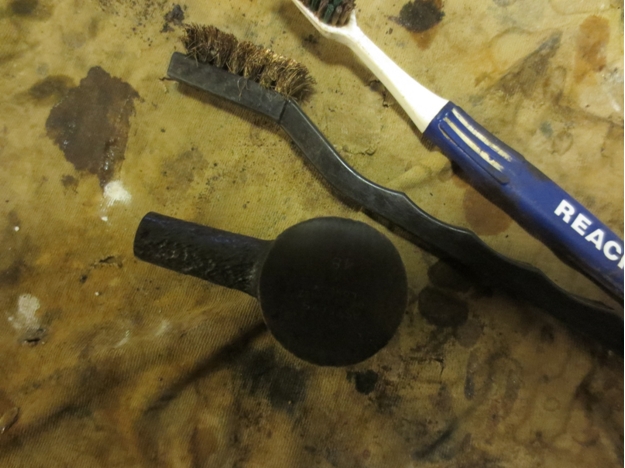
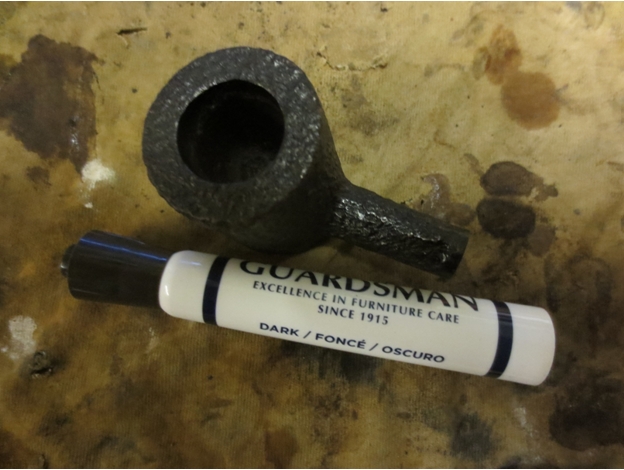
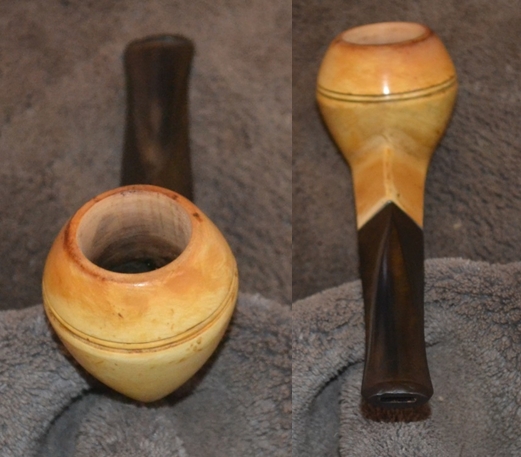
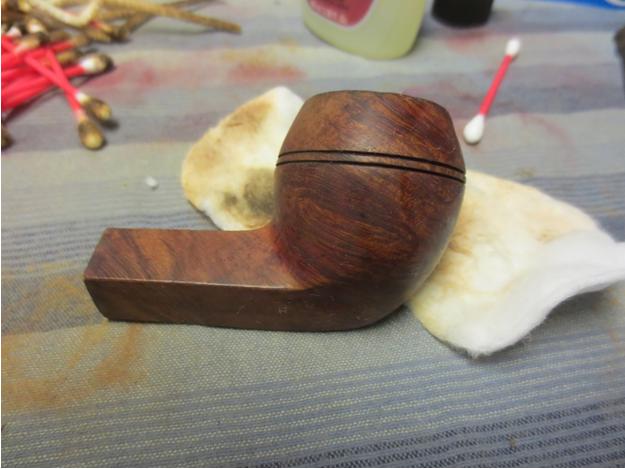
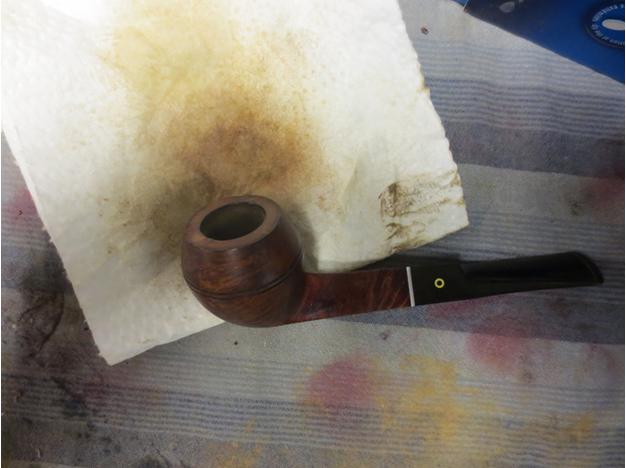
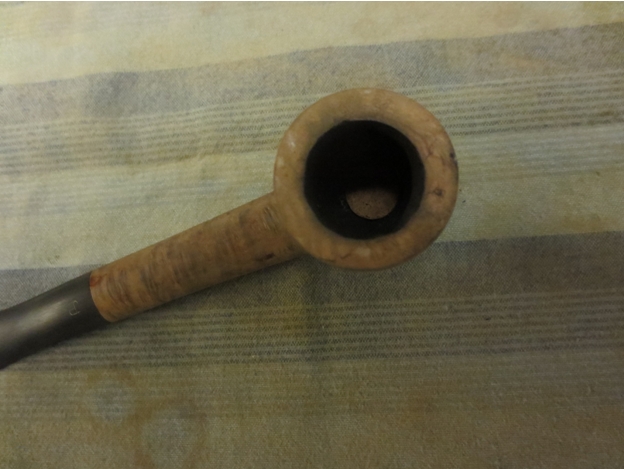
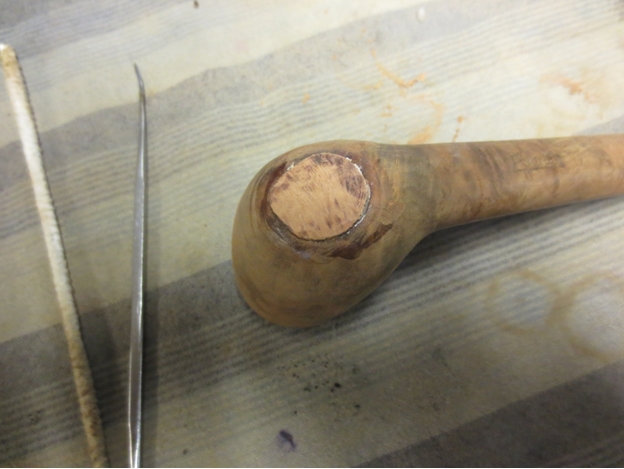
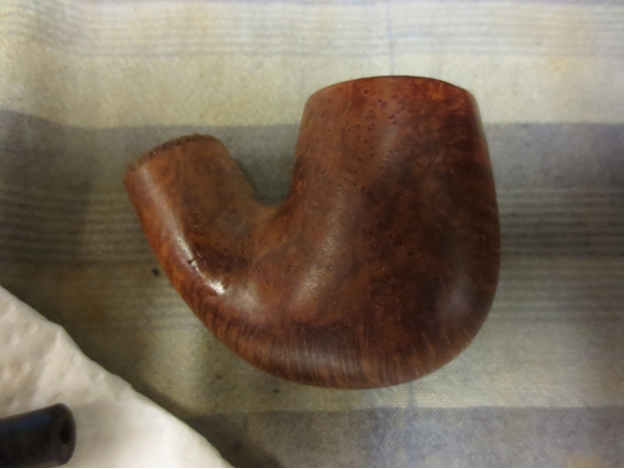
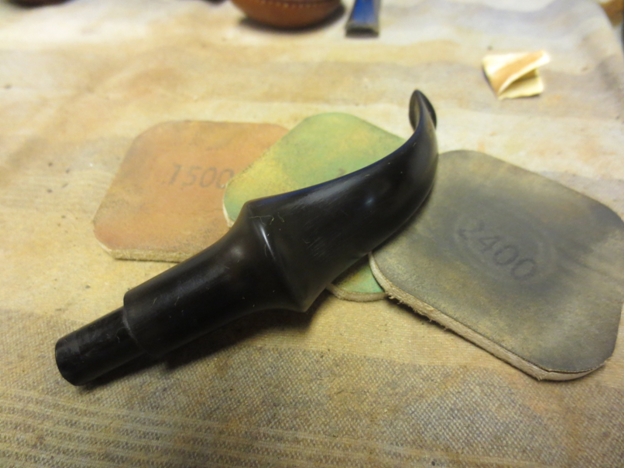
I reamed that bowl with vigor and then sanded it, first with 150-grit paper and then 400, for about 40 minutes, until it was completely clear of carbon and down to the briar at the top. I used 220 on the rim, then micro-meshed it with 2400.
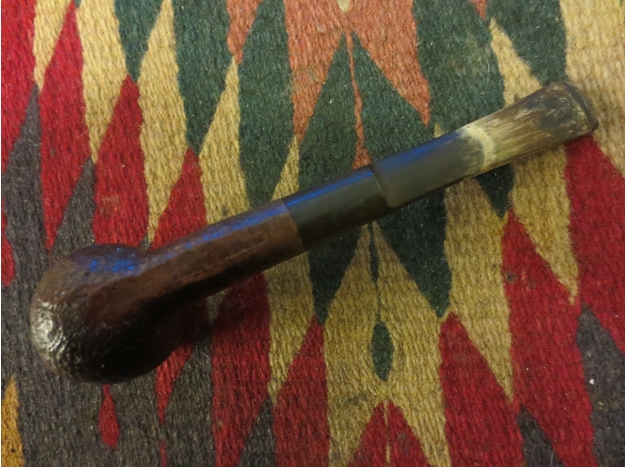
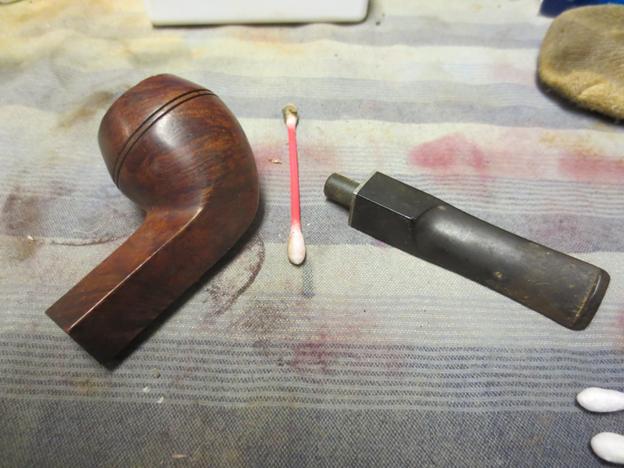
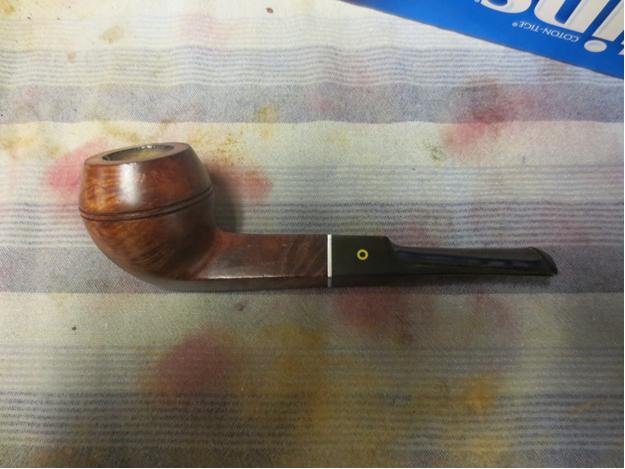
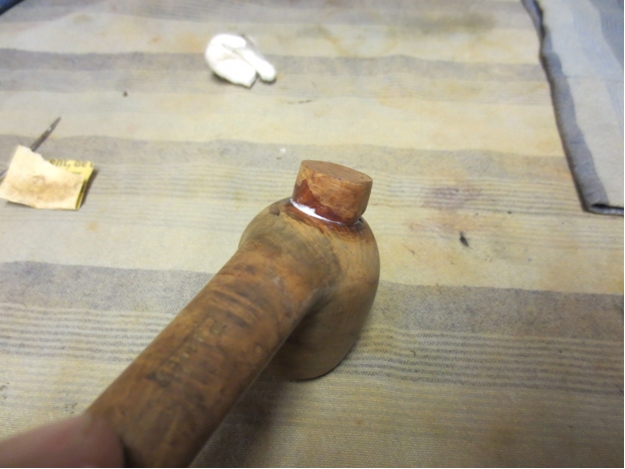
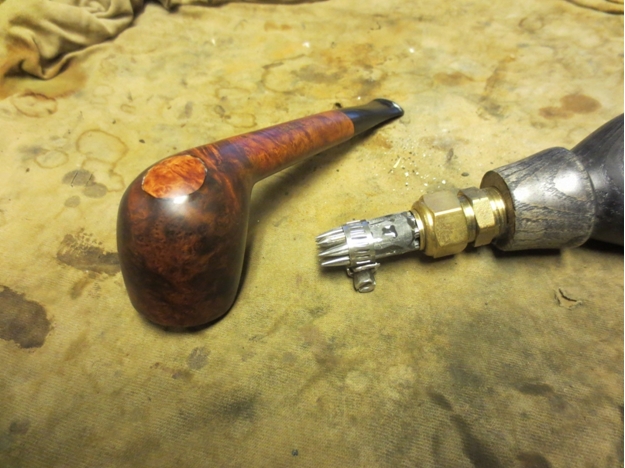
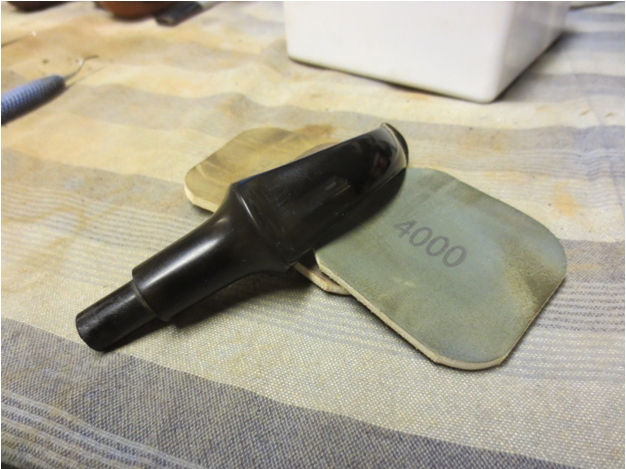
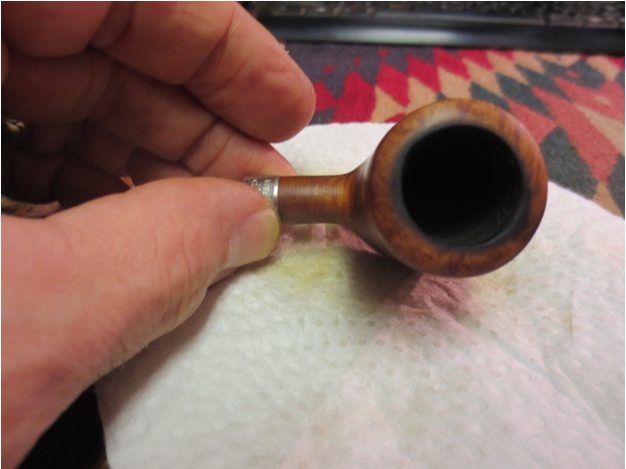
In this way time flew, and the hour arrived to reassemble the pipe. I really had no idea how that would go, but after a few tries I managed, with the rod inserted through the holes on either end of the bulb and decorative cap that was attached to it, to turn the crazy tenon as far as it would go back into the shank. Relieved that the cap was snug in place, I made several tries to line up the tiny exposed end of the rod with a space station-like dock deep inside the hollow stem. For some odd reason I felt like Major Tom floating in a tin can. At last I heard a happy click of connection, and the pipe was as whole as it could be.
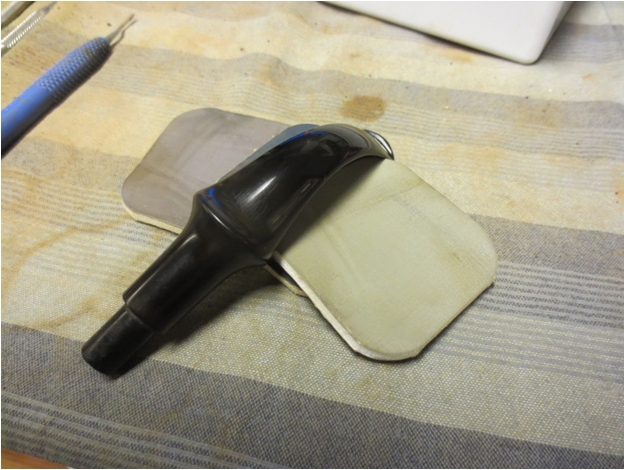
You see, that was the problem right there. Even after I buffed up the stem with red Tripoli and White Diamond, and the briar with the works, I just was not satisfied with the wicked little Apollo 13 shimmy thing going on between the stem and the tenon. My attention, working memory, processing speed, long-term memory, visual processing, logic and reasoning were all whirring at full capacity as I tried to rationalize putting this piece of horse pucky up for sale on my new Web store, but something in my subconscious still refused to learn this new trick.
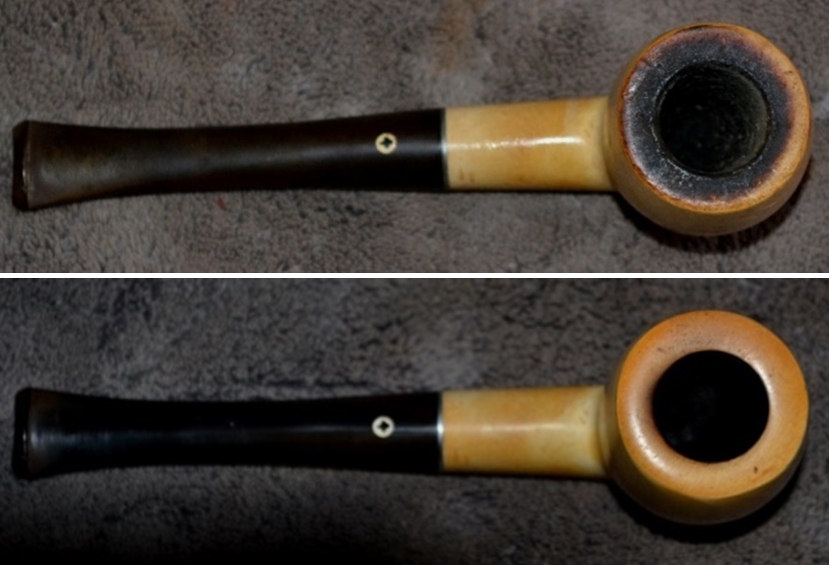
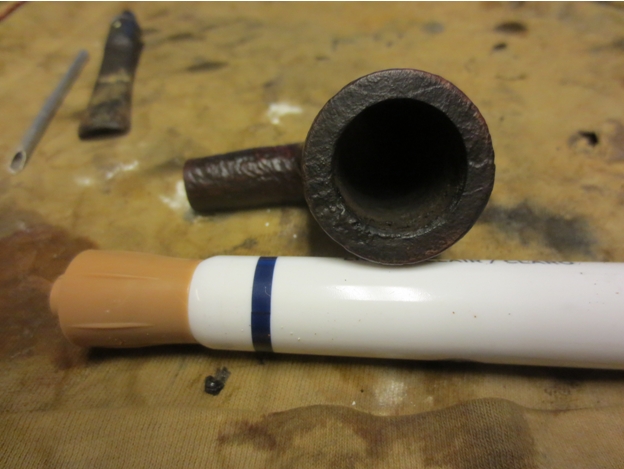
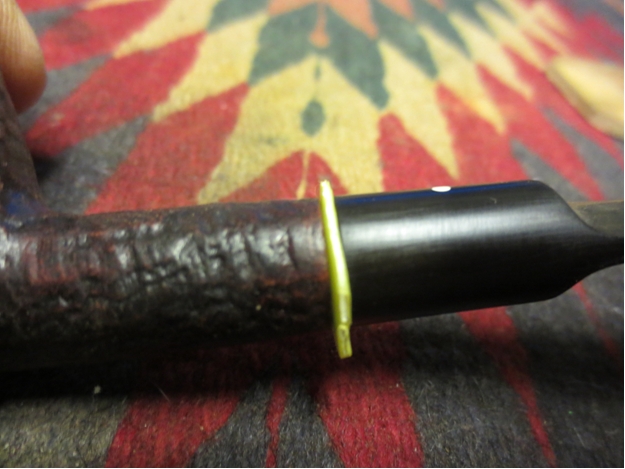
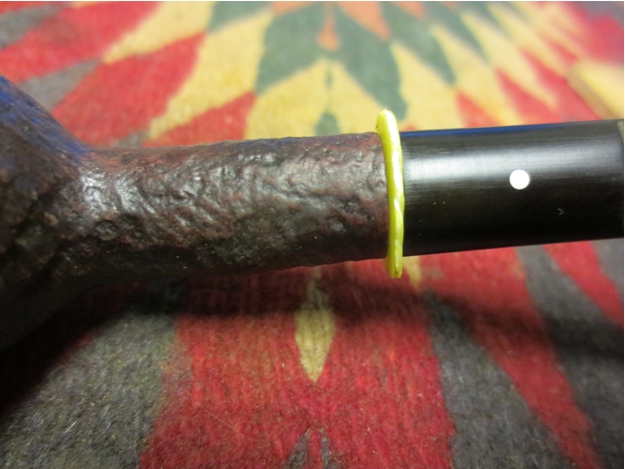
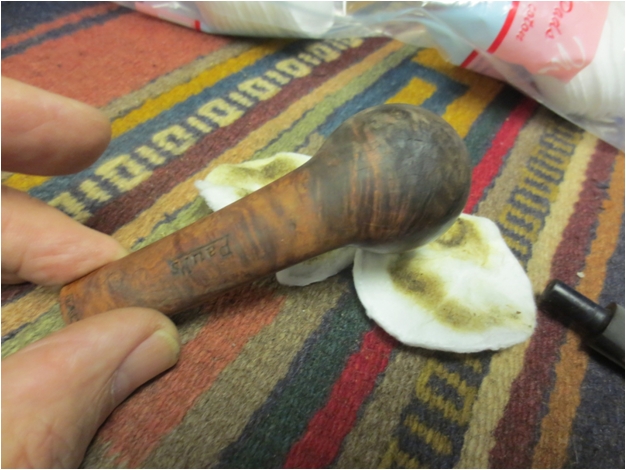
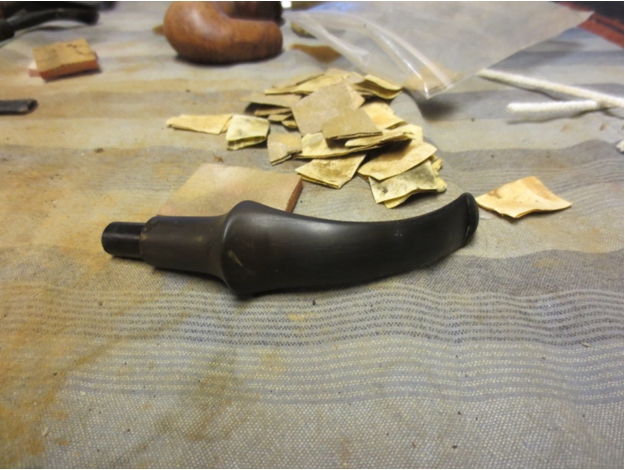
Therefore, I went to the Google chalkboard to see if I could work it out by looking up “Monarch tobacco pipe tenons,” which was actually a suggested search, and found images of them. And what do you know, but right there, number one, was my hideous creature.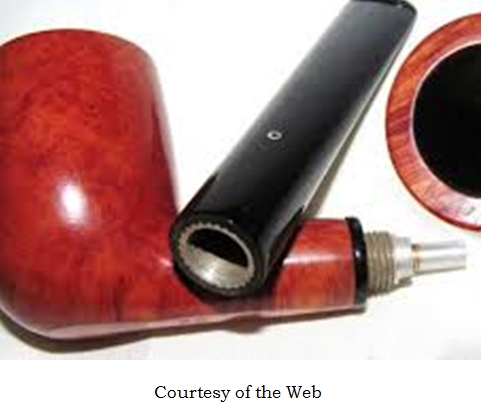 Take special note of two items of intelligence we can gather from this photo: the significantly greater length of the rod sticking out of the bulb, and the still far too big of a gap between the exposed rod and the connector in the stem of my Monarch. The first thought I had was to disassemble the doggone thing again and see if I had somehow made a mistake – which does happen sometimes – and perhaps the tenon was screwed in too tightly. I’m sorry to say it wasn’t.
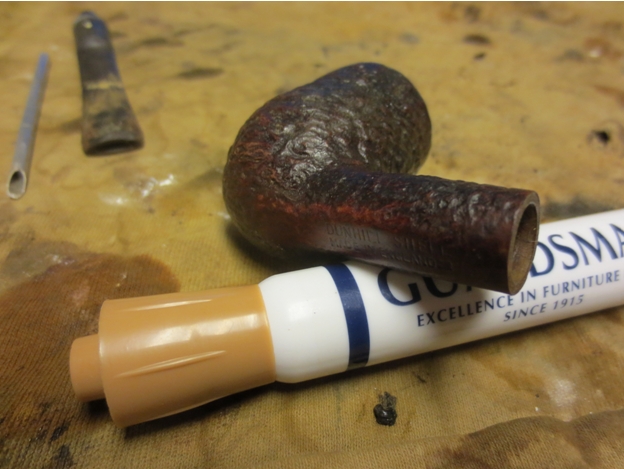
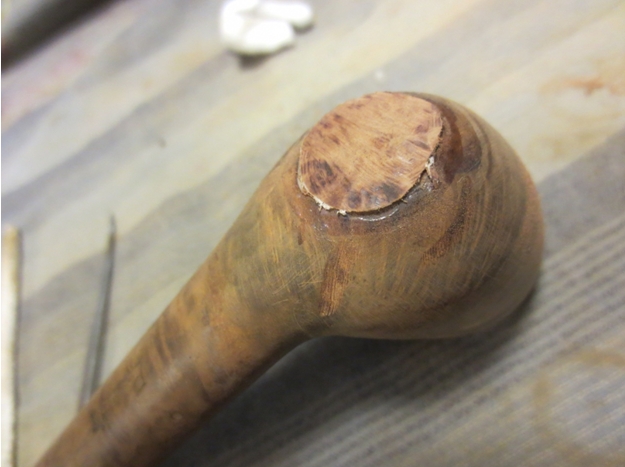
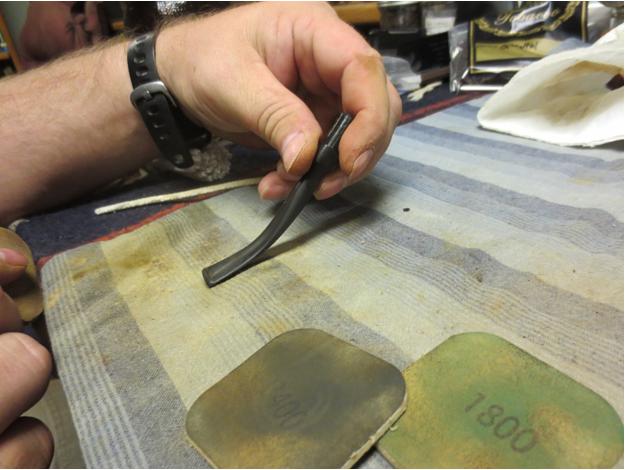
Still, the exercise in self-doubt was a success in that without it I might not have observed the length of the tenon loose in my hand again and imagined it re-inserted into the shank without the bulb and cap in the way. I mean, I never really liked it from the beginning, let’s face it, and so the notion of tossing it into my growing assortment of pipe odds and ends was rather appealing.
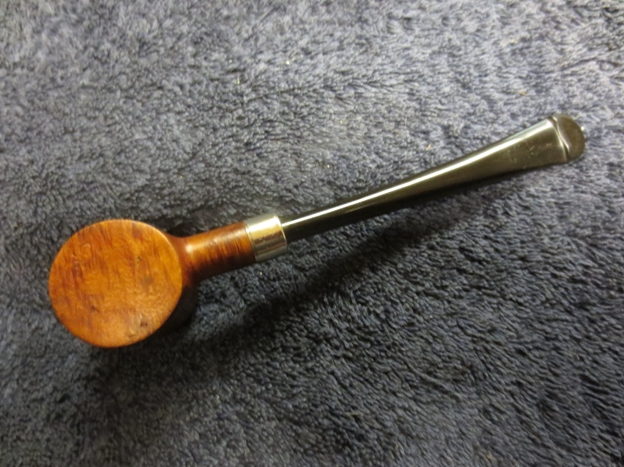
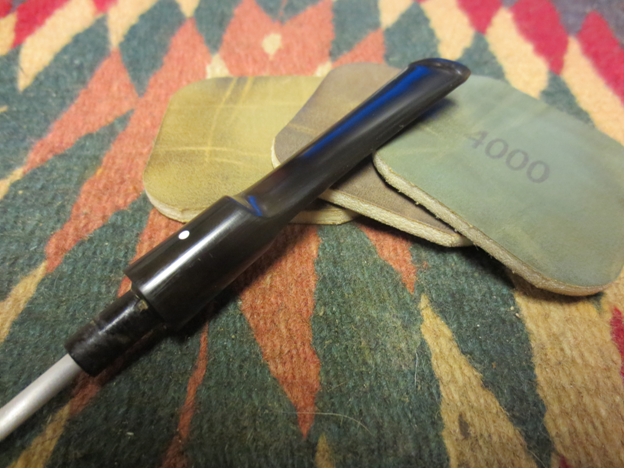
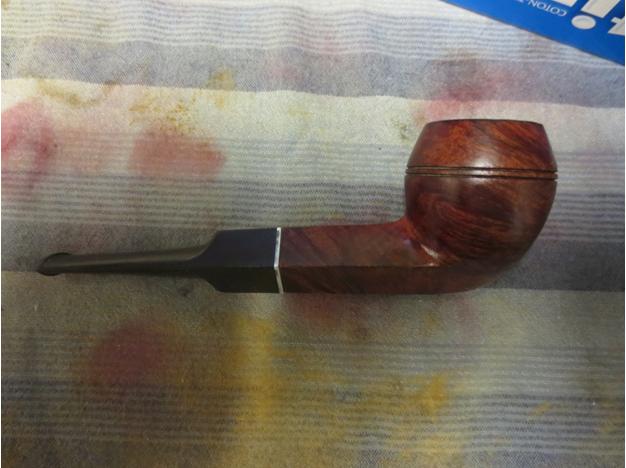
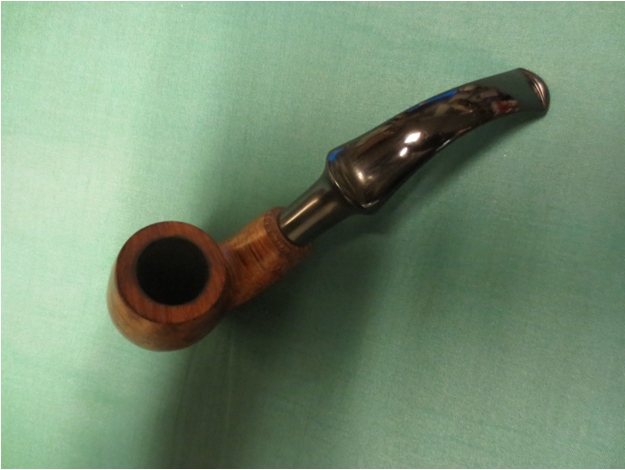
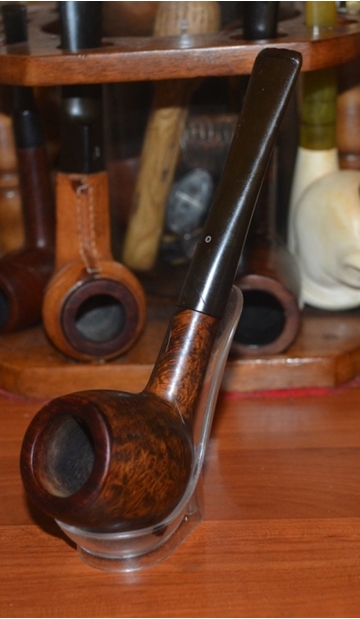
I made a battlefield decision and thought, what the heck. I’ve already spent too much time on this fanciful, vintage and even patented experiment in pipe making, so what are a few more minutes? After re-screwing in the rod without the bulb and cap, I snapped on the stem – and it indeed was a much better fit.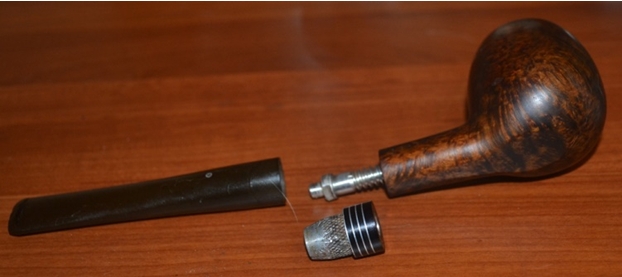


CONCLUSION
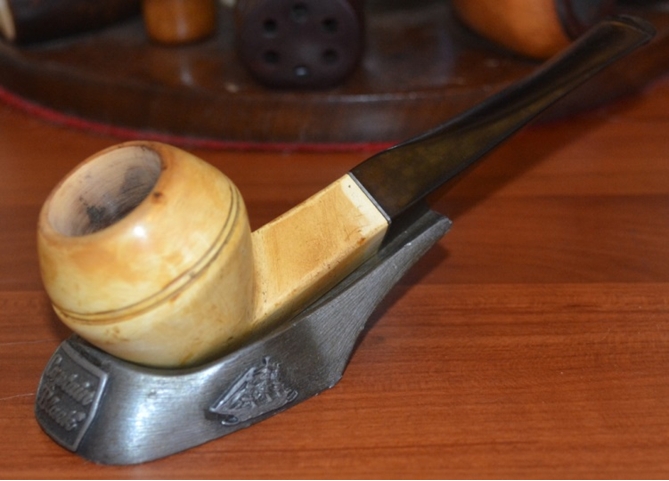
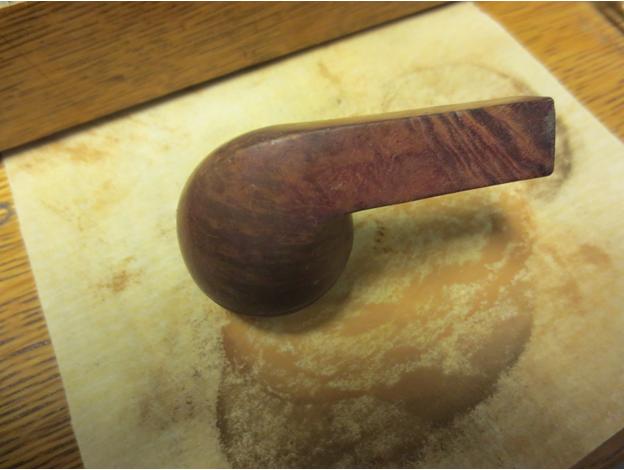
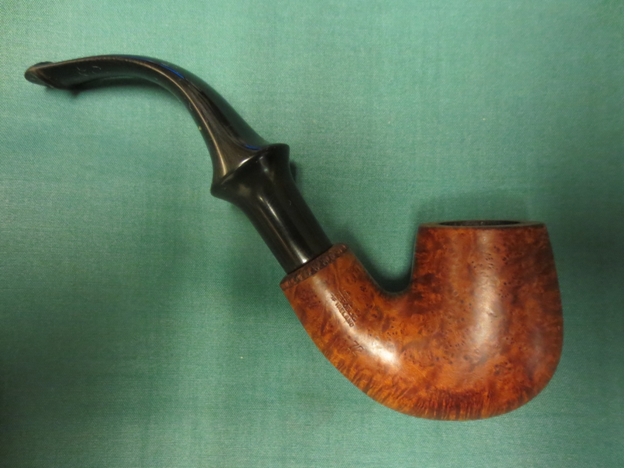
Now that all is said and done, I am happy that I did the work of making this sad example of pipe craft look beautiful again and ready to smoke in some fashion. But the bottom line is, I don’t even want to keep it around to use for my own enjoyment, so I certainly won’t sell it to anyone. First thing after finishing this blog and dispatching it, I intend to remove the pipe from my online store, where I have already posted it for $35. To me that would be the same as robbery, and even offering it free with the purchase of another pipe would be a cruel joke to play on some unsuspecting customer. Besides, it would only come back to me by the power of three times three. Maybe I’ll give it to a friend who is particularly fond of apples, with a copy of this blog. At least I have made it reasonably easy to remove the so-called tenon now.
To me, this is the real purpose behind the Tooth Fairy, the Easter Bunny and Santa Claus. Learning.
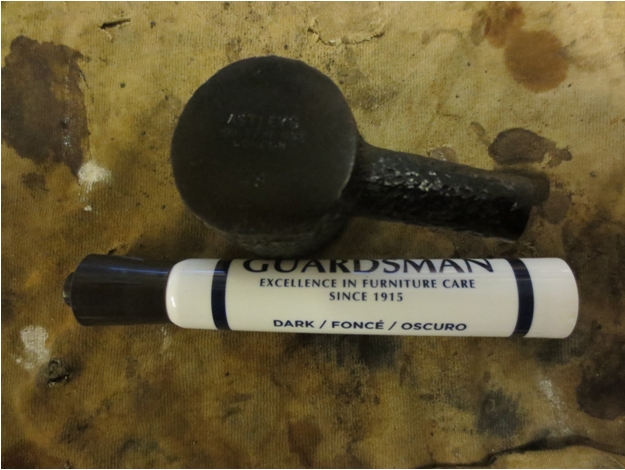
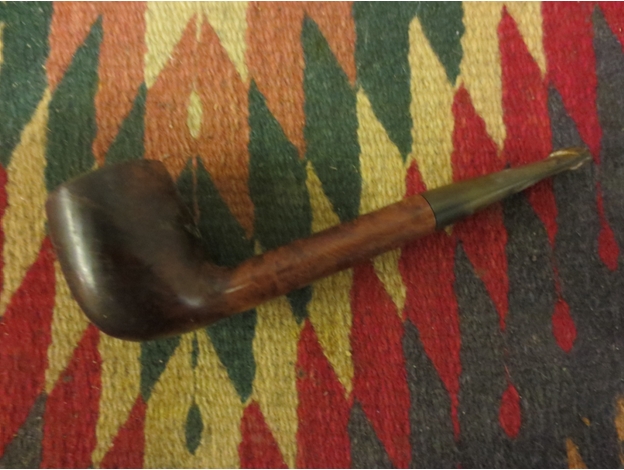
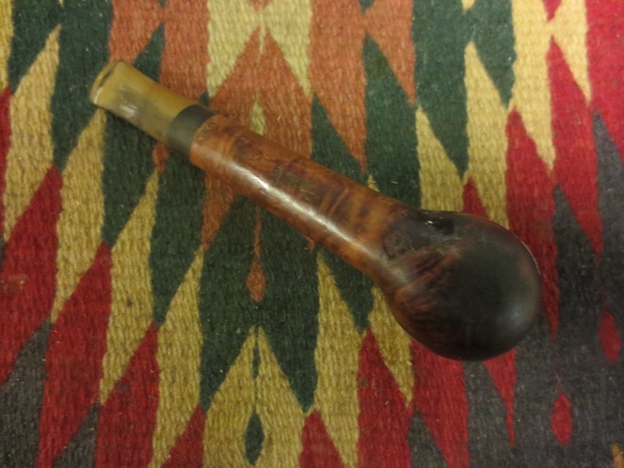
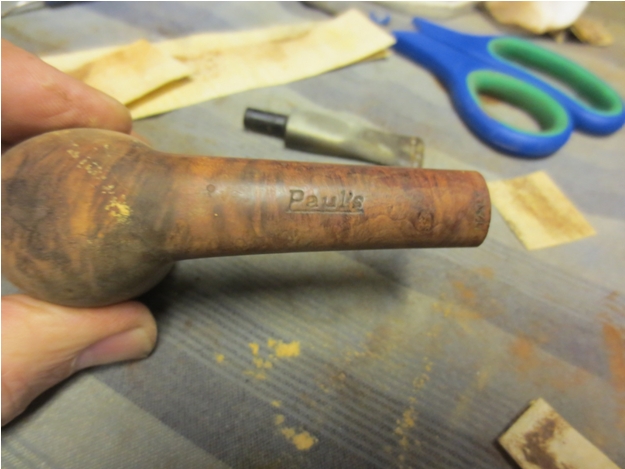
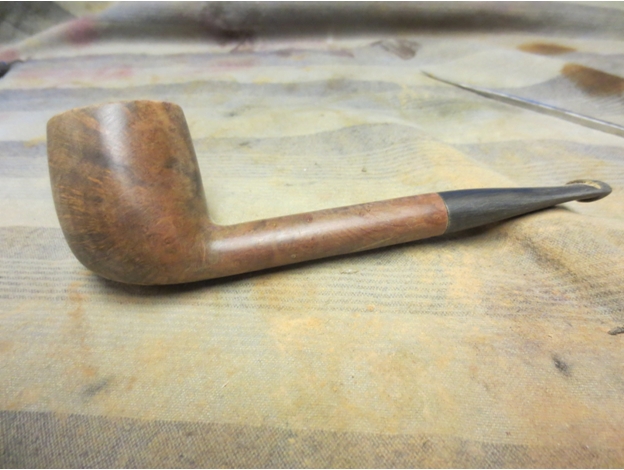
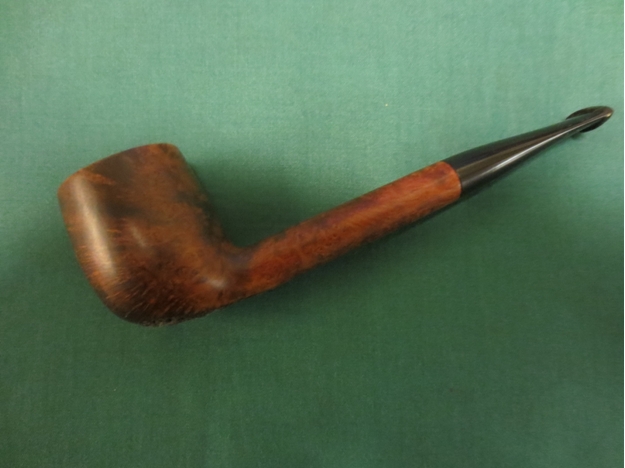
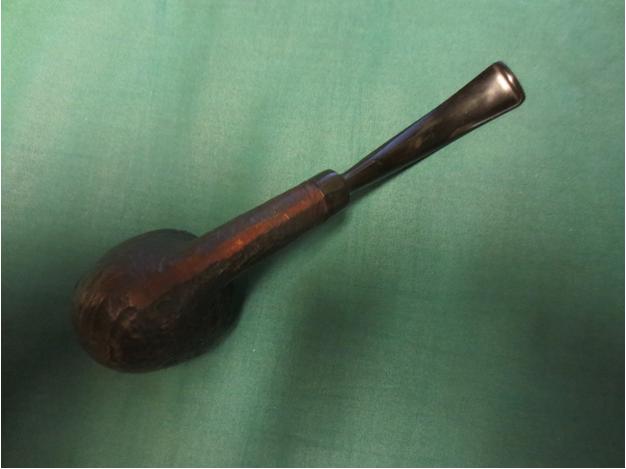
 The Tankard was in worn but decent shape. The finish was dirty and there was darkening around the bowl middle from the hands of the previous owner. The rim had a thick buildup of tars and oils that had hardened. There were burn marks around the inner edge of the rim at the back of the pipe and the right front. The burn on the front of the bowl was more extensive that then one on the back inner rim. The bowl had a thick cake in it and the shank was dirty. The stamping was readable but faint. The stem had tooth marks on the top and bottom sides of the stem near the crease on the P-lip. It was badly oxidized and there was a heavy calcification around the stem about an inch in from the button. The silver ferrule was clean and would shine up easily.
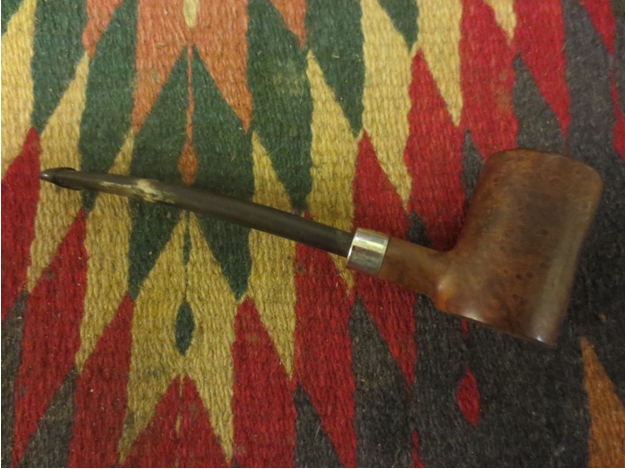

 I reamed the bowl with a PipNet reamer to remove the cake back to bare wood. I scrubbed down the exterior with Murphy’s Oil Soap on a cotton cloth and wiped it off to clean the briar.
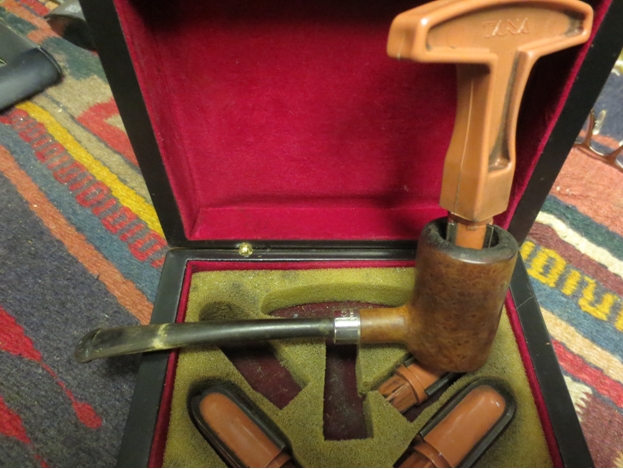
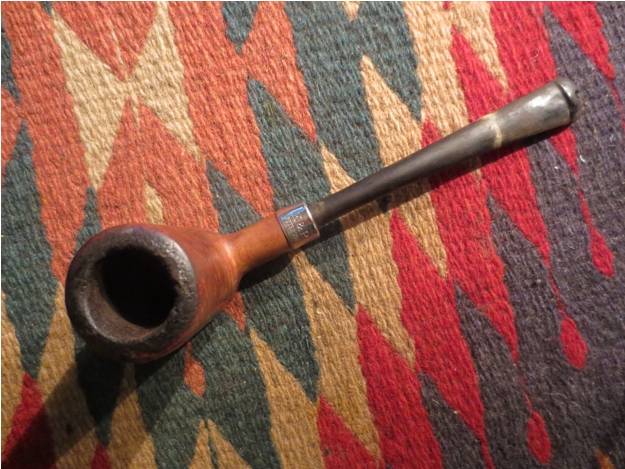
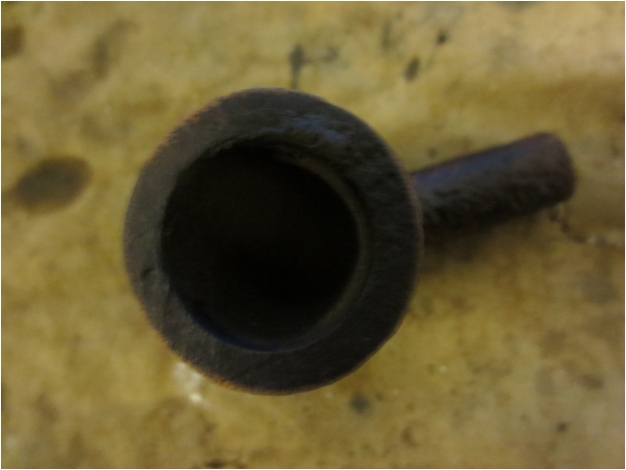
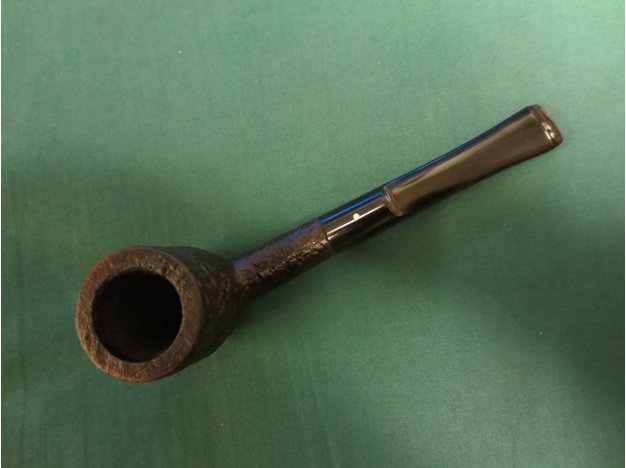
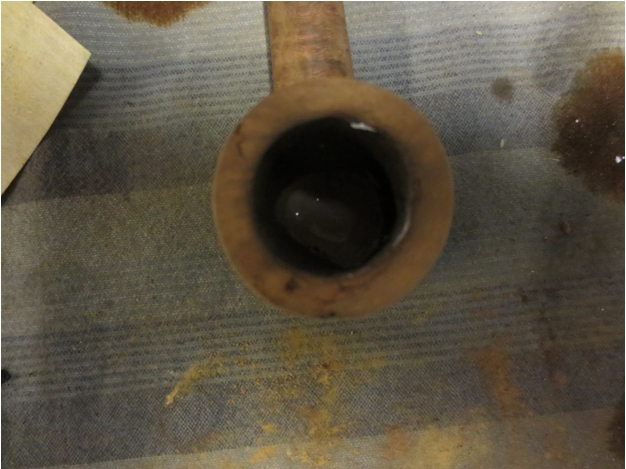
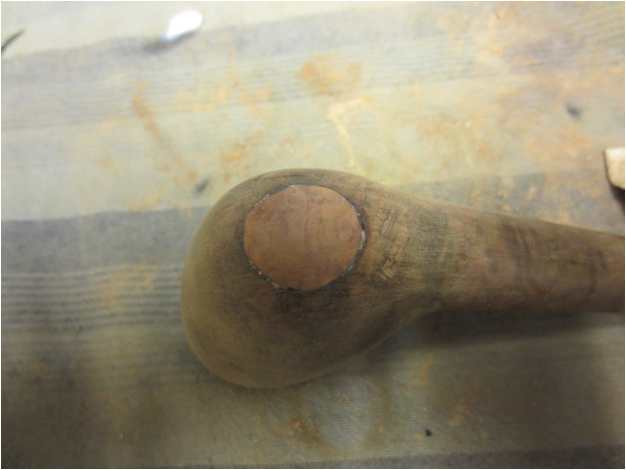
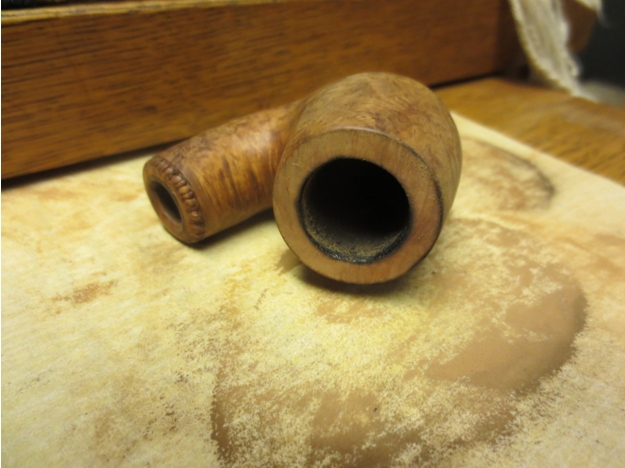
 The next photo shows the reamed bowl and the caked rim top. It was very thick so it would take some work with sandpapers and oil soap to remove the tars. I scrubbed it with the soap and then with alcohol to remove as much of the tars as possible. I then sanded it with 220 grit sandpaper and a medium grit sanding sponge. I wiped it down with acetone once I had finished sanding it. The extent of the rim damage can be seen in the second photo.
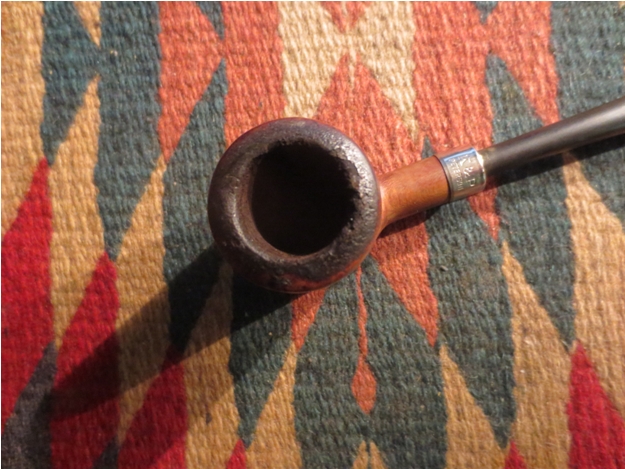
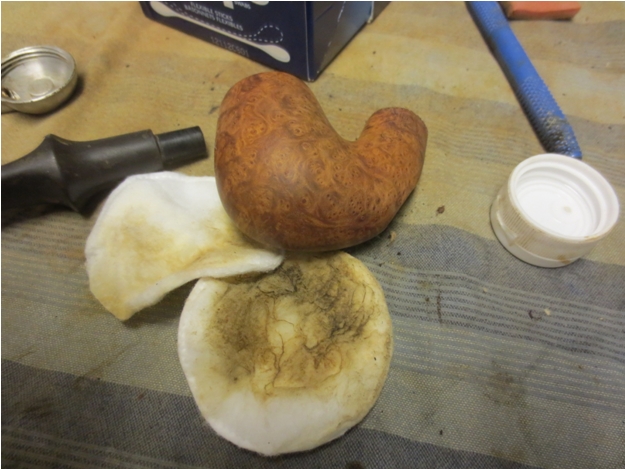
 I wiped down the finish with acetone on cotton pads to completely remove the wax and the finish from the outside of the bowl.
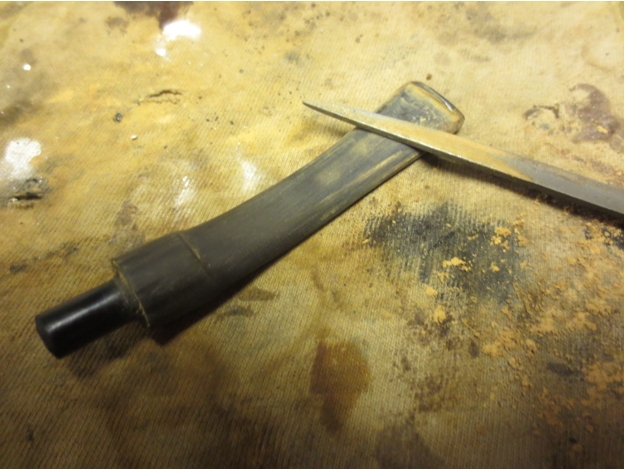
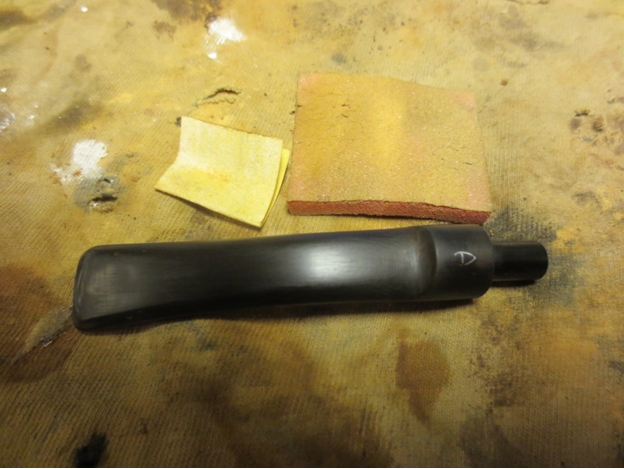
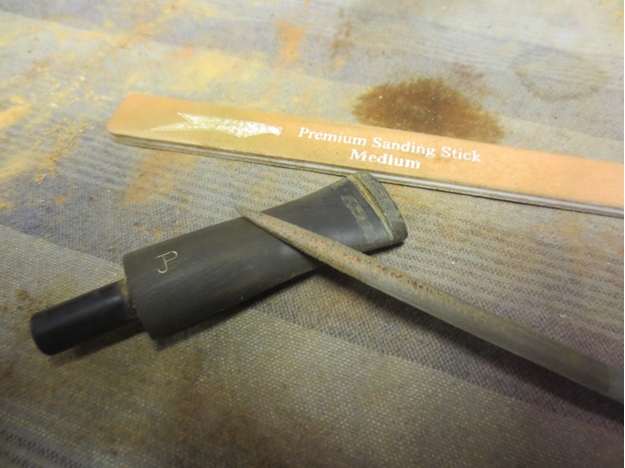
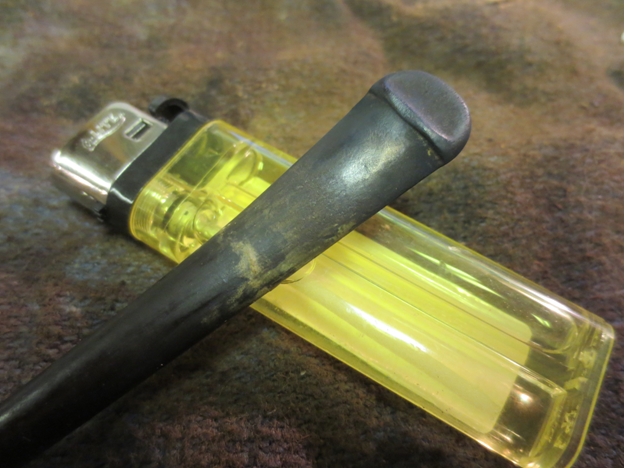
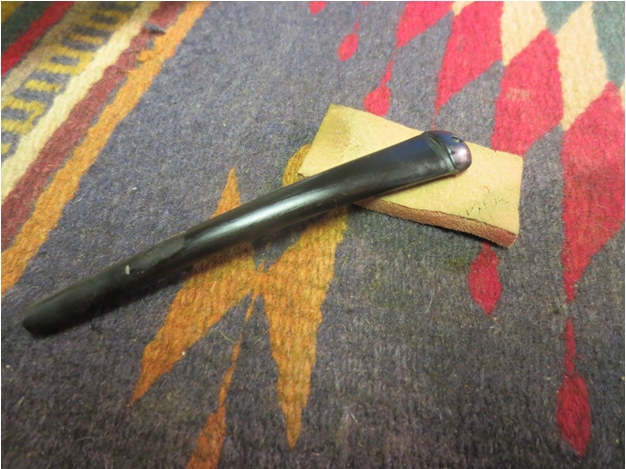
 I set the bowl aside to work on the stem. I used a Bic style lighter to “paint” the surface of the stem and lift the tooth marks. Doing this I was able to remove many of the tooth dents and lessen the depth of the remaining ones.
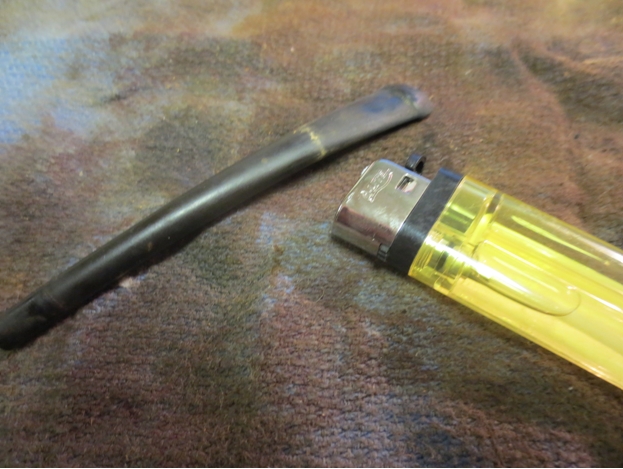

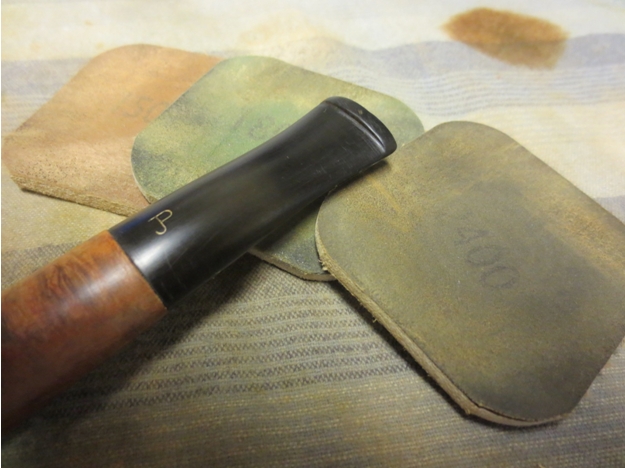
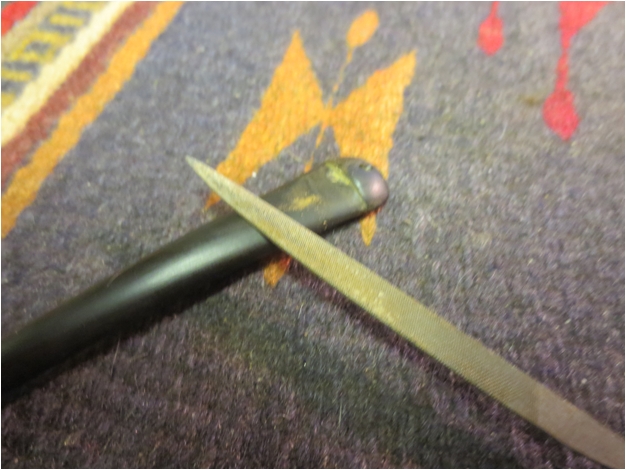
 I sanded the stem with 220 grit sandpaper to remove the rest of the dents and the oxidation and calcification. I reshaped the button and the crease to sharpen them. There was one tooth mark that I could not minimize further without damaging the thickness of the stem at the crease. I used a clear super glue to fill that spot. Once the glue had dried I sanded it and then used a needle file to reshape the crease and smooth things out. I sanded the repair with 220 grit sandpaper and then with medium and fine grit sanding sponges until I had blended it into the surface of the vulcanite.
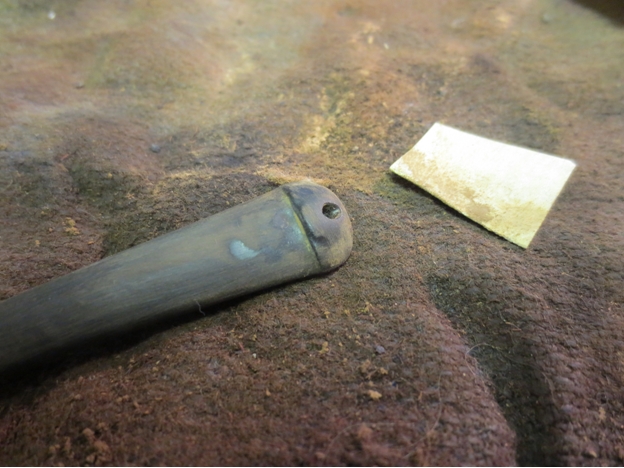

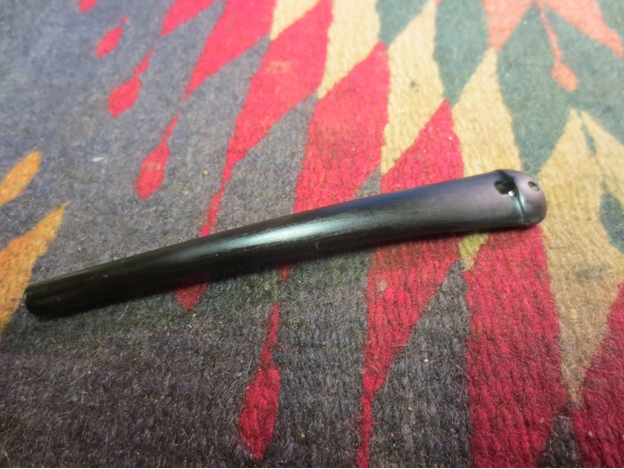
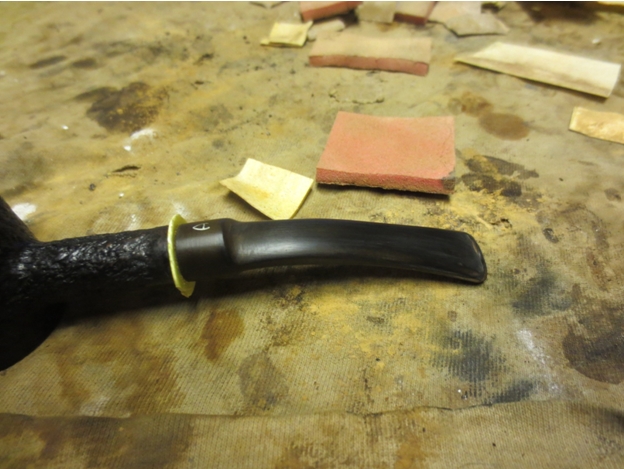
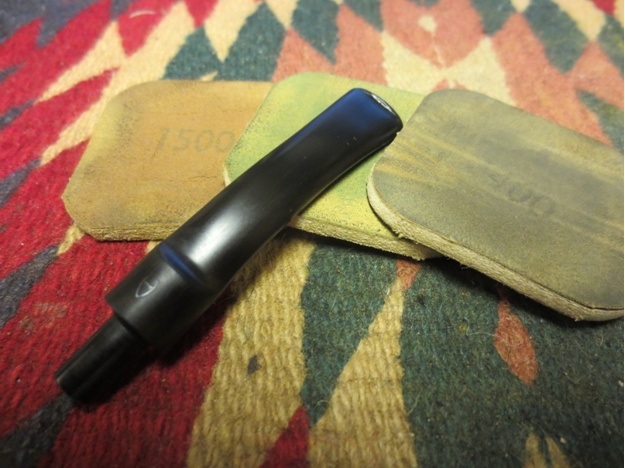
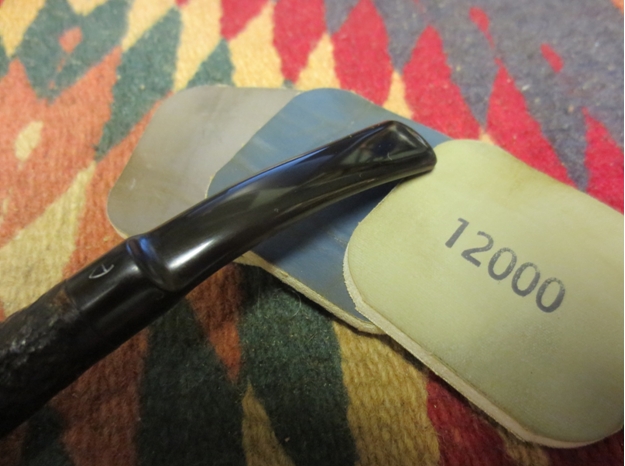
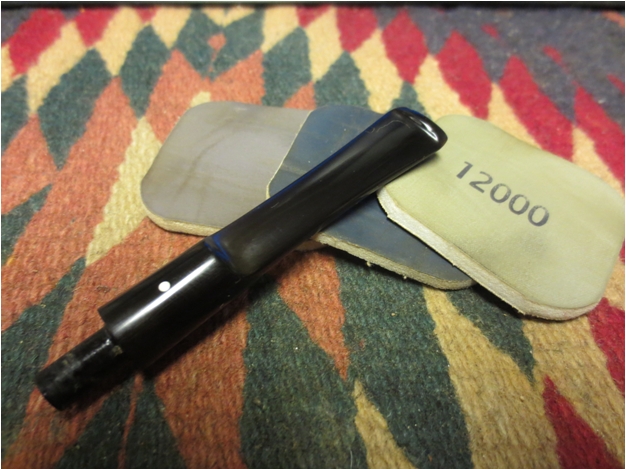
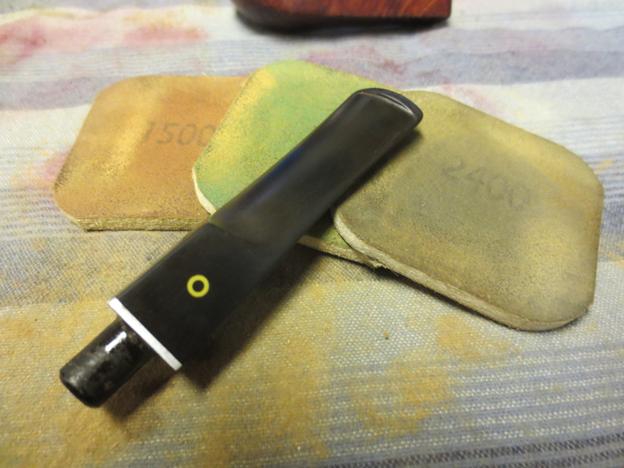
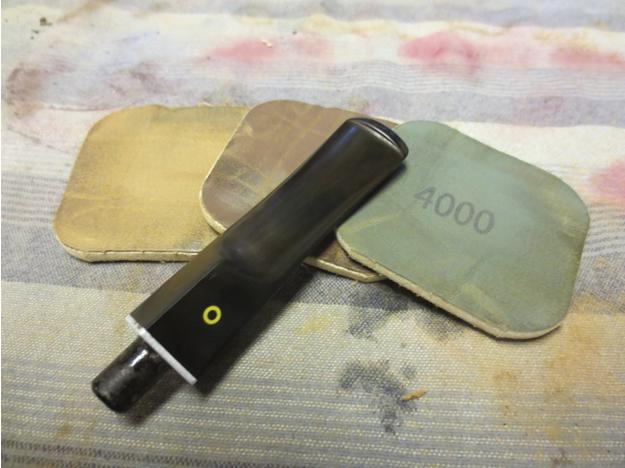
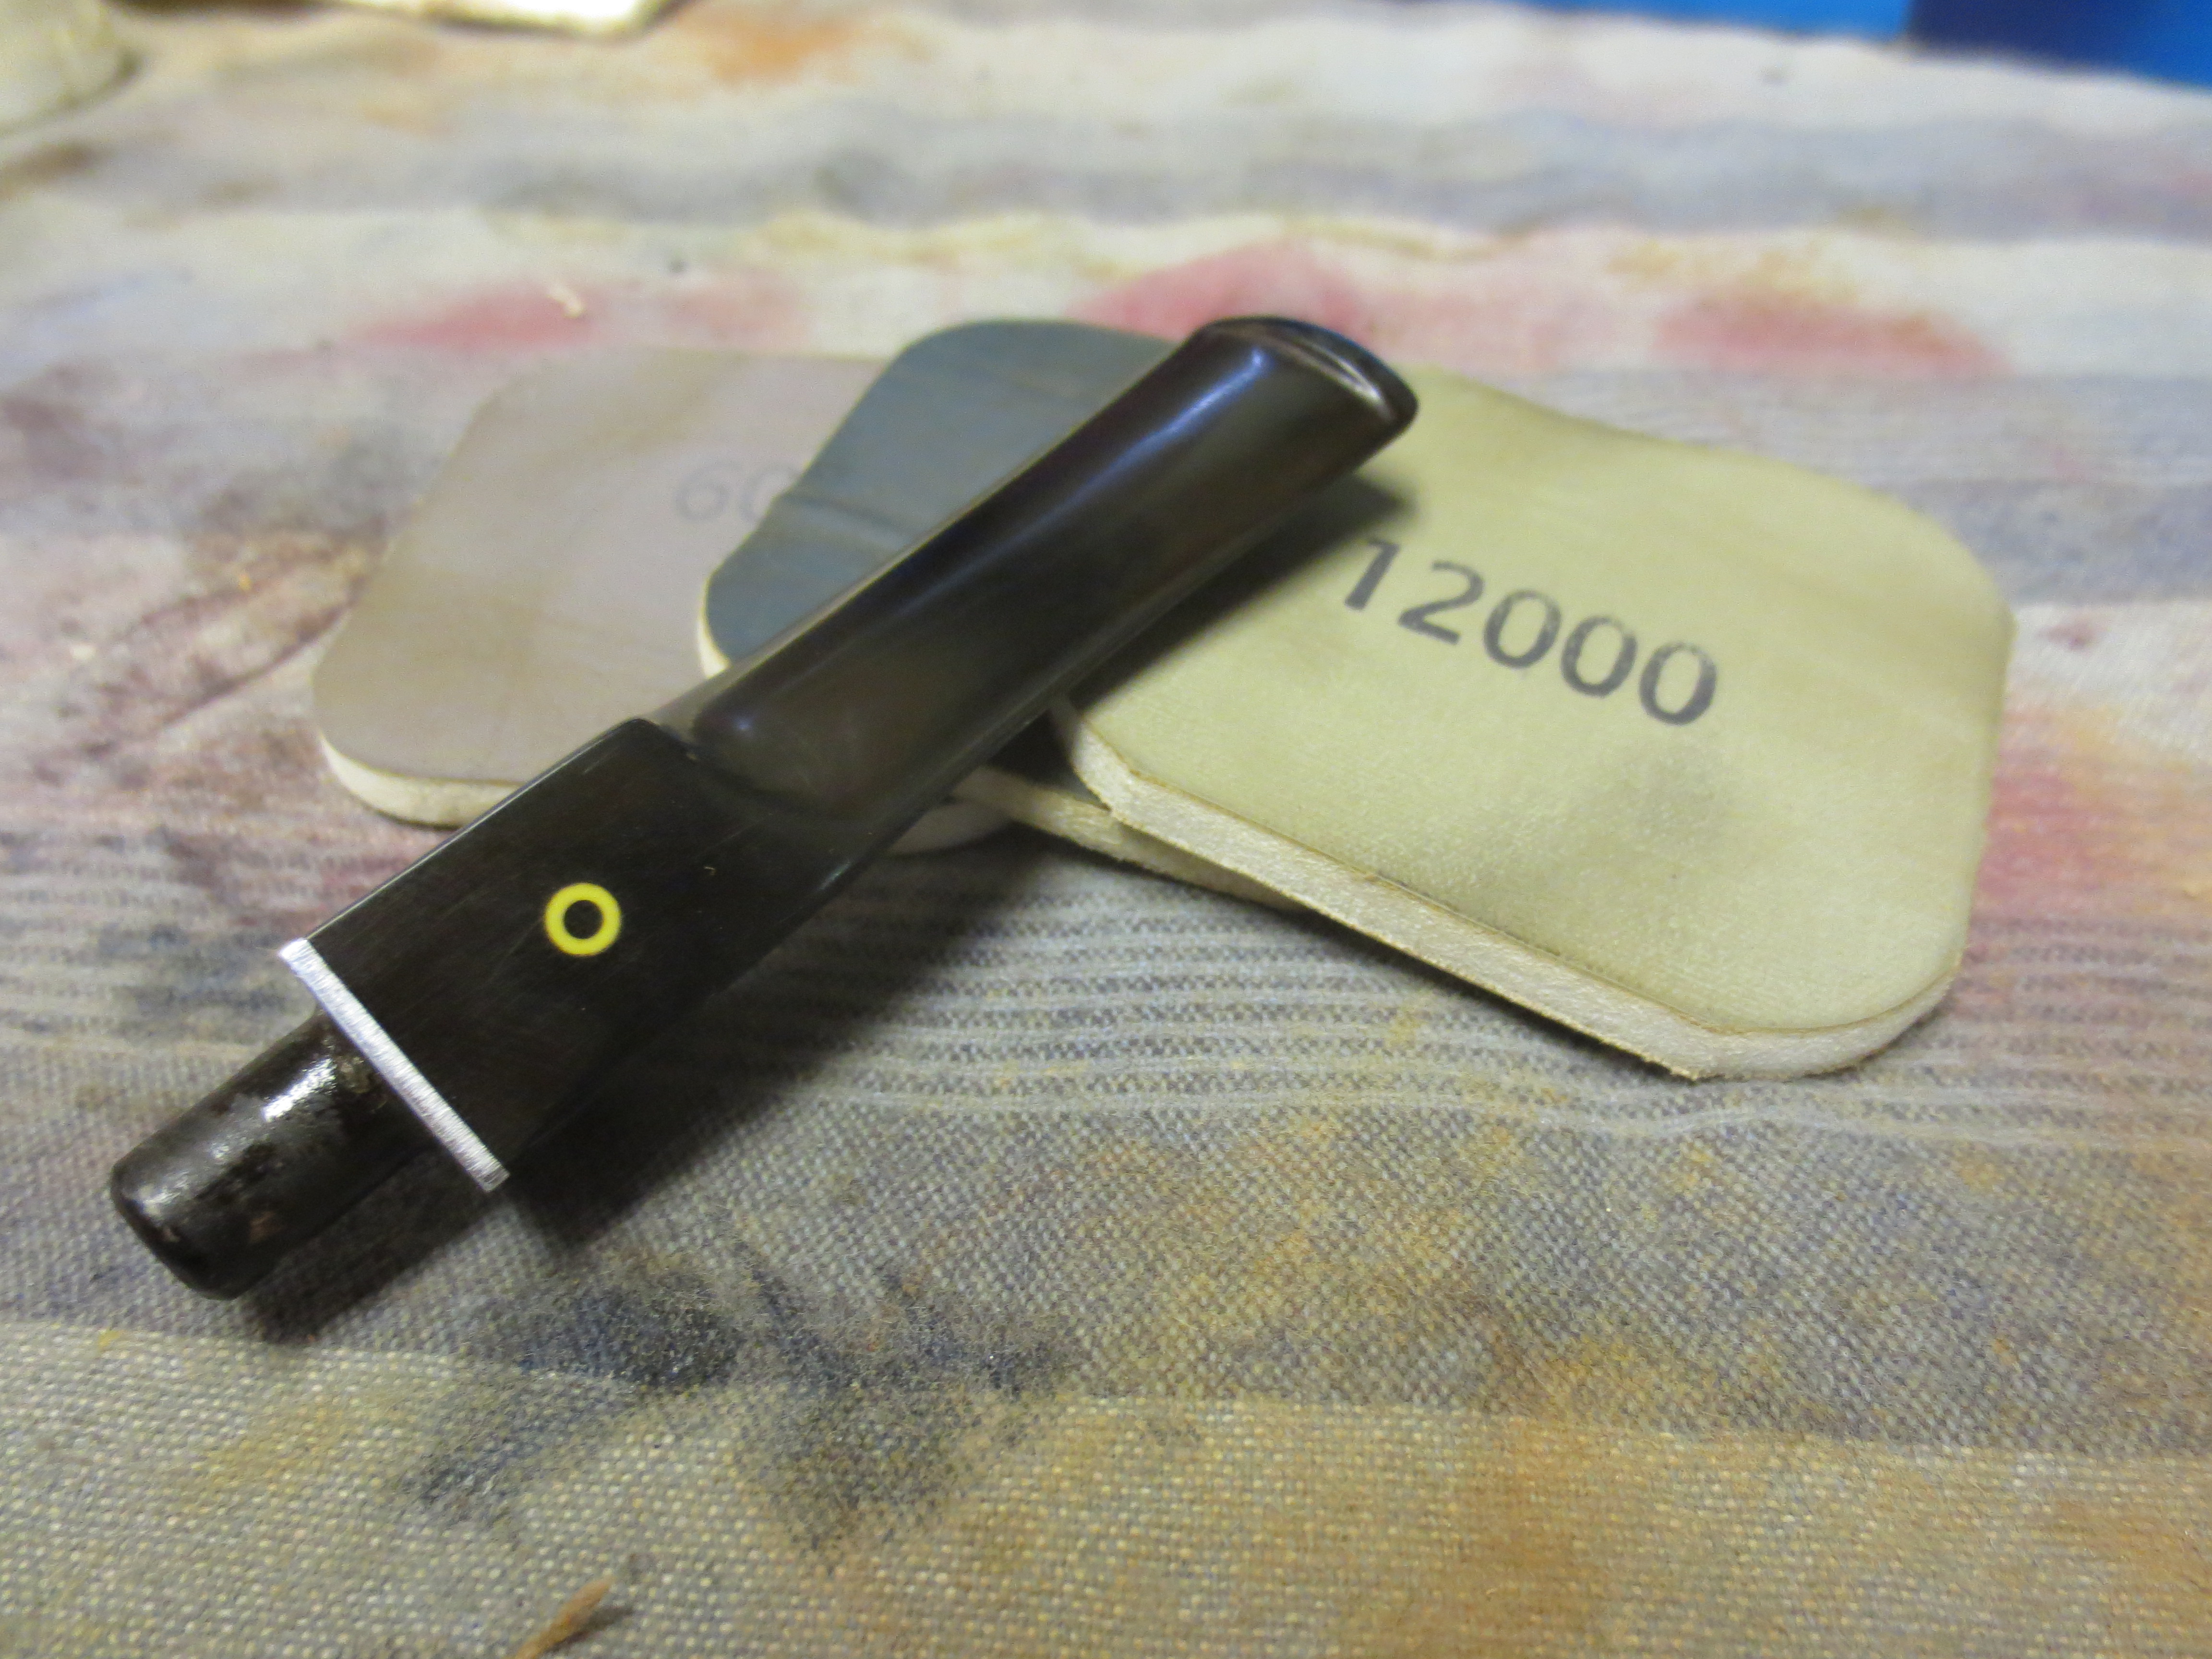
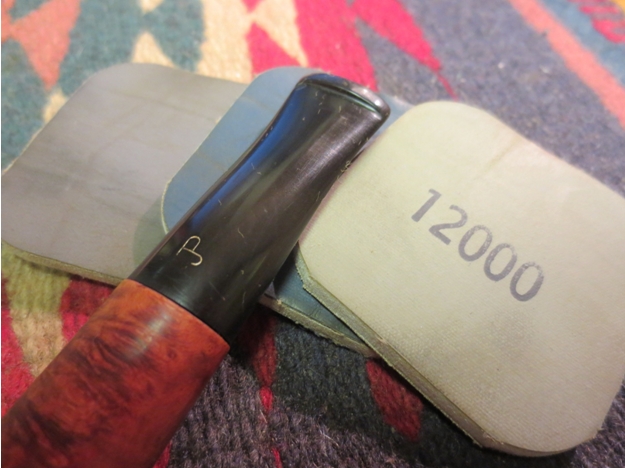
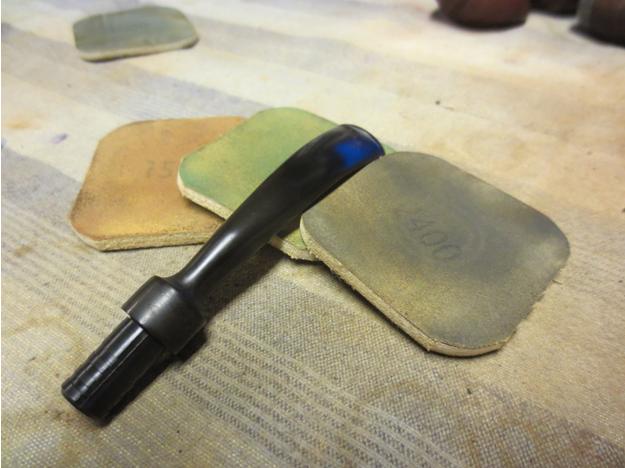
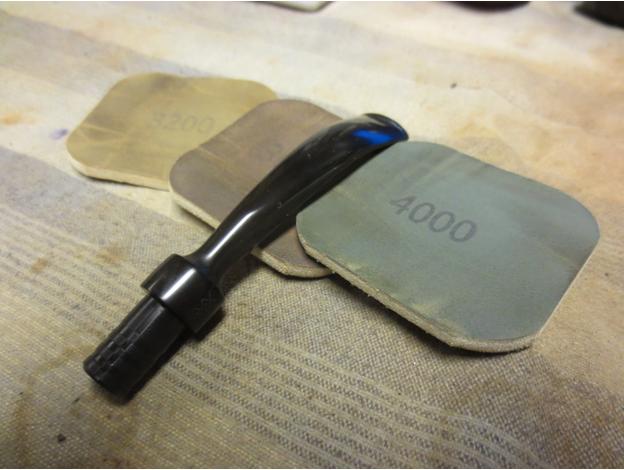
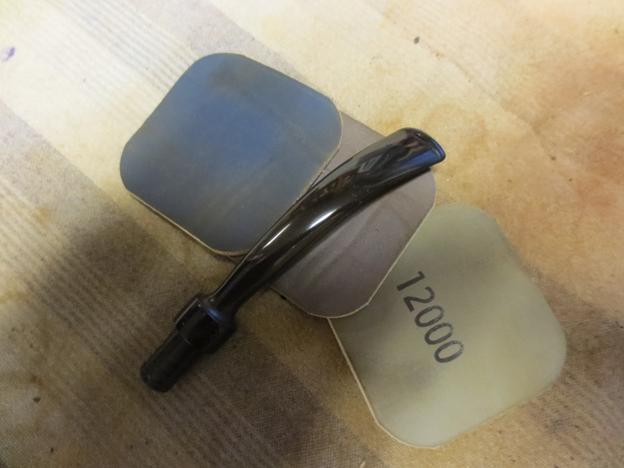
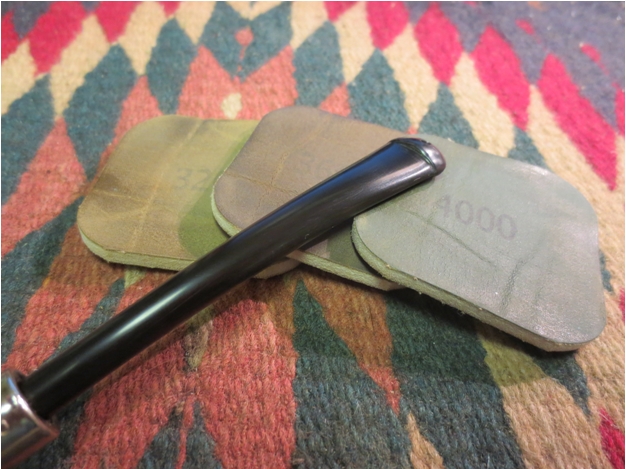
 I sanded the stem with my usual array of micromesh sanding pads to polish and finish it. I wet sanded with 1500-2400 grit sanding pads and dry sanded with 3200-12,000 grit pads. I wiped it down with Obsidian Oil between each set of three grits. Once I finished with the micromesh pads I buffed the stem with White Diamond and then gave it several coats of carnauba wax to protect it and give it a deep shine.
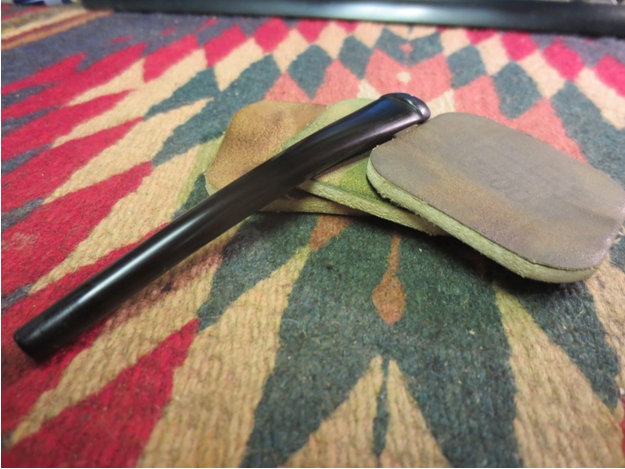
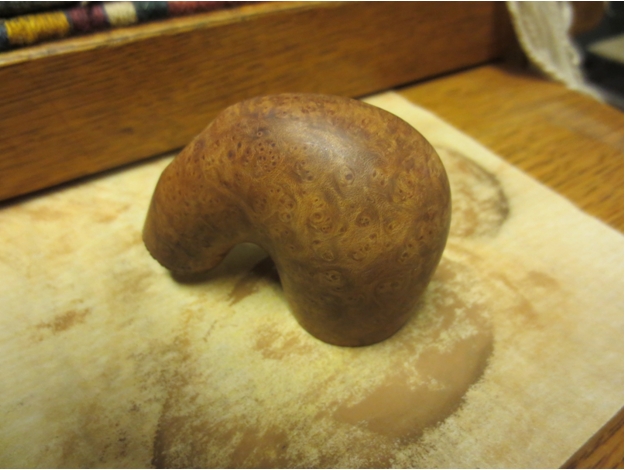
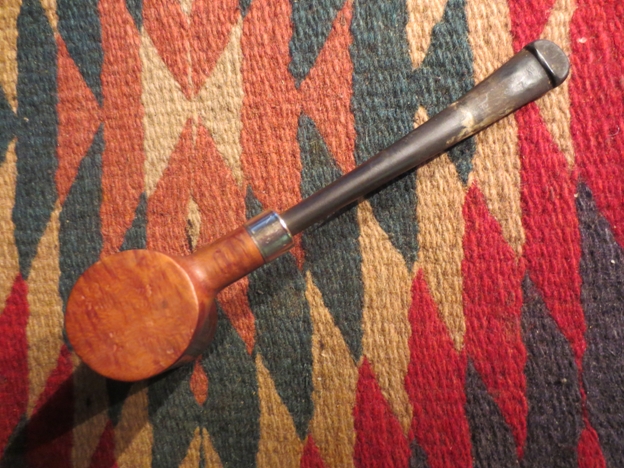
 I decided to leave the finish natural and not stain it. I rubbed it down with a light coat of olive oil to enhance the redness of the briar.
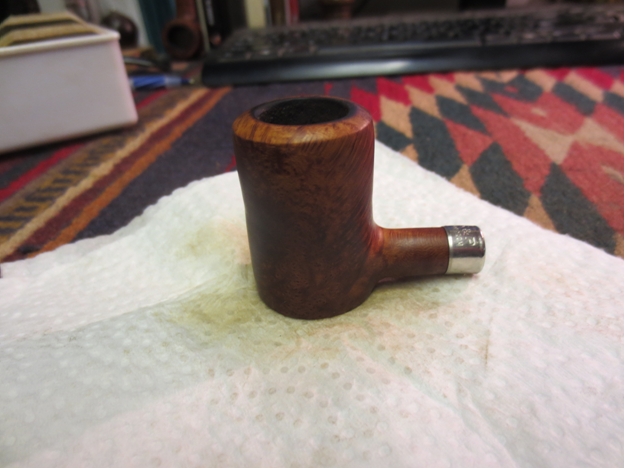

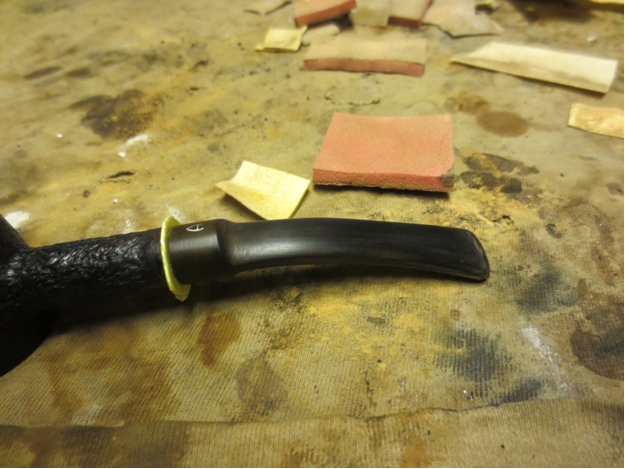
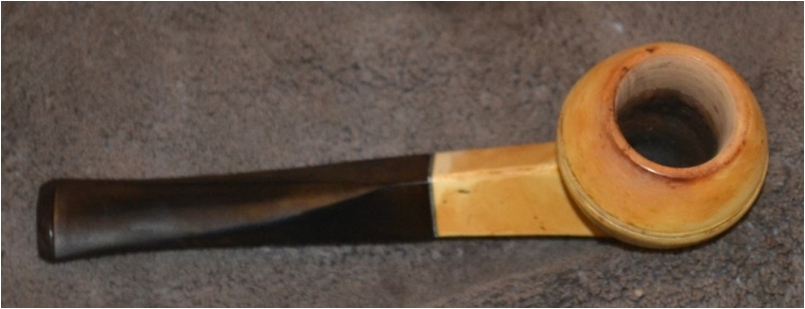
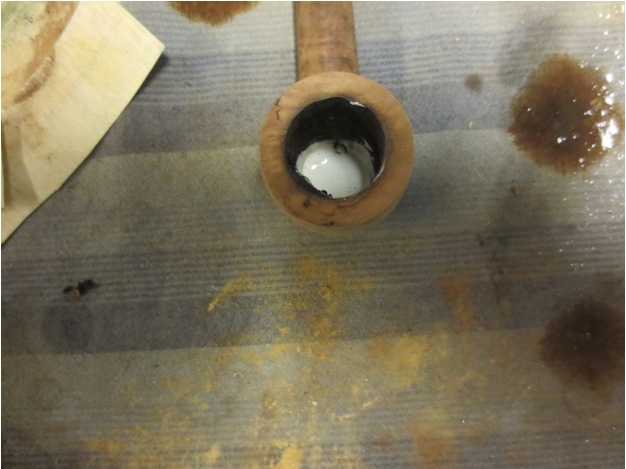
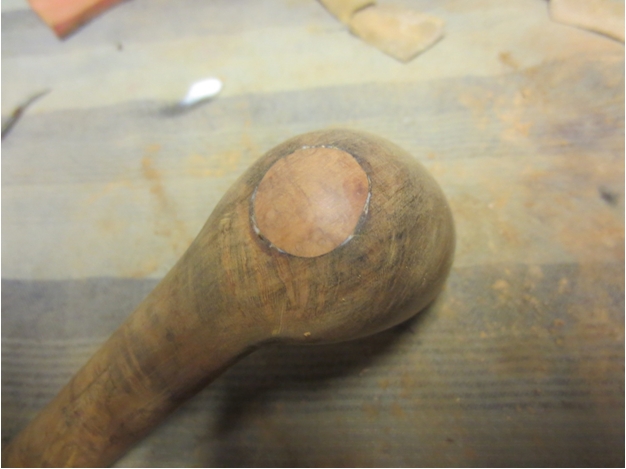
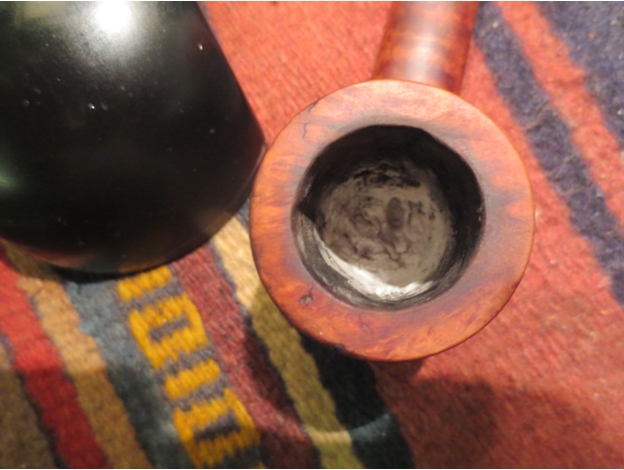
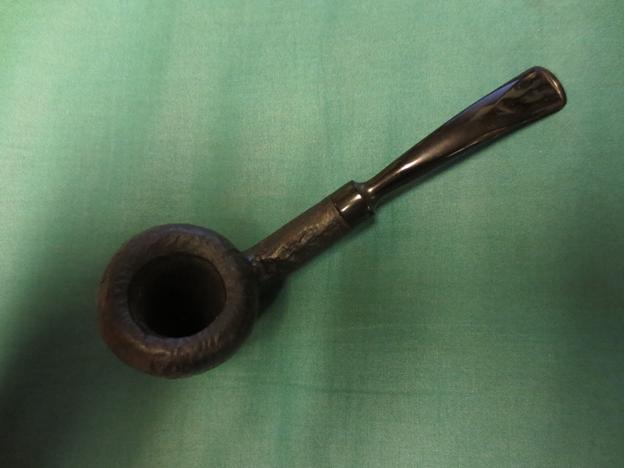
 I took a close up photo of the rim to see if the scratches were still visible. At the back side of the rim there were still some scratches that I needed to work on more to remove. I also wanted to see if I could also remove some more of the rim damage from the burn marks.
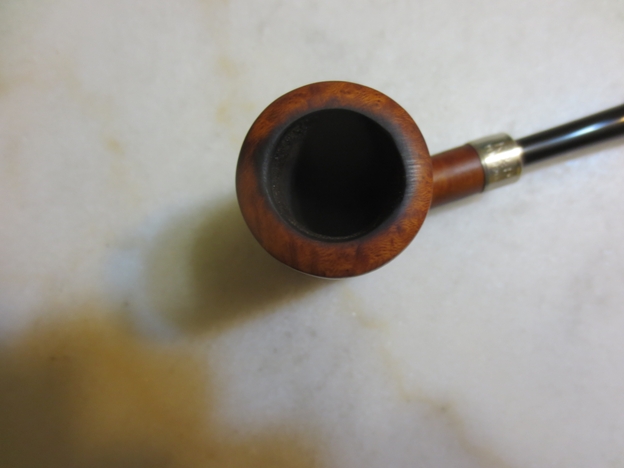 I sanded the rim with a medium and a fine grit sanding sponge to work on the scratches and the burn marks. Working on the surface with the sanding sponge I was able to remove the scratches and some more of the burn marks from the surface.
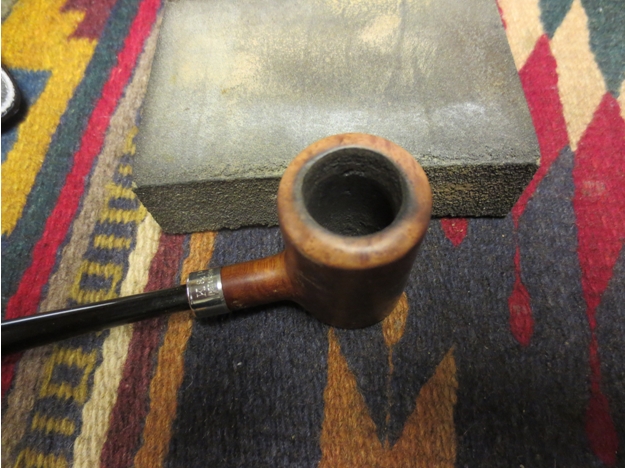
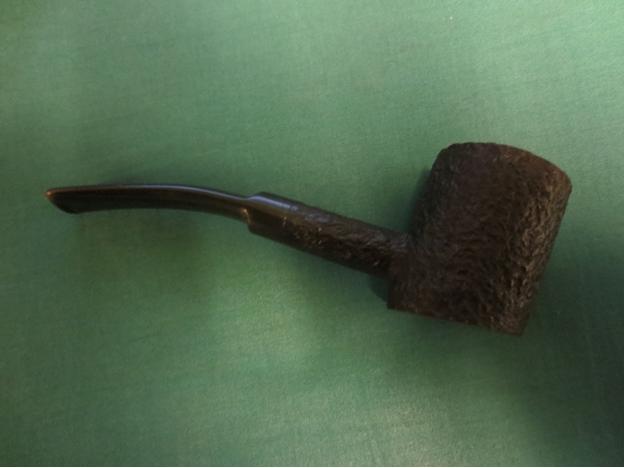
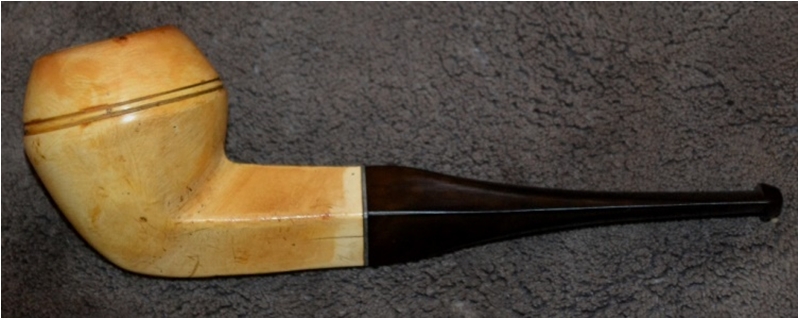
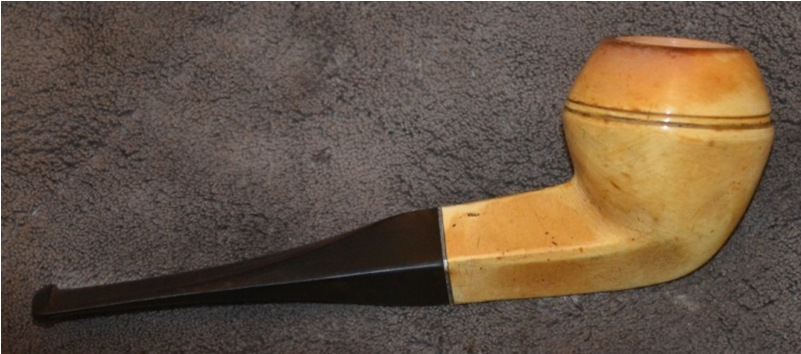
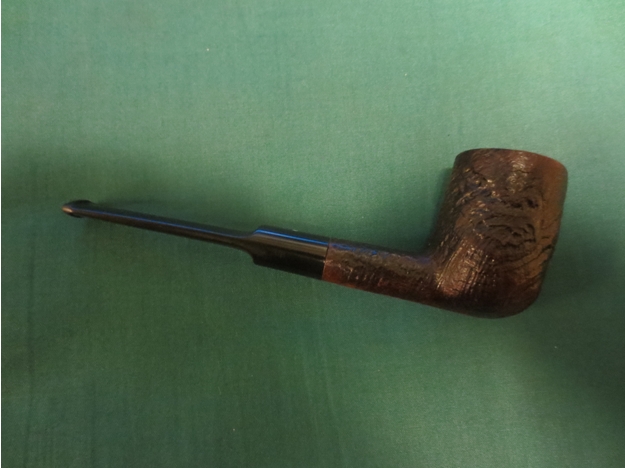
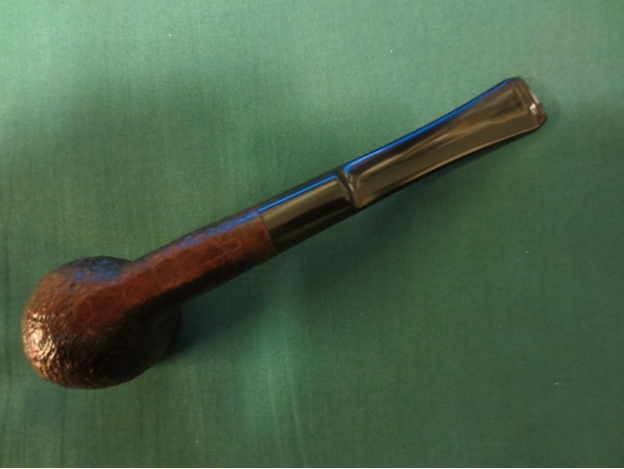
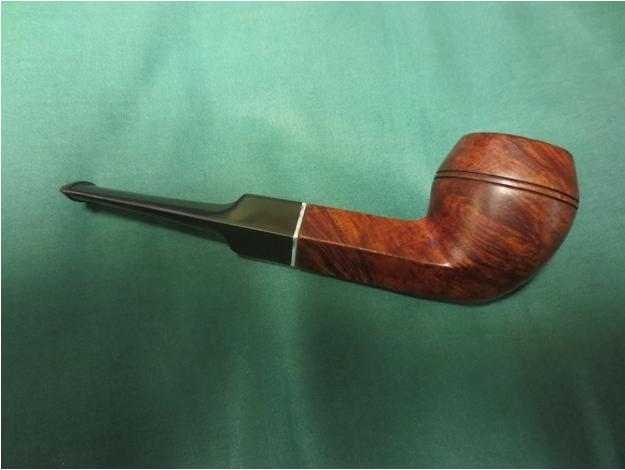
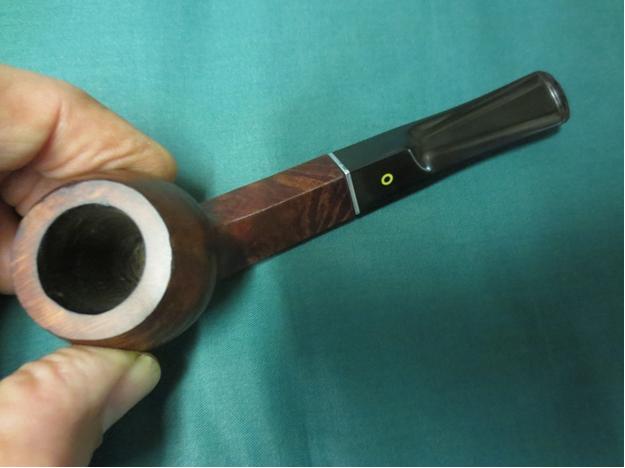
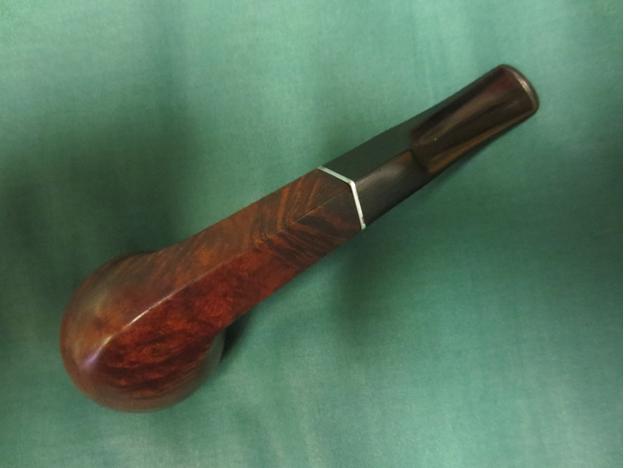
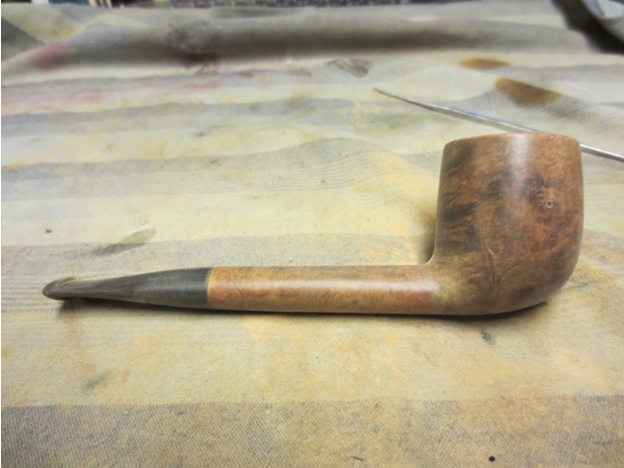
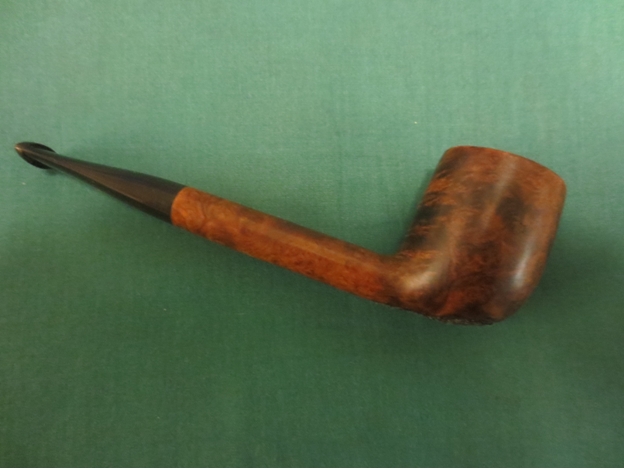
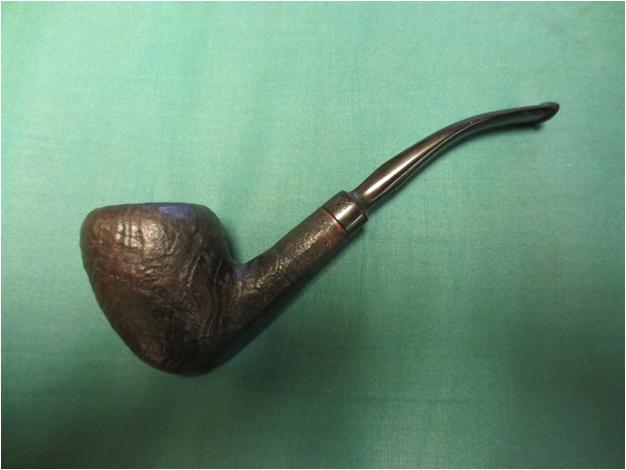
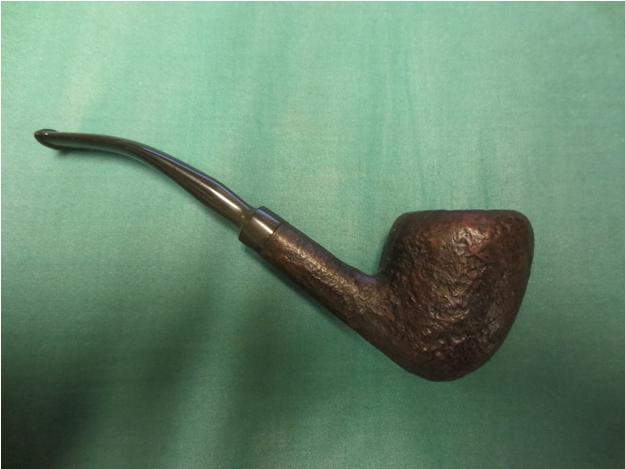
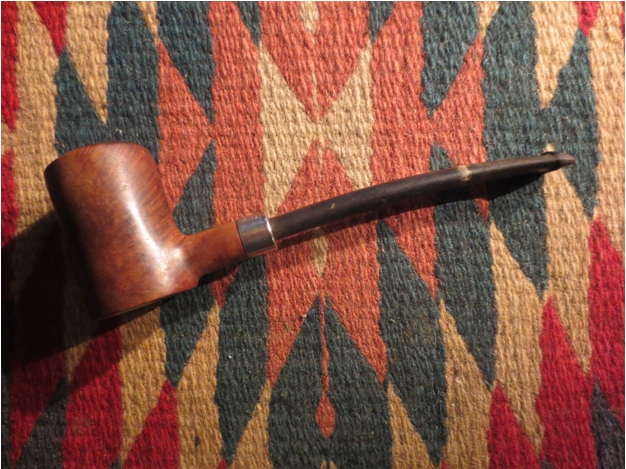
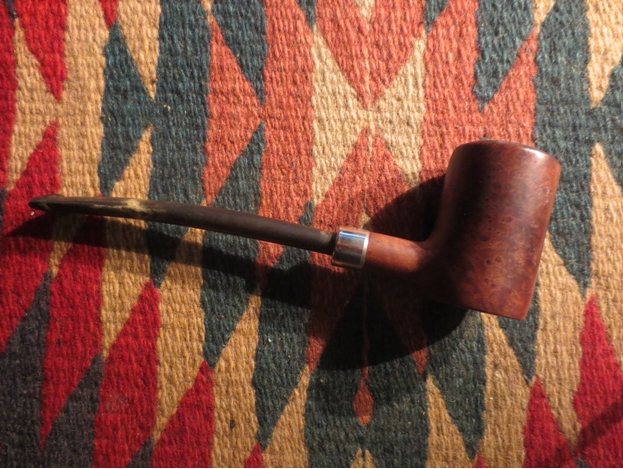
 I sanded the bowl with the same fine grit sanding sponge and then buffed it with White Diamond. I took special care around the stamping to make sure that I did not damage the light stamping. I gave it multiple coats of carnauba wax and lightly buffed it to a shine with a soft flannel buffing pad. The finished pipe is shown below. The birdseye grain on the sides and the cross grain on the ends both work really well. It is a beautiful pipe and I think it will be a great smoking pipe as well. It should provide many more years of service and certainly live beyond my lifetime to be passed on to a new generation of pipemen.