Sasieni Hendon Patent Era Addition


By Al Jones

The Sasieni “Hendon” shape has been on my Holy Grail list for a while. It is one of the more elusive of the Sasieni shapes, also known as the shape 87 in the Sasieni catalog. The Hendon shape drops in and out of the Sasieni catalogs. It is certainly the least common of the Sasieni bulldog shapes. (Grosvernor, etc.)

Below are two catalog pages depicting the Hendon shape. The standard multi-page Sasieni catalog, which shows black and white drawings of the shapes and names does not show this shape.

This is the first Patent Era Sasieni in my collection. The Sasieni florid script, Patent number and town name reveal that the pipe was made sometime between 1935, when town names started, and the onset of Word War II (’42). The patent number 150221/20 was used on pipes exported to the United States. The iconic Blue Dots are smaller, and spaced closer together than Sasieni’s from a later era.

I showed the pipe to a trusted British pipe fan who is a member of the PipesMagazine and PipeSmokersUnlimited forums. He was worried that it might have been topped. That was good advice and I asked the seller for pictures showing the bowl height. I found a few previously sold Hendon shapes on the web, but only two with specs. The bowl height and depth on this one is right in between the two that I found. It certainly could have had a millimeter taken of the bowl height, but I decided it was close enough. Jesse Silver recently mentioned the phrase “cut down process” in describing small variations in standard shapes by Barlings, etc. Perhaps this one was similarly affected?

The pipe still retains the screw in stinger, but I think that the ball may have been cut off. There is a scorch mark on the top of the bowl, which I was able to lessen, but not completely remove. The stem is in excellent shape as is the bowl interior. The button is quite different than those on my later era Sasieni’s and it has more of an ovoid but not quite orific shape.

The pipe didn’t need much in the way of clean-up or restoration. I gave the stem my usual finish process. I soaked the stinger/tenon in some alchol so it could be screwed out. I think for smoking use, I’ll keep the stinger in place. The walls of the tenon are thin and I believe the stinger gives it some additional support. Without the stinger, the draft hole would be quite large.

I used some 2000 grit wet paper on the bowl top to lessen the scorch mark, then the briar was buffed with White Diamond and several coats of Carnuba wax.

Below is the completed pipe.

Restoring an interesting old Bakelite Cavalier


Blog by Steve Laug

One of the sellers I follow on eBay often has unique older pipes that catch my eye. I can’t remember how long I have been following him but it has been quite a while now and I have purchased many pipes from him. When this old style cavalier came up for sale on his page it caught my eye and I wanted to add it to the collection. There were no distinguishing marks on the stem or shank. It was identified as a no name Cavalier. The bowl appeared to be briar though I was not certain of that. The base unit was one integral piece from the tip of the cavalier end to the end of the preformed button. The bowl looked like it had been smoked as there was a cake in it that had run over like lava on the rim top. It had a small nick in the side of the bowl that can be seen in the first photo below. The stem looked to be oxidized but I was not sure what the material was – it could have been vulcanite or even Bakelite. I would know more when it arrived in Vancouver from England.The second photo shows the delicate look of the bowl and the base. There is something simple and flowing about the pipe. It is that look that caused me to bid on the pipe. It just flowed nicely from the button to the end of the base.While I waited for it to arrive I did a bit of research on the web. I checked my favourite site for metal and non-metal pipes that have either threaded or push fit bowls. I was not sure what I was dealing with on the above pipe because there were no photos of it with the bowl removed. My guess was that it was a push fit bowl. I did find a similar looking pipe on the Smoking Metal website. The link is http://www.smokingmetal.co.uk/pipe.php?page=325 and the pipe bears the stamp L.M.B. in a rectangular banner on the left side of the shank. The bowl looks identical to the one that I picked up and the base had a very similar shape. I would be able to tell more about it when it arrived.When the pipe arrived I was in Europe for work so it sat for three weeks. When I got home I opened it to see what I was dealing with. I took some photos of the pipe before I started to work on it to show what it looked like when I began. I was not sure what the stem and base was made of – I was leaning toward Bakelite rather than vulcanite but the cleanup would verify. I took a close up photo of the bowl and the rim. The bowl had an uneven, thick cake that all but clogged the air hole in the bottom of the bowl. The rim had a lava overflow that covered the flat surface.The stem and base were oxidized. It had the brown tint of oxidation. I still wondered if the stem was vulcanite or if it was Bakelite. I dropped it in a container of Before & After Deoxidizer to let it soak.When I took it out of the Deoxidizer the oxidation was gone and the underlying colour of the stem and base unit was a rich dark brown. It turned out to be Bakelite not vulcanite. It would clean up nicely and be a beauty. I cleaned out the airway and the inside of the base of the pipe with pipe cleaners, cotton swabs and alcohol to remove the build up inside. It took a bit of work before I could remove all of the grime. I reamed the bowl and scraped the tars off the rim top with a Savinelli Fitsall Pipe Knife. It took a bit of work to scrape away all of the buildup and the lava overflow. I used a bristle brush to clean out the airway in the bottom of the bowl and remove the clogged hole. I wiped the bowl down with an alcohol dampened cotton pad to remove the grime on the bowl. The wood underneath did not appear to be briar. I am thinking that it is maple or some other hardwood with a tight grain pattern. I sanded the bowl with micromesh sanding pads – wet sanding with 1500-2400 grit pads and dry sanding with 3200-12000 grit pads. When I finished polishing it with the micromesh sanding pads I rubbed the bowl down with Before & After Restoration Balm. The Balm brought the briar to life. The rich colour and the grain on the alternate wood came to life. With the bowl finished I turned the attention to the Bakelite base and stem. I polished it with micromesh sanding pads – wet sanding with 1500-2400 grit pads and dry sanding it with 3200-12000 grit pads. The photos below show the process. I pressed the bowl back on the base and buffed it with Blue Diamond on the buffing wheel to polish the stem and the bowl. I gave the base and stem multiple coats of carnauba wax and buffed it with a clean buffing pad to raise a shine. I gave the bowl multiple coats of wax and buffed it until the bowl shown. I hand buffed the pipe with a microfiber cloth to deepen the shine. The finish on the bowl and dark brown Bakelite stem combine to present a beautiful pipe. The dimensions of this pipe are Length: 8 inches, Height: 2 inches, Bowl diameter: 1 1/4 inches, Chamber diameter: 3/4 inches. The finished pipe is shown in the photos below. Thanks for looking.

A Review – Before & After Restoration Balm


Blog by Steve Laug

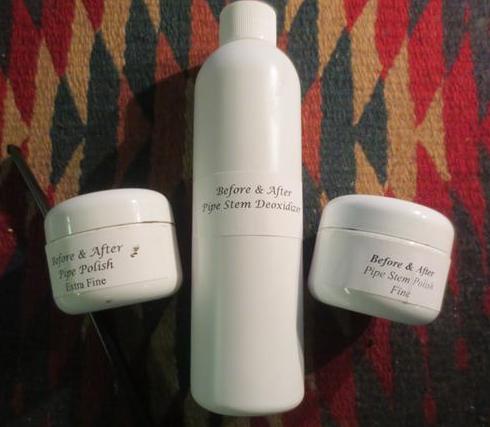
I have been using Mark Hoover’s Before & After Pipe Stem Deoxidizer and Before & After Fine and Extra Fine Pipe Stem Polishes for several months since I posted the review of those products in September. If you are interested in finding out about this new product, you can read the review at the following link on rebornpipes (https://rebornpipes.com/2017/09/15/a-review-before-after-pipe-stem-deoxidizer-and-fine-and-extra-fine-polishes/). I have gone through the first bottle of the Deoxidizer and have a second one on order. It is a great product that is certainly easy to use and it gives good results. With my previous experience with his products when Mark released a new product it was natural for me to want to check it out.

Background

In a chat on Facebook Messenger, Mark told me about a new product that he had developed. He called it Before & After Restoration Balm. I asked some questions and figured I might try it sometime along the way but did not order any at this point. We did not “talk” long as I had to head out for work. But I continued to read about the product on Mark’s pipe restoration posts on the Facebook Group – The Gentlemen’s Pipe Smoking Society and became more and more intrigued. It seemed to add lustre back to the bowl when applied. Mark never showed his application of the product to the bowl or stem in his posts, he just showed the before and after pictures. It seemed to work very well on sandblast and rusticated finishes and was also effective on smooth finishes. I was not certain what it had to offer that would trump my existing regimen of cleaning and polishing products, but I kept reading his posts. The more I read the more curious I became. After having used his other products and finding them to be helpful I eventually decided that I would pick some of the Balm up when I ordered from Mark the next time.

Product and Cost

I seem to catch Mark most of the time on Facebook Messenger, so I sent him a message and asked him to tell me more about the product. Mark wrote back that he had developed the Restoration Balm primarily for use on briar but that it worked well on stems – whether vulcanite, acrylic or horn. He went on to say that it was formulated to pull the dirt off of the briar as well as polish it at the same time. It includes anti-oxidants to keep the briar from getting damaged from UV rays and water as well as something that enlivens the briar. Well that description intrigued me and I figured with all the pipes I have sitting around me to restore I had nothing to lose. I did not think that there a piece of briar in my boxes did not need a bit of “enlivening”.

The Restoration Balm was available in 2 ounce jars and will clean and costs $12 USD plus postage to your door. A jar of the balm can be used to rejuvenate about 25-30 pipes depending on the finish of the briar. A smooth finish will take less than a rusticated or sandblast finish so there is some variation. It can be ordered from his pen website, http://www.lbepen.com/ though I could not find it listed there. Just send an email to him from his site and he is quite prompt at replying to inquiries. When I ordered my second bottle of the Deoxidizer, I had him also send along a jar of the Before & After Restoration Balm. I paid via PayPal and the product was on its way to Vancouver.

Learning to use the Restoration Balm

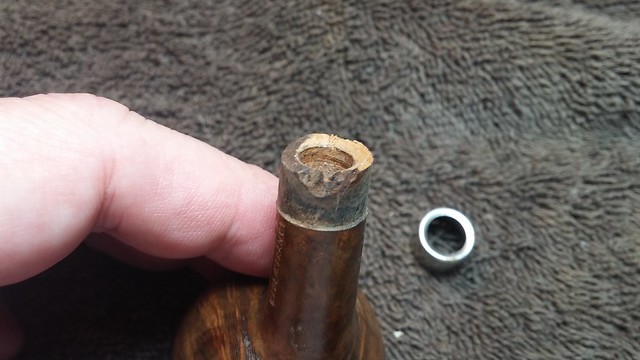
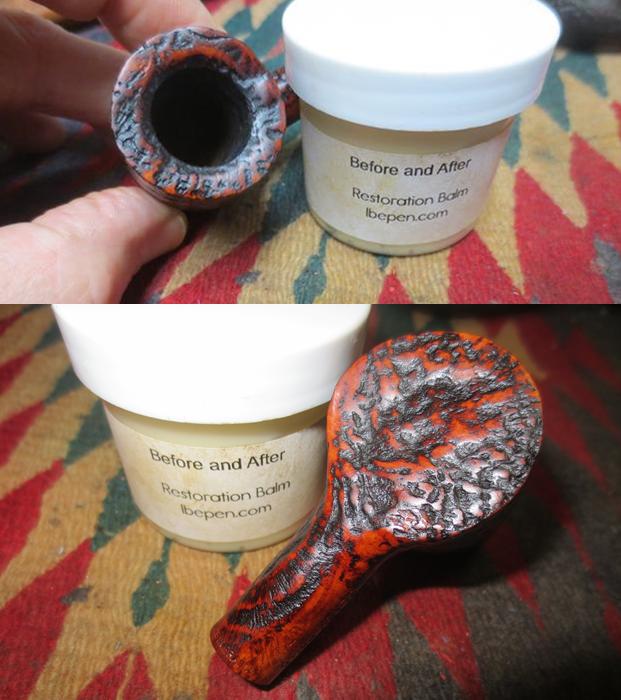
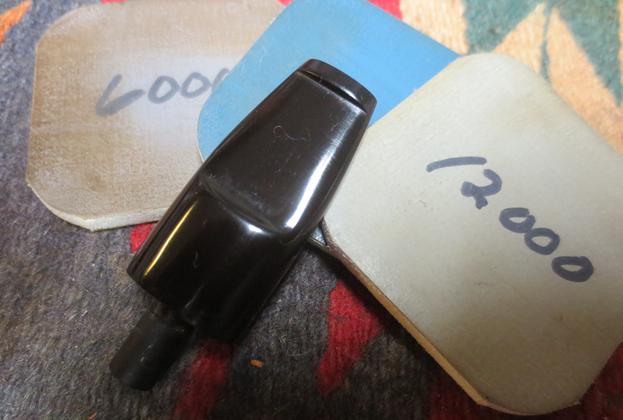
I received the package from Mark quite quickly considering it had to cross the Canadian/US border and clear customs. I don’t know what I expected the stuff to look like but when it arrived I was a bit surprised. It was tightly packed in a small square box that the postie left in between my doors. It was sealed very tightly and did not even rattle when I shook it. I had to use a sharp knife to cut through the tape that completely sealed the box before I could even look at the product on the inside. When I finally got the small jar out of the box I was even more surprised. It had the look of white beeswax through the clear plastic jar that held it. It had a similar label to the other products I had purchased – kind of a plain, vanilla label with no real information on it. When I removed the lid there was a seal covering the mouth of the jar.
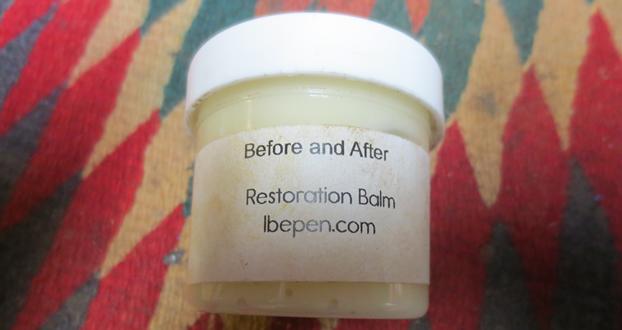
Since there were no instructions included with this product and none that I could find on Mark’s website I decided to use the old noggin and make my own instructions. Those of you who read the previous review of the Deoxidizer might rightly question that tactic but that is what I did nonetheless. After all how hard could it be to rub a product on briar or stem and wipe it off after it had done its work? Other than knowing how long to leave it on the briar or stem it seemed pretty straightforward to me. I opened the jar, removed the seal and found a soft paste product that had a pleasant citrus smell. It was not waxy or hard so it seemed like it would be easy to apply to the surface of the briar or the stem. 
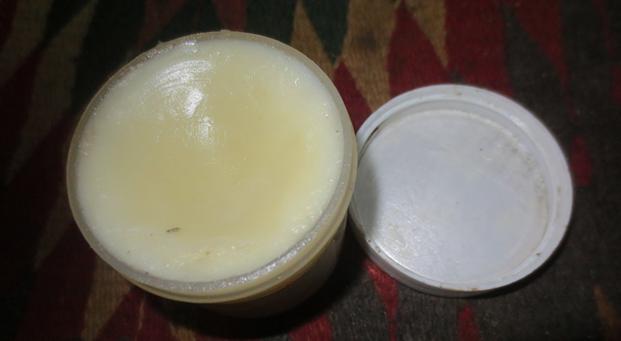
My Method and Experiment with the Balm

In general terms here is my procedure in using the new product. I am sure if Mark is reading this he may get a chuckle out of it and can correct my misapplication of the product. I rubbed the balm into the briar with my finger tips and found that the product became clear as it was rubbed into the finish. It did not leave hard or waxy residue in the crevices of any of the finishes that I used it on. I rubbed it in and then wiped it off with a soft cotton pad. I found that the pad not only picked up the remaining product but the debris that the product had raised to the surface of the briar. I decided to put the product through some pretty rigorous testing on my end. I generally use Murphy’s Oil Soap to clean the briar and have seen no reason to change that practice so I decided to use a large variety of briar finishes in different condition. Each one was chosen as representative of a typical briar finish and stem material.

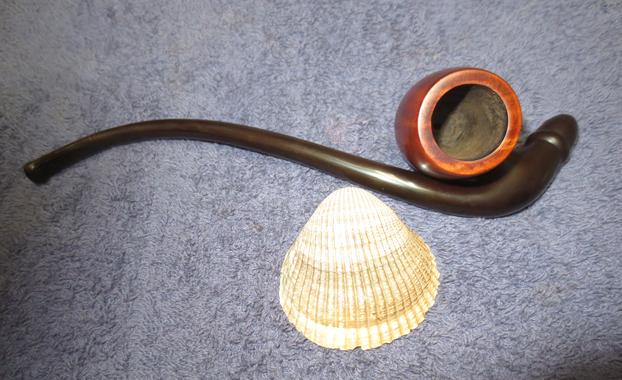
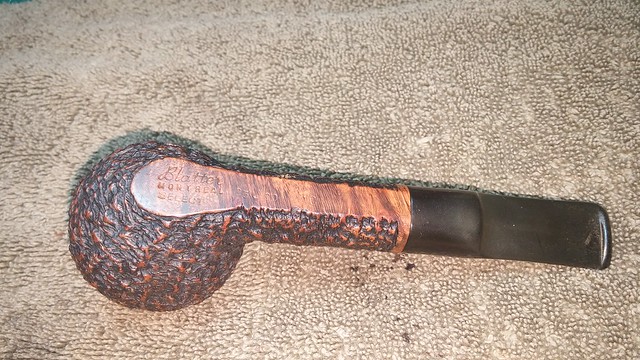
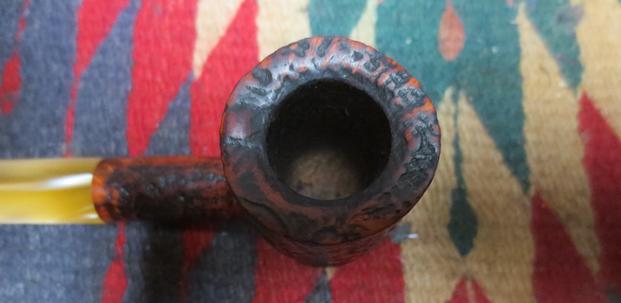
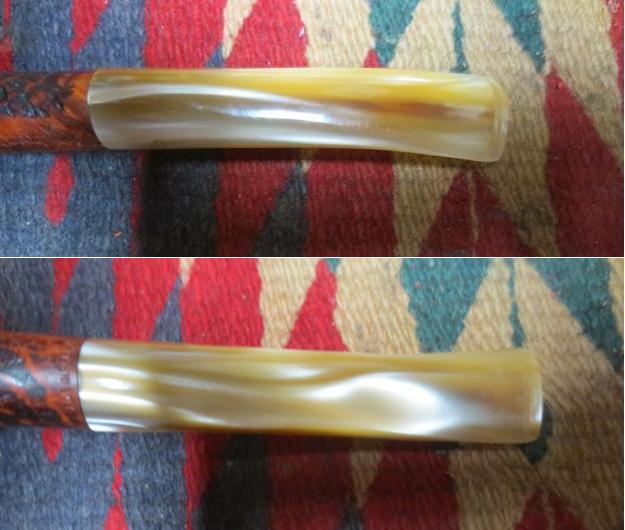
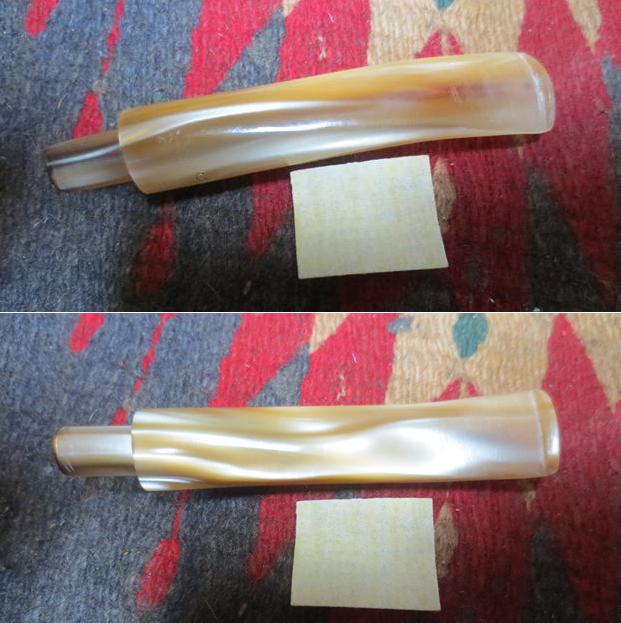
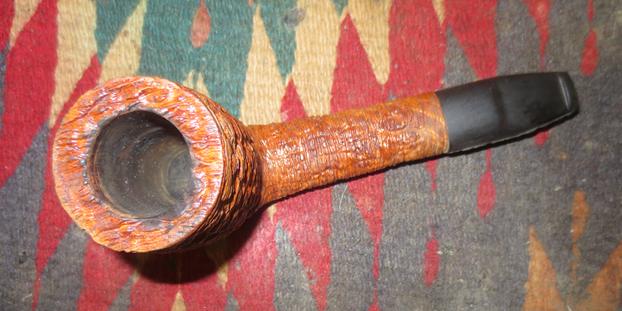
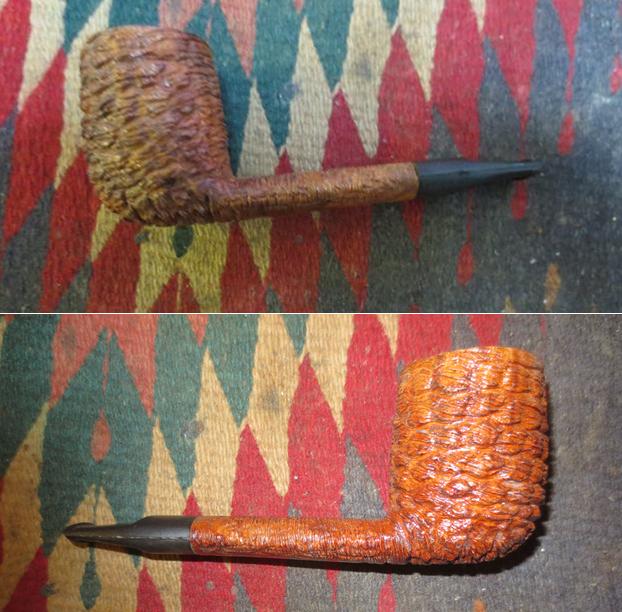
A carved finish and horn stem
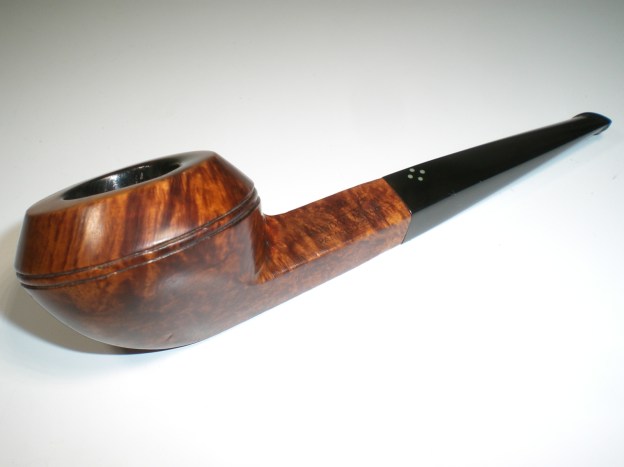
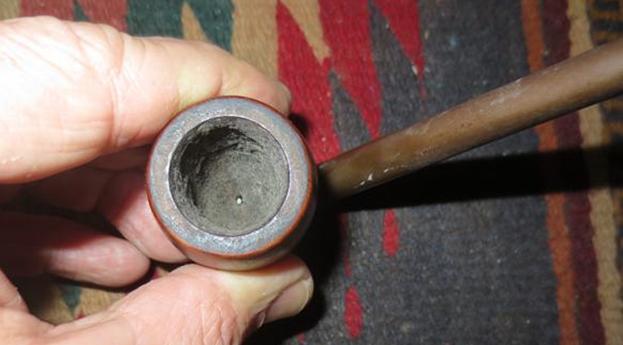
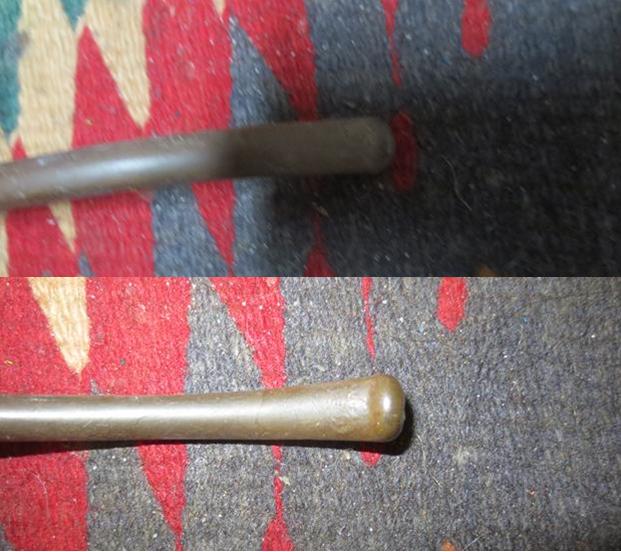
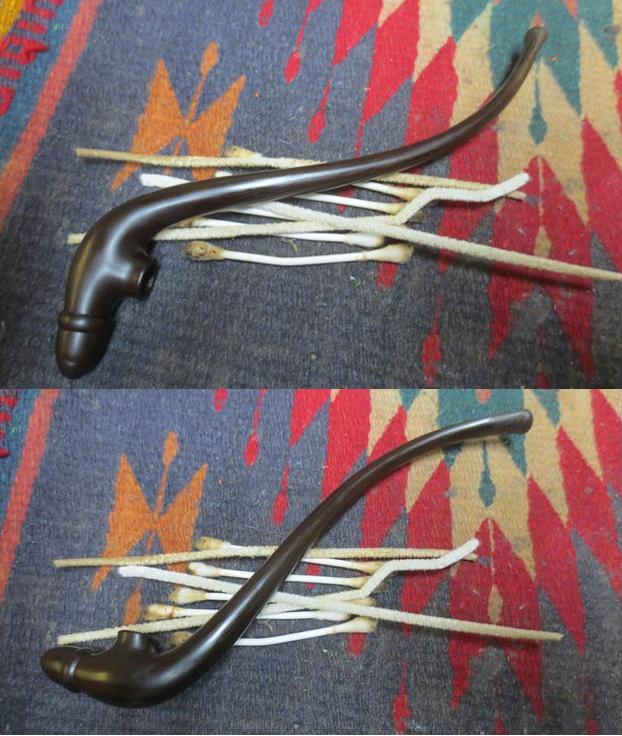
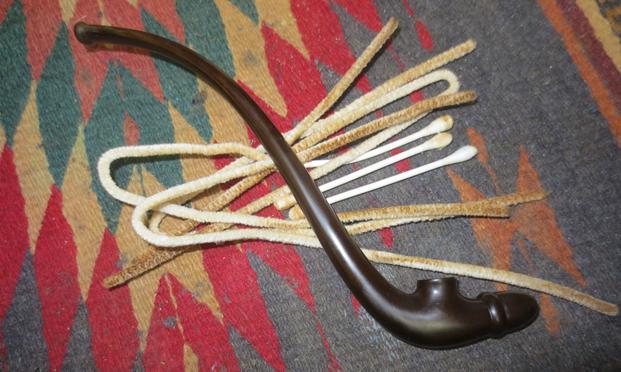
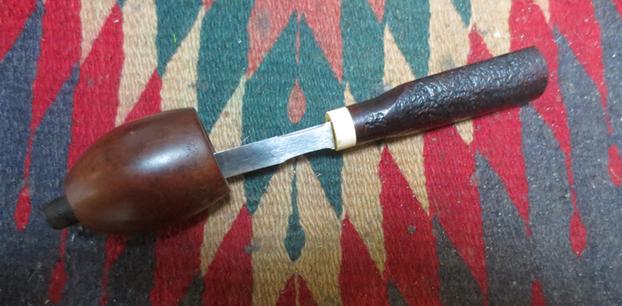
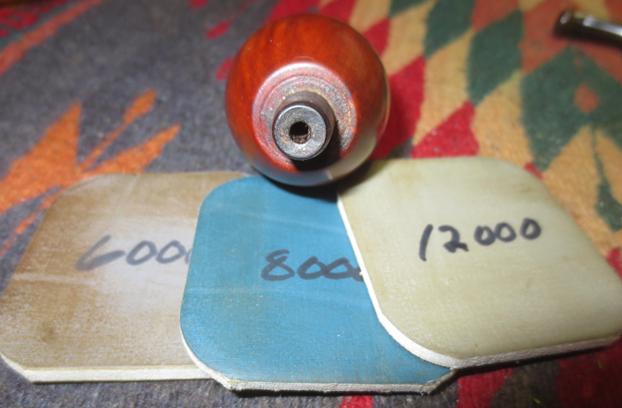
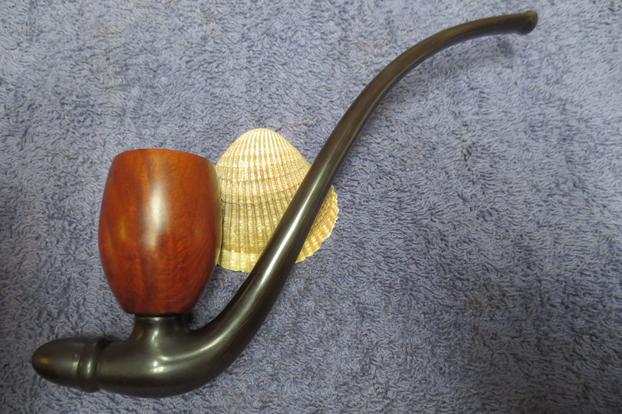
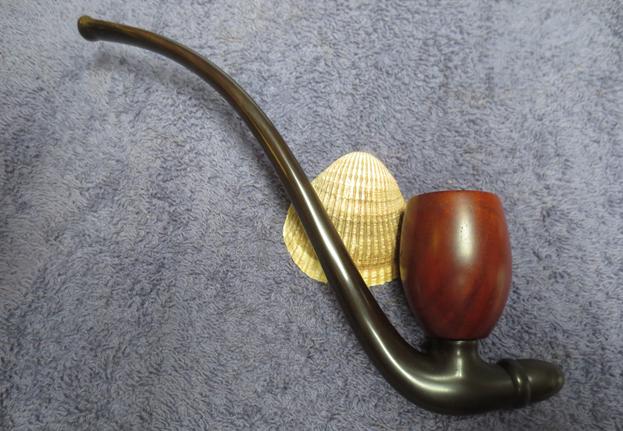
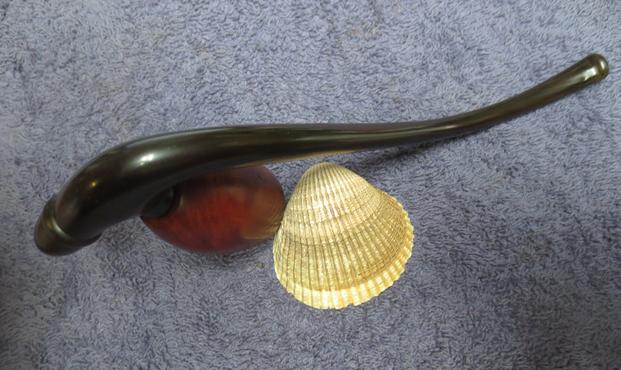
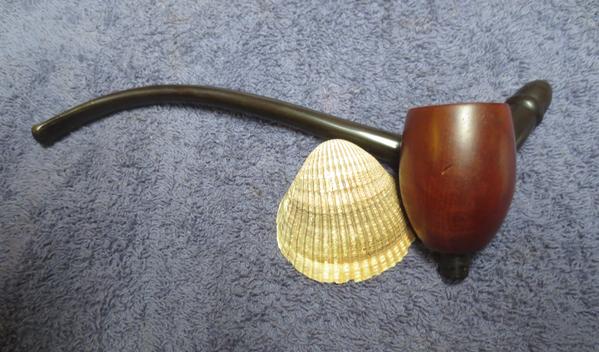
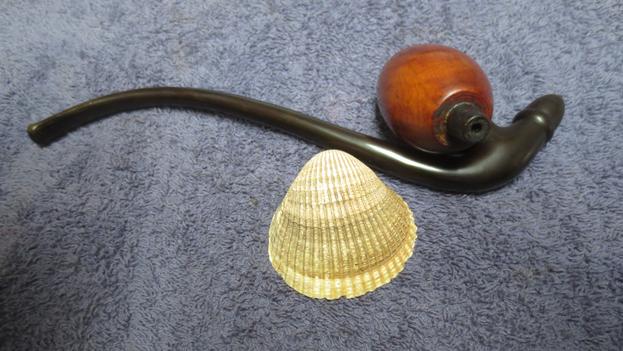
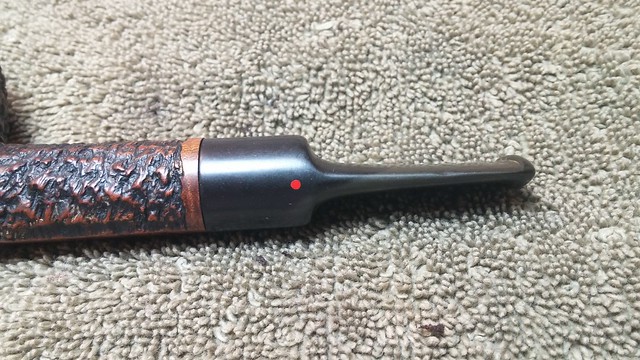
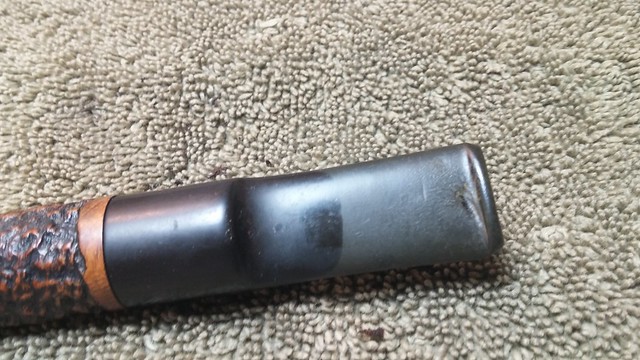
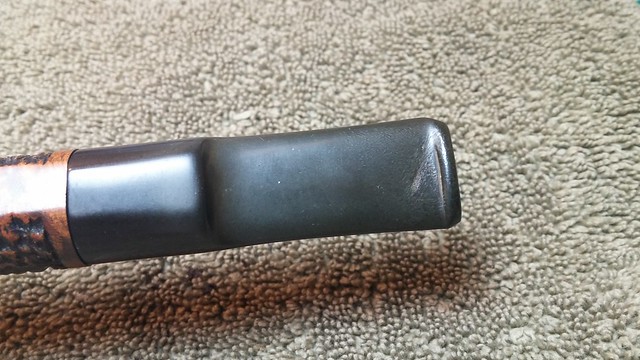
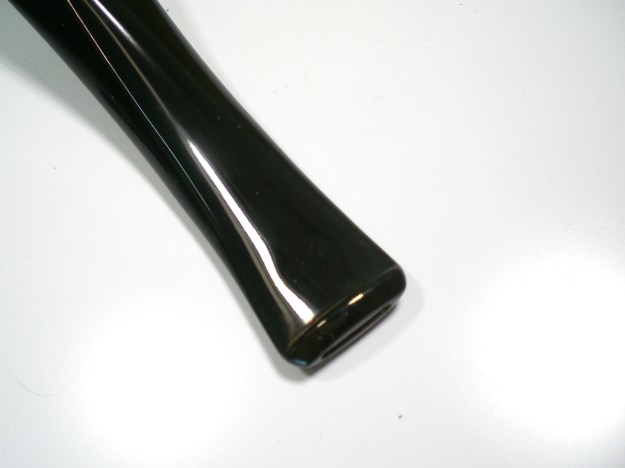
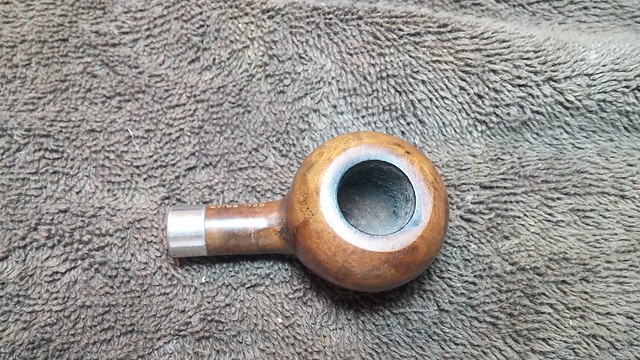
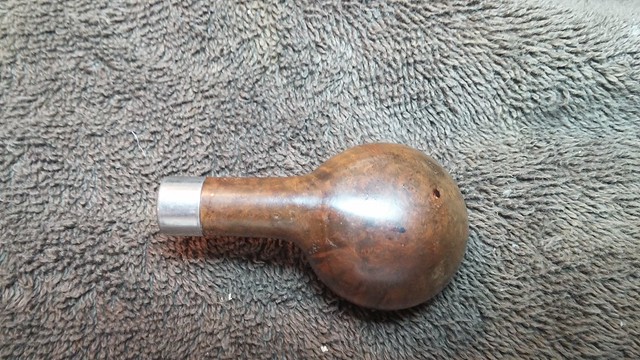
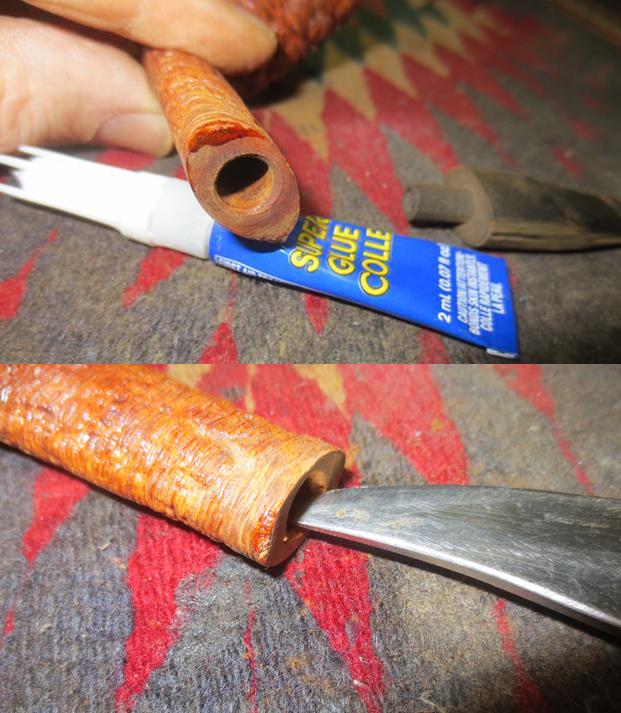
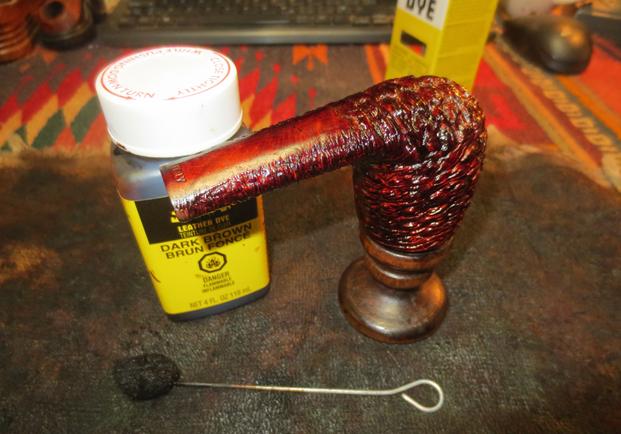
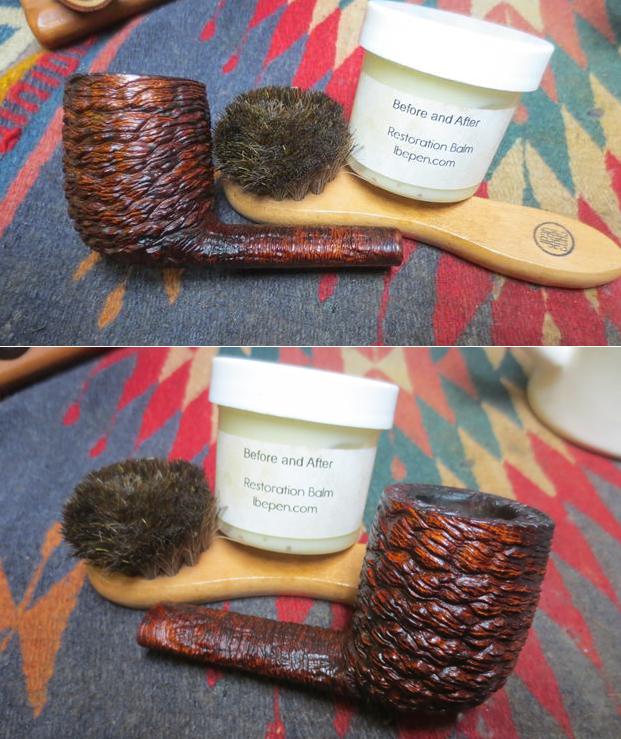
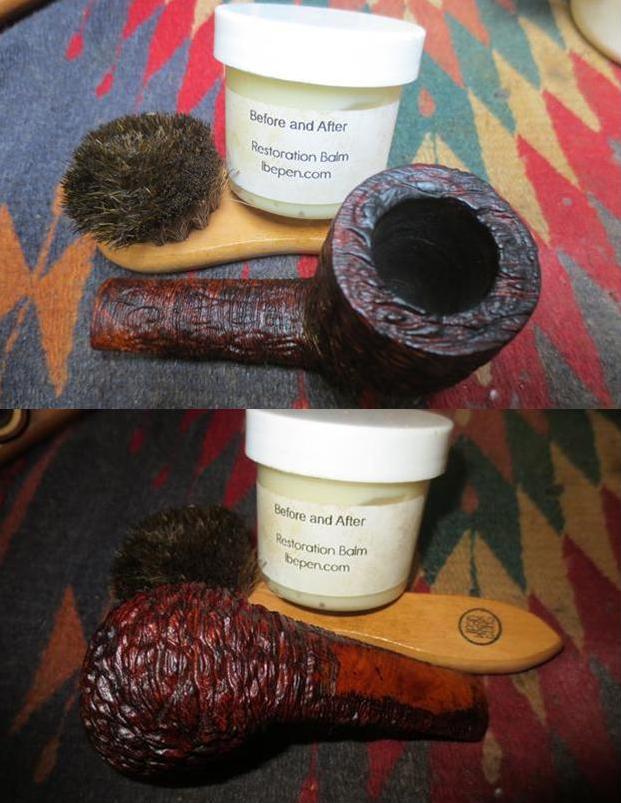
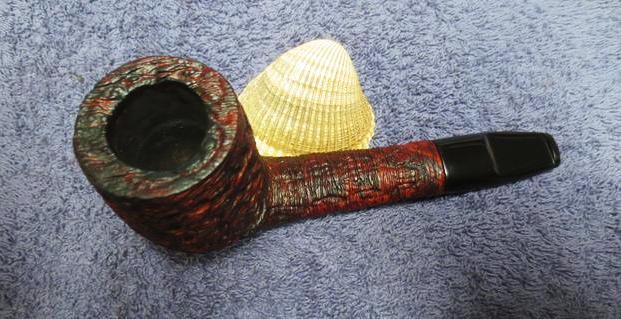
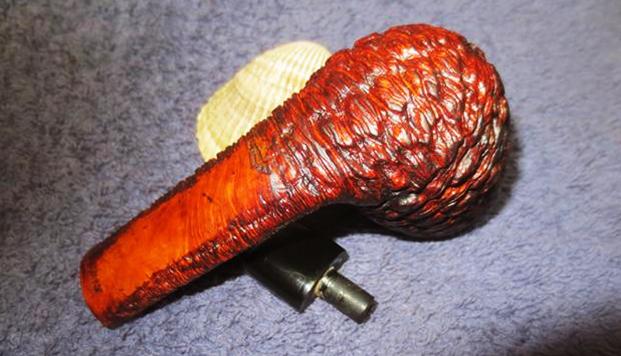
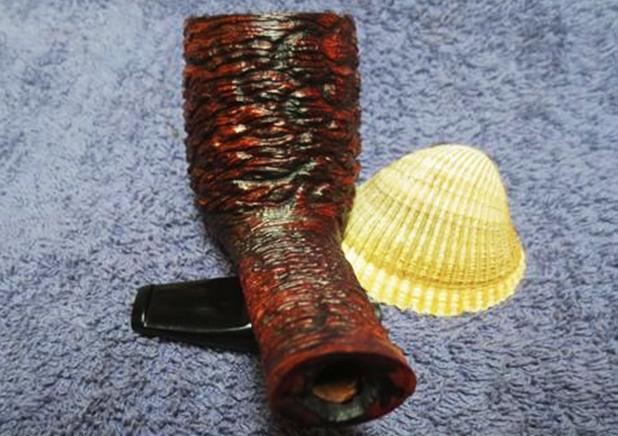
The first pipe I used the product on was a carved C.P.F briar bowl from the late 1890s to early 1900s. The carvings were curved gouges following the flow of the bowl like flames leaping up the sides and shank reaching to the top. I rubbed the balm deep in the carvings making sure to get every nook and cranny. I after I rubbed it into the surface and the product seemed to almost liquefy I wiped it off with a cotton pad to remove what remained. The pipe had an old Bakelite stem so I used the balm on the stem as well. I rubbed it into the surface of the stem and loved the life that it gave to the Bakelite. Before using the product the Bakelite was lifeless and dull afterward it had the same kind of glow that I get from a good buffing and waxing. This briar and stem were both cleaned previously to remove the lava on the rim top and grime that was over the finish and stem. Even after having cleaned it with the oil soap I was surprised by the debris that came off on the pad.

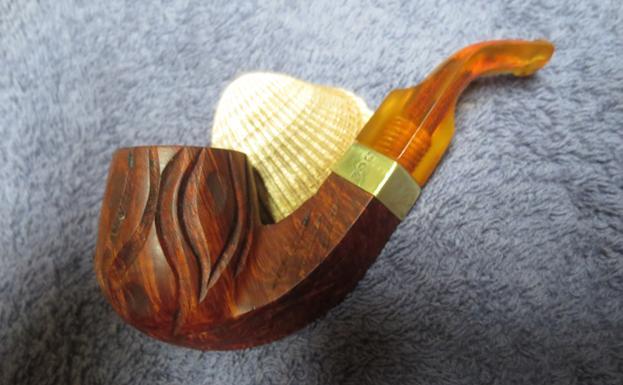
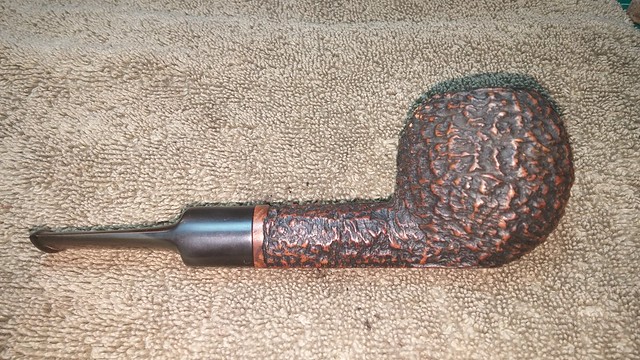
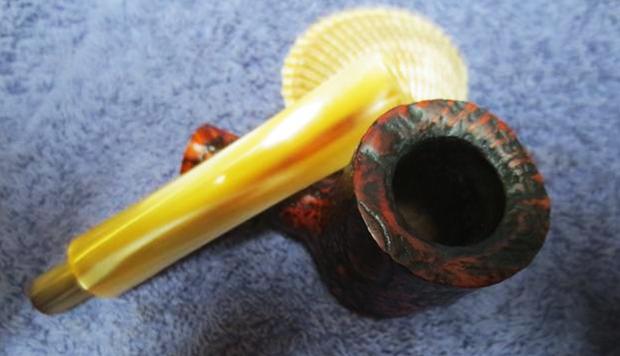
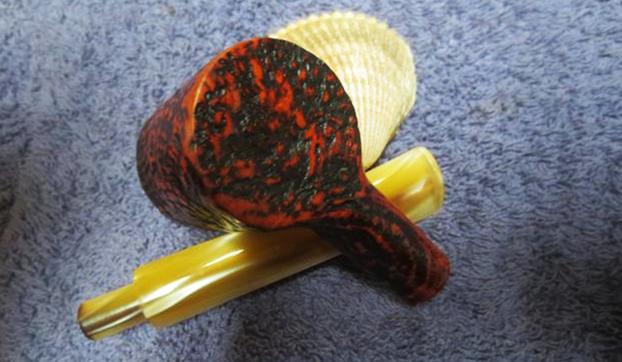
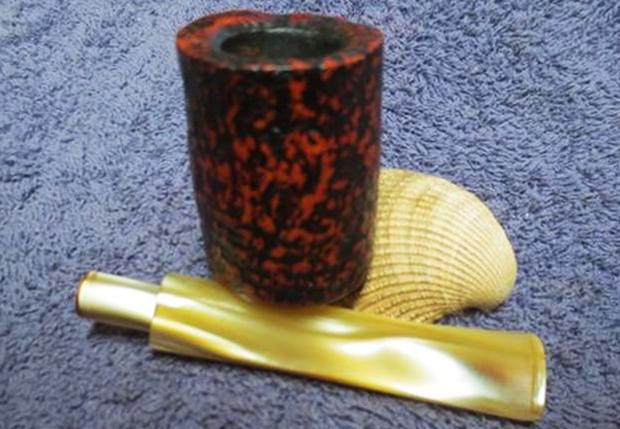
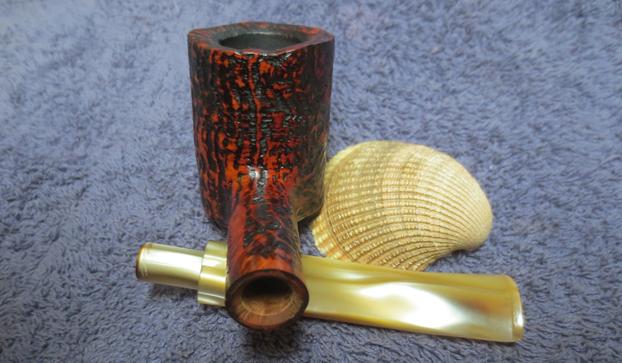
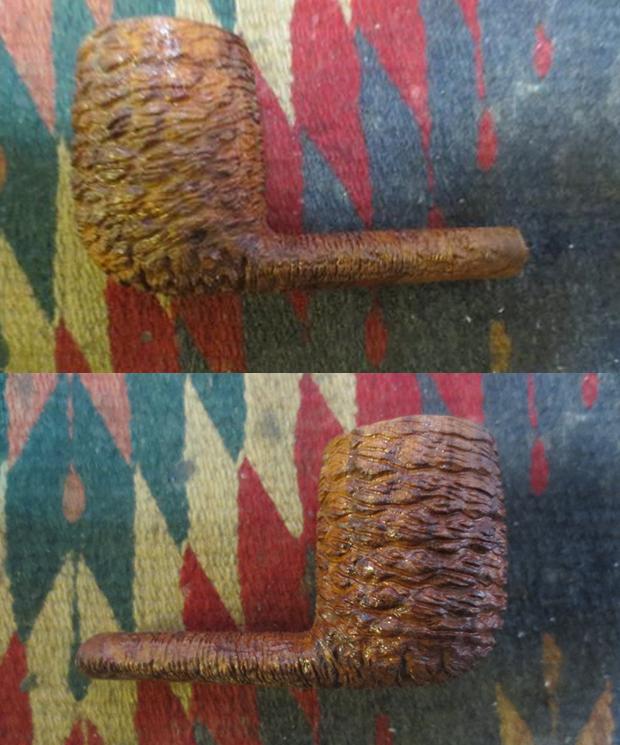
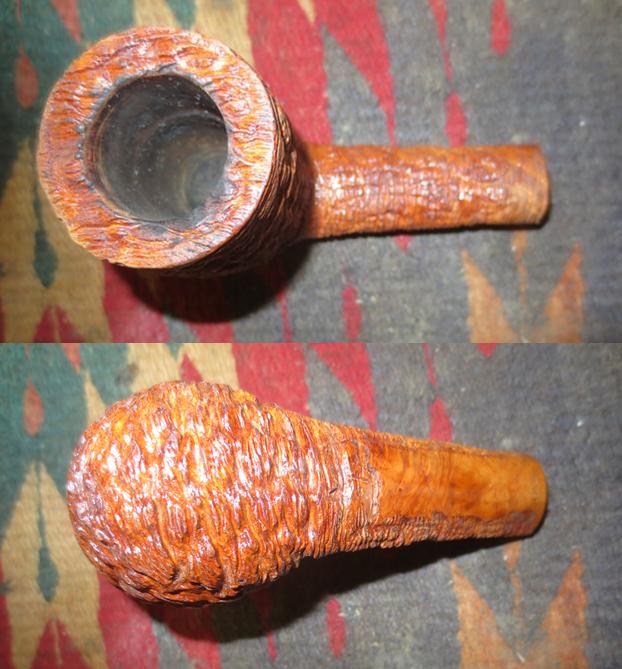
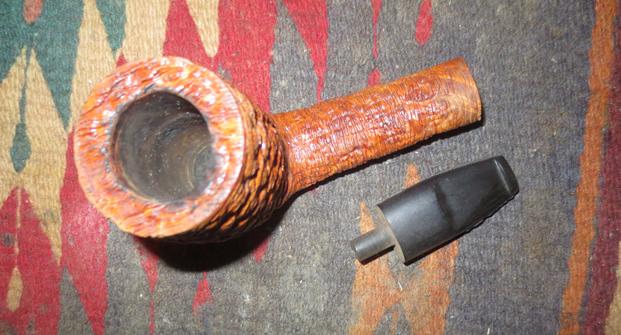
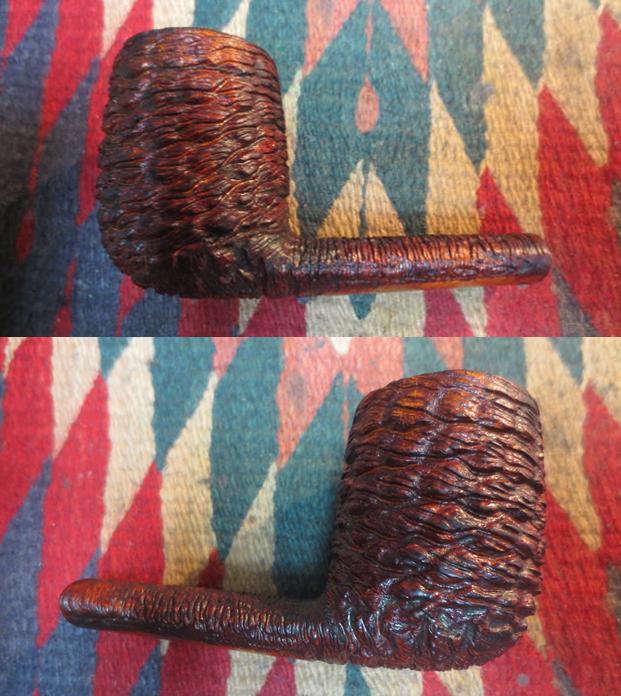
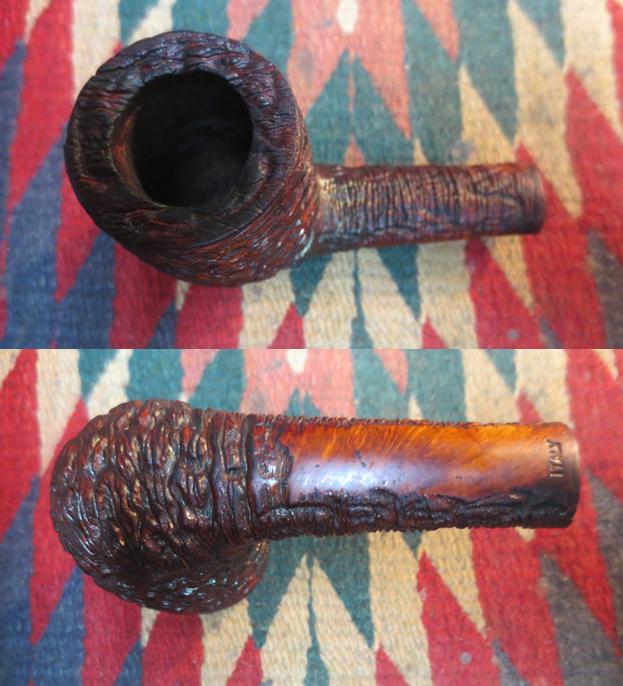
A Sea Rock rusticated finish and vulcanite stem
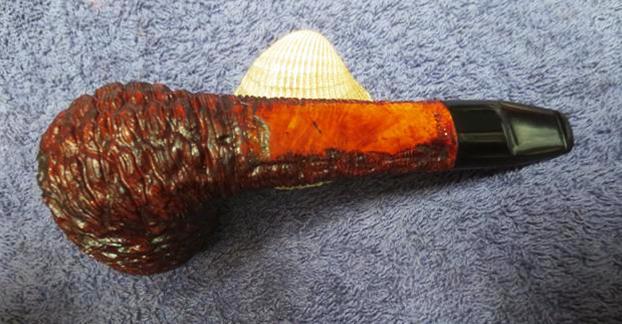
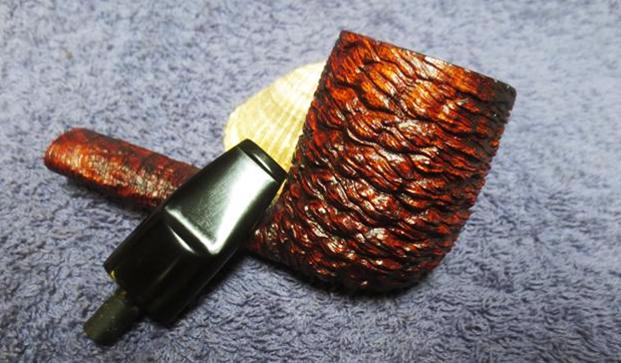
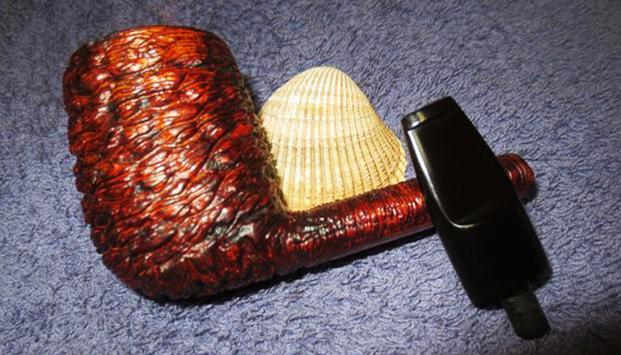
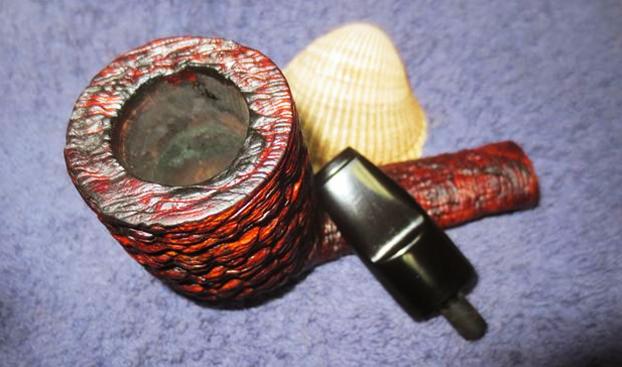
The second pipe I used the product on was an Italian made Canadian with a very rough sea rock style finish. I previously had scrubbed the bowl and shank with soap to clean off the finish. I restained it with a dark brown aniline stain and flamed it. So this use of the product was more of a rejuvenation than a cleaning. I rubbed the product deep into the grooves of the finish with my fingers working it into the briar. I want to get it into the depths of the rustication. I worked over the finish with a tooth brush to spread it evenly. I let it sit for a bit and then polished off with a soft cloth. It really did enliven the briar and add depth to finish. This time it did not clean as much as polish the briar. It gave a wax like polish to the briar. I rubbed the vulcanite stem down as well. It was a new stem that I had fit to the pipe but the product worked well to shine and protect it too.

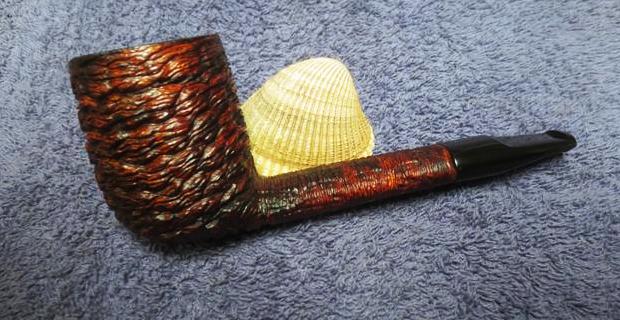
A soft rusticated finish with a Lucite stem
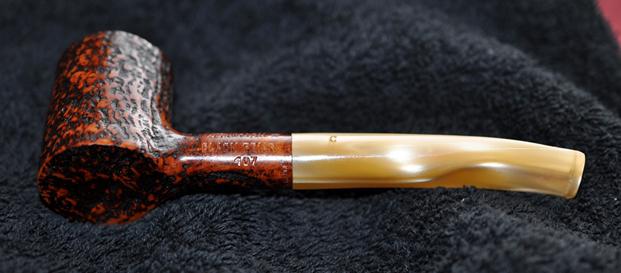
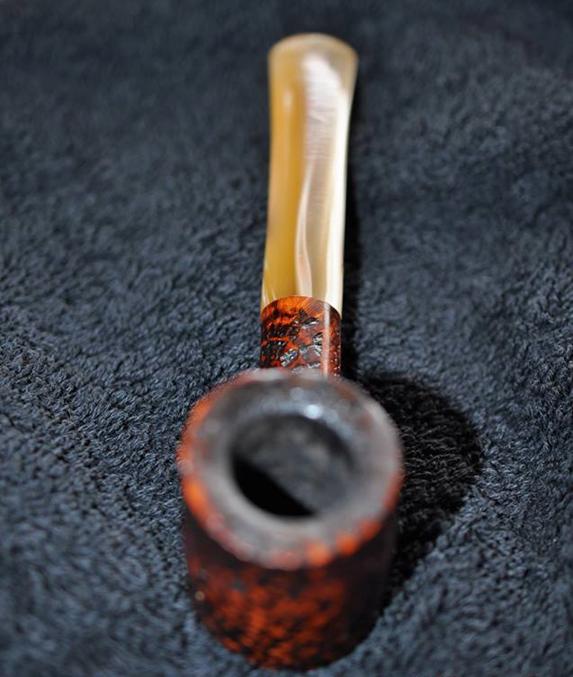
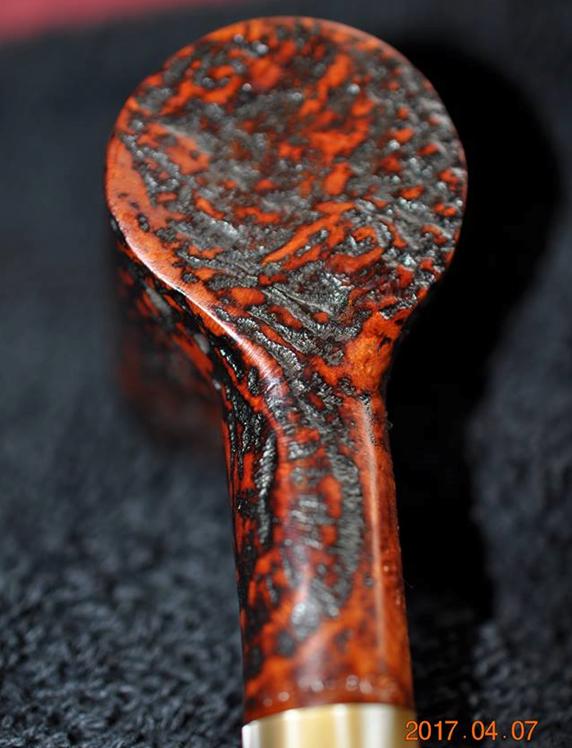
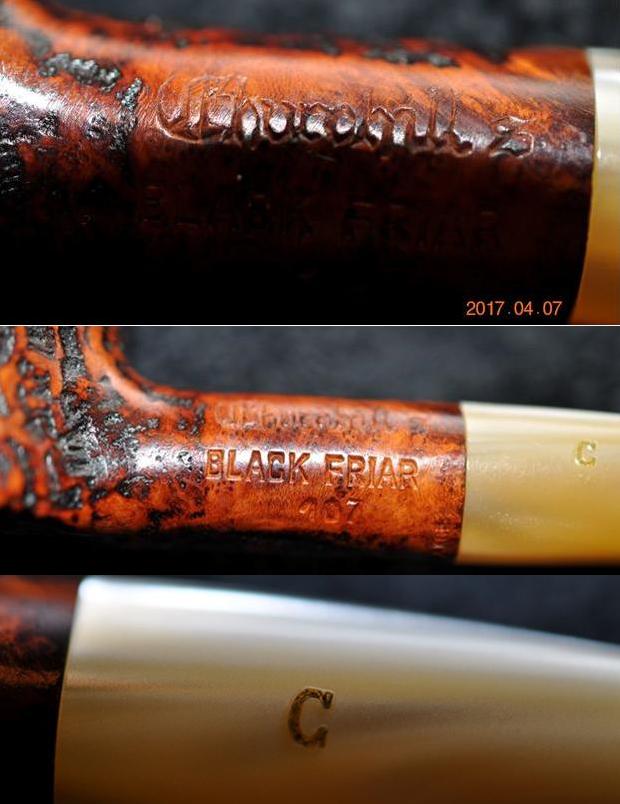
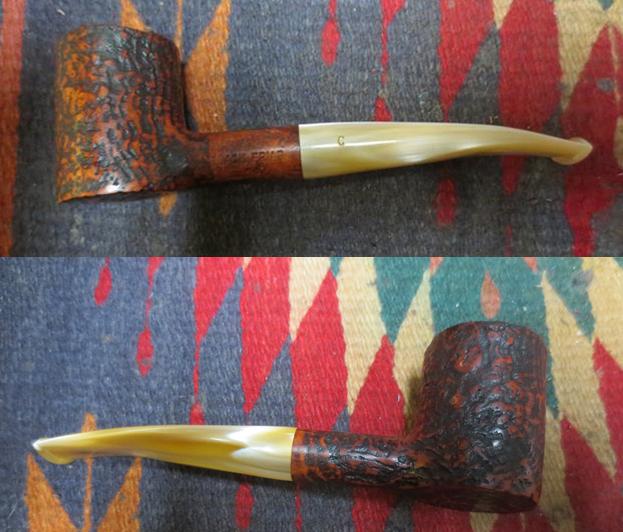
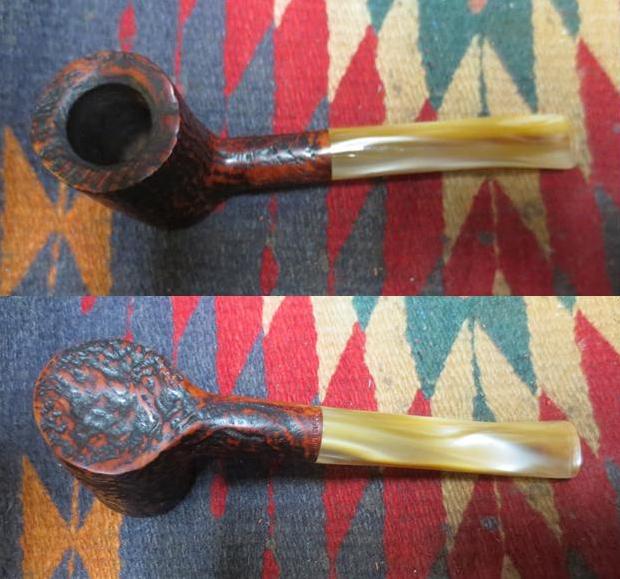
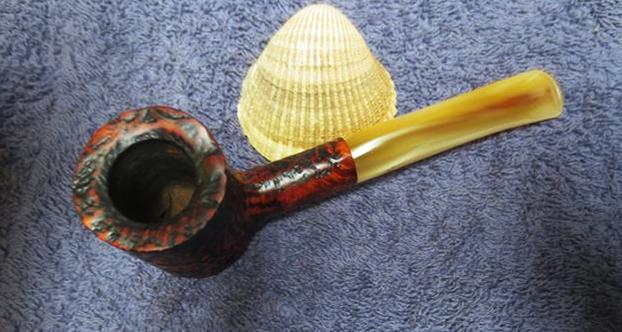
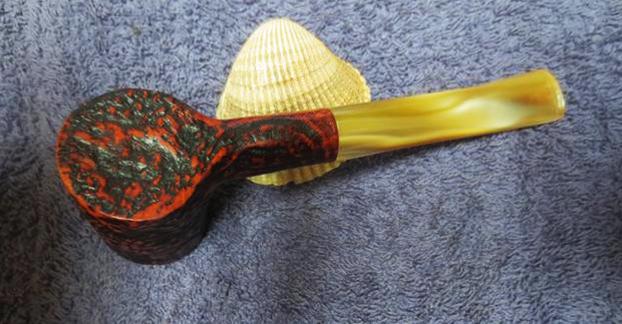
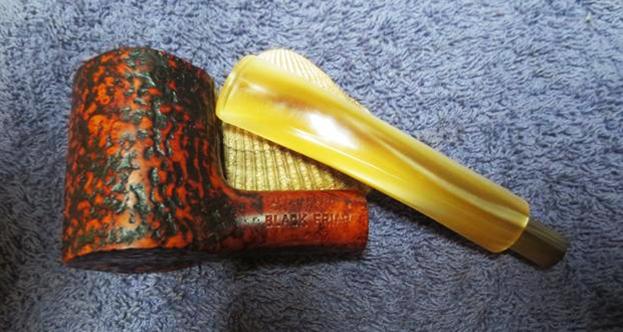
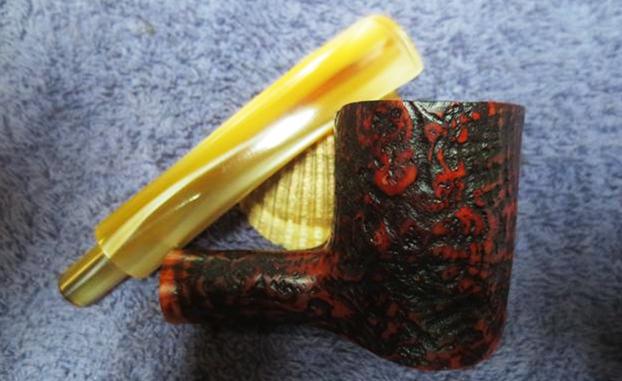
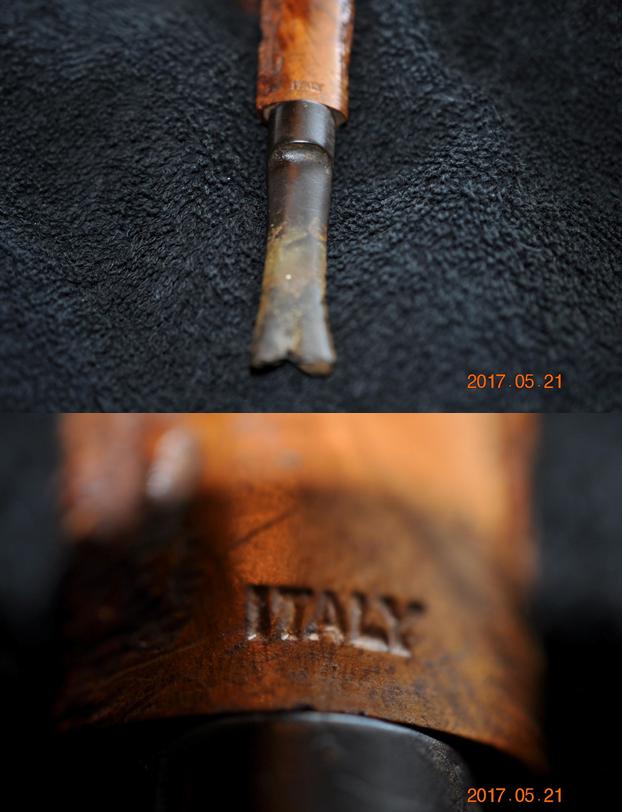
The third pipe I used the product on was an Italian made Churchill’s Black Friar 407 Poker with a very soft rusticated finish. I previously had scrubbed the bowl and shank with soap to clean off the grime from the finish. I did not do a restain on the pipe so the use of the product was more of a rejuvenation than a cleaning. I rubbed the product into the grooves of the finish with my fingers working it into the briar. I want to get it into the depths of the rustication. I worked over the finish with a shoe brush to spread it evenly. I let it sit for a bit and then polished off with a soft cloth. It really did enliven the briar and add depth to finish. With the good condition of the pipe the product worked to polish the briar. It gave a wax like finish to the briar. I rubbed the Lucite stem down as well to try out the product on that material. While it did not absorb into the plastic it did work well to shine and protect it too.

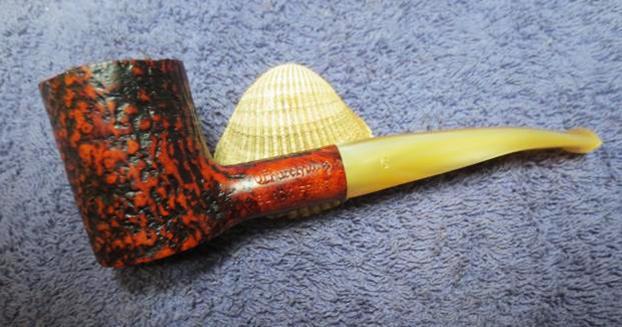
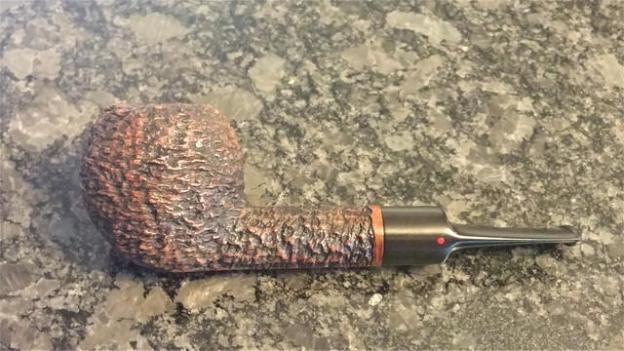
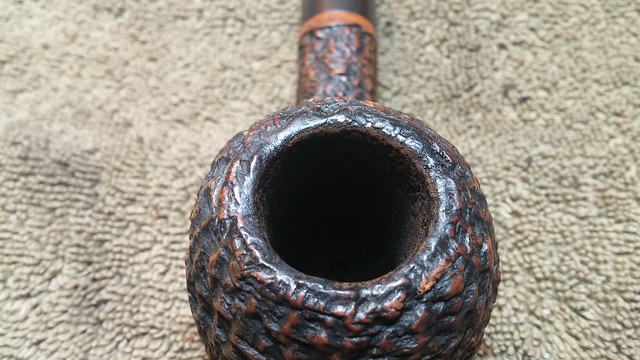
A craggy sandblast finish with a Lucite stem
The fourth pipe I used the product on was an Italian made Oom Paul with a combination finish of sandblast and rustication. It had both very rough sea rock style carving with ridges as well as lighter sandblast style finishing. The combination of blast and rustication seemed like a natural challenge for the product. I previously had scrubbed the bowl and shank with soap to clean off the finish. But I wanted to see what the product did on this finish. I rubbed it deep into the grooves of the finish with my fingers working it into the briar. I want to get it into the depths of the rustication. To work on the combined finish I used a tooth brush to spread it evenly in all of the high and low spots. I let it sit for a bit and then polished off with a soft cloth. It really did enliven the briar and add depth to finish. It left the briar with a wax like polish. I rubbed the Lucite stem down as well. I know that the Lucite will not absorb the polish but it did give it a shine and protect it too.

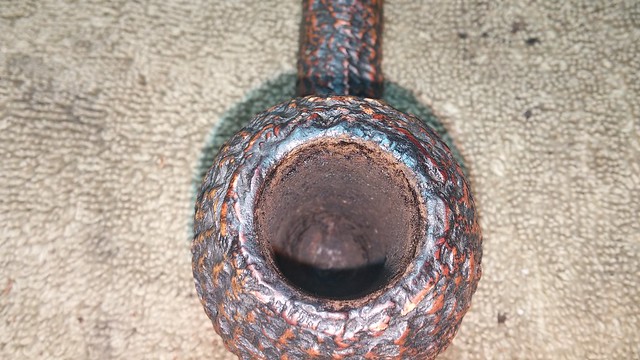
A sandblast finish with a vulcanite stem
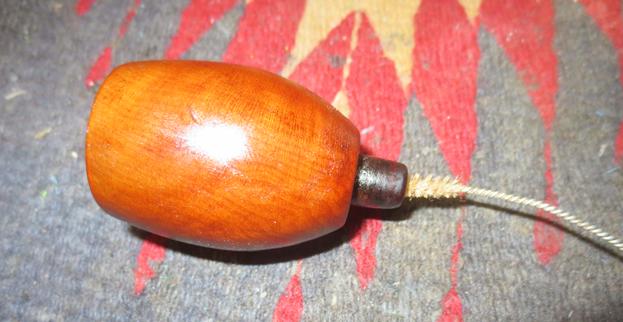
The fifth pipe I used the product on was a Frankenpipe that I put together from an Italian made Brebbia Dublin bowl, a piece of bamboo and a Lucite spacer and a vulcanite stem. The bowl had the Brebbia deep rustication Lido finish. In many ways is like their iceberg finish with very sharp edges and deep crevices. I previously had scrubbed the bowl and shank with soap to clean off the finish. I chose not to restain the bowl but to touch up the nicks on the rim and edges with a stain pen. I wanted to try the product on the four different parts of the pipe – the briar, the bamboo, the Lucite space and the vulcanite stem. In many ways it was more rejuvenation than a cleaning. I rubbed the product deep into the grooves of the rusticated finish on the briar with my fingers, working it into thoroughly into the briar. I wanted to get it into the depths of the rustication. I worked over the finish with a tooth brush to spread it evenly. I let it sit for a bit and then polished off with a soft cloth. I rubbed it into the finish of the bamboo and polished it with the cloth. I did the same with the Lucite spacer and the vulcanite stem. The product worked well on all of the materials in this pipe. It really did enliven the briar and add depth to finish. It gave life to the bamboo and the Lucite and rubber. When polished, it gave a wax like finish to the pipe. I was really pleased with how well it worked on this pipe.

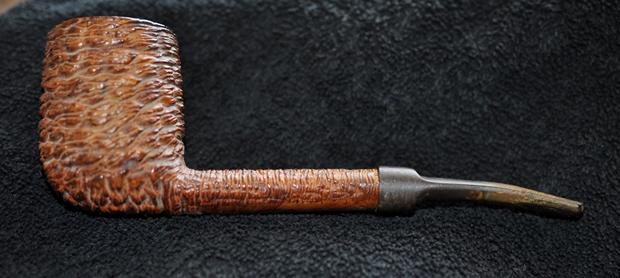
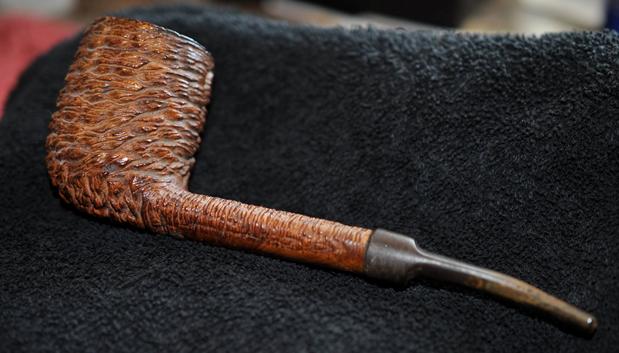
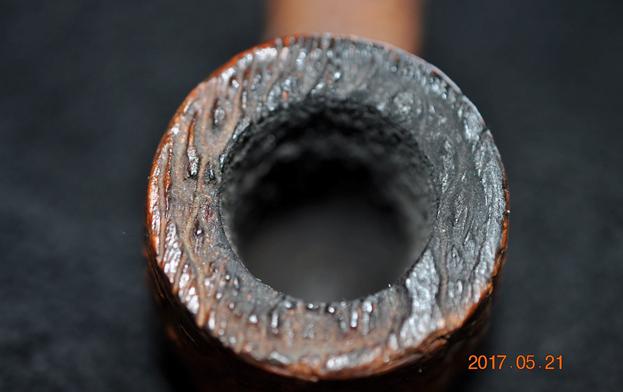
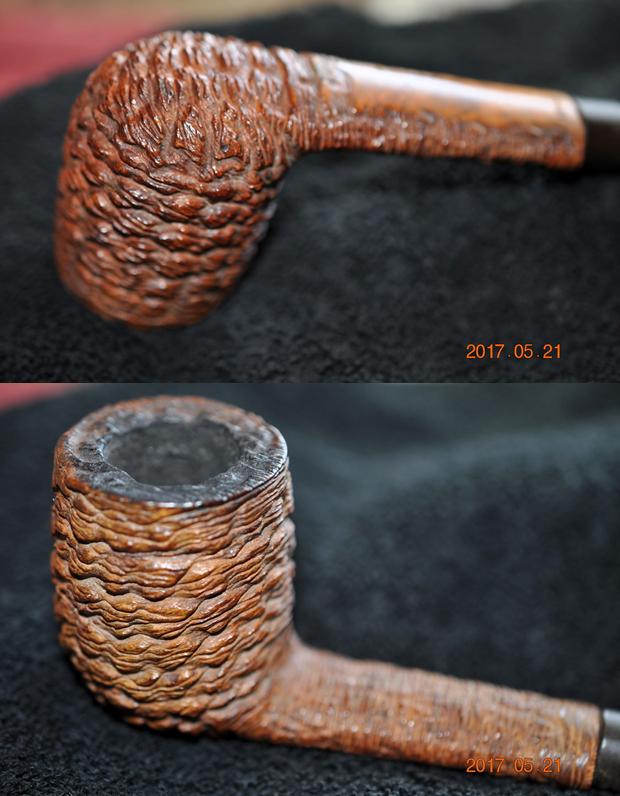
A mixed sandblast/smooth finish with plateau – vulcanite stem
In my ongoing experiment with Mark Hoover’s Before & After Restoration Balm I am using it on this mixed finish Rungsted pipe. It would be a good test of how it works in the transitions between the smooth and sandblast portions as well as on the plateau on the rim and the shank end. I worked it into the sandblast portions with my fingers and rubbed it on the smooth portions. I wiped it down with a cotton pad to see if it pulled out the dirt. It worked very well on all the different parts of this bowl. I also rubbed the turned stem with the product and found that it gave it warmth and polished feel.

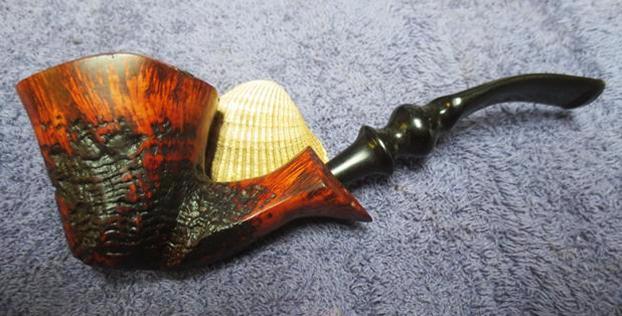
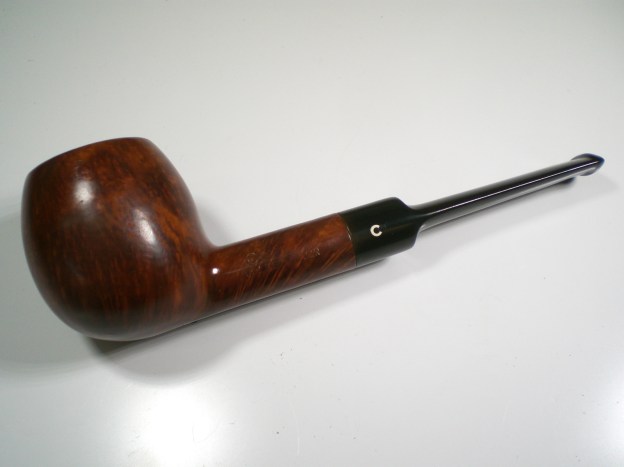
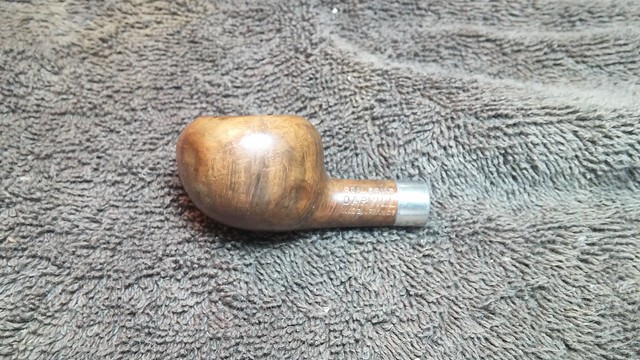
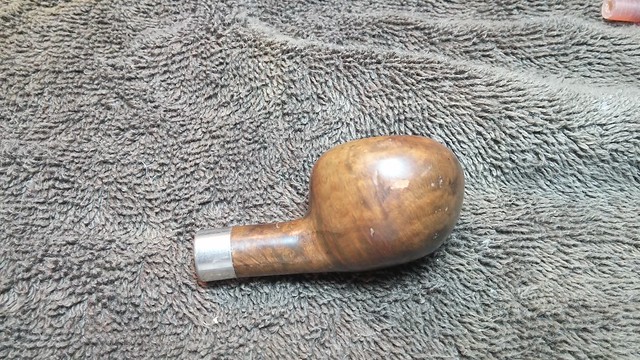
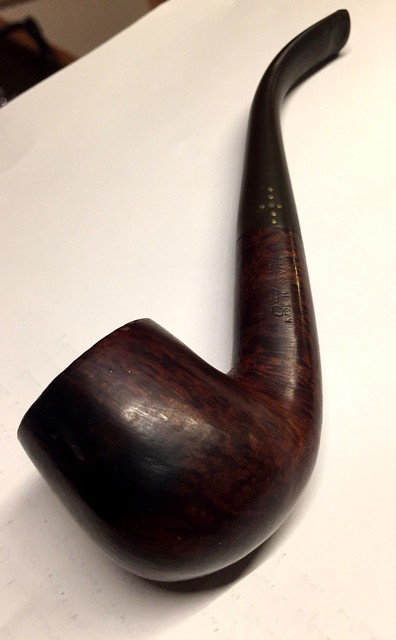
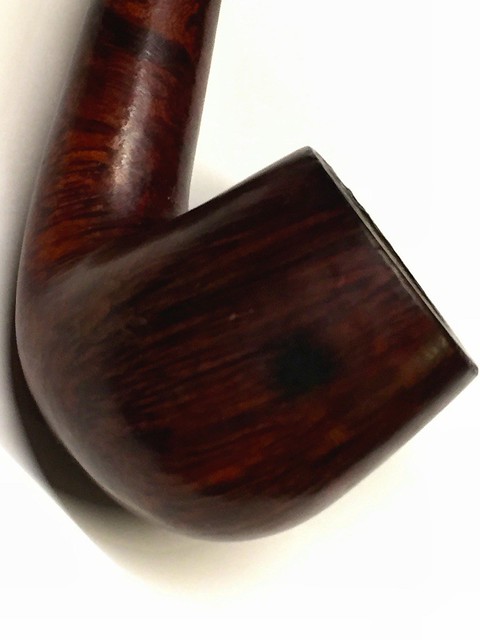
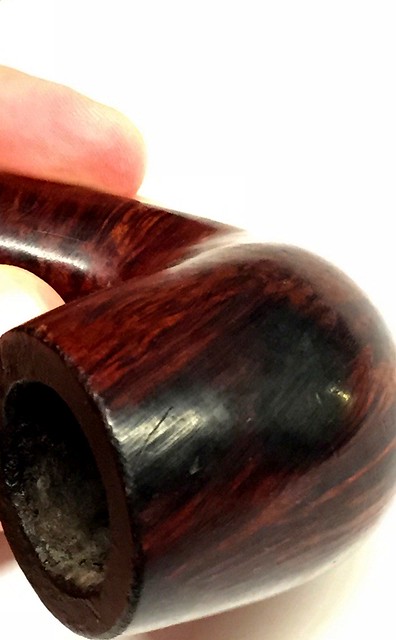
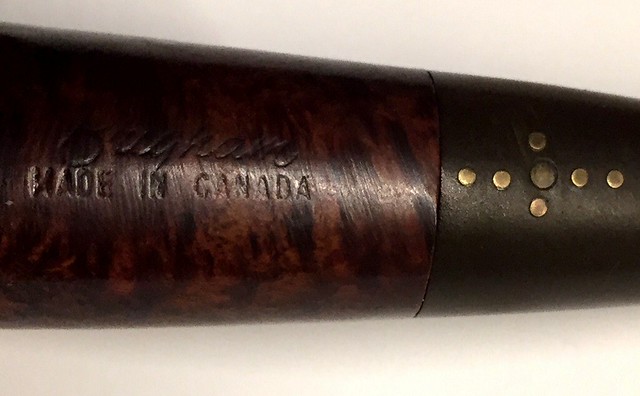
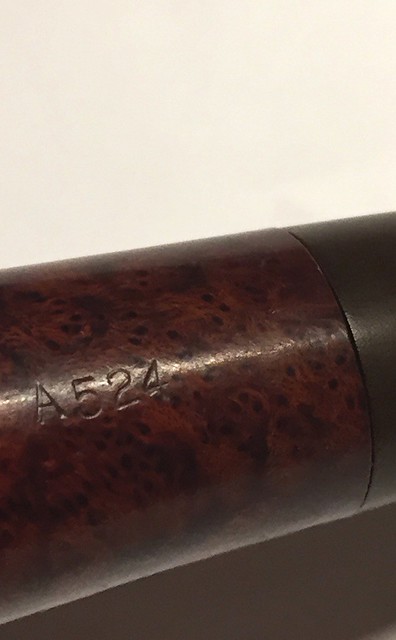
A smooth finish with a vulcanite stem
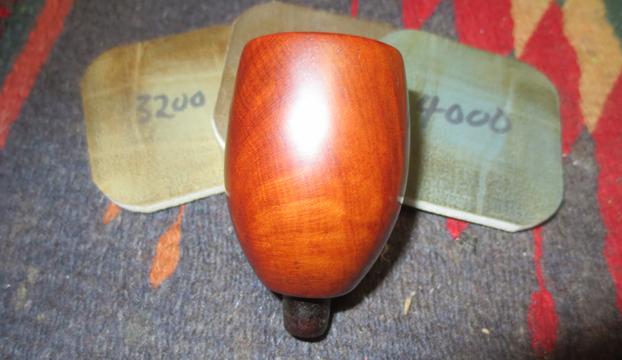
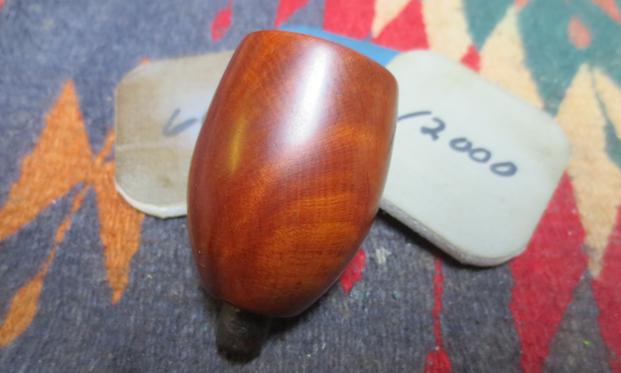
The final pipe that I used the product on was by far the easiest one. It was a smooth Octogonal Heritage square shanked sitter made by Kaywoodie. I had used the product on rusticated, sandblast, carved and mixed finish pipe but this was the first smooth pipe I worked on with it. As usual on all of the other pipes, I rubbed it into the finish on the bowl and shank with my fingers. I wanted to make sure to work it into the finish. I rubbed the bowl and shank down with a cotton pad to see if it pulled out the dirt. It seemed to work very well and brought some more dirt from a pipe that I had previously scrubbed with soap. I rubbed the vulcanite stem down with the product as I had before and found that it added life and warmth to the hard rubber stem and the inset logos on the side.
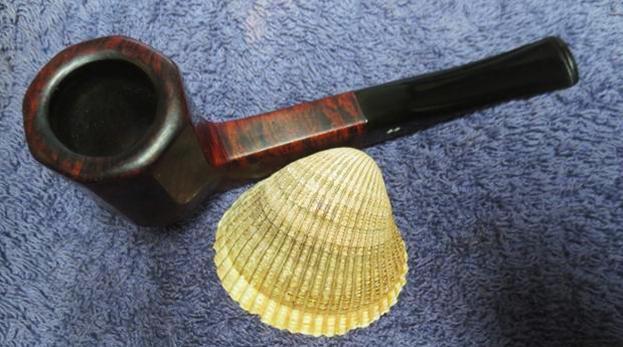
After putting the Restoration Balm through a workout on a variety of finishes and stem materials for the past two months I am pleased with the product. It does bring the dirt to the surface of the briar making it easy to clean out the deep grooves. It also does a great job rejuvenating the briar and the stem materials. I recommend the product with no reservations. There are no other products like it that I am aware of so it has its own niche. It is non-toxic and does not damage the finish on the briar or the stamping or logos on the stems. It has given me something different to use on those heavily rusticated and sandblast bowls. It works well on the surface of plateau briar. I would not say that it has saved me any time as it is an additional step to my restoration process. I think that it is worth the investment I made in it so I will continue to use it. I will keep a jar on hand in my tool box of polishes and waxes as it has found a place there that is unique. Thanks Mark for taking the time to develop these products. They fill a niche that nothing else comes close to.

If you would like to order some of the Before & After Restoration Balm you can do so on his website, http://www.lbepen.com or you can send a message on Facebook to Mark Hoover.

Comoy’s Golden Grain Apple (483) Restoration


By Al Jones

This is the second “Golden Grain” finish Comoy’s to land on my workbench. This one, a shape 483 “Apple” was in very good condition. There was a little build-up on the bowl top and the stem only had mild teeth abrasions.

In searching for information about the Golden Grain finish, I had previously posted the following, from an old eBay ad posted by Tony Soderman (aka Mr. Can).

Exactly when the “GOLDEN GRAIN” was first introduced is not clear, but it became one of COMOY’s most popular lines. By 1977 it was the Company’s third highest grade beneath the “Designer” and “London Pride” and ranked ahead of other favorites including the “Royal Comoy,” “Guildhall,” “Everyman” and so on! The GOLDEN GRAIN was offered as a “new look” with what COMOY called an “antique patina” and later called a “golden hue.” It was advertised as “finished in golden hues to highlight the gorgeous grains in the ‘Classical’ Comoy’s of London tradition.” As you can see, there is some truth to their claim that the GOLDEN GRAIN’s “warm seductive beauty will win your heart.” The GOLDEN GRAIN was dropped from the COMOY line in 1980

The pipe as received. The stem fitment wasn’t flush, which is typically from build-up in the shank. There was some mild cake in the bowl. The three-piece, drilled “C” stem logo denotes the pipe as being made in the pre-Cadogan era (1946 to 1981).

I used a piece of moistended, worn scotchbrite to remove the build-up on the bowl top. The bowl was reamed and filled with sea salt and alcohol, then left to soak for several hours. While it was soaking, I put a dab of grease on the C stem logo and soaked it in a mild Oxy-Clean solution. Following the soak, thank was cleaned with some soft bristle brushes and paper-towels screwed into the shank. Once the shank was clean, the stem fit properly against the shank.

There were two teeth indentions underneath the button. I removed one with heat, but one remained. The stem was mounted and oxidaition removed first with 800 grit wet paper, followed by 1,500 and 2,000 grades. I sharped up the button crease with the 800 paper wrapped around a flat needle file. Micromesh sheets in 8,000 and 12,000 were used to finish the stem. It was then buffed with White Diamond and Meguiars Plastic polish.

The bowl was polished with White Diamond and several coats of carnuba wax.

Below is the finished pipe.

Tidying Up a Large Blatter Select Rustic Ball


I love Blatter & Blatter pipes. This is a unique shape and the restoration is well done. Nice work Charles.

Charles Lemon's avatar

I was recently sent another batch of Blatter estate pipes from a forum friend in Iqaluit, Nunavut. This large Rustic Ball pipe is the first of that lot to be tackled. I decided to start with an easy one this time.

The pipe was in very good estate condition when it arrived on my worktable. It needed a good cleaning, of course, but apart from years of dust, the only real issues were a crust of lava stuck in the deep rustication of the rim, a bit of oxidation to the stem, and a few deep tooth dents. The stem was really tight in the mortise, and once removed wouldn’t seat completely again. A good cleaning should sort that out.

20170917_13582120170917_135826
20170917_13583320170917_135859
20170917_13590320170917_135906
20170917_13591220170917_135918
20170917_135931

The smooth underside of the pipe is stamped “Blatter” over “Montreal” over “Select”, followed by “23-80” and “1C”. This shows that this large Ball pipe is a Select grade pipe…

View original post 661 more words

Sasieni Windsor Bulldog Restoration (Danzey)


By Al Jones

The Windsor is one of Sasieni’s second or sub-brands. I’ve not found any documentaiton of the difference between a second line and a sub-brand but I suspect that pipes stamped “By Sasieni” are second lines. So, I’ll assume the Windsor, which first bears the Sasieni stamp is a sub-brand. These pipes aren’t often as finished as nicely as a first line pipe. This bulldog lacks the bead lines that would be found on a Four Dot in that shape. The pipe is stamped with the shape number 79, which later became the “Danzey” shape when Sasieni began using town names. I’ve found that stems on Sasieni second or sub-brand lines is nearly equal to those used on Four Dot pipes.

The briar had a very rugged finish. I wasn’t sure if it was a sandblast or rustication, perhaps even a mix of the two.  A 1976 Sasieni price list shows the Windsor as a sandblast.

Unfortunately, on delivery, I found that the pipe had a crack in the shank.

The seller offered me a refund and told me to keep the pipe. At first, I was tempted to throw it in a drawer but the rest of it was in such great shape, I decided it was worthy of a nickel band. I never picked up a band kit, so I sent the pipe to Norwood Pipe Repair. Ken said he could use a band that would not obscure any of the nomenclature. Norwood is always does a fast turn around and the pipe was repaired and sent out a day later. Once banded, the stem/tenon fitment was nice and snug.

Once I had the bowl back, I reamed the cake and soaked the bowl with alcohol and sea salt. Norwood had removed the oxidation on the stem and polished it to a nice shine. I always like to put my own finish on an estate stem, so it was finished with 800, 1,500 and 2,000 grade wet paper. Followed by 8,000 and 12,000 micromesh sheets. The stem was then buffed with White Diamond and Meguiars Plastic Polish.

I hand polished the bowl with Halycon wax.

Below is the finished pipe.

?

An Autumn Makeover for a Darvill Squashed Tomato


Charles did a great job restoring and restemming this old Darvil. It turned out really well.

Charles Lemon's avatar

I pulled this little Squashed Tomato stummel from my box and decided it would be the focus of my next restoration. Though it measures a more or less standard 1.5 inches wide, the bowl is only 1.25 inches tall, with a proportionally small 5/8” chamber bore.

The stummel came to me without a stem and in pretty grimy shape. There were thick, greasy stains on both sides of the bowl, and a handful of dents and scrapes speckled about the briar. Though obviously not heavily smoked, there was a bit of lava on the rim.

The shank was fitted with a nickel shank cap which, after a bit of research, appears to be original. The end of the shank had been thinned down to accommodate the cap, but perhaps by too much as the cap was loose and easily removed to reveal a chipped and ragged briar shank end.

20171006_17143620171006_171445
20171006_17144920171006_171454
20171006_17150720171006_171548
20171006_171613

The…

View original post 908 more words

Scorched Briar and Unique Stamping Reveal a Part of Brigham Pipe History


Nice work Charles on a great piece of Brigham history.

Charles Lemon's avatar

A DadsPipes reader contacted me a little while ago to ask about a Brigham pipe he’d picked up at a local antique shop. Initially he had planned to clean up the pipe himself, but after running into possible burnout problems, he decided to send the pipe my way for an opinion.

I was sent these pictures as an introduction to the pipe. As you can see, there were several large scorch marks on the outside of the bowl, and a damaged area inside the chamber that I’d have to sort out. While potentially serious issues, the scorch marks didn’t peak my interests as much as the stampings. Can you spot what made me sit up and take notice in these pics?

brigha524fullburn1
scorch2brigstamp1
brigA524

The pipe is stamped on the left shank “Brigham” over “MADE IN CANADA”, and on the right shank “A524”. The stem is inset with the 7-Dot “starburst” pinning pattern.

View original post 1,651 more words

A Nice Relaxing Refurb – A Churchill’s Black Friar 407 Poker


Blog by Steve Laug

I have cleaned up a few Churchill’s pipes over the years and found them to be well made pipes. Several of the ones I have worked on were English-made pipes but the one on the table now is a French made pipe. I have a few hours to kill before I head to the airport and needing something a bit relaxing to work on. This pipe fit the bill for me. It is stamped on the left side of the shank with the word Churchill’s in old English script and underneath that it is stamped Black Friar over the shape number 407. The number makes me think it is a French made Comoy’s pipe. It is stamped on the underside of the shank at the stem/shank junction FRANCE. The pipe is a rusticated bowl with a contrast finish of dark and medium browns. The stamping on the shank is in excellent condition as is the stamping of the C on the Lucite stem. The finish is in good condition with little wear or tear and only showing the dust of sitting around in disuse. Jeff took the next series of photos before he cleaned the pipe and stem.From previous blogs I have written I remembered that the brand was named for a pipe shop in Norwich, England that was called Churchills of Norwich. They evidently had shop pipes made for them by various makers. I found the following information Pipephil’s Pipes,Logos and Stampings website http://pipephil.eu/logos/en/logo-c4.html. I quote: “Churchill’s Tobacco shop is situated in St Andrew’s Street at the corner of Bridewell Alley in Norwich, England. The shop was next to a church and at the bottom of two hills, and that’s how it became “Churchill’s”. Former manager: John Elvin (retired on May, 31 2008). Current owner (2008): Keith Garrard.”

I then turned again to Churchill’s own website to see if I could find any more information. The site gave me some background information that adds colour to the history of a brand and makes it more personal for me. According to their website the shop is the last remaining specialist tobacconist in Norwich, originally standing at 32 St Andrews Street for over 23 years. http://www.churchillsofnorwich.com/index.php?_a=viewDoc&docId=1. The site also notifies the shop’s clients that Keith Garrard, who had a wealth of knowledge and was an avid pipe and cigar smoker himself, passed away on 23rd March 2012. His wife Coral continues to maintain the business in his honor.The bowl had a thick cake and an overflow of lava onto the top of the rim. The lava had filled in much of the rustication on the rim top. It looked as if the inner edge of the rim was undamaged but I would not know for sure until it was cleaned. The back of the rim had a much thicker coat of lava than the front side. The rustication patter on the bowl – top, bottom and sides is unique and the stain chosen makes it really stand out in contrast. The contrasting browns work really well with the golden swirls of the Lucite stem.The next two photos show the stamping on the left side of shank curling over on to the top of the shank. The third photo shows the stamped C on the left side of the stem.The golden swirled Lucite stem was clean other than having tooth chatter on both the top and underside near the button.Jeff out did himself on the clean up of this pipe. He reamed the bowl with a PipNet reamer and smoothed the walls of the bowl with a Savinelli Fitsall pipe knife. He scrubbed out the mortise and the airway in the shank and the stem with alcohol, cotton swabs and pipe cleaners. When he had finished, the bowl looks almost new on the inside (I actually don’t think it has ever been smoked to the bottom of the bowl as it is raw briar in the bottom third).  He scrubbed the exterior of the bowl, rim and shank with a tooth brush and Murphy’s Oil Soap to  remove the oils and tars on the bowl, rim and shank. He rinsed it under running water. He dried it off with a soft cloth. The lava mess on the rim and deep in the rustication was thoroughly removed without harming the finish underneath it. Once the grime was removed the finish actually looked to be in excellent condition I took photos of the pipe to show its condition before I started my work on it. I took a photo of the rim top to show the great condition it was in after the clean up.The stem looked really good other than the tooth chatter on both sides at the button. The chatter is hard to see in the photos but I was thankful that none of it was too deep.I once again used the Mark Hoover’s Before & After Restoration Balm on the briar. I rubbed it into the rustication on the rim, bowl and shank with my fingers. I wanted it to go deep in the rustication pattern to continue my test of the effectiveness of the product. As I have mentioned before Mark had said that the product can be used on briar or stems – whether vulcanite, acrylic or horn. He said it was designed to pull the dirt off of the briar as well as polish it. I figured this was a totally different type of finish that would once again put those claims to a test. He said that he had added some anti-oxidants to keep the briar from getting damaged from both UV rays and water. Once I had all the grooves and surfaces of the bowl covered I wiped it down with a clean cotton pad and then buffed it with a shoe brush. It seemed to work very well and I took the following photos to show the results. I set the bowl aside and turned my attention to the tooth chatter on the stem. I sanded out the chatter with 220 grit sandpaper until it was gone.It was time to polish out the scratches on the stem left behind by the 220 grit sandpaper with micromesh sanding pads. I wet sanded it with 1500-2400 grit pads and wiped it down after each pad with a damp cloth to wipe off the dust. I dry sanded it with 3200-12000 grit pads and again wiped it down with the damp cloth after each pad. The polishing of the stem removed all of the scratches and the tooth chatter. Each photo shows it progressively getting a shine. I put the stem back on the bowl and buffed it with Blue Diamond on the buffing wheel to polish the stem and lightly polish the briar. I gave the stem multiple coats of carnauba wax buffed it with a clean buffing pad to raise a shine. I gave the bowl multiple coats of Conservator’s Wax and rubbed it into the rusticated finish. I buffed it with a shoe brush and then with a clean buffing pad to raise the shine. I hand buffed the pipe with a microfiber cloth to deepen the shine. The variegated brown stained finish on the bowl and gold swirled Lucite stem combine to present a beautiful pipe. The dimensions of this pipe are Length: 5 1/2 inches, Height: 1 3/4 inches, Bowl diameter: 1 1/4 inches, Chamber diameter: 3/4 inches. The finished pipe is shown in the photos below. I will soon be putting it on the rebornpipes store if you are interested in adding to your collection. It is a beauty and will serve someone very well. Email me at slaug@uniserve.com or send me a message on Facebook. Thanks for looking.

This Old Italian Canadian showed Promise


Blog by Steve Laug

Jeff picked this heavily rusticated pipe up on one of his recent forays into the antique shops and malls of Montana. It is sea rock like rustication on the bowl and shank with a wire rustication on top of that. The finish was very dirty with a lot of dirt and grime in the deeper grooves of the rustication. There was a random stem stuck in the shank when he picked it up – I think it was just to make it more sellable. The stem is a round saddle stem while the shank is oval. The finish was dirty and there were some nicks in it around the shank end. The bowl had a heavy cake in it with some lava overflow filling in the rustication pattern on the rim top. There appeared to be some burn damage on the back left side of the rim top. The pipe had a smooth portion on the underside of the shank for stamping but the only stamping was at the shank/stem junction where it read ITALY. Jeff took photos of the pipe before he started his clean up. The rim top can be seen in the next photo. You can see the thick cake and the lava overflow on the top of the rim. It is hard to know if there is damage to the inner edge of the rim but the outer edge was clean and undamaged. It appeared that there was some burn damage on the back left side of the inner rim edge but we would not know until Jeff cleaned the pipe.Jeff took pictures of both sides of the bowl to show the rocky, craggy appearance of the finish on the bowl. It is unusual and interesting at the same time.The next photos show the shank and Italy stamping on the shank end. The stem is obviously the wrong one. You can see the variation of the round saddle portion of the stem and the oval shank. I am not too worried about the stem as it is going in the bin anyway as I will need to fit a new stem on the shank. Jeff worked his magic in cleaning up this pipe as it was a real mess on the rim and deep grit and grime in the grooves of the finish. He reamed it with a PipNet reamer and smoothed the walls of the bowl with a Savinelli Fitsall pipe knife. He scrubbed out the mortise and the airway in the shank and the stem with alcohol, cotton swabs and pipe cleaners. He scrubbed the exterior of the bowl, rim and shank with a tooth brush and Murphy’s Oil Soap to the oils and tars on the bowl, rim and shank. He rinsed it under running water. He dried it off with a soft cloth. Once the grime was removed the finish actually looked quite good condition. I took photos of the pipe to show its condition before I started my work on it. I did not bother with the old stem as it would be replaced. I went through my can of stems and found one that had the same diameter all the way around as the shank. The fit against the shank end was almost perfect. I would need to make the edges taper a bit more at the shank. The stem was new and still had castings on the sides and the end of the button. The tenon was a perfect fit in the mortise. I put the stem in the shank and took photos of the restemmed pipe. The pipe looks good with the new stem. There is promise in the appearance at this point. I repaired the chip on the left side of the shank end with clear super glue. I needed to rebuild that edge to remove the damaged area and allow the stem to fit snug against the shank. I used a sharp knife to bevel the edges of the mortise to accommodate the hip at the tenon/stem junction.I used a brass bristle wire brush on the rustication to clean off any remnants of the finish and then wiped the bowl down with acetone on cotton pads to remove the dust. I stained the bowl with a dark brown aniline stain and flamed it to set it in the briar. I repeated the process several times until I was happy with the coverage on the bowl. I set the bowl aside to dry overnight before proceeding with polishing the briar.In the morning I buffed the bowl with a shoe brush to raise a shine on the briar. I took the following photos to show what the pipe looked like at this point in the process. The bowl is looking good with a lot of colour variation due to the roughness of the rustication. I laid aside the finished bowl and turned my attention to the stem. I sanded out the casting marks and scratches on the stem with 220 grit sandpaper. I opened up the slot in the button with needle files to make it easier to push a pipe cleaner through. After I had removed the casting marks and the scratches on the stem surface it was time to work on it with micromesh sanding pads. I wet sanded it with 1500-2400 grit pads and wiped it down after each pad with Obsidian Oil to give the next pad more bite when I sanded. I dry sanded it with 3200-12000 grit pads and again wiped it down with the oil after each pad. After the final pad I wiped it down with a final coat of oil and set it aside to dry. Each photo shows it progressively getting a shine. I set aside the stem and picked up the bowl once again. I used the Mark Hoover’s Before & After Restoration Balm on the briar. I rubbed it into the grooves on the bowl sides with my fingers. I wanted it to go deep in the grooves to further test the effectiveness of the product. This would be a good test as it one of the roughest rustications that I have worked on with the product. As I have mentioned in previous blogs Mark had said that the product can be used on briar or stems – whether vulcanite, acrylic or horn. He said it was designed to pull the dirt off of the briar as well as polish it. I figured this deep rustication would certainly put those claims to a test. He said that he had added some anti-oxidants to keep the briar from getting damaged from both UV rays and water. Once I had all the grooves and surfaces of the bowl covered I wiped it down with a clean cotton pad and then buffed it with a shoe brush. It seemed to work very well and I took the following photos to show the results. I put the stem back on the bowl and buffed it with Blue Diamond on the buffing wheel to polish the stem and lightly polish the briar. I gave the stem multiple coats of carnauba wax buffed it with a clean buffing pad to raise a shine. I gave the bowl multiple coats of Conservator’s Wax and rubbed it into the rusticated finish. I buffed it with a shoe brush and then with a clean buffing pad to raise the shine. I hand buffed the pipe with a microfiber cloth to deepen the shine. The variegated finish on the bowl and stem combine to present a beautiful pipe. The pipe really does look good with the new stem. The dimensions of this pipe are Length: 5 1/2 inches, Height: 2 1/8 inches, Bowl diameter: 1 1/2 inches, Chamber diameter: 7/8 inches. The finished pipe is shown in the photos below. I will soon be adding it to the rebornpipes store if you are interested in adding to your collection. It is a beauty and will serve someone very well. Email me at slaug@uniserve.com or send me a message on Facebook. Thanks for looking.