Category Archives: Pipe Refurbishing Essays

Essays and pictorial essays on the art of refurbishing

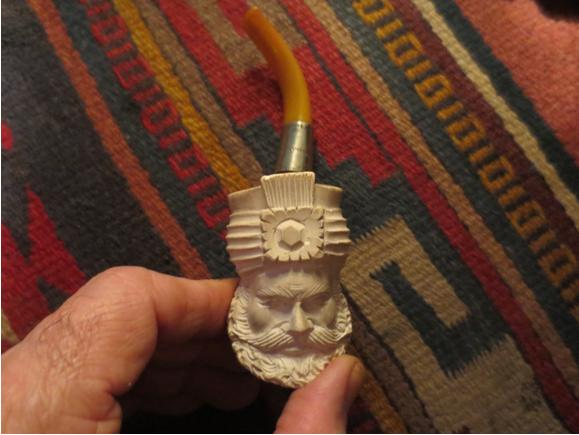
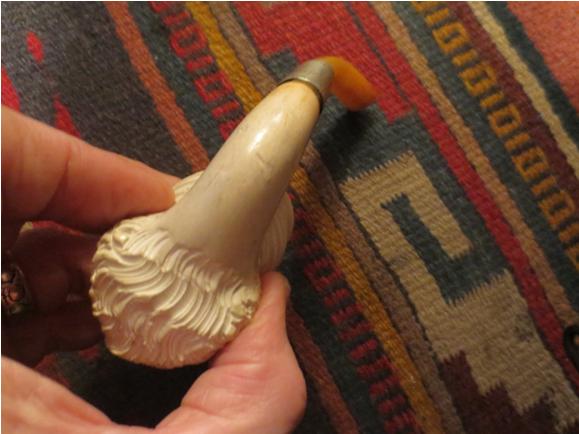
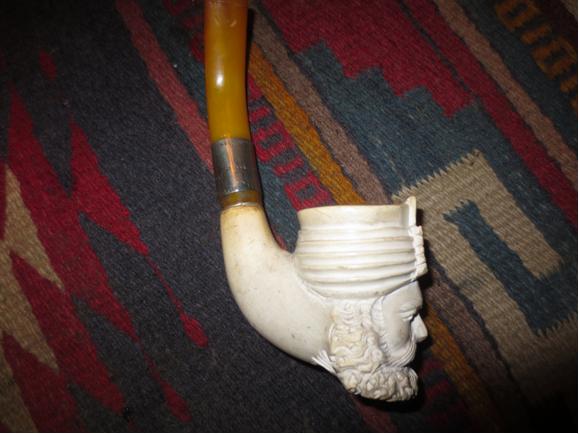
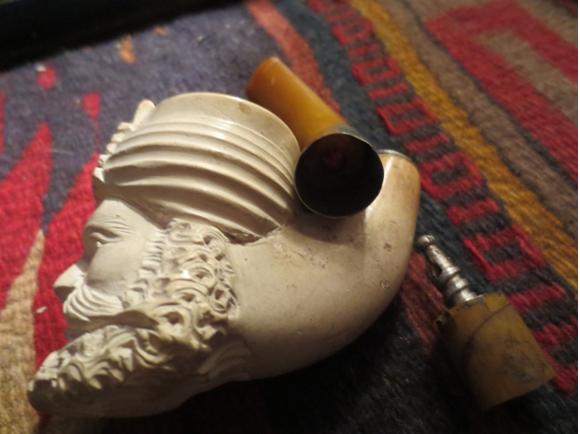
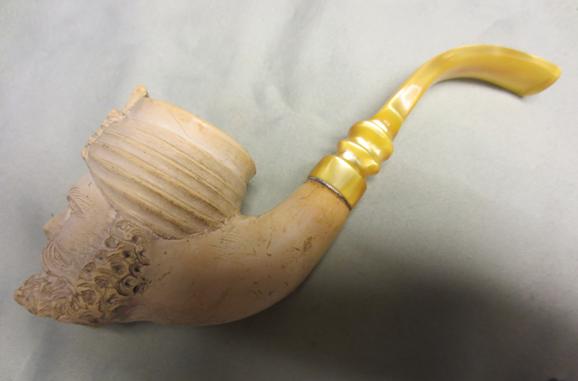
Fixing a Botched Repair on a Bearded Sultan Meerschaum


Blog by Steve Laug

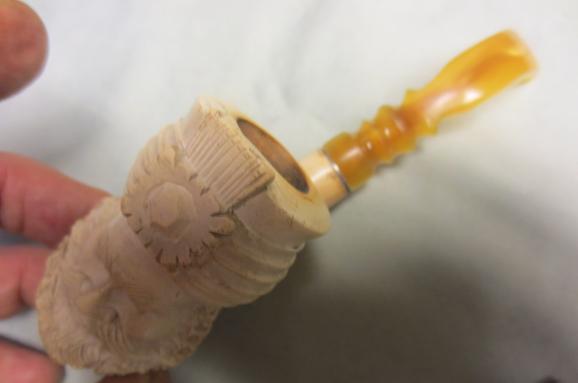
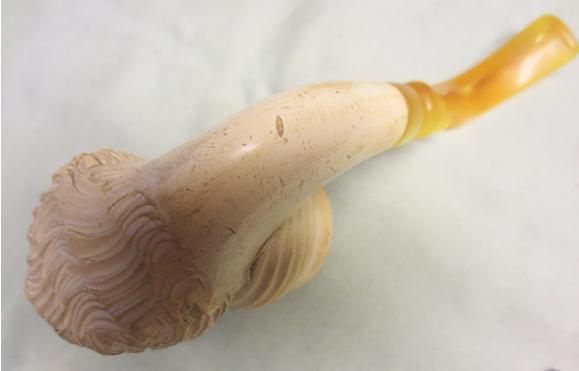
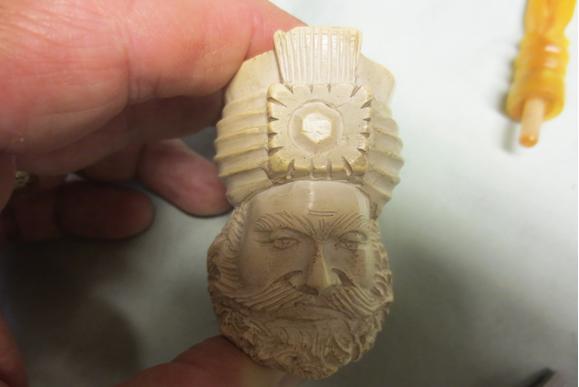
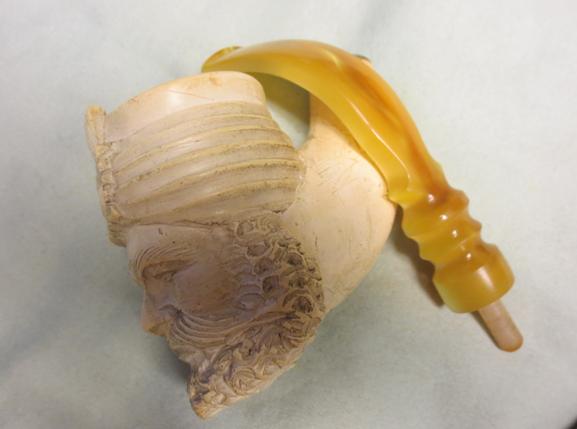
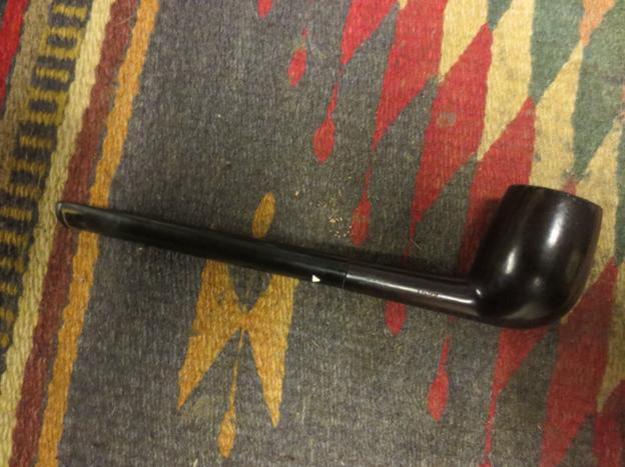
I received and email from a pipe smoker in Chile regarding a meerschaum and a Shamrock pipe that he had that needed repairs and he was wondering if I would be interested in working on them. The Shamrock was straightforward in that all it needed was a cleanup and a new stem. The meerschaum though had some real issues. He wrote me explaining the details of the meerschaum’s problems as follows:

Actually – I now realize – the mouthpiece IS broken at the band. Though the slice seems clean, I realize it is not perfect. The band looks nice though I don’t know if it came that way originally or not. It does cover the slice of the stem. The whole mouthpiece is amber; nothing holds it together except the band. Not glued nor cemented.

The misalignment isn’t only due to the slice but even if I make an effort at aligning the pieces once screwed in, it just won’t be straight.

The pipe needs a new mouthpiece, apart from cleaning. I don’t know if a new beeswax dip is a good idea…It seems dry as marble…no glow… There is a small chip on the rim of the bowl, but the rest seems to be OK.

It’s not your everyday meerschaum but it doesn’t seem unsmokable. I did smoke it once years ago and as I said, it leaks, leaves a mess. I realize why now, but I don’t think it’s only due to the broken stem but also at the screw point.

Can you help me? You tell me. He included the next photos.Sultan1 I wrote him back and said I believed I could help.
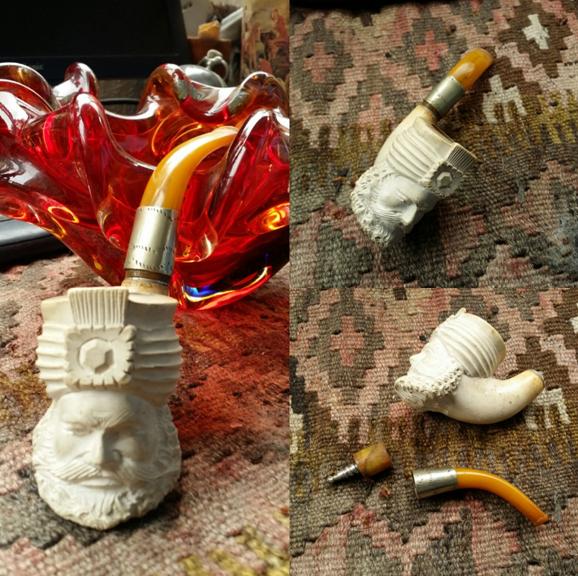
He sent the package to me by FEDEX and I picked it up this morning. When I opened the package and looked over the meerschaum pipe that was sent repair. I made a list of the issues that I was looking at with this pipe. It was actually far worse and far better than I thought when we corresponded.
1. The stem indeed was broken about one inch up from the shank. It almost looked like it was sliced rather than broken.

2. The broken piece with the metal stinger apparatus obviously had broken into further pieces when the tenon insert was put into it. There were several smaller chips that had come off the broken piece and had been glued on. The smaller cracks still showed.

3. The stem is not amber at all, but appears to be Bakelite or some kind of acrylic material. That explains the clean break on the piece and the rest of the stem.

4. The stem that I was looking at was not the original stem. It is actually an oval stem while the shank of the meer is round. Someone fiddled with the stem to make a poor fit.

5. The “silver band” serves two purposes on this stem – first it is cosmetic to cover the broken stem and secondly it hides the fact that the stem is not round.

6. The shank had been cut off – probably had cracks in it as there are still several that have been repaired showing. Looking at the end of the shank with a lens shows rough meerschaum.

7. Sometime during the lifetime of the pipe someone had threaded a metal mortise into the shank of the pipe. It is like the ones that can be found in Kaywoodie pipes or Willard pipes – those that have a threaded tenon and a metal shank insert. In turning it into the shank the meerschaum had split on one side and slivered on the other. This had been repaired when the insert was glued in place.

8. The threaded tenon apparatus matches the insert in the mortise but is misaligned. It also has been epoxied in place so it is not movable. It is obviously not the correct tenon for this kind of pipe. I am pretty certain that both the mortise insert and tenon are incorrect and were later additions on this pipe. The original would have had either a threaded tenon or I think, more likely in this pipe due to age, a nylon insert and a push tenon. Both were replaced when the original stem was lost.

9. The carving on the face was actually quite nice but the sides and smooth portions were not nearly as well done. The back edge of the turban and beard still had carving marks that are usually removed by the better carvers.

10. The bowl had a chip out of the front edge of the rim as noted and had scratches and rim darkening.

11. The meerschaum itself was actually very dirty and dry. There was a fine metallic dust on the grooves of the turban and the beard. It was silver coloured and gave the meerschaum a grey look.

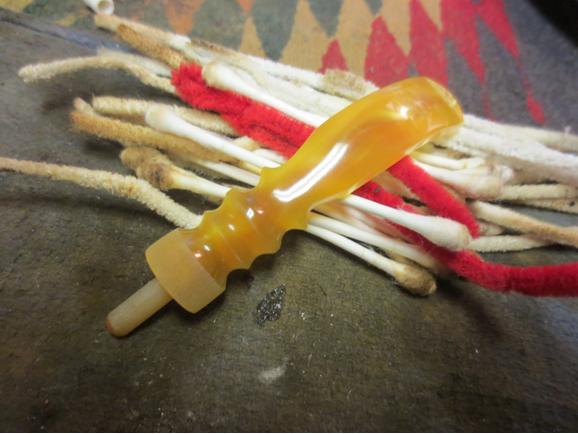
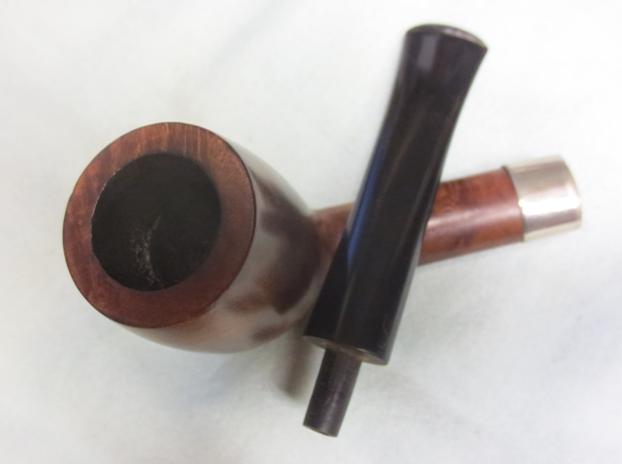
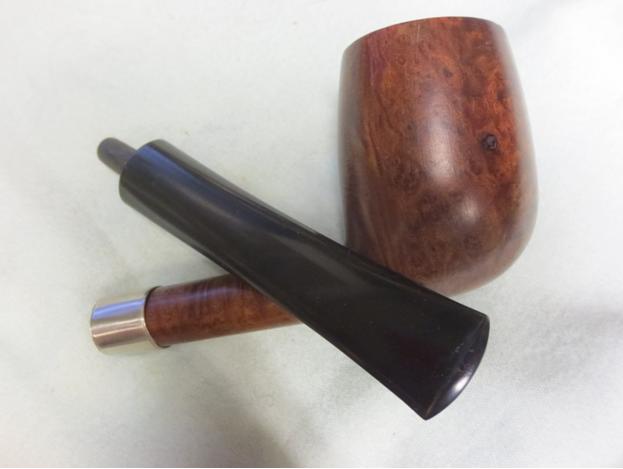
With that long list of issues with the pipe I wrote to the shipper with my suggestion. I concurred with his assessment that it needed to be restemmed. It would be an interesting challenge as I could not remove the metal shank insert without damage to the meerschaum so I would have to figure out some kind of compromise that would work with that mortise. I suggested a stem that I had that came with a meerschaum pipe similar to this one. It is a yellow unique stem with a push tenon. I tried it with the metal mortise insert to see if it would work and it fits really well. The new stem was about an inch longer than the one that arrived with the pipe and looked really good on the pipe.

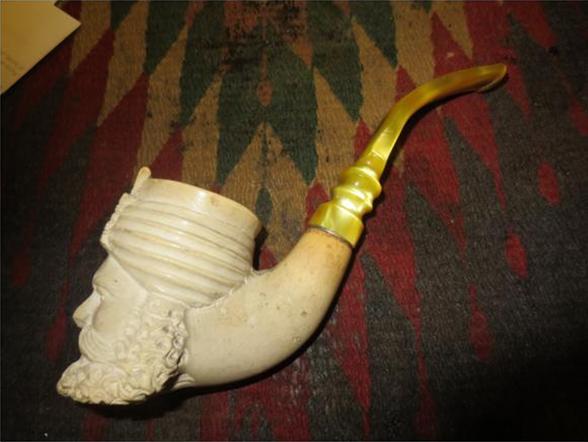
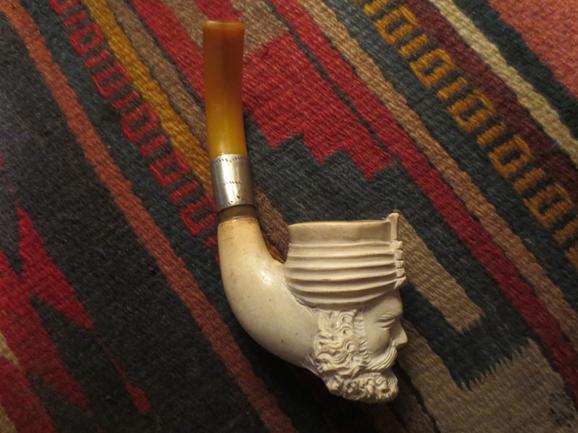
I took some photos of the pipe with the stem attached so that you could see the state of the fit of the stem when it arrived. You can see that the band is also quite poorly done – all the edges are not even or smooth.Sultan2
Sultan3

Sultan4

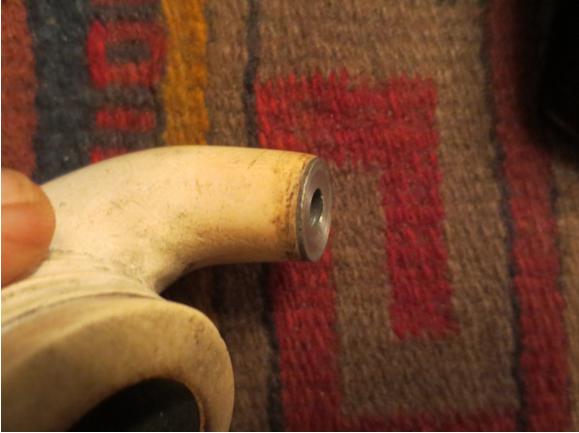
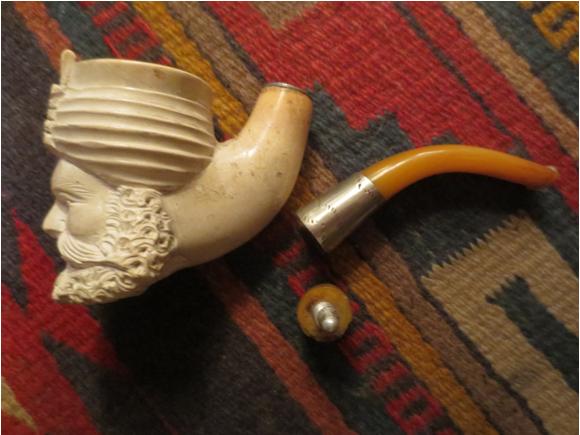
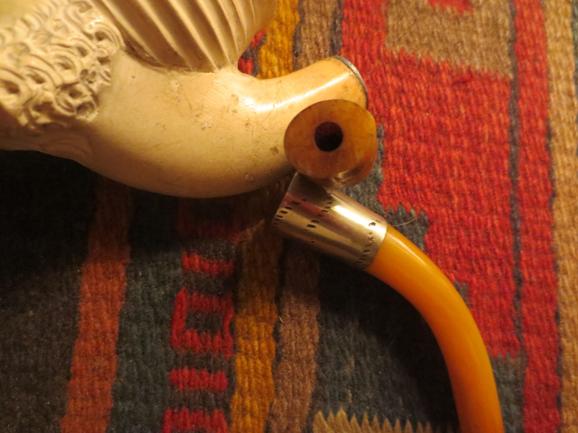
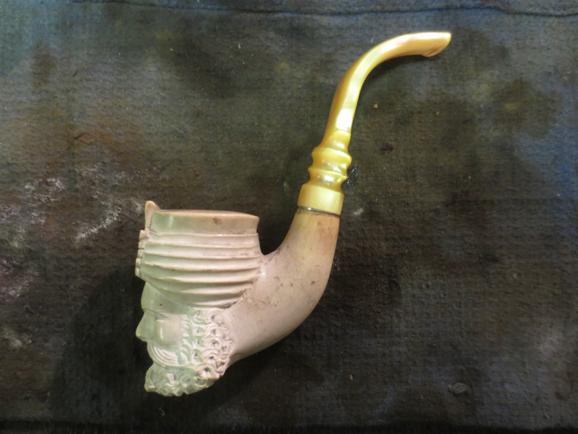
Sultan5 I also removed the stem and took the pieces apart. The stem was indeed broken under the band. It definitely was not amber. You can see the sliced piece and the remainder of the stem as well as the metal mortise edges in the shank in the photo below.Sultan6 I took a photo of the end of the broken piece to show that it was oval while the shank was round. The second photo below shows the cracks and chips that had been repaired on the piece underneath the metal band. Obviously this is not the original stem. The third photo shows the end of the shank – it is round – and the metal threaded mortise insert.Sultan7
Sultan8

Sultan9 I took the next two photos to show the damage to the shank and the poorly done job of adding the threaded mortise insert. The small crack is about a half inch long and can be seen running from the metal insert edge about mid-shank edge on the left side. There are also chips of meerschaum that had been reglued.Sultan10
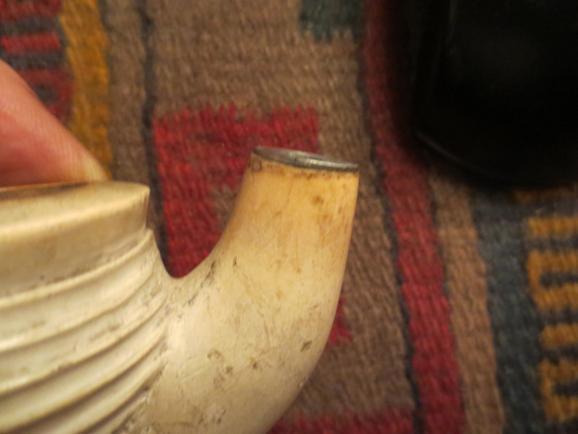
Sultan11 I went through my can of stems and found a new stem whose length and shape was right for this pipe. The diameter of the stem at the shank was slightly larger than the shank on the right side and top. It would also need to be bent slightly more but I liked the look of the pipe with the new stem.Sultan12
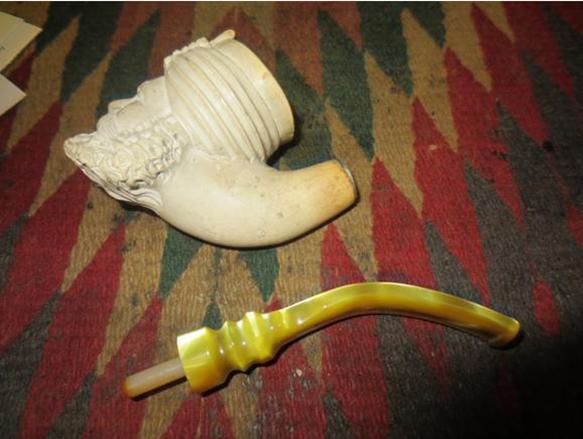
Sultan13 I used a topping board to flatten the metal disk on the top of the mortise insert as it had curled at the edges and would not allow the new stem to seat against it properly. I sanded the sides of the stem on the saddle with 220 grit sandpaper to align it with the diameter of the shank of the pipe. I removed the push tenon from the stem and cleaned out the airway with cotton swabs, pipe cleaners and alcohol to remove all of the tars and staining on the inside. It looked like a dark brown striped up the middle of the stem when I started and when I was finished it looked very clean.Sultan14
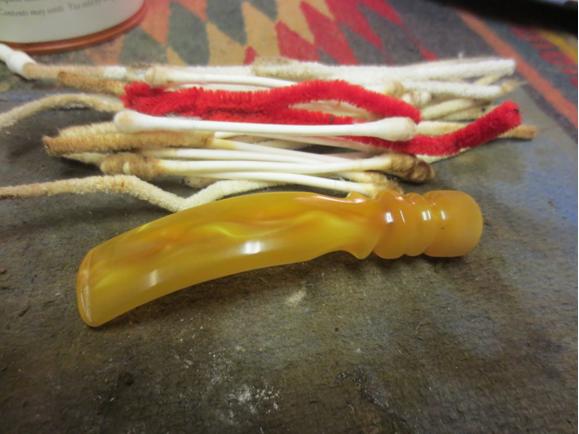
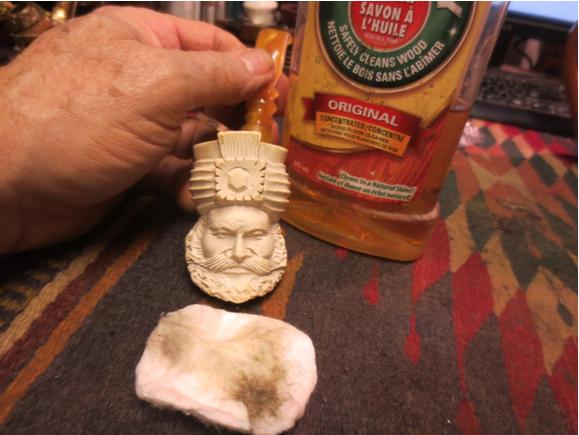
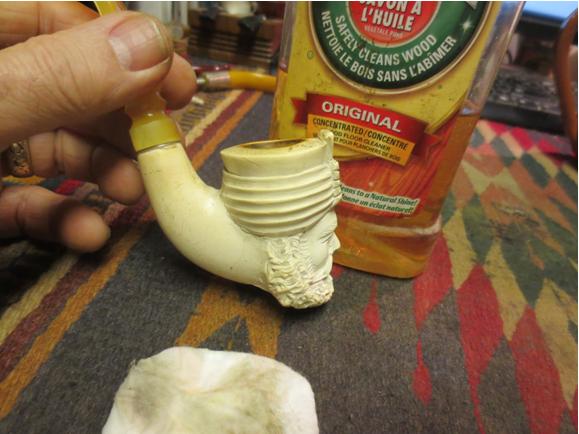
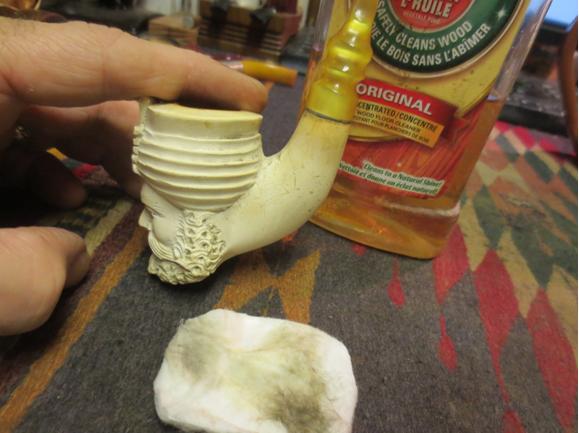
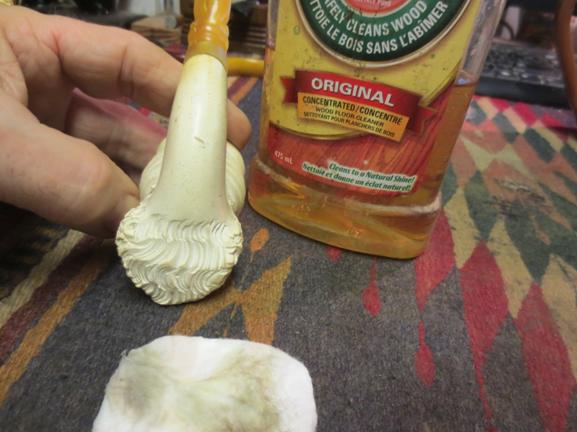
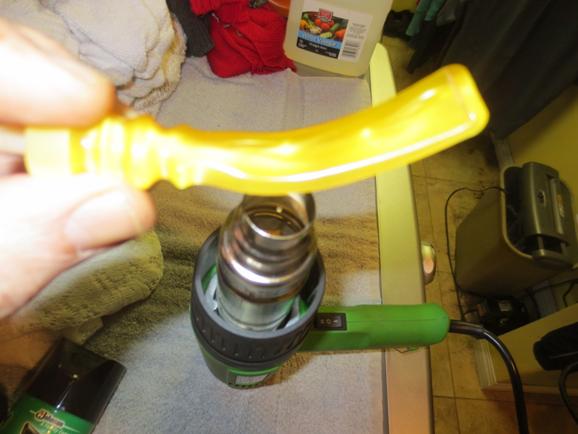
Sultan15 I heated the stem with a heat gun until it was flexible and then bent it to match the curve of the shank and allowed the pipe to sit horizontally when in the mouth.Sultan16 I set the bend with cool water and then pushed it into the mortise insert and took the following photo to show the new look of the pipe.Sultan17 I scrubbed the meerschaum with a soft tooth brush and Murphy’s Oil Soap. I rinsed it carefully with cool water to remove the soap and scum. I dried it off with cotton pads and was able to remove more of the grime in the grooves.Sultan18
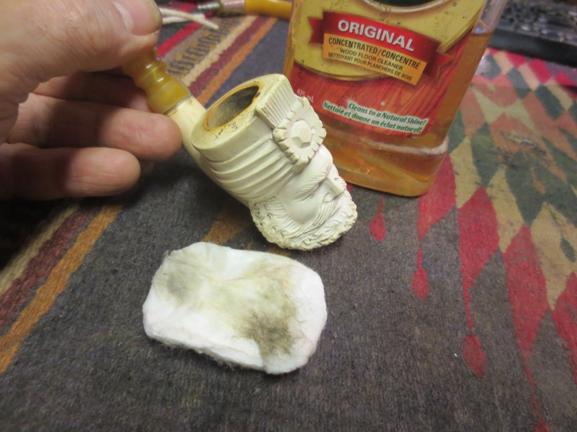
Sultan19

Sultan20

Sultan21

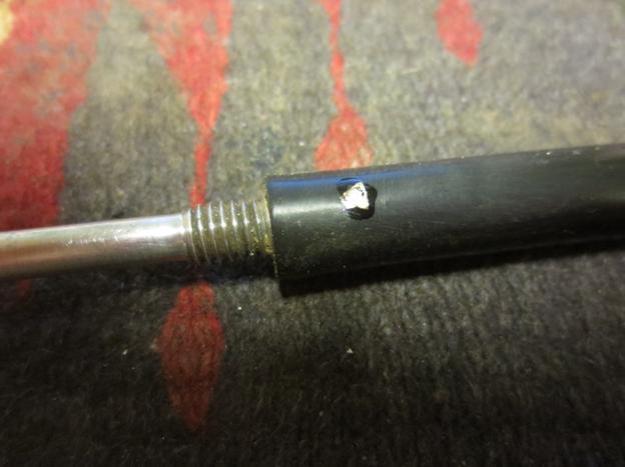
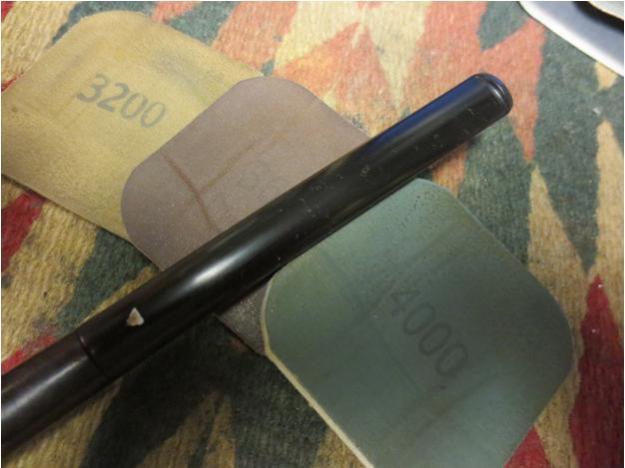
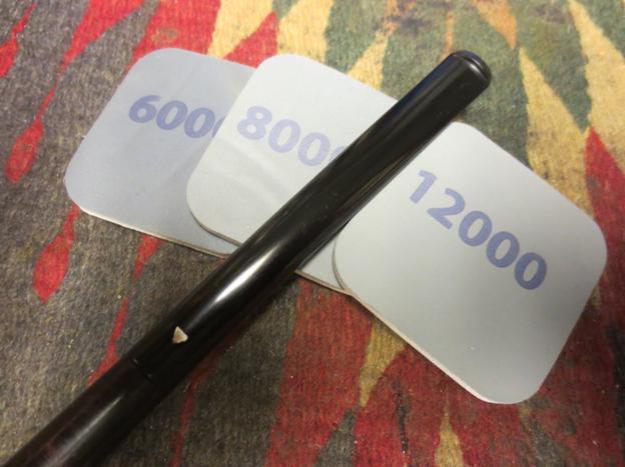
Sultan22 I waxed the meer with white beeswax and hand buffed it with a shoe brush. It has begun to take on the glow that comes to a well waxed meerschaum. I took the full facial photo to show the clean look of the pipe.Sultan23 With the bowl cleaned I turned my attention to the new stem. I had sanded the saddle area with 220 grit sandpaper and needed to polish that portion. I used a medium and a fine grit sanding sponge to remove the scratches. I wet sanded the stem with 1500-2400 grit micromesh and then dry sanded it with 3200-12000 grit pads.Sultan24
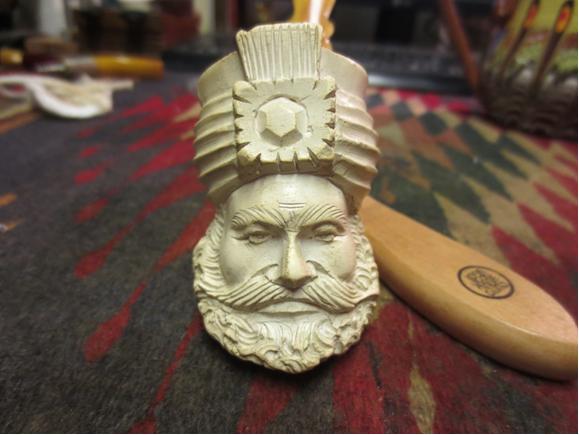
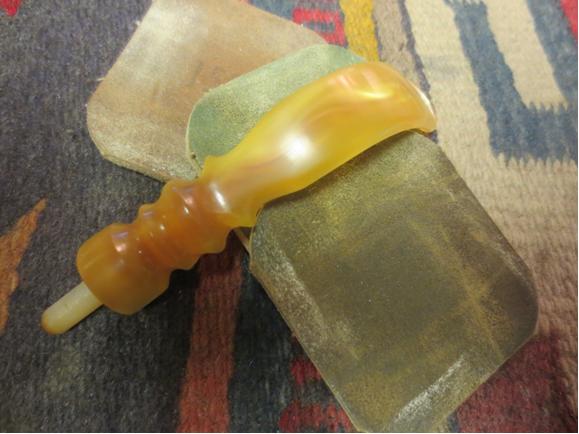
Sultan25

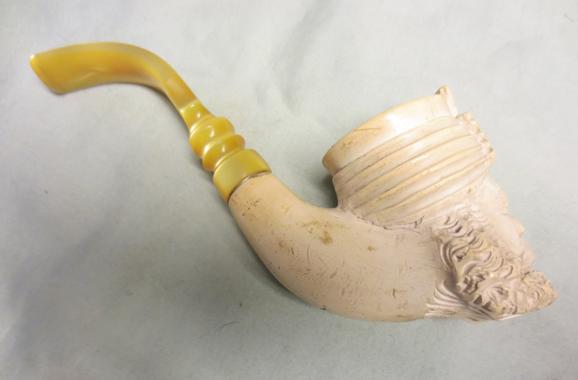
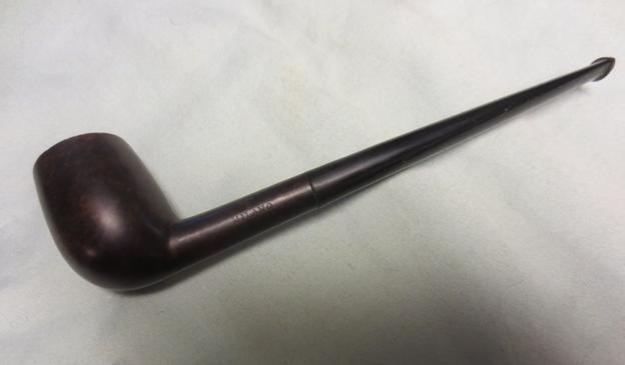
Sultan26 I buffed the stem with Blue Diamond and hand buffed the pipe with some beeswax and a shoe brush. I took the photos below of the finished pipe. Considering the many issues of this pipe when I started working on it, the finished pipe looks really good. I left many of the gouges and scratches in the meerschaum as they add character and to remove them would change the shape of the carving. I like the new stem – the bend is perfect for it to hang effortlessly in the mouth when smoking. The draw is wide open and should smoke really well. The push tenon works well with the metal mortise and sits snug against the shank. Soon it will go back to Chile and it owner. He will have the pleasure of finally smoking this old pipe and enjoying it.Sultan27
Sultan28

Sultan29

Sultan30

Sultan31

Sultan32

Sultan33

Restemming and restoring an oval shank billiard with issues


Blog by Steve Laug

I was gifted an oval shank billiard with a broken tenon and no stem by a fellow pipe refurbisher. He knows I like a challenge so he thought that maybe this would be a fun one for me to fiddle with. I looked at it when I unpacked it and spent more time looking at it over the weekend. When I first picked it up I put it in the bin of pipe to be refurbished and pretty much figured it would be one of those that I picked up when I had nothing else to work on. I have a few of those sitting in the bottom of the box. On Sunday I was going through the box trying to decide which pipe I would work on next and picked it up. There was something about it that drew me to work on it next. I can’t tell you what that was; I have no words to describe it. I know though that those of you who refurbish pipes know the feeling and the call of certain pipes. This was one of those. So it came to my work table.

Now that I had made a decision to work on it I took time to look it over and assess it. That is what I always do when I work on a pipe. I look it over and list out what needs to be addressed if I am to bring this pipe back to life. I like to enter into the work with a clear idea of what needs to be done. Doing this keeps me from finding those issues that surprise you in the process – at least most of the time it does. There will always be exceptions to the rule. For this pipe it was pretty straight forward.
Here is a list of the issues:

1. The finish was very rough and the darkening of the briar around the middle of the bowl was worrisome. It was hard to tell if it was potential burnout starting to happen – thus darkening the briar or if it was dirt and grime. I was pretty sure it was just soiled and stained but could not tell for sure until I had reamed the bowl.

2. There were scratches and dents all over the surface of the bowl.

3. There was one large fill on the right side of the bowl, mid-bowl that would need some work. I would either need to pick it out and refill it or repair it.

4. There was a burn mark on the underside of the shank mid-shank.

5. There appeared to be a small crack on the bottom of the shank at the place the stem and shank meet. It extends inward about a quarter inch. It was hard to see as it was hidden in the dings on the bottom of the shank from when the pipe had been dropped and the stem broken.

6. The bowl had a thick cake in it to the point that the tip of my little finger was about all that would fit in the bowl.

7. The rim had nicks and damage to the surface as well as a lava overflow from the cake in the bowl.

8. The stamping was virtually nonexistent. All that remained was a faint stamp on the left top side of the shank near the end – it read Made in London. It would definitely disappear if I banded the pipe to deal with the crack.

9. The airway in the shank and mortise was dirty and clogged. I could push air through it but barely when I blew through the end of the shank.

10. There was a broken tenon stuck in the shank. Generally these are pretty straight forward so I was not too worried about removing it.
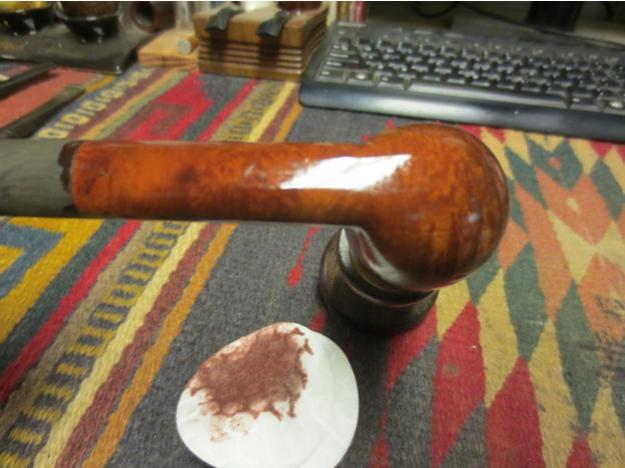
11. There was no stem to work from as a model and the oval shank would make matching it a challenge.

Here is what the pipe looked like when I brought it to the work table.Bill1

Bill2

Bill3

Bill4

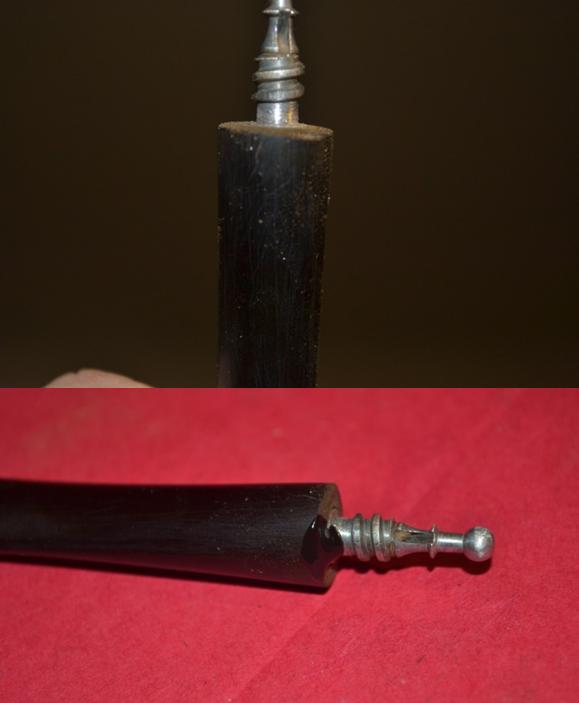
Bill5 I started the cleanup by pulling the broken tenon. I used the normal drywall screw and had the tools handy. In this case I threaded the screw in gently and was able to pull the tenon out by hand very easily.Bill6

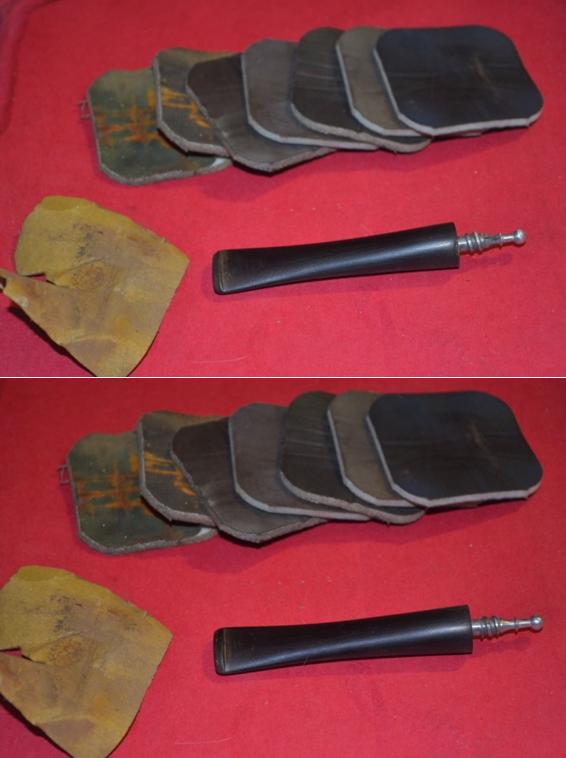
Bill7 I turned to my can of stems for a potential stem. I actually had one that was a decent fit. The tenon was perfect and the fit against the shank end was ideal. The diameter of the stem on the bottom of the oval was too big and would need to be sanded to a correct fit. It happened to be the only oval stem I had at the moment and it was a twin bore bite proof stem. I was careful in fitting the stem because of the small crack in the shank.Bill8

Bill9

Bill10

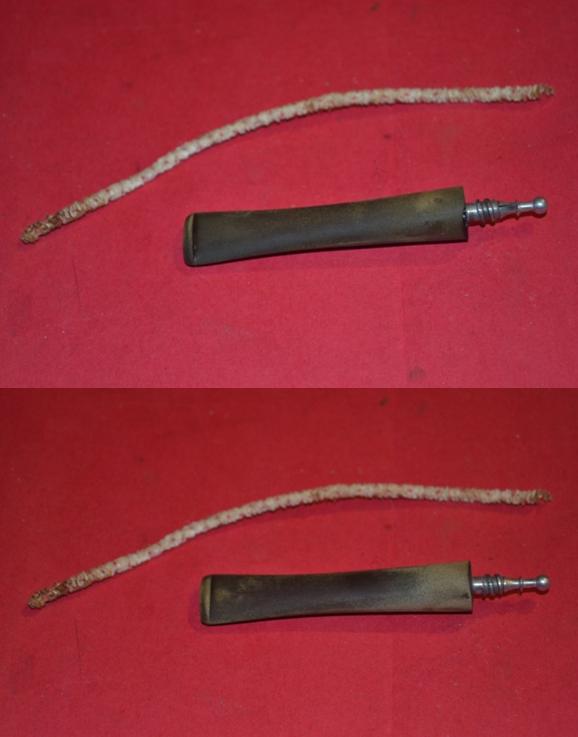
Bill11 I used the Dremel and sanding drum to take off the excess rubber on the bottom of the stem.Bill12 This may be a funny thing to say but as I examined the stem after I fit it to the shank I noticed it had a small hole near the button. When I turned it over to check it out then I noticed that I was dealing with a bite proof stem – a stem with two airholes coming out of the button from the single airway in the stem. Picture the letter Y and you have a good picture of the stem.Bill13 I inserted a greased pipe cleaner in the airway on left airhole and then repaired the hole in the underside of the stem. I used black super glue to fill it and built it up to give a good base. When it dried I sanded it smooth with 220 grit sandpaper to blend it into the surface of the stem.Bill14

Bill15 Reaming the bowl took some effort and several different reamers. I used the PipNet reamer to start and then worked on the bowl with a KLEENREEM reamer. I finished by using a pen knife to clean out the last remnant of carbon in the bowl. I cleaned out the airway in the shank and the stem with pipe cleaners, cotton swabs and alcohol.Bill16

Bill17 I topped the bowl on my sanding board and lightly sanded the cracked area and damage on the bottom of the shank end.Bill18

Bill19 I sanded the stem with 220 grit sandpaper and then with a medium sanding sponge to smooth out the scratches. I wiped the bowl down with acetone on cotton pads to remove the grime and the remaining finish. The new stem fit really well and I only wished that the shank did not have the small crack that mad banding a necessity.Bill20

Bill21

Bill22

Bill23 I cleaned the area around the fill on the right side and repaired it with super glue. I sanded it smooth and then sanded the bowl with a medium grit sanding sponge.Bill24 I heated the briar with a heat gun and then applied a coat of cherry stain to it. The stain took well and sat deeply in the grain of the bowl.Bill25

Bill26

Bill27 With the stain in place the crack on the underside of the shank was very visible. It was mid shank and extended about ¼ inch. At this point I had to decide how to address this crack. I could do a shank insert and do an internal repair or I could band it. In looking over the shank I realized that the tenon was already quite thin and I would be hard pressed to make it smaller to fit inside of a shank insert. I would need to band the pipe.Bill28 I had a round band that would fit once I flattened it. I opened the crack with a dental pick and filled it with glue to repair the crack and then pressed the band into place on the shank.Bill30

Bill31

Bill32 I lightly sanded the tenon as the band made the fit in the shank too tight. I put the stem in place and took the next photo to get an idea of the new look.Bill33 I set the bowl aside and worked on the stem. I sanded it with micromesh sanding pads. I did my usual routine with the micromesh pads – wet sanding with the 1500-2400 grit and dry sanding with the rest of the pads up to 12000 grit. I used Obsidian Oil as usual.Bill34

Bill35

Bill36 I buffed the nickel band with a jeweller’s cloth and buffed the pipe on the wheel with Blue Diamond polish. I gave the bowl and stem multiple coats of carnauba wax. I buffed it on a clean flannel buffing wheel and then by hand with a microfibre cloth to raise the shine. The finished pipe is shown below. I think that taking the time to recondition and restore this pipe paid off with a beautiful oval shank billiard. Thanks for looking.Bill37

Bill38

Bill39

Bill40

Bill41

Bill42

Bill43

Kaywoodie HandMade


Love this chubby apple shape. This is a great clean up. Good work.

pipesrevival's avatarPipesRevival

Screenshot_2016-01-14-21-46-36~2
I’m a sucker for a fat bottom and that’s exactly what we have here in the Kaywoodie Hand-Made Over-size line of pipes. They’re getting harder to find, so when one pops up I have to jump on it. My search for a chunky Kaywoodie lead me to this line of pipes and about a year ago I had the pleasure of refurbishing two, there thick walls and chunky shape not only make it comfortable in the hand but it produces a cool smoke.
As Received

20160113_082336~2PhotoGrid_1452707950514PhotoGrid_1452708010235

The nomenclature was lightly stamped or worn.

PhotoGrid_1452707970576

Over all she was in nice condition and seemed well cared for. Heavy stem oxidation, chatter and a little rim tar&char.

PhotoGrid_1452708133134

I started by reaming the chamber with my Pipnet reamer, first with the smallest attachment and working up to the third  taking it back to briar, the chamber was free of any imperfections. I smoothed out the…

View original post 652 more words

Another Brewster That Looks Better Now Than When It Was Made


Guest Blog by Robert M. Boughton
Member, International Society of Codgers
Member, North American Society of Pipe Collectors
http://www.naspc.org
http://www.roadrunnerpipesnm.biz (Coming Soon)
http://about.me/boughtonrobert
https://roadrunnerpipes.wordpress.com/2016/01/13/about-the-author/
Photos © the Author

Everything has beauty, but not everyone sees it.
― Kong Qui (Confucius), 551-479 BC, Chinese philosopher, teacher and political figure

INTRODUCTION
This Brewster Billiard arrived in one of the many pipe lots I bought online the year before last, at which time I apparently dismissed it as a common Dr. Grabow that could be put off until I had nothing better to clean or restore. Nevertheless, despite the oppressive grime and weariness that lay upon the wretched pipe like a veil of black magic – or maybe because of this gloomy aspect, as a good friend once remarked with acerbic nonchalance that I seem to be attracted to wounded things (his exact words, all the more angering because I knew he was right) – my eyes returned to it many times since it came in the mail. On every occasion except the last, a week or so ago, I made the mental Dr. G. connection and passed it by.

I’m not saying all Dr. G. pipes are worthless; I just seem to be happier when they’re not cluttering up my own collection. But the two I do own are excellent and exceptional, not counting three unusual beauties that were given to me by my friend and mentor, Chuck Richards and which I expect to sell.Brew1

Brew2

Brew3

Brew4

Brew5

Brew6 There is a good reason for all of this talk about Dr. G. pipes, which might seem to some as nothing more than pointless rambling. As I already noted, all but the last time I considered this pipe, I was so certain it was a Dr. G. that I didn’t even bother with more than a glance. Then, not more than 10 days ago, for some reason I will never understand, I picked it up and squinted at the left side of the shank to check the brand. The pipe was so filthy and sticky (remember that last word) that it might have fallen out of a pig farmer’s bib overalls and smack into the trough. It was so bad, at any rate, that I had to take it into the living room where I keep my jeweler’s magnifier headset to begin to decipher the name, which I could see began with a B. Even then some hard rubbing with a thumb was necessary to break on through to the other side.

When I at last made out the word Brewster, all that came to mind was a great old movie, “Brewster’s Millions,” from 1945. Go figure! And so, of course, I took a seat on the couch and consulted my laptop, clicking the speed dial to pipephil.eu. There, sure enough, was Brewster. Made in Italy. Unknown maker. What kind of hogwash was this? I Googled “brewster tobacco pipes” and found only a few identical references. Well, I said to myself, I’m not about to let any lack of preliminary intel stop me from making this wounded or perhaps birth defected little thing better.

Only when I was gearing up for the restoration, and happened to visit my local tobacconist, did I chance to notice a new estate pipe put out by Chuck. You guessed it: a Brewster, made in Italy. What were the odds, I wondered, laughing so loudly that the young lady behind the counter, Candice, looked at me in surprise. I explained myself.

But the real shock came a few days later, when I was nearly done with the restoration and started wondering (worrying is more like it) how I was going to write a blog about a pipe with a clear name on it of which several experts in the pipe community had heard but still had no clue who made it. Being a somewhat persistent little bugger, however, I returned to Google, this time expanding my search to “brewster tobacco smoking pipes.” I will never cease to be amazed how sometimes the computer knows exactly where I’m going with a search and even comes up with the right suggestion, and others it’s a swing and a miss. This time it was out of the ballpark.

The very first link, at the top of the page, was to – where else? BREWSTER PIPES/ REBORN PIPES, https://rebornpipes.com/tag/brewster-pipes/. To say I was beside myself is an idiom that doesn’t begin to describe my sense of amazement. As I wrote to Steve in an email, the Brewster triangle was complete. And there, in the most vindicating black and white letters I have ever read, were the words, “The thread pattern and the look of the metal fitment looked exactly like a Dr. Grabow set up.”

Anyway, the bizarre connection between Brewster and Dr. G. is so thoroughly Italian (read “Machiavellian”) that I haven’t quite processed all of it yet. But it’s all there in Steve’s blog, blow by brutal blow, and as far as I can tell, it’s a Reborn Pipes exclusive. I’m sure those who are interested in the grizzly details will follow the link above. I am not about to try to paraphrase Steve’s incredibly detailed research. All I can say is that congratulations on an investigative job worthy of Woodward and Bernstein are in order. For once I will exercise the better part of valor in not going into details that already took up pages of Steve’s blog.

I will comment that Steve’s history of the Brewster includes one hilarious section on a blunder involving a large shipment of pipes to Mastercraft which were stained but not cured with a drying agent. Hence they remained sticky to the touch for years before they were eventually “fixed.”

RESTORATION
Brew7

Brew8

Brew9

Brew10

Brew11 The first order of business, if only so that I could handle the clinging pieces of wood and Vulcanite, was to clean the outside. I did this with a couple of white cotton gun cleaner cloths and purified water, and while I was at it applied 1800 and 2400 micromesh. Wetting the micromesh pads, I was able to remove all of the char on the rim. The stummel had so many scratches and dings that I doubted the micromesh would be enough, but the immediate difference was striking.Brew12

Brew13

Brew14 Next I chose a fixed, 21mm reamer, 320-grit and 500-grit paper for the chamber, and seeing I was correct about the scratches on the stummel, I tried super fine steel wool, the same sandpaper and steel wool again to work away more of the blemishes. This was an ongoing process.Brew15

Brew16

Brew17

Brew18

Brew19

Brew20

Brew21 An OxiClean bath, for the first time in my experience, was enough to work out all of the mess inside the bit air hole, which, judging from the used, sudsy, murky water, had been somewhat bad.Brew22 I used 320 paper followed by the full gamut of micromesh on the bit, and thought I was done.Brew23 Now, I didn’t actually notice the problem at this stage, but for the sake of uniformity I’ll add it here. In fact, only after I had completed the remainder of the restoration did I notice the turn of the bit was off. Examining the tenon end of the bit, which should have been flat, I saw it had a chip that I hoped – notice I don’t say thought – I could remedy with a little sanding. Luckily I stopped that madness before it was too late. Yes, I’ve utterly destroyed a few bits in my short experience with the treacherous objects, and I’ve learned my lesson! Turning to Black Super Glue, I dabbed a little over the weak spot and let it sit overnight.Brew24 Staining the stummel with Lincoln medium brown boot stain (which is really pretty dark), I flamed it, set it aside to cool, and buffed lightly with 4000 and 6000 micromesh.Brew25

Brew26

Brew27

Brew28 The next day, with the stummel already buffed on the wheels, I had to re-do the entire bit to remove scratches left from my aborted attempt to sand down the lip, and to even out the Black Super Glue. I also heated the tenon, threw a cotton rag over it and clamped it with my grip pliers and turned. It was close, but no cigar, so I repeated the process with less force, and the bit was flush with the shank.

Well, now I looked the two pieces over and was happy with the bit, but there were still fine lines on the wood that I didn’t care for at all. And so, not liking the idea, I used 1800 micromesh to smooth it out, then had to re-buff with white Tripoli, White Diamond and carnauba, and the clean wheel between each.  That did the trick.Brew29

Brew30

Brew31

Brew32

Brew33

Brew34 CONCLUSION
The most difficult part of this task, surprisingly, was the bit, from which, after bringing it to a high shine the first time, I didn’t expect any further problems. It’s taken some time, but I’m finally getting the hang of bits. The easy part of the restore was making the sweet little billiard look better than I expect it ever did out of the factory in Italy, with everyone involved in its creation doing his best to hide the fact!

The When and Zen of Pipe Restoration


Conversation Charles Lemon lives in Eastern Canada and Steve Laug lives in Western Canada. Connecting them across the distance is a common passion for restoring old pipes. Both men find beauty and pleasure in the work of restoration, and share their work on their respective blogs. Charles started and maintains DadsPipes – exploring the art of tobacco pipe restoration and Steve started and maintains rebornpipes – reclaiming old and worn estate pipes. The two restorers sat down recently over Skype for a discussion about their shared hobby. Here is an edited version of that conversation. We invite you into the conversation and to comment at the close of the blog. Let’s carry the dialogue beyond the borders of Canada!

“Other people can talk about how to expand the destiny of mankind. I just want to talk about how to fix a motorcycle. I think that what I have to say has more lasting value.”
― Robert M. Pirsig, Zen and the Art of Motorcycle Maintenance

“Logic presumes a separation of subject from object; therefore logic is not final wisdom. This is Zen. This is my motorcycle maintenance. ”
― Robert M. Pirsig, Zen and the Art of Motorcycle Maintenance

Steve Laug: When has a pipe reached the point that is not repairable or restorable in your opinion? In my experience the answer to that question changes all the time. In the past there were many pipes that I did not pick up because I thought they could not be brought back to life. One thing I have learned over the years is that the definition of no-return has changed as my skills have changed. I have learned new tricks that keep me even taking old bowls and broken shanks and recrafting a new pipe from them. So I would say that my definition of what is not repairable is in a state of flux all the time. How about you?

Charles Lemon: I agree – I’ve tackled some restorations lately that I wouldn’t have touched with a barge pole a year ago. I still ask myself if a restoration is worth it, or advisable, though, even if I know it’s possible. A few situations come to mind. A pipe with great sentimental value to its owner may sometimes be best approached as a preservation effort rather than a restoration. All pipes can benefit from a good cleaning, but I’ve left the pipes inherited from my father in otherwise original condition, tooth dents and all. I don’t smoke most of those pipes, so they’re more memorial items in my collection. On the other end of the stick, a highly collectible pipe can be devalued by an overzealous effort to return it to as-new condition.

SL: True enough Charles. To ask whether a restoration is worth it or even advisable though, is a very different kind of question as to whether it is possible. I think that the cases that you give are good testament to the fact that there are various layers of restoration. To me preservation is also restoration at some level. Think of a beautiful work of art that is cleaned and restored. It is not restored to new condition it is merely brought back to the creator’s intent plus the passage of time. I too have left special pipes from good friends as they came to me in honour of their memory and the gift they were to me. Somehow to remove the dents and dings on them reduces the impact of the gift to me. I smoke them but less frequently than others. The time of smoking is kind of a memorial in fire/smoke. For a moment I join with the person who gave the pipe to me and is no longer present. Those are special times. I leave them for times when there is nothing pressing in my life.

I think the other scenario you put forward is that of the highly collectible pipe. For that I agree with you. Nothing is worse than an overzealous restoration that leaves the stamping reduced and the beauty diminished. I sometimes have the feeling that the restorer who does that really removes the personality of the original. Maybe they should restamp it as their own! LOL.

When I look at a pipe I first ask the question, “Can I restore this?” From there I move to “Should I restore this?” To me once I know it is something that I can tackle then it is easier to choose not to do so.

“An experiment is never a failure solely because it fails to achieve predicted results. An experiment is a failure only when it also fails adequately to test the hypothesis in question, when the data it produces don’t prove anything one way or another.”
― Robert M. Pirsig, Zen and the Art of Motorcycle Maintenance

CL: Knowing your strengths and weaknesses is key. If a project is beyond my grasp I will pass it to someone else or put it away for a while and have another look in a few months or longer. Maybe my skills have caught up, maybe not. When IS a pipe no longer restorable? It seems every time I think I’ve found the limit, I see another refurb online where someone’s done something clever and raised the bar.

SL: I do find that I use junk pipes – those with no inherent value – as training ground for doing work on pipes that matter to me. If I screw up the junk pipe I can laugh and call it education. Far better to learn on those than on ones that matter. One of the first burn outs I tackled was on an absolutely worthless Tinderbox Monza. It was fire wood but it gave me the opportunity to practice cutting briar plugs and fitting them in the bowl. This adds another category to what or what not to refurb. I have learned to tackle even useless pipe as part of my pipe repair university course.

CL: There’s a reason I keep buying auction lots of estate pipes – they provide a fairly steady source of pipes with wide-ranging damage and thus repair needs that I can tinker with more or less risk-free.

SL: The trick is having the eye to know when to do what. That is the hard part to learn I have found. The learning is that old concept of “when less is more”.

CL: I was just thinking the same thing! I’ve had so many “firewood grade” pipes come out of the estate lots around here that I tend to forget that some pipes are actually well cared for and won’t need the Terminator approach to refinishing.

SL: Exactly! The restoration process often is like this conversation, back and forth, debating with yourself and the briar what is needed and then starting. Then more debate and then continuing. It is a dance with the wood. We have similar experience with the firewood grade pipes I think. But that is what builds the creativity for me and gets the juices flowing. What can be done with this piece of kindling.

“Care and Quality are internal and external aspects of the same thing. A person who sees Quality and feels it as he works is a person who cares. A person who cares about what he sees and does is a person who’s bound to have some characteristic of quality.”
― Robert M. Pirsig, Zen and the Art of Motorcycle Maintenance

SL: The more I think about it, the longer I have been in the work of refurbishing the defining feature for me regarding the restorability of a pipe is whether I want to do it. Sounds persnickety but I think it’s really what I have come down to. There seems always to be a work around to bring a damaged pipe back to life. What do you think about the idea that the critical functional feature in restorability is not the ability of the repair person but the desire? Once you have the basic skills mastered the ability issue disappears from the equation for me. It rather becomes an issue of desire. Do I want to restore this? Either as a part of my ongoing education or as a piece of pipe history or beauty. What do you think?

CL: You’ve got something there, Steve. The basic skills are, well, basic – anyone with a will to learn can figure out how to use sandpaper, glue and stain to restore a pipe. Or a coffee table for that matter. Desire or drive is what keeps us doing what we do. I’ve spent more hours than I can count working on a restoration, knowing full well that the resulting pipe, even if functional and maybe even beautiful, will have no greater value than when I started. But I did it anyway because something about the pipe intrigued me – a shape, a maker, a different style of rustication, or just because I wanted to do it. I’ve also got a few pipes in my rack that I know would have turned out better if I had put a little more care, attention – or desire – into the work while it was on my bench.

I also find that restoring a pipe is an organic process. I sometimes have an idea of how the finished pipe will look going in, but usually the pipe decides on its own how the restoration will proceed. Just reaming the bowl of an old estate pipe can reroute a restoration drastically – hey look! A burnout! How’d that get there? And if you’re lucky, that PITA pipe repair is also the job in which you hit the magic and elusive perfect combination of stains that turns an ordinary pipe into a stunning piece of briar.

SL: I don’t know about you Charles, but I have gone back to the rack and redone those I did early in the learning curve. I have reworked them – some of them two or even three times before I am finely happy with them. To me it is like reading a favourite book – I go back to it again and again and there is always something more. Same with reworking a favourite pipe.

I agree the process of restoration is organic – it develops with each stem that you take along the way. I work on trying not to preset the outcome – other than clean and functional. The rest just happens. I think that is why I am willing to take on seeming disasters – the sheer joy of seeing what is reborn in the process – like finding treasure. I think that mysterious happening is part of the charm that keeps me hunting for pipes to refurbish.

“The way to see what looks good and understand the reasons it looks good, and to be at one with this goodness as the work proceeds, is to cultivate an inner quietness, a peace of mind so that goodness can shine through.”
― Robert M. Pirsig, Zen and the Art of Motorcycle Maintenance

CL: There is an undoubtedly spiritual/psychological aspect to restoration work. People talk about being in the groove when they are immersed in the work. Restoring a pipe is oddly restful for me – it’s both a tactile, physical activity and an intellectual pursuit that requires a high degree of focus. On a related note, I find it nearly impossible to be angry or agitated while smoking a pipe, so smoking a pipe while working on a pipe is cheaper than therapy!

SL: The act of restoration is definitely therapeutic. To restore a pipe after work gives me the space to decompress from my day and actually finish something. Sometimes the more complex the restoration is the better it is for me in terms of disconnecting me from the rest of the day. The act of restoration is spiritual at its core it seems to me. The very act of bringing life to a broken and abused thing is spiritual in nature. To me it takes our craft and lifts it to a deeper level. Maybe that is why I find it hard to neglect a sad old pipe that shows promise.

“To live only for some future goal is shallow. It’s the sides of the mountain which sustain life, not the top. Here’s where things grow…..We want to make good time, but for us now this is measured with the emphasis on “good” rather than on “time”….”
― Robert M. Pirsig, Zen and the Art of Motorcycle Maintenance

The conversation wrapped up at this point, but the collaboration will continue with a shared restoration project. Watch for that very special post, in which Steve and Charles put a LOT of miles on an old pipe, coming soon to both rebornpipes and DadsPipes!

Thanks for joining us for this discussion. If you’d like to share your own thoughts and opinions on the craft of pipe restoration, we invite you to continue the conversation through the comments section below.

pipes

Putting the pieces together and arriving at a Parker Super Bruyere Billiard


Blog by Pam Otto

It is with pleasure that I introduce to you all the work of one of our readers, Pam Otto. I think as you read this first blog of hers posted here that you will join me in hoping we have not heard the last of her. She has done work on this Parker that rivals what an early writer, Gan Barber did with a Peterson. (If you did not read it or don’t remember here is the link: https://rebornpipes.com/2012/10/03/all-the-kings-horses-and-all-the-kings-men-a-petersen-adventure-gan-barber/). Pam has done the work a masterful job of rebuilding this old pipe. Its finished beauty is amazing. Thank you Pam for being willing to post here. It is a privilege to have you here. Without further ado, here is her post. — rebornpipes

I discovered the hobby of pipe restoration about a year and a half ago and jumped in with both feet. I soon discovered Reborn Pipes and Steve, let me tell you, my life hasn’t been the same since. Thanks so much for the information, techniques and methods you share, and for this opportunity to contribute to your blog.

Most of the pipes I’ve worked on, and learned on, have arrived through the “usual channels”–flea markets, estate sales and of course eBay. But this particular pipe, a Parker Super Bruyere, came via a more unusual route.

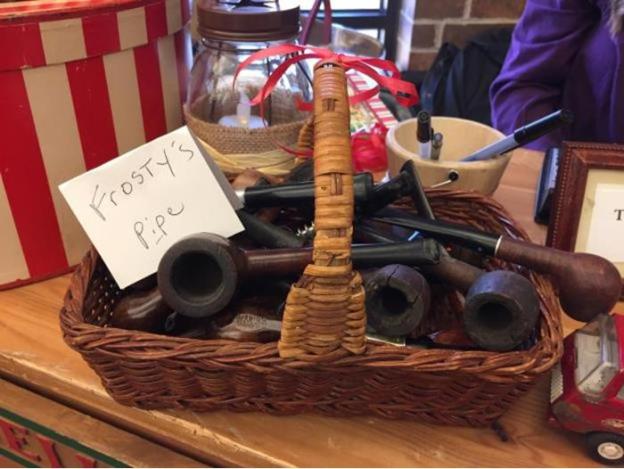
I was at work one recent Saturday (I manage a nature center when I’m not fiddling with pipes) when I received a text message from my friend Suzi. It contained this photo, along with the words, “Thought of you at Geneva Mothers Club bazaar!”Pam1 One look at that pic and I knew work could wait. I jumped in the car and within minutes arrived at the craft show location.

I half walked, half jogged up to the building, paid my entrance fee and made my way through the throng—a well-dressed, Ladies Who Lunch crowd—in search of a sign that read Exit 22E. A subsequent text from Suzi had given this added detail, which turned out to be absolutely essential in navigating the cavalcade of vendors.

After a couple of wrong turns I at last found the booth, staffed by a pleasant woman peddling hand-crafted snowman décor. With sawdust and a little mud crumbling off my jacket, I reached for her basket of “Frosty’s Pipes” and began laying them out on the counter. We exchanged pleasantries—the woman and I—and she told me that the pipes were US$4.95 each. She also encouraged me to consider a snowman for my front door. But by then I wasn’t really listening.

I emptied the basket and studied what Frosty had to offer, eventually deciding on five Yello Boles of various vintages going back to Honey Cured Briar; a Medico Ventilator I want to try unventilating; and the Parker.

Clutching my prizes, swathed in tissue paper within a plastic Wal-Mart bag, I then faced the daunting task of navigating back through the crowded aisles. (Exit 22E, it turns out, was for emergencies only.) Along the way I bumped into Suzi and excitedly showed her the pipes—especially the Parker—while she in turn showed me the handmade greeting cards she’d found. Both happy with our purchases, we went our separate ways—she to peruse more holiday wares, I to head home and triage my treasures.Pam2 Spread out on the dining room table, the pipes ran the gamut from barely touched to smoked nearly beyond recognition. Oddly enough, rather than dismiss pipes in poor condition, I find myself drawn to them. Clearly their previous owners found them quite delectable; there’s a good chance some of that former glory remains. And so it was that the Parker went to the front of the line.

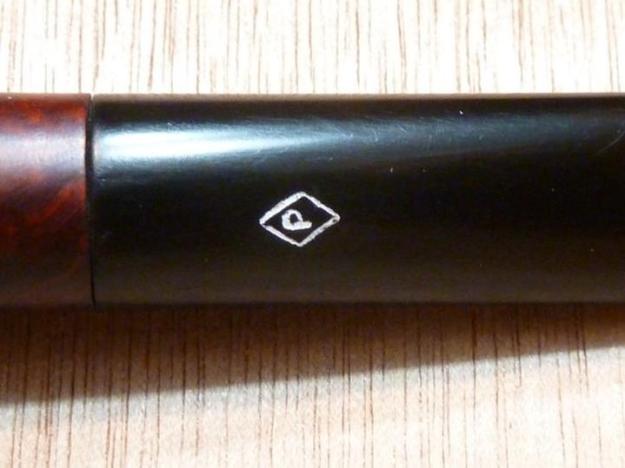
Carbon clogged the bowl and had fractured the briar in three separate places, the cracks pervading the crusted rim and converging at the bottom of the bowl. The shank too was obstructed with decades of hardened goo, to the point where the mortise could accommodate only about half of the stem’s tenon.Pam3Pam4Pam5Pam6 I turned up the lights and rubbed the shank a bit in an effort to remove some surface grime and get a better look at the shank’s stampings. The left side bore a faint PARKER SUPER BRUYERE, the SUPER inside a diamond; closer to the bowl was stamped the number 5. The right side read MADE IN LONDON over ENGLAND and the number 18. Below this was PAT. NO. 116989/17 and, about 5mm toward the bowl, a capital letter T.

I did a quick check of Pipedia and PipePhil for Parker date codes and discovered that this old boy* dates to 1941. (*As a female, I find it funny that men tend to refer to pipes in the feminine, i.e. she/her. To me they’re clearly male. But to each his or her own, right?)

At any rate, I couldn’t wait to get started on the pipe’s revival. I started by gently pulling the stem from the shank and laying it aside. For all its years of service, its oxidation was minimal. There were some troubling dings, one nearly marring the P logo, but the delicate work they would require could wait.

Instead I turned my attention to the amazing carbon cake. I tried to picture the very last time the previous owner loaded up the bowl. Roughly half its original capacity remained and the draw, if there was one at all, probably caused some pulled lip and/or cheek muscles.Pam7 I put the smallest head on my Pipnet and gently twisted it inside the cake. I expected the bowl to disintegrate immediately but, no, that took a good two or three turns more.

Moments later, with three distinct pieces in my hand and a lot more carbon to remove, I headed down to the garage and the Dremel. Even though this tool and its potential for destruction scares the bejeebers out of me, when equipped with a sanding barrel it does make quick work of hardened cake. A few minutes later I returned to my dining/work table blackened with carbon (thank goodness for dust masks and goggles) but with three much-cleaner pieces of briar to assess.

Parts of the bowl were not only caked but also charred, so I’d had to remove a considerable amount of material. Worse, due to the uneven nature of the char, the bowl innards were something less than round.

The good news tho was that all the breaks were clean, and the three pieces fit neatly back together. Before reassembly I scrubbed the outer surfaces with straight-up Murphy’s Oil Soap, then wiped them down with a damp towel. The grain that was hiding beneath the grunge made me smile.Pam8 I mixed up some JB Weld and applied it to the breaks, placing more on the inner edges than the outer. I reunited the individual parts, pressed and held them together for a couple of minutes, smoothed the interior with a toothpick and then set the bowl aside to cure.

A combination of demands at work as well as home meant that it was another week before I returned to the Parker. I tried twisting and turning the bowl and thankfully the “welds” held. JB Weld is tough stuff. 🙂 I ran a needle along the external surfaces of the cracks to clean out any loose debris, then applied briar dust and super glue.Pam9Pam10 While waiting for the glue mixture to cure, I began work on the stem. Starting with a small, folded bit of 220 grit paper, then 400 and 600, I gingerly worked on the small gouges near the base. If it weren’t for their location near the logo, I would have tried using a flame and then sanding. But I opted instead to make the raised edges flush with the stem, then mixed powdered charcoal with super glue and filled in the small cavities that remained. After curing, I sanded the patches smooth.

I also decided to experiment with the inside of a cigar box as background for picture taking.Pam11 The next day I sanded the briar-dust crack repairs with a succession of 220, 400 and 600 grit sandpapers. I also topped the bowl with that same sequence to see how the cracks appeared from the top down.Pam12Pam13 I put the stem back in the shank to size up how things were coming along and, when it only went in halfway, remembered that I still had a lot of internal cleaning to do.

I dipped a bristle pipe cleaner in 91% isopropyl alcohol and threaded it through the stem, then set it aside to soak. I attempted to do the same with the shank, but it was so clogged I had to first abrade away whatever gunk I could reach with a round needle file.

I dripped some alcohol down the shank and eventually was able to poke through to the bowl with a bristle cleaner—the first of many. I worked for about an hour, switching between bristle cleaners and cotton swabs, before finally finishing up with a few regular pipe cleaners.

The stem took a little less time, maybe 30 minutes, and a dozen bristle and regular pipe cleaners combined.

The P logo on the stem was a little worse for wear. The lower right side of the diamond, as viewed from the button end, was virtually nonexistent. Using an Exacto blade, I pushed on the faint outline that remained until there was a slight indent. It wasn’t quite as deep as the other three sides of the diamond, but I thought it prudent to stop before I went too far.

I tried using white nail polish to brighten up the logo but, perhaps because the bottle was 20 years old, the results weren’t quite what I was looking for. I wiped away the nail polish residue and applied Liquid Paper white correction fluid, which I’ve had success with in the past.Pam14 I would say the results were “Meh,” except that, in looking up other Parkers online, it would appear that their stem stampings are not always super-crisp. Rather than waste more time on a detail that probably can’t improve a whole lot more, I decided to celebrate its unevenness and move along to the next step: resolving the bowl’s myriad issues.

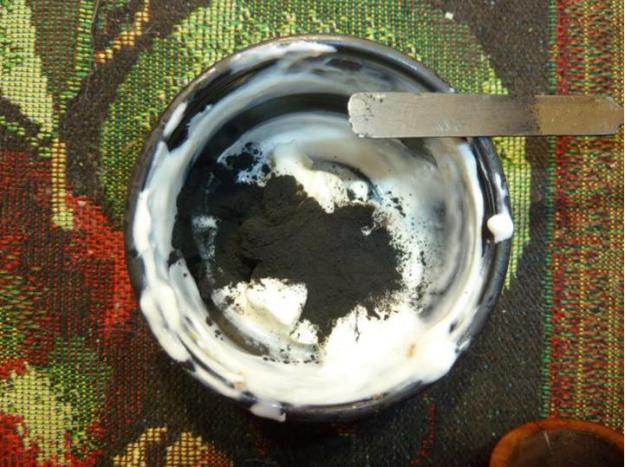
Using 220 grit sandpaper, I moved along the inside of the bowl, sanding away excess JB Weld along with microns of briar. I eyeballed the progress as I went, hoping for a shape that approximated round. When I was satisfied it was as close as it could get, I mixed up a small batch of Steve’s sour cream-n-powdered-charcoal bowl coating and applied it, first with a dental spatula, then a folded pipe cleaner. I used my index finger for a final smoothing.
Pam15Pam16Pam17 It was during this process that I noticed the left exterior of the bowl was itself somewhat flattened. Maybe a few too many whacks on a tabletop or boot heel?

Whatever the reason, I moistened a towel, heated a table knife and proceeded to steam the area. Maybe it worked, maybe it’s just wishful thinking, but the flatness did seem to raise up a bit. With that issue addressed, it was time to start staining.

When I’d cleaned up the briar with the Murphy’s Oil Soap, the grunge on the towel included a considerable amount of red pigment. Hoping to recreate the same hue, I swabbed the bowl with oxblood aniline stain, wiped it immediately with an absorbent cloth, then swabbed it with dark brown stain and wiped again. After a few touch-ups I was satisfied that the coverage was even, and flamed the stain with a lighter.

The seams where the bowl had been mended were still a little too visible for my taste, so I went at them with a black Sharpie marker. A quick dab with the marker followed by a quick wipe with my finger helped the cracks blend in a little more.

At this point I decided this Parker was about as reborn as he was going to get. Down to the garage workshop we went, one last time, to apply some carnauba. Only then did I realize just how cold our recent cold snap has been. I brought the wax bar inside to warm up a bit, then went back to the garage for a couple quick coats. More will come, after the next thaw.

If you look at the pipe up close, the cracks are still apparent. But like a bad memory, they fade with some distance. This is one pipe Frosty is going to have to do without.Pam18Pam19Pam20

Peterson System 314 Challenge


By Al Jones

I was overdue for a challenge pipe as lately, most of my personal estate purchases have been in pretty decent shape. I was also looking for the right pipe to attempt Dave G’s stain stripping process (documented earlier on this blog). This one came from a forum buddy in India, who had it sent directly to me.

Taking the pipe out of the box, it looked pretty beat. The bowl top was damaged and it would surely need topped. The P-lip button had some teeth marks and the nickel band was corroded and dinged. It did appear to be a good candidate to test the new stripping process.

Peterson_314_Before (1)

Peterson_314_Before (2)

Peterson_314_Before (3)

Peterson_314_Before (4)

Peterson_314_Before (5)

My smile turned to a frown as I attempted to remove the stem. It was impossibly stuck. To further complicate the stem removal, the stem was plugged shut as well, which didn’t allow me to get any alcohol into the bowl from that vantage point. I tried dribbling in some alcohol, but it didn’t appear much was going into the bowl (or any!). I put the pipe in the freezer for a few hours, but no dice on stem movement (recommendation: always tell your wife when you put a pipe in the freezer). Next, I tried soaking the entire pipe in alcohol, which also failed. Last last night, I sprayed in some PB Blaster, automotive penetrating fluid. This morning, it was still stuck fast. I used a piece of thin wire to work it into the stem, which was filled with some nasty looking crud. This did eventually allow me to get a bristle cleaner soaked in alcohol into the stem. I then inserted another alcohol soaked cleaner and dropped it onto the bowl of alcohol again. After an hour, I could detect some slight movement and a few moments later, I had success.

The system sump was filled with tobacco build-up, which took an hour to clean out with towels, bristle brushes and cleaners all dipped in alcohol. This pipe is a poster child for advocating the frequent cleaning of Peterson System pipes. The stem went into an Oxy-clean soak.

I topped the bowl using 150 grade paper on a flat work surface. Next it was sanded to a smoother finish using 320 grade paper and then wet sanded with 800 grade. The bowl was reamed and incredibly, in fantastic condition with no issues inside. I then soaked the bowl with sea salt and alcohol (might have been redundant by that point). Here is the bowl after topping.

Peterson_314_Before (7)

Next up was to strip the factory finish. I used a heat gun to pull off the nickel cap. While it was hot and malleable, I used a dowel to push out a few of the dings. Using Dave G’s stripping method, I wiped the bowl down with Murphy’s Oil Soap (being sure to not get any into the bowl interior). I then wiped it down with alcohol. A solution was prepared using warm water and a generous helping of Oxy-Clean powder. I heated the bowl with a heat gun as Dave thinks that helps open the pores of the wood. Using some 0000 steel wool, I scrubbed the pipe down. I used a cloth around the nomenclature. Not surprisingly, the stripping process revealed some fills and actually pulled the putty. I applied a few drops of super glue to each spot and pressed in some briar dust. The spots were then sanded smooth with 800 grit wet paper. The nickel band was glued back in place. Below we see the bowl stripped and fills ready to sand smooth.

Peterson_314_Before (9)

Now the pipe was ready to restain. I used some diluted Fieblings Medium Brown stain and set the stain with flame. The bowl was then buffed with White Diamond and waxed with Carnuba Wax.

I removed the stem from the Oxy-clean solution and filled the two tooth marks on top with black Superglue and accelerator. I used a file to reshape the button end then with 800 grit paper wrapped around the needle file. The oxidation on the stem was removed using 800 grit paper, than 1500 and 2000 grades. I followed that with 8,000 and 12,000 grade micromesh sheets. It was then buffed with White Diamond and Meguiars Plastic polish.

This one required most of the pipe restoration techniques and was a fun challenge. Here is the completed pipe.

Peterson_314_Finished (1)

Peterson_314_Finished (4)

Peterson_314_Finished (2)

Peterson_314_Finished (5)

Peterson_314_Finished (6)

Peterson_314_Finished (3)

Peterson_314_Finished (7)

?

?

?

?

Peterson_314_Finished (1)

Who Made Benson and Hedges Pipes – Reclaiming a B&H Acorn


Blog by Steve Laug

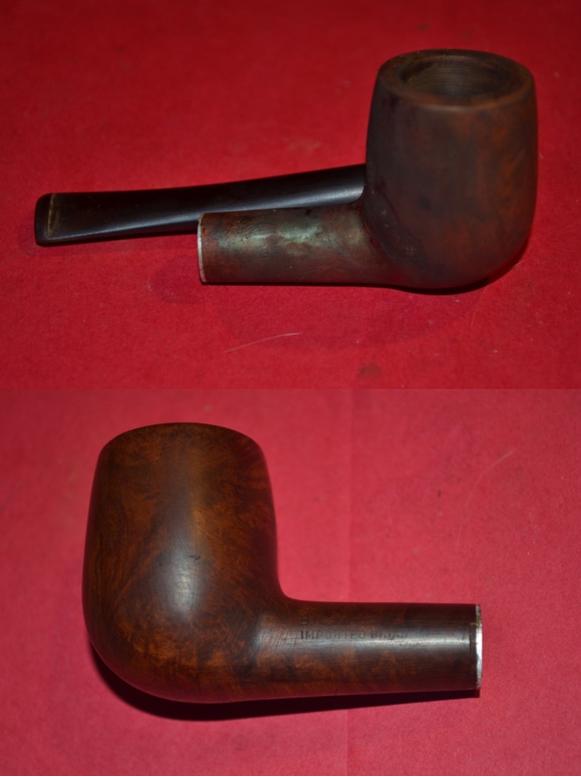
My brother sent me a little acorn shaped pipe that was stamped on the left side of the shank, Benson & Hedges and on the right side, Imported Briar over 84 and next to that in a smaller sized font 18. I have had several of these pipes on the work table over the years but this is a beautiful little pipe (5 inches long). The briar is nice and there are no fills or sandpits in it that I can see. The rim was dirty and had some cut marks in it. There was a cake in the bowl that was uneven – thick in some places and thin in others. The stem was badly oxidized and on the underside near the button there was a small tooth mark. Here is what it looked like when I brought it to the table to work on it.B1

B2

B3

B4 I have included a close up photo of the rim to show the damage and the thickness of the cake.B5 I was curious about the maker of the pipe so I did some searching. In Who Made that Pipe it says that the pipe is English Made. In Pipedia says that it was likely made by Comoy for the London Tobacco Company. Then it lists the following stamping “London Made”. http://pipedia.org/wiki/British_Pipe_Brands_%26_Makers_A_-_D There was one other note that Orlik made pipes that were stamped with the Benson and Hedges label. Nowhere in the listings that I could find did anyone mention the stamping on this one: Imported Briar. That stamping tells me that it was made for the American Market. The number stamp on the right side of the shank fits both Comoy and Orlik numbering systems and point to either as possible makers of the pipe. I guess this is one mystery that I can go no further in unraveling.

I reamed the bowl of the uneven cake with a PipNet reamer using the first two cutting heads. I took the cake back to bare briar. It was crumbly and soft so it was an easy reaming job.B6

B7 I lightly topped the bowl on the topping board to take of the rim damage and clean it up.B8

B9 Sometimes I think that my readers probably could tell me the next step but I write it anyway. I scrubbed down the bowl with alcohol and cotton pads to remove the grime and the light varnish coat that seemed to be on the bowl.B10 I scrubbed the mortise with cotton swabs and alcohol to clean out the grime. I used a shank brush and pipe cleaners to clean out the airway. I cleaned out the airway on the stem with pipe cleaners and alcohol.B12

B13 I could have let the stem sit in Oxyclean but did not feel like doing that this morning so I put a plastic washer between the shank and the stem and worked on the oxidation with 220 grit sandpaper. I also sanded and removed the tooth mark on the underside of the stem near the button. I sanded it with a medium and a fine grit sanding sponge as well to remove the scratching in the rubber.B14

B15 I wet sanded the stem with 1500-2400 grit micromesh pads and rubbed it down with Obsidian Oil. I dry sanded with 3200-4000 grit pads and gave it another coat of oil. I finished sanding with 6000-12000 grit pads. I gave it a final rubdown of Obsidian Oil and let it dry.B16

B17

B18 I buffed bowl and stem with Blue Diamond on the wheel and gave the entire pipe multiple coats of carnauba wax. I buffed it with a clean flannel buff to raise a shine and then again by hand with the microfibre cloth. The finished pipe is shown in the photos below. It is a pretty little pipe that is lightweight and charming looking. Thanks for looking.B19

B20

B21

B22

B23

I Got the Kaywoodie-Delta Blues


Guest Blog by Robert M. Boughton
Member, International Society of Codgers
Member, North American Society of Pipe Collectors
http://www.naspc.org
http://www.roadrunnerpipesnm.biz (Coming Soon)
http://about.me/boughtonrobert
Photos © the Author

The Delta blues is a low-down, dirty shame blues. It’s a sad, big wide sound, something to make you think of people who are dead or the women who left you.
― David “Honeyboy” Edwards (1915-2011), U.S. Delta blues guitarist and singer

INTRODUCTION
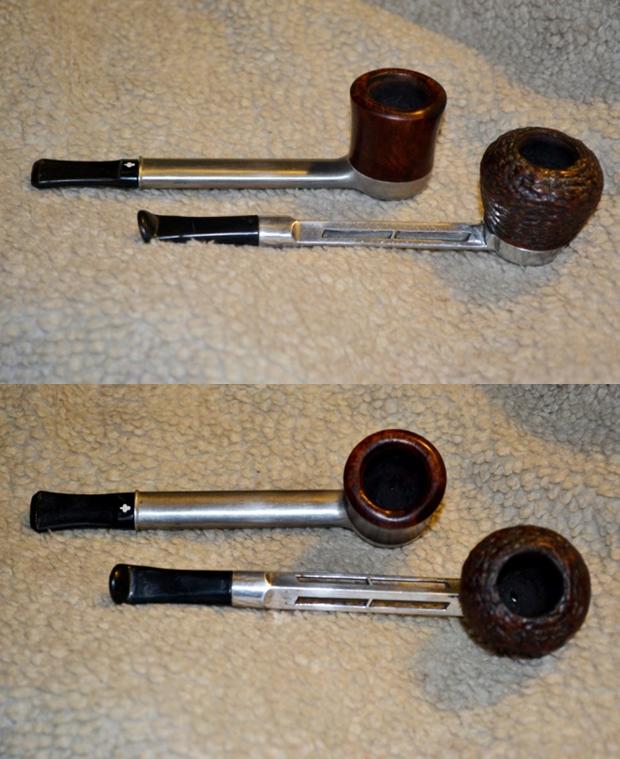
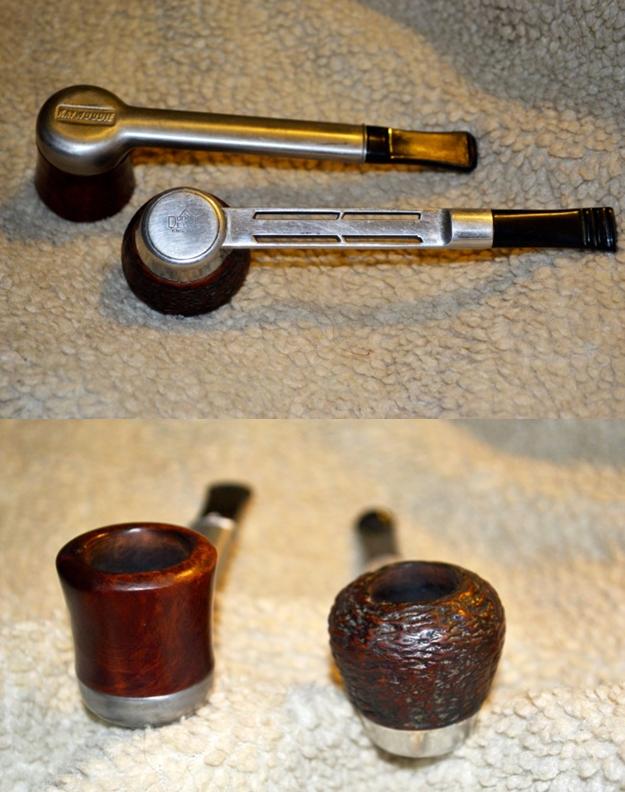
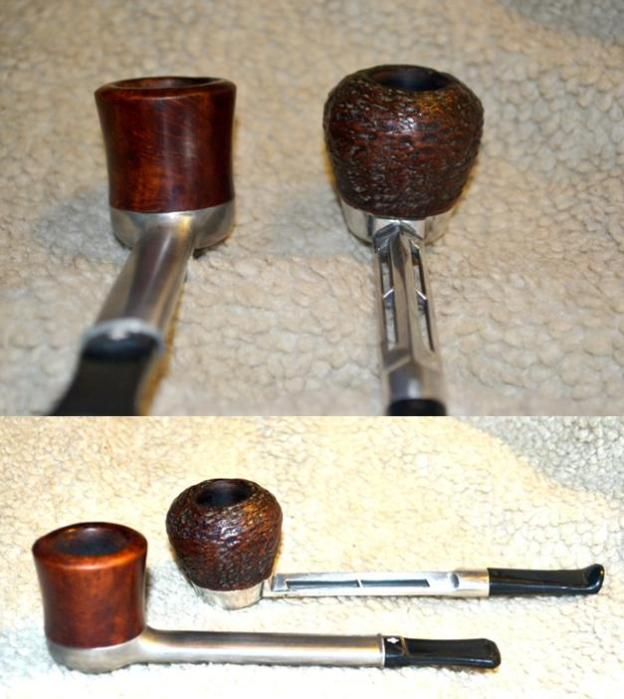
I’ve been sitting on these two nice metal pipes, different brands but modeled after the original of their kind, designed by Frederick Kirsten, a U.S. professor of electrical engineering at the University of Washington who was transferred to the aeronautics department and promptly changed the course of aviation history with the creation of the Kirsten Wind Tunnel for subsonic aerodynamic testing. He also upended the tobacco pipe industry and generally rocked the world of pipe enjoyers with his 1936 invention of a sleek aluminum radiator frame with interchangeable bowls. The patented revolution in a box was more or less a way to quit cigarettes by exercising his boundless creativity. He puffed cigars as well.

Maybe I’m just not as daring as the good professor. Whenever I find myself on the edge of pipe restoration territory I haven’t charted, I hesitate. I don’t panic or freeze in terror. I just pause to survey the terrain and get my bearings; to triangulate my coordinates, find my footing, and then one day, as if on an impulse but really because I’m good and ready, I take the next leap, with some faith.

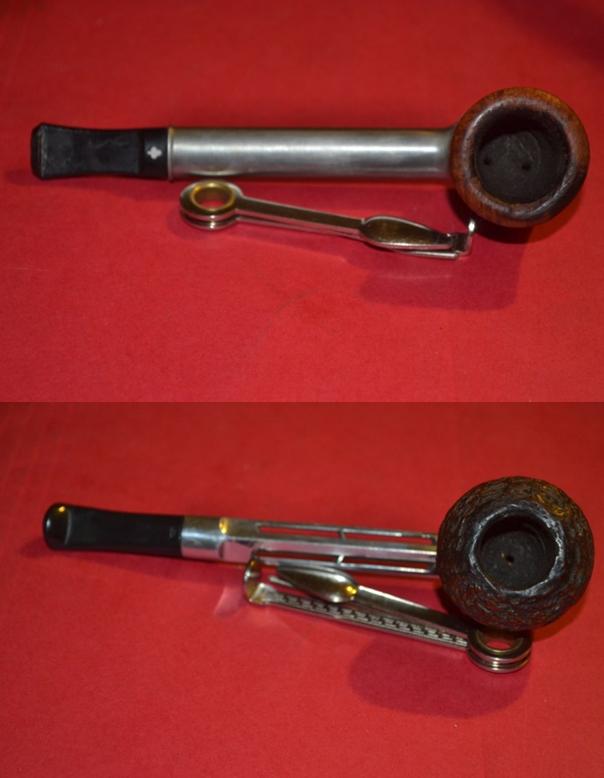
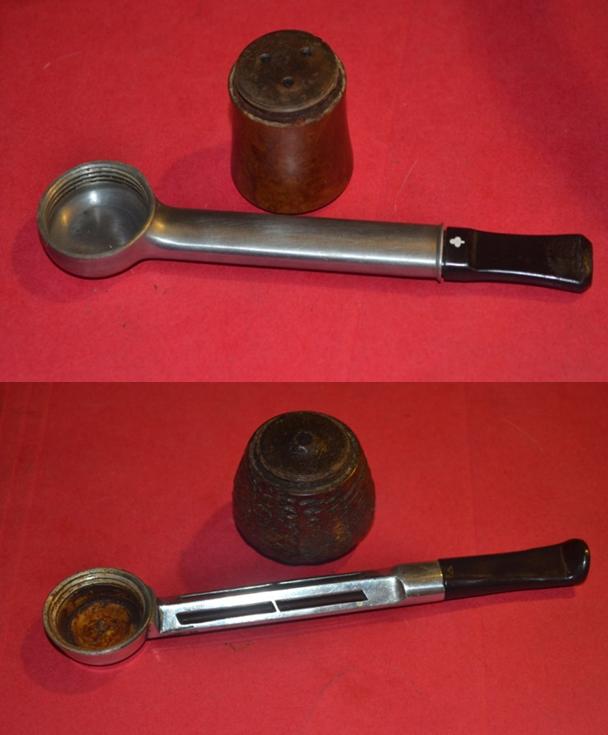
And so it was last night that I looked at the Kaywoodie Smooth Billiard and Duncan Delta Rusticated Brandy with a dental lip – again – and without thinking grabbed them. The next thing I knew, I was looking around for the implements of cleaning and restoring I might need for the combined tasks and remembered another aluminum pipe I fixed up once, an Aristocob, and how I used a solution of white vinegar and baking soda to soak the metal. Although I had bought enough of each for a lifetime when I did the Aristocob, I discovered they were lost in my latest necessarily hasty move.Delta1 The nearest Walmart would close in about a half-hour, at midnight. All of Sam Walton’s children here used to stay up round the clock, but now there are less than a handful that do, and only one within any kind of reasonable distance. They had too many problems with thievery and other shenanigans, you see, mostly through the dock doors, if you follow me. I armed myself against the natives, threw on a coat, petted my cats as they were curious about the sudden hullabaloo and hurried out the door. I was back before the witching hour.

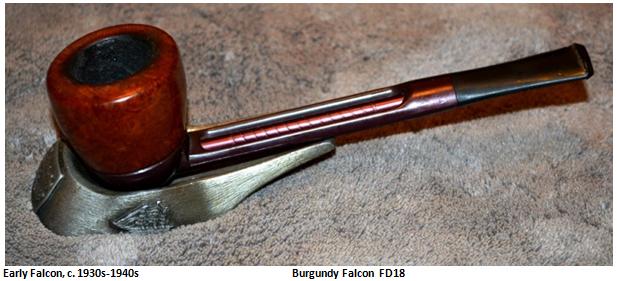
As part of the map checking I did in comforting if only perceived preparation for these restorations, I noted that the Duncan Delta, of the English metal genre, as it were, came with a non-removable bit, as did the two Falcons in my personal collection. At this point I made that greatest of mistakes: I assumed there were no exceptions to the rule.Delta2

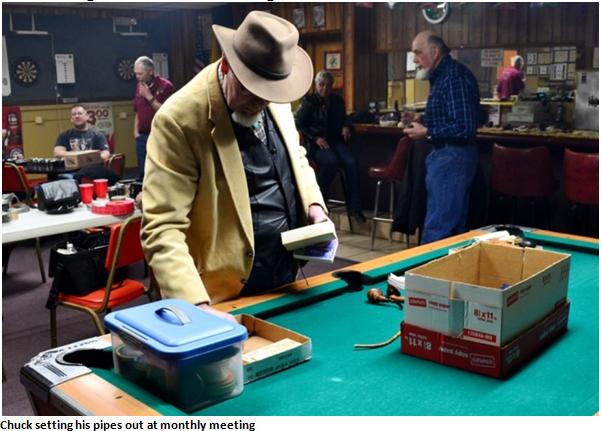
Delta3 To be fair to myself, I showed the Kaywoodie and Duncan Delta to my friend and mentor, Chuck Richards, who is usually infallible, and asked how the bits come off for cleaning. In hindsight and an extended spirit of fairness, I’m not sure he looked all that closely at them.

“They don’t,” he said, with a certain amused grin he has. “You just have to work through them.” Or something to that effect.Delta4 Taking a seat on the couch with the supplies I would need to proceed, I had no idea what I was in for. I can’t wait to show Chuck the mind-boggling discovery I tripped over, figuratively speaking – about halfway through the restorations. To those in the audience who know the astonishing secret of a certain rare Kaywoodie metal pipe made from 1955-1959, with this particular surprise only included during the first year or so of that period, Shhhh! Don’t spoil the revelation for others when it comes, in good time.

RESTORATIONS
Delta5

Delta6

Delta7

Delta8

Delta9

Delta10

Delta11

Delta12

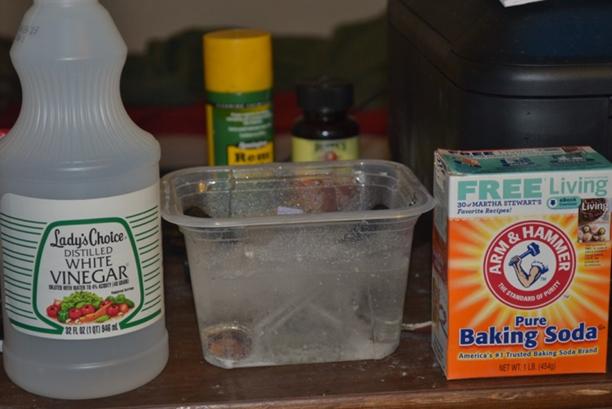
Delta13 I had prepared an empty macaroni salad tub, by cleaning it with scalding water and dish soap, for the vinegar-baking soda soak of the aluminum pipe bodies. It was the widest container I had but also deeper than it needed to be. Into the tub I measured about a tablespoon of baking soda, then added the vinegar and watched it fizz madly until the powder dissolved. I placed the two parts in the mix and added more vinegar until they were almost covered. Considering the possible effects on the bits, I spontaneously chose the bolder path and pushed down a little on each one until they were submerged. The bubble action was really something to see – much more active of an interaction than an OxiClean bath – but I had other things to do.Delta14 The bowls needed cleaning in the worst way, the bases in particular. The moisture from tobacco creates steam, and Kirsten’s system, which is used in metal pipes still today, traps and cools the steam in the stem. Much of the resulting very sticky, cloying gunk ends up on the bottoms of the bowls and can be cleaned in seconds by anyone who enjoys these pipes. But as Steve put it perfectly in one of his blogs on a particularly messy Generation 1 Kirsten A, I’ll just quote him: “The cleaning in seconds must not have been something that the previous owner of this pipe ever read or understood.” https://rebornpipes.com/tag/kirsten-pipes/

Taking also from this great blog the idea that metal pipes are, for the most part, sturdy things that can outlive generations of a single family of pipe enjoyers, I launched a three-pronged assault on the bottoms of the bowls alone. First I swabbed them and the rest of the bowls’ exteriors with cotton gun cleaning squares soaked with purified water; then the same with Everclear swabs, and next superfine steel wool on the bases and rims. The Delta base, being metal and somewhat pocked with corrosion, needed a little more work with sandpaper before another round of steel wool.Delta16

Delta17

Delta18

Delta19 An odd trick of sight makes the rusticated Duncan bowl, which indeed has a wider outer diameter than the smooth Kaywoodie (about 5” compared to 4-3/8), appear as if it would need a bigger reamer to clean out most of the excess cake. But the Duncan only took a 19mm fixed reamer while the Kaywoodie held a 21mm.Delta20 I smoothed the chambers with 320-grit paper followed by 200, followed by long and careful consideration of the next step. While I started restoring pipes with the habit of stripping the old finish completely, I have taken to avoiding that step for the most part on different levels of thinking, primarily two. One, I never know for sure what I’ll find beneath the finish that might have been better left uncovered, and two, I have become more purist in my approach, liking the idea of imitating the original.

Nevertheless, I concluded I just didn’t care for the light brown shade of the Kaywoodie or the dark brown of the Duncan. As the former was of U.S. origin and the latter of British make, I reasoned, that would make them cousins, as some folks on either side of the Pond refer to each other. But I wanted them to be more like brothers. Therefore, “Off with their stains!” I heard a voice cry in my head, and dunked both bottoms up into an Everclear bath, careful to leave the bases above the alcohol level.Delta21 While the 190-proof alcohol changed from clear to something else, I removed the frames from their long vinegar-baking soda soak, rinsed them thoroughly and began to “work through” the Duncan frame with pipe cleaners dipped in more Everclear, still shocked, as always, at the filth that came out. Seriously, how hard is it to run a cleaner through your pipe now and then? Are restorers the only people who do it? Deep breath; exhale. I suppose that’s a rant better left for my upcoming Encyclopedia of Pipe Trips. Still, seven bristly cleaners through the frame later, and three swabs soaked with alcohol to clean out most of the mess in the round bowl connector, not to mention having to use my wire cleaner to dig out the muck in the grooves of said connector, I thought I was finished with that part.Delta22 But now, looking at the photo above, I see it needs a little more work. I’m going to soak the connector in Everclear and scrub it some more. Give me a few minutes to make it shine better, and I’ll be right back with another picture.Delta23 There. That was easy, and I for one feel better. Plus the picture tells the whole story!

Anyway, enough time had passed to take the bowls out of the Everclear and scrub them cleaner and dry inside-out with more cotton swabs.Delta24 I used the steel wool again on both, lightly on the Kaywoodie to make it shine before heightening the effect with a micromesh progression, and vigorously to take the finish of the rusticated Duncan down still more until it was actually reddish, for which I had hoped.Delta25 Re-staining both with Lincoln Marine Cordovan (Burgundy) boot stain, I flamed them with my Bic and set them aside.Delta26 Now, at last, I near the dramatic moment I know you have all been waiting for! Is that the faint fade-in of a drum roll I hear, or an auditory hallucination? Due to my slight deviation from following the restorations of each pipe part by part – starting when I cleaned the Duncan frame and instead of moving on to the Kaywoodie, continued to the bowls – I did not learn the wonderful nature of the Kaywoodie until I attempted to work through it with bristly cleaners as I had the Duncan…

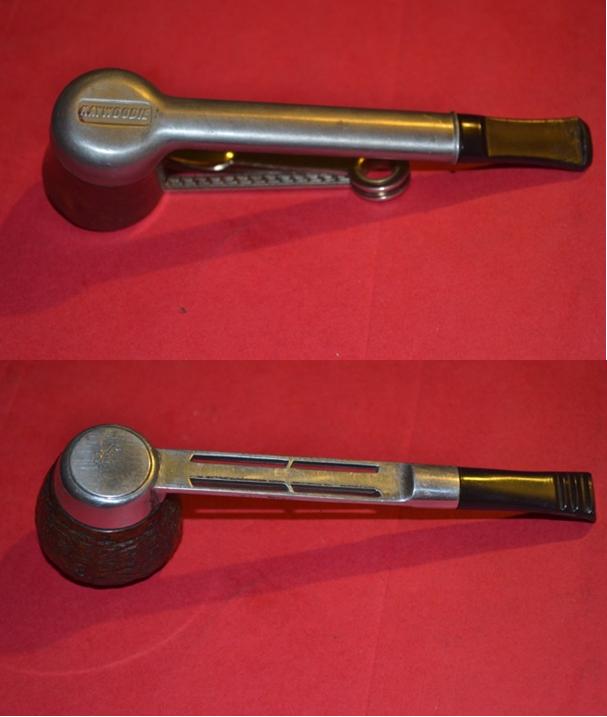
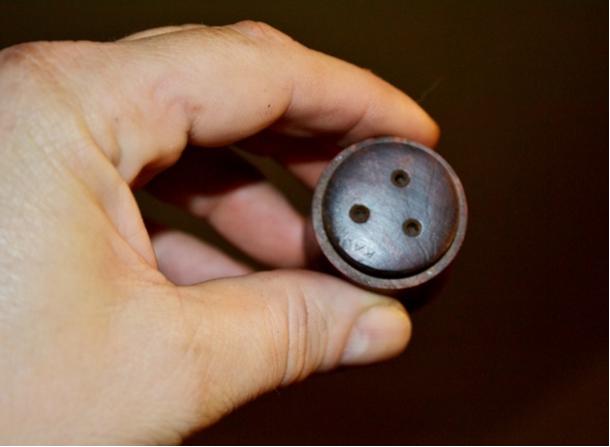
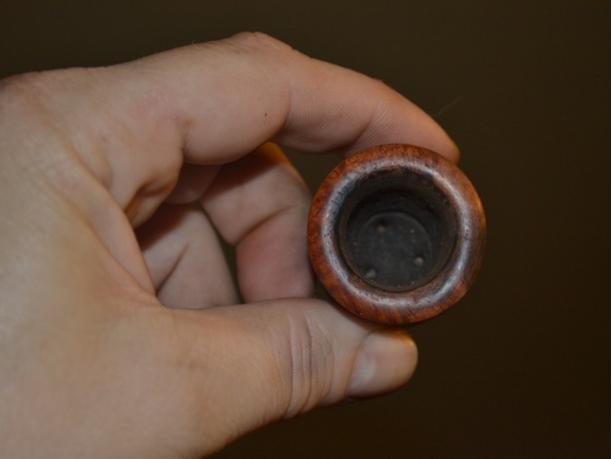
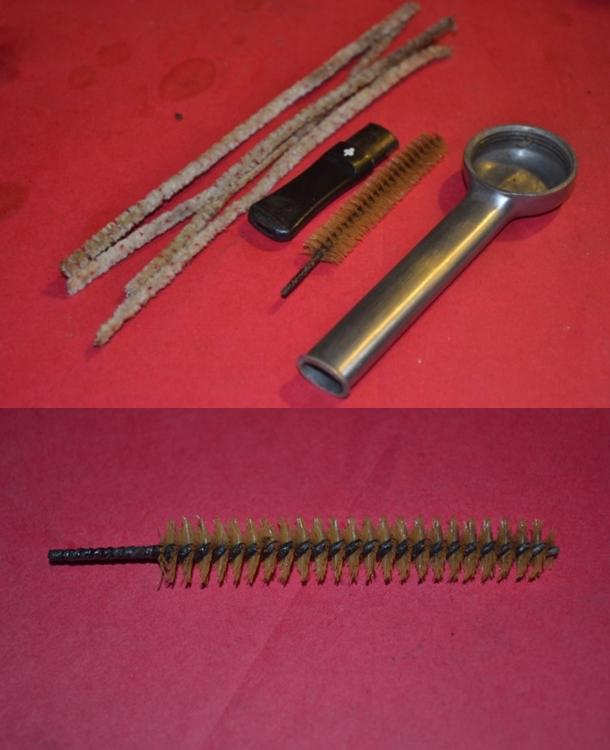
…and the whole thing came apart in my lap! There were the bit that wasn’t supposed to come off and some bizarre, vile, noxious looking thingamabob that looked like a wire brush. I picked it up with distaste and tossed the whole dark, stained mess in the leftover Everclear from stripping the bowls. I knew that would clean it up somewhat, and it did. With the brush out of the Kaywoodie frame, by the way, the metal was quite easy to clean. That should have been a clue, but my first thought was that someone had stuck the brush inside the frame as a makeshift filter. (It is truly scary how close and yet so far from the truth I can be sometimes in my denser moments.)Delta27 At least I had the sense to recognize that the resulting hole in the frame was gaping wide, and turned to pipephil.eu for help, which I found as I almost always do. It was the second metal “filter” pipe in the Kaywoodie models A-K section, the Filter Plus, made from 1955-1959. A convenient link to Smoking Metal led me to the rest of the story. http://www.smokingmetal.co.uk/pipe.php?page=133

As it turns out, the brush is not a fluke, of course, but an original Kaywoodie nylon brush filter that was only included with the pipe during the first year or so of its four-year run. The filter brush has 5,000 fibers. Now, I want y’all to think on that fer a spell. Finding a pipe with one at all, much less intact, is a miracle. It’s no wonder Bill Feuerbach, president of S.M. Frank & Co. Inc., owner of Kaywoodie, is quoted at the link above as saying of the Filter Plus, “It is one of the most indestructible and durable pipes I have ever run across.”

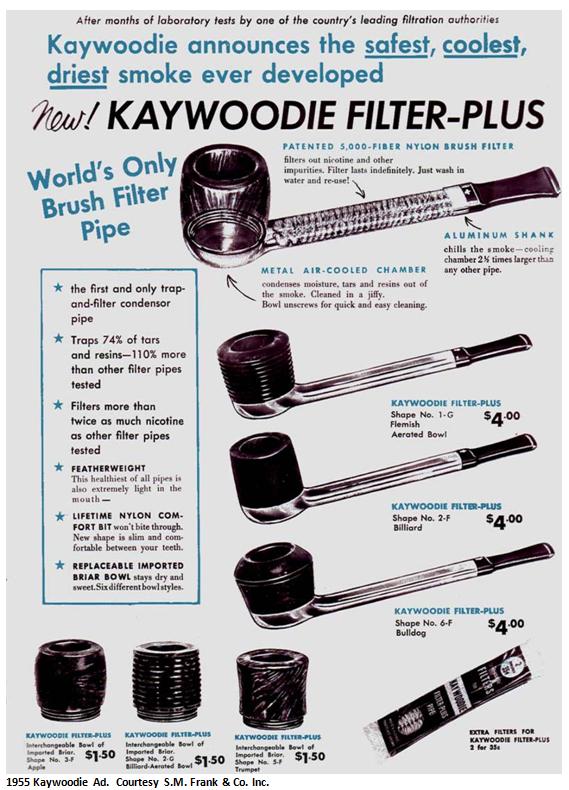
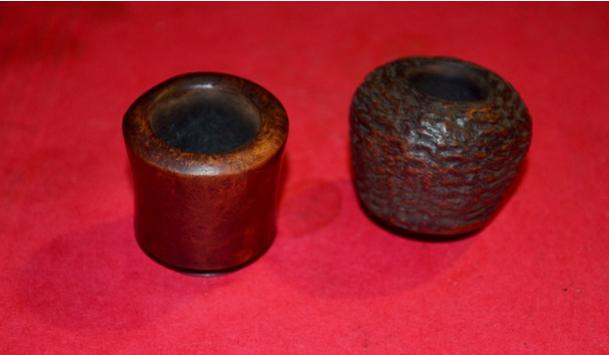
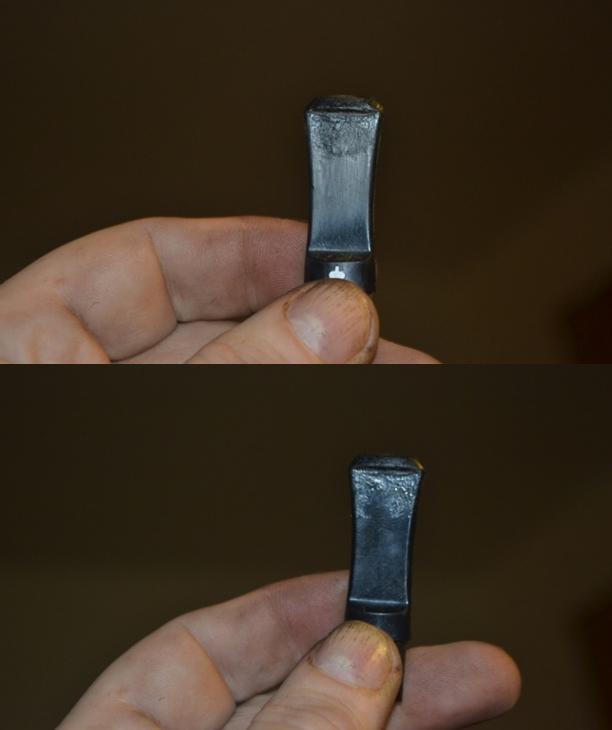
Check out the advertisement below from the first year the Filter Plus was made. Considering how easy it was to clean the frame of the pipe itself, despite (or because of) the dirty condition of the filter brush, it’s a shame they stopped making them. As the ad shows, the pipe cost $4, or $35.42 in today’s money. http://www.usinflationcalculator.com/. Replacement or additional bowls were $1.50 ($13.28), and two-packs of the filter brushes were 35 cents ($3.10).Delta28 Getting close to the finish line always makes my blood start to race! I buffed the two bowls with 4000 and 6000 micromesh.Delta29 Then there was the Kaywoodie bit, which was looking a little rough.Delta30 I sanded it with 200- and 320-grit paper before working my way up the micromesh trail, and moved on to putting a little Halcyon II wax on the Duncan. During a few of the 15 minutes or so it set in, I took the Kaywoodie Filter Plus billiard bowl and the bit (which indeed is removable) into my office. I buffed the bit with red and white Tripoli, then White Diamond, using the clean wheel between each; then the bowl with white Tripoli, White Diamond and a good coat of carnauba, again using the clean wheel in between.

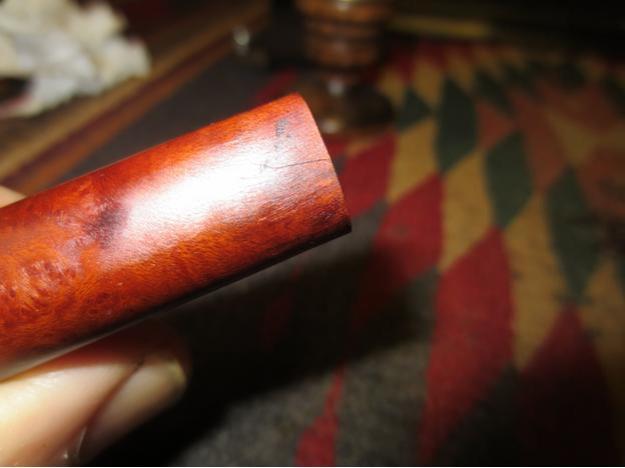
Really only ten minutes more passed, at most, as I sat back on my couch, screwing the Kaywoodie bowl in and out of the frame threads and wiping it down, over and over, because it seemed like the minute hand on the clock was stuck there to spite me! Maybe that’s because I kept eyeballing it. But the time did pass, and I carried the Duncan bowl into the office for a quick spin on the clean wheel only. That was my reward for being so patient and all.Delta31
Delta32

Delta33 CONCLUSION
Well. Now that it’s all said and done, all I really have to add is that this pair of restorations was just plain fun. And full of surprises. And I learned a few new things I never imagined, too, and can’t wait to show Chuck!

ADDITIONAL SOURCE
https://www.reddit.com/r/PipeTobacco/comments/3a5hf9/info_on_falcon_pipe_markings/ Info on FD18 stamp

Cleaning up a WDC Milano Hesson 1925 Long stem Billiard


Blog by Steve Laug

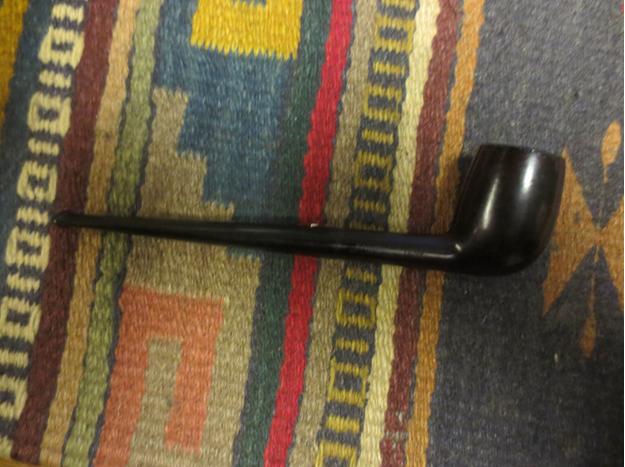
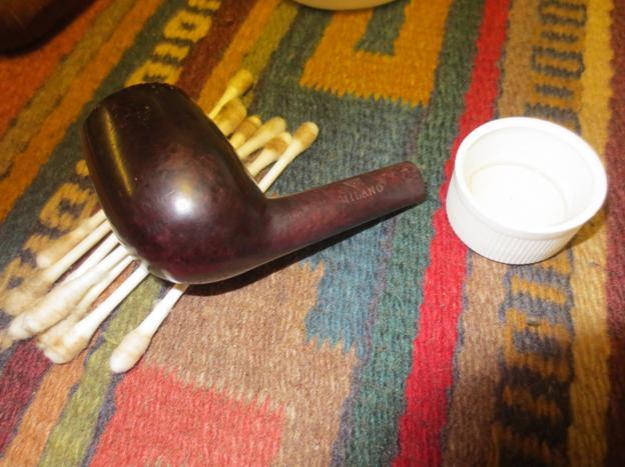
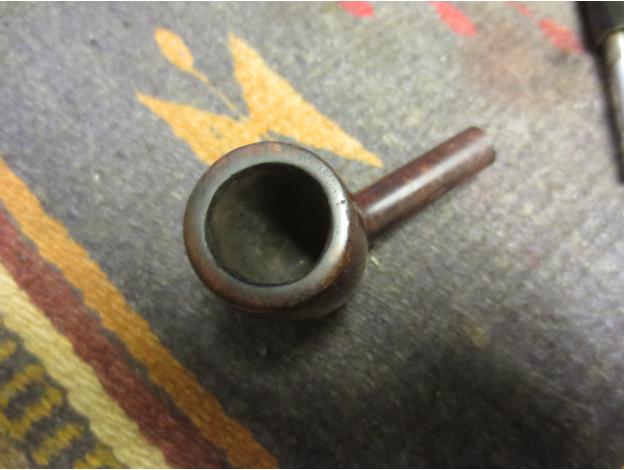
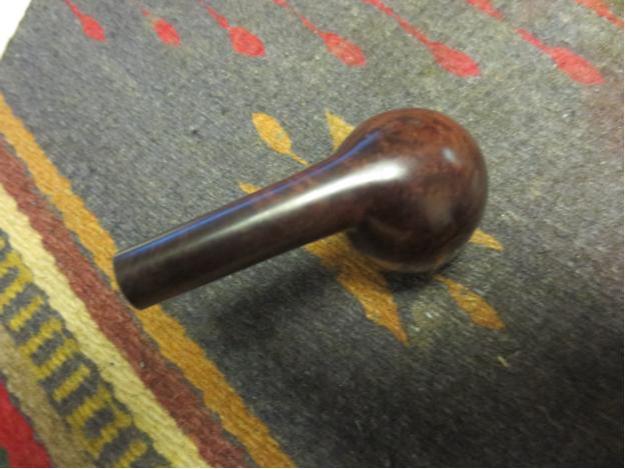
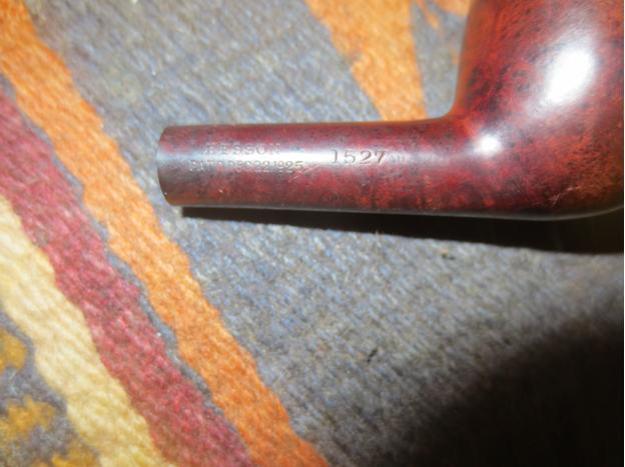
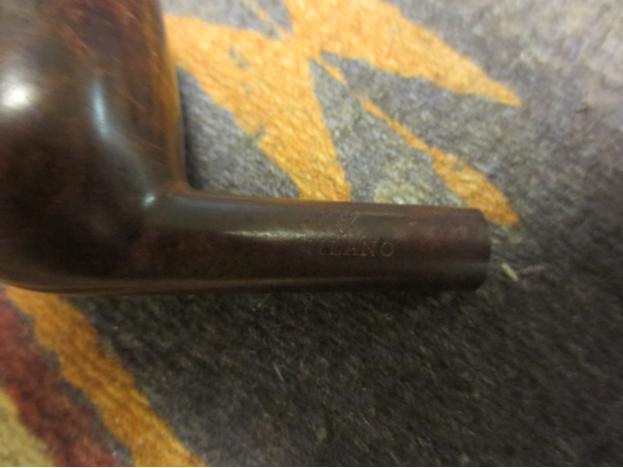
One of the pipes my brother sent me this past week was this long stemmed little billiard. The stem was over clocked almost ½ a turn in the shank and the stem was frozen in the shank. It was dark coloured and the finish was dingy. The rim was covered with an overflow of cake from the bowl but it did not look to be damaged either on the inside or outside edge. The bowl itself had a broken cake lining it – thicker in the middle and the back edge than at the top or the bottom fo the bowl. There was some small pin prick sized marks around the back side of the bowl near the top edge but they were not rough. The stem itself was quite clean – good rubber so it had hardly oxidized. There were two small tooth marks – one on each side of the stem. The WDC white triangle in the stem had lifted and would need to be repaired. The stamping on the shank of the pipe is what got my attention. On the left side it had the WDC in a triangle logo over MILANO. I have seen quite a few WDC Milano pipes over the years. On the other side it is stamped Hesson over Pat’d Dec 22, 1925 and the shape number 1527.Hesson1

Hesson2

Hesson3

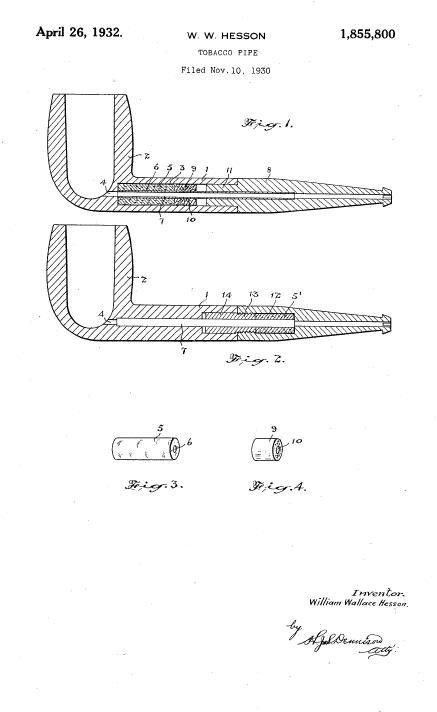
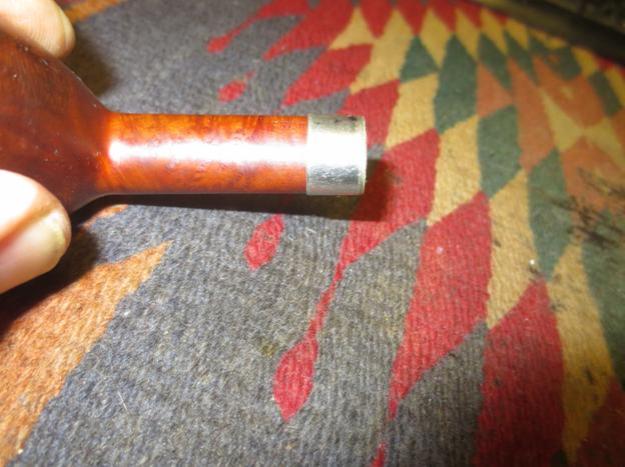
Hesson4 I was not sure what kind of connection I was dealing with on the tenon on this old Milano. Other ones I had worked on were push aluminum tenons and sat in the shank. The aluminum oxidized and the tenons often were bound to the shank when I got them. But there was something about this one that was different. I could not turn it either direction so I put it in the freezer overnight and let the different expansion/contraction rates of briar and metal do their work. In the morning I carefully worked it back and forth and it seemed to give a little. I decided to see if it was a threaded tenon so I held the shank tightly next to the stem and the turned the stem counter clockwise and it came free. Once it was out I could see that I was dealing with a slightly older Milano Hesson system than any of the previous ones I had worked on. This one had a threaded tenon with a long tube attached to the end. The tube extended right up to the entry of the airway in the bottom of the bowl. The shank was also was threaded but the threads had been cut into the briar. There was no mortise insert in the shank.Hesson5 I looked at the documents I had from the other WDC Milano Hesson pipes that I had restored. This one was slightly different. I have included the Patent drawing for your comparison. The differences are readily notable. The patent is from 1932 and the pipe is stamped 1925. The major difference that I see is the internal of the shank and the tube on the tenon in the 1925 edition.Hessiona I decided to use my tried and true method for correcting over clocked stems. I heated the tenon with the flame of the lighter and tried to turn it. It did not work. No matter how long I held the lighter in place it did not heat the glue in the stem enough to allow me to align the stem with the shank. I set up a heat gun and heated the tenon on low heat. It did not take long and I was able to screw it into the shank and align the stem properly. I set it aside and let it cool with the stem in place while the glue hardened again. I took the following three photos to show the properly aligned stem.Hesson6
Hesson7

Hesson8 I cleaned out the shank with cotton swabs and alcohol until it was clean. I ran a pipe cleaner through at the entry of the airway into the bowl. The end of the metal tube sat against the entry so it was pretty clean. Most of the grit and grime were in the threads on the walls of the mortise.Hesson9 I reamed the bowl with a PipNet reamer and the smallest cutting head to take the cake back to the briar.Hesson10

Hesson11 With the inside clean I worked on the bowl finish. It was dirty but it also had a coat of varnish on the surface that had gone opaque. The grain was invisible underneath it. I lightly sanded the bowl and rim with 1500 grit micromesh to break up the surface of the varnish and then wiped the bowl down with acetone on cotton pads until I had removed the grime and varnish coat and the grain was visible. The stain on the pipe was oxblood so it had a rich, deep red hue to it.Hesson12

Hesson13

Hesson14

Hesson15 I scrubbed the metal tube with 1500 grit micromesh and used a brass tire brush on the threads to clean up the grime and oxidation that was present on it. I cleaned out the inside with pipe cleaners, cotton swabs and alcohol.Hesson16 I buffed the bowl with White Diamond (very lightly around the stamping on the shank) and gave it a coat of carnauba wax.Hesson17
Hesson18

Hesson19

Hesson20 I took close up photos of the stamping on the shank. The left side shows in the first photo. The right side of the shank is shown in the second. It is sharp and very legible.Hesson21
Hesson22 I worked on the stem with 220 grit sandpaper to remove the small tooth marks on the top and the bottom sides. I then sanded it with a medium and fine grit sanding sponge to minimize the scratching.Hesson23

Hesson24

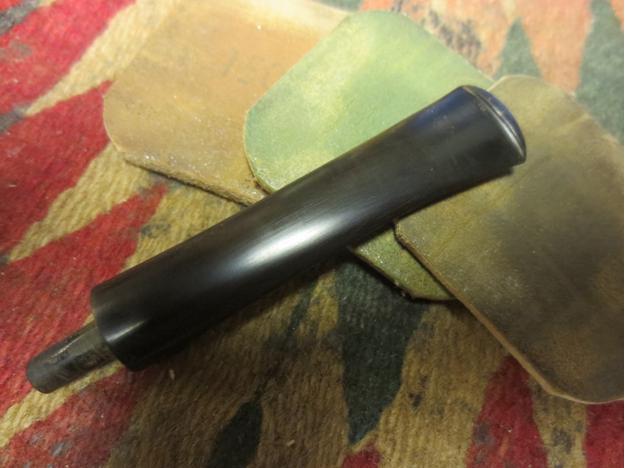
Hesson25 I started to polish the stem with micromesh sanding pads. I wet sanded with 1500-2400 grit pads and then rubbed the stem down with Obsidian Oil. I was just starting to sand with a 3200 grit pad when the edge of the pad hit the edge of the triangle (it sat high on the stem as it appeared to have lifted) and sent it flying. The white triangle was nowhere to be found so now I faced a new dilemma.Hesson26 I filled in the empty triangle in the stem with liquid paper. It is the same white as the previous triangle. It shrinks as it dries so once it was dry I put a drop of clear super glue on top of it to form a bubble. Once it dried I could sand it down to the surface of the stem and I would be good to go with the replacement triangle.Hesson27 Once the glue dried I sanded the fill down to match the surface of the stem and the new triangle looked pretty good. I cleaned out the threads on the tenon with alcohol and a cotton pad and then screwed it back into the mortise. I sanded the newly filled and area with 1500-2400 grit pads and then continued with 3200-4000 grit pads. I rubbed the stem down with Obsidian Oil and then dry sanded with 6000-12000 grit pads. I gave it a final coat of Obsidian Oil and let it dry.Hesson28

Hesson29 I buffed the stem and bowl with Blue Diamond on the wheel and then gave it multiple coats of carnauba wax. I buffed it with a clean flannel buff to raise the shine and then hand buffed it with a microfibre cloth. The finished pipe is shown in the photos below. It does not look too bad for a pipe from Dec. 22, 1925. Thanks for looking.Hesson30

Hesson31

Hesson32

Hesson33

Hesson34

Hesson35

Hesson36