Author Archives: Greg

Unknown's avatar

About Greg

I am medically retired from my 'career', have been since 1999. For quite some time I missed my old job a lot. I enjoyed it, I was good at it and didn't have any desire to do anything else. But the Lord had other plans for me. Now He has called me to work for Him. He has graciously given me some talent to work with words. He has also seen fit to guide me with the Holy Spirit to study and comprehend His Word. Don't misunderstand; I am no scholar nor a pastor. I'm just trying to be obedient to my Lord and Savior and do what He asks me, in a way that would please and bring glory to His holy Name.

A Handmade Denmark Dublin Reborn


Blog by Greg Wolford

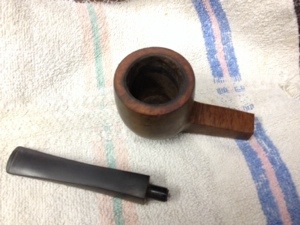
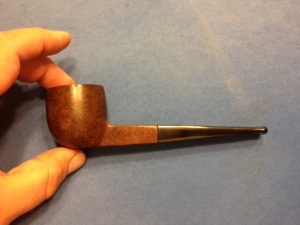
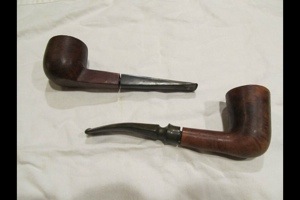
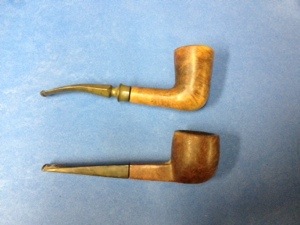
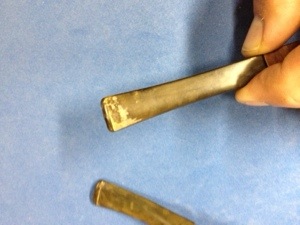
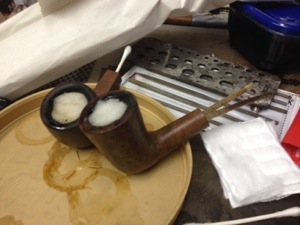
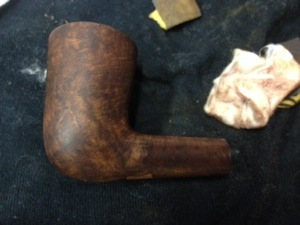
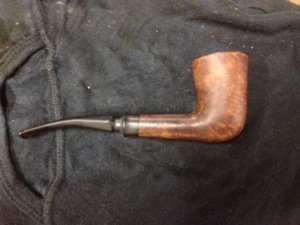
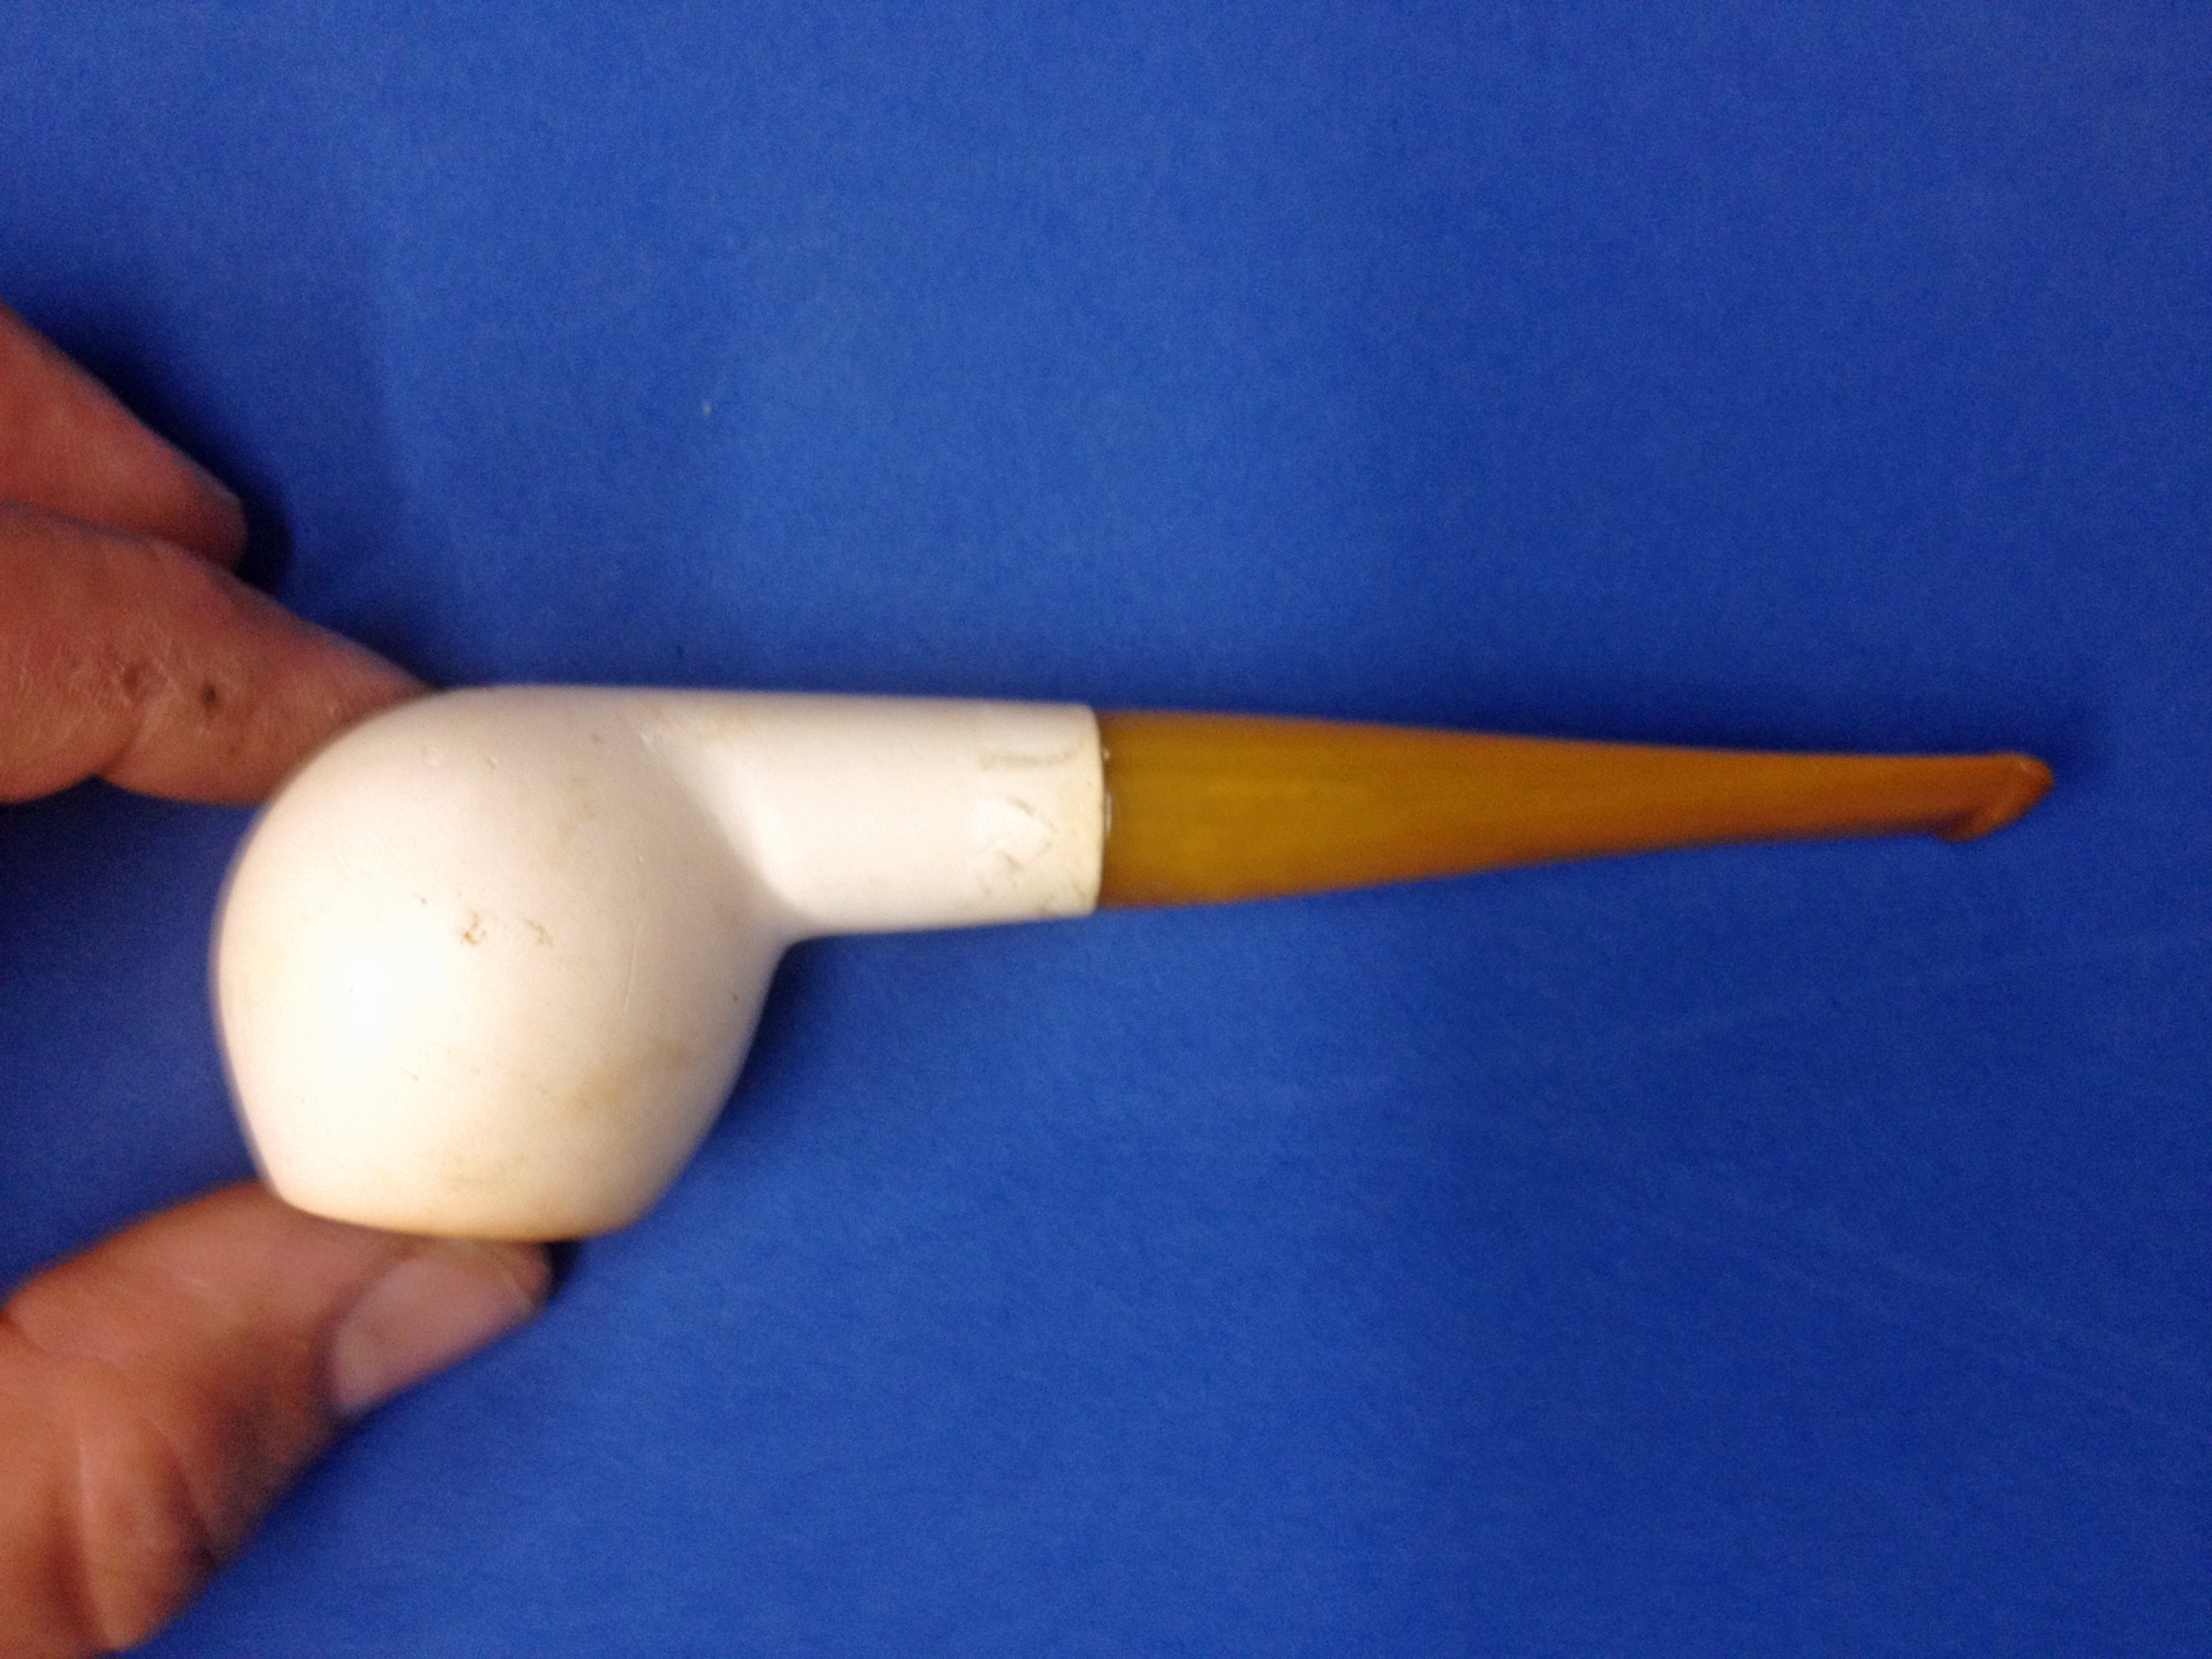
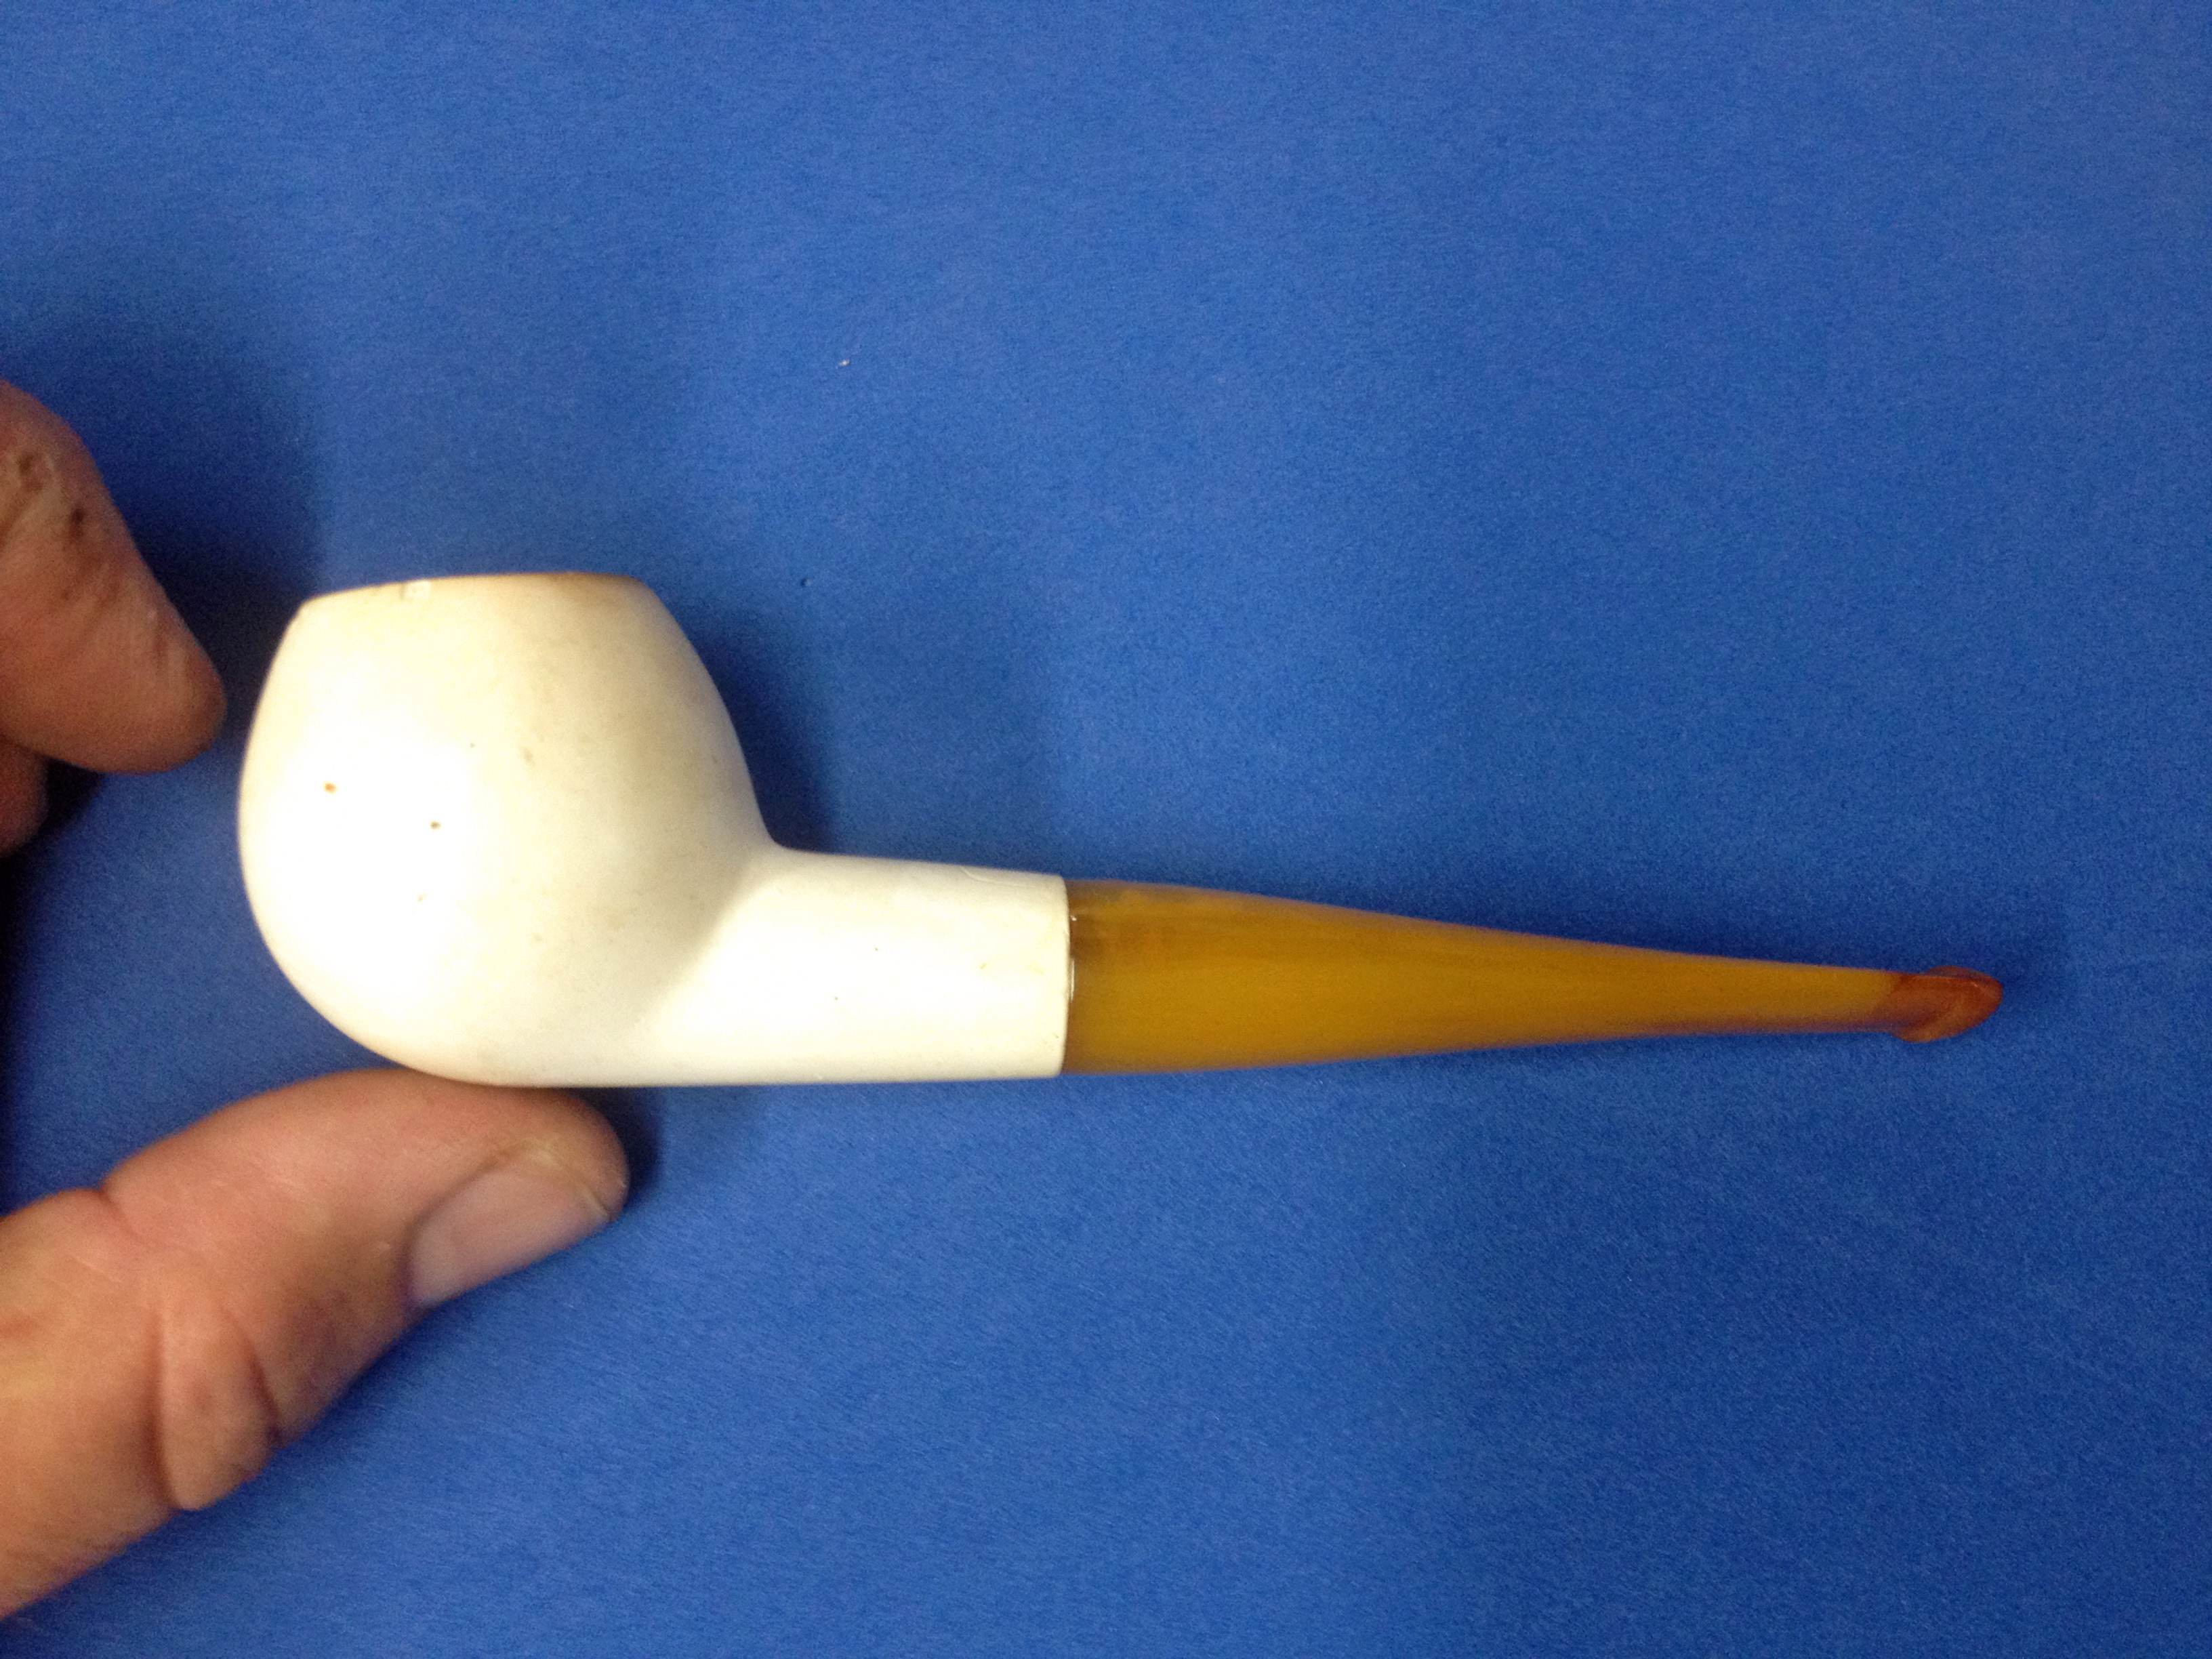
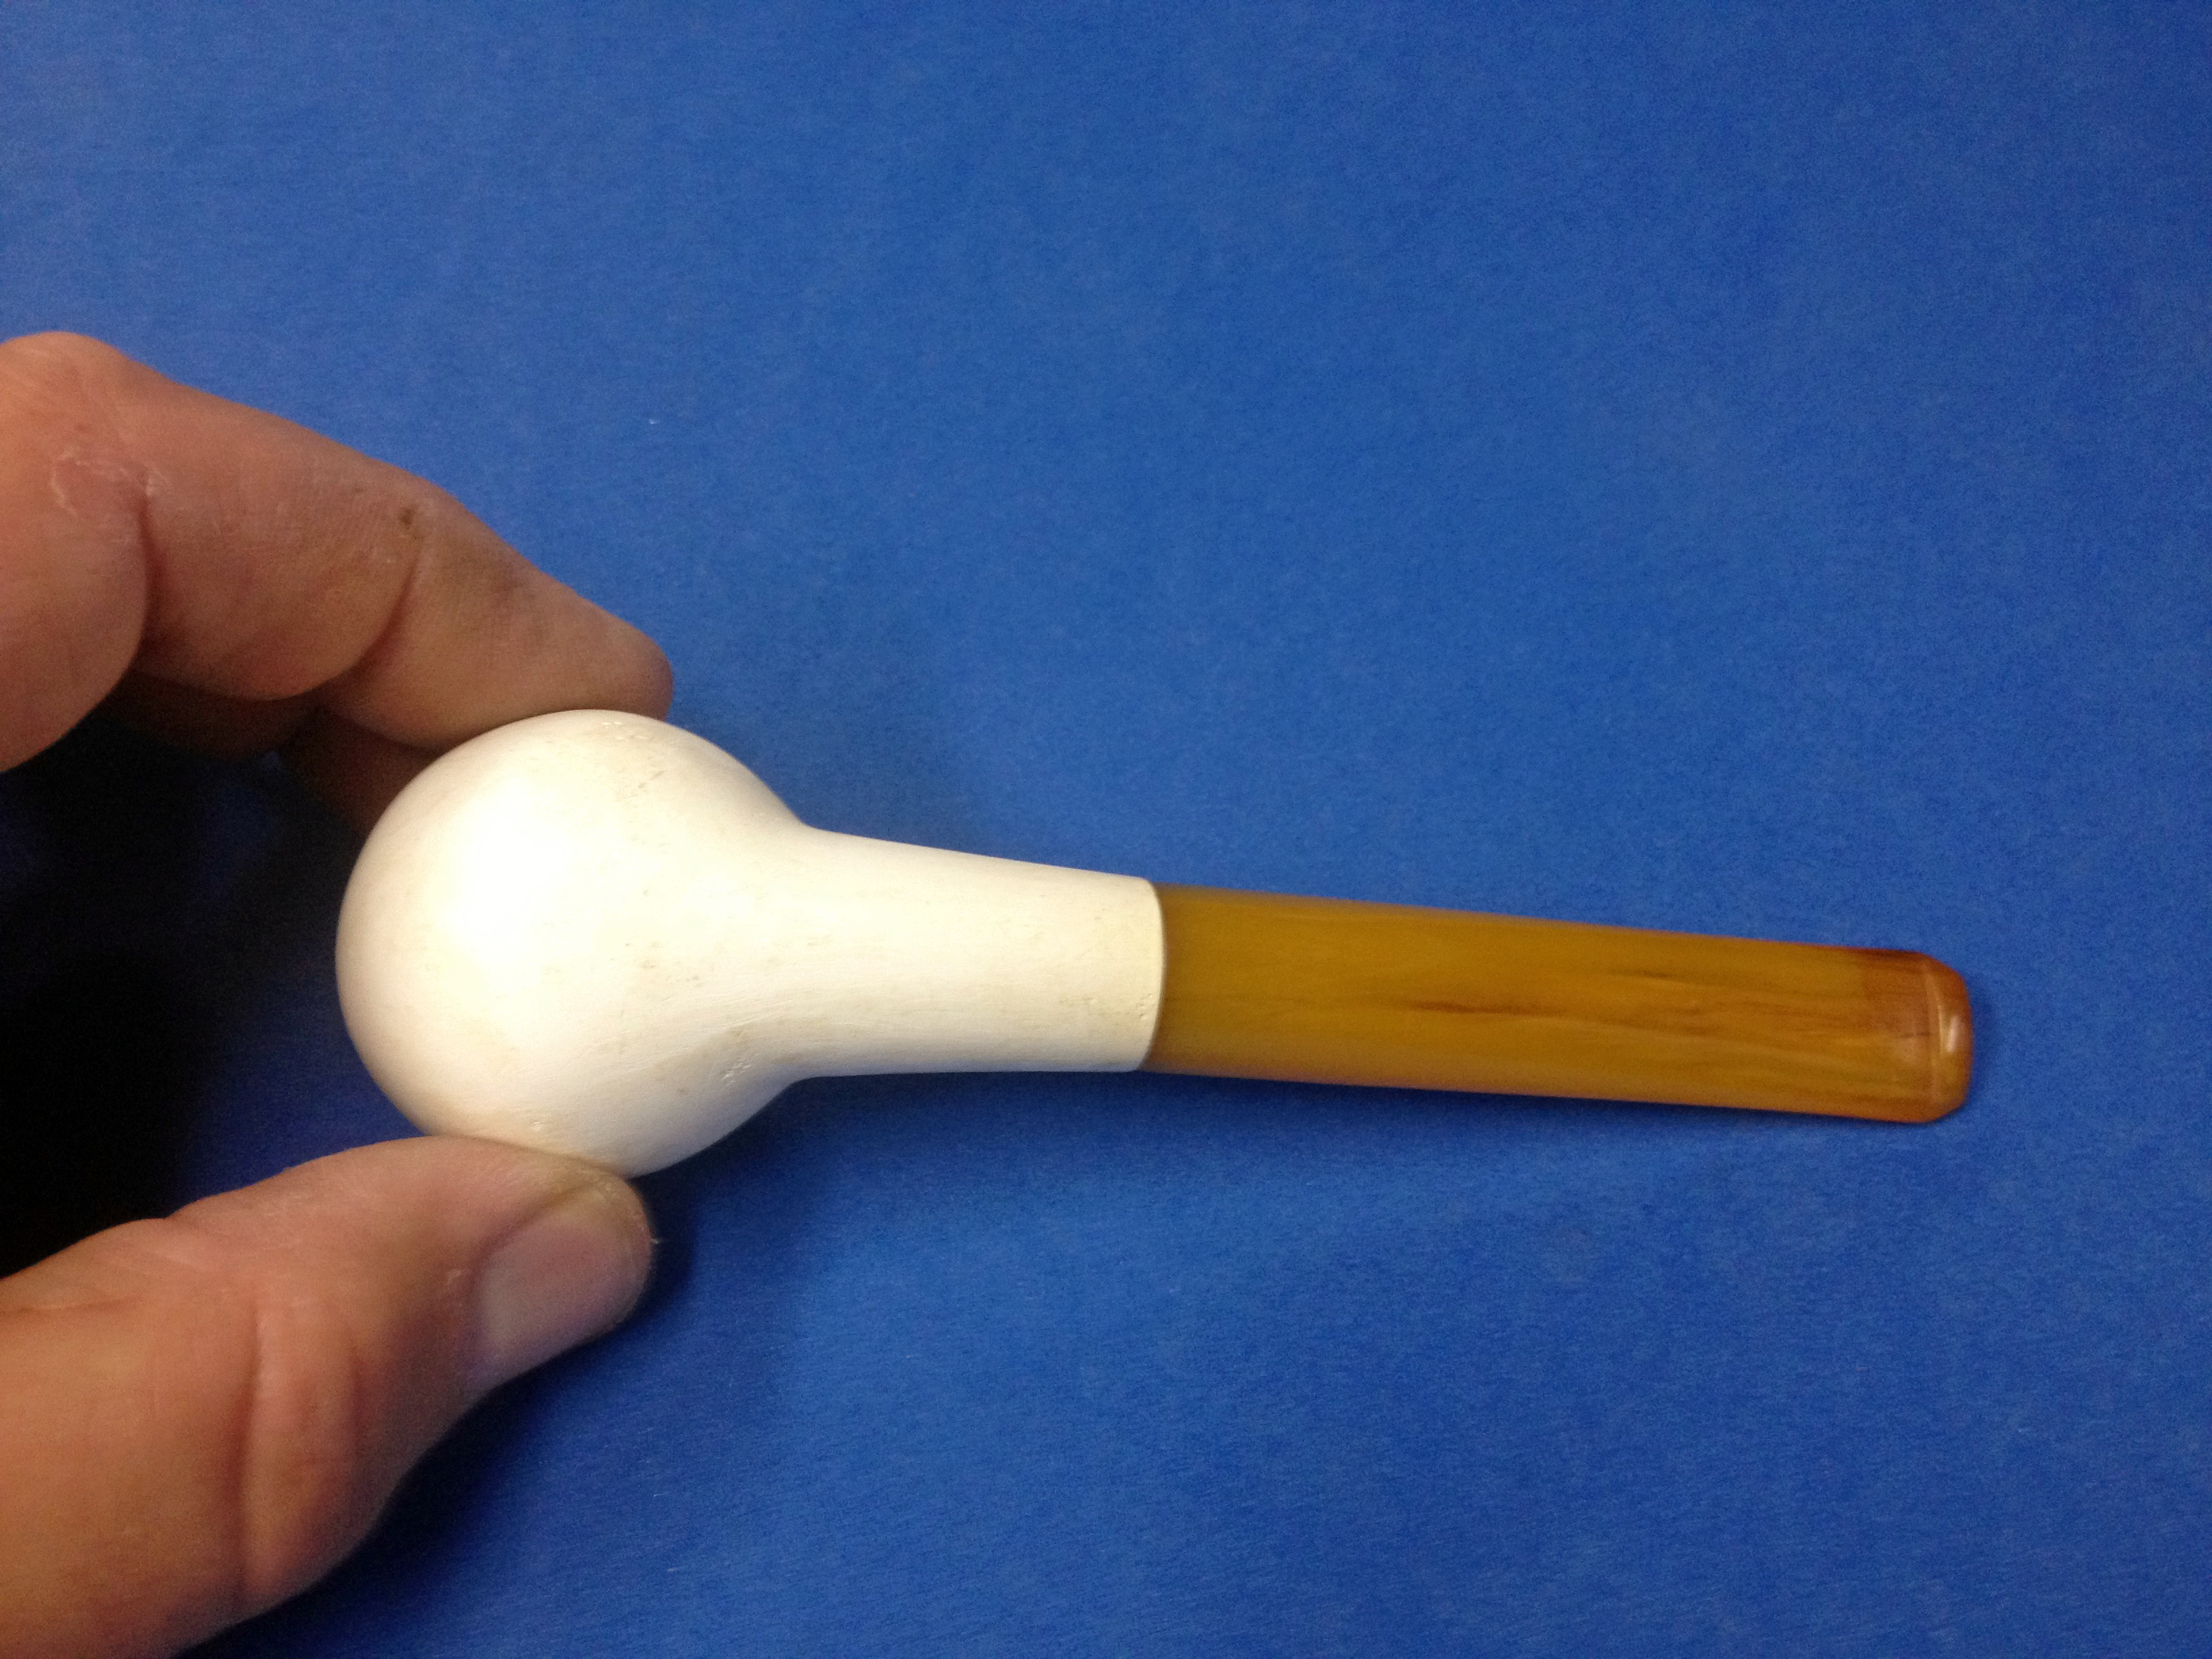
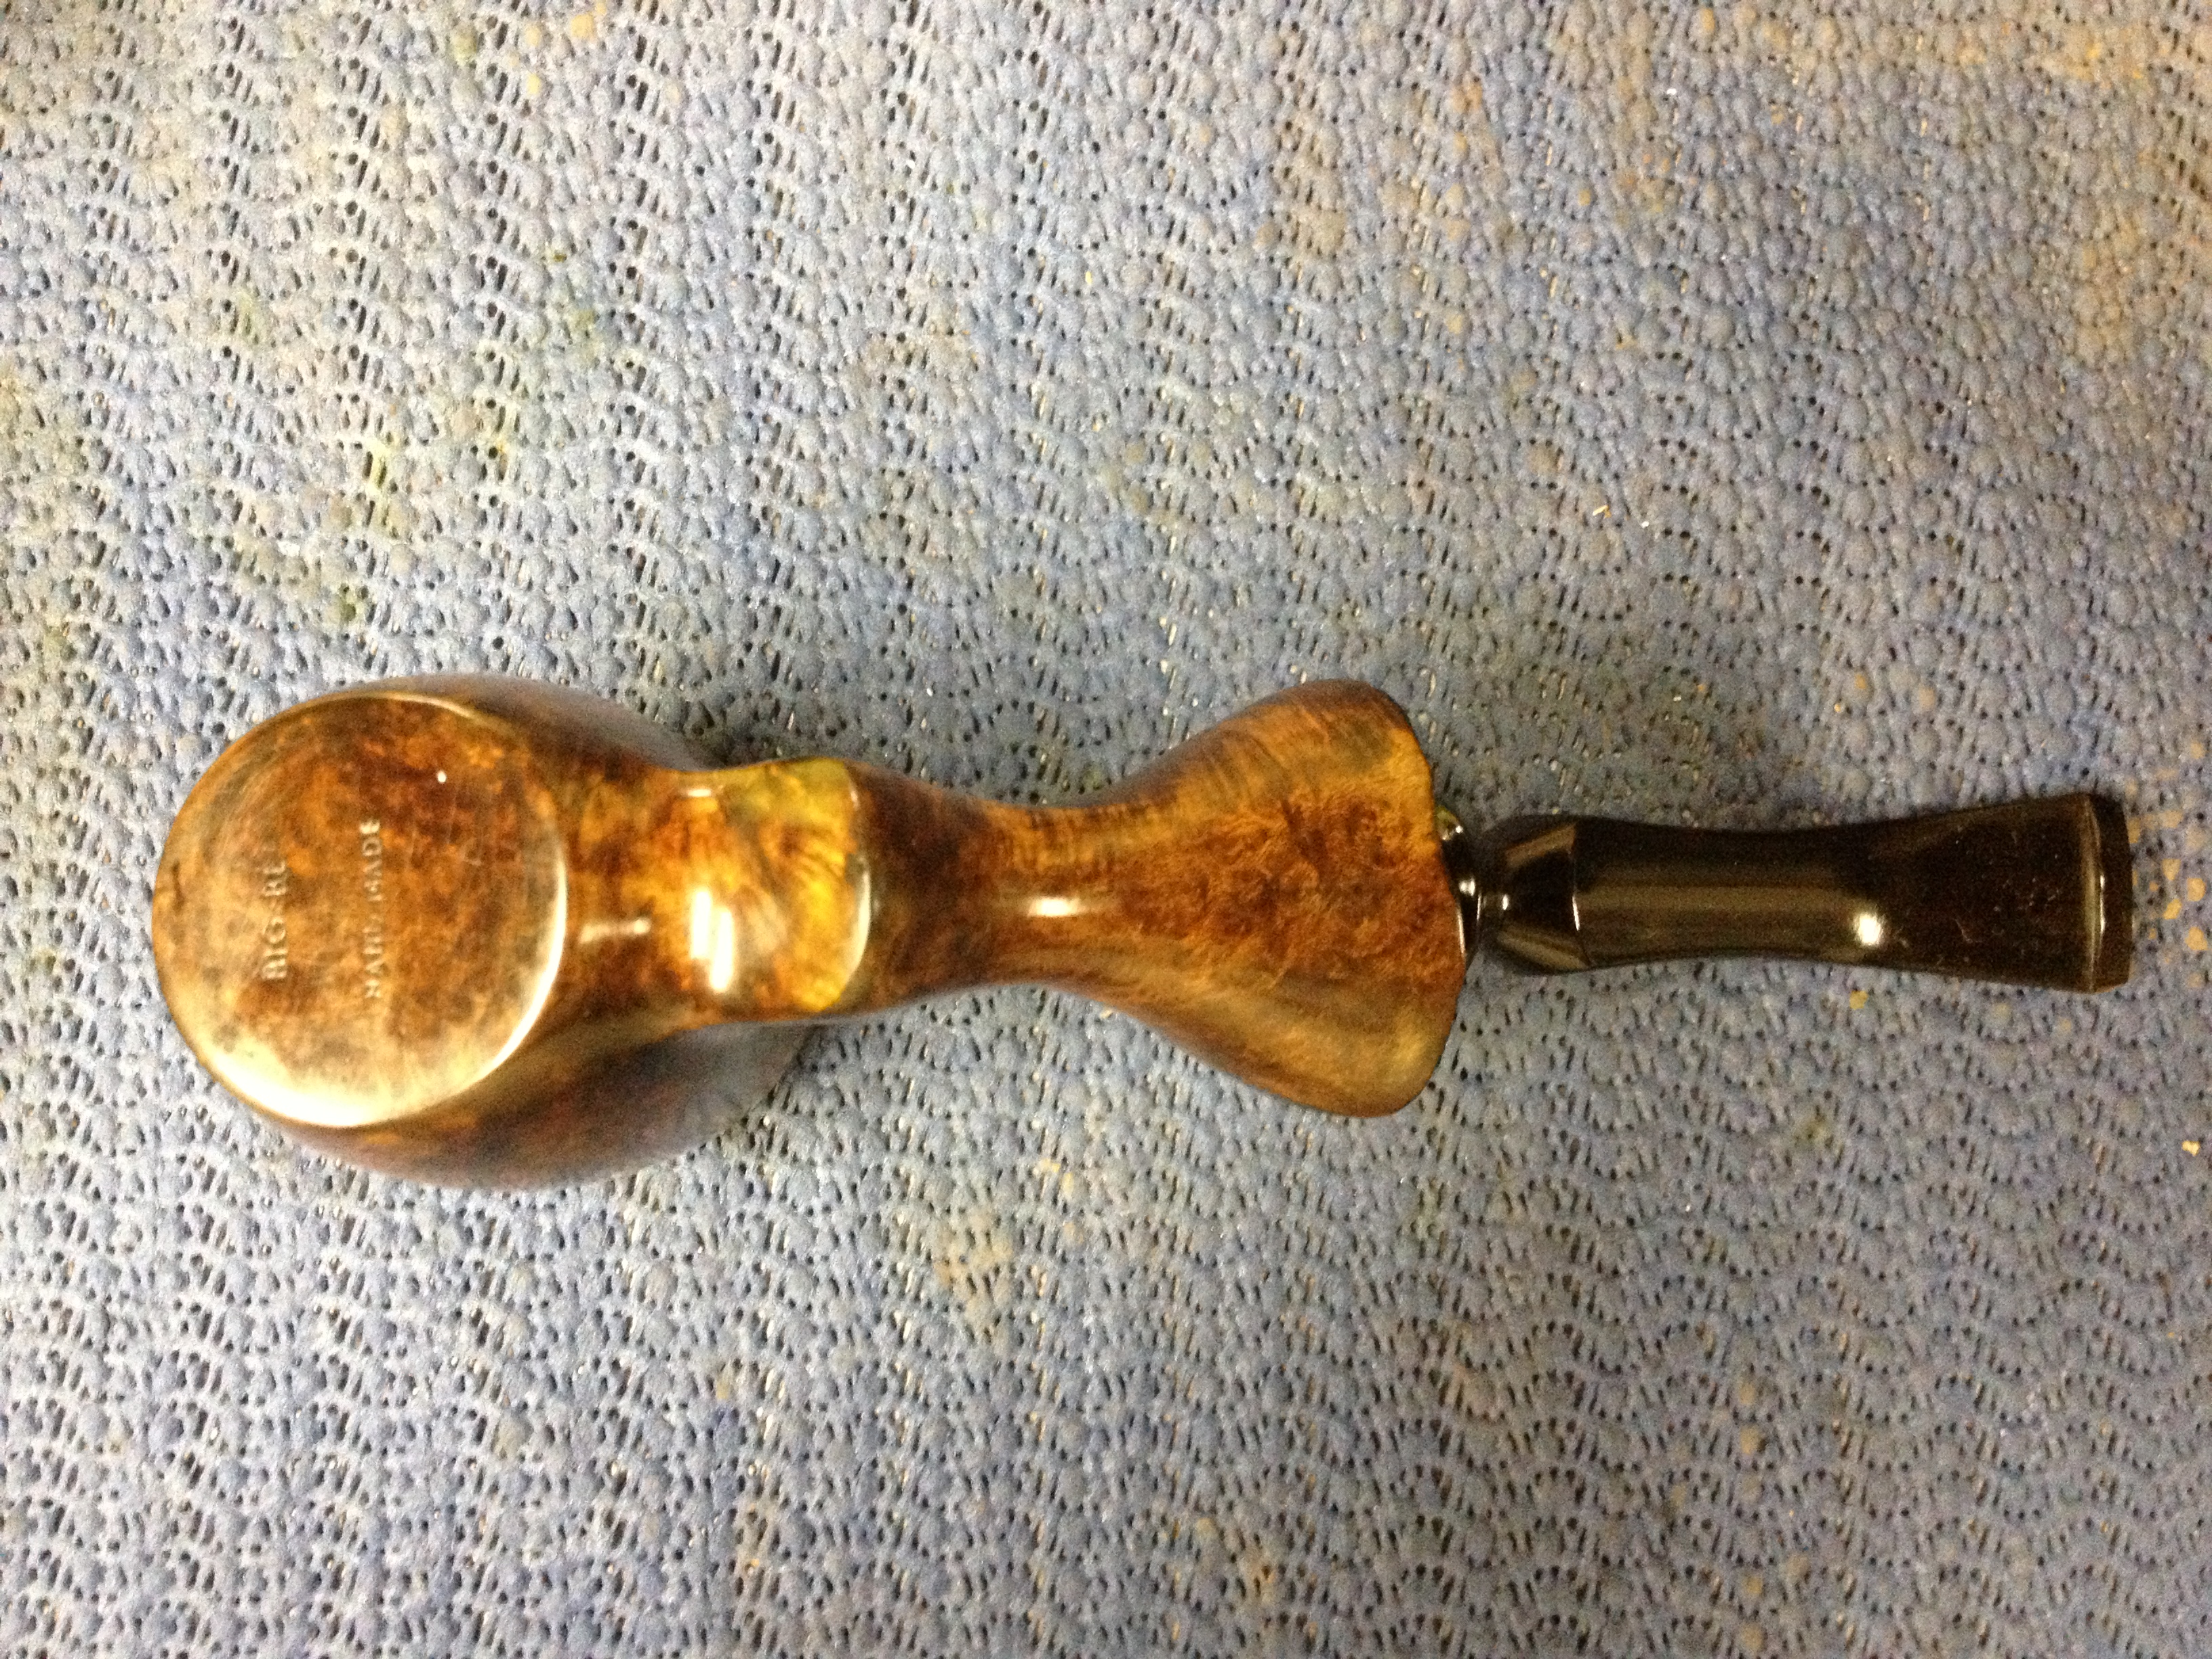
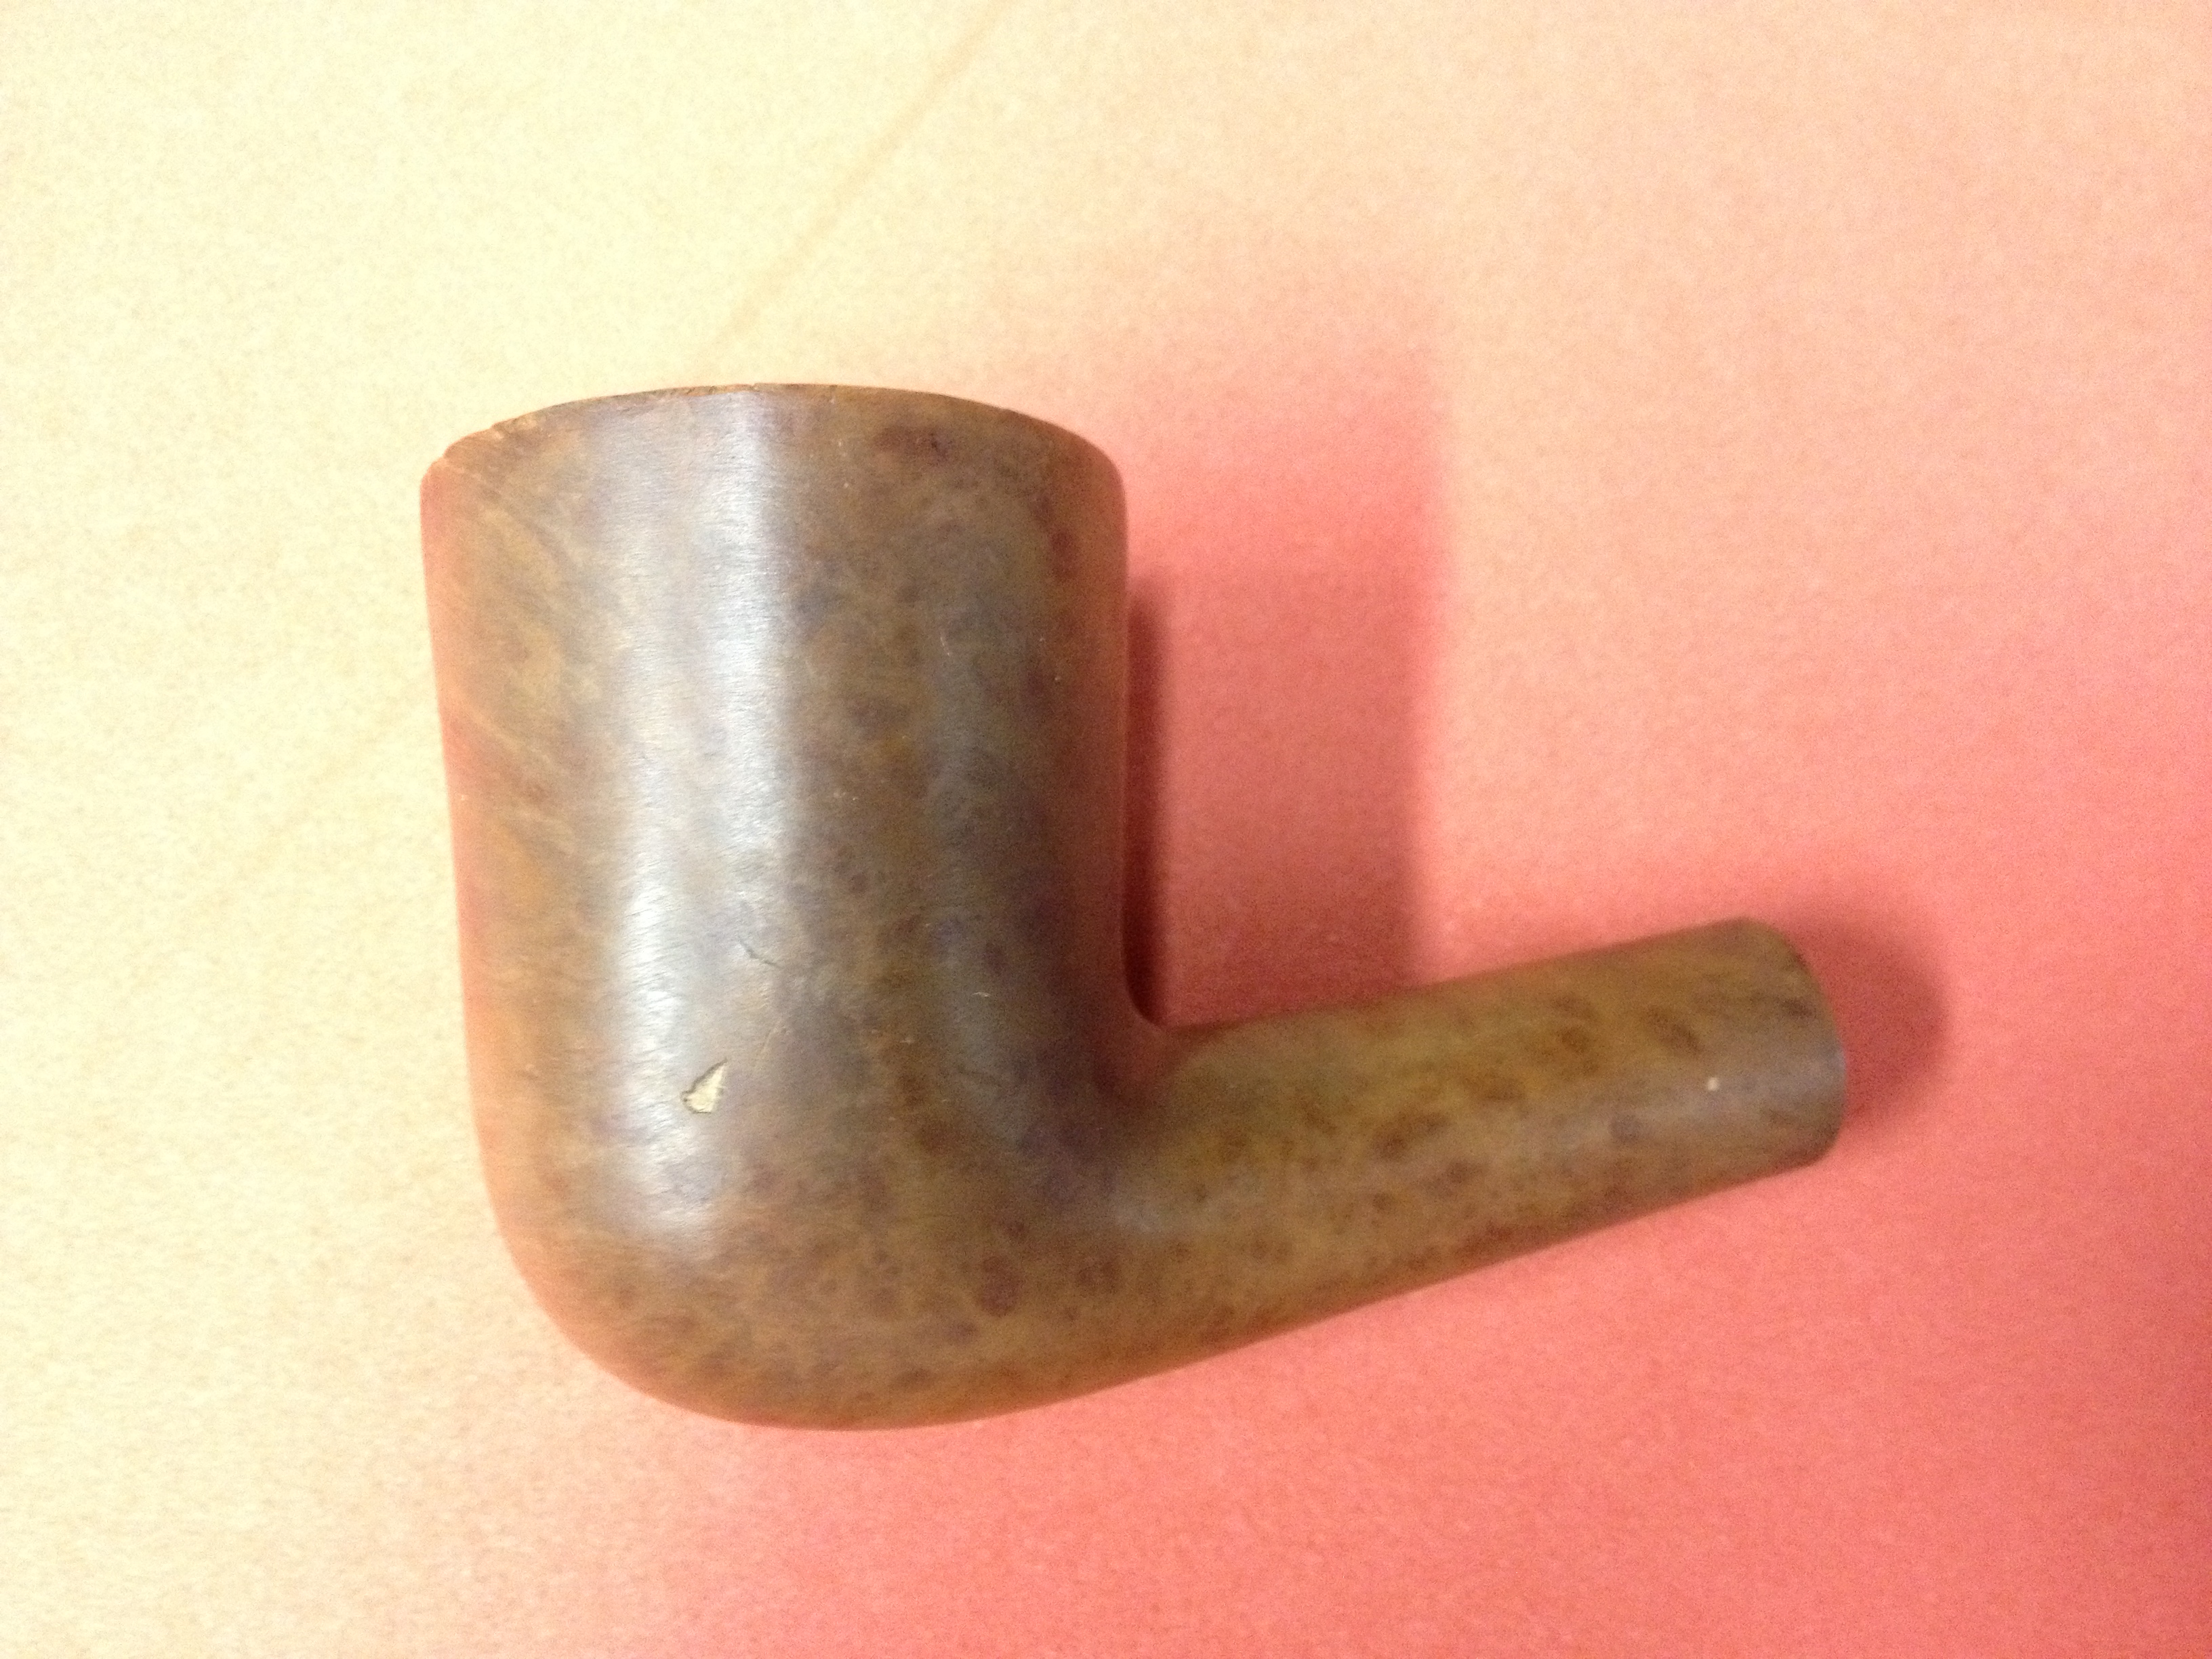
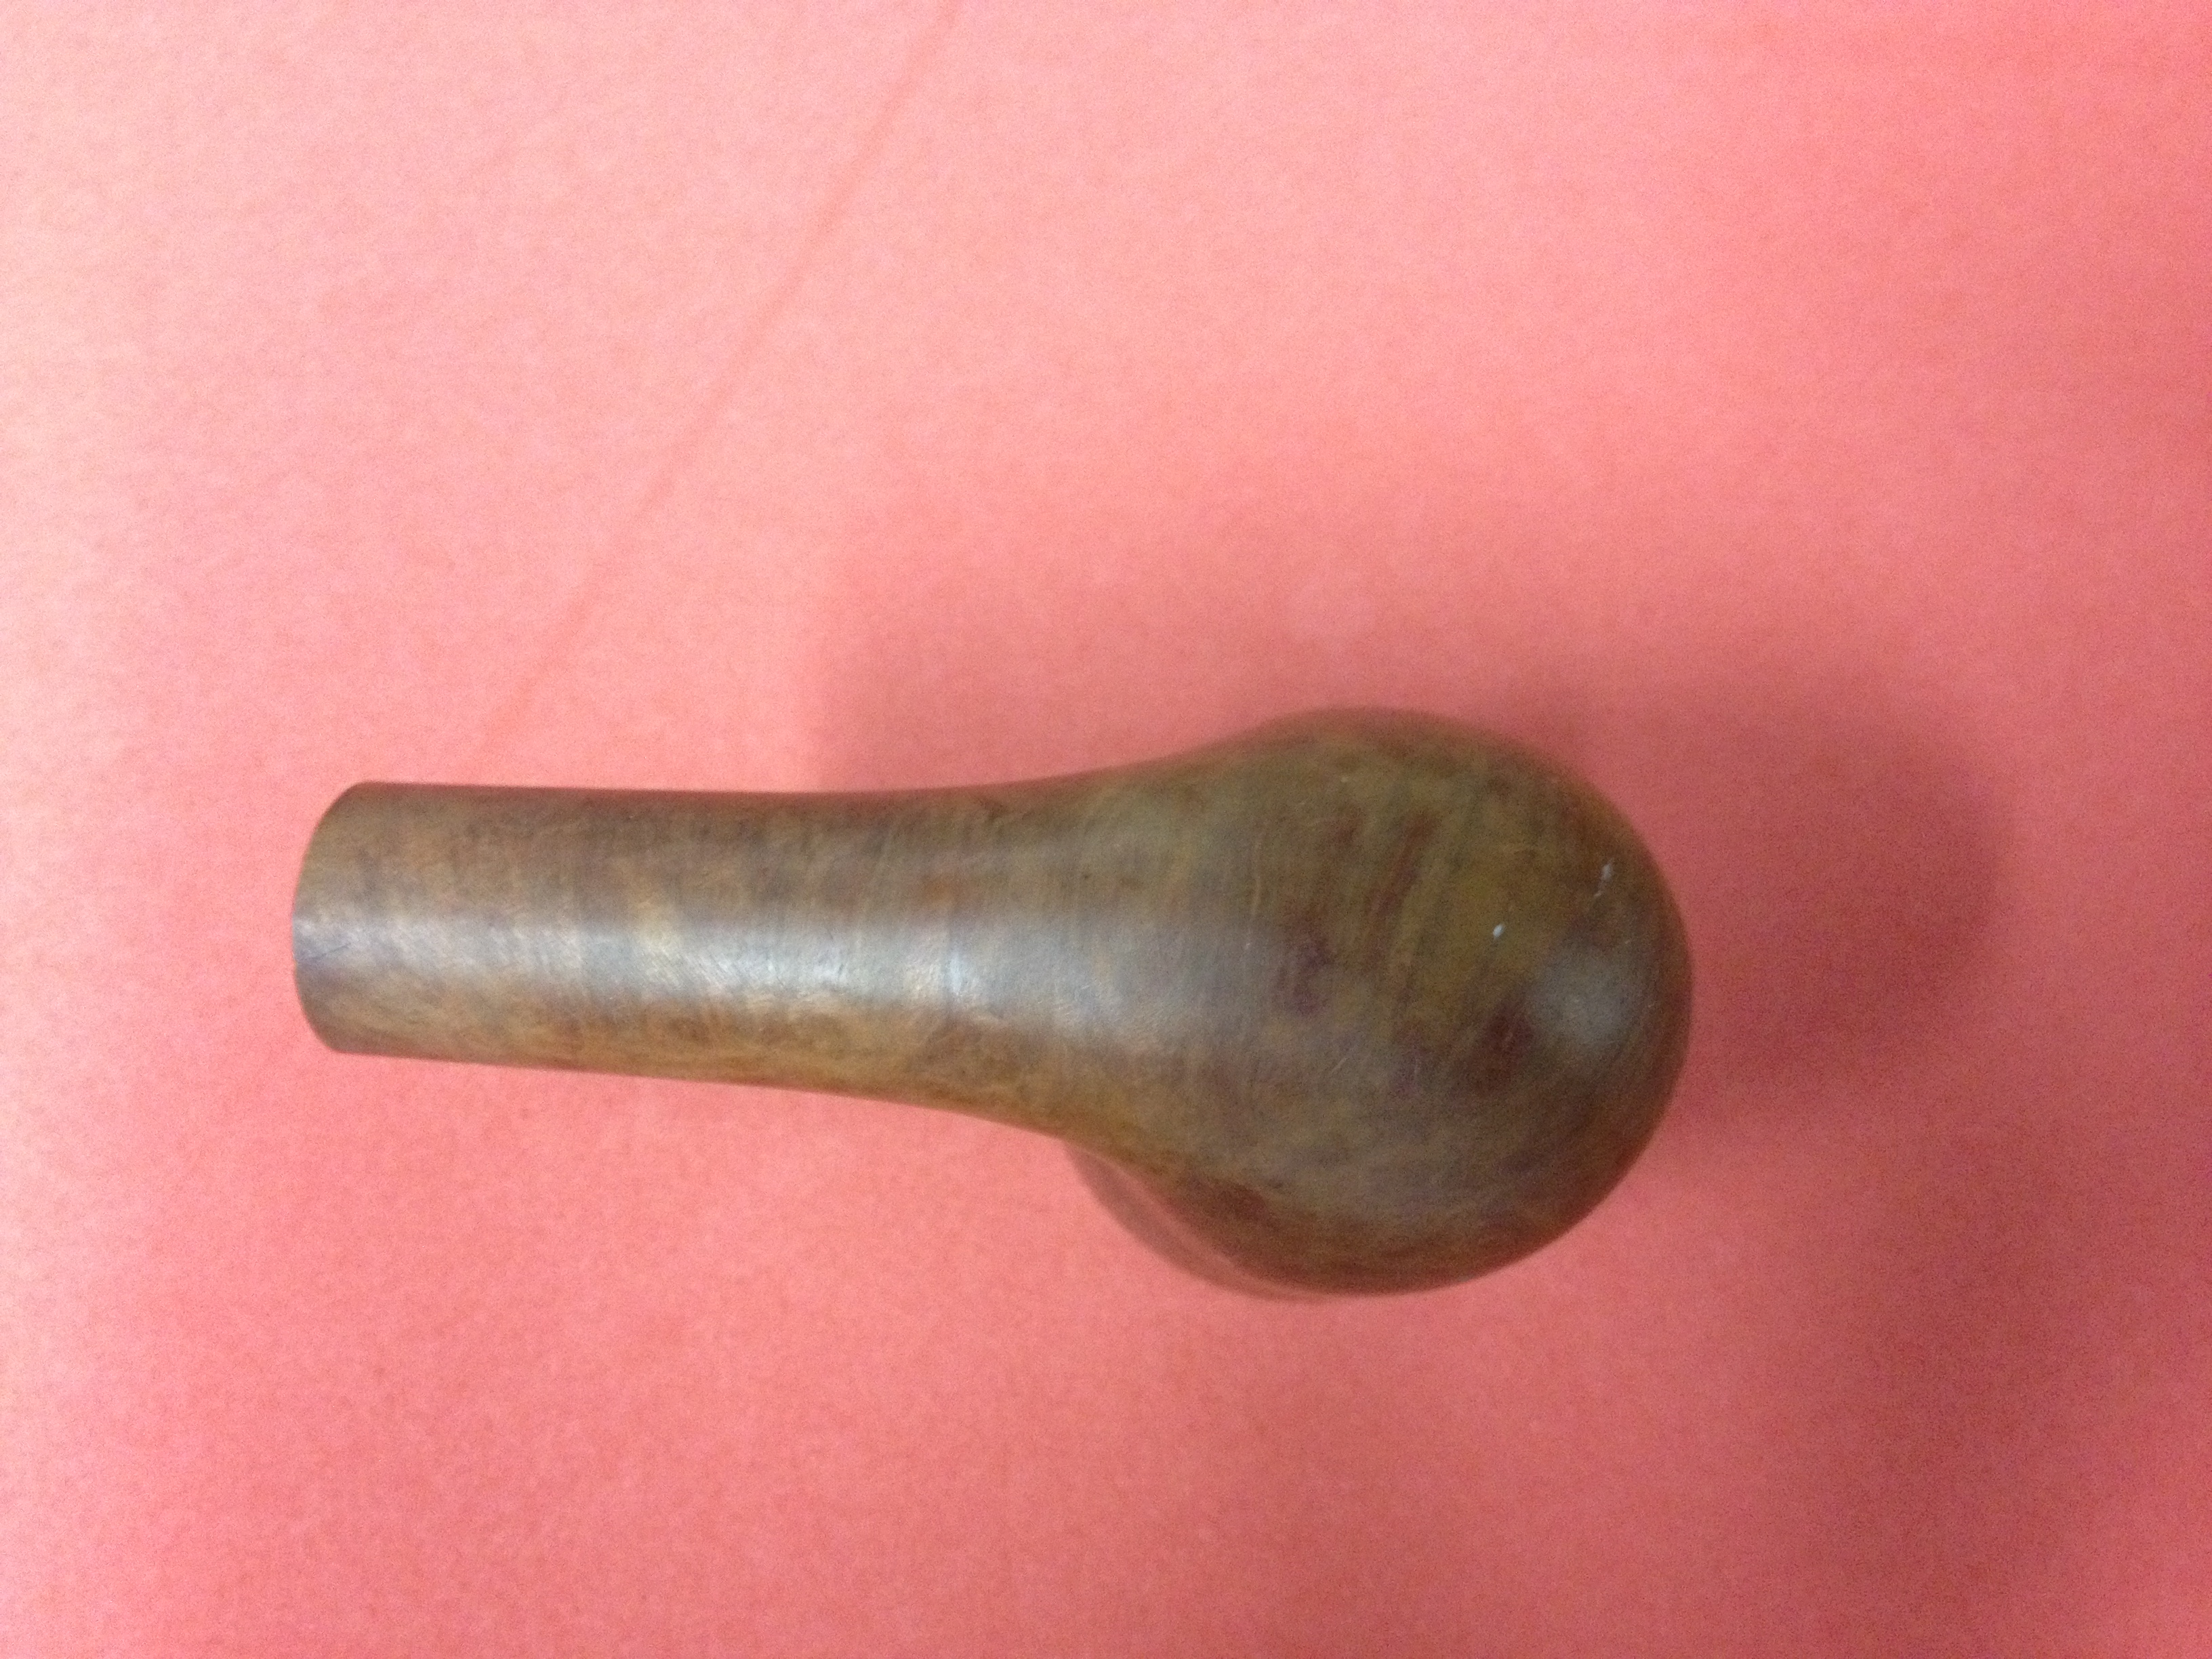
A week or so ago I went into a local antique shop that houses a variety of vendors. In the past I have found a few decent pipes here so I always have high hopes when I go there. This trip yielded a nice little haul of four pipes which I plan to restore over the next few weeks as i have time. The first two have already been started one: one completed and one still in the process. This post will mainly focus on a Dublin shape that is stamped on the shank Handmade over Denmark, with no other information on the pipe or stem. This is the pipe as it looked when I got it home:

Image

ImageImageImage

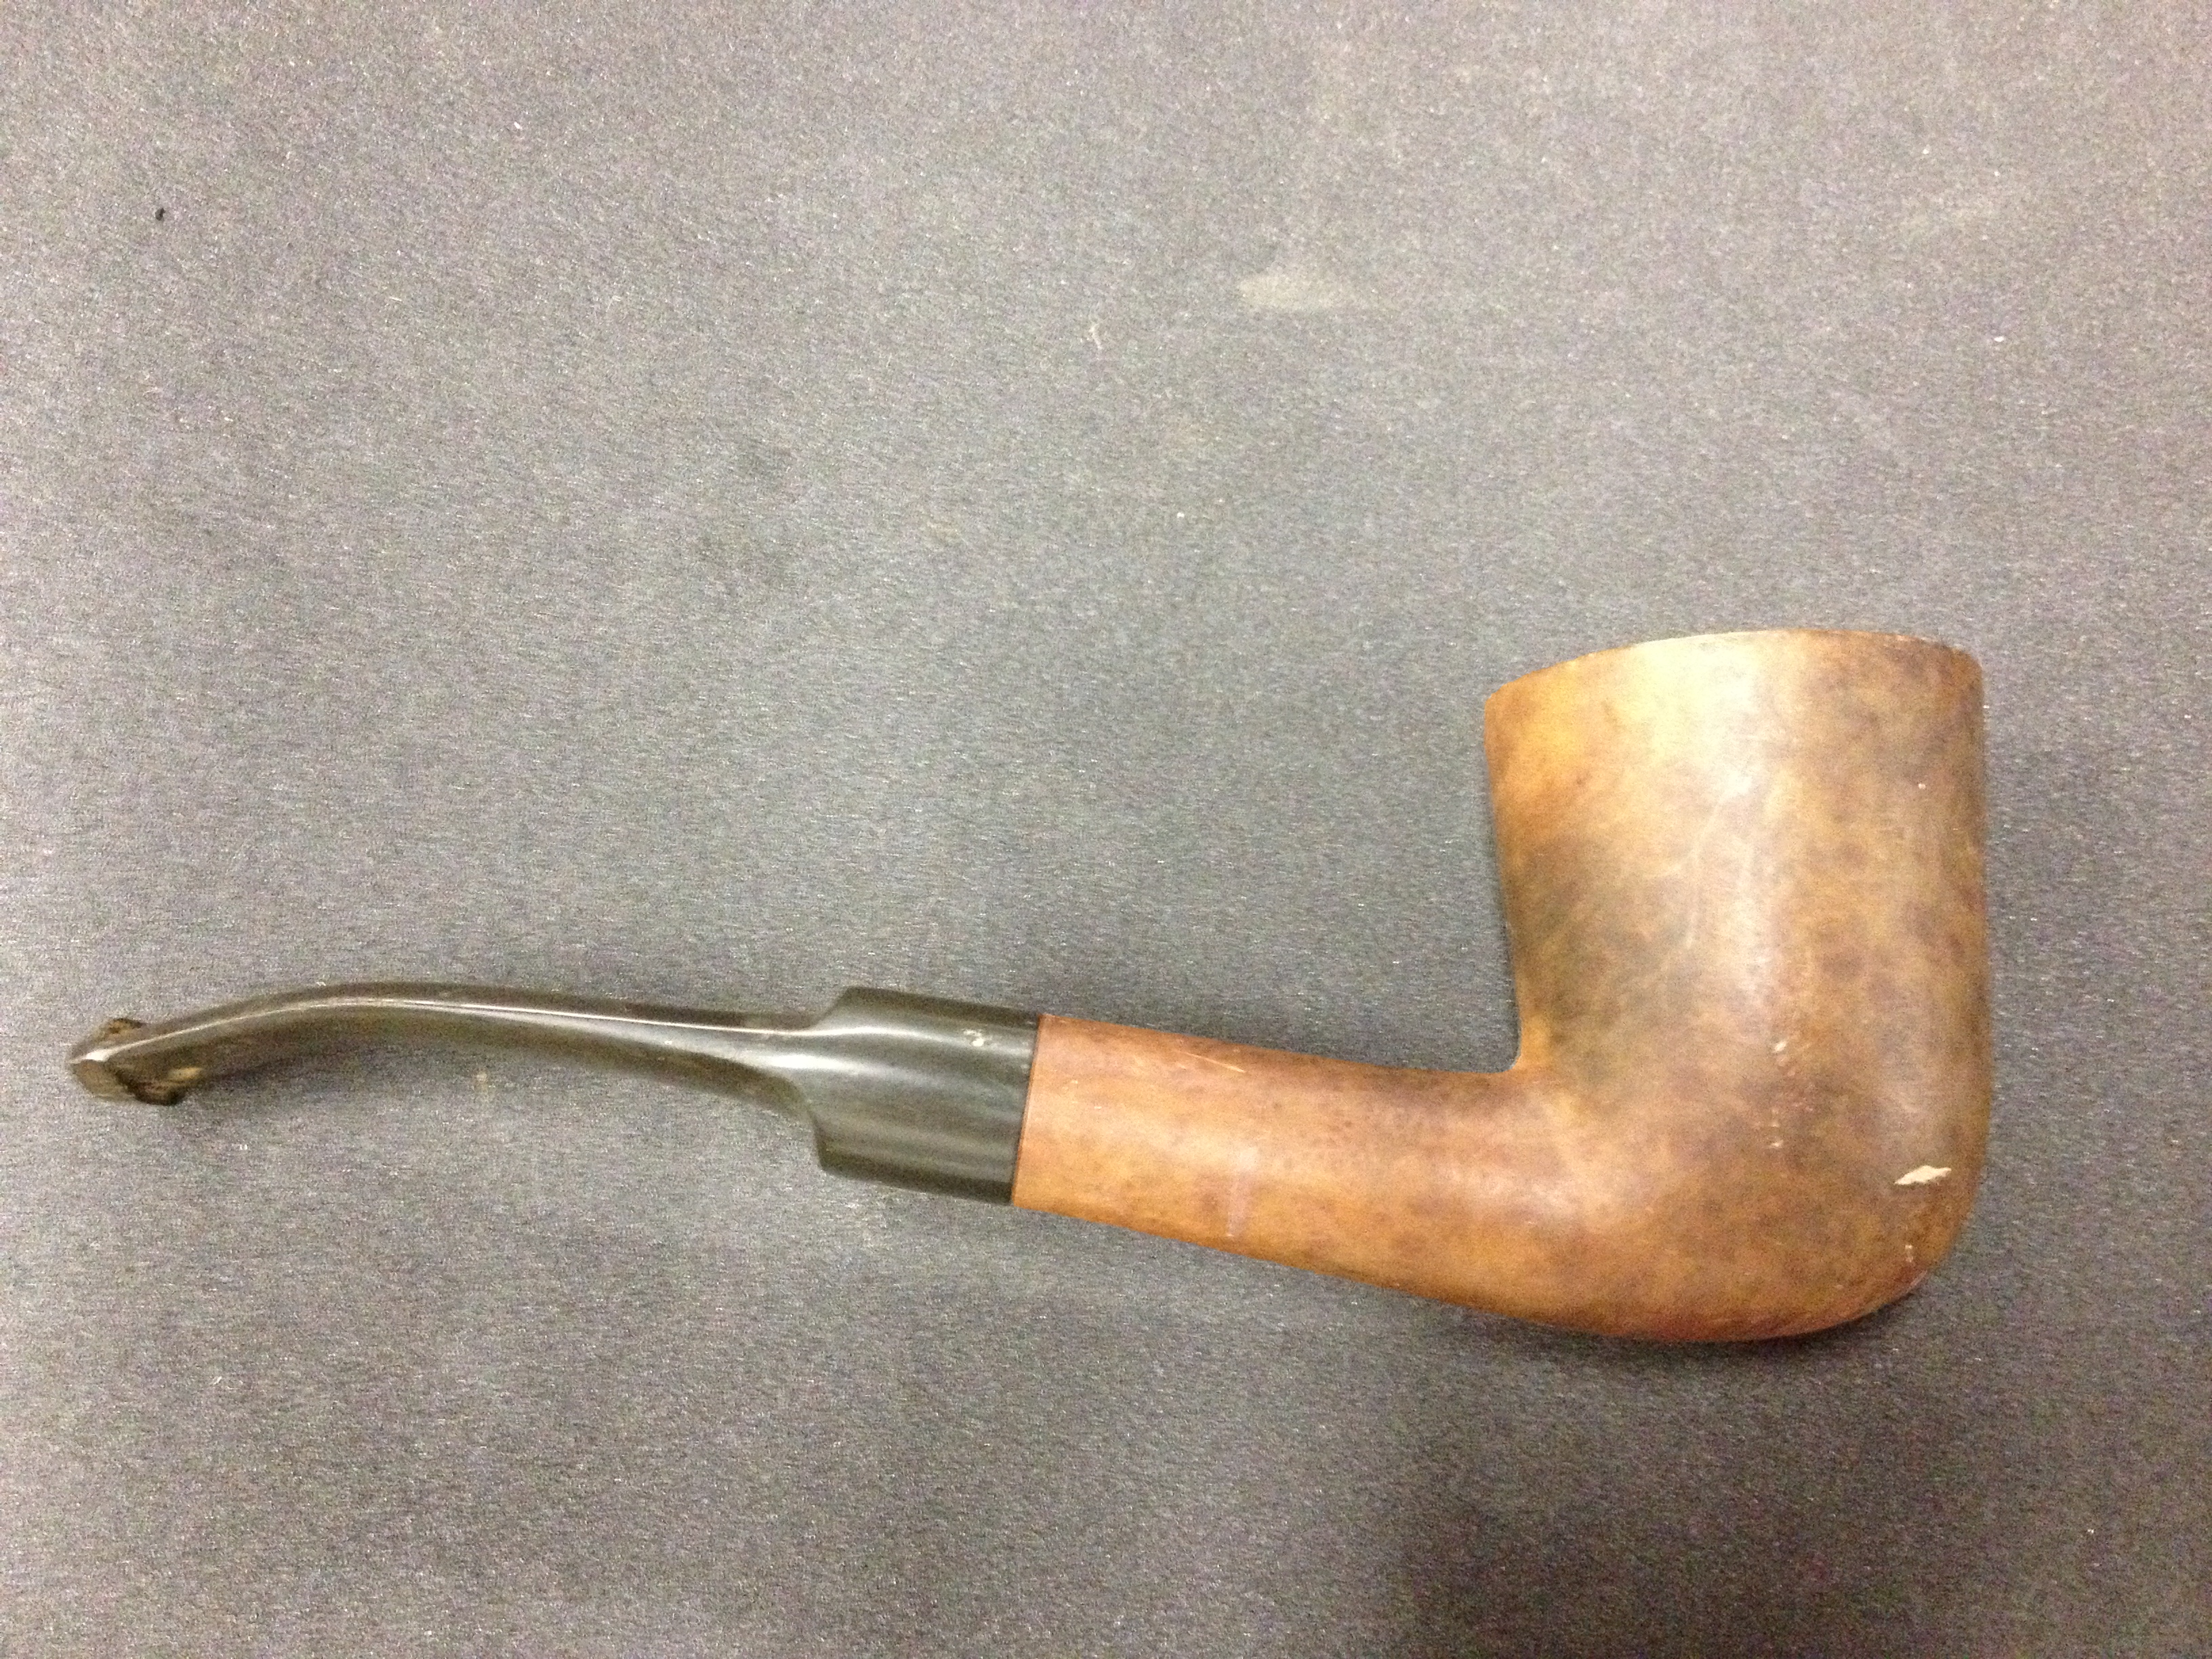
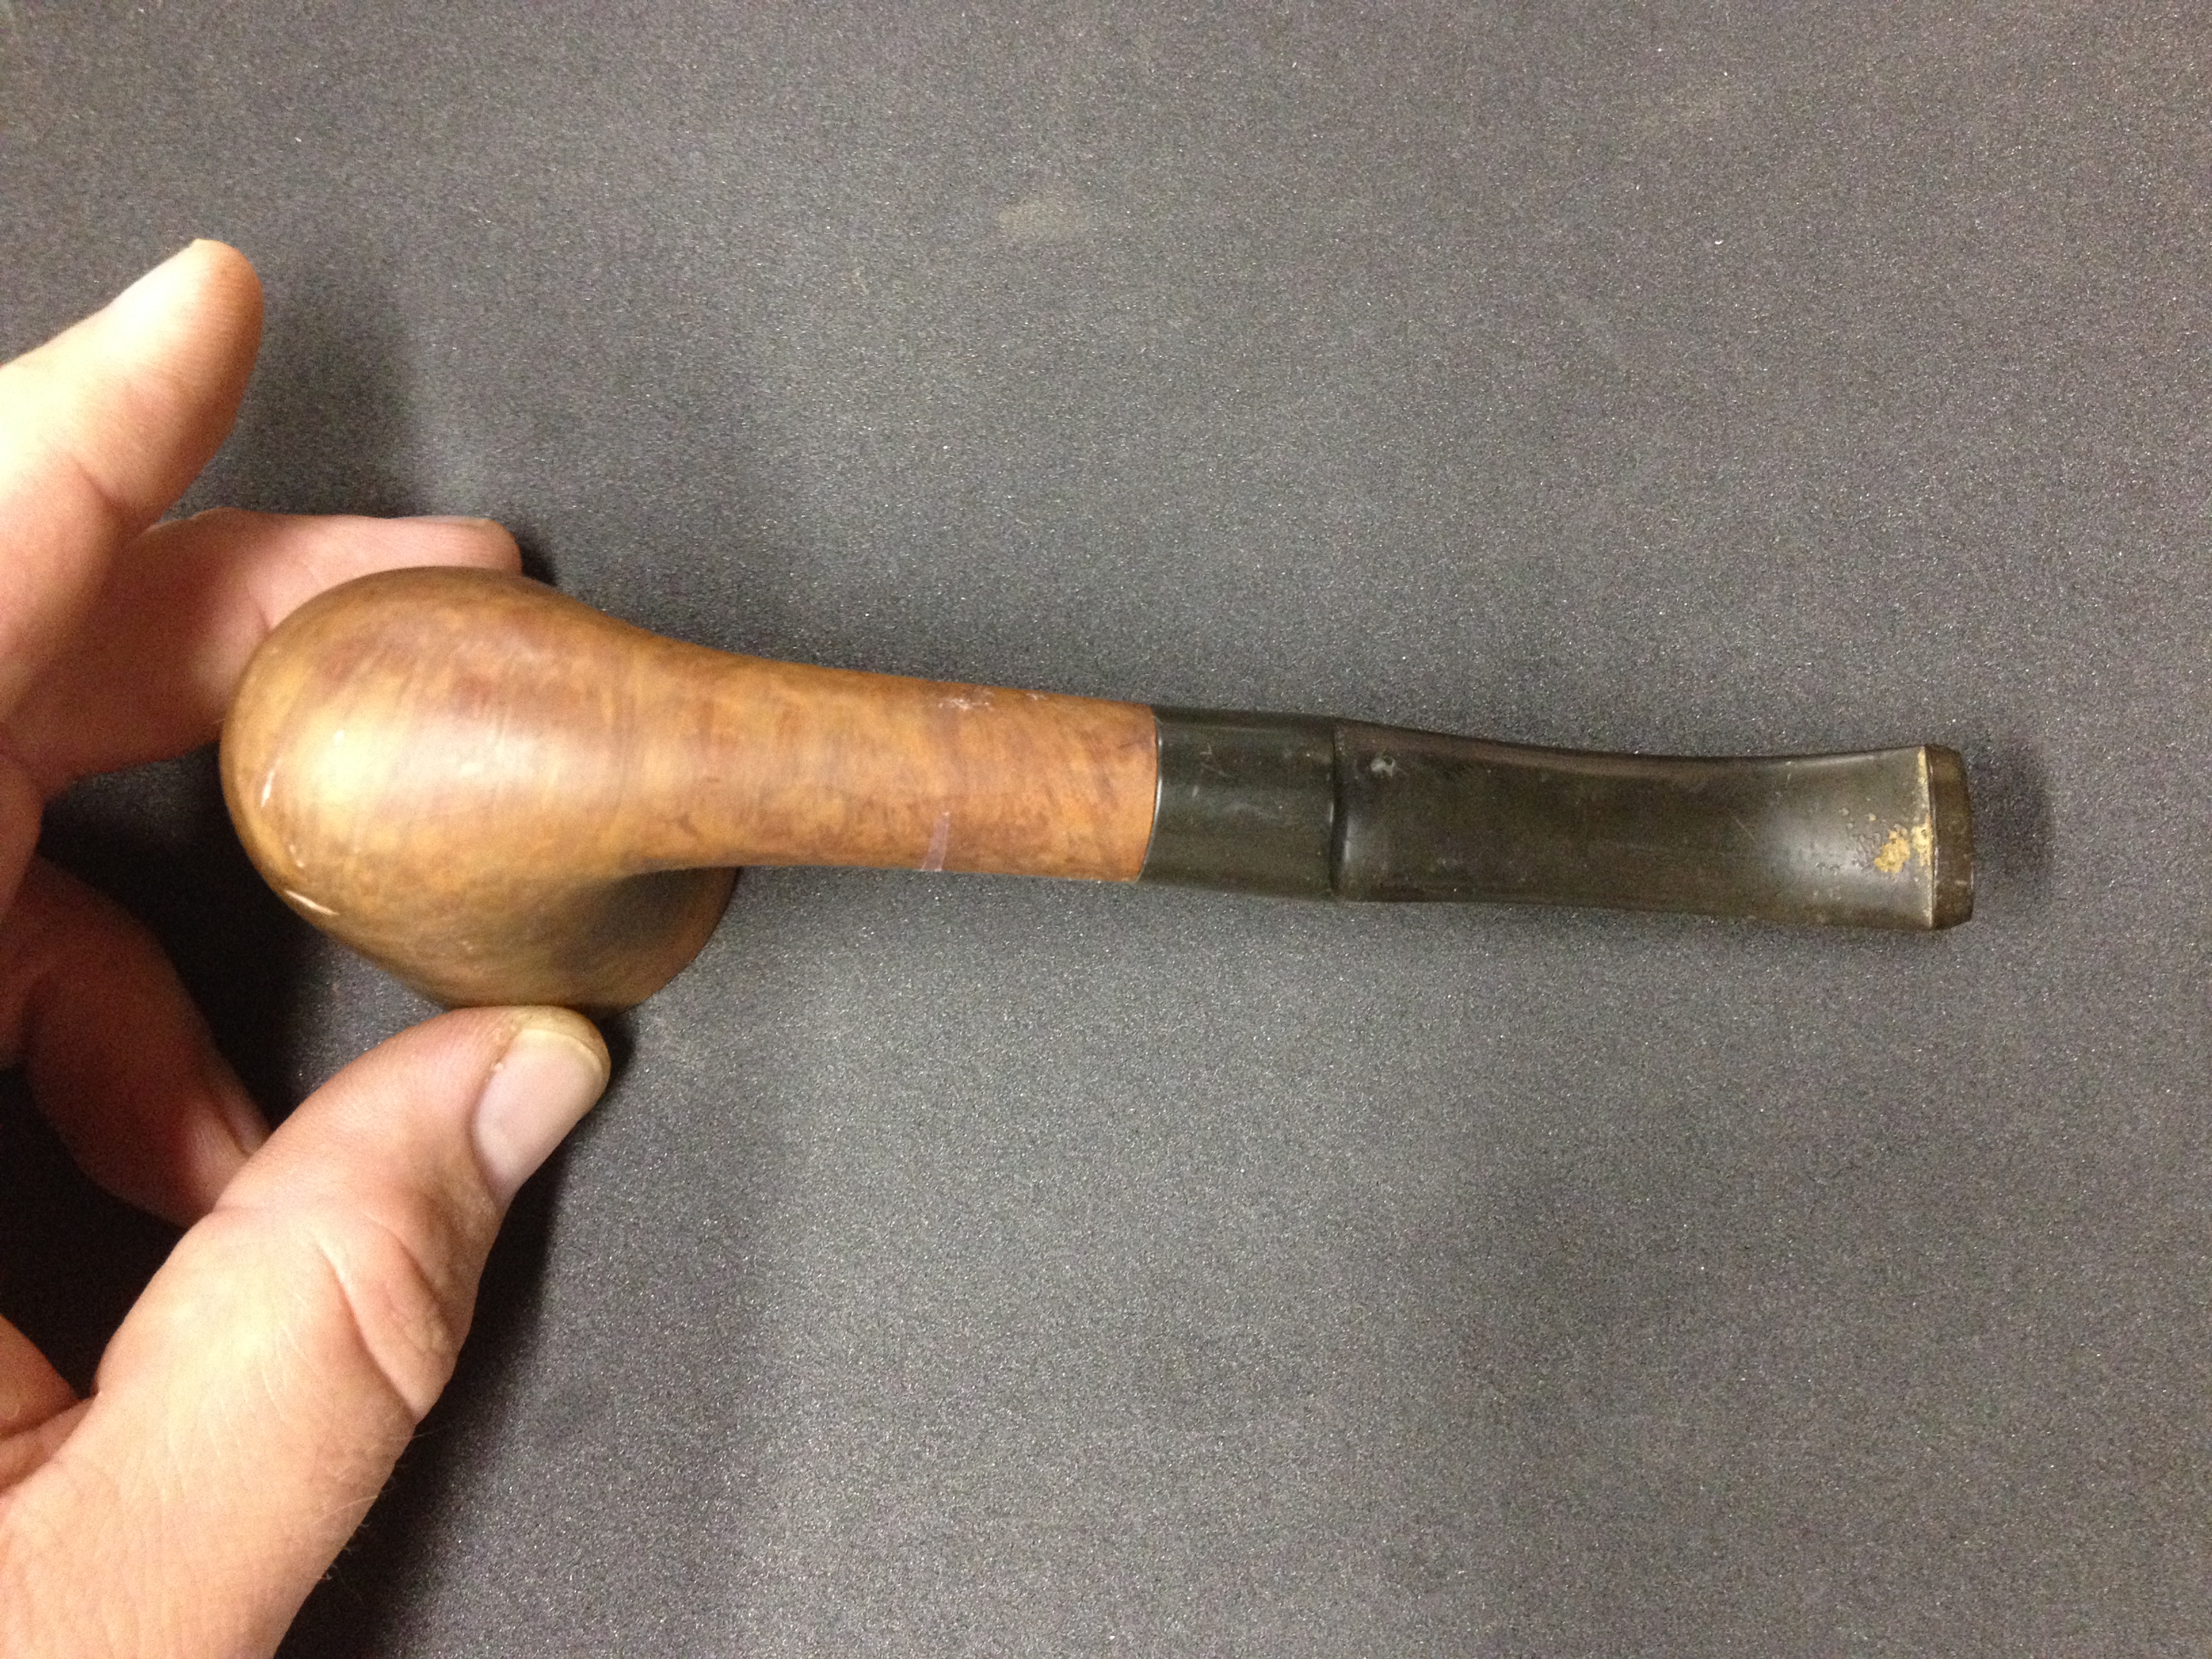
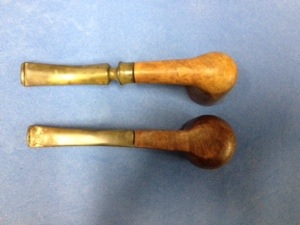
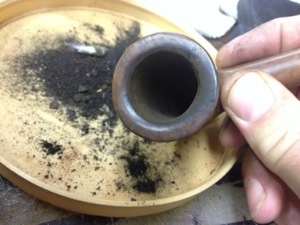
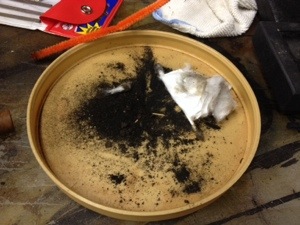
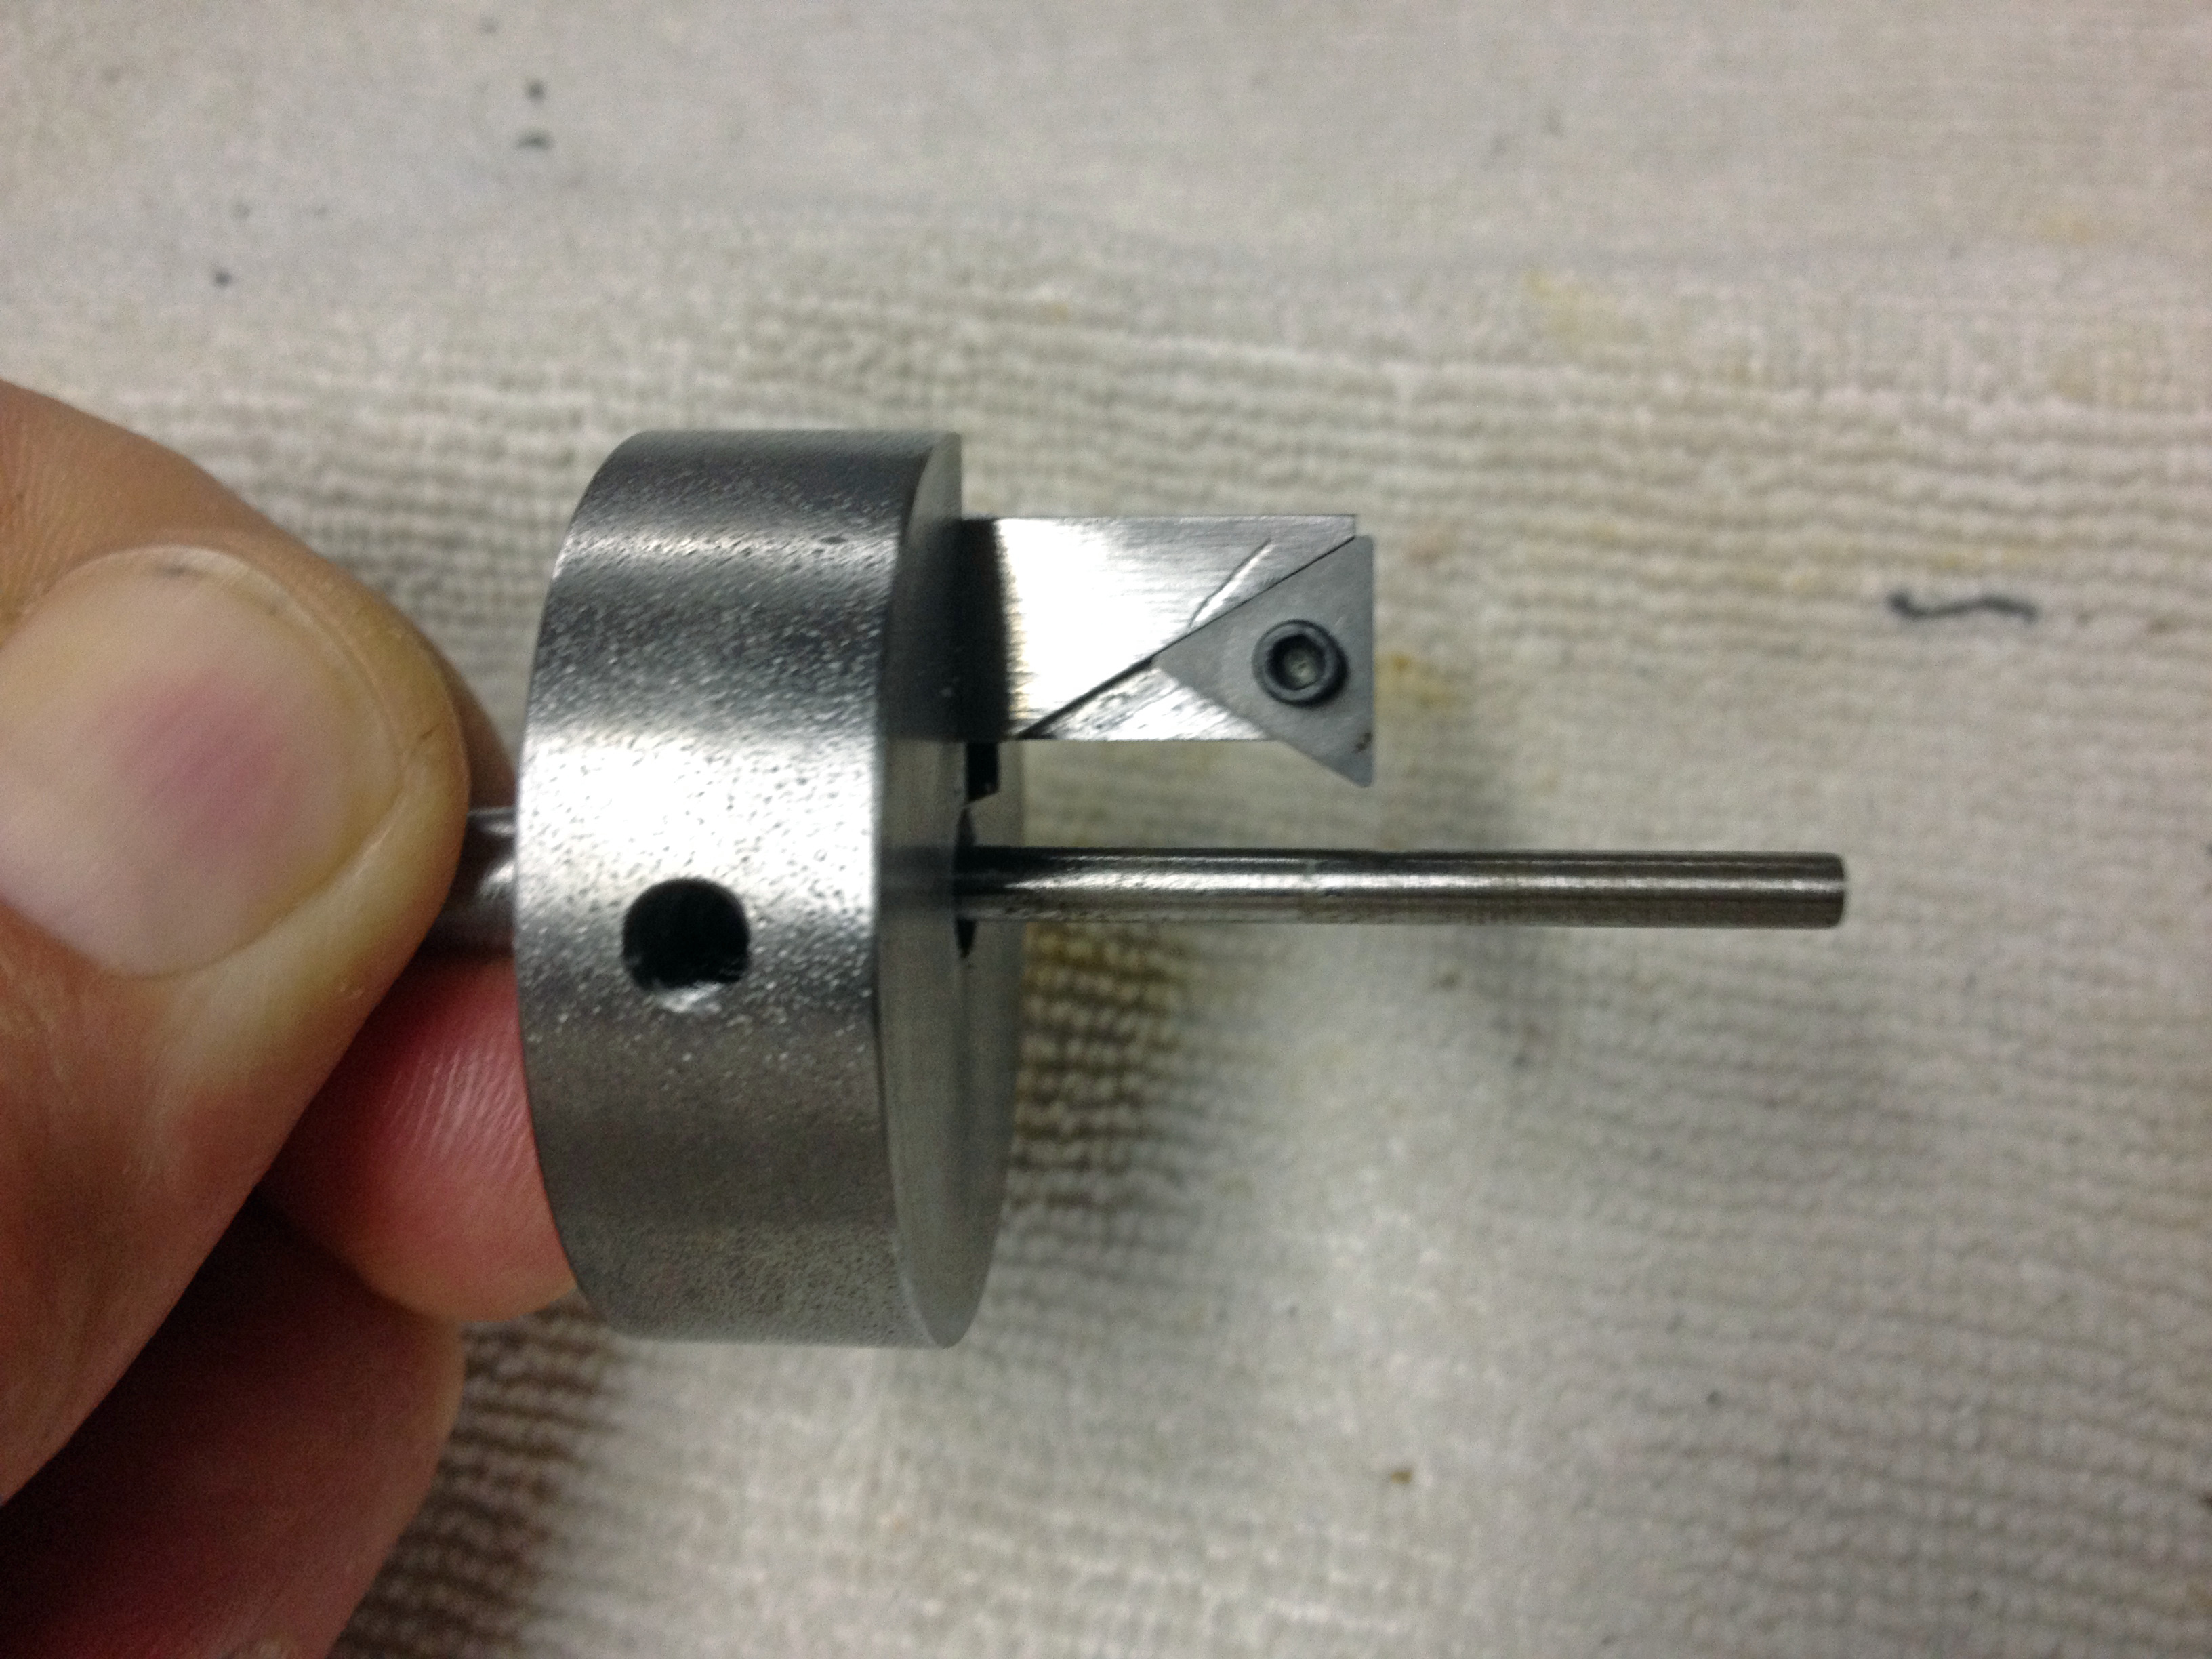
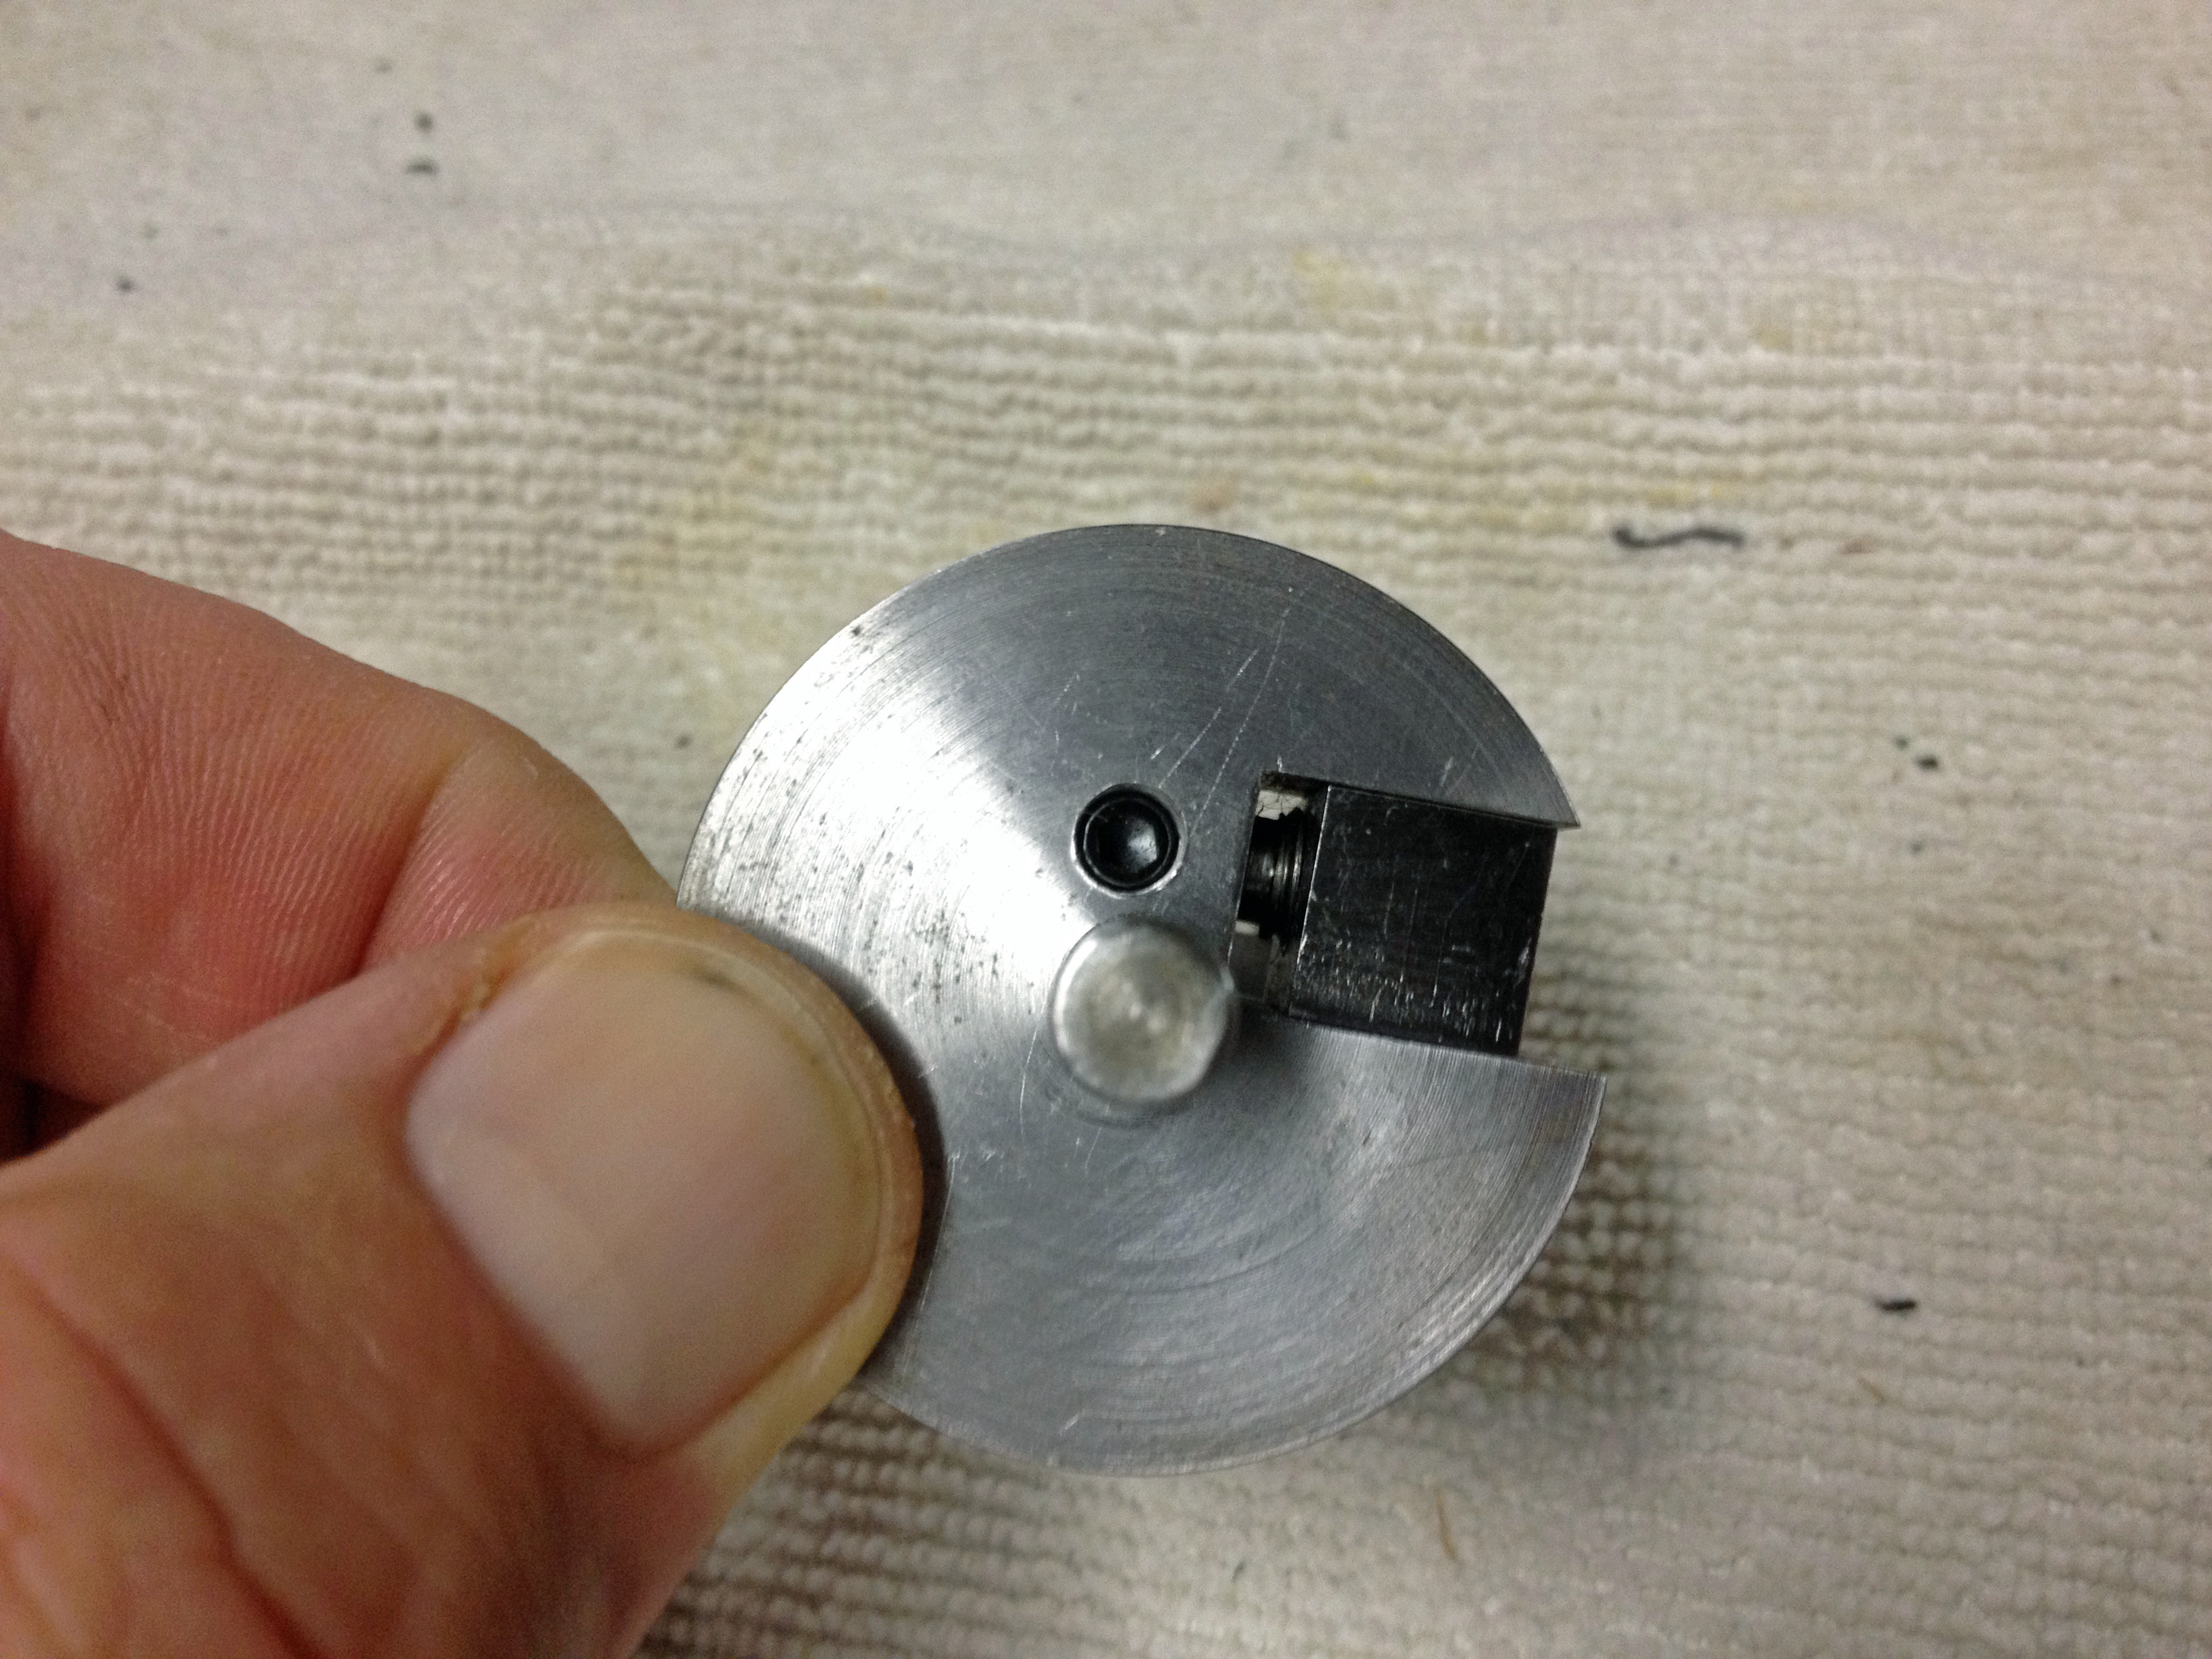
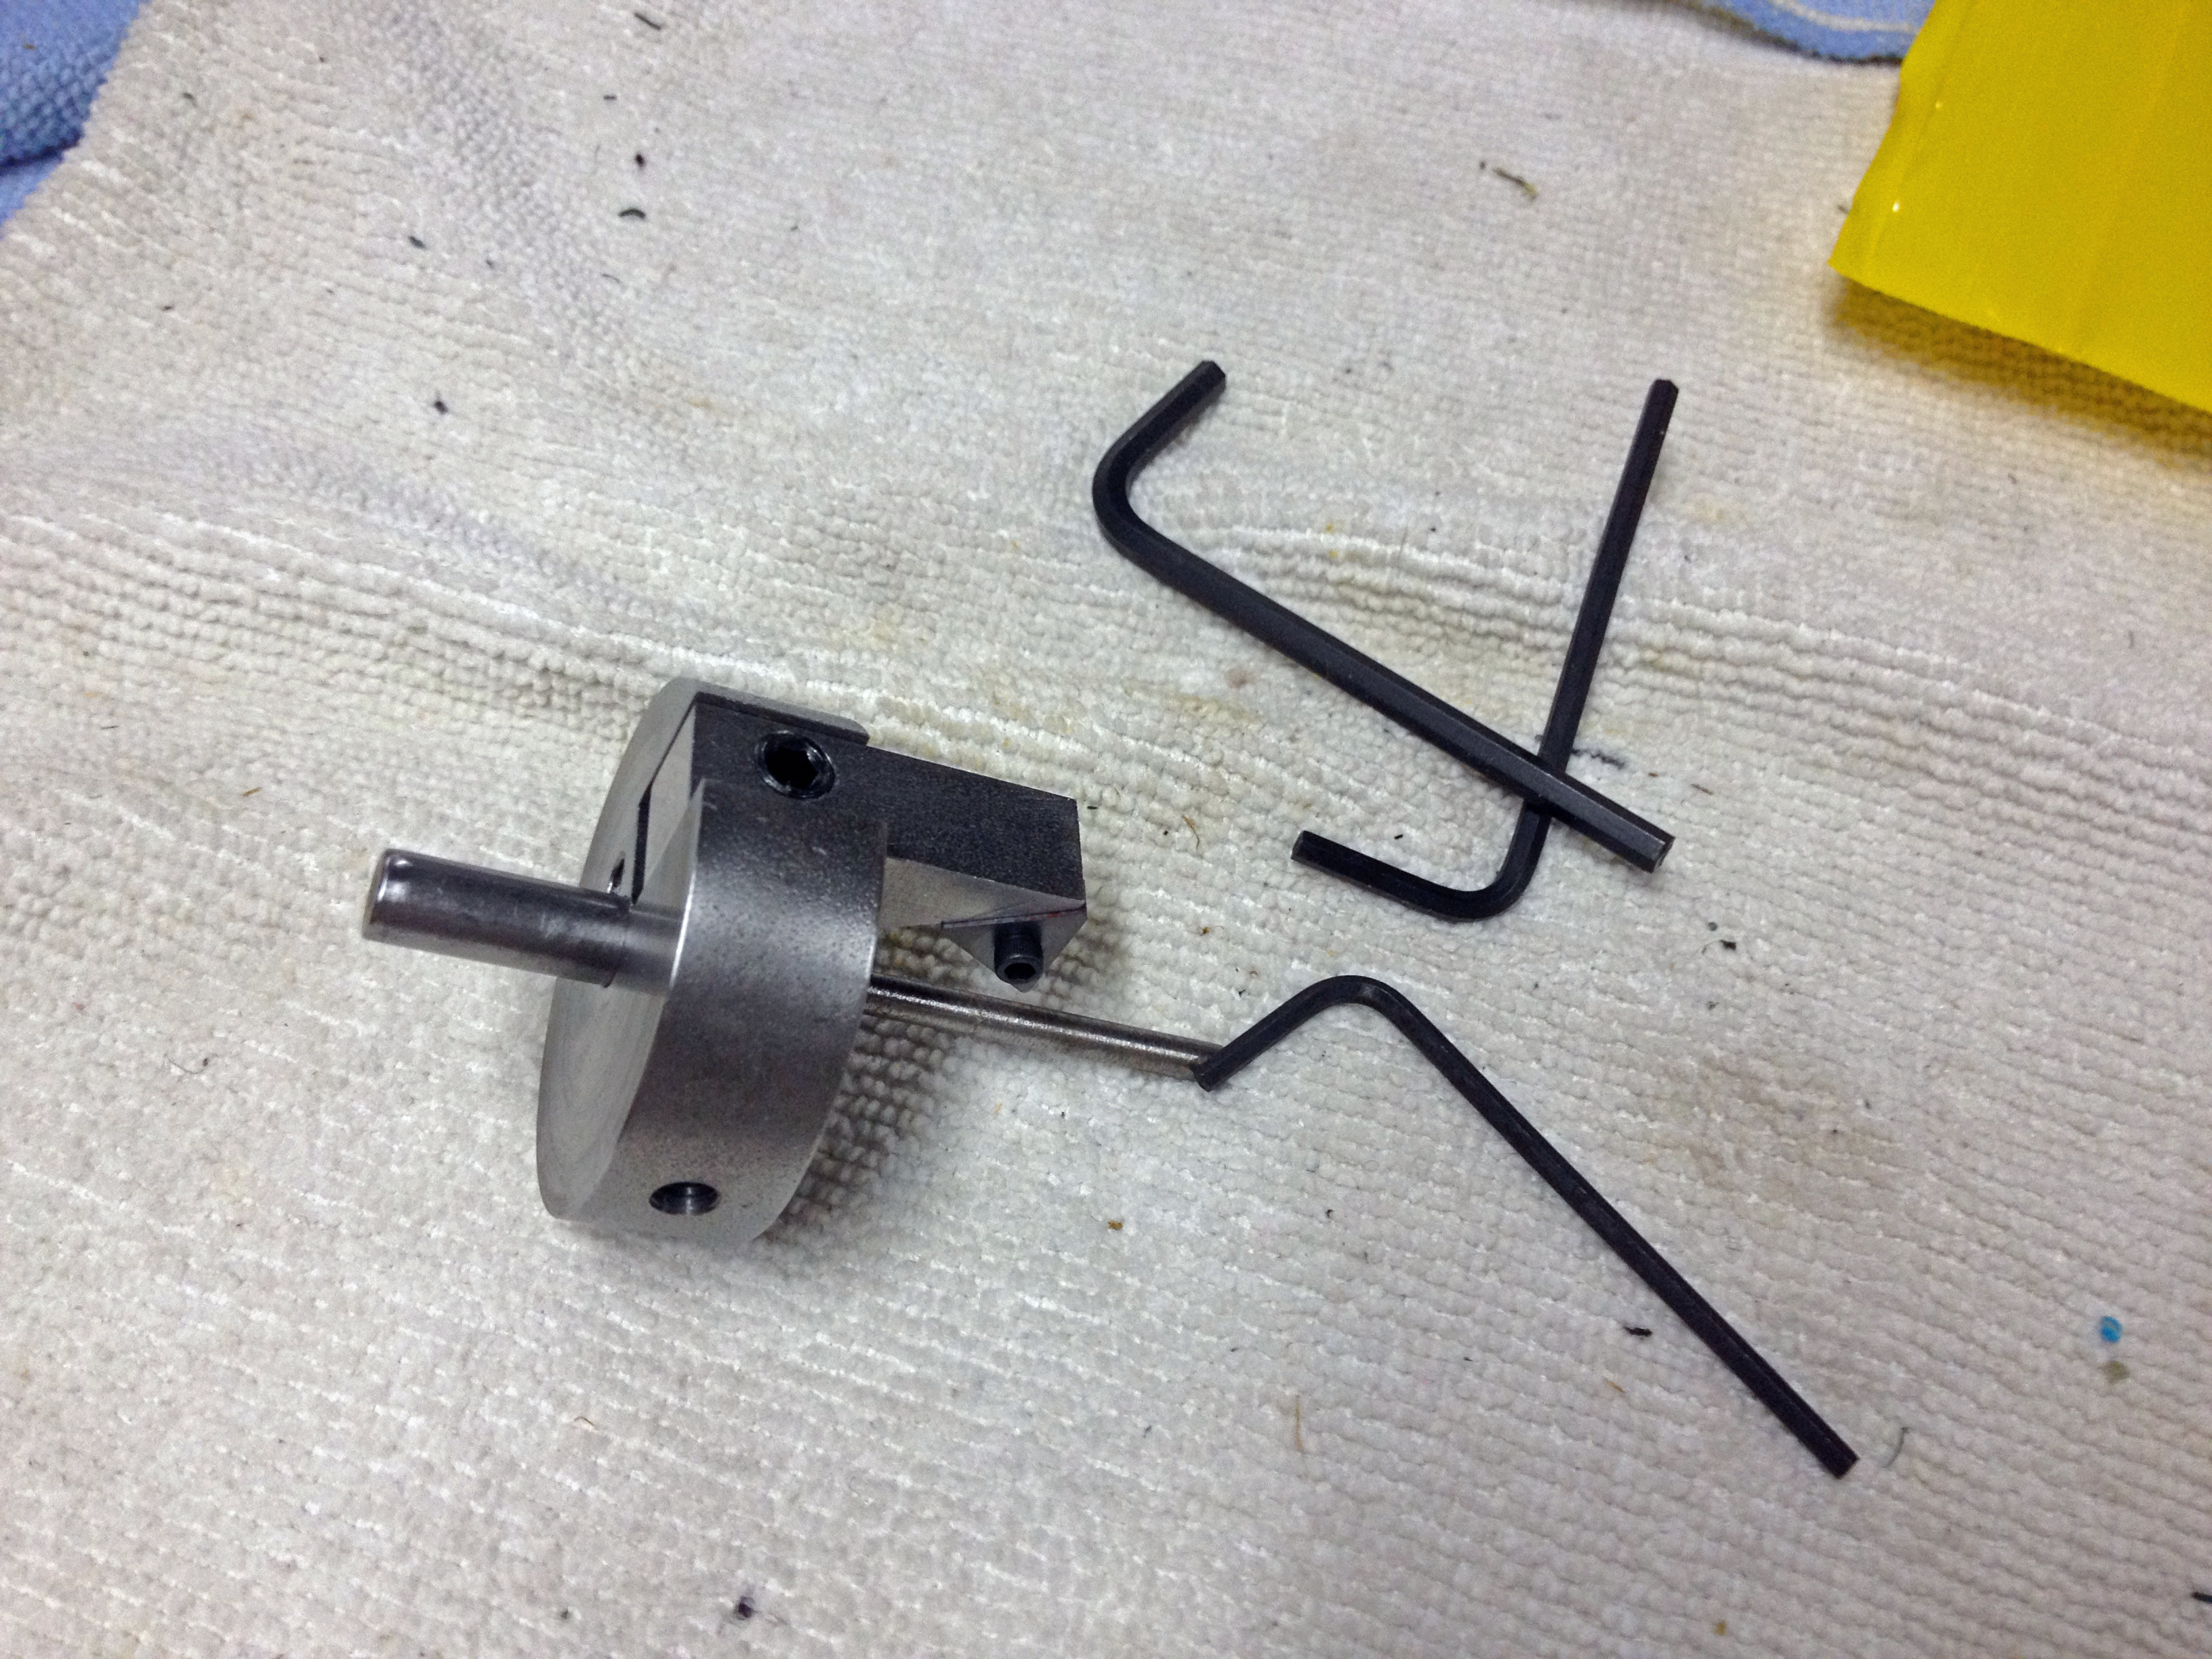
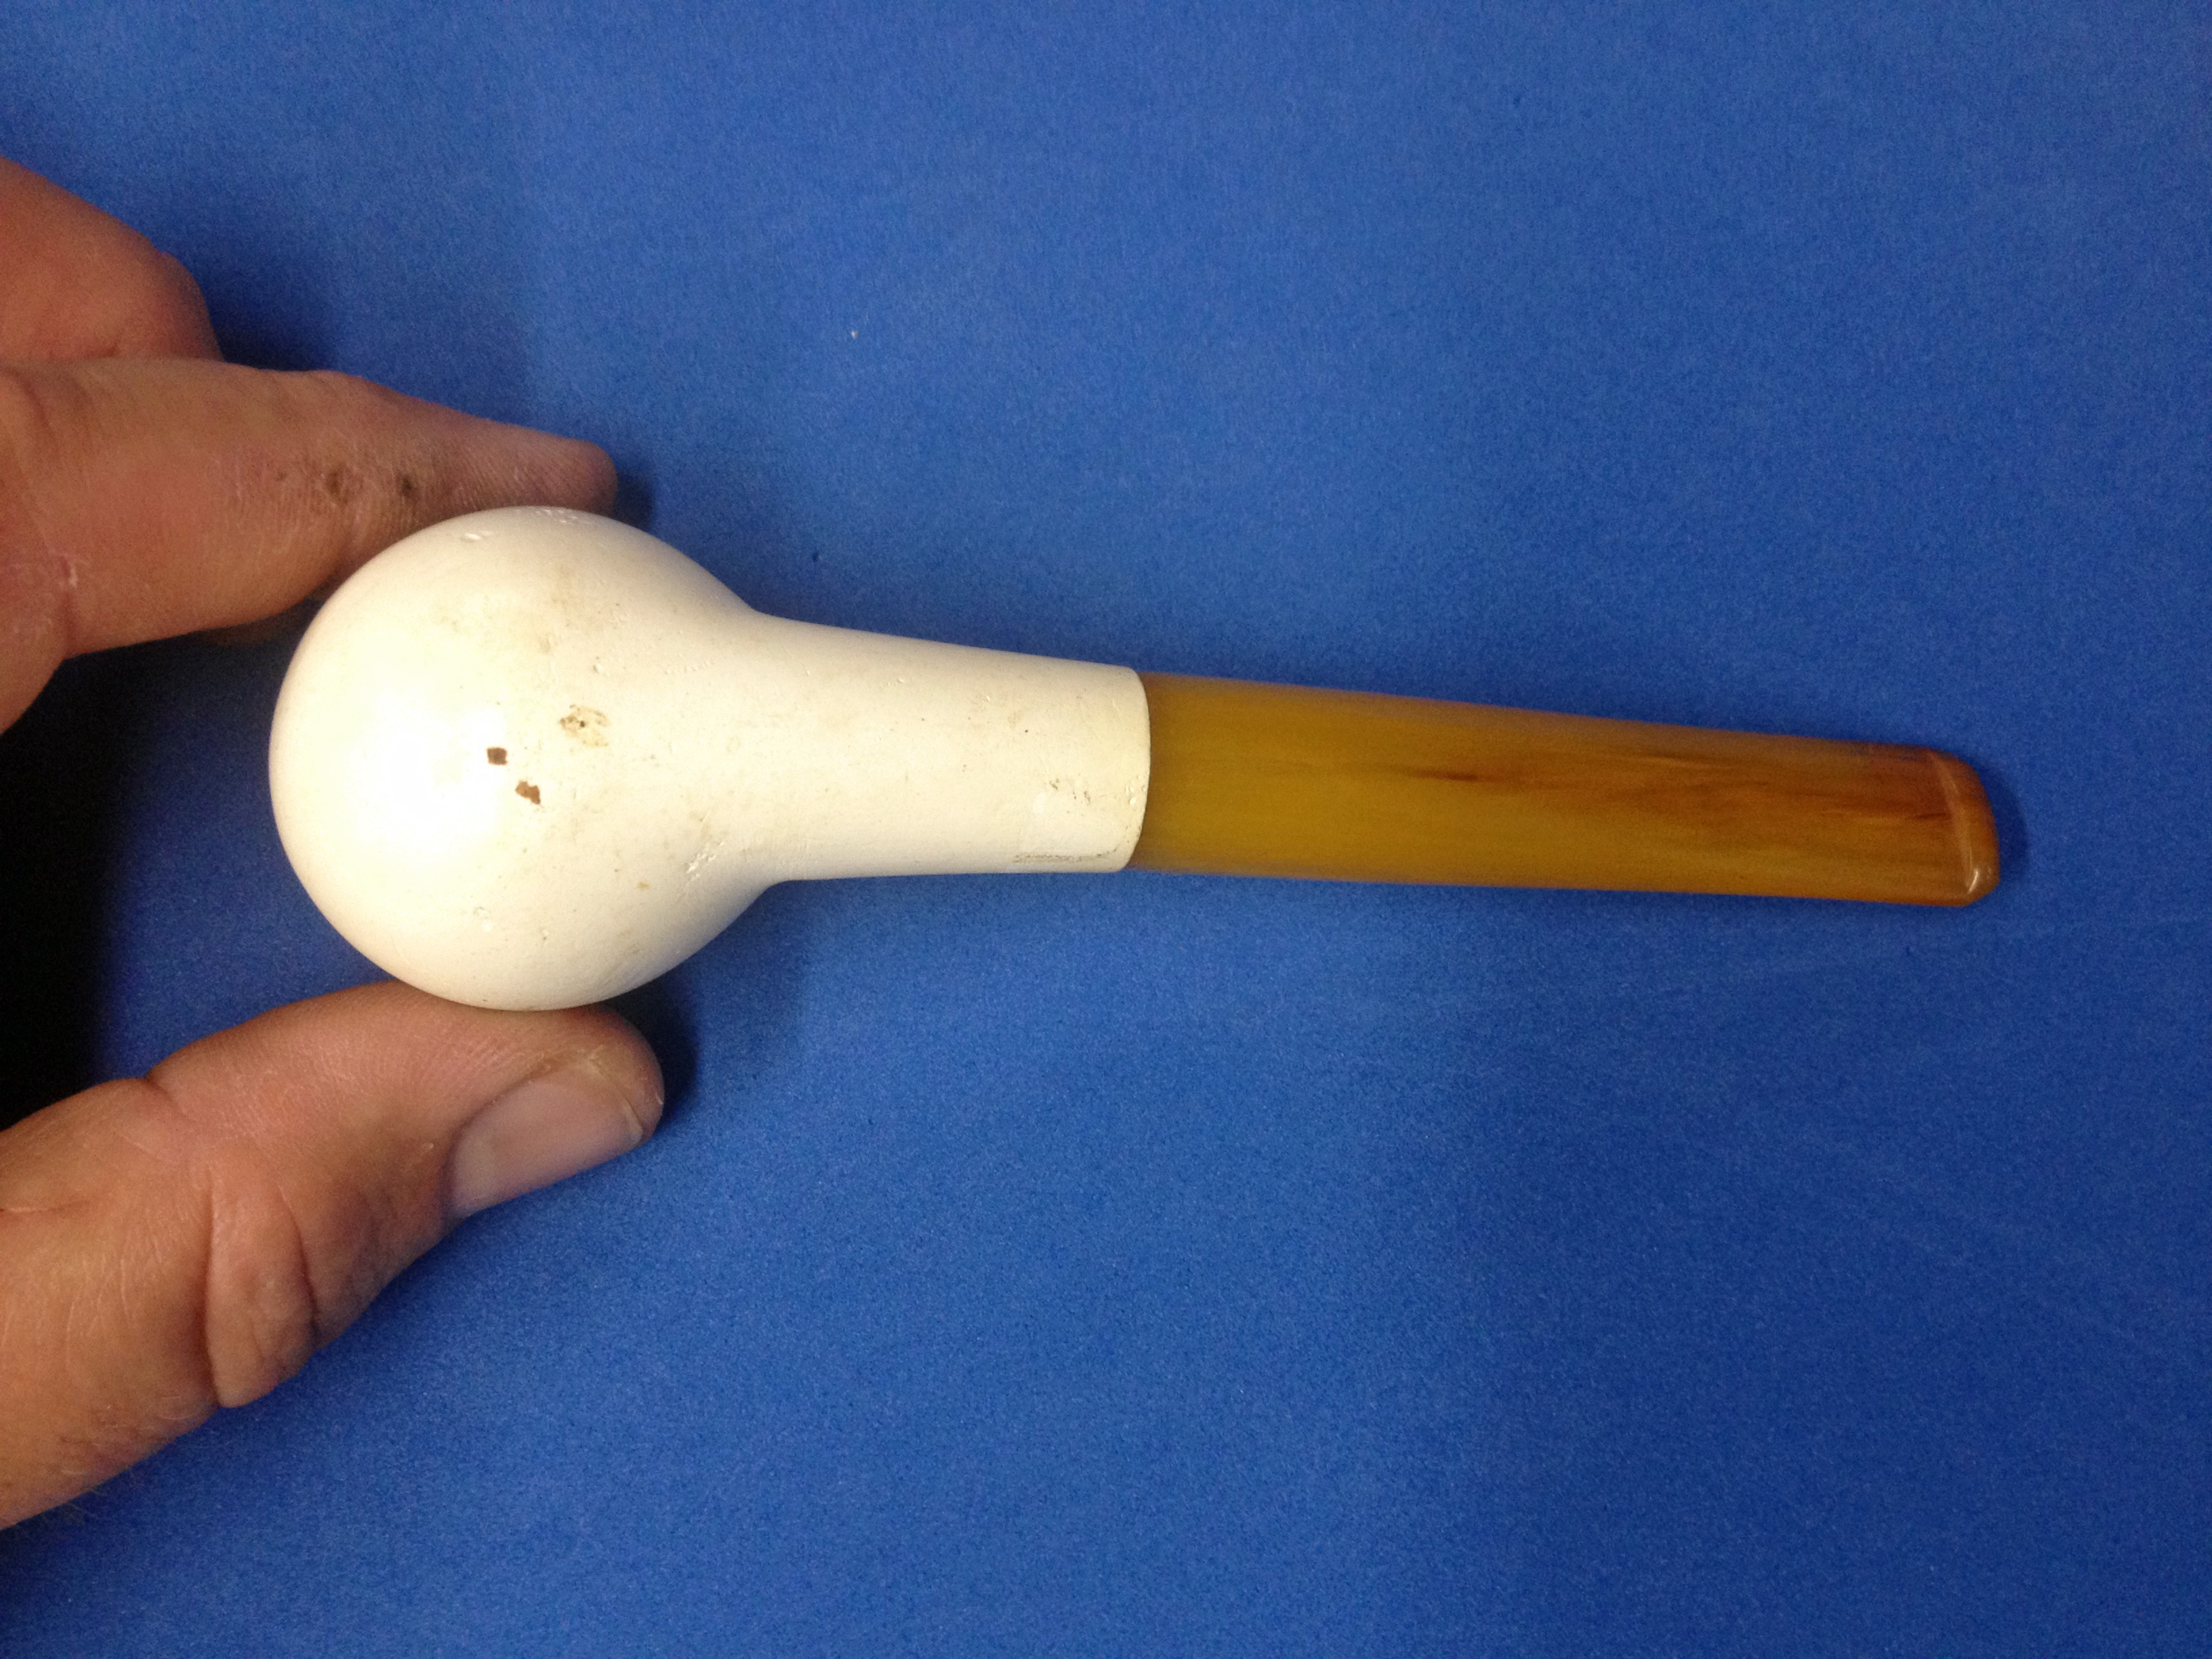
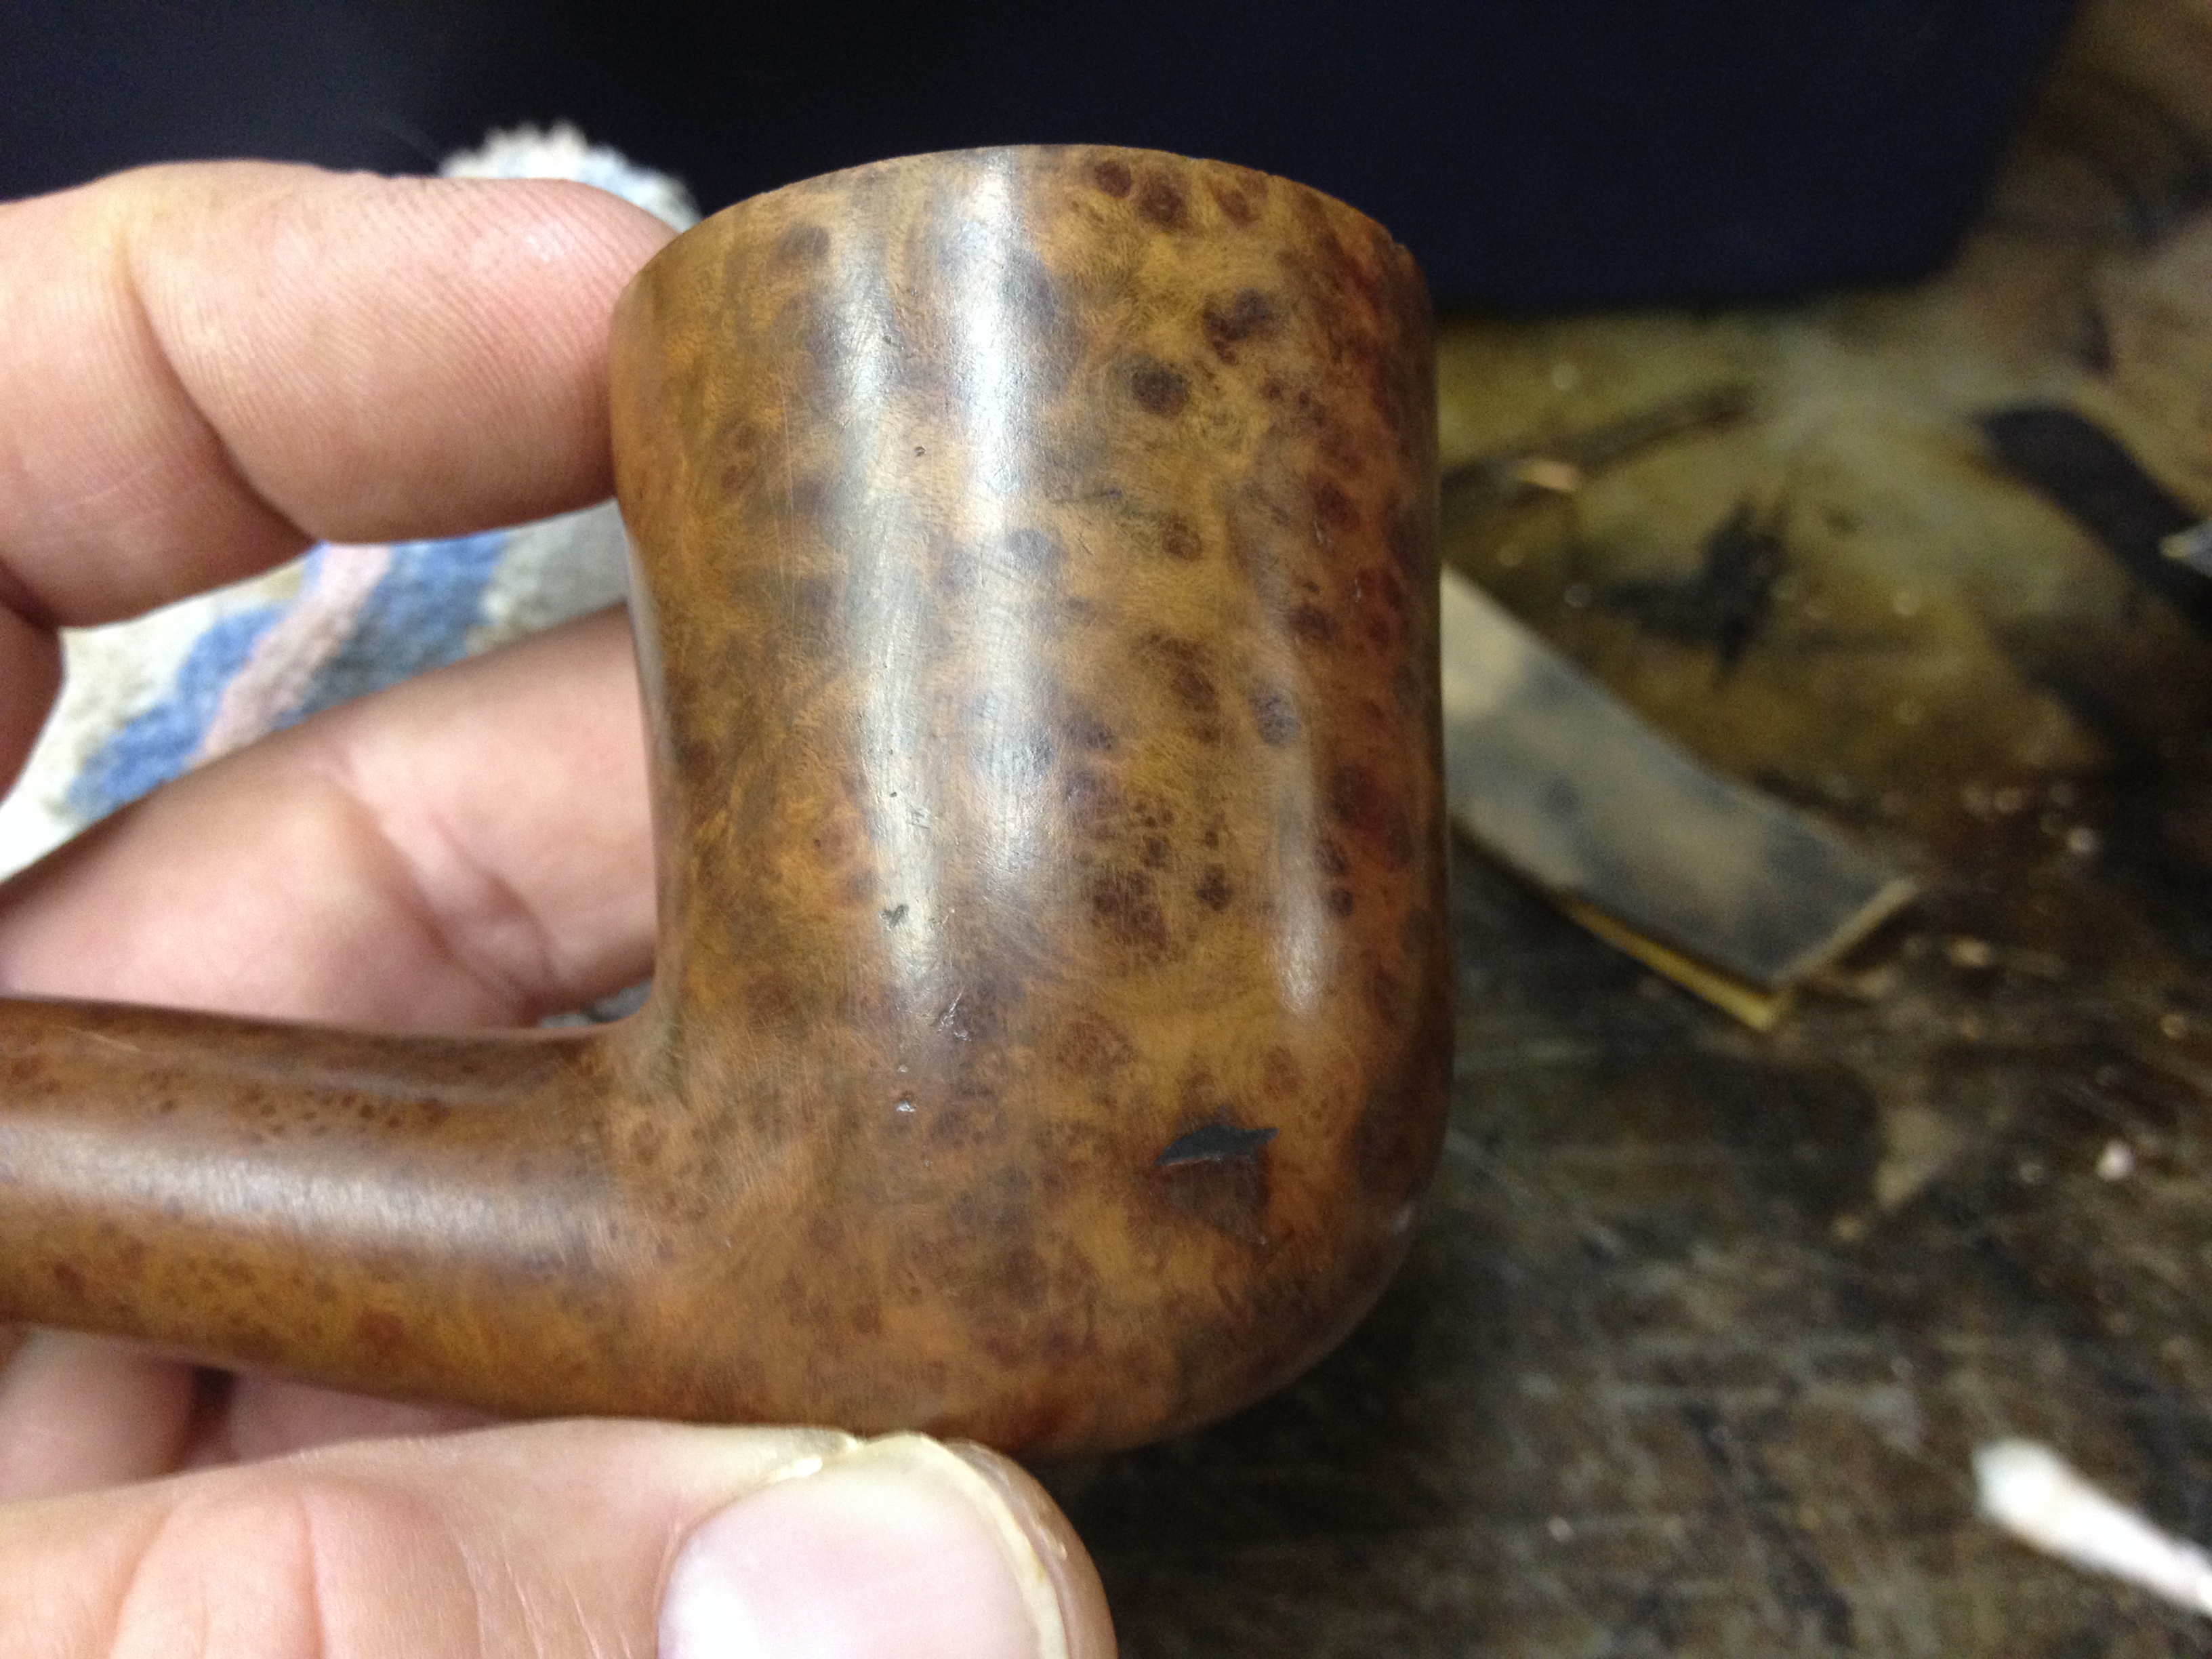
As you can see, it was heavily caked and had what I thought were some deep scratches on it, the rim was charred and damaged from knocking out the dottle, the finish was gone, and the stem was oxidized but had little chatter on it. I decided to start with reaming the back the cake. This bowl is a tapered one, as many Dublins are, and required the use of all four of the bits on my Castleford reamer. After reaming the cake back considerably, to an even, thin layer, I decided to sanitize it with my retort. And since one of the other of the lot I picked up needed very little work other than cleaning (or so I thought at the time) I decided to go ahead and retort it (no reaming needed on this one) while I had the equipment out and also do both stems at this time, too. The Dublin took several “runs” with the retort to produce a clean tube of alcohol at the end; the cherrywood that I was also doing only took two tubes, but I knew it hadn’t been used much and wouldn’t be very dirty.

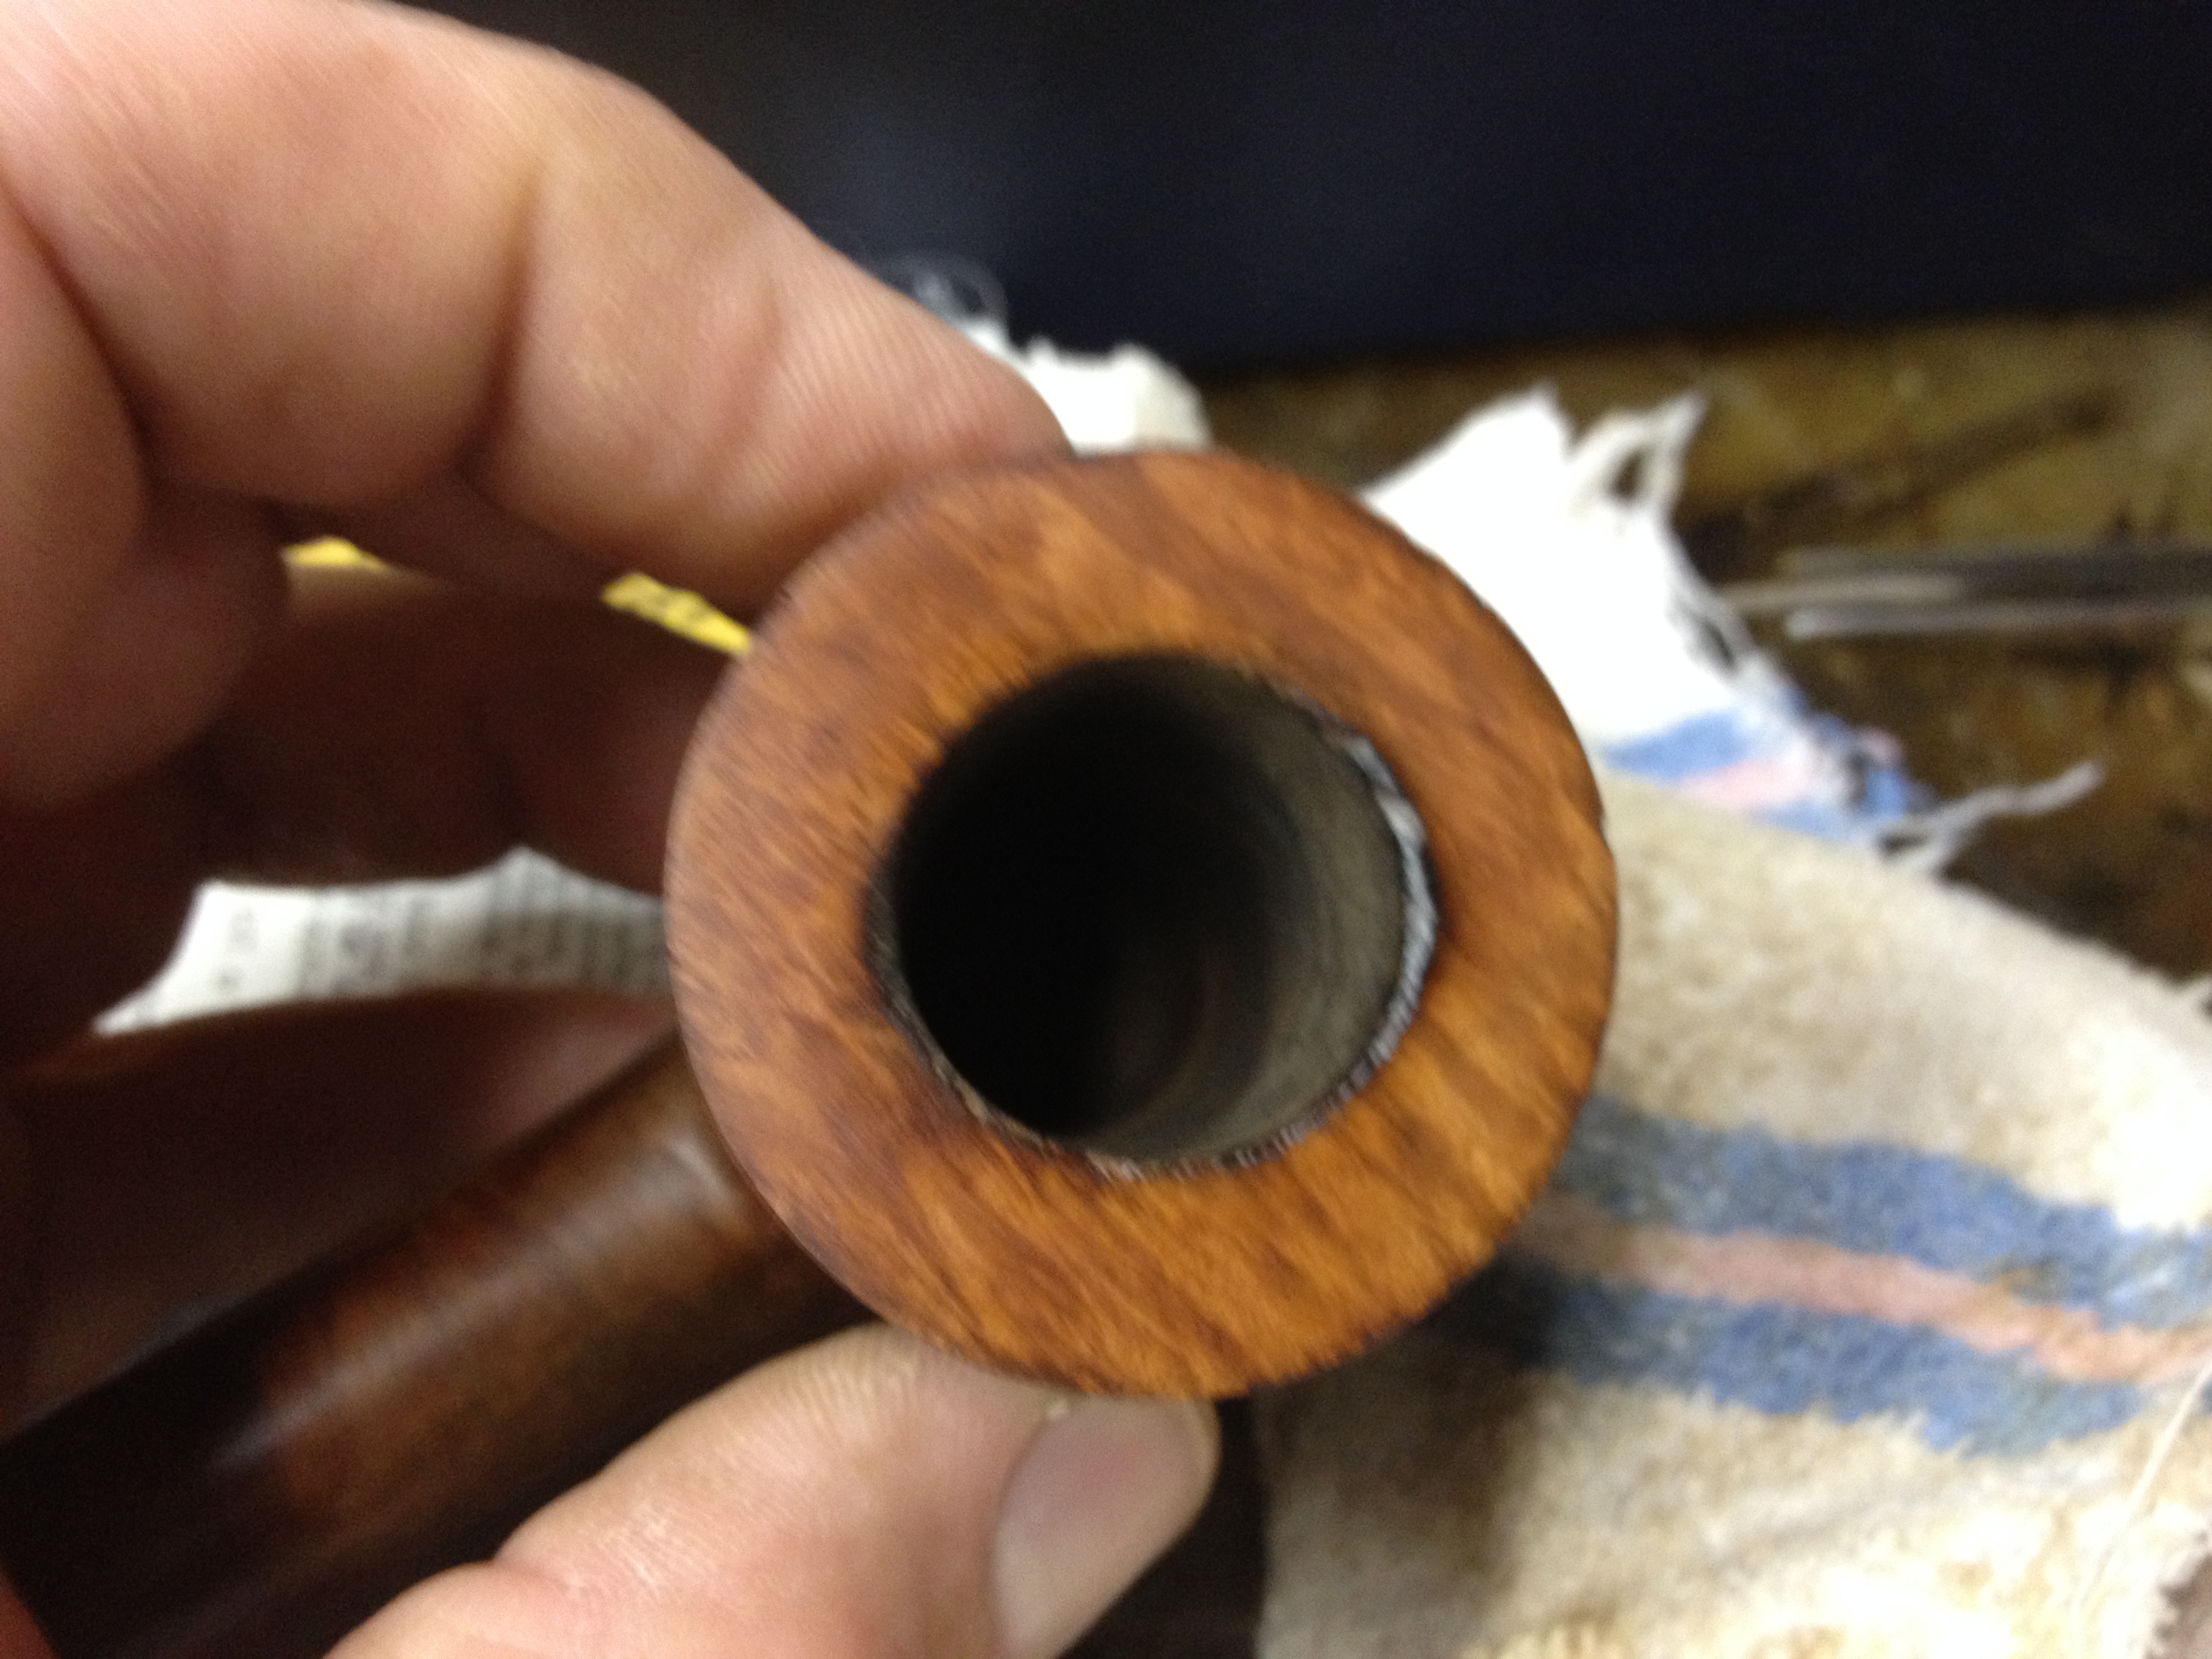
After I finished the work with the retort I dropped the stems in a OxyClean bath and left them to soak while I cleaned the shanks out. The retort had done a nice job of taking out most of the gunk in the shank of the Dublin; it took comparatively fewer pipe cleaners and cotton swabs than most restorations. I expected the shank from the cherrywood to be all but clean with one or two passes and it sort of was; instead of tar I found the alcohol had “raised” a mahogany-like stain inside the shank – and a lot of it. I then noticed that there was some of this same color on the outside, bottom edge of the shank. The pipe itself wasn’t a reddish color but a more maple, orange-ish one and I hadn’t planned on refinishing it since the color was nice and I didn’t really see a need – until now. Once I noticed the red color it had to come off the outside and out of the shank. Now the entire finish was going to have to be removed so both pipes got wiped down several time with acetone and then put into the alcohol bath overnight.

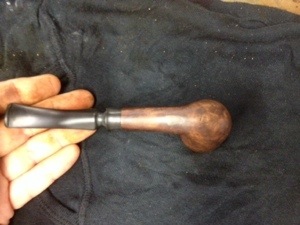
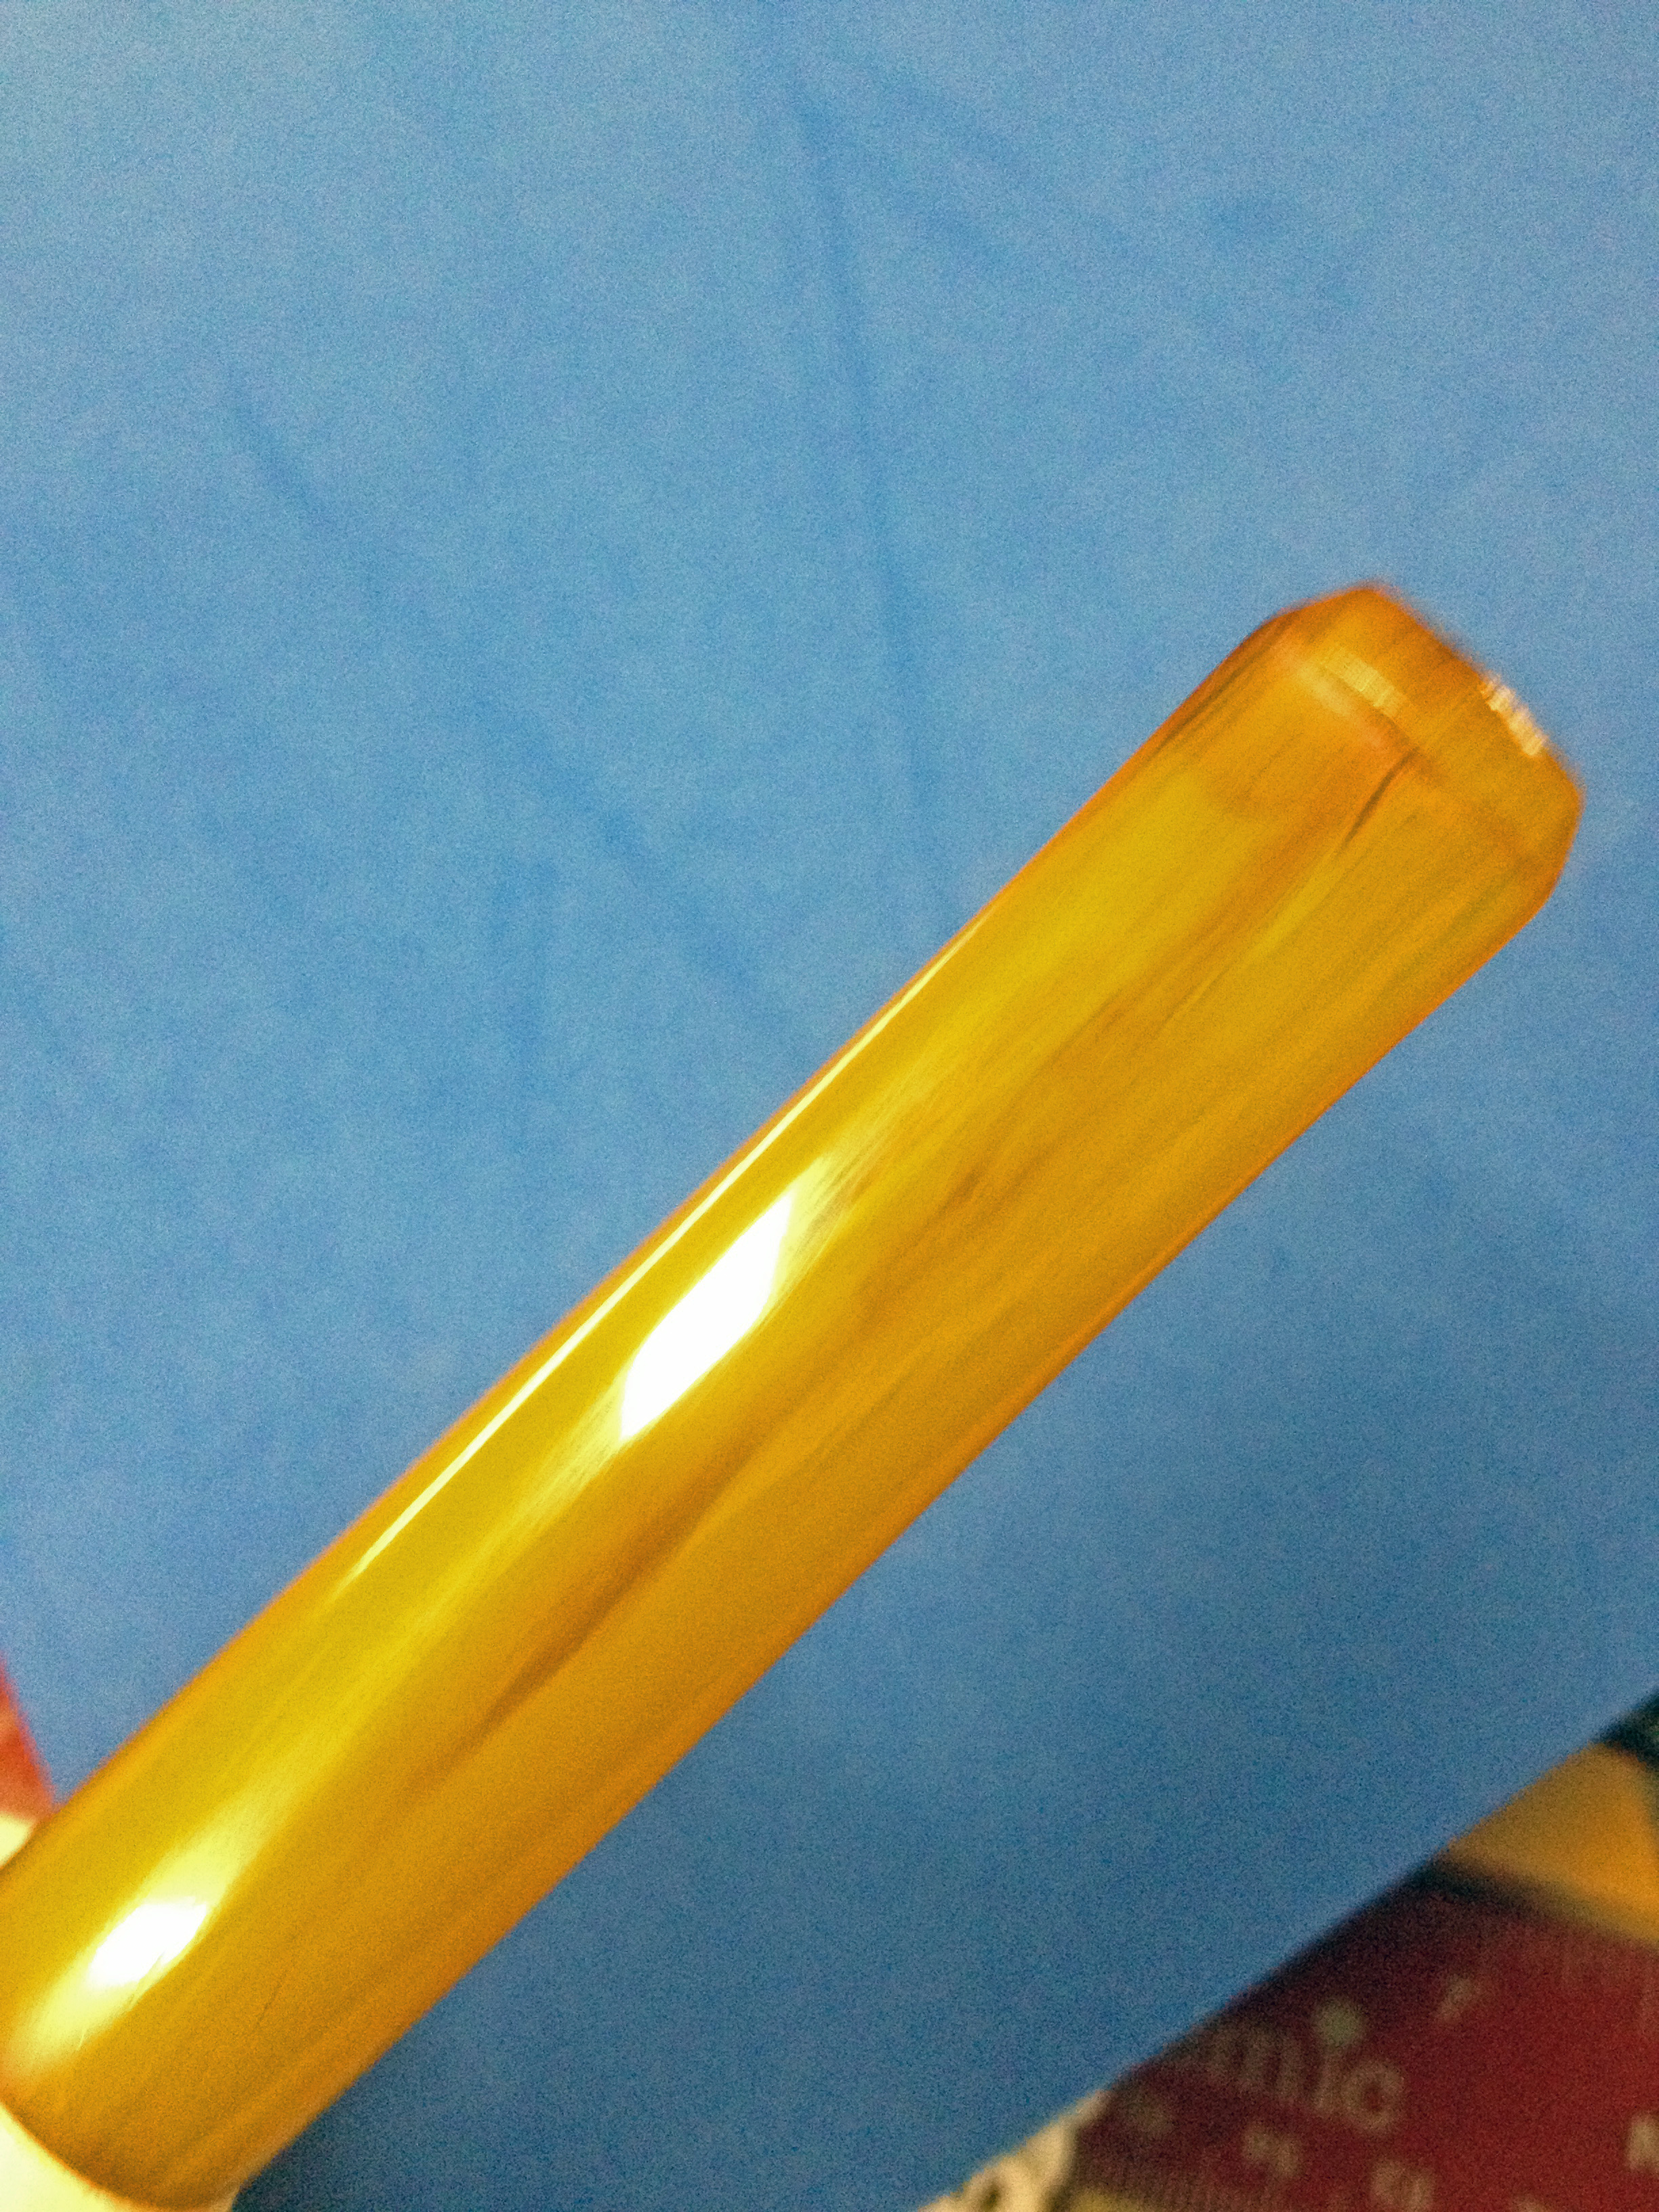
Several hours later I removed the stems from their soak to begin to make them look new again. I was disappointed to see that the thin layer of petroleum jelly I’d put over the logo on the cherrywood’s stem had washed away and the “white” which had been there was now gone; the stem logo had only been about 60% colored and I’d have had to apply more white anyway so I suppose it wasn’t that big of a deal. I washed the stem well with dish soap and then sprayed them with some liquid Bar Keeper’s Friend, a new product to me (I’ve tried the powdered form before but not the spray). I scrubbed them off with a Miracle Eraser hoping for the good results I had gotten last time I used the eraser but they weren’t as good, though a lot of the oxidation had softened and been removed.

ImageImage

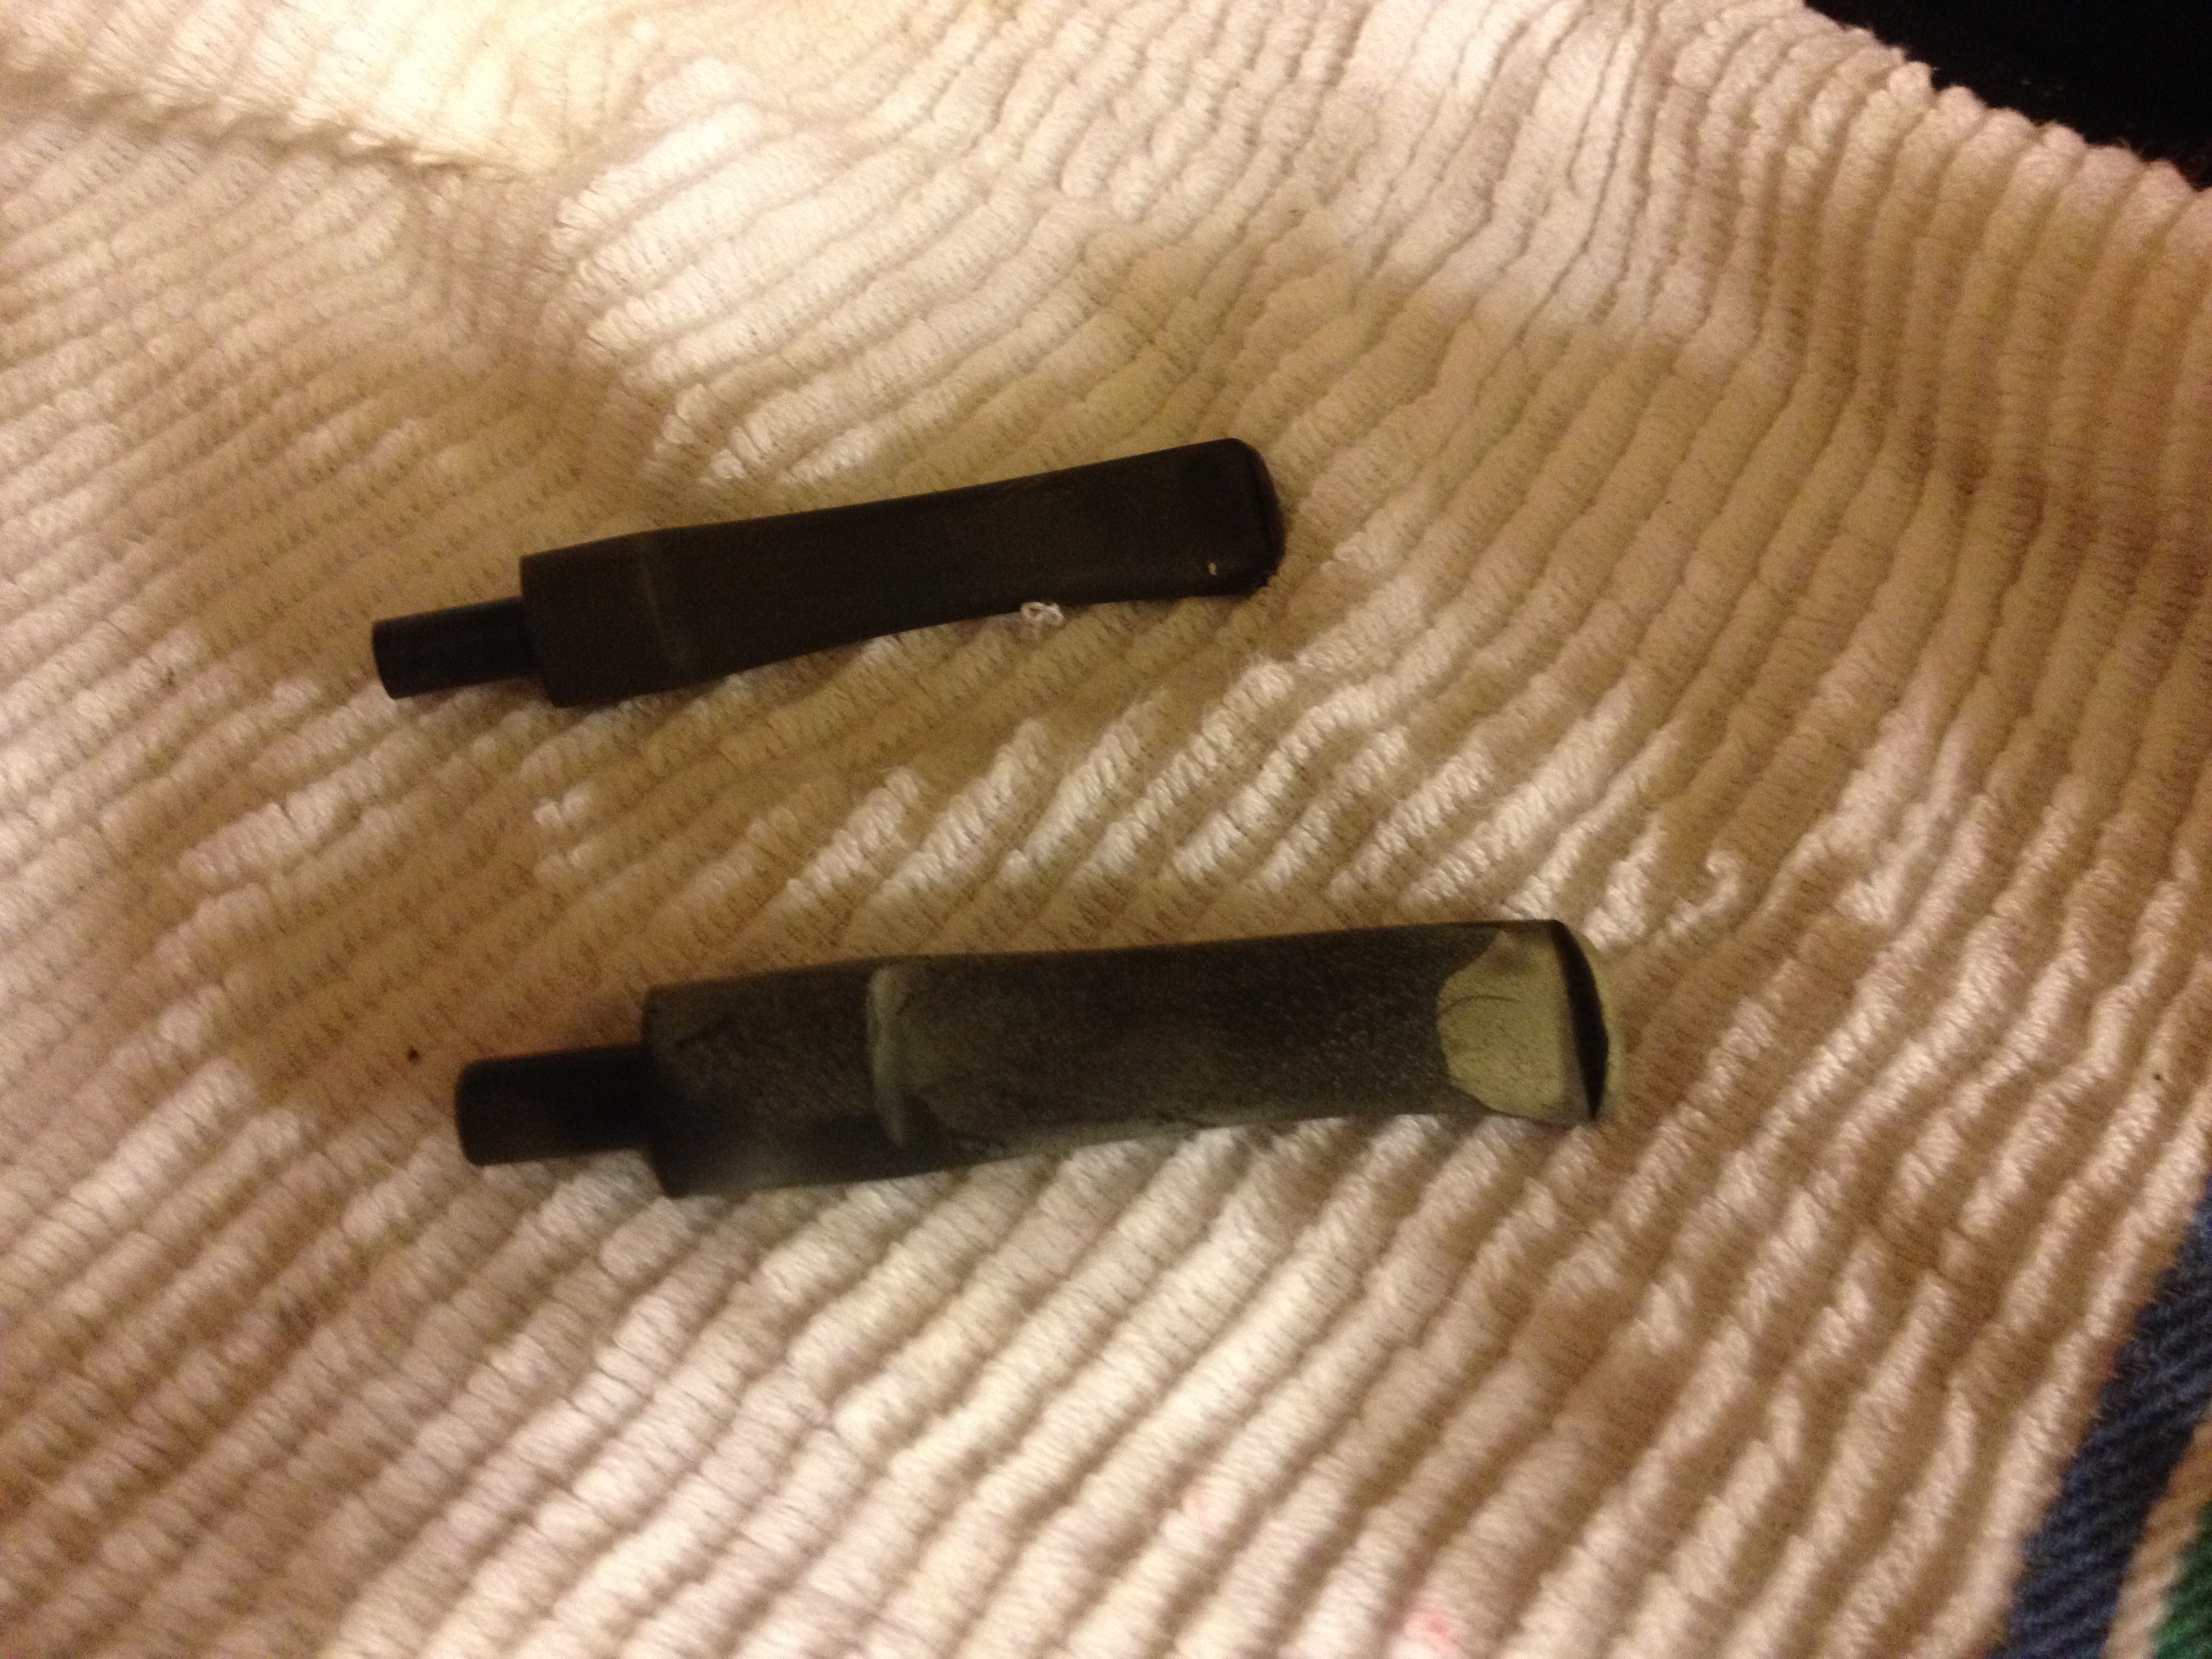
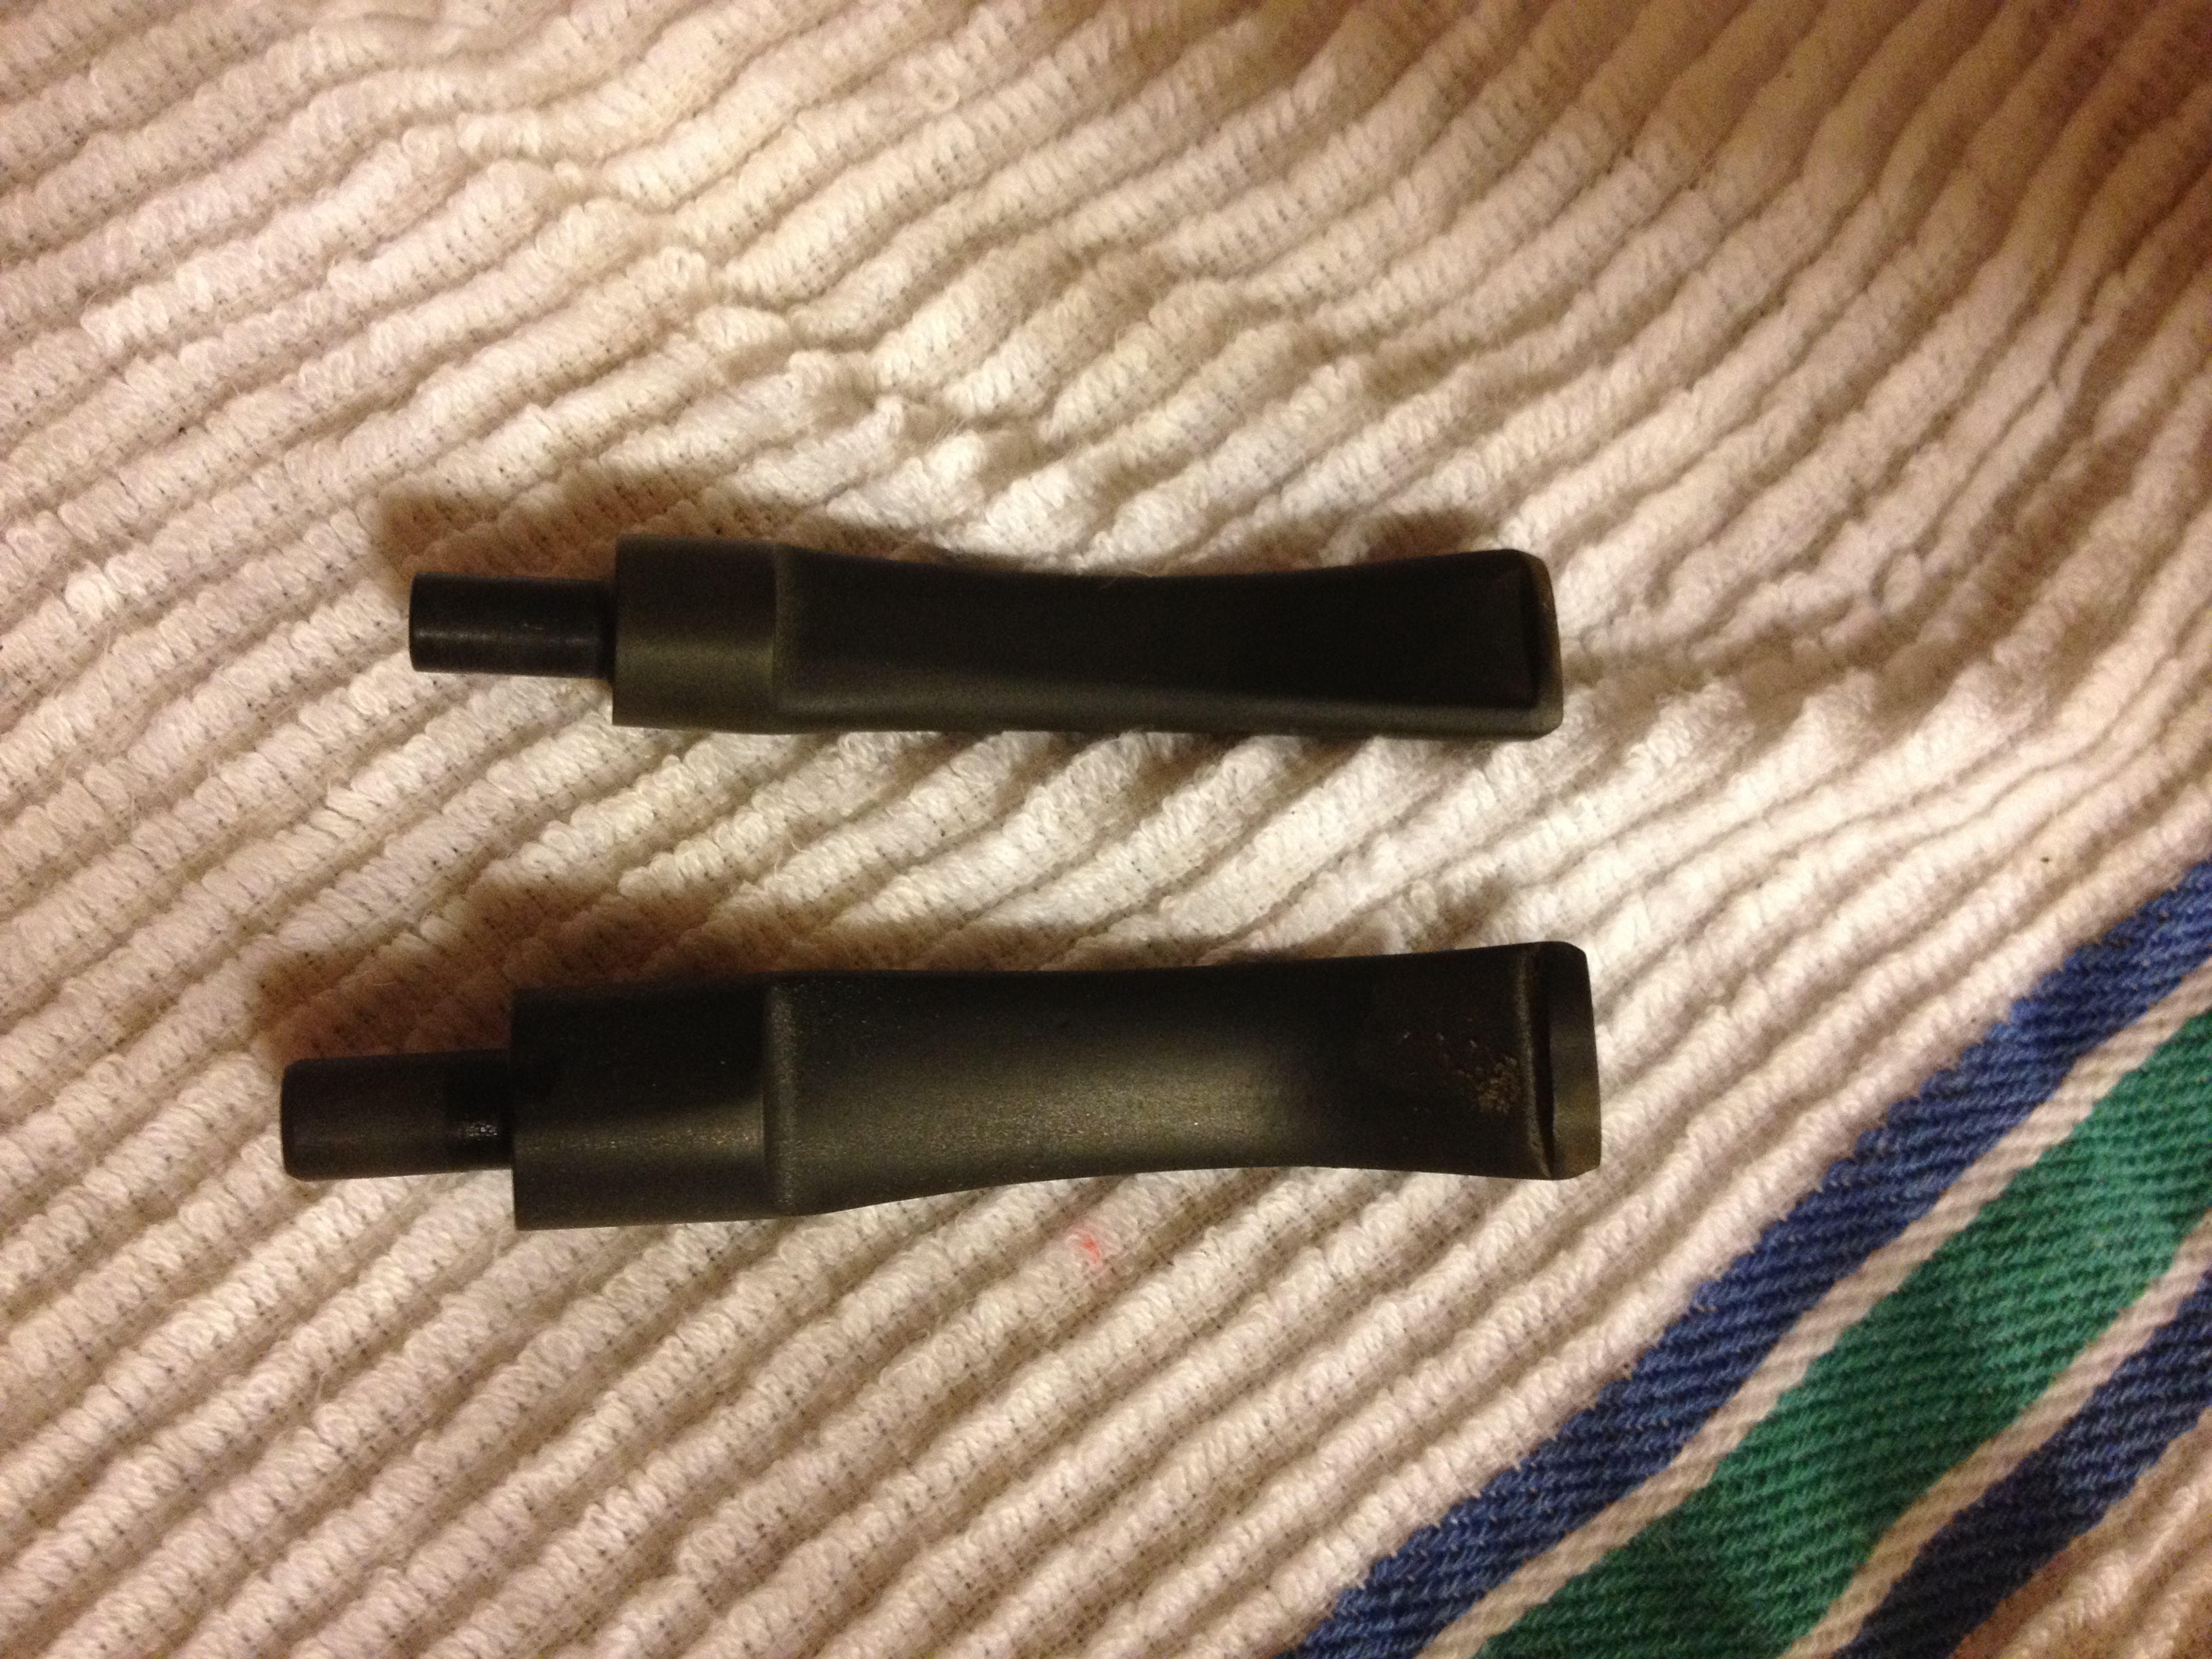
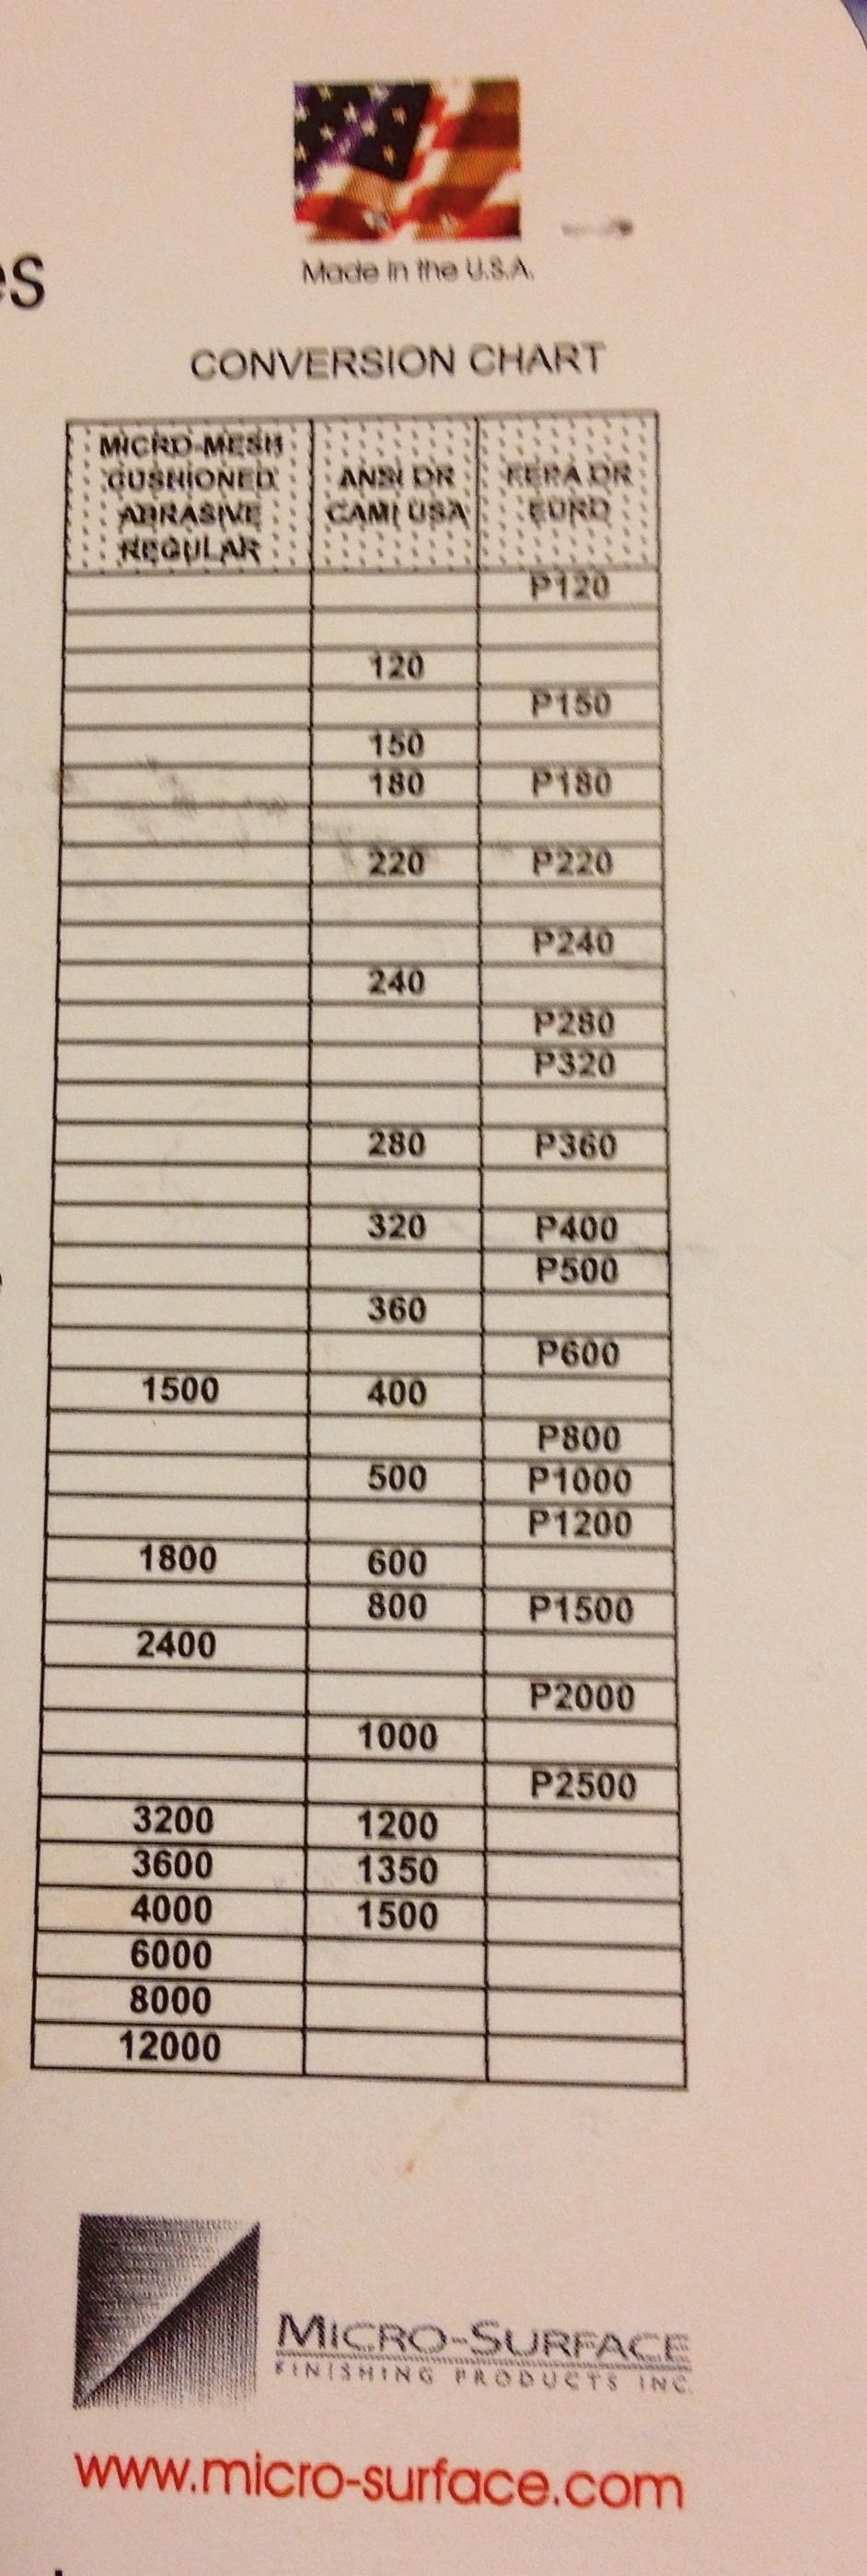
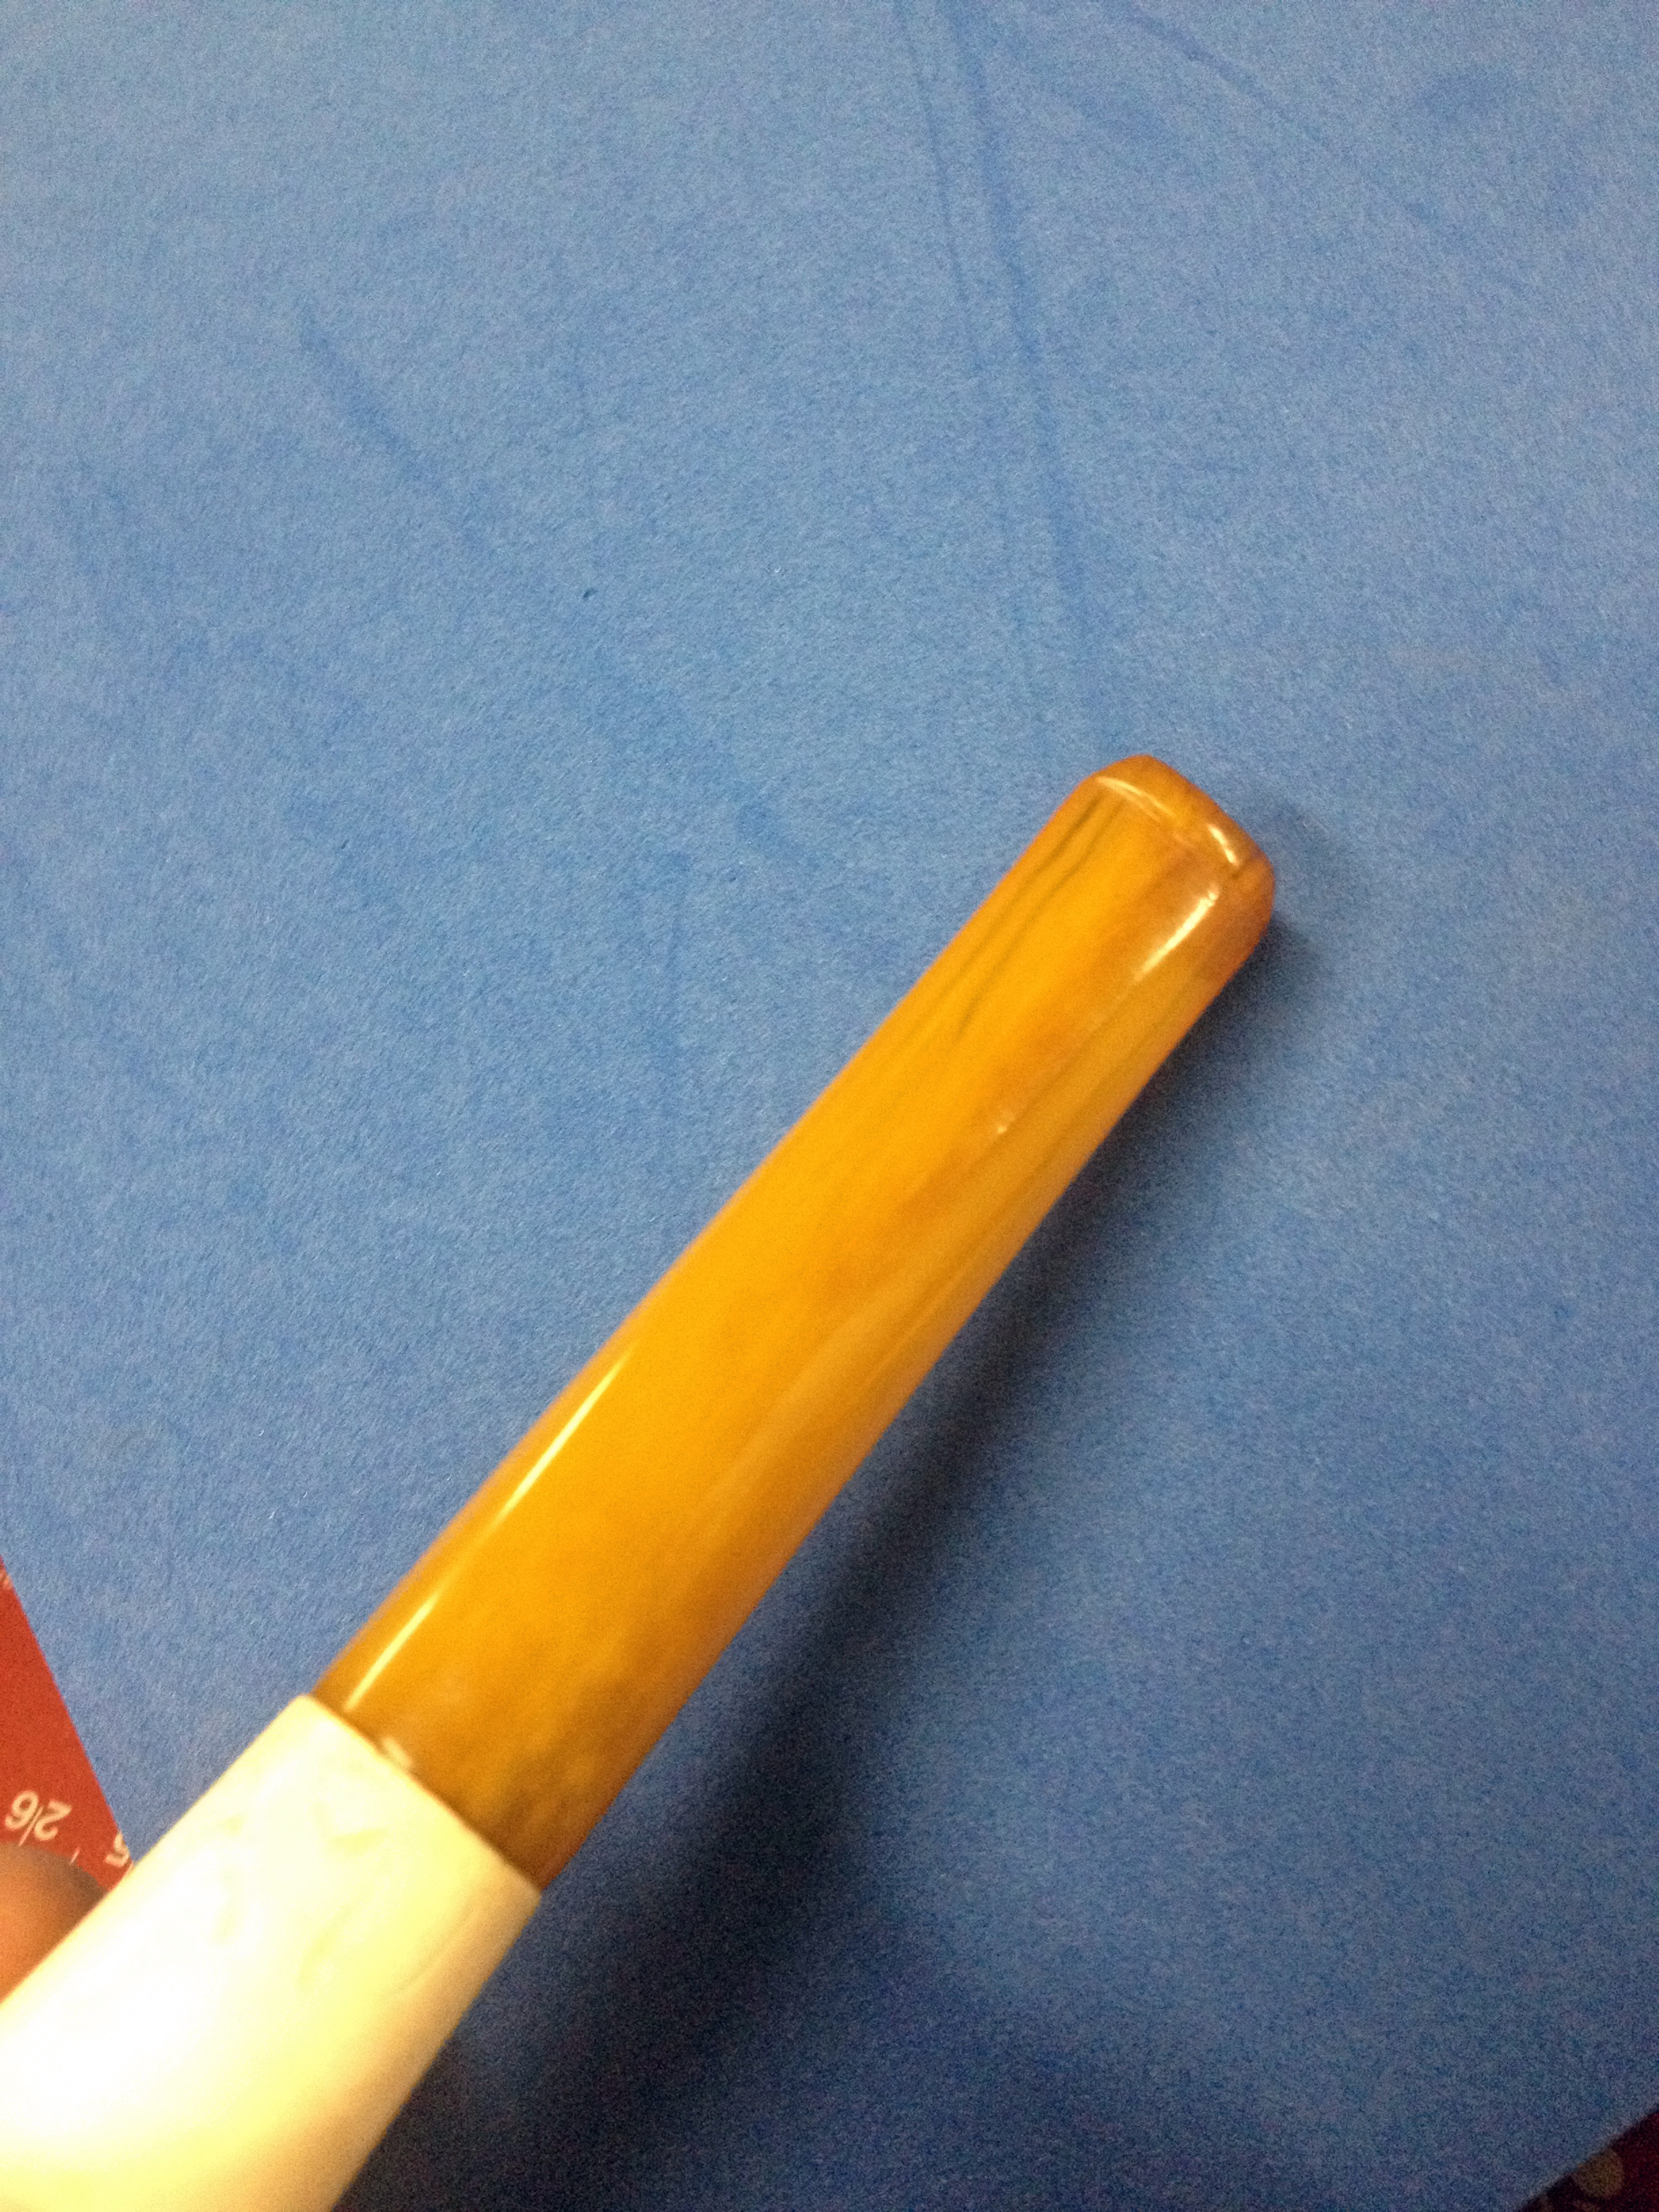
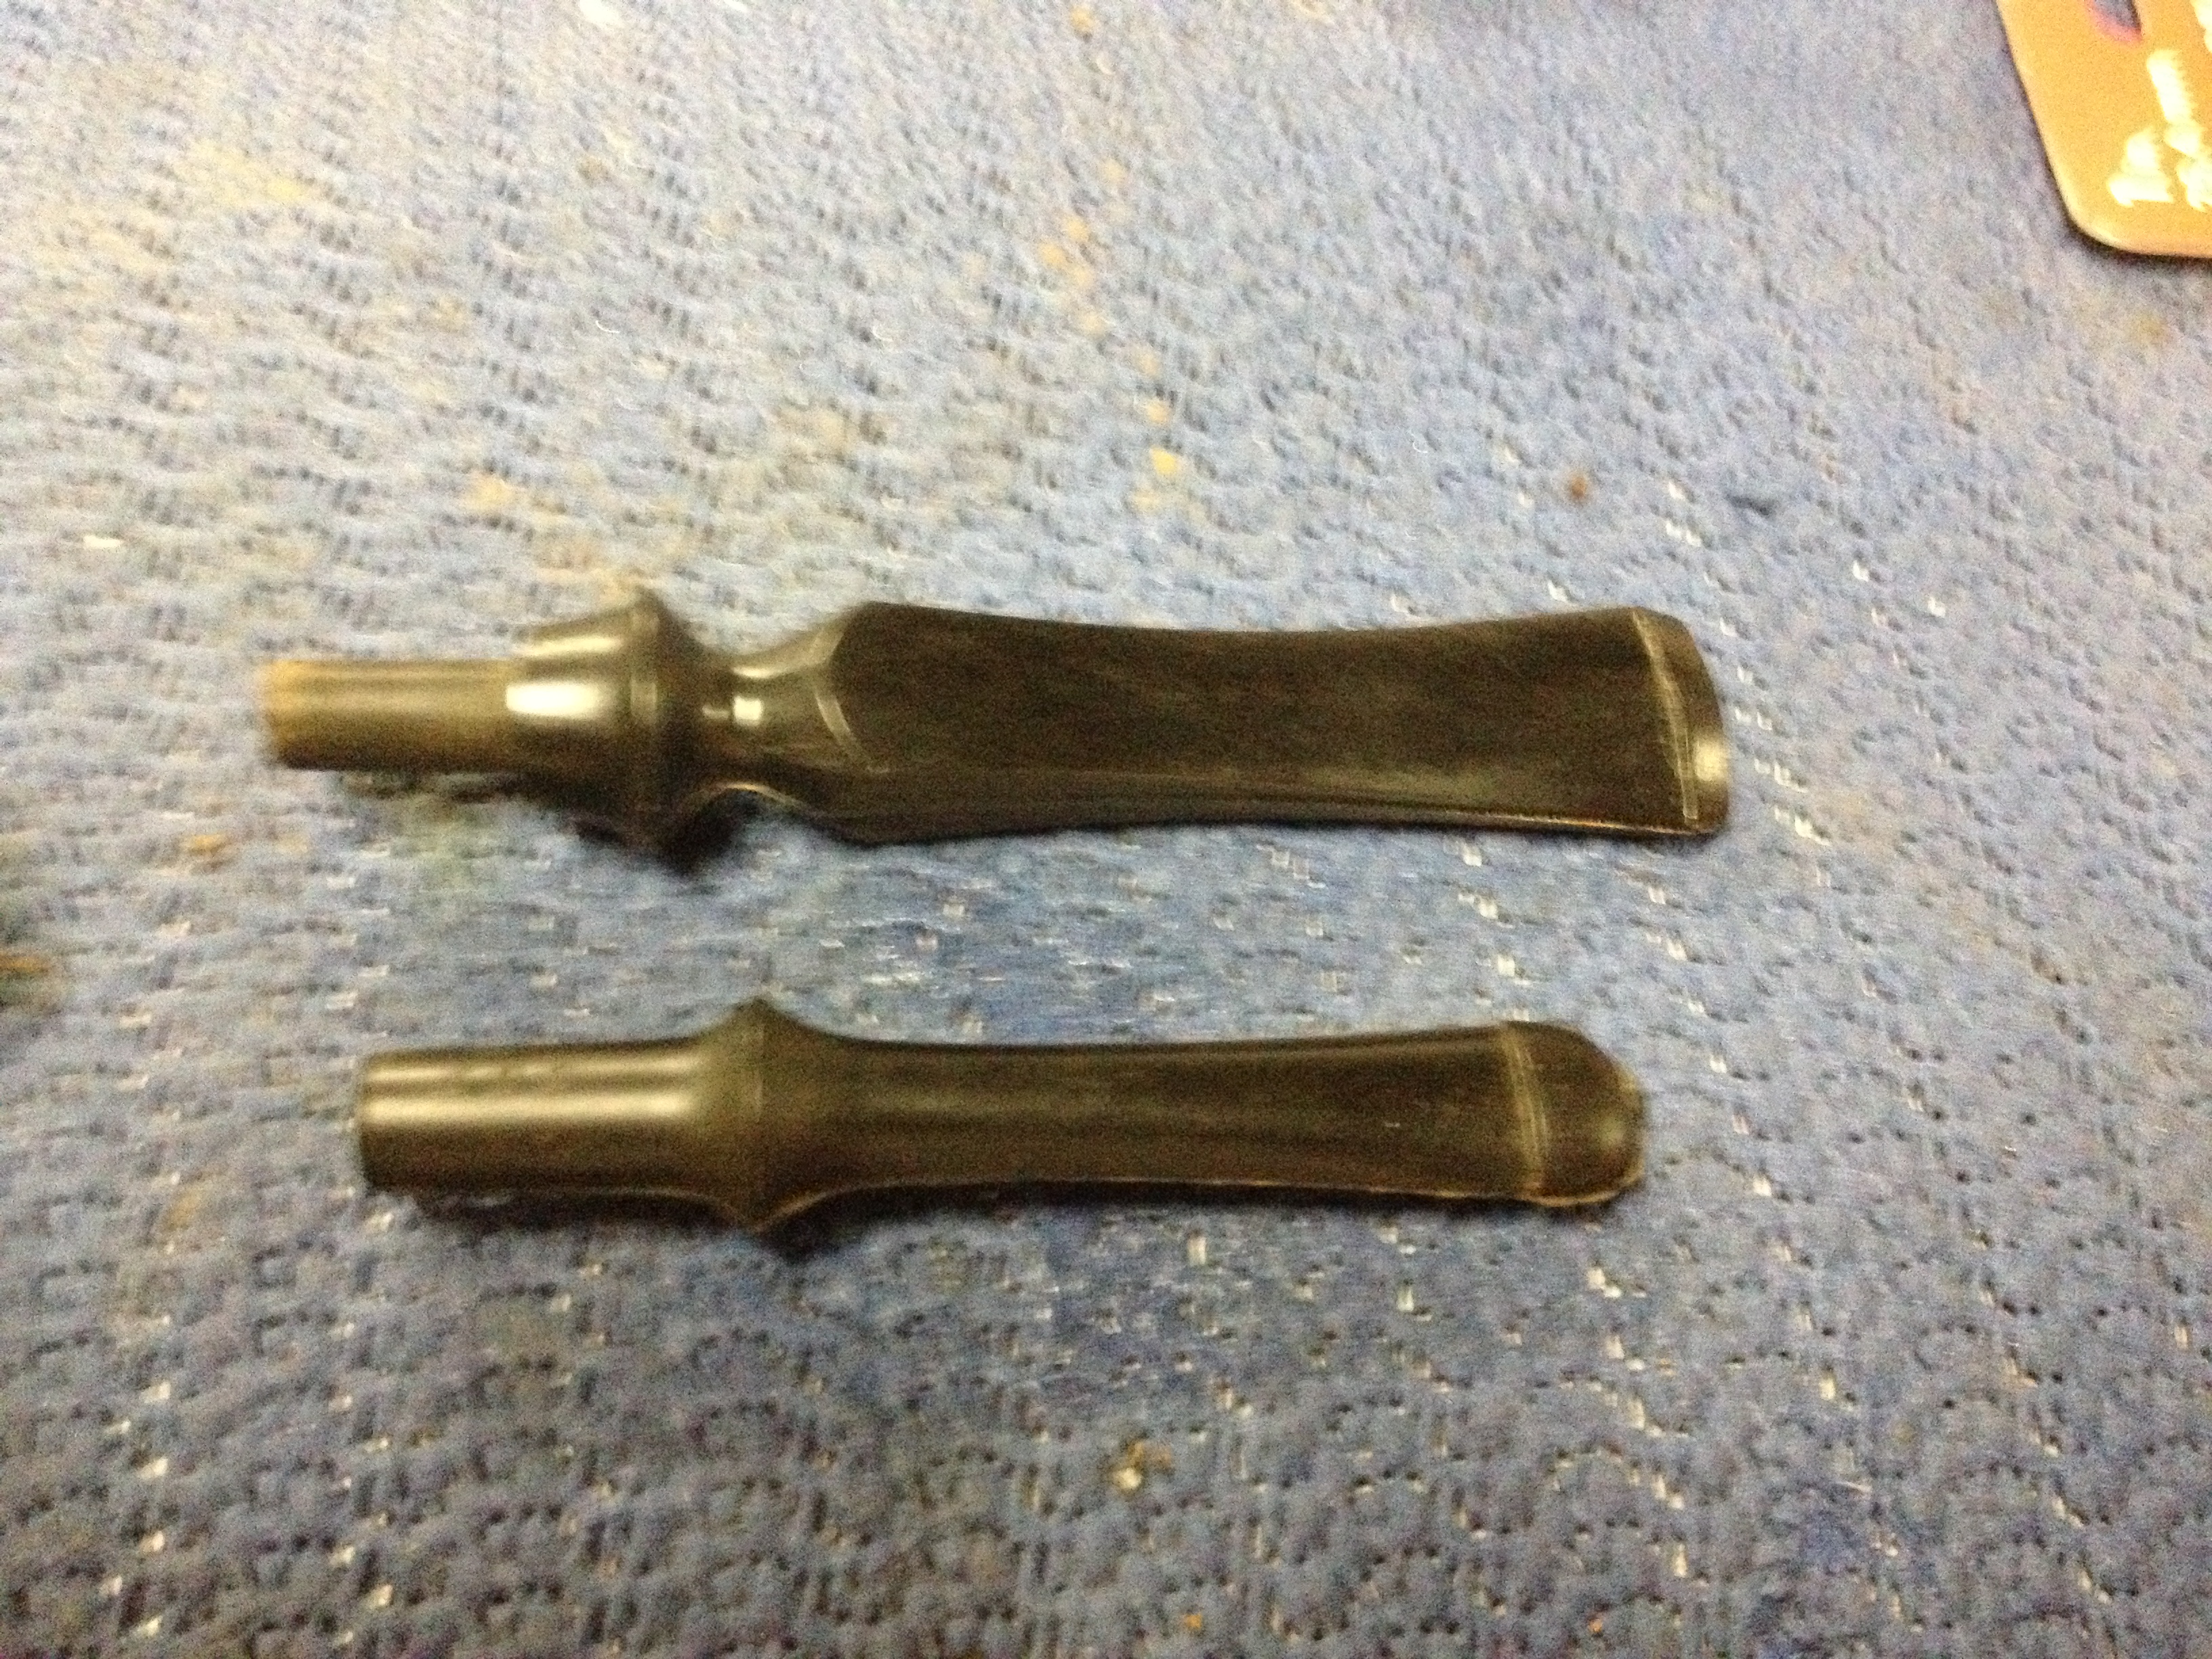
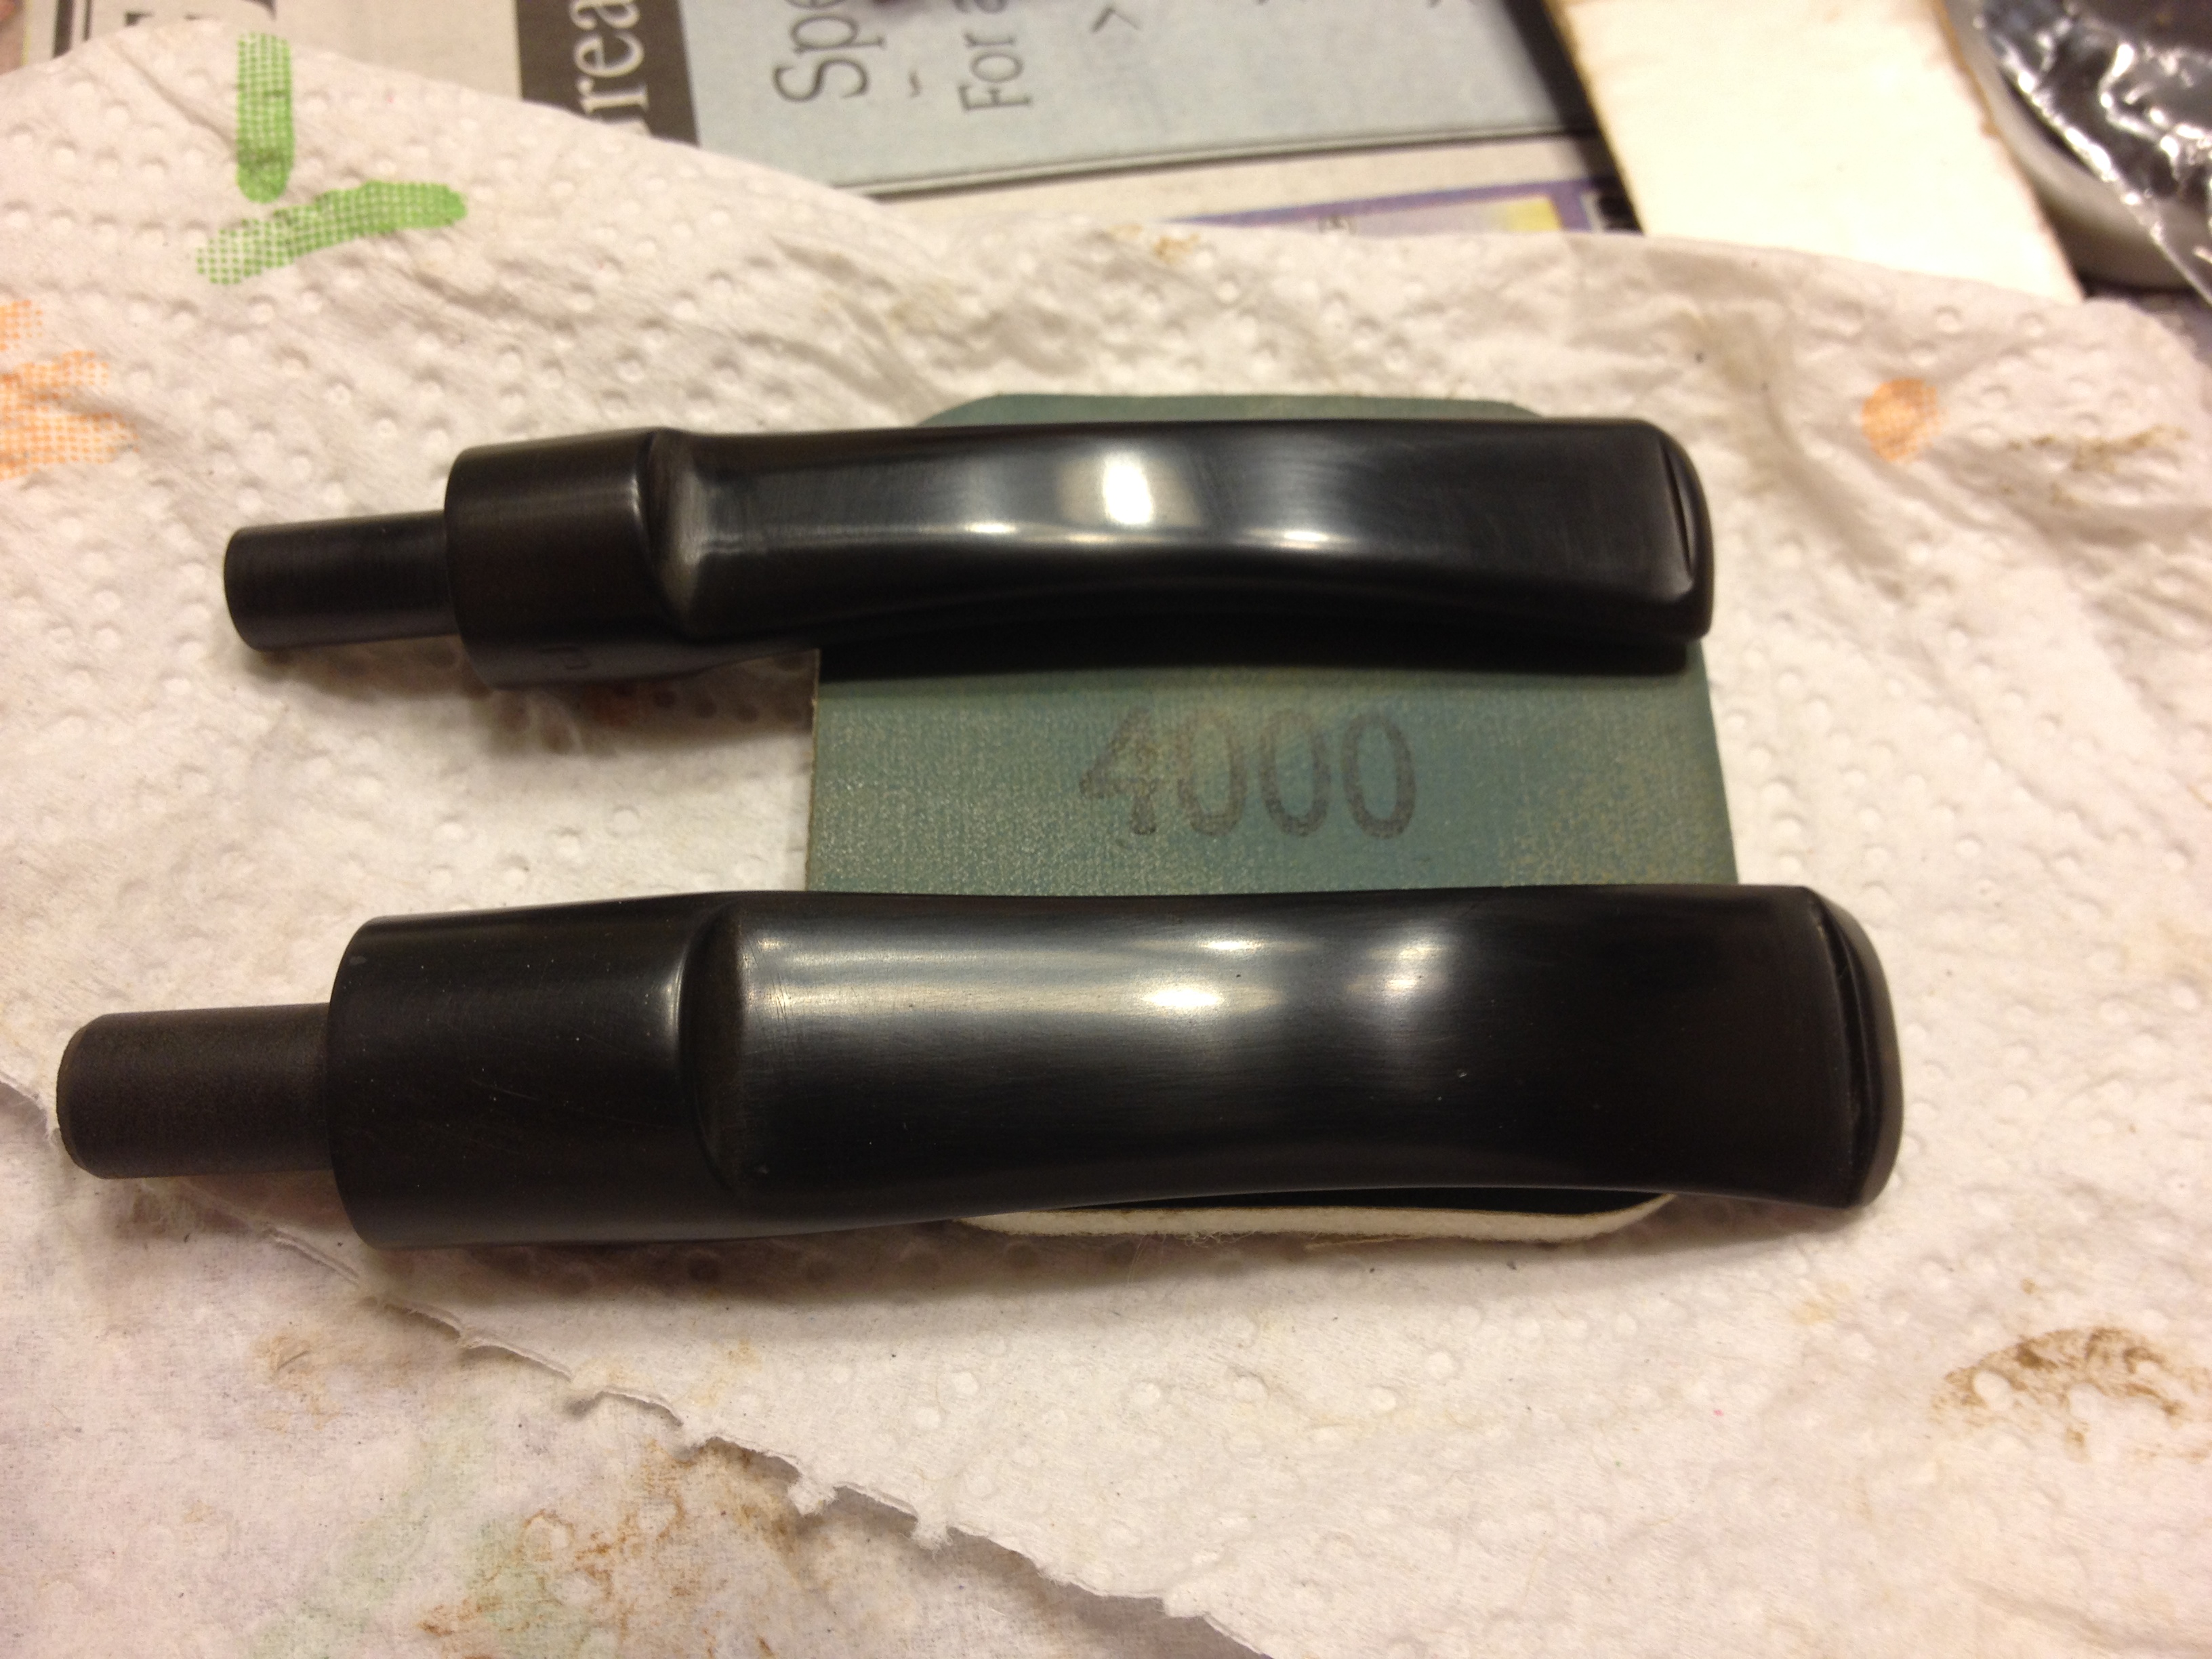
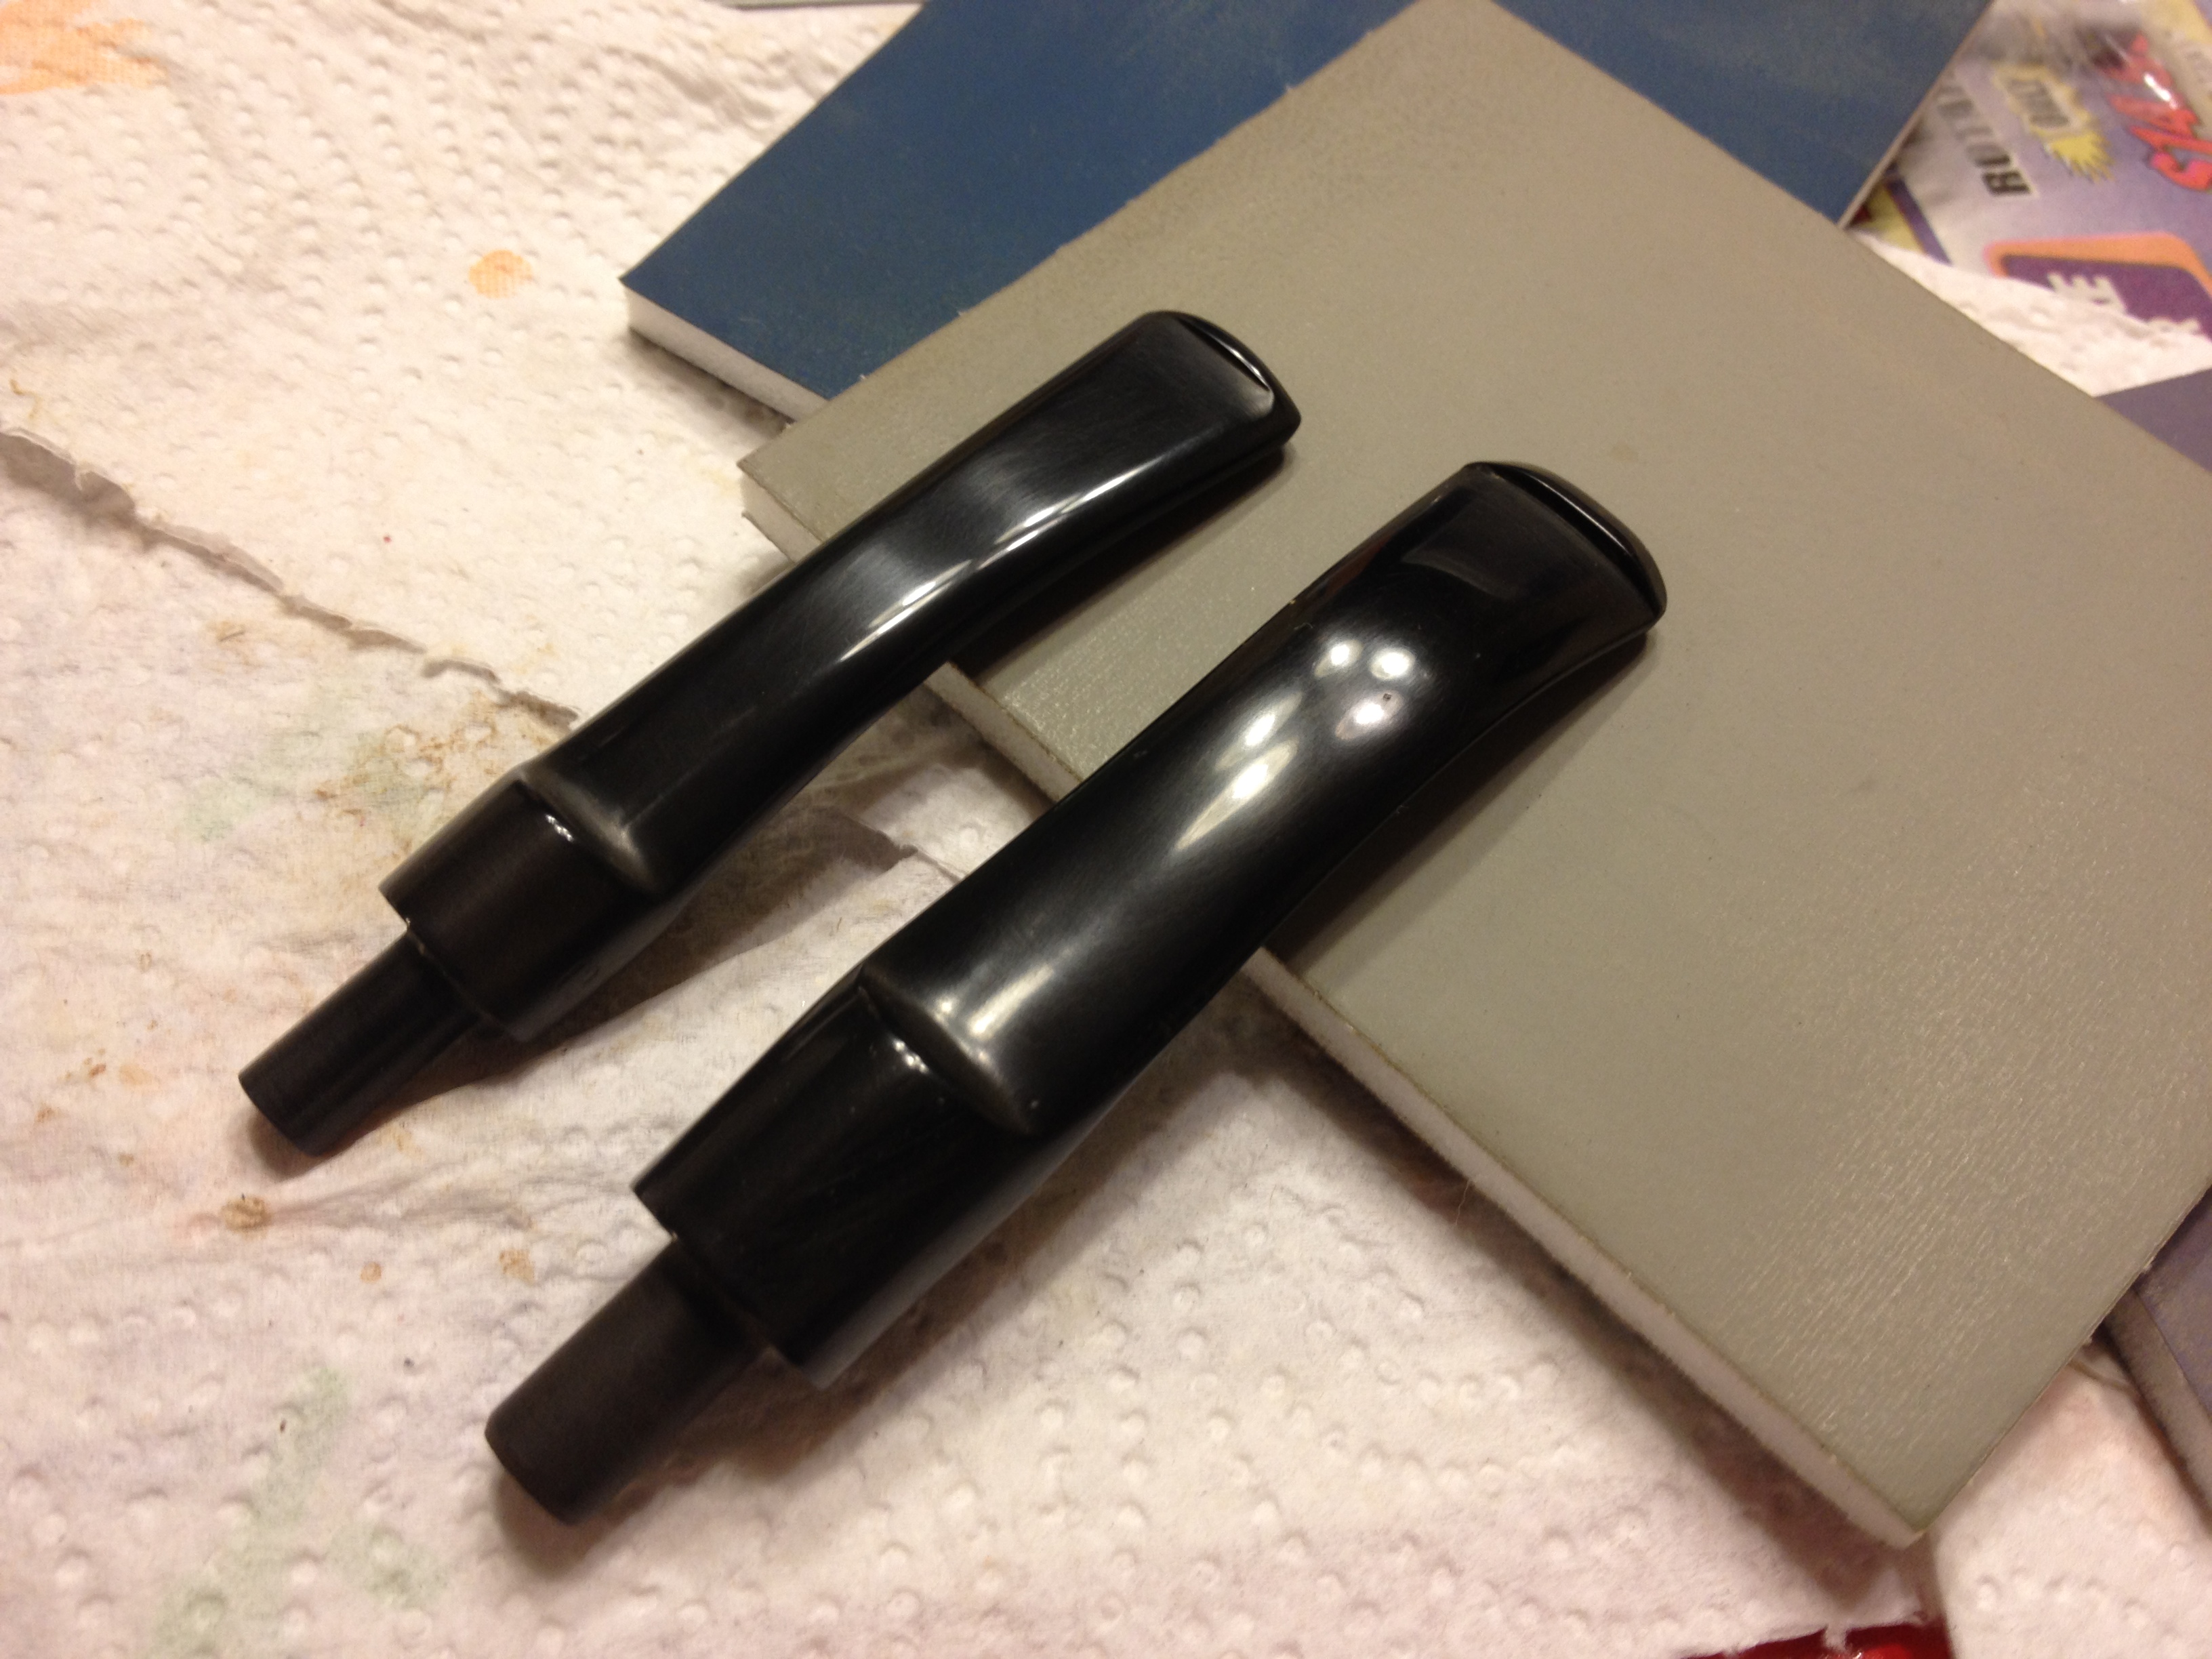
I now moved onto using the micro mesh pads, wet sanding them with 1500 & 1800 grit. At this point I noticed there was some oxidation that hadn’t come out well so I took some 400 grit wet/dry paper to the stems, then “painted” them with a Bic lighter, and then back to the 400 grit paper until the oxidation spots were gone. I then went back to wet sanding with the micro mesh 1500-3200 grits. After the 3200 grit I polished the stems with plastic polish and then dry sanded with the remaining grits through 12,000. Here are a few photos of the shine progression:

IMG_7744  IMG_7745IMG_7746

I now set the stems aside until the next day when the stummels would come out of their bath.

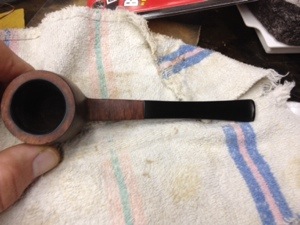
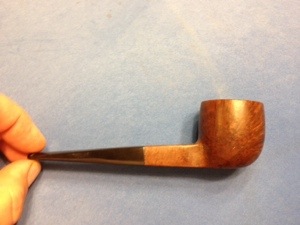
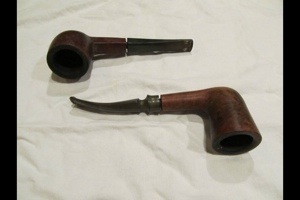
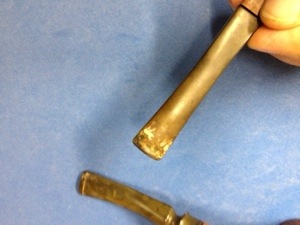
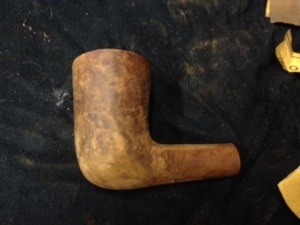
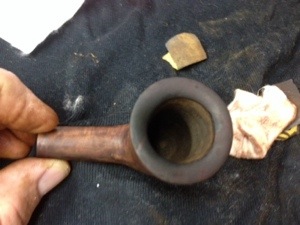
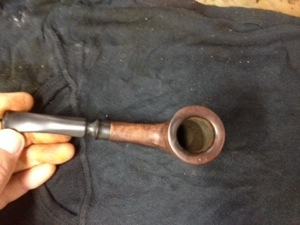
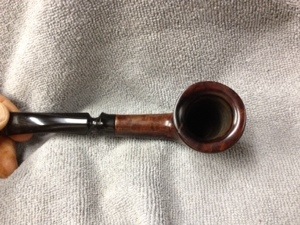
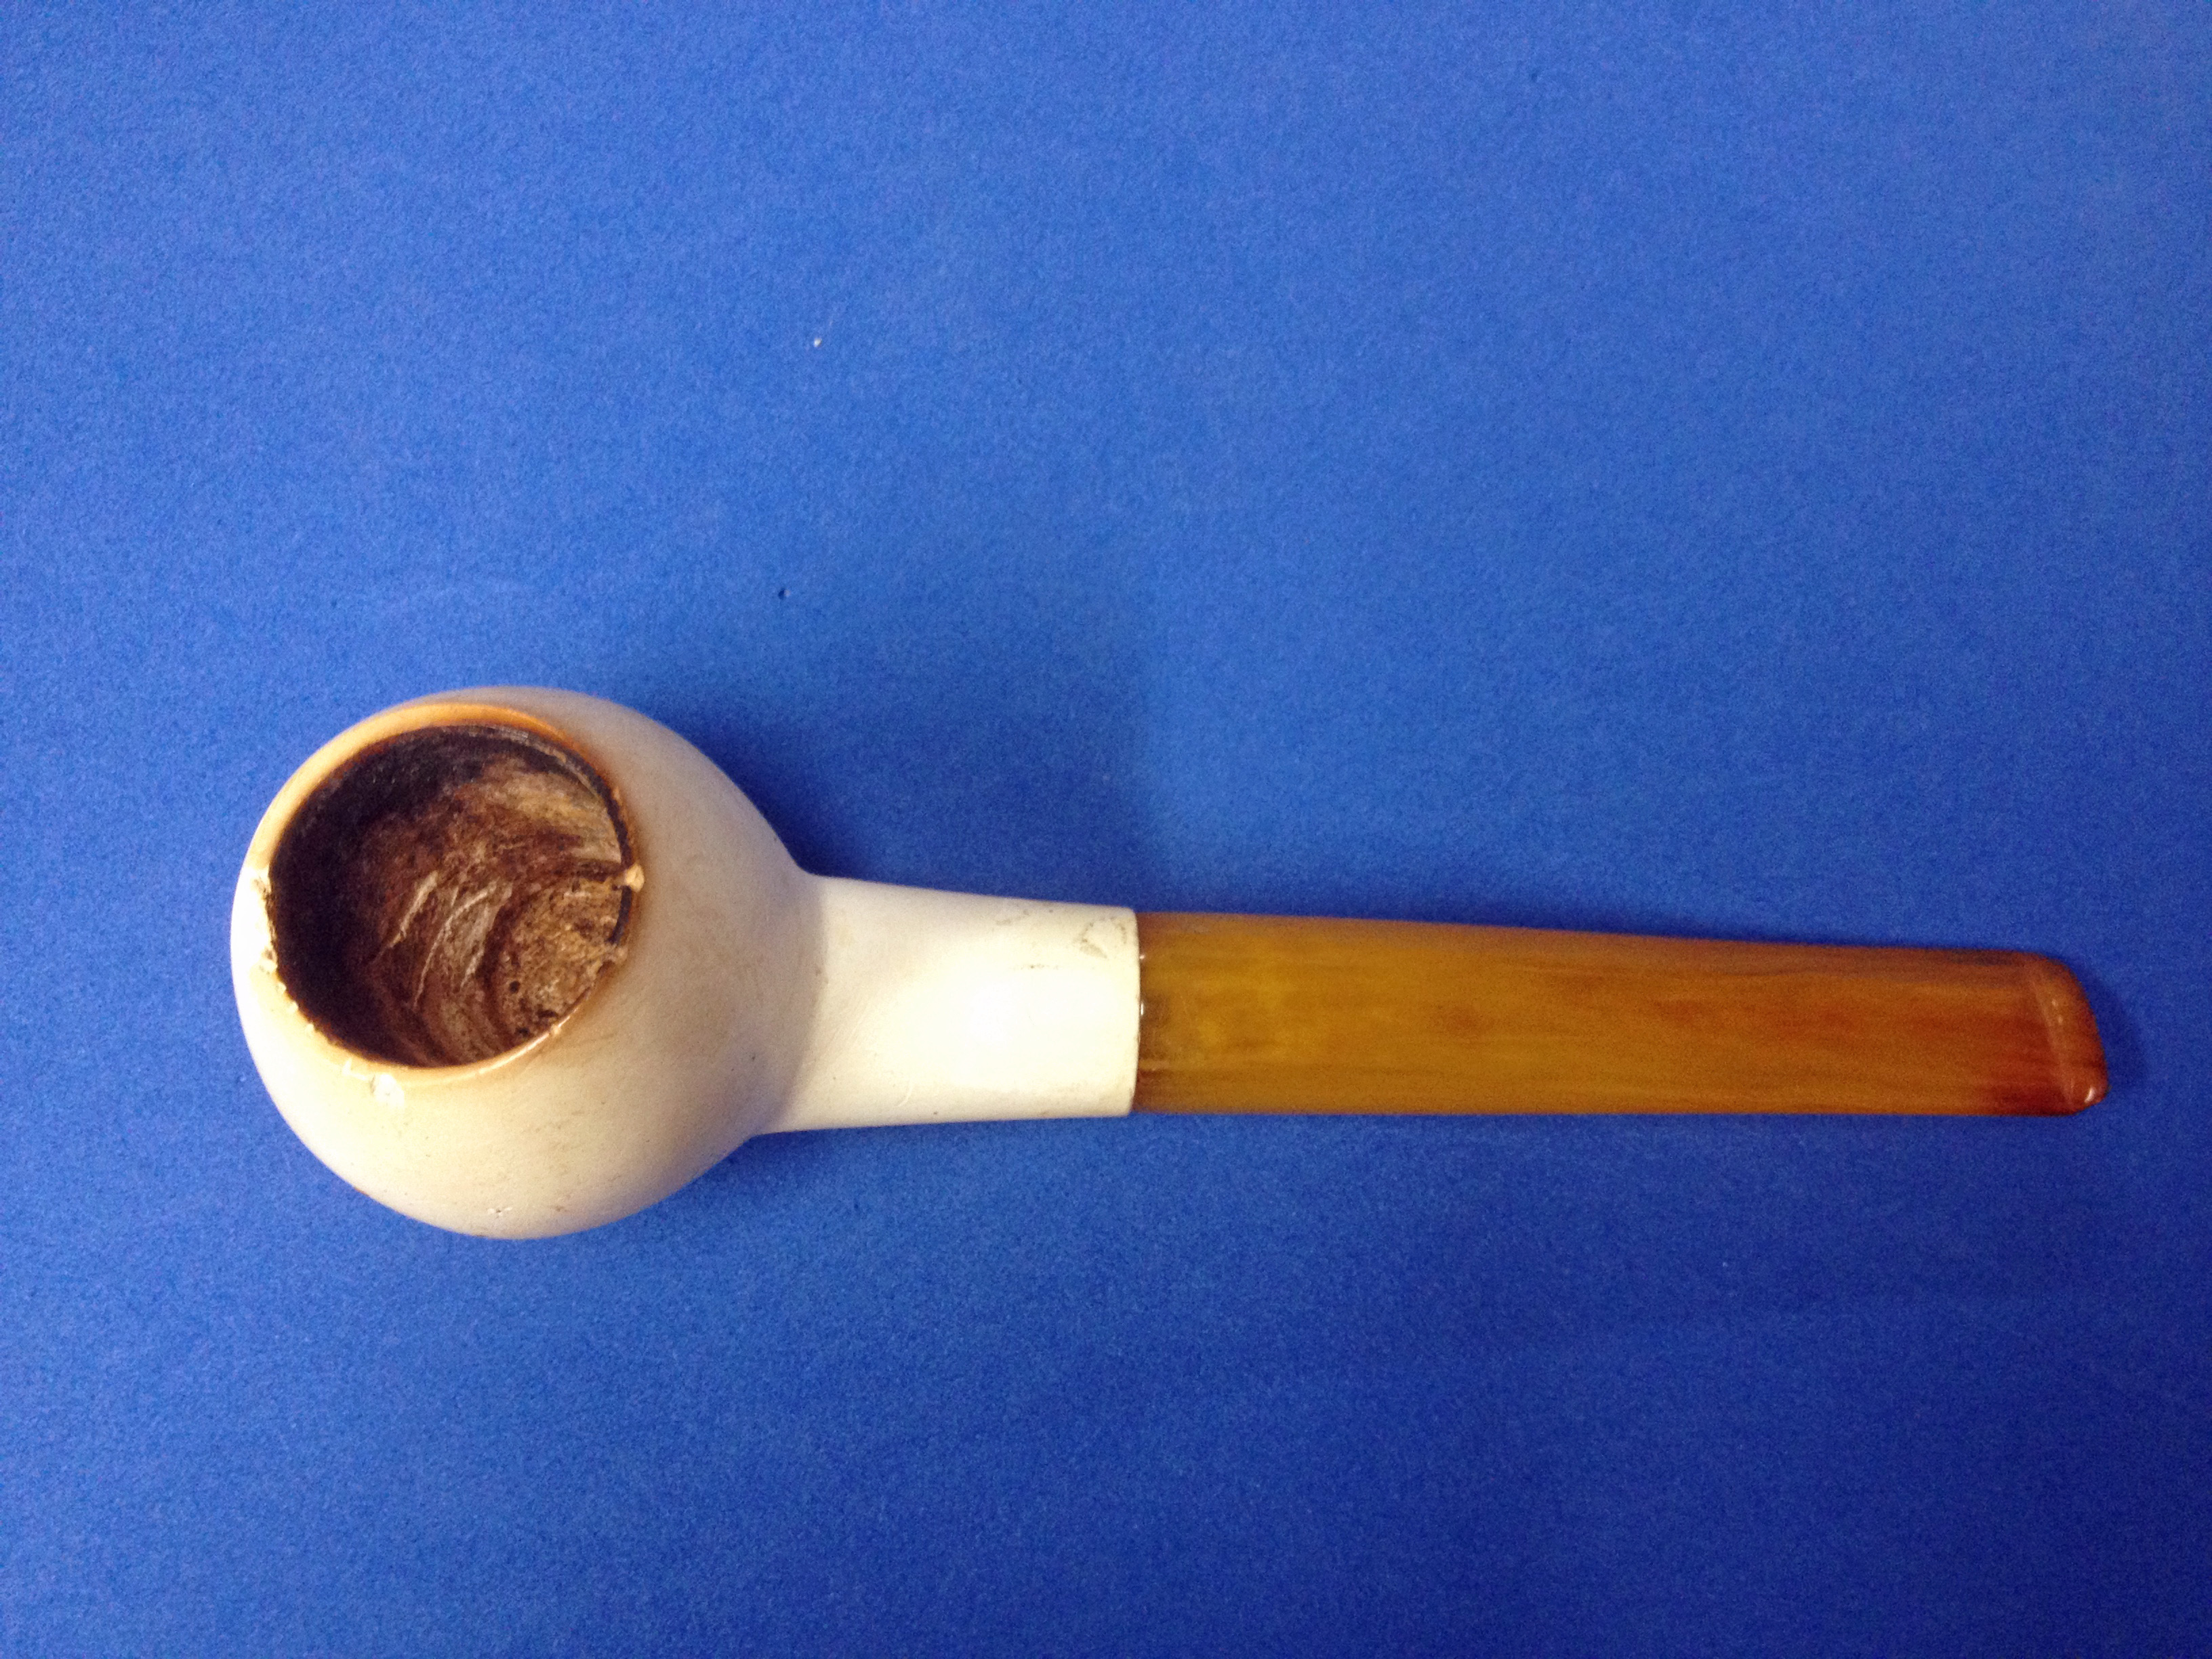
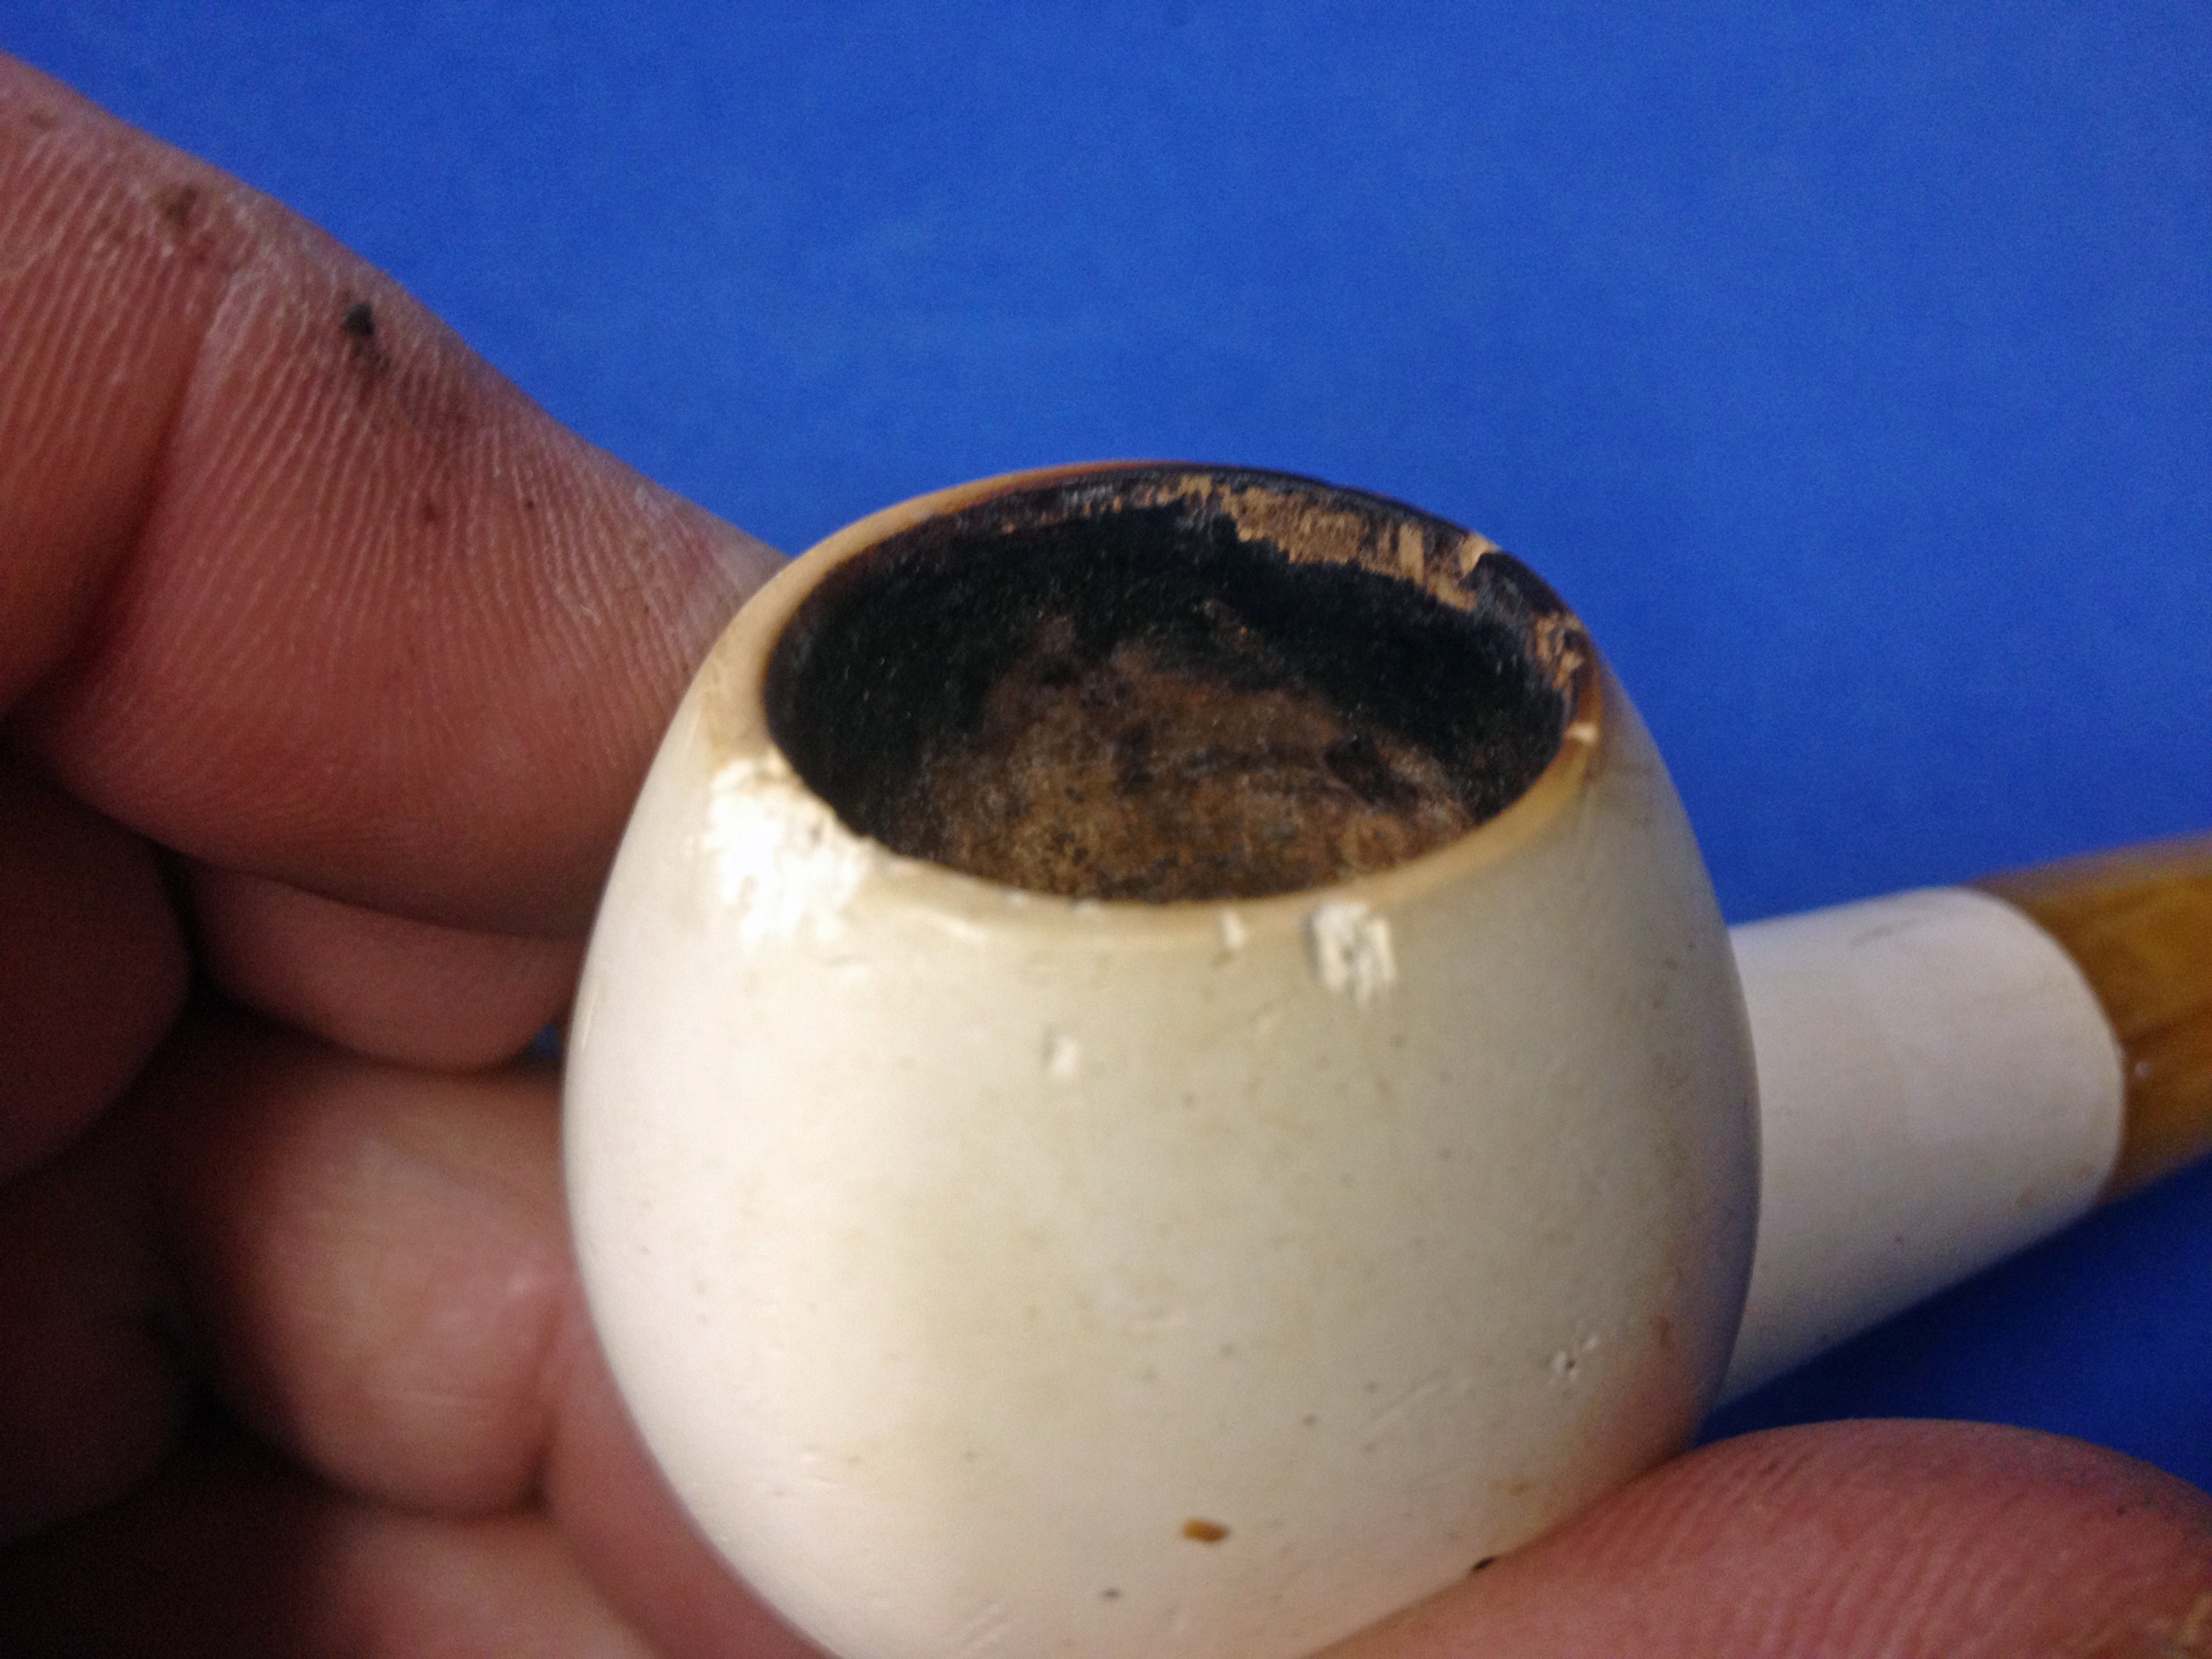
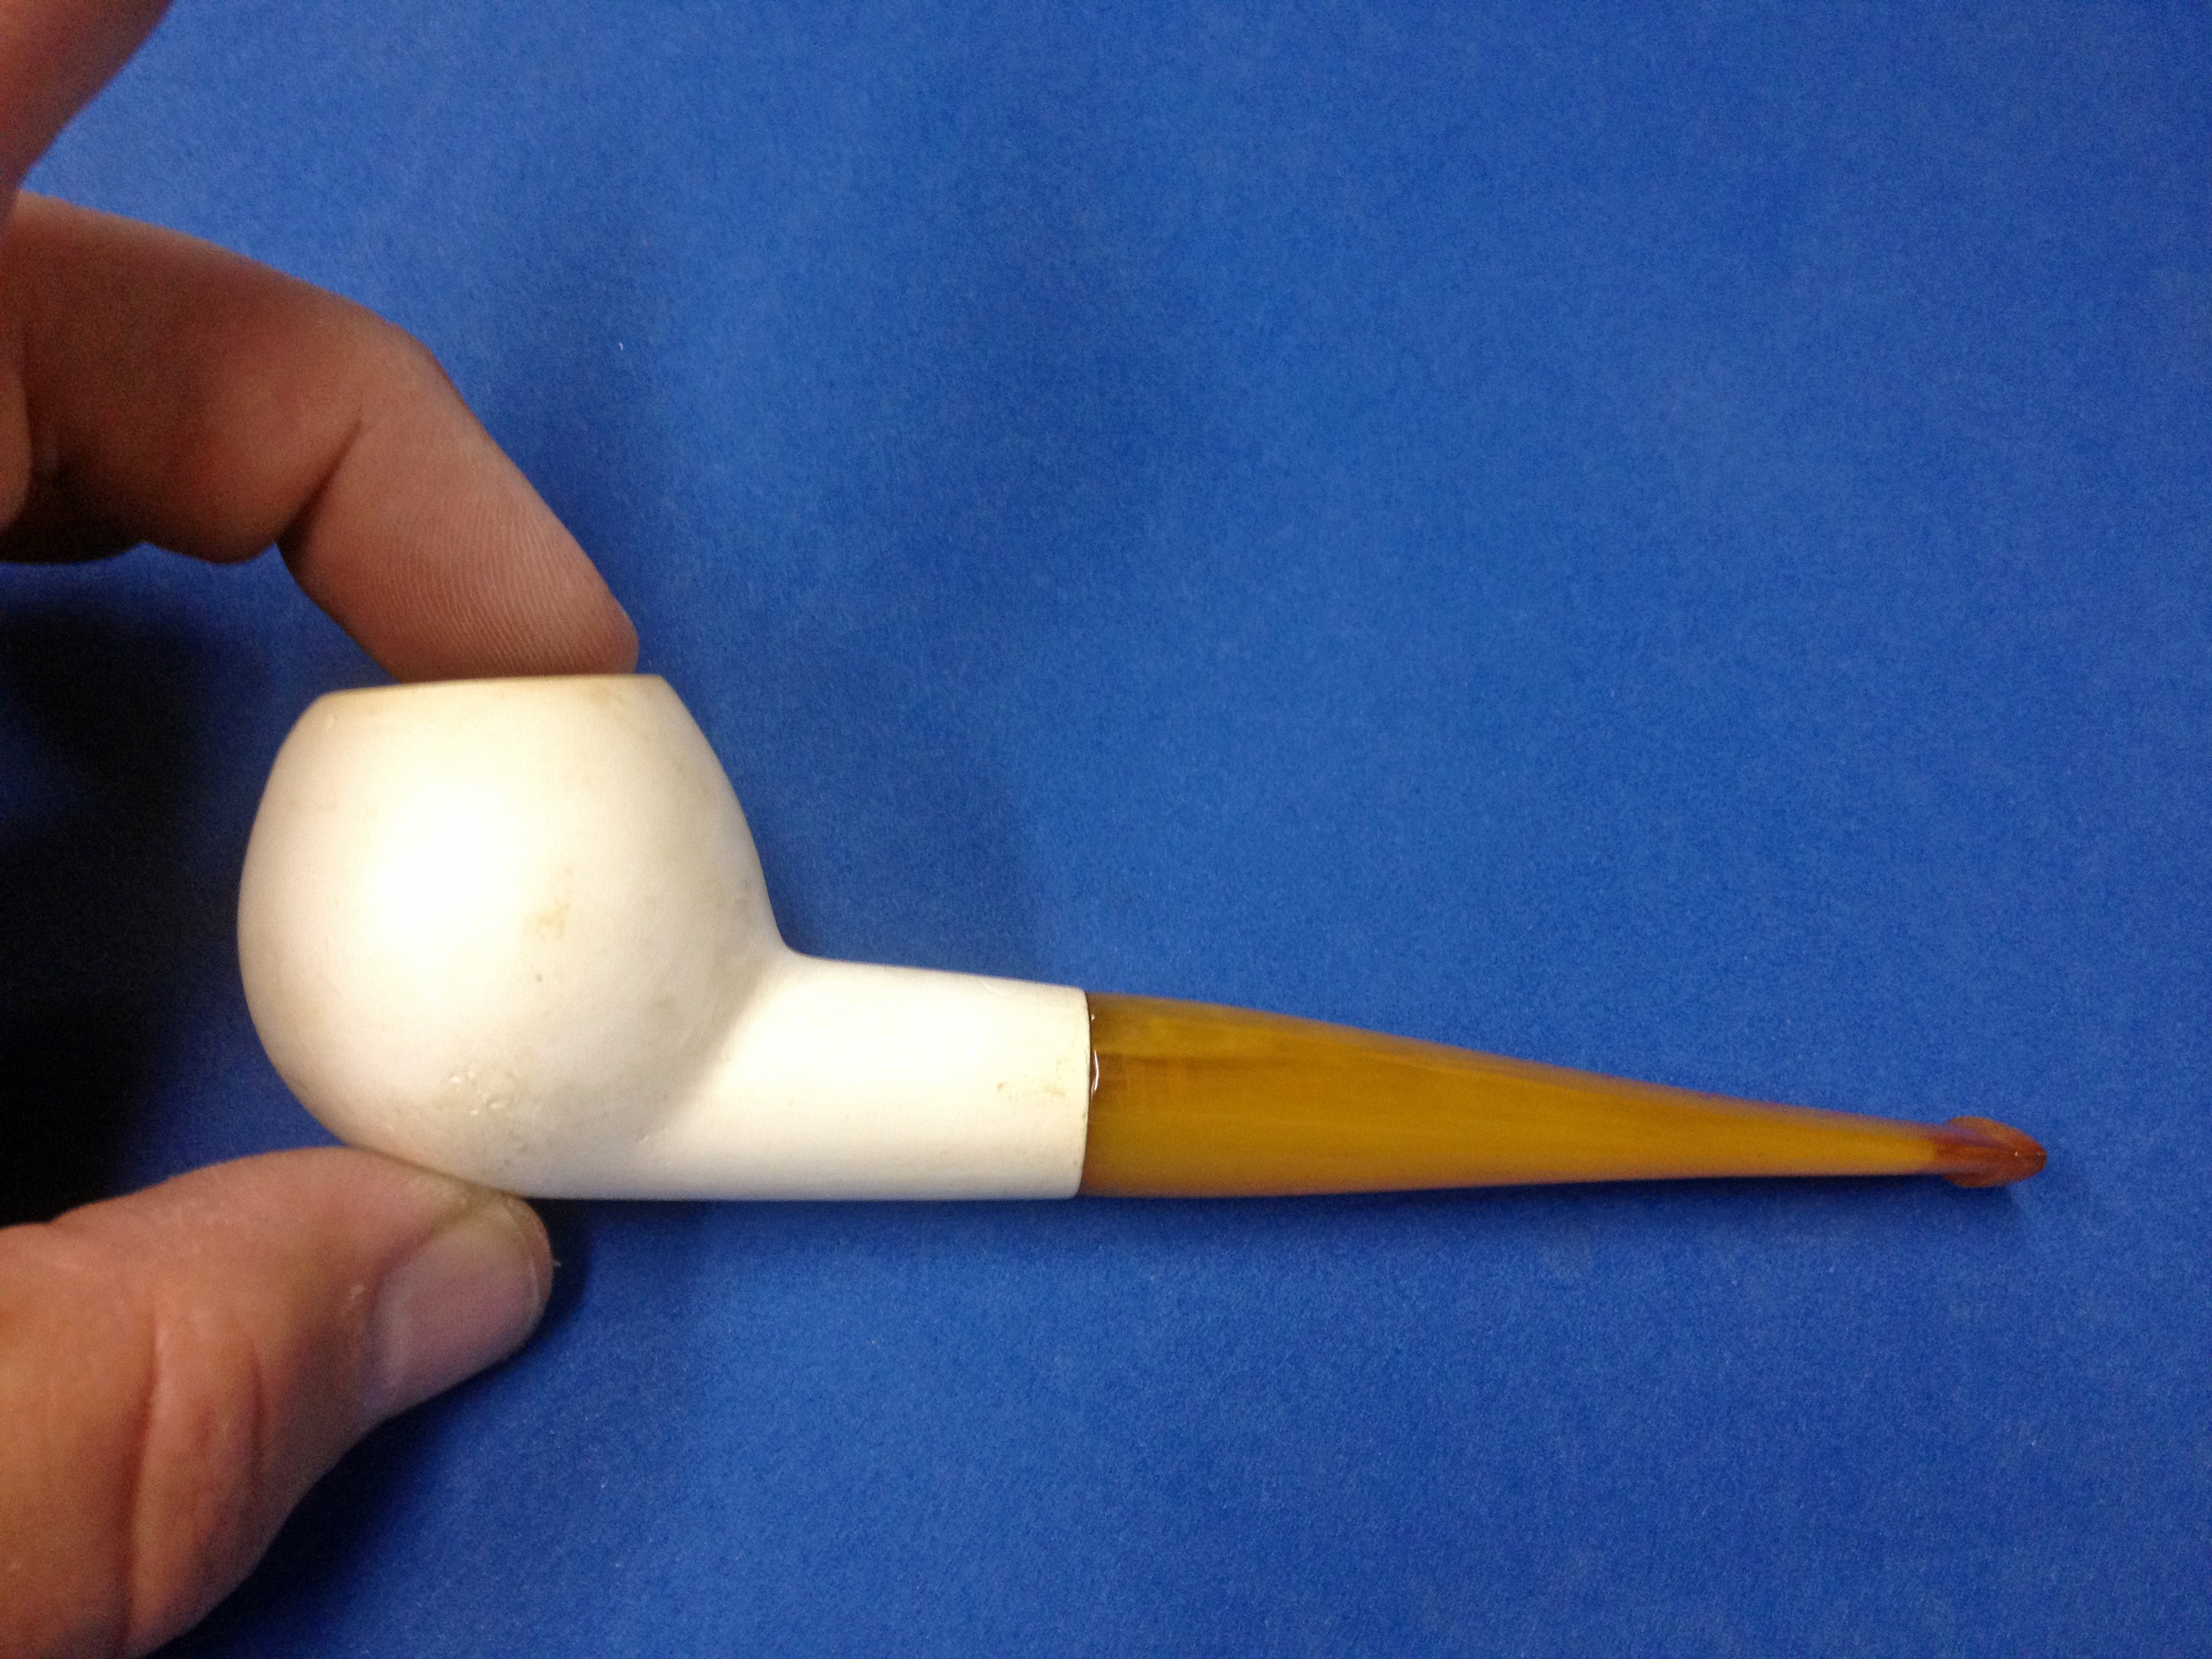
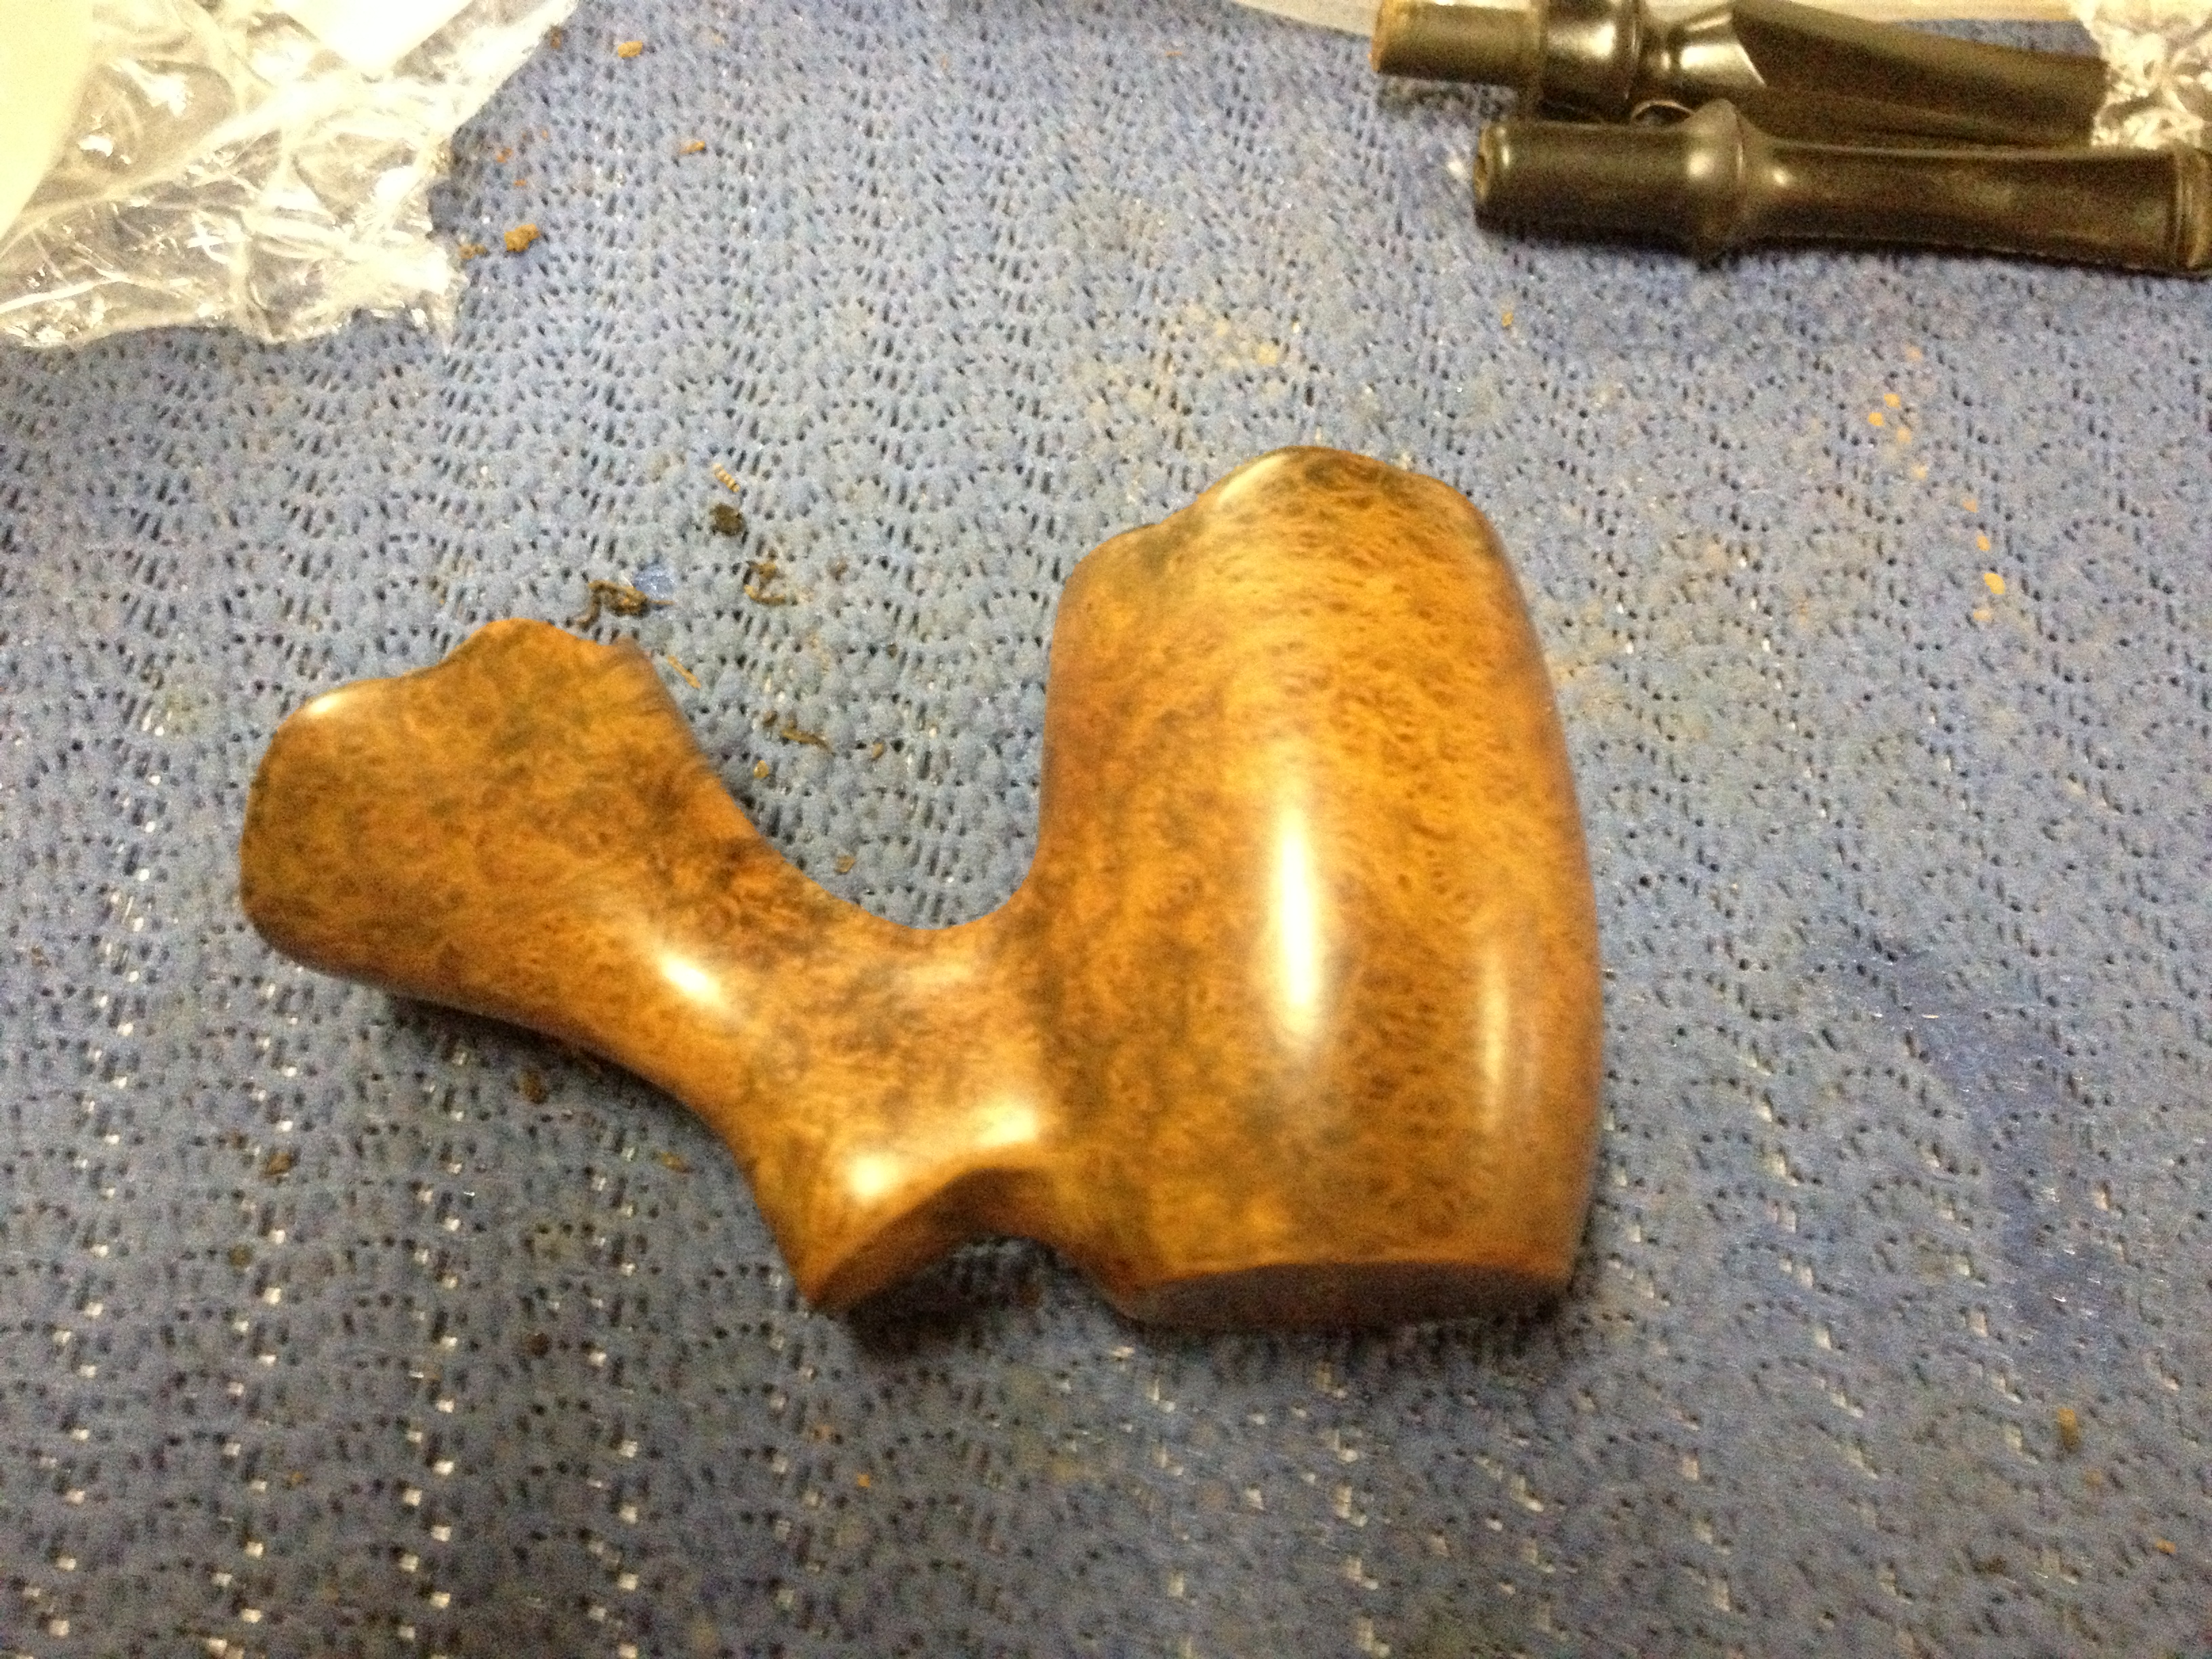
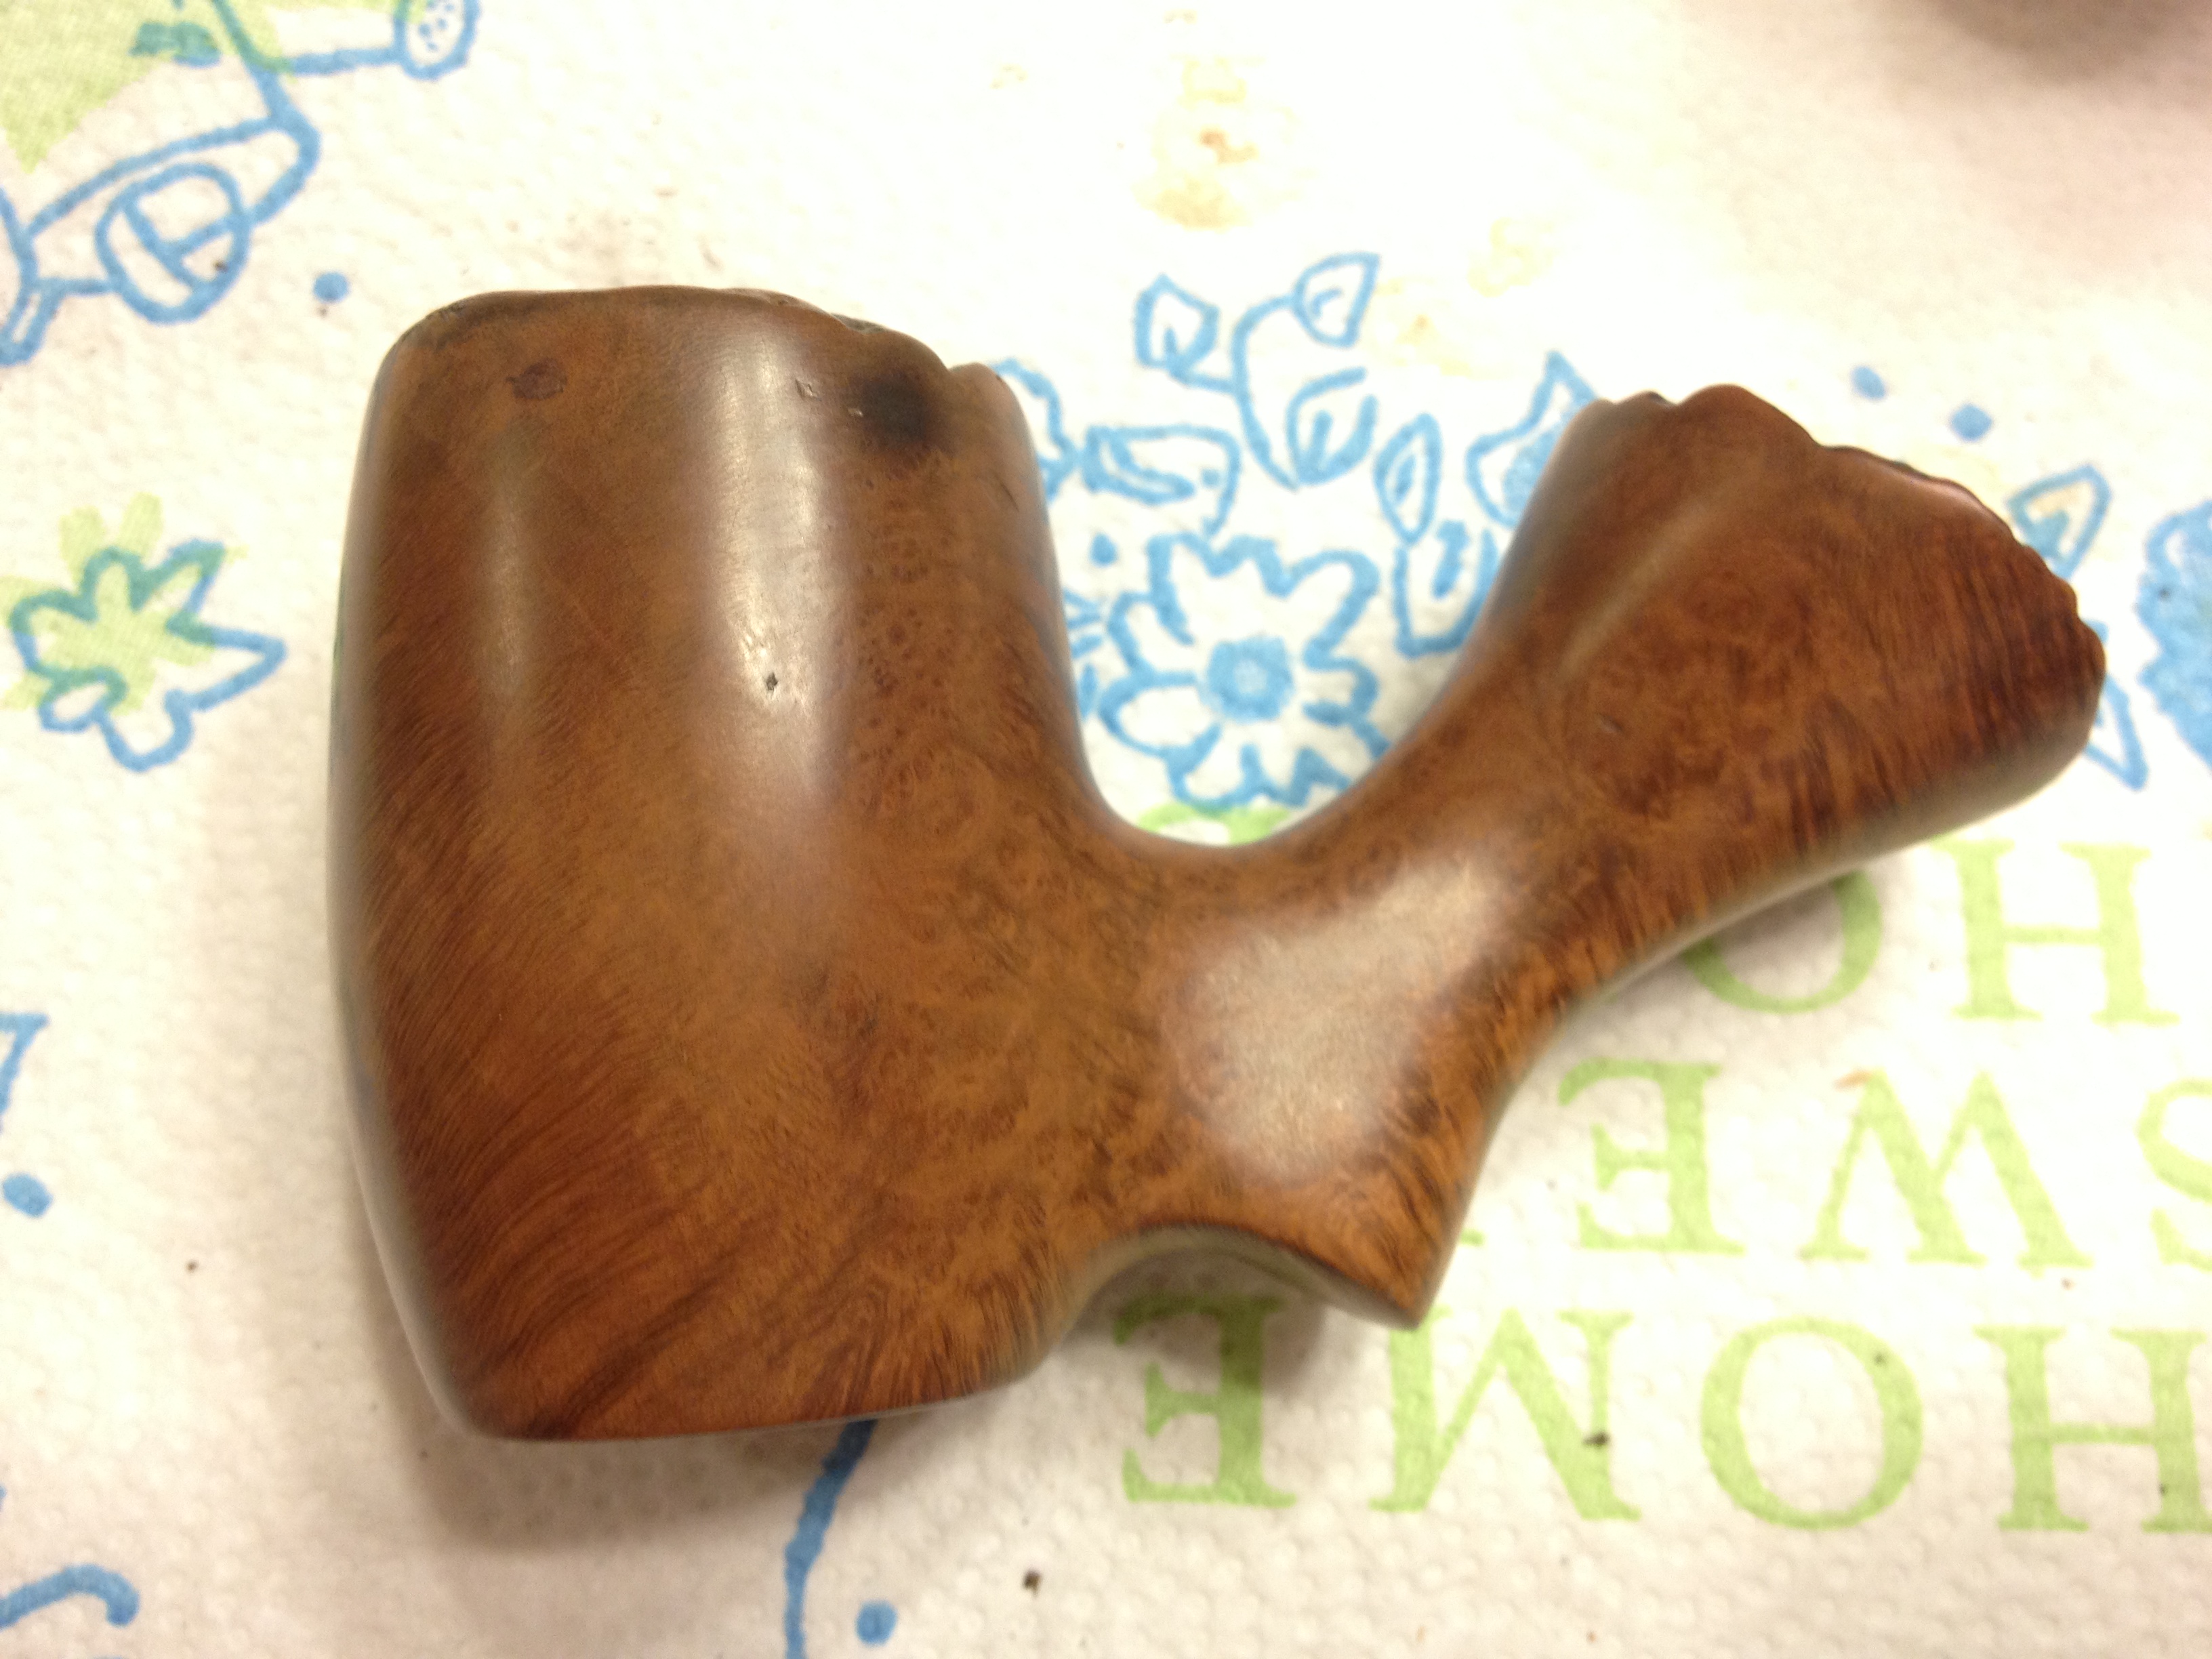
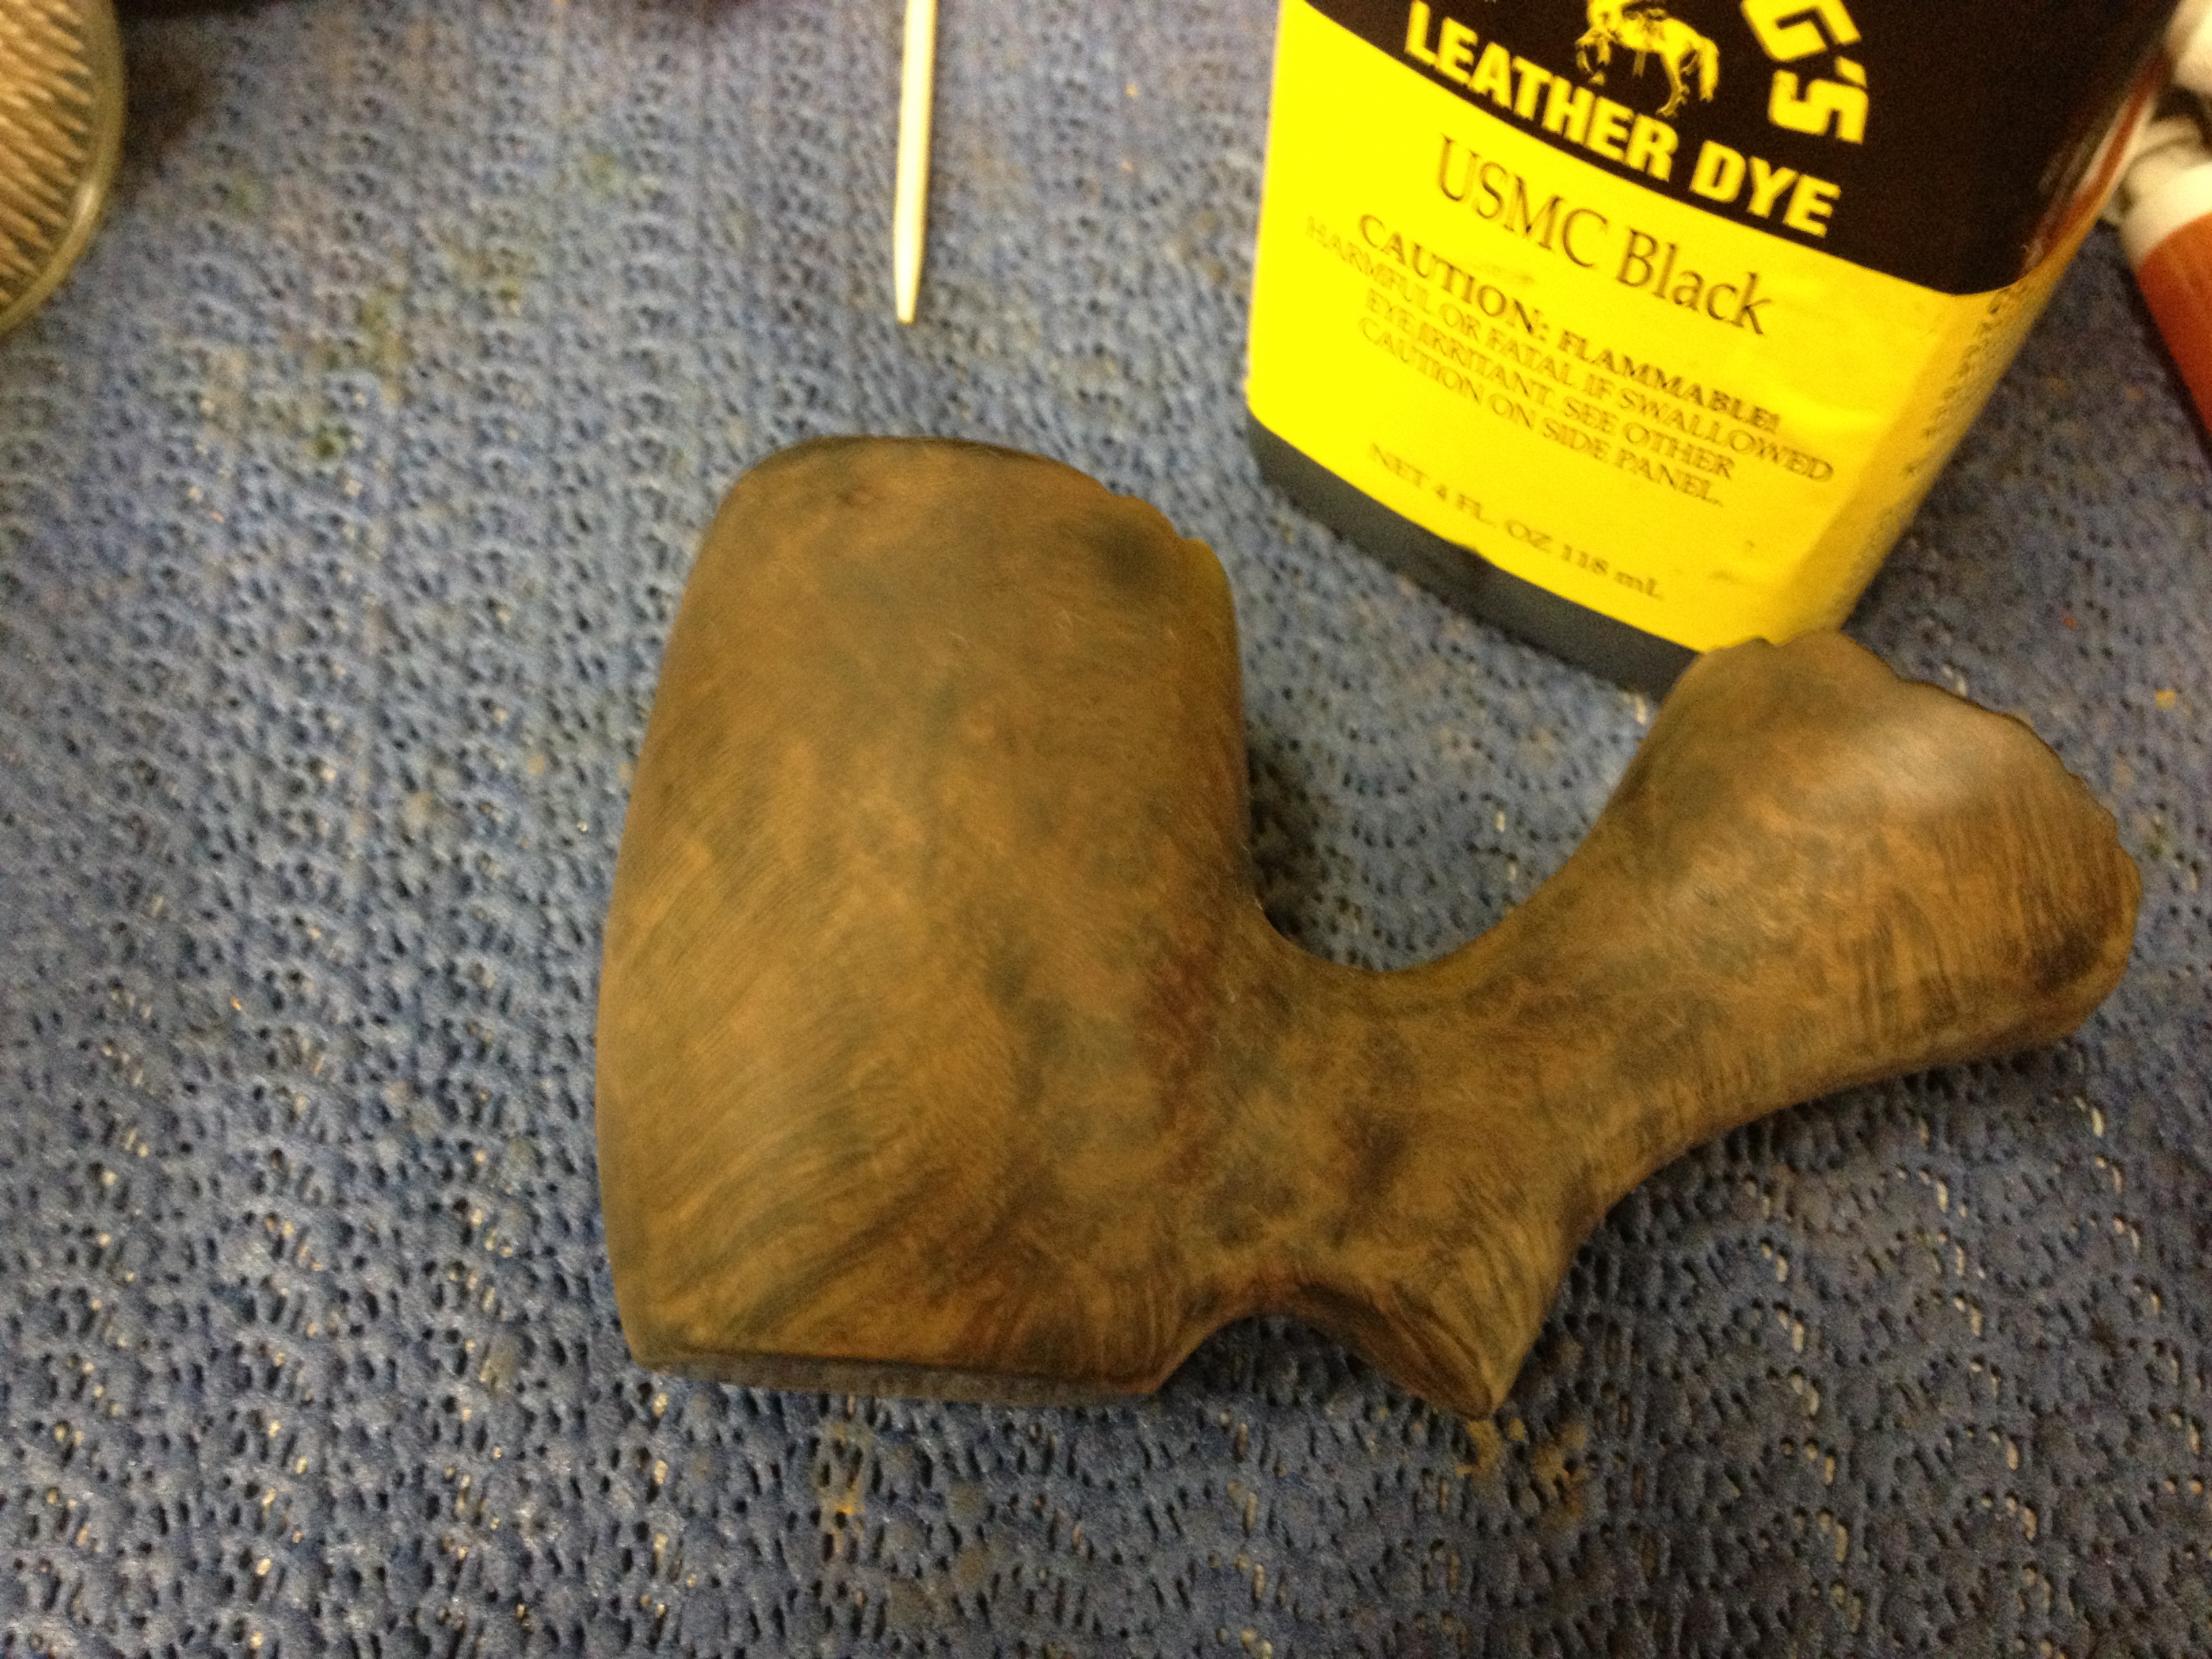
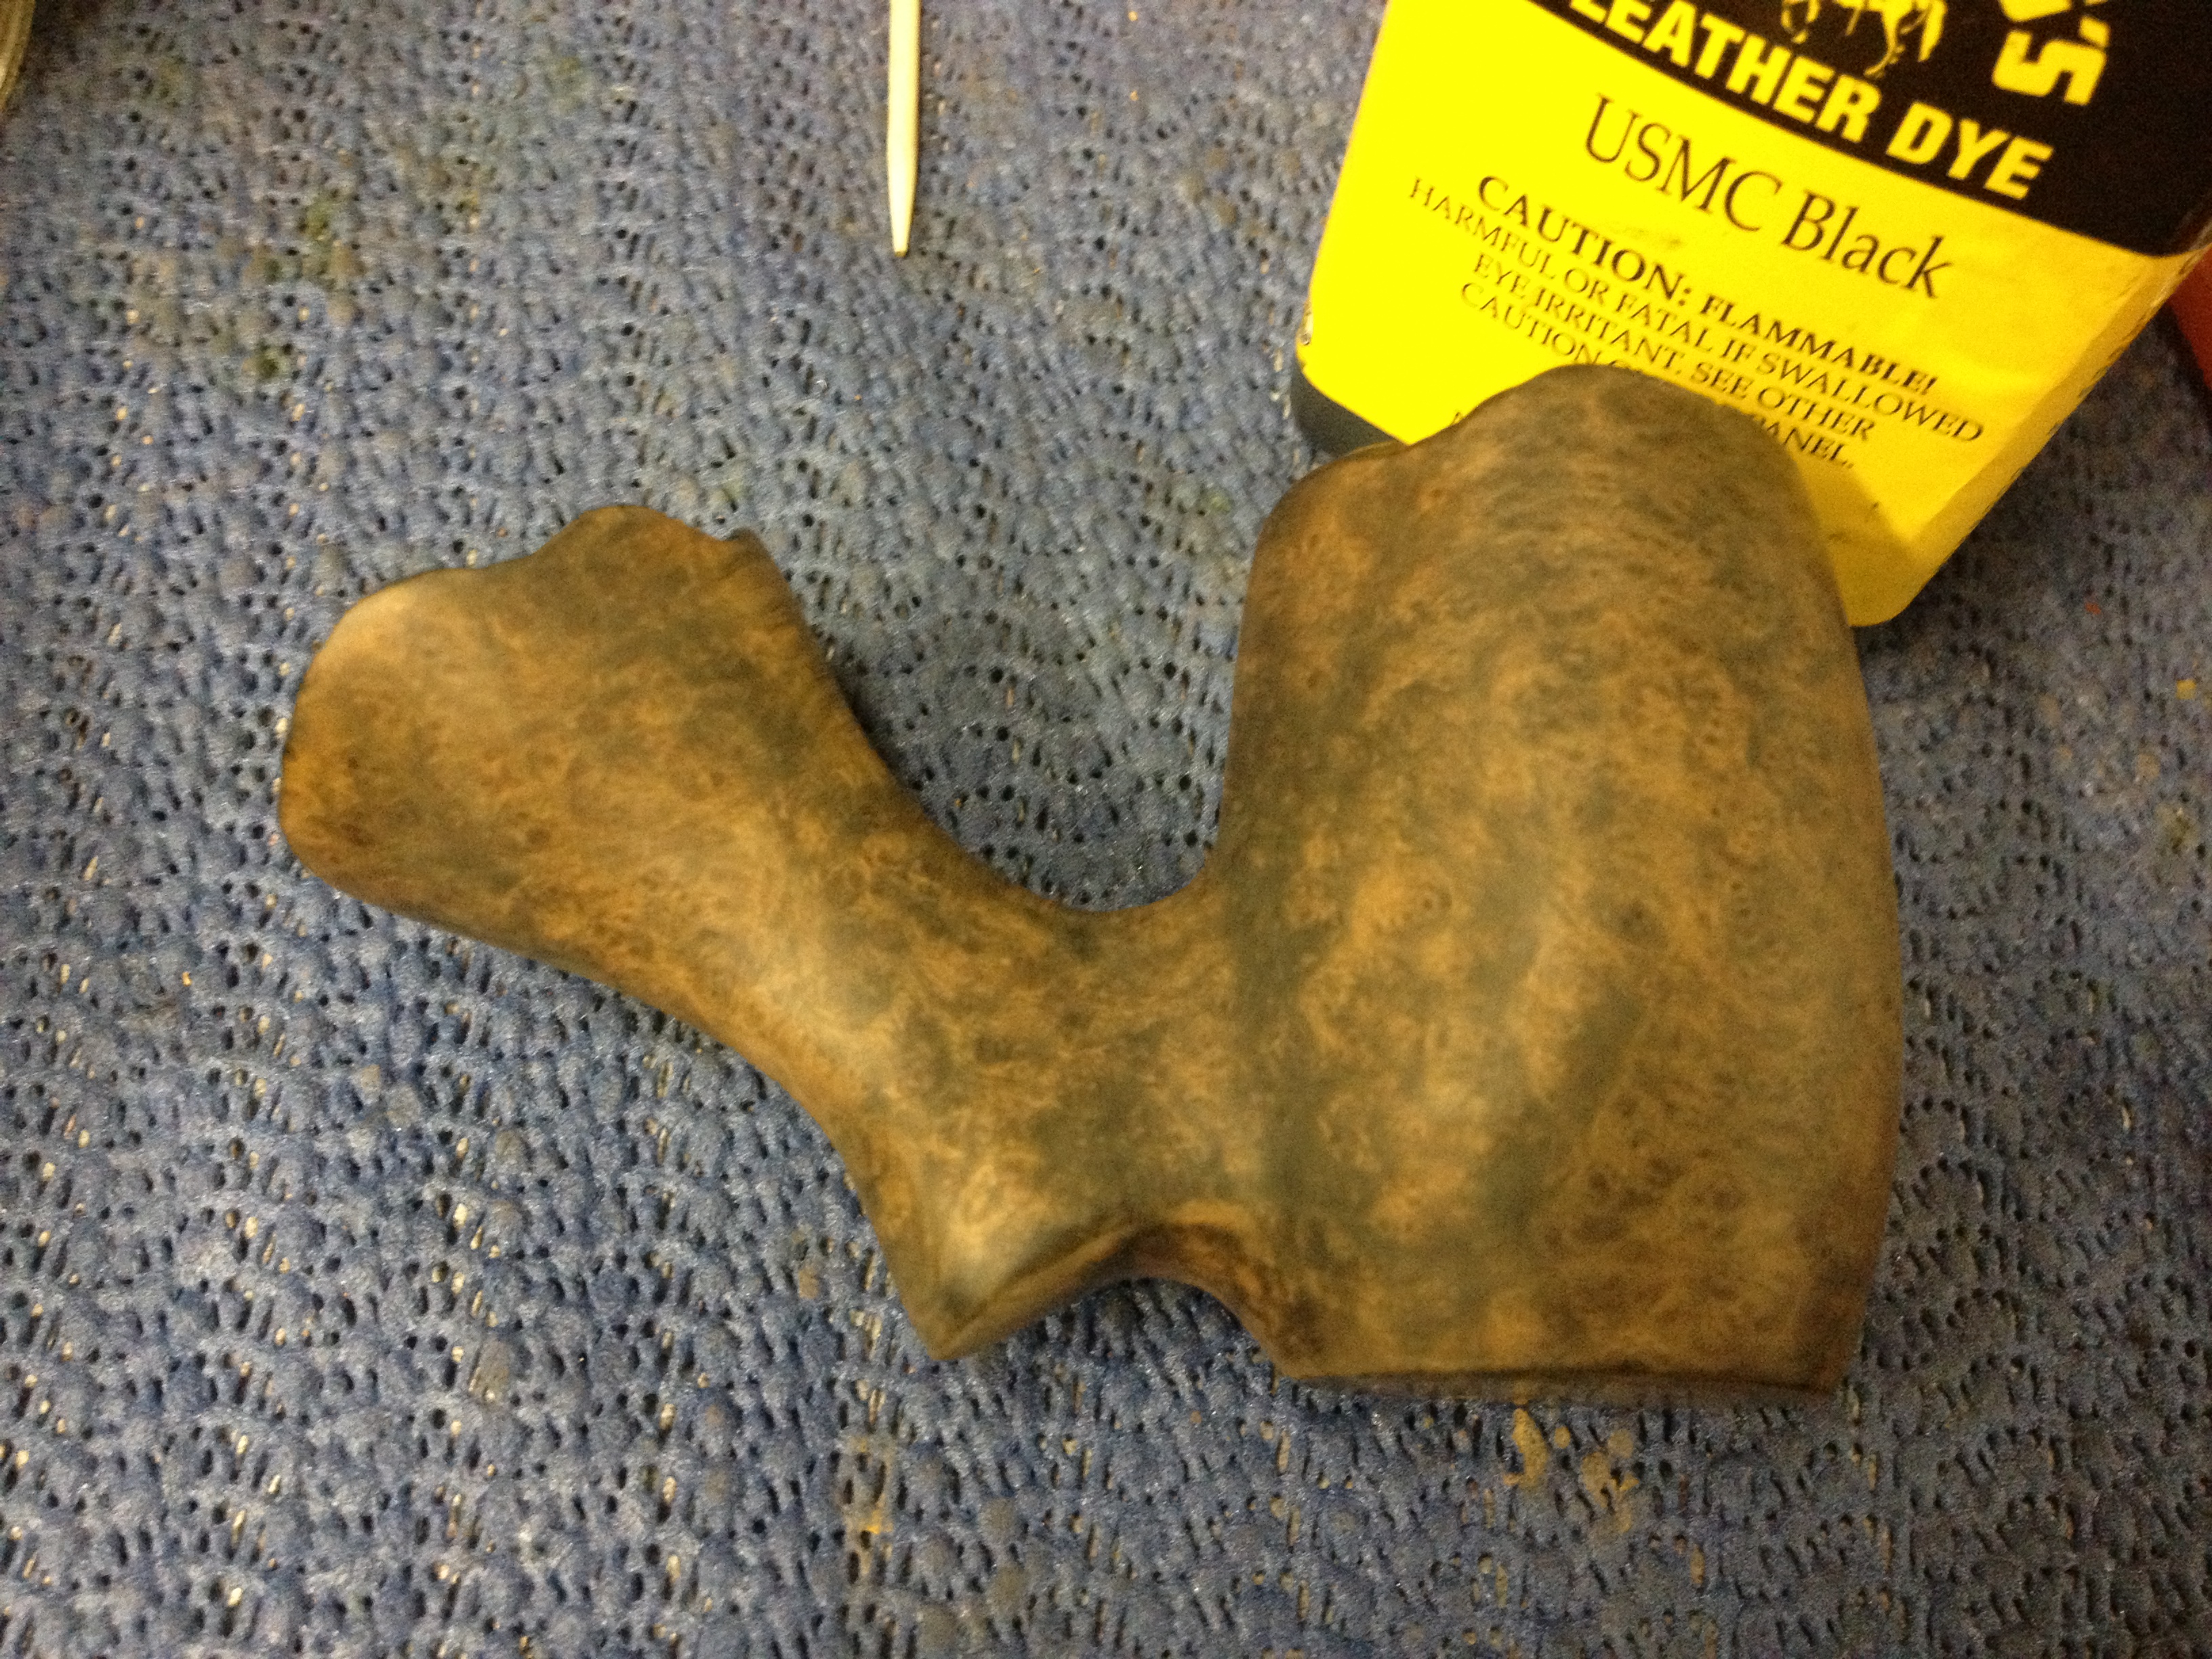
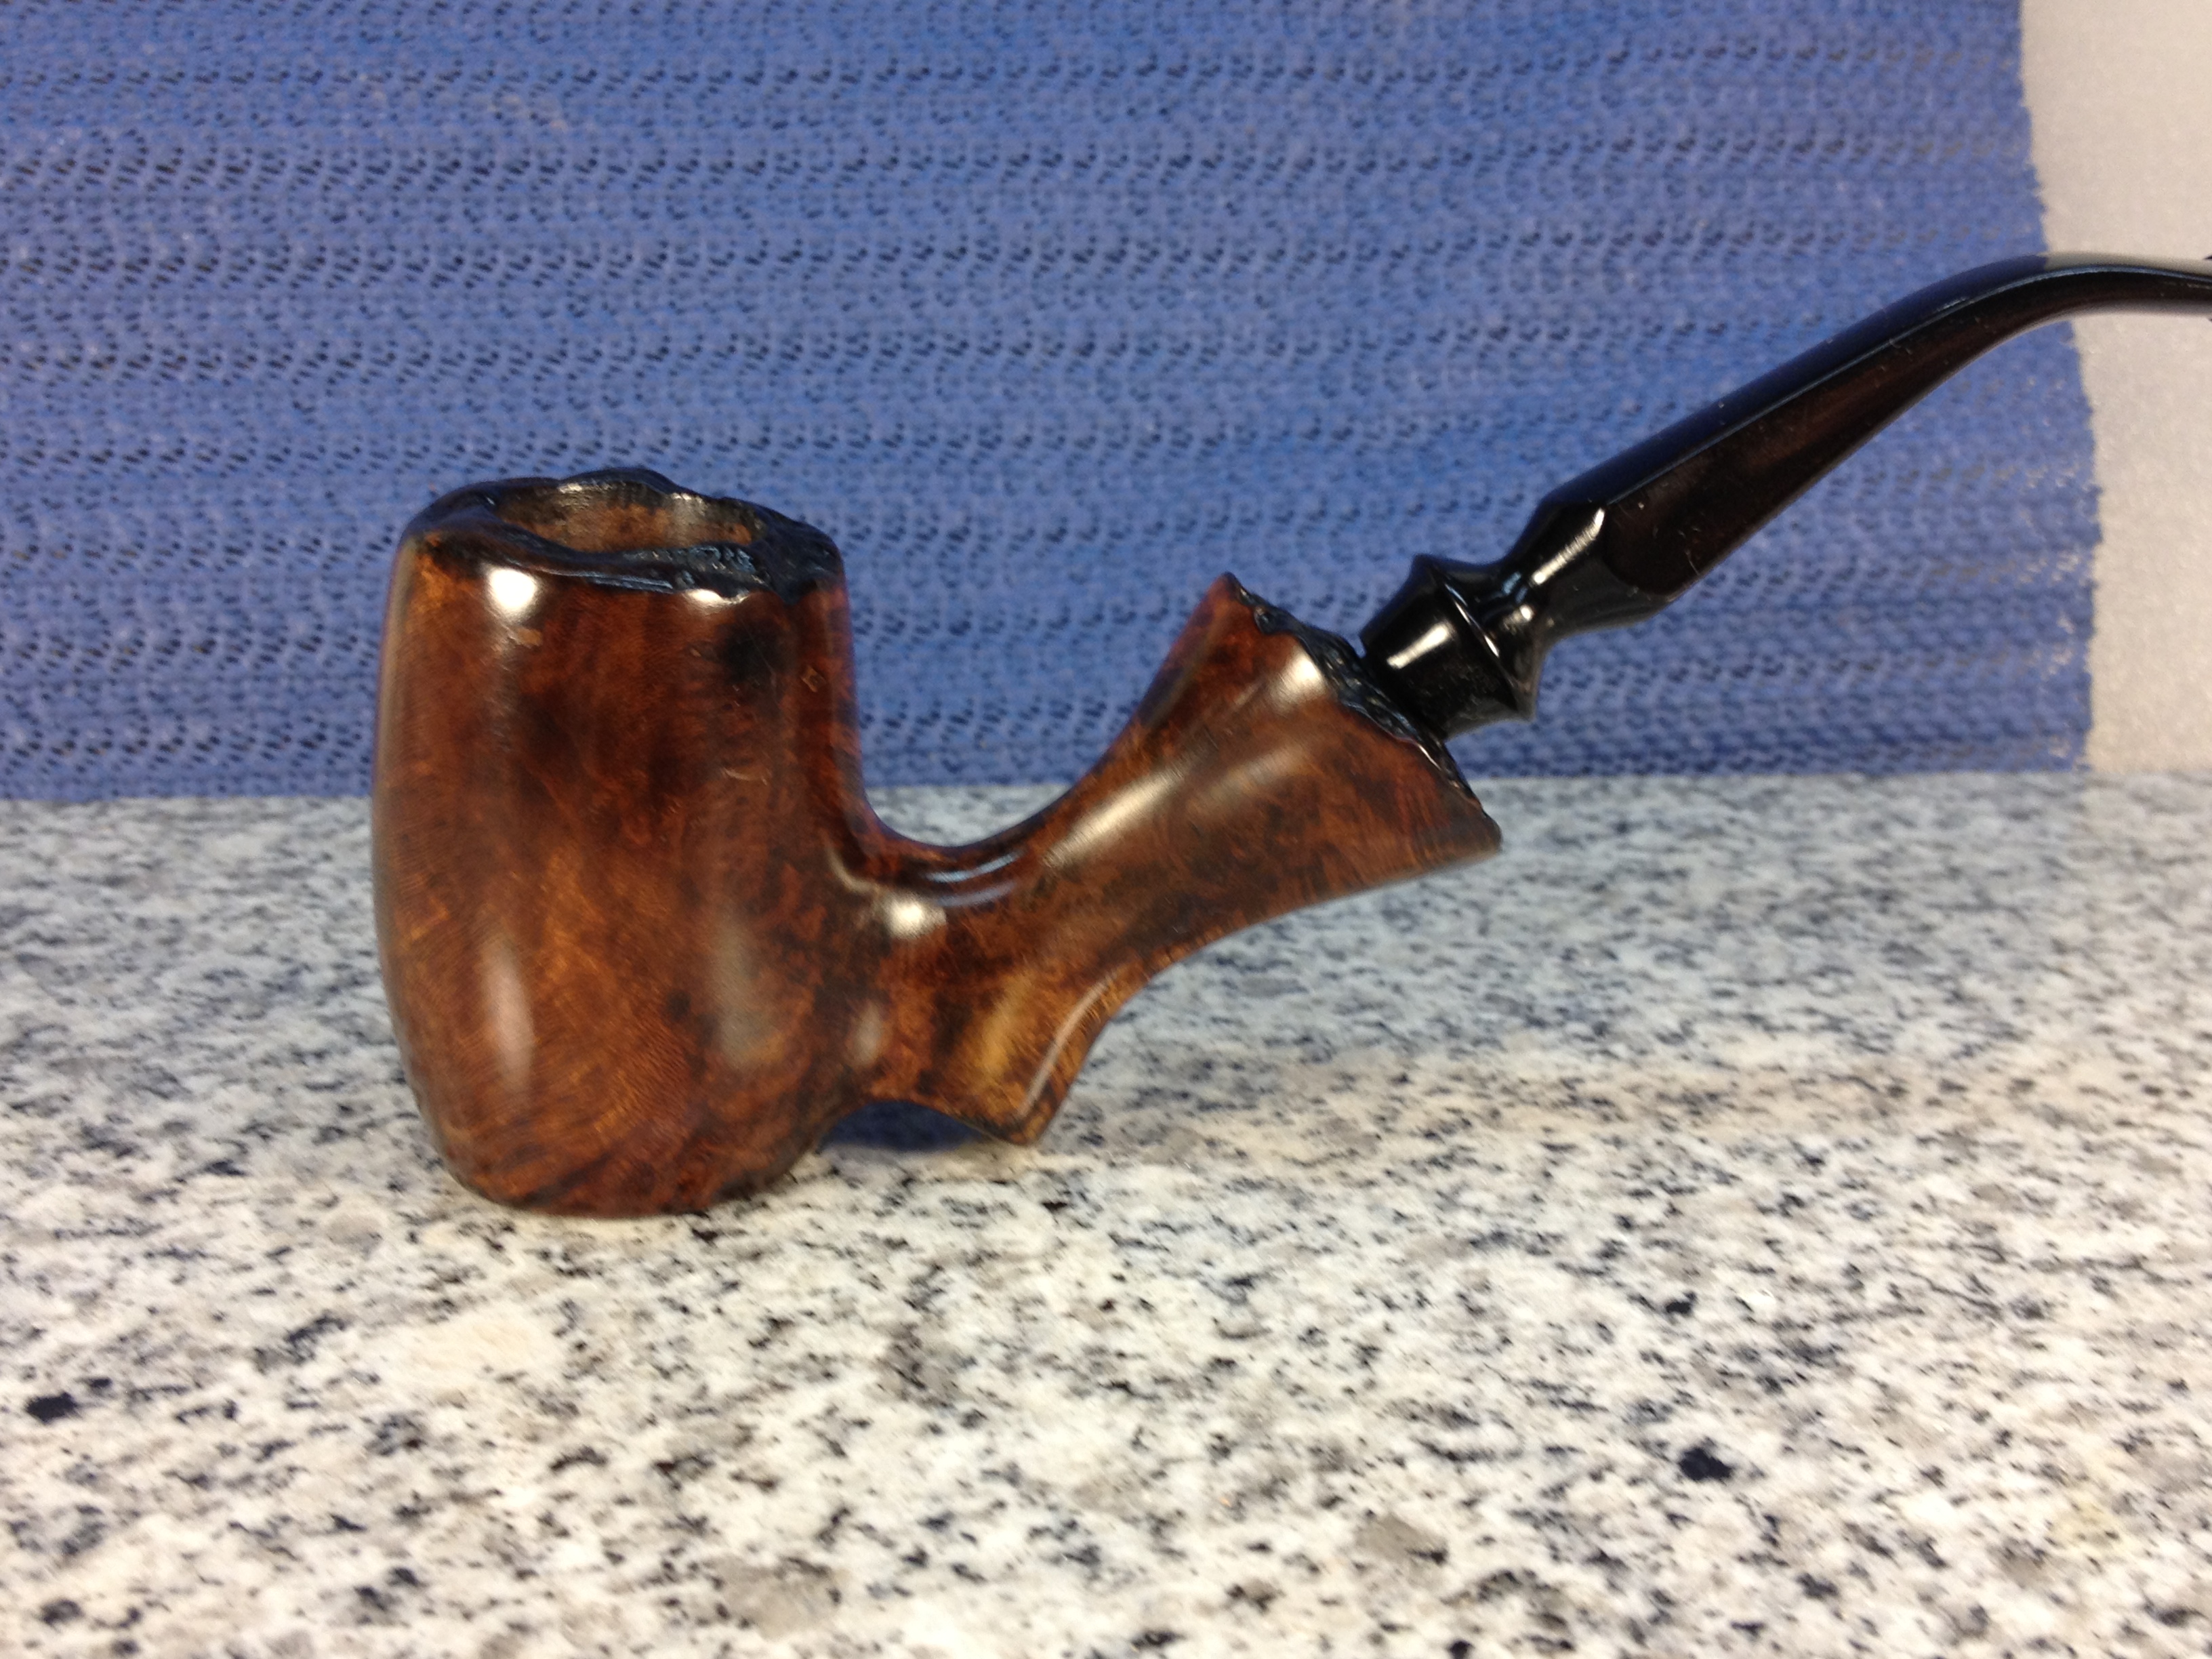
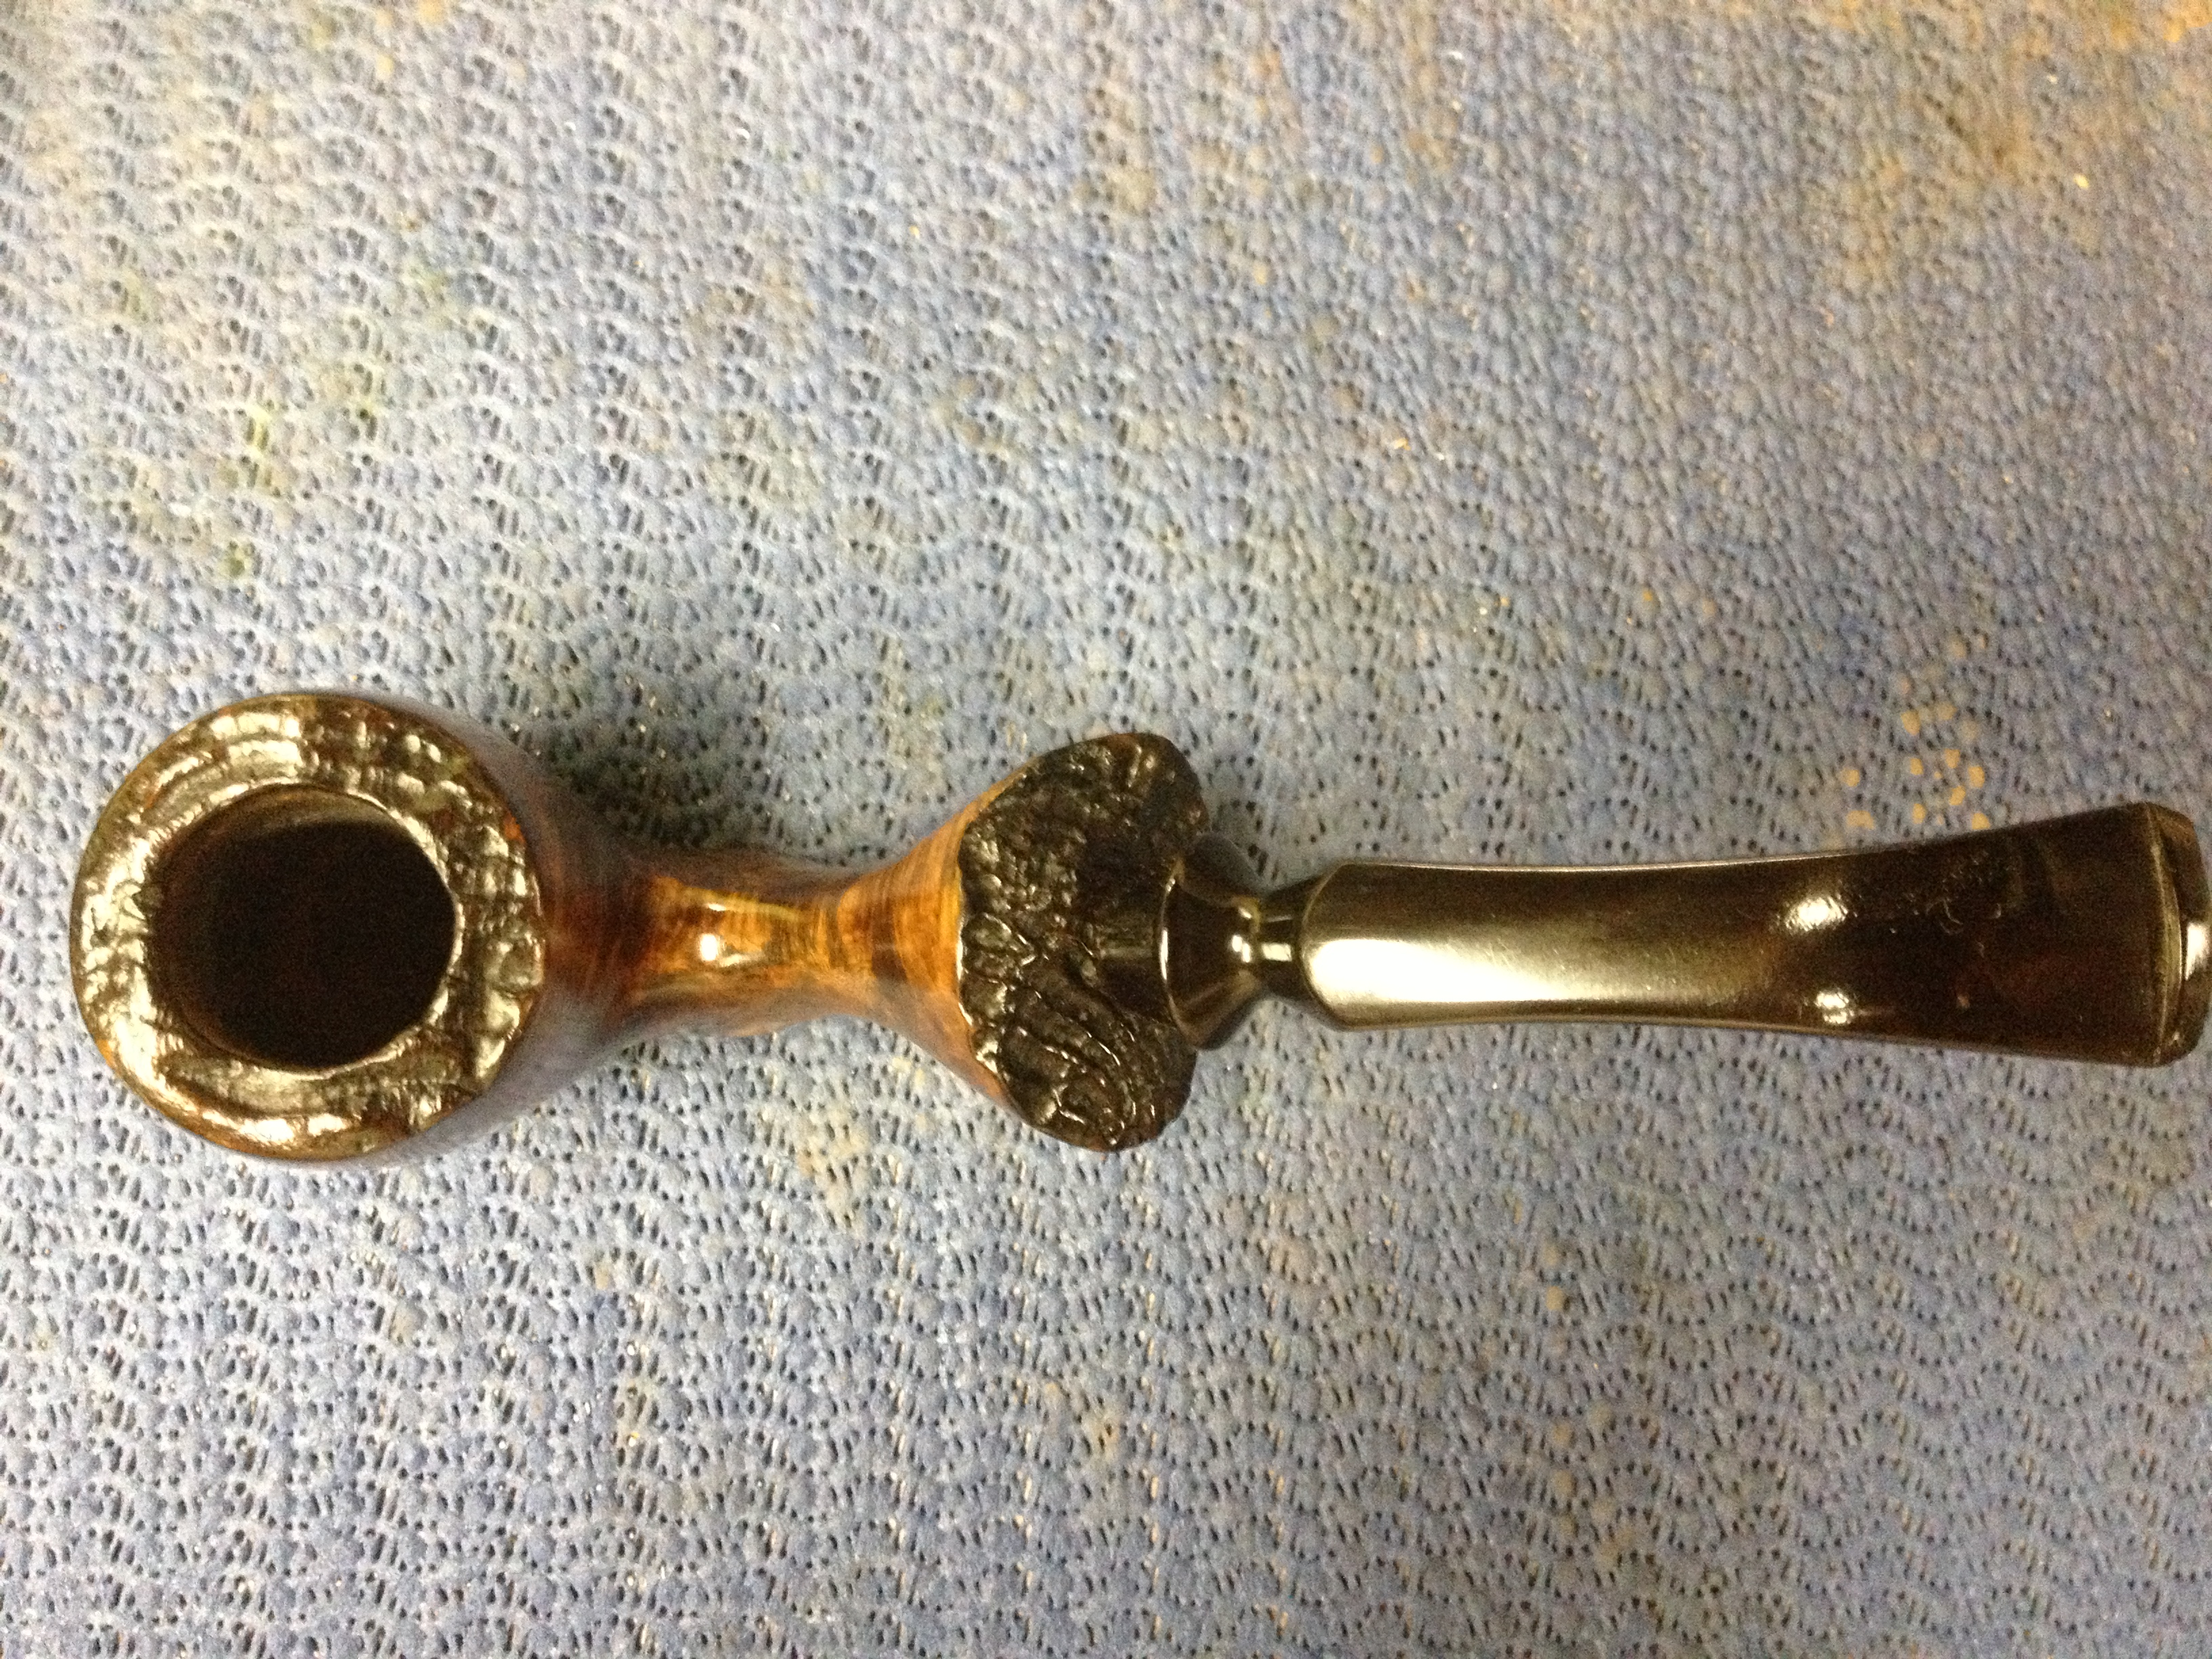
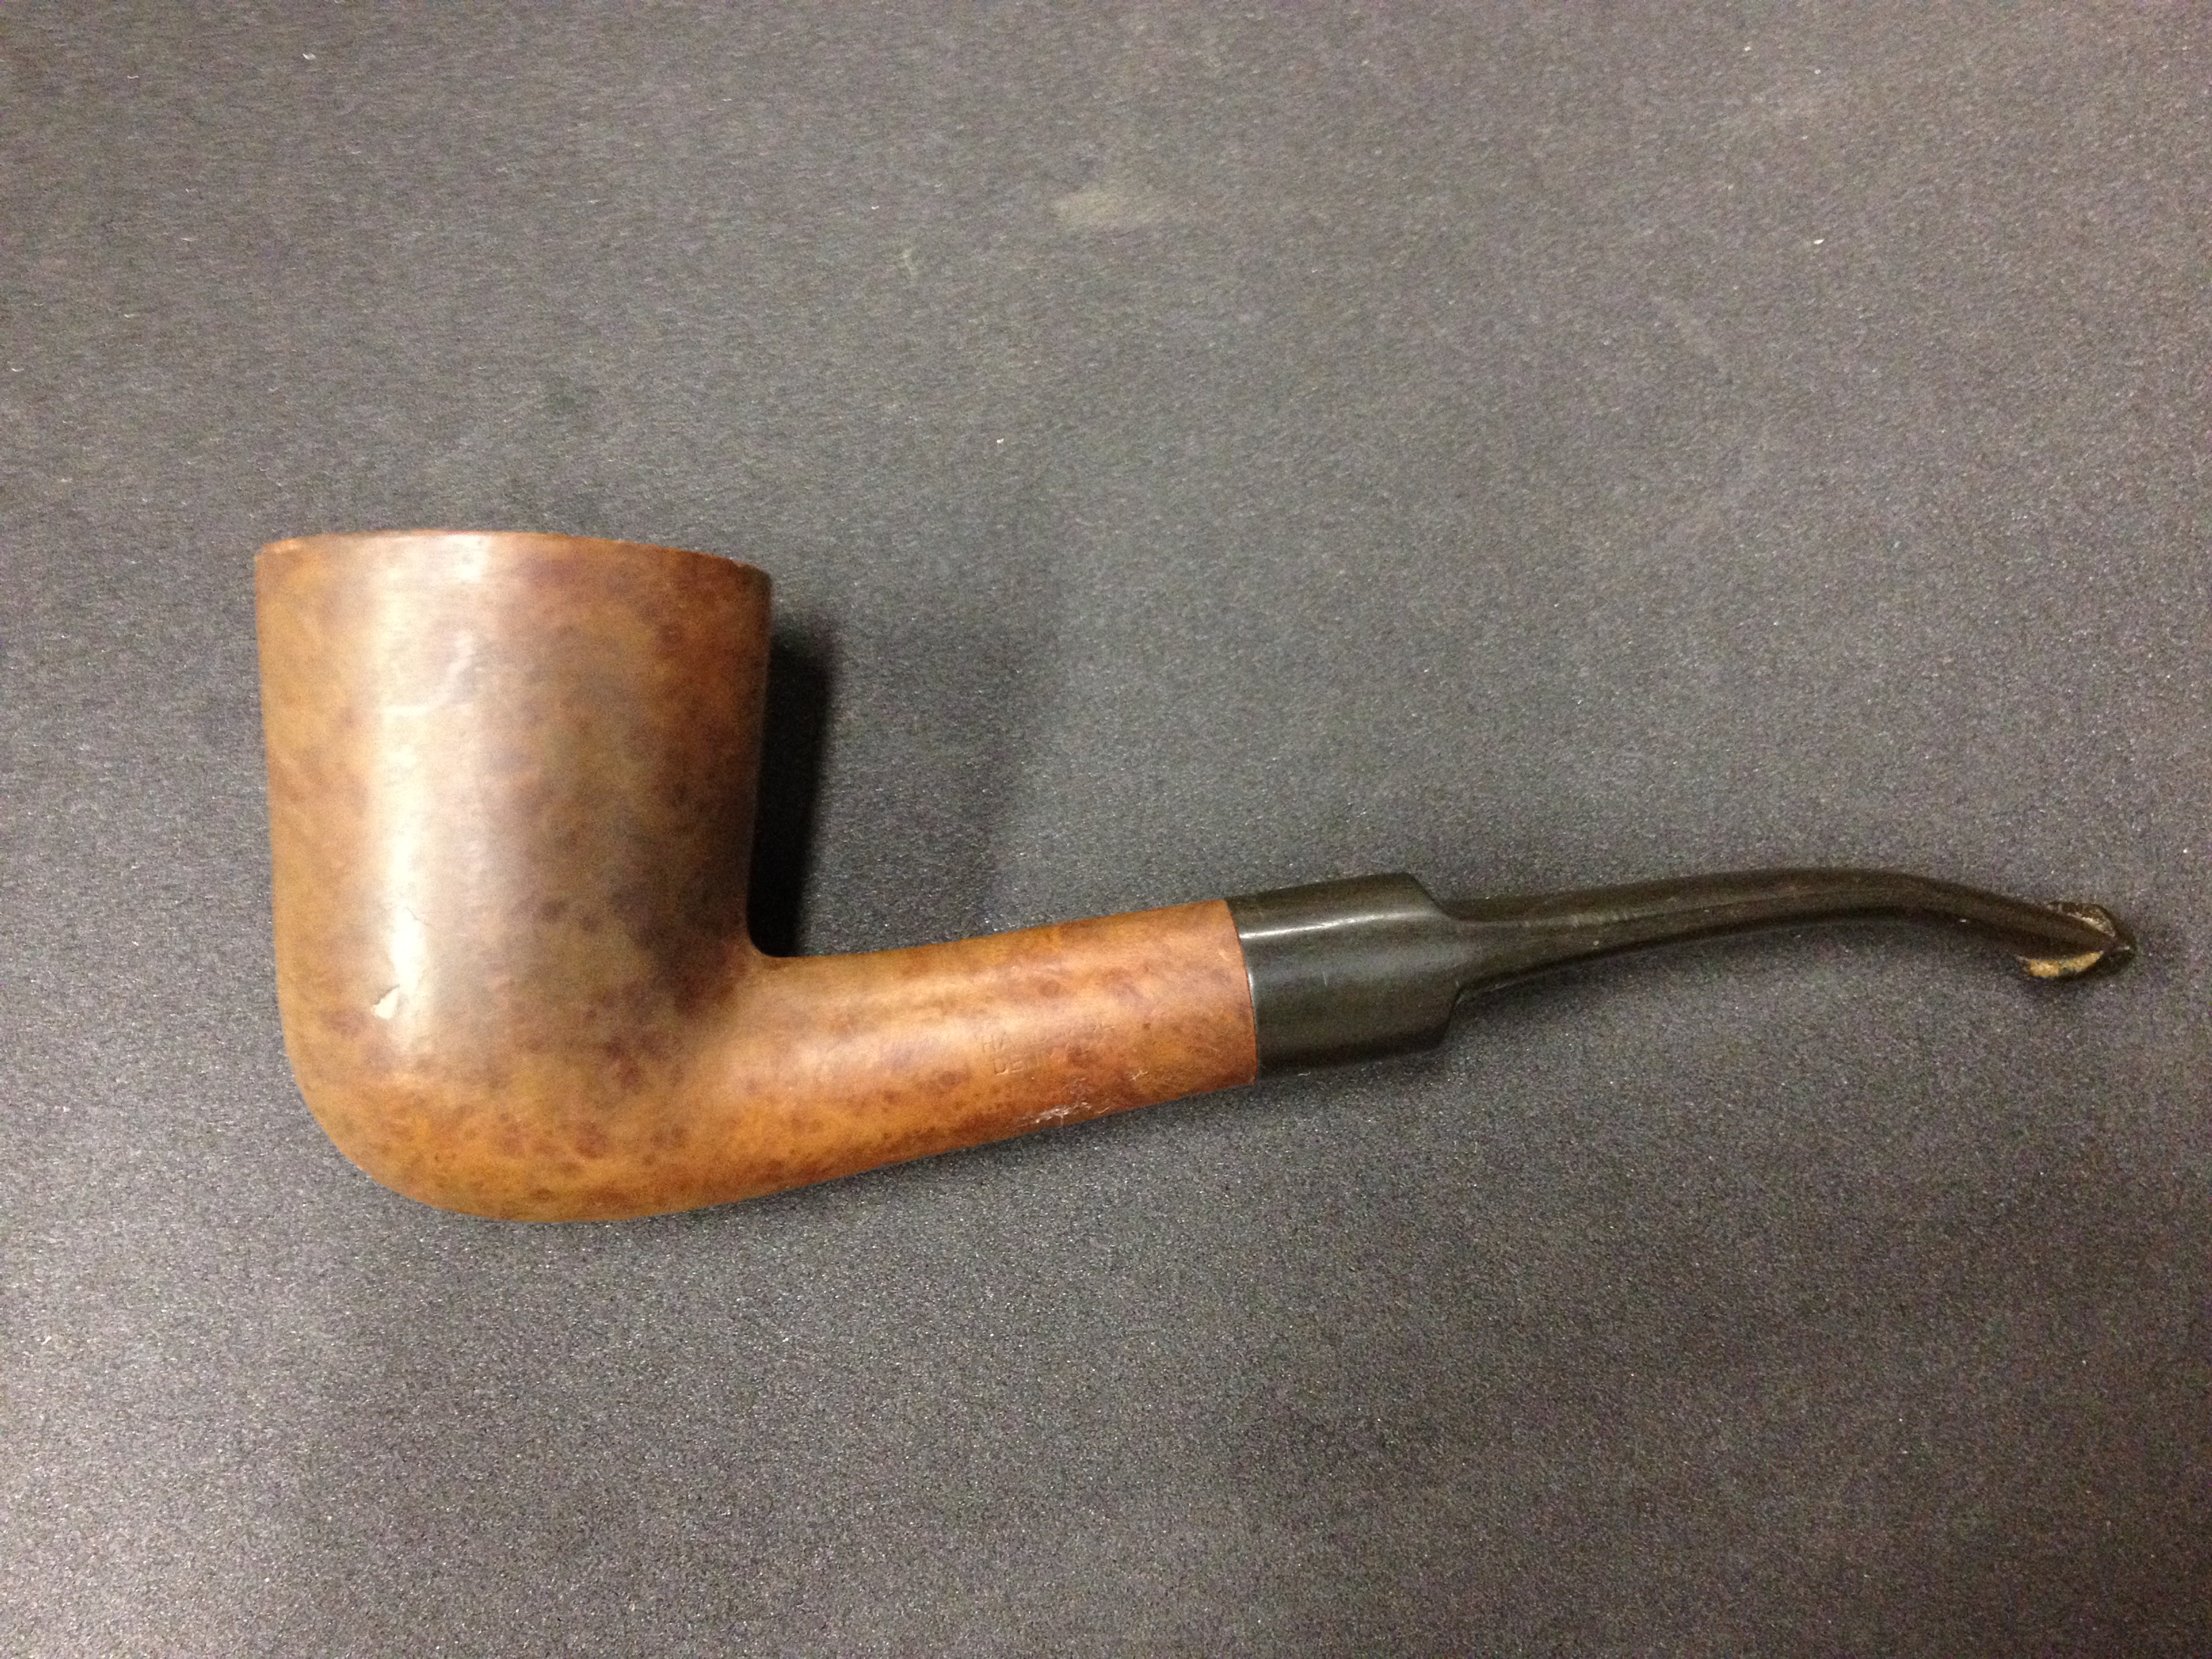
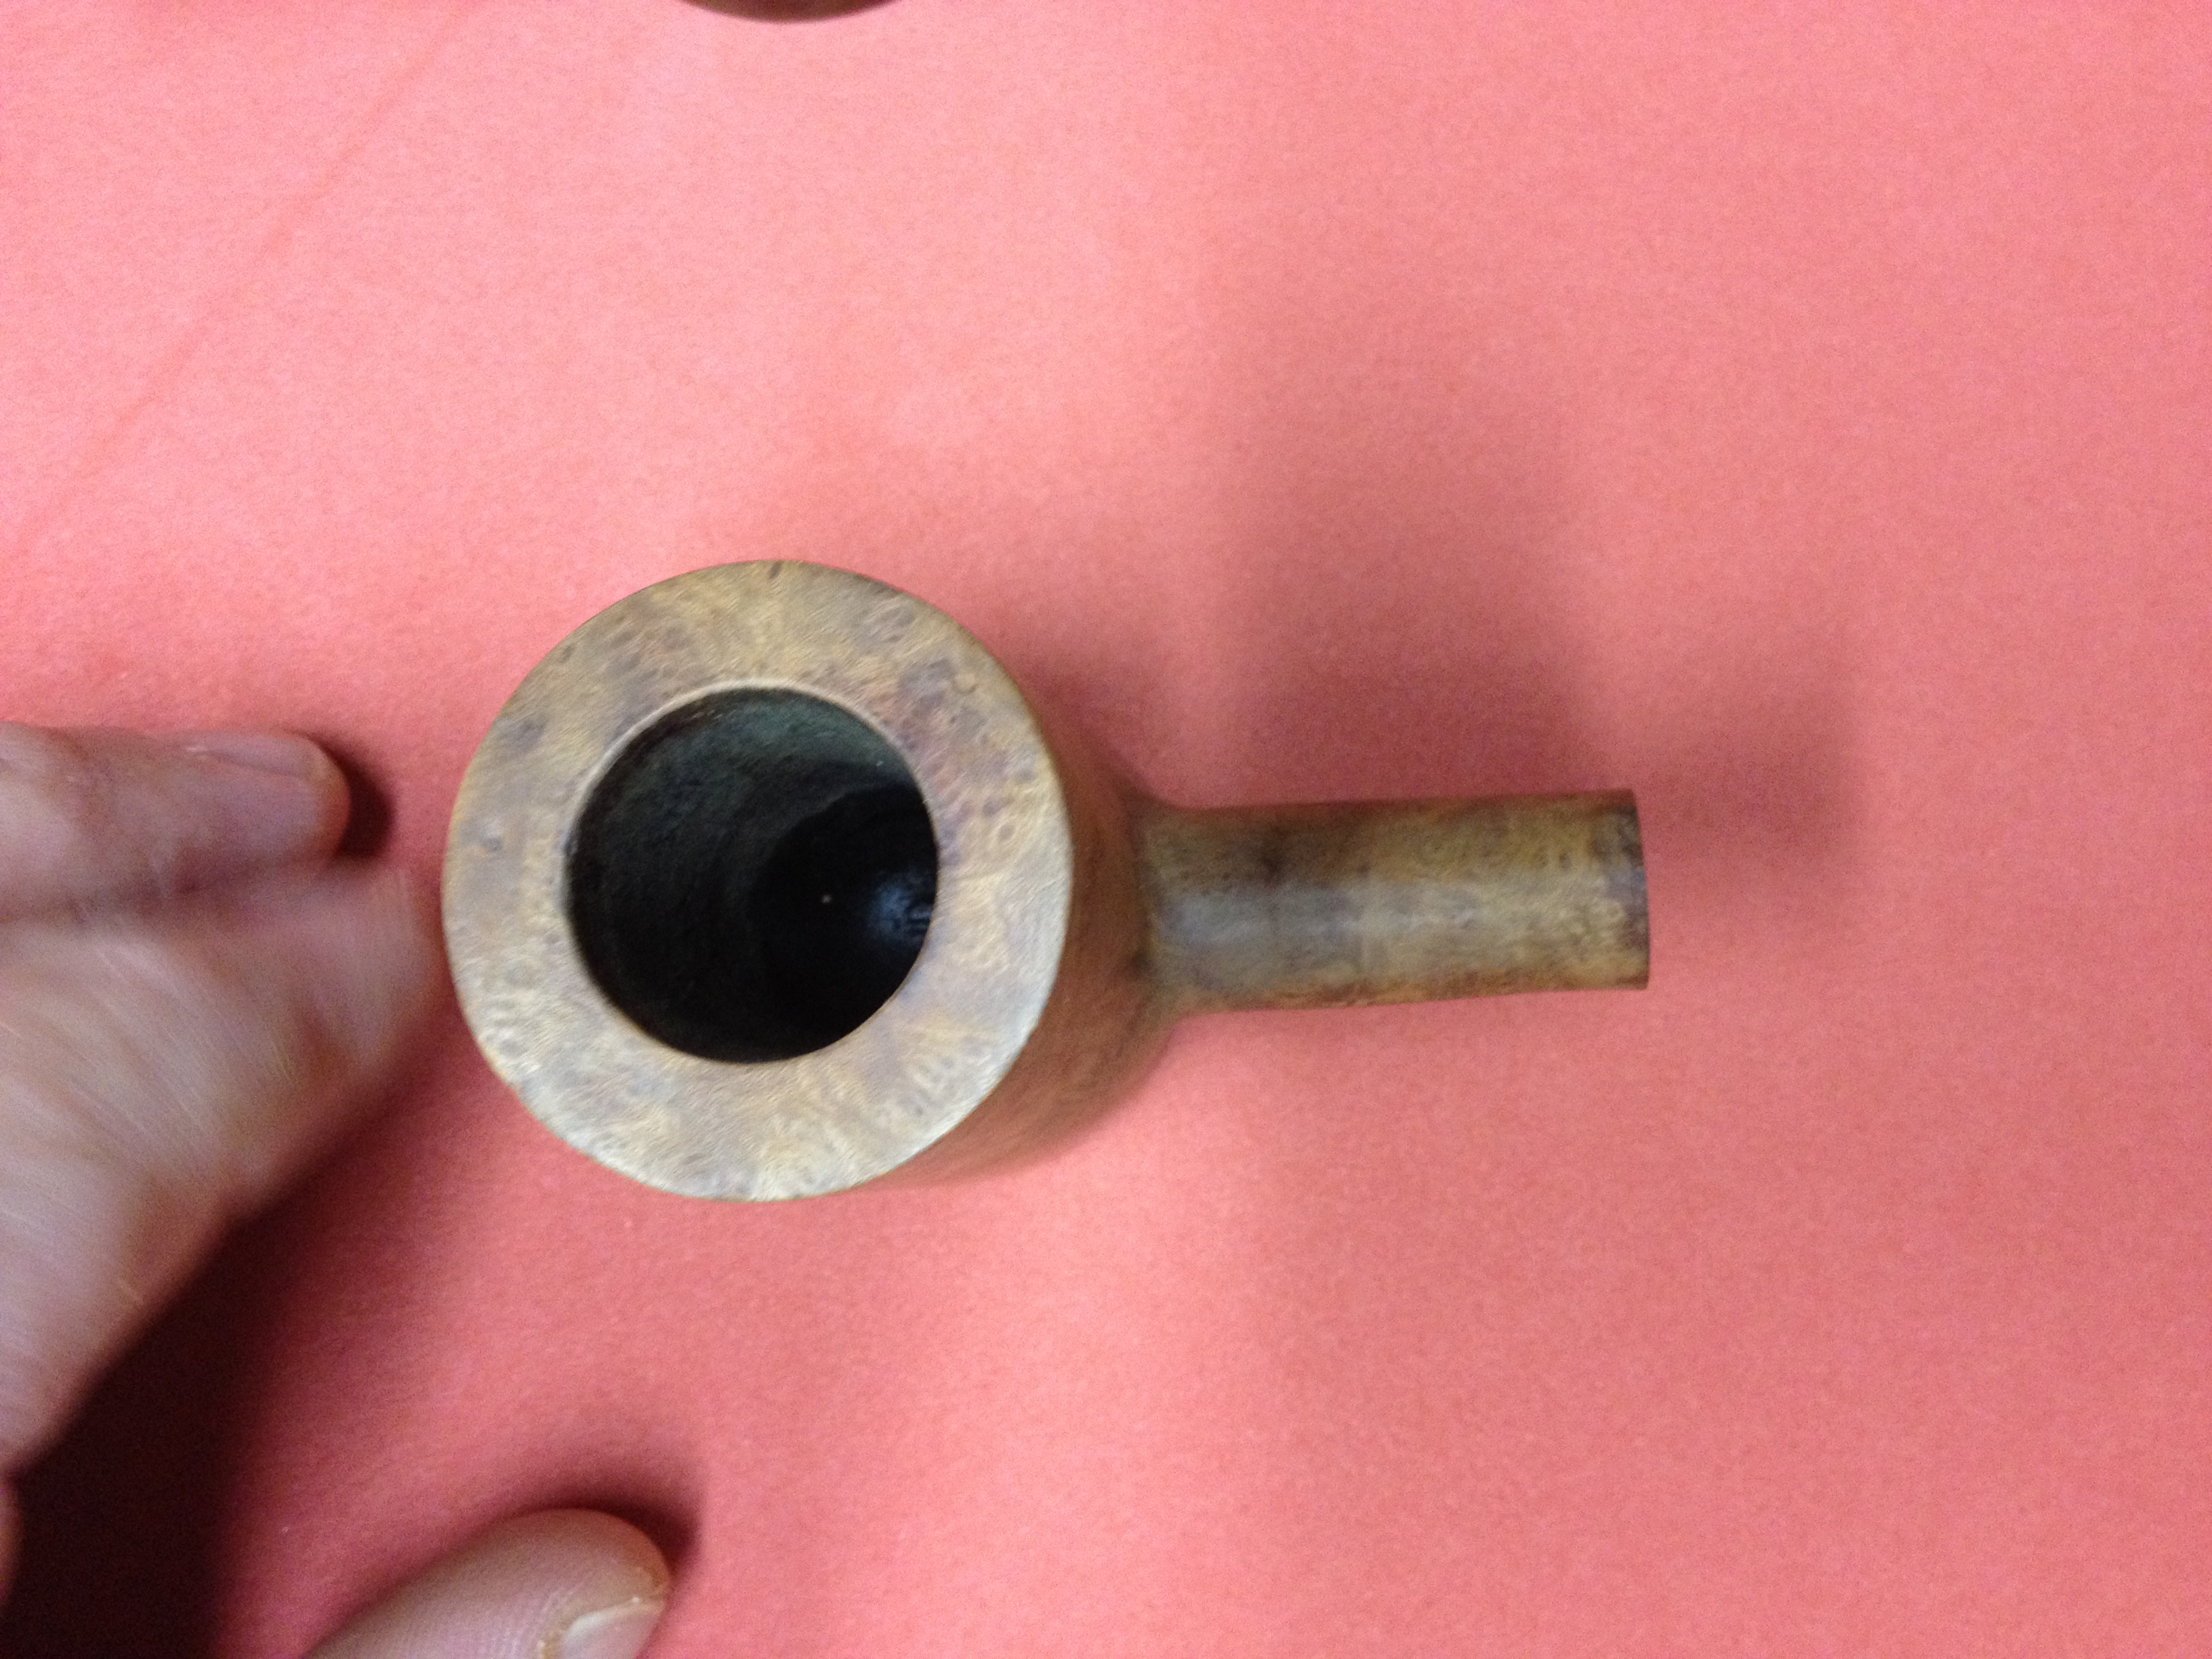
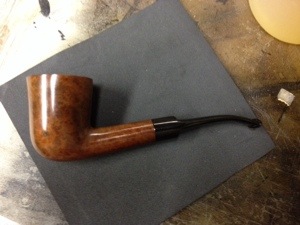
After removing the stummels from the alcohol bath I wiped them down and them dry a bit. Then I began cleaning the shanks again to make sure all the tar, gunk, and stain were gone.  I also cleaned as much gunk off the rims as I could so I could see what their condition really was; fair on the cherrywood and poor on the Dublin.  I decided to top the bowl of the Dublin and set the cherrywood aside to finish later. This what the Dublin looked like at this point:

IMG_7748 IMG_7749 IMG_7750 IMG_7751

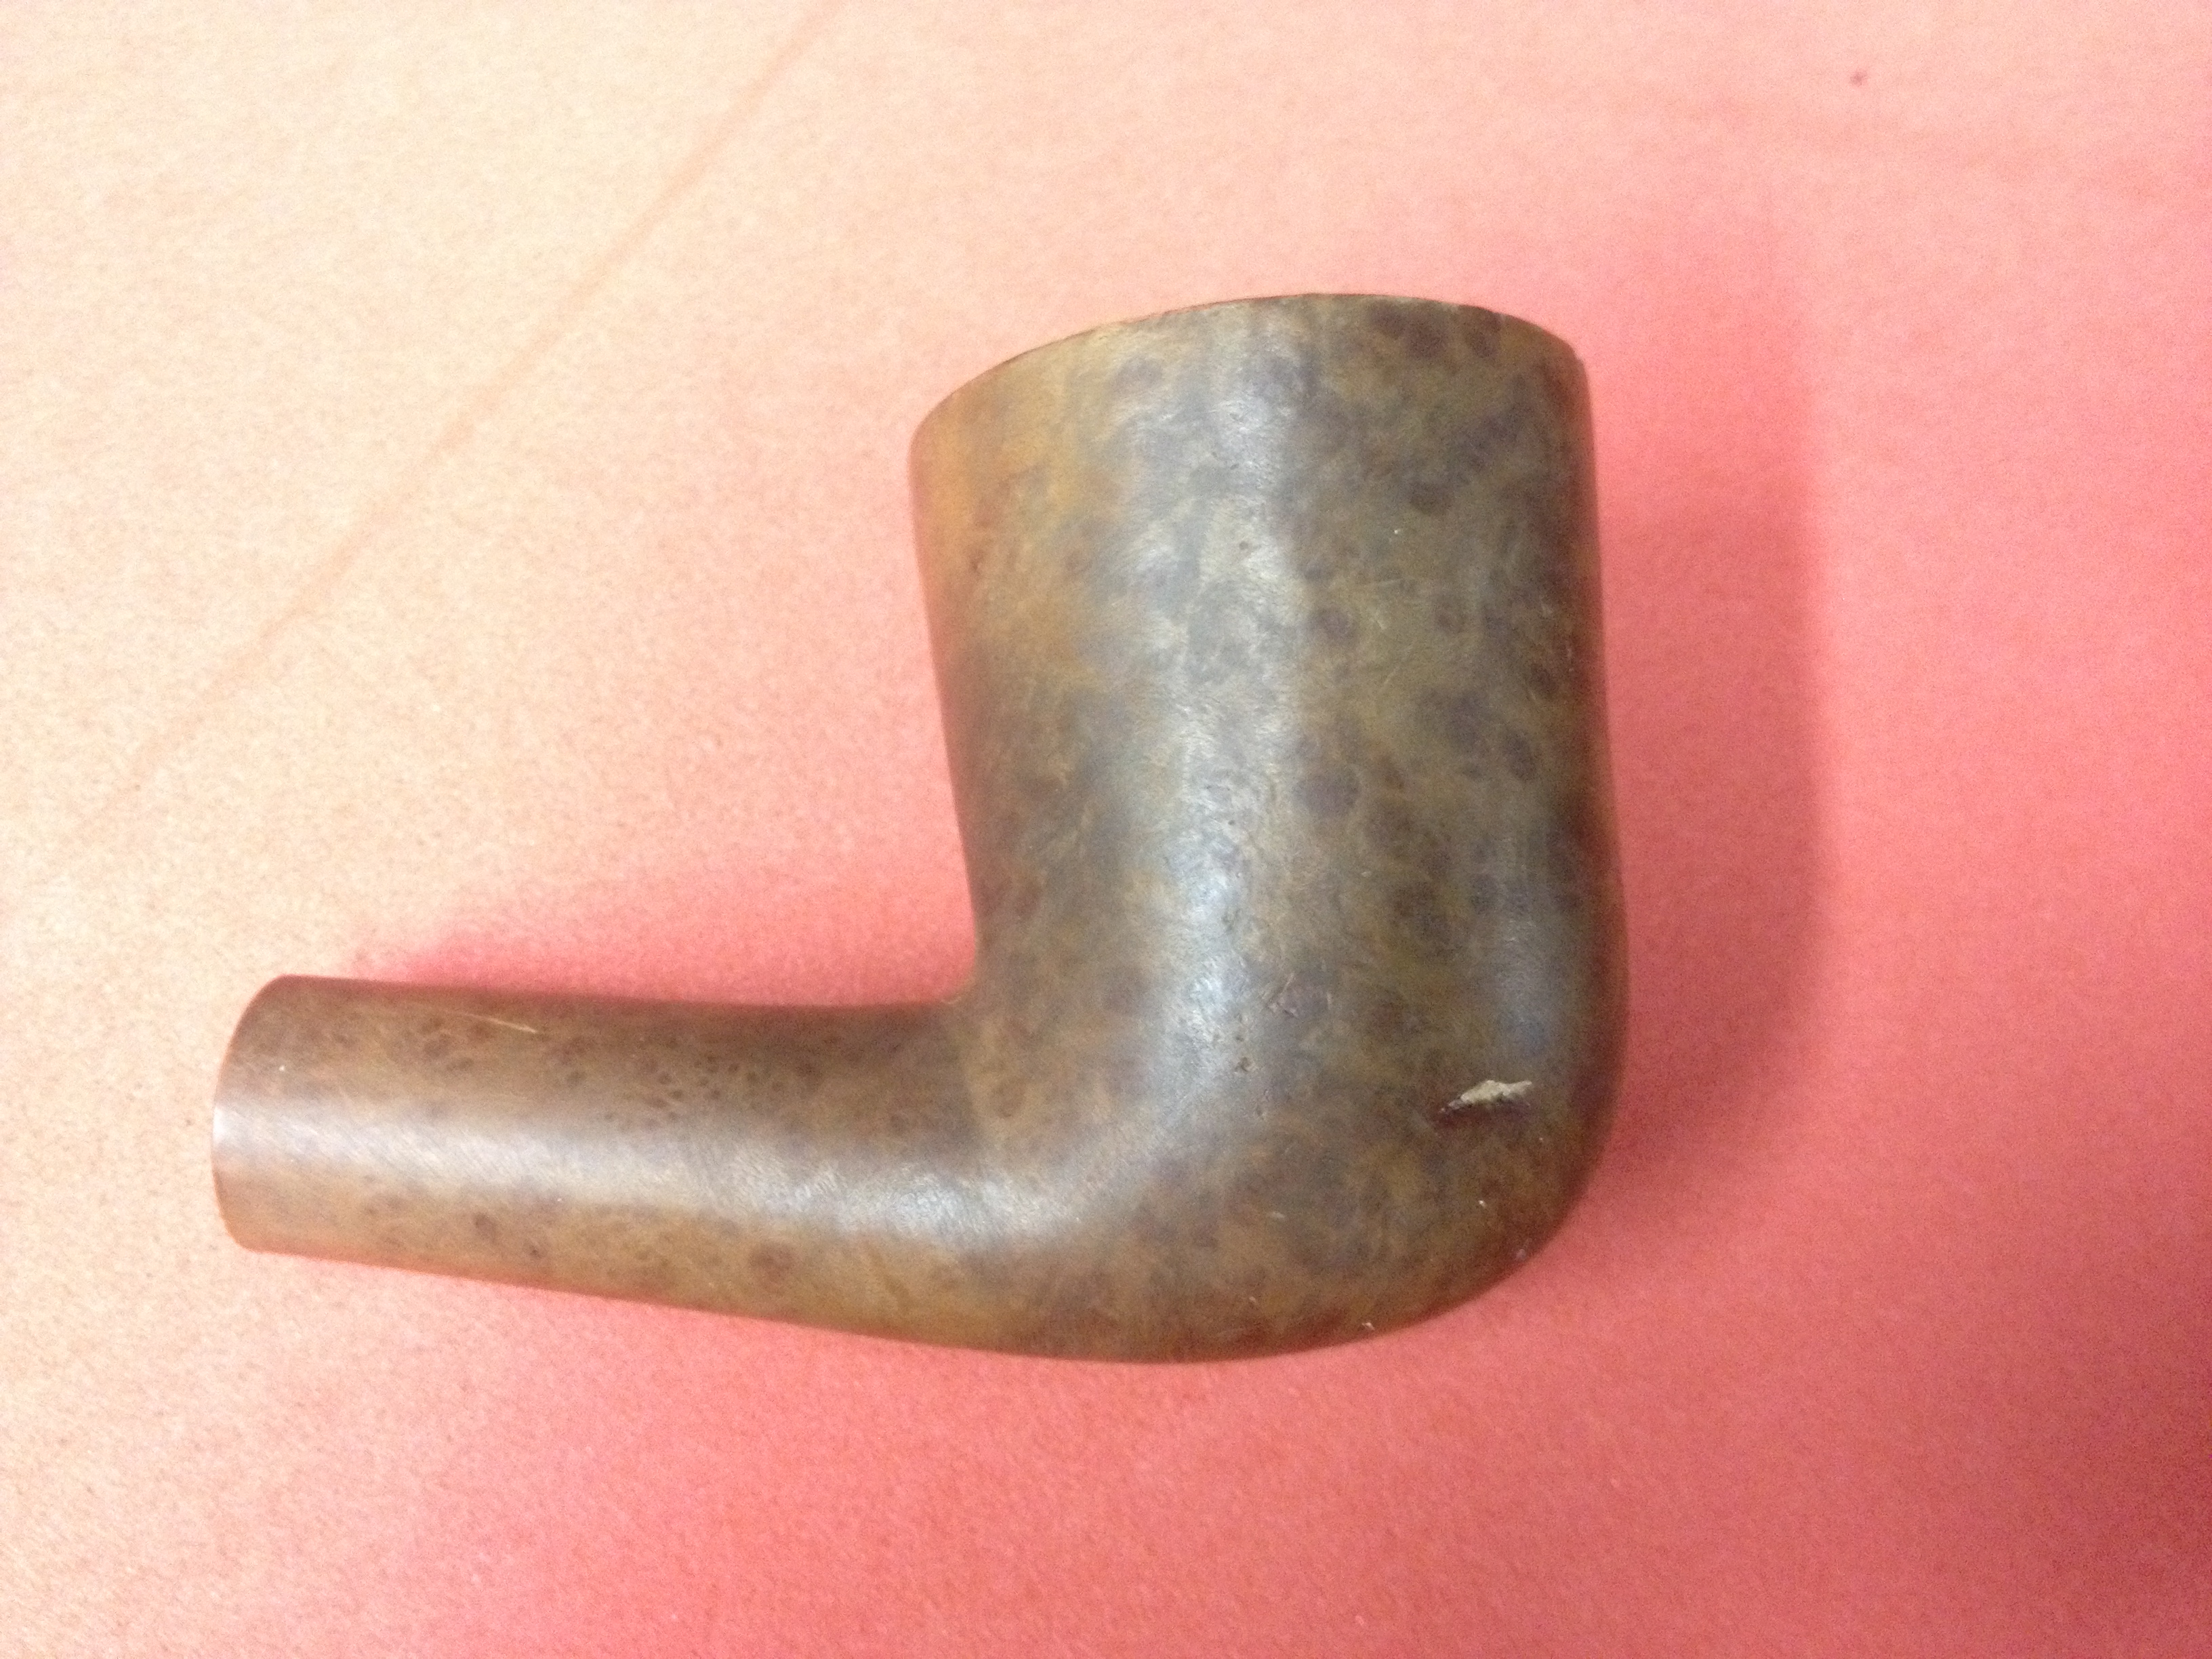
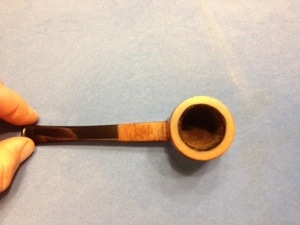
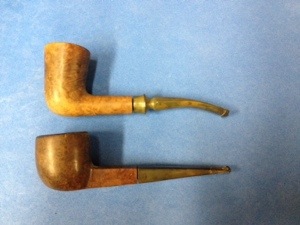
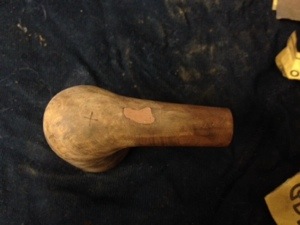
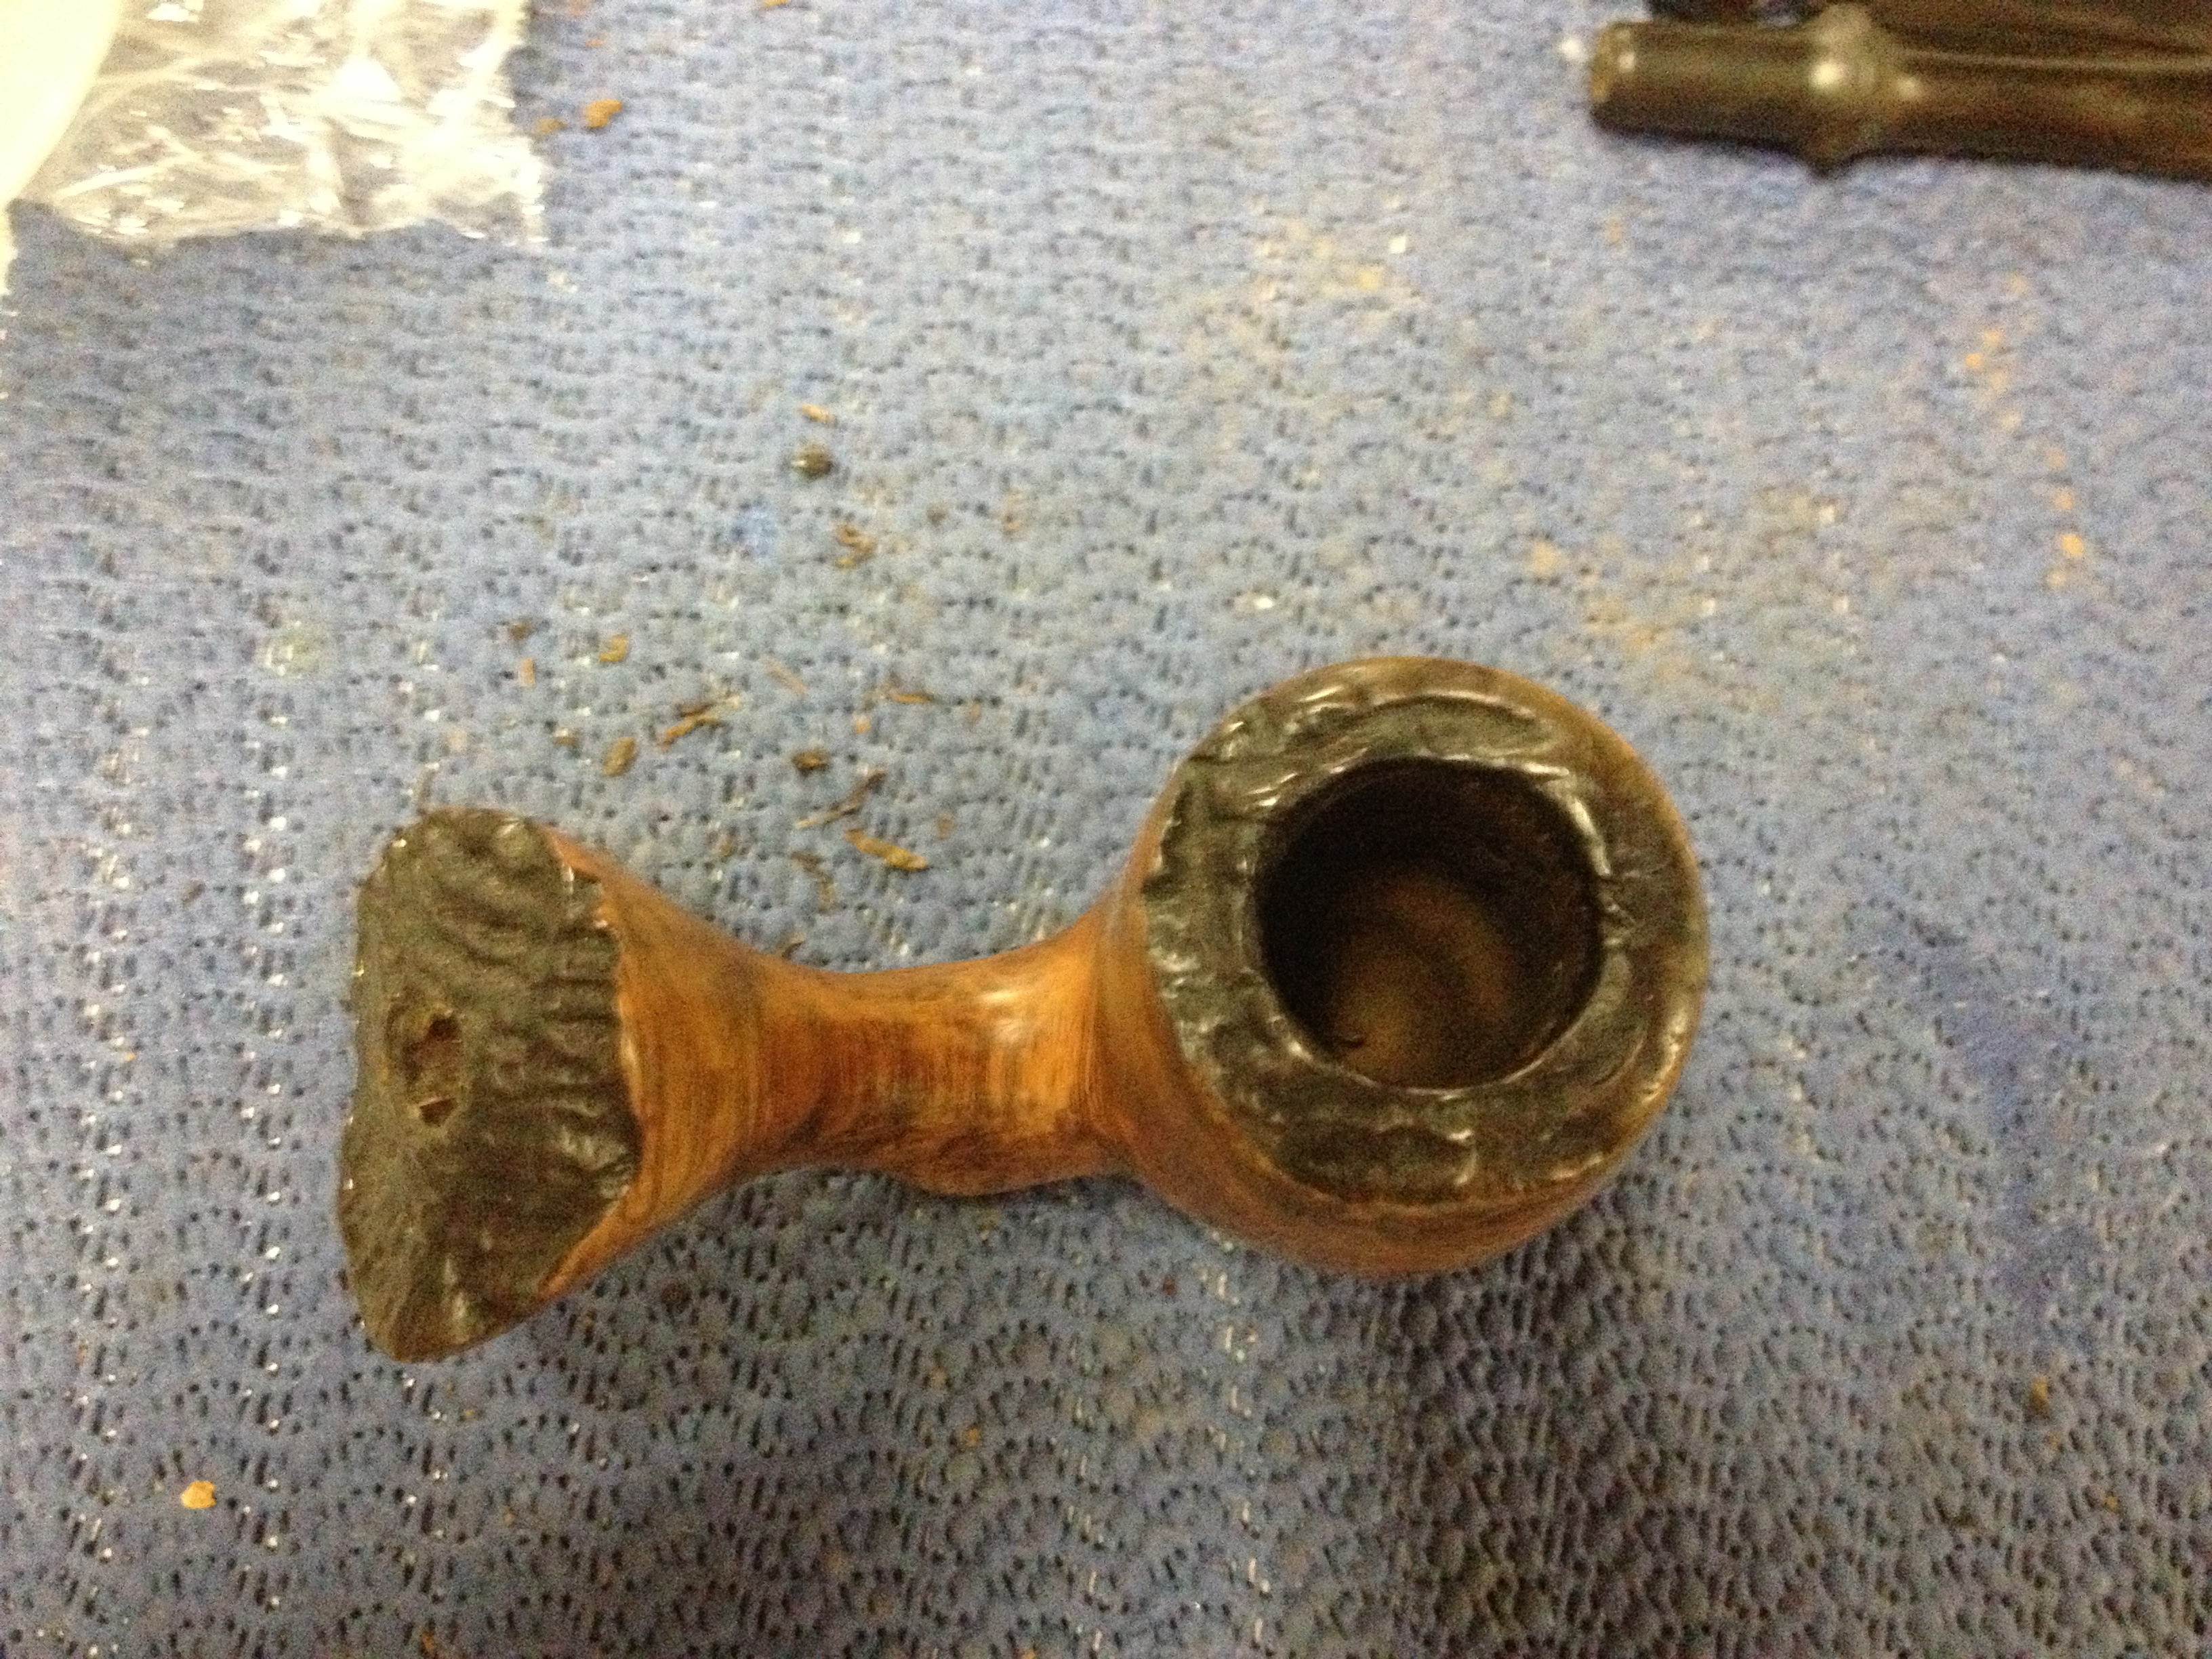
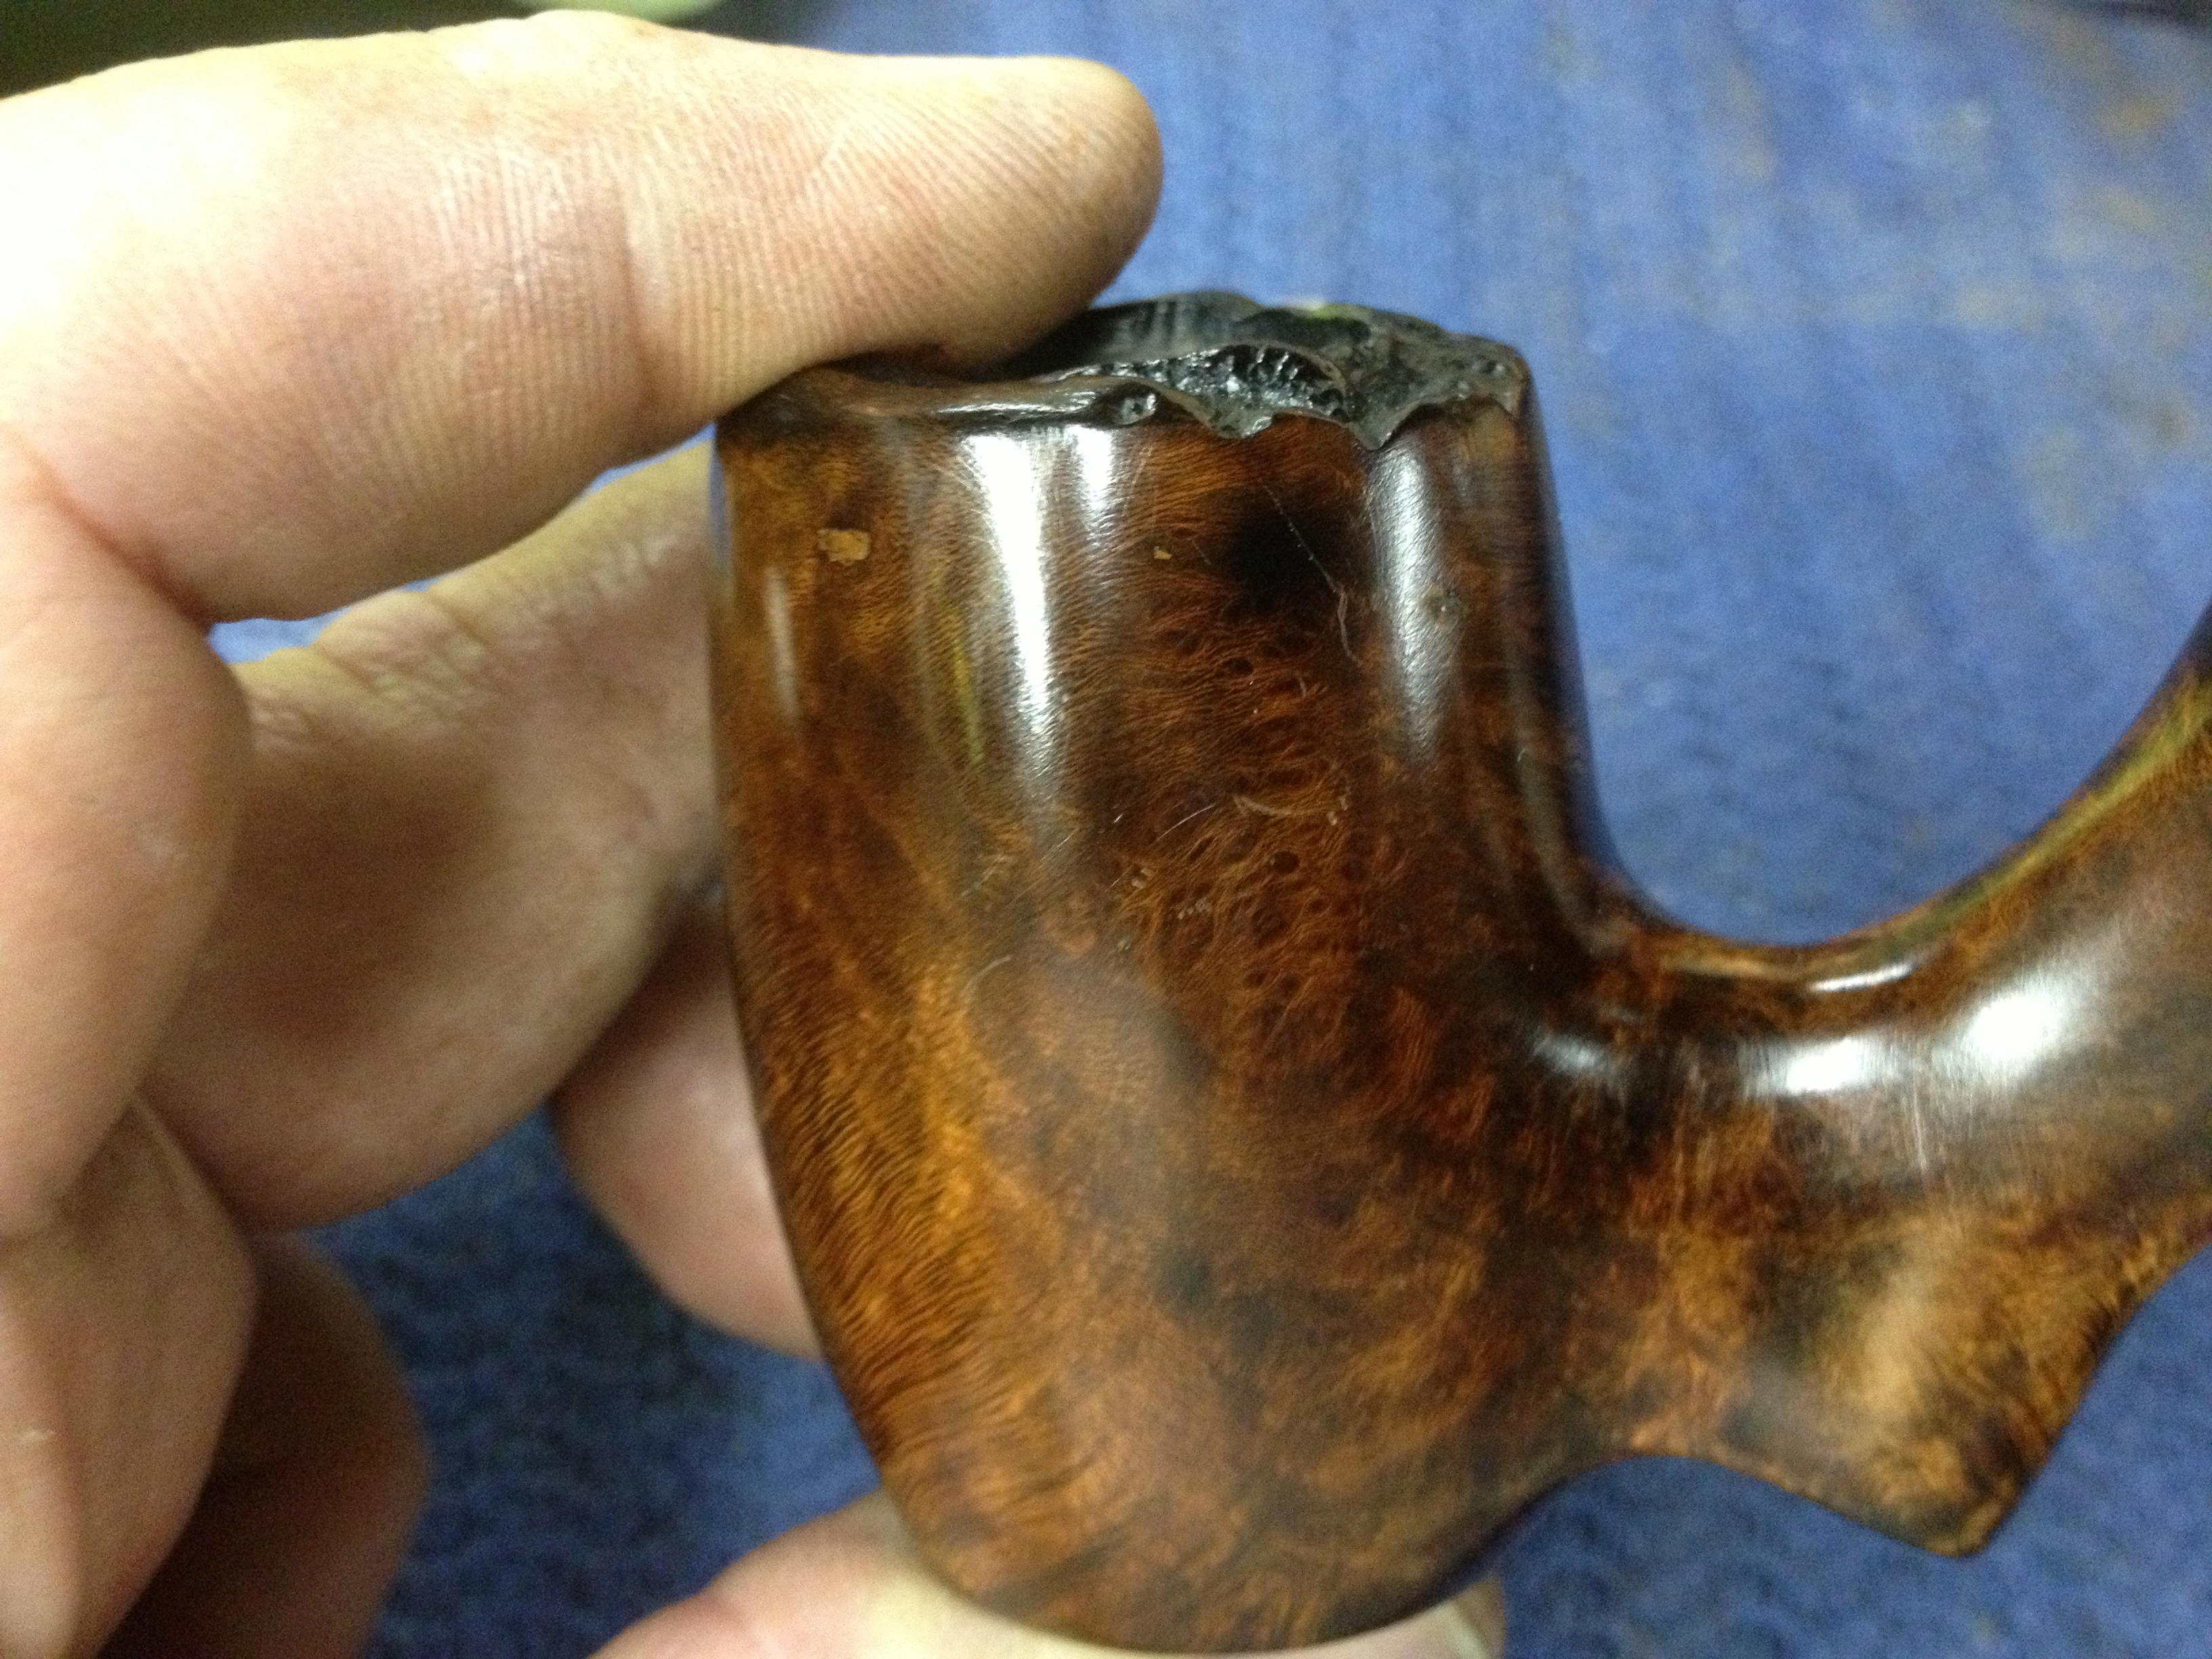
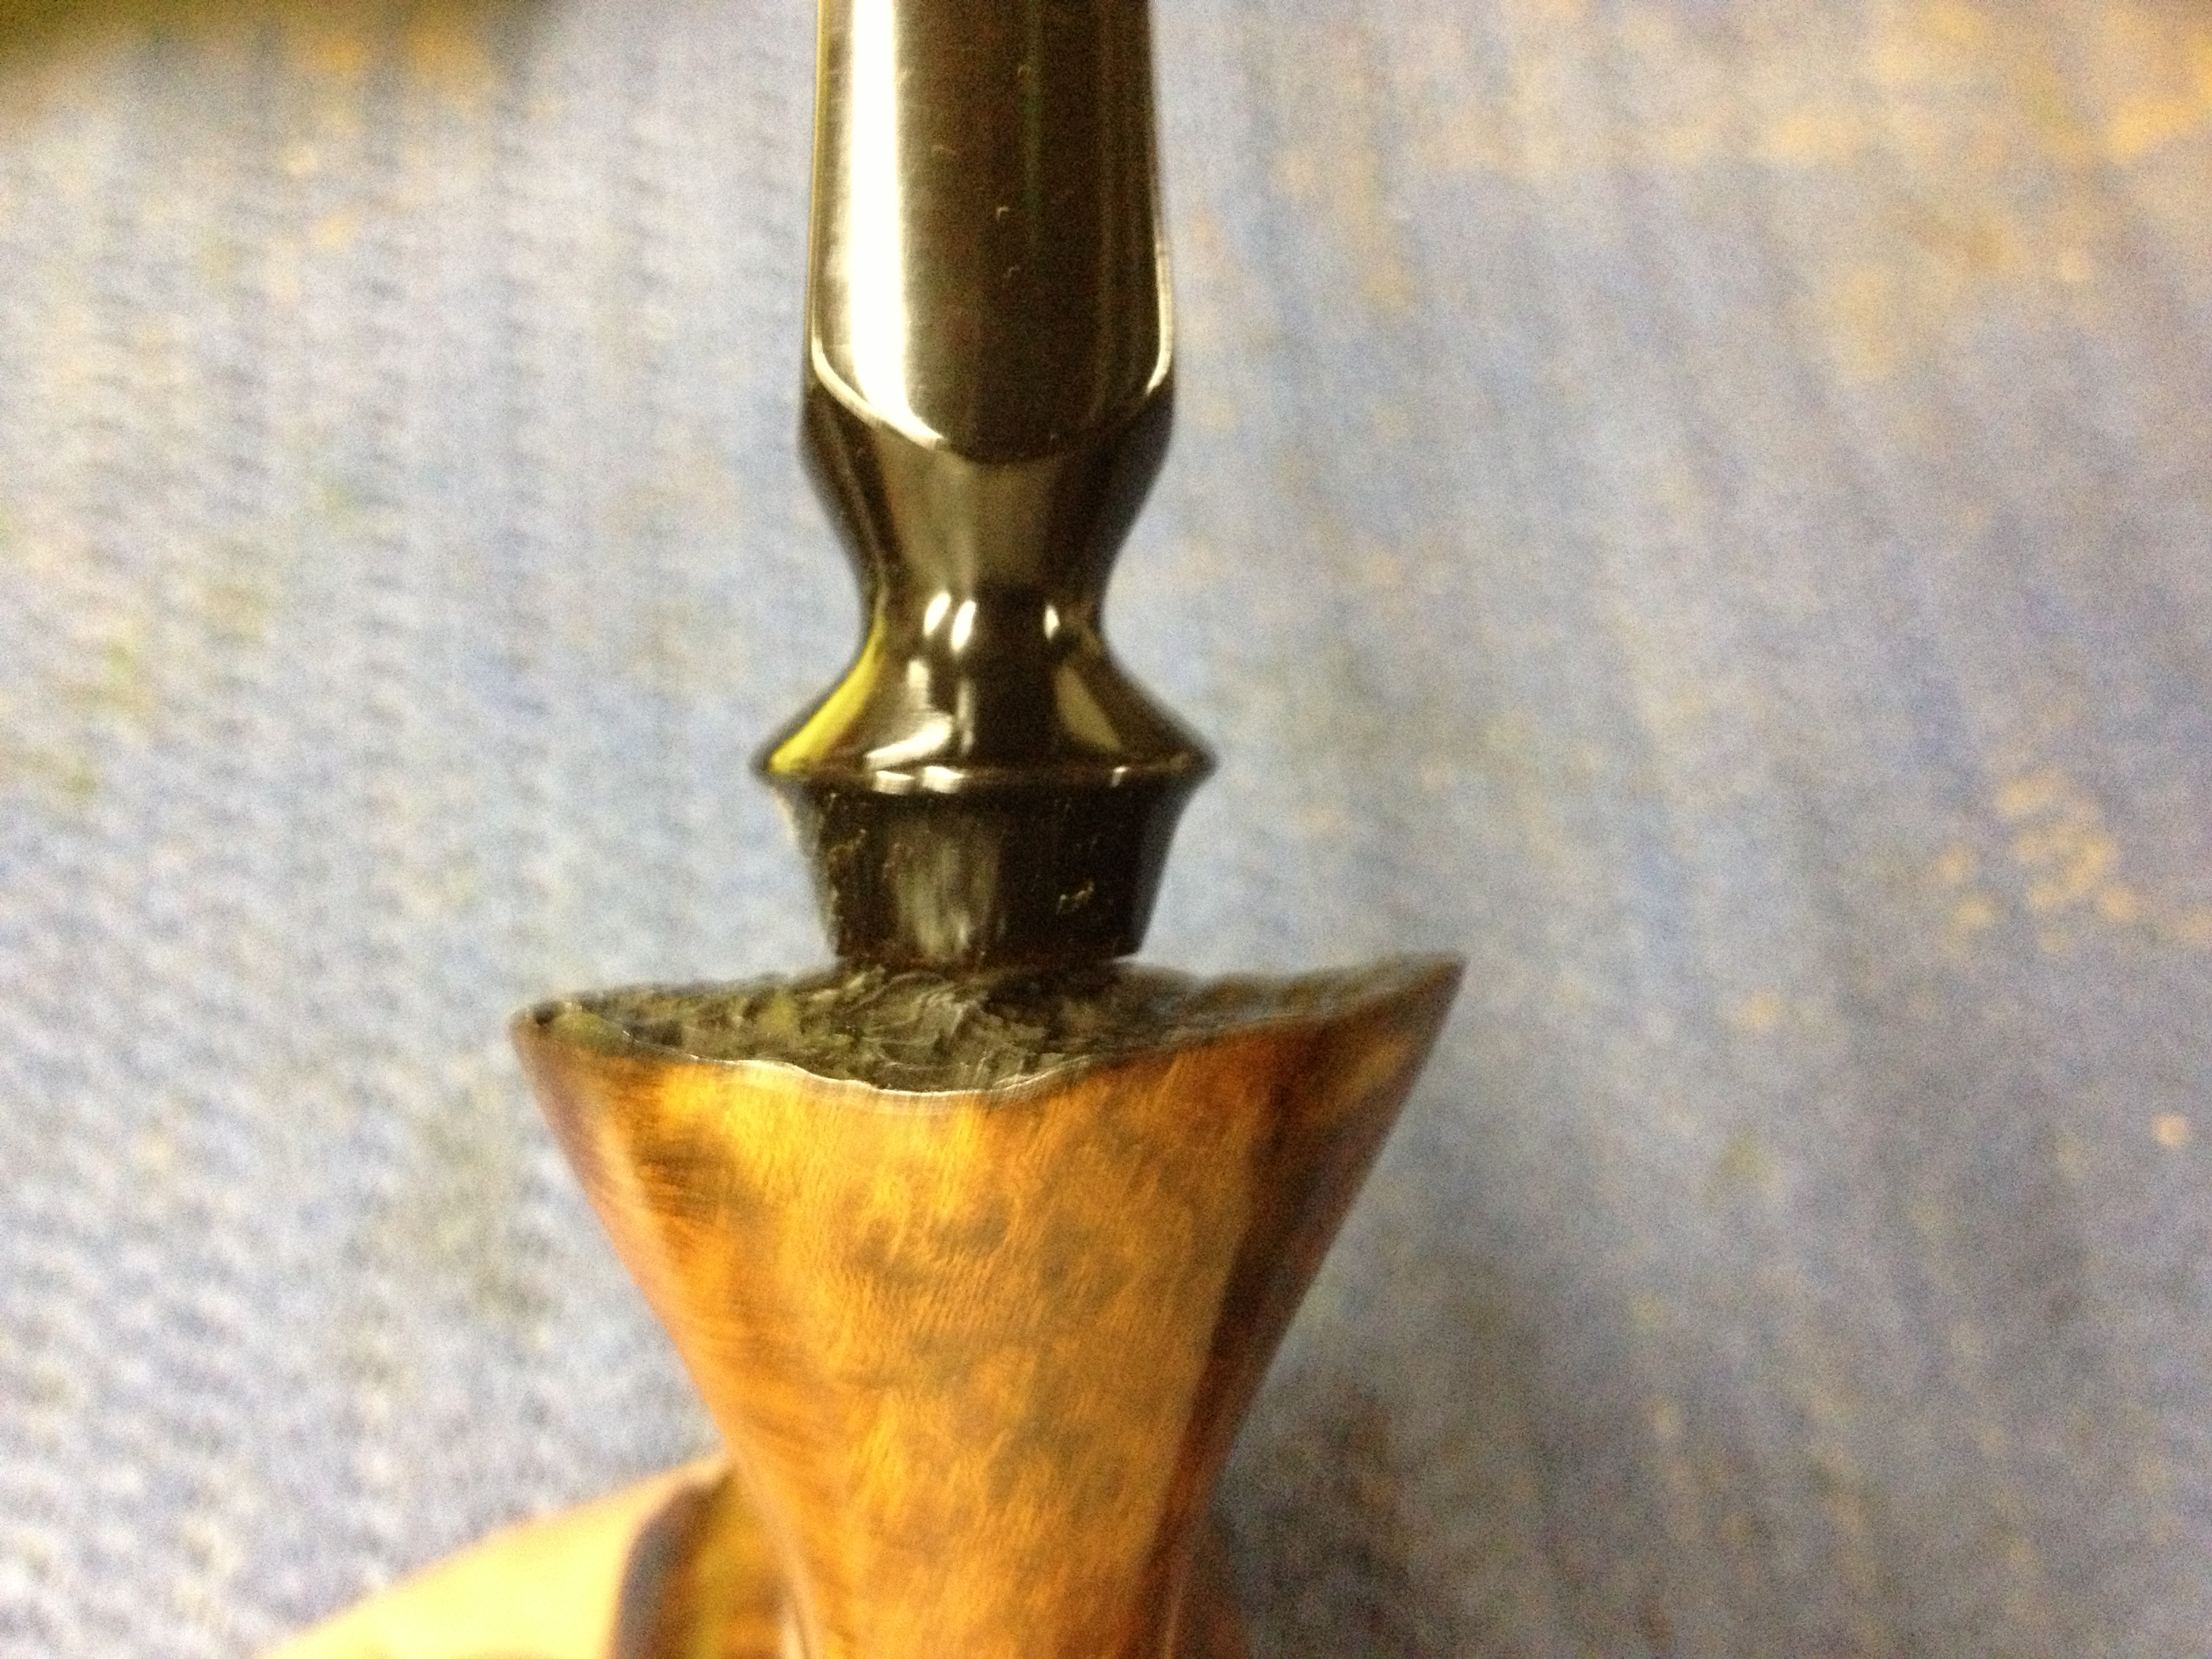
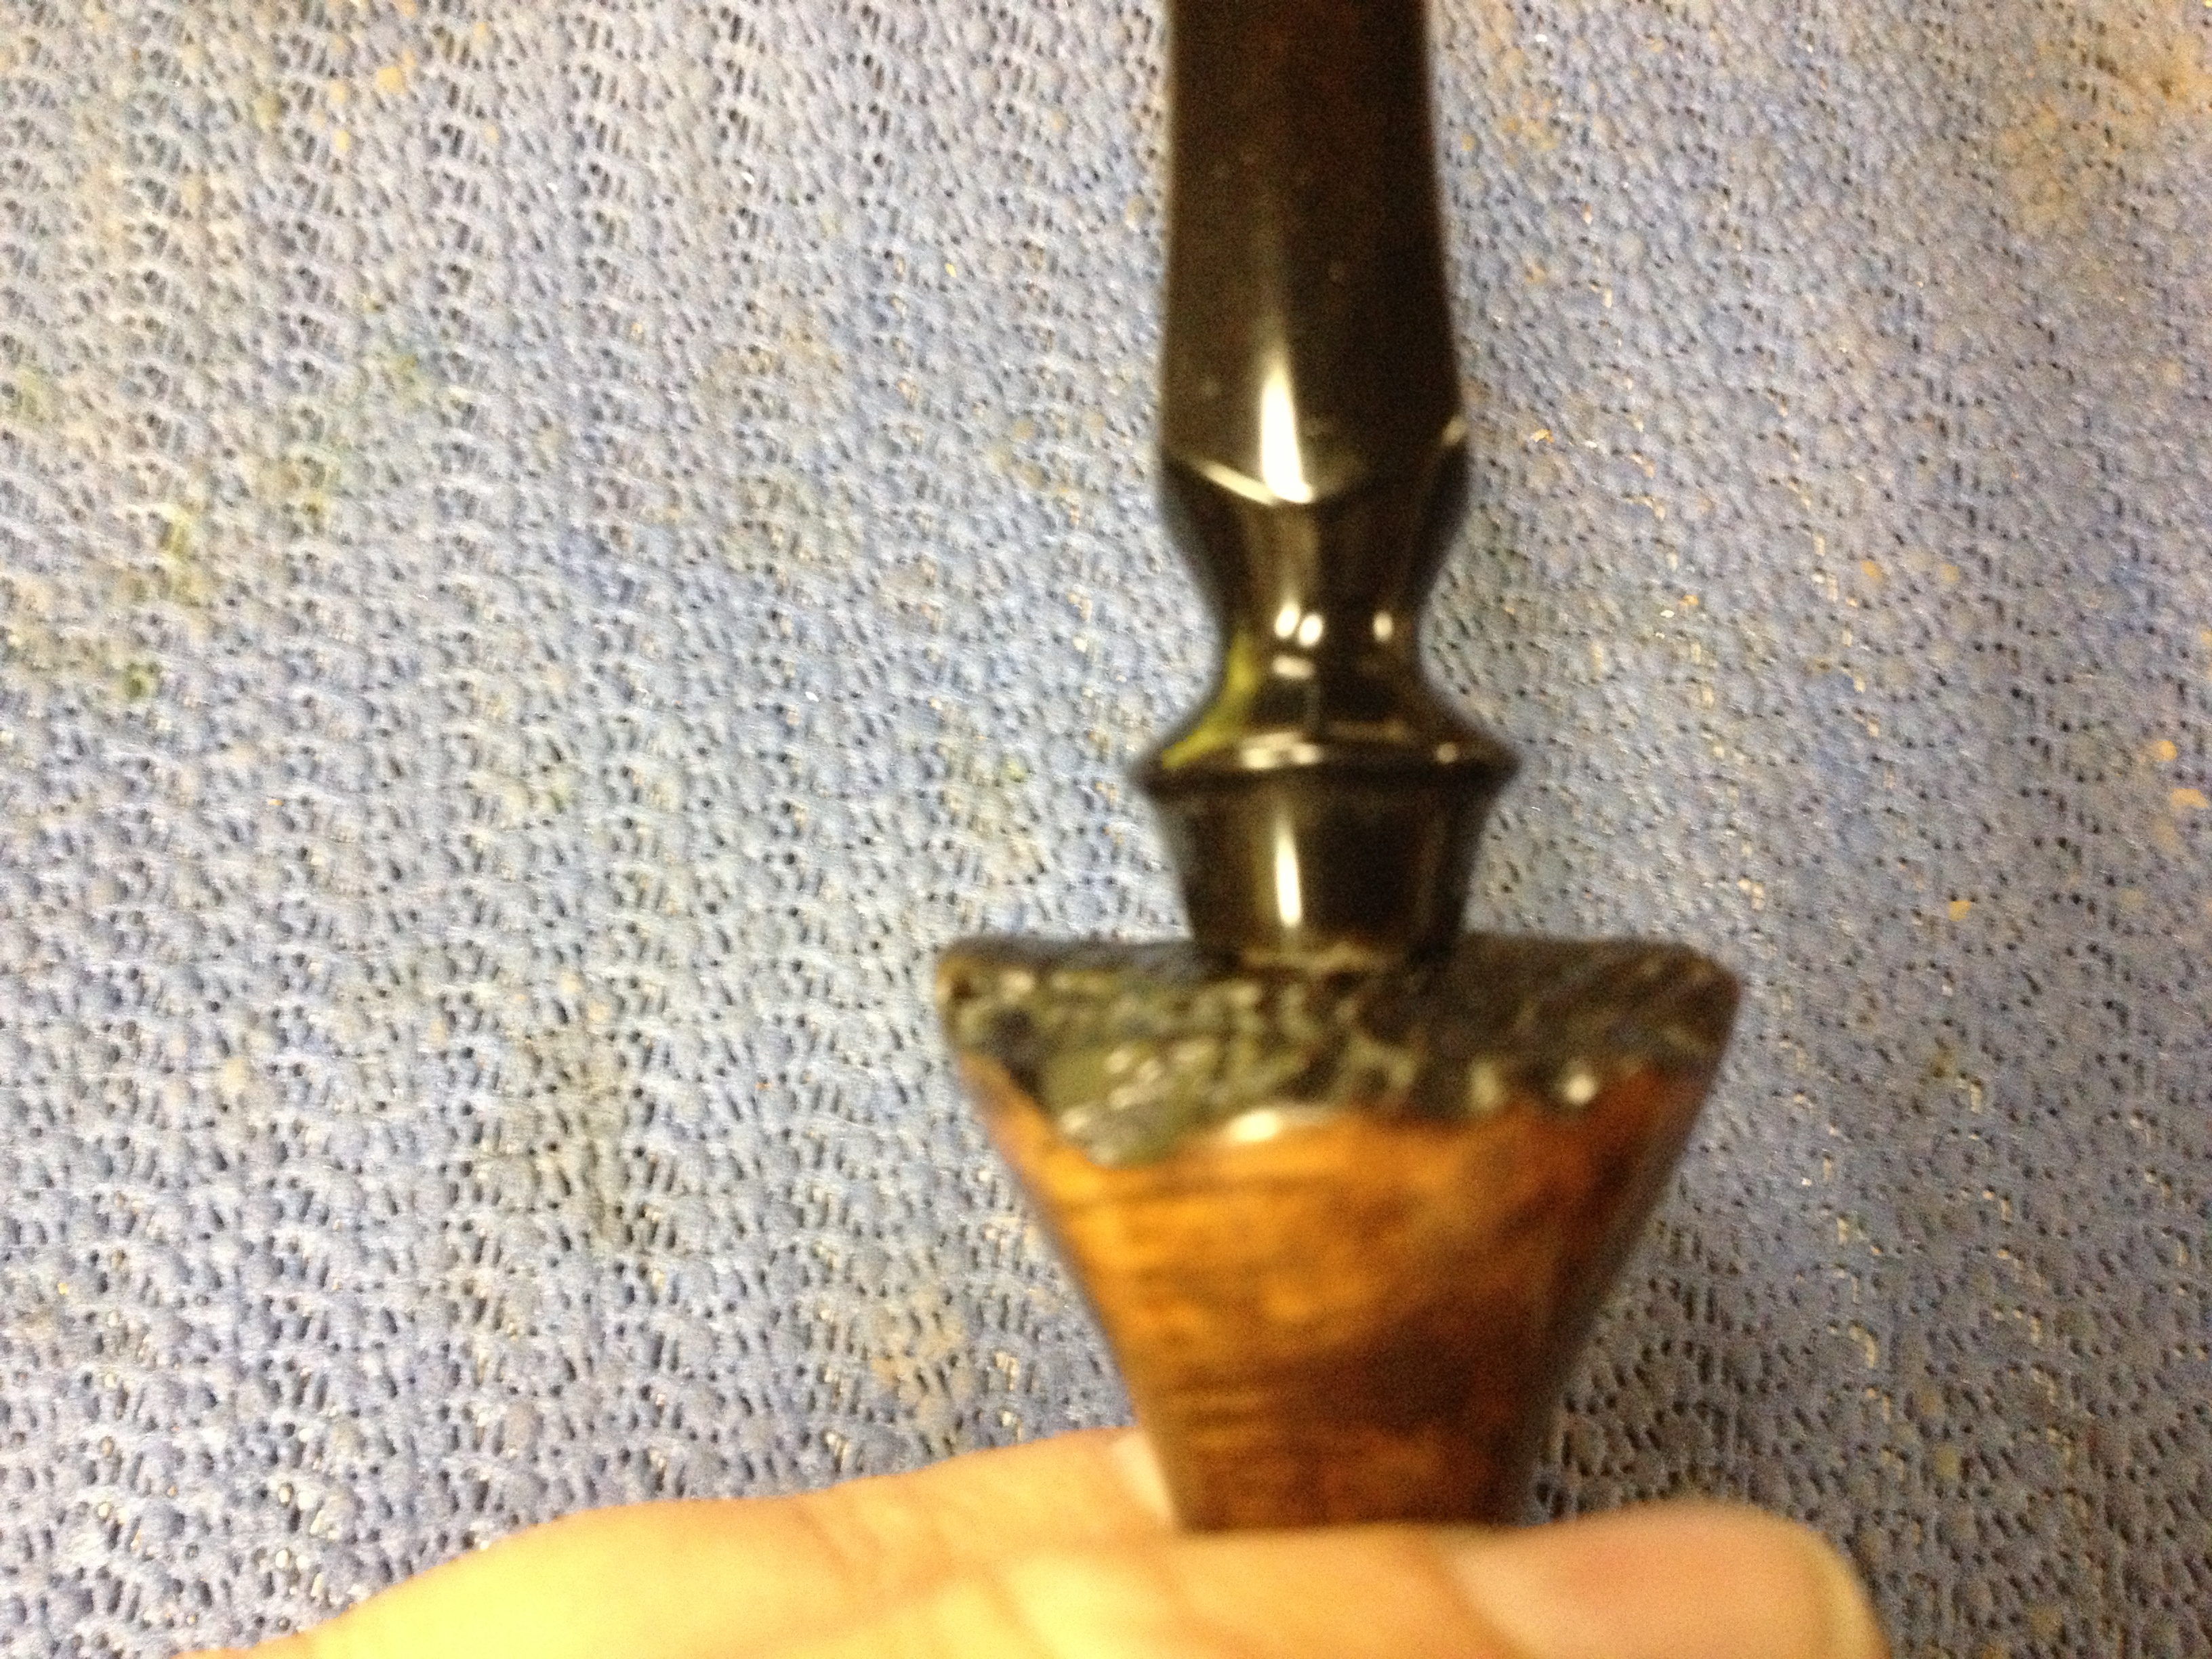
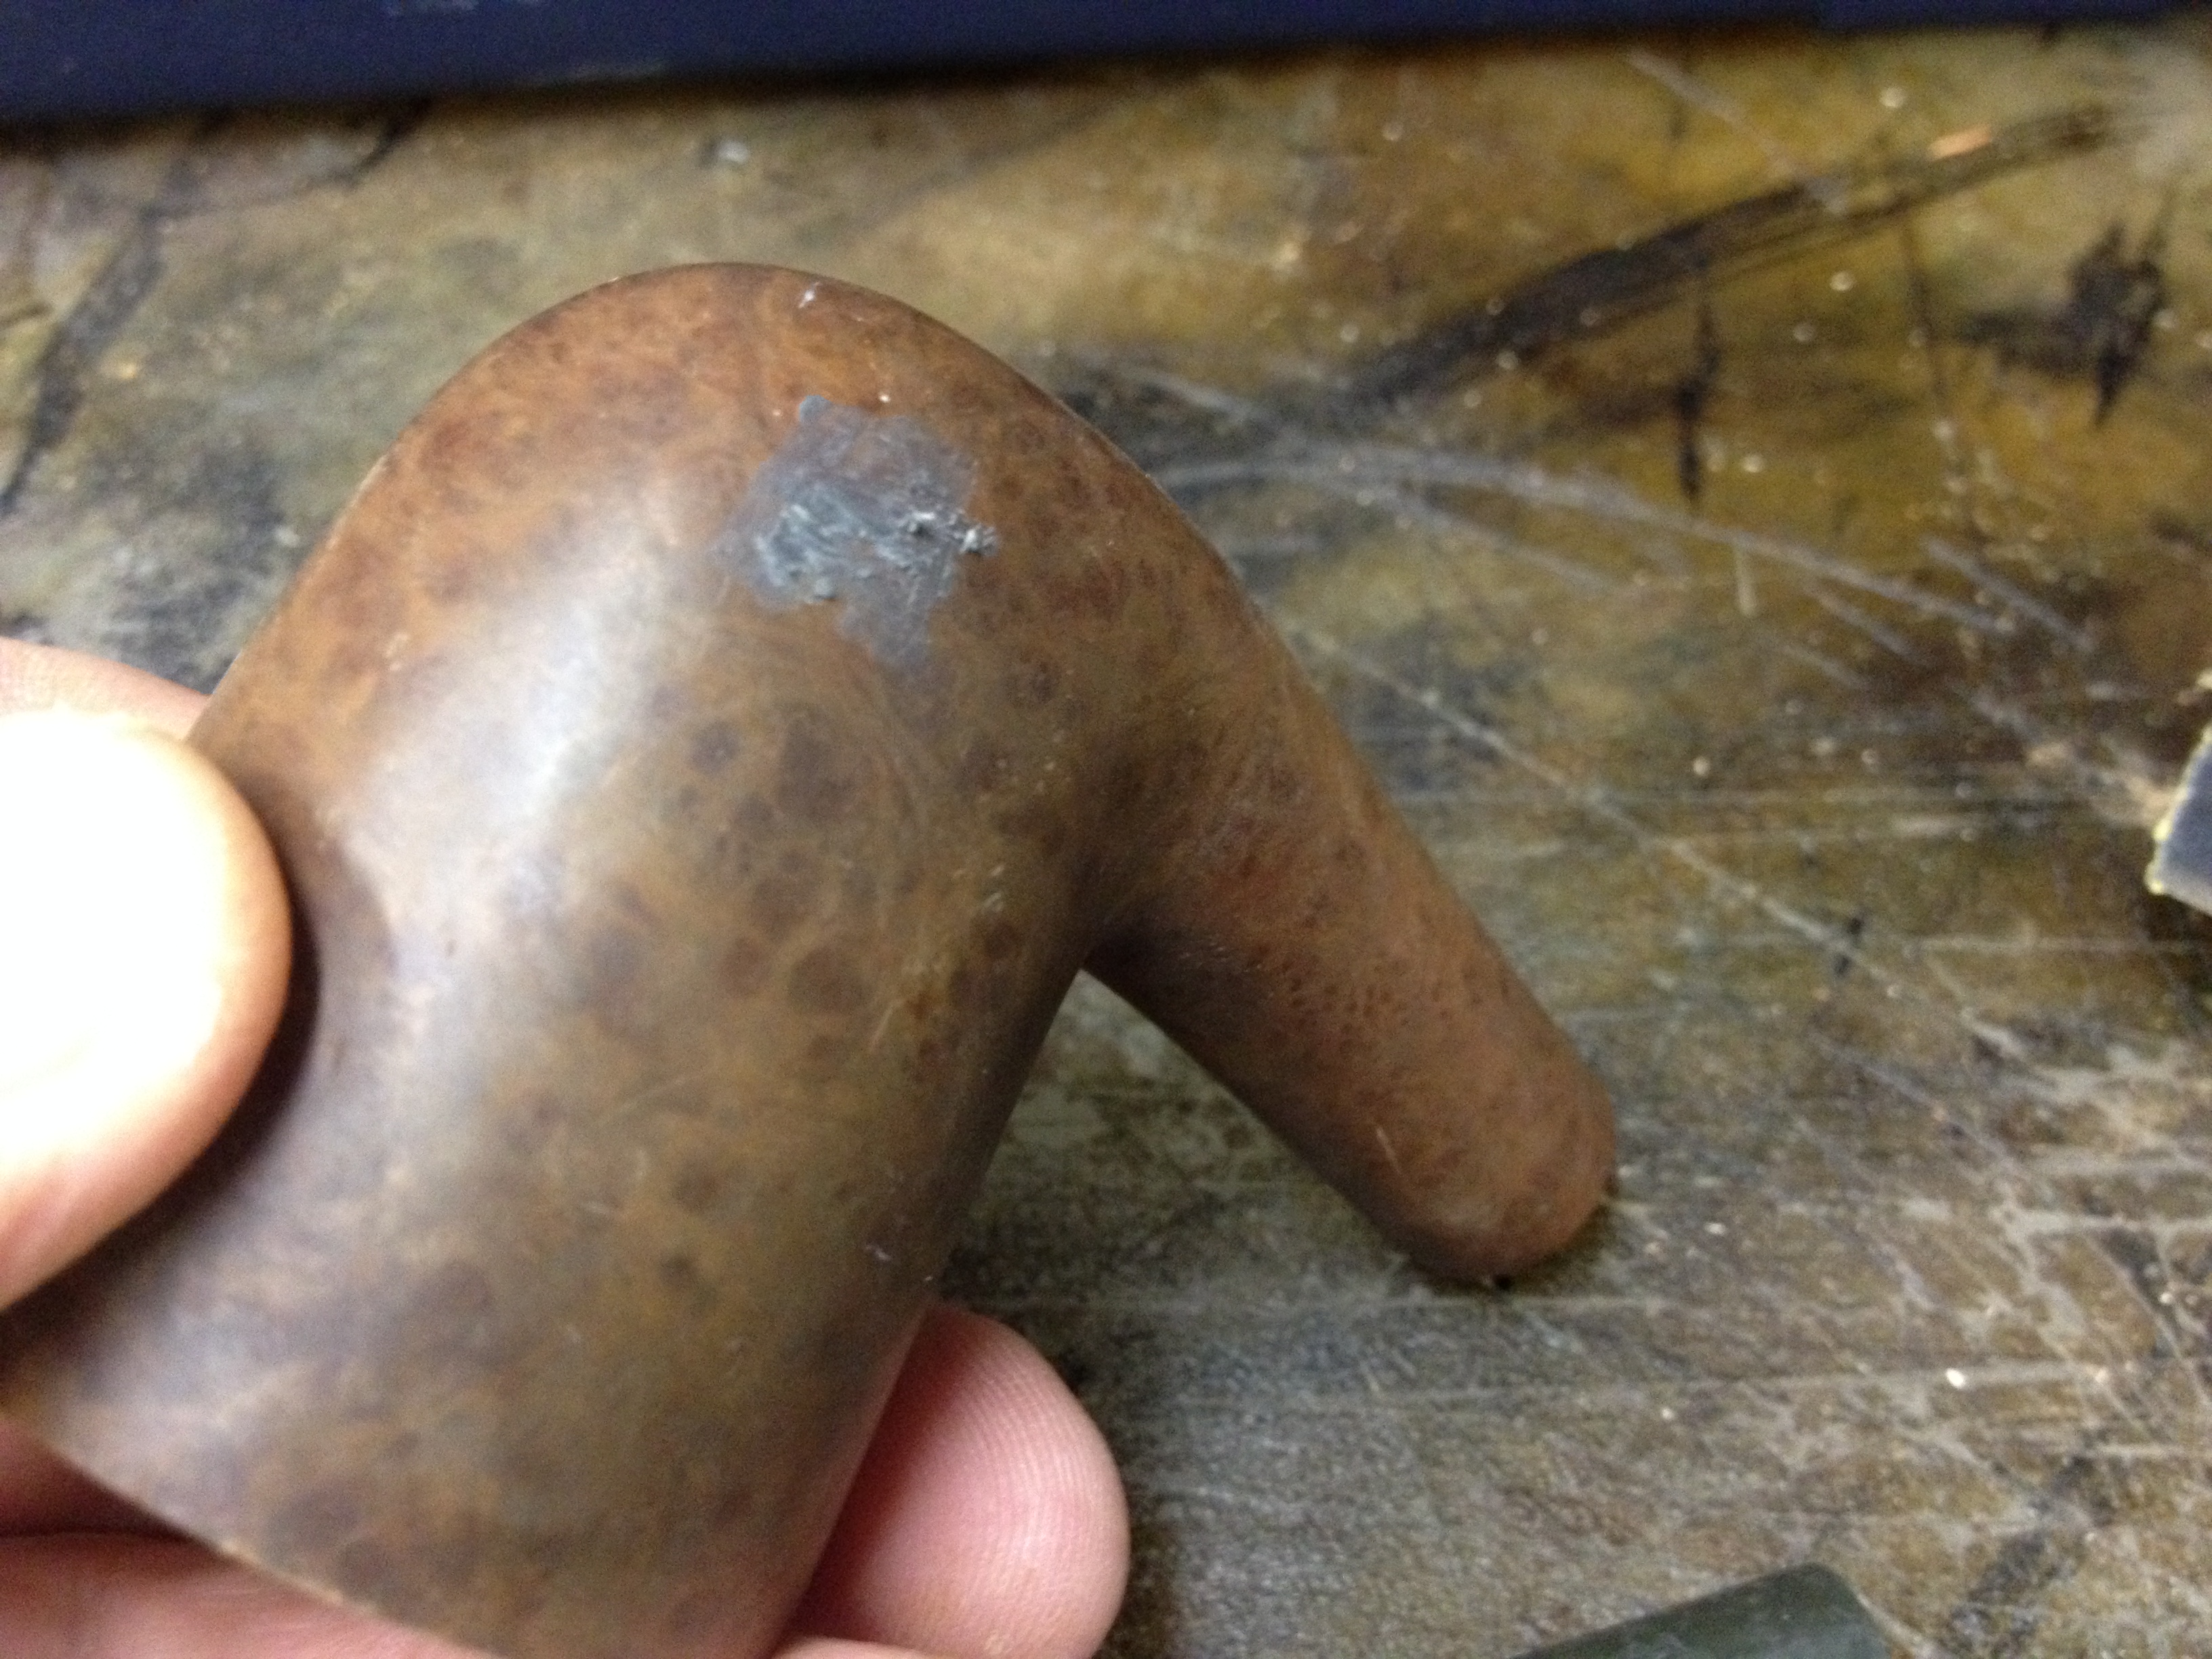
You can see much better the condition of the rim here. You can also see that the “scratches” I referred to earlier are in reality fills that have fallen out; I scraped them with my dental pick to be 100% certain. These would have to be dealt with after I topped the bowl.

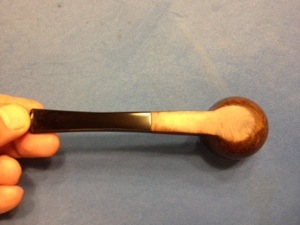
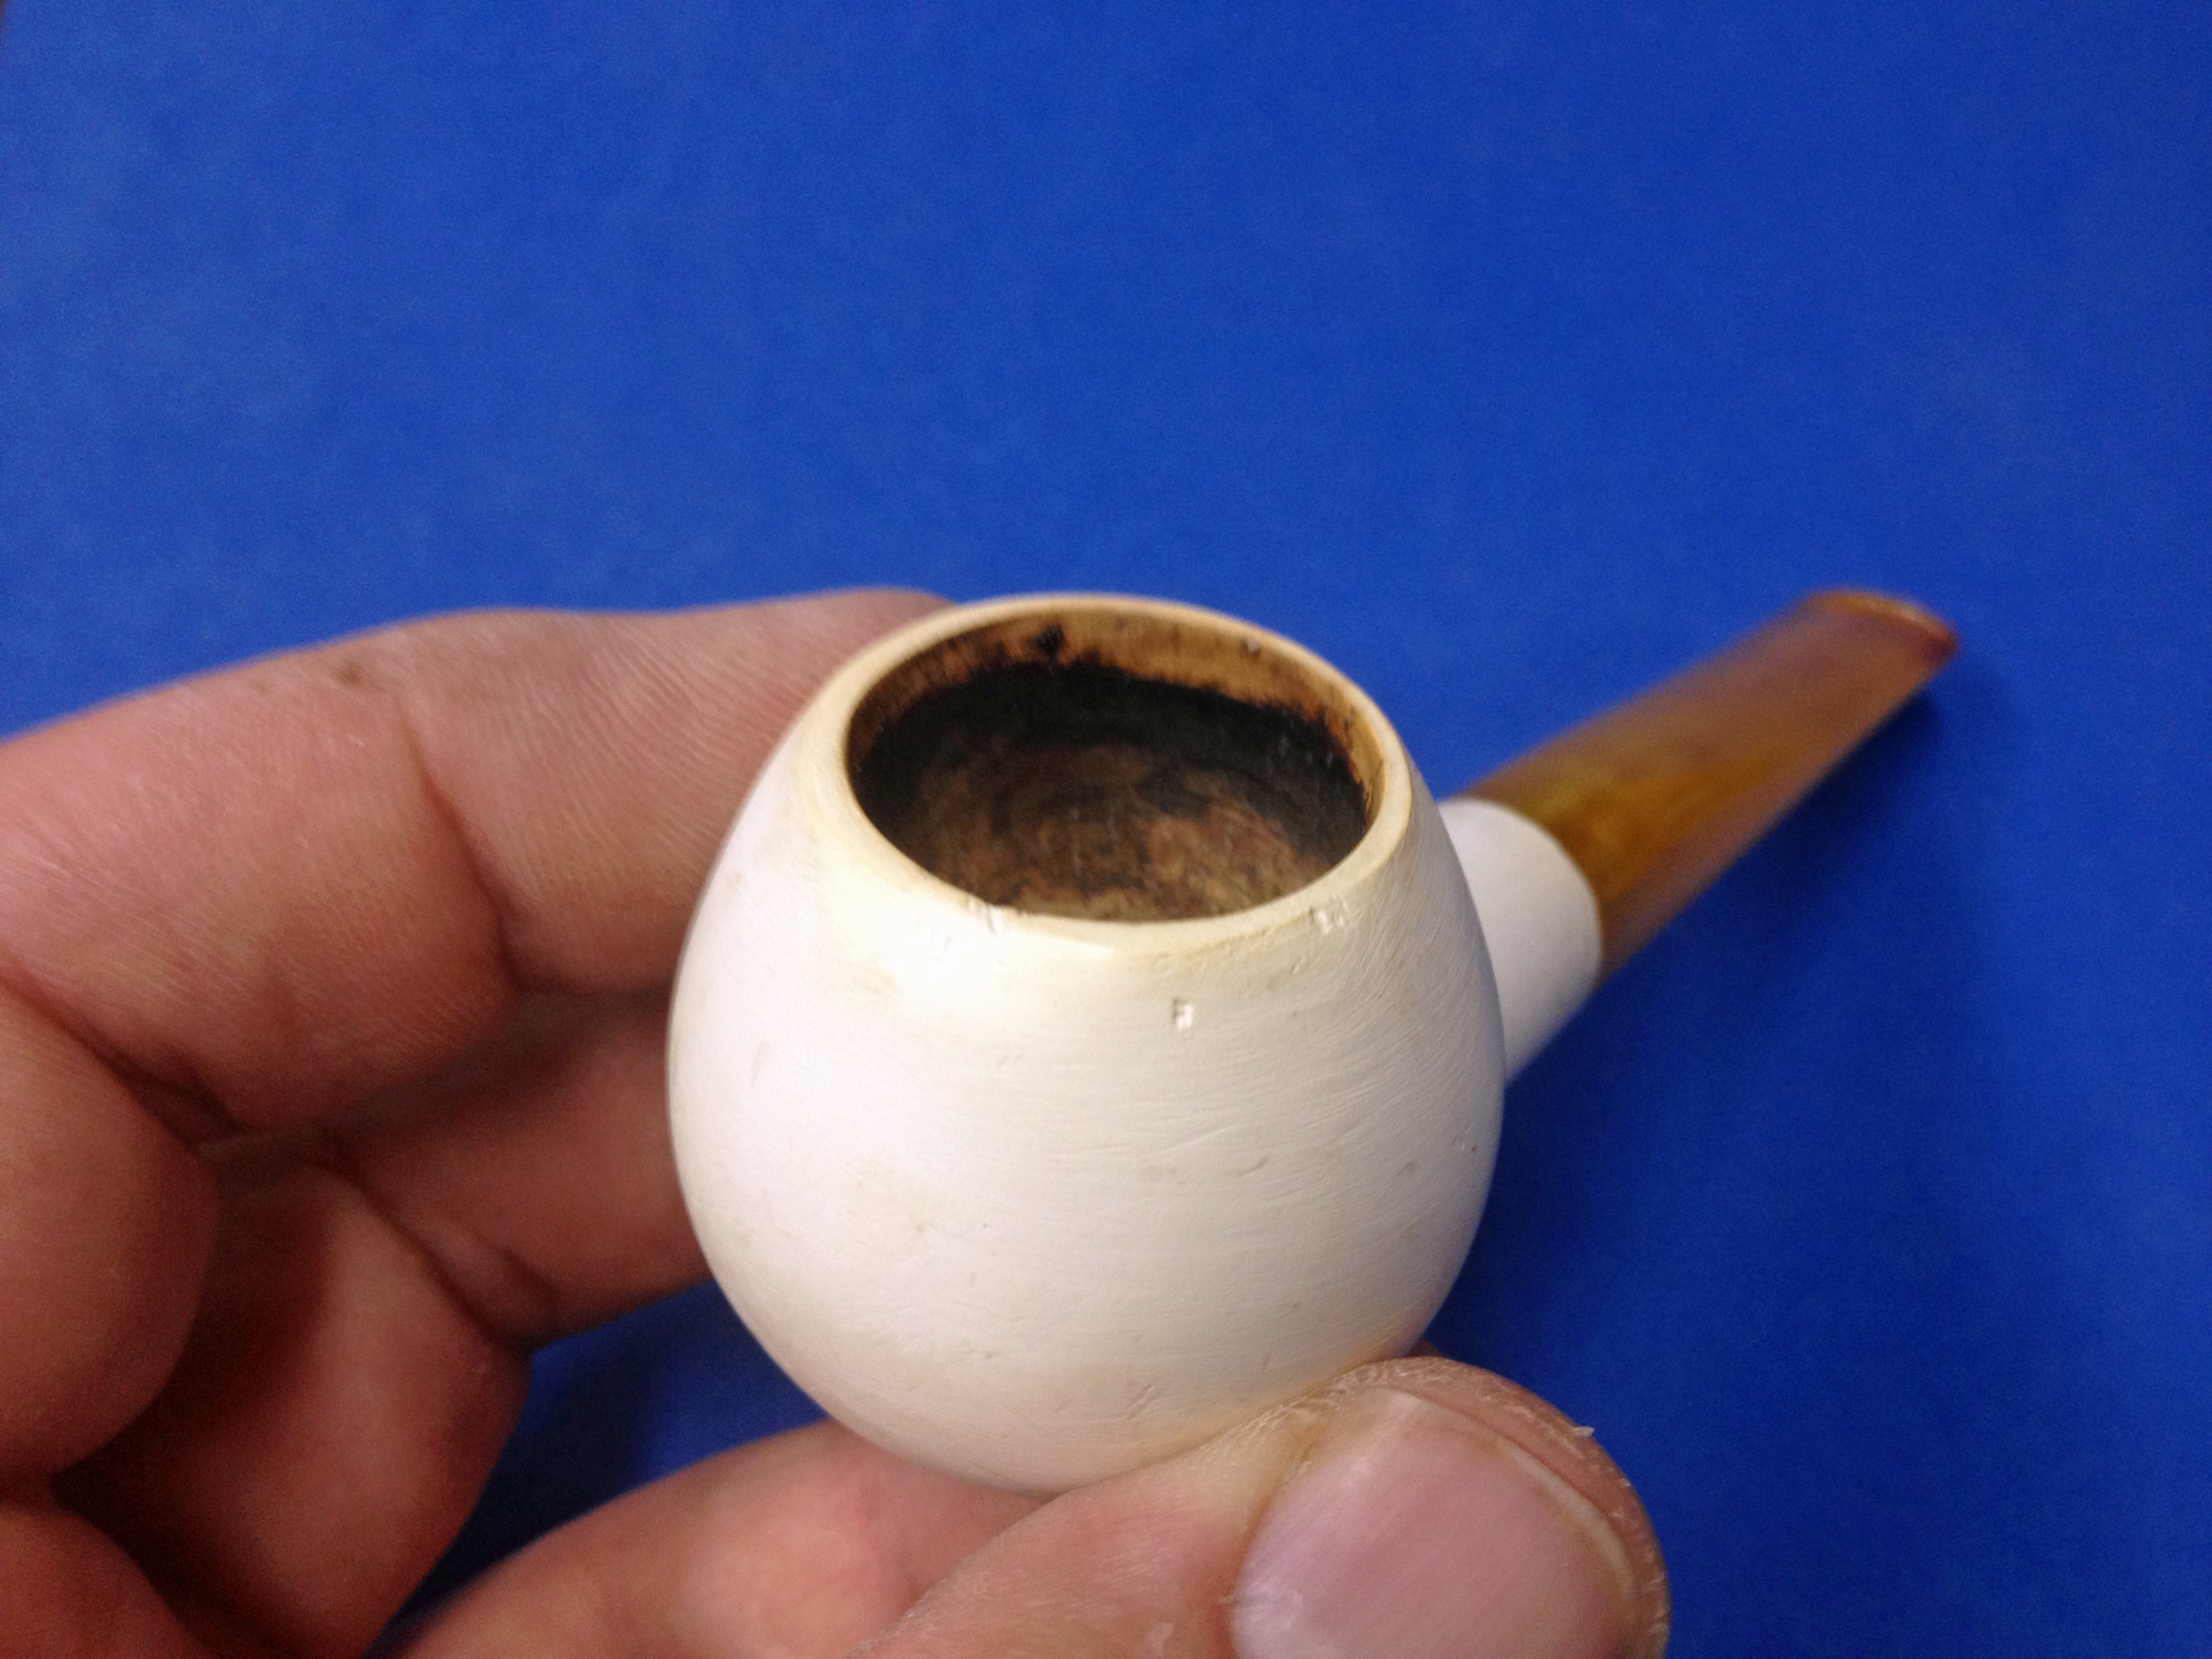
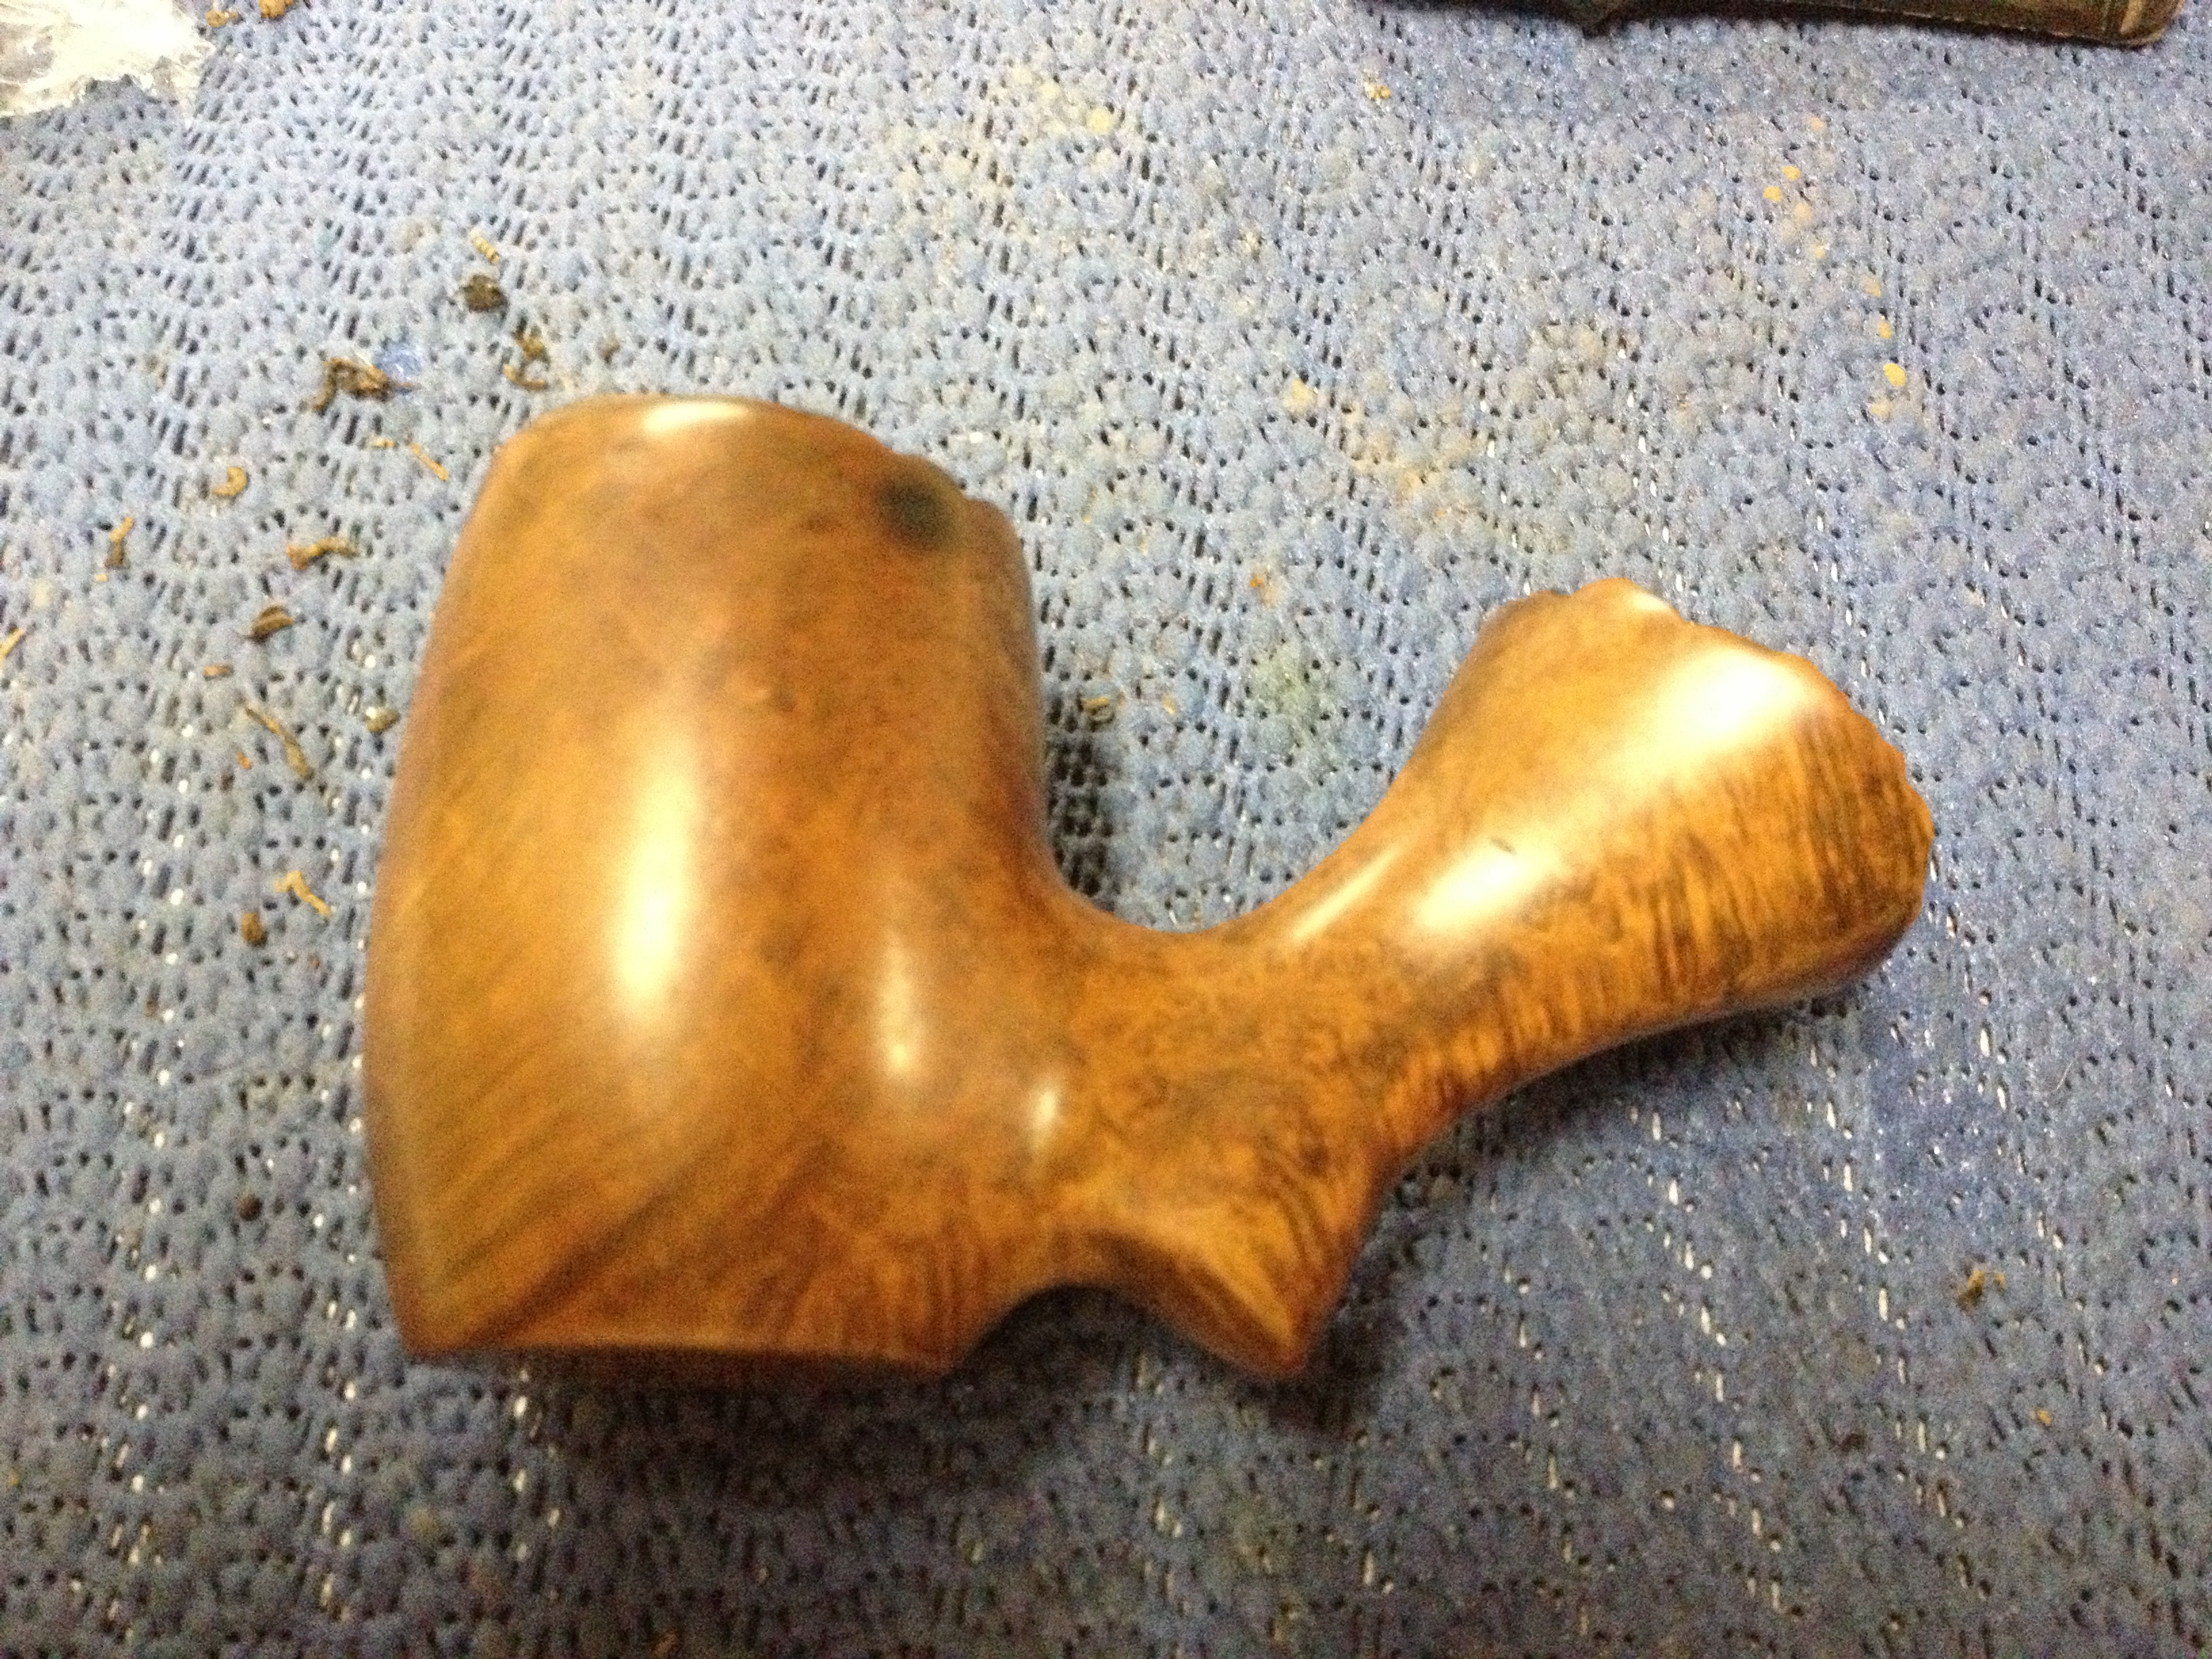
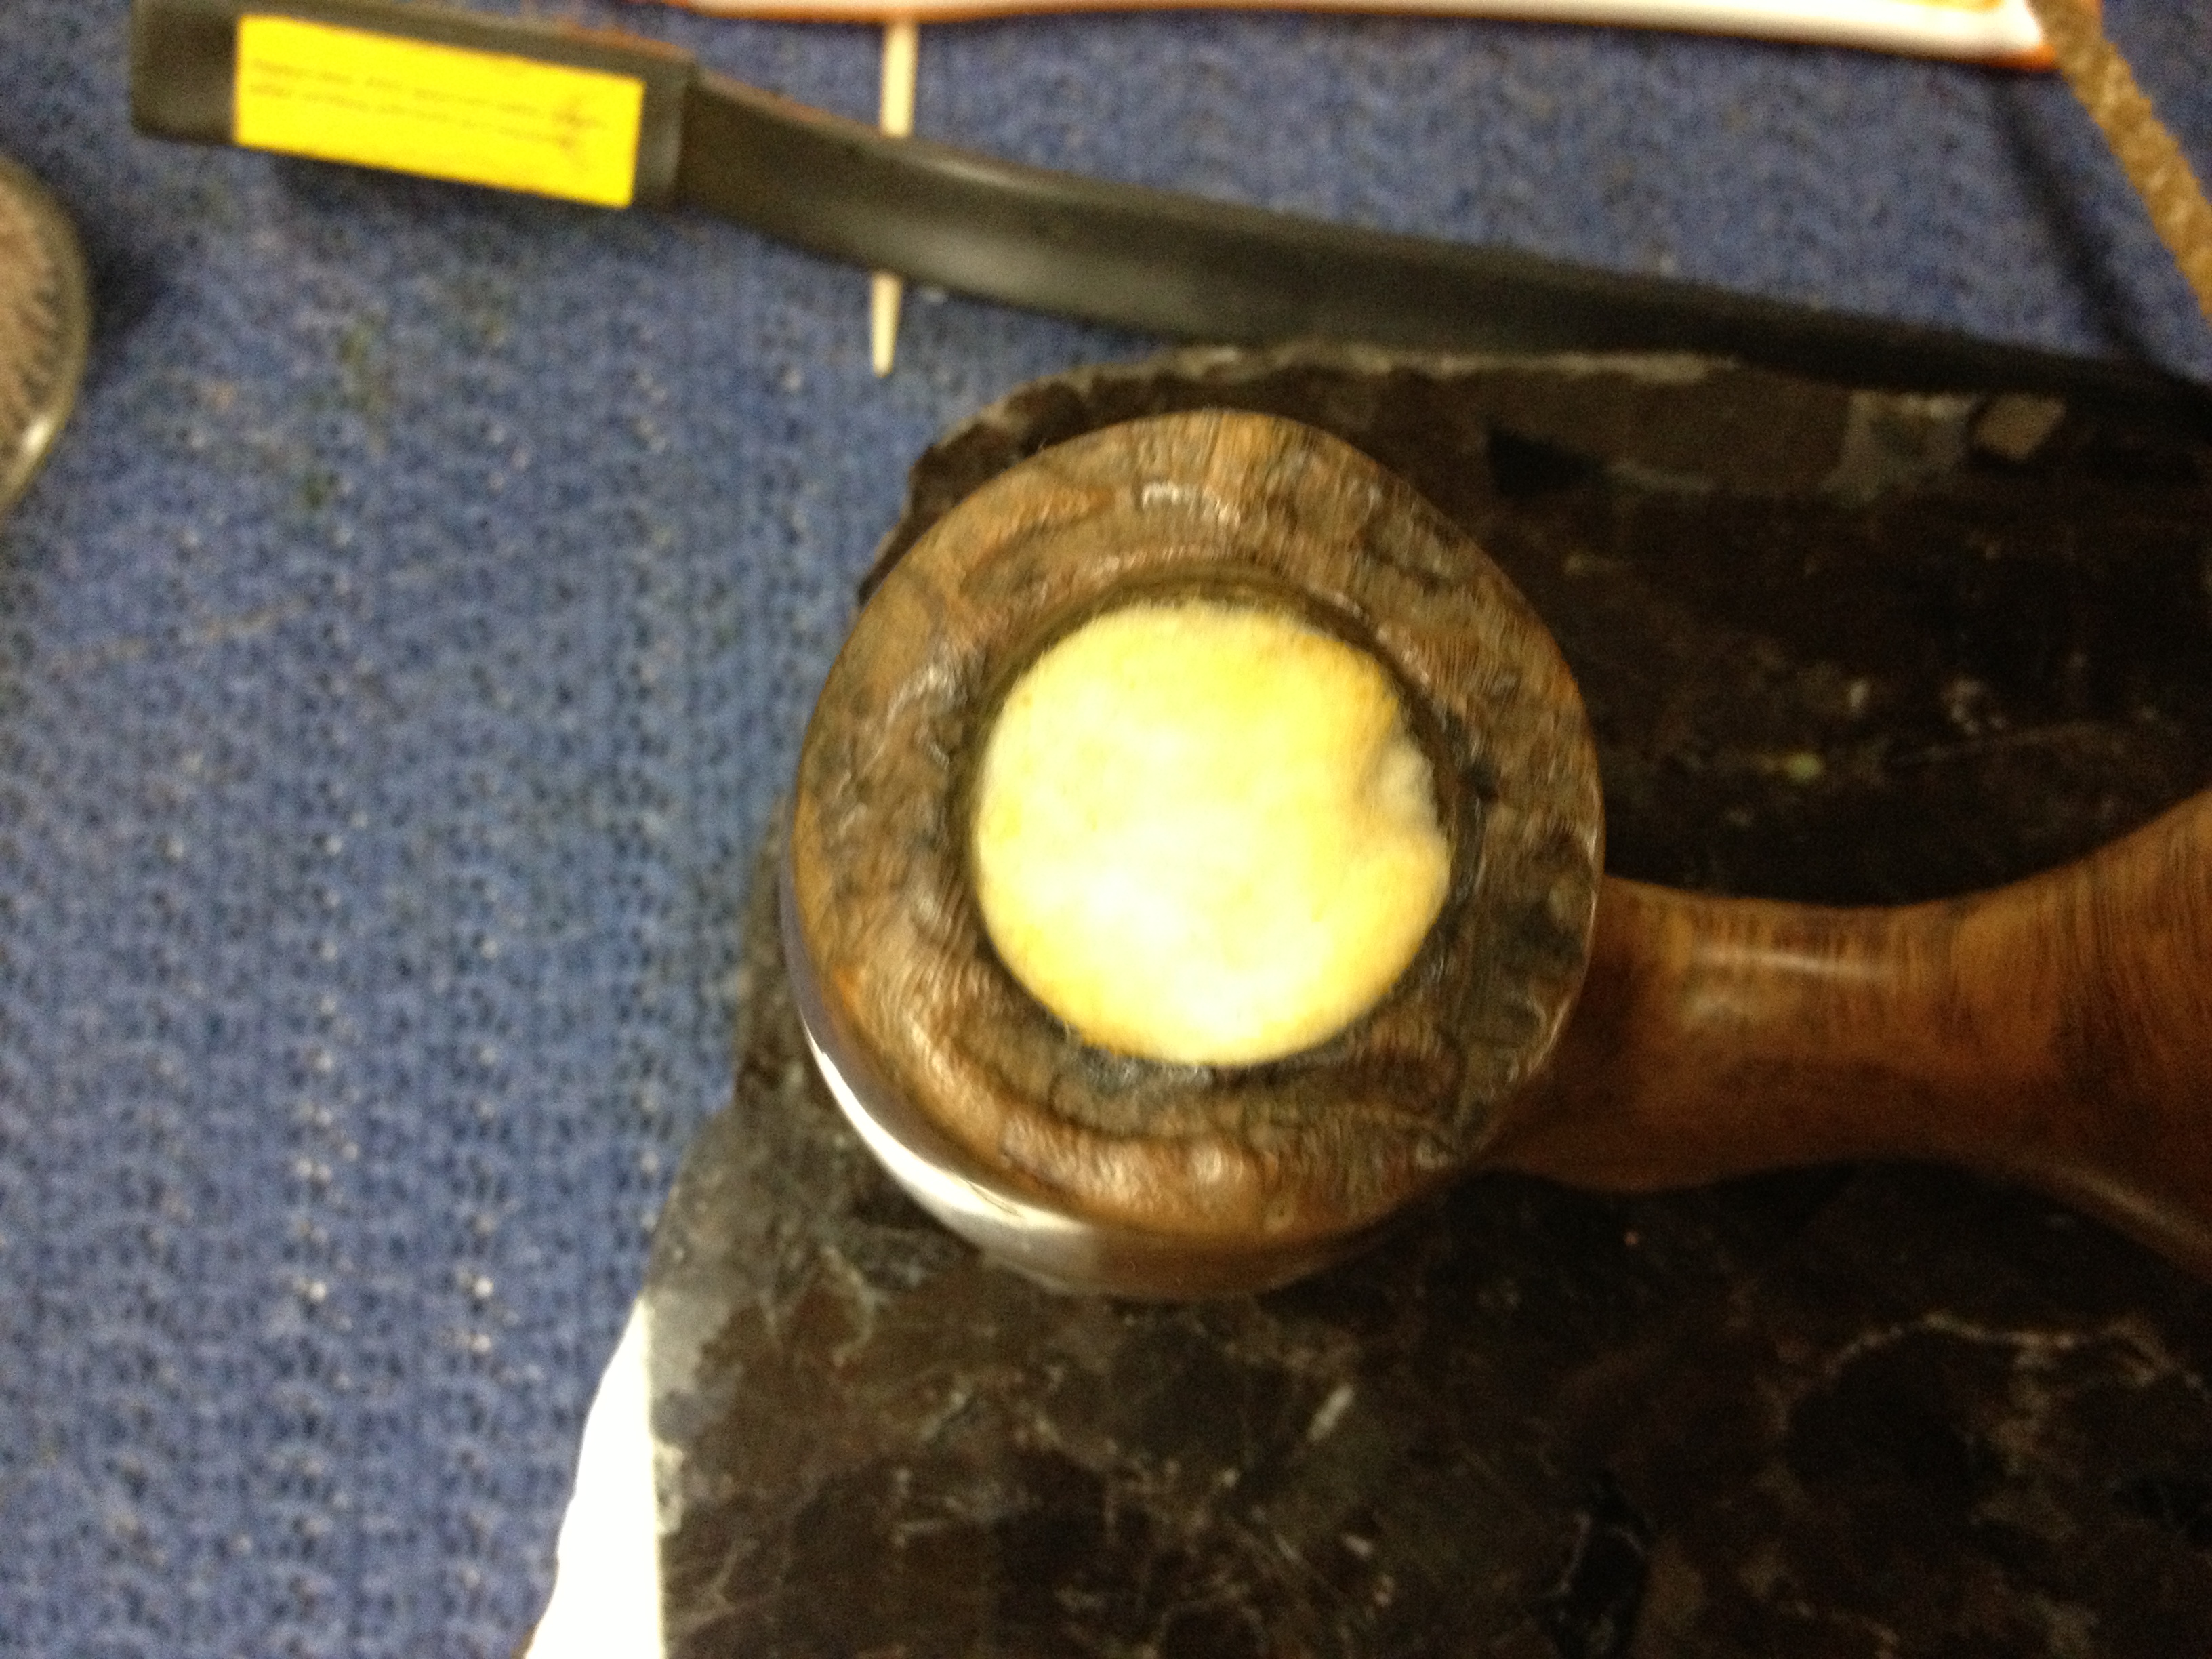
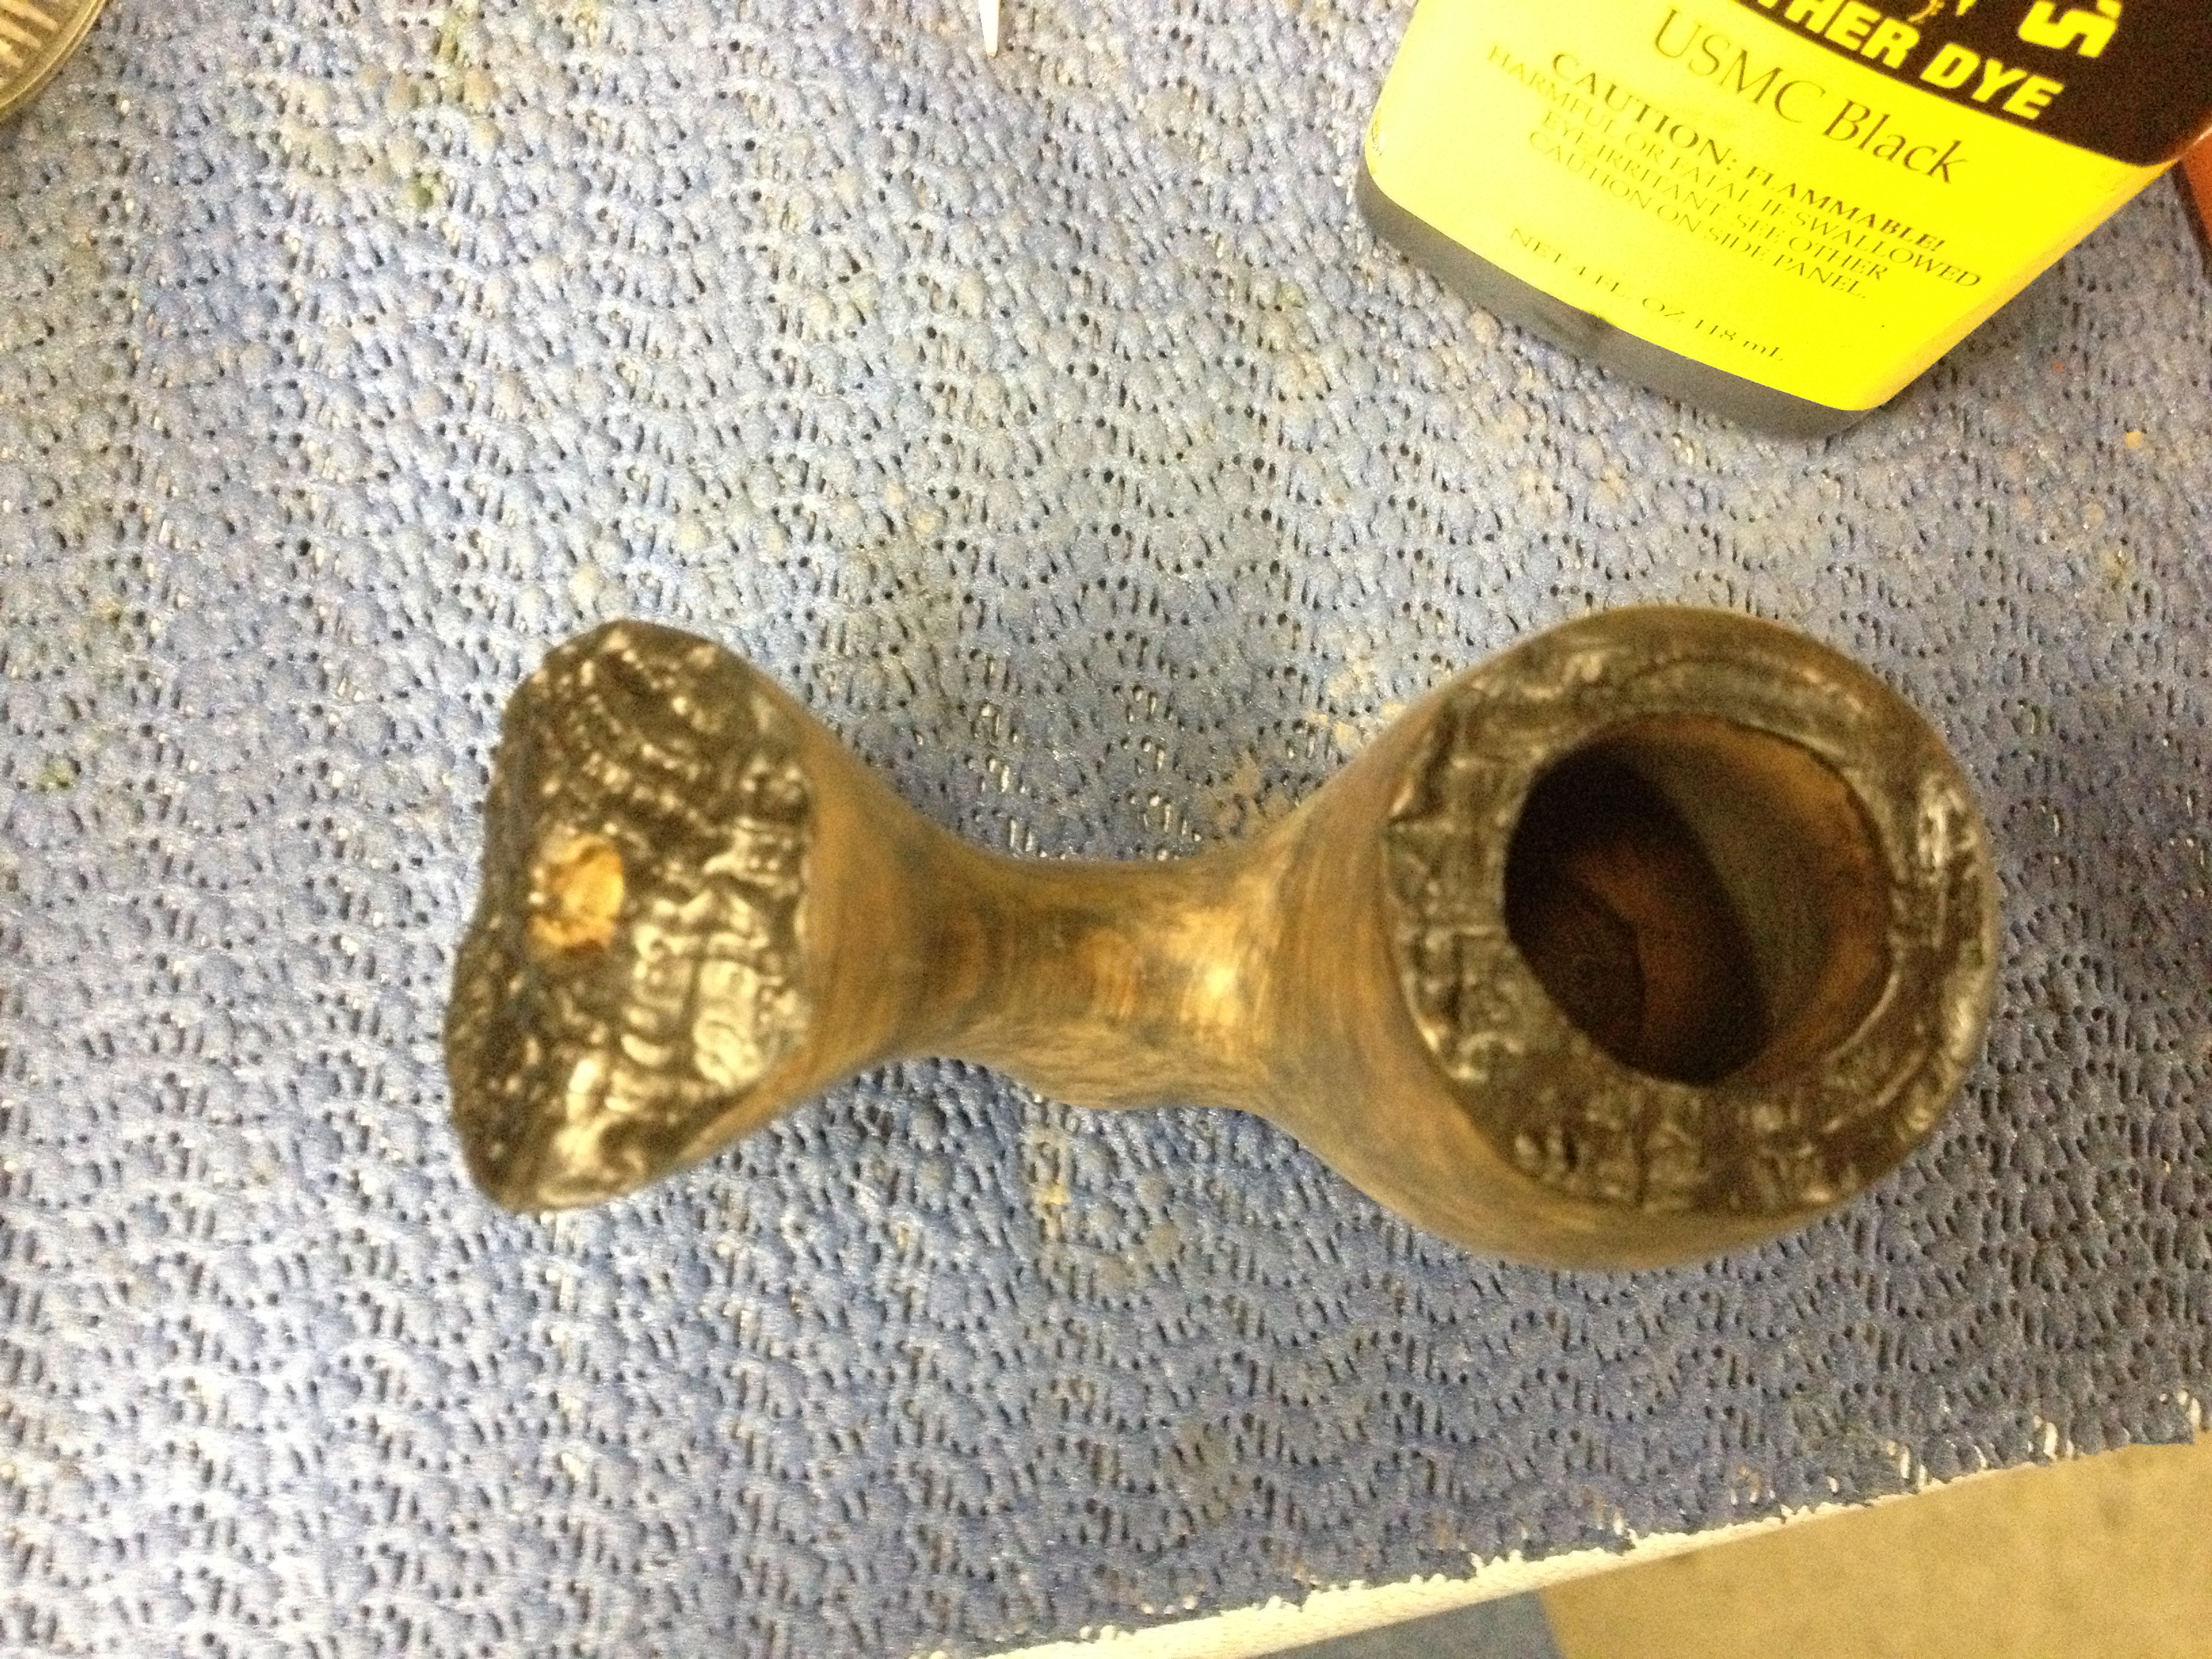
I used 400 girt wet.dry paper to top the bowl, checking it often to see how it progressed. The char marks wouldn’t come out completely but were reduced substantially. And the dings in the rim were nearly sanded out, in good enough shape that I was happy with them; the one on the outside edge would require me to sand at least another 1/16″ off the entire bowl and I didn’t want to remove anymore material than I already had.

IMG_7752

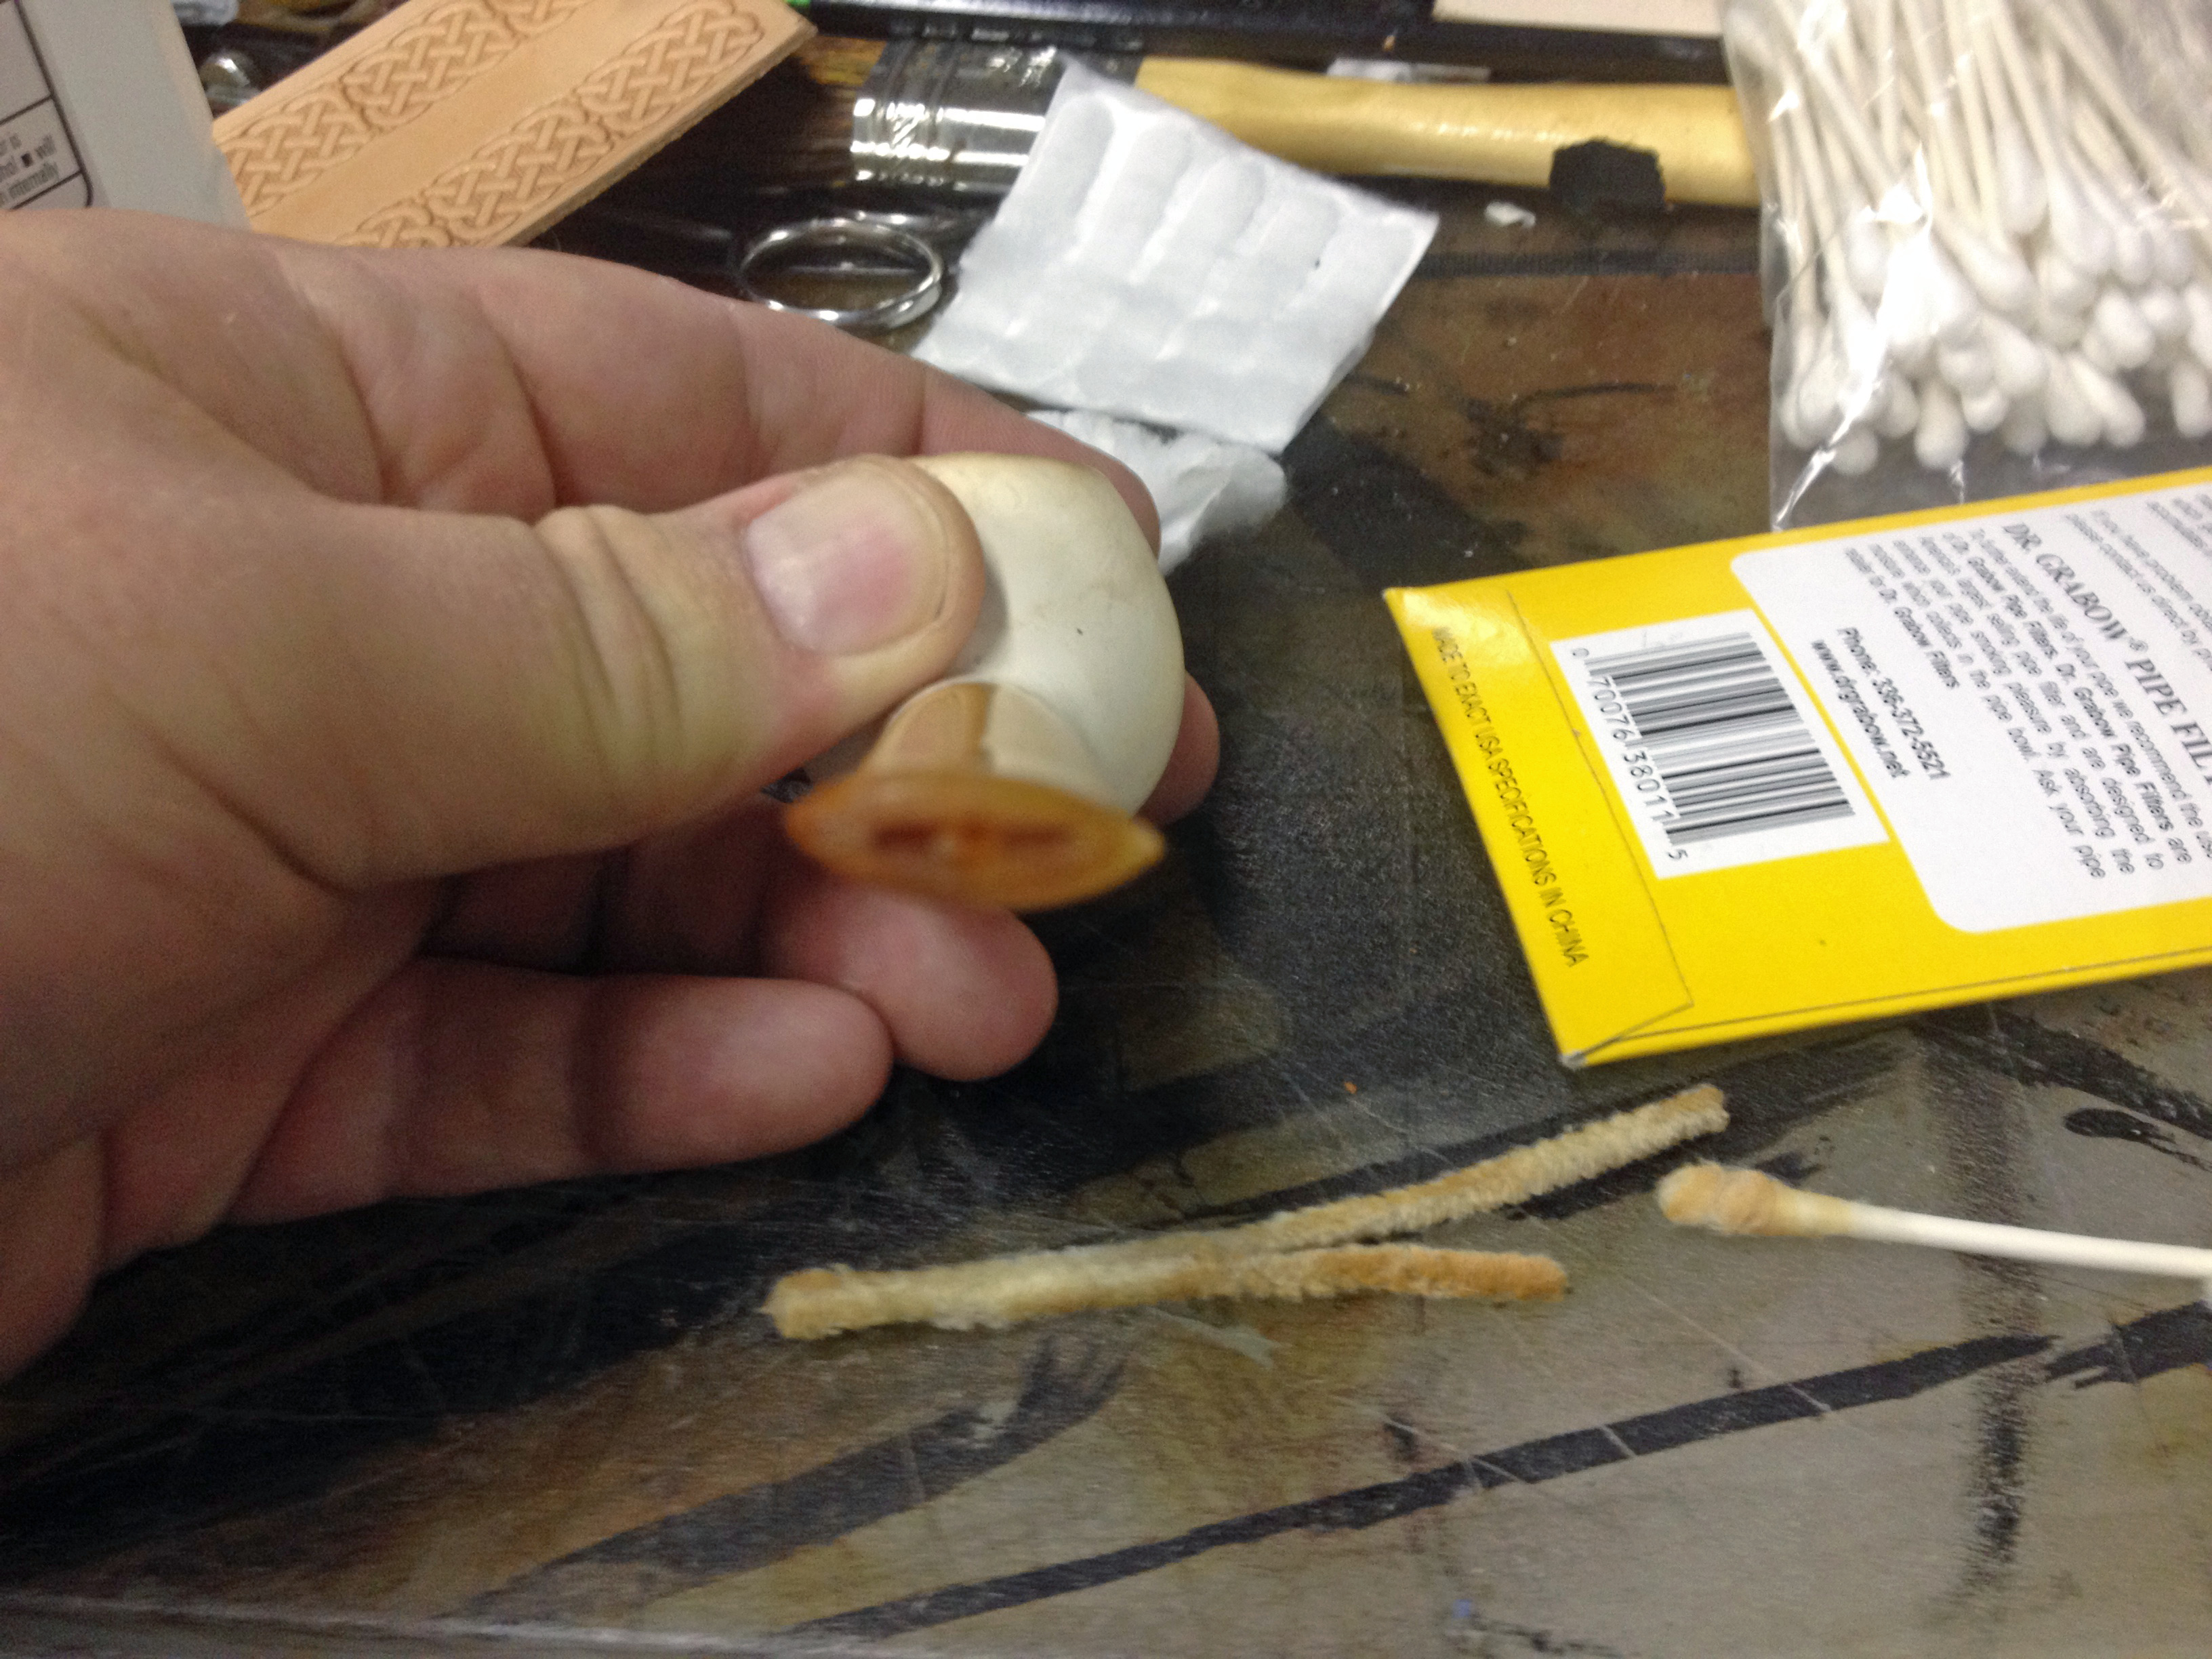
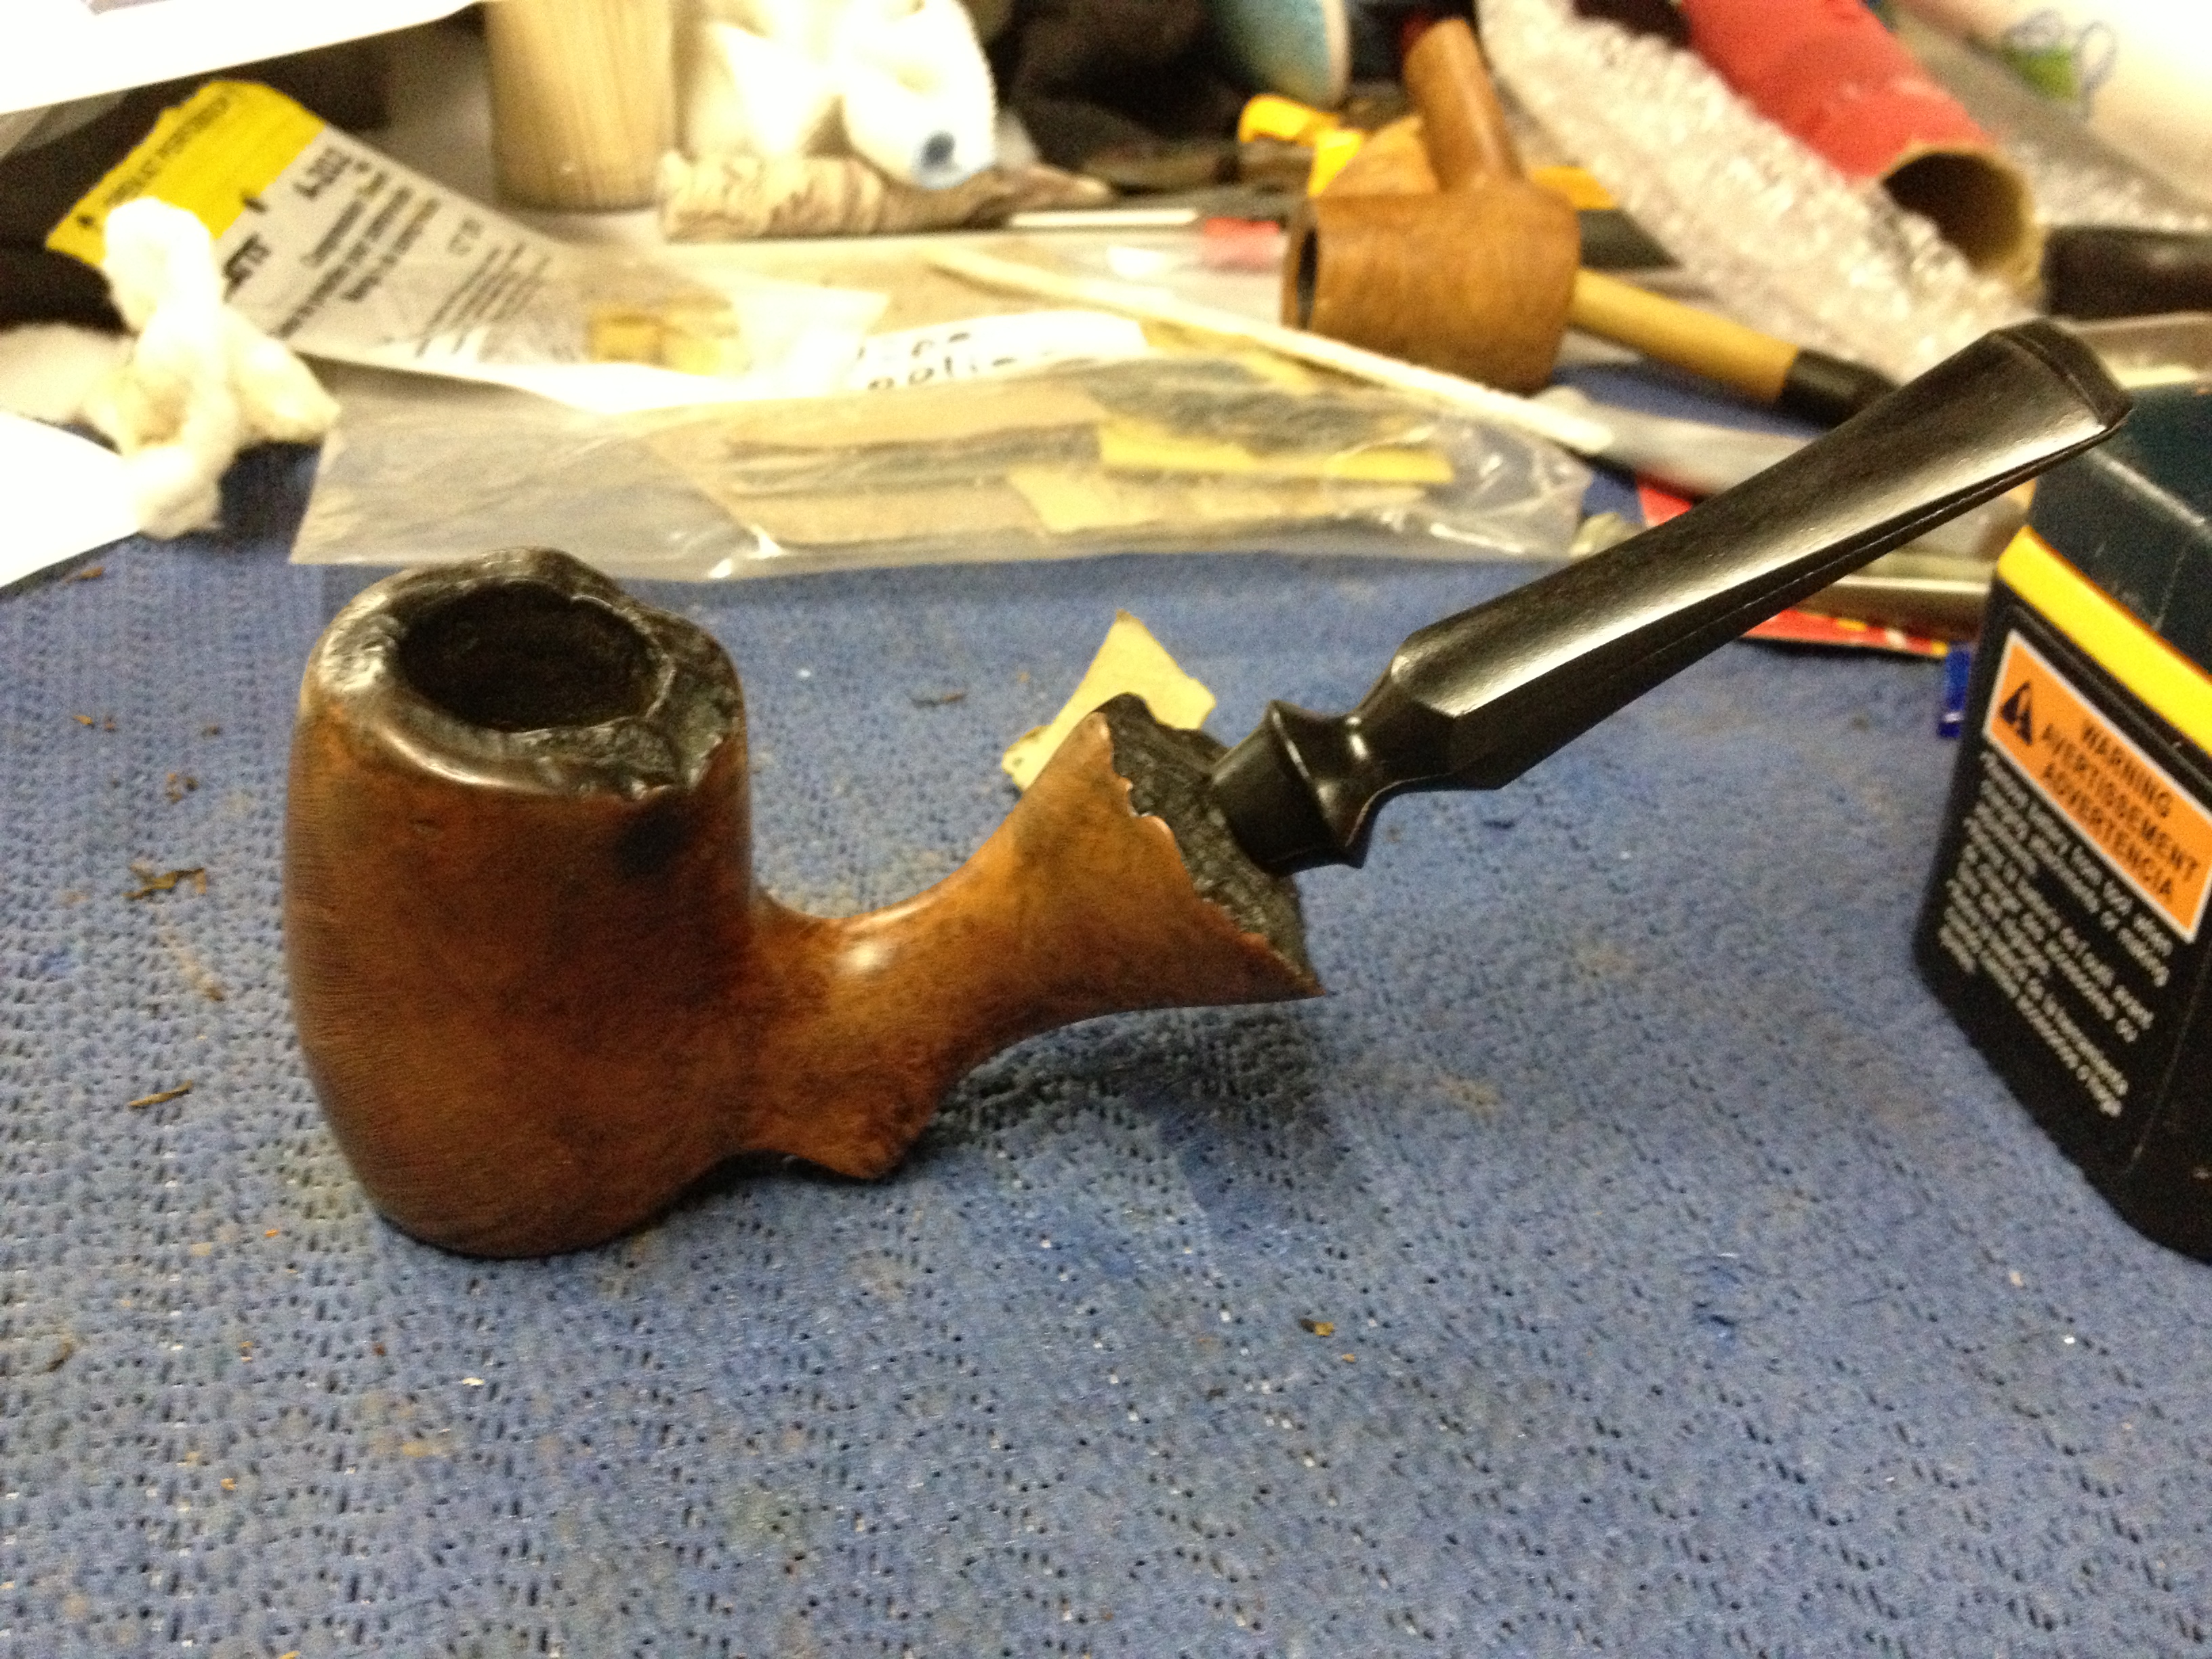
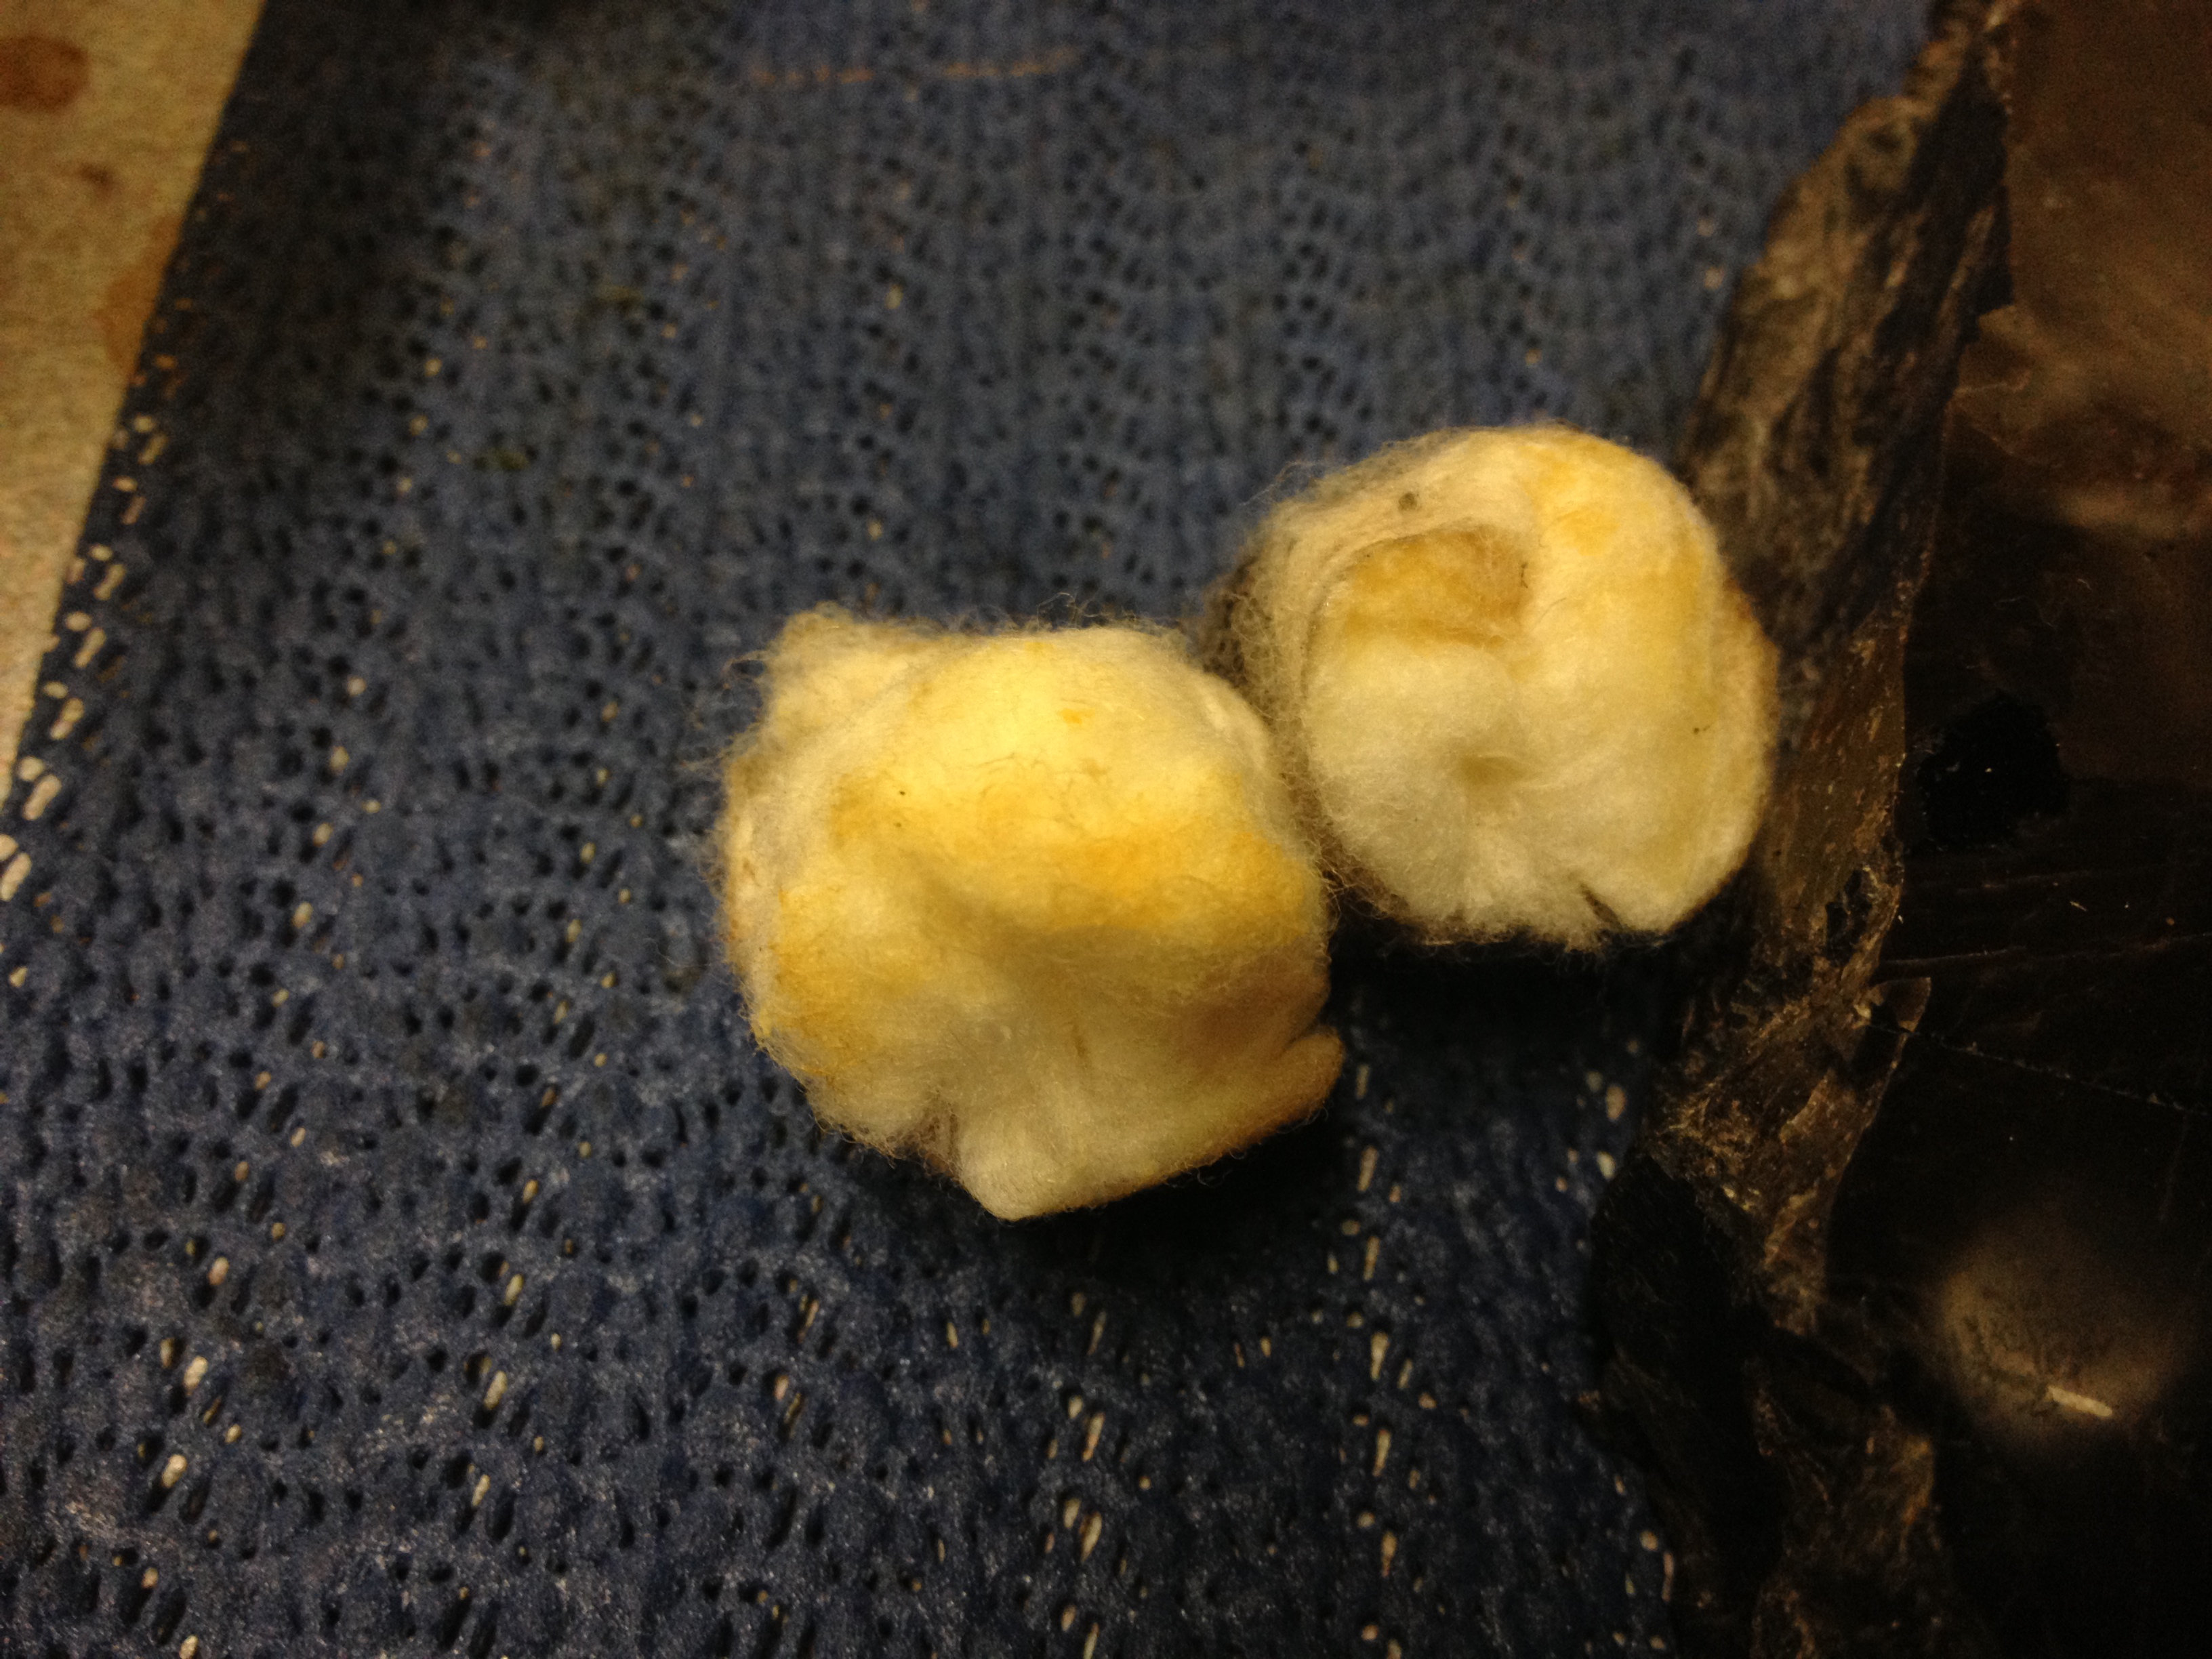
Now I turned my attention back to the fills. Taking the dental pick, I picked out the remaining fill material. I recently picked up a new product that I wanted to try on fills made by DAP and I thought this would be a good opportunity.IMG_7757

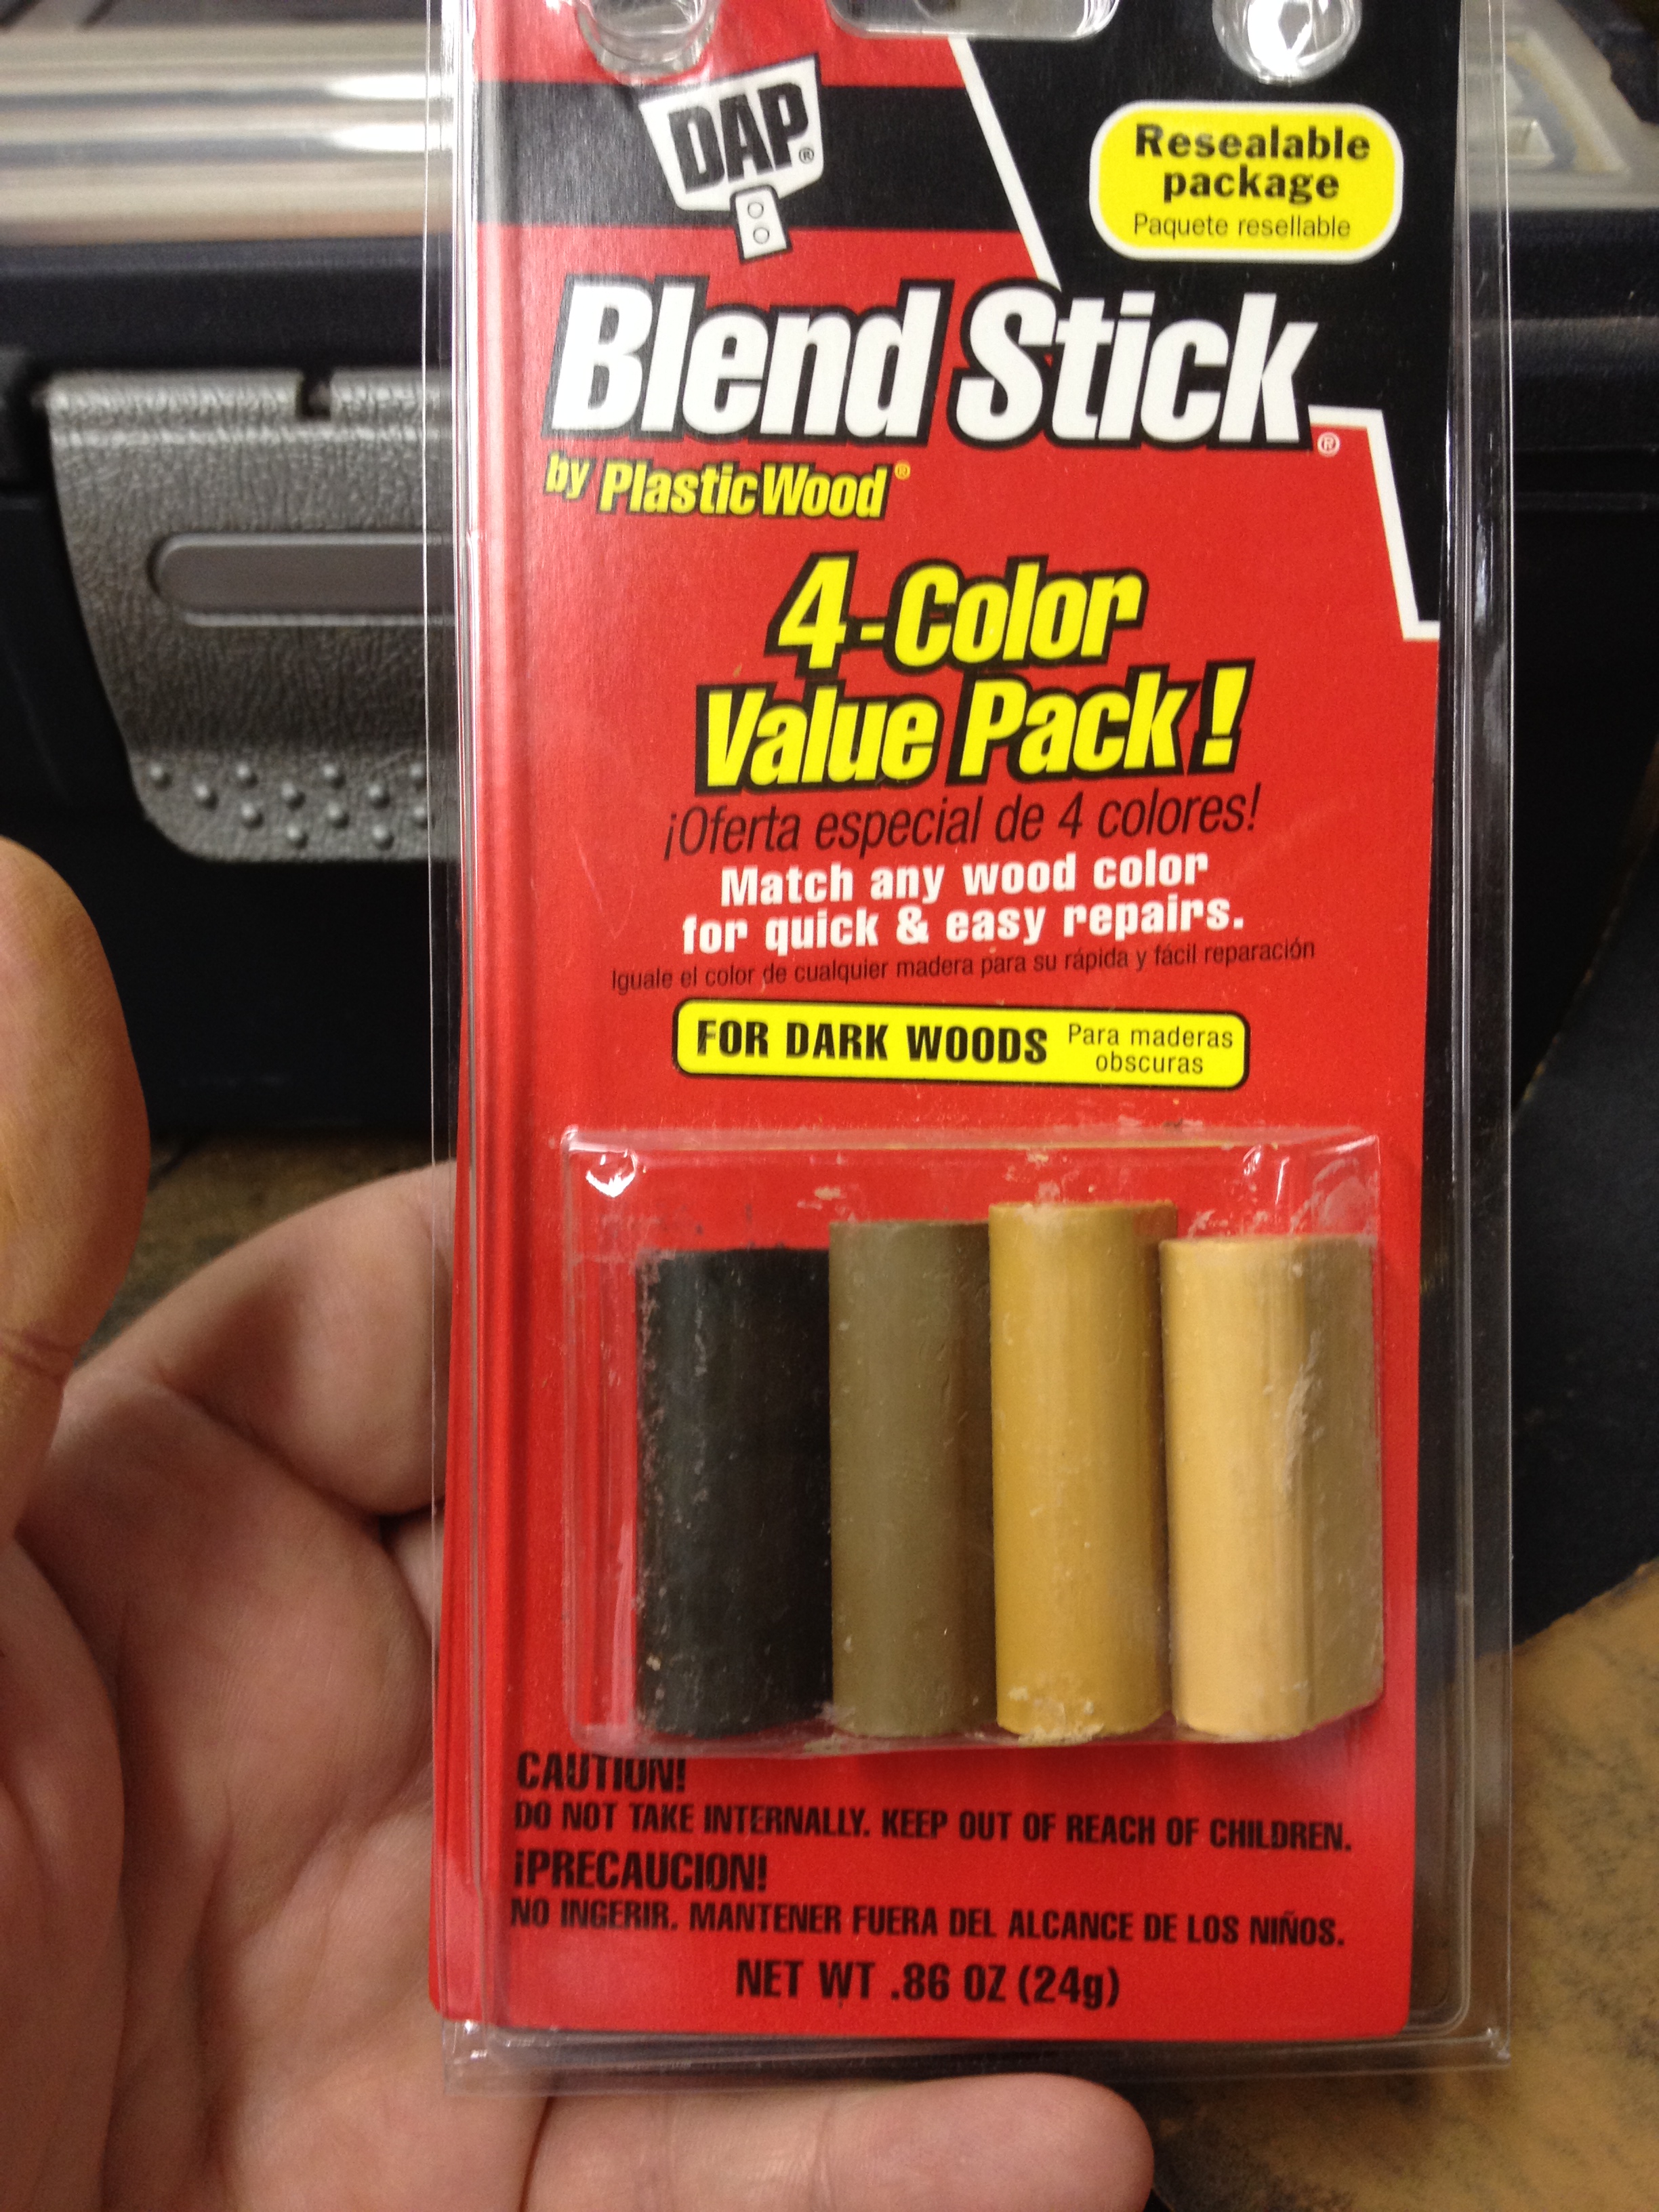
These sticks are a wax-like substance that softens with heat/friction. I chose the darkest of the four sticks and rubbed it into the two largest fill areas. The sticks worked easily into the areas that needed filled:

IMG_7758 IMG_7759

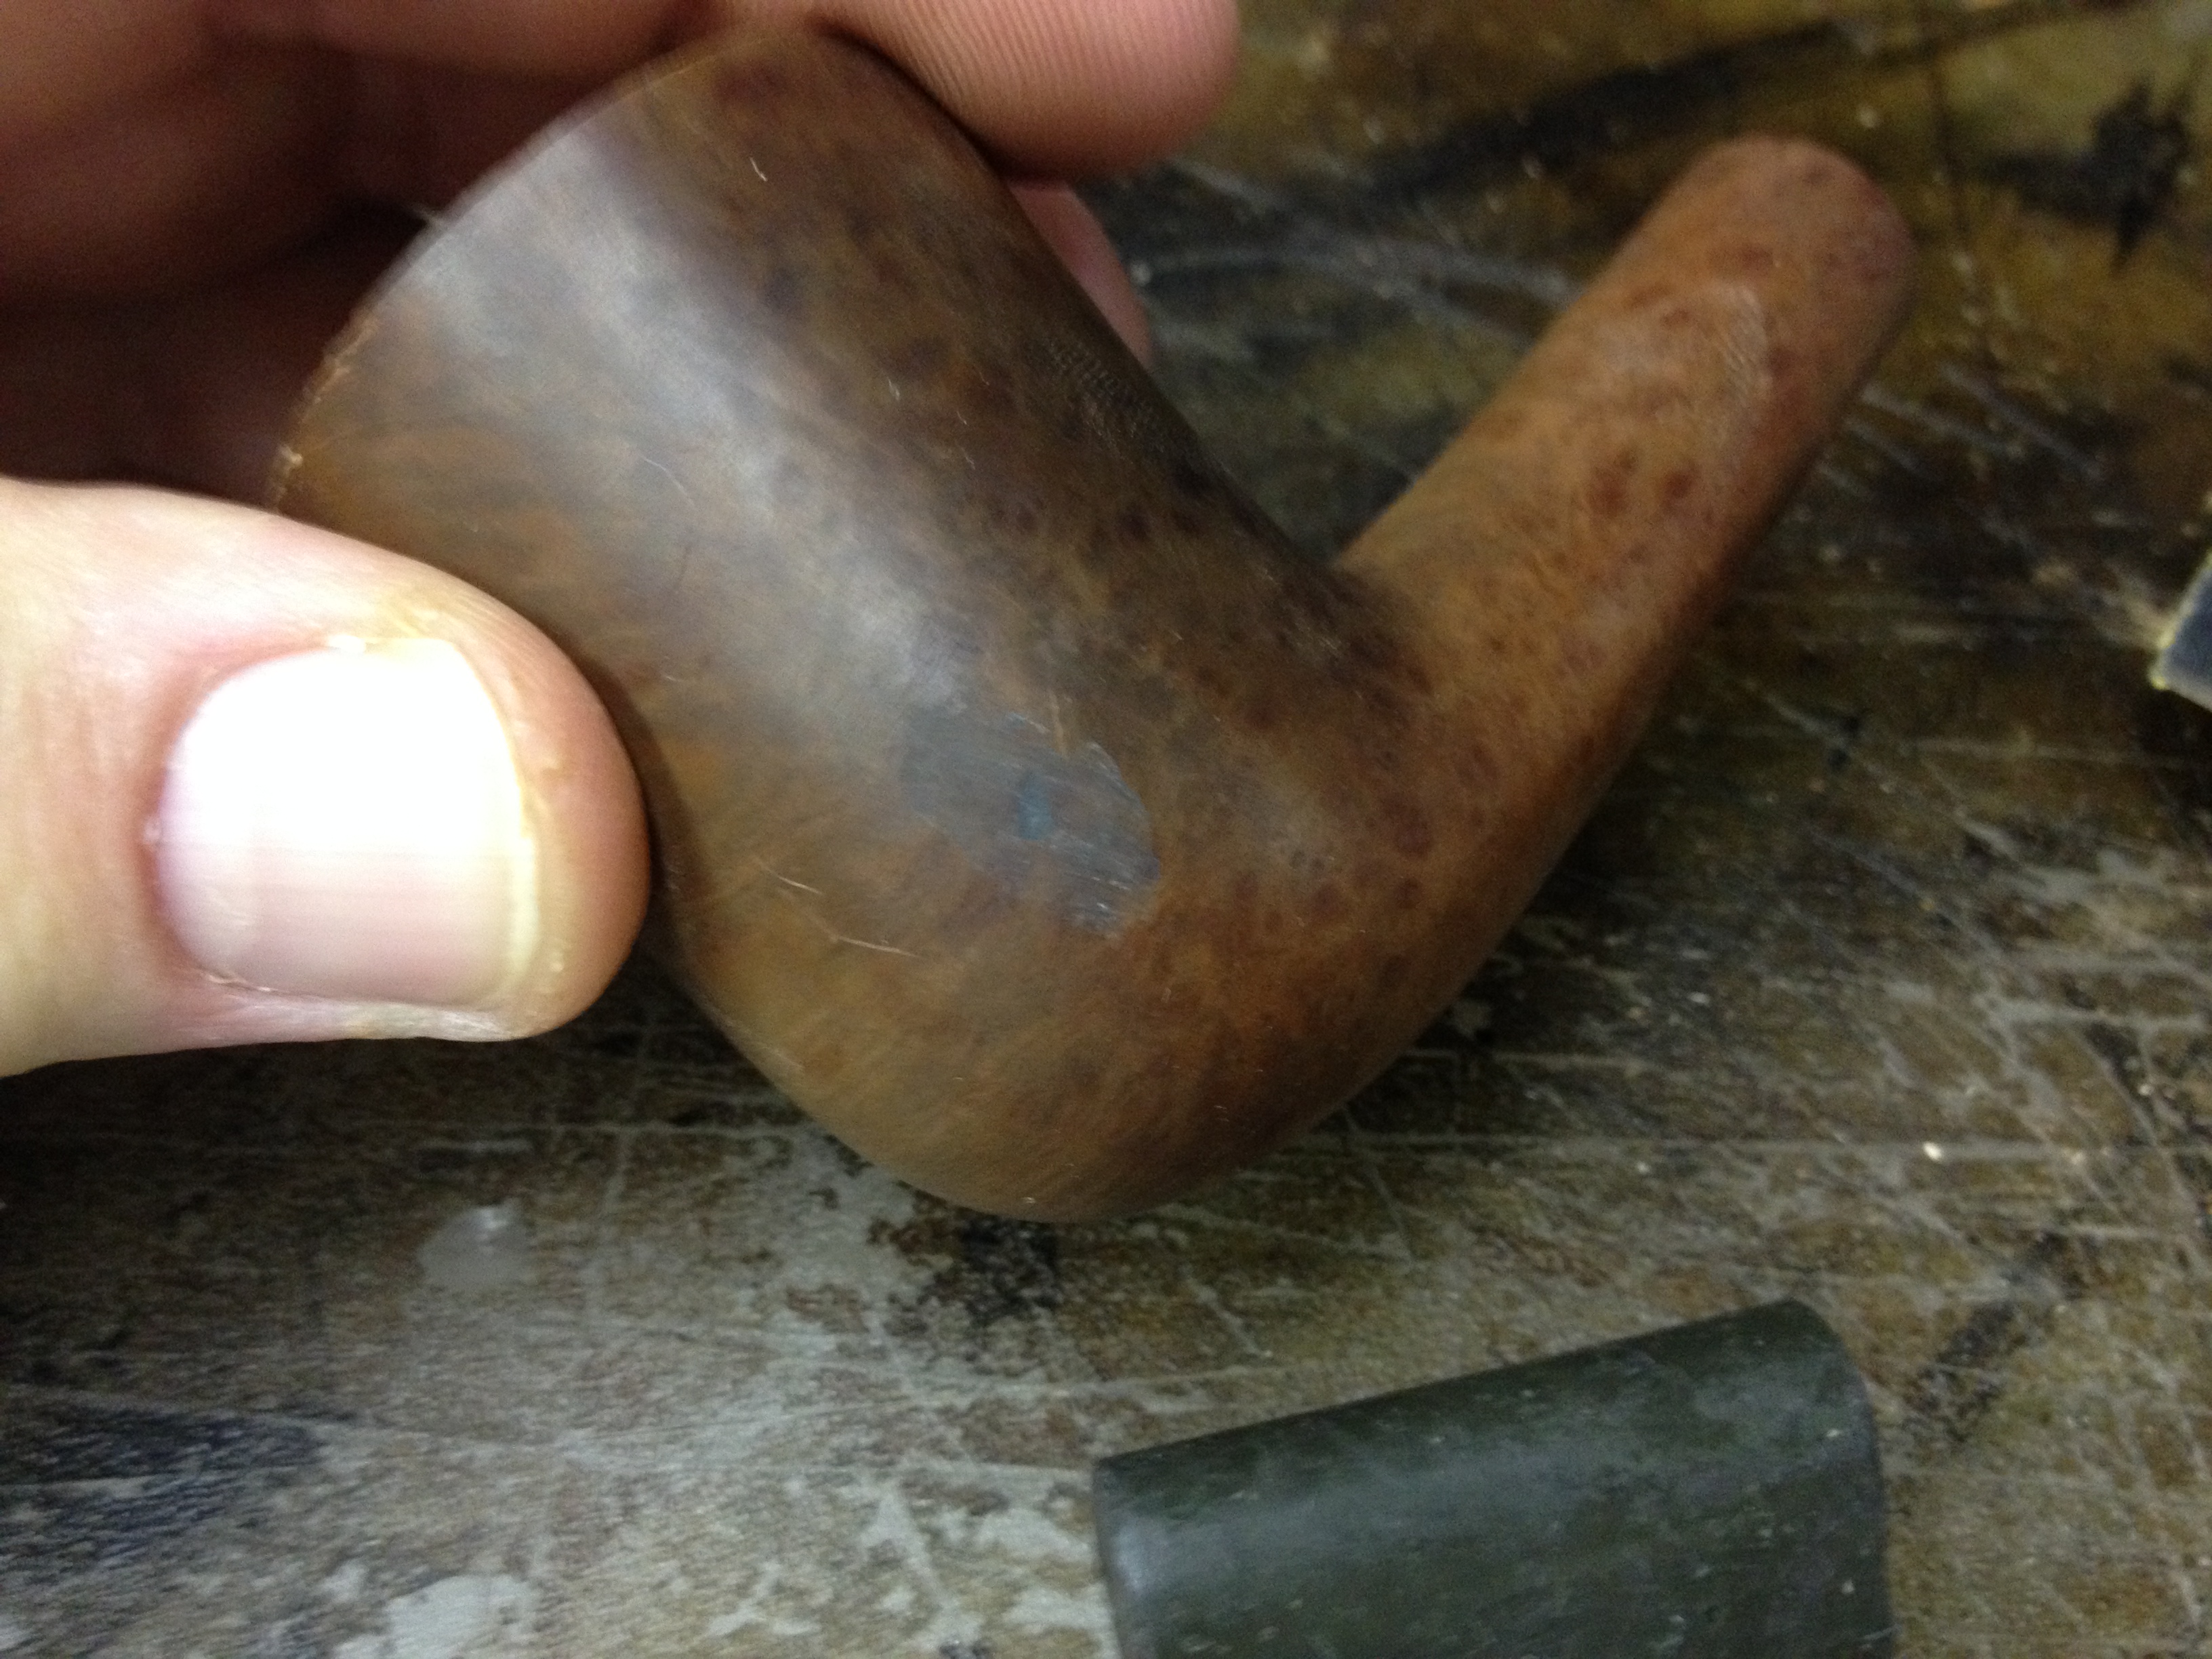
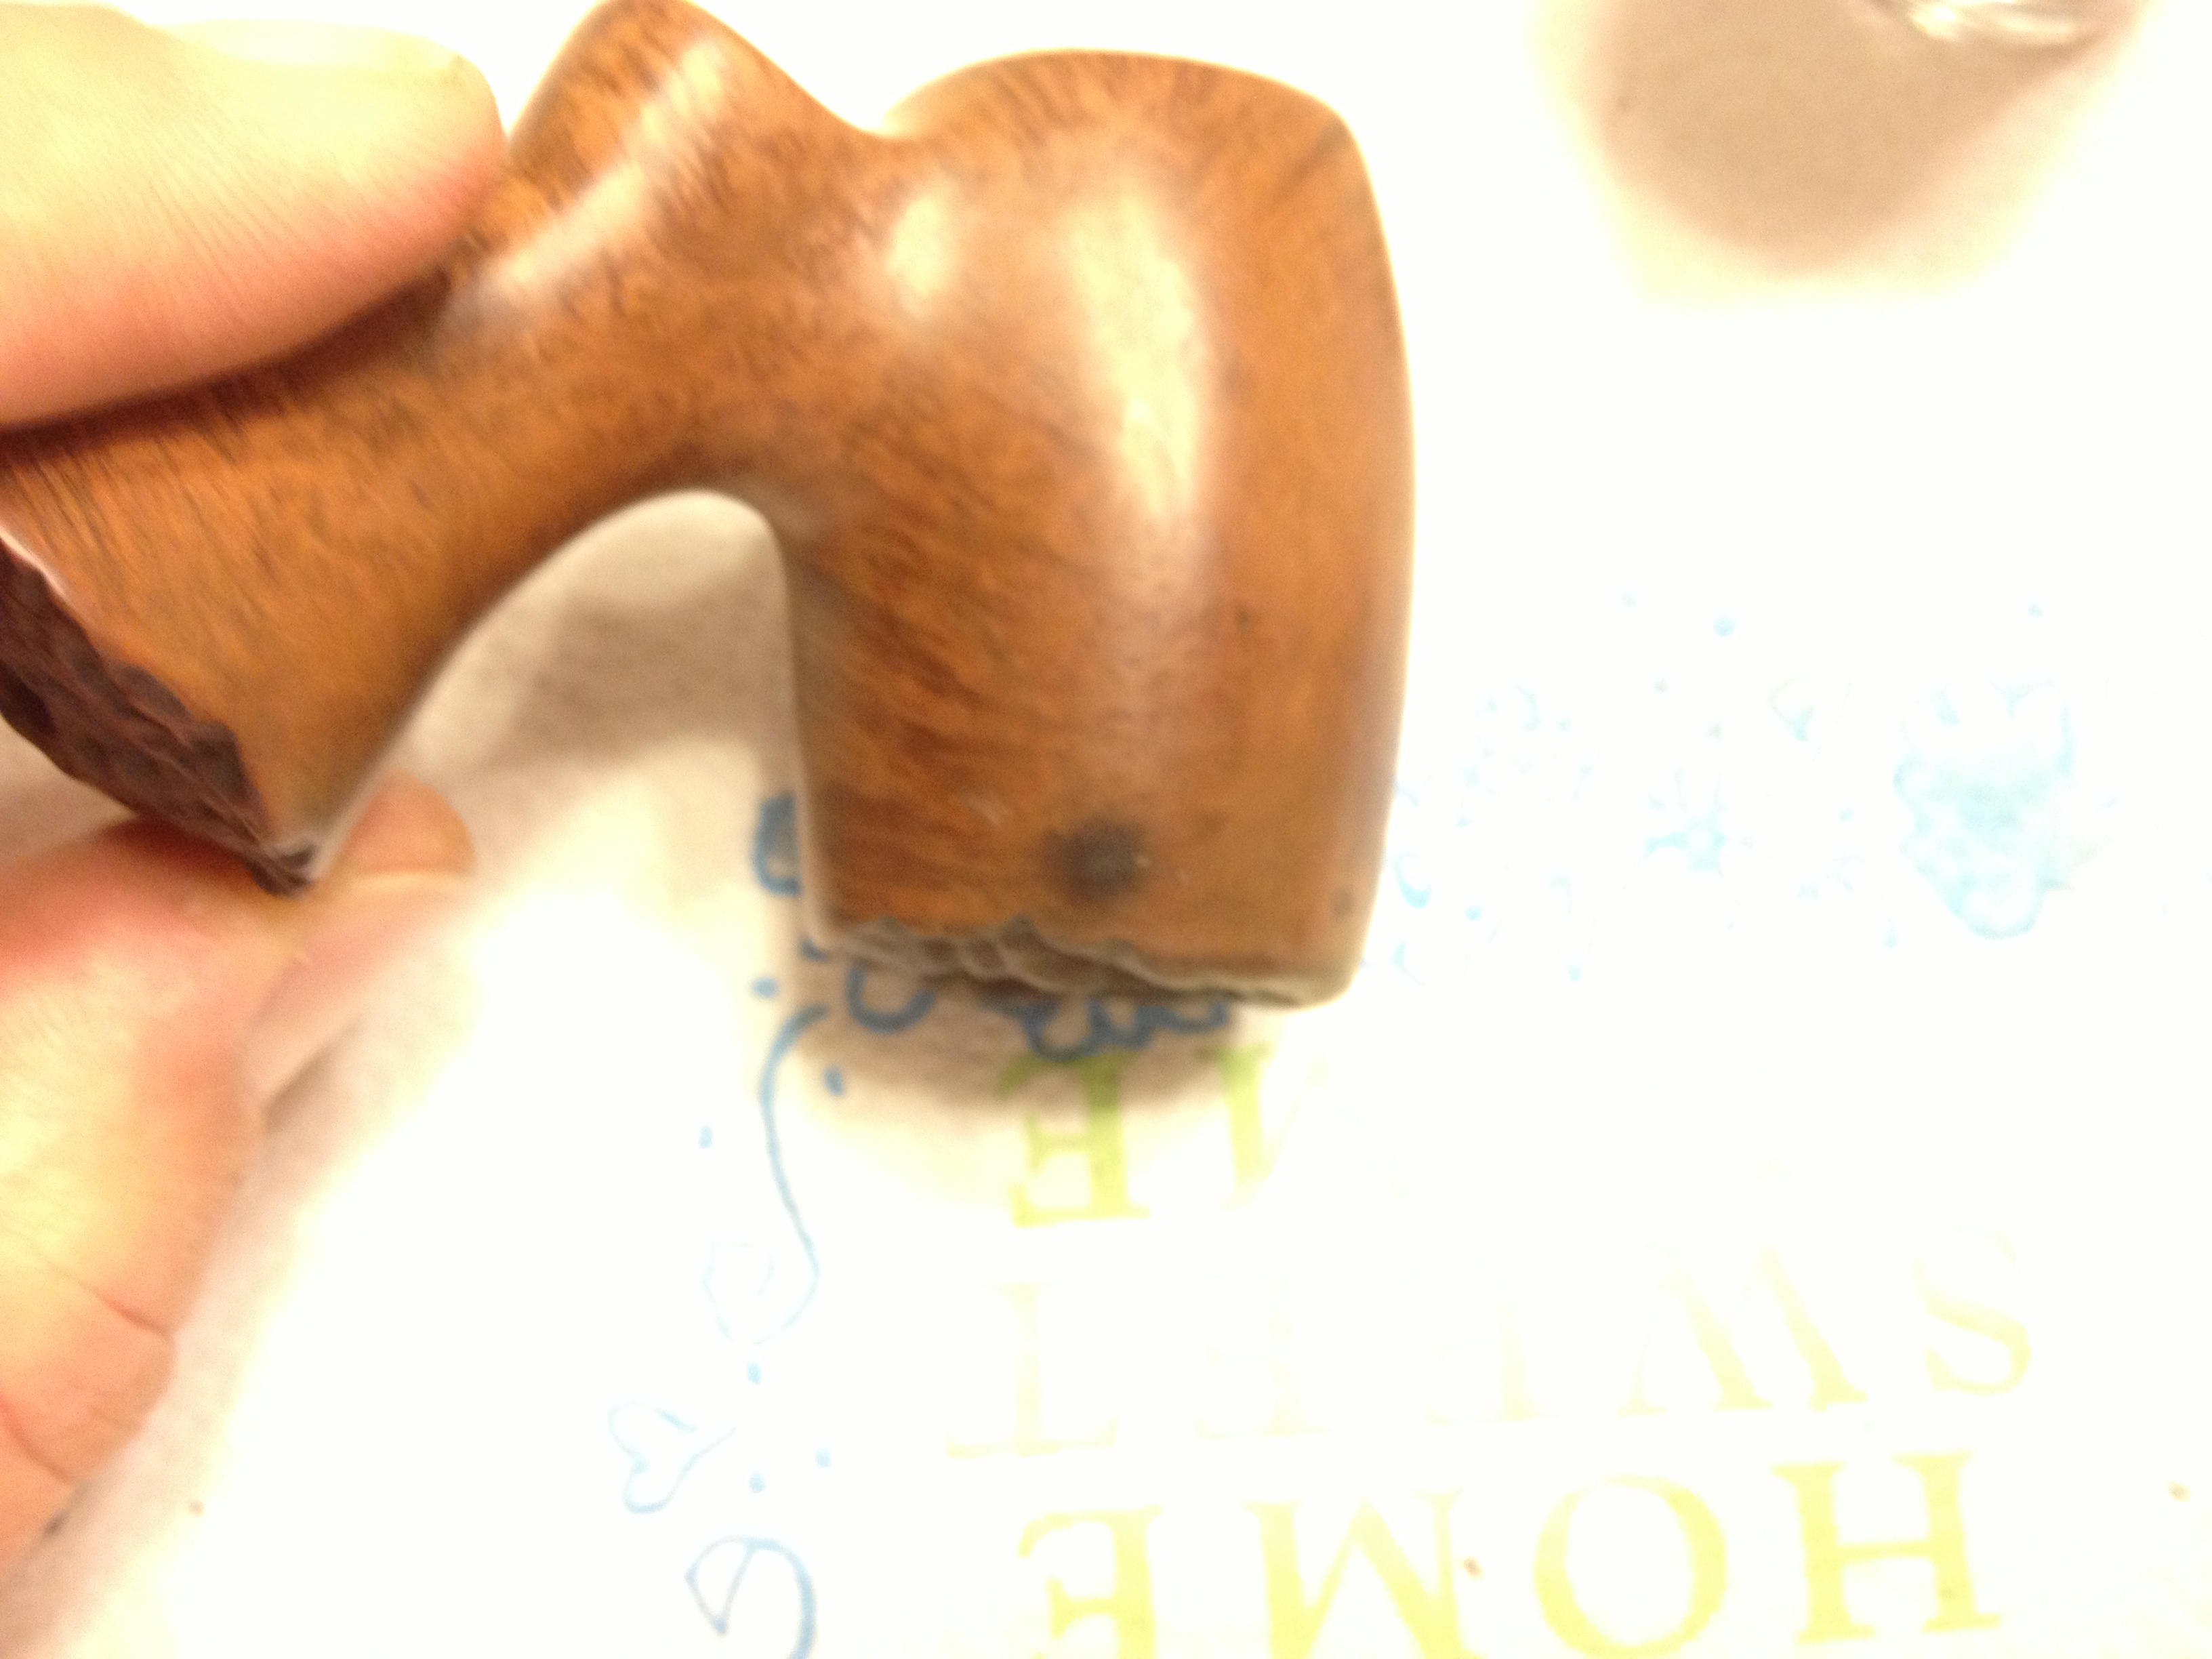
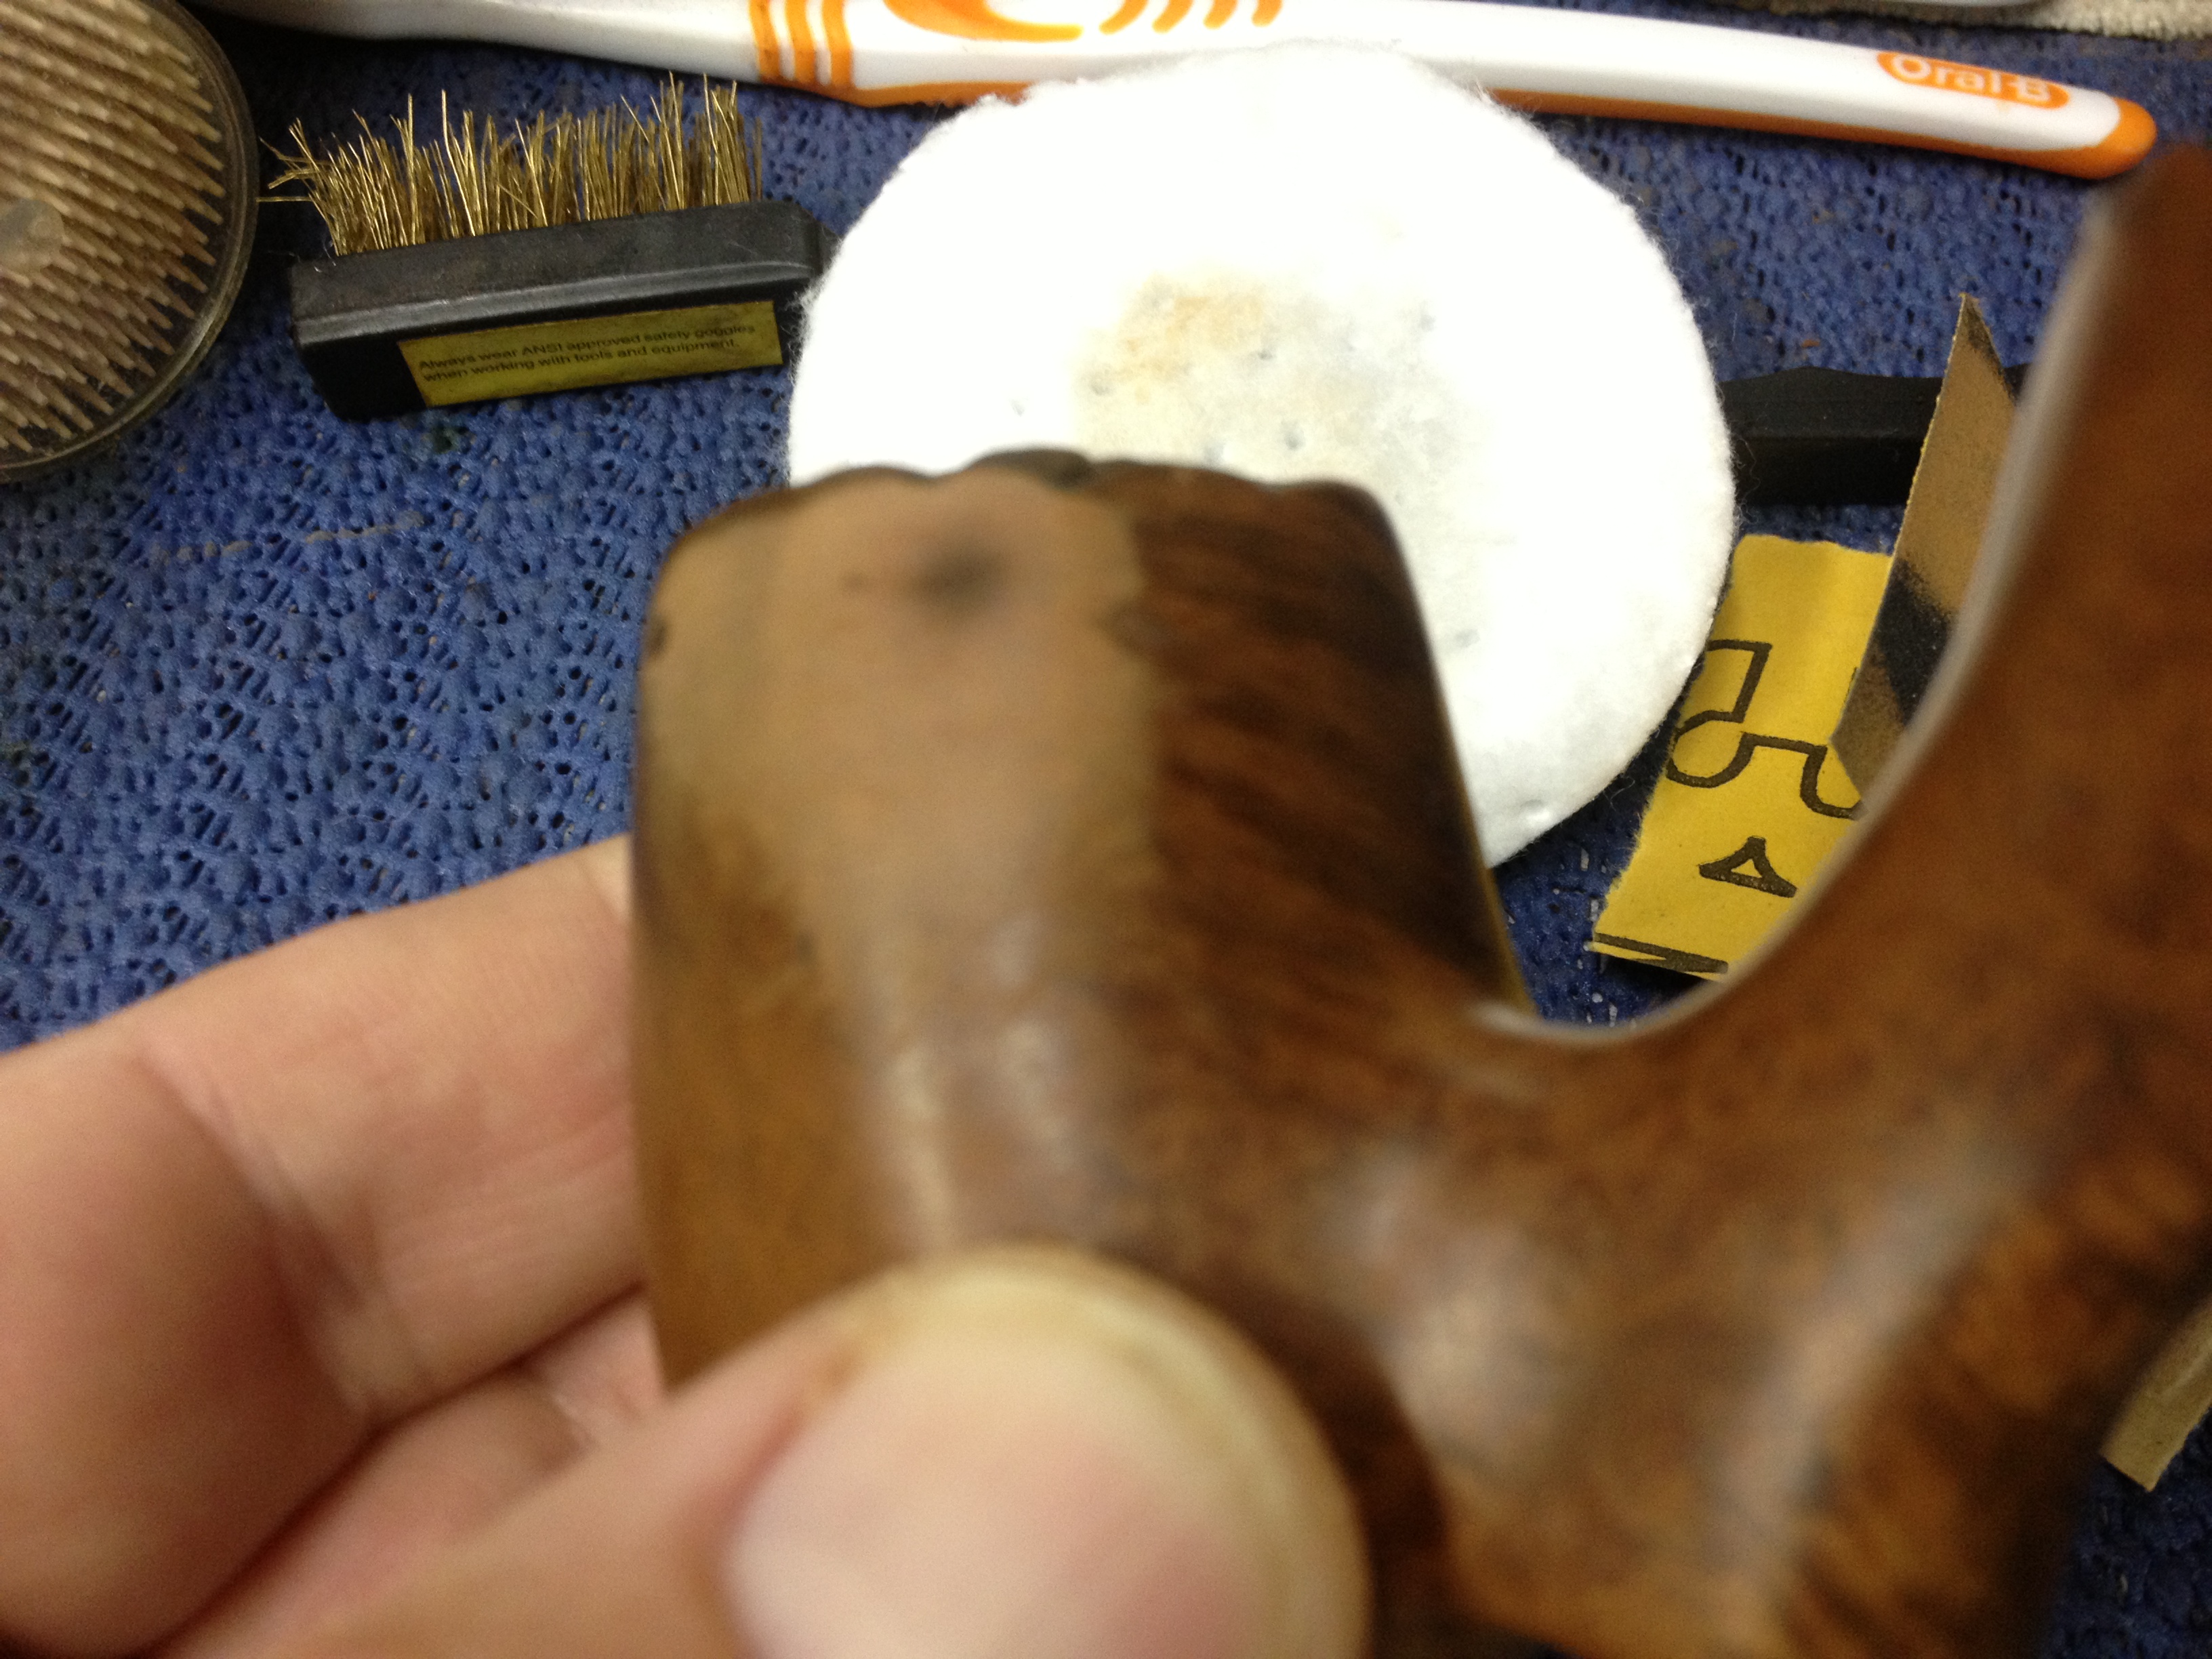
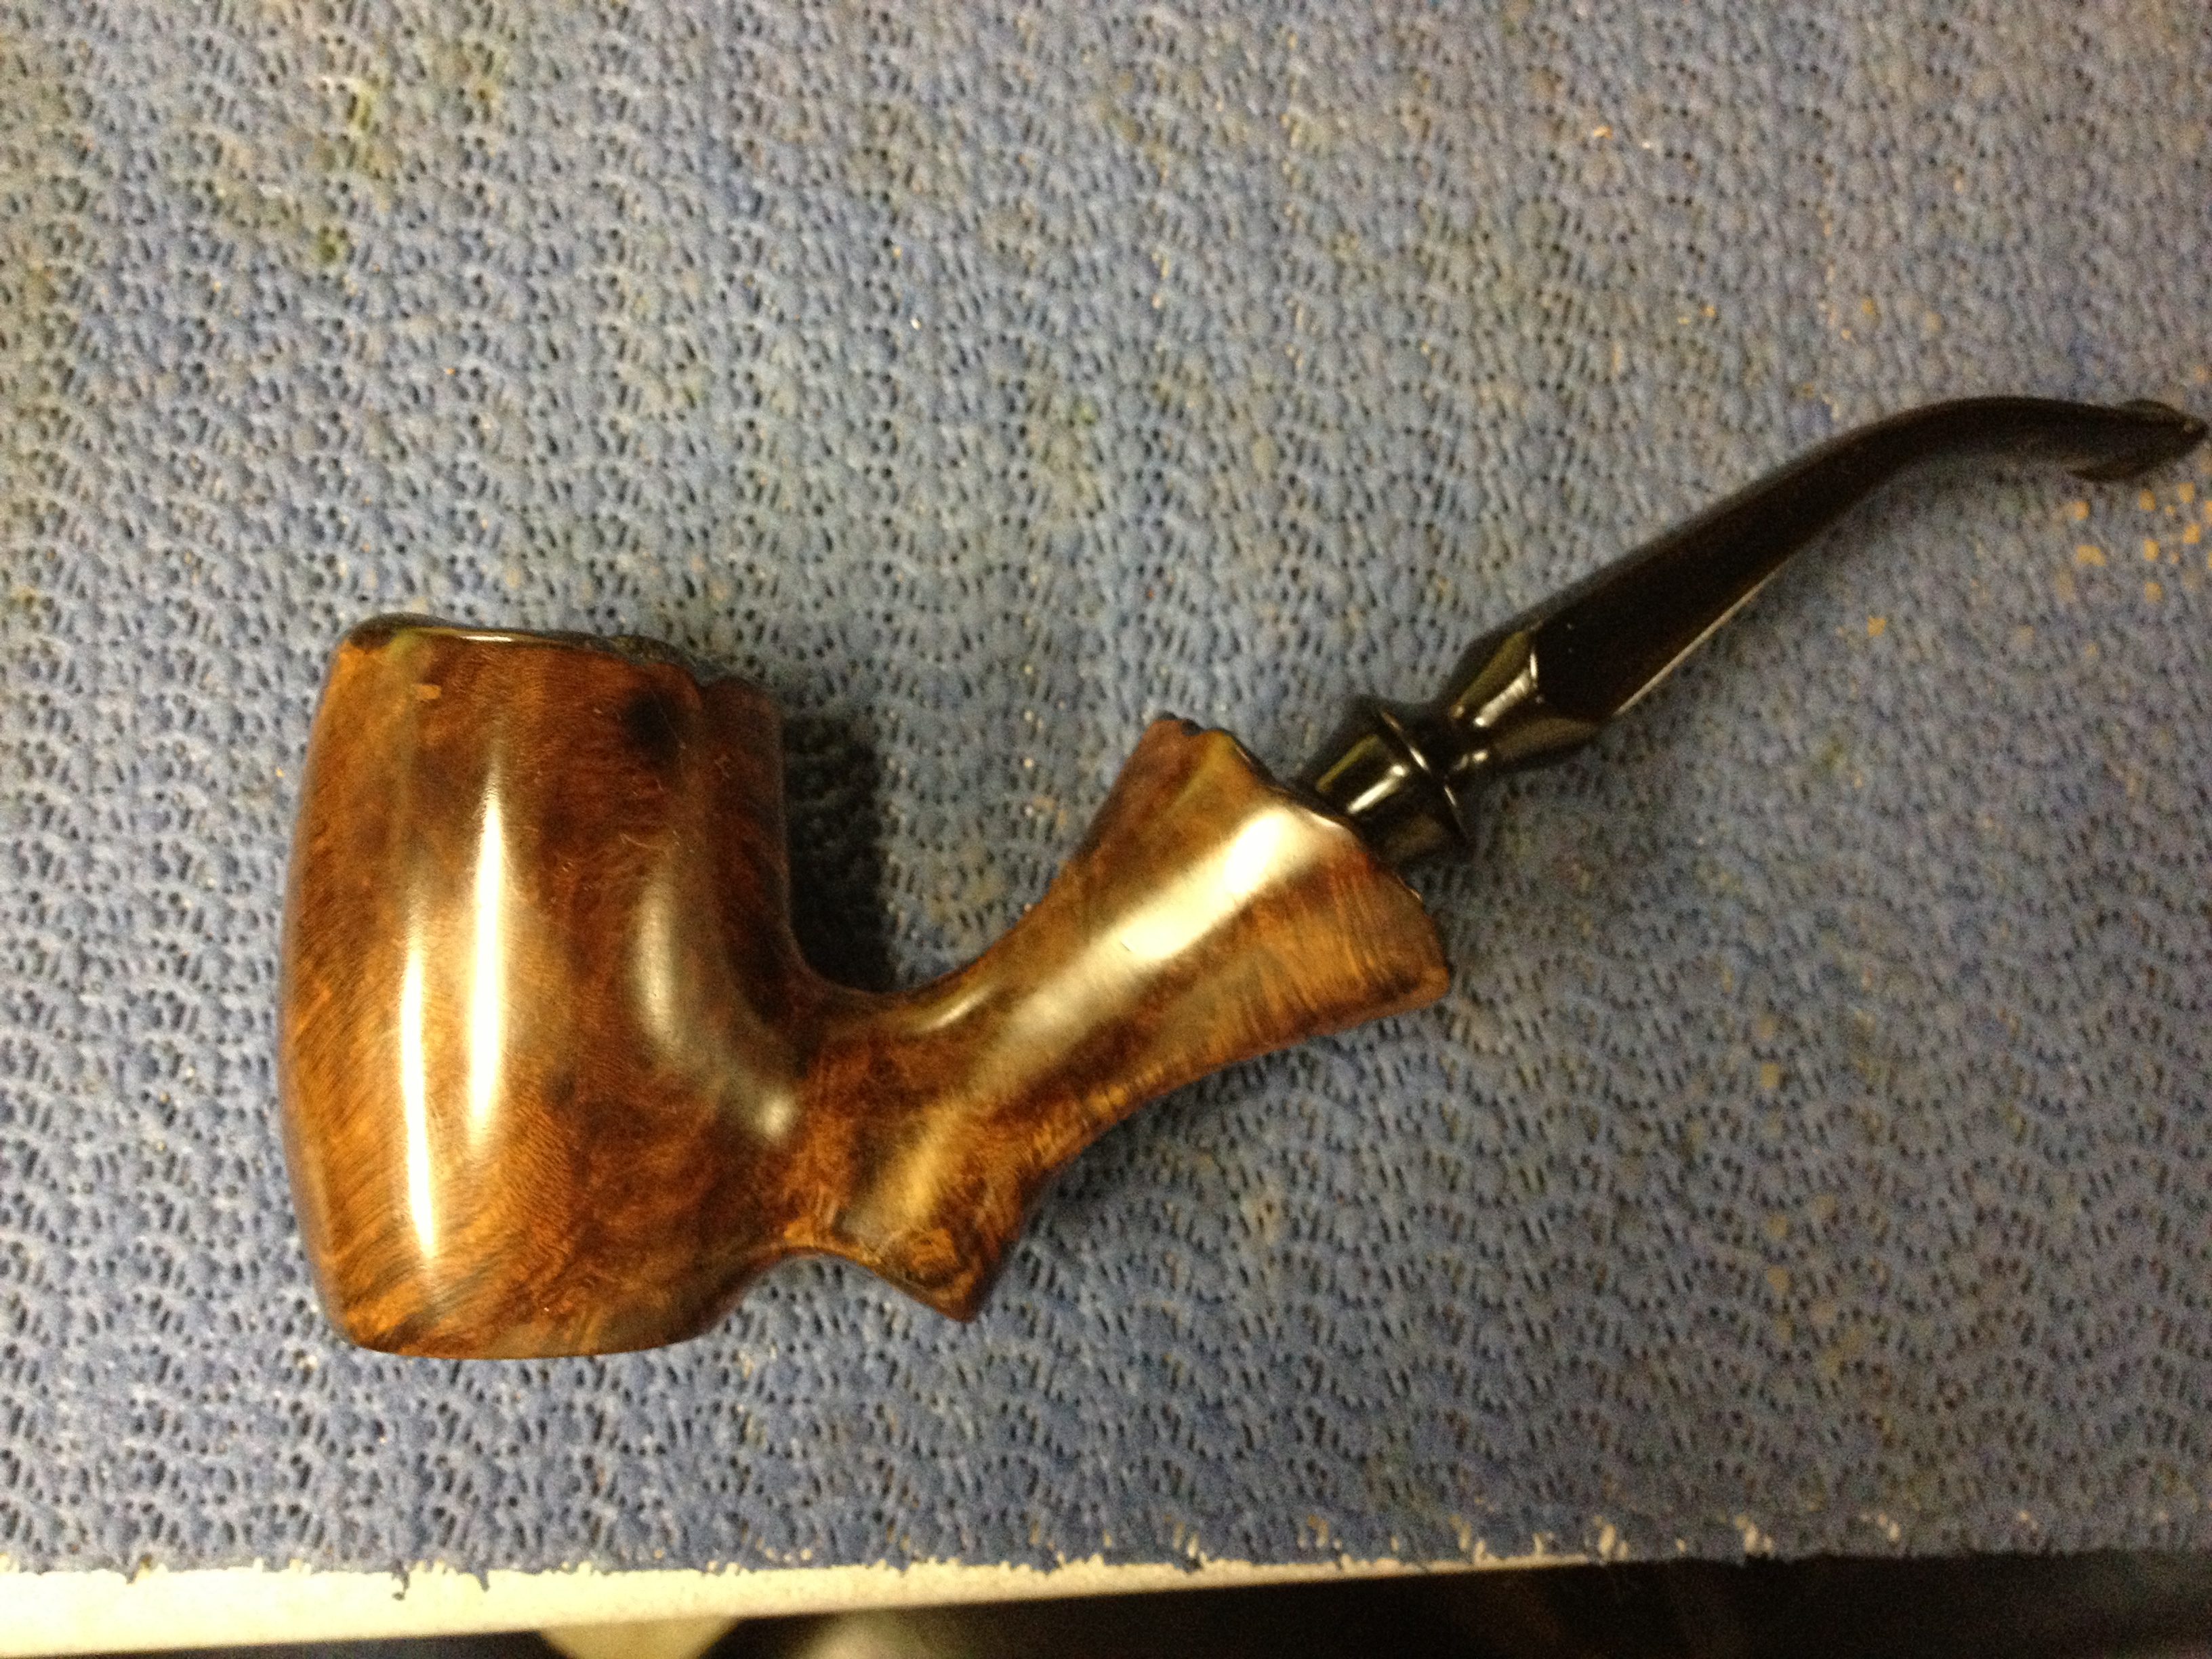
I buffed the excess off lightly with an old cotton rag, getting it into the fill well and just below the surface. I then put a bit of super glue over the new fills and let it dry. After it dried I sanded the fills back down to flush. There were also some areas that needed small scratches/marks sanded out on the bottom of the stummel so I did that at this time, too.

IMG_7764 IMG_7765 IMG_7766

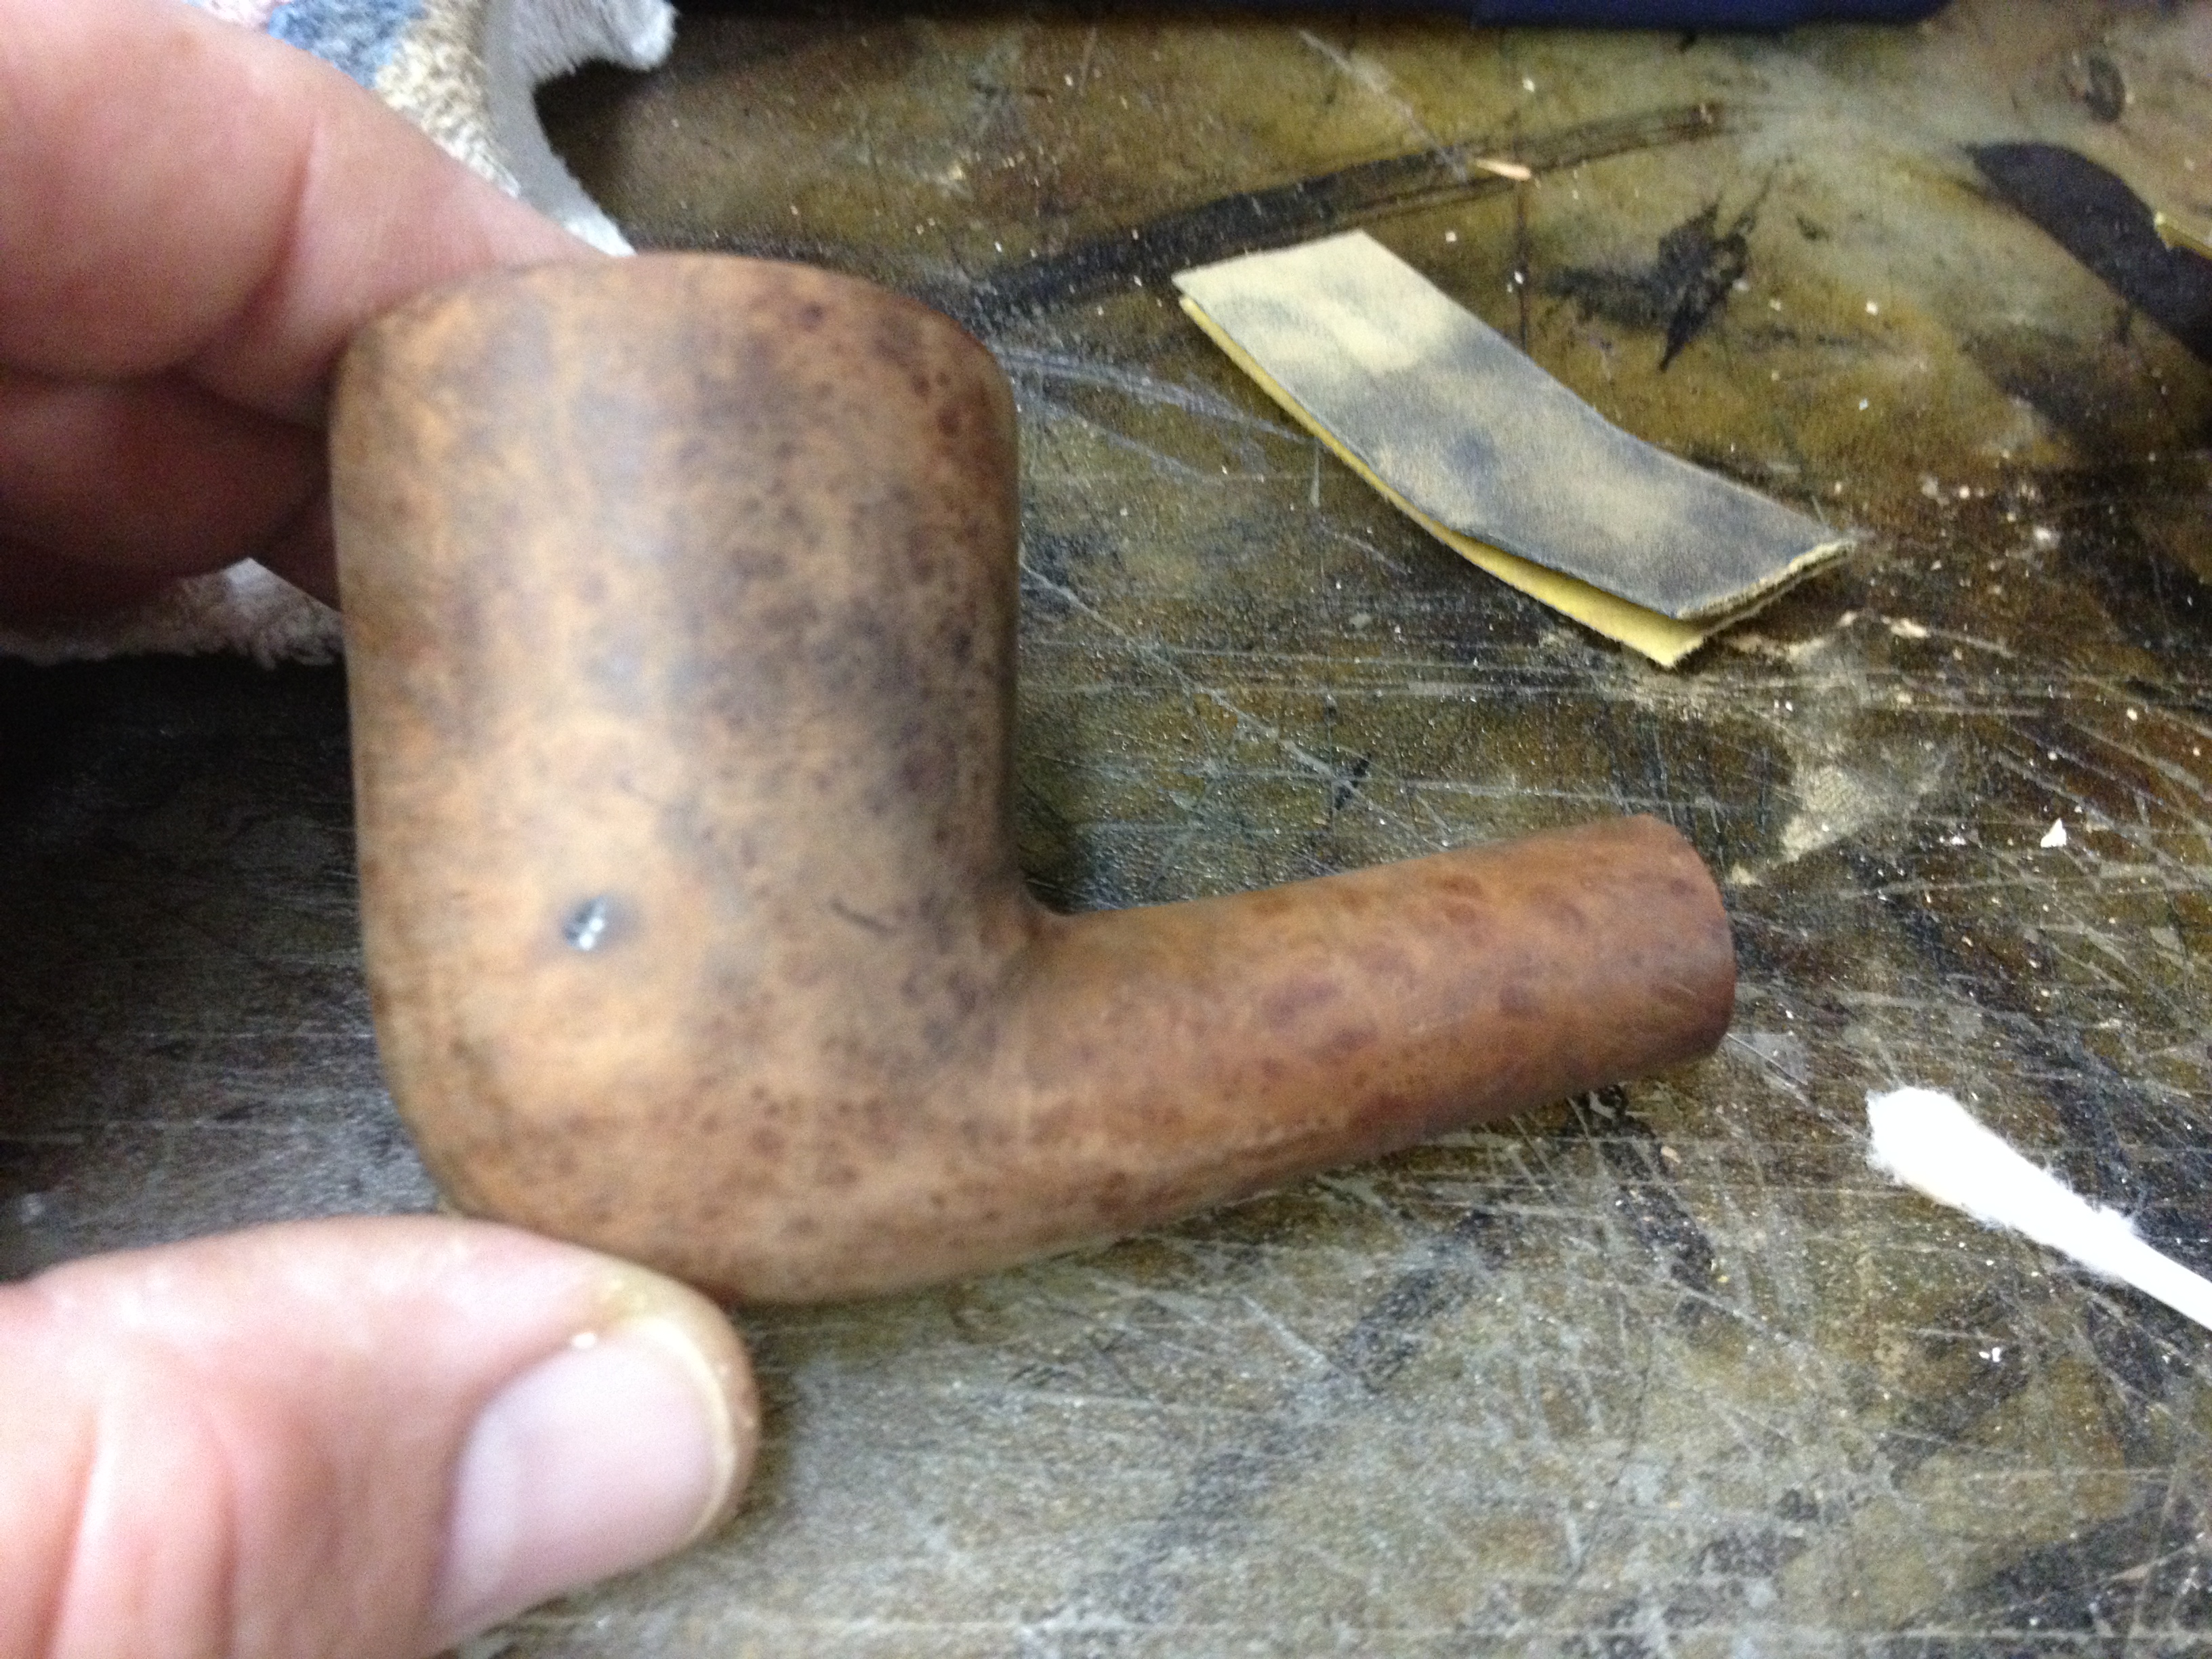
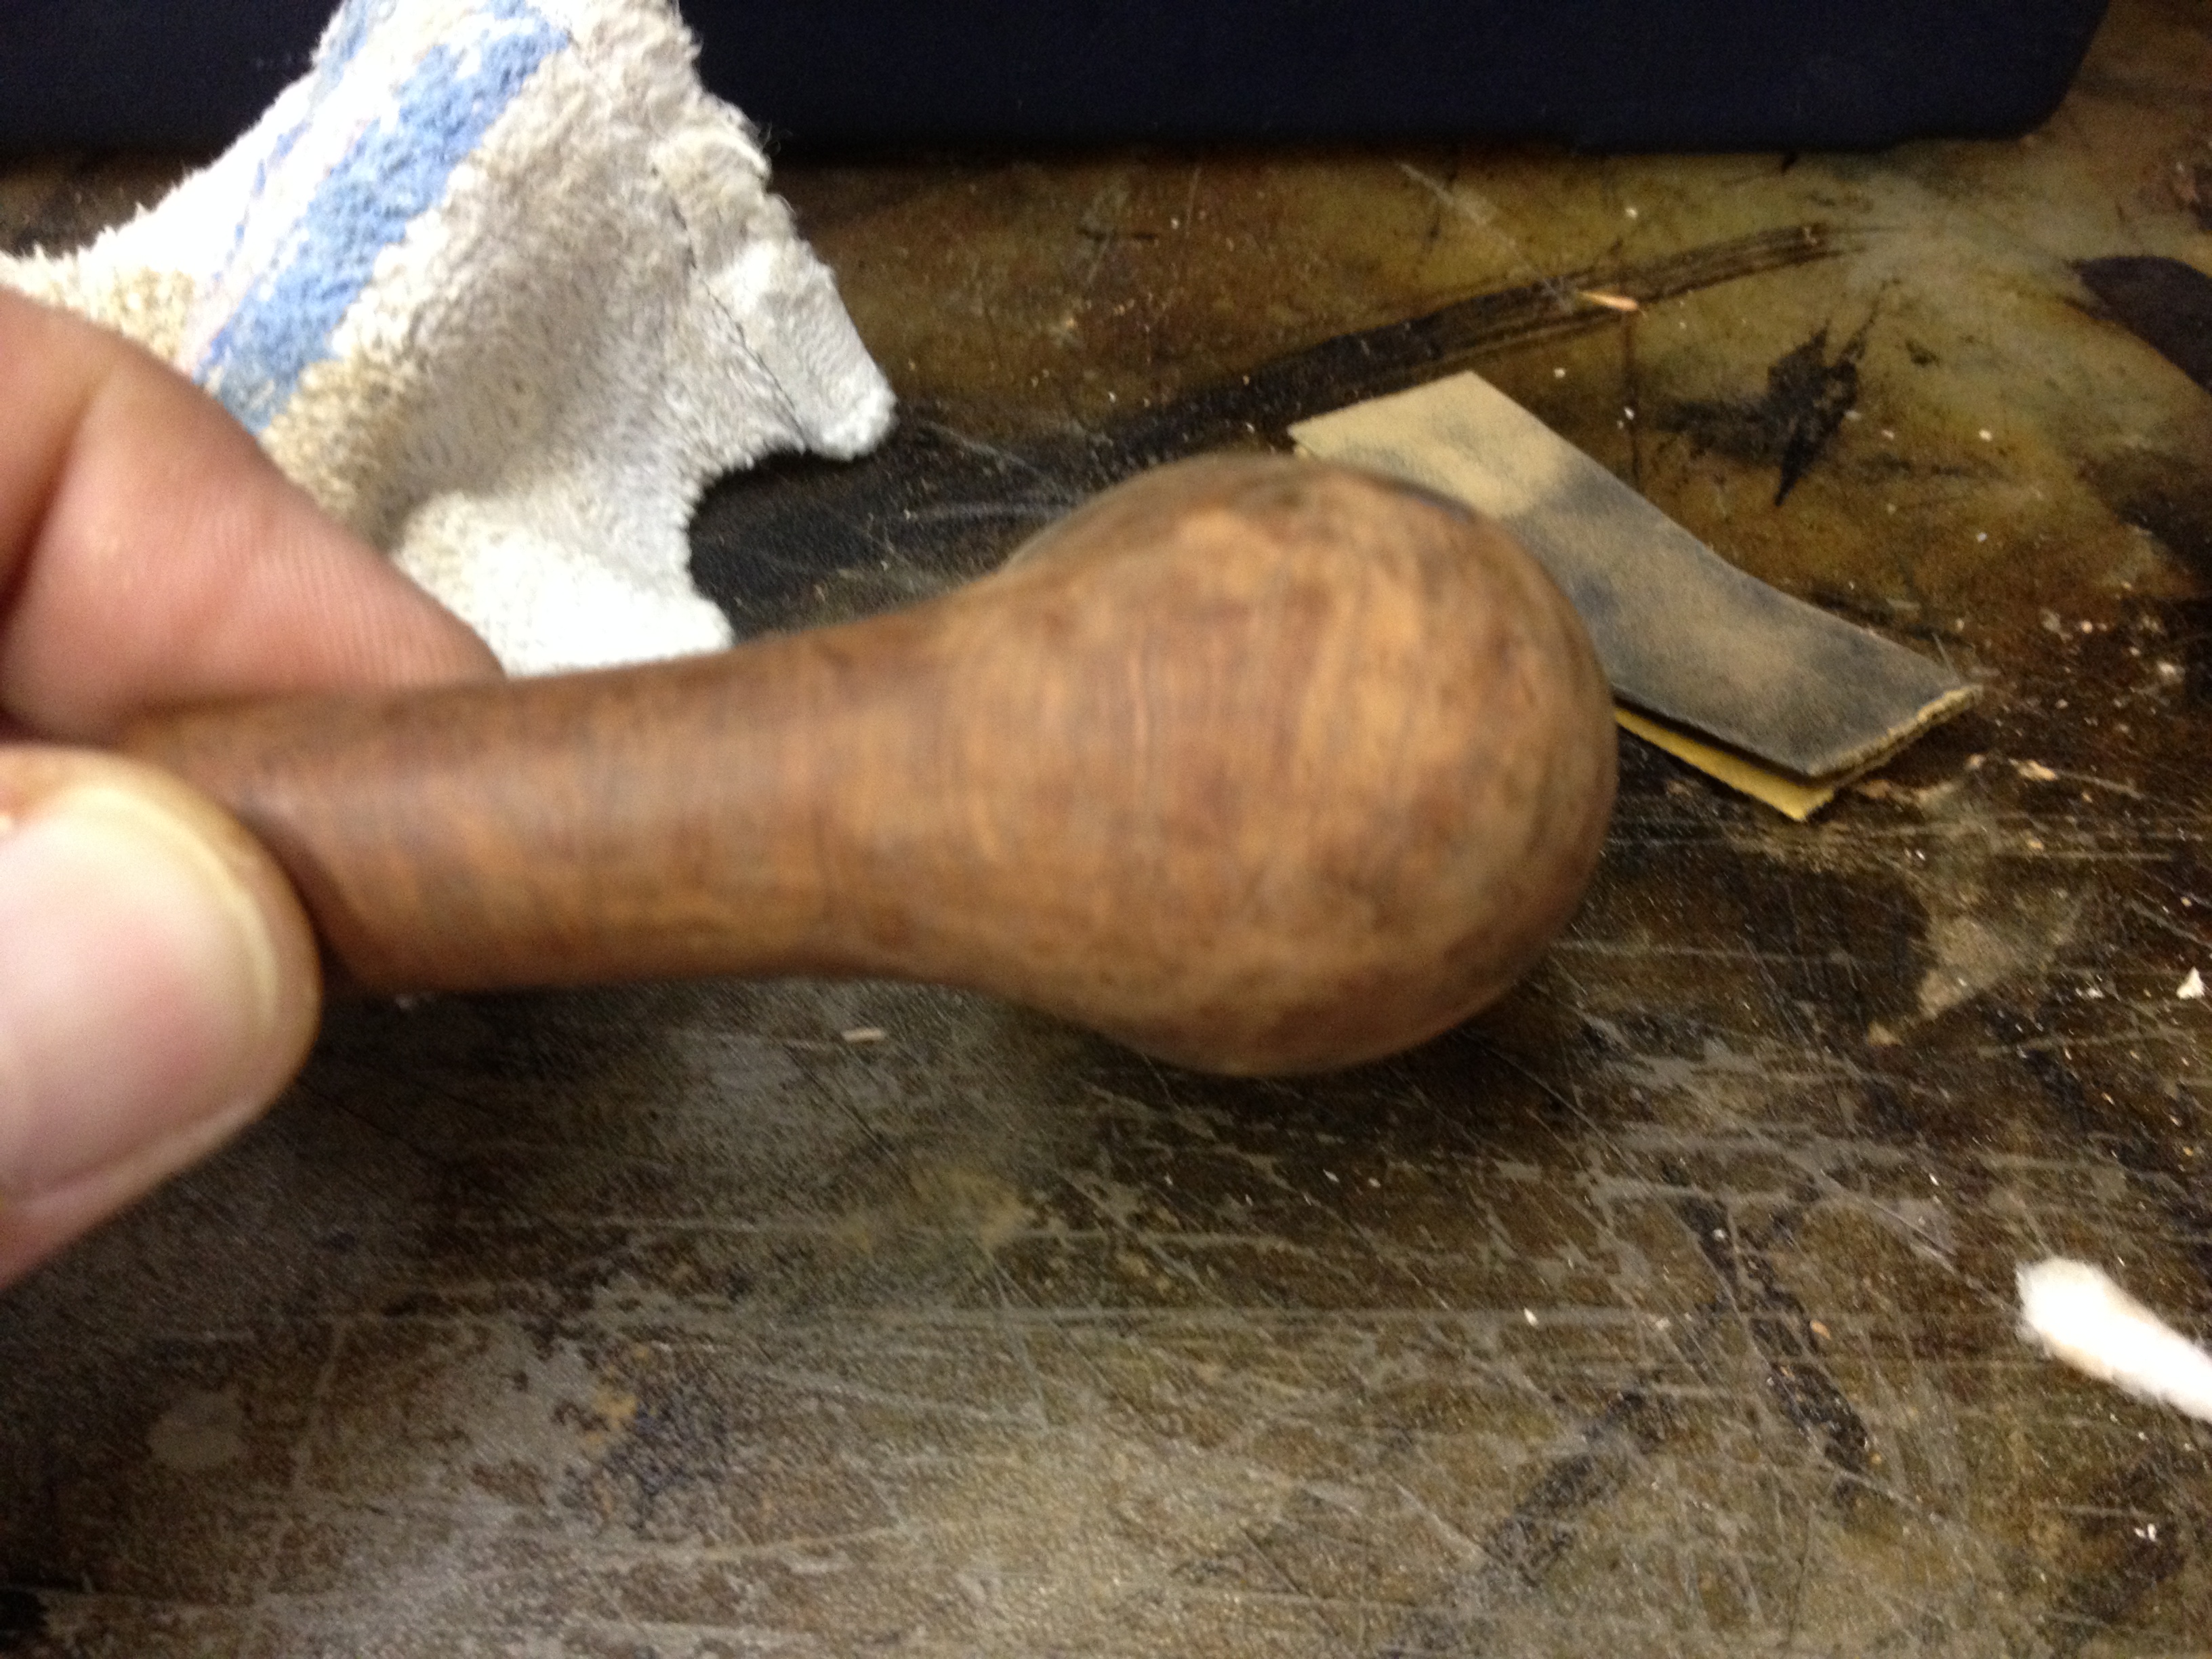
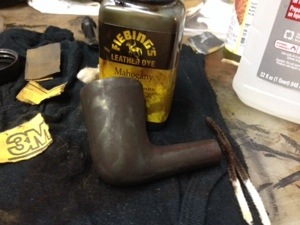
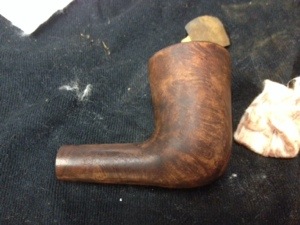
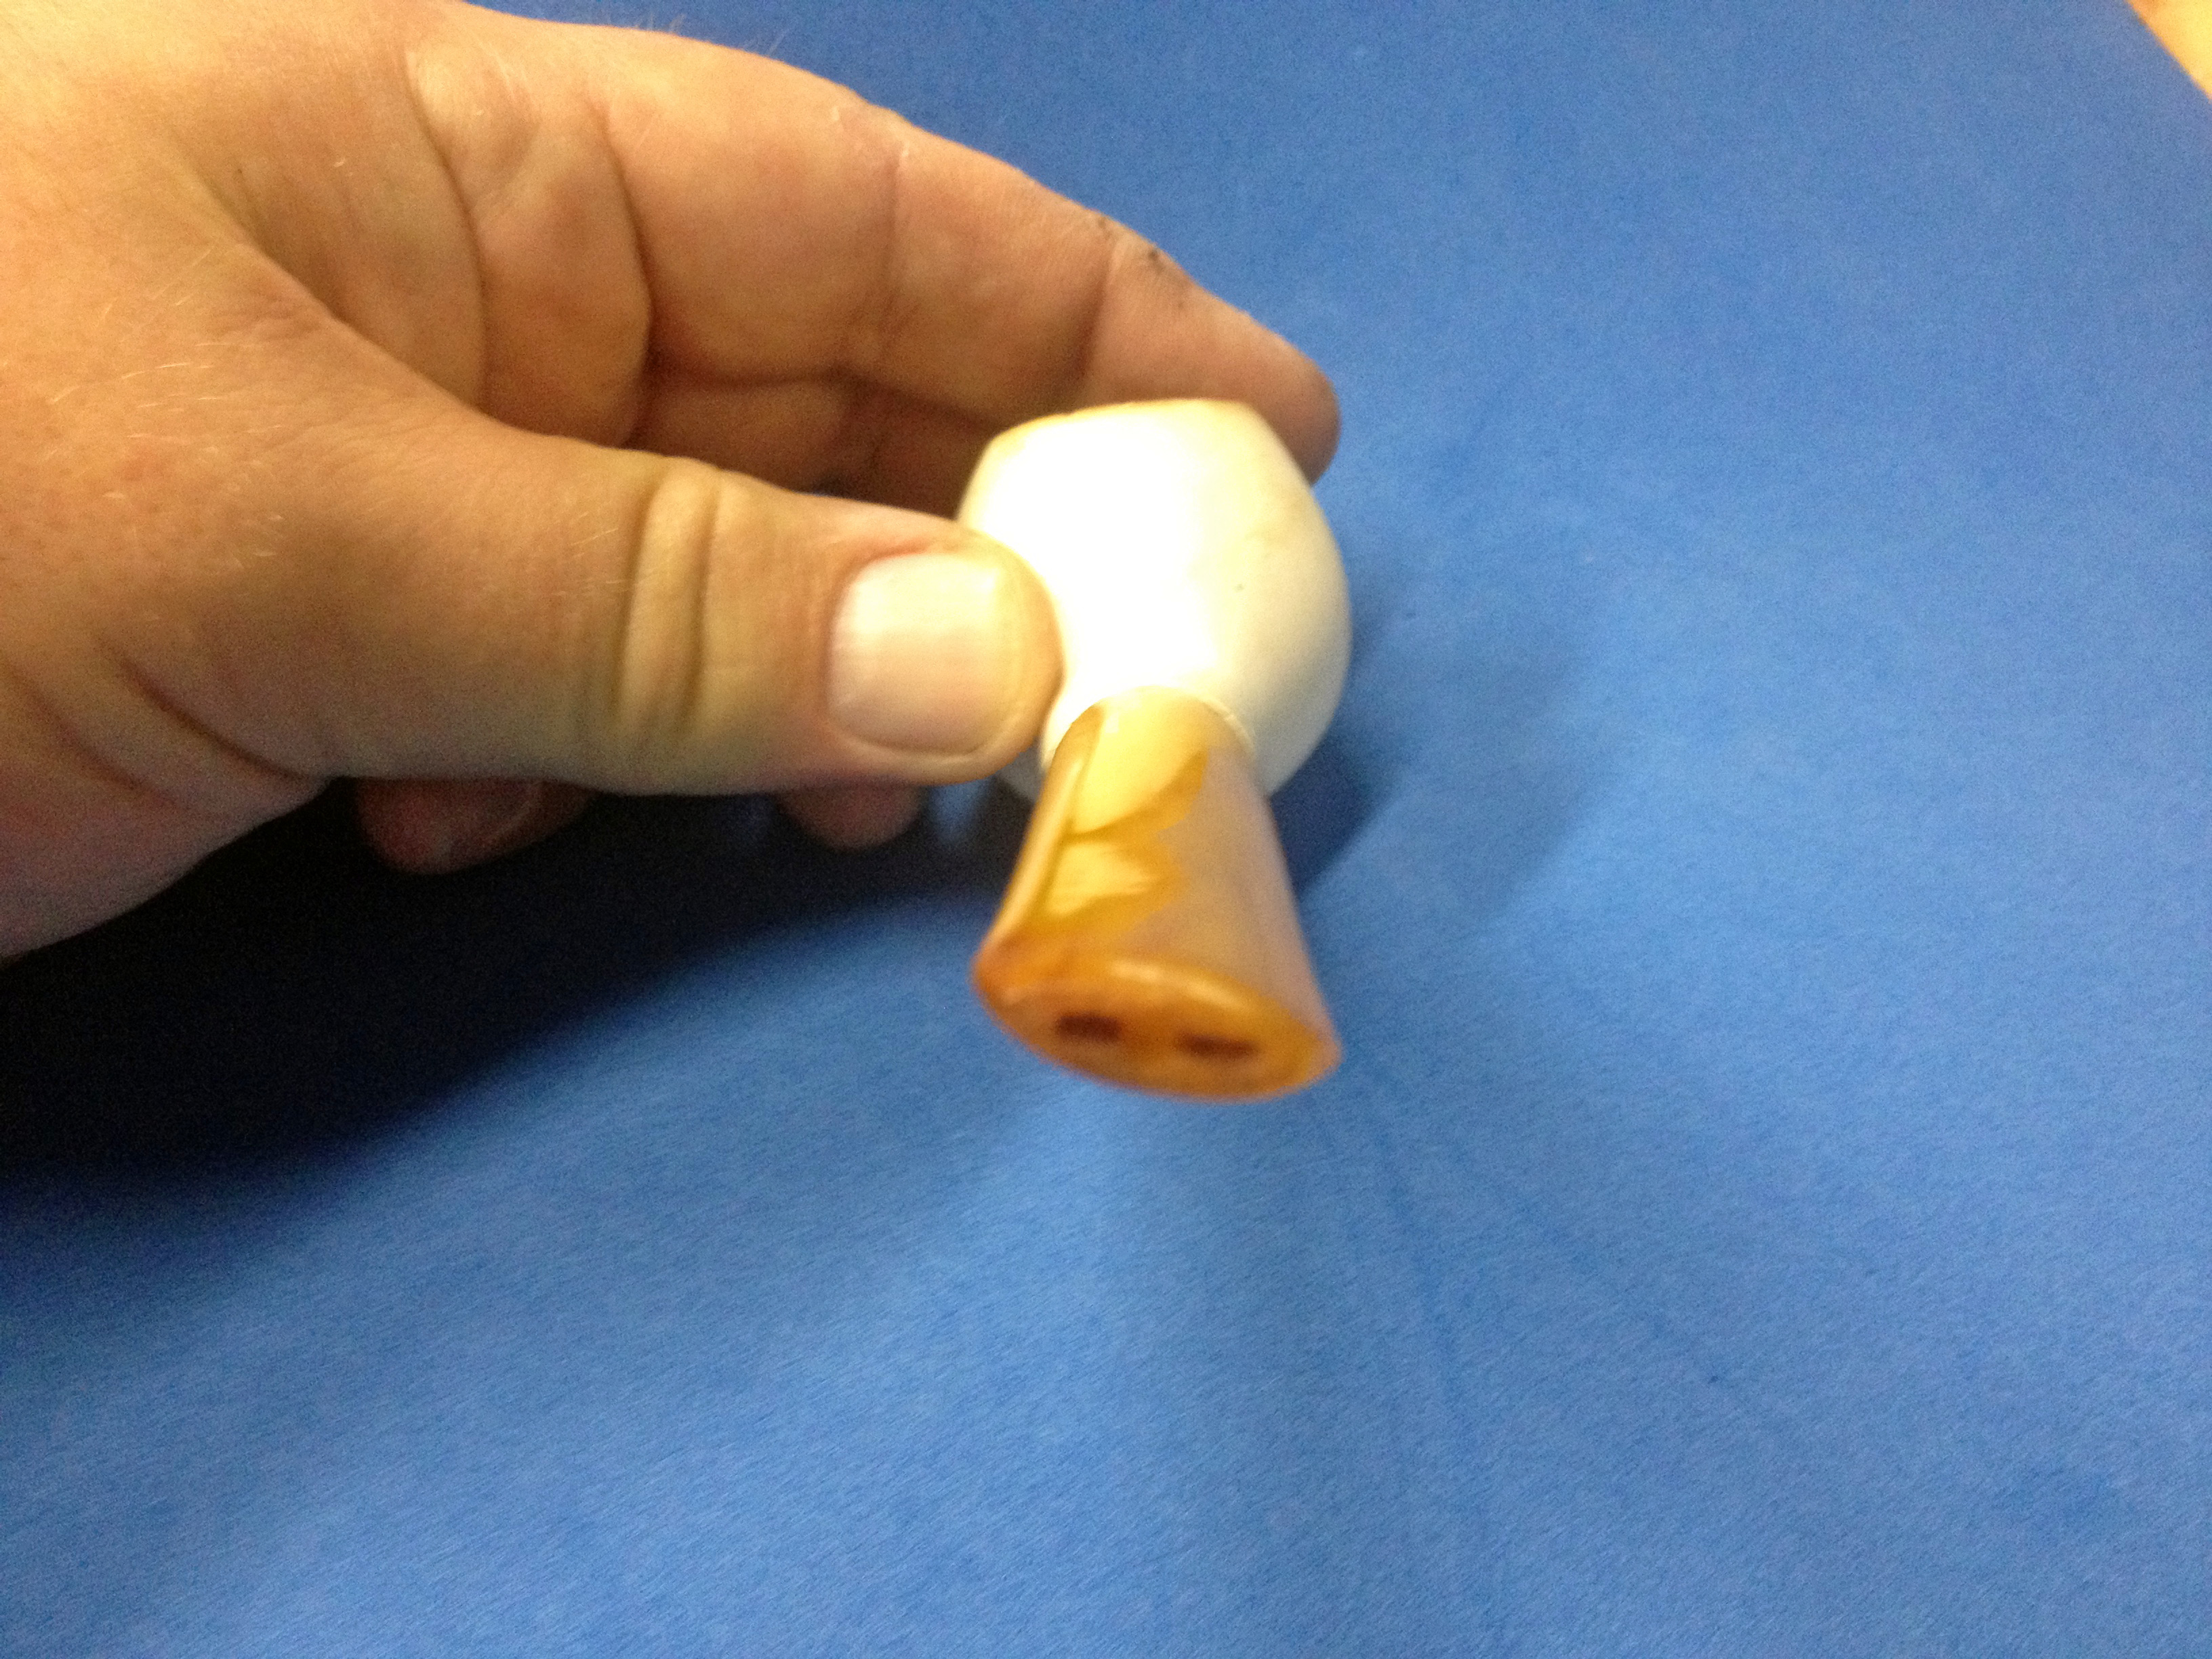
I avoided sanding around the nomenclature and the shank in general. As you can see, the spot sanding left some obvious differences in the finish. But I didn’t want to sand any more than I needed to and knew that as it was I’d have to blend the stain. I decided to use the new-to-me wood stain markers for this job as well as the bowl’s rim. I applied the stain from the marker in small sections and blended it immediately with my finger after I put it on; I did this with all of the fills, spot sanding and the rim. The stain from the markers is very easy to apply in just the area you want it and blending by “finger” was very smooth and didn’t take long at all. I think that the pens did a great job and they have earned a permanent place in my restoration arsenal!

IMG_7767 IMG_7768 IMG_7773

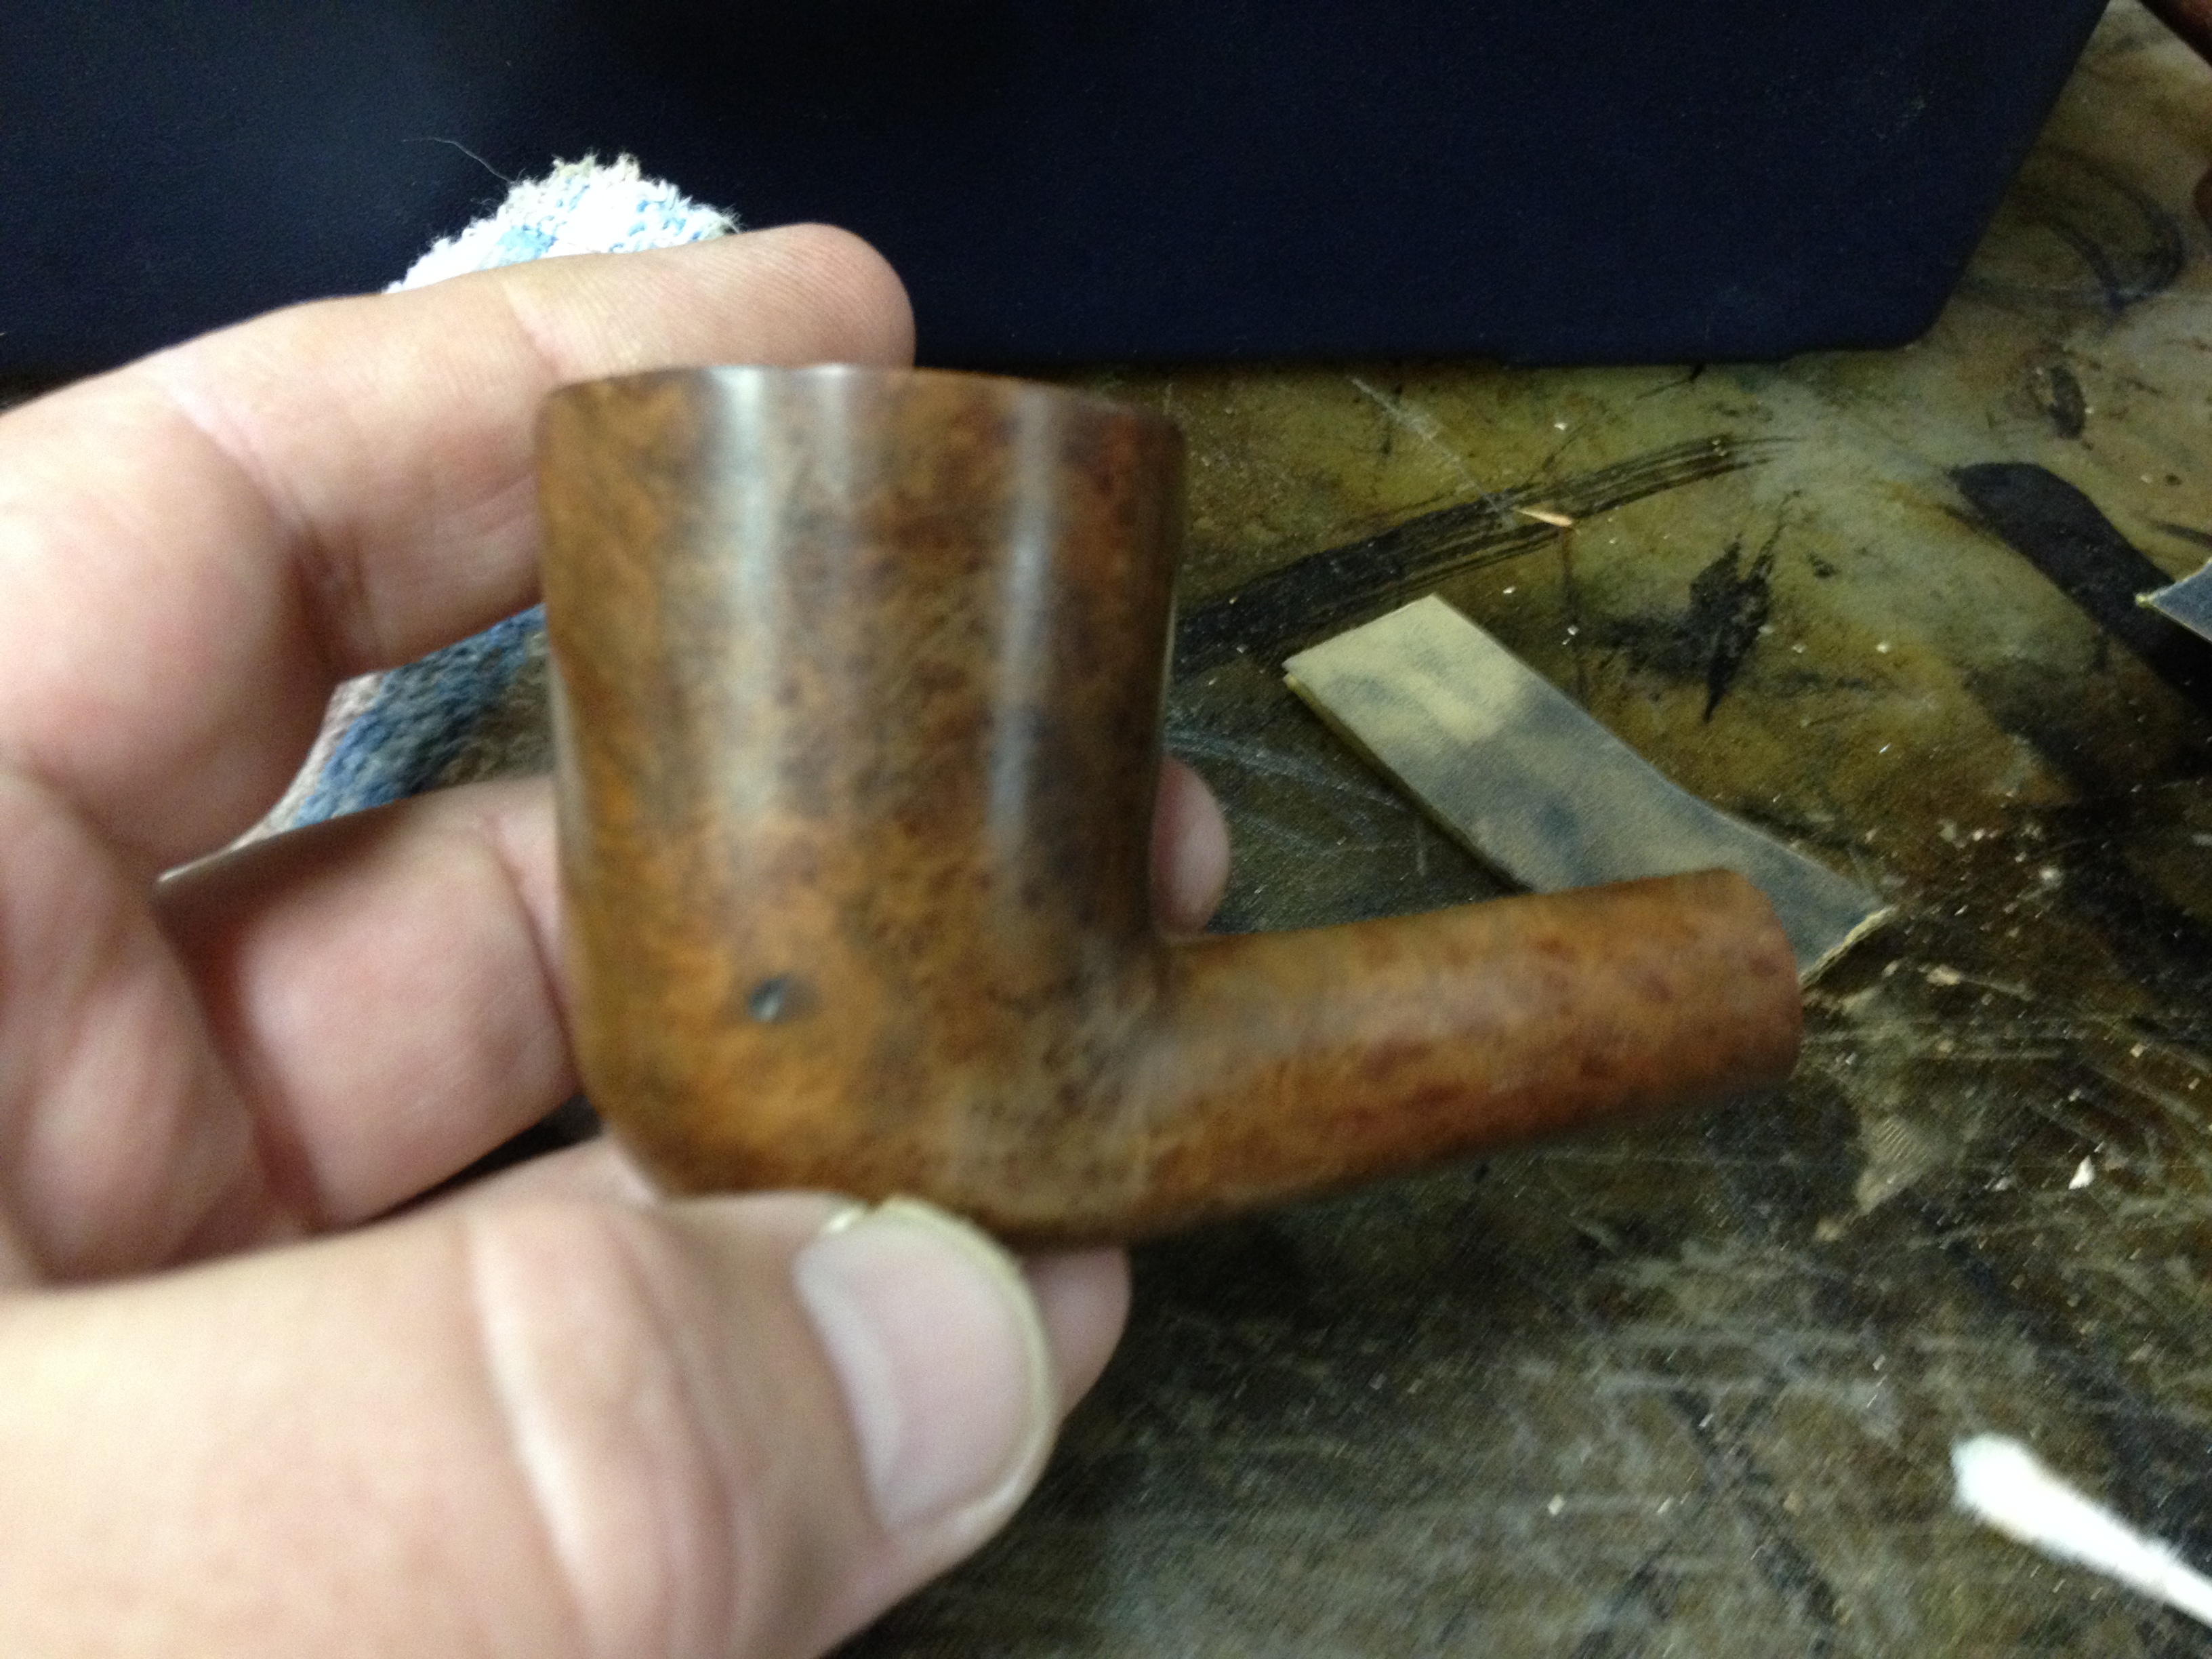
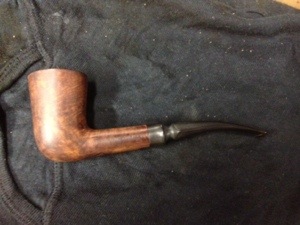
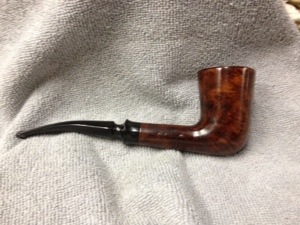
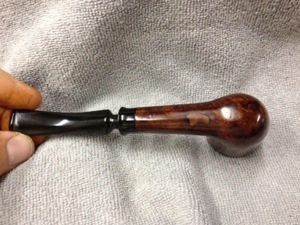
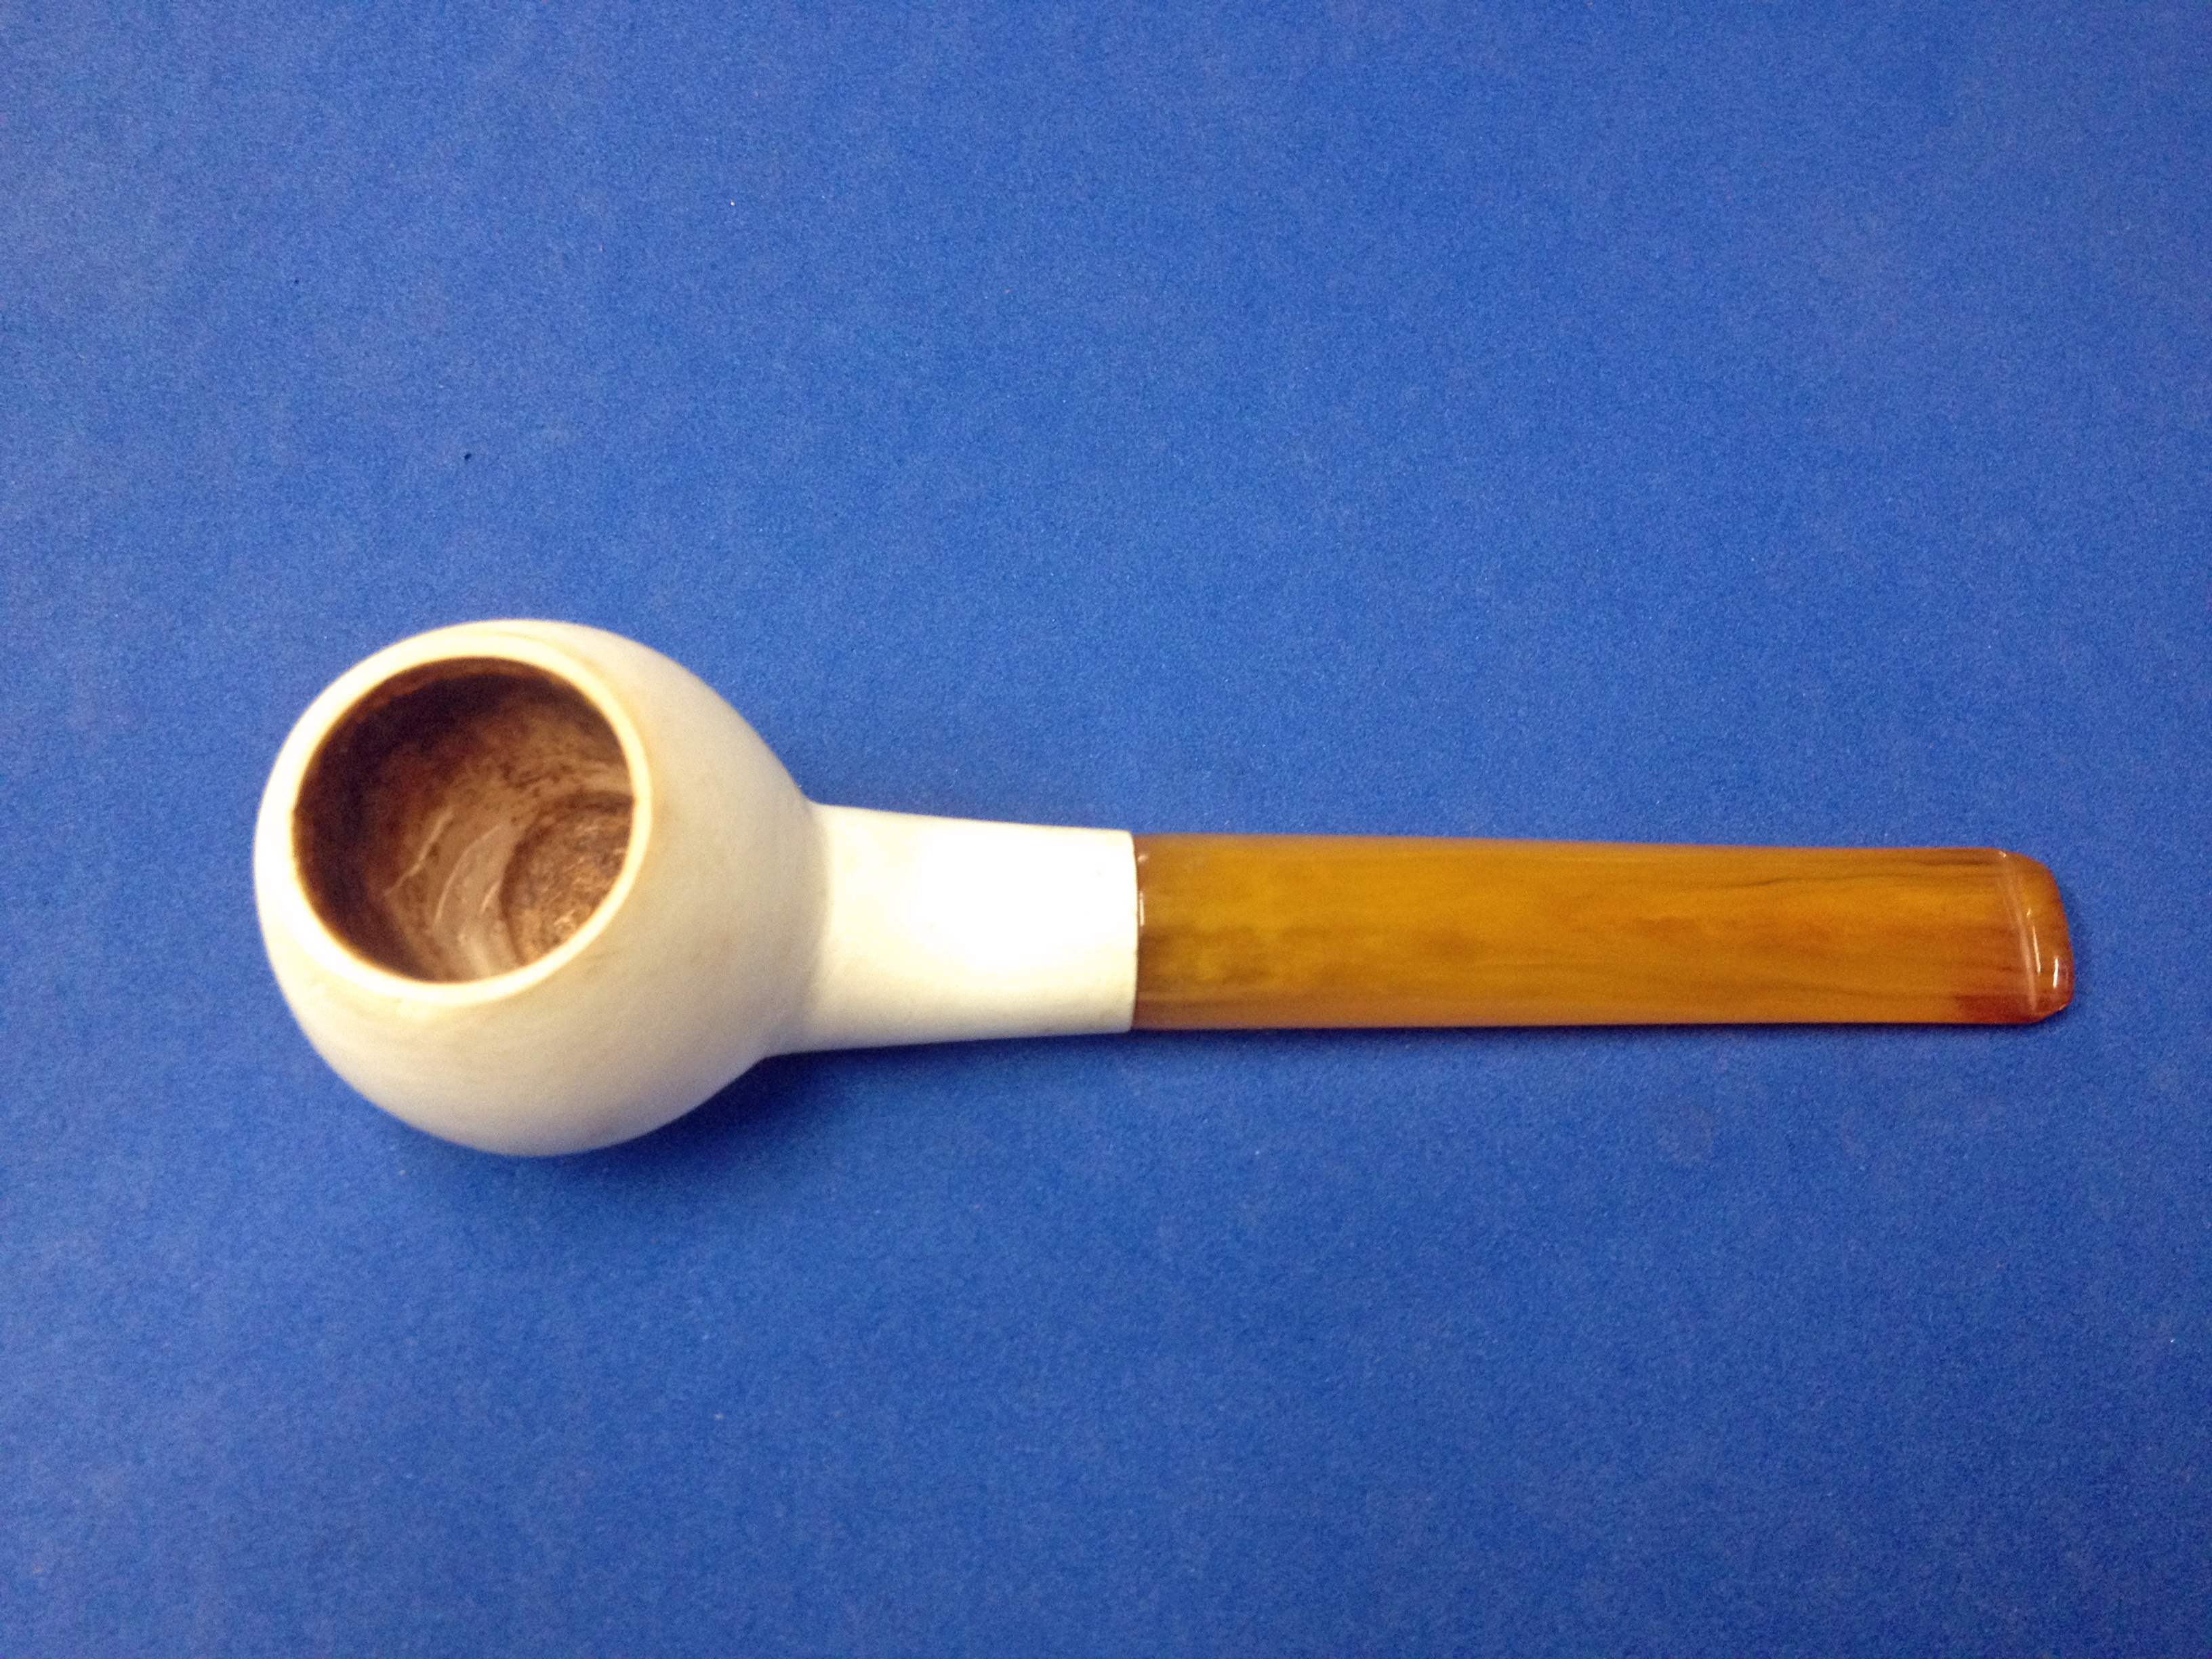
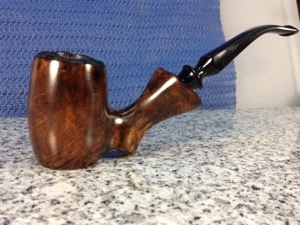
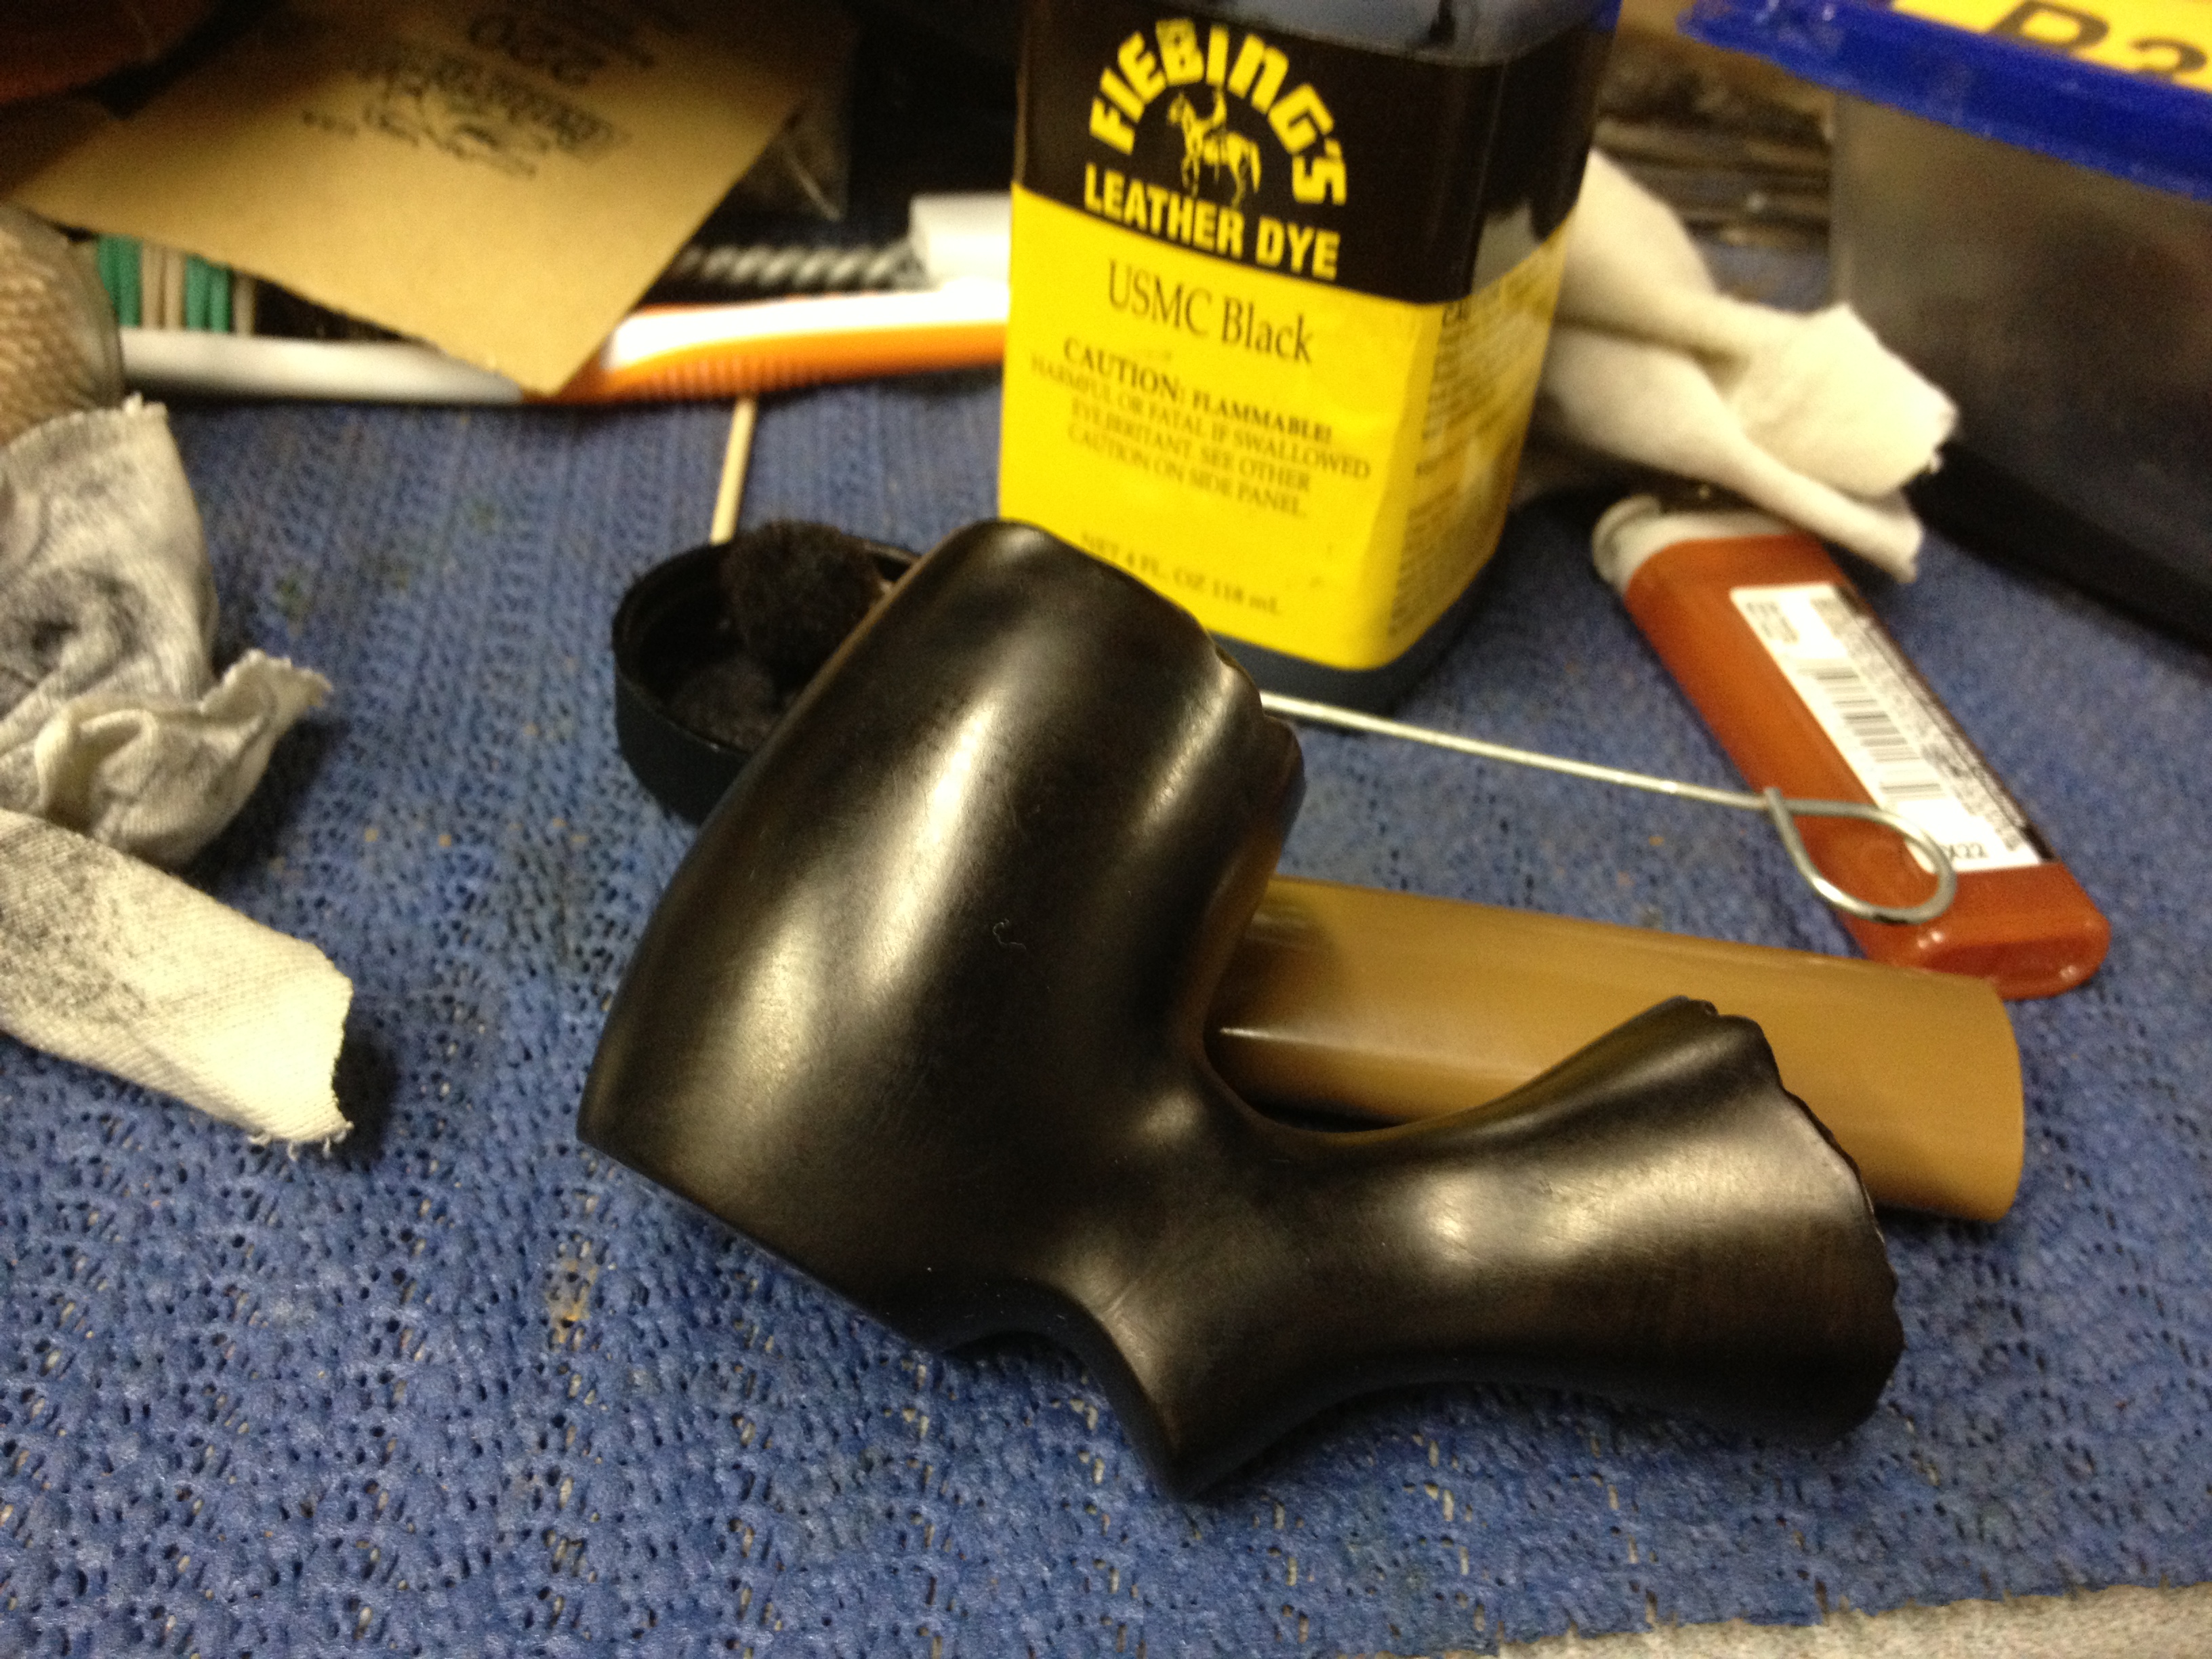
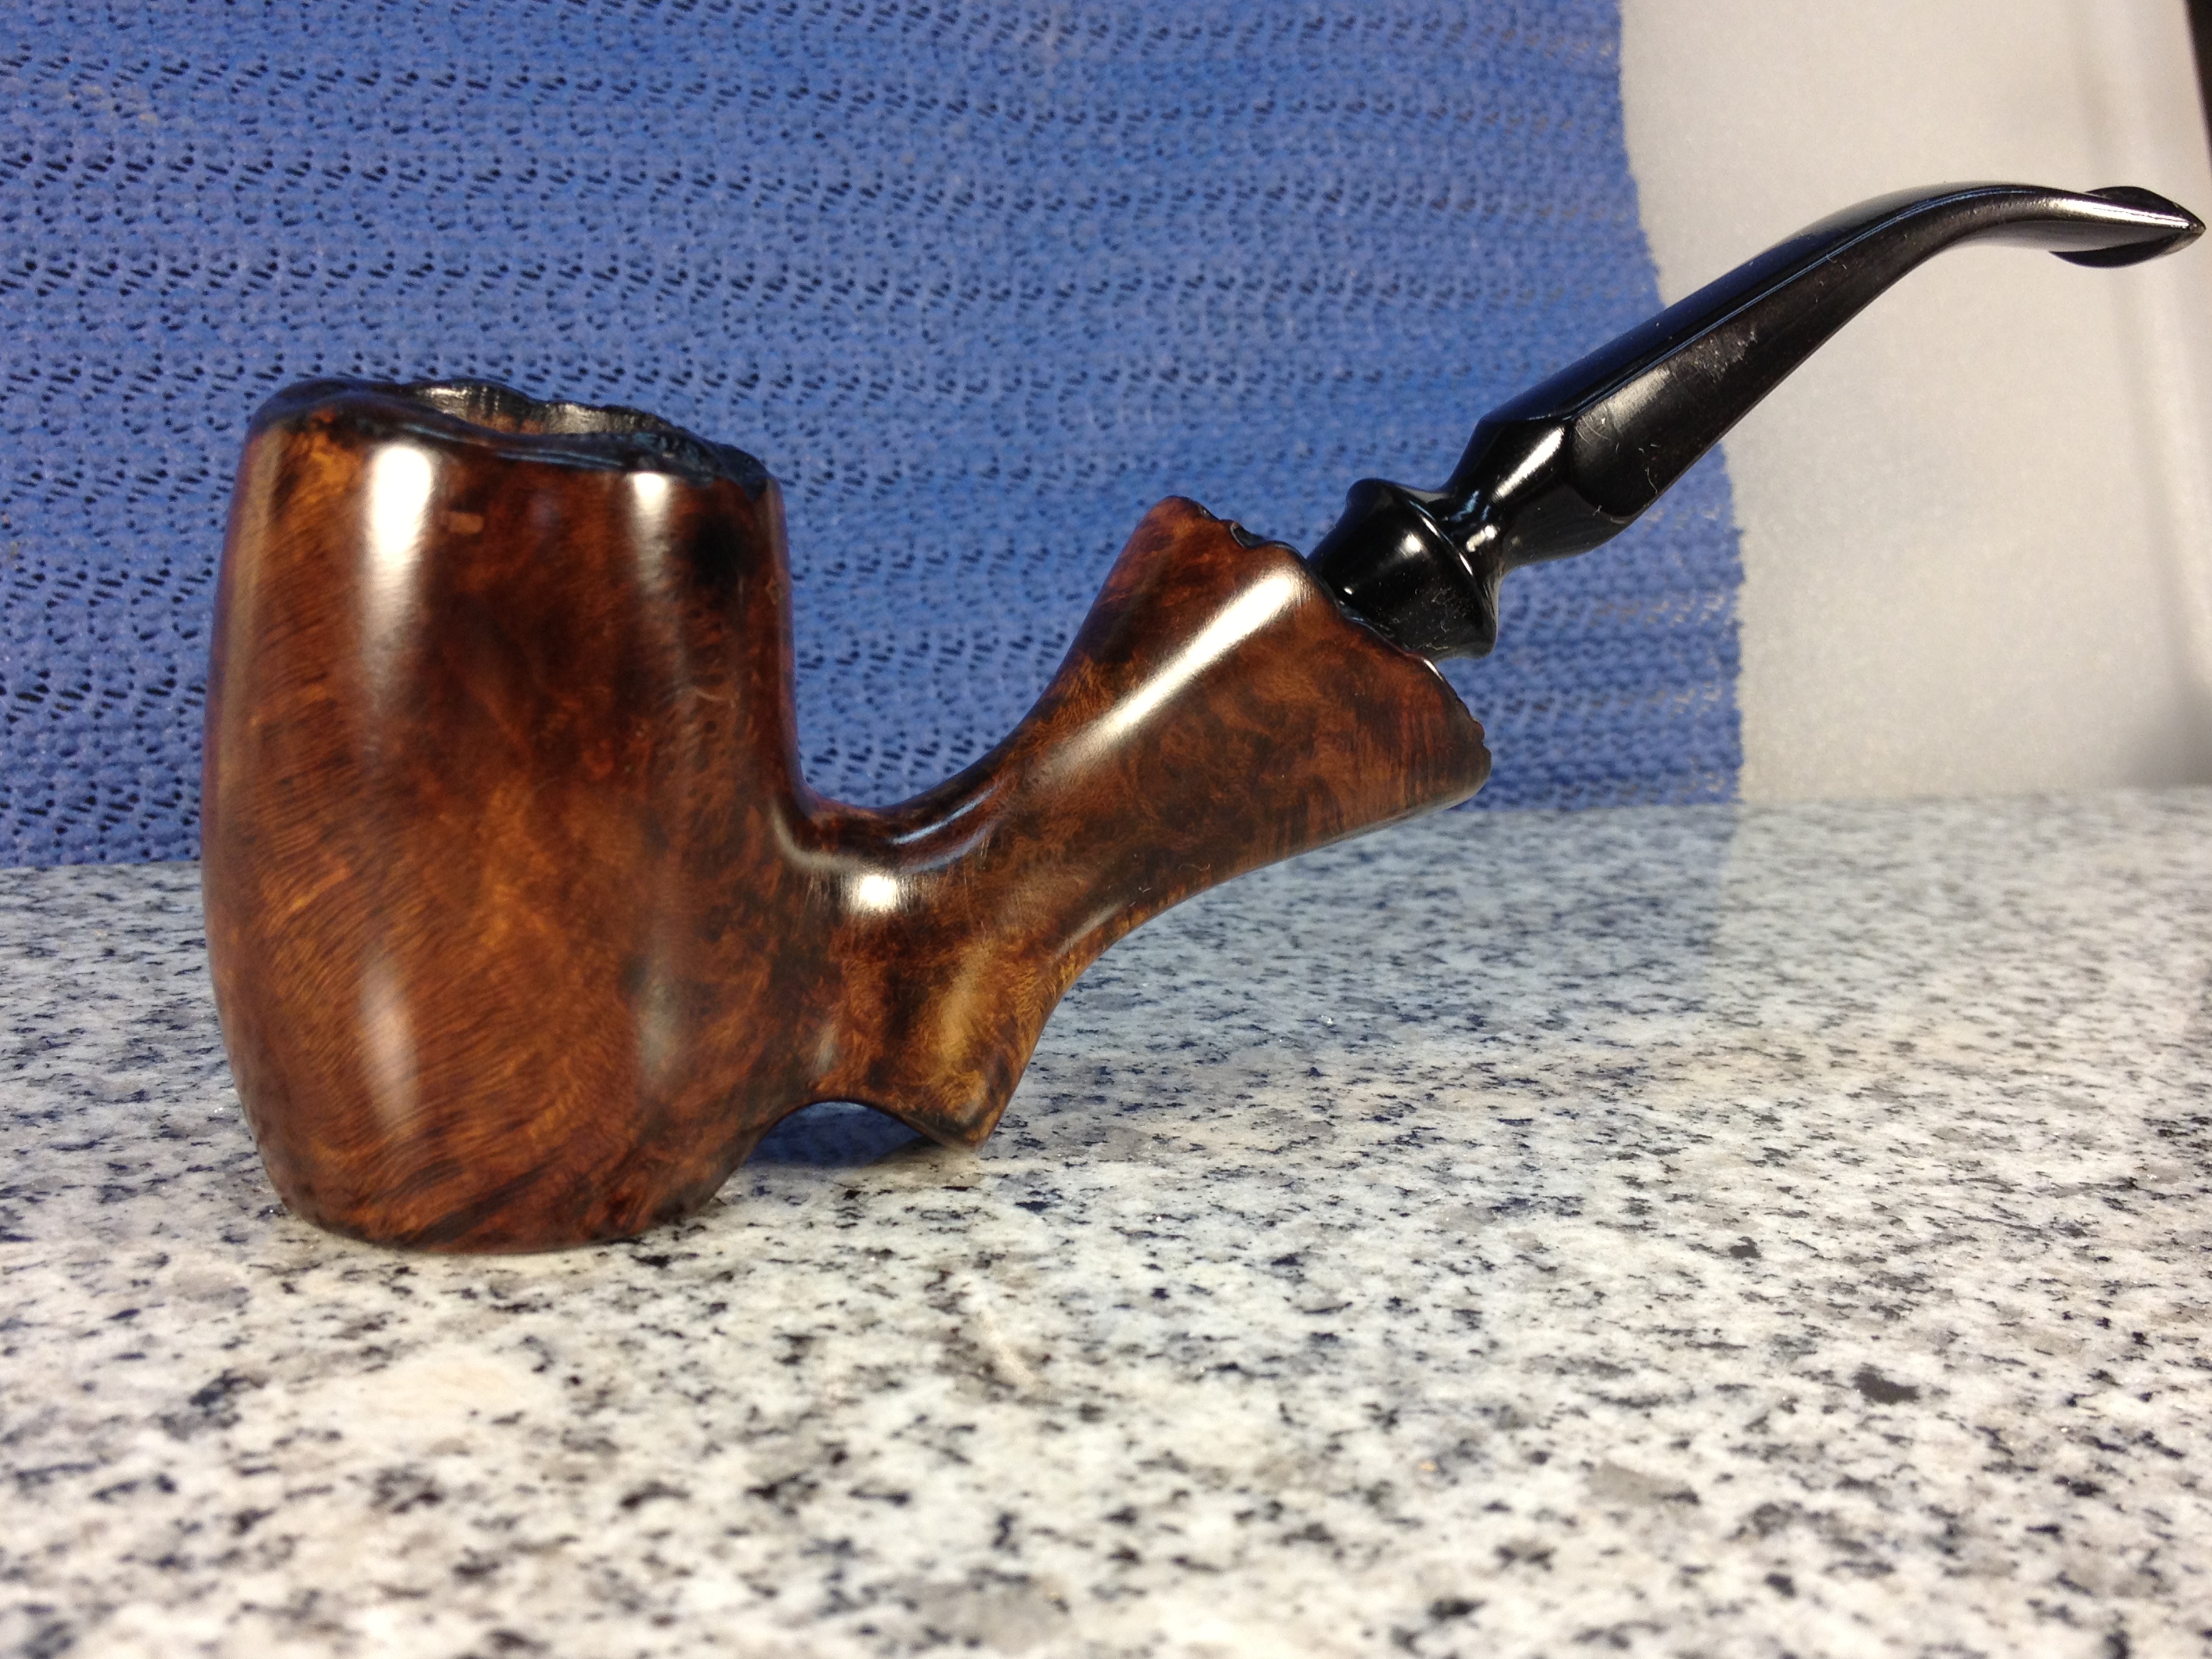
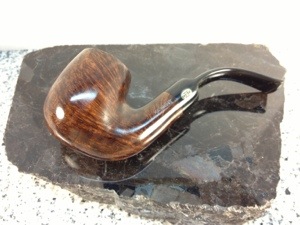
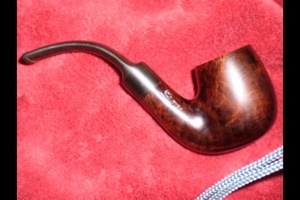
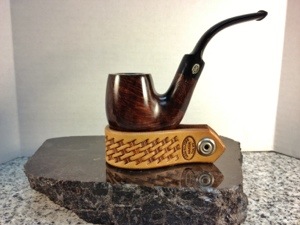
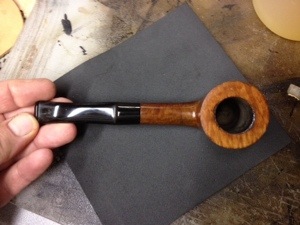
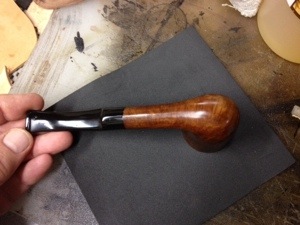
I know took the entire pipe to the buffer and buffed the stummel with Tripoli and then the pipe with white diamond and carnauba wax, finishing with a few passes on a clean soft buff. This is the finished pipe:

20131023-160821.jpg20131023-160835.jpg

20131023-160848.jpg  20131023-160901.jpg

The DAP fill sticks did a pretty good job I think. In retrospect, I should have, perhaps, used a lighter color; the fills were so near the grain I thought darker would be better. I do think that they are something that I will explore using further and believe they have potential for some good results.

GBD Century Pot Reclaimed


Blog by Greg Wolford

This GBD pot shaped pipe came with the Edwards Algerian Briar that I restored recently. Most of the stem work and clean-up done on this pipe was done at the same time as the Edwards and in the same manner, so I won’t go into that process in this article but you can read it here.

The stem was, upon closer inspection, a replacement; there are no markings, the tenon is a tad short, and you can see the tool marks from the turner. The nomenclature was very faint and I needed good light and some magnification to read it accurately. The right side of the shank has the GBD in an oval and the model Century stamped on it. The left side has the London England in a straight line, meaning it is a pre-Cadogan pipe that should’ve had an inlaid rondel on the stem, over the shape number 9486. Since the stamping was so faint already I didn’t want to risk any sanding or buffing and make it worse, or remove it. I decided to only top the bowl and sand nowhere else on this pipe. These photos are post-alcohol bath, cleaning and most of the stem work.

20131019-210745.jpg

20131019-210757.jpg

20131019-210809.jpg

20131019-210822.jpg

20131019-210837.jpg

I used 320 grit wet/dry paper to top the bowl, which was badly dinged and burned. I worked it in circles on my bench, checking every so often on the progress. I worked out a smooth, flat rim with much of the charring gone. But the edges had a few sharp dings that I ended up leaving rather than trying to take the bowl down much farther or bevel off the nice edge I’d gotten. The finish now was non-existent on the rim and my options were pretty limited on how to match it up again; I decided that the stain markers I’d recently bought were the best choice and started with them. I “drew” on the finish with the marker one “round” at a time, blending it with my finger, and letting it set for a minute of so before continuing. When I got the rim to a point I was okay with I moved on to that last of the stem work.

I micro meshed the stem from 1500-4000 grits. The stem wasn’t ultra shiny but the pipe was not going to be a prize so I was happy with the level of shine and removal of oxidation I had and stopped there.

Since I didn’t want to buff the pipe I opted to wax it by hand. Before any wax, I polished the stem and the stummel with plastic polish, not something I’ve ever done before and actually by accident this time; I was polishing the stem and absentmindedly applied the polish to the wood before I realized it. I recalled someone reviewing another polish somewhere saying “an abrasive is an abrasive, no matter what it’s intended purpose” and I hoped I hadn’t made anything worse. It actually made the wood look better, and also the stem, to my surprise without harming the nomenclature.

After I buffed the entire pipe clean by hand with an old t-shirt, I applied some paste wax by hand and let it set up for about 10 minutes before hand buffing it back off, to a fairly nice shine. This is the completed pipe:

20131019-212602.jpg

20131019-212613.jpg

20131019-212626.jpg

20131019-212637.jpg

I’m not a big fan of the pot shape, though I do like GBDs in general. The pipe’s poor condition that I received it in made it hard to do a restoration on without re-stemming it and possibly reshaping the bowl and loosing the stamping altogether. I don’t know what I’ll end up doing with this one yet – I may still re-stem it when I get a square stem to do it with – but I do believe this reclaimed briar will still make someone a good smoker, just not a stunning looker.

Abrasives Conversion Chart


Blog by Greg Wolford

Not long ago I was searching to find the equivalent of one sandpaper grit to another, trying to find what most closely matched 1500 micro mesh in sandpaper. I don’t remember finding what I wanted, not easily anyway. Today I ran across this conversion chart that was exactly what I wanted: It came with my last order of micro mesh and I didn’t realize of remember it. So I thought it might be a handy resource to share here for easy access for everyone.

20131019-134353.jpg

Here is the more complete Chart that Al comments about below:
Micromesh Conversion

An Edwards Dublin Reborn


Blog by Greg Wolford

A couple of weeks back I saw two old pipes on eBay that were being sold as a lot that caught my attention: an Edwards Algerian Briar in a Dublin shape and a GBD pot with, what I was pretty sure was, a replacement stem. The combined opening bid and shipping cost was below $20 and it was late in the auction with no bidders yet. The seller had provided a poor description and only two poor photos, which must be the reason for no bids yet I thought. Since I am a fan of GBD pipes and have been wanting an Edwards (since hearing Brian Levine talk about them on the Pipes Magazine Radio Show a few moths ago and it being in a shape I really like I tossed in the opening bid. To my surprise, I won the auction for the under $20 total opening bid with shipping included. Here are the photos from the seller:

20131014-150328.jpg

20131014-150337.jpg

When they arrived they were in a bit worse condition than the pictures showed: very dirty, heavily caked, some very large fills, and lots of oxidation. But the stems (the GBD is a replacement) were free of holes and deep teeth marks, something I was glad to see. (This post will mainly be on the Edwards, though some of the GBD will be included. Eventually I’ll post that job, too, when I finish it.) Here are some photos of what they actually looked like when I got them:

20131014-150723.jpg

20131014-150734.jpg

20131014-150748.jpg

20131014-150800.jpg

The Edwards had a lot of build up on the rim. As I cleaned it I realized that all of it wasn’t build up but a fair amount of charring and a larger fill on the back of the rim of the bowl. There was also the largest full I’ve ever seen on the bottom of the shank. I decided that I wouldn’t try to remove and refill these areas but just refinish the pipe with them as they were. Although very large, they wouldn’t effect my personal enjoyment of this pipe so I didn’t feel there was any good reason to cool with them, and I had some concern that fills that large, disturbed, might present problems down the road.

20131014-151256.jpg

20131014-151325.jpg
I reamed back the thick cake to a nicer, even level, using all four bits on my Castleford reamer.

20131014-151514.jpg
I then put the bowls into an alcohol bath and the stems into an OxyClean bath and left them overnight to soak.

The next day I starts with the stems, taking them out of the bath and washing them under warm water with dish soap. I was surprised at how easily the oxidation came off after this with a miracle eraser scrub; I’ve used miracle erasers many times, but not on all stems, and have never had such good results. I wish I knew what the variable was to give me this result this time but I don’t. Next I scrubbed the stems out with alcohol and pipe cleaners until they came out white.

20131014-152048.jpg

20131014-152100.jpg

20131014-152111.jpg

20131014-152120.jpg

At this point took the bowls out of there bath and wiped them down. In the photos you can probably see (above) that the stem/shank union was not flush at all. I figured the problem was a buildup of tar and gunk in the shank so I set the bowls at an angle, shank tilted up, and placed cotton balls in the bowls. I filled them with alcohol with a syringe and then also filled the shanks the same way, plugging them with cotton swabs. I let them soak while I worked on the stems, changing the cotton swabs out as they drew out tars; I changed them three times I think, going to doubled over pipe cleaners the final time.

20131014-152727.jpg

I polished the stems with plastic polish, making sure they were literally squeaky-clean before using micro mesh pads 1500-4000 grits, wet, to bring up a shine. The condition was very nice, to my eye, at this point, and the bowl needed a lot more attention so I set the stems aside to get to the bowl.

The shanks were very thick with build up even after the soaking. I used the Senior Reamer drill bit on the GBD but it was too large for the Edwards; I chose I smaller bit for it, the size of which escapes me. After many bristled and smooth pipe cleaners the shanks were finally gunk free and the stems seated well once again.

I sanded the bowl rim to reduce the damage of the charring as much as I could while trying to not alter the shape. This was a challenge and I left a little more char, which I tried to blend later with dye, than I’d normally like but I really wanted to keep as much briar as I could for the shape and for insulation since the walls aren’t very thick to start with. I also lightly sanded the rest of the stummel, while avoiding the already faint nomenclature, to remove the last of the finish and some scratches with 320/400 grit wet/dry paper.

20131014-153502.jpg

20131014-153514.jpg

20131014-153525.jpg

20131014-153539.jpg

To start, I put a little stain on the rim of the bowl using some furniture touch up markers I found at our local Walmart: three markers for $4 I think. I wanted to get a base coat started before I went forward. Next I applied a coat of mahogany leather dye to the entire pipe; it is dark but not as red as some of the other color choices Fiebings makes and I thought it might help hide some of the defects and being up the contrast at the same time. I didn’t flame this in, by the way, since I didn’t want to change the entire color of the pipe. After it had set for about 10 minutes I sanded it back off with 400 grit paper to where I liked it.

20131014-160104.jpg

20131014-160115.jpg

20131014-160129.jpg

20131014-160150.jpg

20131014-160205.jpg

20131014-160219.jpg

20131014-160232.jpg

20131014-160244.jpg

20131014-160257.jpg

At this point I was pretty happy with the overall results: most of the defects were fixed or hidden, except for the two biggest fills, which didn’t hide as well as I’d liked but about as I expected. Off to the buffer the pipe went now: the entire pipe, stem and all, got a buffing with tripoli, white diamond, and carnauba wax, flowed with the clean, soft buff and a hand final buff. The final result is one I’m pleased with: a nice looking and good smoking old pipe.

20131014-160658.jpg

20131014-160709.jpg

20131014-160721.jpg

20131014-160732.jpg

Pipe Maker’s Emporium Tenon Turning Tool


Blog by Greg Wolford

Several weeks ago I obtained a tenon turning tool from Pipe Maker’s Emporium (PME). I have been planning on writing my “review” of this tool since I mentioned it in the Big-Ben post but have put it off due to time and wanting to get better acquainted with the tool. Well, I think I am ready so here we go!

IMG_7086_edited-1 IMG_7087_edited-1 IMG_7088_edited-1 IMG_7089_edited-1 IMG_7090_edited-1

The tool can be purchased from PME here and is, essentially, the same tool that PIMO sells and Steve has and uses. There is at least two differences that I can see: An extra adjusting screw )which is rarely used) and the price of the PME tool is about $9 less. (Having bought from both sources, I have a personal preference for PME: their S/H costs are a bit less and speed and service are better, again in my opinion; I have no affiliation with either company other than being a customer.) Both tools are used in the same way and they both have similar limitations on size. They also both lack precision measurements/adjustment mark, requiring one to go slowly and check often the tenon size so as to not over-turn it.

Steve describes the use and adjustment very well in an article he wrote nut I can’t find at the moment. He also compared the PME and PIMO tools in this article so I won’t go into a lof ground he has already covered, but try to add my impression of the PME tool,

I found the tool relatively easy to use overall. I experimented on a few old stems before re-stemming Big-Ben and have since turned several other stems for different stummels and corn cob pipes. I have had mostly good results but there have been a few massive failures, too.

As Steve has pointed out, the best use of this tool is gotten by turning the tenon very close to size and then finishing the job by hand sanding. I have also learned that the tool not only has no markings to gauge the amount of material to be removed by a single adjustment (you have to look at the cutter head relative to the tenon) but one cannot gauge the amount consistently by using a “formula” such as 1/4 turn of the adjusting screw has been giving me .5′ decrease in diameter so each 1/4 turn will continue to do so – I have over-turned two stems using that type of “formula”!

PME doesn’t sell the right size drill bit for the guide pin (a size #30 or .128″) so you will have to obtain it from another source (PIMO does sell it for $2.50) or make due with another size. At first I used an 1/8″ bit on the vulcanite stems which, while tight, worked okay. However, I had to move up to a 5/32″ bit for Lucite/acrylic and be careful to not get it out of round. I have since ordered the .128″ bit from PIMO and am happy with that.

The extra set screw on the PME tool is really not used except for turning multiple tenons of the same style to the same size: For instance if you needed to slightly turn several tenons for corn cob pipes you would use it. This second locking screw just really sets the cutter head to zero movement but the main locking screw is the one that is generally used since you will mostly be taking more and more material off of a tenon.

I find that using the tool at different speeds helps to get a nice, smooth tenon. I like to start out fairly slow and make my first pass, then increase the speed on subsequent passes. The final passes I will be at full speed and will slowly rotate the stem as I make the pass up then back down the tenon. Generally, this gives me a nice smooth tenon, without a lot of turning marks/lines.

As I mentioned above, the adjustments are not always equal so one has to watch carefully how much the cutter head advances with each movement of the adjusting screw. And in order to get a good, even result it is very important to lock the locking screw with each adjustment. I have found that my digital micrometer (bought very cheaply from Harbour Freight) is a good help in getting the size of the tenon down to where it needs to be. But due to the lack of real precision with the tool, I don’t think one can rely solely on the micrometer; when it is getting close I begin checking the tenon to mortise fit after every pass.

My analysis, then, would be something like this: If you wish to re-stem pipes you have to have one of these toolsI think that either the PME or PIMO tool would work as well as the other and which one you should purchase is simply a matter of preference or economics; the PME is cheaper but if you are ordering from one company or the other buying it with your order will save you on S/H costs. My personal recommendation would be (if you don’t already have some stems to experiment with) buy the tool from PME and order a dozen or two of whatever Carolyn has on sale that week to practice on (usually there are 2-3 styles of vulcanite stems on special for $4-$5) and maybe a couple of closeout acrylic ones, too, to get a feel for the difference (which is big!) in the two materials. The learning curve isn’t huge but it is there. But, if you are like me, learning a new skill to add to your arsenal of restoring these wonderful old pieces is a lot if fun and a big part of the draw of the hobby.

So what are you waiting for? Place your order and step into the next phase of the art of restoration.

Restoring on an Old Meerschaum Cutty with Amber Stem


Blog by Greg Wolford

I own two meerschaum pipes: an old African block estate pipe and a Turkish bulldog shape my son bought me for Christmas two years ago. Both of these pipes smoke well but they are also both quite large, for my evolving taste anyway, as a result, I don’t smoke either of them very often. So of late I have been on the lookout for a smaller ‘meer that was both affordable and appealing to my eye in local flea markets and antique shops. Most of what I find locally is priced too high, either in general or for my budget, and often they are in poor condition. But a couple of weeks ago I stumbled upon a little pipe that met all of my conditions and it became mine. I took it (and an old Kaywoodie that I’ve yet to touch) home and it waited in my “to do” basket until yesterday.

At first glance I saw that the pipe was dirty and likely had never been waxed. The screw in stinger was also out of time. But these were small things considering the price and my intended use: As a smoker not a show piece. The pipe also appeared to have a Bakelite stem that looked dirty but in good shape. Here are a few photos of it before I began:

IMG_7253_edited-1 IMG_7257_edited-1 IMG_7256_edited-1 IMG_7255_edited-1 IMG_7254_edited-1

I knew that I wanted to re-clock the stem and also to even out the bigger chips on the bowl and rim. For the chips I remembered Steve’s post on the meerschaum bowl he modified to fit a Kirsten pipe. So I got out some wet/dry paper in about 400 grit and also some well-worn 1000 grit to sand/polish the bowl and rim. after setting the needed paper out, I removed the stem to clean it and the shank well before anything else.

The first thing I noticed was that the stem looked and felt different from I expected; at the antique mall I didn’t look too closely since I was hoping to score a better deal on the pari of pipes. The stem seemed heavier and just, well, different from the Bakelite stem on my African meer. Not owning a pipe with an amber stem I had nothing to compare it to so I messaged Steve and sent these photos:

IMG_7261_edited-1 IMG_7260_edited-1

After a few exchanges, he directed me to a link to test to see if I had real amber. I started with the alcohol test: pass. Then I moved to the acetone test: pass again. In fact, after the tests and then cleaning the stem well with alcohol it was much shinier and better looking! The final test, which was inconsequential, was the taste test: Not only a pass but I could really feel a different in the mouthfeel of this stem versus any other I have. Now I was excited to get her cleaned up and tried out! As sort of a last test, I heated the stinger with my heat gun to see if I could loosen and straighten it; there were no bite marks to remove, thankfully. After a bit of heat the stinger did loosen but the stem didn’t soften like Bakelite or acrylic would. I began to adjust the stinger to find that the metal apparatus was a screw in tenon, threaded into the amber. So I removed it and dropped it (the tenon) into a bit os alcohol to loosen and dissolve the grime in the threads. While it soaked I began to clean the shank and stem with cotton swabs and pipe cleaners and alcohol. To my great surprise the shank and stem were very clean. I only used two pipe cleaners and two cotton swabs and they were not at all grimy:
IMG_7259_edited-1

After cleaning and drying everything I reassembled the pipe. I wasn’t able to get it 100% straight but it is better. I tested the draw now and it was open and clean tasting, though the air hole in the stem is not very large. There were, after the cleaning of the stem, some scratches and dings, all small, present. But the shine was pretty good and since I don’t feel comfortable with it I opted to not try to sand/remove them. I may at some point go back and wax it but I’m in no hurry for that. Time to move to the bowl.

I began by gently sanding at the deep chips, especially on the bowl.

IMG_7258_edited-1

This took some time with the 400 grit paper because I didn’t want to remove too much material. When it was close to what I wanted, I topped the bowl slightly to clean up and even the rim. I then moved to the well-worn 1000 grit to polish off the entire stummel, removing some stuck on pieces of tobacco and most of the dirt/grime. Then I tore off a piece of the 1000 grit paper and polished the bowl out a bit. There was some grime, some scratches and some “digging” marks in the bottom of the bowl. I wanted only to smooth it a bit as I thought it would remove too much material to attempt to fully even it out. Lastly I wiped the entire pipe down with a barely dampened with alcohol cotton pad to remove any dust that might have been remaining. This is the result:

IMG_7262_edited-1 IMG_7266_edited-1 IMG_7265_edited-1 IMG_7264_edited-1 IMG_7263_edited-1

I let it dry out for a few hours and loaded it up with a rubbed out bowl of Peterson Irish flake last night and rubbed beeswax on it as I smoked it. I must say it smokes as well or better than either of my other ‘meers! Unfortunately, I accidentally grabbed up a non-lint free rag to polish it after it had cooled and now have some lint specks in the wax. But I’ll be re-waxing it soon anyway and will fix it then. I also may sand it a bit smoother with 800 grit paper; there are a few scratches still visible but not too irritating to me. This morning I triad a little Rattray’s Accountant’s Mixture in her as I was writing this article and she smoked equally well. This is a look at her after the first wax application.

IMG_7272

All in all, I’m very pleased with my new no-name ‘meer. She is exactly the size I was hoping for, smokes great, looks pretty good and will look better with time and I got an amber stem that I’d not bargained for! The joys of the hunt and the rewards of the work: That’s why I love bringing these old pipes back to a useful, if not beautiful, state.

Another Loose Stem Fix


Blog by Greg Wolford

As I undertook this project I had no idea that Steve was writing and posting an article on tightening a loose stem. But when I saw it I figured that since this was a little different fix, and the pipe was already blogged about here, I would go ahead with the article.

If you have read the story of Big-Ben then you know I had to restem it. It was the first time I’d done this and the first use of my new tenon turning tool, too. So, in my haste and excitement I made a goof, one that Ric Farrah was kind enough to comment on: I had not cleaned the shank out real well before fitting the stem, leading to a loose new stem.

I tried beeswax and “smoking it in” but neither of these worked on this particular problem; as Steve noted often an application of beeswax and use will tighten up an estate pipe stem. But I suppose since this was just a goof on my part and the stem had not been for properly these solutions weren’t going to work.

I was aware of the tools sold for stretching a tenon, the pluses and minuses that Steve mentioned. But I wasn’t really inclined to buy one at this point, especially since I had another idea on what might work: a drill bit! So, since the two easy fixes failed I went down to the shop to try out this new-to-me idea.

I removed the stem from the pipe and checked the size of the air-hole against my set of drill bits. I thought I had drilled it out to 5/32 so this is where I started. However, I soon realized that I had drilled it at 9/64 so I took both of these sizes and the stem to the heat gun set up.

I almost always use leather gloves when I use my heat gun; things can get real hot, real quick. And since I was using steel drill bits I definitely wanted the hand protection. So, I donned the gloves and turned the heat gun on low to start stretching!

Now, the first thing I need to say here is when doing this you are inserting the blunt end of the bit that normally gets chucked into the tenon. The sharp end is the turning end, in your hand for this procedure. This part is very important.

I began to heat the tenon slowly, checking every several seconds on the progress; I only wanted it warmed enough to be slightly softened, not so soft that it could easily be deformed or badly bent. Keeping the tenon moving, I would take the smaller bit and try to insert it in the air hole until it went in. At this point I worked very gently to get the bit inside the tenon the entire length of the tenon, removing the bit/tenon from the heat. I kept the bit turning slightly while it was inside the hole so it wouldn’t stick. After about a minute I gently removed the bit and allowed the tenon to cool a few minutes before checking the fit, which ended up being too loose still. So, I picked up the larger bit and began the whole process over, this time resulting in a perfect fit: good and snug with no “play” or slipping but not too tight either. Finally, the new stem was fit properly!

I left of overnight and loaded it up the next morning, checking the for again; it was still perfect, like it had been made for it (a little humor there)! The pipe smoked good before the adjustment but it now smokes very well with a good fit on the stem, part of which I’m sure is in my head, not fussing or worrying about the bowl falling off.

I found this fix very simple and expect to use it again in the future: it was done with tools/items I had on hand and only required a bit of patience and slow going to do right. Of course if I’d applied that idea to turning the tenon to start with I wouldn’t have had to refit the the stem. But then I’d not have had the opportunity to try out this fix if I had done it right to start with either: I suppose that is the silver lining in this cloud of errors!

20130822-211846.jpg

Big Ben Freehand: Re-Stemmed and Reborn


Blog by Greg Wolford

This stummel was gifted to me by a friend from Louisiana. We met via one of the pipe smokers forums probably near a year ago and he recently sent me two stemless pipes, this one and one I have yet to get to, to restore. These are interesting pieces, in my opinion, because of their history, a little of which I will share with you before I get into the “meat and potatoes” of the work.

RJ, my friend, inherited a large quantity of pipes, near 100 if memory serves me. They were given to him by an aunt, I think it was, after her father passed away. Her father was Major in the US Army and served overseas in World War 2 (again, some of these details may be a tad off but they are close enough for our purposes). He was an avid pipe smoker and acquired many of his pipes while deployed overseas.

The Major’s wife was involved in a serious car accident many years ago. Her injuries were serious, leaving her with diminished mental, and to a lesser extent, physical capabilities. THe Major, as they affectionately called the man, took care of her himself after this accident. Sadly, the Major began to develop Alzheimer’s with dementia in his latter years, though he continued to care for his beloved wife; they were separated from their daughter, who gave the pipes to RJ, by miles, geographically.

The Major called his daughter the day after Valentine’s Day, 2005, and told her, quite confusedly, that her mother had gone missing. After much questioning, she called the police, local to her parents, and they dispatched a unit to the couple’s home. Shortening the story some, the Major had, in a state of mental confusion brought on by his disease, killed his wife. He was never found competent to stand trial for the killing of his wife 50-years. As far as I understand it, he was in a mental hospital for the rest of his life. A tragic story to be sure but an interesting one to go along with these unique pipes!

When the stummel arrived it was dull and dirty and, as I said, without a stem. The bottom of the pipe is stamped “Big-Ben” over “Handmade” and the stamping is pretty good overall. Doing a quick search on http://pipephil.eu, it seems that the Big-Ben brand is a brand of the Elbert Gubbels & Sons -Royal Dutch Pipe Factory. Here are a few photos of it before I began any work.

IMG_6726 IMG_6727 IMG_6728 IMG_6729

I actually began this restoration with the stem, finding the pipe a new one that is. I had planned on using an acrylic stem but changed my mind for a couple of reasons: I was turning my first tenon with my brand new Pipe Makers Emporium tenon turner and know that acrylic is more finicky than vulcanite and I thought, after looking at it, that the rubber stem would look better on this stummel.

The PME tenon tool is, by all accounts, essentially the same tool as the one offered by PIMO. I chose the PME tool because it was about $10 cheaper and they happened to have a couple of acrylic stems I liked on clearance for cheap. I plan on writing about my thoughts on the tool in a separate article.

I choose a pre-formed Italian ebonite freehand-style stem for this stummel. To my eye it looked like it would be something very close to what the pipe would have originally had. I took my time turning the tenon down to fit since it was the first time I had done this and I didn’t have another stem like this one to use if I fouled up. After I got the tenon very close with the tool I hand sanded the tenon to get to the final fit; I know from reading Steve’s articles that it is easy to over-turn a tenon and you can’t put the material back on once it is gone! Here is a photo of the stem placed in the stummel after getting it fit:

IMG_6717

I decided to not bend the stem until after I had sanded and polished it. In retrospect, I probably should have bent it before I did all the sanding; there are some very small “marks” on the stem where the bend is now that I had not anticipated. Next time I will bend after the initial sanding is done I think,

I began the sanding with 220 grit sandpaper to take out the casting/molding lines on the sides. I forgot to photograph the stem before I had started to sand it. This shows it early on and beside a smaller ebionite stem from the same lot to try to give you an idea of what the lines looked like from the start:

IMG_6725

I sanded out the marks with 220 then 320 grit paper. The stem had some, but not many, small sots on it that made me decide to go head and use the 320 wet/dry paper on the entire stem. I progressed to 400 grit wet/dry and then micro mesh 1800 through 12000 (I also used the plastic polish several times between grits to make sure I wasn’t missing any scratches). Here is a progressive photo along the way from rough through 12000 grit micro mesh.

IMG_6736

The stem didn’t fit flush at the top and bottom due to the angle of the shank so I had to do a considerable amount of file work to get it almost completely flush to the shank on the top and bottom. At this point I stopped working on the stem and turned my attention to the stummel.

I wiped the pipe down with an alcohol soaked cotton pad. There was little wax left on the pipe and the wipe down removed what remained as well as some surface dirt. While the pipe was wet with the alcohol I could see there was a nice grain hiding under there, one that I hoped to bring out with a contrast stain. But first it would need an alcohol bath. So, I soaked the stummel a couple of in an alcohol bath. When I removed it I realized that the rim had a lot of build up on it; the rim, I thought, was stained black but that was just dirt, grime, and tar, and it was actually not stained black. I then scrubbed the rim with a brass bristle brush lightly to loosen the grime, with not a lot of success so I put the pipe back in the alcohol bath and left it overnight. The next afternoon I removed it from the bath and wiped it down then took it over another container of alcohol that I use for cleaning and dipped in my wire brush and started to scrub gently again. This time I saw much more removal of grime; the extra time in the alcohol has paid off in really softening the buildup. I switched to a toothbrush and scrubbed out all the remaining grime. I found that there were some rim char under there that the gunk had hidden. Below is a photo of before and after the 12-plus hour soak and scrubbing.

IMG_6754

The charring made me decide that the rim would need to be stained black now. The large shank end was stained black so this would match and look good I was sure. But there was also a fairly large burn on the back, left side of the bowl that would have to be addressed. There were two fairly large fills near the burn but I didn’t plan on removing and/or refilling them; I planned on leaving them and seeing how they covered with the contrast stain. I had recently read a post suggesting that fills should be done with carbon dust, not briar dust, and super glue. The idea was that the pipe would darken over time with use and the black fills would blend in more naturally. I don’t know if that is a fact but I thought on this pipe I would stain the existing fills black and see how it ended up looking. Here are a few photos:

IMG_6766 IMG_6770

It was at this point that I decided to clean and ream the pipe. Knowing this pipe had more or less been in retirement for almost a decade, I expected it probably would be fairly dirty; I was right. The alcohol bath had softened the cake some, I suspect, and it was fairly thick and not very even so reaming was definitely in order. I used a Castleford reamer to do the job, using the second largest bit to ream the bowl; the two smaller sizes didn’t touch the cake in this large bowl. After reaming I began to clean the shank, which was terribly gunked up. I used the drill bit-tool on my Kleen-Reem to open up the shank, both with and without pipe cleaners on it. After many pipe cleaners, both on the drill bit and doubled over off of the bit, I finally decided that I needed to do an alcohol and cotton ball treatment; this is the same as a salt and alcohol treatment only you use cotton balls instead of salt. I put two large cotton balls in the bowl and, using an old medicine syringe, I filled the bowl with 91% isopropyl alcohol. Then I took the syringe and filled the shank; since this pipe is a sitter with such a large shank this idea worked very well and was quite easy to do. I topped off the bowl with a bit more alcohol and left it till morning. This is what the cotton balls looked like when I came back the next day:

IMG_6764 IMG_6765

The photos don’t really show how much tar leached out into them; they were really quite brown. The shank was much cleaner now as I went back to it, only taking less than a dozen pipe cleaners to get it clean now.

Back to the burn on the bowl, I started out with some course emery boards to remove some of the charred area. I had three different grits, from a package I bought at the local dollar store, and I worked through all three grits on it. The burn mark was reduced in size a fair amount but would need more, which I planned on doing with sandpaper. I thought the emery boards would be a good way to keep the more coarse sanding confined to a smaller area and it seemed to work fairly well.

IMG_6774IMG_6775

From here I went to 220 grit paper and got out the biggest part of the burn, feathering out the sanding a little, too. I then went to 320 wet/dry paper and sanded the entire pipe, except for the bottom; I didn’t want to sand any where the nomenclature was if I could keep from it. I then moved up to 400 wet/dry paper, wiping ever so often with an alcohol pad to see how the pipe looked, making sure it was smooth and scratch free. After I got the pipe to where I thought it would be good I took it to the buffer and buffed it with black compound; I find that this buffing highlights any small scratches or dents that may have been missed during the sanding. Here is what the pipe looked like at this point:

IMG_6798

I saw one small scratch I had missed so I took the 400 grit paper to it and got that one out, along with lightening the burn mark a bit more. Now it was time to bend the stem.

I heated the stem with my heat gun on low until it was pliable, after putting a pipe cleaner in the stem to keep from closing off the airway accidentally. I had set up my maul as my bending guide on my table. I heated and bent it and eyeballed it; it wasn’t quite what I wanted. So, I heated it again and bent it a little more and looked it over carefully; now it was more to my liking:

IMG_6784 IMG_6783

I used Fiebing’s USMC Black leather dye to the rim and shank end, since I knew these would need deeper penetration of color since they would remain black. I applied the stain, flamed it in and then repeated. I then heated up the stummel, setting the stem aside, to start the contrast staining. I got the stummel nice and warm, wearing leather gloves to protect my hand. I then applied the dye to the entire pipe, flamed and repeated. Next I hand buffed the pipe with an old cotton t-shirt leaving it at this point:

IMG_6788

After the pipe had cooled for 10-15 minutes and was no longer warm I began to sand off the black; I wanted to remove the majority of the black but leave it in the grain areas as much as possible. I also wanted to try to blend in the burn as much as possible. I sanded and wiped it clean with a dry cotton pad until I thought I was getting close to where I wanted it to be; I didn’t want to use an alcohol pad until I had to in order to not lift any stain that I wanted left on the pipe. I think I sanded it over about three times before I wiped it with an alcohol pad. As the dust came off the alcohol wet pipe began to look more like what my mind’s eye had thought it would:

IMG_6789 IMG_6790IMG_6791 IMG_6792

Now I applied a brown stain that I had mixed up earlier for another project; to be honest, I don’t recall what color I used or what I diluted it to. I applied the stain, flamed and repeated. After buffing it off with the old t-shirt I realized it was too dark for what I had wanted so I took an alcohol pad to it and removed some stain. But it was still too dark so back to the 400 grit I went. I sanded it over, wiped with an alcohol pad, and repeated until I was happy with the color; I think it took about four cycles to get it where I left it. I then buffed it off with the t-shirt one last time before heading to the buffer.

I buffed the stummel with Tripoli and then the stummel and stem, separately due to the way this pipe is made, with white diamond. Both parts then got several coats of carnauba wax, buffed on a clean soft wheel and finally hand buffed with my flannel gloves; I don’t know the flannel glove-buff is needed but it seems it adds a little “something” though it may only be in my head. But since it only takes a few extra minutes, and gets any stray threads of the pipe that the wheel may have left, I almost always finish this way.

I am really happy with how this old pipe came out. The new stem was a success, both in fitting it and in the look, and I really like how the contrast staining came out. The rim looks much better now stained black with dye not tar. The fills didn’t hold the stain as well as I’d hoped but are much less noticeable now. And the and burn mark is almost invisible, which really pleases me. The only thing that I am not happy about, really confused about more than unhappy, is that the stem has loosened from the tight fit it had the day I turned it. I don’t know if the humidity (it had been extremely humid here the last two weeks), the alcohol soak, the extended time of separation for stem and stummel or what caused that. Hopefully a few days seated together and/or some use will remedy that. If not, I’ll likely heat and gently expand the tenon a tad to get the fit better. At any rate, here is the final result:

IMG_6802 IMG_6801 IMG_6800 IMG_6799 IMG_6796 IMG_6795 IMG_6794 IMG_6793

Not So “Mint” Danish Sovereign Reborn


Blog by Greg Wolford

I picked up this Danish Sovereign off eBay for my son as a gift. I have one in a different shape and he has admired it since I got it. I knew that he had been wanting a Danish pipe and when I was this one it looked to be right up his style-alley.

This pipe came described as in “mint condition” from an eBay seller. It was a Father’s Day gift for my son, his first Father’s Day pipe actually; he took up the pipe only about 8 months ago. The photos the seller provided were not good and none of the problems were shown/disclosed; I could see some oxidation but didn’t expect the chatter and dents.

The seller shipped it not as expediently as I had hoped so the pipe didn’t arrive in time for Father’s Day; it came yesterday. I spent the evening getting it cleaned up for him, not doing anything to alter the originality of the pipe, which is what he wanted. If he decides he wants me to, I may end up sanding it down and re-staining it, filling the dents as needed, to make it much more like new. But that’ll be his call since it’s his gift.

I thought I would try something, actually a few things, different for this project: I used a few new things/processes, yes, but mainly the difference is I took video as I went instead of photos and will show the steps/progress in the video rather than writing it all out. This is something I have been wanting to try and so, now I have! Since it is the first time doing a resto-video I’m sure there will be things that could’ve been done better. And hopefully with time and practice, if this idea seems to “fly”, they will in the next projects.

GBD Midnight 9456


Blog by Greg Wolford

The last few months have been extremely busy for me. It is amazing how much a disabled, non-working person can be obligated to do; I think I had more “free time” when I was working full time in the car business! Ah, but I digress …

By chance, I found myself today with no obligations, no chores, no appointments, just a day to myself. Unfortunately it also stormed badly which flared up my arthritic joints but I was able, finally, to get to a project, if only a simple one.

I picked up this GBD Midnight about two weeks ago. It was a fair price and an interesting pipe to me; all of the Midnight models I had seen before had acrylic stems and this one had vulcanite. Some later research led me to believe that there were at least two productions of this line: the first with vulcanite stems shortly after the merger and another some time later with acrylic stems.

Although I forgot to take “before” photos the seller’s were quite accurate except for the oxidation was a bit more than I anticipated: it wasn’t thick or heavy but was even, all over brown. The seller said he had only smoked it a few times over the years and didn’t like it; he prefers a 9 mm filter pipe. He said there were a few tooth dents but not bad ones and that he had cleaned it; these things were accurate, if he meant cleaned the inside.

The too had a fair amount if tar build up but not thick. The stummel was dirty but not in bad shape at all. And the dents were mild as be had said.

I began with an alcohol soaked pad, wiping down the stummel, paying extra attention to the rim’s build up. It didn’t take a lot to get it cleaned up and the rim smoothed out. I then reamed the bowl, which needed it but wasn’t badly caked. I set the stummel aside and began to work on the stem.

I started by rubbing the entire stem well with Back-to-Black, which removed a lot of oxidation. Then I took some automotive rubbing compound and cotton pads and polished away almost all of the remaining oxidation. After the rubbing compound I took the stem to the heat gun to raise the dents. They came up pretty well but not completely. But they were now slight enough I decided to not sand them smooth; I wanted to finish this pipe and write this blog tonight, those things and the small dents left made this decision for me easy. I did wet sand the stem with 400 grit wet/dry paper to remove the last of the oxidation and the few scratches I saw.

I reassembled the pipe and went to the buffing wheel. I like to buff the shank-stem union together so as to keep a nice fit. I began with black buffing compound, about an 800-grit I believe. After the union was buffed I took the stem and stummel apart and buffed each piece. I moved onto brown tripoli, then white diamond doing the same process.

I had a small deviation at the end of the white diamond buffing: the wheel grabbed the stummel and bounced it off my table. It left two dents, the bounce across the garage, that totally irritated me. I then had to steam the the dents out; thankfully the dents weren’t bad and came out. I went back to the white diamond and re-buffed the stummel.

I reassembled the pipe and gave it several coats of carnauba wax, buffed it on a soft, clean wheel and, finally, hand buffed it wearing a pair of linen gloves I bought just for that purpose.

The pipe came out quite well I think. After cleaning and buffing it is a bit lighter on color, which I am very happy with; the grain, especially the Birdseye on the front of the bowl really pops now.

Hopefully the frantic pace of life will slow some over the coming weeks; I have many more wonderful old pipes that are patiently awaiting being brought back to life. And I am anxious to do the work an share it with you.

20130613-222006.jpg

20130613-222015.jpg

20130613-222023.jpg

20130613-222030.jpg

20130613-222040.jpg

20130613-222049.jpg

20130613-222056.jpg

20130613-222105.jpg

20130613-222111.jpg

20130613-222119.jpg

20130613-222126.jpg

20130613-222132.jpg