Author Archives: rebornpipes

A Pipe’s Journey – Big Ben Select Bent Billiard


Blog by Steve Laug

I personally enjoy knowing the history or journey of a pipe before it arrives in my trust. So when I am gifted a pipe I record where it came from and if I keep it I have an idea of the path it took to come to me. If I gift it forward I pass on that information to the next owner if they are interested in knowing. I don’t know what it is about the story of a pipe that intrigues me but I have some idea that it is because of the connection it gives with pipe men behind me and those who will live beyond me. I know that a briar pipe will live long after I am gone. Because I buy estate pipes I know that it has had a long history before it came to me. When I know that history it adds a dimension to my enjoyment of the pipe. When I don’t know the history I can learn a lot about it from the previous pipe man who smoked it before me.

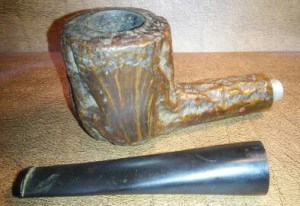
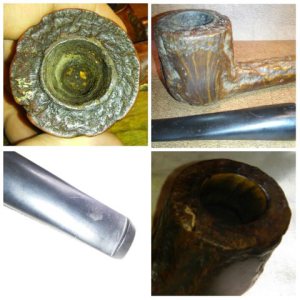
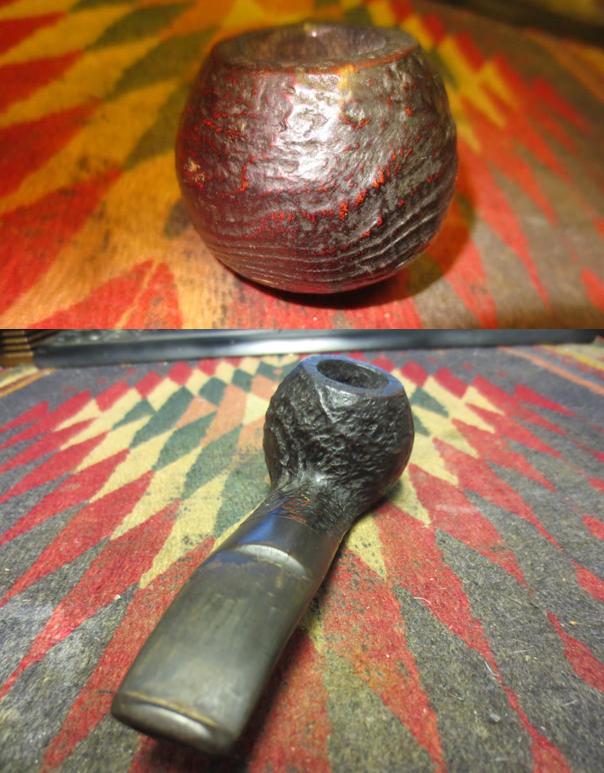
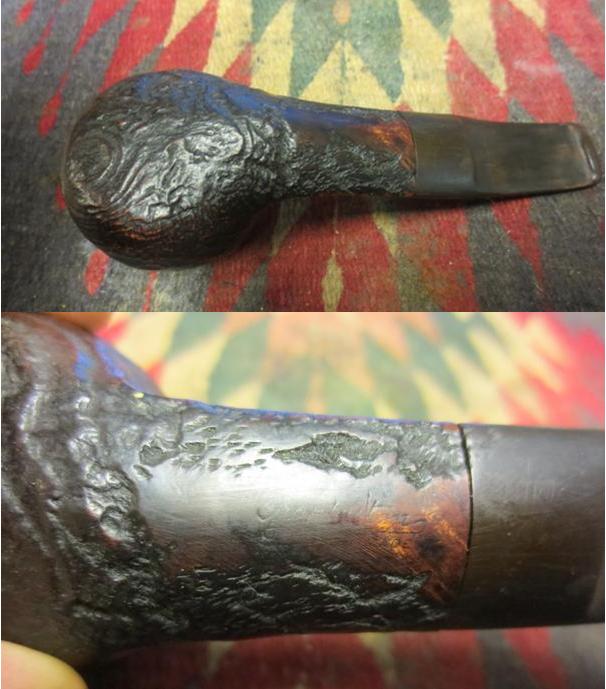
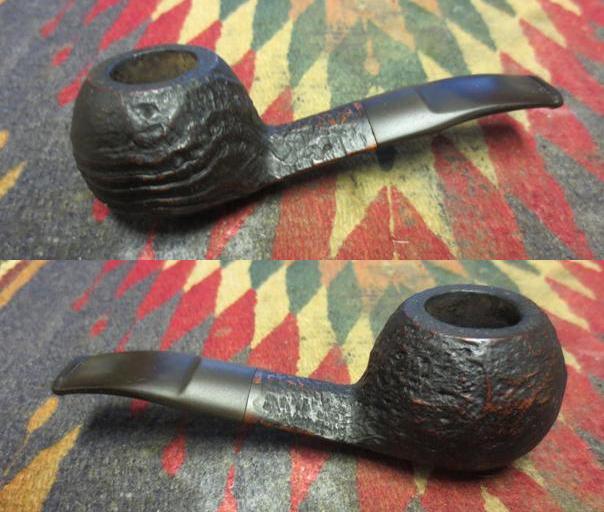
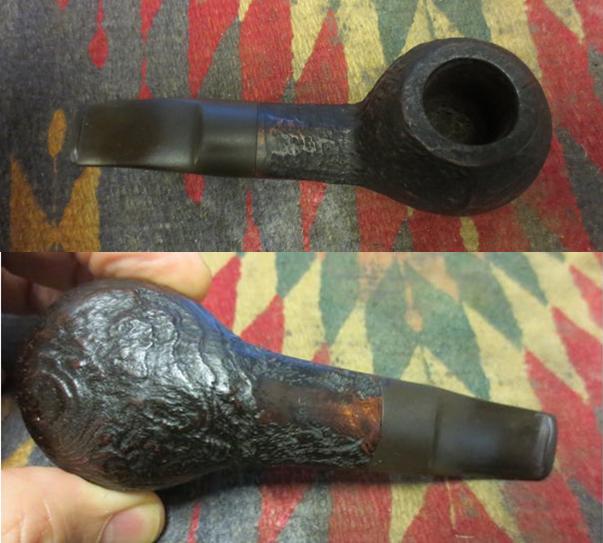
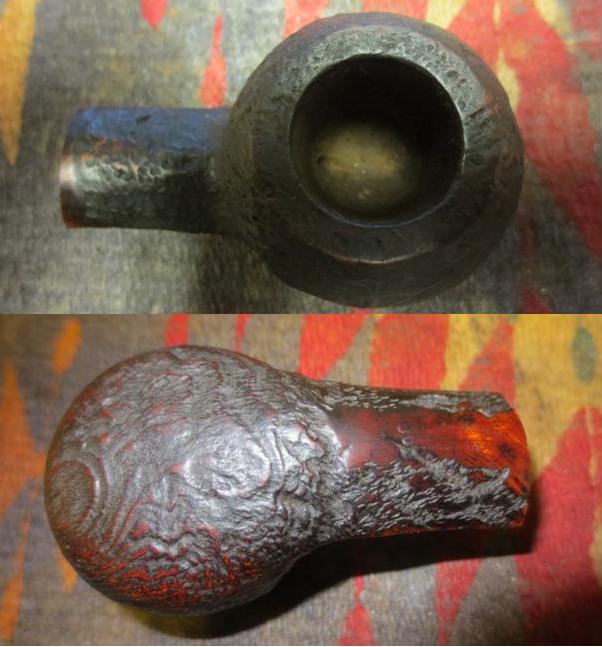
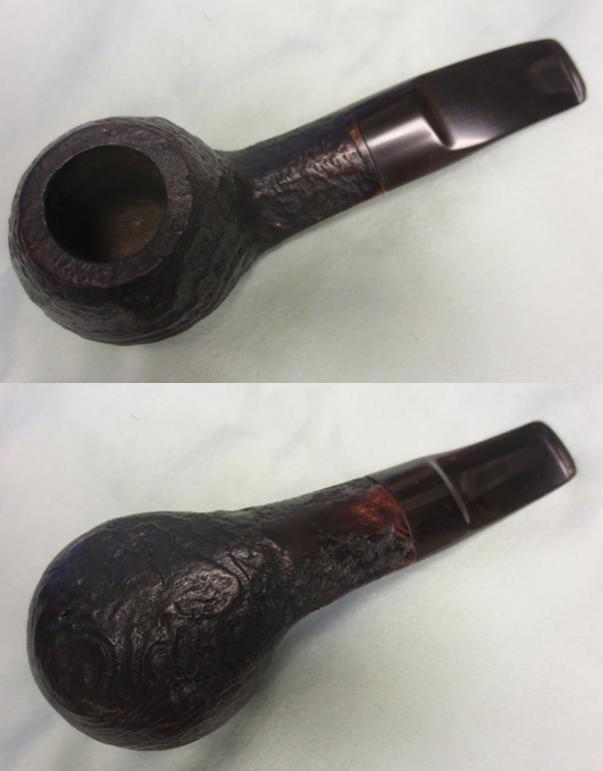
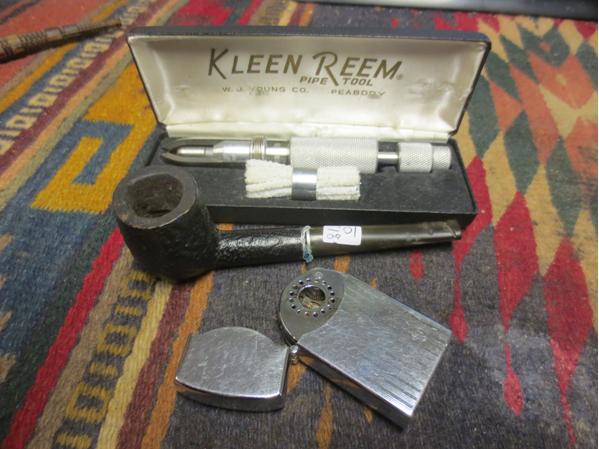
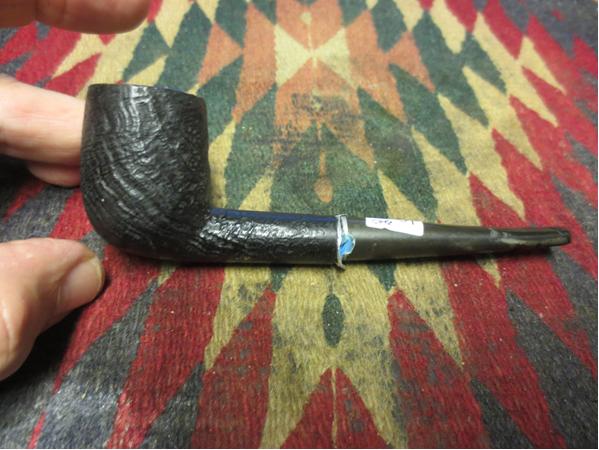
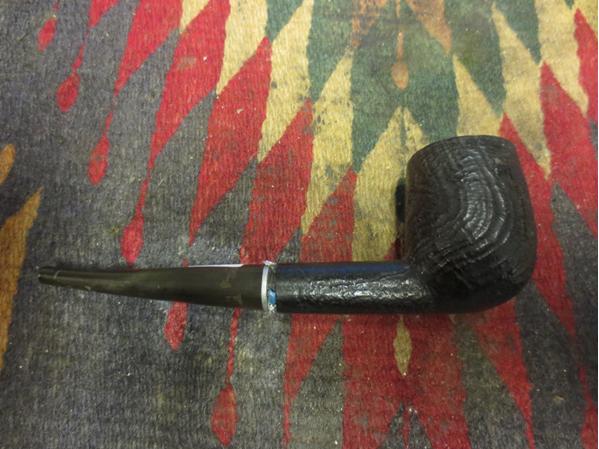
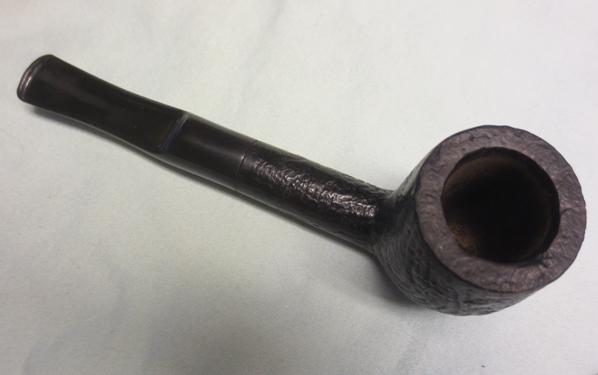
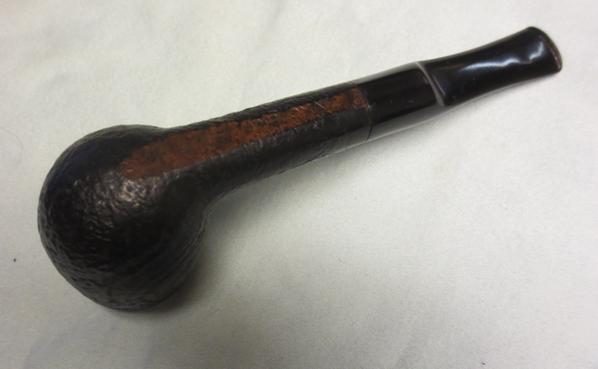
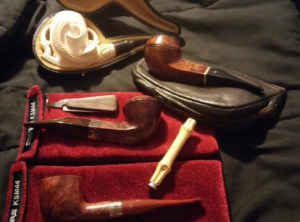
This pipe came to me in a gift box of six pipes that were in need for refurbishment from a friend in California on Smokers Forums. I believe he picked them up from Ebay in a lot of pipes he purchased. As many do, he bought the lot for one of the pipes and then set aside the others to either work on or to pass on to others. This particular pipe was a sandblasted Big Ben Bent Billiard. Underneath the wear and tear I could see that a gem still resided. It had a silver band and a nice looking blast. I could see from the use and condition of the pipe that it was obviously someone’s favourite pipe. I must have been a great smoking pipe because it was smoked into the condition it arrived at my work table.

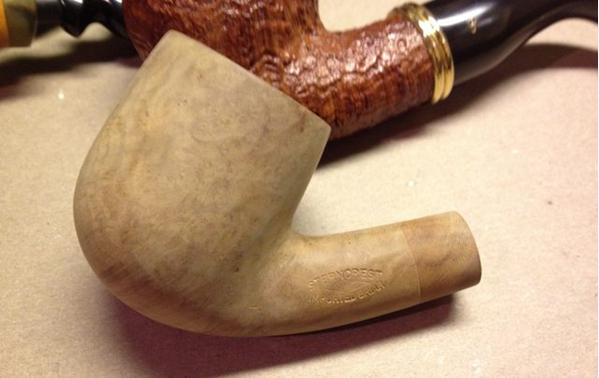
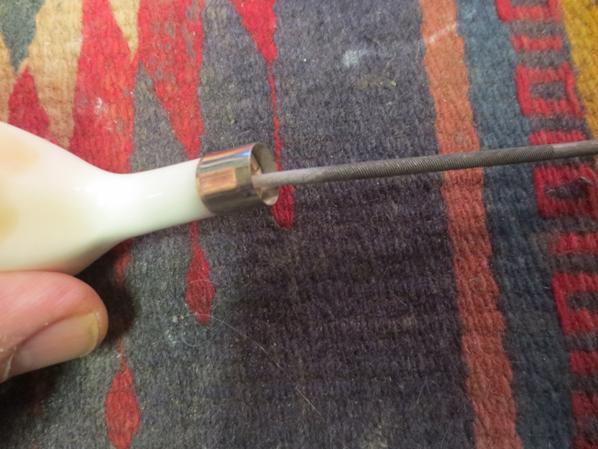
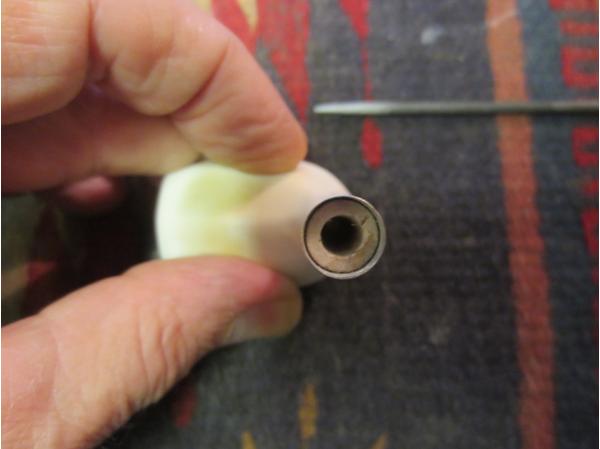
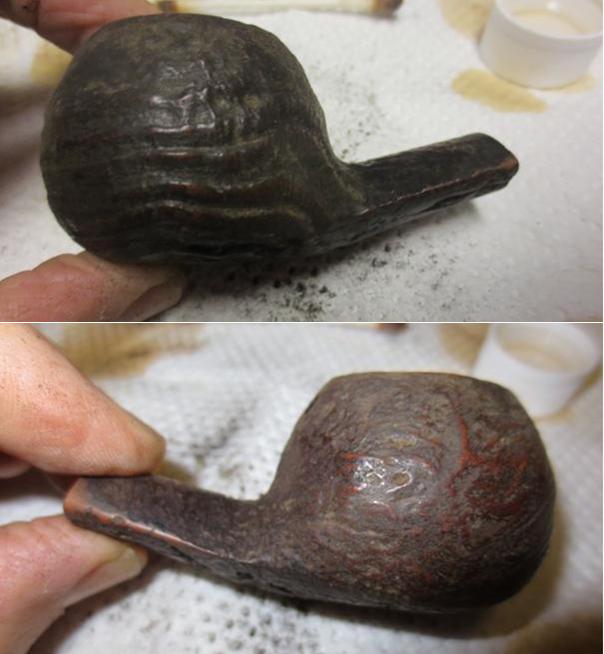
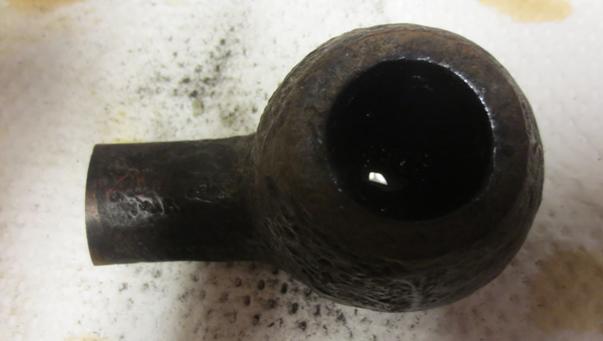
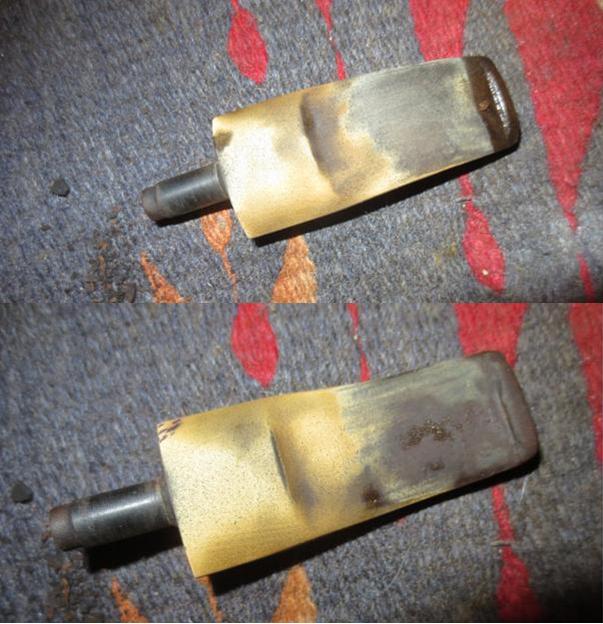
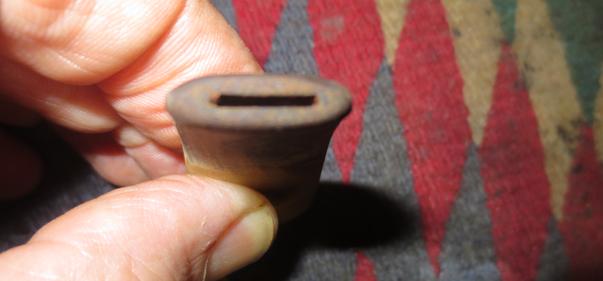
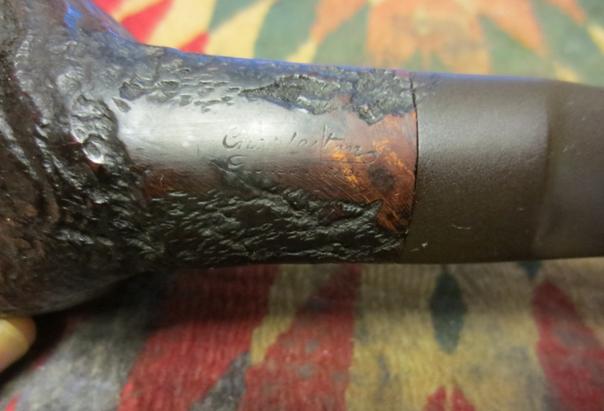
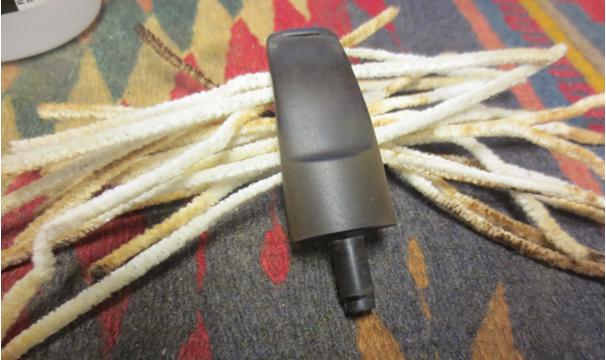
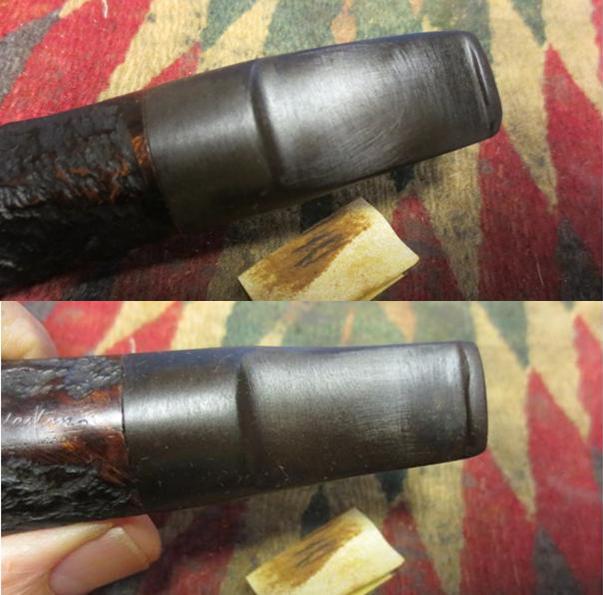
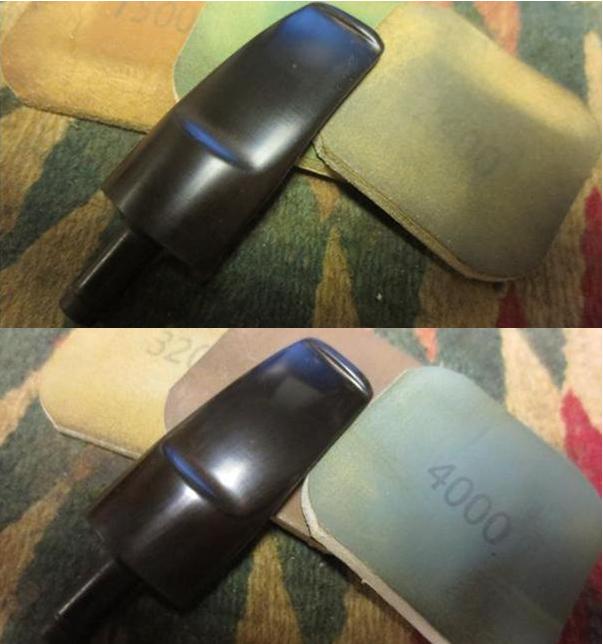
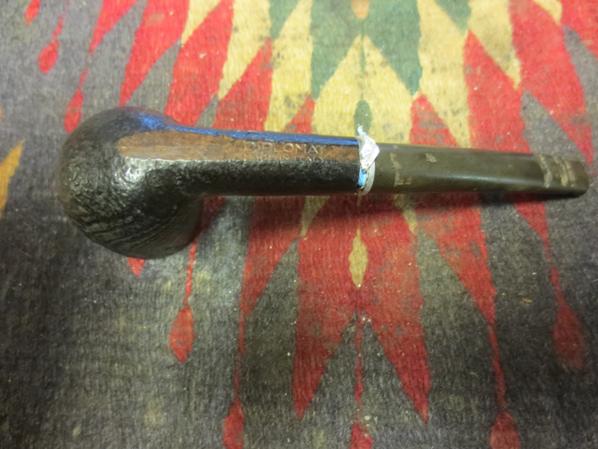
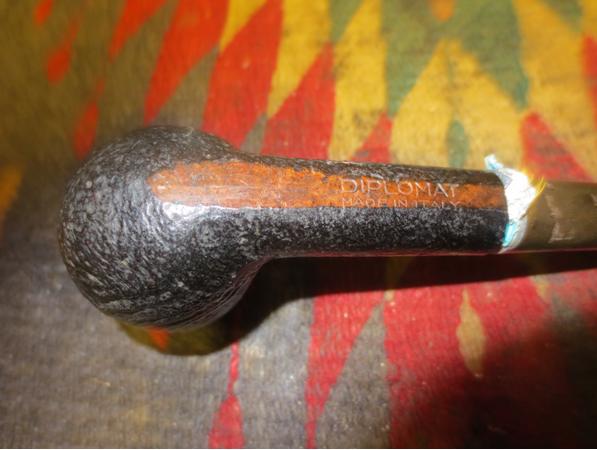
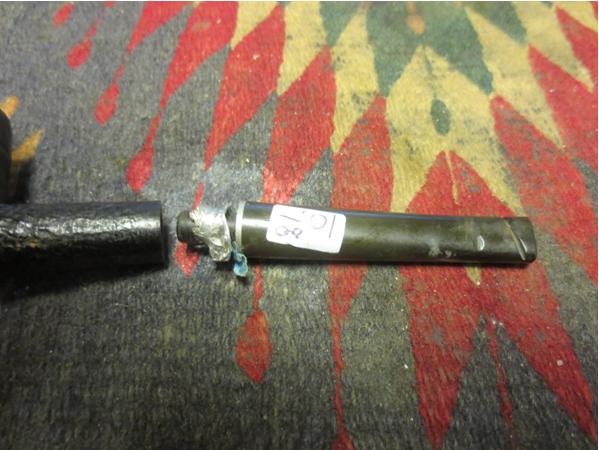
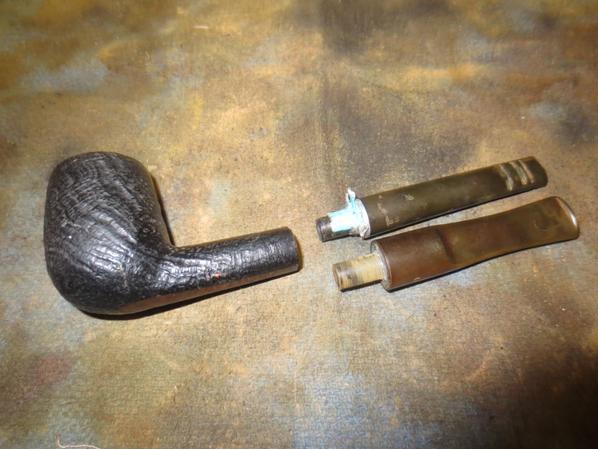
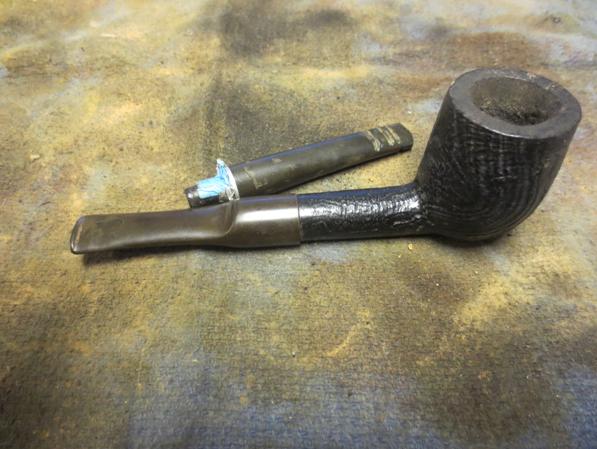
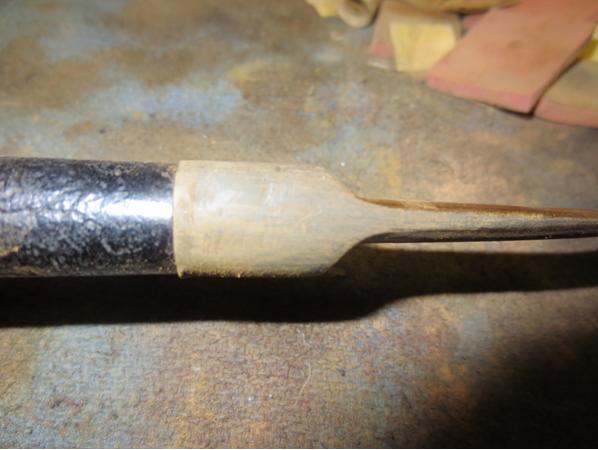
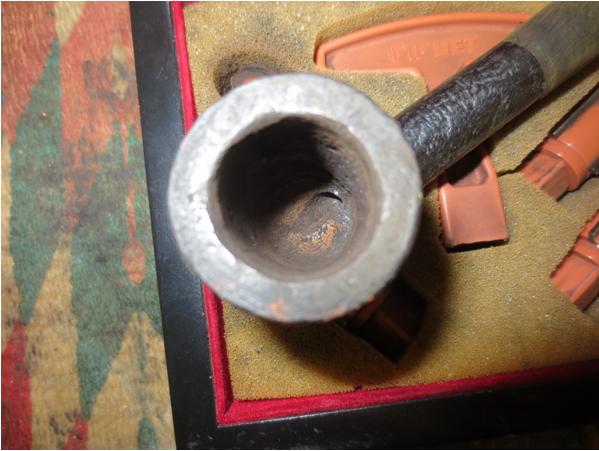
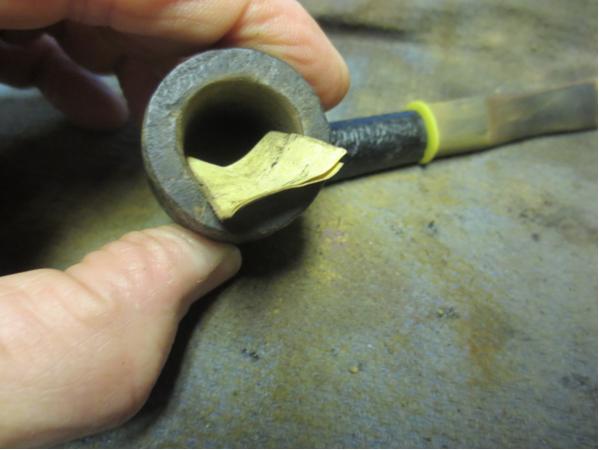
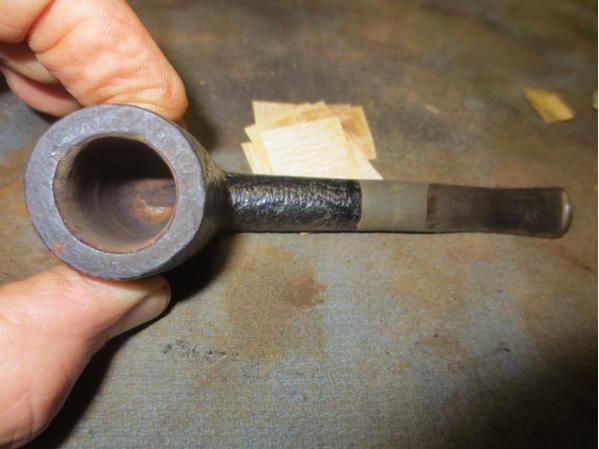
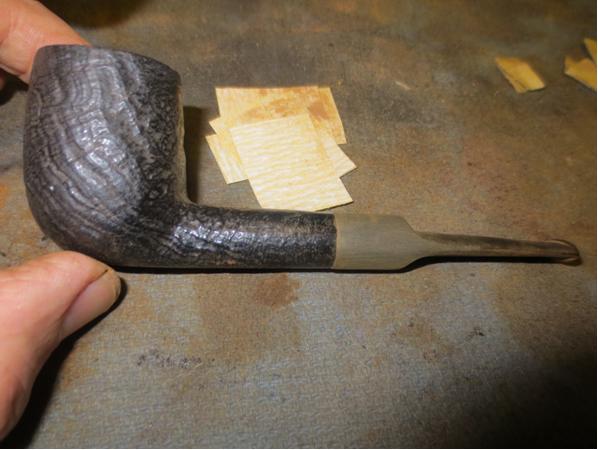
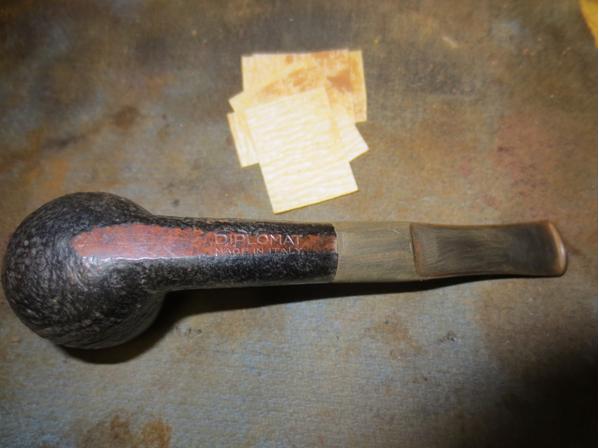
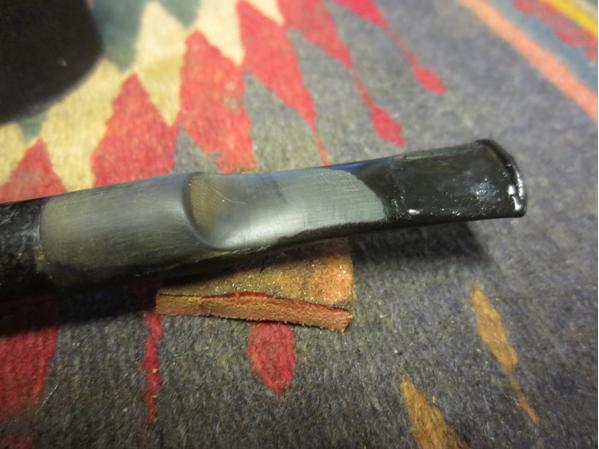
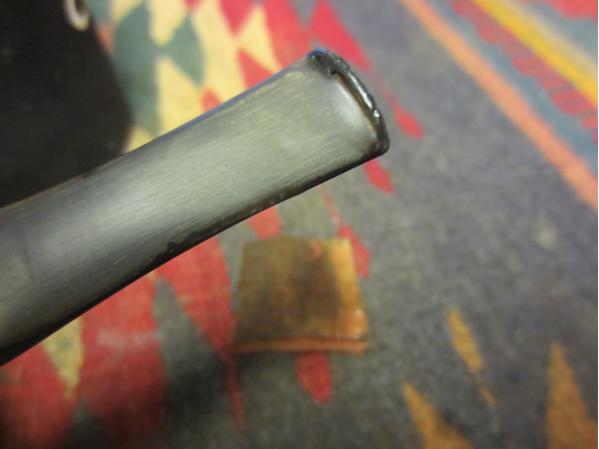
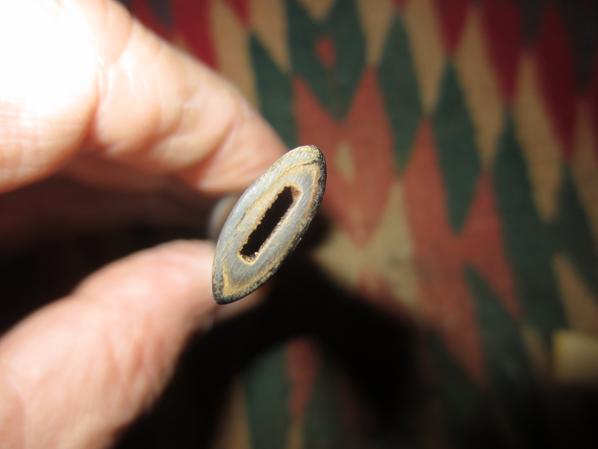
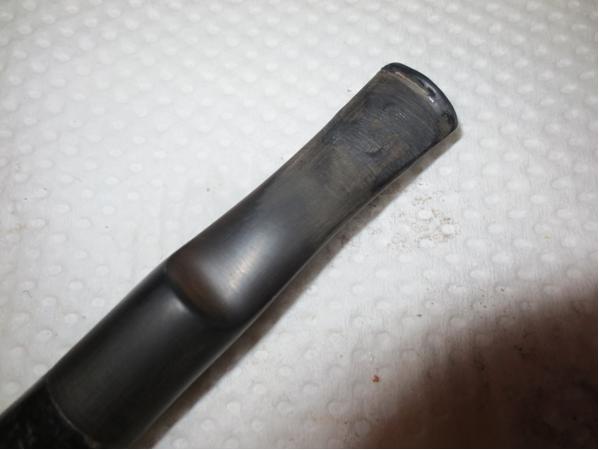
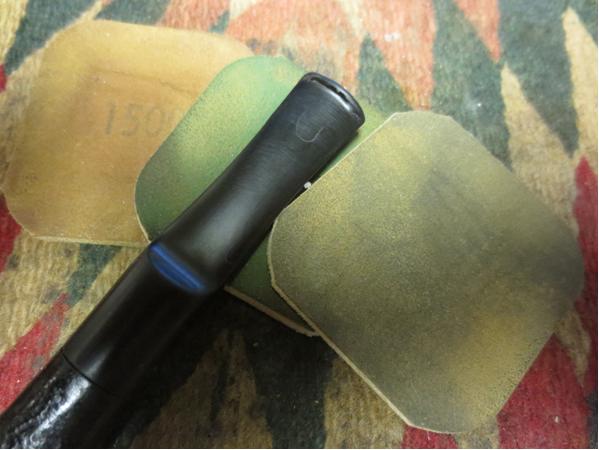
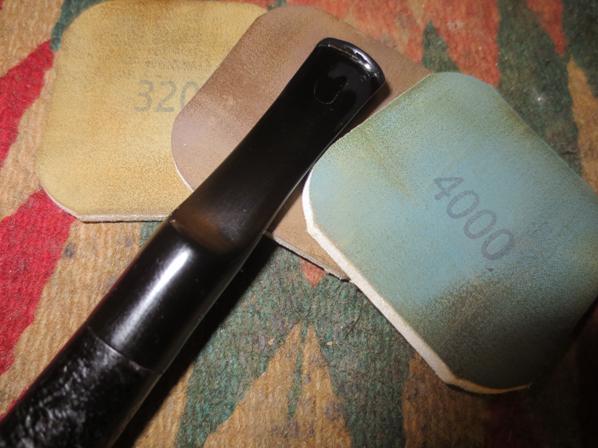
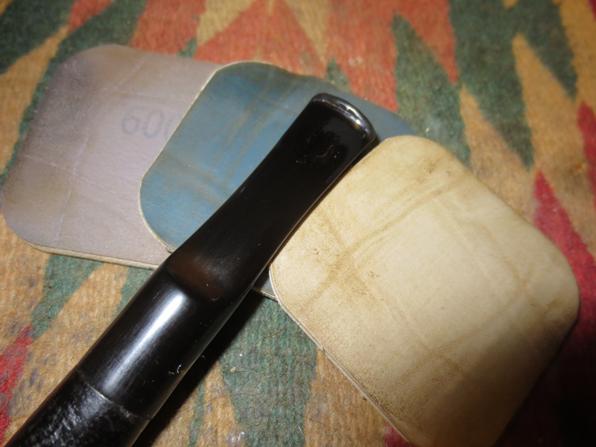
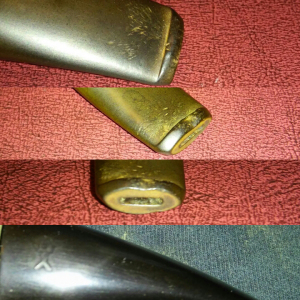
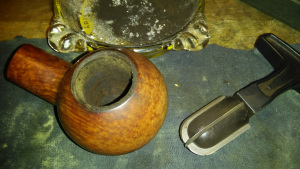
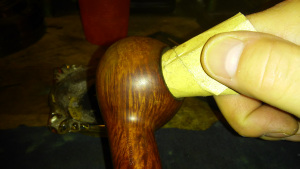
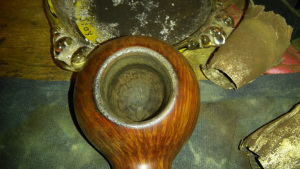
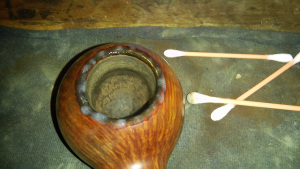
The finish was rough but shape was classic. The feel of the pipe in my hand was perfect. It fit in the cup of my hand and was light weight and comfortable. The thin stem would clean up nicely and feel great in the mouth. There was some work to do before it would be ready to be smoked by me or by someone I gifted it to that was for sure. The bowl was dirty and thickly caked. The shank and stem were filled with tars and grime. The bowl was stamped on the underside of the shank – Big Ben Select under a B in a circle. The rim edges were worn and rough but as it was a blast this would not be a problem to clean up. Over the stain coat was also a shiny varnish or lacquer coat that I always find to be a pain to remove and deal with in a pipe that is worn like this one. The outside of the stem was oxidized but the circle B logo was still deeply stamped. There was also a slight tooth mark on the underside of the stem near the button. The button was very tight and small – so much so that a thin pipe cleaner was work to get through the slot. I described the process of refurbishing this old timer in a previous blog that can be found at the link below. https://rebornpipes.com/2013/01/20/new-life-for-a-big-ben-select-bent-billiard/

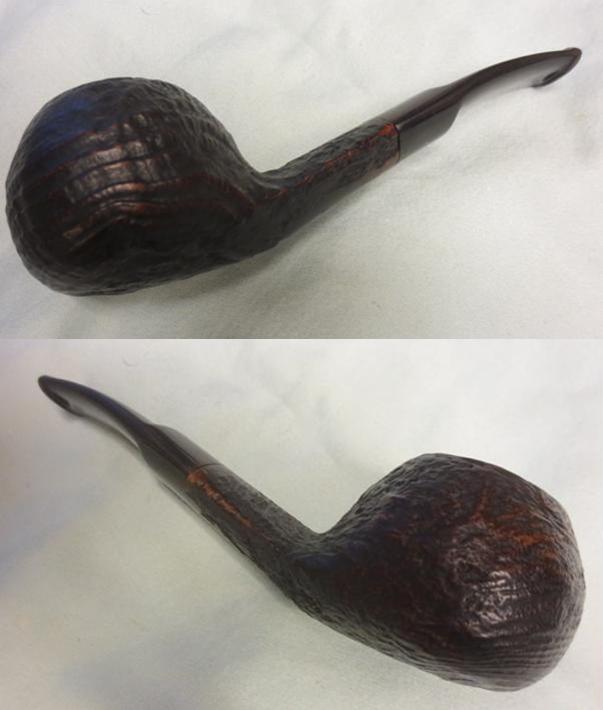
I don’t know anything about the original owner of the pipe as the gifter had no information on where it had come from. However, that being said I could tell a lot about the pipe man who had smoked it to this point in its life. From the condition of the pipe I knew that it had belonged to an old timer who smoked his pipes until they were worn out, threw them away and picked up another one. In terms of that scenario this pipe had a lot of life left in it. I could see that the pipe had never met a pipe cleaner in its long existence. I could tell that it was smoked almost continuously without a break to let it rest. I think it could easily fit into the category of rode hard and put away wet that accompanies many an old horse. All that being said it must have been a great smoking pipe to have been so “loved” that it never left the hand of the pipe man. The wear on the finish around the bowl where his hands rested showed how he held it. The small tooth mark on the underside of the stem near the button showed the way he clenched it in his mouth. As for the tobacco he smoked – well it was pretty oily and dark smelling so there is part of me that thinks that it was something like Erinmore. The cake was hard and dense.

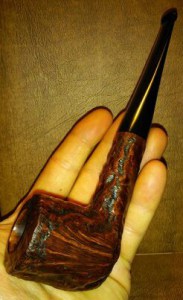
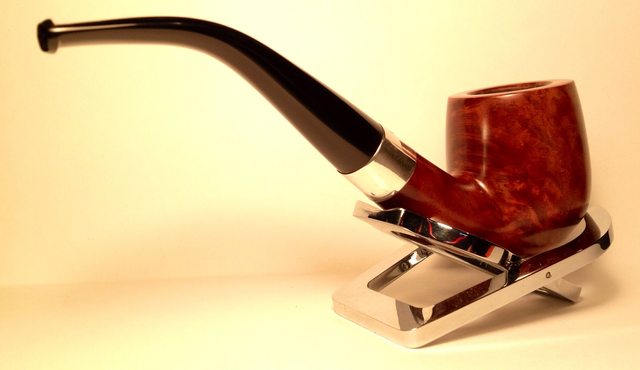
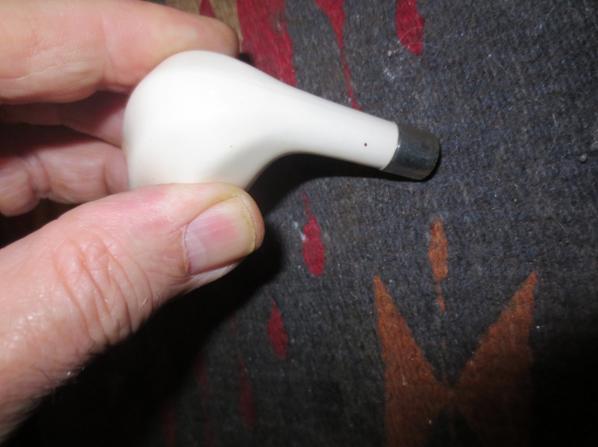
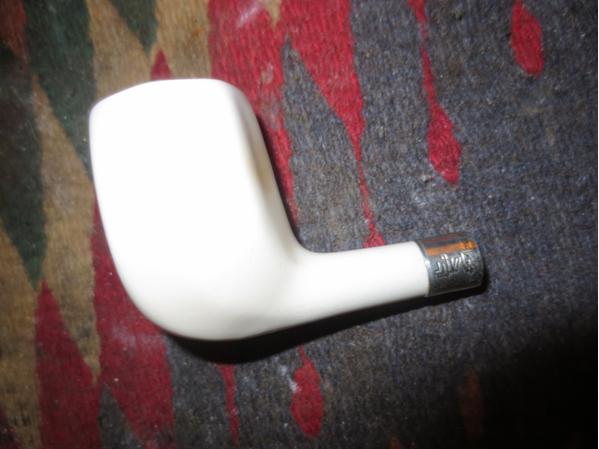
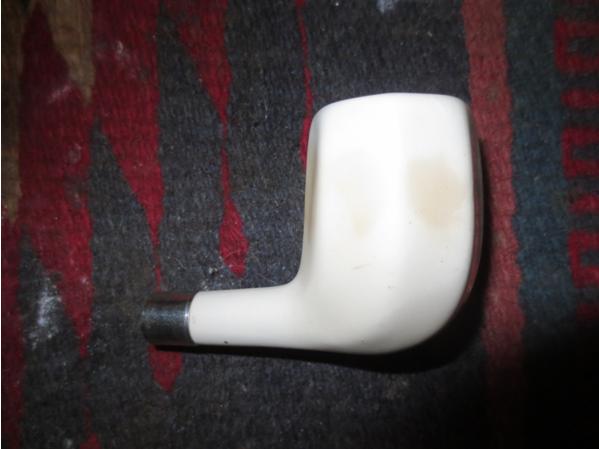
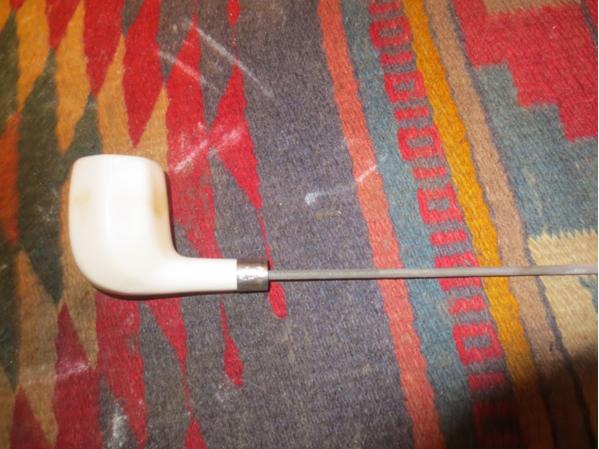
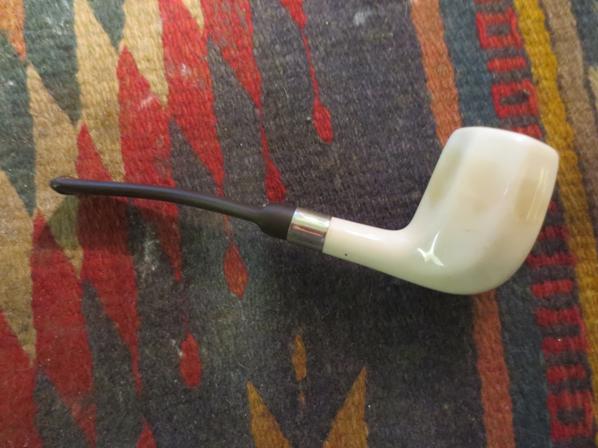
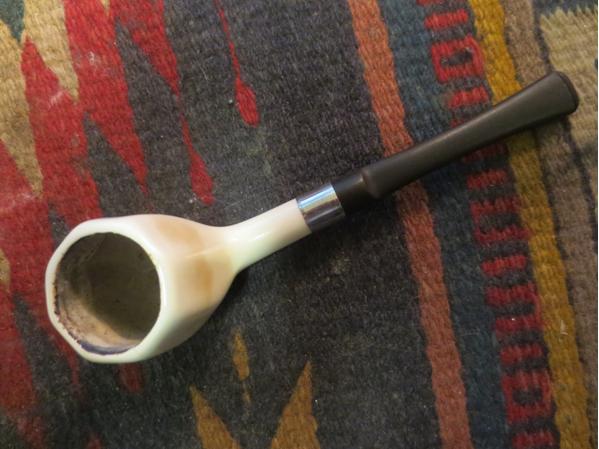
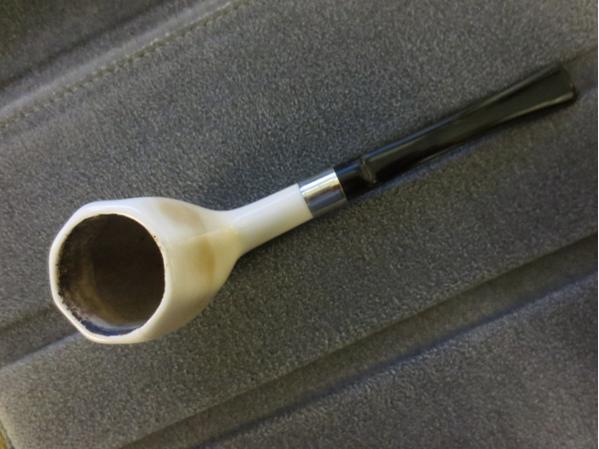
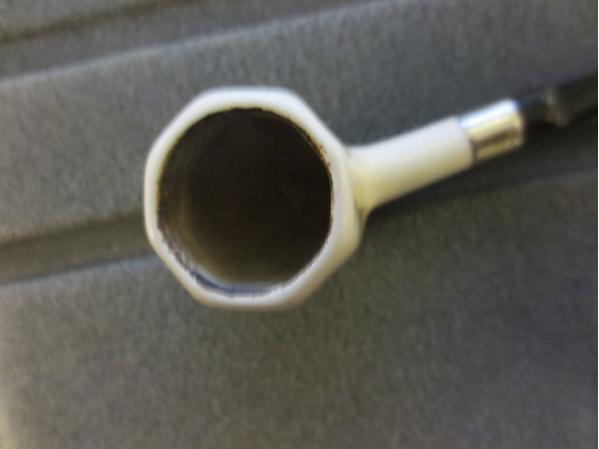
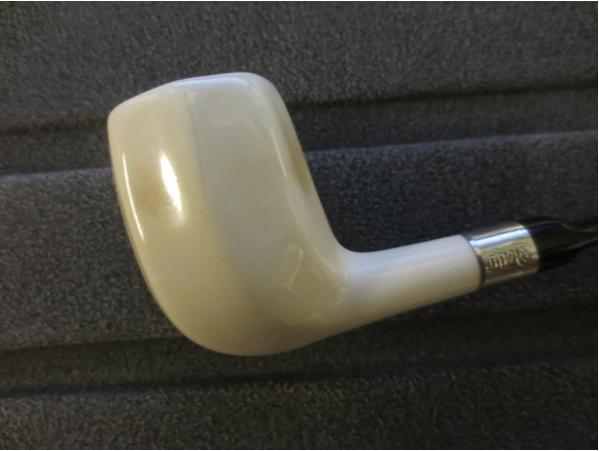
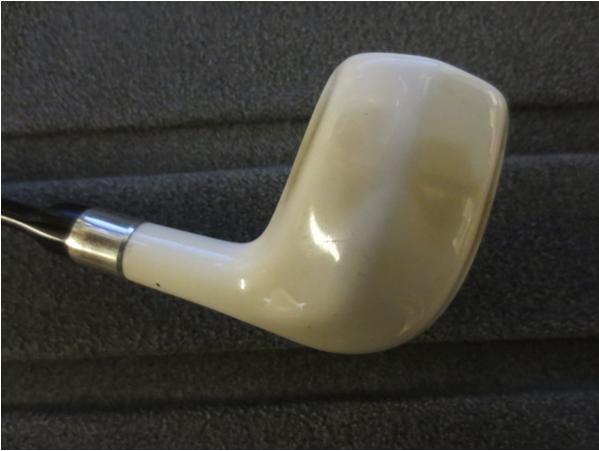
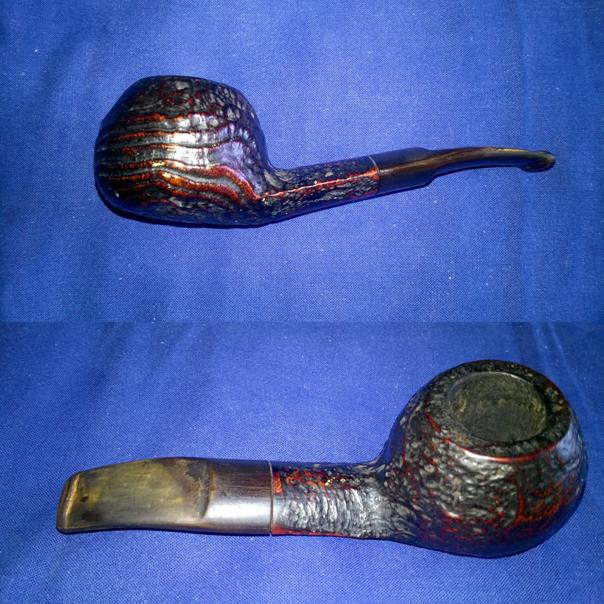
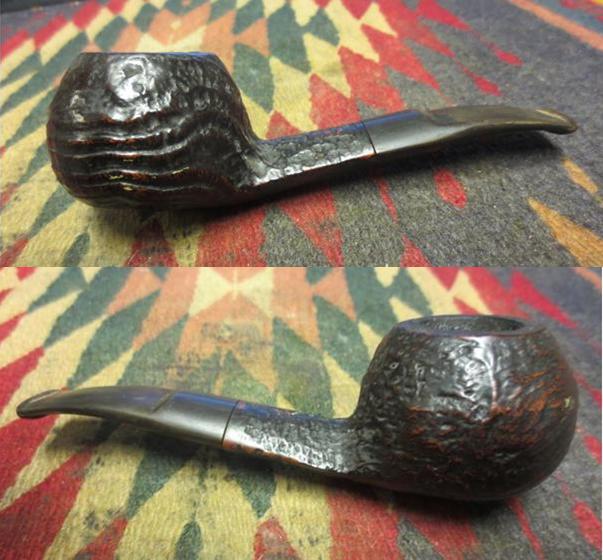
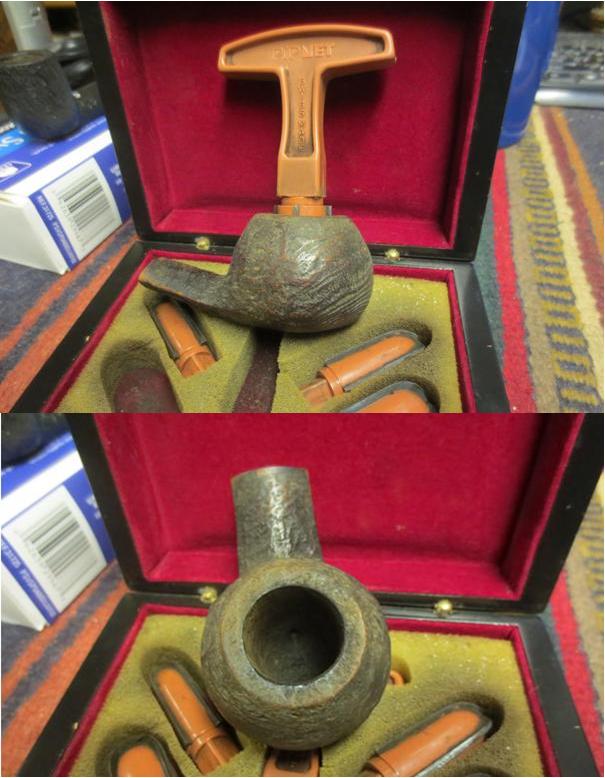
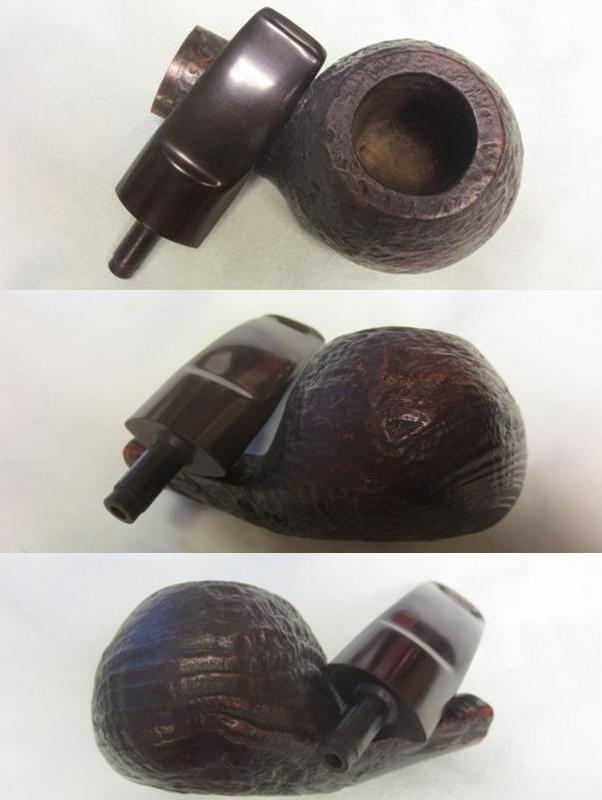
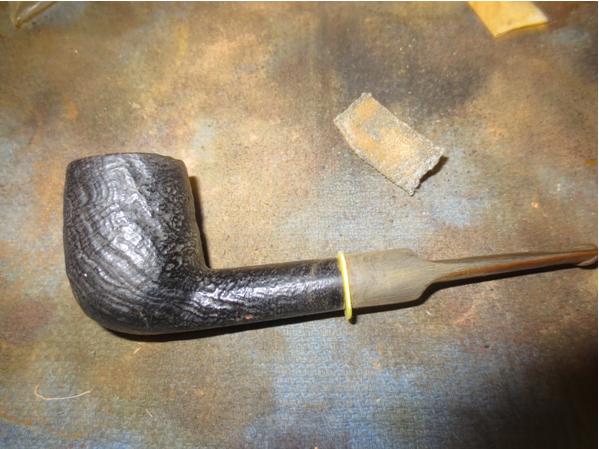
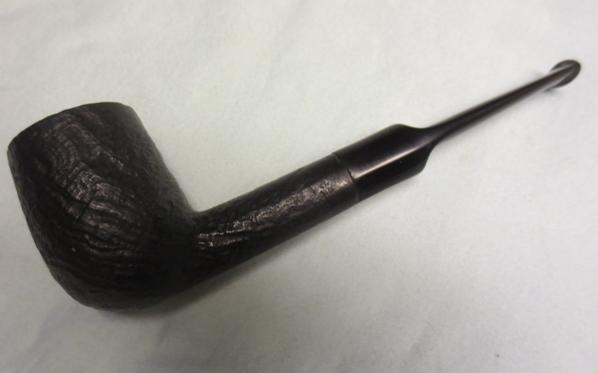
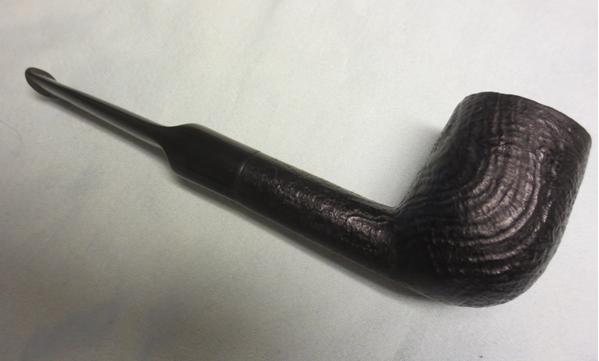
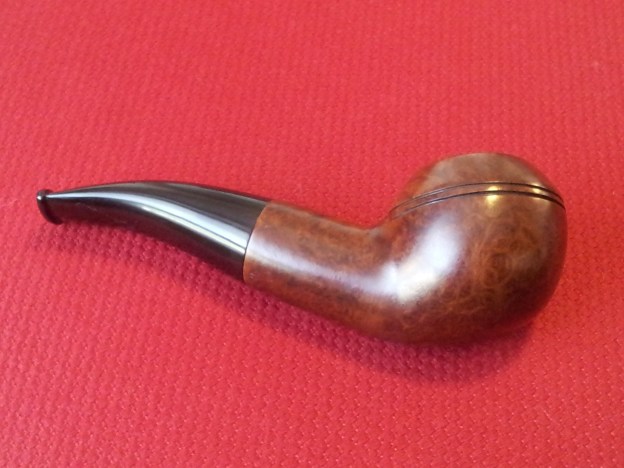
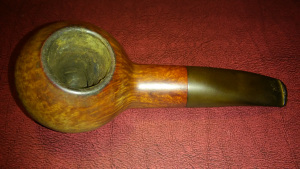
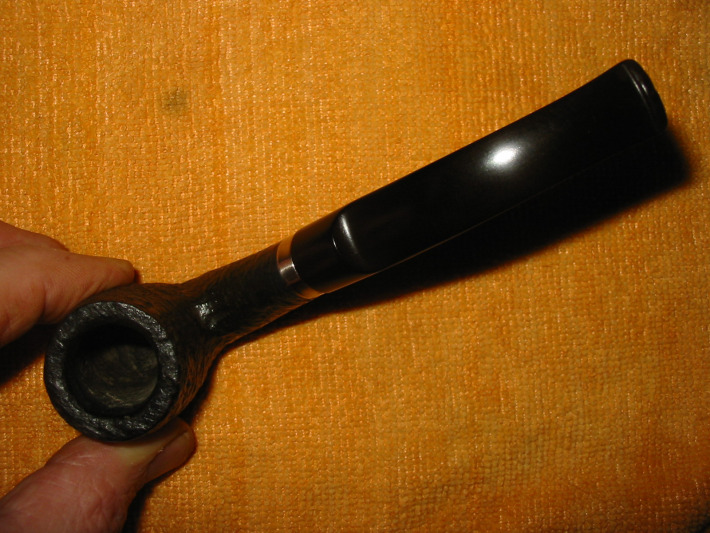
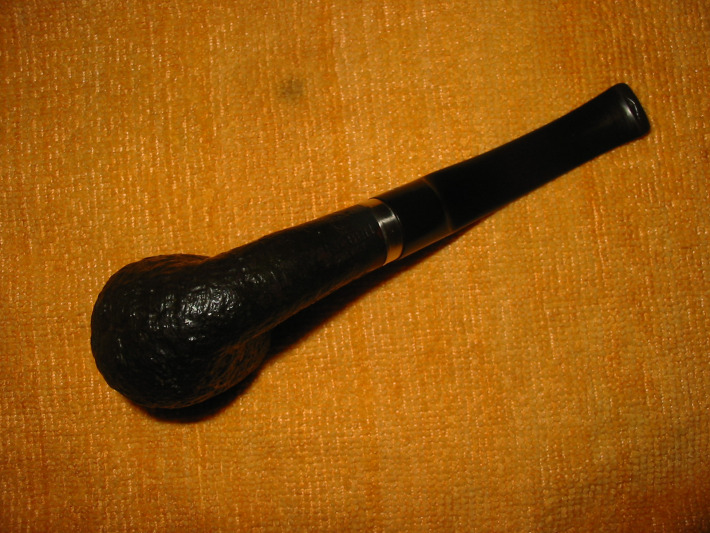
Here are some photos of the pipe when I finished restoring it. I knew that one day I would find the right person to pass this one on to.Ben1

Ben2

Ben3

Ben4 
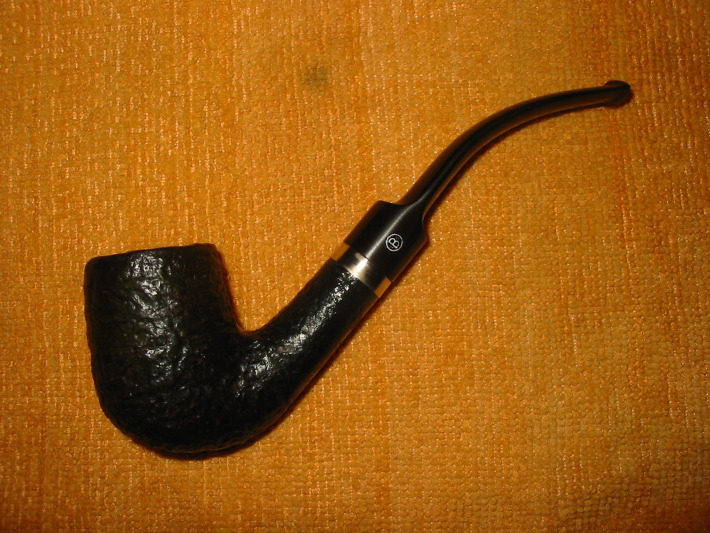
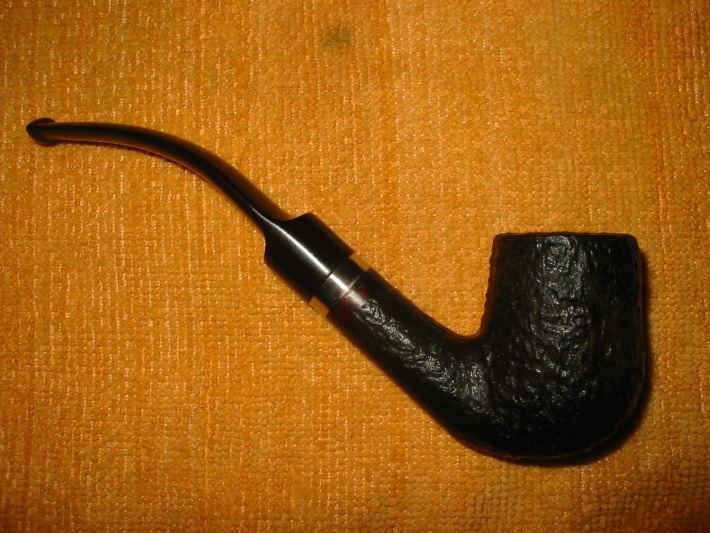
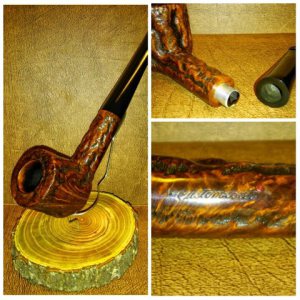
Not too long ago now I was talking to a good friend of mine, Dal who lives in Sofia, Bulgaria. He had recently taken up the pipe again. He had a few pipes that already had stories attached to them so we spoke of cleaning up and restoring his pipes. We talked about methods and tools used to clean them so that he could bring them back to a bit of their former glory. That got me thinking that I would like to pass a pipe from my collection on to him. Looking through my rack my eyes fell on the Big Ben Select bent billiard and I knew this was the one that I would gift to him. It had an interesting history and the idea of sending this Dutch pipe back to Europe just fit for me. I also knew that the thin stem, the tactile sandblast and the bend of the pipe would appeal to his liking.

The timing was perfect as one of his colleagues was here in Vancouver for training at our office so I could send it back to Bulgaria with her. It would be hand delivered in a timely way and much more likely to arrive in one piece than if I shipped it to him through the post from Canada. I took it from the rack and gave it a quick cleaning to remove any dust that had collected. I gave the pipe a light buff with carnauba wax and then with a clean buff to bring up a shine. I took it apart and wrapped the stem and the bowl separately in paper towels. I put a small bag of Stokkebye’s Balkan Supreme with the wrapped pipe and put the gift into a ziplock bag for easy delivery.

This past weekend she gave him the pipe. I was curious to find out what he thought of it so I fired him an email and asked him. Sometimes my curiosity cannot wait to just let things happen at their own pace I want to know sooner. I wanted to be able to finish my chapter of the life this pipe. I had after all delivered the trust to another pipe man and I wanted to discharge the trust for this old pipe to him. He wrote the following email in response:

Hey Steve,
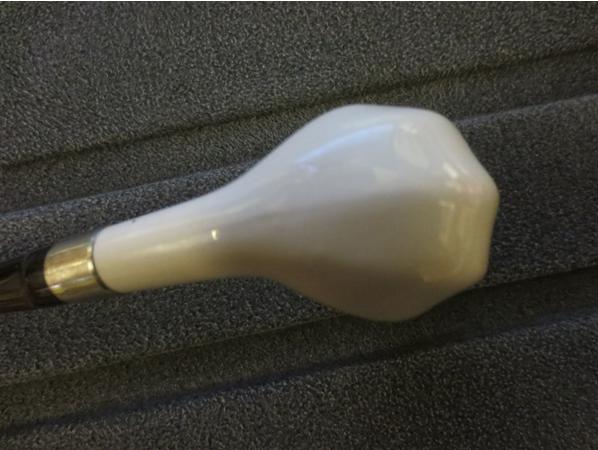
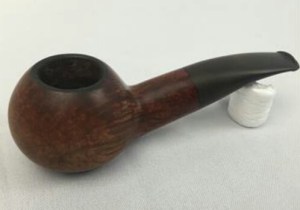
Well, I named it ‘Vancouver’. It only seemed right. I really like it – the look, feel…very nice. Today I smoked my first bowl, recorded it for posterity with the photo attached. I’m not too practiced at doing selfies…. Very light weight and smoked well. I love the stem design too. Thanks. The tobacco was good too – starts with a sweet aroma and finishes with something really full – can’t quite put my finger on it. I look forward to hearing the back story on it.
Dal
Ben5 So my trust has been discharged. With one journey across the Atlantic under its belt and travel to the West Coast of the US from somewhere in the Eastern or Central US it now crossed the Atlantic once again. It had a stopover in Amsterdam and Budapest before it came to Sofia, Bulgaria. Its story can now continue in the rack of another pipe man a continent away from the original purchaser of the pipe. His first bowl was a Balkan Supreme on the balcony of his apartment in Sofia. I am sure that he will add his own unique elements to the story and will grow and expand over the years he enjoys this pipe. One day when he passes it on as a trust to another pipe man he can also pass on its history with his part of the tale added to the story.

Custombilt Compilation


I love the old CB pipes so this is a natural for me to reblog. Nice work on these. I had never seen a CB Canadian like the one you posted. It is a beauty.

pipesrevival's avatarPipesRevival

I’m starting to realize the photos of my process on many of the pipes I’ve redone in the past are lost. Luckily I have before and after photos, please bare with me as new pipes are redone I will add more detailed photos of my process. I decided to put together a compilation of some of my favorites.

20151009_1027472_zpsuvvs9drj~2

Custom-bilt pipes there will be quite a few of these. I’m a collector and I haven’t seen an end in sight. Each one has it’s own personality As Individual As A Thumbprint stands true. The few below were redone in the past year.  My process has remained the same for that time, I followed the same process as in my previous posts.

20151025_122929~220151025_112240~2~2

(1939 brochure)

20151025_123435~2

Images & information courtesy of Bill Ungers As Individual As A Thumbprint-The Custombilt Pipe Story.

~~~~~~~~~~~~~~~~~~~~~~~~~~~~~~~~~~

20150501_112045_zpszhnfky8g~220150501_112005_zpsxasdh2wi~2PhotoGrid_1430935869731_zps1gymblhs20150506_1414002_zpsrn9kgjfl~2PhotoGrid_1430935937335_zpsawasawyt

First up a Custom-Bilt patiented filter system billiard from what I’ve read it was…

View original post 151 more words

Removing Stain from a Briar Pipe – Additional info added


Blog by Dave Gossett
stain1

stain2 I’ve been working on a stain removal recipe/technique with some junker pipes and came up with this. It works pretty well. It will also strip the color out of any fills in the pipe and they will stand out afterwards. This is great for a fill free briar, but not recommended if it does, unless you plan on digging out the old fills and replacing them with briar dust. I always advise trying new repair and restoration tips on a test pipe before trying it on a keeper.

Step 1. Use Murphy’s wood soap to remove the wax. Take care not to get the Murphy’s soap inside the pipe!

Step 2. Wipe down with alcohol.

Step 3. Mix a heavy batch of Oxy Clean powder with hot water. 3 tablespoons give or take. Use just enough hot water to dilute the powder and then add a couple of shots of 91% alcohol. Heat the briar with a hair dryer before starting. This opens the pores and speeds up the removal process. (at least that’s my theory.)

0000 steel wool can be used with mix to gently scrub the briar. The steel wool is fine enough it will not scratch the briar. Use gently, let the wool do the work for you. A rag can be used but it will take a few runs to achieve the same results. When dipping the rag or wool don’t submerge to the bottom of the mix where the undissolved gritty powder is settled. You don’t want the grit on the briar when scrubbing. Stay clear of the stampings with the steel wool. Use a rag on those areas.

Rinse the stummel clean with tap water and towel off so the oxy residue doesn’t dry on the wood.

Let the stummel dry completely to see if you’re satisfied with the coloring. repeat the process again if it’s still dark.

Step 4. Depending on how much time and cleaning it took to remove the stain, it could raise the grain a bit. Don’t worry. Most of the time this isn’t the case. After the stain has been striped and the pipe has thoroughly dried, give the stummel a light dry sanding with 2000-3000 grit and this will take care of any raised grain concerns.

Step 5. Now your pipe is ready for your color change of choice or waxed up for a beautiful natural finish.

I tried to be as detailed as possible but may have forgotten something. This is why I recommend trying new techniques on a test pipe.

Here are the results of the stain removal on a very dark pipe.

Photos of the pipe before stripping the stain:stain3

Stain7

stain6

stain5 Photo of the pipe with the stain stripped:stain2 Photos of the finished pipe:stain9

stain10

stain11ADDENDUM

Dave took the time to measure all of the components in his recipe and has sent them to be added to this post. Here it is:
1 cup hot water (hotter the better)

3 spoons of Oxy Clean powder

After the Oxy is thoroughly dissolved then add the alcohol

1 spoon of 91% alcohol

The alcohol cuts the suds and stops the solution from becoming a foaming mess while you’re working on the pipe.

Thanks Dave

Fitting a Stem to an Old Ceramic/Porcelain Pipe Bowl


Blog by Steve Laug

In a box of pipe parts I was given was a hexagonal shaped ceramic/porcelain pipe bowl with a thin pencil shank. It was cut off mid-shank at a slight angle. Looking at it I decided that it would be an interesting looking pipe to restem. The finished pipe would be unique and well worth the work to restem. I am guessing that the pipe originally had been longer and possibly had a bit on the end. There was a tiny chip cracked in the end of the shank. I reglued that and held it in place until it dried. Since the shank had been cut at an angle, I used a topping board to flatten the edge and square the end of the shank as much as possible. I then used a nickel band that I had in my box of bands and heated it and pressed it in place on the shank. I left a small portion of the band extending beyond the end of the shank to help square the fit of the stem to the shank. I went through my can of stems and found one that was the perfect diameter for a match to the shank. The tenon would need to be made smaller to fit in the shank and the mortise would need to be opened further with needle files for the stem to fit well.ceramic1 I scrubbed the bowl with Murphy’s Oil Soap and polished it with a microfibre cloth. There was a small hairline crack on the left side of the bowl coming from the rim downward about one half-inch. It was sealed so it was not currently a problem that I would need to deal with. I took some photos of the newly banded stem and the polished bowl to show the new look of the pipe. The bowl is quite thin so it will be a hot one to hold. It will need to be smoked slowly to keep it cool.ceramic2

ceramic3

ceramic4

ceramic5

ceramic6 I used a coarse needle file to open up the mortise in the shank to accommodate the tenon. I used a Dremel with a sanding drum to reduce the tenon as much as possible. I worked on the mortise to file down the inside of the shank. It took some careful file work to keep the mortise round so that once the opening was sufficient the tenon would not be loose inside.ceramic7

ceramic8 The next photo shows the finished mortise. The files worked well and the newly shaped tenon fit the shank perfectly.ceramic9 I put the stem in place on the bowl and took some photos to get a better look at the new pipe. The newly stemmed pipe actually looked very good. I loved the delicate look of it. The slight bend in the stem worked well with the bowl and allows the pipe to sit upright on a flat surface.ceramic10

ceramic11

ceramic12

ceramic13 The stem was rough and lightly oxidized. I sanded it with 220 grit sandpaper to loosen the oxidation and then used a medium and a fine grit sanding sponge to smooth out the scratches on the stem. I then wet sanded the stem with 1500-2400 grit micromesh sanding pads and rubbed the stem with Obsidian Oil. I dry sanded it with 3200-4000 grit pads, gave it another coat of oil and then finished sanding with 6000-12000 grit pads. I gave the stem a final coat of Obsidian Oil and let it dry.ceramic14

ceramic15

ceramic16 I buffed the stem and bowl lightly with Blue Diamond polish on the wheels and then gave the stem and bowl multiple coats of carnauba wax. I polished it with a clean flannel buff on the wheel making sure to hold the bowl tightly. To have the buffer grab this one and throw it would be a disaster that the pipe would not survive. Once I finished the buffing on the wheel I hand buffed it with a microfibre cloth to raise the final shine. The finished pipe is shown in the photos below. There is some slight coloring forming on the sides of the bowl midway down from the top. I am wondering if the rest of the bowl will also colour with use. The pipe looks really good with the new stem and band. It will fit well in my collection of unique older pieces.

Thanks for looking.ceramic17

ceramic18

ceramic19

ceramic20

ceramic21

ceramic22

ceramic23

ceramic24

Cleaning up a London Made Charleston Banker


Blog by Steve Laug

When I saw this pipe on Ebay I decided to bid on it. I had bought from this English sell a few times in the past and he generally has some great older pipes. He had listed this one as a Criterion London Made pipe. I had looked and found that Criterion was made by Comoy’s. He described it as a 1/8th bent sandblasted prince. To me it is almost a Banker shape. The bowl is quite large and the oval shank ends with a saddle bit. It is 5 inches (12.75cms) long and the bowl height is 1.5 inches (3.75cms). He described it as lightly smoked, and in very good condition and as usual his description was perfect. He said that the markings on the bottom of shank were very faint and read Criterion over London Made. When the pipe arrived I looked at the faint stamping with a lens and a bright light and it actually reads: Charleston in script over block script LONDON MADE. I had not heard of Charleston pipes before so I did a bit of research and found the brand listed in Who Made That Pipe. It was listed as being made by Sydney Charleston Ltd. London, England. The first two photos are the ones provided by the seller on Ebay.Charleston1 When the pipe arrived I took it to the work table and took a few photos of the state of the pipe before I began to work on it. It was in pretty decent shape. The finish was dirty and the rim had dirt on it. The bowl had a cake build up. The stem was oxidized with a few small tooth marks on the top and bottom of the stem near the button. The slot was virtually plugged so I could not get a pipe cleaner through it to clean the inside.Charleston2

Charleston3

Charleston4

Charleston5 I took the pipe apart and put the bowl in an alcohol bath to soften the hard cake and the stem into an Oxyclean bath to soften the oxidation on the stem. I left them to soak overnight.Charleston6 When I took the bowl out in the morning I scrubbed it with a brass bristle whitewall tire brush to clean out the grooves in the blast on the bowl and the rim. I was able to remove all of the build up and grime from the ridges and grooves.Charleston7

Charleston8 I wiped out the bowl with a cotton swab and then reamed it with a PipNet reamer to remove the cake. The bath had softened the cake so it came out very easily.Charleston9 I took the stem out of the Oxyclean bath and the oxidation had all come to the surface. It was soft and would be easier to remove.Charleston10 I used a dental pick to clean out the slot and then a pipe cleaner to make sure the edges of the Y were wide open to further clean it.Charleston11 I scrubbed down the bowl and stem with a Mr. Clean Magic Eraser and gave the bowl a light rub down with olive oil. I took the following photos. There was progress to be seen.Charleston12

Charleston13 The cleaning and oil seemed to make the stamping more legible. In the photo below you can see the Charleston with a curled line under it and the London Made stamping underneath the line.Charleston14 I cleaned out the bowl, shank and stem with pipe cleaners, cotton swabs and alcohol. It was incredibly dirty. I would need to use the retort to really clean it.Charleston15

Charleston16 I sanded the stem with 220 grit sandpaper and worked out the tooth marks on the top and underside near the button.Charleston17 I set up the retort and held the tube over the flame to boil the alcohol through the stem and bowl. I ran three test tubes of alcohol through the pipe before it came out clean. The fourth bowl came through with clear.Charleston18

Charleston19 I took the cotton ball out of the bowl, wiped out the bowl with a cotton swab and ran pipe cleaners through the stem and shank to remove any moisture and final debris. The pipe smelled fresh and clean and the interior was clear.Charleston20

Charleston21 I worked on the stem with a medium and a fine grit sanding sponge and then wet sanded with 1500-2400 grit micromesh sanding pads. I rubbed the stem down with Obsidian Oil before dry sanding with 3200-4000 grit pads. I gave it another rub down with oil and then finished sanding with 6000-12000 grit pads. I gave it a final rub down of Obsidian Oil and let it dry.Charleston22

Charleston23 I buffed the pipe with White Diamond and Blue Diamond on the buffing wheel and then gave it multiple coats of carnauba wax. I then buffed it with a clean flannel buff and a final hand buff with a microfibre cloth. The finished pipe is shown in the photos below. It is fresh and ready to smoke. I intend to fire up a bowl today!

Thanks for looking.Charleston24

Charleston25

Charleston26

A Simple Elegance: Cleaning, Restemming and Restoring a Diplomat Billiard


Blog by Steve Laug

On my recent Lethbridge trip I found the Diplomat pipe at an Antique Fair. It is a nice sandblast billiard with a dark undercoat and a brown over stain. The bowl was in decent shape. The sandblast was deep and quite beautiful to look at. The nooks and crannies caused in the process made for an interesting feel in the hand as well. The stain had worn off in spots on the sides of the bowl and along the outer edges of the rim. The finish was also generally dull and lifeless. The surface of the rim was dirty with tars and oils. The inner edge was slightly damaged and would need to be worked on. There was a thick cake around the middle of the bowl and light at bottom and on top. The stem was one that somebody had Gerry-rigged to fit. It was smaller in diameter and the tenon was too small. The previous owner had wrapped the tenon with thread and then with aluminum foil and pressed it into the shank. The stem had also been hacked up to repair a damaged button and grooves had been carved on the top and bottom sides of the stem to make it a dental bit.Dip1

Dip2

Dip3

Dip4

Dip5 I took close-up photos of the top of the bowl and the underside of the shank to give a clear picture of the state of the inner edge of the rim and the stamping on the pipe.Dip6

Dip7 The next two photos show the stem that came with the pipe and the “fancy” work that had been down to make it fit the shank and create grooves on the top and underside that would allow the pipe to be held in the mouth behind dentures.Dip8

Dip9 My first task was to go through my stem can and see if I could find a better stem for this pipe. I did not have a tapered stem that would readily fit but I did have a saddle stem that would look good after shaping and fitting it to the shank.Dip10 I lightly sanded the tenon to get a snug fit in the shank and pushed the new stem home to have a look at the fit. The stem would need to be sanded to bring the diameter at the stem/shank union down to match the shank. I took a few photos to see what the pipe looked like with this new stem.Dip10

Dip11

Dip12

Dip13 I used a Dremel with a sanding drum to carefully reduce the diameter of the saddle portion of the stem. I have found that I can roughly shape the stem to fit better and then finish by hand sanding it (photo 1). Once I had the rough shape I sanded it with a coarse emery paper to remove the gouges and scratches left behind by the sanding drum (photo 2). I slipped a plastic washer on the tenon and put the stem back in place. I sanded it with 180 and 220 grit sandpaper to further shape it and remove the scratches (photo 3).Dip15

Dip16

Dip17 With the basic fit correct and only needing to fine tune it and polish the stem I decided to ream the bowl. I used a PipNet reamer and took the cake back to bare wood.Dip18

Dip19 I cleaned out the inside of the shank and stem with pipe cleaners, cotton swabs and alcohol. Once it was clean I worked on the inner edge of the rim. I sanded it and reshaped it to make it smooth and round once again using a folded piece of 220 grit sandpaper.Dip20

Dip21

Dip22 I sanded the stem some more with 220 grit sandpaper and flattened the bottom side to match the flat bottom of the shank. The next set of three photos show the fit and shape of the stem at this point.Dip23

Dip24

Dip25 The button was quite thin and I decided to build it up with black superglue. I also could see a repair that had been done on the stem before I used it so I worked on that to further blend it into the stem surface.Dip26 When the glue dried I sanded it with 220 grit sandpaper to feather it into the surface of the rest of the stem and also worked on shaping the button. In the second photo below you can see the end view of the built-up and reshaped button.Dip27

Dip28 I sanded the stem and button with a medium and a fine grit sanding sponge to remove the scratches and blend in the patches. I then wet sanded the stem with 1500-2400 grit micromesh sanding pads and then rubbed the stem down with Obsidian Oil. I dry sanded with 3200-4000 grit pads and rubbed it down again with oil. I finished by sanding it with 6000-12000 grit pads and gave the stem a final coat of Obsidian Oil. I set it aside until the oil was dry.Dip29

Dip30

Dip31

Dip32 I touched up the worn spots on the finish of the bowl with a dark brown stain pen and a black permanent marker and then buffed the bowl and stem with White Diamond on the wheel. I buffed it again with Blue Diamond and then gave the pipe multiple coats of carnauba wax. I polished it with a clean flannel buff and then hand buff with a microfibre cloth. The finished pipe is shown in the photos below. I like the looks of the saddle stem and the deep sandblast finish. The pipe has an understated elegance about it that I like.

Thanks for looking.Dip33

Dip34

Dip35

Dip36

Dip37

Restoring an Underwhelming Habitant Deluxe Chubby Bulldog


Great job on this one! I love this shape. Like Al, it tugs on me as well. I am a sucker for this shape. Nice work on completing the twin rings around the cap and on the reshaping of the button. Great work.

Charles Lemon's avatar

Some pipe shapes jump out at you from across the room, grabbing your attention in the equal but opposite way other shapes make you wonder what the carver could possibly have been thinking. I was immediately drawn to this pipe when I spotted it on a recent estate pipe hunting expedition. The chubby bulldog reminded me of a kind of cross between a Savinelli 320KS recently featured on rebornpipes.com and the classic Peterson 999 shape, though this pipe was not nearly as well-executed. In fact, it rather struck me as a practice piece after I had stared at it a while. The bowl was drilled slightly off-centre, and the distinctive bulldog bowl rings were anything but on this pipe – the upper ring was almost entirely absent, and the lower was unevenly cut.

The pipe had the usual gammut of estate pipe woes – tarry rim, dents, dings, scratches and…

View original post 739 more words

One More For The Case.


I am a big fan of Custom Bilt and Custombilt pipes ever since I read Bill Unger’s book on the Custombilt story. I have about 7-8 of them in my collection. This is a great piece of pipe history. Thanks Tim.

pipesrevival's avatarPipesRevival

 photo 20151009_1028122_zpsnbbw4qeb.jpg

My ever-growing collection of Custom-Bilt pipes, it has indeed outgrown it’s display case. Originally meant to house my small Tom Howard and Custom-Bilt collection has turned into an overflowing collection of Custom-Bilt pipes alone. Before my knowledge of the company and it’s founder Tracy Mincer, I was intrigued by these large and ugly pieces of briar. They seemed like misfits in a sea of smooth,small and manicured pipes of it’s time.

Custombilt pipes are not all created equally which I soon found out. My first Custom-Bilt purchase three years ago was more of an accident, an older woman the owner of an antique shop in Troy N.Y. had listed a pipe in her EBay shop, poor photos and little information let it slip by unnoticed , I decided to pull the trigger. I was surprised upon receiving the pipe it was big, bulky and roughly carved but comfortable in the hand…

View original post 1,322 more words

Savinelli Hercules 320 EX


Nicely done Tim. I love the cross grain and birdseye on this one. It is a beauty. Great work.

pipesrevival's avatarPipesRevival

Screenshot_2015-10-22-18-29-46~220150904_110911_zpsotamwek9-1

About a month ago my wife surprised me with a haul of five that I could have never pulled off. She is an incredible woman and apparently has a better eye then myself.  This was the worst of the lot.

20150911_205203

The pipe upon receiving, a Savinelli Hercules 320 EX. She was big and beautiful.

20150911_205240PhotoGrid_1445555032134

She was in decent shape a little cake, rim char,the button was worn and the biggest problem was the stem logo, it was beyond saving very worn.

20150911_21074320150911_21120520150911_213405

I started with my Castleford Reamer working from the smallest to the largest attachment and in this case the largest was too small. I moved to 250 grit sandpaper so I could take it back to the briar and finished it off with 400 grit paper.

20150911_213720

 Next the build up on the rim, I applied Method wood for good polish and let it soak in for 10 min . After the…

View original post 427 more words

Kaywoodie Handmade Oversized Pipes


Tim did an amazing job on this pair. Thought I would reblog it. Well done.

pipesrevival's avatarPipesRevival

Screenshot_2015-07-10-10-41-452_zpsw2hs3uvb

The ad above I believe is from the late 40’s early 50’s from what I could find I think this is where my pair falls.

Some of my first estates were Kaywoodies. Living in New York most of my life I loved reading of there history and the successful building of a brand everyone knows. The only thing I couldn’t get past was how small there pipes were. I have a few in my collection from the 30’s and 40’s that make my wife laugh when I smoke them. I’m a pretty hefty guy so in turn I would need to find a hefty Kaywoodie.

Six months ago I found my chance with the Kaywoodie Handmade Oversized line. They are big and beautiful pieces of Briar reminiscent of my first love Custom-bilt. I originally posted this refurb on Pipes Magazine with the help of forum members I was able to put these beauties back…

View original post 577 more words