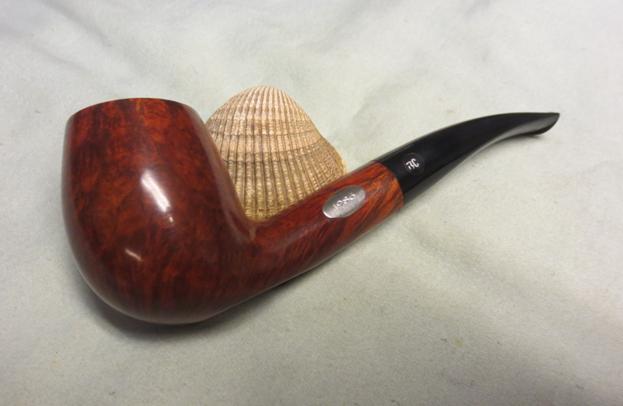
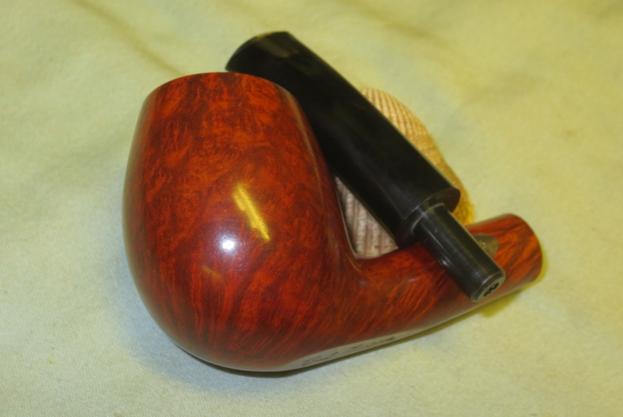
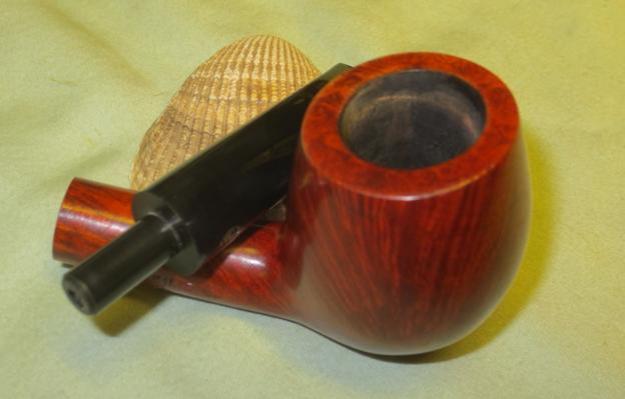
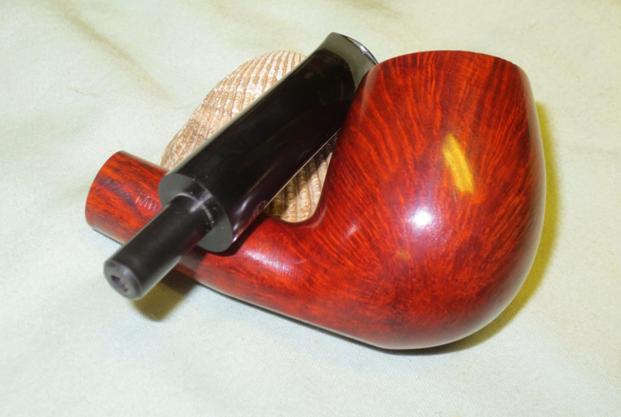
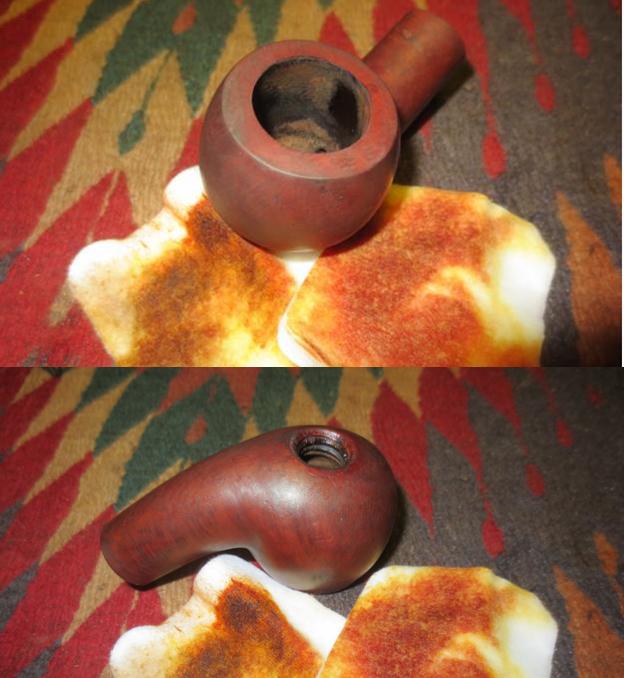
A few years ago I purchased a collection of pipes from a friend who’s father had passed. I had talked with him about cleaning up old pipes and he thought I would appreciate the collection. Ba…
Source: Ben wade selected grain #188
A few years ago I purchased a collection of pipes from a friend who’s father had passed. I had talked with him about cleaning up old pipes and he thought I would appreciate the collection. Ba…
Source: Ben wade selected grain #188
Blog by Steve Laug
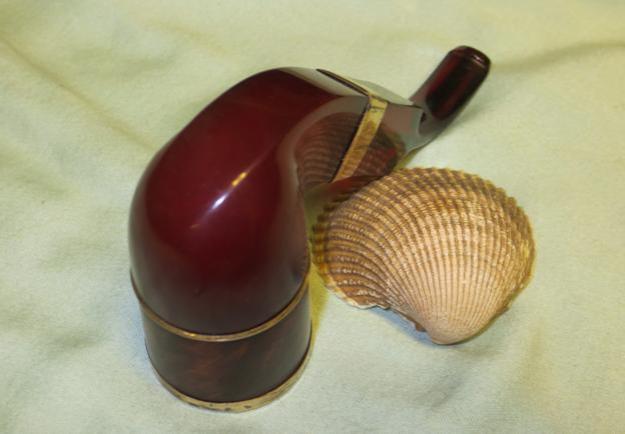
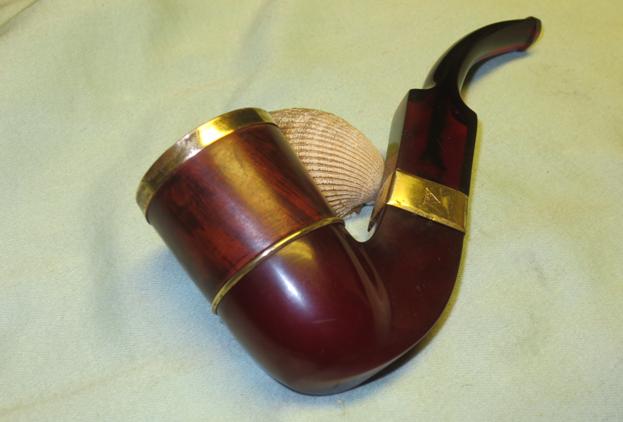
When my brother sent me this pipe I have to say I was surprised and enamored with it. I have cleaned up a lot of WDC pipes over the years and have come to really like them. There is something about them that always gets my attention. The workmanship is generally well done. The materials used are good quality. The briar always tends to have some flaws and is never perfect. But there is something about the brand that I like. Well this pipe is an oddity to me. It is a shape that is similar to some of the CPF pipes I have cleaned up and the combination of briar, brass and Bakelite it really nicely done. The first difference is that this one has a flat rectangular shank and saddle stem. The Bakelite base is rounded and flows into the flattened shank and stem. The stem is also Bakelite or Redmanol as the case may be. It is a rich reddish colour that is translucent and the light really plays with. The second difference is that in a lot of this style pipe the threaded connector and bottom of the bowl is metal. On this one it is white porcelain. When the bowl is removed the threaded connector is also porcelain – a single porcelain unit from the cupped bottom of the bowl to the connector. Those two differences intrigued me.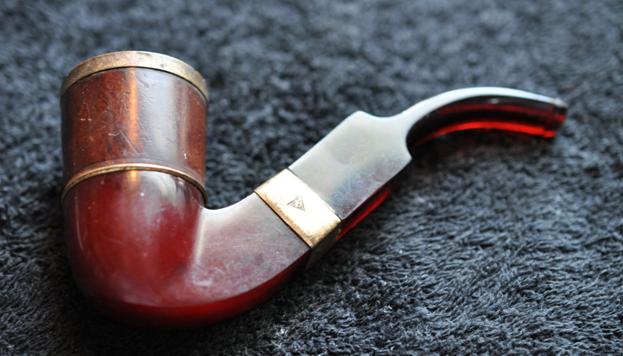 There is a brass spacer between the base and the briar bowl and at some time in its life the spacer had been reversed and the sharper edges scarred the bowl. The Bakelite is actually notched to receive the sharp turned down edges of the spacer. The bowl had lots of dents and scars – character marks that I wish could talk and tell the story of the travels of this old pipe. The brass rim had long since come loose and was easily removed but for some reason never disappeared as it clung to the rim of the pipe. In the next photo you can see the rim top and the porcelain bottom of the bowl… it almost looks like the old milk glass that my grandmother collected.
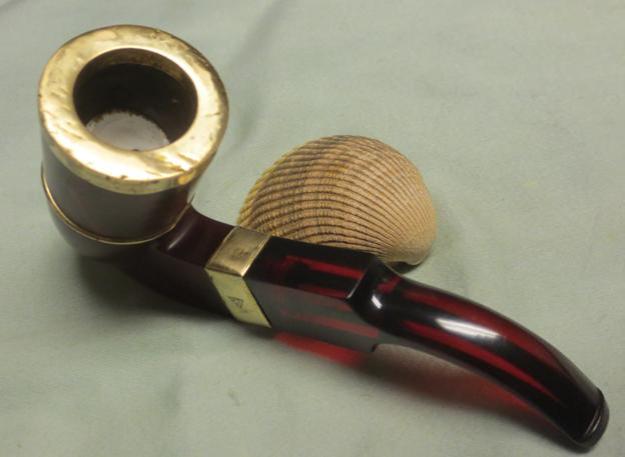
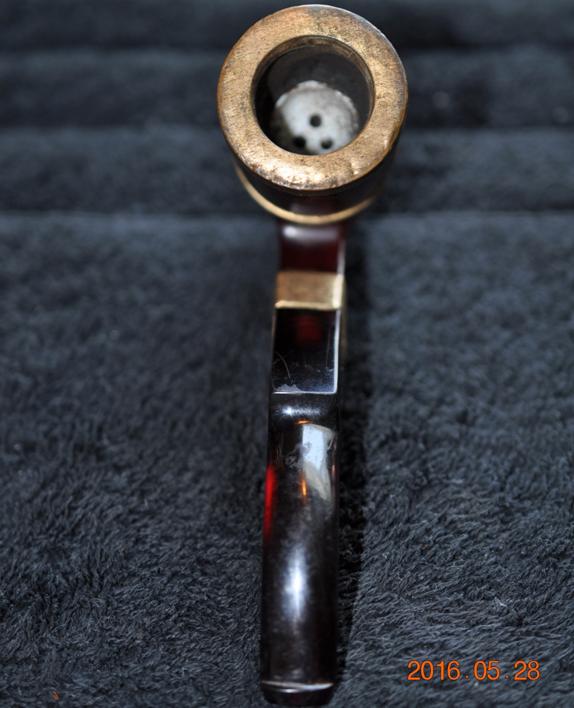 After looking at the two pictures above that came from my brother I was looking forward to seeing the pipe in person. When it arrived and I finally took it out to work on it was all that I had expected. The stem was over clocked so that would need to be addressed but I lined things up and took the next set of photos to show what the pipe looked like after my brother did an amazing job cleaning it. (It is great to have him work with me – it really speeds up the process on the restoration. He reams and cleans the pipes and does the dirty work of reaming and removing the debris of the years.) I looked it over to see if there were identifying marks. What I thought was brass may all be what is stamped on the right side of the band – 14K Gold Plated. The left side of the band bears the inverted WDC triangle logo.
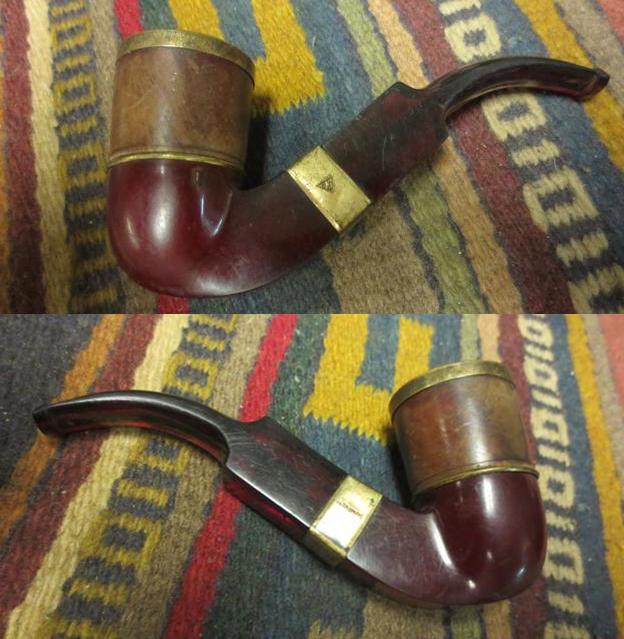
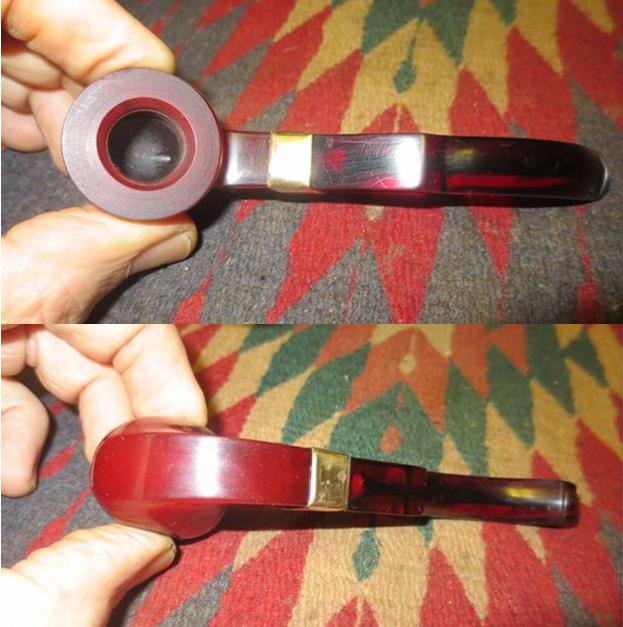
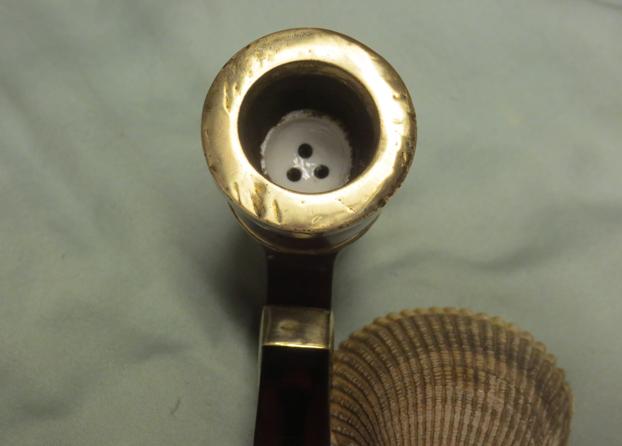
 I took a close up photo of the rim top to show the dents, scratches and scars on the surface. The photo also shows the porcelain cup in the bottom of the bowl. It has three round air holes for directing the smoke into the bottom chamber and into the stem.
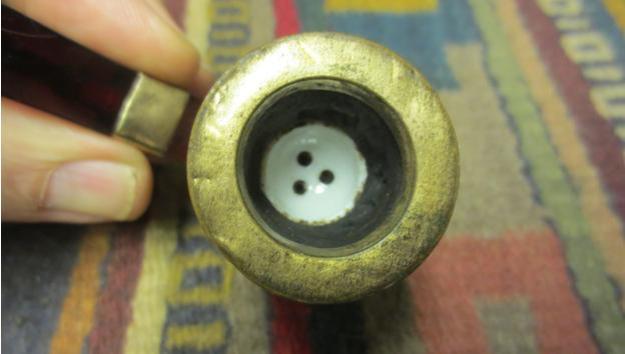 I dismantled the pipe to show the many parts that went into its construction. The photo below shows the broken down pipe.
 The next photos show the over clocked stem. (I had removed the loose band at this point in the process.) Once the base was screwed onto the stem it was grossly overturned. The metal tenon was set in the stem so it would need to be heated to be able to repair this.
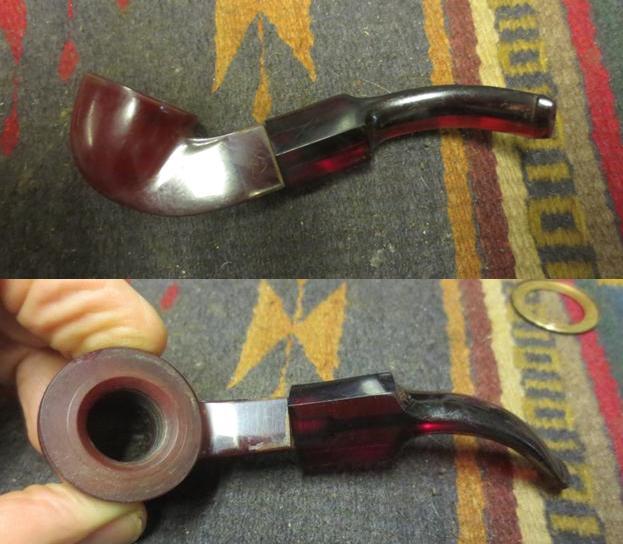 I heated the metal tenon with a lighter and once the glue softened I was able to align the stem and shank very easily. Underneath the band the number 43 had been scratched into the Bakelite shank. I am not sure if that is the shape number or if it is the “autograph” of the assembler of the pipe. Either way it is something that remained hidden for many years.
 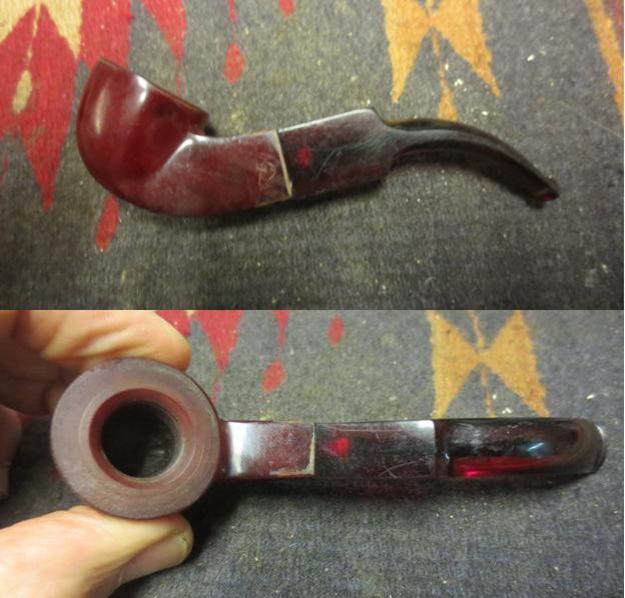 I set the base aside and worked on the bowl. I removed the rim cap and cleaned off the glue that remained behind on the top of the bowl. It was rough and I was thinking that it was reason that the cap was no longer smooth. I scrubbed out the glue residue in the inside of the rim cap as well with alcohol and cotton swabs. I used a flat blade screw driver to smooth out the interior flat surface of the cap. I wiped down the bowl with acetone to remove the remnants of the finish and then glued the rim cap back in place with an all-purpose glue. I polish the rim with some micromesh and metal polish. I decided to leave some of the dents and dings as to me it gave the pipe character.
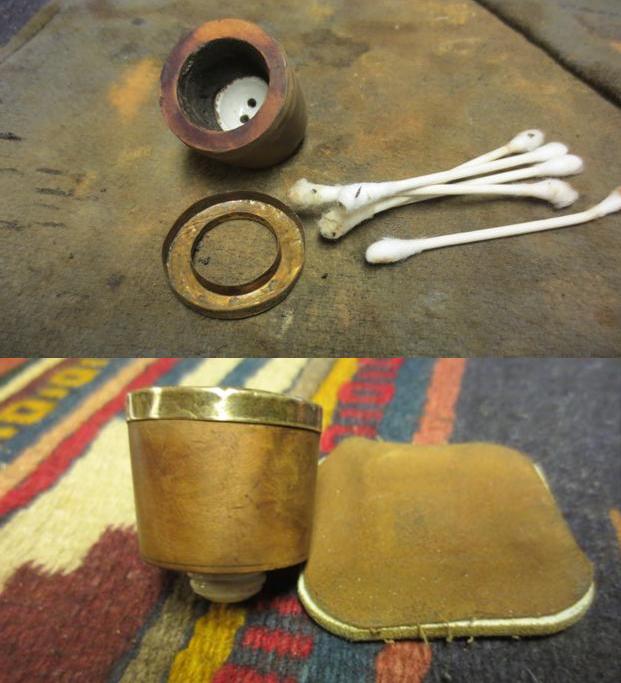
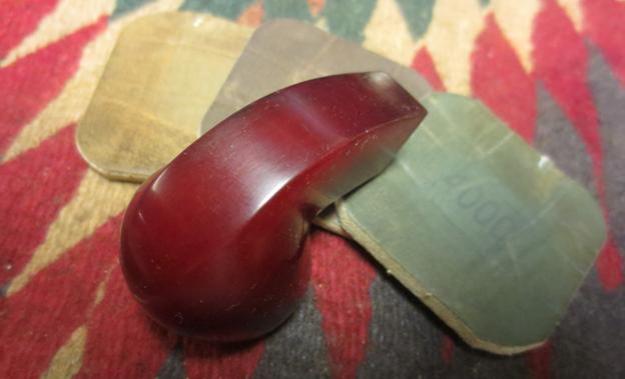
 I cleaned the surface of the Bakelite base and sanded the whole base with micromesh sanding pads from 1500-12000 grit. I rubbed the base down with Obsidian Oil several times throughout the process to give the micromesh some bite as I polished the base.
 I gave the internals a quick clean with alcohol and cotton swabs to remove any of the sanding dust that might have found its way into the bowl base and shank. I also cleaned the airway in the stem at the same time with alcohol and pipe cleaners.
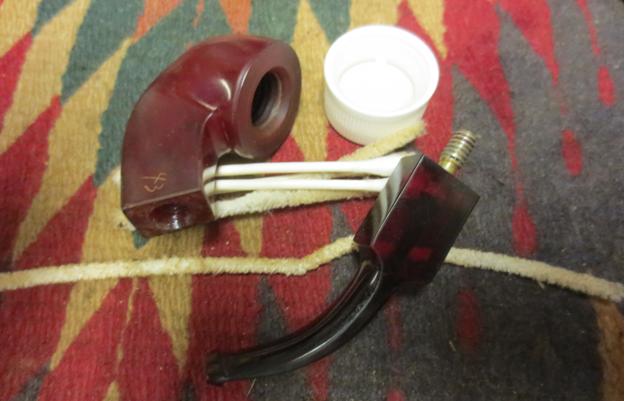 I roughened the area on the base that would be underneath the band to give the glue something to bind to. I used an all-purpose glue and applied it sparingly to the shank. I had previously polished the band with metal polish to remove any tarnish and give it a shine. I pressed it in place and laid the base aside for the glue to set.
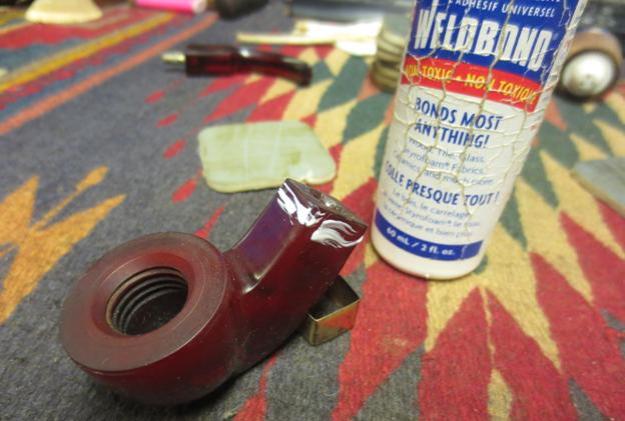 I cleaned the inside of the space plate with alcohol and cotton swabs to remove the debris of the years. The spacer appeared not to have been glued in place so I left it that way. I polished it with micromesh sanding pads 1500-4000 grit until it gleamed. I laid it aside until I was ready to put the pipe back together.
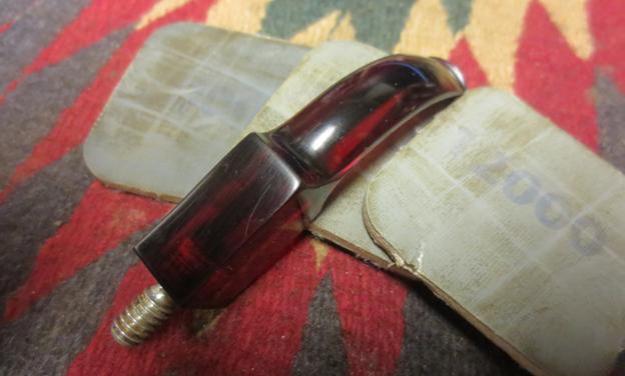
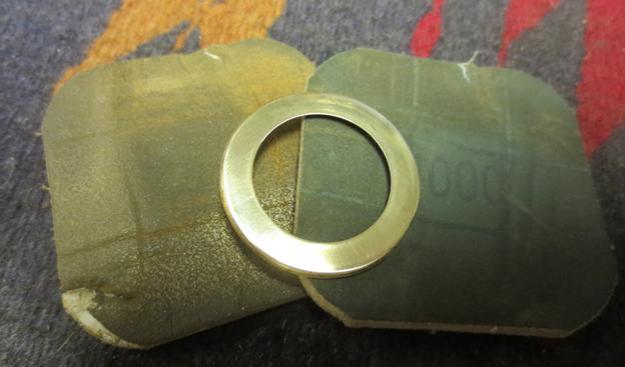 I turned my attention to the stem. There were some light tooth marks on the underside of the stem near the button. I sanded these out with 220 grit sandpaper. I wet sanded the stem with 1500-2400 grit micromesh sanding pads. I wiped the stem down with a damp cotton pad and dry sanded it with 3200-12000 grit pads. I gave the stem a final wipe down with the damp pad.
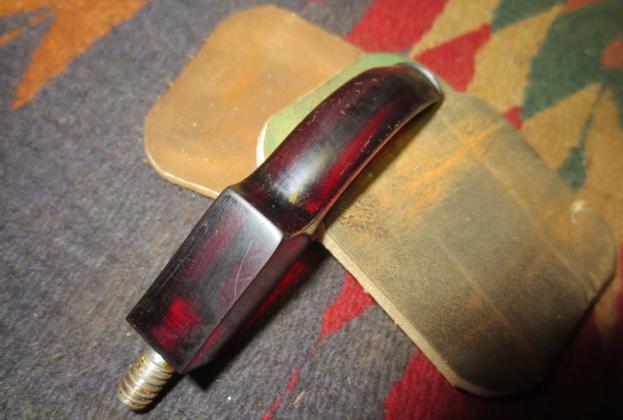
 With the stem finished and the glued band dried I put the base and stem back together. I would still need to buff the entirety with Blue Diamond on the buffing wheel.
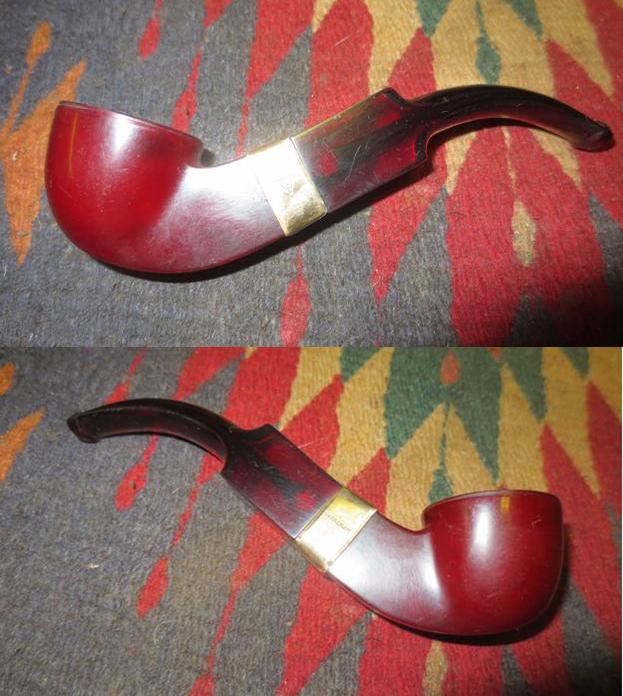
 I used a medium brown stain pen to stain the bowl. I heated the briar and then applied the stain with the pen. I repeated the staining until the coverage was smooth and even.
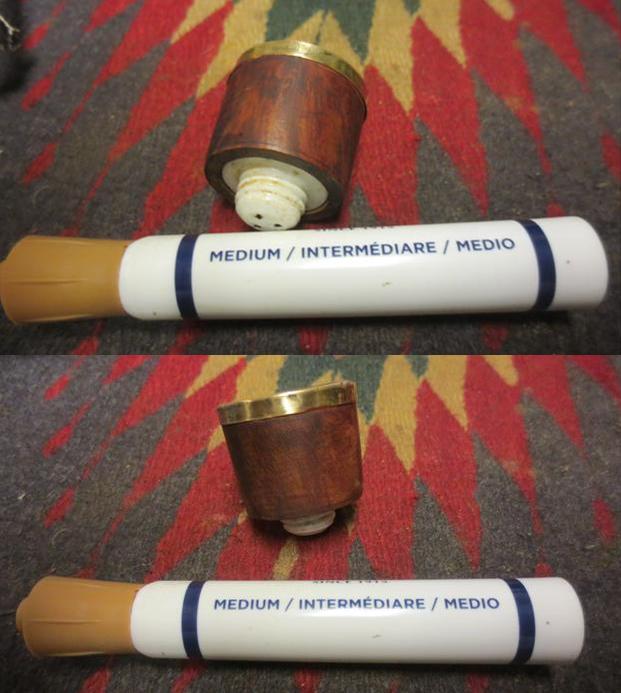 I gave the bowl several coats of Conservator’s Wax and hand buffed it to raise the shine with a microfibre cloth.
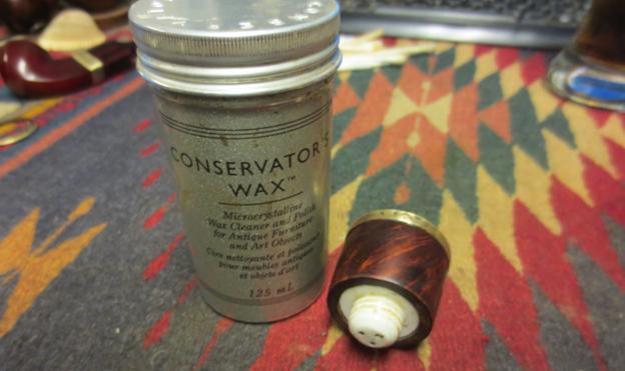
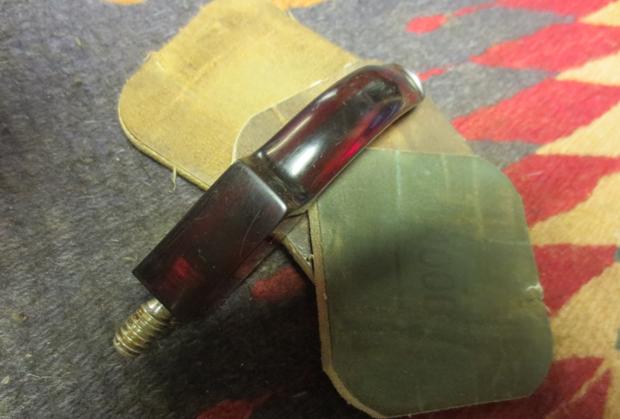
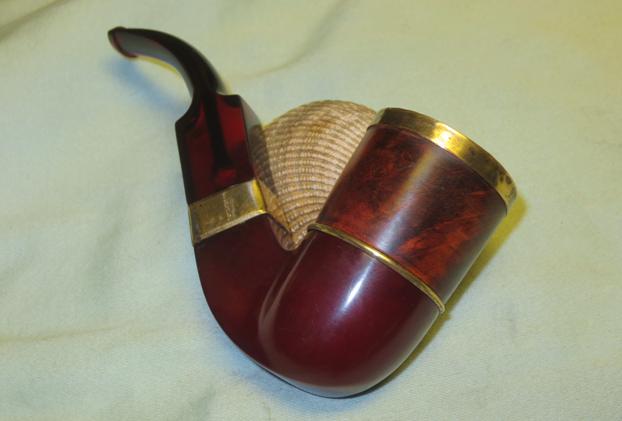
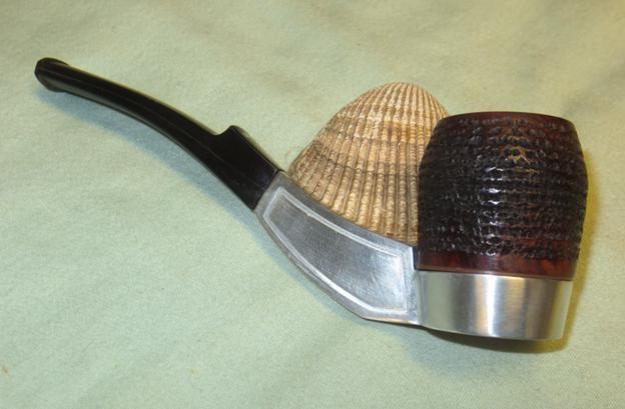
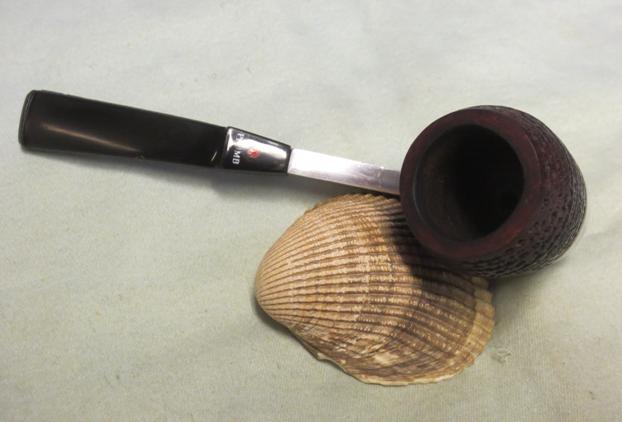
 With all the parts finished I took a final photo of the bowl and the base before putting it back together.
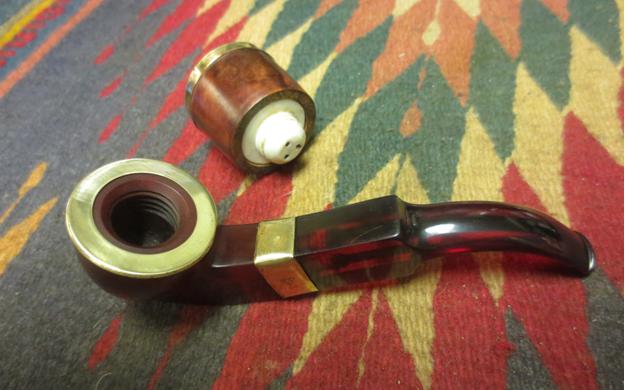 I buffed the completed pipe with Blue Diamond to polish out some of the scratches in the base and the stem. I was not able to remove all of them so I left a few behind to tell the story. I gave the pipe several coats of carnauba wax and buffed it with a clean buffing pad. I hand buffed it with a microfibre cloth. The finished pipe is shown in the photos below. I am really pleased with the finished pipe and how it looks. Thanks for looking.
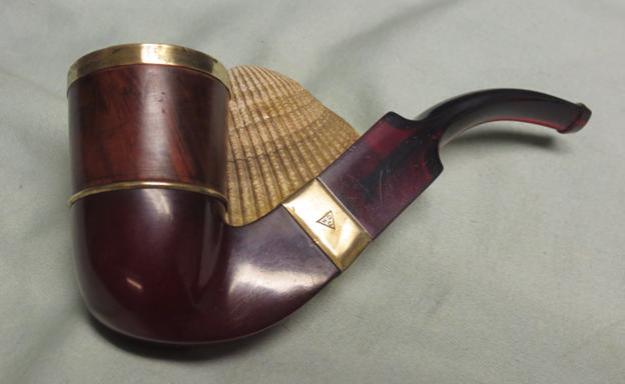

Blog by Steve Laug
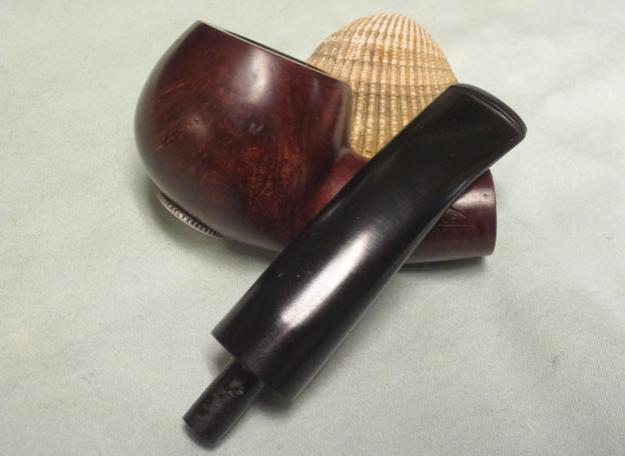
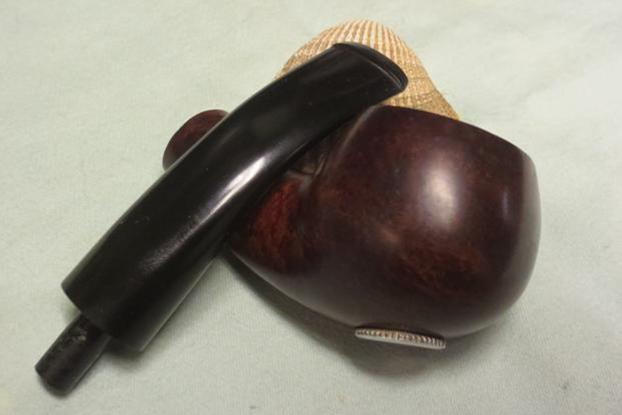
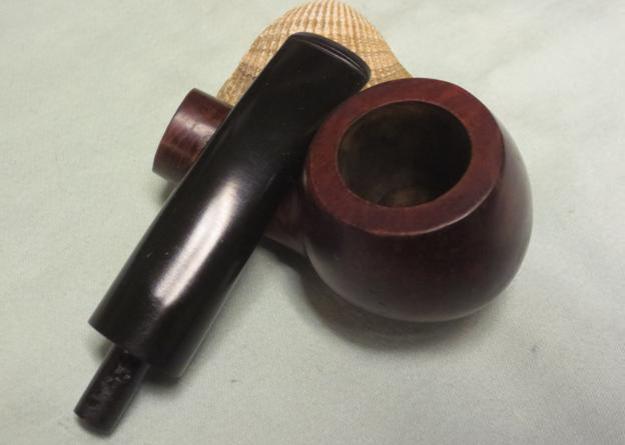
My brother sent me a link to this sale on eBay and I found it intriguing. In the first photo there is what appears to be the edge of a dial on the bottom of the bowl – it is peeking out at the bottom of the bowl. That was intriguing to me. I wanted to know more about the pipe but at this point I had not read the seller’s description of the pipe. I was still looking at the pictures and seeing all of the fills and rim damage on the pipe in the first three photos. It really was quite a mess. The bowl appeared to be reamed but the dings and dents added to the fills made me wonder if it was worth the effort. I still had no idea what the bottom looked like and what made this a dry bowl. Scrolling through the rest of the seller’s photos soon made that clear.

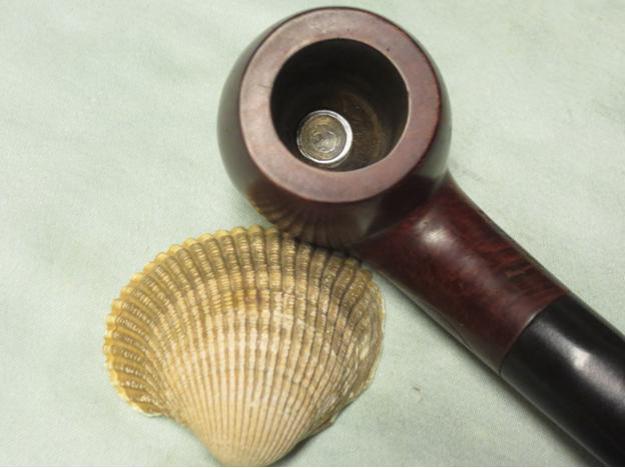
 The fourth and fifth pictures remove the mystery of the knurled edge on the bottom of the bowl that showed in the first photo. You can see in that photo of the bowl bottom that the silver disk looks like it was made to be rotated. We talked and my brother bid and won the pipe (I can’t wait for the pipe to get here so I can check this out). The fifth photo shows the inside of the bowl. The top of the disk appears to be a cup intruding into the bowl bottom. It was really odd looking.
I dropped to the bottom of the eBay ad to read the seller’s description of the pipe. I wanted to get some information on the pipe. I had done some searching on Google but was unable to find any information on the brand. It is a bit mysterious. The seller writes:
“This French Briar Rhodesian Dri-bole has a 5/8″ diameter silver metal “sump”, with knurled edge, set into the bottom of the bowl. The “sump” may actually be an alloy of silver, such as coin or sterling; metal is untested, but has silver-like qualities.”
“According to advertisements, found in various 1911 magazines, this “sump” was used to hold a provided, removable “wad”. The throw away “wad” would absorb all of the nicotine and saliva as the tobacco burns. Thus the tobacco was kept dry, so that it would be fully burned.”
“This extra nice Dri-bole pipe has the same “wad” holder or “sump”, as those “silver mounted” pipes patented on Sept. 7, 1909 and shown in 1911 Saturday Evening Post and Literary Digest Magazine advertisements! That would make this pipe over 100 years old, if it is indeed the same Dri-bole pipe! There are not any “wads” with this one, but it should be a good smoker, with a nice look and make a great conversation piece!”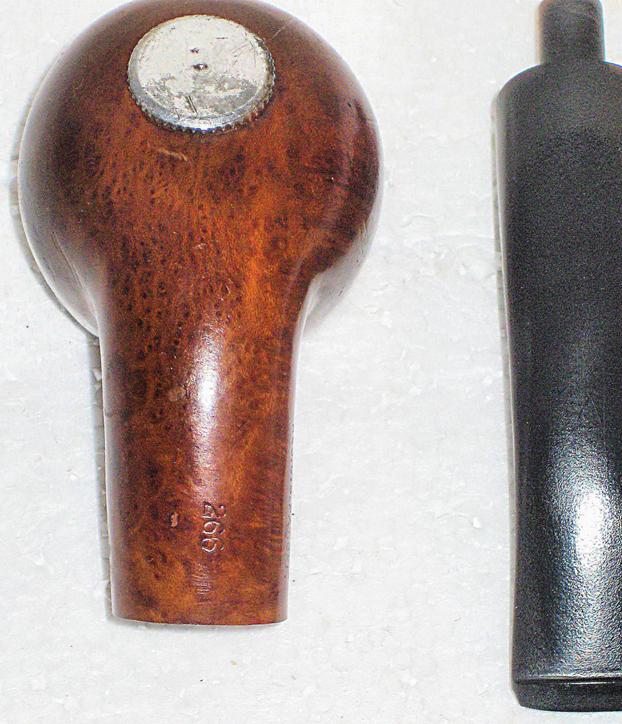
 That information was helpful on many levels. He did not however have any photos or drawings of the pipe or pictures of the advertisements. I wanted to know if the bottom “sump” as he called it was pressure fit or threaded and screwed into the briar. I wanted to know if the bottom of the bowl was damaged or if the “sump” sat as it was supposed to flush with the bottom. It was hard to tell from the photos. I wanted to know was the “wads” were that sat in the sump. From the look of the bowl bottom it appeared that the “wads” may well have been lozenges that fit in the curved cup and then sat flat in the bottom of the bowl. But what did they look like? More research would be needed to answer these questions. But at least the mystery of the knurled edge peaking from the first photo was solved. It was a single unit with a cup on the inside of the bowl. I could not wait to see this in person and “fiddle” with it.
The seller also included a photo of the stamping on the pipe and briefly spelled out what it said. The left side of shank is stamped DRI-BOLE (in crescent) and below the crescent it reads REG. U.S. PAT. OFF. The right side of the shank is stamped Imported Briar leading me to believe that is it American made. The bottom of shank is stamped “266”. 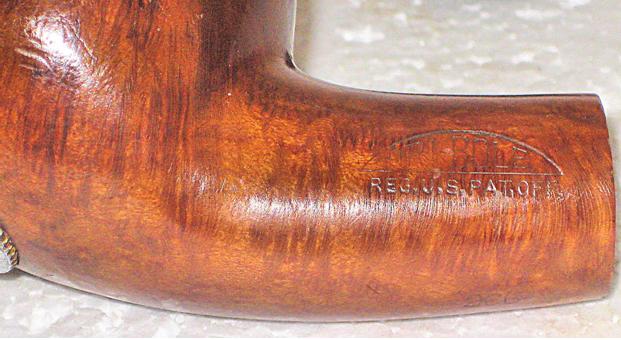 He gave the dimensions of the pipe as follows: overall length: 5 ½ inches, bowl height: 1 ½ inches, diameter of the bowl: 1 5/8 inches, bore diameter: 7/8 inches, bore depth: 1 1/8 inches and the weight: 44 grams or 1.6 ounces
When the pipe arrived in Vancouver I was looking forward to working on it. My brother had done a great job cleaning the interior and stripping the shiny coat that had been applied to the pipe. It was clean and ready for me to work on. I tried to turn the knurled silver disk on the bottom of the bowl and could not move it at all. The rim looked rough and needed topping. The stem was in decent shape with some pitting and dulling to the old rubber. I was so excited that I forgot to take photos of the pipe before starting my restoration. I put the bowl in an alcohol bath to see if I could loosen the tars that held the silver disk tightly in place. I was guessing it was threaded so I was thinking that if I could soak the bowl overnight things would soften up.  I took it out of the alcohol bath and heated the disk with the flame of a lighter. I used a pair of pliers to hold tightly to the edge of the disk and I was able to twist it out of the bowl. Once it popped free I could undo it by hand. The first photo below shows the inside of the silver disk. The second shows the knurled outside.
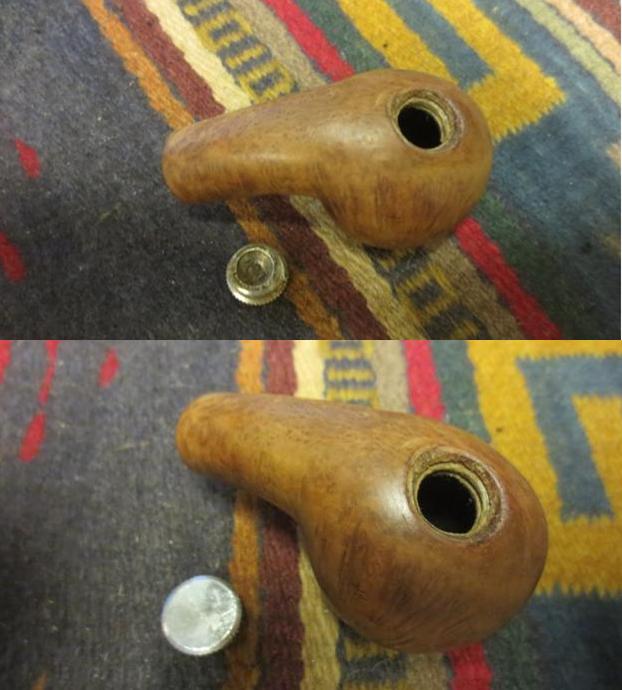 To remove the damage to the rim top and edges I topped the bowl on a topping board with 220 grit sandpaper.
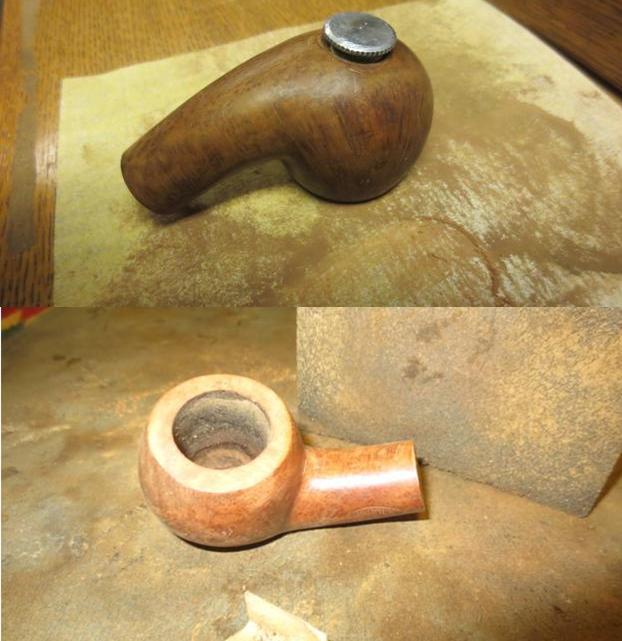 There were some nicks around the hole in the bottom of the bowl so I sanded those smooth with sandpaper and then cleaned out the threads in the briar with a cotton swab and alcohol.
 I used the brass bristle brush to scrub the threads and the cup on the disk. I cleaned it afterwards with cotton swabs and alcohol.
 I used a cotton swab to coat the threads on the disk with Vaseline and turned it into the bottom of the bowl. I wanted to make sure that I could easily turn the disk by hand.
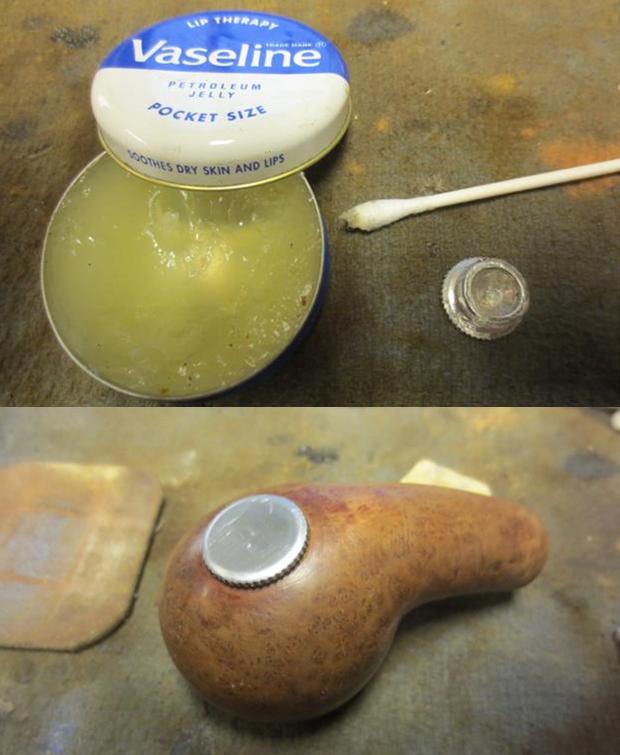 I cleaned out the internals with pipe cleaners, cotton swabs and alcohol. It was pretty clean thanks to my brother. It did not take too many to clean it out.
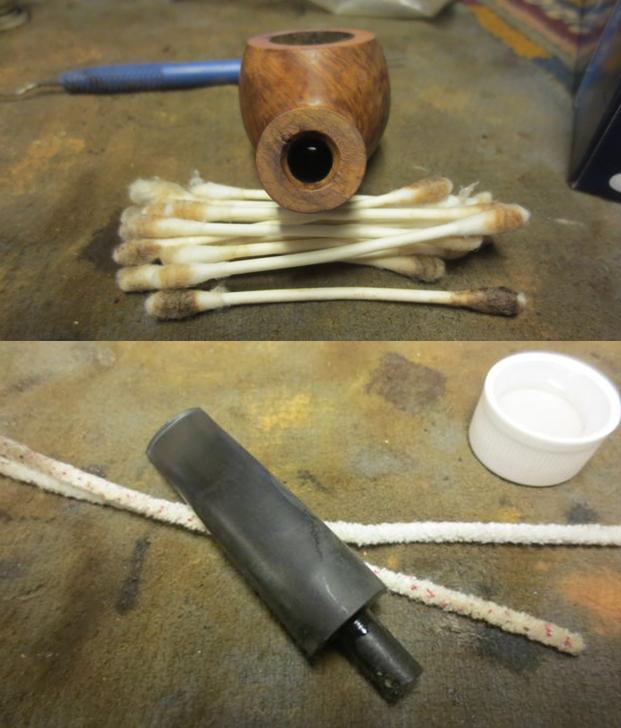 I sanded the bowl and stem with a medium and a fine grit sanding block. The pipe is beginning to look really good. I had to make a decision how far to sand the bowl and how many of the original dings and dents to remove without changing the “story” and character of this old timer.
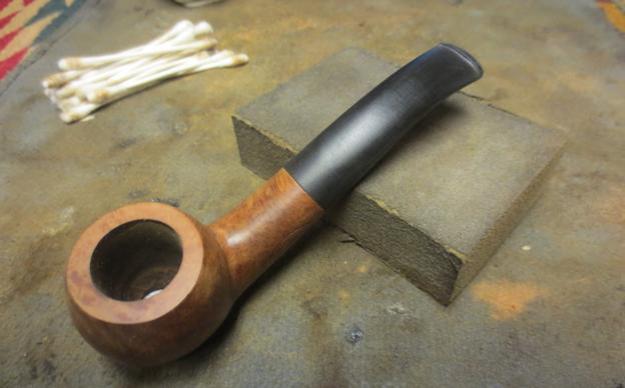 I heated the briar and then stained it with dark brown aniline stain cut by 50% with isopropyl alcohol. I flamed it to set the stain and repeated the process.
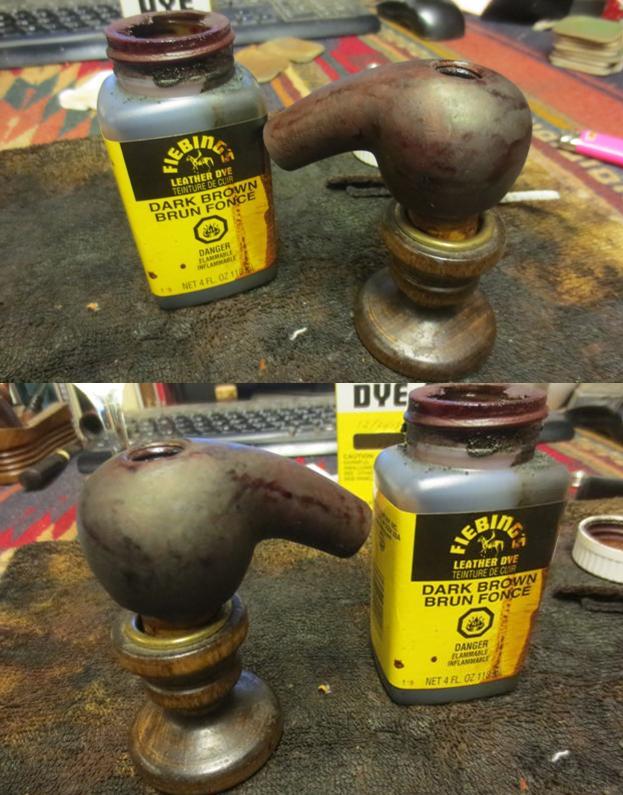 I wiped down the stain with alcohol dampened cotton pads to make it more transparent and make the grain stand out. At this point the fills stood out and I would need to address them a bit differently.
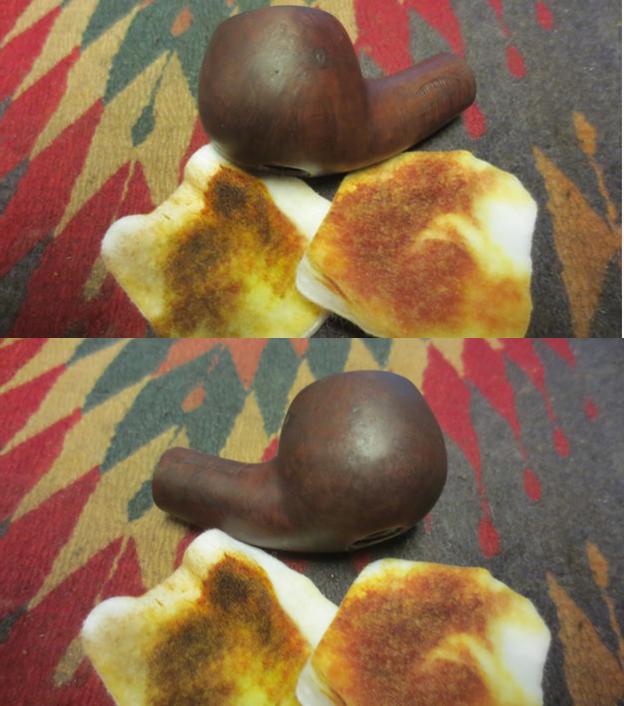
 I used a black Sharpie Permanent Marker to draw some lines across the fills and blend them into the grain on the pipe. I then chose to give the bowl a second contrast staining using a Cherry Danish Oil stain. I find that the combination of the black marker and the cherry stain blends the fills better than a brown stain. The combination of the brown and the cherry stains gives depth to the finish so I like using them together.
 Once the cherry Danish Oil stain dried (overnight) I buffed it lightly on the wheel with Blue Diamond and then gave the bowl a coat of carnauba wax. I hand buffed it with a microfibre cloth. You can see the small dings that I left in the bowl sides rather than change the look. I polished the silver disk with a silver polishing cloth. The next series of photos shows the bowl at this point in the process.
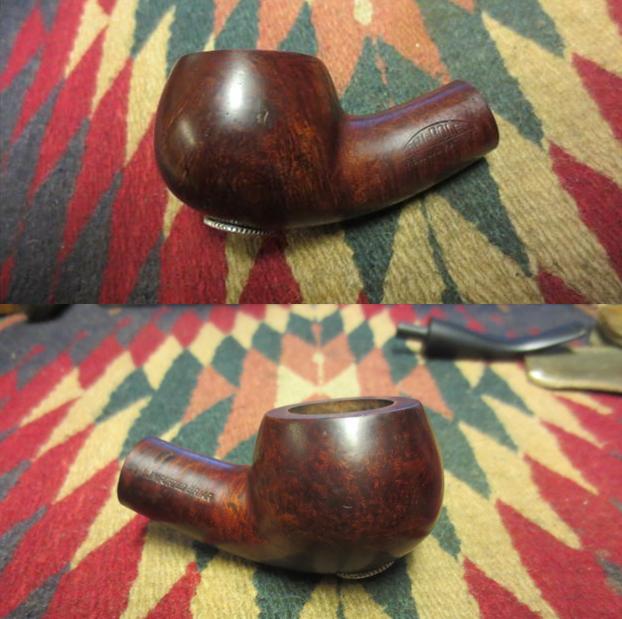
 I set the bowl aside and worked on the stem. The old hard rubber that was used on this stem was good quality. There was very little oxidation if any on it. The main issue was the pitting that covered the surface of the stem. I sanded it with 220 grit sandpaper to address the pitting and smooth out the surface and then began my normal sequence of micromesh sanding pads. Between each set of three grits (1500-2400, 3200-4000, 6000-12000) I rubbed the stem down with Obsidian Oil. I gave it a final coat of the oil and let it dry before I buffed the pipe.
 I buffed the pipe and stem with Blue Diamond and gave it several coats of carnauba wax. I buffed it with a clean buffing pad to raise the shine. I hand buffed it with a microfibre cloth to put the finishing touches on the pipe. The finished pipe is shown in the photos below. Thanks for looking.
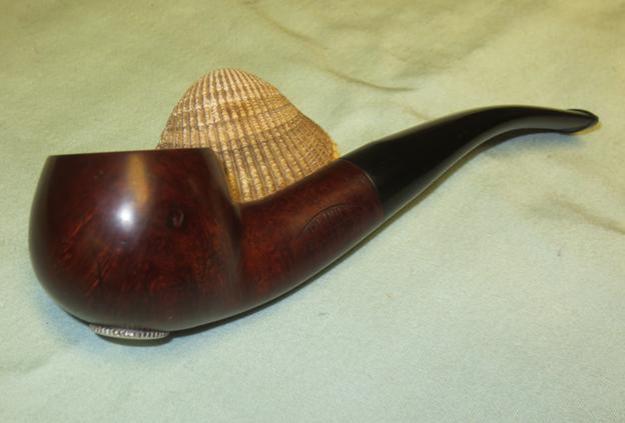

Blog by Steve Laug
Our four daughters gifted my wife Irene and I a trip to Palm Springs, California, US for our fortieth wedding anniversary mid-July. Little did we know that Palm Springs in July is about 120 degrees Fahrenheit – dry and hot. We flew into Palm Springs and stayed in Indio. We managed to arrange our days to do most of our shopping and hunting in the mornings to avoid the heat of the day. It was a great trip and an amazing time of celebration together. One of the days we drove to Palm Desert, a community between Palm Springs and Indio. We went through thrift shops, antique stores and department stores looking for pipes and tobacciana as well as gifts for our kids. As we drove through the main part of town I saw a sign on the left corner that said Palm Desert Tobacco. It was located at 73580 El Paseo in Palm Desert. I noted it and planned to go back a few days later.
When I got back to the condo we were staying at I looked up their website on my iPad. The link is: http://www.palmdeserttobacco.com/our-story.html. I read their history and have summarized it below. I have clipped portions of it here.
The Bruning family have been full service tobacconists selling the finest tobacco products and accessories in Southern California since 1969. Brothers Bert and Jack have operated Palm Desert Tobacco… in the Greater Palm Springs Area since 1983. Bert is a past president of the Tobacconist Association of America as well as a former board member of the Retail Tobacco Dealers of America…Originally, (the) locally owned and operated company was in San Diego, and…moved to Palm Desert in 1983…”Business has blossomed as we continue to seek out the finest in tobacco products and to offer great service to our customers.”
After spending time on their website I was more convince than ever to make sure I visited the shop before returning to Canada.
We did all of our other shopping and looking about and the day came for my visit to the shop. I was excited to see what it was like. We drove down El Paseo and found a parking place down the street from the shop. It was a hot day in Palm Desert – over 120ºF. I stopped outside the shop and took some photos of the exterior. The heat in the air was almost palpable and it was hard to get a focused photo from across the street. I love the looks of tobacco shops and over the years during my travels I have collected photos of the shops. I apologize for the blurriness of the first photo.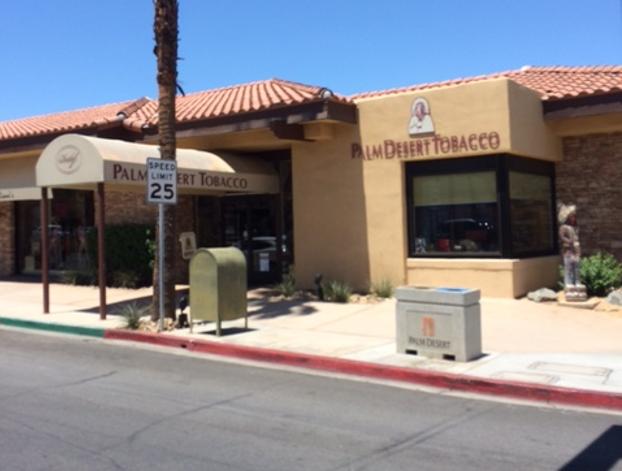 I crossed the street and took a closer picture of the front and the cigar store Indian standing on the corner. The lettering on the store sign appears to be out of focus but it is not – what you are seeing is the shadow of the letters on the wall behind the sign.
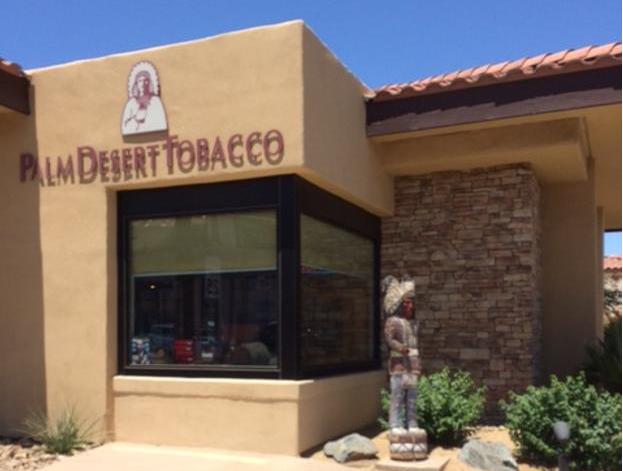 Passing through the doors into the air-conditioned interior was like stepping back into time in some ways. The aromas and sight of the old time tobacco shop were immediately present. In the back was a humidor with large variety of top cigar brands that the website says include Davidoff, Arturo Fuente, Opus X, Tatuaje, Illusione, La Flor Dominicana, Aging Room, Casa Magna Domus Magnus Montecristo, Royal Butera Vintage, Padron, Griffin, Ashton, and Diamond Crown. On the left was a relaxing smoking lounge that is available to members as well as those who purchase products that meet the minimum value. It was well set up with couches and chairs and was filled with smokers. On my right as I entered the door there was rack with their bulk pipe tobacco selections and an assortment of various tinned blends. Of course I stopped there to have a look.
Walking into the shop the floor held many display cases with pipes, racks, lighters as well as cigar cutters, lighters and humidors. I took a few photos to give you an idea of the layout and the look of the displays within the shop. Somehow I missed the display case with the estate and new pipes. I was enamored examining the selection so I neglected to take some photos of that part of the shop. There were Dunhills, Comoys, GBDs, Sasienis, Charatans, Barlings, Petersons, Savinellis, Rossis, Amorellis, Vipratis, Mastro de Pajas, Castellos, Ascortis, Radices, Rattrays, Ser Jacopos, Stokkebyes, Bjarnes, Nordings, WO Larsens, Stanwells, Bentleys, Neerups, Chacoms, Butz-Choquins, Tom Eltangs as well as some American made pipes like those by Icarus and Briarworks. You can see why I got lost looking at the huge variety of pipes spilling over the shelves of display cases and on the wall behind the case. I went through some of the estate pipes and looked at GBDs and Comoys shapes that I had not seen before. They were beautifully restored by Bert. Excellent workmanship.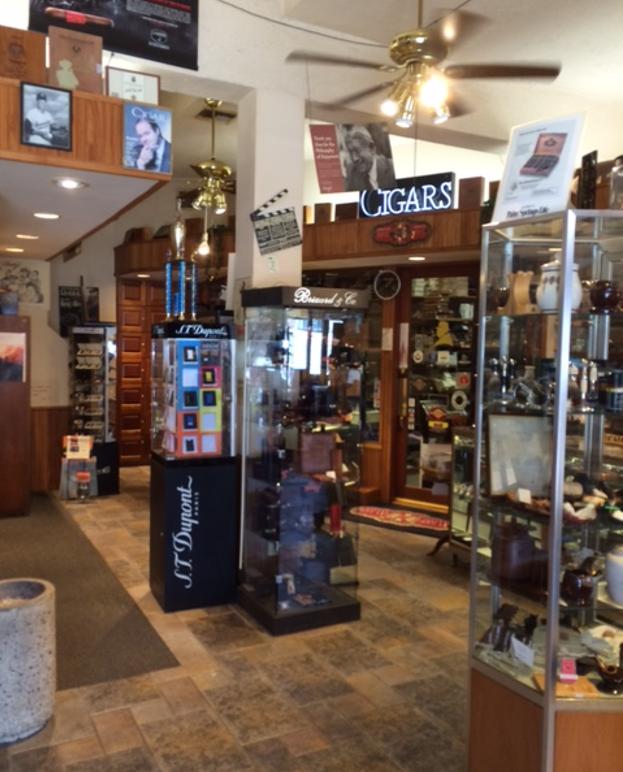 I made my way finally to the cash register. I did not want to make Irene wait for me to sit and have a bowl so I settled my account. At the cash out counter there were lots of interesting things as well. There was a rack of pipe obviously belonging to the brothers, pipe cleaners, lighters for pipes and cigars, and pipe and cigar tools. I could have stood looking for hours at the photos of famous customers lining the walls. It was a great shop with the air of an old time tobacco shop.
 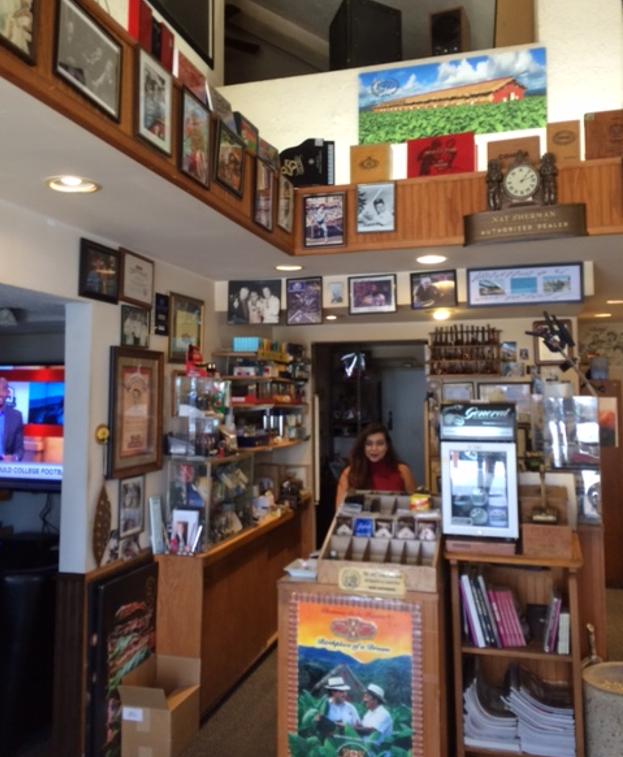 I took a photo of my purchases – they were put in a Palm Desert Tobacco shopping bag and the clerk threw in some wooden matches and a business card. I picked up two issues of Pipes and Tobacco Magazine (I found out later that one of them had an article on the very shop that I was visiting). I bought two bags of pipe cleaners, a tin of Balkan Sobranie and a 100 gram pouch of Crown Achievement.
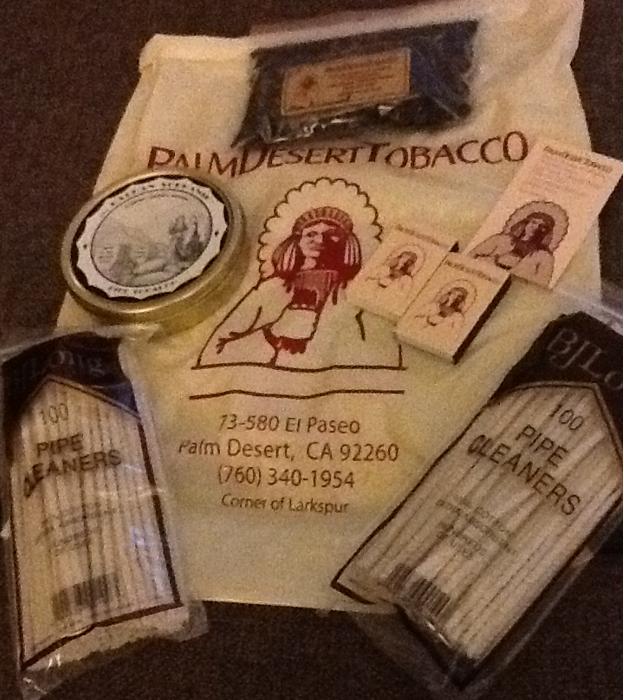
Since coming home I have read the magazines, used the pipe cleaners and begun to enjoy the pouch of tobacco. I have to say, if you are ever in Palm Desert, the Palm Desert Tobacco Shop is well worth a visit.
Nice work on this one Mark. It is a beauty. Going to have to get some Fabulustre
Blog by Steve Laug
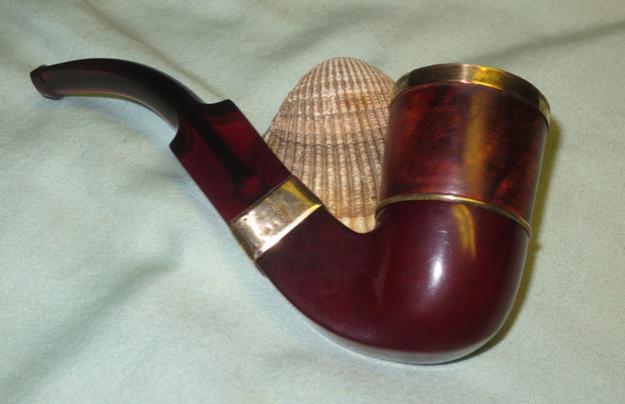
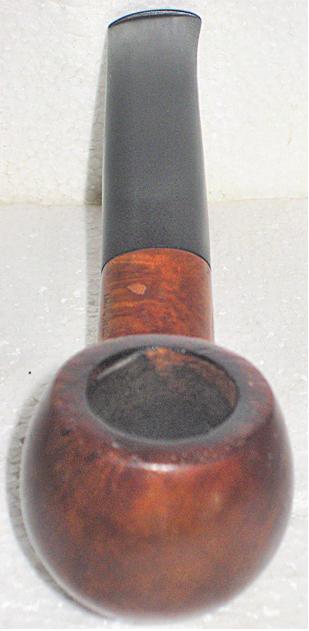
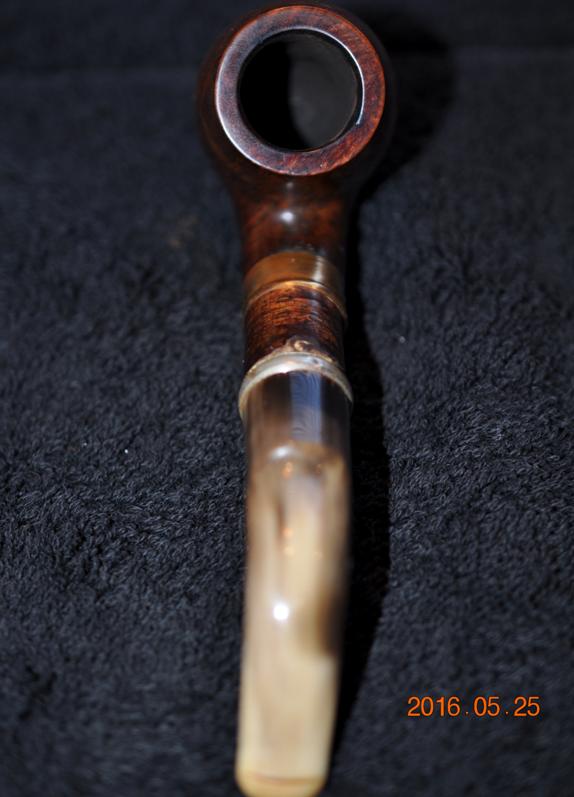
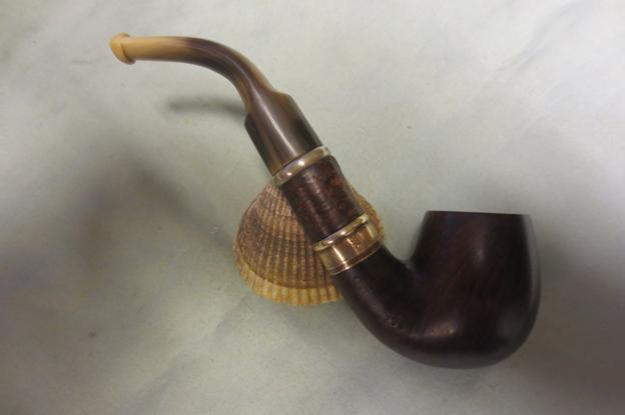
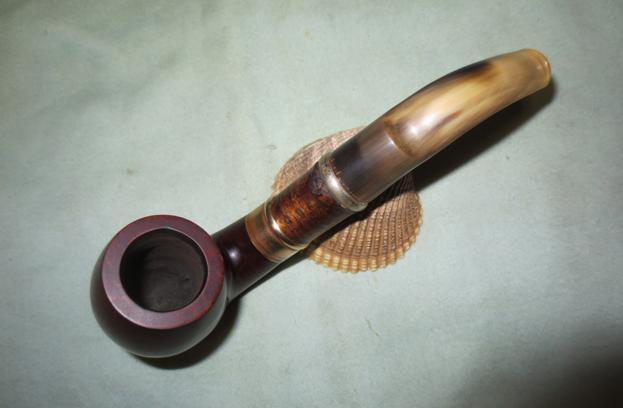
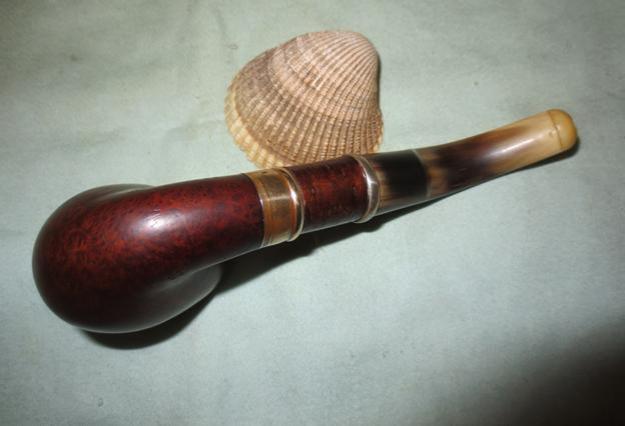
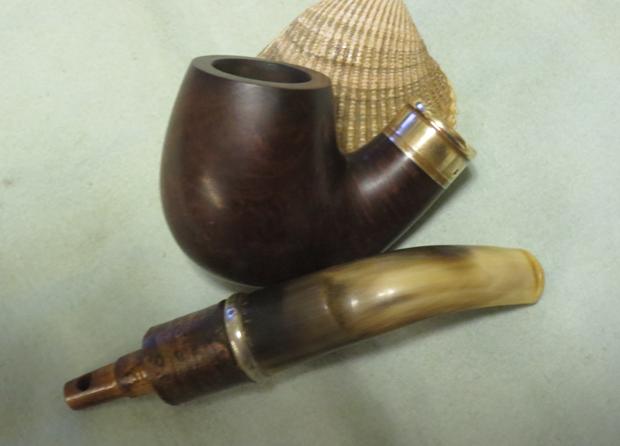
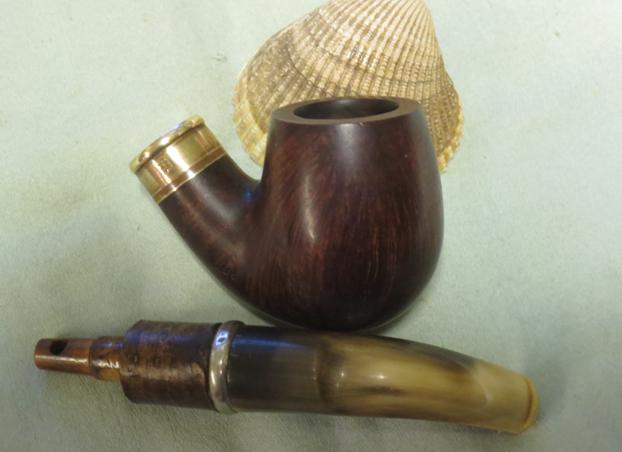
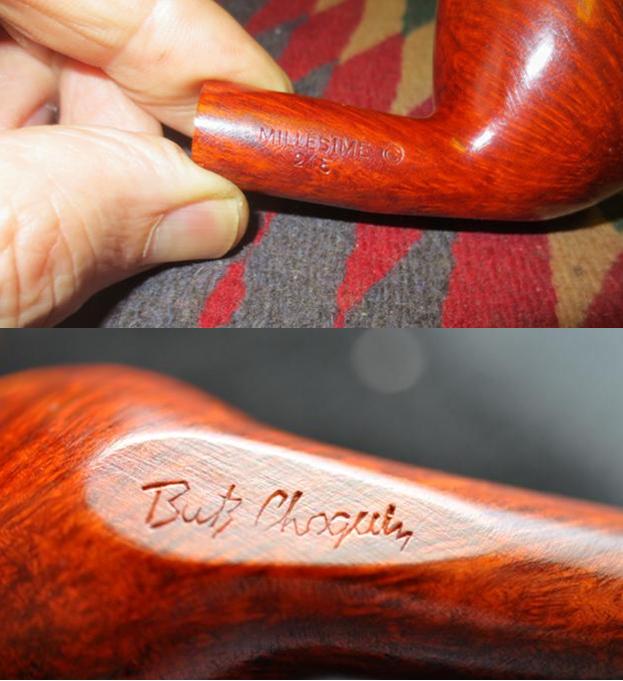
I have been cleaning up a lot of pretty standard pipes lately, whether metal, meerschaum or briar. It has been a while since I took on a unique looking piece that captured my interest. In the current box of pipes my brother sent there are some great one of a kind pipes that I have not seen before so I turned my attention to one of them. The first one that I decided to work on just called out my name. The combination of rustic cherrywood with the bark on, really nicely striated horn and beautifully grained briar just called out to see what I could do with a restoration. I have no idea of the age of the pipe but the horn stem with the orific button speaks of some age. The pipe is stamped on the left side La Montagnarde over Deposee and on the right side it is stamped with Ropp in an oval with the 298 shape number next to it. The brass band on the shank and the small wedding ring brass band on the cherrywood extension give the pipe a touch of class. The next two photos were the seller’s photos. The pipe looked to be in really good condition.
 When the pipe arrived at my brother’s house it was not nearly as clean as it appeared. The finish was spotty and worn. It had been waxed or maybe shellacked to give it a shine. The stem screws into the cherrywood and then the wood end is pressure fit into the shank of the pipe. It was very loose and would not stay in place. My brother cleaned the internals and scrubbed the exterior with Murphy’s Oil Soap. It took off the soiled finish and the remnants of the polish. When I got it the pipe was very clean. The brass bands were tarnished and the horn was dull.
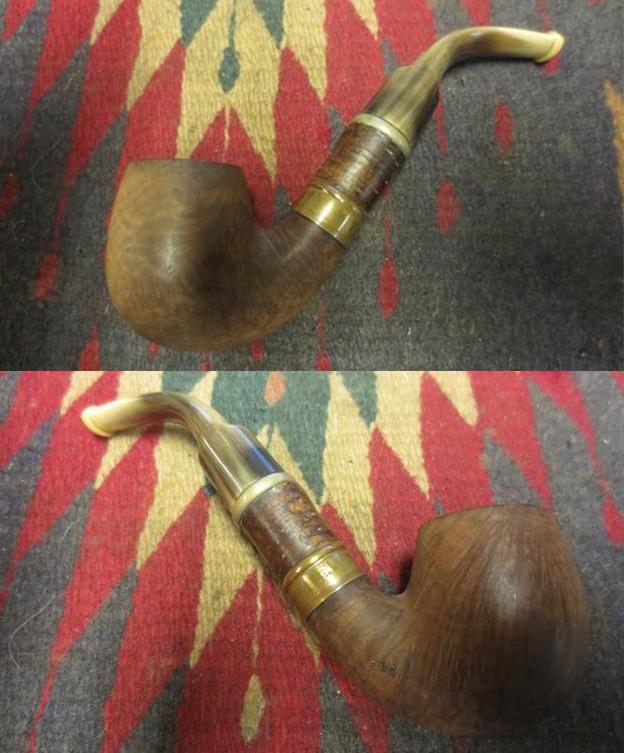
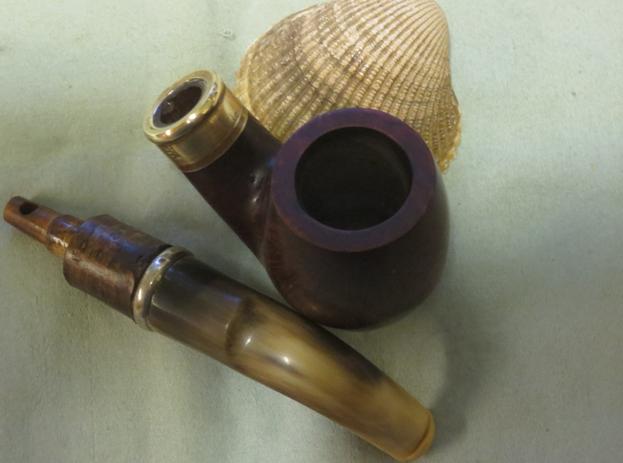
 I took some close up photos of the rim and the stamping to have a better look. The top of the rim had a burn mark on the inner edge of the right side. It did not go deep into the surface of the briar so a light topping would remove the damaged area.
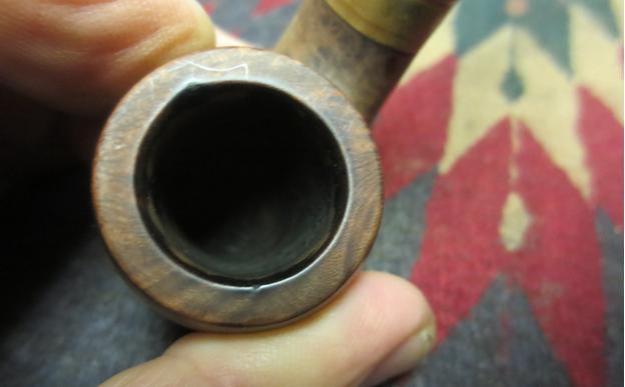 The second close up shows the stamping on the shank. La Montagnarde Deposee is what it reads. La Montagnarde translates from French as “The Mountain” and Deposee translates as “Filed” or “Registered”.
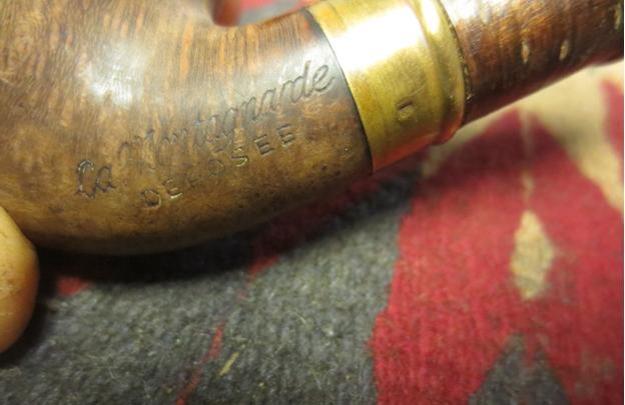 I topped the bowl with 220 grit sand paper on a topping board. Once the bowl was topped I used a rolled piece of sand paper to sand out the bowl and smooth out the inner edge of the rim.
 The internals were pretty clean. My brother had done a good job scrubbing out the mortise and shank. I used a few cotton swabs and pipe cleaners and alcohol to remove and of the dust left behind by my sanding.
 I stained the bowl with dark brown aniline stain and flamed it. I repeated the process until the bowl was covered.
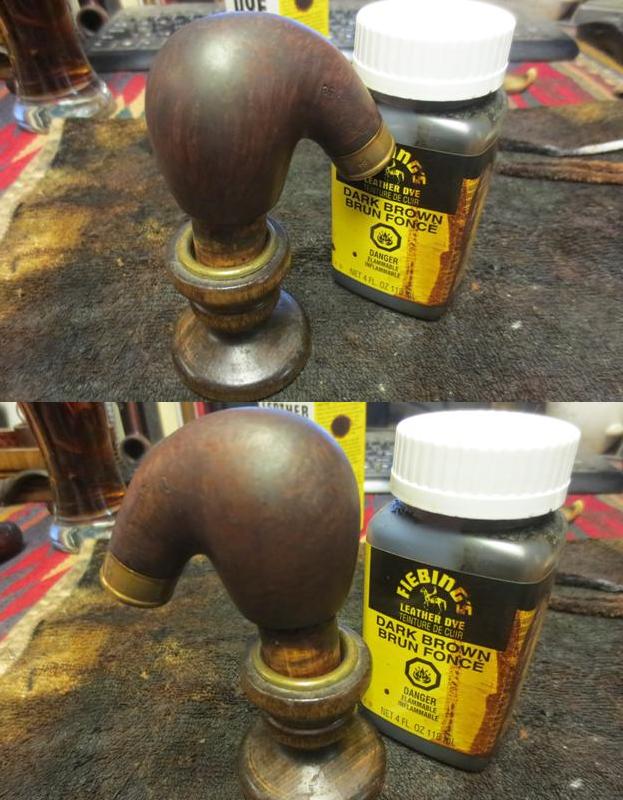 I wiped the bowl down with a cotton pad and alcohol to thin the stain and make the grain stand out better.
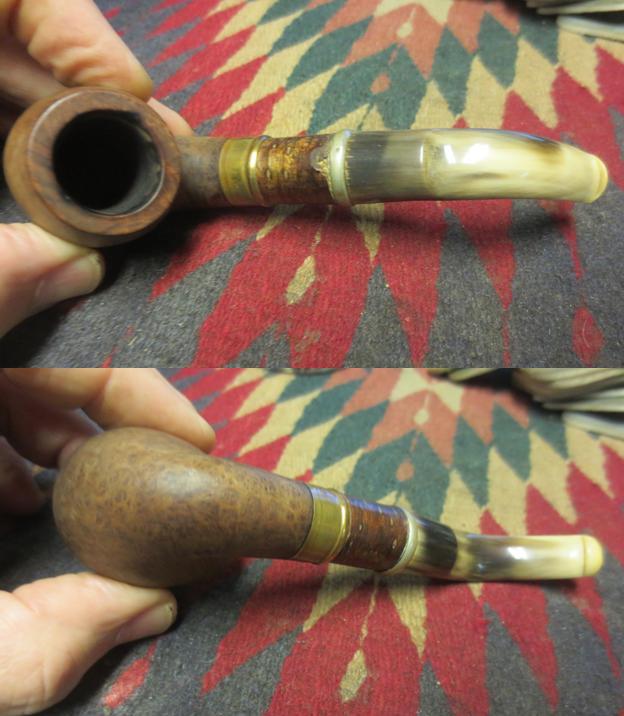
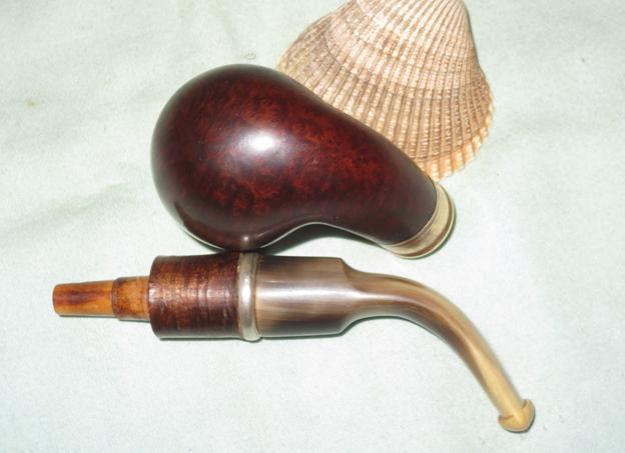
 I buffed the bowl with Blue Diamond and gave it a light coat of olive oil. I rubbed down the cherrywood bark with oil as well to bring some life to it. In the photo below you can see the way in which the pipe is held together.
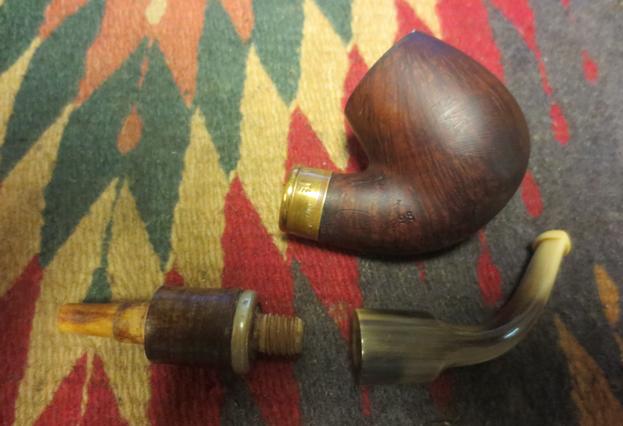 The cherrywood insert has a threaded wooden tenon on the outer side which the horn stem threads onto. The other end is a wooden stinger apparatus that fits into the shank of the pipe and holds the stem in place on the bowl.
 I polished the brass bands with a tarnish polish to bring back the shine.
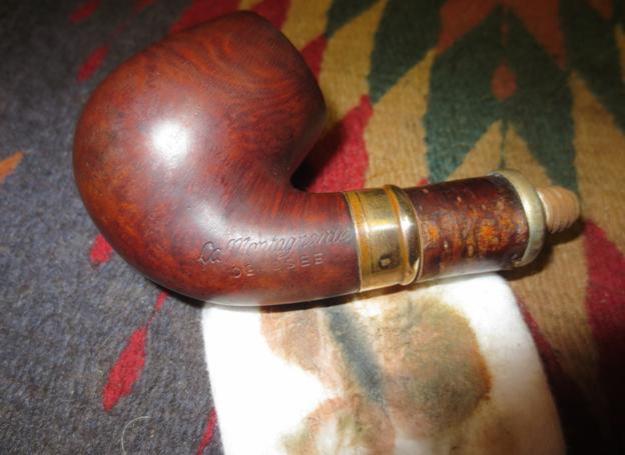 I cleaned out the threads in the end of the stem with cotton swabs and alcohol.
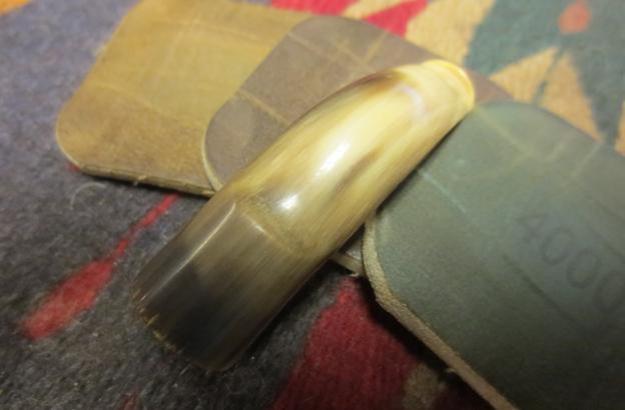
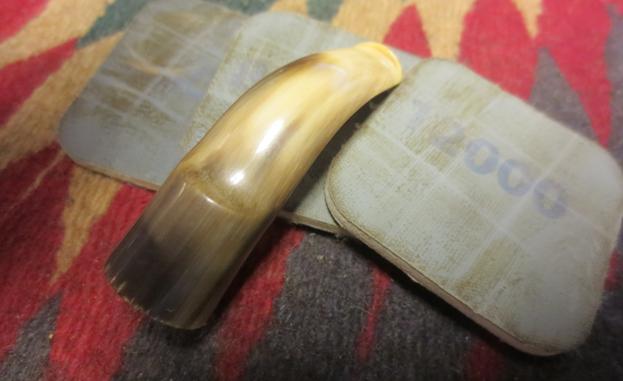
 I sanded the stem with micromesh sanding pads – wet sanding with 1500-2400 grit pads and dry sanding with 3200-12000 grit pads. I rubbed the stem down with Obsidian Oil between each set of three pads. What appears to be chips along the end of the stem are not actually chips but striations that run through the rest of the stem.
 I sanded the bowl with 1500-12000 grit micromesh sanding pads. As I sanded it the grain really began to pop and some of the scratches in the briar disappeared.
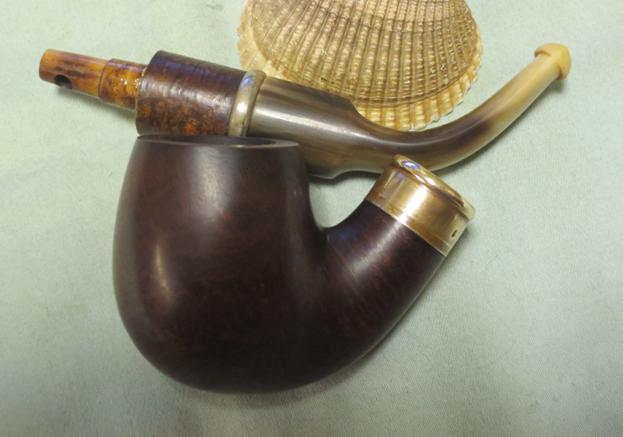
 I buffed the bowl and stem with Blue Diamond. I avoided buffing the cherrywood insert as I did not want to risk peeling the bark. The finish began to take on a rich glow. The finished pipe is shown in the photos below. The first four photos show the pipe as a whole. The rest of the photos show the various pipe parts. Thanks for looking.
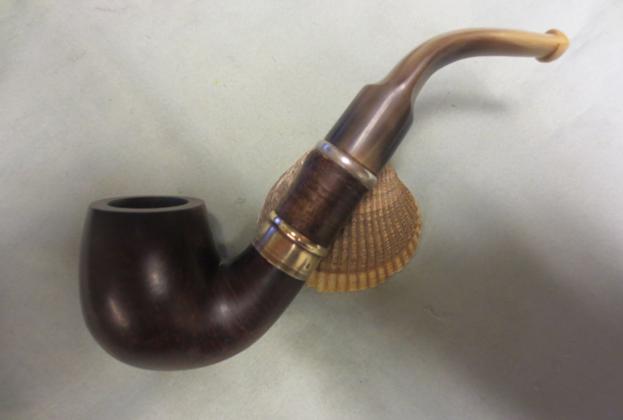

When my brother sent me the latest batch of pipes there was a boxed Peacemaker. I wrote about it earlier on the blog. Inside the box was this brochure. It always interests me to be able to see the original literature that came with a pipe and advertised its strengths. This brochure is double sided and on the front side explains the Peacemaker, its special features and its guarantee. On the other side are some general smoking hints, care for the pipe and then some of the variety of bowls that are available in terms of shape and finish. It makes a fascinating step back in time to read the descriptions and the promises. I scanned it to post it here so you all could enjoy it as well. Thanks for looking.


Blog by Steve Laug
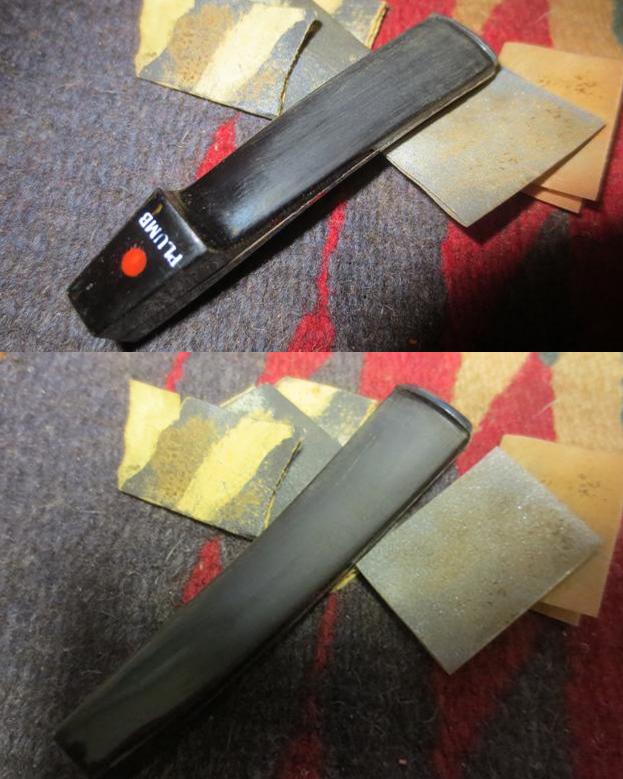
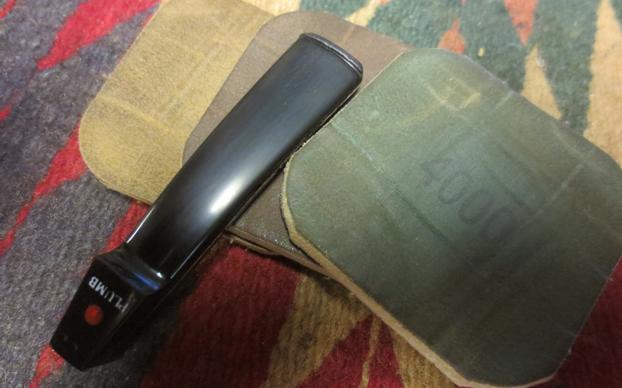
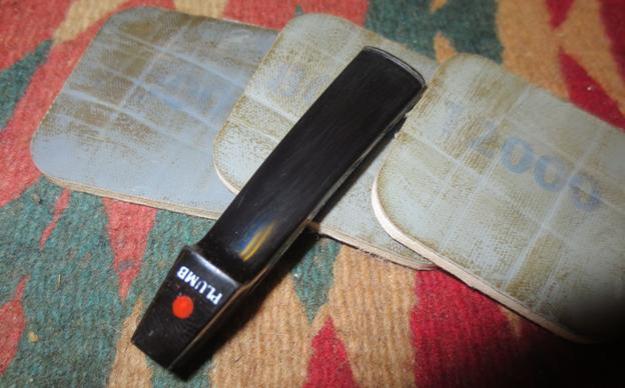
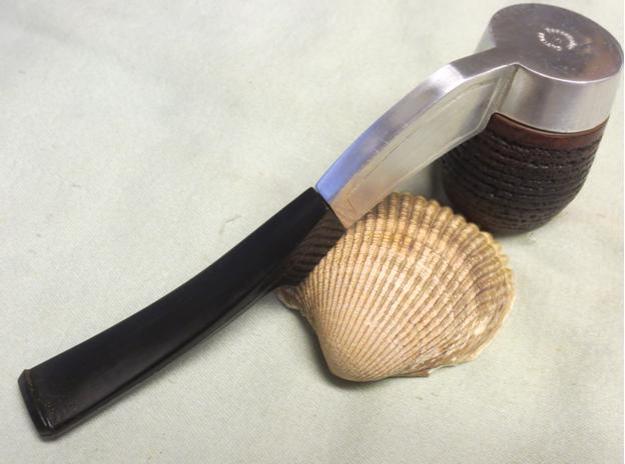
I learned something this afternoon as I worked on a Peacemaker. The stem bears the Dr. Plumb stamp and red dot but the box says BBB. So who made this pipe? What I found inside the box may well explain that question. The brochure reads The Peacemaker Pipe. There is no Dr. Plumb or BBB on the brochure. This got me thinking that the pipe was probably made by a third manufacturer and sold under a variety of labels. Somewhere along the way a Dr. Plumb version got placed in a BBB box. The interesting thing about the box was that it had peal and stick logos on circular marked areas. It was missing a sticker on one side. I looked on-line and found a BBB version of the pipe. It was stamped identically to mine with the only difference being on the top of the stem. Where my pipe had the Plumb and red dot it had the BBB Diamond on the top. I tried to find out who made them but everything pointed to them being made by Peacemaker. I am wondering if they were not made by the Cadogan Group after they had bought out both GBD and BBB. Maybe some of you know some of the history about the brand. Don’t be shy let us all know.
When my brother received the pipe and opened the box it was an interesting discovery. The pipe definitely did not read BBB and it was in pretty decent condition. The metal was in great shape as was the stem. There was some minor tooth chatter on the top and bottom sides of the stem. The finish on the bowl was in good condition. There was a cake in the bowl and the rim top was dirty and the inner edge of the bowl had some nicks that made it slightly out of round.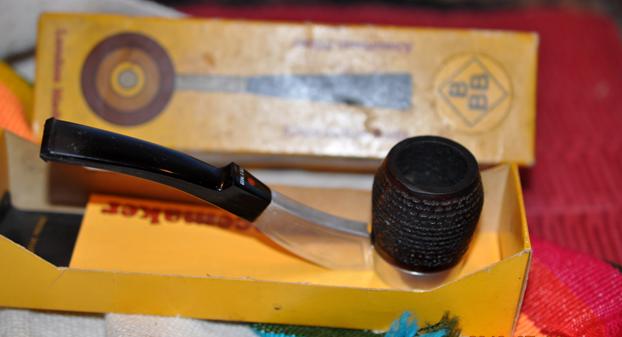
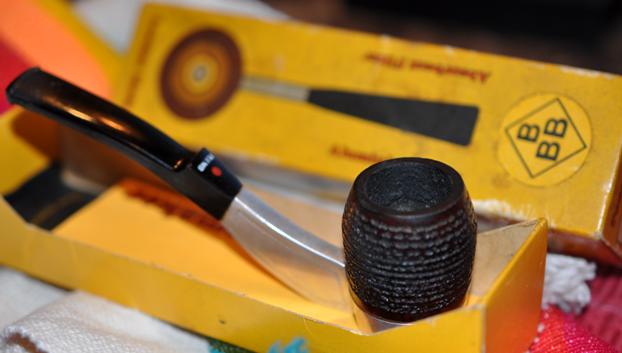 The box had a Peacemaker brochure inside and a pipe cleaner sleeve for the Smokin’ Bowl, a pipe shops in Charleston, Beckley and Vienna West Virginia.
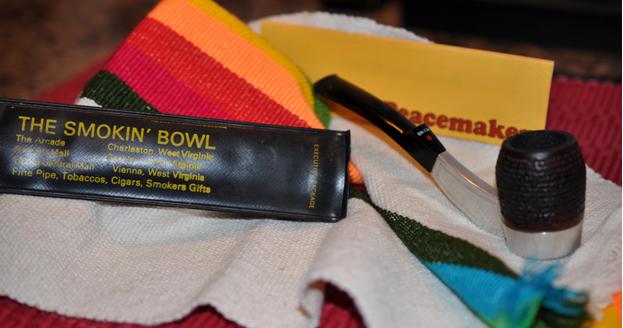
 My brother took the above photos and also some close-up photos to show the condition of the pipe before he cleaned it up.
 The bottom of the metal base is stamped Peacemaker England in a Circle and the number 1 in the centre of the circle.
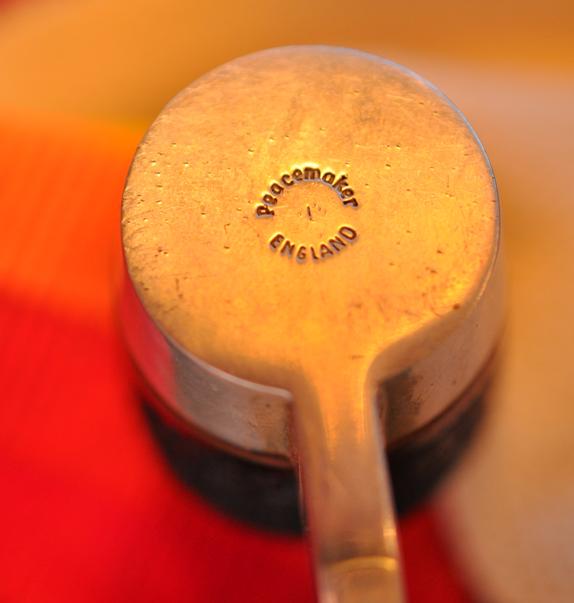 He took a close up photo of the rim top and bowl. It shows the chips and nicks on the inner edge of the rim.
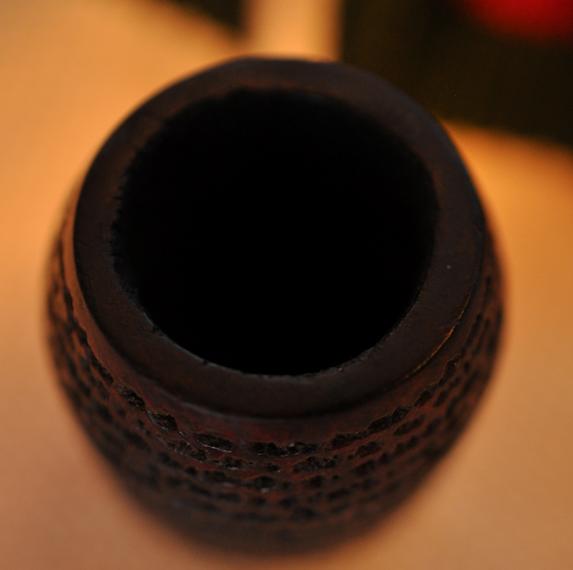 He took the bowl off of the base and took a photo of the bottom of the bowl and the inside of the base that both reveal the tars and oils built up in both places.
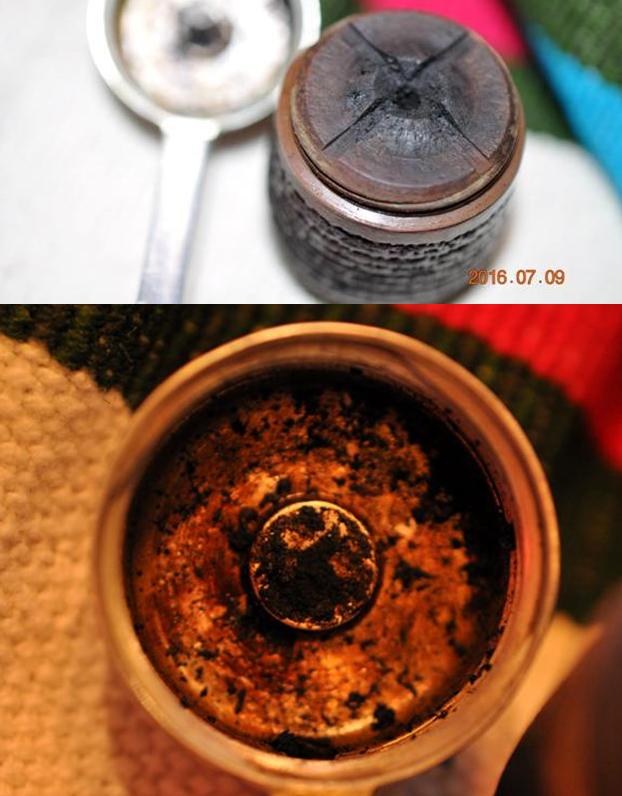 When the pipe arrived here it was in the BBB box. I took some photos of the box because I had not seen one of them before. It is an interesting box. The BBB logo is a sticker on the top and on one side of the box.
 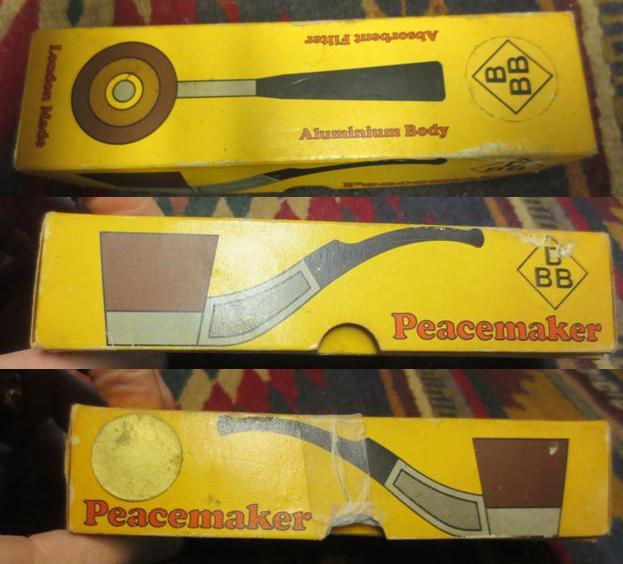 I opened the box and inside was the pipe and a brochure for Peacemaker pipes. It shows the various bowl shapes and finishes that are provided. The pipe looked pretty good. My brother had done the hard work of cleaning up the bowl and the base. He had reamed it and scrubbed the finish and rim. He had also washed the base to remove the hardened oils and tars.
 I took the pipe out of the box and took some photos of it showing where it stood when I started my clean up.
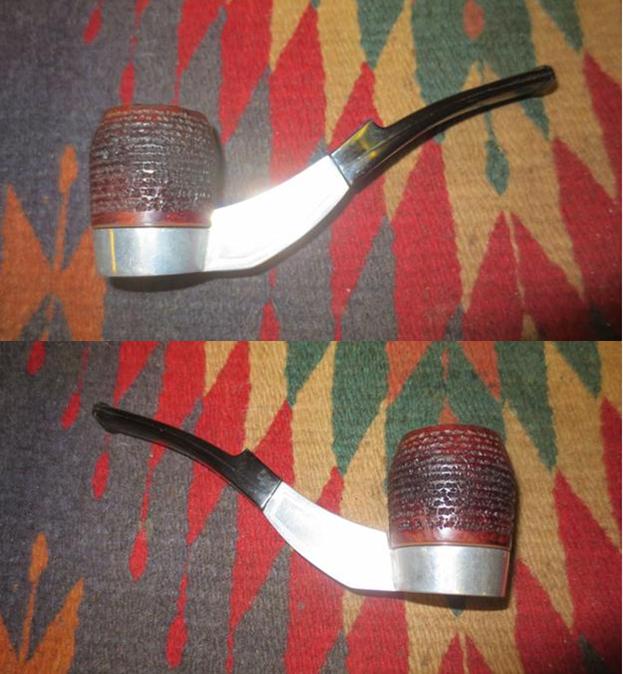
 I took a close up photo of the rim and bowl. I still needed to do some light reaming with the Savinelli pipe knife and the bowl would need to be topped to remove the damage to the inner edge of the bowl.
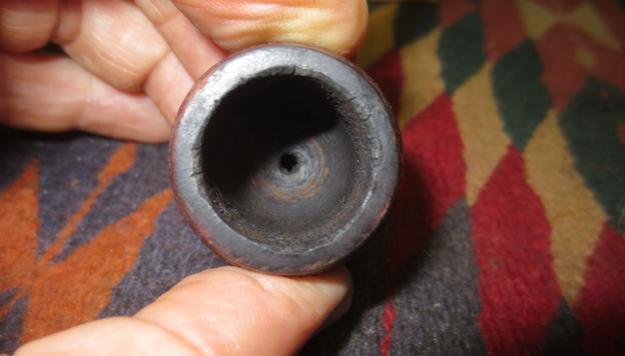 I took the bowl off the base to see what I would need to do to clean out the inside of the base. The threads and the entry of the airway into the shank needed to be cleaned up. I removed the stem from the shank and used pipe cleaners, cotton swabs and alcohol to clean out the base and the entrance of the airway into the base. I cleaned out the airway in the stem with pipe cleaners and alcohol.
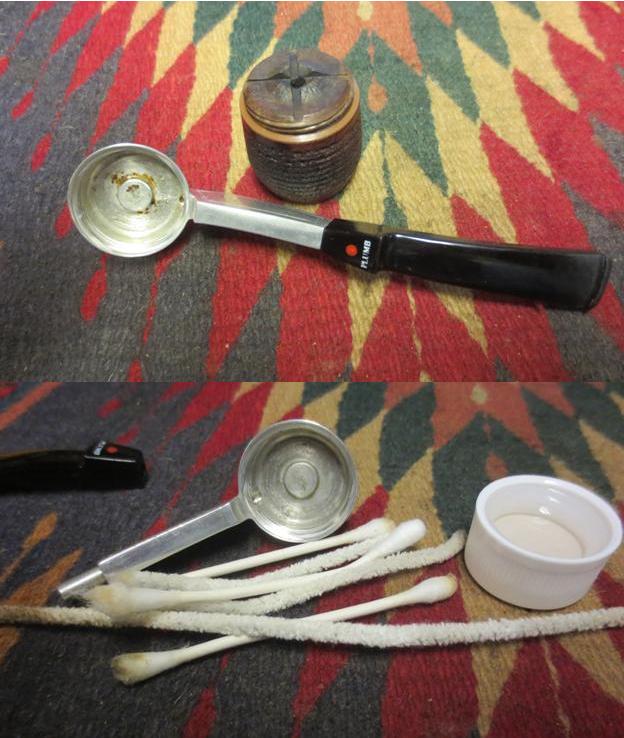
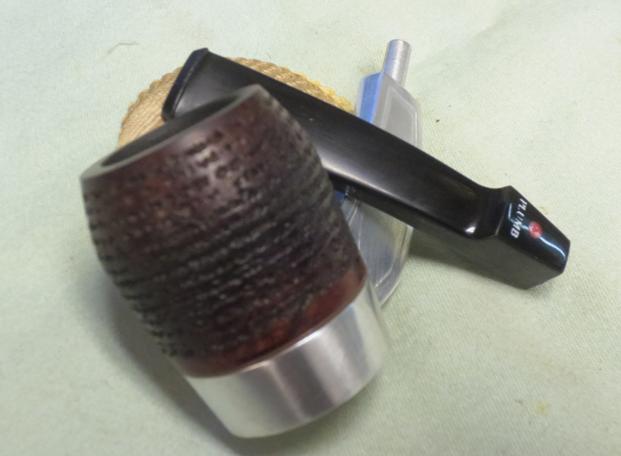
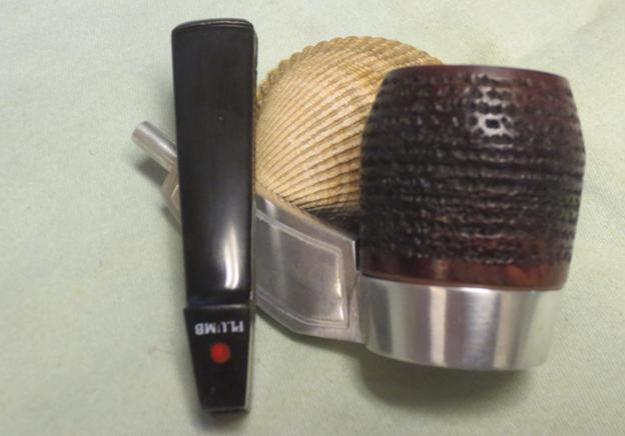
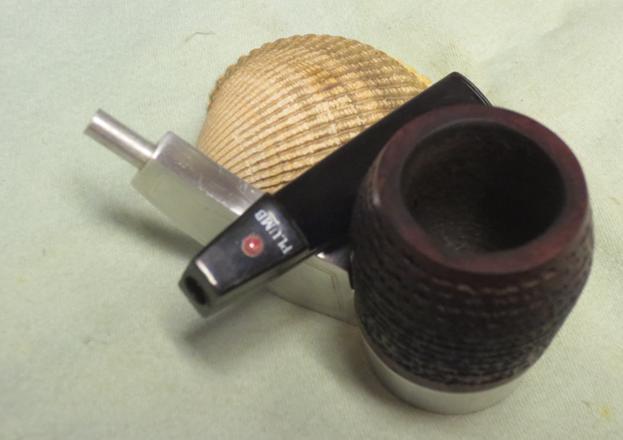
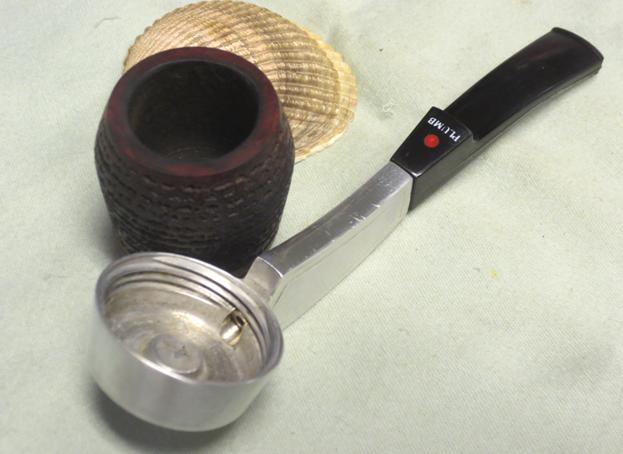
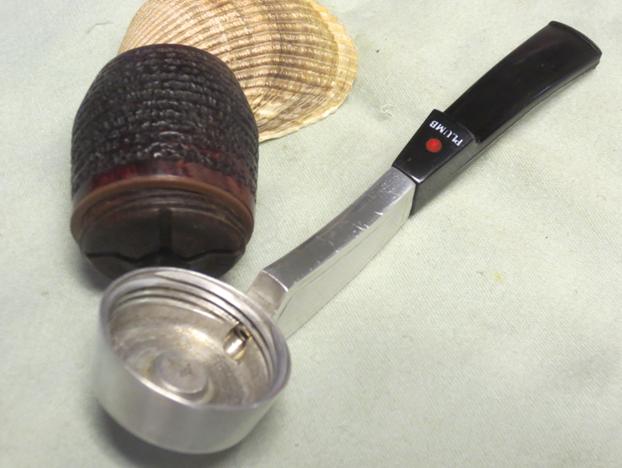
 I took a photo of the cleaned up parts of the pipe. It is a simple and yet effective design that is very similar to the Falcon pipe in basic concept.
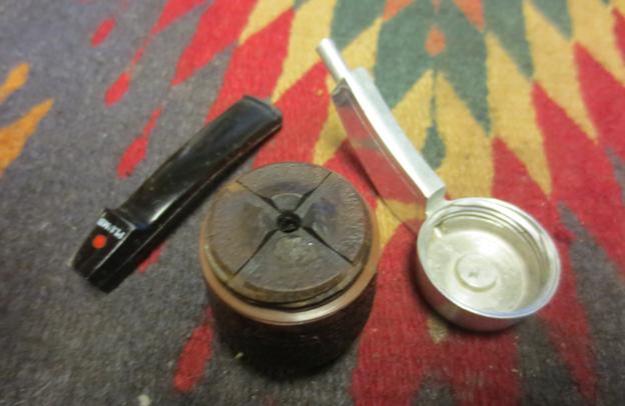 I topped the bowl on the topping board with 220 grit sandpaper to remove the damage to the rim and the inner edge. I sanded until the rim was smooth and the rim was round once again.
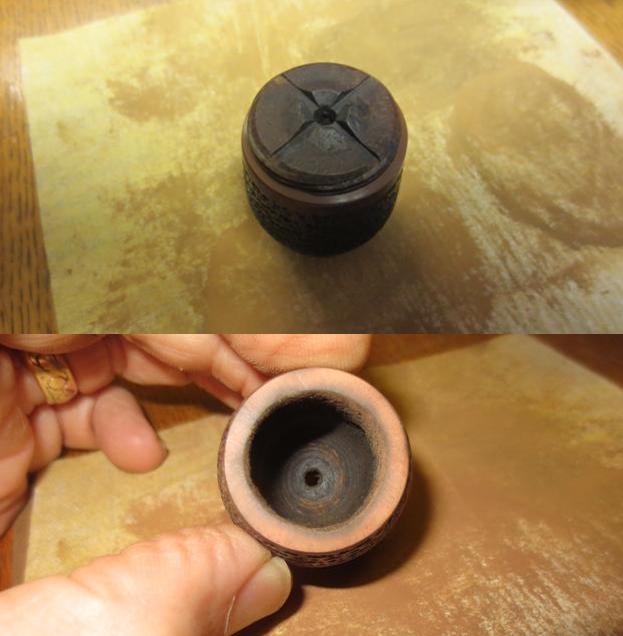 I cleaned up the inside of the bowl with a Savinelli Pipe Knife to remove the light cake that still was in the bowl. I smoothed out the walls and the base of the bowl.
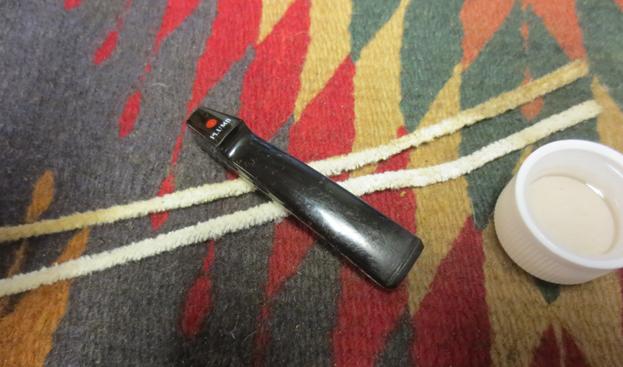
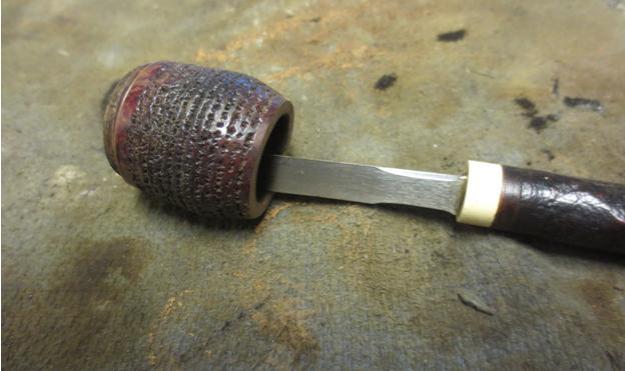 The stem had tooth chatter on the top and the bottom sides near the button. These plastic stems are not too hard to sand smooth but it is an issue to get the shine back. It takes a lot of sweat equity investment to bring a shine back to the stem. I sanded it with 220 grit sand paper and then with a series of 400-600 grit wet dry sandpaper to smooth out the scratches.
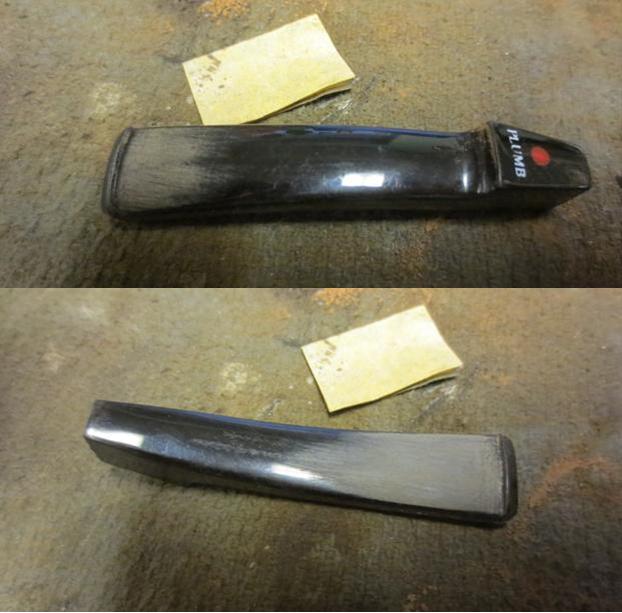
 I wet sanded it with 1500-2400 grit micromesh sanding pads. I gave it a rub down with Obsidian Oil. I dry sanded it with 3200-4000 grit pads and gave it another coat of oil. I finished sanding it with 6000-12000 grit pads, gave it a final coat of oil and set it aside to dry.
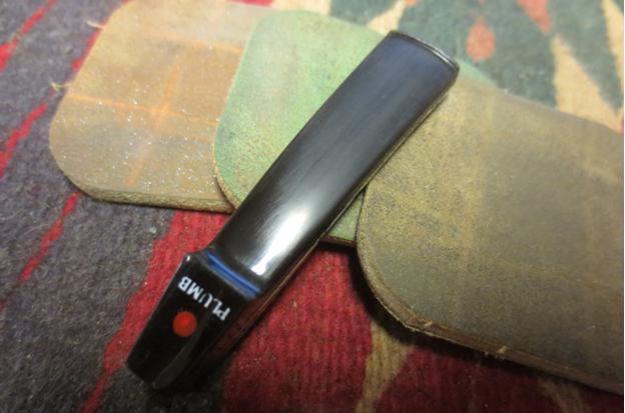
 I sanded the rim with 1500-4000 grit micromesh sanding pads to smooth out the scratches left behind when I topped the bowl. I used a dark brown stain touch up pen to restain the rim to match the sides of the bowl. I touched up the outer edge of the rim as well making sure that all the stain matched the bowl. I gave the bowl multiple coats of Conservator’s Wax and then used a shoe brush to buff it. I also buffed it with a clean buffing pad to raise the shine (The second photo was taken when I had coated the bowl with the third coat of wax).
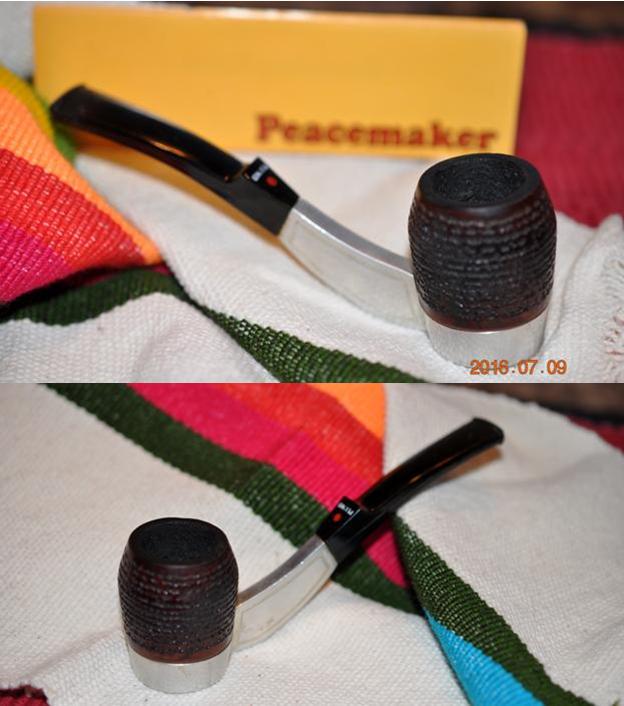
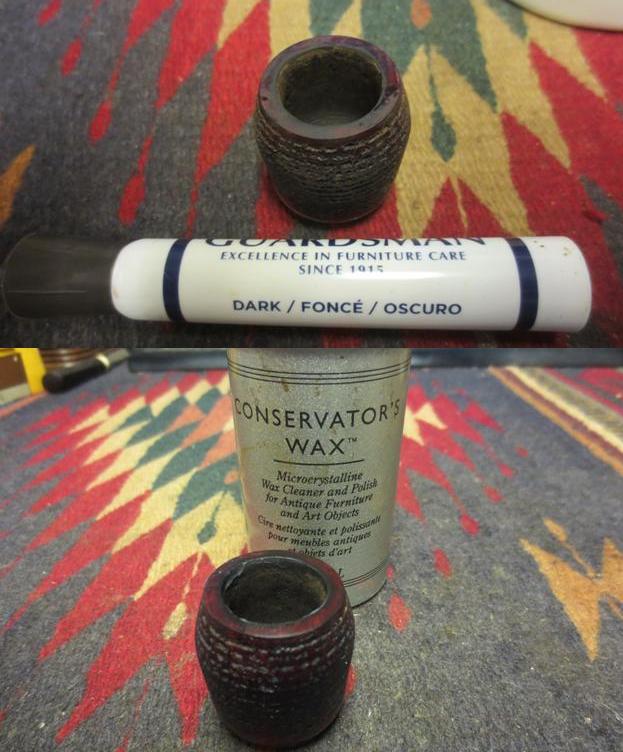 I lightly buffed the aluminum base and the stem with Blue Diamond on the wheel. I put the pipe back together and then buffed the pipe with a light touch giving it multiple coats of carnauba wax. I buffed it with a clean buffing pad and then with a microfibre cloth. The finished pipe is shown in the photos below. It is a great example of the Peacemaker Pipe. I have several of these so I will not be keeping this one either. If any of you want to have a Peacemaker for your metal collection, contact me and this one can be yours. Thanks for looking.
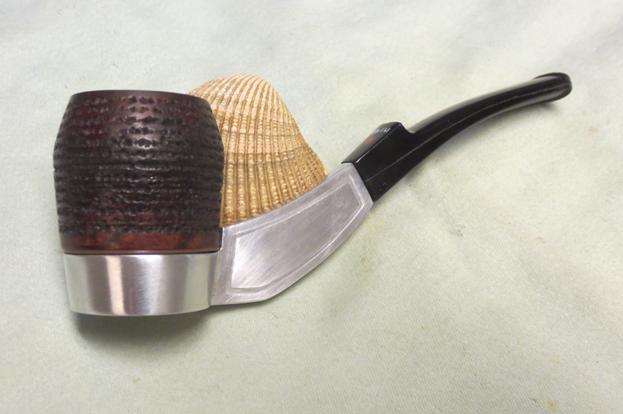
Blog by Steve Laug
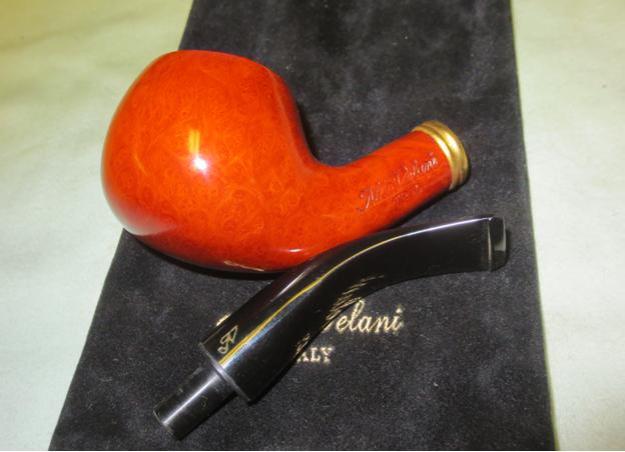
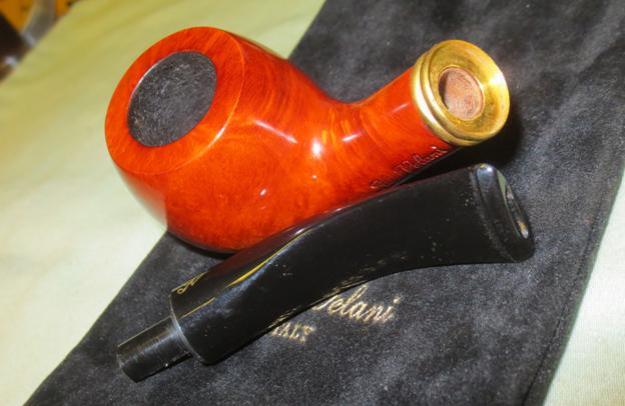
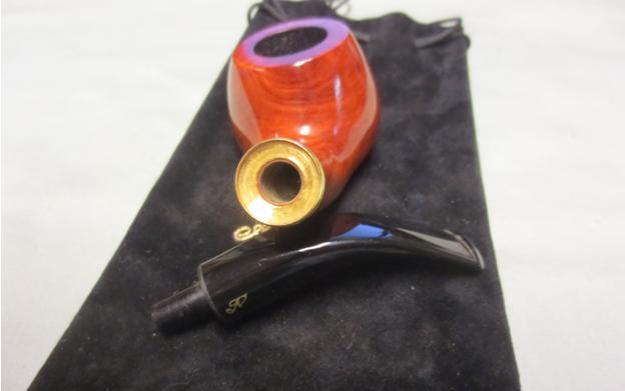
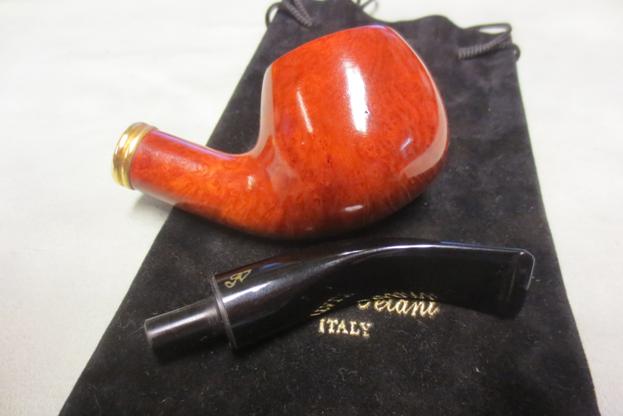
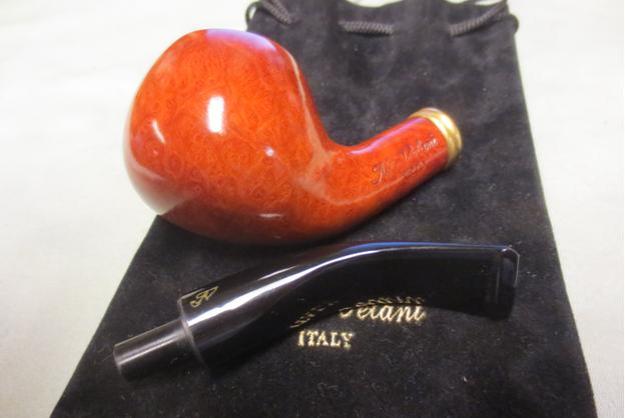
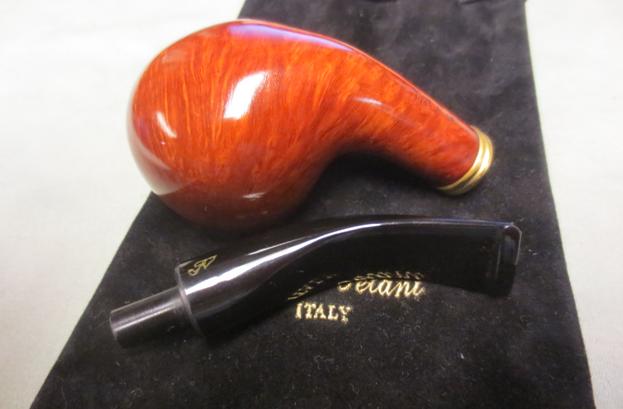
I have never worked on or seen an Aldo Velani Italian made pipe before. I have read about them but never had one in my hands. This one came to me from my brother and it needed no clean up or refurbishing. This pipe was spotless and appeared to be unsmoked. I am always dubious when I get what appears to be an unsmoked pipe. I spent some time going over the internals of this pipe to check that out. It did not smell like tobacco or smoke. When I ran a pipe cleaner through the stem and shank it came out pristine. So I am fairly convinced that the pipe is unsmoked. The bowl has a dark neutral tasting bowl coating on the walls. The finish is clean and unblemished. There are no scars or damage to the finish on the bowl. It has a combination of cross grain on the top and underside of the bowl and shank and up the front and back of the bowl. There is also some great birdseye grain on the bowl sides. It is not a pipe that I will be keeping. If any of you who are reading this blog want to add it to your rack it can be yours for $60 + postage. The shape is great in the hand and it would be one I would keep if I did not have so many already. 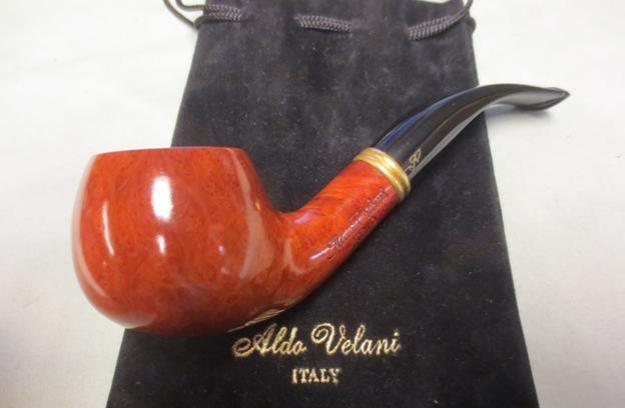
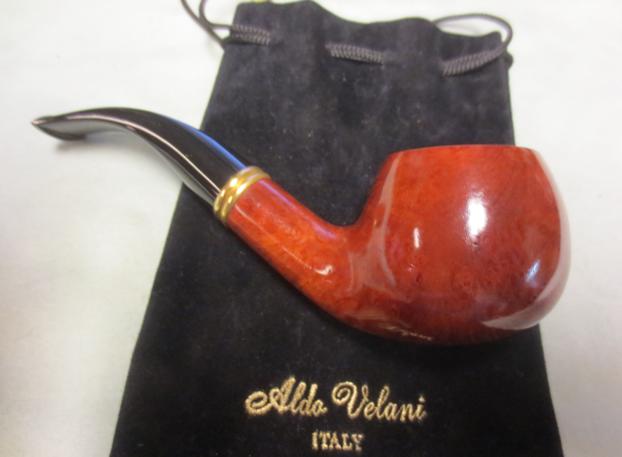
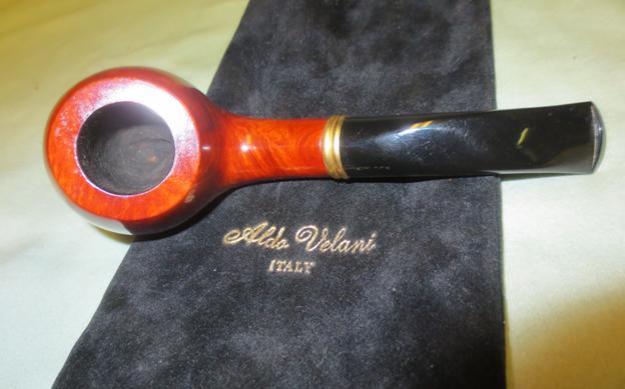
 The stamping on the bowl read Aldo Velani over Trio on the left side of the shank and Italy 56 on the underside. There is no stamping on the right side of the shank. The stem was a shiny black Lucite and there was a brass end cap/band on the shank. The band sat between the bowl and the shank. The stem had the stylized Aldo Velani stamp – a kind of AV that ran together. The pipe came with a thick velvet pipe sock with drawstrings.
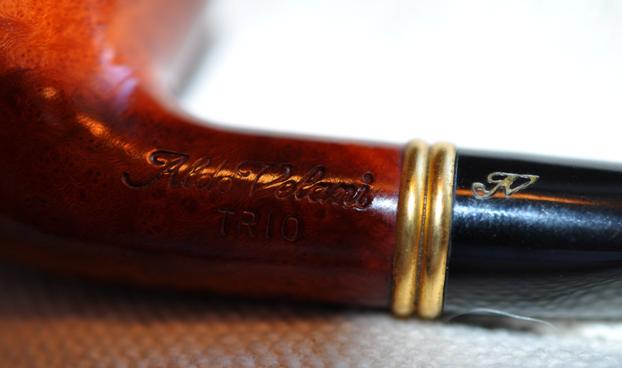 I took the pipe apart to make sure that it was clean and had no dust or debris from sitting in the bag and it was very clean. There is no smell of tobacco in shank or the stem. The stem has a well done funnel at the end of the tenon. The drilling in the shank is at the top of the shank but comes out at the bottom of the bowl and is centred. The draught on the pipe is open and easy.
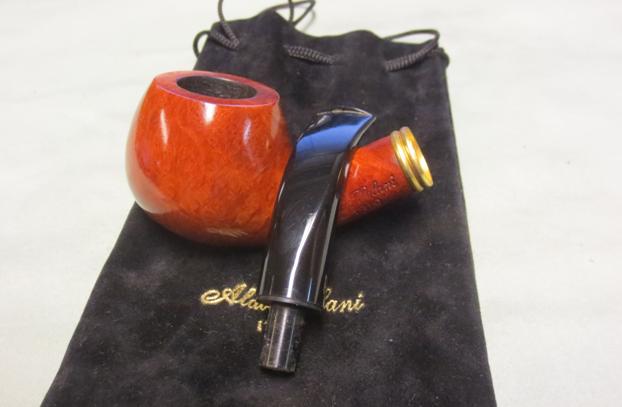
 Once again if you are interested in adding this one to your collection email me at slaug@uniserve.com or send me a message on Facebook. We can work out a deal. Thanks for looking.
Blog by Steve Laug
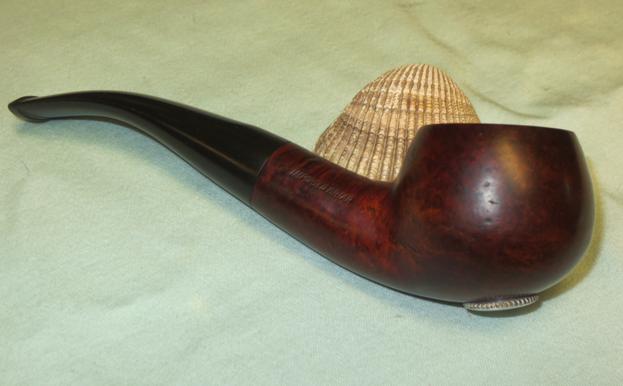
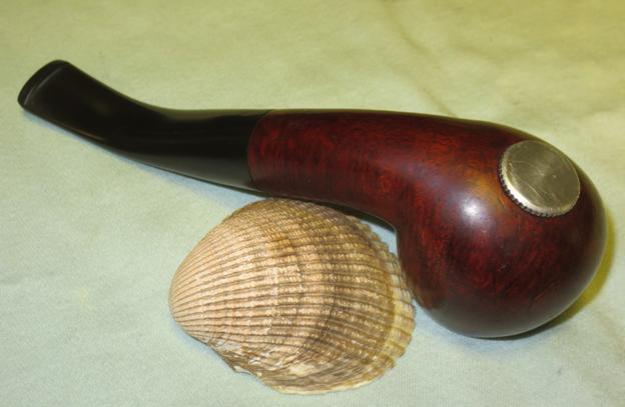
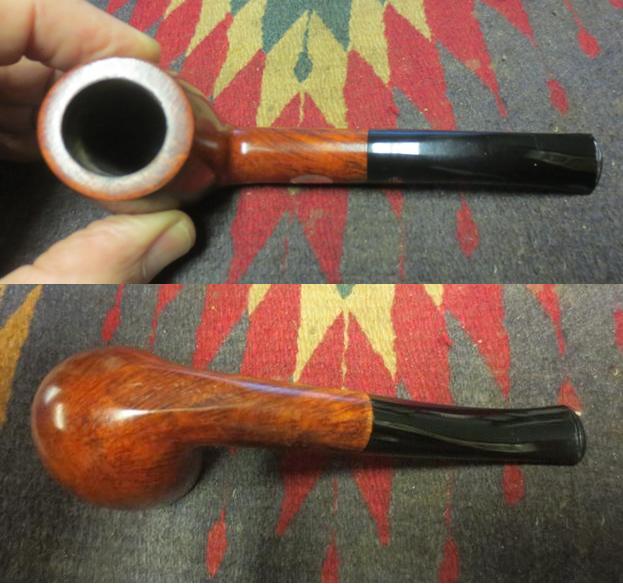
One of the pipes that my brother sent me was a Butz-Choquin that was in a large presentation box. It was stamped Butz-Choquin on the bottom of the shank and had a silver disk on the left side of the shank with 1986 engraved on it. On the right side of the shank it was stamped MILLESIME with C in a circle and 215 underneath. The box was satin lined and the pipe was held in place by an elasticized band. The stem bore the acrylic inset BC logo. In the lid of the box was a Butz-Choquin pipe sock and a certificate stating that this pipe was a limited edition and bore the number 215 of 1200 pipes made. On the satin lining of the box it was stamped BC and the Butz-Choquin logo. Underneath was Millesime. Underneath that to the left it read Limited Edition, central it read Maitre Pipier a Saint Claude – France, and to the right it read edition numerotee. A little research on Google told me that Millesime translated Year and the Millesimei line was composed of the BC pipes of the year. Thus I had in my hands a 1986 Pipe of the Year.
 I took the pipe out of the box and laid it on the pipe sock and took a photo of it. It is a beautifully grained piece of briar with a shiny Lucite stem.
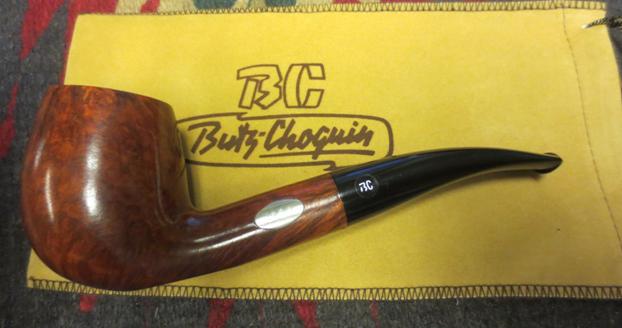 The certificate has the BC Butz-Choquin logo and Millesime. Then it reads:
This year we have carefully selected this model B.C. Millesime 1986. This year is engraved on a silver plate inlaid in the briar and the edition is limited to 1200 pieces.
We have created the B.C. Millesime for the special and individual taste of pipe lovers. Those who appreciate their pipe will be able to savour this new B.C. shape and start a new collection.
The distribution has been intentionally limited and great attention has been given to it production.
This has made this B.C. Millesime 1986, with the No. 215, a pipe that caters to the pipe smoker’s enjoyment.
This certificate which accompanies this pipe guarantees its authentic and unique character and justifies its prestige.
Jacques et Jean-Paul Berrod, Maitres Pipiers a Saint-Claude. The certificate bears his signature below the name and title.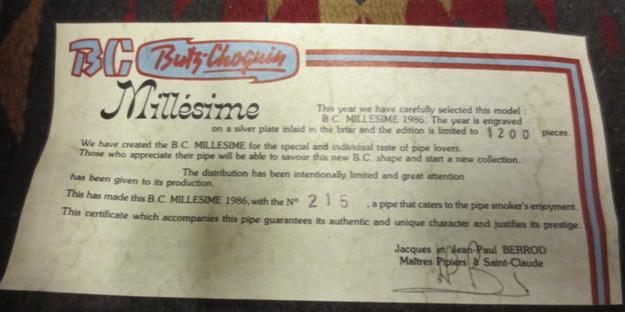 I took the pipe to the work table and took some photos of it before I started to clean it up. The first four photos show the various views of the pipe. The grain on the pipe is quite a stunning mixture of flame, cross grain and birdseye.
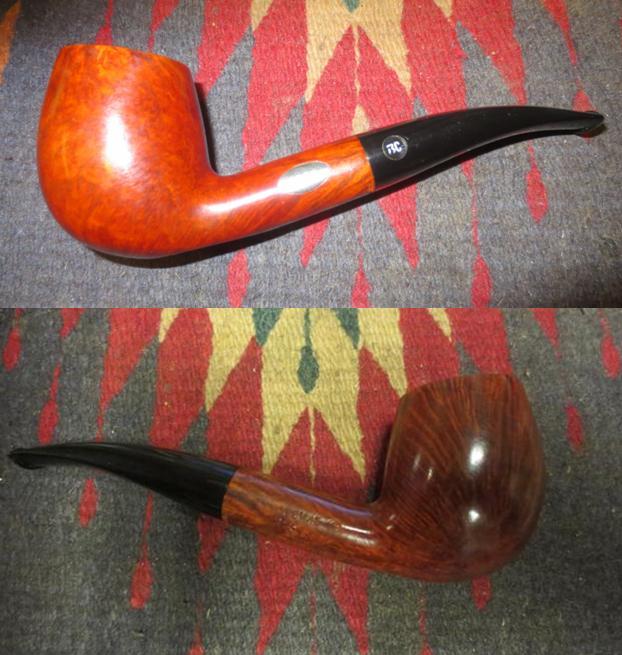
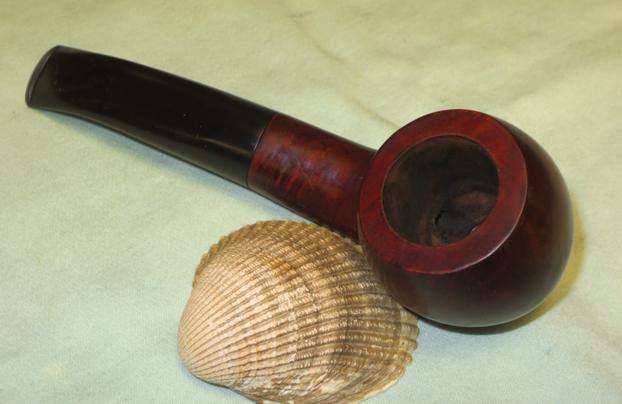
 The pipe had obviously been lightly smoked as the tobacco chamber still the bowl coating on the bottom two-thirds of the bowl. I think that the most disturbing feature of this pipe to me was that the sanding marks were still visible on the rim and bowl. I am not sure if those were original or if the entire pipe had been brushed with a coat of varnish. In the close up photos you can see the marks that I am talking about. Each of the photos shows a different portion of the pipe from the rim to the stamping on the sides and bottom of the shank.
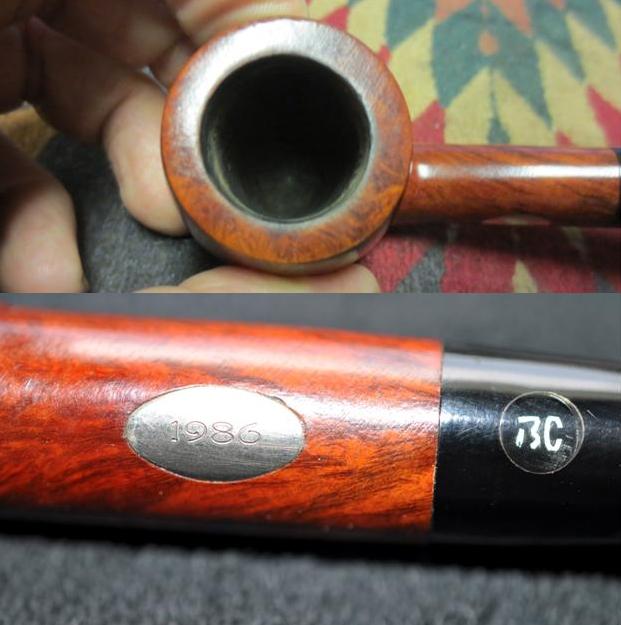
 I cleaned out the mortise and the airway in the shank and the stem with alcohol, cotton swabs and pipe cleaners until they were clean.
 The Lucite stem had scratches and small nicks in the surface so wet sanded it with 1500-2400 grit micromesh sanding pads and dry sanded it with 3200-12000 grit pads. I wiped it down with a damp cotton pad between each set of three grits.
 I sanded the briar with the same sequence of micromesh pads to remove the scratches. The more I worked with them the more convinced I became that the surface had a brushed on coat of varnish or shellac. I don’t think it came that way originally but had probably been done by the eBay seller to make the pipe look shiny.
 When I finished sanding it with the micromesh sanding pads I buffed the bowl and the stem with Blue Diamond polish on the buffing wheel. The sanding pads and the buffing wheel took out the scratches and polished the finish. The grain really stands out after the buffing. I gave the pipe and stem several coats of carnauba wax and buffed it with a clean buffing pad. I hand buffed it with a microfibre cloth to deepen the shine. The finished pipe is shown in the photos below. The Lucite stem looks great with the newly polished bowl and shank. The silver inlaid disk engraved 1986 also shined up nicely with some silver polish.