Author Archives: rebornpipes

Reworking and Restemming What Looked Like a Lost Cause


Blog by Ryan Thibodeau

I have been following Ryan’s work on FaceBook’s Tobacco Pipe Restorers Group and have been impressed with his work. When he posted the work on this old Canadian stummel with a lot of issues I wrote and asked if he would be willing to post it on rebornpipes. He said sure and sent me the following write up. I am happy to welcome Ryan to the pages of the blog. It is a pleasure to have you here. Without further ado I will let Ryan introduce himself to you all. — Steve

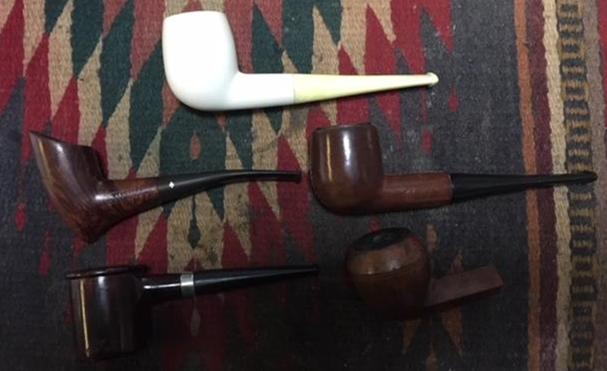
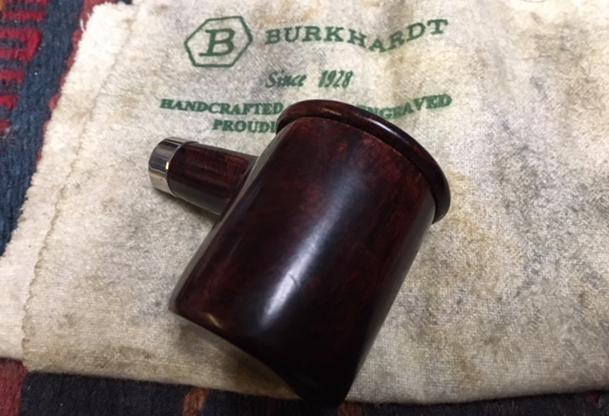
My name is Ryan Thibodeau, I live in the Hamilton Ontario region I stumbled upon this hobby by accident. When my Father learned of my new hobby, he gave me his 1959 Dunhill shell briar pipes. They hadn’t been smoked in 38 years and needed some TLC. I had them restored and they were the first two pipes in my rack.

From there I joined various Facebook Groups and happened upon Steve’s blog “Reborn Pipes”, I was inspired immediately. Since that time I’ve been collecting tired worn out pipes and testing my ability to return them to a condition that I would be proud of. It is a wonderful hobby, that doesn’t require a lot of space to do.

Every pipe has a story! Usually the smoker who owned it, and their story, is more interesting than the pipe itself.

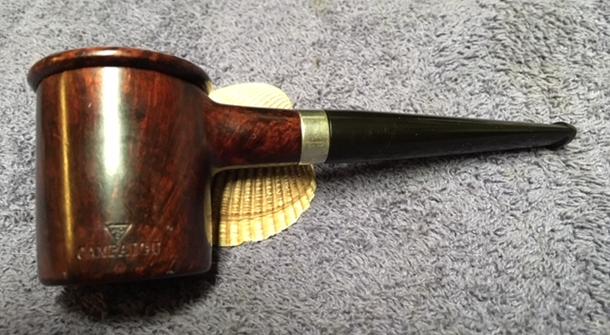
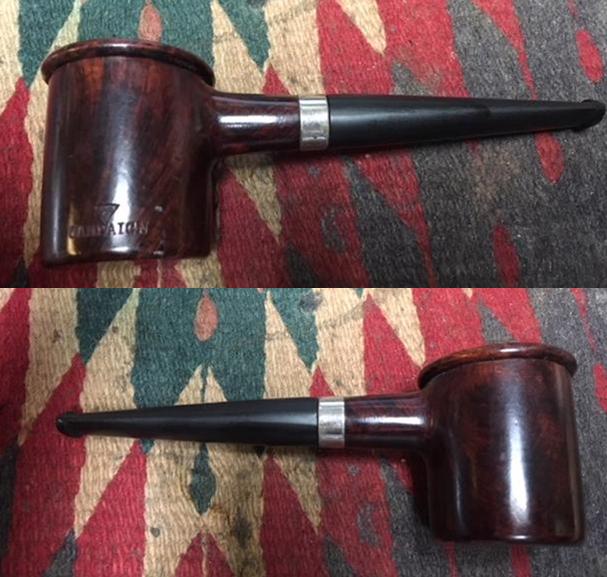
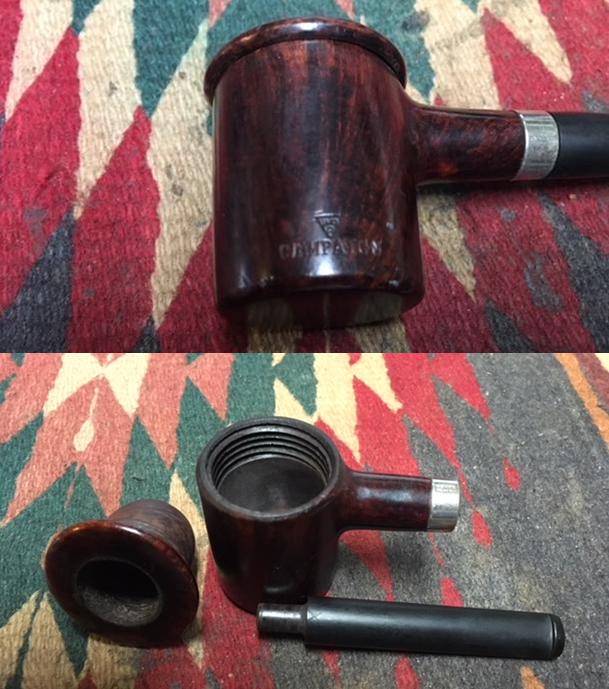
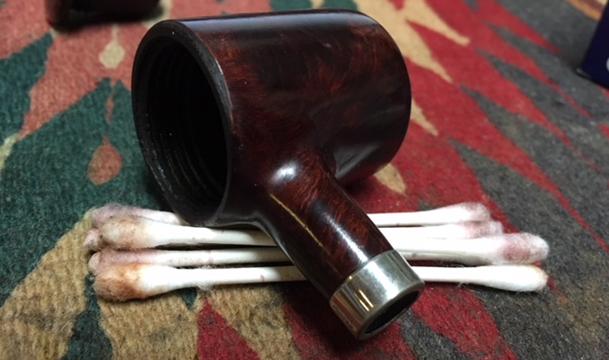
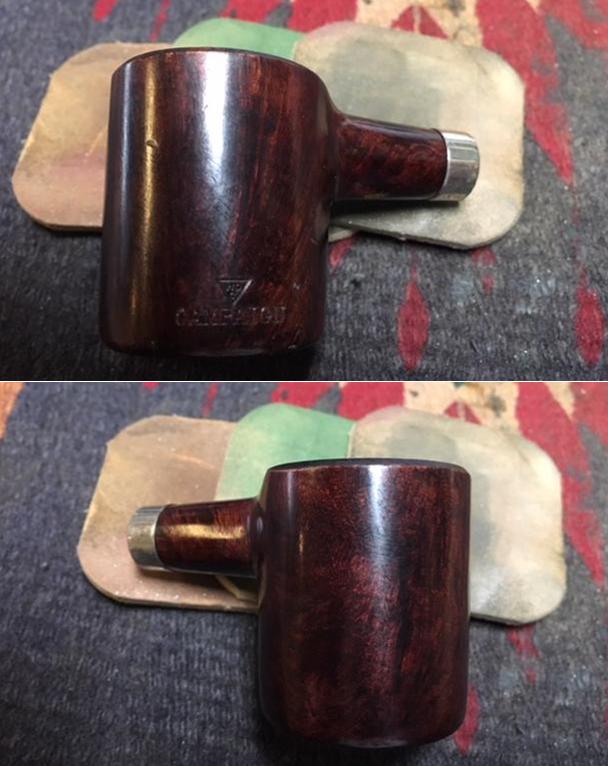
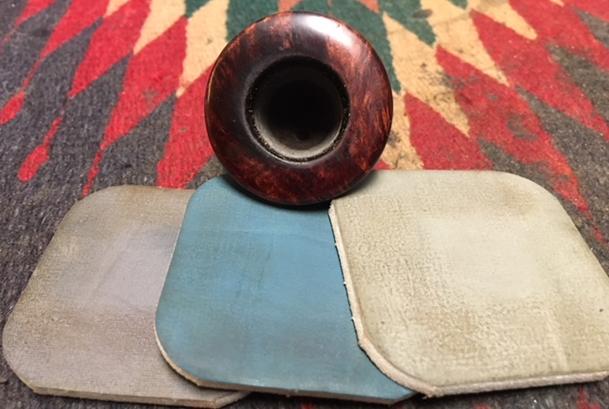
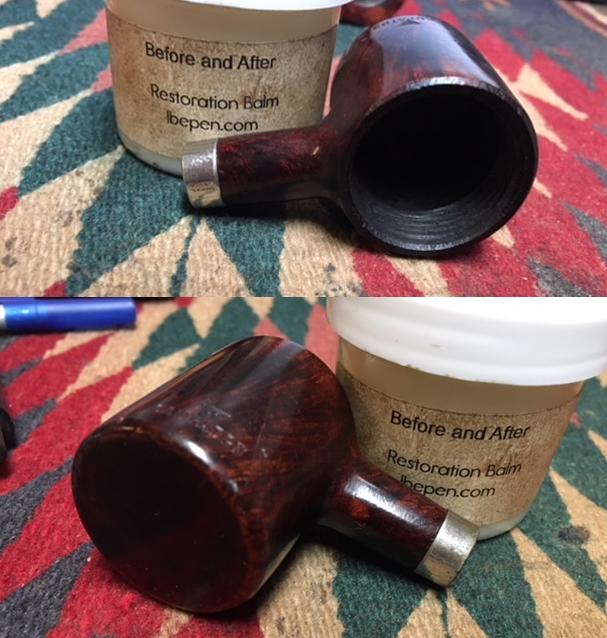
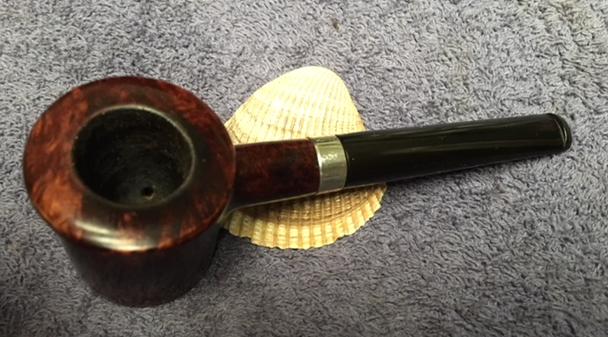
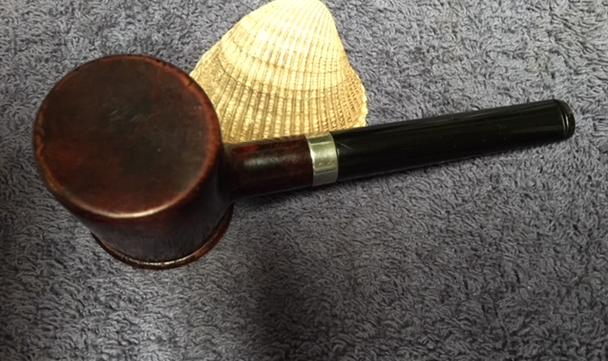
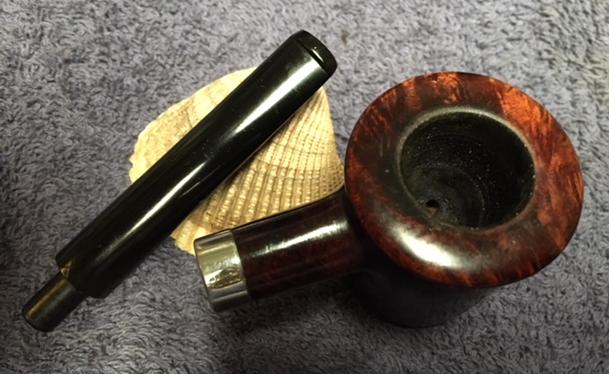
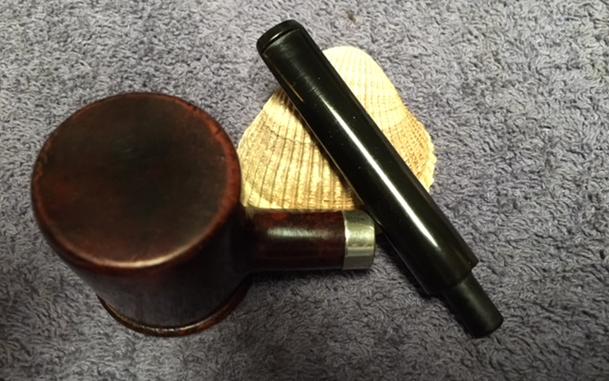
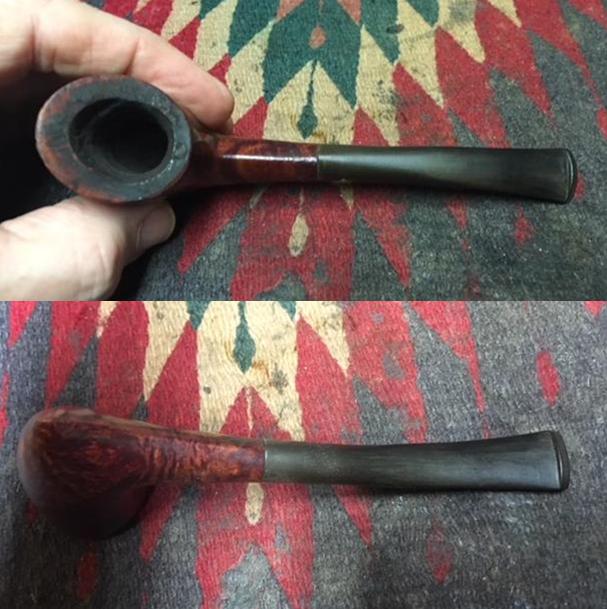
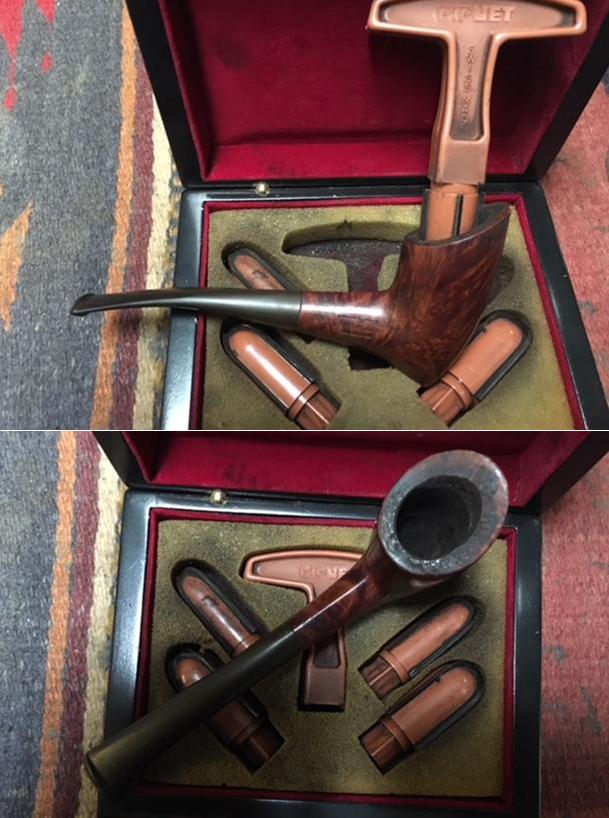
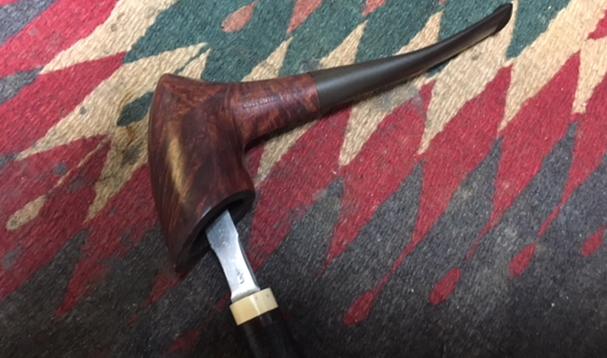
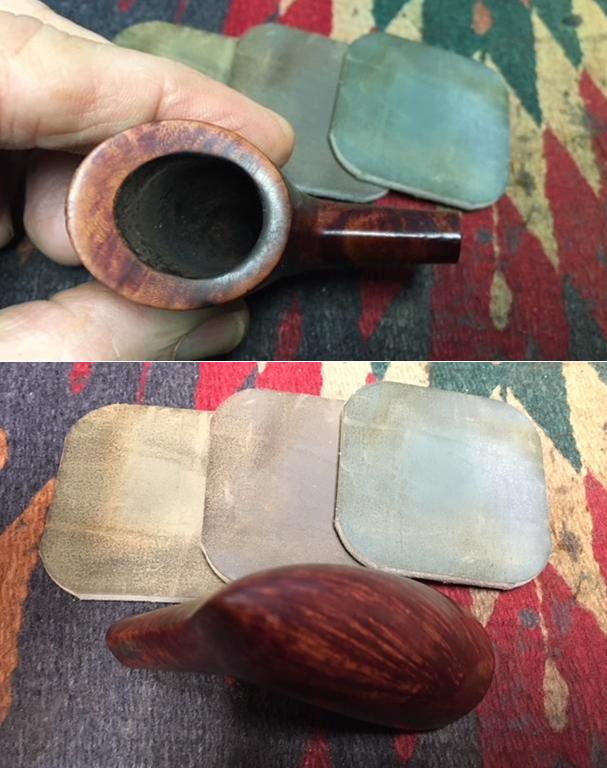
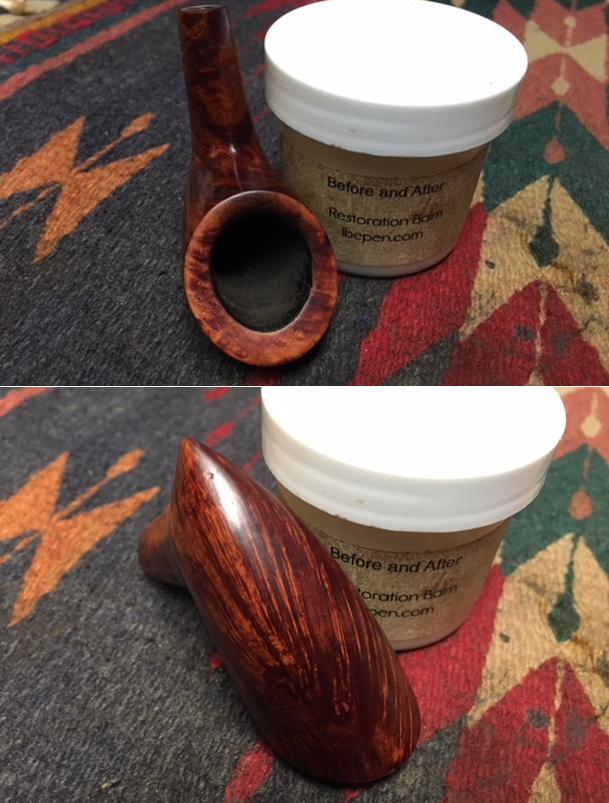
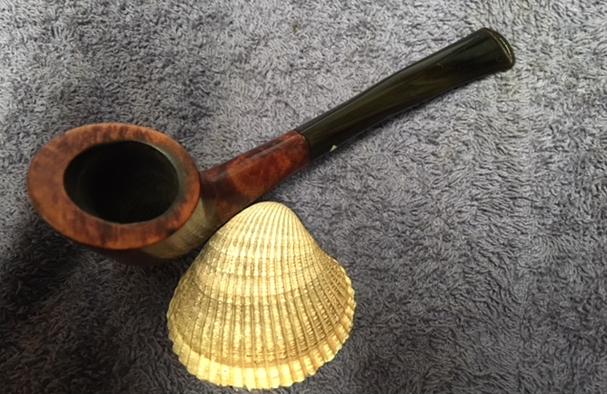
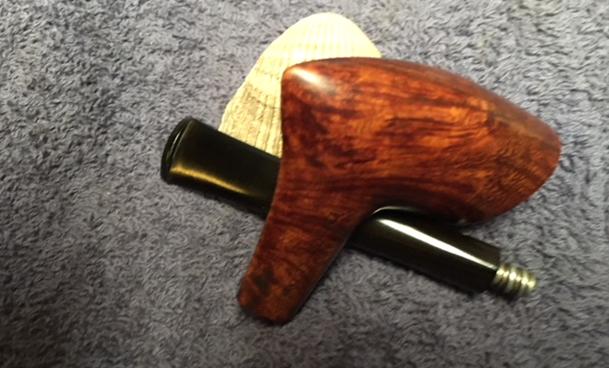
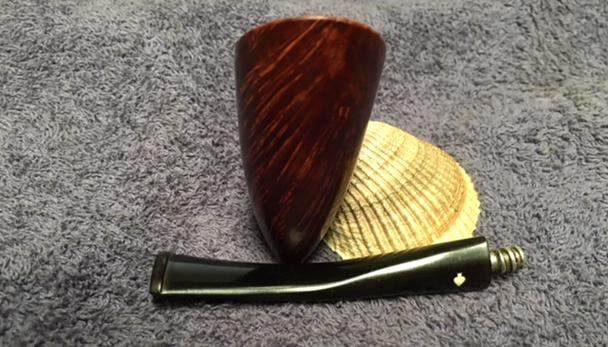
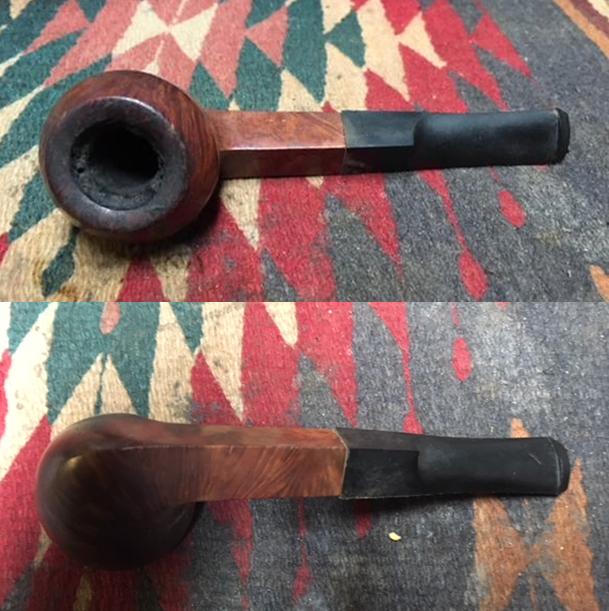
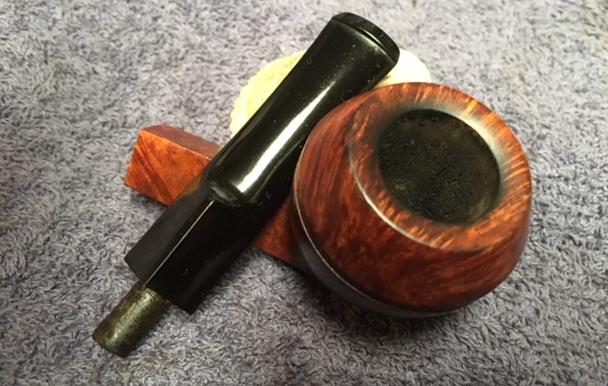
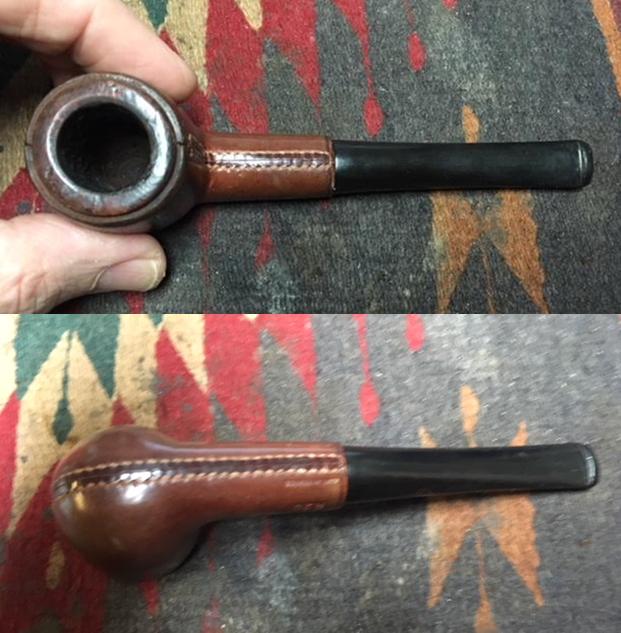
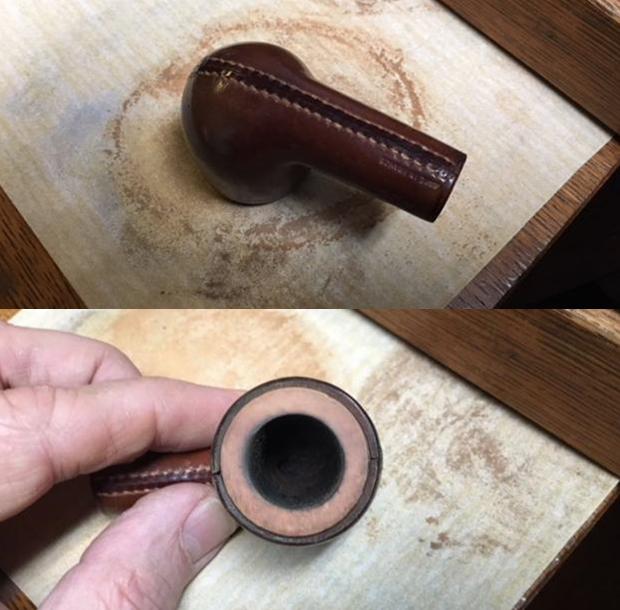
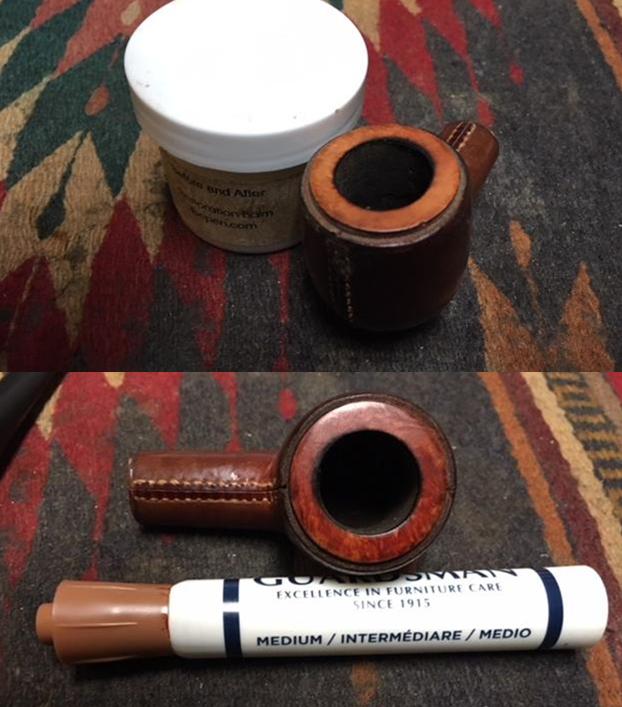
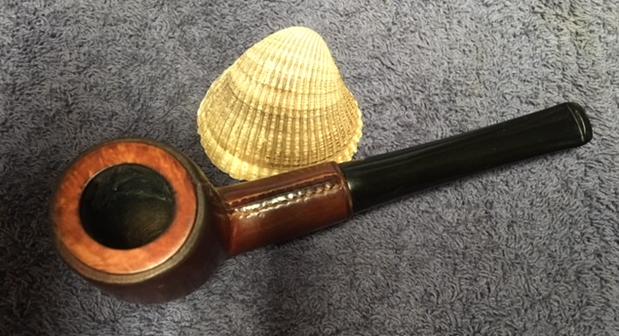
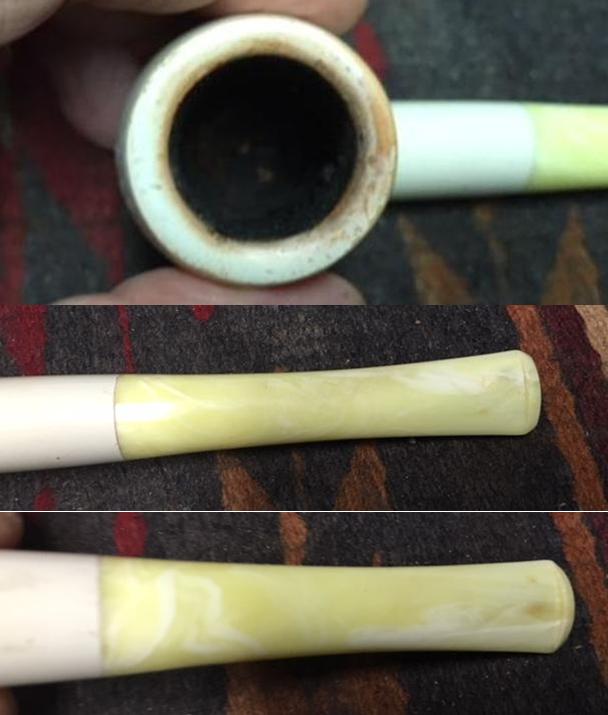
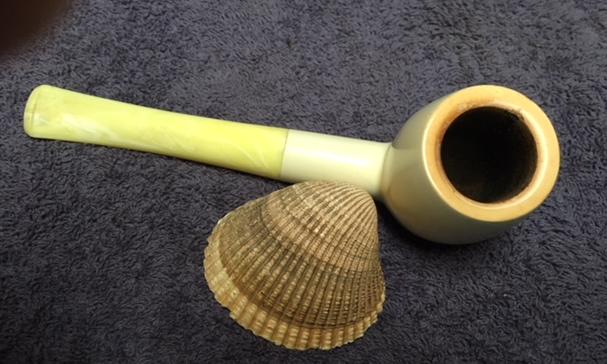
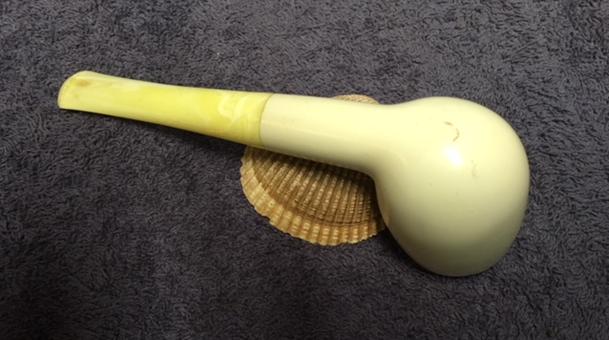
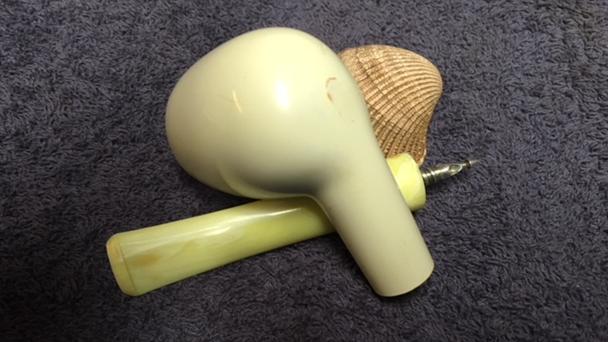
I purchased this pipe in a lot of 12. There were only one or two pipes in the lot that I really wanted and the price was right, so I wasn’t heartbroken if the rest came to rest in the bottom of my box of pipes. One of them came in a case that was meant for a meerschaum, and it looked decent when in the picture, but further investigation revealed a lot of issues that would need to be repaired. I started by removing the silver band, which came off without any effort and used Heirloom Stripper to remove all the dirt, grime, old finish and lift some of the stain. This allowed me to get a real good look at the damage to this pipe. 
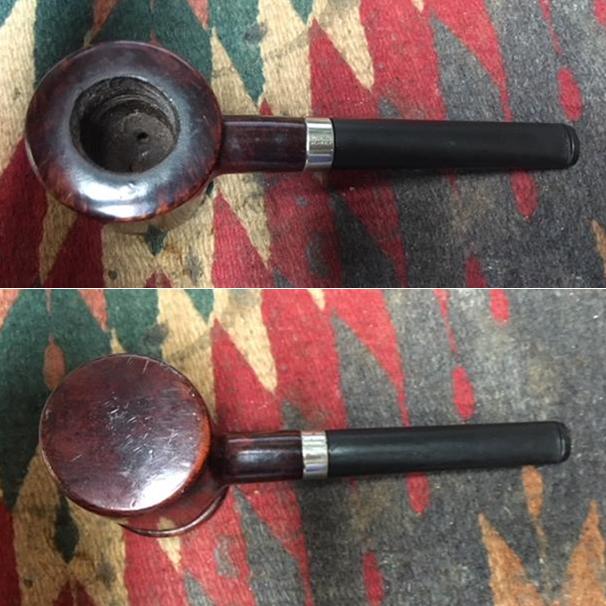
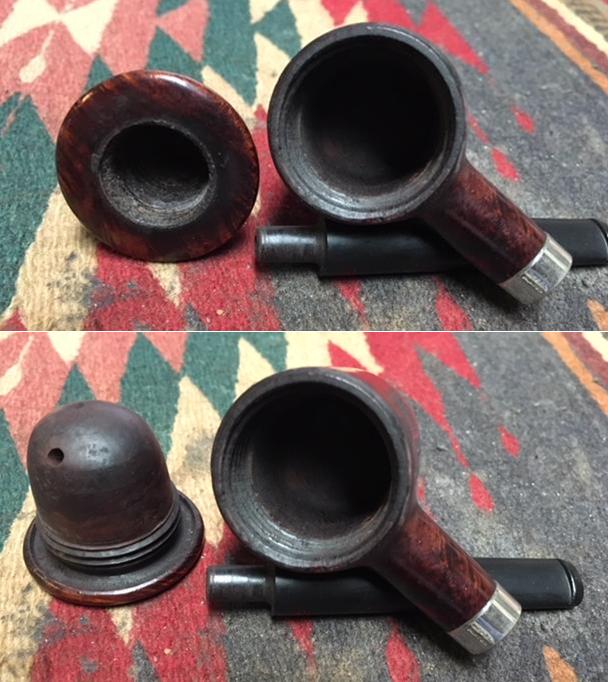
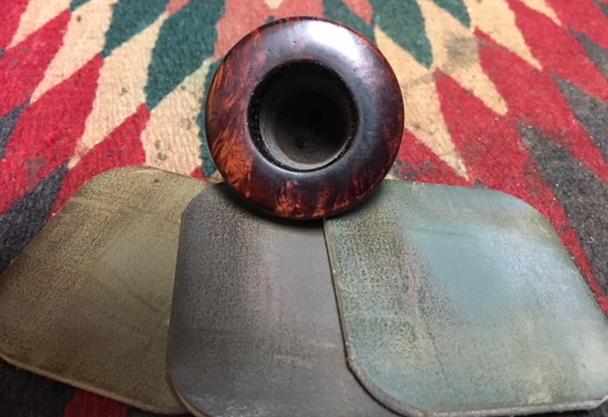
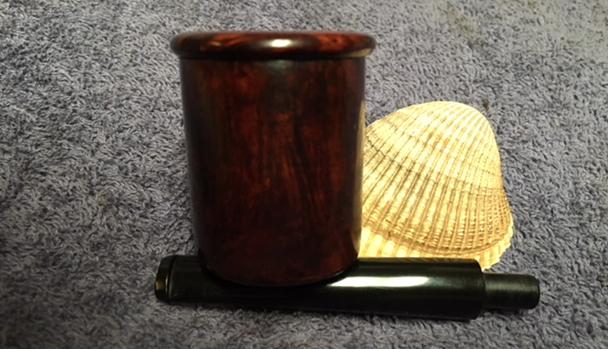
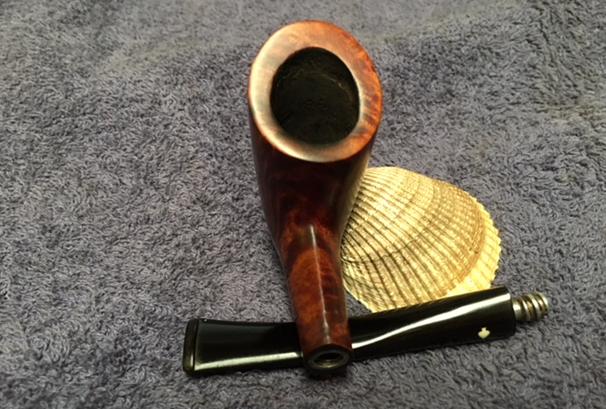
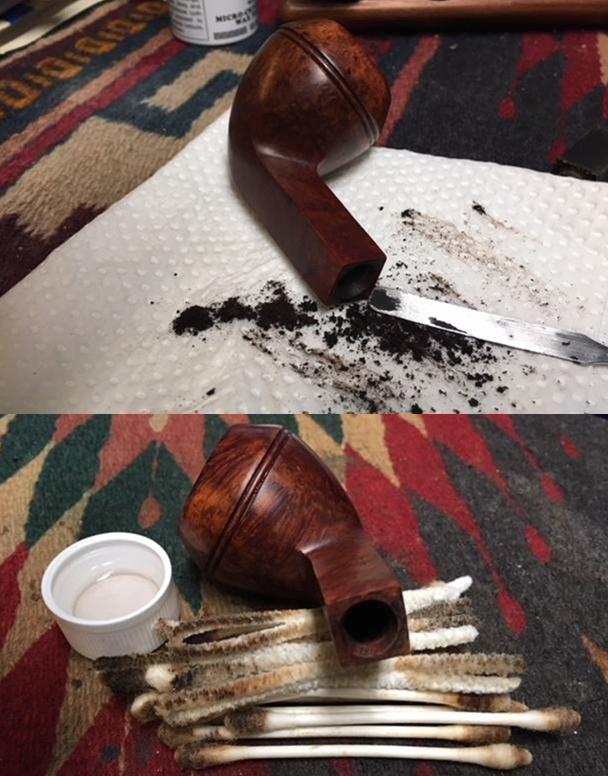
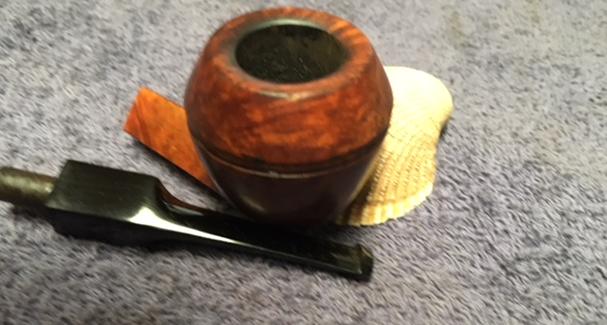
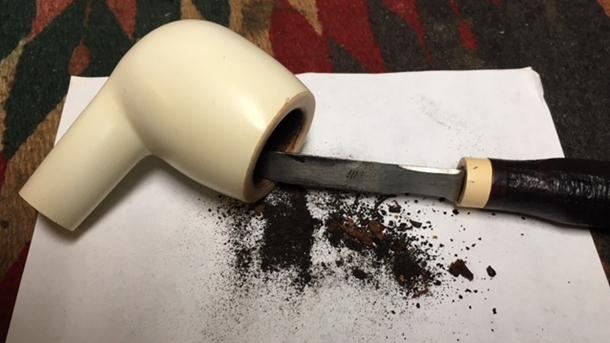
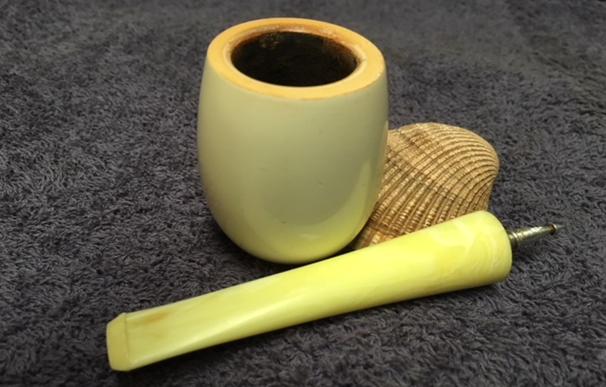
Next I used my Castleford reamer to remove all the cake out of the bowl. There was very little cake lining the bowl, however; once I removed the cake I found that walls of the tobacco chamber were severely charred. I suspect this pipe was smoked very hot and the briar was charred to charcoal. I wanted to see how much of the chamber was damaged ( I prefer to ream my bowls right back to fresh briar. This way I can see if there are any heat fissures or major issues that would make a restoration go sour after the first smoke)

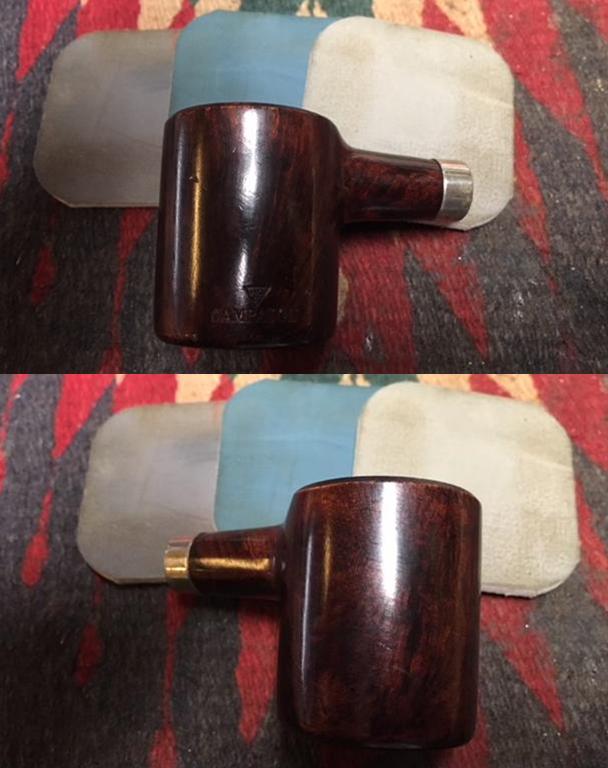
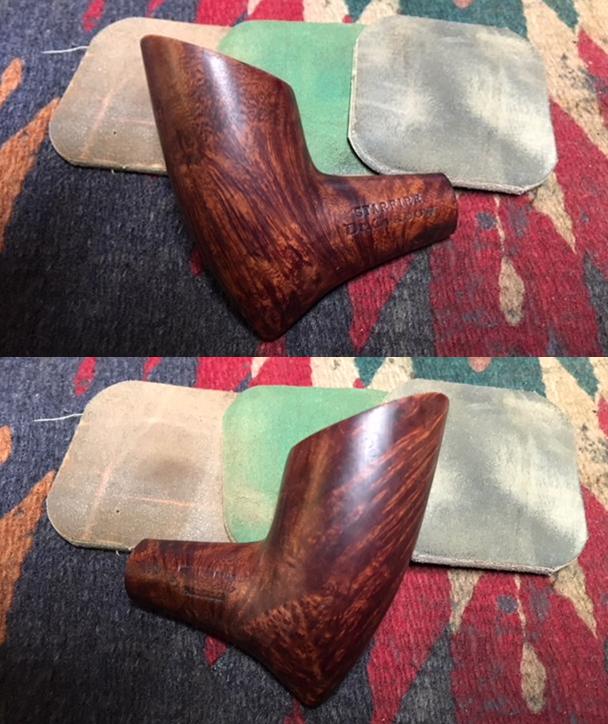
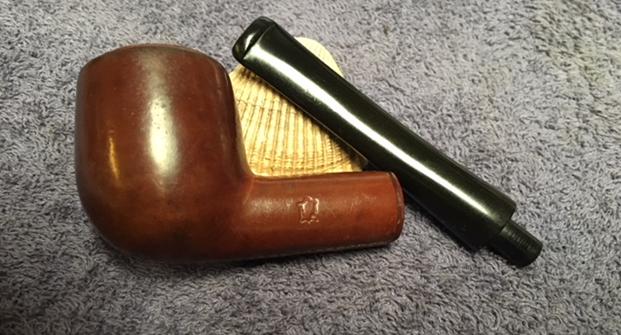
I removed the charred wood. The reamers will shave away the charred wood, once you feel the resistance of the blades rubbing the fresh briar you know you’ve removed the charring.I used a combination of Briar dust and CA Glue to create a patch for the gouge on the side of the bowl. Using a flat file, I filed the patch down to the profile of the pipe. Afterwards I topped the bowl to level out the rim and the patch. The bowl was also over reamed by its previous owner so I added a bevel to the inside of the bowl at the rim to blend everything in.

There was a lot of filing and sanding through this process to get it just right. Unfortunately I get hyper focused during this process and forgot to take step-by-step pictures.

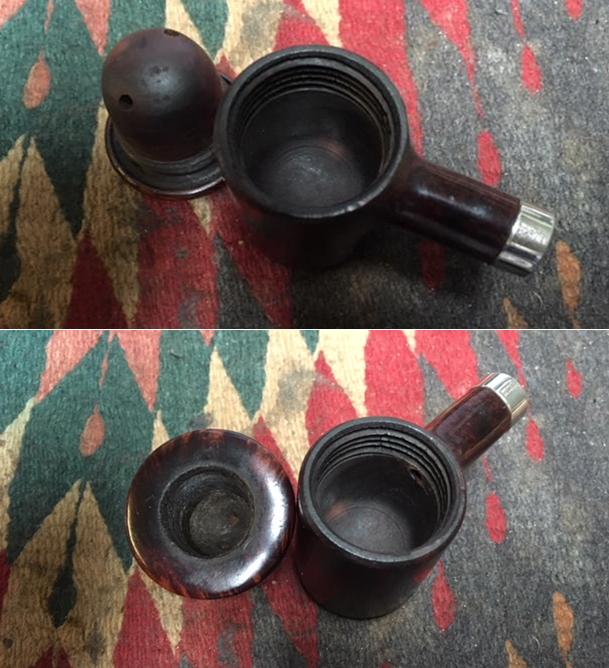
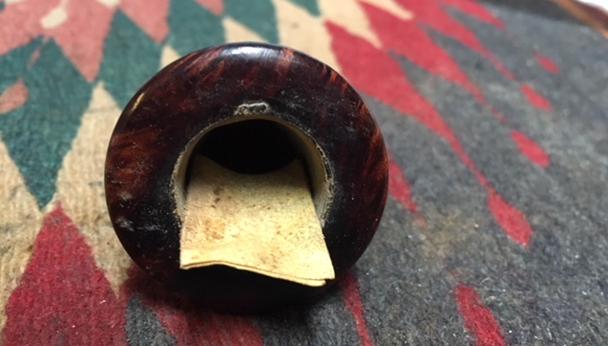
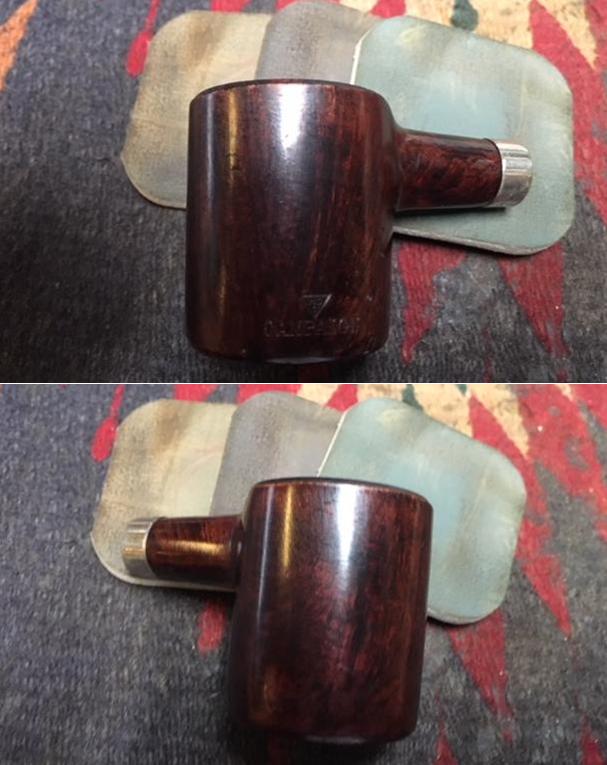
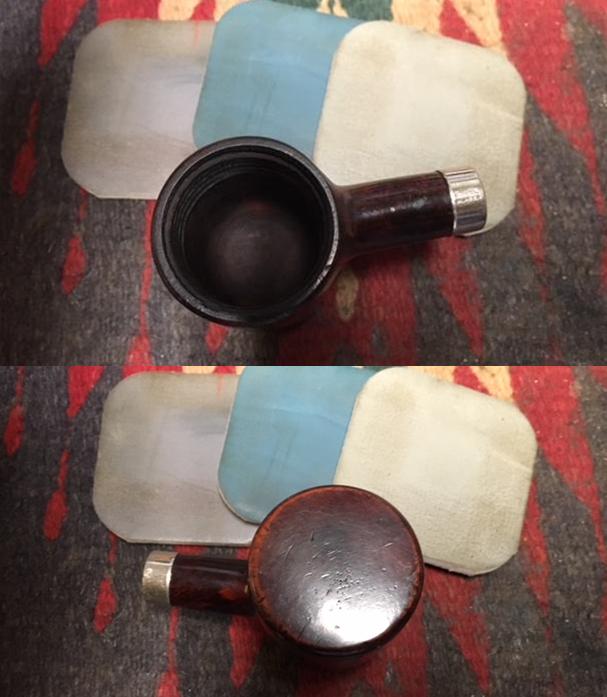
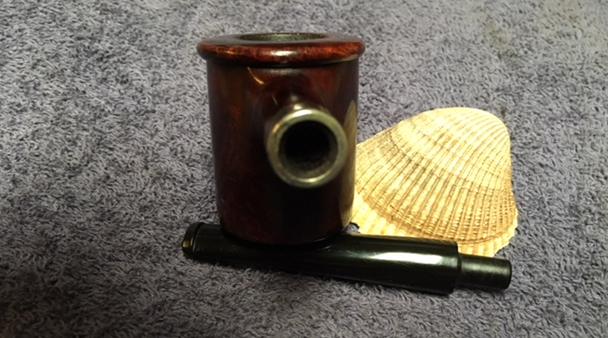
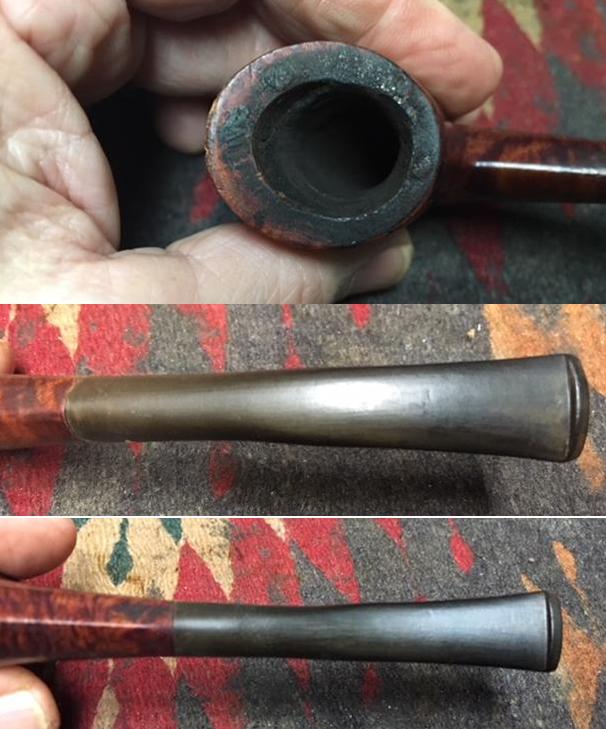
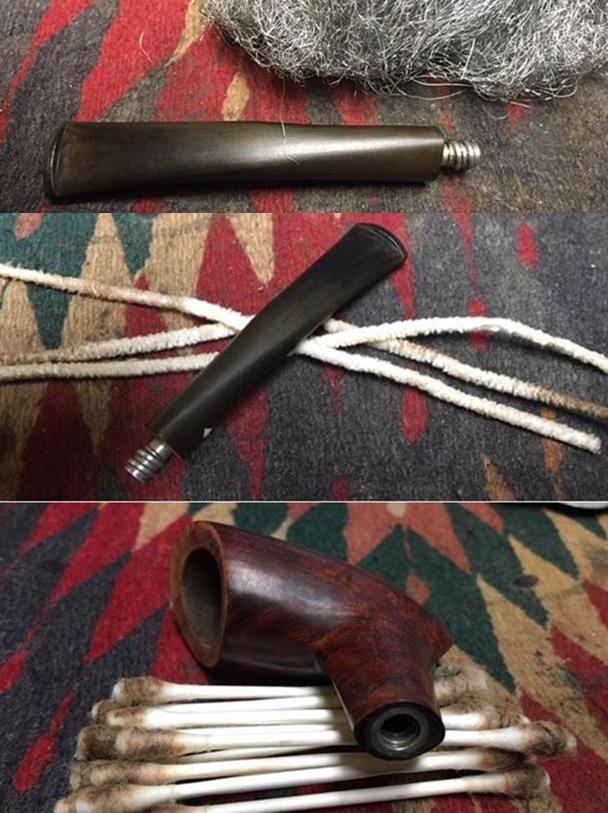
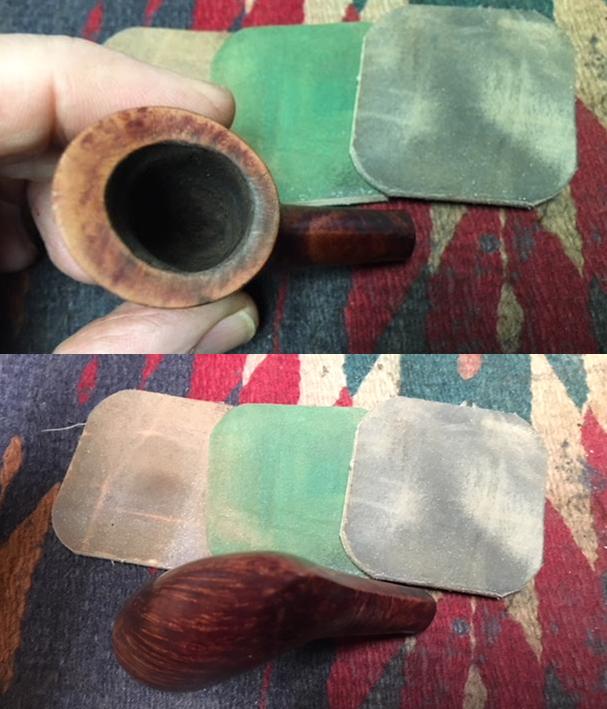
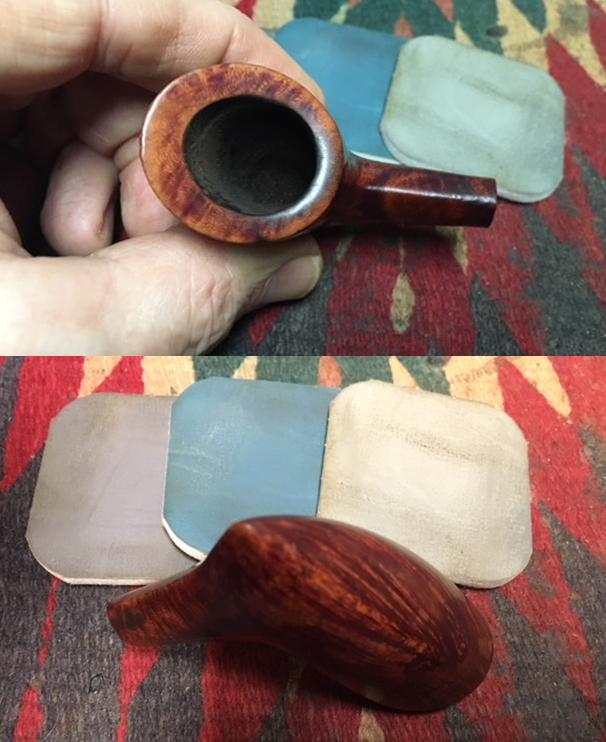
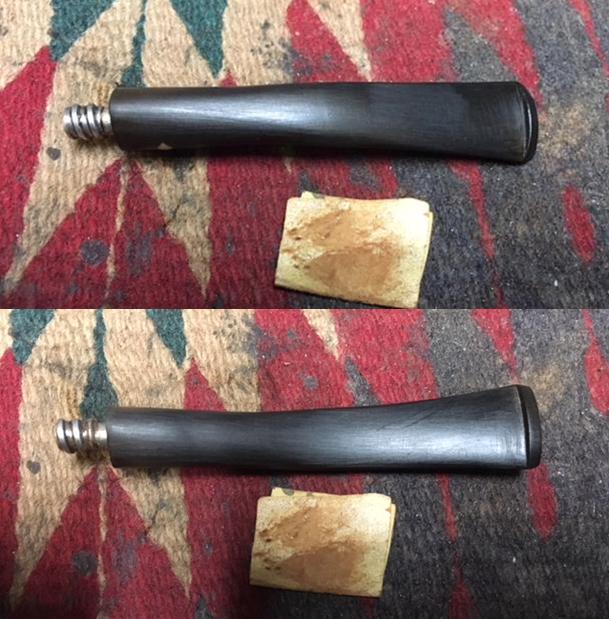
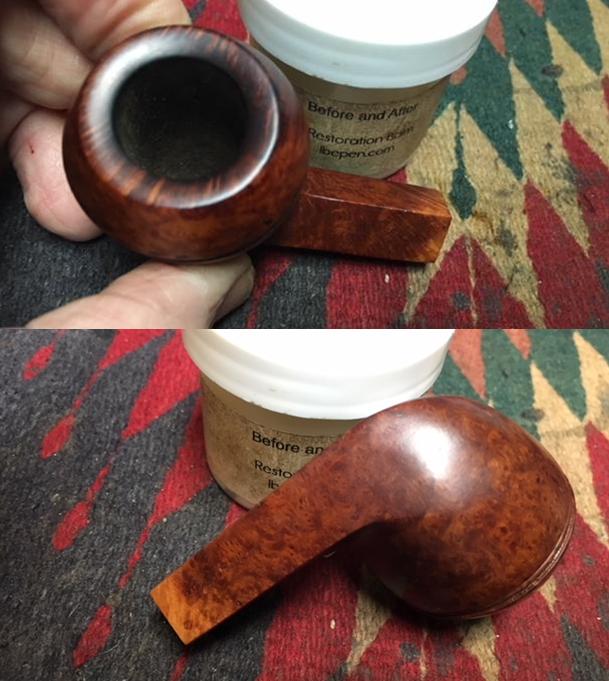
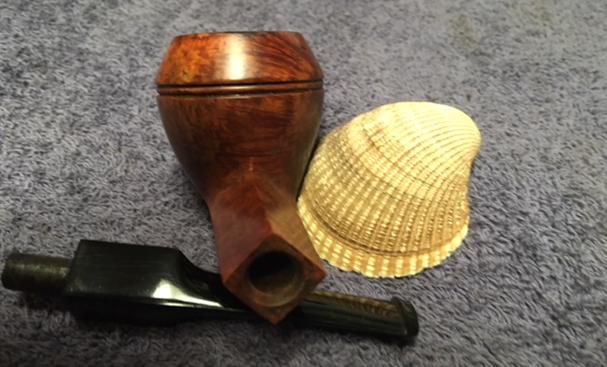
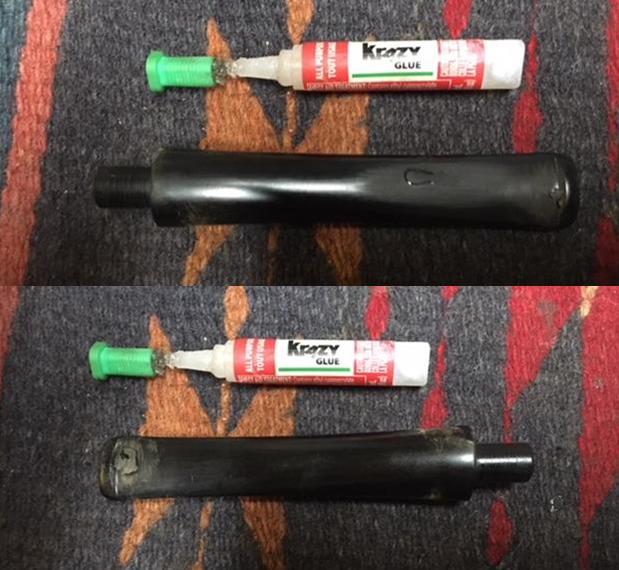
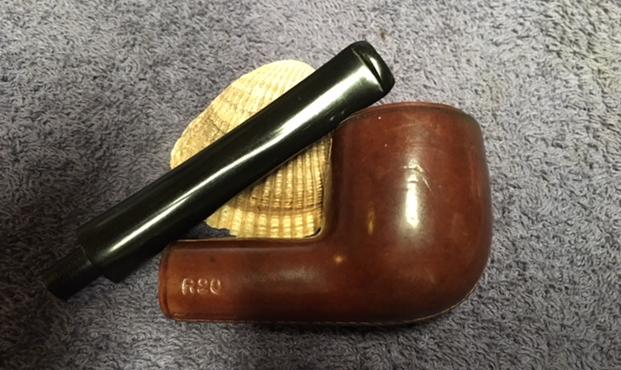
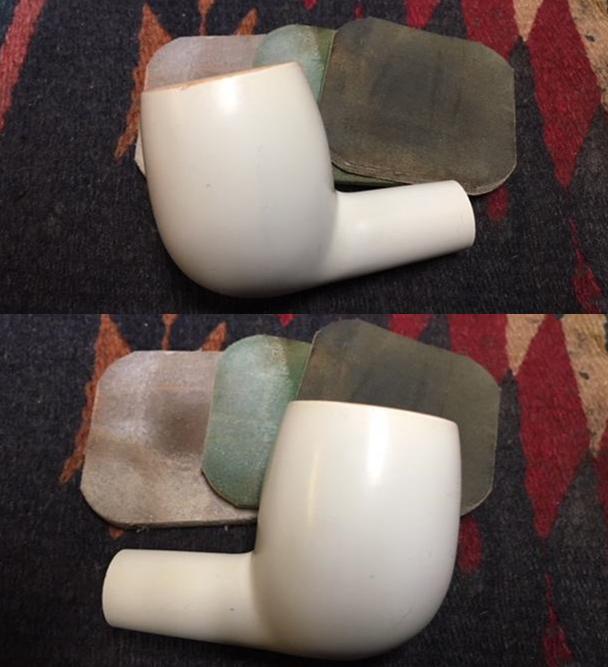
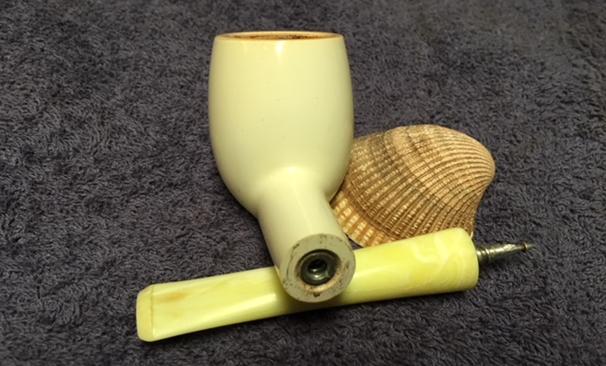
The grey patches you see inside the bowl is a product called JB Weld. I mixed up a batch and filled the problem areas in the chamber, afterwards I sanded it down to blend with the rest of the chamber. In my experience the product is completely inert once cured. It is handy for a reconstruction of this kind, but I’d recommend adding a bowl coating as an added barrier.This pipe came to me without a stem. Fortunately I had a stem that would be the perfect length, I just needed to shape the tenon to fit the pipe. For this I used the Pimo Tenon cutter from Vermont Freehand.

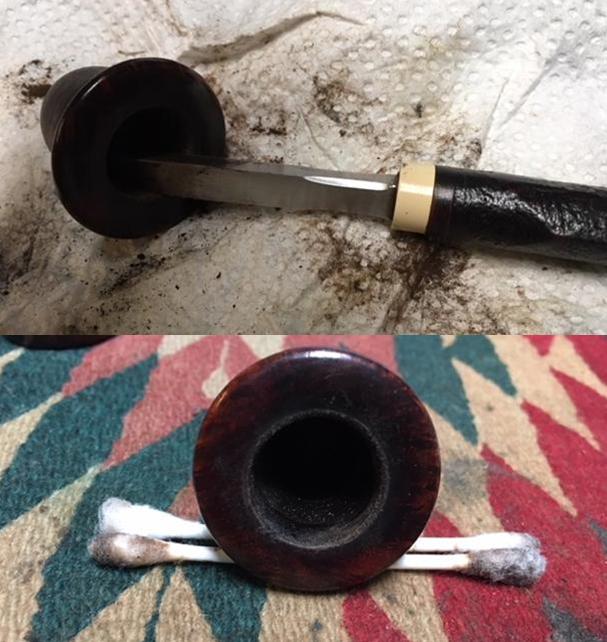
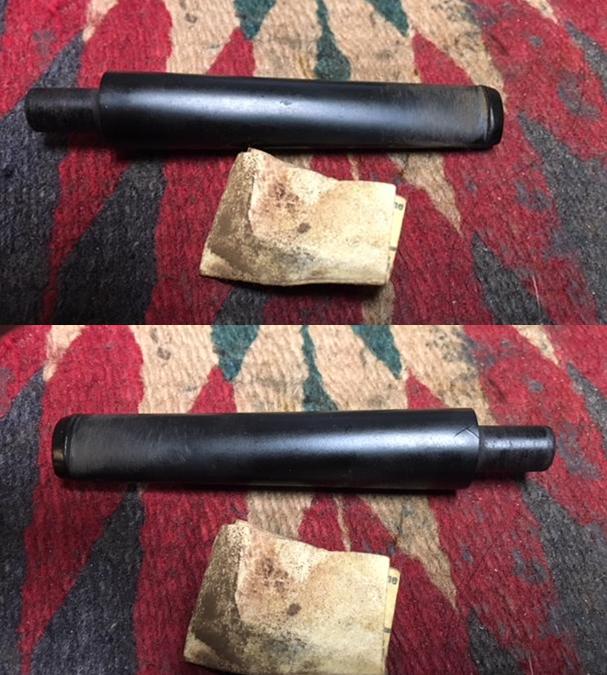
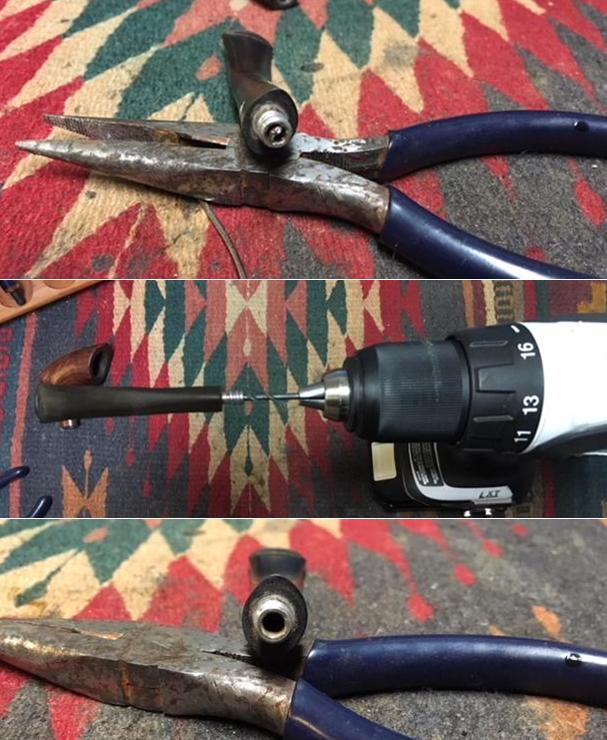
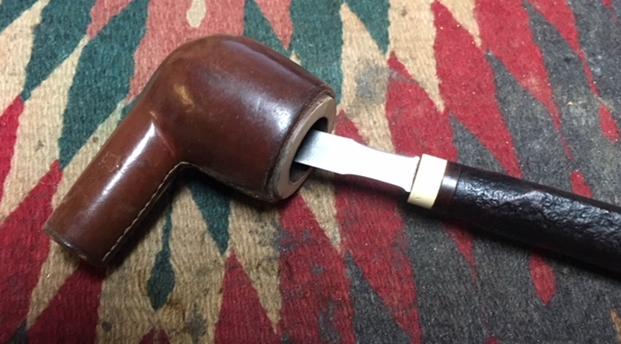
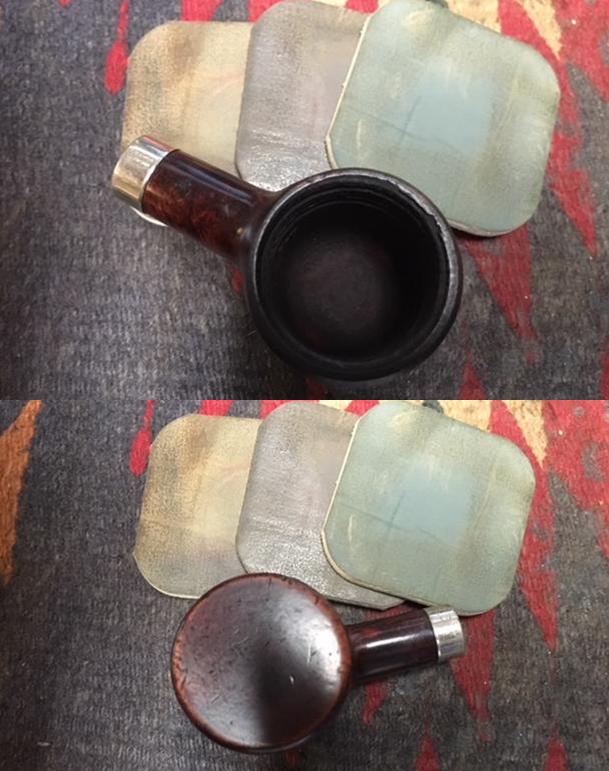
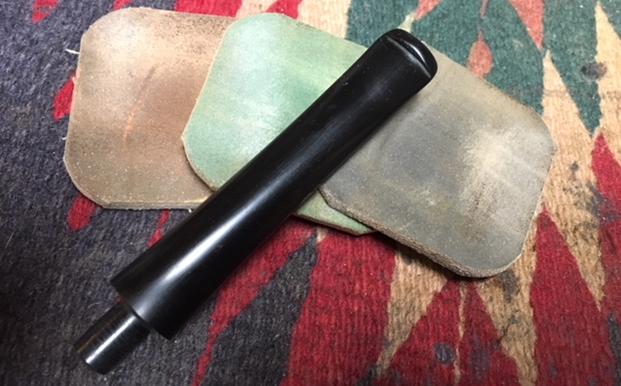
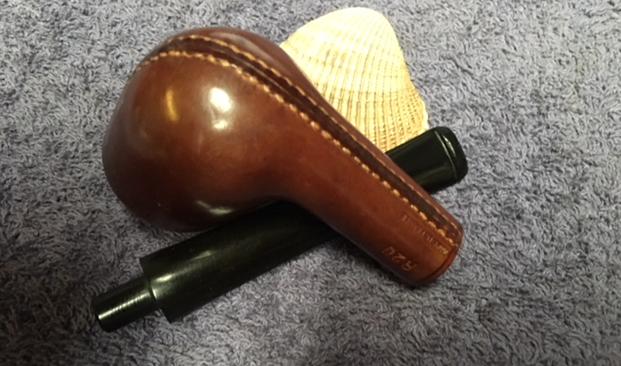
I also used the opportunity while I was at this end of the pipe to drill a hole ahead of the crack in the shank and filled used briar dust and CA Glue. As sometimes happens with restorations, I thought I stopped the crack from spreading, well I was wrong and it continued from the patch further up the shank about ¼ of an inch. So I drilled another hole and patched it again. This time I seemed to have everything under control.

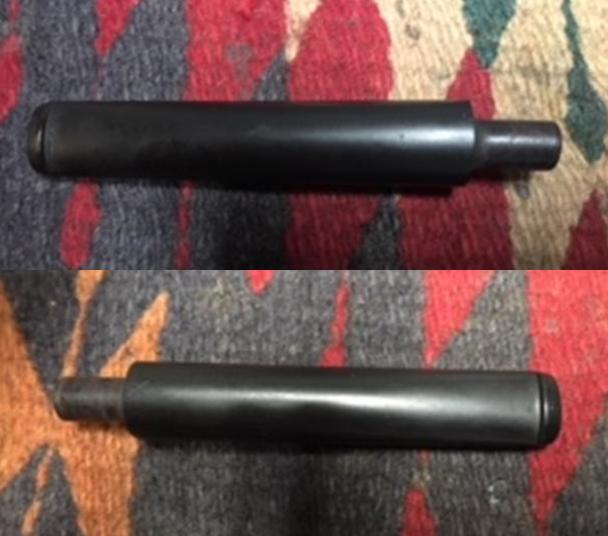
The stem was quite simple to shape to the profile of the pipe and was a welcome change from the frustrations of the other repairs that didn’t go according to plan.

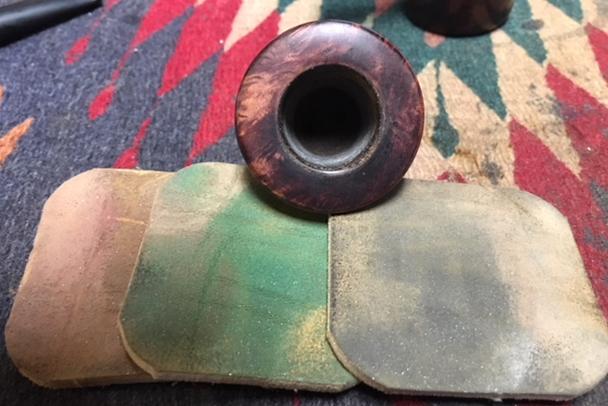
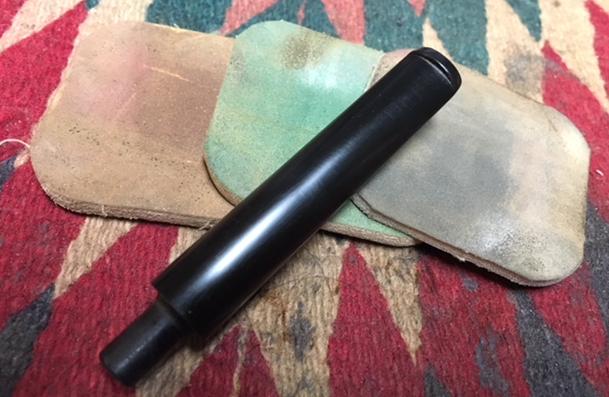
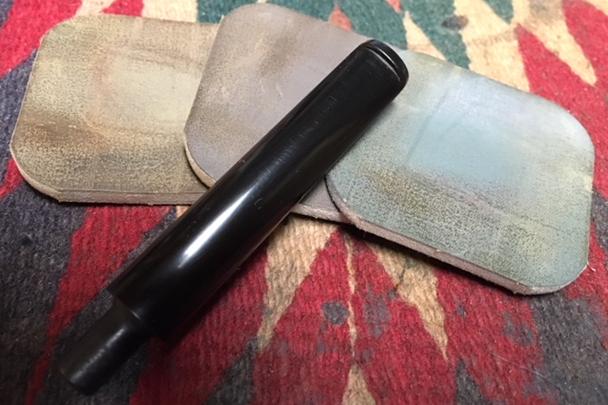
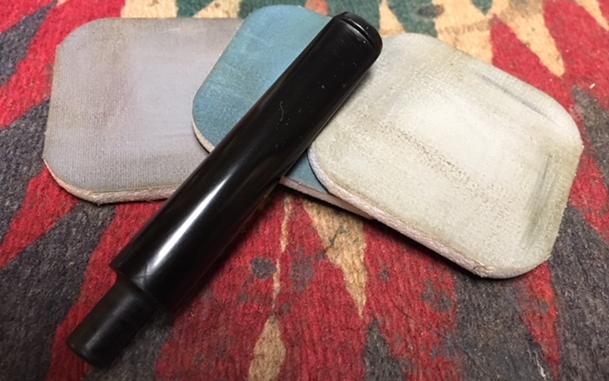
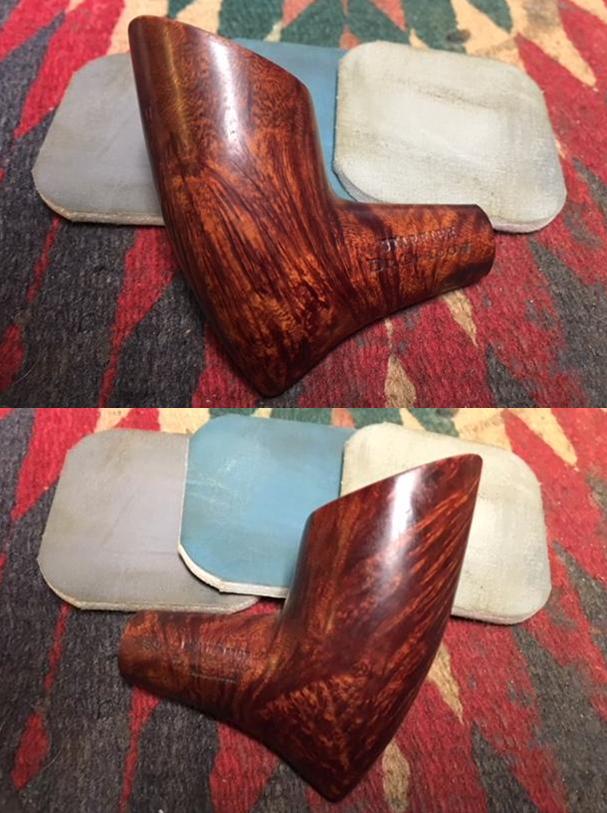
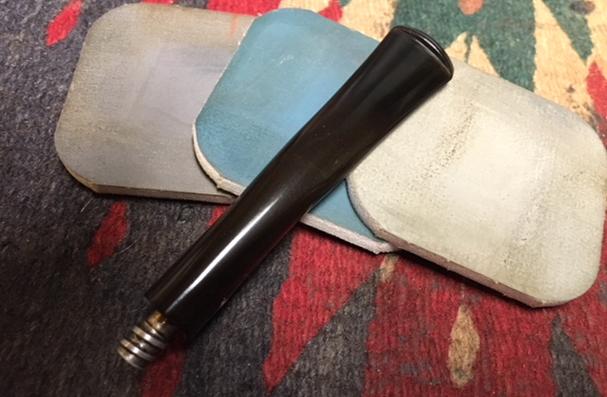
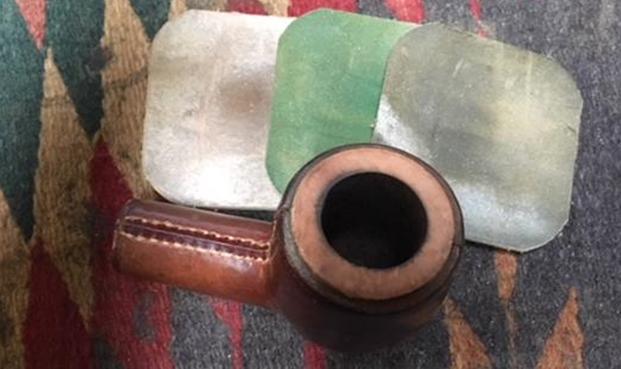
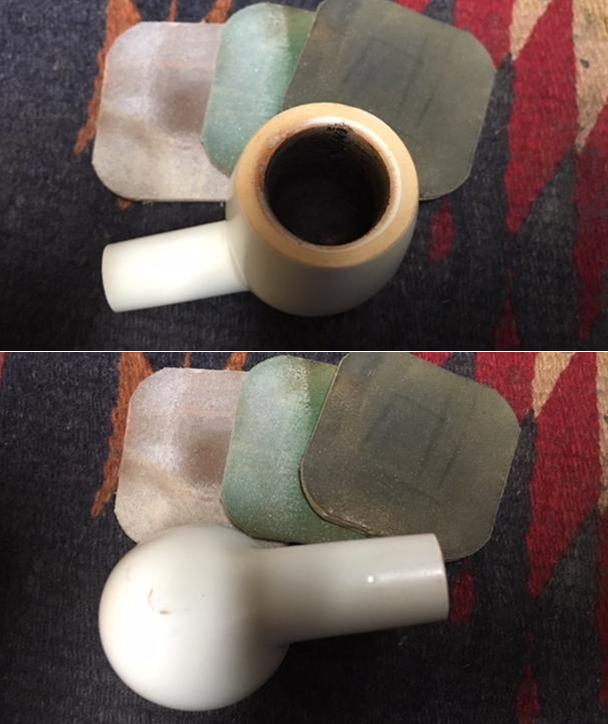
Once I had all the parts and repairs completed. I sanded the entire pipe and stem with 320 grit sandpaper up to 8000 grit (1500-8000 with micro mesh pads) Rustication

At this point I had to consider how I was going to finish this pipe. Originally this was a smooth finish Canadian Billiard, but those days were long behind this tired old pipe. I originally thought of using a really dark stain to hide all the imperfections, polish it and call it a day, then I thought I’d take a risk and create something new, and breath new life into this pipe. For all the effort I put into this pipe up to this point I figured I’d let my creativity flow.

I decided that I would rusticate this pipe and leave a smooth patch somewhere, where I hadn’t determined yet. Using a Dremel and a 107 Carving bit I started to rusticate the shank and worked my way to the heel, then up the stummel. Halfway up the stummel the pipe revealed its final design-leave the top of the bowl smooth! I wasn’t sure at first because it would mean I had to blend in that CA patch, but I now avoided trying to rusticate it.

I was very pleased with the result.

Staining & Finishing

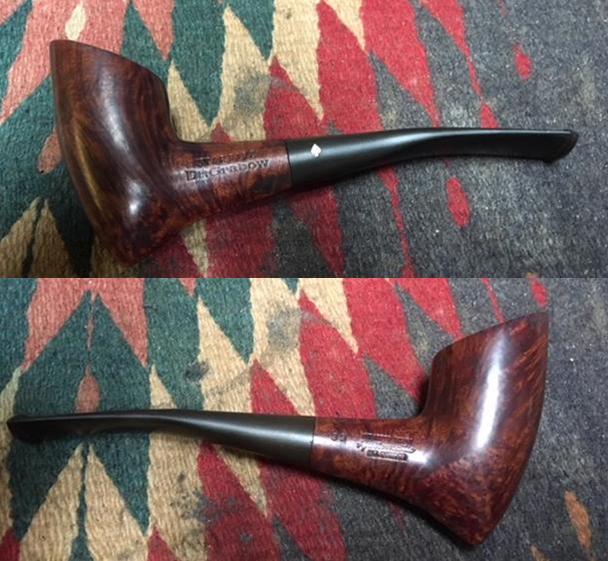
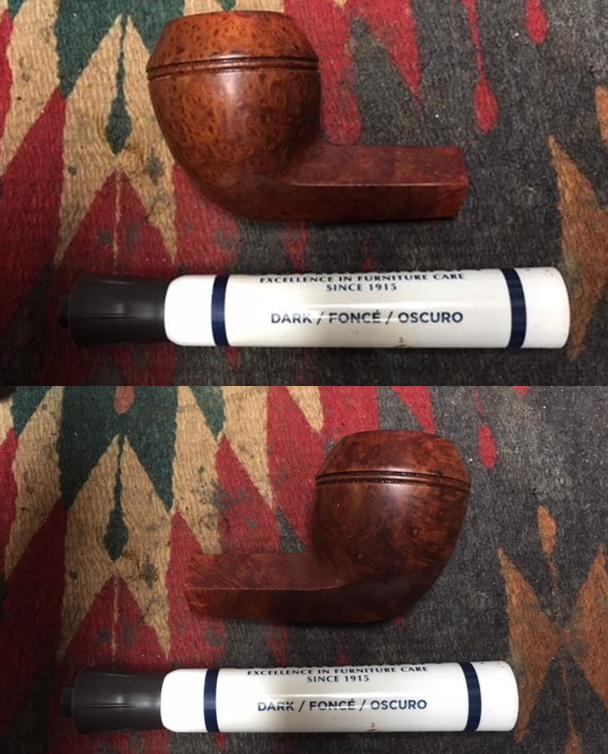
I used Fiebings Dark Brown alcohol based dye over the entire pipe as a base, then wiped on Fiebings Oxblood till I achieved the colour I wanted. To seal the stain in the pipe I applied a thin layer of shellac which gave it a glossy look I didn’t like. I left it, and just stayed the course with this experiment to see how it turned out.

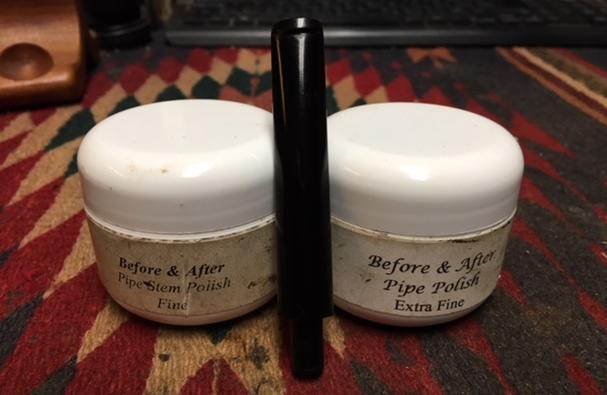
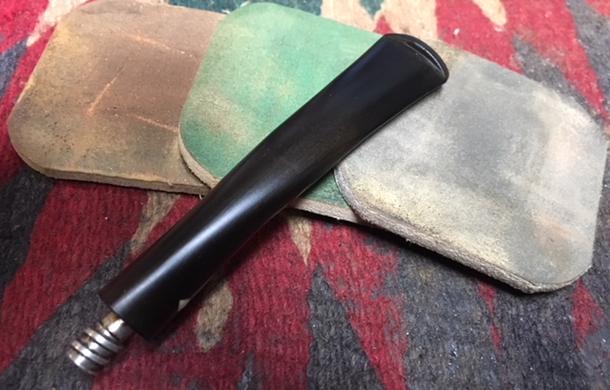
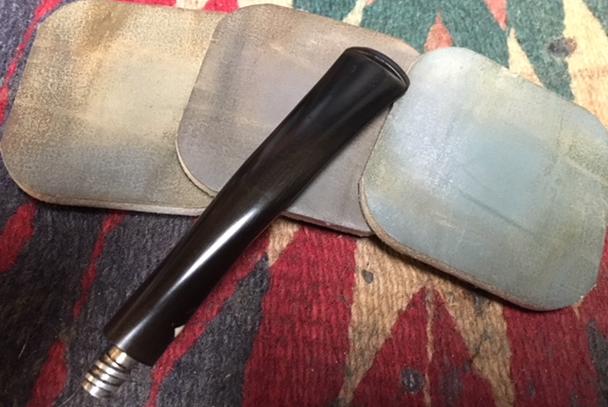
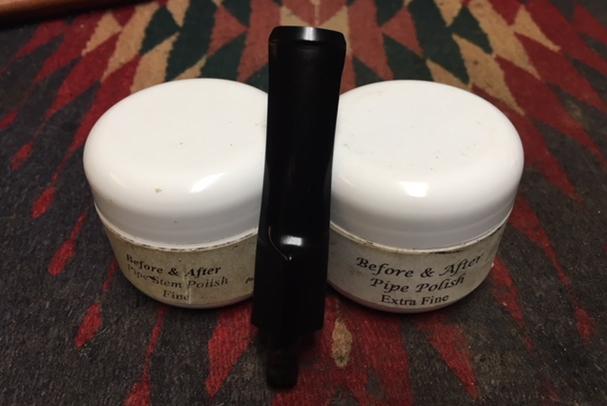
In the morning the Shellac had cured. I began the polishing process at this point. I don’t have a buffing wheel yet, so I use cotton wheel buffing bits that fit to my dremel.

I started with Tripoli and thoroughly went over the entire pipe and stem. The tripoli did a good job of taking down the shellac, and making it less pronounced. I followed that up with white diamond and then finally carnauba wax.  I used a fluffy felt bit to polish the whole pipe.

Bowl Coating

You will find a variety of recipes and opinions on bowl coatings. I use them when needed and I prefer the waterglass recipe that a pipe maker shared with me. It is a combination of Sodium Silicate, Activated Charcoal and White Pumice. Once cured it provides a refractory layer on the inside of the bowl, and it feels like 800 grit sandpaper which promotes new cake build up without putting a lot of heat stress on the worn out briar.

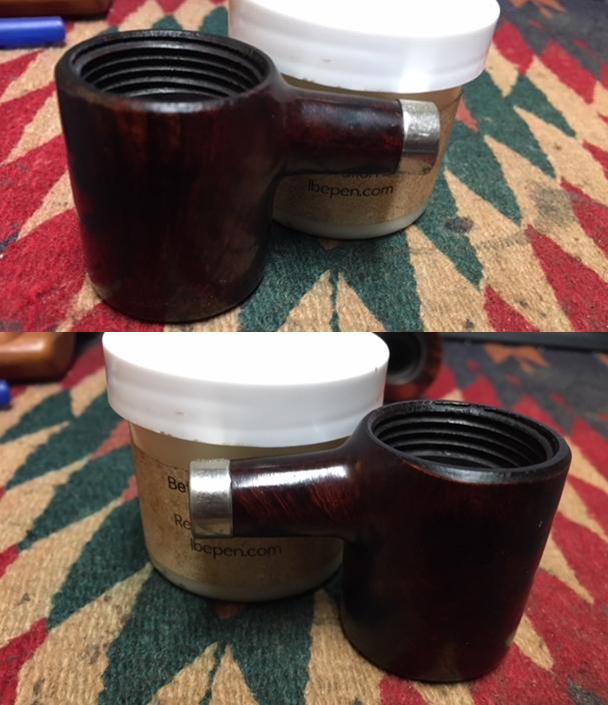
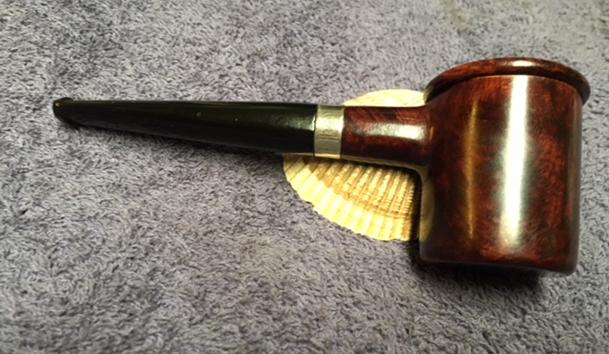
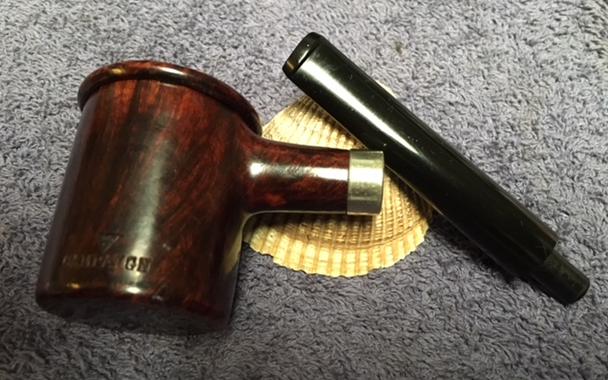
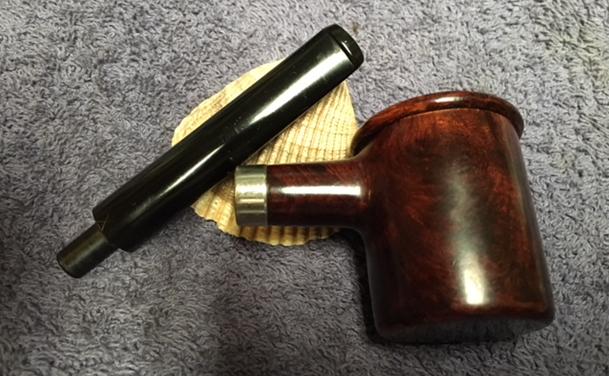
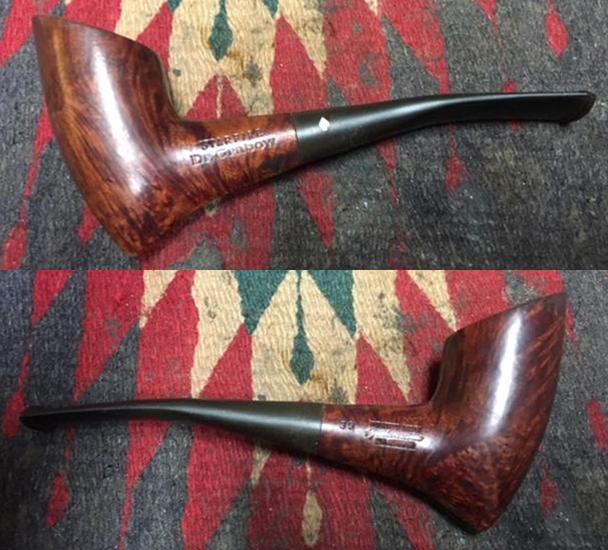
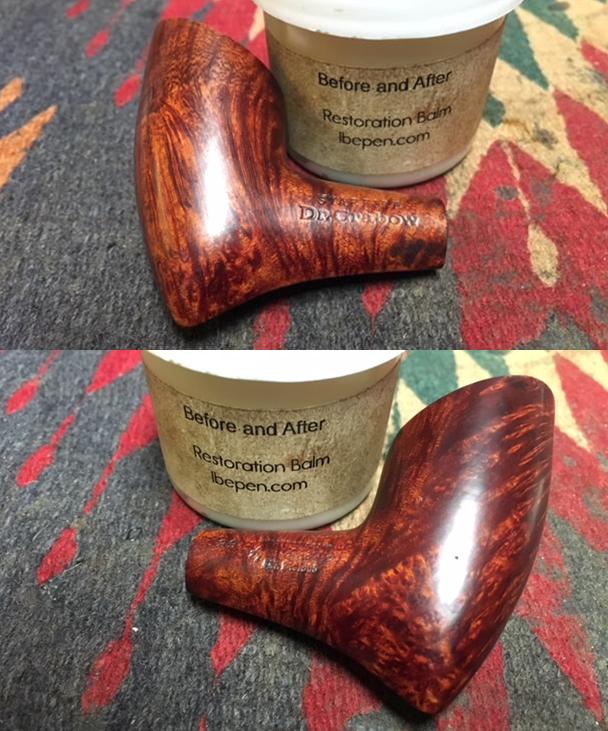
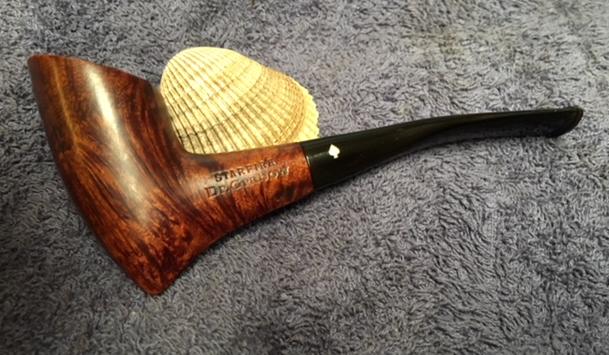
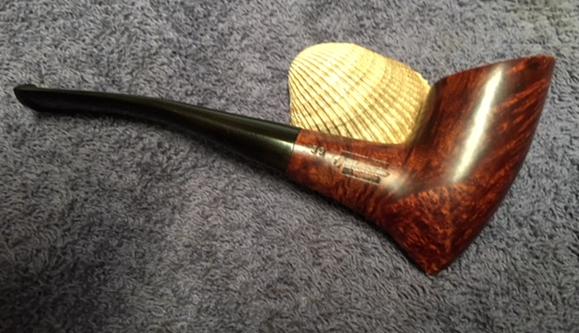
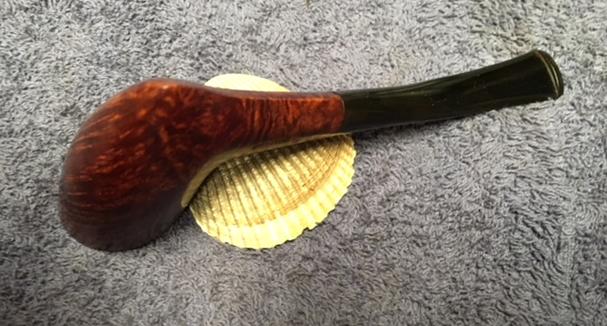
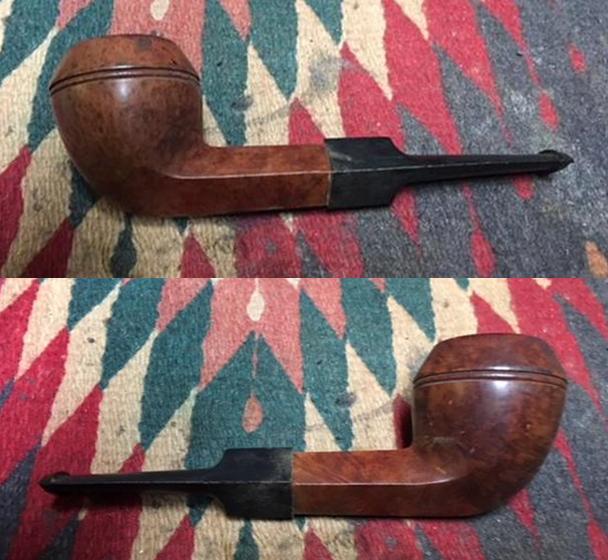
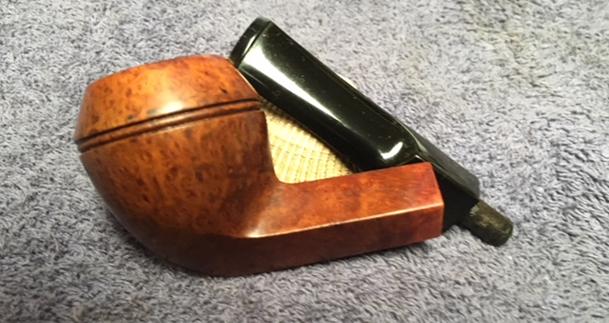
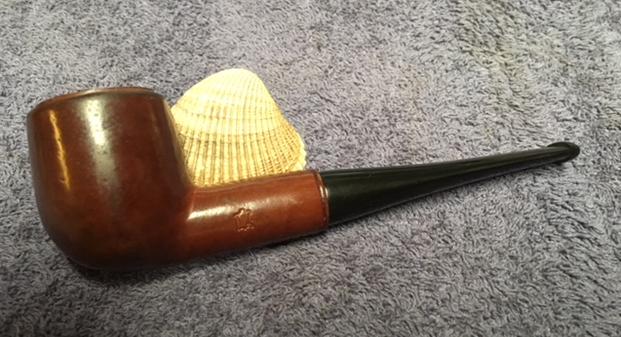
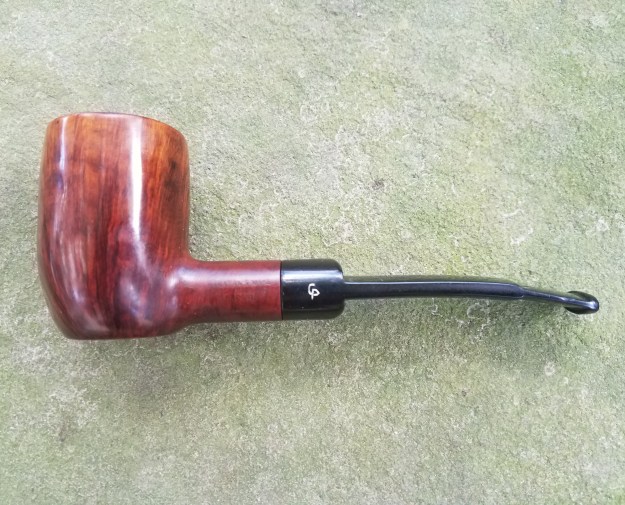
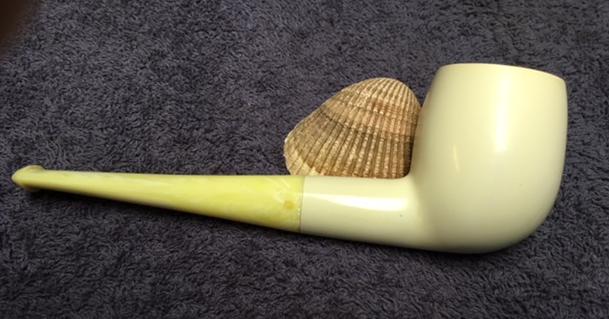
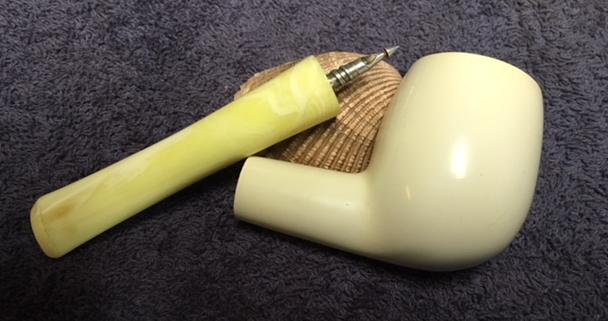
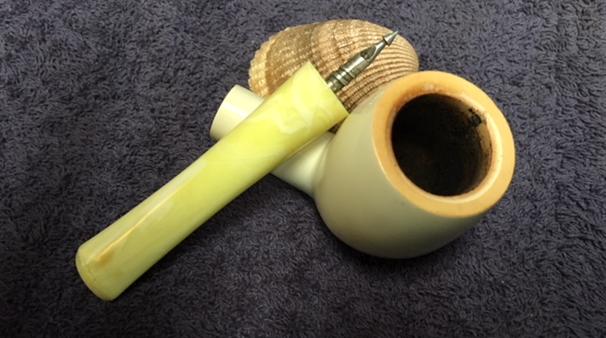
This pipe definitely tested the limits of my abilities  and I learned some new techniques that I had only seen others use. Here’s the finished pipe!


Craig’s Pipes #5 Restoring a William Demuth and Company (WDC) Campaign Calabash


Blog by Steve Laug

In my previous 4 blogs on Craig’s pipes I spoke of the five pipes that I am working on for him. In this blog I am taking on the fifth of his pipes – a WDC Campaign Calabash. It was another one with a cake in the bowl that was thick and hard. For the last time I am going to include what Craig wrote me about his pipes. I have included it in the previous four blogs but I think it adds context to the bunch.

I was recently given a bag of pipes…literally, a BAG of 20 or so pipes that are 50+yrs in age and VERY used. I was wondering if you would have time to either Skype or FaceTime with me, and go through what I have in order to determine which are worth sending to you to have them refurbished. If you would be so kind, I’d really appreciate it.

We met on FaceTime and he pulled out a grocery bag with no rhyme or reason to it. It was filled with a jumble of no name or low-end drug store pipes. This last pipe is one of the two pipes that stood out for me – the old WDC Campaign pipe and a Grabow Starfire. He had several others that he liked. But we excluded all but five of the pipes. The amount of work necessary to bring them back was not worth the price. These are the five that we chose to work on. I have included the links to the blog covering each pipe. I am finally addressing the last one.

– A No Name Meerschaum that looked interesting – https://rebornpipes.com/2018/01/31/is-it-a-meerschaum-looks-like-one-feels-like-one-but/

– A leather clad billiard marked R20 and bearing a shield – https://rebornpipes.com/2018/02/01/rejuvenating-a-leather-clad-billiard/

– A Wally Frank Bulldog marked Natural Unvarnished lacking a stem https://rebornpipes.com/2018/02/02/craigs-pipes-3-restemming-and-restoring-a-wally-frank-natural-bulldog

– A Dr. Grabow Starfire 39 that had great grain – https://rebornpipes.com/2018/02/03/craigs-pipes-4-restoring-a-dr-grabow-starfire-39/

– A WDC Campaign underslung pipe

After our conversation, he packed up the pipes and threw the rest of the pipes in a separate bag for me to scavenge parts. The box did not take too long to get to Vancouver and when it did I opened the box and had a look. Here are pics of what I saw – there were two bags inside. One bag held the discards for the scrap pile and the other held the five pipes he wanted restored.  This is last of Craig’s five pipes. It is the second WDC Campaign that I have worked on. It is stamped on the lower left side of the outer bowl with the WDC triangle logo over the word CAMPAIGN. There was no other stamping on the pipe. The bowl was like a calabash bowl and screwed into the outer bowl. The entirety was made out of briar. The grain on the bowl and rim top is mixed grain with straight, flame, swirled and a bit of birdseye thrown in as well. The briar was very dirty and there were some sticky spots around the sides of the bowl. The rim top had some lava on the surface and there was an uneven cake in the bowl. There was a polished nickel band on the shank but there was no shank stamping. The band was stamped NICKEL PLATED. The stem was lightly oxidized and the fit against the end of the shank was snug. I took photos of the pipe before I started my cleanup work. I took close up photos of the bowl, rim top and all of the parts of the pipe. The first photo shows the stamping on the left side of the bowl. You can see the WDC triangle over the word Campaign. The surface of the outer bowl was dirty and grimy. The rim top had some tars and lava on the surface and a few nicks along the outer edge of the bowl. I unscrewed the cup from the outer bowl and took photos of the parts. It was actually surprisingly clean. The photos show the cake in the bowl and the dust and grime between the bowls. The stem had some minor tooth chatter and marks on both sides near the button and scratching on the surface. There were some small nicks on the top side of the stem. There was an X on the underside of the stem at the shank/stem junction. The surface of the stem was lightly oxidized and dirty.The previous Campaign pipe that I restored was posted on the blog earlier. I am attaching the link to that blog and some of the information that I found in researching the brand at that time. (https://rebornpipes.com/tag/wdc-campaign-calabash-pipe/). In my online research I found a brief interchange on a Google group. I include the link if you would like to read it in context and its entirety. It gives some helpful information regarding this particular pipe. https://groups.google.com/forum/#!topic/alt.smokers.pipes/kpkpd3zXoiwExcerpt from pipedia.org

To a request for information regarding the WDC Campaign pipe on the Google Group there was quite a long string of answers. I am quoting two of those in full…

Respondent 1: While I can’t say anything about this pipe specifically, I have a hazy memory of that shape listed in a book about pipes; (I may be totally misremembering this, but here goes) the shape being called the “Dawes”, named after Harding’s Vice President?  Anyone else remember this? Sounds like an interesting pipe, whatever it’s called…

Respondent 2: From Weber’s Guide to Pipes: “The Dawes Pipe (more correctly named the Lyons, after its inventor, Charles Herbert Lyons) happened to be the favorite pipe of General Charles G. Dawes, Vice-President of the USA from 1925 to 1929. General Dawes smoked the curious pipe incessantly and it became popularly known as the Dawes Underslung, because the shank joined the bowl near its rim.”

I looked on Pipedia, (https://pipedia.org/wiki/William_Demuth_Company) and I quote in part from the article on the William Demuth Company.

The Demuth Company is probably well known for the famous trademark, WDC in an inverted equilateral triangle. William commissioned the figurative meerschaum Presidential series, 29 precision-carved likenesses of John Adams, the second president of the United States (1797-1801) to Herbert Hoover, the 30th president (1929-1933), and “Columbus Landing in America,” a 32-inch-long centennial meerschaum masterpiece that took two years to complete and was exhibited at the World’s Columbian Exposition in Chicago in 1893.

The Presidential series was the result of Demuth’s friendship with President James A. Garfield, a connoisseur of meerschaum pipes. Demuth presented two pipes to Garfield at his inauguration in 1881, one in his likeness, the other in the likeness of the President’s wife. Later, Demuth arranged for another figurative matching the others to be added to the collection as each new president acceded to the White House, terminating with President Hoover.

From the above information I learned some significant details about the Campaign pipe. It was invented by Charles Herbert Lyons and was the favourite pipe of General Charles G. Dawes who was the Vice President of the USA under President Harding from 1925-1929. It fits nicely into that period when WDC was having Presidential Pipes commissioned ending in 1933. That places this old pipe in the time period between the late 1920s and early 1930s.

Reminded of the history of the brand and the provenance of this particular pipe it was time to begin working on the cleanup. I removed bowl cup and cleaned out the shank with pipe cleaners, cotton swabs and alcohol. I cleaned out the inside of the outer cup with cotton swabs and alcohol to remove the buildup of tars and oils in the threads and sides and bottom of the bowl.I reamed the inner bowl/cup with a Savinelli Fitsall Pipe Knife to scrape away the remaining cake that was in the bowl. I scraped it back to bare briar. I scrubbed out the outside and the inside of the bowl with cotton swabs and alcohol to remove the remaining oil and tars. I used a folded piece of 220 grit sandpaper to clean up the inner edge of the cup. I worked on the edge until it was clean. I polished the bowl and rim with micromesh sanding pads – wet sanding it with 1500-2400 grit pads and dry sanding with 3200-12000 grit pads. I wiped the bowl down after each pad with a damp cotton pad to clean off the sanding dust. The photos show the progress of the polishing. Once again I decided to do this before the deep cleaning with Before & After Restoration Balm. I worked some Before & After Restoration Balm into the surface of the briar on the bowl and the rim top with my finger tips to deep clean the finish, enliven and protect the wood. I let it sit for a few minutes and then buffed it with a cotton cloth. The grain in the wood came alive and there was a rich shine to the briar. I took some photos of the bowl at this point to mark the progress in the restoration. I sanded the band with 6000-12000 grit micromesh sanding pads. I polished the nickel band with a jeweler’s polishing cloth.I set the bowl aside in my rack and worked on the stem. I started by sanding it with 220 grit sandpaper to remove the light oxidation, tooth chatter and nicks in the surface.I cleaned the stem with alcohol and pipe cleaners to remove the debris and tars in the airway from the tenon to the slot in the button. I worked over the stem with micromesh sanding pads. I polished out the sanding scratches and marks from the reshaping work. I wet sanded it with 1500-2400 grit pads and dry sanded it with 3200-12000 grit pads and wiped it down with Obsidian Oil after each one. When I finished with the last micromesh pad I gave it a final coat of oil and let it dry. I polished the stem with Before & After Pipe Stem Polish – both the fine and the extra fine polishes. I wiped it down with a final coat of Obsidian Oil and set it aside to dry. With the stem polished I put it back on the pipe and buffed the entire pipe with Blue Diamond polish on the buffing wheel. I buffed it with the polishing compound until it was shiny. I gave the entire pipe several coats of carnauba wax and buffed it with a clean buffing pad to raise the shine. I hand buffed it with a microfibre cloth to deepen the shine. The stem and the bowl polished up pretty nicely. The finished pipe is shown in the photos below. This is the final pipe of Craig’s five. Now that I have finished the last of the pipes it is time to pack them up and get them out to him. I am looking forward to hearing what he will think once he has them in hand. Thanks for walking through these restorations with me. Once again I can’t help thinking that the pipeman who gave Craig these pipes would be happy that they are back in service and that Craig is carrying on the pipeman’s trust with them. Cheers.

Craig’s Pipes #4 – Restoring a Dr. Grabow Starfire 39


Blog by Steve Laug

In my previous 3 blogs on Craig’s pipes I spoke of the five pipes that I am working on for him. In this blog I am taking on the fourth of his pipes – one of my favourite Dr. Grabow shapes – Starfire 39. It was another one with a cake in the bowl that was thick and hard. Once more I am going to include what Craig wrote me about his pipes. I have included it in the previous three blogs but I think it adds context to the bunch.

I was recently given a bag of pipes…literally, a BAG of 20 or so pipes that are 50+yrs in age and VERY used. I was wondering if you would have time to either Skype or FaceTime with me, and go through what I have in order to determine which are worth sending to you to have them refurbished. If you would be so kind, I’d really appreciate it.

We met on FaceTime and he pulled out a grocery bag with no rhyme or reason to it. It was filled with a jumble of no name or low-end drug store pipes. The only pipes that stood out for me were an old WDC Campaign pipe and a Grabow Starfire. He had several others that he liked. But we excluded all but five of the pipes. The amount of work necessary to bring them back was not worth the price. These are the five that we chose to work on. As I finish them, I will include the link to the blog covering that pipe.

– A No Name Meerschaum that looked interesting – https://rebornpipes.com/2018/01/31/is-it-a-meerschaum-looks-like-one-feels-like-one-but/
– A leather clad billiard marked R20 and bearing a shield – https://rebornpipes.com/2018/02/01/rejuvenating-a-leather-clad-billiard/
– A Wally Frank Bulldog marked Natural Unvarnished lacking a stem https://rebornpipes.com/2018/02/02/craigs-pipes-3-restemming-and-restoring-a-wally-frank-natural-bulldog/
– A Dr. Grabow Starfire 39 that had great grain
– A WDC Campaign underslung pipe

After our conversation, he packed up the pipes and threw the rest of the pipes in a separate bag for me to scavenge parts. The box did not take too long to get to Vancouver and when it did I opened the box and had a look. Here are pics of what I saw – there were two bags inside. One bag held the discards for the scrap pile and the other held the five pipes he wanted restored. The fourth pipe was the pickaxe shaped Dr. Grabow on the upper left of the above photo, just below the meerschaum. The briar was very dirty with lots of grime and residue that had hardened on the surface of the bowl around the front and right side of the bowl.  It was hard to tell what the rim top was like because of the lava overflow from the bowl up and over the scooped rim. The outer edges had some nicks at the front of the bowl. The inner edge looked pretty rough but I could not tell if it was just the lava or actually damage to the briar. There appeared to be some darkening on the rim but it may also be thin tars and oils. The bowl had a thick cake in it and remnants of tobacco. The shank is stamped on the left side Starfire over Dr. Grabow. On the right side it is stamped with the shape number 39 at the shank stem junction and next to that it reads Imported Briar over Adjustomatic over Pat.2461905. The patent is for the Adjustomatic apparatus in the stem. The stem was in pretty decent condition with some scratches on the top and underside at the button and a light oxidation. I took the following photos of the pipe before I started cleaning it up. I took close up photos of the bowl and rim top as well as the stem. The rim top had been beaten on a hard surface to knock out the dottle and there were some nicks along the outer edge of the bowl, particularly on the front edge. There was a lot of overflow on the rim, particularly heavy on the back side. The stem had some minor tooth chatter on both sides near the button and scratching on the surface. There were some small nicks on the top side of the stem. It was lightly oxidized and it was slightly overturned to the right. The Dr. Grabow metal “spear” stinger was missing. The pipe was very dirty.I looked up the brand and the line on Pipedia to see what I could find out about it. I have often wondered about how Grabow came up with the names like Regal, Eldorado, Starfire etc. The article solved that mystery for me so I have included that portion for easy reference. The link is:(https://pipedia.org/wiki/Dr._Grabow_Models_(Series,Line)_Names_Through_the_Years).

Before I get started in this section here is a great piece of trivia that I learned from a devoted and caring Dr. Grabow employee recently. You have probably wondered, as I have, just where these names originated or what inspired them. Maybe you have even guessed the connection, but I sure didn’t! When this employee mentioned this to me, he brought it up like a riddle: “THINK CARS!” Now, see if you came up with what I did:

Eldorado — Cadillac

Viscount — Dodge (Car built by Chrysler Corporation of Canada Ltd, for Canadian Markets only ca1959.)

Starfire — Oldsmobile (The original Oldsmobile Ninety-Eight Starfire, named after the Lockheed F9413 Starfire fighter jet, was first introduced as a show car in 1953 at GM’s Motorama along with the Buick Skylark and the Cadillac Eldorado.)

Regal — Buick

Savoy — Plymouth (by the way, my friend at Dr. Grabow didn’t say, but there was also a Plymouth BELVEDERE!)

Riviera — Buick, I think first produced for model year 1963, which would have made it known in 1962. The pipe name precedes that, but maybe I missed something.

Lark – Studebaker

All of these cars had roots or beginnings in the 1950s and early 1960s I believe, and perhaps I should do a little more research along those lines to get more accurate facts. If anyone finds better info, just let me know. I never thought of a “car” connection, but had looked at some sort of Royalty thing, what with the DUKEs, VISCOUNT, ROYALTON AND SAVOY, etc. I haven’t checked to see if they were also car names or not.

The article also included the following information on the date of the line. It stated that the STARFIRE (c1956) — First appears in a magazine ad for $3.50 as early as December 1956. “E” selection of briar was used on both the Starfire and Westbrook.

I also wanted to refresh my memory on the Patent information for the Adjustomatic stem and found a page from a catalogue in the same Pipedia article. I have included that page below. The description of the patented system and the cutaway picture are helpful in understanding how the system works.Armed with a refreshed memory I was eager to dive into the restoration of the Starfire. It really was a beautiful piece of briar and I could not wait to see the finished pipe. I started by removing the stem. I found that not only was the stinger apparatus missing but it had actually broken off in the tenon itself. I knew from past experience that the stinger were threaded and unscrewed from the tenon. In this case the upper part of the spade stinger had been twisted off leaving the stem clogged and useless. There was no airflow in the stem at all as the broken stinger cut off all air. I used a piece of wire to pry the edges of the broken stinger to the middle of the tenon, thinking I might be able to use some needle nose pliers to twist it out. But that did not work. It was time to resort to more intrusive measures. I set up my cordless drill and a small drill bit and drilled the tenon. I was careful to keep the bit in the centre of the tenon so as to not damage the threads should I want to put a new stinger in place. It was not too long before the broken stinger end came out on the drill bit. I blew air through the stem and was happy that it was clear and unimpeded.I used a piece of 000 steel wool to clean off the debris from the threads and body of the metal tenon. I cleaned the airway in the stem, shank and mortise with pipe cleaners, cotton swabs and alcohol. I scrubbed those areas out until the pipe cleaners and swabs came out clean.The stem was slightly overturned so I worked it back and forth until it lined up. That is the purpose of the Adjustomatic system. I took photos of the pipe with the stem in place and aligned. I reamed the bowl with a PipNet reamer starting with the smallest cutting head and working my way up to the second cutting head as it was the same diameter as the bowl. I reamed it back to bare briar. I cleaned up the remnants with a Savinelli Fitsall Pipe Knife. I carefully sanded the scooped rim top with 220 grit sandpaper to remove the thick lava coat and to minimize the damage on the front outer edge of the bowl.I polished the bowl and rim with micromesh sanding pads – wet sanding it with 1500-2400 grit pads and dry sanding with 3200-12000 grit pads. I wiped the bowl down after each pad with acetone to clean off the sanding dust. The photos show the progress of the polishing. I decided to do this before the deep cleaning with Before & After Restoration Balm this time. I decided to leave the rim unstained as the polishing had blended the colours with the bowl really well. Instead I worked some Before & After Restoration Balm into the surface of the briar with my finger tips to deep clean the finish, enliven and protect the wood. I worked the balm into the rim top to polish the cleaned up area. I let it sit for a few minutes and then buffed it with a cotton cloth. The grain in the wood came alive and there was a rich shine to the briar. I took some photos of the bowl at this point to mark the progress in the restoration. I set the bowl aside in my rack and worked on the stem. I started by sanding it with 220 grit sandpaper to remove the light oxidation, tooth chatter and nicks in the surface.I worked over the stem with micromesh sanding pads. I polished out the sanding scratches and marks from the reshaping work. I wet sanded it with 1500-2400 grit pads and dry sanded it with 3200-12000 grit pads and wiped it down with Obsidian Oil after each one. When I finished with the last micromesh pad I gave it a final coat of oil and let it dry.

With the stem polished I put it back on the pipe and buffed the entire pipe with Blue Diamond polish on the buffing wheel. I buffed it with the polishing compound until it was shiny. I gave the entire pipe several coats of carnauba wax and buffed it with a clean buffing pad to raise the shine. I hand buffed it with a microfibre cloth to deepen the shine. The stem and the bowl polished up pretty nicely. The finished pipe is shown in the photos below. This is the fourth of Craig’s five pipes. Once I finish the last of the pipes I will pack them up and get them out to him. I am looking forward to hearing what he will think once he has them in hand. Thanks for walking through these restorations with me. Once again I can’t help thinking that the pipeman who gave Craig these pipes would be happy that they are back in service and that Craig is carrying on the pipeman’s trust with them. Cheers.

Craig’s Pipes #3 – Restemming and Restoring a Wally Frank Natural Bulldog


Blog by Steve Laug

In my previous 2 blogs on Craig’s pipes I spoke of the five pipes that I am working on for him. In this blog I am taking on the third of his pipes – a Wally Frank Natural Unvarnished Bulldog that came to me sans stem. It was by far the most used pipe he sent me with a cake in the bowl that was thick and hard. I am going to include what Craig wrote me about his pipes. I have included it in the previous two blogs but I think it adds context to the bunch.

I was recently given a bag of pipes…literally, a BAG of 20 or so pipes that are 50+yrs in age and VERY used. I was wondering if you would have time to either Skype or FaceTime with me, and go through what I have in order to determine which are worth sending to you to have them refurbished. If you would be so kind, I’d really appreciate it.

We met on FaceTime and walked through each of the pipes in his bag. He pulled out a grocery bag with no rhyme or reason to it. It was filled with a jumble of no name or low-end drug store pipes. The only pipes that stood out for me were an old WDC Campaign pipe and a Grabow Starfire. We excluded all but five of the pipes. The amount of work necessary to bring them back was not worth the price. These are the five that we chose to work on. As I finish them, I will include the link to the blog covering that pipe.

– A No Name Meerschaum that looked interesting – https://rebornpipes.com/2018/01/31/is-it-a-meerschaum-looks-like-one-feels-like-one-but/
– A leather clad billiard marked R20 and bearing a shield – https://rebornpipes.com/2018/02/01/rejuvenating-a-leather-clad-billiard/
– A Wally Frank Bulldog marked Natural Unvarnished lacking a stem
– A Dr. Grabow Starfire 39 that had great grain
– A WDC Campaign underslung pipe

After our conversation, he packed up the pipes and threw the rest of the pipes in a separate bag for me to scavenge parts. The box did not take too long to get to Vancouver and when it did I opened the box and had a look. Here are pics of what I saw – there were two bags inside. One bag held the discards for the scrap pile and the other held the five pipes he wanted restored. The third pipe was the stemless Bulldog on the lower right of the photo above. The briar was very dirty with lots of grime and some residue that had hardened on the surface of the bowl. The rim top was in good condition but I would not be sure until I was able to remove the lava overflow from the bowl over the bevel. The outer edges were undamaged all around the bowl and I was hoping the same was true of the inner edge. There was some darkening on the rim as well. The bowl had a thick cake in it and remnants of tobacco. On the front of the bowl on the cap there was some hardened sticky substance. The shank is stamped on the left side Natural over Unvarnished. On the right side it is stamped Wally Frank Ltd. On the underside of the left side it reads Imported Briar. There was no stem so I was going to need to fit one to the shank. I took the following photos of the pipe before I started cleaning it up. I went through my can of stems and found one that would work with the pipe. It was a diamond saddle stem. The saddle portion was slightly larger than the shank of the pipe but I could work that to make it fit well. The tenon would need to be turned with the PIMO tenon turning tool make it a snug fit in the shank.I drilled out the airway in the stem with a drill bit the same size as the post in the centre of the tenon turning tool. Once it was open I adjusted the cutting head on the tool to take the tenon down incrementally to the right dimension. I readjusted it and repeated the process until the fit was right. I sanded down the tenon lightly with 220 grit sandpaper to fine tune the fit and put it in the shank of the pipe. I took photos of the pipe at this point to show what needed to be done to adjust the fit. It needed some work. The bowl was also very caked and that needed to be reamed. I took the stem off and reamed the bowl with a PipNet reamer. I started with the smallest cutting head and worked my way up to the one that was the same diameter as the bowl. I reamed it back to bare briar. I cleaned up the remnants with a Savinelli Fitsall Pipe Knife. With bowl reamed I turned to the rest of the internals. I used a dental spatula to scrape out the heavy tar buildup in the shank. There was a lot of mess there and it took a lot of scraping before I had it cleaned out. I cleaned the shank and mortise with pipe cleaners, cotton swabs and alcohol. I scrubbed out the shank and mortise until the pipe cleaners and swabs came out clean.I sanded off the lava and darkening on the rim top with 220 grit sandpaper. I was able to remove all of the buildup and damage on the rim.I sanded the saddle portion of the stem with a Dremel and sanding drum to reduce the sides to match the shank. I sand it on a slower speed and carefully work to keep it from hitting the shank of the pipe. I finish the fitting with 180 and 220 grit sandpaper to sand it to match the shank. I sand the shank at the same time to make the transition smooth. The next set of four photos show the fit of the stem at this point in the process. I worked some Before & After Restoration Balm into the surface of the briar with my finger tips to deep clean the finish, enliven and protect the wood. I worked the balm into the rim top and inner bevel of the rim to polish the cleaned up area. I let it sit for a few minutes and then buffed it with a cotton cloth. The grain in the wood came alive and there was a rich shine to the briar. I took some photos of the bowl at this point to mark the progress in the restoration. I polished the bowl and rim with micromesh sanding pads – wet sanding it with 1500-2400 grit pads and dry sanding with 3200-12000 grit pads. I wiped the bowl down after each pad with acetone to clean off the sanding dust. The photos show the progress of the polishing. I used a dark brown stain pen to blend the sanded shank end with the rest of the bowl. I polished it with micromesh sanding pads to blend it in and hand buffed it with a microfibre cloth. I worked over the stem with micromesh sanding pads. I polished out the sanding scratches and marks from the reshaping work. I wet sanded it with 1500-2400 grit pads and dry sanded it with 3200-12000 grit pads and wiped it down with Obsidian Oil after each one. I polished the stem with Before & After Pipe Stem Polish, using both Fine and Extra Fine polishes to polish out the remaining light scratches in the vulcanite. When I finished with the polish I gave it a final coat of oil and let it dry. With the stem replaced and polished I put it back on the pipe and buffed the entire pipe again with Blue Diamond polish on the buffing wheel. I polished it with the polishing compound until it was shiny. I gave the entire pipe several coats of carnauba wax and buffed it with a clean buffing pad to raise the shine. I hand buffed it with a microfibre cloth to deepen the shine. The new stem and the bowl polished up pretty nicely. The finished pipe is shown with the original stem in the photos below. This is the third of Craig’s five pipes. Once I finish the other two pipes I will pack them up and get them out to him. I am looking forward to what he will think once he has them in hand. Thanks for walking through these restorations with me. I am thinking that the pipeman who gave Craig these pipes would be happy that they are back in service and that Craig is carrying on the pipeman’s trust with them. Cheers.

ANSWERS TO QUESTIONS – How do you decide whether to replace fills or rusticate a bowl?


Blog by Steve Laug

Another of the questions that I am frequently asked is “How do you decide whether to replace fills I the briar or to rusticate the bowl and shank?” As always seems to be the case there is another question behind that one that needs to be answered before even considering that decision. That question is fundamental to all the work we do as refurbishers/restorers. Simply stated it is: “How far do I go in the process of working on a pipe before it ceases to be its original maker/manufacturers pipe and becomes a product of my work?” If your changes essentially alter the original it has become yours. The choice boils down to a question of preservation or abandonment. I thought it was worth devoting an Answers to Questions Blog to addressing this question and all of the considerations that it raises. As always the ideas are my own and I am not expecting everyone to agree with my conclusions but I ask that at least you wrestle with the issues.

Once you have wrestled with the question of how far you go in your work and make a decision about how much is too much then you are ready to go the direction that decision presets for you. If you decide to preserve the pipe as much as possible to the original then rustication is off the table. It becomes simply a matter of repairing or replacing the fills in the briar. That decision is not difficult because the end result is that you want the fills to blend into the finish as much as possible. The last thing you want is spots all over the bowl where the fills stick out.

Hopefully, that will help you make the initial choice regarding the pipe in your hands. To fine tune the decision make process further, set some parameters for what you will or will not rusticate. For example for me the fine tuning has led me to make decisions on what I will and will not rusticate. I will rusticate any Imported Briar no name pipe without thinking twice. These generally have a lot of fills that stick out and I want to get rid of them. With these there is never any concern about preservation. I am really more concerned about beautifying what to me is an eye sore. I wipe it down with alcohol to clean it up and jump right into the rustication.

I have also decided that I will not personally rusticate or change any name brand pipes – Stanwell, Kriswill, BBB, KBB, Charatn, GBD, Kaywoodie to just name a few. With the Kaywoodie brand I specify even more focused on the early pipes they made. I never mess with higher end pipes like Dunhill or even new artisan pipes. With all of those I have chosen to take a minimalistic approach in terms of refurbishing and restoration. Even in my repairs I tend to be a minimalist with these brands as much as possible. I do not want the pipe to be anything less than what it was when it left the factory or the maker. I want it to shine in all of its beauty. Of course you will need to make your decisions regarding parameters and once you do you also have the power to make exceptions to them.

If I am going to preserve the pipe and leave the fills in place that decision also have some qualifiers. If the fills are large and ugly pink putty has been used to fill them in I almost always use a dental pick and remove them. I refill them with a mixture of briar dust and super glue. If they are chipped but otherwise solid I often repair them instead of replacing them. If they are soft they need to be replaced. If they are small and well hidden in the finish I tend to leave them. If they are out of my sight line when I smoke it then I also tend to leave them. If they stand out then to me they have to go. I replace them and blend them into the finish as much as possible. All of these qualifiers are arbitrary and personal at some level I guess but you can decide that yourselves. If you can live with the fills as they are then leave them. Most if not all of them are aesthetic and in no way affect the smoking function of the pipe. I have had the most filled and ugly pipes that are my best smokers and I have had almost flawless pipes that were awful smokers.

I think that summarizes my thoughts on the original question. As with most things in our hobby there are questions behind the questions. There are multiple levels of answers but at the same time it really boils down to what you individually want to do. It comes down to your aesthetic. Whether you choose to preserve a brand or to make it your own truly is your choice. I think for many of us once we have made it our own we should remove the original makers marks as it is no longer a pipe from their hands (at least externally as notice we have said nothing about changing the mechanics). Hopefully you have found this blog helpful as you make your own choices. Thanks for humouring this old pipeman in his ramblings. Cheers.

Some People Meditate. I Smoke a Pipe.


Well written and well thought out Charles. Your thoughts parallel what I have written and thought much about. Thank you.

Charles Lemon's avatar

I sometimes get asked why I smoke a pipe. It is, after all, the rarest method of tobacco consumption in Canada these days (only about half of one percent of tobacco users are pipe smokers). If it’s nicotine you’re after, there are more efficient, though arguably more diabolical, delivery methods than a cantankerous old briar. A pipe is also regarded by many as an anachronism, something belonging to the past that reminds one of leather-bound books, slightly damp tweed and Granddad telling stories by the fire.

Similar to a cigar, the smoke from a pipe is tasted rather than inhaled, so I don’t crave nicotine from my pipe, but I must admit to harbouring a bit of sentimentality when it comes to the hobby. My father smoked a pipe, and though he passed when I was still quite young, the olfactory memory kicks in when I catch a whiff of…

View original post 781 more words

Rejuvenating a Leather Clad Billiard


Blog by Steve Laug

In my previous blog on the No Name Meerschaum I spoke of the five pipes that I am working on for Craig. In this blog I am taking on the second of his pipes – a leather clad billiard marked R20. It looks like a Longchamp pipe but there is no name on the shank. Here is what Craig wrote me about his pipes: I was recently given a bag of pipes…literally, a BAG of 20 or so pipes that are 50+yrs in age and VERY used. I was wondering if you would have time to either Skype or FaceTime with me, and go through what I have in order to determine which are worth sending to you to have them refurbished. If you would be so kind, I’d really appreciate it. We met on FaceTime and walked through each of the pipes in his bag. He pulled out a grocery bag with no rhyme or reason to it. It was filled with a jumble of no name or low-end drug store pipes. The only pipes that stood out for me were an old WDC Campaign pipe and a Grabow Starfire. We excluded all but five of the pipes. The amount of work necessary to bring them back was not worth the price. These are the five that we chose to work on. As I finish them, I will include the link to the blog covering that pipe.

After our conversation, he packed up the pipes and threw the rest of the pipes in a separate bag for me to scavenge parts. The box did not take too long to get to Vancouver and when it did I opened the box and had a look. Here are pics of what I saw – there were two bags inside. One bag held the discards for the scrap pile and the other held the five pipes he wanted restored. The second pipe was the leather-clad billiard. The leather was dry and dirty but the stitching holding the halves together was sound and undamaged. A little leather soap or oil would bring it back to life. The rim top had been hammered against a hard surface to knock out the dottle and there was serious road rash on the surface of the rim. The outer edges were damaged all around the bowl but predominantly on the right side. There was some darkening on the rim as well. The bowl had a thin cake in it and remnants of tobacco. The leather cover had scuff marks around the sides near the top. The only identifying mark was what looked like the shape of a tanned hide (cowhide or other) stamped into the left side of the shank. There were no other identifying marks on the left side. On the right side was the stamping R20 which I am assuming was the shape number. The stem was vulcanite and it had nicks half way up the stem and tooth marks and chatter on both sides near the button. The surface was dirty and dull looking but thankfully not oxidized. There was a corkscrew like stinger apparatus in the tenon that was clogged and I could not even blow air through the slot or stem. The slot itself also had tars built up reducing the size of the slot by half. The pipe smelled like the same Half and Half tobacco as the other pipe. The tobacco leaves behind a ghost of an anise smell that clings to a pipe that has smoked that blend. I took the following photos of the pipe before I started cleaning it up. I took close up photos of the bowl and rim top as well as the stem. The rim top had been beaten on a hard surface to knock out the dottle and there were some serious nicks and dents in the surface. There was some overflow on the rim. The stem was another story – it was in decent shape with tooth marks and chatter on both sides near the button. There was a metal tenon like a spear tip on the end of the stem. It was very dirty.I decided to top the damaged portion of the bowl to remove the rough top of the bowl. It did not take too much sanding to remove the damaged inner and outer edges of the rim as well as the surface. Once it was smooth and even all the way around I finished the topping.I used a Savinelli Fitsall Pipe Knife to clean out the cake and tobacco remnants from the bowl. As I worked on it I was again certain that the tobacco of choice to the pipeman who had smoked the pipe in the past was Half and Half.I polished the rim top with micromesh sanding pads – wet sanding with 1500-2400 grit pads and dry sanding with 3200-12000 grit pads. I polished the rim until it was smooth and shiny. I wiped the rim top down with a damp cotton pad to remove any sanding dust. I scrubbed the surface of the briar with Before & After Restoration Balm. I worked it into the rim top with my fingers and it raised the grime and dust that was in the grain of the briar. I buffed it with a soft cotton cloth to remove the debris and the remaining balm on the surface of the briar. When it was clean I stained the rim top with a medium brown stain pen to match the colour of the leather and the blend it with the rest of the pipe. The rim would still need to be buffed to smooth out the colour of the rim.I decided to try out the restoration balm on the leather cover of the pipe. I worked it into the pores of the leather to clean and enrich it. I was amazed at how well it worked. It lifted the grime to the surface and I was able to wipe it off with a clean cotton pad. I worked it into the grain of the leather until the leather was soft and pliable. I worked it into the cotton cord that held the halves of the leather cover together. It worked very well. The corkscrew stinger was threaded as I expected. I unscrewed it from the shank to remove it. It was clogged with tars and oils in the slot and in the stem. I could not blow air through the stem as the debris clogged it. I would clean up the stinger and leave it out of the tenon. I would send it back to Craig and he could do what he wanted.I cleaned out the mortise and the airways in the shank and stem with alcohol, pipe cleaners and cotton swabs. Both were very dirty and as the pipe cleaners and cotton swabs came out they reeked of  Half and Half tobacco. It was strong smelling. It took a while to get rid of all the tars and the oils in the vulcanite and the briar. I used a lot of pipe cleaners, cotton swabs and alcohol before the airways in the stem and shank and the mortise were clean.With the stem cleaned on the outside it was time to work on the outside of the vulcanite. There were tooth marks near the button on both sides and there were deep nicks on the top of the stem about half way up. I filled in the spots with clear super glue and overfilled it. I started to smooth out the repairs and then remembered that I had not photographed the filled in areas. So the photos below show the stem midway in the process of sanding it.When the repaired areas had dried I used a needle file to smooth out the bubbles of hardened glue. I worked them over until the surface area in front of each button and on the top of the stem was smooth. I sanded them with 220 grit sandpaper to remove the file marks and the scratches in the surface of the vulcanite. I polished the stem with micromesh sanding pads – wet sanding with 1500-2400 grit pads and dry sanding with 3200-12000 grit pads. After each pad I wiped the stem down with Obsidian Oil. When I finished with the last pad I gave it a final coat of the oil and let it dry. When I finished polishing the stem and it had dried I put it back on the bowl and took it to the buff. I gently buffed both the rim of the bowl and stem with Blue Diamond. I gave the rim and stem several coats of carnauba wax and buffed them with a clean buffing pad to raise the shine. I buffed the leather with a clean buffing pad as well to give it a shine. I hand buffed the pipe with a microfiber cloth to deepen the shine. This is the second restoration of the pipes Craig sent me. I look forward to the rest of them. I think he will enjoy this one when I send it back. The finished pipe is shown below. Thanks for looking.

Product review: Grout whiteners


Great tool for the arsenal. Thanks Mark for the review. Had to share it the rebornpipes readers.

Lone Star Briar Works's avatarLone Star Briar Works Blog

20180129_041125

I use grout whitener to refresh the letter or logo on a vulcanite stem. My procedure is to get the oxidation off the stem and return it to jet black. The grooves of the stamping must be cleaned out under magnification using dental picks and probes. The job usually involves deepening the recesses with the same tools. Shake the pen for 2 minutes and apply a small amount over the area. After setting up for a minute I  use a toothpick to roll across the area and soaking up the excess liquid, leaving the grooves filled. After hardening awhile, i can buff it with carnuba wax to protect and seal the work. I prefer the Miracle grout pen over the Rustoleum brand. I find the Rustoleum is too watery.

PicsArt_01-27-09.16.5620170409_154154.jpg

Thanks for looking!

View original post

Is it a meerschaum? Looks like one, feels like one, but….


Blog by Steve Laug

Not too long ago I received an email contact from a fellow, Craig on the rebornpipes blog. He sent me the following message: I was recently given a bag of pipes… Literally, a BAG of 20 or so pipes that are 50+yrs in age and VERY used. I was wondering if you would have time to either Skype or FaceTime with me, and go through what I have in order to determine which are worth sending to you to have them refurbished. If you would be so kind, I’d really appreciate it. I was interested in seeing what he had been given so we arranged a Facetime call. I was in Idaho with my brother so we both sat in on the call and had a look at his pipes. It was literally a big bag of pipes – all thrown into a plastic grocery bag with no rhyme or reason. The bag was filled with many no name or low end drug store pipes. There was really nothing stellar in the lot except for an old WDC Campaign pipe and maybe a Grabow Starfire. We went through the bag via Facetime and excluded most of the pipes. The amount of work necessary to bring them back was not worth the price. However, we picked some of the lot that were worth cleaning up for sure as they would make nice rack additions for a budding rotation. There were five that we pulled to work on.

  1. A No Name Meerschaum that looked interesting
  2. A Dr. Grabow Starfire 39 that had great grain
  3. A WDC Campaign underslung pipe
  4. A Wally Frank Bulldog marked Natural Unvarnished lacking a stem
  5. A leather clad billiard marked R20 and bearing a shield

With that he packed up the pipes and through in the rest of the bags for me to scavenge parts from and put the box in the mail. It did not take too long for it to arrive in Vancouver and when it did I opened the box and had a look. Here are pics of what I saw – there were two bags inside. One bag held the discards for the scrap pile and the other held the five pipes he wanted restored. I chose to work on the No Name ?Meerschaum? first. It was very dirty and he was not even sure it was a meer. He thought it might be a painted pipe but I wondered about it. When it arrived I checked it out and the inside of the bowl that was visible looked like meer and the shank end with the threaded tenon looked like meer. From the look of the rim I wondered if it was not a pressed meerschaum – in fact it probably was. The bowl had a cake in it – not too thick but bothersome and the rim to had some darkening and some tan spots. The bowl was extremely dirty on the outside and there were black scuff marks on both sides. There were scratches and nicks on the bottom of the bowl. There was no stamping or identifying marks on the pipe. The stem was soft acrylic or plastic. There were tooth marks and chatter on both sides near the button. The exterior was dirty and dull looking. The slot had tars built up reducing the size of the slot by half. The pipe smelled like Half and Half tobacco – kind of that anise smell that clings to a pipe that has smoked that blend. I took close up photos of the bowl and rim top as well as the stem. The rim top had some overflow on the inner bevel and there was some odd coloration on part of the rim. It was almost as if the top coat of polished meer was compromised but it was hard to know. This area made me wonder about whether I was dealing with painted briar. The stem was another story – it was in decent shape with tooth marks and chatter on both sides near the button. There was a metal tenon like a spear tip on the end of the stem. It was very dirty.I used a Savinelli Fitsall Pipe Knife to clean out the cake and tobacco remnants from the bowl. As I worked on it I was even more certain that the tobacco of choice to the person who had smoked the pipe in the past was Half and Half.I polished the meerschaum bowl with micromesh sanding pads. The way the bowl acted with the micromesh and the sanding dust that came off on the pads it seemed to point to meerschaum. There was one spot on the underside of the bowl that had the same coloration as the rim top. The rest of the bowl cleaned up nicely and the black marks and surface scratching disappeared and was replaced by a shine. I wet sanded with 1500-2400 grit pads and dry sanded with 3200-12000 grit pads. I wiped the bowl down after each grit with a damp cotton pad to remove the dust. The more I worked with it the more I am convinced that I was dealing with a pressed meerschaum pipe. It acts like pressed meer and feels like in the hand. I repaired the deep tooth marks on both sides of the stem with clear super glue. Once the repair had cured I sanded them smooth with 220 grit sandpaper to blend them into the surface of the stem. I polished the stem with micromesh sanding pads – wet sanding with 1500-2400 grit pads and dry sanding with 3200-12000 grit pads. After each pad I wiped the stem down with Obsidian Oil. When I finished with the last pad I gave it a final coat of the oil and let it dry. When I finished polishing the stem and it dried I put it back on the bowl and took it to the buff. I gently buffed both the bowl and stem with Blue Diamond. I did not want to damage the bowl and the plastic material of the stem is very soft so I did not want to make more work for myself with it overheating and melting. I gave the bowl and stem several coats of carnauba wax and buffed them with a clean buffing pad to raise the shine. I hand buffed the pipe with a microfiber cloth to deepen the shine. This is the first restoration of the pipes Craig sent me. I look forward to the rest of them. I think he will enjoy this one when I send it back. The finished pipe is shown below. Thanks for looking.