by Kenneth Lieblich
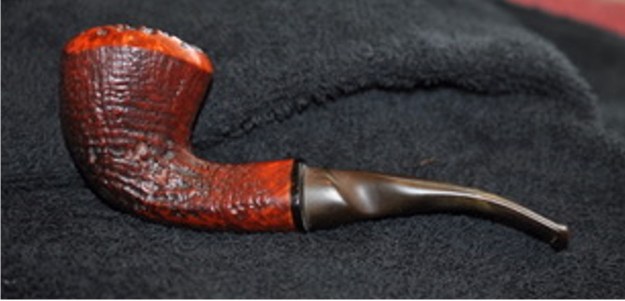
A gentleman in England contacted me recently about repairing a handsome, old Dunhill Root Briar billiard he had. He communicated to me that the pipe was in dire condition, but was such a good smoker that he needed it brought back to life. As always, I was game, but needed to see the pipe in order to assess the situation. Well, the situation was grave indeed – if this pipe was a person, I might have called a priest to administer Extreme Unction. In this case, however, I opted to be the ‘surgeon’ and I needed to operate.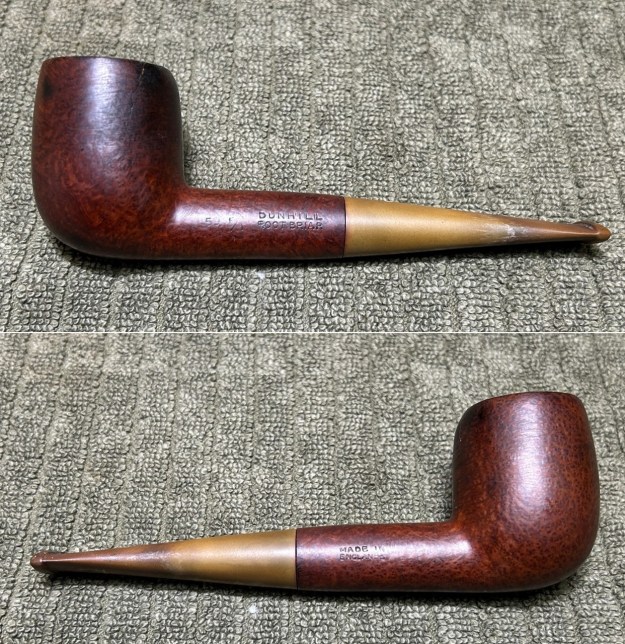
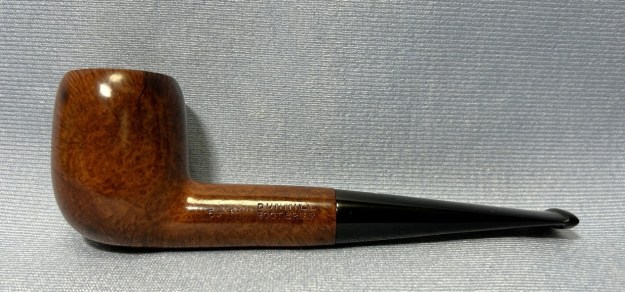
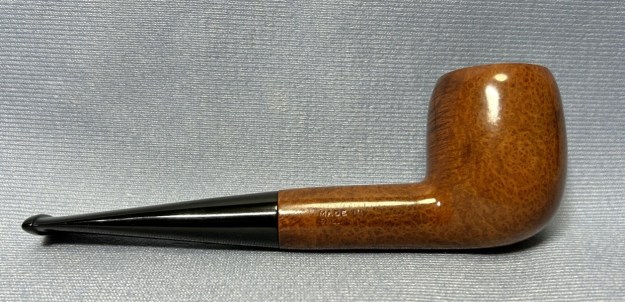
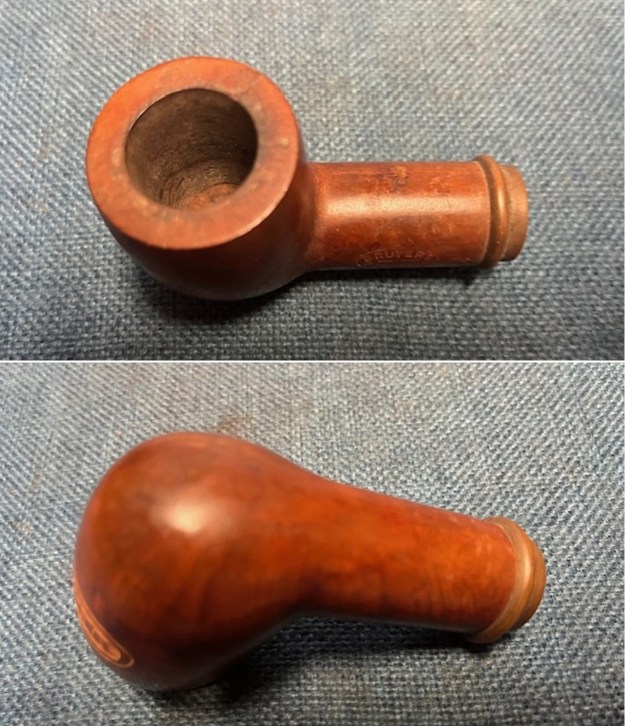
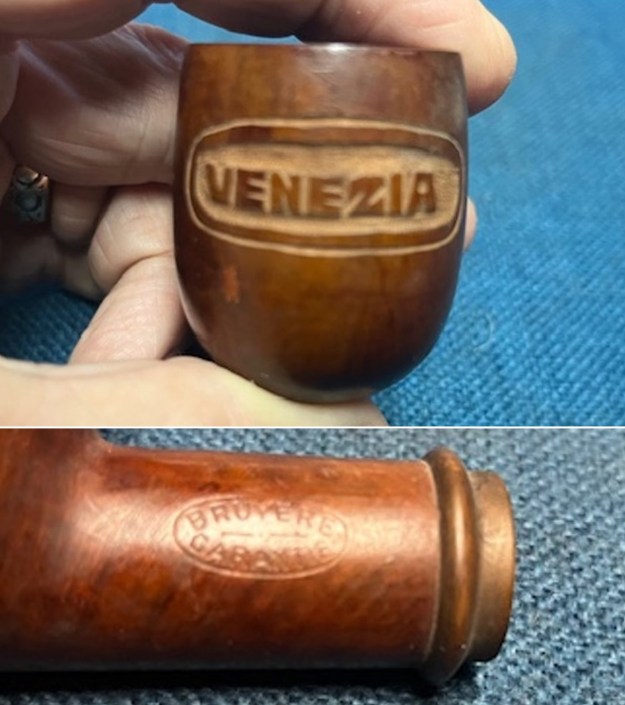
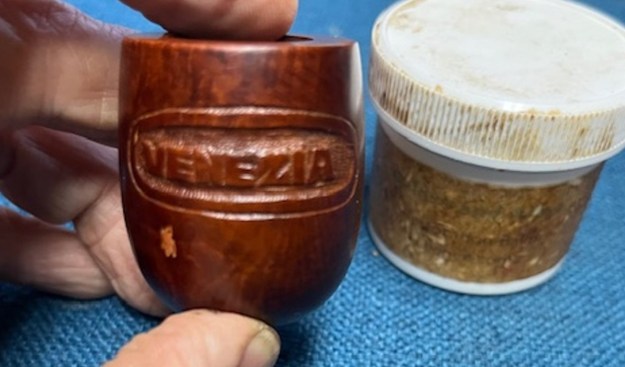
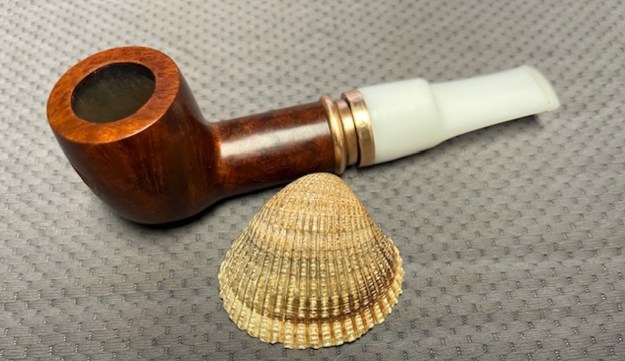
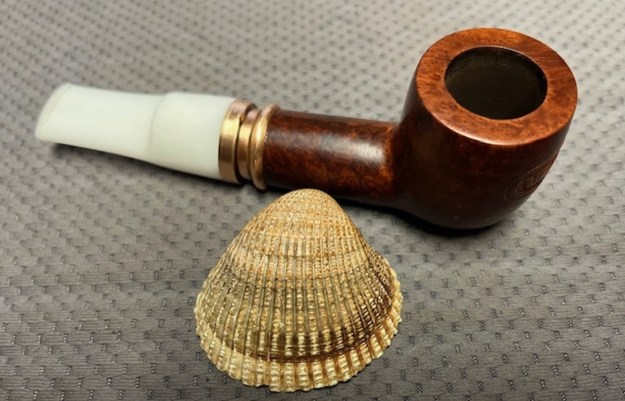
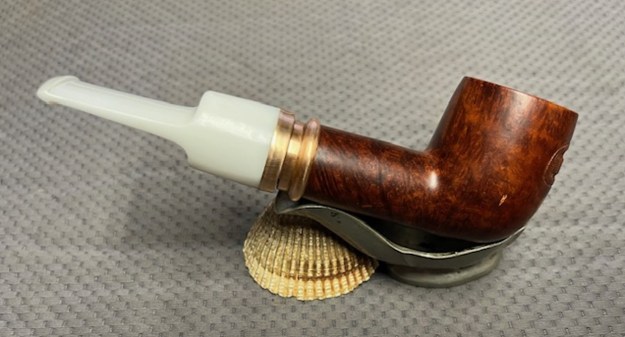
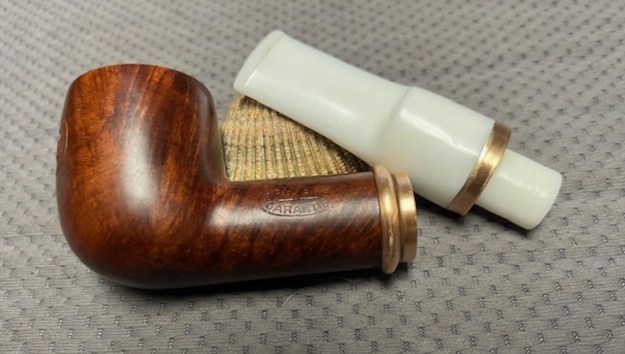
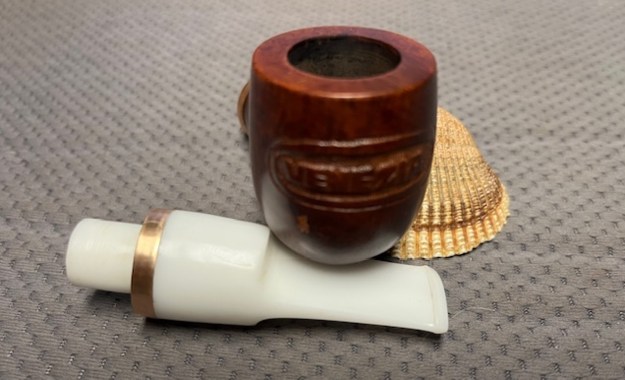
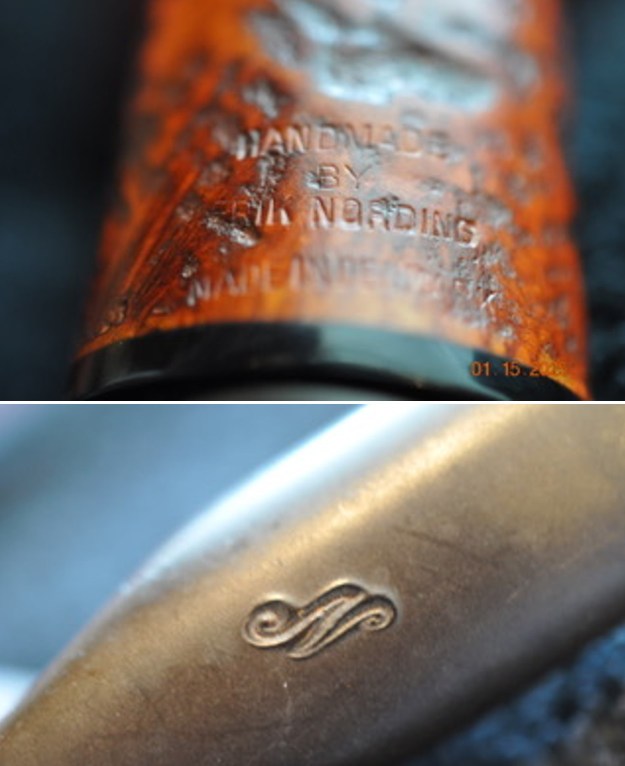
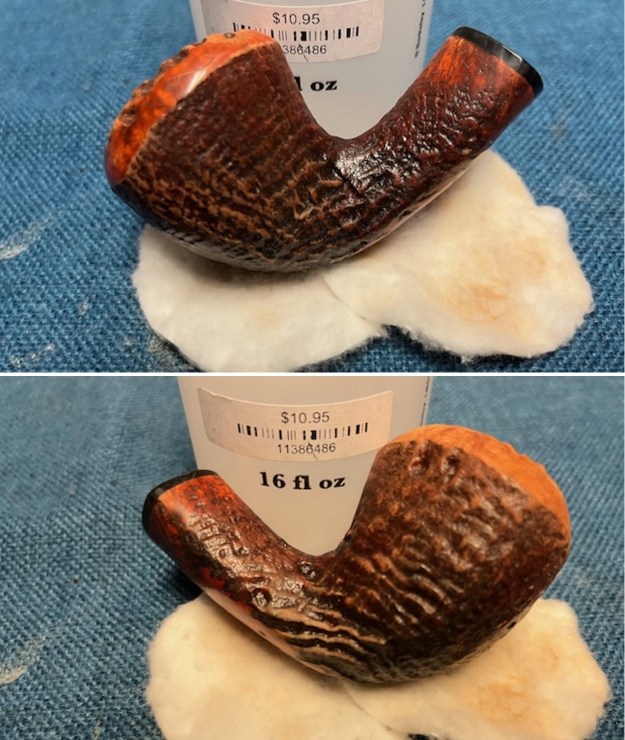
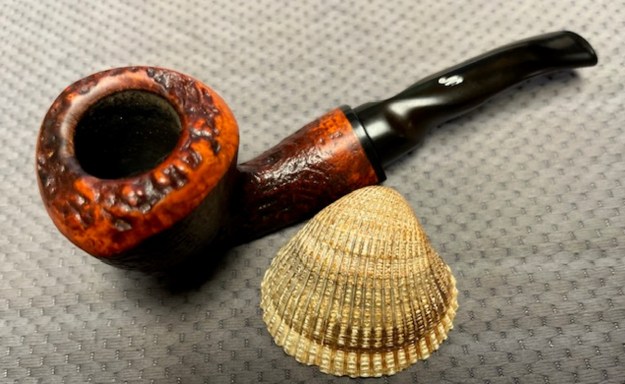
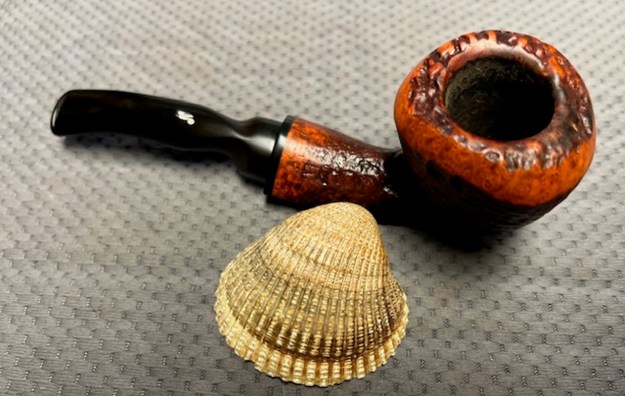
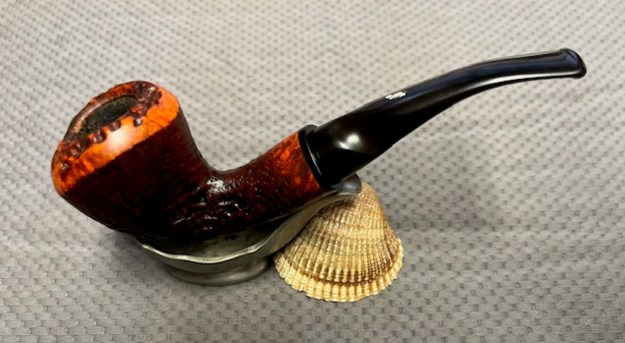
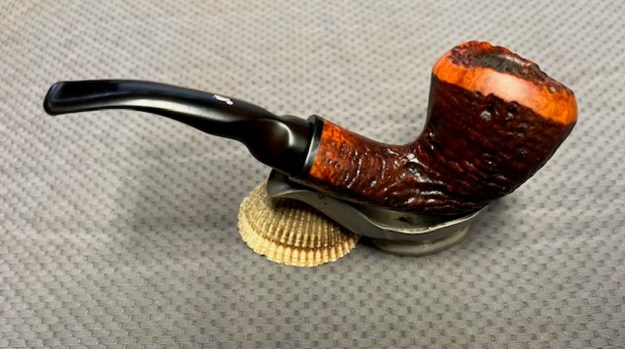
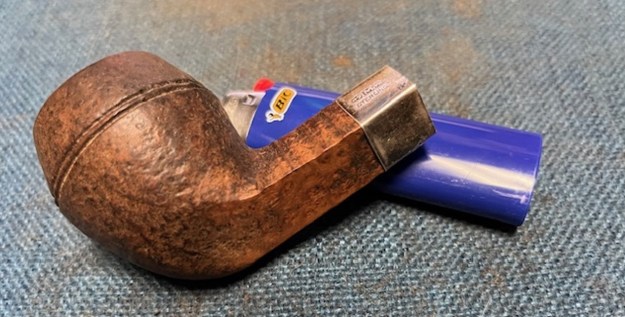
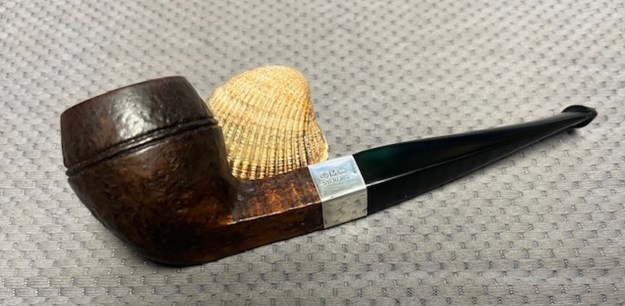
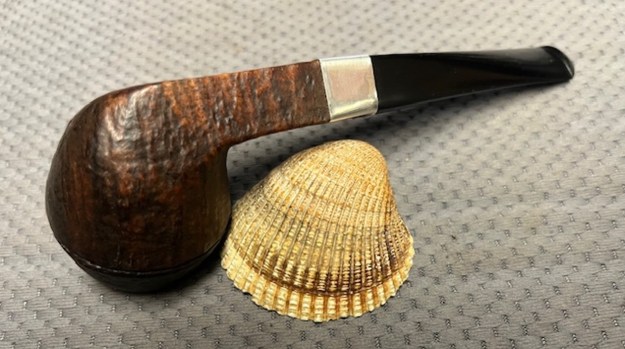
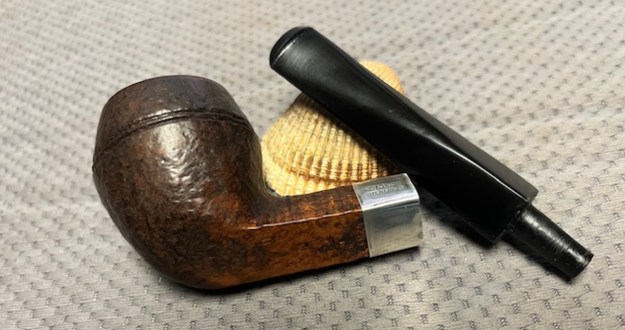
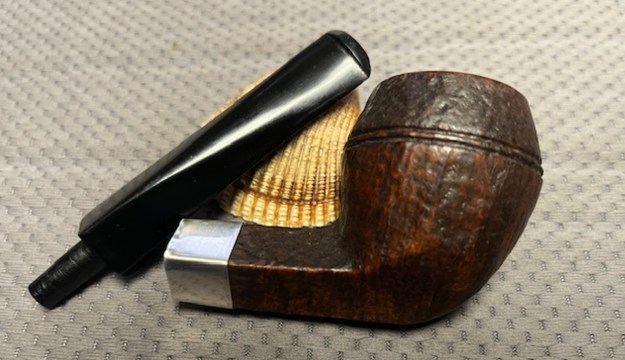
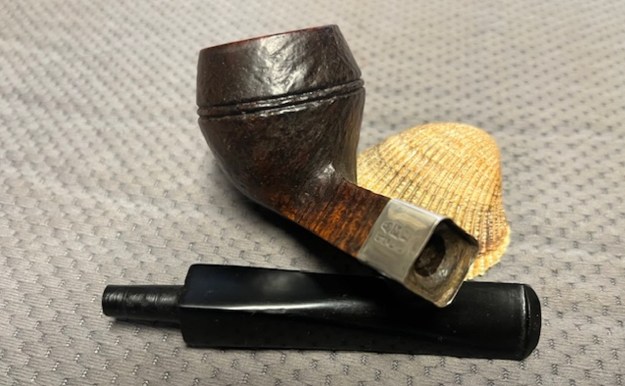
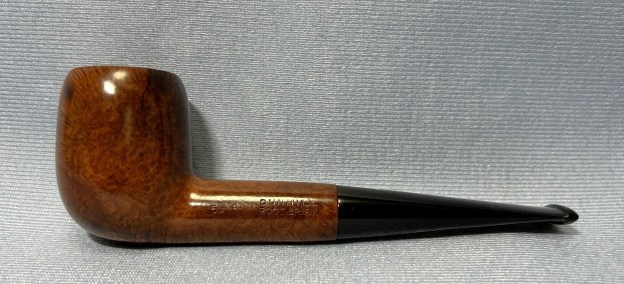
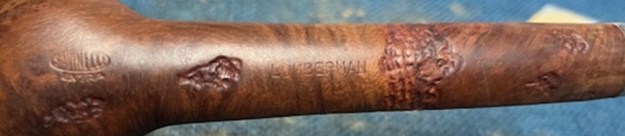
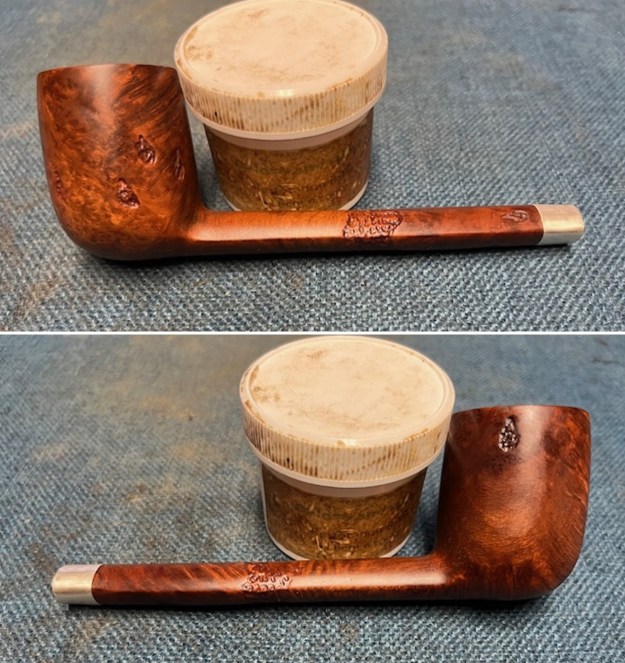
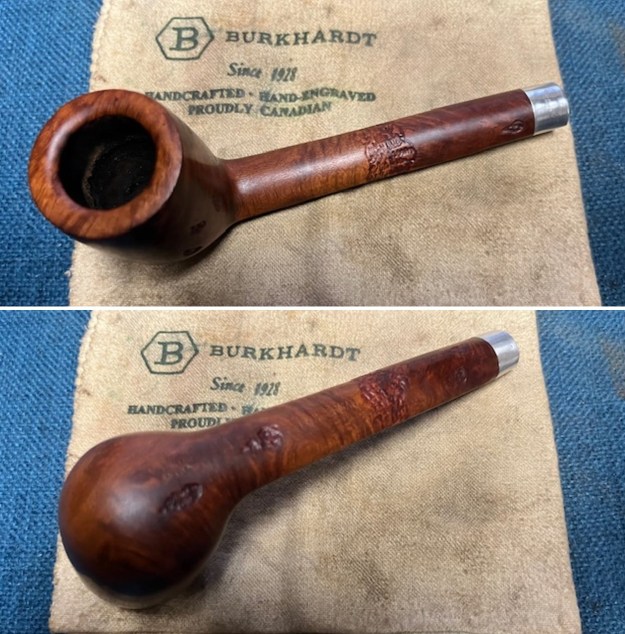
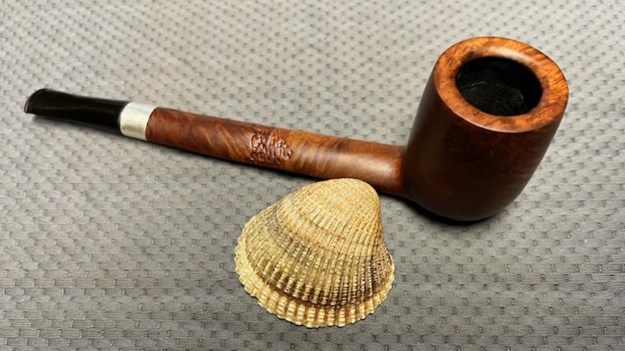
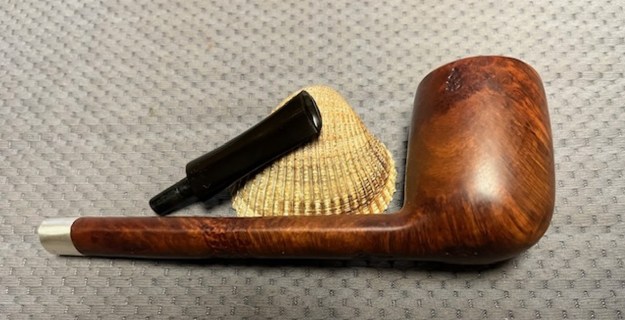
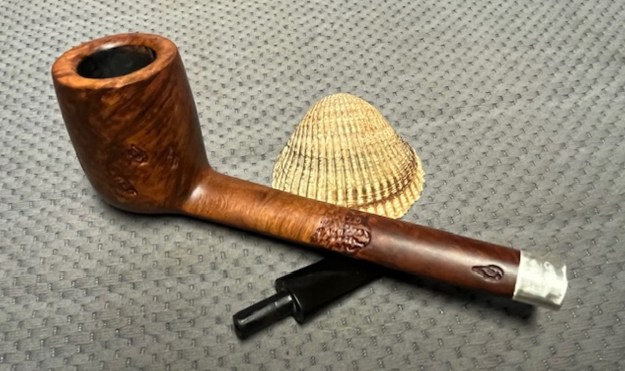
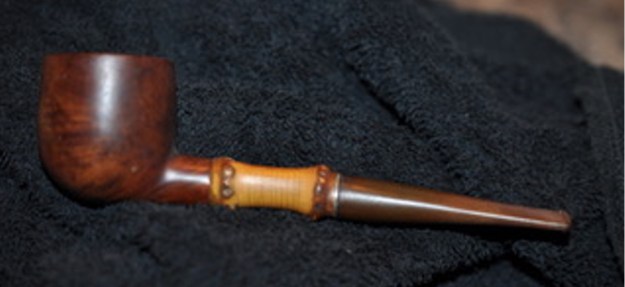
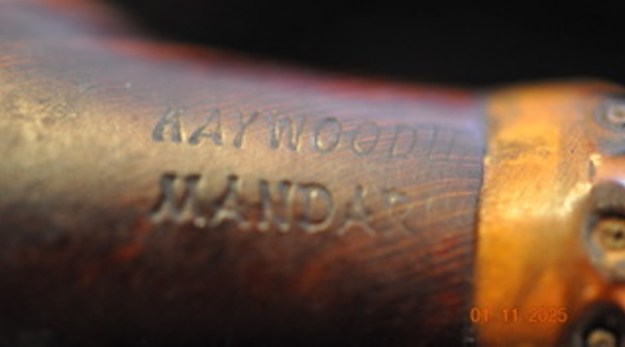
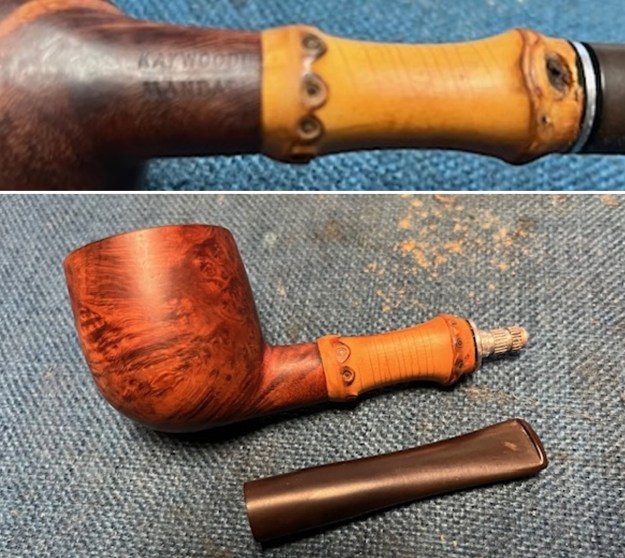
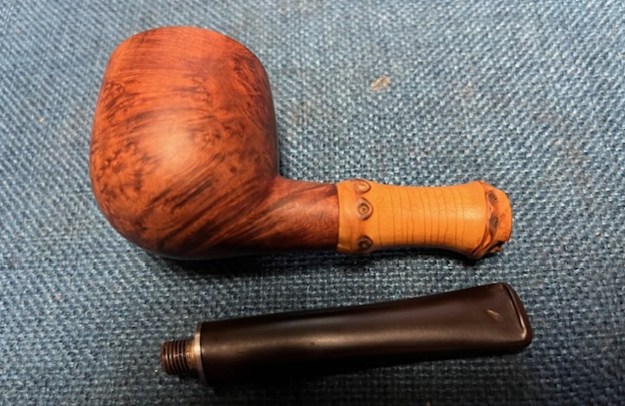
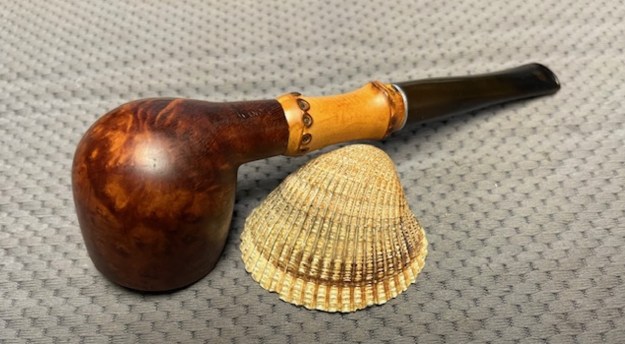
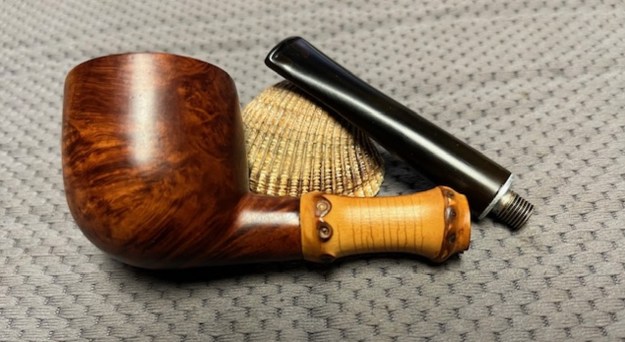
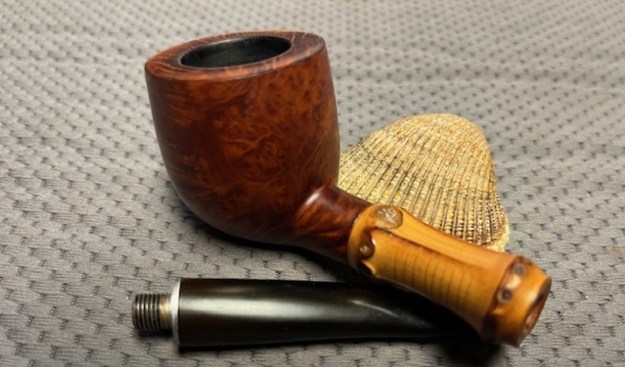
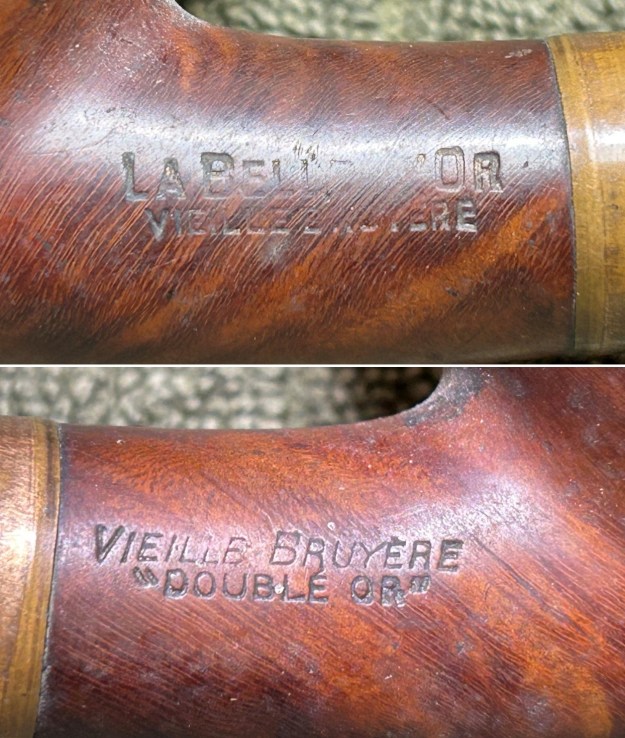
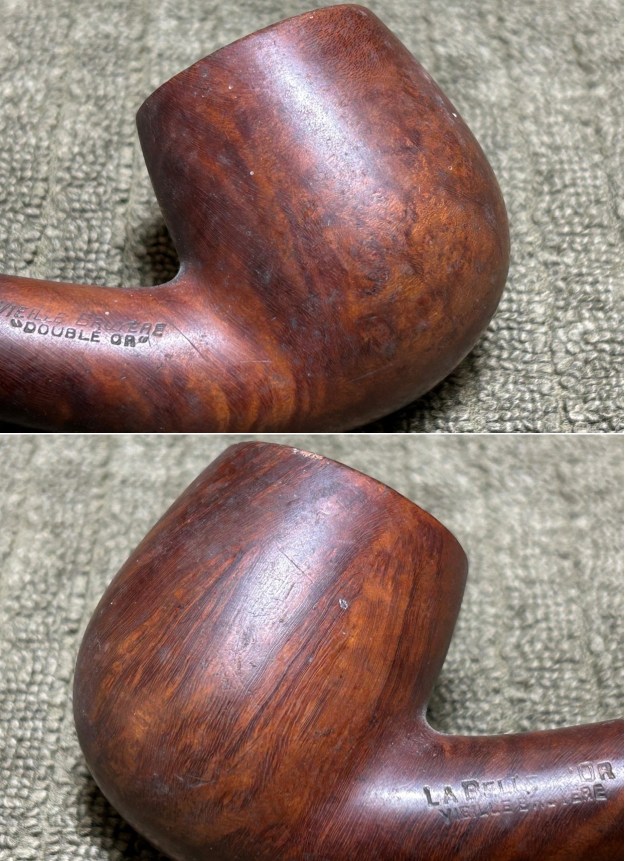
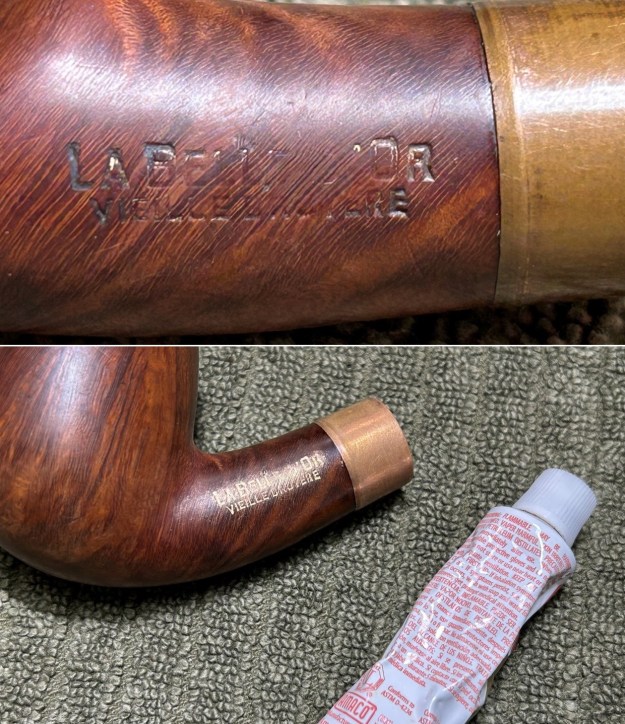
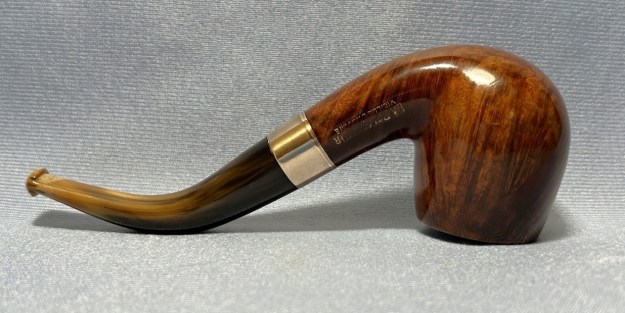
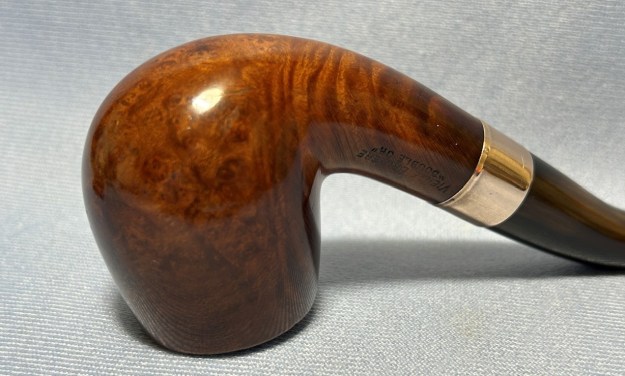
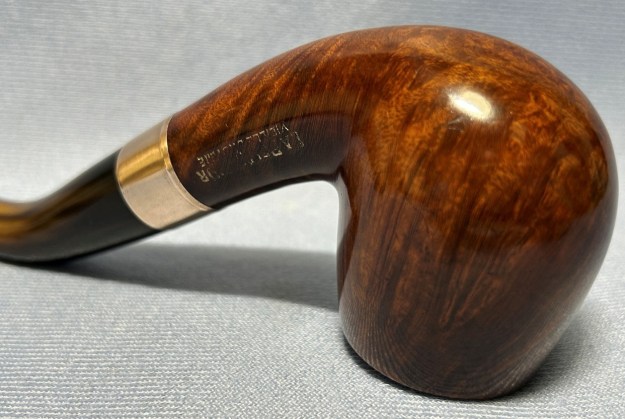
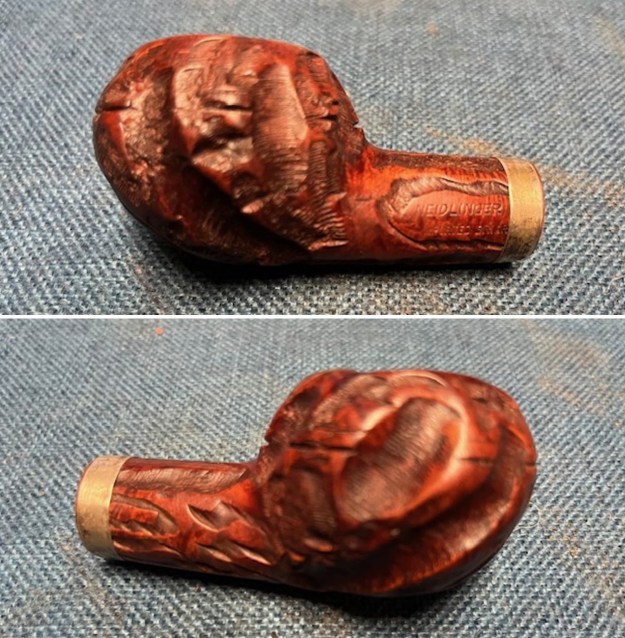
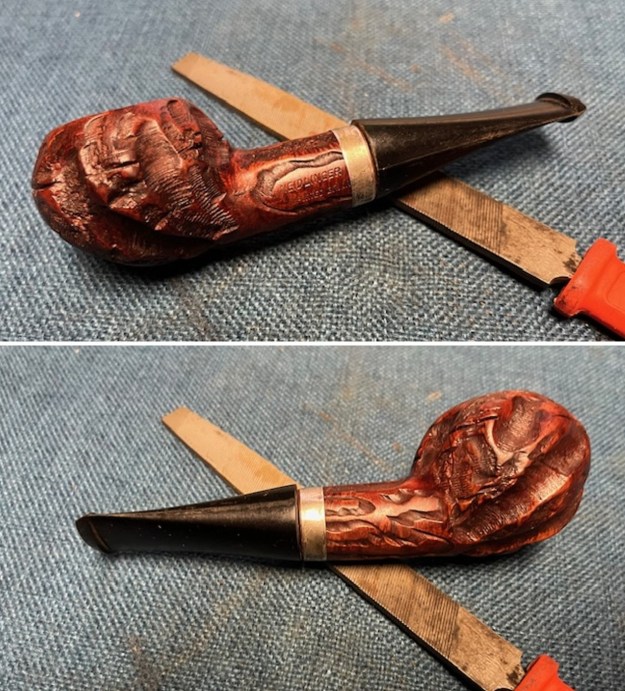
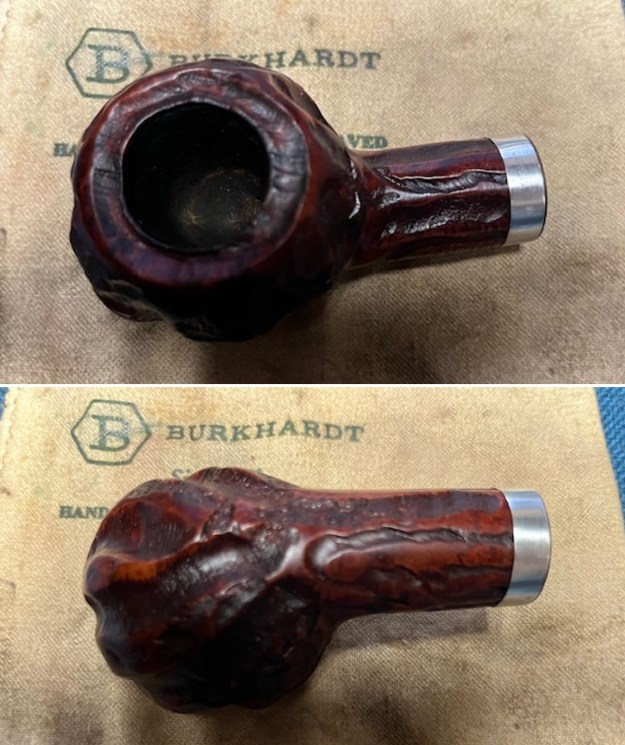
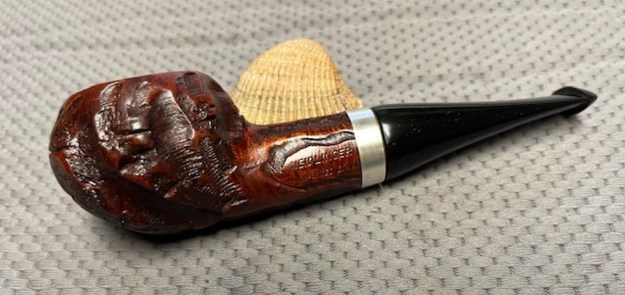
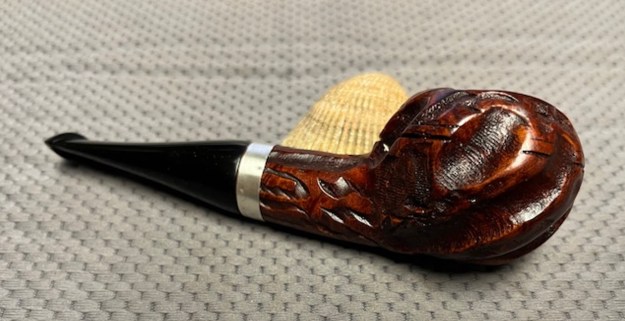
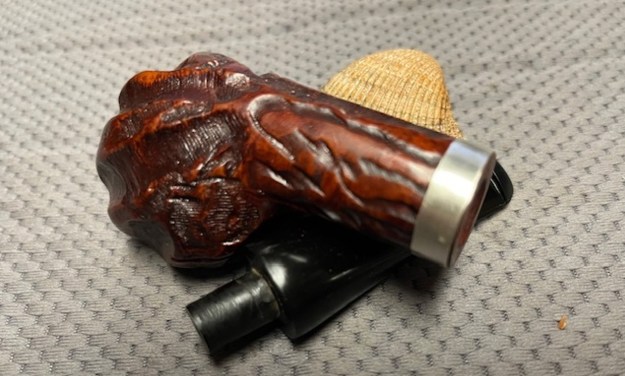
 Let’s look at the markings on the pipe, so we know what we’re dealing with. On the left side of the shank, we can see the number 59 (the shape number). Next to that is F/T (which stands for ‘fish tail’ – the type of bit on the stem). Next to that is Dunhill [over] Root Briar. On the right side of the shank, we see Made in [over] England5. At least, I think it’s a five – it could be a six – and this indicates that the pipe was made in either 1965 or 1966. Next to that we see ④ R, which indicates the size of the bowl (group 4) and the R indicates that it is root briar.
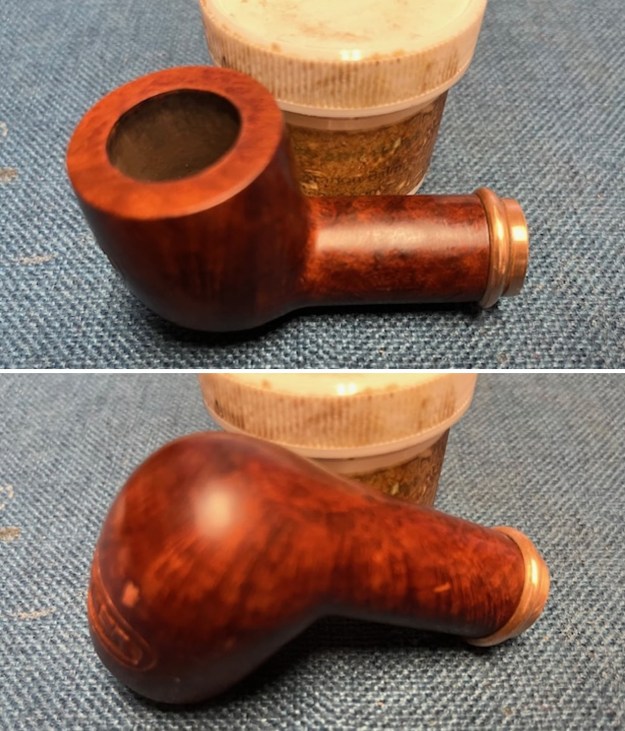
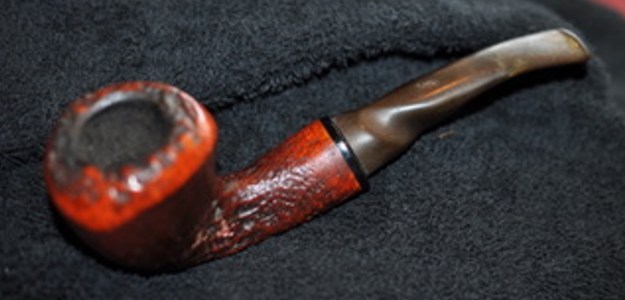
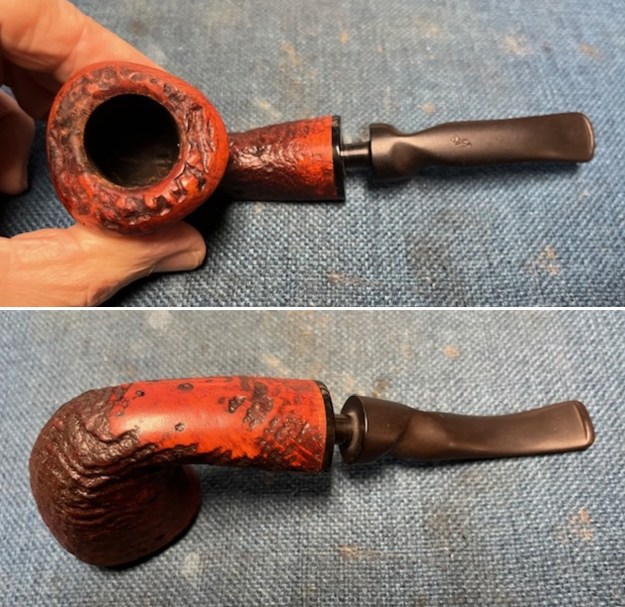
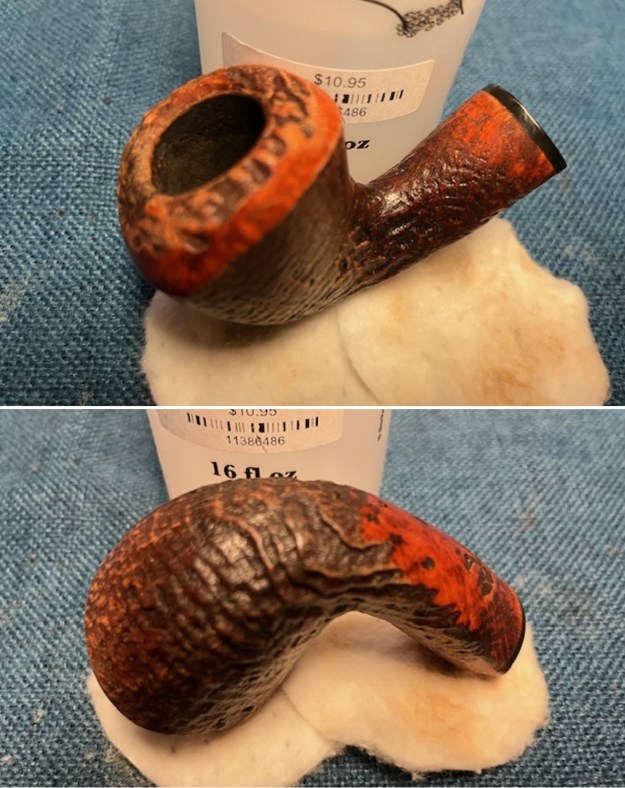
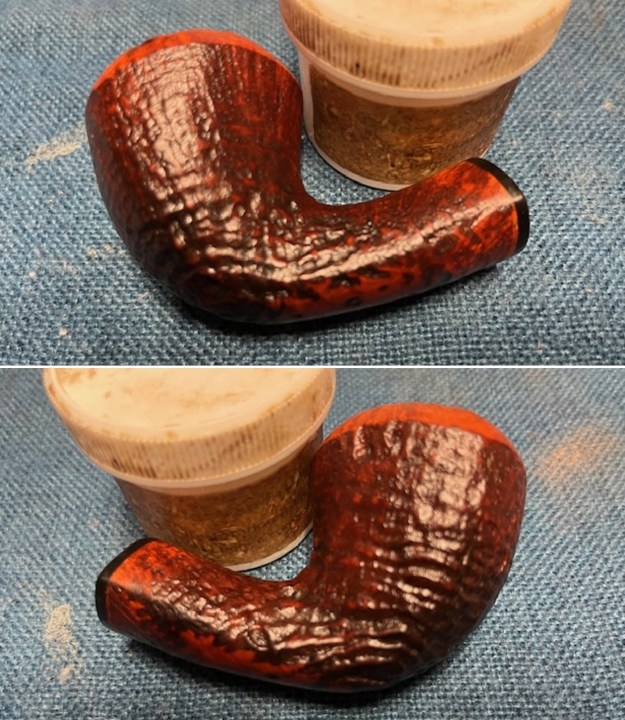
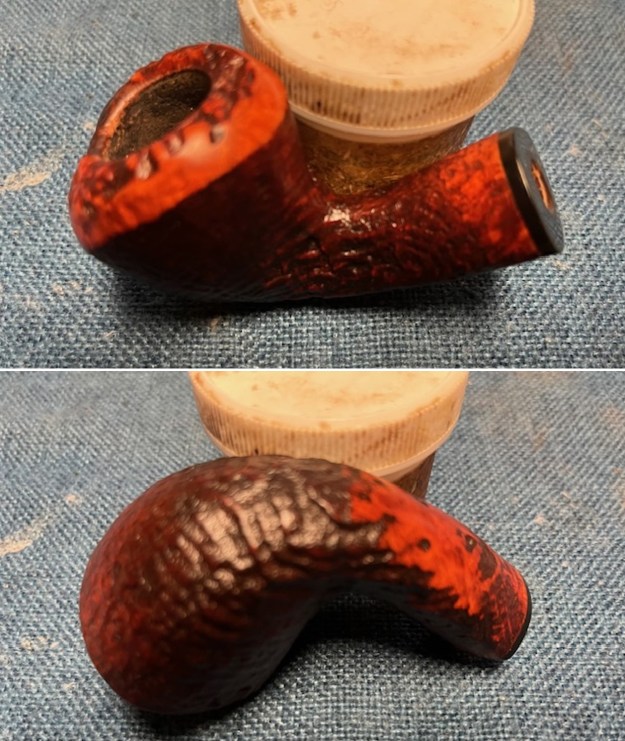
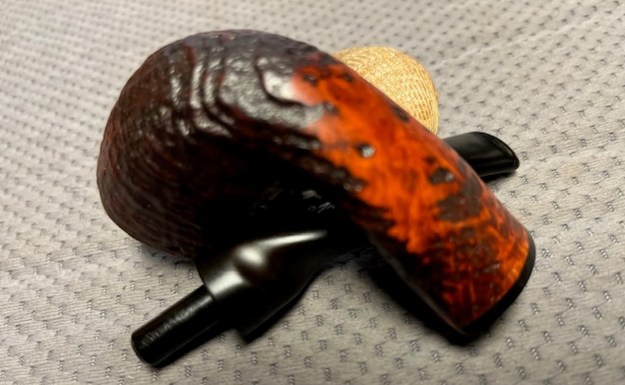
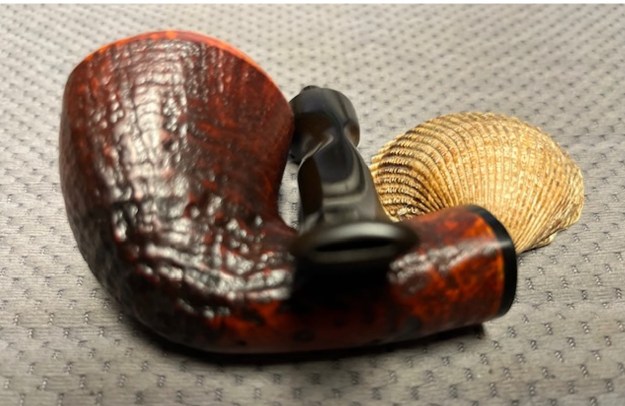
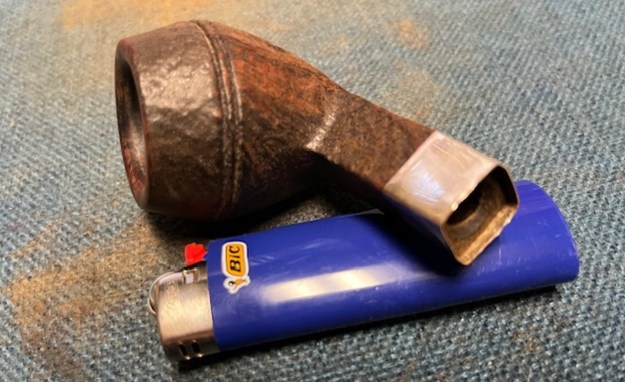
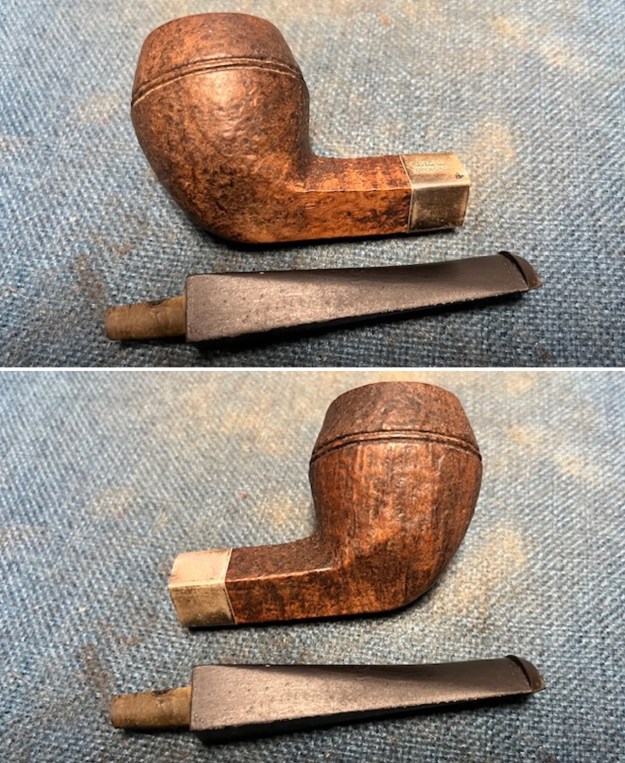
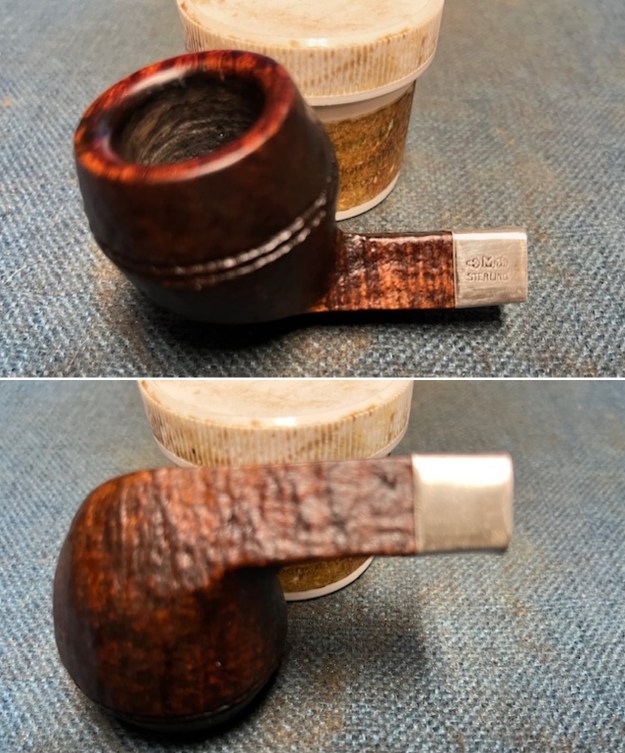
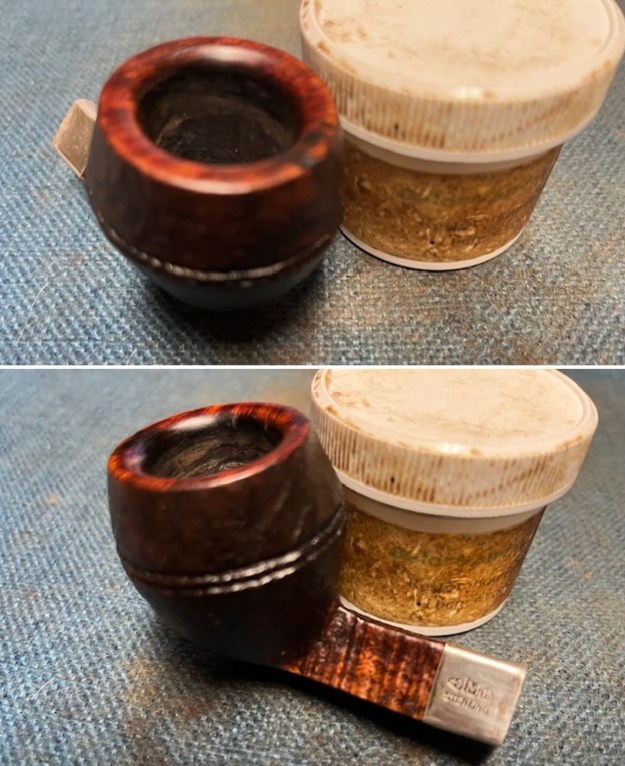
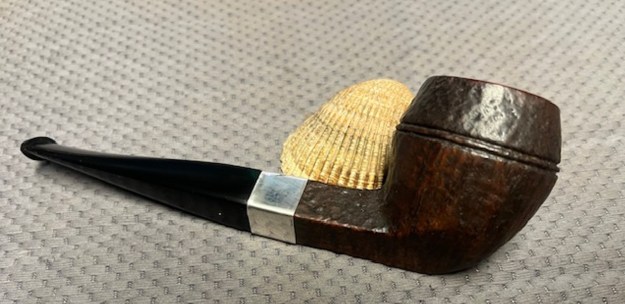
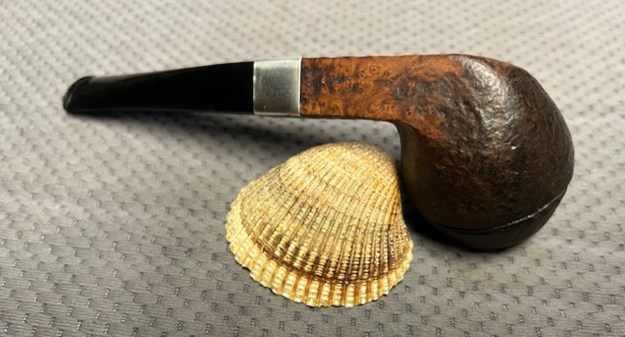
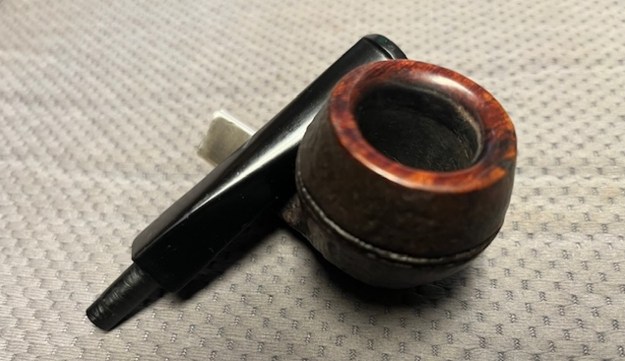
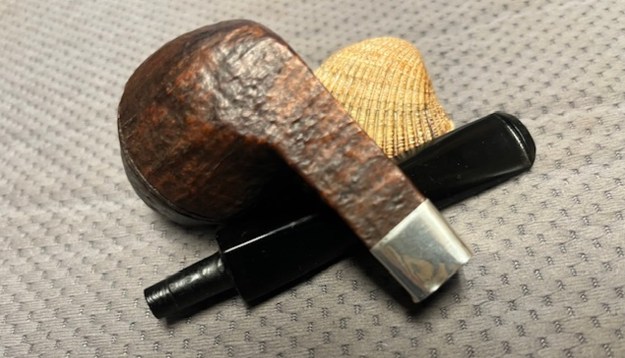
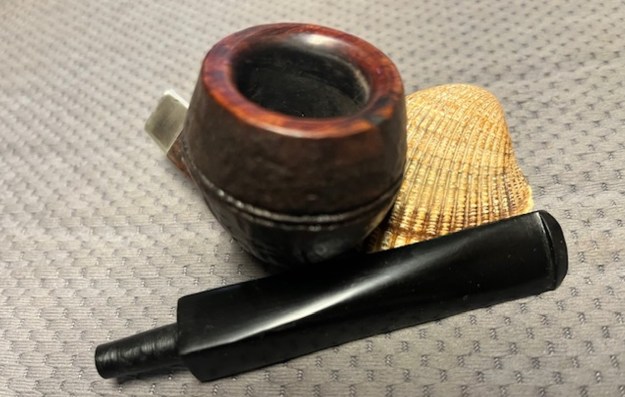
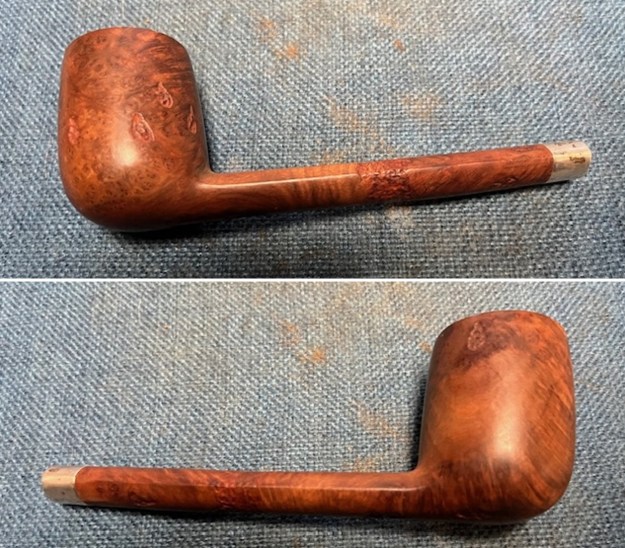
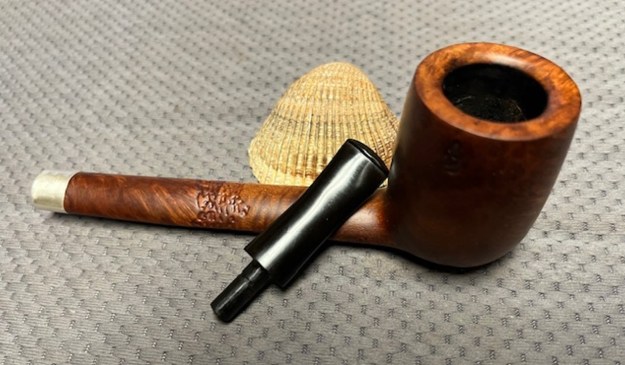
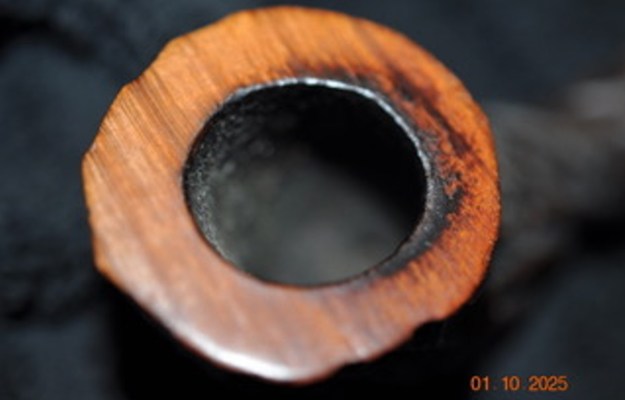
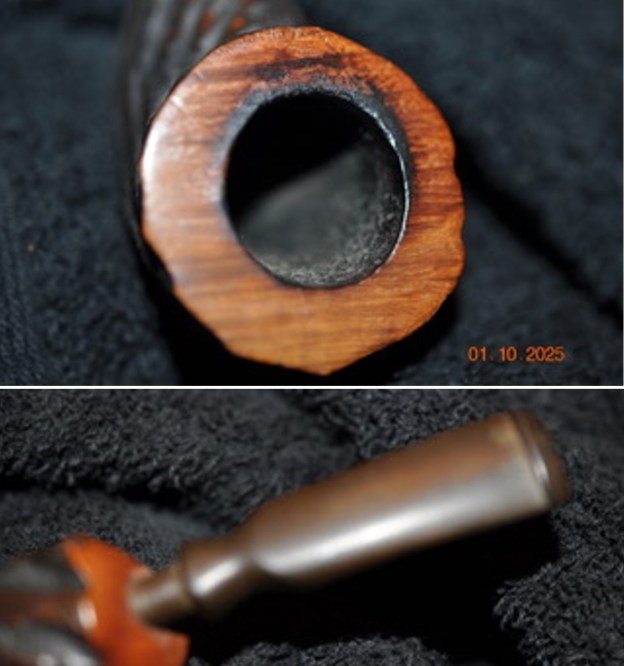
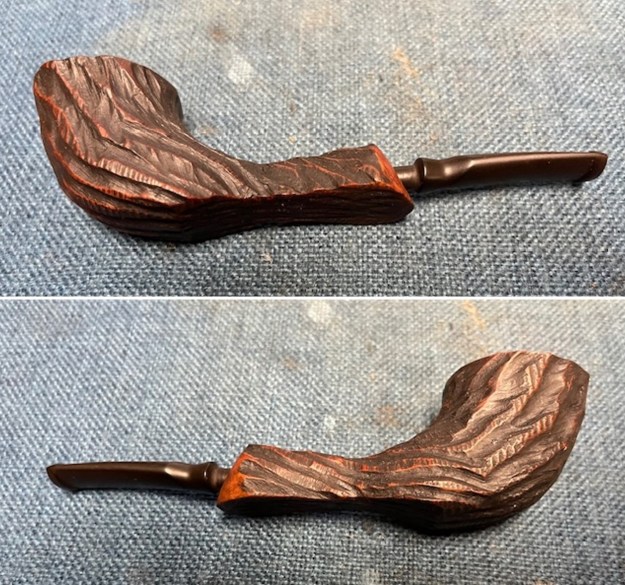
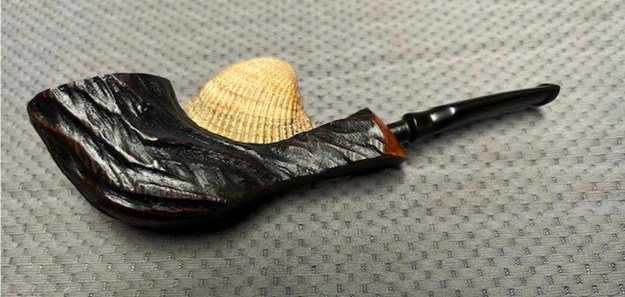
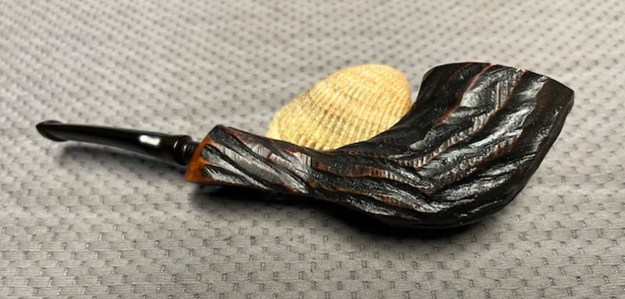
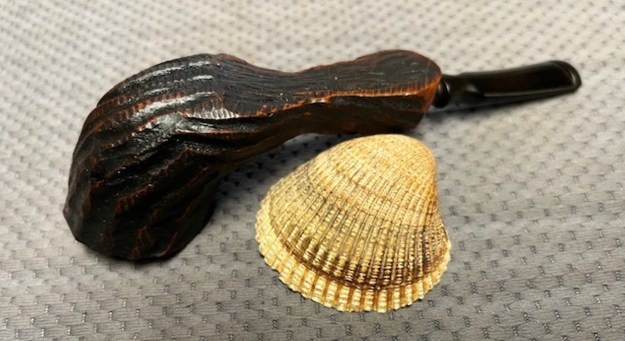
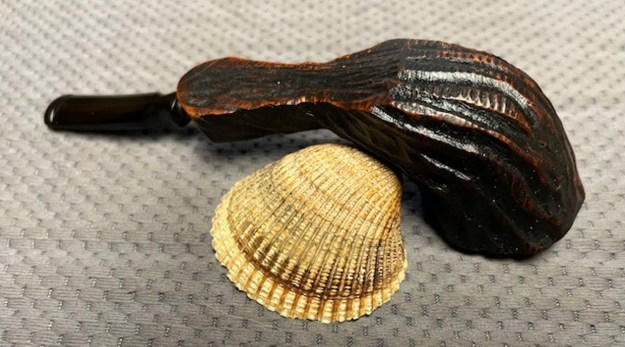
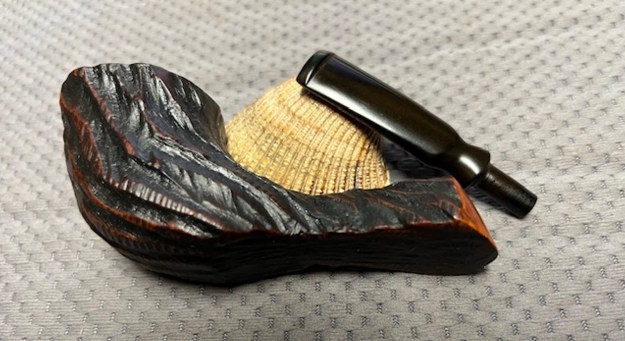
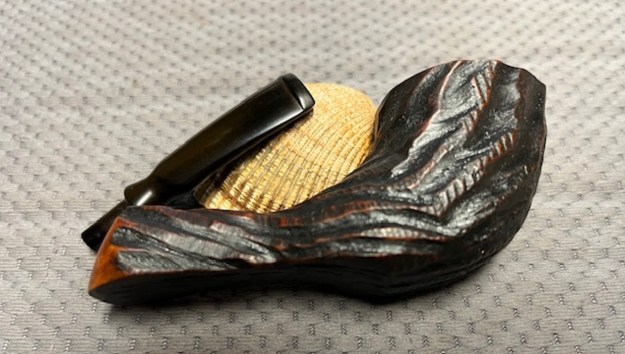
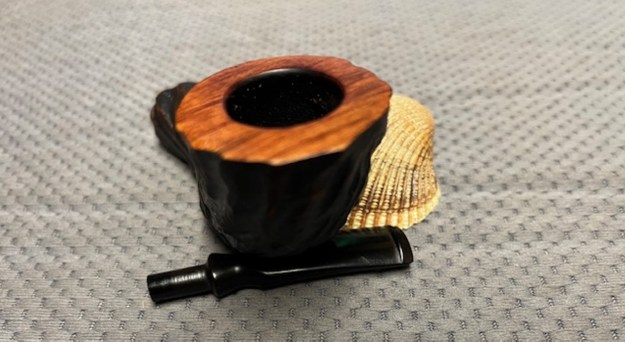
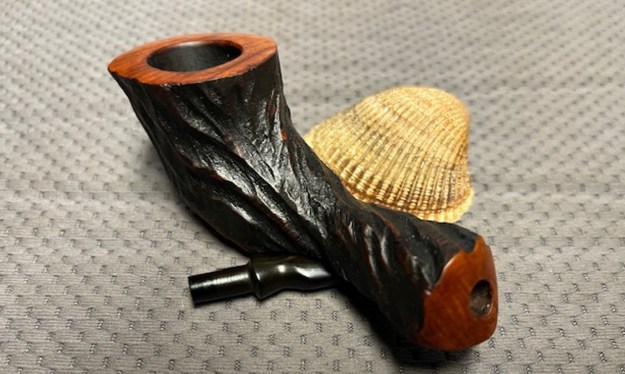
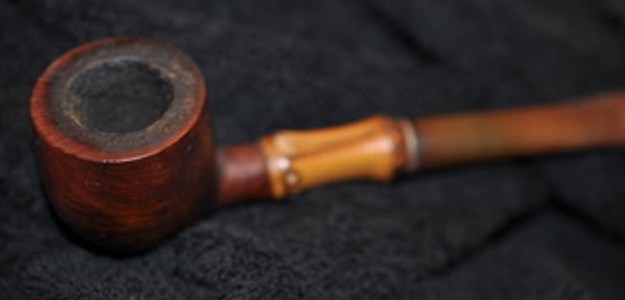
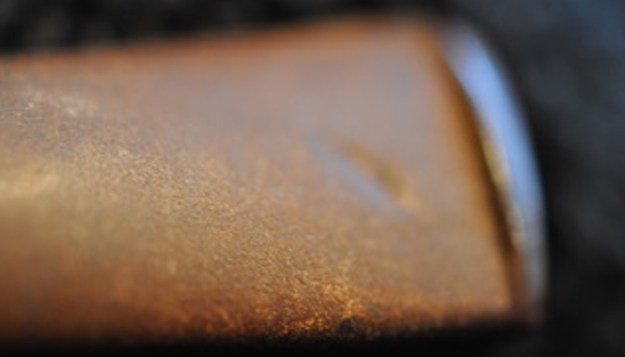
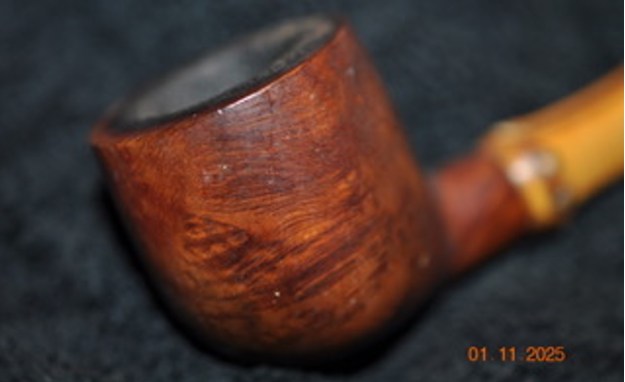
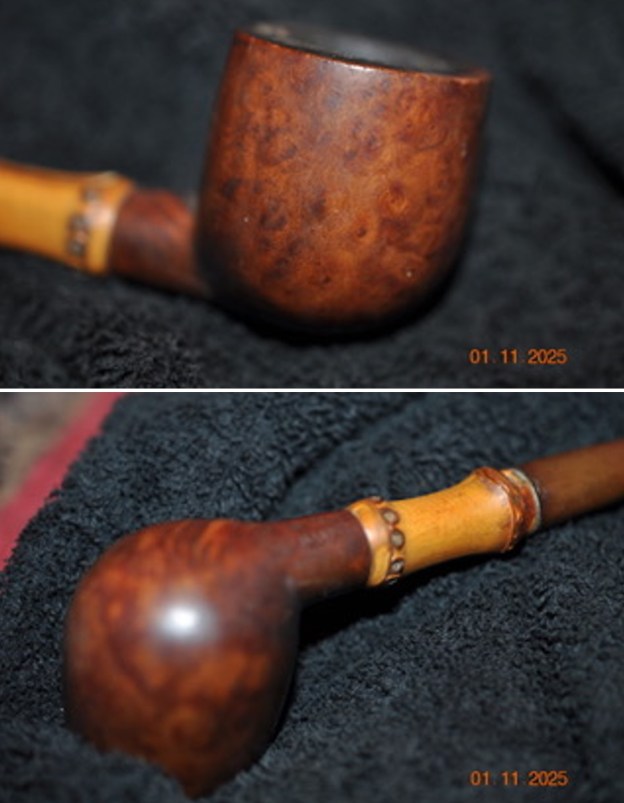
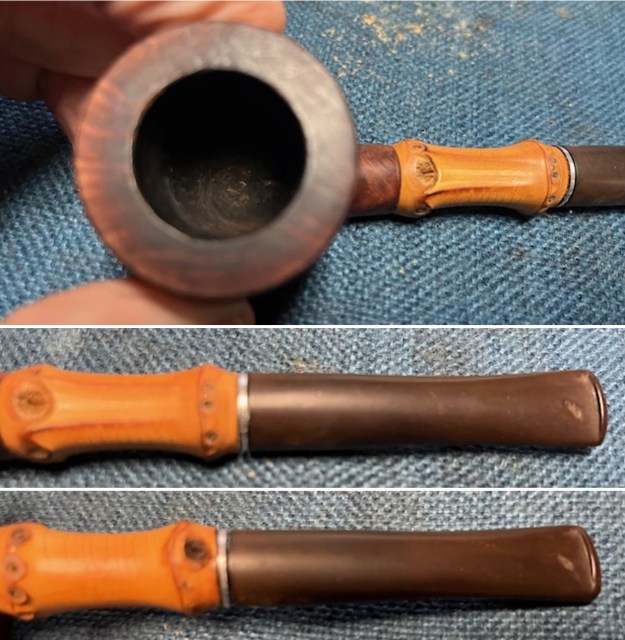
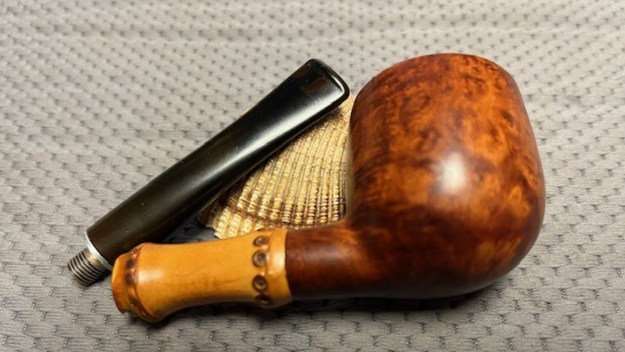
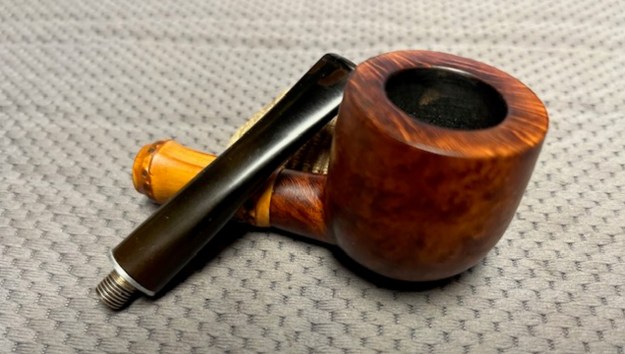
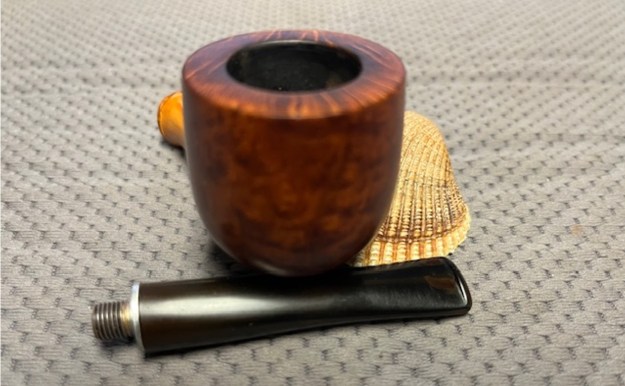
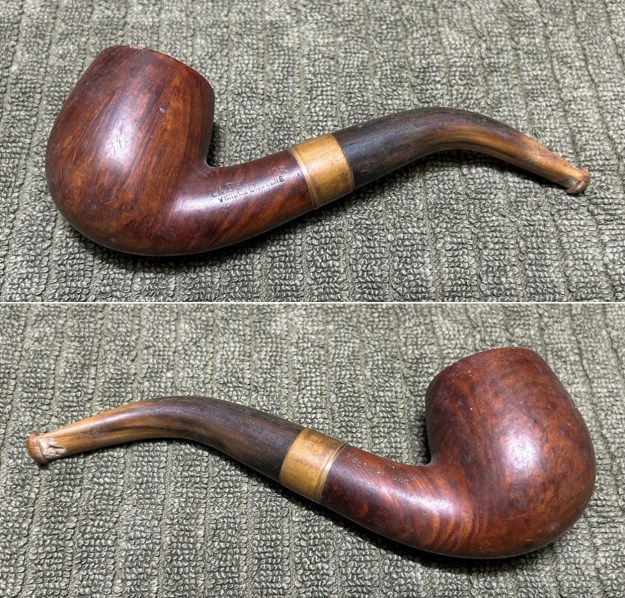
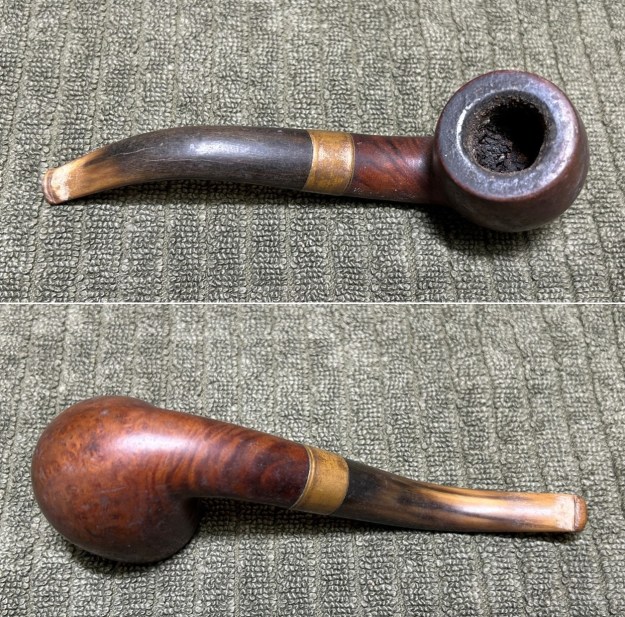
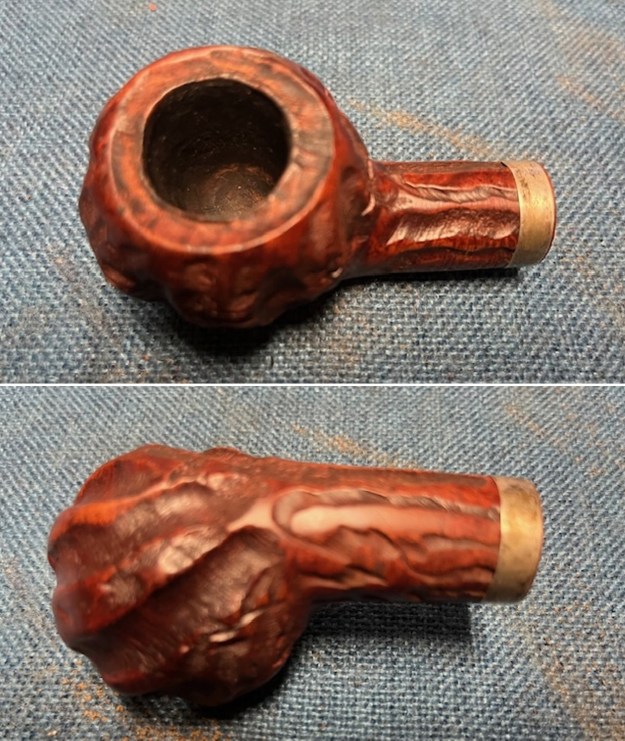
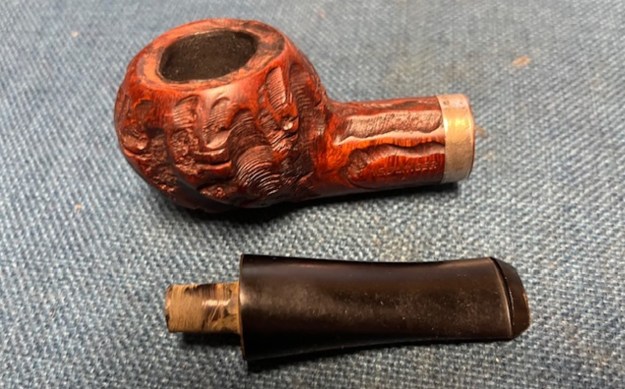
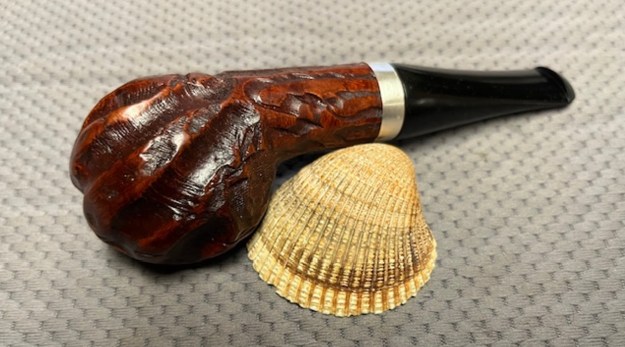
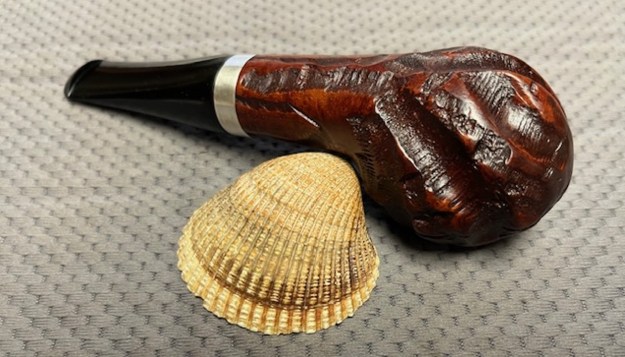
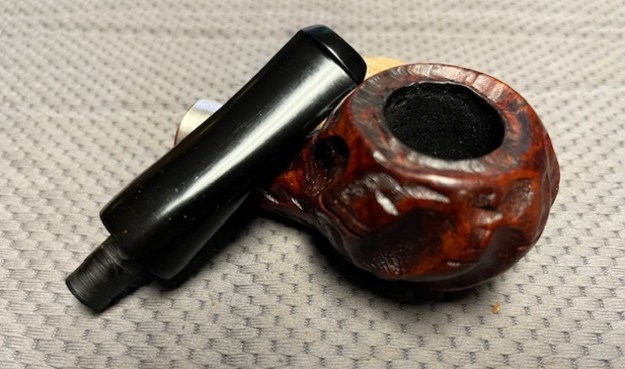
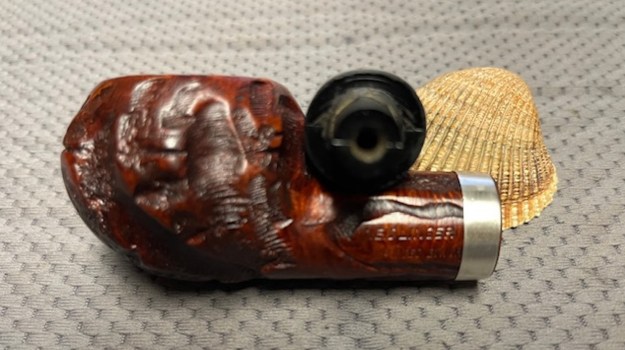
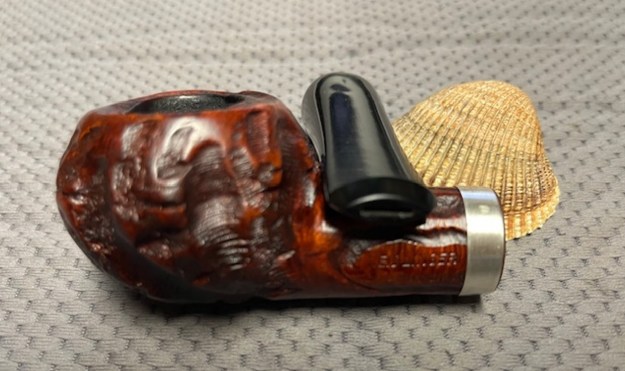
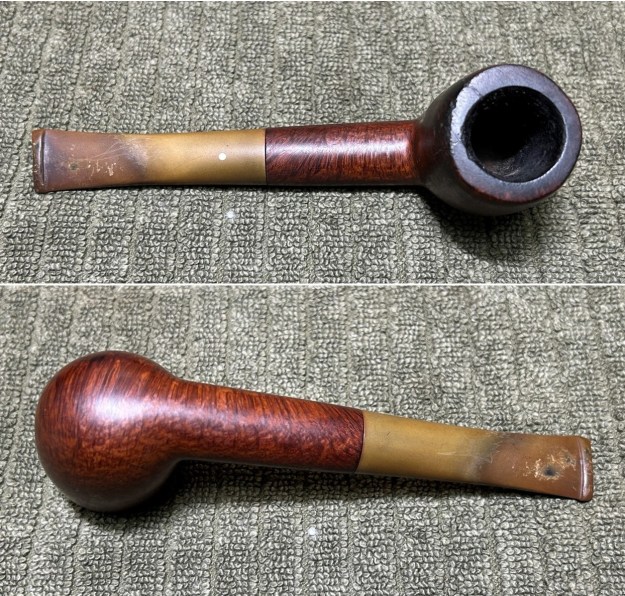
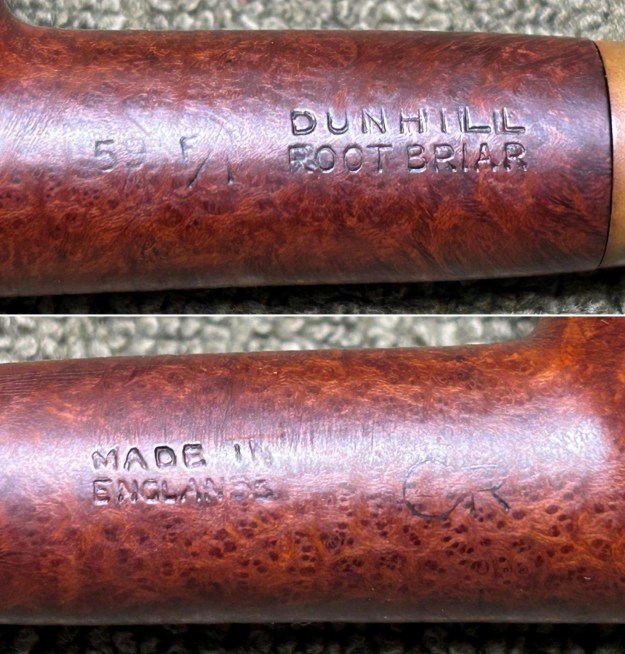 Oh boy – where to begin? There are very many issues with this pipe. The stem has about as much oxidation as any stem could handle. There is some calcification, and several tooth dents, scratches, and marks. Extra work will be required on this stem. Meanwhile, the stummel is really where the action is. It is very dirty inside and the bowl has a thick layer of cake. There are many scratches in the briar, a few nicks, and some notable chunks missing. There are also six burn marks on the outside of the bowl – that’s pretty impressive. There is grime everywhere on the briar and it has a grungy feel. Furthermore, there is a major and unsightly flat spot (likely an old burn) on the part of the bowl nearest the shank. Finally, there are no fewer than two substantial cracks in the bowl that run quite a distance. I say ‘…no fewer than two…’ because more cracks would be revealed in due course. Naturally, there was considerable damage to be found on the inside of the bowl too.
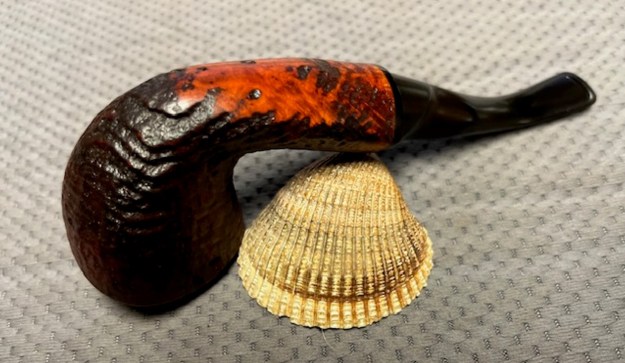
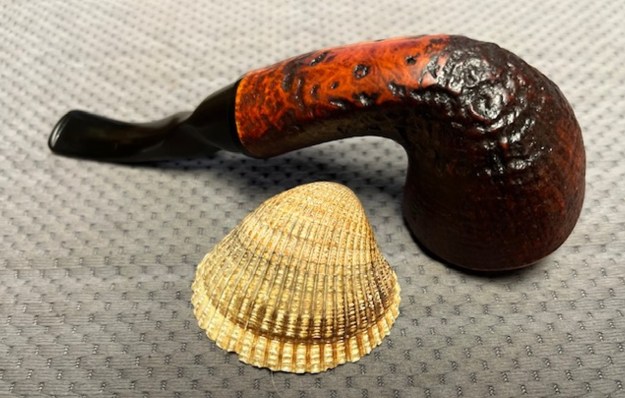
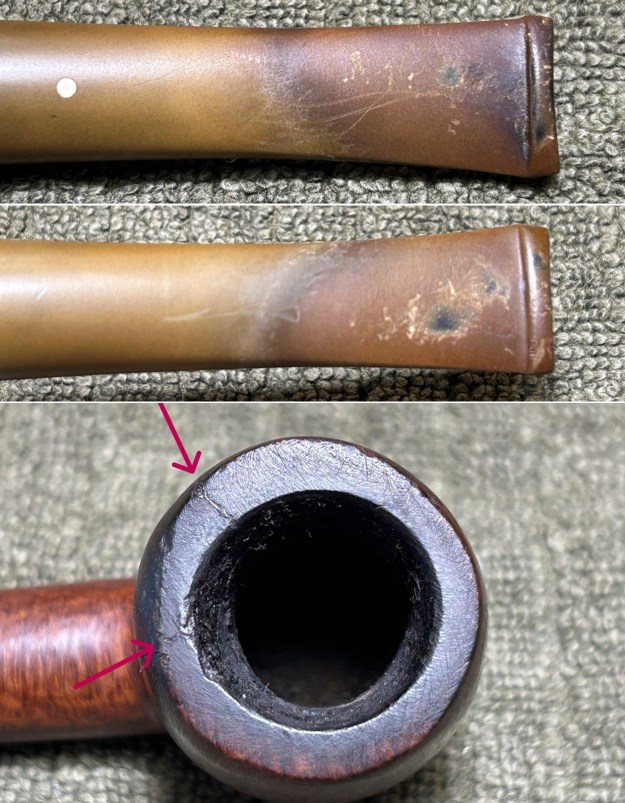


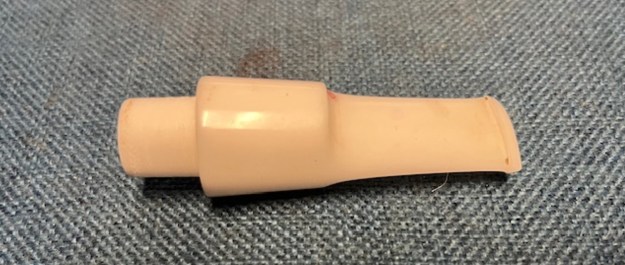
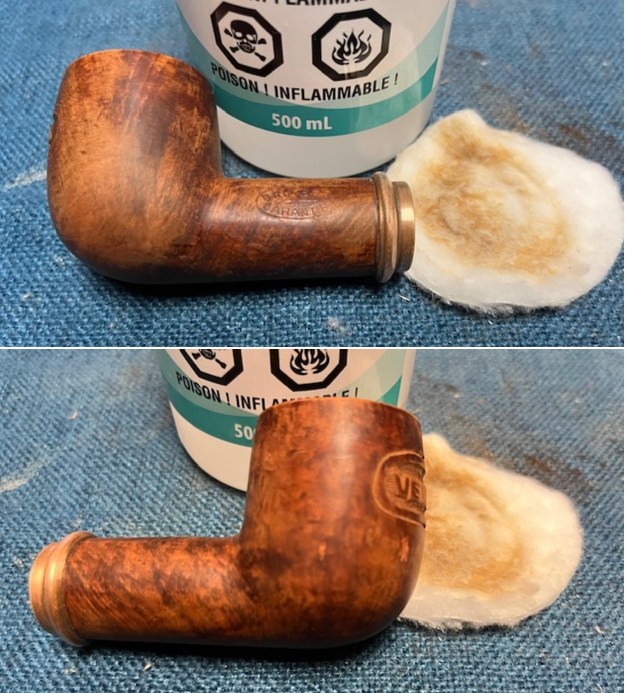
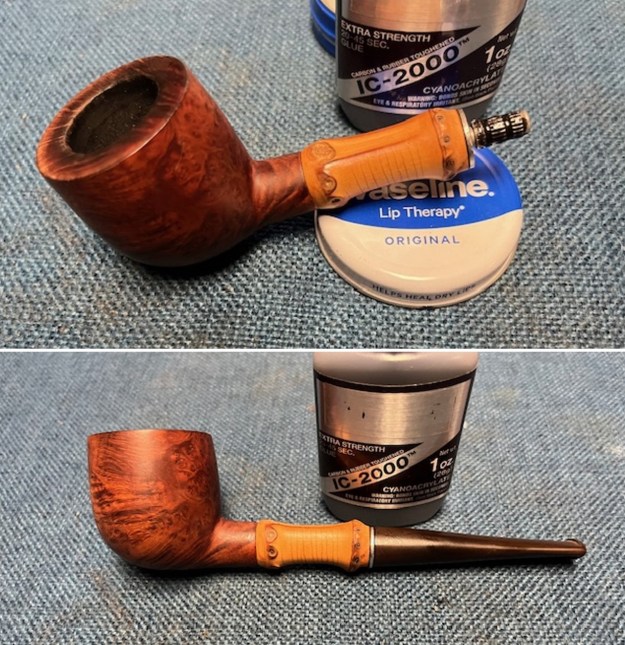
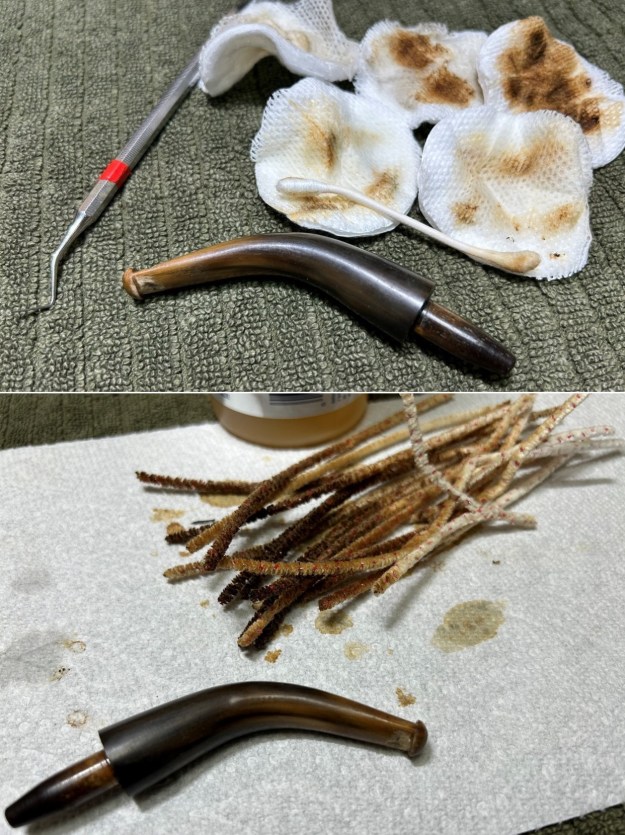
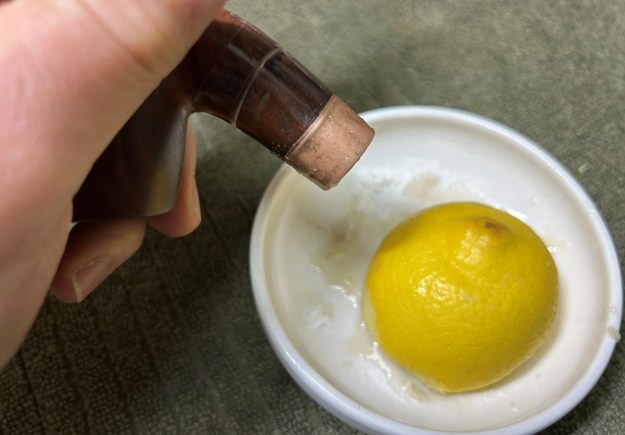
 This is an epic repair – it isn’t really restoration or conservation. Regardless, it was fun, nerve-wracking, and educational. Let’s get started! First of all, I used isopropyl alcohol on a few cotton rounds and wiped down the stem to provide an initial cleaning of filth before moving on to the next steps. The primary cleaning came next. I disinfected the inside of the stem with both pipe cleaners and cotton swabs dipped in lemon-infused 99% isopropyl alcohol. I scrubbed thoroughly to make sure the interior was very clean. Fortunately, the inside wasn’t too dirty at all – it’s just the outside that needs serious help.
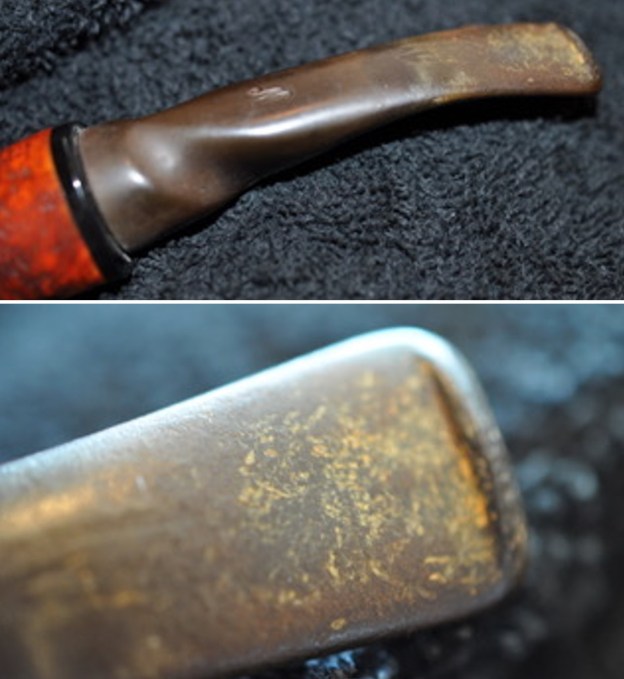
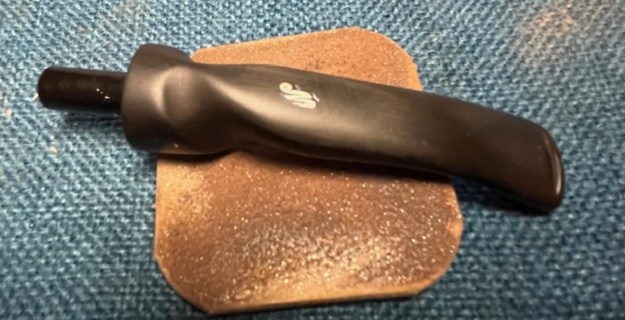
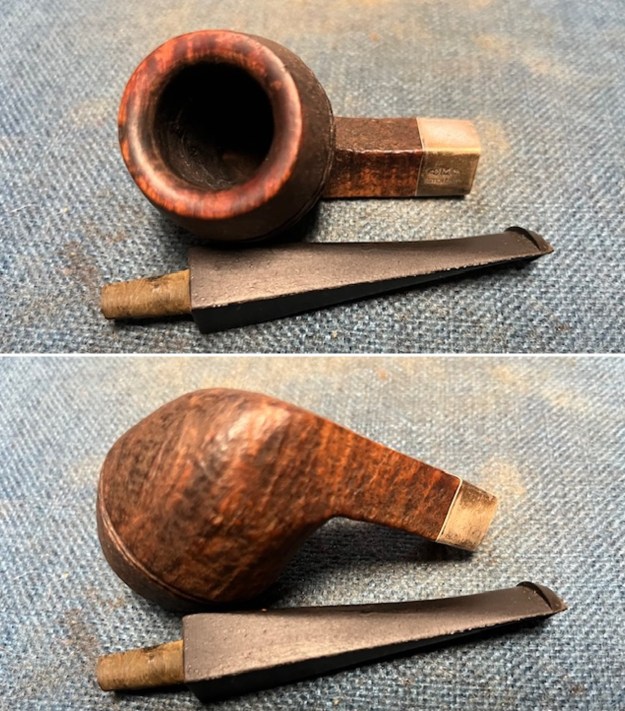
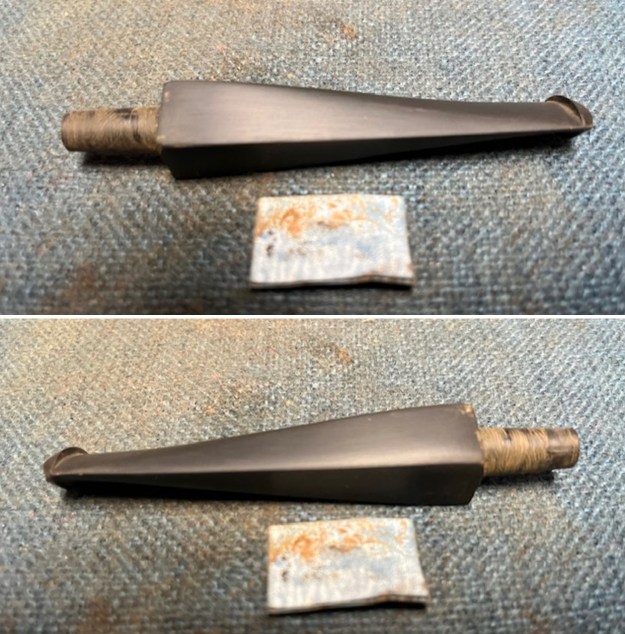
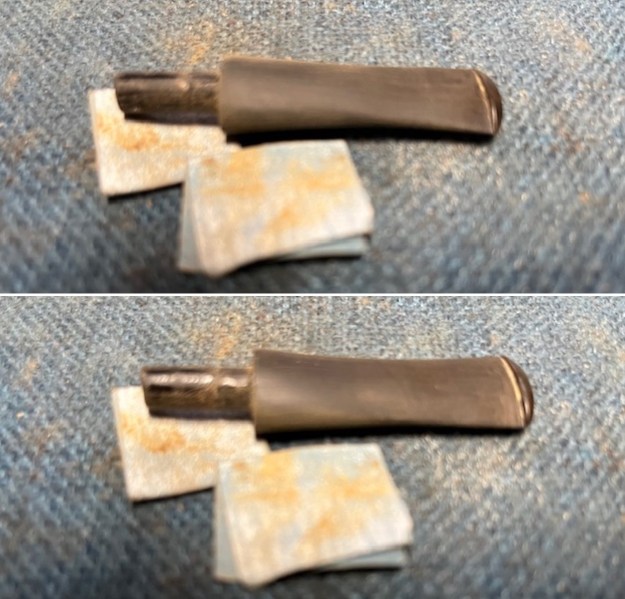
 The goal of the next step is the removal (or minimization) of oxidation. Going to my sink, I used cream cleanser, cotton rounds, and a toothbrush, and scoured the stem to remove as much surface oxidation as possible. As the photos show, the result was a hideous, brownish mess – but better off the stem than on it.
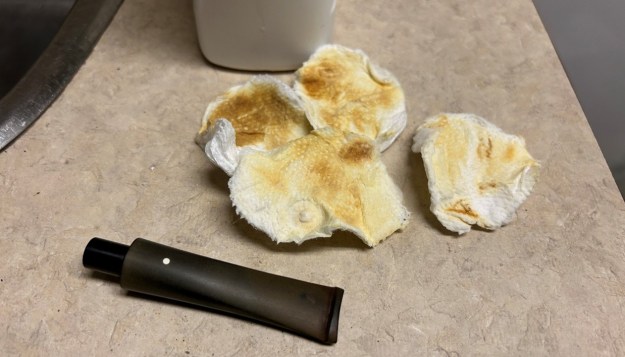 Once the stem was reasonably clean, I soaked it overnight in some Briarville Stem Oxidation Remover. This solution works to draw oxidation in the stem to the surface of the vulcanite. This is a major aid and an important step in ensuring a clean stem. The following day, I drew out the stem from its bath and scrubbed the lingering fluid with a toothbrush. Due to the severity of the oxidation, I then repeated the scrubbing with the cream cleanser for maximum effect.
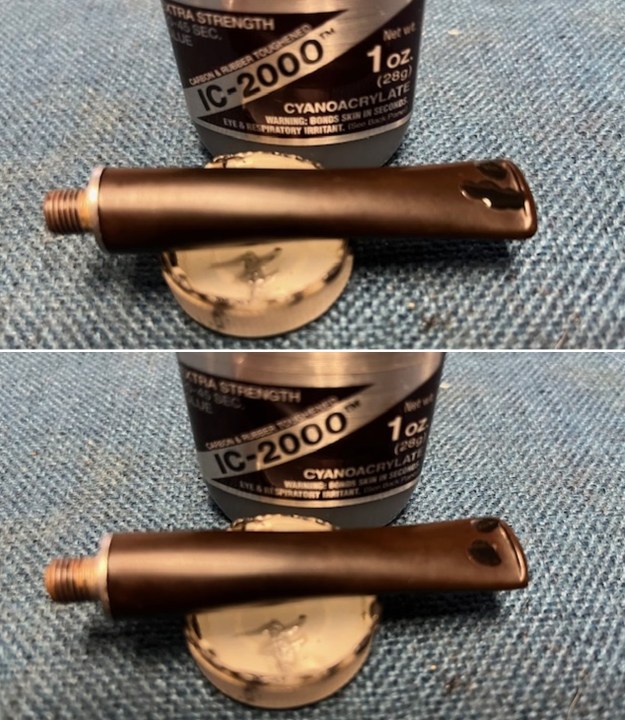
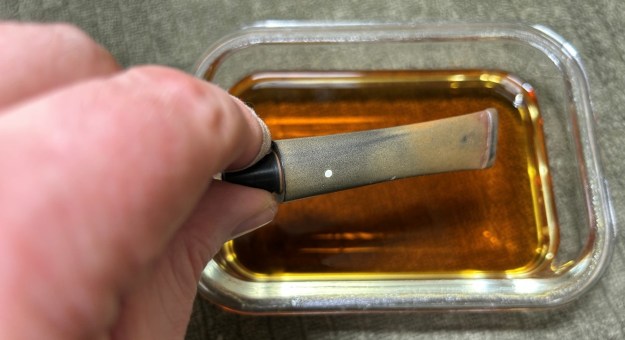 As the stem was now clean and dry, I set about fixing the marks and dents in the vulcanite. This was done by filling those divots with black cyanoacrylate adhesive, impregnated with carbon and rubber. I left this to cure and moved on.
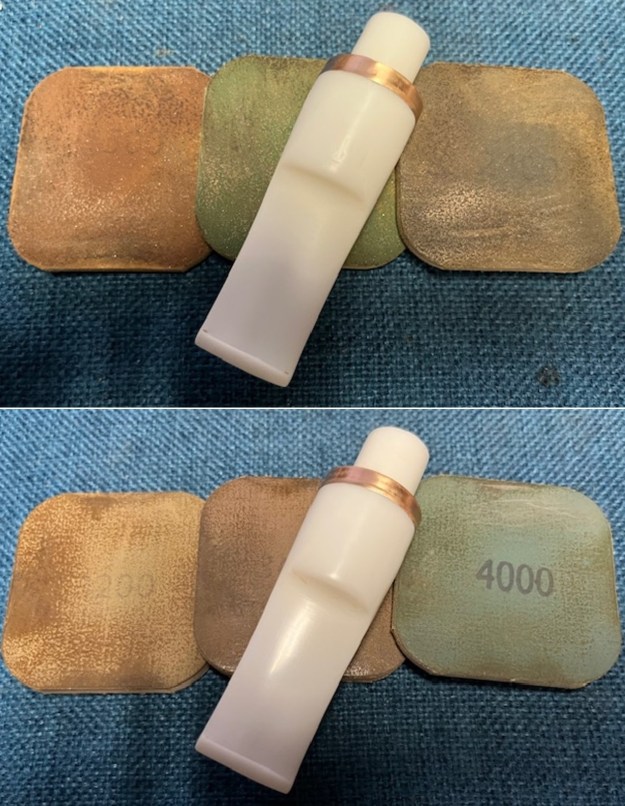
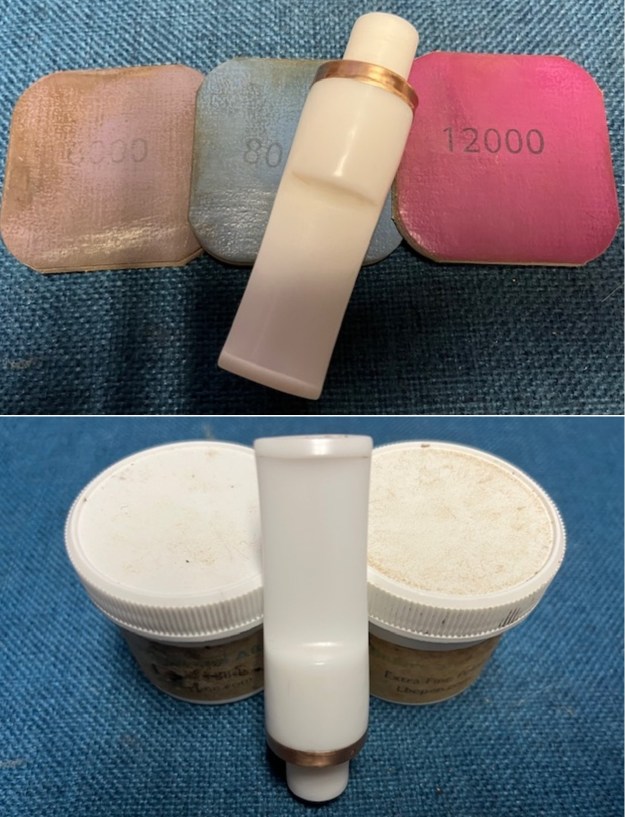
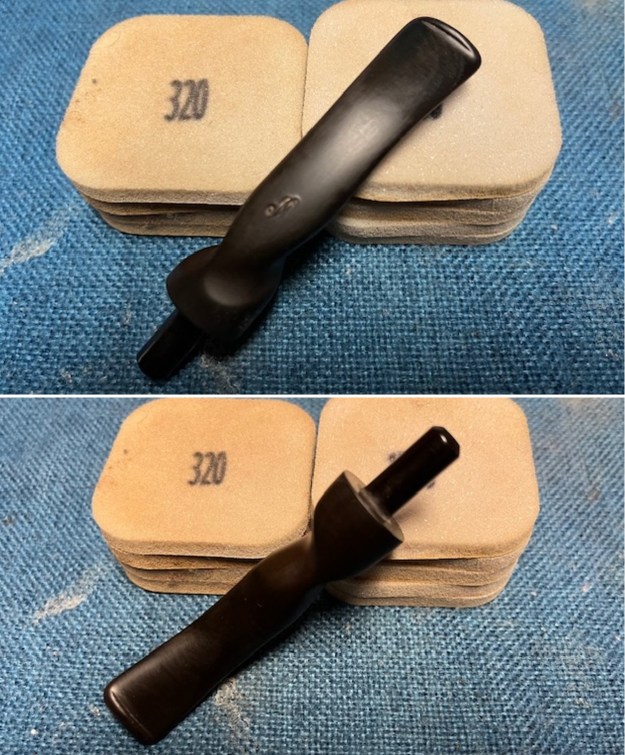
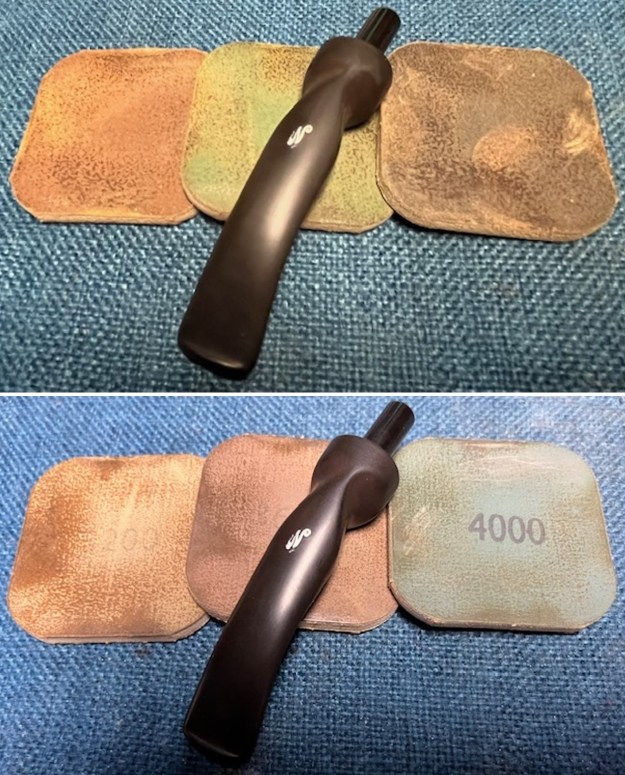
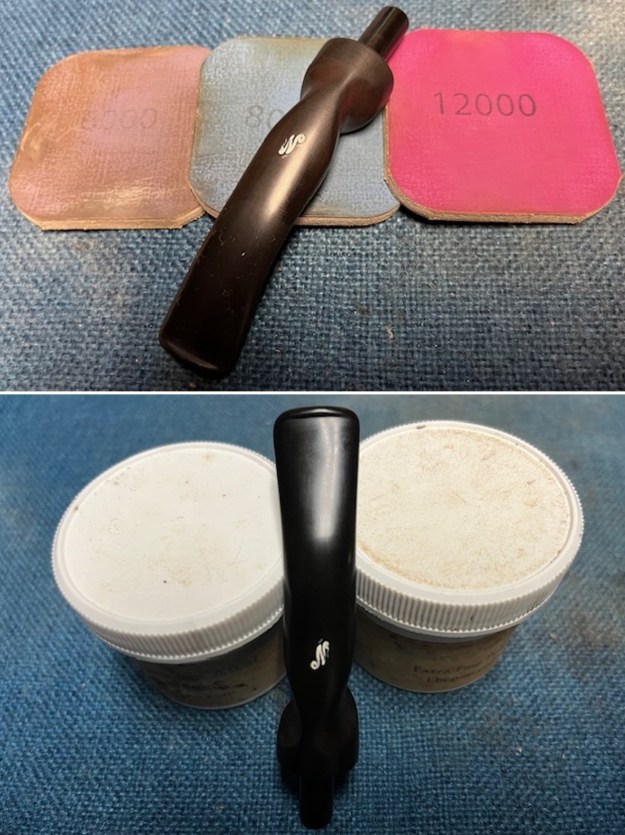
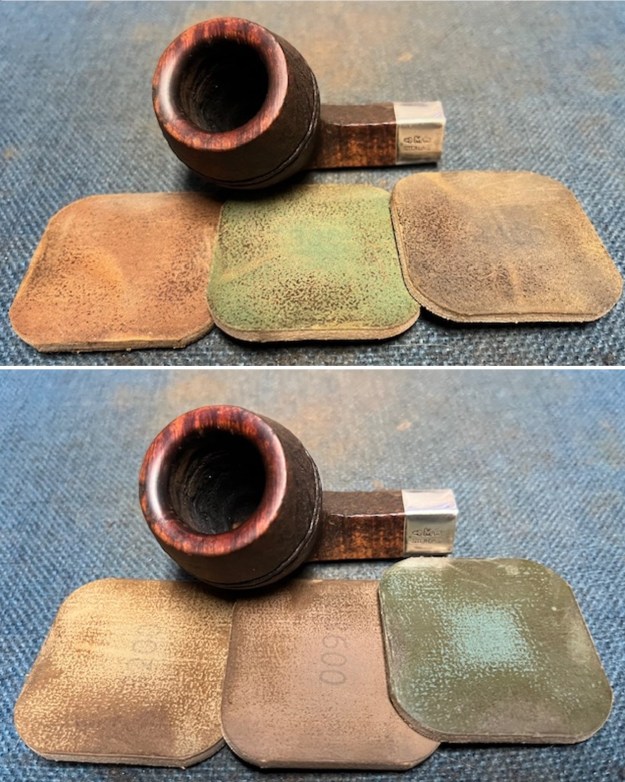
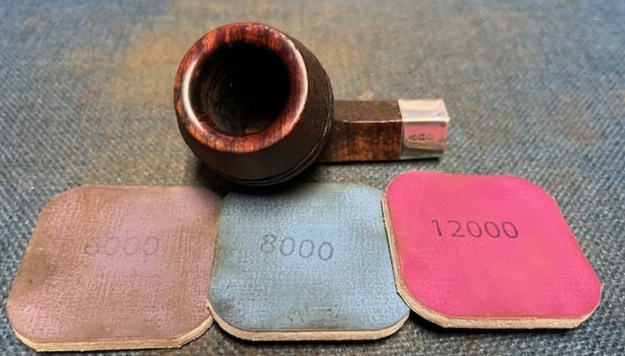
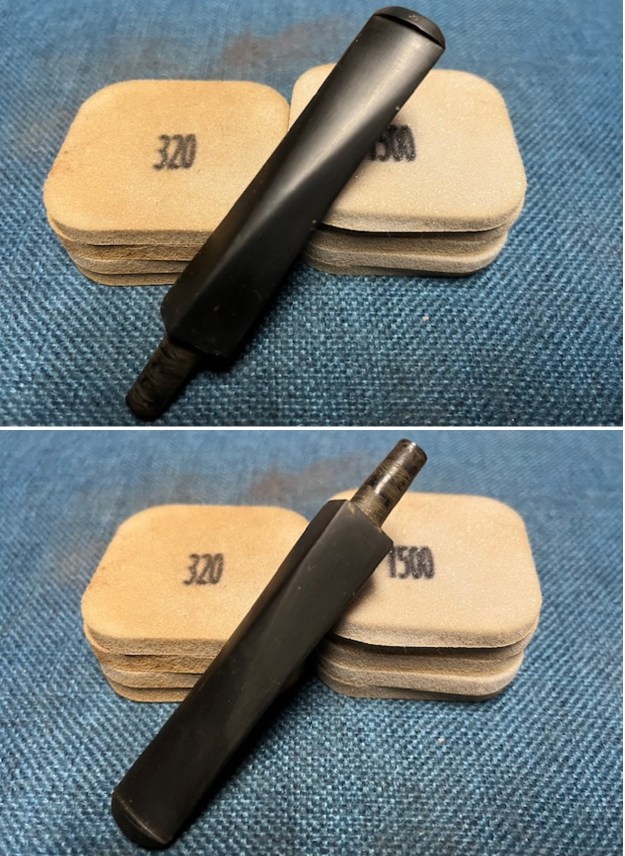
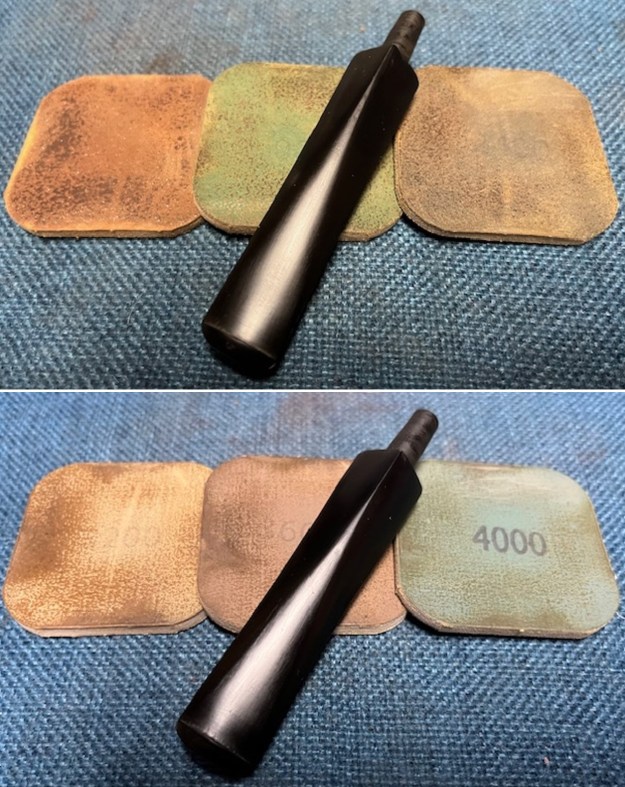
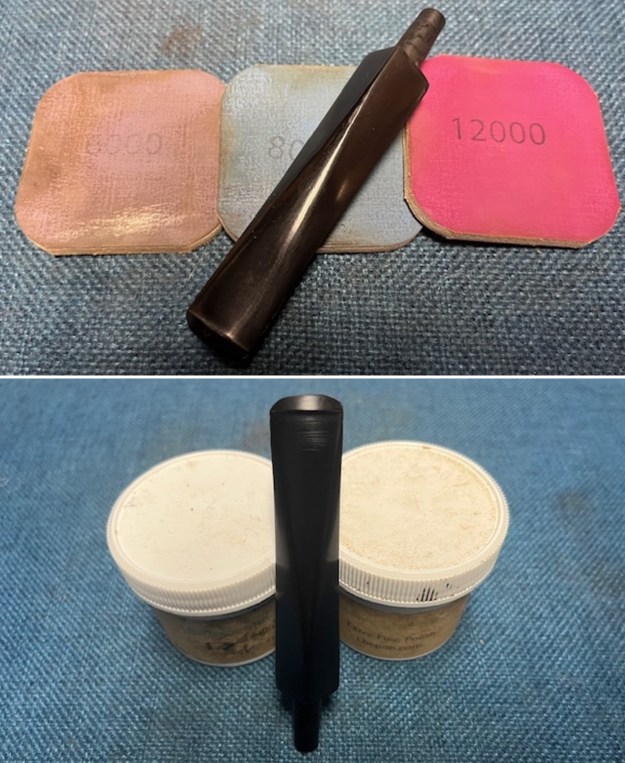
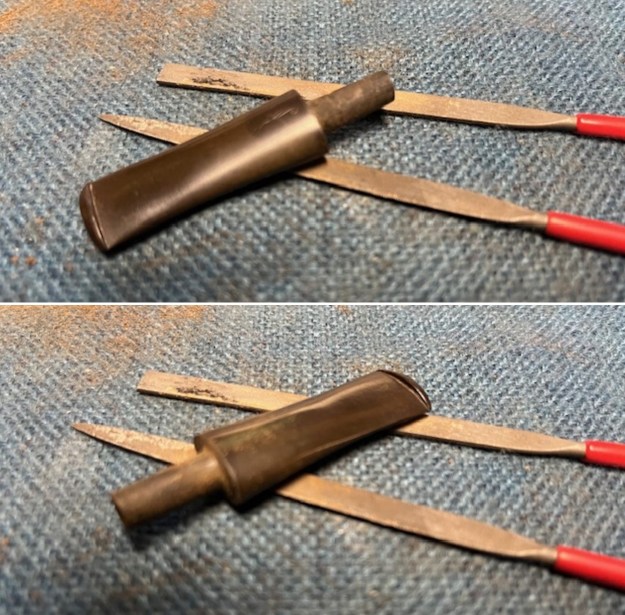
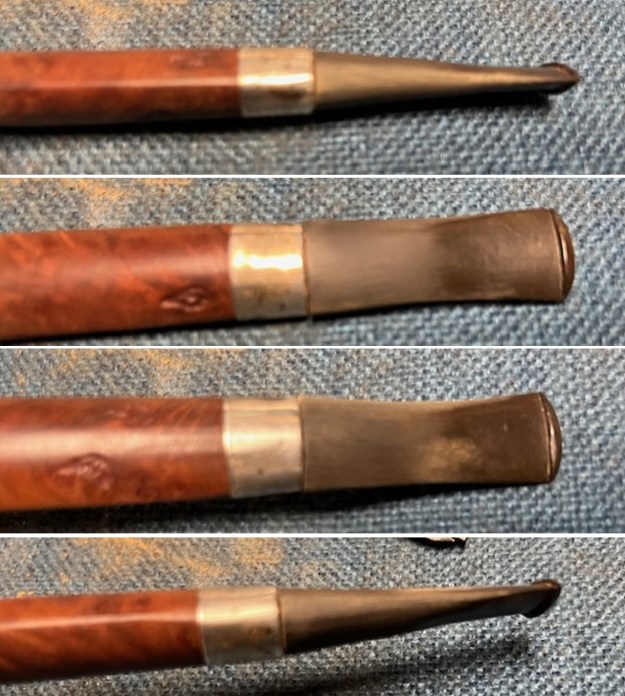
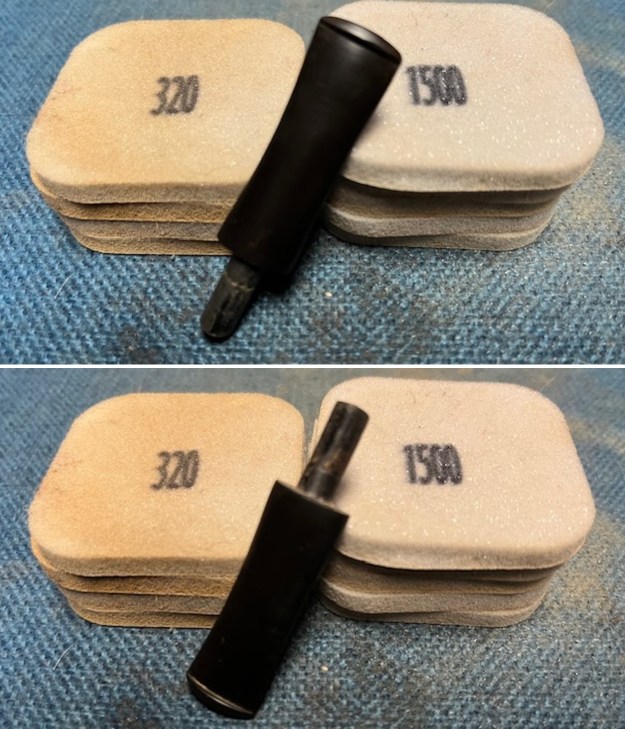
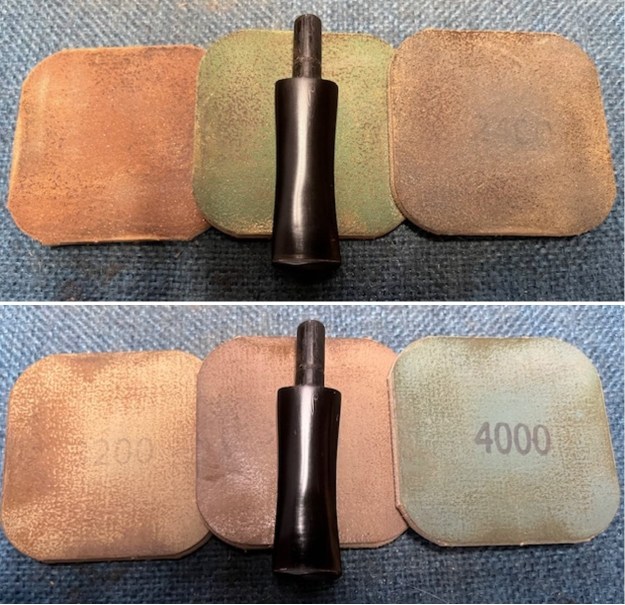
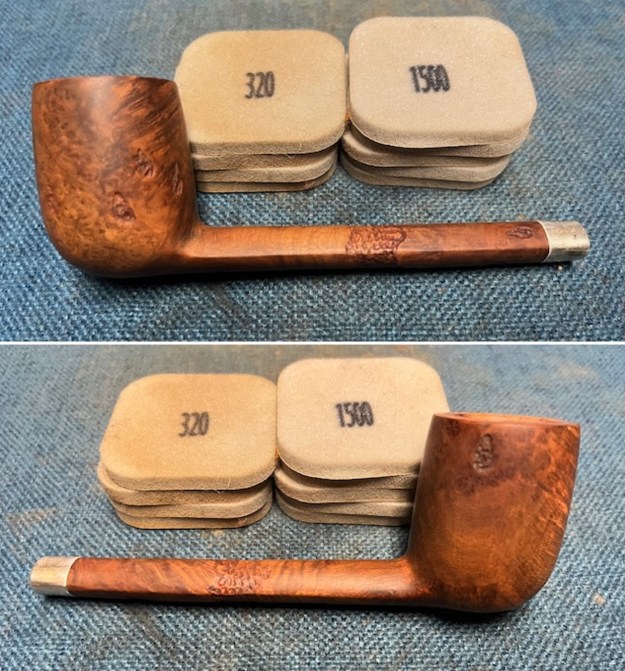
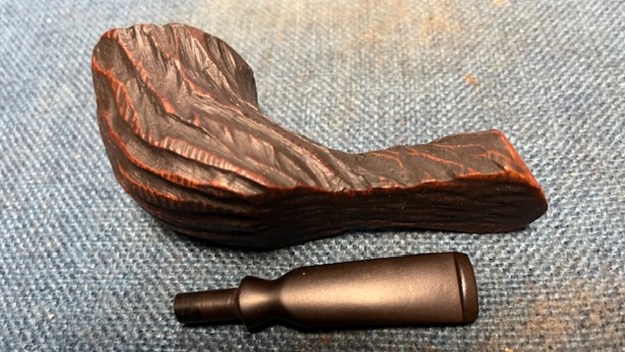
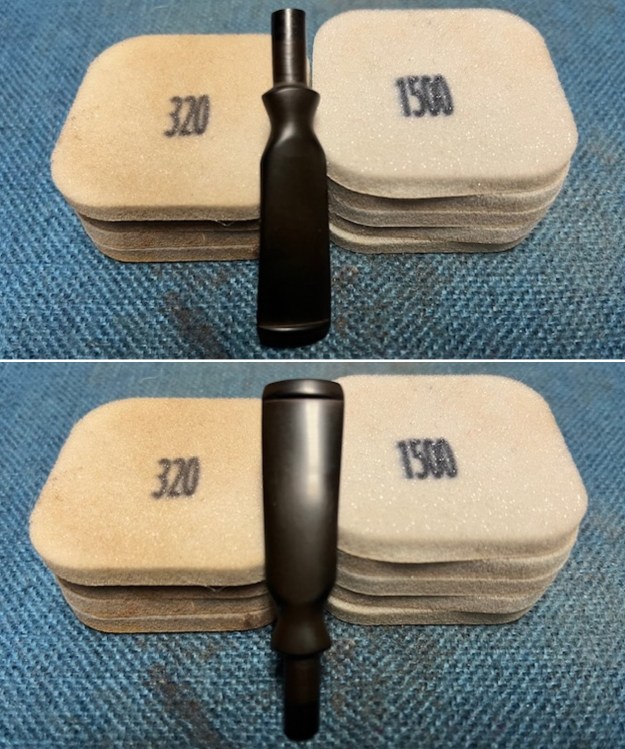
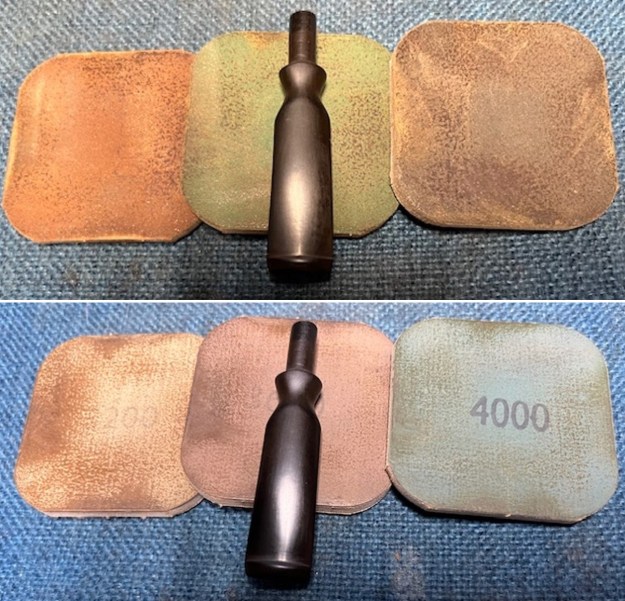
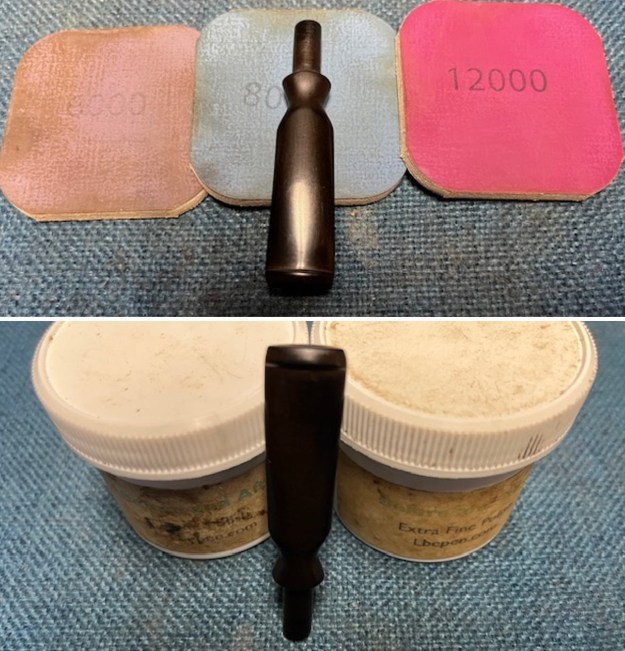
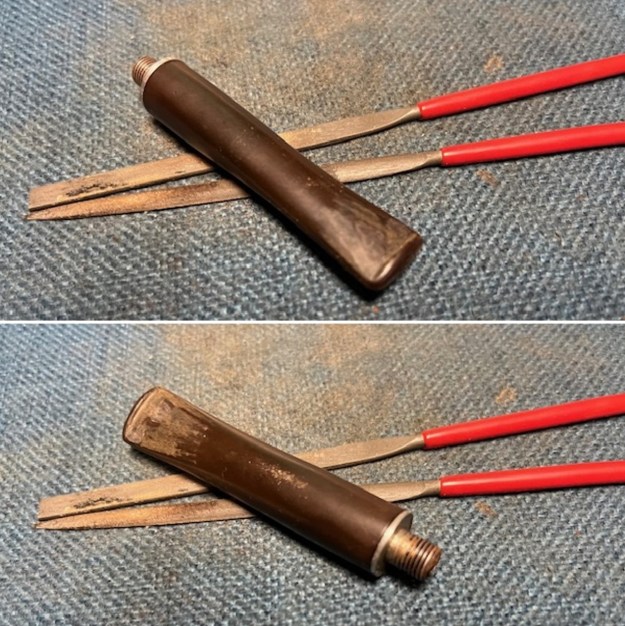
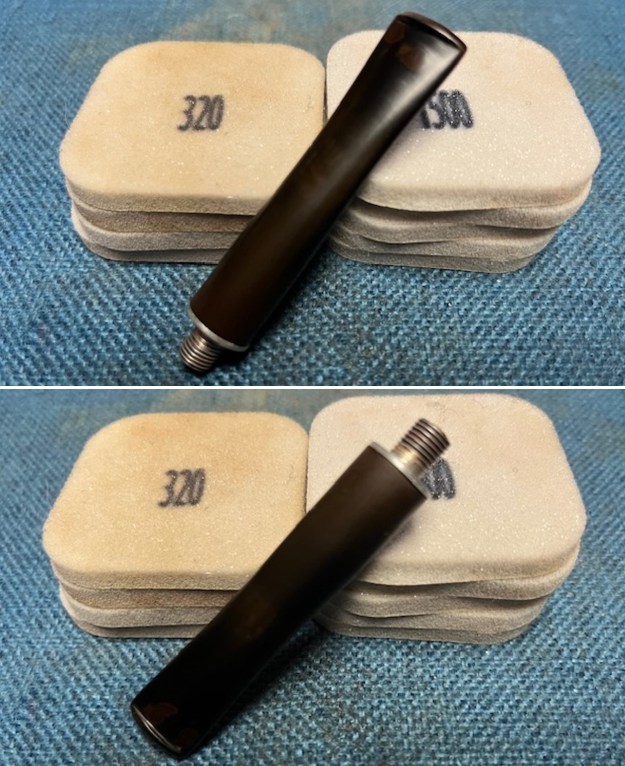
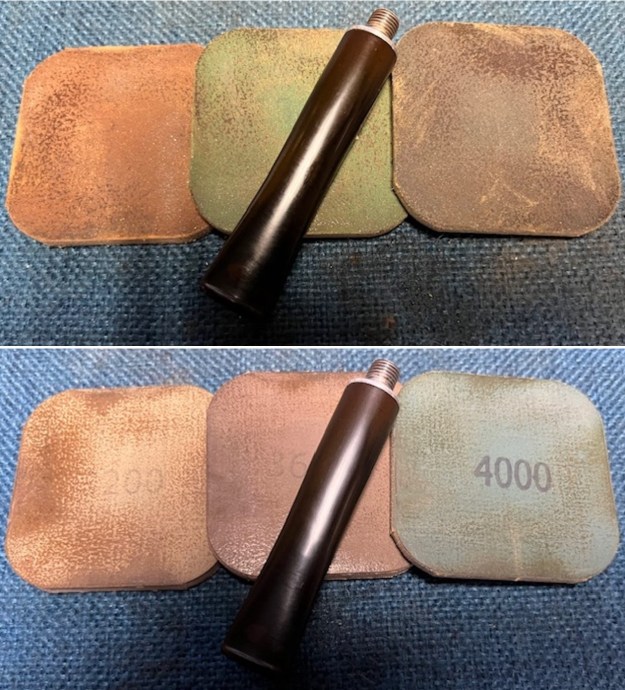
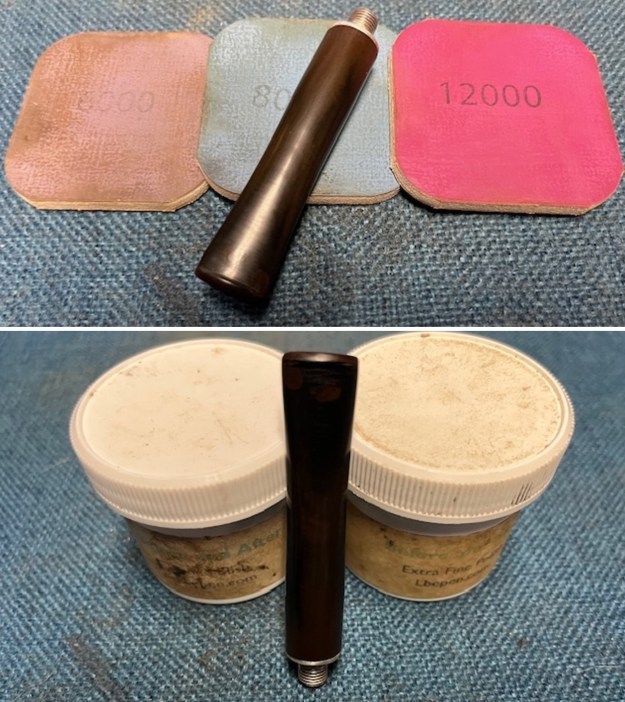
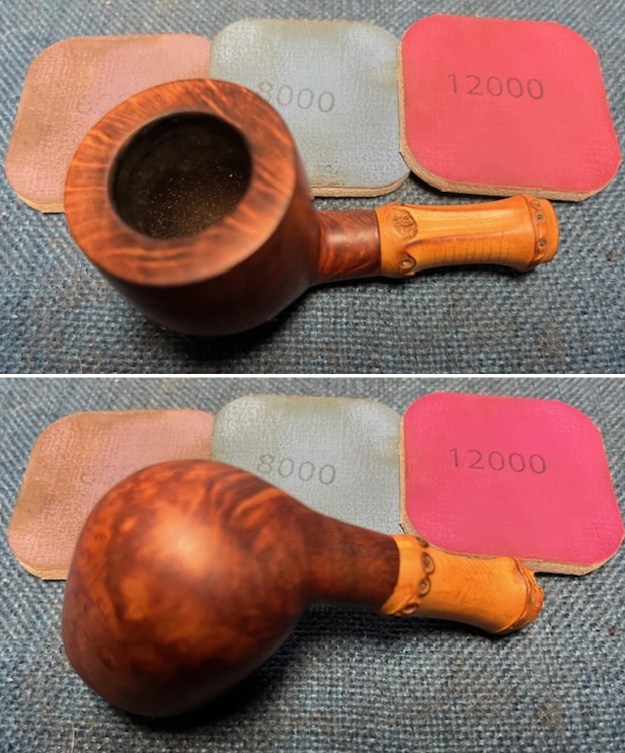
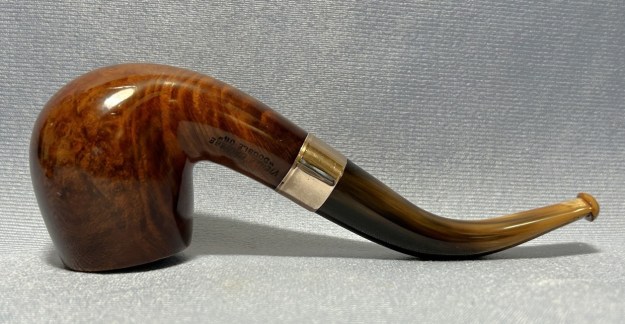
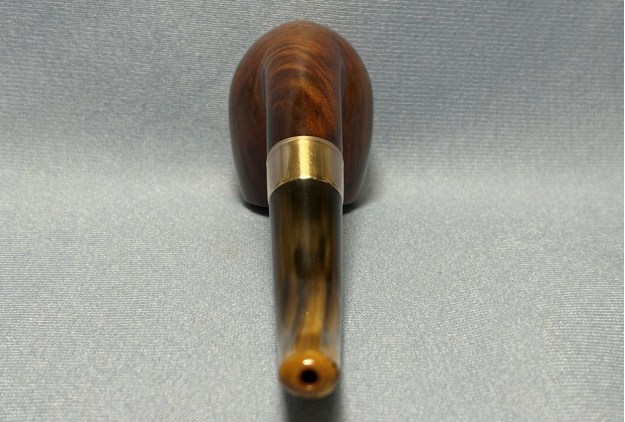
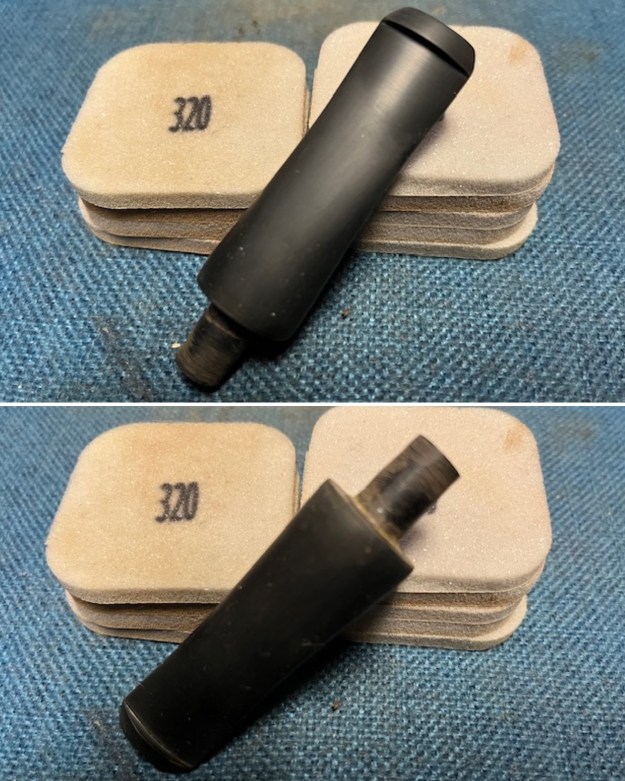
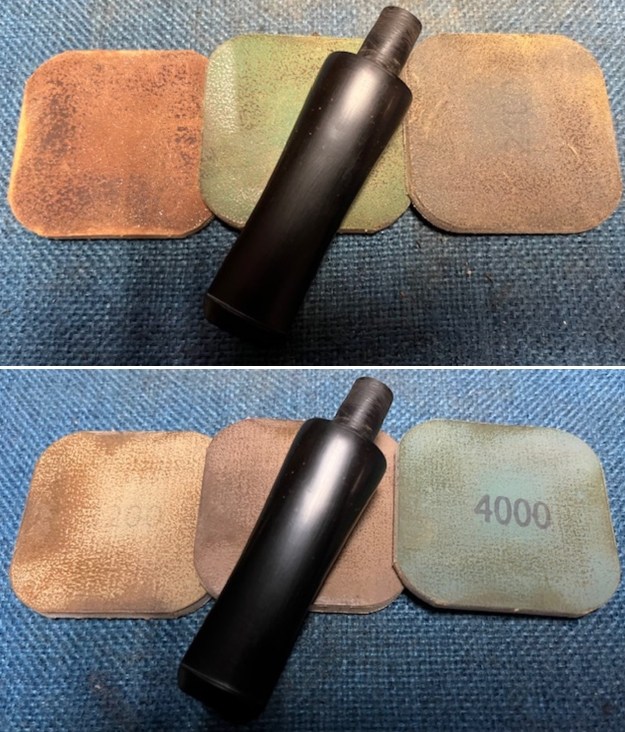
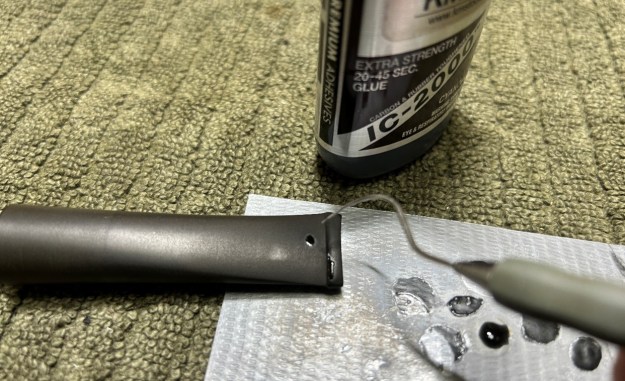 The penultimate step for the stem is sanding. First, with my set of needle files, I reduced the bulk of the cyanoacrylate repairs. I removed the excess adhesive as near to the surface as possible, without cutting into the vulcanite. Following that, I used all nine of the micromesh sanding pads (1,500 through 12,000 grit) to sand out flaws, even out the vulcanite, and provide gentle polishing of the finished surface. I also applied pipe-stem oil while using the last five micromesh pads. There was a wonderful, deep black shine to the stem when I was done. Quite frankly, the stem is now incomparable with how it started – just look at those photos!
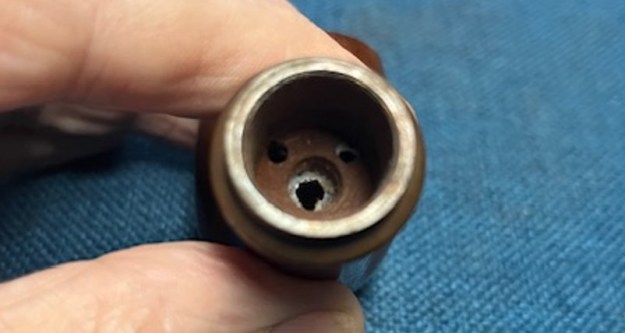
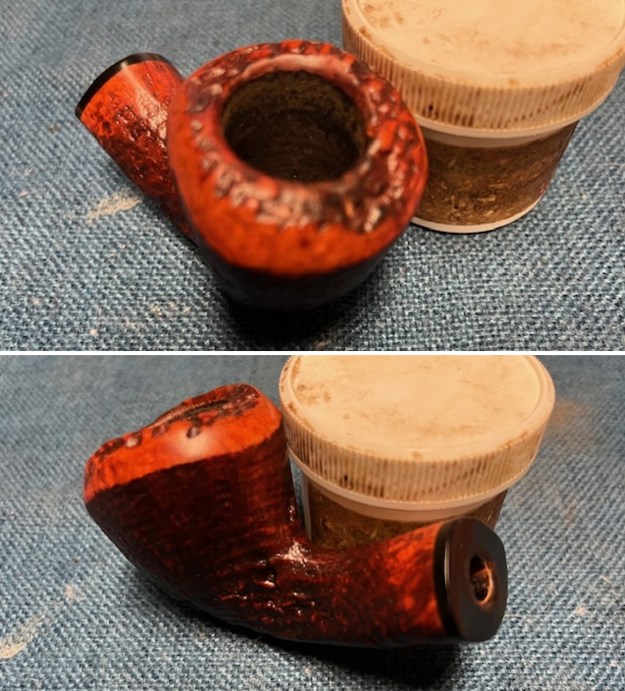
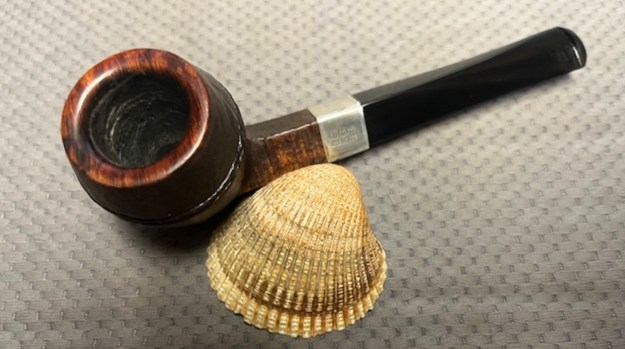
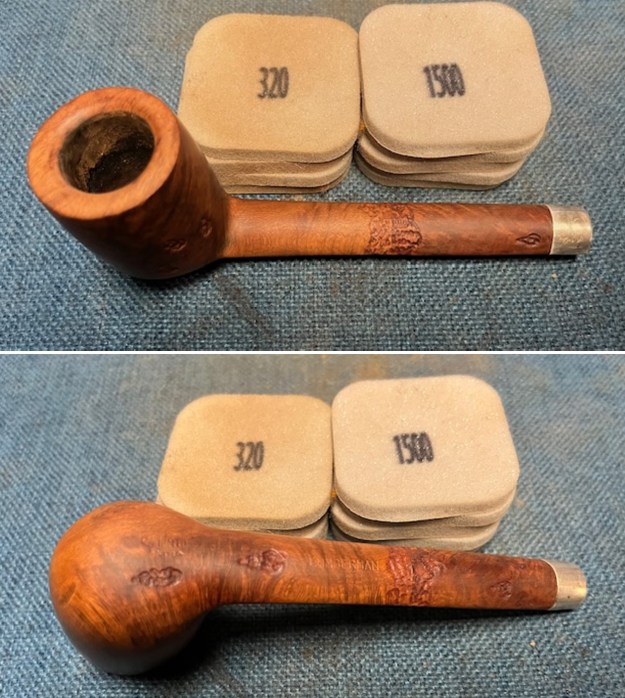
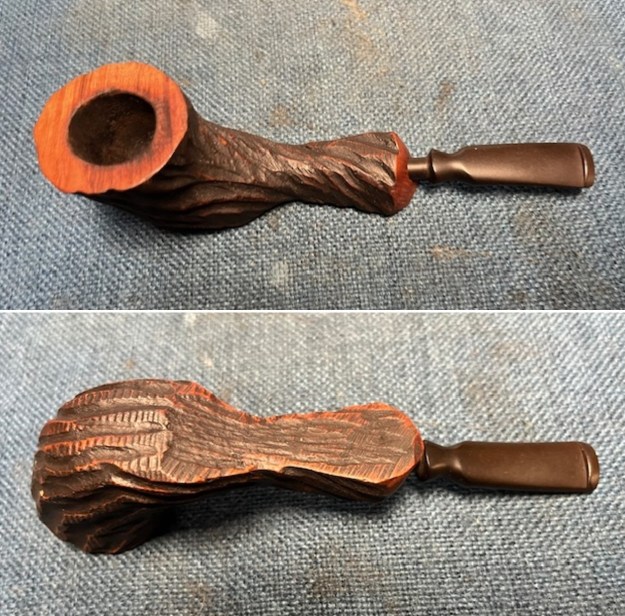
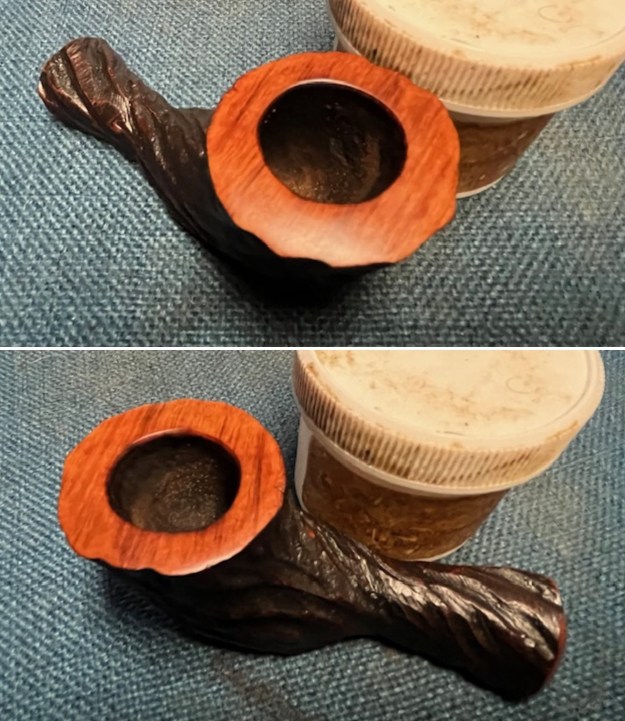
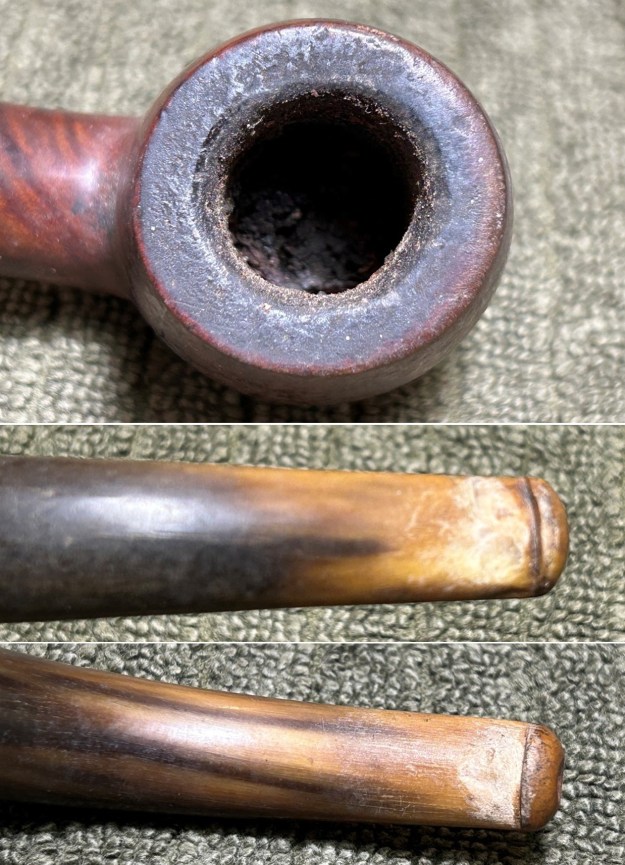
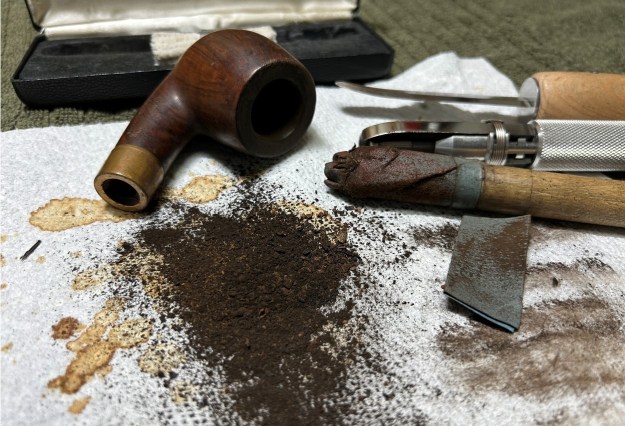
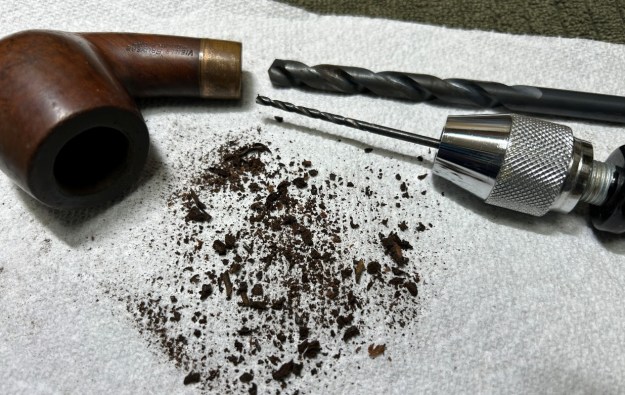
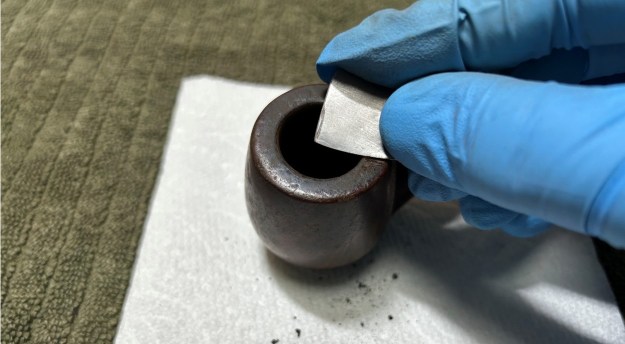
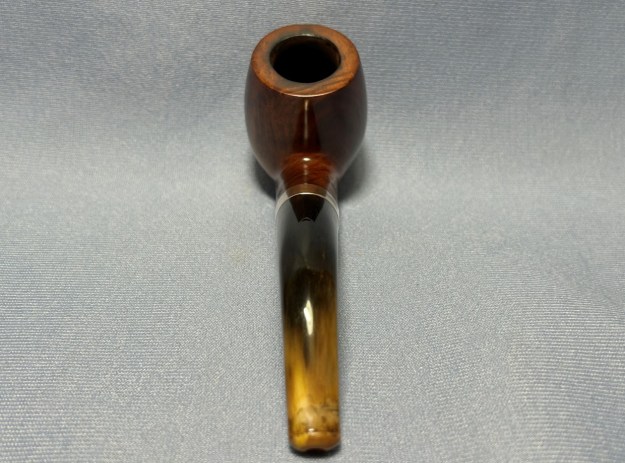
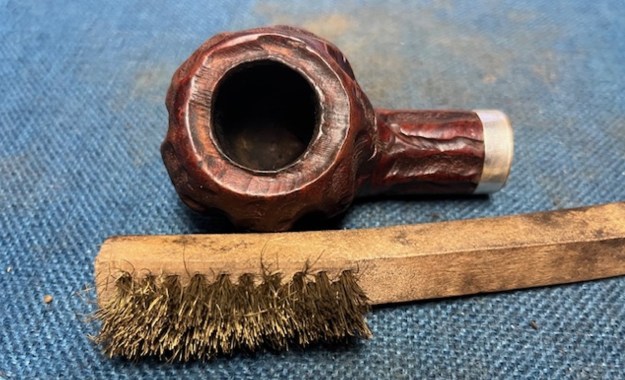
 As the stem was (nearly) complete, I moved on to the stummel. The first step was to ream out the bowl – that is to say, remove all the cake inside the bowl. This accomplished a couple of things. First (and most obviously), it cleaned the bowl and provided a refurbished chamber for future smoking. Second, when the old cake was removed, I could inspect the interior walls of the bowl and determine if there was damage or not. I used a reamer, a pipe knife, and a piece of sandpaper taped to a wooden dowel. Collectively, these ensured that all the debris was removed. However, there was considerable damage, heretofore undiscovered, to the walls of the bowl. We’ll come back to that in a bit.
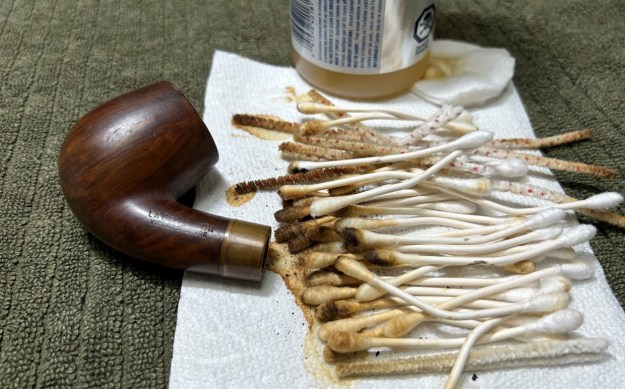
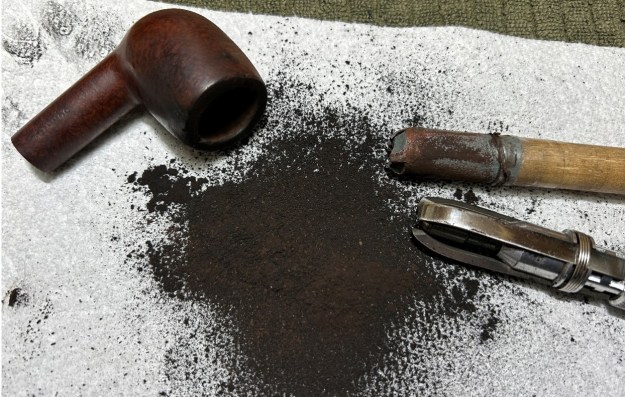 Similar to the stem, I then cleaned the stummel with both pipe cleaners and cotton swabs dipped in lemon-infused 99% isopropyl alcohol. With a pipe this dirty, it took quite a while and much cotton to get clean. I also used a dental tool to remove the gunk, old glue, and other detritus from the cracks in the bowl.
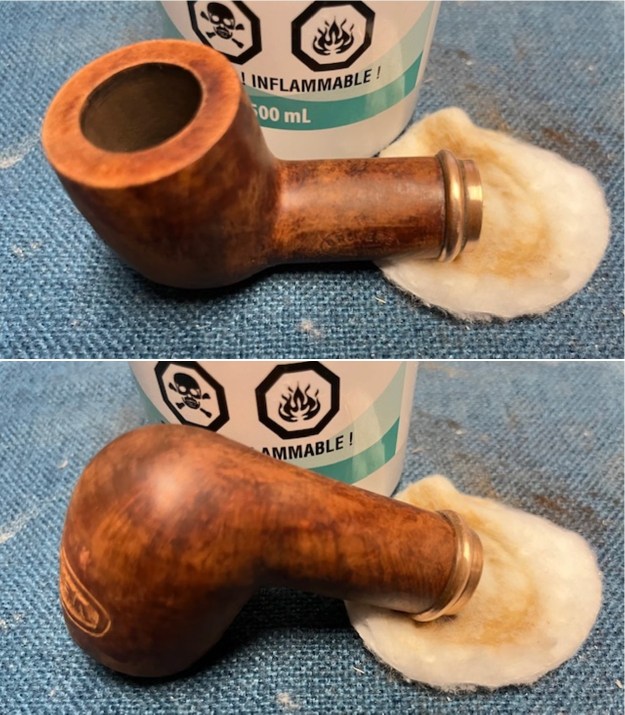
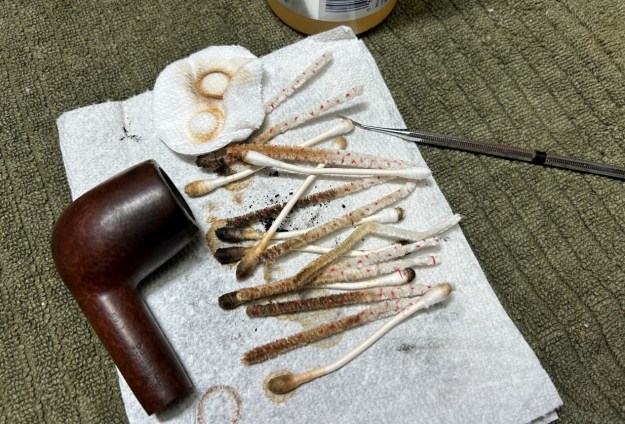 I then decided to ‘de-ghost’ the pipe – that is to say, exorcize the remaining filth from the briar. I filled the bowl and the shank with cotton balls, then saturated them with 99% isopropyl alcohol. I let the stummel sit overnight. This caused the remaining oils, tars and smells to leach out into the cotton.
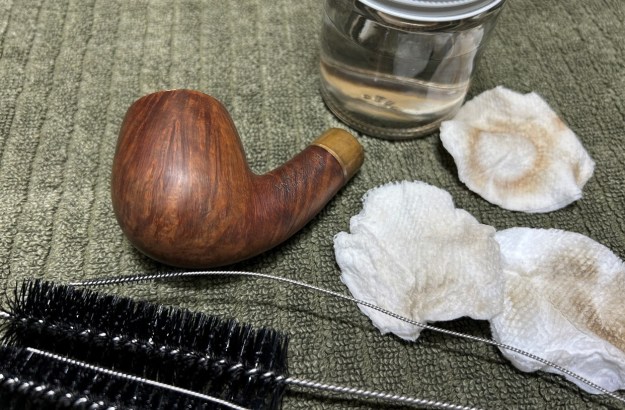
 To tidy up the briar, I wiped down the outside, using a solution of a pH-neutral detergent and some distilled water, with cotton rounds. This did a good job of cleaning any latent dirt on the surface of the briar. The last step of the cleaning process was to scour the inside of the stummel with the same mild detergent and tube brushes. This was the culmination of a lot of hard work in getting the pipe clean.
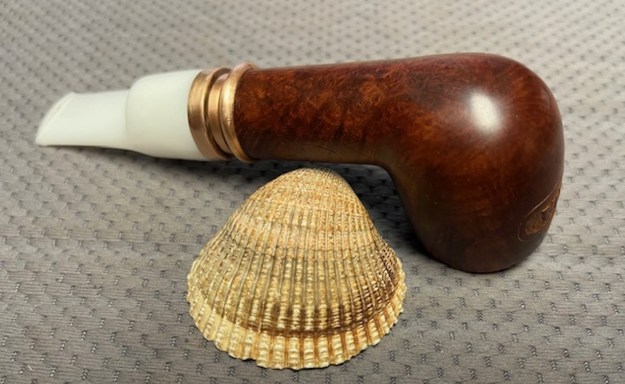
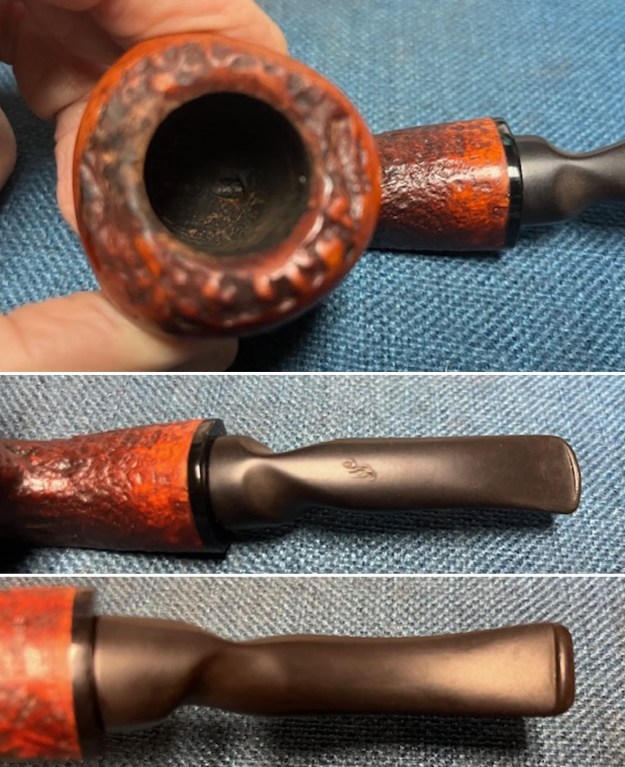
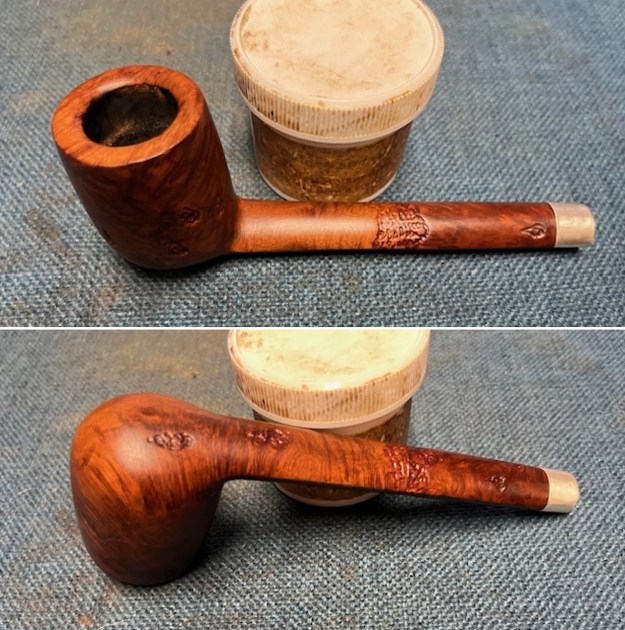
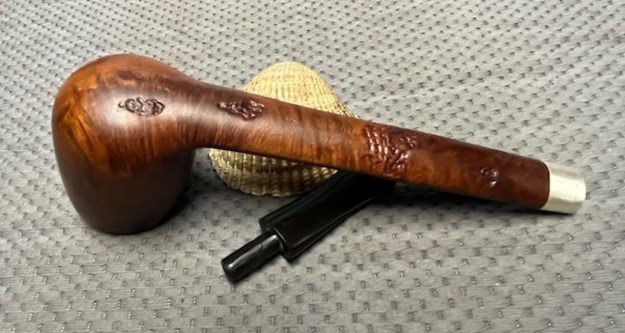
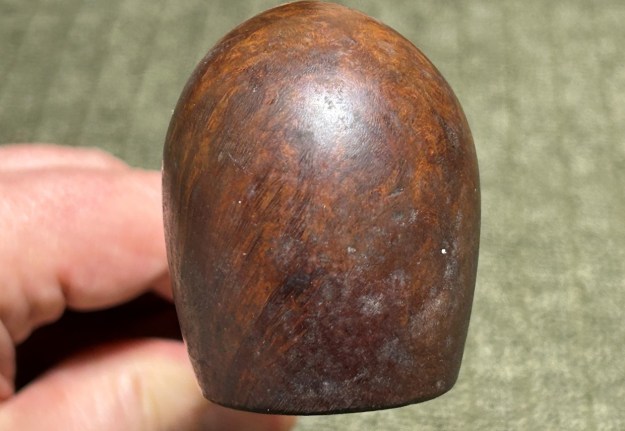
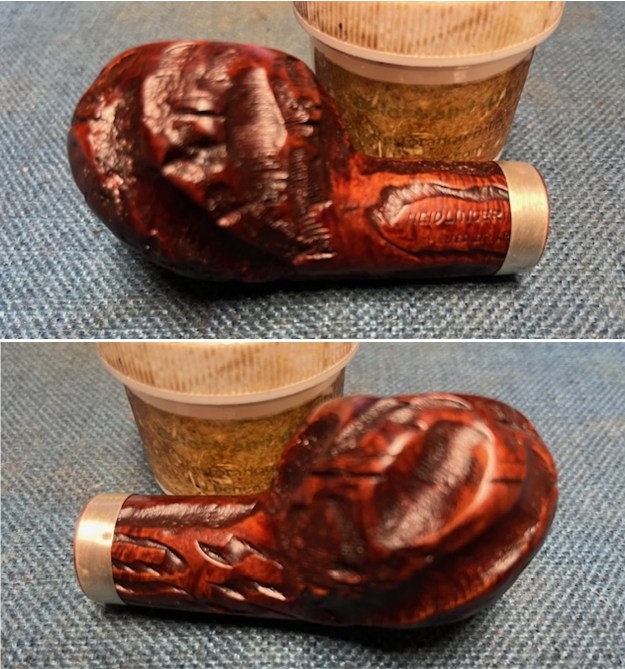
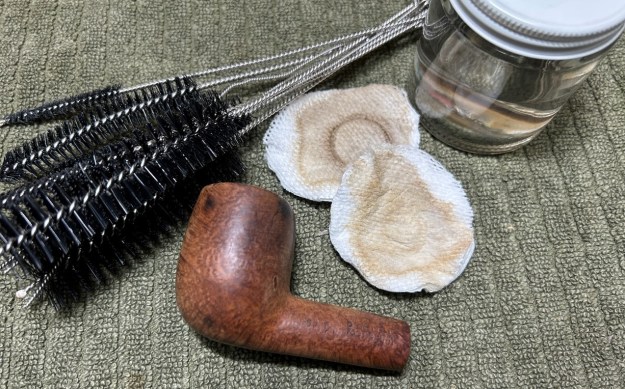 Now it was time to get serious. I performed a close examination of the many burn marks on the outside of the bowl. The good news was that they were all quite superficial – there was no deep burning of the wood. The bad news was that there were so many, and they would remain as an interesting detail in this pipe’s history.
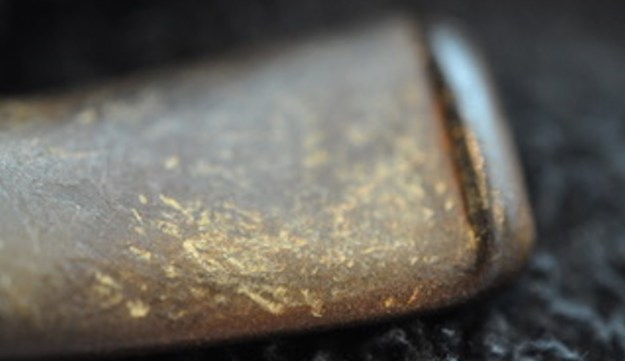
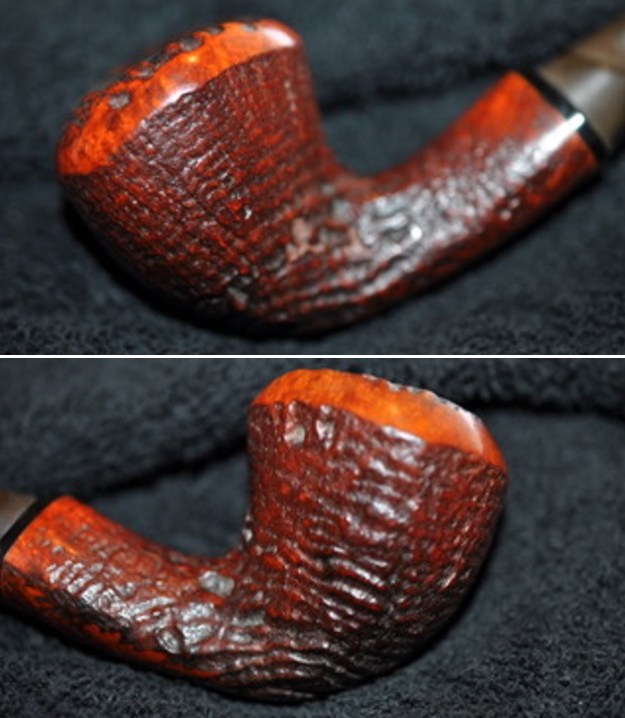
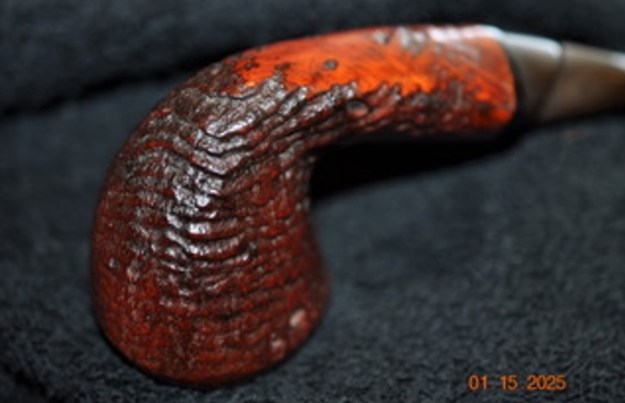
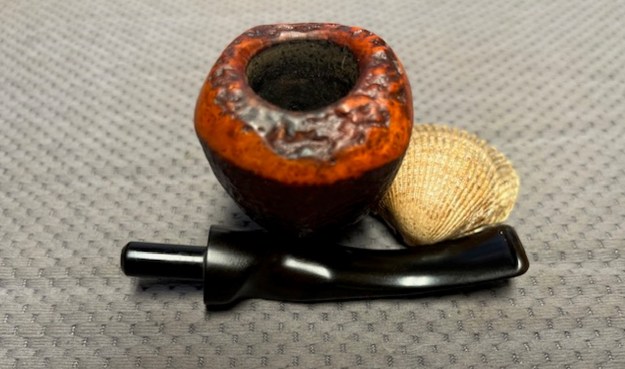
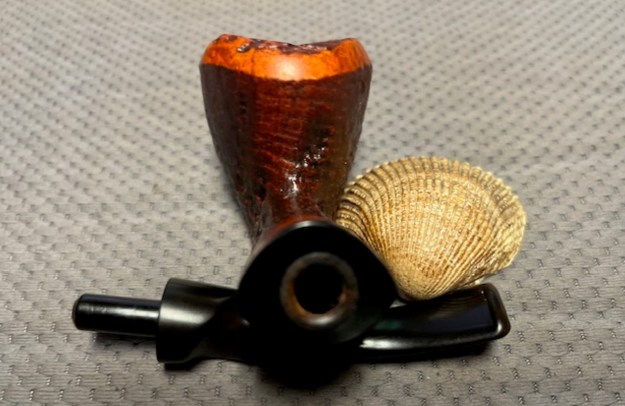
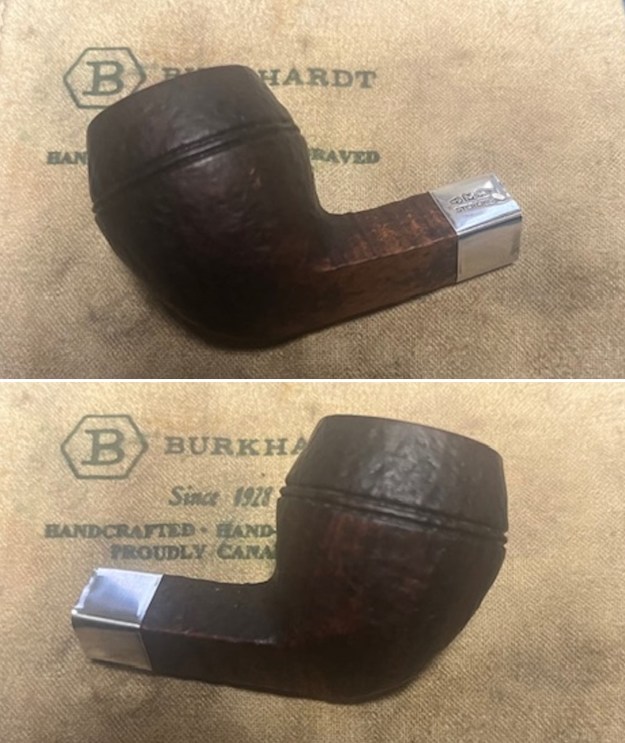
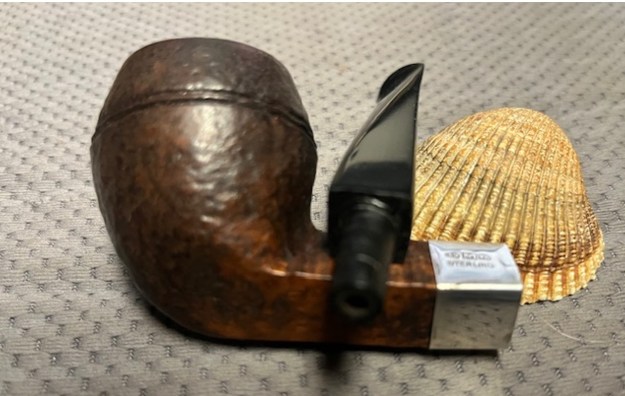
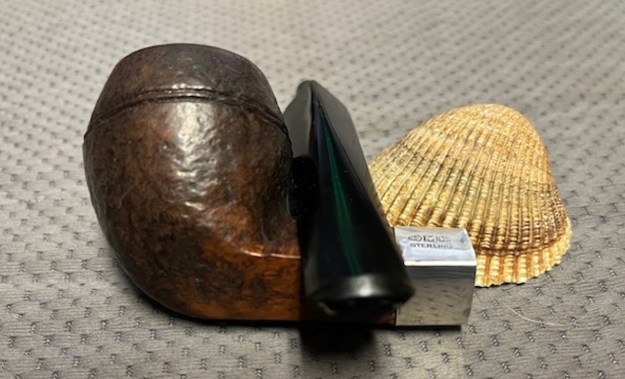
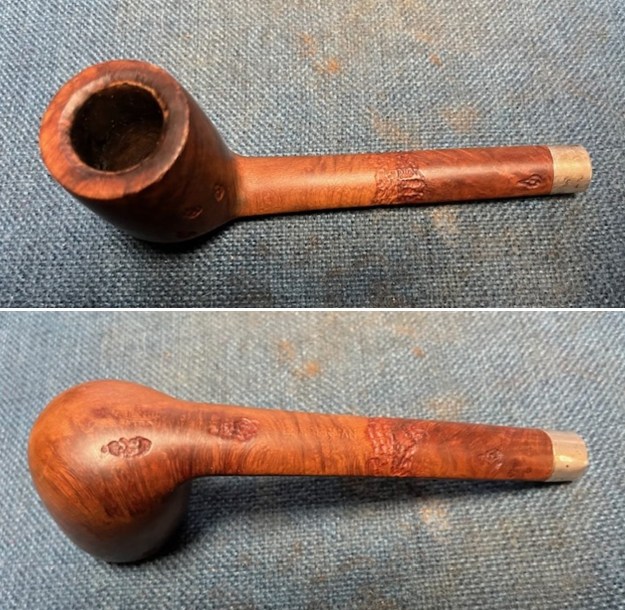
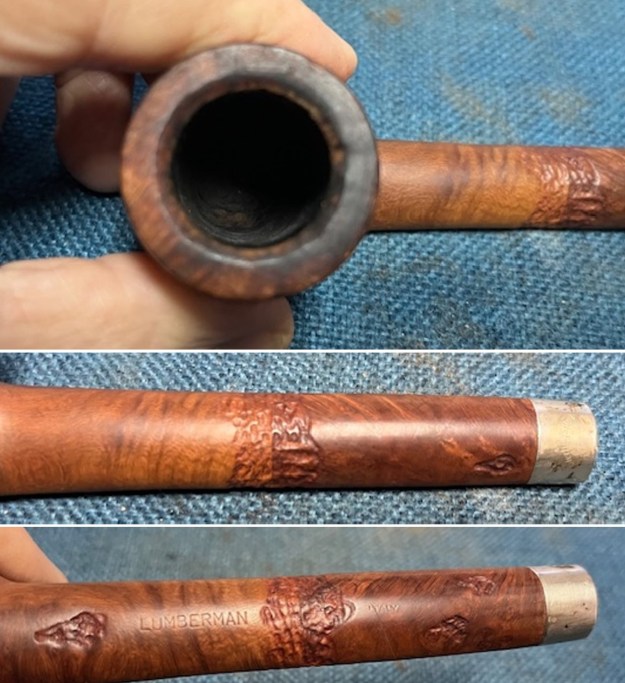
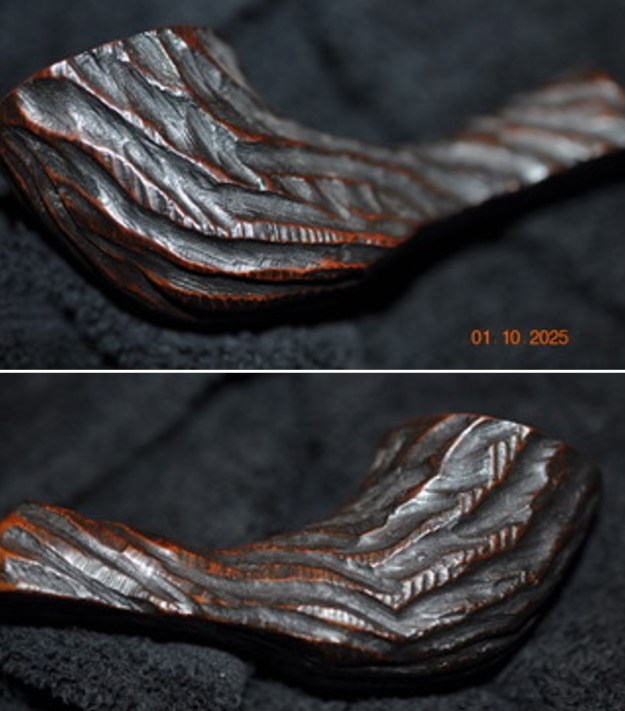
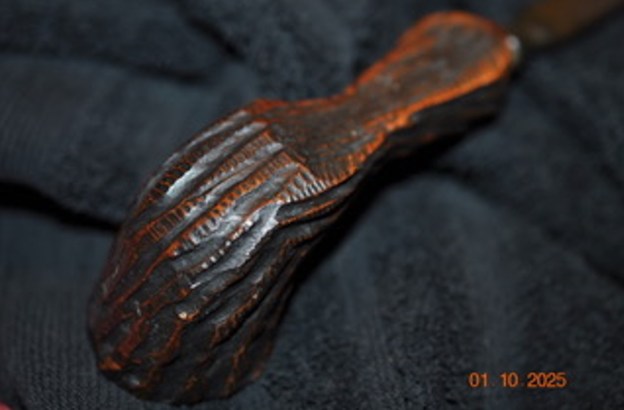
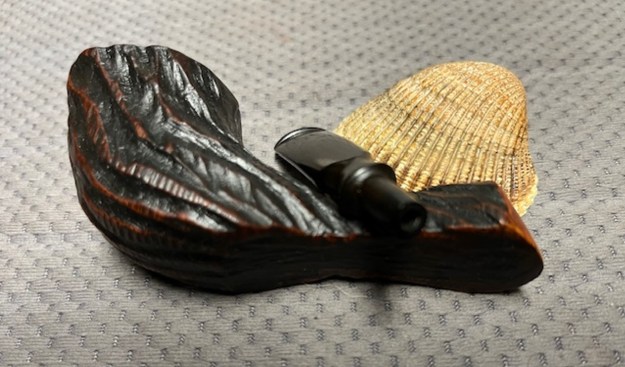
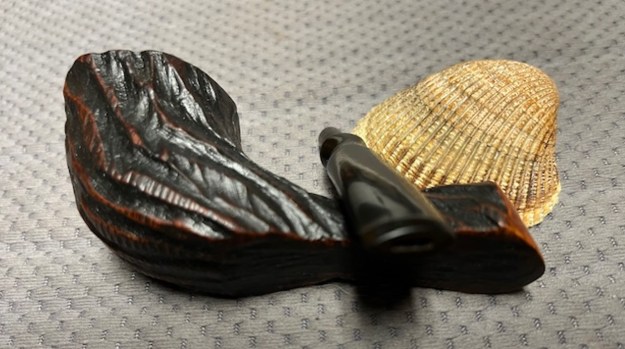
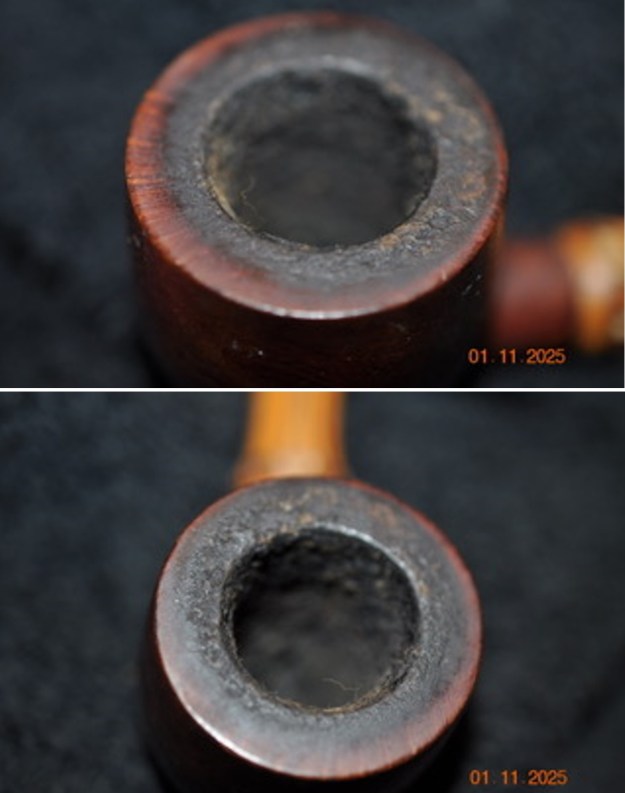
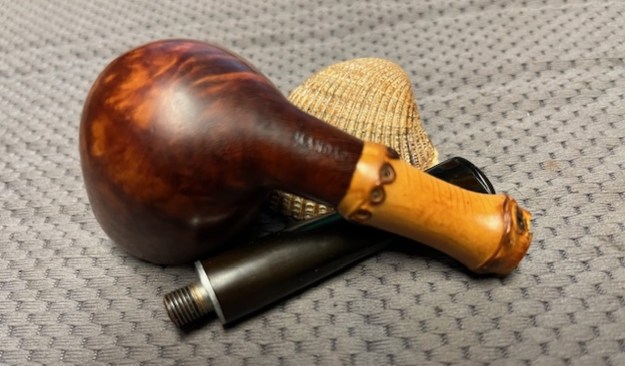
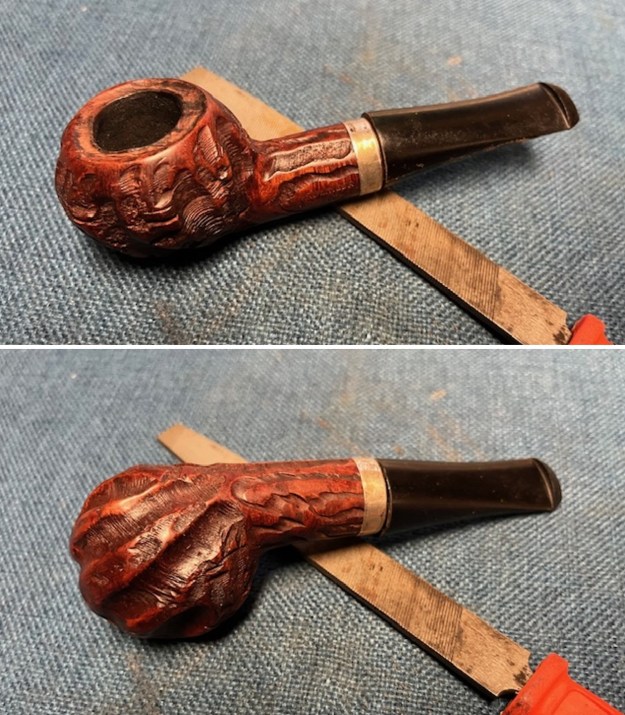
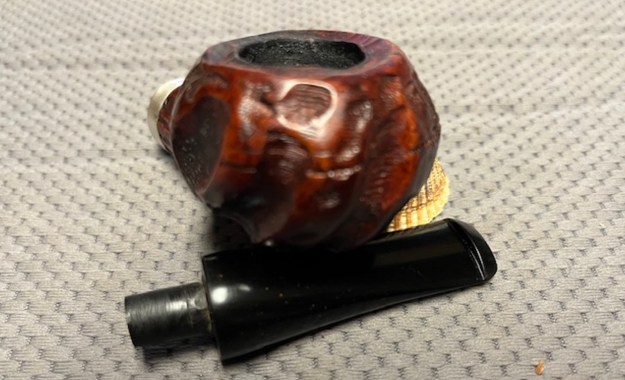
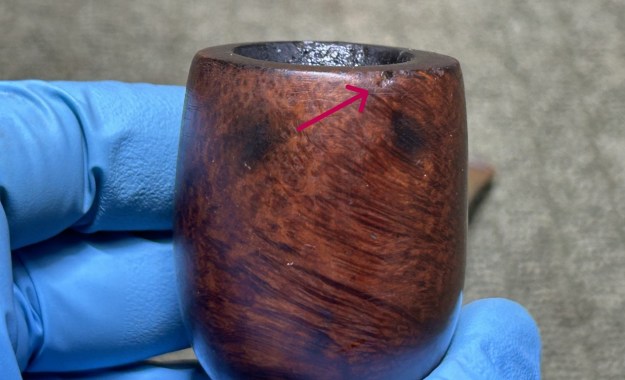
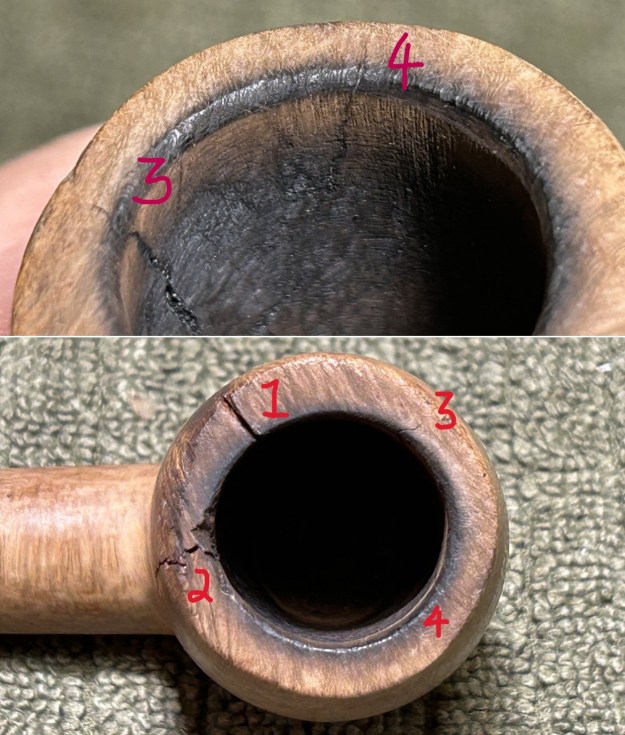
  The two original cracks were now clean – and there were now two more cracks on the opposite side of the bowl. Coupled with the major flat spot I mentioned earlier, this was severe damage and was going to require significant work to salvage. Here is a photographic survey of what I was dealing with.
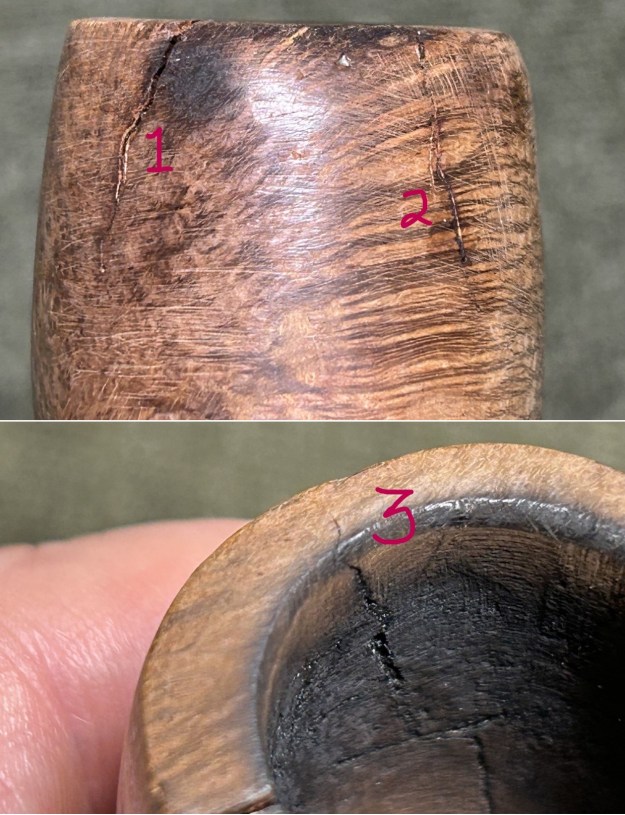
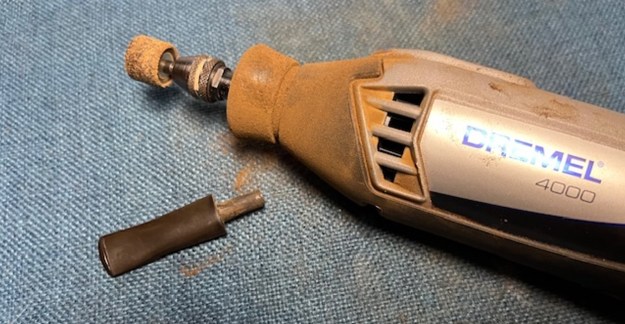
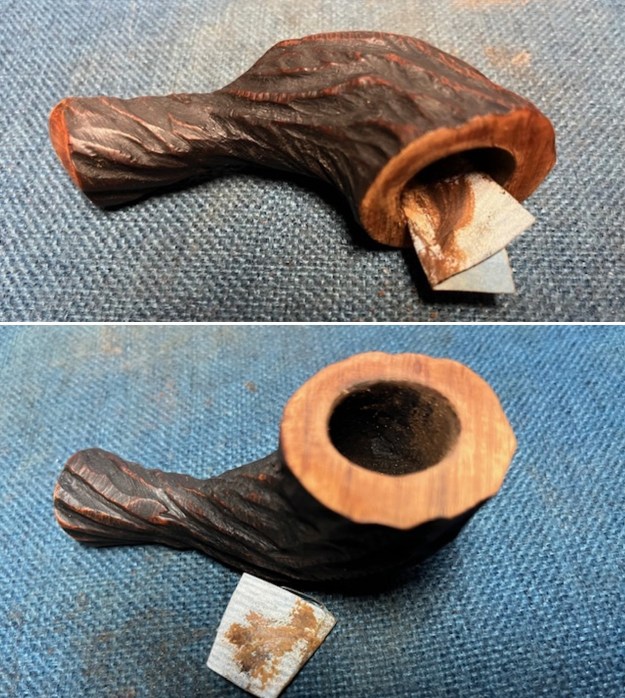
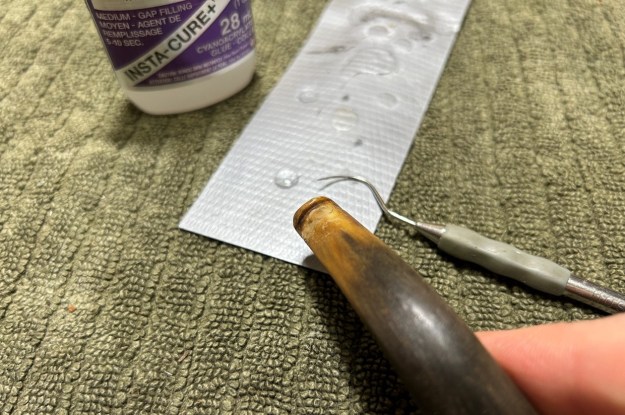
 I decided to repair the tiny cracks in the briar next. Before anything else, it is imperative that I ensure that the cracks do not continue to creep after I repair them. To that end, I took a micro-drill bit, inserted it in my rotary tool, and very carefully drilled a hole right through the wall of the shank. That hole will stop the crack from progressing. As you can see, the drill bit is incredibly thin and quite prone to snapping if great care is not taken.
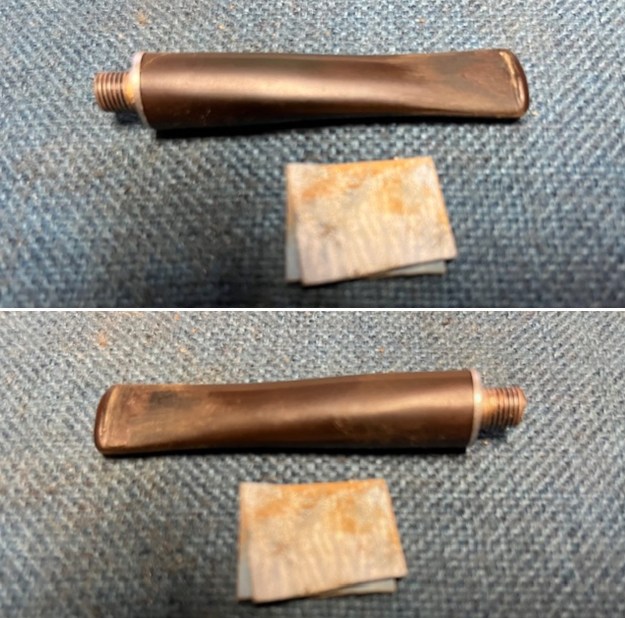
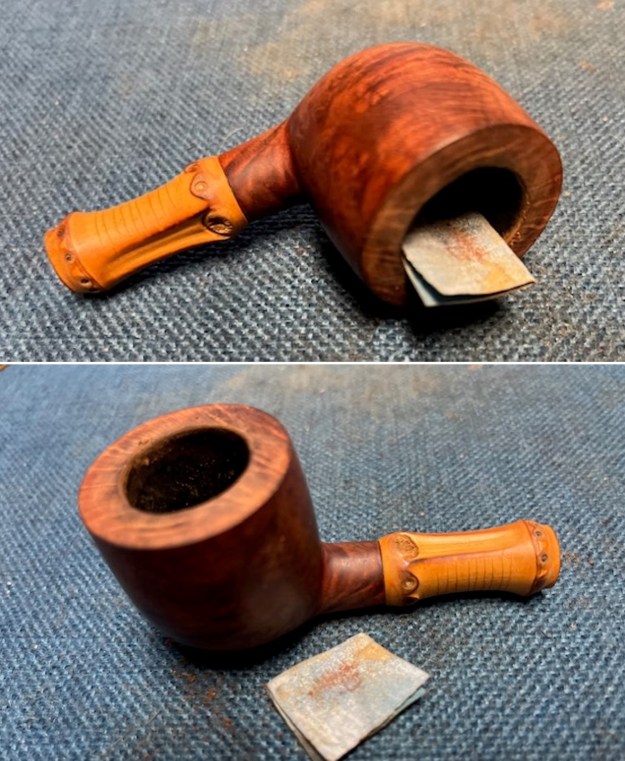
 The next step is to line these cracks with clear cyanoacrylate adhesive. To prevent the adhesive from dripping into the bowl, I lined it with a piece of duct tape – because cyanoacrylate adhesive does not stick well to it. Applying the adhesive neatly and cleanly is not important at this stage – but being thorough is!
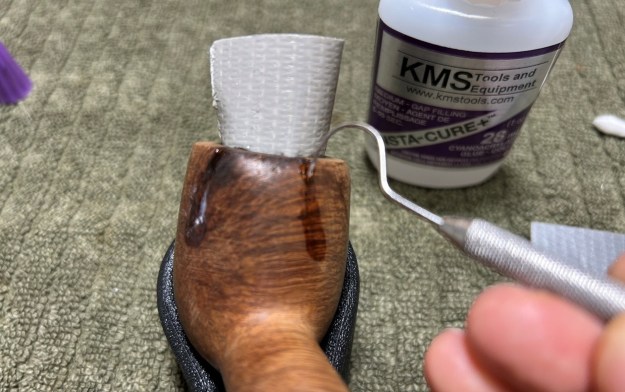 Having completed that, I moved on to repairing the grievously damaged interior of the bowl. Prior to my customer’s ownership, this pipe was heavily smoked and not cared-for as it should have been. There are heat fissures throughout the bowl and have resulted (obviously) in the cracks migrating to the outside. To fill damage like this, I used an epoxy adhesive that is extremely hard, resistant to high temperatures, and completely inert when cured. It worked superbly. I filled the affected area with the epoxy and let it cure for a full 24 hours.
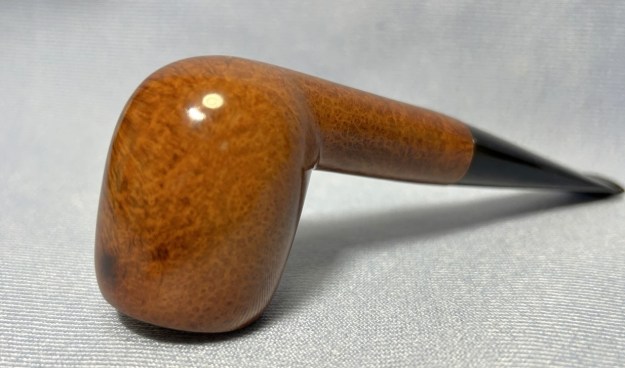
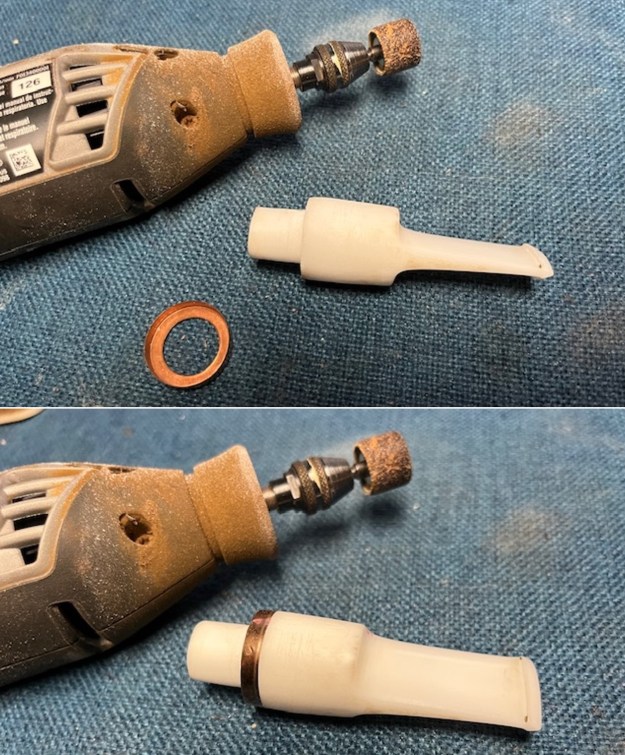
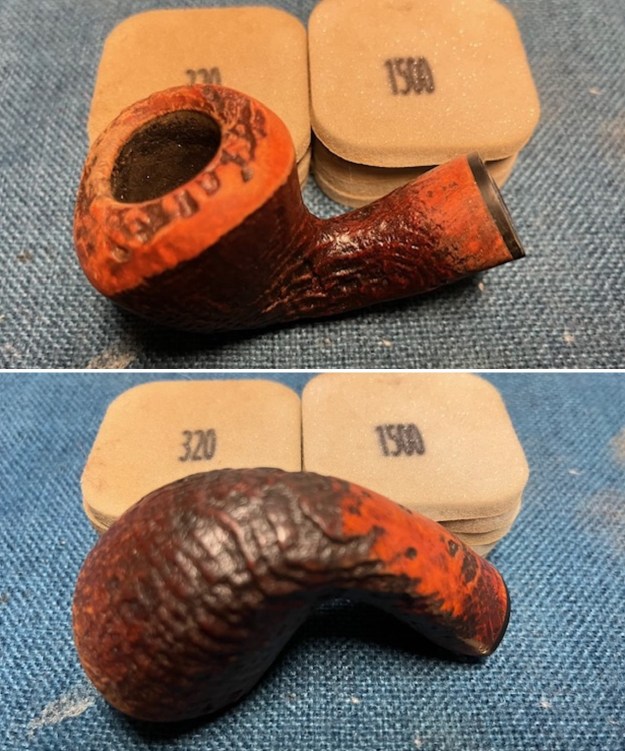
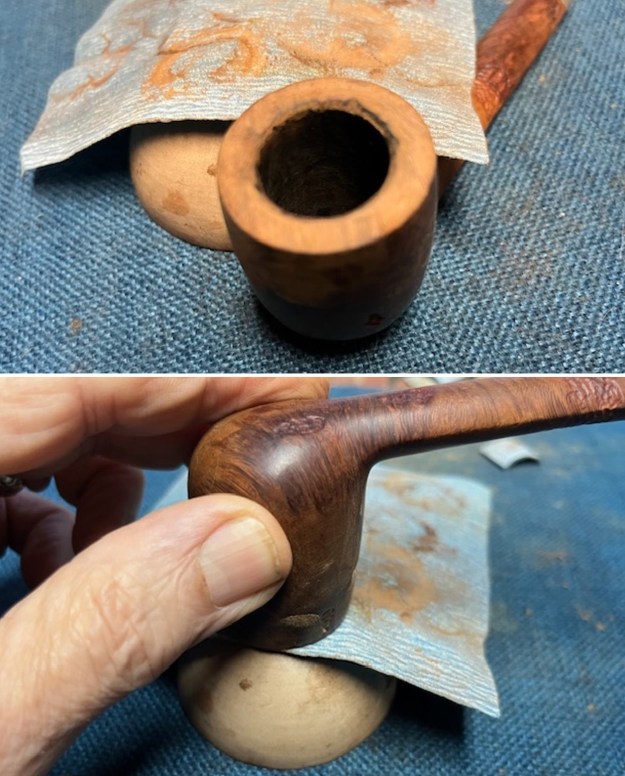
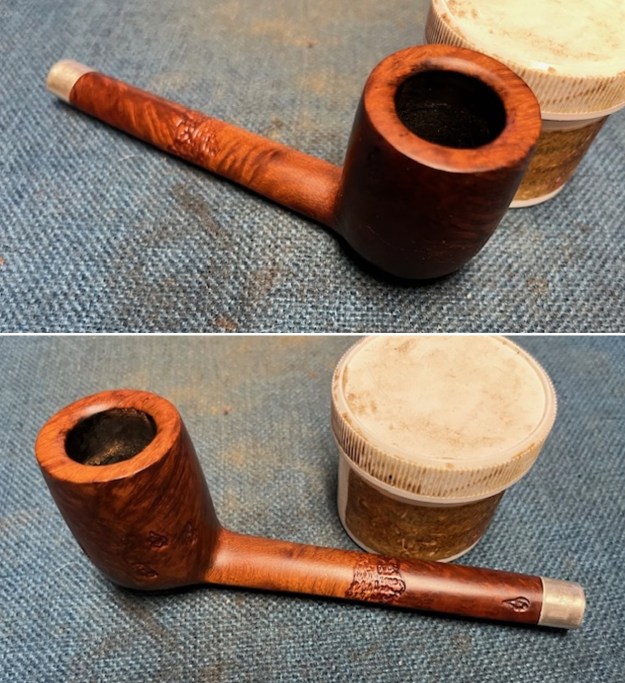
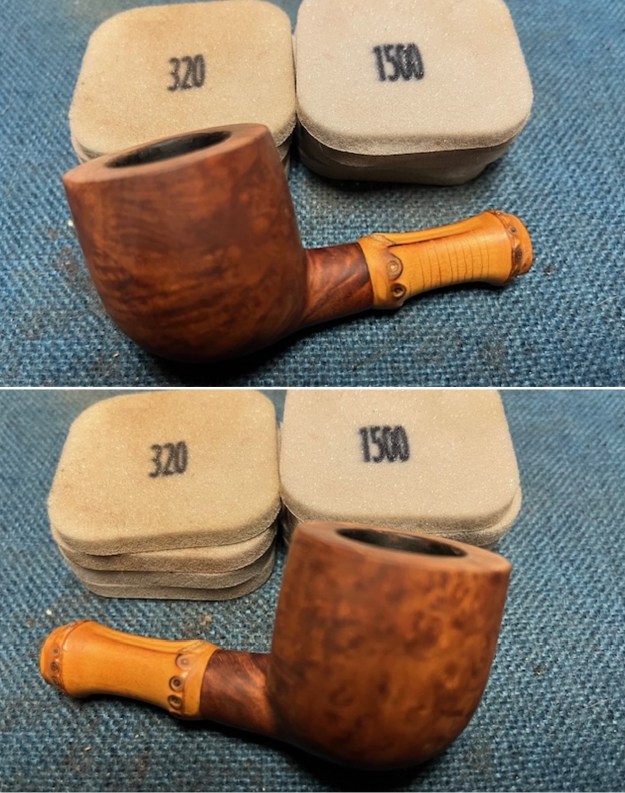
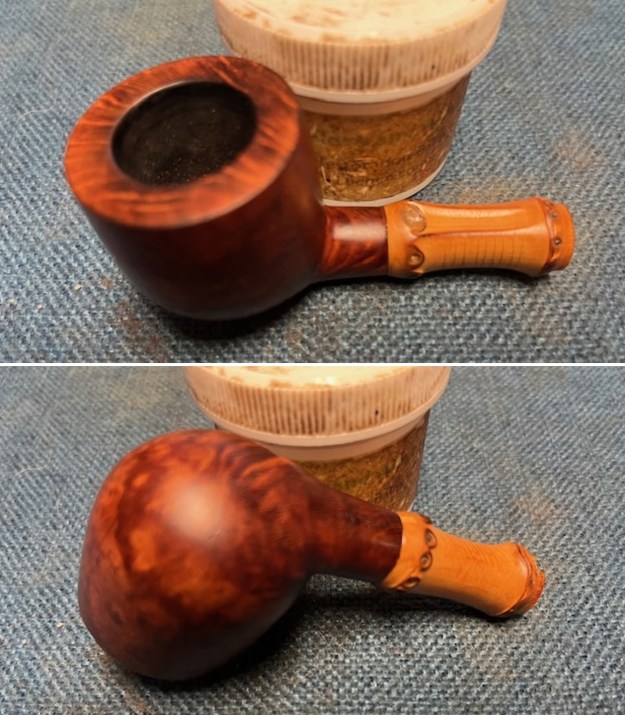
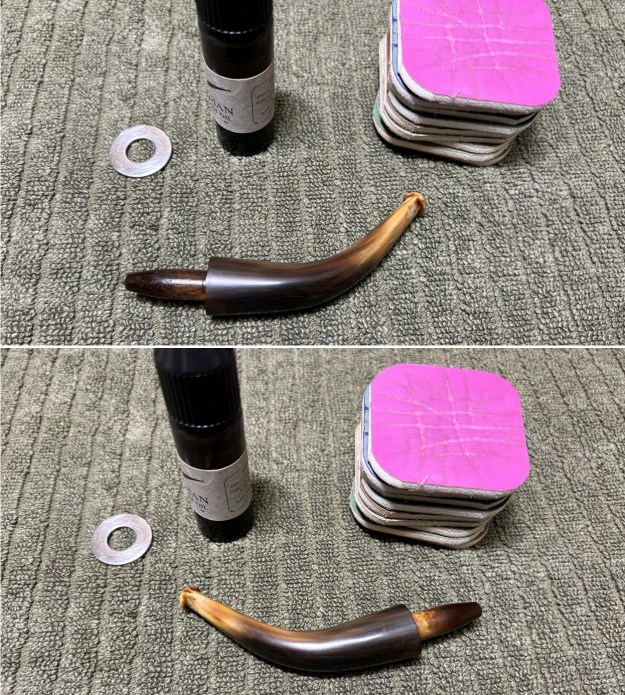
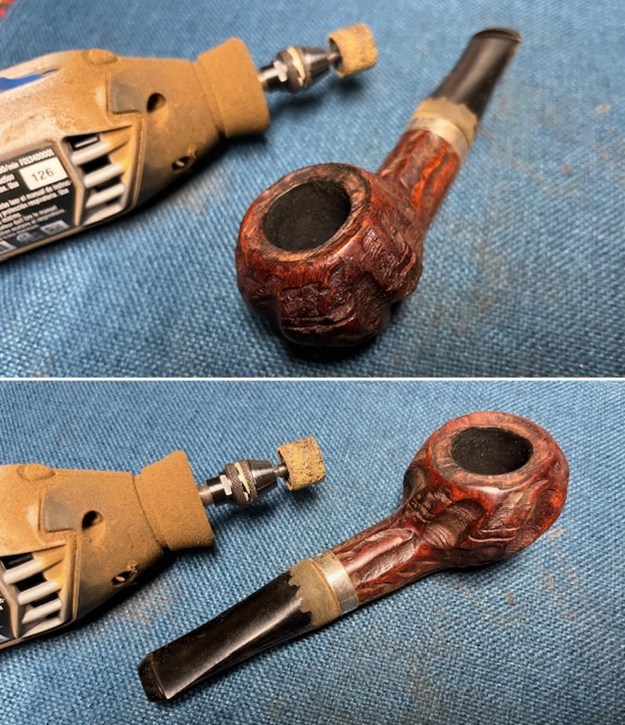
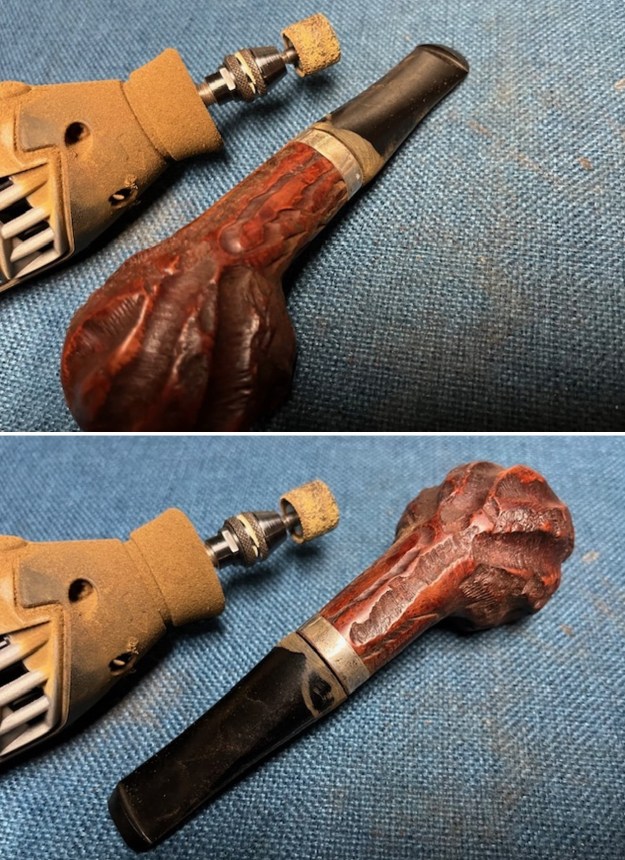
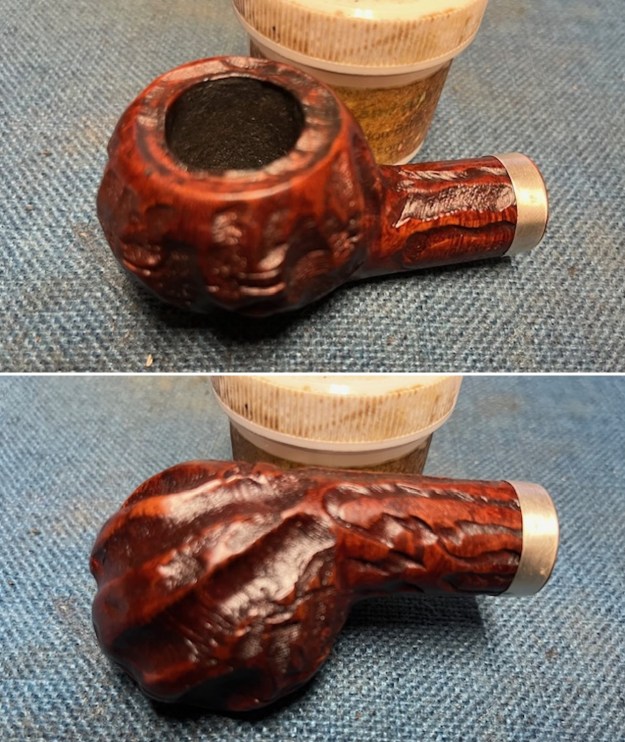
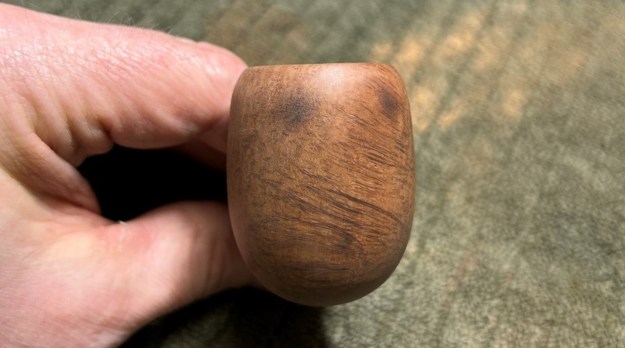
 I had a long discussion with my customer in England about how to proceed in addressing the large flat spot, the remnants of the cracks, the chunks missing, etc. – in other words, how do we want the pipe to look in the end? The fact is that there isn’t any all-encompassing solution to this pipe’s aesthetic woes. Having said that, the best of a bad set of options was to round off the top of the pipe and make it look even all around. We know that the cracks will always be there; we know that the burns will always be there; but we can at least do this and make the pipe better. I used my rotary tool and removed some material. I progressed with sandpaper and, below, you’ll see a series of photos which document some of this procedure.
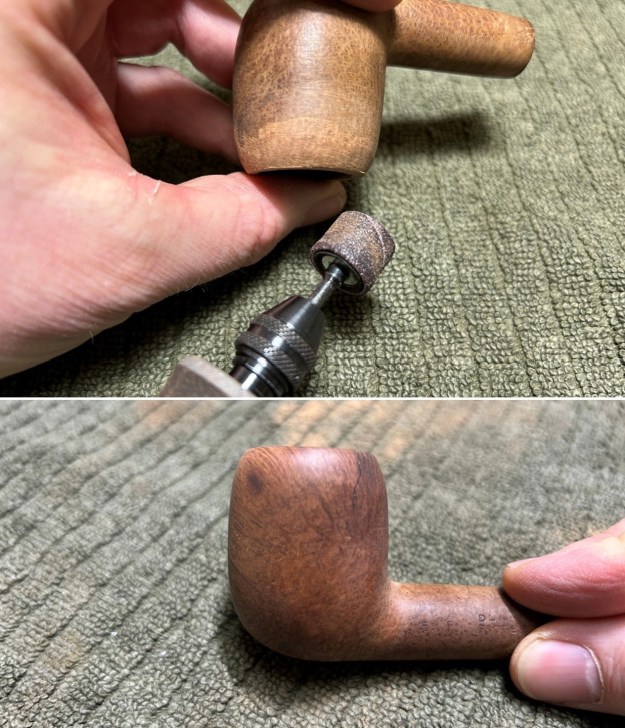

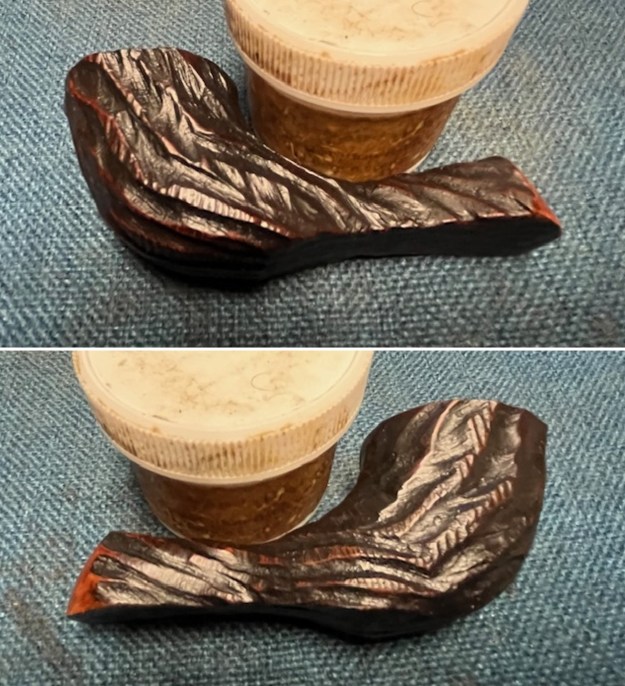
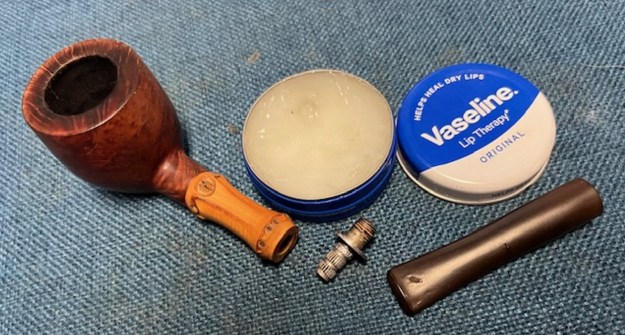
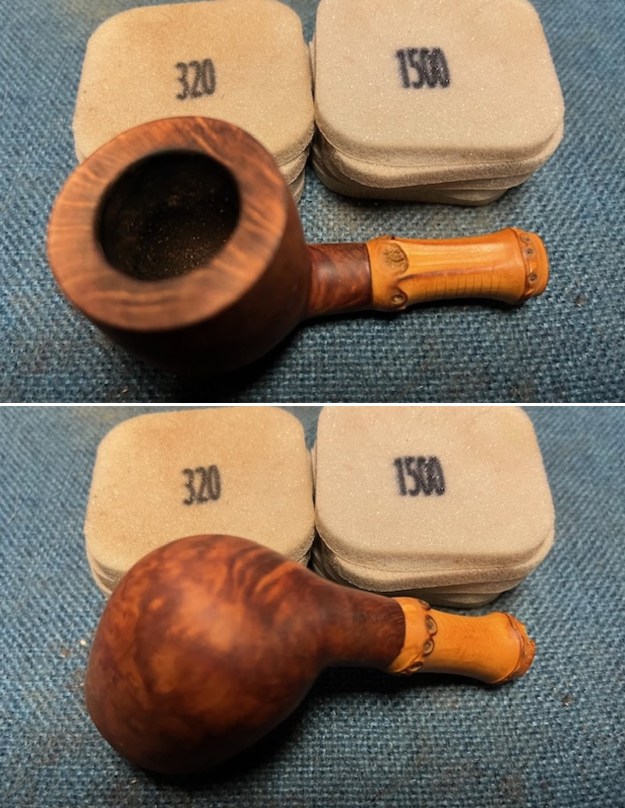
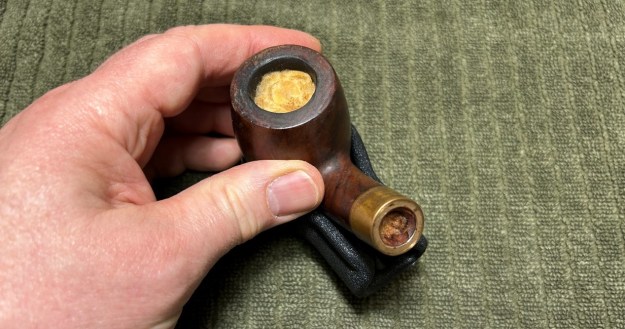
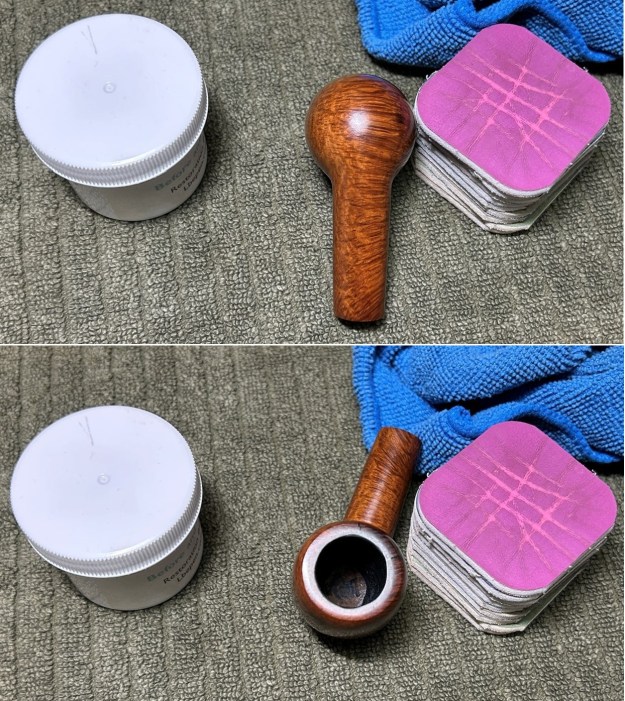
 Following that, I roughened up the epoxy’s surface (inside the bowl) with 220-grit sandpaper for the next step. I thinly coated the inside of the bowl with a mixture of my wife’s homemade yogurt and activated charcoal. Once hardened, this provided a good, faintly rough surface for a new cake to build.
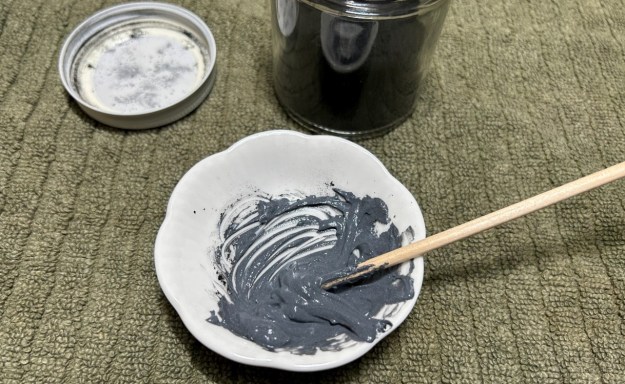
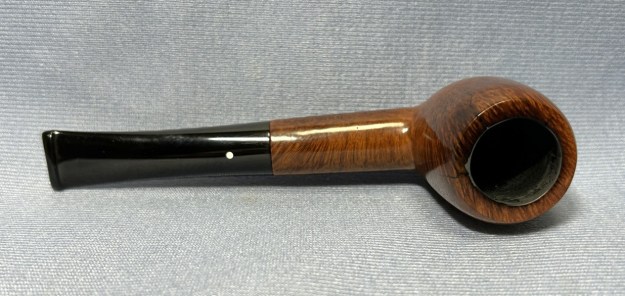
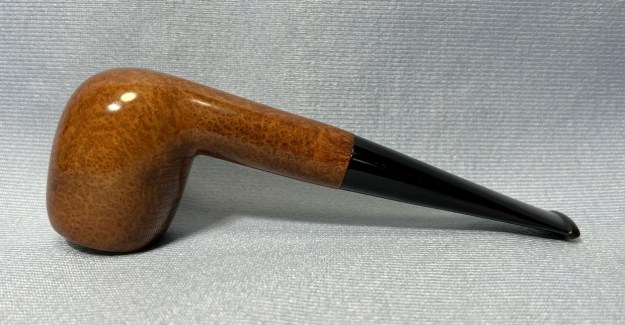
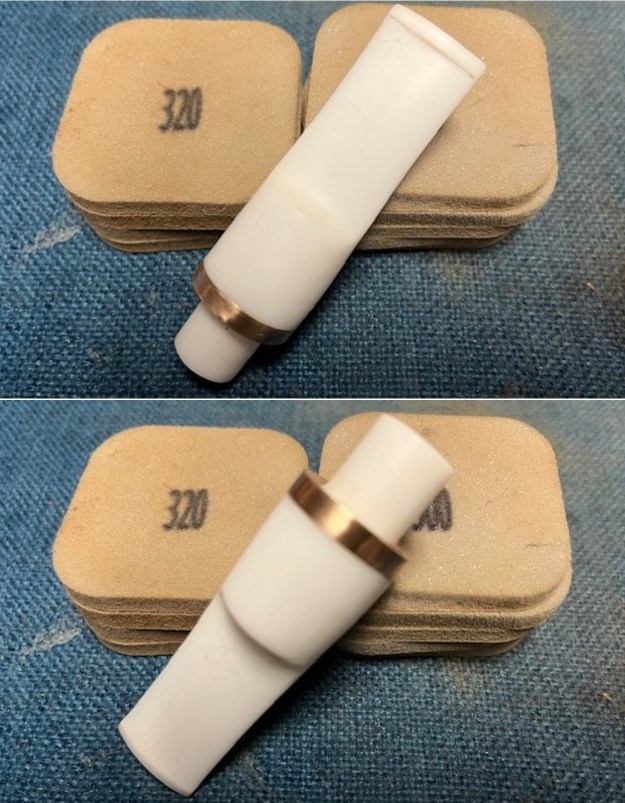
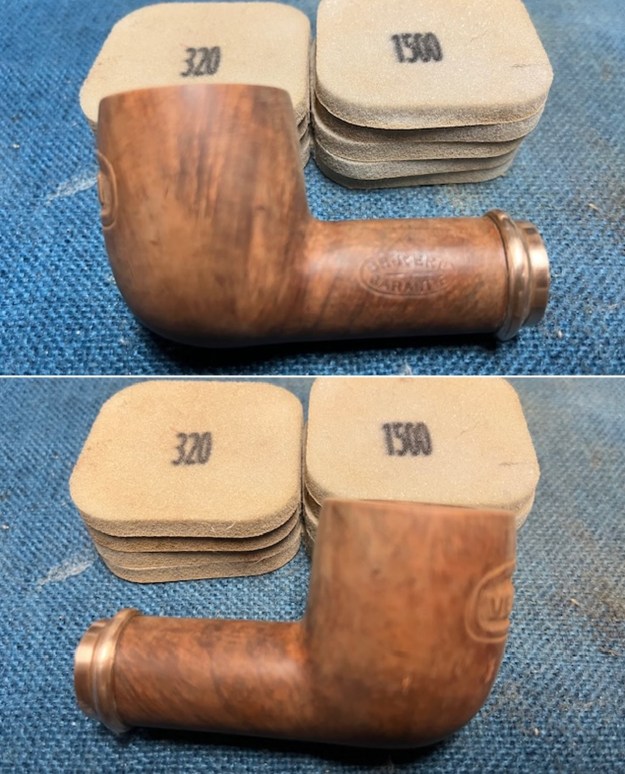
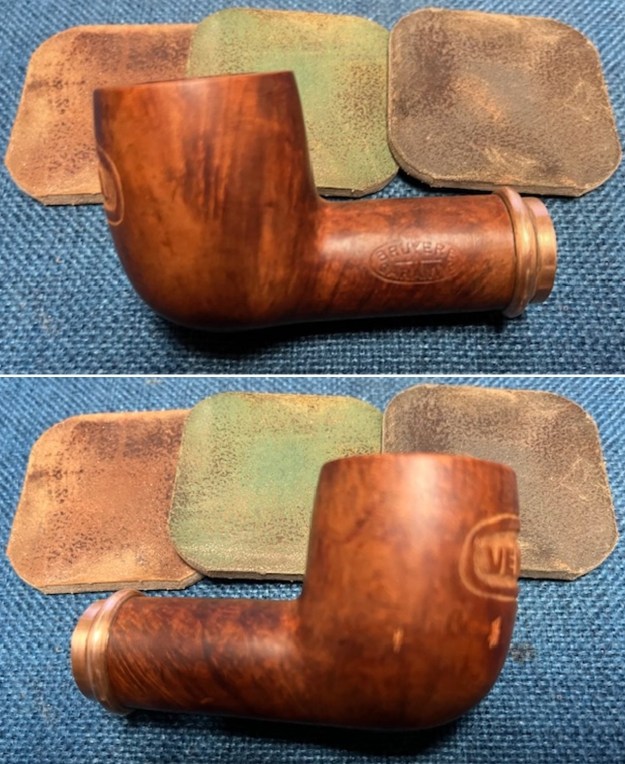
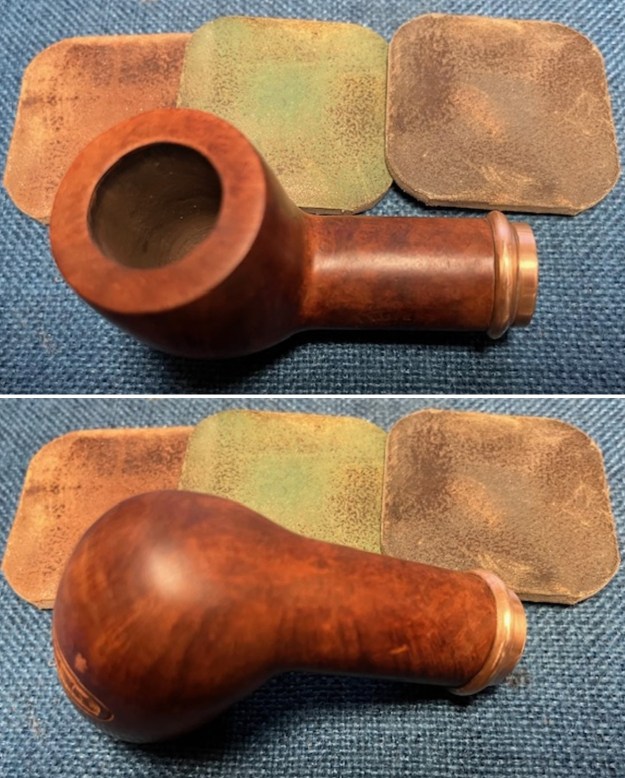
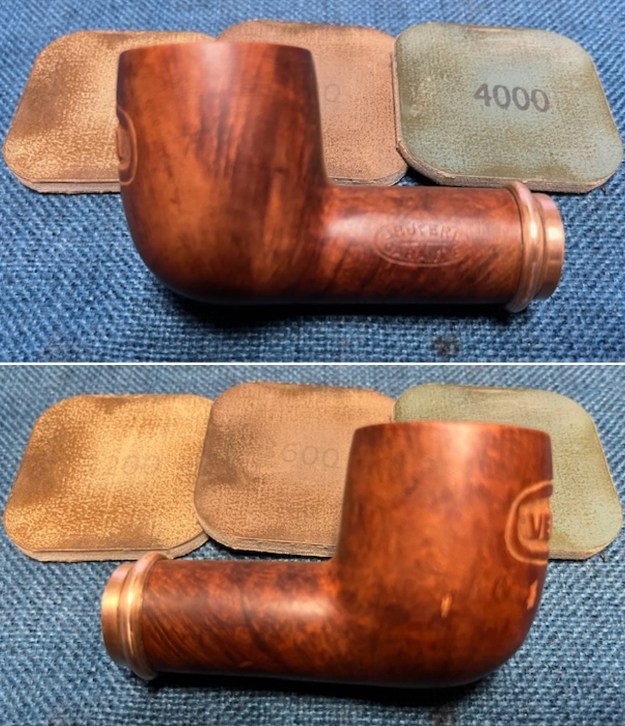
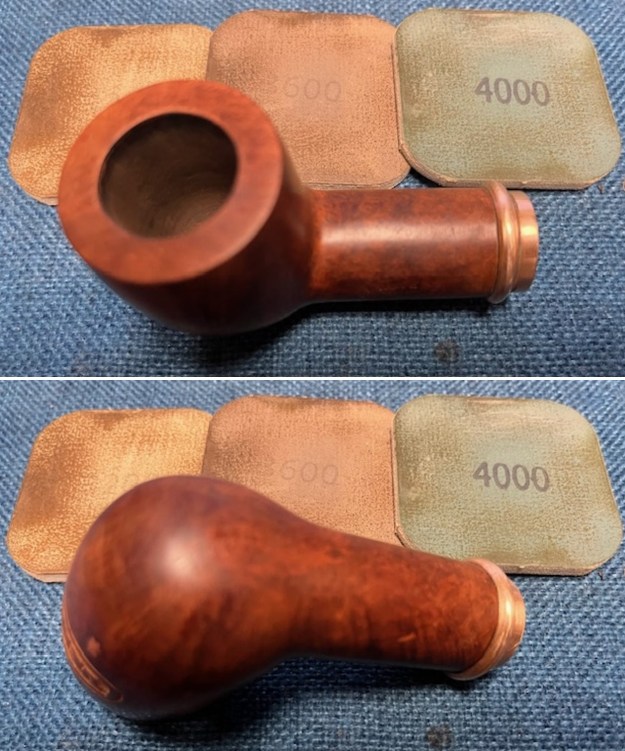
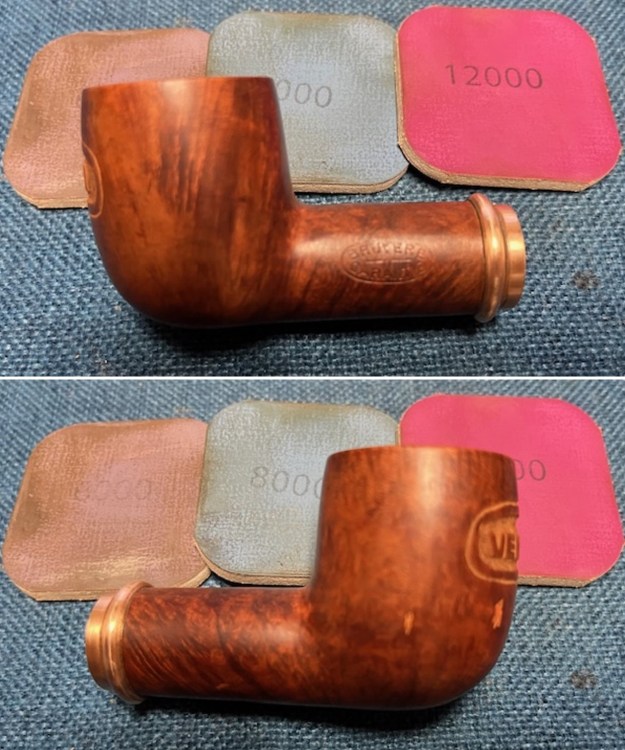
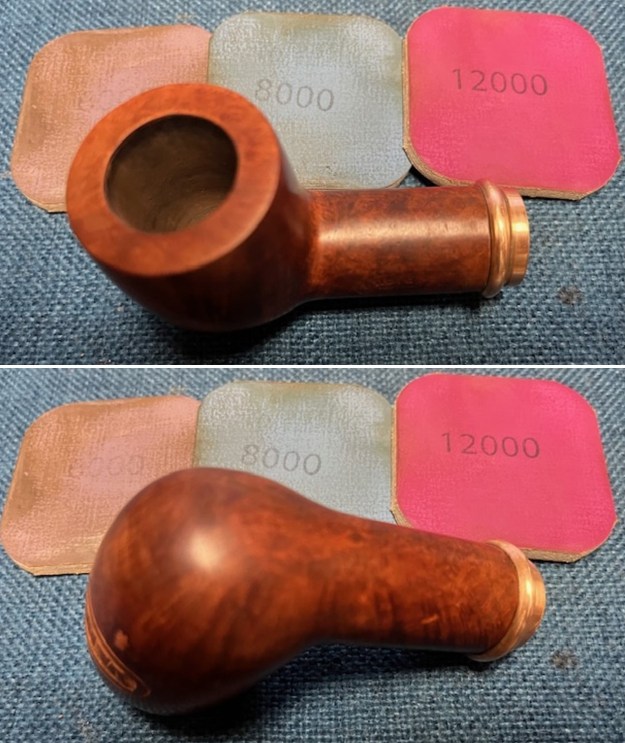
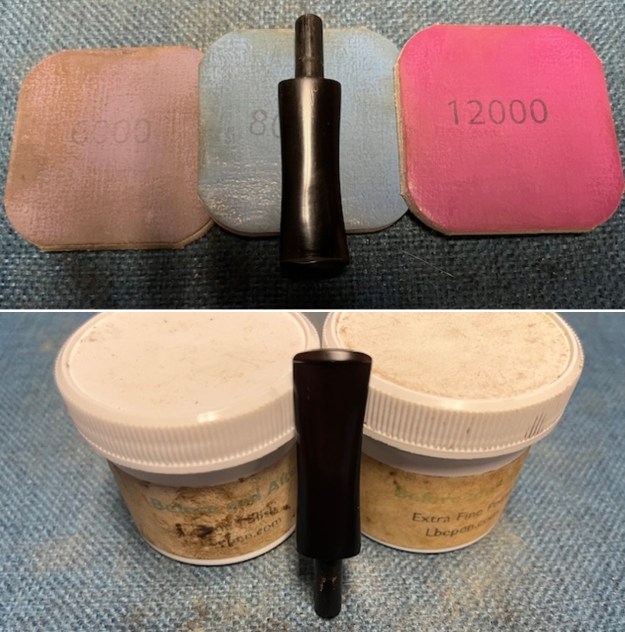
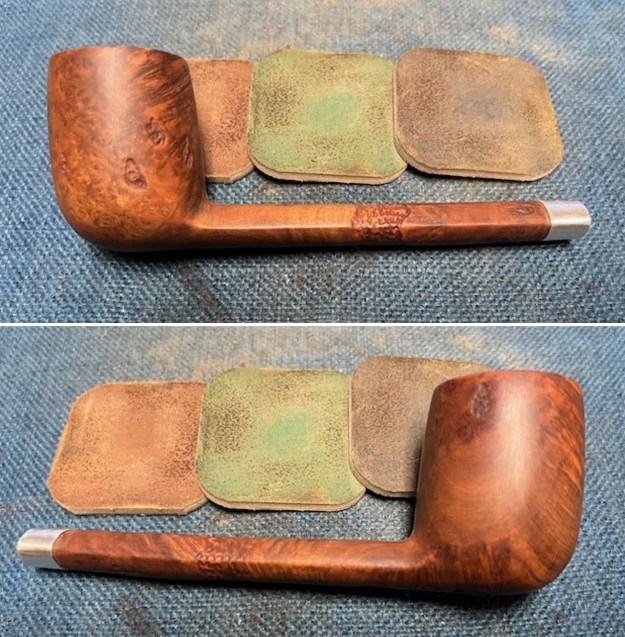
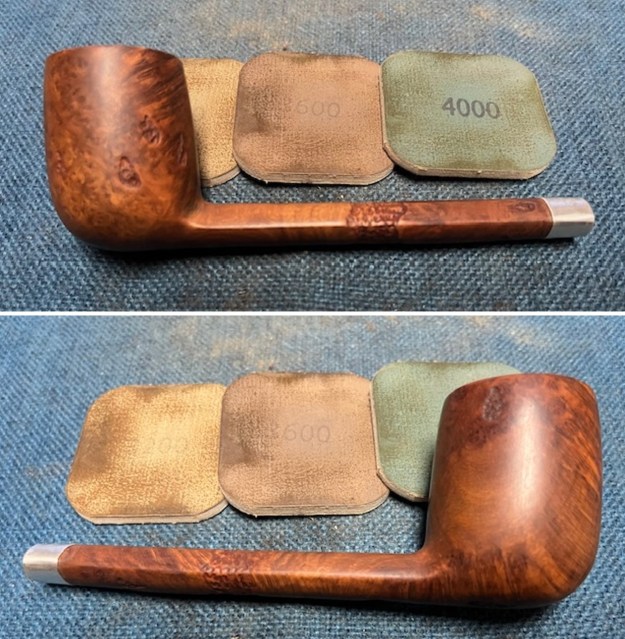
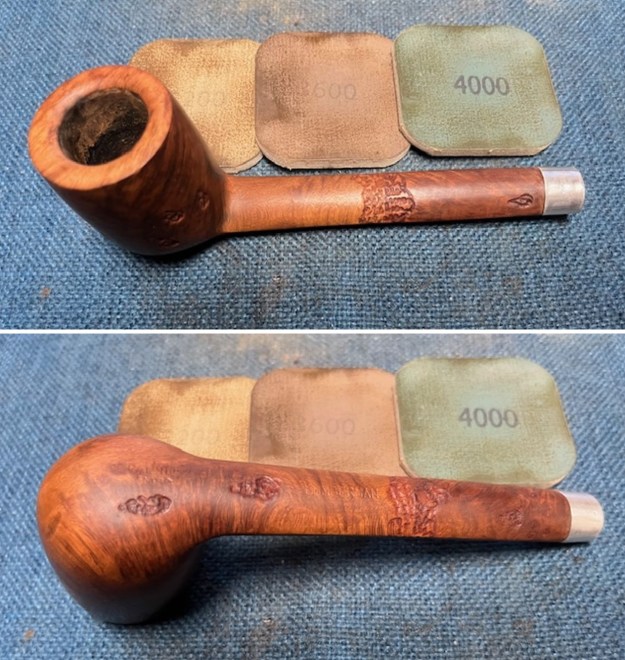
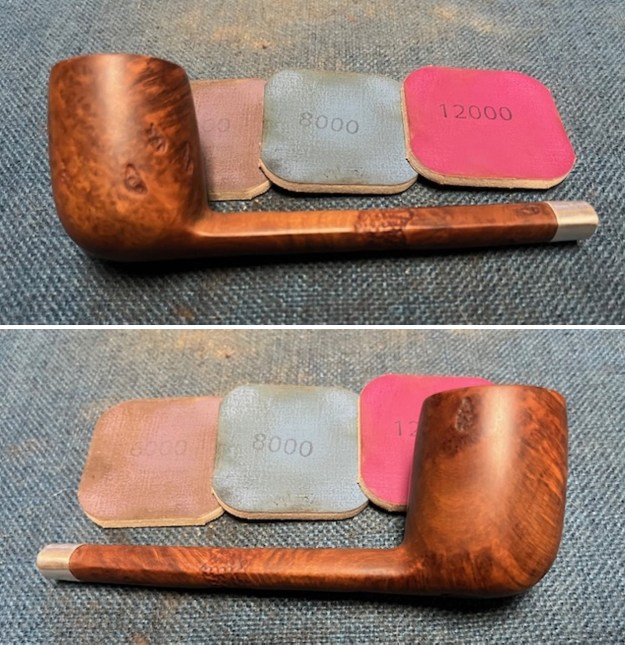
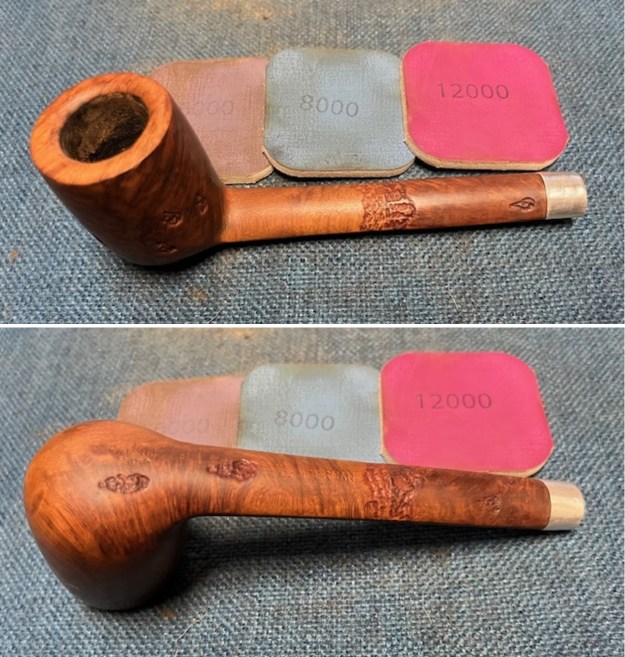
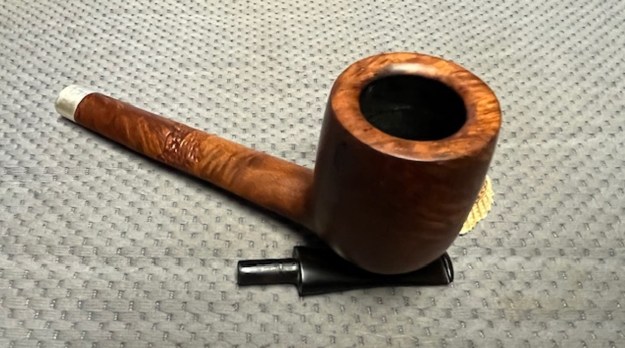
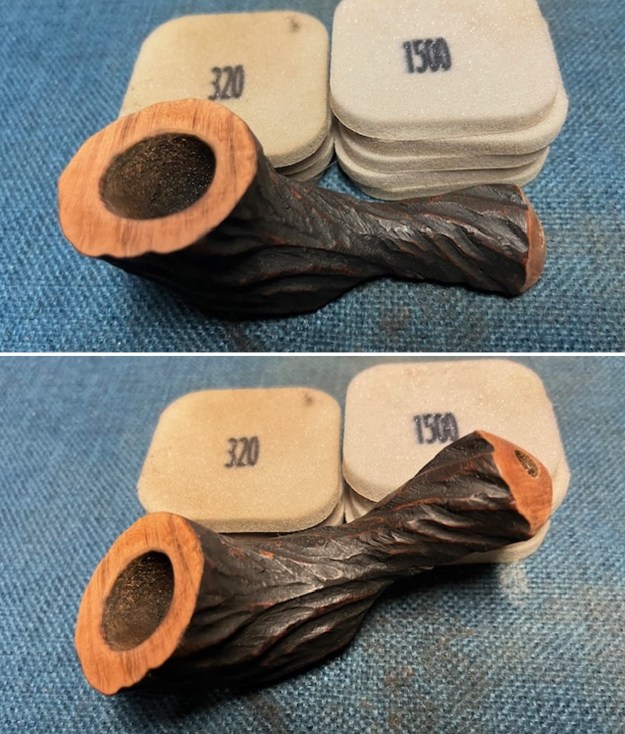
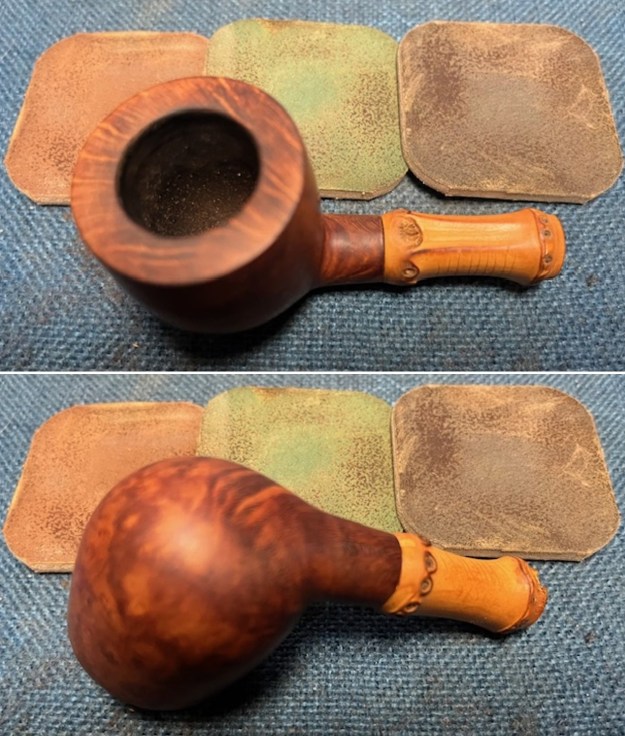
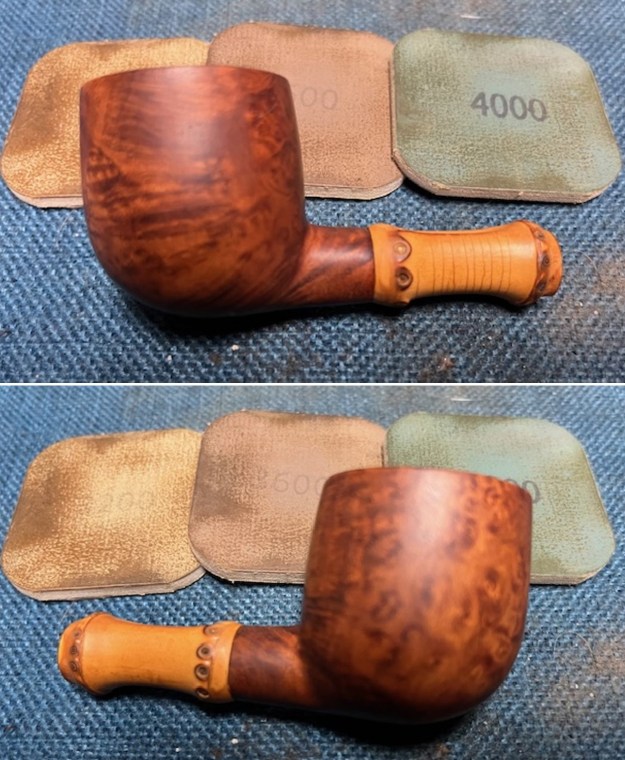
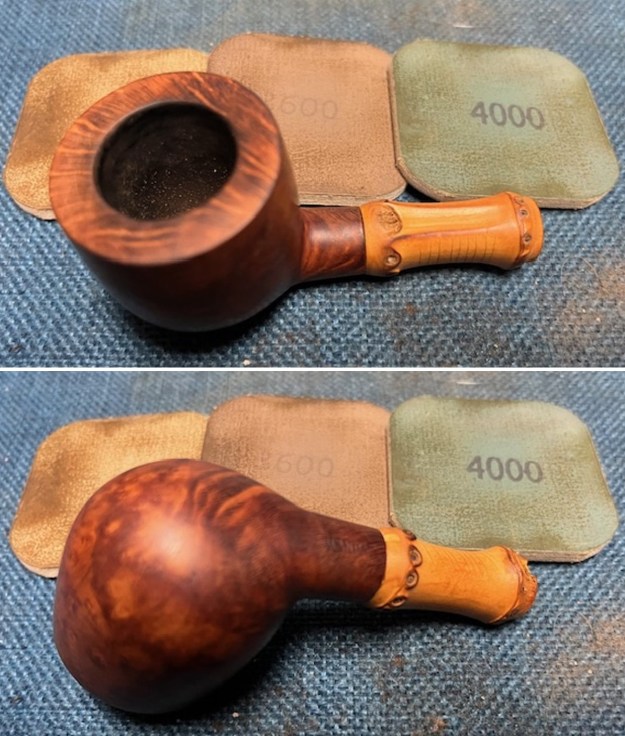
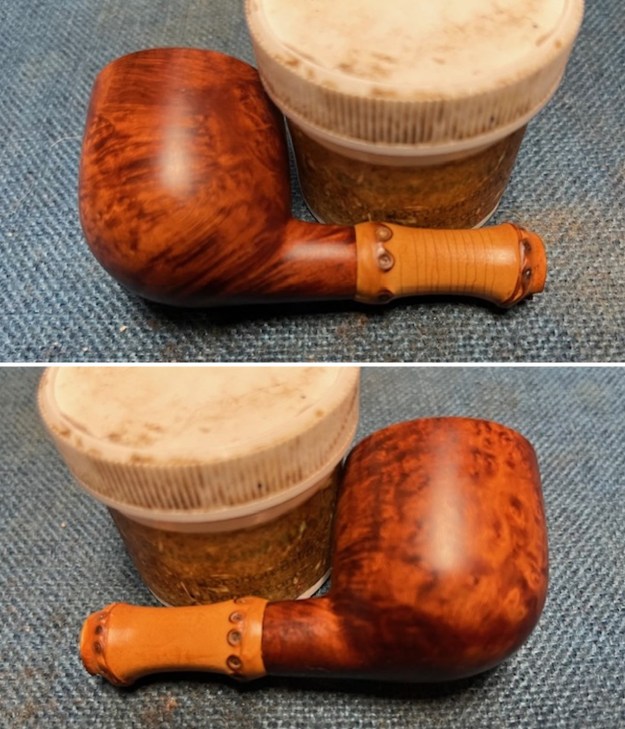
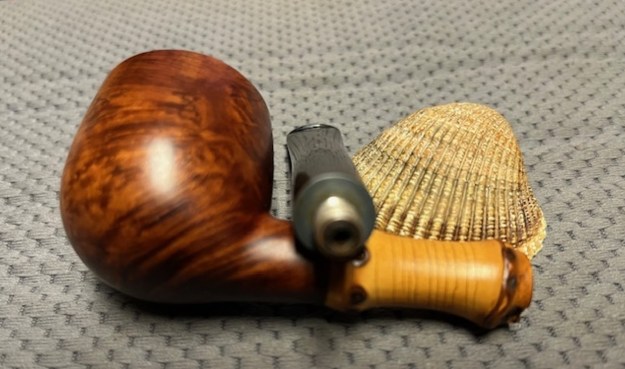
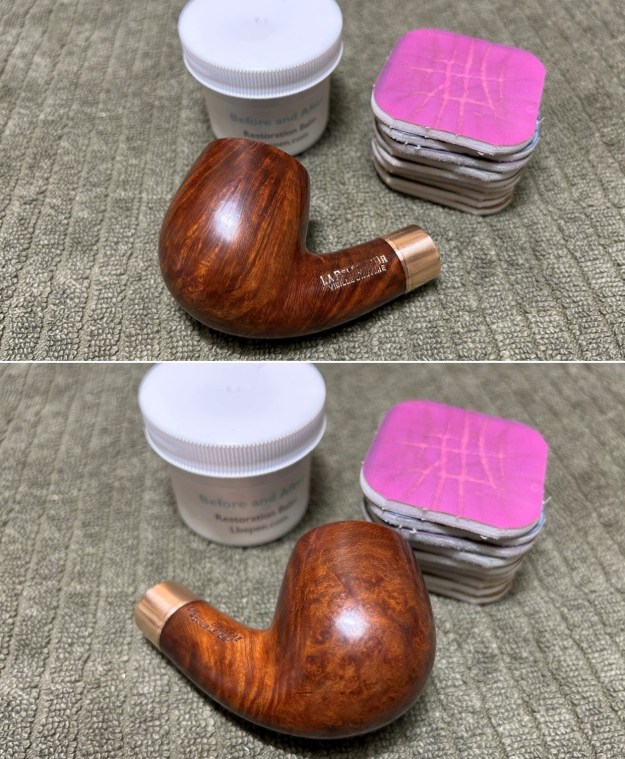
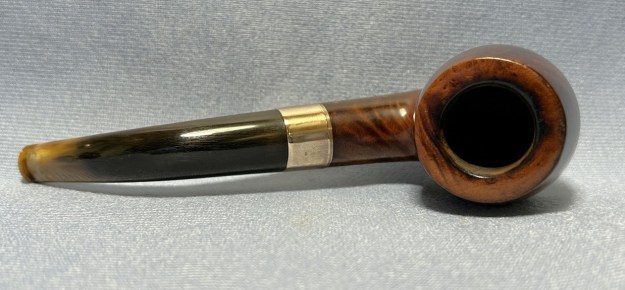
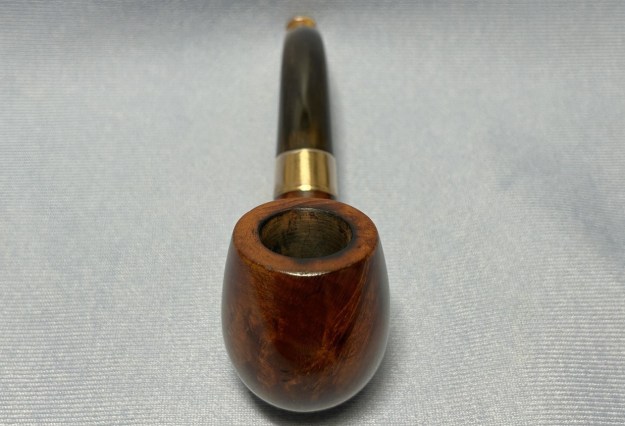
 I used all nine micromesh pads (1,500 through 12,000 grit) to sand the outside of the stummel and finish it off. This sanding minimizes flaws in the briar and provides a beautiful smoothness to the wood. I rubbed some LBE Before & After Restoration Balm into the briar and let it sit for 30 minutes or so. The balm moisturizes the wood and gives a beautiful depth to the briar. I then buffed the stummel with a microfibre cloth.
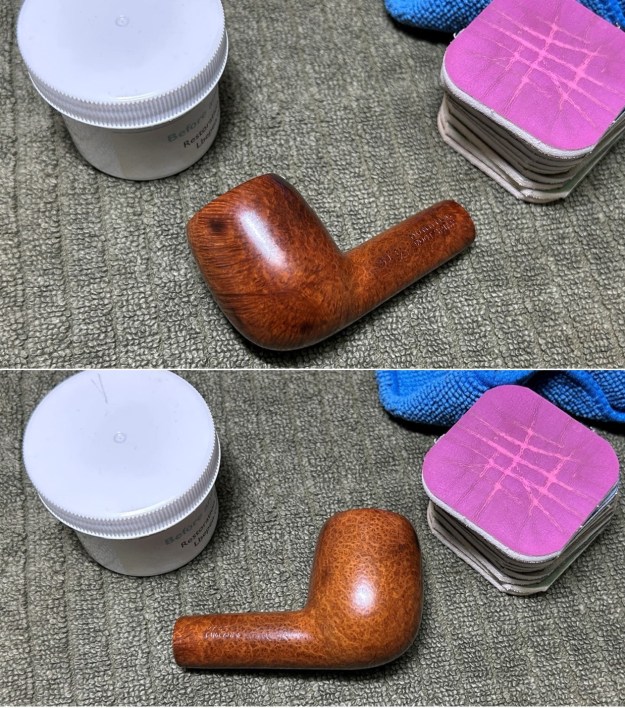
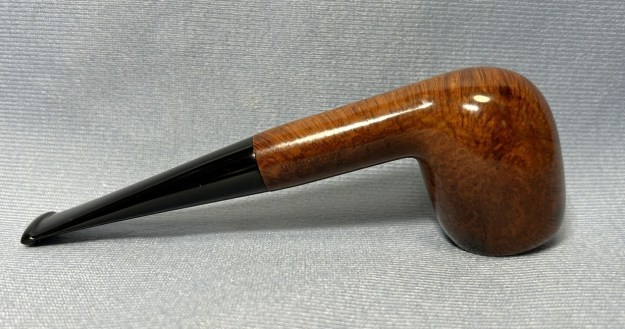
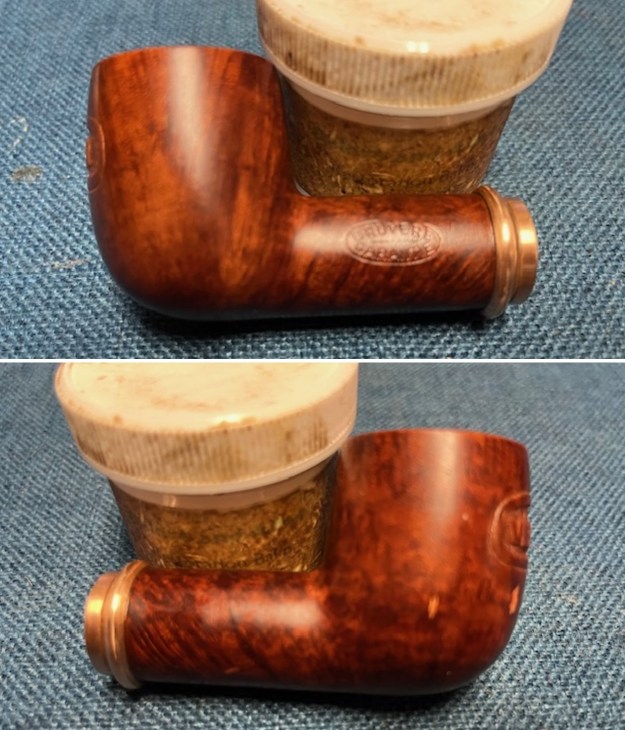
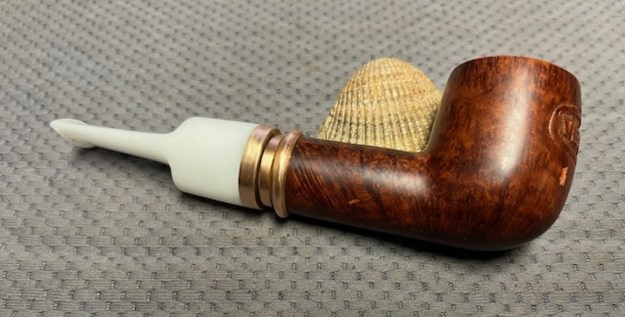
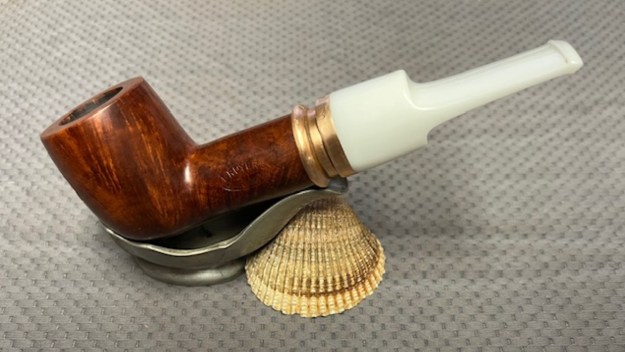
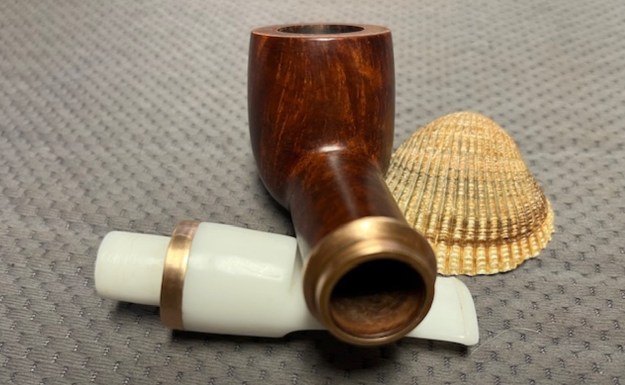
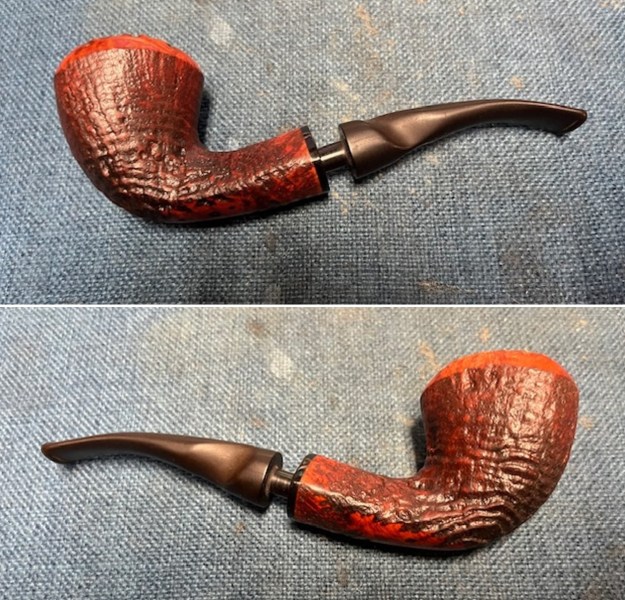
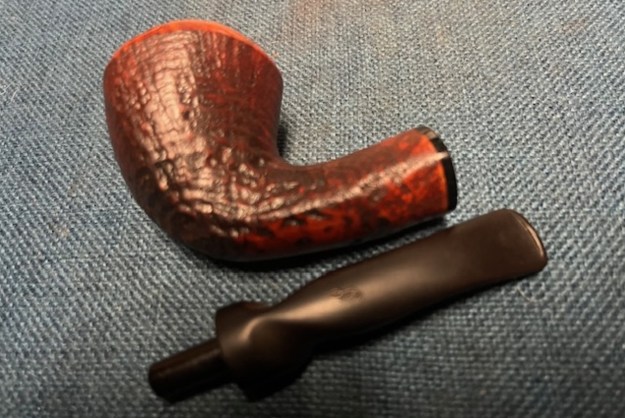
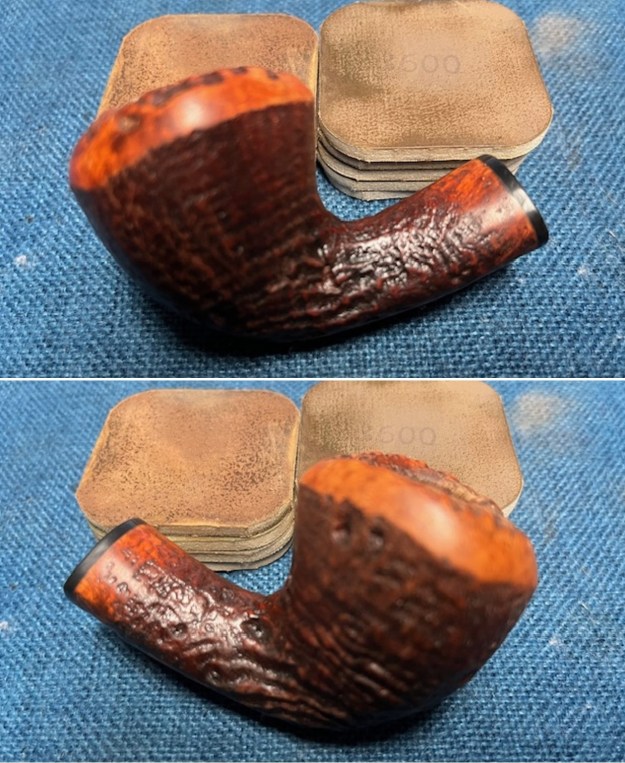
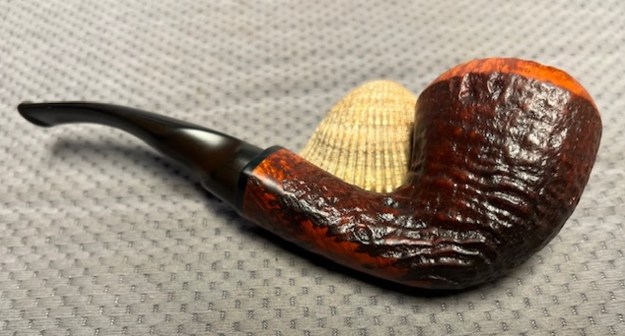
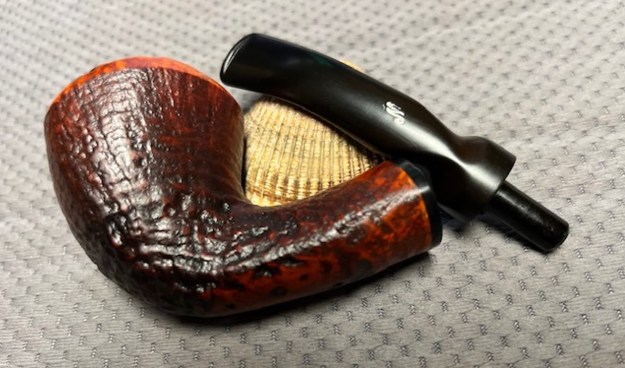
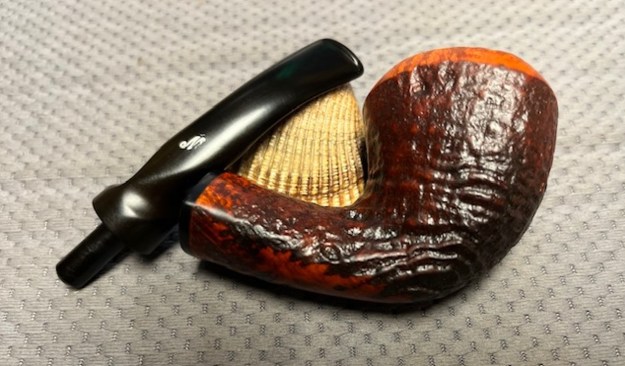
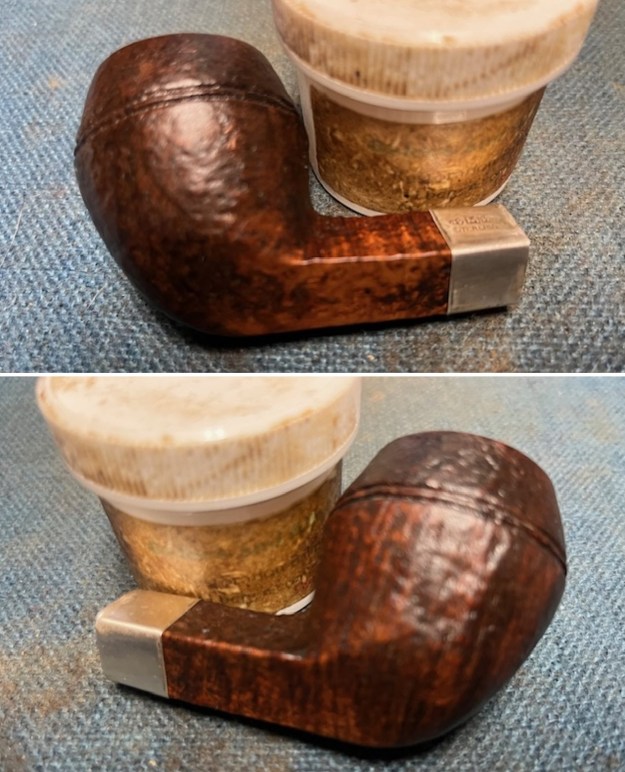
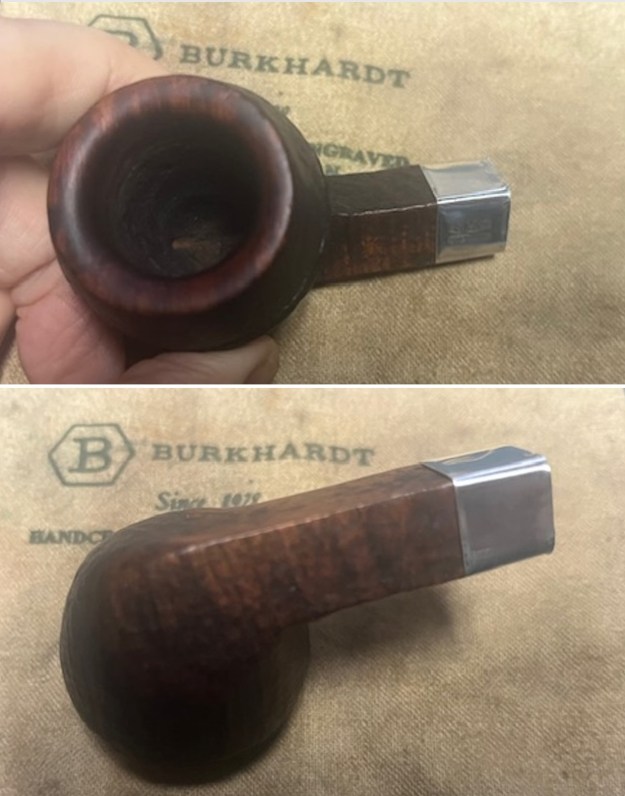
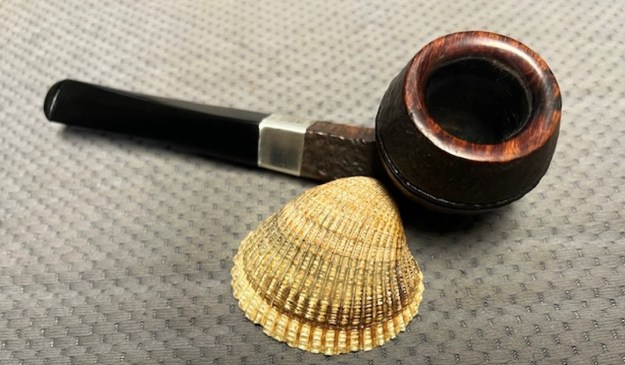
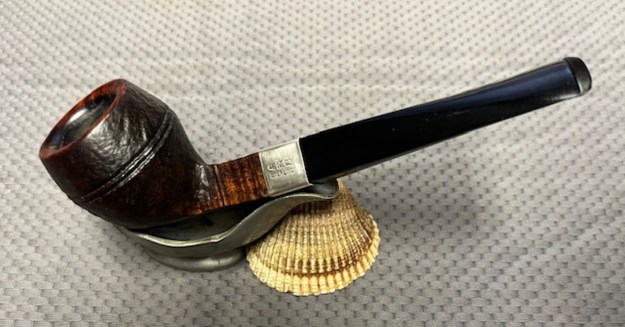
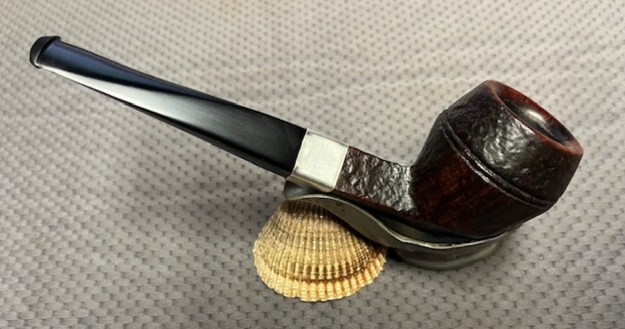
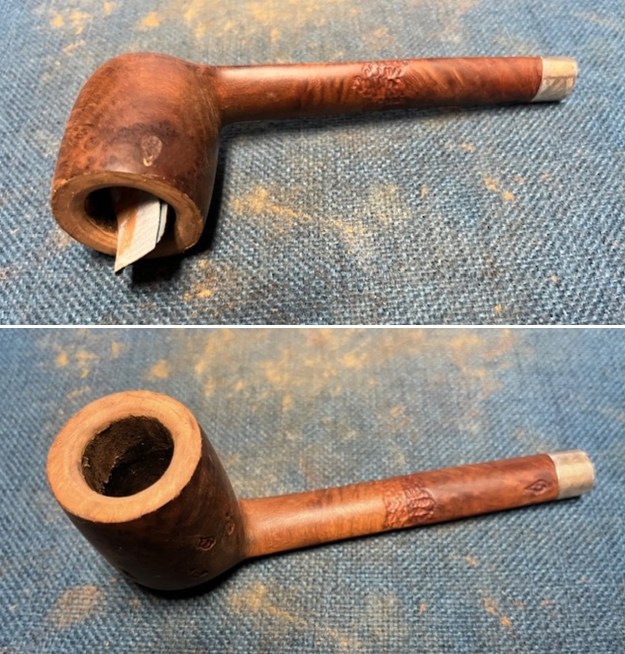
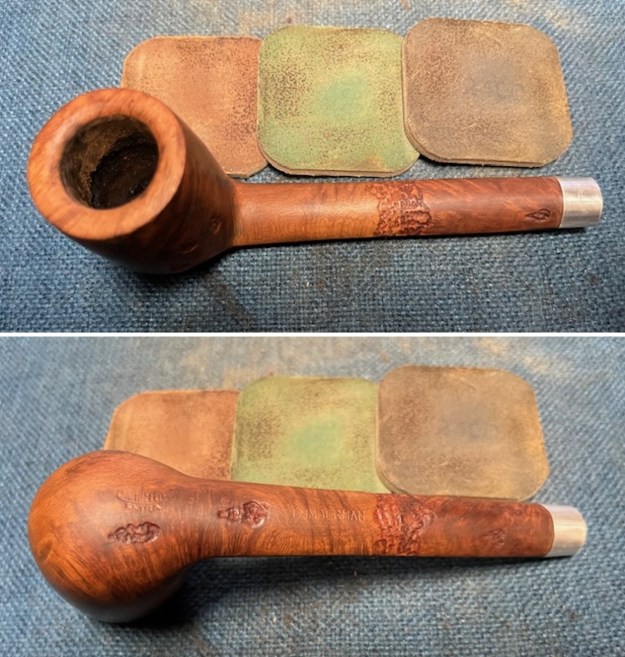
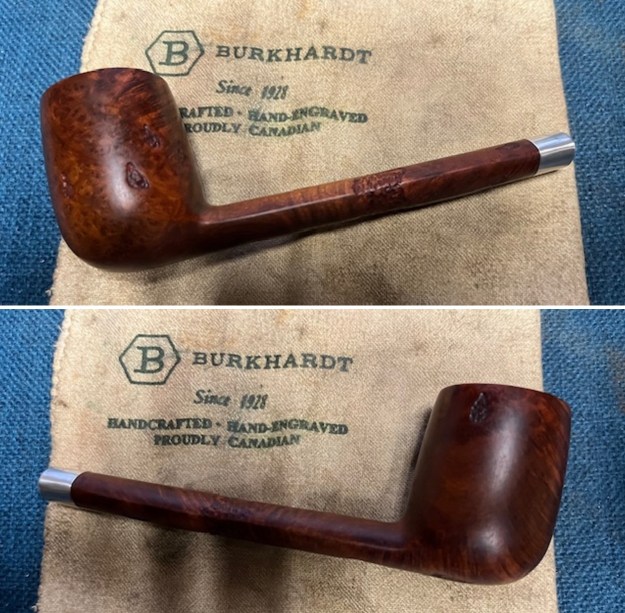
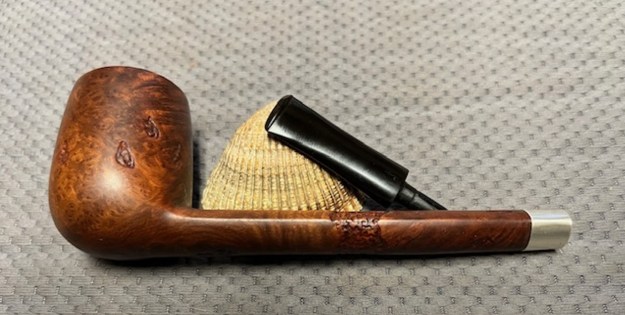
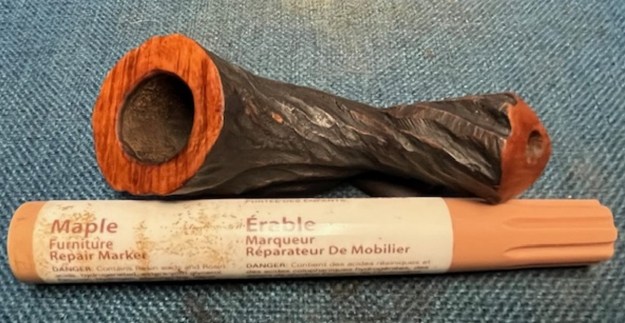
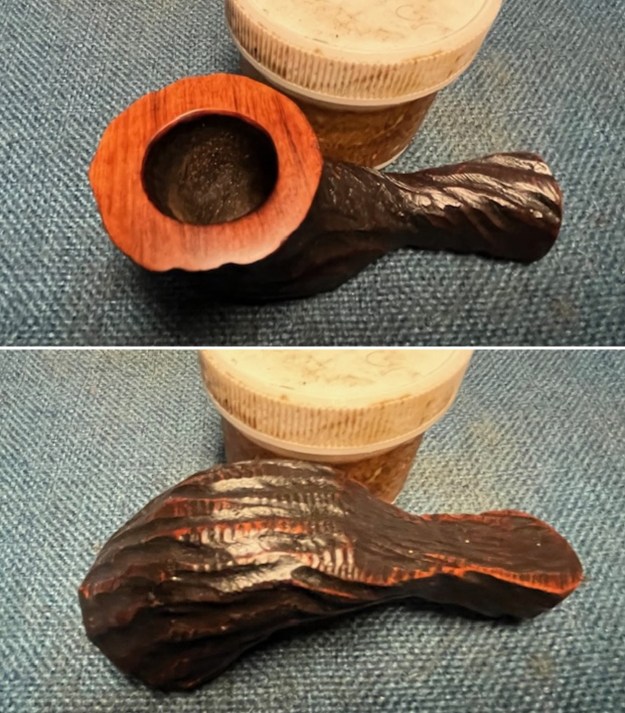
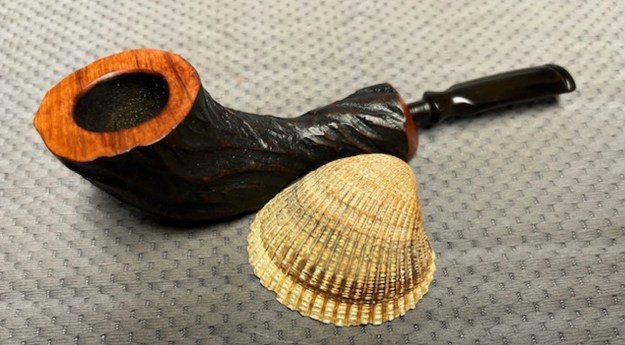
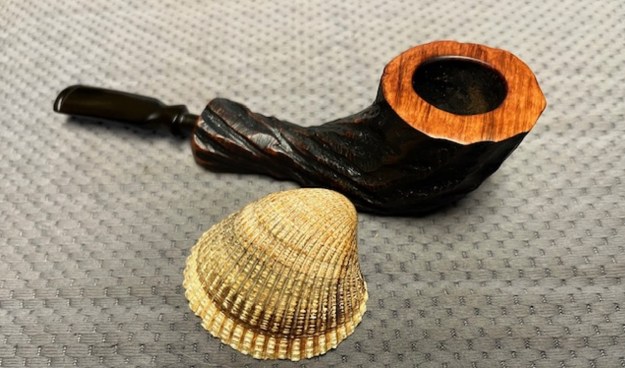
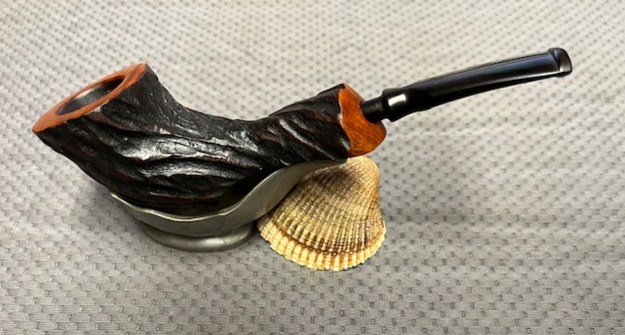
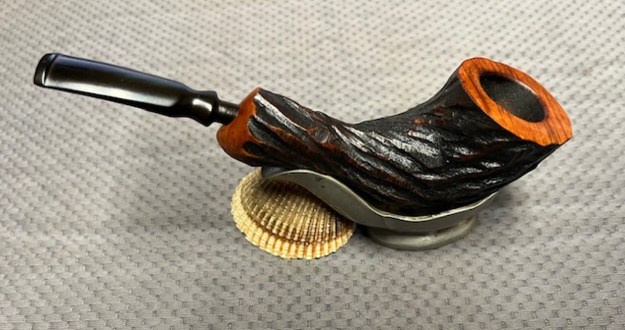
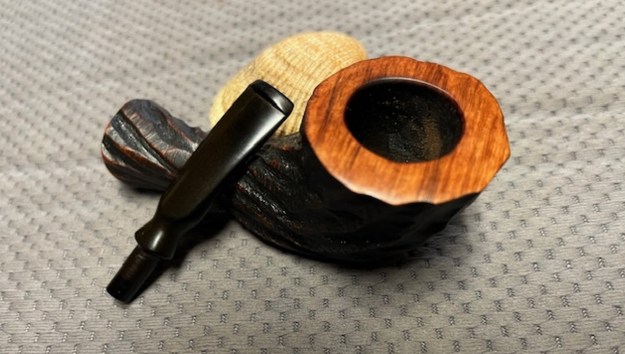
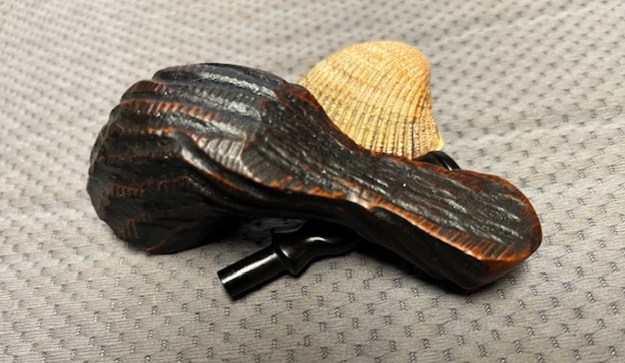
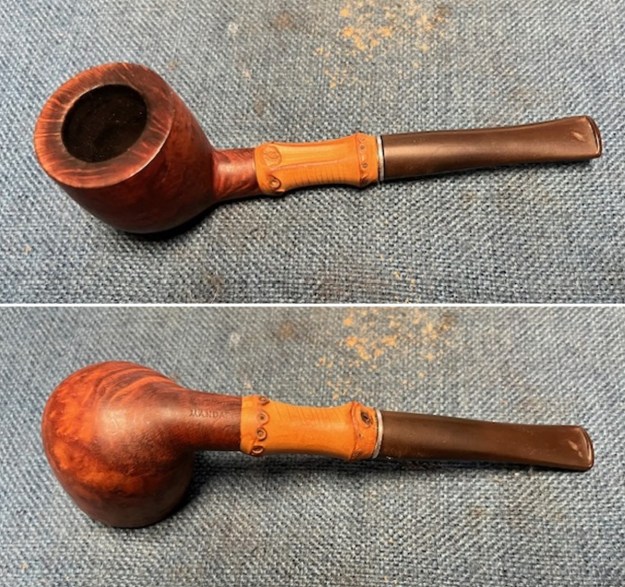
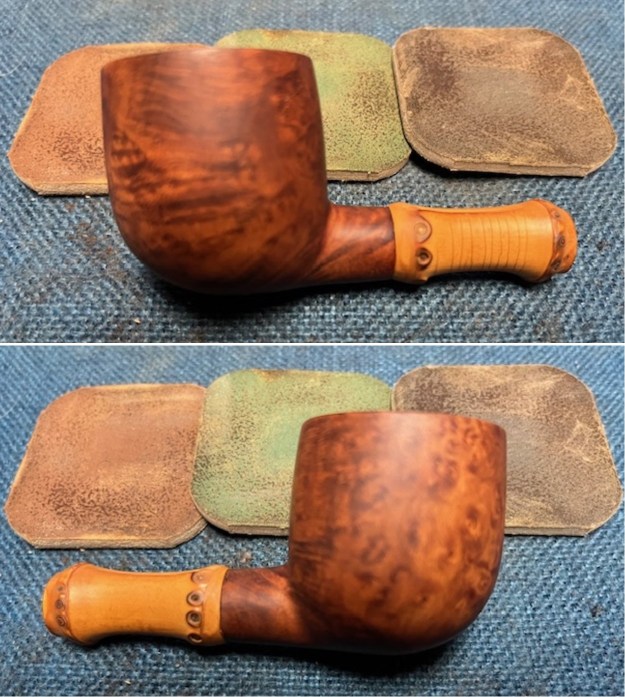
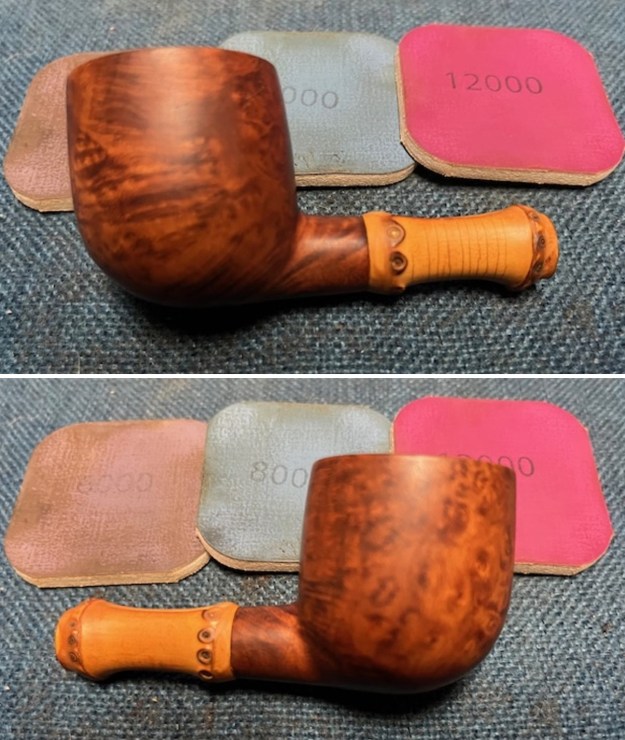
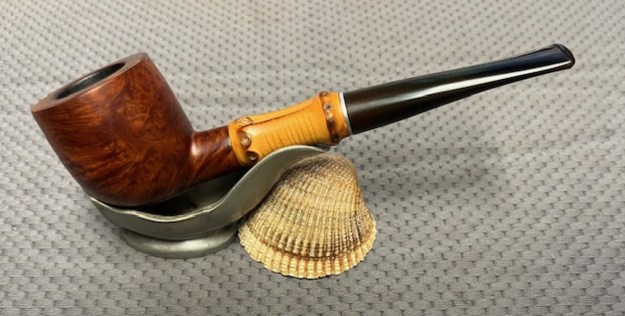
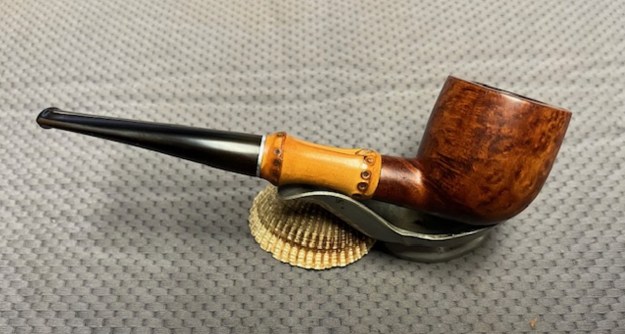
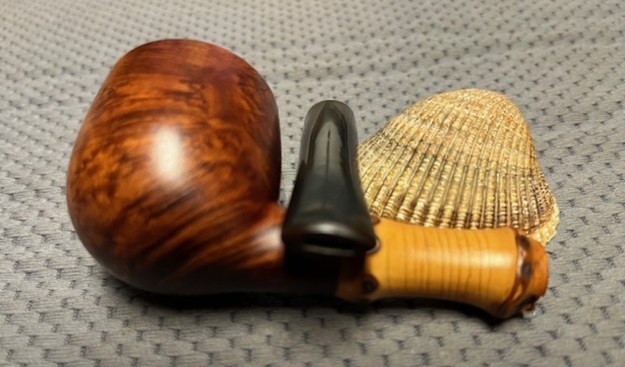
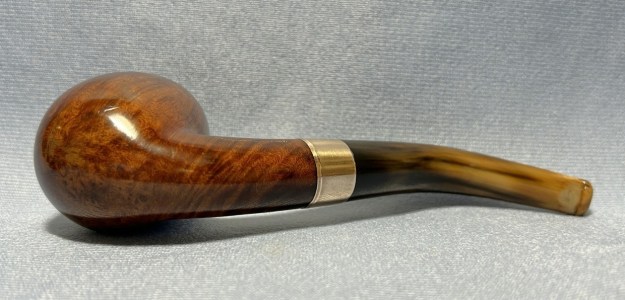
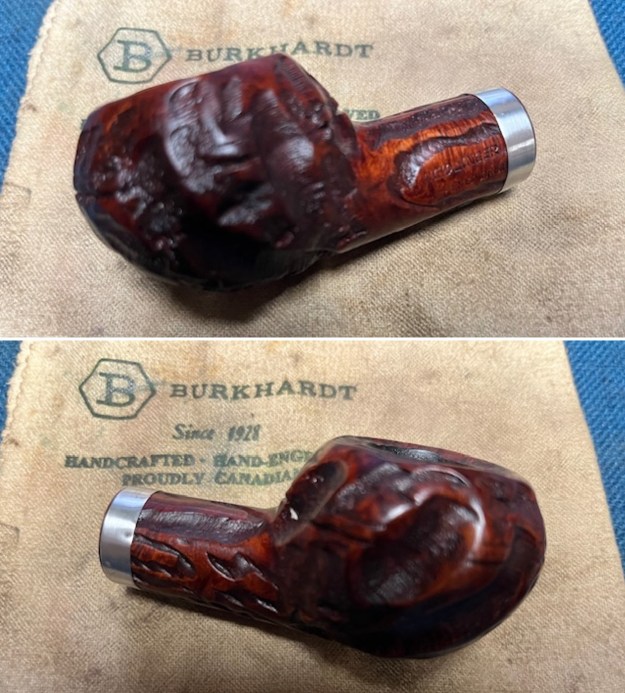
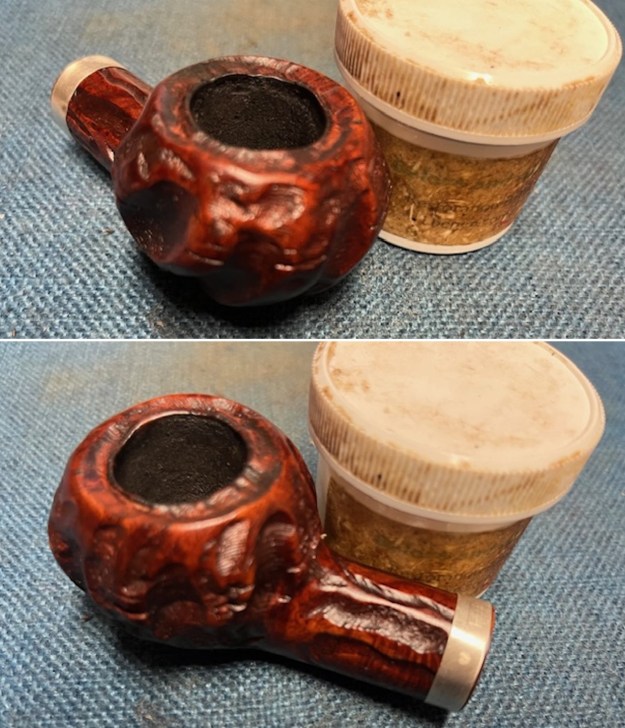
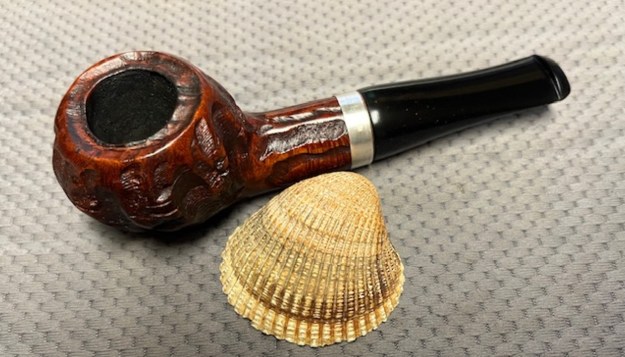
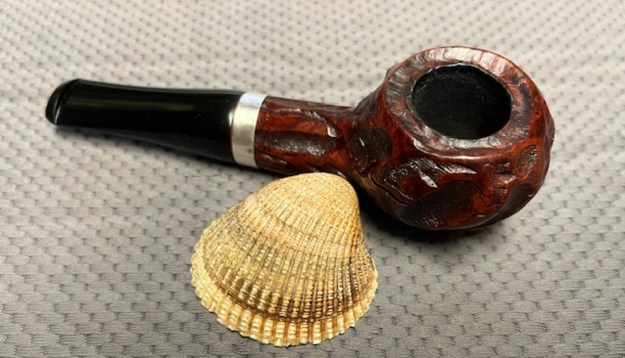
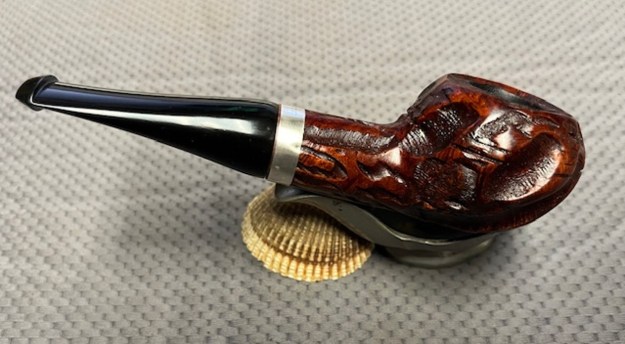
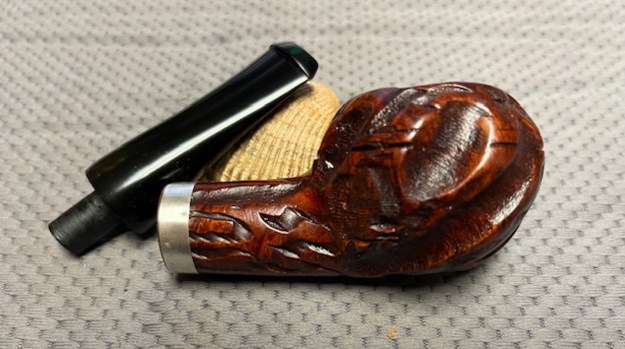
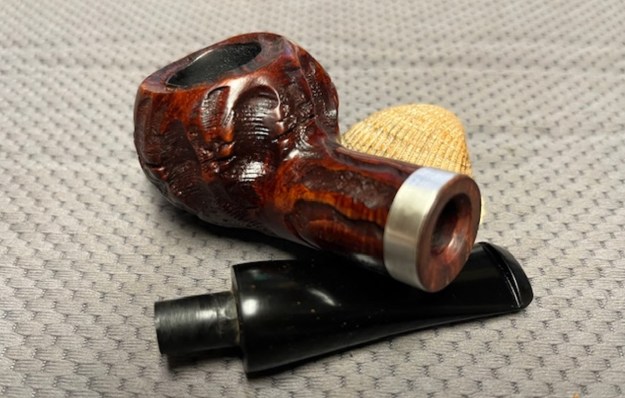
 The gentleman from England and I did discuss the possibility of staining the briar – but ultimately decided against it. We felt that stain would not hide the damage well anyway, so why not lean into the scars and accept them. This isn’t quite kintsugi, but it did remind me of it. So, for the final step, I took the pipe to my bench polisher and carefully buffed it – first with a blue diamond compound, then with three coats of carnauba wax. This procedure makes the pipe look its best – despite the difficult circumstances.
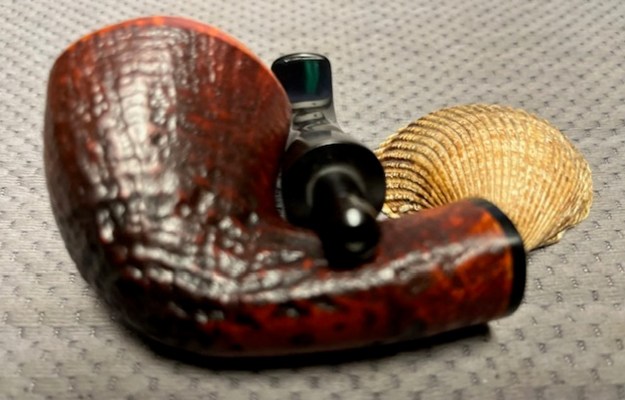
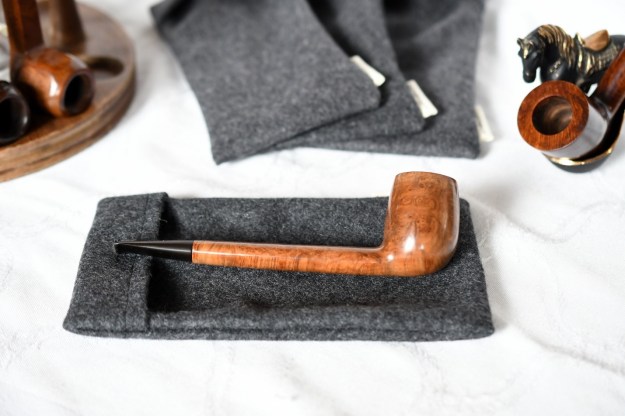
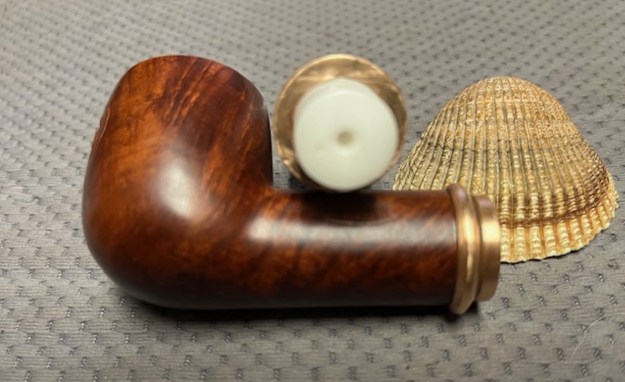
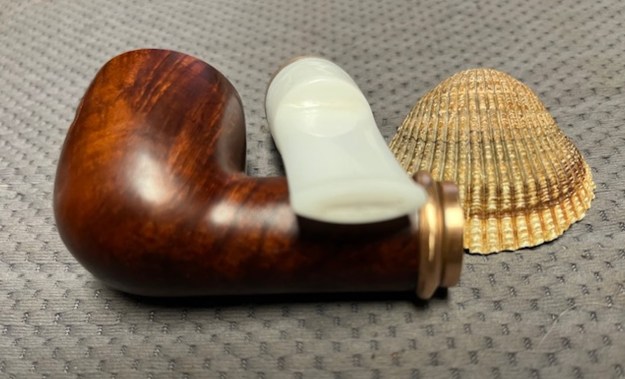
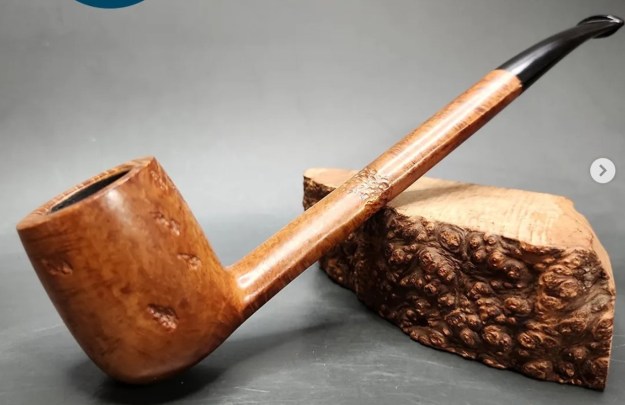
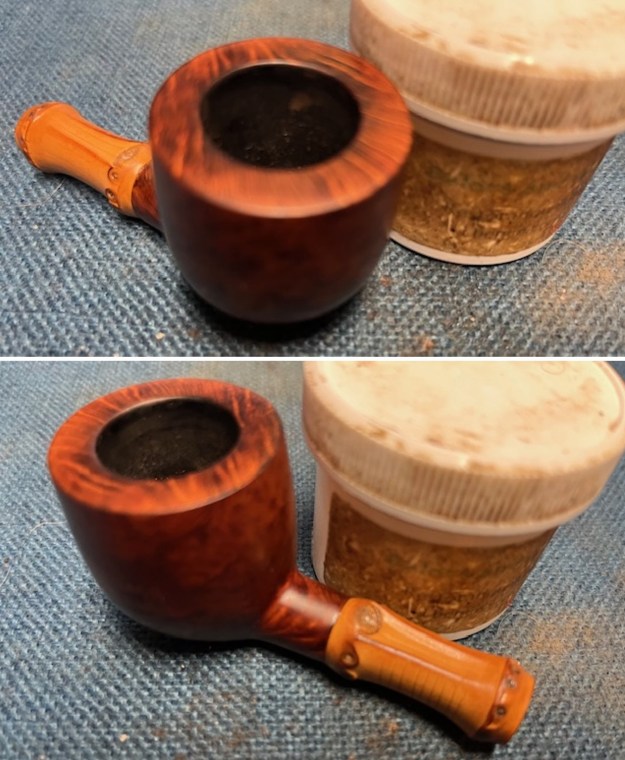
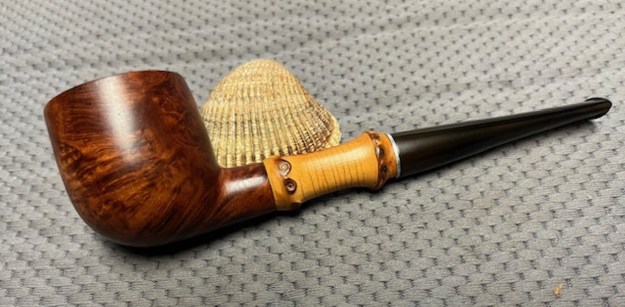
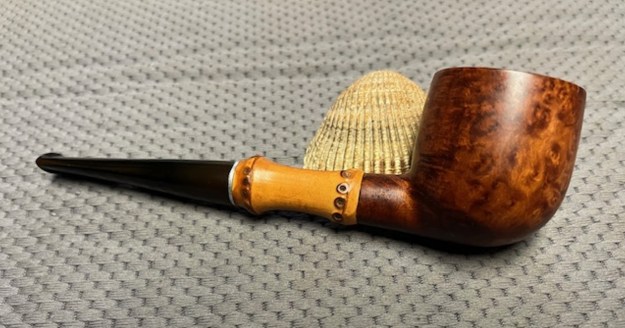
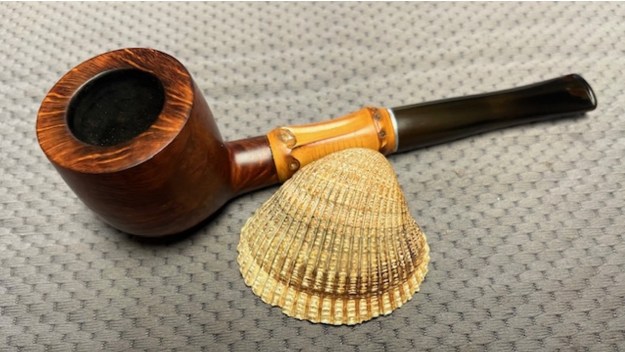
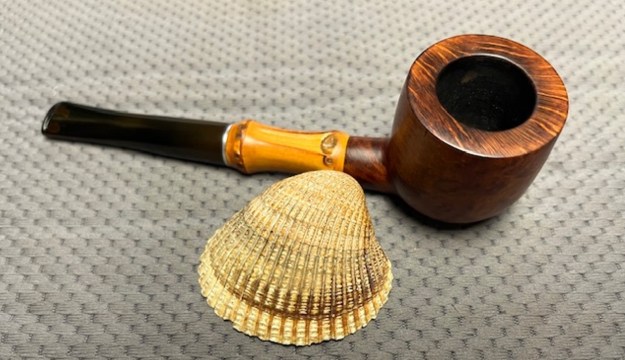
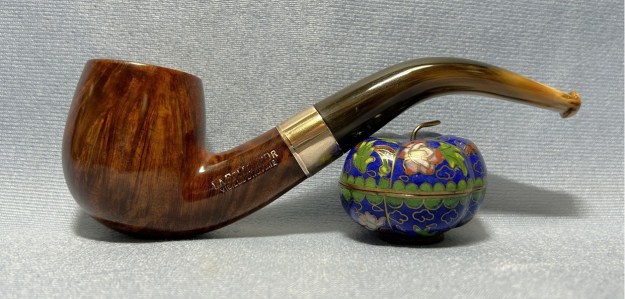
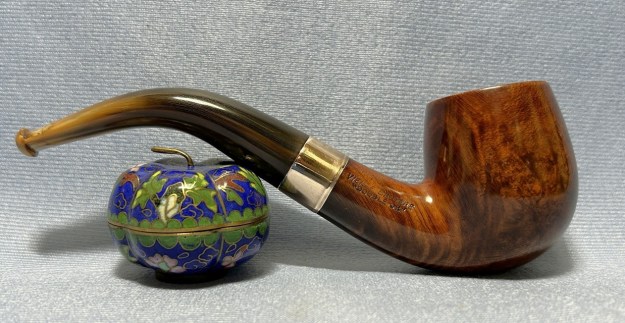
All done! This Dunhill Root Briar 59 billiard pipe has had a remarkable transformation and it’s hard to believe that it’s the same pipe – perhaps some would say that it isn’t. I am pleased and proud of the work and the results – I certainly hope my customer will be pleased too. I hope you enjoyed reading the story of this pipe’s restoration as much as I enjoyed restoring it. If you are interested in more of my work, please follow me here on Steve’s website or send me an email at kenneth@knightsofthepipe.com. Thank you very much for reading and, as always, I welcome and encourage your comments.