Blog by Dal Stanton
Continuing our Christmas Vacation trip in our 20’ R-pod travel trailer, we are now in Nashville, Tennessee, visiting my daughter, son-in-law and 6 1/2-month-old grandson! The New Year has come and the first pipe on my ‘mobile worktable’ here in Nashville is special. It is special not only because it’s a gargantuan Billiard which my rather large, 6-foot, 3 inch, son-in-law commissioned to fit his gargantuan hand, but It is also special because it was donated, along with 15 other very nice pipes, to benefit the Daughters of Bulgaria.
The benefactor of the 16 pipes, who asked to remain anonymous, is a retired educator in the KC area who wrote to me with an offer to give the pipes to benefit the work in Bulgaria that my wife and I helped to found over a decade ago – helping women and girls who have been trafficked and sexually exploited. This was the letter that I received:
Greetings, Dal, from the middle of the USA where it is cold, foggy, and wintery.
By way of introduction, I am XXX XXX. We have communicated a handful of times via one of the pipe groups on Facebook. Your posts have allowed me to read about your restoration work in support of the Daughters of Bulgaria. I find your pipe restoration work fascinating and your true mission inspiring.
If you are interested, I have approximately 15 briar pipes, from different makers, I would like to anonymously donate to your work. Most are in good condition but would likely need a clean and polish. Since most would fall short of needing a full restoration, I don’t know for sure whether you would be interested. If you are, I would be happy to send them to you. If pictures would help you decide, I would be glad to take said pictures and send them your way.
Warm regards
We 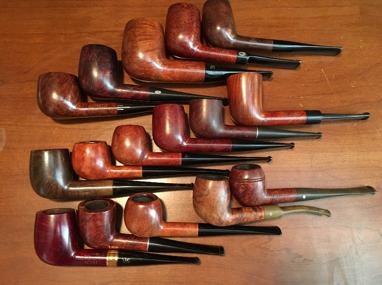 exchanged emails and he sent pictures of the pipes. Several weeks later after the 16 pipes arrived in Bulgaria, I wrote an email with the subject line, “Christmas in August!” and sent this picture of the 16 pipes unwrapped and displayed. Nice pipes – not a throw-away in the lot! I decided not to place these pipes in the For “Pipe Dreamers” Only! online collection for a time. The ‘Dreamers’ collection is for pipe men and women to commission pipes to be restored. I am thankful to this generous pipe man for his gift and support of the Daughters of Bulgaria. With the New Year here, I’ll be adding these pipes to ‘Dreamers’ section soon!
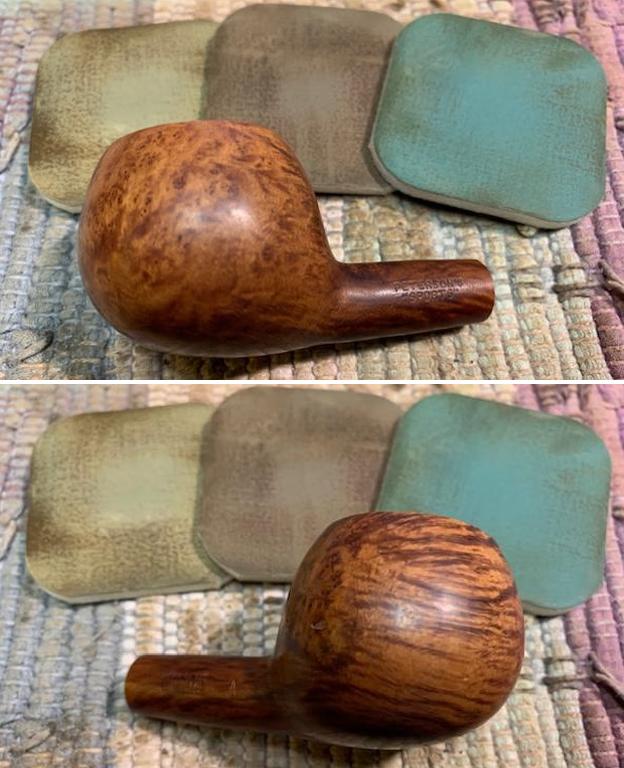
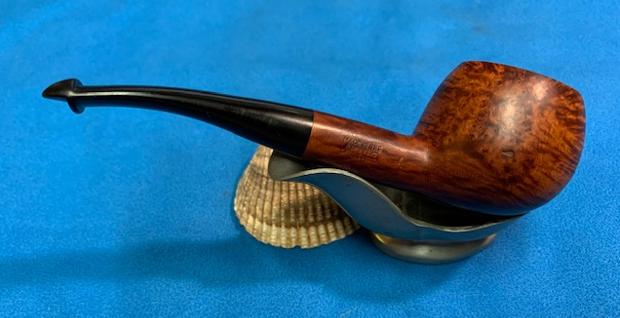
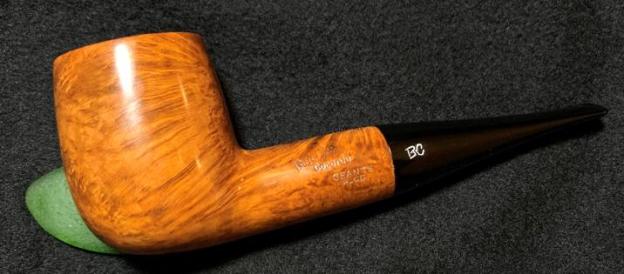
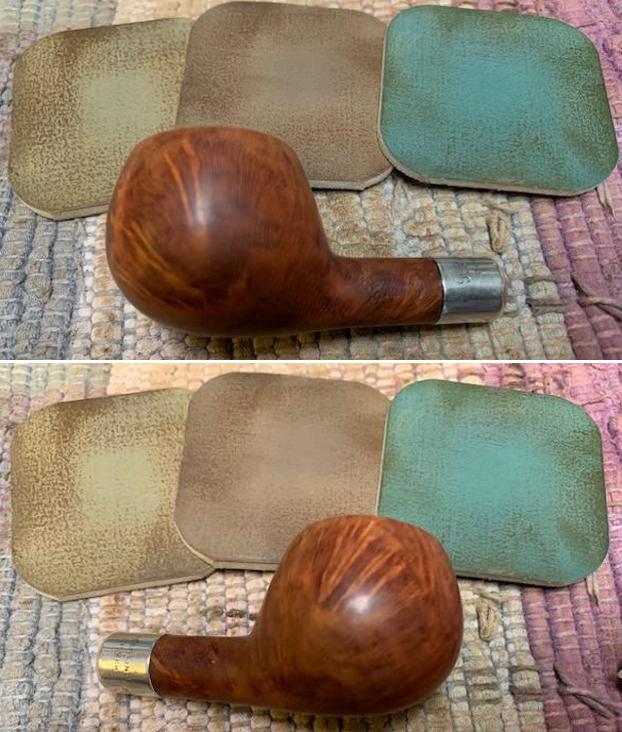
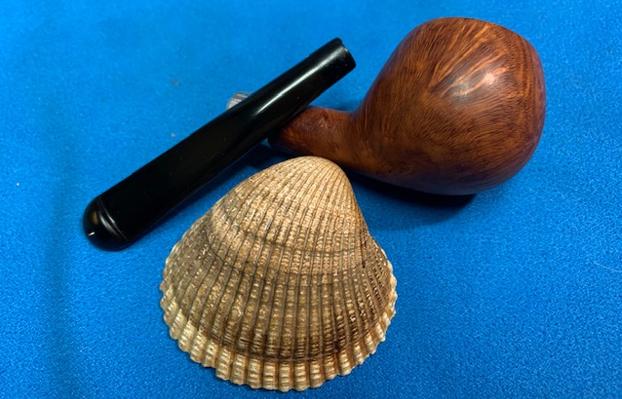
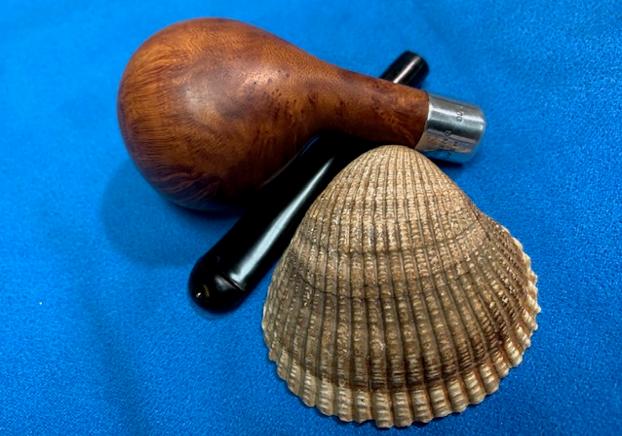
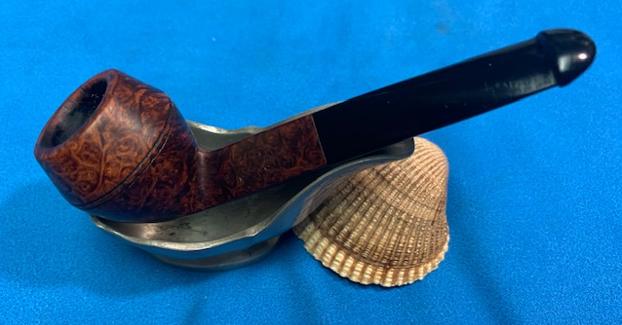
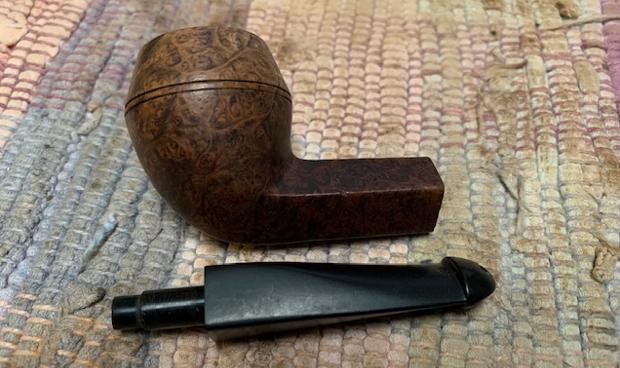
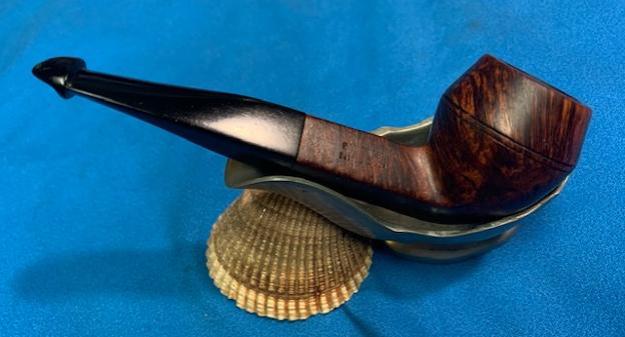
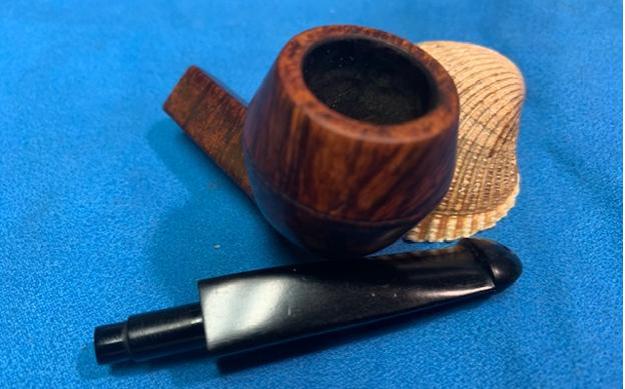
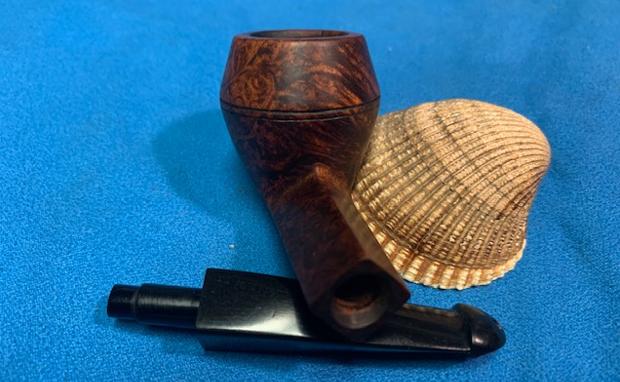
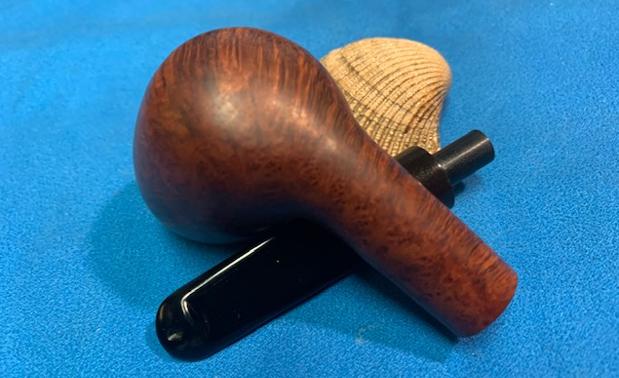
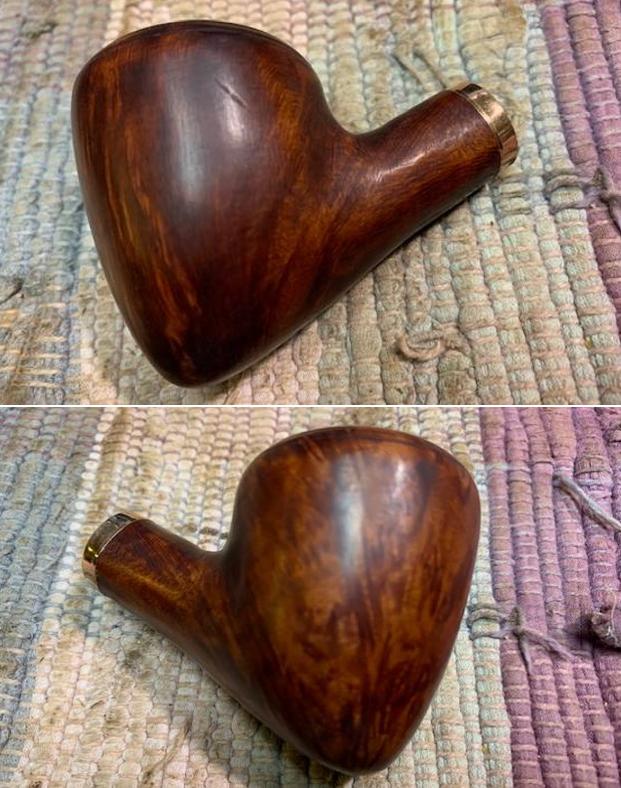
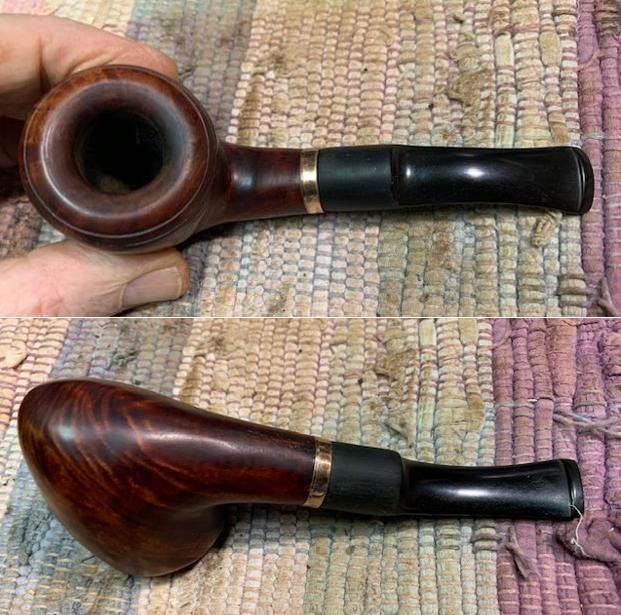
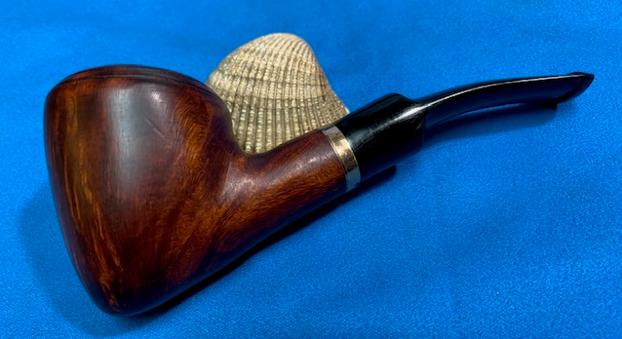
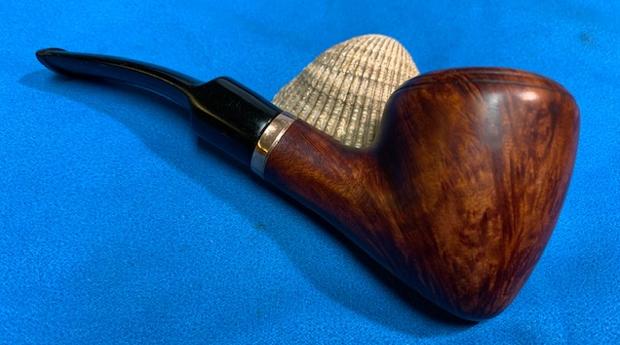
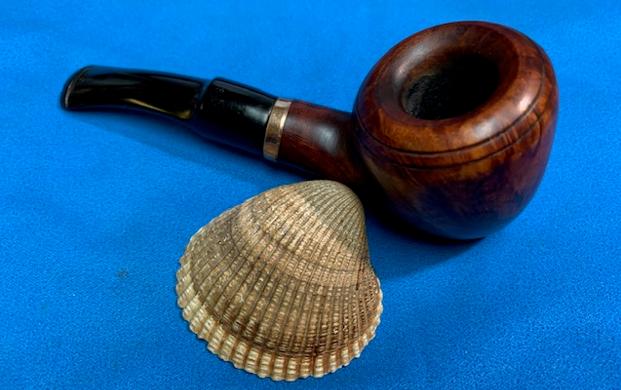
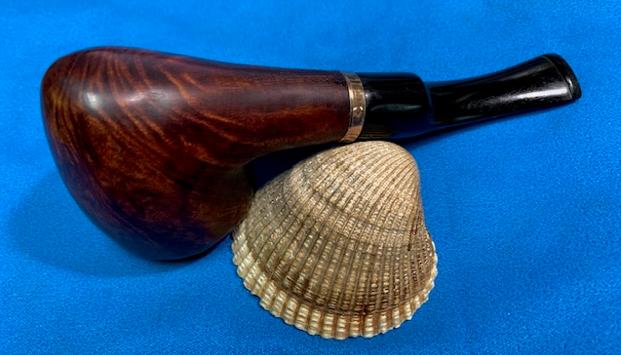
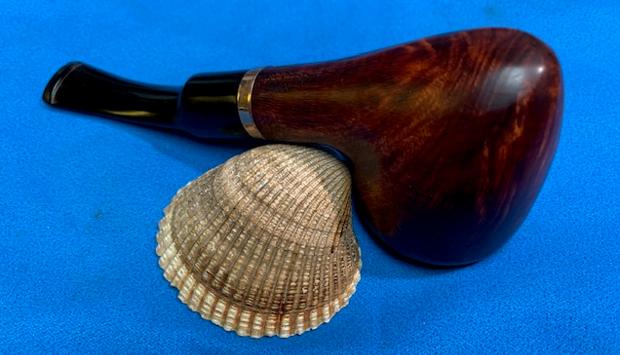
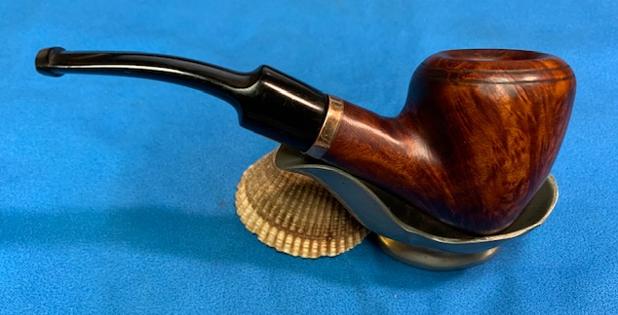
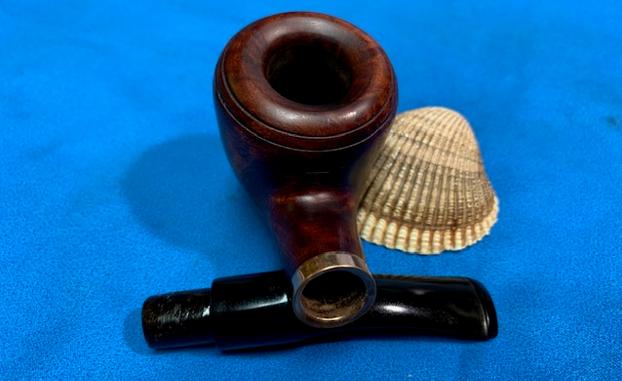
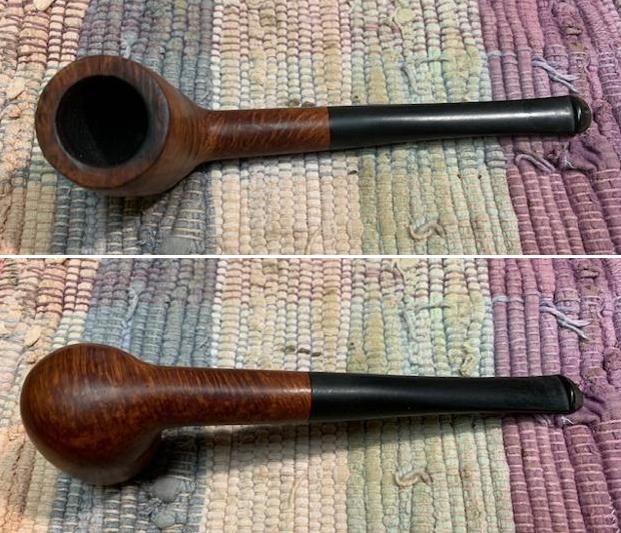
Last September, after our transition from Bulgaria to living in Golden, Colorado, my daughter and son-in-law, Niko, were visiting us in Golden from their home in Nashville. Niko is a pipe man and has commissioned pipes from the ‘old man’ before and he was in the hunt again for a new pipe looking through boxes of The Pipe Steward inventory. This time he had a specific aim – a larger pipe that he could cradle in his larger than normal hands! Niko is 6 foot, 3 inches, and during college was a pitcher on the baseball team. He aspired toward playing in the Majors but when an injury came his way, these dreams were put aside. Niko and I have shared bowls together many times and what I’ve noticed was that Niko’s hands were so large that he would ‘pinch’ the bowl on the end of his fingers rather than cradle the bowl. With Niko’s request for a larger pipe, the ’16 Pipes for the Daughters’ came to mind recalling the HUGE Butz-Choquin Cocarde Geante Plus (in picture above, top row center). I pulled out the box and it didn’t take long for Niko to decide to commission the BC. He also commissioned a Danish Royal Guard Pickaxe, next on the worktable. With the BC now on the table, some pictures give a closer look.


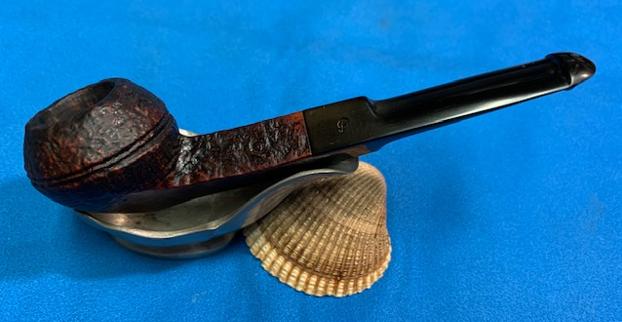
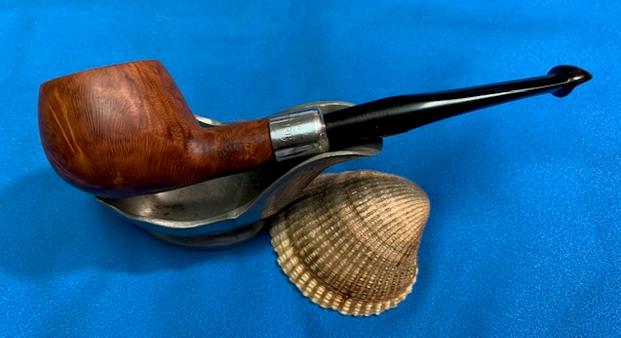
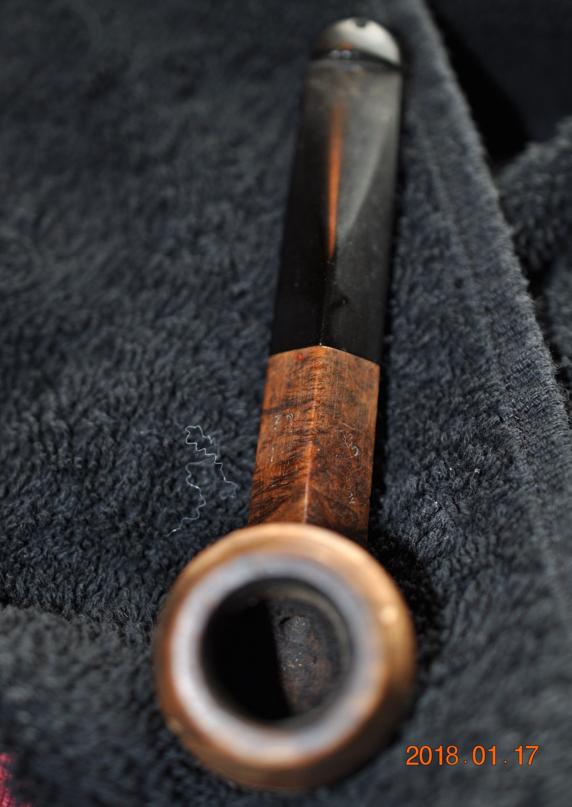
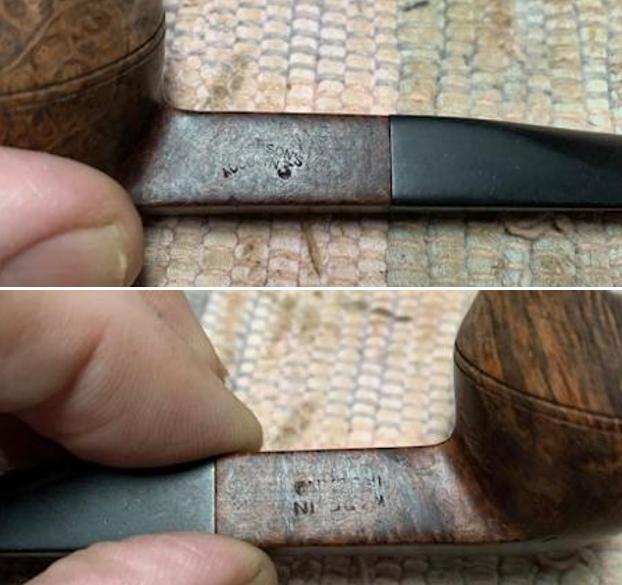
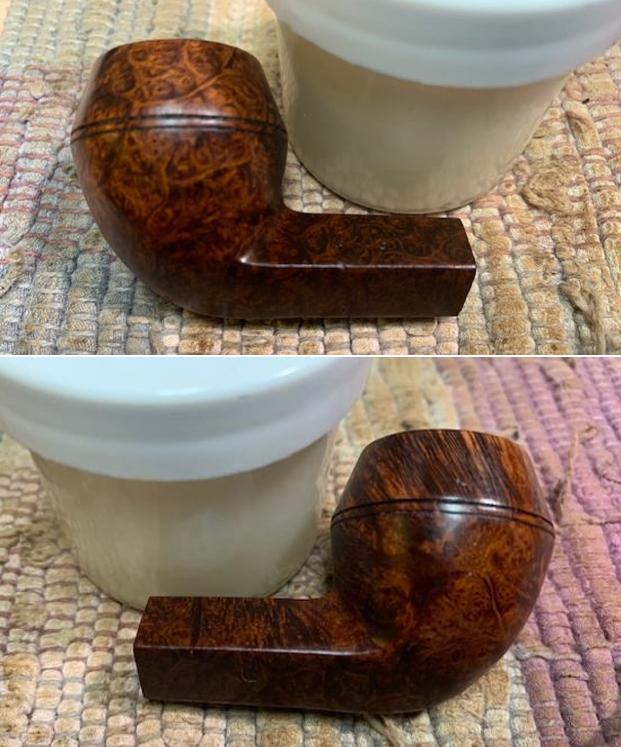
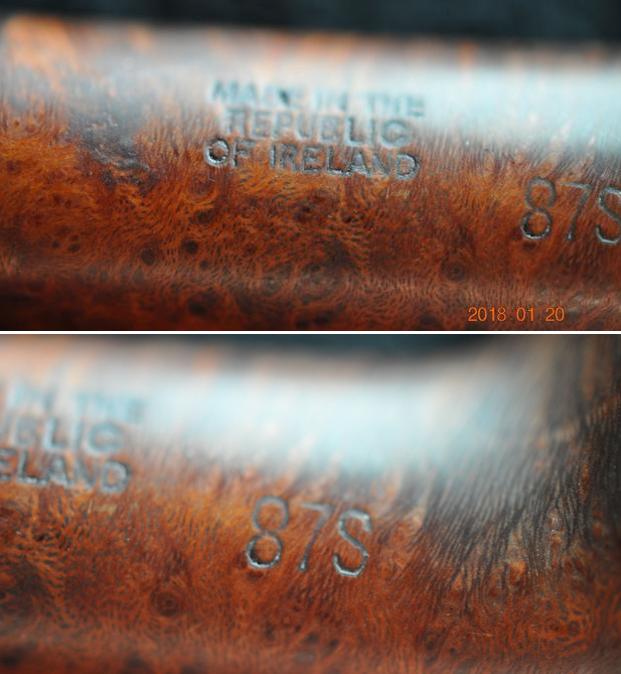
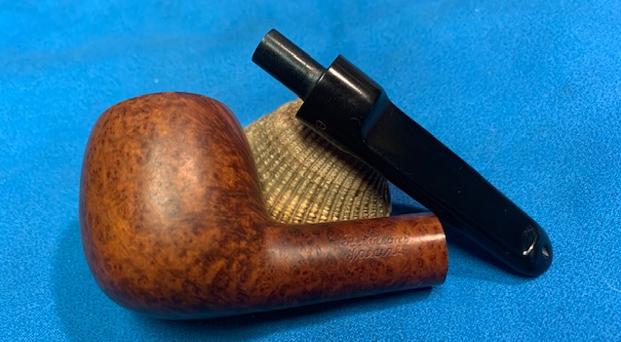
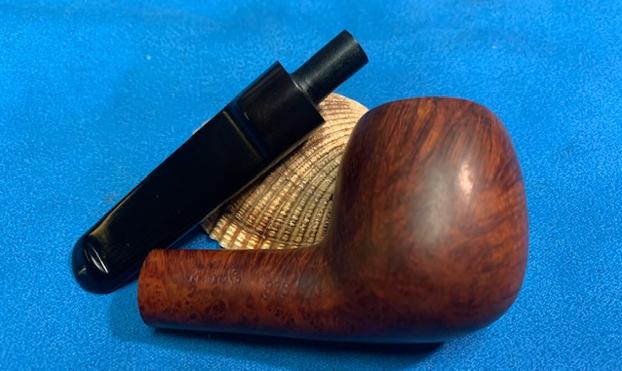
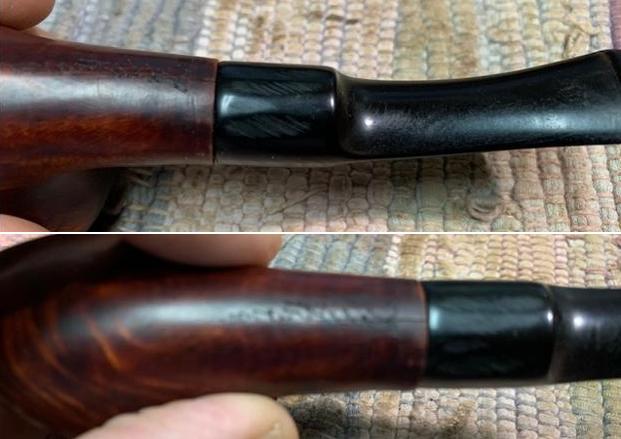
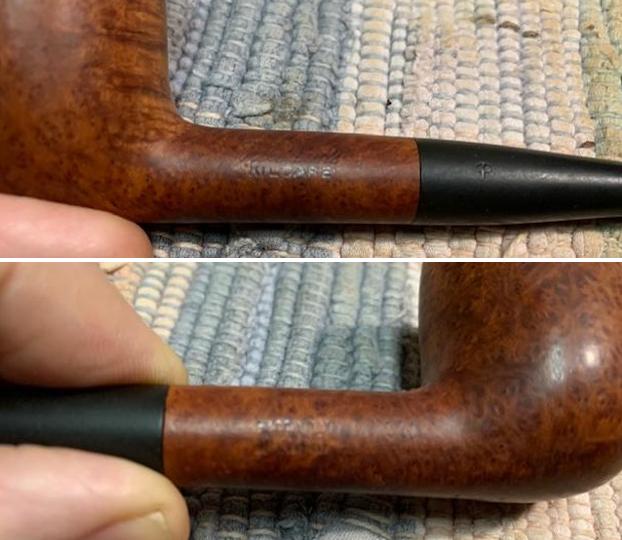
 The nomenclature on this pipe is interesting. On the left shank flank is stamped the traditional mark, ‘Butz-Choquin’ [in cursive offset slightly to the left and slightly at a diagonal, over] Cocarde [over, slightly to the left] GEANTE [over] PLUS. The stem stamping is Butz-Choquin’s recognizable chiseled, ‘BC’.
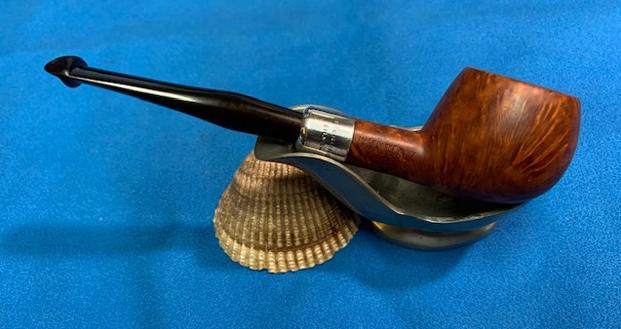
  On the right side of the shank is stamped ST. CLAUDE [ARCHED over] FRANCE [over] 1397 the shape number. In the second photo below, seen more clearly, is the interesting addition of a pipe shop in Paris. Stamped below the shape number is, TABAC ST. MICHEL [over] PARIS.
 The history of the Butz-Choquin name is concisely put on Pipephil.eu and its helpful to me for the refresher.
The origin of the brand reaches back to 1858 when Jean-Baptiste Choquin in collaboration with his son-in-law Gustave Butz created their first pipe in Metz (France). Since 1951 Butz-Choquin is a brand of the Berrod-Regad group (Saint-Claude, France).
Jean Paul Berrod managed the company from 1969 to 2002 when he retired and sold the corporate to Mr Fabien Gichon. Denis Blanc, already owner of EWA, took over the S.A. Berrod-Regad in 2006.
I could not find anything specific in Pipedia about the ‘Cocarde’ line, but a simple search on the internet will show many different shapes available in the Cocarde line from Butz-Choquin. I did find a shapes chart pictured in the Butz-Choquin Pipedia article that included the 1397 Geante Plus. Unfortunately, there is no reference to the date of the catalogue. A quick look at Google Translate gave a translation of the Geante Plus as ‘Giant More’ – which is no surprise. The photo below sets the Geante Plus apart with the 1397 shape number as unique to this designation. The Giant Billiard seems to be the unique bearer of this designation.
 What’s of interest as well is that this pipe is uniquely stamped with the name, Tabac St. Michel in Paris. I do a quick search on the internet to discover that it is a tobacco shop still in operation in Paris at 22 Rue Saint-André des Arts. The picture below is taken from this LINK giving the address and operational hours. There is no link to a website but looking closely at the front display window, there appears to be pipe related products available. I can find no more information about this establishment. Apparently, Butz-Choquin produced some pipes for the Tabac Saint Michel with the shop name stamped on the pipe. With my curiosity piqued, I send a note to the benefactor pipe man regarding the origin of this pipe – if he had acquired this pipe at the Tabac Saint Michel on a trip to Paris. We’ll see if he can add some information of interest.
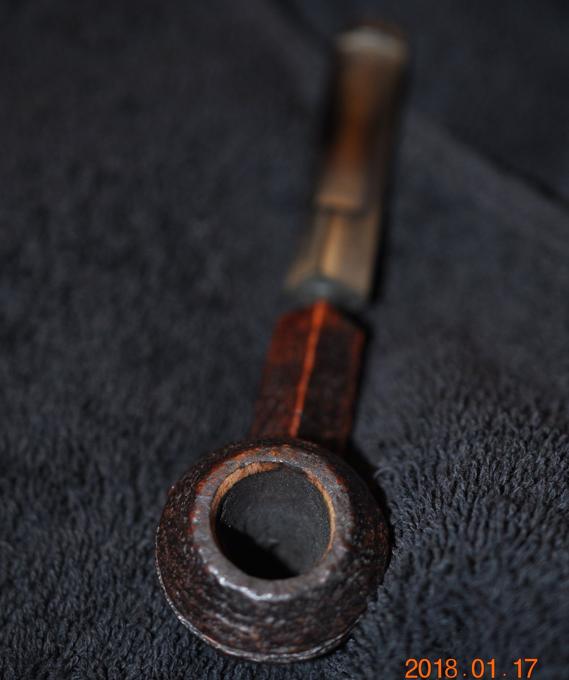
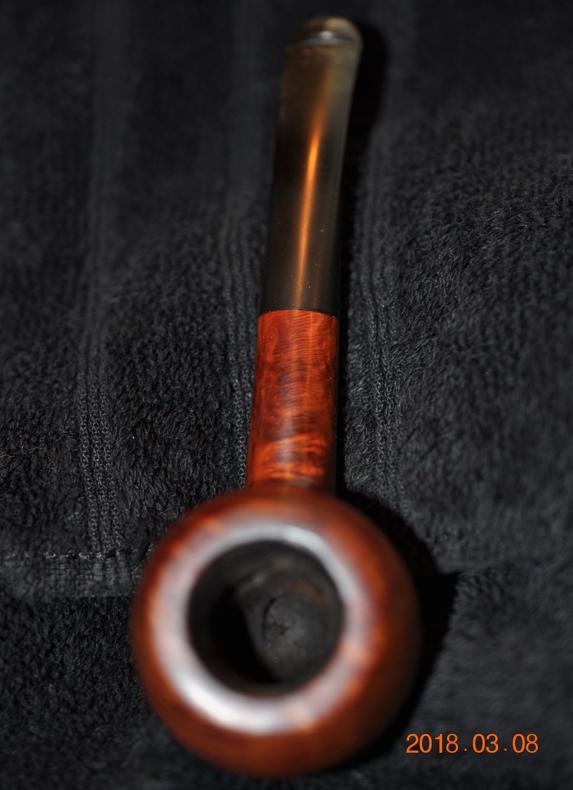
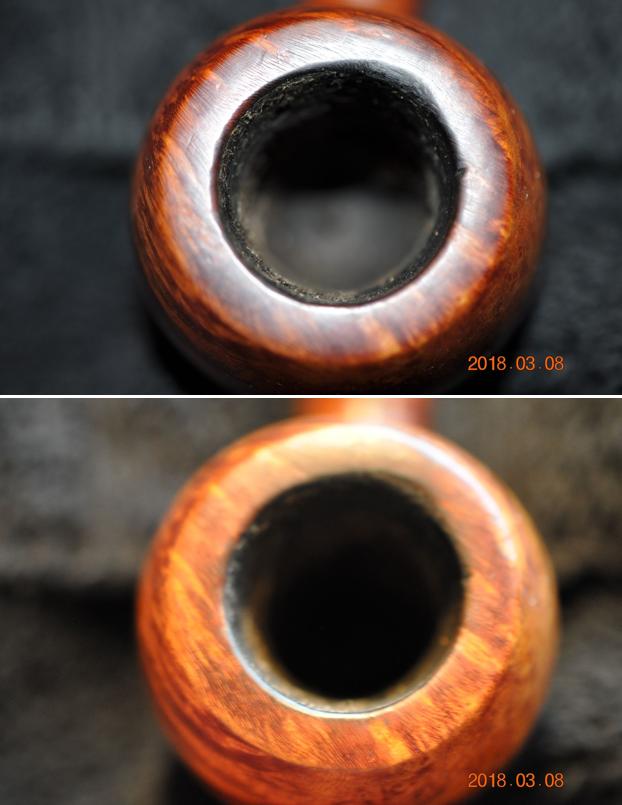
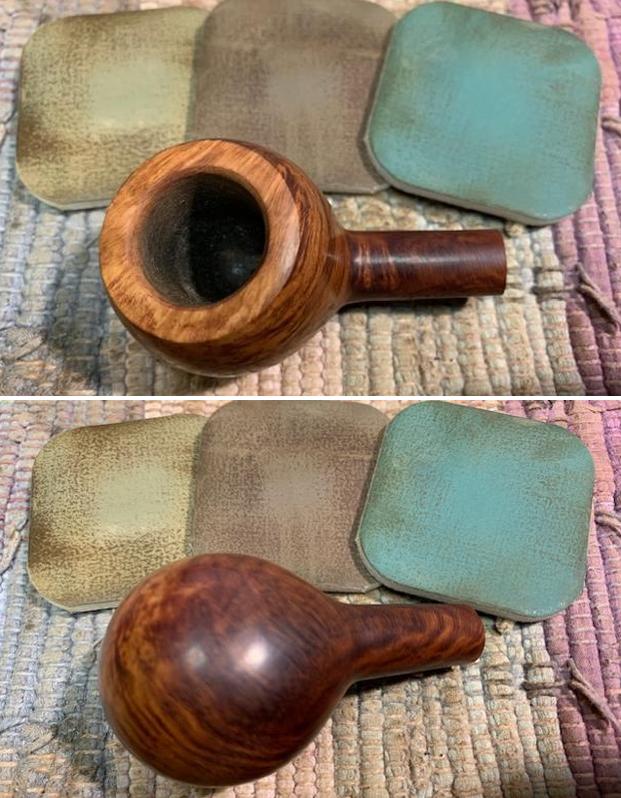
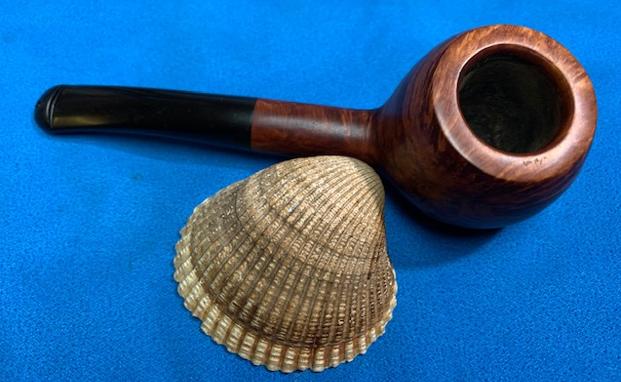
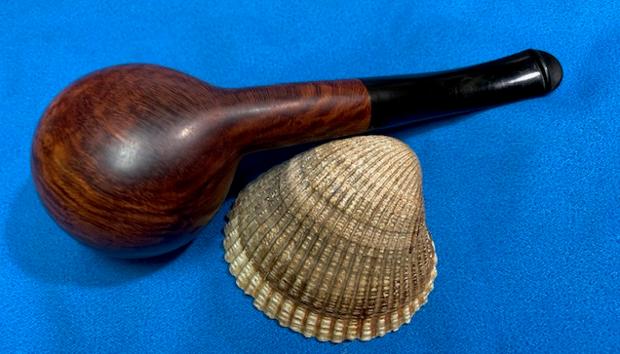
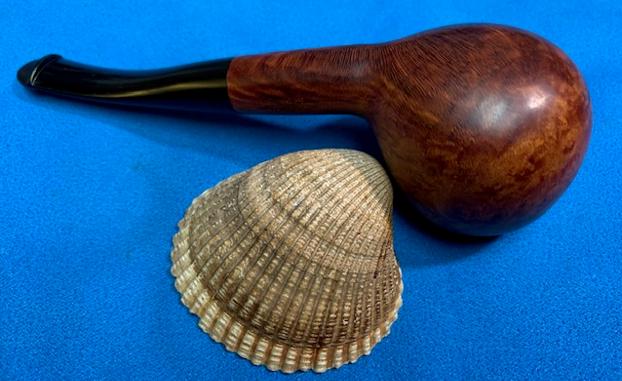
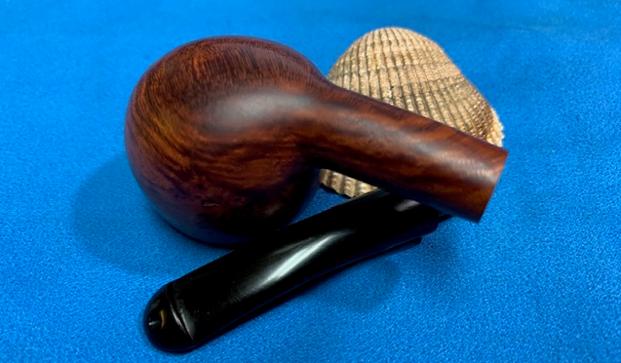
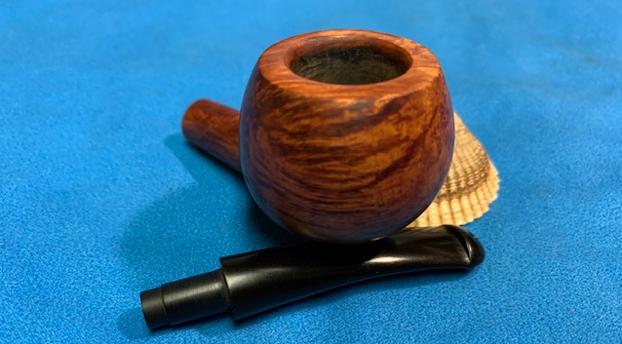
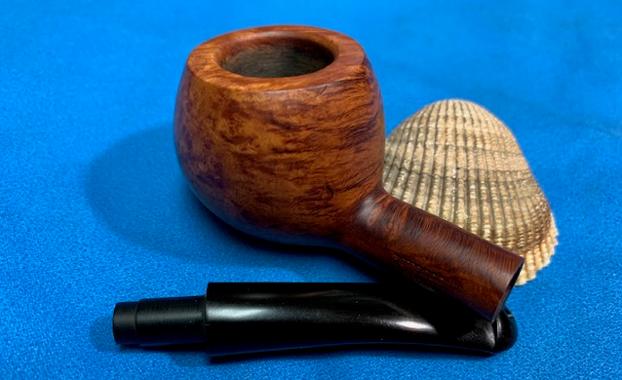
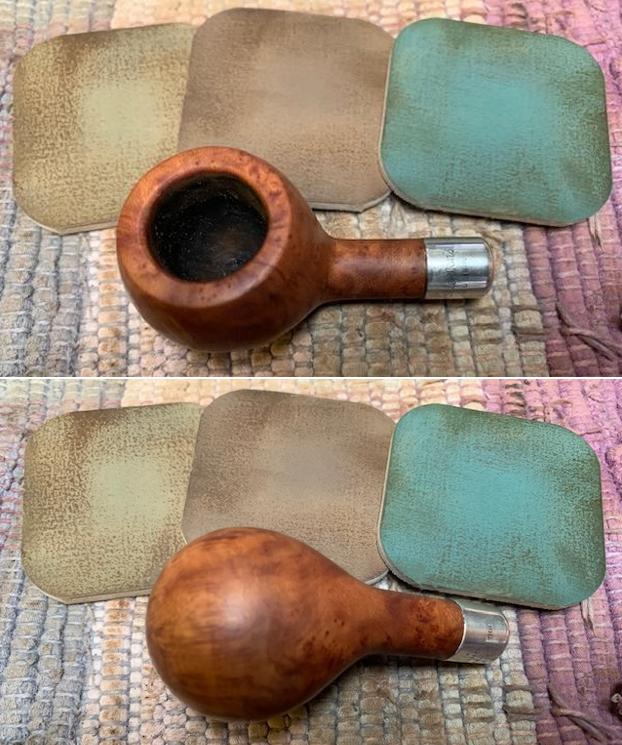
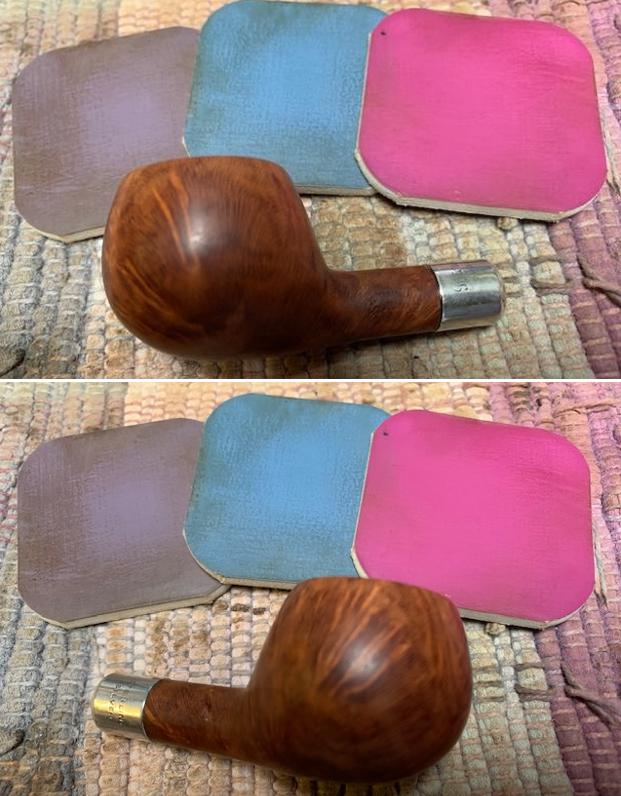
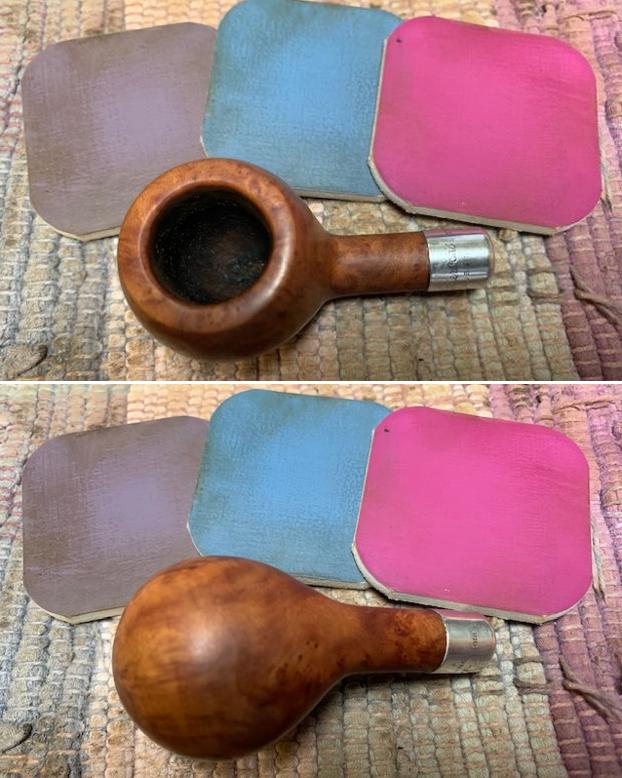
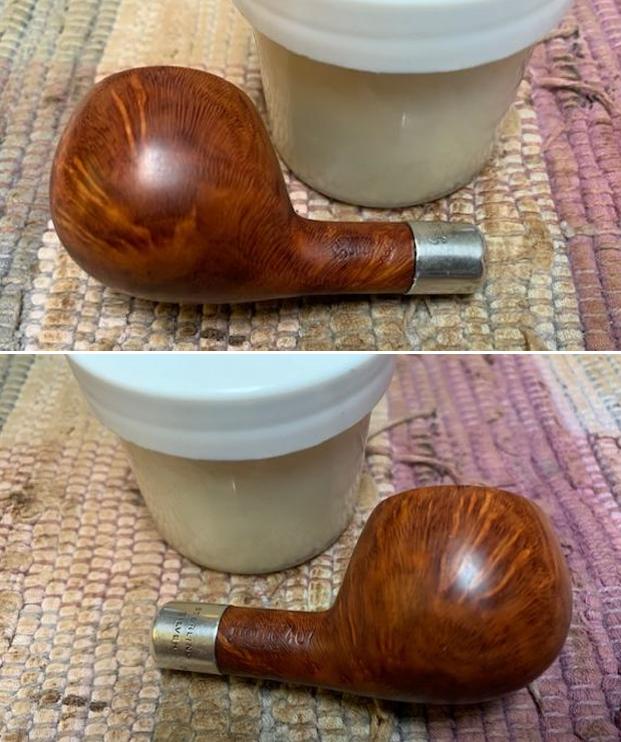
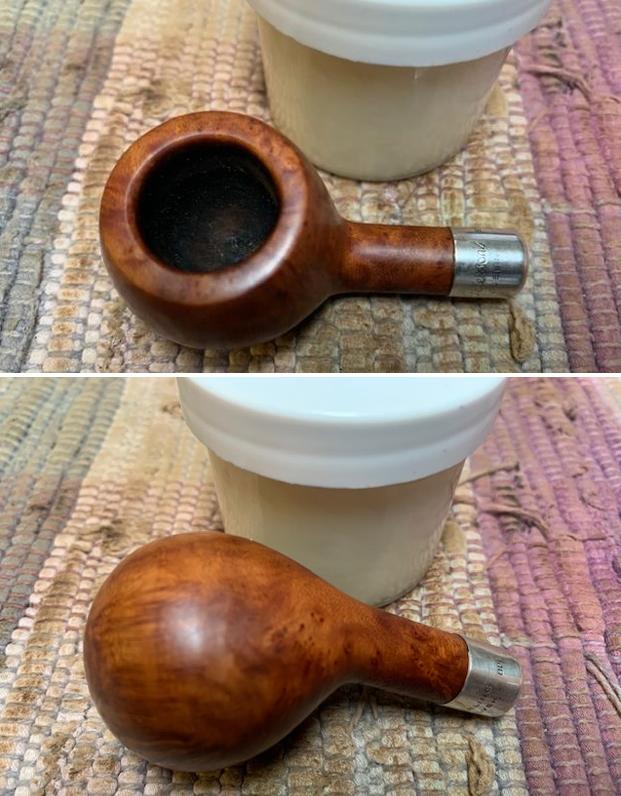
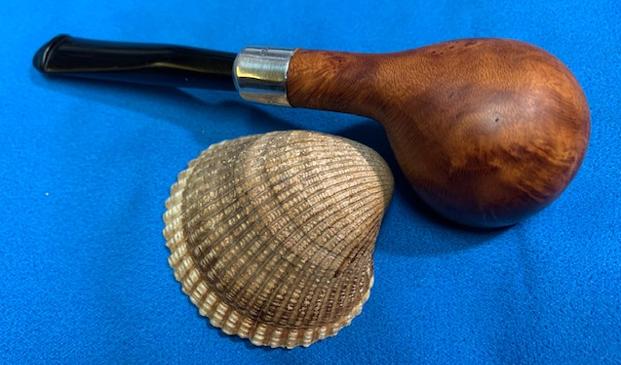
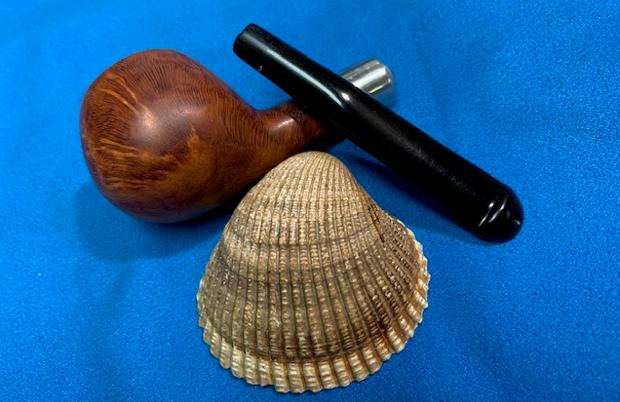
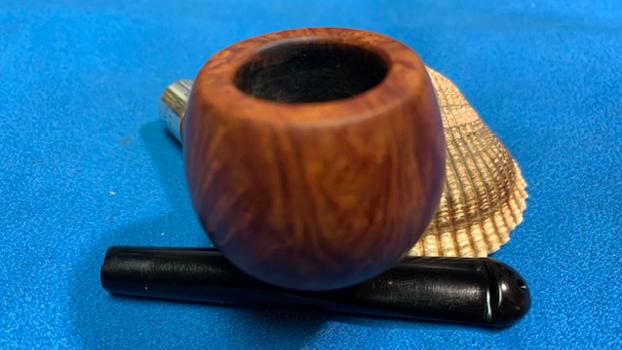
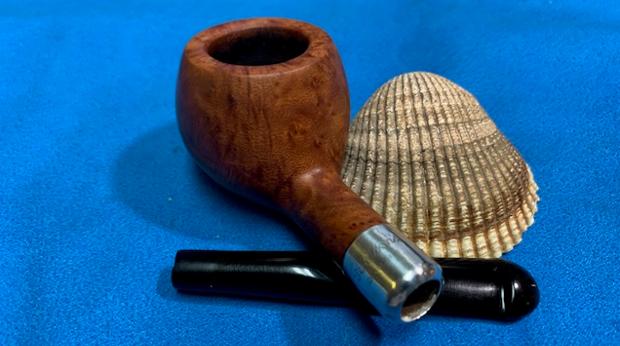
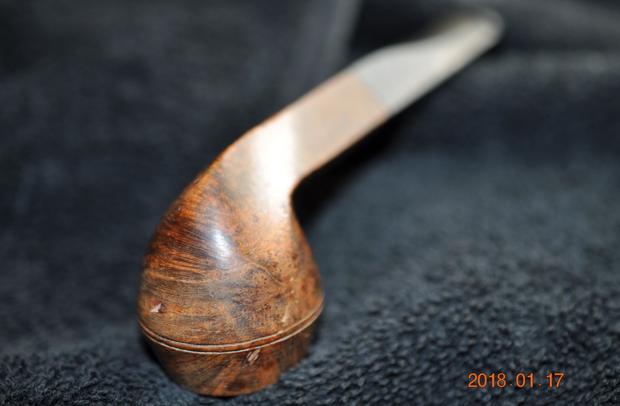
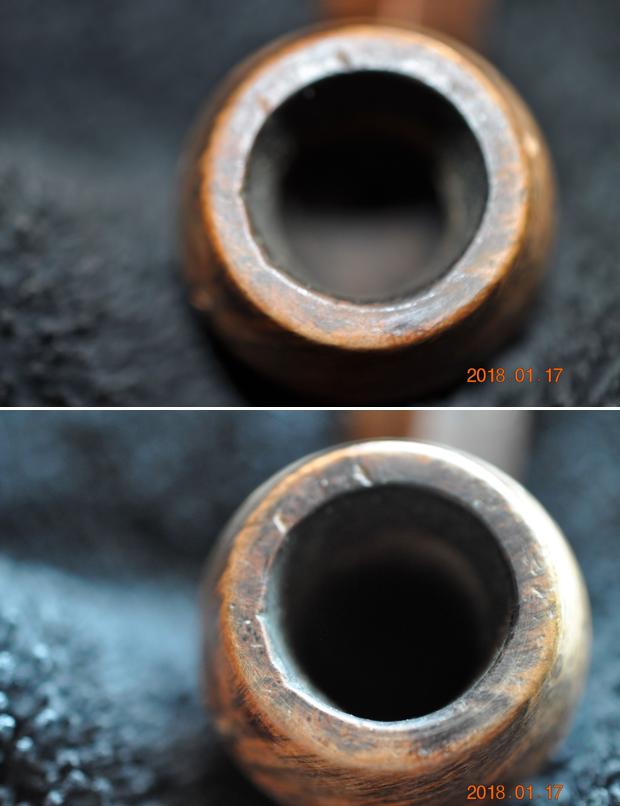
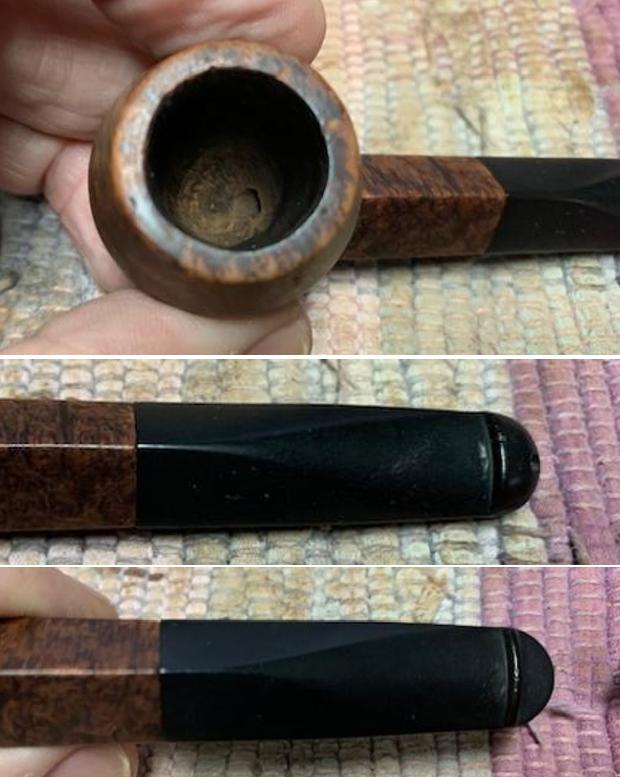
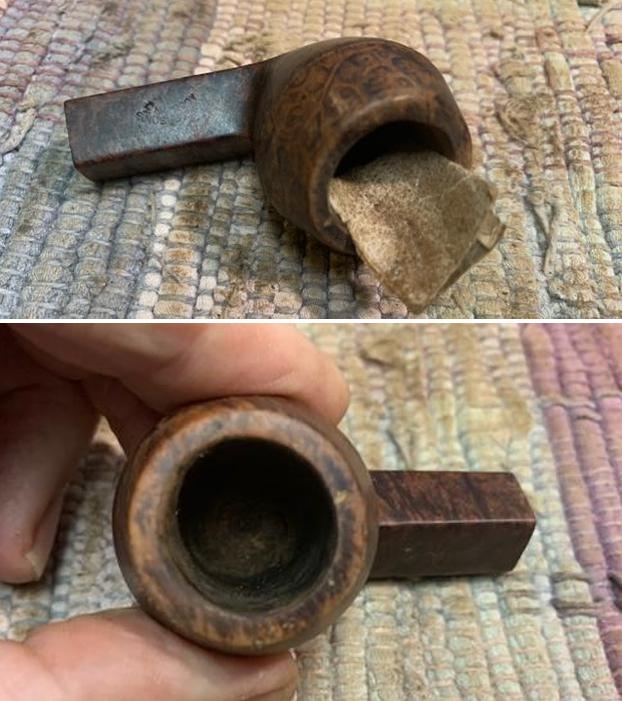
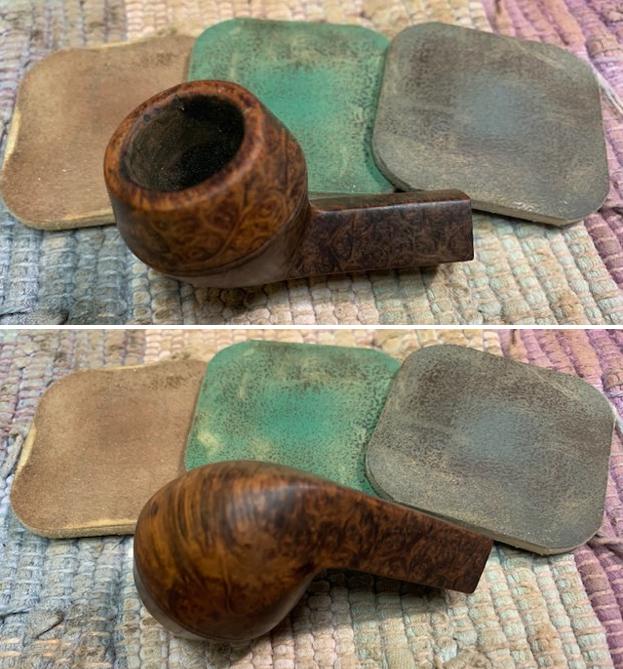
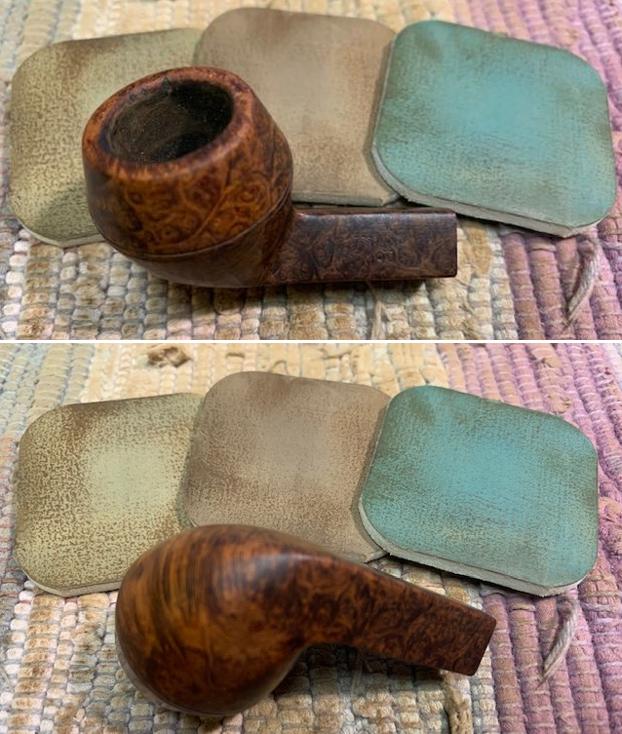
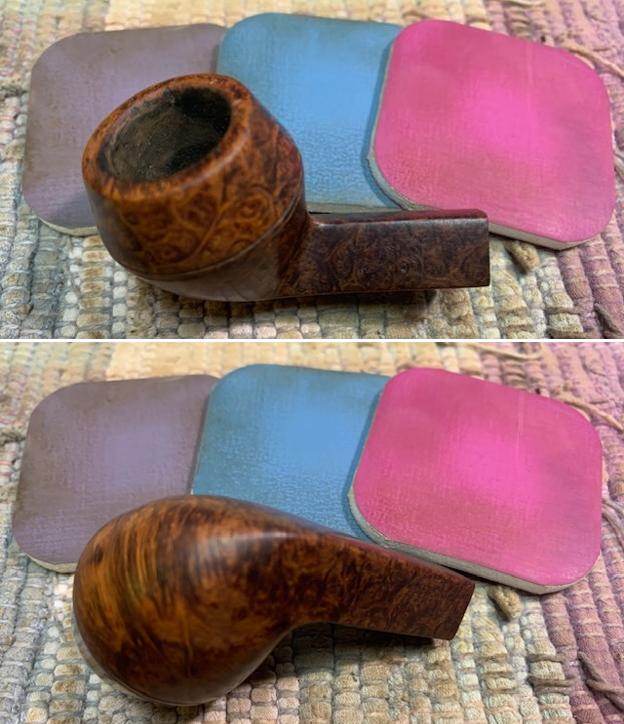
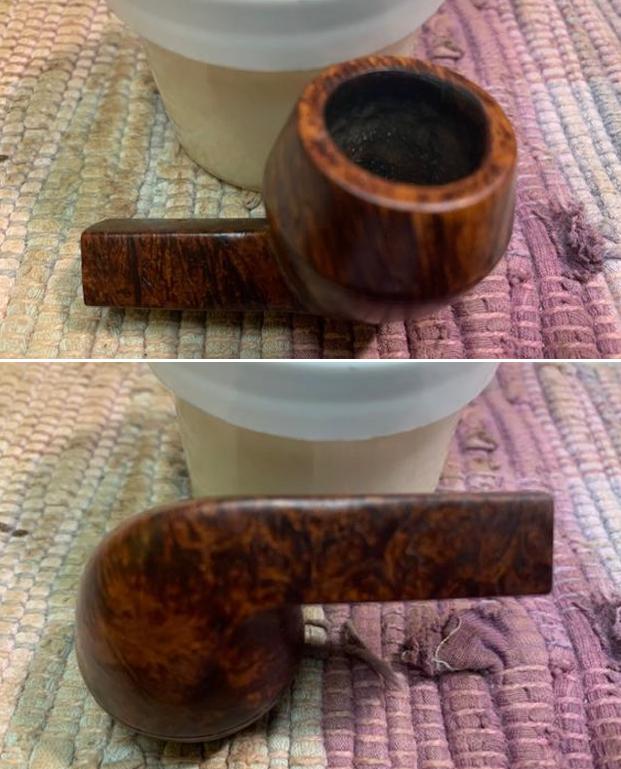
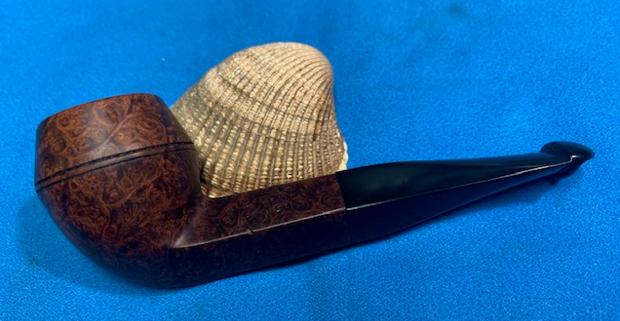
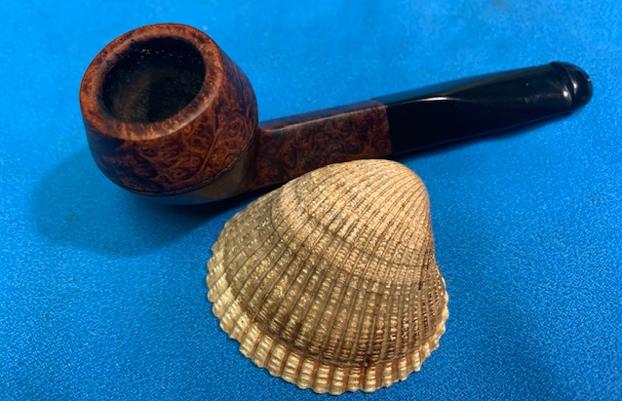
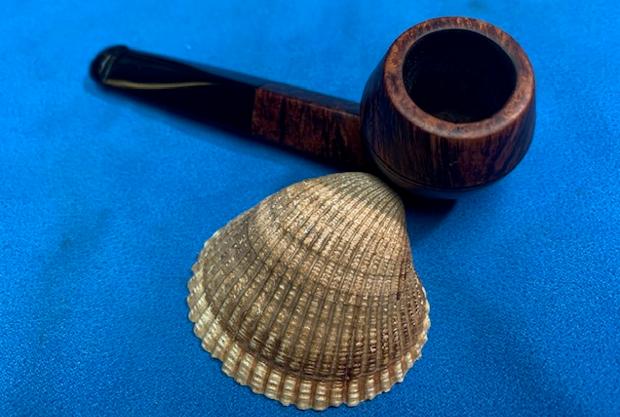
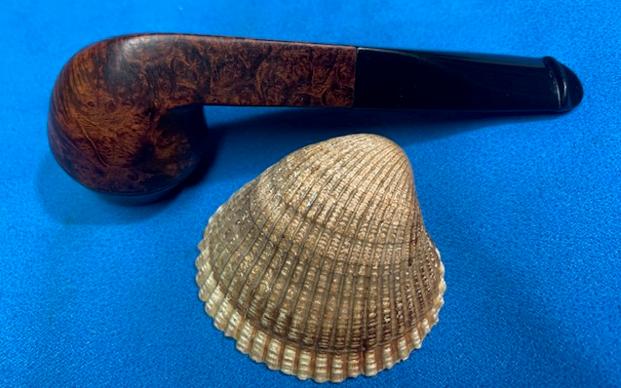
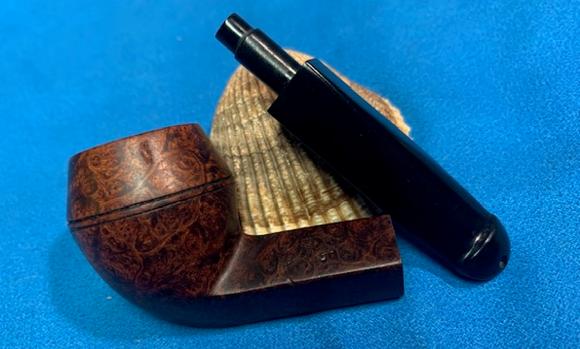
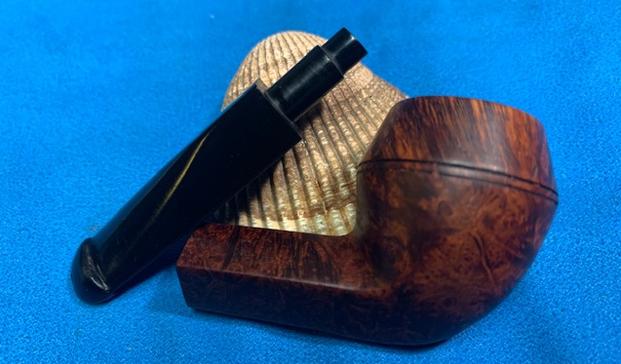
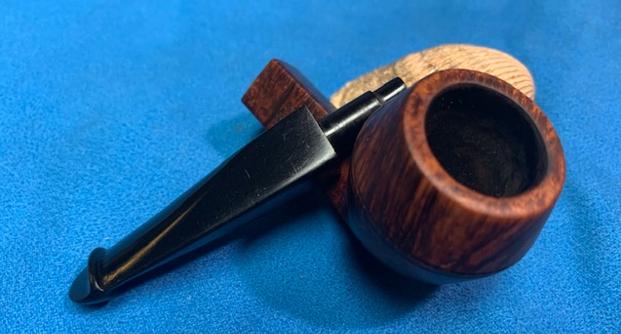
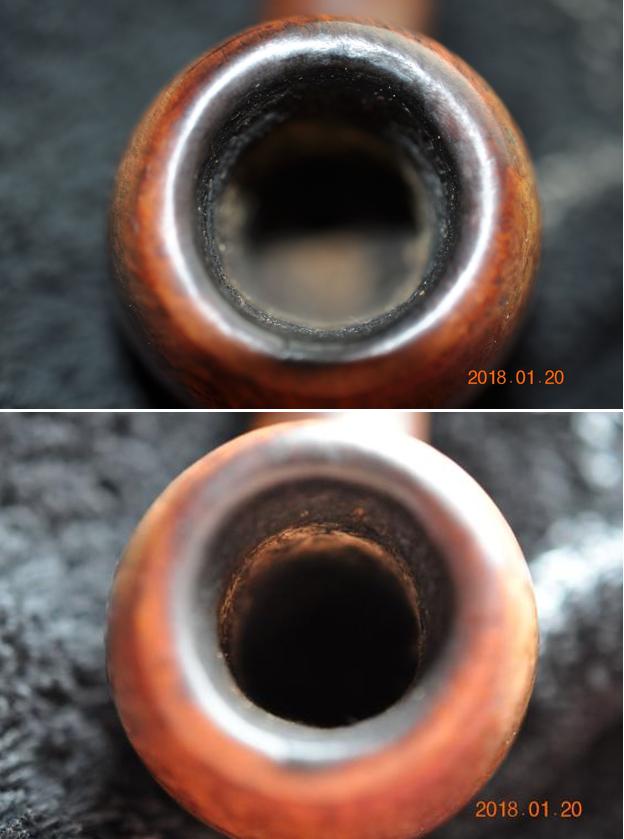
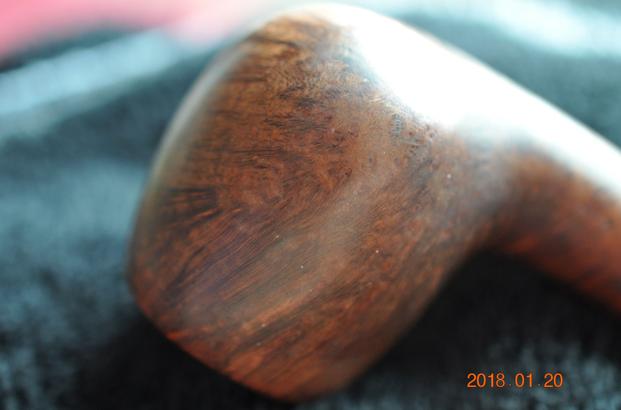
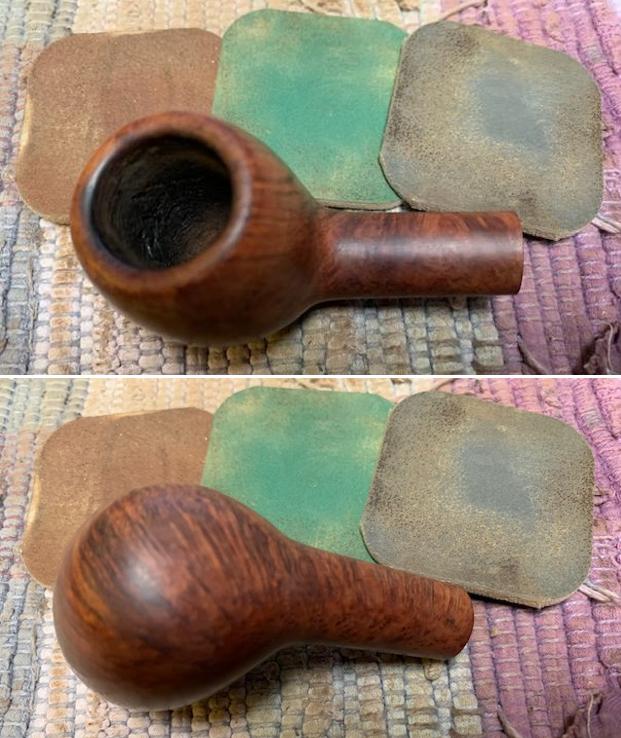
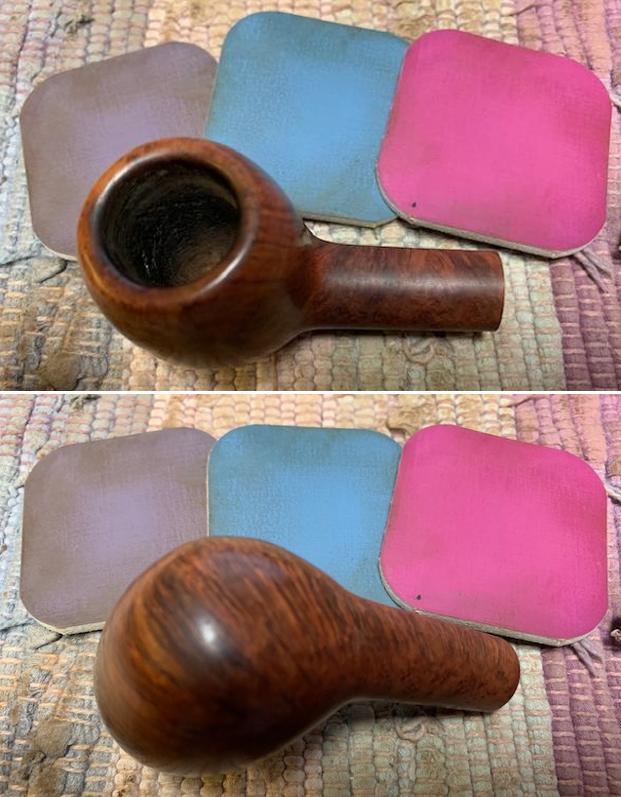
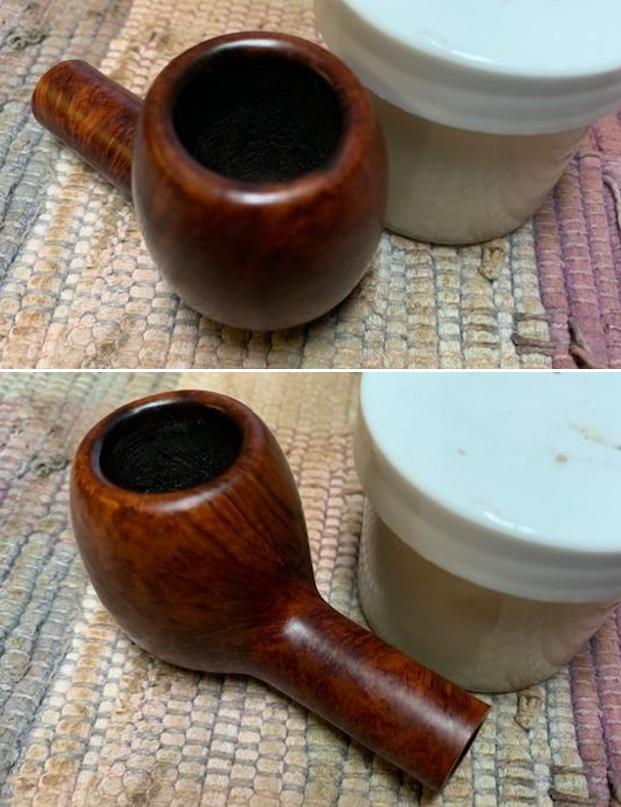
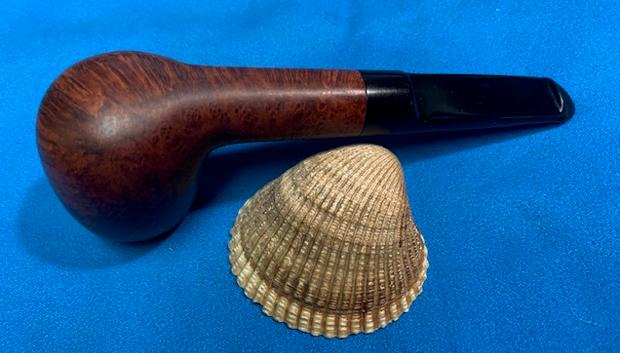
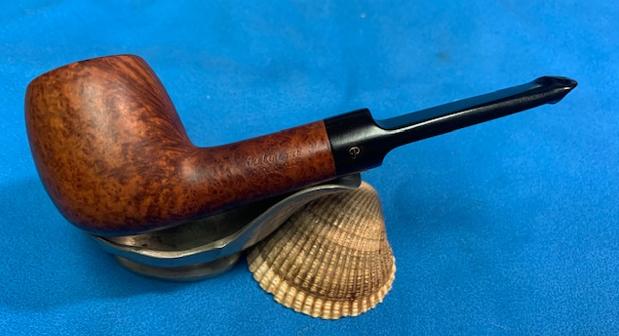
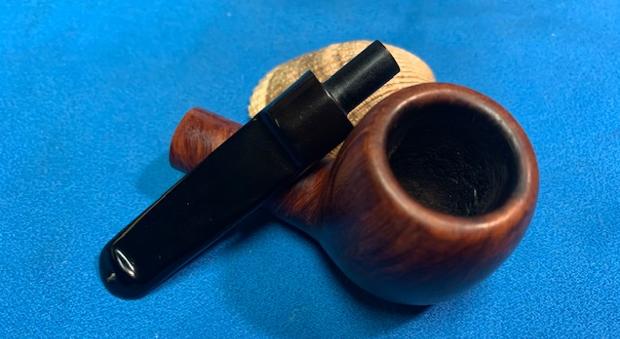
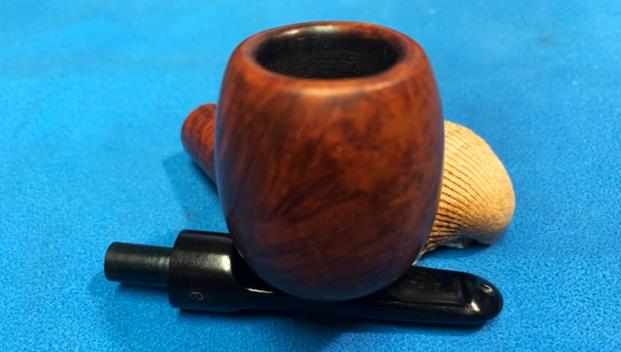
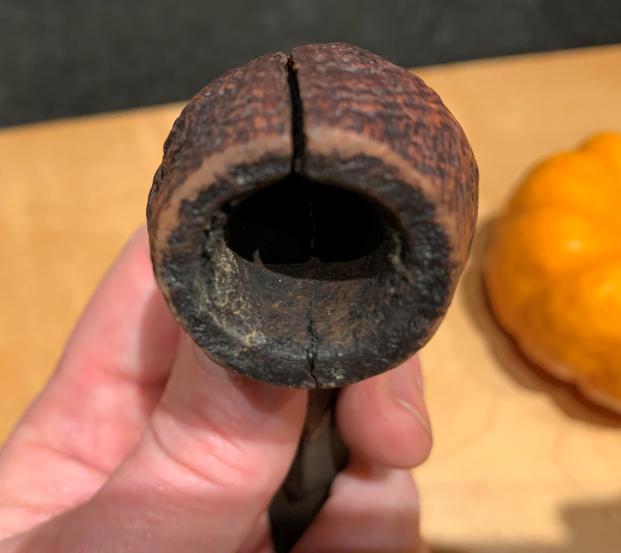
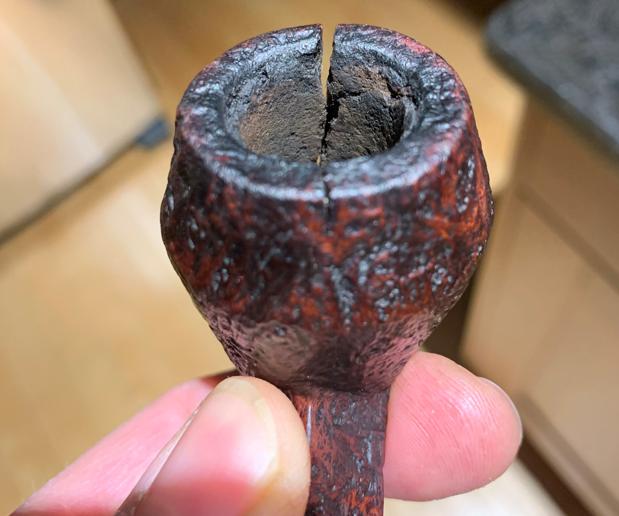
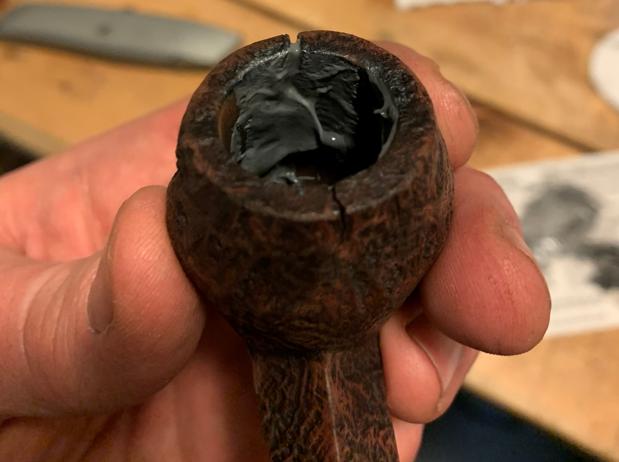
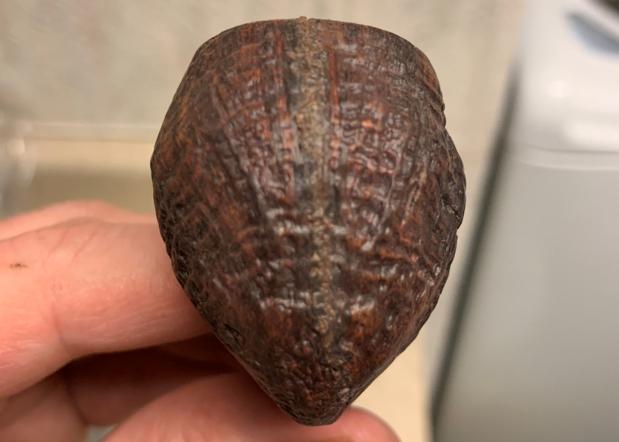
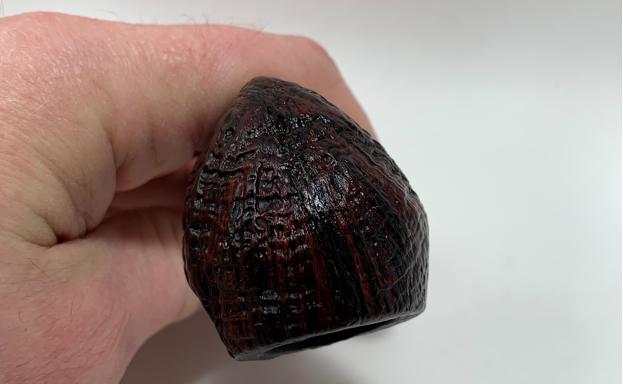
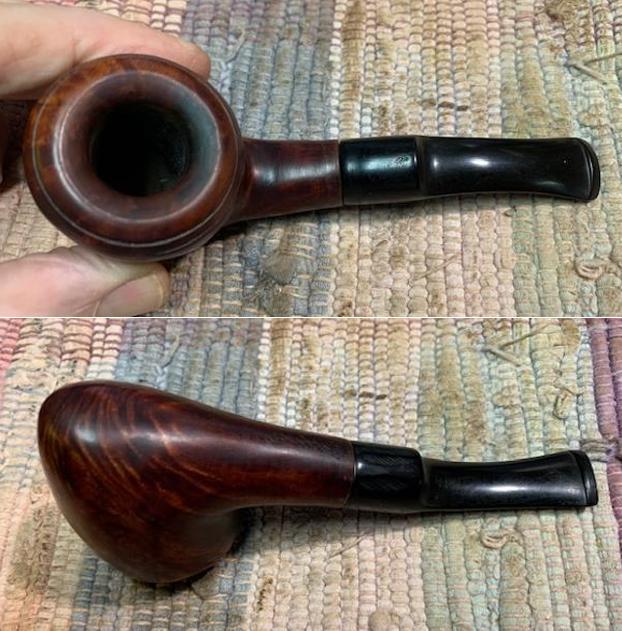
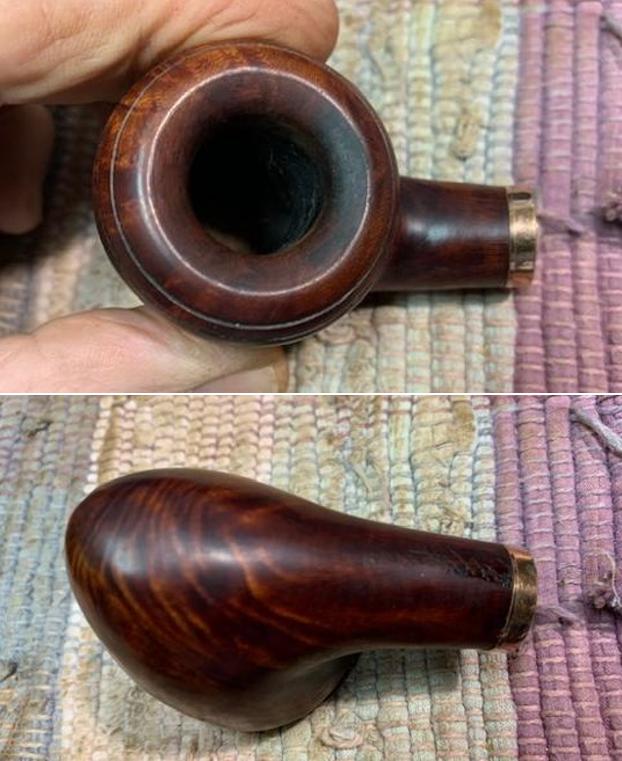
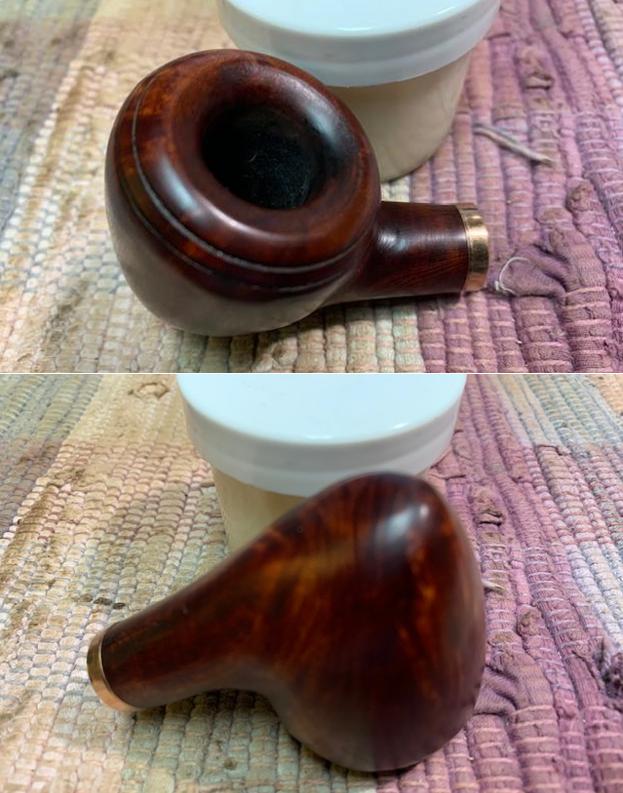
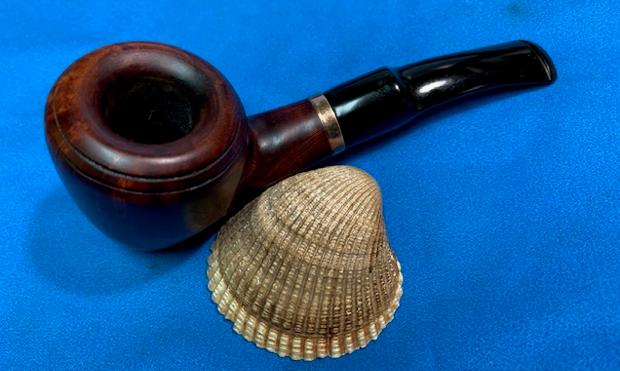
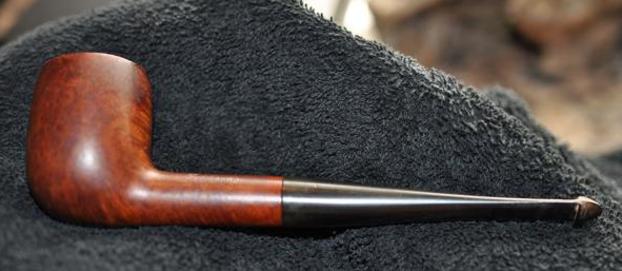
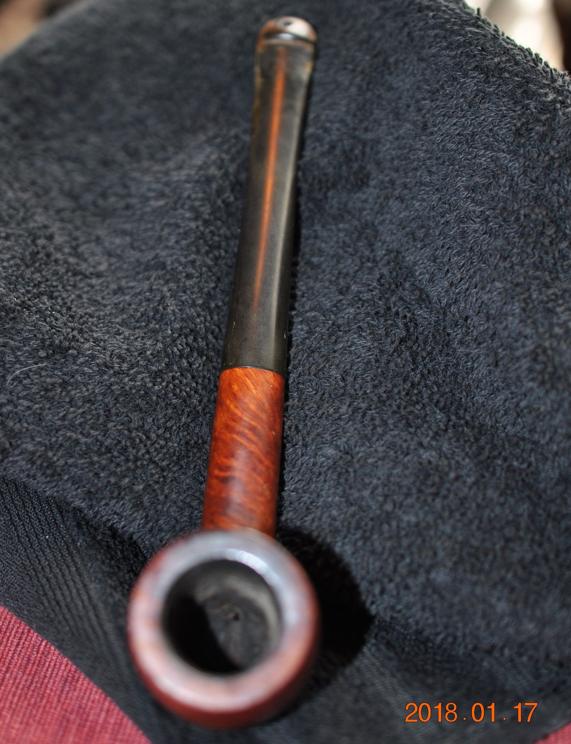
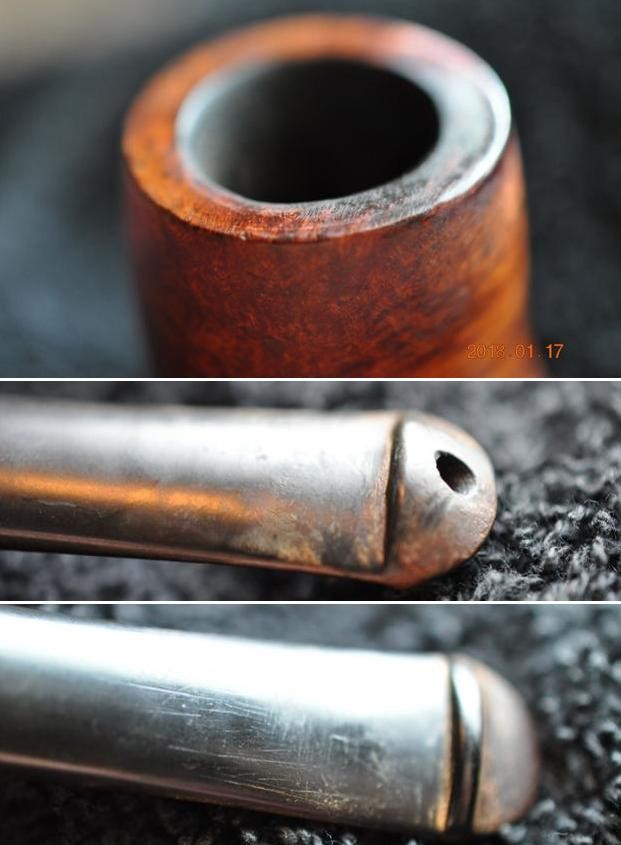
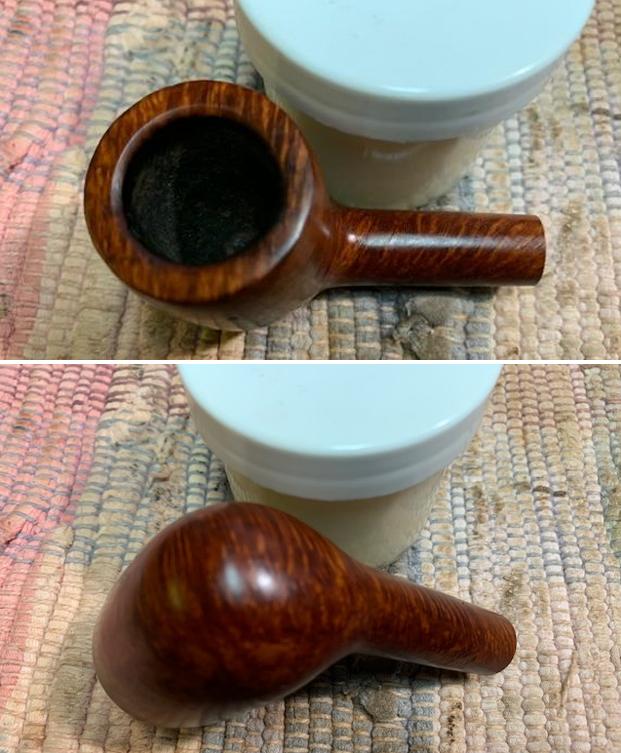
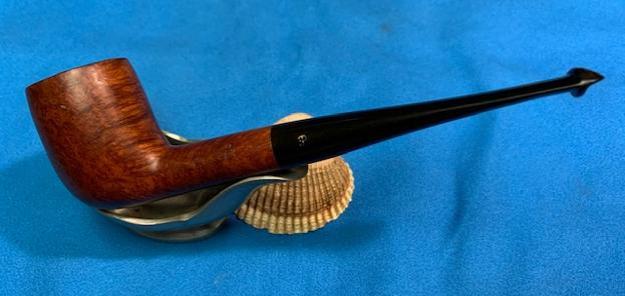
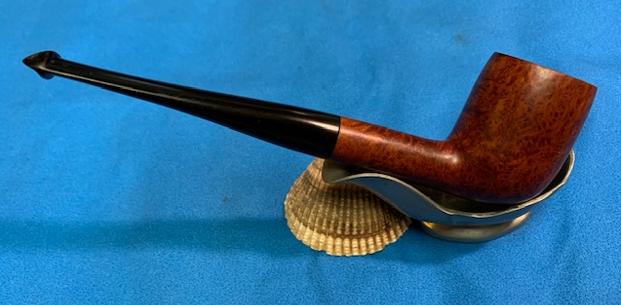
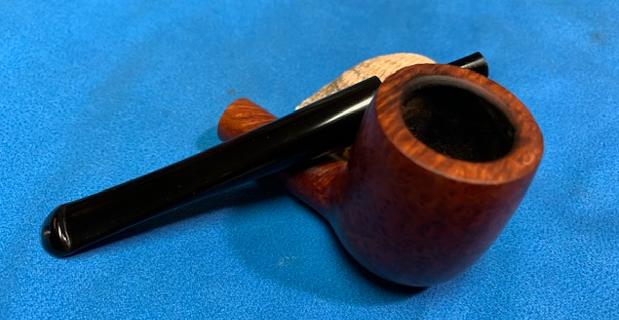
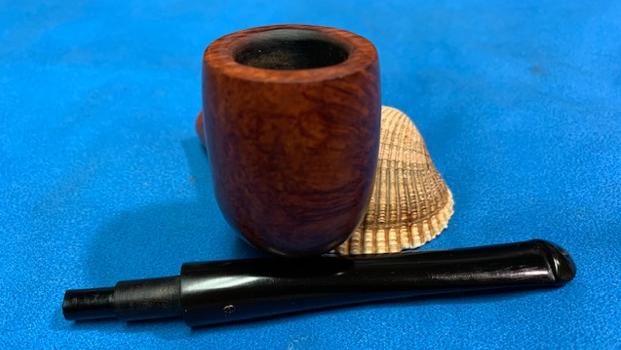
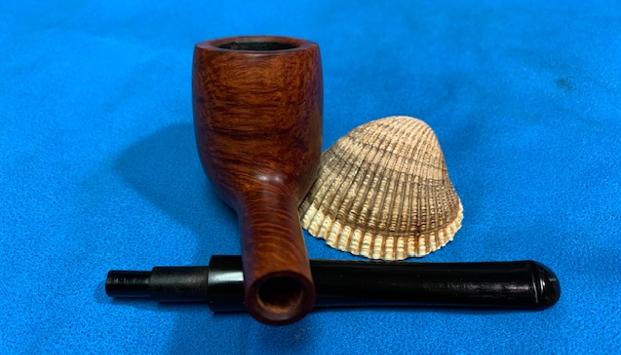
Looking now more closely at the BC Cocarde Geante Plus Billiard on my table, the dimensions of this Giant are, Length: 6 1/8 inches, Height: 2 1/4 inches, Rim width: 1 1/2 inches, Chamber width: 7/8 inches, Chamber depth: 1 3/4 inches with a weight of 2.9 ounces – almost a hefty 3 ounces! The chamber looks well maintained with a very thin cake. The rim has minor darkening on the aft quadrant from lighting practices. Besides general cleaning of the ample briar real estate of the stummel, I detect pitting of some fills which need attention. I take a few pictures to show these.

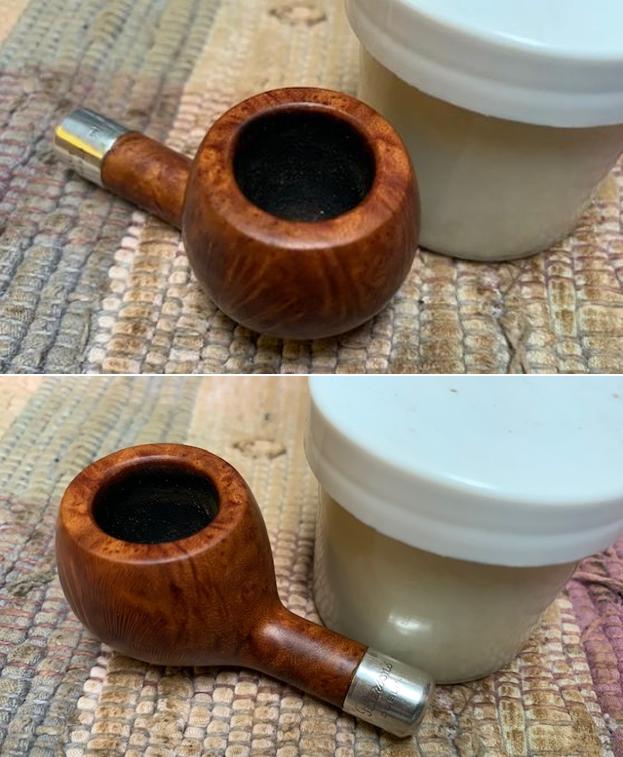
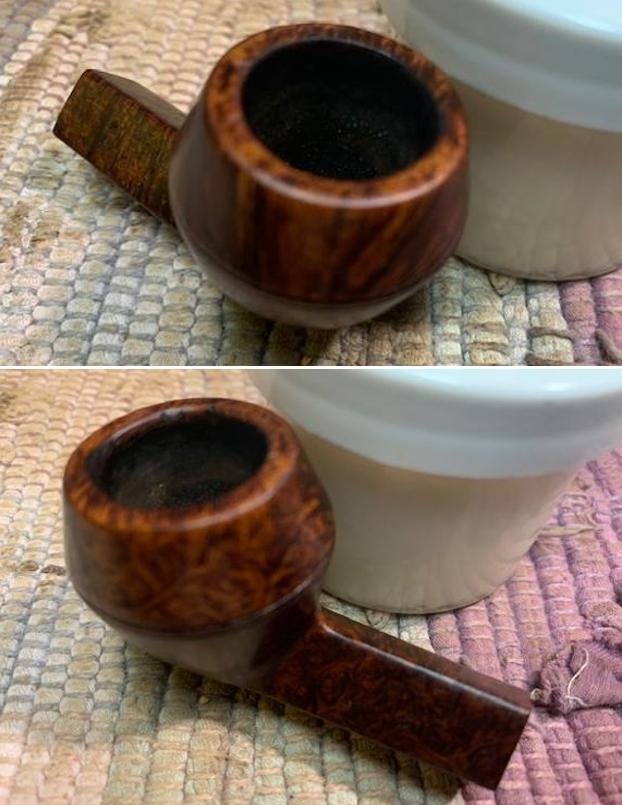
 The stem shows no oxidation but tooth chatter and some button biting. This will be addressed as well. To begin the refreshing of this Butz-Choquin Cocarde Geante Plus, the chamber is cleaned. With another picture showing the starting place of the chamber, it appears to be a well maintained with a dime’s width thickness.
  I use all 4 blade heads of the Pipnet Reaming Kit to begin the cleaning of the mild carbon cake. Following the reaming, the wall is scraped using the Savinelli Fitsall Tool and then sanded with 240 paper wrapped around a Sharpie Pen.
  After wiping the chamber with a cotton pad, the chamber is inspected revealing healthy briar – no heating problems.
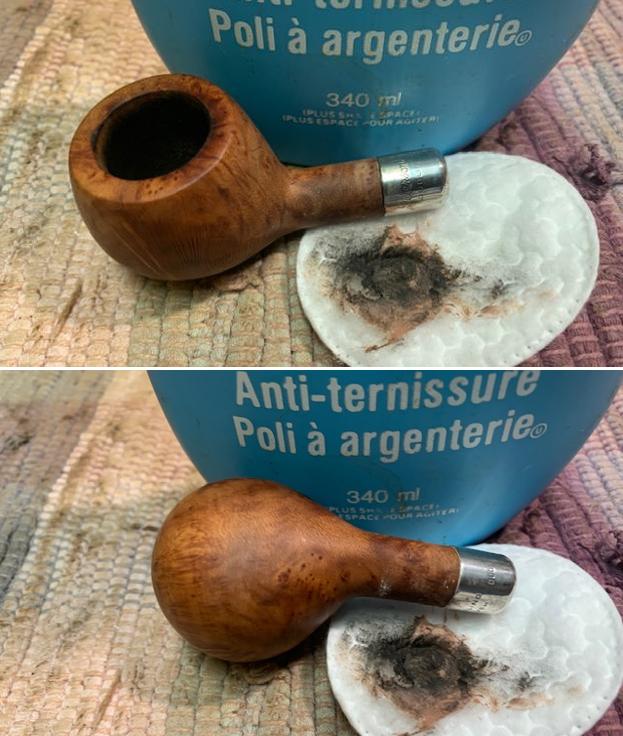
  Transitioning from the chamber to the external briar surface, using undiluted Murphy’s Oil Soap and a cotton pad, the stummel is scrubbed. A brass wired brush is used to concentrate more on the backside of the rim where it was darkened from lighting from that side. Brass brushes are friendlier to the briar and not as abrasive but helps with the cleaning.
 The stummel is then transitioned to the sink using warm water and anti-oil liquid dishwashing soap, the internals of the mortise are scrubbed using shank brushes. The brass wired brush is used again on the rim area.
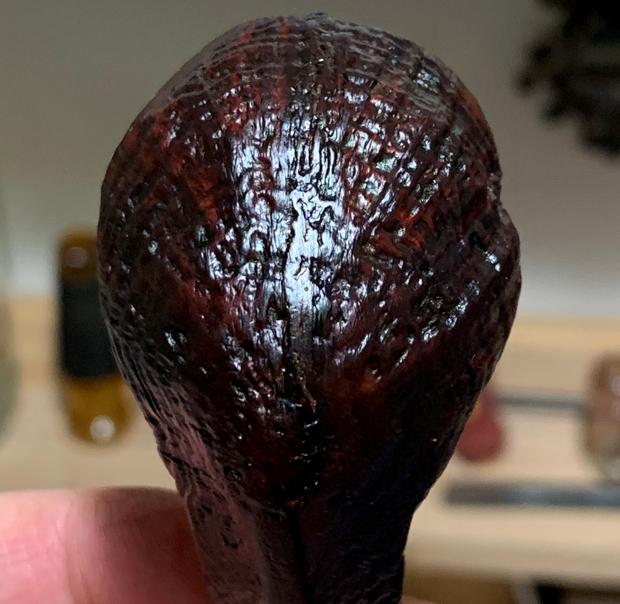
 After the cleaning, I look at the stummel. The finish has generally disappeared over the stummel. The rim has cleaned up well but as expected, the finish on the aft rim quadrant where most of the scrubbing was needed is lighter.
 To finalize the internal cleaning, cotton buds and pipe cleaners wetted with isopropyl 99% are used. It only takes a couple buds and pipe cleaners to do the job. I move on!
 With the cleaning supplies on the table, the airway cleaning of the stem is quickly dispatched with a couple pipe cleaners wetted with isopropyl 99%.
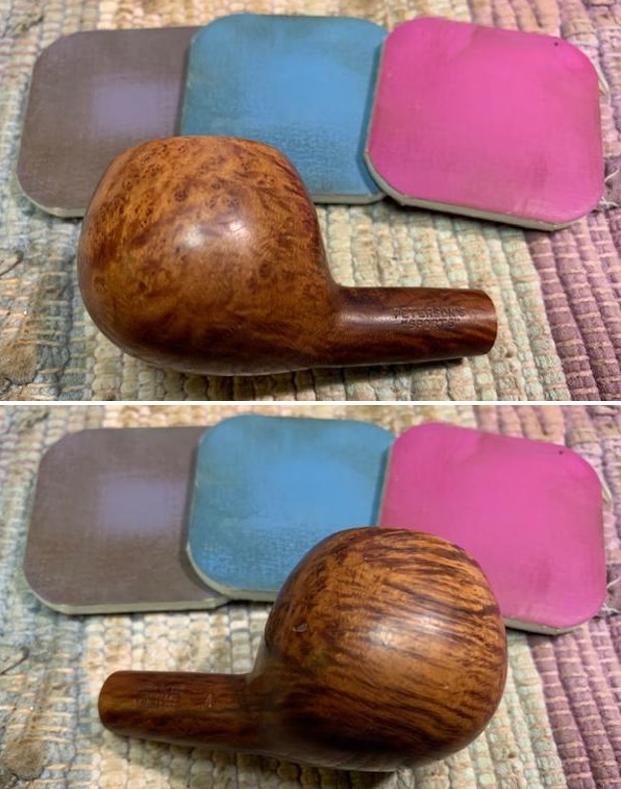
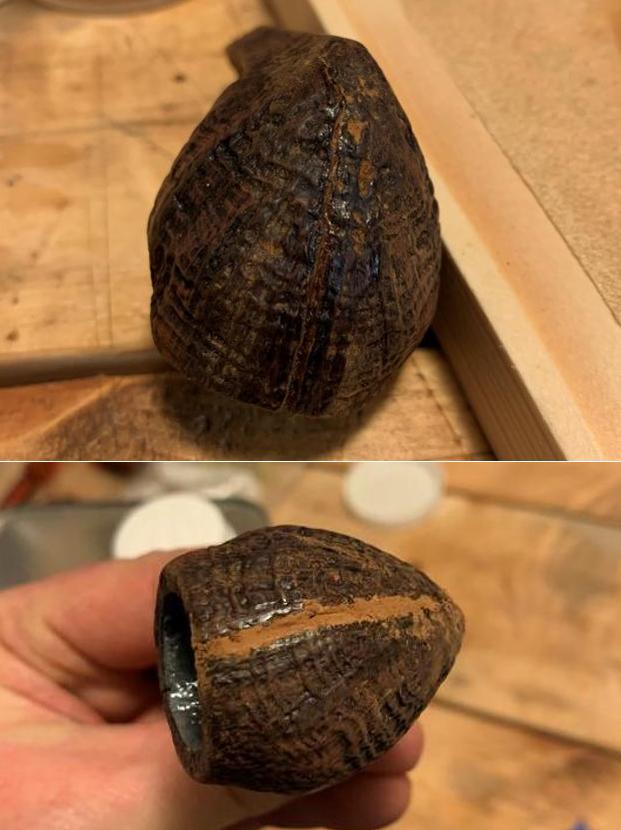
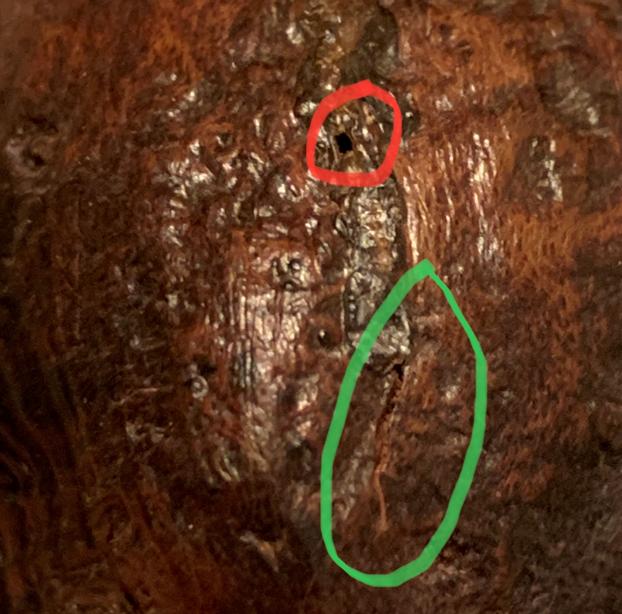
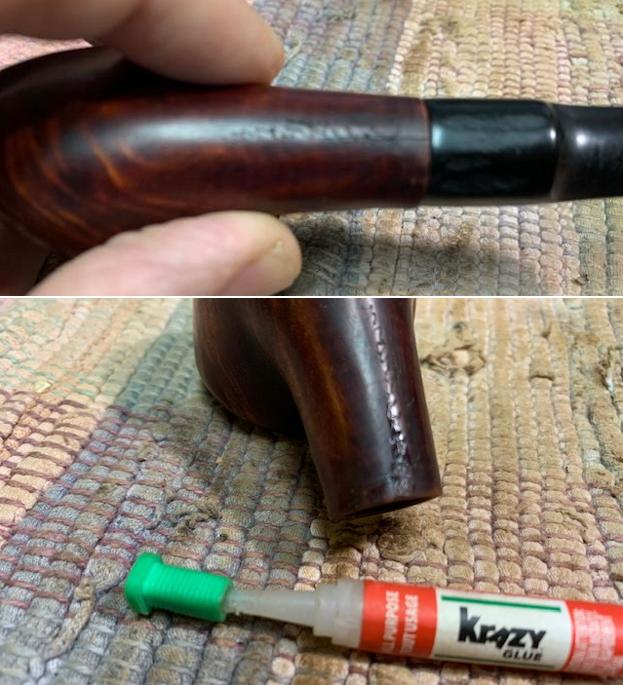
 With the general cleaning done, I turn now to the stummel. Another survey of the bowl and shank show the deterioration of the patches that are now pitted. In the third picture you can also see a few patches of the old finish that have not surrendered during the cleaning process.

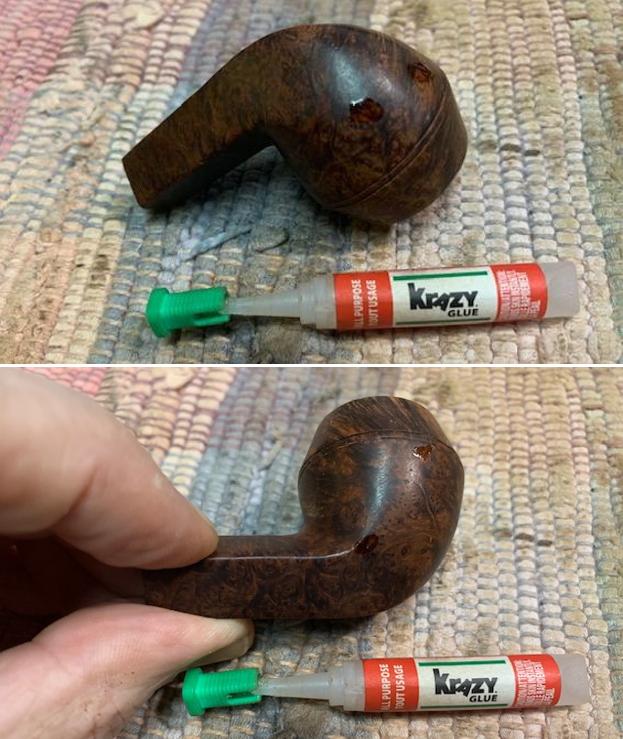
 To prepare to refill and patch the pits, I use a sharp dental probe to dig out the old fill material in each pit.
 Next, I use a cotton pad wetted with isopropyl 99% to clean the patch areas. The cleaning with the alcohol is expanded to scrub the whole stummel to remove the last vestiges of the old finish. This works well.
 I mix briar dust and thick CA glue to create a briar putty to fill the pits. After covering the plastic disk with scotch tape to help with clean up, I place some briar dust and CA on the mixing palette. Using a toothpick, I gradually draw briar dust into the glue and mix it as I go.
 When the putty reaches a thickness of molasses, I use the toothpick to trowel a bit of briar putty onto the pits. To keep the patches in place, I use an accelerator to quicken the curing process of the CA.
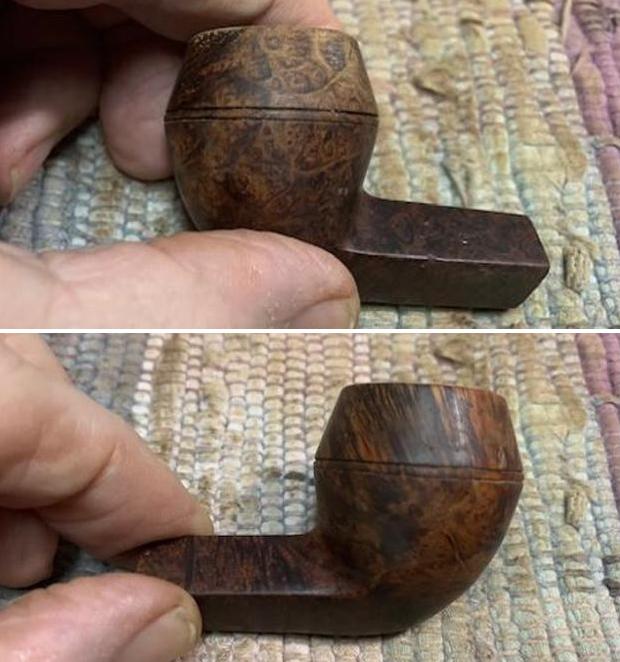
 Starting with the patch on the heel, the flat needle file is used first to file the patch mound down to the briar surface. A tightly rolled piece of 240 paper follows the file to smooth and blend further. Then, to conclude this phase, 600 grade paper is used to blend further.
 The same process is used on the patch on the side of the bowl – file, sanding with 240 and 600.
 Again, the same process with the patch on the shank.
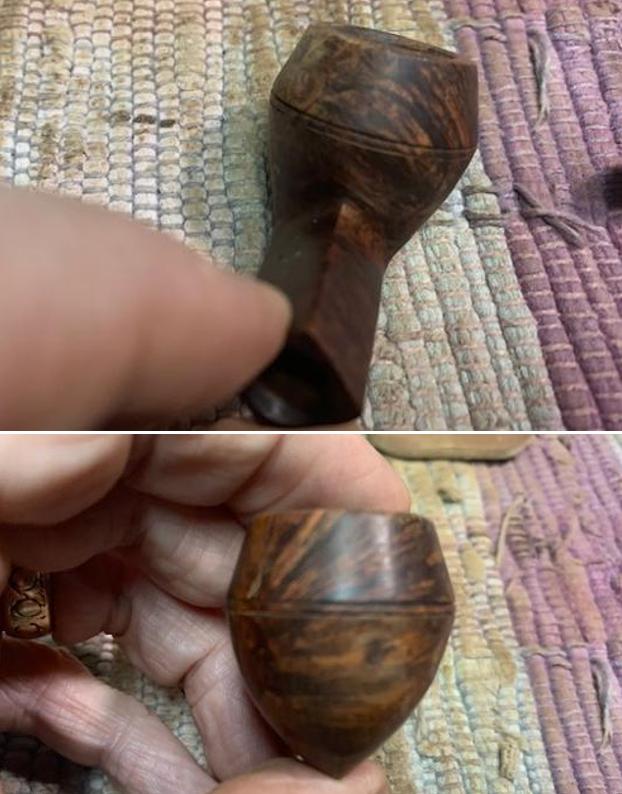
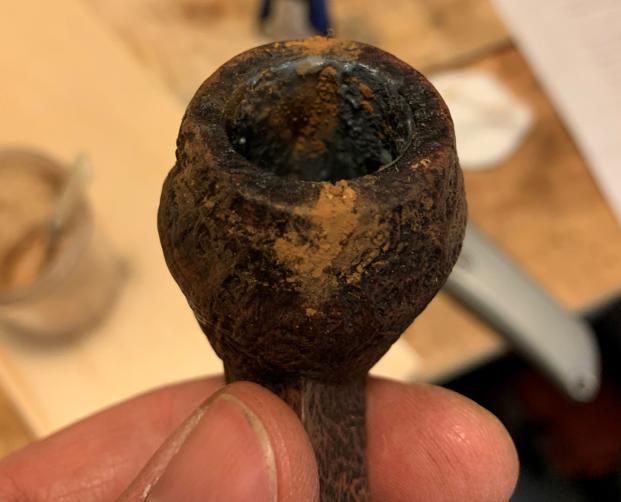
 The rim has charred briar around the lower rim lip on the chamber side. This is primarily on the back of the rim. To refresh the rim, I sand the inner bevel with 240 paper following this with 600 paper. This removes the darkened stain on the briar. It looks much better.
 To encourage blending of the patches as well as to further clean the rim and bowl surface of small nicks and scratches, I employ sanding sponges. Sanding sponges are not as invasive as sanding papers and I use them to prepare for micromesh pad sanding. Starting first with a coarser grade, the rim is ‘topped’ along with sanding the entire stummel – careful to avoid the BC nomenclature on the shank. Following the coarser grade, medium and then a light grade sponges are used and complete this sanding phase.
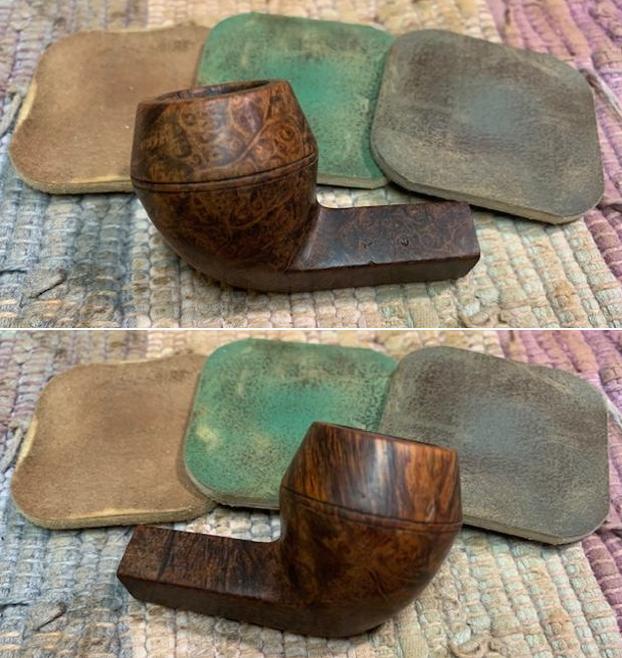
 Switching now to micromesh pads, I start by wet sanding with pads 1500 to 2400. This is followed by dry sanding with pads 3200 to 4000 and 6000 to 12000. The grain starts emerging very nicely during the micromesh cycles. It’s looking great.
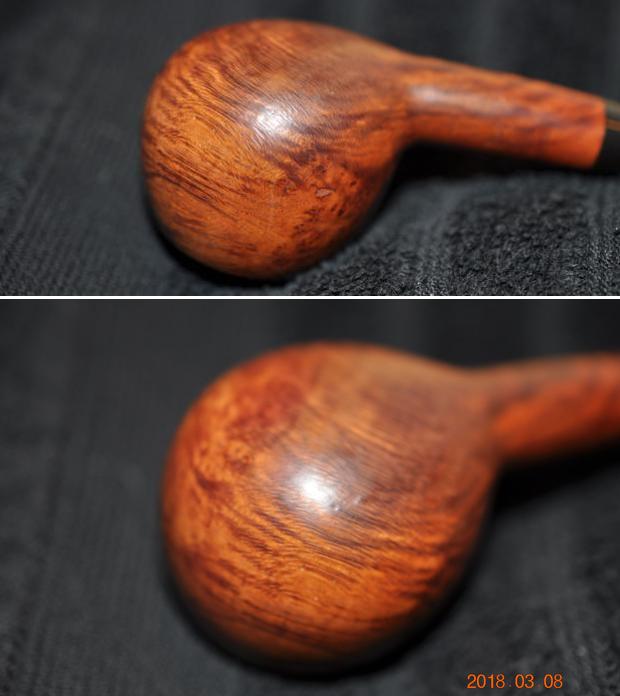
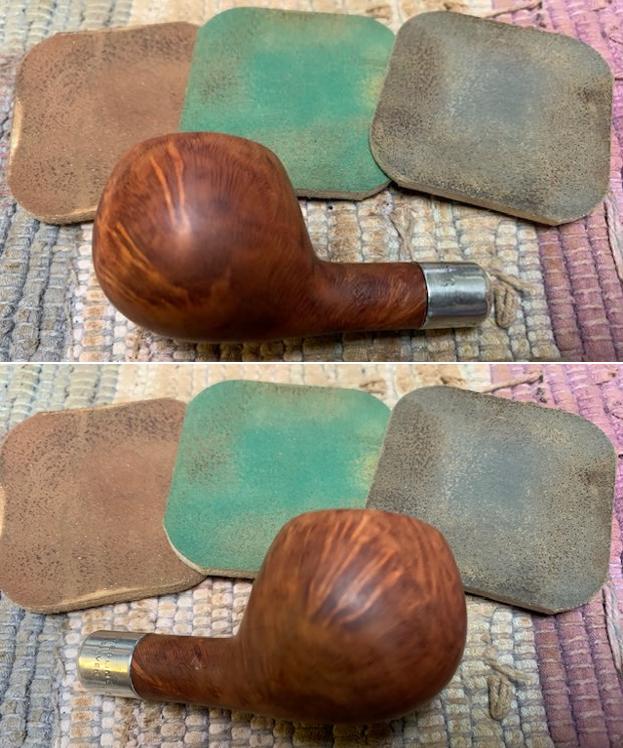
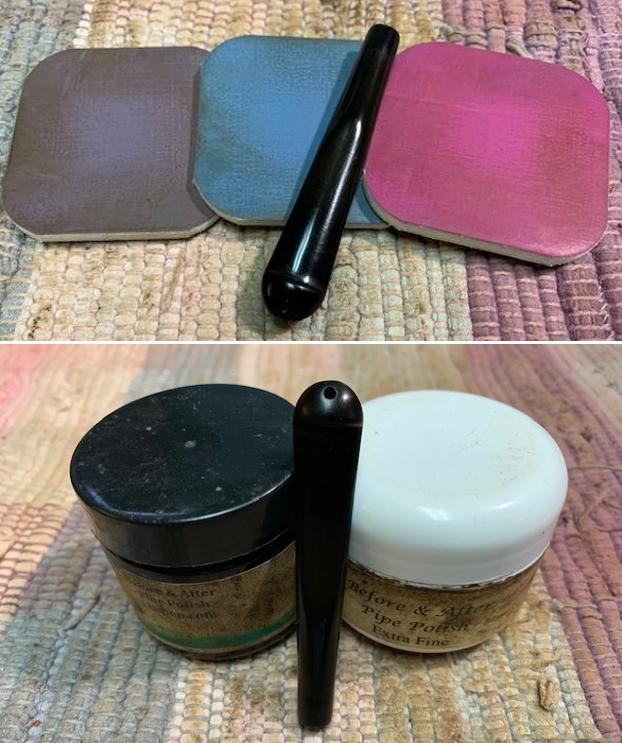
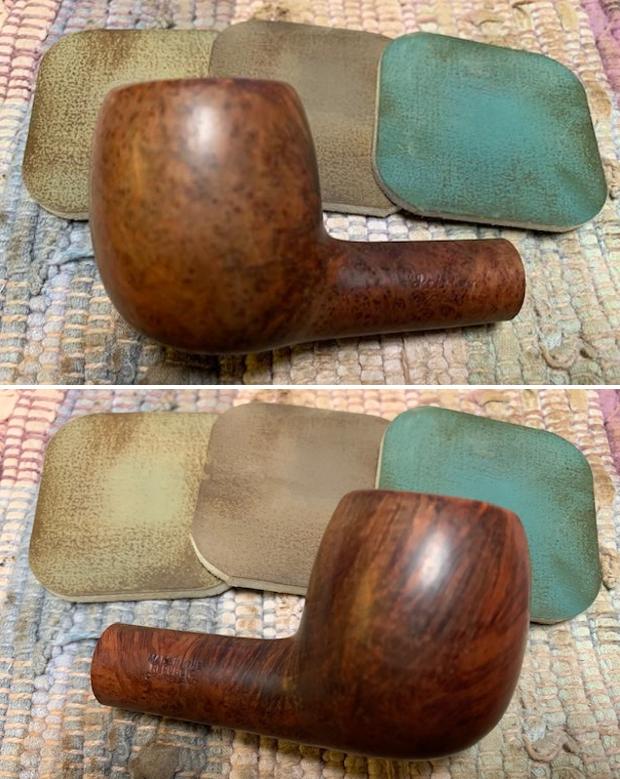
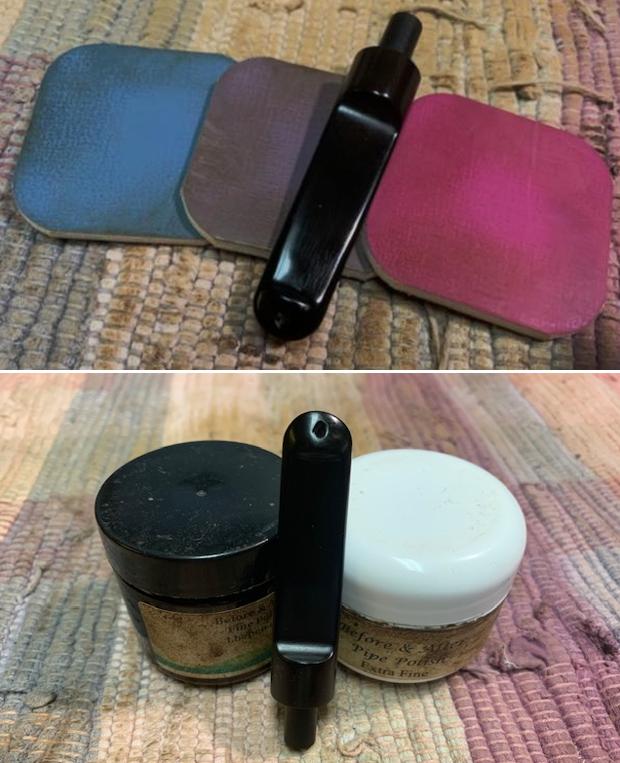
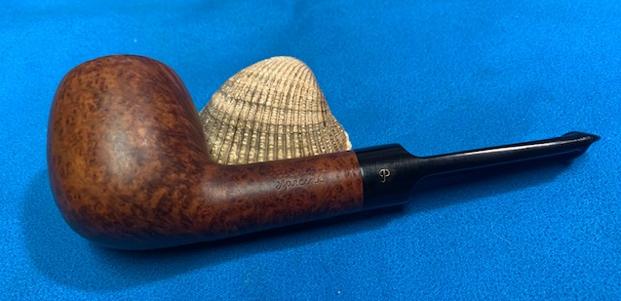
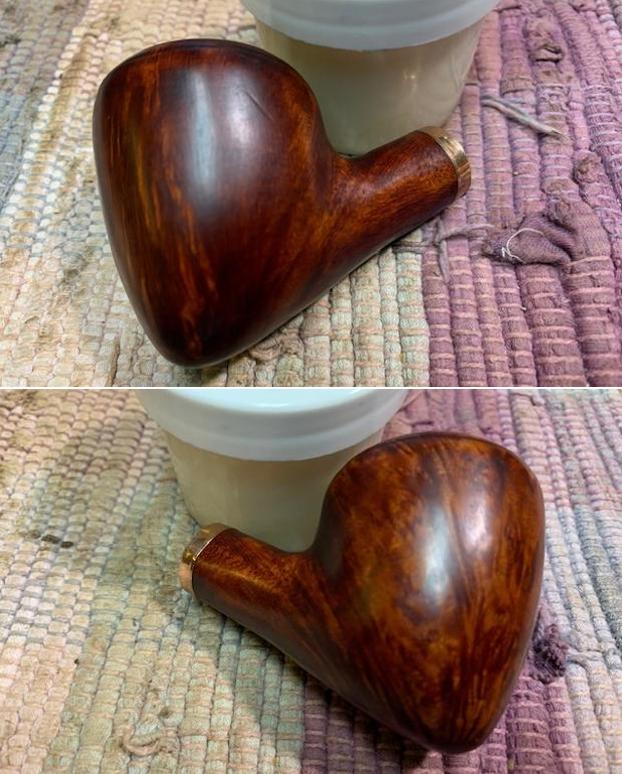
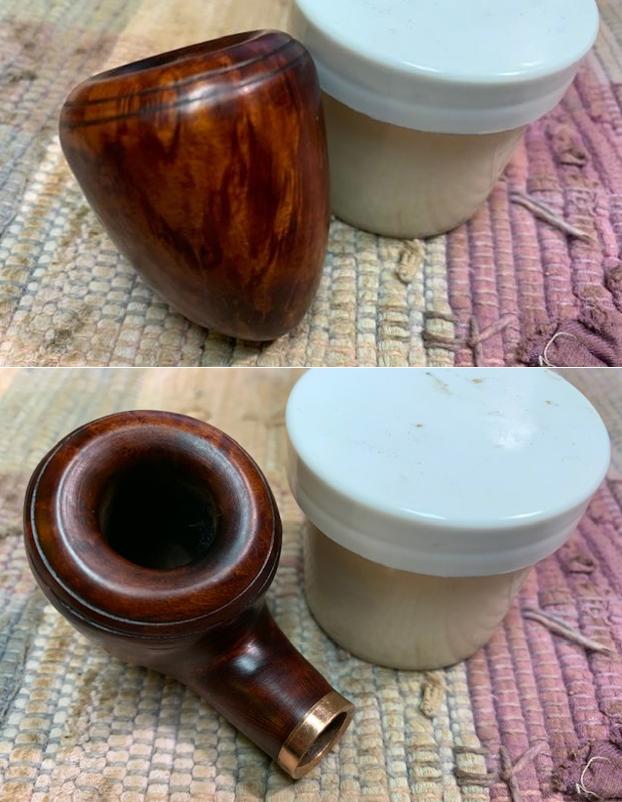
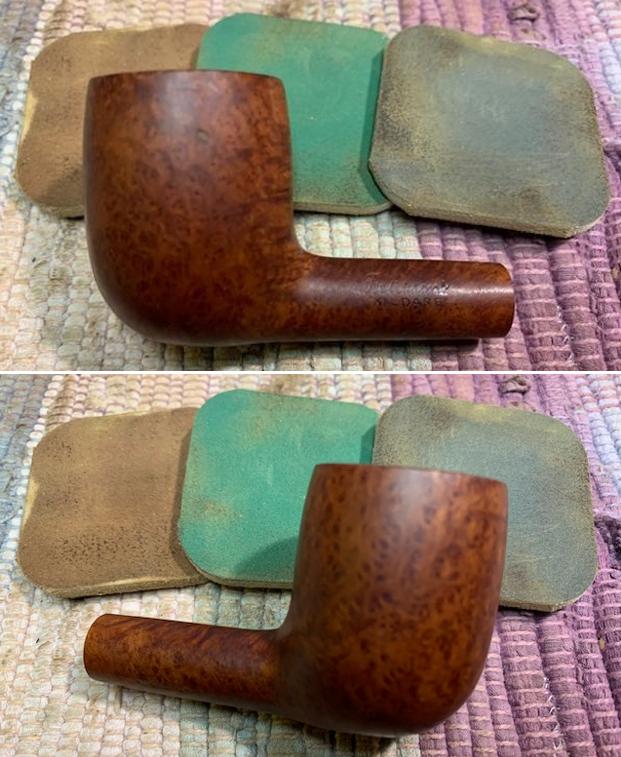
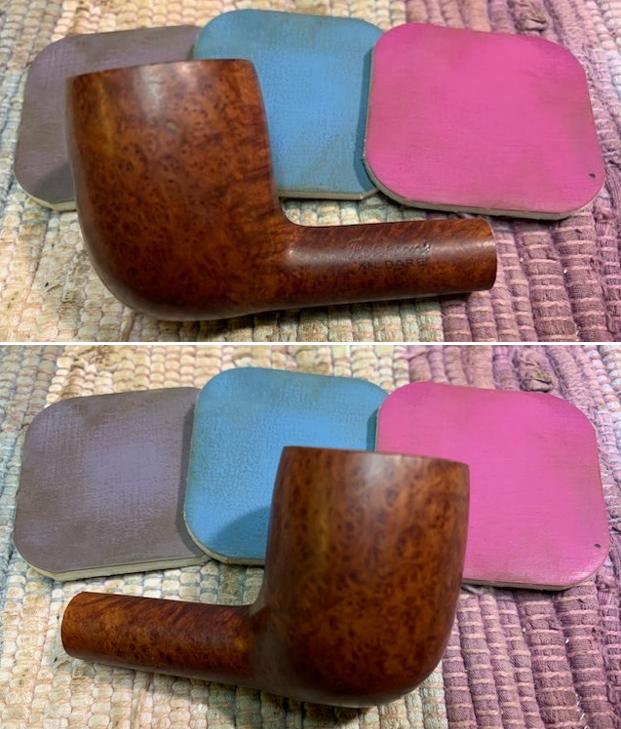
 Next, to tease out more of the natural hues of the briar, Mark Hoover’s product, ‘Before & After Restoration Balm’ (www.Lbepen.com) is applied to the briar surface. To do this, a bit of the Balm is applied to my finger and I work the Balm thoroughly into the surface. The Balm starts off with a cream-like texture and gradually thickens as it’s applied. I then put the stummel aside for about 20 minutes for the Balm to be absorbed.
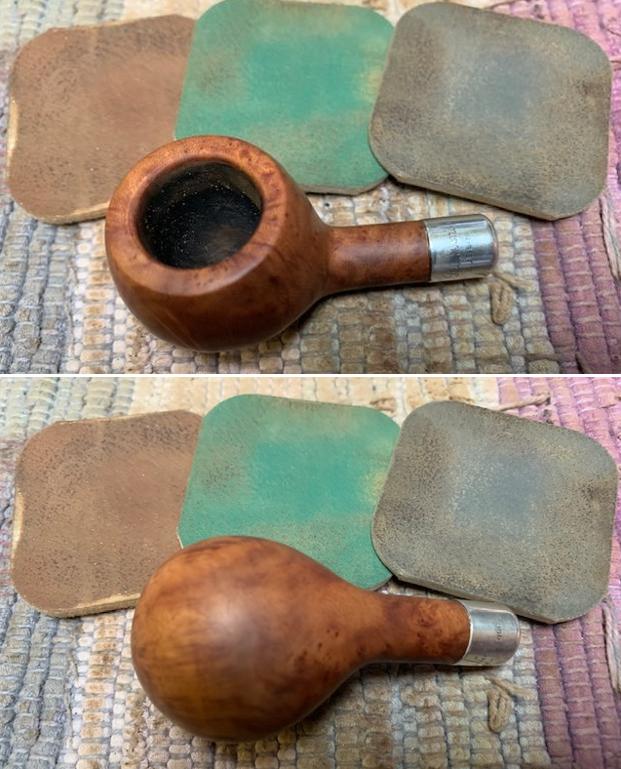
 When the 20 minutes are completed, I wipe the excess Balm with a microfiber cloth and then buff up the surface. I like Mark Hoover’s Balm. It does a great job with the subtleties of the briar hues.
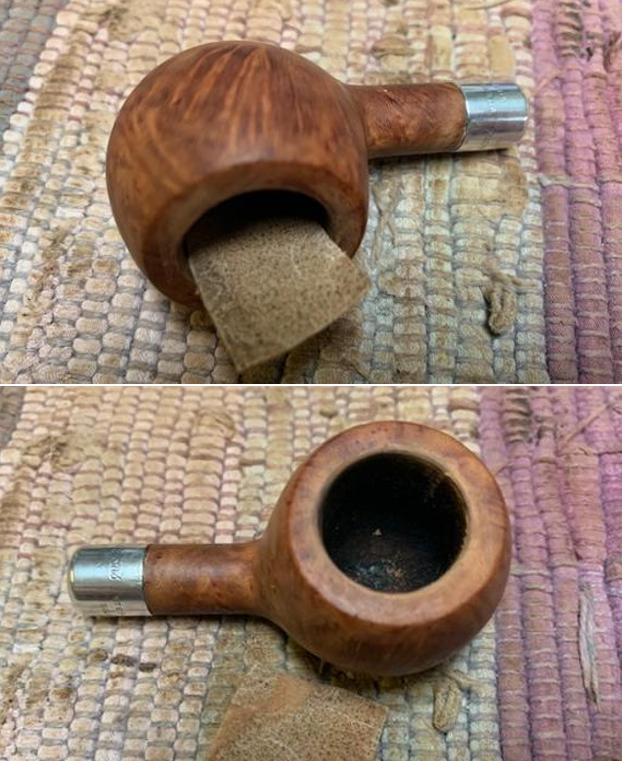
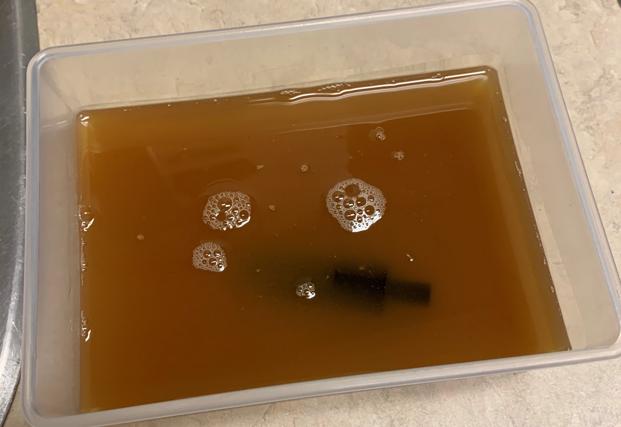
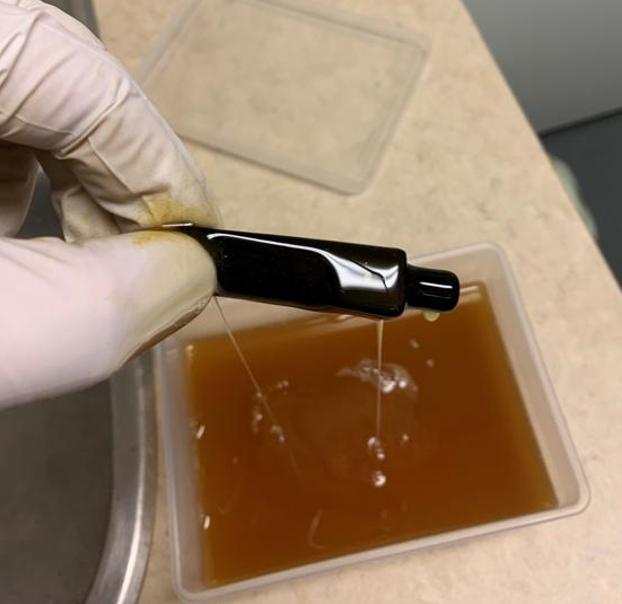
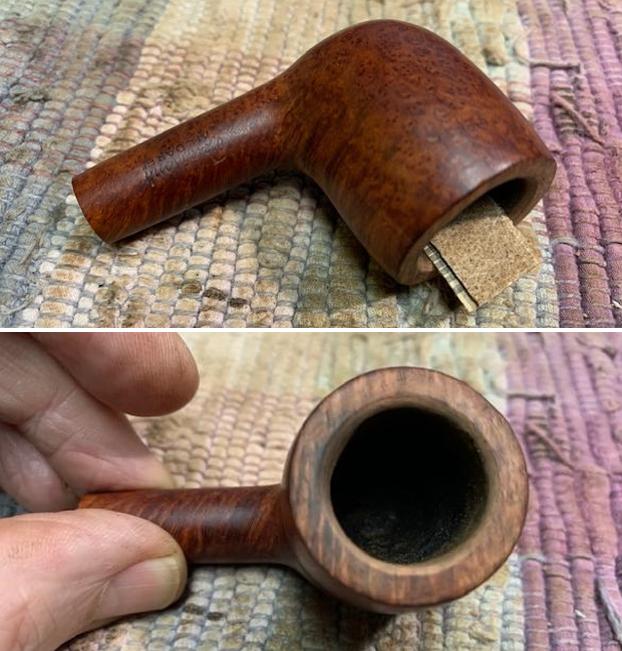
 Before turning to the stem, I continue the internal cleaning and refreshing of the internals of the stummel by doing a kosher salt and alcohol soak. This process draws the oils and tars out of the internal briar and freshens the pipe for the new steward. Kosher salt is used as it doesn’t have an aftertaste like iodized salt. A wick is formed by pulling and twisting a cotton ball. The cotton wick helps to draw the oils out. The wick is guided down the mortise into the airway using a stiff piece of hanger wire.
 Isopropyl 99% is then put in the bowl using a large eye dropper until the alcohol surfaces over the salt. After a few minutes, the alcohol is absorbed and then is topped off once more. I then put the pipe aside and allow the soak to do its thing through the night.
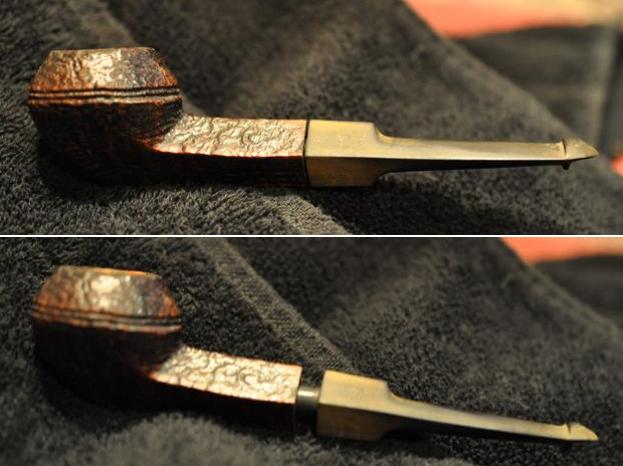
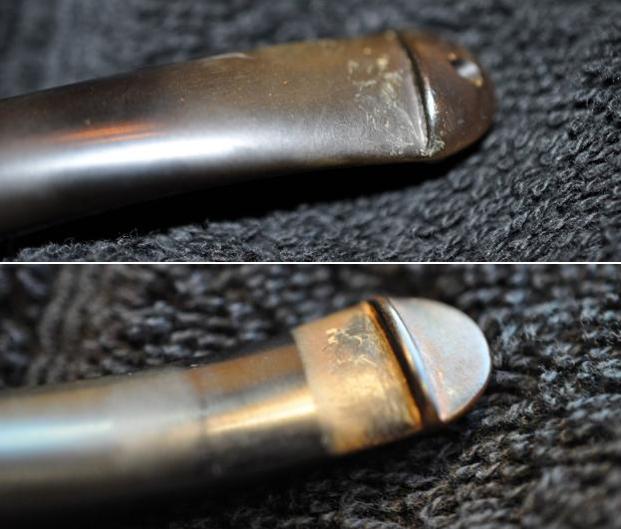
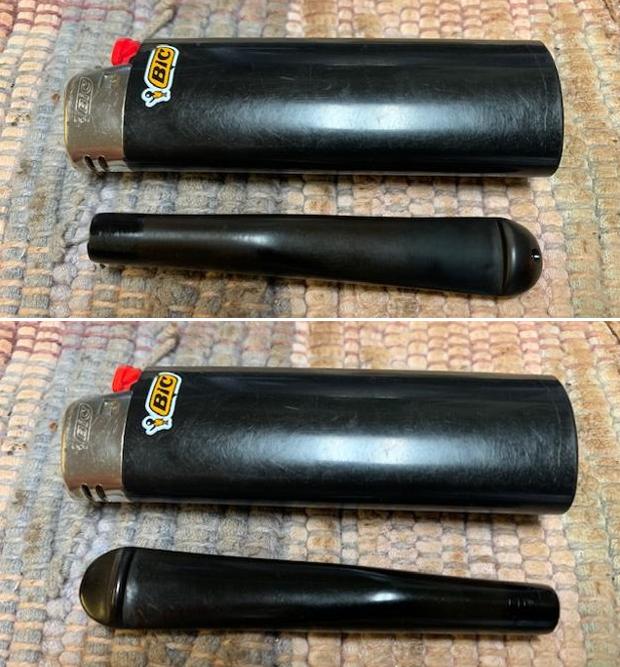
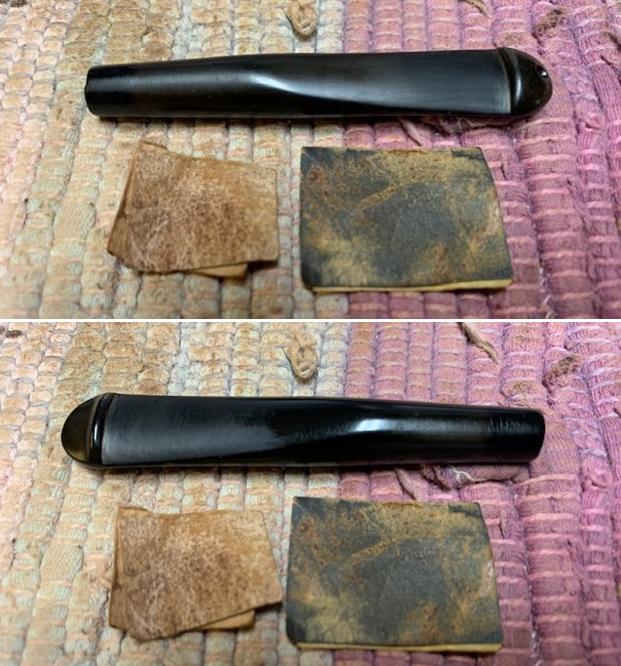
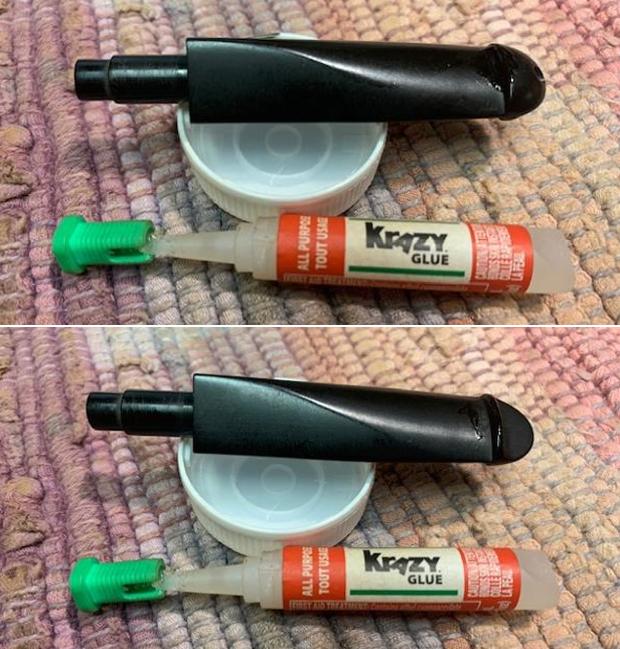
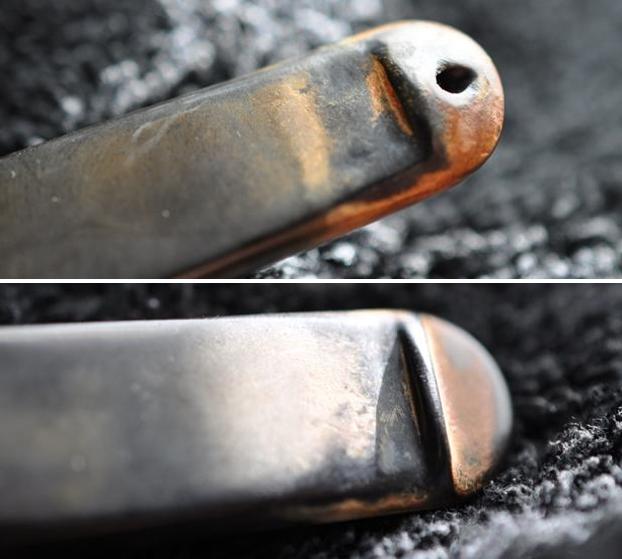
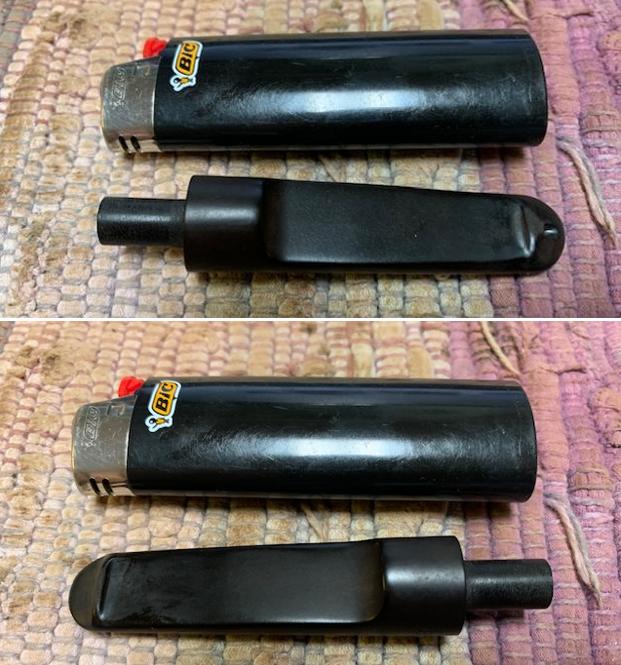
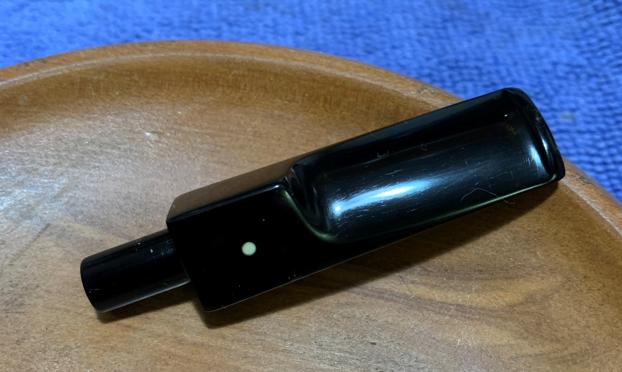
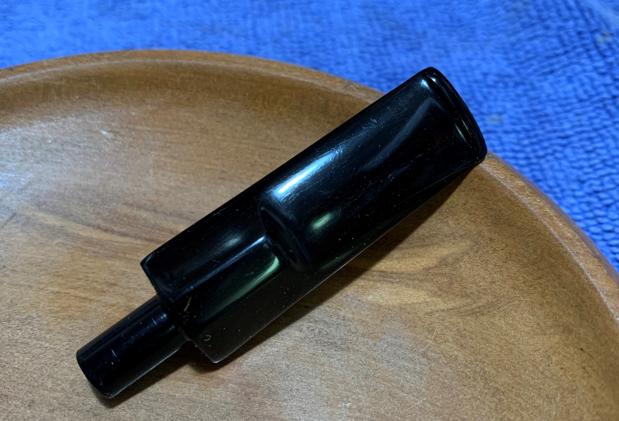
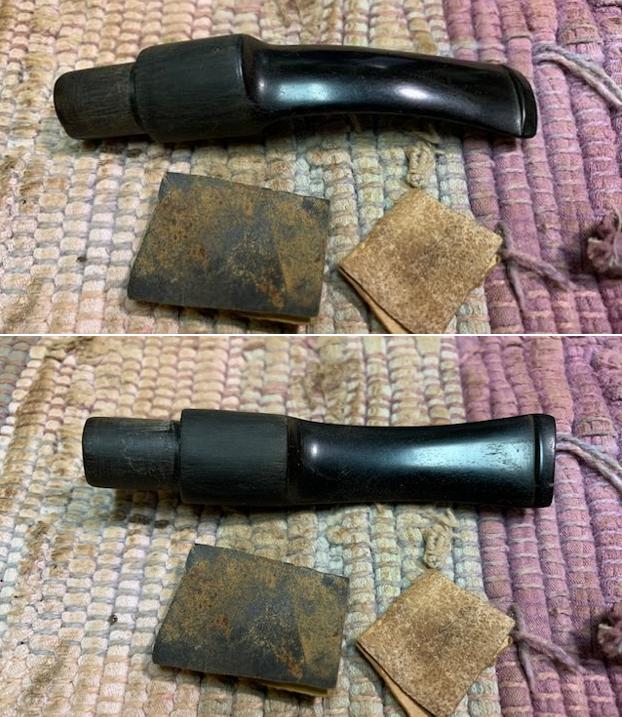
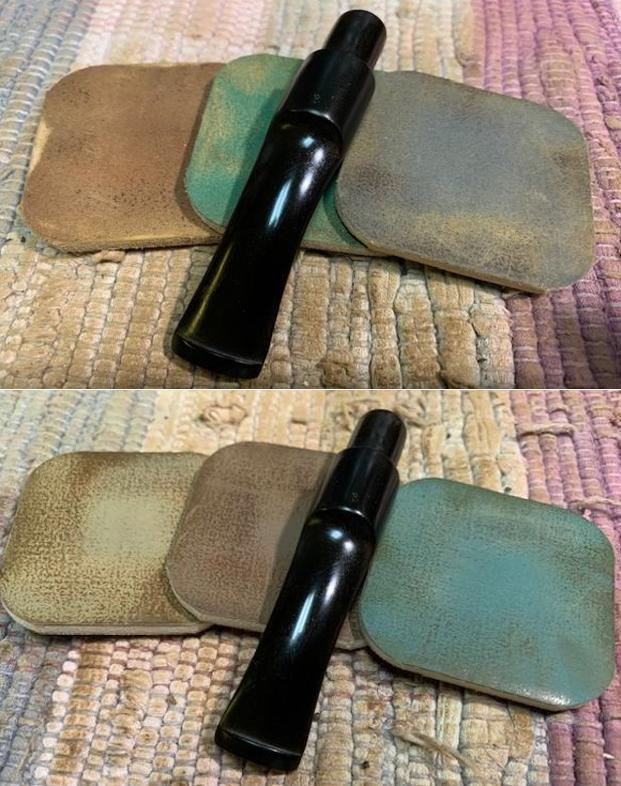
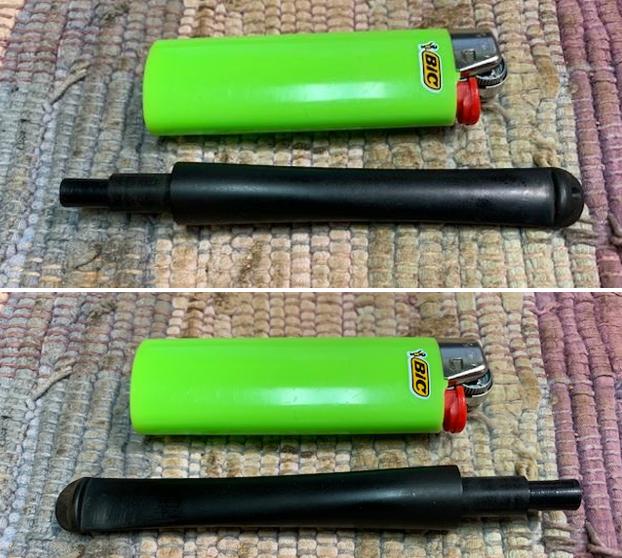
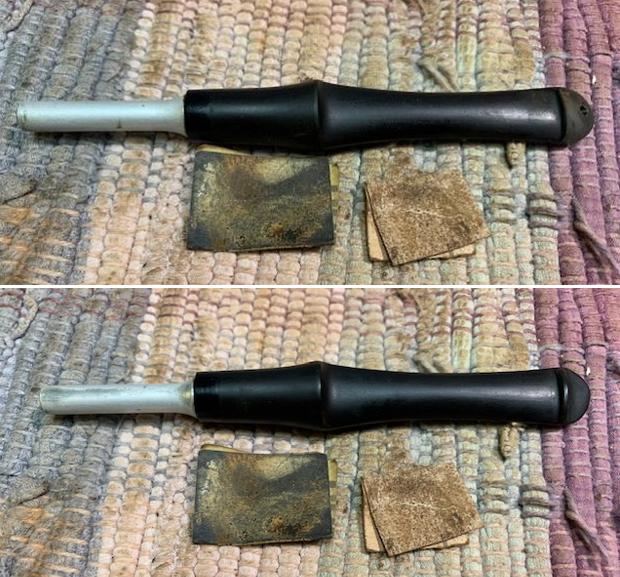
 Turning now to the stem, I take a few pictures to show the bit tooth chatter and button damage. The heating method is used initially to address the tooth chatter. Using a Bic lighter, the bit – upper and lower – is painted with flames to heat the vulcanite and to cause the rubber compound to expand. As it expands, it reclaims to a degree its original condition. I place the before and after pictures together for comparison. The procedure did help to minimize the chatter as the pictures show.
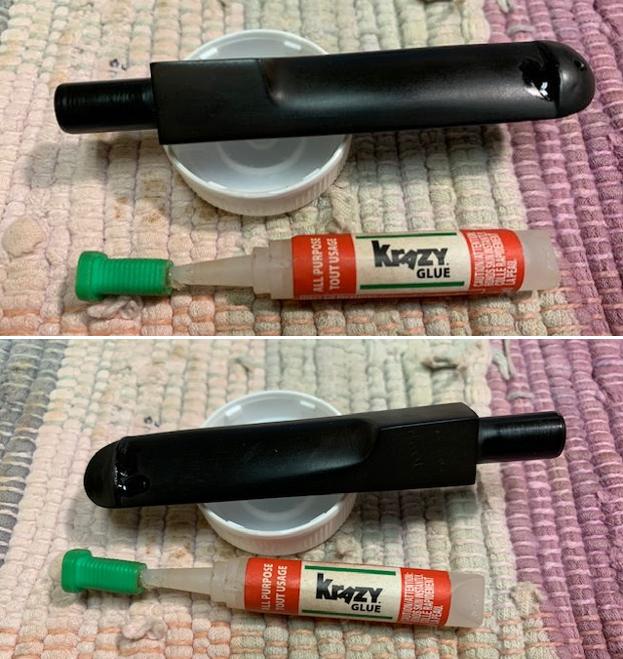
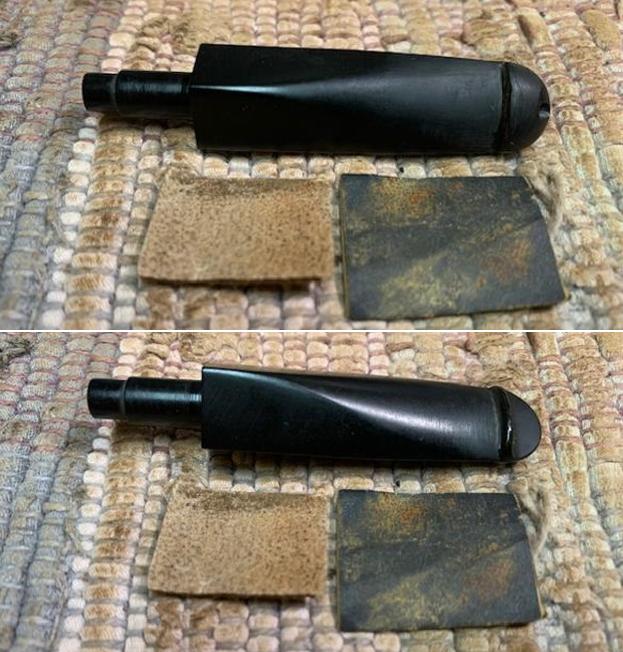
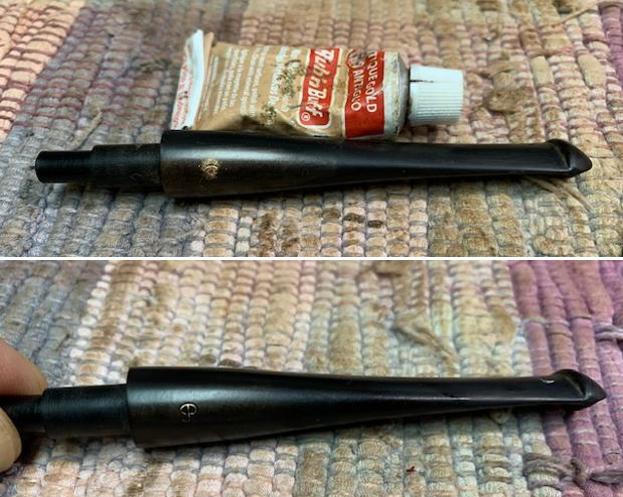
 Next, I begin the stem restoration by refreshing the button with a flat needle file. After I started filing, I decided to stop filing and to apply a patch to the button lip. As I was filing the edge of the lip to redefine it, I decided that the tooth compressions on the lip were too severe and needed to be addressed and the lip built up some before filing.
 I use black CA glue to spot drop on the lip of the button to build it up. I do this on the upper and lower button. An accelerator is also used on the CA not only to quicken the curing time but also to hold the CA glue in place.
  After the button patches are thoroughly cured, the flat needle file is again used to define and shape the upper and lower button lip. I’m careful to establish the lip edge on both upper and lower so that the lip is not worn down through sanding.
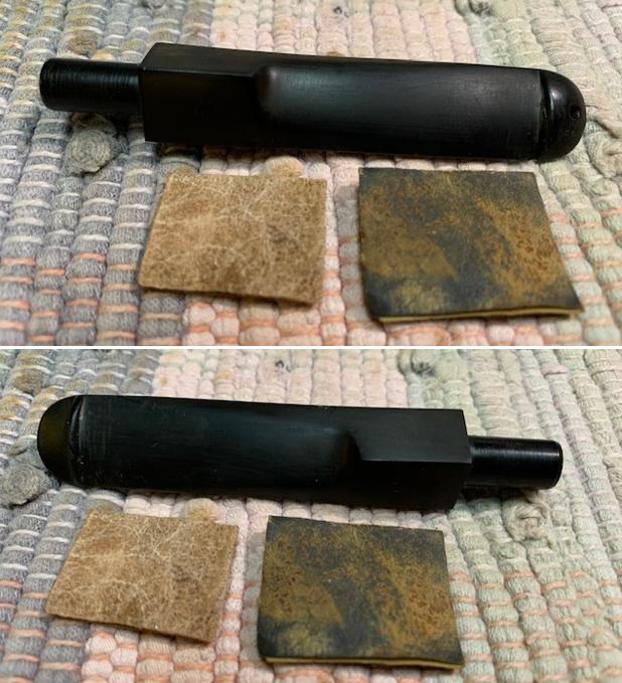
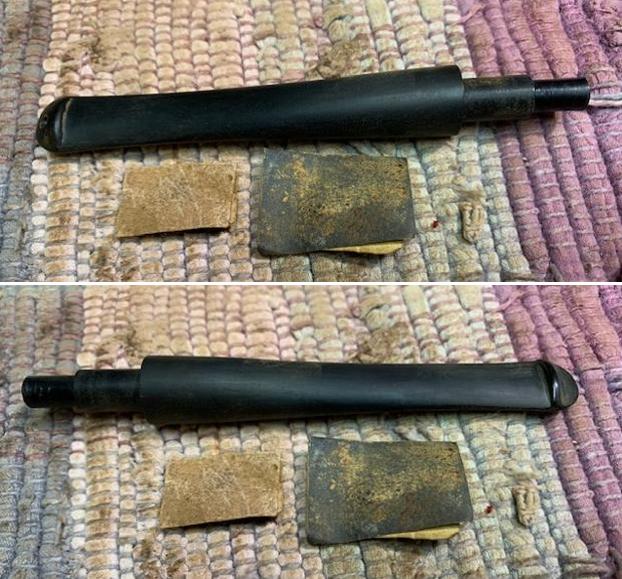
 With the button again well defined, 240 paper is used to sand the bit – upper and lower to remove filing scratches and the residual tooth chatter. The paper is also applied to the button lips to even out and shape after application of the black CA glue.
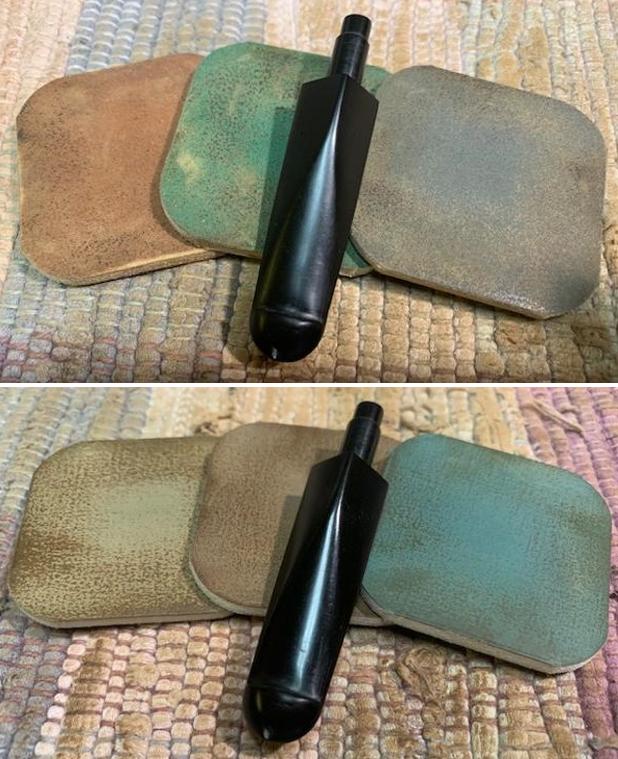
 Next, the entire stem is wet sanded with 600 grade paper and this is followed with 0000 grade steel wool.
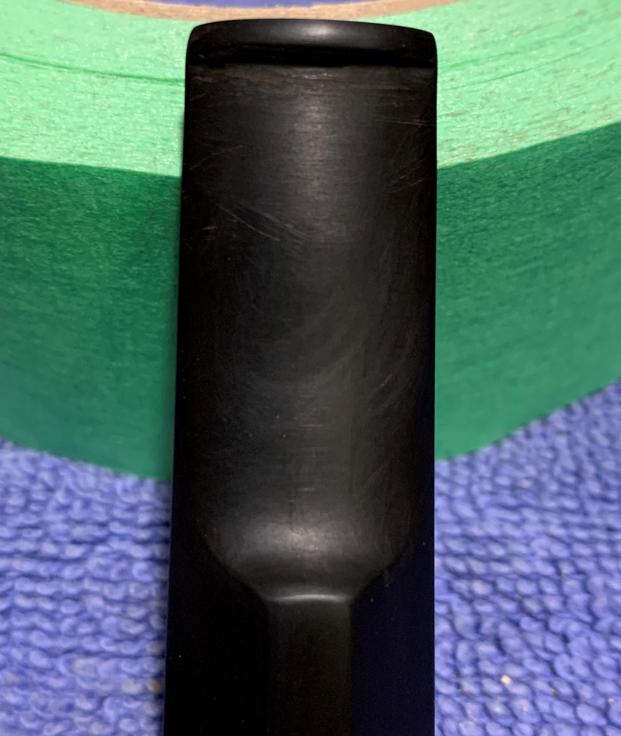
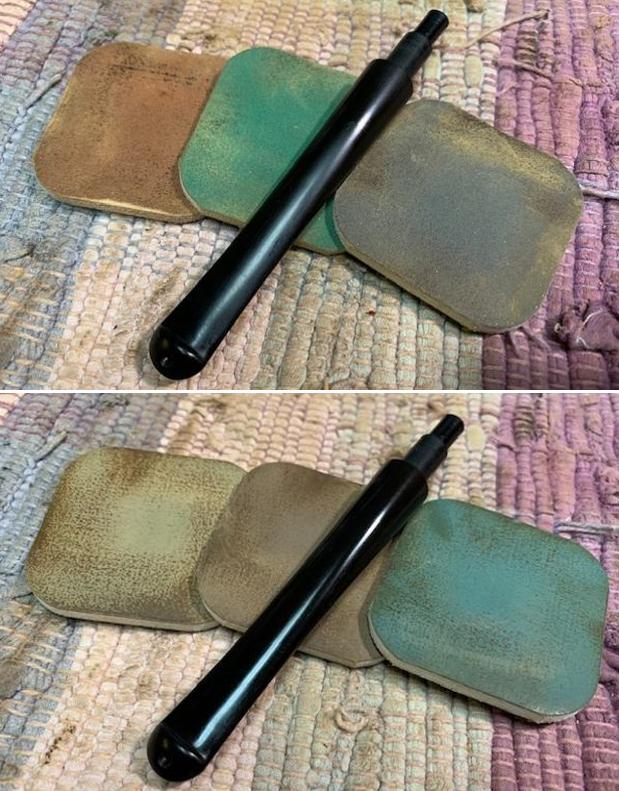
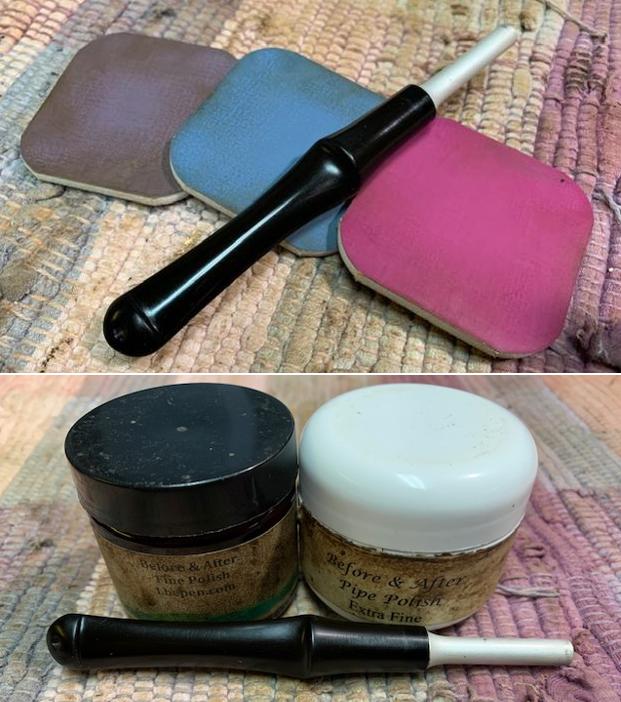
 Following the steel wool, the stem is sanded with the full regimen of micromesh pads beginning by wet sanding with pads 1500 to 2400. Then, this is followed by dry sanding with pads 3200 to 4000 and 6000 to 12000. Between each set of 3 pads, Obsidian Oil is applied to the stem to condition and guard against oxidation. The finished stem has a nice pop to it and the tooth chatter and button repairs look good.
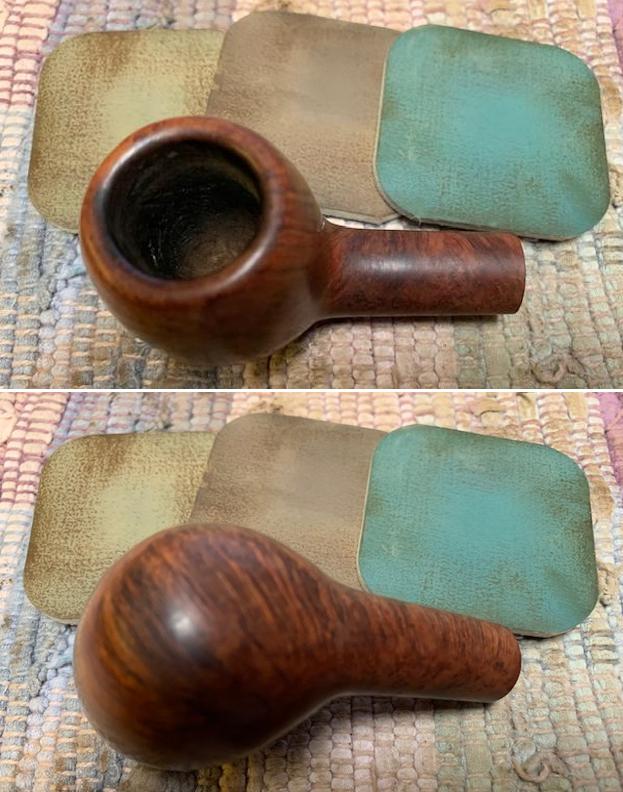
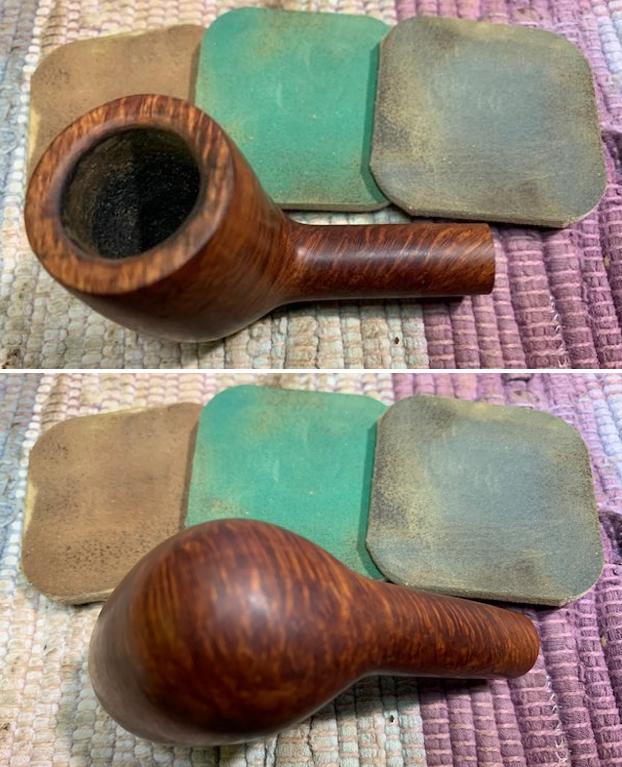
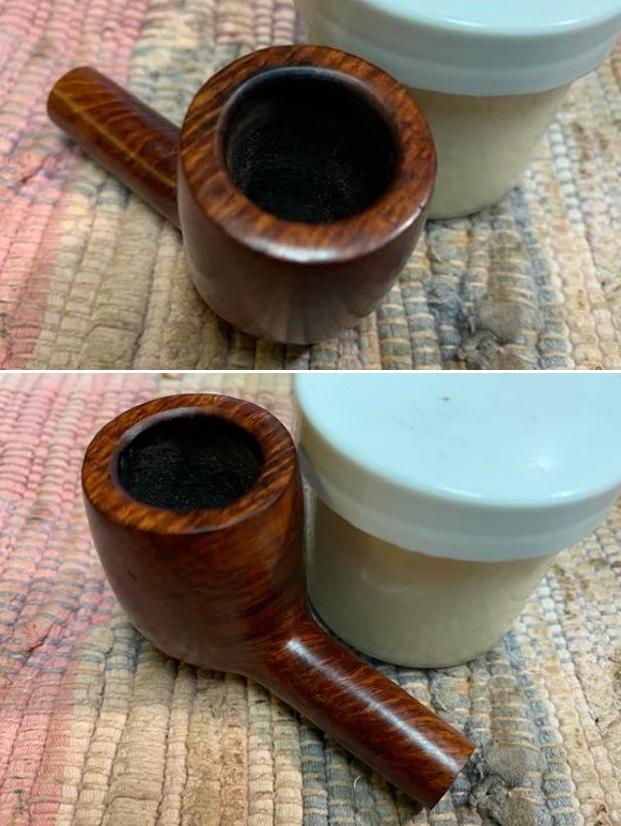
 The stummel has gone through the night allowing a kosher salt and alcohol soak to continue the cleaning of the internals. This morning the salt and wick show a bit of soiling, but not much. After clearing the expended salt in the waste, the chamber is wiped with a paper towel and I blow through the mortise to make sure all the salt crystals are removed.
  The follow up cleaning with a pipe cleaner and cotton bud confirm that the internals are clean and refreshed.
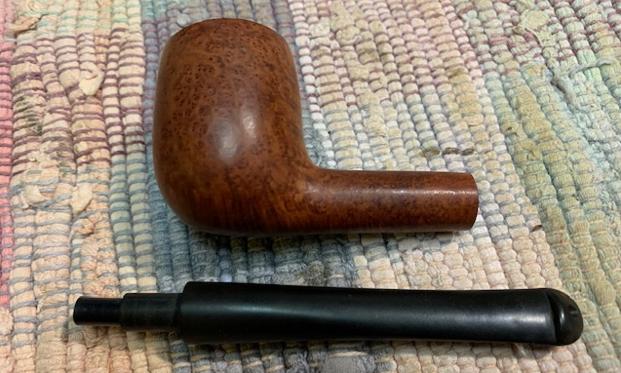
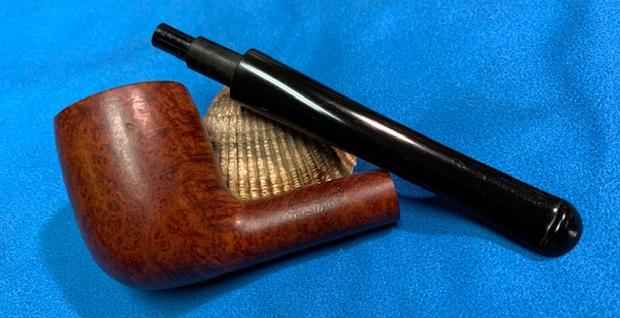
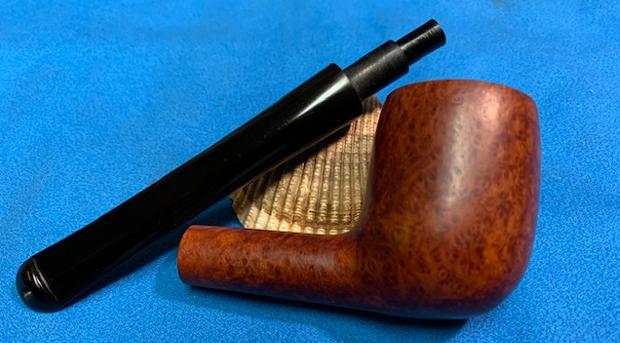
 To get a look at the progress, the Butz-Choquin Cocarde Geante Plus stem and stummel are reunited. What I discover when I try to insert the tenon into the mortise is that it will not fit. What often happens through the cleaning process is that the mortise will expand minutely, and the fit is too tight for comfort. I never force stems into shanks. I’ve learned the hard way that this is the way to add a cracked shank repair to the list.
 To remedy this is not difficult. A piece of 240 grade paper is wrapped around the tenon and while pinching it against the tenon with my fingers, the stem is rotated to create the necessary abrasion to decrease the tenon diameter by a bit. I pinch and rotate the tenon with 240 paper a few times trying the fit after each session. When it finally starts to insert more easily, I graduate the paper to 600 to smooth the tenon.
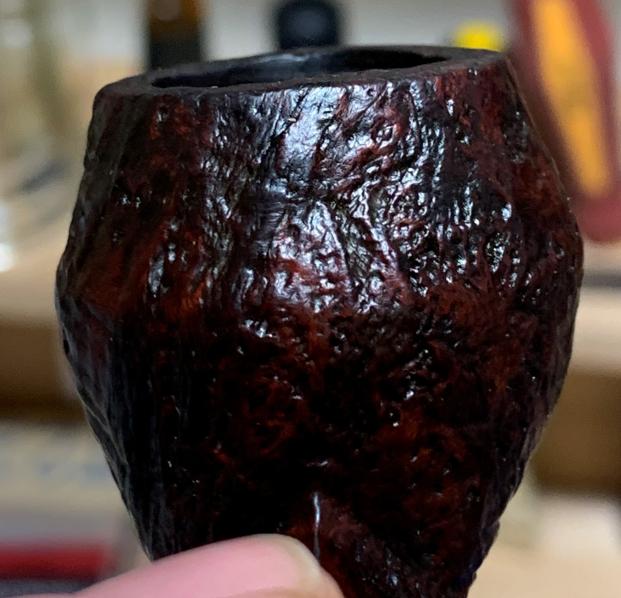
 This worked well. The stummel and stem are reunited, and the fit is snug but not tight. The BC is looking good.
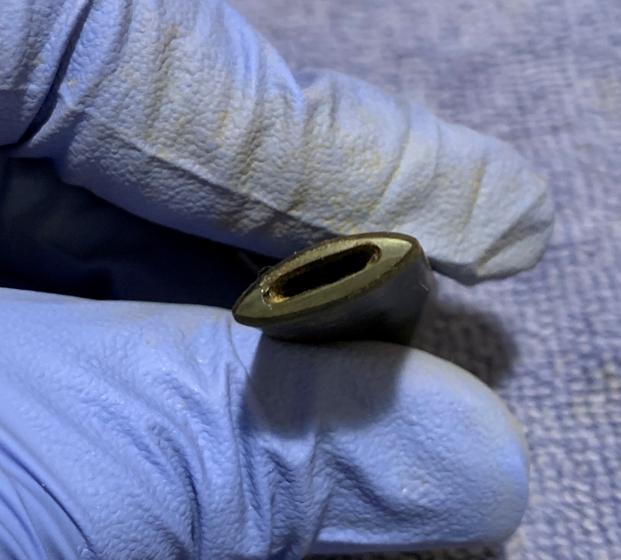
 Before starting with the compound process, the BC stem stamp needs refreshing. The stamping indent is strong and distinct and touching it up with white acrylic paint should not be a problem.
 After shaking the paint bottle, a bit of paint is applied over the stamping and spread with a toothpick.
 I then use a cotton pad to daub the wet paint. This does two things. The daubing spreads the paint over the lettering and thins the paint. The daubing also dries the paint quickly.
 I then use the side of a toothpick to rub over the stamping removing excess dried paint.
 To finish the job, a pointed cotton bud enables me to clean the lettering more closely. Finally, I briskly rub a cotton pad over the stamping to shine up the vulcanite and sharpen the stamping. It looks great!
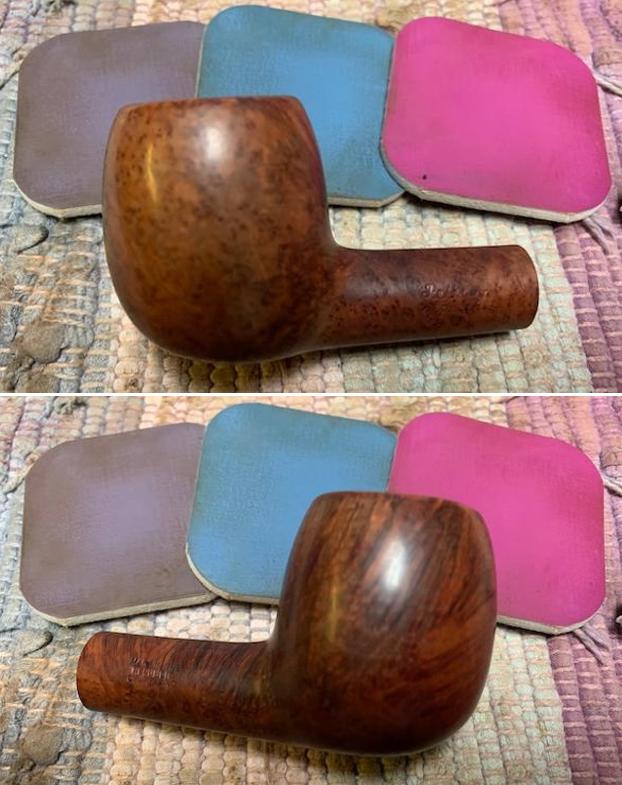
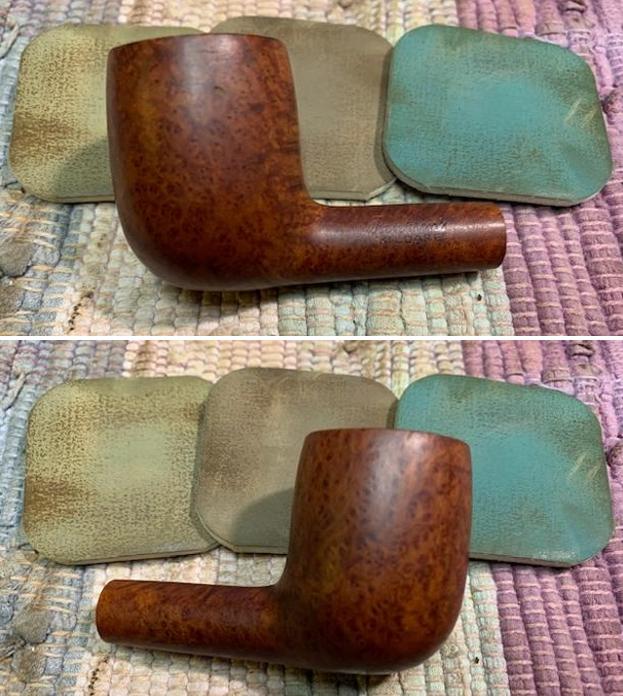
 Now on the home stretch. The rotary tool is mounted with a cotton cloth buffing wheel and set at about 40% full power. Blue Diamond compound is then applied to the entire pipe. This finely abrasive compound helps to remove very fine blemishes on the briar surface. After methodically covering the pipe, I use a felt cloth to wipe the pipe removing leftover compound dust in preparation for application of the wax.
 After changing the cotton cloth buffing wheel, speed remaining the same, carnauba wax is applied to stem and stummel. To complete the recommissioning of the BC, the pipe is given a rigorous hand buffing to raise the shine more and to remove any excess wax remaining on the surface.
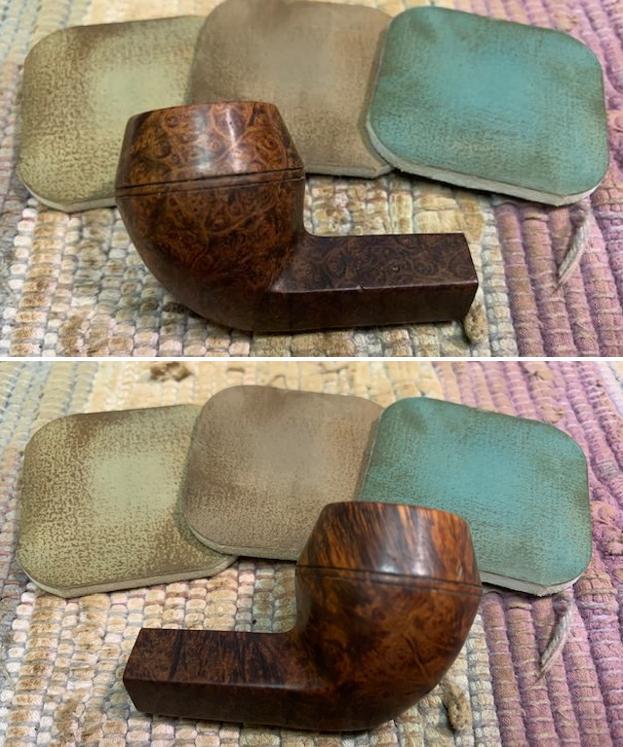
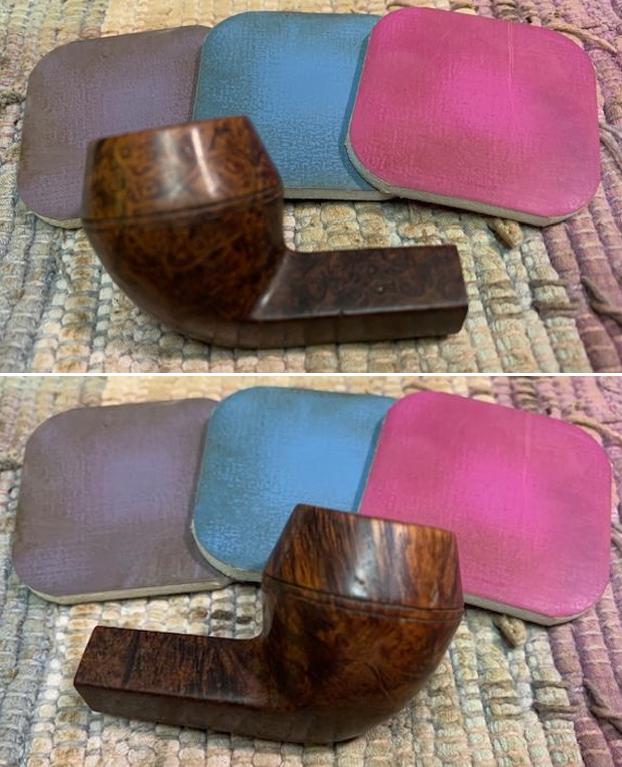
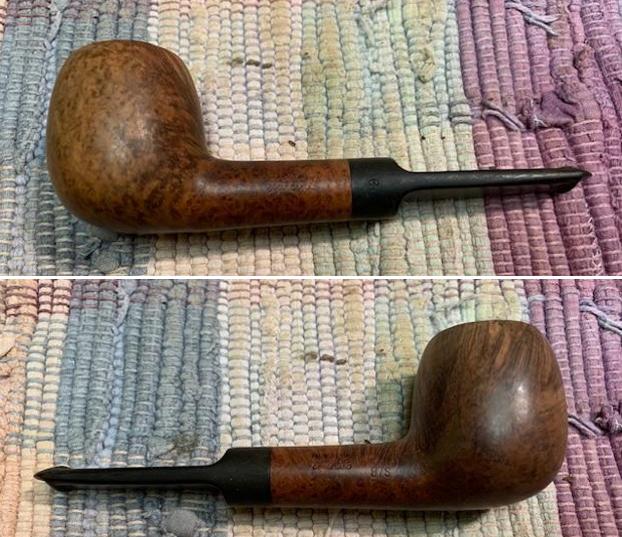
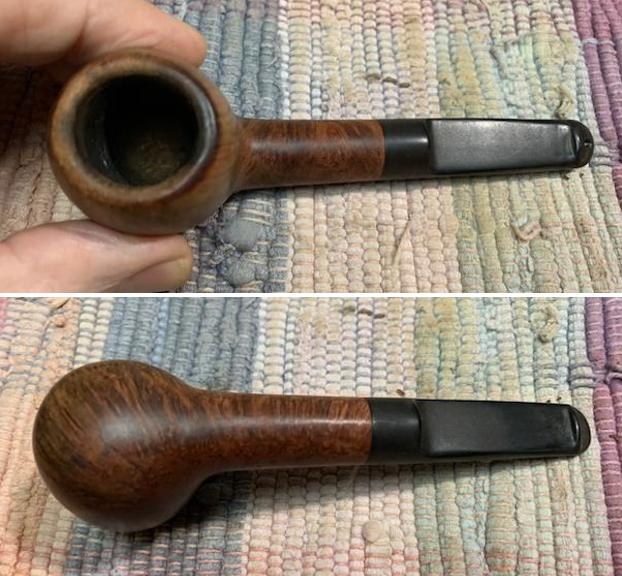
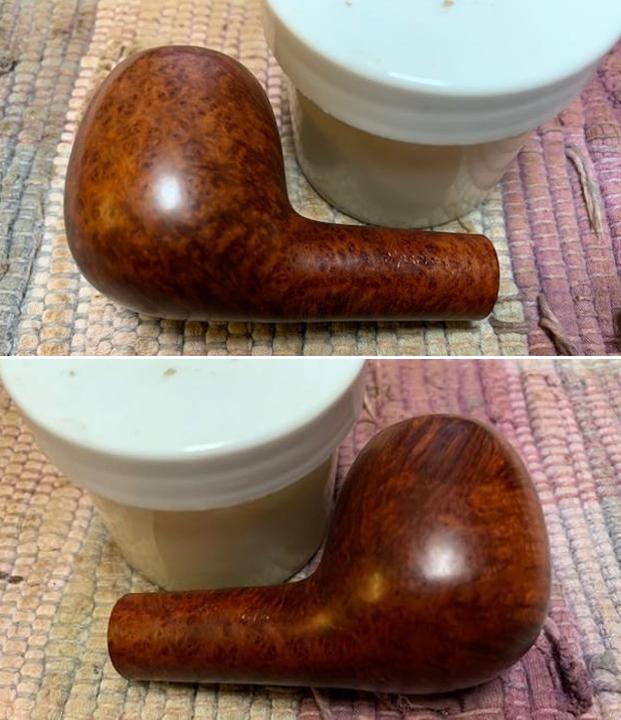
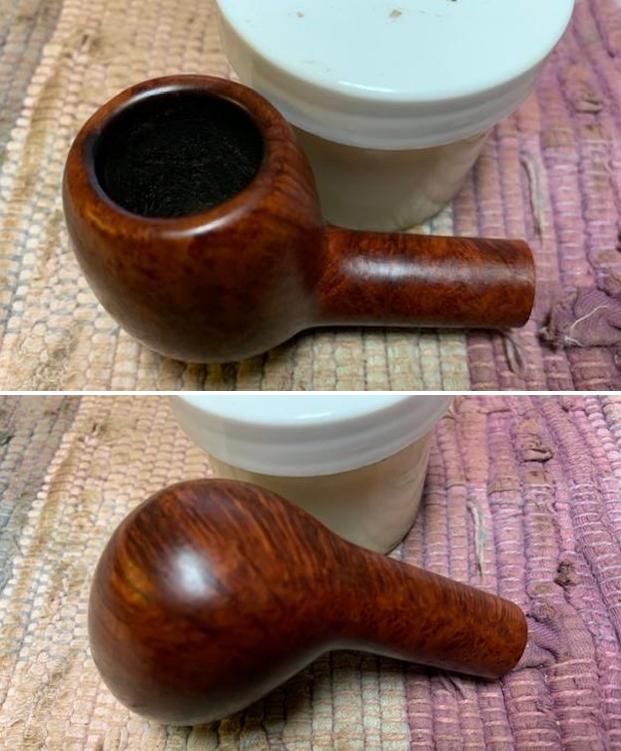
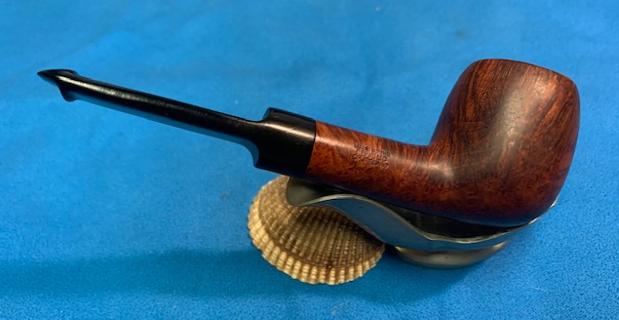
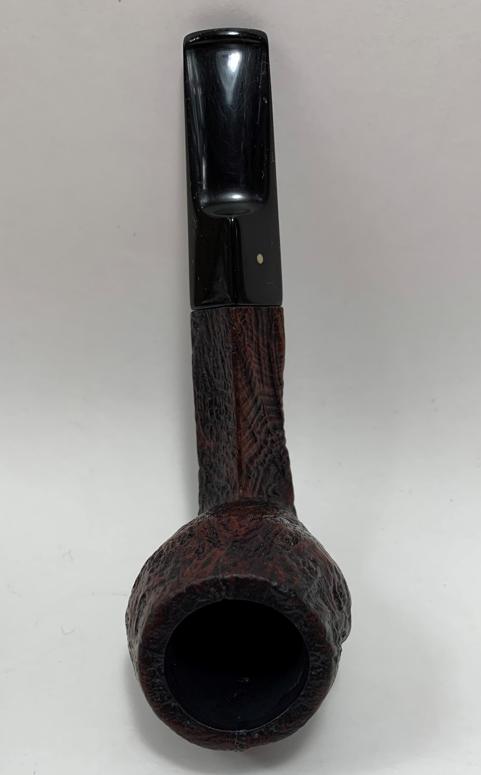
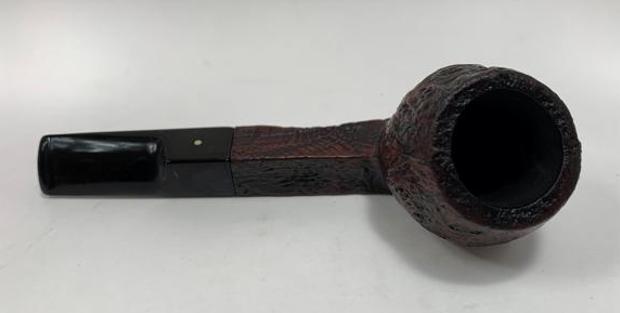
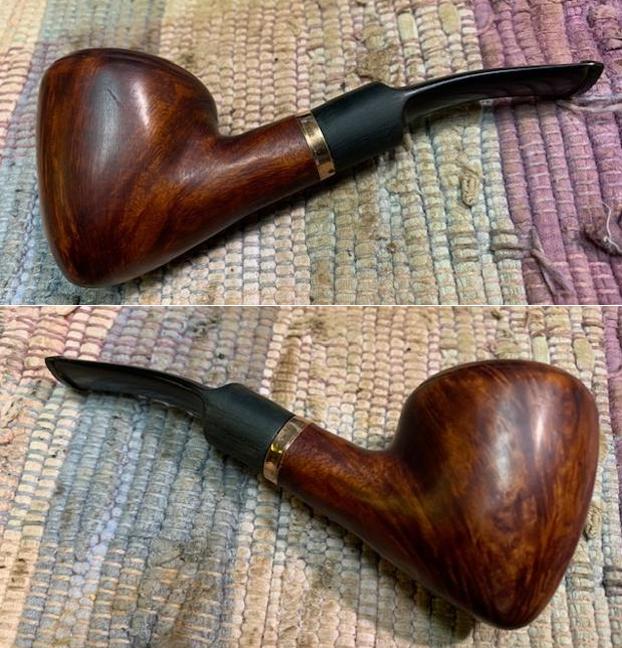
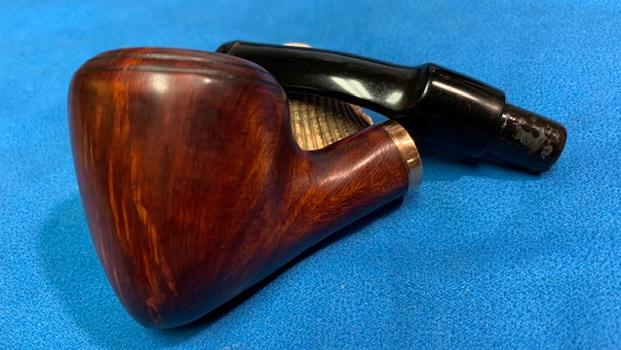
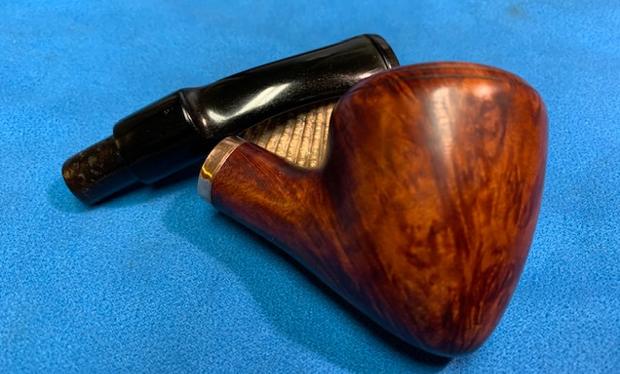
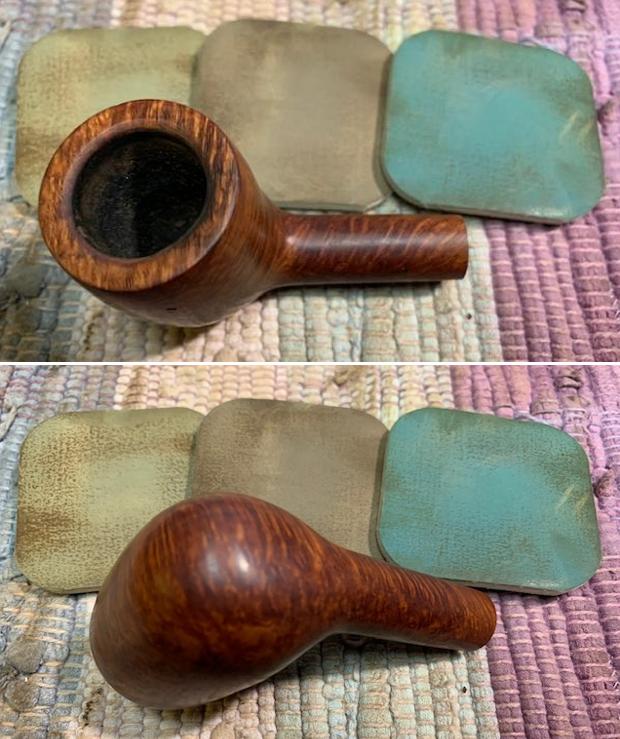
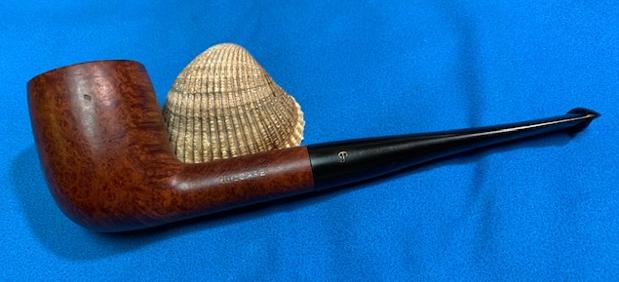
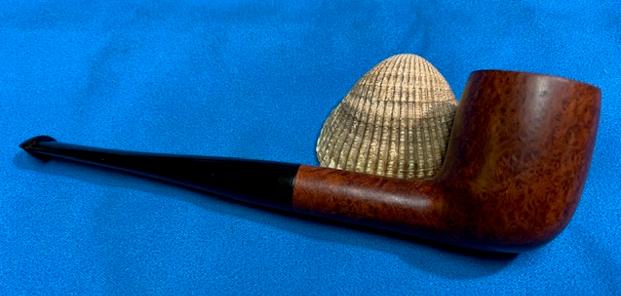
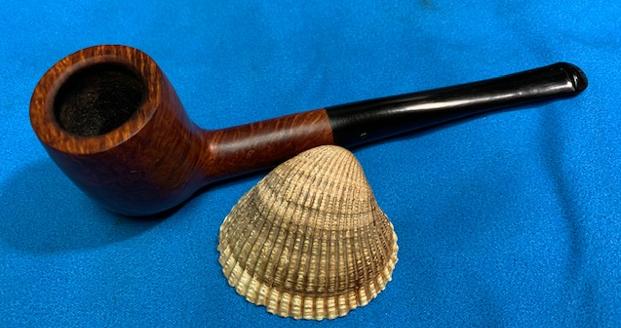
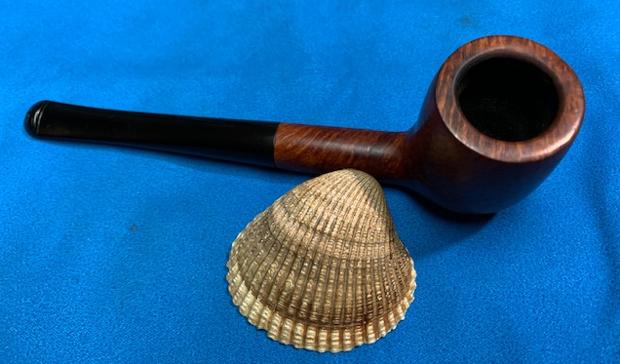
 When I began working on this pipe, it already was an attractive pipe not with any major issues. Repairing the stummel pits with new patches and erasing the tooth chatter damage from the bit and button were the main issues. The briar on this Butz-Choquin Cocarde Geante Plus covers a lot of real estate with horizontal grain moving along the length of the stummel. The bird’s eye grain populates the front and aft of the bowl showing the cross-cut perspective of the lateral grain. This BC giant will cradle nicely in Niko’s hand and filled with his favorite blend will provide years of service and fellowship. Niko has already claimed the BC from The Pipe Steward Store benefiting the Daughters of Bulgaria. Unlike most of the pipes I restore that are sent to their new stewards by post, this one is hand delivered from my mobile worktable in Nashville and I’m able to share an inaugural bowl with the new steward! With L. J. Peretti Black Virginia in our bowls and 14 year Glenfiddich in our glasses, the fellowship is good. Thanks for joining me!


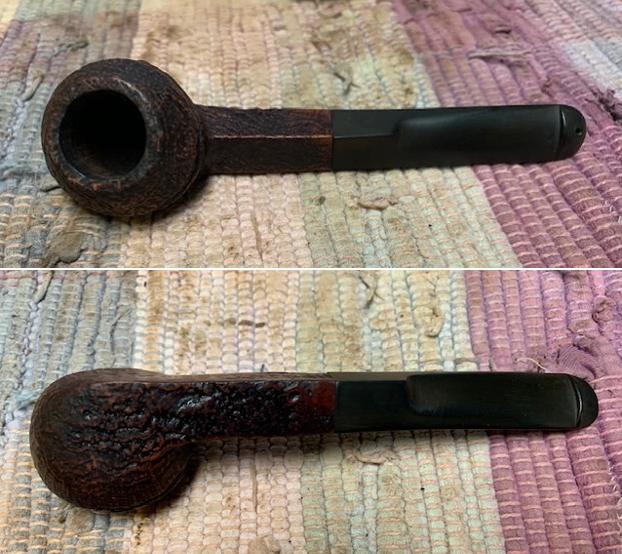
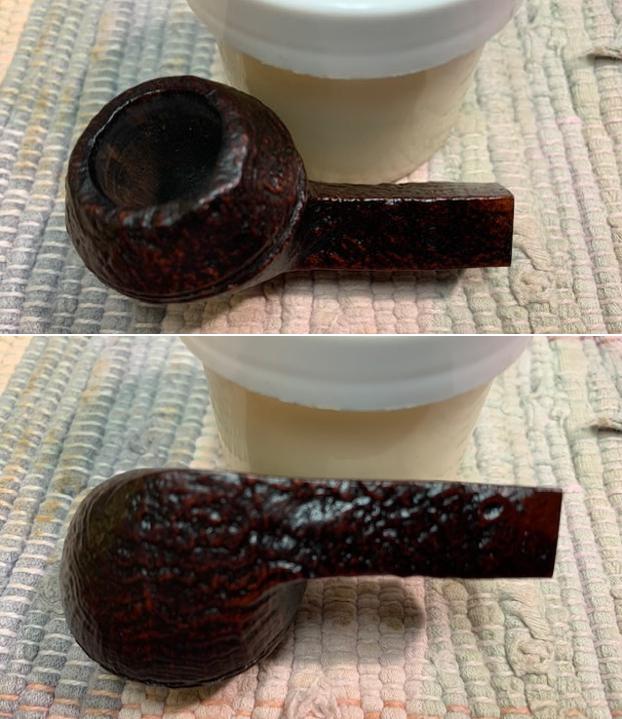
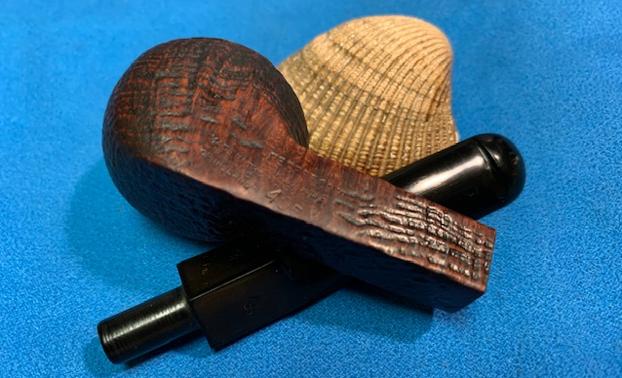
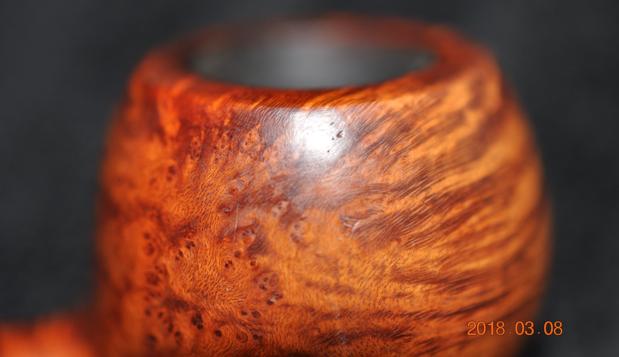
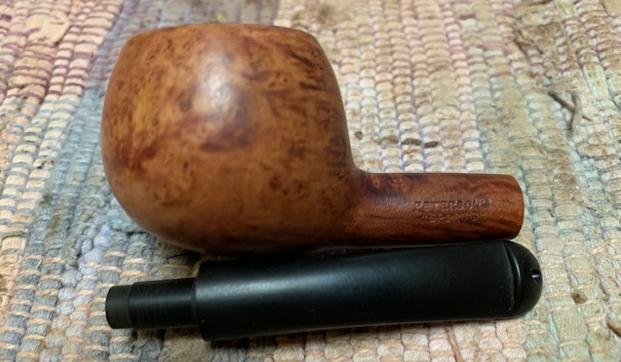
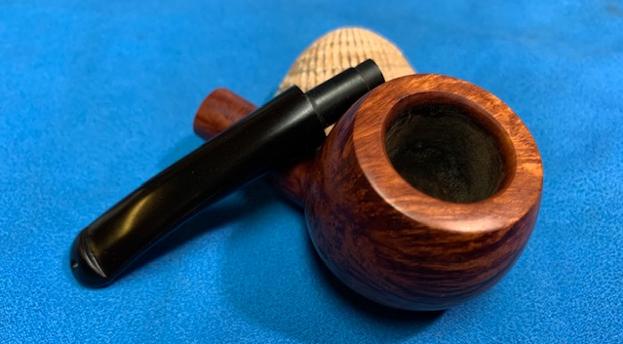
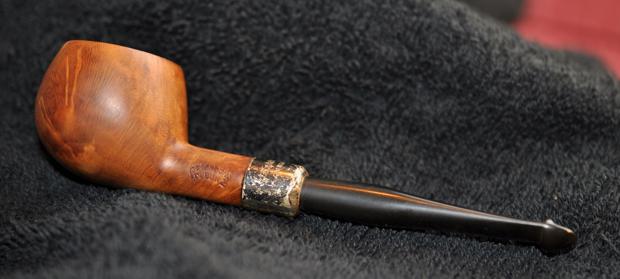
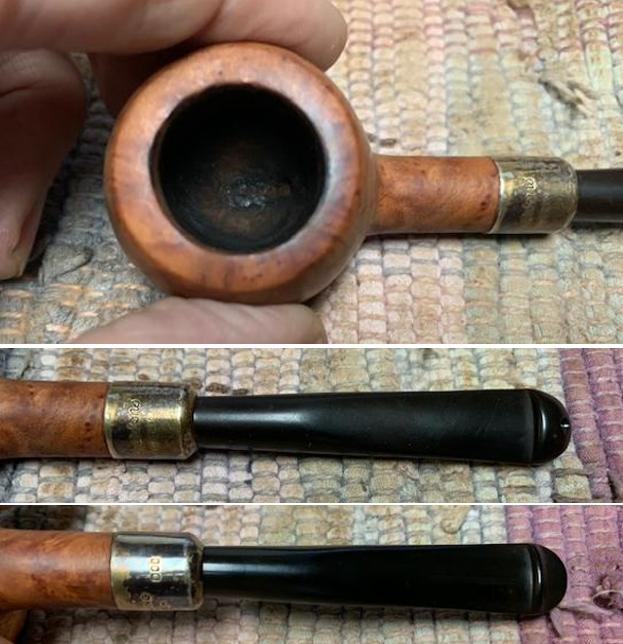
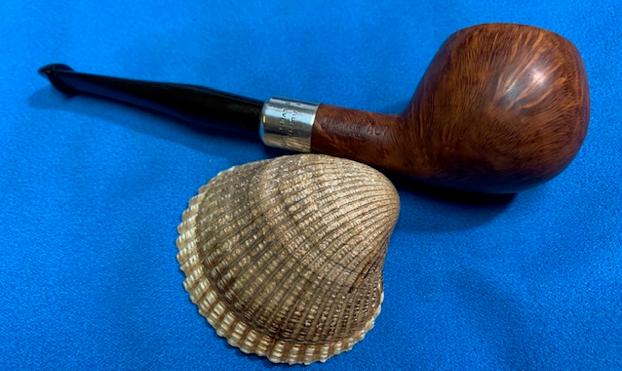
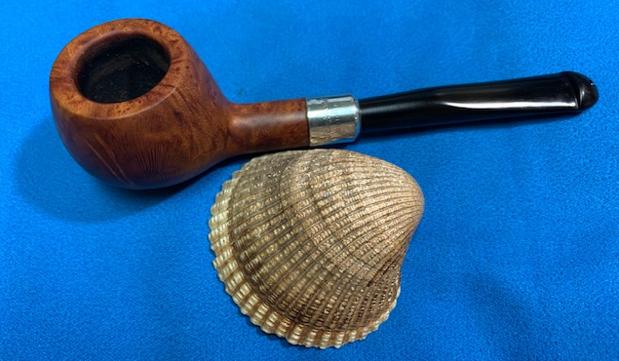
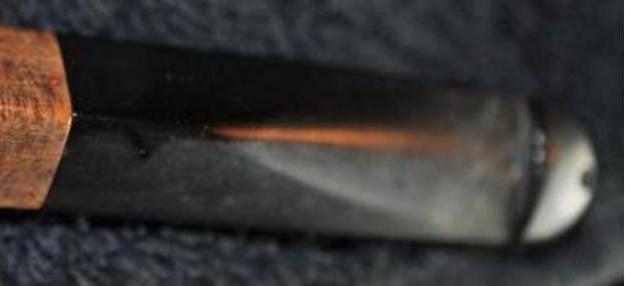
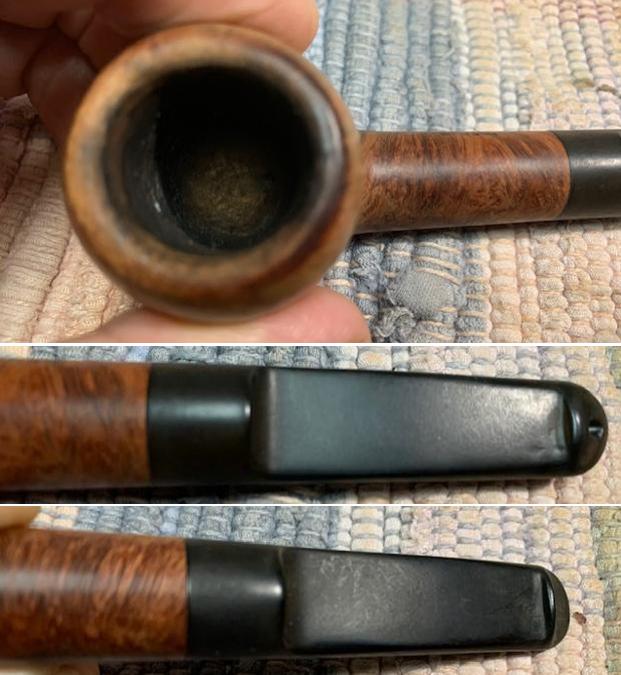
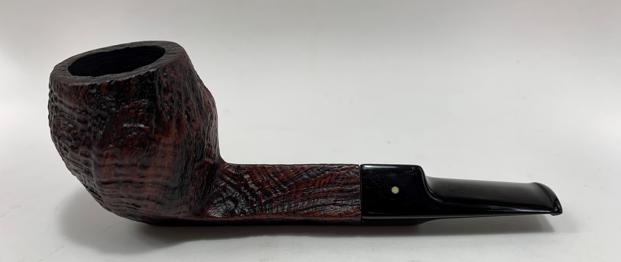
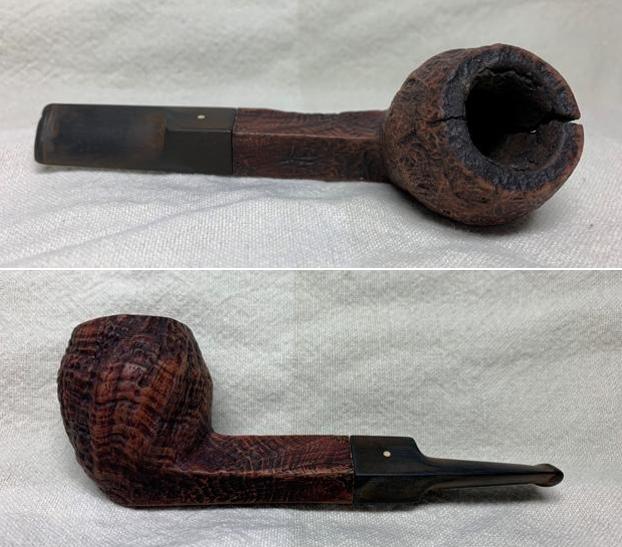
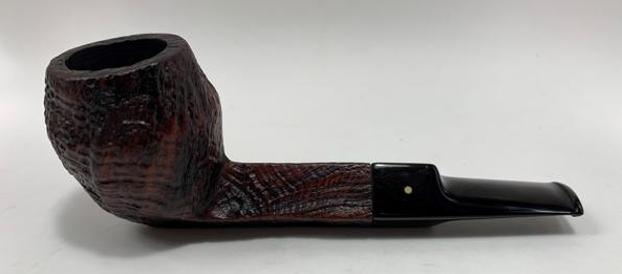
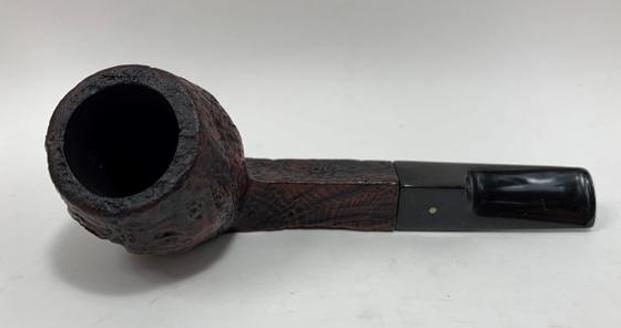
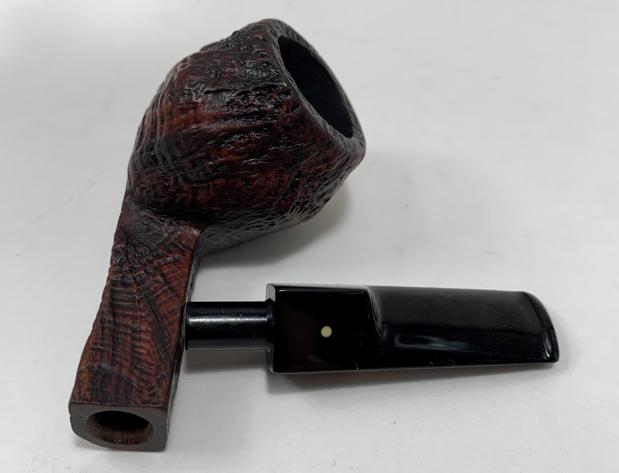
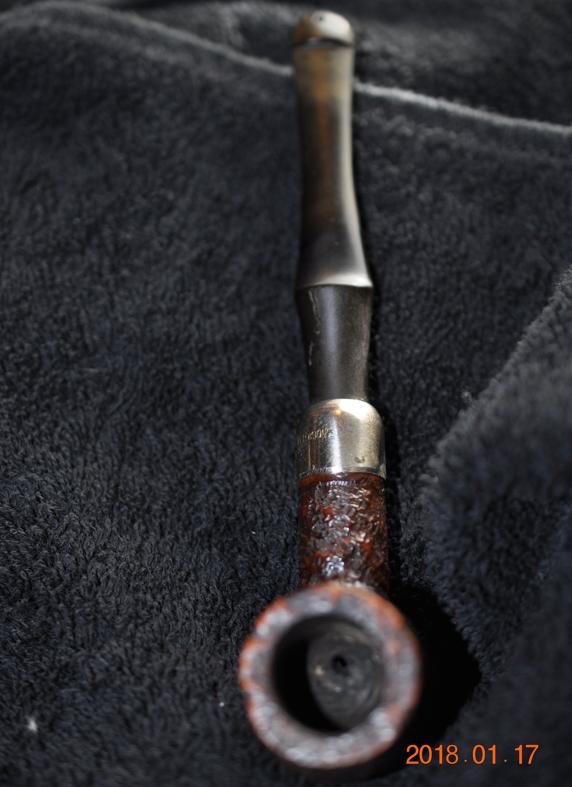
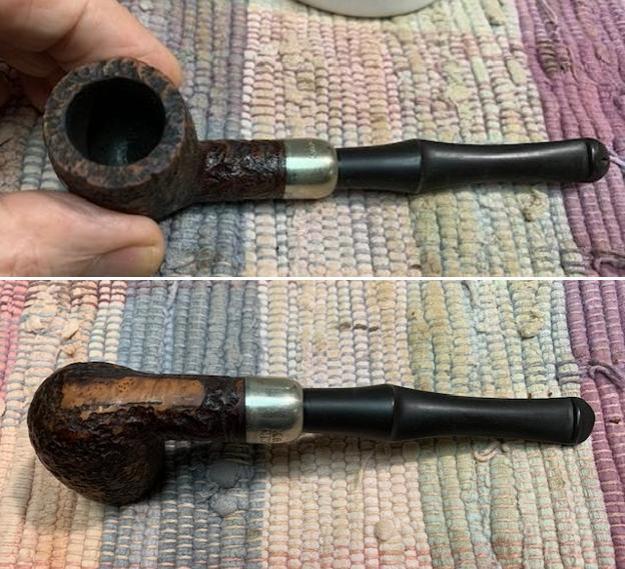
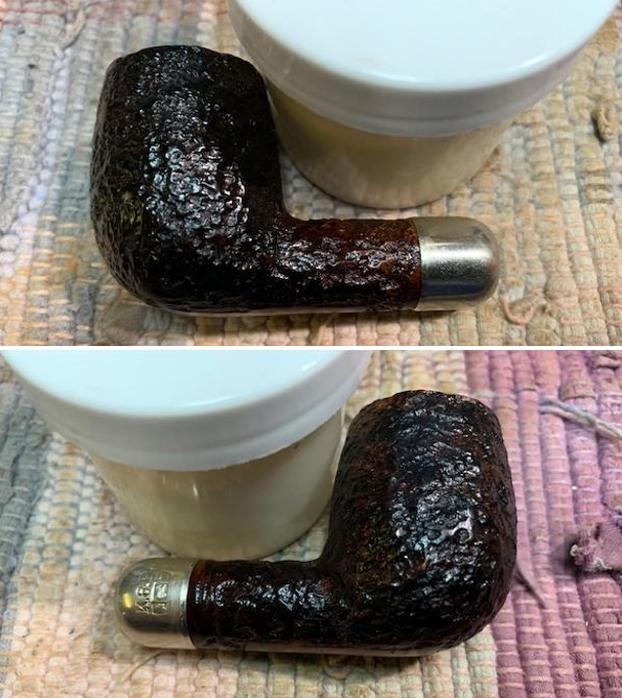
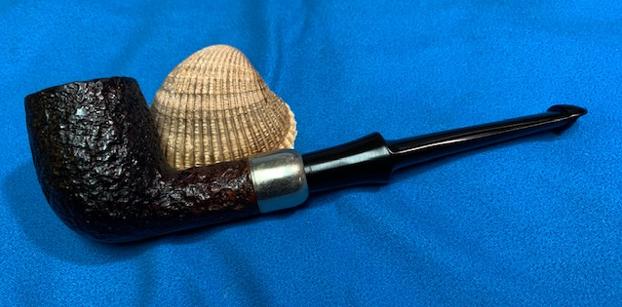
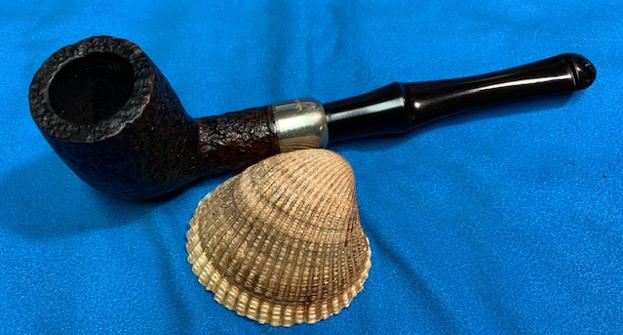
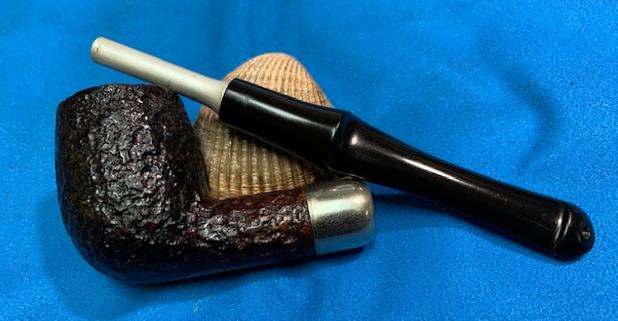
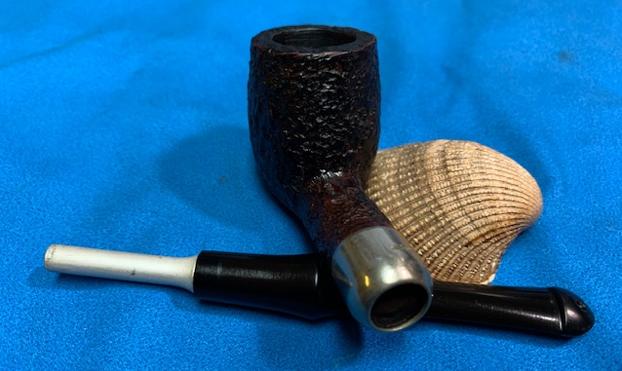
 Jeff took photos of the rim top and stem to show the general condition of the pipe. The bowl is heavily caked and the rim top and edges have some lava overflow. The stem is oxidized, calcified has tooth marks on the top and underside near the button.
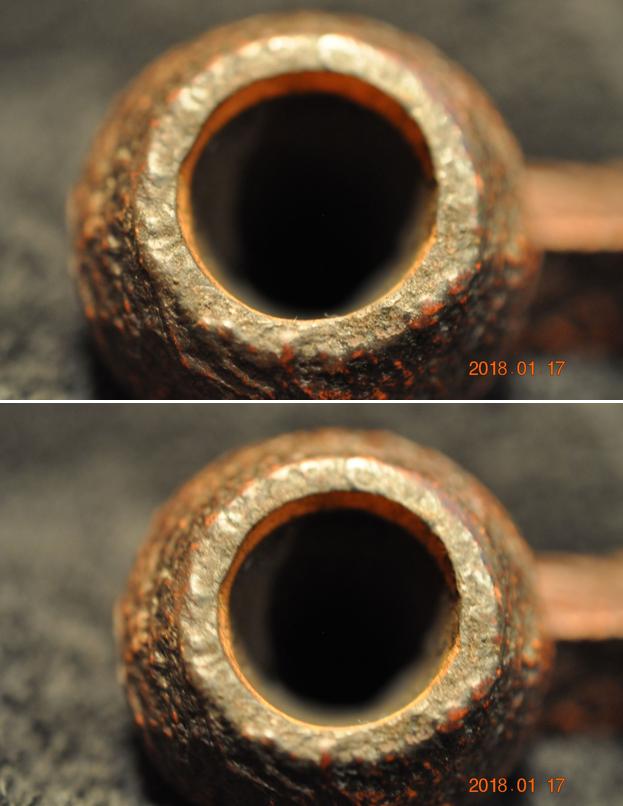
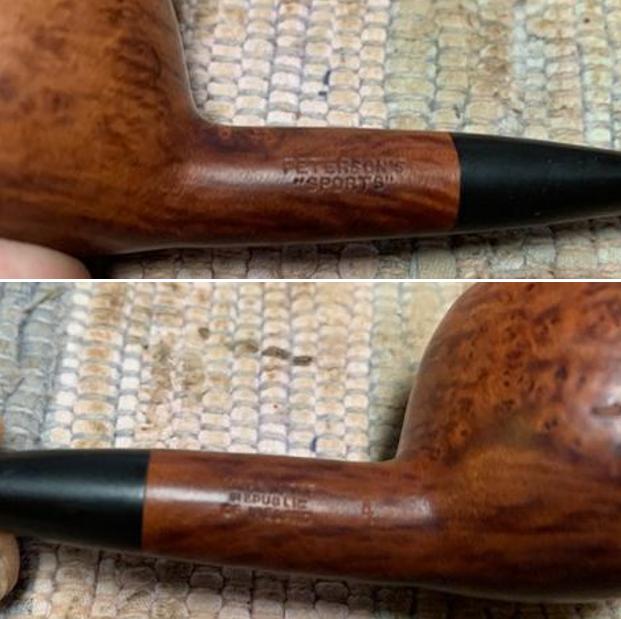
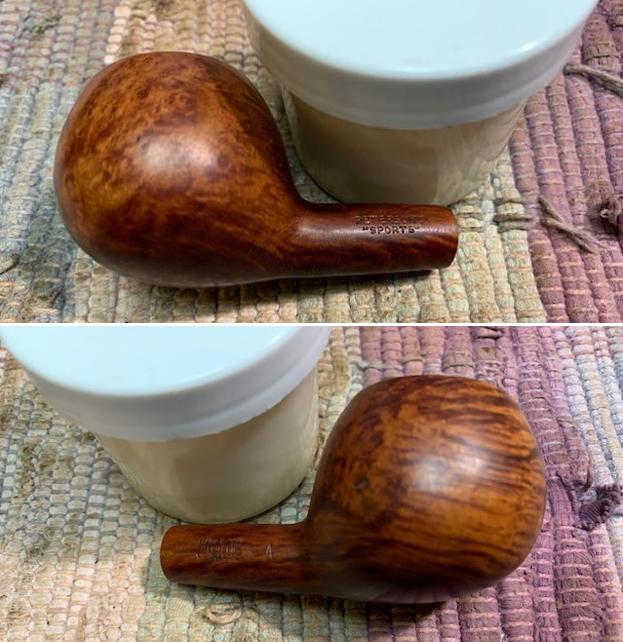
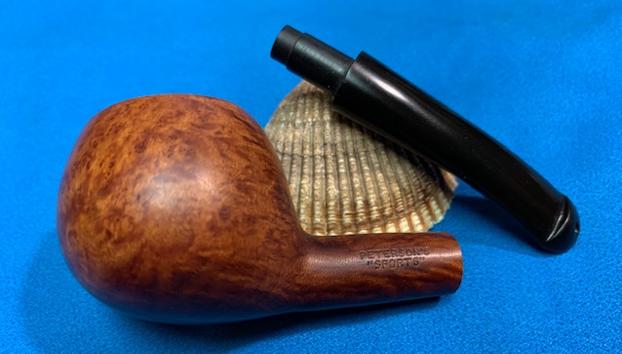
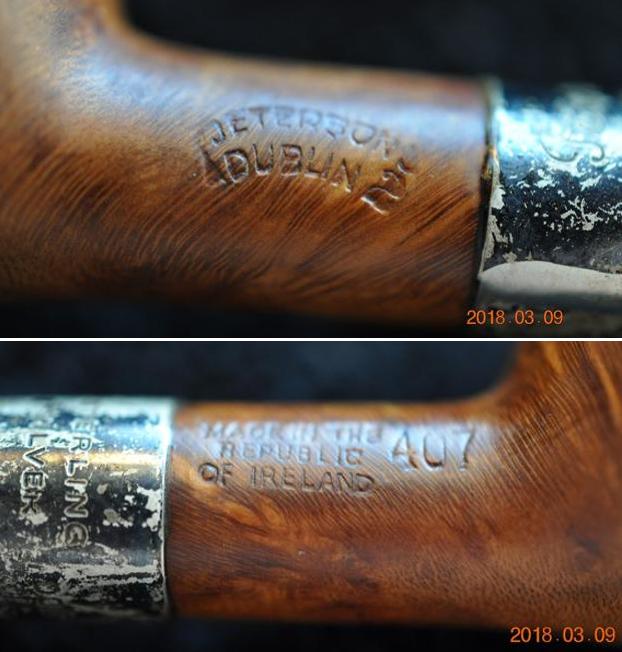
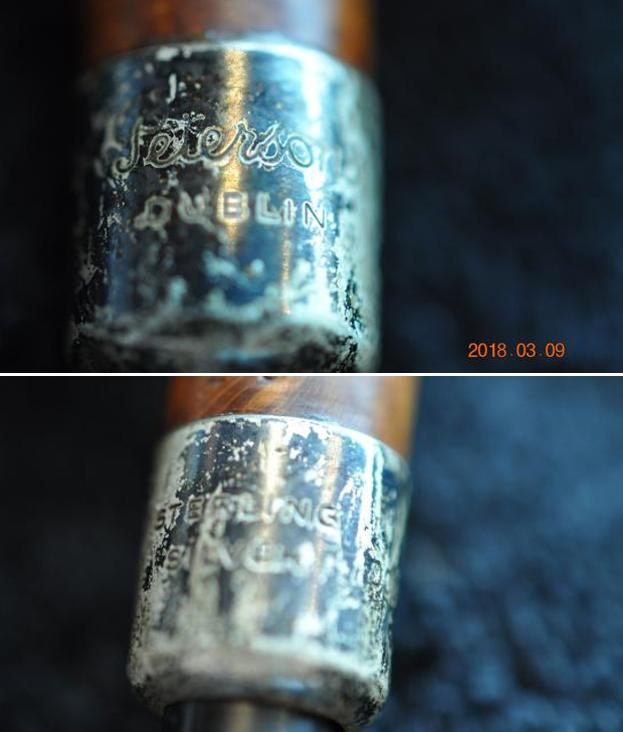
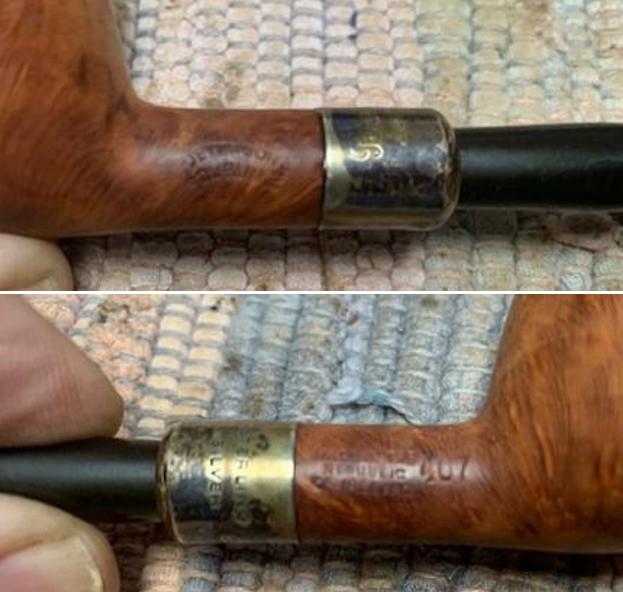
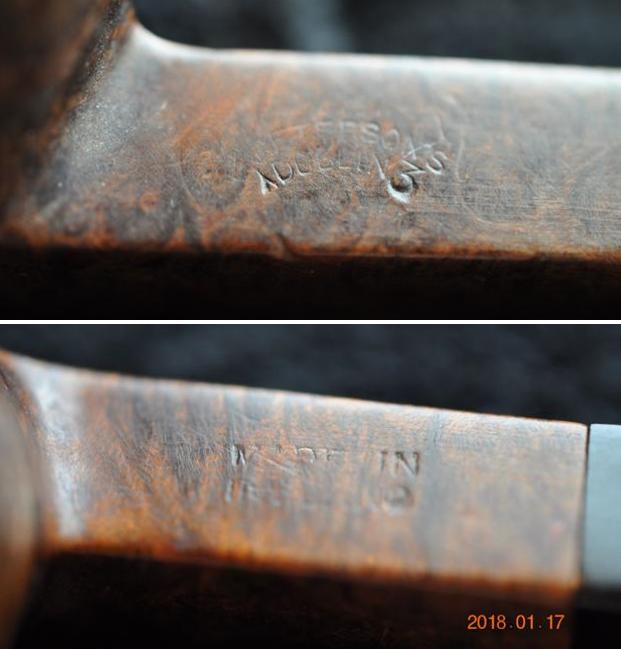
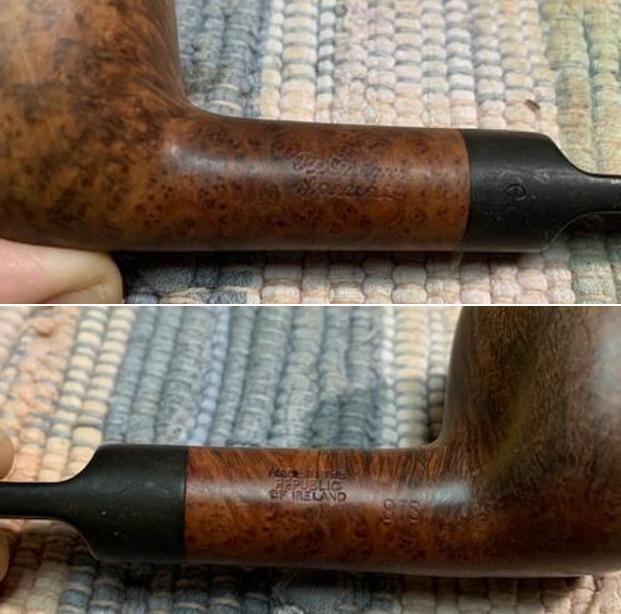
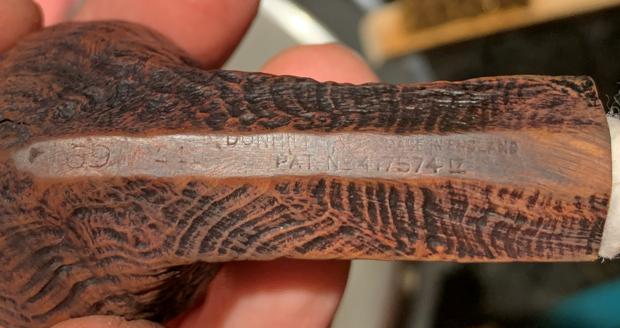
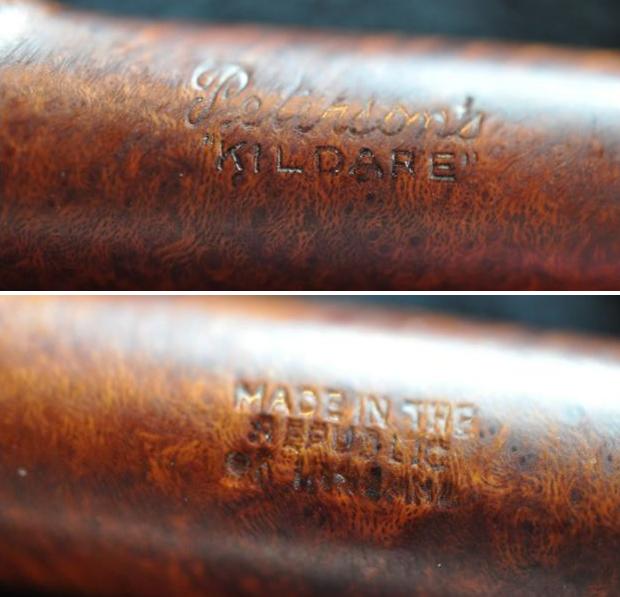
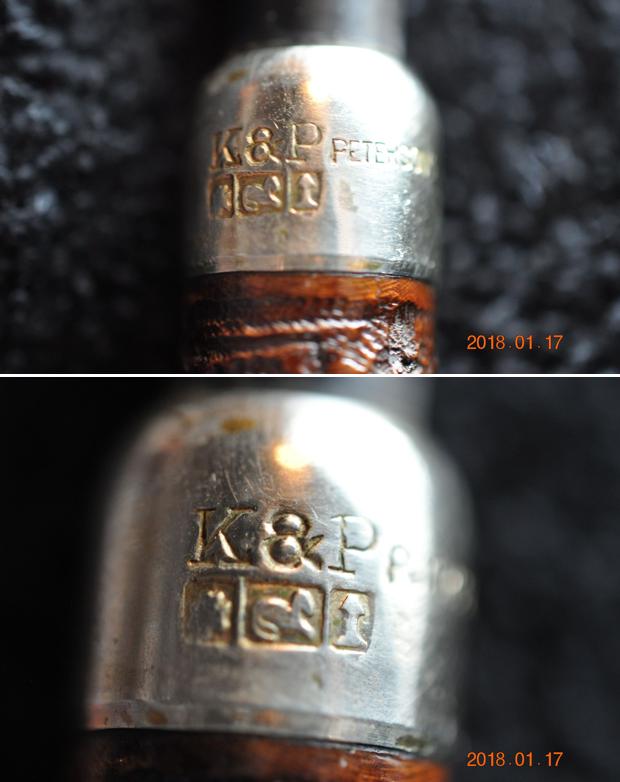
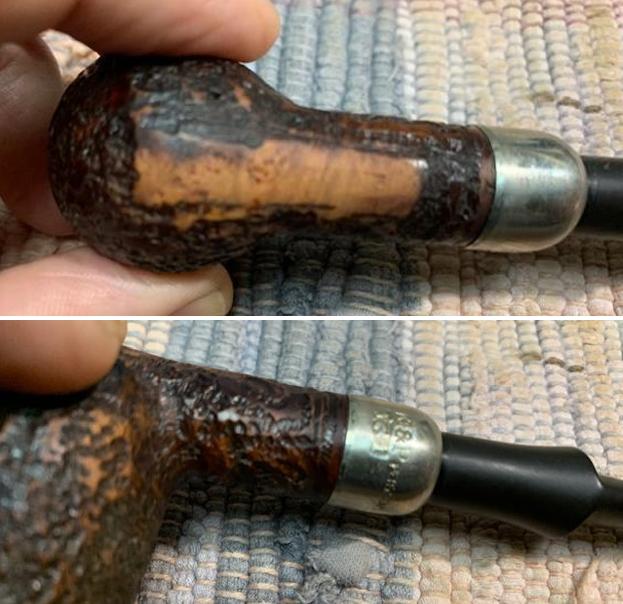
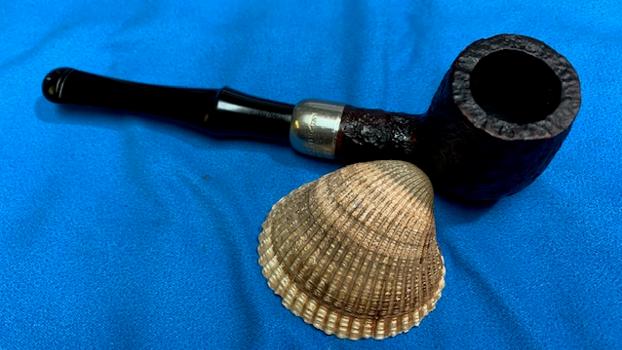
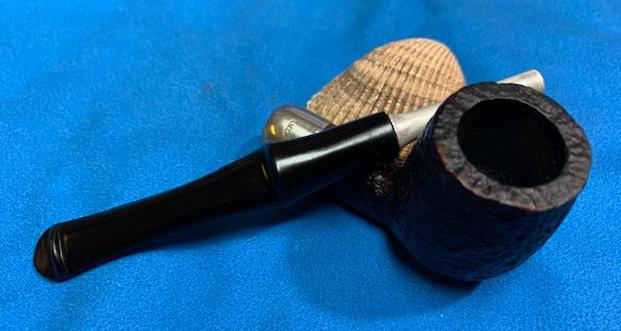
 He took photos of the underside of the bowl and shank to show the stamping. The stamping is readable in the photos below and is as noted above.
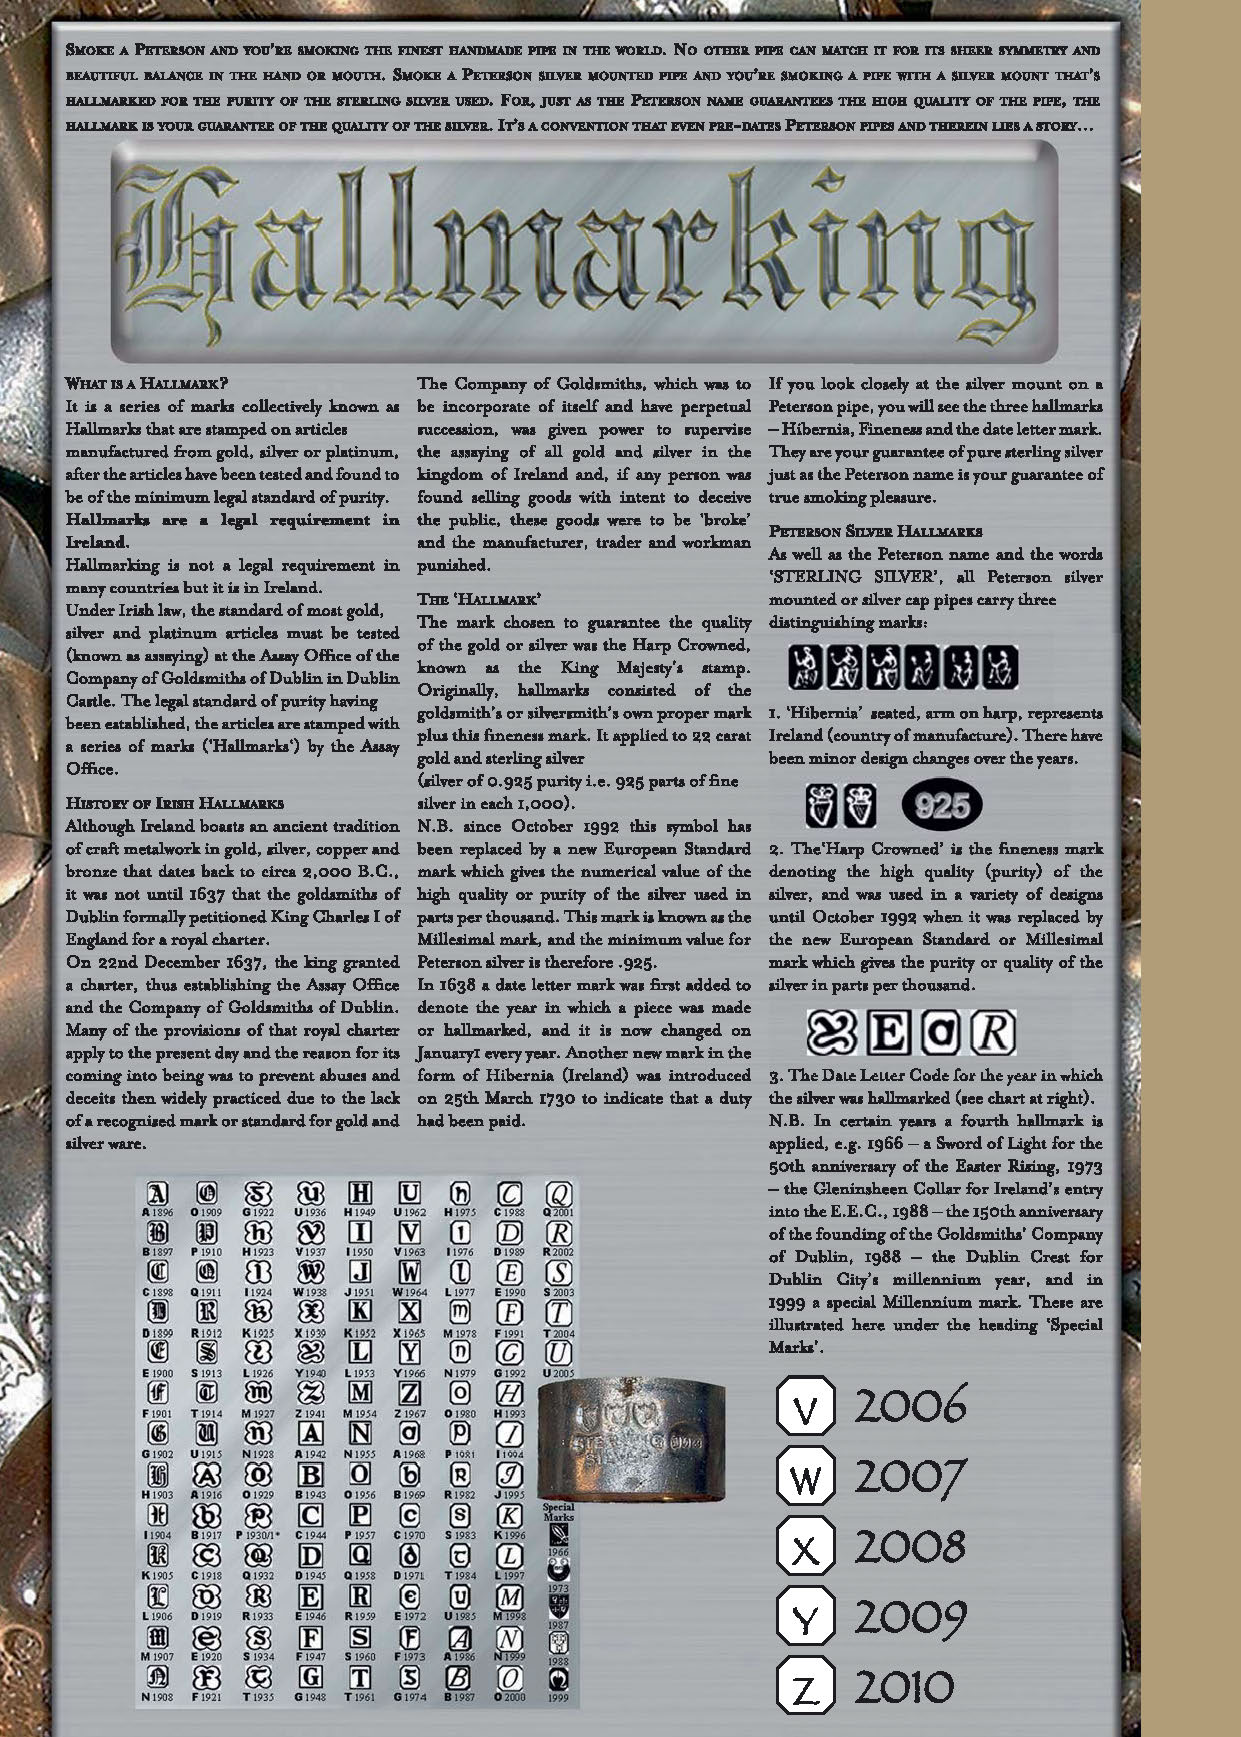
 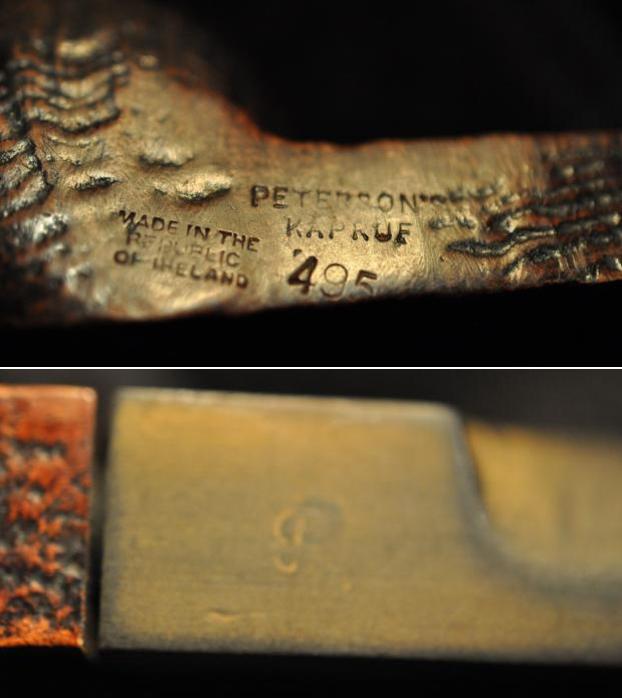 I am including the information from Pipedia’s article on Peterson pipes. It is a great read in terms of the history of the brand (https://pipedia.org/wiki/Peterson).
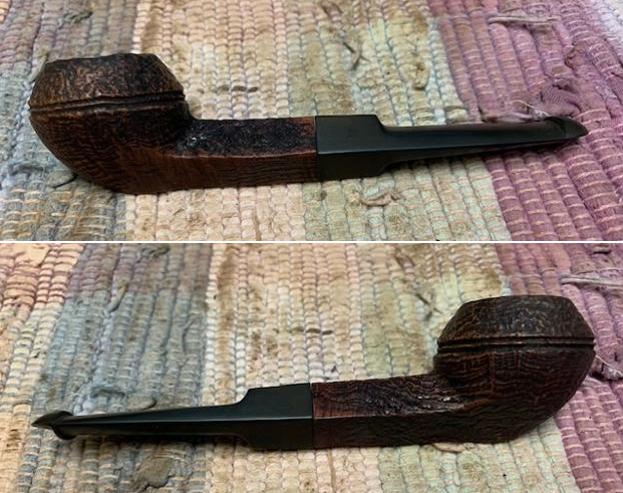
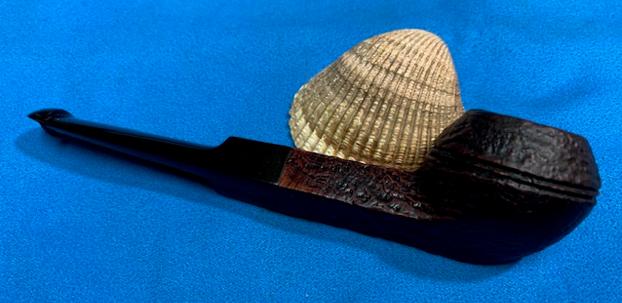
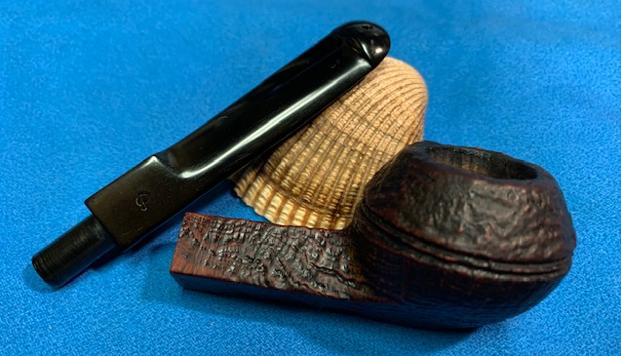
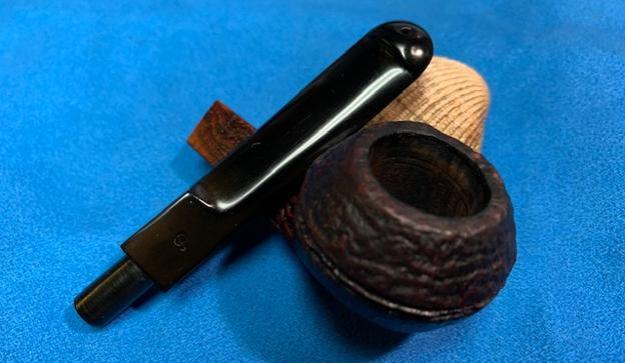
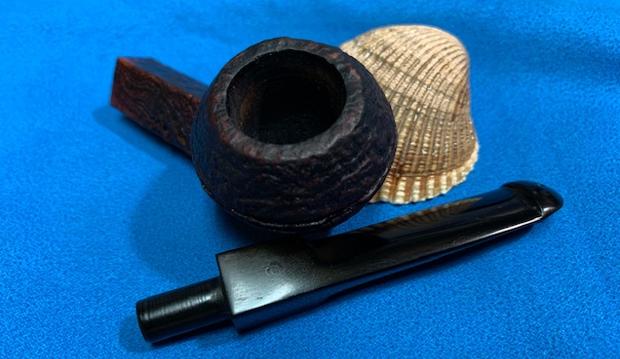
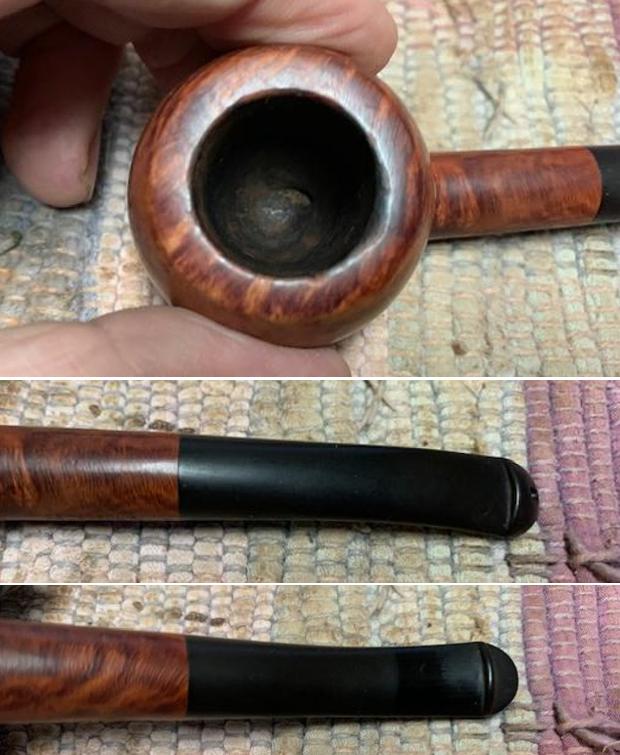
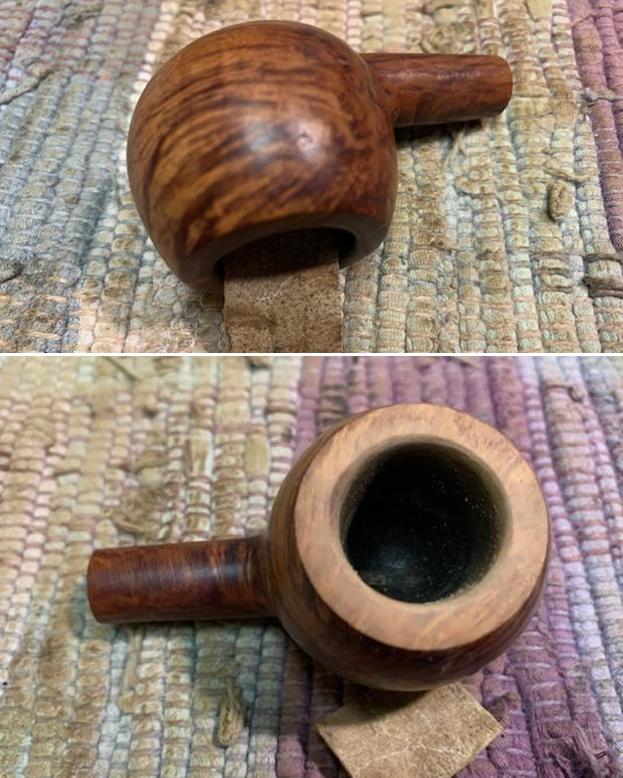
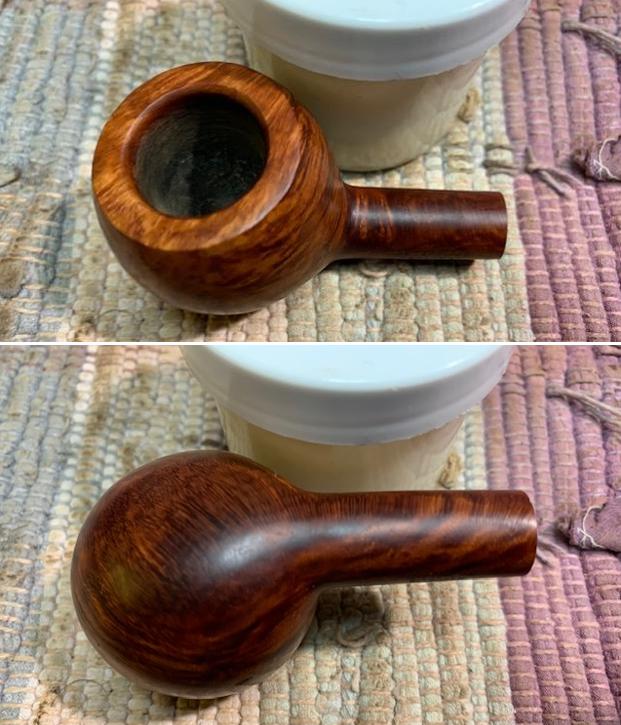
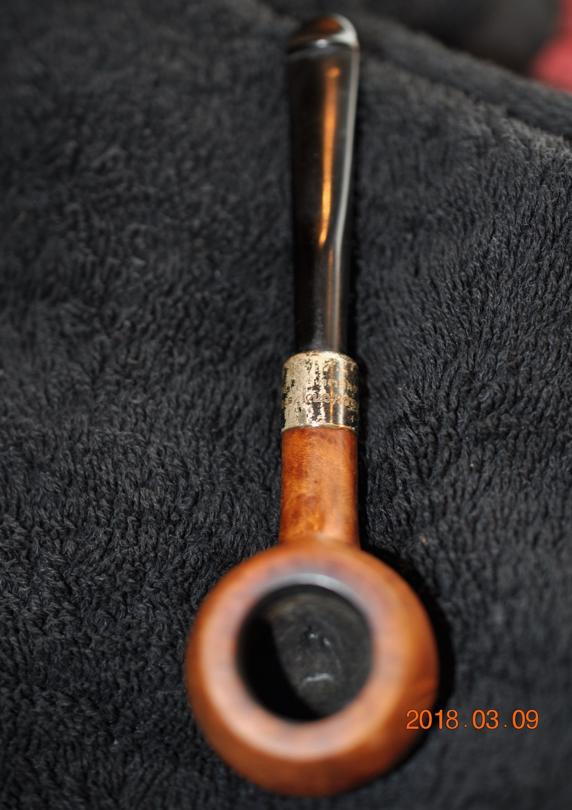
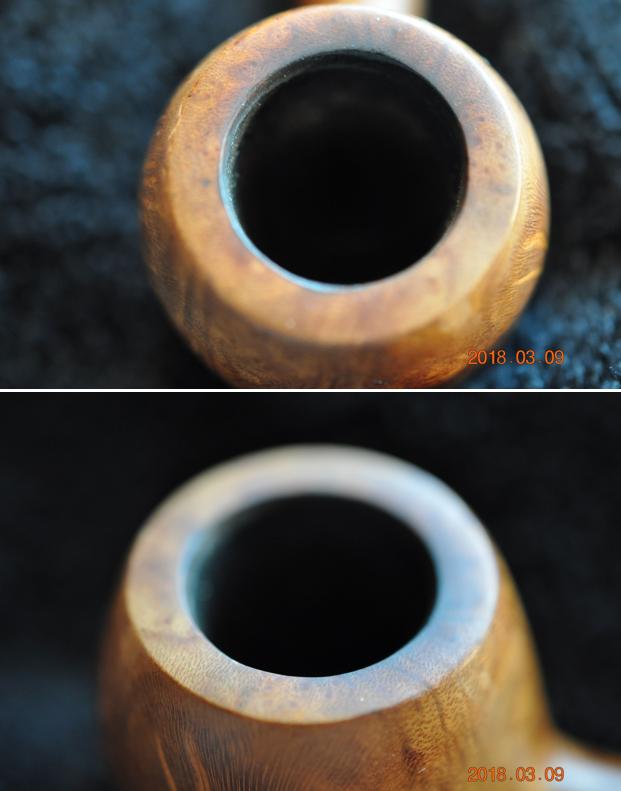
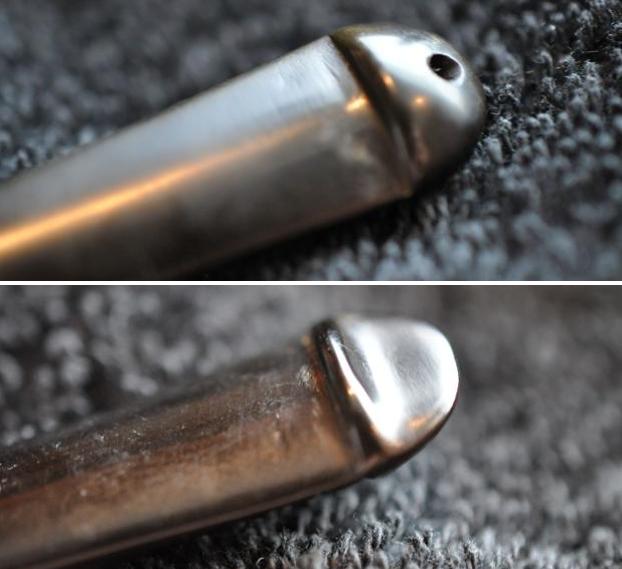
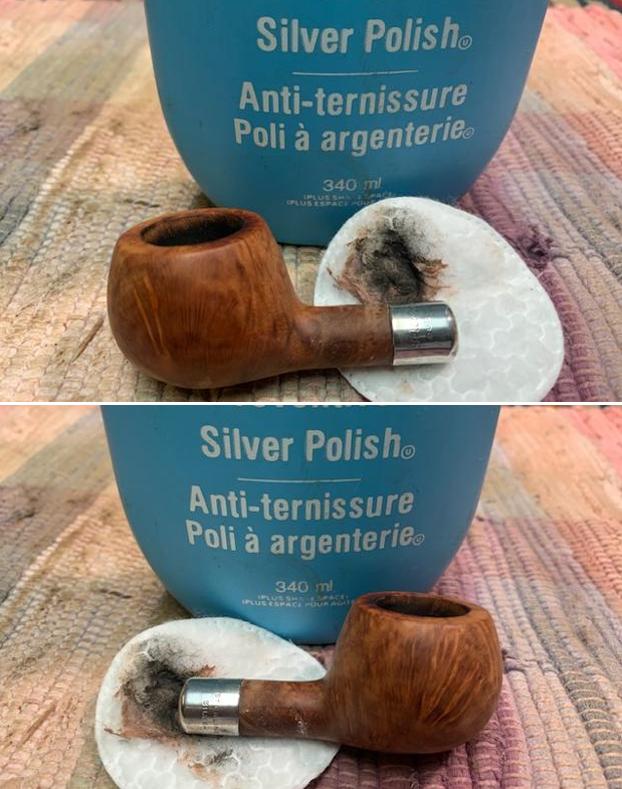
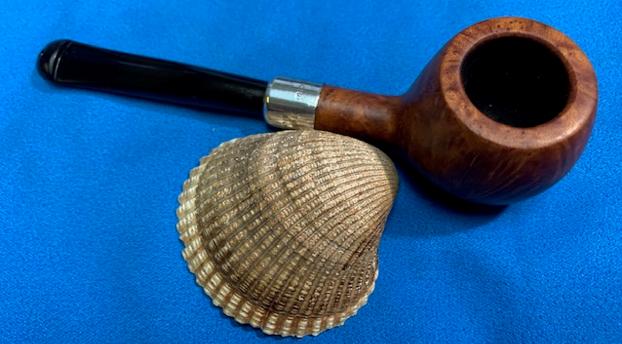
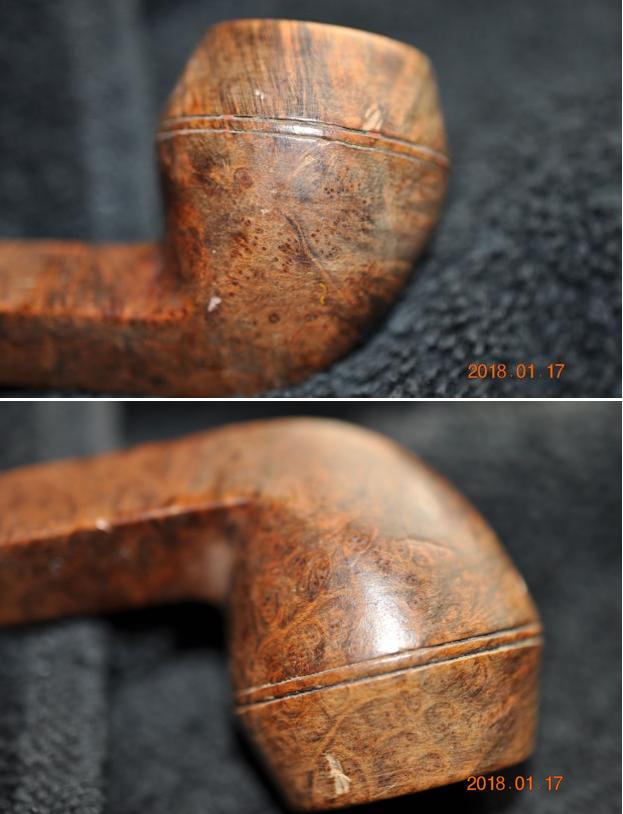
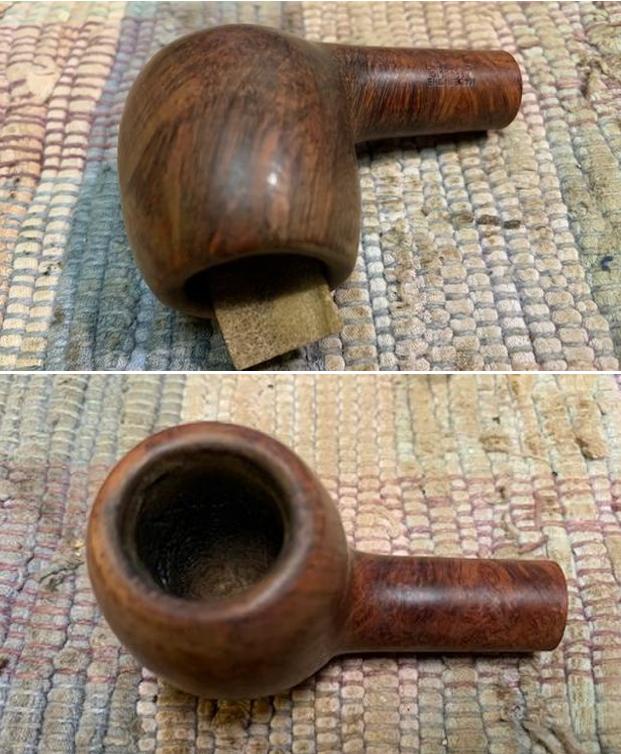
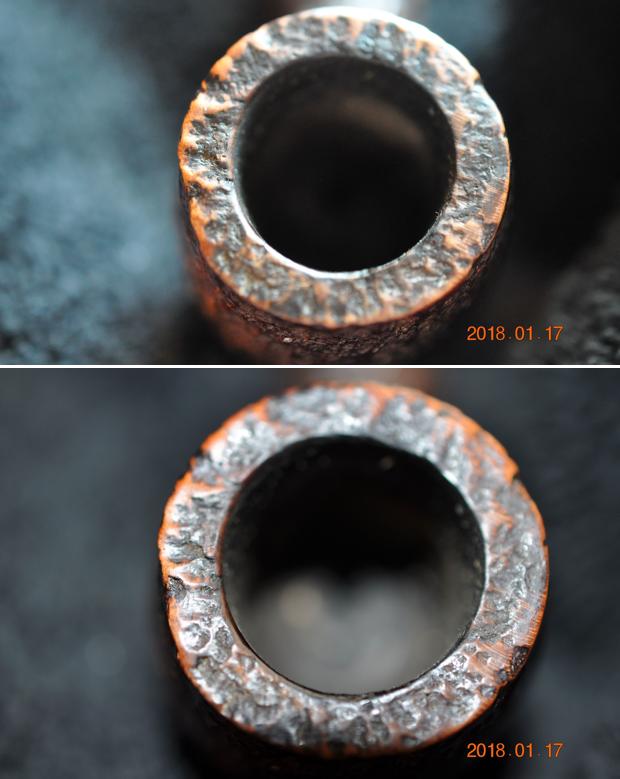
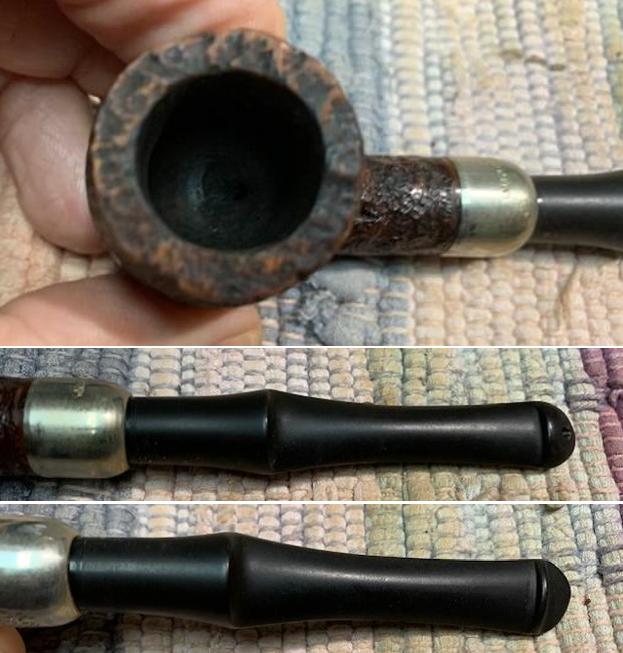
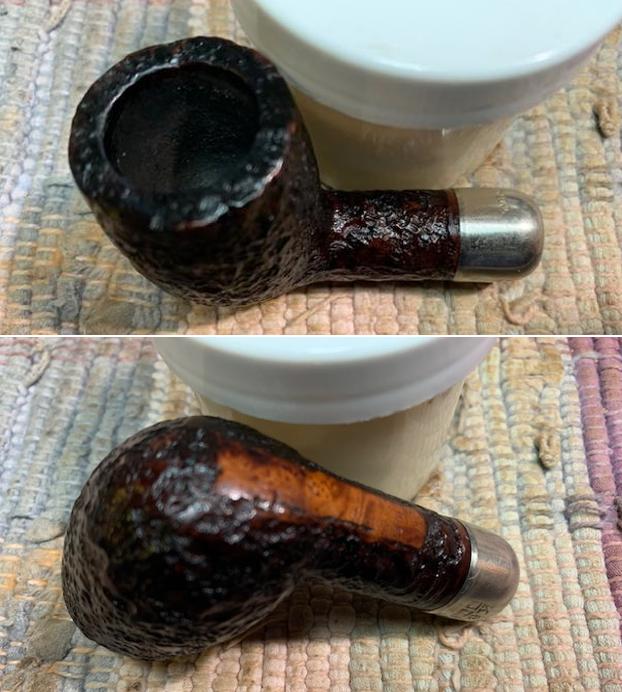
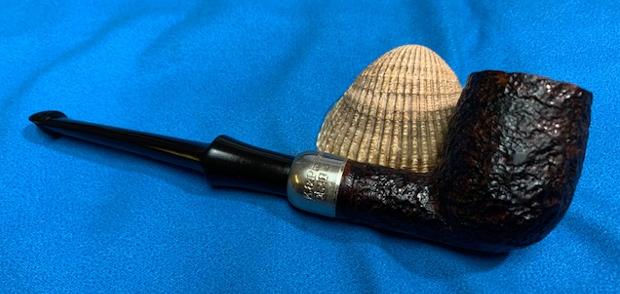
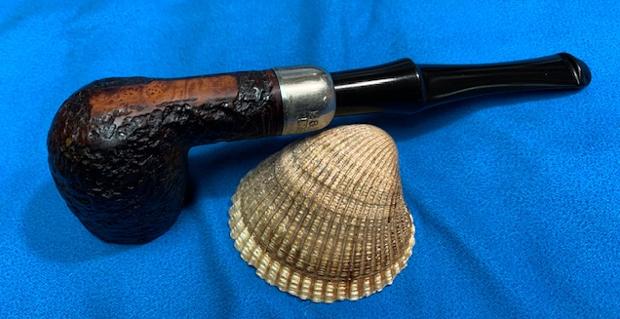
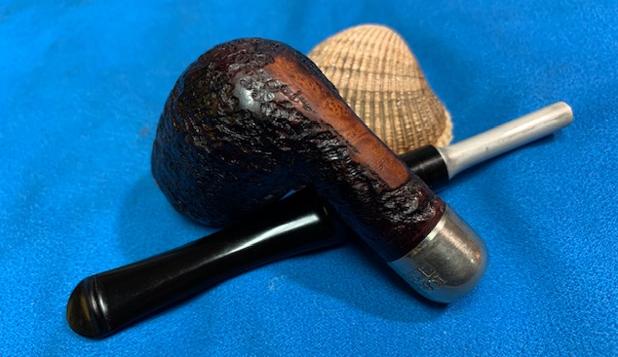
 I took some close up photos of the rim top and also of the stem surface. I wanted to show how clean the rim top looked. The sandblast surface is perfect. I also took close up photos of the stem to show the tooth marks on the surface of the stem and button.
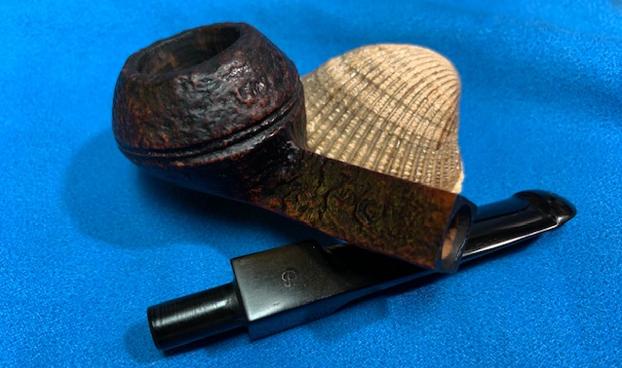
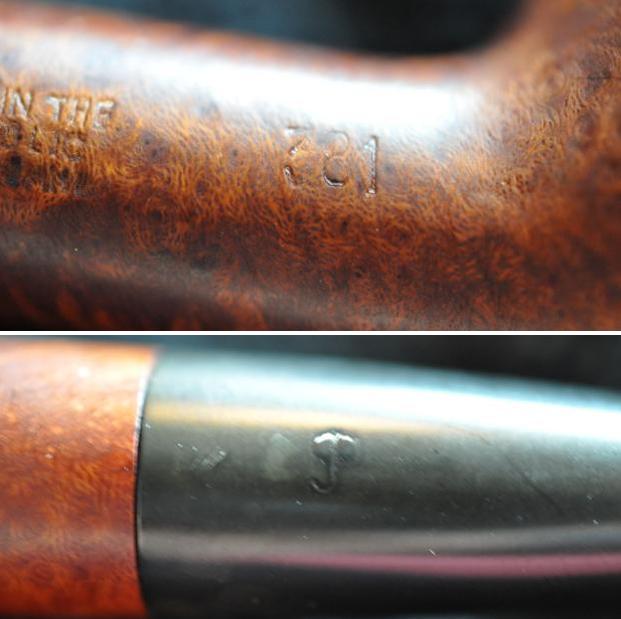
 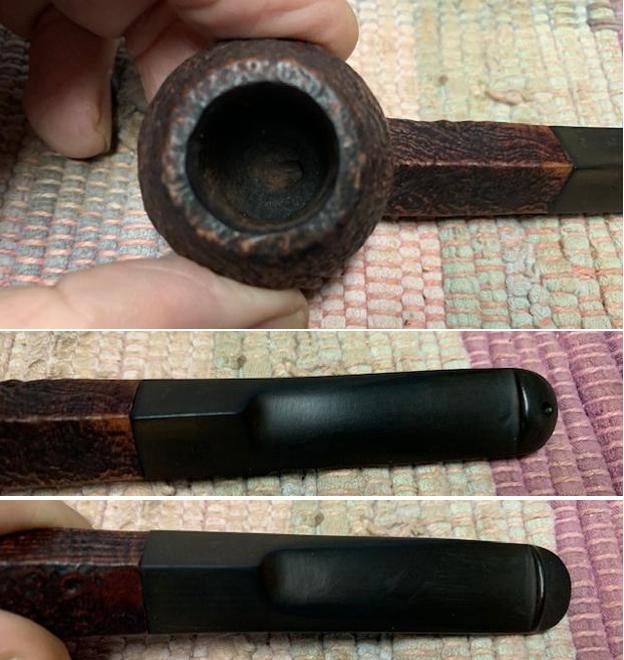 I took a photo of the stamping on the underside of the shank. You can see that it is stamped as noted above. It is faint in spots but very readable.
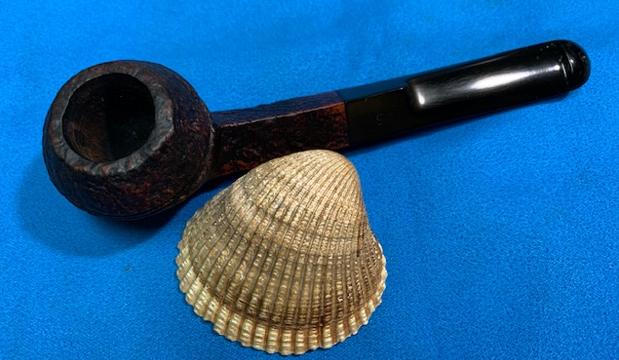
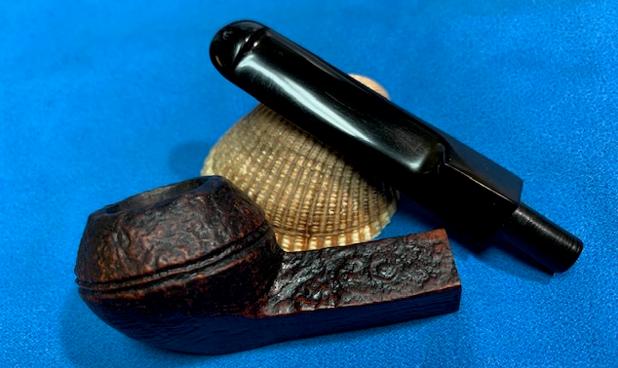
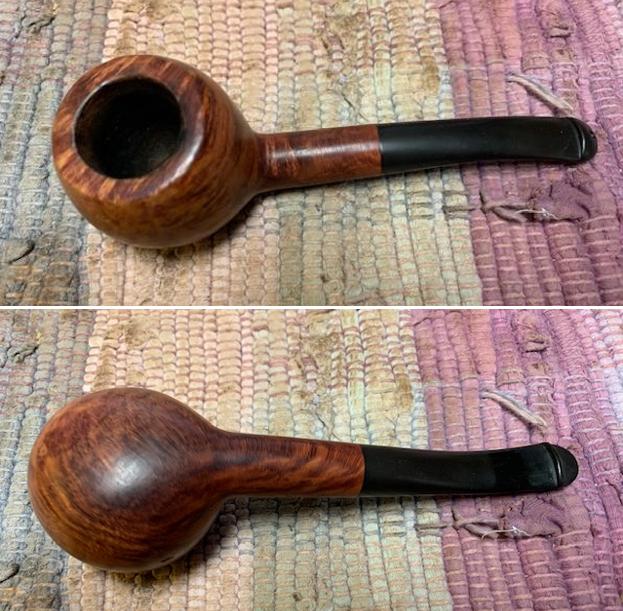
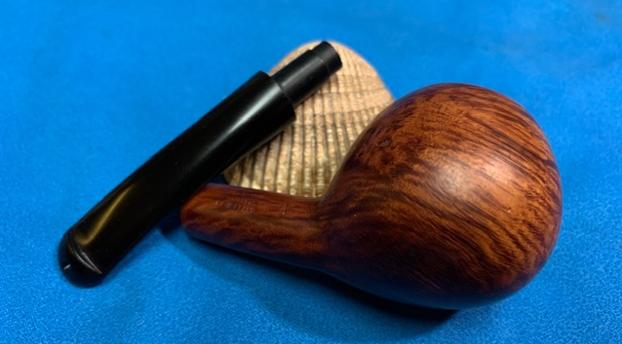
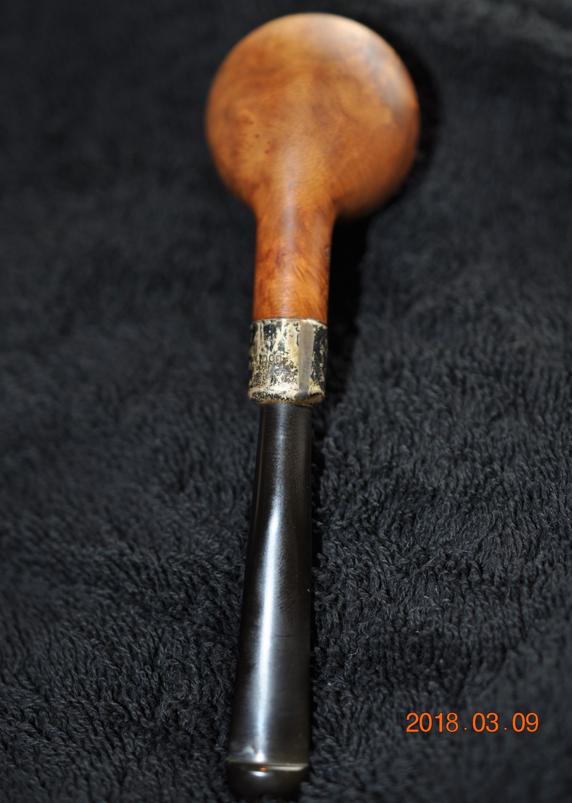
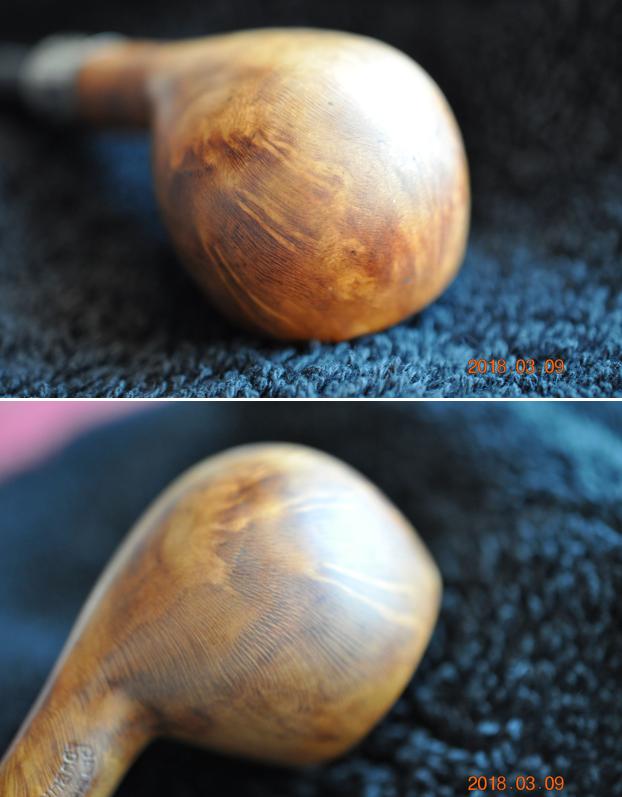
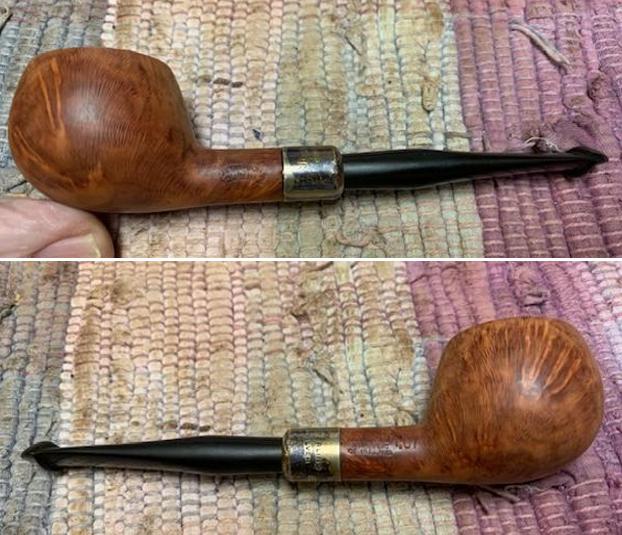
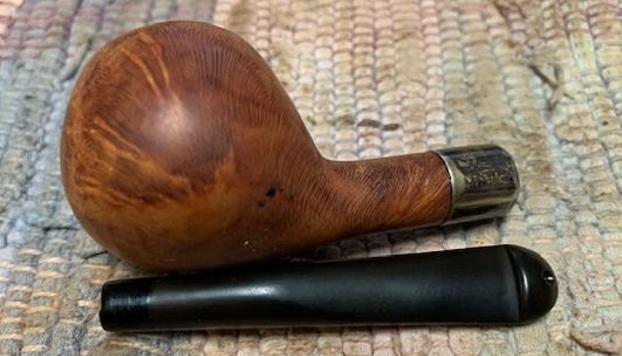
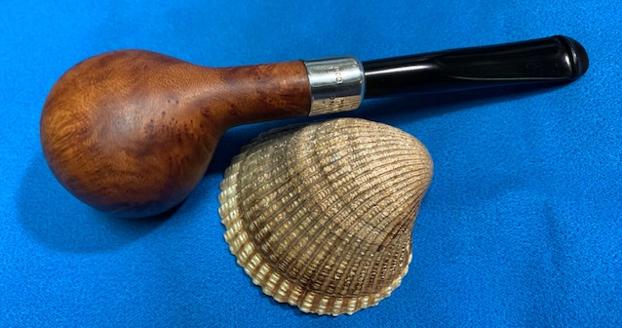
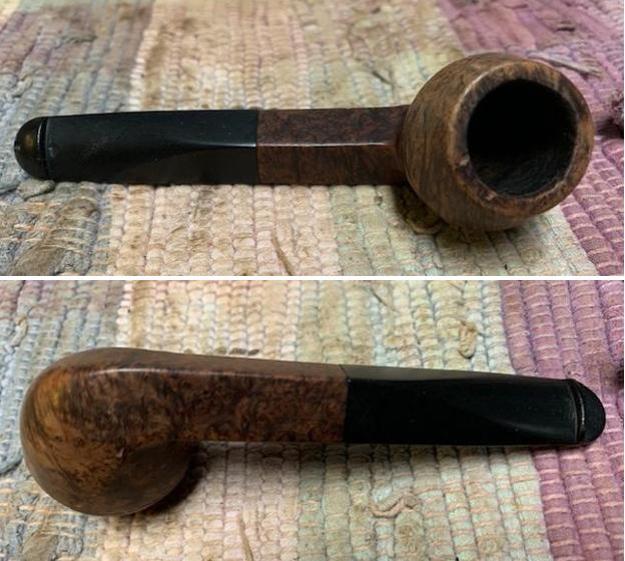
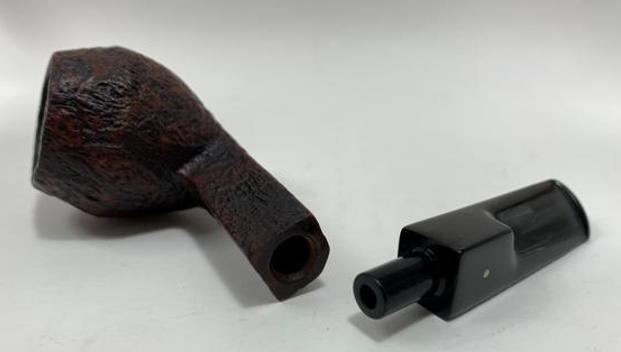
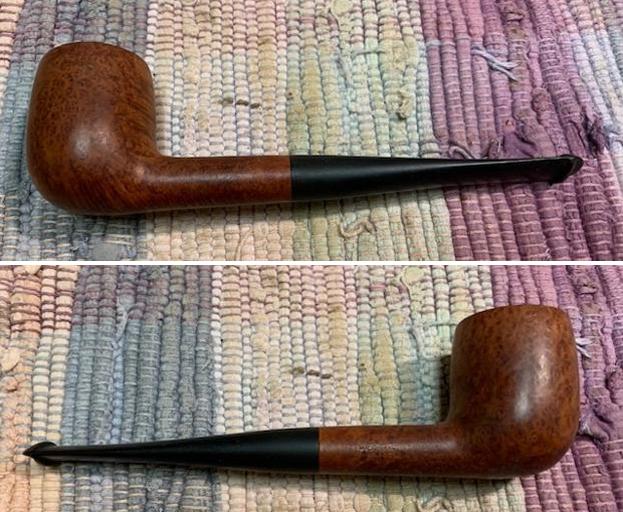
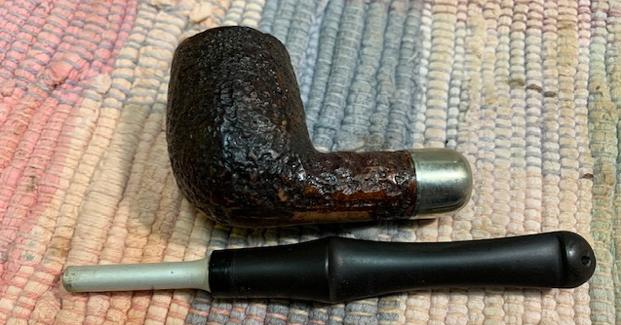
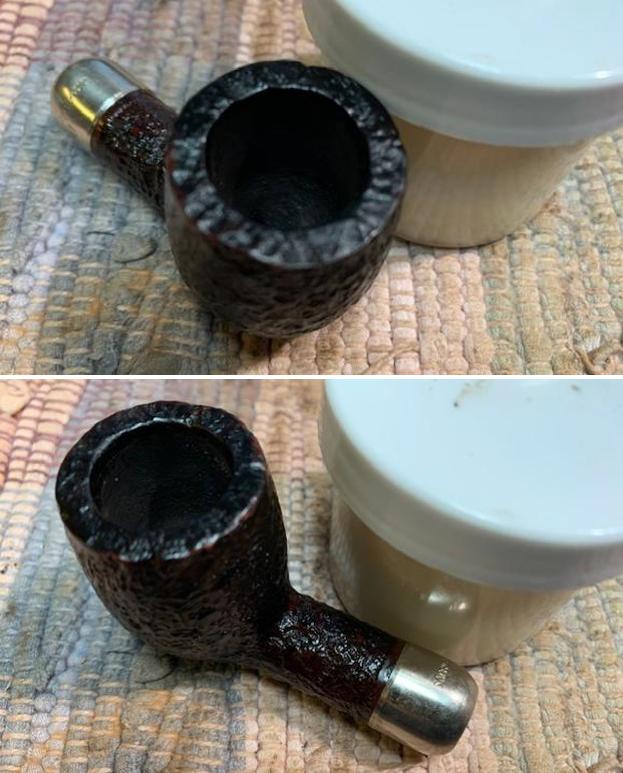
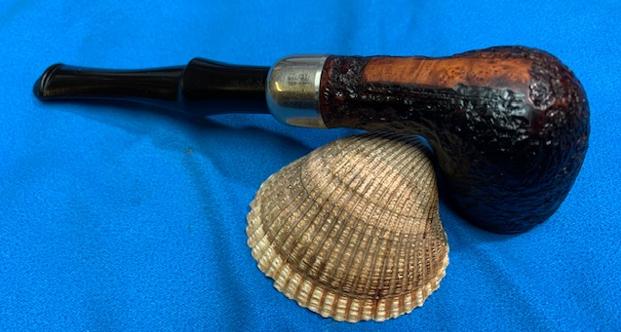
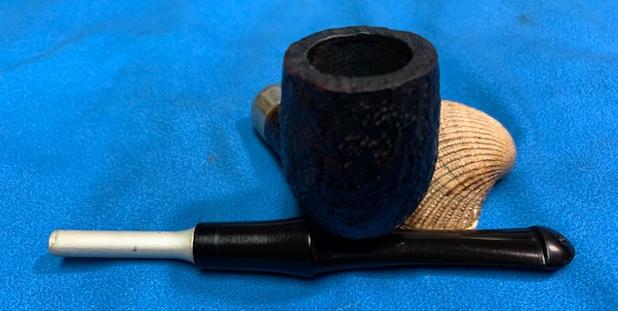
 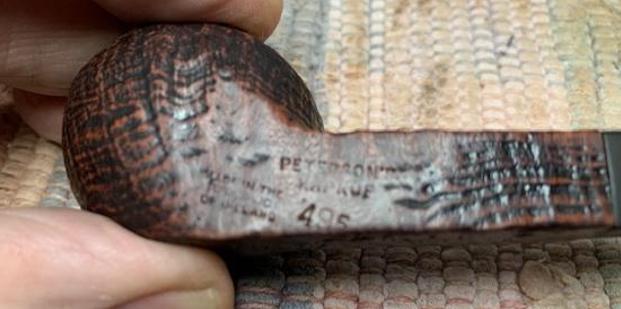 I took the pipe apart and took a photo of the pipe. It is a good looking pipe and has a great looking sandblast.
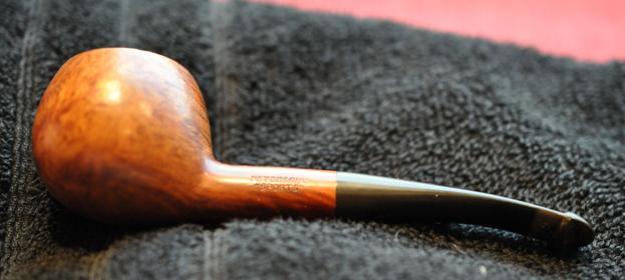
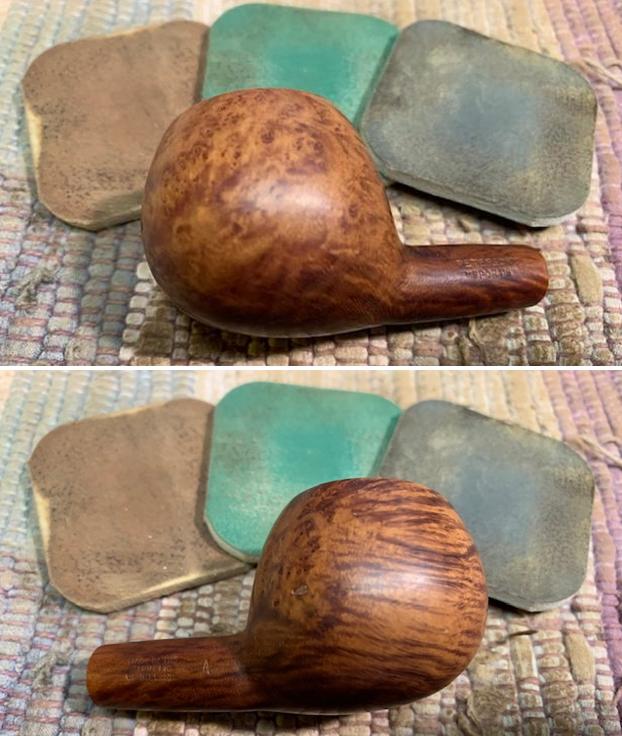
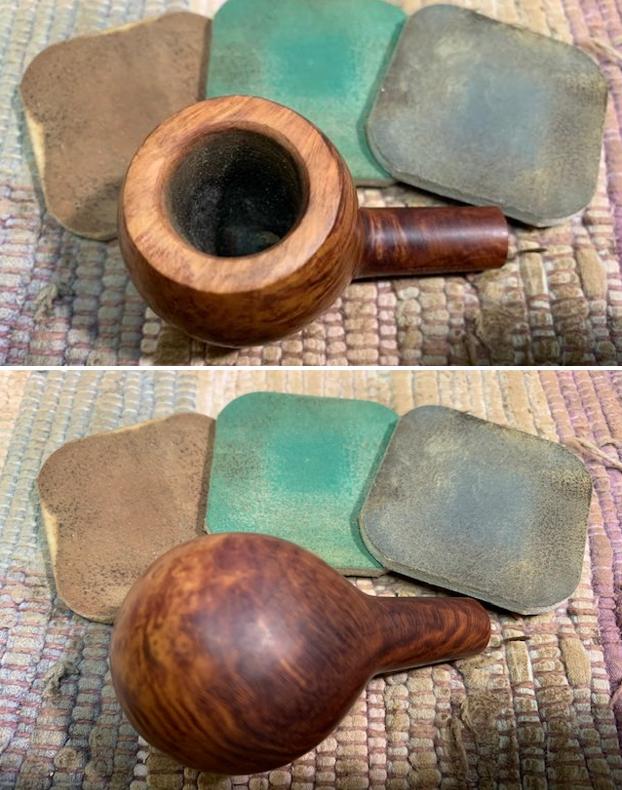
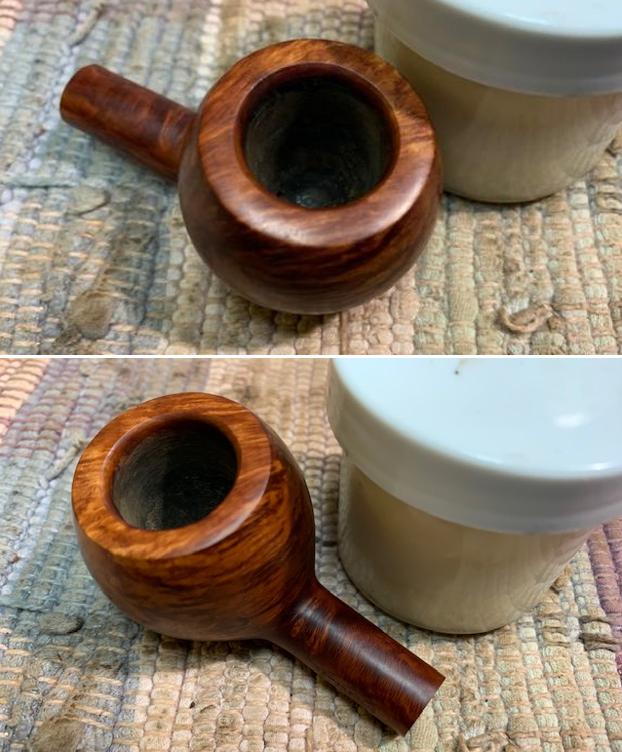
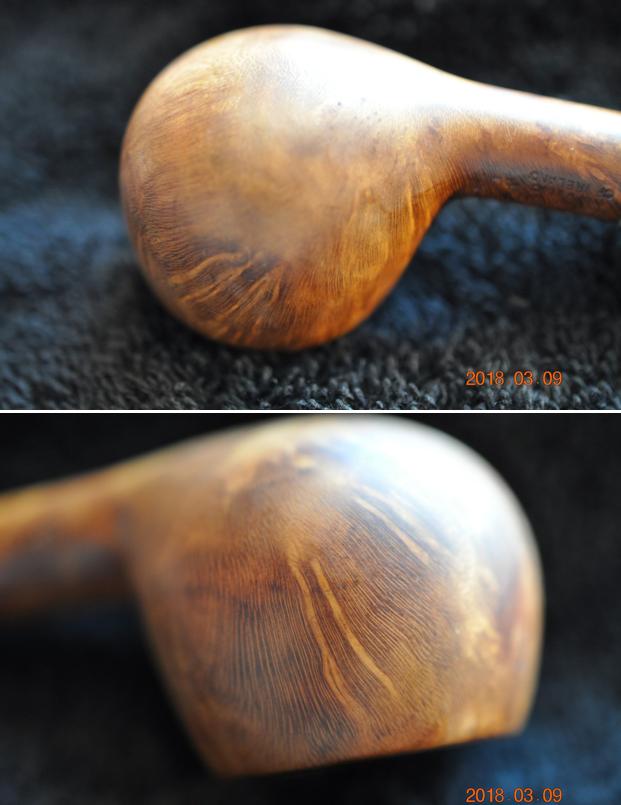
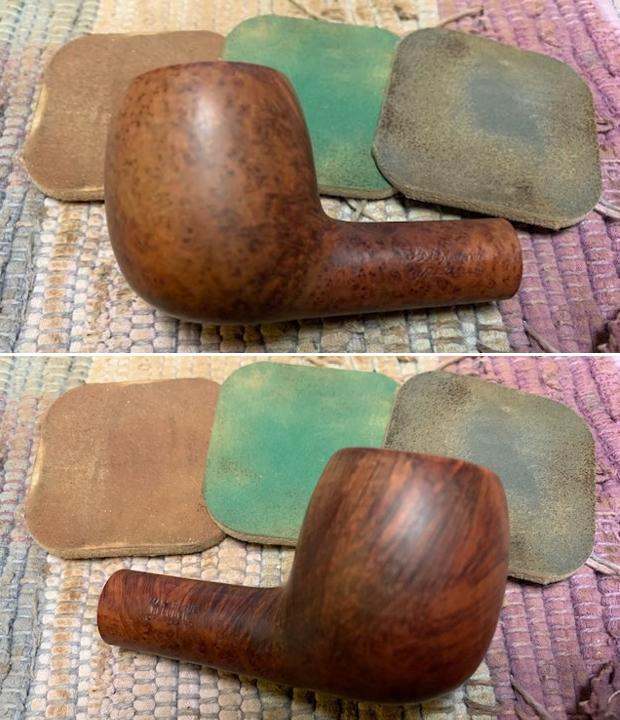
 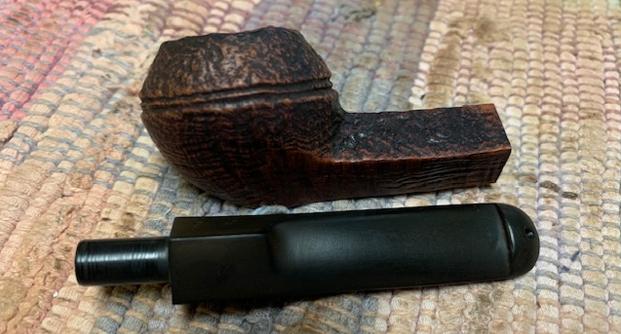 The bowl was in such good condition that I worked some Before & After Restoration Balm into the surface of the briar with my fingertips and a horsehair shoe brush to clean, enliven and protect the briar. I let the balm sit for 15 minutes and then buffed with a cotton cloth to raise the shine. The photos show the bowl at this point in the restoration process.
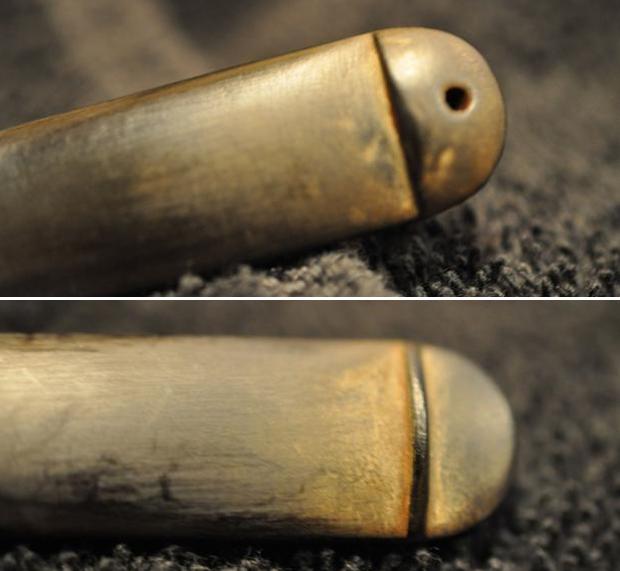
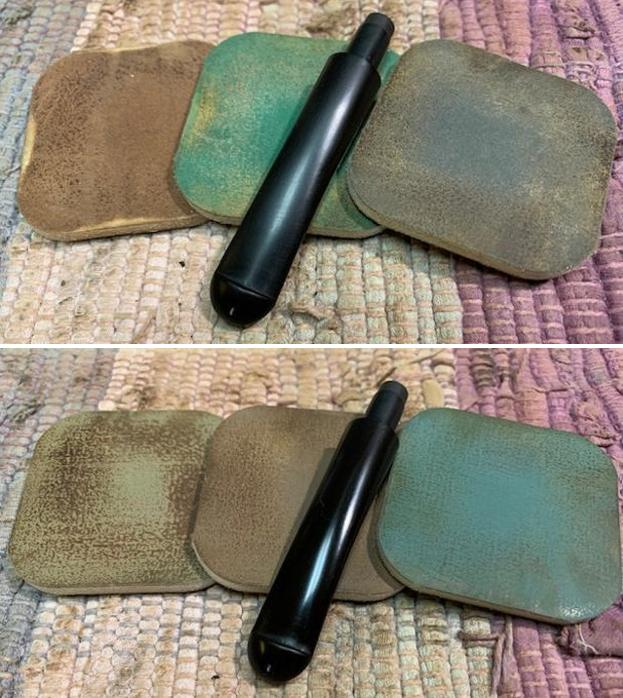
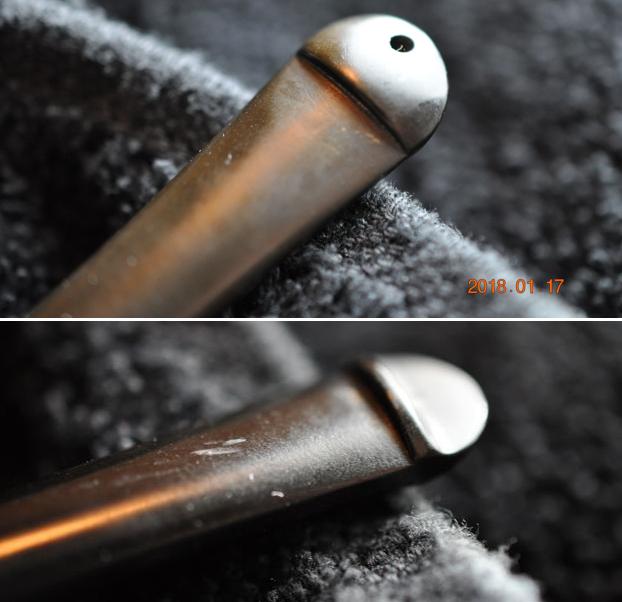
 I set the bowl aside and turned my attention to the stem. I “painted” the surface of the stem with the flame of a lighter to lift the tooth marks. While it lifted many of them a few remained. I filled them in with clear super glue. Once the repair had cured I flattened it out with 220 grit sandpaper to blend them into the surface of the vulcanite. I started polishing the stem by wet sanding it with 400 grit wet dry sandpaper.
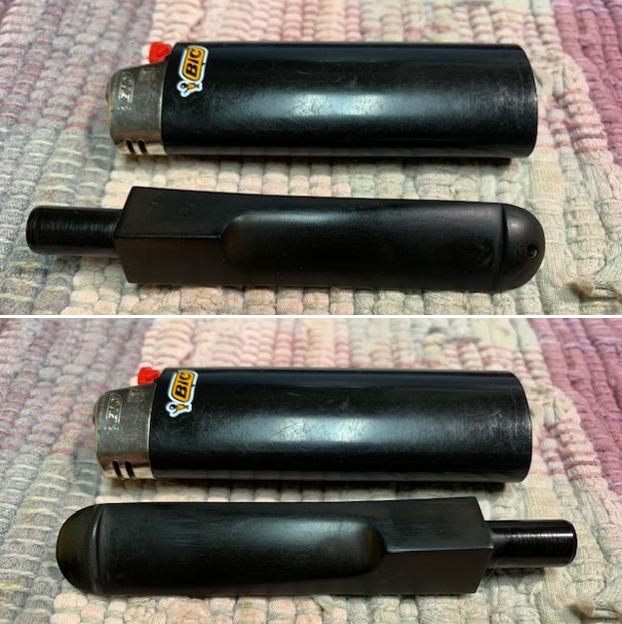
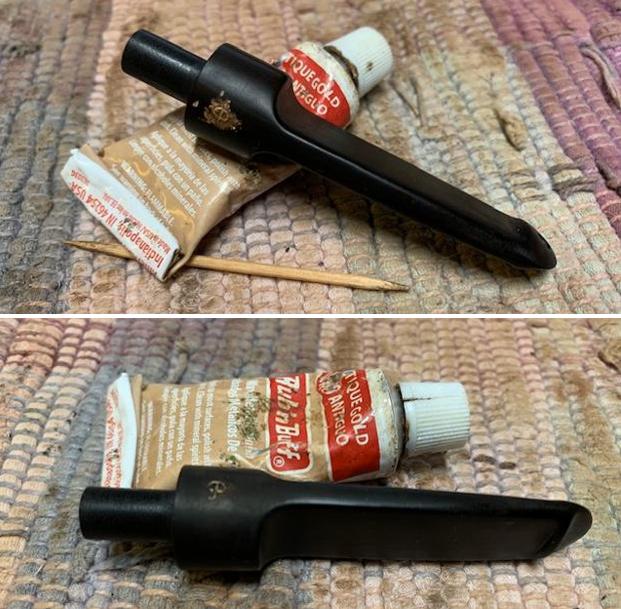
 The “P” stamp on the left topside of the saddle stem was quite faintly stamped. I touched it up with some Rub’n Buff Antique Gold. I worked it into the remaining stamp with a tooth pick. I buffed off the excess with a cotton pad. It shows but it is very faint.
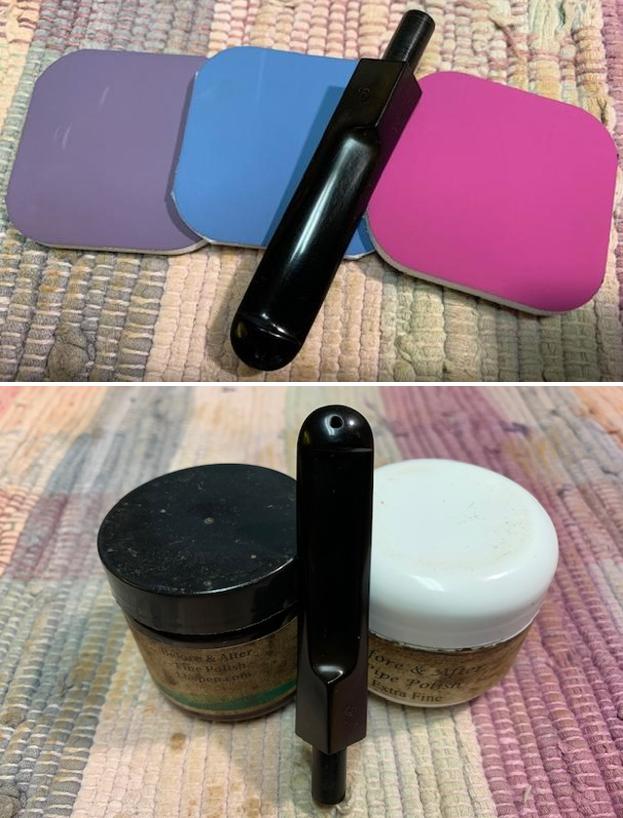
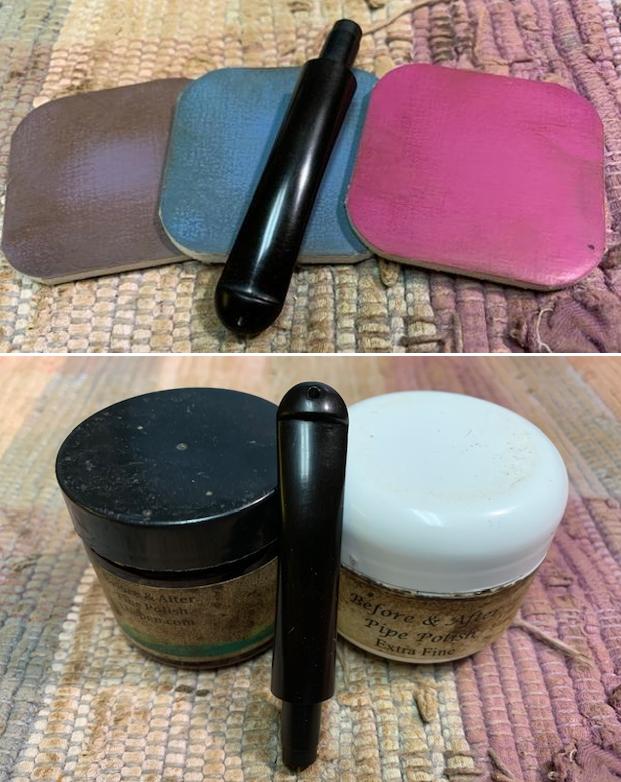
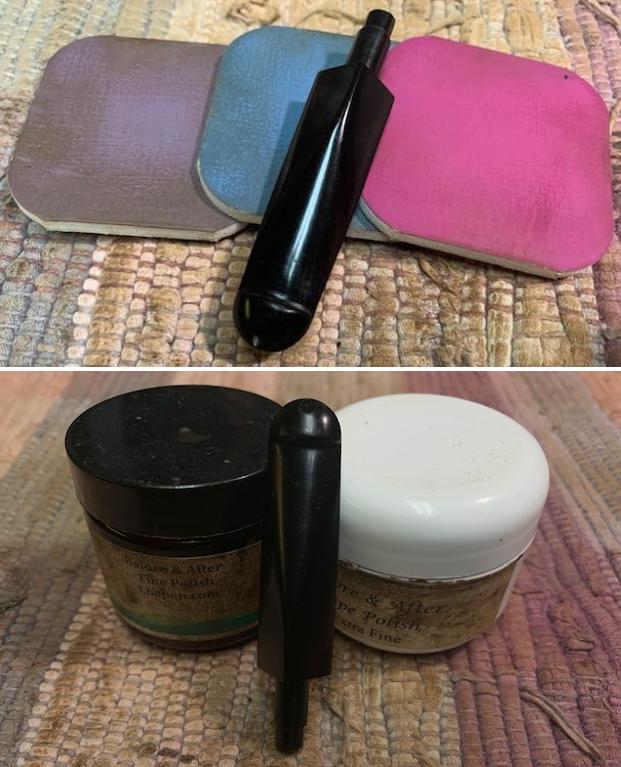
 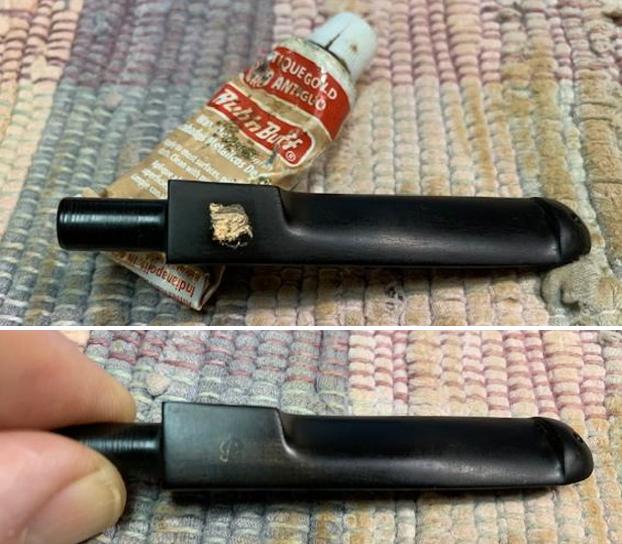 I polished the stem with micromesh sanding pads – wet sanding with 1500-12000 grit sanding pads. I wiped it down after each sanding pad with Obsidian Oil. I polished it with Before & After Pipe Stem Polish – both Fine and Extra Fine.
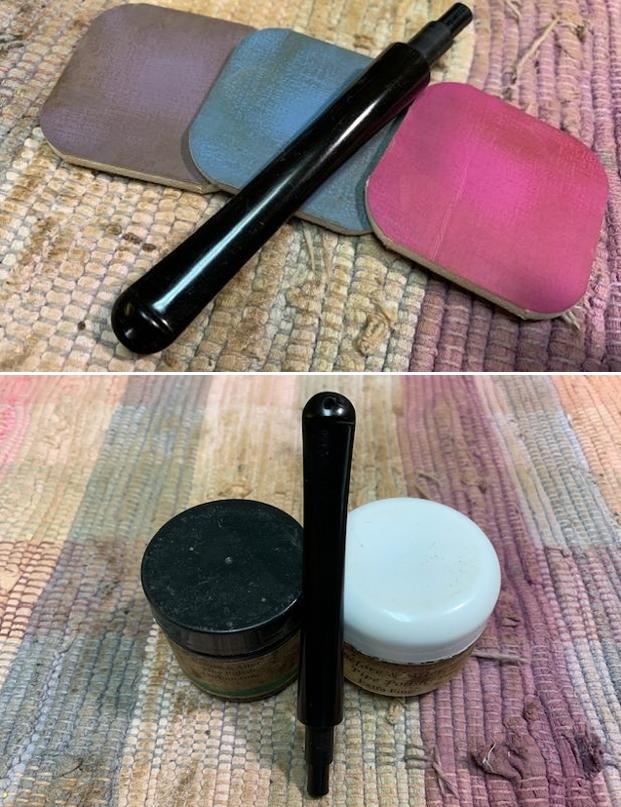
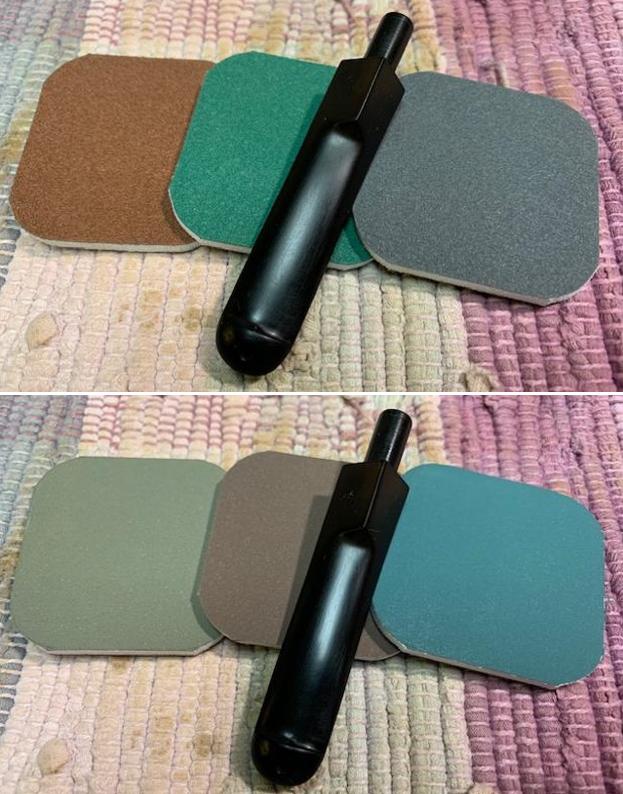
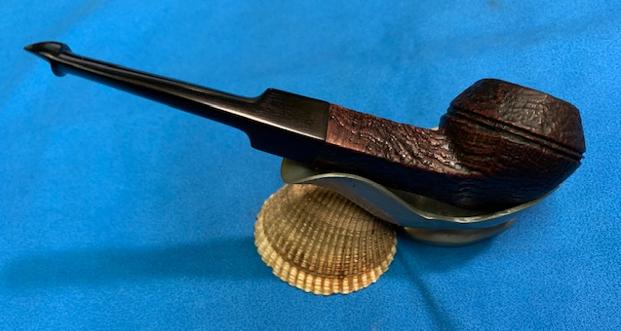
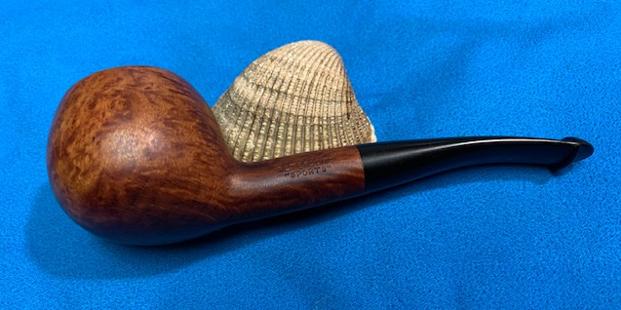
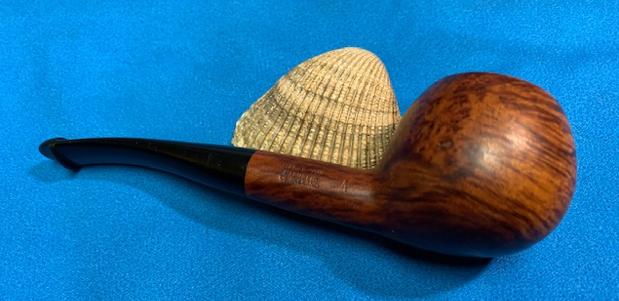
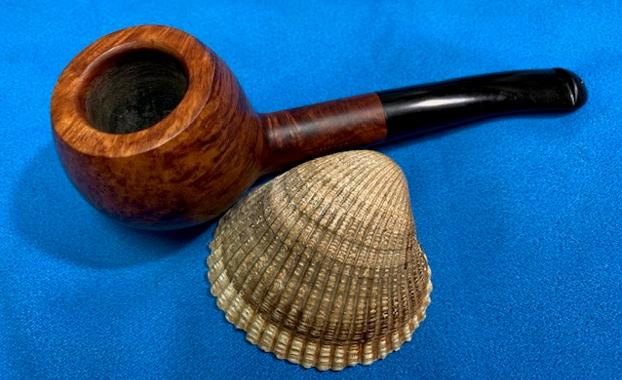
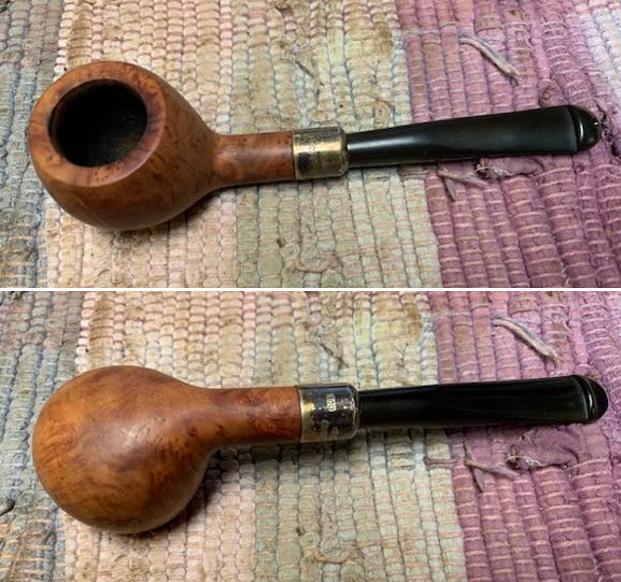
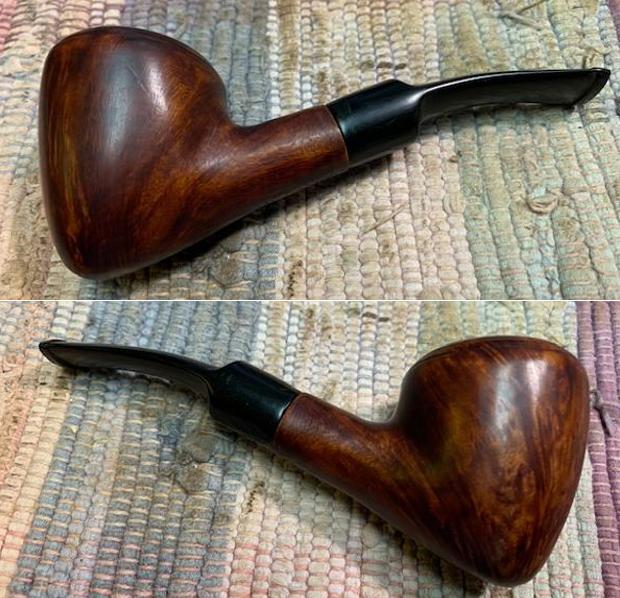
 I am excited to finish this Peterson’s “Kapruf” 495 Republic Era Sandblast Squat Bulldog. I am really happy with how the bowl turned out when I consider the damage that needed to be addressed. I put the pipe back together and buffed it with Blue Diamond on the buffing wheel. I gave the bowl multiple coats of Conservator’s Wax and the stem multiple coats of carnauba wax. I buffed the pipe with a clean buffing pad to raise the shine. I hand buffed it with a microfibre cloth to deepen the shine. It is fun to see what the polished bowl looks like with the colours popping through the sandblast. Added to that the polished black vulcanite taper stem was beautiful. This shapely Classic Peterson’s “Kapruf” Squat Bulldog is nice looking and the pipe feels great in my hand. It is light and well balanced. Have a look at it with the photos below. The dimensions are Length: 5 ½ inches, Height: 1 ½ inches, Outside diameter of the bowl: 1 ½ inch, Chamber diameter: ¾ of an inch. The weight of the pipe is 25grams/.88oz. It is a beautiful pipe and one that I soon put on the rebornpipes store I you are interested in carrying on the pipeman’s legacy. Thanks for walking through the restoration with me as I worked over this pipe. Thanks to each of you who are reading this blog.
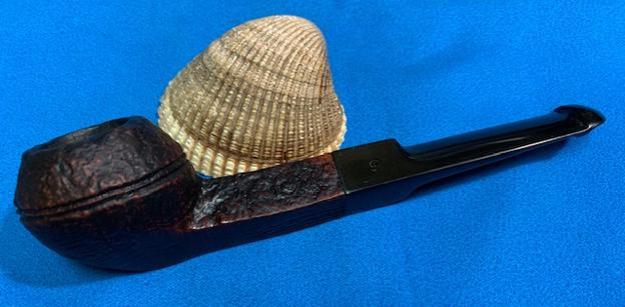


