Monthly Archives: February 2018

ANSWERS TO QUESTIONS – What are the refurbishing tools that you can’t live without?


Blog by Steve Laug

I can’t remember how many times I have been asked for a simple list of refurbishing tools. The list for me keeps growing to I always narrow it down to the tools I use the most and “can’t live without.” This seems easier for you and for me. You will find that as you work with restoring/refurbishing pipes that you will come up with your own tools and tricks. You can add these things to your kit as the need arises. I have organized the various tools under the categories where I see them fitting in my kit. I am well aware that more can be added by each of you who work on pipes but it seems to me that this is the bare minimum of supplies. I added a few items to the end of the list that go beyond the minimum but make life a lot easier. I have organized my list in terms of the order of use of the tools both in the category headings and the supplies under each.

REAMERS

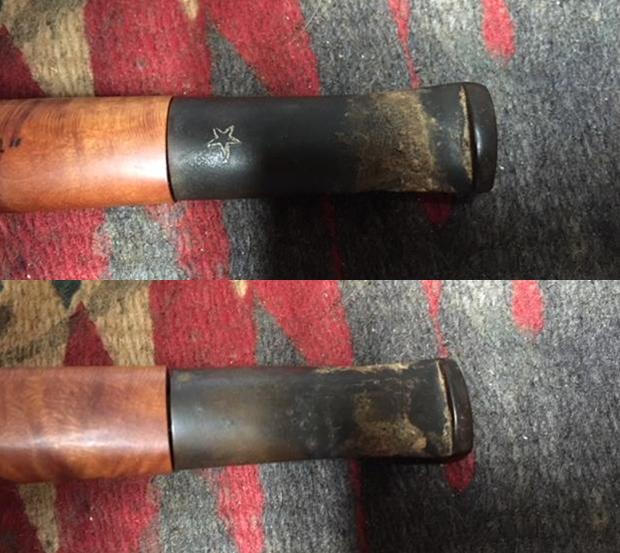
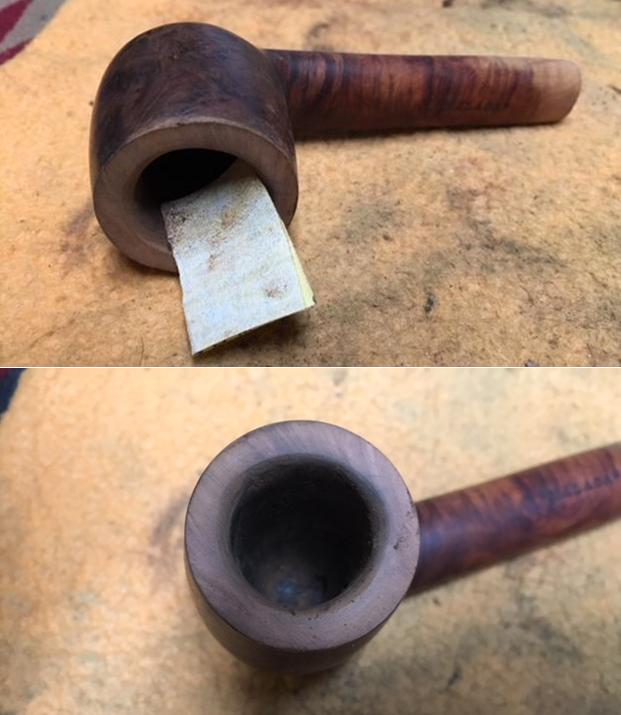
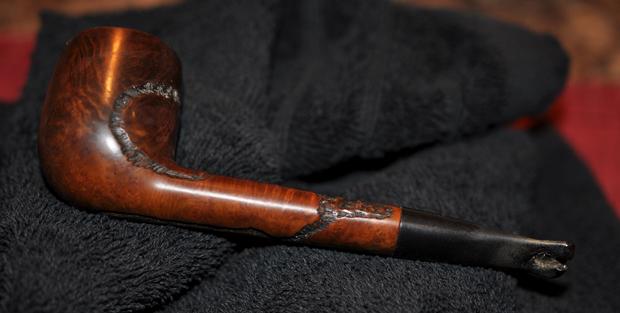
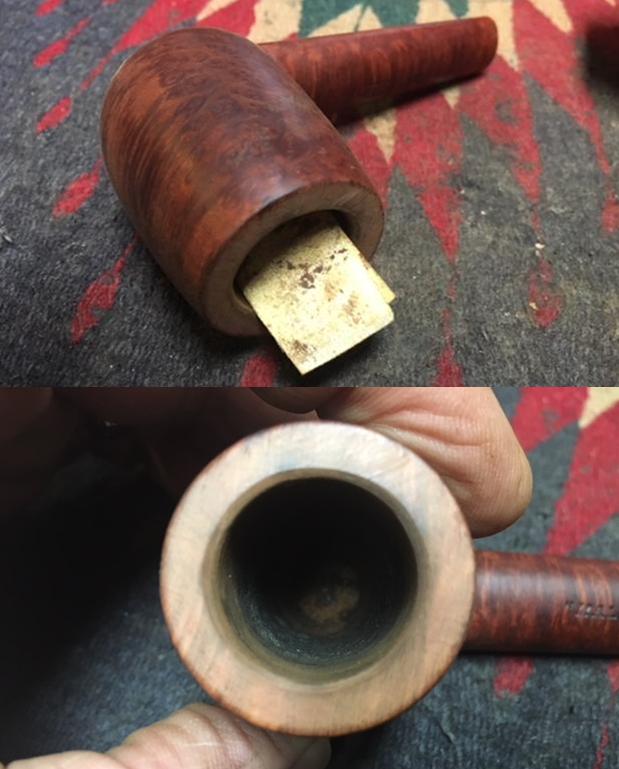
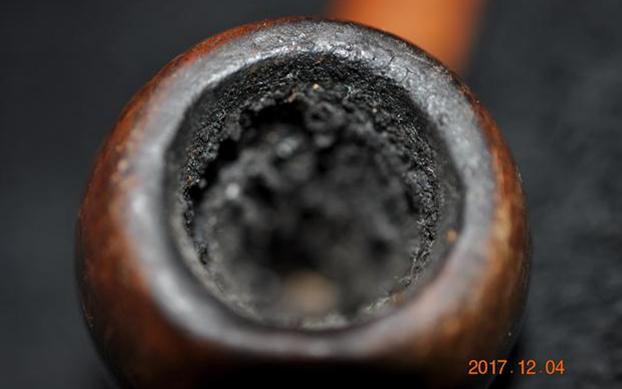
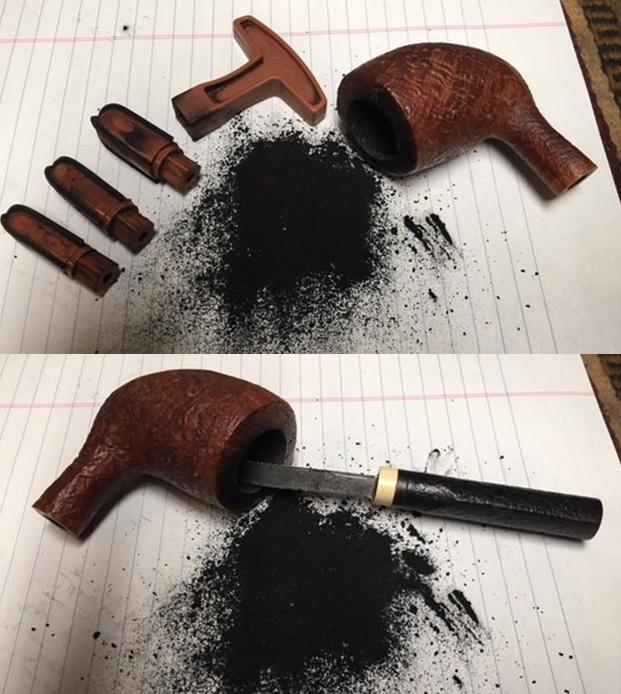
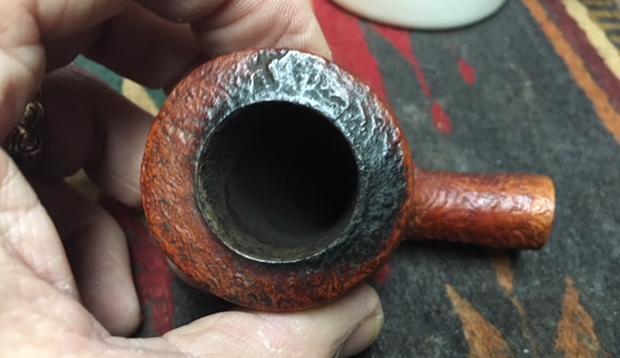
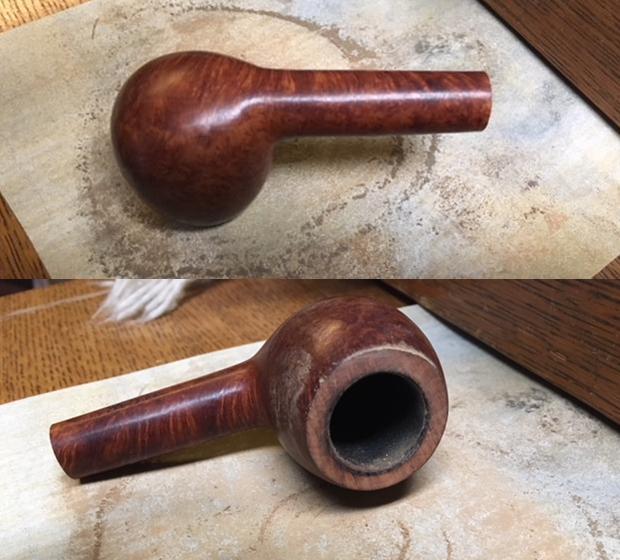
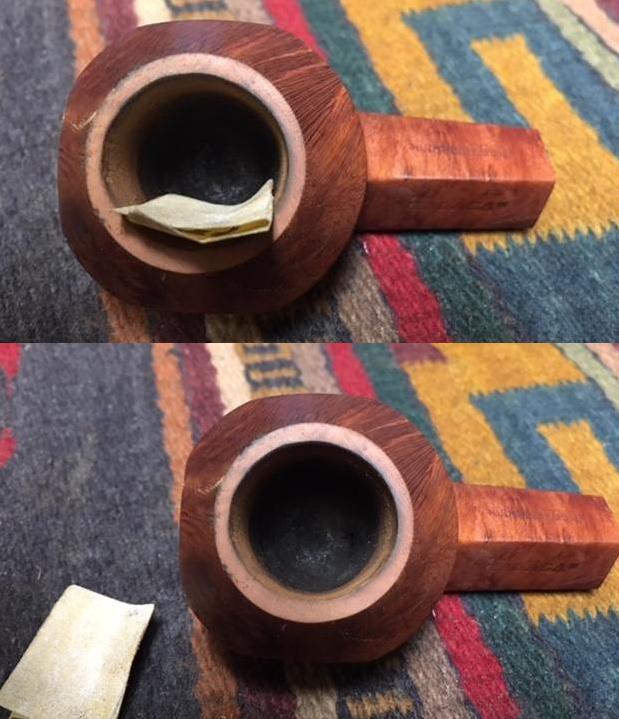
I start my list of tools with my favourite pipe reamers because I use them on almost every pipe that I refurbish. Generally I use at least two of them each day. Remember I clean up a lot of estate pipes (between my brother and I) and these are the ones that we repeatedly come back to. I have listed them in my order of preference. I have at least two (maybe three) PipNet reamer sets in my drawer. I don’t ever want to be without this set. The versatility of the interchangeable cutting heads for various bowl sizes is hard to beat. I always start with the smallest cutting head and work up to the one that takes the cake back to the bare briar or the thinness that I am looking for. It is my first go to reamer.

For me the Savinelli Fitsall Pipe Reamer is a close second. I use it to clean up any remnants in the heel of the bowl or along the walls that have been left behind by the PipNet set. I also use it exclusively on Meerschaum pipes because I can actually feel the work on the bowl walls. I use it to also scrape of the lava coat on the top of the rim. It has a triangular shaped blade that works very well and the pointed end allows me to effectively scrape the bottom of the bowl. I have found that these are hard to come by, but Smokingpipes.com recently tweeted that they have one that looks very similar. The following link will take you to their site: smokingpip.es/2GcoWxK. It is called the Low Country Reamer and they sell for $14.95USD.

The third reamer that I turn to when the other two will not work on a particularly narrow or conical bowl is the KleenReem Pipe Reamer. This is different from the Senior Reamer that I feel is far more flimsy and not designed as well to get to the bottom of the bowl. I keep several of these on hand at all times. Its adjustable diameter allows me to fit it to the bowl and the point at the end of the tool allows me to work on the bottom as well. It also comes with a drill bit in the end of the handle that can be used to ream out the airway between the mortise and the bowl. It can be used as is or can be wrapped with a bit of pipe cleaner to remove the tars and oils that harden in those areas. I often use the drill bit even if I do not use the reamer because there really is nothing like it.

Those are my three indispensable reamers for use in cleaning up the bowl and shank. I have many other reamers that I have collected over the years but none of them live up to the workability and flexibility of these three tools. I have tried using others and just laid them aside to go back to these. If you plan on working pipes as a hobby you need to have all three of these in your tool box.

SCRUBBING – EXTERIOR

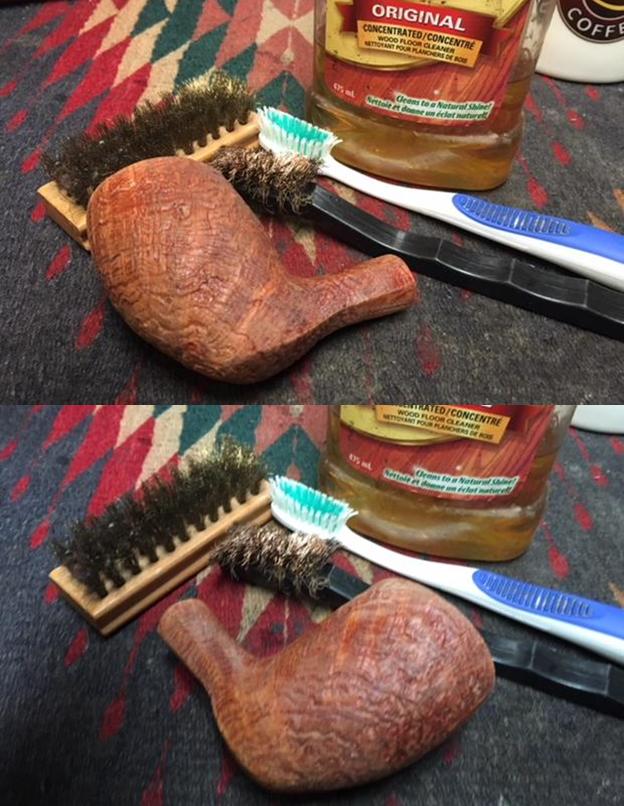
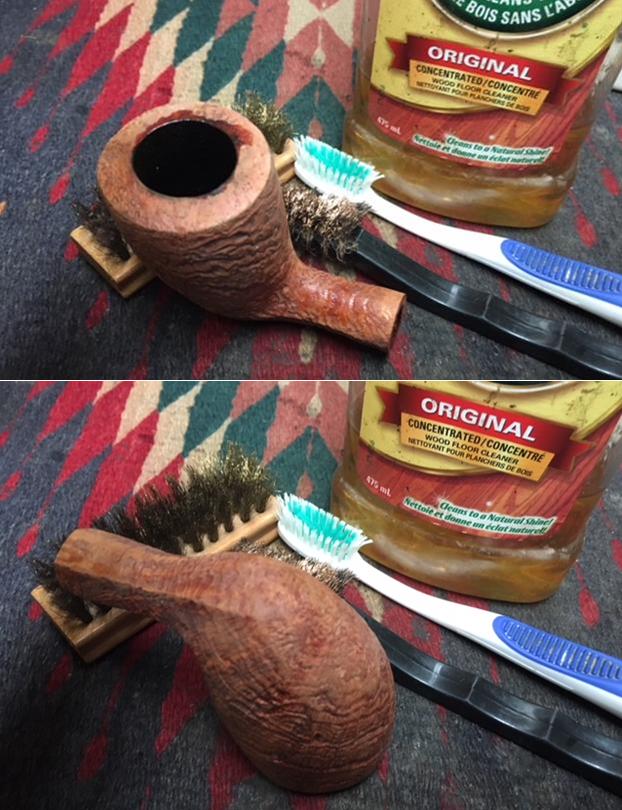
The next indispensable tools in my kit are some brushes that I use for scrubbing the exterior of the bowl, shank and stem. The first of these that I keep handy is a toothbrush. I have several different toothbrushes with different weights of bristle from soft to stiff. I use them on different finishes. The soft bristle brush is what I use on smooth finished pipes as it is stiff enough to remove the grime on the surface of the bowl. With sandblast and rusticated pipes I use either a medium bristle or stiff bristle brush to clean out the nooks, crannies and grooves in the finish.

For plateau rim tops and shank ends as well as heavily rusticated pipes I use a brass bristle tire brush. These are available at most hardware and tool shops as they are used for cleaning parts. The brass is soft and I find that on these particular pipes it does not damage the briar and does a great job of removing the lava and built up grime. It is really a helpful tool. The key with it is not to press too hard on the brush but work it over the surface repeatedly until it is clean.

I use Murphy’s Oil Soap with each of the brushes. I used it undiluted and scrub the briar with the soap and brushes and rinse it off afterward with warm, running water. Many wonder about using water with briar. Remember I am letting it sit and soak in the water I am merely rinsing it off and immediately drying it off with a cloth. The water does not have the time to be absorbed by the briar.

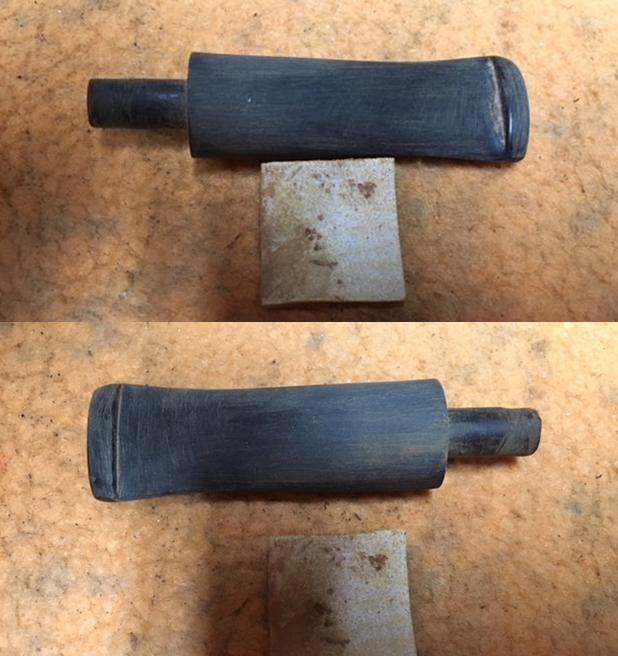
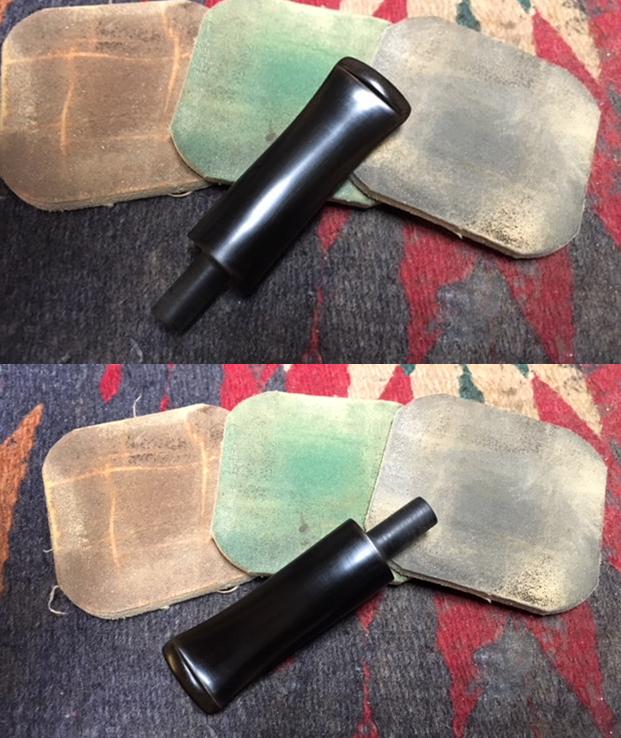
For cleaning vulcanite and acrylic stems I have two different tools in my arsenal. The first is Mr. Clean Magic Eraser and the second is Oxyclean. If the stem is not too badly oxidized often a Magic Eraser wetted with water will make short work of removing the oxidation. I scrub the surface of the stem with the Magic Eraser sponge and then repeatedly rinse the sponge to remove the oxidation that colours it brown. Repeated scrubbing will remove most of the oxidation on hard rubber stems that are not too oxidized. On Lucite or acrylic stems it is more a matter of cleaning off scum or buildup. It works well for that too. For more heavily oxidized stems a soak in a bath of Oxiclean mixed with warm water will bring the oxidation to the surface of the stem where it can be wiped off with a paper towel. I repeat the process until the oxidation is gone. It works quite well to bring a badly oxidized stem back to life. I personally do not use bleach in any form on stems as I find that it deteriorates the rubber, leaves the surface pitted and reduces the life expectancy of the rubber itself.

SCRUBBING – INTERIOR

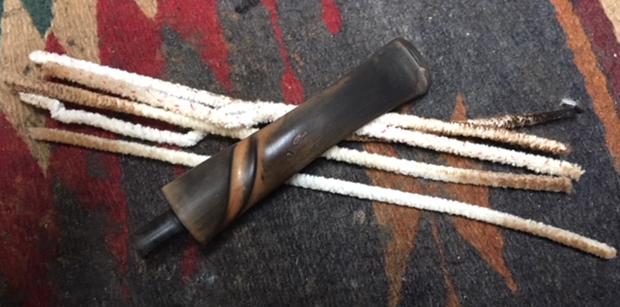
Moving to the inside of the pipe I have four tools that I use on every pipe. I clean out the inside of the mortise and the airway in the shank and stem with 99% isopropyl alcohol. I know that others do not like using this kind of alcohol but the higher the percentage the less water is in the mix and the more quickly it evaporates leaving nothing in the airways and shanks. I have been using it for years and generally have several bottles in my supply. I purchase it from a local pharmacy where it is kept behind the counter. I do not use the common isopropyl that is sold in most shops as it is 79% to 90%. The lower the percentage, remember the more water is in the mix. I do not use Everclear because it is not available here and I do not use any distilled spirits as I don’t waste that on cleaning a pipe.

The second indispensable tool that I always keep in supply is pipe cleaners. I use primarily regular pipe cleaners that are the same the entire length of the cleaner. I do not like tapered ones because I find that the large end rarely fits and the thin end is too thin for anything other than metal pipes. I also have a few bristle pipe cleaners on hand should I want to use them. I find that often a good scrubbing with regular pipe cleaners works very well. I dip them in a small cap of alcohol and run them through the various airways.

I also have pipe brushes that are specifically made to reduce the number of pipe cleaners needed to clean the shank and airways. They are generally made of twisted wire and a nylon bristle brush head. They are flexible enough to fit curved and straight shank pipes and do a decent job of cleaning. I personally do not use them very often as I find that they get very dirty very quickly and are a pain to clean. I have some and use them on rare occasions when a pipe cleaner just does not do the job. I would say don’t bother but just the time I think that I reach for one.

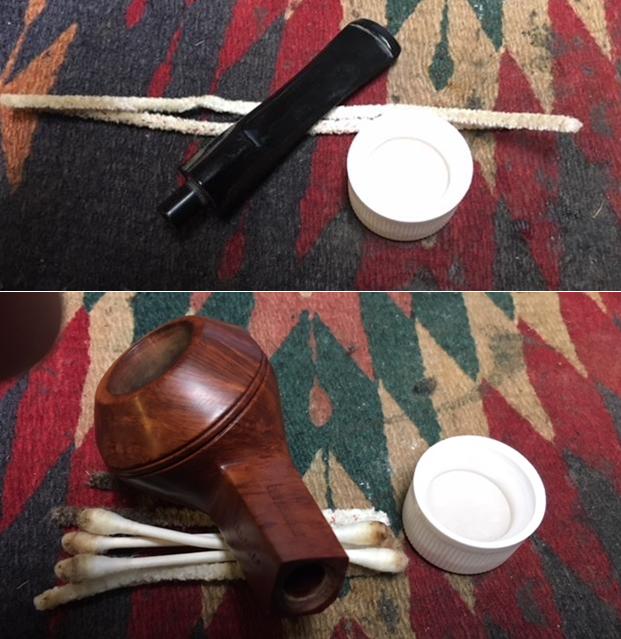
The last items that I go through by the boxload are cotton swabs or q-tips. I know that there are many low cost, inexpensive cotton swabs and I think I have tried most of the generic ones. I find that they fall apart when wet with alcohol and can easily clog the shank and mortise. I don’t skimp on these and get name brand Q-tip or equivalent swabs with the paper stick. I check to make sure the cotton ends are well connected and will not come off inside the shank. I dip them in isopropyl alcohol and scour the inside of the mortise, the end of the tenon and the slot in the button. I work with them until those areas are clean and the swabs remain white.

I cannot think of much other than this combination that is needed to clean out the inside of the pipe. Remember to ream the bowl before you do the cleaning or you will need to repeat it as the carbon dust goes everywhere when you are reaming and you will find that it is in the airway in the bowl, shank and even the stem if you happen to leave it on while reaming. I learned that the hard way and would hope that you could learn from my errors.

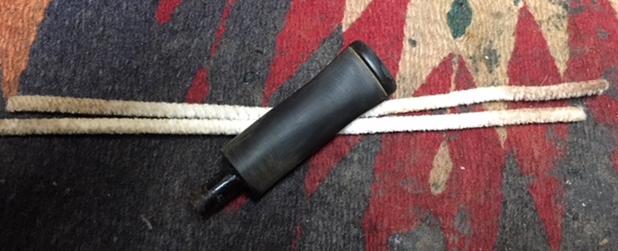
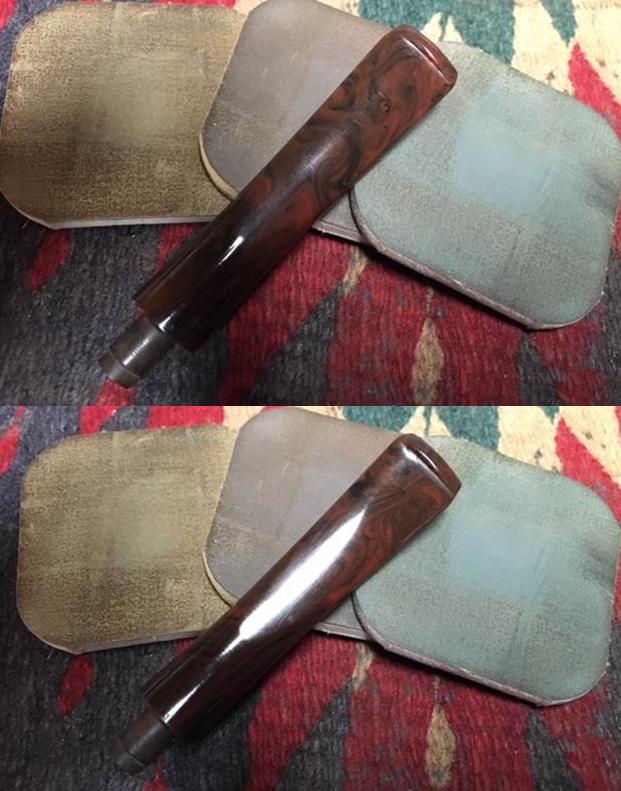
SANDING AND POLISHING

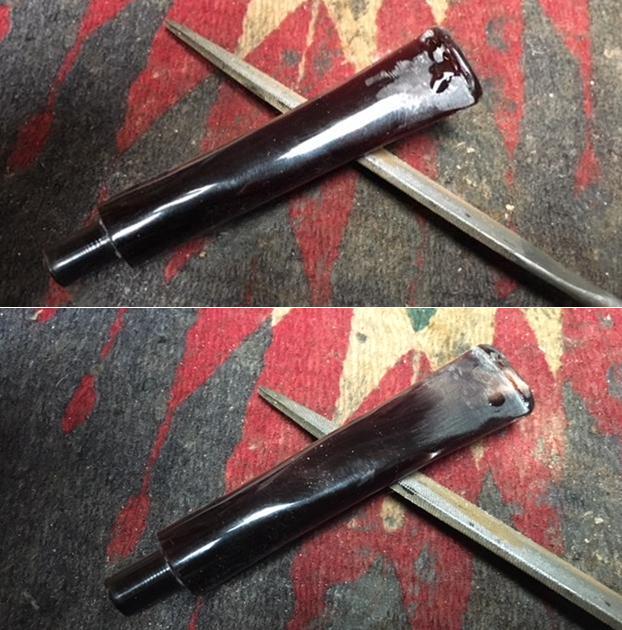
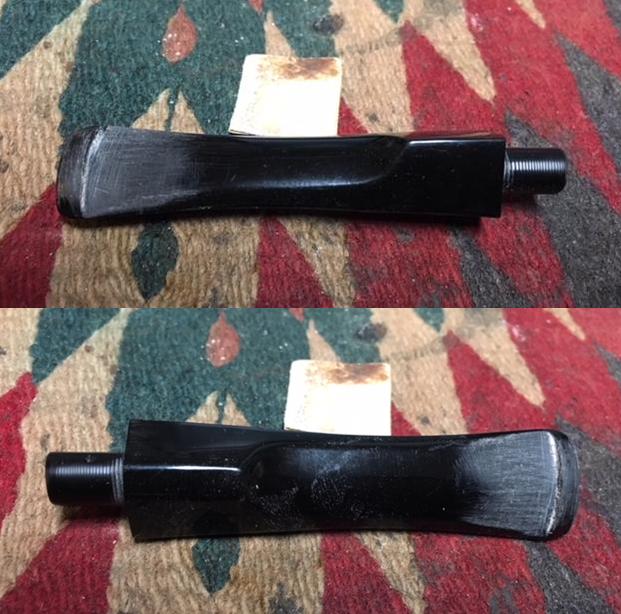
In terms of sanding and polishing I have done both the bowl and the stem over the year so I will include them both as I walk through the tools with you. I know some use low grit papers for stripping finishes, shaping briar and stem material. Personally I use 220 grit sandpaper as I find that the scratches left behind by the paper are easier to deal with than the lower grits. It will pretty much do everything that I want it to do on both. I use it to shape the stem and work over repairs on the bowl. I use it to bevel the rim and to clean up damaged rims. I always keep a stock of that grit paper here. I also keep several other higher grit papers for polishing (400 and 600 grit) but since I started using micromesh sanding pads I rarely use the higher grit papers.

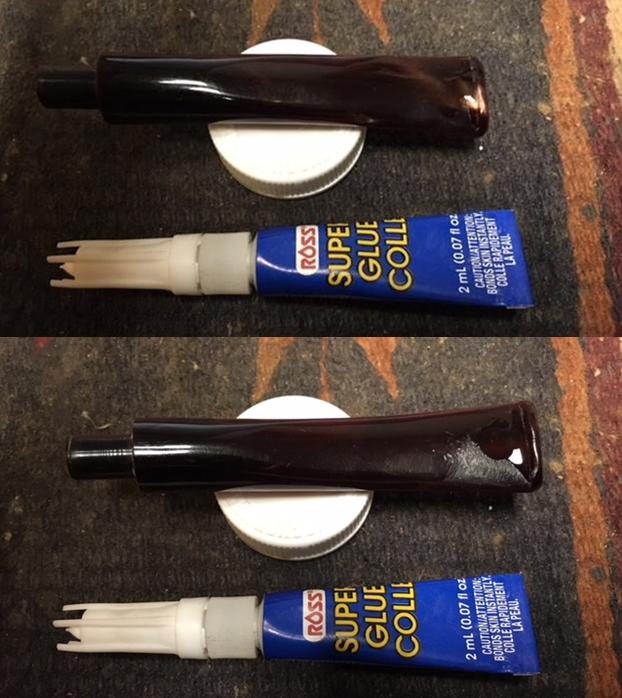
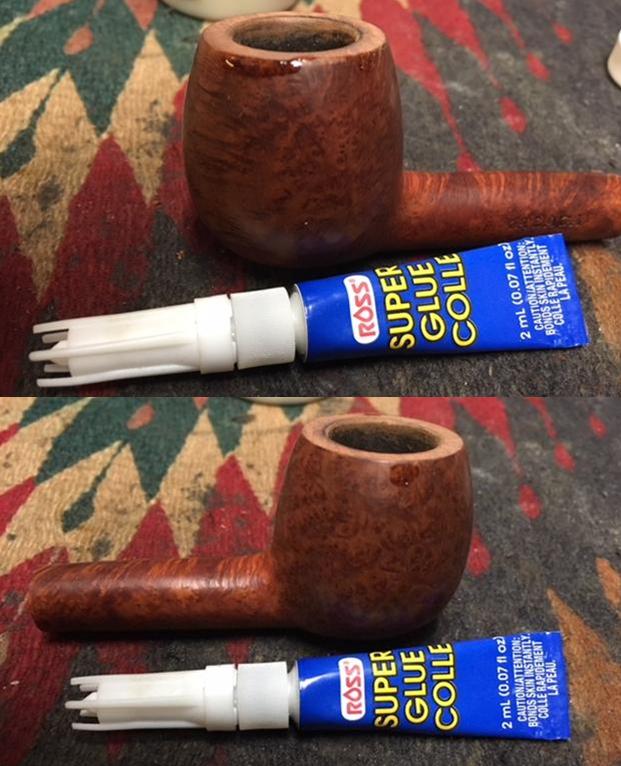
I also have three different sets of needle files in different lengths, shapes and thicknesses that I use in working on airways in the bowl, the rings on bulldog pipes, the button and slot on stems. In almost all the sets there are four different files that are my go to shapes – round, flat oval, oval and knife blade shaped. I find that these are all I need to do most of the work I do. I also have some flat larger files that make short work of smoothing out stem repairs or super glue and charcoal powder. I replace these files about every five years – I have a tool liquidator near the house that allows me to just purchase the style of file that I need.

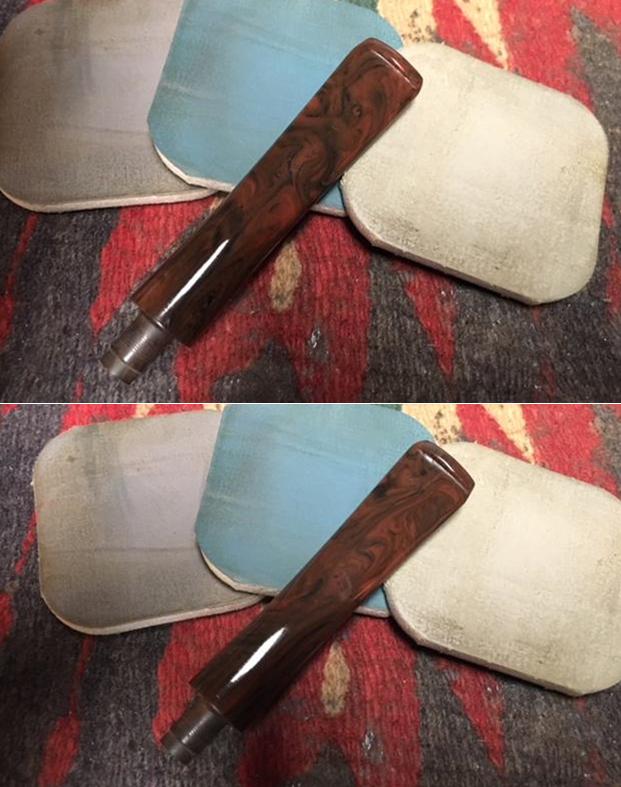
I have started using sanding sticks in shaping the button, slot and funnel in the end of the tenon. I have also found that they are helpful when I am joining together two parts of a broken shank. They are quite long so I can sand inside the shank smoothing out the joint of the two parts. They are not expensive so I go through them quite quickly.

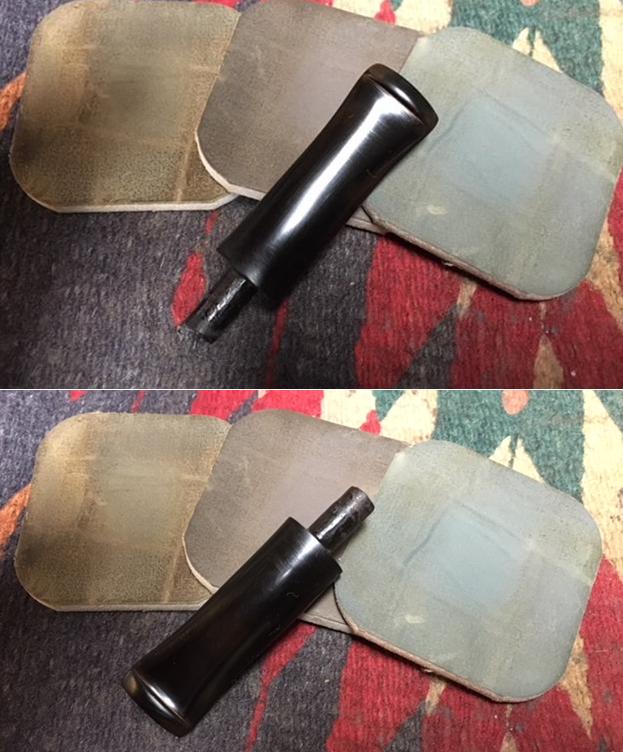
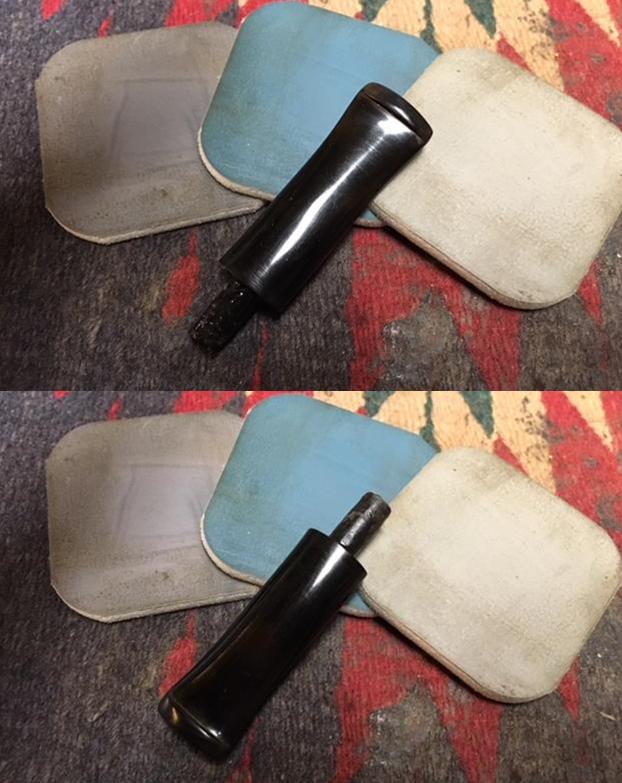
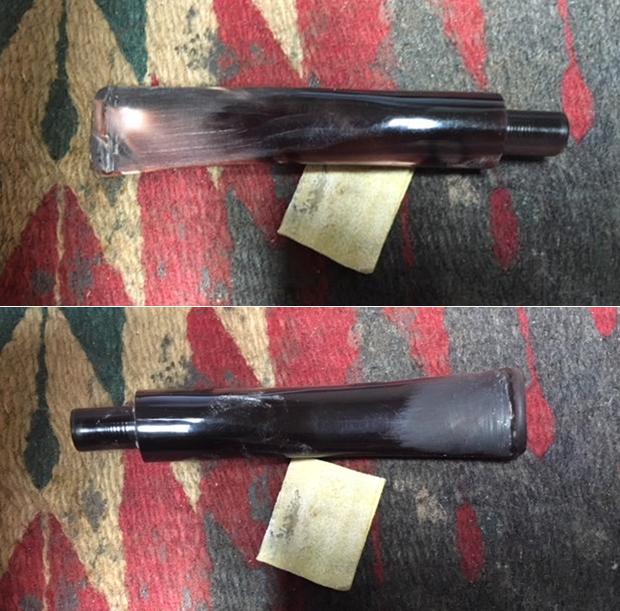
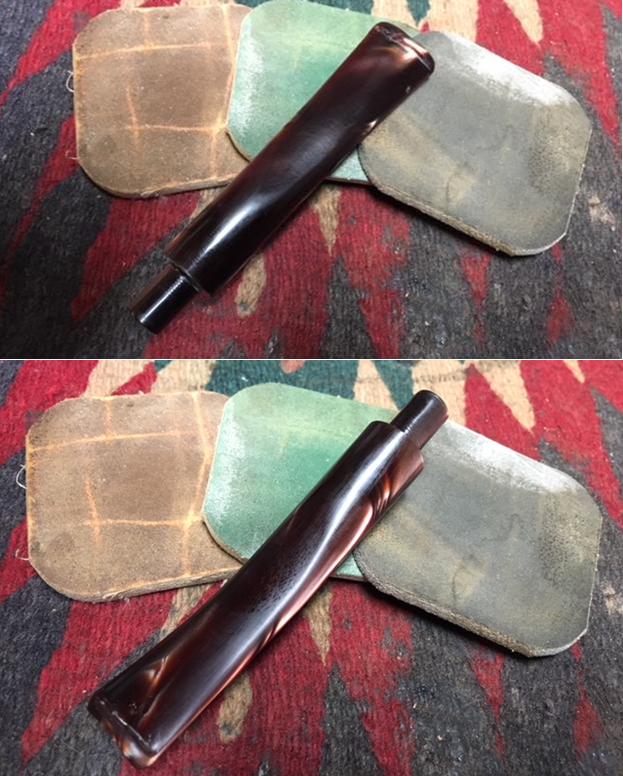
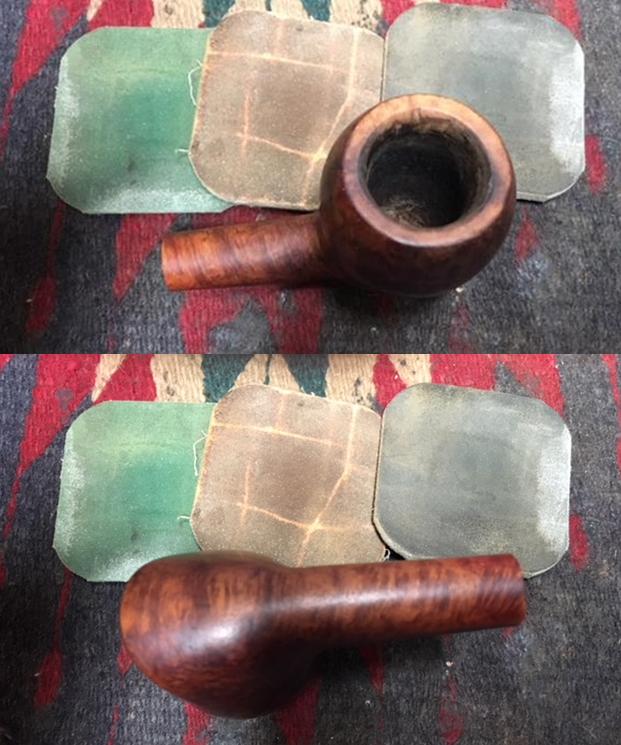
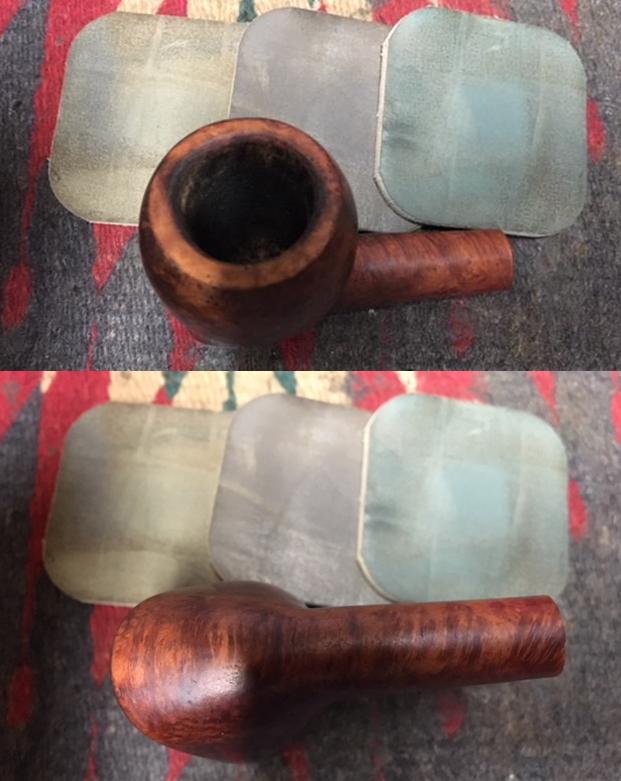
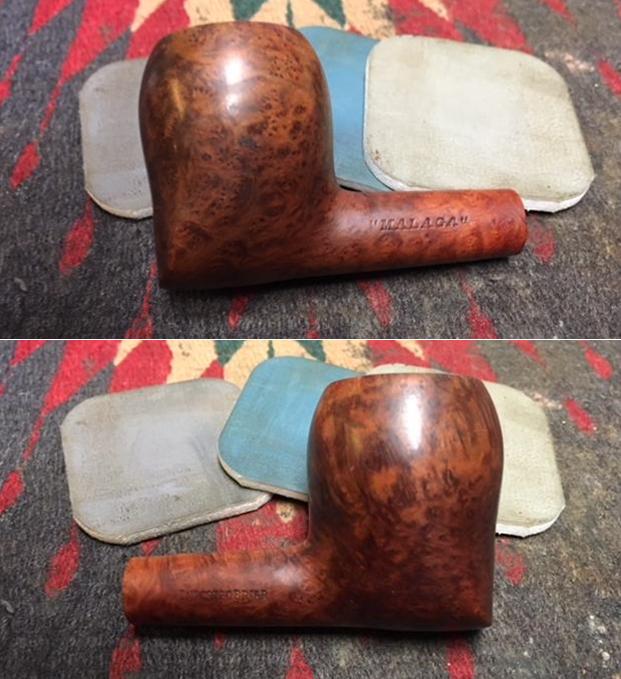
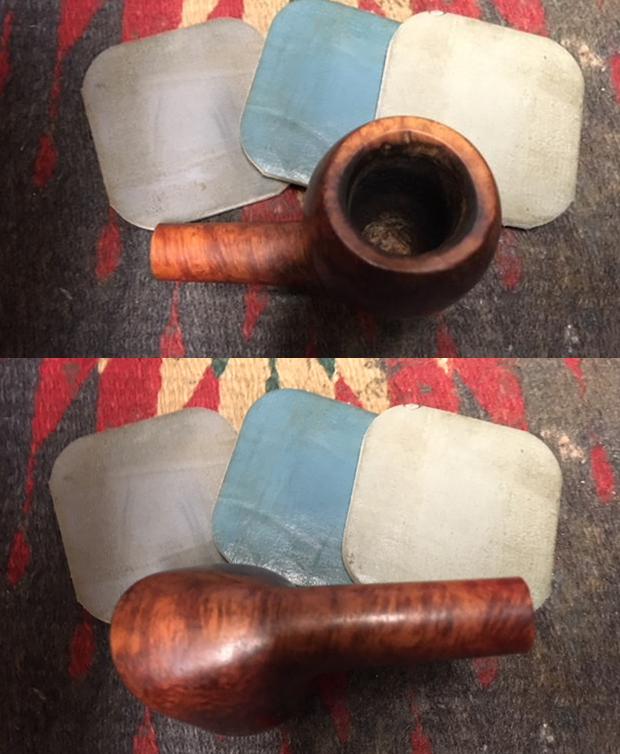
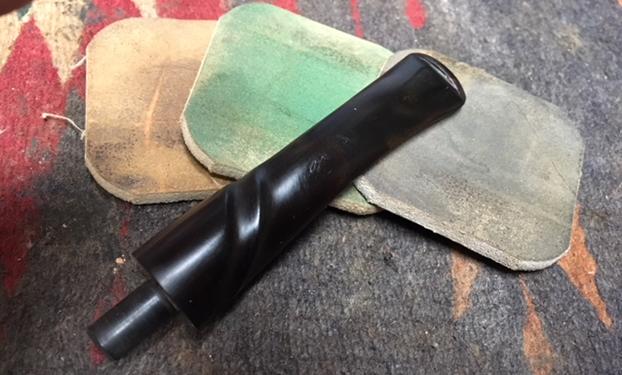
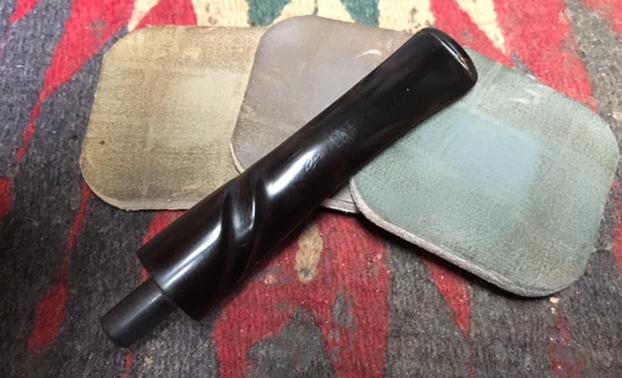
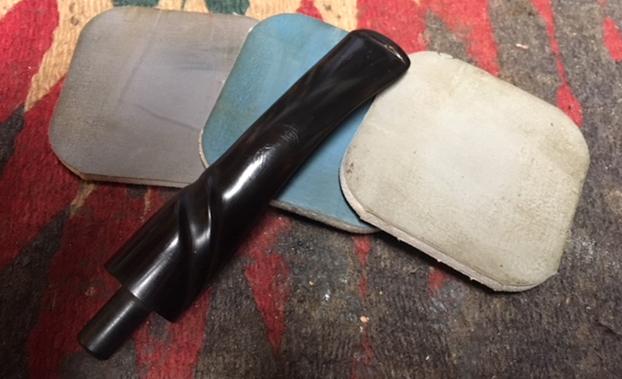
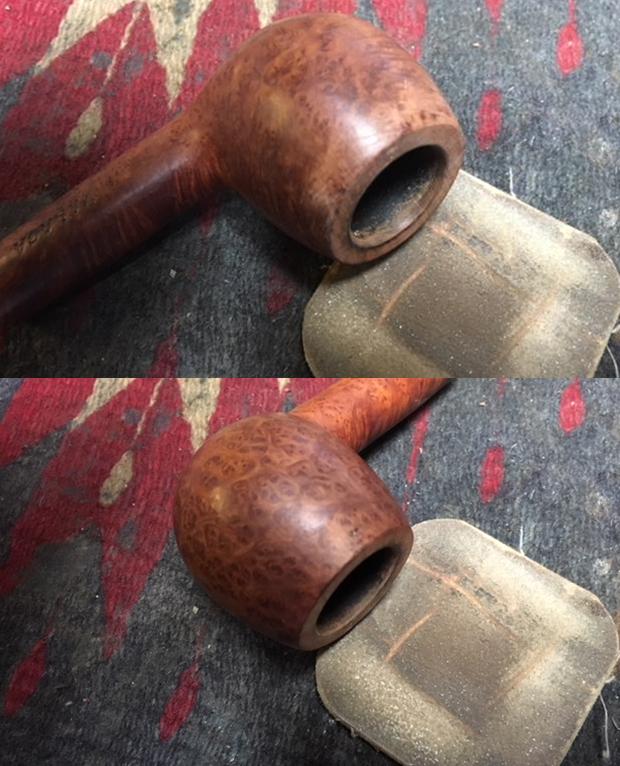
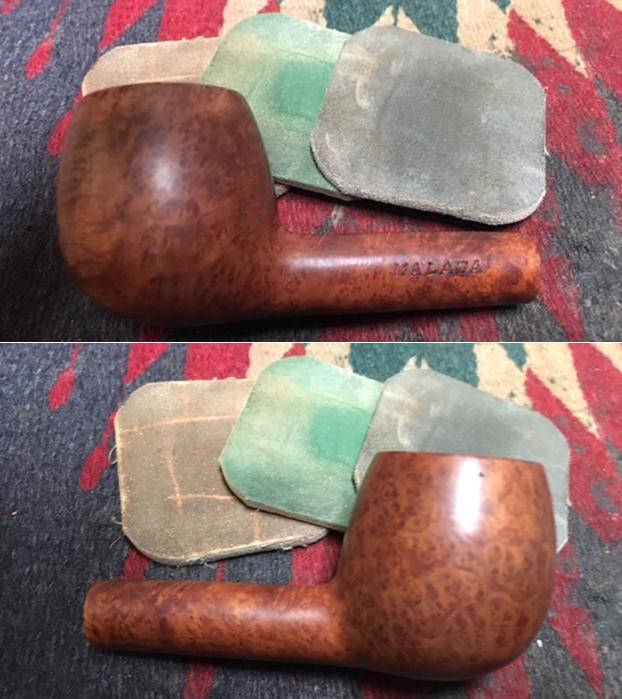
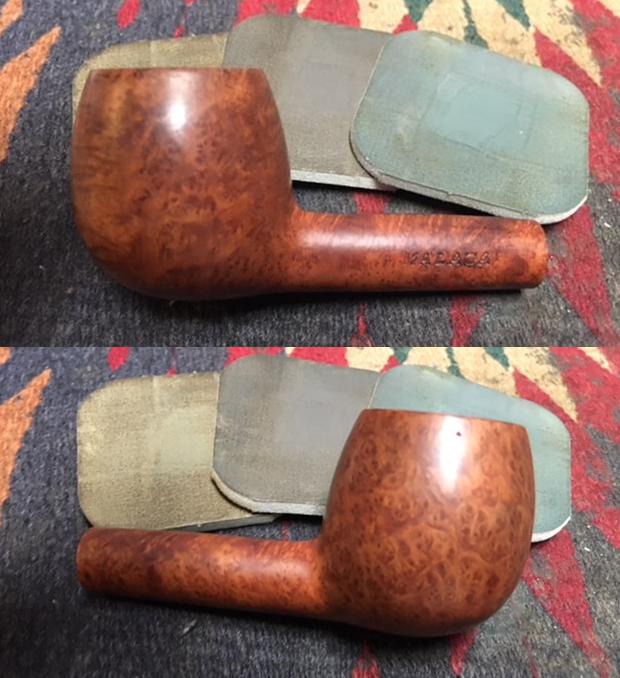
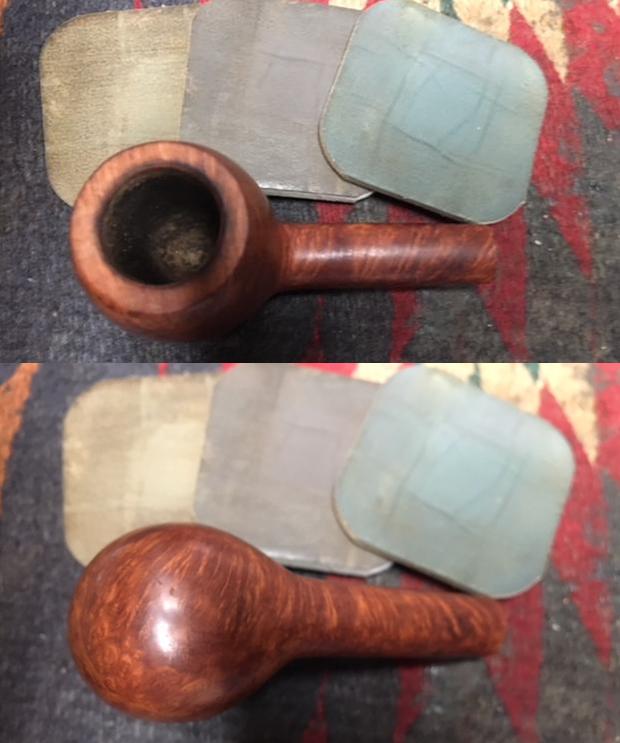
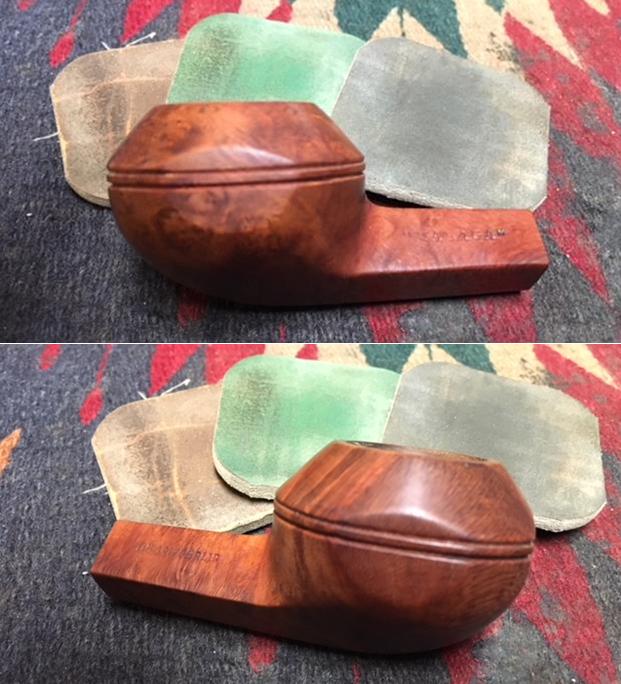
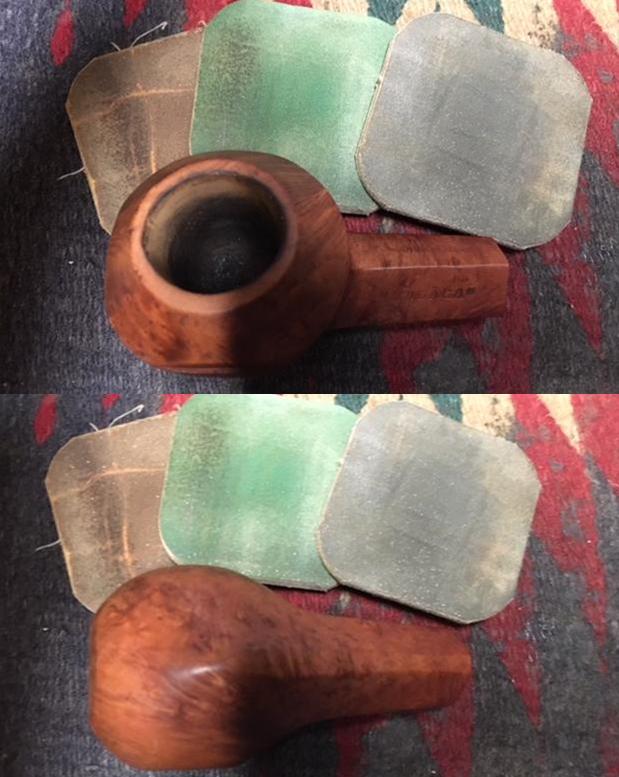
Finally I have several trays of micromesh sanding pads. I buy these in sets from 1500-12000 grit from Stewart MacDonald online( http://www.stewmac.com). I personally like the 2 inch x 2 inch pads as they are a good size for what I do with them. The following link shows the options (http://www.stewmac.com/Materials_and_Supplies/Sanding_and_Polishing/Buffing_and_Polishing/Micro-Mesh_Soft_Touch_Pads.html). They are easy to manipulate around the curves of pipes, the sharp edges of the rim and button and can be rolled or bent to work I the angles. Others use the micromesh sheets and cut them to size. I generally use the pads for wet sanding the briar and the stem material so I wash them with soap and water and reuse them for a long time. I rarely throw them away as even the pads that are worn smooth work to polish at times when nothing else works.

POLISHES AND WAXES

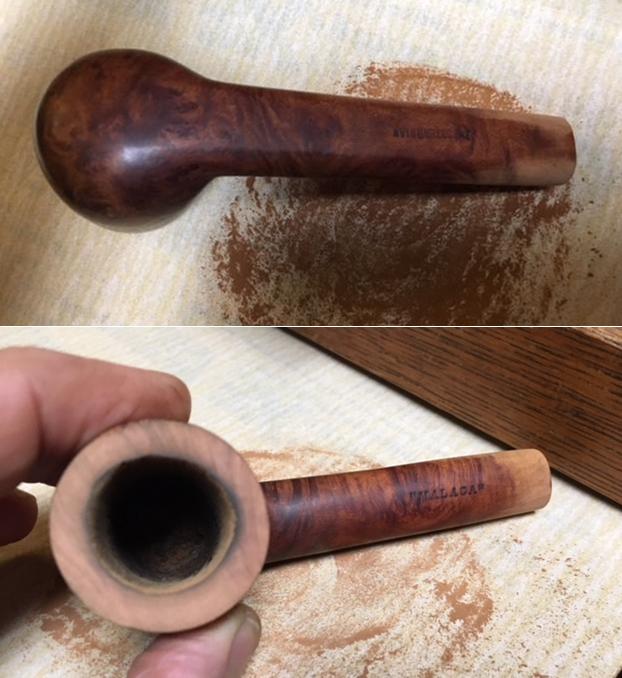
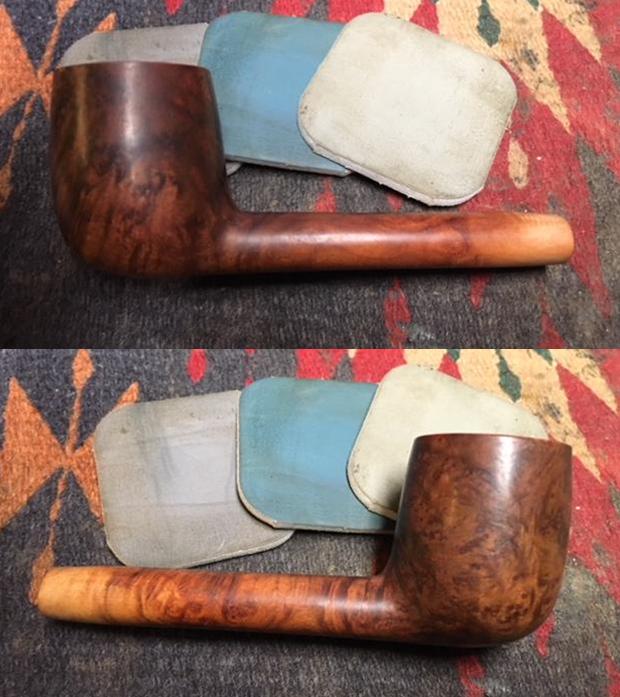
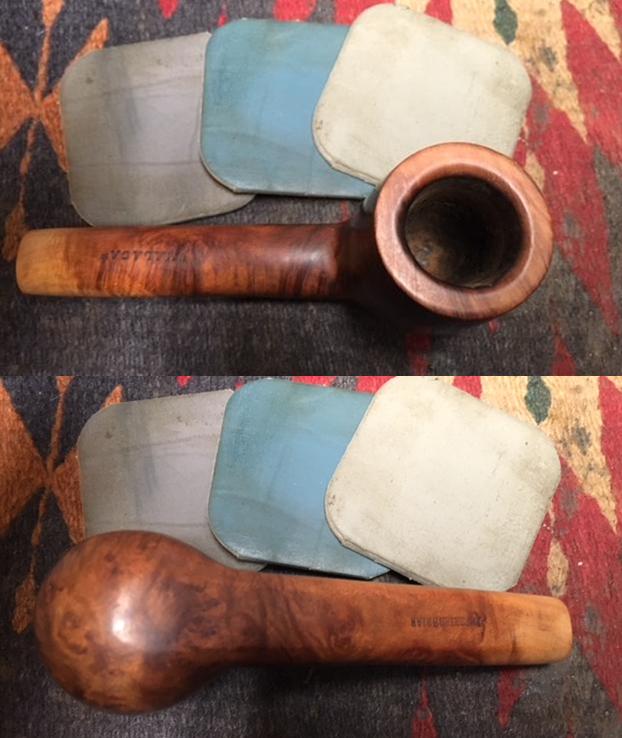
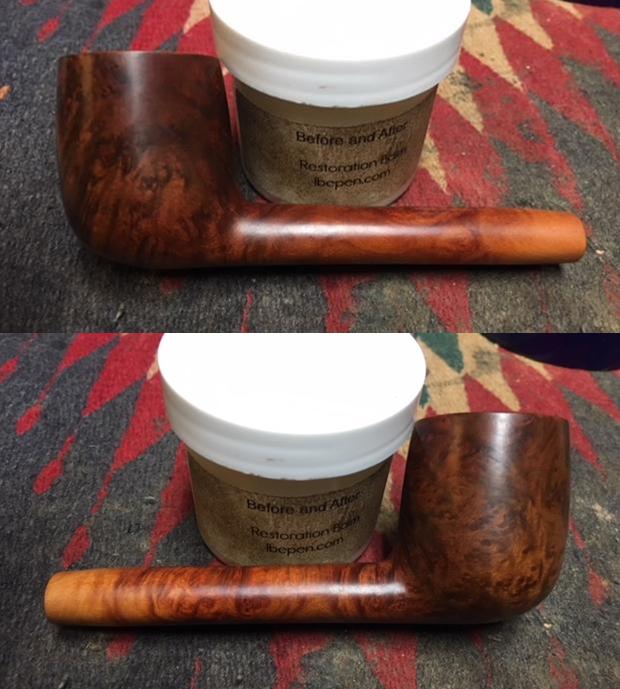
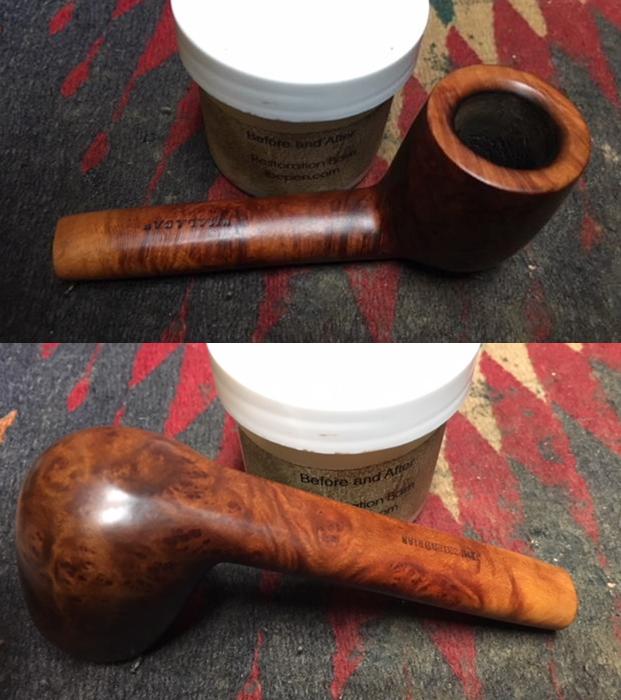
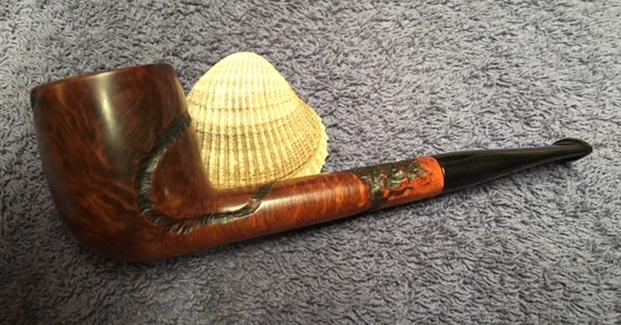
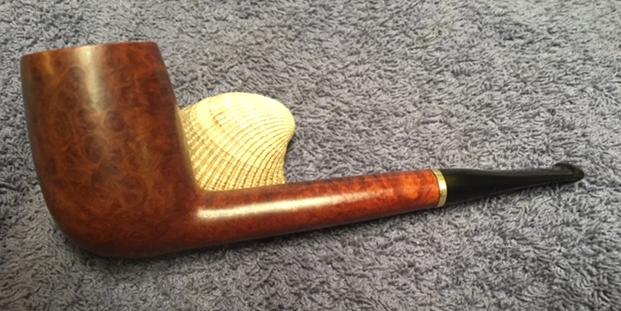
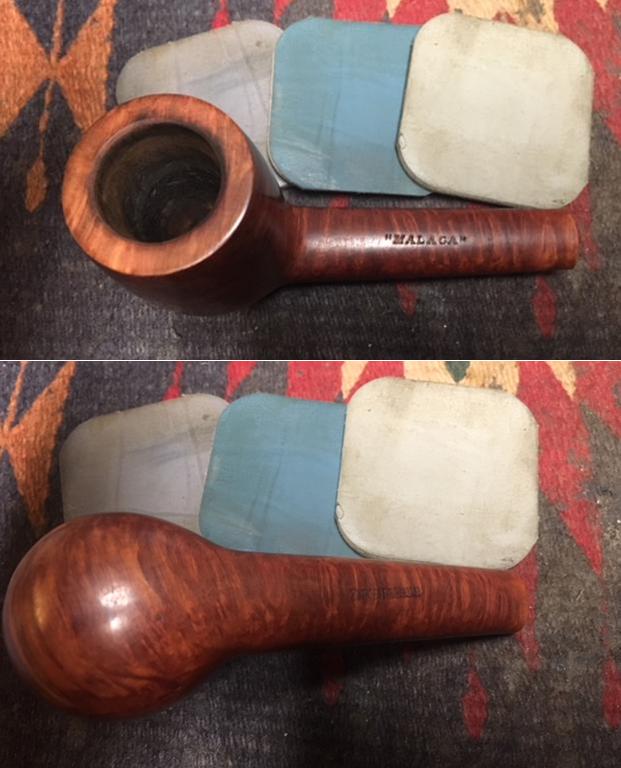
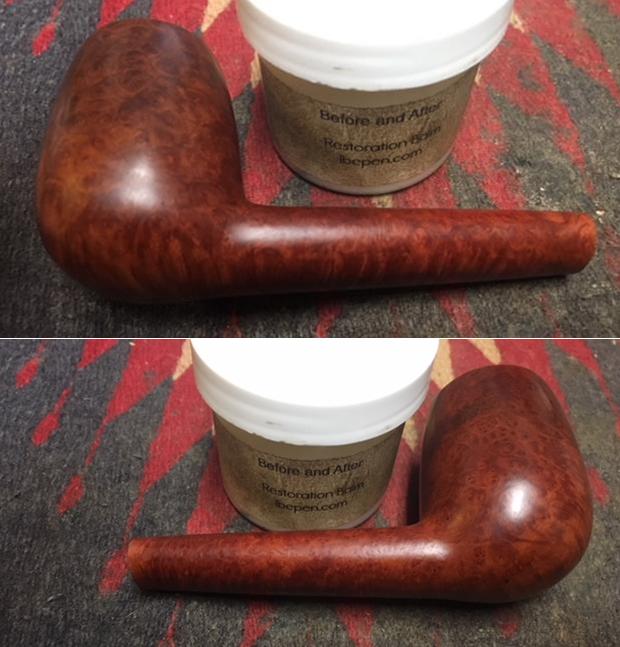
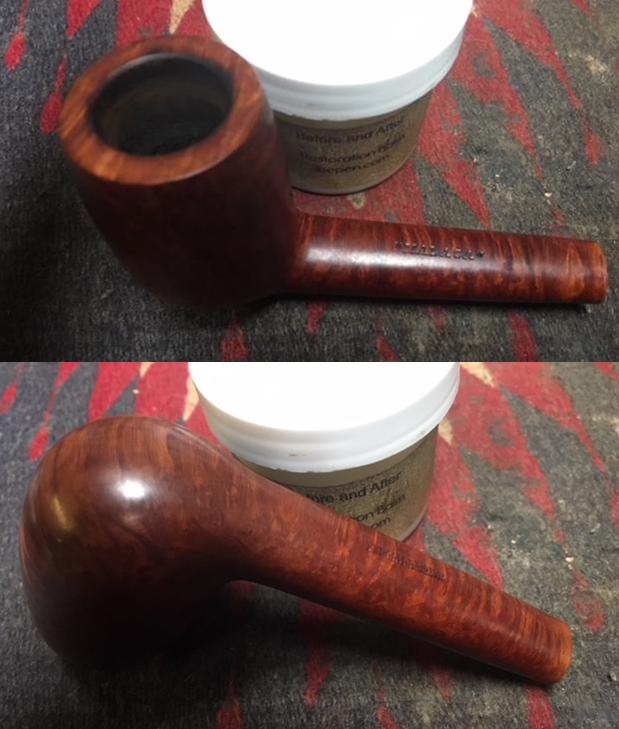
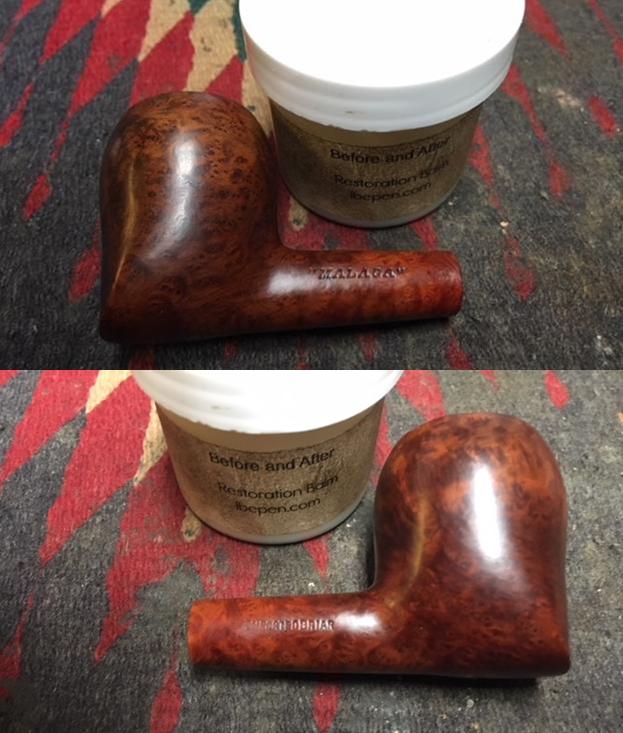
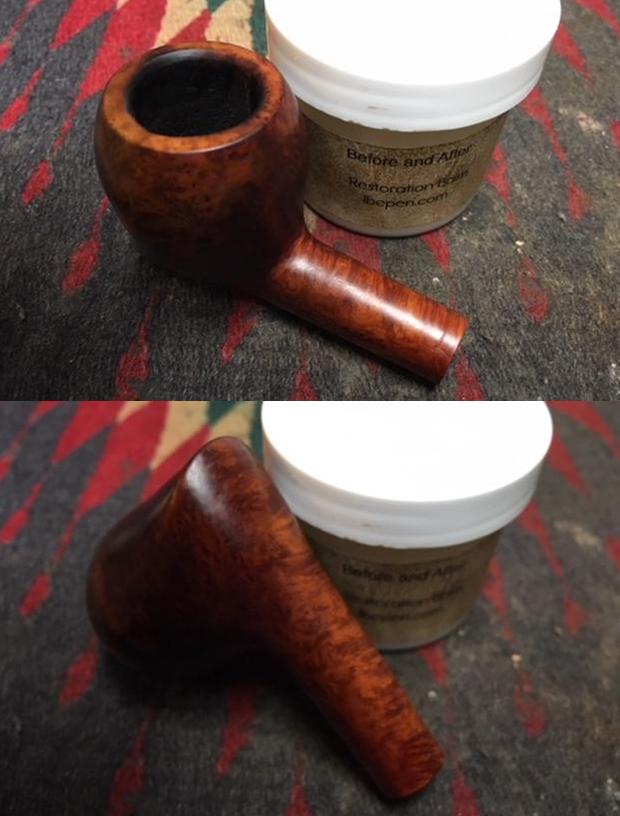
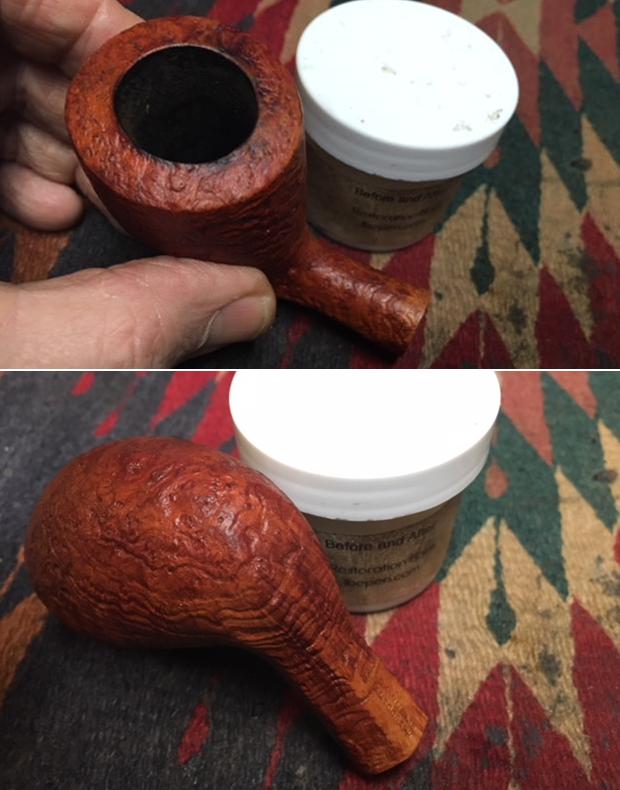
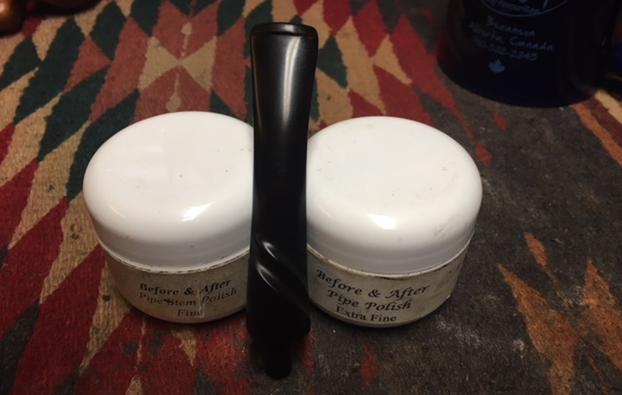
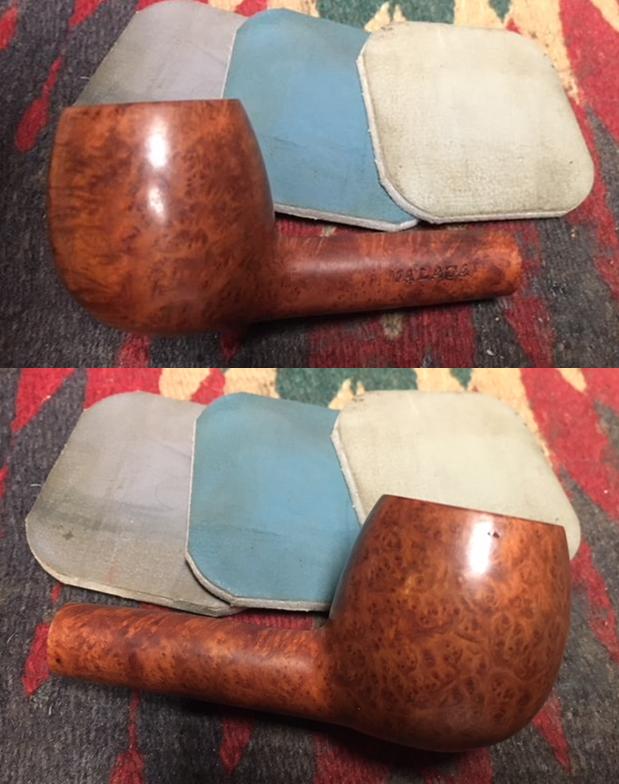
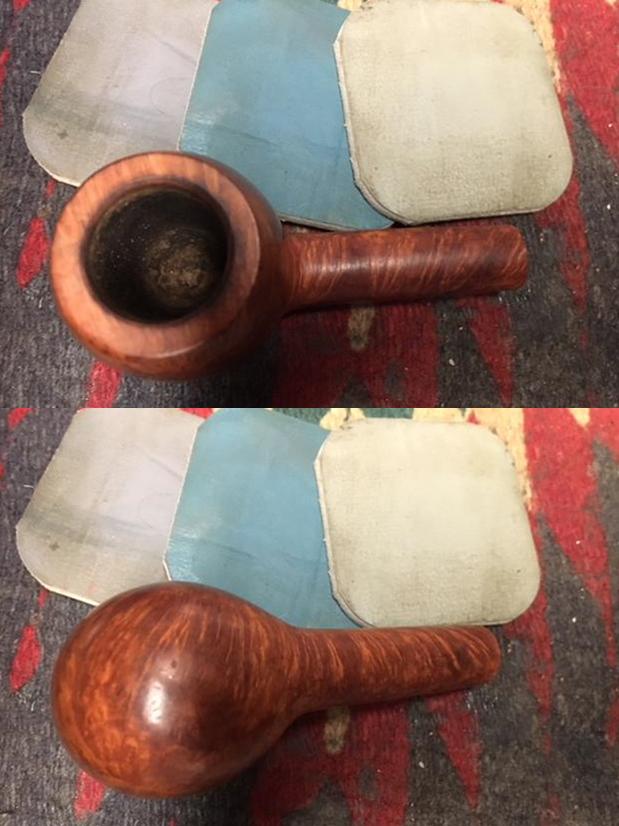
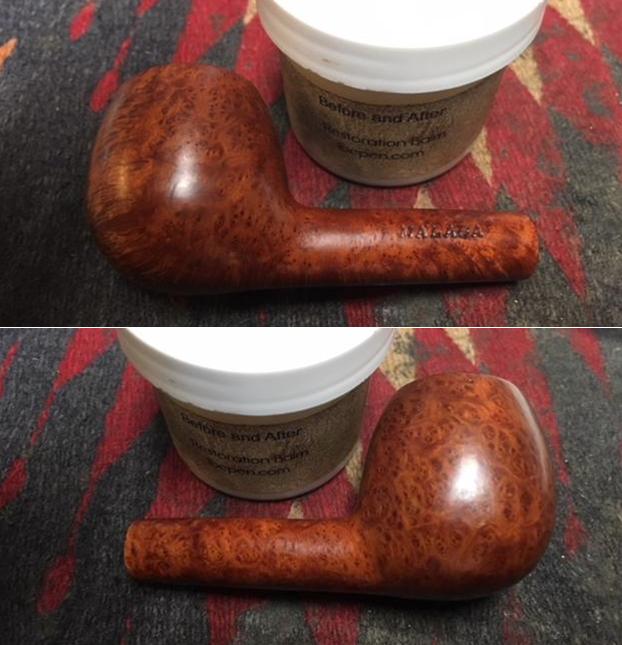
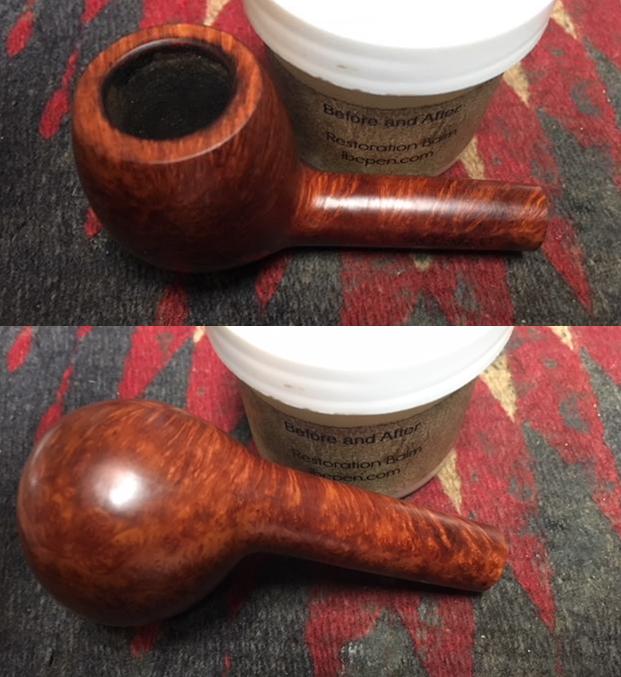
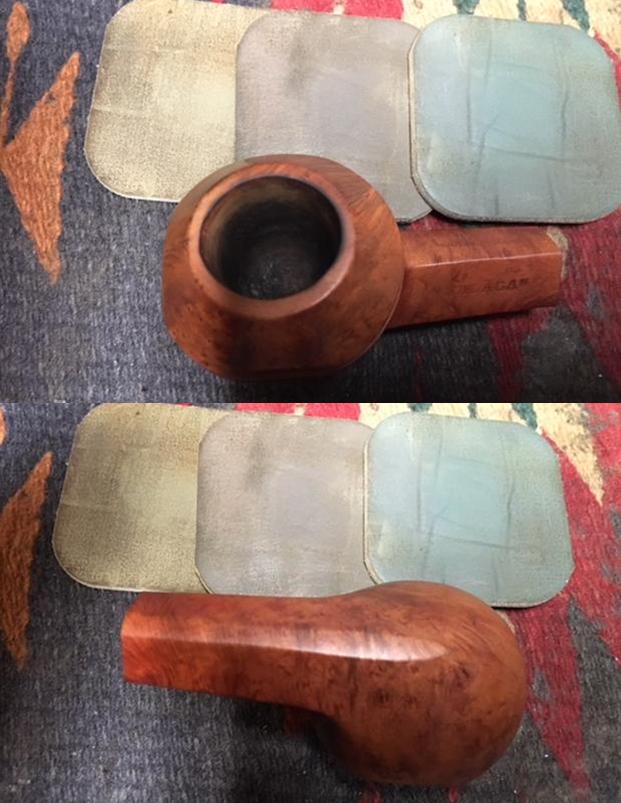
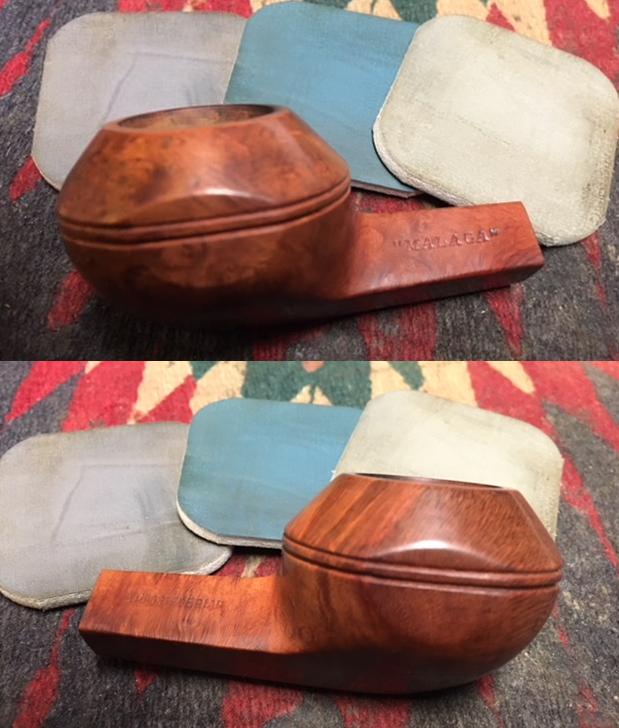
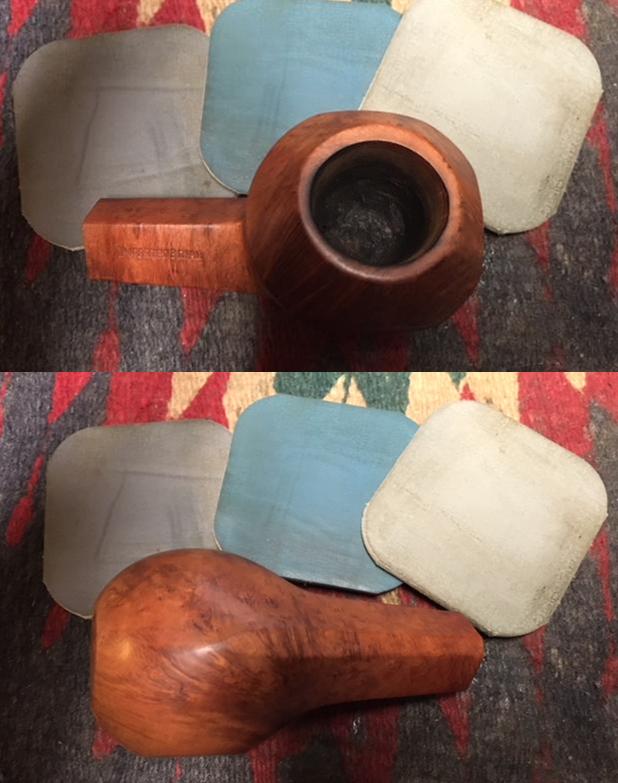
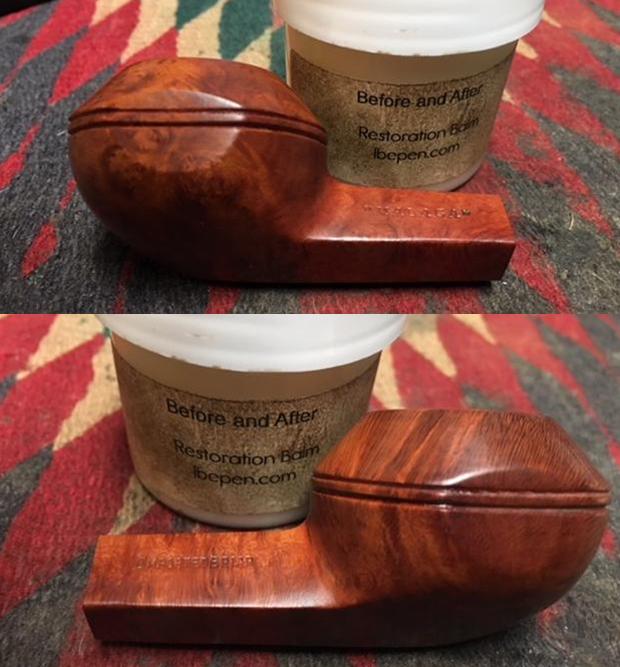
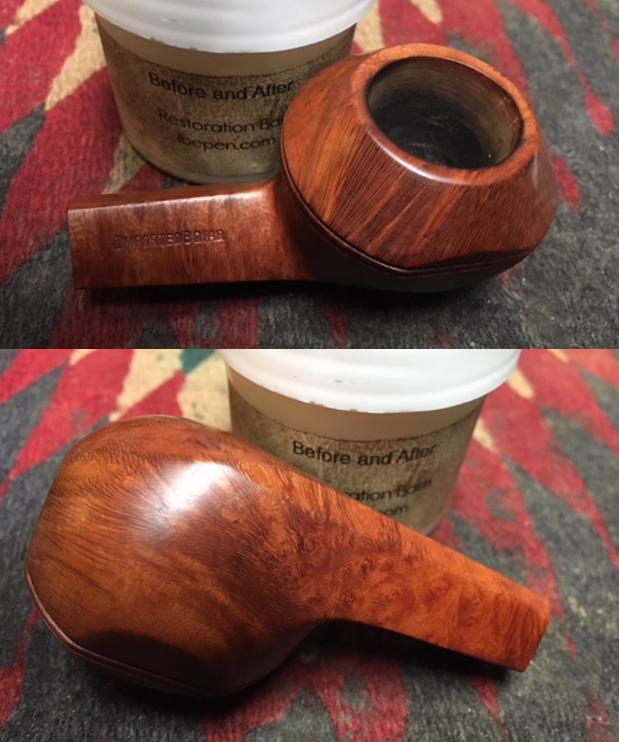
If the finish on the pipe is undamaged once the grime is removed I will often rub it down with a product called Before & After Restoration Balm. I find that it cleans, enlivens and protects the briar. I rub it into the finish with my finger tips and let it sit before buffing it with a soft cloth. Sometimes I will use this product before buffing with and polishes or adding waxes. It really does work.

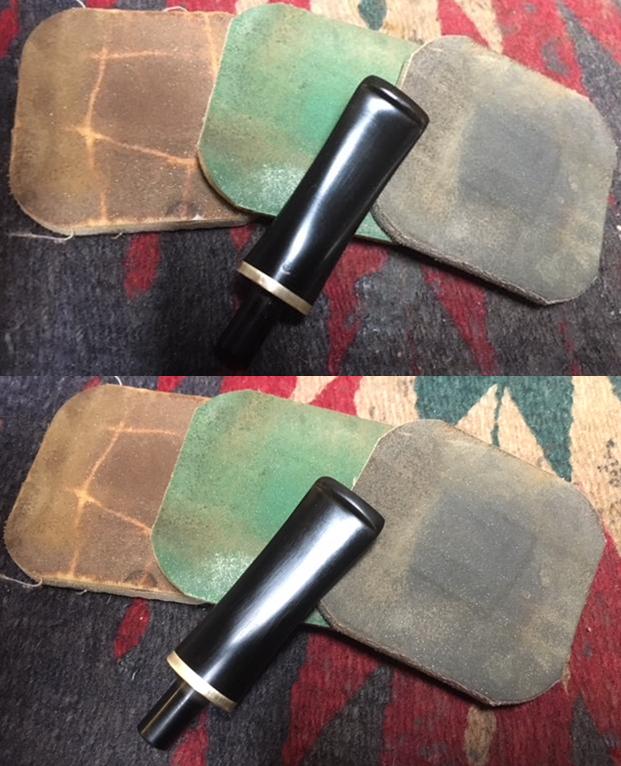
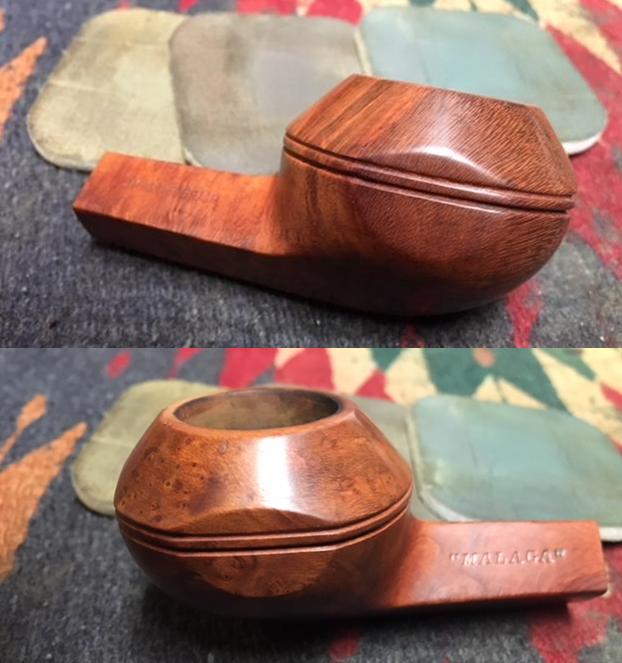
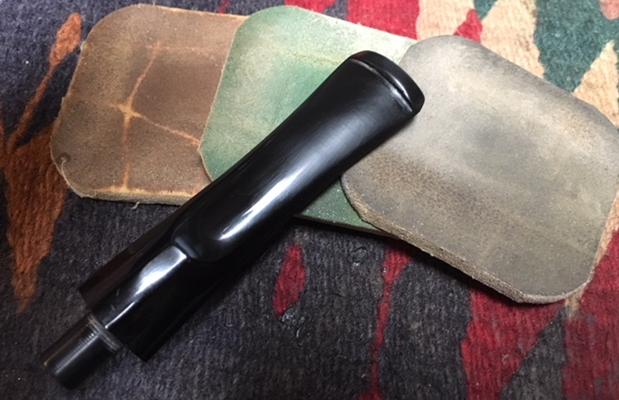
For both the bowl and the stem to remove scratches in the surface left behind by sanding I used Red Tripoli on a buffing wheel and follow that by Blue Diamond. The Red Tripoli is quite coarse so if I have already polished the stem with micromesh sanding pads I skip the Tripoli. If a stem has some nasty spots of oxidation I buff them with Red Tripoli to work at them. But if the stem is polished pretty well I turn to Blue Diamond. Blue Diamond is a plastic polish and is pretty fine. It really makes a finish pop on the bowls and gives the surface of both the vulcanite and acrylic stems a rich shine.

Once the stem has the nice shine that I have come to expect with these buffing compounds I give the stem and bowl several coats of carnauba wax. (I use a soft wax called Conservator’s Wax or even Renaissance Wax for rusticated and sandblasted finishes as the carnauba can fill in the grooves and make the finishes a real mess – learned that from experience.) When I have finished waxing the bowl and the stem I buffed it with a clean buffing pad to polish the wax. Lots of folks leave out this step but it really does add a finished touch to the polished pipe.

APPLICATORS

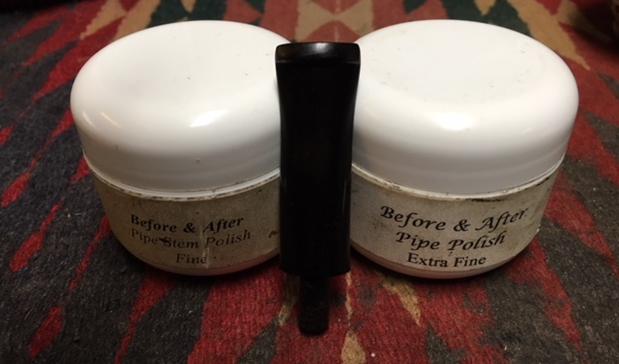
For applying the polishes and wax there are several methods depending on what you are using. With soft polishes like Dunhill Stem polish or Savinelli Pipe Stem polish you can apply it with your fingers and buff it with a soft cloth. But for polishing compounds and carnauba wax you need some kind of wheel to apply the product. Many people use a 4 inch wheel on an arbor on their hand drill or lathe and it works very well. I have used a four inch wheel on a cordless drill with good success. You chuck it in your drill and either move the pipe around the buffing wheel or the buffing wheel around the pipe. I anchored my drill with a bench vise to keep it stationary and worked the pipe around the wheel. I find that gave me more flexibility. I run the drill at a fairly slow speed until I get used to the feel and then speed it up.

Others have used a Dremel and buffing wheels with great success. The key is to run it at a lower speed and don’t leave it in one place as it will definitely cause ripples and waves in the material. You need to change the pads for each product so there is no crossover. Use one pad for Tripoli, one for Blue Diamond or White Diamond and one pad for your waxes. Also use a clean pad to polish the final product.

For me however, the best method is my buffing wheel. I picked up two bench grinders from a local tool liquidator and removed the grinding wheels and covers and use 6 inch buffing wheels on both. This way I do not need to change wheels on it. I used to use a homemade buffer made from a furnace motor, an on/off switch and a three prong plug that I wired to the switch. It had an arbor and quick change system that I purchased called the Beall Buffing System. That worked really well.

SPECIALTY TOOLS

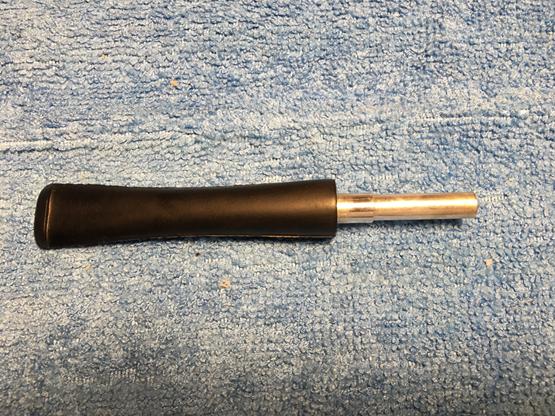
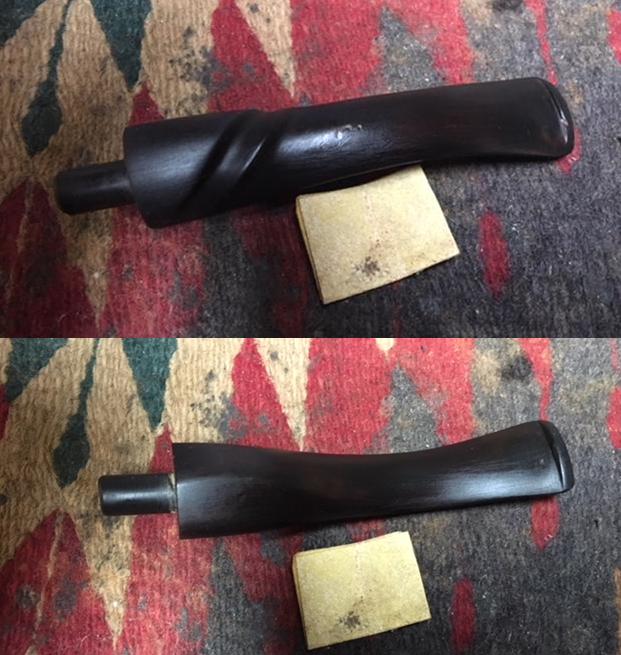
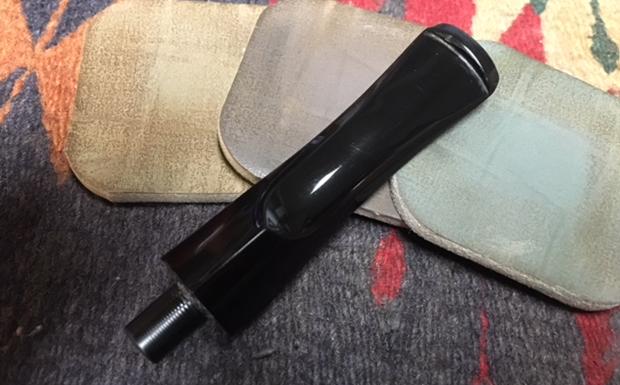
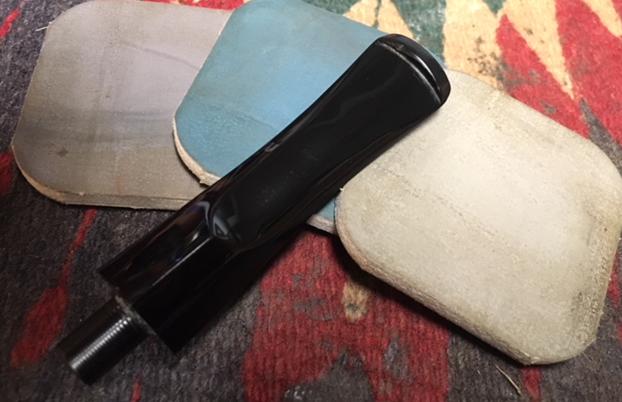
I am adding two other tools that I have added that I really think have lightened my load and made my work simpler. The first of those is the PIMO Tenon Turning Tool which is available now from Vermont Freehand. It is adjustable and you can easily turn down tenons for most pipes. The limitations really are with regard to the tiny pipes and pencil shank pipes. Those I get as close as possible and finish with files and sandpaper. Before I purchased this tool I used to do the tenons by hand with files and sandpaper – it was labour intensive but it worked. Needless to say, that I rarely restemmed pipes with that method. I still have a box of bowls that need to be restemmed from that era. Perhaps one day I will get to them.

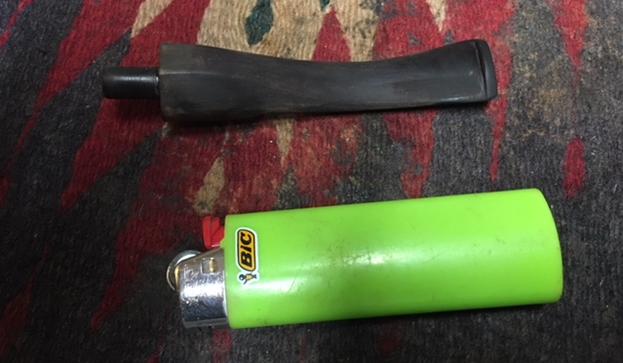
The second tool that I don’t know how I lived without is a heat gun. I used to use boiling water in the microwave or a cookie sheet in the oven to bend stems. With the water method I had to contend with oxidation afterwards. With the oven method the beauty was that I could do multiple stems at once. The only problem is that often I only need one stem and this seemed like over kill. Now with the heat gun I can bend stems on demand. I have also found that it works well to heat up metal tenons for removal and readjustment and for loosening stems that are stuck in the shank.

CONCLUSION

That is the content of the basic tool kit that you can start with to work on pipes. It is a basic list of tools that I use almost daily as I work on pipes. Remember I do this for a hobby so there are probably other tools that a shop or repair business uses that I have not listed. I don’t use them because I do not have the room. I do all of my repairs on my desk top one or two pipes at a time. The tools work for me. Hopefully that helps some of you as you think about our joint hobby. If it does so, great. If not, just ignore this post. As always these are just my own opinions and I am expressing what has worked for me. If you don’t agree that is ok with me. Until the next Answers to Questions blog keep your pipes clean and enjoy smoking your work! Cheers.


Restemming a 428 & 413 Brigham


Blog by Ryan Thibodeau

I recently purchased two Brigham 4 dot pipes online. One was part of a pipe lot and the second was a stand alone pipe that appealed to me on eBay. The first is a Brigham 413 pot, it is a shape that I’ve become quite fond of. Once I had the pipe in my hand I attempted to turn the stem from the shank without success. The aluminum tenon was seized in the mortise. I figured “how bad could it really be stuck”, well I discovered how stuck it was when I basically fractured and broke the vulcanite stem away from the tenon itself…..ouch! I took a few deep breaths and put the stummel aside as I was going to have to make a new stem for this pipe now.

The second pipe, a 428 Brigham (bent apple I think) came to me with some challenges as well. The button had been broken off by the previous owner and he had simply shaped a new button further down the stem, secondly it appears that he had over reamed the bottom of the bowl and attempted to build it back up with glue and sawdust. I now had two pipes that need new stems, so I paired these two projects together and worked on both at the same time.

If you have never had to replace the tenon on a Brigham stem, the following are the methods I use, I hope you find it informative.

Step 1: Salvage the aluminum tenon

The Brigham filter tenons are basically just held in place by friction inside the stem. The factory would further secure it in place by drilling through the stem into the tenon when they add the brass dots for grading. Only one of the brass pins secures the tenon. The simplest method to remove the tenon is to heat up the stem with a heat gun on the lowest setting. You just need it warm enough to make the rubber soft and the tenon will come out with little effort. If you have no intent on saving the stem (which was the case here), the brass pin will work its way out at this point too. As with all metal, depending on the age of the pipe, these tenons can corrode and decay breaking away in the stem. Don’t fret there is a solution there as well.Step 2: Cut off the tenon and level off the end of the stem.

The next few steps I use with my lathe, but you could use a vice and a hand drill, or ask your spouse to hang on to the end of the stem, but the latter will have you begging for forgiveness for an indefinite amount of time (HA!).

I mount the stem in my jaws and simply use a coping saw to cut off the molded tenon, then I use the PIMO tenon cutter to level off the end of the stem. Here you see me drilling a whole to accommodate for the guide pin for the tenon cutter. All I want to do here is give the stem a nice crisp edge to fit against the shank, I’m not turning another tenon but the tool is handy and suits my purpose here.

Step 3: Drill the stem to fit the tenon as well as the filter.

I use a 13/64 drill bit first to open the airway in the stem, this allows the rock maple filter to fit in the upper airway of the stem. I mark the drill bit so I don’t travel too far up the airway. If you don’t drill out the airway to the right diameter, the first time you smoke the pipe with the filter in, the filter will become part of the stem, so this part is very important.

Next I drill the airway to accommodate the filter tenon that secures into the stem. You will see that the filter tenon has groves to help keep it in place with friction. A 9/32 drill bit works perfect for me to allow for a nice snug fit. Once you’ve completed the drilling process the friction of drilling the stem will make it somewhat pliable, this is the best time to insert the tenon back into the stem. Let the stem air cool and you will now have a replacement stem for your Brigham pipe.


Kathy’s Dad’s Pipes #7– Restemming &Restoring George Koch’s “Malaga” Canadian


Blog by Steve Laug

This is the sixth of the “Malaga” pipes that I am working on from Kathy’s Dad’s pipes. For those of you who have not read the other blogs let me tell the story. Last fall I received a contact email on rebornpipes from Kathy asking if I would be interested in purchasing her late Father, George Koch’s estate pipes. He was a lover of “Malaga” pipes – all shapes and sizes and she wanted to move them out as she cleaned up the estate. We emailed back and forth and I had my brother Jeff follow up with her as he also lives in the US and would make it simpler to carry out this transaction. The long and short of it is that we purchased her Dad’s “Malaga” pipes. There are some beautiful pipes in that lot. I have never seen this many “Malagas” together in one place in all of my years of pipe restoring and refurbishing. They varied from having almost pristine to gnawed and damaged stems that will need to be replaced. Many of the pipes already had replacement stems or maybe George had the staff at the Malaga shop in Michigan put Lucite stems on them because he was such a gnawer. I don’t know if we will ever know the answer to that as Kathy did not know for sure. She did know though that he loved the brand and that most of the pipes he smoked he purchased from the shop. These were some well used and obviously well loved pipes. Cleaning and restoring them will be a tribute to this pipeman. (Here is a link to some history of the Malaga Brand if you are interested: https://rebornpipes.com/tag/malaga-pipes/. There are also links there to a catalogue and the maker George Khoubesser.) Knowing about the pipeman who held the pipes in trust before me gives another dimension to the restoration work. This is certainly true with this lot of pipes. I can almost imagine George picking out each pipe in his assortment at the Malaga shop in Michigan. I may well be alone in this, but when I know about the person it is almost as if he is with me work on his pipes. In this case Kathy sent us not only information but also a photo of her Dad enjoying his “Malagas”. Once again, I am including that information so you can know a bit about the pipeman who held these pipes in trust before they are passed on to some of you. I include part of Kathy’s correspondence with my brother as well…

Jeff…Here is a little about my dad, George P. Koch…I am sending a picture of him with a pipe also in a separate email.

Dad was born in 1926 and lived almost all his life in Springfield, Illinois. He was the youngest son of German immigrants and started grade school knowing no English. His father was a coal miner who died when Dad was about seven and his sixteen year old brother quit school to go to work to support the family. There was not much money, but that doesn’t ruin a good childhood, and dad had a good one, working many odd jobs, as a newspaper carrier, at a dairy, and at the newspaper printing press among others. He learned to fly even before he got his automobile driver’s license and carried his love of flying with him through life, recertifying his license in retirement and getting his instrumental license in his seventies and flying until he was grounded by the FAA in his early eighties due to their strict health requirements. (He was never happy with them about that.) He was in the Army Air Corps during World War II, trained to be a bomber, but the war ended before he was sent overseas. He ended service with them as a photographer and then earned his engineering degree from University of Illinois. He worked for Allis Chalmers manufacturing in Springfield until the early sixties, when he took a job at Massey Ferguson in Detroit, Michigan. We lived in Livonia, and that’s where his love for Malaga pipes began. After a few years he returned to Allis Chalmers and we moved back to Springfield. I remember that when we went back to Michigan to visit friends, Dad had to go to the Malaga store and acquire a few new pipes. Many a year I wrote to Malaga and they picked out a pipe for me to purchase that I could give Dad for a Christmas or birthday present. He was always pleased. His favorites were the straight stemmed medium sized bowl pipes, but he liked them all.  He had some other pipes, but the Malagas were his favorites. I remember him smoking them sitting in his easy chair after work, with feet up on the ledge by the fire burning in the fireplace.  Growing up it was my job to clean them and he liked the inner bowl and stem coated with Watkins vanilla, leaving a little of that liquid in the bowl to soak in when I put them back on the rack. Dad quit smoking later in life and so they’ve sat on the racks for many years unattended, a part of his area by his easy chair and fireplace. Dad passed when he was 89 years old and it finally is time for the pipes to move on. I’m very happy they are being restored by you and your brother and hope they find homes who enjoy them as much as Dad did. Thank-you for your care and interest. — Kathy, the oldest daughter

Kathy, once again I thank you for providing this beautiful tribute to your Dad. We will appreciate your trust in allowing us to clean and restore these pipes. I am also trusting that those of you who are reading this might carry on the legacy of her Dad’s pipes as they will be added to the rebornpipes store once they are finished.

The seventh of the pipes that I chose to work on is another “Malaga” Canadian. This one is a smooth pipe with a flat bottom so that it is a sitter. It had a chewed and ruined vulcanite stem. Some great grain peeks through the grime around the bowl. The warm brown finish on the bowl appeared to be good condition under the dust and tars of time. I am pretty certain that Malaga pipes must have been oil cured. The uniform finish and the light weight lead me to think that is the case. Once more there are no fills in the bowl or long shank. I have yet to find a fill in any of the bowls I have worked on in this lot and looking through what remains I think it is fair to say I won’t find any in them either.

The rim top on this Canadian was originally smooth and flat but it was covered with an overflow of lava from the thick cake in the bowl. The rim top at the back of the bowl was more thickly caked than the front. The rim top, along with the inner and outer edge of the bowl was heavily damaged. There were some nicks and rounding of the outer edge and there was some darkening on the inner edge. The bowl was out of round from previous reaming. The rim top and outer edge showed signs of being knocked against a hard surface to empty the dottle from the bowl. The stamping on the topside of the shank was clear and read “Malaga” and on the flat underside it read Imported Briar. There were no shape numbers on the pipe. The black Lucite stem was ruined with bite marks on the top and a long slice on the underside of the stem. It would need to be replaced. The interior of the pipe was dirty. I know that George thoroughly enjoyed his pipes as is evidenced by the wear that all of them show. Jeff took these photos before he started the cleanup work on the pipe. Jeff took close up photos of the bowl and rim to show the condition of the pipe before he started to work his magic on it. The exterior of the bowl and shank were dirty. You can see the lava on the rim top, the cake and remnants of tobacco in the bowl and the nicks on the rim top and bowl around the outer edge of the rim. The second rim top photo shows the damage on the front edge of the rim. It is dirty but in otherwise good condition. He also took photos of the sides and underside of the bowl and shank. He also took a photo of both sides of the shank to show the stamping on both the topside and the underside. You can see the overall condition of the shank before cleanup.The next photo shows the fit of the stem against the shank. The stem was obviously a replacement and was poorly fit. The second and third photo shows the damage to both surfaces of the stem near the button, the worn and chewed down button and the missing underside of the stem. The stem is a write off – misshapen and ruined.Working on this seventh pipe followed pretty much the same pattern as all of these pipes. Jeff had reamed the bowl with a PipNet pipe reamer and followed up with a Savinelli Fitsall pipe knife to remove the cake. He scrubbed out the mortise and the airway in the shank and the stem with alcohol, cotton swabs and pipe cleaners. He scrubbed the exterior of the bowl, rim, shank and stem with a tooth brush and Murphy’s Oil Soap to remove the oils and tars on the bowl, rim and shank. He rinsed it under running water. He dried it off with a soft cloth. The lava mess on the rim was thoroughly removed without harming the finish underneath it. The slight bevel to the rim was visible once the pipe was clean. Without the grime the finish looked really good. As noted above the stem was a write off and would need to be replaced with a suitable one. I took photos of the pipe to show its condition before I started my work on it.   I took a photo of the rim top to show the condition it was in after the cleanup. Jeff was able to remove all of the lava on the rim top and edges. There is still some darkening on the rim top. You can see the damage on the top itself and around the outer edges from knocking out the pipe on a hard surface. The inner edge of the bowl had a lot of nicks and cuts and was out of round. The stem was clean and you can see the tooth chatter and marks on the surface near the button and the large deeper tooth mark on the underside.I went through my can of extra stems and found one that was suitable for a replacement on this Canadian. It was the same shape and size as the replacement that had been chewed through. Once it was cleaned up it would work nicely. The tenon was the right size which was a bonus. I put the stem on the shank and took the following photos. This is the part of restemming that is always a challenge. Like the sixth pipe I finished a bit ago it needed to be shaped. The new oval stem is always slightly off because the shank is never truly oval or round. Either the shank needs to be taken down slightly to accommodate the fit of the new stem or the stem needs to be taken down to meet the shank. In this case you can see from the following photos that the stem was a poor fit on the sides while the top and the underside of the shank were very close. In the photo of the top side you can see that it is slightly smaller. That tells you that the shank is not perfectly oval and adjustments will need to be made.I sanded off all of the calcification on both sides of the stem with 220 grit sandpaper and cleaned up the area around the button edge. I sanded the surface of the button to reshape it on both the top and underside.I decided to work over the rim top next. I topped the bowl to remove the damaged areas on the top of the rim and minimize the damage to the inner and outer edges. Once that was finished there was still some damage to the rim from previous reaming and lighting. I took care of it by reshaping the bevel and the inner and outer edge of the rim with 220 grit sandpaper. I was able to remove all of the damage to the rim surface and reshape both then inner and outer edge of the rim. The gentle bevel that was originally present was restored. With the rim reshaped I turned my attention to fitting the stem to the shank. I carefully sanded the shank to reduce the diameter to match the stem. It was interesting that most of the work had to be done on the sides of the shank with a little on the top and bottom. In essence I made the shank more oval to match the stem. The photos below show the fit of the new stem at this point. I sanded the rim top repairs and the stem/shank junction with a medium and a fine grit sanding sponge to make sure that the scratching was reduces but more importantly that the transition at the shank and stem was smooth and flowing. It is easy to create issues with a folded piece of sandpaper (in terms of dips in the briar or vulcanite) because the two mediums have different hardness. The sanding sponge minimizes that for me. I polished the briar with micromesh sanding pads – wet sanding with 1500-2400 grit pads and dry sanding with 3200-12000 grit pads. I wiped the briar down after each pad with a damp cloth to remove the sanding dust. I rubbed the bowl down with Before & After Restoration Balm to deep clean the briar and particularly the reshaped areas. The product works to clean, enliven and protect the briar. I hand rubbed it with my fingers and wiped it off with a soft cloth. I buffed the bowl with a horsehair shoe brush to polish it. The briar really began to have a rich shine. I took some photos of the bowl at this point to mark the progress in the restoration. I cleaned out the stem with alcohol, pipe cleaners and cotton swabs. It took a bit of scrubbing but before too long the airway was clean.I polished the stem with micromesh sanding pads – wet sanding with 1500-2400 grit pads and dry sanding with 3200-12000 grit pads. I wiped the stem down after each pad with a damp cloth to remove the sanding dust. I used the Before & After Pipe Polish to remove the small minute scratches left in the brass and the vulcanite. I finished by wiping the stem down with a final coat of Obsidian Oil and set it aside to dry. I the polished stem and bowl with Blue Diamond to polish out the remaining small scratches. I gave the bowl multiple coats of Conservator’s Wax and the stem several coats of carnauba wax and buffed the pipe with a clean buffing pad to raise the shine. I hand buffed it with a microfiber cloth to deepen the shine. The pipe polished up pretty nicely. The finished pipe is shown in the photos below. This is the seventh of the many “Malaga” pipes that I am restoring from Kathy’s Dad’s collection. I am looking forward once again to hearing what Kathy thinks once she sees the finished pipe on the blog. I will be posting it on the rebornpipes store very soon. It should make a nice addition to the next pipeman’s rack and in purchasing it you can carry on the trust from her father. The dimensions are Length: 6 inches, Height: 1 3/4 inches, Outside diameter of the bowl: 1 1/4 inches, Chamber diameter: 3/4 inches. Thanks for walking through the restoration with me as I worked over this Malaga from George’s estate. More will follow in a variety of shapes and sizes.


Kathy’s Dad’s Pipes #6– Restemming &Restoring George Koch’s “Malaga” Carved Canadian


Blog by Steve Laug

This is the sixth of the “Malaga” pipes that I am working on from Kathy’s Dad’s pipes. For those of you who have not read the other blogs let me tell the story. Last fall I received a contact email on rebornpipes from Kathy asking if I would be interested in purchasing her late Father, George Koch’s estate pipes. He was a lover of “Malaga” pipes – all shapes and sizes and she wanted to move them out as she cleaned up the estate. We emailed back and forth and I had my brother Jeff follow up with her as he also lives in the US and would make it simpler to carry out this transaction. The long and short of it is that we purchased her Dad’s “Malaga” pipes. There are some beautiful pipes in that lot. I have never seen this many “Malagas” together in one place in all of my years of pipe restoring and refurbishing. They varied from having almost pristine to gnawed and damaged stems that will need to be replaced. Many of the pipes already had replacement stems or maybe George had the staff at the Malaga shop in Michigan put Lucite stems on them because he was such a gnawer. I don’t know if we will ever know the answer to that as Kathy did not know for sure. She did know though that he loved the brand and that most of the pipes he smoked he purchased from the shop. These were some well used and obviously well loved pipes. Cleaning and restoring them will be a tribute to this pipeman. (Here is a link to some history of the Malaga Brand if you are interested: https://rebornpipes.com/tag/malaga-pipes/. There are also links there to a catalogue and the maker George Khoubesser.)Knowing about the pipeman who held the pipes in trust before me gives another dimension to the restoration work. This is certainly true with this lot of pipes. I can almost imagine George picking out each pipe in his assortment at the Malaga shop in Michigan. I may well be alone in this, but when I know about the person it is almost as if he is with me work on his pipes. In this case Kathy sent us not only information but also a photo of her Dad enjoying his “Malagas”. Once again, I am including that information so you can know a bit about the pipeman who held these pipes in trust before they are passed on to some of you. I include part of Kathy’s correspondence with my brother as well…

Jeff…Here is a little about my dad, George P. Koch…I am sending a picture of him with a pipe also in a separate email.

Dad was born in 1926 and lived almost all his life in Springfield, Illinois. He was the youngest son of German immigrants and started grade school knowing no English. His father was a coal miner who died when Dad was about seven and his sixteen year old brother quit school to go to work to support the family. There was not much money, but that doesn’t ruin a good childhood, and dad had a good one, working many odd jobs, as a newspaper carrier, at a dairy, and at the newspaper printing press among others. He learned to fly even before he got his automobile driver’s license and carried his love of flying with him through life, recertifying his license in retirement and getting his instrumental license in his seventies and flying until he was grounded by the FAA in his early eighties due to their strict health requirements. (He was never happy with them about that.) He was in the Army Air Corps during World War II, trained to be a bomber, but the war ended before he was sent overseas. He ended service with them as a photographer and then earned his engineering degree from University of Illinois. He worked for Allis Chalmers manufacturing in Springfield until the early sixties, when he took a job at Massey Ferguson in Detroit, Michigan. We lived in Livonia, and that’s where his love for Malaga pipes began. After a few years he returned to Allis Chalmers and we moved back to Springfield. I remember that when we went back to Michigan to visit friends, Dad had to go to the Malaga store and acquire a few new pipes. Many a year I wrote to Malaga and they picked out a pipe for me to purchase that I could give Dad for a Christmas or birthday present. He was always pleased. His favorites were the straight stemmed medium sized bowl pipes, but he liked them all.  He had some other pipes, but the Malagas were his favorites. I remember him smoking them sitting in his easy chair after work, with feet up on the ledge by the fire burning in the fireplace.  Growing up it was my job to clean them and he liked the inner bowl and stem coated with Watkins vanilla, leaving a little of that liquid in the bowl to soak in when I put them back on the rack. Dad quit smoking later in life and so they’ve sat on the racks for many years unattended, a part of his area by his easy chair and fireplace. Dad passed when he was 89 years old and it finally is time for the pipes to move on. I’m very happy they are being restored by you and your brother and hope they find homes who enjoy them as much as Dad did. Thank-you for your care and interest. — Kathy, the oldest daughter

Kathy, once again I thank you for providing this beautiful tribute to your Dad. We will appreciate your trust in allowing us to clean and restore these pipes. I am also trusting that those of you who are reading this might carry on the legacy of her Dad’s pipes as they will be added to the rebornpipes store once they are finished.

The sixth of the pipes that I chose to work on is a “Malaga” Carved Canadian with some different rustication. There are trails around the pipe and the top of the shank is rusticated in an unusual and interesting pattern. It had a chewed and ruined vulcanite stem. Some great grain peeks through the grime between the trails carved around the bowl. The warm brown finish on the bowl appeared to be good condition under the dust and tars of time. I am pretty certain that Malaga pipes must have been oil cured. The uniform finish and the light weight lead me to think that is the case. Once more there are no fills in the bowl or long shank. I have yet to find a fill in any of the bowls I have worked on in this lot and looking through what remains I think it is fair to say I won’t find any in them either.

The rim top on this Canadian was lightly beveled inward and was covered with an overflow of lava from the thick cake in the bowl. The bevel was almost invisible. The rim top at the back of the bowl was more thickly caked than the front.  The rim top along with the inner and outer edge of the bowl was damaged. There were some nicks on the outer edge and there was some darkening on the inner edge. The bowl was out of round from previous reaming. The rim top and outer edge showed signs of being knocked against a hard surface to empty the dottle from the bowl. The stamping on the underside of the shank was clear and read “Malaga” near the stem/shank junction. There were no shape numbers on the pipe. The black vulcanite stem was ruined with bite marks on the top and a major portion of the underside of the stem missing. It would need to be replaced. The interior of the pipe was dirty. I know that George thoroughly enjoyed his pipes as is evidenced by the wear that all of them show. Jeff took these photos before he started the cleanup work on the pipe. Jeff took close up photos of the bowl and rim to show the condition of the pipe before he started to work his magic on it. The exterior of the bowl and shank were dirty. You can see the lava on the rim top, the cake in the bowl and the nicks on the rim top and bowl around the outer edge of the rim. It is dirty but in otherwise good condition. He also took a photo of the sides and underside of the bowl and shank. He also took a photo of both sides of the shank to show the rustication pattern on the topside and the stamping on the underside. You can see the overall condition of the shank before cleanup.The next photo shows the damage to both surfaces of the stem near the button, the worn and chewed down button and the missing underside of the stem. The stem is a write off – misshapen and ruined.Working on this sixth pipe followed pretty much the same pattern as all of these pipes. Jeff had reamed the bowl with a PipNet pipe reamer and followed up with a Savinelli Fitsall pipe knife to remove the cake. He scrubbed out the mortise and the airway in the shank and the stem with alcohol, cotton swabs and pipe cleaners. He scrubbed the exterior of the bowl, rim, shank and stem with a tooth brush and Murphy’s Oil Soap to remove the oils and tars on the bowl, rim and shank. He rinsed it under running water. He dried it off with a soft cloth. The lava mess on the rim was thoroughly removed without harming the finish underneath it. The slight bevel to the rim was visible once the pipe was clean. Without the grime the finish looked really good. As noted above the stem was a write off and would need to be replaced with a suitable one. I took photos of the pipe to show its condition before I started my work on it.   I took a photo of the rim top to show the condition it was in after the cleanup. Jeff was able to remove all of the lava on the rim top and edges. There is still some darkening on the rim top. You can see the damage on the top itself and around the outer edges from knocking out the pipe on a hard surface. The inner edge of the bowl had a lot of nicks and cuts and was out of round. The stem was clean and you can see the tooth chatter and marks on the surface near the button and the large deeper tooth mark on the underside.I went through my can of extra stems and found one that was suitable for a replacement on this Canadian. It was the same shape and size as the replacement that had been chewed through. Once it was cleaned up it would work nicely. The tenon was the right size which was a bonus. I put the stem on the shank and took the following photos. This is the part of restemming that is always a challenge. The new stem is always slightly off because the shank is never truly oval or round. Either the shank needs to be taken down slightly to accommodate the fit of the new stem or the stem needs to be taken down to meet the shank. In this case you can see from the following photos that the stem fit the underside of the shank perfectly. In the photo of the top side you can see that it is slightly smaller. That tells you that the shank is not perfectly oval and adjustments will need to be made.I sanded off all of the calcification on both sides of the stem with 220 grit sandpaper and cleaned up the area around the button edge. I sanded the surface of the button to reshape it on both the top and underside.I decided to work over the rim top, reshaping the bevel and the inner and outer edge of the rim with 220 grit sandpaper. I was able to remove all of the damage to the rim surface and reshape the inner edge of the rim. The rounded flowing bevel that was originally present was restored.With the rim reshaped I turned my attention to fitting the stem to the shank. I carefully sanded the shank to reduce the diameter to match the stem. It was interesting that most of the work had to be done on the sides of the shank with a little on the top and bottom. In essence I made the shank more oval to match the stem. The photos below show the fit of the new stem at this point. I polished the briar with micromesh sanding pads – wet sanding with 1500-2400 grit pads and dry sanding with 3200-12000 grit pads. I wiped the briar down after each pad with a damp cloth to remove the sanding dust. I rubbed the bowl down with Before & After Restoration Balm to deep clean the nooks and crannies of the rustication paths and patches as well as the smooth areas. The product works to clean, enliven and protect the briar. I hand rubbed it with my fingers and wiped it off with a soft cloth. I buffed the bowl with a horsehair shoe brush to polish it. The briar really began to have a rich shine. I took some photos of the bowl at this point to mark the progress in the restoration. I cleaned out the stem with alcohol, pipe cleaners and cotton swabs. It took a bit of scrubbing but before too long the airway was clean.I polished the stem with micromesh sanding pads – wet sanding with 1500-2400 grit pads and dry sanding with 3200-12000 grit pads. I wiped the stem down after each pad with a damp cloth to remove the sanding dust. I used the Before & After Pipe Polish to remove the small minute scratches left in the brass and the vulcanite. I finished by wiping the stem down with a final coat of Obsidian Oil and set it aside to dry. I the polished stem and bowl with Blue Diamond to polish out the remaining small scratches. I gave the bowl multiple coats of Conservator’s Wax and the stem several coats of carnauba wax and buffed the pipe with a clean buffing pad to raise the shine. I hand buffed it with a microfiber cloth to deepen the shine. The pipe polished up pretty nicely. The finished pipe is shown in the photos below. This is the sixth of the many “Malaga” pipes that I am restoring from Kathy’s Dad’s collection. I am looking forward once again to hearing what Kathy thinks once she sees the finished pipe on the blog. I will be posting it on the rebornpipes store very soon. It should make a nice addition to the next pipeman’s rack and in purchasing it you can carry on the trust from her father. The dimensions are Length: 6 inches, Height: 1 7/8 inches, Outside diameter of the bowl: 1 3/8 inches, Chamber diameter: 3/4 inches. Thanks for walking through the restoration with me as I worked over this Malaga from George’s estate. More will follow in a variety of shapes and sizes.

Kathy’s Dad’s Pipes #5 – Restemming &Restoring George Koch’s “Malaga” Canadian


Blog by Steve Laug

This is the fifth of the “Malaga” pipes that I am working on from Kathy’s Dad’s pipes. For those of you who have not read the other blogs let me tell the story. Last fall I received a contact email on rebornpipes from Kathy asking if I would be interested in purchasing her late Father, George Koch’s estate pipes. He was a lover of “Malaga” pipes – all shapes and sizes and she wanted to move them out as she cleaned up the estate. We emailed back and forth and I had my brother Jeff follow up with her as he also lives in the US and would make it simpler to carry out this transaction. The long and short of it is that we purchased her Dad’s “Malaga” pipes. There are some beautiful pipes in that lot. I have never seen this many “Malagas” together in one place in all of my years of pipe restoring and refurbishing. They varied from having almost pristine to gnawed and damaged stems that will need to be replaced. Many of the pipes already had replacement stems or maybe George had the staff at the Malaga shop in Michigan put Lucite stems on them because he was such a gnawer. I don’t know if we will ever know the answer to that as Kathy did not know for sure. She did know though that he loved the brand and that most of the pipes he smoked he purchased from the shop. These were some well used and obviously well loved pipes. Cleaning and restoring them will be a tribute to this pipeman. (Here is a link to some history of the Malaga Brand if you are interested: https://rebornpipes.com/tag/malaga-pipes/. There are also links there to a catalogue and the maker George Khoubesser.)Knowing about the pipeman who held the pipes in trust before me gives another dimension to the restoration work. This is certainly true with this lot of pipes. I can almost imagine George picking out each pipe in his assortment at the Malaga Pipe Shop in Michigan. I may well be alone in this, but when I know about the person it is almost as if he is with me work on his pipes. In this case Kathy sent us not only information but also a photo of her Dad enjoying his “Malagas”. Once again, I am including that information so you can know a bit about the pipeman who held these pipes in trust before they are passed on to some of you. I include part of Kathy’s correspondence with my brother as well…

Jeff…Here is a little about my dad, George P. Koch…I am sending a picture of him with a pipe also in a separate email.

Dad was born in 1926 and lived almost all his life in Springfield, Illinois. He was the youngest son of German immigrants and started grade school knowing no English. His father was a coal miner who died when Dad was about seven and his sixteen year old brother quit school to go to work to support the family. There was not much money, but that doesn’t ruin a good childhood, and dad had a good one, working many odd jobs, as a newspaper carrier, at a dairy, and at the newspaper printing press among others. He learned to fly even before he got his automobile driver’s license and carried his love of flying with him through life, recertifying his license in retirement and getting his instrumental license in his seventies and flying until he was grounded by the FAA in his early eighties due to their strict health requirements. (He was never happy with them about that.) He was in the Army Air Corps during World War II, trained to be a bomber, but the war ended before he was sent overseas. He ended service with them as a photographer and then earned his engineering degree from University of Illinois. He worked for Allis Chalmers manufacturing in Springfield until the early sixties, when he took a job at Massey Ferguson in Detroit, Michigan. We lived in Livonia, and that’s where his love for Malaga pipes began. After a few years he returned to Allis Chalmers and we moved back to Springfield. I remember that when we went back to Michigan to visit friends, Dad had to go to the Malaga store and acquire a few new pipes. Many a year I wrote to Malaga and they picked out a pipe for me to purchase that I could give Dad for a Christmas or birthday present. He was always pleased. His favorites were the straight stemmed medium sized bowl pipes, but he liked them all.  He had some other pipes, but the Malagas were his favorites. I remember him smoking them sitting in his easy chair after work, with feet up on the ledge by the fire burning in the fireplace.  Growing up it was my job to clean them and he liked the inner bowl and stem coated with Watkins vanilla, leaving a little of that liquid in the bowl to soak in when I put them back on the rack. Dad quit smoking later in life and so they’ve sat on the racks for many years unattended, a part of his area by his easy chair and fireplace. Dad passed when he was 89 years old and it finally is time for the pipes to move on. I’m very happy they are being restored by you and your brother and hope they find homes who enjoy them as much as Dad did. Thank-you for your care and interest. — Kathy, the oldest daughter

Kathy, once again I thank you for providing this beautiful tribute to your Dad. We will appreciate your trust in allowing us to clean and restore these pipes. I am also trusting that those of you who are reading this might carry on the legacy of her Dad’s pipes as they will be added to the rebornpipes store once they are finished.

The fifth of the pipes that I chose to work on is a “Malaga” Canadian with a tall almost chimney like bowl. It was one the lot with a chewed and ruined vulcanite stem. But it is another beautiful piece of briar underneath the grime and debris of the years. The warm brown finish on the bowl appeared to be good condition under the dust and tars of time. The more I work on these the more I think that Malaga pipes must have been oil cured as they are very light weight and the finishes are uniformly well done. I have yet to find a fill in any of the bowls I have worked on in this lot and looking through what remains I think it is fair to say I won’t find any in them either.

The rim top on the tall Canadian was covered with an overflow of lava from the thick cake in the bowl. The rim top at the back of the bowl was more thickly caked than the front.  The inner and outer edge of the bowl had damage. There were some nicks on the outer edge and there was some darkening on the inner edge. The bowl was out of round from previous reaming. The rim top and outer edge showed signs of being knocked against a hard surface to empty the dottle from the bowl. The stamping on the top of the shank was clear and read “Malaga” and Imported Briar on the underside. There were no shape numbers on the pipe. The black vulcanite stem was ruined with bite marks all the way through on both the top and underside at the button. It would need to be replaced. The interior of the pipe was dirty. I know that George thoroughly enjoyed his pipes as is evidenced by the wear that all of them show. Jeff took these photos before he started the cleanup work on the pipe. Jeff took close up photos of the bowl and rim to show the condition of the pipe before he started to work his magic on it. The exterior of the bowl and shank were dirty. You can see the lava on the rim top, the cake in the bowl and the nicks on the rim top and bowl around the outer edge of the rim. It is dirty but in otherwise good condition. He also took a photo of the sides of the bowl. He also took a photo of both sides of the shank to show the stamping and the condition of the overall shank so you could have an idea of where things were at before he cleaned it up.The next photo shows the damage to both surface of the stem near the button and the worn and chewed down button. The stem is a write off on this one. The bite marks go all the way through and leave the stem misshapen and ruined. Working on this fifth pipe was pretty straightforward because Jeff had done all the hard cleanup work on the briar inside and out. He reamed the bowl with a PipNet pipe reamer and followed up with a Savinelli Fitsall pipe knife to remove the cake. He scrubbed out the mortise and the airway in the shank and the stem with alcohol, cotton swabs and pipe cleaners. He scrubbed the exterior of the bowl, rim, shank and stem with a tooth brush and Murphy’s Oil Soap to remove the oils and tars on the bowl, rim and shank. He rinsed it under running water. He dried it off with a soft cloth. The lava mess on the rim was thoroughly removed without harming the finish underneath it. Without the grime the finish looked really good. As noted above the stem was a write off and would need to be replaced with a suitable one. I took photos of the pipe to show its condition before I started my work on it. I took a photo of the rim top to show the condition it was in after the cleanup. Jeff was able to remove all of the lava on the rim top and edges. There is still some darkening on the rim top. You can see the damage on the top itself and around the outer edges from knocking out the pipe on a hard surface. The inner edge of the bowl had a lot of nicks and cuts and was out of round. The stem was clean and you can see the tooth chatter and marks on the surface near the button and the large deeper tooth mark on the underside.I went through my can of extra stems and found one that was suitable for a replacement on this Canadian. It was a bit shorter than the replacement that had been chewed through.  It also had an ornamental brass ring over the end of the tenon and anchored to the stem. The tenon was the right diameter for the shank so it was a simple matter of cleaning up the tenon and fitting it on the shank. I took photos of the pipe with the new stem. The brass band was going to look really good once it was polished. I also like the shorter stem on the pipe as it looks more like the classic Canadian it was when it was sold. I took some close up photos of the new stem to show the fit to the shank. The stem is looking really good. It will need to be thoroughly cleaned and polished but it shows promise.I sanded off all of the calcification on both sides of the stem with 220 grit sandpaper and cleaned up the area around the button edge. Unfortunately, I forgot to take photos of this part of the process. There was no tooth chatter on either side which was a plus. There was some oxidation and the brass spacer at the stem/shank junction was oxidized. I sanded the surface of the button to reshape it on both the top and underside. I cleaned out the airway and the slot in the button with pipe cleaners and alcohol. I used a dental pick to clean out the corners of the slot.I polished the stem with micromesh sanding pads – wet sanding with 1500-2400 grit pads and dry sanding with 3200-12000 grit pads. I wiped the stem down after each pad with a damp cloth to remove the sanding dust. I used the Before & After Pipe Polish to remove the small minute scratches left in the brass and the vulcanite. I finished by wiping the stem down with a final coat of Obsidian Oil and set it aside to dry. I lightly topped the bowl on my topping board using 220 grit sandpaper. It did not take too much work to remove the nicks and damage to the rim top and edges. Once it was complete I topped it on a medium grit sanding sponge to smooth the surface even more.I sanded the inside edge of the rim to minimize the damage and bring the bowl back to round. I gave it a slight bevel that made the darkening on the inside edge less visible.I polished the briar with micromesh sanding pads – wet sanding with 1500-2400 grit pads and dry sanding with 3200-12000 grit pads. I wiped the briar down after each pad with a damp cloth to remove the sanding dust. I rubbed the bowl down with Before & After Restoration Balm to deep clean the pores and grain of the smooth finish as well as to enliven and protect the briar. I hand rubbed it with my fingers and wiped it off with a soft cloth. I buffed the bowl with a horsehair shoe brush to polish it. The briar really began to have a rich shine. I took some photos of the bowl at this point to mark the progress in the restoration. I the polished stem and bowl with Blue Diamond to polish out the remaining small scratches. I gave the bowl and the stem several coats of carnauba wax and buffed the pipe with a clean buffing pad to raise the shine. I hand buffed it with a microfiber cloth to deepen the shine. The pipe polished up pretty nicely. The finished pipe is shown in the photos below. This is the fifth of the many “Malaga” pipes that I am restoring from Kathy’s Dad’s collection. I am looking forward once again to hearing what Kathy thinks once she sees the finished pipe on the blog. I will be posting it on the rebornpipes store very soon. It should make a nice addition to the next pipeman’s rack and in purchasing it you can carry on the trust from her father. The dimensions are Length: 6 inches, Height: 2 1/4 inches, Outside diameter of the bowl: 1 3/8 inches, Chamber diameter: 3/4 inches. Thanks for walking through the restoration with me as I worked over this Malaga from George’s estate. More will follow in a variety of shapes and sizes.

Kathy’s Dad’s Pipes #4 – Restoring George Koch’s “Malaga” Unique


Blog by Steve Laug

This is the fourth of the “Malaga” pipes that I am working on from Kathy’s Dad’s pipes. For those of you who have not read the other blogs let me tell the story. Last fall I received a contact email on rebornpipes from Kathy asking if I would be interested in purchasing her late Father, George Koch’s estate pipes. He was a lover of “Malaga” pipes – all shapes and sizes and she wanted to move them out as she cleaned up the estate. We emailed back and forth and I had my brother Jeff follow up with her as he also lives in the US and would make it simpler to carry out this transaction. The long and short of it is that we purchased her Dad’s “Malaga” pipes. There are some beautiful pipes in that lot. I have never seen this many “Malagas” together in one place in all of my years of pipe restoring and refurbishing. They varied from having almost pristine to gnawed and damaged stems that will need to be replaced. Many of the pipes already had replacement stems or maybe George had the staff at the Malaga shop in Michigan put Lucite stems on them because he was such a gnawer. I don’t know if we will ever know the answer to that as Kathy did not know for sure. She did know though that he loved the brand and that most of the pipes he smoked he purchased from the shop. These were some well used and obviously well loved pipes. Cleaning and restoring them will be a tribute to this pipeman. (Here is a link to some history of the Malaga Brand if you are interested: https://rebornpipes.com/tag/malaga-pipes/. There are also links there to a catalogue and the maker George Khoubesser.)Knowing about the pipeman who held the pipes in trust before me gives another dimension to the restoration work. This is certainly true with this lot of pipes. I can almost imagine George picking out each pipe in his assortment at the Malaga shop in Michigan. I may well be alone in this, but when I know about the person it is almost as if he is with me work on his pipes. In this case Kathy sent us not only information but also a photo of her Dad enjoying his “Malagas”. Once again, I am including that information so you can know a bit about the pipeman who held these pipes in trust before they are passed on to some of you. I include part of Kathy’s correspondence with my brother as well…

Jeff…Here is a little about my dad, George P. Koch…I am sending a picture of him with a pipe also in a separate email.

Dad was born in 1926 and lived almost all his life in Springfield, Illinois. He was the youngest son of German immigrants and started grade school knowing no English. His father was a coal miner who died when Dad was about seven and his sixteen year old brother quit school to go to work to support the family. There was not much money, but that doesn’t ruin a good childhood, and dad had a good one, working many odd jobs, as a newspaper carrier, at a dairy, and at the newspaper printing press among others. He learned to fly even before he got his automobile driver’s license and carried his love of flying with him through life, recertifying his license in retirement and getting his instrumental license in his seventies and flying until he was grounded by the FAA in his early eighties due to their strict health requirements. (He was never happy with them about that.) He was in the Army Air Corps during World War II, trained to be a bomber, but the war ended before he was sent overseas. He ended service with them as a photographer and then earned his engineering degree from University of Illinois. He worked for Allis Chalmers manufacturing in Springfield until the early sixties, when he took a job at Massey Ferguson in Detroit, Michigan. We lived in Livonia, and that’s where his love for Malaga pipes began. After a few years he returned to Allis Chalmers and we moved back to Springfield. I remember that when we went back to Michigan to visit friends, Dad had to go to the Malaga store and acquire a few new pipes. Many a year I wrote to Malaga and they picked out a pipe for me to purchase that I could give Dad for a Christmas or birthday present. He was always pleased. His favorites were the straight stemmed medium sized bowl pipes, but he liked them all.  He had some other pipes, but the Malagas were his favorites. I remember him smoking them sitting in his easy chair after work, with feet up on the ledge by the fire burning in the fireplace.  Growing up it was my job to clean them and he liked the inner bowl and stem coated with Watkins vanilla, leaving a little of that liquid in the bowl to soak in when I put them back on the rack. Dad quit smoking later in life and so they’ve sat on the racks for many years unattended, a part of his area by his easy chair and fireplace. Dad passed when he was 89 years old and it finally is time for the pipes to move on. I’m very happy they are being restored by you and your brother and hope they find homes who enjoy them as much as Dad did. Thank-you for your care and interest. — Kathy, the oldest daughter

Kathy, once again I thank you for providing this beautiful tribute to your Dad. We will appreciate your trust in allowing us to clean and restore these pipes. I am also trusting that those of you who are reading this might carry on the legacy of her Dad’s pipes as they will be added to the rebornpipes store once they are finished.

The fourth of the pipes that I chose to work on is a “Malaga” Unique shape with a swirled brown acrylic stem. Some might call it a skater but it is not quite that. Others may have another idea but I have no clue what to call this shape. But it is another beautiful pipe underneath the grime and debris of the years. The warm brown finish on the bowl appeared to be good condition under the dust and tars of time. The more I work on these the more I think that Malagas must have been oil cured as they are very light weight and the finishes are uniformly well done. I have yet to find a fill in any of the bowls I have worked on in this lot and looking through what remains I think it is fair to say I won’t find any in them either. The rim top on the unique was covered with an overflow of lava from the cake in the bowl. The inner and outer edge of the bowl had damage. There were some nicks on the outer edge and there was some darkening on the inner edge. The bowl was out of round from previous reaming. The rim top and outer edge showed signs of being knocked against a hard surface to empty the dottle from the bowl. The stamping on the left side of the shank was clear and read “Malaga” and Imported Briar on the right side. There were no shape numbers on the pipe. The acrylic brown coloured stem fit the shank quite well and had some really interesting swirls around the stem. There was tooth chatter and marks on both sides at the button and one deep tooth mark on the underside near the button. The interior of the pipe was dirty. I know that George thoroughly enjoyed his pipes as is evidenced by the use that all of them how. Jeff took these photos before he started the cleanup work on the pipe. He took close up photos of the bowl and rim to show the condition of the pipe before he started to work his magic on it. The exterior of the bowl and shank were dirty. You can see the lava on the rim, the cake in the bowl and the nicks on the rim top and bowl around the outer edge of the rim. It is dirty but in otherwise good condition. He also took a photo of the sides of the bowl and the underside of the bowl and shank. He also took a photo of both sides of the shank to show the stamping and the condition of the overall shank so you could have an idea of where things were at before he cleaned it up.The next photo shows the colour of the stem material with all of the swirls browns and copper colours that make the acrylic stem quite beautiful. The nicks in the surface, the tooth chatter on the stem top and underside as well as the button and the deep tooth mark on the underside of the stem can be seen in the photos that follow.Working on this fourth pipe was pretty straightforward because Jeff had done all the hard cleanup work on the briar inside and out. He reamed the bowl with a PipNet pipe reamer and followed up with a Savinelli Fitsall pipe knife to remove the cake. He scrubbed out the mortise and the airway in the shank and the stem with alcohol, cotton swabs and pipe cleaners. He scrubbed the exterior of the bowl, rim, shank and stem with a tooth brush and Murphy’s Oil Soap to remove the oils and tars on the bowl, rim and shank. He rinsed it under running water. He dried it off with a soft cloth. The lava mess on the rim was thoroughly removed without harming the finish underneath it. Once the grime was removed the finish actually looked it was in excellent condition. I took photos of the pipe to show its condition before I started my work on it. It really has some nice birdseye grain on the right side of the bowl and shank. I took a photo of the rim top to show the condition it was in after the cleanup. Jeff was able to remove all of the lava on the rim top and edges. There is still some darkening on the rim top. You can see the damage on the top itself and around the outer edges from knocking out the pipe on a hard surface. The inner edge of the bowl had a lot of nicks and cuts and was out of round. The stem was clean and you can see the tooth chatter and marks on the surface near the button and the large deeper tooth mark on the underside.I sanded out the tooth chatter and worked to reduce the size and impact of the tooth marks with 220 grit sandpaper to smooth and blend them into the surface of the rest of the stem. I sanded the surface of the button to remove the marks on the top and underside. There was a small tooth mark remaining on the top of the stem and the one on the underside is visible and is repairable at this point. I sanded the inside of the tooth mark to rough it up, wiped it down with alcohol on a cotton pad and filled in the divot with clear super glue. I set the stem aside to let the glue cure and worked on another pipe. When the glue had hardened I used a needle file to recut and straighten out the button edge on both sides of the stem. I touched up the small air bubbles that had formed in the super glue with a small drop of glue on each side.When that glue had cured I sanded it smooth with 220 grit sandpaper to blend it into the surface of the acrylic. I worked on it until the repair was basically invisible.I polished the stem with micromesh sanding pads – wet sanding with 1500-2400 grit pads and dry sanding with 3200-12000 grit pads. I wiped the stem down after each pad with a damp cloth to remove the sanding dust. I lightly topped the bowl on my topping board using 220 grit sandpaper. It did not take too much work to remove the nicks and damage to the rim top and edges. Once it was complete I topped it on a medium grit sanding sponge to smooth the surface even more.I sanded the inside edge of the rim with 220 grit sandpaper to minimize the damage and bring the bowl back to round. I gave it a slight bevel that made the darkening on the inside edge less visible.I polished the briar with micromesh sanding pads – wet sanding with 1500-2400 grit pads and dry sanding with 3200-12000 grit pads. I wiped the briar down after each pad with a damp cloth to remove the sanding dust. I rubbed the bowl down with Before & After Restoration Balm to deep clean the pores and grain of the smooth finish as well as to enliven and protect the briar. I hand rubbed it with my fingers and wiped it off with a soft cloth. I buffed the bowl with a horsehair shoe brush to polish it. The briar really began to have a rich shine. I took some photos of the bowl at this point to mark the progress in the restoration. I put the stem back on the pipe and buffed it with Blue Diamond to polish out the remaining small scratches. I gave the bowl and the stem several coats of carnauba wax and buffed the pipe with a clean buffing pad to raise the shine. I hand buffed it with a microfiber cloth to deepen the shine. The pipe polished up pretty nicely. The finished pipe is shown in the photos below. This is the fourth of the many “Malaga” pipes that I am restoring from Kathy’s Dad’s collection. I am looking forward once again to hearing what Kathy thinks once she sees the finished pipe on the blog. I will be posting it on the rebornpipes store very soon. It should make a nice addition to the next pipeman’s rack and in purchasing it you can carry on the trust from her father. The dimensions are Length: 5 ¾ inches, Height: 1 3/4 inches, Outside diameter of the bowl: 1 3/8 inches, Chamber diameter: 3/4 inches. Thanks for walking through the restoration with me as I worked over this Malaga from George’s estate. More will follow in a variety of shapes and sizes.

Farida’s Dad’s Pipes #3 – Restoring a Savinelli Autograph 4


Blog by Steve Laug

The next collection of pipes that I am working on comes from the estate of an elderly gentleman here in Vancouver. I met with his daughter Farida last summer and we looked at his pipes and talked about them then. Over the Christmas holiday she brought them by for me to work on, restore and then sell for her. There are 10 pipes in all – 7 Dunhills (one of them, a Shell Bulldog, has a burned out bowl), 2 Charatans, and a Savinelli Autograph. His pipes are worn and dirty and for some folks they have a lot of damage and wear that reduce their value. To me each one tells a story. I only wish they could speak and talk about the travels they have had with Farida’s Dad.

When I wrote the blog on the Classic Series Dunhill and thinking about its travels, Farida sent me an email with a short write up on her Dad. She remembered that I had asked her for it so that I could have a sense of the stories of her Dad’s pipes. Here is what she wrote: My dad, John Barber, loved his pipes. He was a huge fan of Dunhill and his favourite smoke was St. Bruno. No one ever complained of the smell of St. Bruno, we all loved it. I see the bowls and they’re large because he had big hands. When he was finished with his couple of puffs, he would grasp the bowl in the palm of his hand, holding the warmth as the embers faded. The rough bowled pipes were for daytime and especially if he was fixing something. The smooth bowled pipes were for an evening with a glass of brandy and a good movie. In his 20s, he was an adventurer travelling the world on ships as their radio operator. He spent a year in the Antarctic, a year in the Arctic and stopped in most ports in all the other continents. He immigrated to Canada in the mid-fifties, working on the BC Ferries earning money to pay for his education. He graduated from UBC as an engineer and spent the rest of his working life as a consultant, mostly to the mining companies. Whatever he was doing though, his pipe was always close by. 

She sent along this photo of him with his sled dogs in the Antarctic sometime in 1953-1954. It is a fascinating photo showing him with a pipe in his mouth. He is happily rough housing with his dogs. As a true pipeman the cold does not seem to bother him at all.Thank you Farida for sending the photo and the background story on your Dad for me to use on the blog. I find that it really explains a lot about their condition and gives me a sense of who Dad was. If your Dad was rarely without a pipe I can certainly tell which pipes were his favourites. As I looked over the pipes I noted that each of them had extensive rim damage and some had deeply burned gouges in the rim tops. The bowls seemed to have been reamed not too long ago because they did not show the amount of cake I would have expected. The stems were all covered with deep tooth marks and chatter and were oxidized and dirty. The internals of the mortise, the airway in the shank and stem were filled with tars and oils. These were nice looking pipes when her Dad bought them and they would be nice looking one more when I finished.

I finished two of the pipes and have written a blog on each of them. The first one was the Dunhill Shell with the oval shank pot (https://rebornpipes.com/2018/02/04/restoring-a-1983-dunhill-shell-41009-oval-shank-pot/) and the second was the Dunhill Classic Series Shell Billiard (https://rebornpipes.com/2018/02/08/faridas-dads-pipes-2-restoring-a-1990-lbs-classic-series-dunhill-shell-billiard/).

I wanted a break from the Dunhills for a bit today so I chose to work on the Savinelli Autograph as the third pipe in the estate. It is a beautiful pipe with interesting grain shows through the sandblast. The blast itself is very nice but underneath the grime you can see the next layer of grain showing through. It is a large pipe and stamped Savinelli Autograph on a smooth band on the underside. Next to that it reads Italy and a number 4. The grooves and valleys in the sandblast were filled in with grime and debris and even flecks of white paint. The bowl was thickly caked and the cake had flowed over onto the right and backside of the rim top forming a hard lava in the grooves on the rim. The inner and outer edges of the rim look to be undamaged. I am so happy that there was no heavy burning or charring on the rim top from repeated lighting. I am thinking that this was one of his newer pipes. I think also that the weight of the pipe kept him from clenching it and damaging both the stem and the rim. The stem had the characteristic twists and grooves in the vulcanite that is on the original Autograph. It has the squiggle signature or autograph of Achille Savinelli Senior on the top of the stem. It is quite heavily oxidized and has some calcification at the end. There is tooth chatter and marks on both sides of the stem near the button and on the top and underside of the button. I took photos of the pipe to show what it looked like before I started the cleanup work. I took close up photos of the rim top and the stem. You can see from the photo the thick cake in the bowl overflowing lava onto the rim top. It is hard to know what lies underneath both the lava and the cake until it is removed. The stem has tooth chatter and some deep bite marks on the top edge of the button and a deep tooth mark on the underside of the stem just ahead of the button. There is a lot of calcification and wear on the rest of the stem as well. The Autograph logo is faint and worn but it is present.I reread the blog I did on a previous Savinelli Autograph 4 to refresh my memory about the line and the stamping on the pipe. Here is the link to that blog: https://rebornpipes.com/tag/savinelli-autograph-4-pipes/. I have included some of the pertinent information on the brand to this blog for ease of reference.

The Pipes and Cigars website http://www.pipesandcigars.com/pipes/73592/savinelli-autograph-pipes/ says that: “Savinelli Autographs are as individual as your fingerprints. Each is the dream of an expert pipe maker realized in briar and personally selected by Giancarlo Savinelli. Every Autograph is 100% ‘Hand made’ using only the highest grade of Sardinian and Corsican Briar Plateau blocks. Well grained briar, worthy of becoming an Autograph is rare and therefore, these beautiful masterpieces are very limited and coveted by pipe smokers worldwide. Truly an achievement to be treasured, Autographs are available in smooth, paneled, sandblasted brown or black.”

On the Savinelli website it says that Autographs are (http://www.savinelli.it/en/autograph-lisciaAuto1)“This rare, unique and irreplaceable pipe is shaped from the raw material following the grain and the “fiammatura” (“flame”), which Mother Nature has put at our disposal, according to the artistic mood of our master craftsmen. The wood is natural and the shape is unique for each piece. The name “Autograph” was created from the handwritten signature of Achille Savinelli Senior printed on the mouthpiece. These pipes are graded according to very strict parameters: the 0 (zero) category goes from 000, an outstanding masterpiece, to 00 and then 0. The grading then goes down to 8, 6, 5, 4 and 3.”

Like the previous Autograph I restored this one is also stamped with a 4 making it a 4 Grade pipe. It has a sandblasted brown finish with no smooth panels. The grain is pretty stunning and the blast is nicely done. I took the stem off the pipe and put it in a bath of Before & After Pipe Stem Deoxidizer to soak while I worked on the bowl. I generally let them soak in the bath overnight as I tend to work on the pipes in the evening after work.I reamed the bowl with a PipNet reamer and I had to use three of the four cutting heads to clean out the cake. The bowl is somewhat conical in shape so I started with the largest of the three and worked my way down to the base of the bowl with the smallest. I took back the cake to bare briar. I cleaned it up with a Savinelli Fitsall Pipe Knife (seems fitting to use this on the pipe). I took a photo of the cleaned bowl. I scrubbed the surface of the sandblast with a tooth brush to clean out all of the dust. I worked on the top of the rim with a brass bristle wire brush and a brass bristle polishing brush to remove the lava on the rim. I used the brass bristle brush to remove the flecks of white paint on the surface of the bowl as well. I rinsed it under warm running water to remove the dirt, grime and soap. I dried off the bowl with a soft rag. Once the Murphy’s Oil Soap has done its thing and the briar has dried it is dull and lifeless looking. It is clean but it is not attractive. Some folks stain the briar at this point to bring life back and add some colour. I have been using Before & After Restoration Balm to do that work and I like the end result. I rub the balm into the briar with the tips of my fingers making sure that I work it into all of the valleys and crevices. I use a horsehair shoe brush to work over the surface once I have it covered by hand. The bristles of the brush go deep into the grooves where even the finger tips cannot reach. When it has dried for a little while, I polish it with the shoe brush and then with a coarse towel. I took photos of the bowl after this work. I am so used to Jeff cleaning the pipe that I realized at this point that I had not worked on the internals of the pipe. I looked down the shank and it was filthy as was to be expected. Arghhh. Got to get back in the habit/routine if I am going to clean and restore them. I scraped the hardened tars on the walls of the mortise with a pen knife. I cleaned the mortise and the airway in the shank with pipe cleaners, cotton swabs and alcohol until it was clean. I let the stem soak in the Before & After Stem Deoxidizer over night and in the morning took it out and wiped it down. It looked like the photos below so I put it in for 4 more hours and it still came out looking like the photos below. This one will be a bit of work to clean up.I wiped the stem down with some of the pipe polish and it was better but still quite oxidized in the grooves. The underside looked quite good. I cleaned out the airway in the stem with pipe cleaners and alcohol and it eventually came out clean.I painted the surface of the stem with the flame of a Bic lighter to lift the tooth dents in the underside of the stem. It took a few swaths of the lighter and the dents lifted. There was only one small pin prick left next to the button that would need to be repaired.I sanded the surface of the stem with 220 grit sandpaper to remove the oxidation, carefully avoiding the signature mark on the top of the stem. I rolled a piece of sandpaper and worked the grooves in the stem until the oxidation was removed.I polished the stem, carefully protecting the Autograph on the topside from further damage. I wet sanded it with 1500-2400 grit micromesh sanding pads and dry sanded it with 3200-12000 grit pads. I rubbed the stem down with Obsidian Oil after each pad. I polished it further with Before & After Pipe Polish, using both the Fine and Extra Fine polishes to further protect and polish out the scratches. When I finished with those I gave it a final rub down with the oil and set it aside to dry. With the stem polished I put it back on the pipe and lightly buffed the bowl with Blue Diamond. I buffed the stem with a more aggressive buff of Blue Diamond. I gave the bowl several coats of Conservator’s Wax and the stem several coats of carnauba wax and buffed the pipe with a clean buffing pad to raise the shine. I hand buffed it with a microfiber cloth to deepen the shine. The pipe polished up pretty nicely. The finished pipe is shown in the photos below. This is the third of Farida’s Dad’s pipes that I am restoring from his collection. I am looking forward to hearing what Farida thinks once she sees the finished pipe on the blog. I will be posting it on the rebornpipes store very soon. It should make a nice addition to your pipe rack if you love the large signature Savinelli Autograph line. When you add it to your collection you carry on the trust from her father. The dimensions are Length: 6 ½ inches, Height: 2 1/2 inches, Outside diameter of the bowl: 1 3/4 inches, Chamber diameter: 7/8 inches. Thanks for walking through the restoration with me as I worked over this estate Autograph. More of his pipes will follow including some Charatans and more Dunhills.


Putting the Spiff on an Unsmoked Vintage Yello-Bole


Blog by Robert M. Boughton
Copyright © Reborn Pipes and the Author except as cited

Try not to become a man of success, but rather try to become a man of value.  Albert Einstein

INTRODUCTION

Sometimes a pipe fix-up is so easy that chronicling the work in a blog seems pointless if not self-serving.  No doubt, some readers will agree this is one of those occasions.  Nevertheless, my reason for going ahead with the exercise is manifold: I’ve been off the grid for some time now, and this seems as good a way as any to vault back into the saddle; no effort, if performed with love and attention to detail, is unworthy of mention; the original price of the pipe is so low that this specimen could not have been made after the 1950s, if not earlier, and  this straight natural YB Dublin – made in France – is one of the finest examples I’ve ever seen of the brand.  Some of you may recall a few of my less positive remarks on the maker.I got a good deal for the Dublin on eBay, meaning it was the price of a Walgreen’s variety today.  But there the comparison ended.  The preeminent aspect of this stunning pipe was its pristine, blazing yellow honey-caked coating in the chamber.  I have owned and restored a few well-used old soldiers with this proprietary finish, but this was my only glimpse so far at an untried sample right there in my reverent hands.  There was also a small, round cardstock insert in the bowl.  However, I was most pleased with the tiny decal on the bottom of the bit, which showed the original price as $2.50!  To me, that was a clear sign that the Dublin had sat in a cupboard or closet or attic somewhere for close to three-quarters of a century.

The sole problems were an unpleasant darkness of the stain that bordered on black, an un-clocked bit (as well as the yellow circle emblem on the bit not being centered), and normal roughness of the briar wood.  I knew I could remedy everything but the obdurate yellow circle.

RESTORATION

The un-clocked bit is hard to spot in the photos, but notice the word France at the bottom of the bit’s rear.  Thinking – which is one of my greatest problems – to be done with the easiest part first, I ended up having a deuced time removing the charming little sliver of aluminum that was the tenon.  I wrapped a small micro fiber cloth around the bit, careful to cover everything but the metal, and used my Bic to apply heat.  To my surprise, that failed, even when I wrapped the innocuous seeming aluminum in the rag and applied the least possible force of pliers.  Several more runs of the same type later, I was no closer to success.  At last, not knowing what else to try but needing to put the cursed thing aside for a while, I did so in my freezer.  When I remembered having stashed it there, I found that a simple twist with my fingers did the truck and straightened it. Despite the straight tenon-stem fit, the off-center YB logo can still be seen.

The main goal after re-fitting the bit was to give the stummel only the slightest reduction in darkness, so that the brown would just show through.  Starting with 1500 micromesh, I followed through with the rest.  In most cases, I would prefer to make the wood lighter, but in this case, I was determined to keep it as original as was reasonable for the benefit of the eventual buyer.  I had been worried about going too far, but it worked out quite well.

For the bit, I gave it a light sanding with 400 and 600 paper and then the full micro mesh progression.The last stage was a double waxing of the stummel using red and white Tripoli and carnauba, and red Tripoli and carnauba on the bit.

CONCLUSION

As obsessed as I was with unabridged musings of the delights I anticipated experiencing if I kept this splendid wonder of the heyday of Yello-Bole pipes, with remiss I decided to let it go to another guardian who would, with hope, covet the gem with all due zeal.  One of my first estate pipe purchases was an old brother of the Dublin – in fact, they may have been twins as the shape of that early purchase was the same – and I never tired of caring for it and savoring the pleasures of many tobacco blends its design and construction enhanced.

Planning at first to target the sale to collectors’ circles with the hope of maximizing my profit, one distraction after another delayed the notion.  Then one night, on a whim, I took the pristine implement of contemplation with me to a meeting I attend on a regular basis where there are always regular attendees as well as a few who come and go.  One of the latter, a friend named Mike who, as do I, never fails to bring along a pipe and tobacco, walked into the meeting and waived to me from across the room.  I knew with a flutter in my stomach that I had found the perfect recipient.  His collection so far is spare, counting the latest acquisition. His favorite was an aged corncob that he treats with the utmost respect, never considering it disposable as so many others would, which he told me he likes because of its lightness and ease of keeping it in his mouth without needing to support with a hand.  The only other was one a Custombilt behemoth freehand of unmeasured density that he showed me once without even knowing it was a brand name pipe.  I knew its maker on sight and showed him the somewhat hidden nomenclature that verified the fact.

After the meeting, I hurried over to Mike, who seemed alarmed by my speed.  I unwrapped the Yello-Bole and held it out to him.  Mike was, of course, enchanted at once, most of all due to the extreme lightness.  I told him I was selling it, at which news he stood at once to reach in his pocket, not even knowing the price.  But I was not about to take advantage of my friend and made him an offer he couldn’t refuse.

“I’m afraid to smoke it!” he said.  “I don’t want to ruin the beautiful chamber!”

I persuaded Mike to try it out and convinced him that with attention the yellow honey cure would remain intact.  For some time, we sat there together, each of enjoying our beloved pipes.  Mike could not stop extolling his new addition’s virtues.


Kathy’s Dad’s Pipes #3 -Restoring George Koch’s “Malaga” Apple


Blog by Steve Laug

This is the third of the “Malaga” pipes that I am working on from Kathy’s Dad’s pipes. Another reminder of where I got them. Last fall I received a contact email on rebornpipes from Kathy asking if I would be interested in purchasing her late Father, George Koch’s estate pipes. He was a lover of “Malaga” pipes – all shapes and sizes and she wanted to move them out as she cleaned up the estate. We emailed back and forth and I had my brother Jeff follow up with her as he also lives in the US and would make it simpler to carry out this transaction. The long and short of it is that we purchased her Dad’s “Malaga” pipes. There are some beautiful pipes in that lot. I have never seen this many “Malagas” together in one place in all of my years of pipe restoring and refurbishing. They varied from having almost pristine to gnawed and damaged stems that will need to be replaced. Many of the pipes already had replacement stems or maybe George had the staff at the Malaga shop in Michigan put Lucite stems on them because he was such a gnawer. I don’t know if we will ever know the answer to that as Kathy did not know for sure. She did know though that he loved the brand and that most of the pipes he smoked he purchased from the shop. These were some well used and obviously well loved pipes. Cleaning and restoring them will be a tribute to this pipeman. (Here is a link to some history of the Malaga Brand if you are interested: https://rebornpipes.com/tag/malaga-pipes/. There are also links there to a catalogue and the maker George Khoubesser.)I have previously written about how knowing about the pipeman who held the pipes in trust before me gives another dimension to the restoration work. This is certainly true with this lot of pipes. I can almost imagine him picking out his assortment at the Malaga shop in Michigan. I may well be alone in this, but when I know about the person it is almost as if he is with me work on his pipes. In this case Kathy sent us not only information but also a photo of her Dad enjoying his “Malagas”. Once again, I am including that information so you can know a bit about the pipeman who held these pipes in trust before they are passed on to some of you. I include part of Kathy’s correspondence with my brother as well…

Jeff…Here is a little about my dad, George P. Koch…I am sending a picture of him with a pipe also in a separate email.

Dad was born in 1926 and lived almost all his life in Springfield, Illinois. He was the youngest son of German immigrants and started grade school knowing no English. His father was a coal miner who died when Dad was about seven and his sixteen year old brother quit school to go to work to support the family. There was not much money, but that doesn’t ruin a good childhood, and dad had a good one, working many odd jobs, as a newspaper carrier, at a dairy, and at the newspaper printing press among others. He learned to fly even before he got his automobile driver’s license and carried his love of flying with him through life, recertifying his license in retirement and getting his instrumental license in his seventies and flying until he was grounded by the FAA in his early eighties due to their strict health requirements. (He was never happy with them about that.) He was in the Army Air Corps during World War II, trained to be a bomber, but the war ended before he was sent overseas. He ended service with them as a photographer and then earned his engineering degree from University of Illinois. He worked for Allis Chalmers manufacturing in Springfield until the early sixties, when he took a job at Massey Ferguson in Detroit, Michigan. We lived in Livonia, and that’s where his love for Malaga pipes began. After a few years he returned to Allis Chalmers and we moved back to Springfield. I remember that when we went back to Michigan to visit friends, Dad had to go to the Malaga store and acquire a few new pipes. Many a year I wrote to Malaga and they picked out a pipe for me to purchase that I could give Dad for a Christmas or birthday present. He was always pleased. His favorites were the straight stemmed medium sized bowl pipes, but he liked them all.  He had some other pipes, but the Malagas were his favorites. I remember him smoking them sitting in his easy chair after work, with feet up on the ledge by the fire burning in the fireplace.  Growing up it was my job to clean them and he liked the inner bowl and stem coated with Watkins vanilla, leaving a little of that liquid in the bowl to soak in when I put them back on the rack. Dad quit smoking later in life and so they’ve sat on the racks for many years unattended, a part of his area by his easy chair and fireplace. Dad passed when he was 89 years old and it finally is time for the pipes to move on. I’m very happy they are being restored by you and your brother and hope they find homes who enjoy them as much as Dad did. Thank-you for your care and interest. — Kathy, the oldest daughter

Kathy, once again I thank you for providing this beautiful tribute to your Dad. We will appreciate your trust in allowing us to clean and restore these pipes. I am also trusting that those of you who are reading this might carry on the legacy of her Dad’s pipes as they will be added to the rebornpipes store once they are finished.

The third of the pipes that I chose to work on is a “Malaga” Apple shape with an acrylic Cumberland stem. It is another beautiful pipe underneath the grime and debris of the years. The warm brown finish on the bowl appeared to be good condition under the dust and tars of time. I think that Malagas must have been oil cured as they are very light weight and the finishes are uniformly well done. I have yet to find a fill in any of the bowls I have worked on in this lot and looking through what remains I think it is fair to say I won’t find any in them either. The rim top on the apple was covered with a light overflow of lava from the cake in the bowl. The inner and outer edge of the bowl had damage. There were some nicks on the outer edge and there was some darkening on the inner edge. The outer edge showed signs of being knocked against a hard surface to empty the dottle from the bowl. The stamping on the left side of the shank was clear and read “Malaga”. Once again there were no shape numbers on the pipe. The acrylic Cumberland coloured stem fit the shank quite well and had some really interesting patterns around the stem. There was tooth chatter and marks on both sides at the button and one deep tooth mark on the underside near the button. The interior of the pipe was dirty. I know that George thoroughly enjoyed his pipes as is evidenced by the use that all of them show. Jeff took these photos before he started the cleanup work on the pipe. He took close up photos of the bowl and rim to show the condition of the pipe before he started to work his magic on it. The exterior of the bowl and shank were dirty. You can see the lava on the rim, the cake in the bowl and the nicks on the bowl around the outer edge of the rim. It is dirty but in otherwise good condition. He also took a photo of the side of the bowl and the underside of the bowl and shank. He also took a photo of the left side of the shank to show the stamping and the condition of the overall shank so you could have an idea of where things were at before he cleaned it up.The next photo shows the colour of the stem material with all of the swirls of black and red that make Cumberland beautiful. The nicks in the surface, the tooth chatter on the stem top and underside as well as the button and the deep tooth mark on the underside of the stem can be seen in the photos that follow. Working on this third pipe and working on a Savinelli Autograph from Farid’s Dad’s estate at the same time is a good reminder of how much Jeff does in preparing a pipe for me to restore. He reamed the bowl with a PipNet pipe reamer and followed up with a Savinelli Fitsall pipe knife to remove the cake. He scrubbed out the mortise and the airway in the shank and the stem with alcohol, cotton swabs and pipe cleaners. He scrubbed the exterior of the bowl, rim, shank and stem with a tooth brush and Murphy’s Oil Soap to remove the oils and tars on the bowl, rim and shank. He rinsed it under running water. He dried it off with a soft cloth. The lava mess on the rim was thoroughly removed without harming the finish underneath it. Once the grime was removed the finish actually looked it was in excellent condition. I took photos of the pipe to show its condition before I started my work on it. It really has some nice birdseye grain on the right side of the bowl and shank. I took a photo of the rim top to show the condition it was in after the cleanup. Jeff was able to remove all of the lava on the rim top and edges. There is still some darkening on the rim top. You can see the damage around the outer edges and top from knocking out the pipe on a hard surface. The stem was clean and you can see the tooth chatter and marks on the surface near the button and the large deeper tooth mark on the underside.I sanded out the tooth chatter and tooth marks with 220 grit sandpaper to smooth and blend them into the surface of the rest of the stem. I sanded the surface of the button to remove the marks on the top and underside. The top of the stem looks very good at this point. The tooth mark on the underside is visible and is repairable at this point.I sanded the inside of the tooth mark to rough it up, wiped it down with alcohol on a cotton pad and filled in the divot with clear super glue. I set the stem aside to let the glue cure and worked on another pipe.When the glue had hardened I sanded it smooth with 220 grit sandpaper to blend it into the surface of the acrylic. I worked on it until the repair was basically invisible (first photo below). I sanded the topside of the stem again as well (second photo below).I polished the stem with micromesh sanding pads – wet sanding with 1500-2400 grit pads and dry sanding with 3200-12000 grit pads. I wiped the stem down after each pad with a damp cloth to remove the sanding dust. I lightly topped the bowl on my topping board using 220 grit sandpaper. It did not take too much work to remove the nicks and damage to the rim top and edges. Once it was complete I topped it on a medium grit sanding sponge to smooth the surface even more.I beveled the inside edge of the rim to minimize the damage. I gave it a slight bevel that made the darkening on the inside edge less visible.I filled in the deeper nicks and marks along the outer edge of the bowl with clear super glue. Once it dried and I sanded it back it would make those areas smooth and almost unnoticeable.I sanded the repaired areas with 220 grit sandpaper and then blended it into the surrounding briar with micromesh sanding pads. I polished it with 1500-2400 grit sanding pads.I polished the briar with micromesh sanding pads – wet sanding with 1500-2400 grit pads and dry sanding with 3200-12000 grit pads. I wiped the briar down after each pad with a damp cloth to remove the sanding dust. I rubbed the bowl down with Before & After Restoration Balm to deep clean the pores and grain of the smooth finish as well as to enliven and protect the briar. I hand rubbed it with my fingers and wiped it off with a soft cloth. I buffed the bowl with a horsehair shoe brush to polish it. The briar really began to have a rich shine. I took some photos of the bowl at this point to mark the progress in the restoration. With the stem polished I put it back on the pipe and buffed it with Blue Diamond. I gave the bowl and the stem several coats of carnauba wax and buffed the pipe with a clean buffing pad to raise the shine. I hand buffed it with a microfiber cloth to deepen the shine. The pipe polished up pretty nicely. The finished pipe is shown in the photos below. This is the third of the many “Malaga” pipes that I am restoring from Kathy’s Dad’s collection. I am looking forward to hearing what Kathy thinks once she sees the finished pipe on the blog. I will be posting it on the rebornpipes store very soon. It should make a nice addition to a new pipeman’s rack that can carry on the trust from her father. The dimensions are Length: 6 inches, Height: 1 1/2 inches, Outside diameter of the bowl: 1 1/4 inches, Chamber diameter: 3/4 inches. Thanks for walking through the restoration with me as I worked over this second Malaga of his estate. More will follow in a variety of shapes and sizes.

Kathy’s Dad’s Pipes #2 -Restoring George Koch’s “Malaga” Squat Bulldog


Blog by Steve Laug

This is the second of the “Malaga” pipes that I am working on from Kathy’s Dad’s pipes. Last fall I received a contact email on rebornpipes from Kathy asking if I would be interested in purchasing her late Father, George Koch’s estate pipes. He was a lover of “Malaga” pipes – all shapes and sizes and she wanted to move them out as she cleaned up the estate. We emailed back and forth and I had my brother Jeff follow up with her as he also lives in the US and would make it simpler to carry out this transaction. The long and short of it is that we purchased her Dad’s “Malaga” pipes. There are some beautiful pipes in that lot. I have never seen this many “Malagas” together in one place in all of my years of pipe restoring and refurbishing. They varied from having almost pristine to gnawed and damaged stems that will need to be replaced. Many of the pipes already had replacement stems or maybe George had the staff at the Malaga shop in Michigan put Lucite stems on them because he was such a gnawer. I don’t know if we will ever know the answer to that as Kathy did not know for sure. She did know though that he loved the brand and that most of the pipes he smoked he purchased from the shop. These were some well used and obviously well loved pipes. Cleaning and restoring them will be a tribute to this pipeman. (Here is a link to some history of the Malaga Brand if you are interested: https://rebornpipes.com/tag/malaga-pipes/. There are also links there to a catalogue and the maker George Khoubesser.)To me knowing about the pipeman who held the pipes in trust before me gives another dimension to the restoration work. As I mentioned before, I may well be alone in this but when I know about the person it is almost as if he or she is with me work on his or her pipes. In this case Kathy was more than happy to send us not only information on her dad but also a photo of her Dad enjoying his “Malagas”. Once again, I am including that information so you can know a bit about the pipeman who held these pipes in trust before they are passed on to some of you. I include part of Kathy’s correspondence with my brother as well…

Jeff…Here is a little about my dad, George P. Koch…I am sending a picture of him with a pipe also in a separate email.

Dad was born in 1926 and lived almost all his life in Springfield, Illinois. He was the youngest son of German immigrants and started grade school knowing no English. His father was a coal miner who died when Dad was about seven and his sixteen year old brother quit school to go to work to support the family. There was not much money, but that doesn’t ruin a good childhood, and dad had a good one, working many odd jobs, as a newspaper carrier, at a dairy, and at the newspaper printing press among others. He learned to fly even before he got his automobile driver’s license and carried his love of flying with him through life, recertifying his license in retirement and getting his instrumental license in his seventies and flying until he was grounded by the FAA in his early eighties due to their strict health requirements. (He was never happy with them about that.) He was in the Army Air Corps during World War II, trained to be a bomber, but the war ended before he was sent overseas. He ended service with them as a photographer and then earned his engineering degree from University of Illinois. He worked for Allis Chalmers manufacturing in Springfield until the early sixties, when he took a job at Massey Ferguson in Detroit, Michigan. We lived in Livonia, and that’s where his love for Malaga pipes began. After a few years he returned to Allis Chalmers and we moved back to Springfield. I remember that when we went back to Michigan to visit friends, Dad had to go to the Malaga store and acquire a few new pipes. Many a year I wrote to Malaga and they picked out a pipe for me to purchase that I could give Dad for a Christmas or birthday present. He was always pleased. His favorites were the straight stemmed medium sized bowl pipes, but he liked them all.  He had some other pipes, but the Malagas were his favorites. I remember him smoking them sitting in his easy chair after work, with feet up on the ledge by the fire burning in the fireplace.  Growing up it was my job to clean them and he liked the inner bowl and stem coated with Watkins vanilla, leaving a little of that liquid in the bowl to soak in when I put them back on the rack. Dad quit smoking later in life and so they’ve sat on the racks for many years unattended, a part of his area by his easy chair and fireplace. Dad passed when he was 89 years old and it finally is time for the pipes to move on. I’m very happy they are being restored by you and your brother and hope they find homes who enjoy them as much as Dad did. Thank-you for your care and interest. — Kathy, the oldest daughter

Kathy, once again I thank you for providing this beautiful tribute to your Dad. We will appreciate your trust in allowing us to clean and restore these pipes. I am also trusting that those of you who are reading this might carry on the legacy of her Dad’s pipes as they will be added to the rebornpipes store once they are finished.

The second of the pipes that I chose to work on is a squat “Malaga” Bulldog with flattened panels on the front, right and left sides of the cap. It has a black Lucite saddle stem. It is another beautiful pipe underneath the grime and debris of the years. The warm brown finish on the bowl appeared to be good condition under the dust and tars of time. The rim top was covered with a light overflow of lava from the cake in the bowl. The inner and outer edge of the bowl had damage. There were some nicks on the cap of the bulldog. The outer edge and cap showed signs of being knocked against a hard surface to empty the dottle from the bowl. The twin rings around the top cap were dirty but solid. The stamping on the left side of the shank was clear and read “Malaga”. On the right side it was stamped Imported Briar. Once again there was no shape numbers on the pipe. The Lucite stem fit the shank quite well and was worn. There was tooth chatter and marks on both sides at the button. The interior of the pipe was dirty. I often talk about the wear and tear on the pipes I work on… this is not a bad thing. It actually shows that this was a well loved pipe and that the pipeman who used it held it often and enjoyed its company. Jeff took these photos before he started the cleanup work on the pipe. He took close up photos of the bowl and rim to show the condition of the pipe before he started to work his magic on it. The exterior of the bowl and shank were dirty. You can see the lava on the rim, the cake in the bowl and the nicks on the bowl cap and the outer edge of the rim. It is dirty but in otherwise good condition. He also took a photo of the side of the bowl and the underside of the bowl and shank. He also took photos of the shank to show the stamping and the condition of the overall shank so you could have an idea of where things were at before he cleaned it up.The photos of the stem show the fuzz of dust, calcification at the sharp edge of the button and the chatter and marks of teeth near the button. None of them are a real issue as much of the debris will wash away in the cleanup and the tooth chatter and marks will disappear in the restoration process.Working on this second pipe reminds me yet again how much I have missed working on the pipes that Jeff has cleaned. The last little while I have been working on pipes that I had to clean up and it was a real nice change to work on these. Jeff reamed the bowl with a PipNet pipe reamer and followed up with a Savinelli Fitsall pipe knife to remove the cake. He scrubbed out the mortise and the airway in the shank and the stem with alcohol, cotton swabs and pipe cleaners. He scrubbed the exterior of the bowl, rim, shank and stem with a tooth brush and Murphy’s Oil Soap to remove the oils and tars on the bowl, rim and shank. He rinsed it under running water. He dried it off with a soft cloth. The lava mess on the rim was thoroughly removed without harming the finish underneath it. Once the grime was removed the finish actually looked it was in excellent condition. I took photos of the pipe to show its condition before I started my work on it. I took a photo of the rim top to show the condition it was in after the cleanup. Jeff was able to remove all of the lava on the rim top and edges. There is still some darkening on the rim top.You can see the damage from knocking out the pipe on a hard surface on the top and outside edges of the bowl. There is general darkening and slight burn damage as well. The stem was clean and you can see the tooth chatter and marks on the surface near the button.I lightly topped the bowl on my topping board using 220 grit sandpaper. It did not take too much work to remove the nicks and damage to the rim top and edges. Once it was complete I topped it on a medium grit sanding sponge to smooth the surface even more.I worked on the rim top and the inner edge of the bowl. I used a folded piece of 220 grit sandpaper to smooth out the damage around the edge. I gave the rim a light bevel to remove the damage on the front side of the bowl. I sanded the rim cap with 220 grit sandpaper to remove as much of the damage as I could. I forgot to take photos of that part of the process. I polished the briar with micromesh sanding pads – wet sanding with 1500-2400 grit pads and dry sanding with 3200-12000 grit pads. I wiped the briar down after each pad with a damp cloth to remove the sanding dust. I rubbed the bowl down with Before & After Restoration Balm to deep clean the pores and grain of the smooth finish as well as to enliven and protect the briar. I hand rubbed it with my fingers and wiped it off with a soft cloth. I buffed the bowl with a horsehair shoe brush to polish it. The briar really began to have a rich shine. I took some photos of the bowl at this point to mark the progress in the restoration. I ran pipe cleaners dipped in alcohol through the airway in the stem to clean out the sanding dust. I cleaned out the slot and made sure the corners were all clean. I also ran pipe cleaners through the shank and used cotton swabs and alcohol in the mortise to remove any of the sanding dust from the rim work.I sanded out the tooth chatter and tooth marks with 220 grit sandpaper to smooth and blend them into the surface of the rest of the stem. I sanded the surface of the button to remove the marks on the top and underside.I polished the stem with micromesh sanding pads – wet sanding with 1500-2400 grit pads and dry sanding with 3200-12000 grit pads. I wiped the stem down after each pad with a damp cloth to remove the sanding dust. With the stem polished I put it back on the pipe and buffed it with Blue Diamond. I gave the bowl and the stem several coats of carnauba wax and buffed the pipe with a clean buffing pad to raise the shine. I hand buffed it with a microfiber cloth to deepen the shine. The pipe polished up pretty nicely. The finished pipe is shown in the photos below. This is the second of many “Malaga” pipes that I am restoring from Kathy’s Dad’s collection. I am looking forward to hearing what Kathy thinks once she sees the finished pipe on the blog. I will be posting it on the rebornpipes store very soon. It should make a nice addition to a new pipeman’s rack that can carry on the trust from her father. The dimensions are Length: 5 3/4 inches, Height: 1 1/2 inches, Outside diameter of the bowl: 1 3/4 inches, Chamber diameter: 3/4 inches. Thanks for walking through the restoration with me as I worked over this second Malaga of his estate. More will follow in a variety of shapes and sizes.