Blog by Dal Stanton
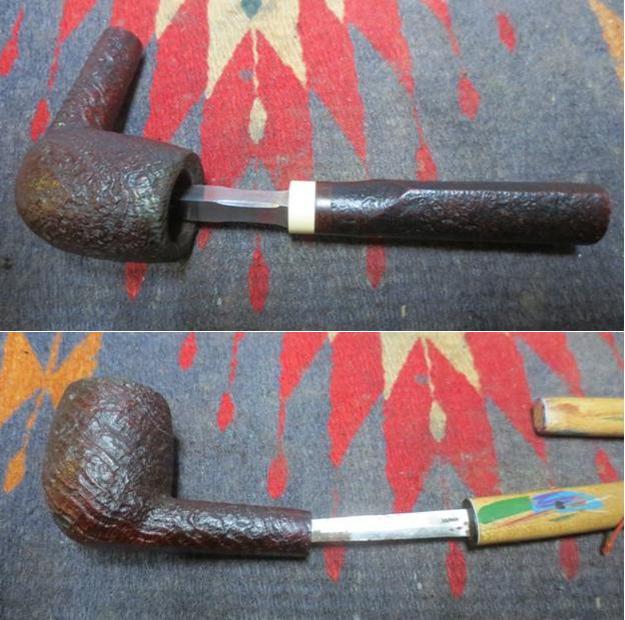
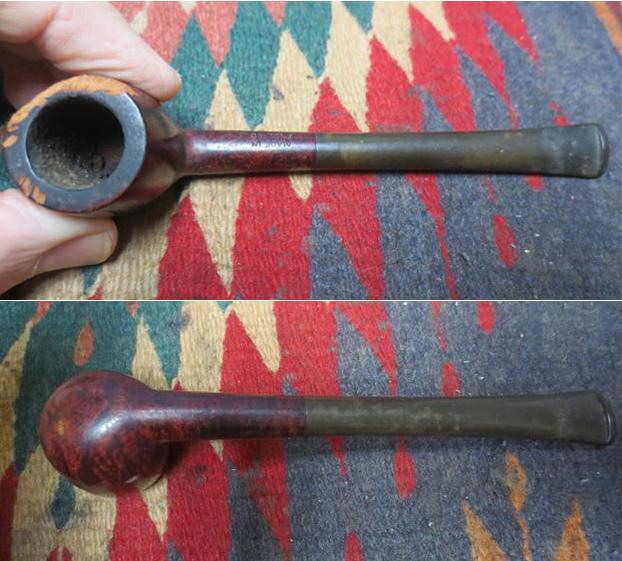
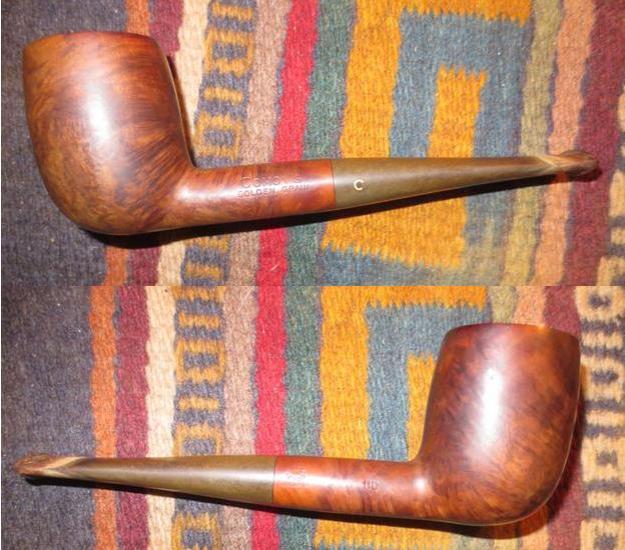
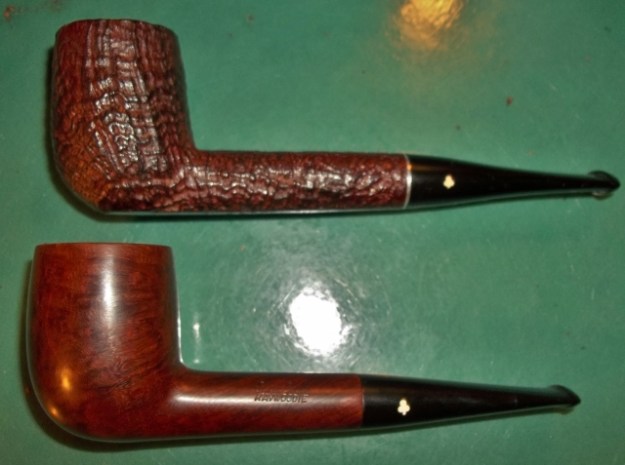
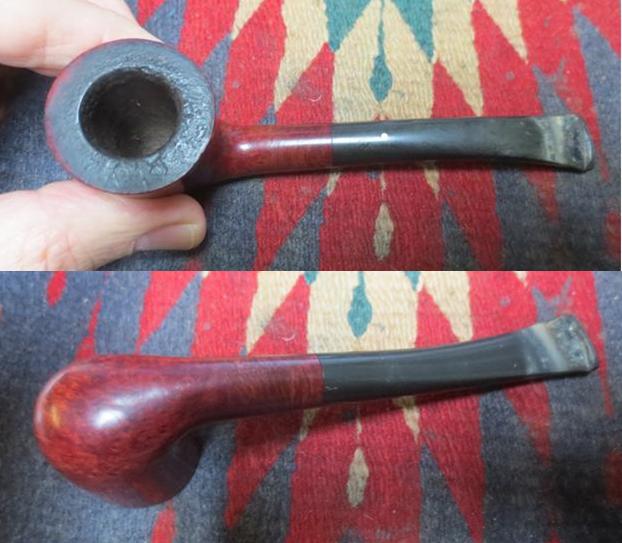
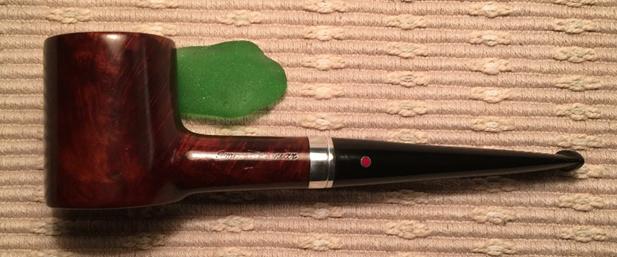
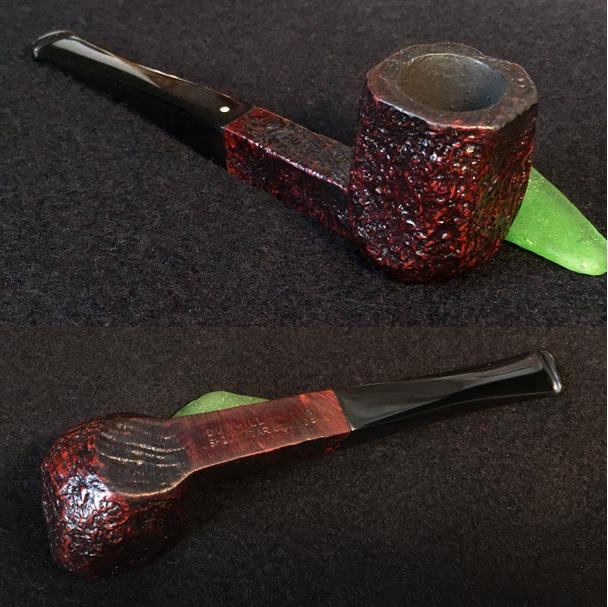
Unbelievably, I found this classic Dunhill EK Shell Briar at Madeline’s Antiques & Uniques during the trip for our daughter’s wedding in the US last November. Madeline’s was one of those picker paradises waiting on the I 24 Exit near Manchester, TN, that thankfully, we did not drive past! I had pleasure restoring and gifting our youngest son on Christmas in Denver, the Aged Imported Briar Poker (Red Dot) pictured below on the bottom (See: Link) and the restored Poker’s picture following. Now, shift two pipes above the Poker in the picture below, and you’ll see the Dunhill EK Shell Briar that now has my attention after rescuing him from my ‘Help Me!’ basket here in Sofia, Bulgaria.
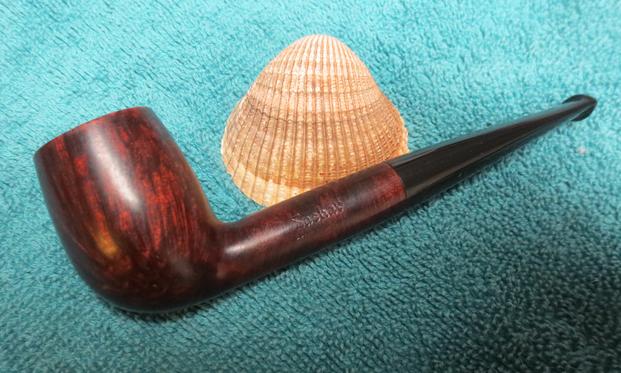
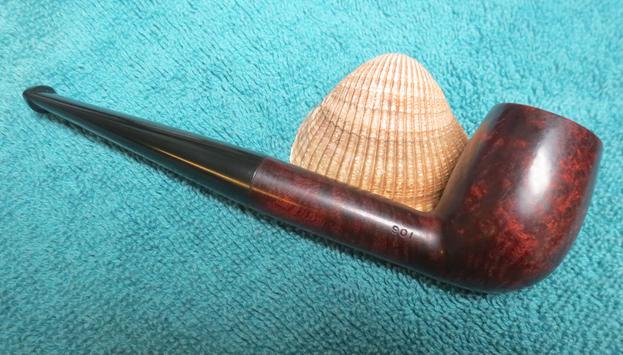
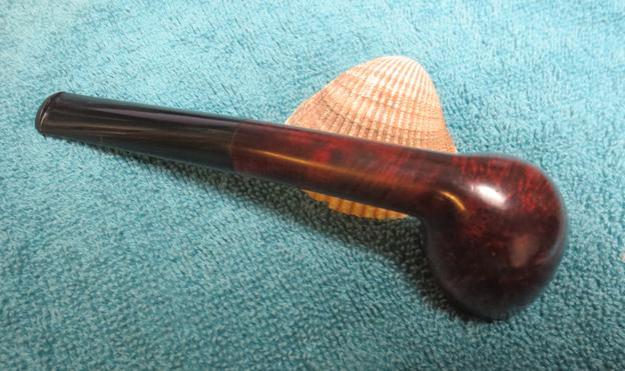
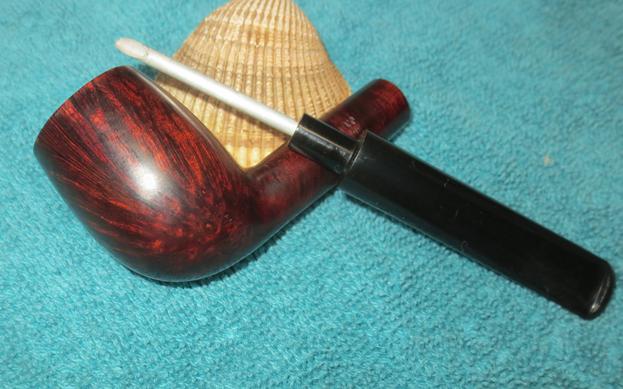
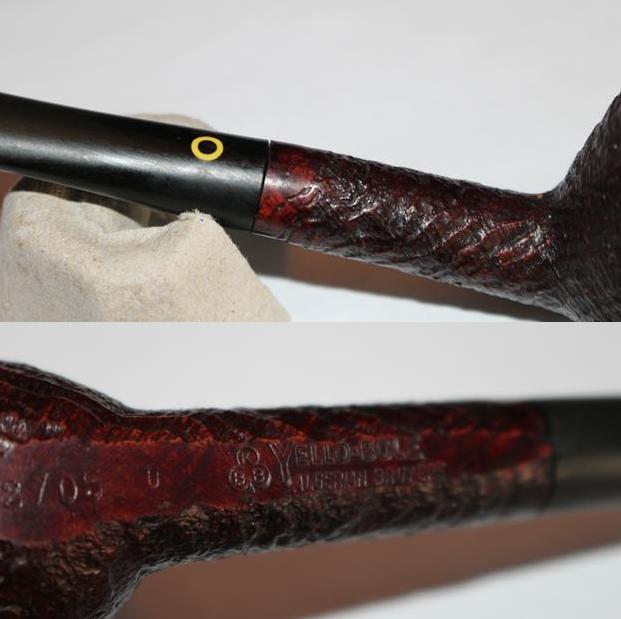
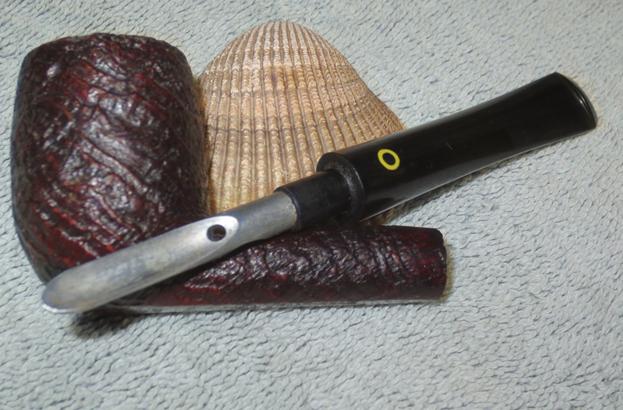
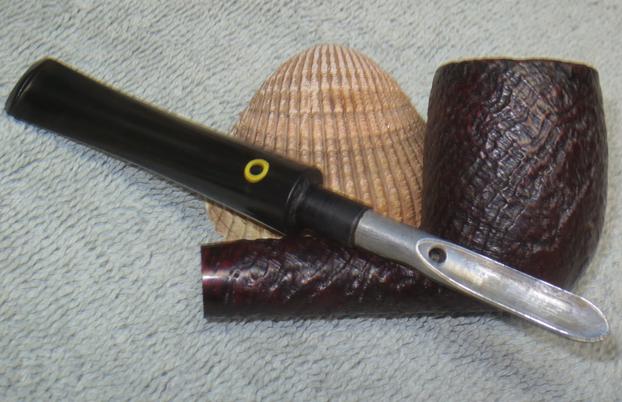
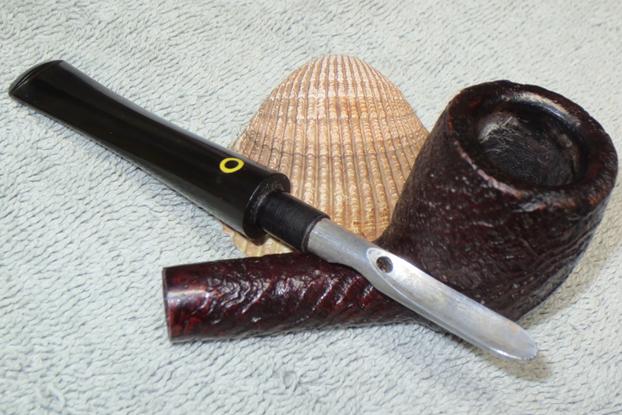
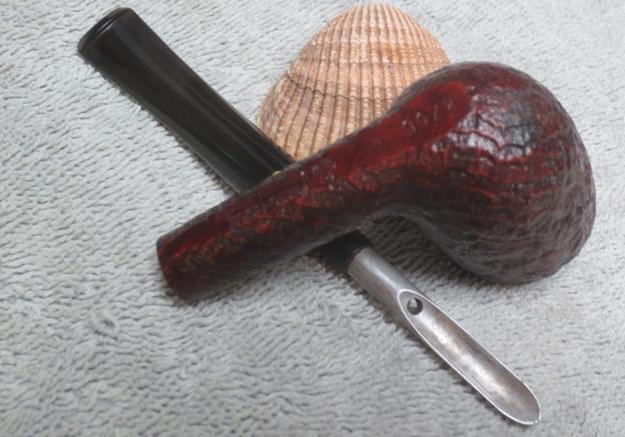
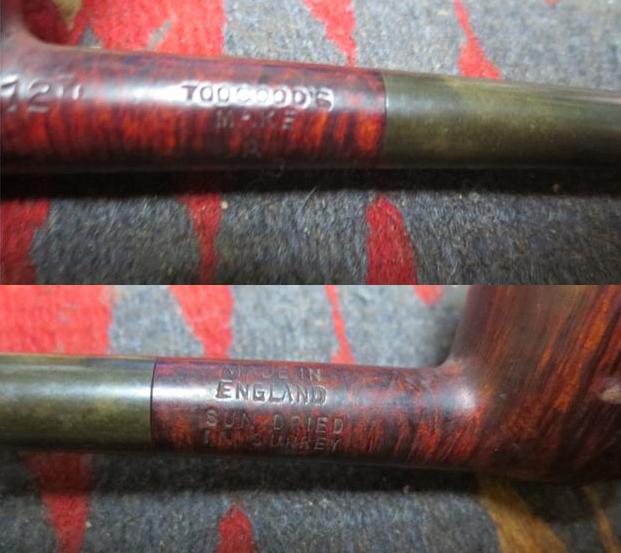
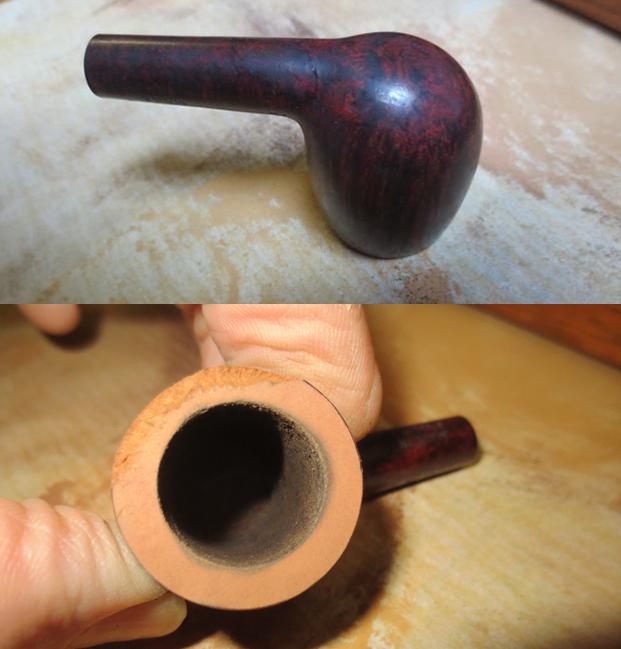
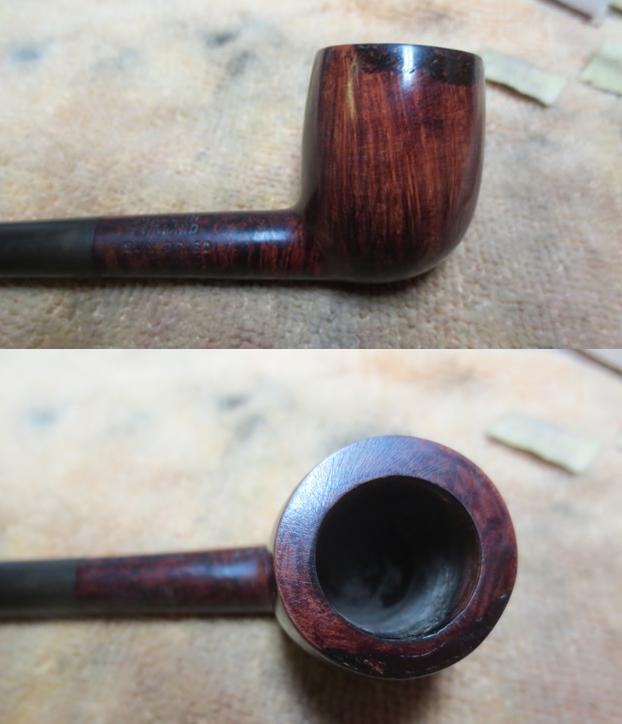
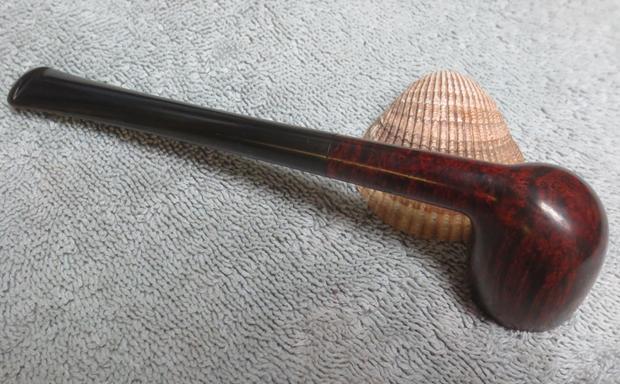
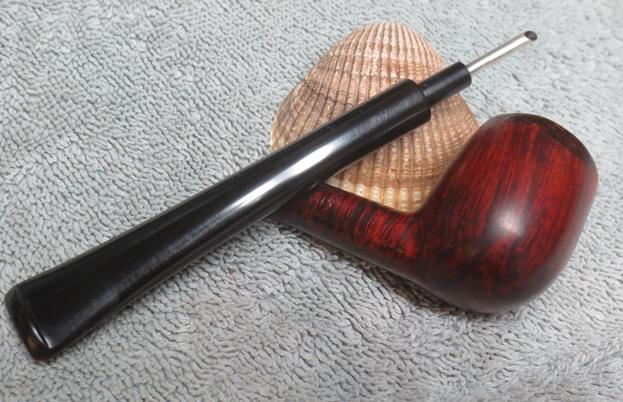
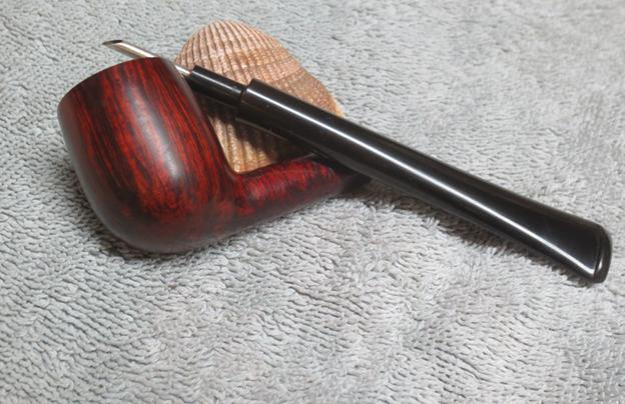
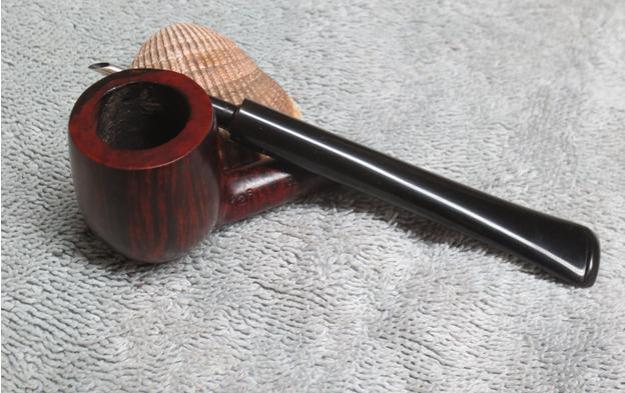
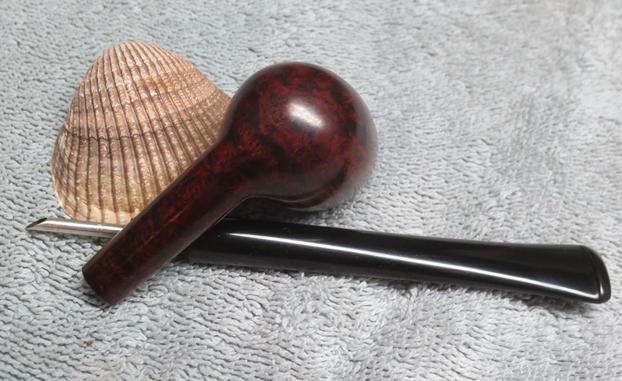
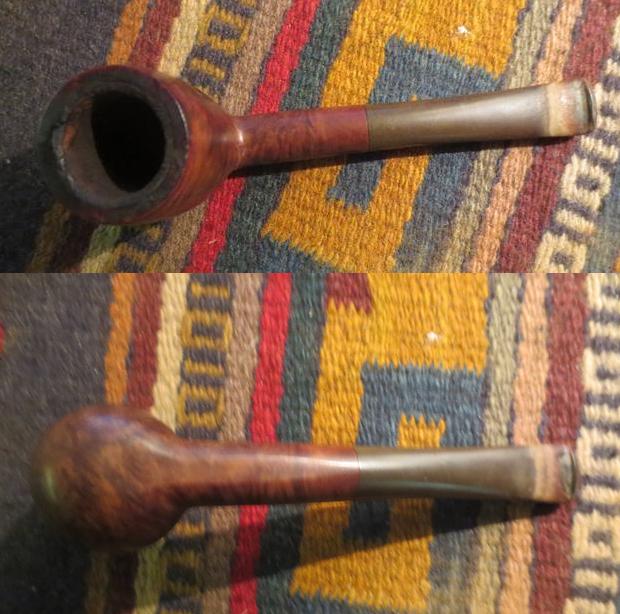
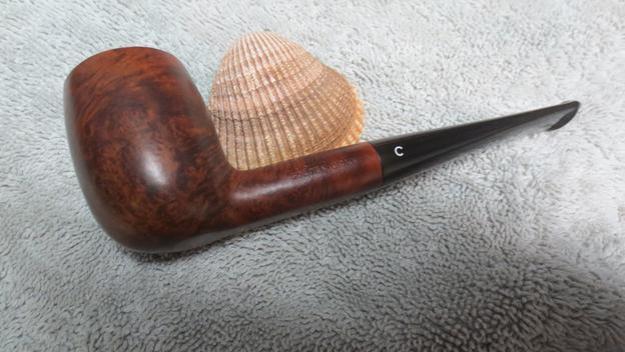
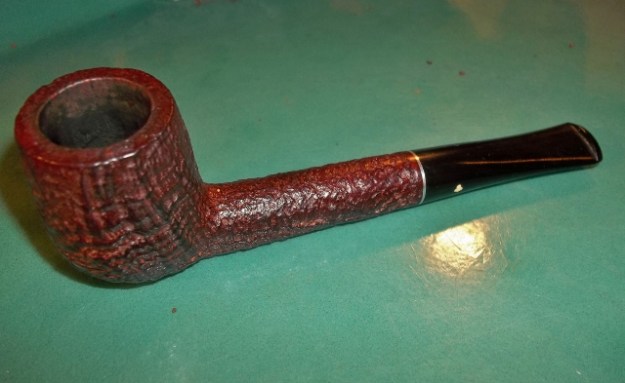
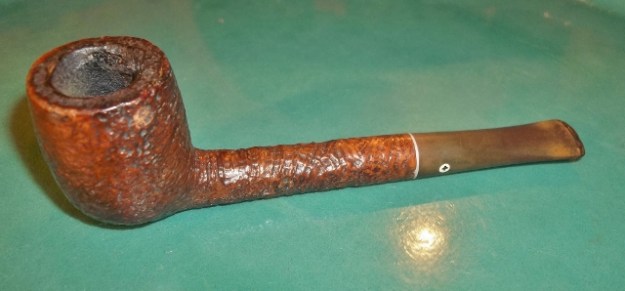
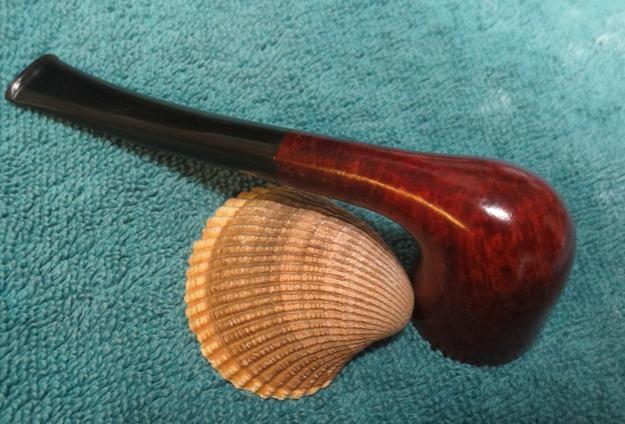
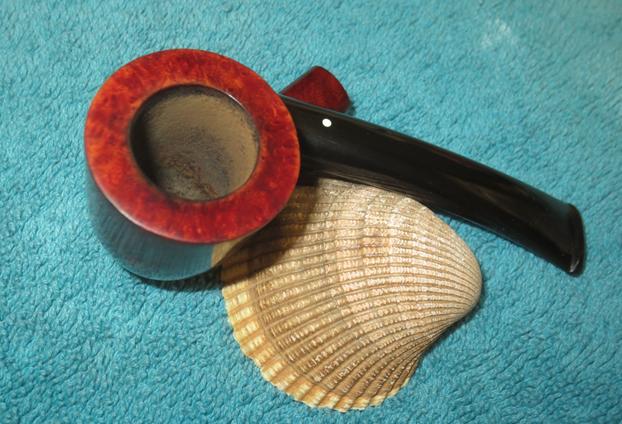
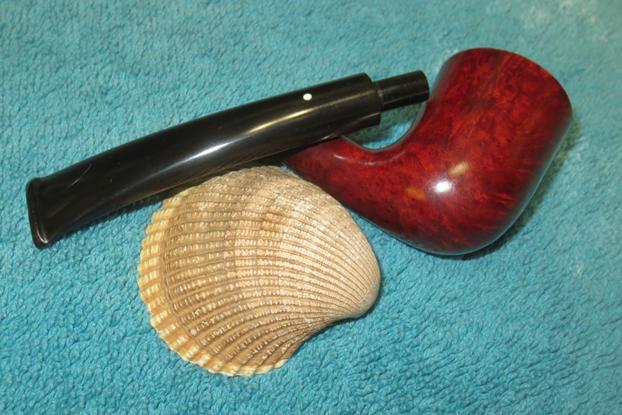
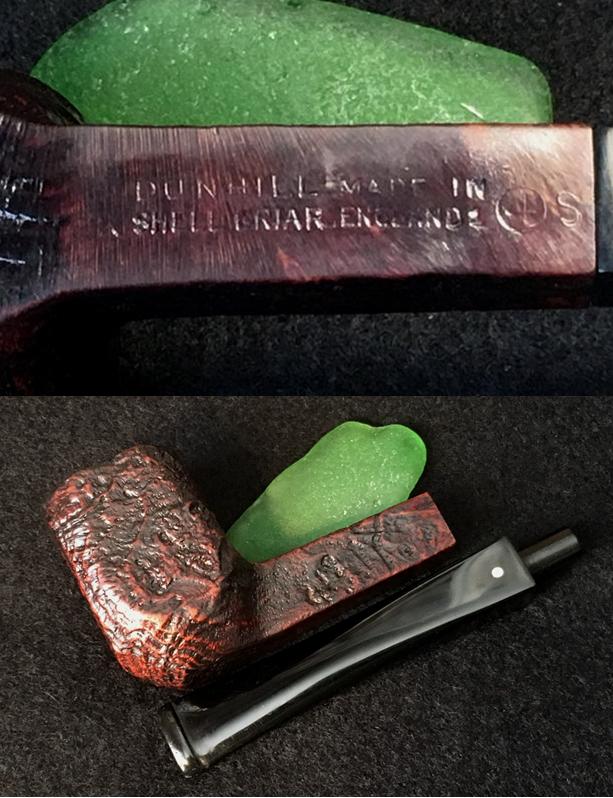
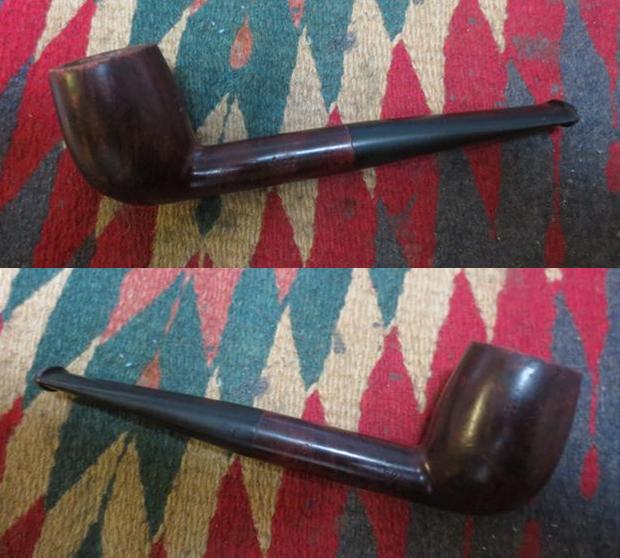
 At 5 3/4 inches in length, it is a nicely sized square shanked paneled billiard – a very nicely blasted Dunhill Shell pipe. The stampings are worn but legible on the lower panel of the squared shank. On the left quadrant, it reads, “Dunhill” over “EK Shell Briar”. The right reads, “Made In” over “England 1”. Then, to the extreme right on the shank’s edge is 4 ensconced in a circle followed by S. On the top panel of the squared, tapered stem is embedded the well-known Dunhill white dot – a mark of excellence since 1915.
In 1915, the famous white spot was introduced for very practical concerns. With straight pipes, customers had trouble knowing which way to insert the handmade vulcanite mouthpieces. So, Alfred Dunhill ordered white spots to be placed on the upper side of the stem. This very practical solution would become a definitive trademark of Dunhill pipes. The “white spot” soon became known as a symbol of quality. (Link to Pipedia’s history for Dunhill)
This is my first opportunity to research Dunhill to understand better the heritage of the pipe on my work table. There is much information about Dunhill on the internet, which is ni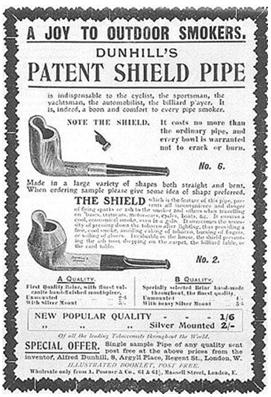 ce change. My impressions of the founder, Alfred Dunhill, are that he was a talented and creative businessman, who understood well that a quality product would create a financial boon along with understanding the ‘needs’ of a market. Per Pipedia, in 1893, he inherited a harness business at only age 21, but was savvy enough to see the approaching reality of the automobile and he leveraged his company to prepare for it. He started, “Dunhill Motorities” to capitalize on this new industry. His first experiment in pipe making was to accessorize for the ‘new’ and sophisticated needs of those now driving cars which were faster than horse and carriage. To me, this epitomizes Alfred Dunhill’s approach to business and perhaps, to life as well. With wind in the faces of potential customers, he birthed the idea of marketing a pipe with a windshield! We laugh, but this says something about the man who guided his company through the Great Depression when many pipe manufacturers were closing their door. Dunhill expanded. The Pipedia synopsis describes the world-wide growth of Dunhill Pipes and their association with quality – the preferred pipe of the rich and famous and the aristocracy. This ‘market share’ was due in part to Alfred Dunhill’s practice of giving pipes to the English military officers during WW1. Altruism or good marketing? During that time the aristocracy of England was awarded military commissions by birth-right. Dunhill was a smart businessman, there’s little doubt of this. I also read that it was Alfred Dunhill who kept Winston Churchill well-supplied in cigars. Another interesting thing I saw as I did my research was threads and discussions arguing why Dunhill pipes are more expensive than most? Quality or overrating based upon a name? This Pipe Magazine thread is one example.
The largest part of my curiosity regarding Dunhill is to understand better the creation of the ‘Sand Blast’ finish, or as it’s called in Dunhill Land, Shell. In my diminutive time rescuing and restoring pipes, I’ve never had clarity in my mind about the differences between blasted and rustified surfaces – and variations therein. These distinctions are clear to most enthusiasts in pipe collecting and restoration but I’ve been a bit slow on the uptake! I’m looking at the Dunhill Shell Briar – my first thought had been that it must have something to do with shells on a sea shore…. This small article was especially helpful from the same Pipedia page:
Shell
A deep craggy sandblast with a black stain finish. Dunhill patented the sandblast finish in England in 1917 (Patent No. 1484/17) and the U.S. in 1920 (Patent No. 1,341,418). See The Art of Sandblasting, by R.D. Field, for in depth look at Dunhill’s revolutionary new finish. The deepest and craggiest finishes were from Algerian briar, which is softer and yields more to the blasting. These are found in circa 1920’s, 1940’s, and 1960’s Shells. The pipes were double blasted until the 1960’s, and then the double blast technique resumed in the 1980’s calling it the “Deep Shell” finish. During the 1960’s and 70’s Dunhill could not acquire the Algerian briar. Consequently, the company’s sandblast pipes were much shallower and less distinct. Once again Dunhill showed itself to be innovative, inventing the “double blast” technique to bring about a deeper blast even with harder briar. The black shell sandblast finish uses a stain the was developed for the color, not the taste. They have a more bitter taste, even when well smoked.
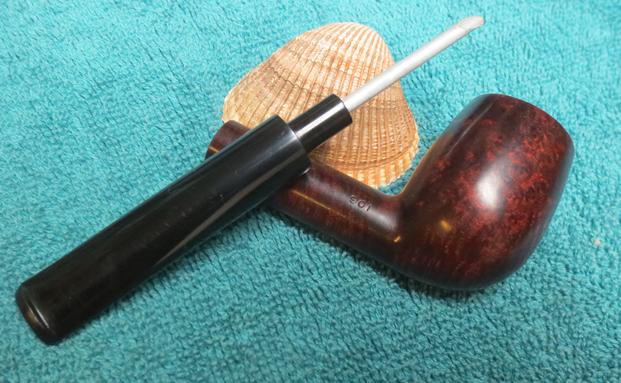
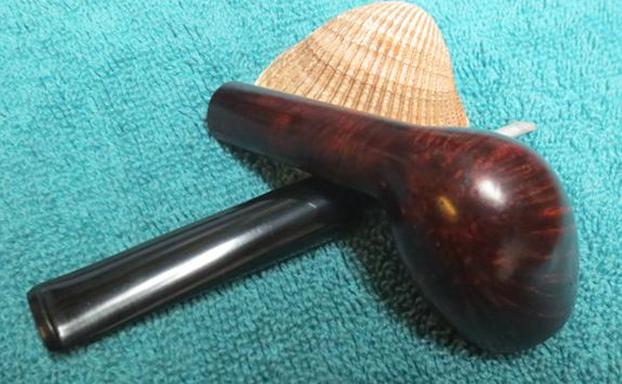
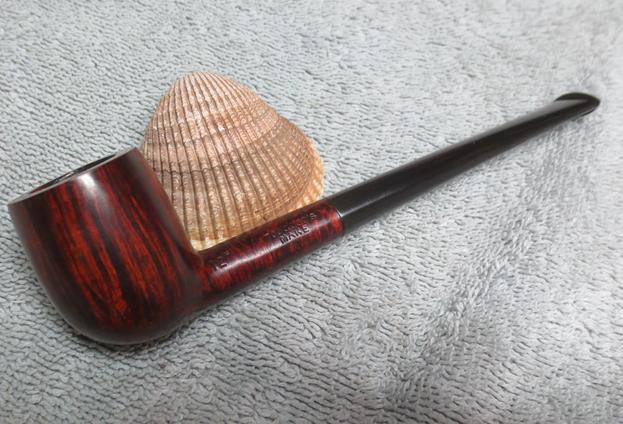
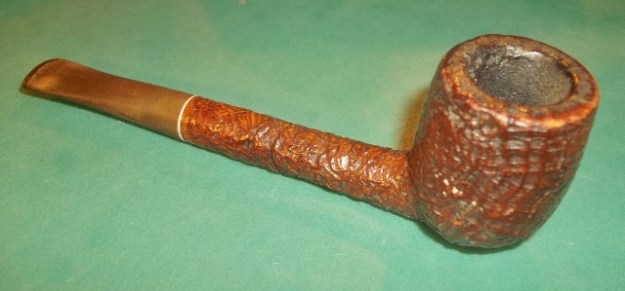
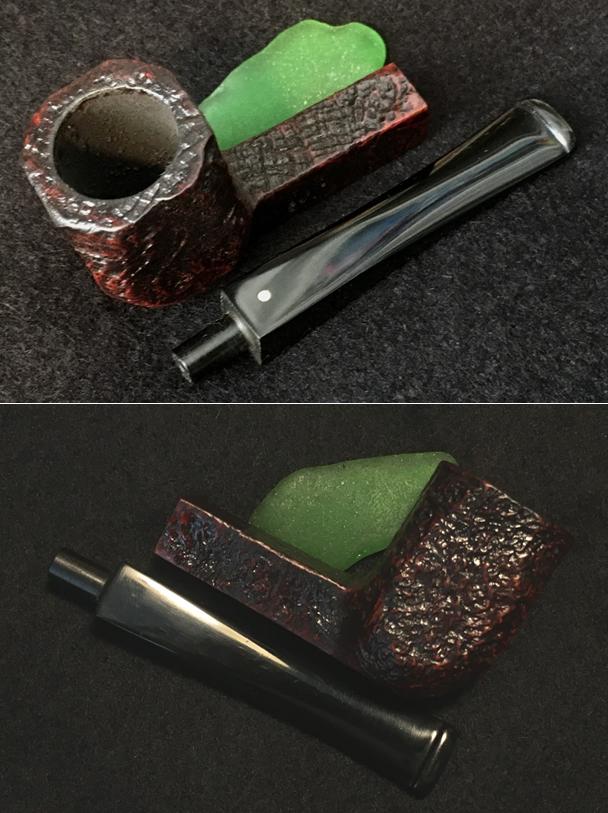
Now I have it. The knowledge that blasting highlights briar grain by removing softer wood through the process has changed how I now look at the surface of a blasted pipe or with Dunhill, a Shell pipe. ‘Shell’ reportedly came from observations of the earliest experiments with sand blasting briar shapes – they were shriveled and looked like a ‘shell’ – that is, a shadow of their former states. Even with the limited number of restorations I’ve done to date, it is obvious that I thoroughly love and enjoy working on smooth briars, simply for the challenge and delight of witnessing the beauty of briar grain appear. Now, I study the Dunhill EK Shell Briar with a new appreciation for a different perspective on the same beautiful grains but revealed via blasting. So much for my reflections! Here are pictures of the Dunhill I’ve been reflecting upon!


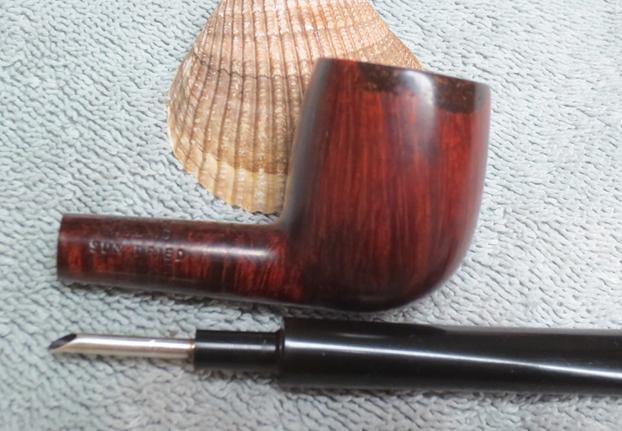
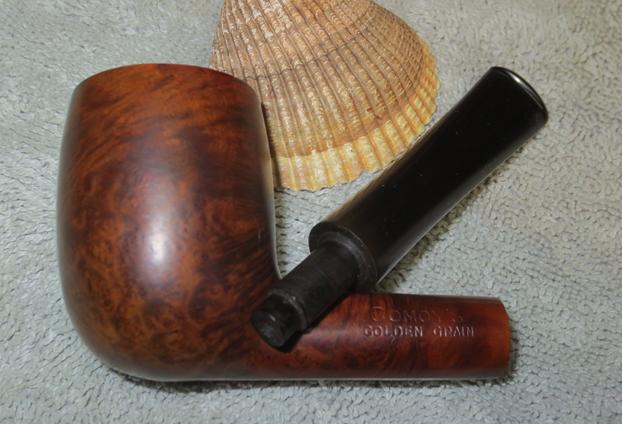
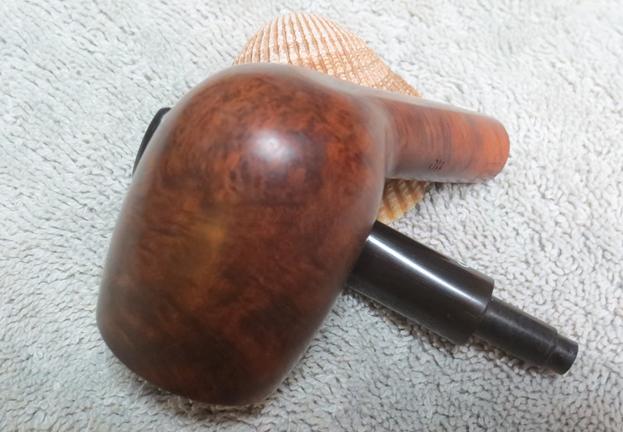
 Before I begin the restoration work, one last tick on the research list – the nomenclature. The two pictures above show the markings on the lower shank panel. I admit, when I first started trying to make sense of the plethora of information on Dunhill dating, it was daunting and a bit confusing, but as I looked at R.D. Fields’ A Dunhill Pipe Dating Guide published in Pipedia, Pipephil’s unbelievable charts, and tooling through all the examples of Dunhill nomenclature exemplified year-by-year, and also Pipephil’s, Dunhill Dating Key – pieces started coming together. Reborn Pipe’s reposting of Eric Boehm’s Dunhill Shapes Collated was helpful as well. When I first looked at the pictures above, I had missed the ‘E’ of the EK Shell Briar which is barely legible due to the wear next to the heel of the stummel. Boehm’s information about ‘EK’ shape was: “Quaint Shape” Hexagonal panel billiard, square shank, angled tapered bit “Stand-up” 1928. The EK Hexagonal panel is interesting in that a hexagon has 6 sides. Over the years, this shape may have added more angled variety. This EK is either squared if you only count the 4 major panels, but it is possible when including the tapered, smaller panels creating the corners, 8 panels are encircling this stummel. The Pipephil Dunhill Shape Code chart calls the EK a square panel and provides an example of an EK 1958. The markings are:
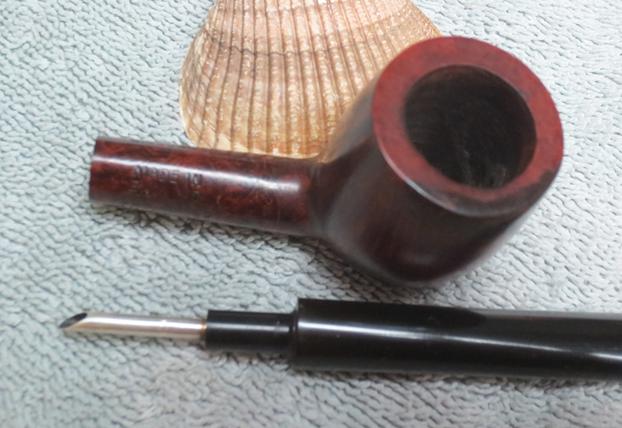
EK = Square Panel (shape letters)
4 (in circle) = Bowl Size
S – material: Shell or sand blasted
The dating of this pipe is 1961, based upon the suffix number ‘1’ following ‘England 1’. Clear? Starting in 1955, Dunhill stopped including the full patent number in the nomenclature. So, for Dunhills without the patent number, if the number following the ‘England’ is 5-0 (underlined or a subscript) then it would be the year 1950 + X = Year. So, a Dunhill having ‘England 5’ is from 1955. With the 1960s the system changed to 1960 being the base starting point with suffix numbers added to ‘England’ that were not underlined or subscripted, but the same size as the D in England. Are you confused – I was, but it finally became clear. The dating suffix in the picture above is ‘England 1’ which indicates a dating of 1960 +1 = a 1961 dating! If I had an ‘England 24’ it would be dated 1984. I found another EK Shell Briar on this finished eBay listing which was “London 8” – 1968.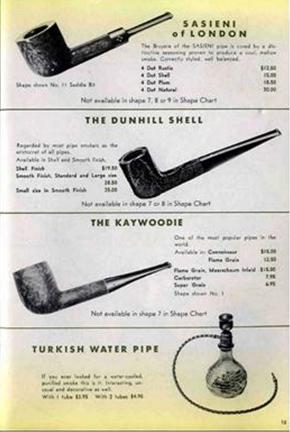
Pipe Pages had this example of an Owl Catalogue of 1962 with a picture of the same EK shape in the center but its dating would look like this: “England 2”. I don’t know if this makes it clearer, but I am thankful for Dunhill dating his pipes!
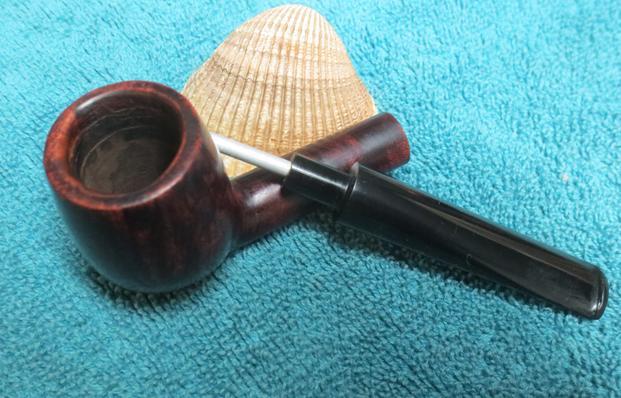
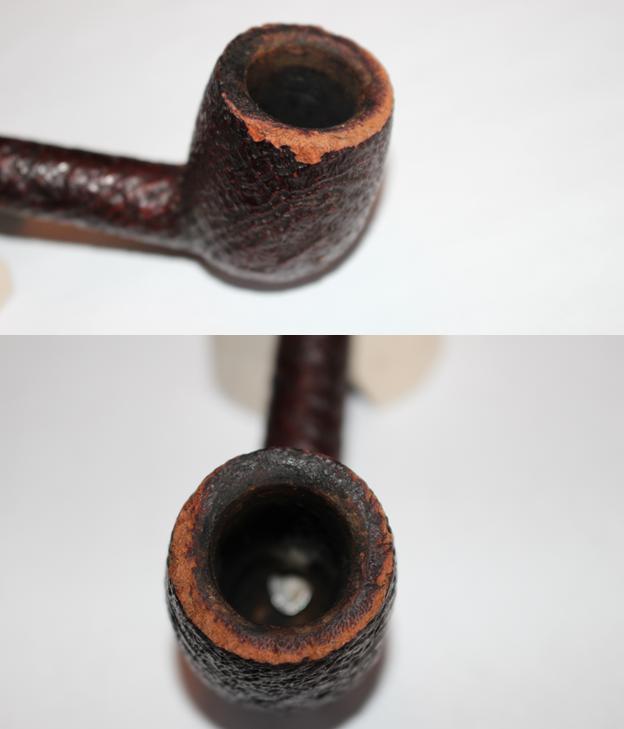
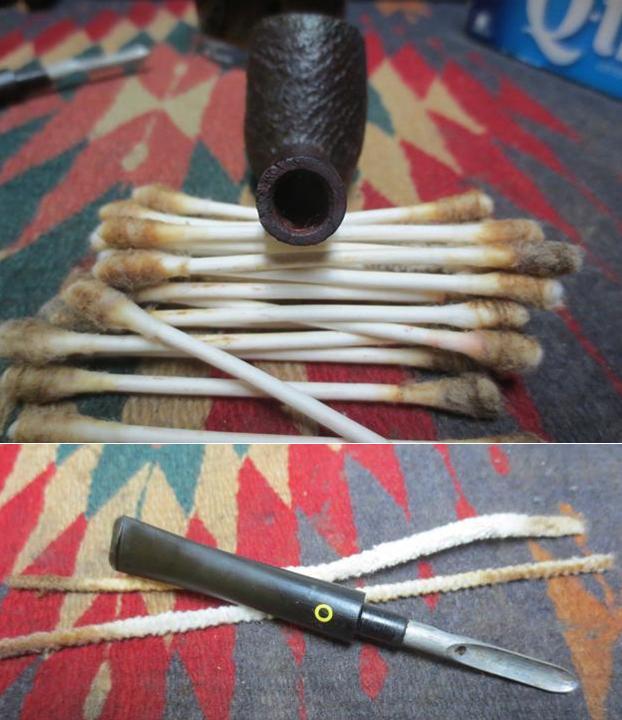
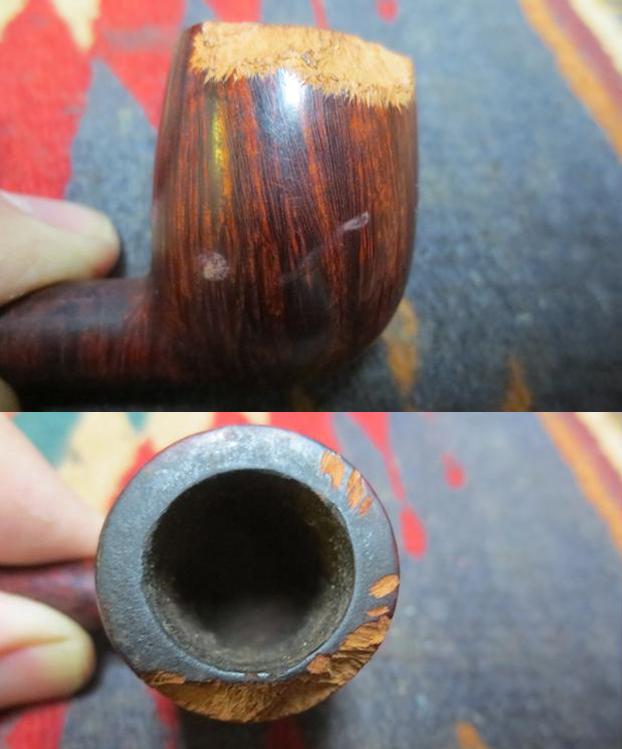
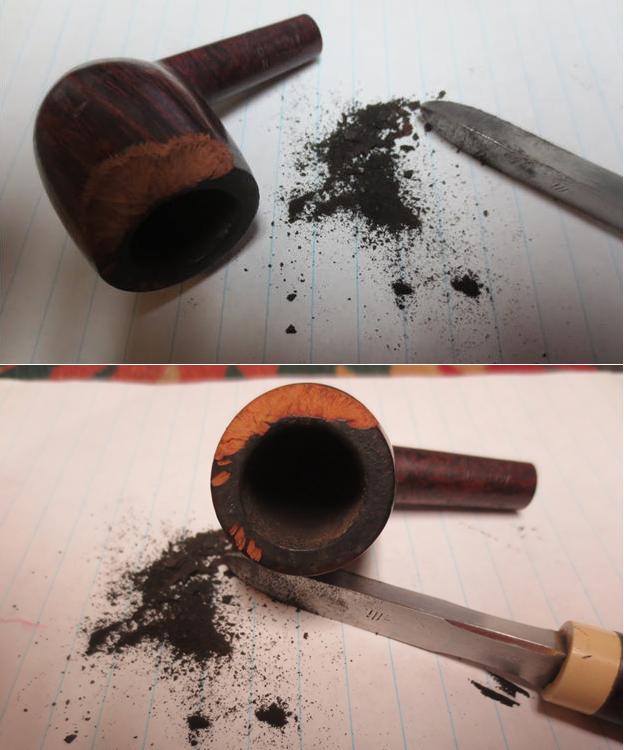
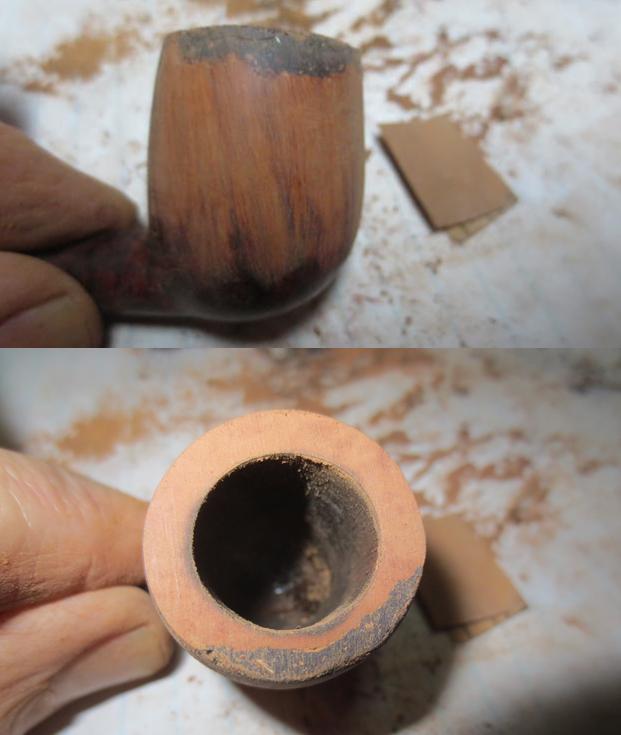
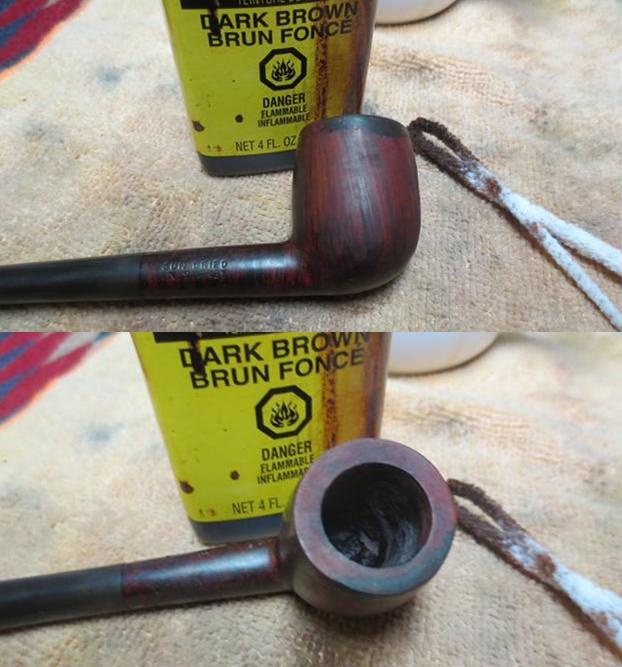
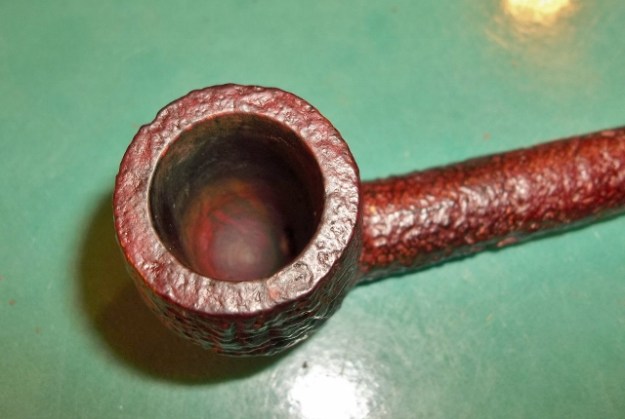
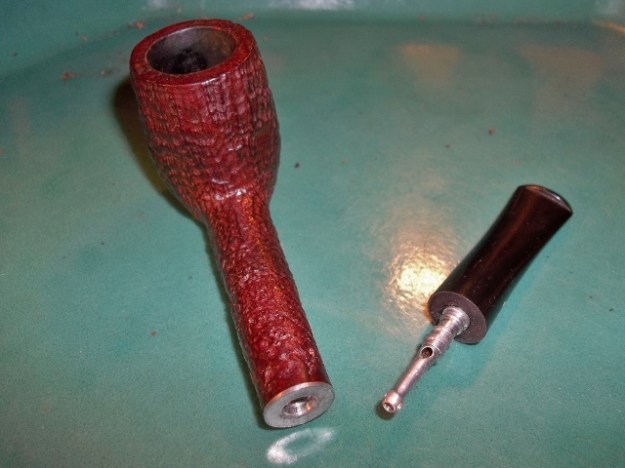
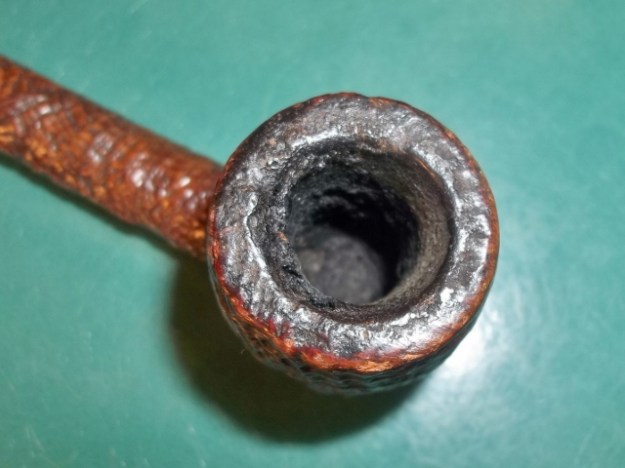
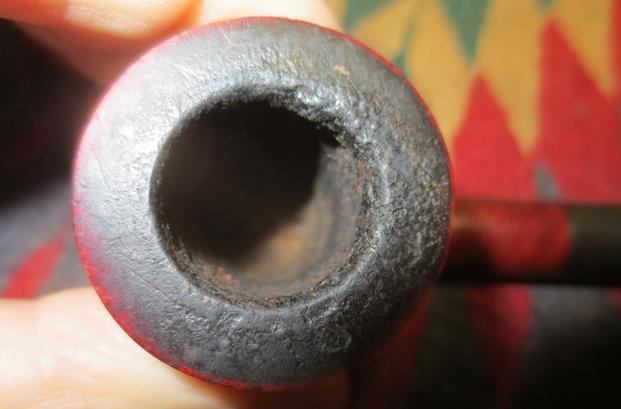
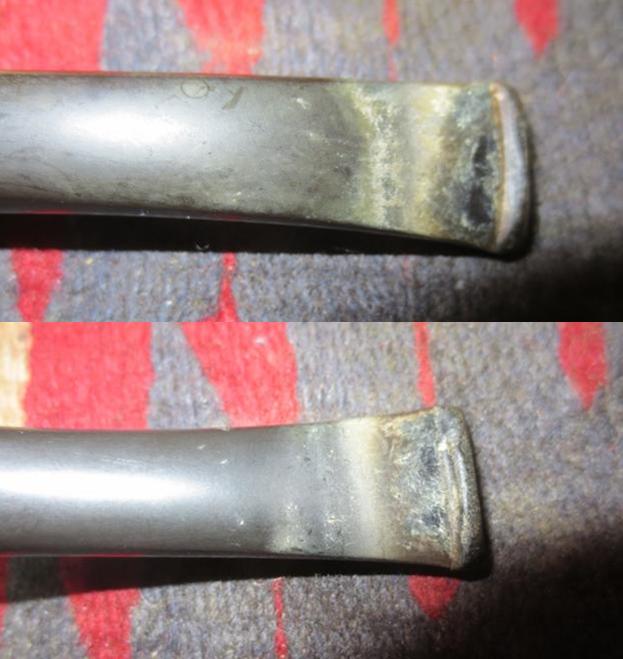
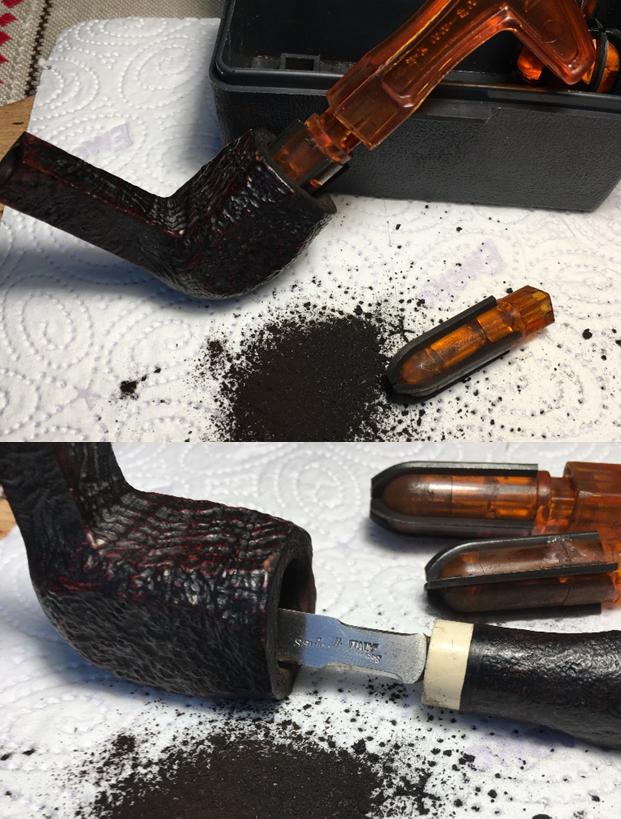
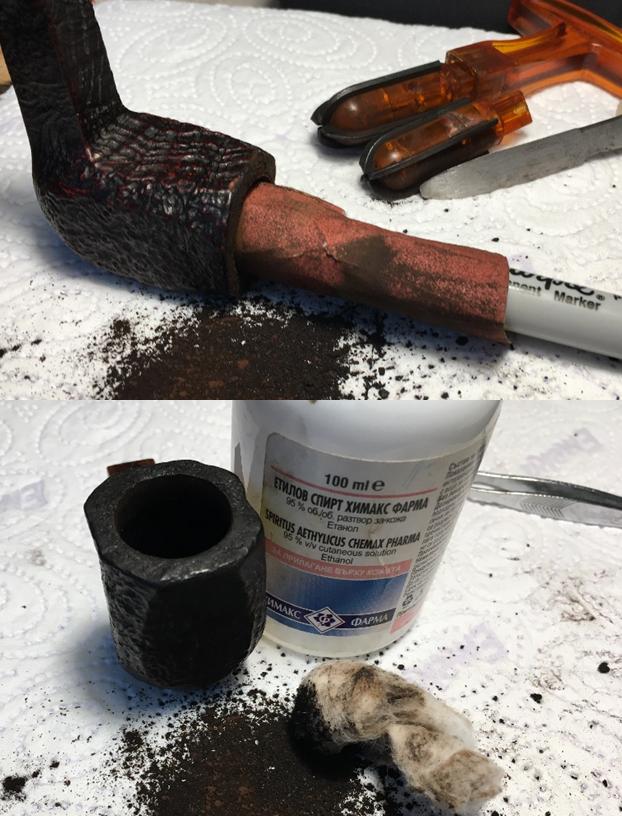
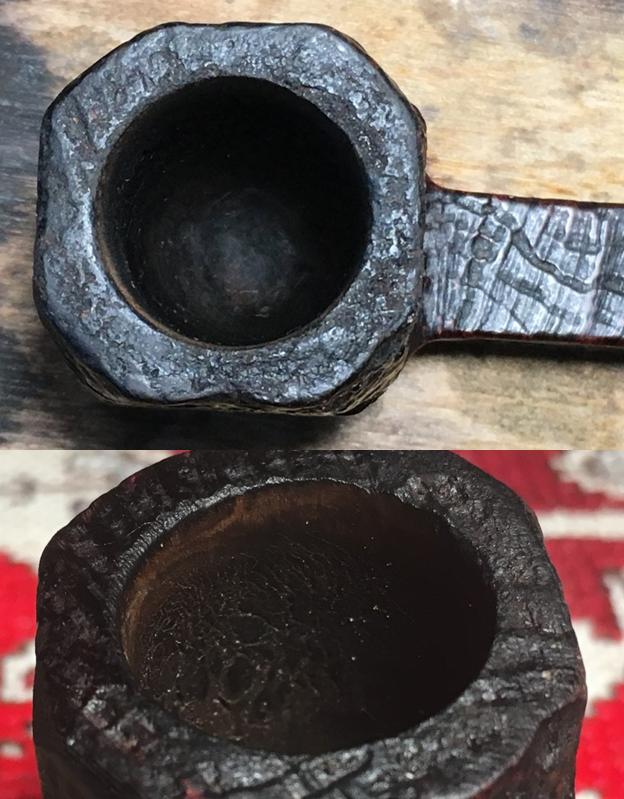
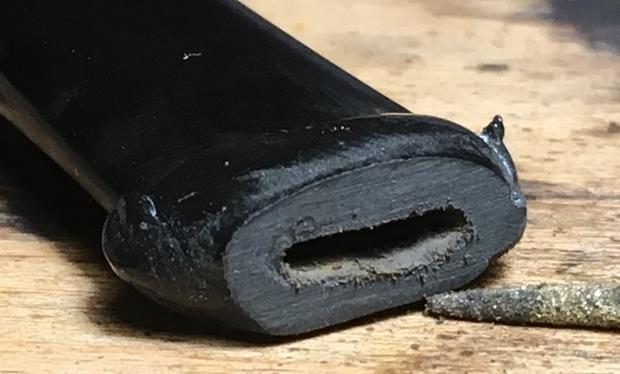
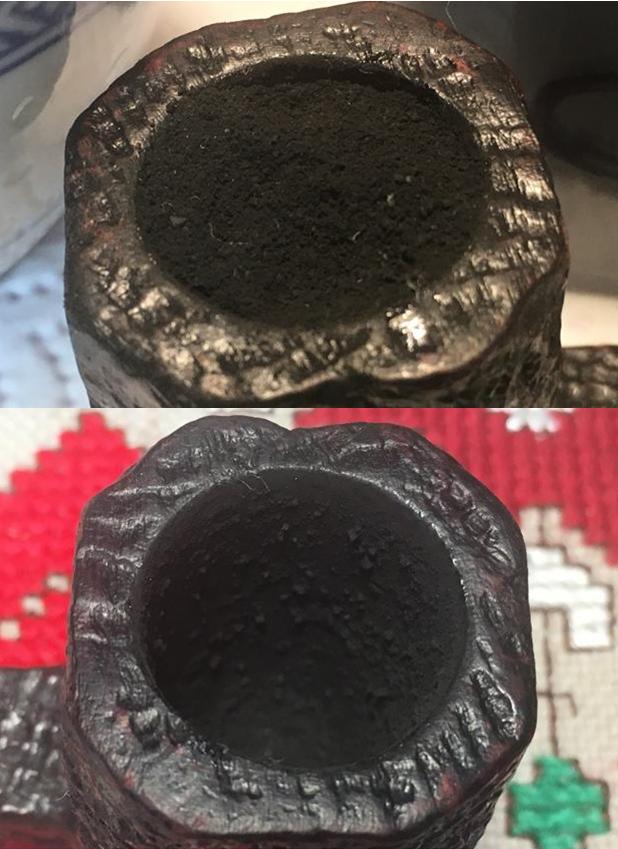
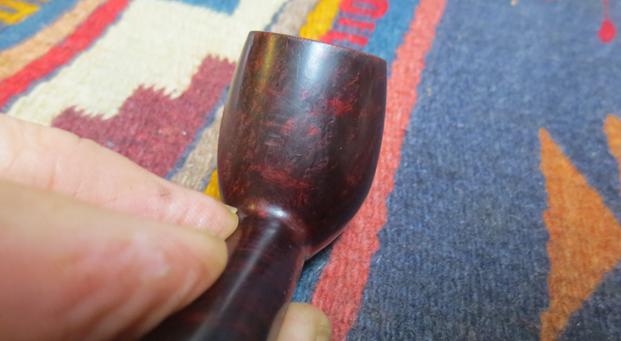
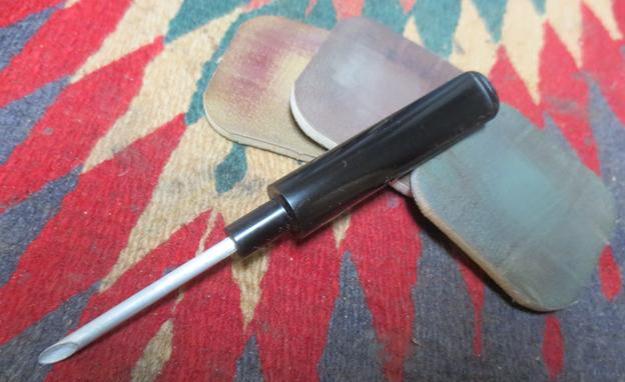
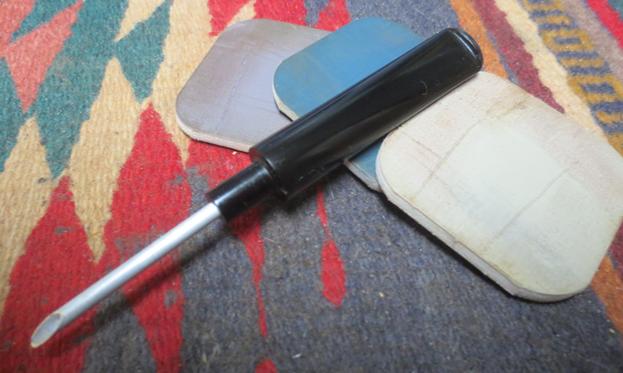
With a new appreciation for Dunhill, and the EK Shell Briar, Made in England 1, 4S, before me, I hope that I can recommission this pipe for another lifetime and to serve another steward! The stummel generally looks good – it needs to be cleaned thoroughly – the internals and the blasting. The cake in the chamber needs to be removed to the briar to allow a fresh start and to examine the chamber wall. The rim is seriously caked with oils and lava flow and the rim has a small chip on the shank-side panel which will need coloring and blending. The lower shank panel with the Dunhill nomenclature is already worn – I will clean the area but stay clear of any abrasives. I thought I detected a crack in at the 4 o’clock mark looking at the shank, but with a closer look, thankfully it is grain and not a crack! The stem is the challenge. The oxidation is heavy and needs to be removed. The button has a bite-through on the lower side that breaches the lip. The button will need rebuilding and the hole patched. I remove the stem from the shank and put a pipe cleaner through the airway and plop it in an Oxi-Clean bath to start addressing the heavy oxidation. With the stummel, I take the Pipnet Reaming Kit to address the cake build-up in the chamber. I take another picture of the cake to mark the progress. For easier clean-up, I always put down a double layer of paper towel to catch the exorcised carbon. I use the two smallest blades of the 4 available to me to ream the chamber. Starting with the smallest, then the next larger size. After this, to fine tune the reaming, I use the Savinelli Pipe Knife by scraping the walls further. Then, wrapping 240 grit paper around a Sharpie Pen, I sand the walls to remove the smallest traces of carbon and to bring the chamber again to briar. I finish by using a cotton pad wetted with isopropyl 95% and wipe the chamber to remove the carbon dust. After inspection, the chamber walls show no sign of burning through though I do detect heat fissures that are not serious, but need attention in the last stages of the restoration. The pictures show the reaming process and inspection questions.
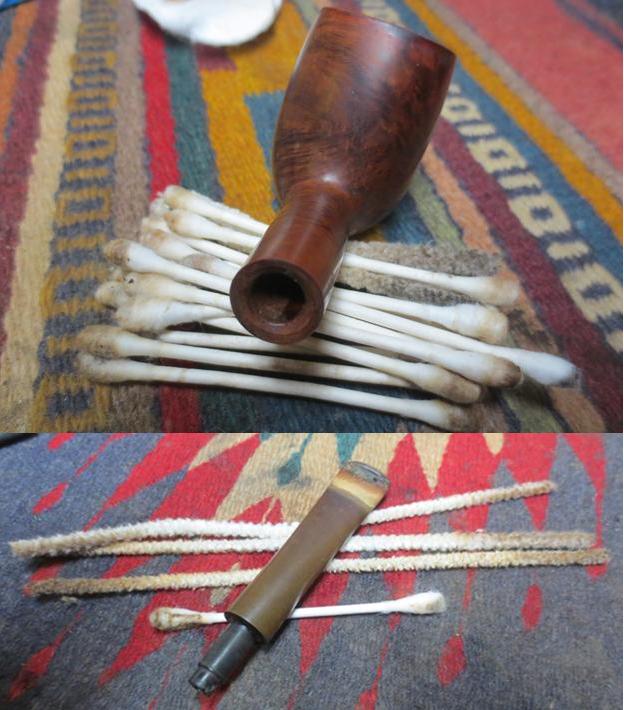
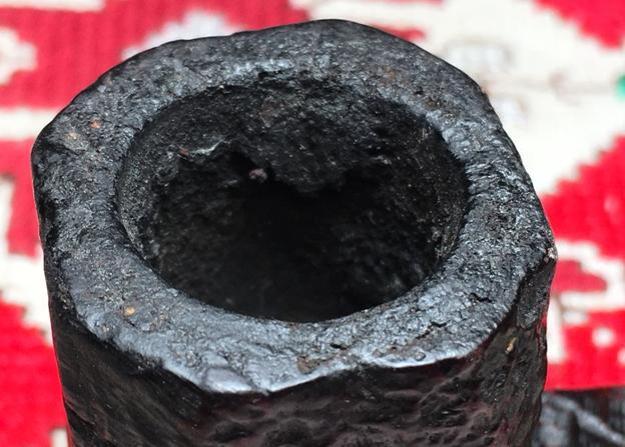
 Before moving to the external cleaning, I tackle the internals – using cotton swabs and pipe cleaners dipped in isopropyl 95% I clean the inside airway. The resistance is significant so I take a drill bit, the size of the airway, and ream and scrape it – trying to dislodge the gunk and bring it out. I continue with cotton swabs and pipe for some time – also utilizing sharp and spaded dental probes to reach and scrape into the mortise. After some time, the pipe cleaners started returning less soiled. I’m calling the frontal siege completed, but at the close of the day, I will commence the Trojan Horse attack to further clean the internals with a Salt and Alcohol soak. The pictures show the progress.
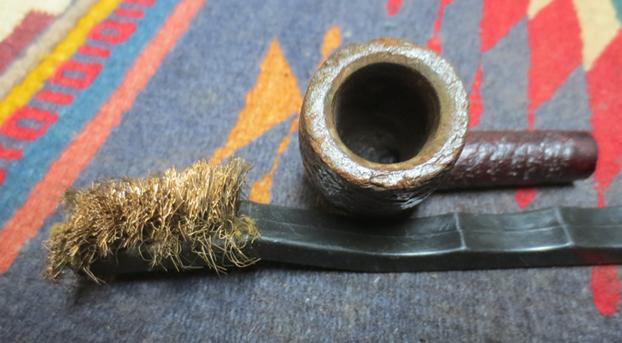
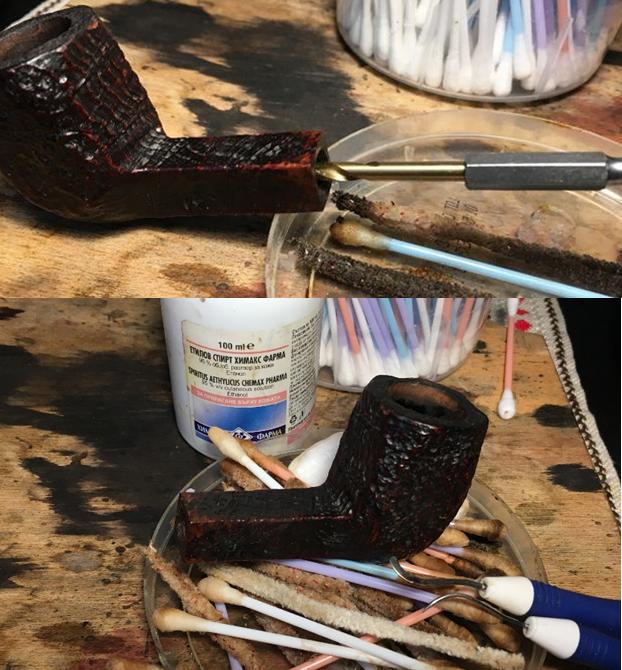 Now to the externals. Using undiluted Murphy’s Oil Soap, I scrub the rim and blast surface using cotton pads and a bristled tooth brush to get into the crags and crevices. I also use a brass wire brush on the rim to loosen the crusting. The brass wire will not harm the briar.
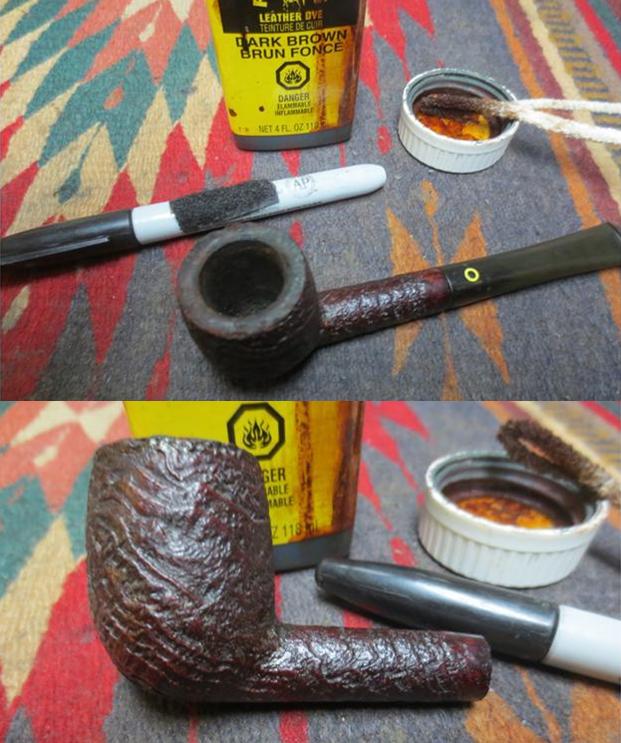
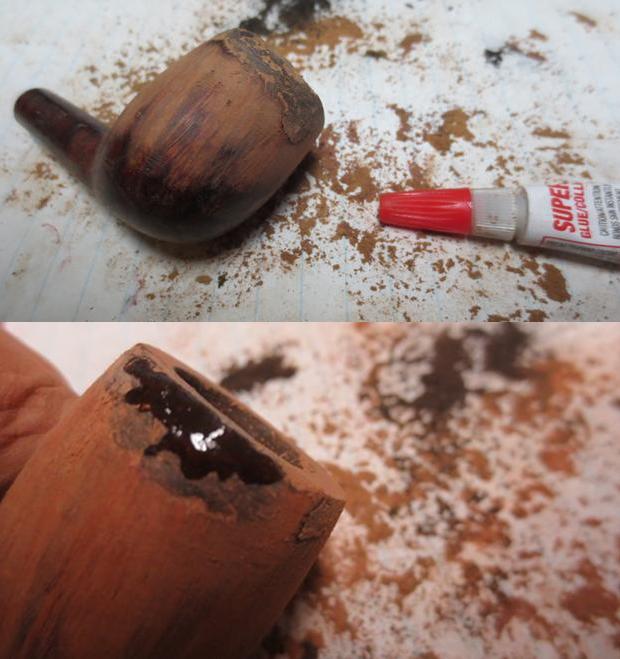
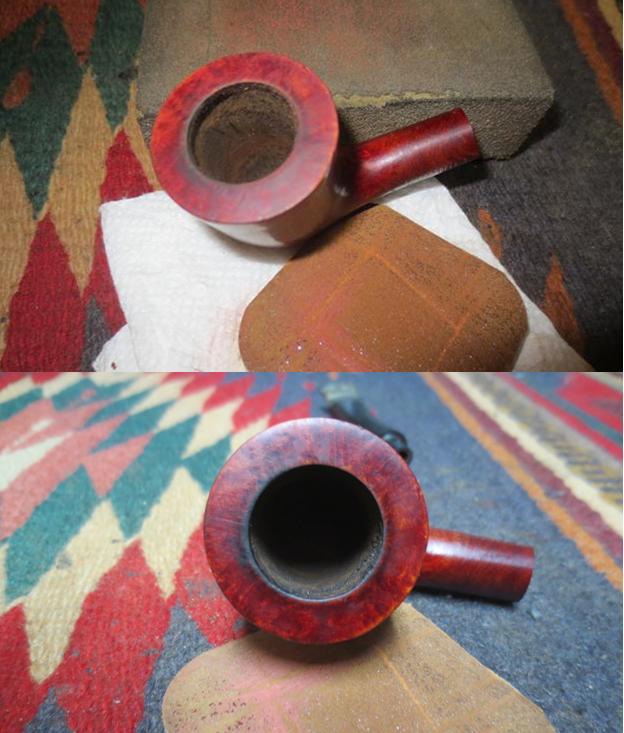
 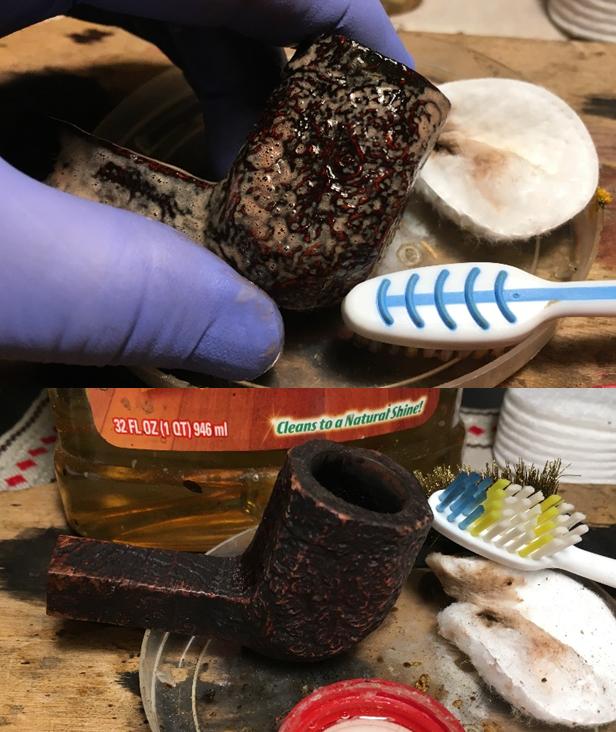 Ridding the rim of the lava crust reveals several nicks and bare briar around the rim panels. I also note that there are several places along the shank/stem junction that have lightened because of wear. I use furniture repair markers starting with the lightest hue (Maple) and methodically start touching the rim spots as well as around the shank. When the ‘scarring’ or lightened areas are still evident, I graduate to the next darker brown hue, then a third stick darker still. Looking for the blending to occur. As I go, I have a cotton pad lightly dampened with alcohol to wipe the areas gently to create more blending of the dyed areas along the rim and shank. The first 3 pictures show the problems (forgot to picture the shank!) and the last 3 after using the dye sticks.


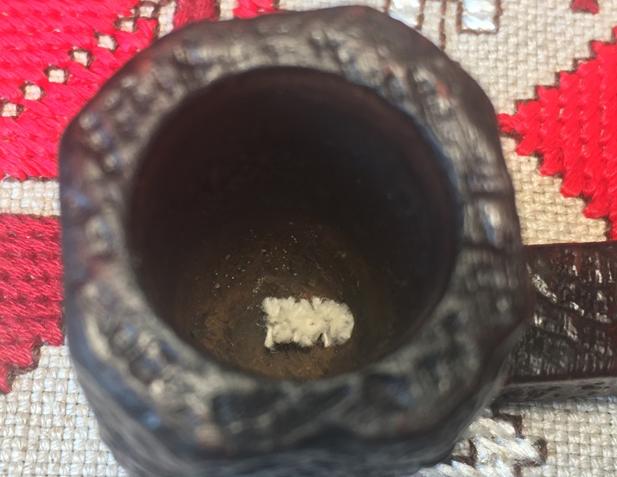
 With the stummel repairs completed, I give the internals more cleaning and freshening. I put the stummel in the egg carton and fill the bowl with Kosher Salt and twist a cotton ball and stuff it down the mortise, to help draw out the left-over gunk. I then fill the bowl slowly with isopropyl 95% until it reaches the level of the salt. I put it stummel aside and let the salt/alcohol soak to do its thing.
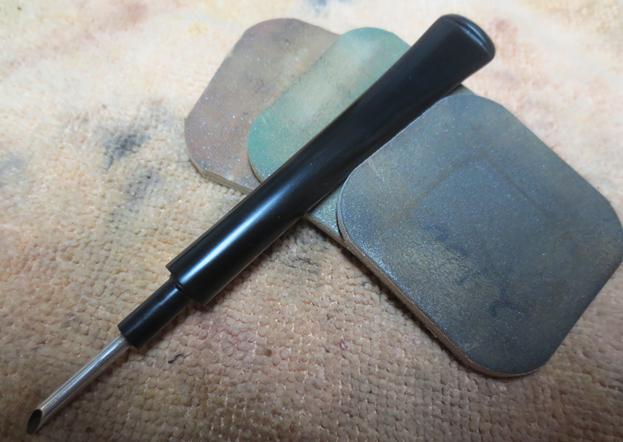
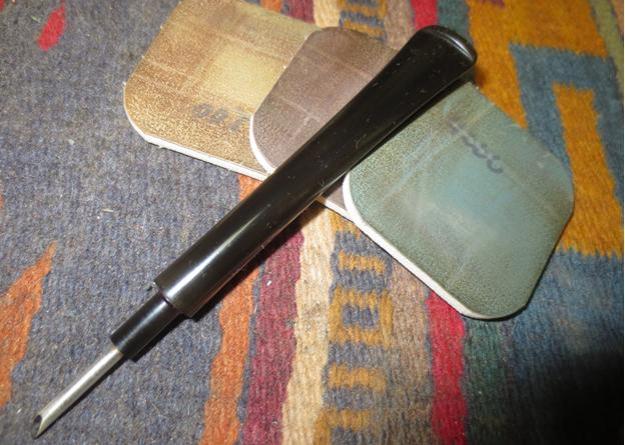
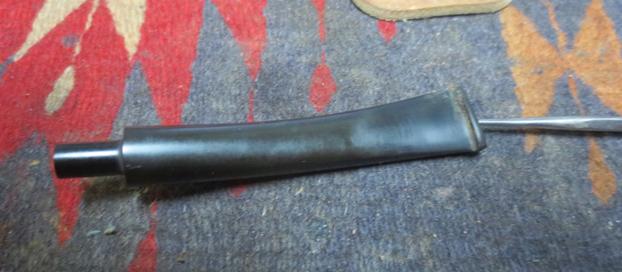
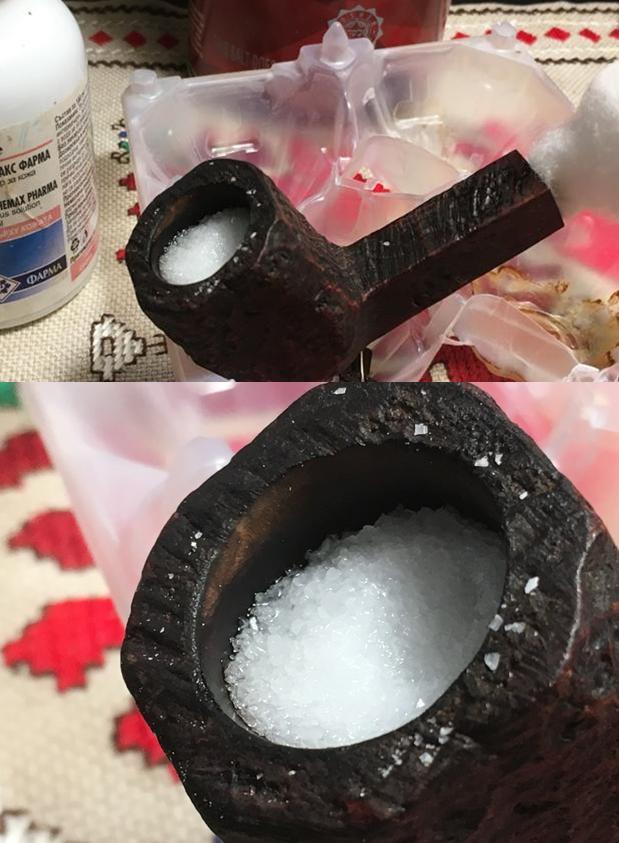 With the stummel soaking, I fish the stem out of the Oxi-clean bath. The bath did a good job causing the olive greenish oxidation to rise to the surface. Using 600 grit paper, I wet sand the stem taking off the raised oxidation. I follow this with using 0000 steel wool – removing more oxidation and shining and smoothing the vulcanite stem. I’m careful to avoid sanding over the shoulders of the stem to round off the squared shank. The pictures show the progress.
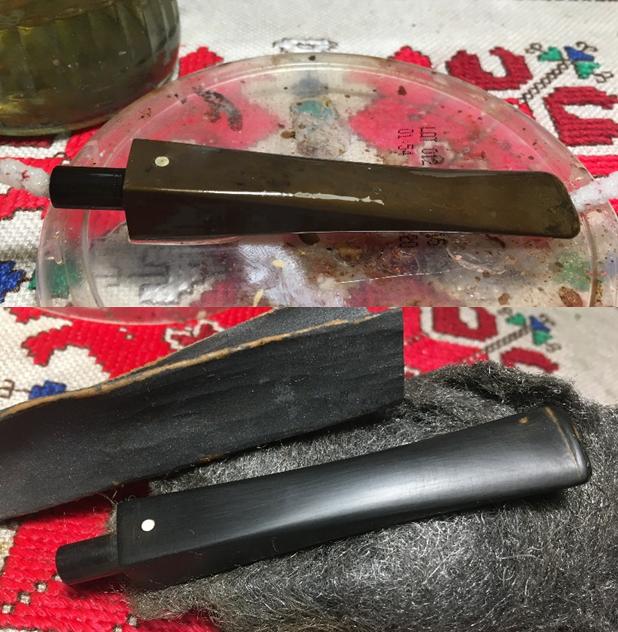 I turn now to the internal stem airway using pipe cleaners dipped in isopropyl 95%. As hoped, the resistance was little and the pipe cleaners were coming through the airway and emerging clean.
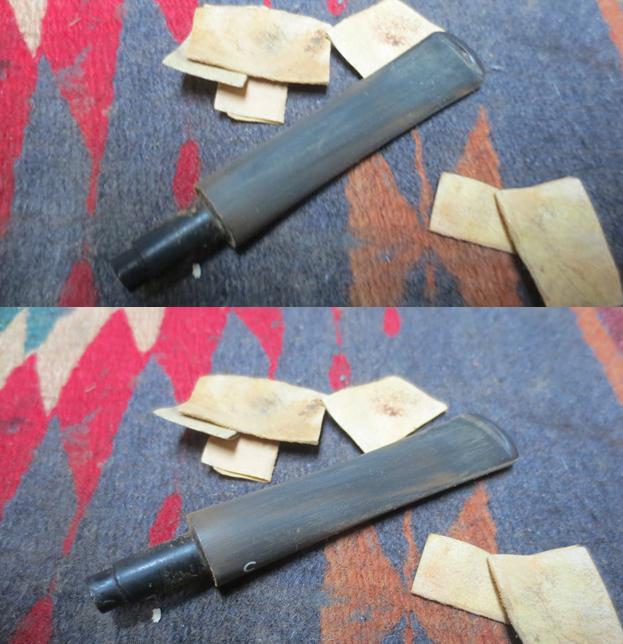
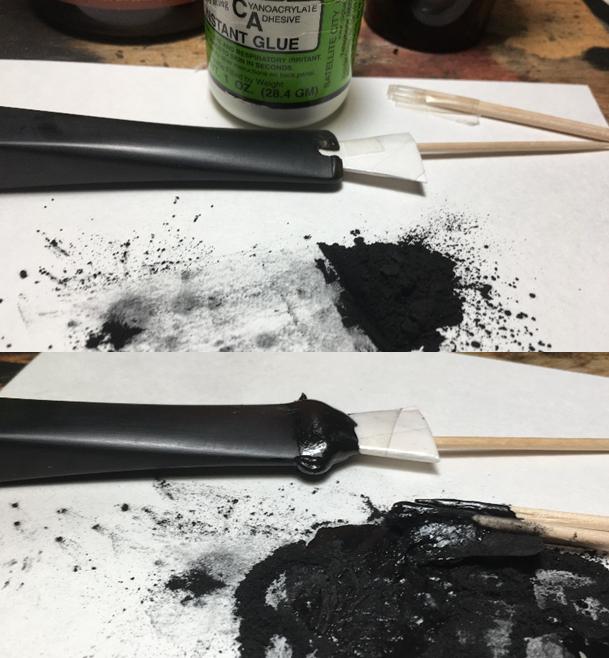
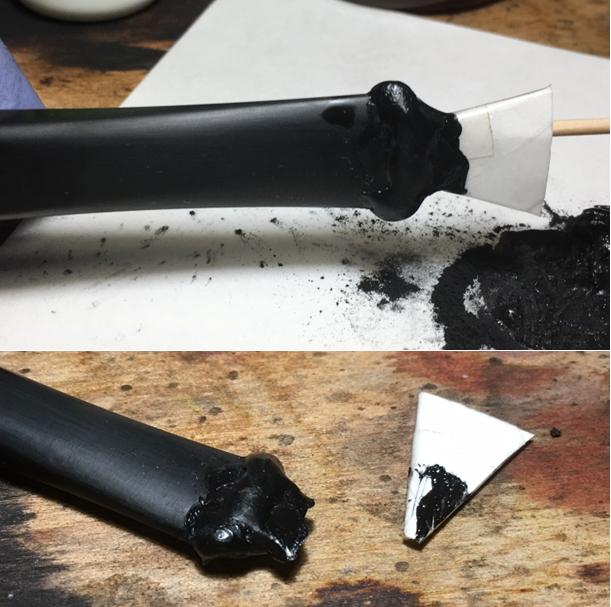
  With clean internals, what remains is to rebuild the button and patch the bite-through hole from the former stewards clinching. I create a slot insert using an index card cut to fit and then covered with slick scotch tape – the plastic looking kind. This will keep the charcoal-superglue putty from sticking to the insert. The insert serves two purposes. First, it protects the airway from putty dripping down and plugging things which would add significantly to the work load! It also provides the form underneath the hole to shape the fill. I open a capsule of activated charcoal on an index card and I mix it with Hot Stuff Special ‘T’ CA glue – after I place a puddle of it next to the charcoal. Gradually, I pull charcoal into the puddle of CA glue using a toothpick until I reach a viscosity of molasses and then strategically I dollop the putty in to the tooth hole and around the button – more than needed so that during the sanding phase there’s enough material to shape the button adequately. Just as an experiment, I’m putting the putty on a bit wetter than usual and use an accelerator to cure it more rapidly. I want to see if the result might be fewer air pockets in the patch material. The pictures show the progress with the button patch and rebuild.
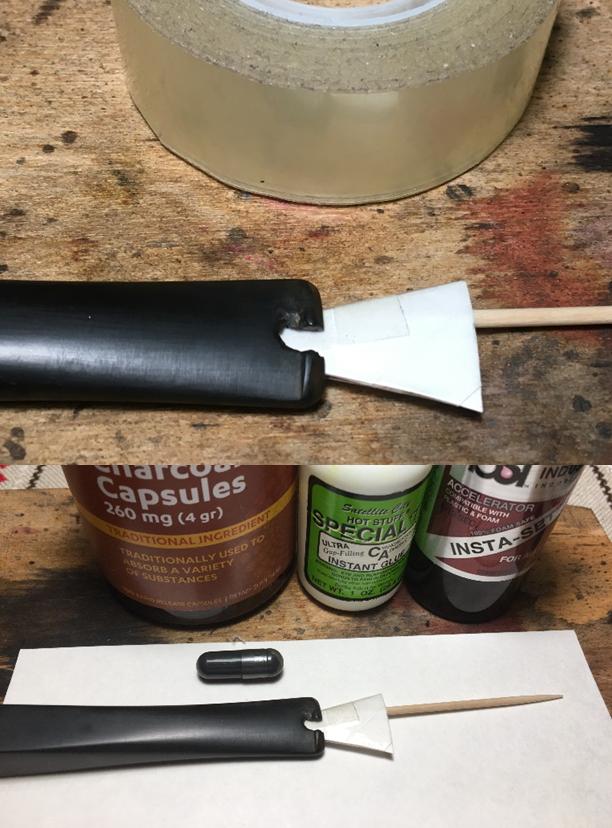
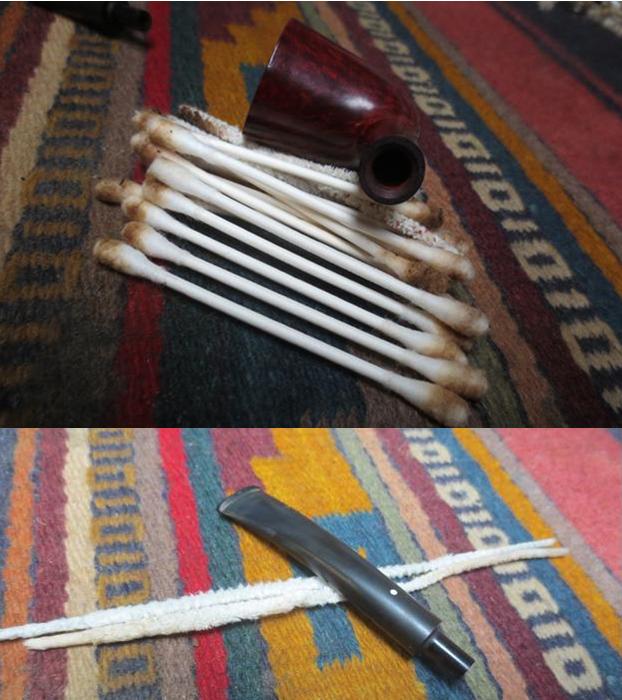
 After a fruitful day at work, I’m anxious to return to the worktable. The Kosher Salt and alcohol bath has run the course and as expected, the salt has darkened and the cotton stuffed into the mortise has acted as a ‘wick’ drawing out the oils and tars – thank you Charles Lemon of Dad’s Pipes for the suggestion of using cotton rather than a cork. It worked well. After dumping the salt, I wipe the chamber with a paper towel to remove all the residue salt. I also employ bristle brushes to clean out the mortise to remove all the old used salt. Then I return to using some cotton swabs and pipe cleaners down the mortise and they came out clean. Job done. The pictures show the progress.
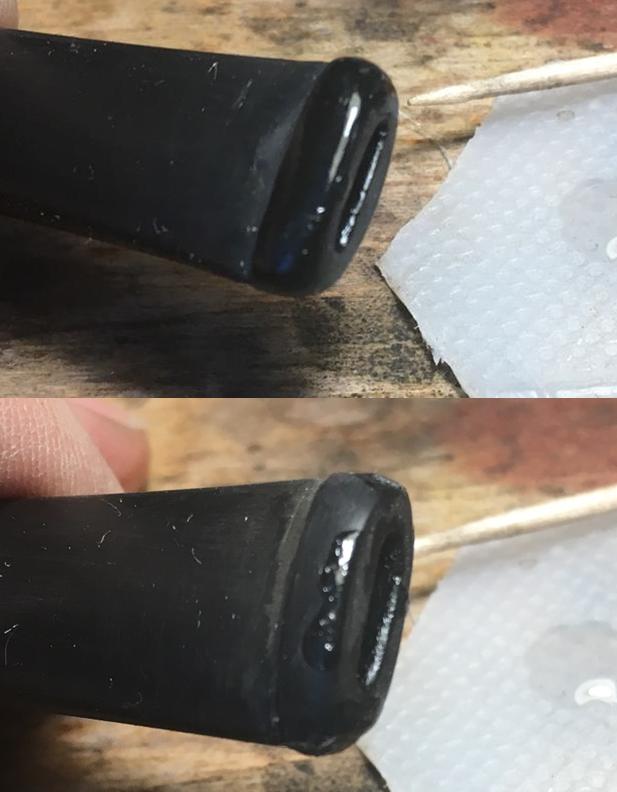
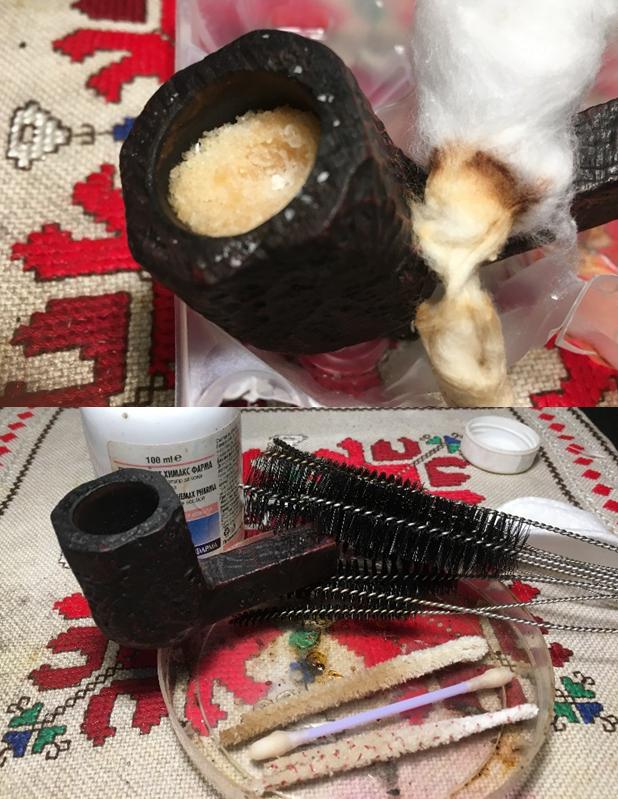 Many of the pipes I’ve been restoring have had significant stem issues – splicing the L J Peretti, and several button rebuilds have come my way. I like to think I’m getting more practice resulting in better results! So is the hope. I take fresh pictures, top and bottom, of the patched area using activated charcoal dust and Special ‘T’ CA glue to mark the progress. Beginning from the slot-side, I use a sanding drum with the Dremel to remove quickly the large hunk of runover. Then, using a flat needle file, I work toward bringing the new edge of the button to where the original slot is. After this is accomplished, I carefully file inside the slot to shape it. Care is given because the lower slot lip in the center, is 100% patch fill from the tooth hole breaching the slot. The patch material tends to be softer than the vulcanite so the center – lower area of the slot may be soft and give up too much territory as I file. I gently (and patiently!) use the small circular part of a pointed needle file to shape the inner part of the slot. It looks good. Pictures show the progress to establishing the new rough slot.
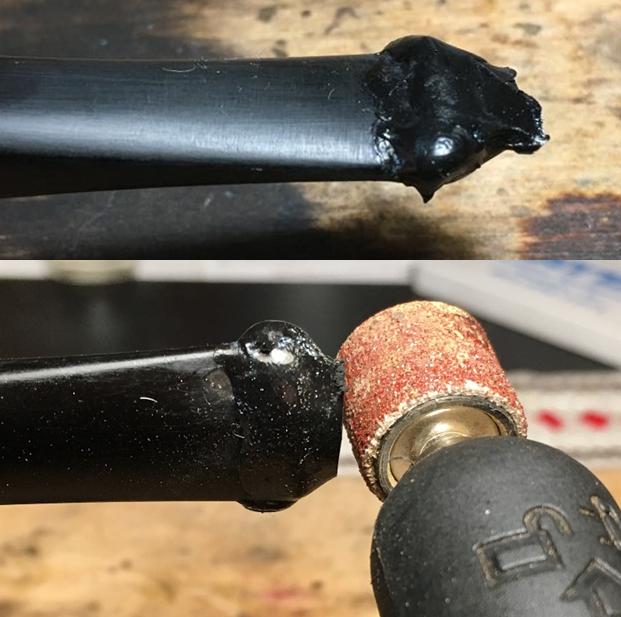

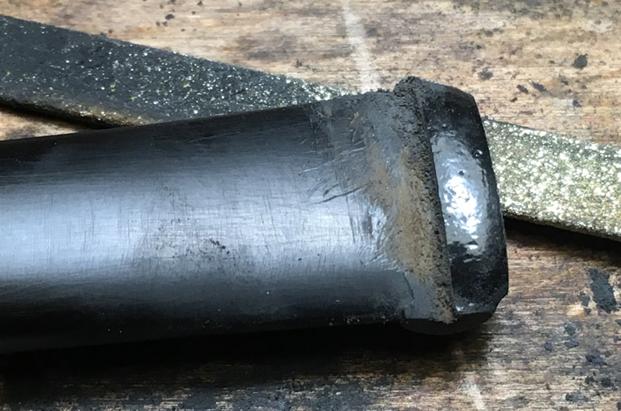
 Now I establish the upper edge of the shank-side of the button lip. I do this by eyeballing a logical place to have the lip – maybe giving me a little more lip than needed now – I can always file it down, but can’t file it up! I place a score in the patch bulge with the corner edge of the flat needle then gradually file the score across the button and moving downward toward the original stem surface. As I file with the flat needle file, I keep the left edge of the file off the stem and lean into the patch area. I don’t want to scar up the stem for no reason! Pictures show the gradual, patient shaping process with the file.
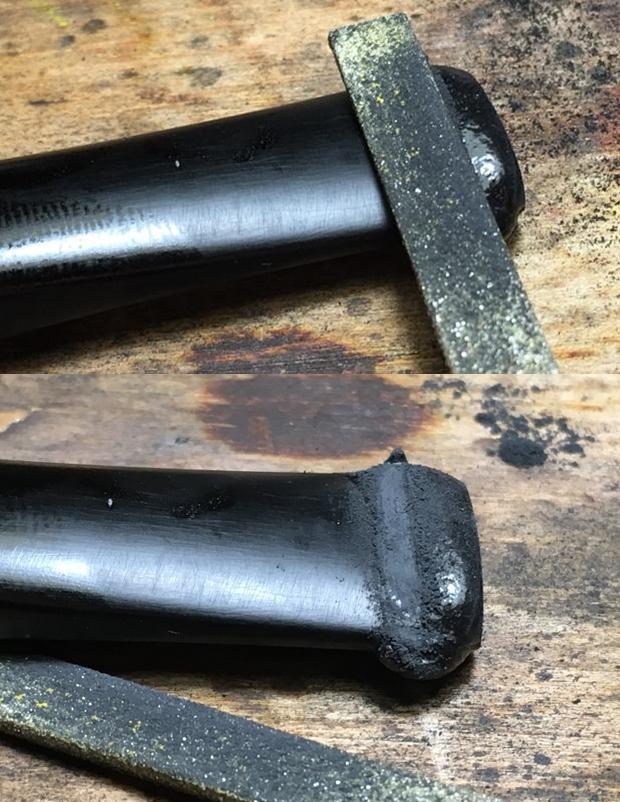
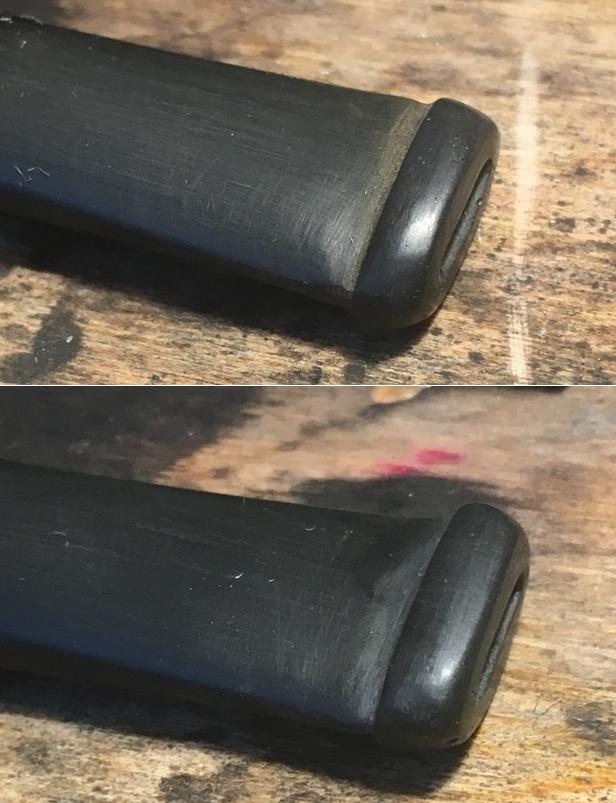
 With the top shape-out completed with the file, I flip the stem and repeat the process on the bottom side. I follow the button line from the top to the bottom by continuing to score the line around the excess on the stem edges, filing and rounding the button on the left and right. I use the stem’s lines on the left and right sides, coming from the shank-side to create the line through the left and right side of the button. At the end, it’s a smooth transition on the sides from the stem’s sides to/though the button’s sides. I picture what I’m attempting to explain in the last picture in this set below. I’m also careful to uncover gradually the tooth hole patched area in the center bottom. I expect the patch area to be softer than the vulcanite and I want the patch to blend. The pictures show the progress on the lower side of the button.
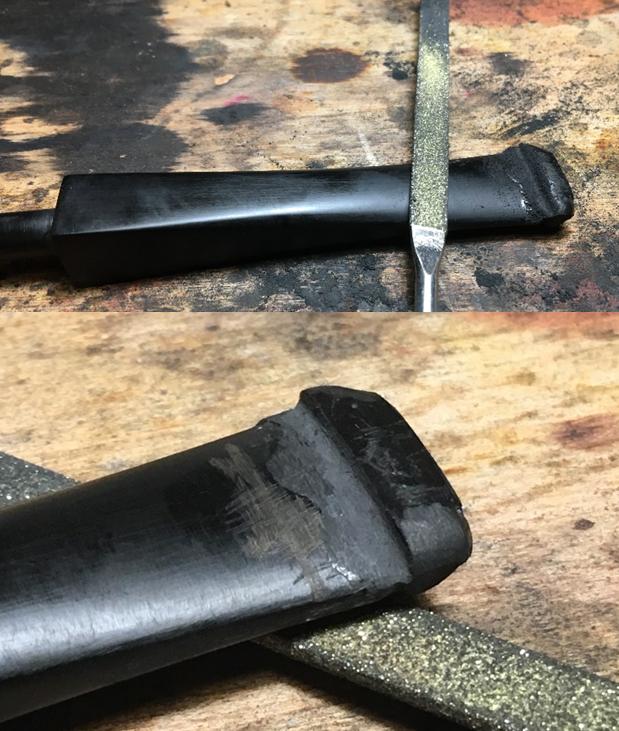
 The last two pictures show the completion of the button shaping upper then lower, using 240 grit paper followed by 600 grit paper and 0000 grade steel wool to catch the button repair area with the rest of the stem. The button rebuild looks great and the hole patch is blending well.
 At this point I take a close look at the patch area and I see some air pockets – not many, but some. That cannot stand for the recommissioning of this 1961 Dunhill. What comes to your mind when you reflect on 1961? This is what I see, a ’61 Chevy with this Dunhill along for the ride! Perhaps I need to acquire one of Alfred Dunhill’s Patent Shield Pipe too!
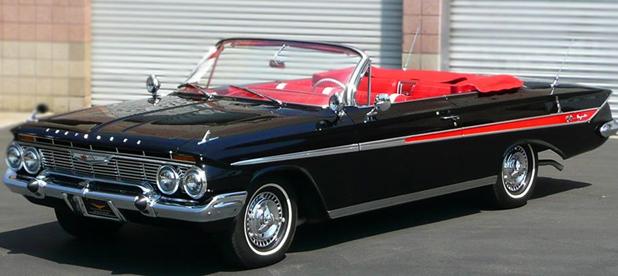 This Dunhill might be a good Birth Year Pipe for someone if I can give it up. I take regular superglue and make a small puddle and use a toothpick to hole drop glue and paint some areas to fill the air pockets and I follow by spraying the fills with accelerator. Following this, I sand the fill areas with 600 grit paper and then 0000 grade steel wool. I declare button repair consummatum est!
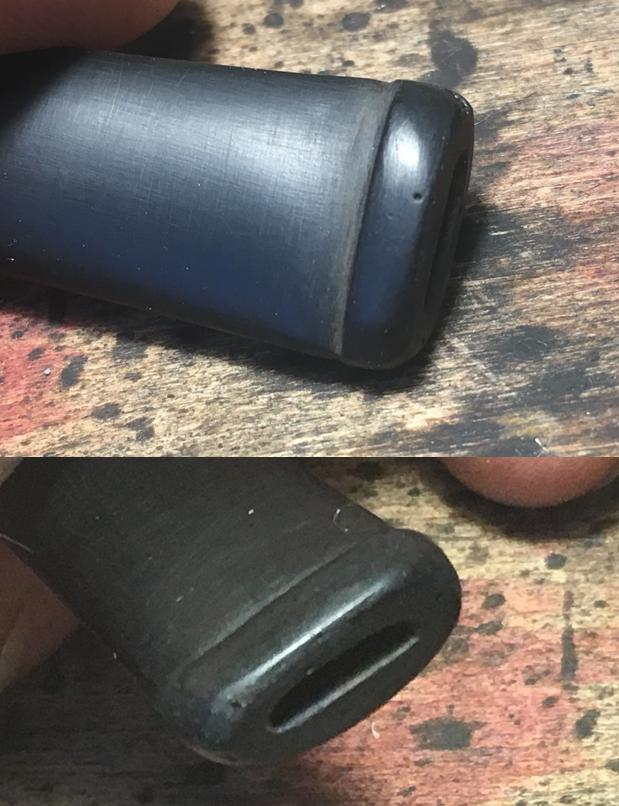
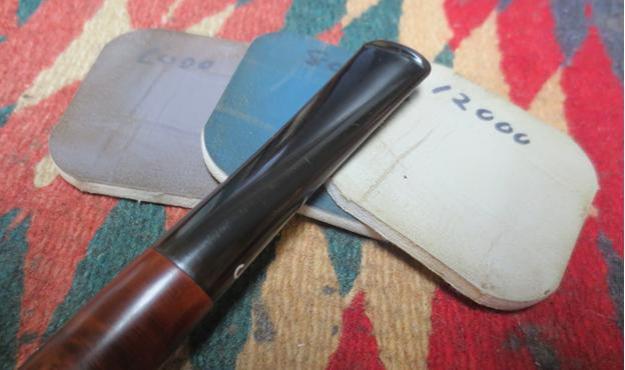
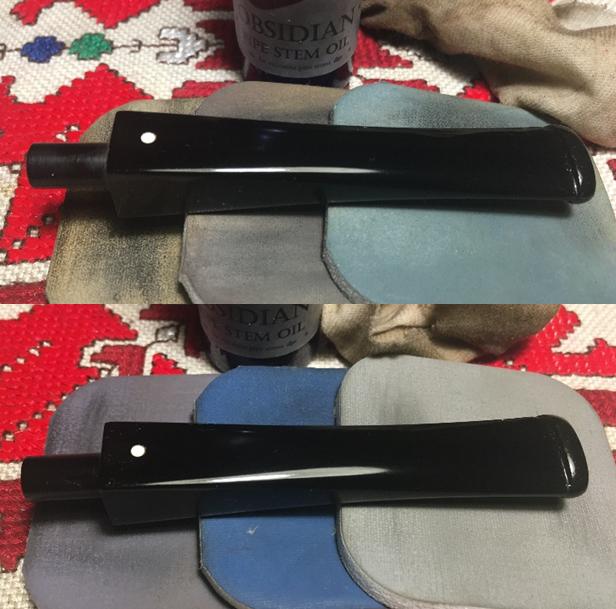
 I take the Dremel and finally fabricate a plastic washer to guard against sanding down the shoulders of the stem. Using the washer with the stummel providing the resistance, I wet sand with micromesh pads 1500 to 2400, then dry sand using the next set of 3200 to 4000, then 6000 to 12000. I follow each set of three with an application of Obsidian Oil to revitalize the vulcanite. My, this stem and Dunhill White dot are ready for the ’61 Chevy convertible!
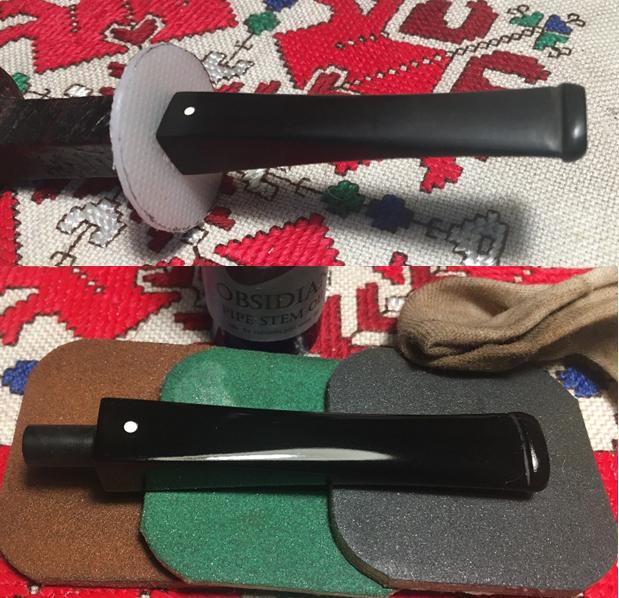
 I may have created a problem showing the ’61 Chevy paired with a British-born pipe. So, I suppose this British made ’61 MGA Roadster would do OK in a pinch 🙂
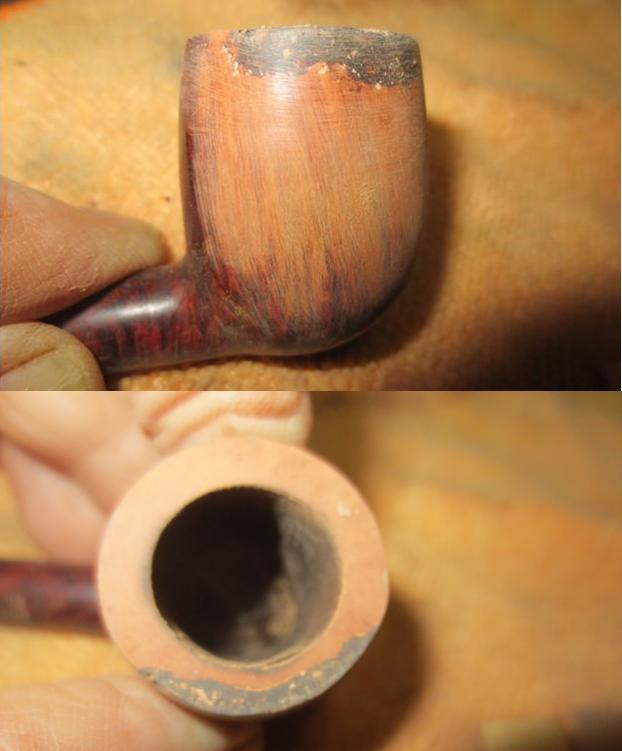
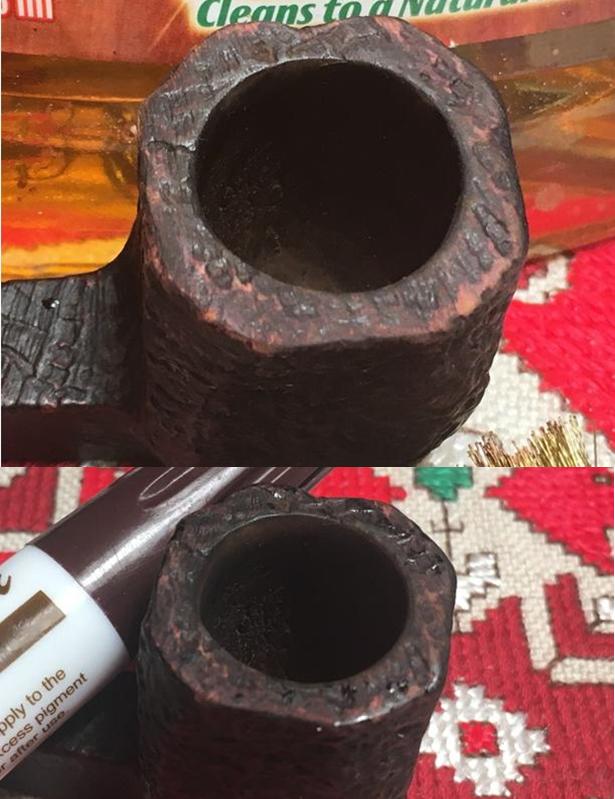
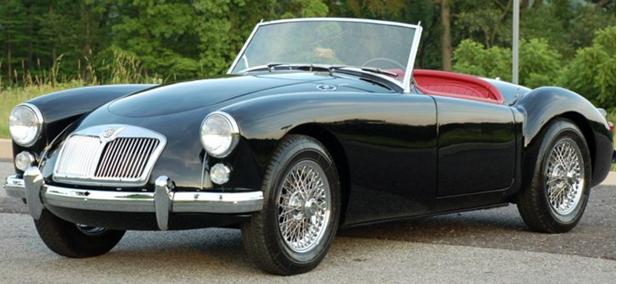 With the micromesh phase completed, I turn again to the stummel. Previously, I applied dye sticks to lightened wear areas to give a fresher look. I look at the rim a little closer and it still appears crusty and black – lacking the light reddish speckling present in the rest of the stummel. I lightly sand the rim with the 1500 micromesh pad and then use my pen knife and gently scrape the top. I only remove the crust on the sand blasted surface. After scraping, I return to Murphy’s Oil Soap and with a brass brush, scrub the rim again and rinse with tap water. I’m seeing a better contrast of hues now in the blast textured surface. I then take the darker hue stain stick and randomly paint portions of the rim to add more contrast and interplay and then lightly dab and wipe with a slightly wetted cotton pad with isopropyl 95% to blend. I want to keep the original color of the EK Shell Briar and the look of a classic 1961 Dunhill. The pictures show the progress.
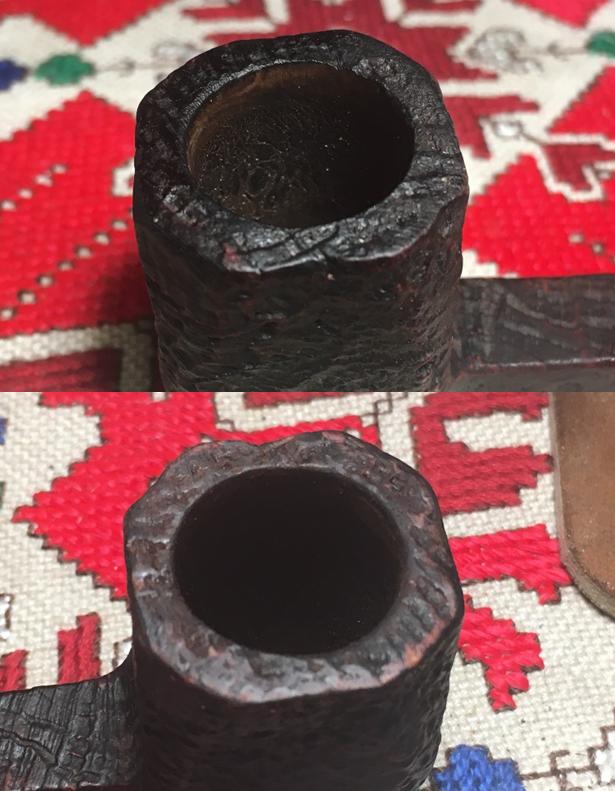
 Using a cotton cloth wheel, I apply Blue Diamond compound to the stummel. I set the Dremel speed to 1, the slowest possible. With the Dremel’s wheel, as small and concise as it is, I can rotate the stummel and guide the wheel so it’s going with grains – maneuvering in the peaks and valley of the Shell moonscape surface. I don’t overload the wheel with compound and press with too much force downward, but allow the RPMs of the Dremel and the compound to do the work. After completing the compound application, I hand-buff the stummel with a flannel cloth to remove the loose compound residue before applying the wax. With the stem and stummel reunited, I give both several coats of carnauba wax. I use a separate cotton cloth Dremel wheel dedicated to carnauba, I set the speed at 2, with 5 being the fastest setting. As I did with the Blue Diamond, I utilize the strategic smallness of the Dremel’s wheel as I maneuver to distribute the carnauba wax without gunking up in the Shell textured surface. Following the wax, I give the Dunhill a brisk hand-buff with a micromesh cloth.
One last need on the check-list before recommissioning this 56-year-old Dunhill. After this many years of active service, heat fissures had developed in the chamber. I want to coat the chamber with a mixture that helps protect the briar while at the same time provides a temporary foundation for the cake to develop which will provide the long-term protection of the chamber briar. I have heard, and repeat here, proper cake depth to be maintained is about the thickness of a US dime. It would have been easier to do this before polishing the stummel, but I forgot until now. No problem. 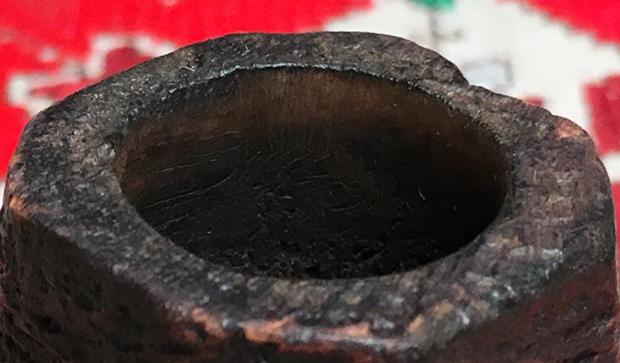 In the past, I’ve used a coating mixture of activated charcoal dust and sour cream (here on Reborn Pipes) – which works wonderfully and leaves no taste or smell – it is inert. Since I don’t see any sour cream in the refrigerator, I decide to use the method that Charles Lemon uses which he described here on Dad’s Pipes using maple syrup and activated charcoal as the main ingredients. Since we do not have maple syrup in Bulgaria (bummer!), Charles assured me after an emailed question, that honey, plentiful in Bulgaria, would serve well as a substitute. Charles’ directions are straight forward, which I follow:
- Insert a pipe cleaner in the stem of the pipe to keep the airway open.
- Wipe maple syrup around the inside surfaces of the bowl. Try for a nice even layer.
- Pour activated charcoal powder into the bowl right up to the rim.
- Allow the pipe to sit for an hour or more. This gives time for a layer of charcoal powder to be absorbed by the syrup.
- Dump out the excess charcoal powder, remove the pipe cleaner from the stem.
- Now the hard part. LET THE PIPE SIT FOR 5-7 DAYS. The bowl coating will cure smooth and hard.
- After curing, your pipe is ready to go!
These pictures show the progress with the final picture a few hours after clearing the excess charcoal. I will need to let the pipe sit now for 5 to 7 days for the bowl coating to fully cure, which will not be a problem! 
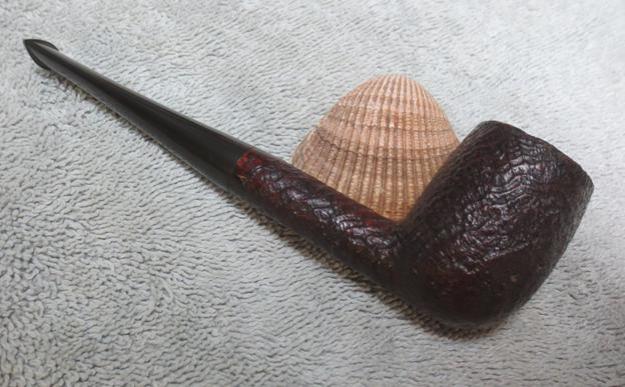
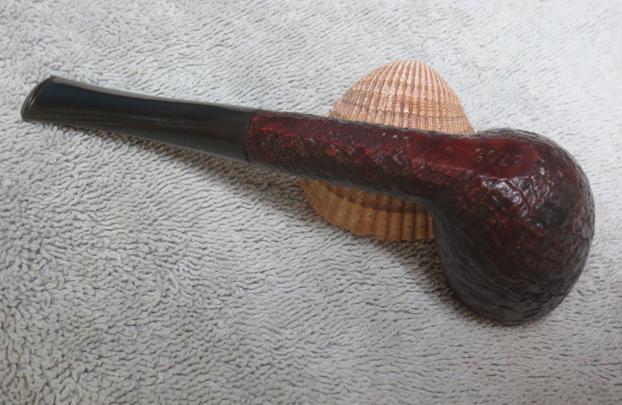
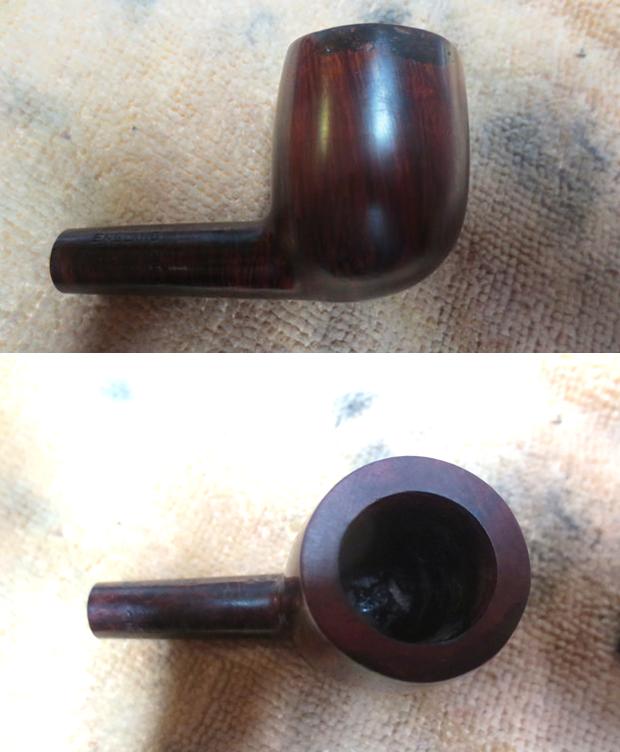
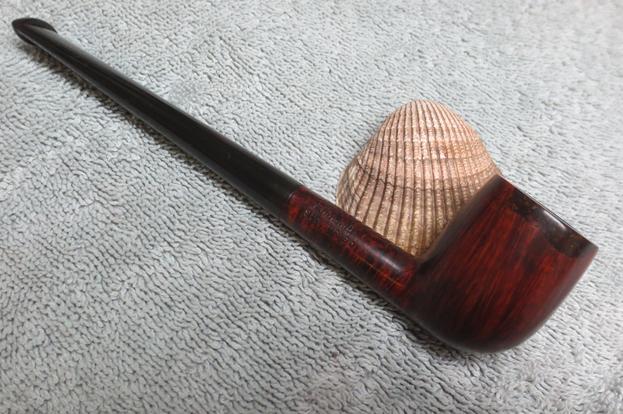
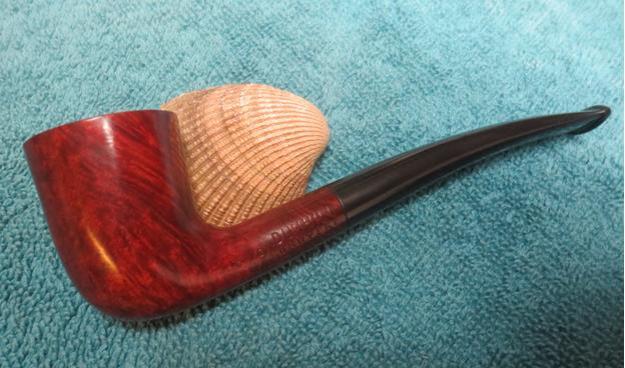
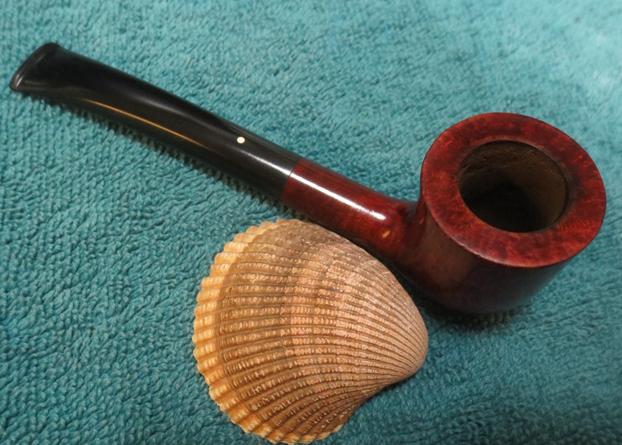
 I’m very pleased with the outcome of the stem/button repair. There is no perceptible indication that there was a hole that breached the lower button lip. The Shell Briar cleaned up well and shines with a rich, deep, brown/burgandyish textured shade. When restoration began, I did not realize how I would grow to appreciate the name, “Dunhill” and the pipes bearing this respected name. The debate will remain regarding Dunhill’s higher pricing – whether one is paying for only a name or for advanced excellence in a pipe. I suspect that both are true. After seeing the beauty of this 1961 Dunhill EK Shell Briar emerge, especially as he responded to the carnauba treatment, coupled with the solid feel of the 4-paneled, square billiard bowl, and the strong bearing of the squared shank transitioning into a squared stem that gracefully tapers to the button – and, all is crowned with Alfred Dunhill’s happenstance white dot mark of excellence – and I agree, I am looking at a quality pipe. I’m conflicted whether to keep this Dunhill, my first, or to put him up for adoption??? Oh well…. I sell my restorations with a special purpose. The profits help the work we do with the Daughters of Bulgaria – women and children sexually exploited and trafficked. This vintage 1961, Dunhill EK Shell Briar, Made in England 1, is ready to serve a new steward. If you’re interested in adopting him and helping the Daughters, go to my blog site at The Pipe Steward Store and check it out. Thanks for joining me!
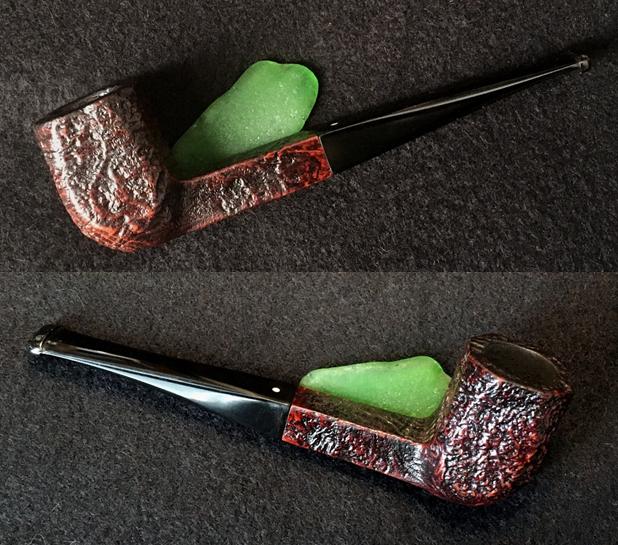

 I remembered that the Sashar line was made by Sasieni. I could not remember any other information on the brand. I did a Google search and found that there was a write up on rebornpipes – go figure. I looked and it was a blog that Al Jones wrote on a Sashar pipe that he worked on. Here is the link https://rebornpipes.com/2016/12/19/sasieni-sashar-restoration/.
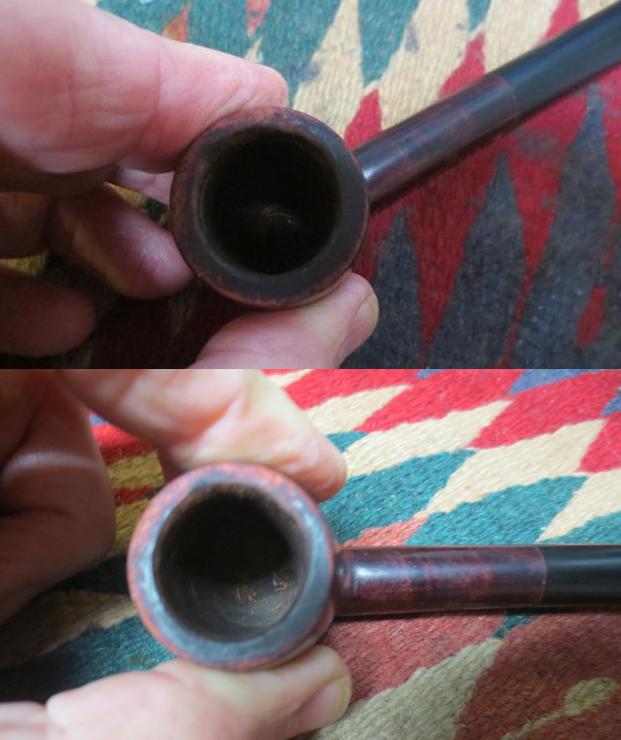
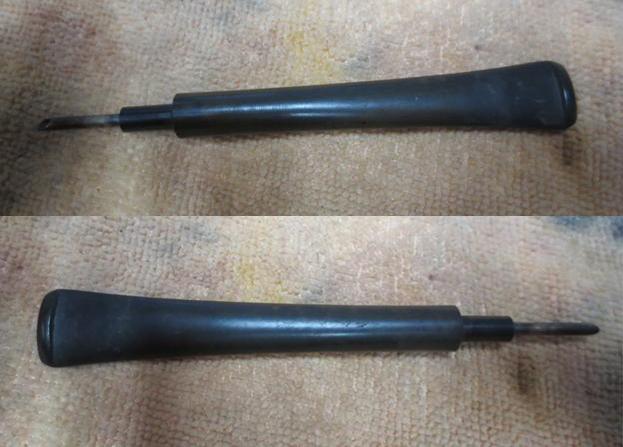
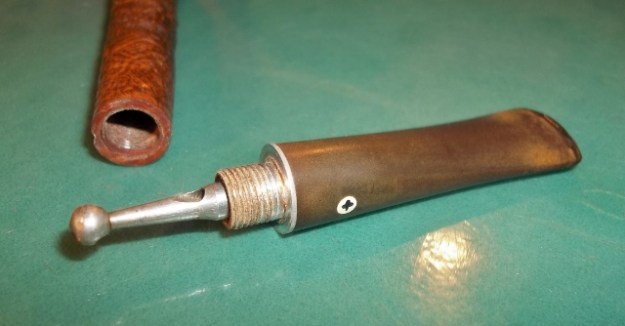
 In order to clean out the airway in the stem I needed to remove the inner tube from the tenon. I heated it with a lighter until the oils and tars holding it in place warmed up. I wrapped the jaws on a pair of pliers and used it to turn the inner tube out of the tenon. With the tube removed I was able to clean out the airway without impediment.
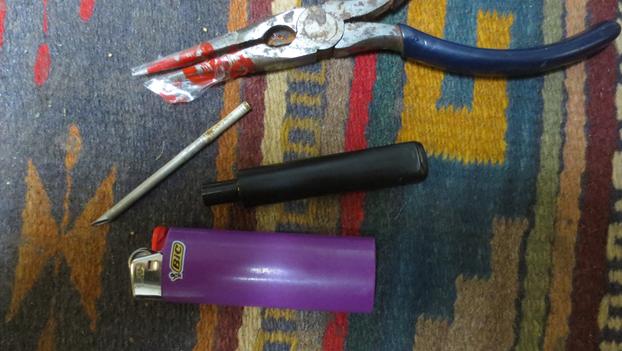 I used a folded piece of 180 grit sandpaper to rework a bevel on the inner edge of the bowl. Once I had the bevel cut I worked on it again with 220 grit sandpaper and 1500 grit micromesh sanding pads. I rolled a piece of 220 grit sandpaper into a tube and wrapped it around a dowel and then my finger to sand the inside of the bowl and clean up the remaining cake on the walls.
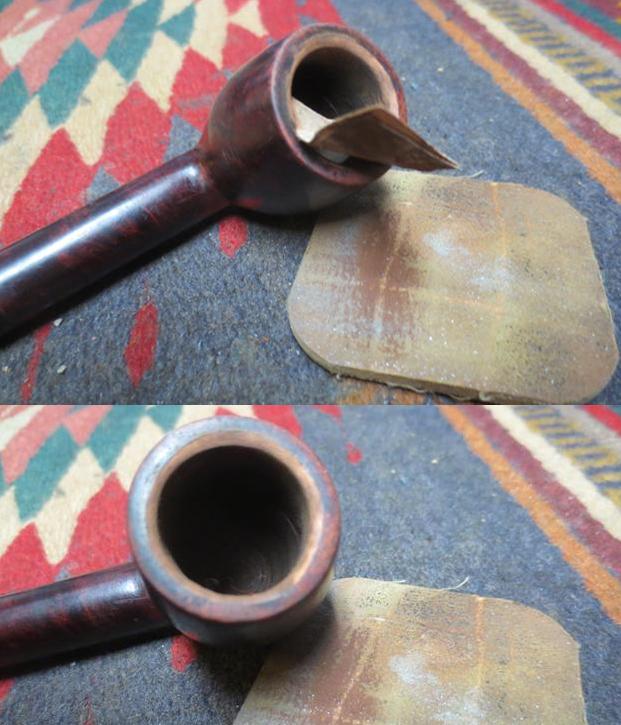
 I used a dark brown stain pen to restain the top of the rim and the inner and outer edge of the bowl. I spot coloured it with a black Sharpie pen and blended the two together to get the finish to match the rest of the bowl.
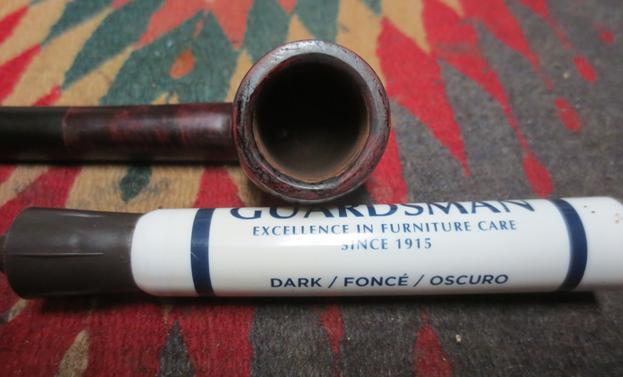 I used a wet cloth and a butter knife to steam out the dents in the back side of the bowl. I heated the knife in the flame of the burners on my kitchen stove. When hot, I folded a wet towel against the dents in the briar and laid the hot knife on the wet cloth. It generated a fair amount of steam. I repeated the process until the dents were lifted.
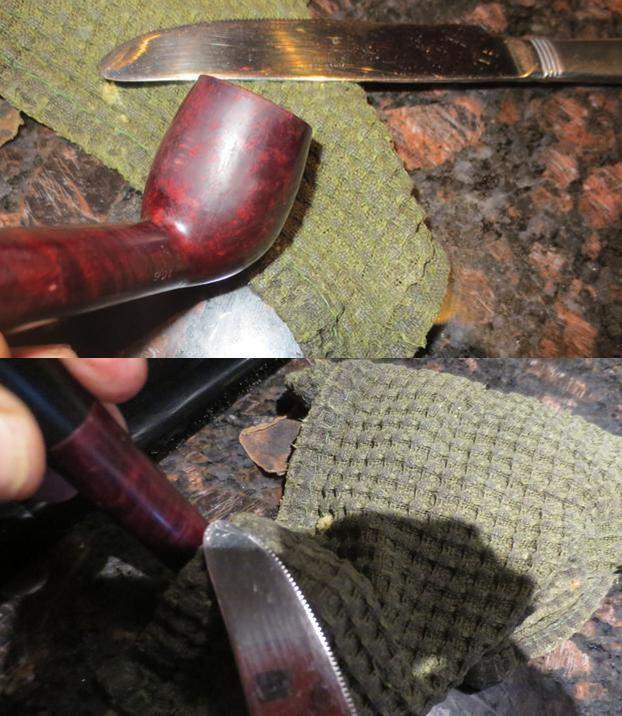
 I used 99% isopropyl alcohol, cotton swabs and pipe cleaners to clean out the mortise and the airway in the shank and the stem. They were not too dirty so it took very few cleaners to clean it. Once the stem was clean I put the inner tube back in place in the tenon.
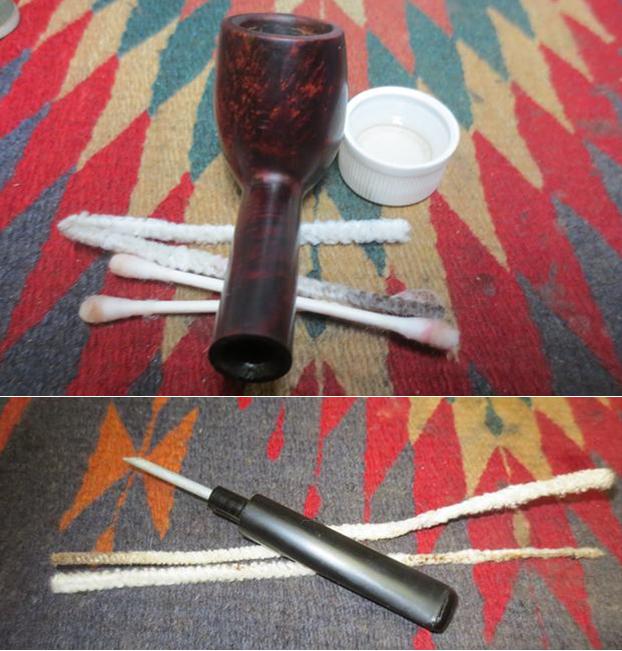 I sanded the tooth chatter on the stem at the button with 220 grit sandpaper to remove it and the few tooth marks that were also present on both sides of the stem near the button.
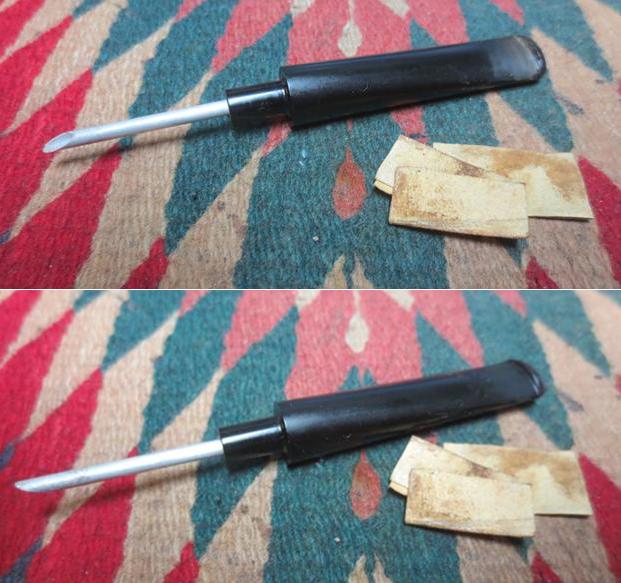 I polished the stem with micromesh sanding pads – wet sanding with 1500-2400 grit pads and dry sanding with 3200-12000 grit pads. I rubbed the stem down with Obsidian Oil after each set of three pads. After the last set of pads I gave it a final coat of oil and let it sit and dry.
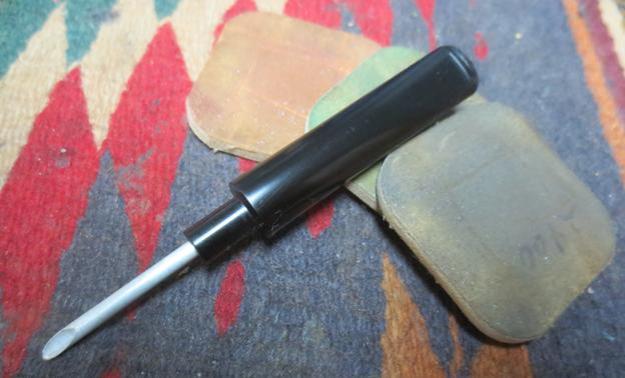
 I buffed the bowl and stem with Blue Diamond on the buffing wheel to polish the briar and the vulcanite. I gave them both multiple coats of carnauba wax and buffed it with a clean buffing pad to raise the shine. I hand buffed it with a microfibre cloth to deepen the shine. The finished pipe is shown in the photos below. It is ready to go back to its owner in Eastern Canada. Thanks for looking.