Blog by Steve Laug
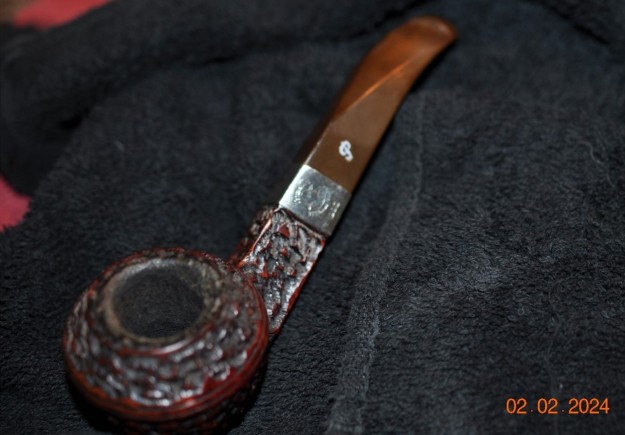
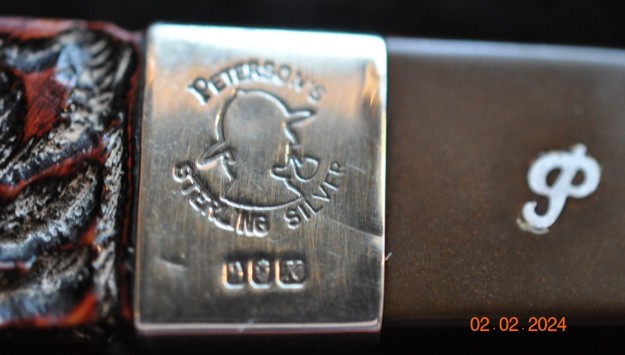
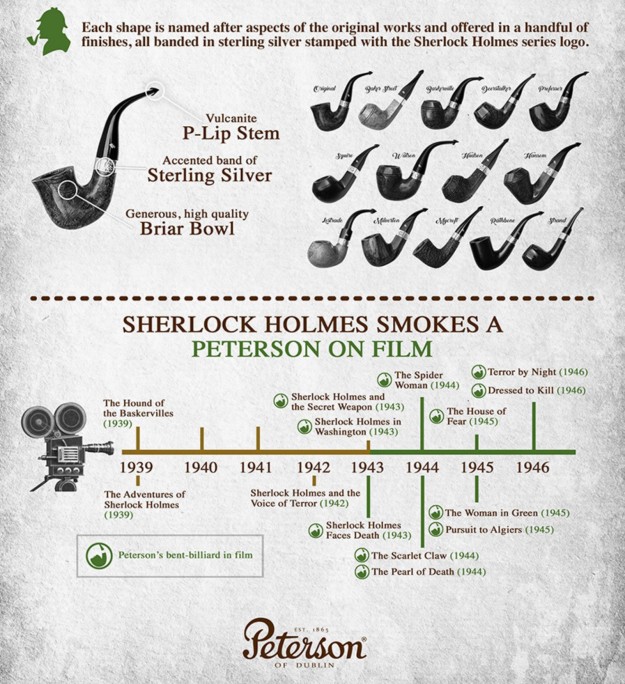
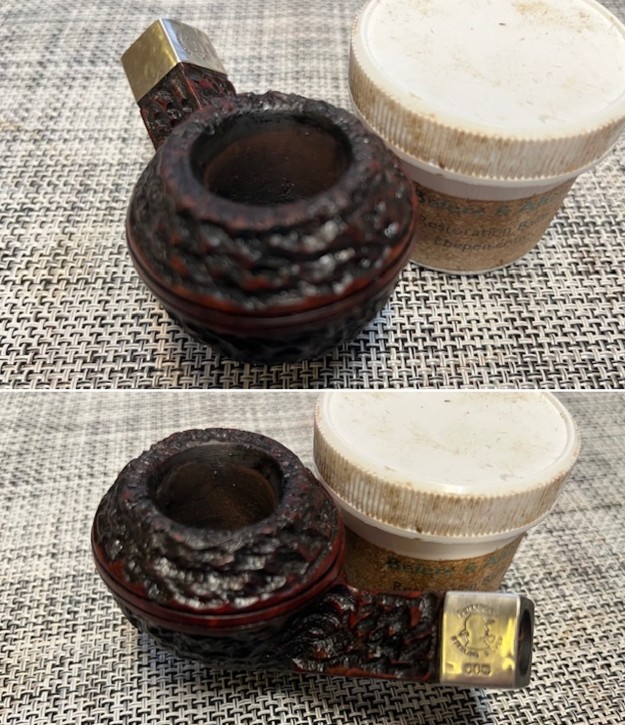
The next pipe that I am working on came from our contact in Copenhagen, Denmark we purchased on 01/08/24. It was very dirty and was a reddish, brown coloured pipe when it started. The rusticated finish around the bowl was dirty and had hand oils ground into the rusticated finish. The bowl had a thick cake and a thick coat of lava onto the bevelled inner edge of the rim top. The rim top had some serious burn damage on the back left and front right that left the bowl out of round. The classic p-lip stem was very dirty, oxidized and had light tooth marks and chatter on both sides ahead of the button. There was a silver inset P logo on the left topside of the diamond stem. The fit of the stem to the shank is perfect. The pipe is stamped on the left underside of the diamond shank and read Peterson’s [over] Sherlock Holmes[over] Squire. That is followed by Made in the Republic of Ireland (in three lines). There is a Sterling Silver band on the shank end that is stamped on the topside with the Sherlock Holmes Series Logo – the outline bust of Sherlock with Peterson ‘s arched above and Sterling Silver arched below. Below that it bears three hallmarks in the silver band – Hibernia seated for Ireland, a crowned harp designating the .925 quality and finally the date mark which in this case is an italic K dating the pipe as made in 1996. It is clean but oxidized. Jeff took photos of the pipe so I could have a sense of what it looked like before he started his work on it.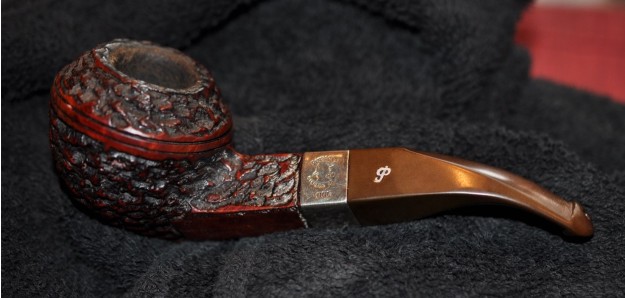
 Jeff took photos of the bowl and rim top to show the cake in the bowl with remnants of tobacco stuck on the walls of the bowl. There was a thick lava build up on the rusticated top of the rim and the bevelled edge of the bowl. The rim top had burned areas on the front and rear and the bevel was destroyed. Only clean up would tell the full story. Jeff took photos of the top and underside of the p-lip stem showing the tooth chatter, scratching and oxidation on the stem surface and wear on the edges of the button.
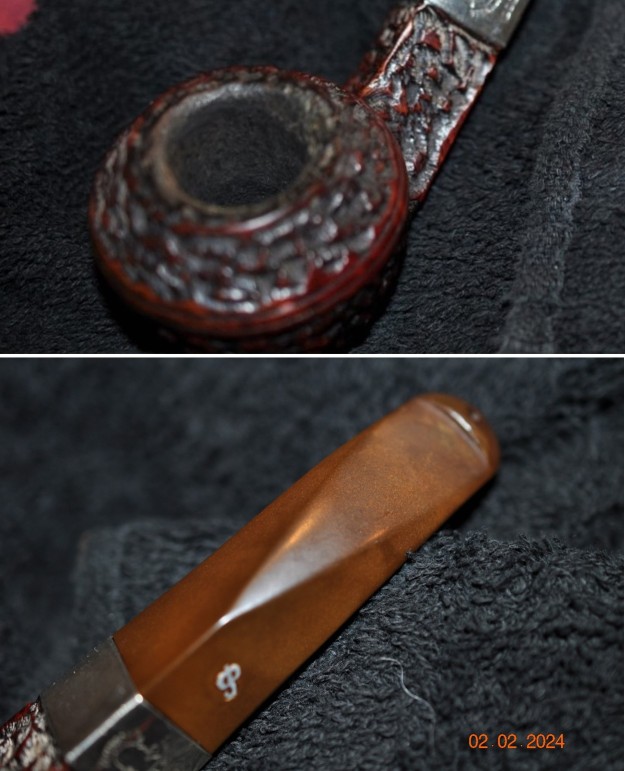
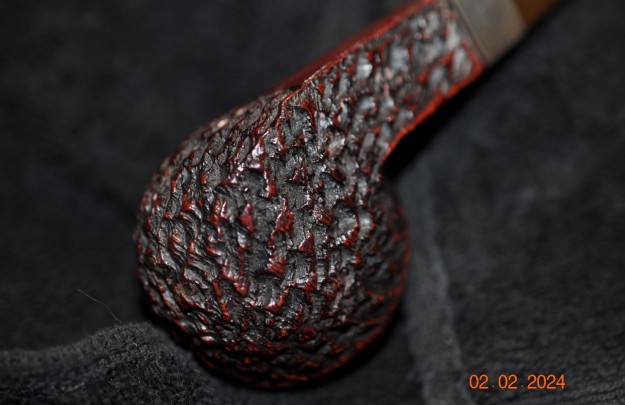
 Jeff took photos of the sides and heel of the bowl to show the condition of the finish. You can see the grime in the rustication around the sides of the bowl and shank. Even under the dirt and debris of the years it looked very good.
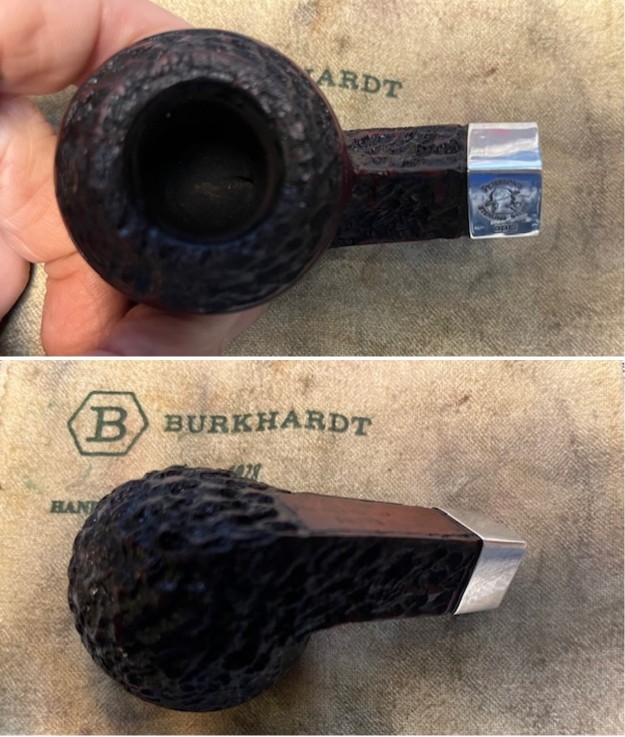
 Jeff took photos of the stamping on the underside of the shank. The stamping was faint in spots but readable as you can see from the photos. It read as noted above. The Sterling Silver Band is stamped as noted above and is very readable under the oxidation.
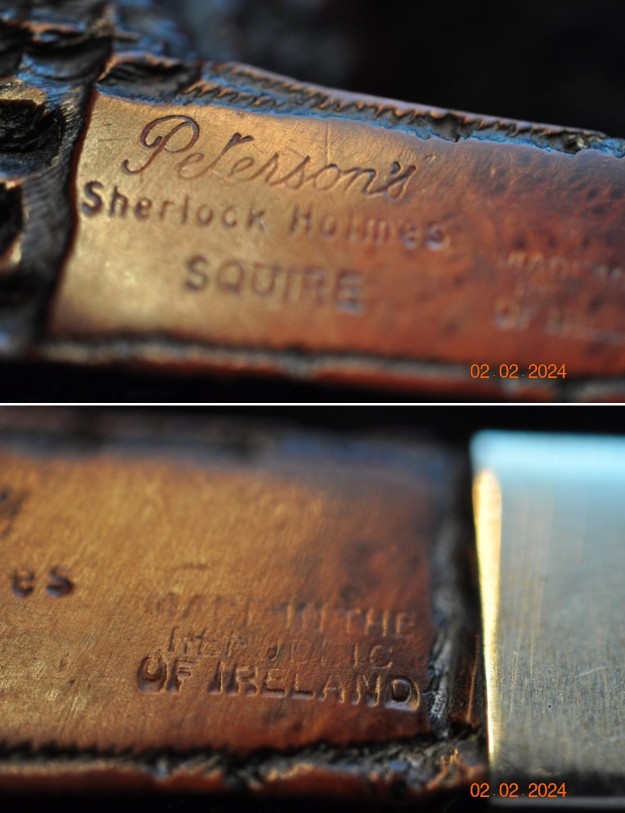
 I wanted to know more about the Peterson’s Sherlock Holmes Line so I turned to the Pipedia article on the line and read it carefully to see where this pipe fit in the line of pipes making up the line. (https://pipedia.org/wiki/Peterson#1950_-_1989_The_Republic_Era). I quote what I found out below.
1987 saw the introduction and Issue of the first Sherlock Holmes ‘Original’ Series of pipes. The Sherlock Holmes series is probably the most successful series of pipes ever introduced by Peterson in terms of numbers. It was first issued to honour Sir Arthur Conan Doyle’s famous fictitious detective character, Sherlock Holmes. Holmes is perhaps the most famous pipe smoking character in fiction…
The Sherlock Holmes Series: Probably the most popular and successful series of pipes ever produced by Peterson. Including the Meerschaum version of the seven day sets. Both briar and Meers can be purchased either as individual pipes or complete seven day sets and stands. Expect to pay around $250 for briars and $300 for individual Meerschaums. The Adventures of Sherlock Holmes runs around $1000 for a 4 pipe boxed set. Complete 7 day sets and stands can be up to $1500 – $2000.
At this point I knew that the original line was introduced in 1987. I did not know the sequence of pipes after the Original first pipe. More work was necessary. So, I followed the links included to another article call the Pete Sherlockiana Group. There was photo there of the full collection of various Sherlock Holmes lines that were issue. I have included the link and the information include with the group photo that shown of the collection below.
Here is the link (https://pipedia.org/wiki/File:Pete_SherlockianaGroup.JPG). The description under the photo read as found below:
Sherlockiana Group, which includes: The ‘Original’ 7 day set w/stand, The ‘Return’ 7day set w/stand, The Meerschaum 7 day set w/stand, The ‘Adventures of’ 4 pipe collection, and Various ‘Silver Specials’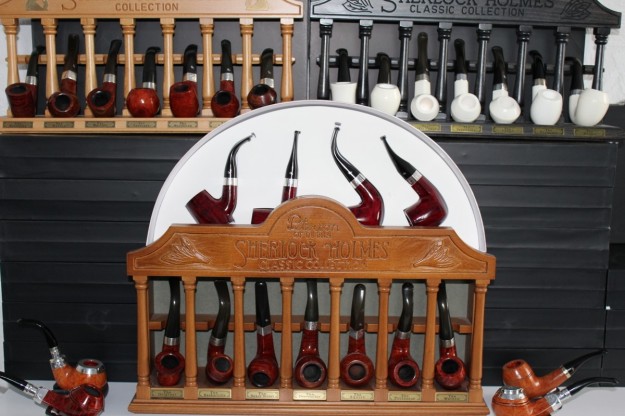 I still wanted to know where it fit in the order of release so I did a bit more digging into the pipe. I wanted to know the name of the pipe and what line of the Sherlock Holmes series it was in when it was released. I Googled and came across a link to an advertising brochure on Smokingpipes.com. (https://www.smokingpipes.com/smokingpipesblog/single.cfm/post/closer-look-petersons-sherlock-holmes-pipes-infographic). I have included it below.
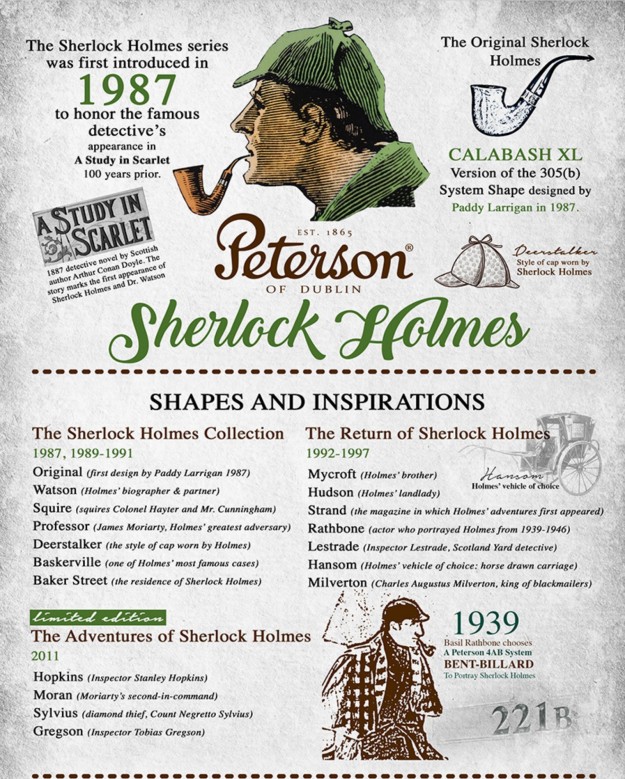
 From that I knew that I was dealing with a Pipe from the Original release of the line from 1987, 1989-1991. It was called the Squire. The pipe is a large bent Bulldog.
I also found a link to a chart on Tobaccopipes.com that was an exploration the Sherlock Series. Here is the link (https://www.tobaccopipes.com/blog/exploring-the-peterson-sherlock-holmes-series/). Each name on the original list on the site can be clicked on for a description of the pipe that is named.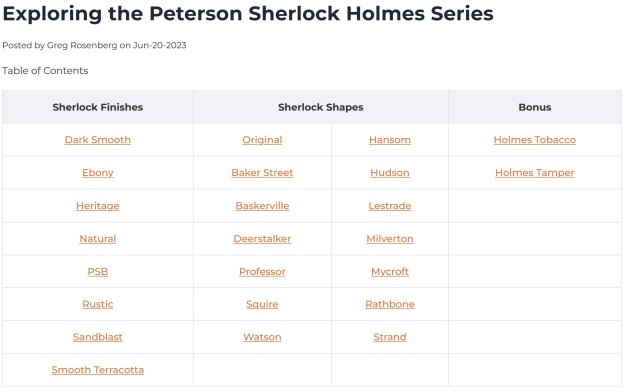 I clicked on the Squire name in the chart above and it took me to the following link and information (https://www.tobaccopipes.com/blog/exploring-the-peterson-sherlock-holmes-series/#baker_street). It states that the pipe was in the Original Collection and came out between 1989-1991.
 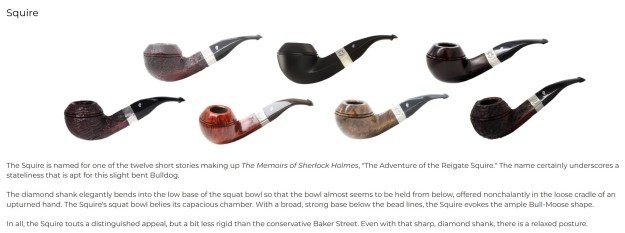 The text below the photos reads as follows:
The Squire is named for one of the twelve short stories making up The Memoirs of Sherlock Holmes, “The Adventure of the Reigate Squire.” The name certainly underscores a stateliness that is apt for this slight bent Bulldog.
The diamond shank elegantly bends into the low base of the squat bowl so that the bowl almost seems to be held from below, offered nonchalantly in the loose cradle of an upturned hand. The Squire’s squat bowl belies its capacious chamber. With a broad, strong base below the bead lines, the Squire evokes the ample Bull-Moose shape.
In all, the Squire touts a distinguished appeal, but a bit less rigid than the conservative Baker Street. Even with that sharp, diamond shank, there is a relaxed posture.
With that information in hand I knew what I was dealing with in terms of the stamping and the age of this pipe. I knew from the information that the pipe was made during the Republic Era between 1950 and the present. The Squire pipe came out as part of the Original Sherlock Holmes Series and thus should have been made between 1989 and 1991. However, here is the anomaly. The silver hallmarks date the pipe to 1996. Now it was time to work on the pipe.
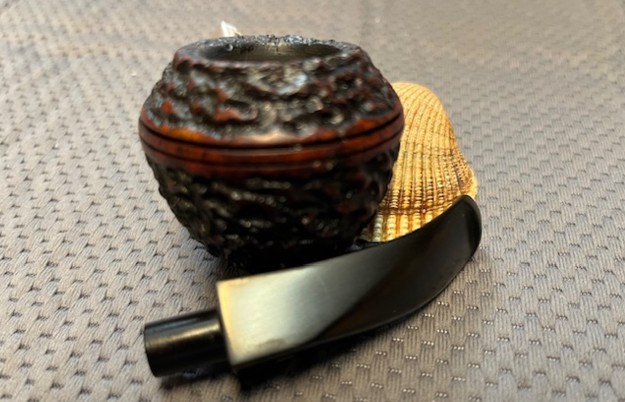
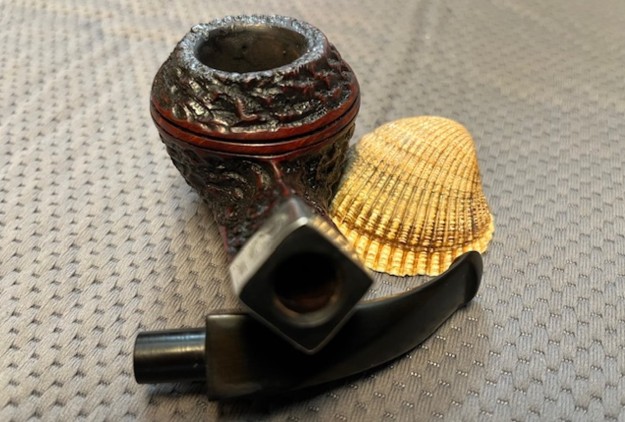
Jeff cleaned this filthy pipe with his usual clean up process. This one was a real mess and I did not know what to expect when I unwrapped it from his box. He reamed it with a PipNet pipe reamer and cleaned up the reaming with a Savinelli Fitsall Pipe Knife. He scrubbed out the internals with alcohol, pipe cleaners, shank brushes and cotton swabs until the pipe was clean. He scrubbed the exterior of the bowl with Murphy’s Oil Soap and a tooth brush to remove the grime and grit on the briar and the lava on the rim top. The finish looks very good with great looking grain showing through the deep rustication around the bowl and shank. There is some fading on the rim top stain that I will work on but it is a beauty. Jeff soaked the stem in Briarville’s Pipe Stem Deoxidizer to remove the debris on the acrylic surface. When the pipe arrived here in Vancouver for the second stop of its restoration tour I was amazed it looked so good.
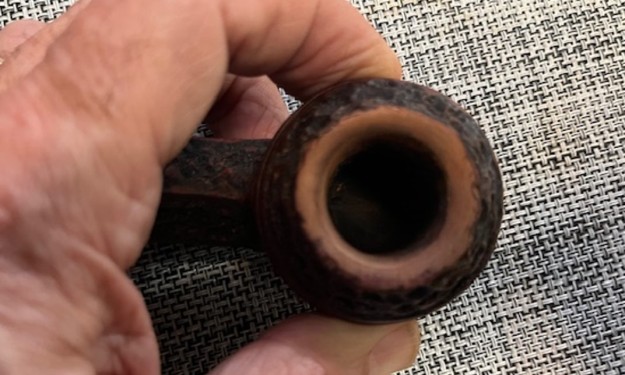
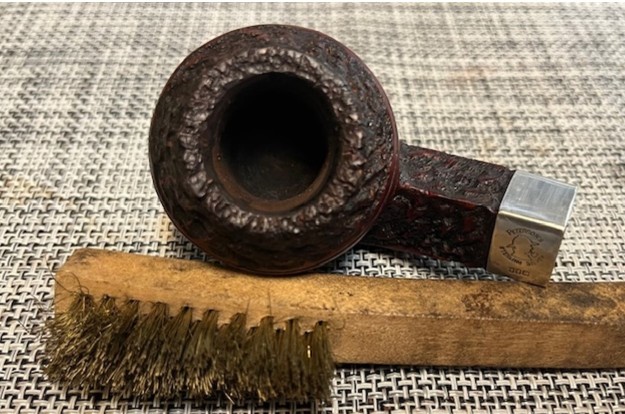
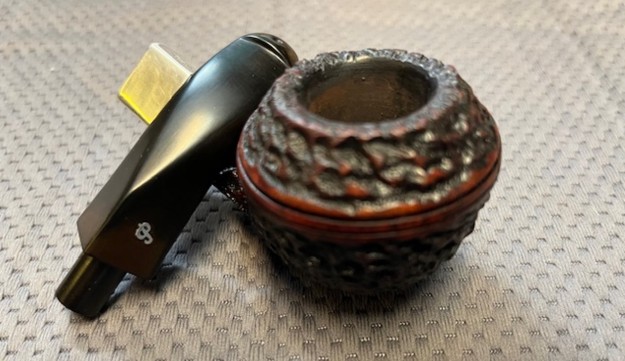
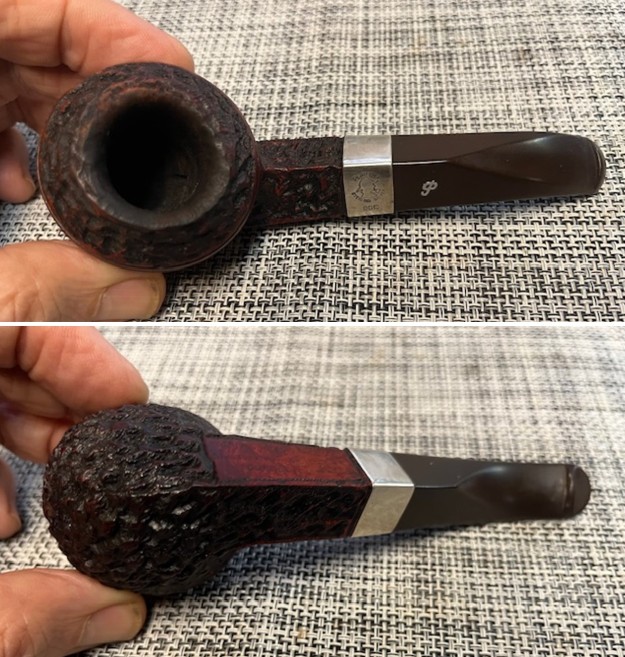 I took some close up photos of the rim top and also of the stem surface. I wanted to show what an amazing job Jeff did in the cleanup of the rim top. I also wanted to show the damage to the rim top. There is burn damage on the on the left side that the right back side is also damaged and looks thin. The rustication on the rim top is also burned off and only remains on the left side quite clearly. I also took close up photos of the stem to show the condition of the vulcanite. It was quite clean other than the light tooth marks and chatter on both sides of the stem ahead of the button. There is also some deep oxidation still remaining on the stem surface.
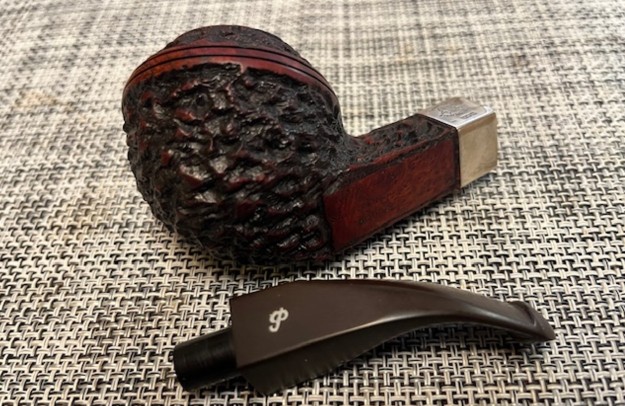
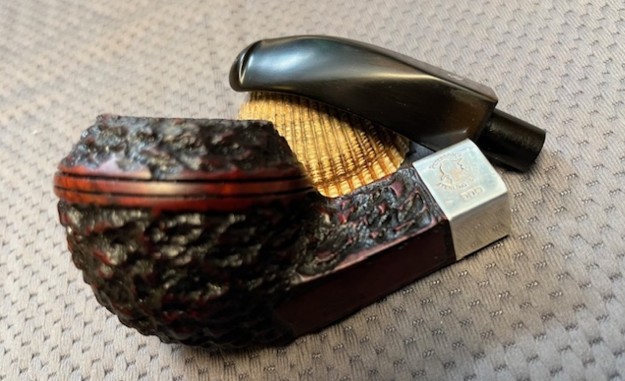
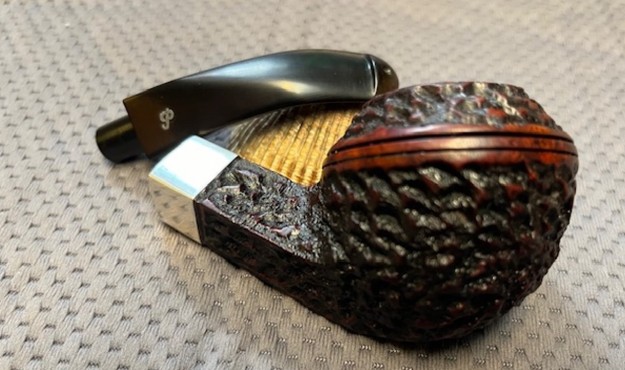
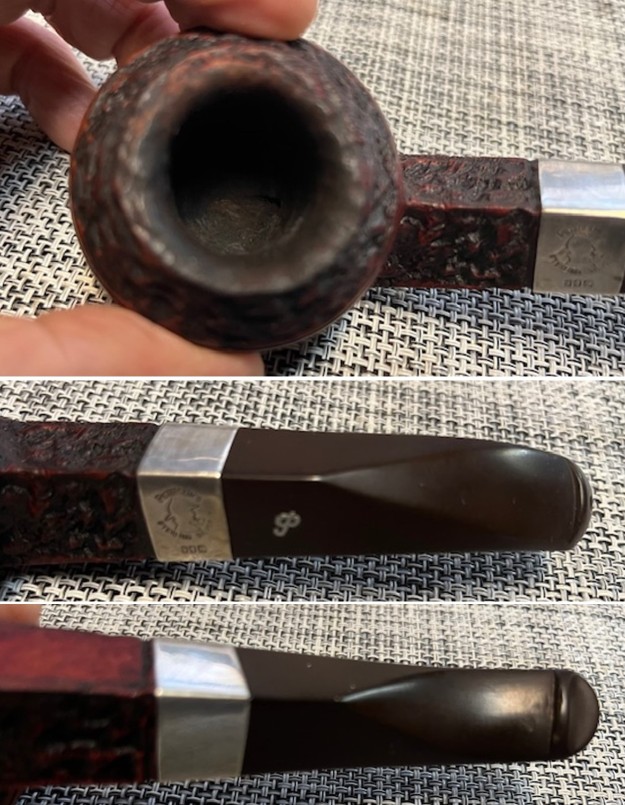 One of the things I appreciate about Jeff’s cleanup is that he works to protect and preserve the nomenclature on the shank of the pipes that he works on. The stamping on this one was faint in spots to start with so I was worried that it would disappear altogether with the cleanup. He was able to preserve and maintain its condition in the process. I took some photos to show the clarity of the stamping. I have noticed that many restorers are not careful to protect the stamping in their cleaning process and often by the end of the restoration the nomenclature is almost destroyed. I would like to encourage all of us to be careful in our work to preserve this as it is a critical piece of pipe restoration! I took the stem off the shank and took a photo of the pipe. The silver P logo on the left side of the stem is in excellent condition.
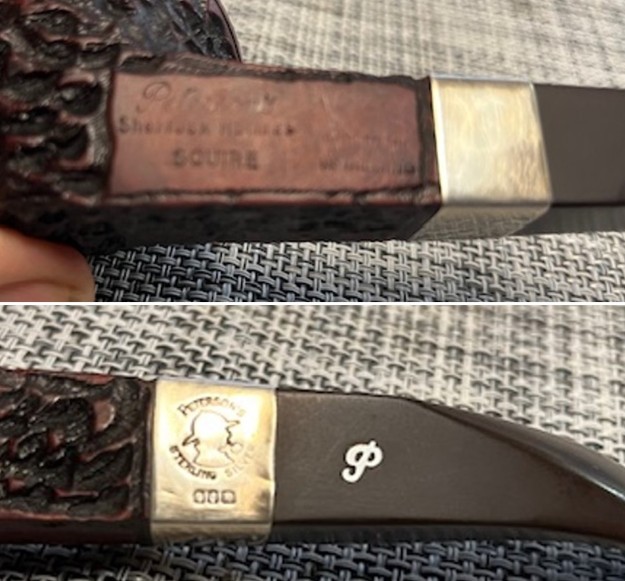
 Now it was time to work on the pipe. I decided to address the issues with the rim top. The first photo below shows the rim top damage before I worked on it. I know that this kind of reworking is a bit controversial and that some would just clean it up and leave it. But for me this pipe begged for a reworking and renewal so I did that.
 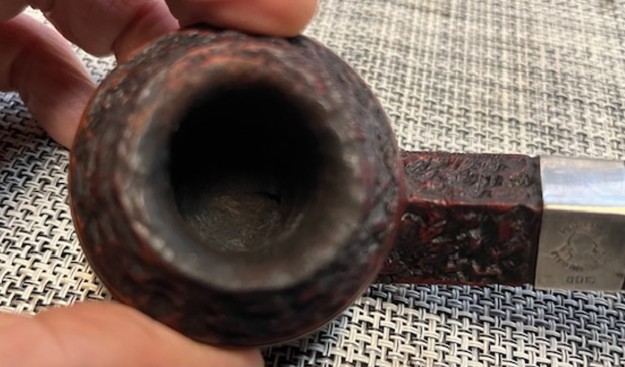 I topped the bowl on a topping board with 220 grit sandpaper. Once finished I took a photo of the rim top. It clearly shows the damage to the top and the edges.
 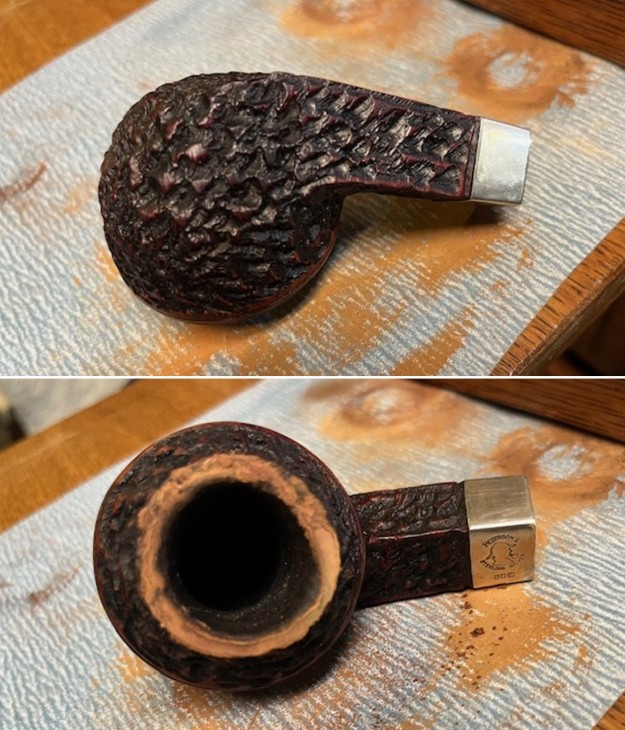 I used a wooden ball and some 220 grit sandpaper to give the inner edge a bevel and minimize the damage to the briar. It took some work to make it happen and the next few photos show the progress in the work.
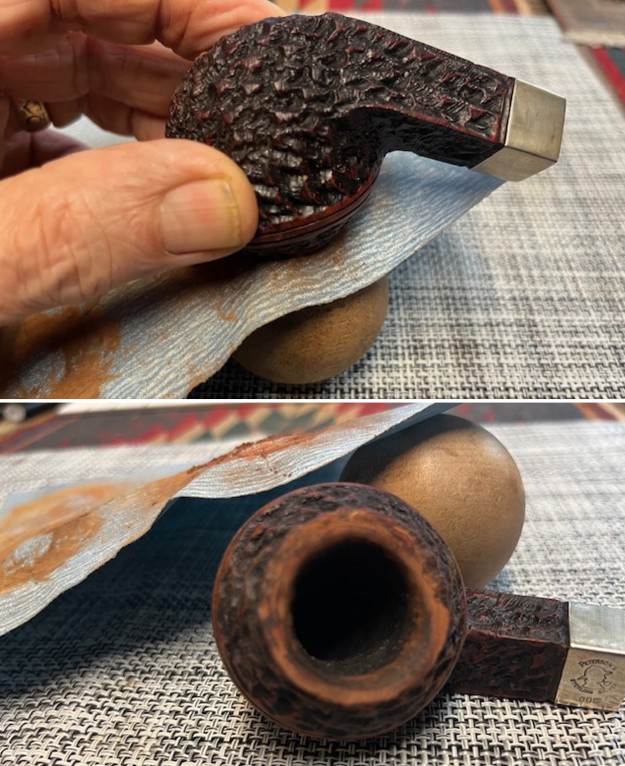
 I used a Dremel and a series of burrs to rusticate the rim top. I stained it with a Mahogany stain pen after the rustication. I took a photo of it and show it below.
 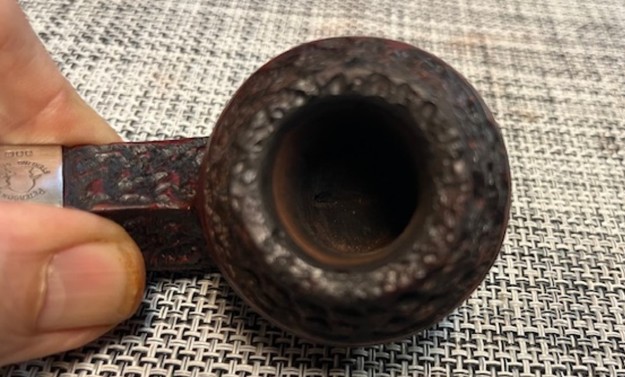 I was not happy with the rustication as it just was not as rustic looking as the rest of the bowl and shank. I used a rusticating tool that a reader of the blog gave me to deepen the rustication on the rim surface. It was what was needed. I stained it with a Mahogany stain pen to match the finish on the bowl. I used a brass bristle wire brush to knock off loose briar particles. It looked good!
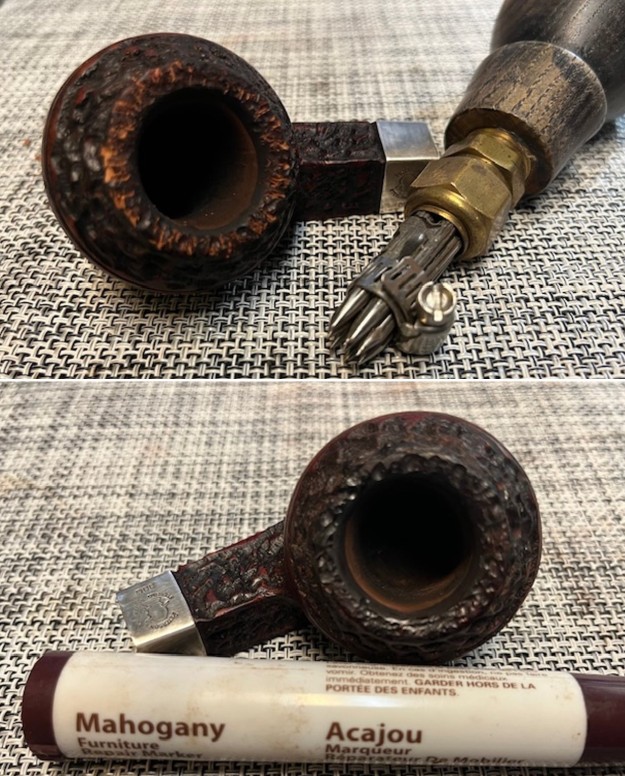
 I rubbed the bowl and rim down with Before & After Restoration Balm. I worked it into the rusticated surface of the briar with my fingertips and a horse hair shoe brush to clean, enliven and protect it. I let the balm sit for 10 minutes and then buffed with a cotton cloth to raise the shine. I really like watching the Balm do its magic and bring the briar alive.
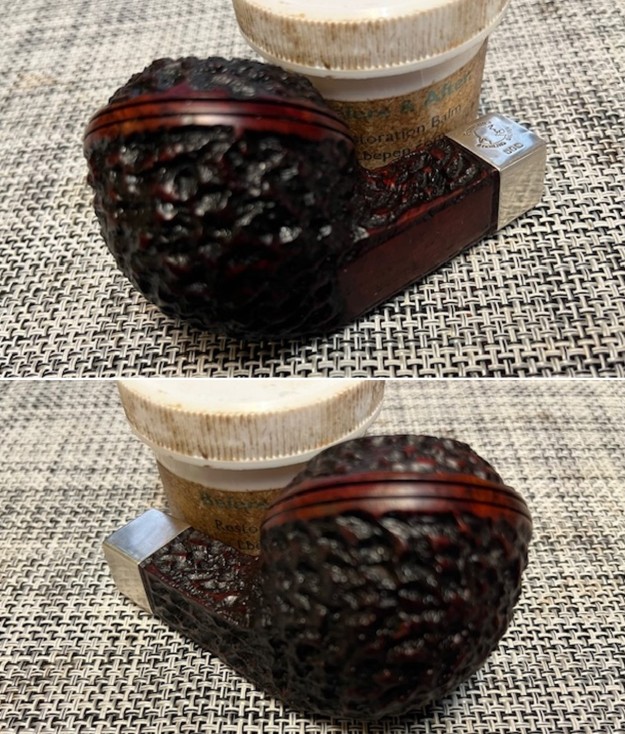
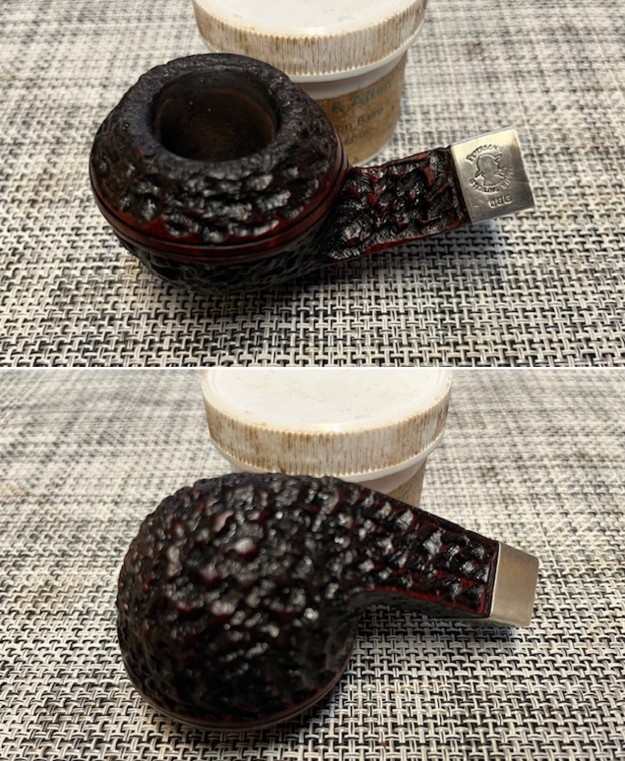
 I polished the Sterling Silver shank band with a jeweller’s cloth to remove the tarnish and also to preserve and protect the silver. It looks much better with the shine.
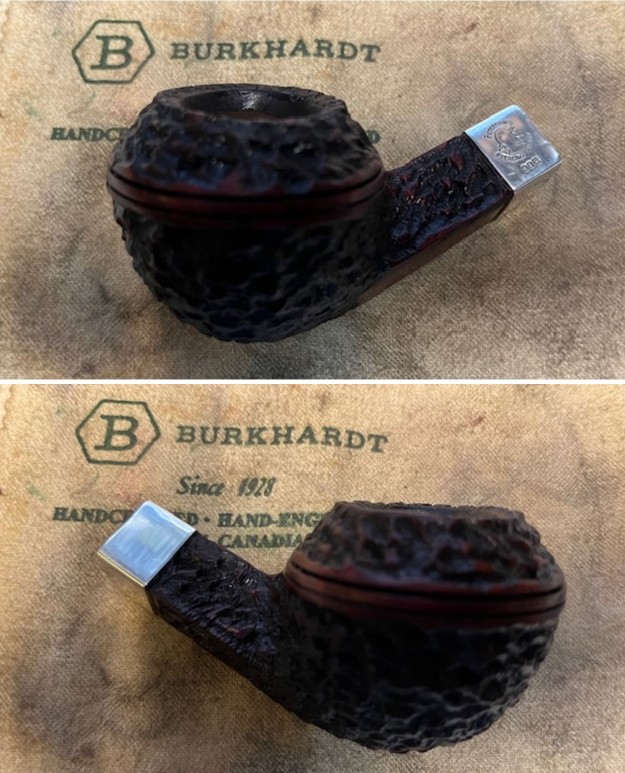
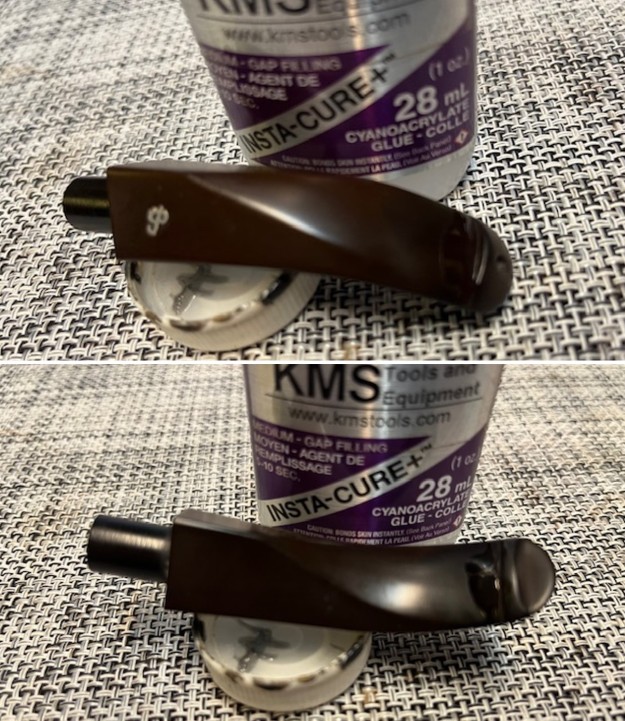
 I set the bowl aside and turned my attention to the stem. I “painted” the stem surface with the flame of a lighter to lift the tooth marks. I was able to lift them significantly. They looked better. I filled in what remained with clear CA glue. I used some small files to flatten the repairs and start to blend them into the surface. I sanded it with 220 grit sandpaper. It looked significantly better at this point in the process.

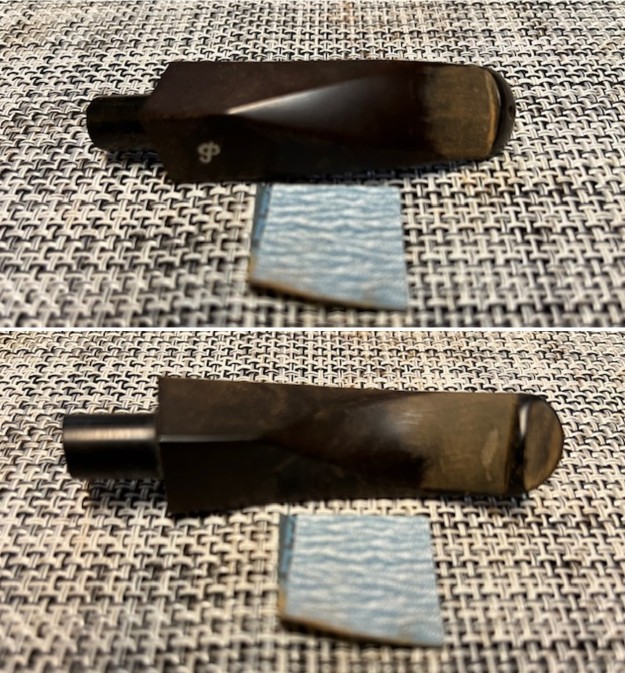 I scrubbed the stem surface with Soft Scrub to remove the remaining oxidation on the stem. It took some work but I was able to remove it and the stem looked better.
 I sanded the stem with 320-3500 grit sanding pads to remove the remaining oxidation and smoothing out the repaired area.
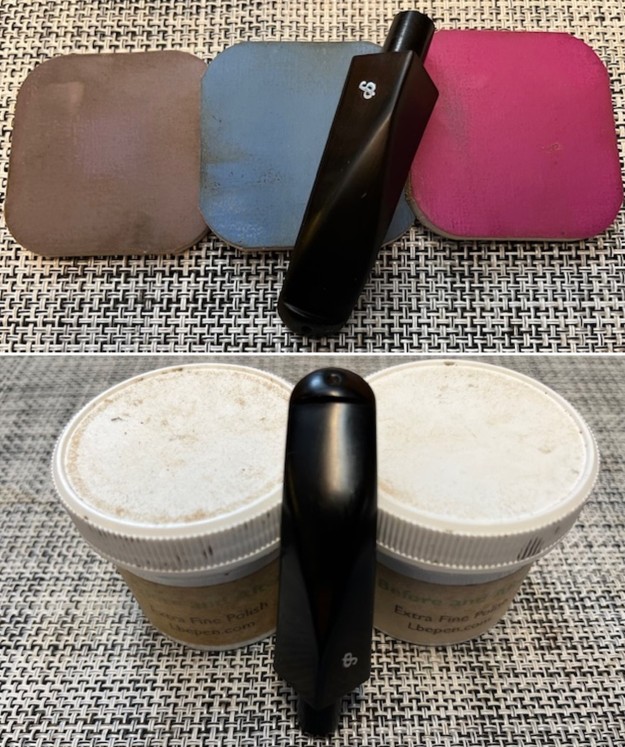
 I polished the stem with micromesh sanding pads – dry sanding with 1500-12000 grit pads. I wiped the stem down after each sanding pad with Obsidian Oil. I polished it with Before & After Pipe Stem Polish – both Fine and Extra Fine. I gave it a coat of Obsidian Pipe Stem Oil. It works to protect the stem from oxidizing. I set it aside to dry.
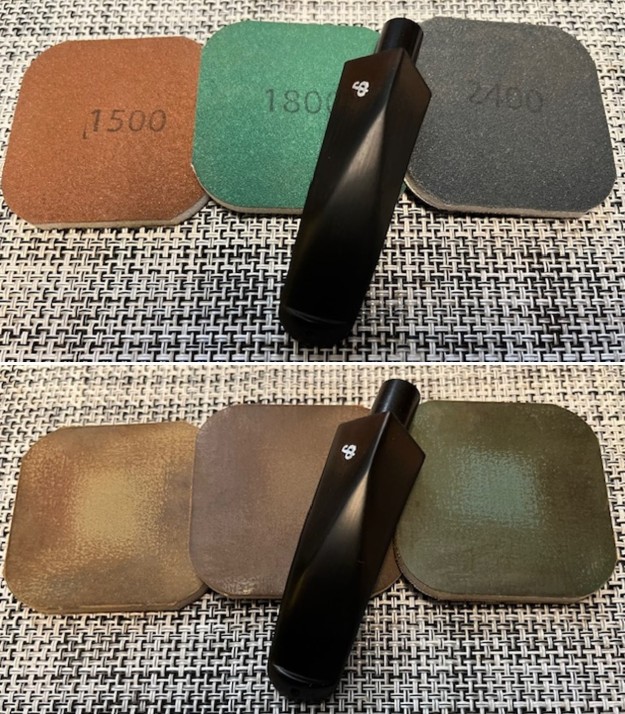
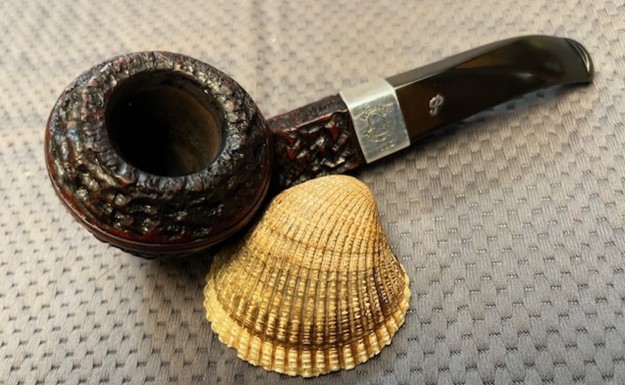
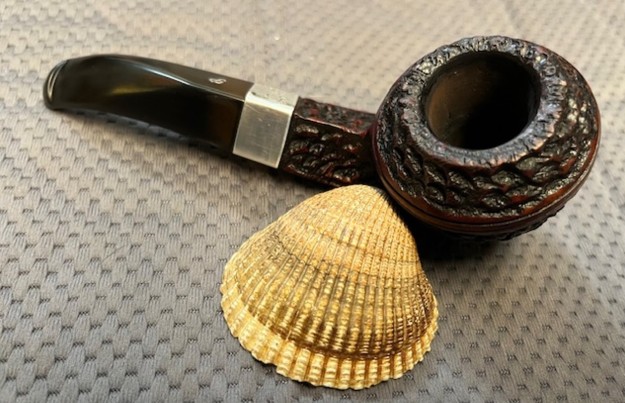
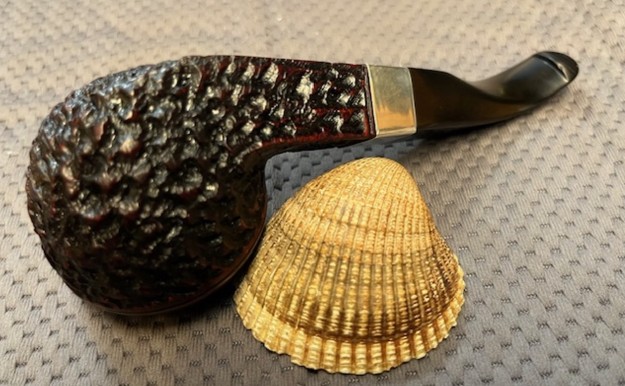
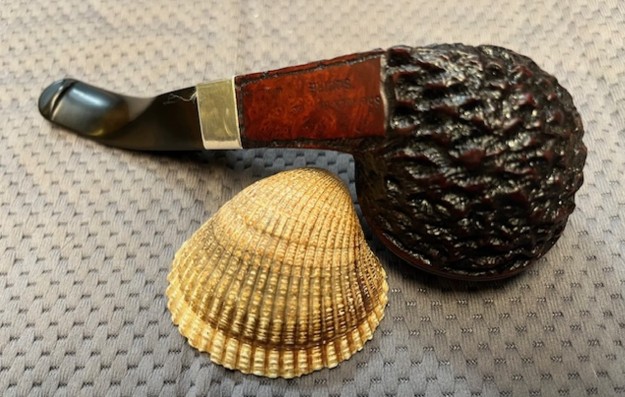
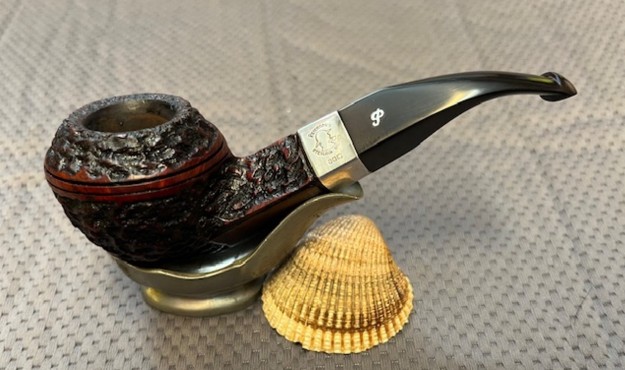
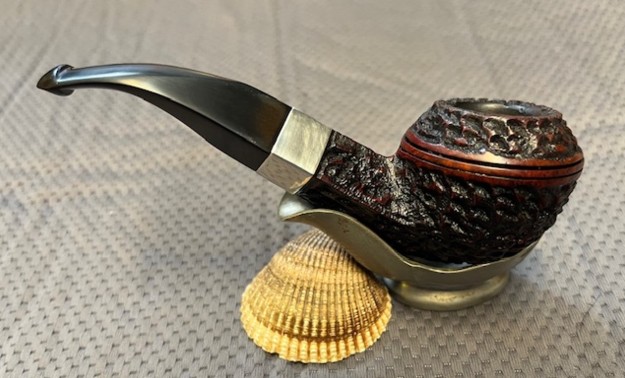
 I am excited to be on the homestretch and look forward to seeing the Republic Era 1996 Sherlock Holmes Squire Bent Bulldog put back together, polished and waxed. I put the bowl and stem back together and lightly polished the bowl and stem with Blue Diamond to polish them. I gave the bowl multiple coats of Conservator’s Wax and the stem multiple coats of carnauba wax. I buffed the pipe on the wheel with a clean buffing pad to raise the shine. I hand buffed it with a microfiber cloth to deepen the shine. The depths of the rustication really pop with the wax and polish. The shiny black acrylic stem is a beautiful contrast to the red and browns of the bowl, thick shank and Sterling Silver Band. This Peterson’s Sherlock Holmes Squire Bulldog was a fun pipe to work on. The pipe is tactile in the hand and should feel great as it is warmed up when smoking. The finished pipe is shown in the photos below. The dimensions of the pipe are Length: 5 ½ inches, Height: 2 inches, Outside diameter of the bowl: 1 ½ inches, Chamber diameter: 7/8 of an inch. The weight of the pipe is 2.19 ounces/ 62 grams. I will soon be putting it on the store in the Irish Pipemakers Section if you are interested in adding it to your collection.
As always, I encourage your questions and comments as you read the blog. Thanks to each of you who are reading this blog. Remember we are not pipe owners; we are pipe men and women who hold our pipes in trust until they pass on into the trust of those who follow us.


