Blog by Steve Laug
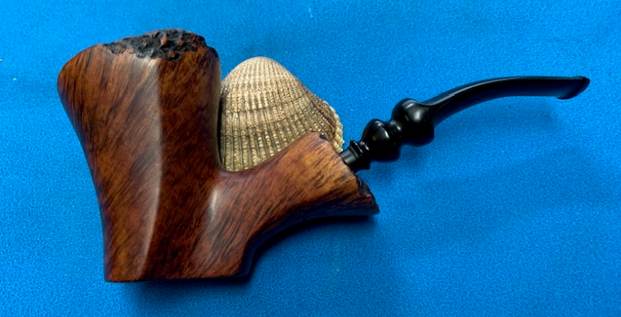
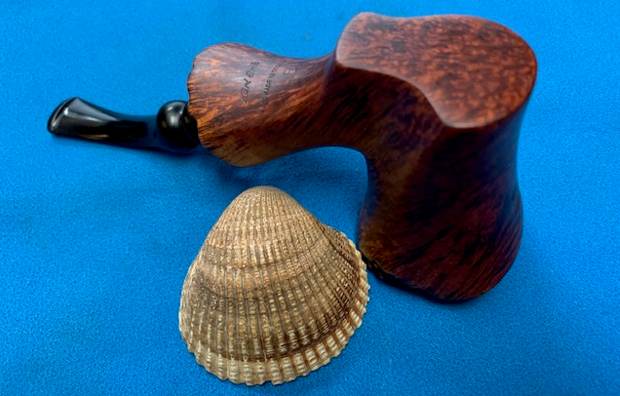
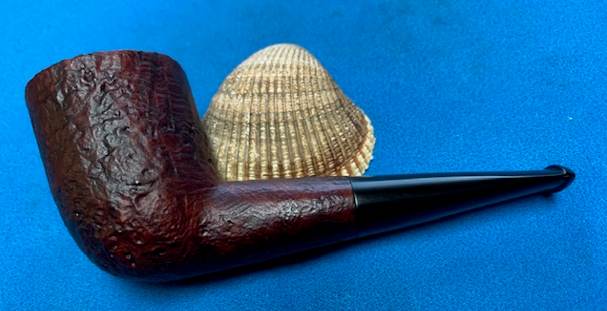
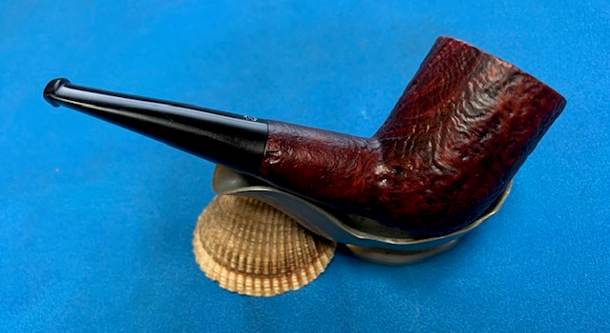
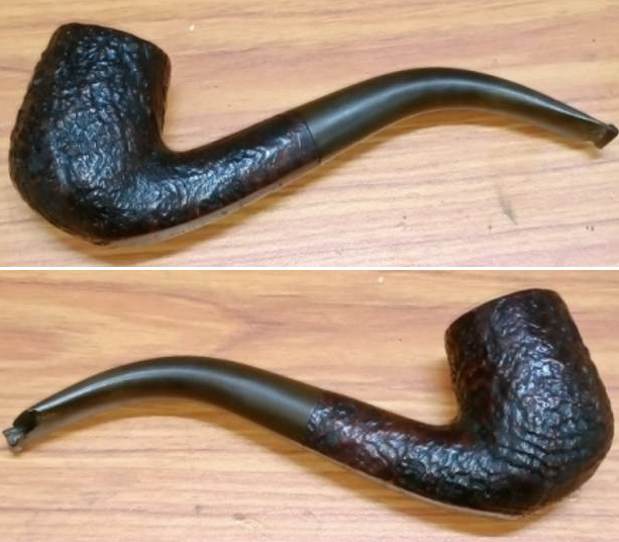
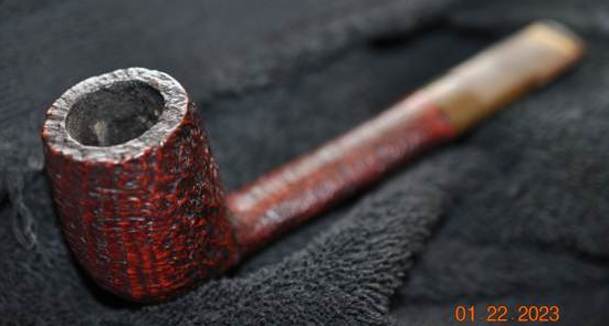
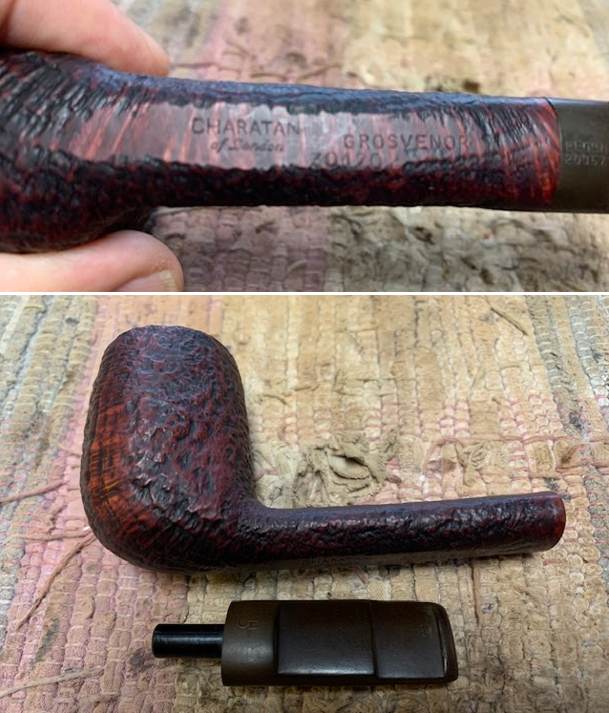
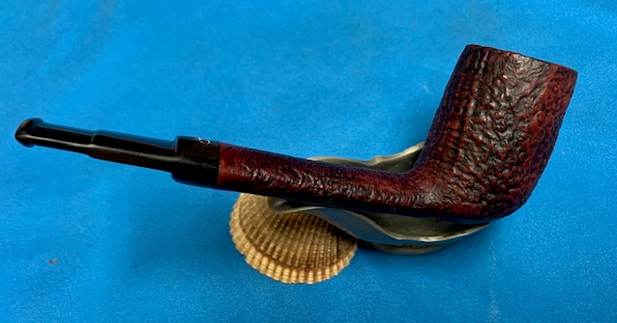
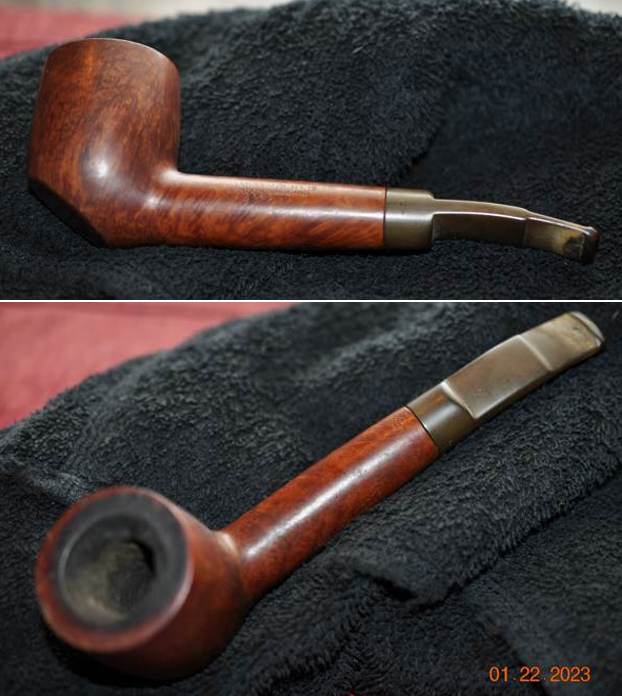
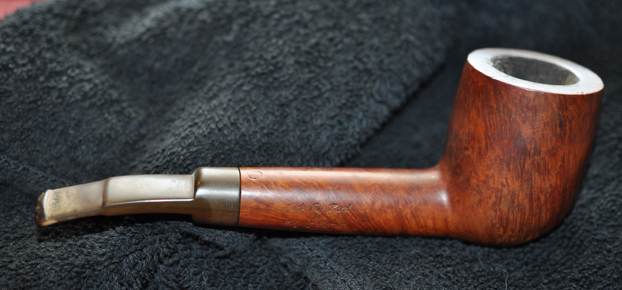
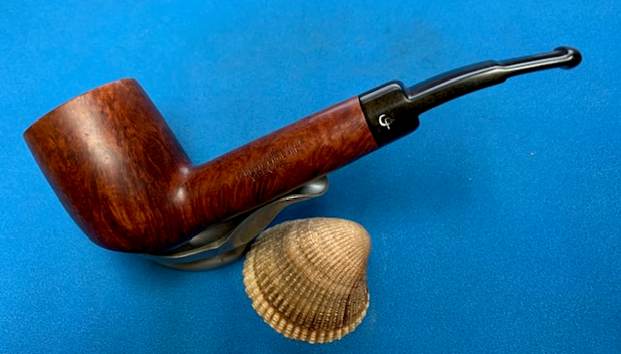
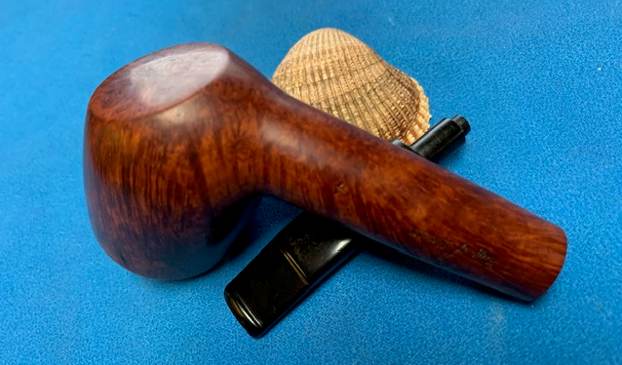
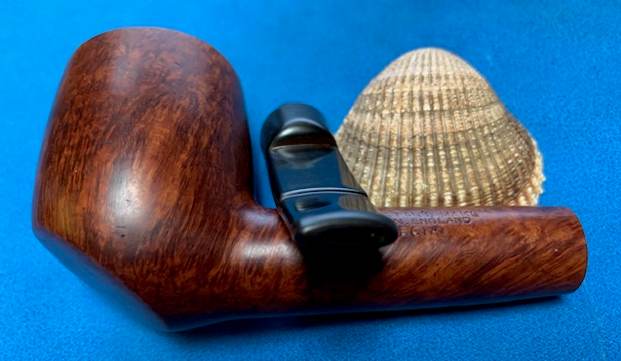
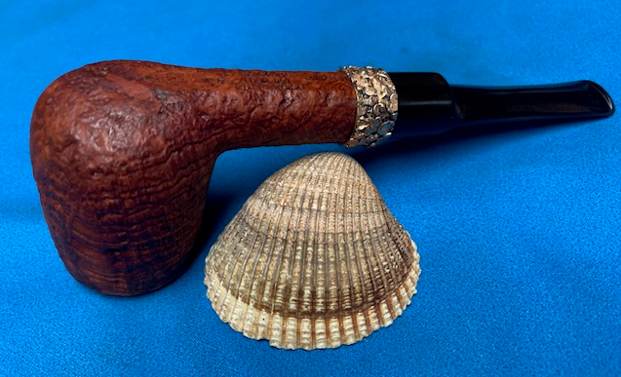
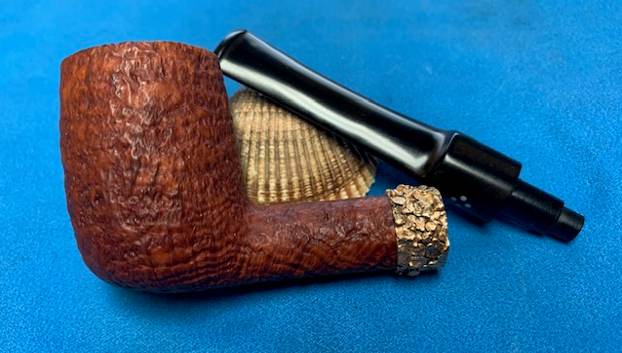
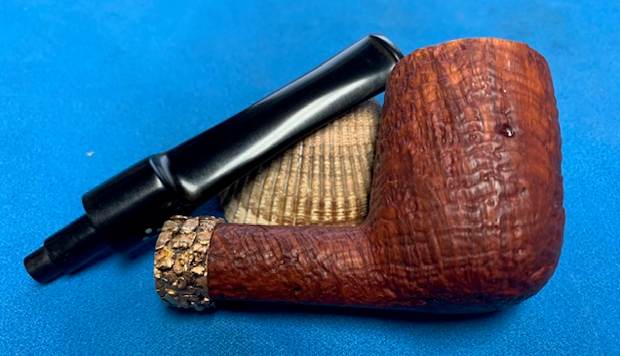
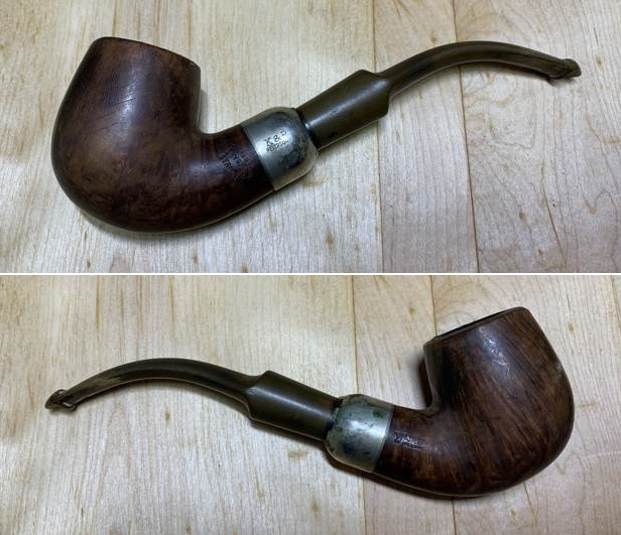
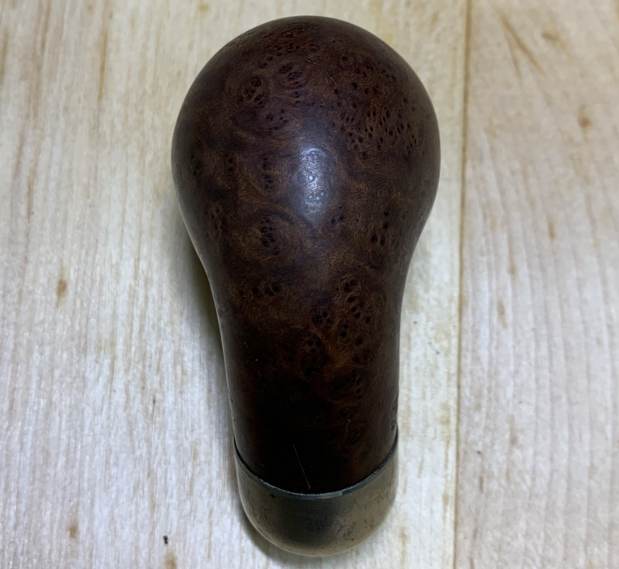
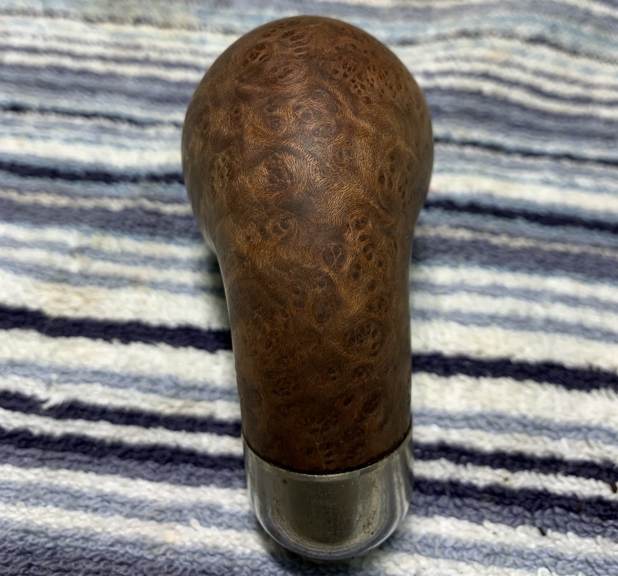
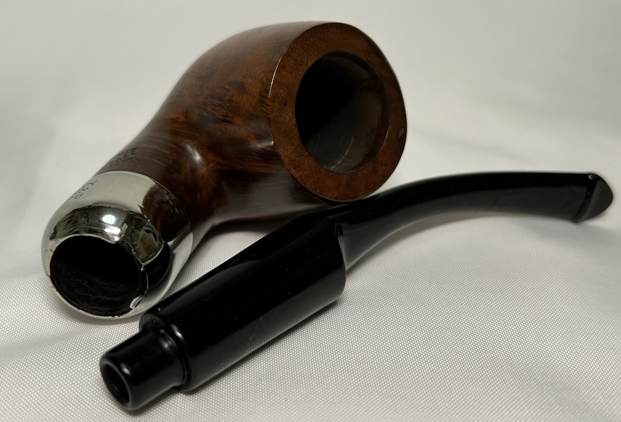
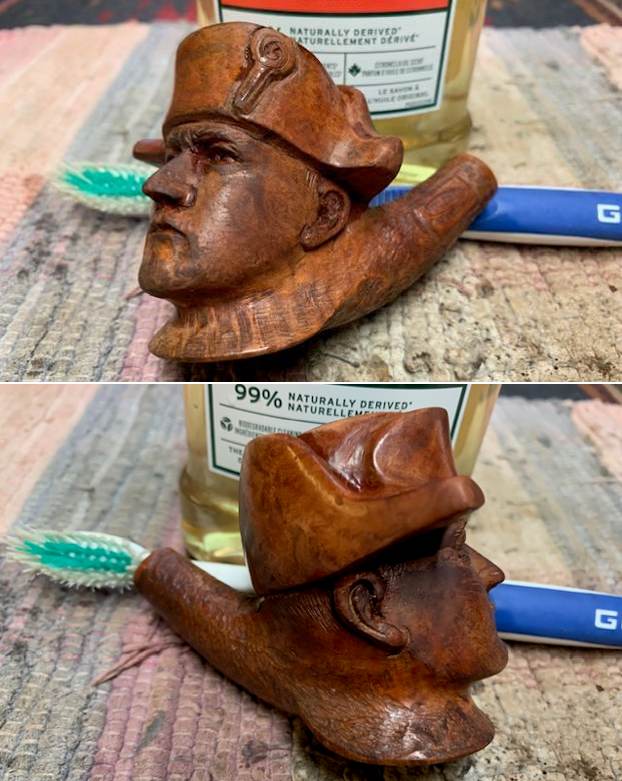
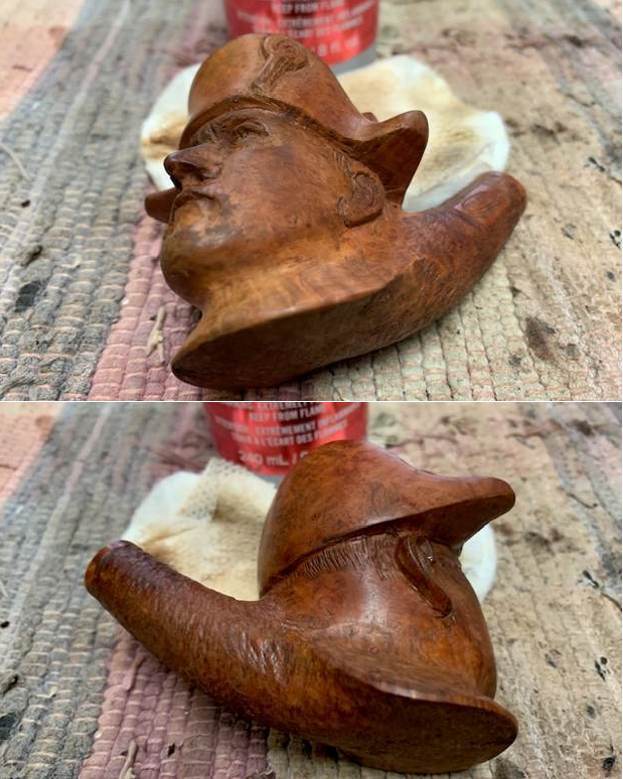
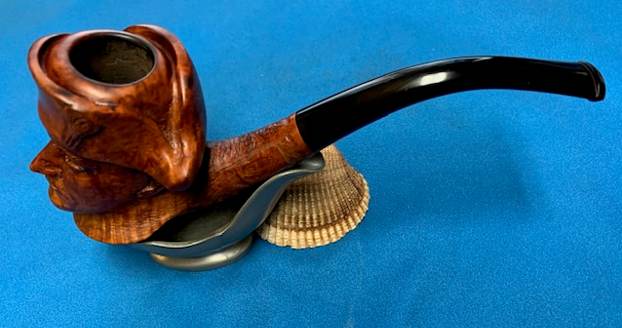
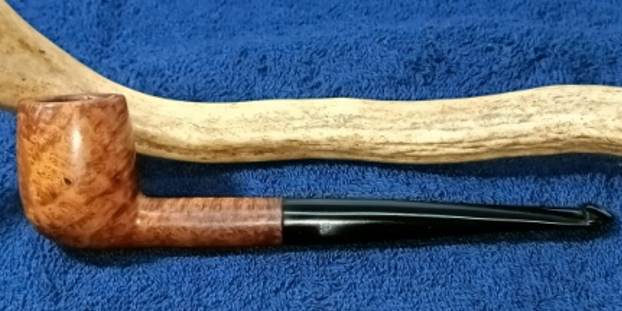
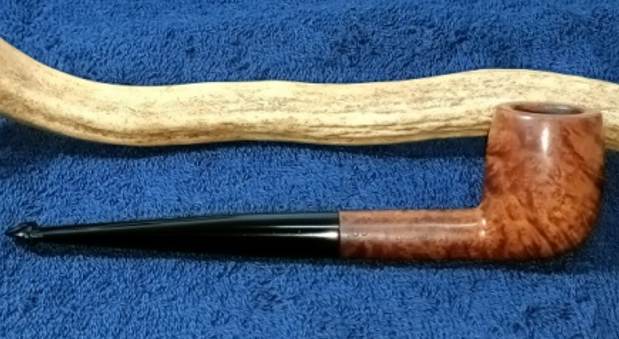
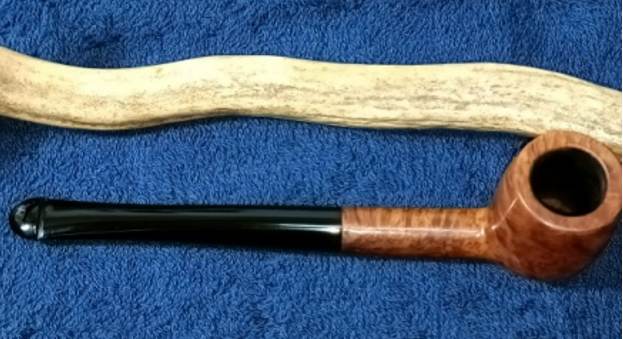
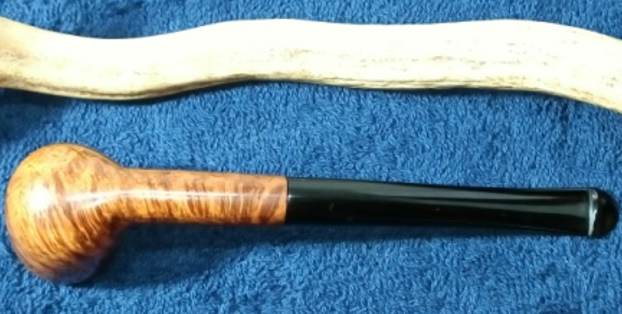
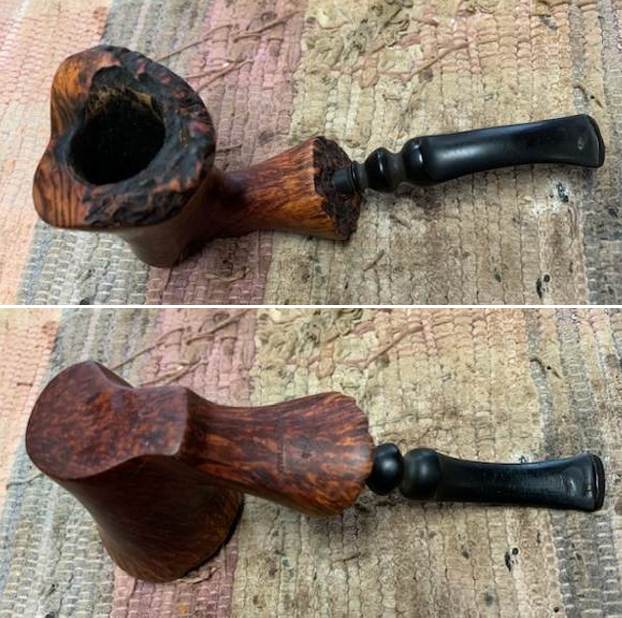
The next pipe I have chosen to work on is a nice looking Freehand with a fancy, turned vulcanite stem. We picked it up on 05/01/2022 from an Antique Mall in Bozeman, Montana, USA. The stamping on the underside of the shank read Karl Erik [over] Handmade in Denmark [over] 5. The black vulcanite fancy, turned stem does not have the usual logo on the topside of the stem. The pipe is a nice looking pipe with medium brown finish that highlights the grain around the bowl sides and shank. The plateau rim top is a mix of smooth brown stain and black plateau. It is light weight and comfortable pipe to hold. Jeff sent me the following photos of the pipe to show the condition it was in before he worked on it.
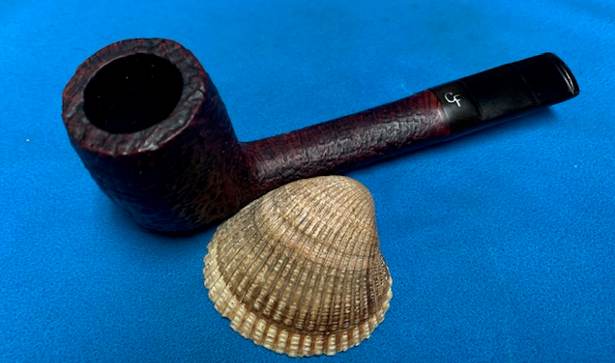
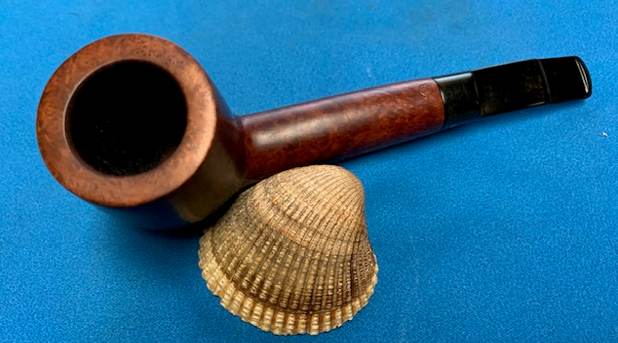
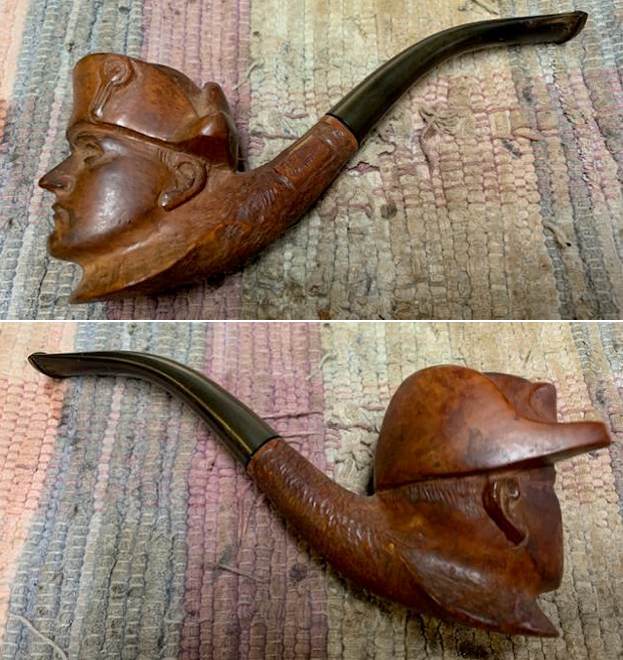
This is what I saw when I looked over the pipe.
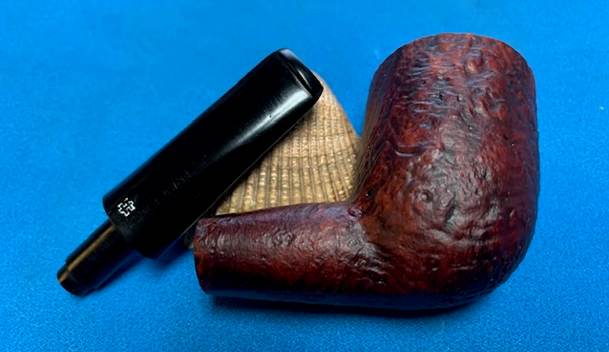
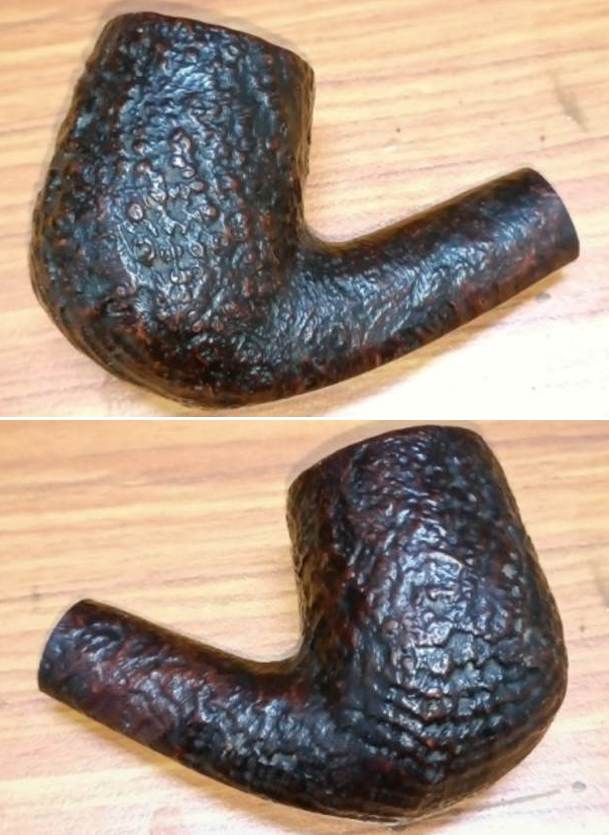
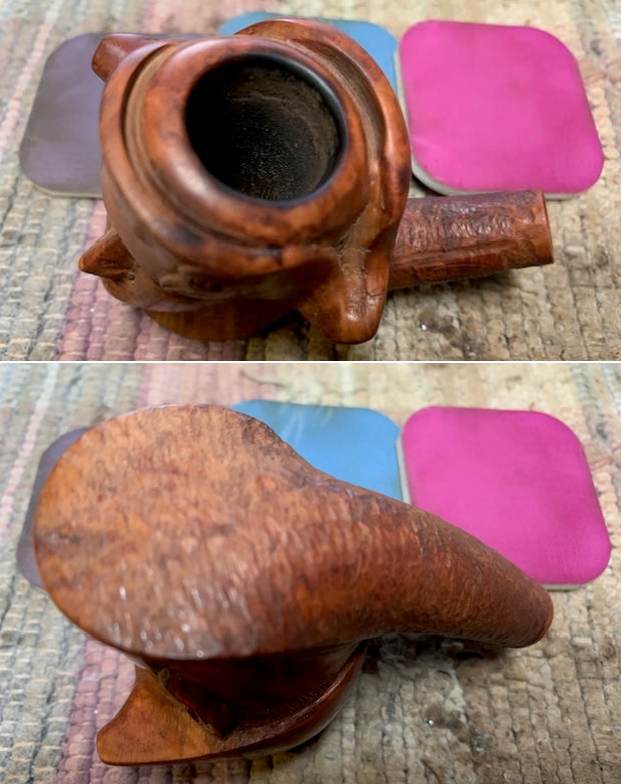
- The finish on the bowl and shank has some oils darkening the side from the smoker’s hands. There is also some grime ground into finish around the bowl and shank. The stain is dull and the grain patterns though visible under the grime are obscured around the bowl sides and shank
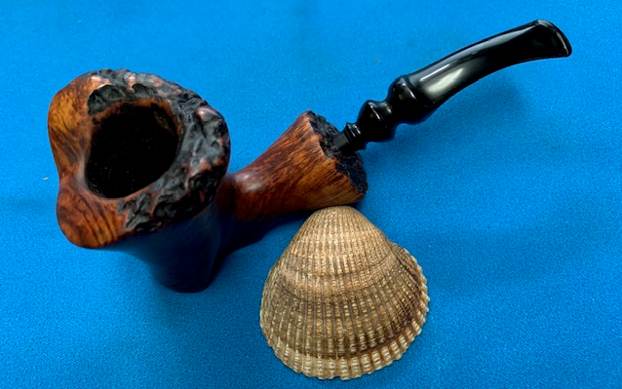
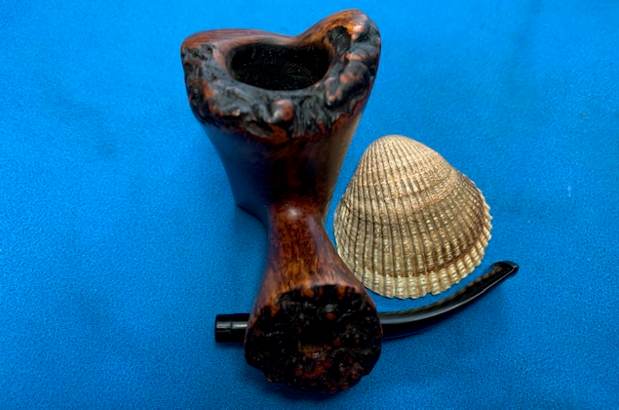
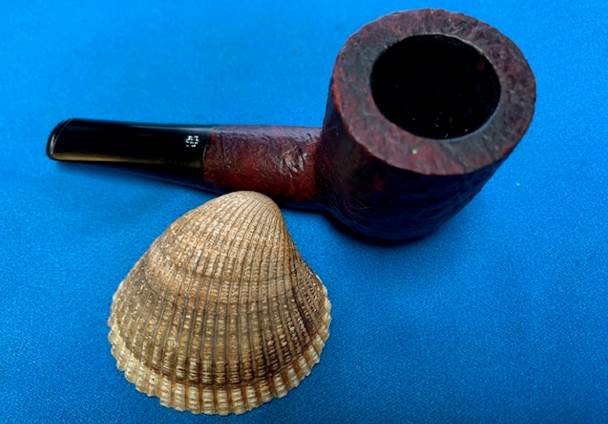
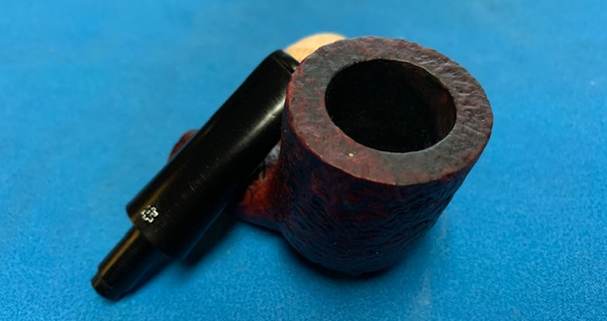
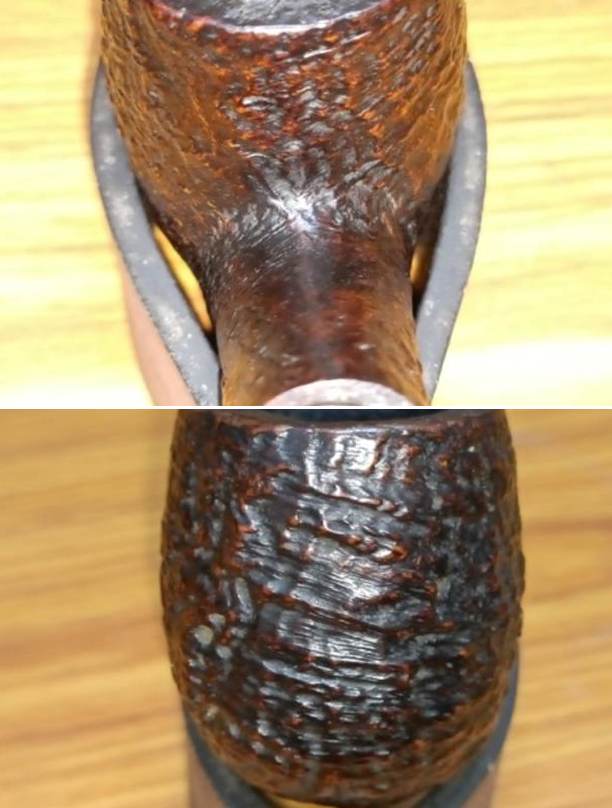
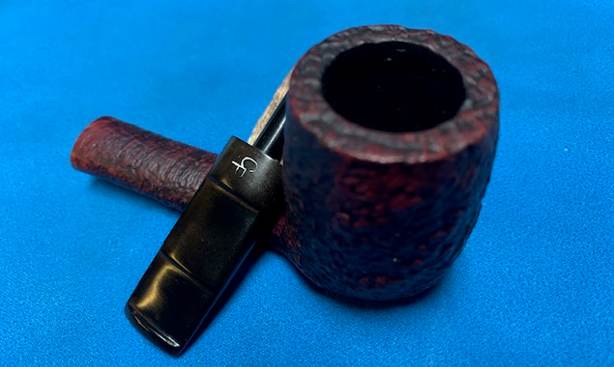
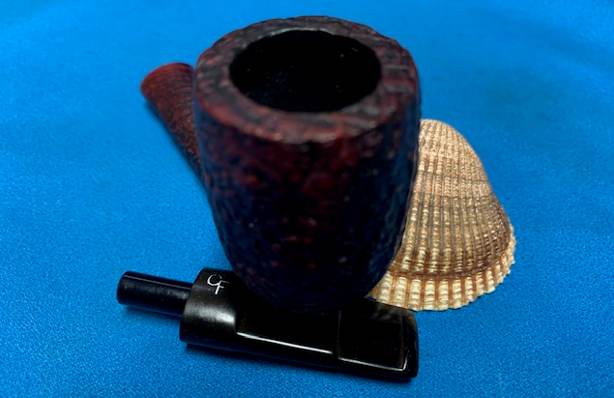
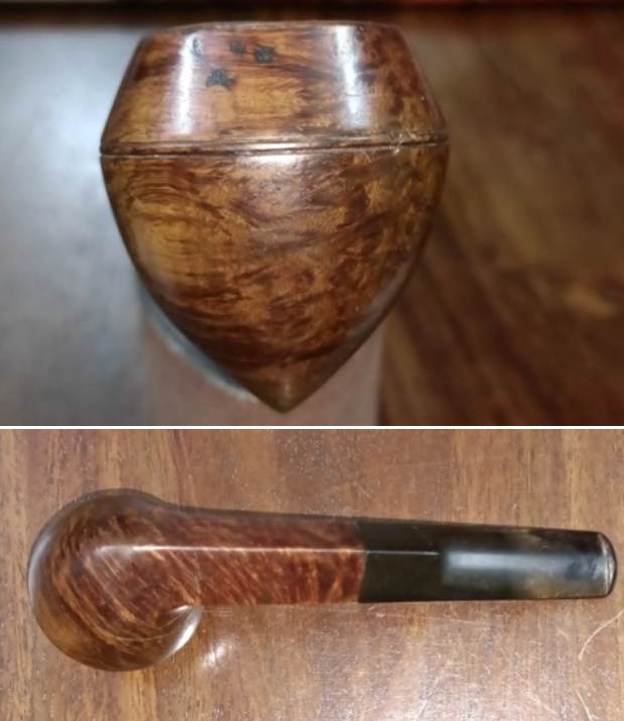
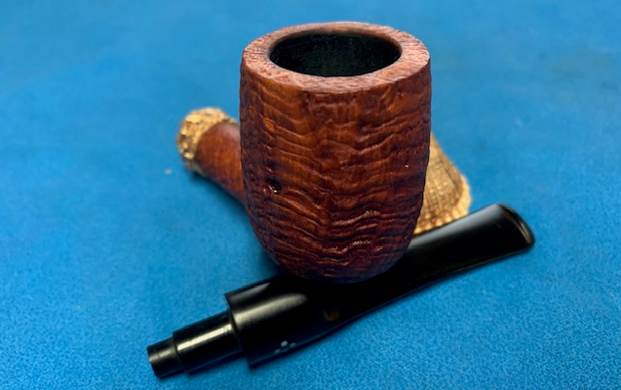
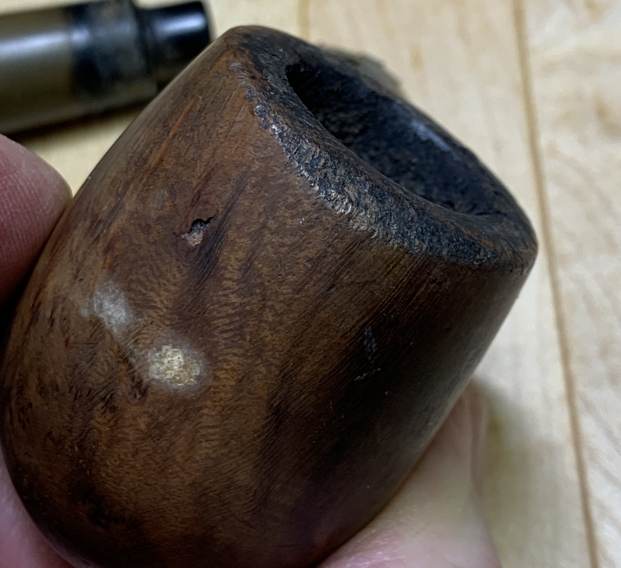
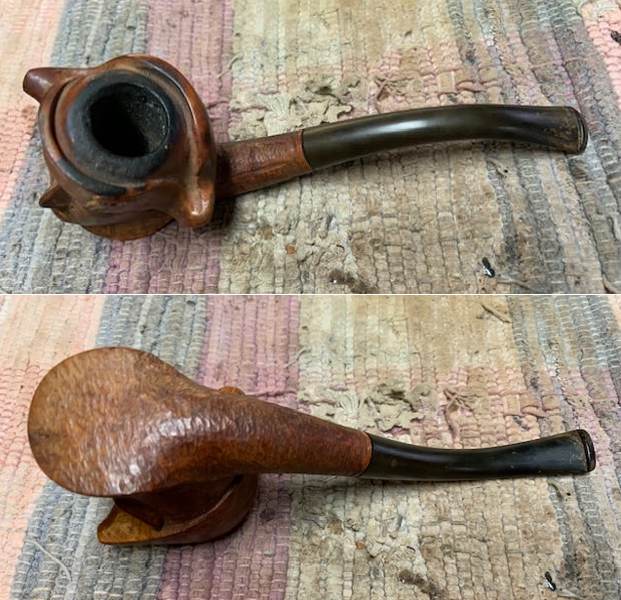
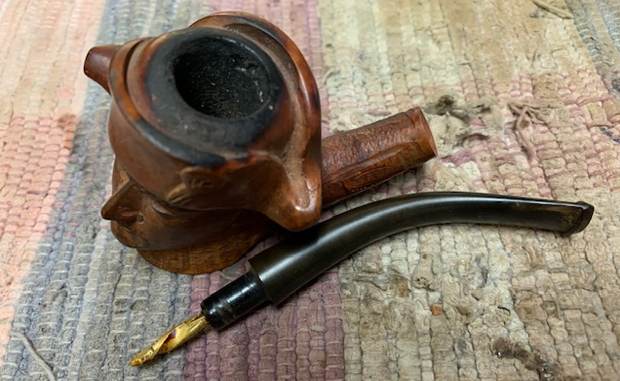
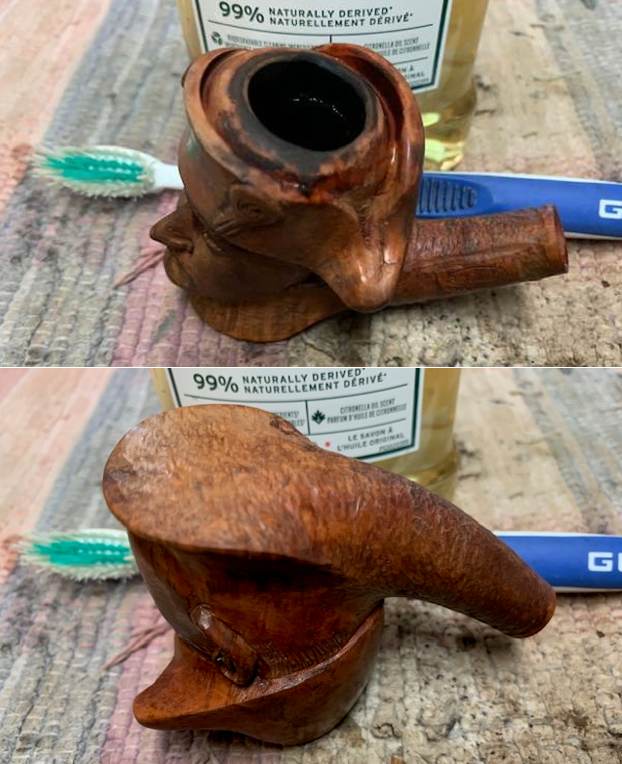
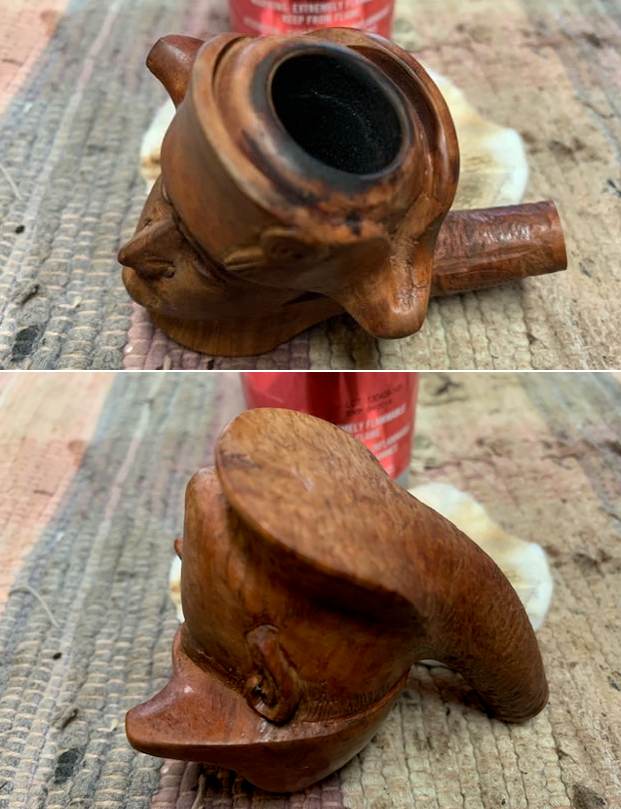
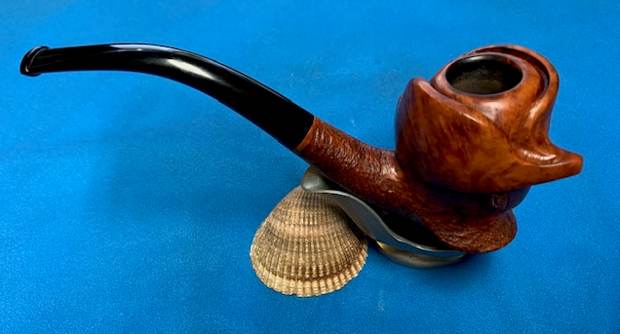
- The plateau rim top was very dirty with a heavy lava coat on it. It is heavier on the front right and backside. The inner edge of the bowl is hard to see under the thick build up of cake that has overflown the bowl top.
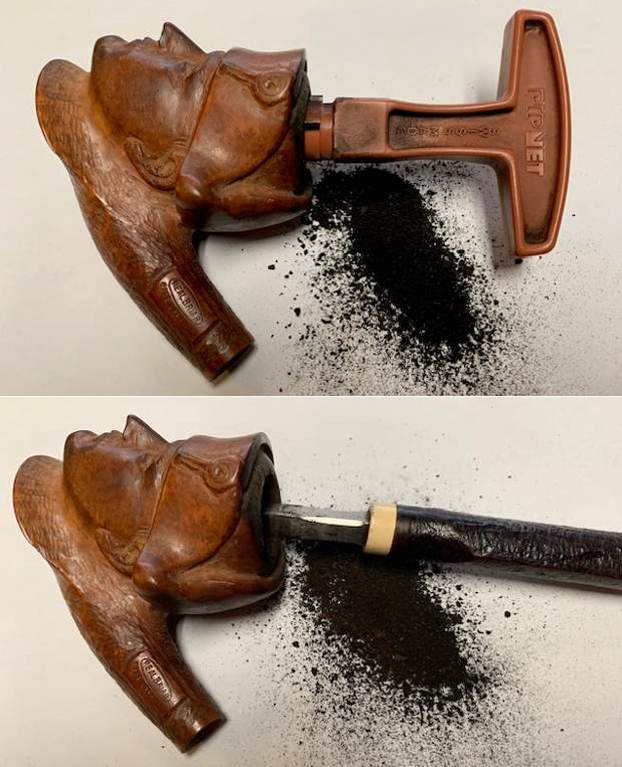
- There was a thick cake in the bowl. The bowl itself was very dark and dirty. Once the bowl was cleaned up we could confirm the condition of the bowl walls.
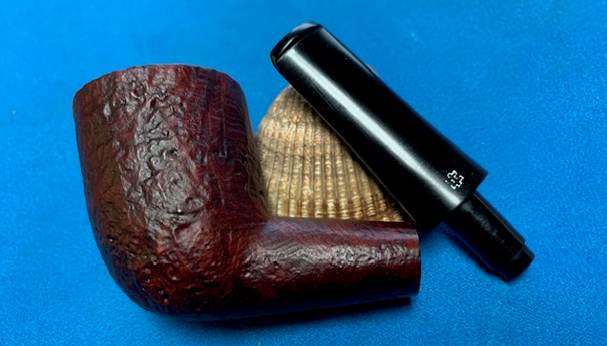
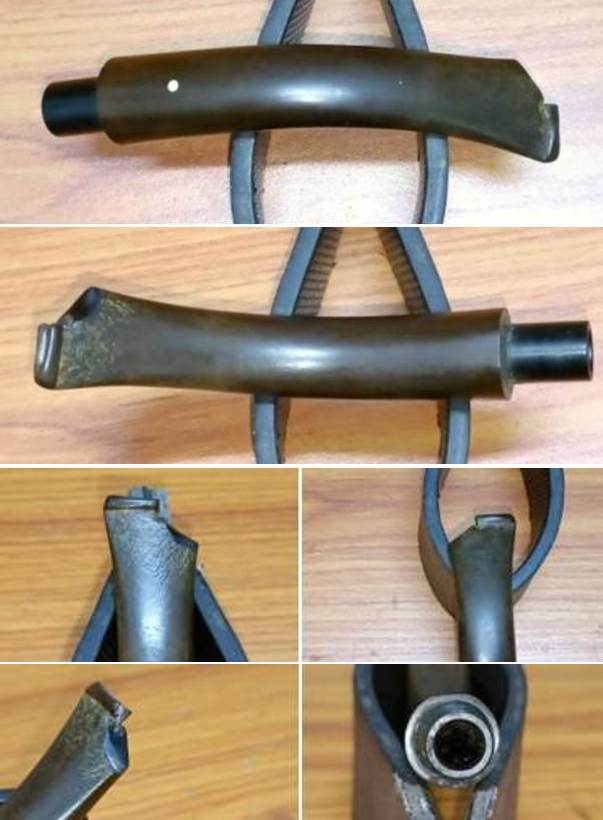
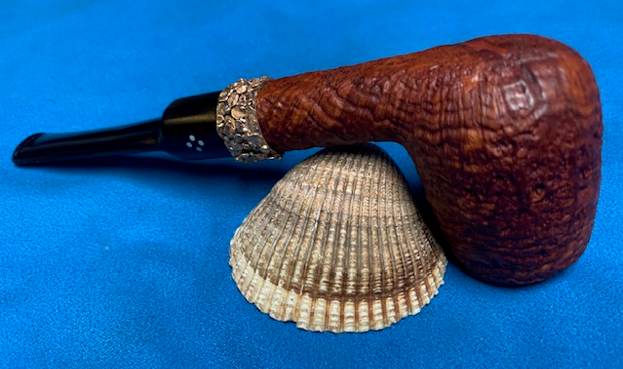
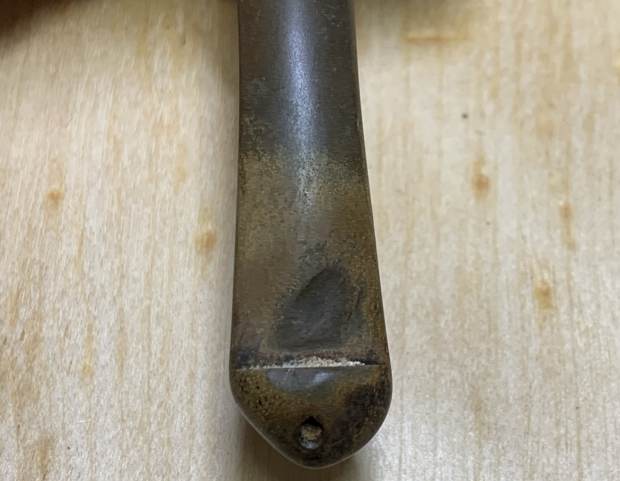
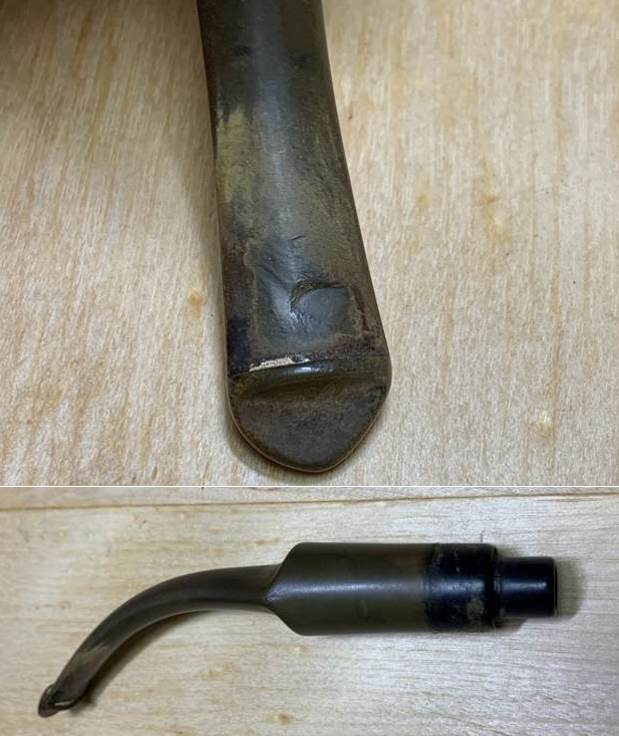
- The fancy turned vulcanite stem was filthy, oxidized, calcified and had deep tooth marks and chatter on both sides ahead of the button.
- There is no logo stamped on the topside of the stem.
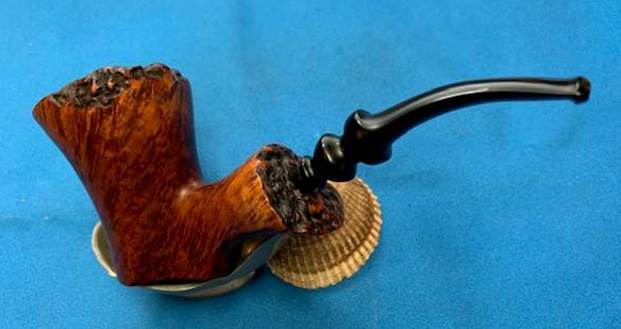
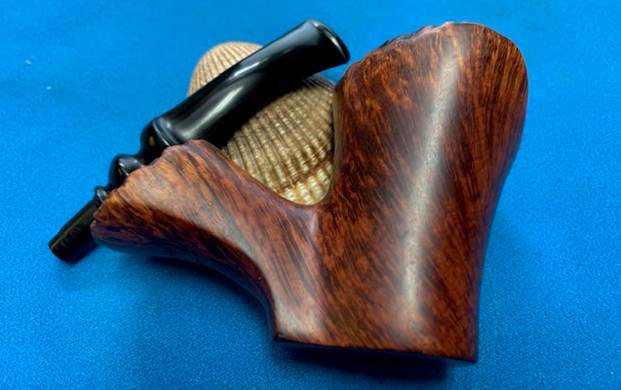
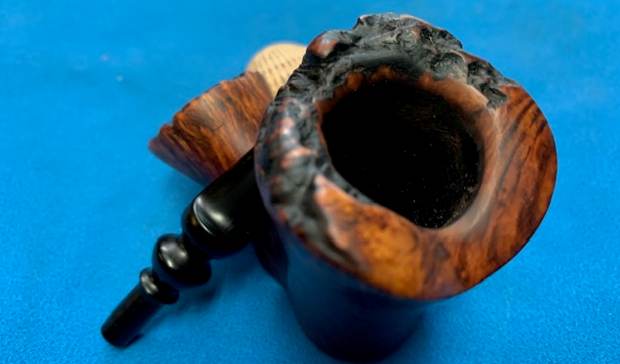
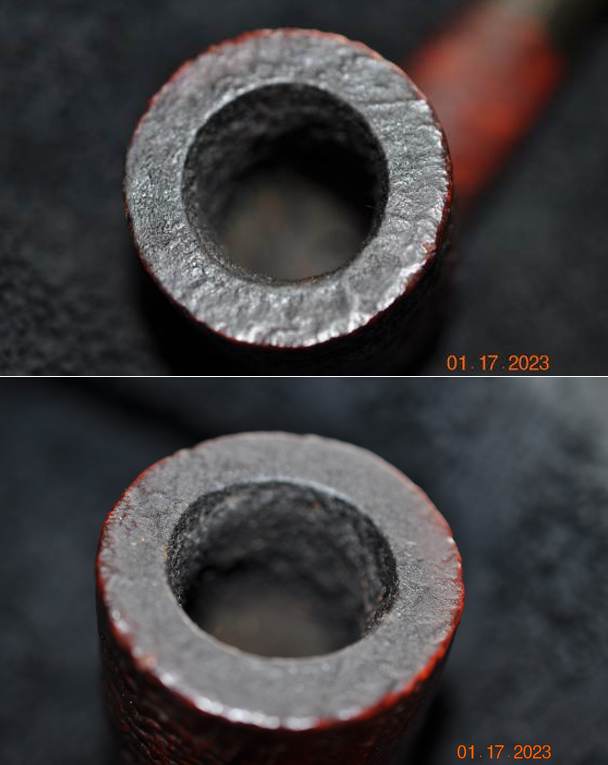
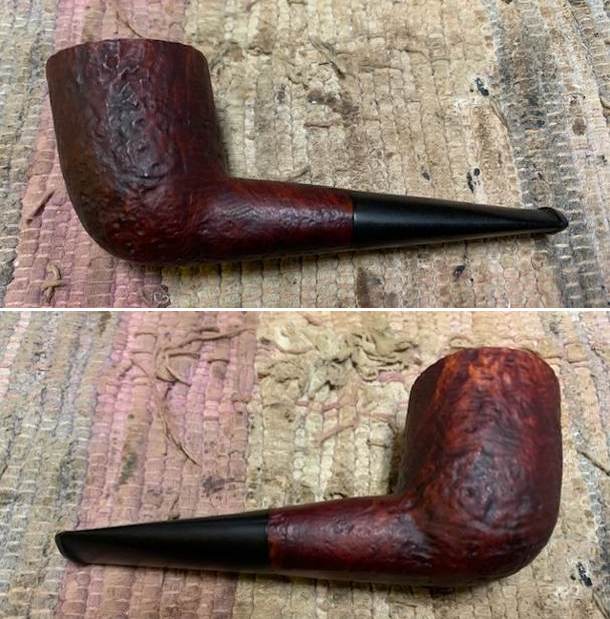
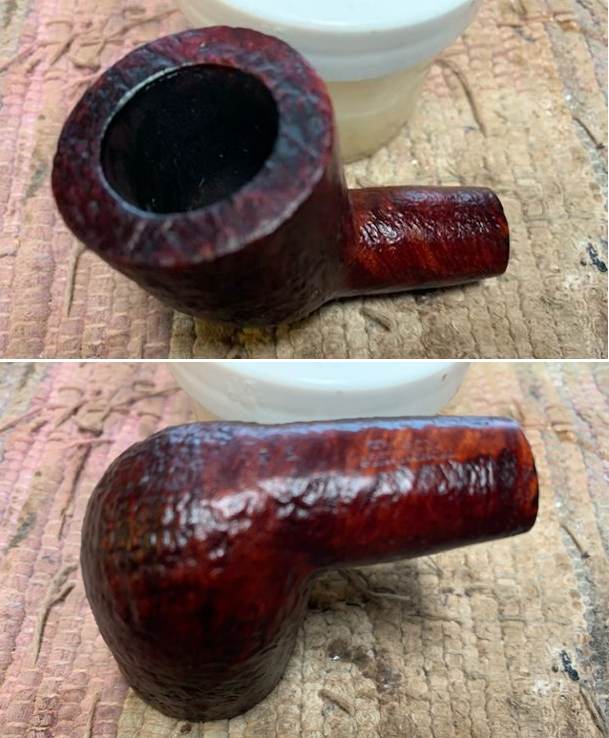
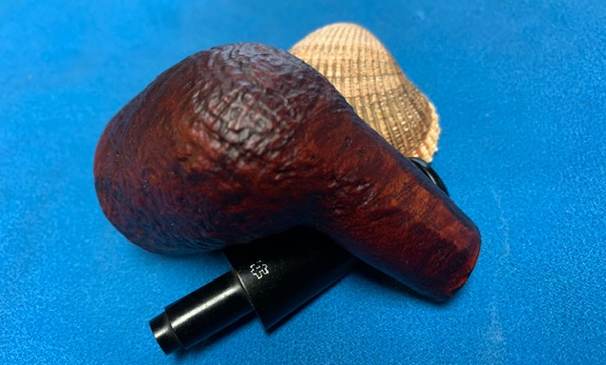
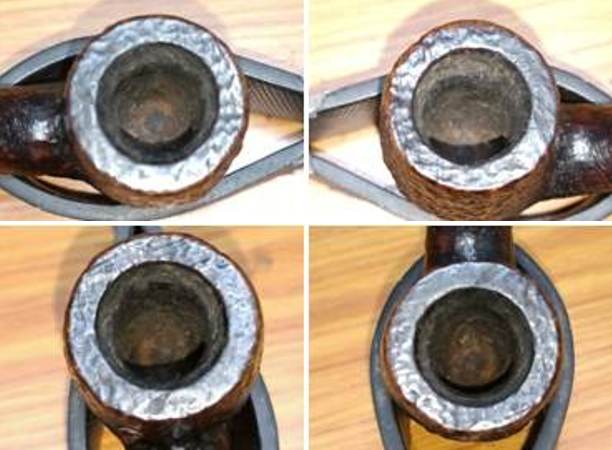
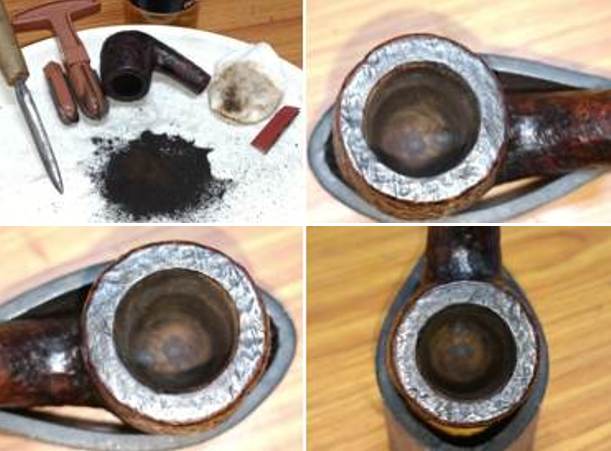
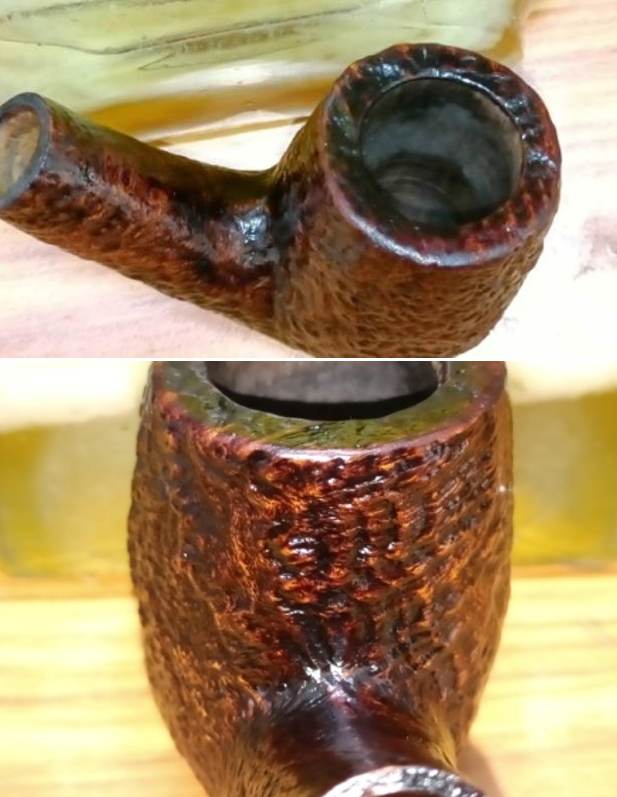
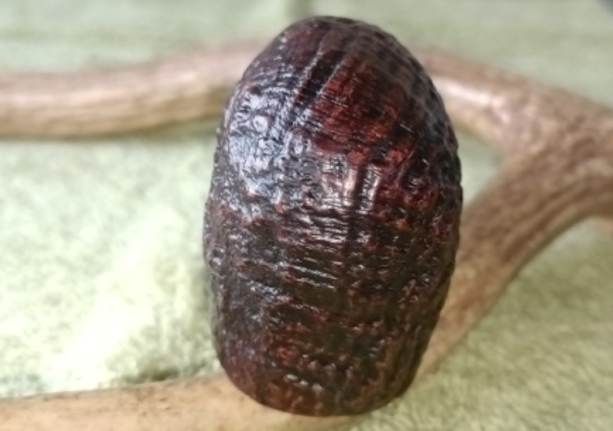
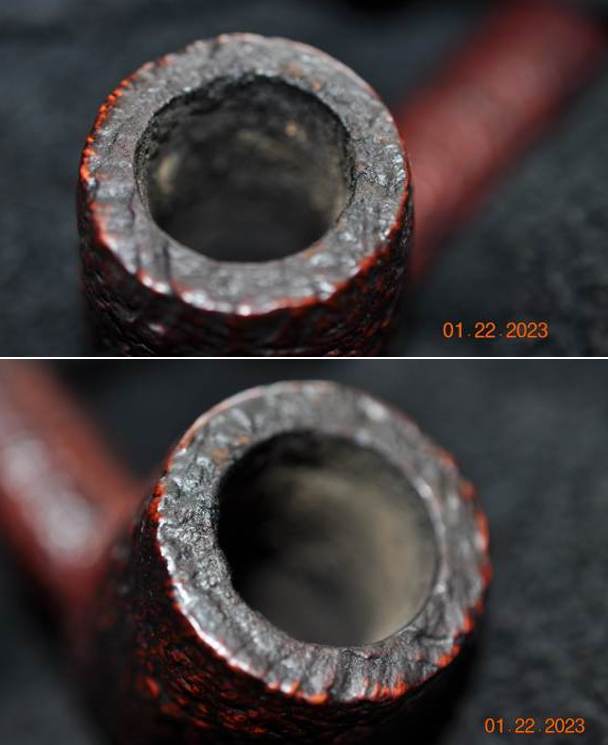
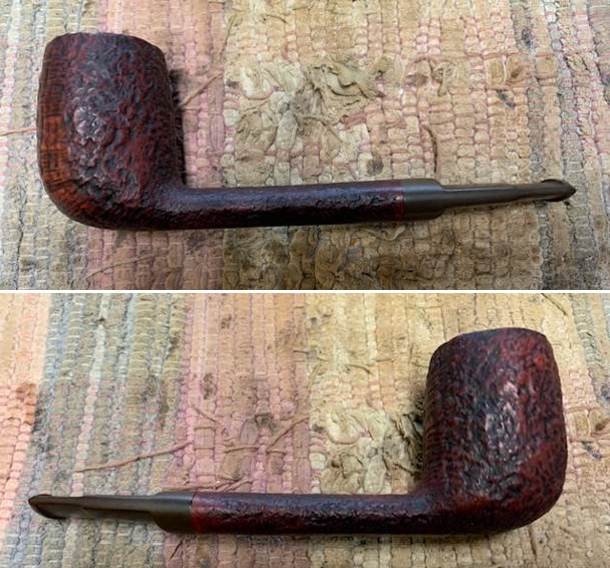
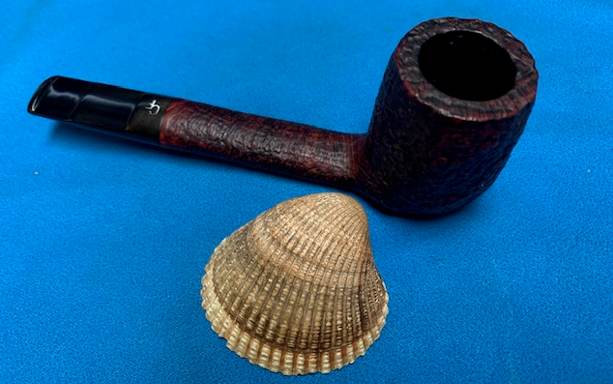
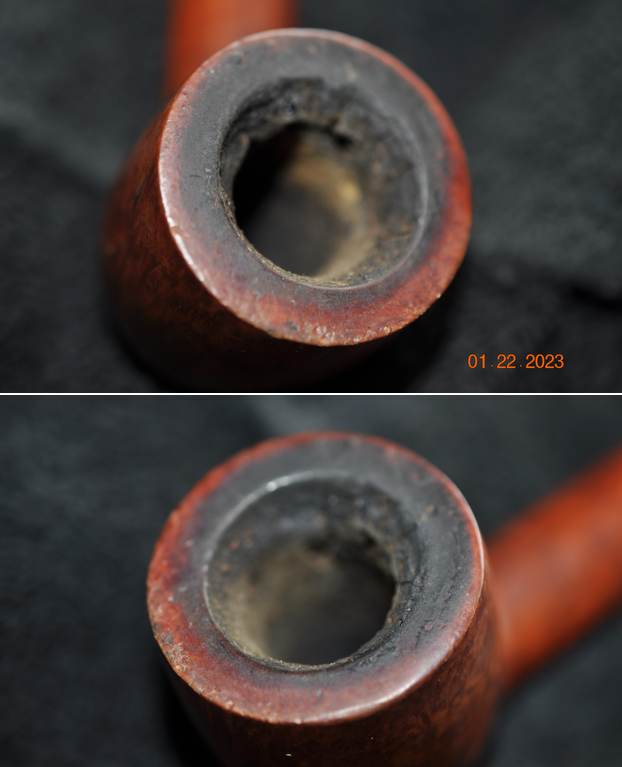
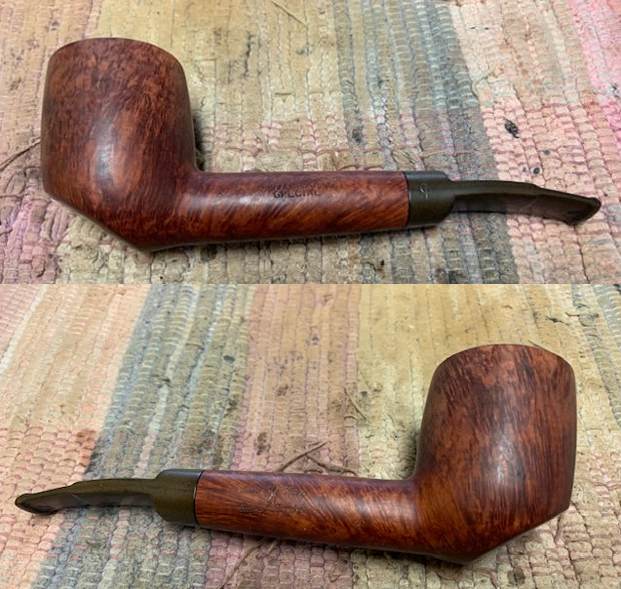
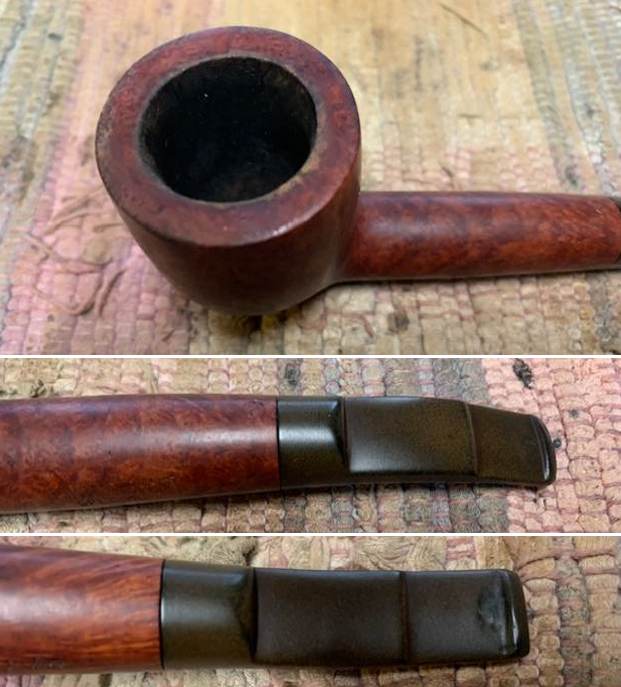
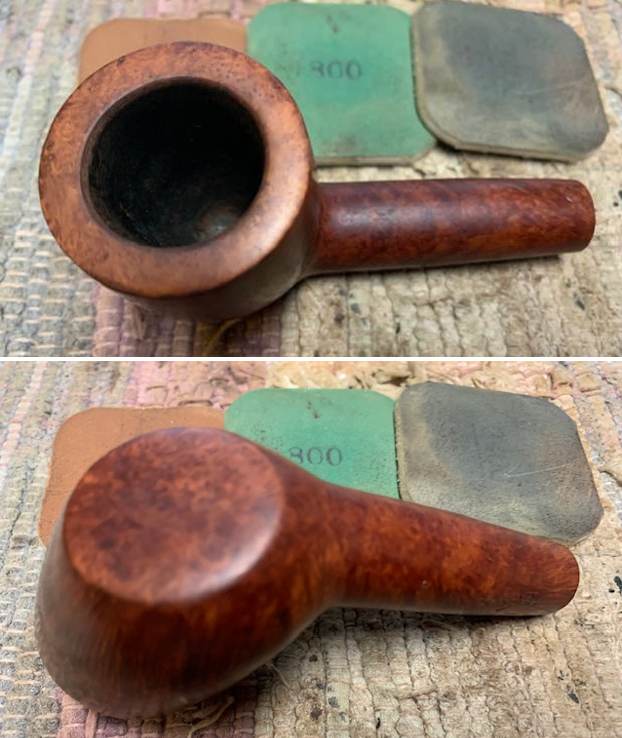
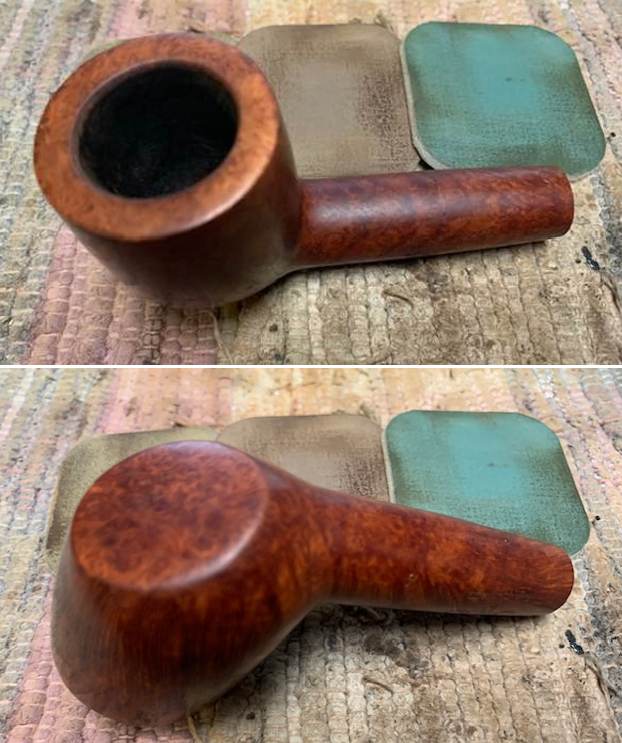
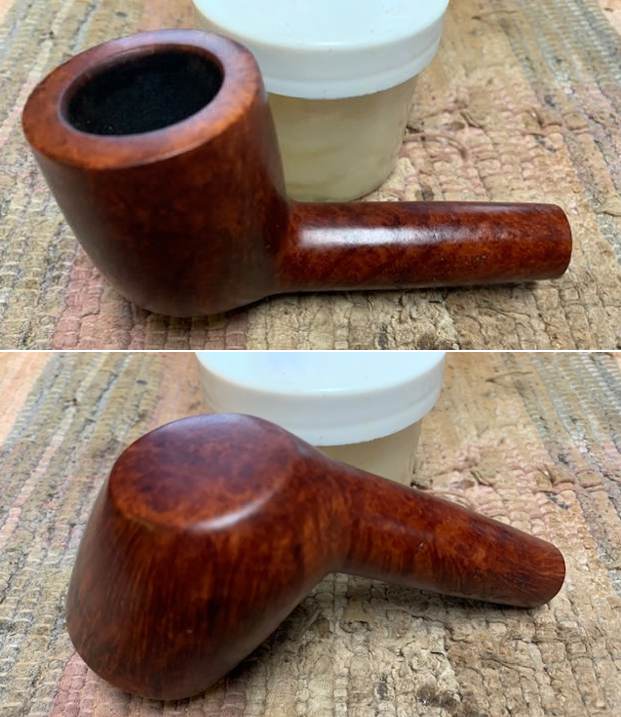
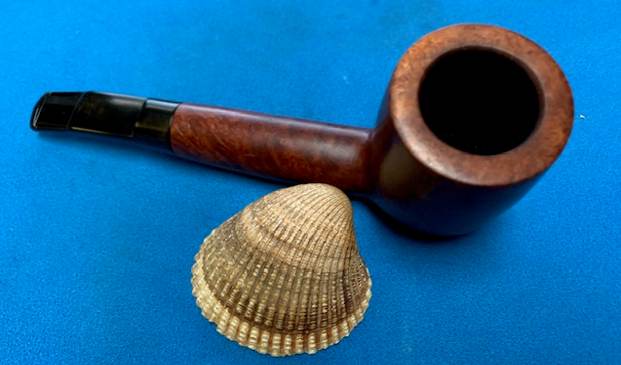
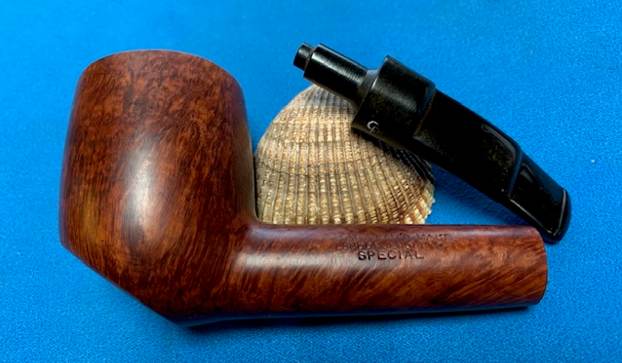
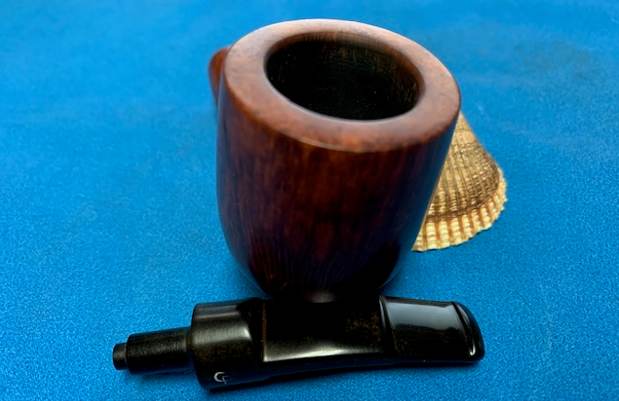
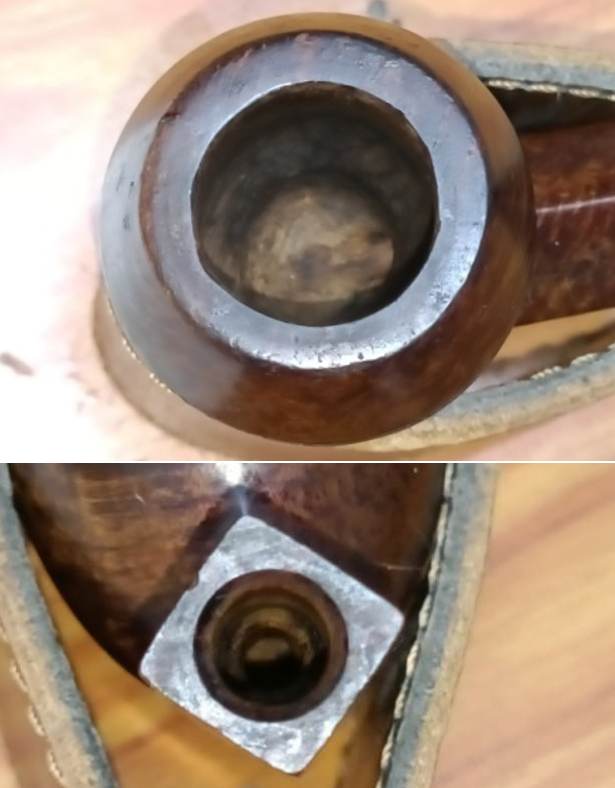
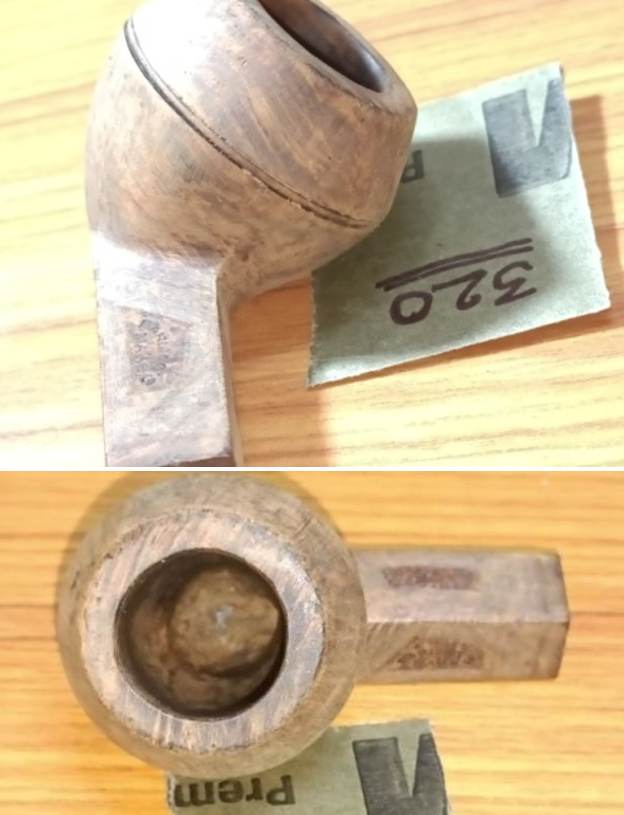
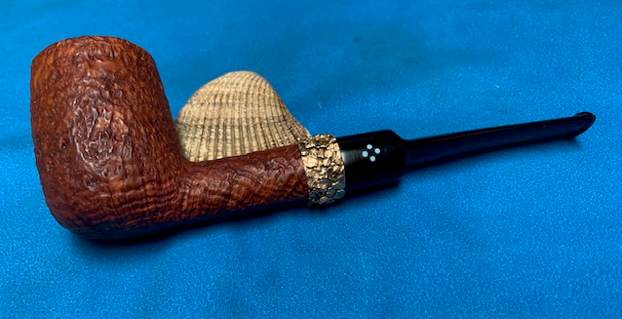
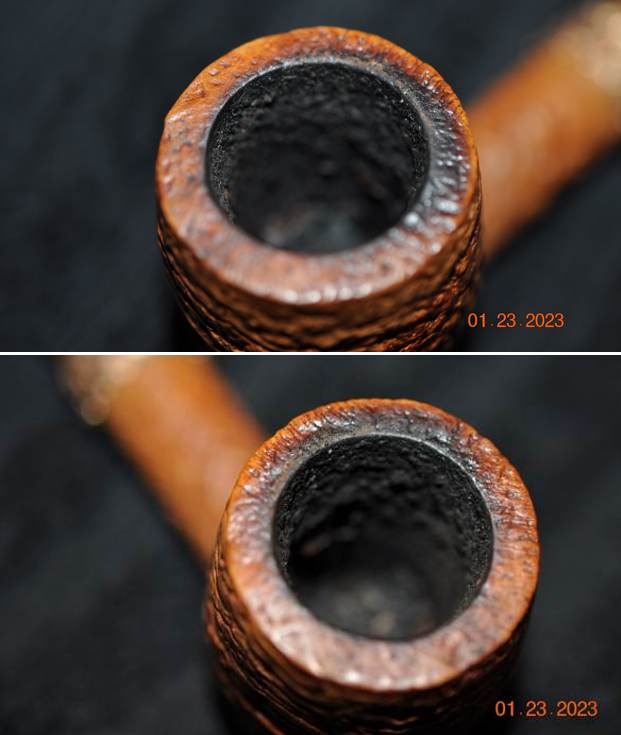
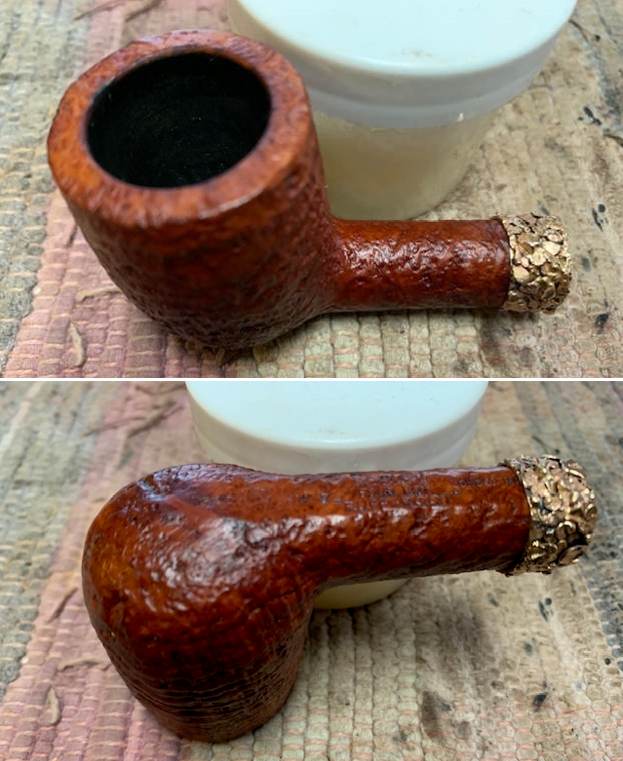
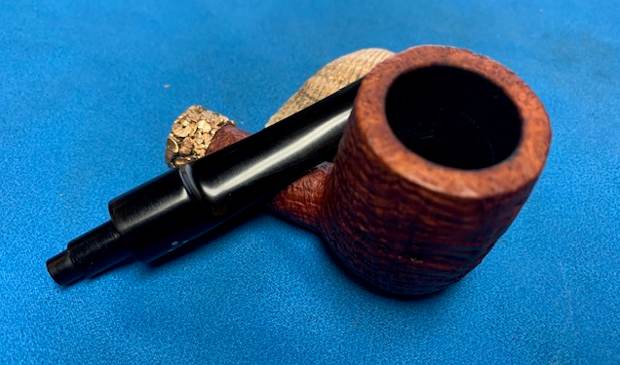
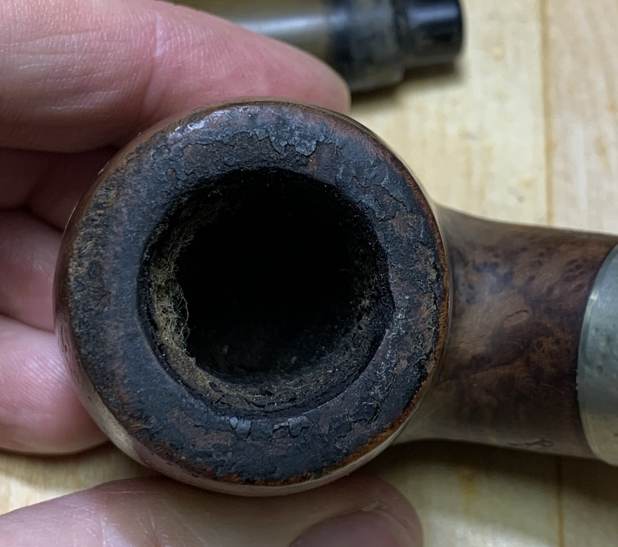
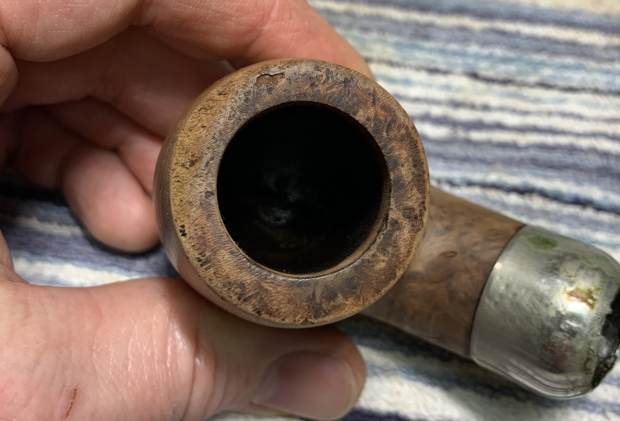
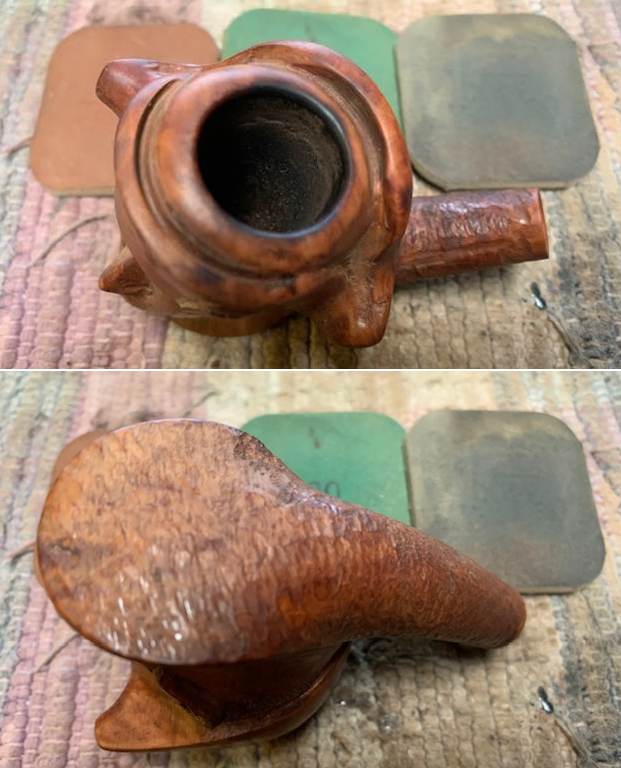
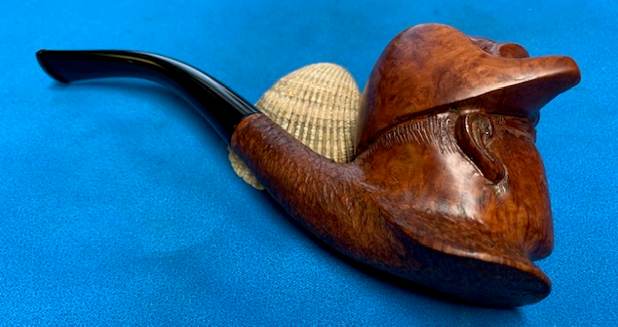
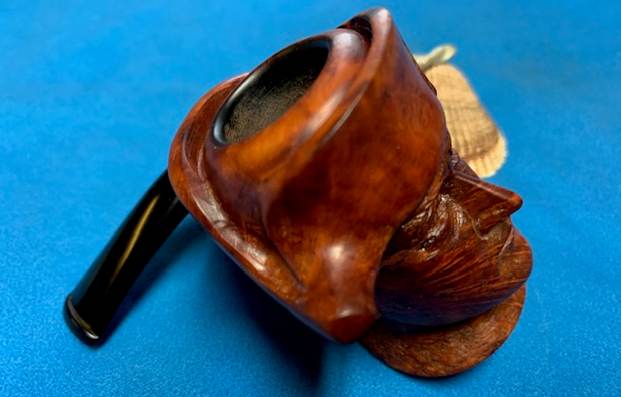
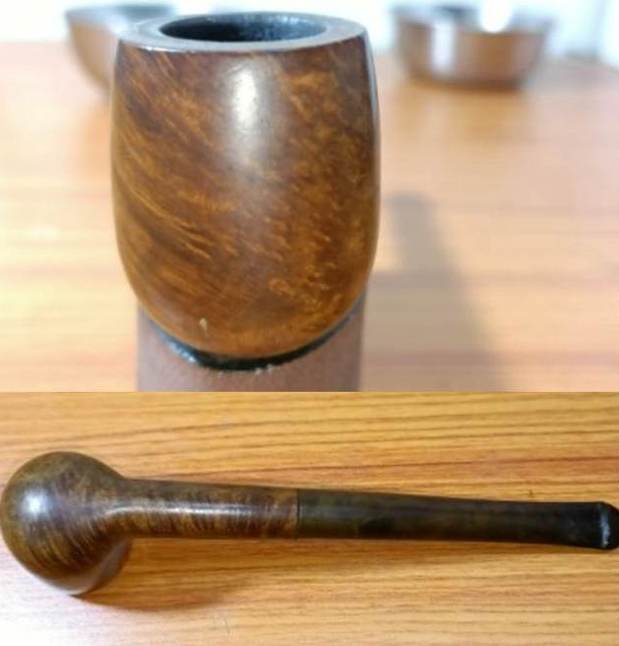
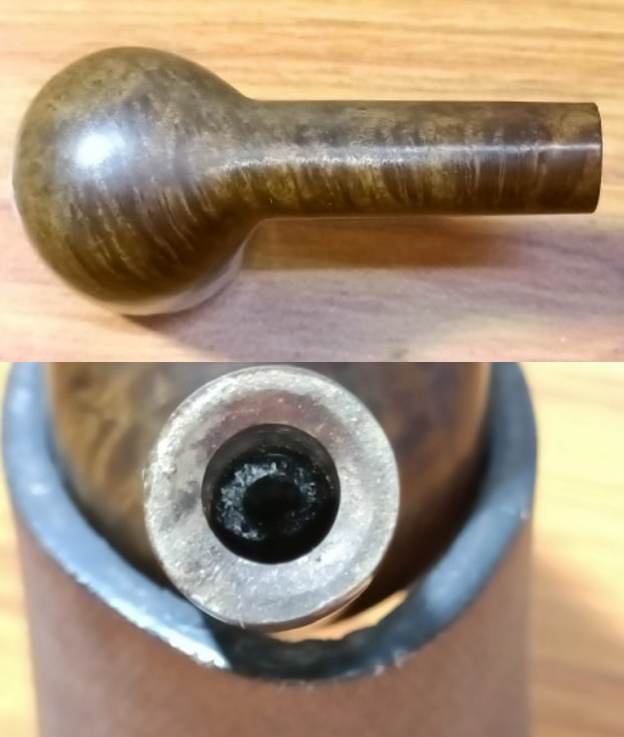
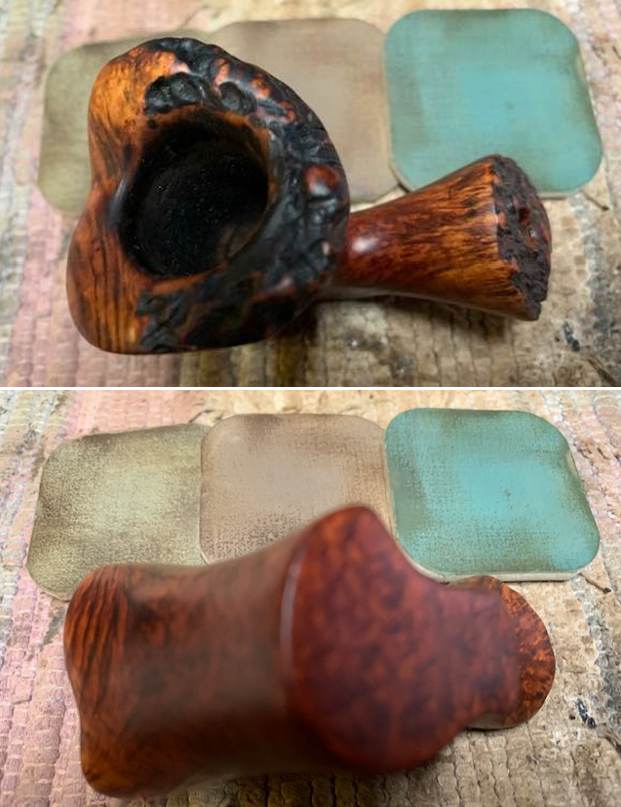
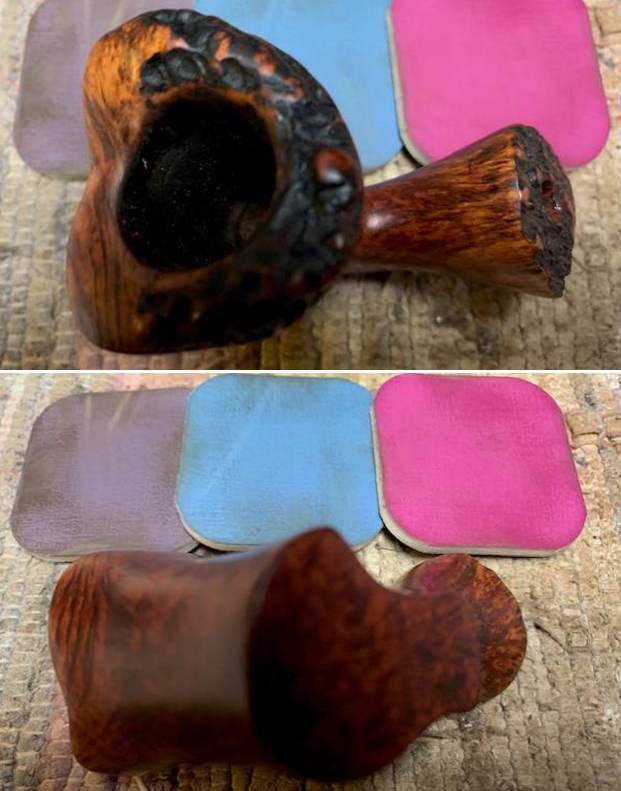
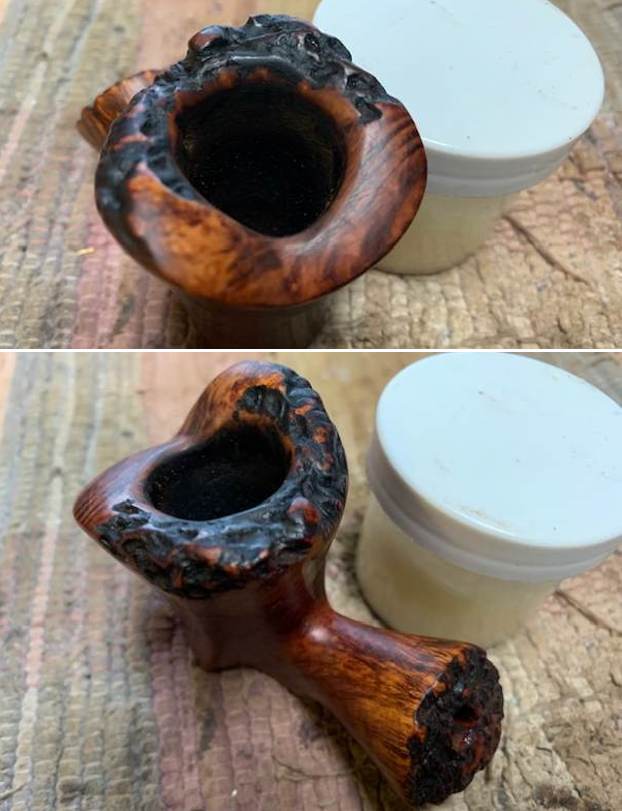
To summarize what I saw – this Karl Erik Freehand is a well made and uniquely shaped pipe. The bowl and stem are very dirty which says to me that once again this pipe was someone’s favourite pipe. The look and feel of the pipe in the hand is great. It should clean up very well. Here are photos of the pipe taken before Jeff started the clean up. 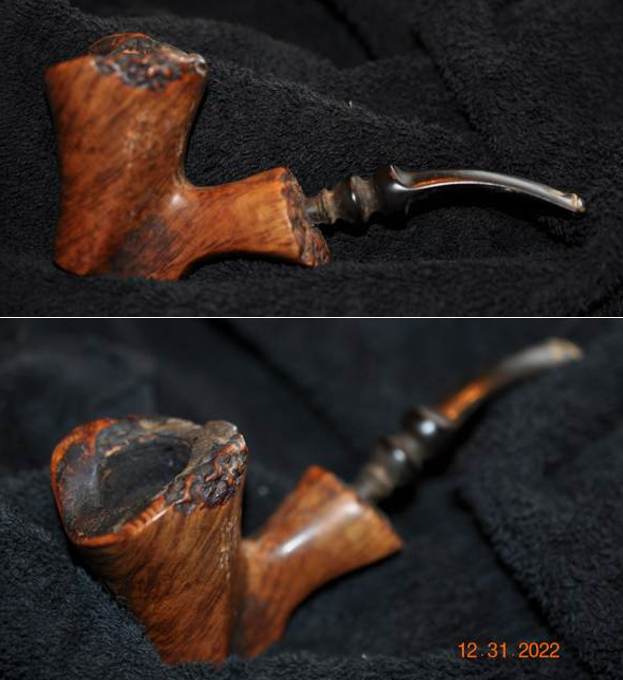 Jeff took close up photos so that I could have a clearer picture of the condition of the bowl, rim edges and top. The rim top photos confirm my assessment above. The cake in the bowl is thick – covering the walls of the bowl. The rim top has thick lava coat overflowing and covering the inner edge. It is heavier on the right front and toward the back of the bowl. It is hard to know the condition of the inner edge in this condition. This is what I look for when assessing a pipe. I look forward to viewing it in person after the clean up work.
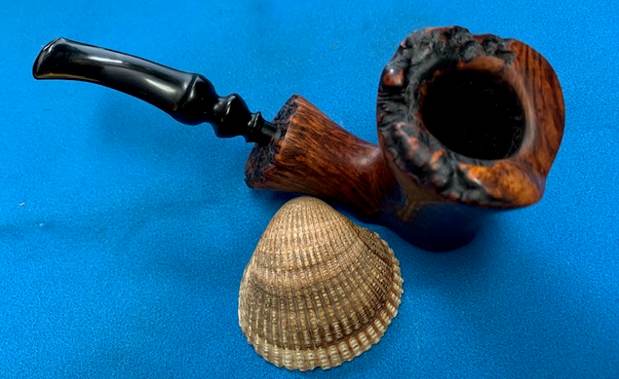
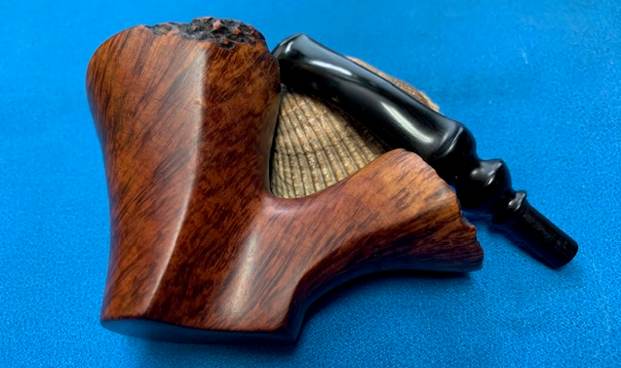
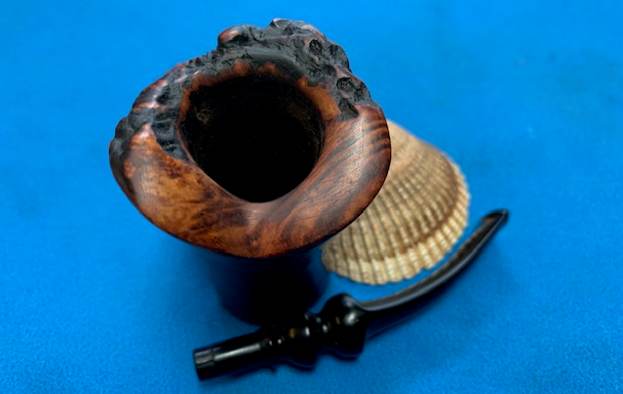
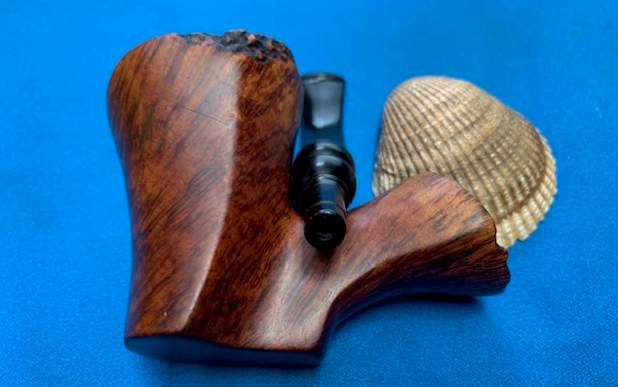
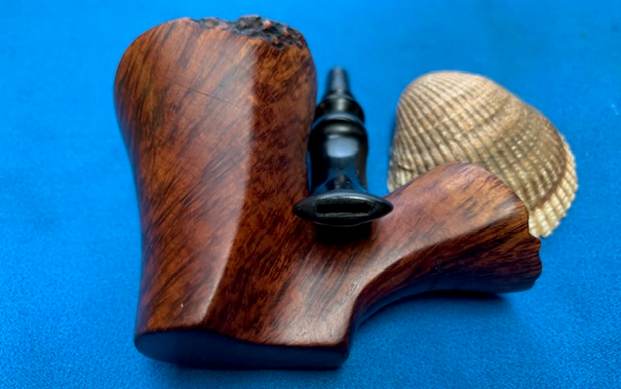
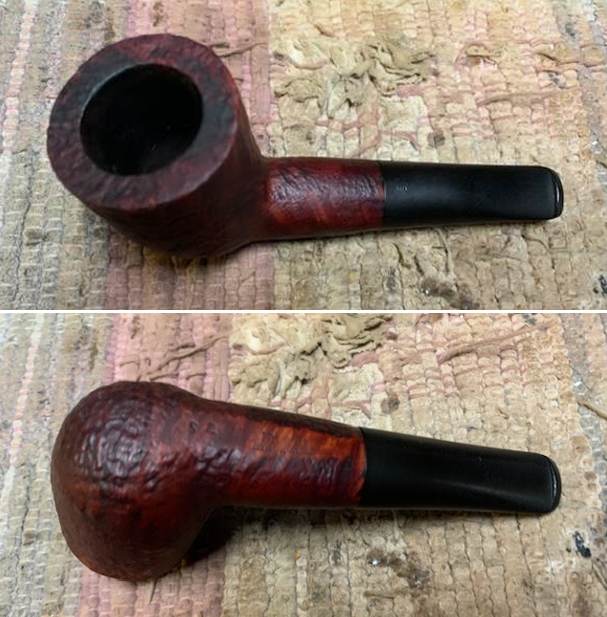
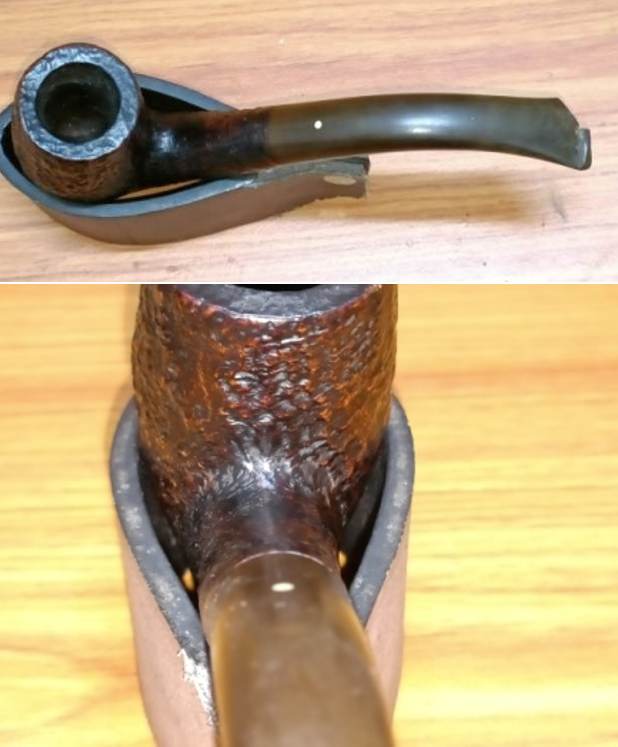
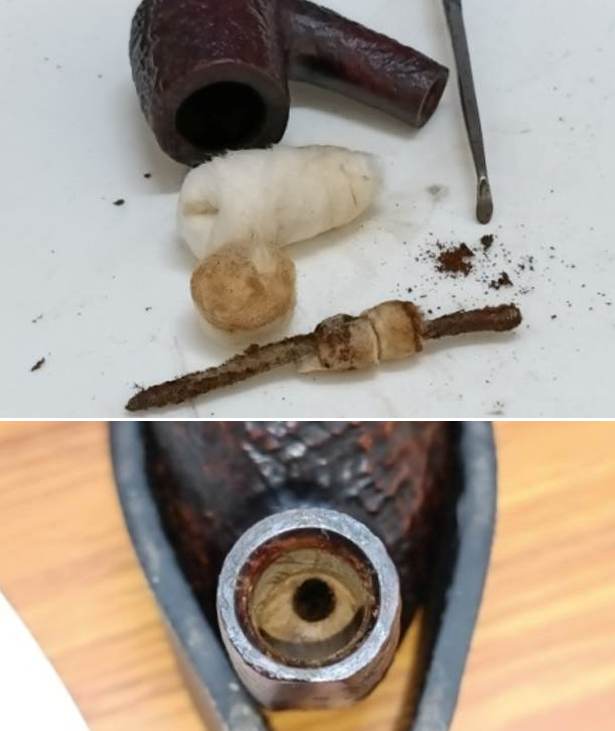
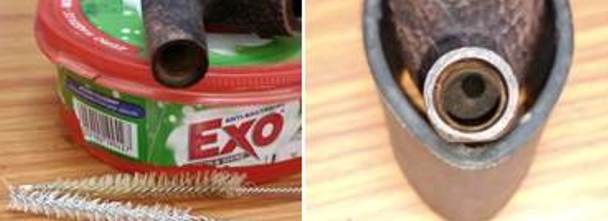
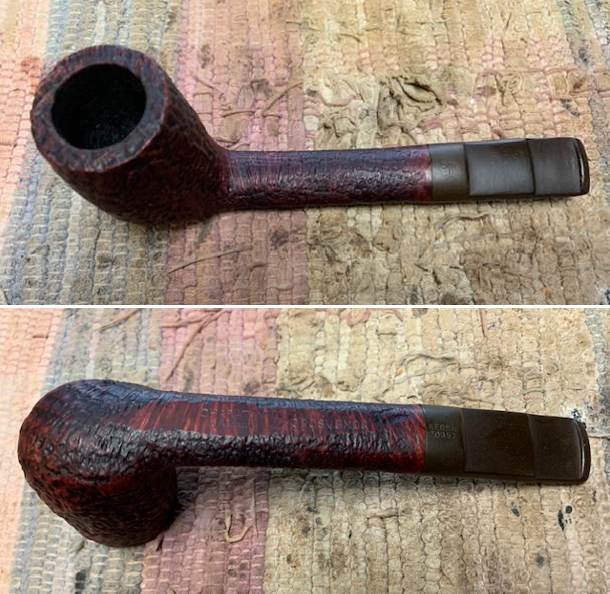
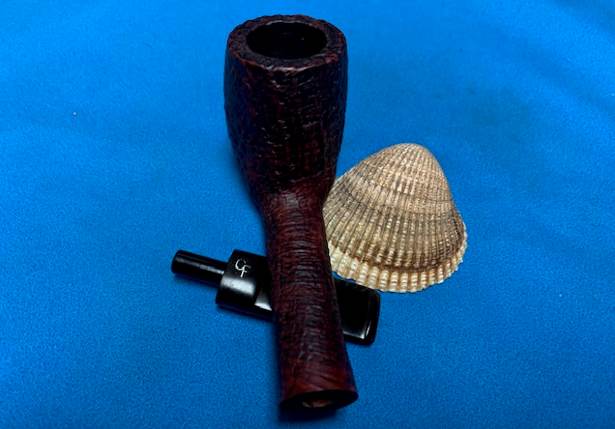
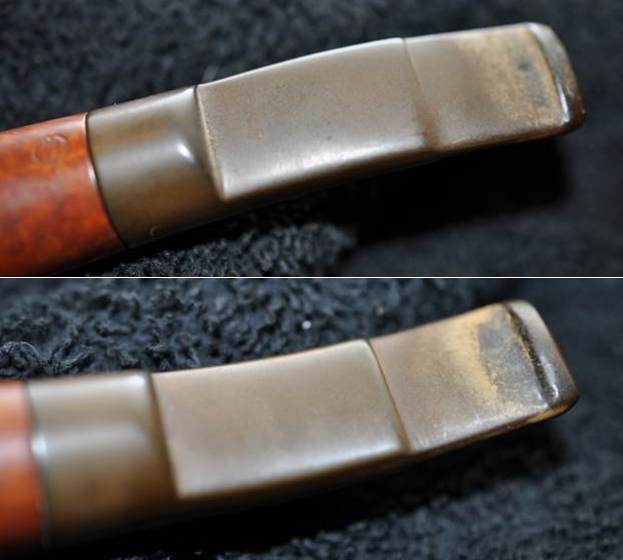
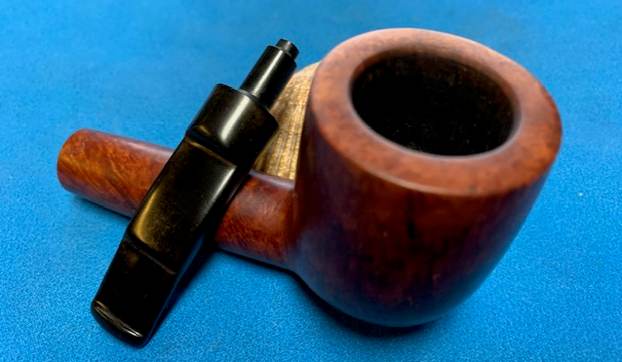
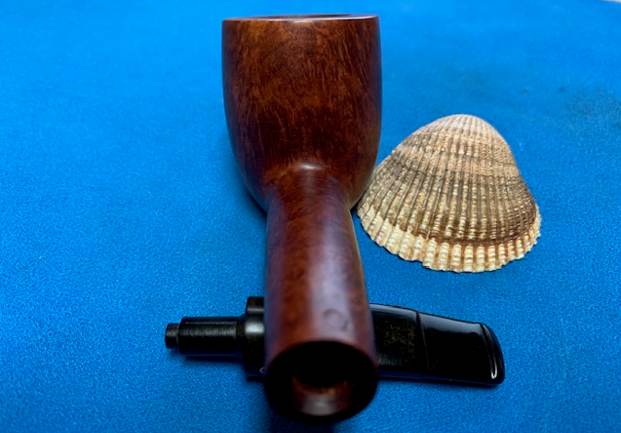
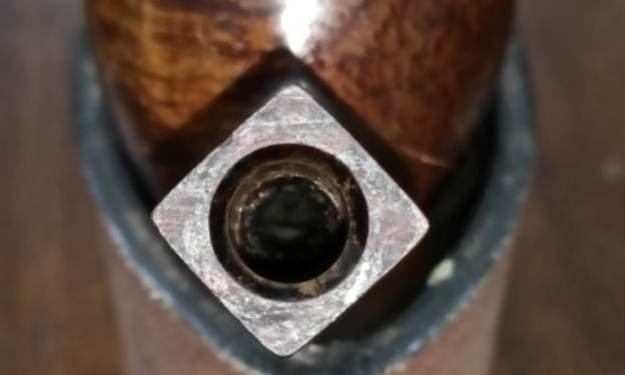
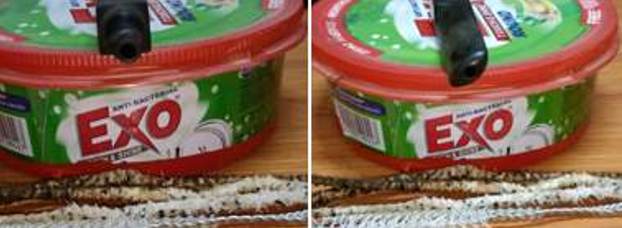
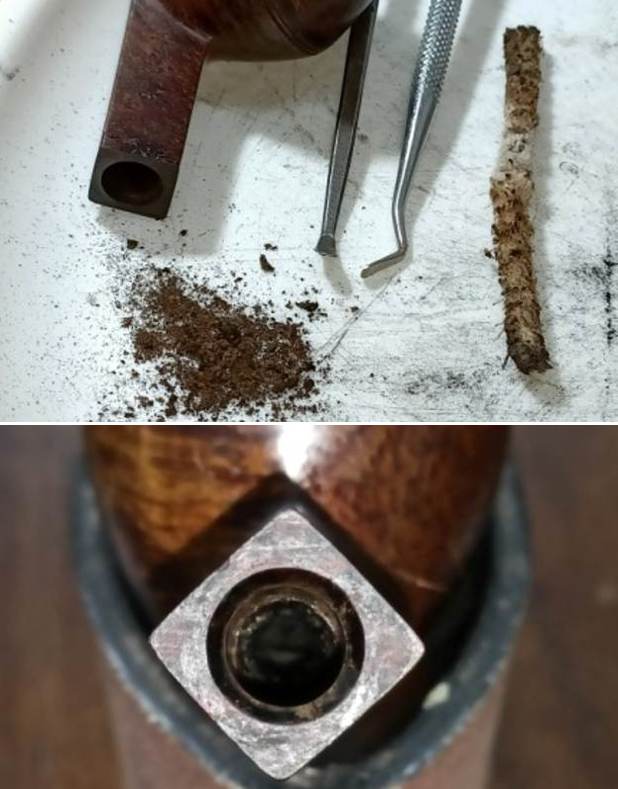
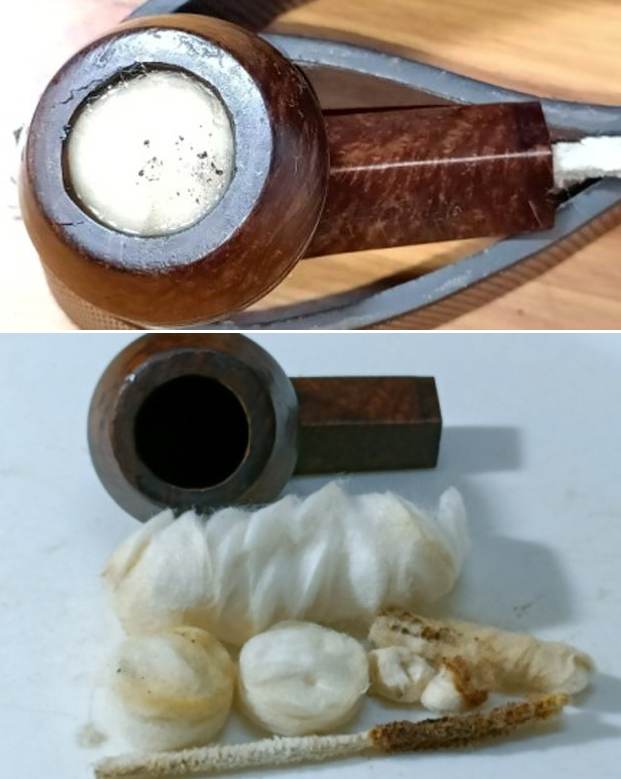
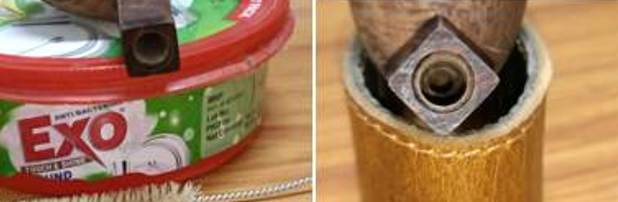
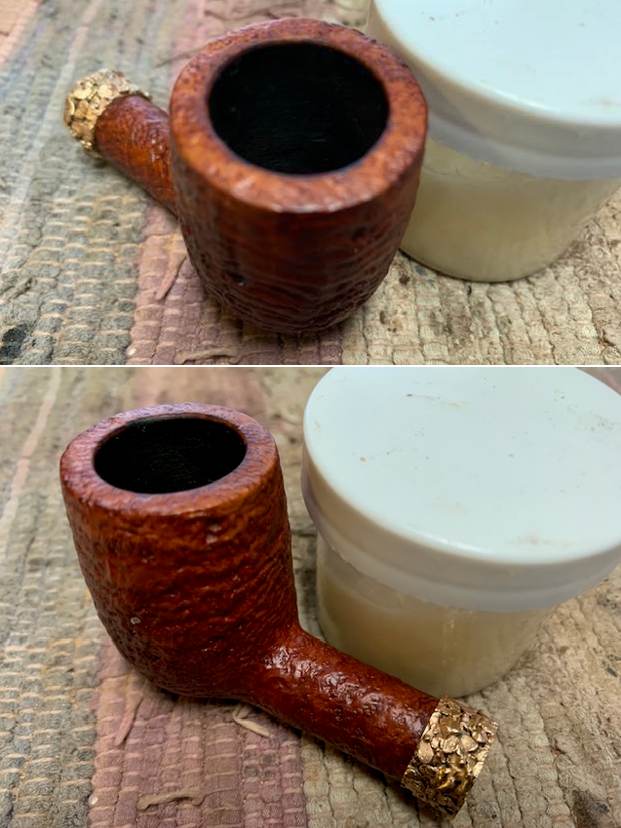
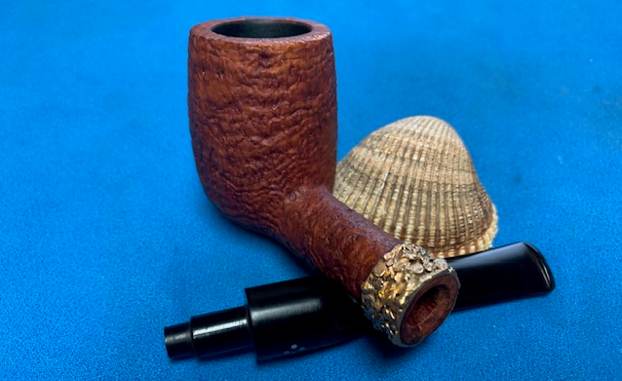
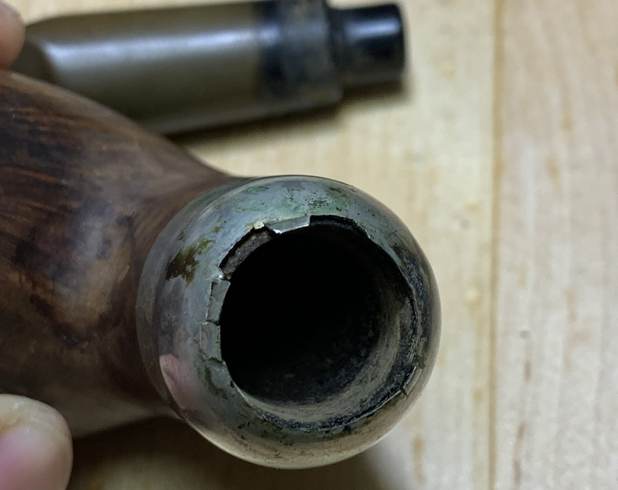
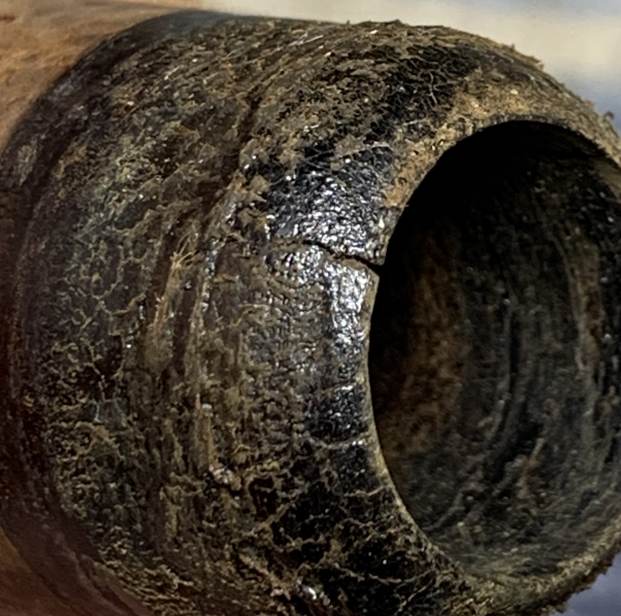
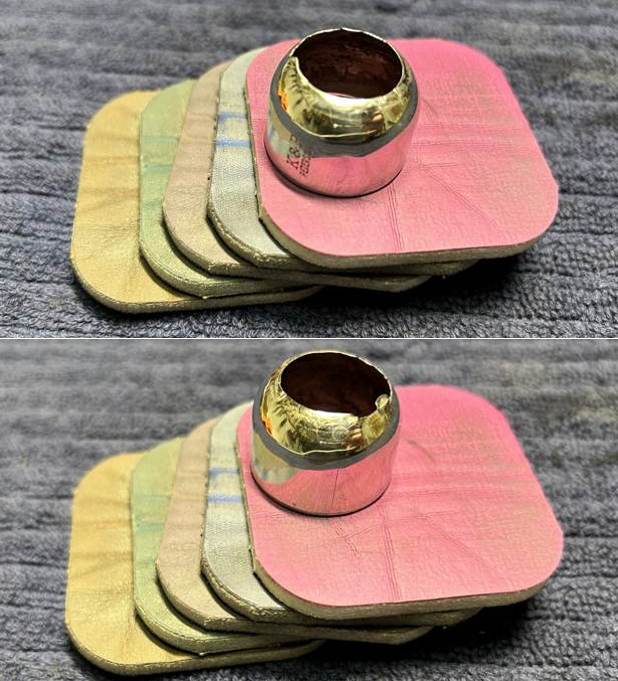
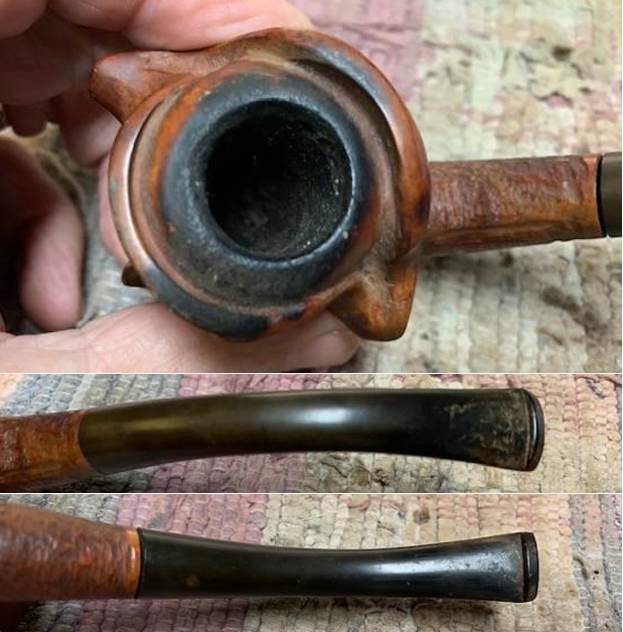
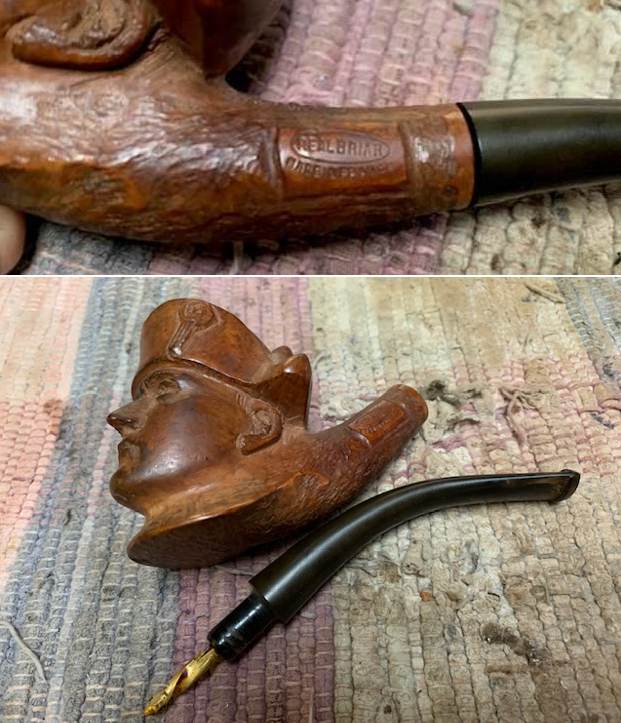
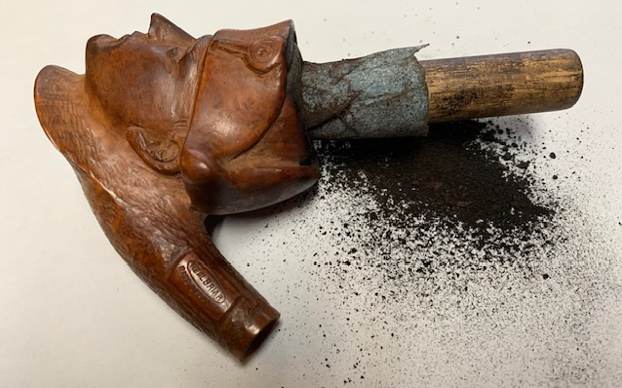
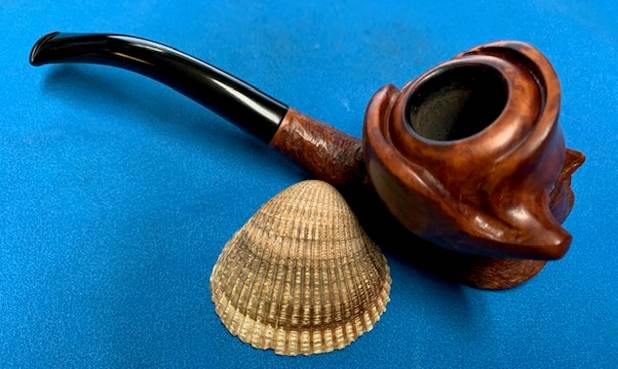
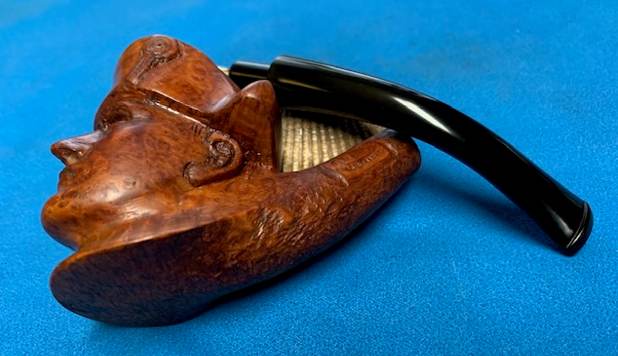
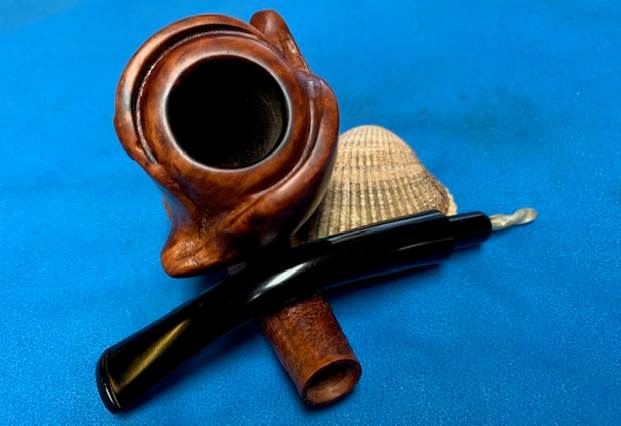
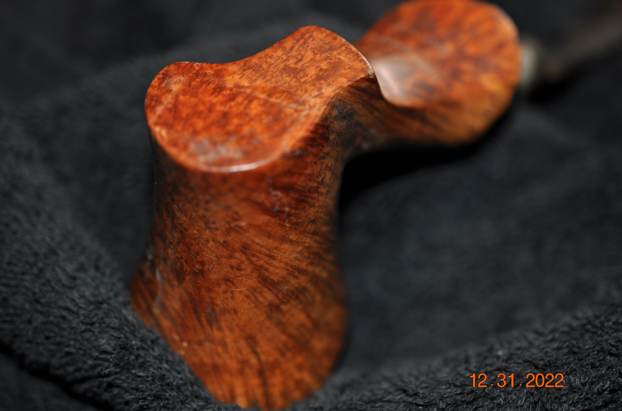
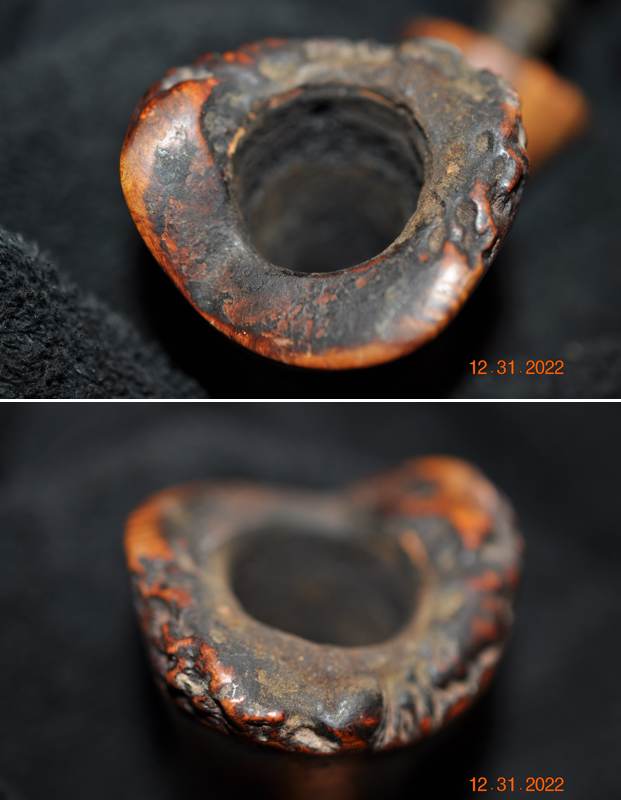 Jeff took a photo of the plateau shank end and the fit of the stem in the shank. You can see the build up of dust and debris in the plateau and in the curves and grooves of the stem. It is a mess but still beauty lies beneath the grime.
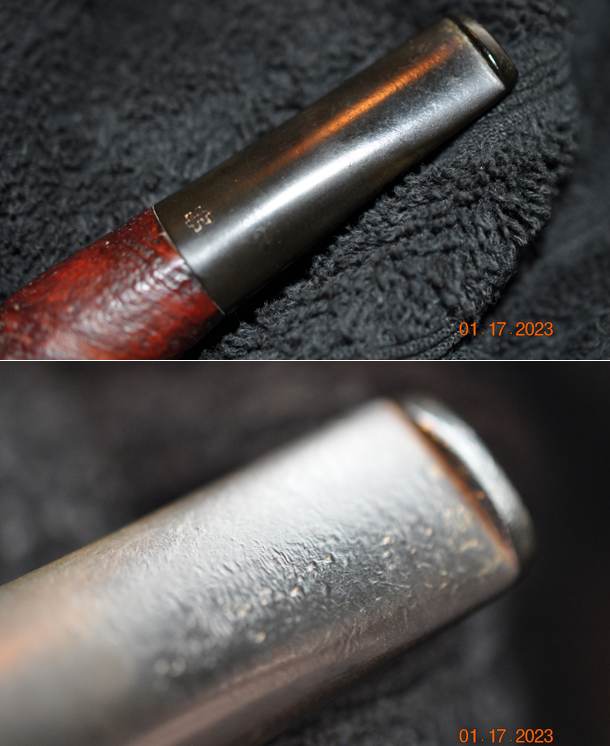
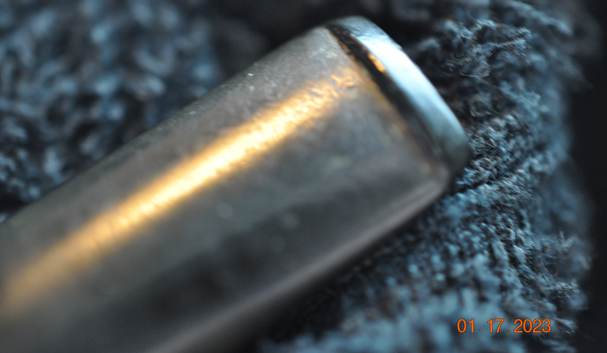
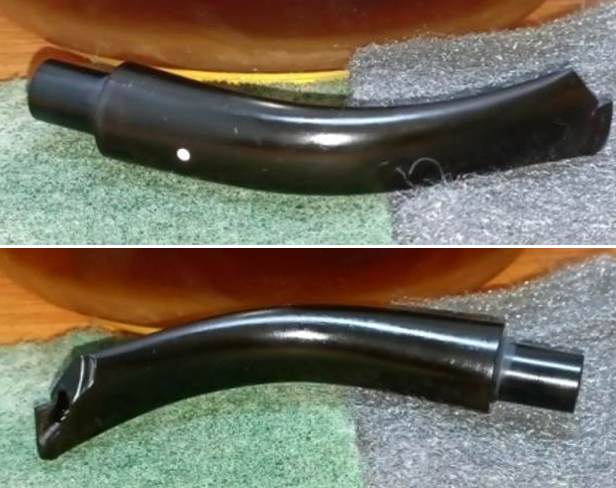
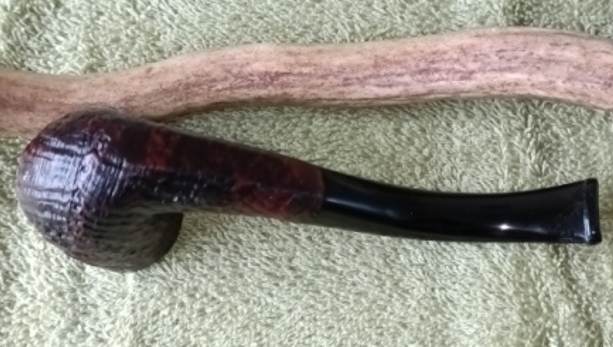
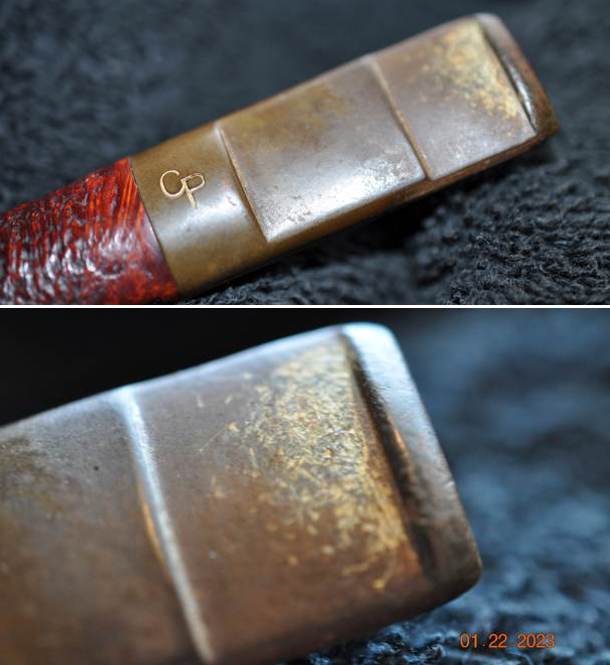
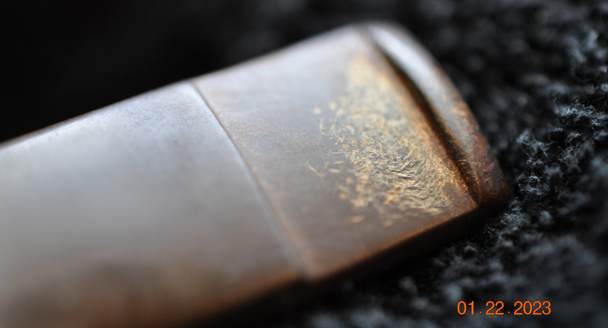
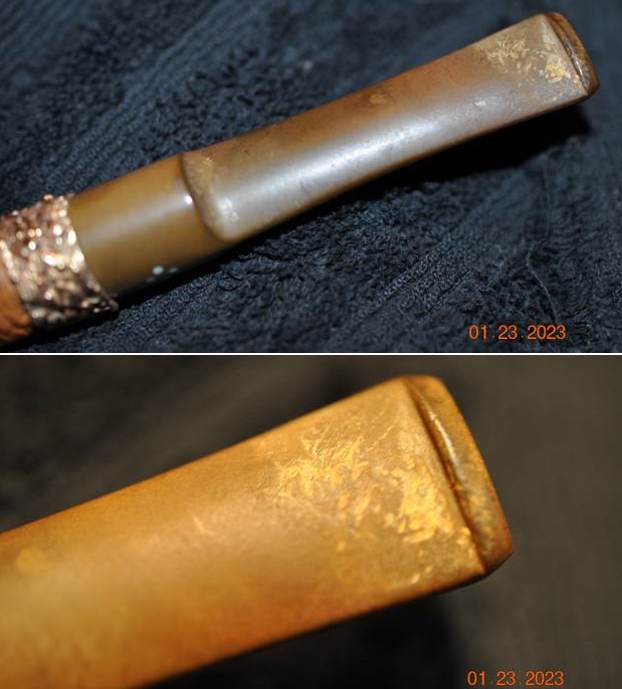
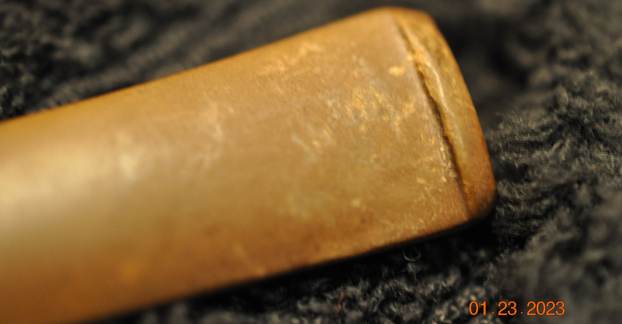
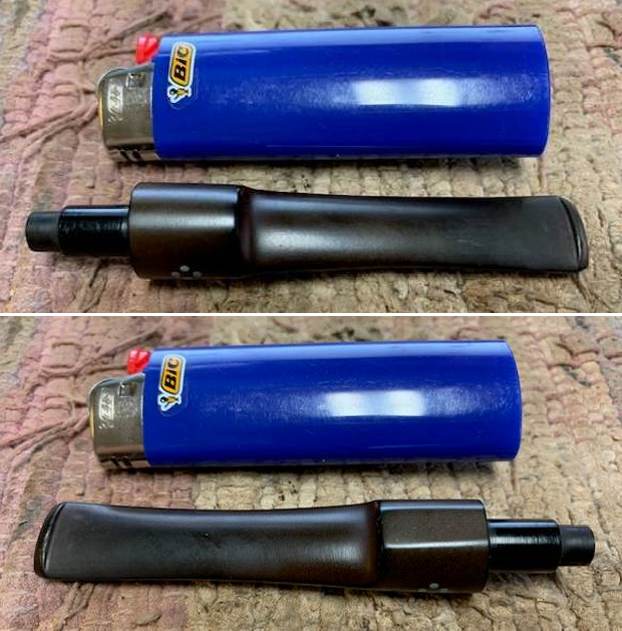
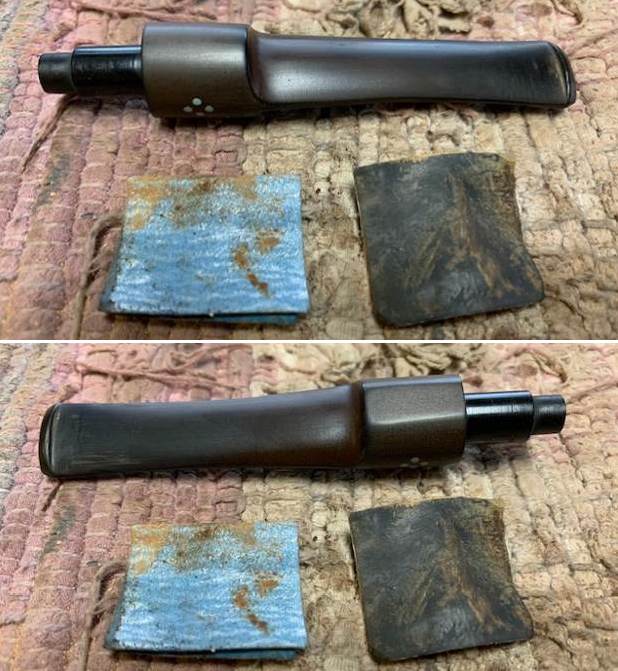
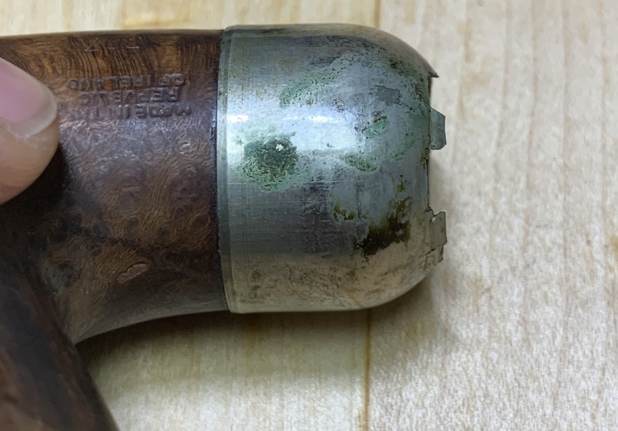
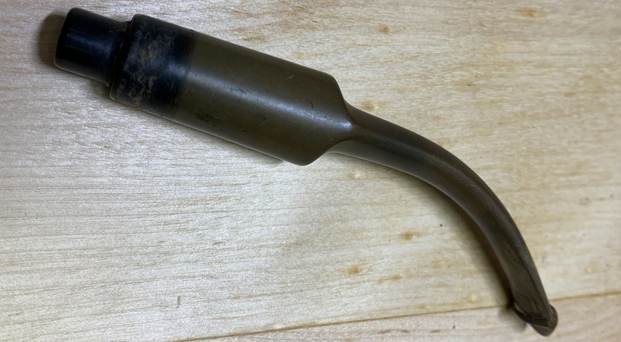
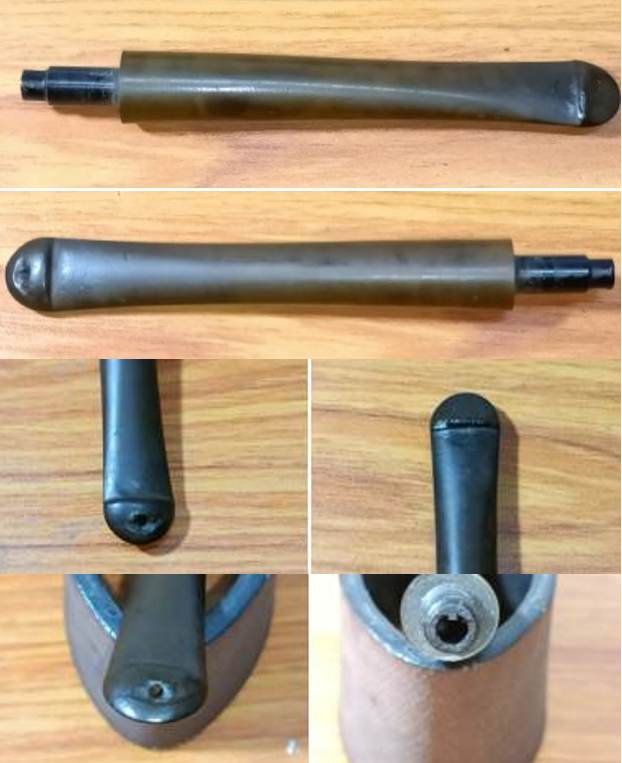
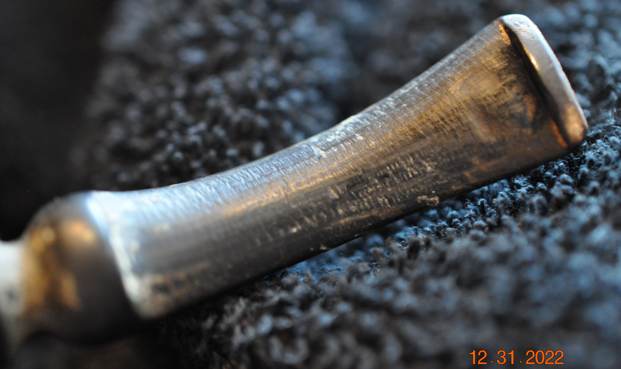
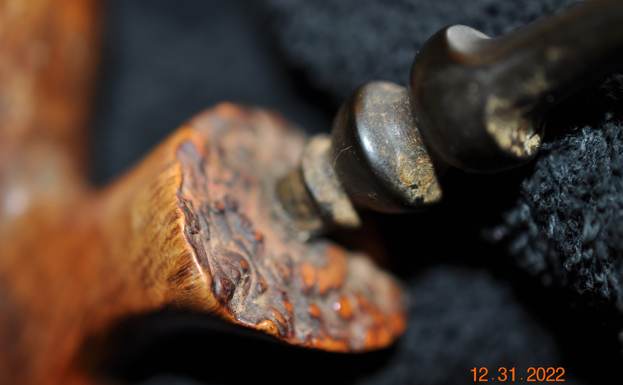 The vulcanite fancy, turned stem is dirty, oxidized and calcified. There are some deep tooth marks and chatter on both sides ahead of the button. You can also see some scrape marks across both the top and underside of the stem.
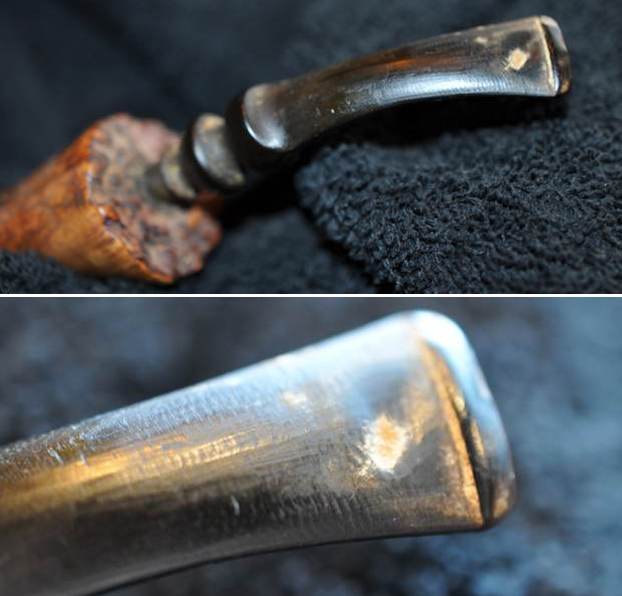
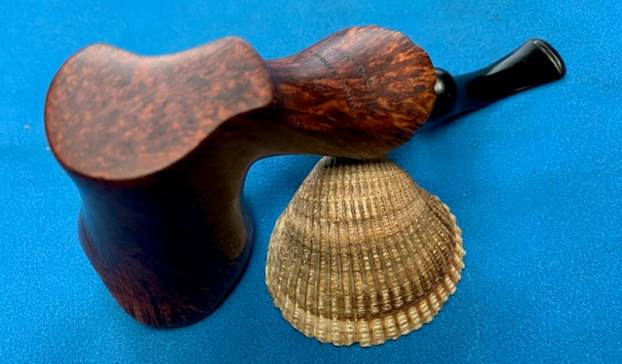
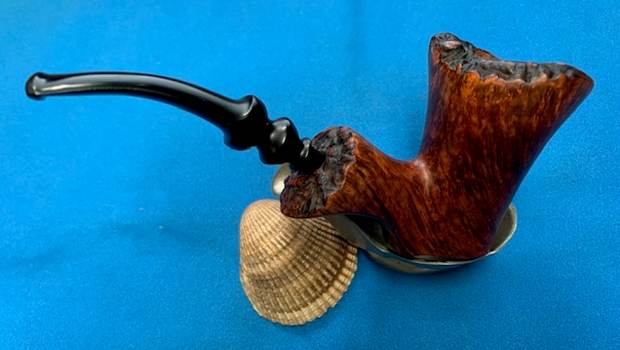
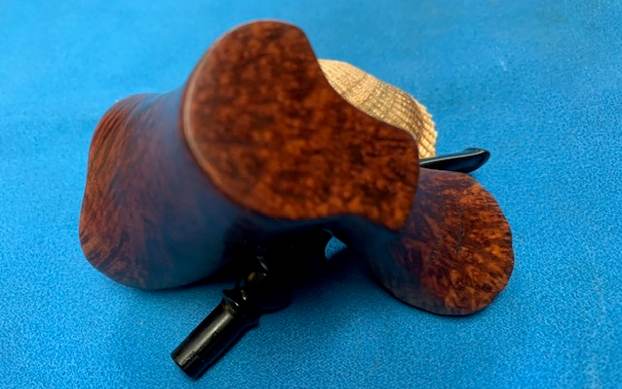
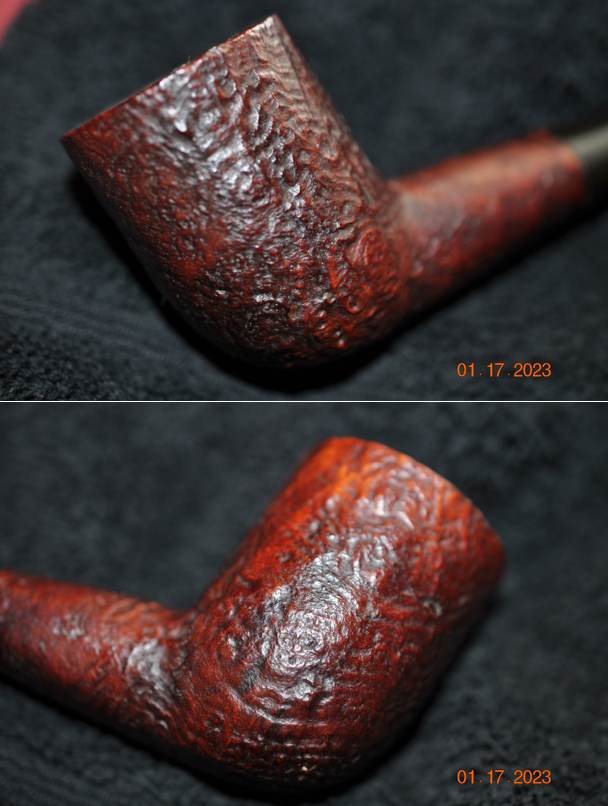
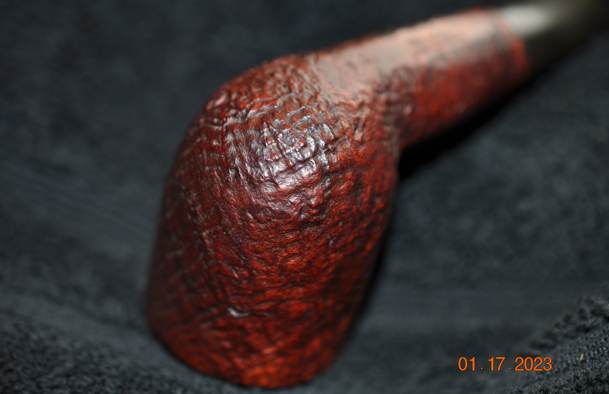
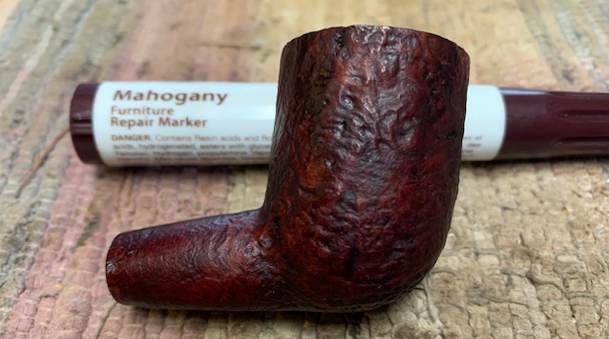
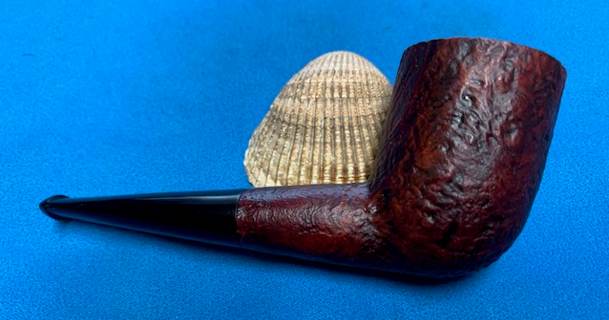
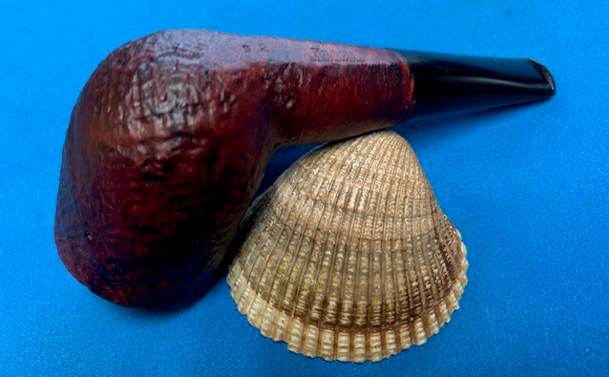
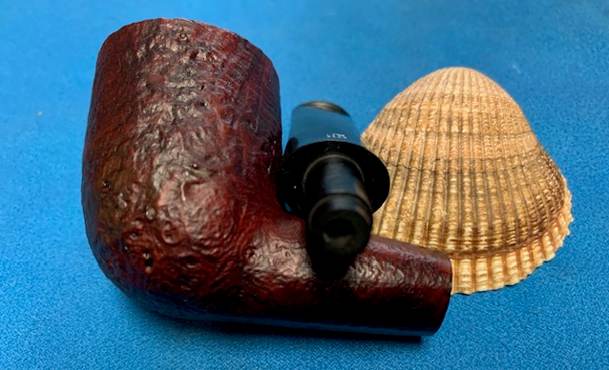
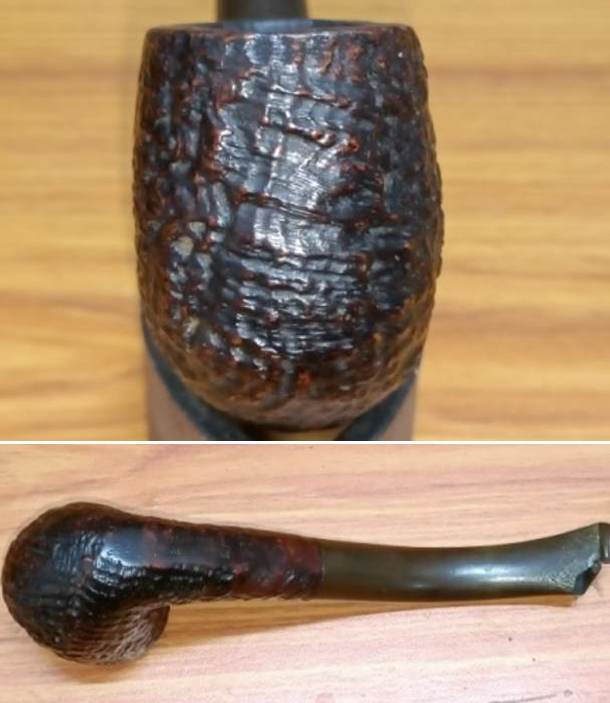
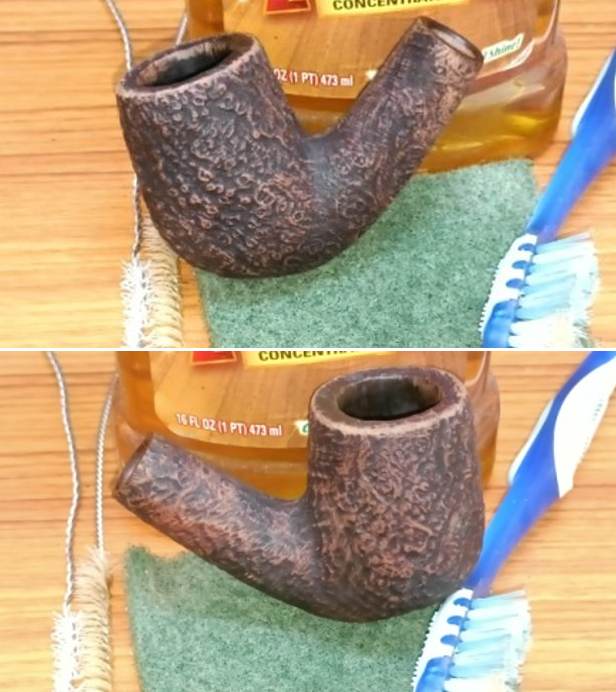
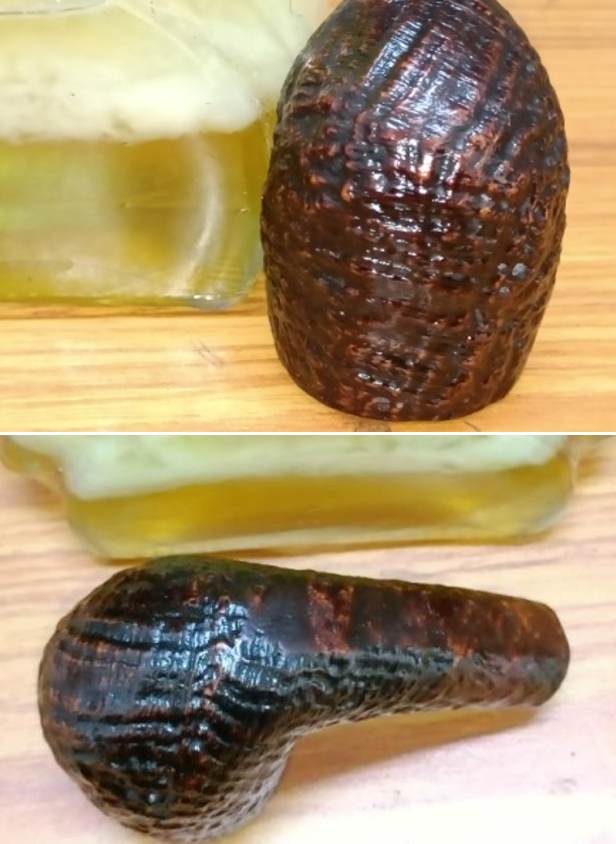
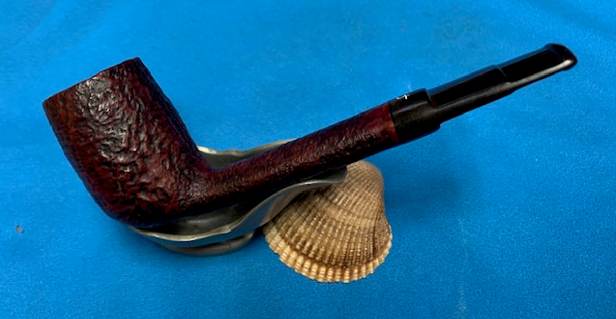
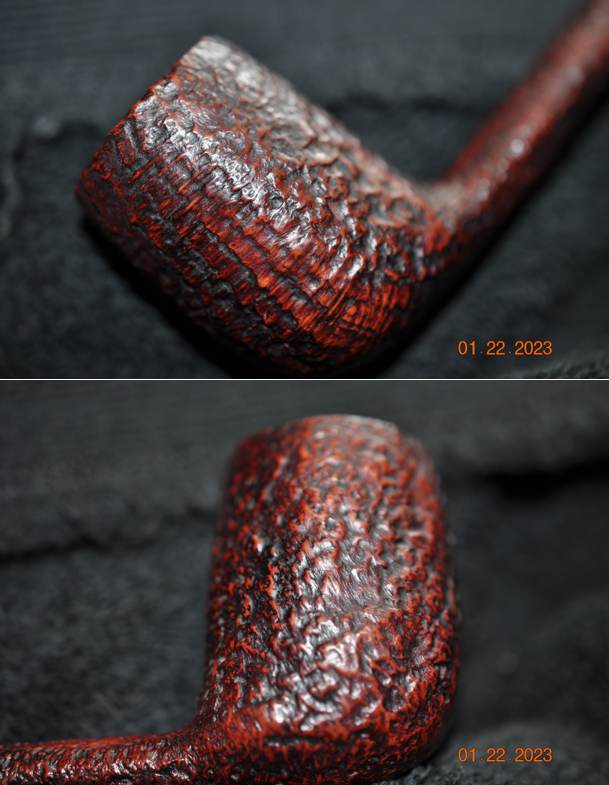
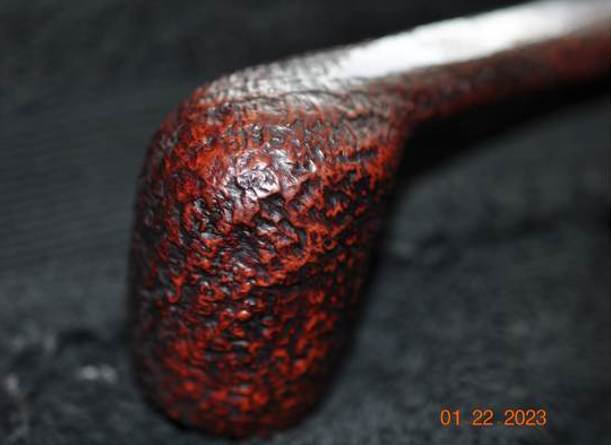
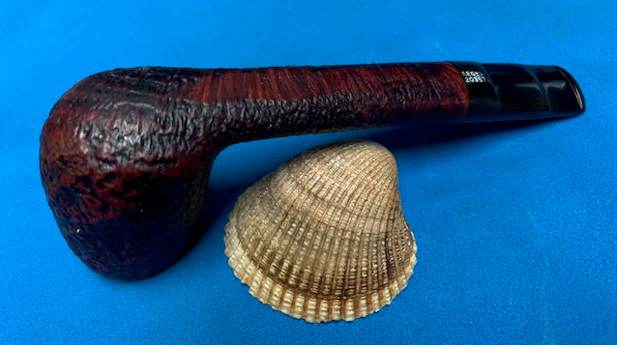
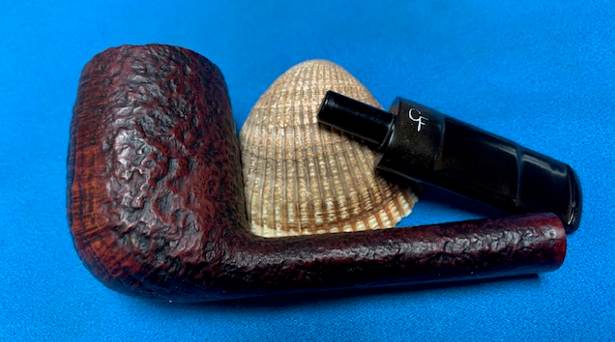
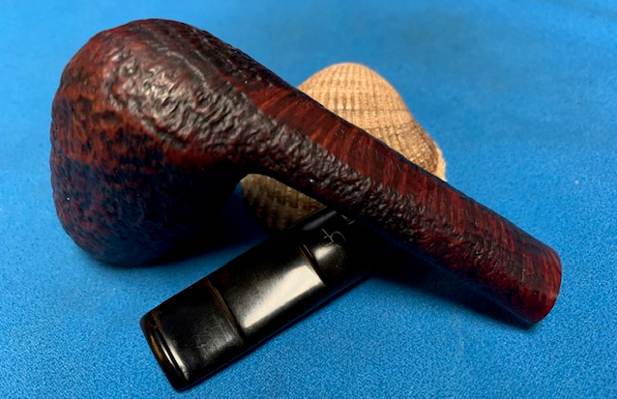
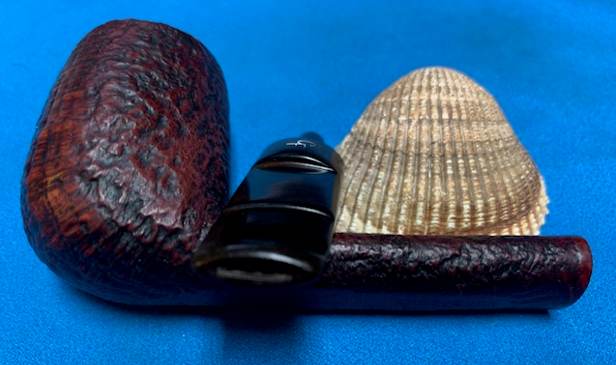
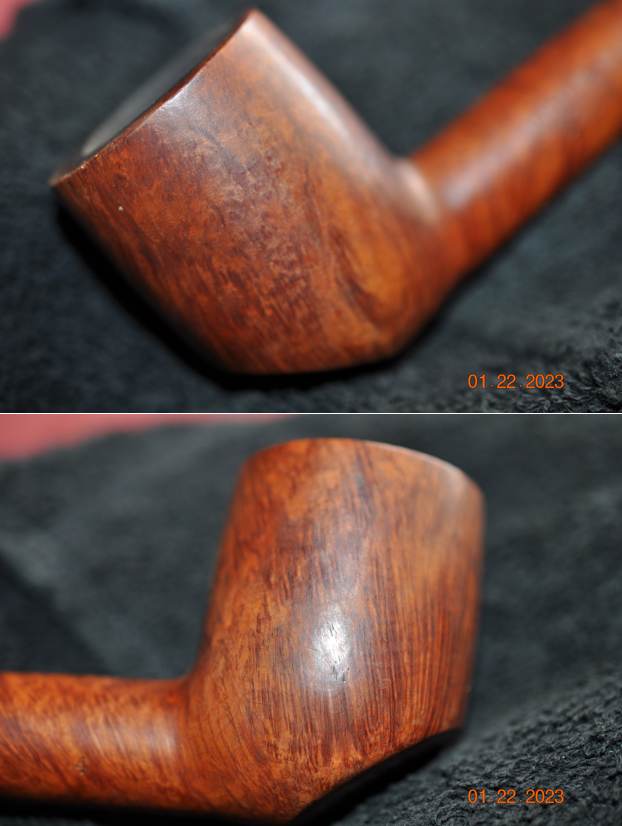
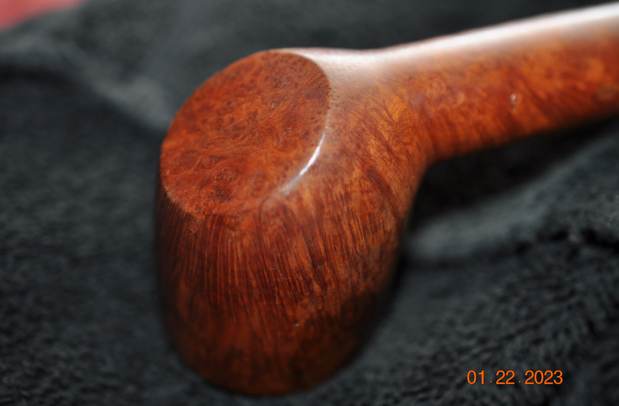
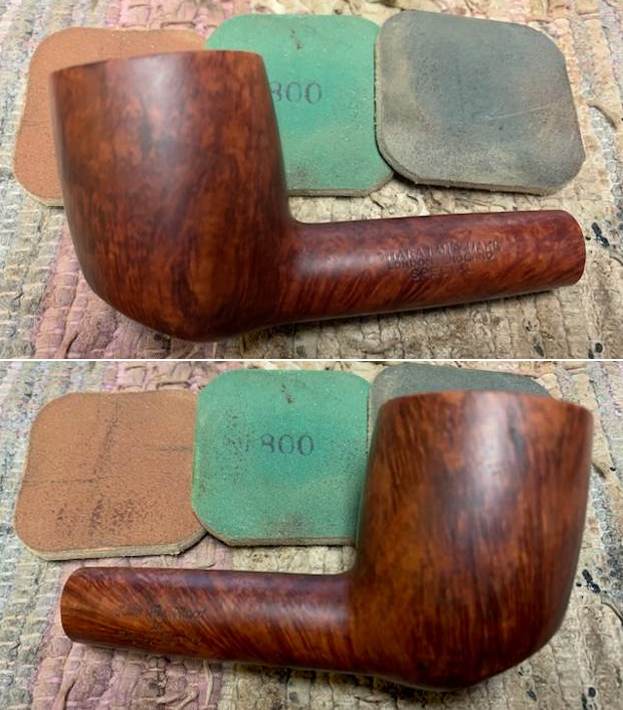
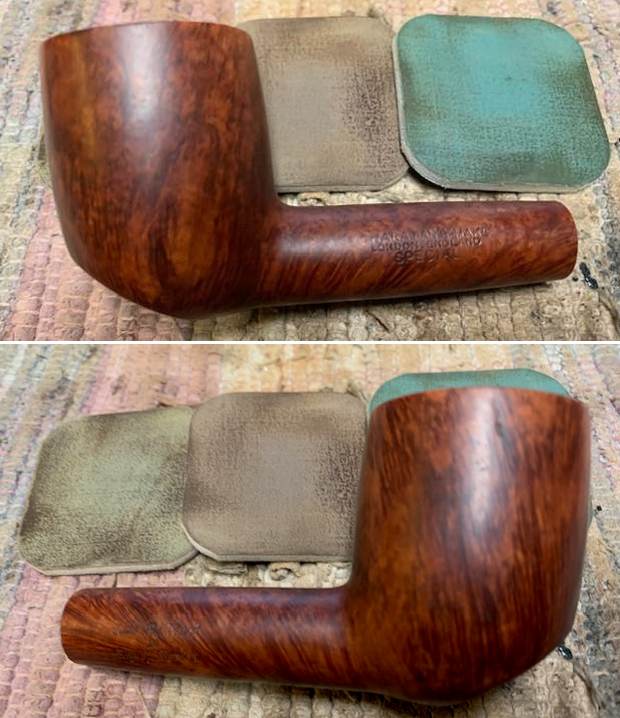
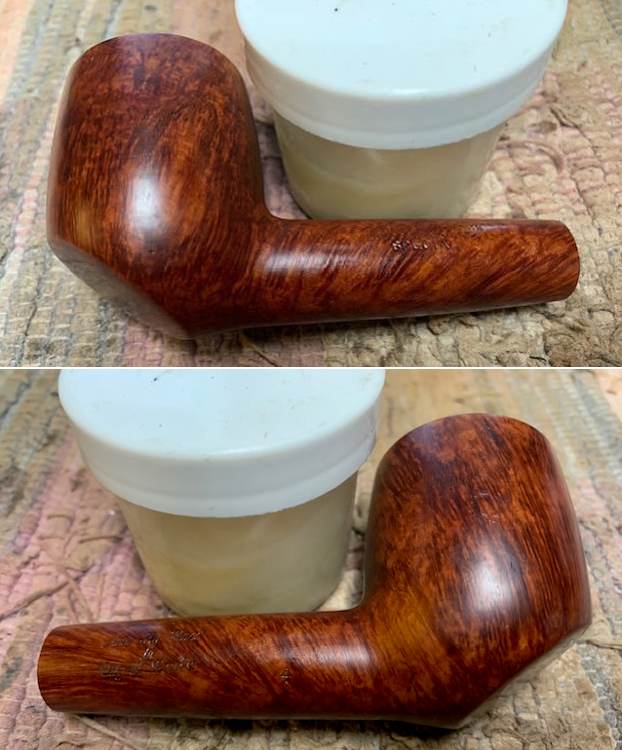
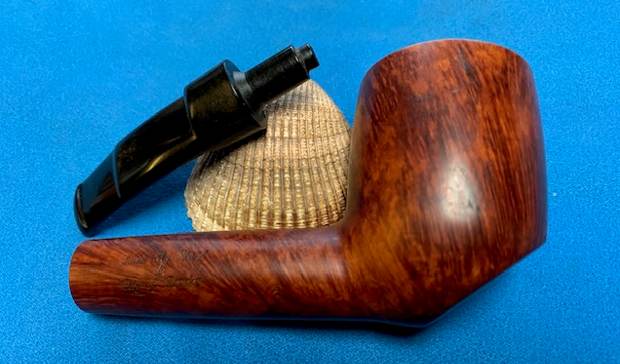
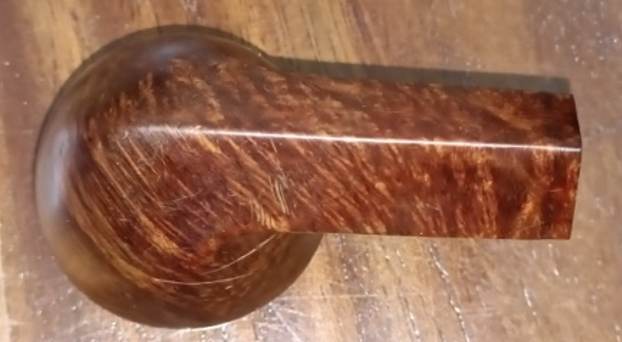
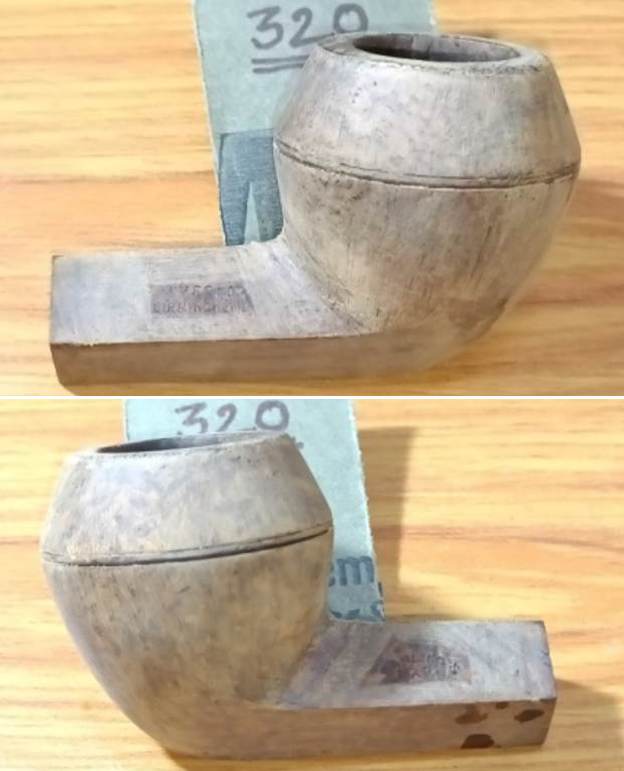
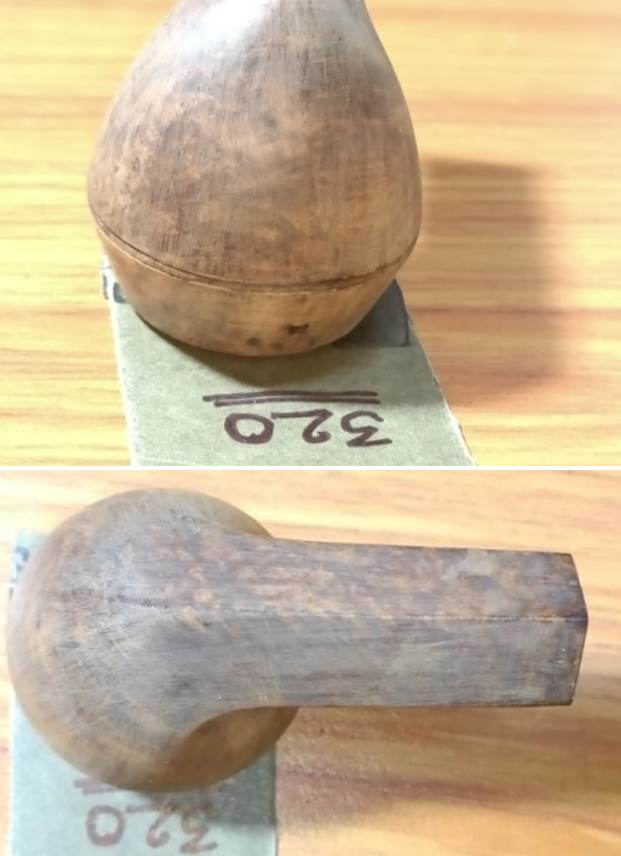
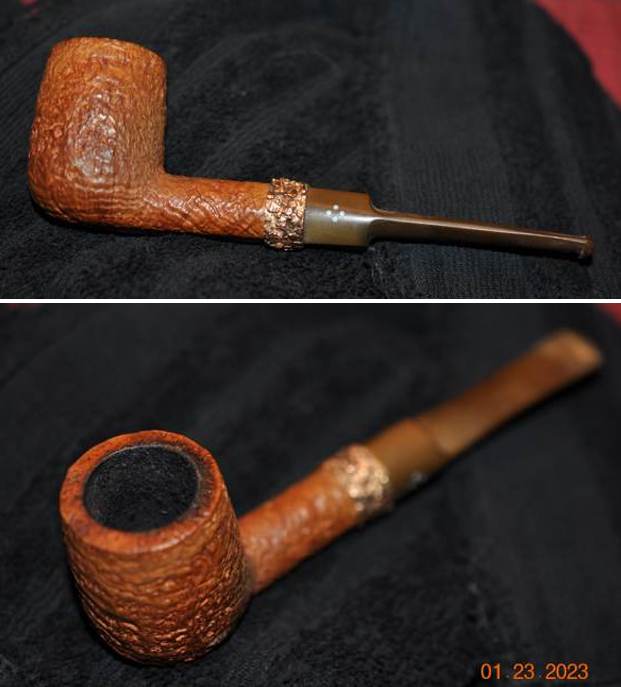
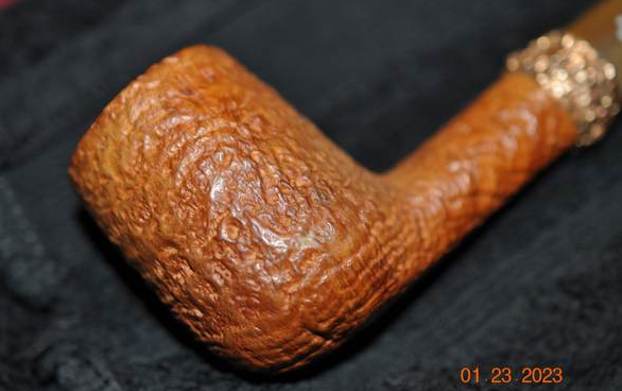
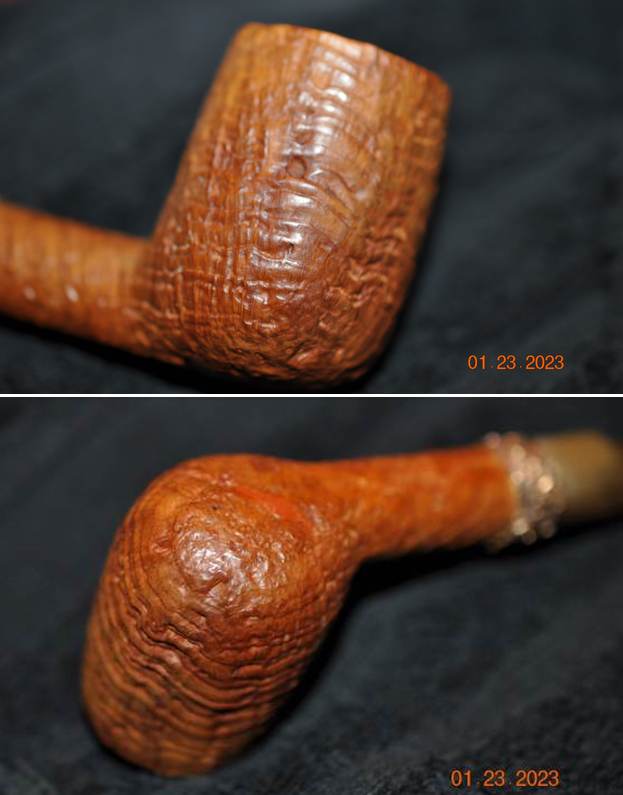
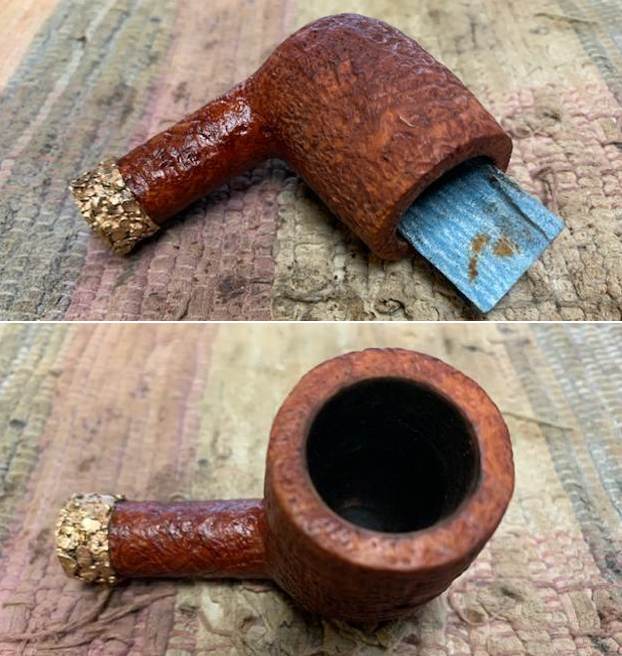
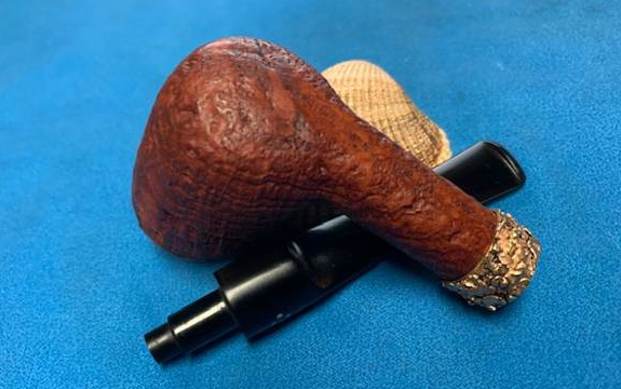
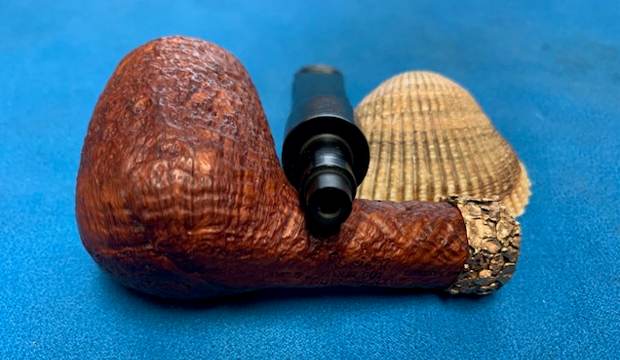
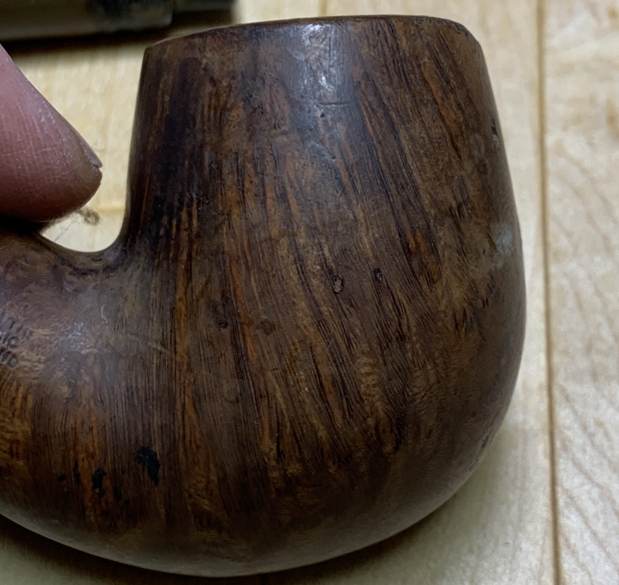
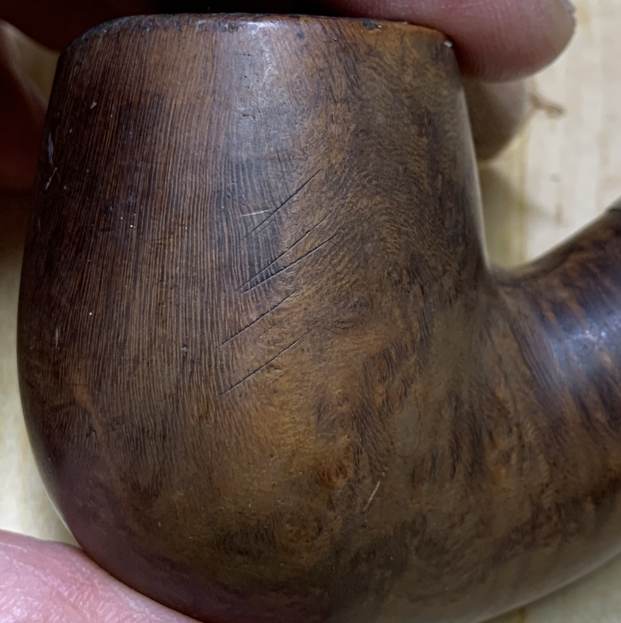
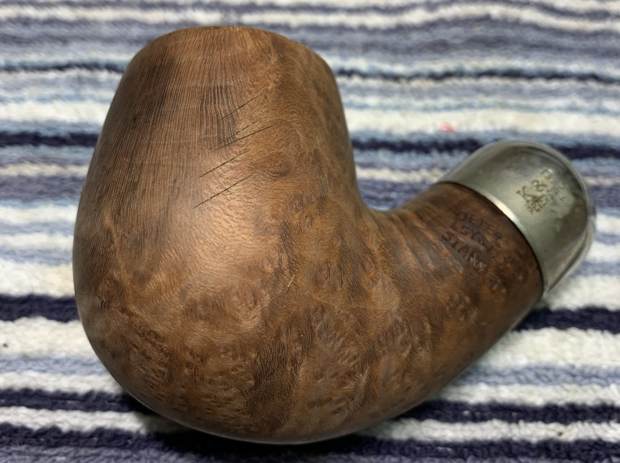
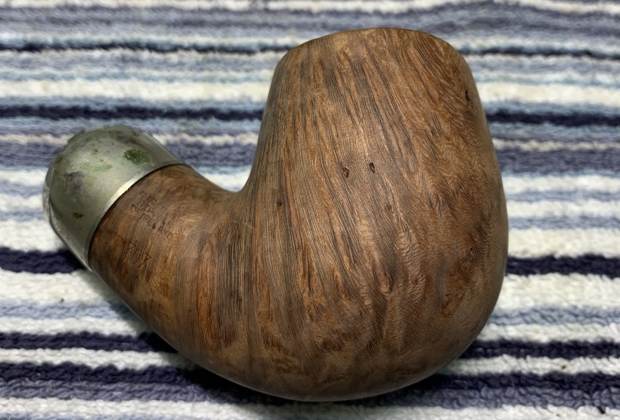
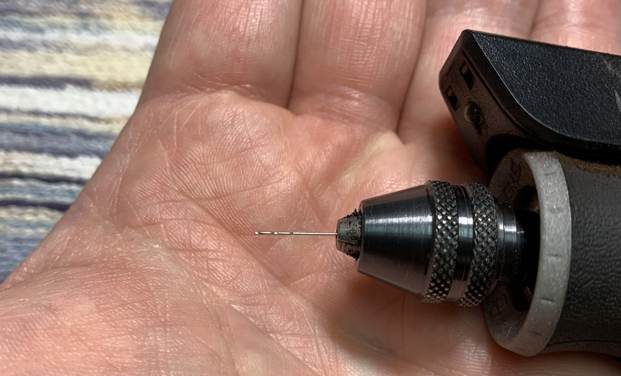
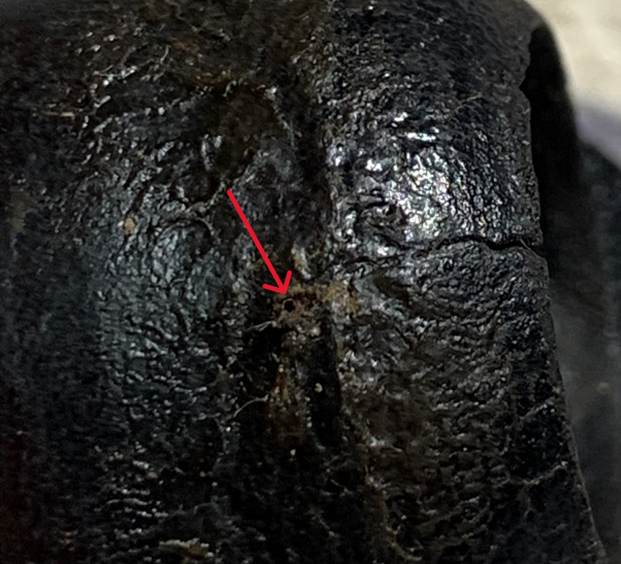
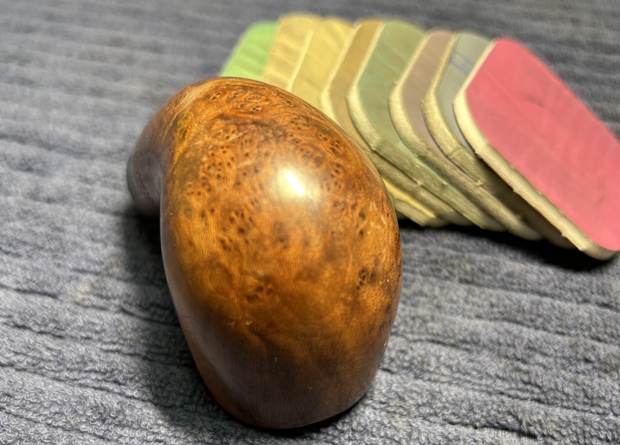
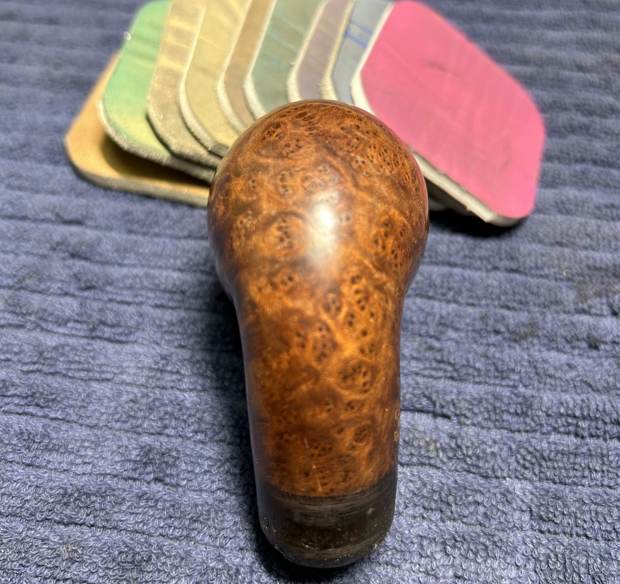
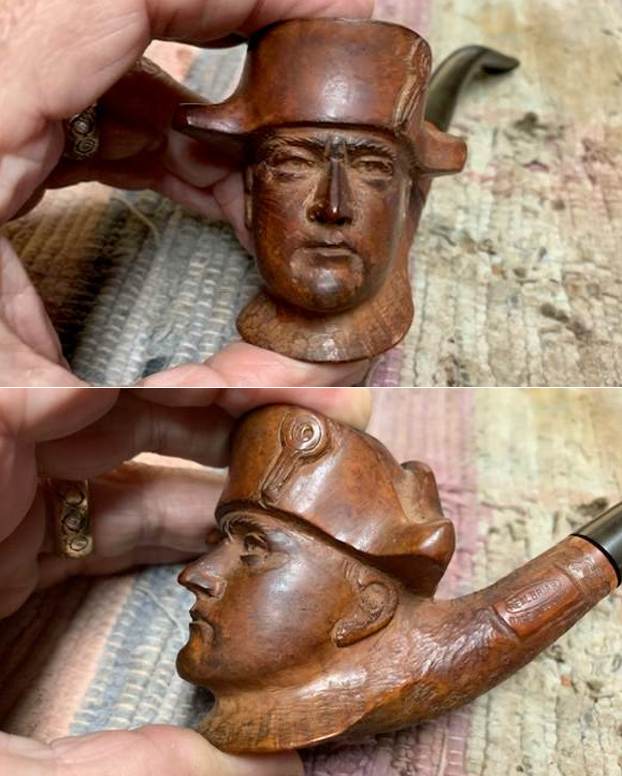
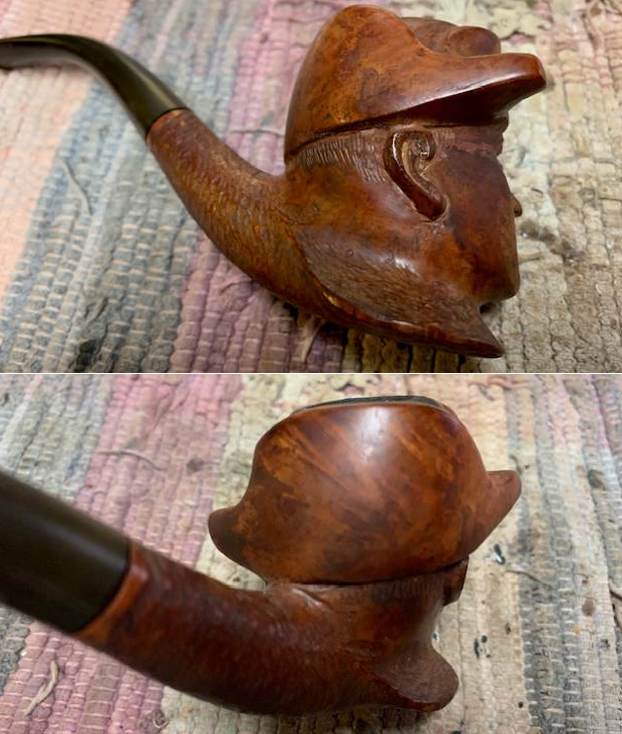
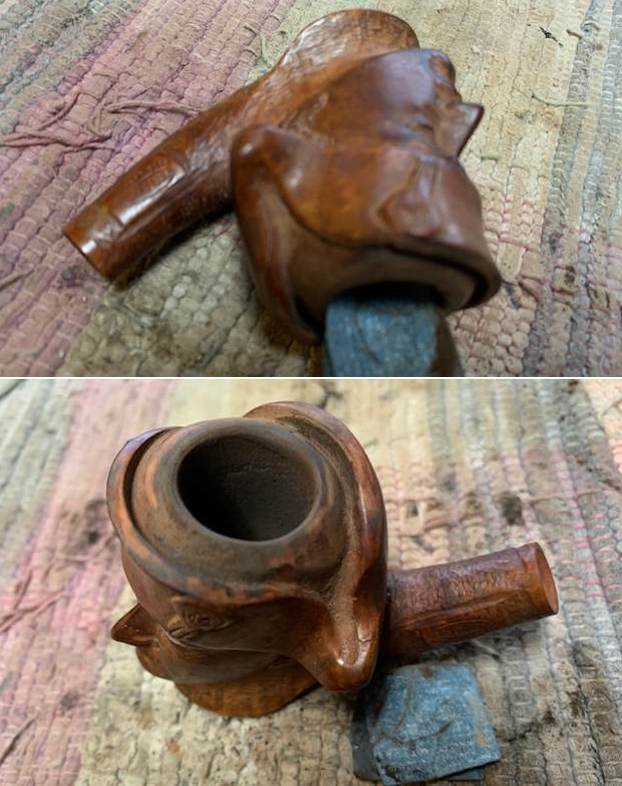
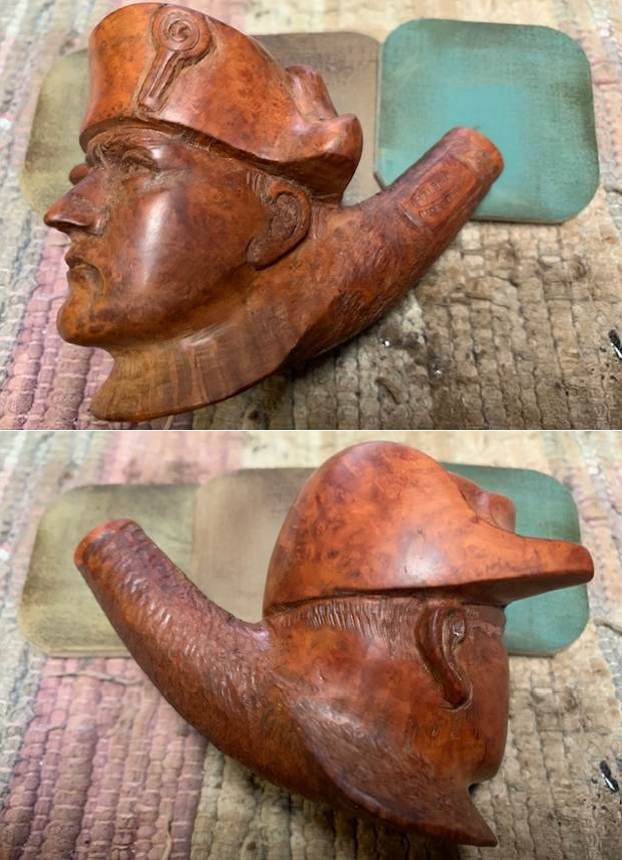
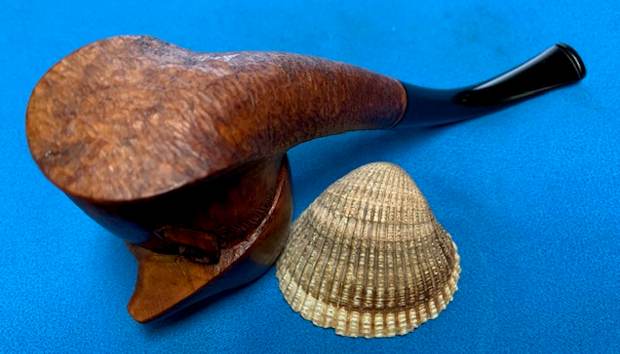
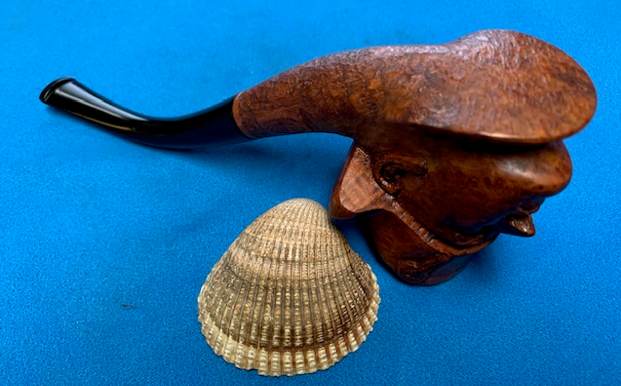
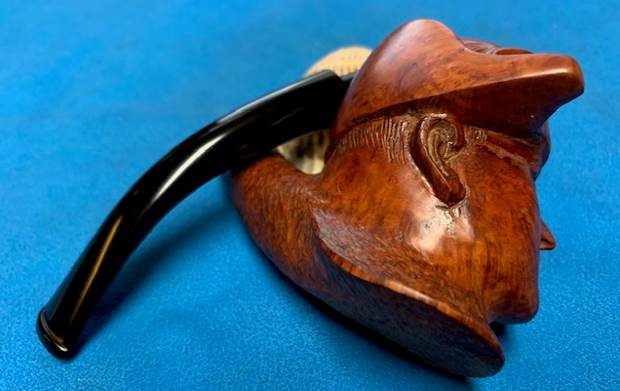
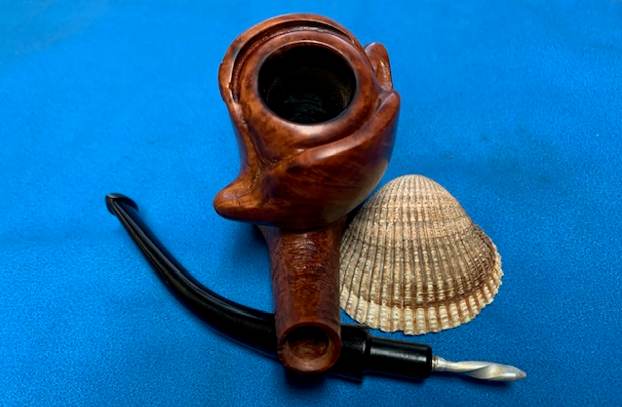
 Instead of telling you what I see in the next photos of the sides of the bowl and the heel I want to hear from you. Tell me what you see? What does the finish look like to you? Are there any visible problems or issues that stand out to you? Are there cracks or scratches in nooks and crannies of the sandblast finish of the bowl? Are there visible flaws or fissures in the briar? What does the finish look like? Is there a pattern to it? Any visible issues on the heel of the bowl? These questions should help you to see what I am looking for when I see these photos.
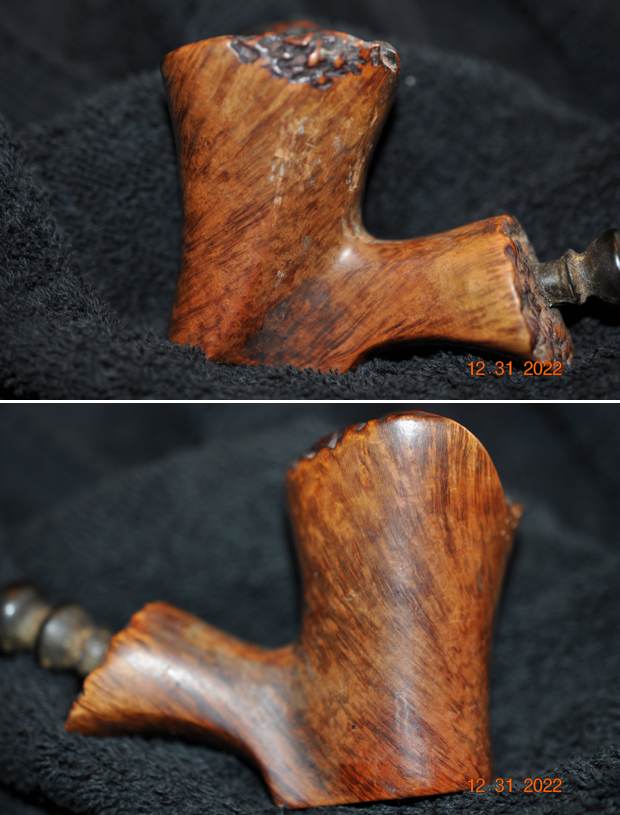
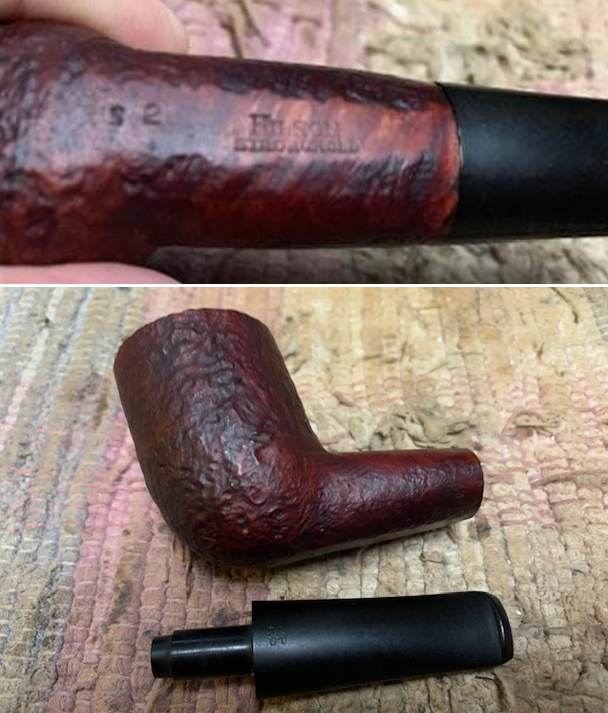
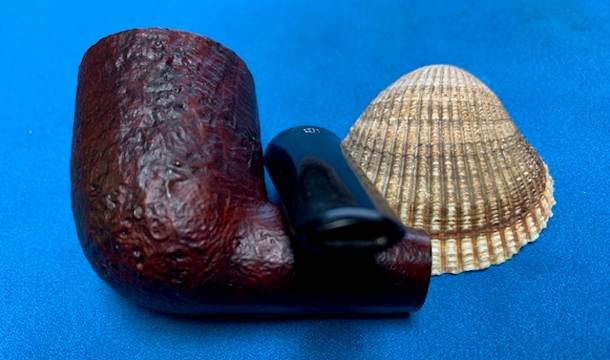
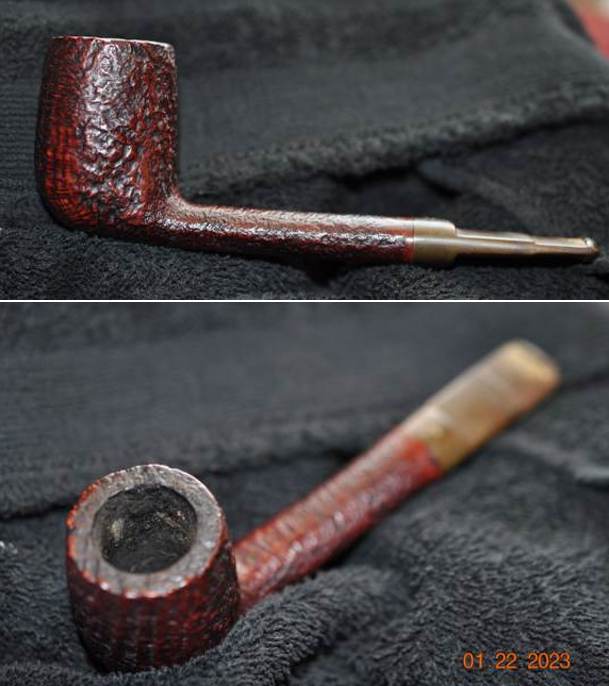
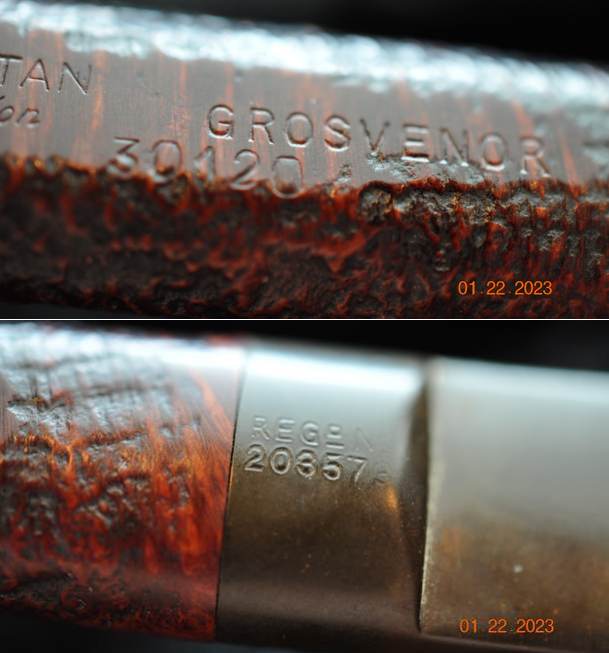
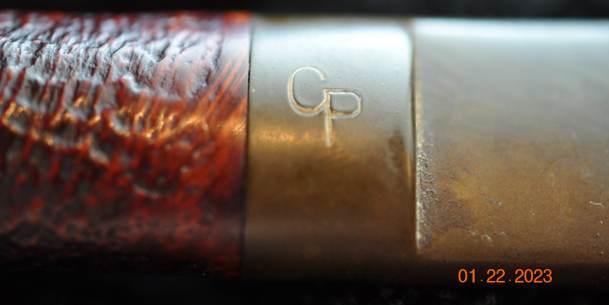
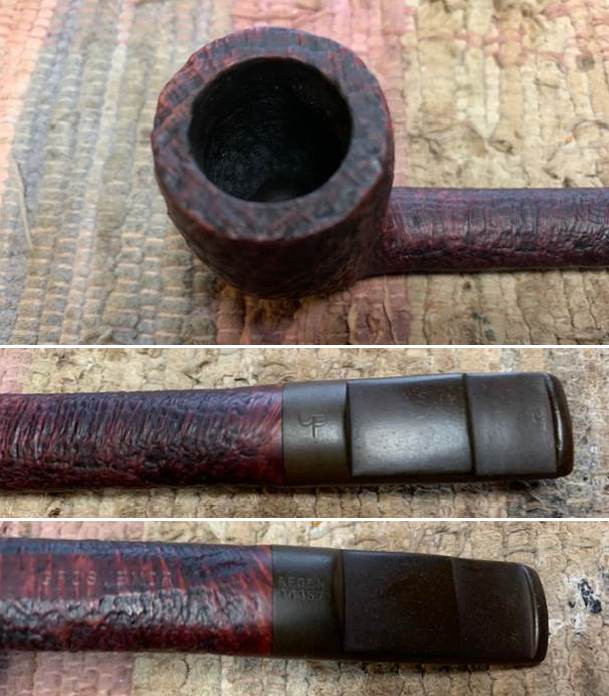
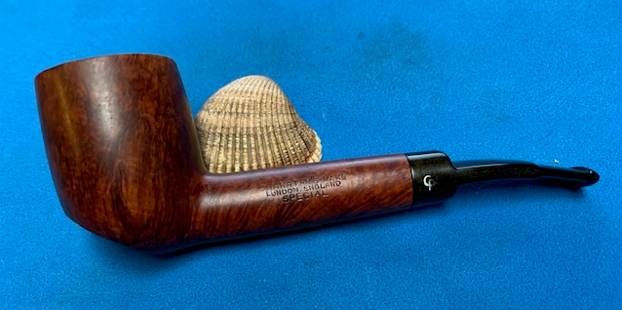
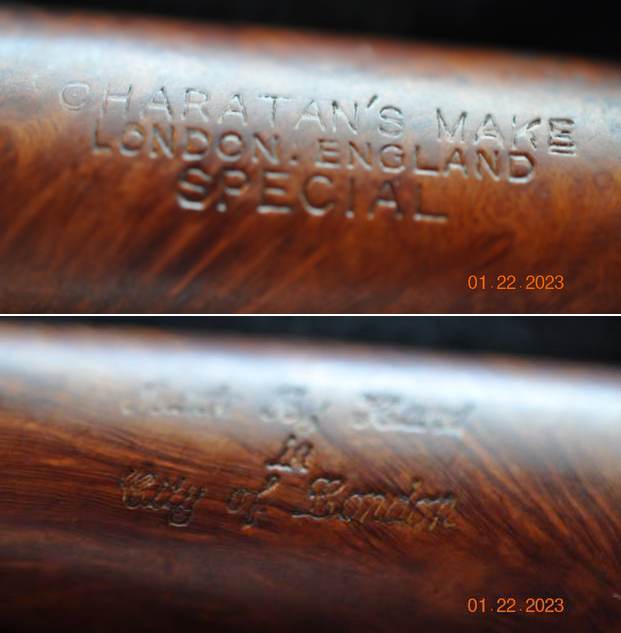
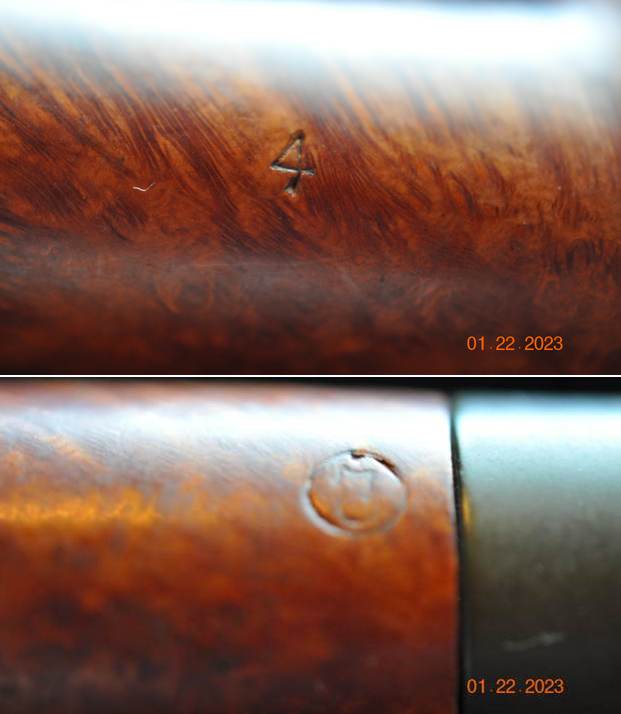
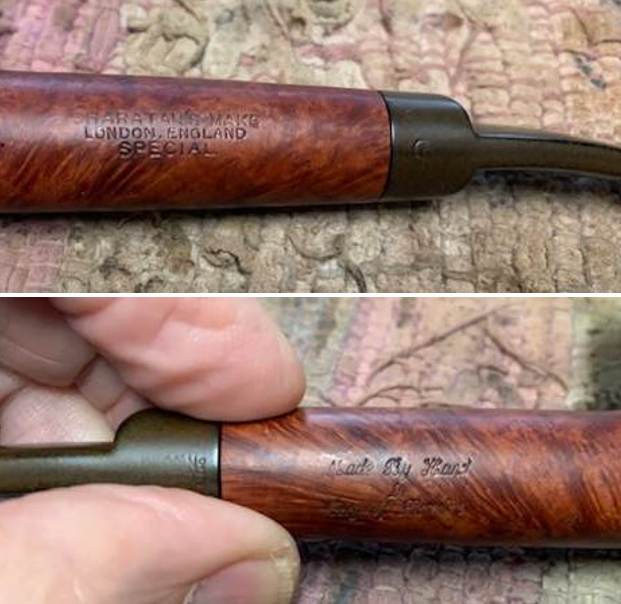
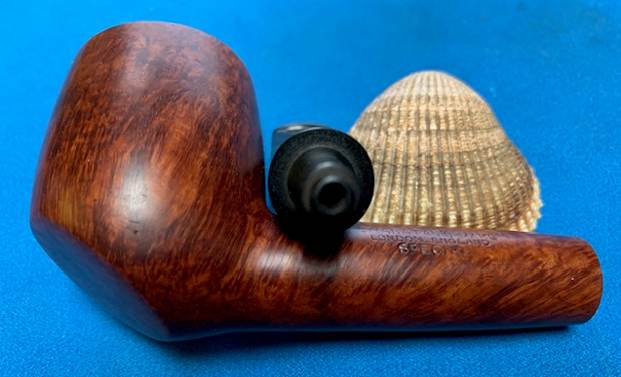
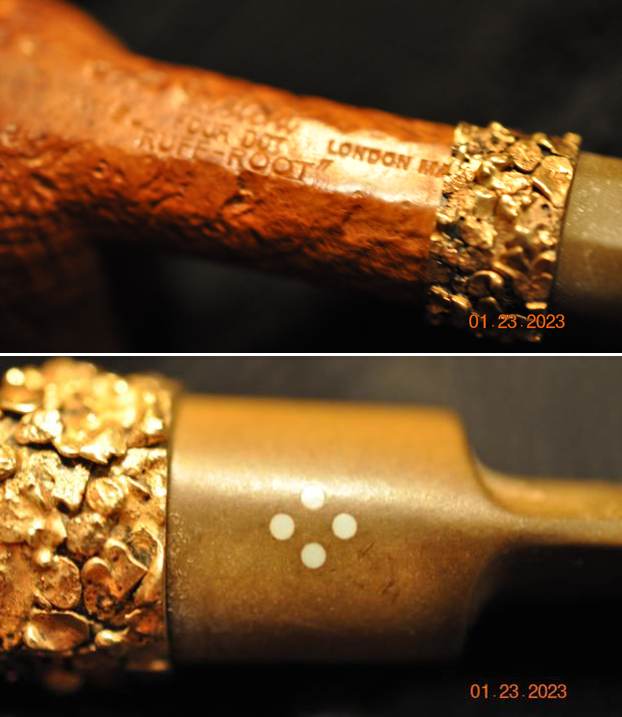
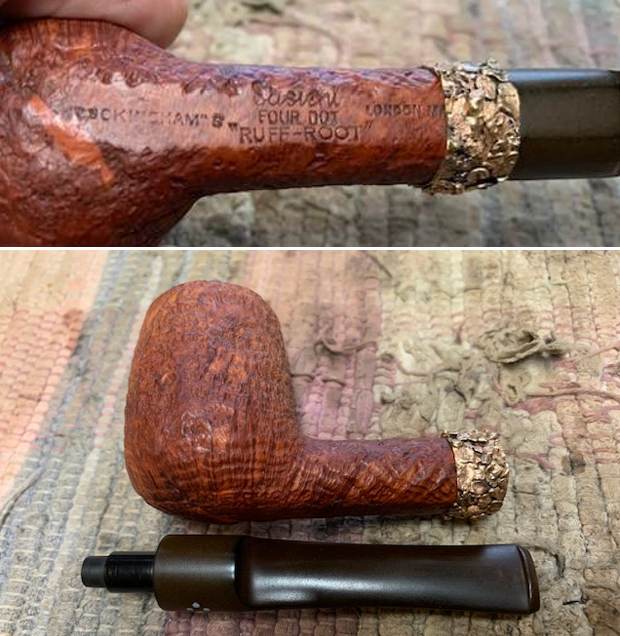
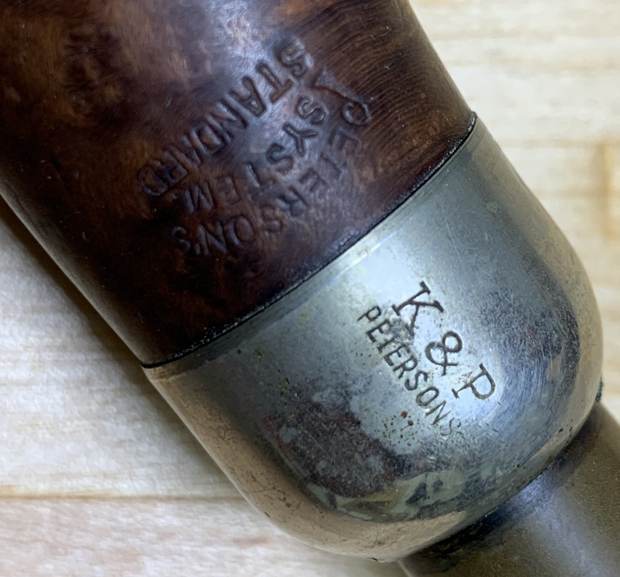
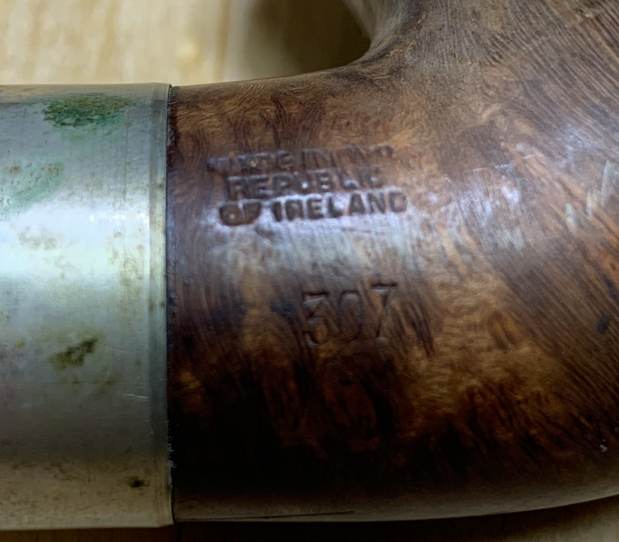
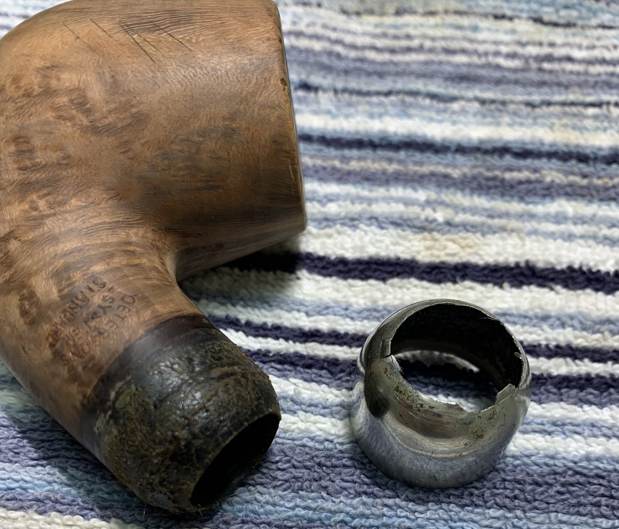
 He took photos of the stamping on the underside of the shank. It is stamped as noted above. The vulcanite stem has no identifying stamping. What stands out for you in the photos of the stamping? What do you look for in the stamping? It is dirty but what do you see underneath the grime on the surface of the briar?
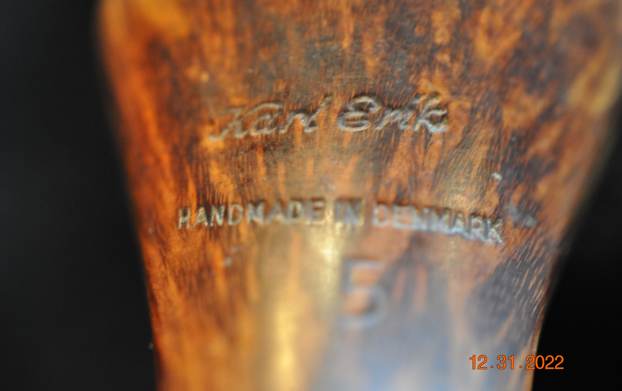 I reread the blog that Robert M. Boughton did for us on his “Grade O” Karl Erik to refresh my memory on the brand and the grading system (https://rebornpipes.com/2018/07/28/a-three-card-draw-for-an-inside-straight-with-an-old-karl-erik-hand-made-grade-o-freehand/). It was enlightening and from there I went on and looked up the brand on both Pipephil’s site and Pipedia to add some details to my knowledge.

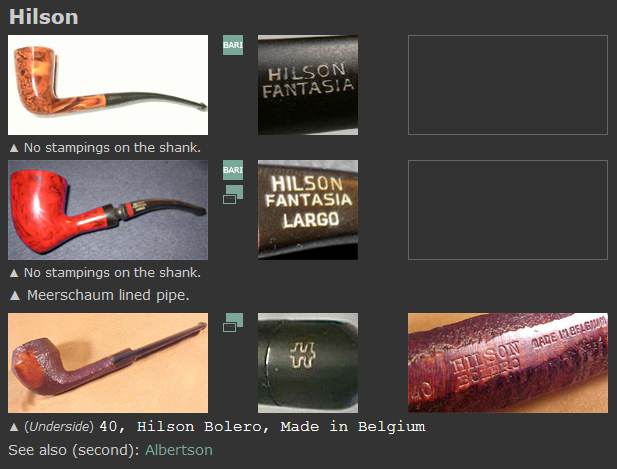
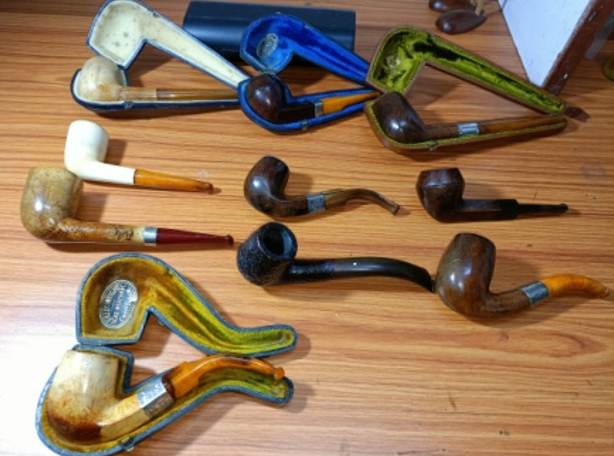
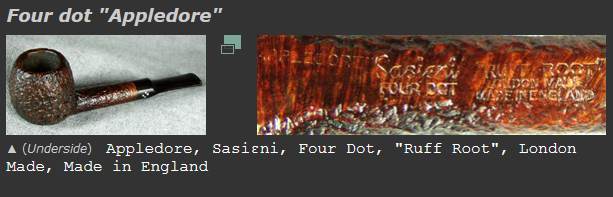
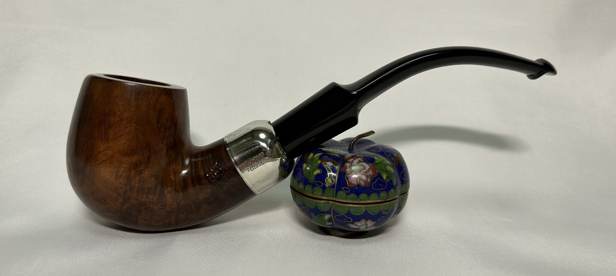
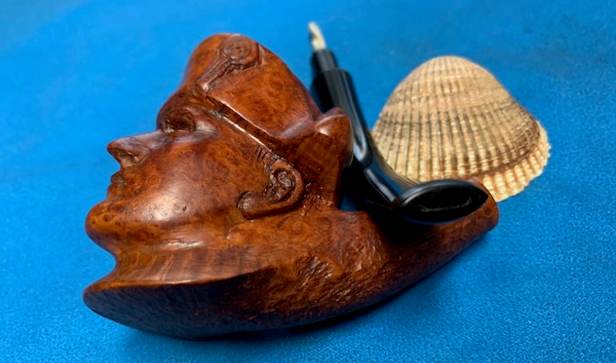
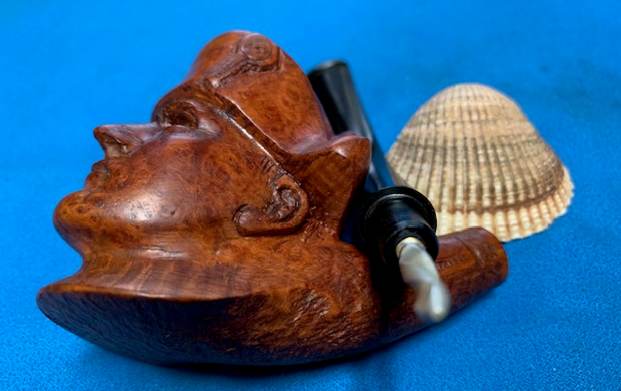
Photo courtesy of Pipedia
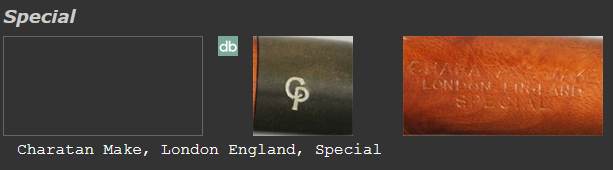
From the Pipephil site I got a quick overview of the history of the brand. I quote: Brand created in 1965-66 by Karl Erik Ottendahl (1942 – 2004 †). In the best years he employed up to 15 craftsmen among which Bent Nielsen (see Benner) and Peder Christian Jeppesen. Former grading (ascending): from 4 to 1, and “Ekstravagant” (entirely handmade). http://www.pipephil.eu/logos/en/logo-k1.html
From Pipedia here is a bit more detailed history of the brand.
Karl Erik Ottendahl (1942 – 2004) was born in Aalborg (Jutland), just a few miles from the very northernmost tip of Denmark. He began smoking a pipe when he was 14 and upon leaving school he started an apprenticeship…as a lithographer at the age of 16.
While working as an apprentice he began hand carving pipes as a hobby. Many were given as gifts to his more senior colleagues. Upon completion of his apprenticeship he moved to Nairobi, Kenya to work as a lithographer during the 1962 war. While in that war torn country, he was unable to procure pipes for himself. In the face of such a predicament, he chose to continue to make pipes for his own use rather than go without.
Returning to Denmark after three years he couldn’t find a well paid… job, and so he began making a few pipes on the side to boost his income choosing his prenames “Karl Erik” – logo “KE” – for his label. When he managed to find some major Copenhagen pipe stores willing to sell his pieces his reputation grew little by little and he was finally able to purchase more and better machinery and began working full time as a pipe maker. https://pipedia.org/wiki/Karl_Erik
Pipedia also included a short description of the grading system that was used. From what I can discern the numbers ascended (6-1) and the letters ascended as well.
KE’s new grading used numbers ascending from D to A. The unique “Ekstravagant” pipes C, B, A, AA to AAA. These superb pieces of remarkable quality were, almost certainly, the least expensive high- quality hand made pipes coming from Denmark today! https://pipedia.org/wiki/Karl_Erik
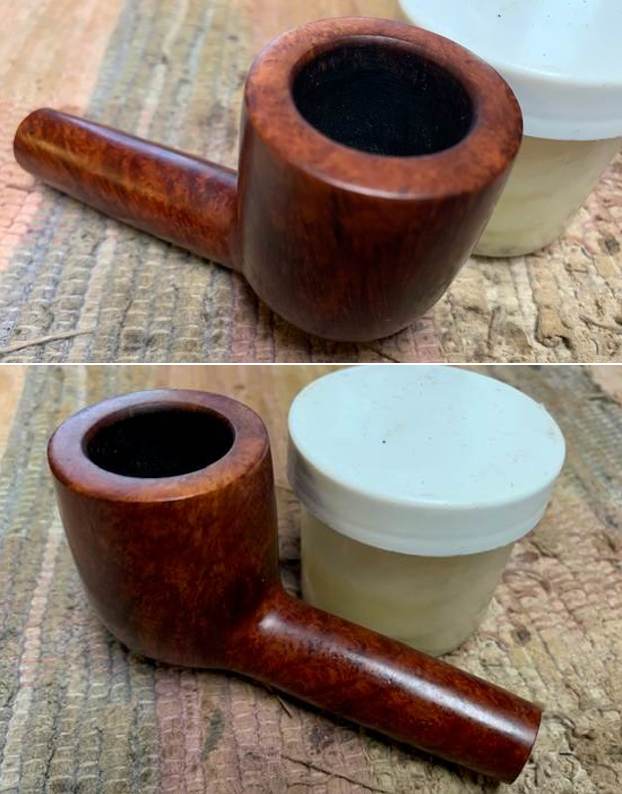
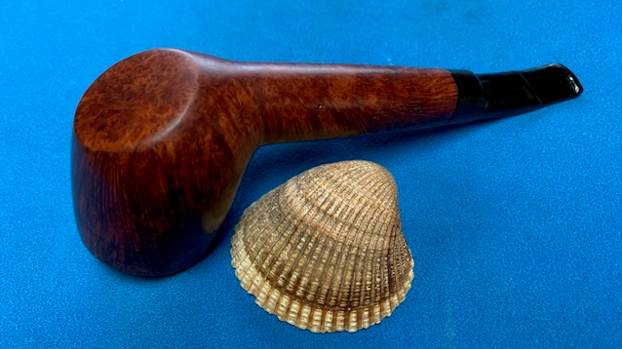
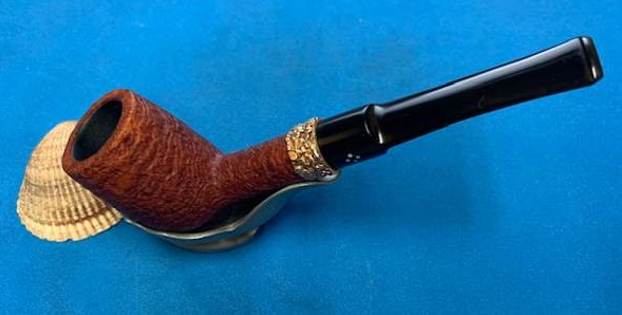
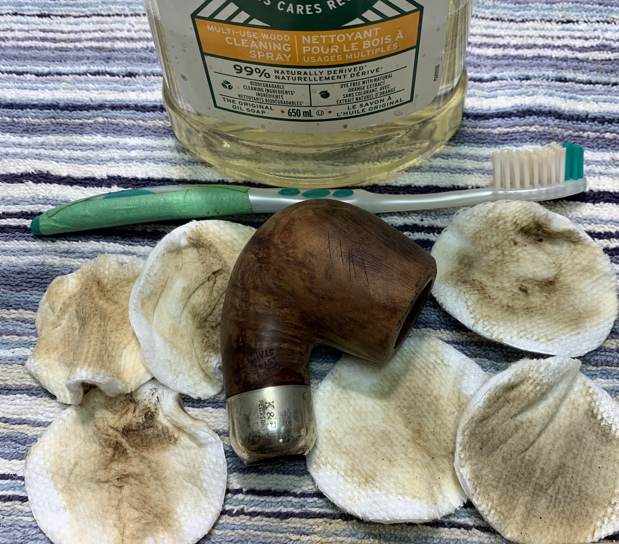
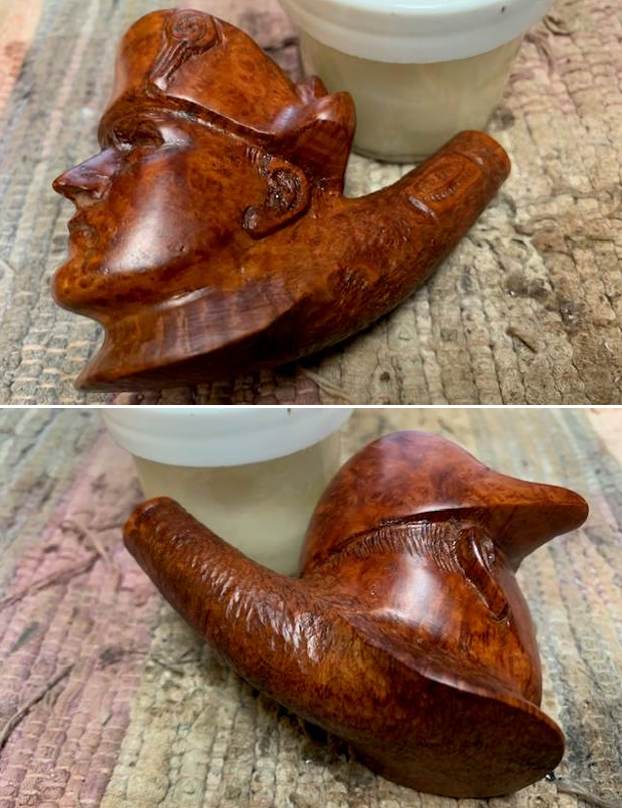
Jeff did a major clean up job on this one and the pipe I received when it arrived in Vancouver looked far better than the one pictured above. Here is what I saw when I brought the pipe to the table.
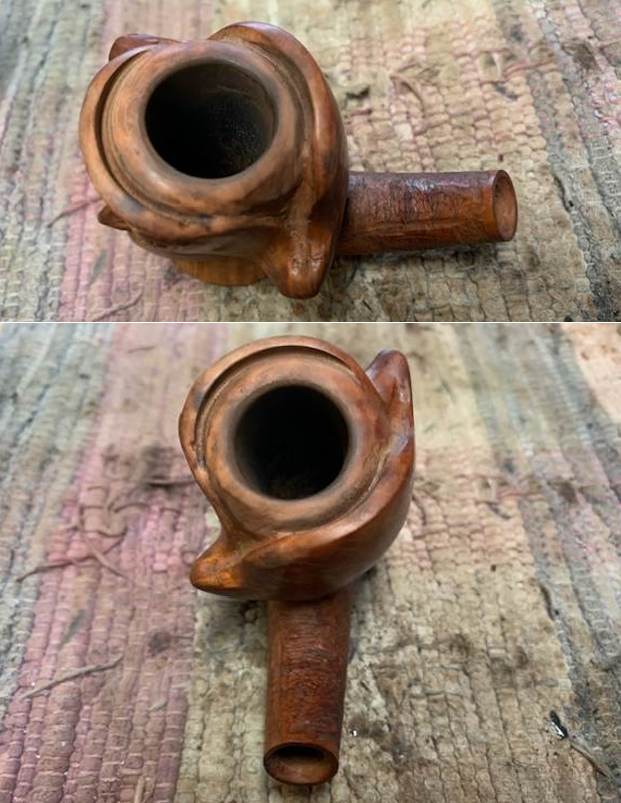
- The finish is clean and the oils and grime are gone from the bowl. The finish shows the beautiful contrast in the stains between the bowl side and the plateau on the rim top and shank end.
- The plateau rim top and shank end were clean and the top and the inner edge of the bowl look very good. There was no damage to the outer edges as well.
- There cake in the bowl has been removed and the bowl is very clean. The walls of the bowl are smooth and appear to be undamaged and show no checking or burn damage.
- The vulcanite fancy, turned stem looks better though the tooth marks and chatter on both sides are visible.
- There was no stamping or identifying marks on the stem.
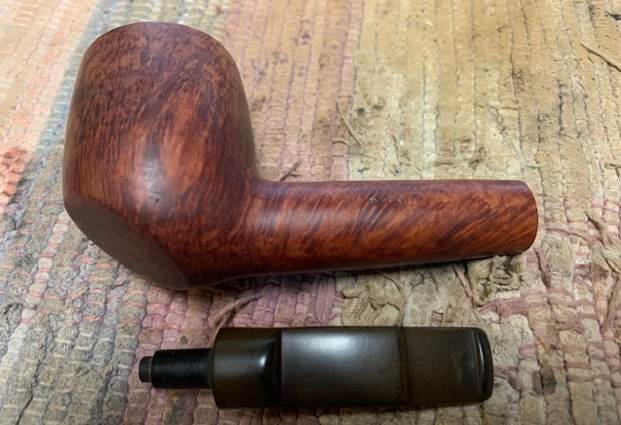
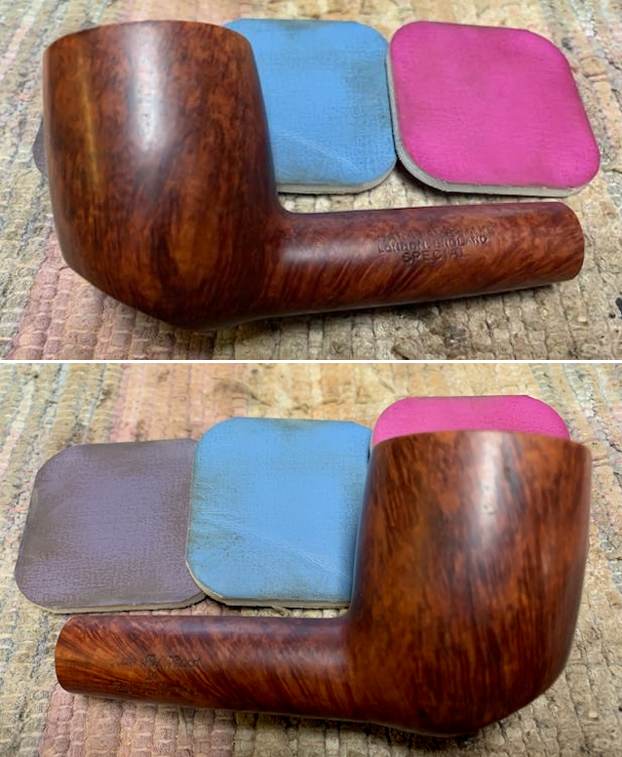
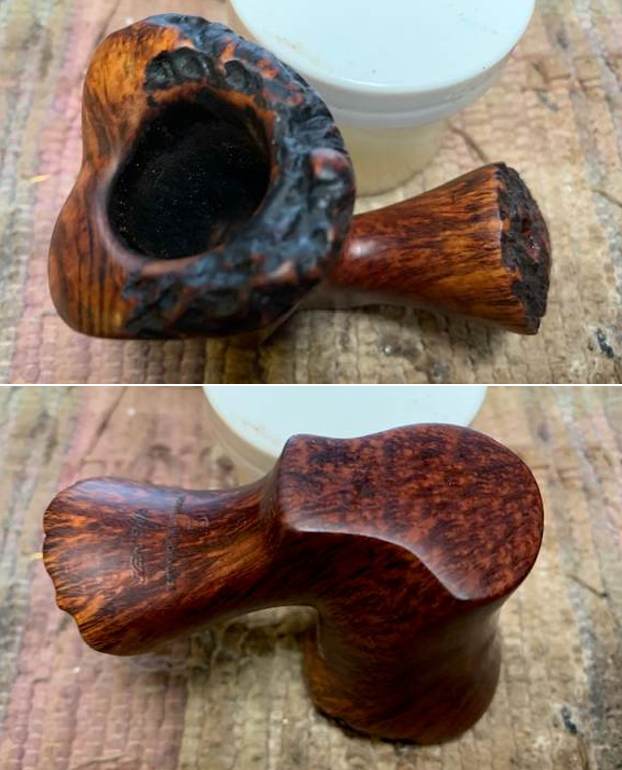
Hopefully the steps above show you both what I look for when I go over the pipe when I bring it to the work table and also what I see when I look at the pipe in my hands. They also clearly spell out a restoration plan in short form. My work is clear and addressing it will be the next steps. I took photos of the whole pipe to give you a picture of what I see when I have it on the table. This is important to me in that it also shows that there was no damage done during the clean up work or the transit of the pipe from Idaho to here in Vancouver. 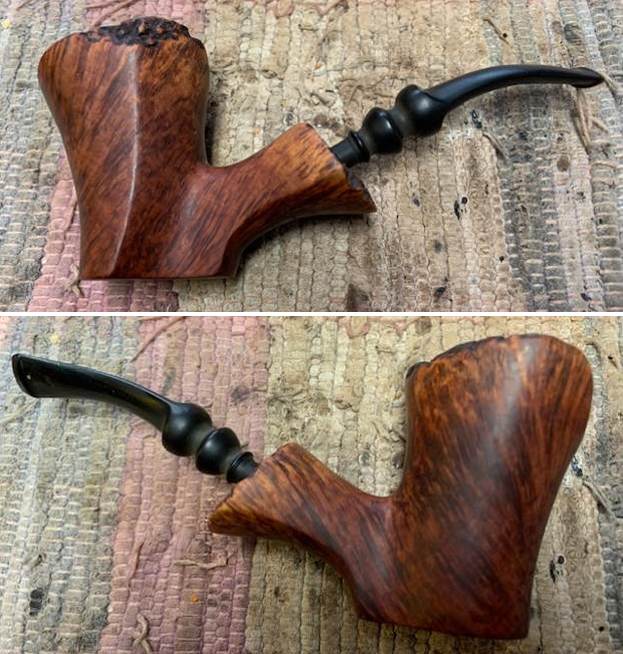
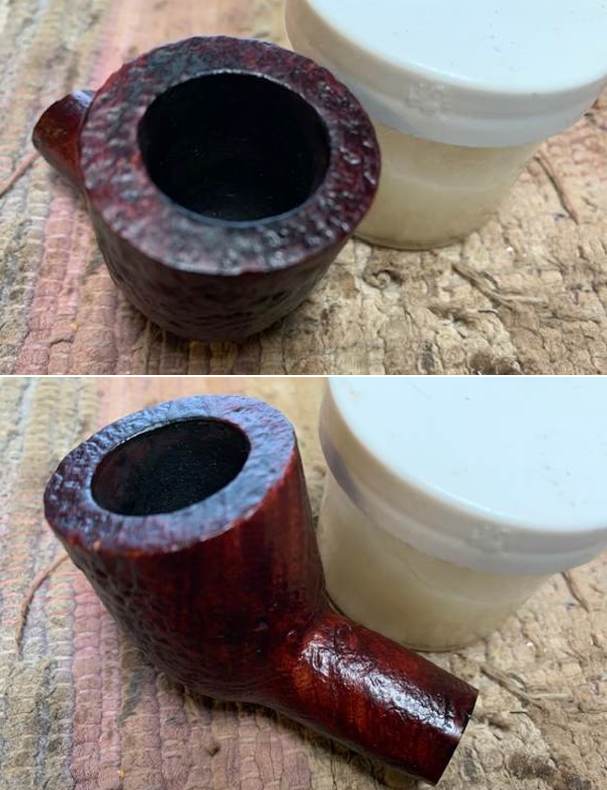
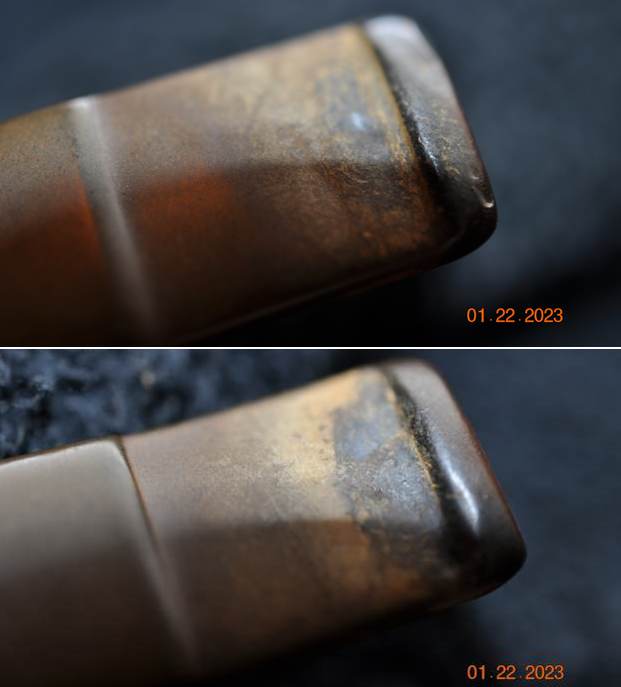
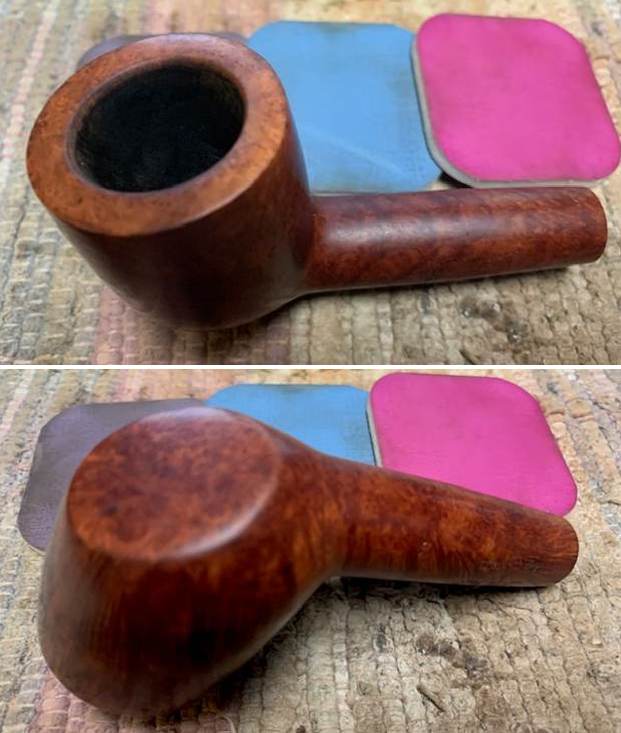
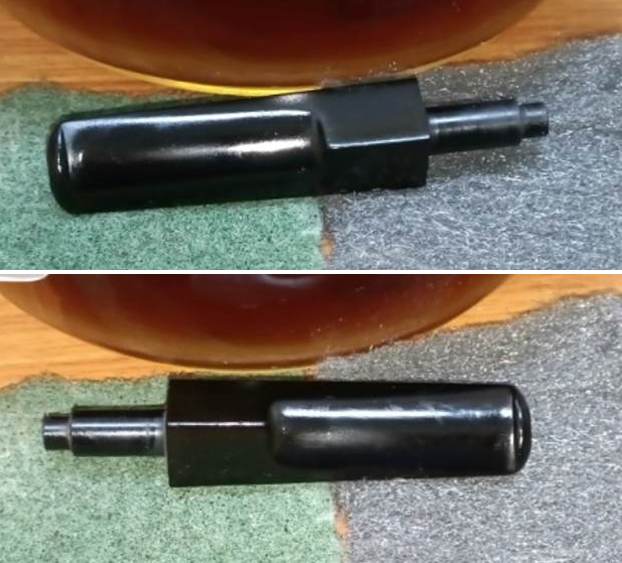
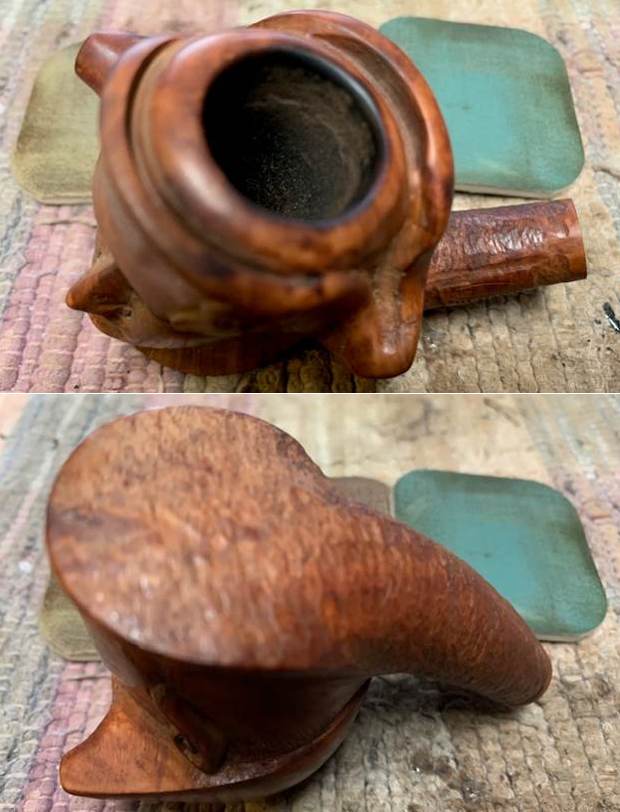
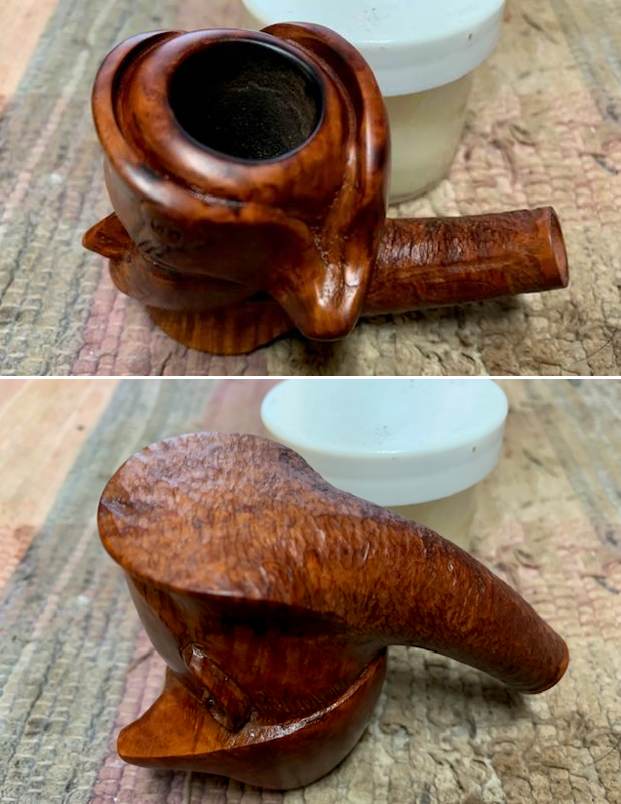
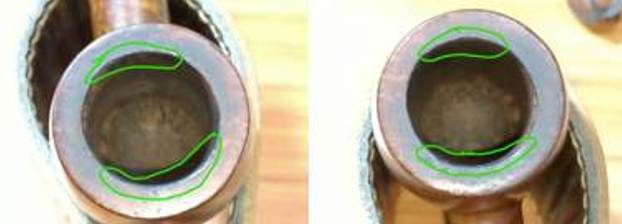
 I carefully went over the bowl and rim top to get a sense of what is happening there. In this case once the rim top and edges were cleaned the rim top looked better. The inner edge had some significant darkening around the front and back overflowing onto the top in place. I would need to do some sanding to clean it up and remove the burn damage on the front top. I also went over the stem carefully. The fit to the shank is snug and the plateau on the shank is clean. There were some deep tooth marks and chatter on the surface of the stem and some scratching or file marks on the entire flat surface. The vulcanite stem surface was clean and looked better. I took photos of the rim top and stem sides to show as best as I can what I see when I look at them.
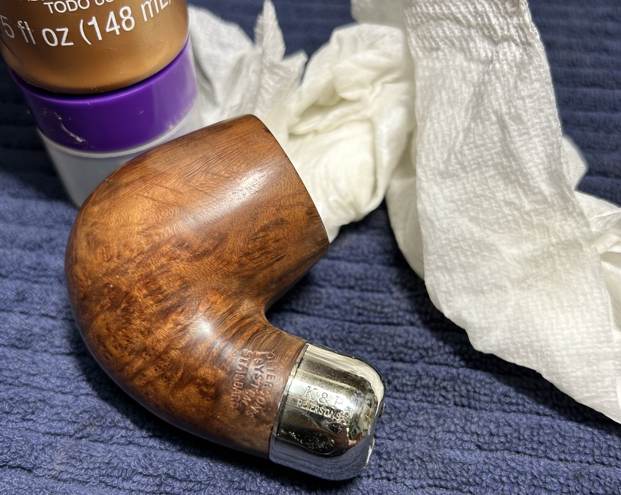
 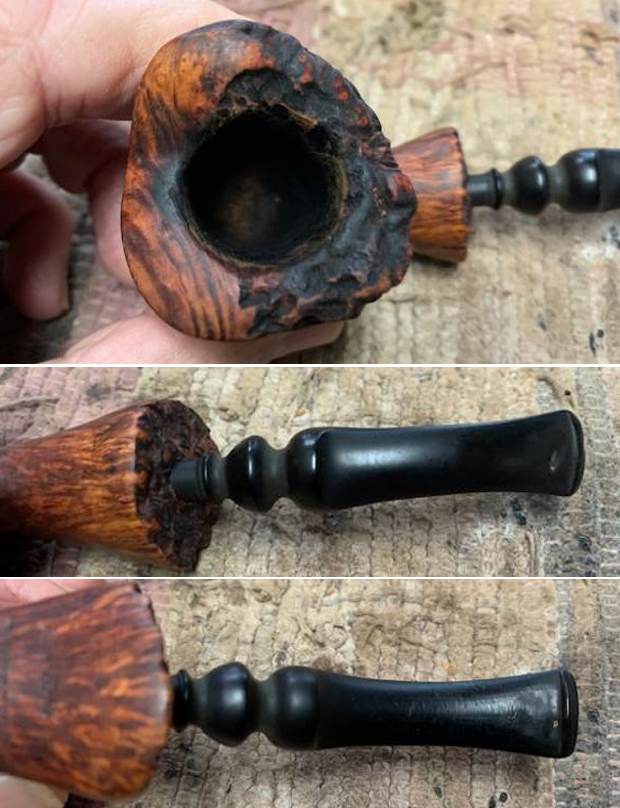 I always check to make sure that the clean up work did not damage the stamping on the shank sides in any way. It is in excellent condition and is very clear and readable. I love just looking at the lay of Karl Erik made pipes and the creative way he follows the briar in flow and shape.
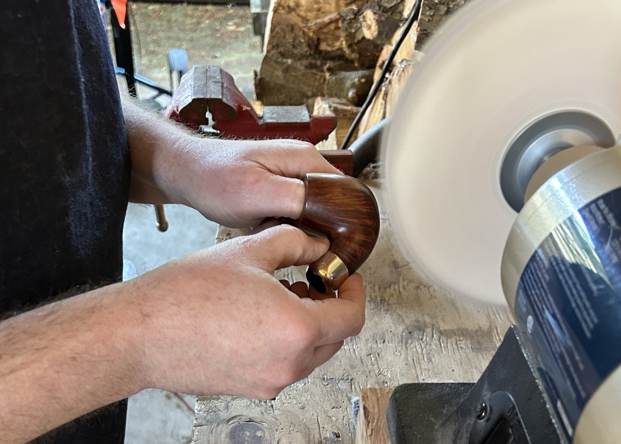
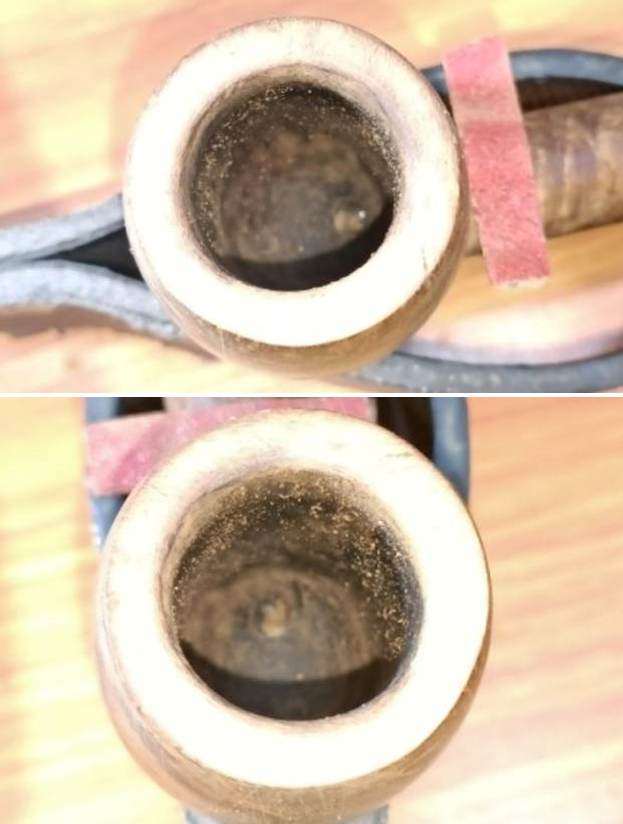
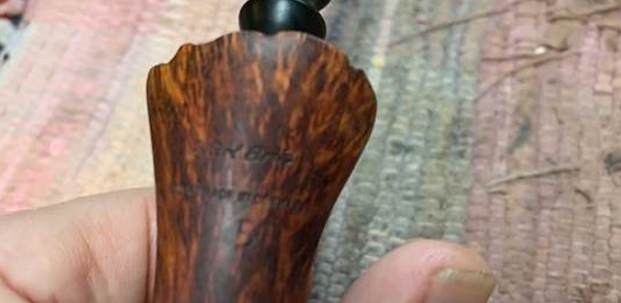 I started my work on this pipe by dealing with the burn damage on the rim top and the inner edge. I used a folded piece of 220 grit sandpaper to go over the high spots on the plateau and all of the smooth parts. I also sanded out the burn damage on the inner edge and gave it a slight bevel all the way around the bowl. I touched up the dark valleys of the plateau with the characteristic black stain that was originally used. I did both the plateau on the rim and the shank end at the same time. I would polish the top and shank end more when using the micromesh on the rest of the bowl. It certainly looked better at this point.
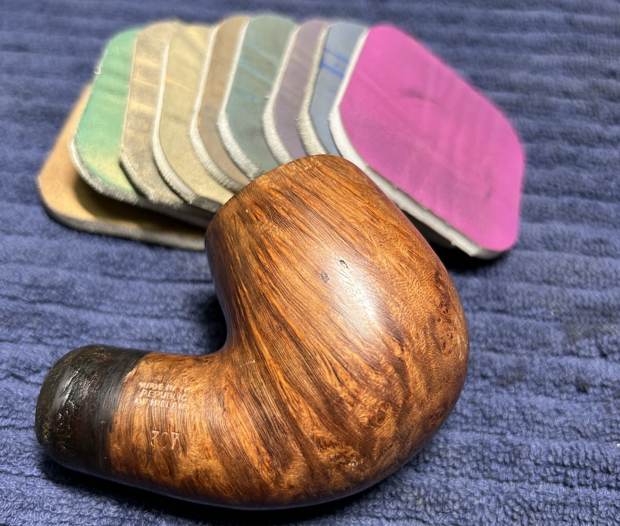
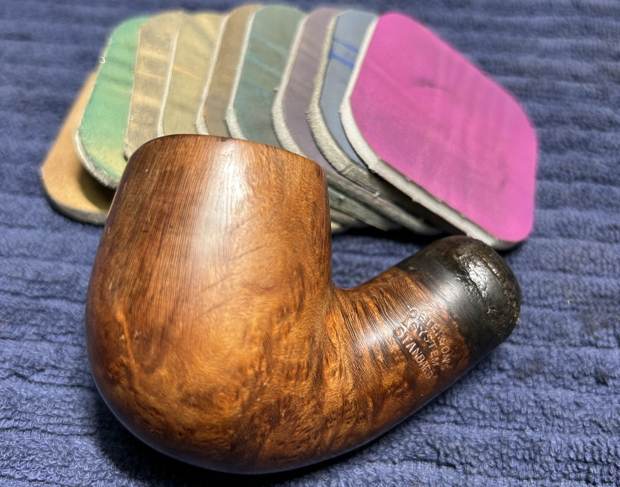
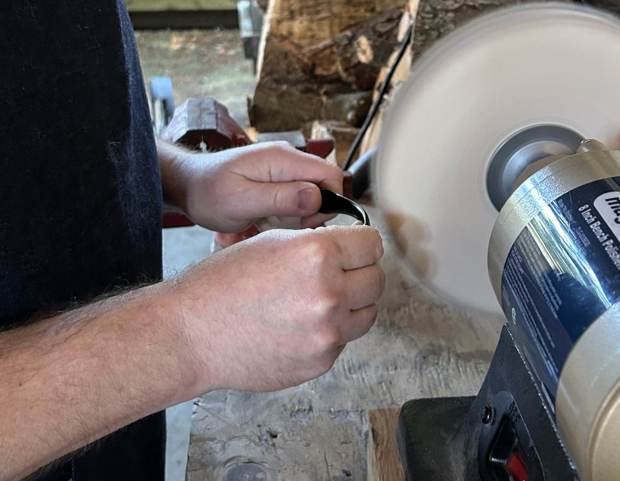
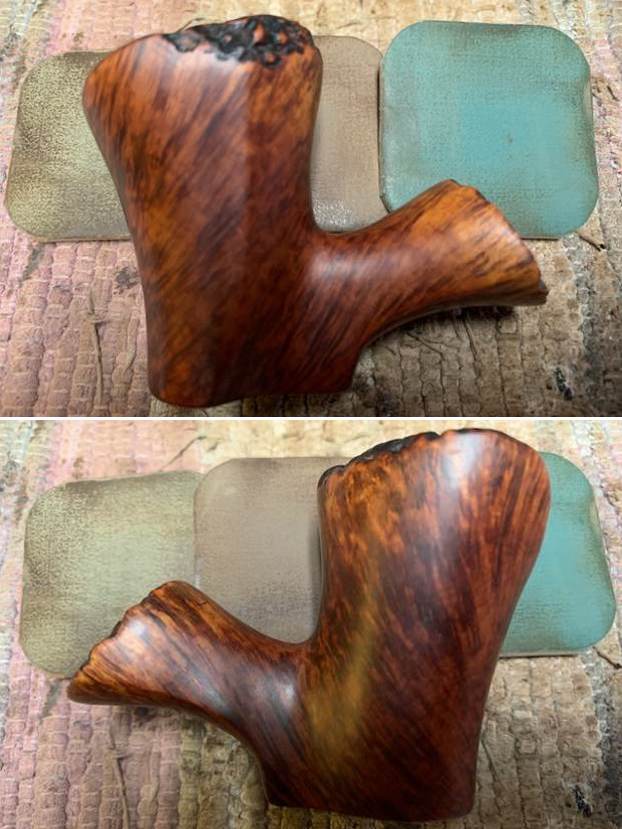
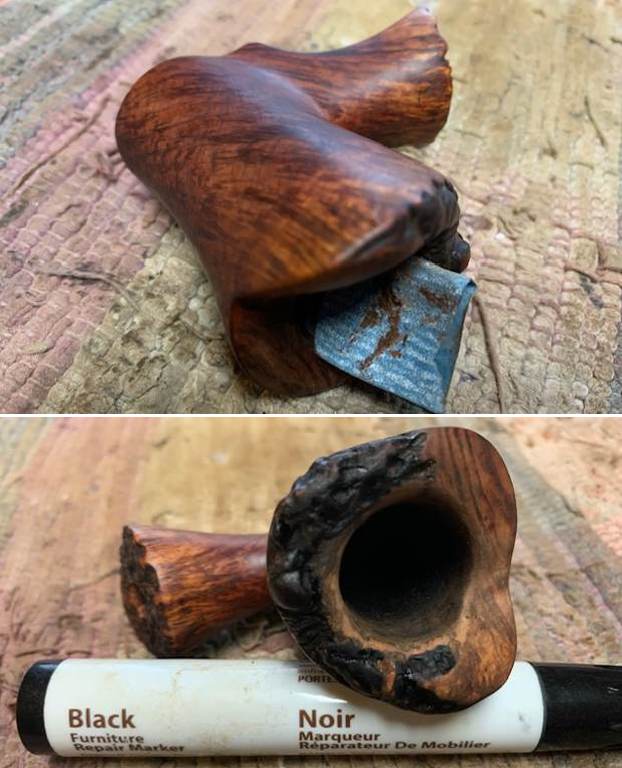 I polished the briar with micromesh sanding pads. I choose to dry sand the briar rather than wet sand it. Again it is a matter of personal preference. I prefer to use the pads dry and find they work very well on the briar. I sand with each pad (9 in total) and group them by threes for ease of reference. I wipe the bowl down after each pad with a damp cloth to remove the sanding debris and check the briar. I love seeing the developing shine on the briar as I move through the pads which is why I include so many photos of this step.
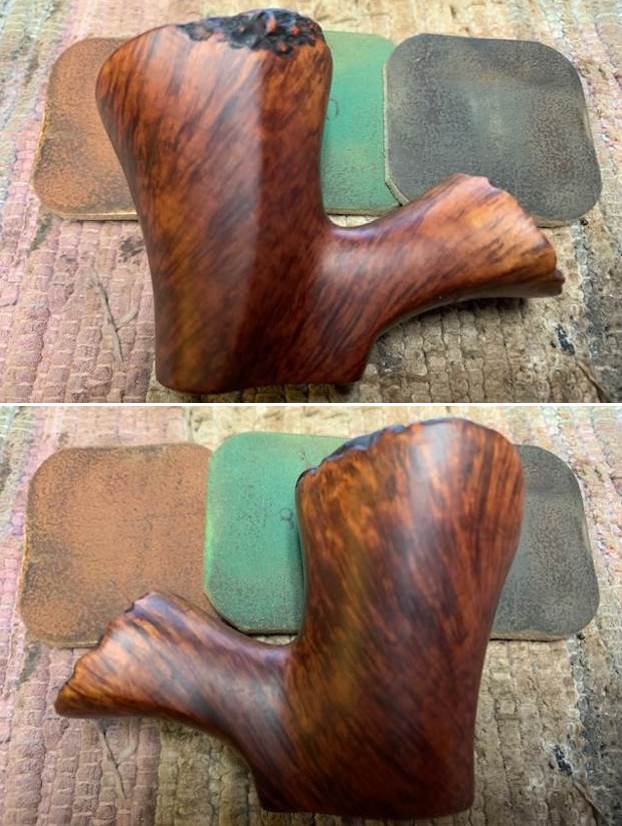

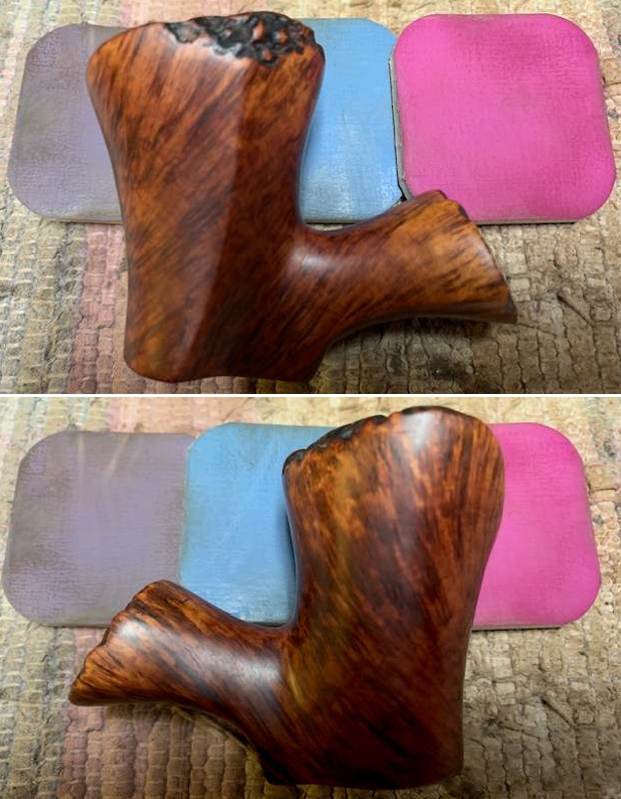
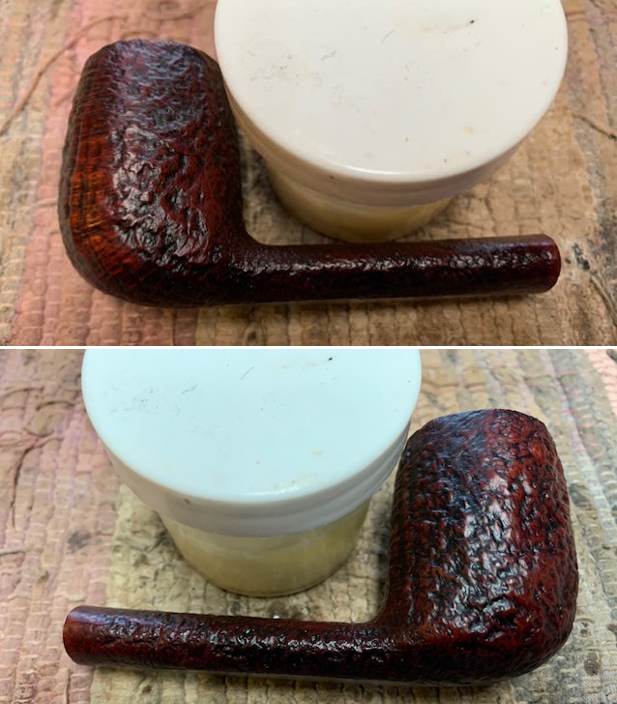
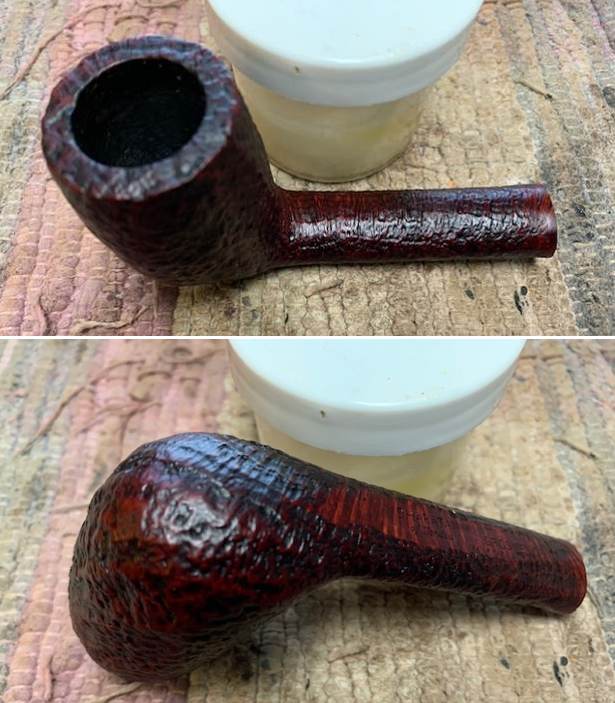
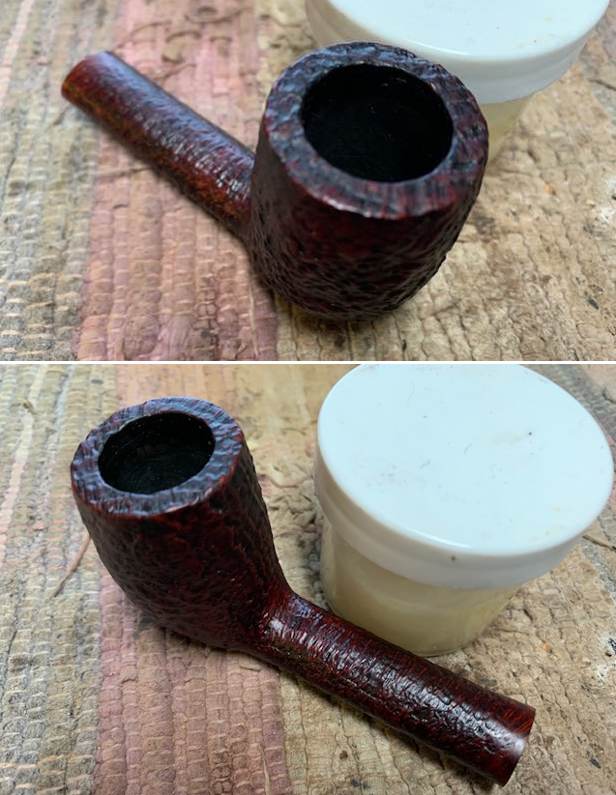
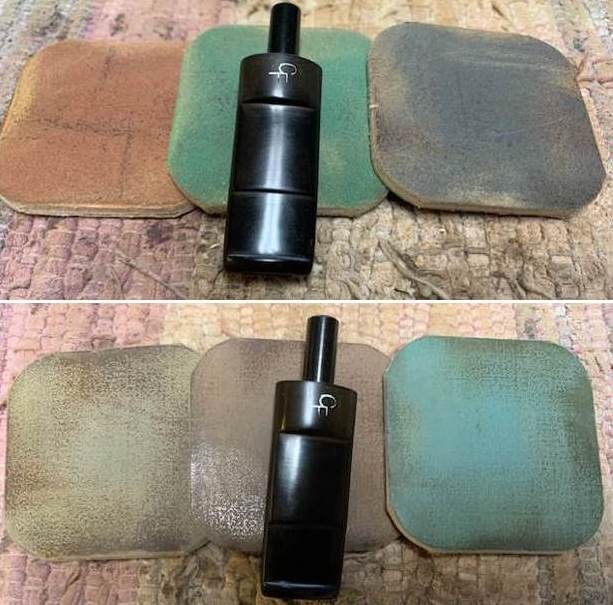
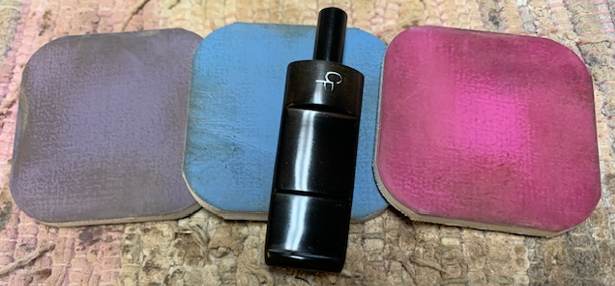
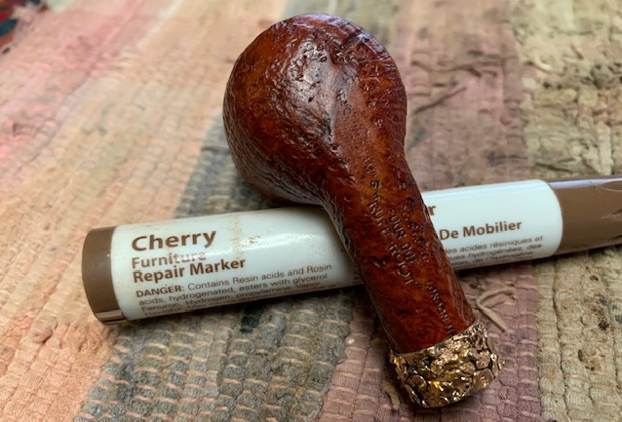
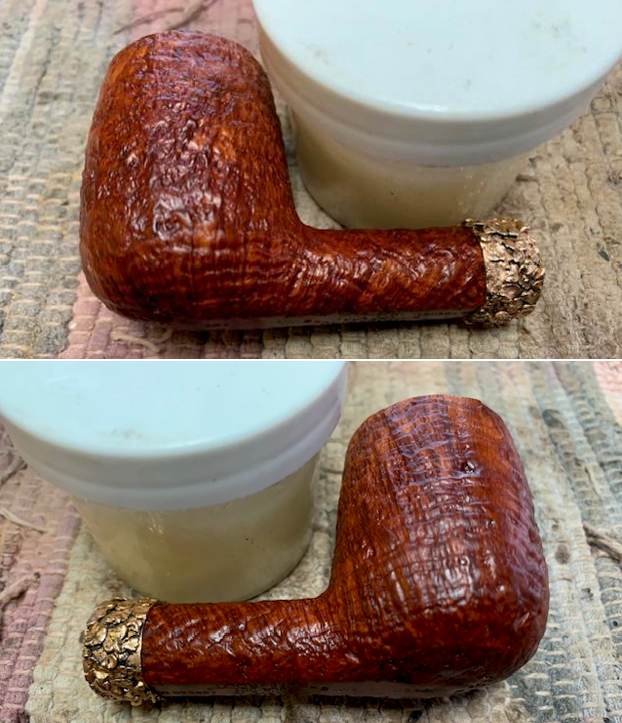
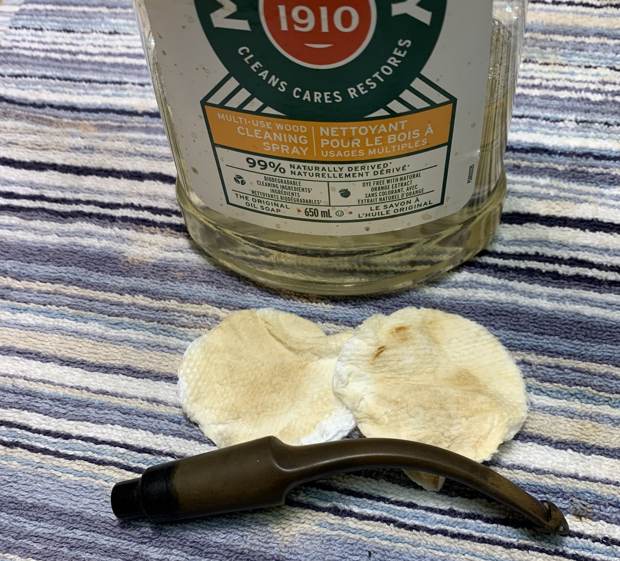
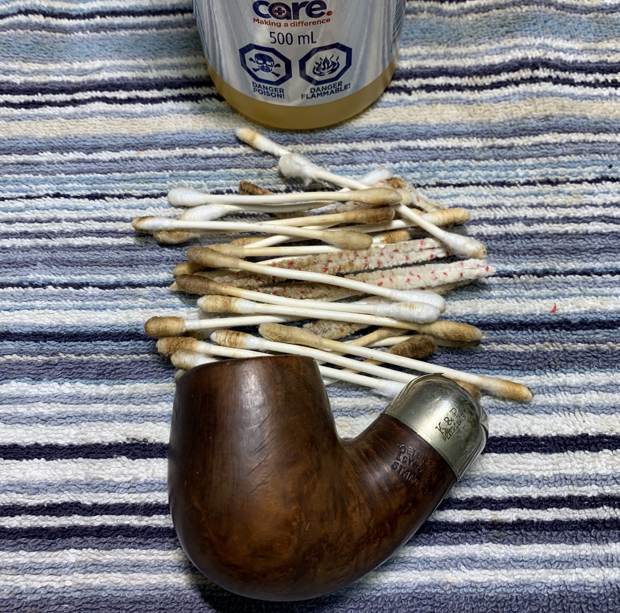
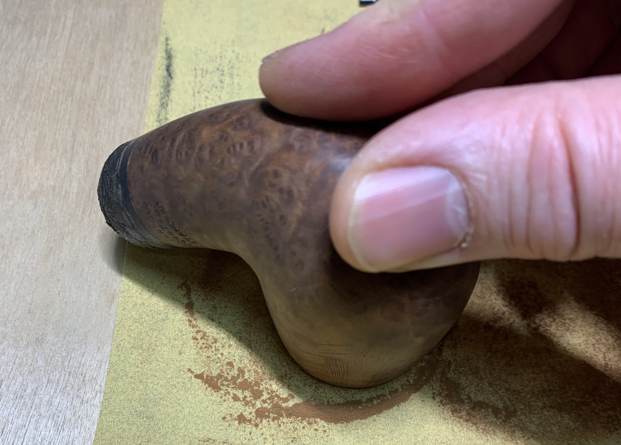
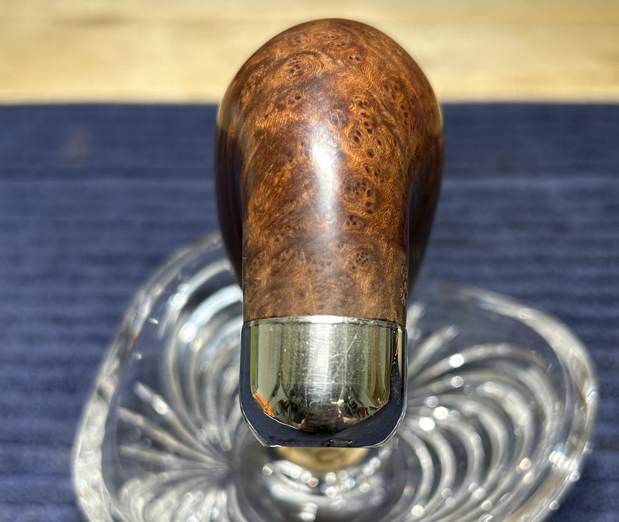
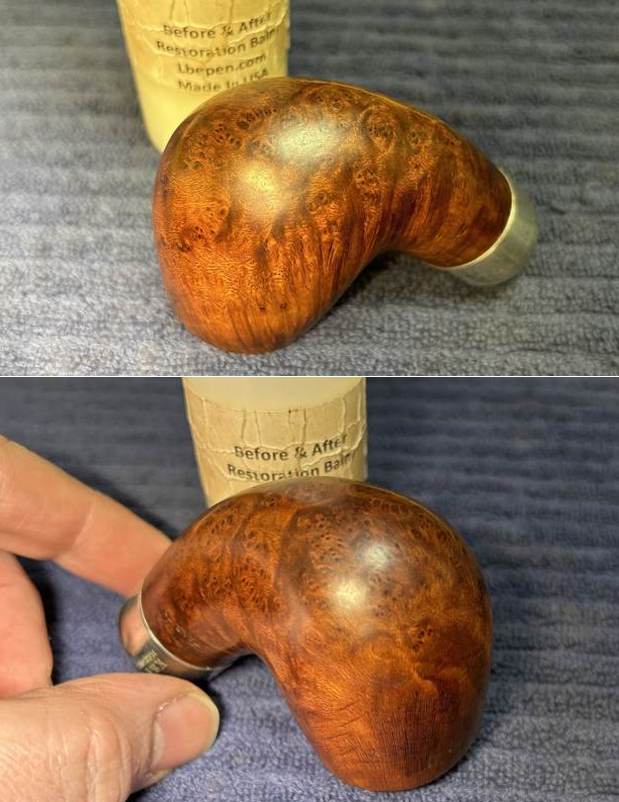
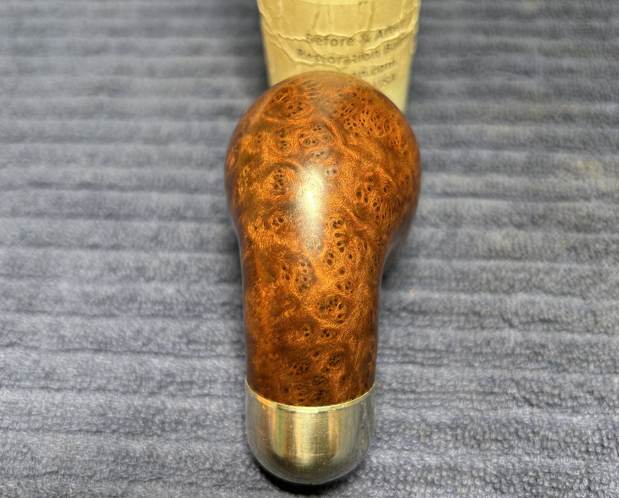
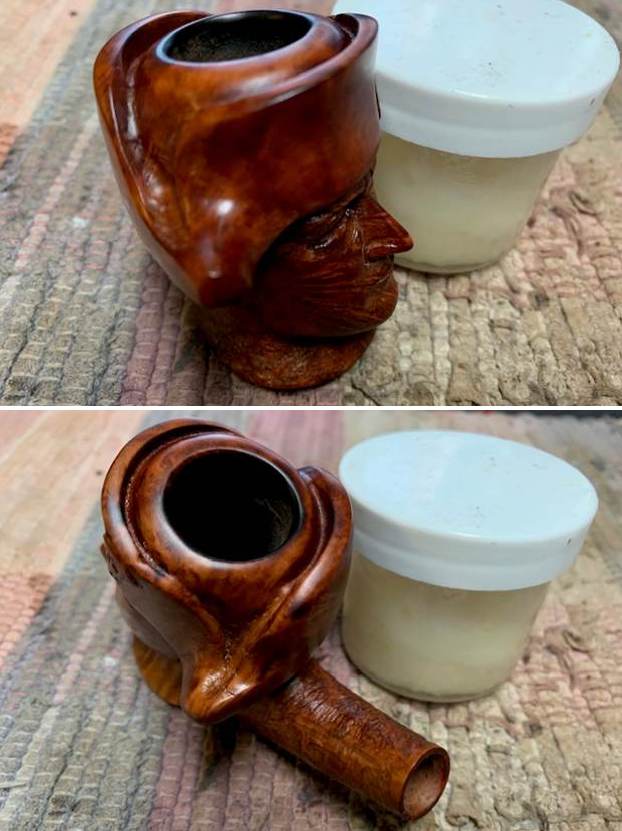
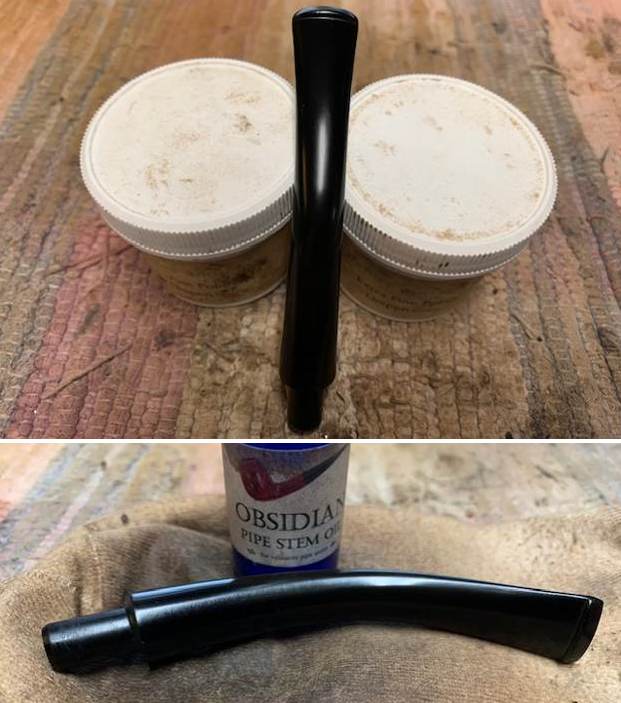
 I rubbed down the bowl and shank with Before & After Restoration Balm. It is a paste/balm that is rubbed into the surface of the briar. The product works to deep clean the finish, enliven and protect the briar. I worked it into the briar with my finger tips. I let it sit for 10 minutes then wiped it off with a soft cloth then buffed it with a cotton cloth. The briar really began to have a deep shine in the briar and the sandblast showed depth. The photos I took of the bowl at this point mark the progress in the restoration. It is a gorgeous pipe.
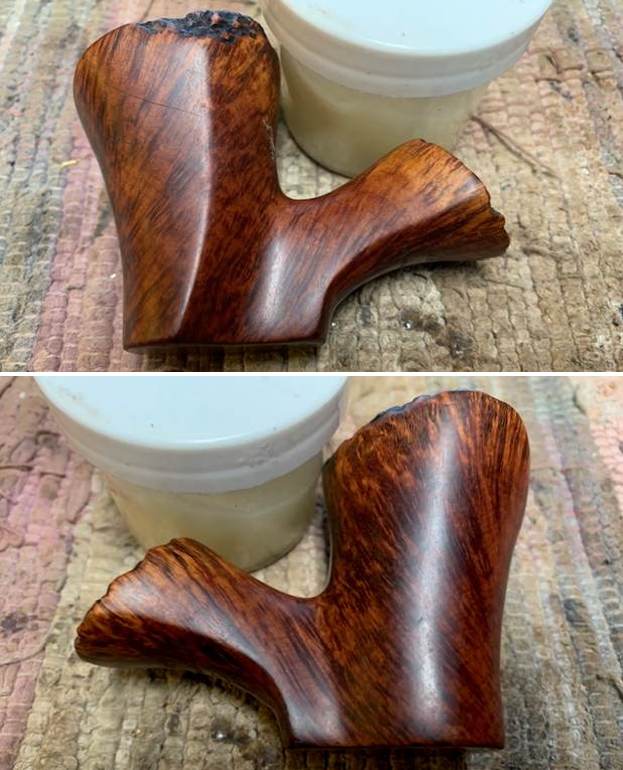
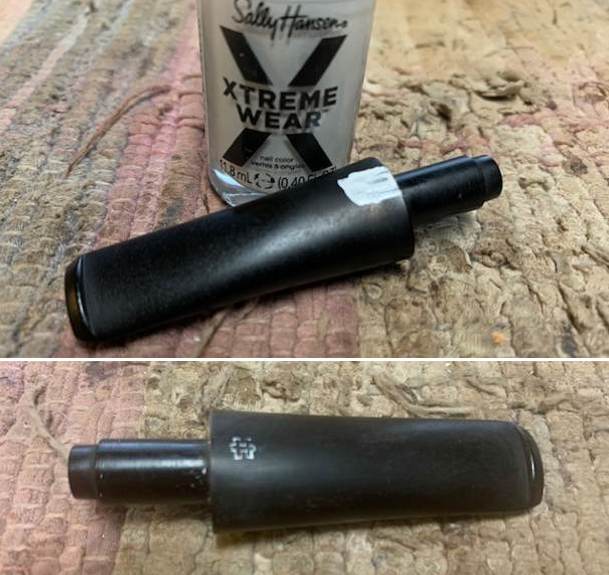
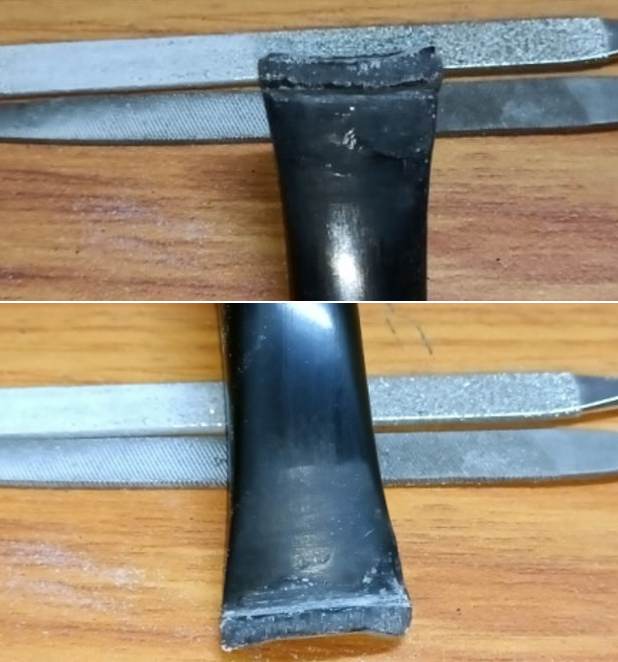
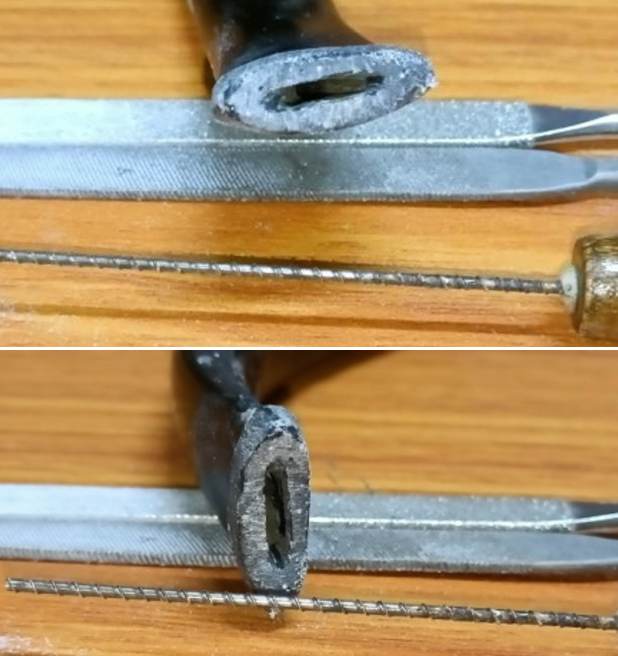
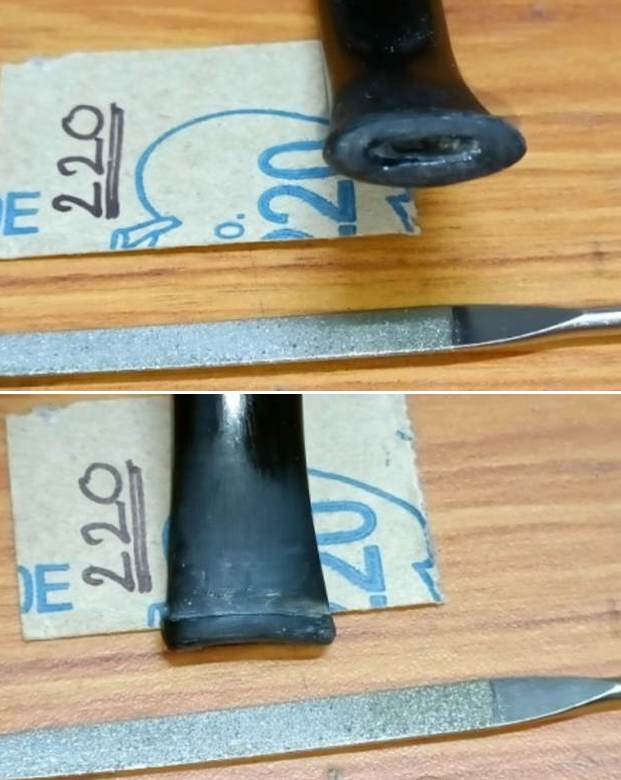
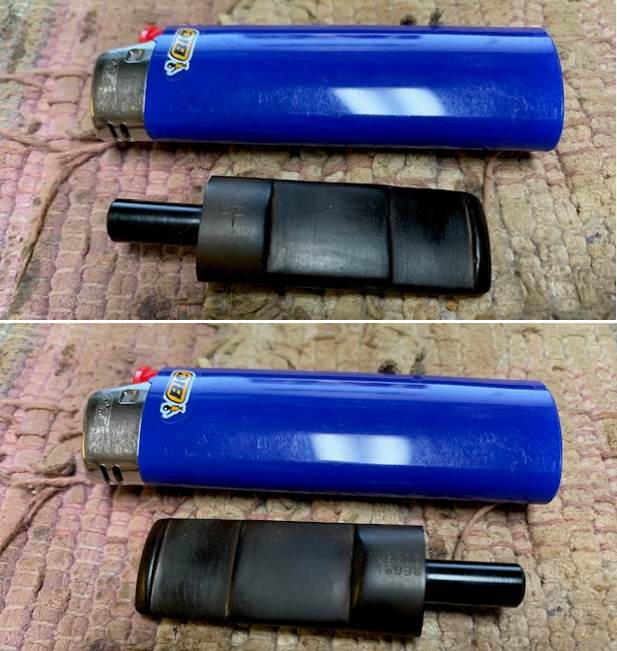
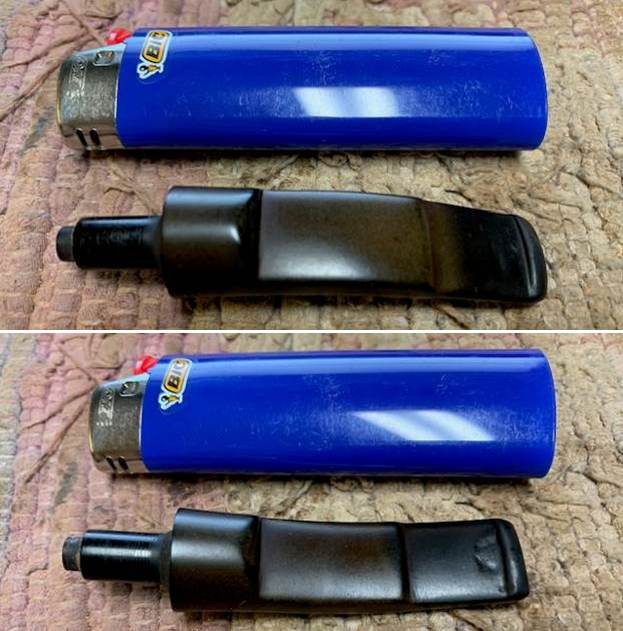
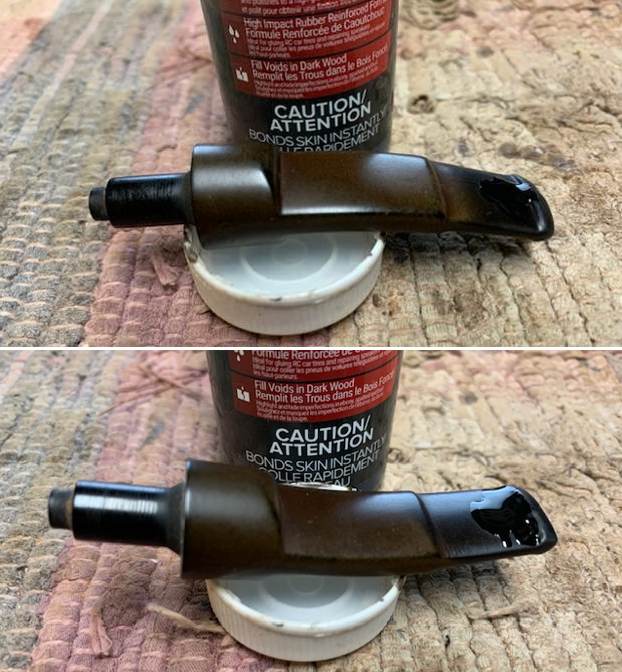
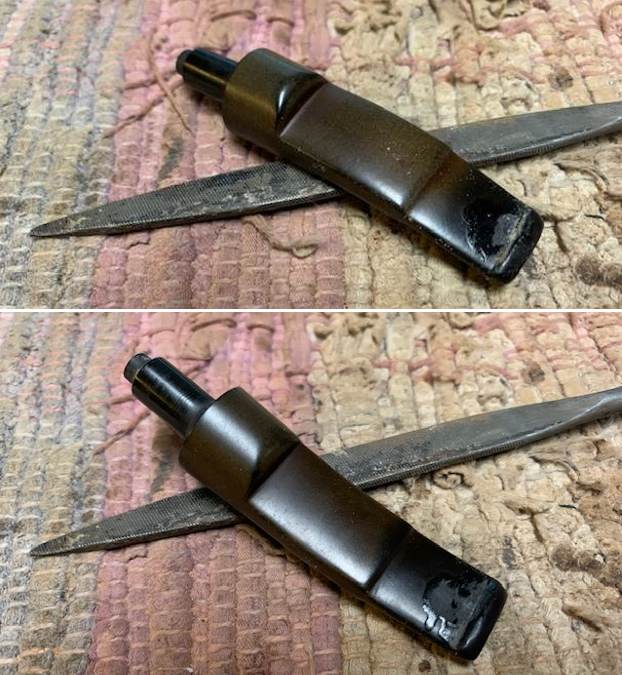
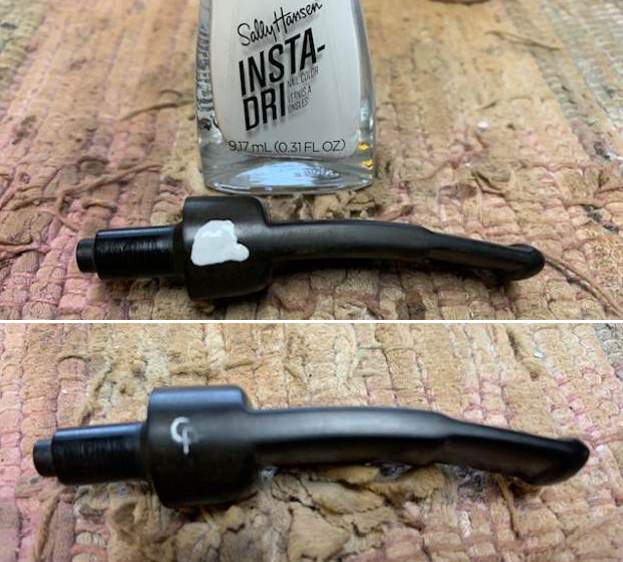
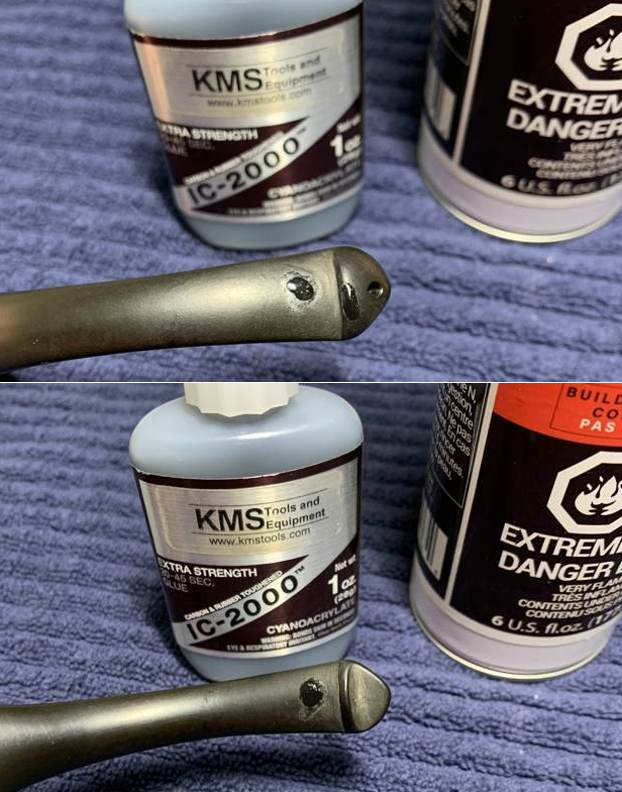
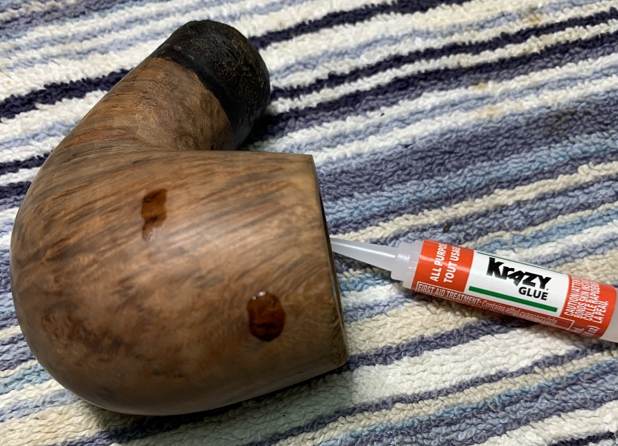
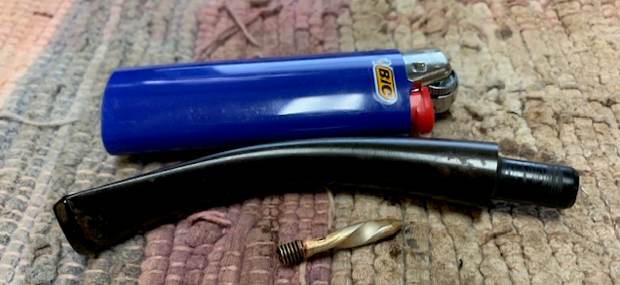
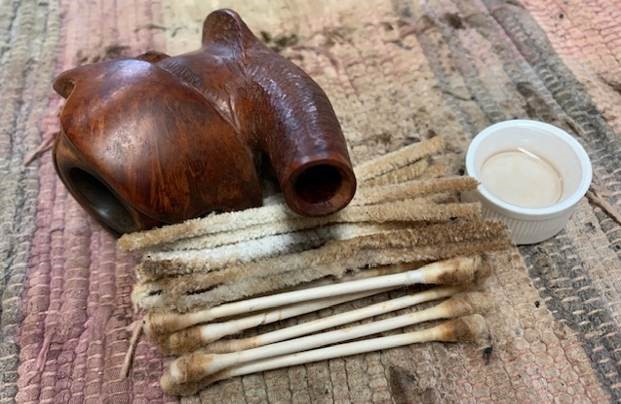
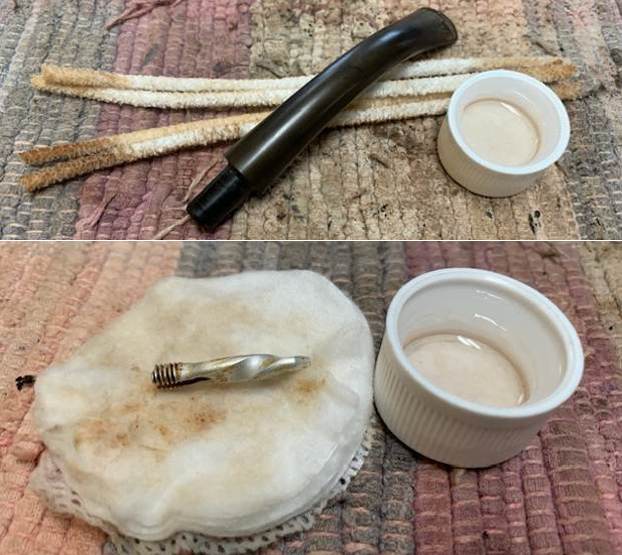
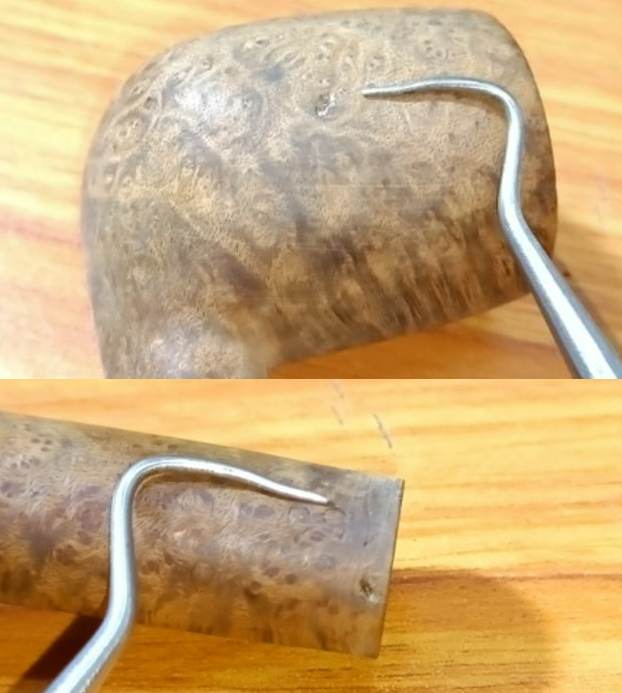
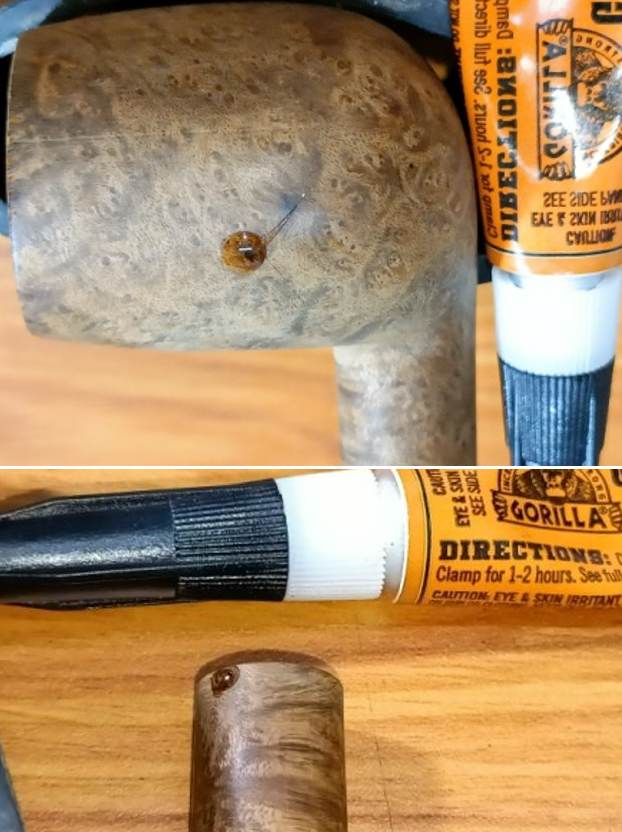
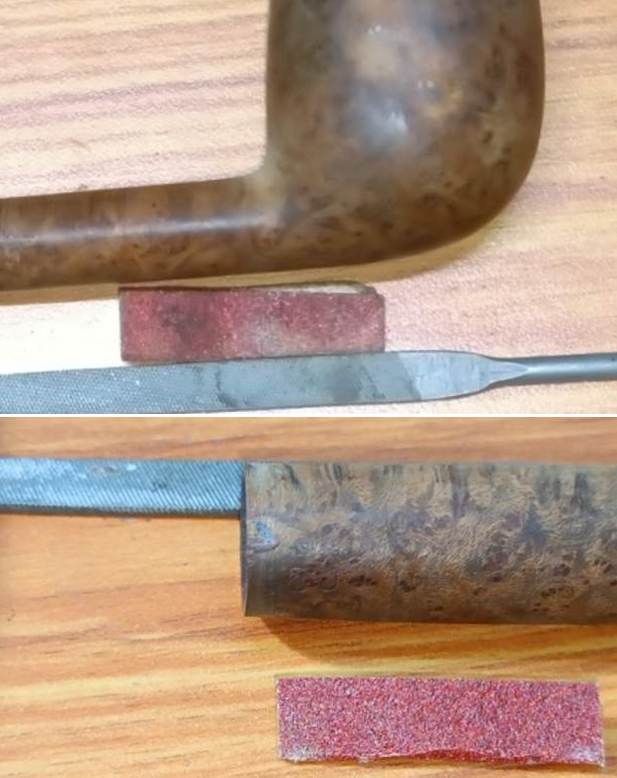
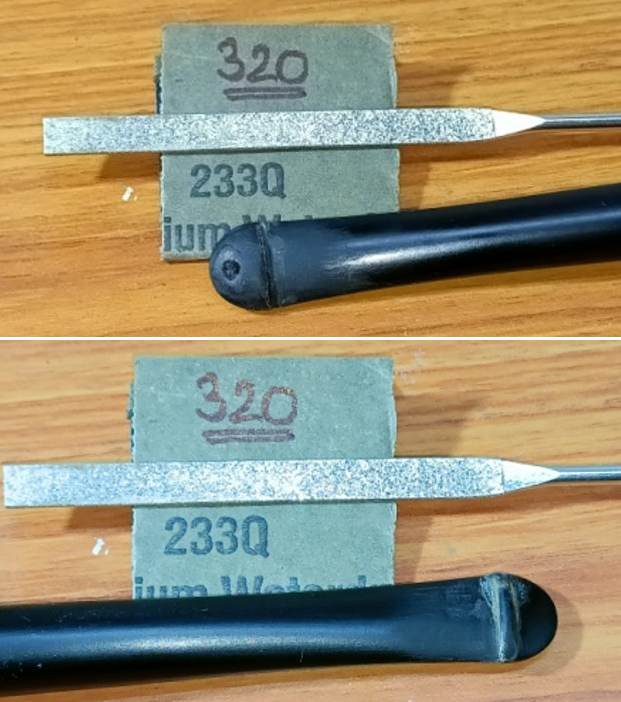
 I set the bowl aside and turned to the stem. I “painted” the stem surface with the flame of a Bic lighter to lift the tooth marks. I was able to lift them some. While they were better they were still there. I filled in what remained with black rubberized CA glue. I used a small file to flatten out the repairs and start to blend them into the surface of the vulcanite. I finished my work on the repairs by sanding them smooth with 220 grit sandpaper. I started the polishing of the stem with 600 grit wet dry sandpaper.

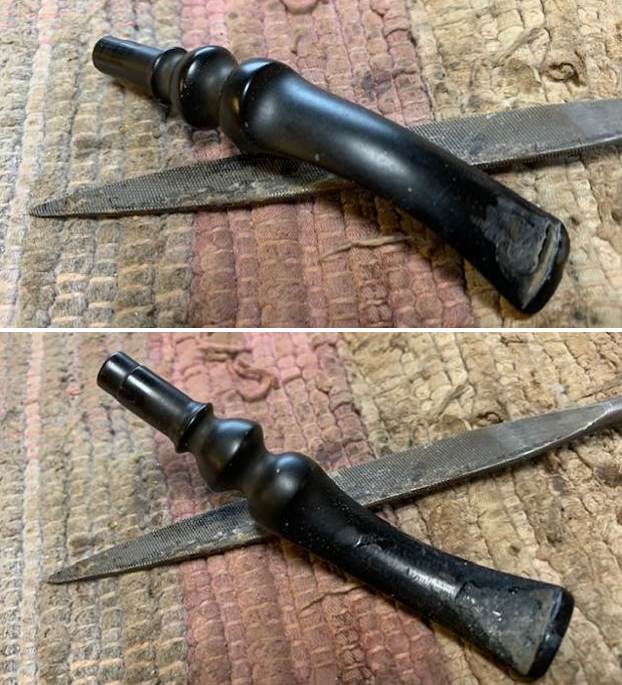
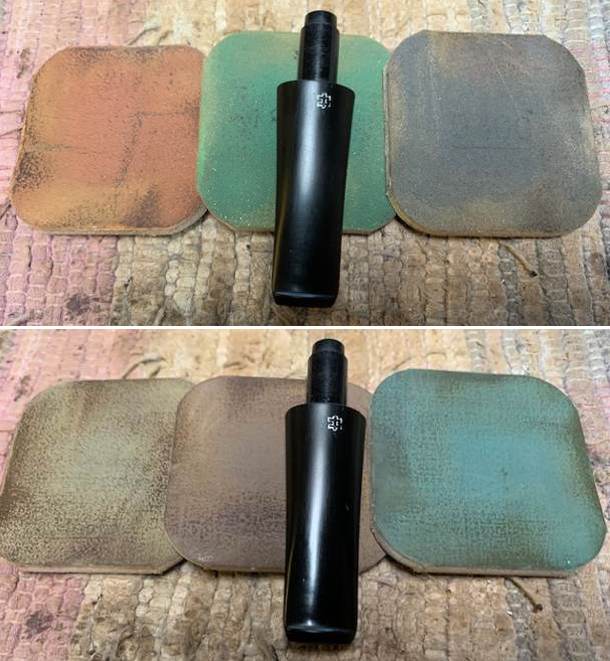
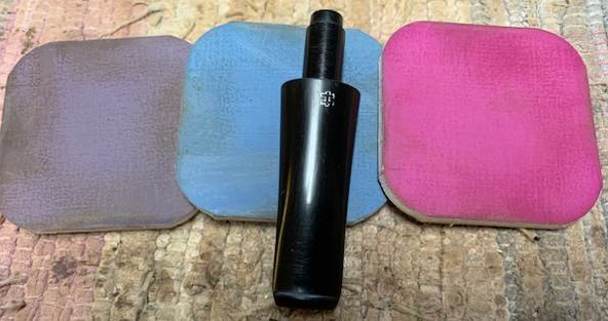
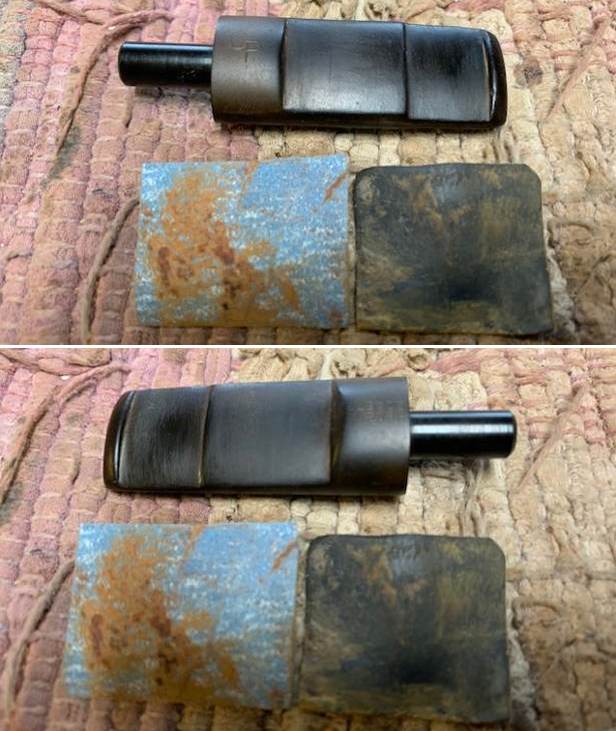
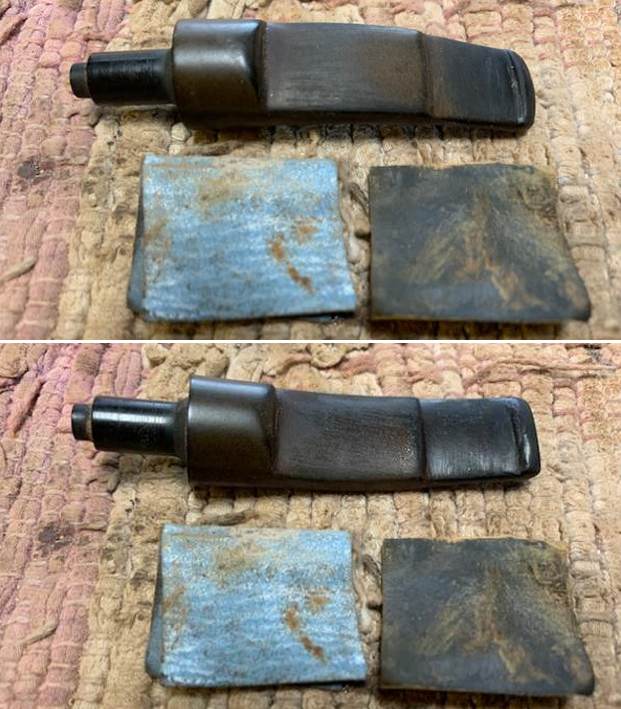
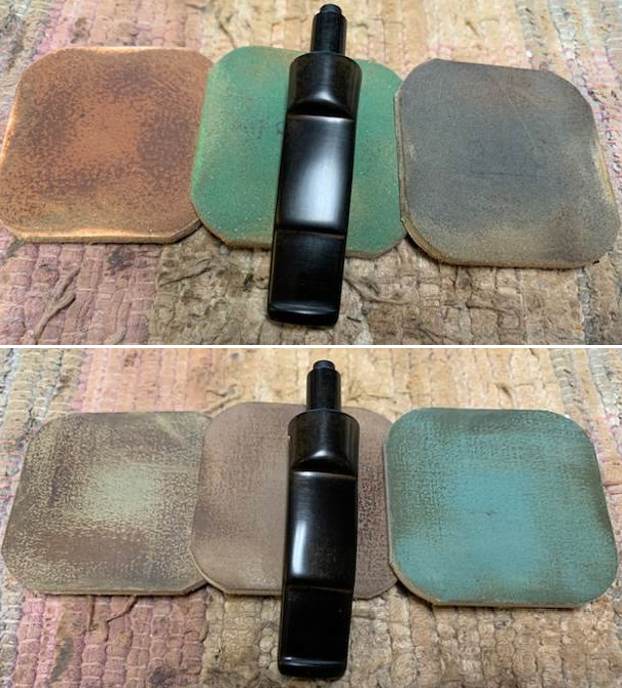
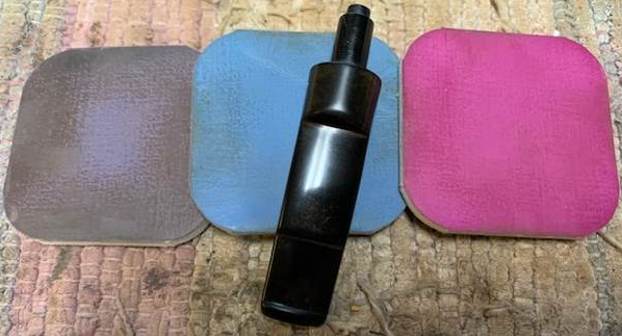
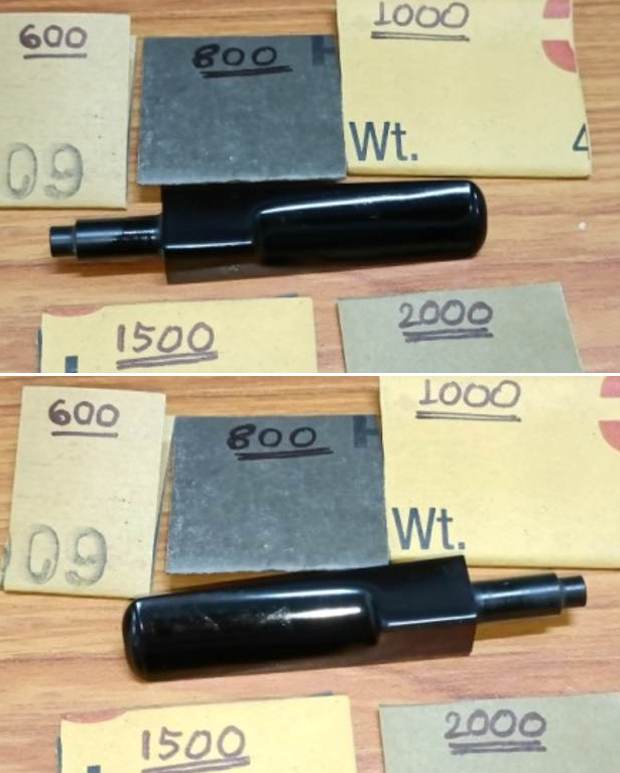
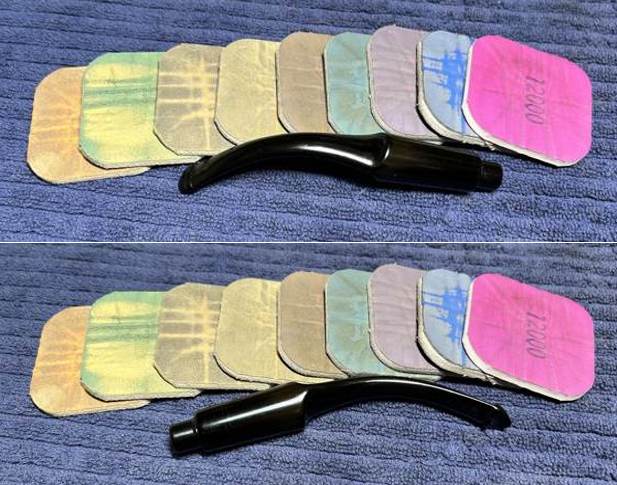
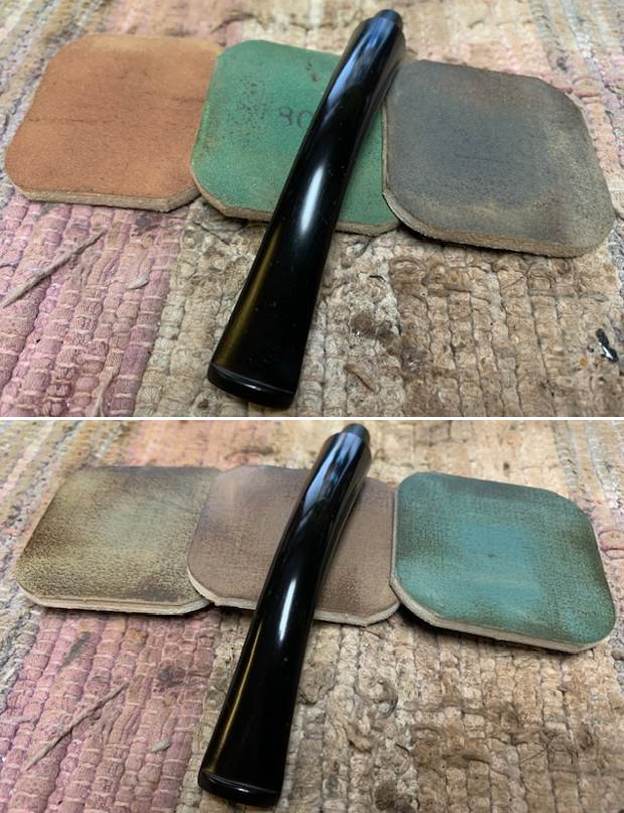
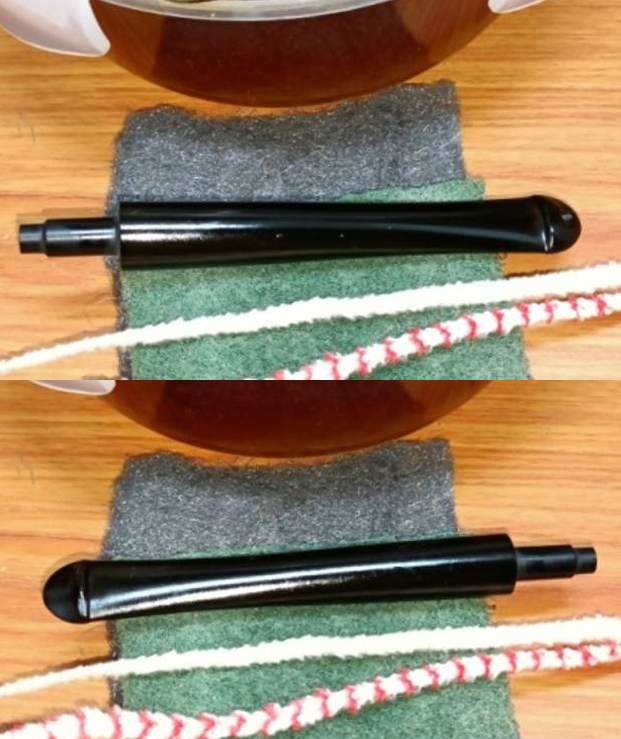
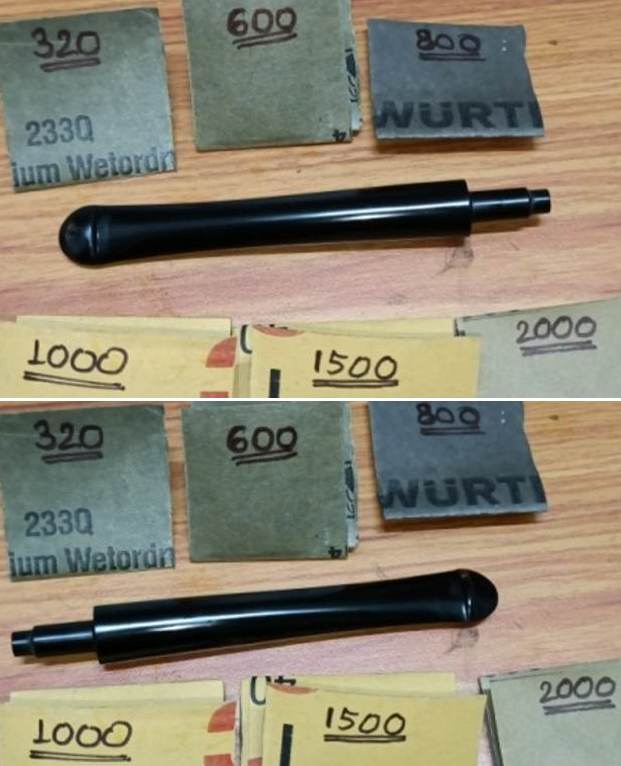
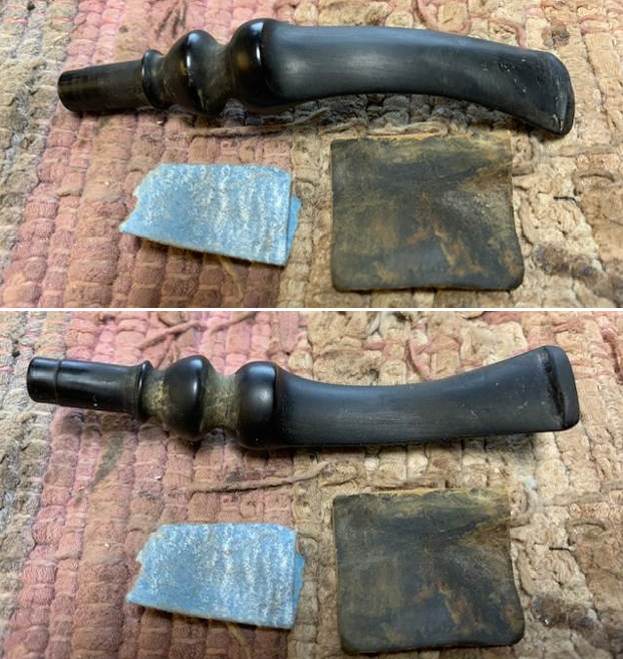 I polished the stem with micromesh sanding pads – 1500-12000 grit sanding pads and water to wet sand the stem. I wiped it down after each sanding pad with Obsidian Oil on a cotton rag after each sanding pads. I find it does two things – first it gives some protection to the stem from buildup and second it give the sanding pads bite in the polishing process.
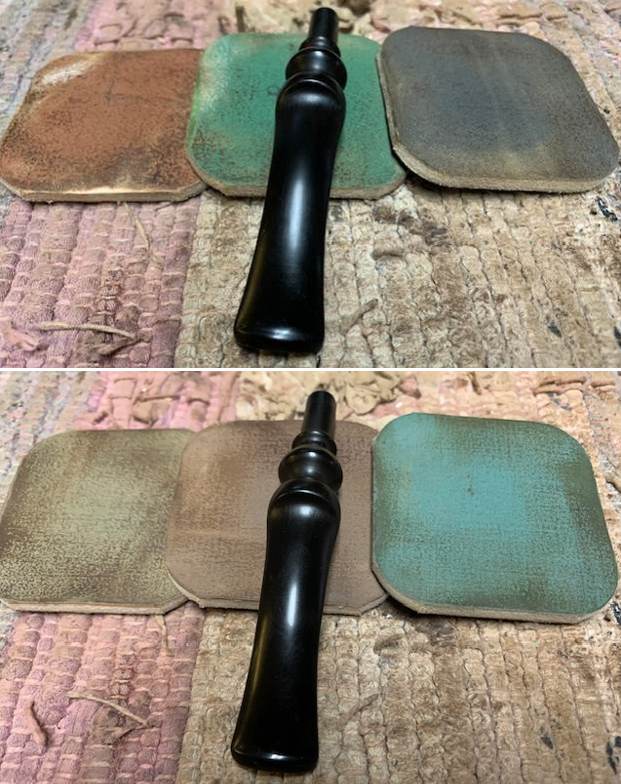
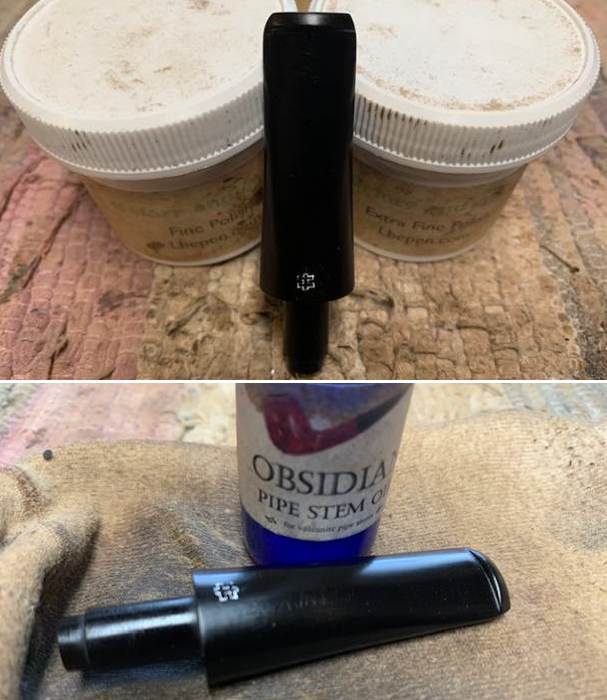
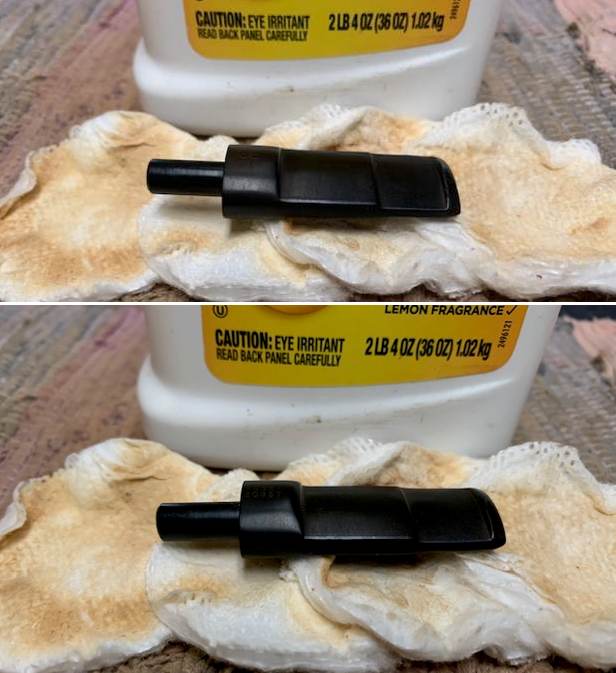
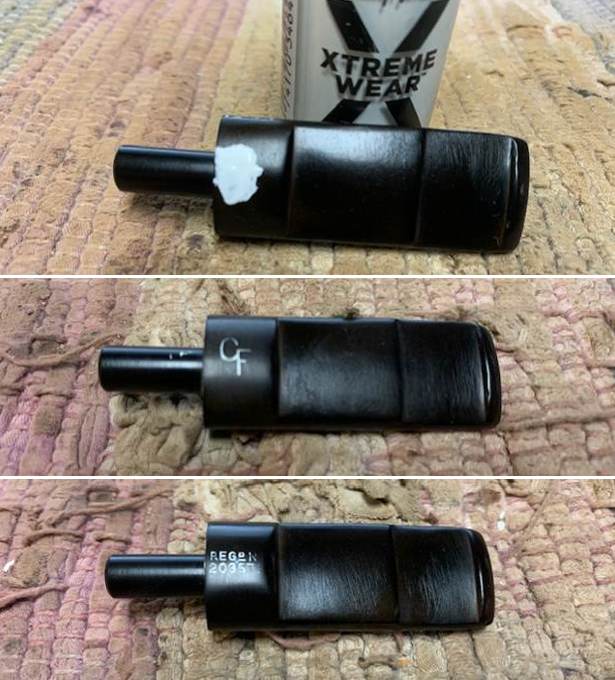
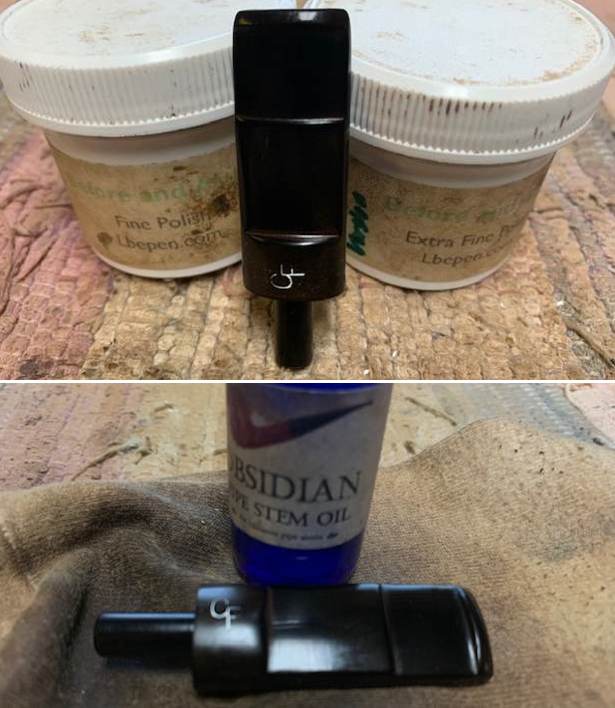
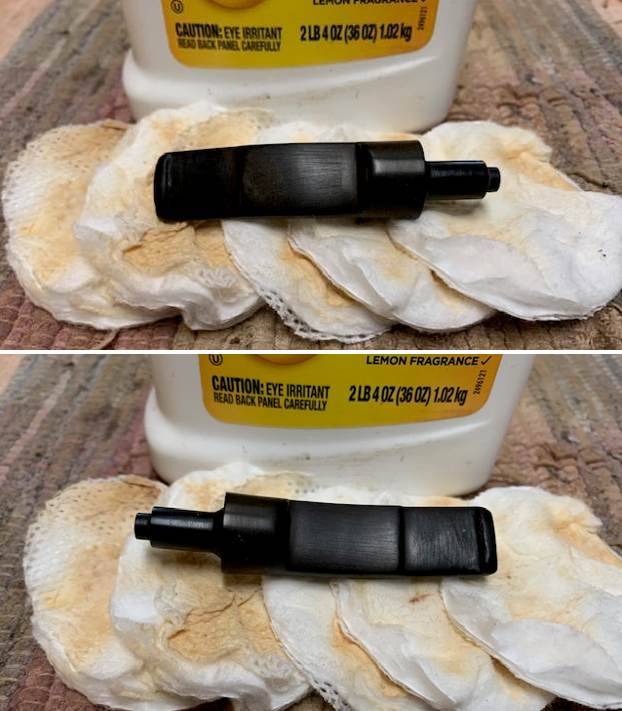
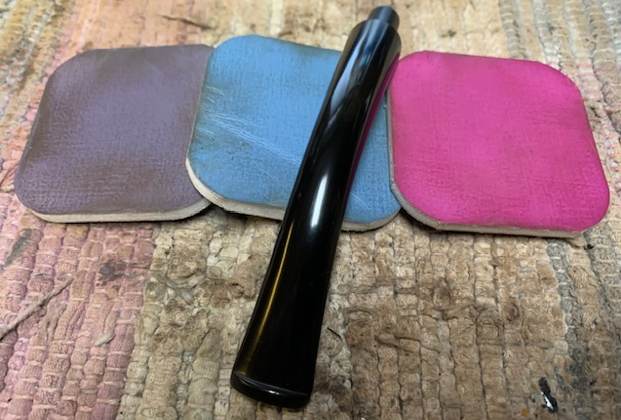
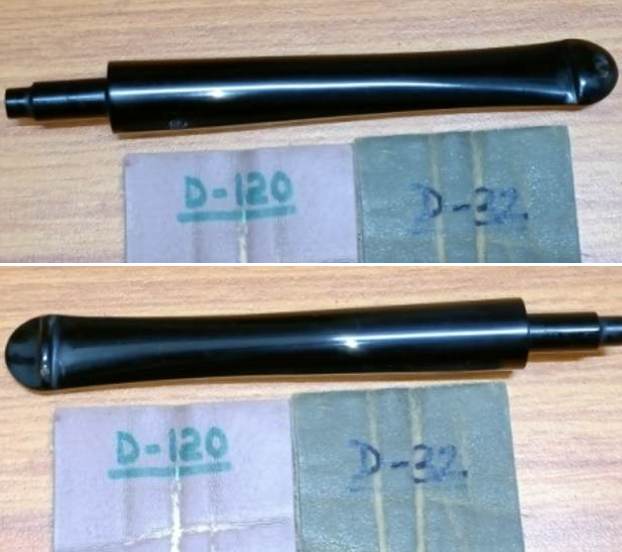
 After finishing with the micromesh pads I rub the stem down with Before & After Fine and Extra Fine stem polish as it seems to really remove the fine scratches in the vulcanite. I rub the Fine Polish on the stem and wipe it off with a paper towel and then repeat the process with the Extra Fine polish. I finish the polishing of the stem down with a final coat of Obsidian Oil and set the stem aside to let the oil absorb. This process gives the stem a shine and also a bit of protection.
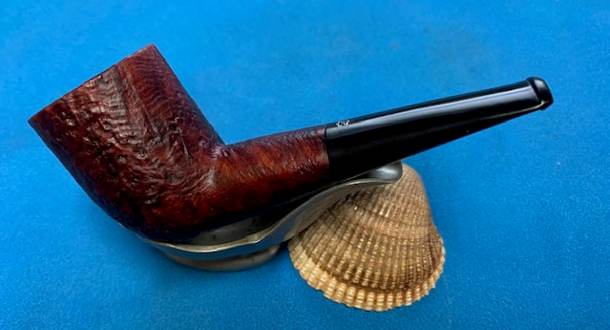
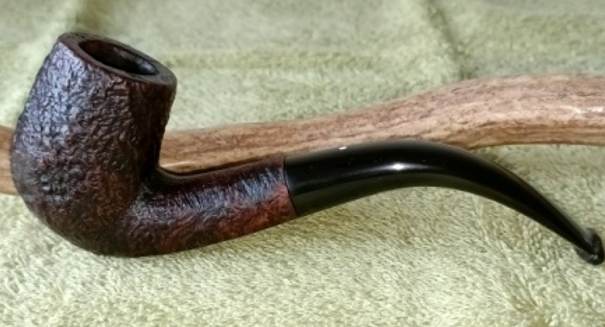
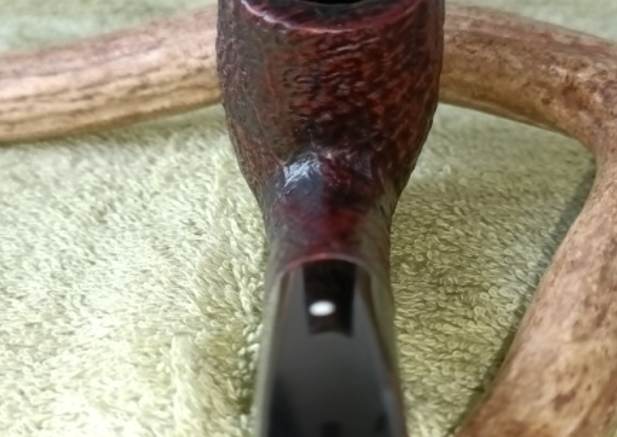
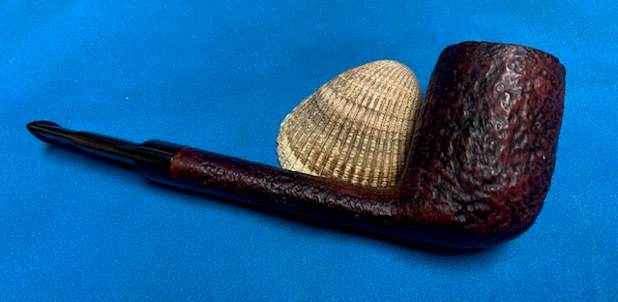
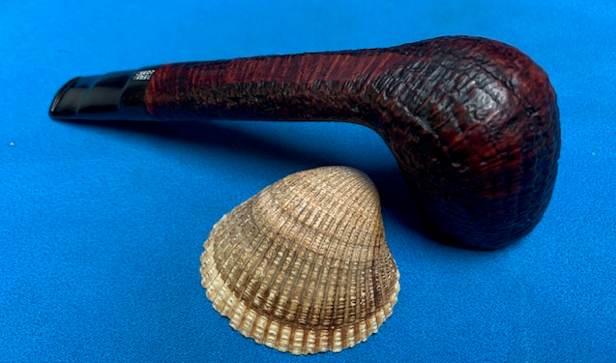
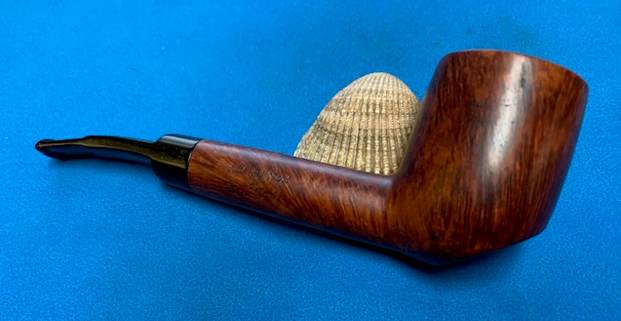
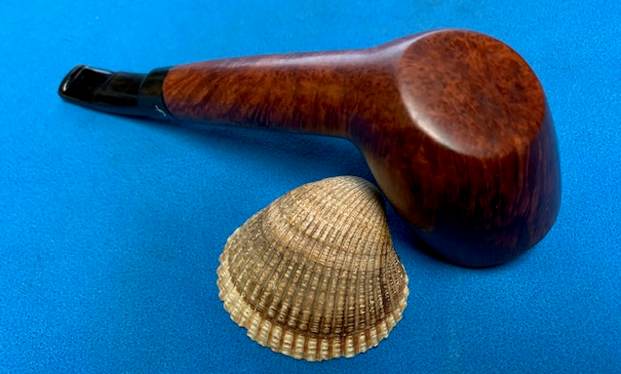
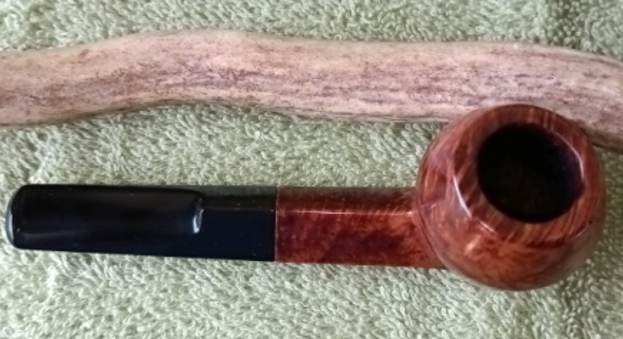
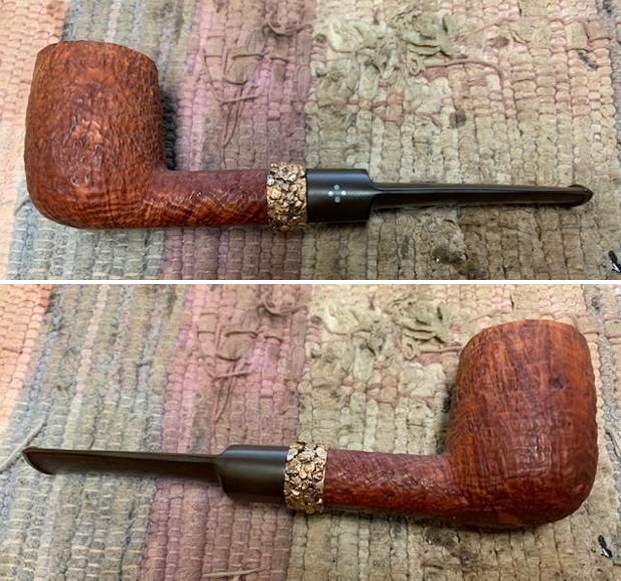
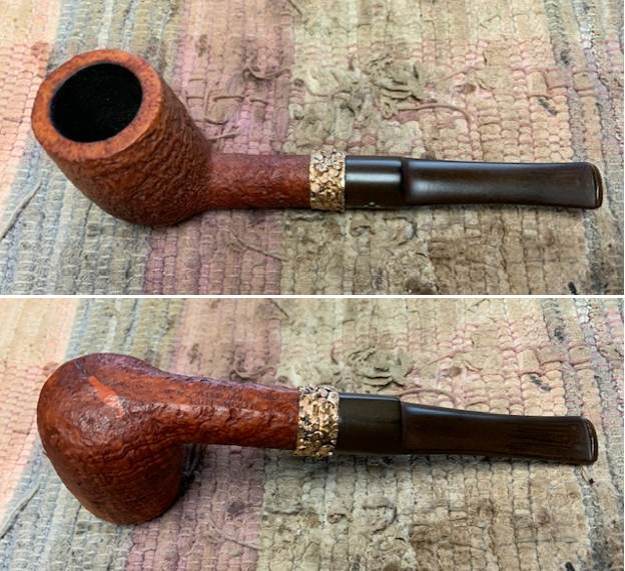
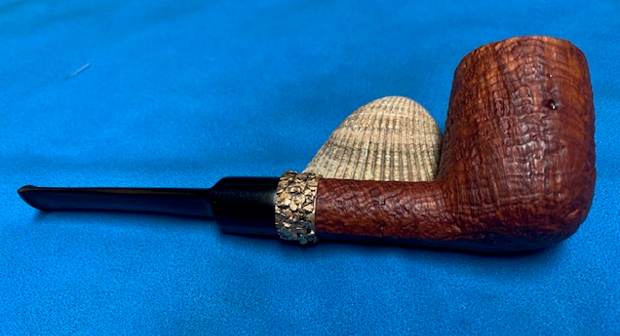
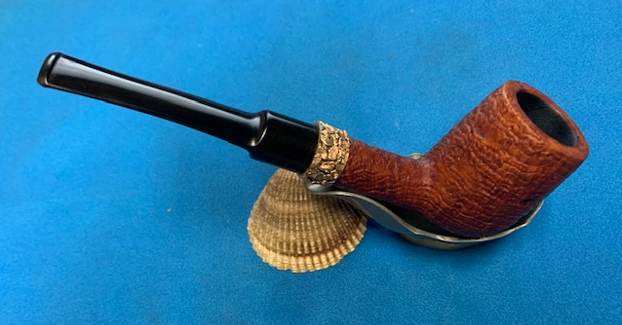
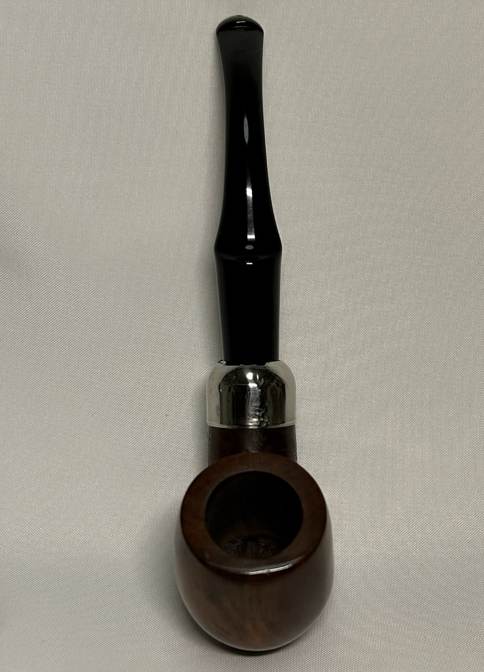
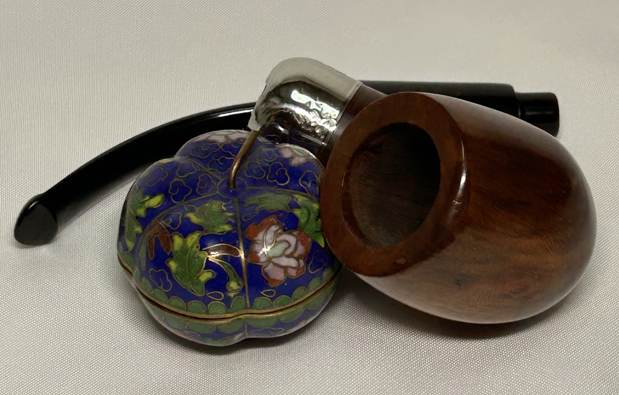
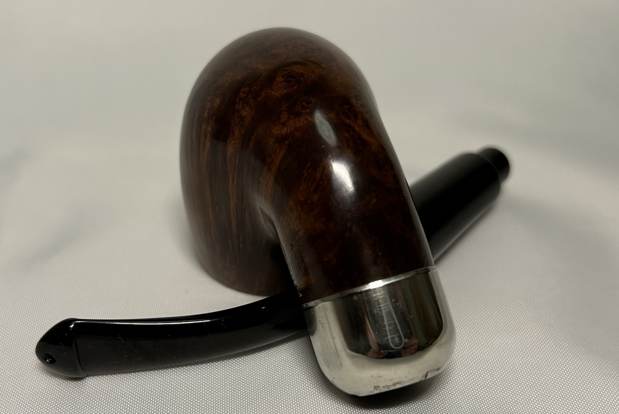
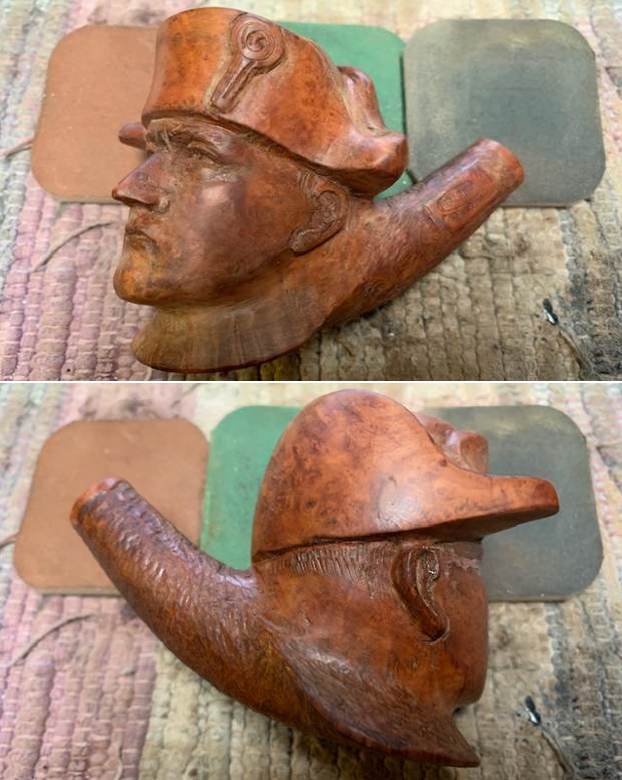
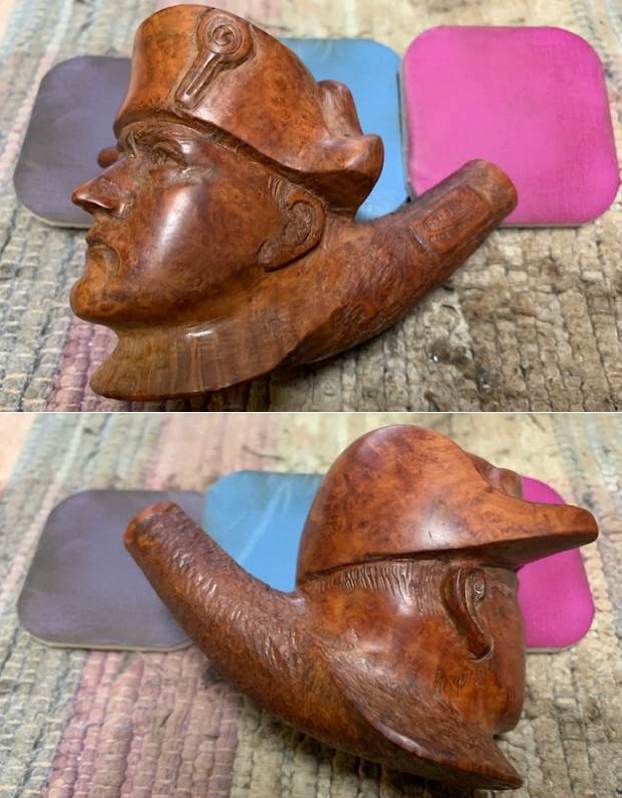
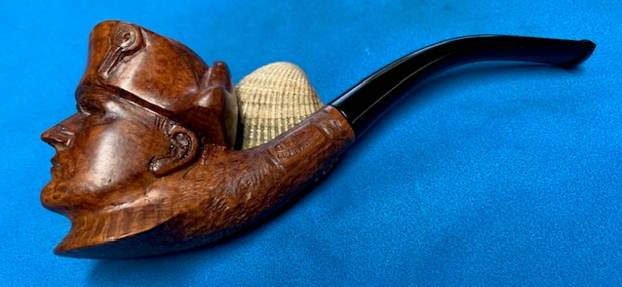
  The final steps in my process involve using the buffer. I buffed the bowl and stem with Blue Diamond to polish out the light scratches in the vulcanite. I gave the bowl and the stem multiple coats of carnauba wax. I have found that I can get a deeper shine if I follow up the wax buff with a buff with a clean buffing pad. It works to raise the shine and then I hand buff with a microfiber cloth to deepen the shine. It is always fun for me to see what the polished bowl looks like with the polished stem. It really is a nice pipe. The smooth finish around the bowl sides and shank looks great. The contrast plateau portions also look good. The vulcanite fancy, turned stem works well with the pipe. The Karl Erik Handmade in Denmark 5 Freehand is a beauty. It feels great in my hand and is a well balanced pipe. Have a look at it with the photos below. The dimensions are Length: 6 inches, Height: 2 ½ inches, Outside diameter of the bowl: 1 ¾ inches, Chamber diameter: 7/8 of an inch. The weight of the pipe is 1.98 ounces/56 grams. It is a beautiful pipe that I will soon be adding to the rebornpipes store in the Danish Pipemakers Section. If you would like to add it to your collection let me know. It should be a great smoking pipe.
As always I encourage your questions and comments as you read the blog. Thanks to each of you who are reading this blog. Remember we are not pipe owners; we are pipe men and women who hold our pipes in trust until they pass on into the trust of those who follow us.