Blog by Steve Laug
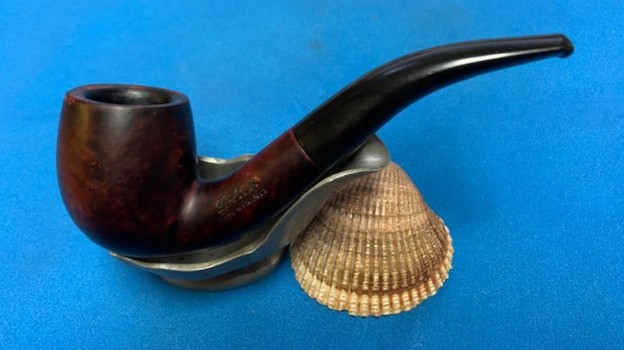
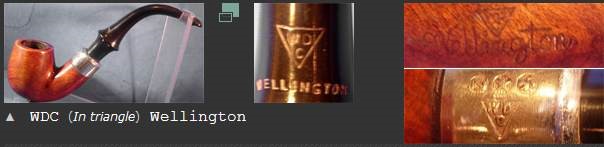
The next pipe on the work table is Rusticated Peterson’s System pipe that we purchased from and estate in Plano, Texas, USA on 03/30/2022. It was stamped Peterson’s System Standard on the underside side of the shank in a smooth panel. It was stamped Peterson’s [over] System [over] Standard. That is followed by the shape number XL307 [over] Made in the Republic of Ireland (in three lines). It has a rugged, tactile rustication around the bowl and shank that is fill with a lot of oils, debris and grime. There was a thick cake in the bowl with remnants of tobacco stuck on the walls. There was a lava overflow on the rim top that was heavier toward the back side. The top and edges of the rim were well hidden under the tars and lava. There was a very beautiful pipe underneath all of the buildup of years of use. The nickel ferrule on the shank end was oxidized and is stamped on the top and left side K&P [over] three faux hallmarks. That is followed by Petersons. It is not dented or damaged. The stem was the wrong stem for the pipe. It was not a Peterson’s style P-Lip but rather a Wellington style with the airway exiting on the end of the stem. It was oxidized and calcified toward the end with some tooth chatter. There were also some tooth marks on both sides of the stem ahead of the button. I would need to restem it with a proper stem once I received it in Vancouver. Jeff took photos of the pipe before he started his cleanup work on it.
 Jeff took photos of the bowl and rim top to show the thick, hard cake in the bowl with remnants of tobacco stuck on the walls of the bowl. There was a lava build up on the top of the rim and the edges of the bowl. The rim top looked pretty good but it was hard to know for sure if there was damage under the thick lava. Only clean up would tell the full story. Jeff took photos of the top and underside of the stem showing the tooth chatter, scratching and oxidation on the stem surface and wear on the edges of the button. You can also see the exit of the airway on the stem end rather than the to of the P-lip.

 Jeff took photos of the sides and heel of the bowl to show the condition of the finish. You can see the grime in the rustication around the sides of the bowl and shank. Even under the dirt and debris of the years it looked very good.
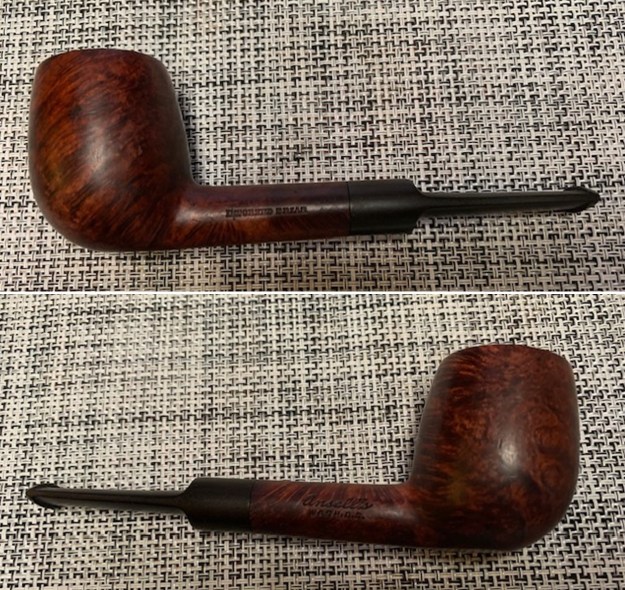
 Jeff took photos of the stamping on the underside of the bowl and shank. The stamping was faint but readable as you can see from the photos. It read as noted above. The nickel ferrule on the shank end is stamped on the top and left side K&P Peterson’s over three Peterson marks used on nickel ferrules.
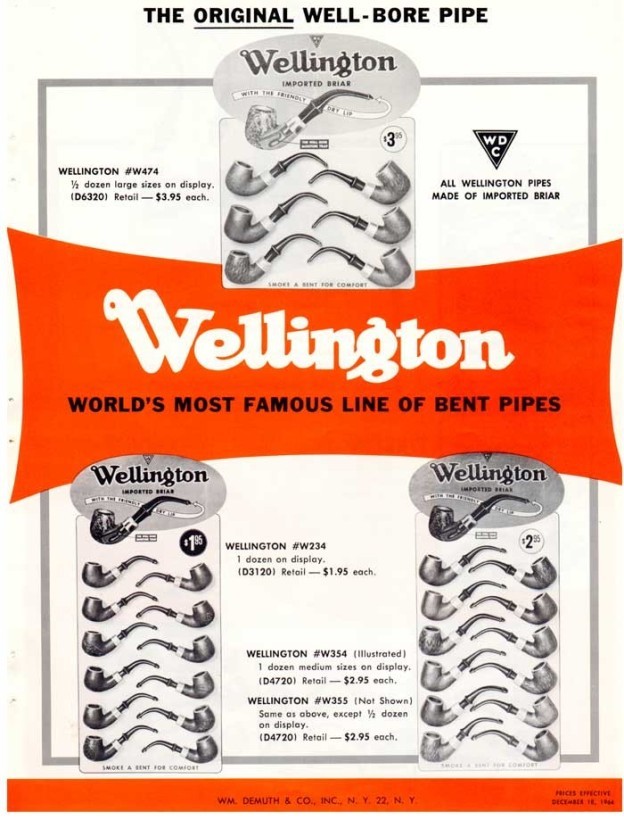
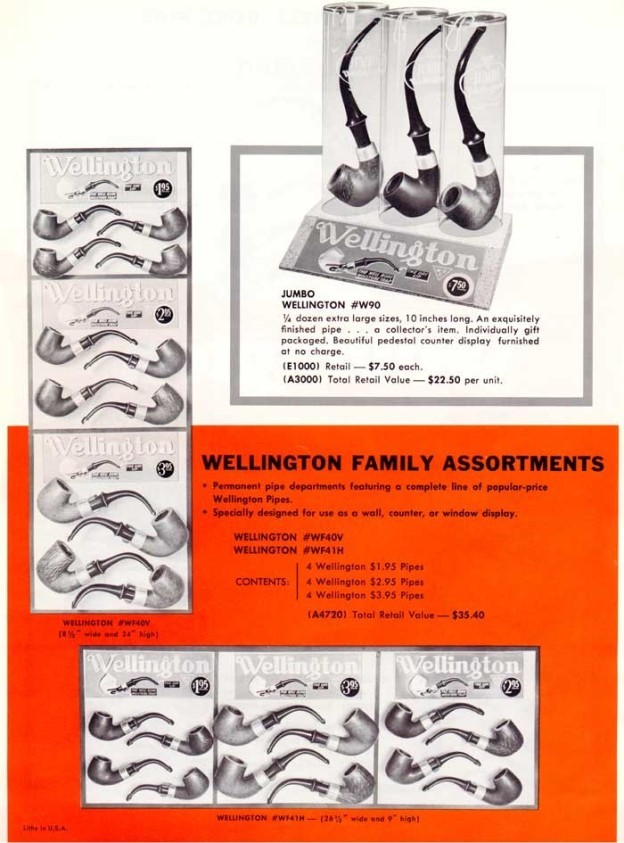
 I have included the information on the shape number on this pipe that I picked up on researching the previous pipes. This is the second of two Peterson’s System Standard pipes in Bob’s collection marked with the 307 shape number. I have included a page from a Petersons Catalogue that I have on rebornpipes (https://rebornpipes.com/tag/peterson-hallmark-chart/). I have put a red box around the 307 shown in the catalogue page shown below. That should give a clear picture of the size and shape of the pipe.
 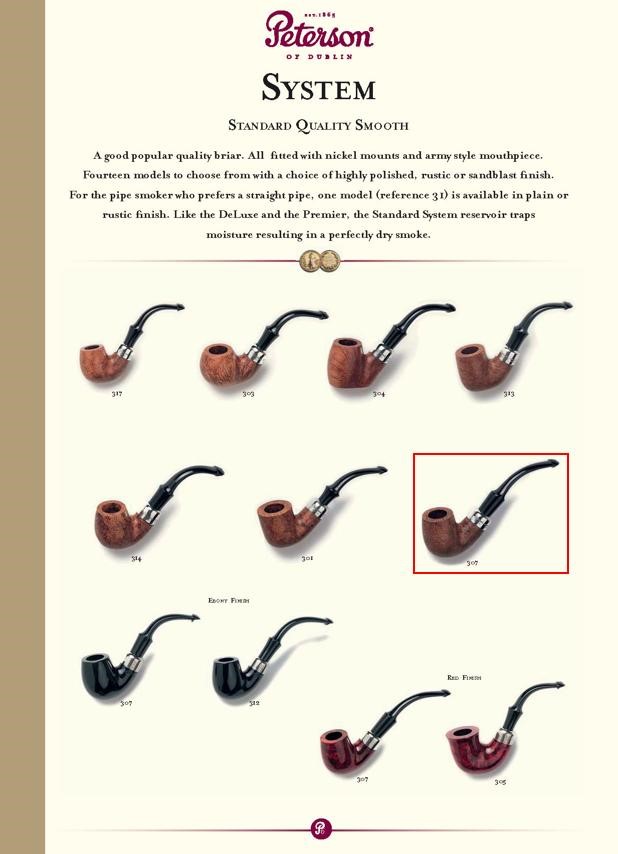 I am also including the information from Pipedia’s article on Peterson pipes. It is a great read in terms of the history of the brand (https://pipedia.org/wiki/Peterson). I have included a bit of the pertinent history here.
1950 – 1989 The Republic Era – From 1950 to the present time, the stamp for this era is “Made in the Republic of Ireland” in a block format generally in three lines but two lines have been used with or without Republic being abbreviated.
During the 1950’s and 60’s the Kapp & Peterson company was still in the ownership of the Kapp family. However 1964 saw the retiral of the company Managing Director Frederick Henry(Harry) Kapp.
 Pipedia also included a section of information on the System pipes including a diagram of the systems look (https://pipedia.org/wiki/Peterson#Republic_Era_Pipes). I quote a section of the article in part and include a link to another article on Pipedia on the System pipe.
The Peterson System pipes are the standard bearers of the Peterson pipe family, famous for the excellent smoking pleasure they provide. Often imitated but never equaled, the Peterson System smokes dry, cool and sweet, thanks to the scientific effectiveness of the original design. The heart of the System is the unique graduated bore in the mouthpiece. This makes the suction applied by the smoker 15 times weaker by the time it reaches the tobacco chamber. The result is that all the moisture flows into the reservoir and, thus cannot reach the smoker’s mouth. The Peterson Lip further enhances the effectiveness of the graduated bore by directing the flow of smoke upwards and away from the tongue. This achieves a uniquely even distribution of smoke and virtually eliminates any chance of tonguebite or bitterness. Furthermore, the shape is contoured so that the tongue rests comfortably in the depression under the opening. Each “PLip” mouthpiece is made from Vulcanite. For the Peterson System pipes to work properly, the stem/tenon has to have an extension, the tip of which will pass by the draft hole from the bowl and into the sump. Upon the smoker drawing in smoke, this extension then directs the smoke down and around the sump to dispense a lot of the moisture before the smoke enters the extension and stem. On the System Standards and other less expensive systems, this extension with be made of Vulcanite turned integrally with the stem. On the more expensive System pipes this extension will be made of metal which screws into the Vulcanite stem. This extension on the earlier pipes will be of brass and the newer pipes will be of aluminium. Most smokers not knowing this function of the metal extension, assumes that it is a condenser/stinger and will remove it as they do with the metal condensers of Kaywoodie, etc. Should you have a System pipe with this metal extension, do not remove it for it will make the System function properly and give you a dryer smoke (https://pipedia.org/wiki/A_closer_look_at_the_famous_Peterson_Standard_System_Pipe).
With that information in hand I knew what I was dealing with in terms of the stamping and the age of this pipe. I knew from the information that the pipe was made during the Republic Era between 1950 and 1989. My guess is that the pipes is a 1960s era System pipe. Now it was time to work on the pipe.
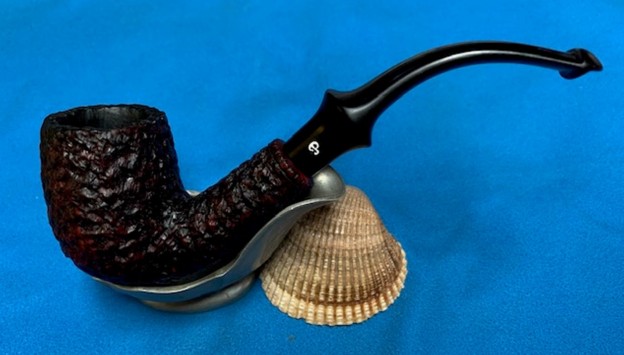
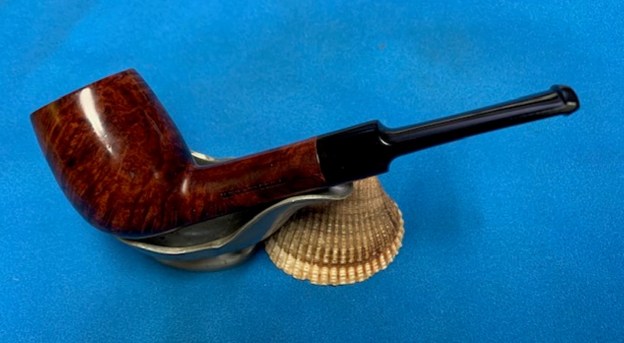
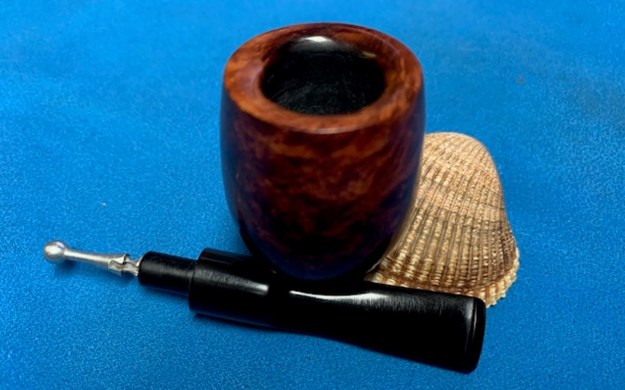
Jeff cleaned this filthy pipe with his usual clean up process. This one was a real mess and I did not know what to expect when I unwrapped it from his box. He reamed it with a PipNet pipe reamer and cleaned up the reaming with a Savinelli Fitsall Pipe Knife. He scrubbed out the internals with alcohol, pipe cleaners and cotton swabs until the pipe was clean. He scrubbed the exterior of the bowl with Murphy’s Oil Soap and a tooth brush to remove the grime and grit on the briar and the lava on the rim top. The finish looks very good with great looking grain around the bowl and shank. Jeff soaked the stem in Briarville’s Pipe Stem Deoxidizer to remove the oxidation on the vulcanite. When the pipe arrived here in Vancouver for the second stop of its restoration tour I was amazed it looked so good. I removed the incorrect stem and replaced it with a correct P-Lip stem for a 307 that I had here in my box of stems. The bonus was that the tenon had a brass chimney in the end that was correct for this pipe. I put the stem in the pipe and took photos of it with the correct stem. I liked the look of the pipe at this point in the process.
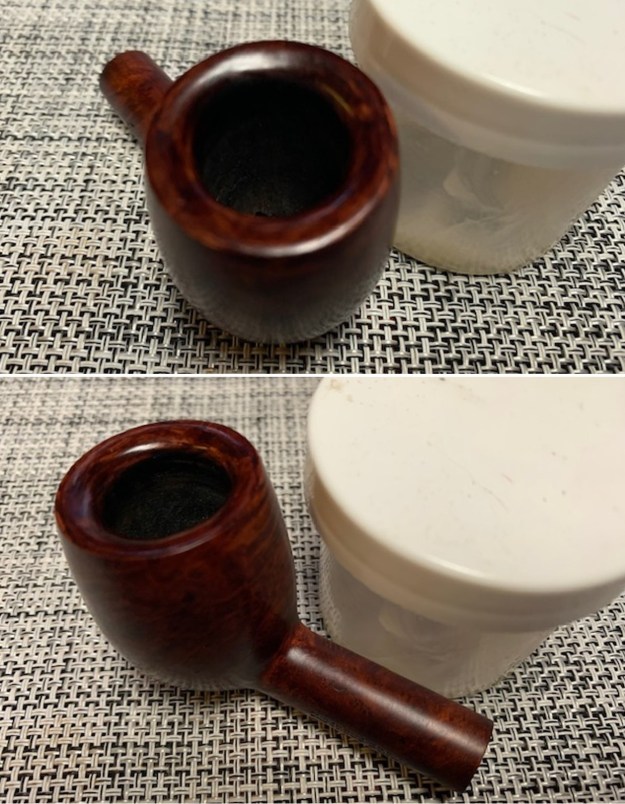
 I took some close up photos of the rim top and also of the stem surface. I wanted to show what an amazing job Jeff did in the cleanup of the rim top. The rim top was and inner edge were in excellent condition. I also took close up photos of the replacement stem I put in the shank to show the condition of the vulcanite. It was quite clean other than some slight oxidation at the edges of the button. There were no tooth marks or chatter on the stem surface.
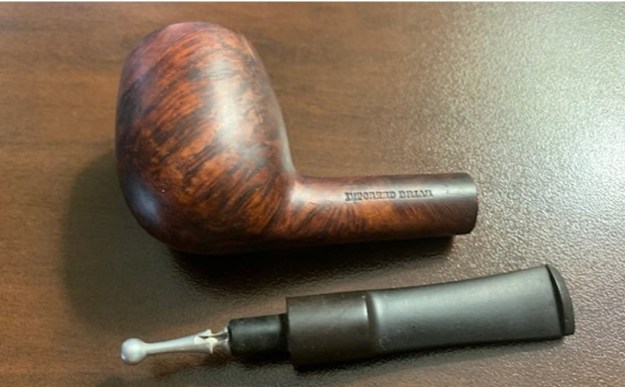
 One of the things I appreciate about Jeff’s cleanup is that he works to protect and preserve the nomenclature on the shank of the pipes that he works on. The stamping on this one was very faint to start with so I was worried that it would disappear altogether with the cleanup. He was not only able to preserve and maintain its condition in the process. I took some photos to show the clarity of the stamping. I have noticed that many restorers are not careful to protect the stamping in their cleaning process and often by the end of the restoration the nomenclature is almost destroyed. I would like to encourage all of us to be careful in our work to preserve this as it is a critical piece of pipe restoration! I took the stem off the shank and took a photo of the pipe.
 I decided to start my work on the pipe by cleaning up some of the polishing compound left in the rustication ahead shank rustication ahead of the ferrule. I worked the end over with a brass bristle wire brush to remove the crud in the finish. The photos show the progress.
 I rubbed the bowl and rim down with Before & After Restoration Balm. I worked it into the rusticated surface of the briar with my fingertips and a horse hair shoe brush to clean, enliven and protect it. I let the balm sit for 10 minutes and then buffed with a cotton cloth to raise the shine. I really like watching the Balm do its magic and bring the briar alive.

 With briar polished with the Restoration Balm I moved onto the metal. I polished the nickel ferrule with a jewellers cloth to raise the shine and to protect the ferrule from further oxidation.
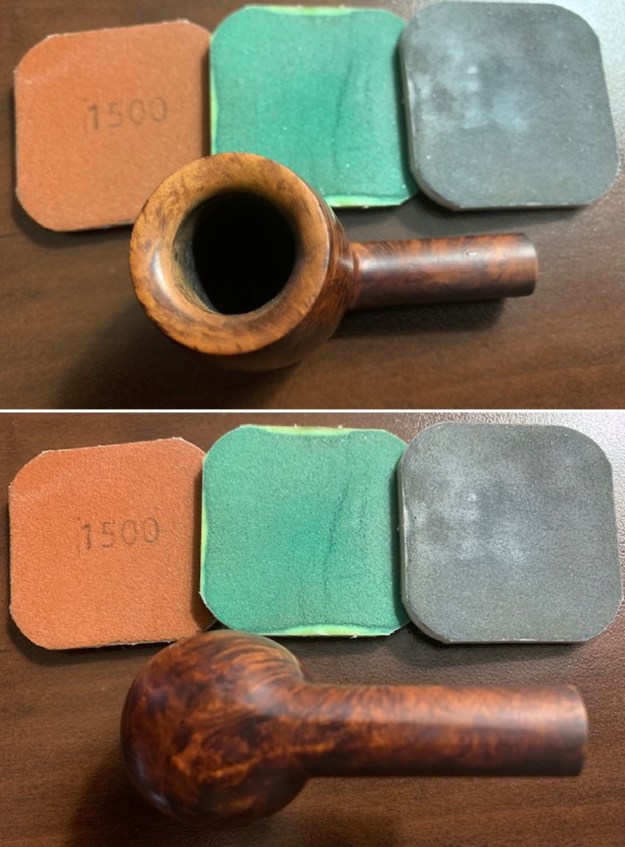
 I sanded the stem with 220 grit sandpaper to remove the oxidation that remained in the vulcanite and also the light tooth marks on the top and underside near the button. I started polishing it with 400 grit wet dry sandpaper.
 I touched up the “P” logo on the left side of the saddle stem with white acrylic fingernail polish. I let it dry then I polished off the excess with a worn 1500 grit micromesh sanding pad. Once the excess was removed the stamp looked much better even though there was some faintness on the curve of the P.
 I polished the stem with micromesh sanding pads – wet sanding with 1500-12000 grit pads. I wiped the stem down after each sanding pad with Obsidian Oil.
 I polished it with Before & After Pipe Stem Polish – both Fine and Extra Fine. I gave it a coat of Obsidian Pipe Stem Oil. It works to protect the stem from oxidizing. I set it aside to dry.
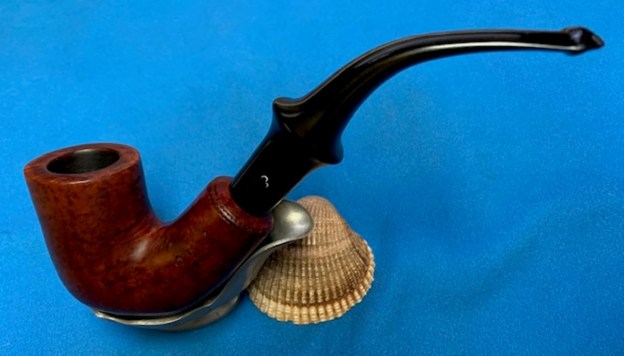
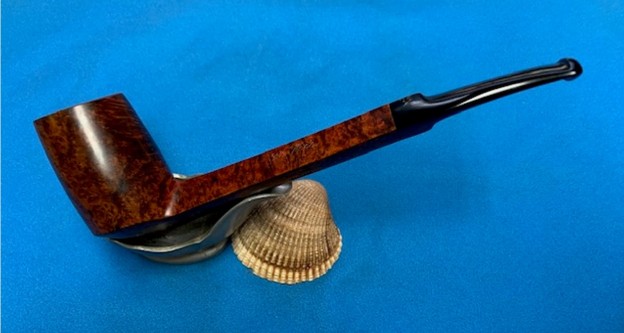
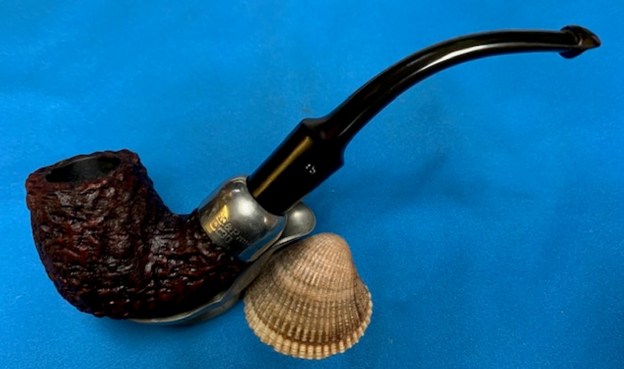
  Once again at this point in the restoration process I am excited to be on the homestretch. I look forward to the final look when the Rusticated Peterson System XL307 is put back together, polished and waxed. I put the bowl and stem back together. I lightly polished the bowl and stem with Blue Diamond to polish out the scratches in the briar and the vulcanite. I gave the bowl multiple coats of Conservator’s Wax and the stem multiple coats of carnauba wax. I buffed the pipe with a clean buffing pad to raise the shine. I hand buffed it with a microfiber cloth to deepen the shine. The pipe polished up pretty nicely. The depths of the rustication really pop with the wax and polish. The shiny black vulcanite stem is a beautiful contrast to the browns of the bowl and thick shank and nickel ferrule. This Peterson’s System Standard XL307 Bent Billiard was another fun pipe to work on. It really is a quite stunning piece of briar whose shape follows the flow of the briar. The pipe is tactile in the hand and should feel great as it is warmed up when smoking. The finished pipe is shown in the photos below. The dimensions of the pipe are Length: 6 ½ inches, Height: 2 inches, Outside diameter of the bowl: 1 ¼ inches, Chamber diameter: ¾ of an inch. The weight of the pipe is 2.26 ounces/64 grams. I will be putting it on the rebornpipes store in the Irish Pipemakers Section if you would like to add it to your rack and carry on the previous pipeman’s legacy. This is an interesting estate to bring back to life.
As always, I encourage your questions and comments as you read the blog. Thanks to each of you who are reading this blog. Remember we are not pipe owners; we are pipe men and women who hold our pipes in trust until they pass on into the trust of those who follow us.