Tag Archives: vulcanite

Releasing a Work Horse Billiard – A Lincoln London Style Real Sandblasted Briar


Blog by Dal Stanton

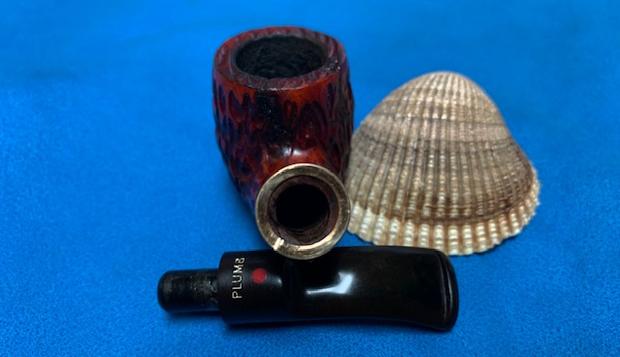
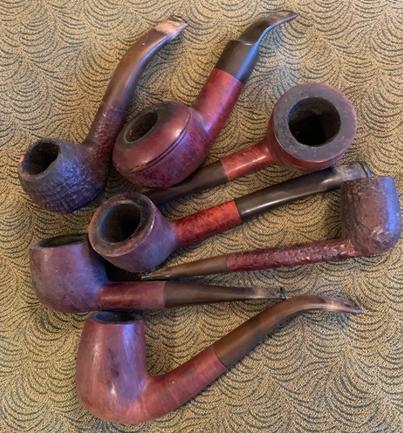
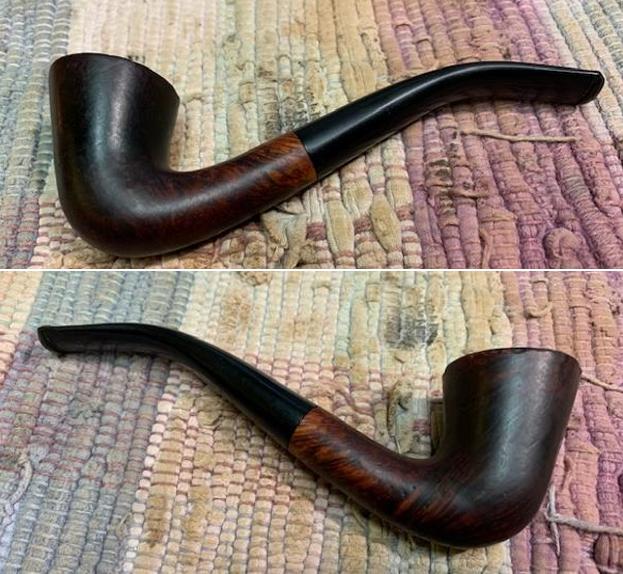
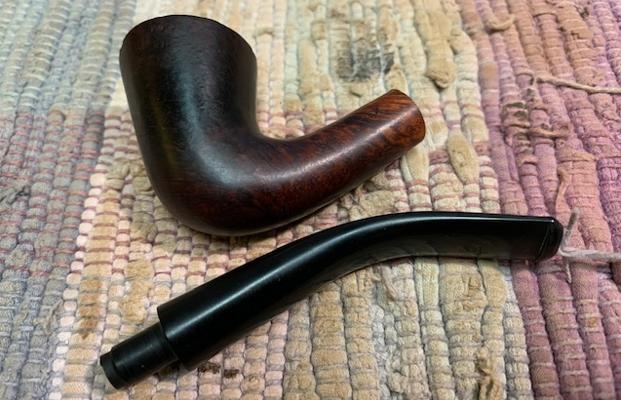
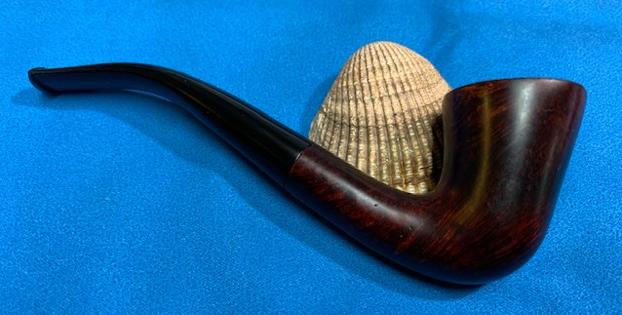
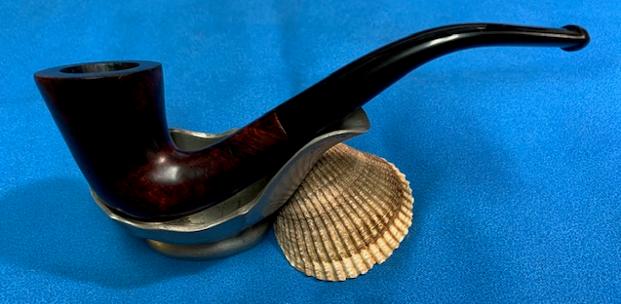
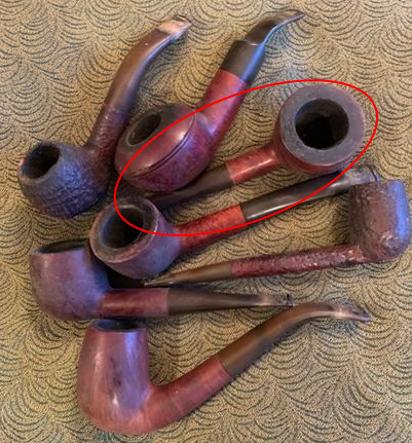
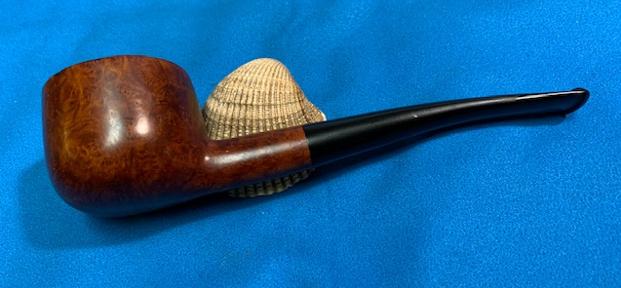
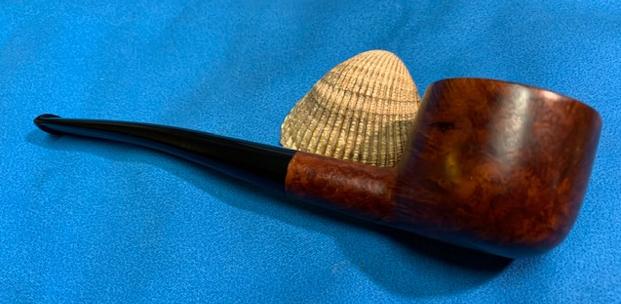
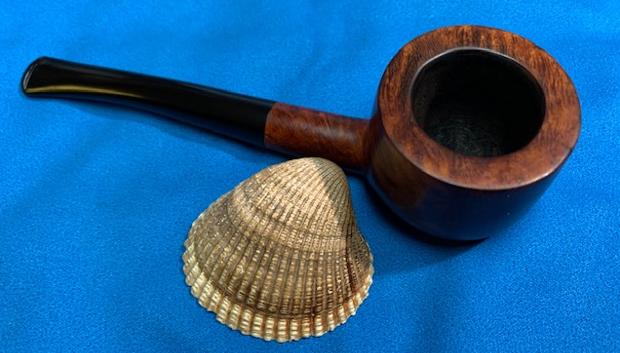
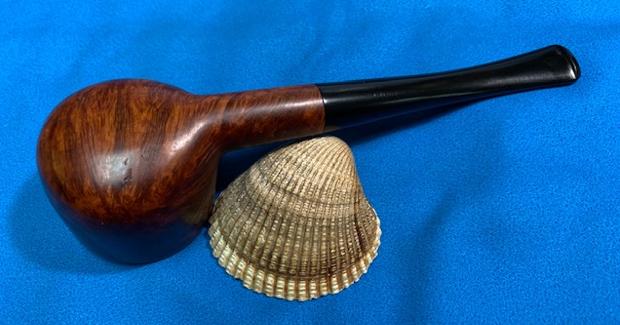
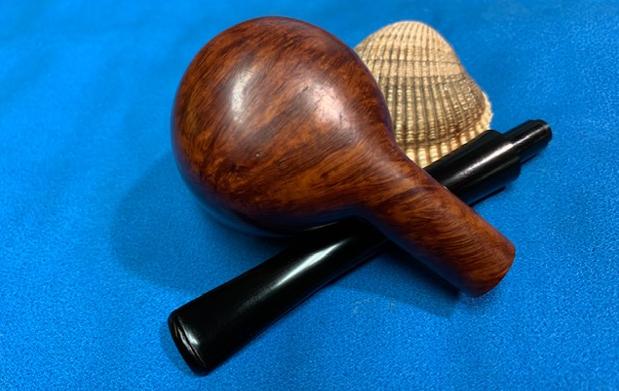
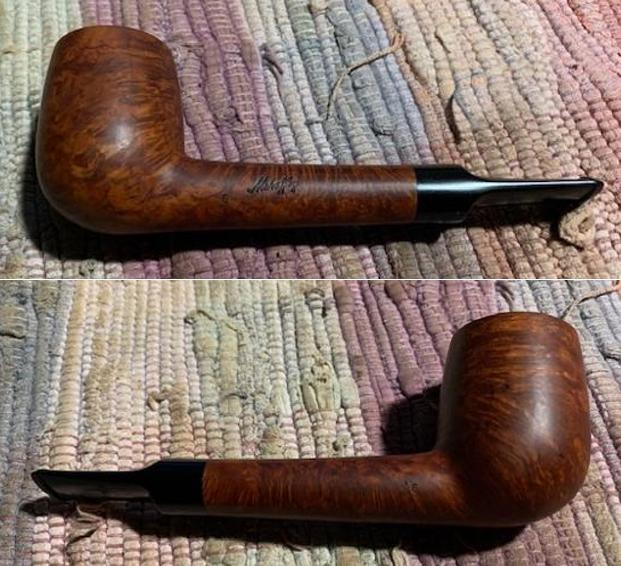
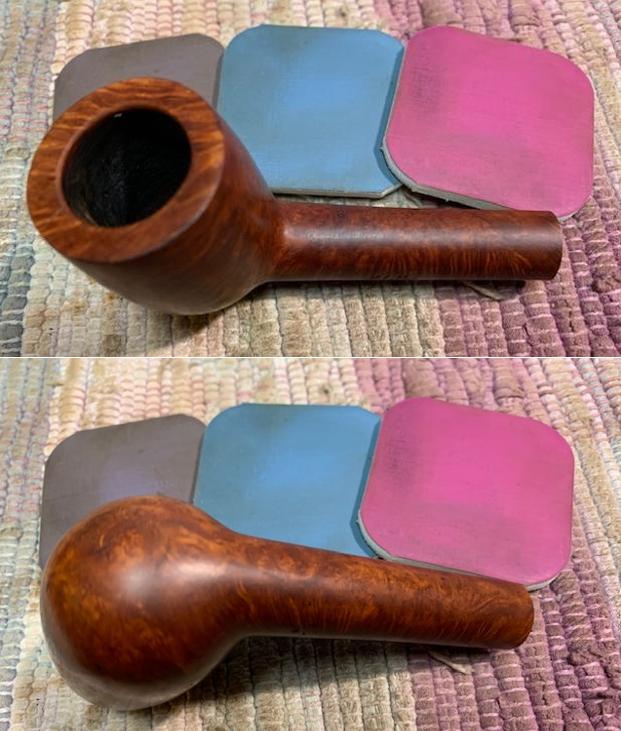
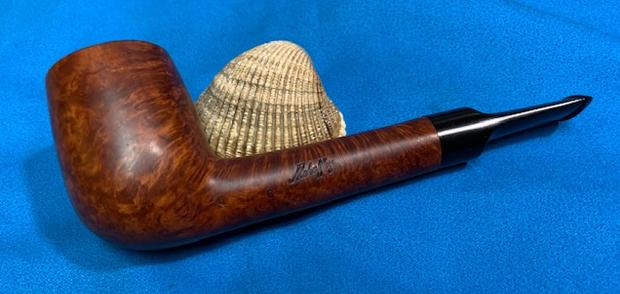
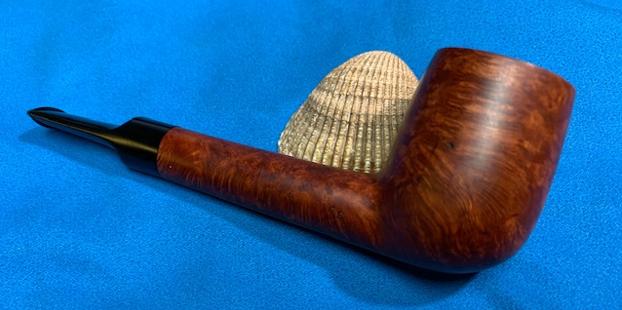
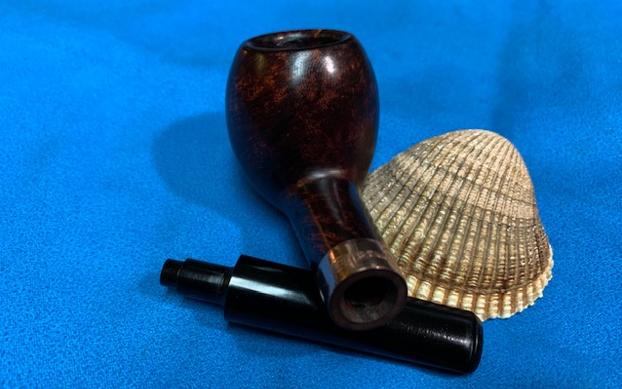
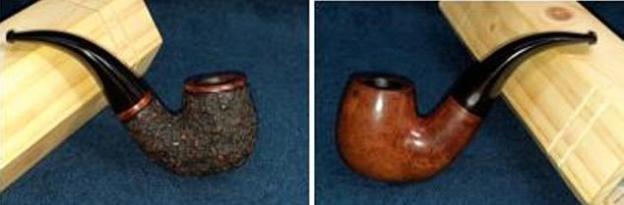
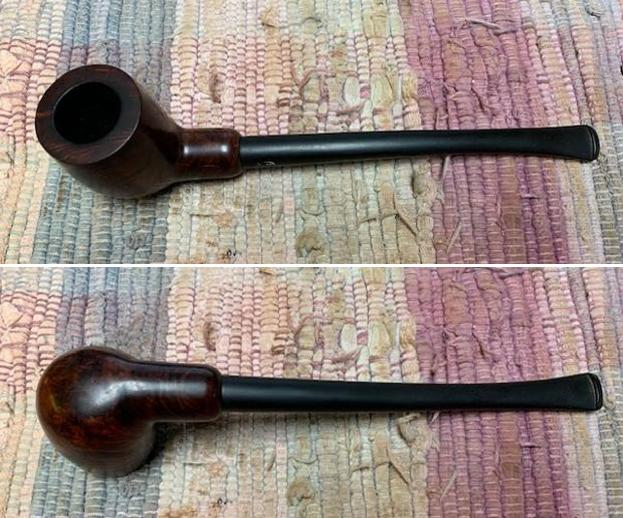
The next pipe on my worktable affords me the opportunity to take a trip down memory lane.  The Lincoln London Style Real Sandblasted Billiard was found along with 8 other pipes at a favorite walking street antique shop in Burgas, Bulgaria.  Burgas is located on the coast of the Black Sea near where my wife and I made our annual summer pilgrimages to the beach.  During the summer of 2017, one of the side trips we enjoyed was to go into Burgas and stroll down the main walking streets lined with shops and a favorite second-hand/antique store.   The vendor on this particular visit was fun to talk with and to finally strike a deal with to acquire the 9 pipes that made their way to the For “Pipe Dreamers” Only! collection available online for pipe men and women to commission benefiting the Daughters of Bulgaria.The Lincoln is the second pipe – the straight Billiard – from the right in the picture below.  
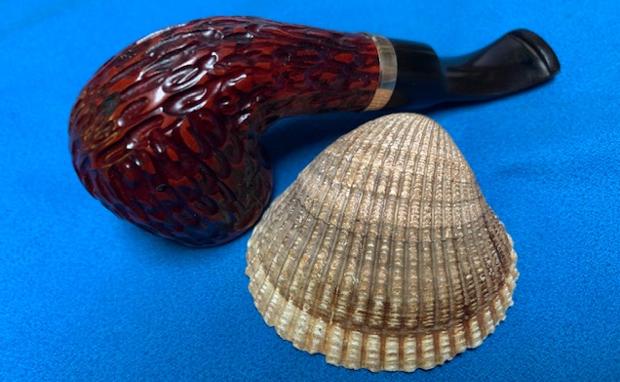
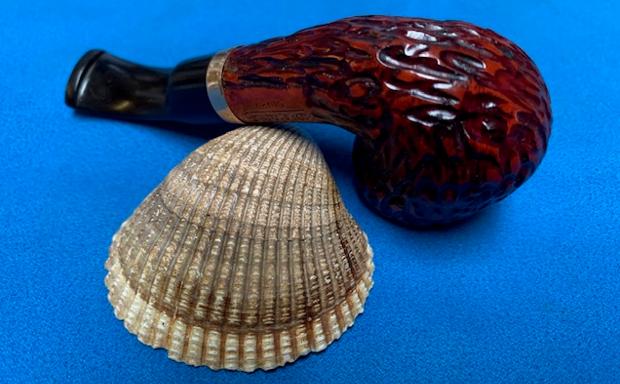
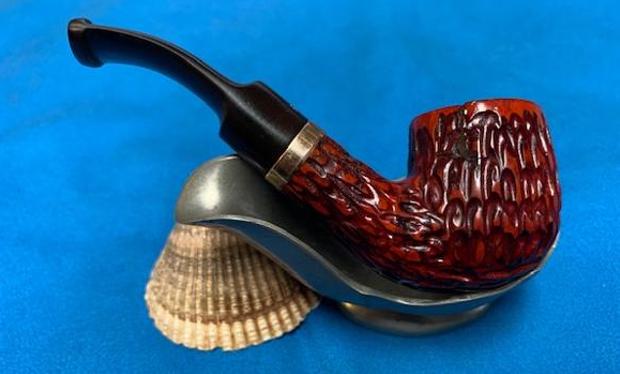
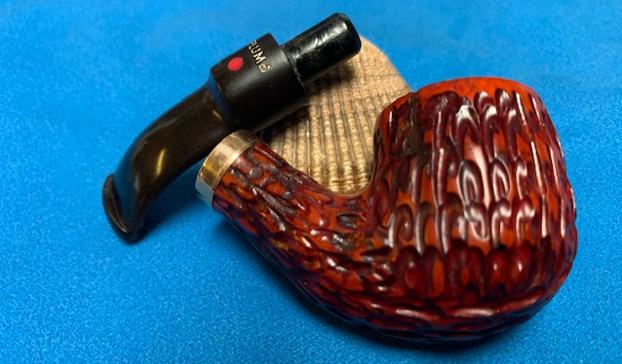
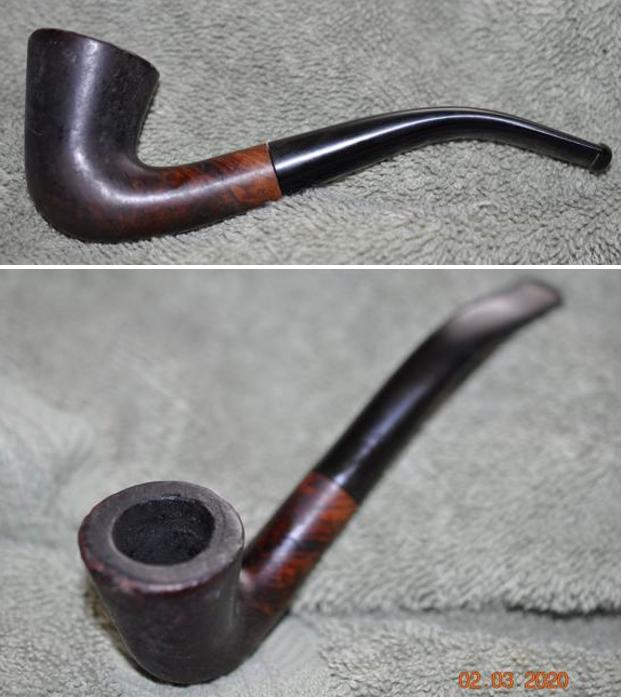
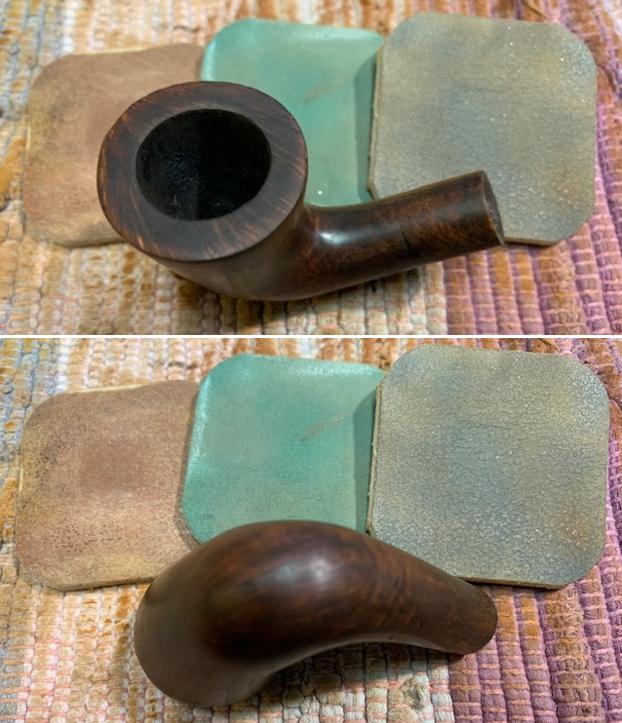
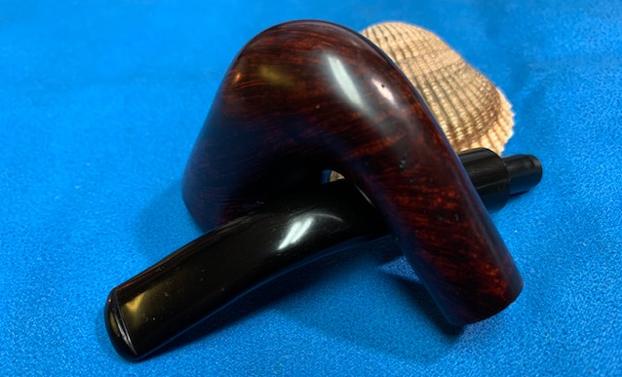
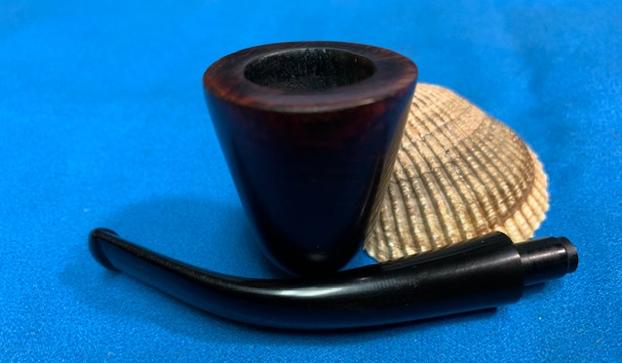
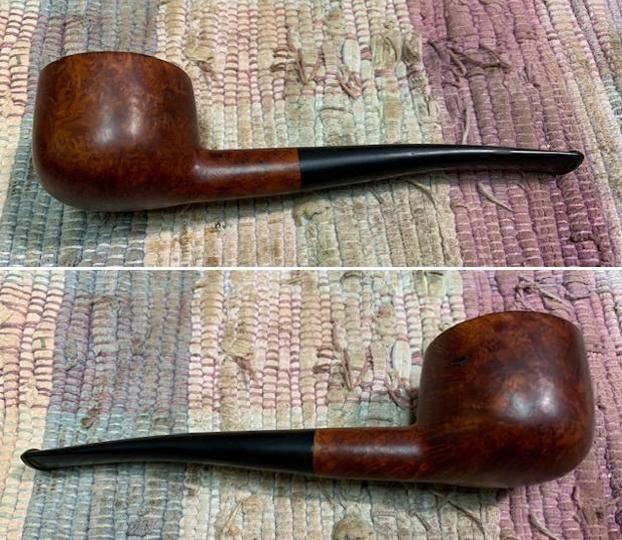
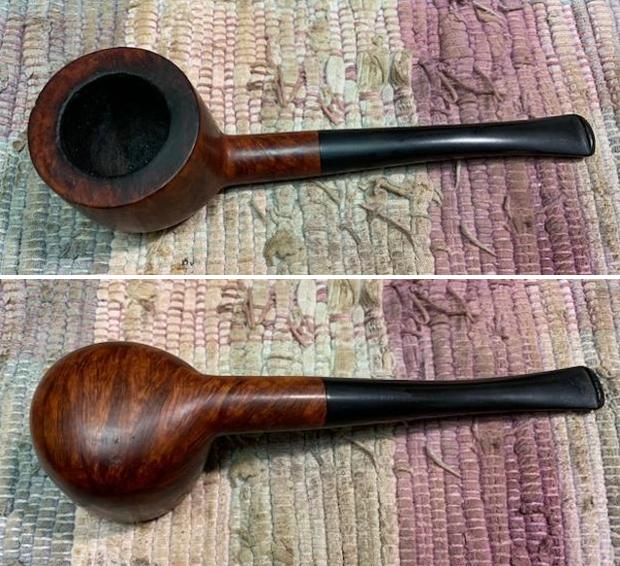
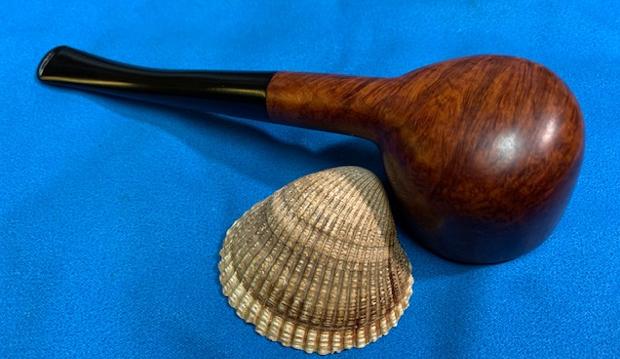
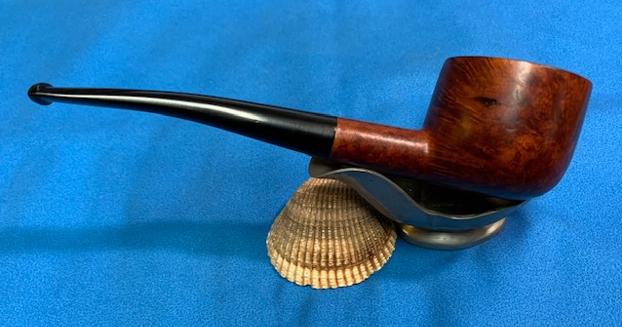
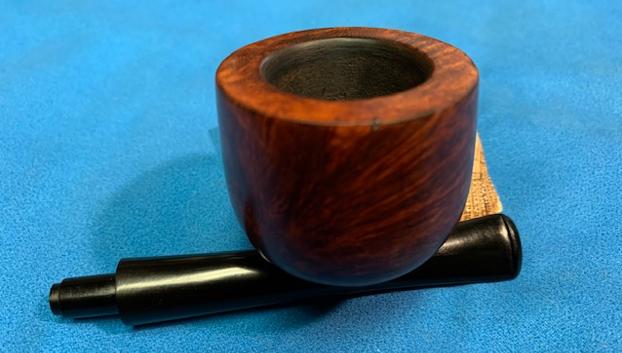
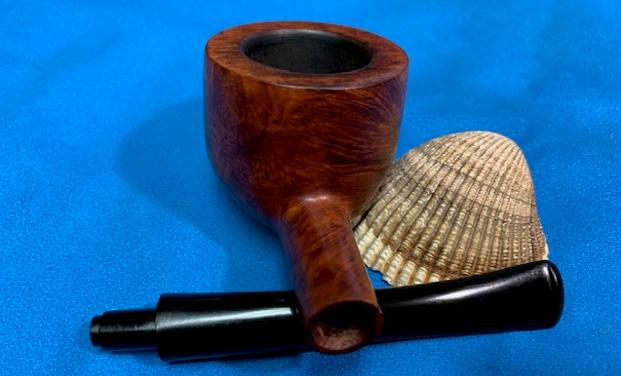
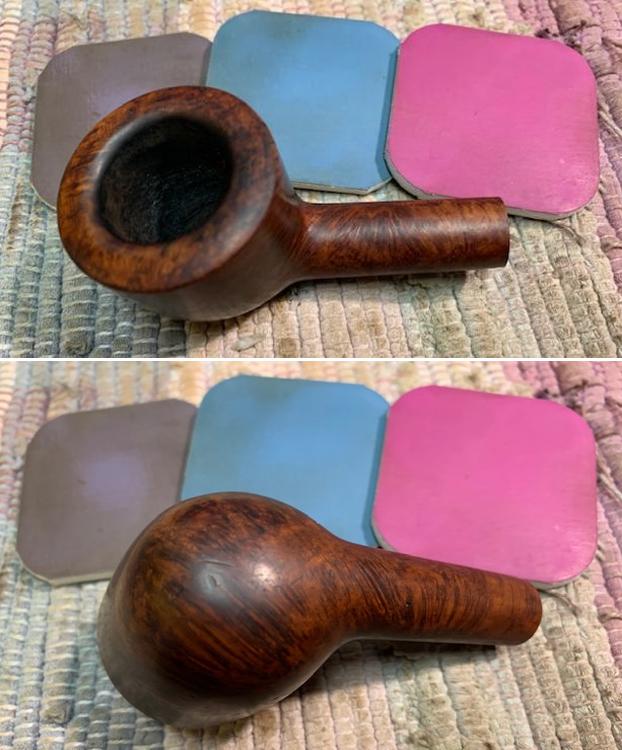
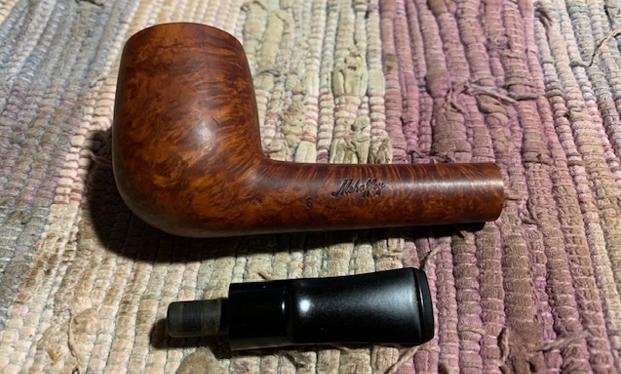
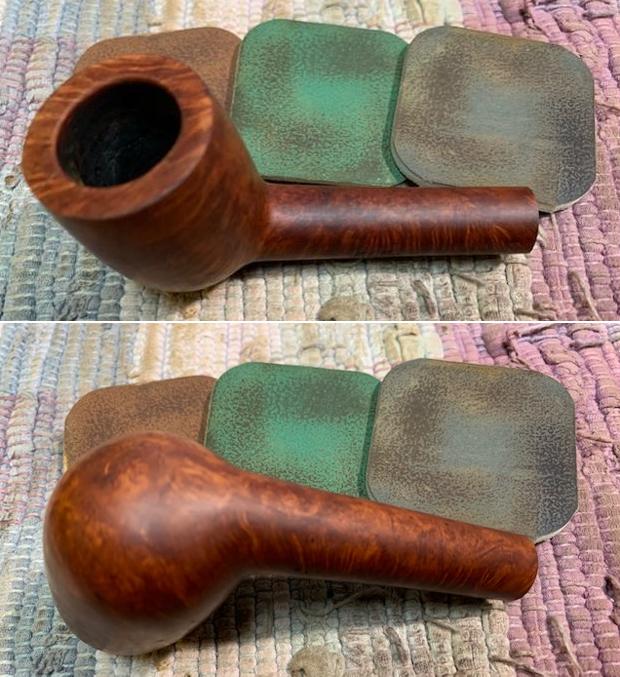
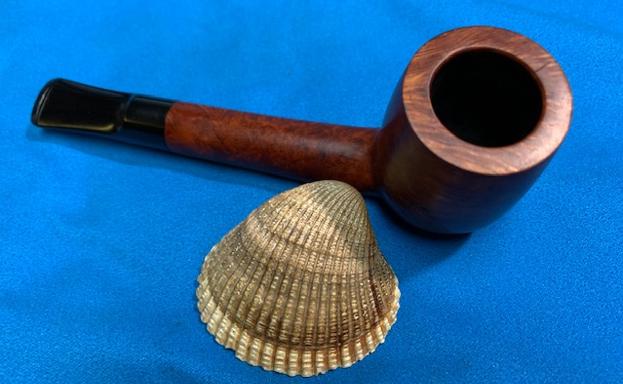
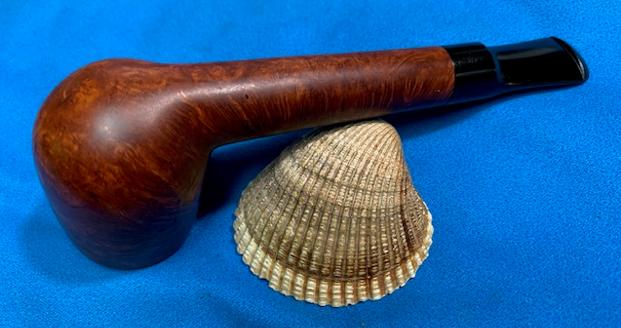
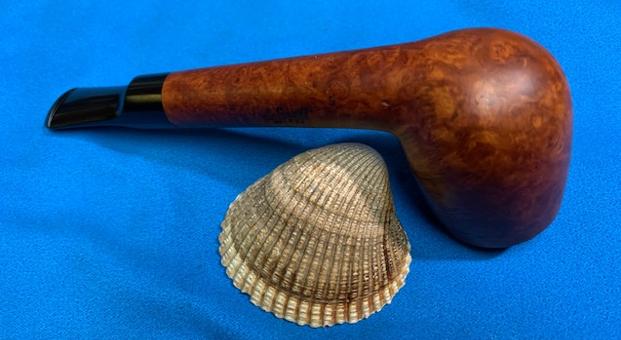
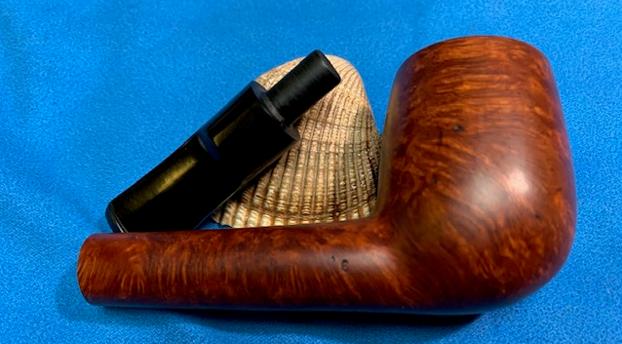
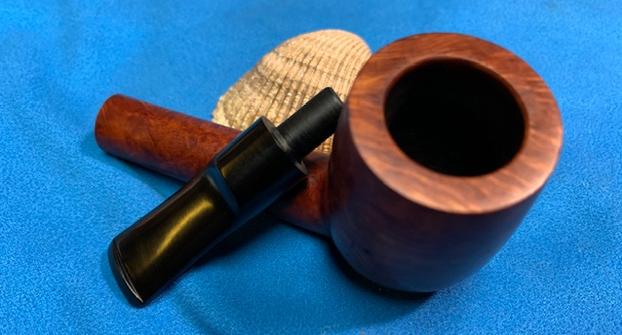
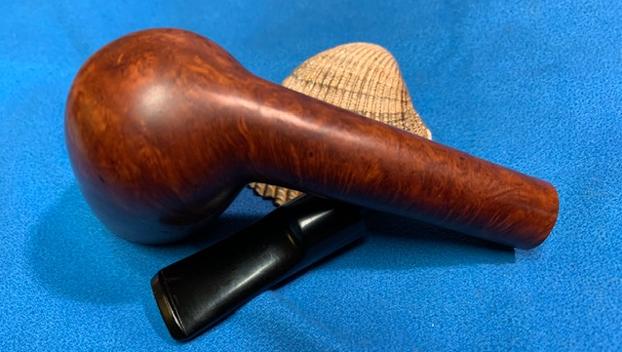
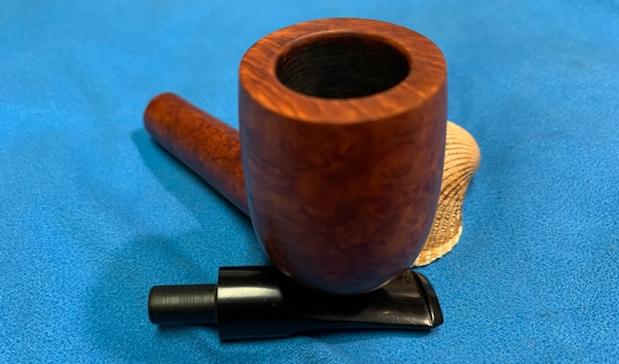
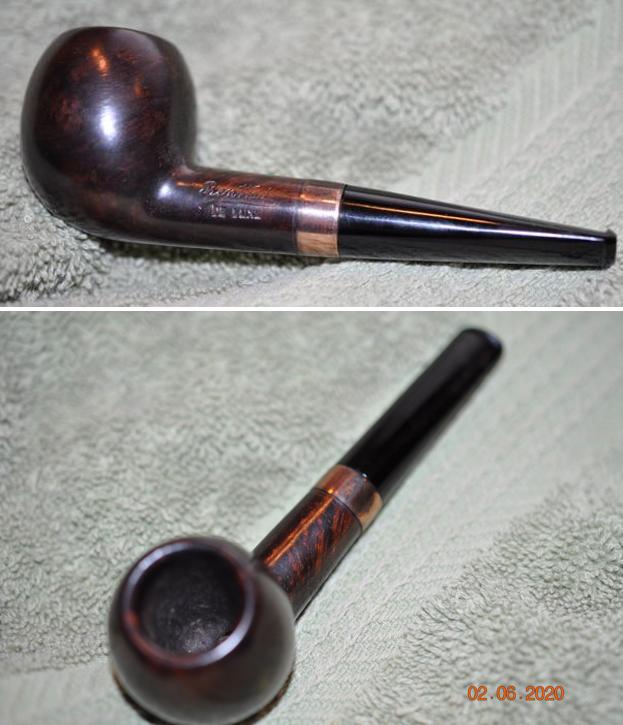
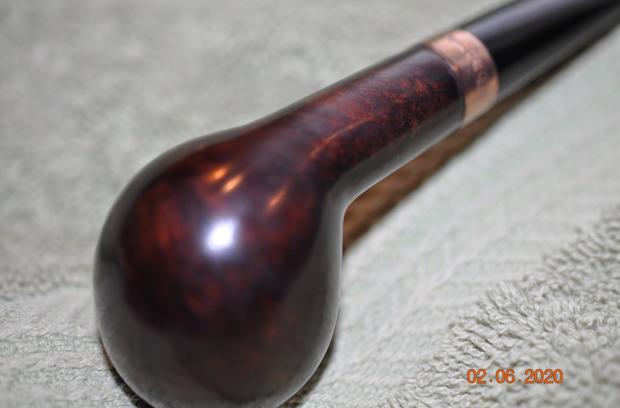
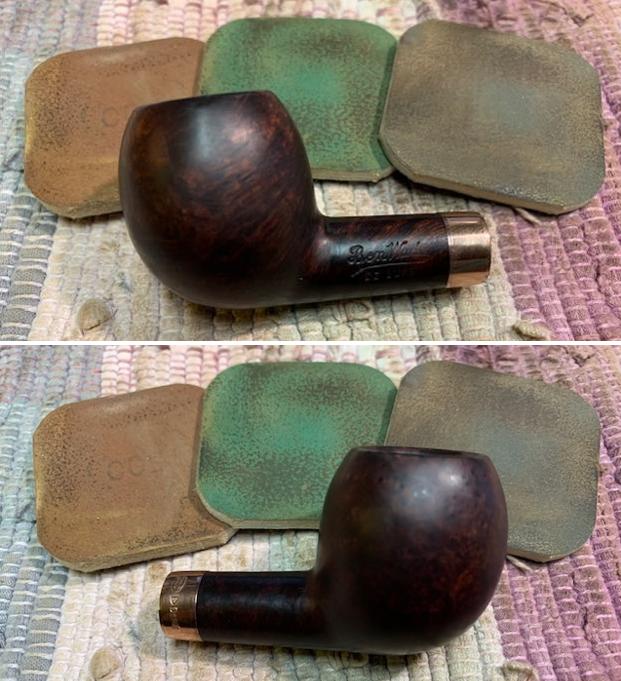
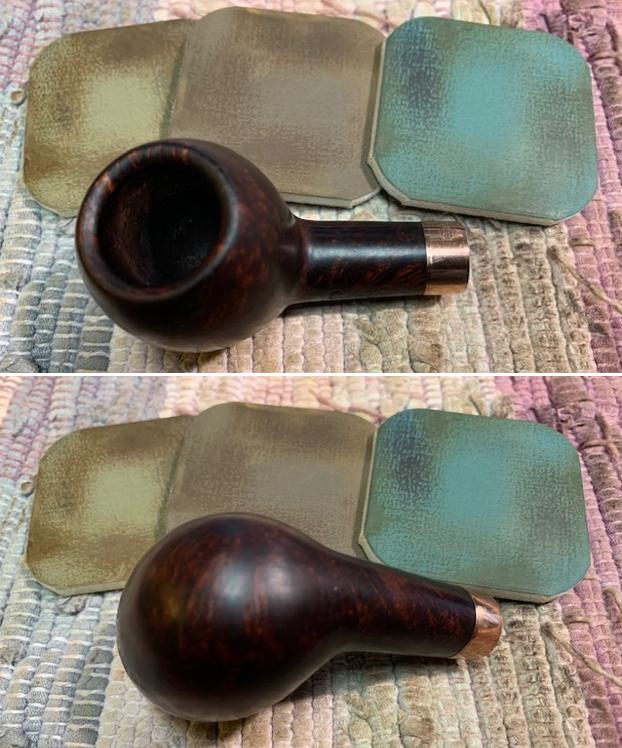
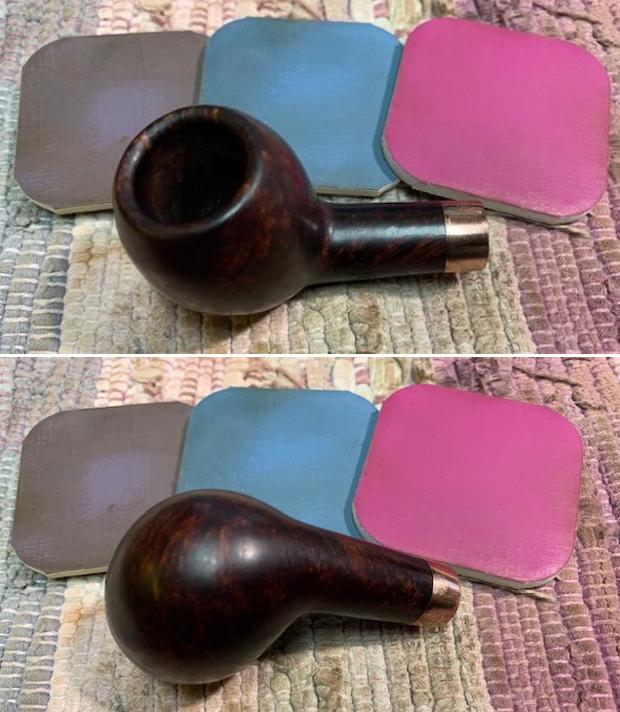
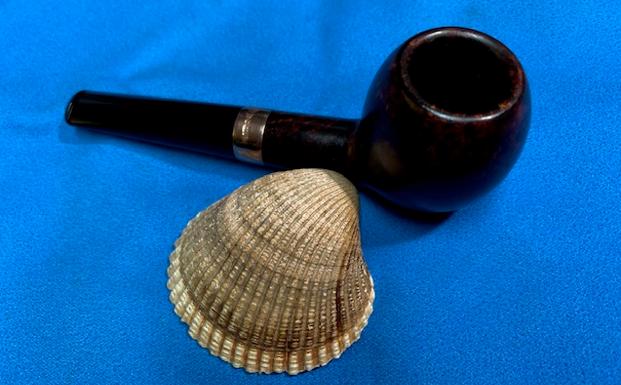
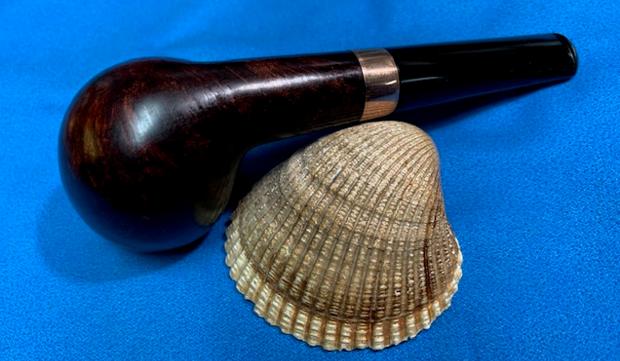
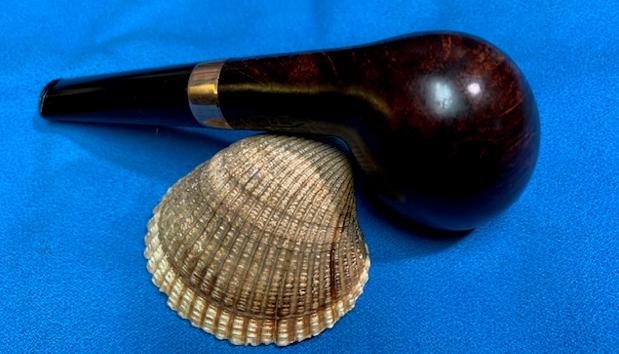
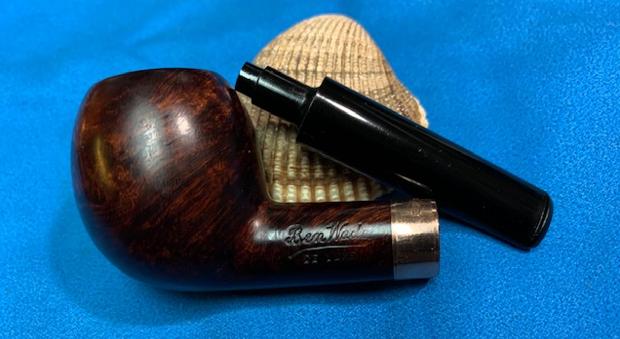
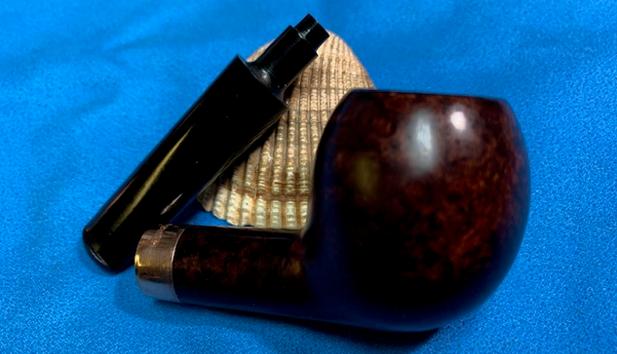
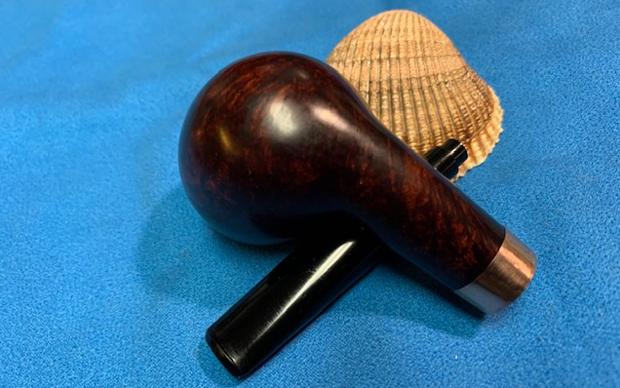
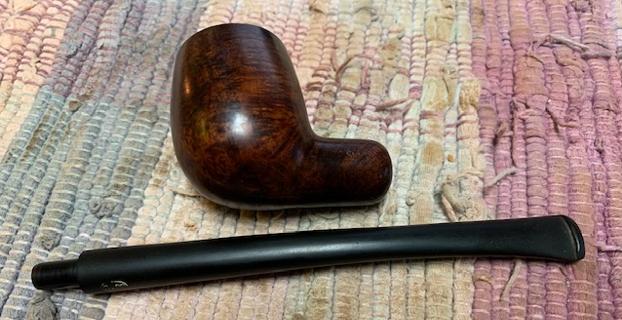
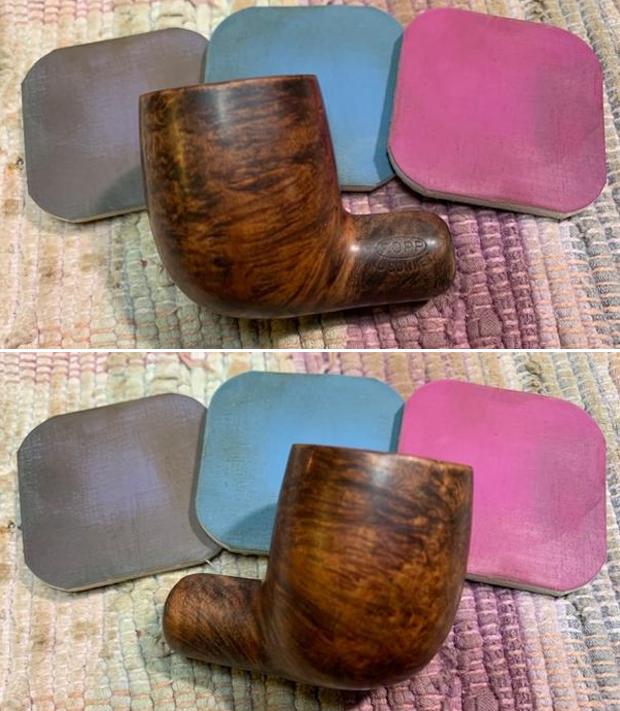
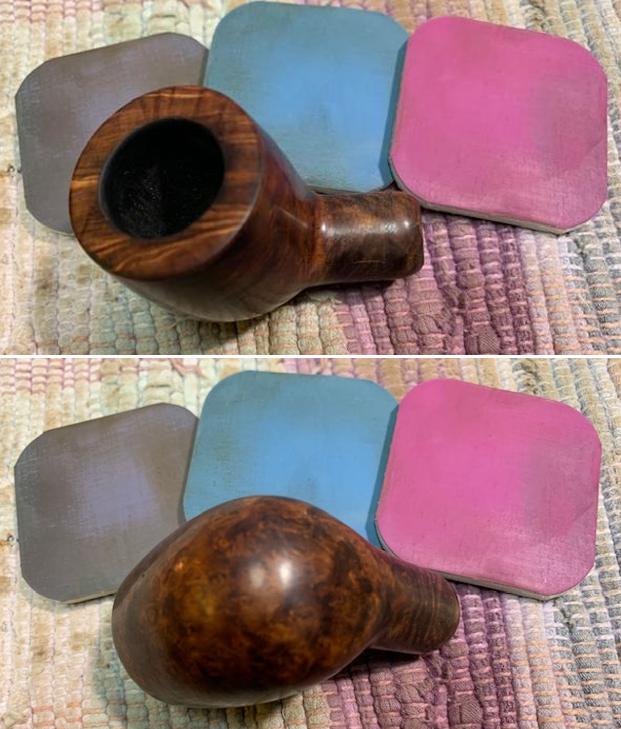
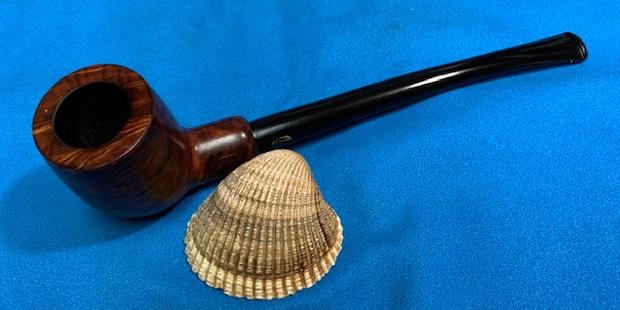
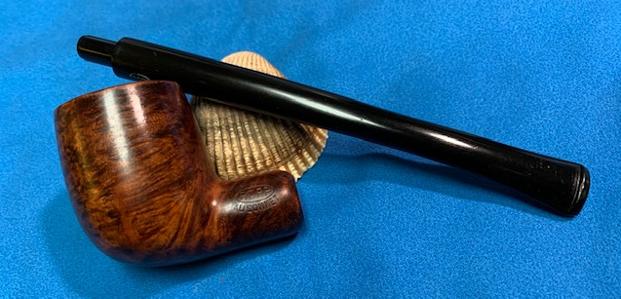
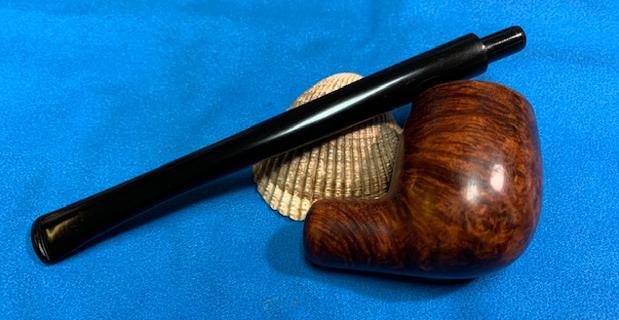
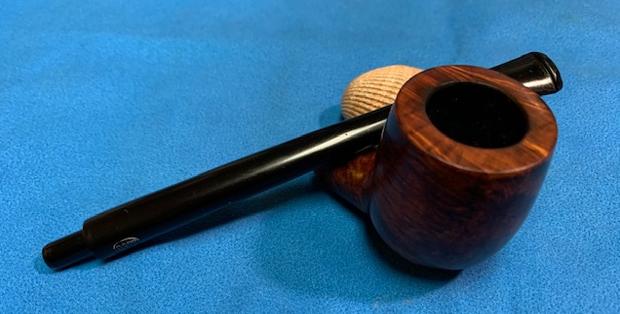
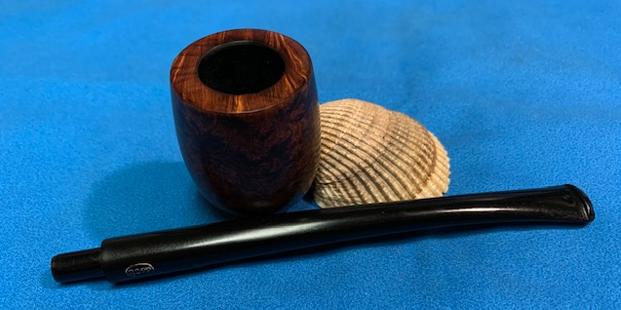
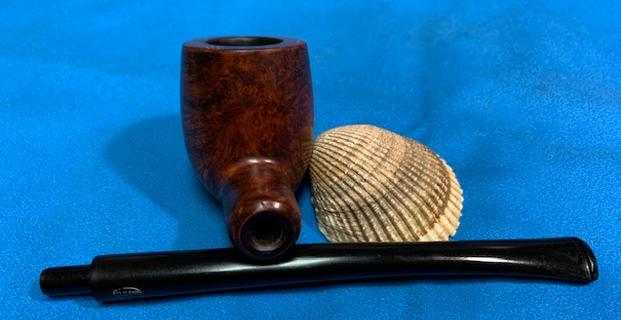
With the Lincoln London Style now on the worktable some pictures are taken go get a closer look. 
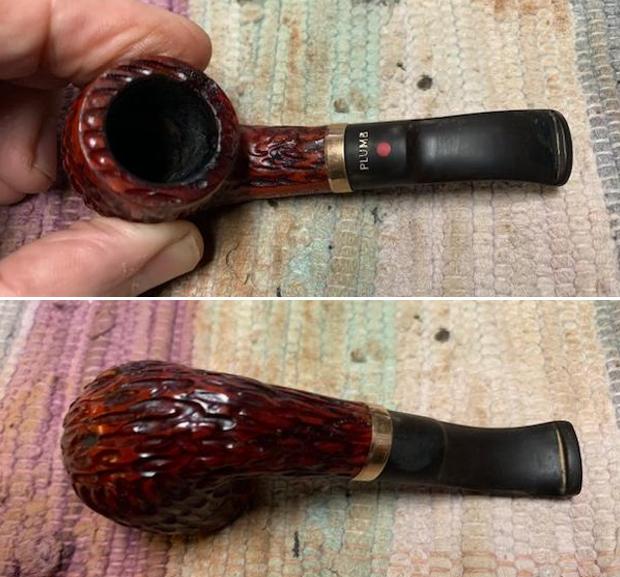
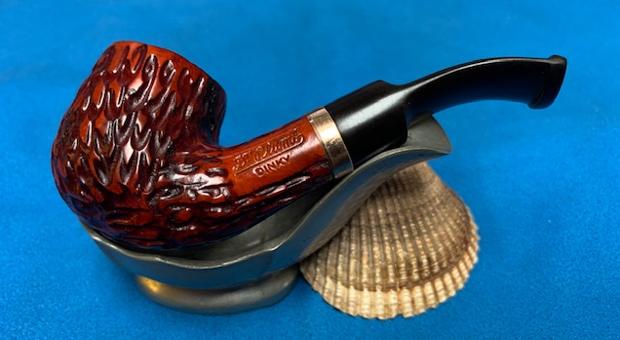
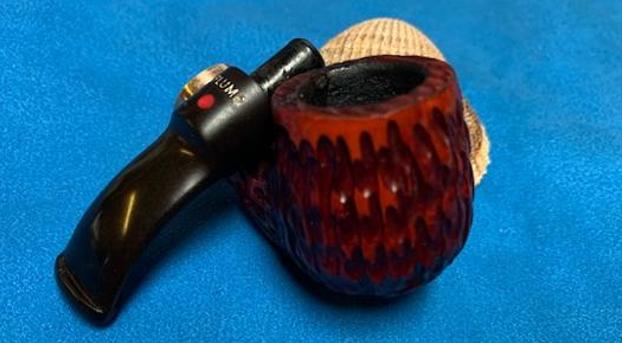
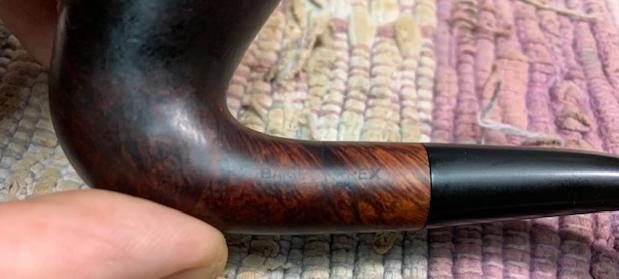
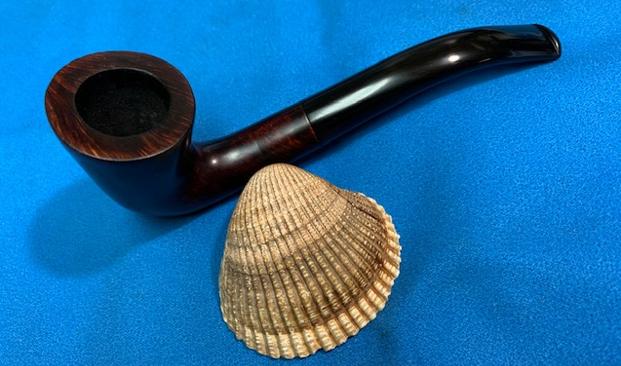
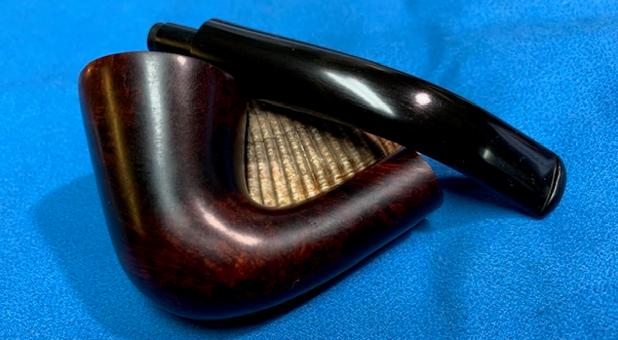
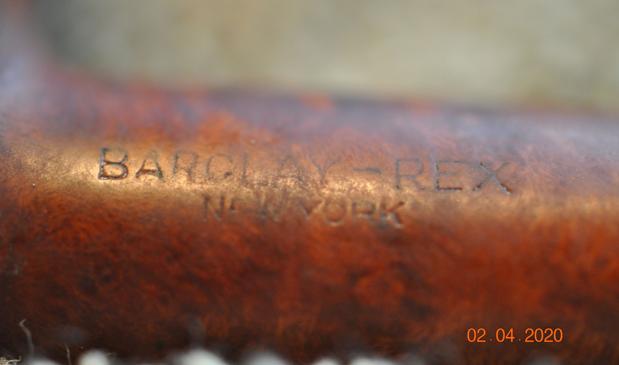
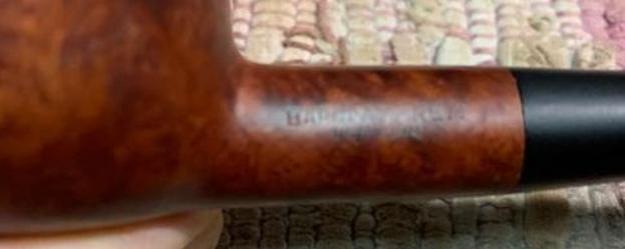
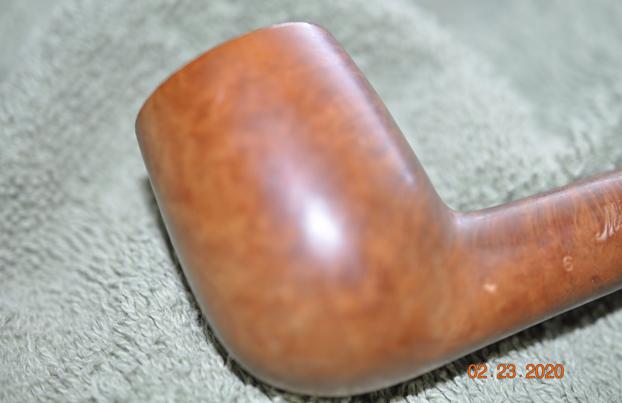
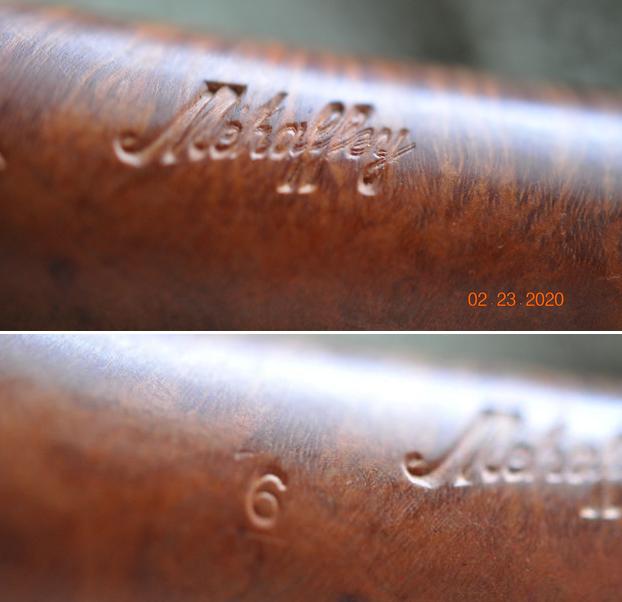
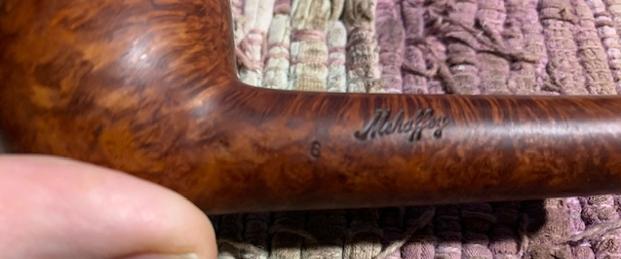
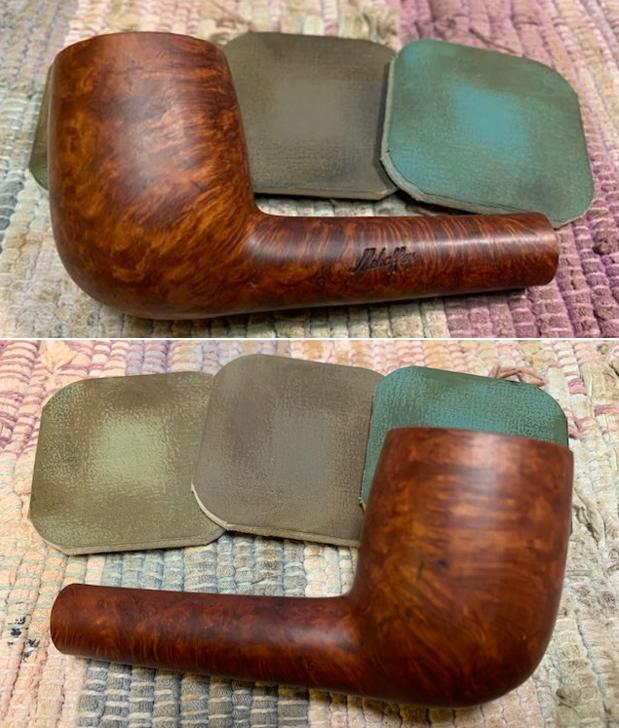
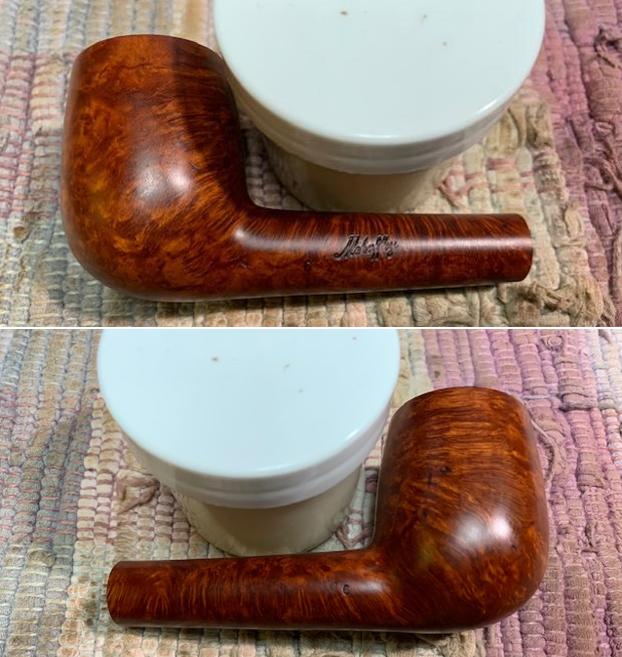
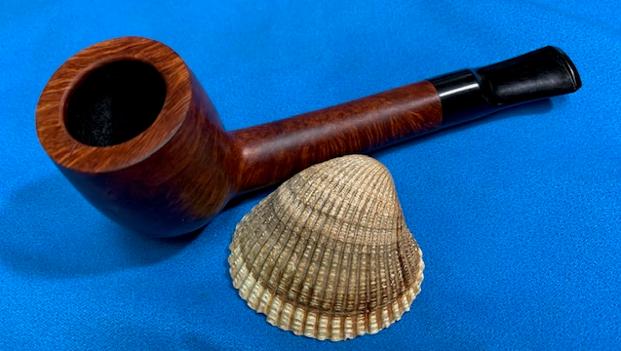
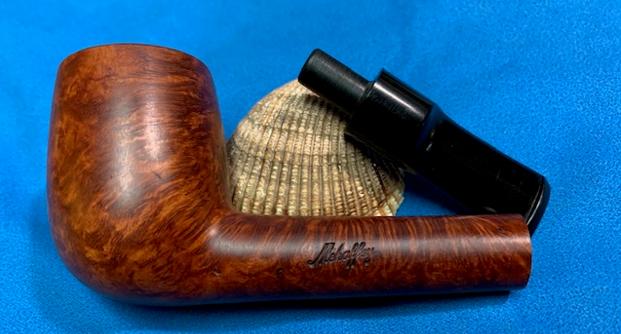
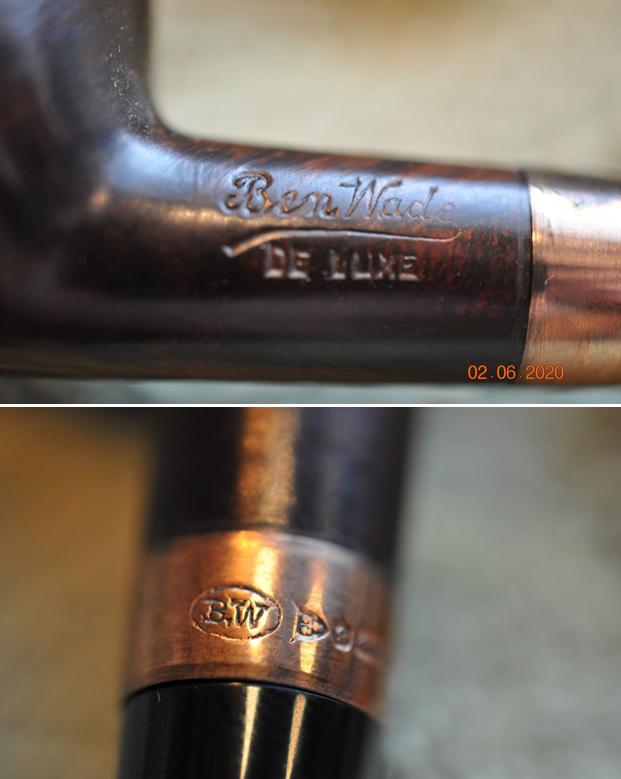
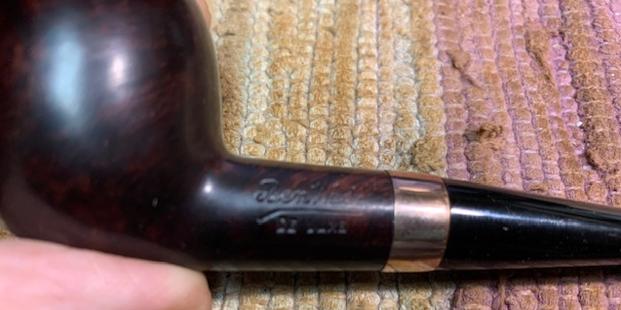
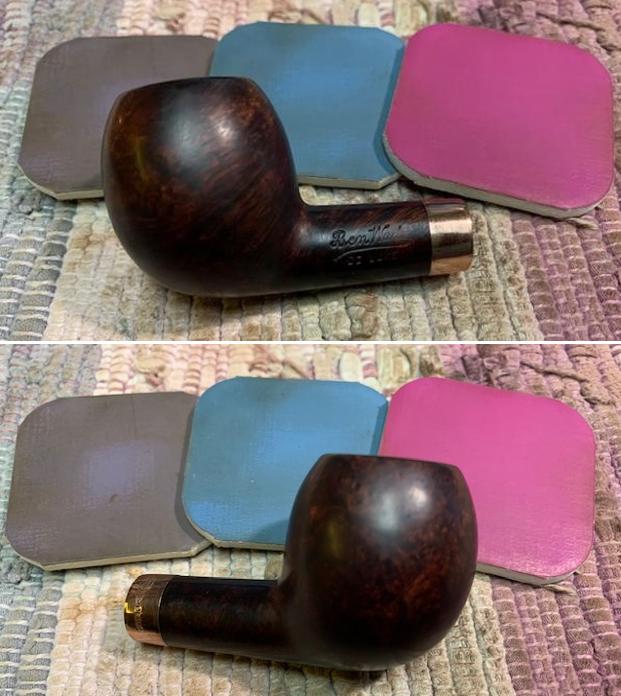
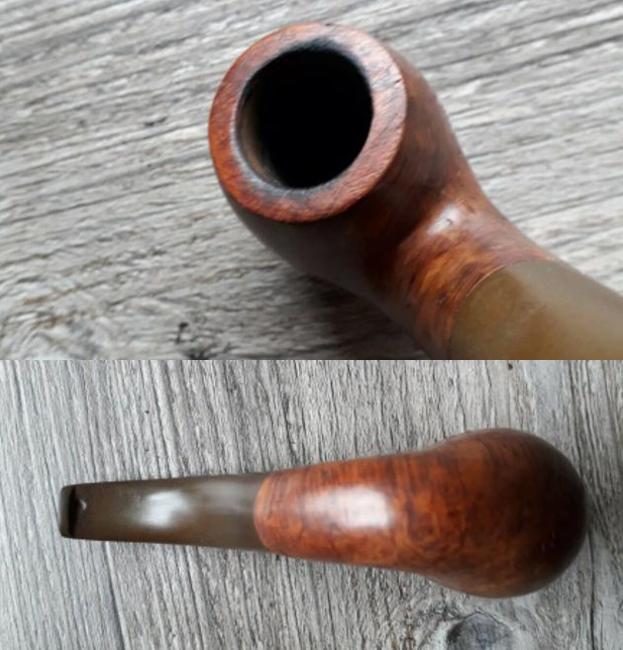
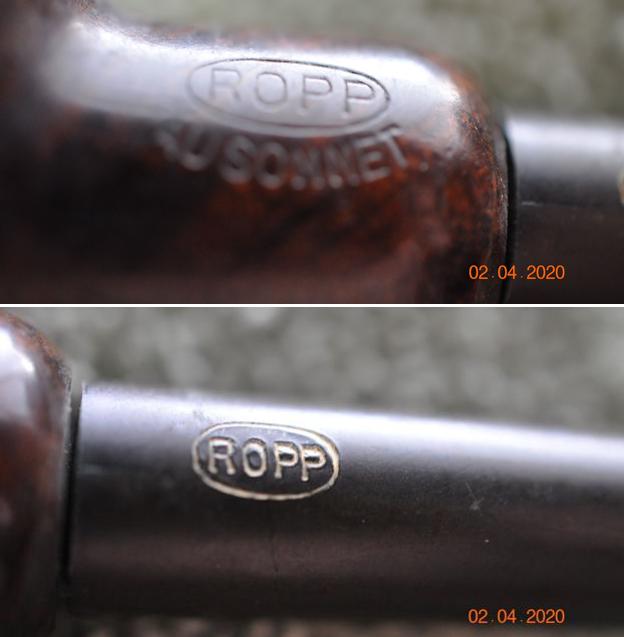
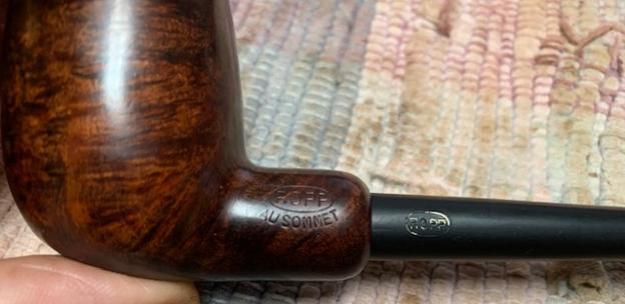
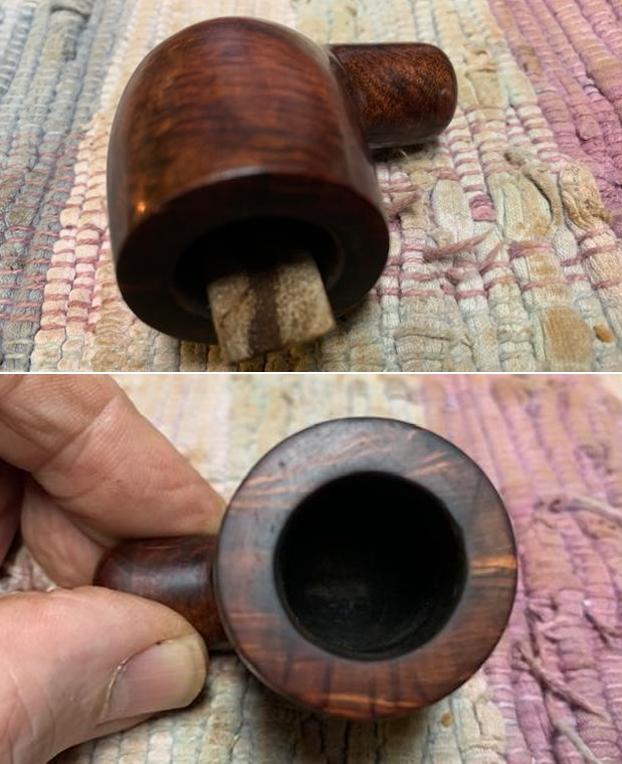
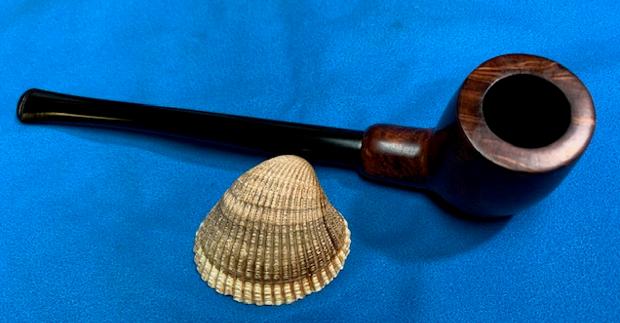
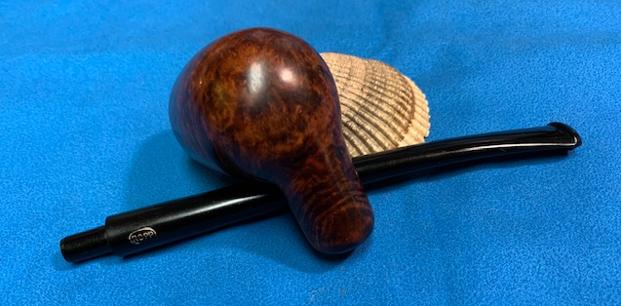
The nomenclature is stamped on the heel’s smooth briar panel.  Stamped is, LINCOLN over LONDON STYLE.  To the right of this is stamped, REAL SANDBLASTED [over] BRIAR.  
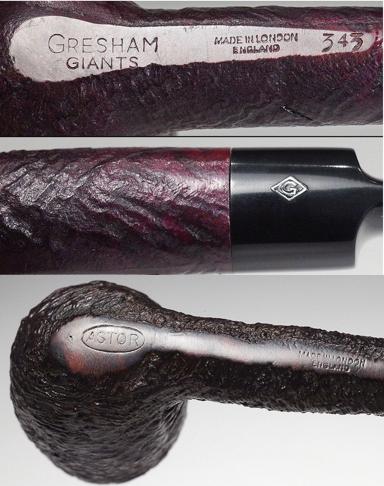
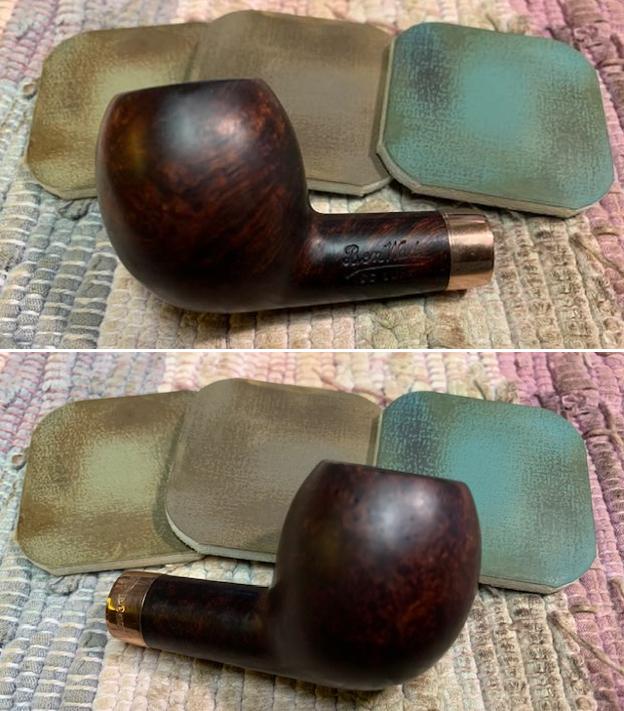
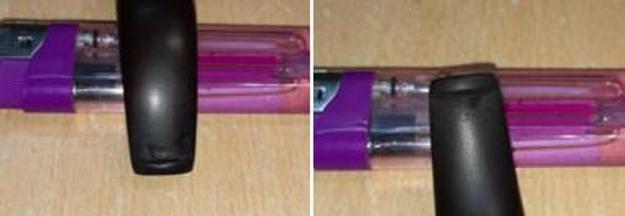
The Lincoln logo is interestingly stamped on the right side of the stem (the normal being on the left side) with an encircled *L* (star-‘L’-star).I cannot remember seeing a pipe logo stamped on the right side of the stem.  With my curiosity piqued, a quick search finds a few Lincoln pipes listed for sale here and there.  The confusion is captured here with this Lincoln Sandblasted at one site and the undiscerning seller simply leaving the logo upside-down where it should be – the left side!I have two Lincolns in my For “Pipe Dreamers” Only! collection.  I acquired both at the same shop in Burgas but on different trips. The two Billiards are similar with the right-sided stem logo stamping and ‘Real Sandblasted Briar’ markings.  The only difference is that the Lincoln still in the ‘Help Me!’ Basket One is marked: LINCOLN [over] LONDON MADE rather than the LONDON STYLE on the Lincoln on the worktable now.  The other small difference is that the current London Style is 6 inches in length whereas the London Made is 5 and 3/4 inches in length.

I turned to Pipehil.eu to find a lone listing for ‘Lincoln’.  The example shows a ‘London Made’ stamping and the stem logo stamping is also on the right side of the stem.  Looking to Pipedia, nothing turns up in the search bar for ‘Lincoln’.  Turning again to my prized copy of ‘Who Made That Pipe?’ by Wilczak and Colwell, a few leads emerge.The only UK leads referenced are W. H. Carrington, Sasieni, Higgs Bros (Lincoln IMP).  The W. H. Carrington listing is also referenced in Pipedia (See: Carrington).  The short article is:

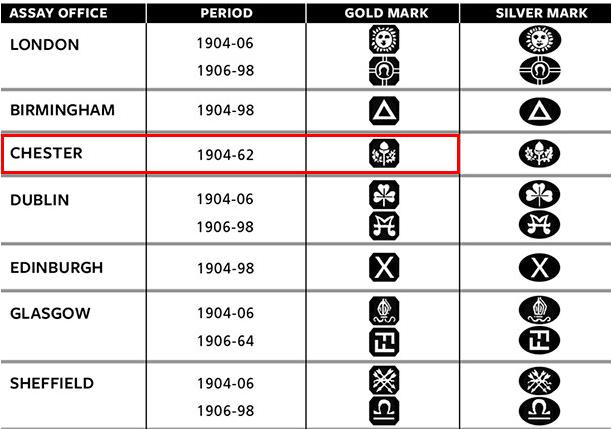
H. Carrington & Co. was founded by William Henry Carrington, and located at 53 Thomas Street, Manchester among several other addresses. Carrington lists his profession as tobacconist as early as the 1891 census, following in his father John Carrington’s footsteps. The firm first registered a silver hallmark in Chester in 1888 and in Birmingham’s Assay Office in 1891. Carrington pipes in both briar and meerschaum with silver have been seen marked “W.H.C.”.

H. Carrington was in operation for nearly a century before going out of business.

The pictures shown in this article point to early examples of hallmarked silver fitments (late 1800s/early 1900s).  The article references that the company functioned for a century before closing.  The first hallmark was registered in 1888 which would suggest that the company produced pipes until the 1980s.  The company is described being in Manchester whereas the examples of Lincolns I have indicate a London origin.  I did find other examples of WHC marked pipes listed (see: LINK) but could find no current description of the W. H. Carrington & Co. nor any connection with Lincoln.

Looking for a Lincoln connection to Sasieni likewise resulted in nothing.  The Higgs Bros referenced pointed again to the late 1800s hallmark information.  Lincoln is mentioned but nothing more.  Interestingly, other listings on the same page would suggest that ‘Lincoln’ in the listing is referencing a place of origin rather than a line – Lincoln, England.  This clipping shows the scant information but with the Lincoln, England, marked as the origin.One additional piece of anecdotal information I found is a description of a Lincoln for sale in Smoking Pipes.com showcasing a Lincoln London Made Sandblasted Billiard:

A nice, classic Billiard can be a work horse of a pipe. This Lincoln (most likely named after the town in England) should prove a good smoker when the time allows. – Adam Davidson

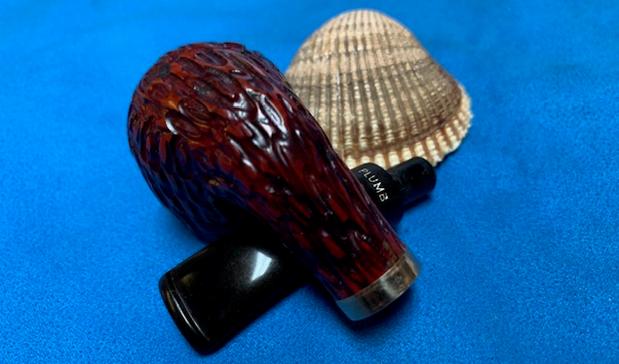
The research is scattered regarding a concrete understanding of the company origin of the Lincoln on my worktable.  What is consistently understood is that the only examples of Lincolns are classic blasted Billiards.  They consistently present the Lincoln stem logo on the right side of the stem and they are stamped London Style or Made.  The feel of the pipe would not surprise me that it was produced in the 60s, but this is only a guess.

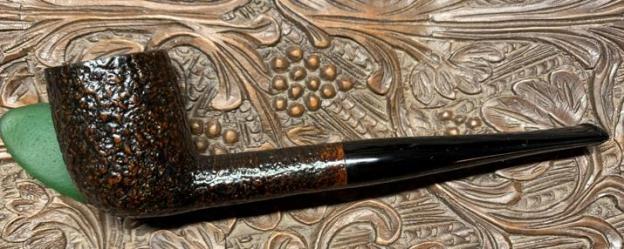
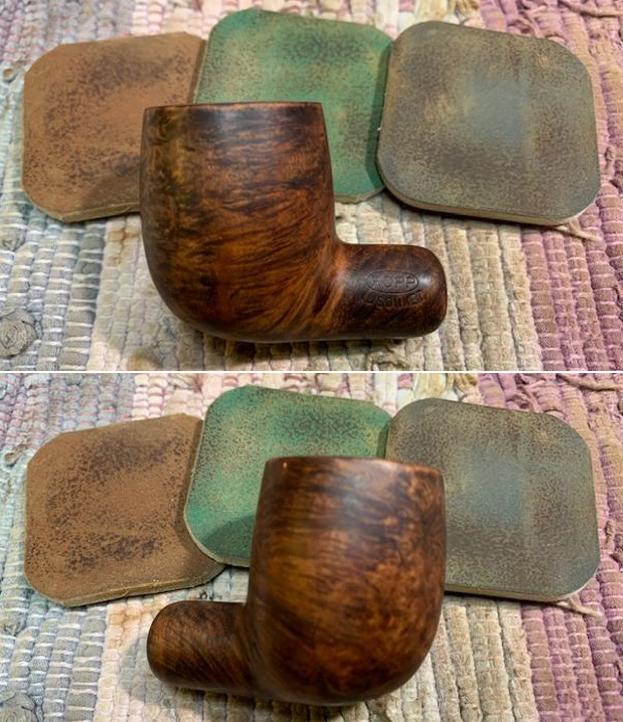
Looking now more specifically at the blasted Billiard on the table – the add above describes well the pipe as a “work horse of a pipe”.  Billiards are the heavy lifters of pipes in the pipe world, no doubt.  When you add the blasted surface, it is almost like adding ‘draft horse’ to the description – horses that are exceedingly strong and pull the loads that others can’t.  So, here is my horse version of this Lincoln Blasted Billiard (LINK) on my worktable!

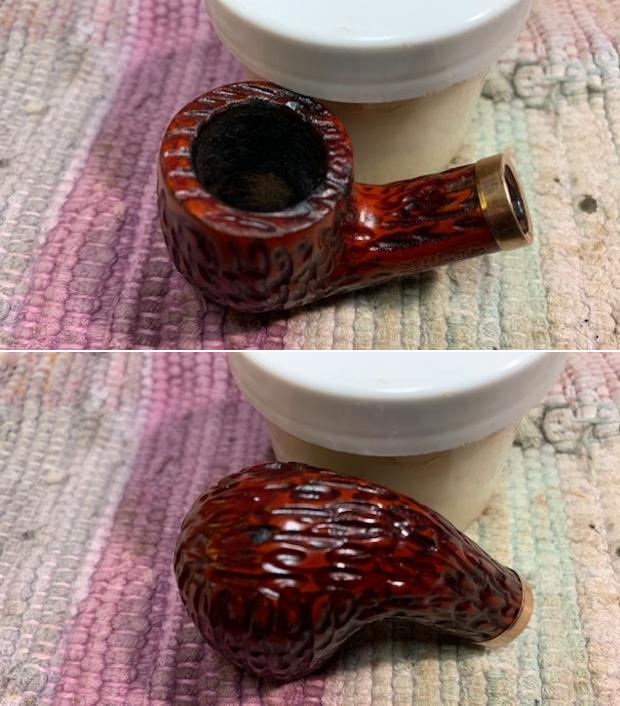
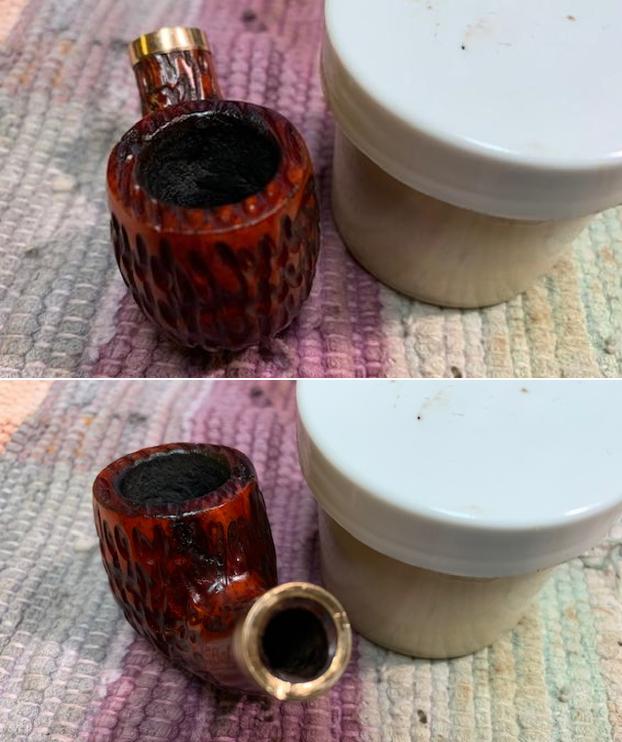
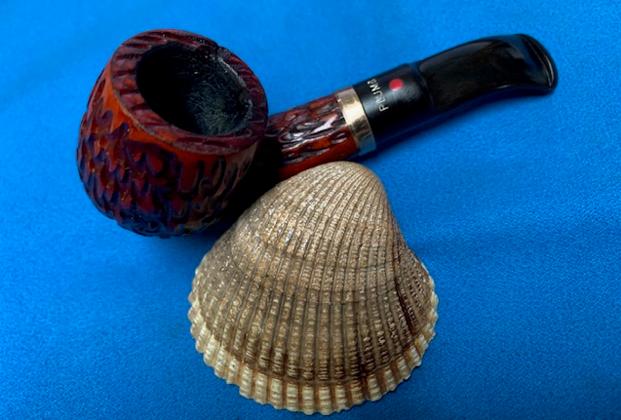
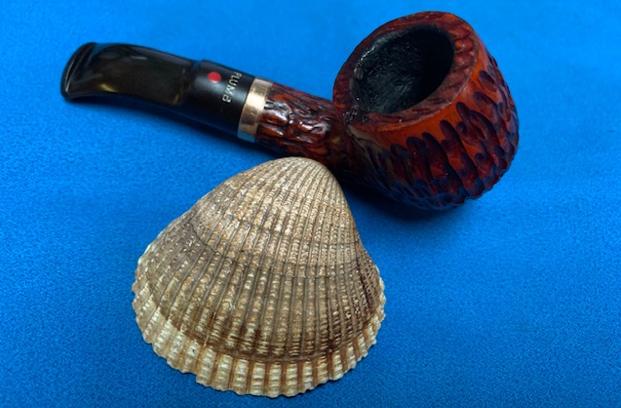
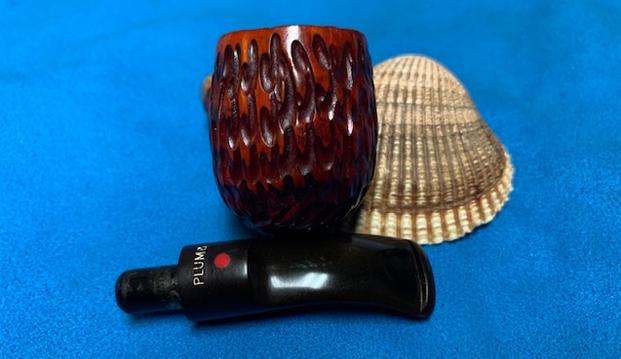
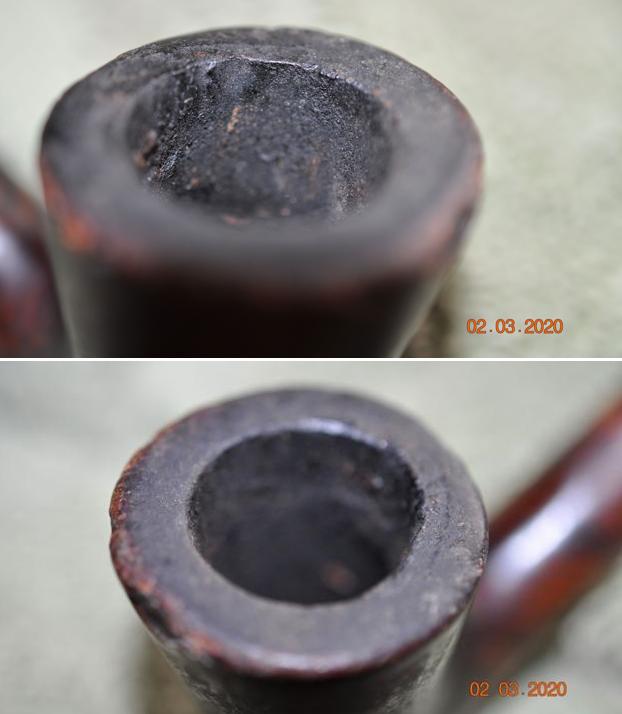
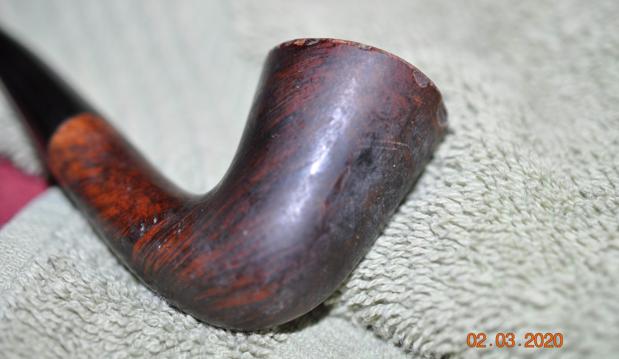
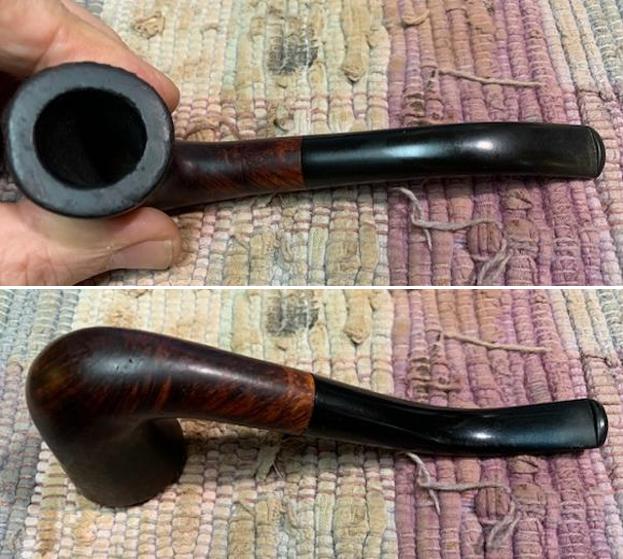
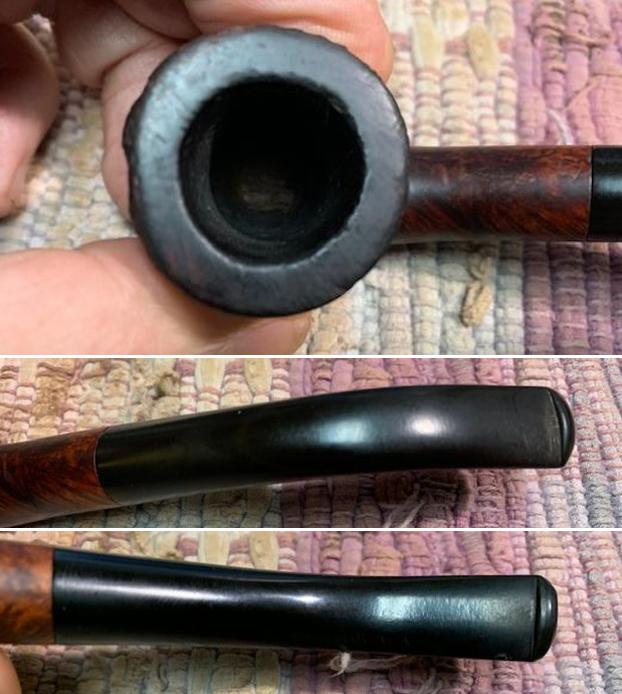
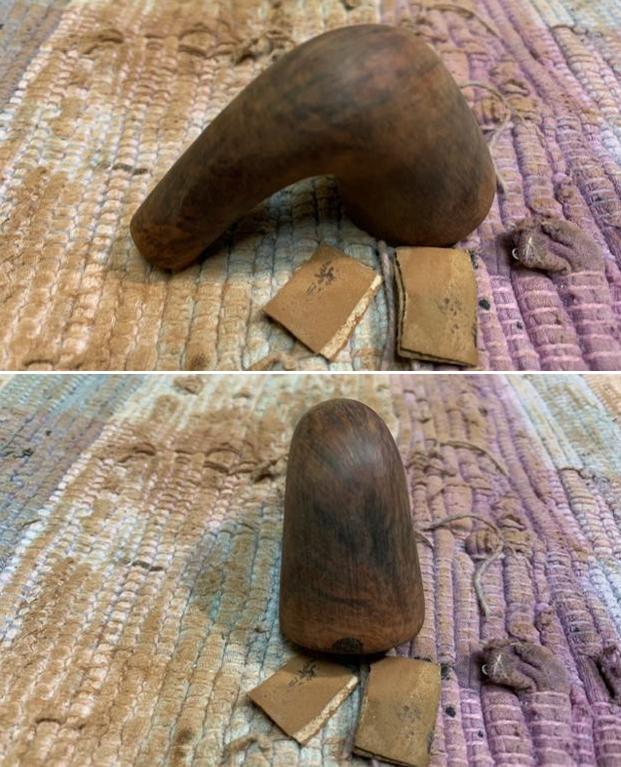
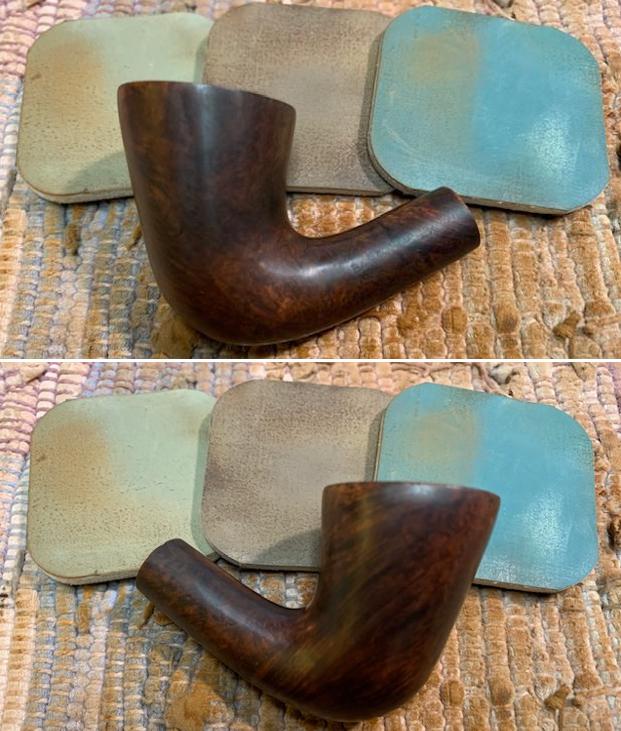
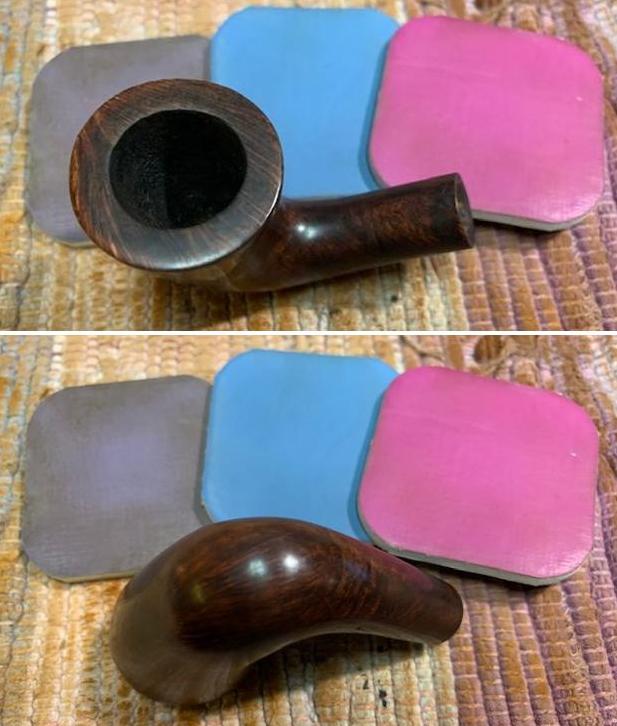
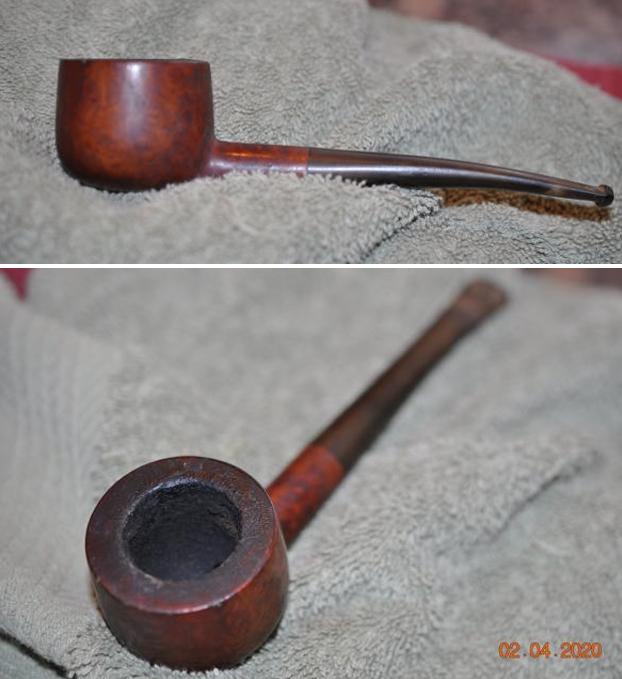
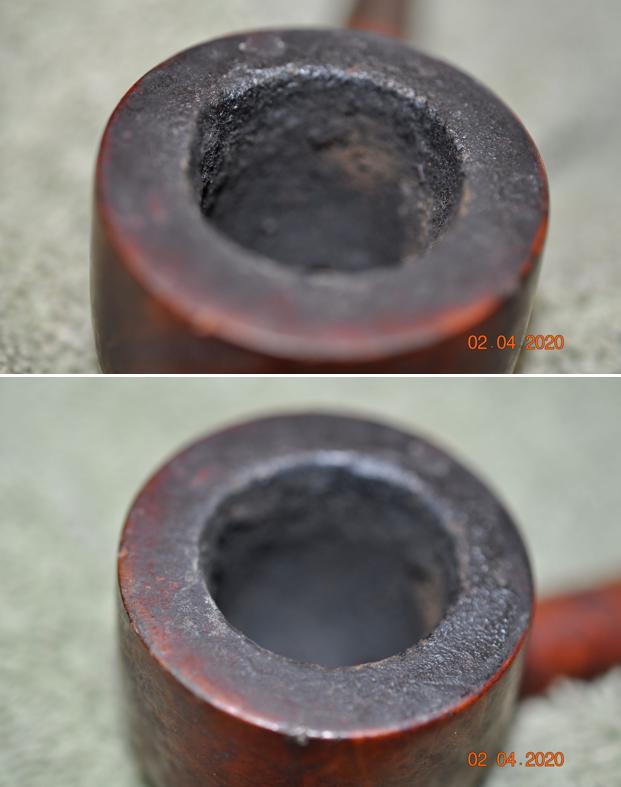
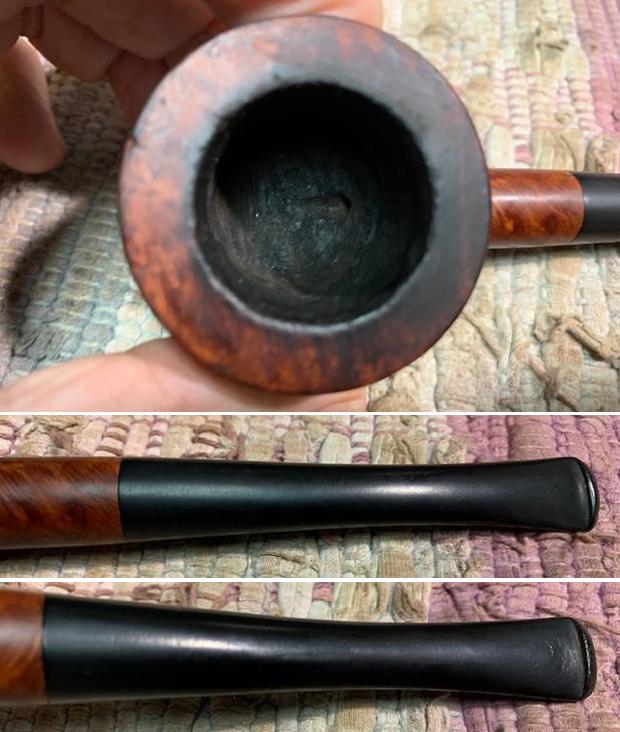
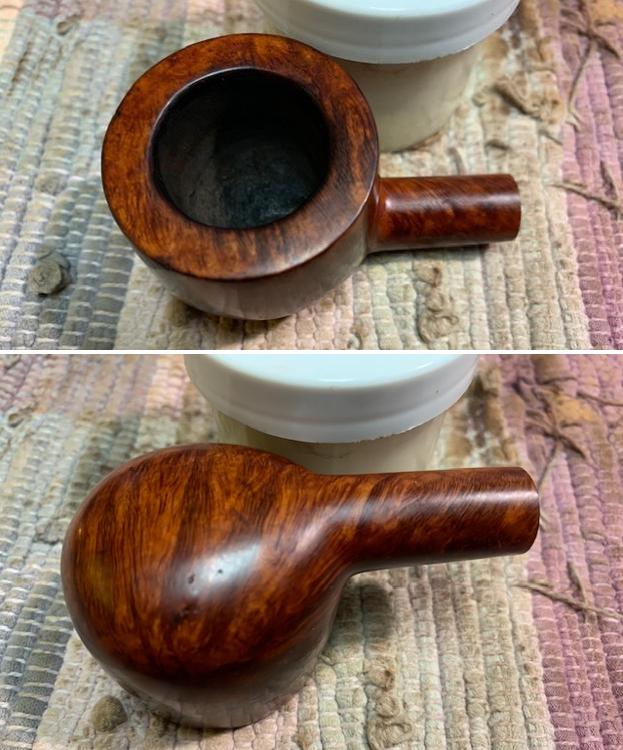
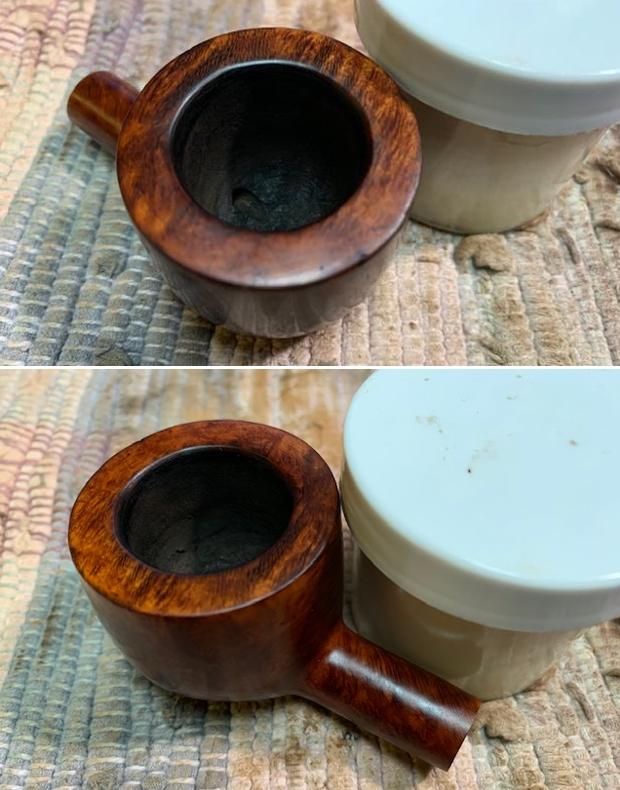
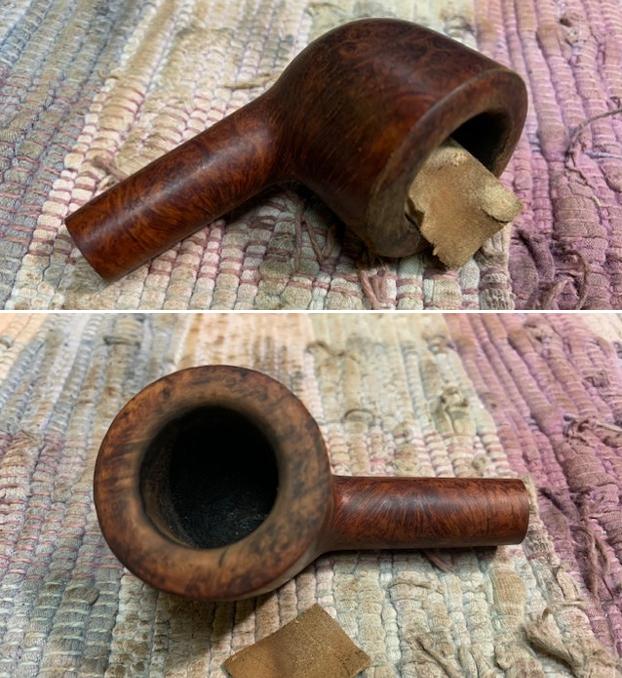
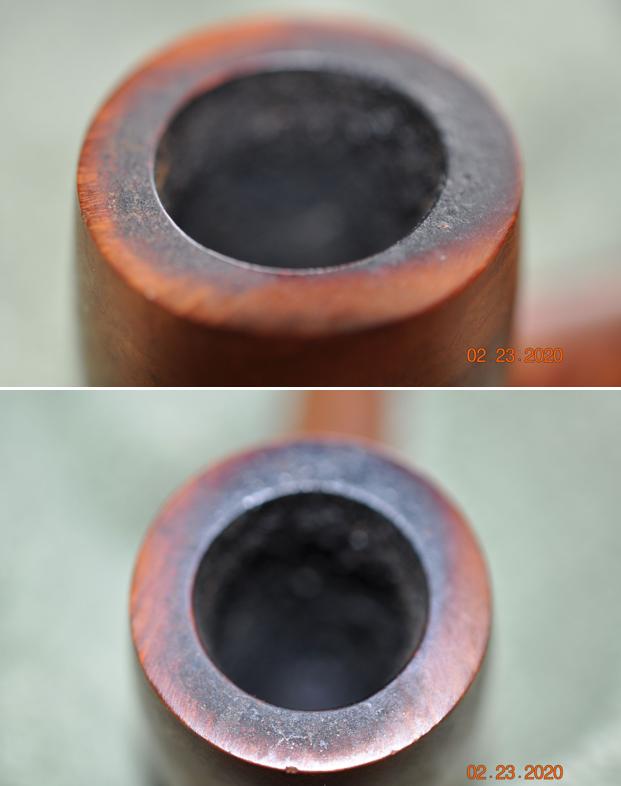
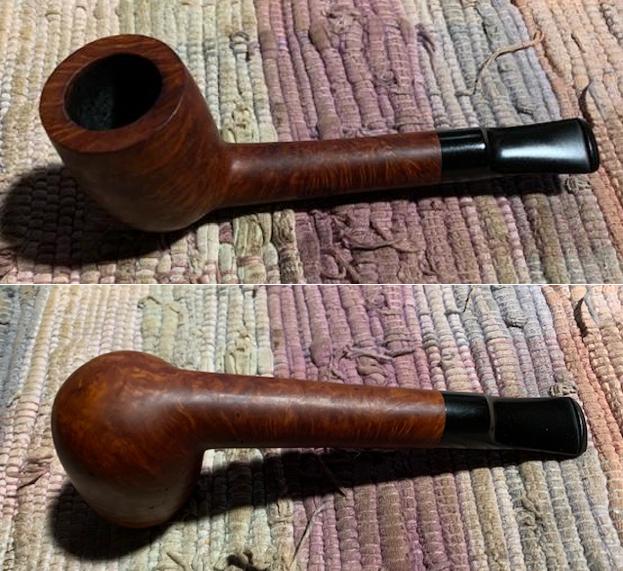
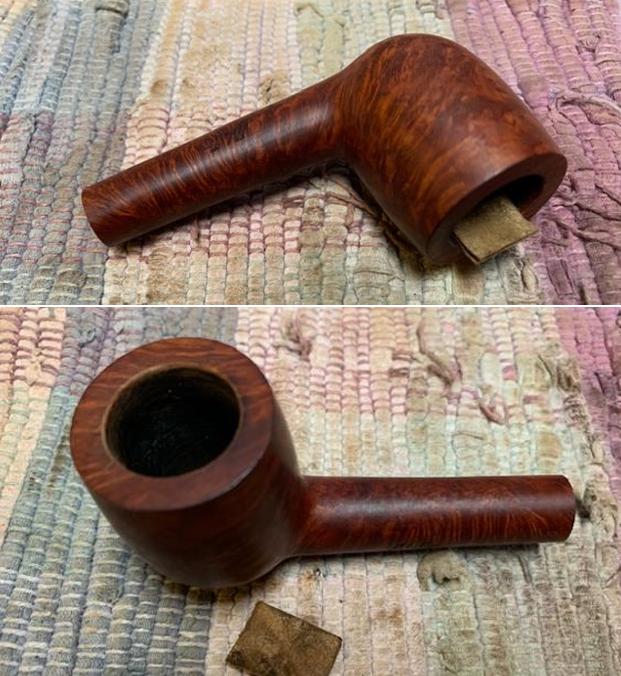
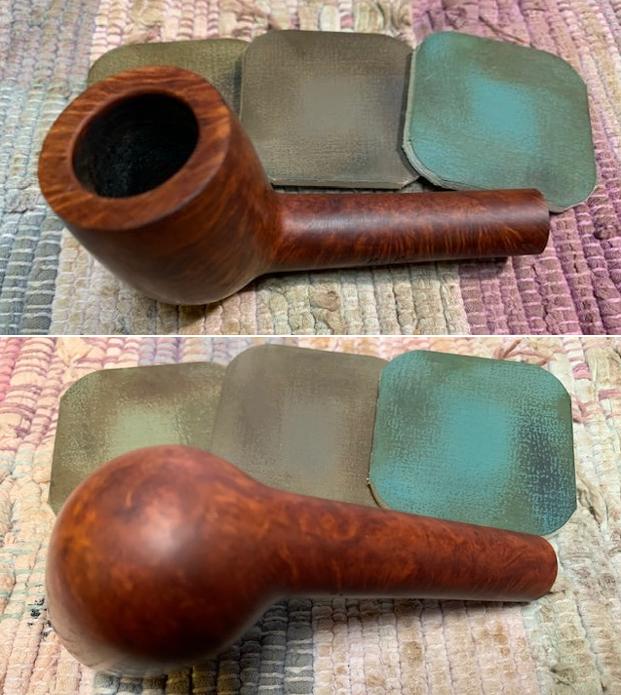
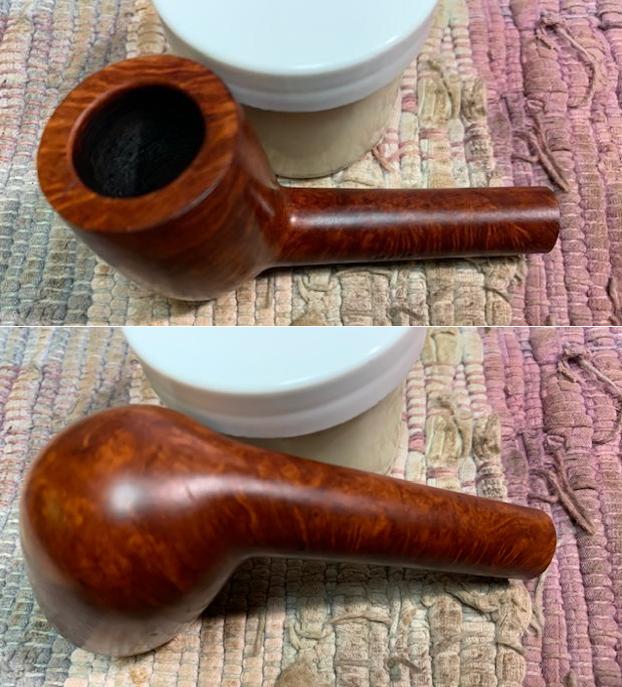
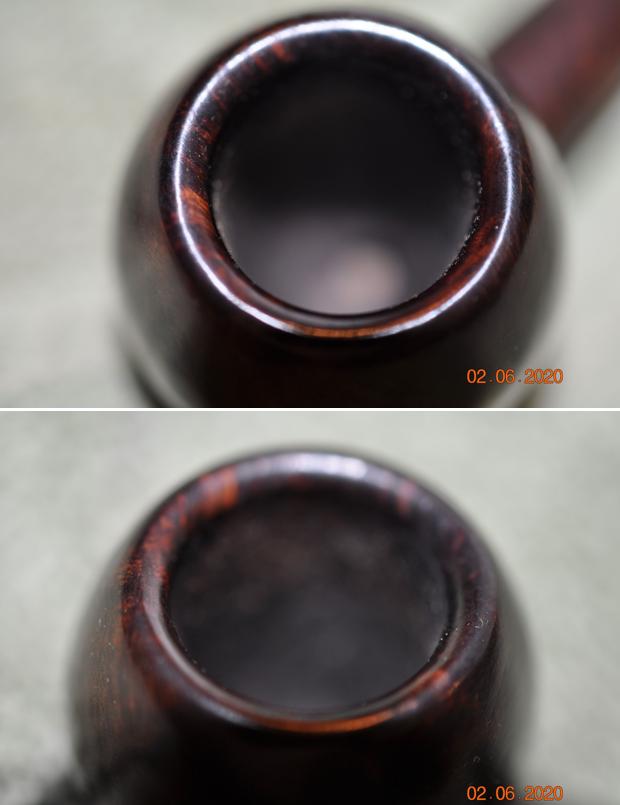
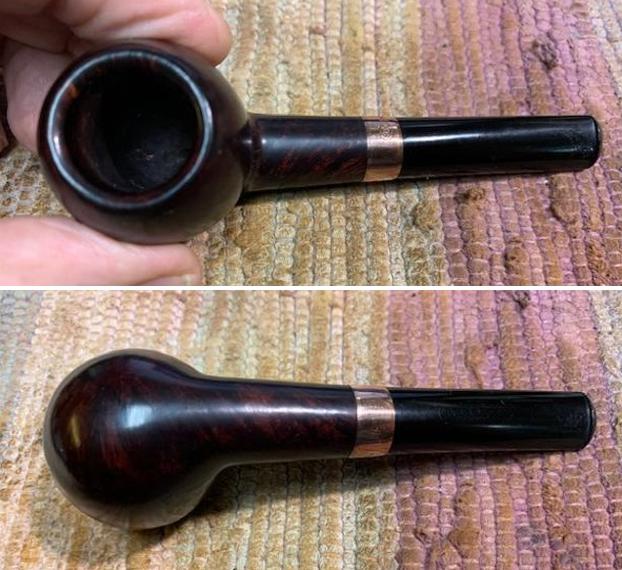
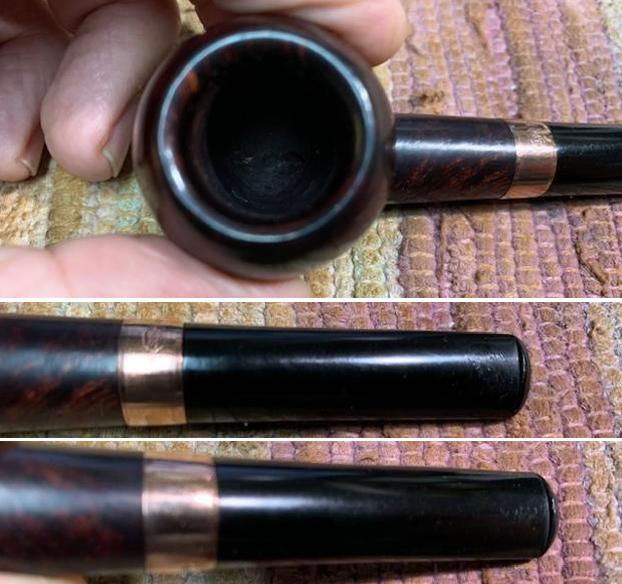
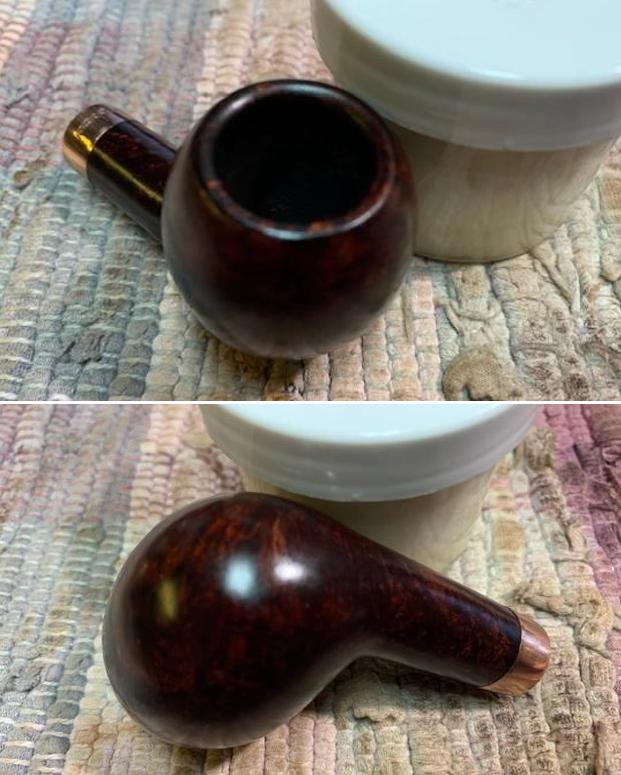
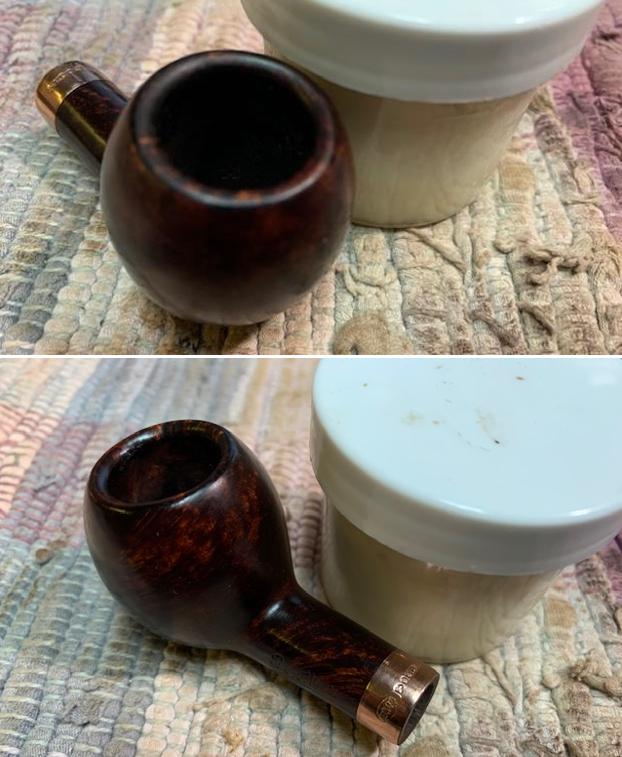
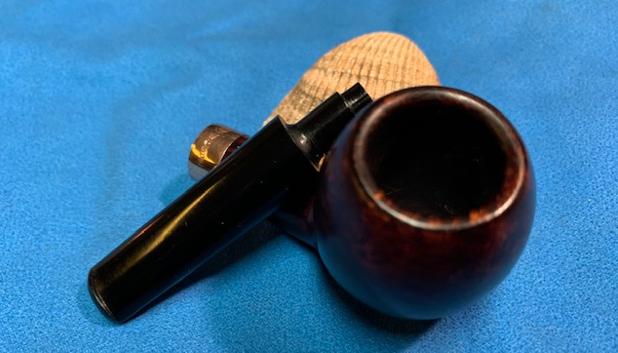
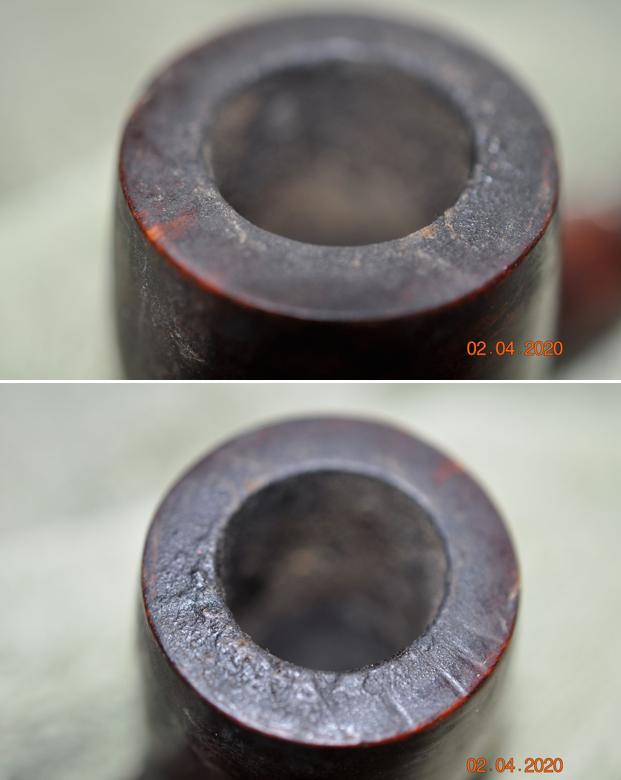
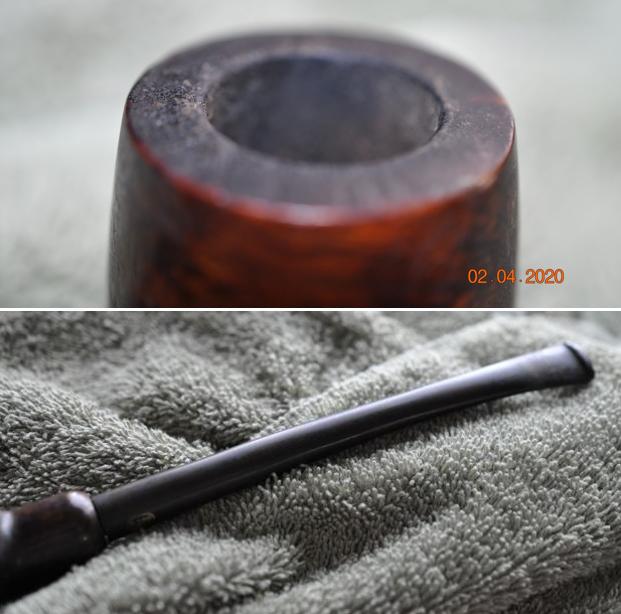
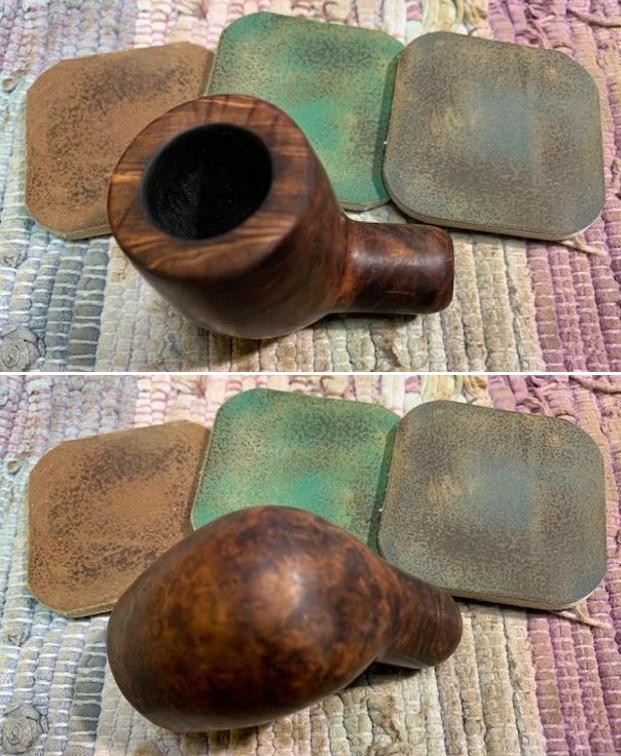
The chamber has a thick cake build up which needs to be removed to allow fresh briar to have a clean start.  The picture is lightened to allow the chamber to be seen.The rim is worn around the edges showing raw briar and on the rear of the outer rim.  This shows a deterioration of the briar – it slopes a bit showing the damage. The blasted surface is exceptional – it’s a genuinely nice classic blasted surface.  The surface is dirty and grimy and needs cleaning.  
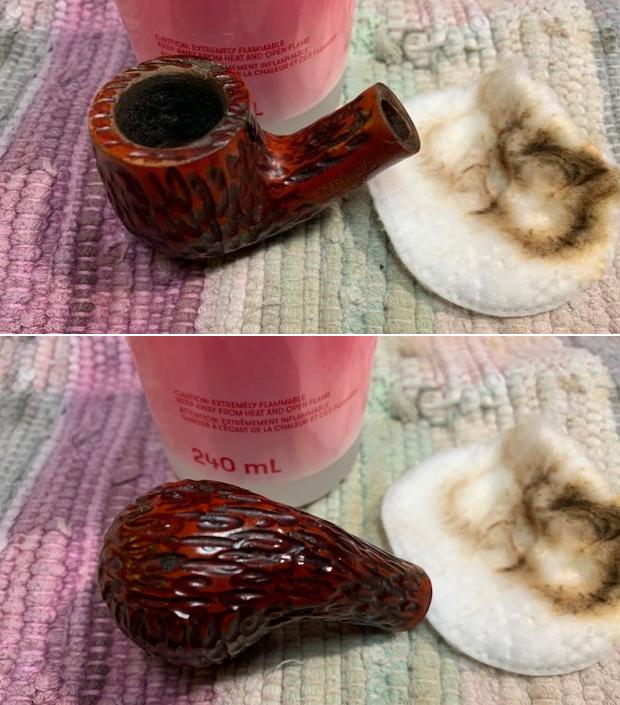
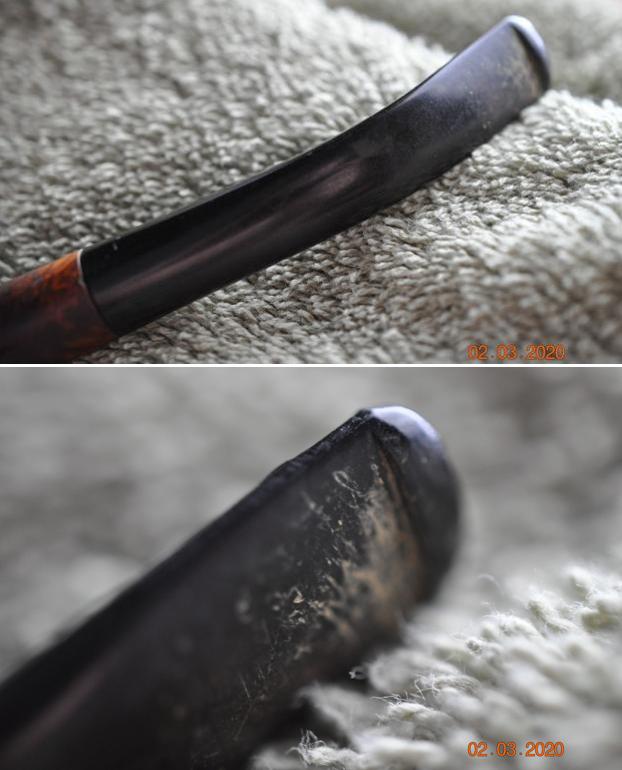
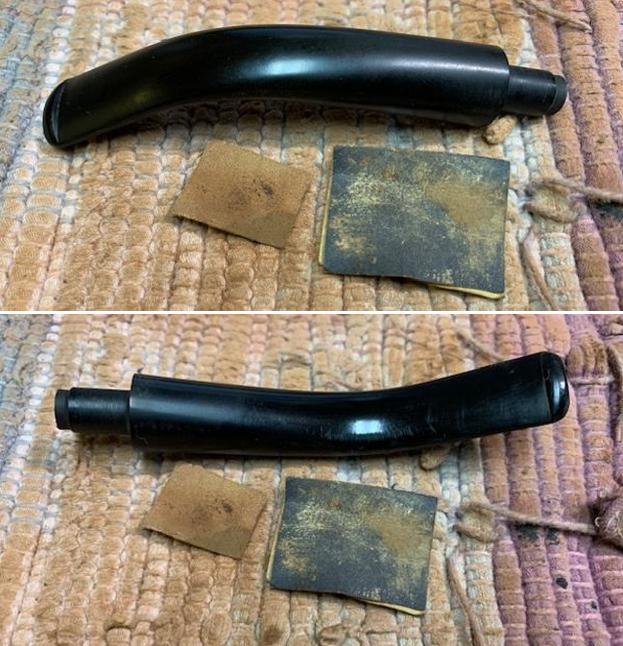
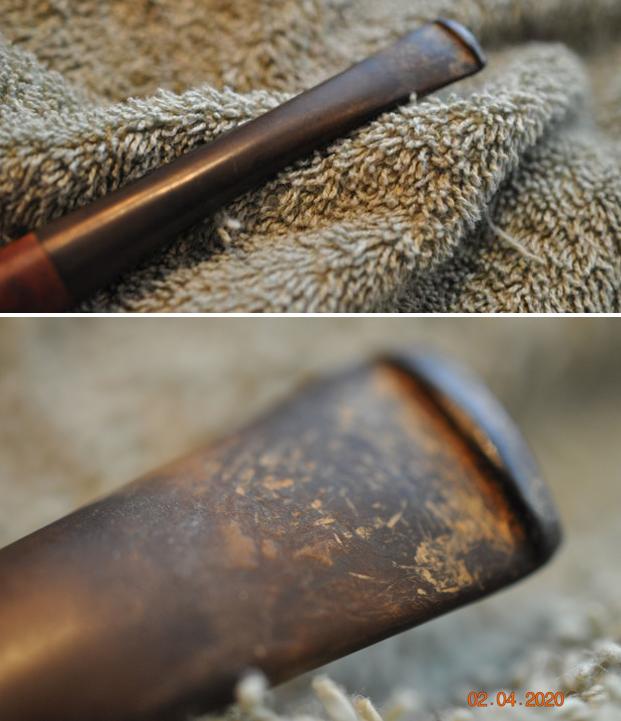
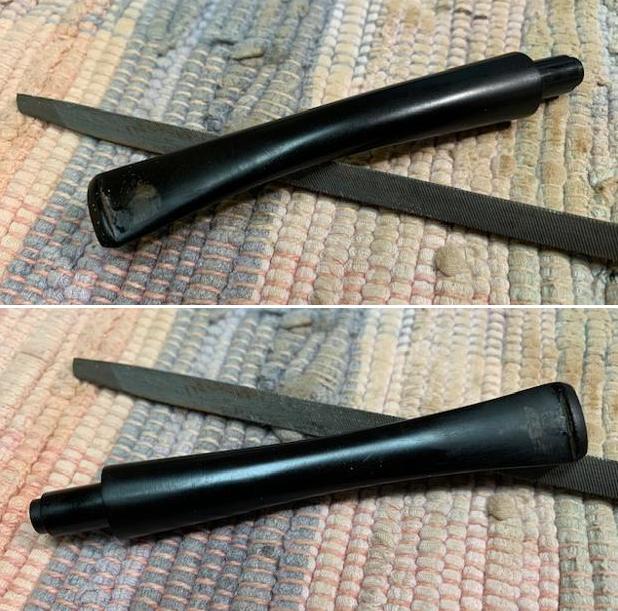
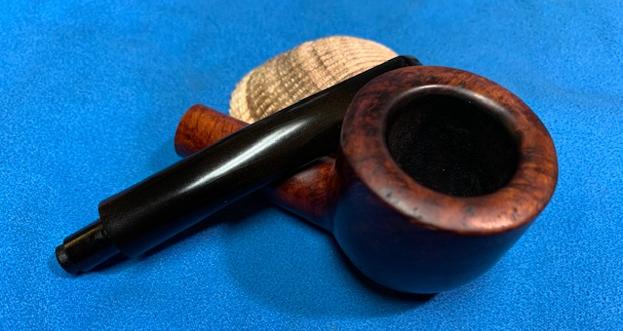
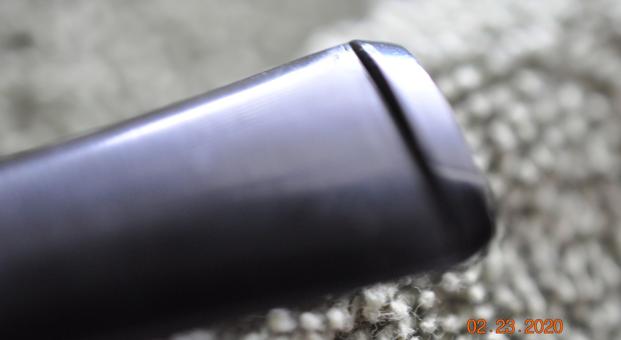
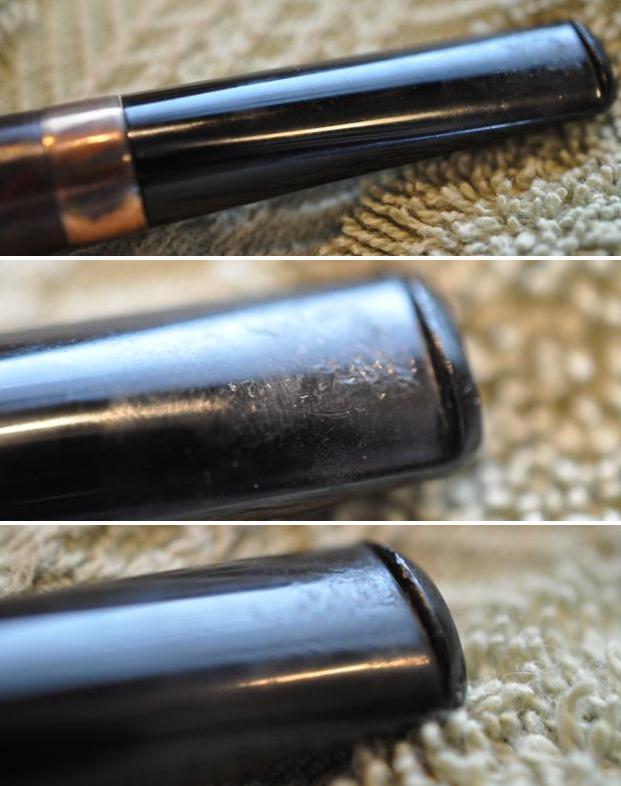
The stem shows tooth chatter on the bit and oxidation.To begin the recommissioning of the Lincoln London Style, the focus is on the stem.  First, the stem airway is cleaned using several pipe cleaners dipped in isopropyl 99%.  It was dirty and took a bit of time.
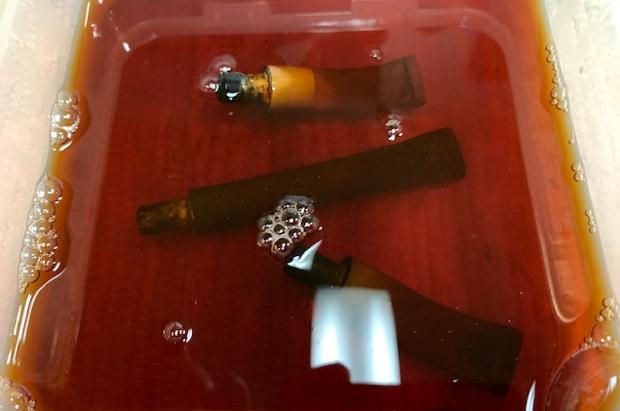
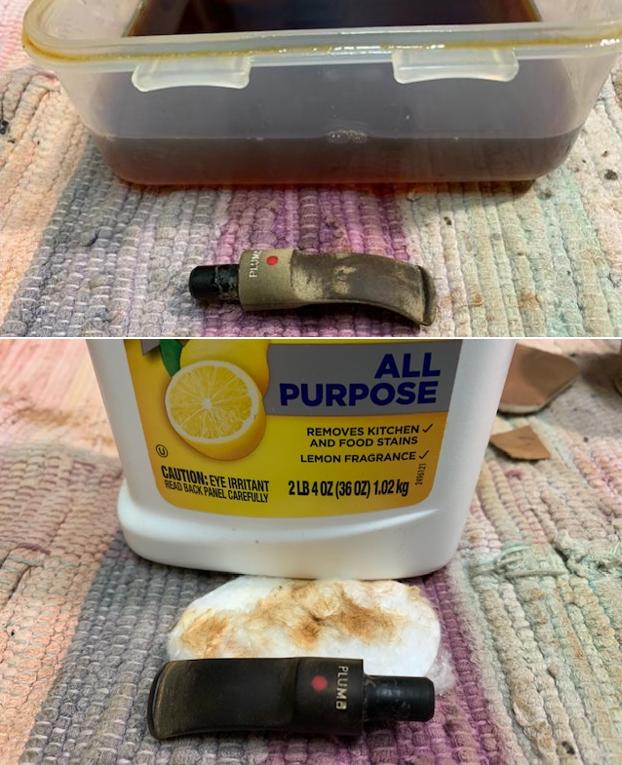
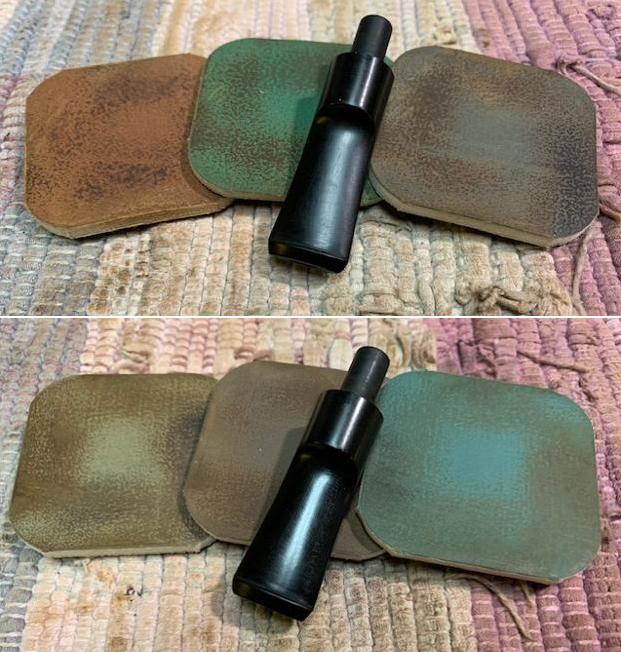
With the airway cleaned, the Lincoln stem joins other pipes’ stems in the queue in a soak using Briarville.com’s Pipe Stem Oxidation Remover as I continue to test this new (to me) product’s effectiveness. 
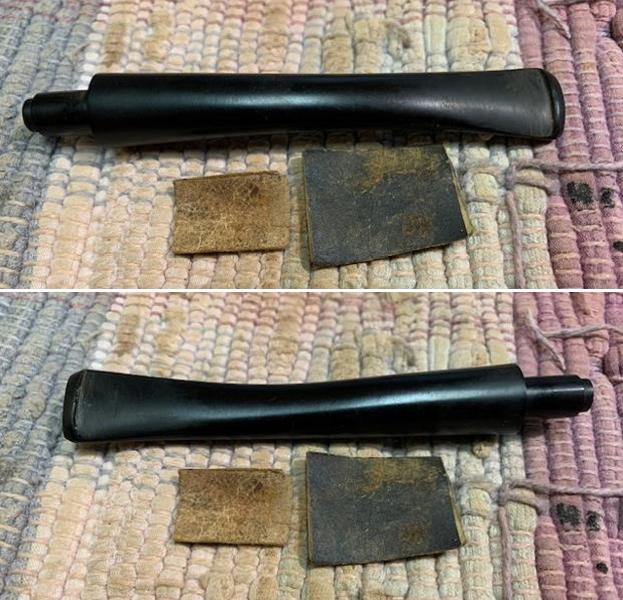
After soaking for about 24 hours, the stem is removed and using a dry cotton pad raised oxidation is wiped off the vulcanite stem surface.  This is followed by scrubbing the stem with a cotton pad wetted with isopropyl 99% to remove more raised oxidation.
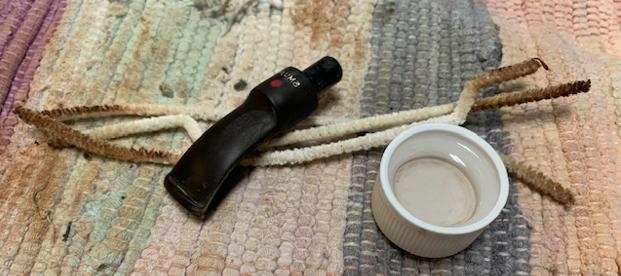
The stem is then treated with paraffin oil to start the reconditioning of the vulcanite.  So far, the Briarville Oxidation Remover has worked well.  I will continue to use it and see how it goes.
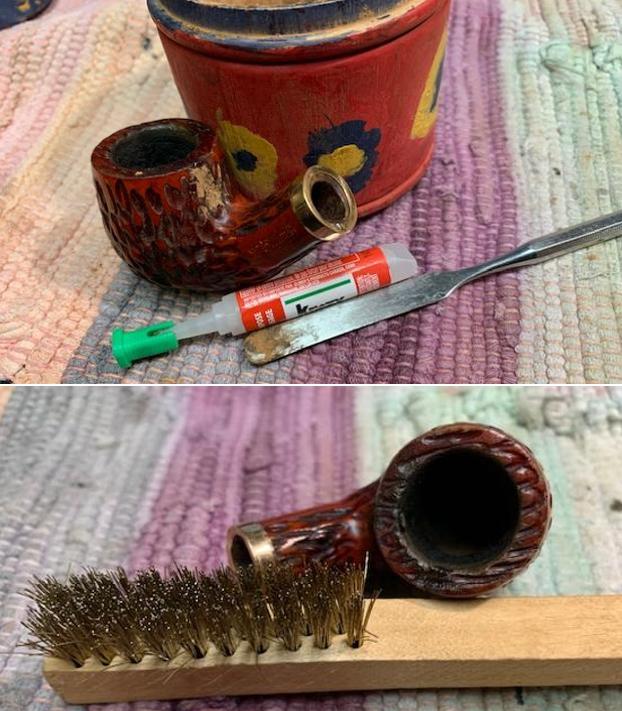
Next, the attention turns to the stummel.  Using the Pipnet Reaming Kit, 3 of the 4 blade heads available were accommodated by the chamber measuring 1 5/8 inches deep and 7/8 inches wide.  Following the reaming, the Savinelli Fitsall Tool reaches down into the chamber to scrape more carbon cake off the walls.  Finally, 240 paper wrapped around a Sharpie Pen clears and cleans the remaining carbon.  After an inspection of the chamber, healthy briar is evident, and I move on.
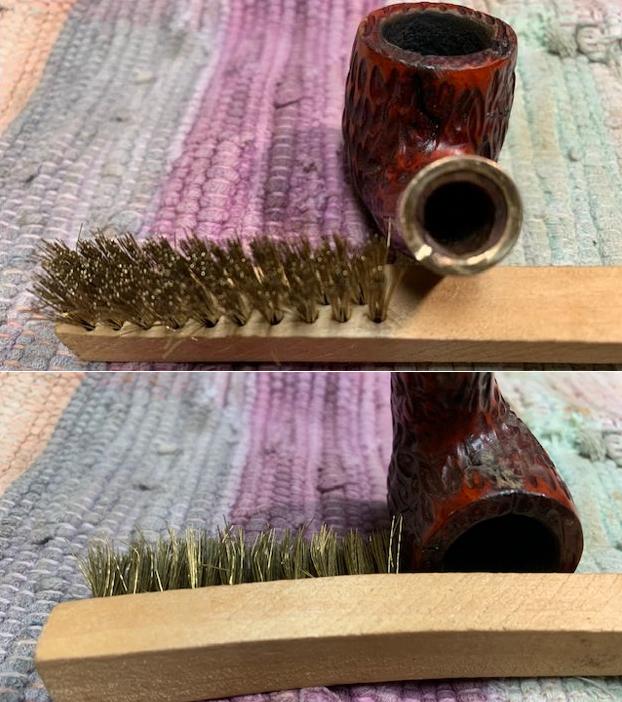
Transitioning now to cleaning the external surface, undiluted Murphy’s Oil Soap is used with a cotton pad. A bristled toothbrush also helps to clean the blasted briar surface and a brass wire brush helps with the rim.  Brass is used because it scrubs without being too invasive with the briar.The stummel is then taken to the sink where the cleaning continues using shank brushes and anti-oil liquid dishwashing soap.  Warm to hottish water is used to scrub the internal mortise. After a thorough rinsing the stummel is back on the worktable.
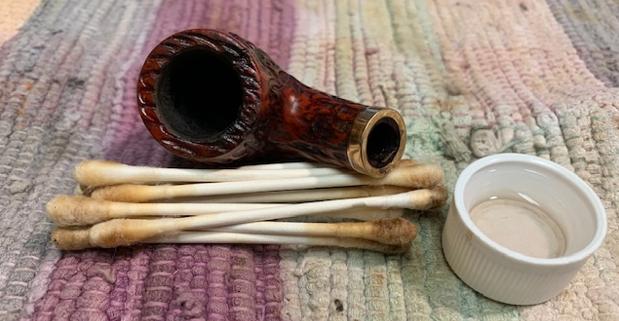
Continuing the internal cleaning, a bunch of cotton buds and pipe cleaners are used as well as scraping the mortise wall with a small dental spoon.  The internals were in pretty bad shape and when the buds finally started lightening up, I decide to stop for now.  At the end of my workday, I’ll continue the cleaning by giving the stummel a kosher salt and alcohol soak through the night.  This helps to draw out the remaining tars and oils from the internal briar.After the cleaning of the external briar surface, I look at the results.  The rim’s worn and deteriorated external edge is evident in the next few pictures.  Raw briar shows the wearing, especially on the back side of the rim.
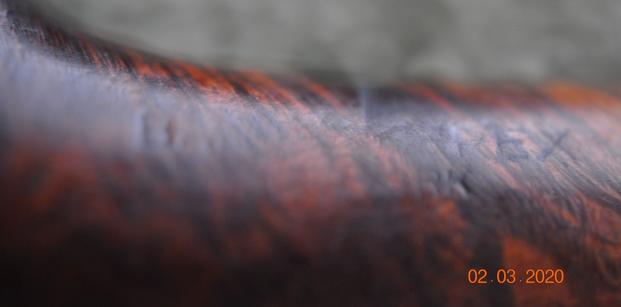
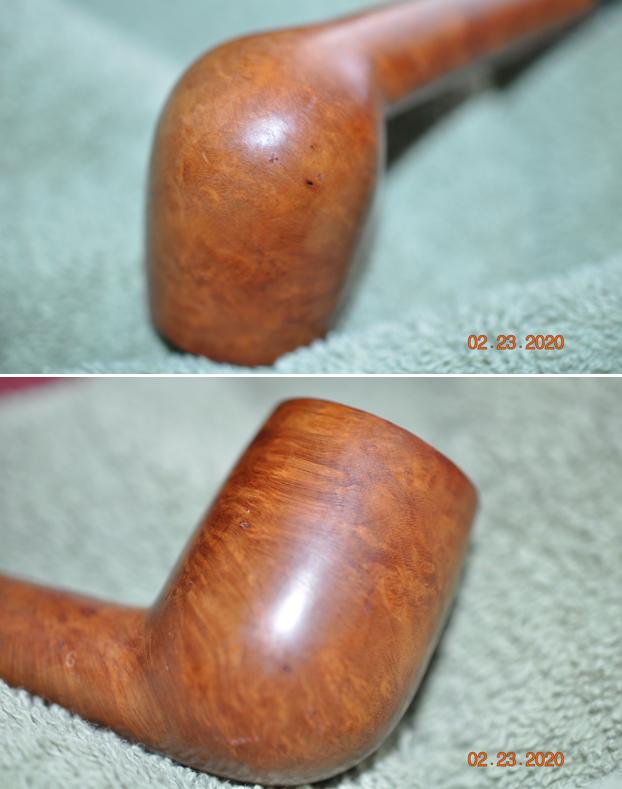
The finish has been removed in large measure by the cleaning – this is not really surprising.  The pictures show the blasted surface very nicely with many bald spots of briar. 
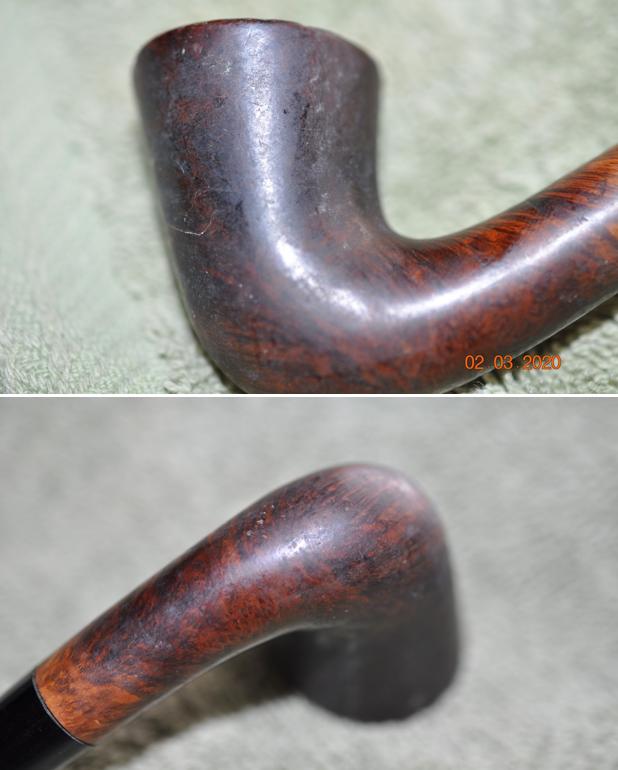
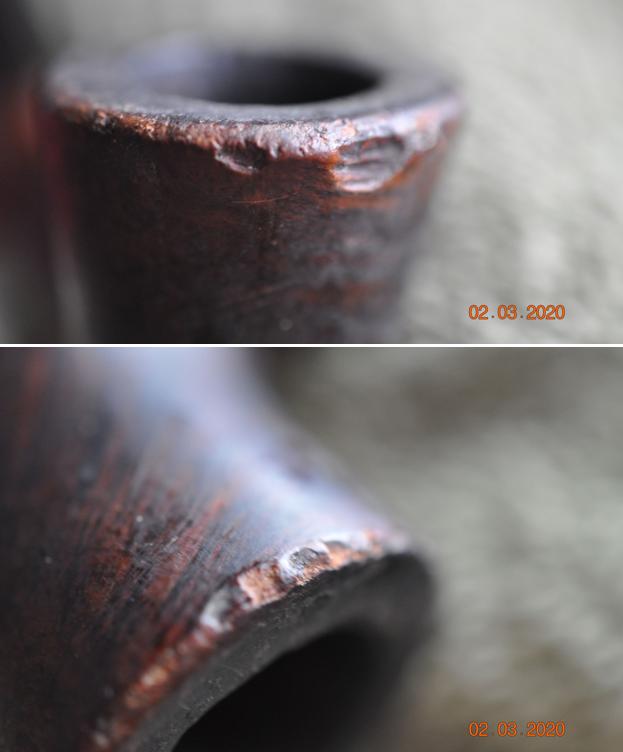
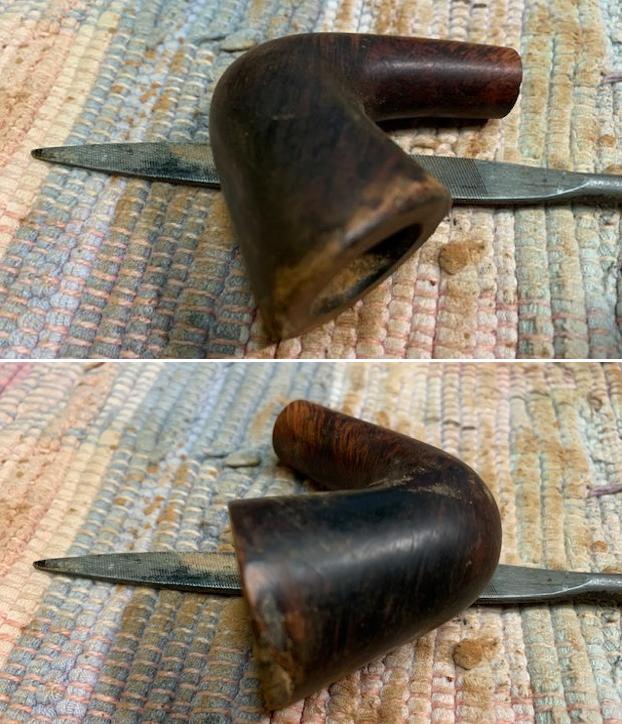
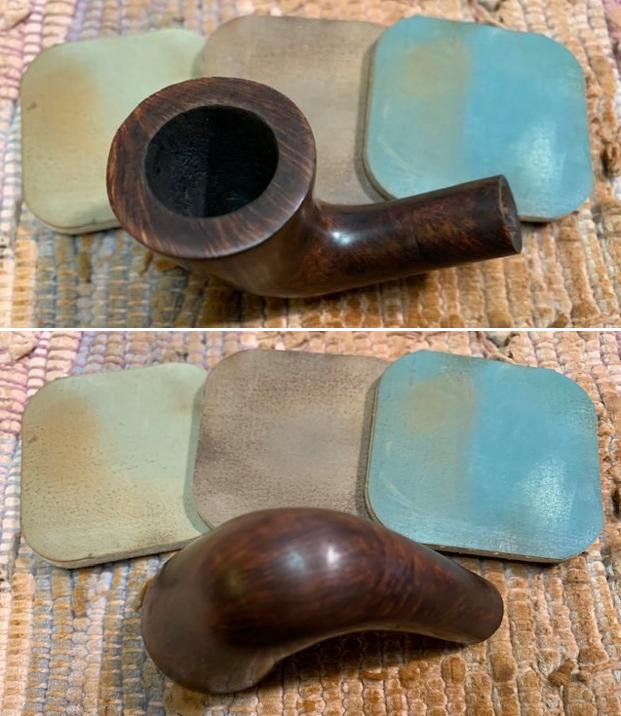
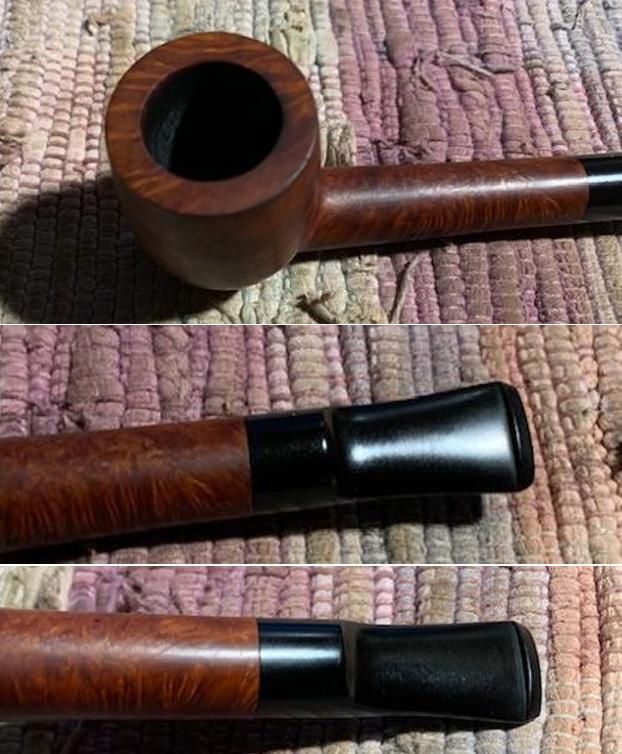
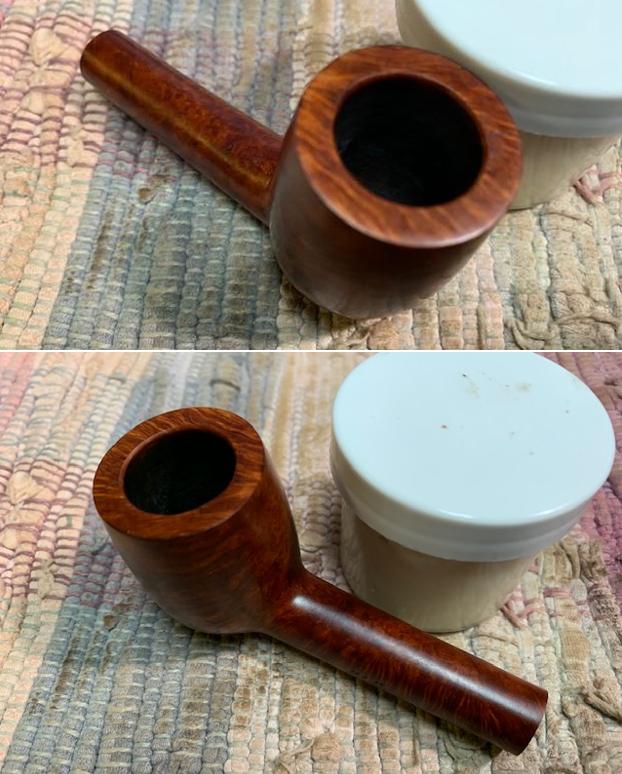
I’ve come to a decision point in the restoration process.  The rim damage needs addressing.  The following two pictures focus on the damage and deterioration of the outer rim edge.  The first picture is from the steward’s perspective looking down the stem.  The back of the rim tapers down with the huge skinning of the briar.  This probably happened as the former steward knocked the stummel’s back edge on a hard surface to remove ash using the stem as a handle.The next picture is the perspective looking from the right side of the stummel.  You can easily see the disparity between the front of the rim (on the right side of the picture) and the tapered, worn off briar on the rear (the left side).  I’ve marked the angle of drop-off in the photo.Topping the stummel would be the normal call with a smooth briar stummel.  However, to top the stummel of a blasted surface means that either you leave the new rim as a smooth briar surface contrasting with the rough blasted surface – which can be a very nice and attractive option – or it means that after the topping, burrs are used to rusticate the rim seeking to emulate a blasted surface texture.  It goes without speaking, the stummel will be the recipient of a fresh application of dye to finish it.  The restoration purist, I suppose, would opt toward recreating the blasted rim without question.  I personally like the smooth/rough briar surface contrasting – it can look classy.  I decide to give some thought to the options and call it a day.

Before I do, the internal cleaning continues with a kosher salt and alcohol soak through the night.  To begin, a cotton ‘wick’ is created by pulling and twisting a cotton ball.  This wick serves to draw oils and tars out of the briar during the soak process.  The wick is guided down the mortise to the draft hole with the help of a stiff wire that I cut from a wire closet hanger.  Kosher salt then fills the chamber and the stummel is placed in an egg carton for stability through the night.  Kosher salt is used instead of regular iodized salt because it will not leave an aftertaste.  Isopropyl 99% then fills the bowl until it surfaces over the salt using a large eye dropper.  After 10 minutes or so, the alcohol is absorbed, and more alcohol is added to top it off.  The lights are then switched off!The next morning a picture shows the soiling of the cotton wick and salt showing that some cleaning activity was continuing through the several hours soak.  After clearing the expended salt to the waste, the bowl is wiped with paper towel and I blow through the mortise to make sure salt crystals were removed.  To check the cleaning, a few cotton buds wetted with isopropyl 99% confirm that the internals are clean and refreshed for a new steward.  I love the fresh smell of the chamber after using the kosher salt and alcohol soak.After sleeping on it, I decide to top the stummel and then rough it up with burrs to emulate the blasted surface.  Using the chopping board on my worktable, after taking a starting picture, the inverted stummel is rotated over 240 grade paper. I stop the rotation often to check the progress making sure that the topped plane is level and not dipping. The Billiard bowl, fortunately, has significant height and the loss of briar on the top will be negligible.  The goal is to take off as little briar as possible to erase the raw briar along the outer edge of the rim.  The raw briar indicates that the rim has worn away and deteriorated.  The aft of the rim will be the most stubborn as the deterioration is most acute there.  The pictures show the gradual process of topping the stummel. At this point, I stop the topping process.  There is still a bit of rim damage evident on the aft quadrant but I’m hopeful that after roughing the rim surface with burrs, this damage will blend away.  The topping resulted in a nicely rounded chamber and an even rim diameter – this is good! One of my briar dust donor bowls volunteers allowing me to test the burrs that I’ve chosen to use.  The general goal is to emulate a blasted surface on the rim.  The guiding principle I use is ‘less is more’ with this.  Pictures of the original Lincoln rim displayed a gentler texture on the rim and not as distinctive as the bowl surface.  You can always add MORE texture with a burr but you can’t remove it without sanding.  I first try the round burr.I gently tap the burr over a portion of the rim to see how it behaves.  I like what I’m seeing.I add to this the cylindrical burr and randomly ‘dance it’ over the previous burr’s work.  Again, I’m liking what I see.  I’m looking for more subtlety.With the dry run completed, the Lincoln takes the stage. The first phase is random taps and curves using the rounded burr.  I use a light touch to avoid deep ravines and digs.  After working around the rim, I’m liking what I’m seeing.Following with the cylindrical burr, again the movement is uniform randomness writing, dancing, and dragging gingerly over the rim surface.  The final close up shows the finished roughed surface.  I think it will blend very nicely.
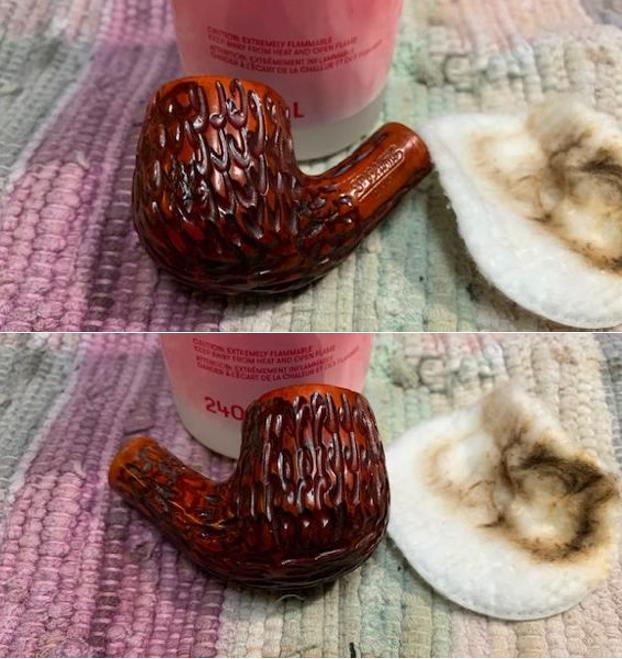
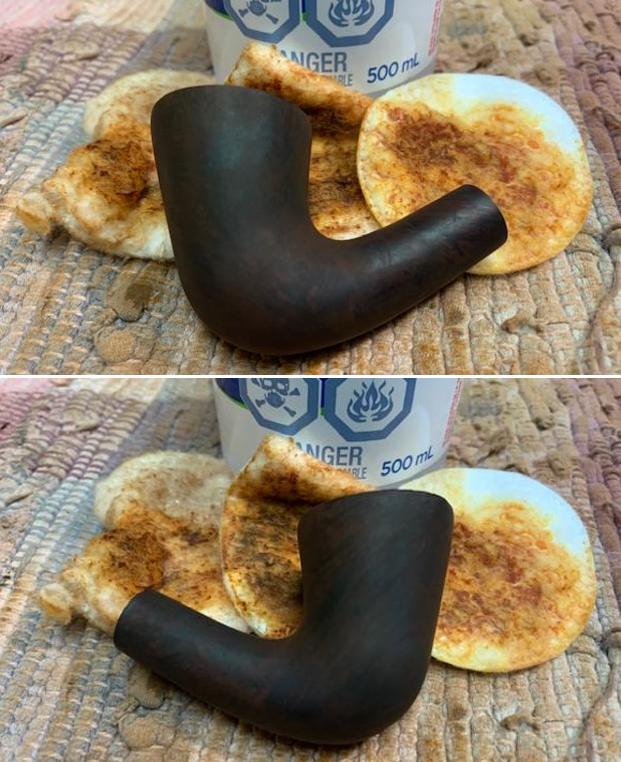
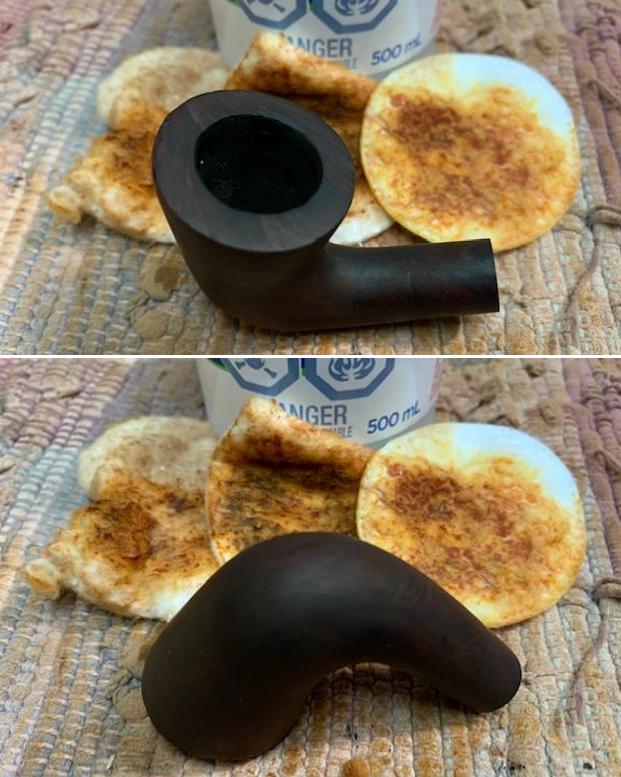
The next step is to apply a dark dye to refresh the blasted surface of the bowl and to cover and blend the refurbished rim.  First, the bowl is wiped with a cotton pad wetted with alcohol to clean the surface.  A few fresh pictures are taken to show the starting point of the needy blasted surface.
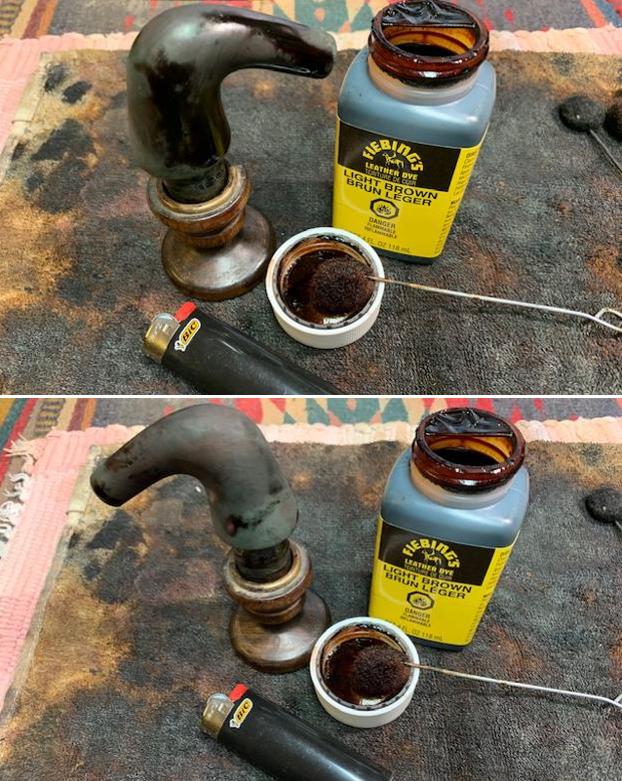
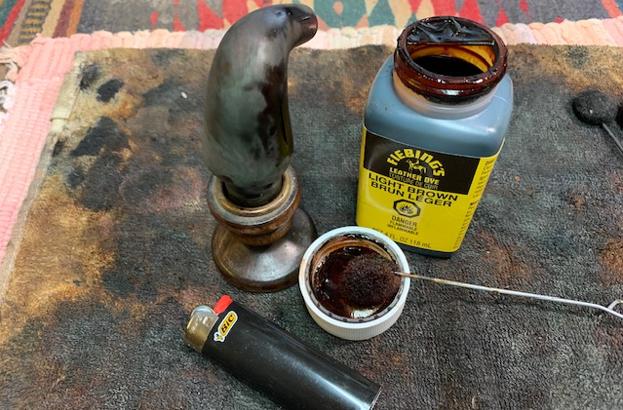
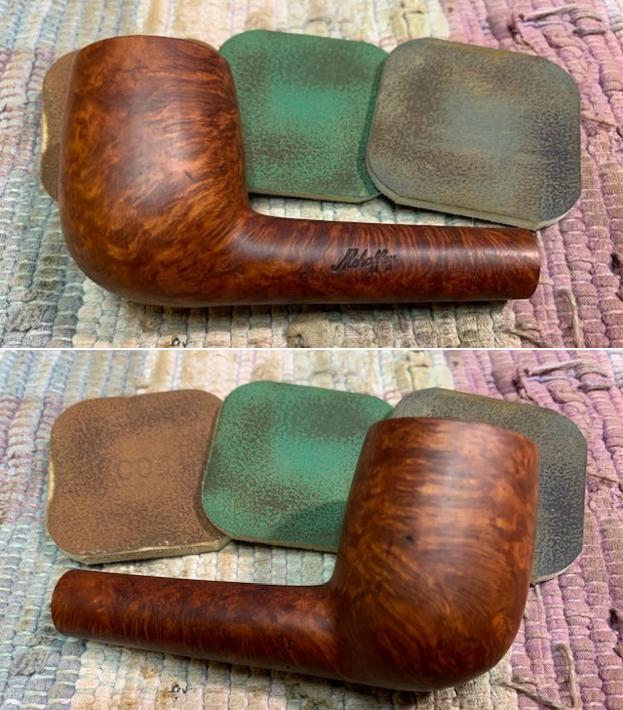
From the pictures I’ve seen of Lincolns online and the Lincolns in my own collection, the sense I get is that the finish is very dark.  I use a dark brown base and mix a small amount of black dye with it to take it to the next level of a darker brown hue.  Fiebing’s Leather Dyes work well.  After the Dark Brown is put in a small mixing glass, a few drops of Black dye are added and mixed with the toothpick.  The toothpick coloring gives me a clue to the mixture balance.  Using the hot air gun, the stummel is warmed to open the briar and to make it more receptive to the dye.After heated, the Fiebing’s Leather Dye mixture is applied in sections moving around the bowl using a folded pipe cleaner.  With each section painted, the wet aniline dye is flamed with a lit candle immediately combusting the alcohol base of the dye.  The combustion lasts a few seconds leaving behind the embedded pigment of the dye in the briar. After painting and flaming the entire surface, including the refurbished rim, the stummel is set aside for several hours allowing the new dye to settle.
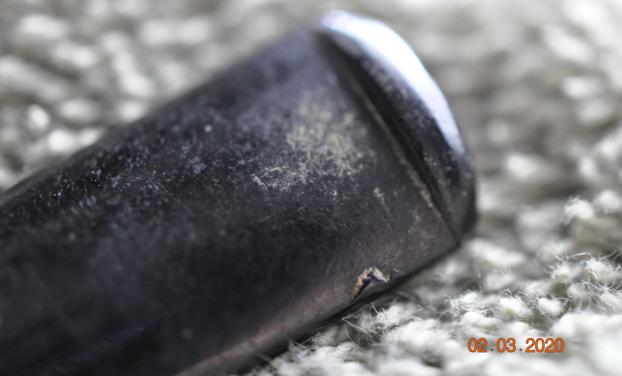
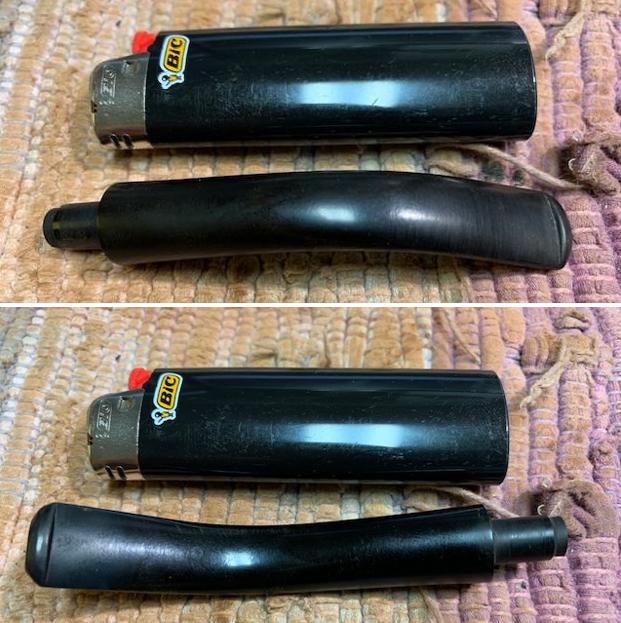
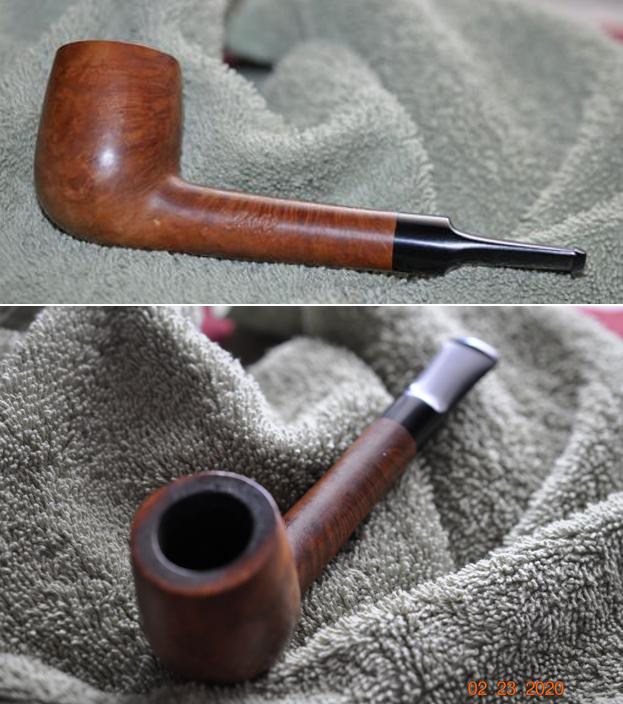
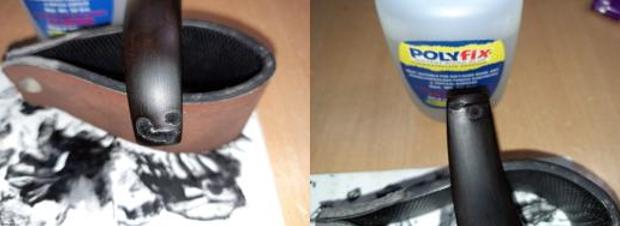
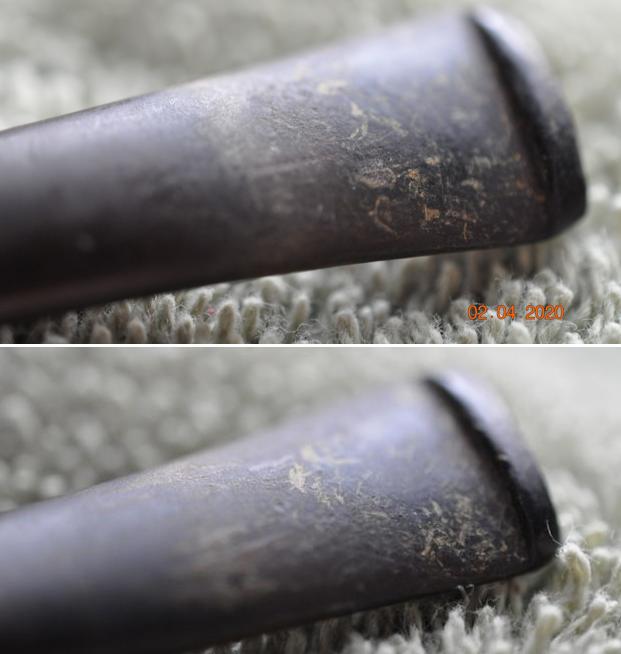
Turning now to the Lincoln straight tapered stem, I take fresh pictures of the tooth chatter on the upper and lower bit.  To minimize and maybe erase most of the chatter, the heating method is used.  Using a Bic lighter, the flame is painted over the bit sides and with the heating of the vulcanite, the rubber expands and regains its original condition or in some degree.  After painting, the before pictures are compared to the after pictures to show the results.  I believe there’s some improvement, but all should be removed through sanding.  
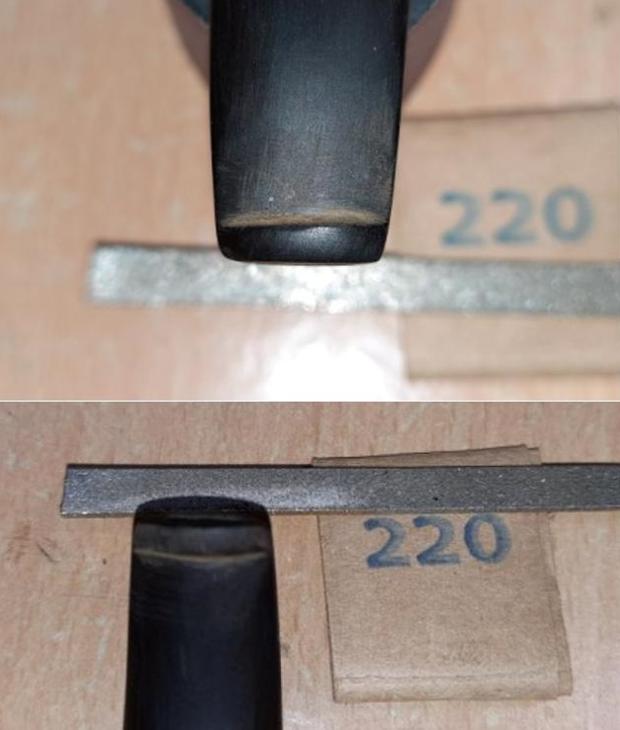
Using the flat needle file, the button lips are refreshed.  The remaining tooth chatter is removed using 240 sanding paper on the upper and lower bit.While the stummel is resting with new dye, I rejoin the stummel and stem with the sanding disk wedged between.  The disk protects against shouldering the stem facing as the 240 sanding expands to the whole stem.  During this sanding, care is given while sanding around the circled *S* stem logo.
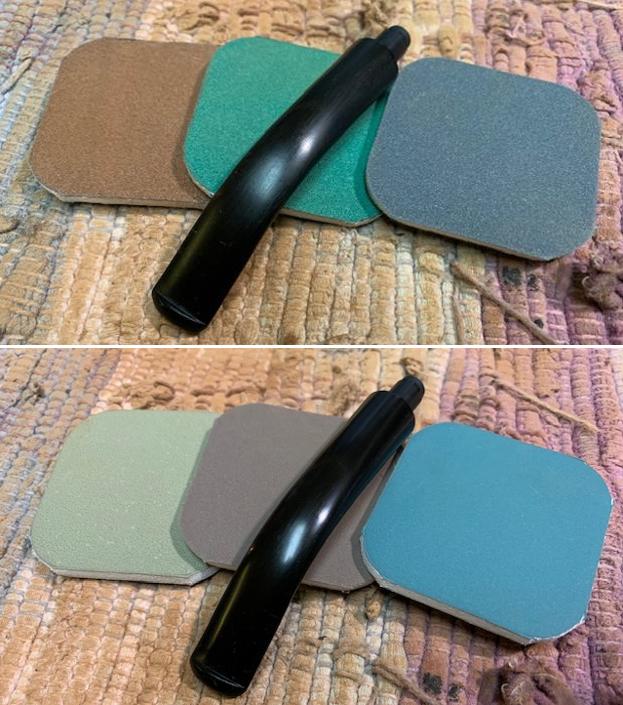
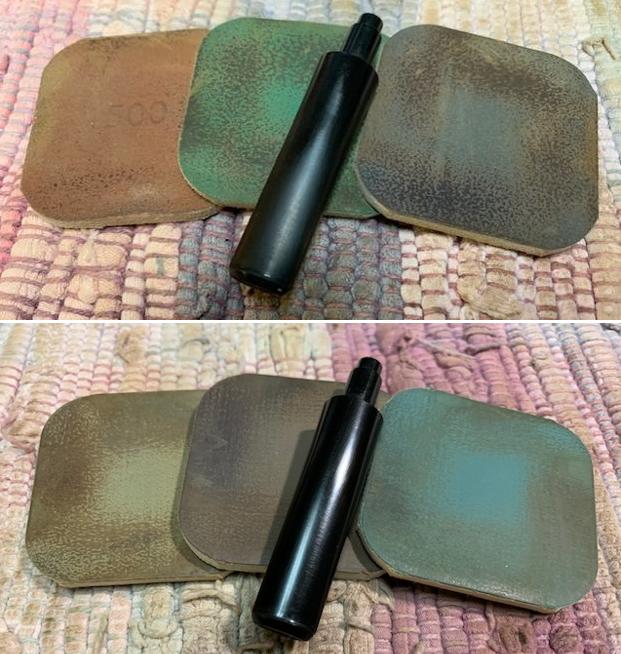
The sanding is next transitioned to wet sanding with 600 grade paper and then 0000 grade steel wool is applied. 
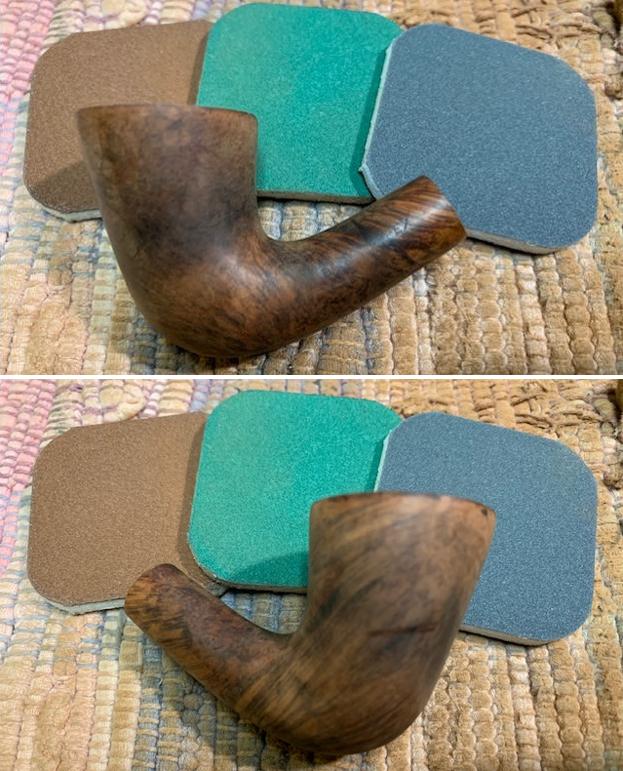
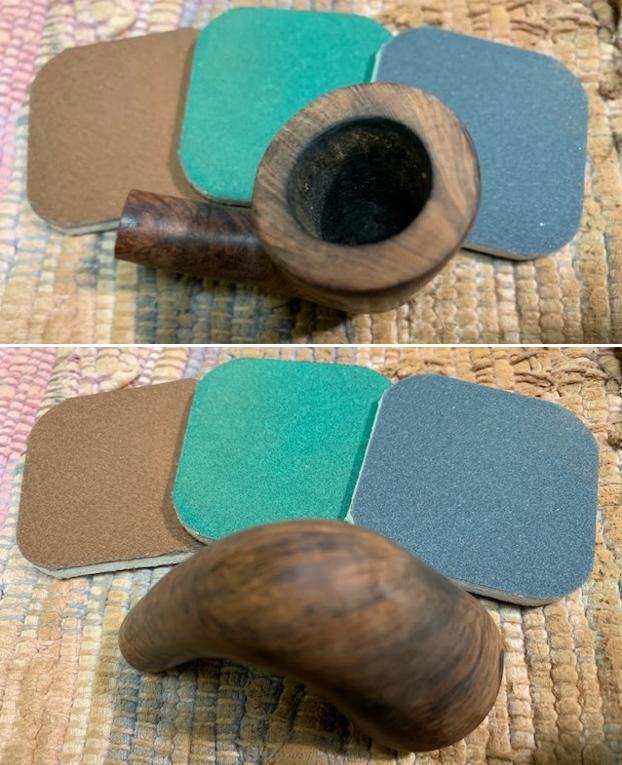
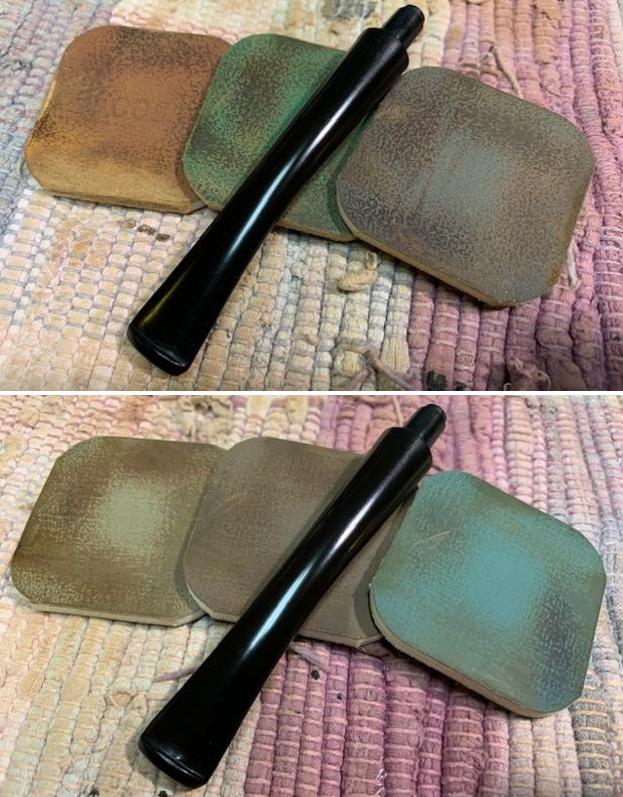
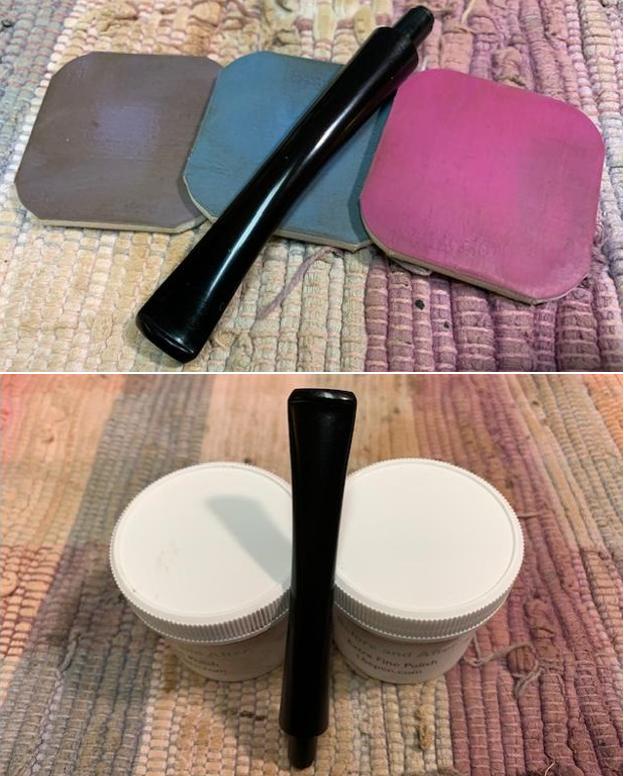
Next, the full regimen of micromesh pads is applied starting with wet sanding with pads 1500 to 2400.  This is followed with dry sanding with pads 3200 to 4000 and 6000 to 12000.  Between each set of 3 pads, Obsidian Oil is applied to condition the stem as well as help protect it from developing oxidation. 
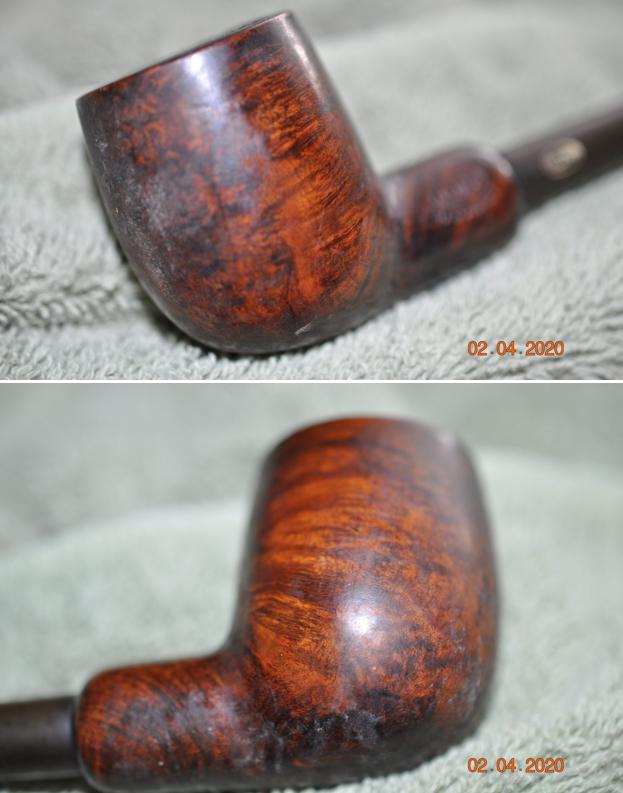
After putting the stem aside, the stummel has rested through the night allowing the new dye to settle in.  To unwrap the crusted, flamed dye surface, a felt buffing wheel is mounted to the rotary tool set at about 30% full power – a bit slower to reduce the heat/friction.  Tripoli compound, a more abrasive compound, is used.I pause during the process to show the contrast and the results.  I like the natural lighter, reddish peaks appearing because of the felt wheel and Tripoli action.  Usually, with blasted surfaces, I will lightly sand the peaks of the blasted surface with a 1500 grade micromesh pad to create the lighting effect.  This effect helps to create a depth and texture contrast in the darker dye blasted surface background.  I like what I’m seeing! I rotate the wheel angle a lot to navigate the edge of the wheel to run down the crevasses to make sure the excess flamed dye is removed. After completing the application of Tripoli with the felt wheel, I change to a cotton cloth buffing wheel, increase the speed to about 50% full power and again apply Tripoli over the entire stummel.  I do this to continue removing excess dye that is compacted deeper in the crevasses missed by the firmer felt wheel.  The cotton cloth wheel can reach where the felt wheel could not. To blend the new dye and to remove excess, the bowl is wiped with a cotton pad wetted with alcohol.After reuniting the stem and stummel, a different cotton cloth wheel is mounted to the rotary tool and Blue Diamond compound is applied setting the speed at about 40% full power.  This continues to fine tune and sharpen the features in the blasted surface.Both stem and stummel are then buffed after application of the Blue Diamond compound.  I do this to remove the compound dust before applying wax.With the stem and stummel separated, I have two more micro projects to do before applying wax.  First, to prevent dye leaching onto the fingers after the pipe is put into service, the bowl is warmed with the hot air gun to emulate the heating of the bowl in service.  Often, newly dyed bowls will leach and turn fingers a nice shade of brown.  After the bowl is thoroughly heated, it is buffed with an old cotton cloth to remove more dye leaching from the briar.  I don’t think leaching can be 100% prevented, but these procedures will certainly minimize the possibility.
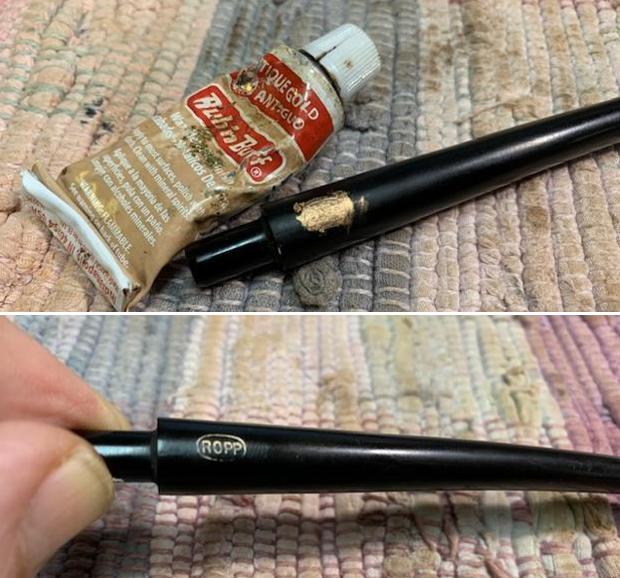
The next mini project is seeing if the Lincoln stem logo can be refreshed.  It looks solid enough to give the acrylic paint traction.A small drop of the white acrylic paint is spread over the entire logo.It is then daubed with the cotton pad to remove excess paint and to dry it.Well…, I wish I could say, presto, and here is the refreshed Lincoln logo, but I’m not able.  The paint would not hold in the treads of the logo imprint.  The best result I achieved, unfortunately, would have drawn attention to a half-baked stem stamping.  I would rather leave it as it is than leave it looking worse.  So, after reuniting the Lincoln stem and stummel, another cotton cloth buffing wheel is mounted to the rotary tool and with the speed set to about 40% full power, carnauba wax is applied to the pipe.  After a thorough application of wax, the pipe is given a rigorous hand buffing to raise the shine and to blend any excess wax on the blasted surface.
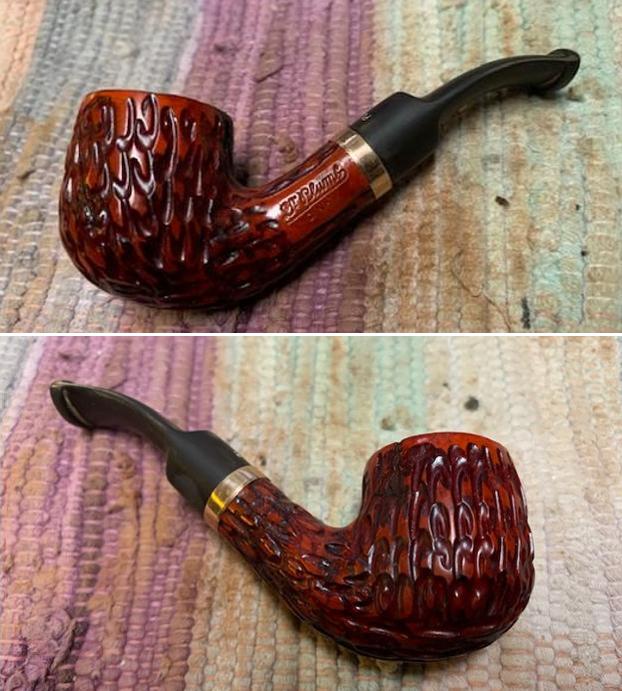
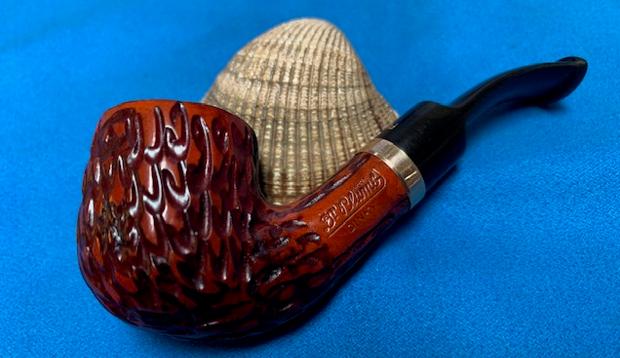
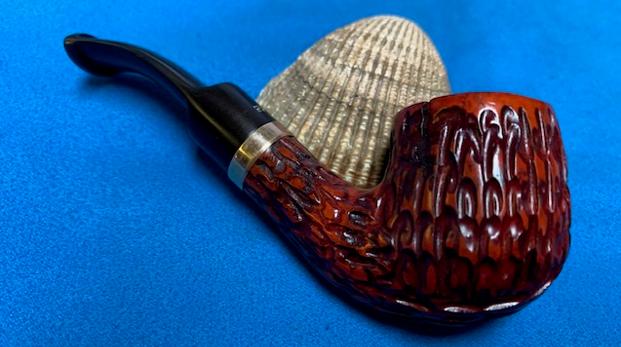
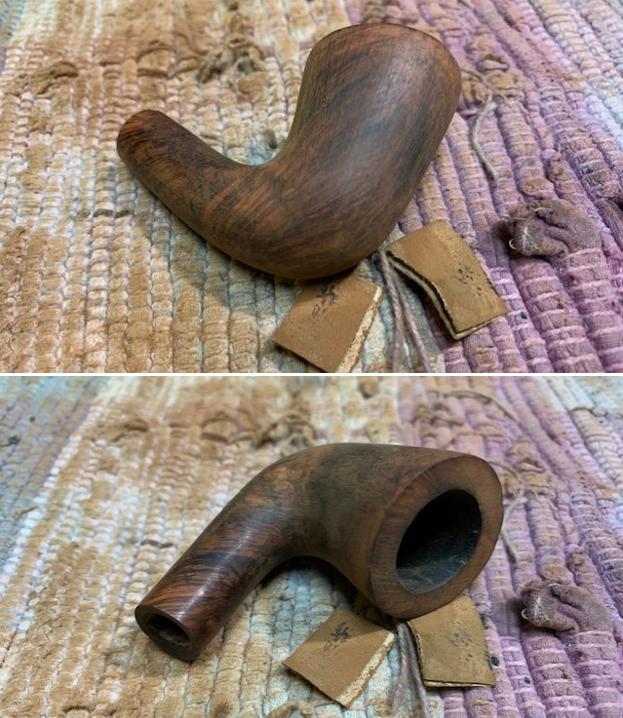
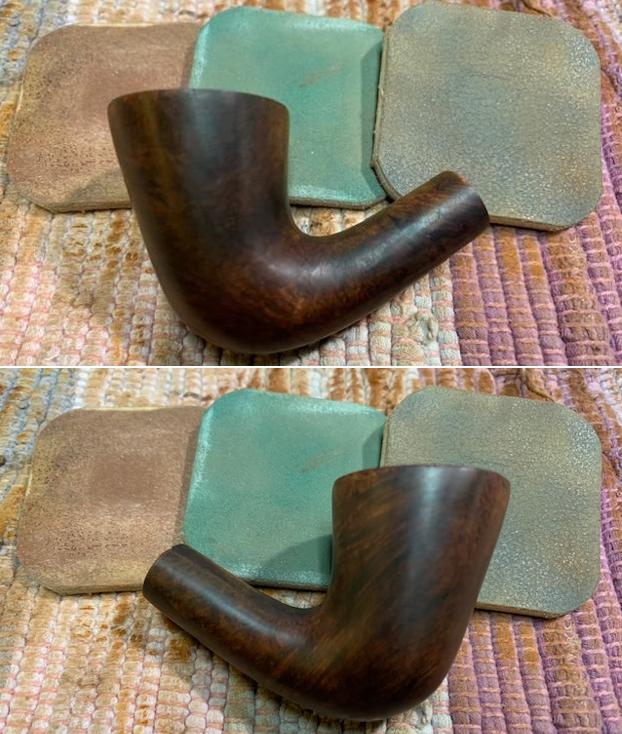
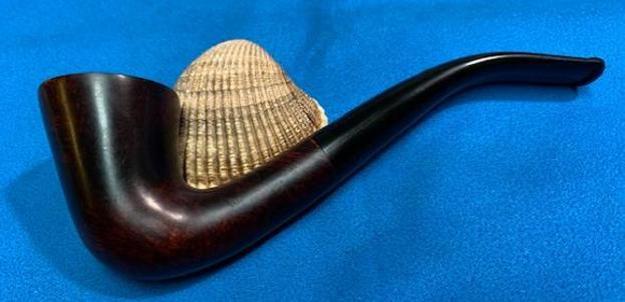
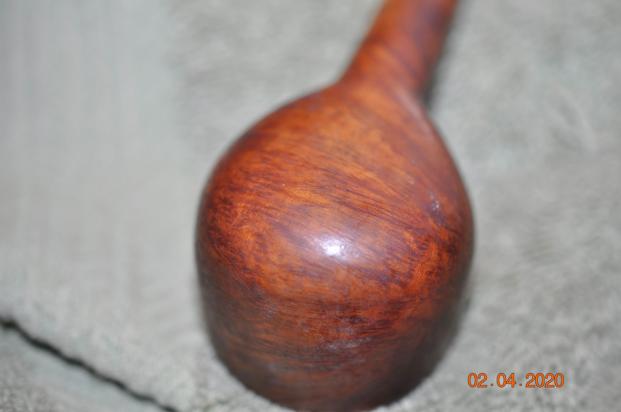
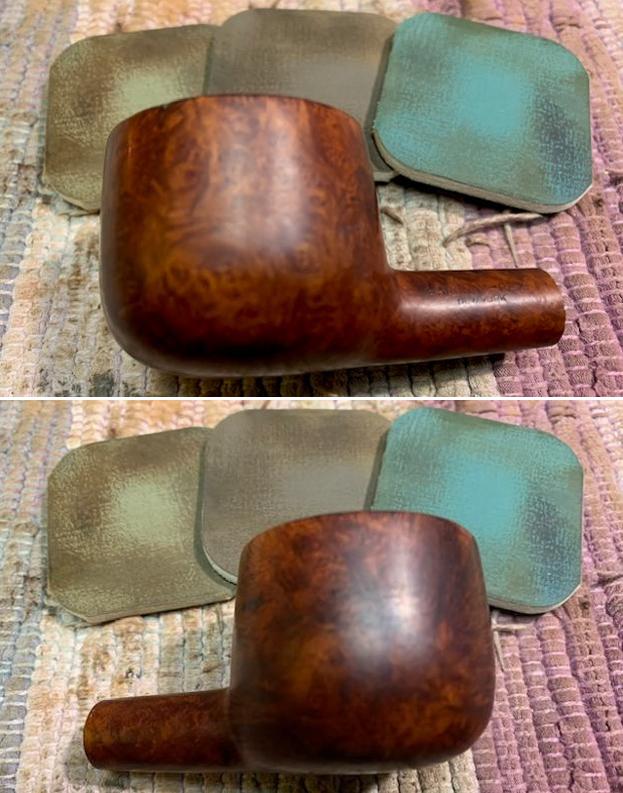
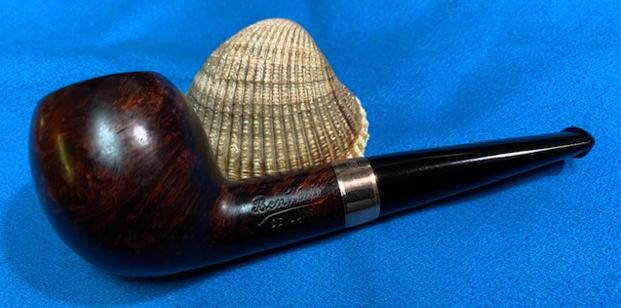
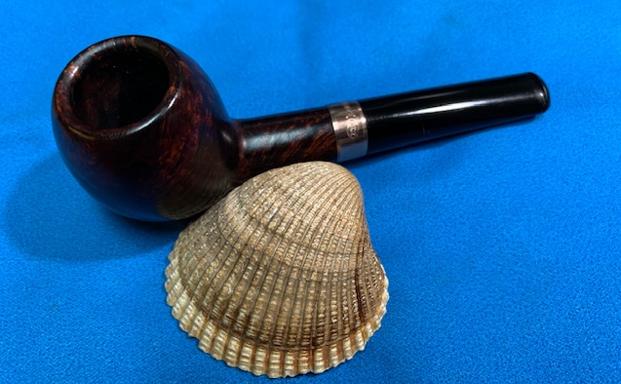
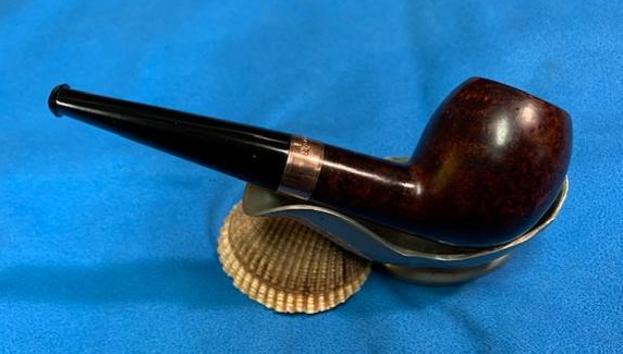
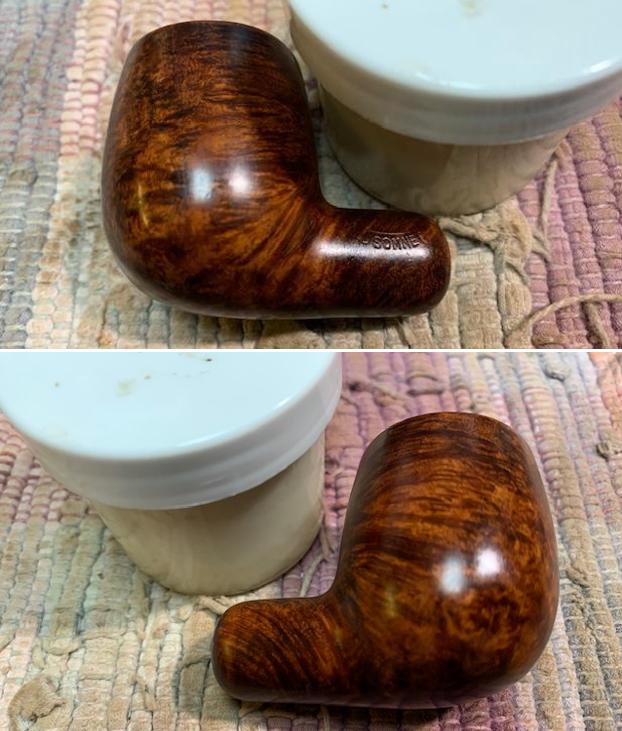
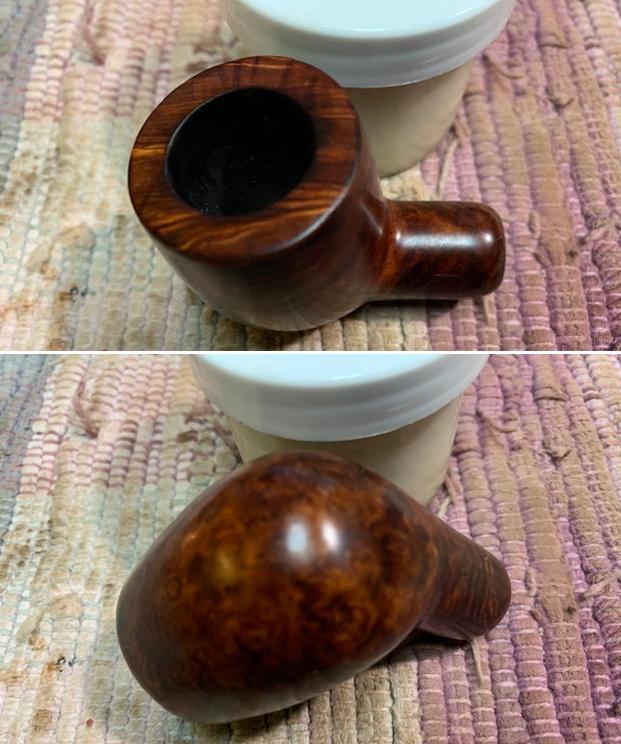
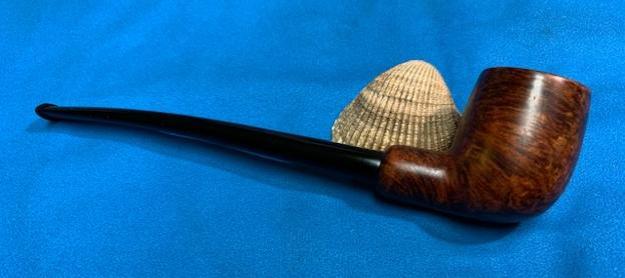
I am pleased with the rustic, classic look and feel of this Lincoln London Style Sandblasted Briar Billiard.  He is without doubt a work horse pipe and ready to go again.  I am especially pleased with the repair to the rim and the emulated blasted surface that I was able to create.  The new blasted finish, well, it rocks.  The flecked reddish highlights of the blasted peaks give depth and eye-drawing appeal to the briar surface.  The Lincoln is available to be claimed from The Pipe Steward Store benefiting the Daughters of Bulgaria – helping women and girls who were trafficked and sexually exploited.  Thanks for joining me!

Repairing a Trio of His Dad’s Pipes for a fellow here in Vancouver – Part One


Blog by Steve Laug

Last week I received a call from a fellow pipeman, Keith here in Vancouver who had been referred to me by City Cigar, a local pipe and cigar shop in the city. He was a soft spoken gentleman who had a request for me. In January  this year his Dad died and he had three of his Dad’s pipes that he wanted restored in memory of his Dad. He also was a pipe smoker so he fully intended to enjoy them for a long time as he smoked them in his Dad’s honour. I told him to send me some photos of the pipes so I would know what I was dealing with.

I received the email below from Keith that included the photos of the pipes that he wanted me to work on. He even went to the trouble of marking the trouble with each of the pipes that needed work.

Hi Steve,

Glad your call back today, my name is Keith, I got your contact from City Cigar. My dad has three pipes include two Dr Plumb DINKY and one not sure brand. My dad passed this year January and I looking for fix those pipes which had broken and cracked, understand they are not expensive pipes but for me is priceless memory…

…Have a wonderful day!

Best regards

Keith

I called him as soon as I received the photos and talked over what I saw when I looked them over. We struck a deal and he dropped them off to me late on Friday afternoon and I started to work on them a bit over the weekend. All three pipes needed varying degrees of work on them. Two were Dr. Plumb Dinky Bent Billiards and one was a Real Briar Dublin. I decided to work on them in the order of the photos that he sent me.

The first of them is a Dr. Plum Dinky Bent Billiard. It was probably in the roughest shape in many ways. It had a crack on the back right and middle of the exterior of the bowl. Neither were spread and they both had stopped cracking but they were significant. In the first photo below that  Keith sent he noted one of the cracks with the blue arrow. I inserted a second arrow (red) to show the location of the second crack. The second photo below also shows a crack in the shank on the underside as Keith noted with a blue arrow. That photo also clearly shows the crack on the back of the bowl that I have noted with a red arrow. Keith also included a photo of the side view of the pipe and the condition of the stem. The bowl had a thick coat of varnish that would need to be cleaned up before I repaired the cracks. The stem was heavily oxidized, calcified and had tooth marks on both sides just ahead of the button. The Dr. Plumb logo stamp was clear and readable.I took pictures of the pipe when Keith dropped it off before I started my clean up work. He had cleaned the bowl and removed the screen that was visible in the bottom of the bowl in the photos above. It was very clear from the cleaned pipe what needed to be addressed on this first one. The rim top was darkened and had debris in the carved finish.I took a close up photo of the rim to show the condition of the bowl and the rim. You can see the cracks as noted above and shown in the photo below by the arrows. I also took photos of the stem to show the general condition as noted above.I took a photo of the stamping on the left side of the shank – it read Dr. Plumb [over] Dinky and was clear and readable.The next two photos show the cracks (though a bit blurry the cracks are clear). I have circled the three cracked areas that will need to be dealt with and repaired.I removed the stem from the shank and took a photo of the pipe. There is something quite winsome about this tiny pipe.I turned to Pipephil’s site for see what I could find on the brand (http://pipephil.eu/logos/en/logo-d8.html). I quote the sidebar below followed by a screen capture of the pertinent section.

Brand created in 1925 by GBD’s Parisian sales manager J.B. Rubinovich. The Dr Plumb production was run by the Ruchon & Verguet and also Ropp factories (Saint-Claude – France). The brand now belongs to the English Cadogan group.I turned to Pipedia and looked up the brand (https://pipedia.org/wiki/Dr._Plumb%27s). I have included the additional information below.

The Dr. Plumb’s brand name is owned by A. Oppenheimer & Co., Limited, owners of Cadogan Investments, Ltd.. J.B. Rubinovich, GBD’s Parisian sales manager, created this brand in 1925. The pipes was produced by the Ruchon & Verguet and also Ropp factories (Saint-Claude, France). In 1962 a Dr. Plumb’s pipe sold for between C$3.95 and C$4.95, or $31.72 in 2015 U.S. dollars, and pipes can still be purchased from this brand for a similar price today.

These pipes have long been advertised as Dr. Plumb’s Perfect Pipe, that name coming from an aluminum tube system designed to keep the smoke cool and dry while at the same time permitting the “cooling chamber” to be cleaned by simply twisting the stem. While Dr. Plumb’s pipes were long made in France and stamped accordingly, they are now British made.

None of the sites included information on the Dinky line. I knew who made the pipe and where it was made but not anything about the tiny little pipes in this estate. Now it was time to work on the pipes. I removed all of the stems and dropped them in a bath of Briarville’s Pipe Stem Deoxidizer. I put the lid on the box and let them sit for 24 hours.I wiped the bowl down with acetone on a cotton pad to cut the shiny varnish coat. It took a lot of scrubbing and I was able to greatly reduce it but not remove it. With the bowl cleaned up it was time to address the cracks in the bowl and shank. I pressed some briar dust into the cracks on the back of the bowl and filled them in with clear CA glue. I did the same with the crack on the underside of the shank. I repeated the process until the repair was finished. I found the proper sized brass band for the shank end and dribbled some CA around the shank end and pressed the band in place on the shank.I filled in some of the spots that remained on the crack on the back of the bowl and then used a brass bristle brush to score the repairs to match the surrounding rustication. I also worked over the rim top at the same time with the brush. The repairs on the bowl are a little darker than the rest of the bowl but the repairs are solid. It dawned on me at this point that I had not cleaned the shank. I scrubbed it with 99% isopropyl alcohol, pipe cleaners and cotton swabs. It was quite dirty so I am glad I remembered.I worked some Before & After Restoration Balm into the surface of the bowl and shank with my fingertips and a horsehair shoe brush to clean, enliven and protect the briar. I let the balm sit for 15 minutes and then buffed with a cotton cloth to raise the shine. The photos show the bowl at this point in the restoration process. I set the bowl aside and turned my attention to the stem. I removed it from the deoxidizer bath and it did not really look much better. I scrubbed it down with Soft Scrub and a cotton pad. I found that the oxidation was significantly softer and came off quite easily.I scrubbed out the airway in the pipe with alcohol and pipe cleaners until it was clean. It was a well used pipe.I still needed to polish the stem with micromesh and buff the pipe but I had to put the stem on and have a look at the pipe. I took some photos so you could see what I see. I polished the stem with micromesh sanding pads – dry sanding with 1500-12000 grit sanding pads. I wiped it down after each sanding pad with Obsidian Oil. I polished it with Before & After Pipe Stem Polish – both Fine and Extra Fine. I gave it a final coat of Obsidian Oil. With the bowl and the stem finished I put the tiny GBD Made Dr. Plumb Dinky Bent Billiard back together and buffed it on the wheel using Blue Diamond to give it a shine. I gave the bowl multiple coats of Conservator’s Wax and the stem multiple coats of carnauba wax on the wheel. I buffed the pipe with a clean buffing pad to raise the shine. I hand buffed it with a microfiber cloth to deepen the shine. It really is a great looking pipe. The dimensions of the pipe are – Length: 4 inches, Height: 1 ½ inches, Outside diameter of the bowl: 1 inch, Chamber diameter: ¾ inch. The weight of this small pipe is .85 ounces /24 grams. This small Dr. Plumb Dinky is a great reminder for Keith of his Dad’s Pipe smoking and one that he can enjoy for a long time. Once I finish the other two pipes I am sure he will be excited to load them with a memorable tobacco and slip back into the memories of his Dad. Thanks for walking through the restoration with me.


Working on the Fourth of Seven Barclay-Rex Pipes – A Bent Dublin


Blog by Steve Laug

It seems like just a few weeks ago I was contacted by an older gentleman about purchasing his pipe collection. He sent me the photos and I was amazed at what I saw. He had Dunhill pipes, BBB pipes, Orlik pipes, Barclay Rex Pipes, a couple of Meerschaums and a whole lot of other pipes. All I could say as I looked at the pipes was what a collection it was. We negotiated a deal and I think we both walked away quite happy with the exchange.

You have seen the work we have done on the Dunhills, Hardcastles, H. Simmons all briar billiard and BBB pipes from the lot but there are still more. The above photo shows all of the Barclay-Rex pipes that were purchased from the New York City shop by the fellow we bought the collection from. The pipe I am working on is one that was not included above. It takes the place of the Barlings in the top left. It is a nice little bent Dublin.

I have worked on several Barclay-Rex pipes in the past and this Dublin is a beauty in terms of shape and grain. This pipe is stamped on the left side of the shank and reads BARCLAY-REX [over] New York. The stamping is faint but readable and there is no shape number evident.

Jeff took some photos of the BARCLAY-REX Petite Bent Dublin before he worked his magic in cleaning up the pipe. It is a an interesting pipe with a lot of potential and what appears to be some great grain under the grime and debris of the years. Jeff took photos of the bowl, rim top to show the thickness of the cake in the bowl and the thick lava on the rim top. There is significant damage to the outer edge of the rim that is visible in the photos. He took photos of the top and underside of the vulcanite stem showing the oxidation, calcification, tooth marks, chatter and wear on the stem and button. There is also damage to the edges of the stem. Jeff took photos of the sides and heel of the bowl to show the condition of the briar. You can see the beautiful shape and the grain on the bowl even through the dirt and debris of many years. The chips around the outer edge are also very visible. He took a pictures of the damage to the outer edges of the rim. It really is a mess. The work will have to include topping and rebuilding the edge.Jeff took a photo of the stamping on the left side of the shank. You can see that it is faint but readable as noted above.I turned to Pipephil’s site to see what I could learn about the Barclay-Rex brand and particularly the sandblast one I was working on (http://pipephil.eu/logos/en/logo-b1.html). I have included a screen capture of the information that is shown there. I quote from the sidebar on the site below as it gives a good summary of information.

Brand created in 1910. The shop was situated on Maiden Lane. Three addresses now (2010): 75 Broad Street, 70 East 42nd Street, 570 Lexington Avenue. See also: André

I turned to Pipedia to try and place this pipe in the timeline of the brand and was able find some helpful information which I have included below (https://pipedia.org/wiki/Barclay_Rex). I quote the information below.

Barclay-Rex, a downtown Manhattan tobacconist, was founded in 1910 by Vincent Nastri, a pipemaker from Salerno, Italy. The store was originally located at Barclay and Church Street, and the name was taken from that location and Nastri’s beloved Great Dane, Rex. The business is still run by Vincent Nastri, III and owned by Vincent Nastri, Jr.. They have several locations in New York City. The store has carried pipes from all fine makers, and the Barclay-Rex line of pipes is also much sought after, in that pipes were made in a range from the very inexpensive into the several hundreds of dollars. The pipes were, at least into the 1960’s, made of Algerian briar.

In addition to pipes made by Mr. Nastri over the years, Mr. Nastri, III, has been quoted as stating that a pipemaker just leaving Dunhill made pipes with a small off-white dot on the stem for a time for the shop. As was discovered by Steve Laug of Reborn Pipes, they were evidently made by a pipemaker whose initials were HGP, and stamped on the pipe as such. These pipes were made for a single run only, and then never made again.

In addition, Sasieni at least for a time made private label pipes stamped with the Barclay-Rex name, but with their own shapes and shape numbers.

Locations: (Flagship Store) 75 Broad Street, New York, New York 10004 Telephone: (212) 962-3355

70 East 42nd Street, New York, New York 10165 Telephone: (212) 692-9680

570 Lexington Avenue, New York, New York 10022 Telephone: (212) 888-1015

Email: info@barclayrex.com Website: http://www.barclayrex.com Toll Free: (888) 278-6222 Fax: (212) 962-3372

With the information from Pipedia I knew that I was working on a pipe from the Barclay-Rex Tobacconist in New York City. The fellow we bought them from intimated that he purchased them at the Manhattan store. I was unable to pin down any information regarding the date this pipe was made. Now it was time to work on the pipe.

Jeff carefully cleaned the pipe. He reamed it with a PipNet pipe reamer and then cleaned up the reaming with a Savinelli Fitsall Pipe Knife. He scrubbed out the internals of the shank, stem and shank extension with alcohol, pipe cleaners and cotton swabs until the pipe was clean. He scrubbed the exterior of the bowl with Murphy’s Oil Soap and a tooth brush to remove the grime and grit on the briar and lava on the rim top. The finish looks much better and has a deep richness in the colour that highlights grain of the briar. The rim top was severely damaged on the entire outer edge and the inner edge was chipped and nicked. When the pipe arrived here in Vancouver I was amazed that it looked as good as it did. Here are some photos of what I saw. I took some close up photos of the rim top and the stem surface. The inner edge of the rim had some nicks and burn damage on the bevel. The outer edge had a nicks and chips missing all the way around the bowl. There was some darkening on the rim top that would need to be cleaned up. I took close up photos of the stem to show the condition of the surface and button.I took a picture of the stamping on the left side of the shank and it was faint but readable as noted above.I removed the stem from the shank and took a photo of the parts of the pipe. I started my work on the pipe by addressing the damage to the rim top and edges of the bowl. It was a mess so it was going to take the majority of work on this pipe to get it back to some semblance of round once more. I topped it on a topping board with 220 grit sandpaper to smooth out the top and give me a sense of the outer edge around the bowl.   Once I had it smooth I could clearly see the damage around the top and outer edge of the bowl. I repaired the deep chips around the edge and rim with clear CA glue and briar dust. I layered on the dust and glue to rebuild the edges. I flattened out the repairs with a small flat file. I worked to being them down to the surface of the surrounding briar. From there I would need to sand but it was looking better.   I sanded the bowl down with folded 220 grit sandpaper to smooth out the transition and remove the darkening opaque stain around the bowl sides and shank. I wiped it down with alcohol to remove the finish and the sanding dust. I polished the briar with micromesh sanding pads – dry sanding with 1500-1800 grit pads to prepare for staining the bowl. It started to bring out the grain. I would do more polishing with micromesh after the staining of the bowl. I stained the bowl with a light brown aniline stain. I applied it to the bowl with the dauber and then flamed it to set it in the grain. I repeated the process until I was happy with the coverage of the colour on the briar. I wiped down the bowl with alcohol and cotton pads to remove the excess stain and make it more transparent. I polished the stained briar with micromesh sanding pads. I used 1500-12000 grit sanding pads and wiped the bowl down with a damp cloth between each pad. The grain began to stand out with the polishing. I worked some Before & After Restoration Balm into the surface of the bowl and shank with my fingertips to clean, enliven and protect the briar. I let the balm sit for 15 minutes and then buffed with a cotton cloth to raise the shine. The photos show the bowl at this point in the restoration process. I set the bowl aside and turned my attention to the stem. I “painted” it with the flame of a Bic lighter to lift the tooth dents in the surface of the vulcanite. I was able to lift the majority of them. I sanded those that remained smooth with a folded piece of 220 grit sandpaper to blend them in the rest of the stem surface. I started polishing the stem with 400 grit wet dry sandpaper. I polished the stem with micromesh sanding pads – dry sanding with 1500-12000 grit sanding pads. I wiped it down after each sanding pad with Obsidian Oil. I polished it with Before & After Pipe Stem Polish – both Fine and Extra Fine. I gave it a final coat of Obsidian Oil. With the bowl and the stem finished I put the beautiful Barclay-Rex New York Petite Bent Dublin back together and buffed it on the wheel using Blue Diamond to give it a shine. I gave the bowl and the stem multiple coats of carnauba wax on the wheel. I buffed it with a clean buffing pad to raise the shine. I hand buffed it with a microfiber cloth to deepen the shine. It really is a great looking pipe. The dimensions of the pipe are – Length: 5 ¾ inches, Height: 1 ¾ inches, Outside diameter of the bowl: 1 ¼ inches, Chamber diameter: ¾ inch. The weight of this large pipe is .99 ounces /28 grams. This Barclay-Rex Petite Bent Dublin is another great find in this collection. It is much more beautiful in person than these photos can capture. I will be putting it on the rebornpipes store soon. If you would like to add it to your collection let me know. This is another pipe that has the possibility of transporting the pipe man or woman back to a slower paced time in history where you can enjoy a respite. Thanks for walking through the restoration with me.


Working on the Third of Seven Barclay-Rex Pipes – A Large Pot


Blog by Steve Laug

It seems like just a few weeks ago I was contacted by an older gentleman about purchasing his pipe collection. He sent me the photos and I was amazed at what I saw. He had Dunhill pipes, BBB pipes, Orlik pipes, Barclay Rex Pipes, a couple of Meerschaums and a whole lot of other pipes. All I could say as I looked at the pipes was what a collection it was. We negotiated a deal and I think we both walked away quite happy with the exchange.

You have seen the work we have done on the Dunhills, Hardcastles, H. Simmons all briar billiard and BBB pipes from the lot but there are still more. The above photo shows all of the Barclay-Rex pipes that were purchased from the New York City shop by the fellow we bought the collection from. The pipe I am working on is the third pipe down from the top of the picture and is a pot with a crowned rim top. I have circled it in red in the photo above.

I have worked on several Barclay-Rex pipes in the past and this large bowled Pot is a beauty in terms of shape and grain. This pipe is stamped on the left side of the shank and reads BARCLAY-REX [over] New York. The stamping is clear and readable and there is no shape number evident.

Jeff took some photos of the BARCLAY-REX Large Bowl Pot with slightly bent stem before he worked his magic in cleaning up the pipe. It is a an interesting pipe with a lot of potential and what appears to be some great grain under the grime and debris of the years.     Jeff took photos of the bowl, rim top to show the thickness of the cake in the bowl and the thick lava on the rim top. There is some damage to the outer edge of the rim that is visible in the photos. He took photos of the top and underside of the vulcanite stem showing the oxidation, calcification, tooth marks, chatter and wear on the stem and button. Jeff took photos of the sides and heel of the bowl to show the condition of the briar. You can see the beautiful shape and the grain on the bowl even through the dirt and debris of many years. He took a picture of a large flaw on the back right side of the bowl. This would need to be dealt with.Jeff took a photo of the stamping on the left side of the shank. You can see that it is faint but readable as noted above.I turned to Pipephil’s site to see what I could learn about the Barclay-Rex brand and particularly the sandblast one I was working on (http://pipephil.eu/logos/en/logo-b1.html). I have included a screen capture of the information that is shown there.I quote from the sidebar on the site below as it gives a good summary of information.

Brand created in 1910. The shop was situated on Maiden Lane. Three addresses now (2010): 75 Broad Street, 70 East 42nd Street, 570 Lexington Avenue. See also: André

I turned to Pipedia to try and place this pipe in the timeline of the brand and was able find some helpful information which I have included below (https://pipedia.org/wiki/Barclay_Rex). I quote the information below.

Barclay-Rex, a downtown Manhattan tobacconist, was founded in 1910 by Vincent Nastri, a pipemaker from Salerno, Italy. The store was originally located at Barclay and Church Street, and the name was taken from that location and Nastri’s beloved Great Dane, Rex. The business is still run by Vincent Nastri, III and owned by Vincent Nastri, Jr.. They have several locations in New York City. The store has carried pipes from all fine makers, and the Barclay-Rex line of pipes is also much sought after, in that pipes were made in a range from the very inexpensive into the several hundreds of dollars. The pipes were, at least into the 1960’s, made of Algerian briar.

In addition to pipes made by Mr. Nastri over the years, Mr. Nastri, III, has been quoted as stating that a pipemaker just leaving Dunhill made pipes with a small off-white dot on the stem for a time for the shop. As was discovered by Steve Laug of Reborn Pipes, they were evidently made by a pipemaker whose initials were HGP, and stamped on the pipe as such. These pipes were made for a single run only, and then never made again.

In addition, Sasieni at least for a time made private label pipes stamped with the Barclay-Rex name, but with their own shapes and shape numbers.

Locations: (Flagship Store) 75 Broad Street, New York, New York 10004 Telephone: (212) 962-3355

70 East 42nd Street, New York, New York 10165 Telephone: (212) 692-9680

570 Lexington Avenue, New York, New York 10022 Telephone: (212) 888-1015

Email: info@barclayrex.com Website: http://www.barclayrex.com Toll Free: (888) 278-6222 Fax: (212) 962-3372

With the information from Pipedia I knew that I was working on a pipe from the Barclay-Rex Tobacconist in New York City. The fellow we bought them from intimated that he purchased them at the Manhattan store. I was unable to pin down any information regarding the date this pipe was made. Now it was time to work on the pipe.

Jeff carefully cleaned the pipe. He reamed it with a PipNet pipe reamer and then cleaned up the reaming with a Savinelli Fitsall Pipe Knife. He scrubbed out the internals of the shank, stem and shank extension with alcohol, pipe cleaners and cotton swabs until the pipe was clean. He scrubbed the exterior of the bowl with Murphy’s Oil Soap and a tooth brush to remove the grime and grit on the briar and lava on the rim top. The finish looks much better and has a deep richness in the colour that highlights grain of the briar. The rim top looked good with some darkening on the top and light damage to the inner edge of the bowl. When the pipe arrived here in Vancouver I was amazed it looked so good. Here are some photos of what I saw.   I took some close up photos of the rim top and the stem surface. The inner edge of the rim had some nicks and burn damage on the bevel. The outer edge had a nick on the front of the bowl. There was some darkening on the rim top that would need to be cleaned up. I took close up photos of the stem to show the condition of the surface and button.I took a picture of the stamping on the left side of the shank and it was faint but readable as noted above.I removed the stem from the shank and took a photo of the parts of the pipe. I started my work on the pipe by addressing the darkening on the rim top and the damage on the edges of the bowl. I used a folded piece of 220 grit sandpaper to work over the inner and outer edge to smooth out the damage and to remove the darkening on the rim top as well.   I used a Cherry stain pen to touch up the repair on the right side of the bowl and the rim top.I polished the briar with micromesh sanding pads – dry sanding with 1500-12000 grit pads. I wiped the briar down with a damp cloth after each pad. I worked some Before & After Restoration Balm into the surface of the bowl and shank with my fingertips to clean, enliven and protect the briar. I let the balm sit for 15 minutes and then buffed with a cotton cloth to raise the shine. The photos show the bowl at this point in the restoration process. I set the bowl aside and turned my attention to the stem. I “painted” it with the flame of a Bic lighter to lift the tooth dents in the surface of the vulcanite. I was able to lift the majority of them. I filled in the remaining marks with clear CA glue. Once the repairs cured I flattened them with a small file. I sanded them smooth with a folded piece of 220 grit sandpaper to blend them in the rest of the stem surface. I started polishing the stem with 400 grit wet dry sandpaper.  I polished the stem with micromesh sanding pads – dry sanding with 1500-12000 grit sanding pads. I wiped it down after each sanding pad with Obsidian Oil. I polished it with Before & After Pipe Stem Polish – both Fine and Extra Fine. I gave it a final coat of Obsidian Oil. With the bowl and the stem finished I put the beautiful Barclay-Rex New York Large Bowl Pot back together and buffed it on the wheel using Blue Diamond to give it a shine. I gave the bowl and the stem multiple coats of carnauba wax on the wheel. I buffed it with a clean buffing pad to raise the shine. I hand buffed it with a microfiber cloth to deepen the shine. It really is a great looking pipe. The dimensions of the pipe are – Length: 6 ½ inches, Height: 1 ½ inches, Outside diameter of the bowl: 1 ¾ inches, Chamber diameter: 1 inch. The weight of this large pipe is 1.66 ounces /47 grams. This Barclay-Rex Large Bowl Pot is another great find in this collection. It is much more beautiful in person than these photos can capture. I will be putting it on the rebornpipes store soon. If you would like to add it to your collection let me know. This is another pipe that has the possibility of transporting the pipe man or woman back to a slower paced time in history where you can enjoy a respite. Thanks for walking through the restoration with me.

Working on the Second of Seven Barclay-Rex Pipes – A Crowned Rim Pot Blog


Blog by Steve Laug

It seems like just a few weeks ago I was contacted by an older gentleman about purchasing his pipe collection. He sent me the photos and I was amazed at what I saw. He had Dunhill pipes, BBB pipes, Orlik pipes, Barclay Rex Pipes, a couple of Meerschaums and a whole lot of other pipes. All I could say as I looked at the pipes was what a collection it was. We negotiated a deal and I think we both walked away quite happy with the exchange.

You have seen the work we have done on the Dunhills, Hardcastles, H. Simmons all briar billiard and BBB pipes from the lot but there are still more. The above photo shows all of the Barclay-Rex pipes that were purchased from the New York City shop by the fellow we bought the collection from. The pipe I am working on is in the center of the picture and is a pot with a crowned rim top. I have circled it in red in the photo above.

I have worked on several Barclay-Rex pipes in the past and this one is a beauty in terms of shape and grain. This pipe is stamped on the left side of the shank and reads BARCLAY-REX [over] New York. The stamping is faint but readable and there is no shape number evident.

Jeff took some photos of the BARCLAY-REX Pot with a crowned rim and slight bend to the stem before he worked his magic in cleaning up the pipe. It is a an interesting pipe with a lot of potential and what appears to be some great grain under the grime and debris of the years.    Jeff took photos of the bowl, rim top to show the thickness of the cake in the bowl and the thick lava on the rim top. There is some damage to the outer edge of the rim that is visible in the photos. He took photos of the top and underside of the vulcanite stem showing the oxidation, calcification, tooth marks, chatter and wear on the stem and button. Jeff took photos of the sides and heel of the bowl to show the condition of the briar. You can see the beautiful shape and the grain on the bowl even through the dirt and debris of many years. Jeff took a photo of the stamping on the underside of the shank. You can see that it is faint but readable as noted above. I turned to Pipephil’s site to see what I could learn about the Barclay-Rex brand and particularly the sandblast one I was working on (http://pipephil.eu/logos/en/logo-b1.html). I have included a screen capture of the information that is shown there.I quote from the sidebar on the site below as it gives a good summary of information.

Brand created in 1910. The shop was situated on Maiden Lane. Three addresses now (2010): 75 Broad Street, 70 East 42nd Street, 570 Lexington Avenue. See also: André

I turned to Pipedia to try and place this pipe in the timeline of the brand and was able find some helpful information which I have included below (https://pipedia.org/wiki/Barclay_Rex). I quote the information below.

Barclay-Rex, a downtown Manhattan tobacconist, was founded in 1910 by Vincent Nastri, a pipemaker from Salerno, Italy. The store was originally located at Barclay and Church Street, and the name was taken from that location and Nastri’s beloved Great Dane, Rex. The business is still run by Vincent Nastri, III and owned by Vincent Nastri, Jr.. They have several locations in New York City. The store has carried pipes from all fine makers, and the Barclay-Rex line of pipes is also much sought after, in that pipes were made in a range from the very inexpensive into the several hundreds of dollars. The pipes were, at least into the 1960’s, made of Algerian briar.

In addition to pipes made by Mr. Nastri over the years, Mr. Nastri, III, has been quoted as stating that a pipemaker just leaving Dunhill made pipes with a small off-white dot on the stem for a time for the shop. As was discovered by Steve Laug of Reborn Pipes, they were evidently made by a pipemaker whose initials were HGP, and stamped on the pipe as such. These pipes were made for a single run only, and then never made again.

In addition, Sasieni at least for a time made private label pipes stamped with the Barclay-Rex name, but with their own shapes and shape numbers.

Locations: (Flagship Store) 75 Broad Street, New York, New York 10004 Telephone: (212) 962-3355

70 East 42nd Street, New York, New York 10165 Telephone: (212) 692-9680

570 Lexington Avenue, New York, New York 10022 Telephone: (212) 888-1015

Email: info@barclayrex.com Website: http://www.barclayrex.com Toll Free: (888) 278-6222 Fax: (212) 962-3372

With the information from Pipedia I knew that I was working on a pipe from the Barclay-Rex Tobacconist in New York City. The fellow we bought them from intimated that he purchased them at the Manhattan store. I was unable to pin down any information regarding the date this pipe was made. Now it was time to work on the pipe.

Jeff carefully cleaned the pipe. He reamed it with a PipNet pipe reamer and then cleaned up the reaming with a Savinelli Fitsall Pipe Knife. He scrubbed out the internals of the shank, stem and shank extension with alcohol, pipe cleaners and cotton swabs until the pipe was clean. He scrubbed the exterior of the bowl with Murphy’s Oil Soap and a tooth brush to remove the grime and grit on the briar and lava on the rim top. The finish looks much better and has a deep richness in the colour that highlights grain of the briar. The rim top looked good with some darkening on the top and light damage to the inner edge of the bowl. When the pipe arrived here in Vancouver I was amazed it looked so good. Here are some photos of what I saw.   I took some close up photos of the rim top and the stem surface. The inner edge of the rim had some nicks and burn damage on the bevel. The outer edge had some chips and nicks. There was some darkening on the rim top that would need to be cleaned up. I took close up photos of the stem to show the condition of the surface and button. I took a picture of the stamping on the underside of the shank and it was faint but readable as noted above.I removed the stem from the shank and took a photo of the parts of the pipe. The metal tenon is in excellent condition and the threaded shank also looks very good.I started my work on the pipe by addressing the darkening on the rim top and the damage on the edges of the bowl. I used a folded piece of 220 grit sandpaper to work over the inner and outer edge to smooth out the damage and to remove the darkening on the rim top as well.I polished the briar with micromesh sanding pads – dry sanding with 1500-12000 grit pads. I wiped the briar down with a damp cloth after each pad. I worked some Before & After Restoration Balm into the surface of the bowl and shank with my fingertips to clean, enliven and protect the briar. I let the balm sit for 15 minutes and then buffed with a cotton cloth to raise the shine. The photos show the bowl at this point in the restoration process. I set the bowl aside and turned my attention to the stem. I “painted” it with the flame of a Bic lighter to lift the tooth dents in the surface of the vulcanite. I was able to lift the majority of them and interestingly the small pin hole on the topside sealed off. I filled in the remaining marks with clear CA glue. Once the repairs cured I sanded them smooth with a folded piece of 220 grit sandpaper to blend them in the rest of the stem surface. I started polishing the stem with 400 grit wet dry sandpaper. I polished the stem with micromesh sanding pads – dry sanding with 1500-12000 grit sanding pads. I wiped it down after each sanding pad with Obsidian Oil. I polished it with Before & After Pipe Stem Polish – both Fine and Extra Fine. I gave it a final coat of Obsidian Oil. With the bowl and the stem finished I put the beautiful Barclay-Rex New York Crowned Rim Pot back together and buffed it on the wheel using Blue Diamond to give it a shine. I gave the bowl and the stem multiple coats of carnauba wax on the wheel. I buffed it with a clean buffing pad to raise the shine. I hand buffed it with a microfiber cloth to deepen the shine. It really is a great looking pipe. The dimensions of the pipe are – Length: 6 inches, Height: 1 ½ inches, Outside diameter of the bowl: 1 ½ inches, Chamber diameter: 1 inch. The weight of this large pipe is 1.34 ounces /38 grams. This Barclay-Rex Pot is another great find in this collection. It is much more beautiful in person than these photos can capture. I will be putting it on the rebornpipes store soon. If you would like to add it to your collection let me know. This is another pipe that has the possibility of transporting the pipe man or woman back to a slower paced time in history where you can enjoy a respite. Thanks for walking through the restoration with me.

A Mystery Pipe for Luxury – Discovering a Comoy’s St. Regis De Luxe Made in London England Apple


Blog by Dal Stanton

The large Apple now on the worktable came to me in September of 2017 in a Lot of 66 pipes from a seller in Georgetown, Texas.  The lot had belonged to a pipe man which had been donated by his family after his passing to a charitable organization to auction.  I was privileged to add these pipes to the For “Pipe Dreamers” Only! collection for other pipe men and women to commission benefitting another good cause close to my heart, the Daughters of Bulgaria – helping women and girls who have been trafficked and sexually exploited.  Many of these ‘66’ have made it to the collections of new stewards all over the world.  One pipe man, Nat, who is from South Florida, saw the St. Regis De Luxe and reached out to me about it.  Some years ago, I had met Nat briefly in my mother’s church in Stuart, Florida, and Nat had mentioned that he was the brother-in-law to one of my fellow work colleagues in Europe and my colleague (from Europe) had mentioned to Nat (in Florida) about The Pipe Steward and that Nat should have a look.  I love the fellowship of pipe men around the world!  Here are pictures of the St. Regis Nat commissioned. The nomenclature stamped on the left flank of the shank is, ST. REGIS [over] DE LUXE.  The right side of the shank is stamped the COM and shape number: MADE IN LONDON [over] ENGLAND and to the right is, 483.The saddle stem has a stamp with an ‘S’ encircled which I assume is referencing the ‘S’ of Saint.I have never worked on a St. Regis before this, and my research begins at all the normal places which offers nothing regarding a St. Regis line of pipes.  My normal beginning places, Pipedia and Pipephil.eu rendered nothing.  I looked at a variation of simply, ‘Regis’ without the ‘St.’ and still no traction.  Next, my ‘go to’ pipe bible, ‘Who Made That Pipe?’ by Herb Wilczak & Tom Colwell gave a listing for St. Regis, but it was attributed to a now-defunct Waldorf Pipe Company in the USA.  I discovered that it was a pipe factory in 1939 located in Chicago that was referenced as selling metal pipes at the same Chicago address attributed to another pipe company – Challenger Pipe Company located at 549 North Randolph Street.  An interesting trail, but for the St. Regis on my worktable with a Made in London England county of origin – Chicago was a rabbit trail.  Next, I did some ‘Hail Mary’ searches on the internet looking for a St. Regis pipe line – nothing.

In forensic research one must stay with the information at hand.  The next step in the research trail looking for some traction on the origins of the St. Regis De Luxe was the shape number.  The look and feel of the English pipe on my table takes my guessing back to at least the 1960s – just a guess.  I decided to look at the pipe shapes of English pipe makers to see if I could find a hit where the shape number 483 lined up with an Apple shape.  I looked at BBB, GBD and Ben Wade during this general period.  No hits – no ‘483s’ could be found in any of those shape lists.  I finally hit something that showed some promise – Comoy’s.  I have all these shape lists in virtual files on my computer for easy access.  The Comoy’s Shape List comes from Pipedia’s article (see: LINK).  This is a clipping of the 483-shape described as a ‘Globe’.The ‘S’ following the ‘globe’ designation points to a saddle stem which is straight (‘str.).  ‘L’ is Comoy’s ‘large’ designation.  When I first saw the ‘globe’ listing my question was, is this how the Apple shape was described when this list was compiled?  I went back to Pipedia’s page and found the picture of the basic Comoy’s shapes and hit confirmation pay dirt.Comparing the St. Regis De Luxe to the Comoy’s 483 Large Apple – Saddle looked like a positive match.  At this point, I’m thinking that St. Regis is most likely a second of Comoy’s.  The listing of Comoy’s seconds is found on Pipedia’s main Comoy’s article (see: LINK) which I’ve listed here:

Seconds made by Comoy’s

Academy Award, Ace of spades, Ancestor, Astor, Ayres, Britannia, Carlyle, Charles Cross, Claridge, Coronet?, Cromwell, Damman?, Dorchester, Dunbar, Drury Lane, Emerson, Everyman, Festival of Britain, Golden Arrow, Grand Master, Gresham, Guildhall, Hamilton (according to Who Made That Pipe), Kingsway, Lion’s Head, Lord Clive, Lumberman, Hyde Park, Lloyds, Mc Gahey, Moorgate, Newcastle, Oxford, O’Gorman, Rosebery Extra, Royal Falcon, Royal Guard, Royal Lane, Scotland Yard, St JamesSunrise, Super Sports, Sussex, The Academy Award, The Golden Arrow, The Mansion House, The Exmoor Pipe, Throgmorton, Tinder Box Royal Coachman, Townhall, Trident, Trocadero, Westminster, Wilshire

The closest listing is ‘St. James’ – no St. Regis.  These ‘seconds’ lists often give a disclaimer that the list is not exhaustive, so my thoughts are that this is a Comoy’s second that didn’t make this list.  To add further confirmation that the St. Regis was made by Comoy’s was to look at the COM stamping.  All line Comoy’s COMs are stamped with either an arched (very early), circular or rugby shape – ‘Made in England’ or ‘Made in London England’ – depending on period.  The COM on the St. Regis is a straight – ‘Made in London’ over ‘England’.  Not a rounded Comoy’s COM.  Yet, looking through the myriad of examples of pictures of seconds of Comoy’s in the same Pipedia article, the COM designs run the gamut.  All I wanted to do is find a second of Comoy’s COM to match the St. Regis’ COM design to be able to have confidence that Comoy’s did produce seconds with this COM design.  Two Comoy’s seconds,  ‘Gresham’ and ‘Astor’, provided that confidence.

At this point, I am sure I have found the ‘Lost Second of Comoy’s of London’ and I’m thinking about writing to Pipedia to add this information to the archives.  Instead, I send Steve a note describing the process of research I used, the evidence I found and my question whether the St. Regis could be a Comoy’s second?  Steve’s response came quickly and hit a home run!

Hey Dal

There are St. Regis Hotels in many locations. I am wondering if the pipe was not made by Comoy’s for a smoke shop in one of these Hotels. In days past most of the quality hotels had smoke shops in their facilities

Steve

Of course!  I could almost feel the nostalgia in Steve’s words!  I wrote back to Steve and described how when I did my earlier ‘Hail Mary’ online searches for ‘St. Regis’, the only thing that came up was information about hotels and destinations….  The most likely missing piece of the puzzle was already trying to get my attention and Steve’s email brought the puzzle into focus.  Oh, for the days when hotels had ‘smoke shops’ and one wasn’t concerned about political correctness and getting canceled for blowing smoke rings in public as is the case in today’s world!  It makes sense that the St. Regis De Luxe was a pipe made by Comoy’s of London for these luxury hotels to make available to their patrons.

This is the current St. Regis Hotel in London and a picture of a lounge area – perhaps back in the day can one imagine pipe smoke wafting….

With a better understanding of the Comoy’s origins of the St. Regis De Luxe Large Apple, I take a closer look at the condition of the pipe now on the worktable.  The pipe was well loved but apparently, not too well treated.  He’s in pretty rough shape.  The cake is very thick in the chamber with a good bit of damage to the rim and crusting.  Most of the damage is on the back side of the rim where the briar is scraped and worn down – most likely the flame lighting side.   The dip in the rear rim quadrant can be discerned from this angle.  What is also evident is that the upper quadrant of the bowl is significantly darkened around its circumference.  This possibly points to heating problems and the need of a close inspection of the chamber underneath the thick carbon buildup.The bowl is darkened from heating as well as grime on the surface that needs cleaning.  There are also several small fills which will need a closer look after cleaning the surface. The shank also shows several small fills. One fill is in the center of the COM.  This should be fun.The stem has heavy oxidation as well as calcium build up on the bit.  The bit looks like it’s been chewed pretty well.  The upper and lower bit has clinch marks, and the button has been worn down.To begin the restoration of the St. Regis De Luxe, I start with the stem.  The first step is to deal with the deep oxidation which is seen in the pictures above.  Before working on the oxidation, the stem’s airway is cleaned using several pipe cleaners dipped in isopropyl 99%.In my last write up of the Dr. Grabow Blasted Sculptura Bulldog, I tried for the first time a new product from www.Briarville.com called, ‘Pipe Stem Oxidation Remover’.  The St. Regis stem joined the Dr. Grabow stem to test the new product. The stems were put in the solution, which the smell reminded me of mouthwash, for the maximum period described in the directions on the label – 2 to 24 hours.  I wanted the stems to get the full impact of the Oxidation Remover, whatever it was.After the 24 hours, the St. Regis stem was removed and was first scrubbed with a dry cotton pad to wipe the residue that resulted through the deoxidation process.  The dry cotton pad was followed by a cotton pad wetted with alcohol to remove more raised oxidation. The stem was then conditioned using paraffin oil and set aside to dry.  Overall, I’m pleased with the result of the Briarville product and will continue to use it to see how it performs in the long term.With a bit of fear and trepidation, I turn now to the stummel.  The first step is to clear the thick carbon cake build up in the chamber.  I take a fresh picture of the thick cake to mark the starting point.The chamber is reamed with the Pipnet Reaming Kit using 3 of the 4 blade heads available.  Following this, the chamber walls are scraped with the Savinelli Fitsall Tool and finally sanded with 240 paper.  I’m wondering if this chamber has ever been reamed before this?I would be dishonest to say that I wasn’t surprised to find what was found after inspecting the chamber.  I expected to find heating veins and possibly fissures in the chamber wall.  Instead, I happily find what looks like healthy briar underneath the cake.  I’m thankful for this surprise!Next, turning to the cleaning of the rim and the briar surface, undiluted Murphy’s Oil Soap is used on a cotton pad to begin the scrubbing.  A starting picture is taken as a reminder of the dark, grimy surface.The grime on the surface was thick and a brass wired brush was used additionally to work on the rim.The stummel was then taken to the sink along with shank brushes and the internal mortise walls were scrubbed with the brushes and anti-oil liquid dishwashing soap and warm to hot water.  After a thorough rinsing, the stummel returned to the worktable.  The next picture reveals that the finish was nonexistent after the cleaning.  The darker upper part of the bowl that I thought indicated heating problems was removed during the cleaning.To continue the internal cleaning, cotton buds and pipe cleaners wetted with isopropyl 99% waged a fierce war against the thick gunk that had built up no telling how long!  A small dental spoon also excavated oils and tars off the mortise walls.  After a lot of effort, a truce was declared after the buds began to emerge lighter. I will continue the internal cleaning later at the end of the day with a kosher salt and alcohol soak through the night.Turning now to look more closely at the briar surface after the cleaning, it is no surprise that there is little if any of the old finish remaining.  The damage to the aft side of the bowl is evident and will need to be addressed.The dark shadow which I feared was darkening of the briar because of overheating turned out not to be the case.  The scrubbing generally removed the darkened area, but blotches remain on the surface.There are several small pit fills on the briar surface.  They seem to be solid after testing and probing them.  I’ll keep my eye on these as I clean the surface. One other thing that the cleaning reveals is that the chamber does have fine heating veins which are not problematic.  With the development and maintenance of a proper cake of a dime’s width, this should not develop into something worse.Next, to begin the restoration of the stummel, I begin with the rim and work downward. The following angle shows the area worn down as the rim dips on the back section of the rim.  To relevel the rim, topping will be necessary to sand down the high part of the rim to gain alignment with the dipped area. Using a chopping board and my portable topping board, a sheet of 240 sanding paper is placed on it.  With the stummel inverted, I start the process of rotating the stummel over the paper to sand down the rim to become even.  The tricky part is to keep the rim level and not to tip into the ‘soft’ dip as the stummel is rotated.After only a few rotations I stop to check the progress.  I can tell that I’m staying true to the plane of the rim because the paper is making contact only with the high briar and low dip remains out of reach of the sanding in the initial stages.The process continues slowly with a few rotations and checking to see the progress shown in the following pictures. I come to the point where the removal of more briar has diminishing returns.  The dip has been removed through the topping and the chamber is close to a good round.  The remaining dark area on the back right of the rim should be removed with the introduction of a bevel.To smooth the 240 sanding on the topping board, the paper is changed to a 600 grade paper and the stummel is rotated a few more times.  The finer sanding reveals the residual damage to the back of the rim.  There is a small fault briar running laterally in the rim. There is also a chip on the inner rim edge that is too deep for the topping to remove without taking off too much briar.Next, 240 paper is used to sand a bevel on the inner rim edge. The bevel helps to remove the charred briar on the edge as well as defining more crisply the chip on the inner lip which helps in the patching process.To address this chip, I apply briar dust putty.  Using a small amount of briar dust, it is mixed with regular CA glue on a piece of paper I have topped with scotch tape, so the glue is not absorbed.  I add a small amount of CA next to the briar dust and mix the briar dust in until it gets to the consistency of molasses. I then use the toothpick to trowel a small amount of putty onto the chip to fill it.  A small amount is applied on the rim top to fill the small crevasse running on the rim.I put the stummel aside for a few hours to have dinner – my wife just called – and to allow the patches to cure.After dinner and a few episodes on TV of our favorite, I return to the worktable and the rim patches are cured.  Using a half circle needle file, the patches are filed down flush with the briar – using the curve in the file to round the chamber side of the chip patch. Following the filing, 240 paper followed by 600 paper smooths and blends the chip patch as well as the rim top patch. It looks good.With the day ending, the internal cleaning is continued with a kosher salt and alcohol soak.  I use kosher salt because it doesn’t leave an aftertaste as does the regular iodized salt. Using a cotton ball, after stretching and twisting it to form a wick, it is then guided down the mortise to the draft hole with the help of a stiff wire.  The cotton wick helps to draw out the tars and oils from the internal briar.After the bowl is filled with salt, the stummel is placed in the egg crate to keep it stable and at the right angle – top of the bowl and the end of the shank are close to level.  Isopropyl 99% is then placed in the bowl with a large eye dropper until it surfaces over the salt.  After about 10 minutes, the alcohol is topped off after it is absorbed into the salt and cotton wick.  I put the stummel aside and turn out the lights.The next morning the soiling of the cotton wick and salt are indications that the soak process was at work.  After removing the expended salt and tossing it in the waste, the bowl is wiped with a paper towel and I blow through the mortise to make sure all the salt crystals are removed.To make sure that the internals are clean, and no residue is left behind, a pipe cleaner and 2 cotton buds dipped in isopropyl 99% are good indicators that all is clean and fresh for the new steward.  I move on.Looking now to the stummel briar surface, I will use sanding sponges to clean the myriad of nicks and stains.  To guard the very thin stampings, especially on the COM side, both shank stampings are covered with painter’s tape.   I then use 4 sanding sponges starting with a coarser grade moving to a medium and then finer sponges.  The results are good.  The grain begins to emerge through the sanding process and the surface is clearing of the nicks and dents.After the sanding sponges, I take another close look at the various small fills that are on the briar surface to make sure they are still looking good. They are solid and I move on to using micromesh pads to continue the sanding process. Starting with pads 1500 to 2400, the stummel is wet sanded.  Following this is dry sanding with pads 3200 to 4000 and 6000 to 12000.  After using 5 pads in the process, the tape over the nomenclature is removed to help blend the resulting spot. At this stage of sanding, I’m not concerned that it will cause additional deterioration to the nomenclature.  The grain is coming through very nicely.   The next step in the process of the restoration of this Comoy’s St. Regis is to apply a dye to the stummel.  With all the fills and rim repair and with the shank spots left from the taping over the nomenclature, the decision to darken the stummel was not difficult.  I will use Fiebing’s Mahogany Leather Dye to do the job.  I decide to try Mahogany which has a slight lighter and more reddish tone than my usual approach in using Dark Brown.  I picked up the Mahogany to add to the dyes I have on hand and would like to see how it behaves.  After assembling the components needed to stain the stummel, the stummel is heated using a hot air gun.  This expands the briar grain and encourages the grain to be more receptive to the hue of the dye.With the stummel heated, the dye is applied in patches with a folded pipe cleaner.  A cork makes a good handle.  The aniline dye is then ‘flamed’ with a lit candle which immediately combusts the alcohol in the dye.  This combustion then sets the dye pigment into the grain.  After methodically painting and flaming the entire stummel, the stummel is put aside for several hours allowing the new dye to settle in.With the stummel on the side resting, I turn now to the stem and take a close look.  The Briarville Oxidation Remover seems to have done a good job with no oxidation that I can see now.  The upper and lower bits have bite compressions and the vulcanite over the stem is rough.  The vestiges of the circled ‘S’ stamp are remaining, and care is needed in protecting this.  The first step to repairing the stem is to use the heating method to expand the vulcanite allowing it to regain its original condition – or closer to it.  A Bic lighter is used to paint the vulcanite surface with flame.  The comparison pictures of before and after show the results.  The bite marks on the upper and lower bit are remarkably similar.  The heating did not erase the compressions, but I believe that sanding alone will do the job – without having to patch the indentations with CA glue. A flat needle file is used first to redefine and refresh the button lips – upper and lower.Next, 240 grade paper sands out the remaining compressions in the upper and lower bit.To smooth the vulcanite, the sanding is expanded to include the entire stem.  I sand around the logo stamping and use a plastic disk to guard from shouldering the stem facing.Next, the sanding transitions to wet sanding with 600 grade paper and then applying 0000 grade steel wool.Next, the full application of micromesh pads is utilized starting with wet sanding with pads 1500 to 2400.  Following this, with pads 3200 to 4000 and 6000 to 12000, the stem is dry sanded.  Between each set of 3 pads, Obsidian Oil is applied to the stem to condition it and to guard against future oxidation.  I like the glassy pop resulting from the process. With the stem now waiting in the wings, I turn back to the stummel which has been resting for several hours after the application of Fiebing’s Mahogany Leather Dye.  This is the first time I have used Mahogany and I’m curious to see how it will render grain definition after ‘unwrapping’ the flamed crust.  Using Red Tripoli compound with a felt buffing wheel mounted to the rotary tool, the process of removing the crust of flamed dye is done with a slower speed – about 30% full power rather than my usual 40%.  I do this to reduce the heat buildup happening with the more abrasive compound and felt wheel combined together ‘bulldoze’ the surface.I enjoy the unwrapping process to watch the newly dyed grain appear.  I expected the Mahogany to have a slightly redder hue than straight dark brown and what I see looks good.   A few pictures show the process.  The veins of the grain have absorbed the dye giving a luminescent quality to the briar as the Mahogany-darkened grain contrasts with the lighter soft briar. As the felt buffing makes progress very slowly, it is purged often on a hard edge to clean it of the crusted dye collected and to soften it.Again, using Tripoli compound, a cotton cloth buffing wheel is mounted, and the speed is increased to about 50% full power and I give another round of buffing to remove more excess dye which sharpens the grain definition.  The cotton wheel is also able to reach into the crook of the shank/bowl junction to remove excess dye crust better not as accessible as well with the less flexible felt wheel.Following the Tripoli compound the bowl is wiped with a cotton pad wetted with alcohol.  This is done not so much to lighten the dye but to remove more excess and to blend the new dye. After rejoining the stem with the stummel, another cotton cloth wheel is mounted on the rotary maintaining 40% full power speed.  Blue Diamond compound is then applied to the pipe to achieve an even more brilliant shine with the lesser abrasive compound.After the Blue Diamond is applied, the entire pipe is buffed with a felt cloth.  This is done to remove the compound dust from the surfaces before application of the wax.  Before applying the wax, the stem logo needs refreshing.  By the looks of the logo, I can already tell that the left side of the logo has worn away too much and will most likely not hold the acrylic paint. Using white acrylic paint, a drop of paint is placed over the circled S.The paint is then daubed with a cotton pad to absorb the excess and dry the paint.The side of the pointed cotton bud is used to lightly scrape over the logo removing the excess surface paint from the stem surface.  What is left is what I expected – a logo not fully intact but showing some of its former condition.The home stretch!  Another cotton cloth buffing wheel is mounted on the rotary tool at 40% speed.  Carnauba wax is applied to the pipe.  After application of the wax, the pipe is given a hearty hand buffing with a microfiber cloth to raise the shine further and to disperse and excess waxy residue.This Comoy’s St. Regis De Luxe Apple certainly made a surprising reappearance!  If he could only talk!  Steve and I believe he was made by Comoy’s for the luxury hotel chain, St. Regis, back in the day when quality hotels had their own tobacconist shops catering to the customers’ needs – pipe men and cigar aficionados situated in leather chairs with drinks of choice adding to the pampered moment.  A day gone by 😊.  Nat commissioned the Comoy’s St. Regis Made in London, England, and will have the first opportunity to claim him from The Pipe Steward Store benefitting the Daughters of Bulgaria – helping women and girls that were trafficked and sexually exploited.  To recall just how far this Comoy’s St. Regis has come, a ‘before’ picture starts us off!  Thanks for joining me!


Breathing New Life into a Mehaffey 6 Lovat


Blog by Steve Laug

The next pipe on the work table came to Jeff and me from one of our estate purchases. It was in the box but was due to be restored for a while as we had a lot others in the queue ahead of it. Then on February 15th I received an email from a fellow named Rob inquiring if we had any Mehaffey pipes. I am including the email below as it is an interesting piece of history.

Hello, I am looking for a Mehaffey pipe. Ernest Mehaffey was my grandfather on my mothers side. I used to work in his shop when I was a child. Please let me know if you have any for sale or know of where I might buy one. I appreciate your time, Rob

I checked with Jeff and sure enough we had one Mehaffey left. I contacted Rob and let him know and he was quite happy. I told him it would be a little while before we got to it but that it was reserved for him. That time has come and it is on the table.

It an interesting looking piece – a smooth oil finished Lovat shaped pipe that came to us in the lot of 125 + Bertram pipes. The pipe is stamped on the left side of the shank and reads 6 followed by Mehaffey. It also has a 6 stamped in the same position on the right side of the shank. It is the last Mehaffey pipe that we have so I was looking forward to working on it. The finish had a lot of grime ground into the smooth finish on the briar. The bowl had a thick cake and a lava coat on the top of the rim. The outer edge looked to be in good condition and the inner edge had some damage on the front. This is probably the most near flawless Mehaffey we had as there are small sandpits but no visible fills in the bowl. The stem was in excellent condition with little oxidation and only light tooth chatter on the top and underside near the button. There were not markings or a logo on the taper stem. It really showed promise but it was very dirty. Jeff took some photos of the pipe before he started his cleanup work.He took photos of the rim top and bowl to give a clear picture of the thickness of the cake and tobacco debris as well as the overflow of lava on the rim top. He also took photos of the top and underside of the stem to show how clean it really was.    Jeff took photos of the sides and heel of the bowl to give a picture of what the briar looked like. There is some nice grain around the sides even though it is quite dry and washed out looking. The stamping on the and right side of the shank is clear and readable as noted above.  I turned to Pipephil to find if there as any information included on the brand. There was nothing listed. I turned then to Pipedia (https://pipedia.org/wiki/Mehaffey). There was limited information there on the brand. I quote the article in full below.

E.A. Mehaffey operated a pipe & tobacco shop in Wheaton, Maryland. He used to make pipes for many years but as legend has it, his house tobacco mixtures were much more prestigious than his pipes. Mehaffey was in business up to the 1980’s.

While this statement does not engender enthusiasm for E. A. Mehaffey’s pipe production, the Rhodesian with a Natural finish is a very nice piece of briar. Both sides of the bowl show mixed cross grain. On the front and back of the bowl there is some birdseye grain. This is a beautifully shaped Lovat with a vulcanite saddle stem that says to that Mehaffey indeed could turn out some beautiful, well-made pipes. Jeff had reamed the pipe with a PipNet pipe reamer and removed the rest of it with a Savinelli Fitsall Pipe Knife.  He scrubbed the bowl with undiluted Murphy’s Oil Soap with a tooth brush. He rinsed it under running warm water to remove the soap and grime. He cleaned out the inside of the shank and the airway in the stem with alcohol, cotton swabs and pipe cleaners. He soaked the stem in Briarville’s Pipe Stem Deoxidizer and rinsed it off with warm water. I took photos of the pipe once I received it. The rim top cleaned up really well. The edges of the bowl were also very clean. There was a little damage on the  back inner edge of the bowl but it was a simple fix. The stem surface looked very good some light tooth chatter near the button on both sides.    The stamping on the left side of the shank is clear and readable. The right side of the shank it is also stamped with another 6.  I removed the stem and took a photo of the pipe to give a sense of the whole. I used a folded piece of 220 grit sandpaper to smooth out the damage on the back inner edge of the bowl.I polished the repaired areas and the rest of the briar with micromesh sanding pads – wet sanding with 1500-12000 grit pads and wiping it down after each pad with a damp cloth.  I rubbed the bowl and shank down with Before & After Restoration Balm. I worked it into the surface of the bowl sides and shank with my fingertips to clean, enliven and protect the briar. I let the balm sit for a little while and then buffed with a cotton cloth to raise the shine. The grain came alive and the sandpits and flaws seem less visible than when I began. I set the bowl aside and turned to work on the stem. It was in good condition and the tooth marks were light so I figured they would polish out fairly easily. I polished the vulcanite stem with micromesh sanding pads – 1500-12000 grit pads. I wiped it down with Obsidian Oil after each sanding pad. I used Before & After Pipe Polish – both Fine and Extra Fine to further polish the stem.       This Lovat 6 from E.A. Mehaffey Pipe & Tobacco Shop in Wheaton, Maryland is a great looking pipe now that it has been restored. It really is a piece of pipe shop history as more and more of them disappear. The smooth oil cured finish around the bowl is quite beautiful and highlights the grain and works well with the polished vulcanite saddle stem. The flaws and pits are small and insignificant. I put the stem back on the bowl and carefully buffed the pipe with Blue Diamond on the buffing wheel using a light touch on the briar. I gave the bowl and the stem multiple coats of carnauba wax on the buffing wheel and followed that by buffing the entire pipe with a clean buffing pad. I hand buffed the pipe with a microfiber cloth to deepen the shine. The finished Mehaffey Lovat 6 fits nicely in the hand and feels great. Give the finished pipe a look in the photos below. The dimensions of the pipe are Length: 5 ½ inches, Height: 2 inches, Outside diameter of the bowl: 1 ¼ inches, Chamber diameter: ¾ of an inch. The weight of the pipe is 42 grams/1.45 ounces. I will be sending it on to E.A. Mehaffey’s Grandson soon so he can carry on the legacy of the pipe. Thanks for reading this blog and my reflections on the pipe while I worked on it. There are many more pipes of a variety of brands to come!

Working on a Lone Pipe of a Pair of Cased Ben Wade De Luxe


Blog by Steve Laug

It seems like just a few weeks ago I was contacted by an older gentleman about purchasing his pipe collection. He sent me the photos and I was amazed at what I saw. He had Dunhill pipes, BBB pipes, a Barling’s Make “Ye Olde Wood” Fossil, Orlik pipes, Barclay Rex Pipes, a couple of Meerschaums and a whole lot of other pipes. All I could say as I looked at the pipes was what a collection it was. We negotiated a deal and I think we both walked away quite happy with the exchange.

You have seen the work we have done on the Dunhills, Hardcastles, H. Simmons all briar billiard and BBB pipes from the lot but there are still more. The above photo shows a Ben Wade’s Special British Make Pipe Case with a single pipe in it. The single pipe is a Ben Wade De Luxe Apple with a Gold Band on the shank. It is a perfect fit for the cut out in the case.

Jeff took photos of the case and the label in it when it arrived in Idaho Falls. The case is in excellent condition  for its age. It is royal blue in colour and has a gold rectangle around the top lid. The inside of the lid bears a label as noted above. I have worked on a few Ben Wade English pipes in the past but this one was unique in many ways that will become evident in the photos below. I knew it was an old one but I had no idea how old until I worked through the mystery of the hallmarks on the shank. I have to say the age of the pipe was a surprise. Read on to find out how I determined the age.

This gold banded Ben Wade is stamped on the left side of the shank and reads Ben Wade in script over De Luxe. The stamping is clear and readable and there is no shape number evident. The gold band is also stamped and reads BW in an oval which is the sponsor’s mark (Ben Wade) followed by a series of hallmarks as noted. The first is a thistle in a shield like the gold mark in the chart below denoting Chester. The mark was used from 1904-1962 (I have drawn a red box around it in the chart below).I followed the thistle hallmark for Chester to a website that identified date letters and followed the link to the site. The Thistle stamp in the photo below is identical to the one on the pipe. I have drawn a red box around the mark of interest.The second hallmark is 9 in a circle followed by the third which is 375 which together identifies the mark as gold which 9 carat and is 375 percentage.

The link took me to the date chart (https://www.925-1000.com/dlc_chester.html). I have included it below. Note that it says Silver at the top but according to the site it is used on both gold and silver. The cartouche with a upper case V with a flourish identifies the pipe being made in 1921. I have drawn a box around the letter in the chart below.Now that we know what we have to work on Jeff took some photos of the 1921 Ben Wade De Luxe Apple before he worked his magic in cleaning up the pipe. It is a an amazing looking pipe for its age. It has a lot of potential and what appears to be some great grain under the grime and debris of the years.Jeff took photos of the bowl, rim top to show the thin cake in the bowl and the thick lava on the inner edge. This is the cleanest pipe that we picked up from this collection of pipes. It was in great shape in terms of the bowl and shank. He took photos of the top and underside of the vulcanite stem showing the light oxidation and the tooth marks and chatter on the stem and button surface. Jeff took photos of the sides and heel of the bowl to show the condition of the briar. You can see the beautiful shape and the grain on the bowl even through the dirt and debris of many years. Jeff took a photo of the stamping on the left side of the shank and on the band. You can see that the stamping  on the shank and stem is clear and readable as noted above.

I turned to Pipephil’s site to see what I could learn about the Ben Wade brand apart from the when Preben Holm carved under that name (http://pipephil.eu/logos/en/logo-benwade.html). I quote from the introduction on the site below as it gives a good summary of information.

Brand founded in the 1860’s at Leeds (GB). Lane Ltd. (NYC) bought the brand in 1962 and closed the factory in Leeds in 1965. The pipes were then manufactured in London at Charatan’s . During the period 1972 (about) – 1989 Ben Wade pipes were mass produced for Lane Ltd. by Preben Holm’s workshop in his very personal style. Peter Wilson owner of Duncan Pipes bought the rights of the brand in 1998.

I turned to Pipedia to try and place this pipe in the timeline of the brand and was able find some helpful information which I have included below ( https://pipedia.org/wiki/Ben_Wade). I quote the information below.

Ben Wade is one of the great names in English pipe making. As Richard Carleton Hacker noticed correctly Ben Wade, like many British pipe companies, has had a checkered history. Very checkered in this case.

The Family era – Family Era Nomenclature

The company was founded by Benjamin Wade in 1860 in Leeds, Yorkshire, where it was located for over a century. Ben Wade started as a pipe trader, but yet in the 1860’s he established a workshop to produce briar pipes. The pipes were made in very many standard shapes – always extensively classic and “very British”. Many models tended to be of smaller dimensions. Ben Wade offered a very high standard of craftsmanship and quality without any fills. Thus the pipes were considered to be high grade and a major competitor to other famous English brands. The often heard comparison to Charatan seems to be a little bit inadequate because those days’ Charatans were entirely handmade.

In the second World War the factory was destroyed by German air raids on Leeds. But the Ben Wade family decided to re-build it immediately after the war and pipe production was re-started soon and successfully linked to the fame from the pre-war years.

Before the second war Ben Wade clustered their offerings into three price points: “Ben Wade” included the higher end pipes (eg the Larnix, Super Grain, Selected Grain, etc), “BW” included the mid-level pipes (eg Statesman, Natural Grain, County, etc), and “BWL” were the least expensive (eg Hurlingham, Adelphi, Tense Grain). Champion was in the last group, and in the 1930s at least retailed for 2/6.

The Champion disappeared during the War when the Ben Wade line was materially slimmed down, presumably to reflect difficulties of supply. The name continued to appear in brand directories st least through the early sixties, however it’s unclear whether production was actually resumed.Courtesy PipesMagazine.com

Even though the owner family decided to leave pipe business and sell off the firm. The family went into negotiations with Herman G. Lane, president of Lane Ltd. in New York at about the same time as the Charatan family. Lane Ltd. bought both firms in 1962.

Herman G. Lane had been Charatan’s US sole distributor since 1955 and Charatan always remained his pet child. But Ben Wade was treated in another way by it’s new owner. The fabrication of pipes was reduced and the factory in Leeds was closed in 1965 finally.

So this was the end of Ben Wade pipes stamped “Made in Leeds, England”.

I have also include an advertising page on the brand. The way the signature was in the logo on the advertisement was the same as the one on this pipe.With the information from Pipedia I knew that I was dealing with a Family Era Ben Wade. It is a great piece of briar with chunky nicely made shape. The fellow we bought them from said that he had had this pipe for a very long time. I had dated the pipe to 1921 by the hallmarks on the gold band. Now it was time to work on the pipe.

Jeff carefully cleaned the pipe. He reamed it with a PipNet pipe reamer and then cleaned up the reaming with a Savinelli Fitsall Pipe Knife. He scrubbed out the internals of the shank, stem and shank extension with alcohol, pipe cleaners and cotton swabs until the pipe was clean. He scrubbed the exterior of the bowl with Murphy’s Oil Soap and a tooth brush to remove the grime and grit on the briar and lava on the rim top. The finish looks much better and has a deep richness in the colour that highlights grain of the briar. When the pipe arrived here in Vancouver I was amazed it looked so good. Here are some photos of what I saw.   I took some close up photos of the rim top and the stem surface. The crowned rim top and edges looked very good. I took close up photos of the stem to show the condition of the surface and button. I took a picture of the stamping on the left side of the shank and it was clear and readable as noted above.The pipe was in such good condition that I started with polishing the briar with micromesh sanding pads – dry sanding with 1500-12000 grit pads. I wiped the bowl down with a damp cloth after each pad. It really began to take on a shine. I worked some Before & After Restoration Balm into the surface of the bowl and shank with my fingertips to clean, enliven and protect the briar. I let the balm sit for 15 minutes and then buffed with a cotton cloth to raise the shine. The photos show the bowl at this point in the restoration process. I set the bowl aside and turned my attention to the stem. I polished the stem with micromesh sanding pads – dry sanding with 1500-12000 grit sanding pads. I wiped it down after each sanding pad with Obsidian Oil. I polished it with Before & After Pipe Stem Polish – both Fine and Extra Fine. I gave it a final coat of Obsidian Oil. With the bowl and the stem finished I put the beautiful 1921 Ben Wade De Luxe Apple back together and buffed it on the wheel using Blue Diamond to give it a shine. I gave the bowl and the stem multiple coats of carnauba wax on the wheel. I buffed it with a clean buffing pad to raise the shine. I hand buffed it with a microfiber cloth to deepen the shine. It really is a great looking pipe that feels amazing in the hand. The dimensions of the pipe are – Length: 4 ½ inches, Height: 1 ½ inches, Outside diameter of the bowl: 1 1/8 inches, Chamber diameter: ¾ of an inch. The weight of this large pipe is 1.09 ounces /30 grams. This older Ben Wade De Luxe is another great find in this collection. I will be adding this 1921 pipe to my own rotation of older pipes as it is too good to pass on. It is another pipe that has the possibility of transporting the pipe man or woman back to a slower paced time in history where you can enjoy a respite. Thanks for walking through the restoration with me.

Half ’n Half: An Amazing Transformation Of A St. Claude Bent Billiard


Blog by Paresh

On one of my online hunts for pipes on http://www.Etsy.com/fr (French) site, I came across this beautiful full bent chubby billiard that I really liked. In fact, this pipe called out to my heart. However, the condition of the pipe was such that spending even the paltry sum the pipe commanded, did not make for a sound purchase decision and I moved ahead. A few weeks later, this same pipe again popped on my notification alert and the Seller had further offered a discount. This time around, I made the purchase and within 20 days (that’s a record speed of shipping!!), it was received by Abha and she loved the shape and its chubbiness (??). Here are a few pictures of the pipe that Abha sent me after she had received the pipe… The pipe is stamped on the left side of the shank as “ST. CLAUDE” in cursive over “BRUYERE” in capital letters. The tapered bent high quality stem is stamped as “RW” which is faintly discernible through the thick layer of oxidation that is seen on this stem.At the back of my mind I knew that St Claude is a region in France that is well known for making briar pipes. To get a more accurate and detailed knowledge of the region and the society of all pipe makers in the region, I visited pipedia.org and here is what I learned (Saint-Claude – Pipedia)

Saint-Claude is a commune in the Jura department in the Bourgogne-Franche-Comté region in eastern France and was the world capital of wooden smoking pipes crafted by hand from the mid 19th century all the way to the mid 20th century.[1]

As early as the Middle Ages an established place of pilgrimage in Eastern France was the monastery of abbot Saint Claudius. In medieval iconography Saint Claudius was the patron saint of toymakers. The town that grew servicing the pilgrims was Saint-Claude. The pilgrims arrived from all over the Christian world, and the towns people made mementos for sale and lived off business from the pilgrims. The town also produced snuff and pipe stems made of boxwood, bone, horn and amber which they sold to Switzerland, Germany, and Austria. In time Saint-Claude became a thriving centre of wooden souvenirs, gem-setting, and luxuriously-carved pipe stems. According to local legend a Saint-Claude turner named David is credited with the making the first briar pipe. The souvenir industry of Saint-Claude supplied all the manufacturing preconditions for the making of the briar pipe. The firm of Jeantet, as early as 1807, was making and selling German type porcelain pipes, Ulm-type wood pipes and meerschaums from local wood and horn. The contemporary technology determined the shape of the pipes, and they were typically composed of wood-turned parts. Local records indicate that in 1841 there were three pipe-making firms employing twenty workers. 1854 is the year ascribed to the beginning of pipes made from briar.

Further down, the article gives out the changes in the name of the organization and it’s functioning up to 2007!!! The article has a single line on the stamp “Saint- Claude”……..

Stamp “Saint-Claude”
Pipe likely made by Butz-Choquin with JP on stem.

But on my pipe, the stamping on the stem is “R.W.” and so no headway in establishing the provenance of this beauty with piece of information!!

Towards the end, however, there was some information along with a couple of pictures that really caught my attention. Here is what it says…

Saint-Claude Briar Pipe, c. 1855
The pipe illustrated here is one of those early briar pipes made from wood turnings with the same construction as the contemporary pipe stems. It appears that this pipe was marketed to the pilgrim trade. We conclude this because of its lack of finish: the horn mouthpiece is not polished and shows file marks, the grade of the briar is low with large pits whose fillings have since fallen out, the wood is enameled not polished and all the connectors are wooden or horn screws. Of interest is the lip on the horn bit, it is a button lip.Though completely unrelated to the pipe currently on my work table, it is definitely closely related to a pipe that Steve, Jeff and my family had restored during their visit to India a couple of years back. Here is a link to that particular write-up on rebornpipes.com. The similarity is there for you to see. The Final Restoration while in Pune, India – a no name Cavalier | rebornpipes

I would really appreciate if I could be helped with establishing the provenance of this pipe.

Initial Visual Inspection
Abha, my wife, had sent me a lot of 40-45 pipes that she had cleaned up and all ready for my part of restoration process and since she had liked this pipe, it naturally found its way up in to this lot. From the images that Abha had sent, the pipe appeared to be reamed and with no serious damage to the stem, save for heavy oxidation. It was the stummel that is peppered with fills and would need a ton of work.

There are no pictures that were taken to clearly show the condition of each part of the pipe, however, as I had said earlier and the pictures that I have included above, the pipe had been reamed, the mortise had been cleaned, the stem was deeply oxidized but with no serious damage. The stummel had far too many fills on right side for my liking while the left side had a couple.

Initial Cleaning By Abha…
The initial cleaning on this pipe was done by Abha, my wife. She reamed out the complete cake and further smoothened out the chamber walls with a folded piece of 220 grit sand paper. She further cleaned out the internals of the shank with pipe cleaners and alcohol and cotton buds. She followed the internal cleaning of the shank with external cleaning of the stummel using Murphy’s Oil soap and hard bristled tooth brush and dried it with paper napkins and cotton cloth.

Next she cleaned out the internals of the stem air way and immersed it in “Before and After Deoxidizer” solution (pipe is marked in yellow arrow) along with the stem of other pipes in line for restoration. Once the stem had soaked overnight, she cleaned the stem under running warm water and scrubbed the raised oxidation from the stem surface using Scotch Brite pad. She further removed the oxidation by scrubbing the stem with 0000 grade steel wool and applied a little olive oil to rehydrate the stem.Once The Pipe Is On My Work Table…
The cleaned up pipe presents a very clear picture of what needs to be done to restore this pipe to a decent and smoke worthy condition. I really cannot thank Abha, my wife, enough for all the help and support that she extends in my pursuance of this hobby. I proceed to carry out my appreciation of the work that needs to be done on this pipe to restore it. The cleaned up pipe, as I received it, is shown below. The chamber walls are without any heat fissures or pits and that’s a big relief. The rim top surface is peppered with dents and dings. The inner rim edge shows charring at 3 o’clock and 9 o’clock direction (encircled in yellow) and should be addressed, to an extent, by topping on a piece of 220 grit sand paper. There are some minute chipped spots on the outer edge and fills over the rim top surface (encircled in blue). The condition of the chamber is good and will not require much repair work. There are no ghost smells in the chamber.The stummel surface is nice and clean and this cleaned up surface makes shiver my timbers… The right side of the stummel has the semblance of aftermath of a trench warfare battle during WW1! The surface has a large number of fills, many of which have fallen away when the stummel was cleaned. However, the right side has only a couple minor fills with some decent Bird’s eye grains seen over the surface. This clear division of surface, poor on half the left, front and heel and a decent one to the half right has me in a bit of a quandary. Should I rusticate the entire stummel surface or refresh all the fills, stain it dark, polish it and that’s it? Well, I shall cross the bridge once I reach it. The mortise is clean and air flow is smooth. Abha had cleaned the sump in the shank thoroughly and there are no traces of residual oils or tars/ gunk. The tapered vulcanite stem had cleaned up nicely. The surface still has some deep seated oxidation that will have to be removed. The upper stem surface has a couple of deep bite marks at the base of the button and also in the bite zone. The lower surface has some minor tooth indentations in the bite zone. The button edges on both the surfaces need to be sharpened. The aluminum stinger is clean on the exterior but has traces of residual oils and gunk on the inside. The seating of the stem in to the mortise is loose. The Process
The first issue that I addressed in this project was that of the stem repairs. I painted both surfaces of the stem with the flame of a lighter to raise the tooth chatter and bite marks to the surface. This also helps in loosening minor oxidation from the stem surface. I sand the entire stem surface with a folded piece of a 220 grit sand paper to remove the loosened oxidation. I wiped the stem with a cotton swab and Murphy’s oil soap to further clean the surface. Even though most of the tooth indentations have been eliminated by heating the damaged stem portion, one deep indention is still seen on upper and lower surfaces in the bite zone of the stem surface. I filled the tooth indentation in the button edge on both the lower and upper stem surfaces with a mix of activated charcoal and CA superglue and set it aside for the fill to cure. With the stem fills set aside for curing, I decided to work the stummel. The other day during a Face Time video call with Steve, we discussed the best way to transform this stummel. The long and short of the discussion was that it was decided to rusticate the stummel. This would help to mask the fills and provide a very tactile feel while smoking. However, when I held the stummel and saw the beautiful Bird’s eye grains on the left, I waivered from the plan of rusticating the entire stummel. I wanted to preserve and highlight these beautiful grains while the right side was a complete mess. A thought struck me, “why not rusticate the right half while leaving the left side smooth surfaced?” I had worked on a Bari Matador Freehand that had left side sandblasted while the right was smooth and the pipe looked awesome. Here is the link to the write up for the Readers to appreciate the beauty of this pipe. A Simple Refurbishing of a Bari “Matador” | rebornpipes

Though sandblasting is not feasible given that I do not have the necessary wherewithal to do so, I thought of doing something that was within my resources and capabilities…I would rusticate the right side while leaving the left side smooth. In case the end result is not to my liking, I could always rusticate the entire stummel. With this decision finalized, I proceed with rusticating the right half of the stummel.

I drew a mental map on the look/ pattern of rustications over the stummel surface that I desired. I decided to maintain a smooth ring atop the rustication below the outer edge of the rim and also at the shank end. I used a white paper and transparent tape to mask the entire left half of the stummel, the rim top about quarter of an inch below the rim outer edge and a thin band at the shank end that I wanted to keep smooth. Covering the entire left half also covered the faint stampings seen on this pipe. From my experience, I knew that this is a very essential step as I have realized that during rusticating it is very easy to lose track and transgress over the areas and stampings which you wish to preserve. To rusticate, I firmly held the stummel in my left hand and with my right hand and began gouging out the briar. The technique is to firmly press the pointed four prongs of the modified Philips screwdriver in to the surface, rotate and gouge out the removed chunk of briar. I worked diligently till I was satisfied with the rustication and the appearance of the stummel. I cleaned the stummel surface with a brass wired brush to clear all the debris from the rustication. I decided to take a break from further rusticating the surface as the process is tiring and painful. This makes me want a better and efficient rusticating tool. I removed the demarcating tape and took stock of the progress made. I felt that the symmetry between the rusticated and the smooth surface is biased towards the smooth and also the pits and fills on the right side of the stummel are still aplenty. With a marker pen, I marked the area that would need to be rusticated further to address both the issues.  So, I got back to rusticating the remaining stummel surface along the marked line with my tool. I was extra careful not to cross the drawn line.Continuing with the stummel repairs, I removed the few old fills from the left smooth surface using a sharp dental tool and refreshed these with CA superglue and briar dust. Once satisfied that all the fills have been refreshed, I set the stummel aside for these fills to cure. While giving my right hand a rest from this task of rustication, I decided to work on the stem. The fill has cured nicely and with a flat head needle file, I sand the fill to achieve a rough match with the surrounding surface. To achieve a perfect match, I sand the filled stem surface with a 220 grit paper. Once this was achieved, I progressively moved to polishing the stem through 320, 400, 600, and 800 and finished with a 1000 grit sand paper. As expected, a clean and neat looking stem stared back at me. I rub a little Extra Virgin Olive oil into the stem surface to hydrate it and set it aside to be absorbed in to the vulcanite. Turning my attention back to the stummel, I sand down the jagged high points in the rustication to a smooth and even surface without compromising on the tactile feel to the hand. The fills too had cured and set solid. With a flat head needle file, I sand the filled spots and roughly match it with the rest of the surface. I followed it by sanding the entire left smooth surface with a folded piece of 220 grit sand paper to blend in the fills with the rest of the stummel surface.Next I decided to work on the damage to the rim top and edges. I topped the rim on a piece of 220 grit sand paper, checking frequently till I was satisfied that the darkened surface is addressed to a great extent and the rim top surface is nice, smooth and even. The inner and outer edges are still uneven, though much better than before topping, and shall be addressed subsequently.With a folded piece of a 220 grit sand paper pinched between my thumb and forefinger, I created a delicate bevel on the inner and outer edges of the rim top surface. This helps to mask and address the minor dents and dings that had remained on the rim edges after topping. I was careful so as not to alter the profile of the stummel by excessive topping or creation of the bevels. I am pretty pleased with the appearance of the rim top and edges at this stage.To further define and demarcate the rusticated surface from the smooth, I picked up a trick which Steve had used few months back when he had rusticated a bald spot in the briar and cut smart grooves around the rusticated portion. The results were fantastic. Here is the link. Rusticating a Bald Spot on the Briar on a Bjarne Bent Apple | rebornpipes

Just as I had read, I mounted a thick burr on to my rotary tool to create a broad groove between the two surfaces. However, it was easier said than done! The burr just bounced off the stummel surface and no matter how firmly I pressed down on the burr, it wouldn’t cut a groove. Another Face Time video call with Steve and the issue was resolved. The trick is to hold the burr at an angle to the surface and start at slower speeds of the tool. I followed the advice and it worked. I cut a sharp groove at the shank end, along the center of the stummel and under the outer rim edge. Looks pretty cool now! Next I polished the rim top and the smooth surfaces of the stummel using micromesh pads, wet sanding with 1500 to 12000 grit pads. I also polished the high spots in the rustication with the micromesh pads. I wiped the bowl with a moist cloth after each pad to clean the surface. I am happy with the appearance of the stummel at this point in the restoration. The stummel is now ready for a fresh coat of stain. I wanted to highlight the difference between the rusticated and the smooth stummel surface. I decided to stain the rusticated surface with a black dye which would contrast beautifully with the browns of the rim top, shank band and the rest of the smooth surface. I heated the rusticated portion of the stummel surface with my heat gun to open up the pores on the stummel so that the stain is well absorbed. I mixed black stain powder with isopropyl alcohol and liberally apply it over the heated surface, flaming it with the flame of a lighter as I went ahead to different self designated zones of the surface. This helps in the setting of the stain in the grain of the briar. I ensured that every inch of the rusticated surface is coated with the dye while the smooth surfaces are not stained. I set the stummel aside for a day to set the dye in to the briar surface. Once the stain has set in well, I again warm the stummel with my heat gun. This helps the stain to be absorbed and set further into the briar. I mounted a felt cloth buffing wheel on my rotary tool and gently buff the entire stummel surface using Red Tripoli to remove the stain crust. I wiped the stummel with a cotton swab and alcohol to remove any excess stain and followed it up by sanding the raised rustication with a folded piece of 220 grit sand paper. This is followed up by careful dry sanding of the entire stummel, especially the raised rustications with 1500 to 12000 grit micromesh pads. This lightens and highlights the high spots in the rustications.Next, I rub a small quantity of “Before and After Restoration Balm” in to the briar with my finger tips, work it deep in to the sandblasts and let it rest for a few minutes. The balm almost immediately works its magic and the briar now has a nice vibrant appearance over the smooth surface with the beautiful rusticated patterns on full display on the other half. I further buff it with a horse hair shoe brush.With the stummel set aside, I turned my attention to the stem polishing. Using the micromesh pads, I complete the polishing cycle by wet sanding the surface with 1500 to 12000 grit pads. The stem looks great with the fills nicely matched with the rest of the surface. I polish the stem with a little Extra Fine stem polish compound that has been developed by Mark Hoover to remove the last minor scratches. I rub a little quantity of Extra Virgin Olive oil in to the stem surface and set it aside to be absorbed by the vulcanite. The only issue that remains unaddressed at this stage is the issue of loose seating of the stem in to the mortise. With the flame of a lighter, I heated the tenon with the flame of a lighter till it was pliable and inserted a drill bit that was a bit larger in diameter than the tenon opening. This helps in expanding the pliable vulcanite for a snug fit. I held the tenon under cold tap water for the tenon to cool down and set the increased diameter. I also refreshed the stem stamping with a white correction pen.  To complete the restoration, I first mounted a cotton cloth buffing wheel that is dedicated for use with Blue Diamond, on to my hand held rotary tool.  I set the speed at about half of the full power and polished the entire pipe after the stem and stummel were united. The Blue Diamond compound helps to erase the minor scratches that are left behind even after micromesh polishing cycle. I followed the Blue Diamond polishing by applying several coats of carnauba wax with a cotton cloth buffing wheel dedicated to Carnauba Wax. I finished the restoration by giving the entire pipe a rigorous hand buffing using a microfiber cloth to deepen the shine further. The finished pipe looks amazingly beautiful and has undergone quite a transformation. With its perfectly balanced weight, a nice full bent shape and light weight, this is a perfect pipe for clenching while I am working in my office. This is one pipe that will make its way in to my rotation. I wish to thank our esteemed readers for sparing their valuable time to read through and any input or advice is always welcome.

Working on the Second of Two Ropp Pipes – A Ropp Au Sommet Mini Churchwarden


Blog by Steve Laug

It seems like just a few weeks ago I was contacted by an older gentleman about purchasing his pipe collection. He sent me the photos and I was amazed at what I saw. He had Dunhill pipes, BBB pipes, a Barling’s Make “Ye Olde Wood” Fossil, Orlik pipes, Barclay Rex Pipes, a couple of Meerschaums and a whole lot of other pipes. All I could say as I looked at the pipes was what a collection it was. We negotiated a deal and I think we both walked away quite happy with the exchange.

You have seen the work we have done on the Dunhills, Hardcastles, H. Simmons all briar billiard and BBB pipes from the lot but there are still more. The above photo shows the two Ropp pipes.

I have worked on several Ropp pipes in the past but this one was unique in many ways that will become evident in the photos below. This second Ropp pipe is stamped on the left side of the shank and reads ROPP in an oval [over] AU SOMMET, which translates as AT THE TOP. The stamping is clear and readable and there is no shape number evident. The shank end is rounded and countersunk to give the stem a tight fit against it. The long, taper stem has a gold ROPP oval stamp on the left side.

Jeff took some photos of the Ropp Au Sommet Mini Churchwarden before he worked his magic in cleaning up the pipe. It is a an interesting pipe with a lot of potential and what appears to be some great grain under the grime and debris of the years.Jeff took photos of the bowl, rim top to show the thickness of the cake in the bowl and the thick lava on the rim top. I was hoping that the thick cake and lava had protected the edge from the kind of damage that I had to work on with the other Ropp pipe. He took photos of the top and underside of the vulcanite stem showing the oxidation, tooth marks,chatter and wear on the stem and button. Jeff took photos of the sides and heel of the bowl to show the condition of the briar. You can see the beautiful shape and the grain on the bowl even through the dirt and debris of many years. Jeff took a photo of the stamping on the left side of the shank. The ROPP Oval on the stem is also visible. You can see that the stamping  on the shank and stem is clear and readable as noted above.Jeff removed the stem from the shank to give an idea of the way the rounded shank end had been beveled to accommodate the stem.I turned to Pipephil’s site to see what I could learn about the Ropp brand and particularly the Ropp Au Sommet Line that I was working on (http://pipephil.eu/logos/en/logo-ropp.html). I quote from the introduction to the brand on the site and include a screen capture of a poster that was on the site.

Brand created by Eugène-Léon Ropp (1830 – 1907) and continued throughout 3 generations. “GBA Synergie” run by Bernard Amiel (†2008) bought back Ropp in 1988 and owned it until 1991. The company was taken over by Cuty-Fort Entreprises (Chacom, Vuillard, Jean Lacroix…) in 1994.

I quote from the sidebar on the site below as it gives a good summary of information.

Brand created in 1910. The shop was situated on Maiden Lane. Three addresses now (2010): 75 Broad Street, 70 East 42nd Street, 570 Lexington Avenue. See also: André

I turned to Pipedia to try and place this pipe in the timeline of the brand and was able find some helpful information which I have included below (https://pipedia.org/wiki/Ropp). I quote the information below. Ropp is well known for its Cherrywood pipes which were patented in1869. Besides that Eugene Ropp also made beautiful briar pipes.

Eugène-Léon Ropp (1830 – 1907) had acquired a patent for a cherrywood pipe (wild cherry, lat.: Prunus avium) in 1869. In 1870 he established a workshop to manufacture such pipes in Büssingen (Bussang, Vosges mountains). Around 1893 the business moved into the former mill of Sicard (part of the community of Baume-les-Dames – Département Doubs, Upper Burgundy – from 1895 on).

The pipes were a big success in the export as well. Shortly before 1914 Ropp designated A. Frankau & Co. (BBB) in to be the exclusive distributor in the UK and it’s colonies.

Probably in 1917 a workshop in Saint-Claude in the Rue du Plan du Moulin 8 was acquired to start the fabrication of briar pipes. In 1923 a small building in the environment of Saint-Claude, serving as a workshop for polishing, was added.

Even though cherrywood pipes were the mainstay of Ropp until the company finally closed down in September 1991. The company was taken over by Cuty-Fort Entreprises (Chacom, Jeantet, Vuillard, Jean Lacroix…) in 1994.

With the information from Pipedia (thought there was nothing specific on this line) I knew that I was working on an older pipe from the Eugene Ropp Workshop. It is a great piece of briar with chunky nicely made shape. The fellow we bought them from said that he had had this pipe for a very long time. I could not set a date for certain but my guess was early 30s or 40s like some of the earlier pipes. Now it was time to work on the pipe.

Jeff carefully cleaned the pipe. He reamed it with a PipNet pipe reamer and then cleaned up the reaming with a Savinelli Fitsall Pipe Knife. He scrubbed out the internals of the shank, stem and shank extension with alcohol, pipe cleaners and cotton swabs until the pipe was clean. He scrubbed the exterior of the bowl with Murphy’s Oil Soap and a tooth brush to remove the grime and grit on the briar and lava on the rim top. The finish looks much better and has a deep richness in the colour that highlights grain of the briar. The rim top looked good with some darkening on the top and light damage to the inner edge of the bowl. When the pipe arrived here in Vancouver I was amazed it looked so good. Here are some photos of what I saw.   I took some close up photos of the rim top and the stem surface. The inner edge of the rim was rough and nicked and the rim top had some damage. It appears that there are grooves on the top on the right side. I took close up photos of the stem to show the condition of the surface and button. I took a picture of the stamping on the side of the shank and it was clear and readable as noted above.I removed the stem from the shank and took a photo of the parts of the pipe. It is a unique looking pipe.I started my work on the pipe by addressing the darkening on the rim top and the damage on the inner edge of the bowl. I used a folded piece of 220 grit sandpaper to work over the inner edge to smooth out the damage and to remove the darkening on the rim top as well.I polished the briar with micromesh sanding pads – dry sanding with 1500-12000 grit pads. I wiped the bowl down with a damp cloth after each pad. It really began to take on a shine. I worked some Before & After Restoration Balm into the surface of the bowl and shank with my fingertips to clean, enliven and protect the briar. I let the balm sit for 15 minutes and then buffed with a cotton cloth to raise the shine. The photos show the bowl at this point in the restoration process. I set the bowl aside and turned my attention to the stem. I polished the stem with micromesh sanding pads – dry sanding with 1500-12000 grit sanding pads. I wiped it down after each sanding pad with Obsidian Oil. I polished it with Before & After Pipe Stem Polish – both Fine and Extra Fine. I gave it a final coat of Obsidian Oil. I used some Rub’n Buff Antique Gold to touch up the Ropp logo on the left side of the stem. The stamp was worn so though it is better it is not perfect.With the bowl and the stem finished I put the beautiful Eugene Ropp Au Sommet Mini Churchwarden back together and buffed it on the wheel using Blue Diamond to give it a shine. I gave the bowl and the stem multiple coats of carnauba wax on the wheel. I buffed it with a clean buffing pad to raise the shine. I hand buffed it with a microfiber cloth to deepen the shine. It really is a great looking mini churchwarden. The dimensions of the pipe are – Length: 7 ½ inches, Height: 1 ¾ inches, Outside diameter of the bowl: 1 ¼ inches, Chamber diameter: ¾ of an inch. The weight of this large pipe is 1.52 ounces /43 grams. This older Ropp Mini Churchwarden is another great find in this collection. I will be putting it on the rebornpipes store soon. If you would like to add it to your collection let me know. This is another pipe that has the possibility of transporting the pipe man or woman back to a slower paced time in history where you can enjoy a respite. Thanks for walking through the restoration with me.