by Steve Laug
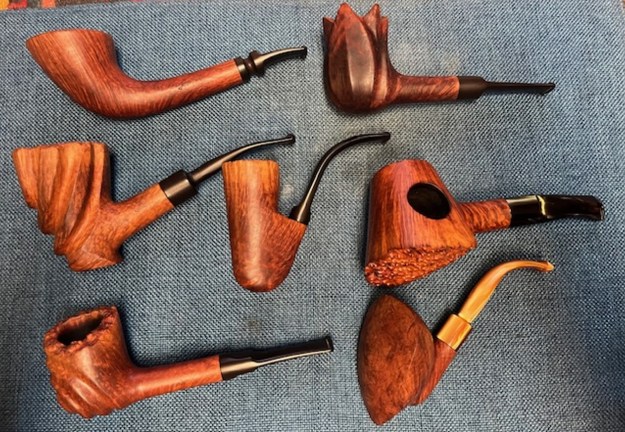
Last month I was contacted by Donna to see if I knew anyone interested in purchasing her father’s pipes. She wrote as follows: “I am wondering if you would be interested in my father’s collection of Brighams.” She further spelled out what he had in the collection. He had 1 – 2 dot pipe, 3 – 3 dot pipes, 2 – 4 dot pipes and 4 – 5 dot pipes. There was a total of 10 pipes. I asked for a photo of the pipes and she sent the photo below. I was very interested.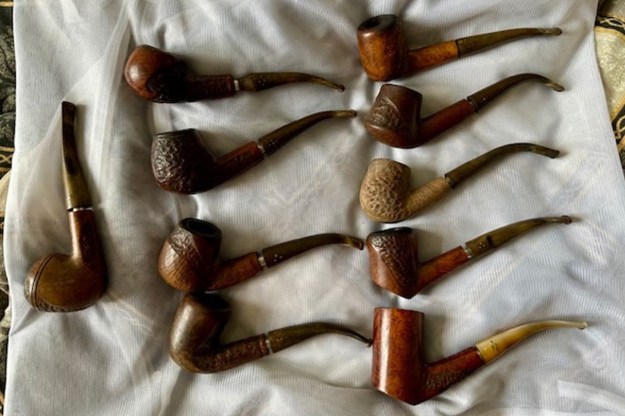 We emailed back and forth and the short story is that I paid for the collection and she shipped the pipes to me. On Tuesday after Easter the box arrived and I was happy to be able to see them up close. They were obviously well-loved pipes and in varying degrees of needing work. I wrote her and told I received them and that I was pleased with the lot. I was looking forward to working on them. She aske me to send her photos along the way as I finished the pipes. I will be sending her the links to the blog so she can see the work and the process of bringing them back to a semblance of their original beauty. Thanks Donna for the opportunity to work on your Dad’s pipes.
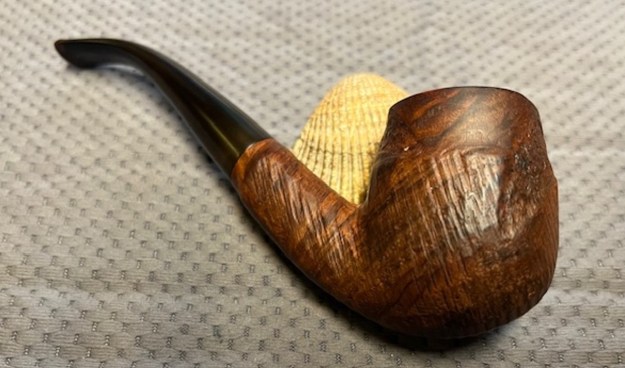
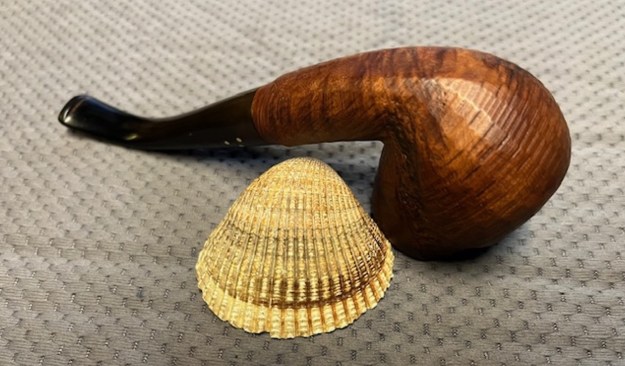
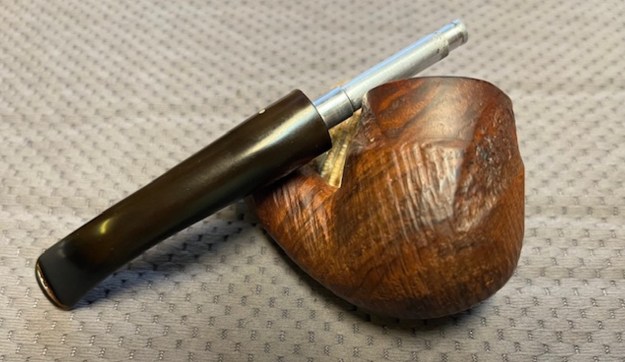
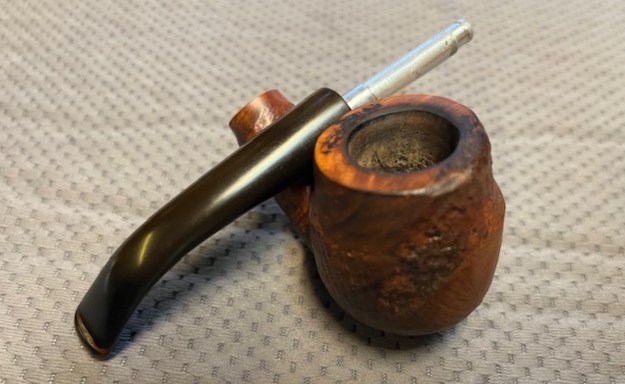
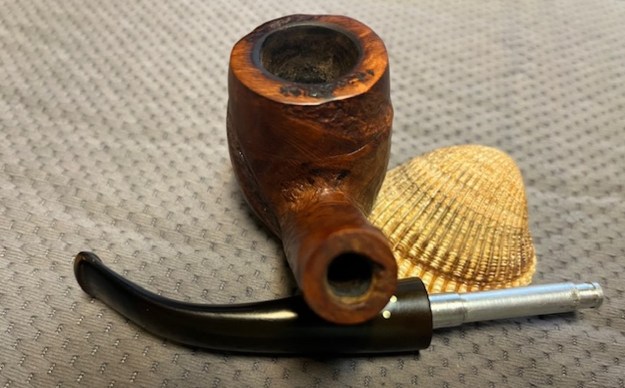
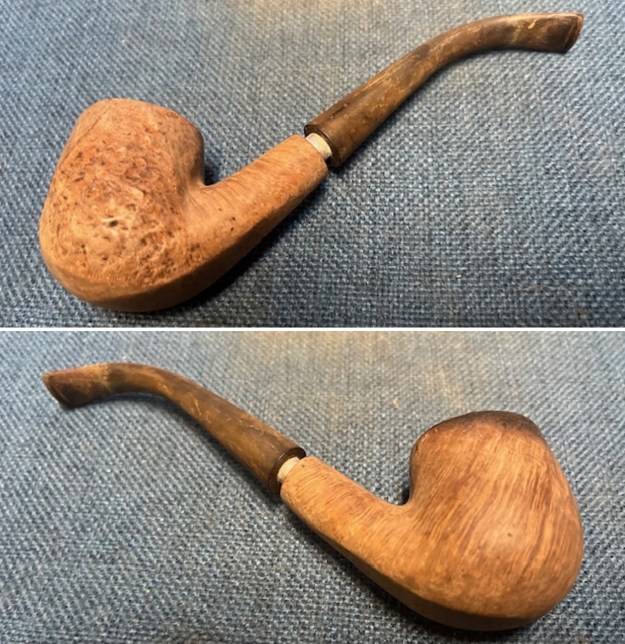
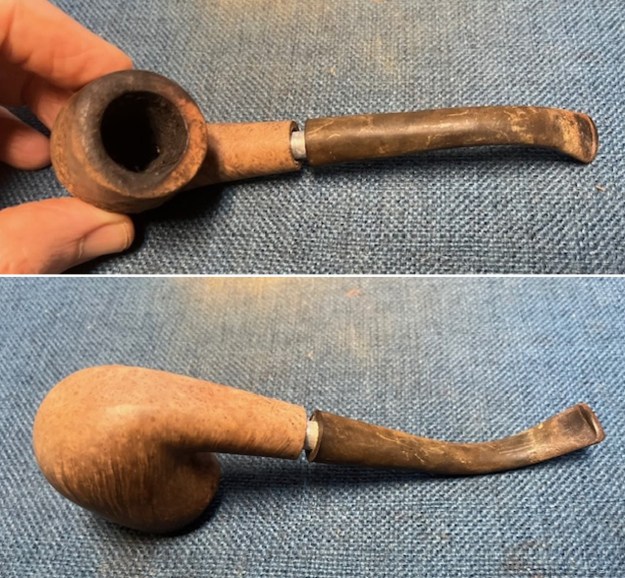
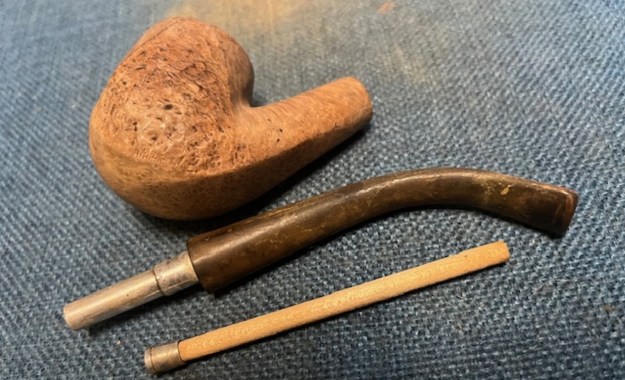
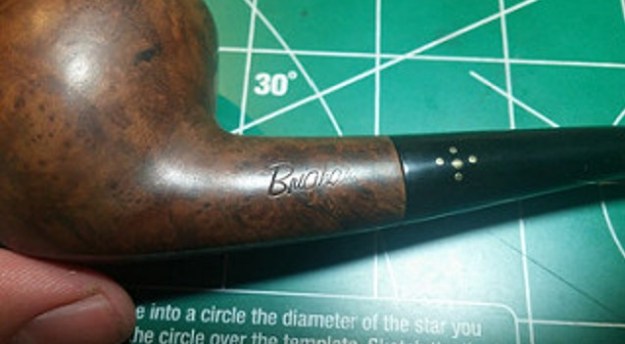
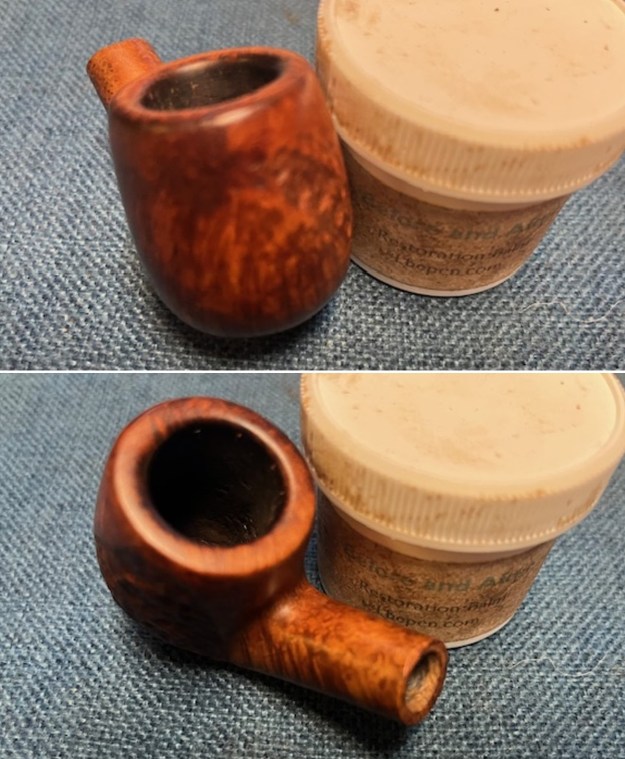
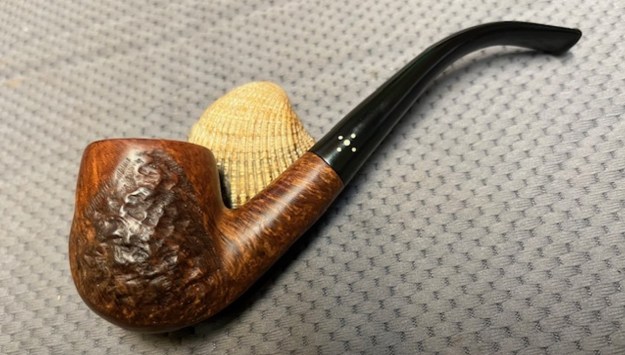
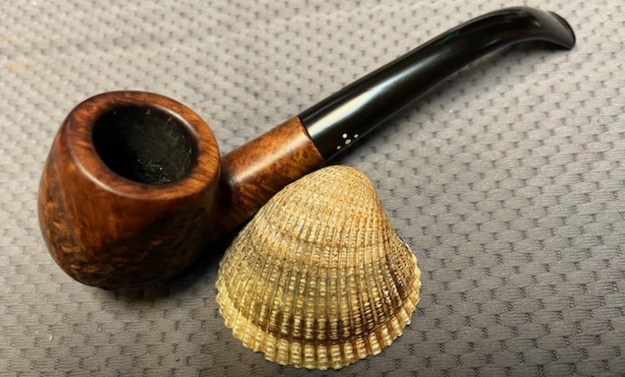
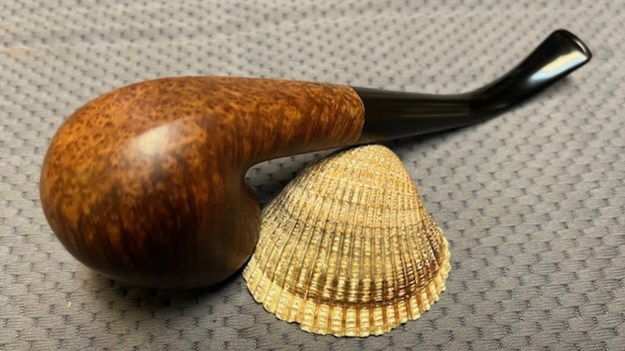
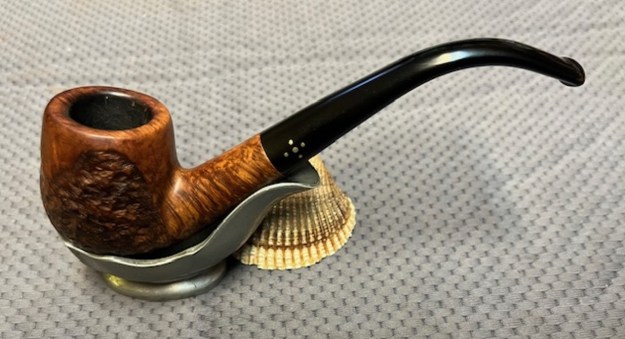
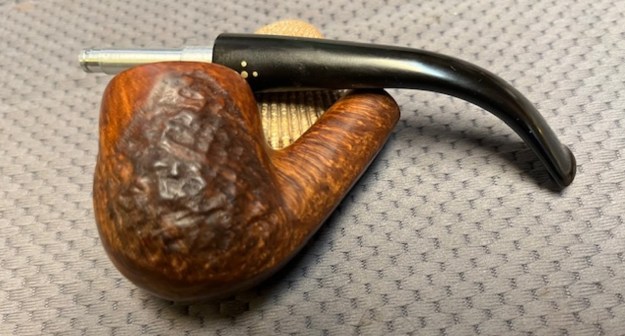
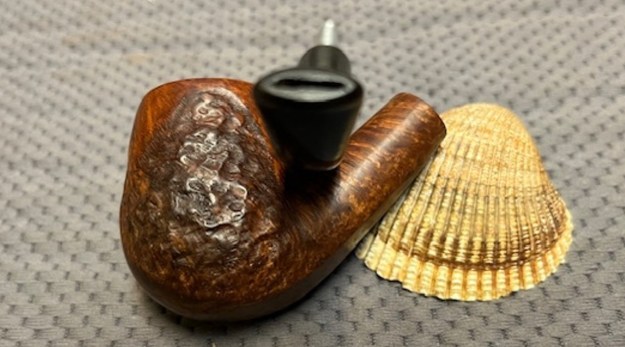
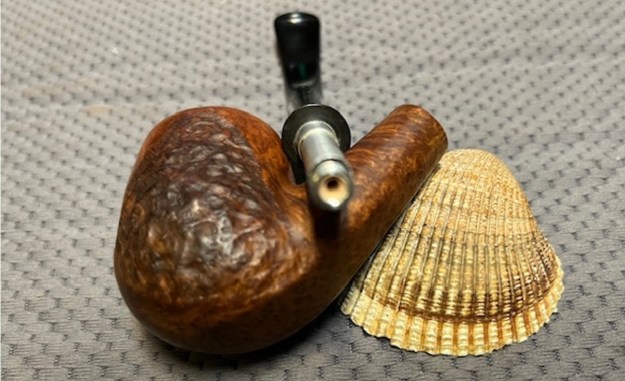
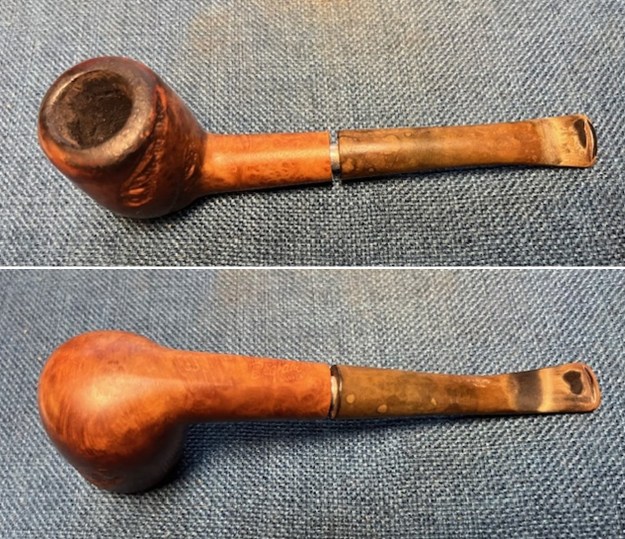
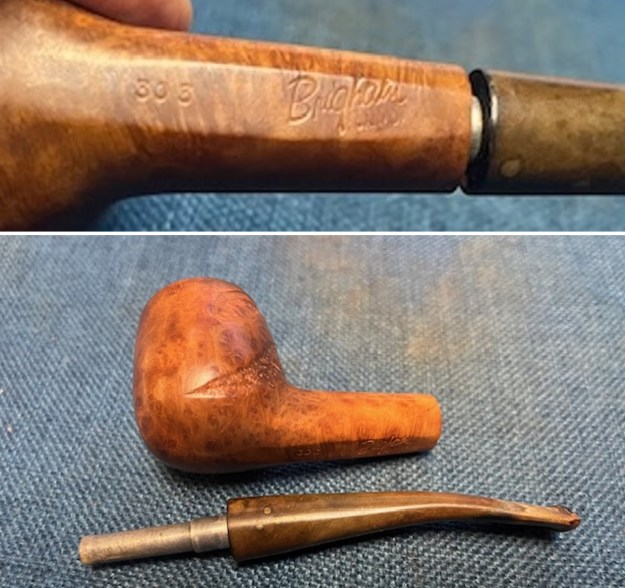
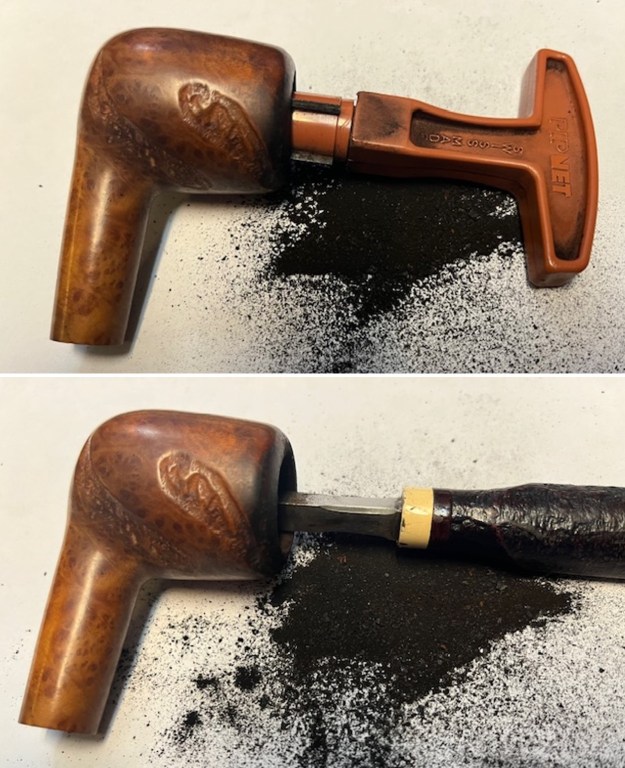
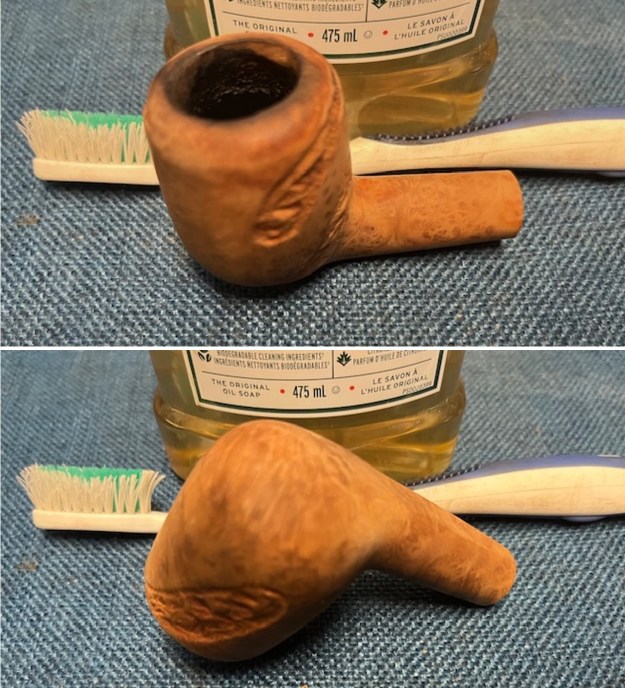
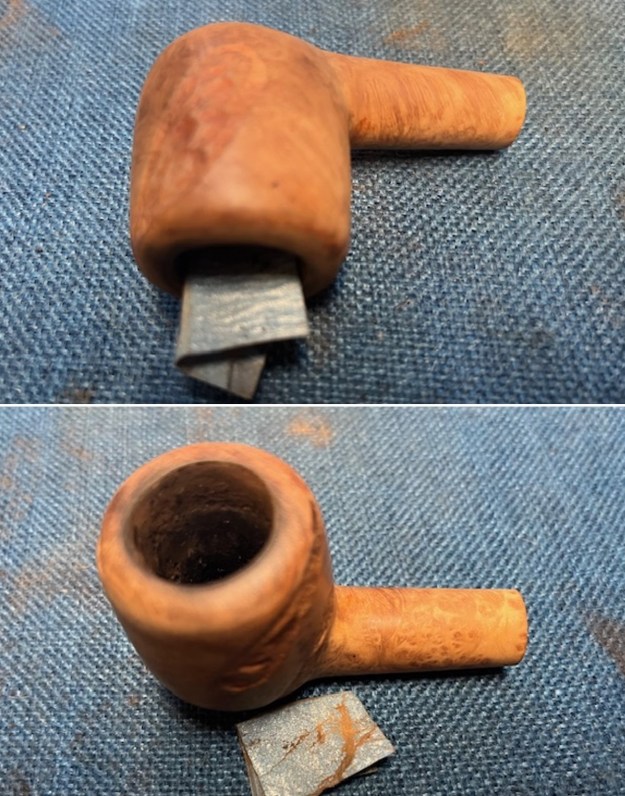
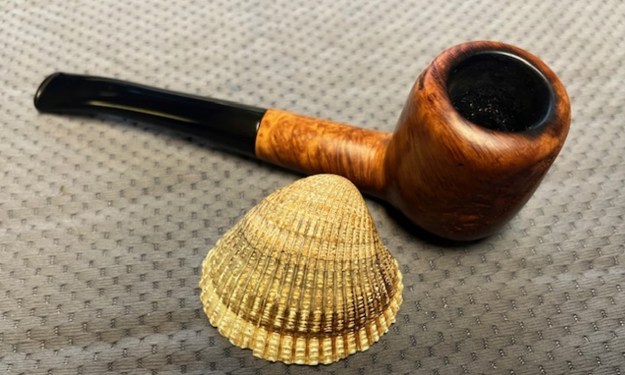
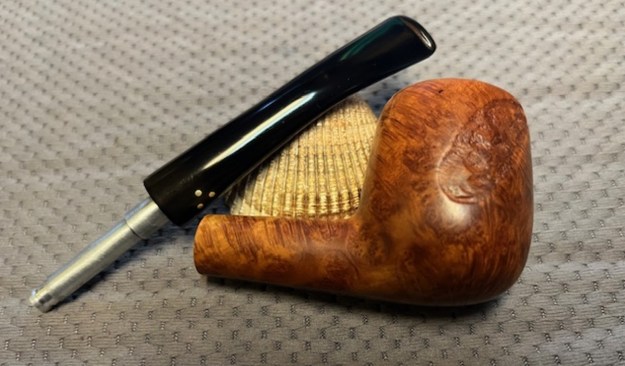
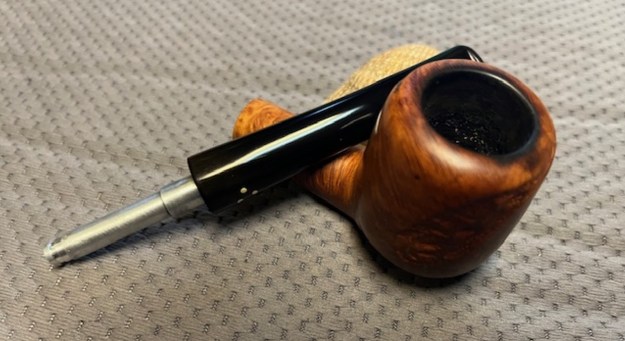
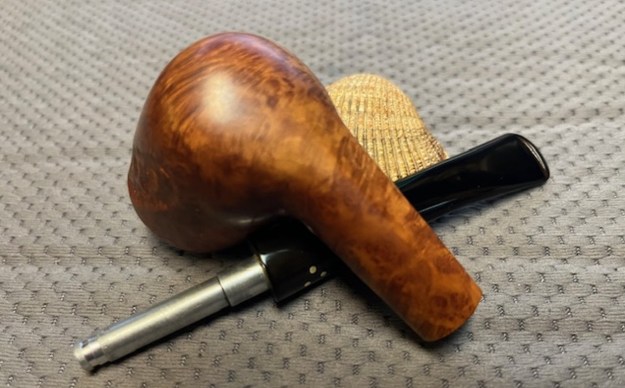
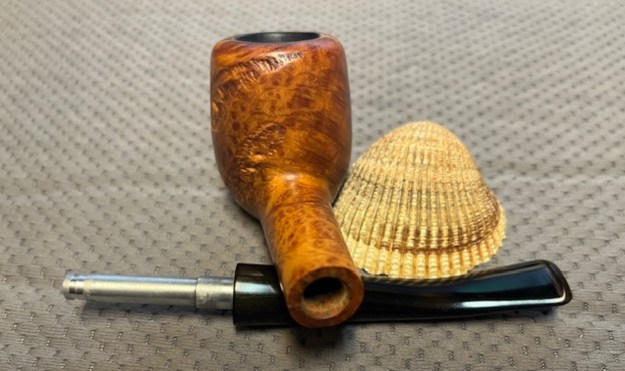
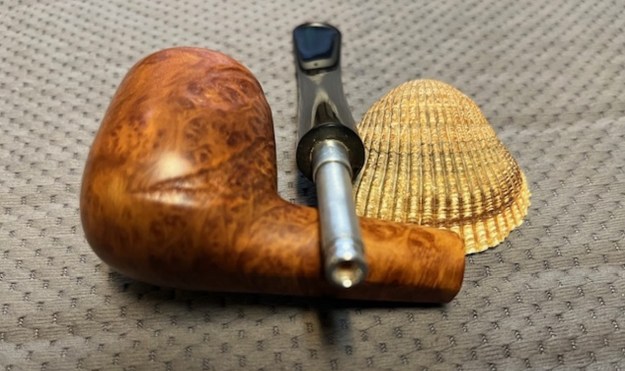
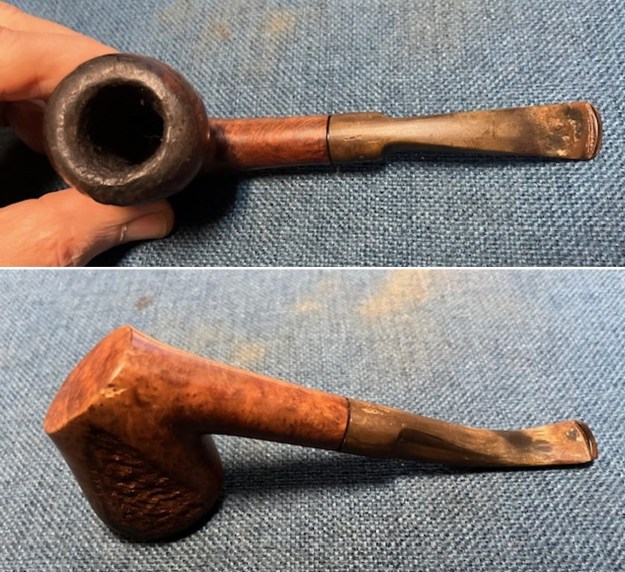
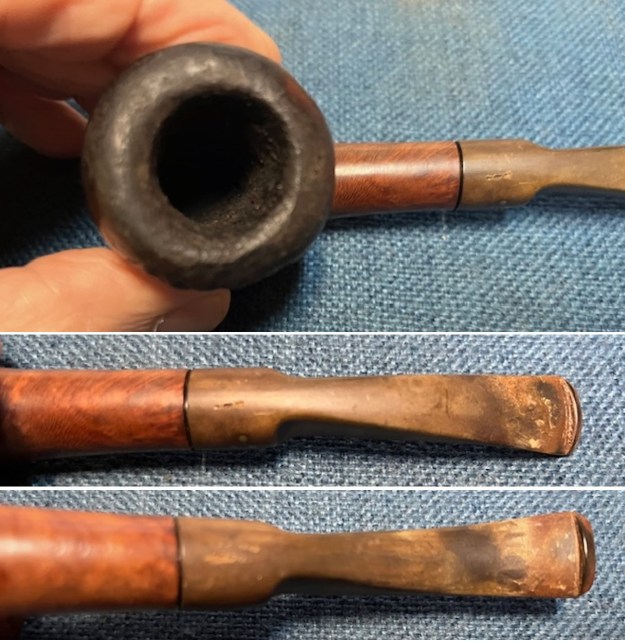
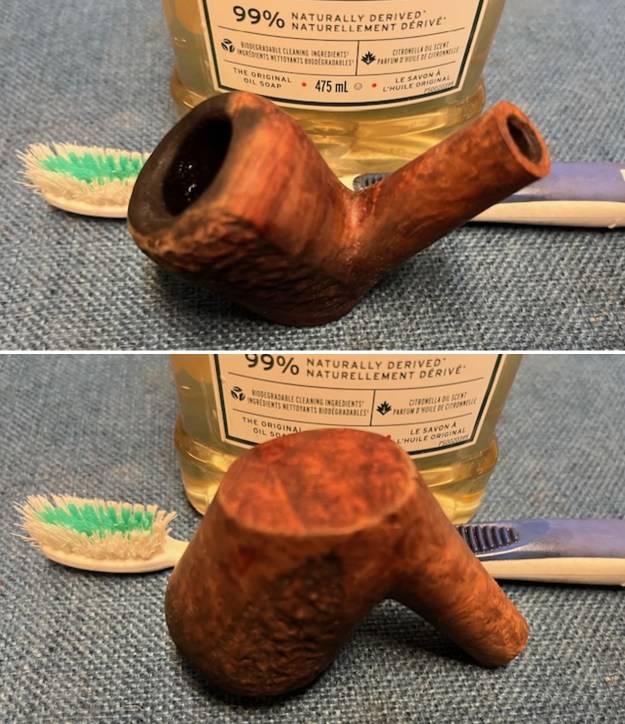
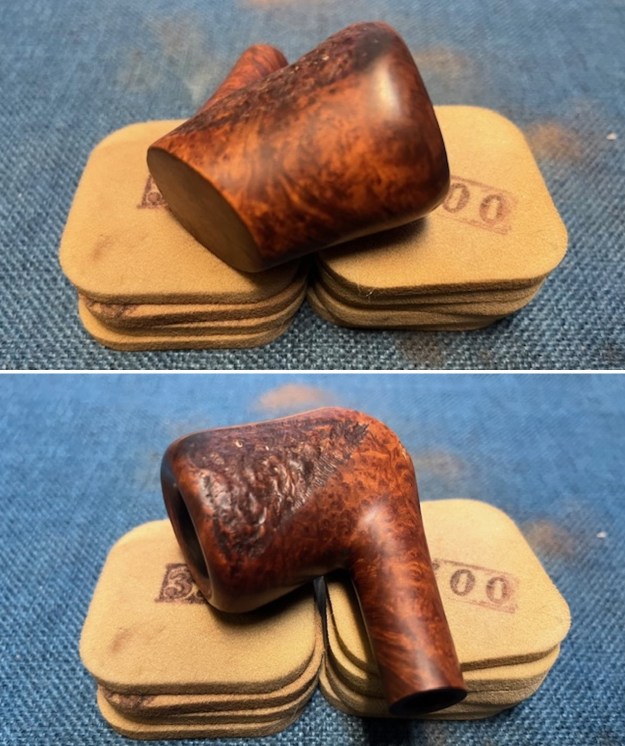
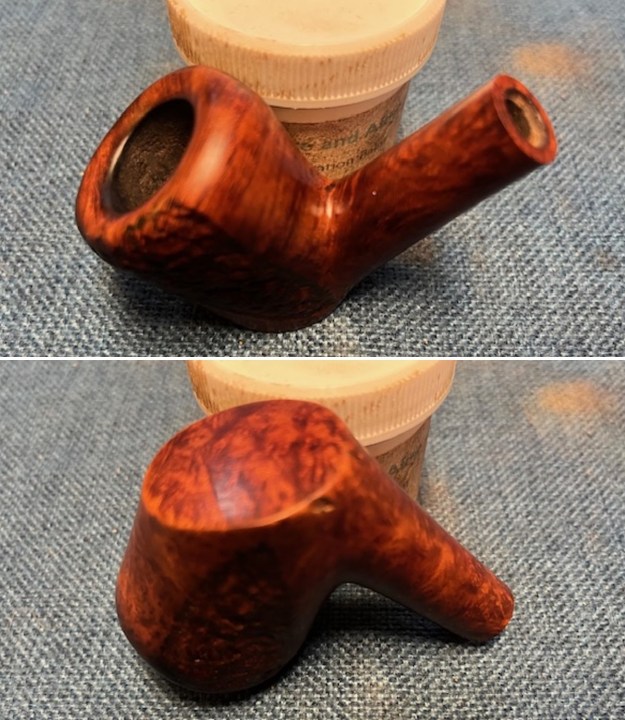
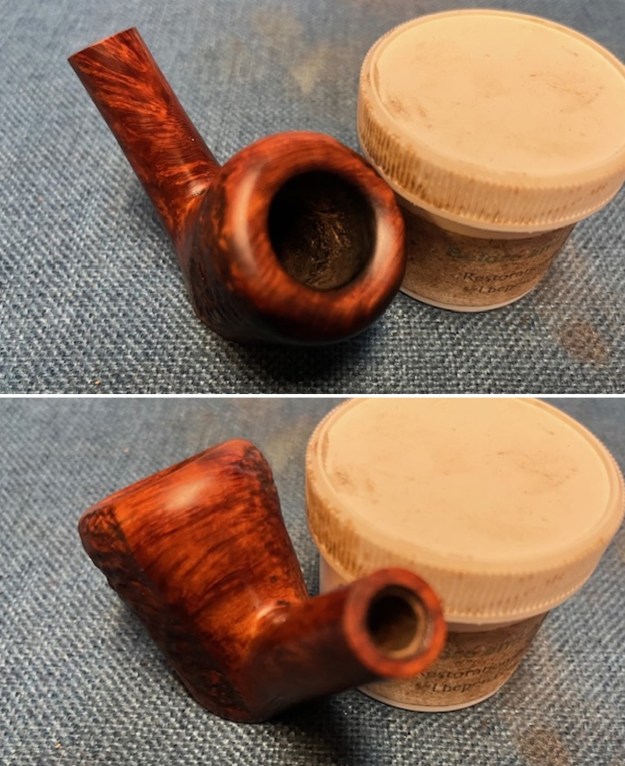
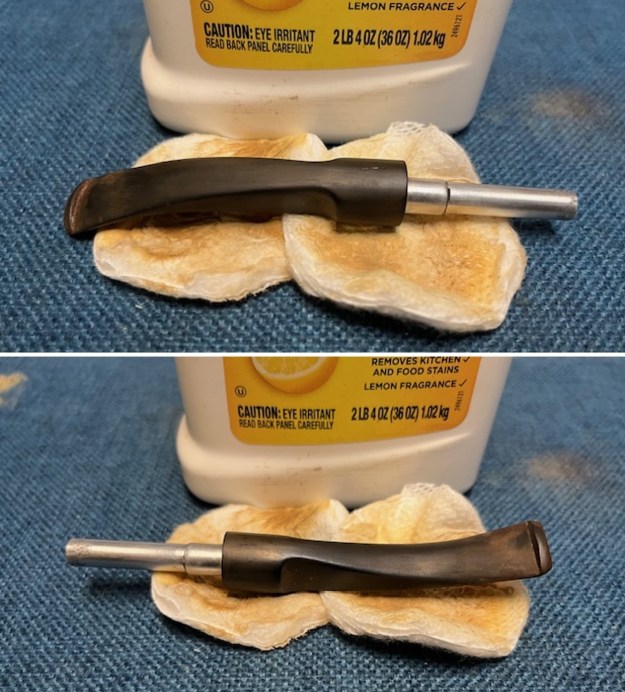
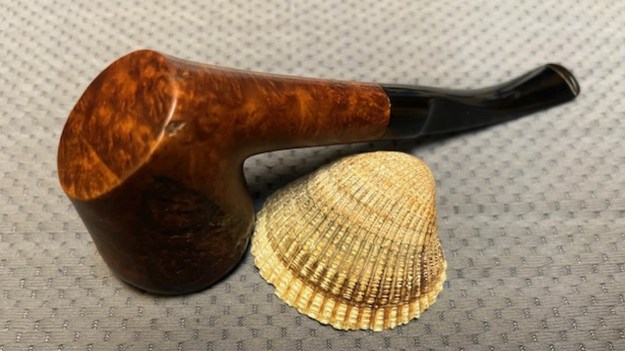
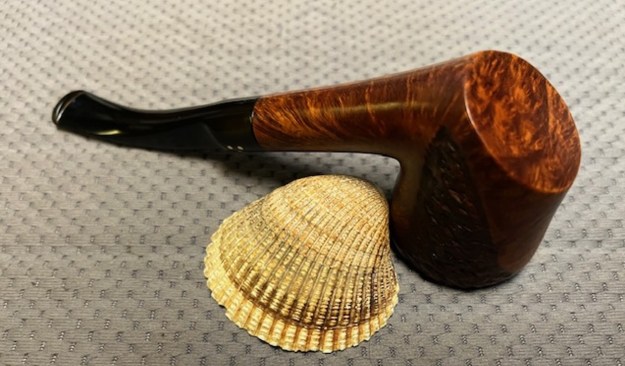
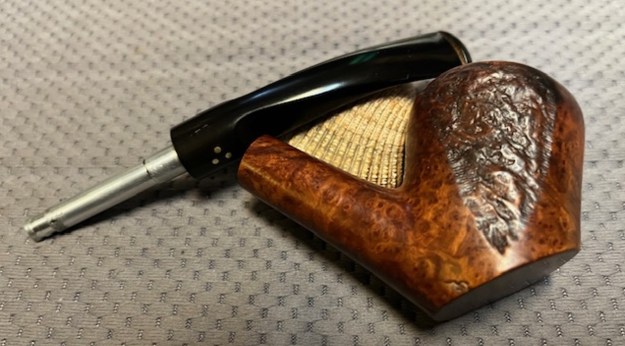
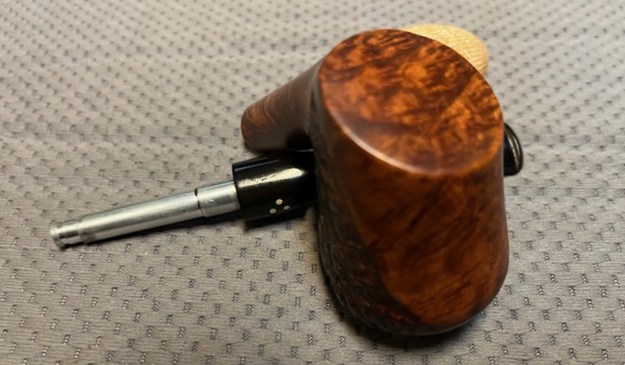
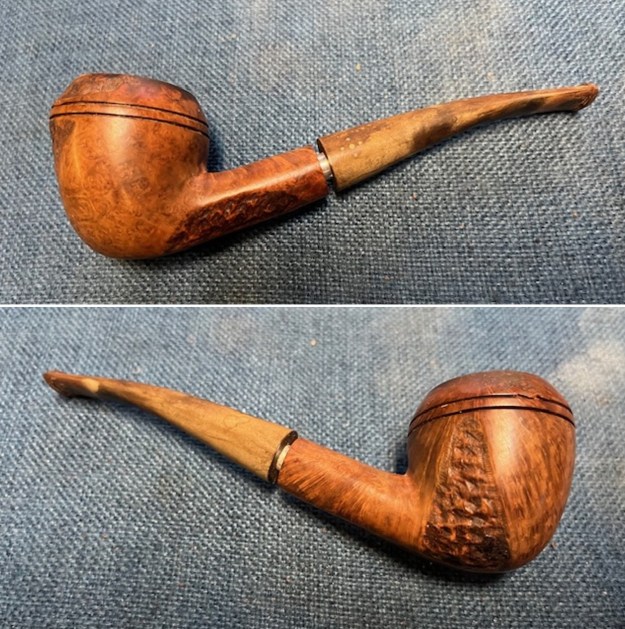
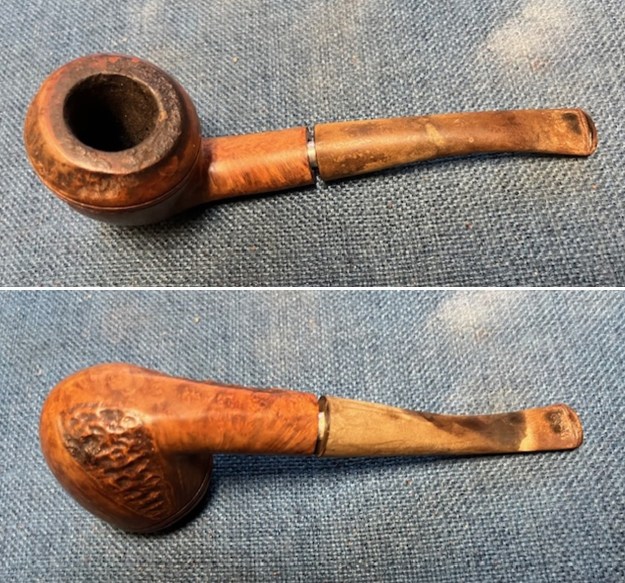
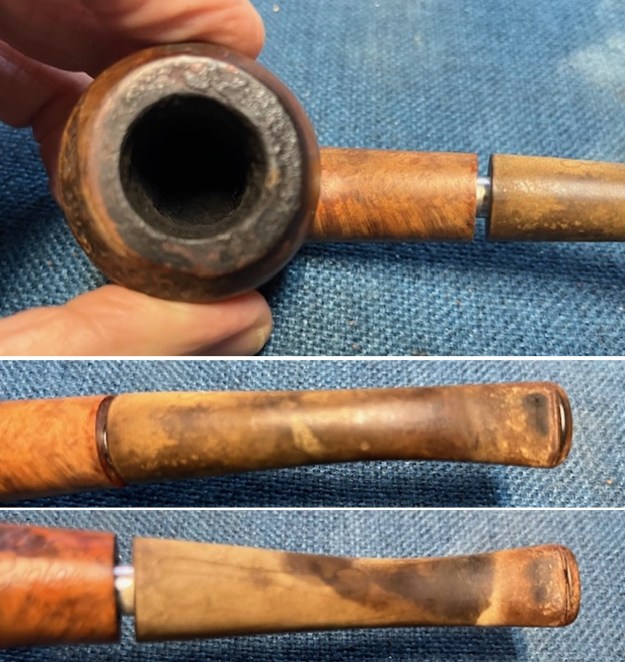
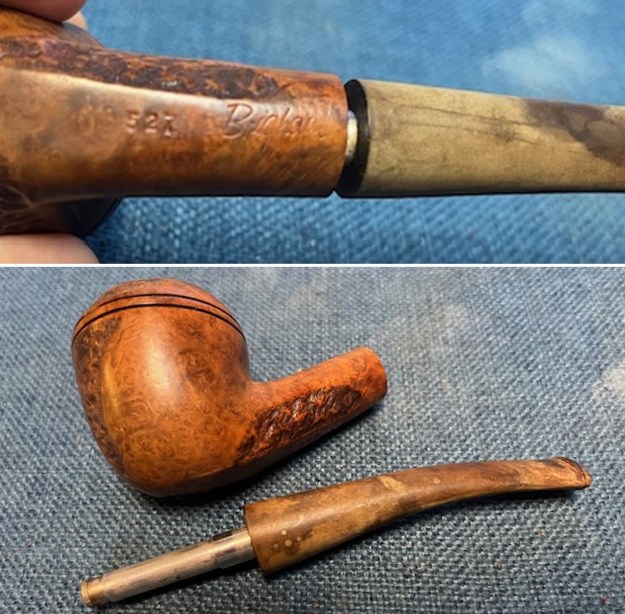
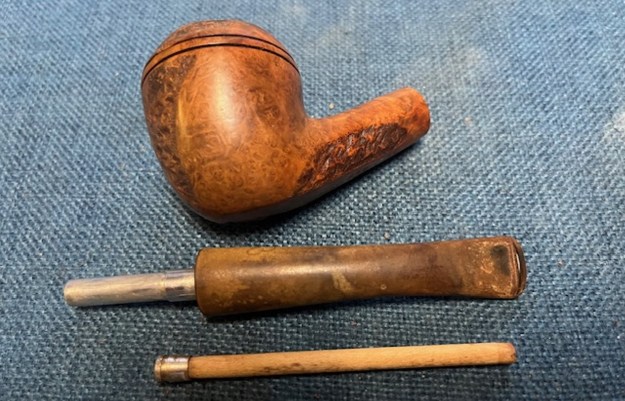
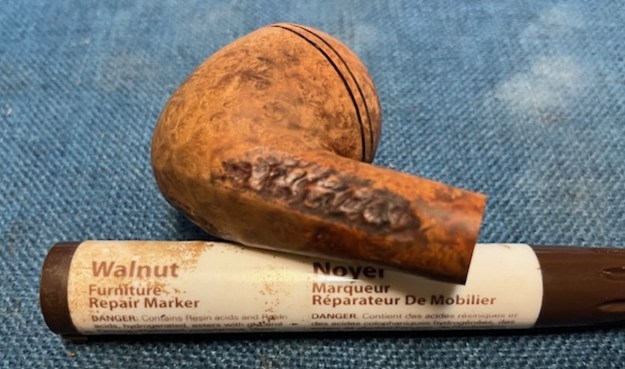
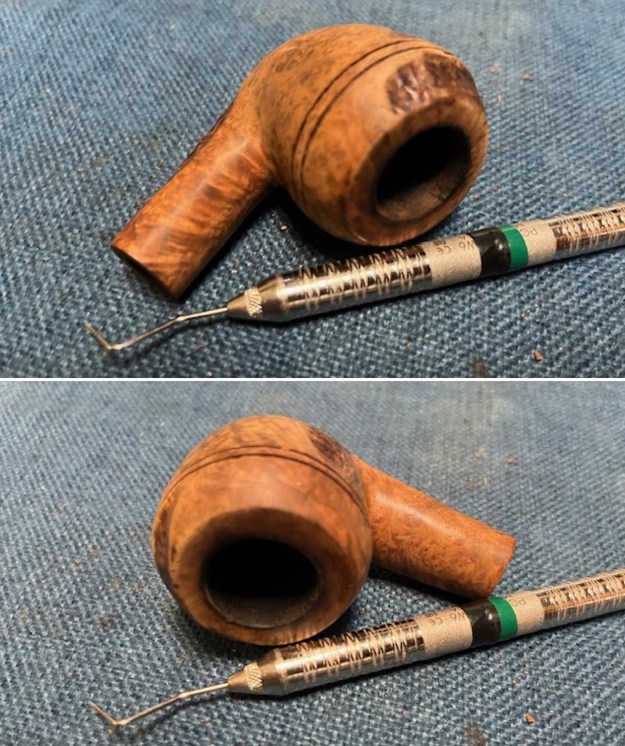
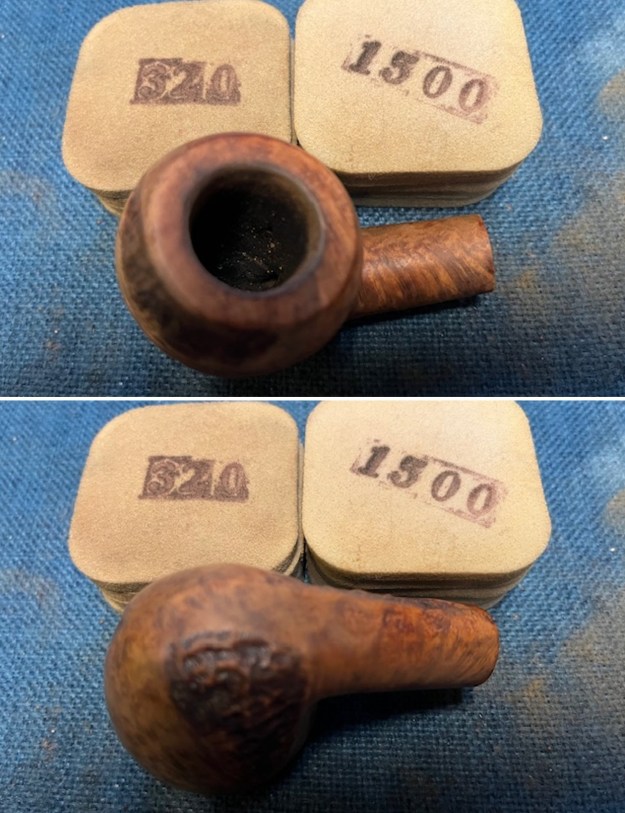
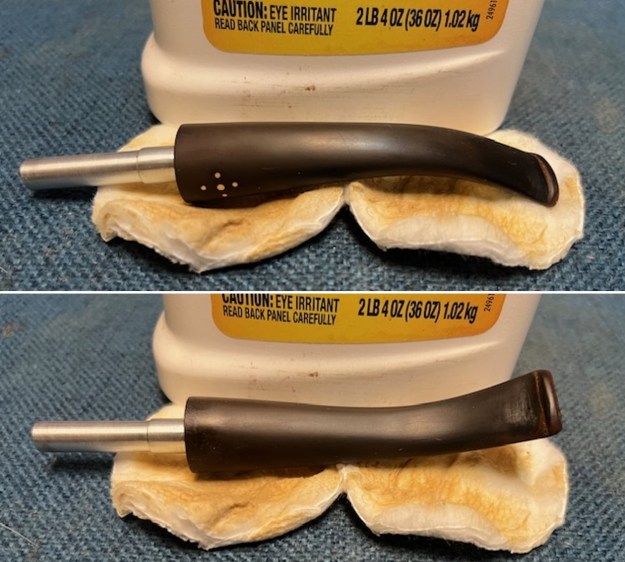
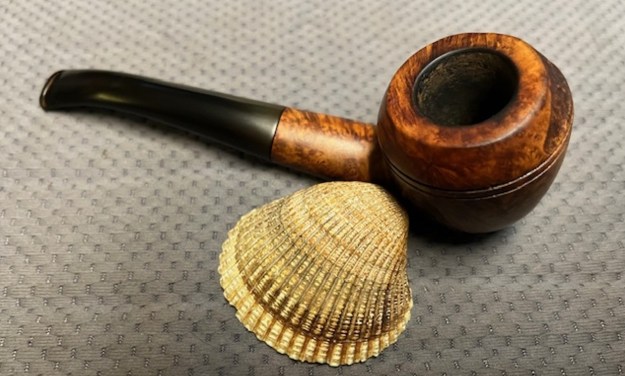
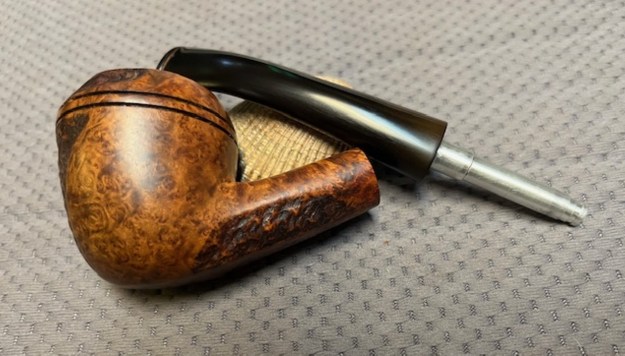
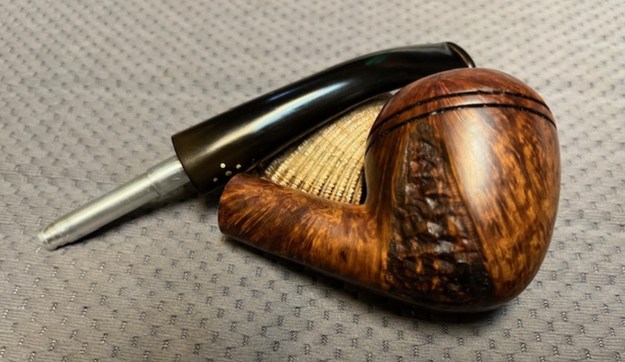
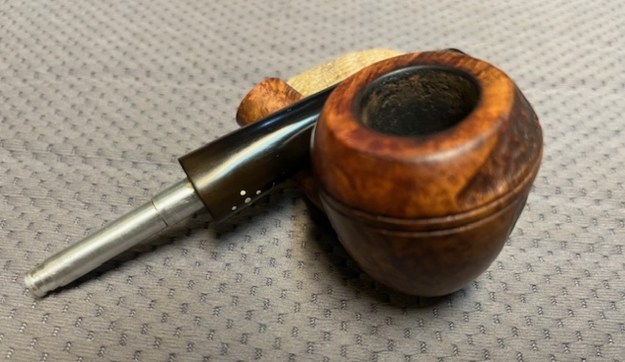
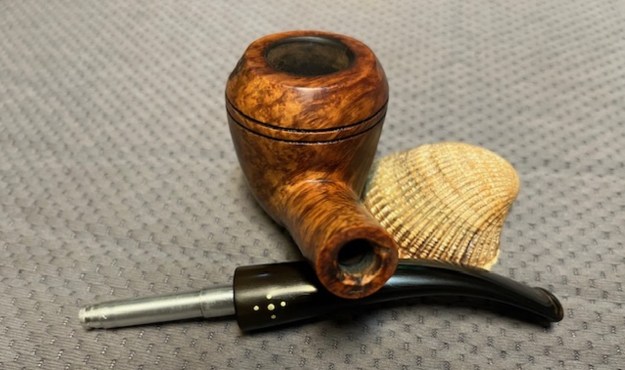
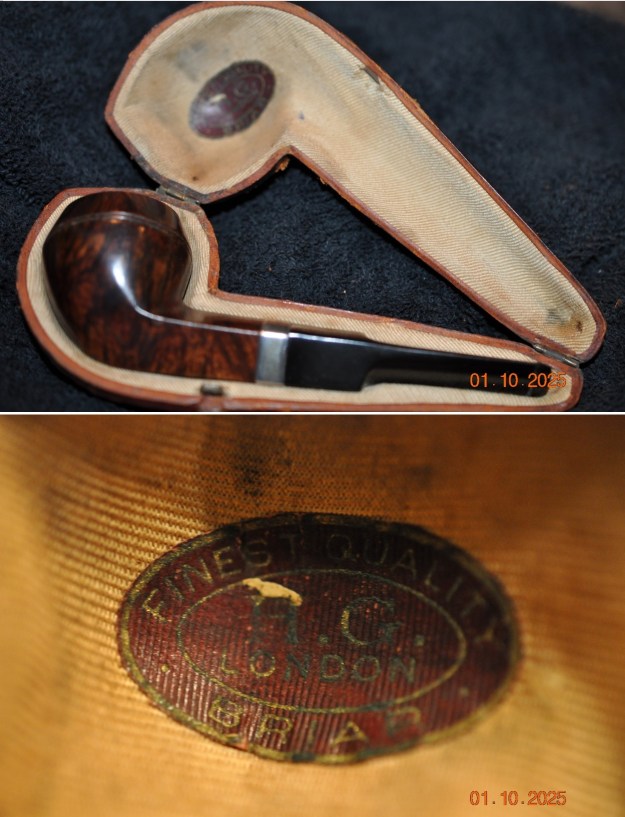
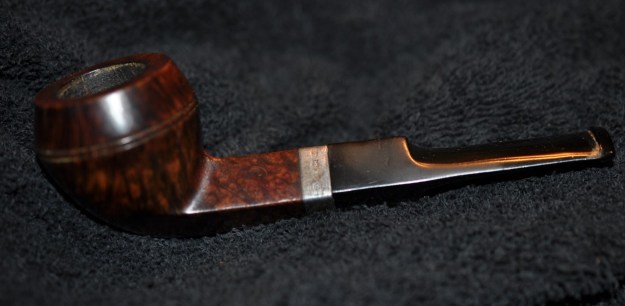
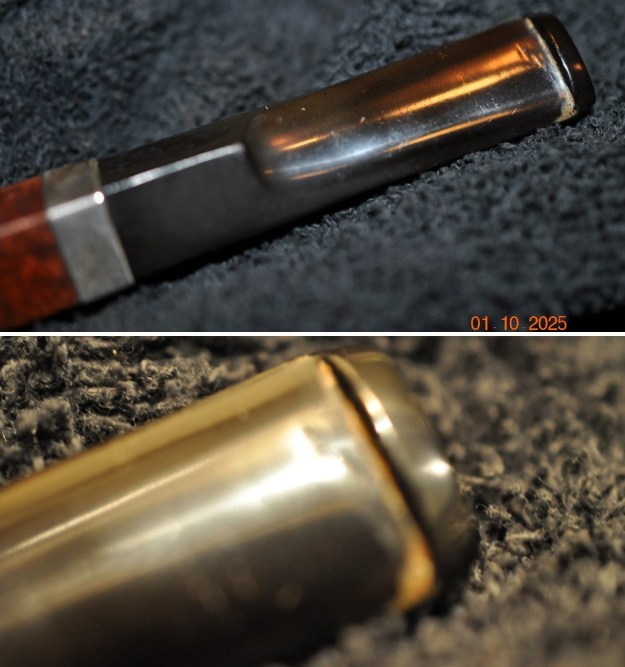
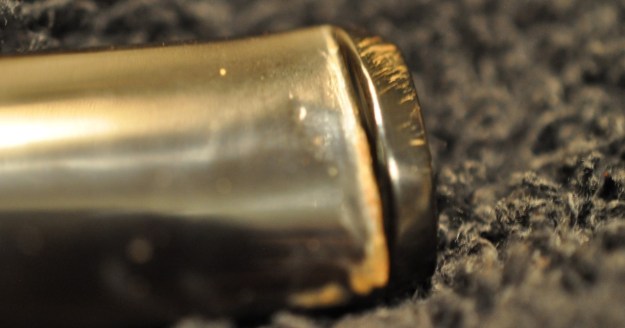
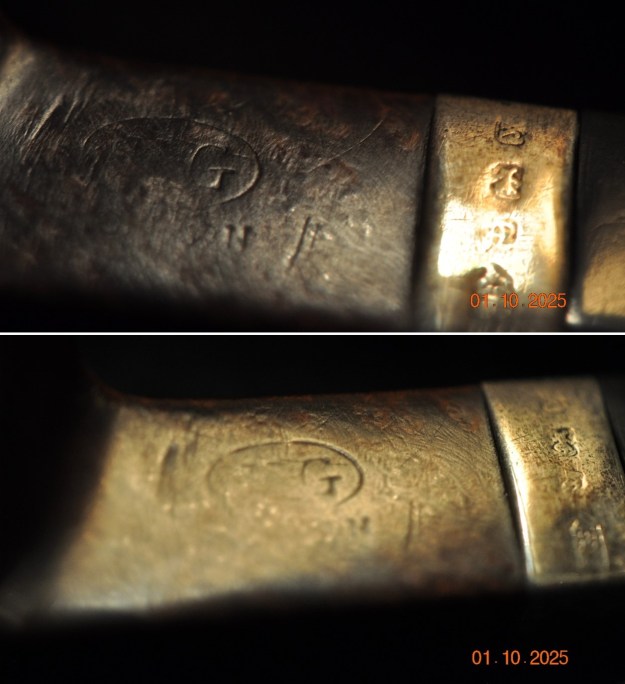
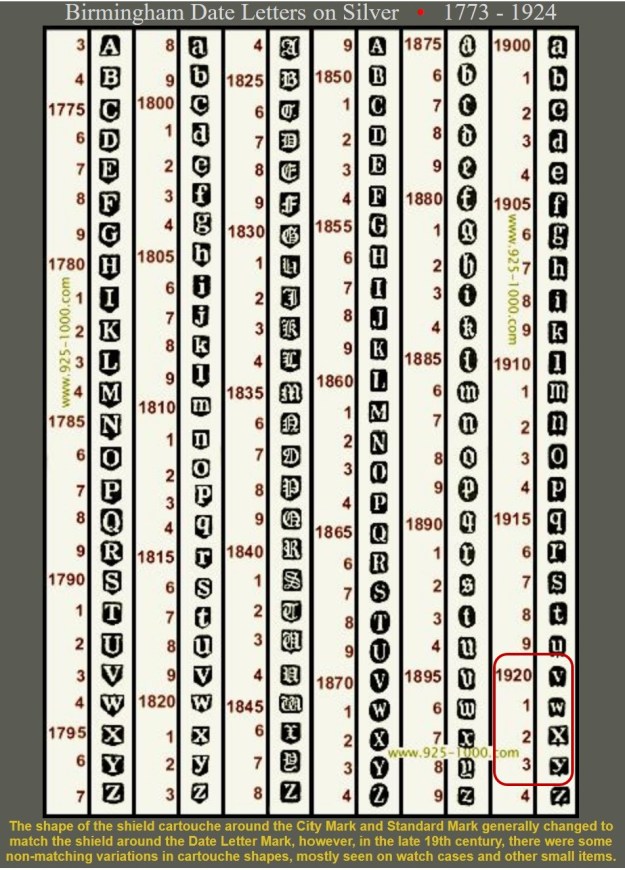
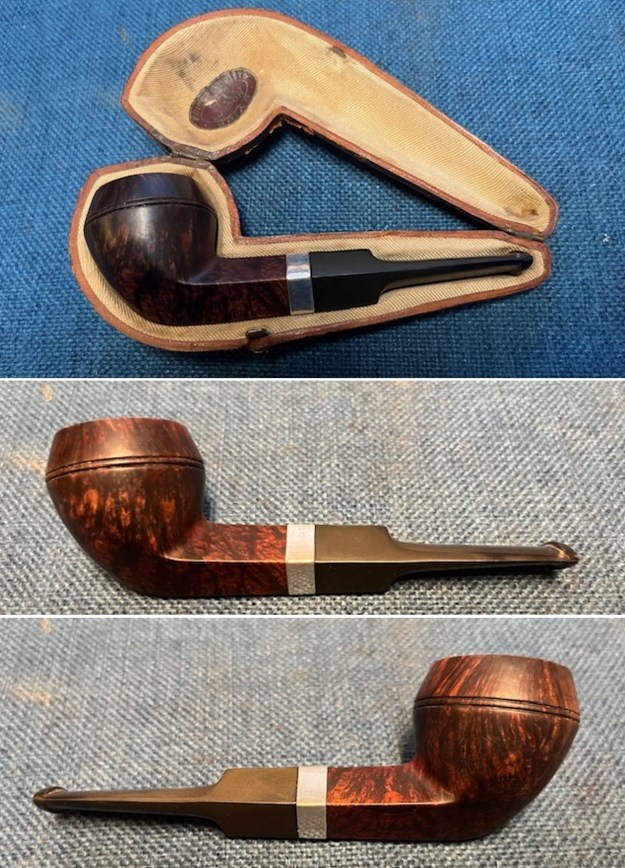
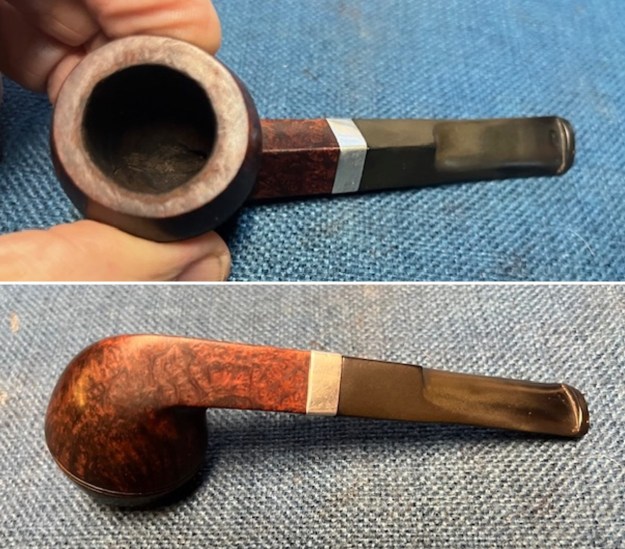
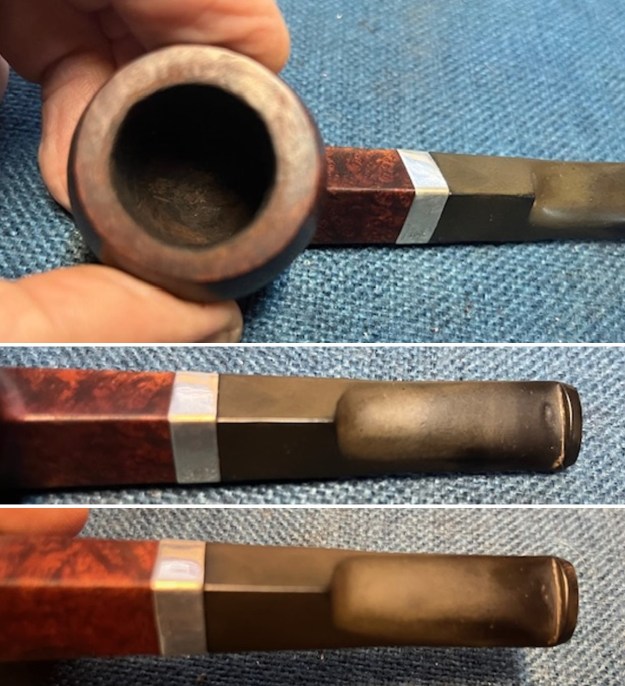
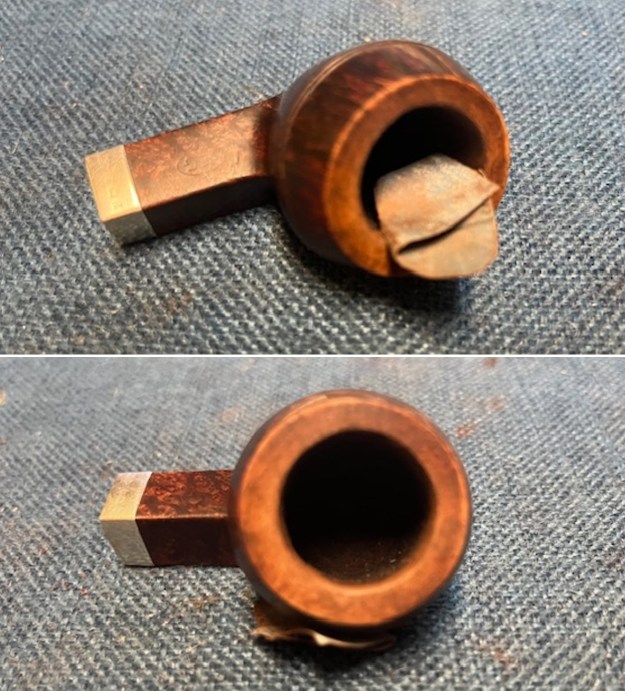
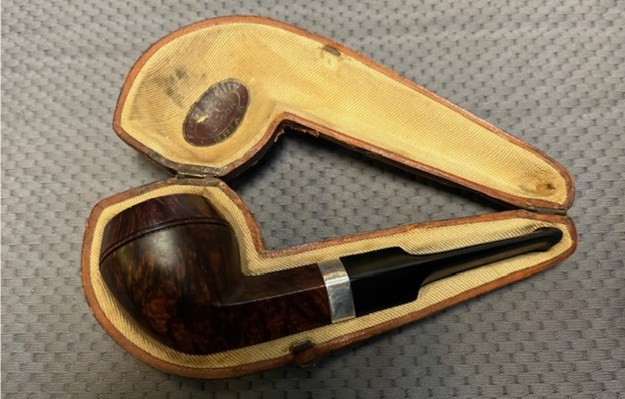
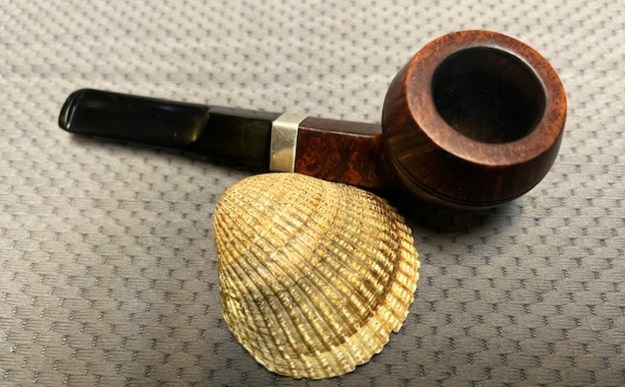
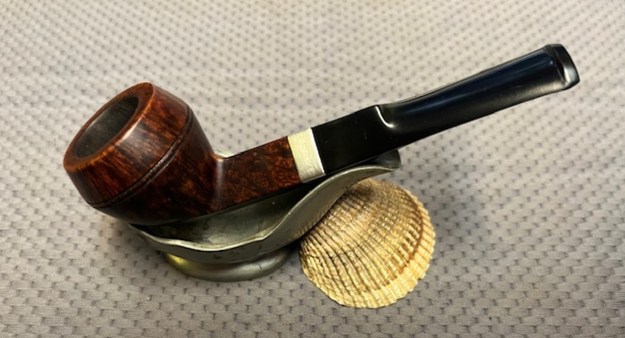
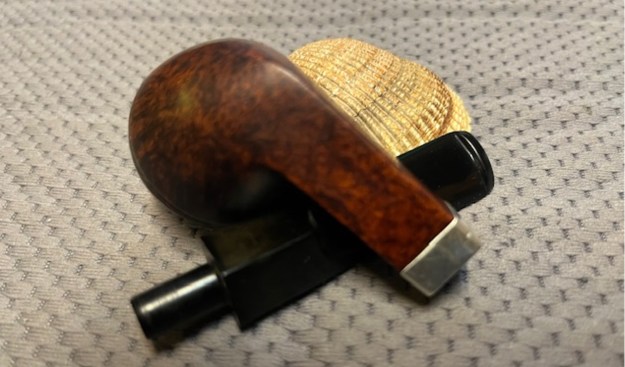
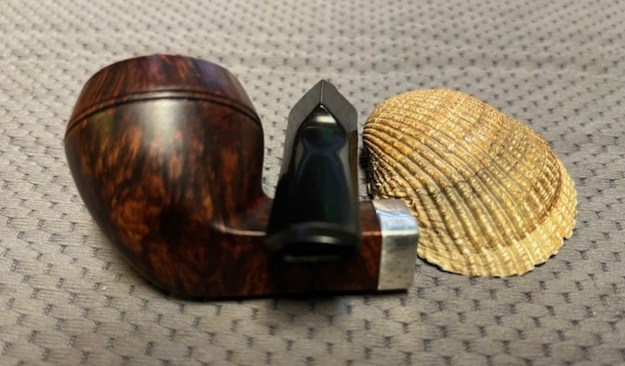
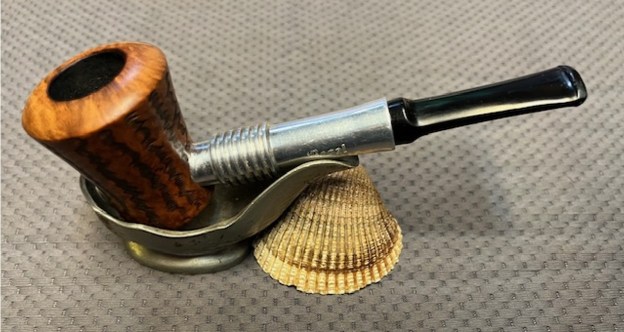
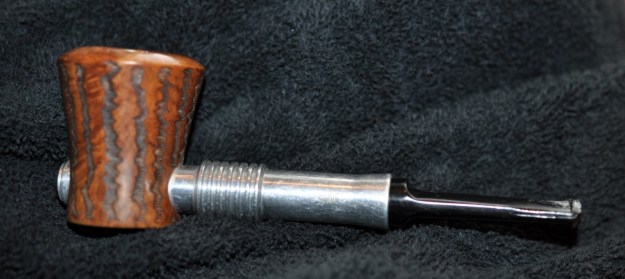
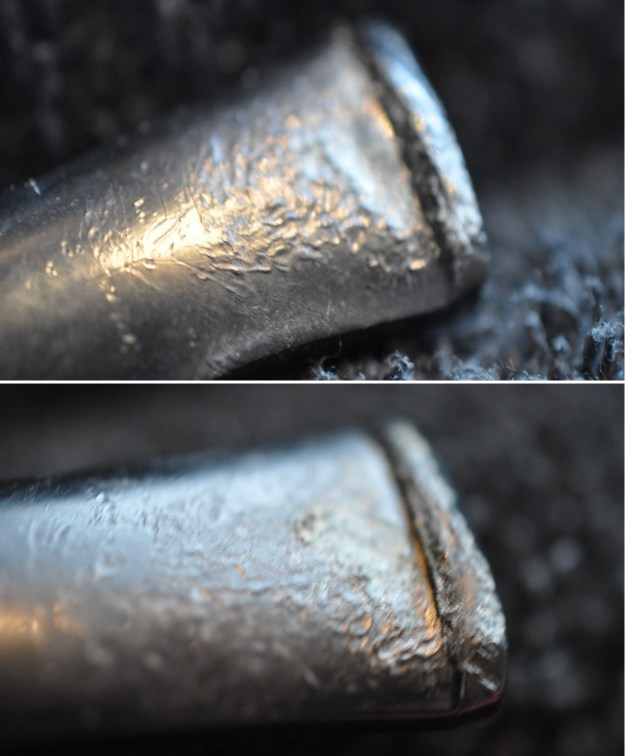
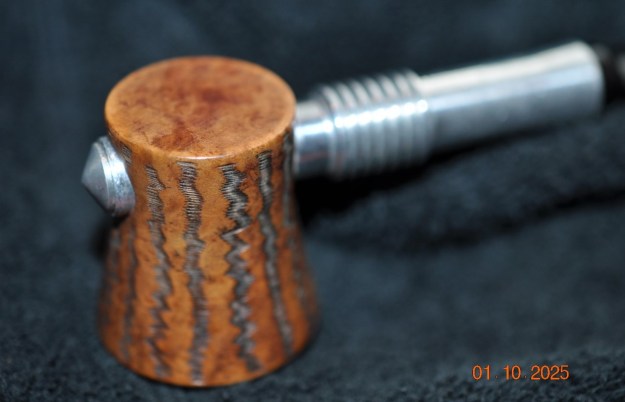
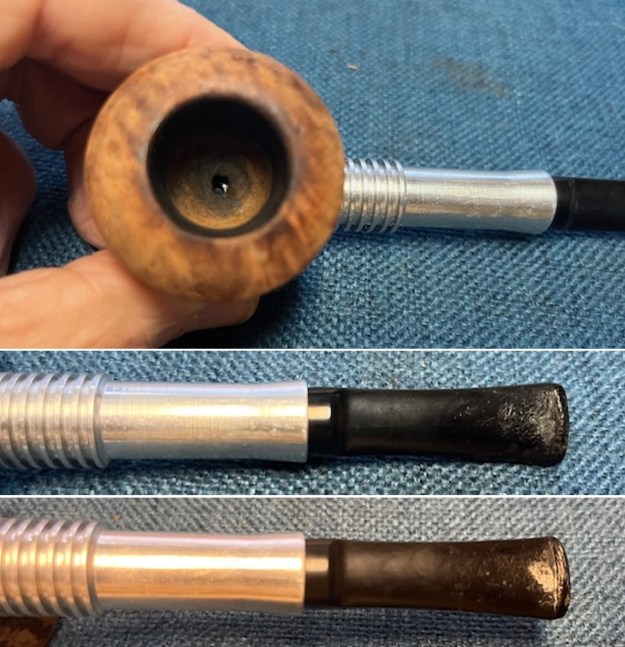
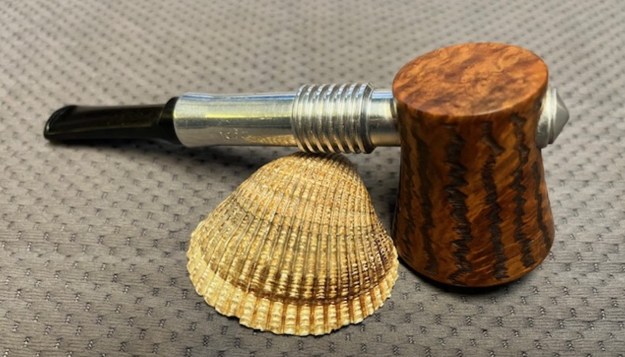
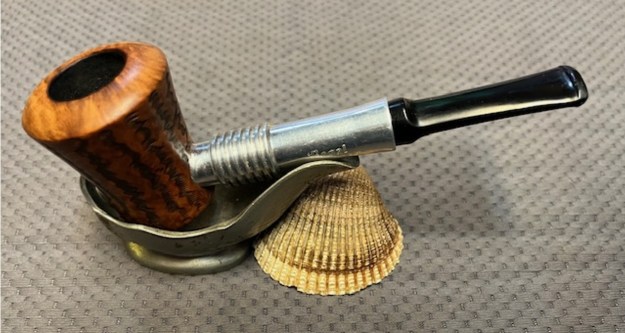
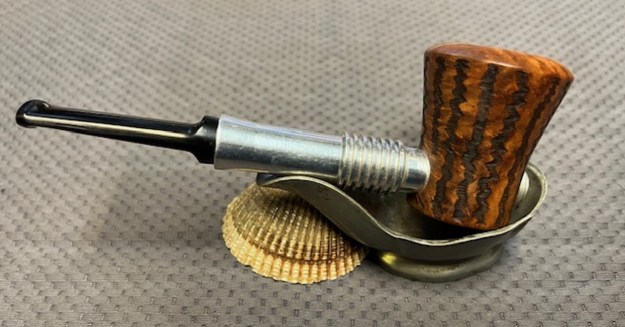
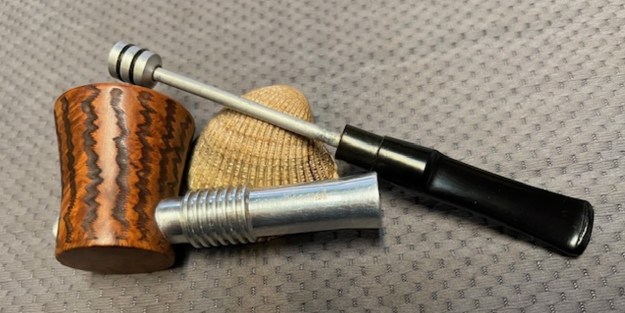
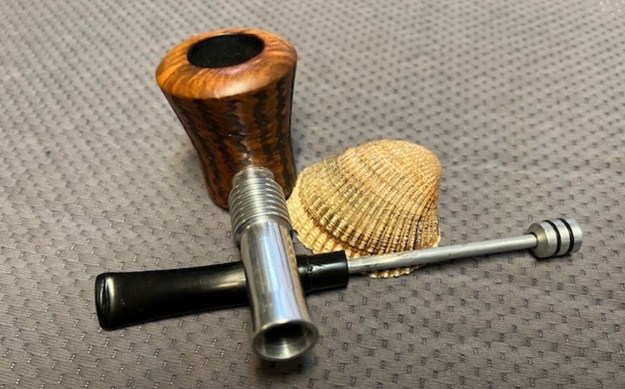
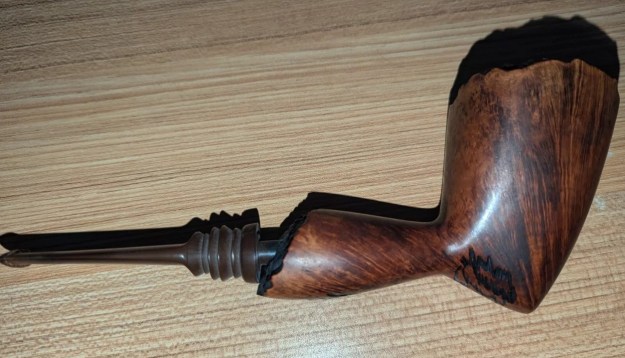
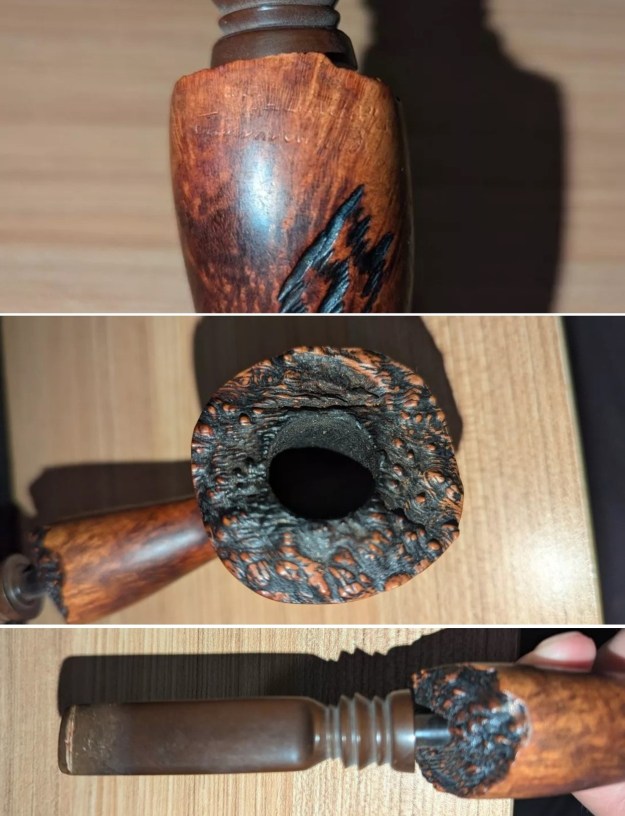
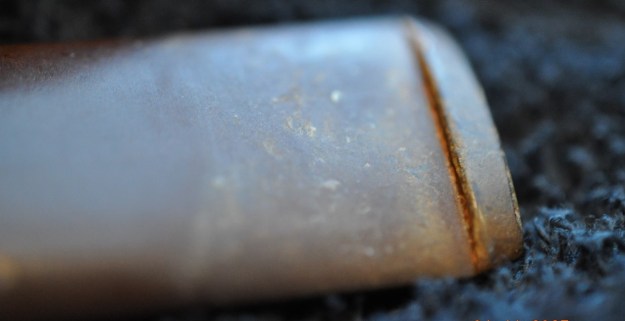
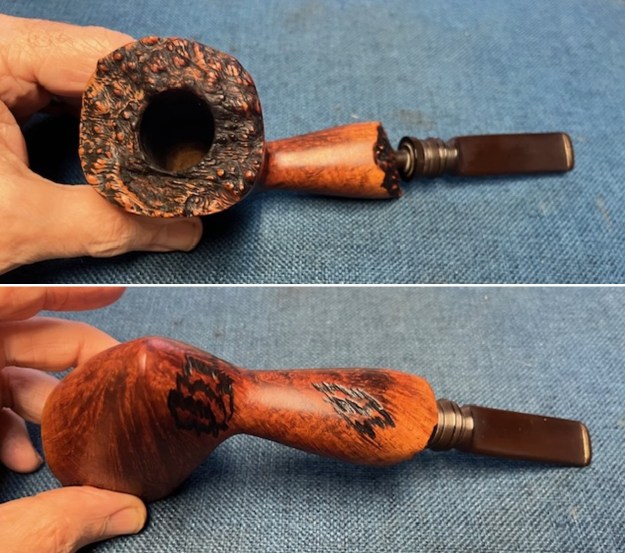
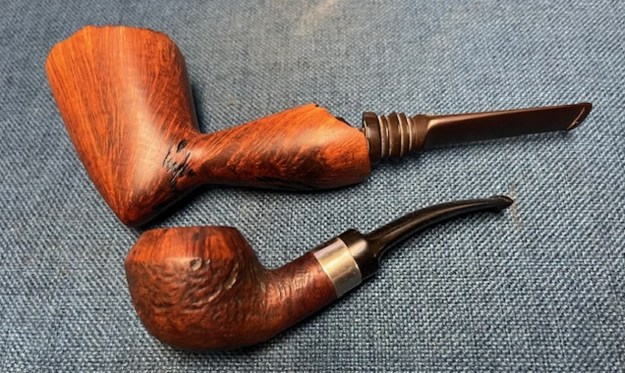
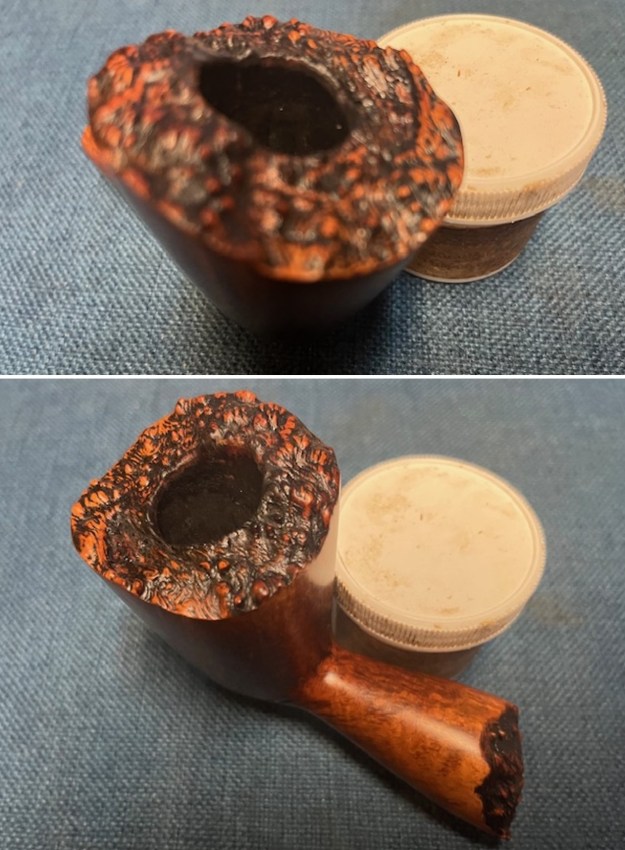
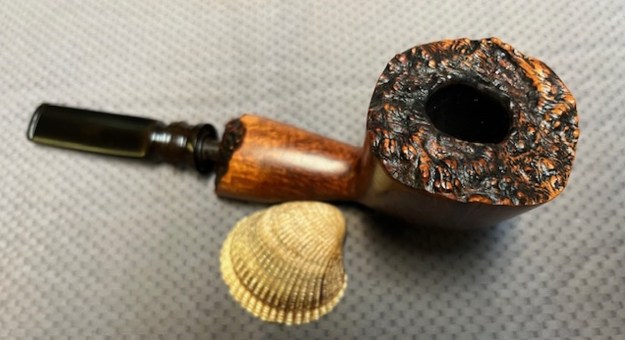
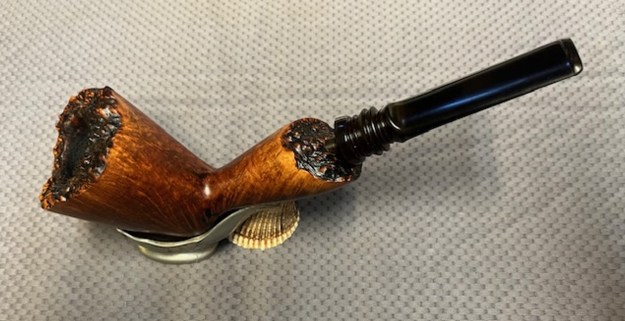
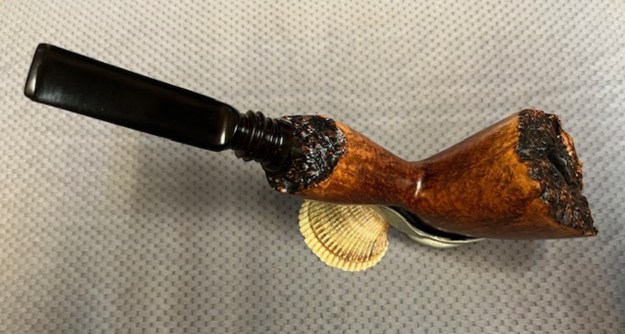
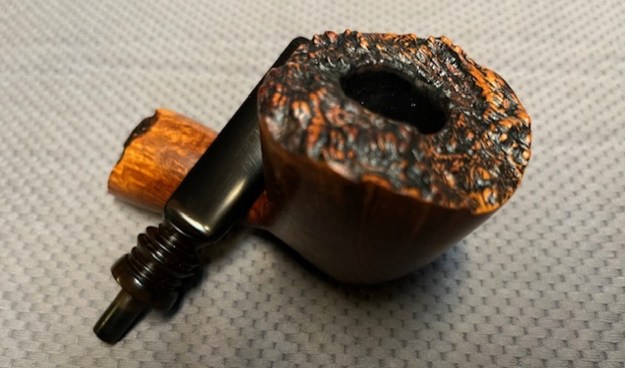
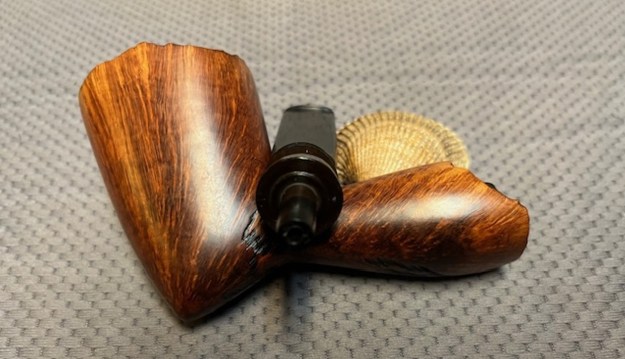
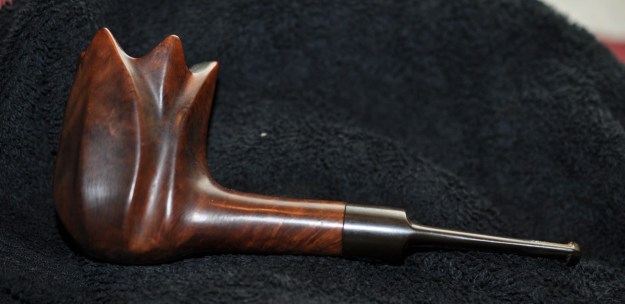
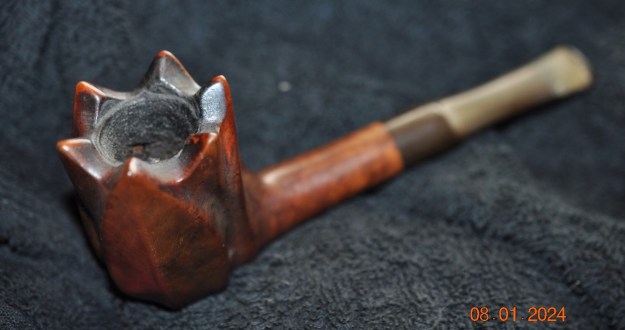
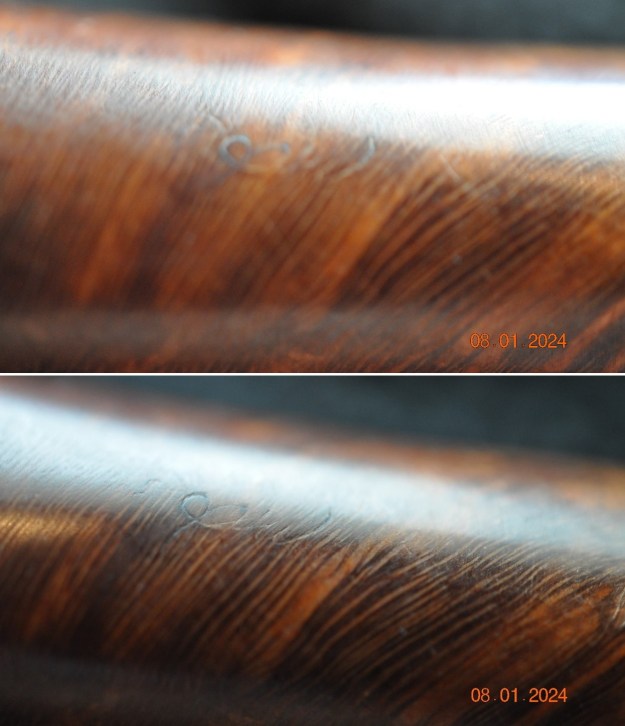
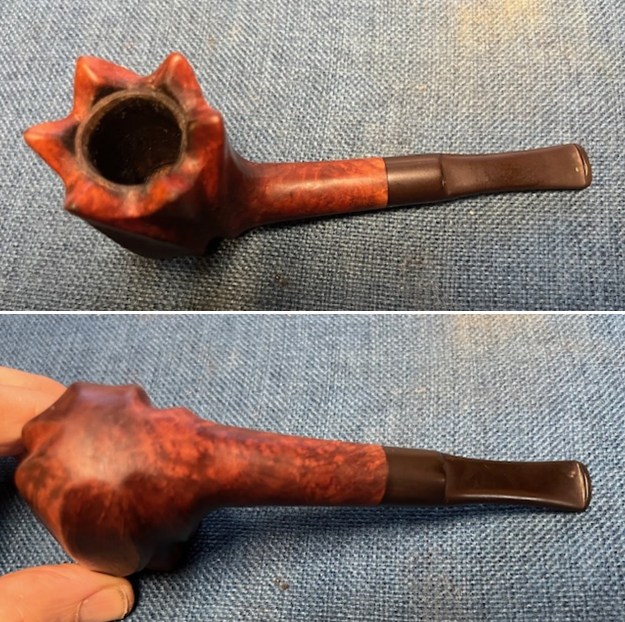
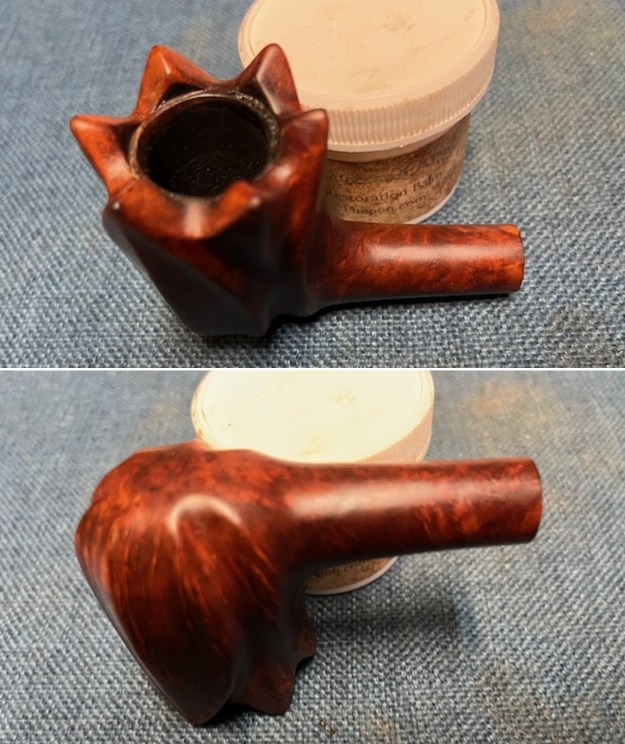
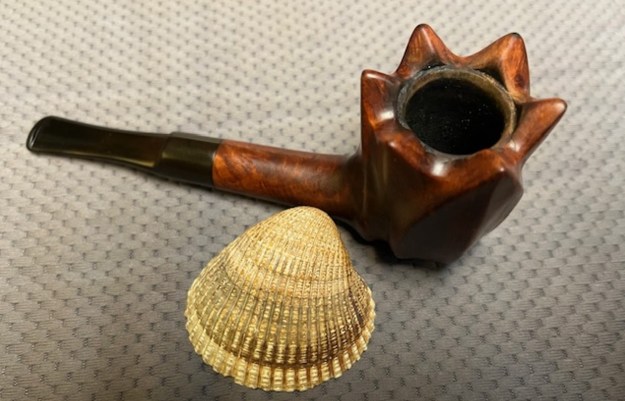
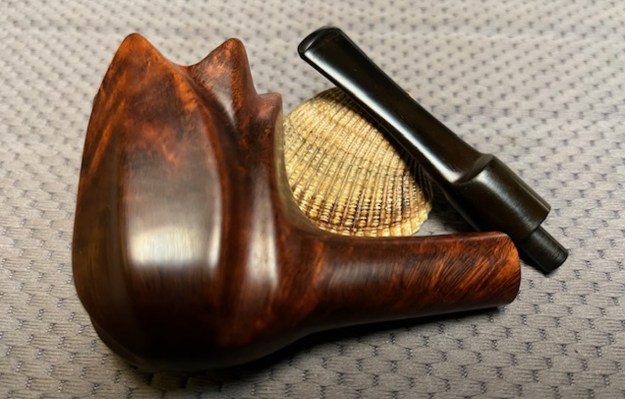
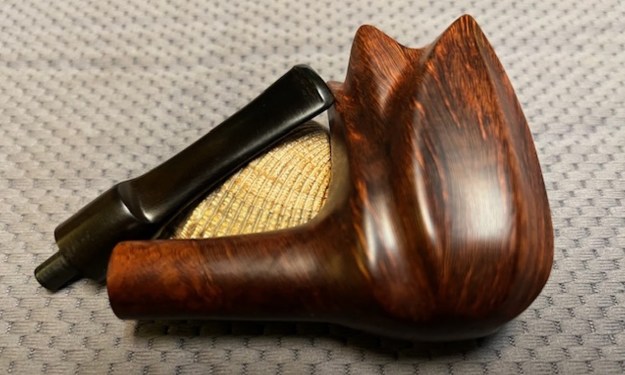
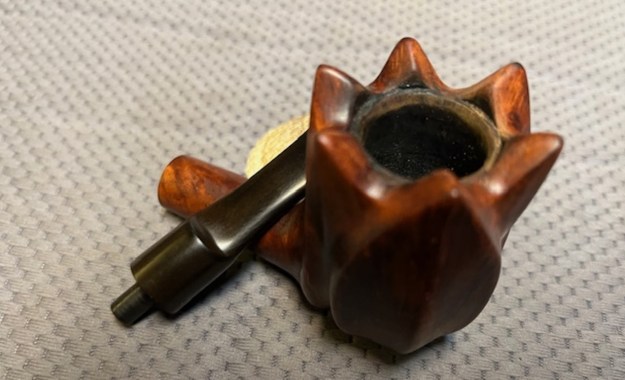
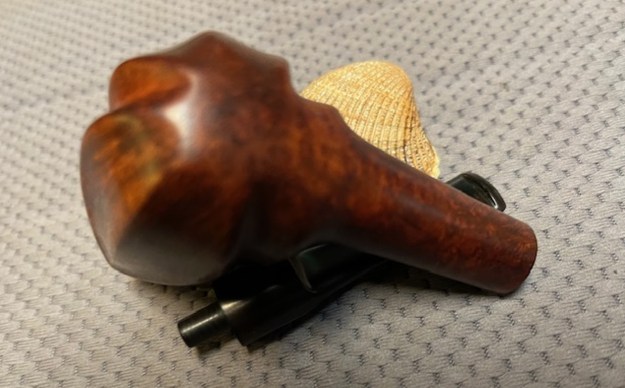
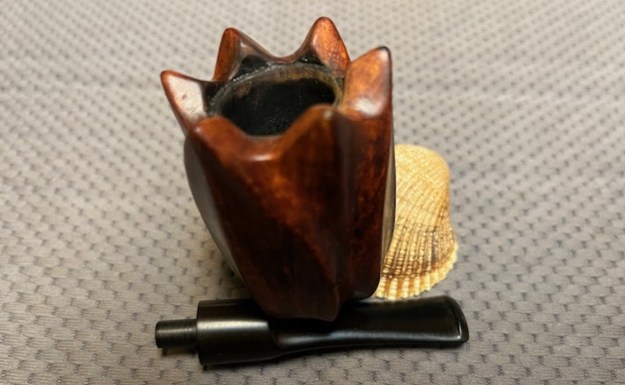
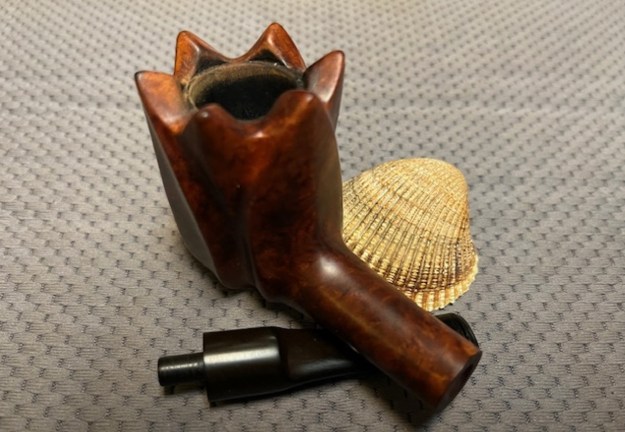
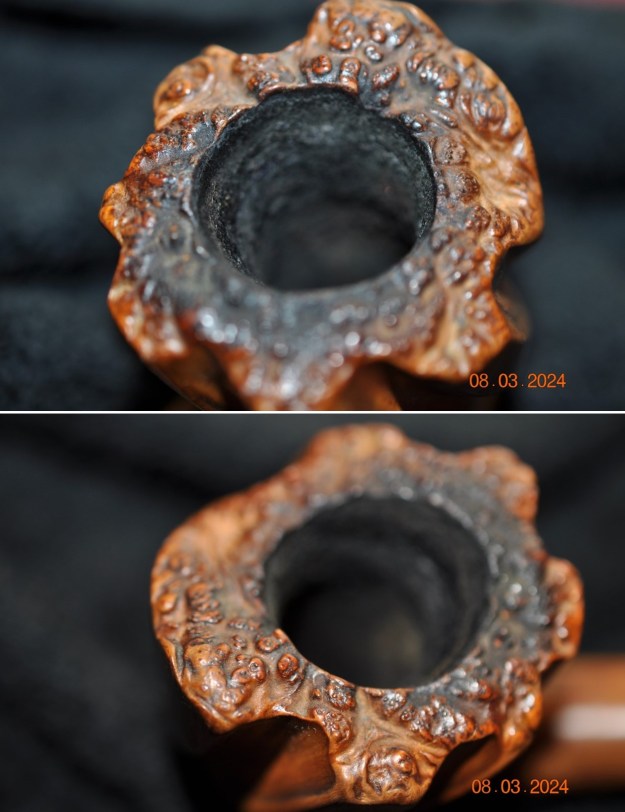
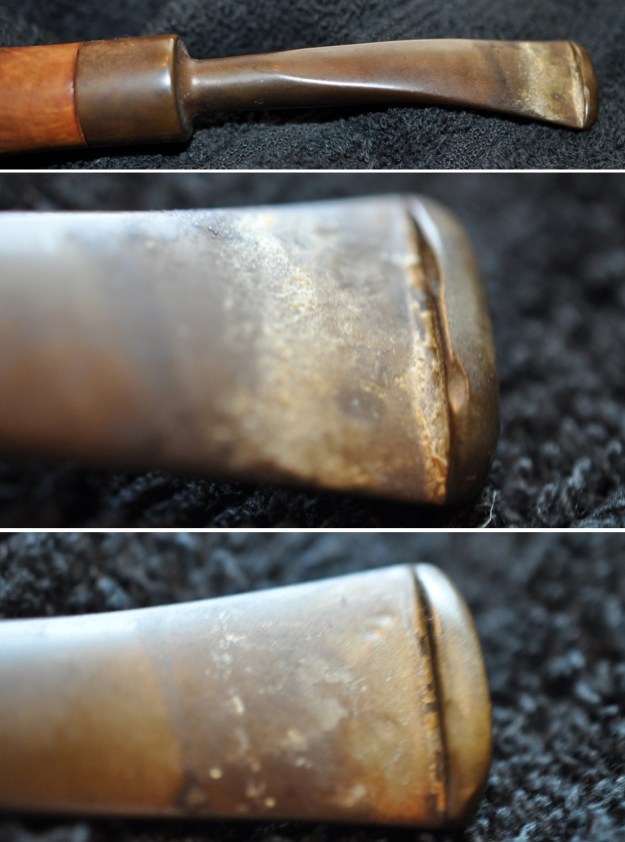
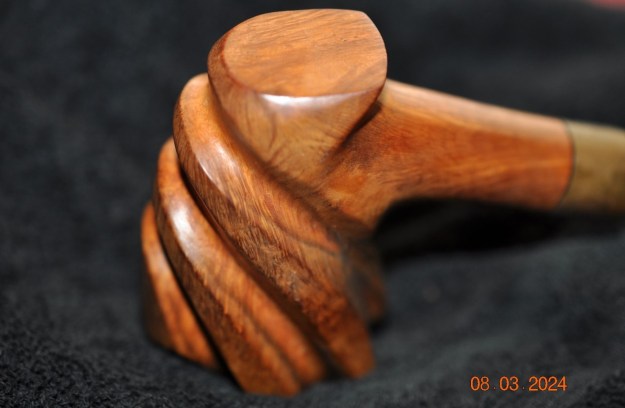
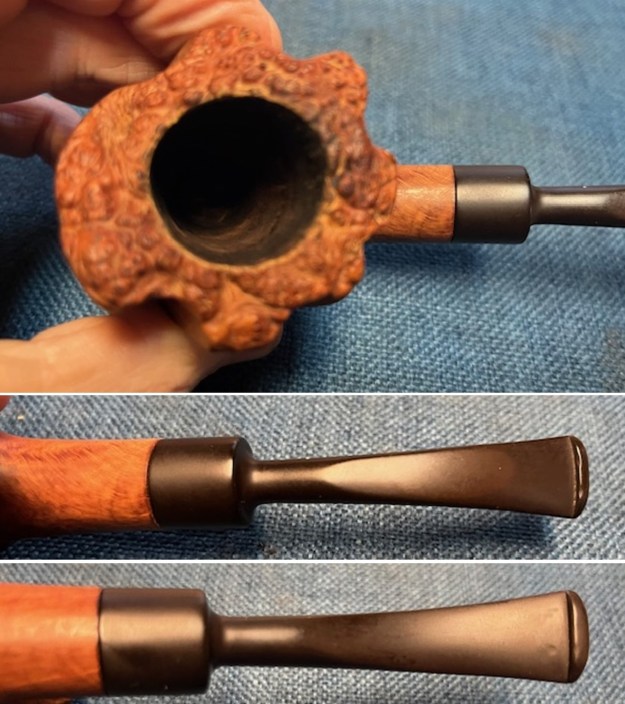
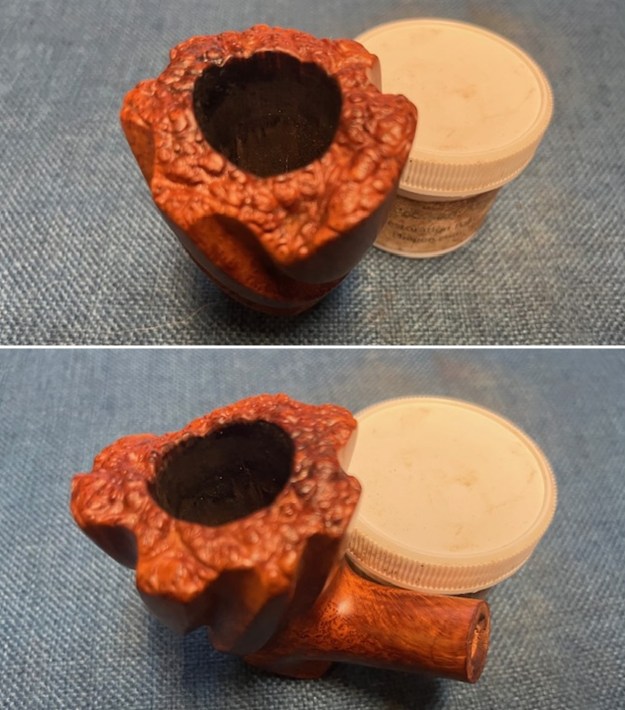
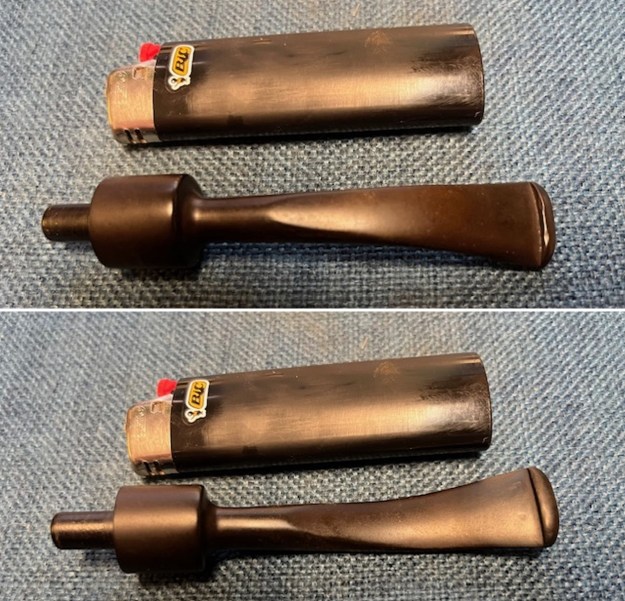
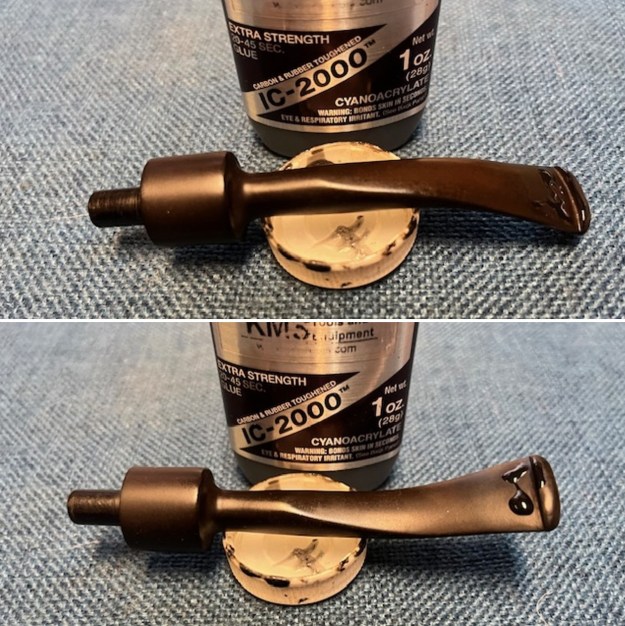
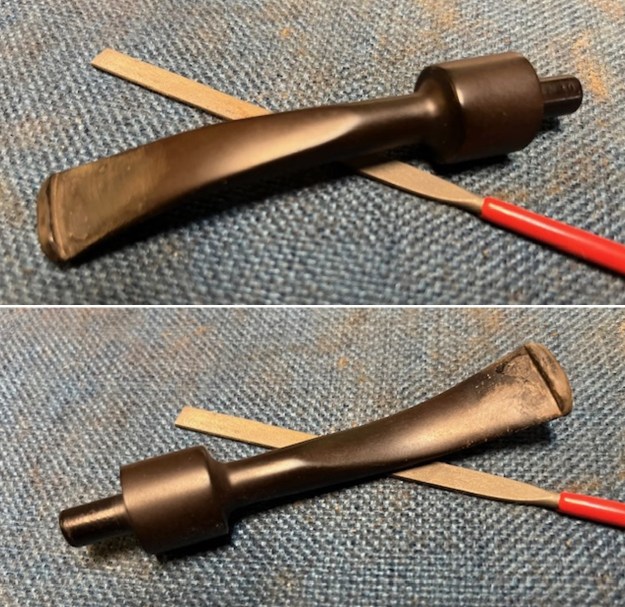
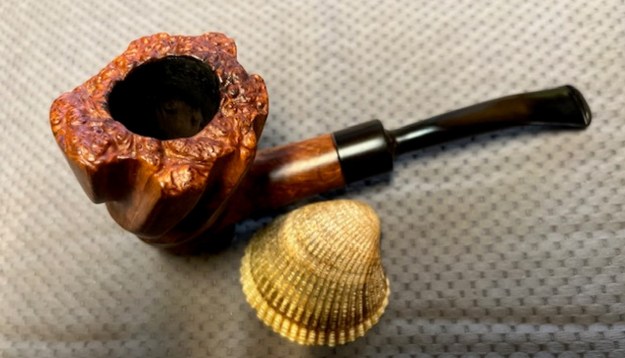
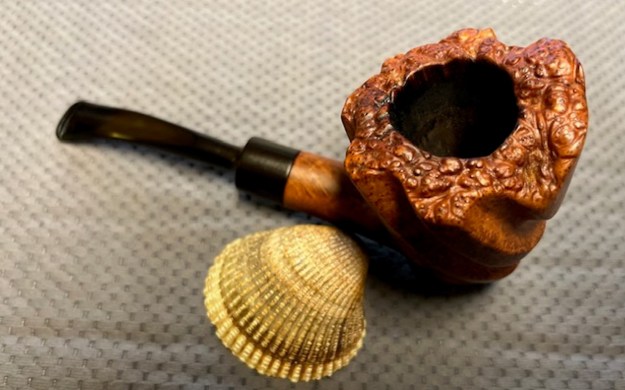
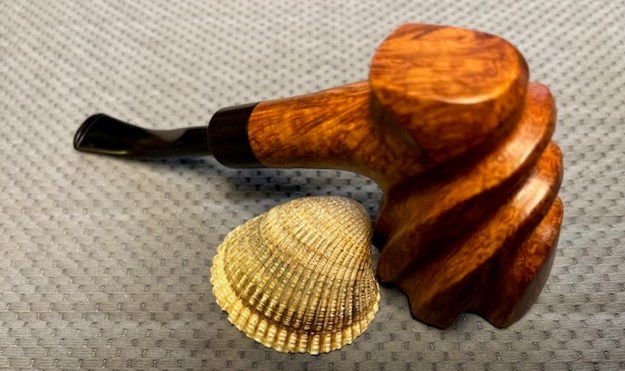
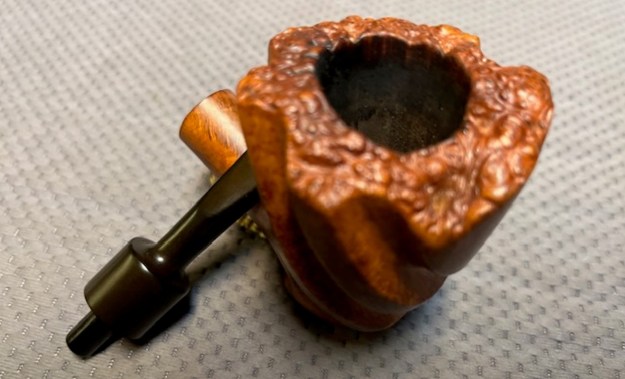
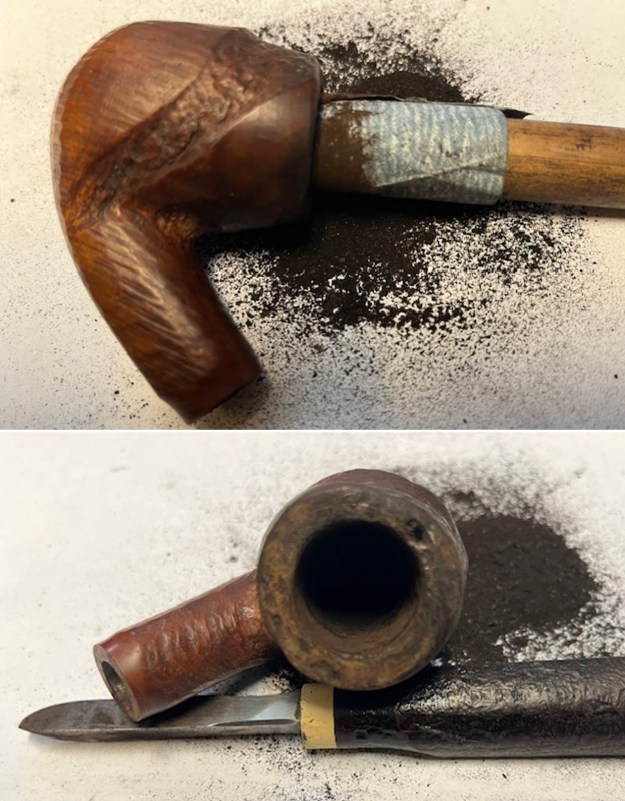
The seventh pipe I have chosen to work on from the lot was the one sitting three down on the left column in the photo above. I would call the pipe a Bent Billiard shaped pipe with a vulcanite taper stem. It is stamped on the underside of the shank and reads Brigham in script on the rustication. There is no shape number that I can see. It appears to be a Brigham Sportsman pipe – rough finished or even a bit unfinished in carving. From the cake in the bowl and the other pipes I could tell her Dad loved aromatic tobaccos. This pipe was heavily caked with an overflow of lava on the rim top and on the inner and outer edges of the bowl. There was burn damage on the rim top and inner edge on the front of the bowl. The rim top had some rustication areas on the front and back that are dark in the photos. The shank end even that had a coating of tar build up. The finish was smooth with a rusticated panel on the left side of the bowl. The finish was incomplete – rusticated, smooth, rough and uncarved portions. The stem did not sit all the way in the shank so I assumed it was very dirty in the shank. I removed the stem and the Hard Rock Maple Distillator that was missing from the tenon. The shank was black, tarry and oily. The stem was dirty, calcified and oxidized with thick oil and tar in the airway from the tenon to the button. There were light tooth marks and chatter on both sides ahead of the button. The left side of the taper stem bore three brass. That would also help with identifying the pipe. I took some photos of the pipe before I started my work on it. 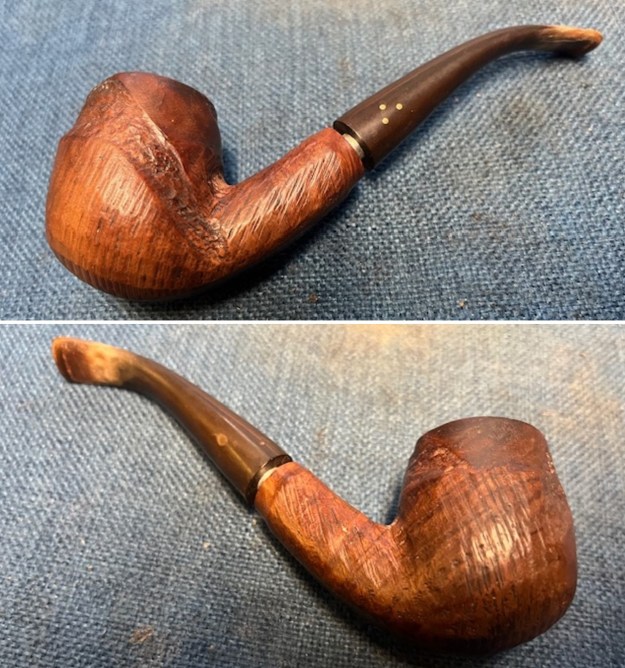
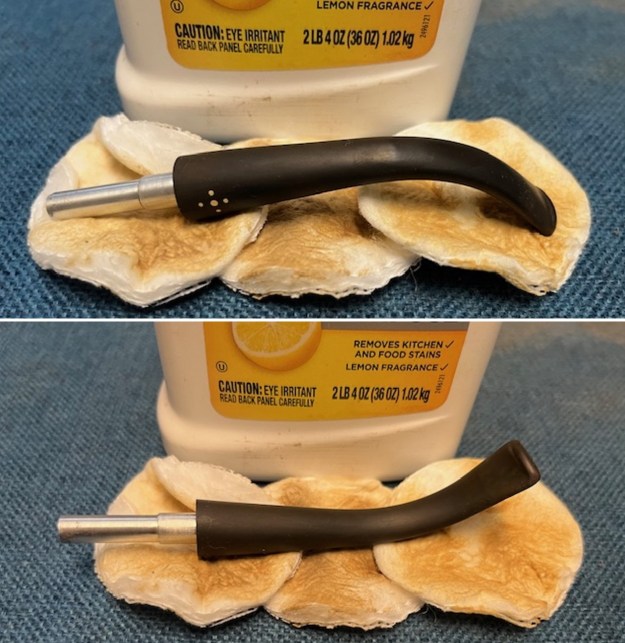
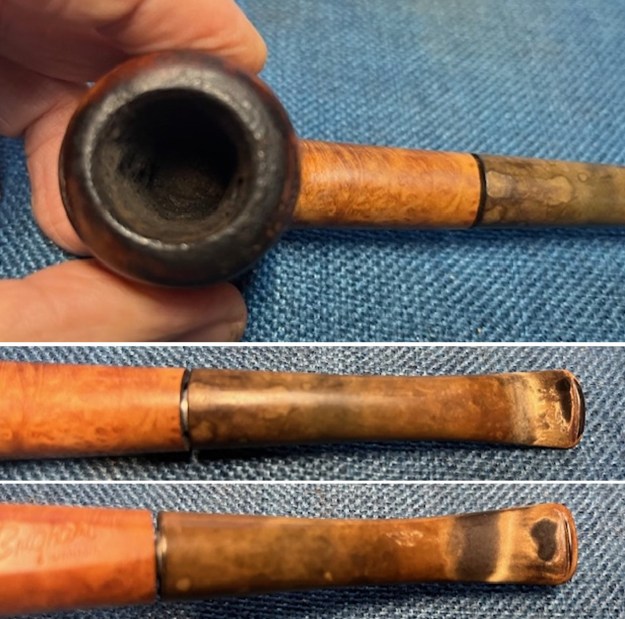
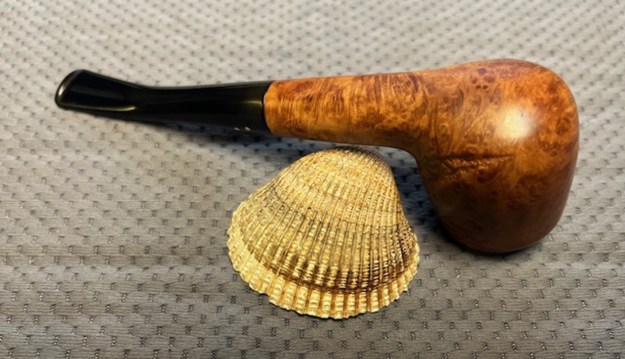
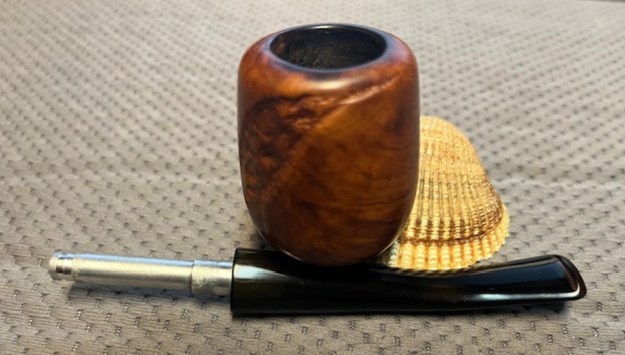
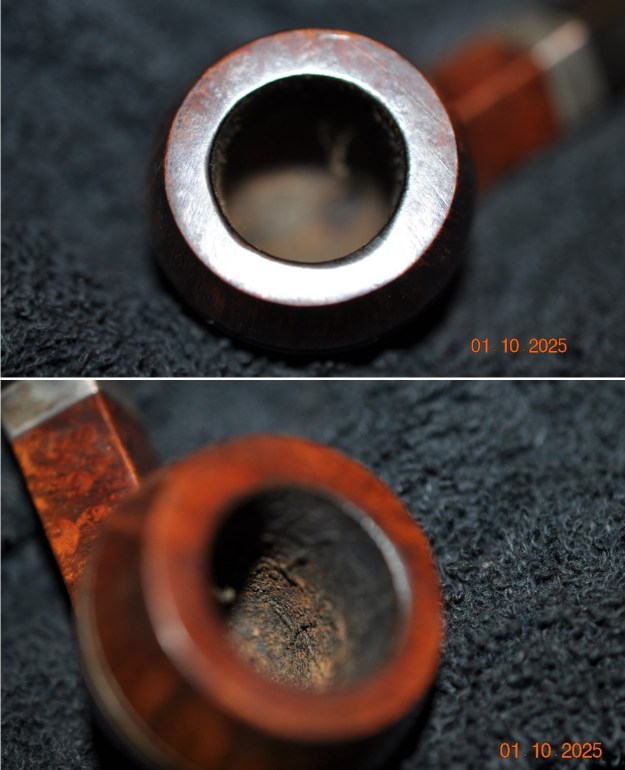
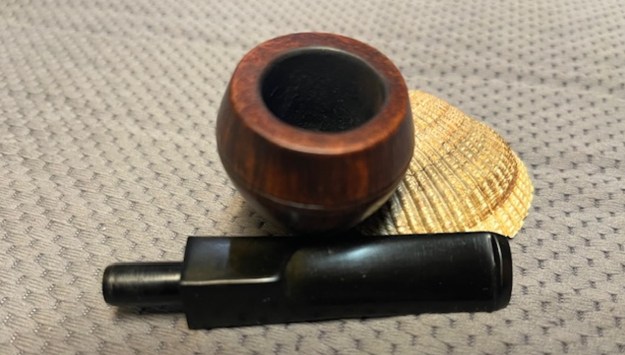
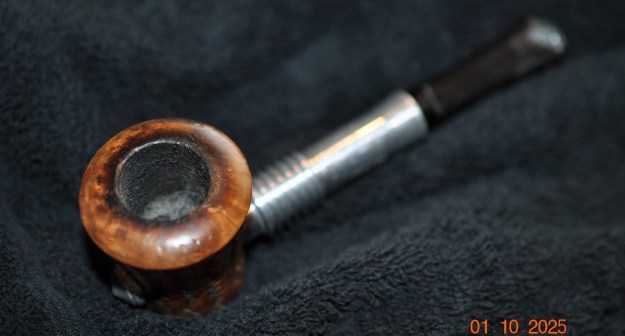
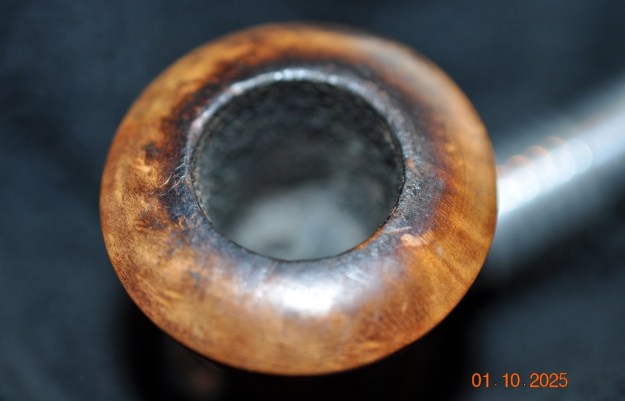
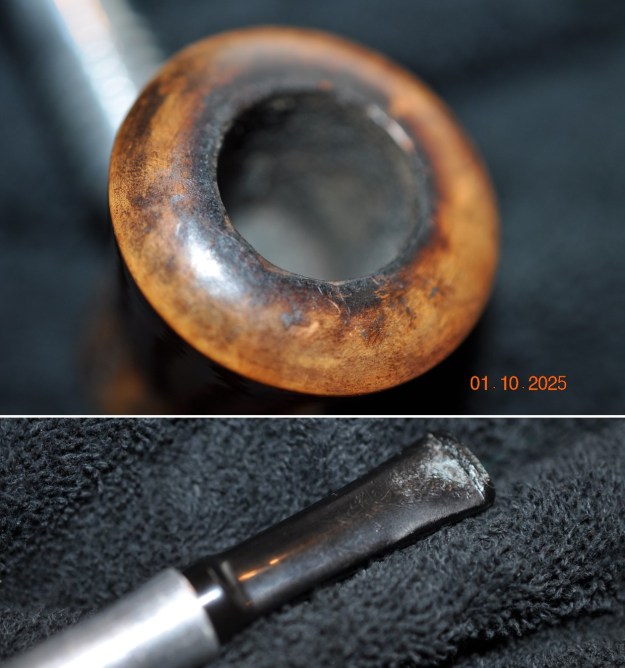
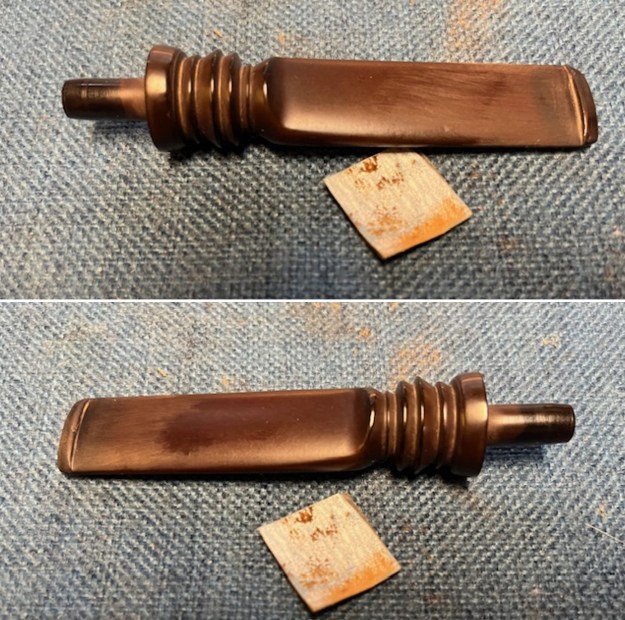
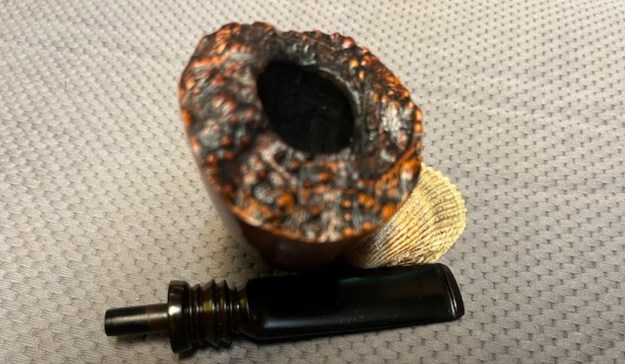
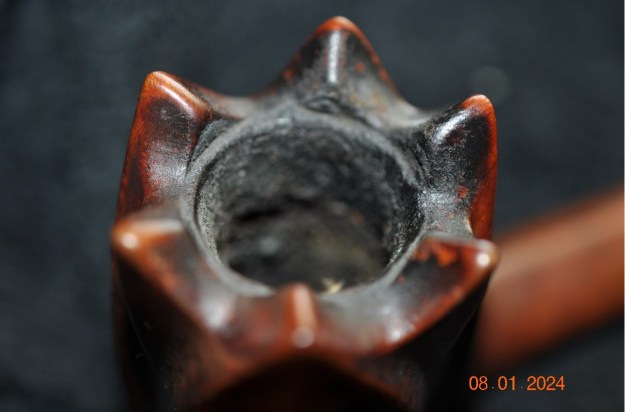
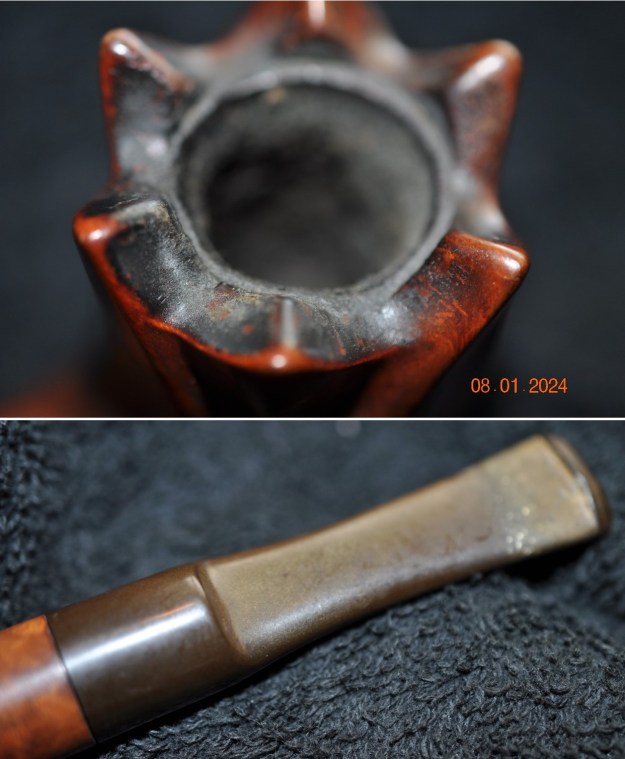
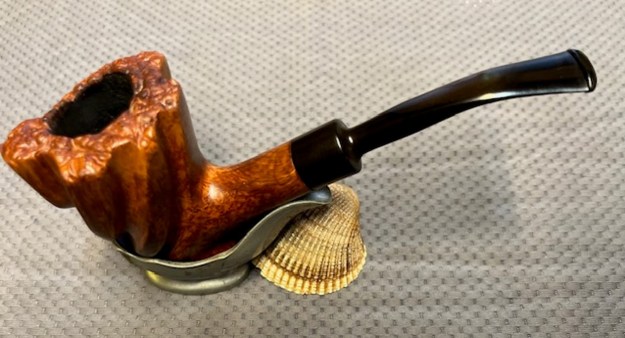
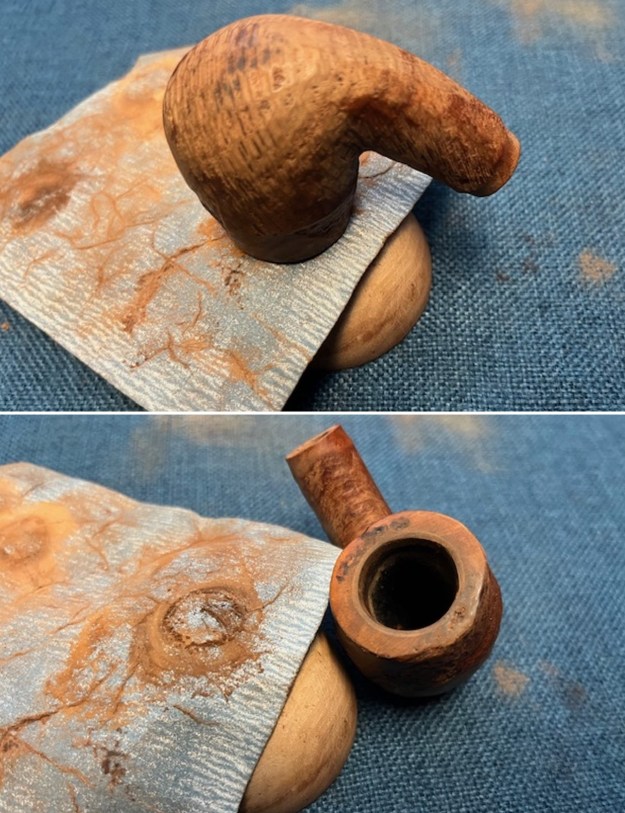
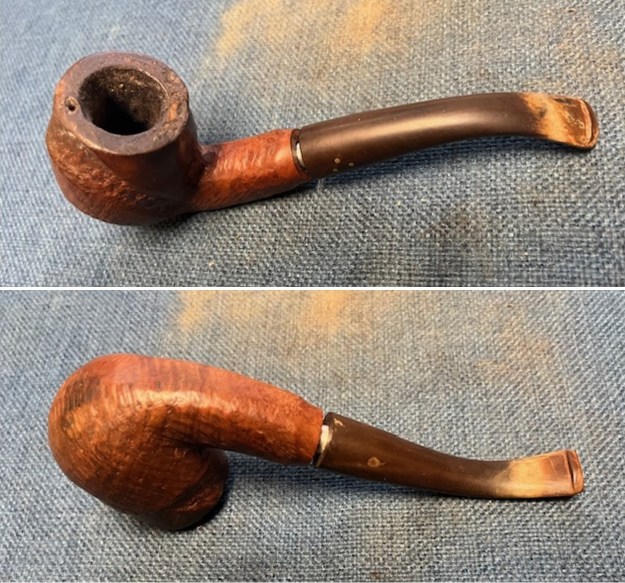 I took a photo of the bowl and rim top to show the cake in the bowl. The rim top had a thick coat of lava overflowing down the crowned top with heavy burn damage around the top, inner and outer edge. I took photos of the top and underside of the stem showing the light tooth chatter on the vulcanite stem surface. It is heavily oxidized and calcified and is quite dirty on the surface of the vulcanite.
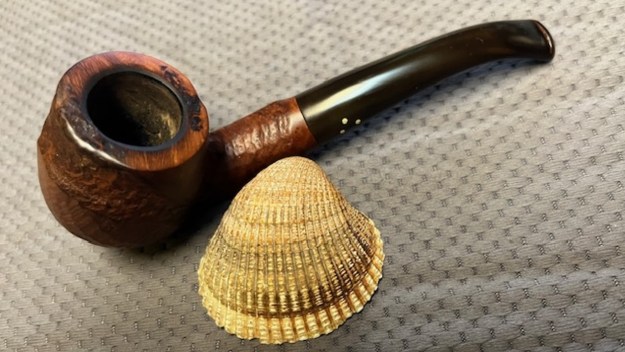
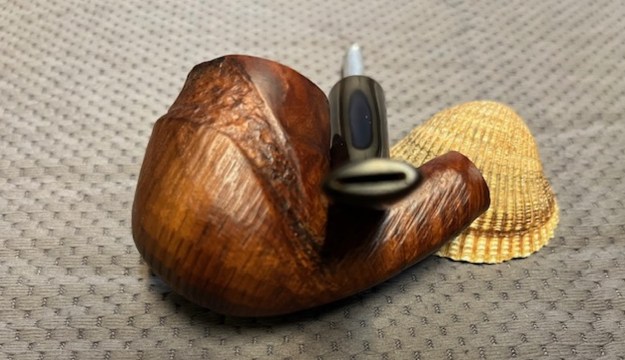
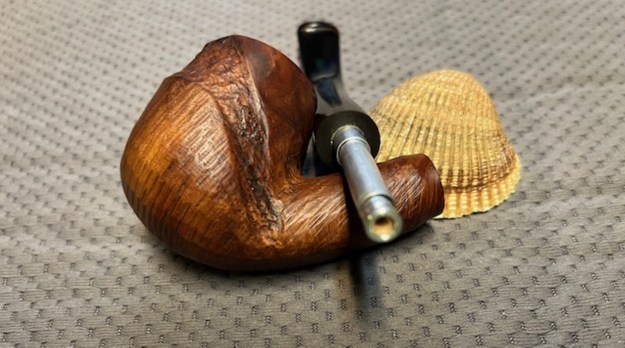
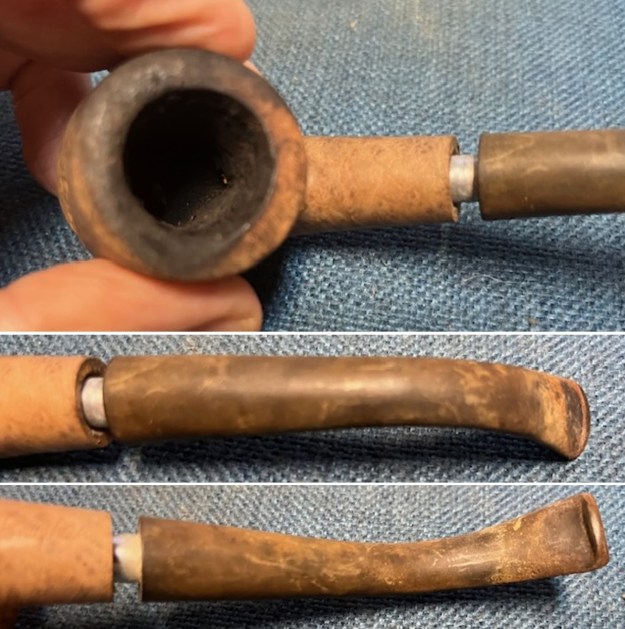
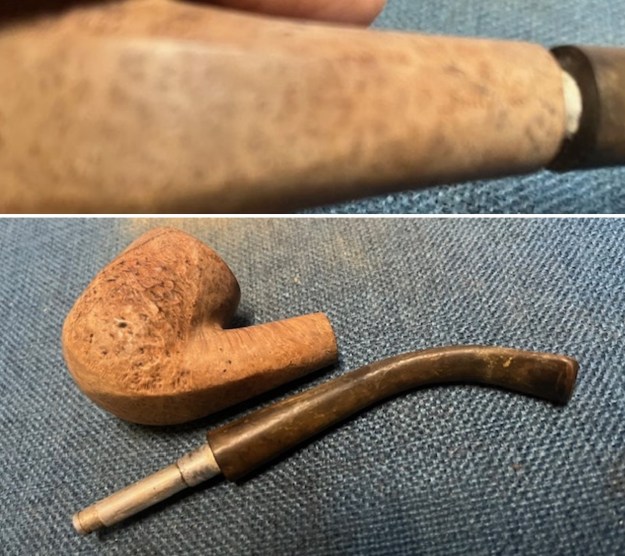
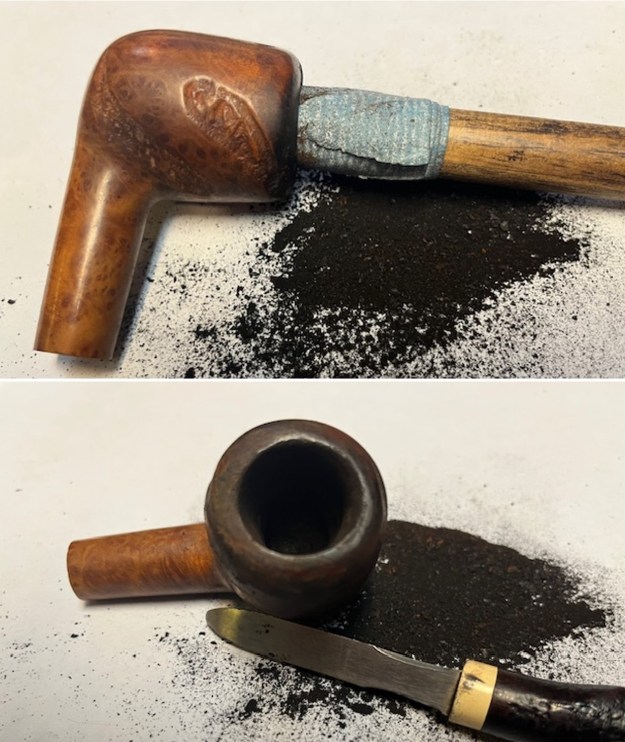
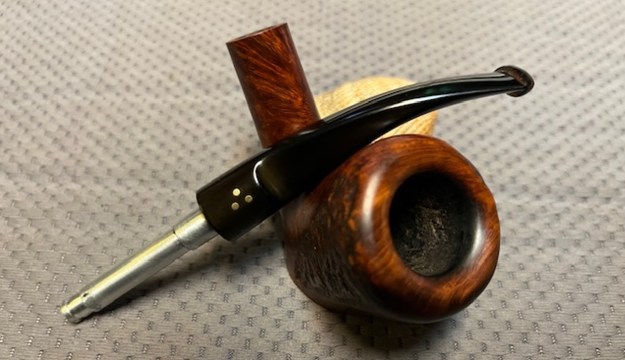
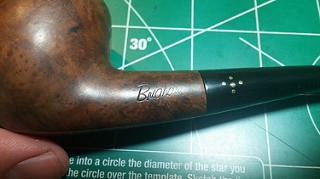
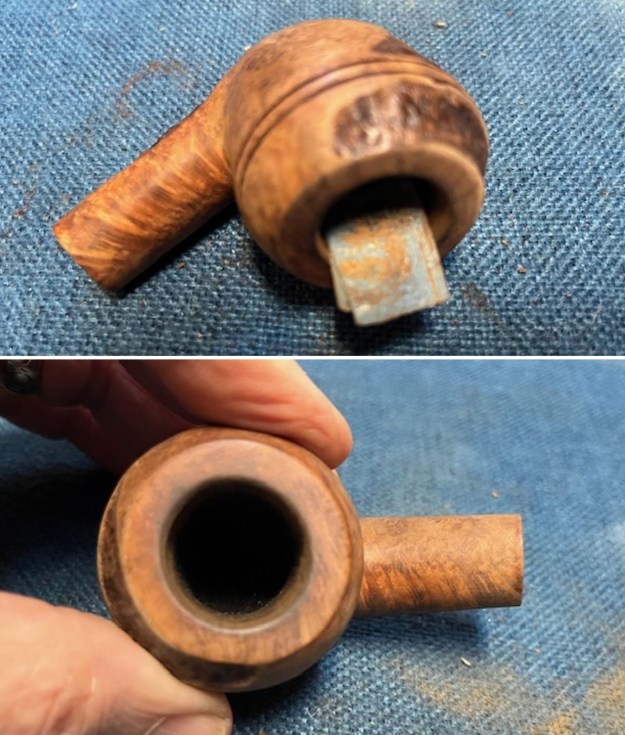
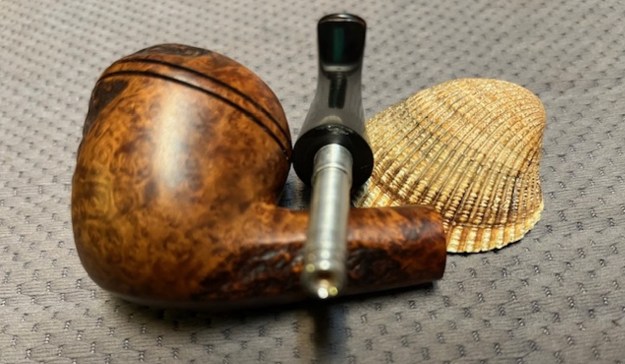
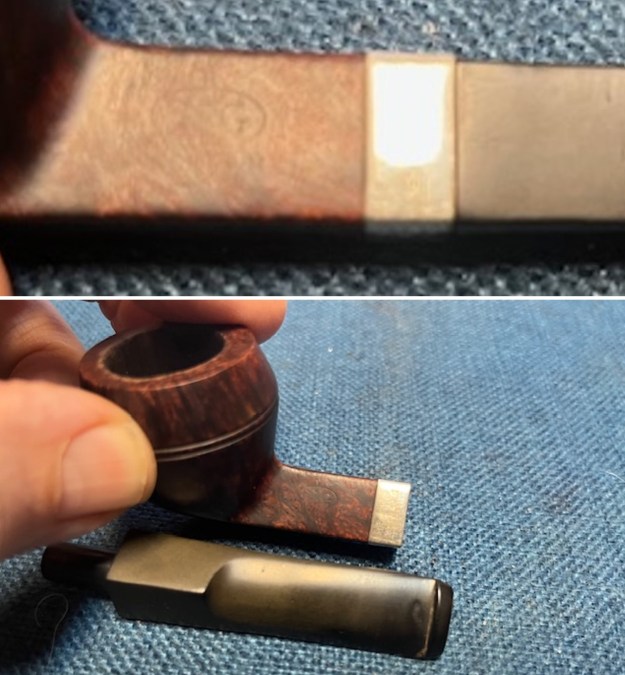
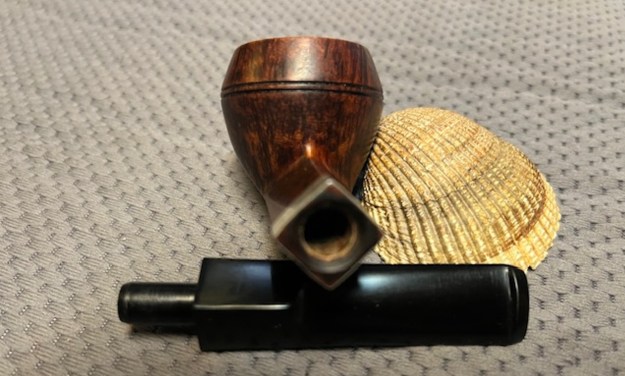
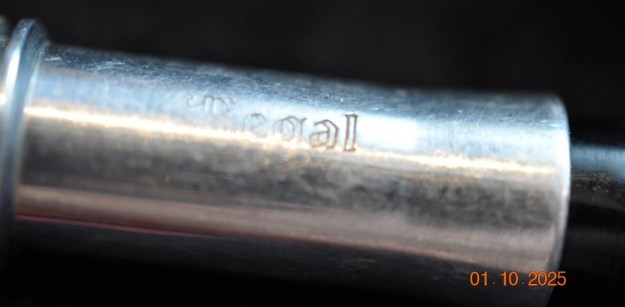
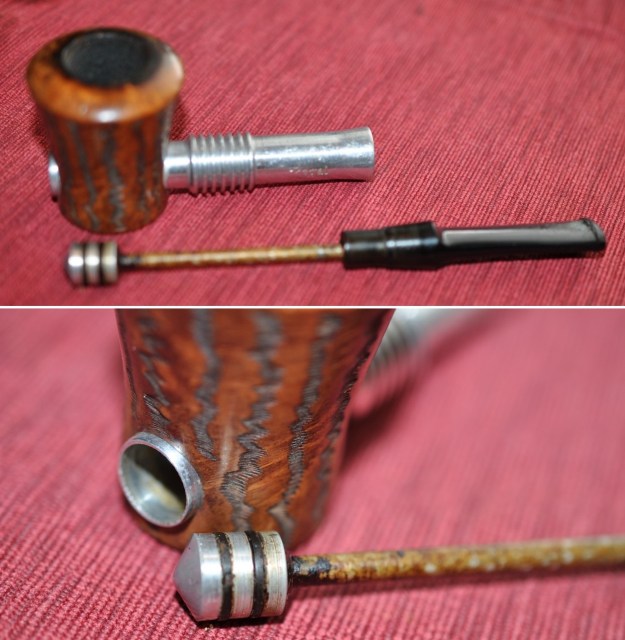
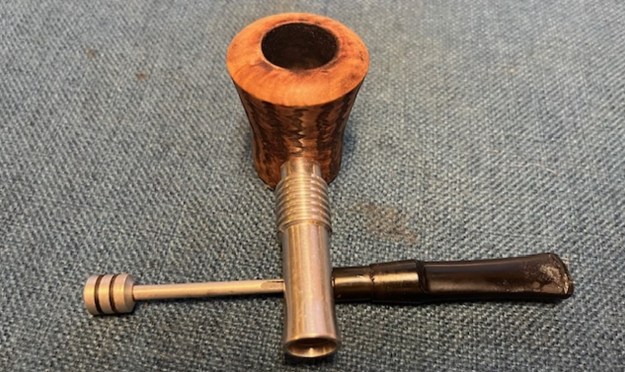
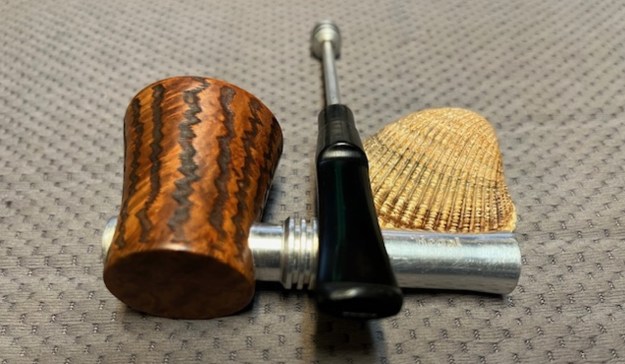
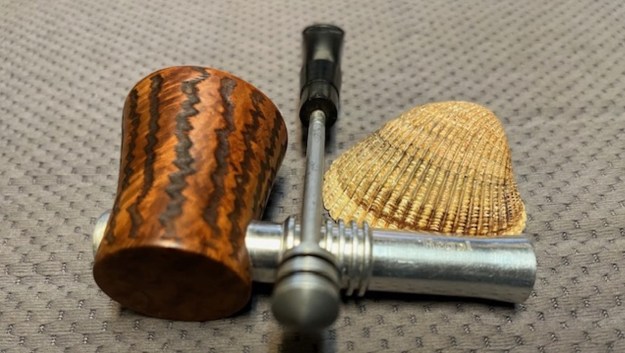
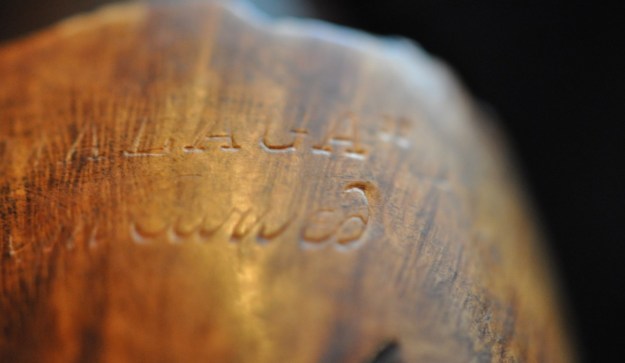
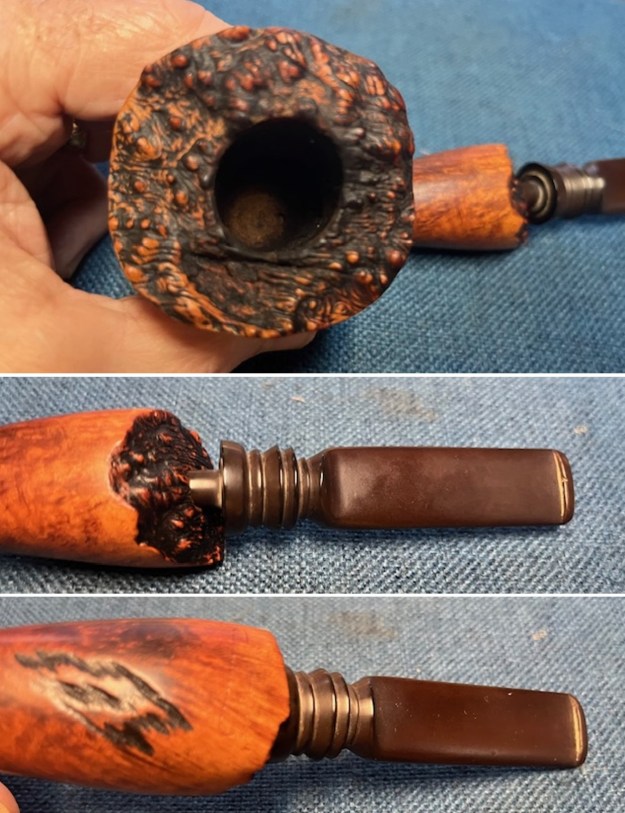
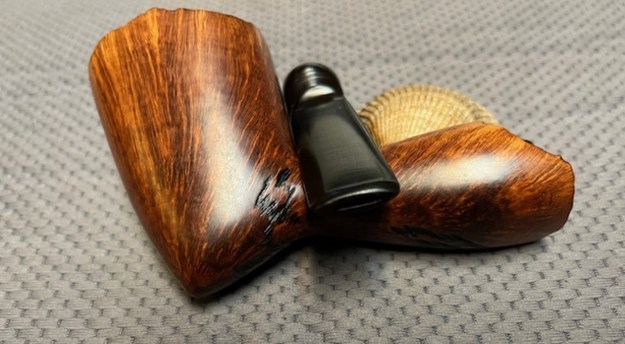
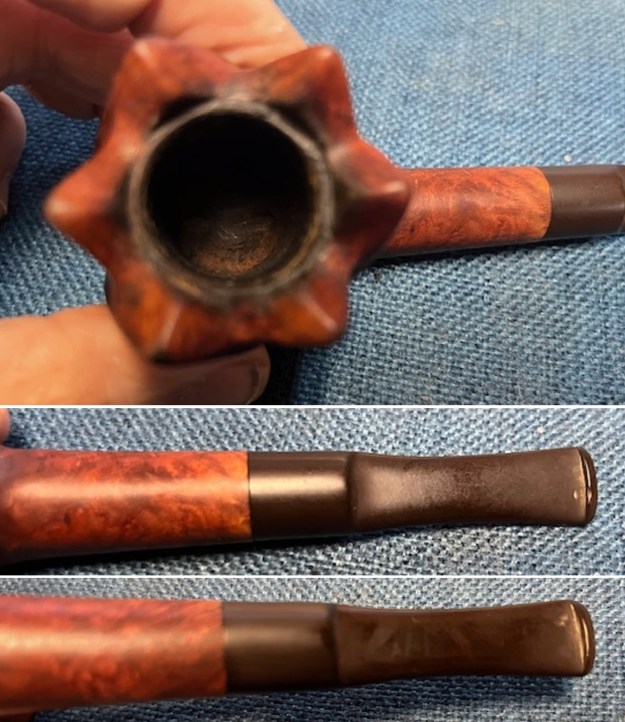
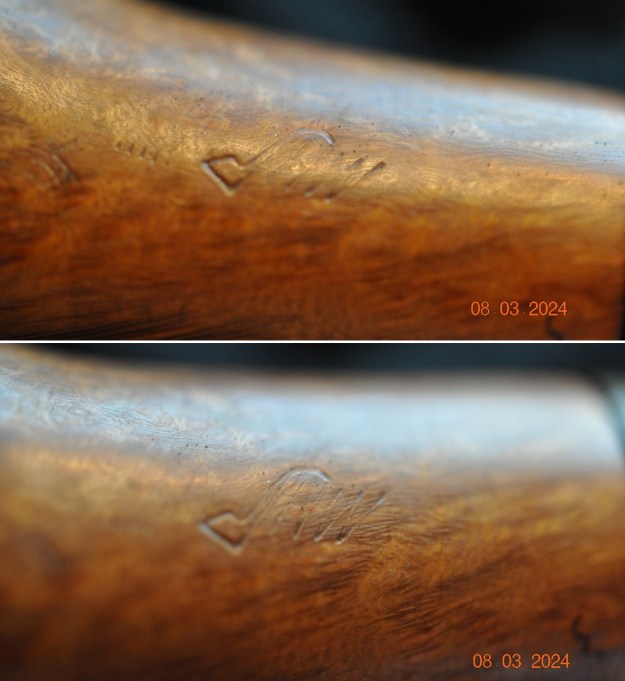
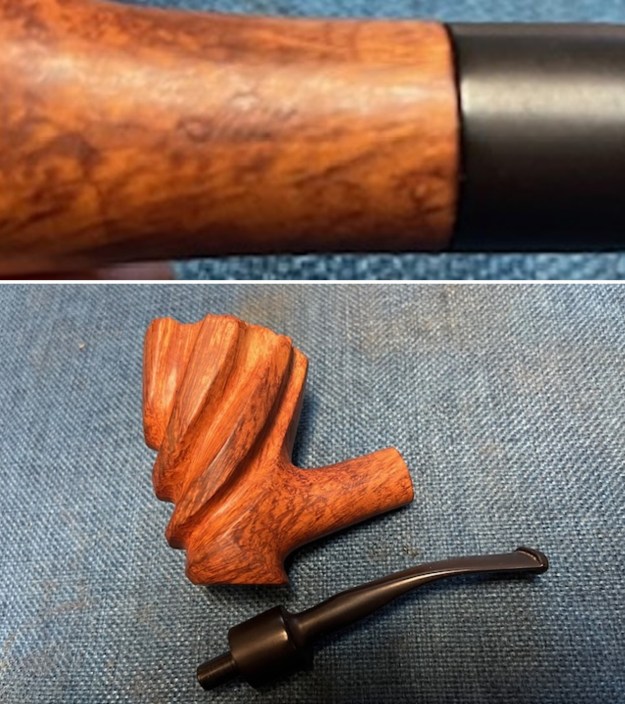
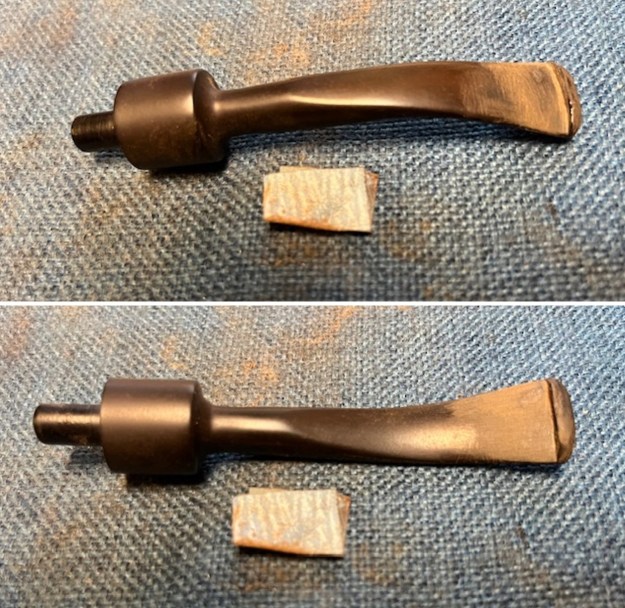
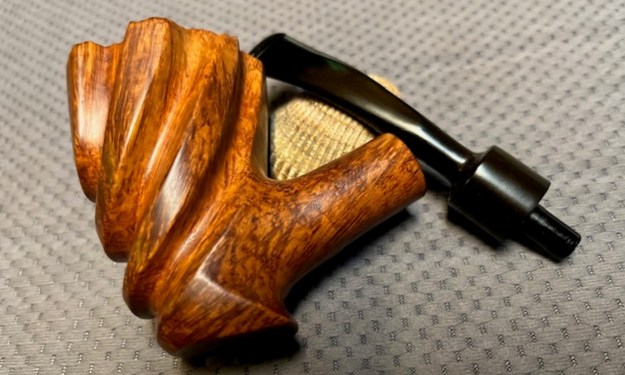
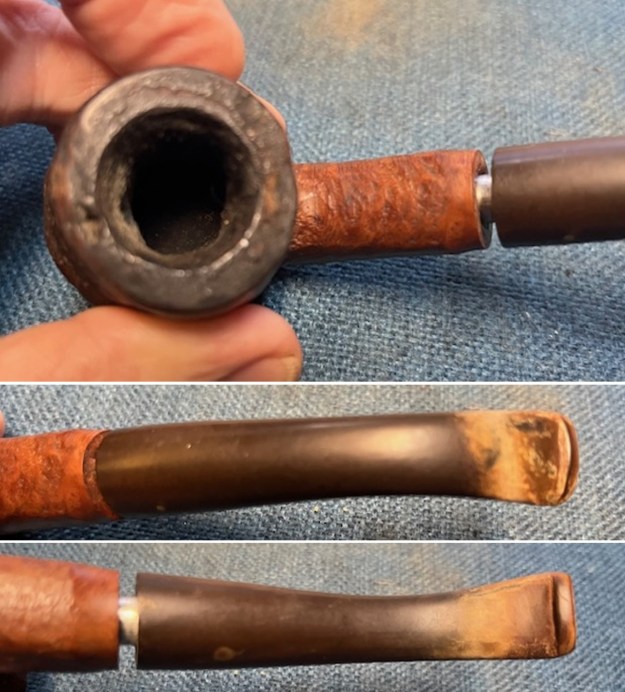 The stamping is very, very faint and hard to read in the photo below. With a bright light and lens, it reads as noted above. I removed the stem from the shank and took a photo of the parts to show the parts of the pipe. The finish on the pipe is very worn and tired looking. The brass dots on the stem are hidden under the grime and oxidation.
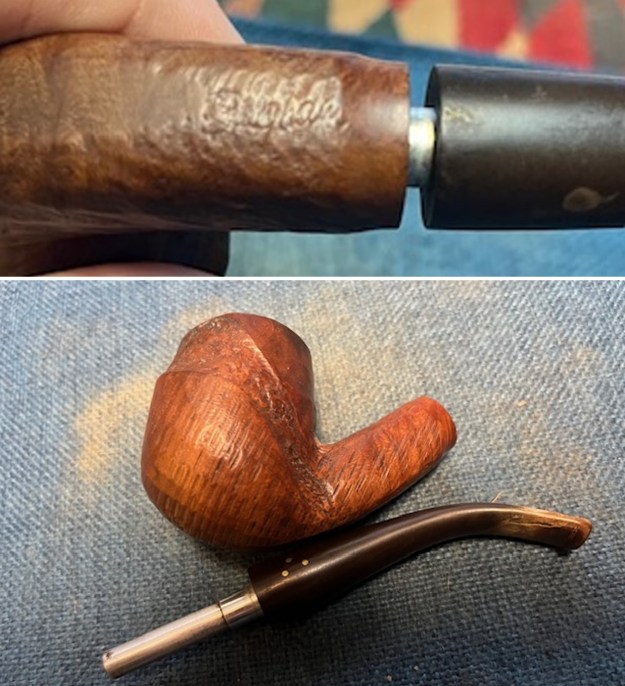 For the needed background I am including the information from Pipedia on Brigham pipes. It is a great read in terms of the history of the brand (https://pipedia.org/wiki/Brigham_Pipes). Charles Lemon (Dadspipes) has written book on the history of the brand and well worth the price. The Pipedia article is a good summary.
I turned to Charles Lemon’s book, Brigham Pipes A Century of Canadian Briar, page 24-25. I quote the section on Brigham Sportsman Pipes below:
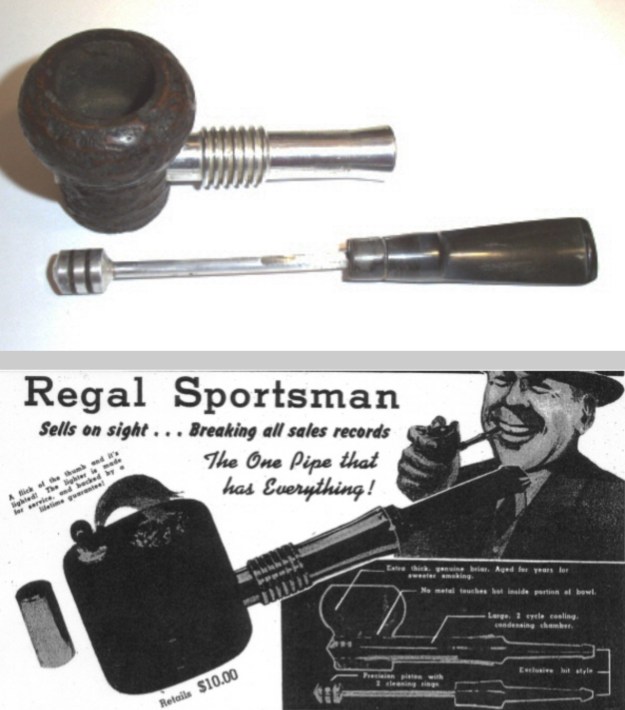
The Toronto Sportsman’s Show has been an annual tradition since the late 1940s, catering to all manner of outdoor pursuit. Brigham began renting a booth at the show in the early 1950’s and created the Sportsman series of rugged, rough-and-ready pipes available exclusively at the Sportsman’s Show.
The Sportsman pipes were essentially semi-shaped (or half-finished) briar bowls with vulcanite stems, complete with the Brigham System. The smoking characteristics of the Sportsman models were identical to regular Brigham pipes, and the rough exterior and simple wax finish gave the series a rugged, outdoorsy appearance that many pipe smokers found appealing.
Special show prices allowed pipe smokers to buy a 4-Dot pipe for the price of a 3-Dot pipe, a 3-Dot pipe for the price of a 2-Dot pipe, or a 2-Dot pipe for the price of a 1-Dot pipe. Soon Sportsman pipes could be found in golf bags, backpacks, tackle boxes, and camping trailers across the country.
Initially available only at the annual Toronto Sportsman Show, retailers began requesting Sportsman models to sell in their shops. Alphie’s in Timmons, ON, has claimed the honour of being the first retail shop to carry the semi-finished Sportsman line. Others soon followed, including Albion Smoke and Gift Shop, though the pipes remained available only for a short period in the Spring of each year.
A good number or Brigham Sportsman pipes can be found on the estate market, in a multitude of shapes and sizes ranging from the basic Billiards to rough-carved versions of Brigham’s freehand-style pipes.
Brigham continued to sell Sportsman pipes at both the Toronto Sportsman’s Show and through its independent retailers until the late 1990s when the company began winding down domestic production. Demand for the rugged, semi-shaped pipes remained strong, however, and in 2011, Brigham relaunched the line using rough-carved pipes from its European producers.
I then turned to the Pipedia article by Charles Lemon called, “A Closer Look at the Dots, Dates, and Markings of Brigham Pipes” to be able to pin down the time frame that the pipe was made in and to help interpret the stampings and shape number on the pipe. Here is the link to his article (https://pipedia.org/wiki/Brigham_Pipes_%E2%80%93_A_Closer_Look_at_Dots,_Dates_and_Markings). I quote the pertinent paragraphs below.
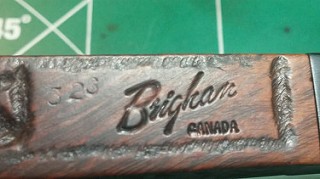
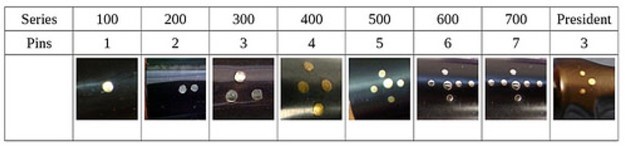
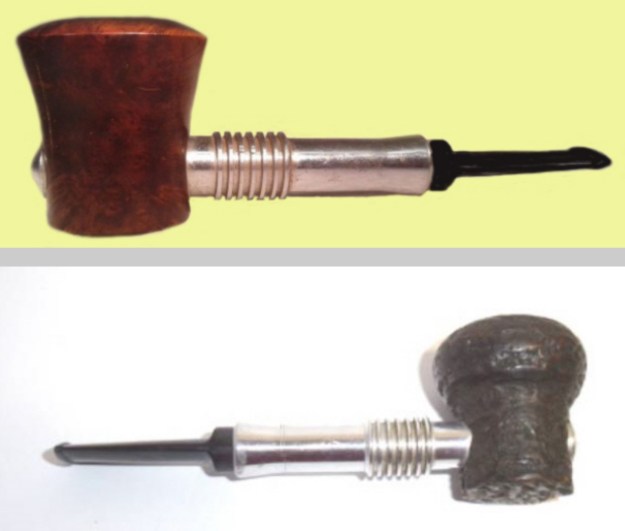
 I have dubbed the decades between 1980 and 2000 the Late Canadian Era, a period that saw several changes at Brigham that are of note to the collector. First, the traditional 8-grade pinning system (the famous Brigham “Dots” which denoted the quality of the pipe) was changed to a 7-grade system to simplify pinning (more on this below), and the Norsemen and Valhalla series were merged to form the President Series, which represented the very finest pipes coming out of the Toronto factory. Early pipes from this era (left, below) are stamped with a shape number and “Brigham” over “Canada”; later pipes (late 1980s+, on right below) are stamped simply with a shape number and the Brigham logo.
I knew that the pipe I was working on was from the Sportsman Line and was probably made between the 1980s-1990s. It sports 3 dot Sportsman Series pipe which gives the grade of the pipe. There is not a shape number on the pipe. Now to do a bit of spiffing with the pipe itself.
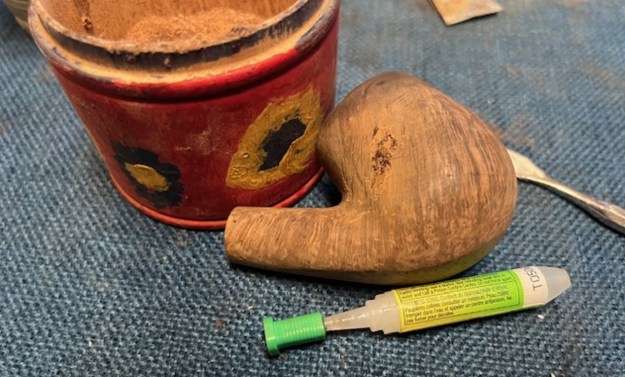
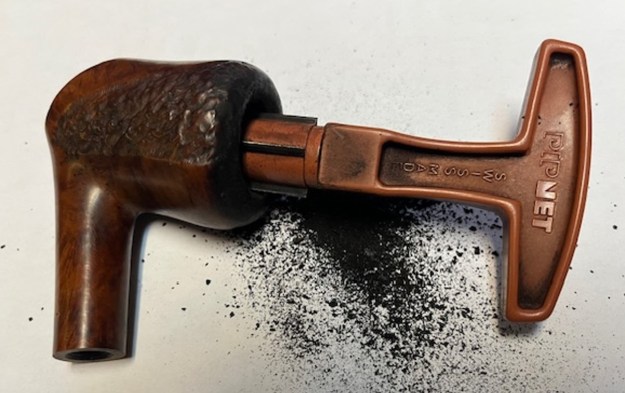
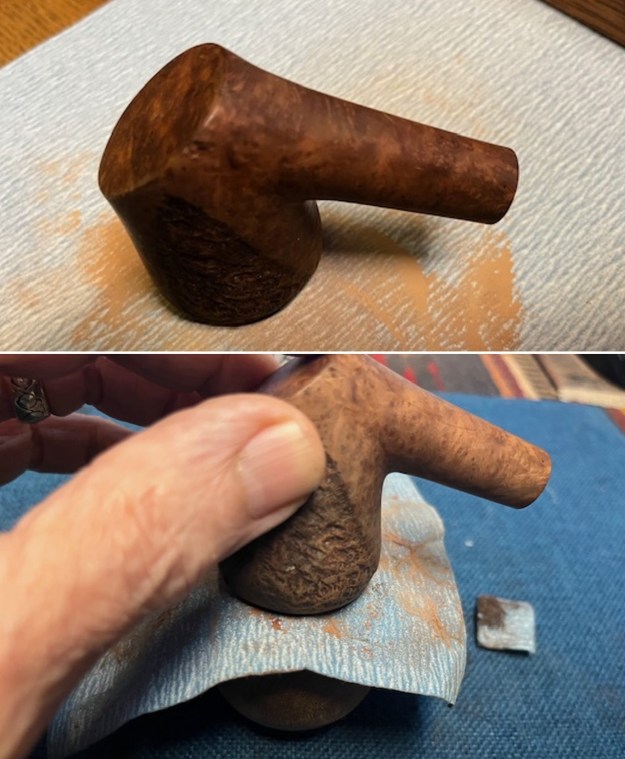
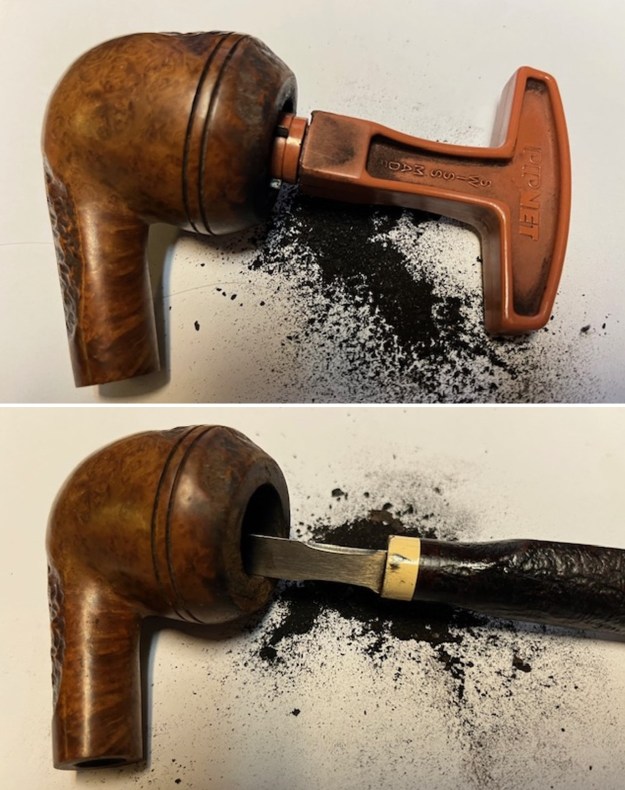
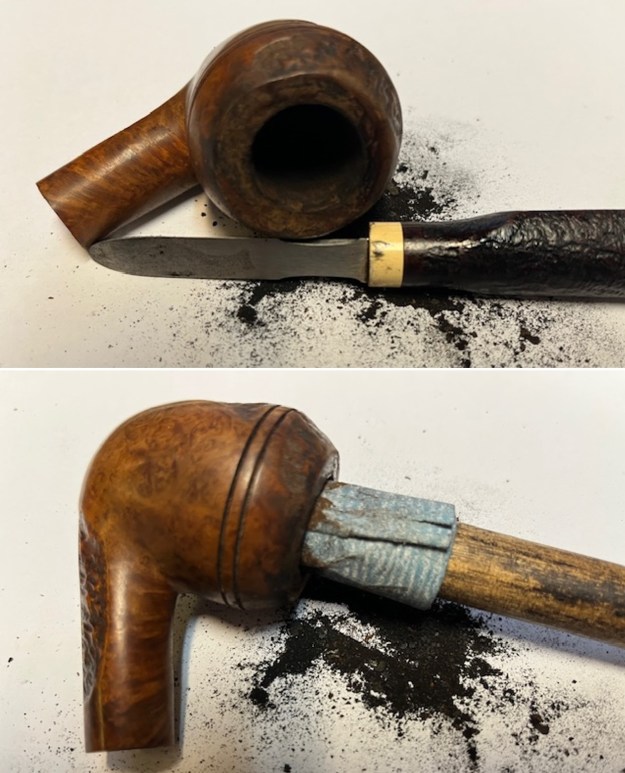
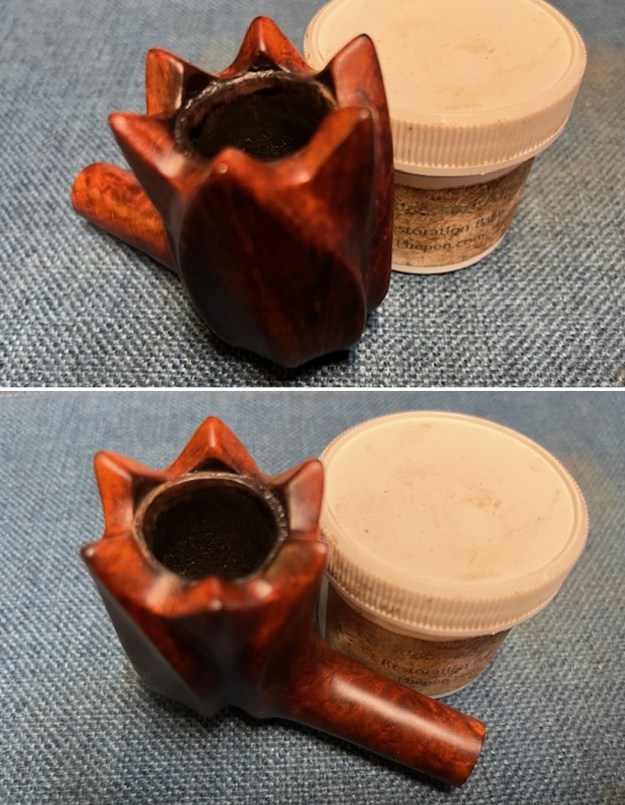
I started my work on the pipe by reaming the bowl with a PipNet reamer. I used the first and second cutting heads and took the cake back to bare briar. I cleaned up the reaming with a Savinelli Fitsall Pipe Knife and removed all the remnants of the cake. I scraped the rim top with the flat edge of the blade at the same time and removed most of the thick lava build up. I sanded the walls of the bowl with a piece of dowel wrapped in 220 grit sandpaper. The walls look very good at his point in the process.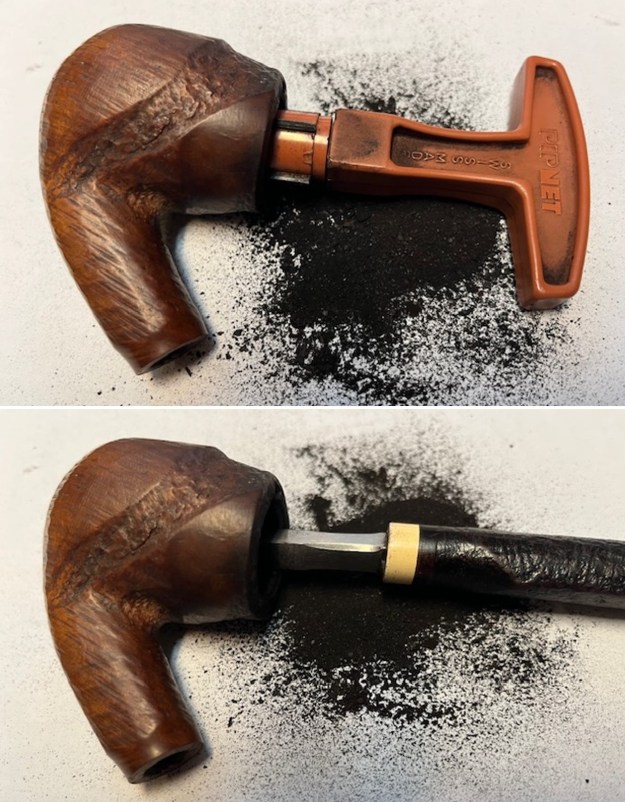
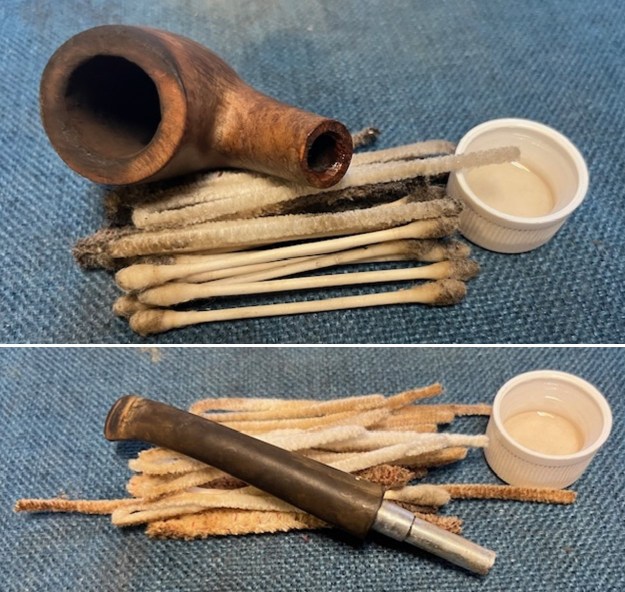
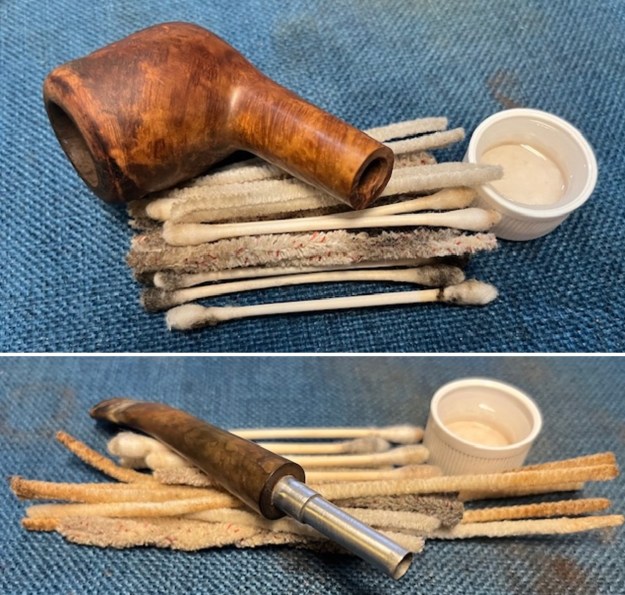
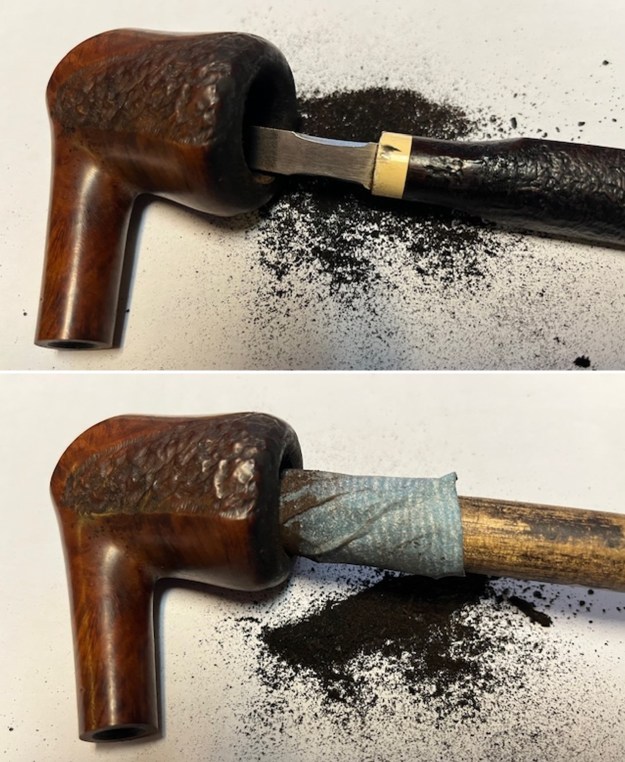
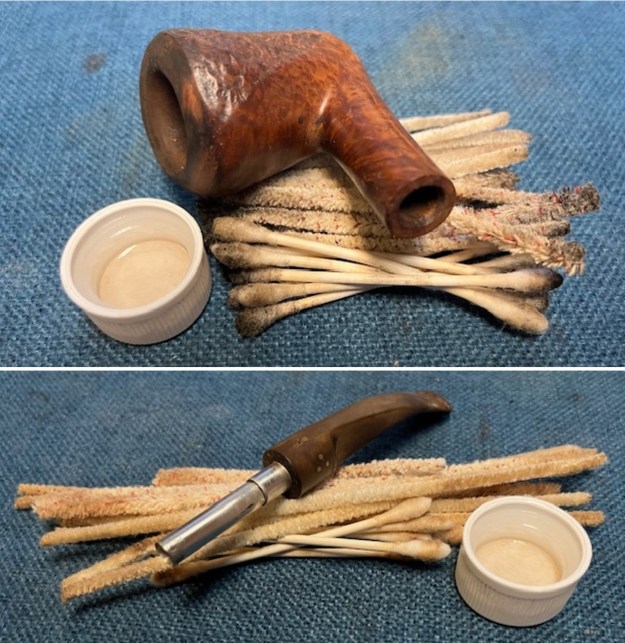
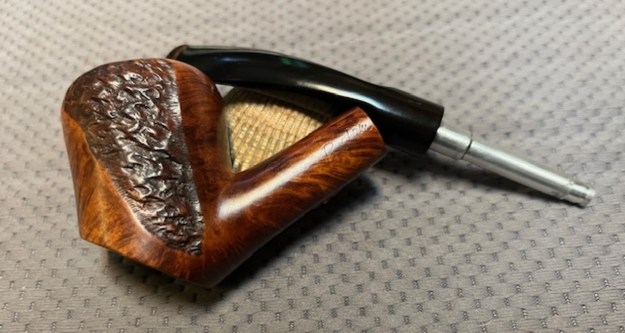
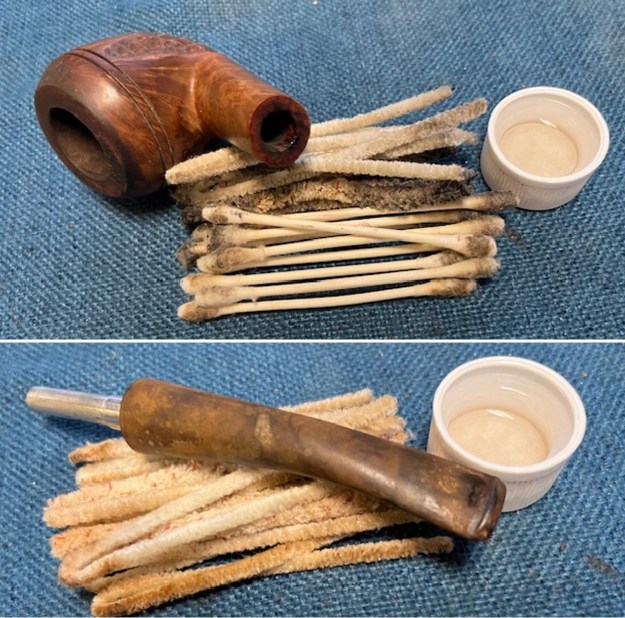
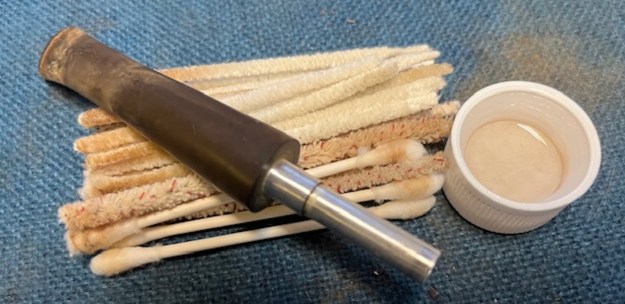
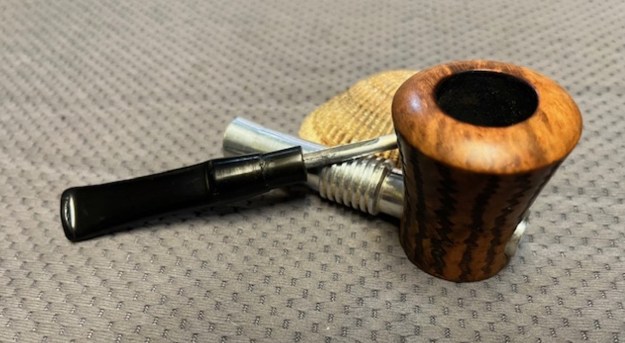
 I cleaned out the shank, the airway and the deep mortise with alcohol, cotton swabs, hard bristle and soft bristle pipe cleaners. It was a very dirty pipe which just meant that Donna’s Dad had really enjoyed and used this pipe. I cleaned the inside of the aluminum tenon and the airway in the stem with alcohol, cotton swabs and pipe cleaners in the same way as I did the shank. It also was very dirty.
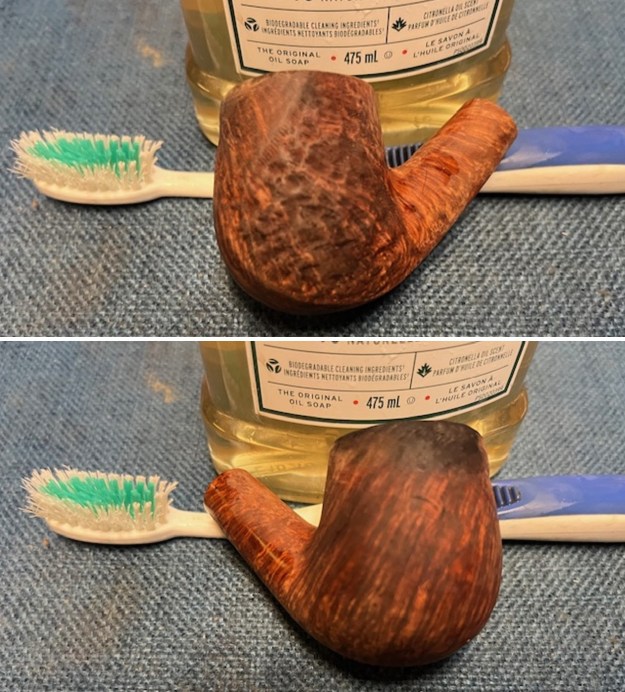
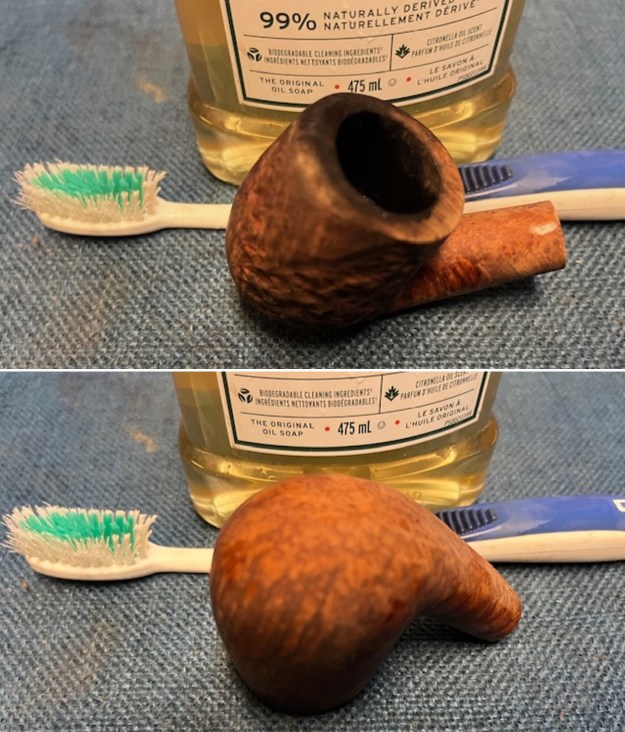
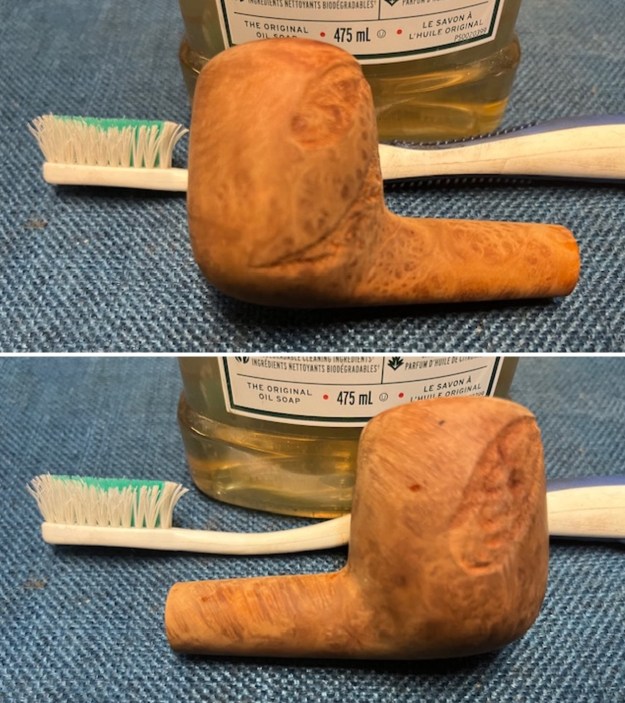
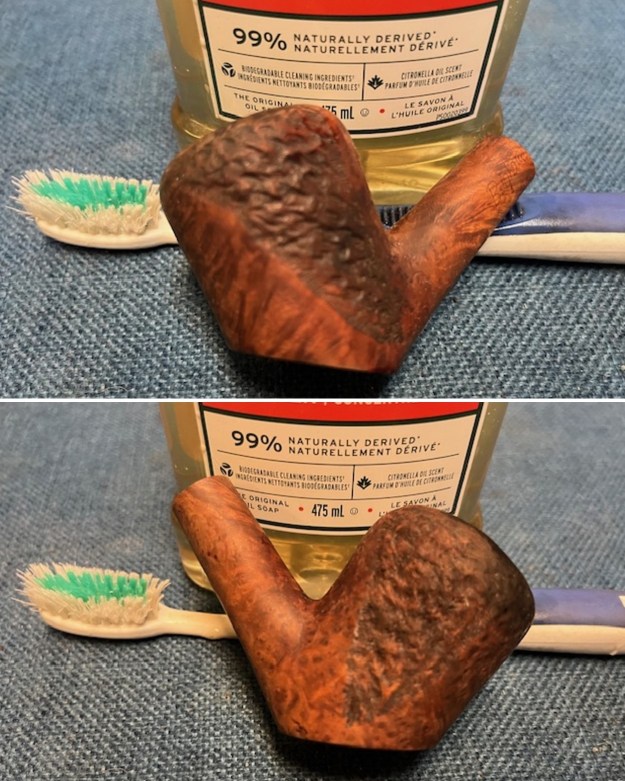
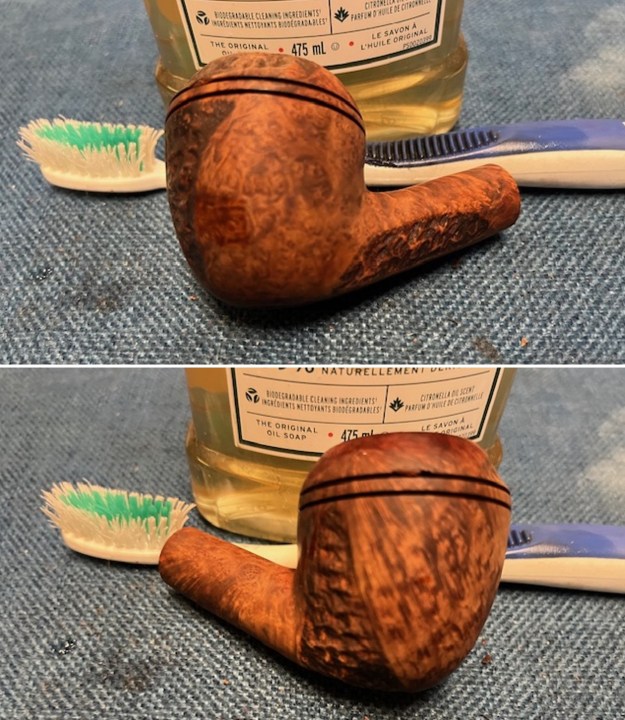
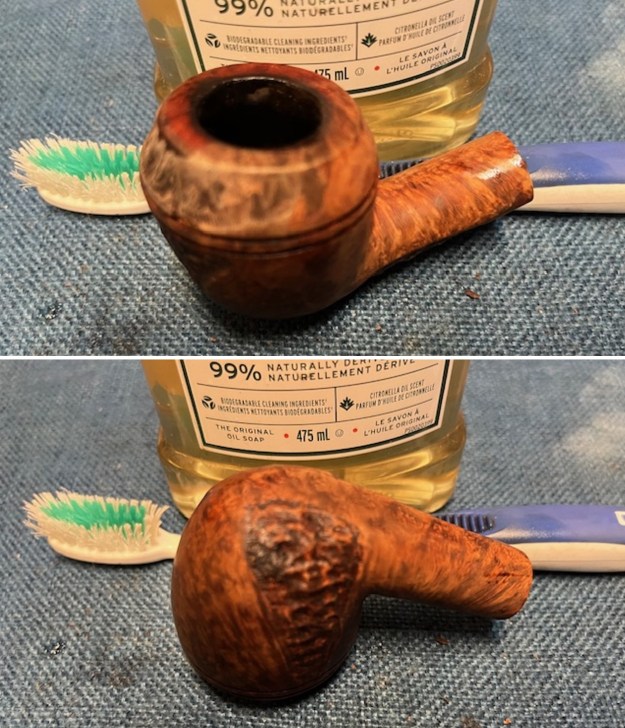
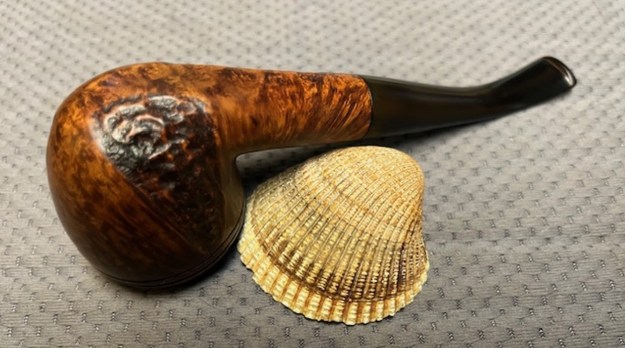
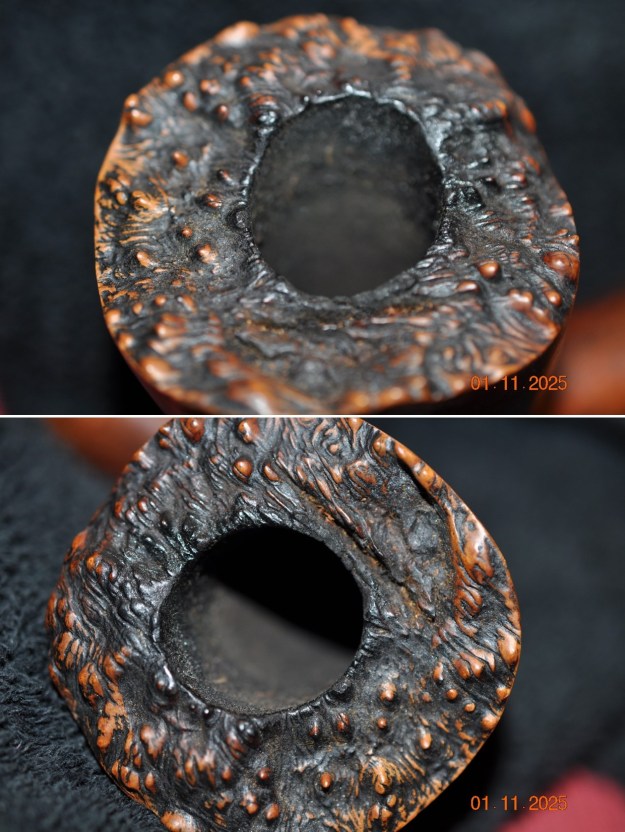
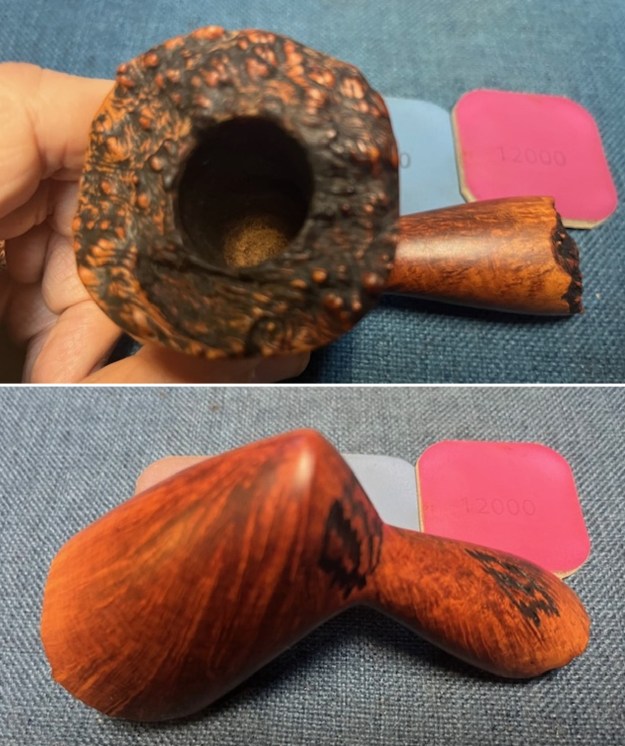
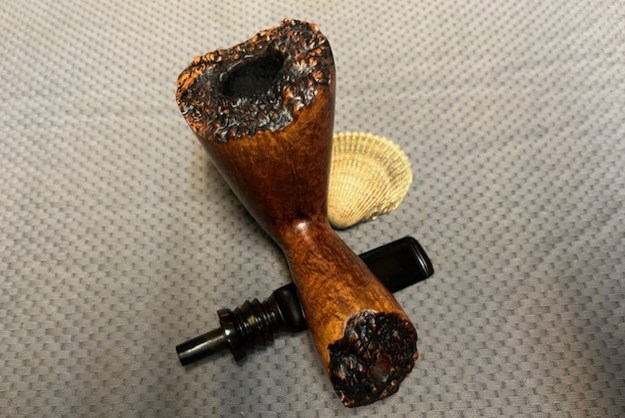
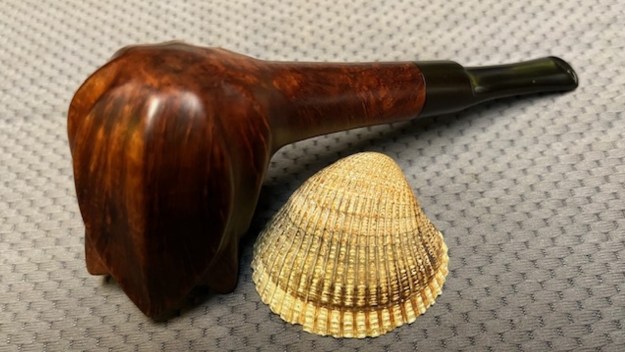
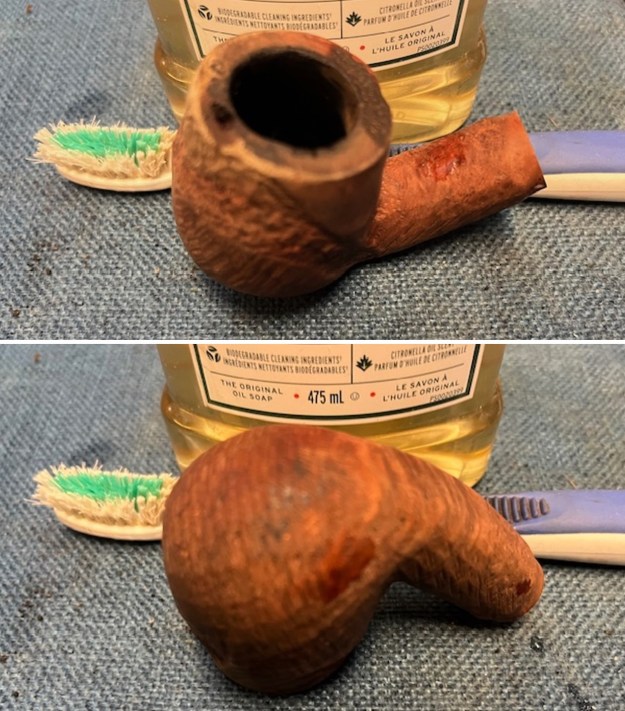
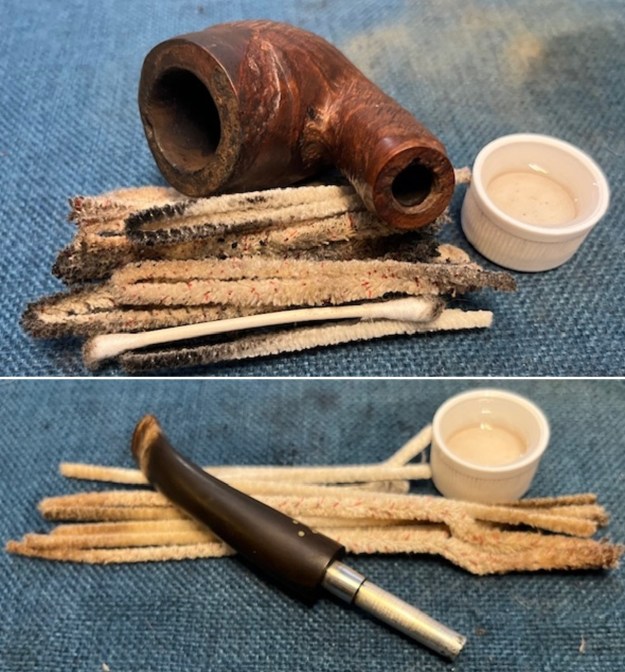 I scrubbed the exterior of the bowl and shank with a tooth brush and undiluted Murphy’s Oil Soap. I scrubbed the lava on the rim top and overflow on the outside of the bowl with the soap. I rinsed the briar with warm water to remove the grime and debris of the scrubbing. It looked significantly better after the scrubbing. The damage on the bowl front and rim top is very clear.
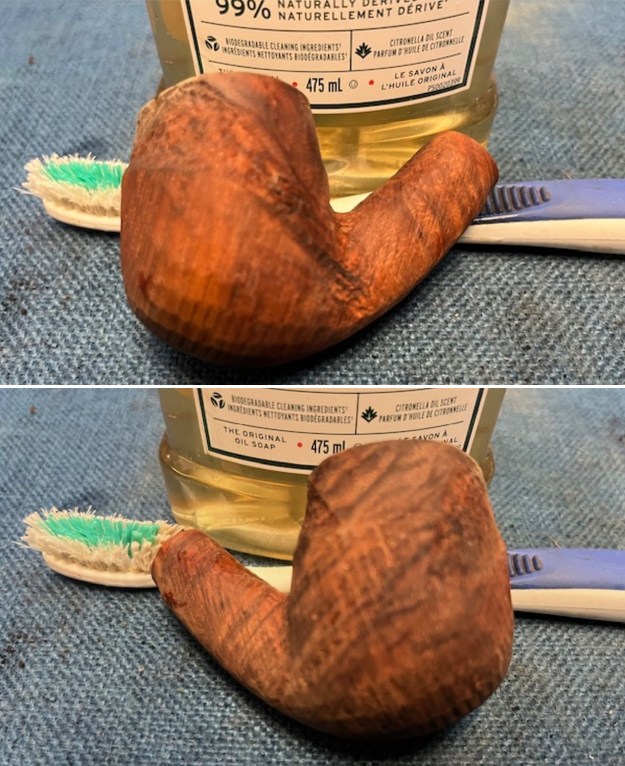
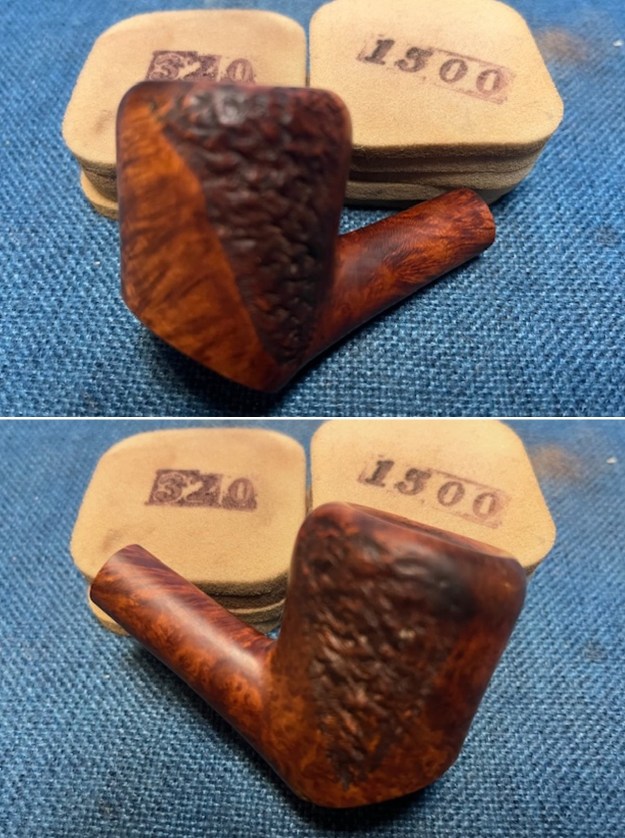
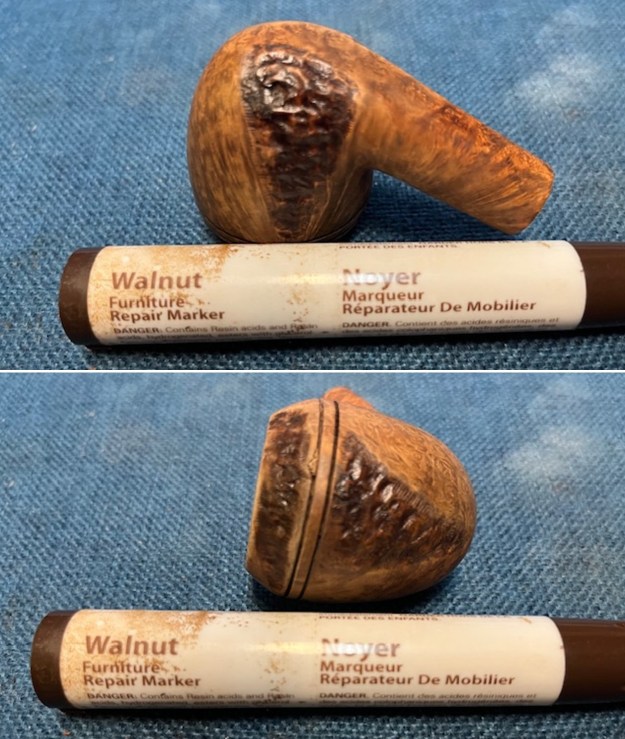
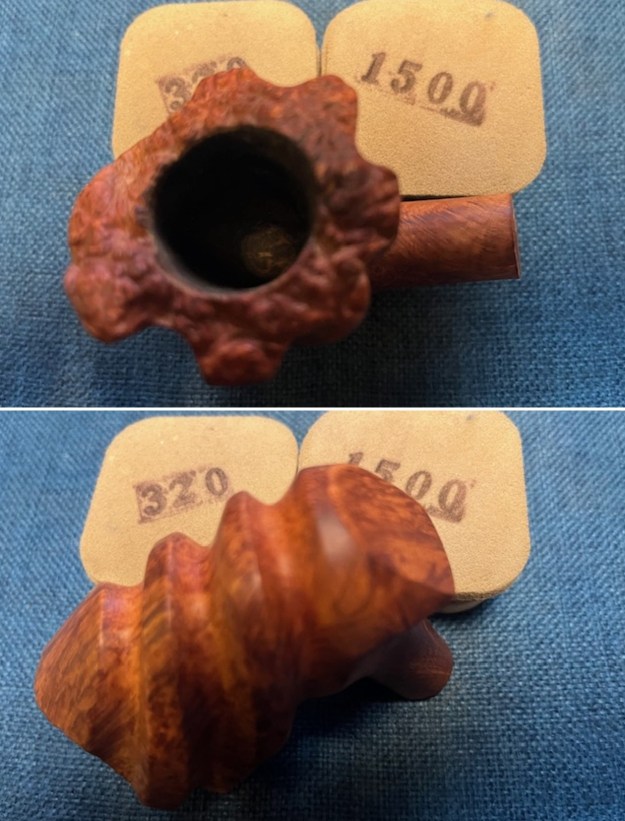
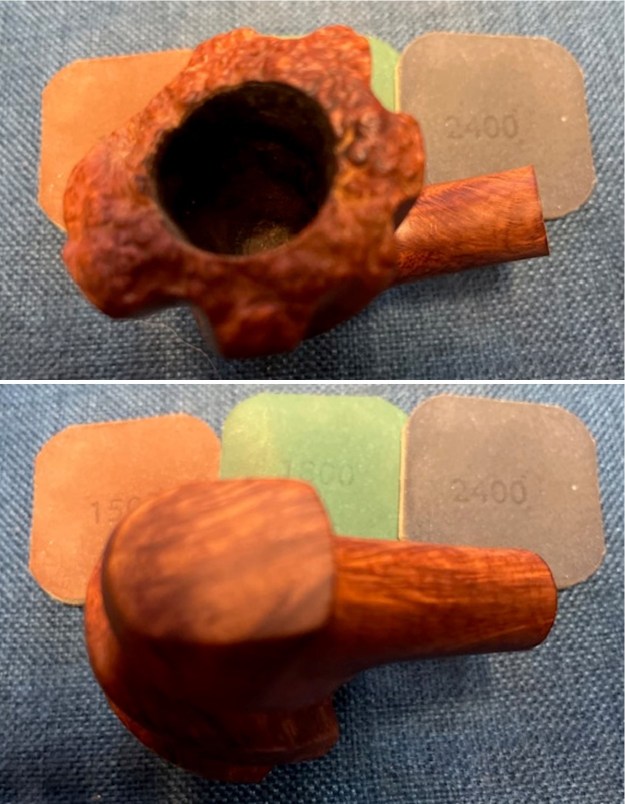
 The burn damage on the front of the rim top, the outer and the inner bevelled edge were going to take a lot of shaping work. There was a spot on the top of the rim toward the front appeared to be a flaw in the briar. I cleaned up the inner edge with a piece of sandpaper. I topped the bowl on a 220 grit sheet of sandpaper on a topping board. I used a piece of 220 grit sandpaper and a half wooden sphere to clean up the inner and bevel it slightly.
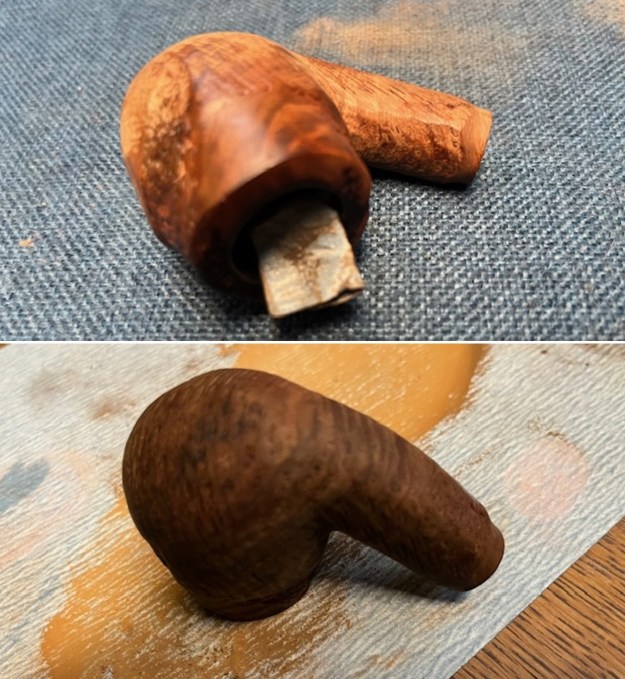
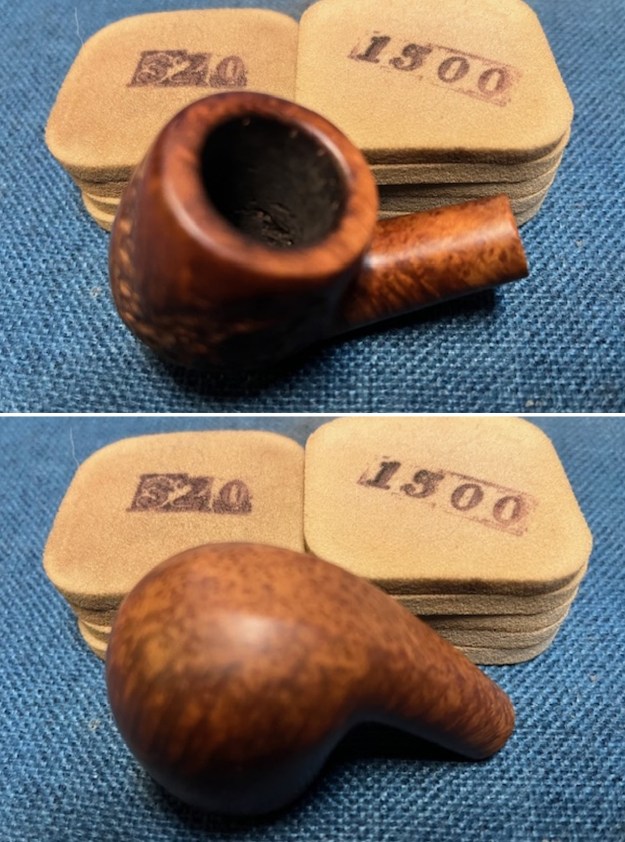
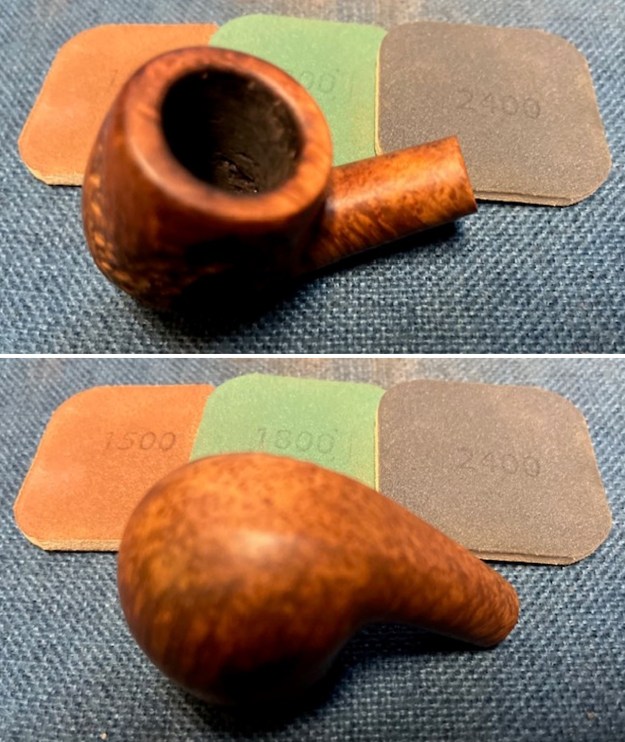
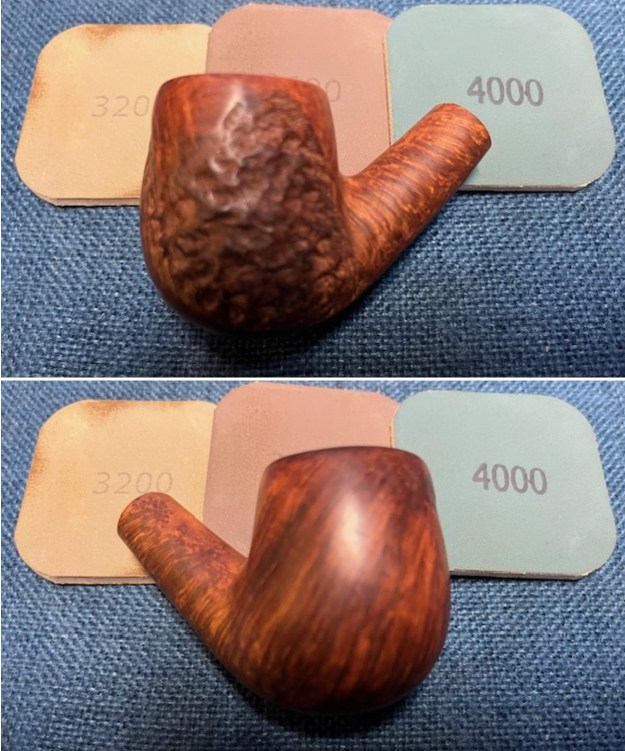
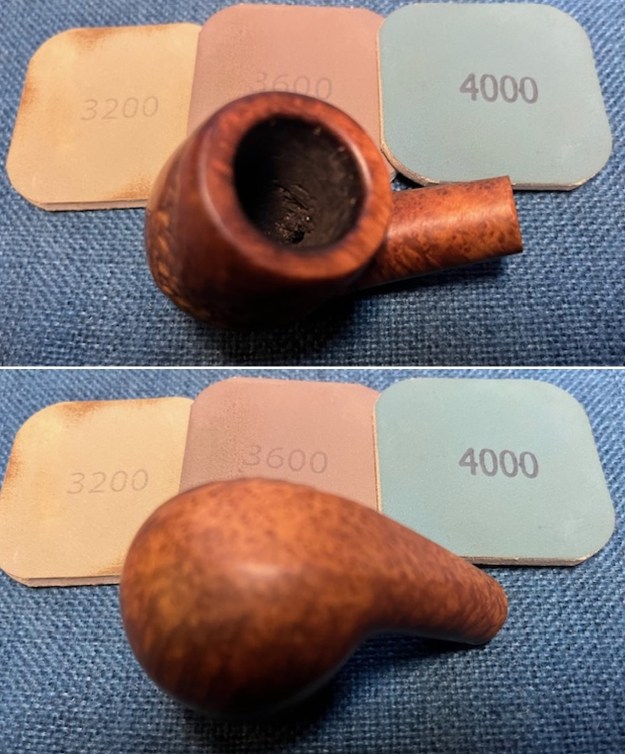
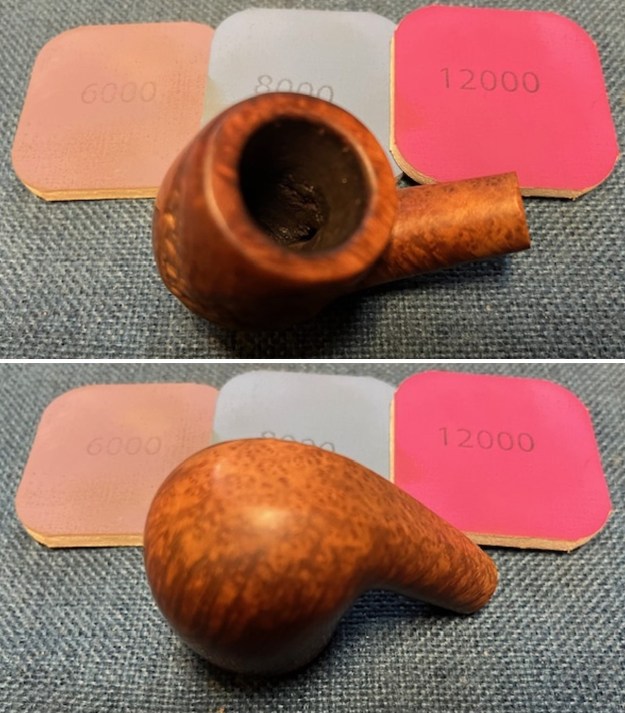
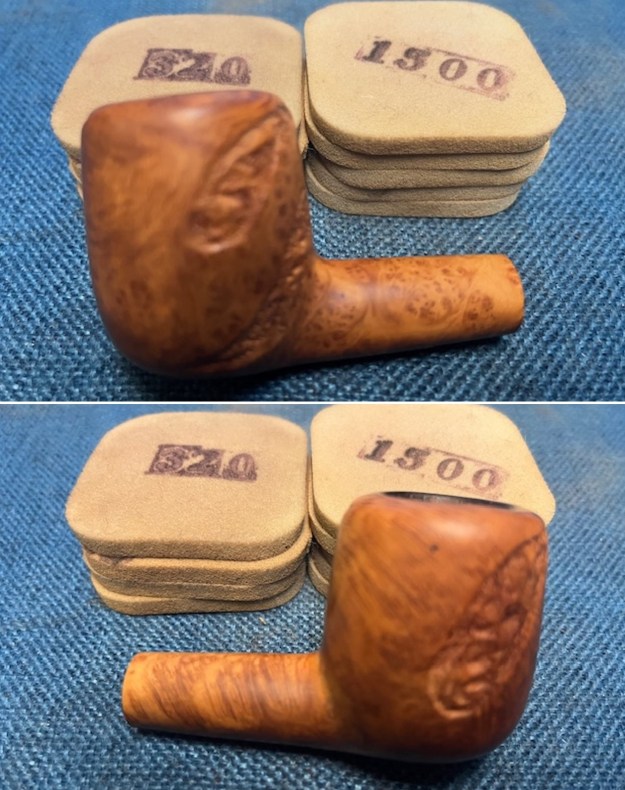
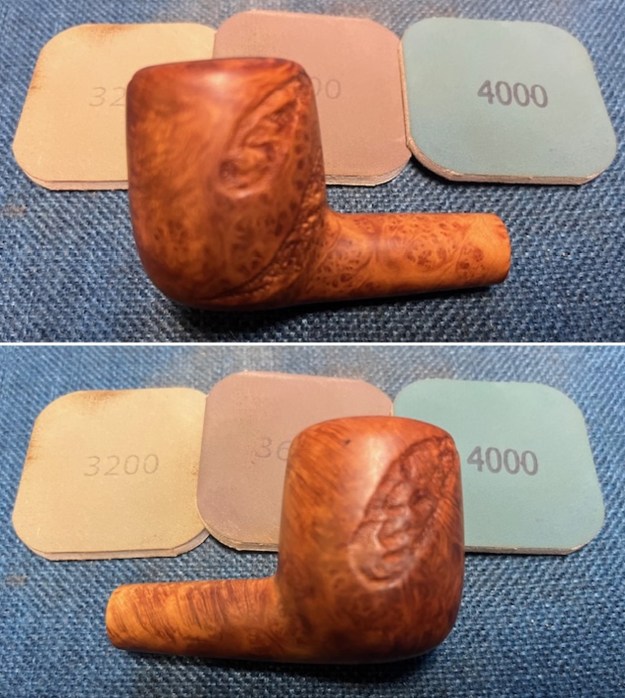
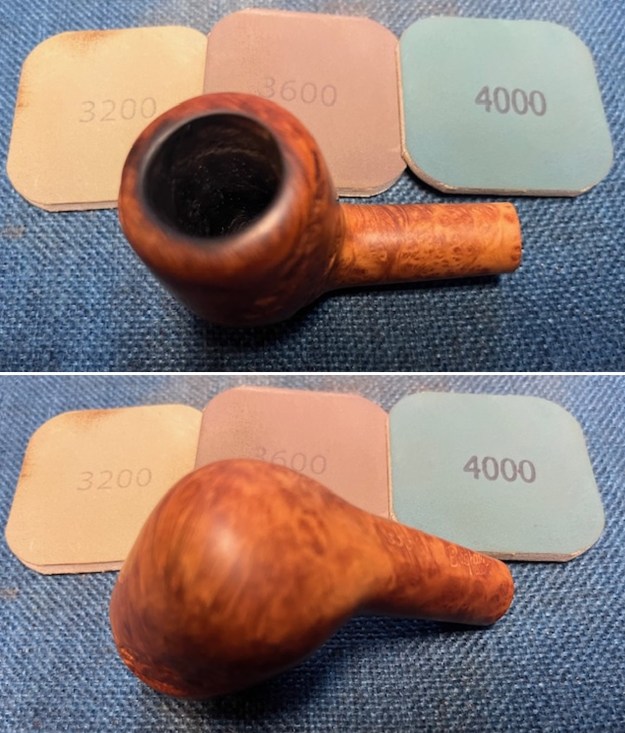
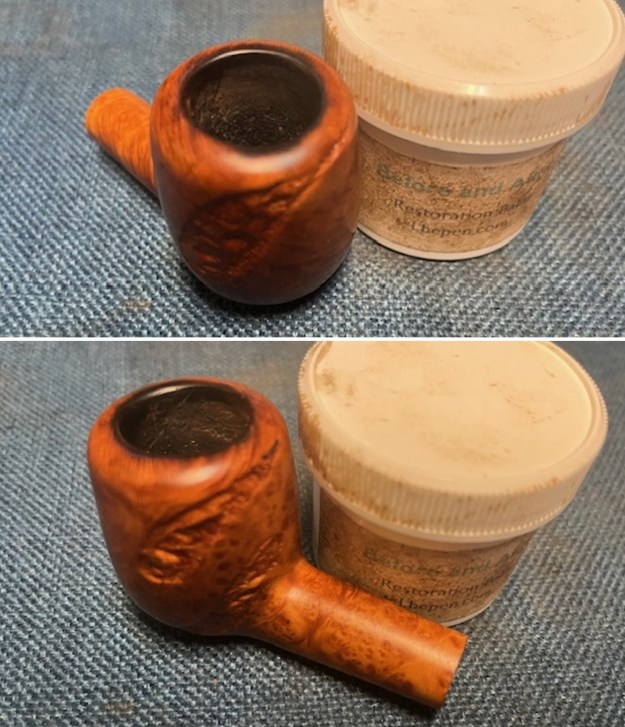
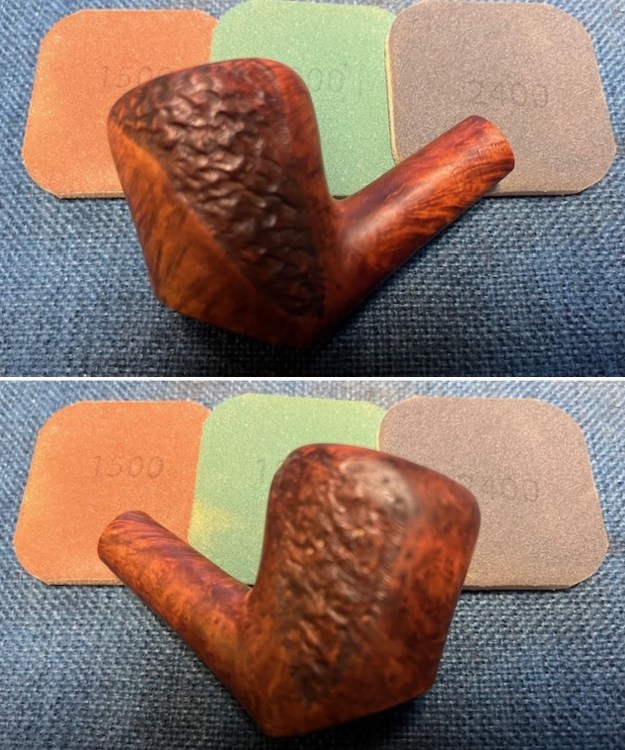
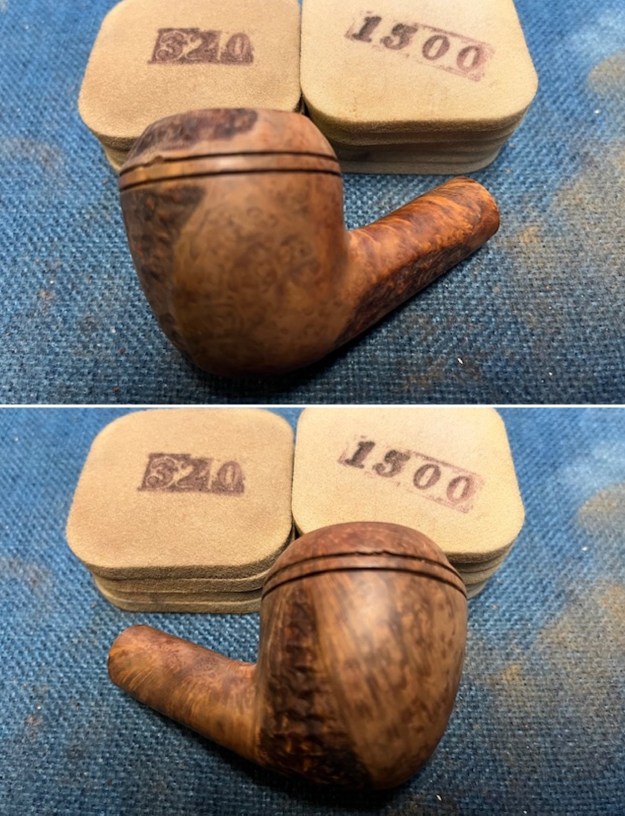
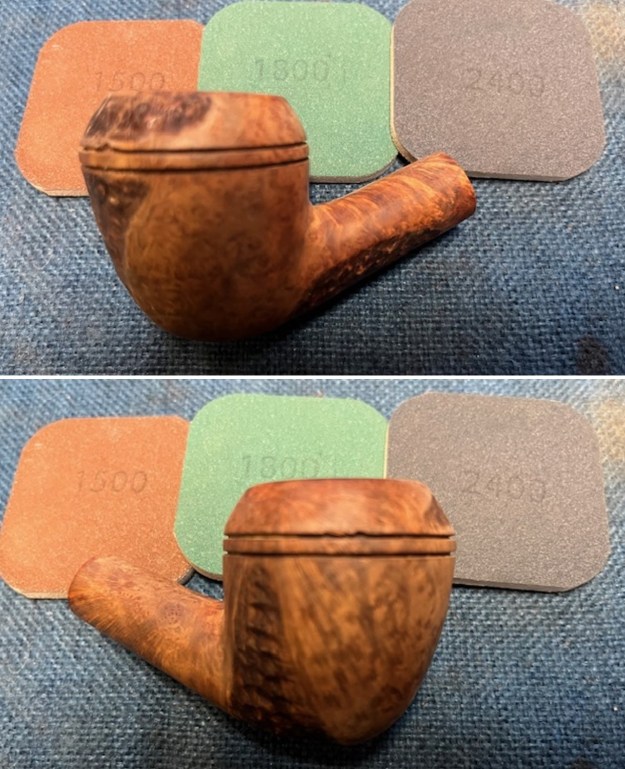
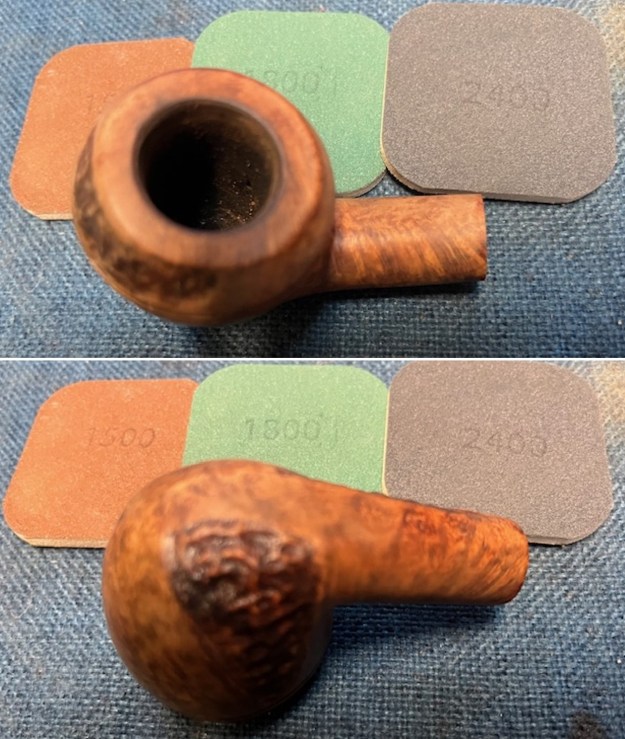
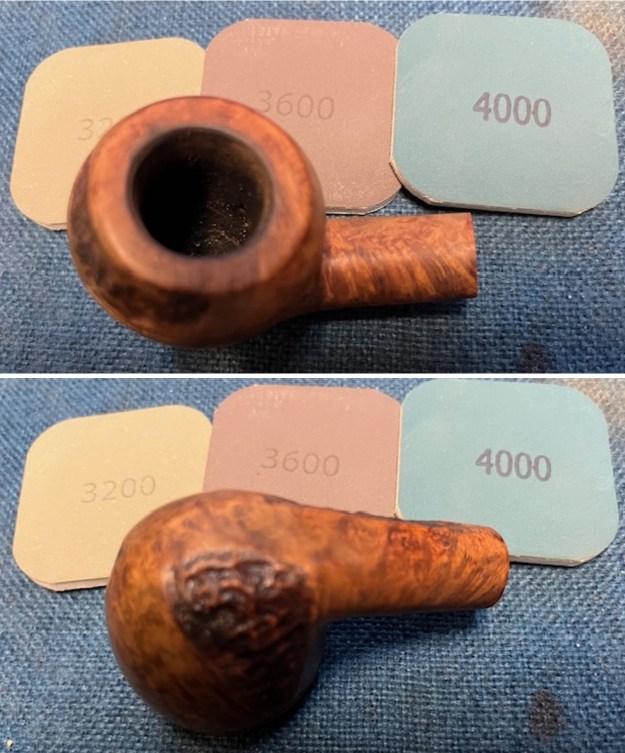
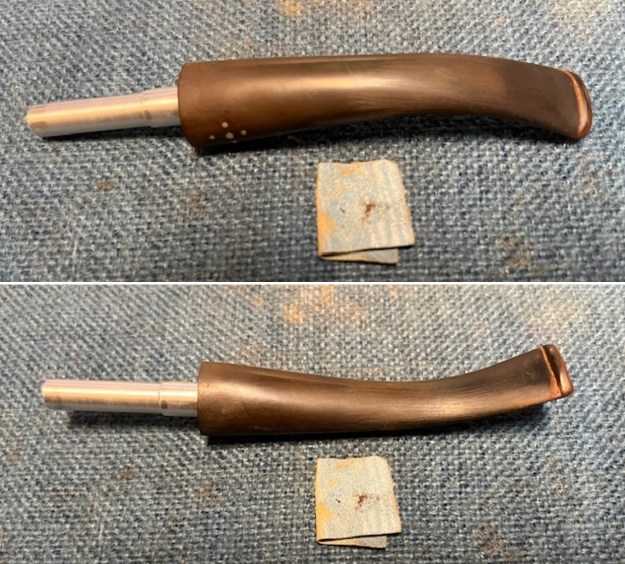
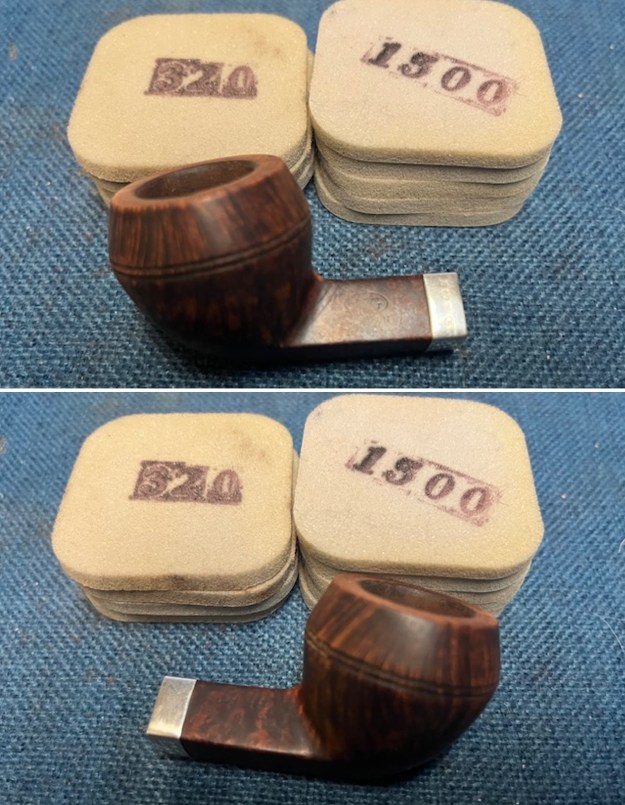
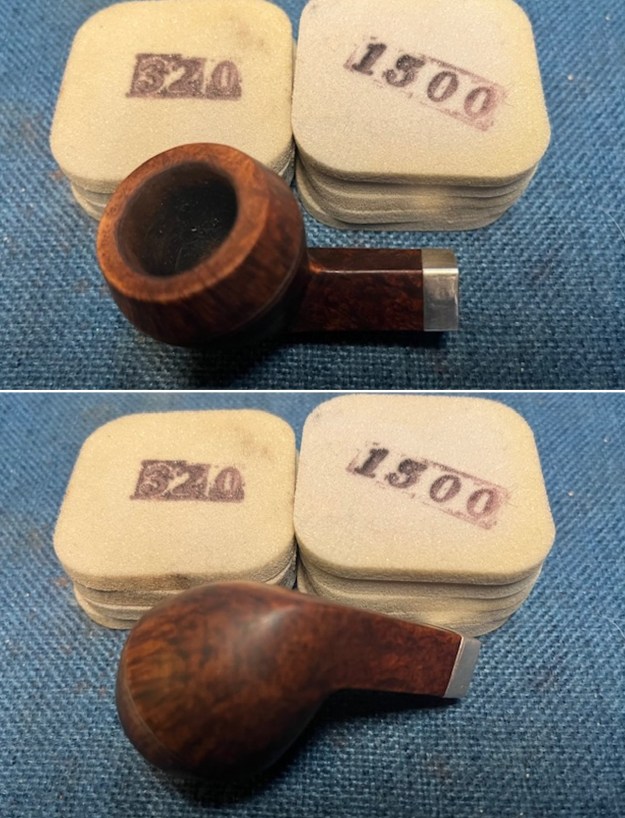
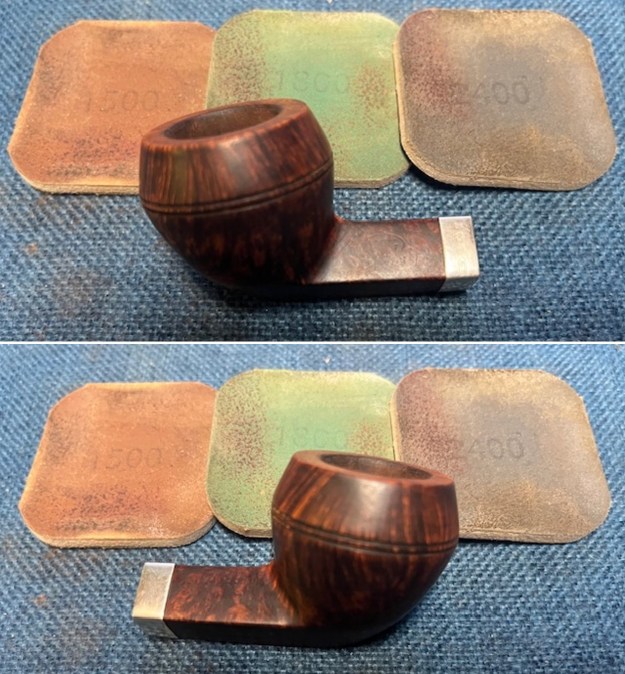
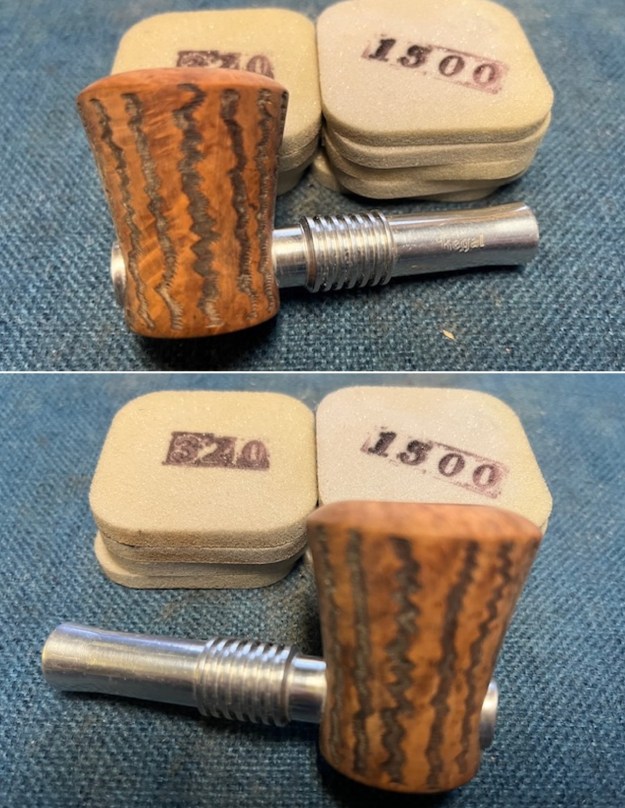
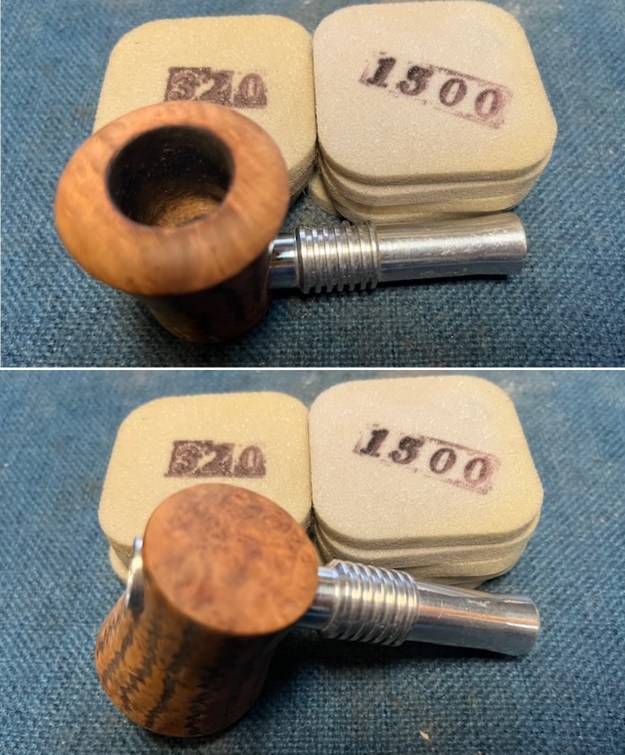
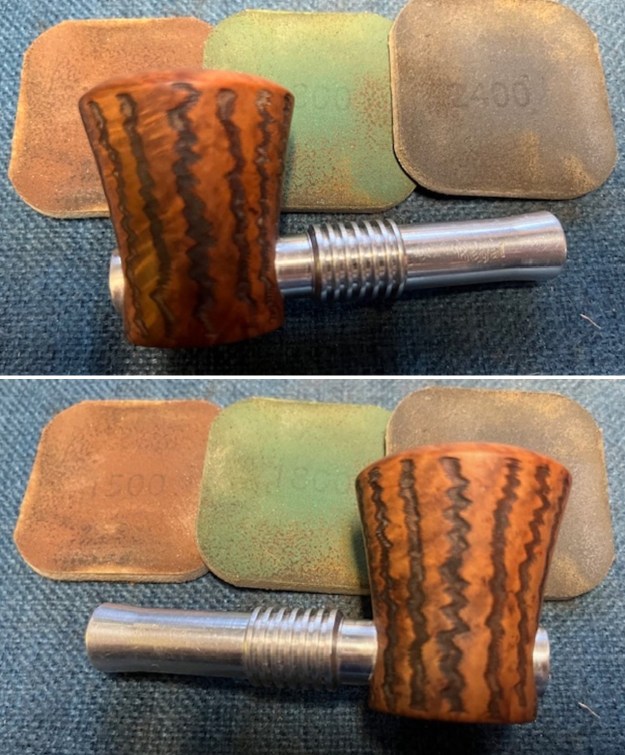
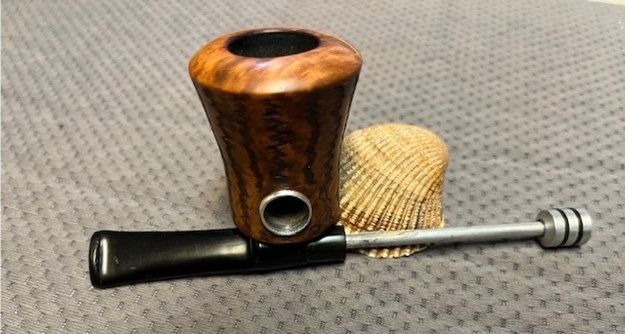
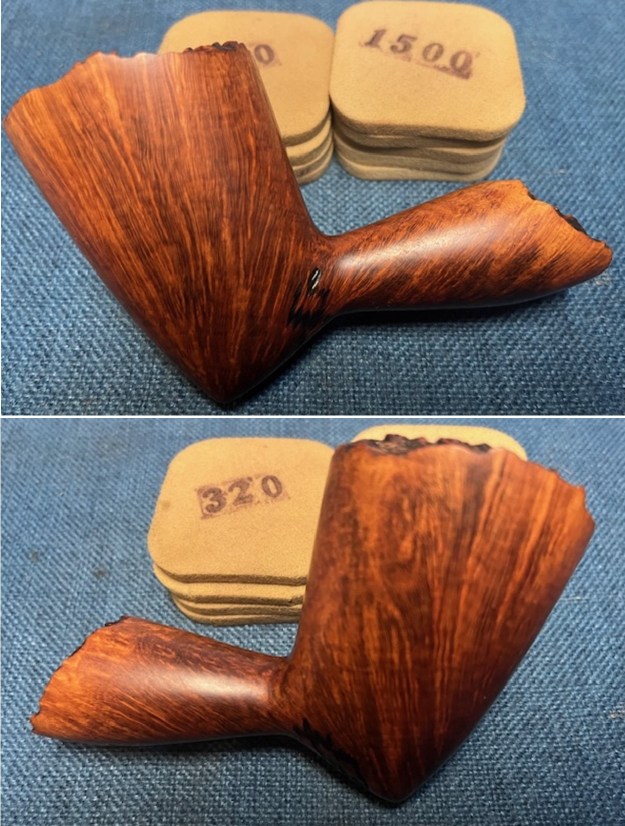
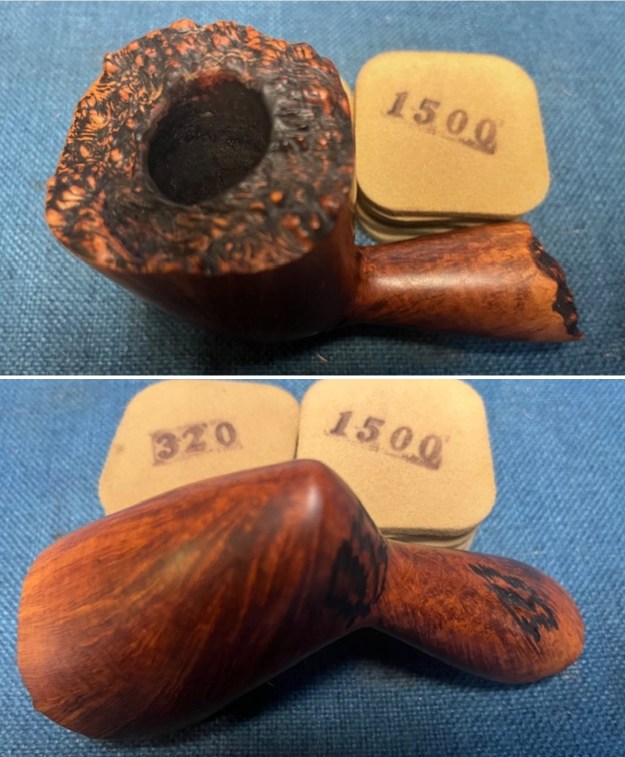
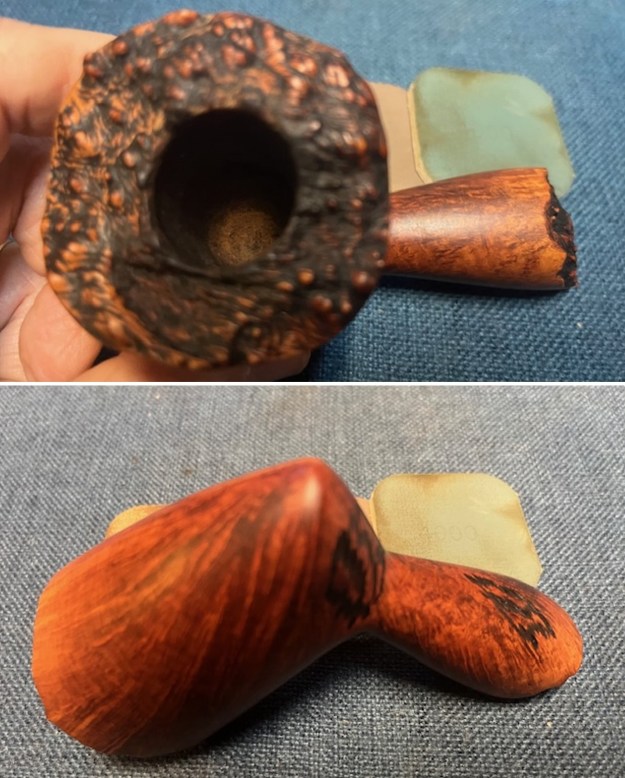
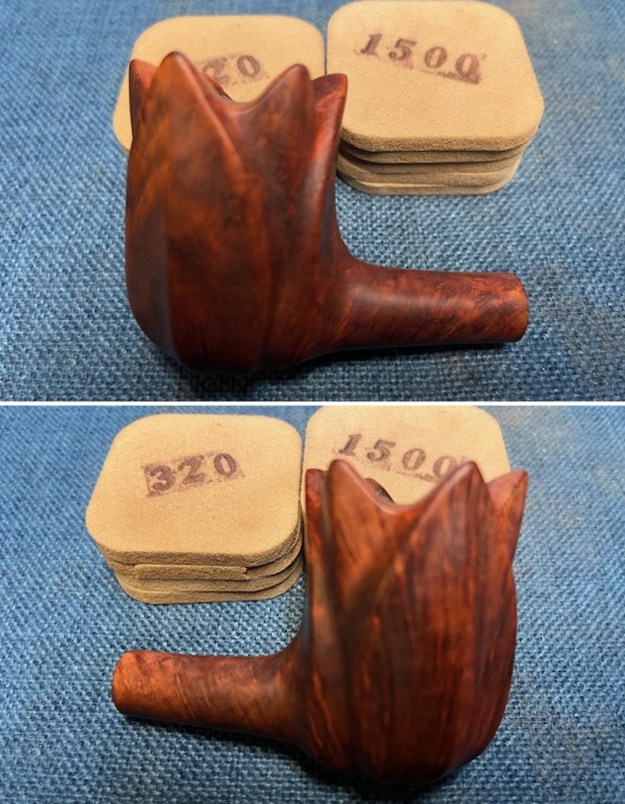
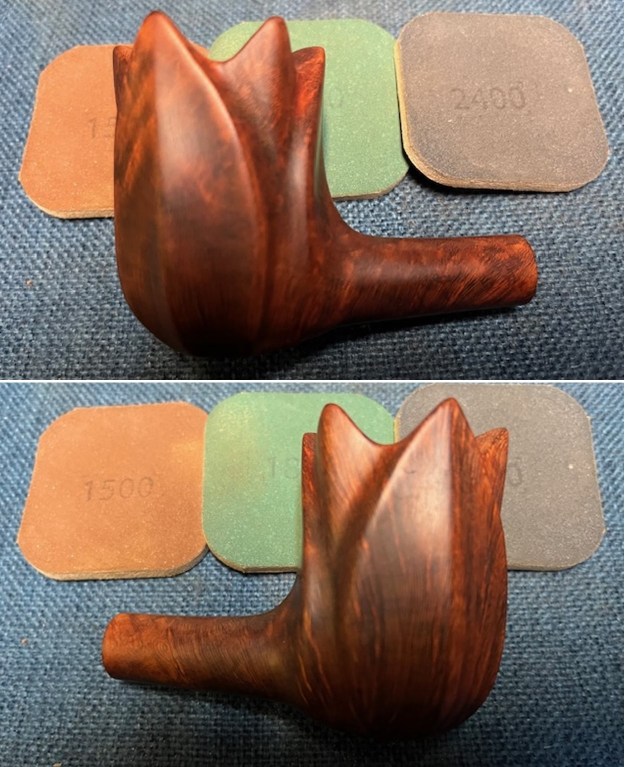
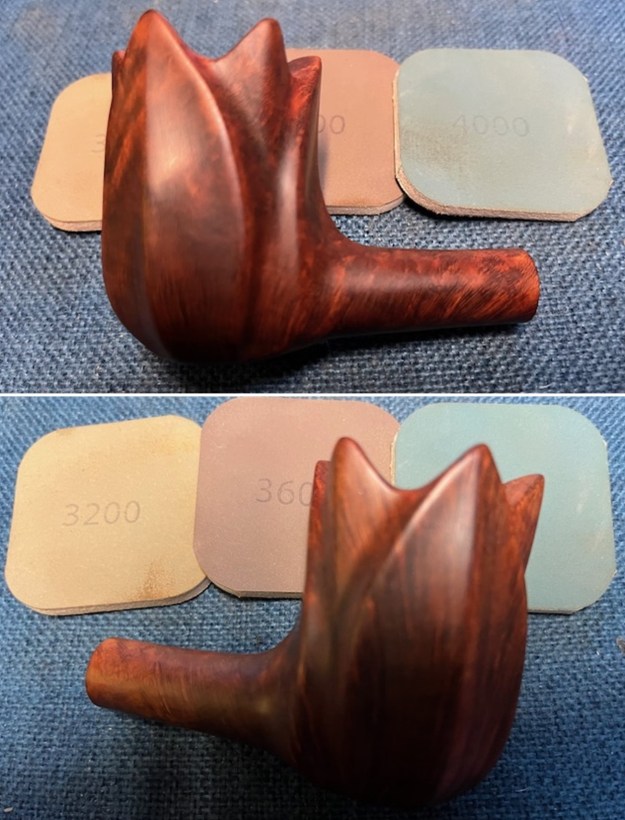
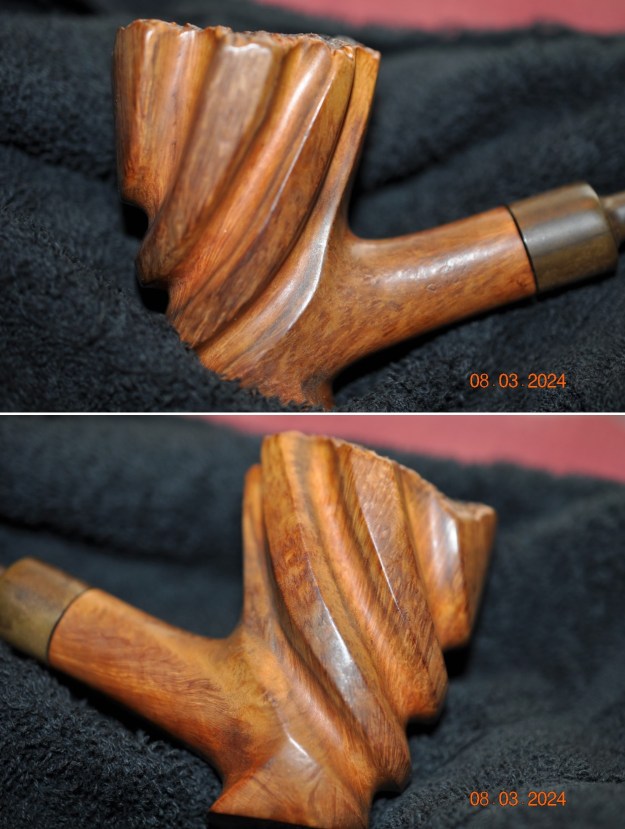
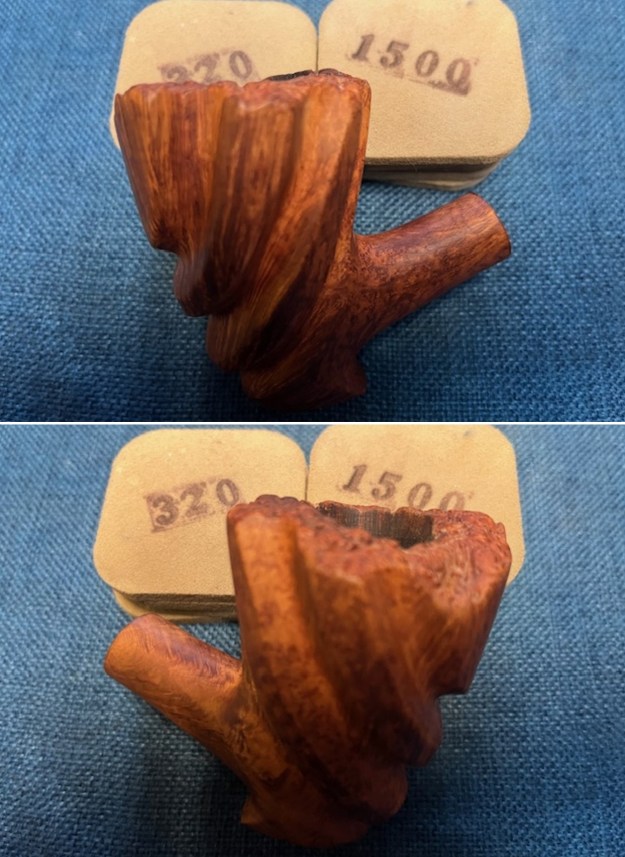
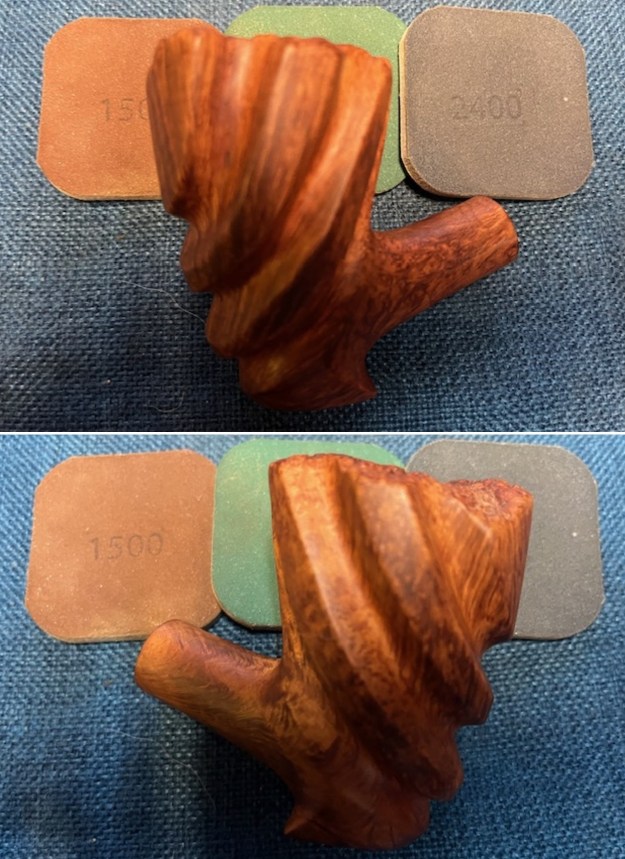
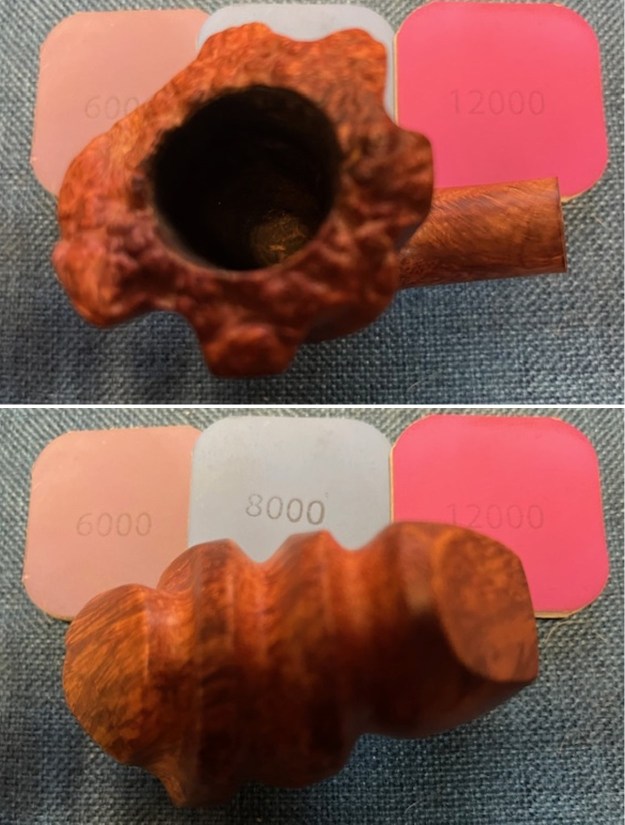
 I finished that and moved on to it with 320-3500 grit sanding pads to finish minimizing the burn damage and reshape the rim top and the top half of the bowl. The briar began to take on a rich shine and the burn damage was by and large gone. The photos tell the story.
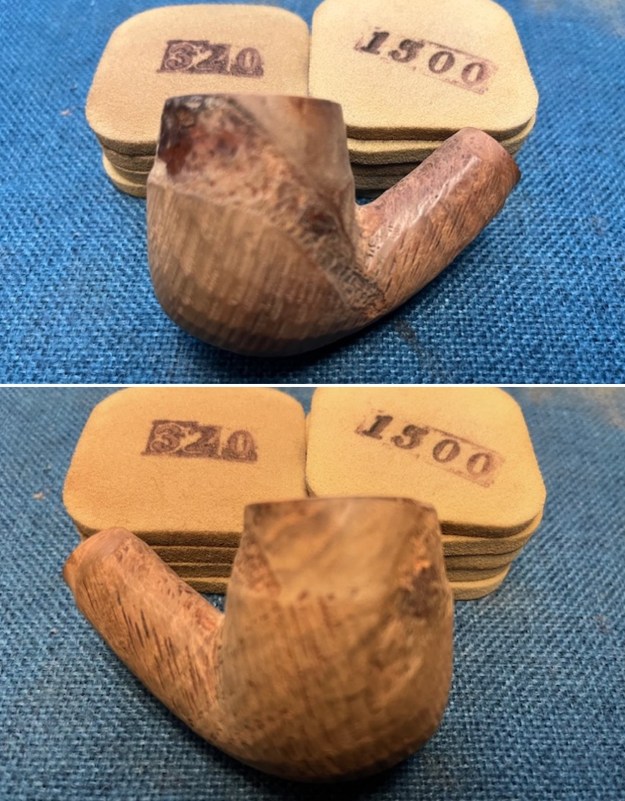
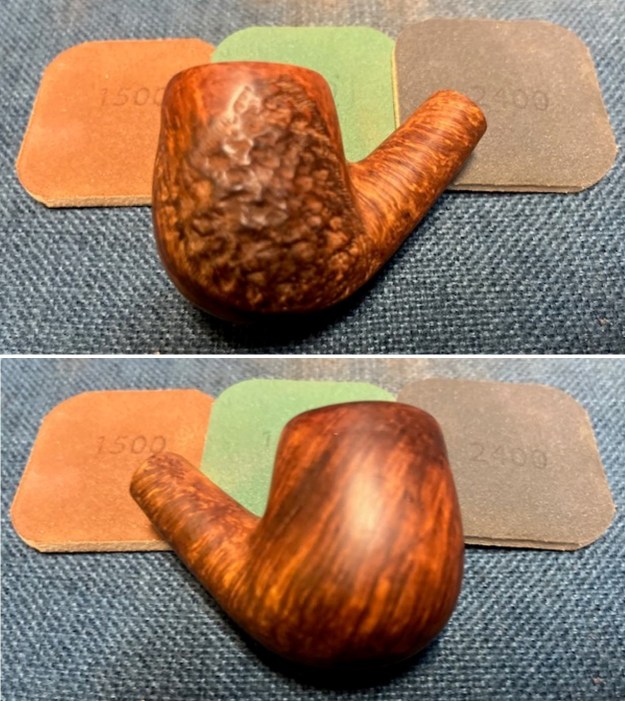
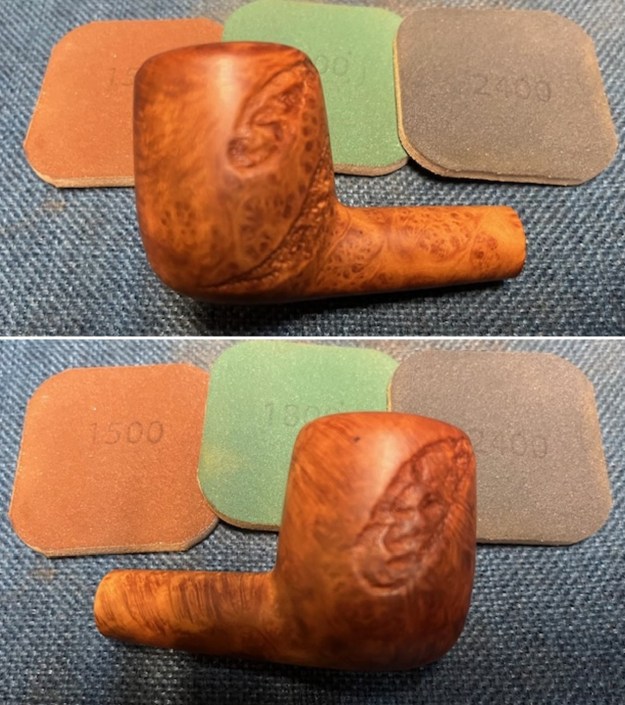
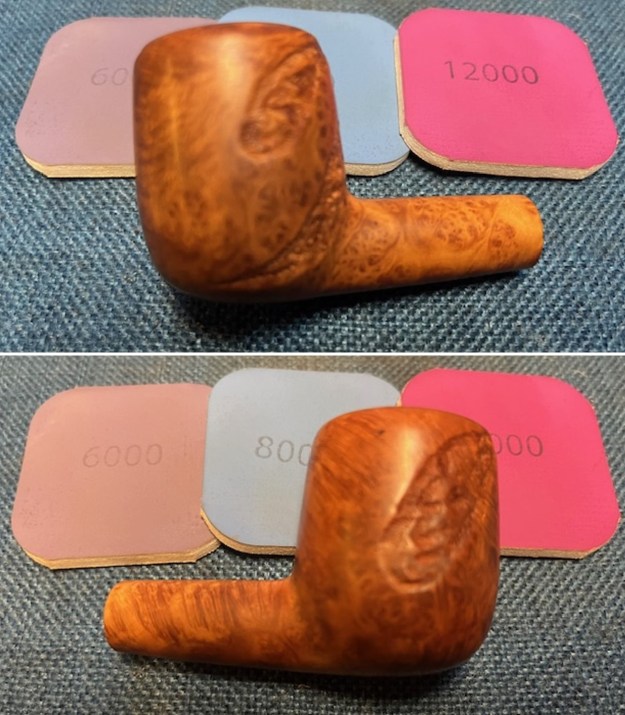
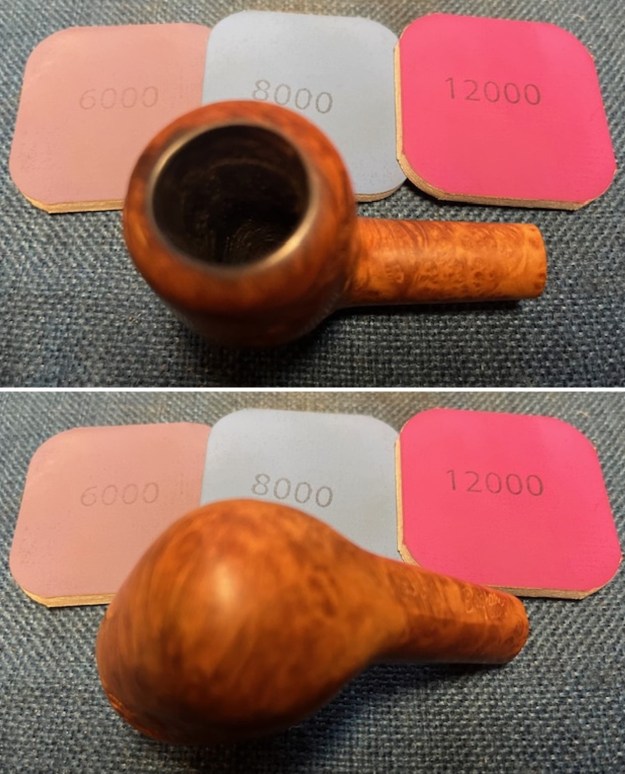
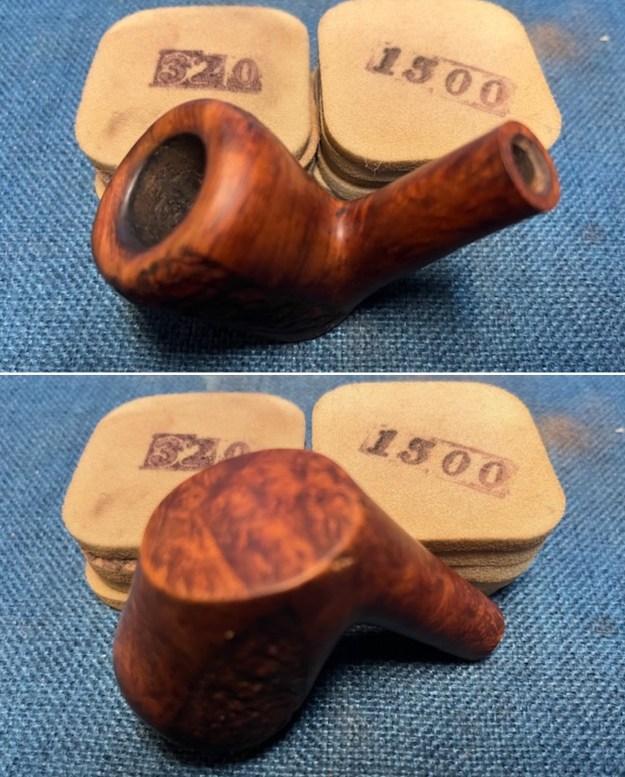
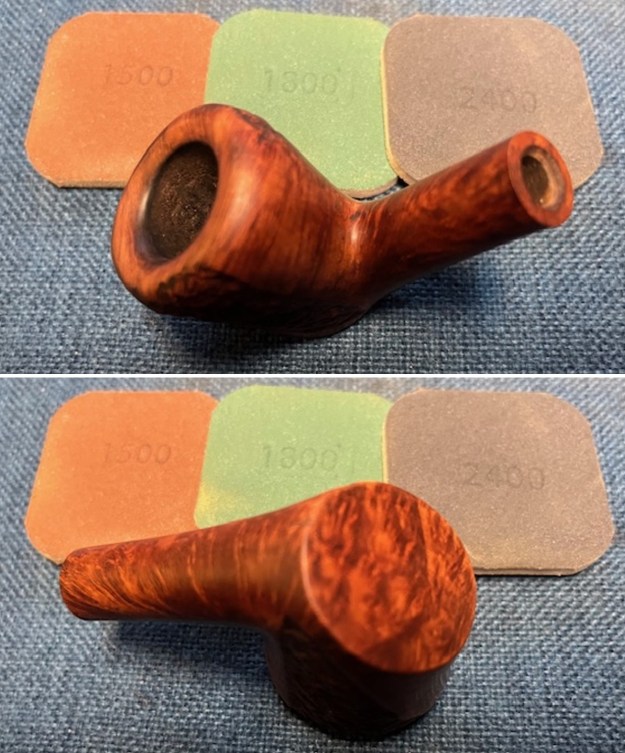
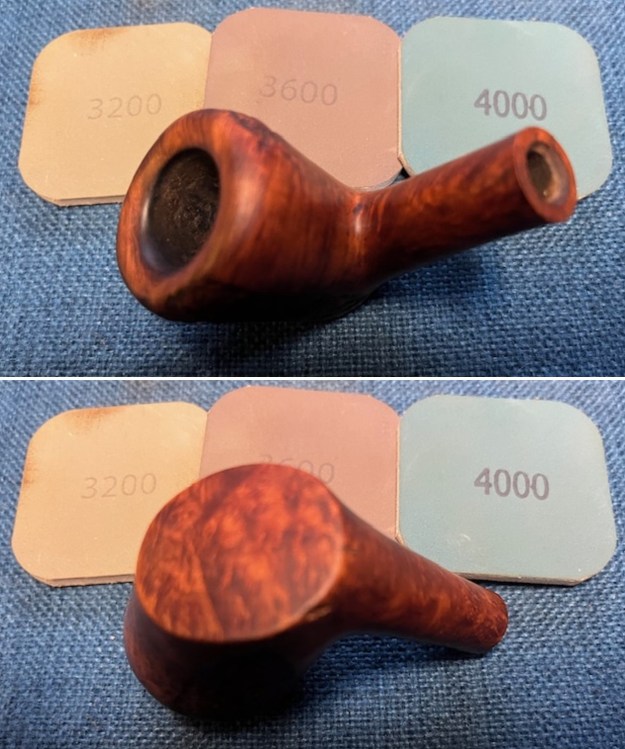
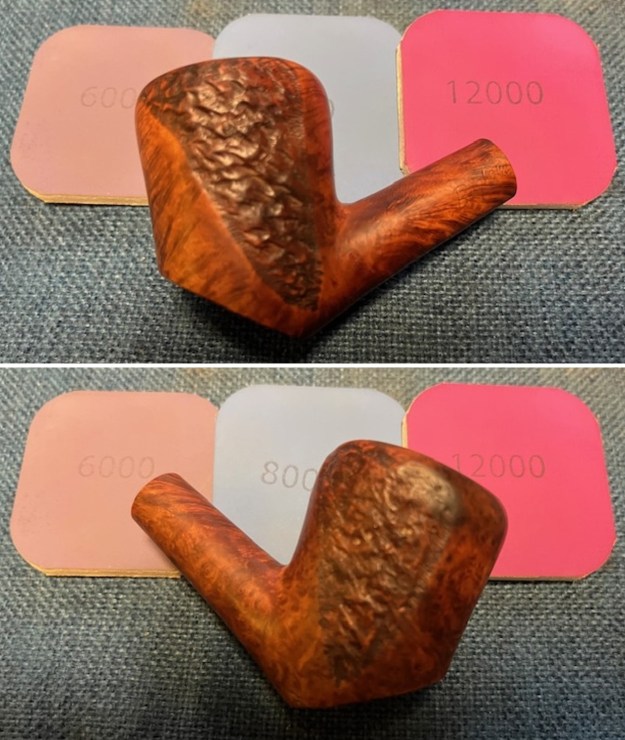
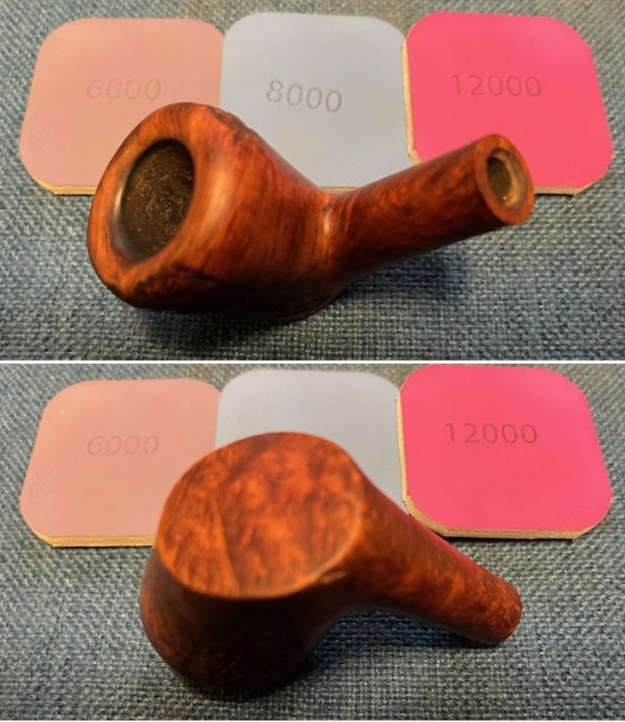
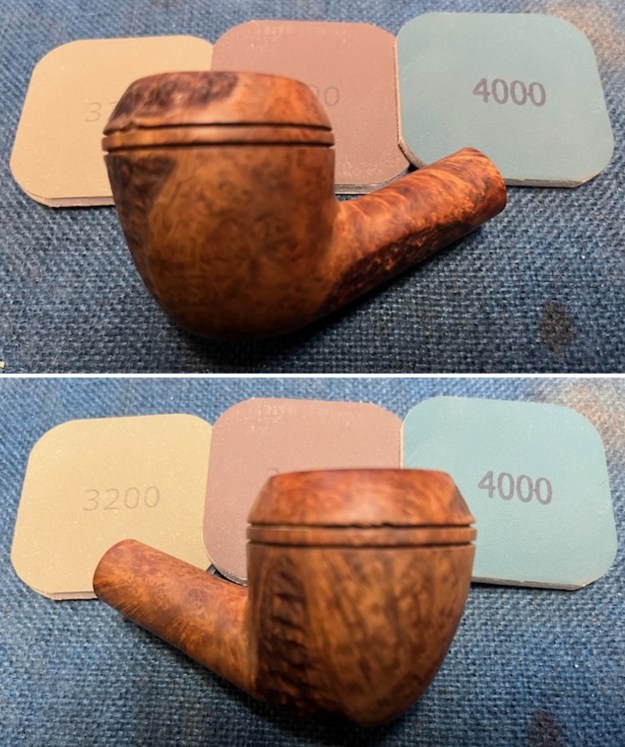
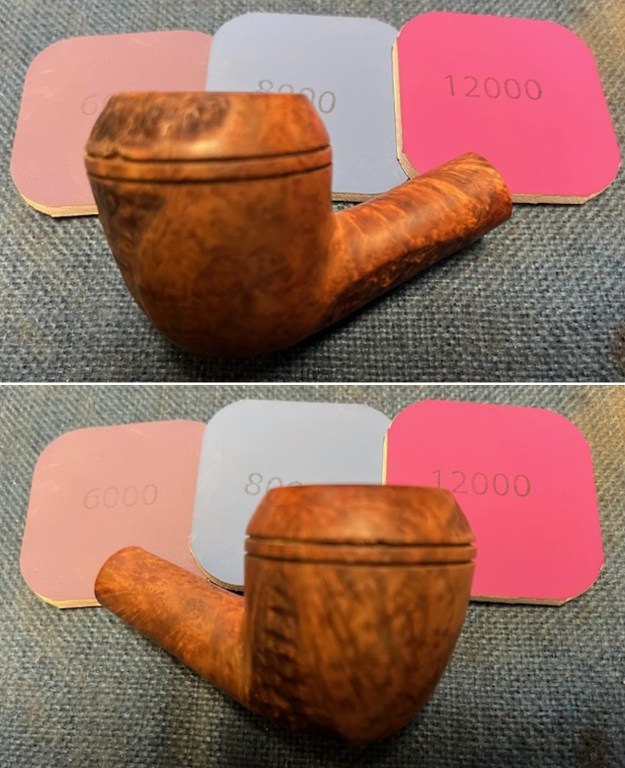
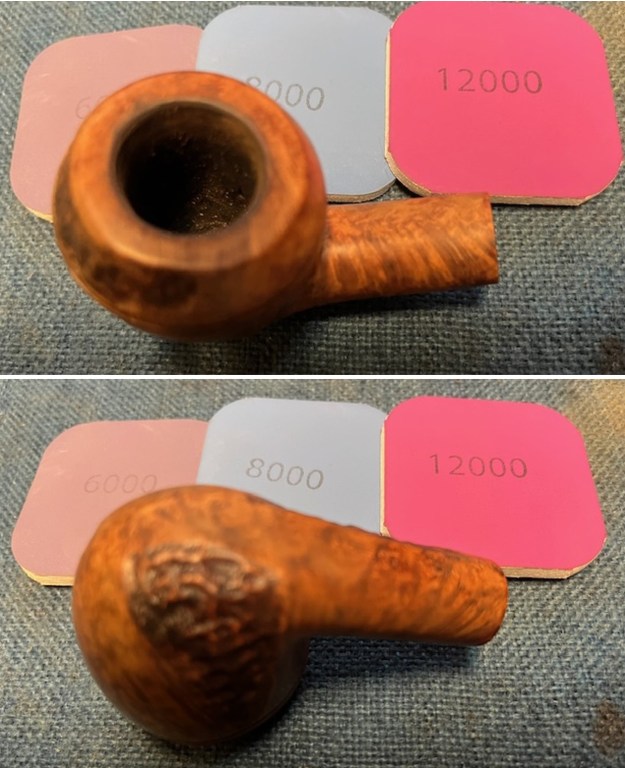
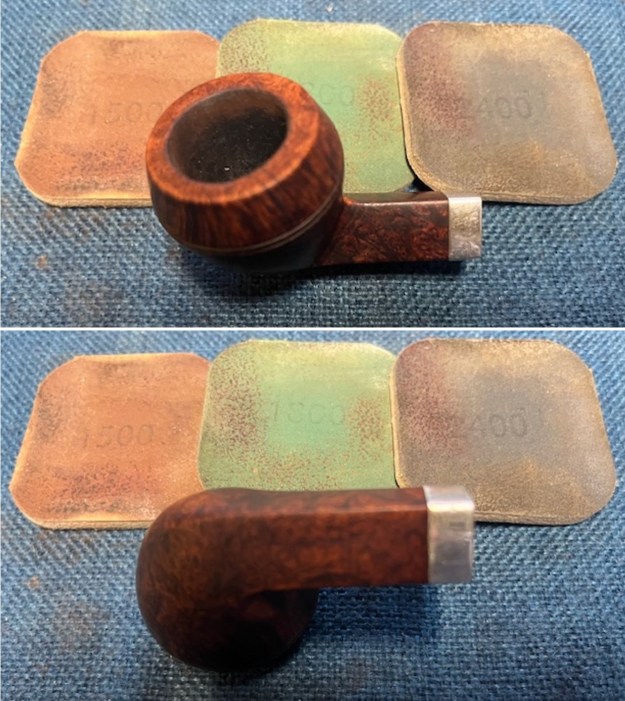
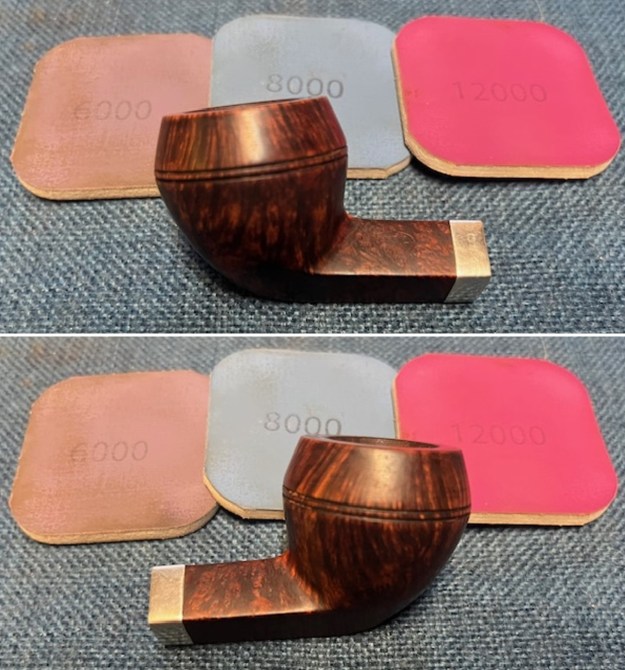
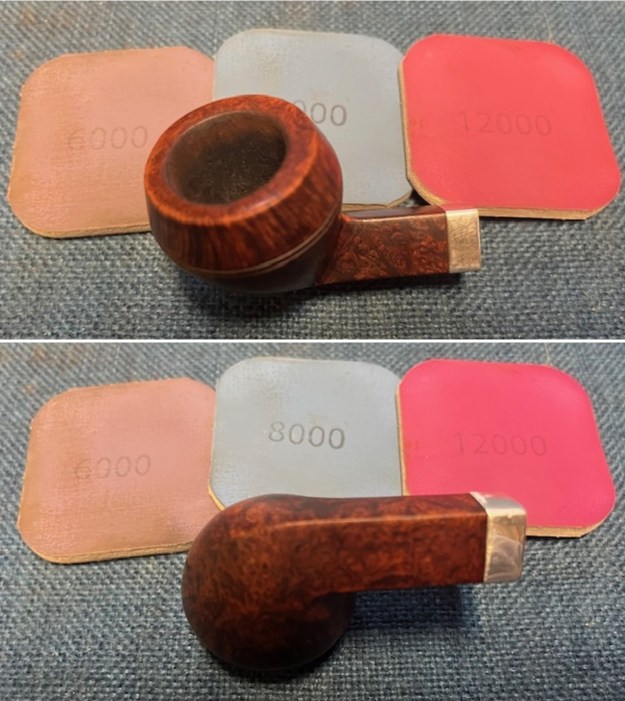
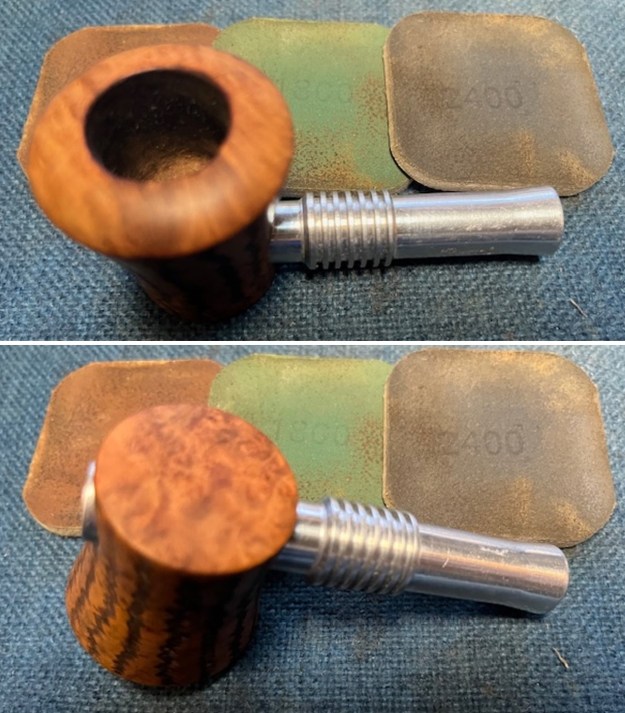
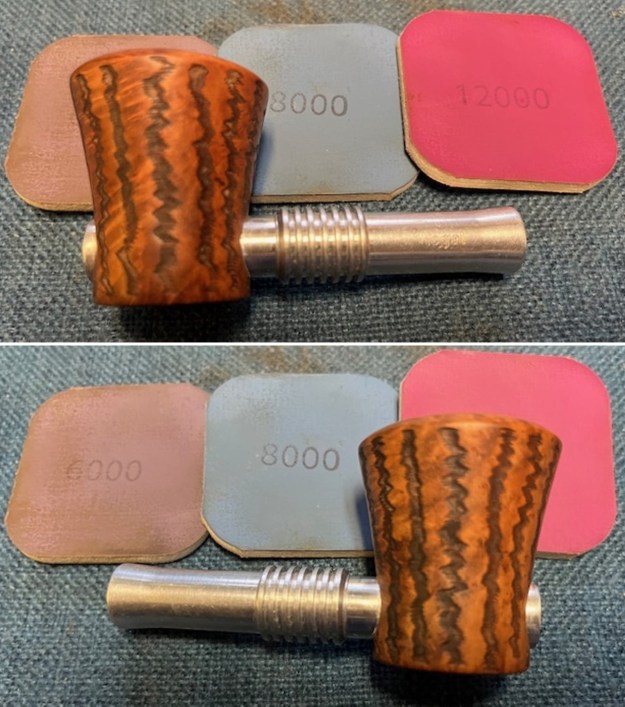
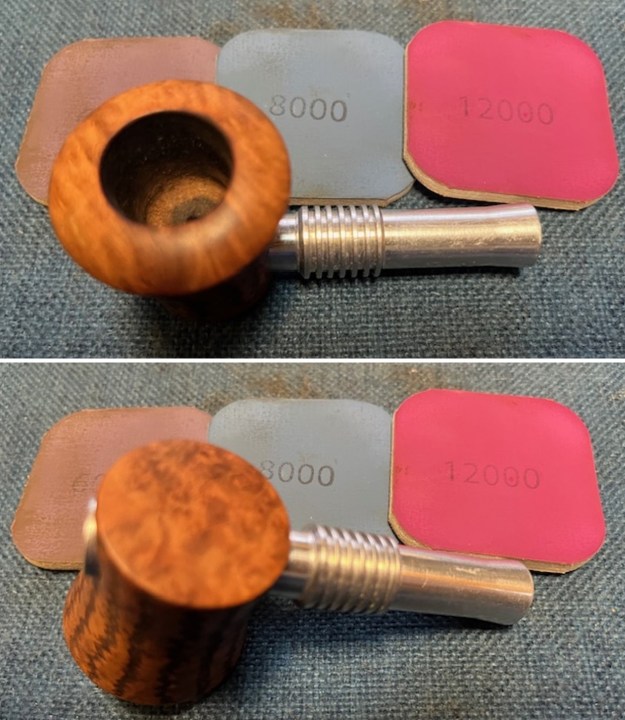
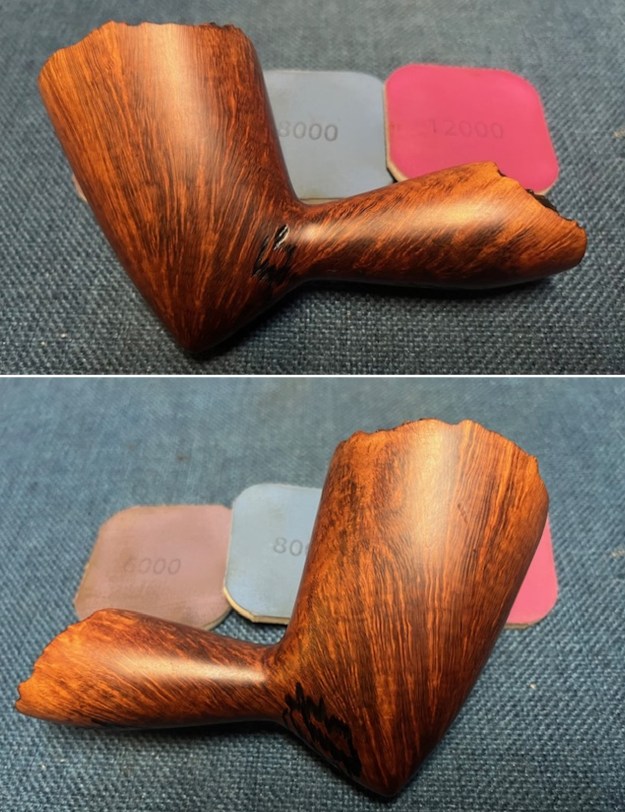
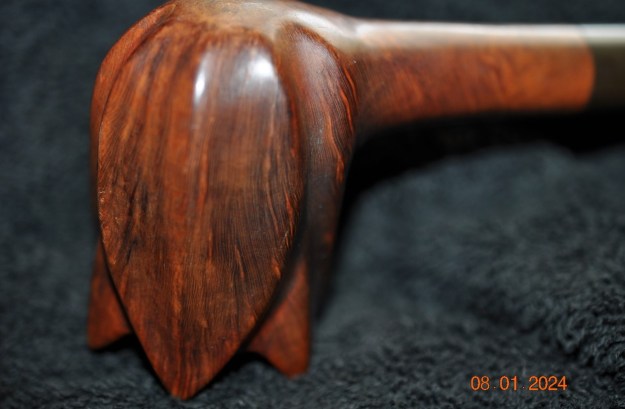
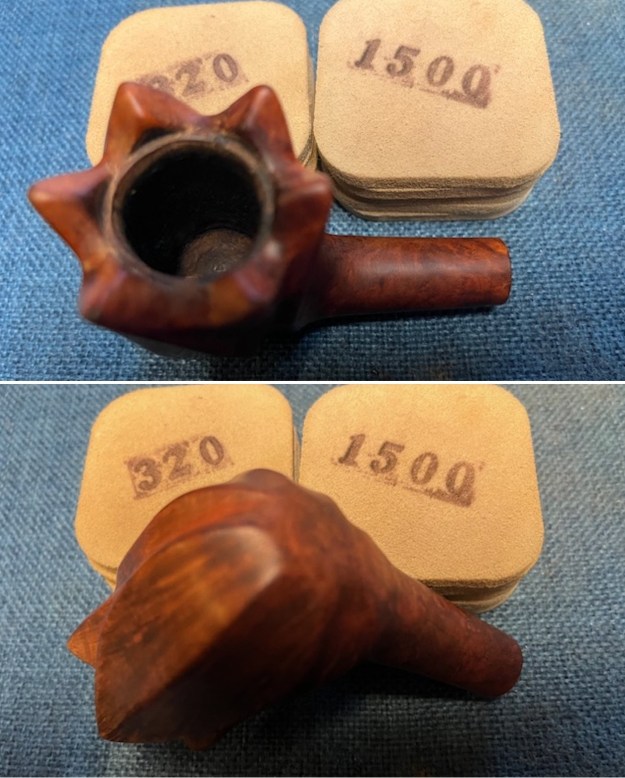
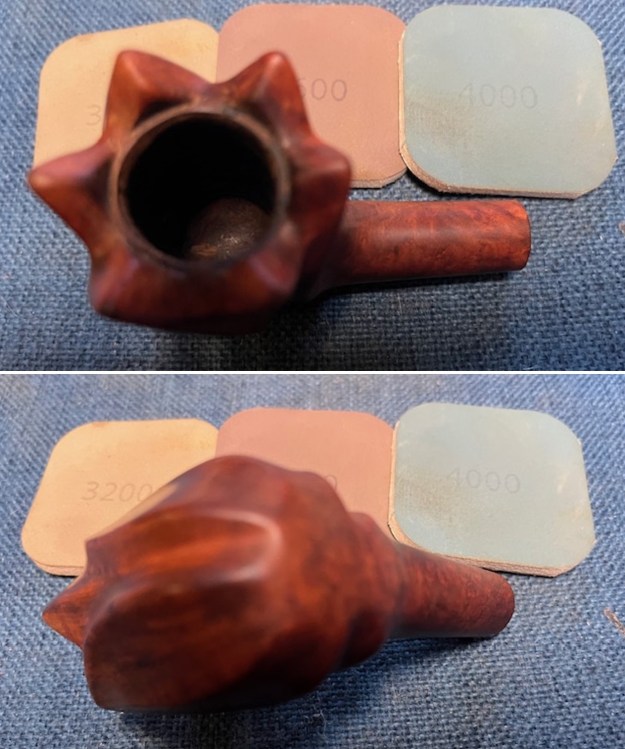
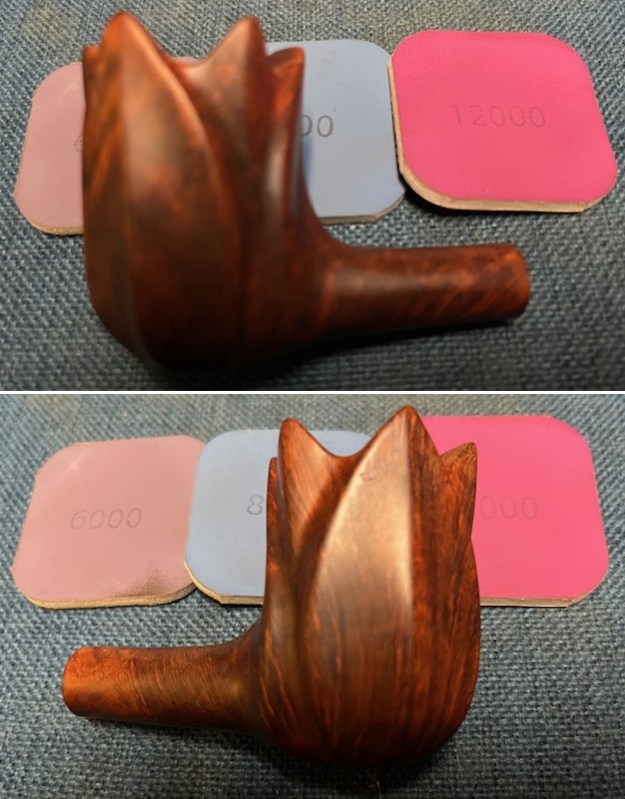
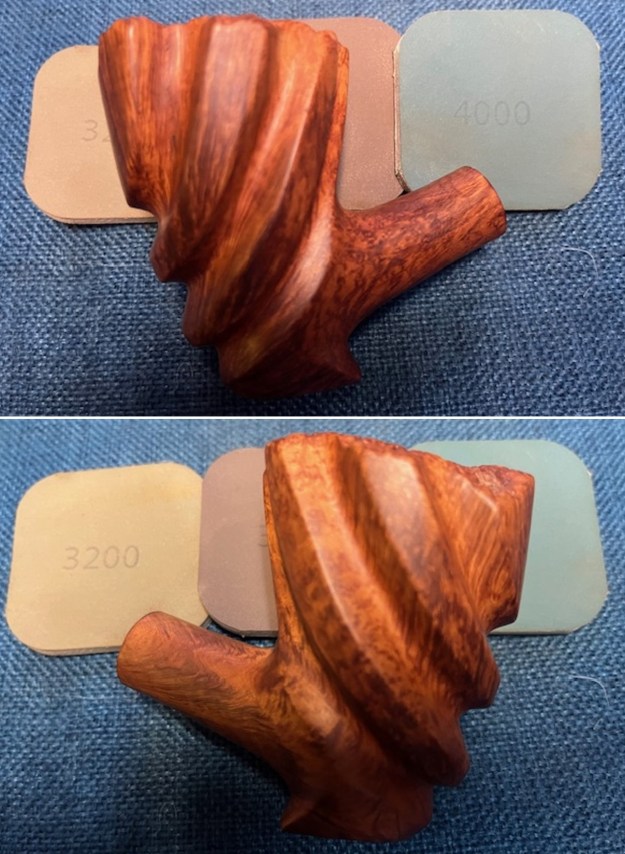
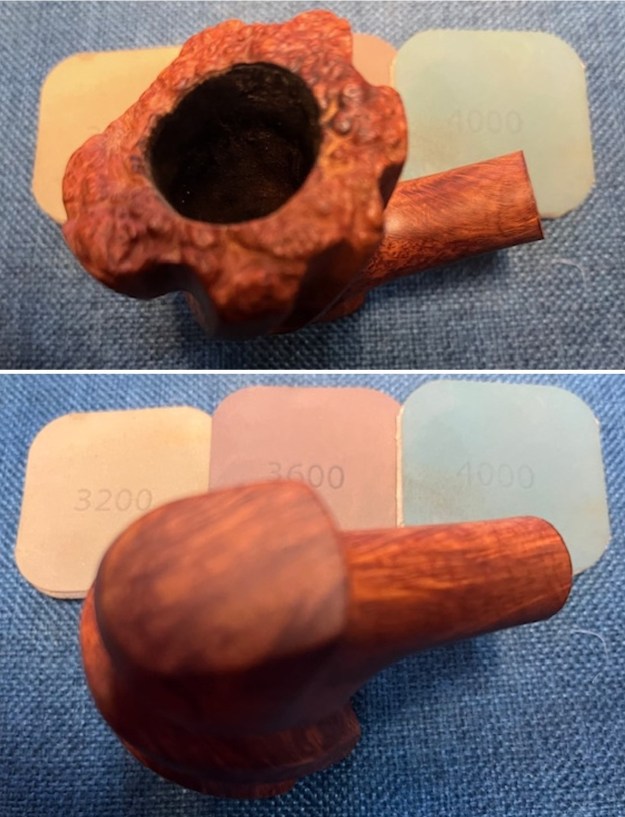
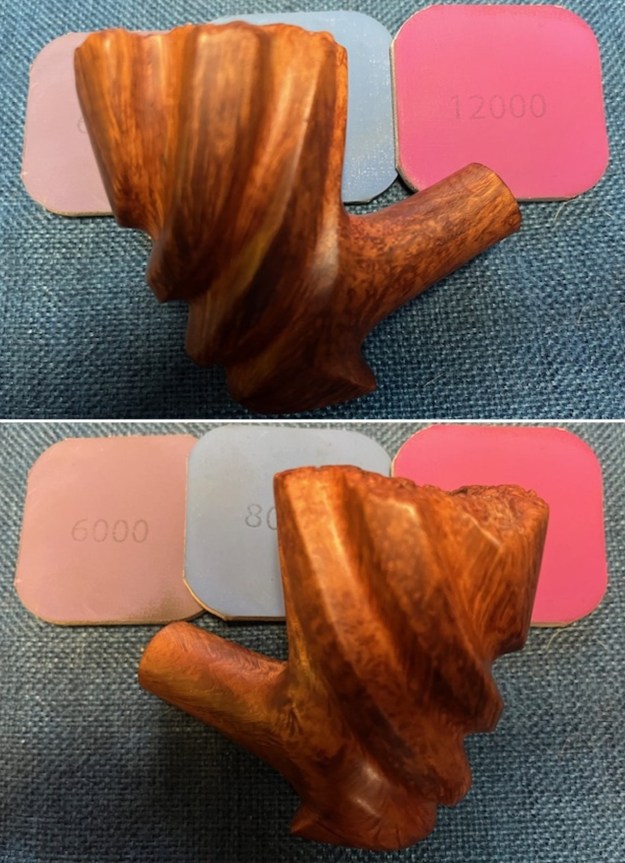
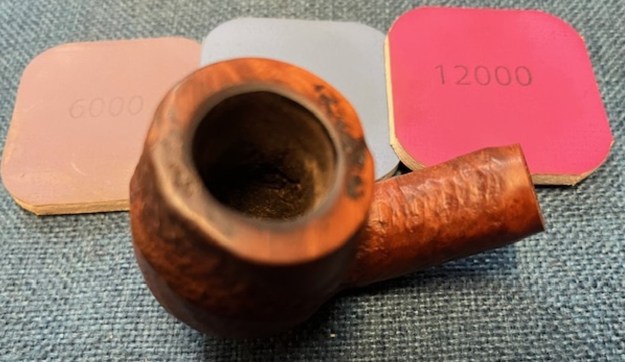
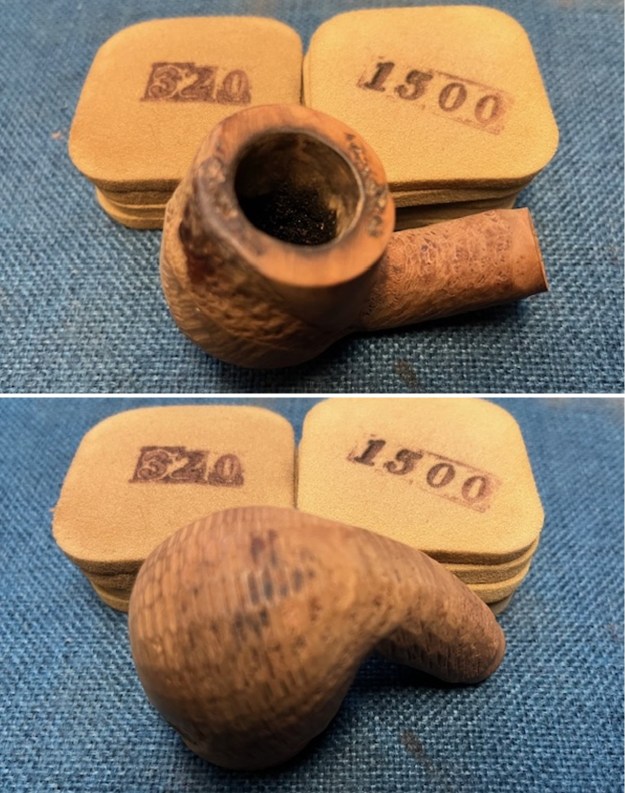 I polished the smooth rim top with micromesh sanding pads – dry sanding it with 1200-15000 grit pads. I wiped the bowl down with a damp cloth after each sanding pad. The grain started to rise to the surface as I polished it. The rusticated portions looked very good as well.
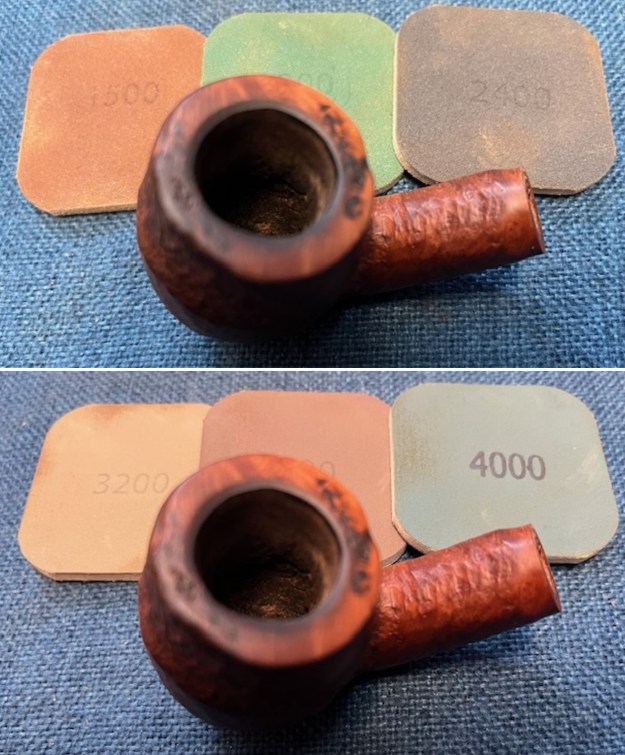
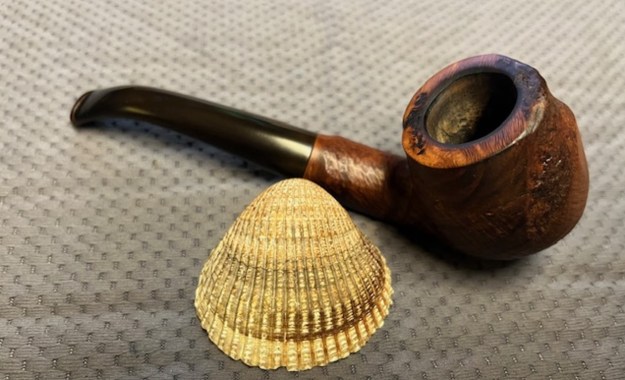
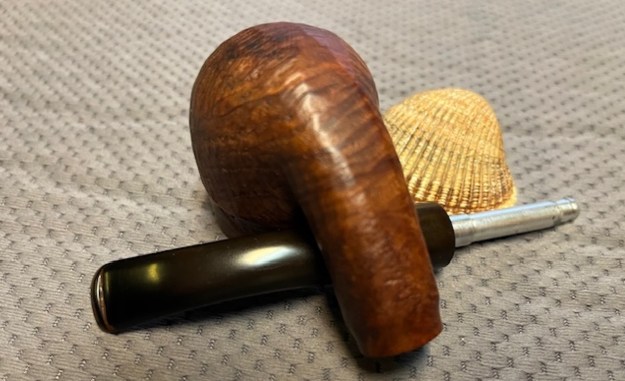
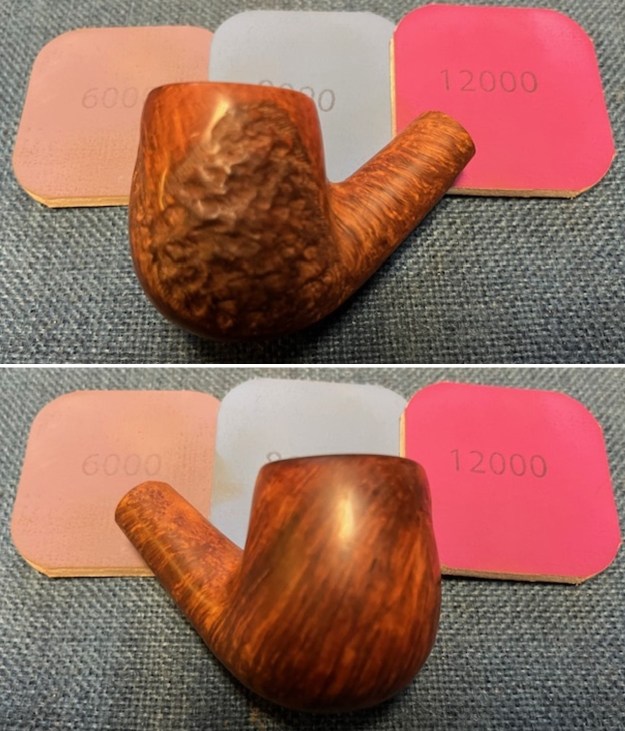
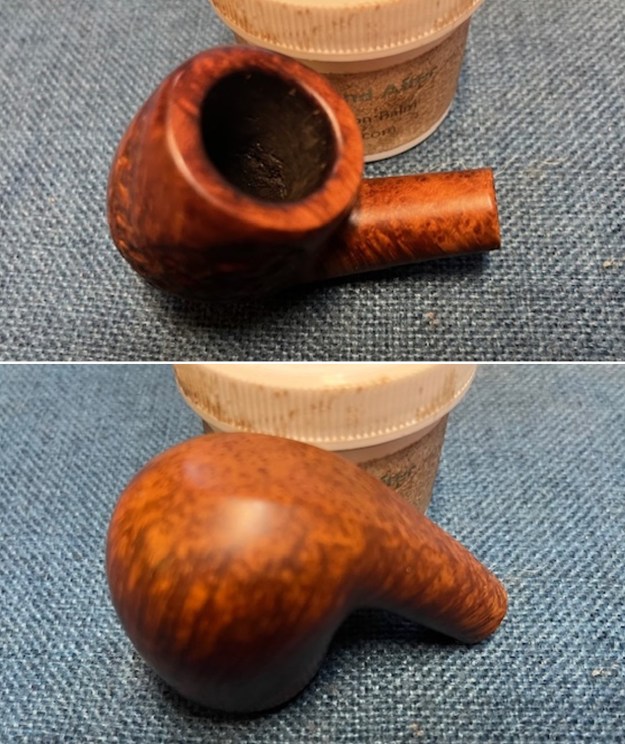
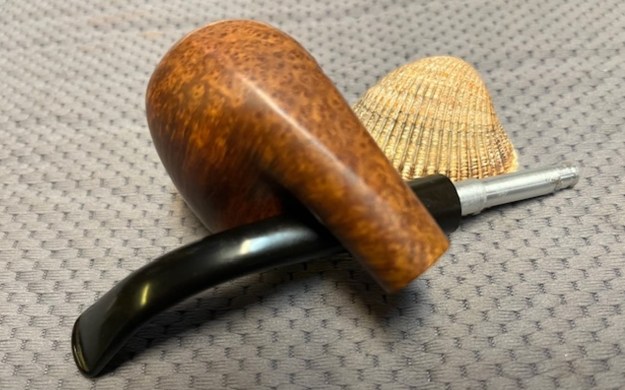
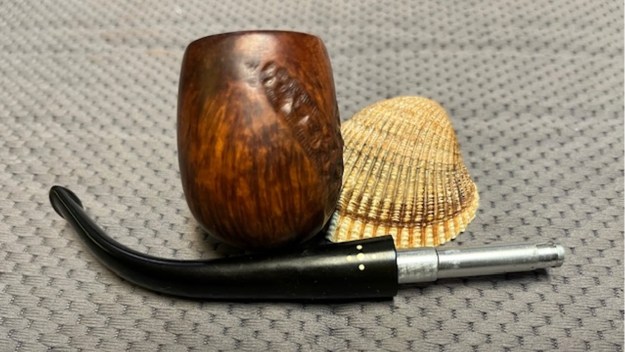
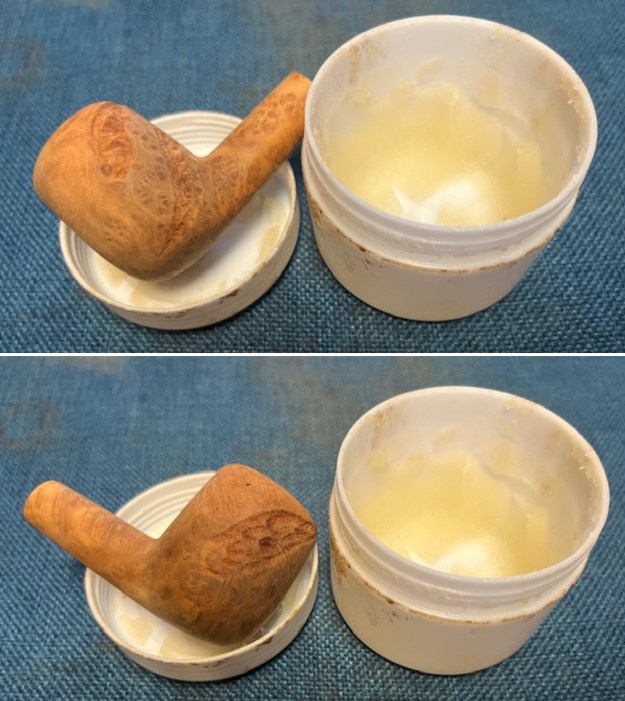
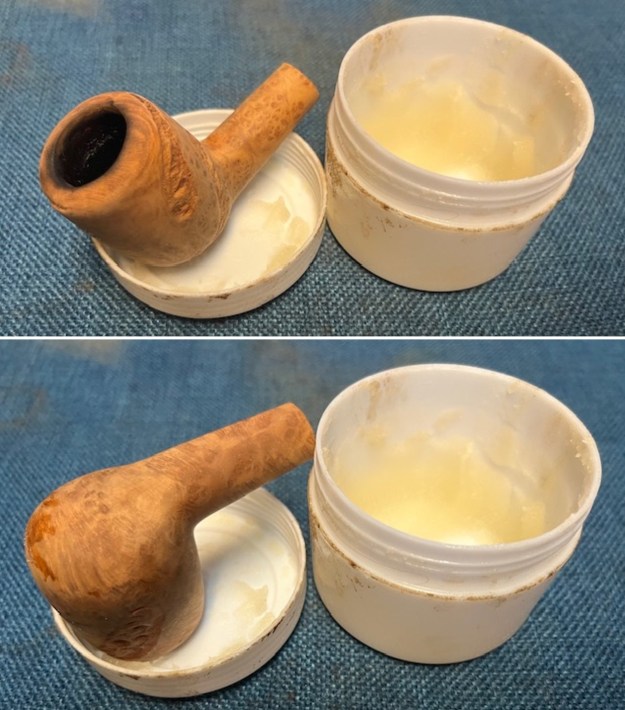
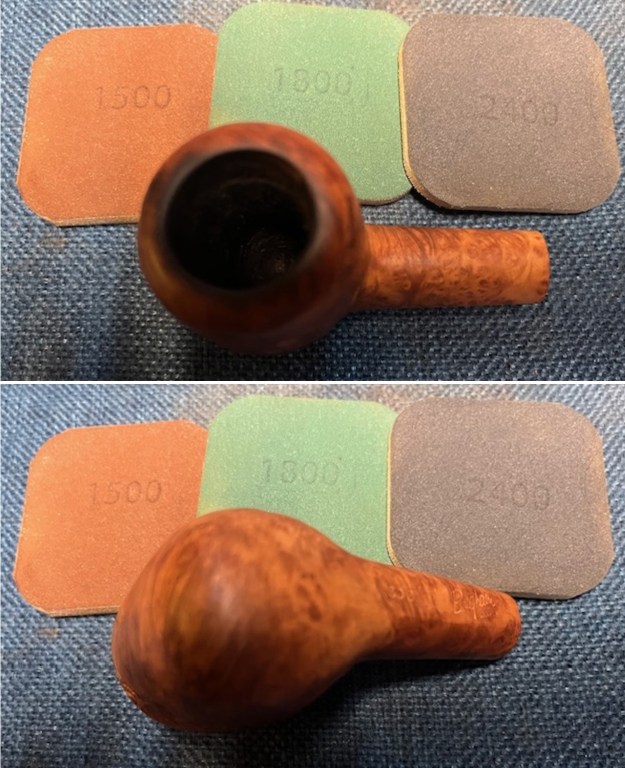
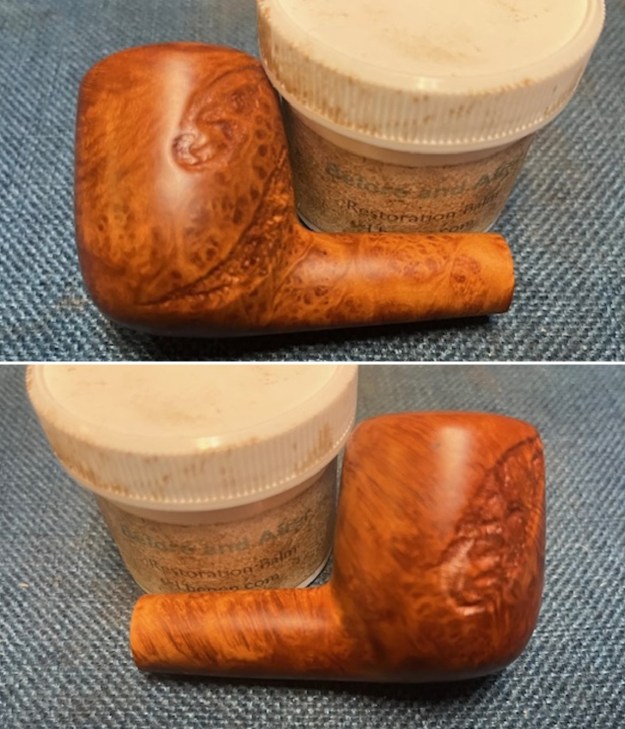
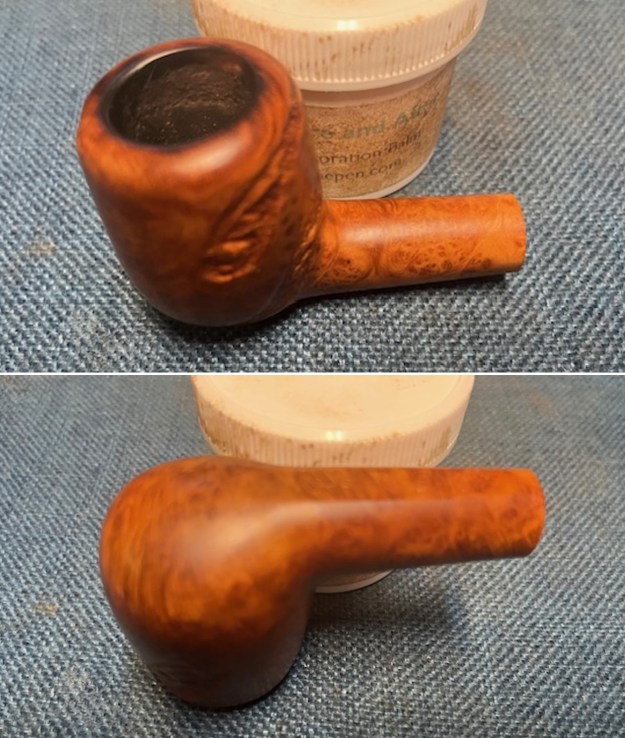
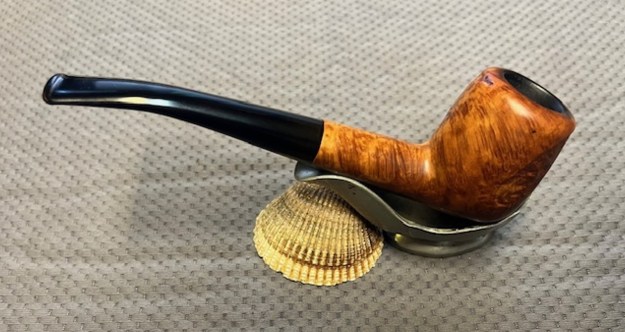
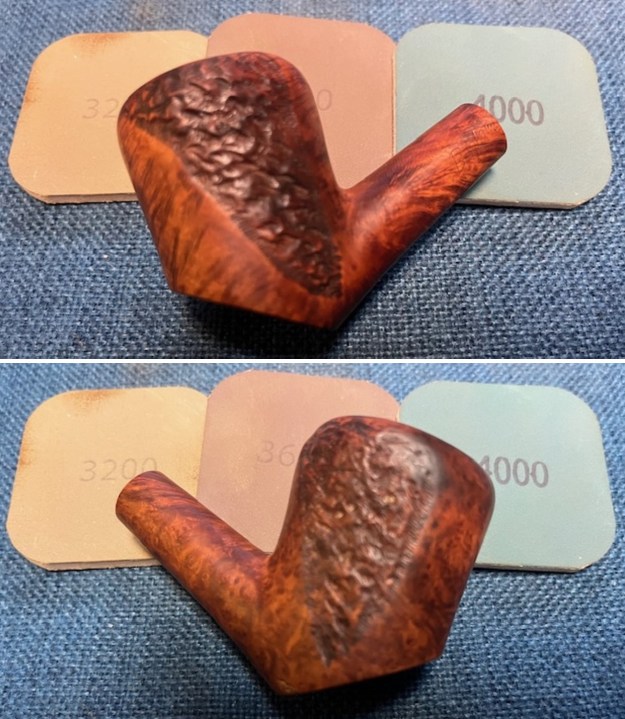
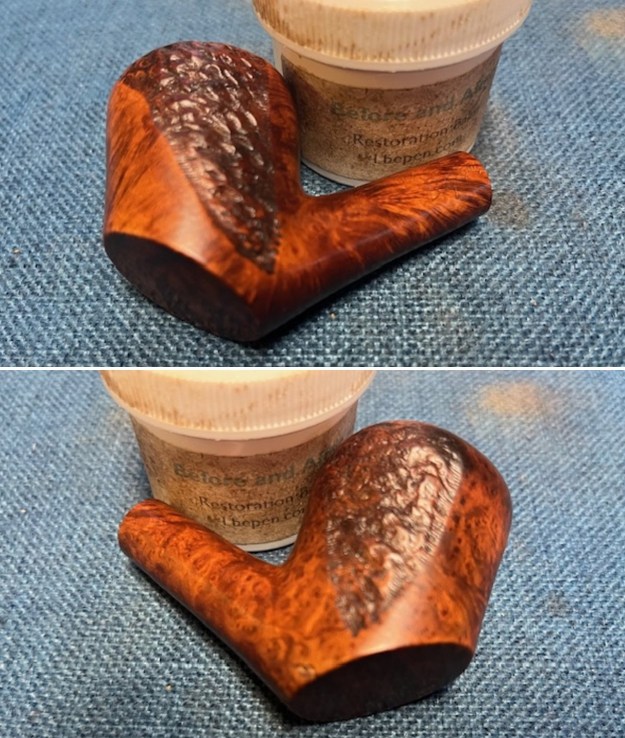
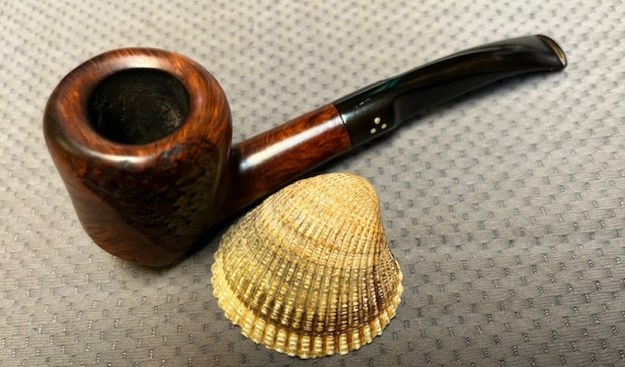
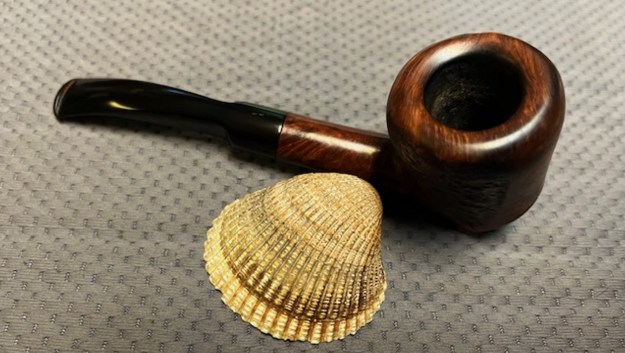
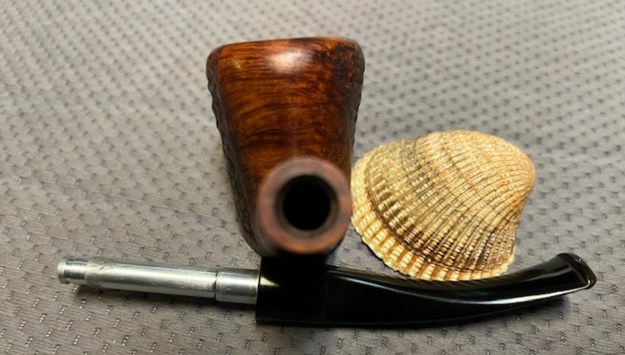
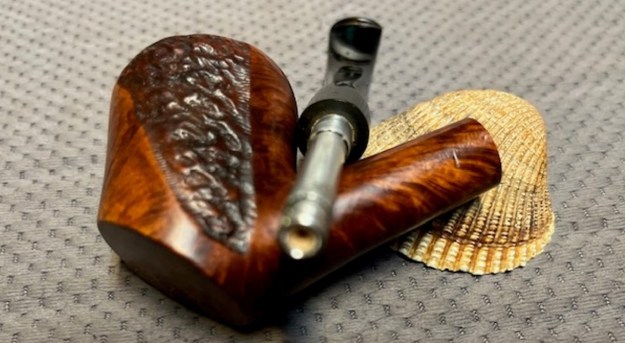
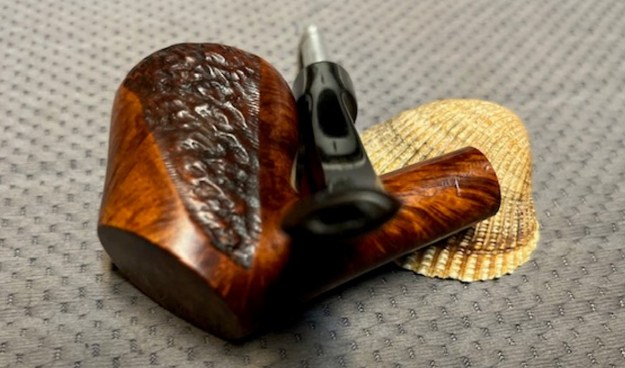
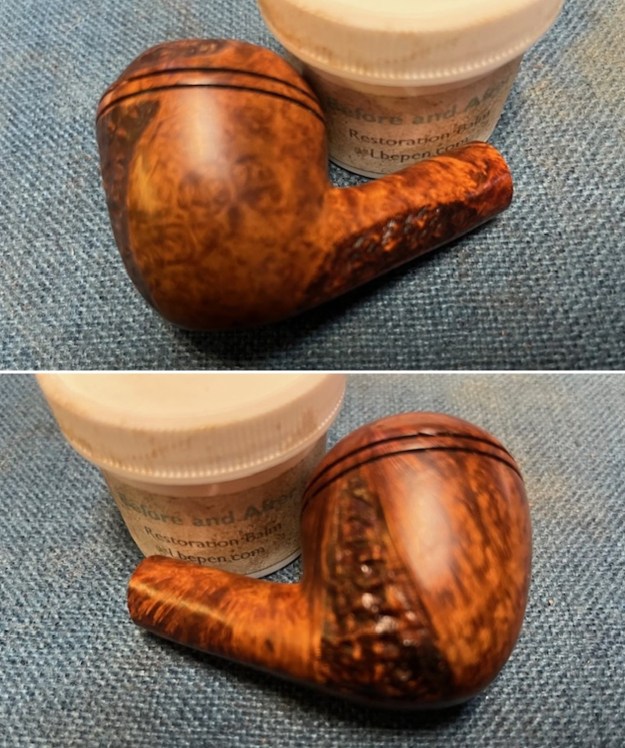
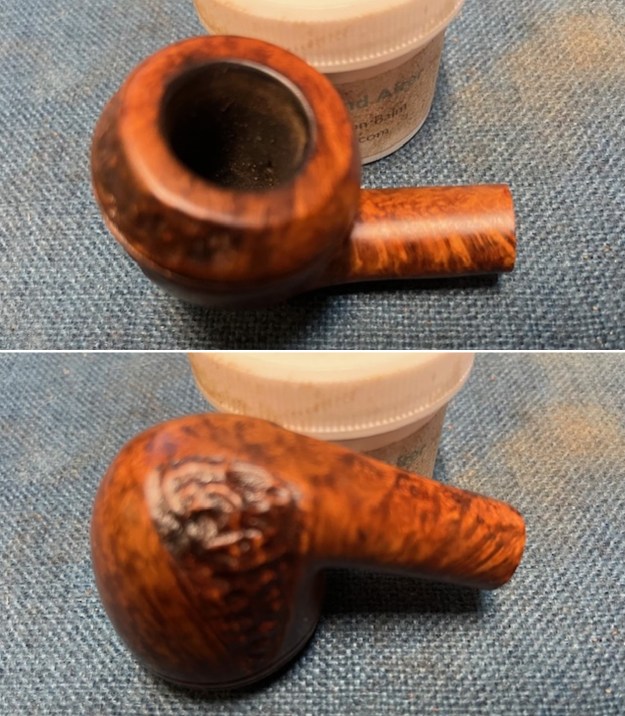
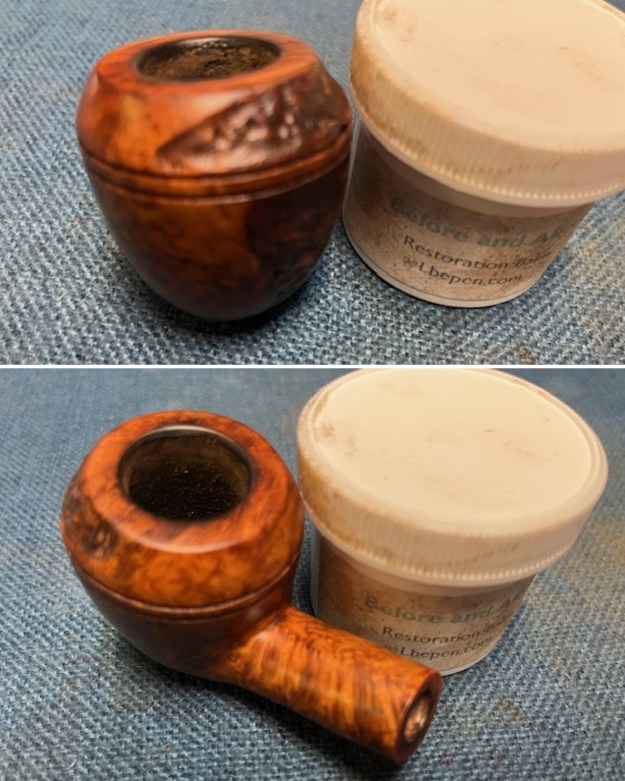
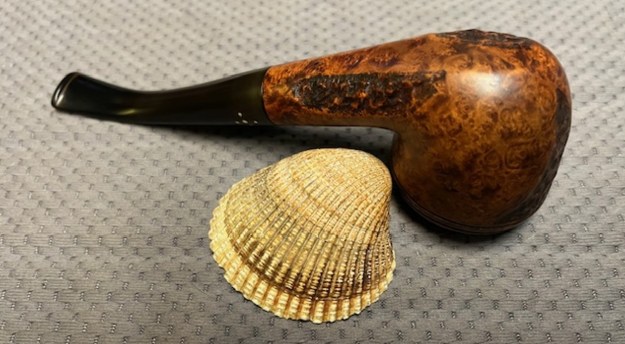
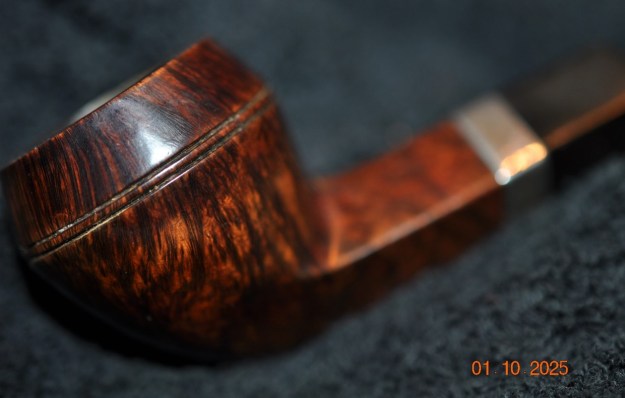
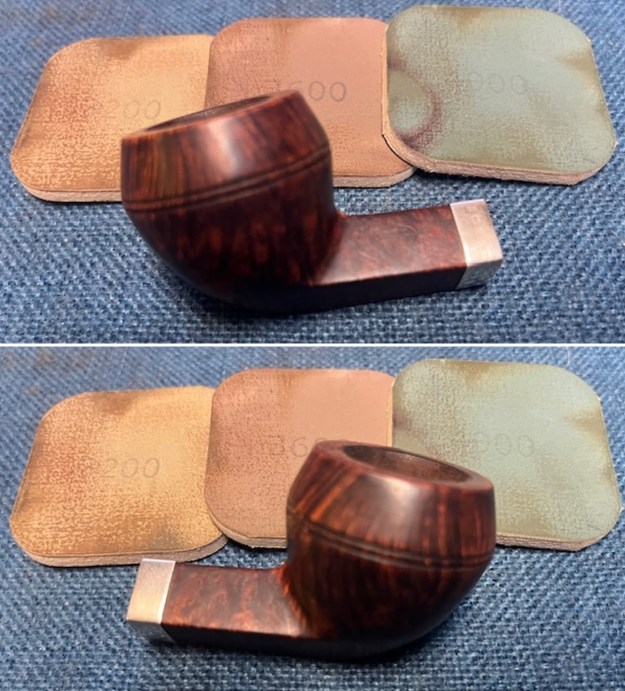
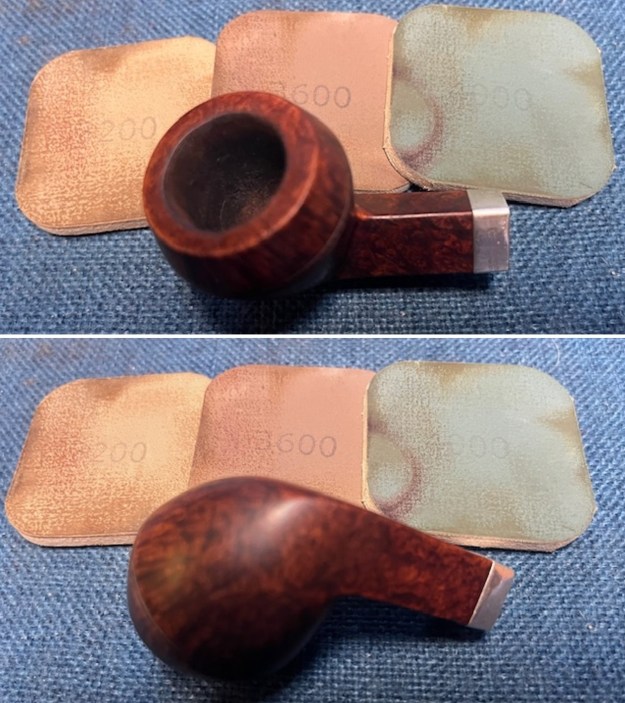
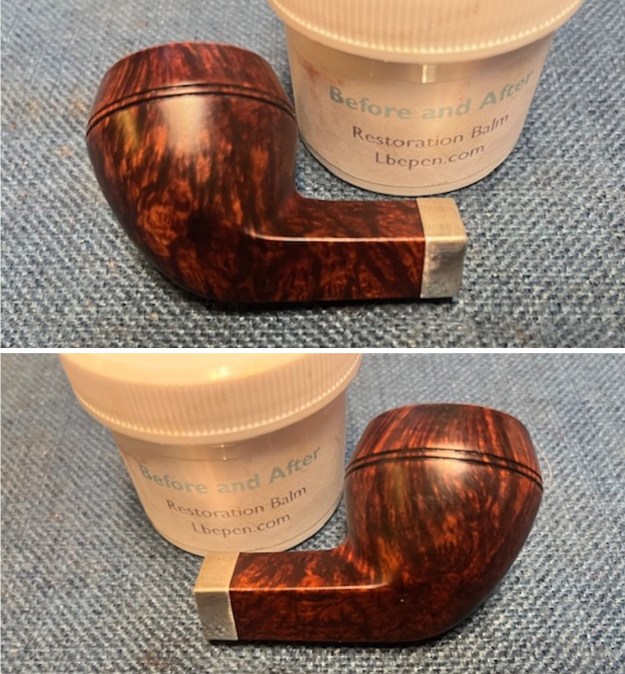
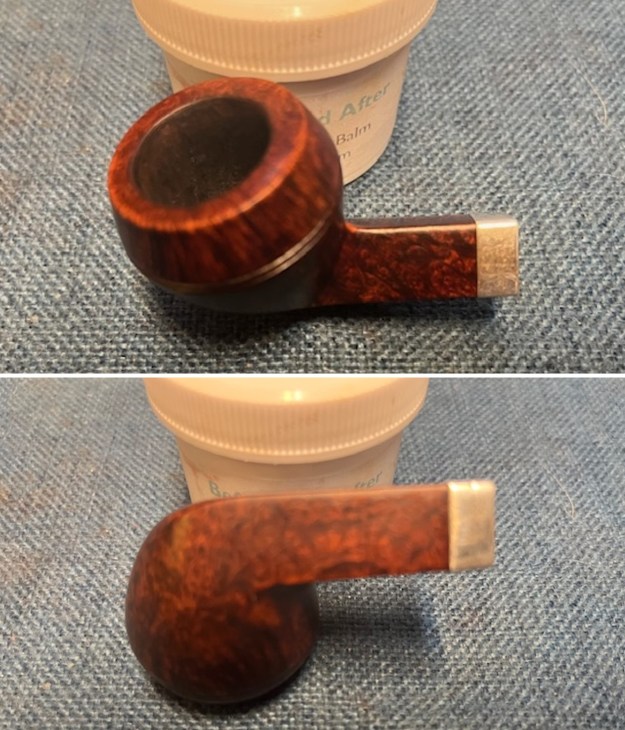
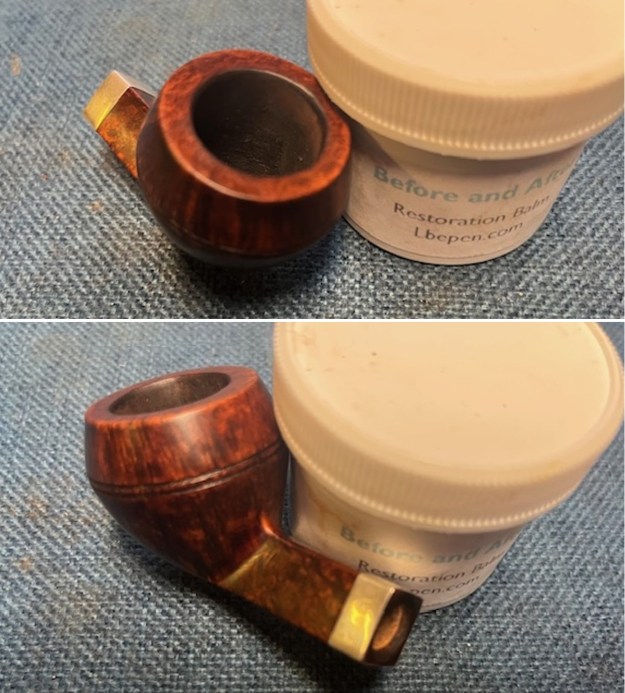
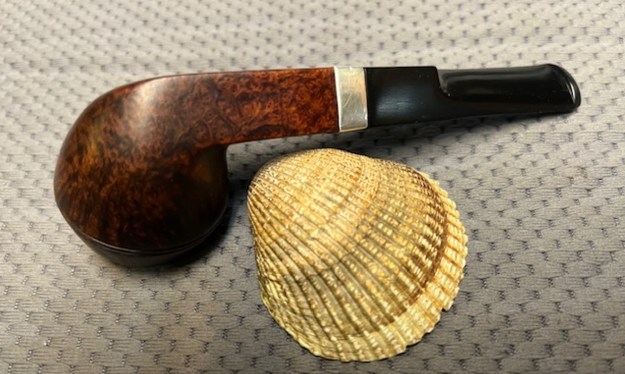
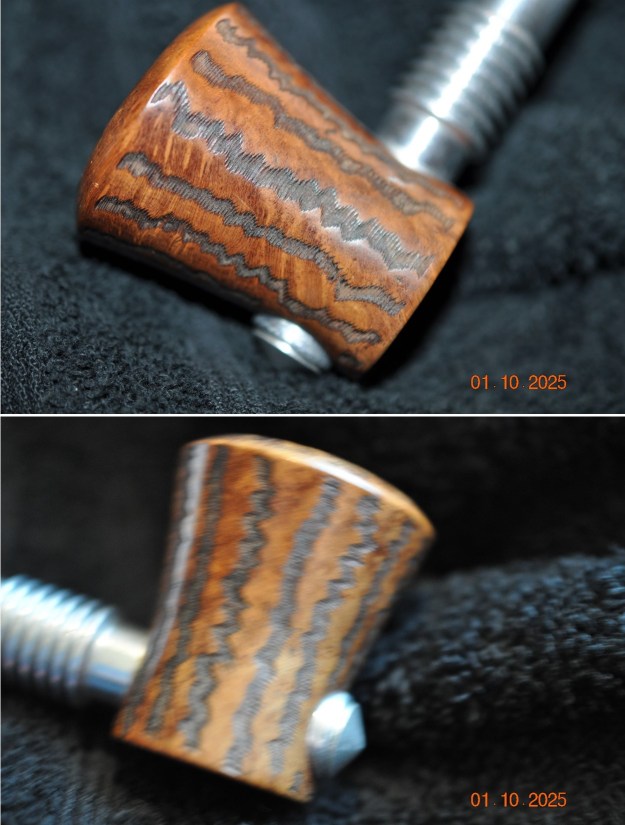
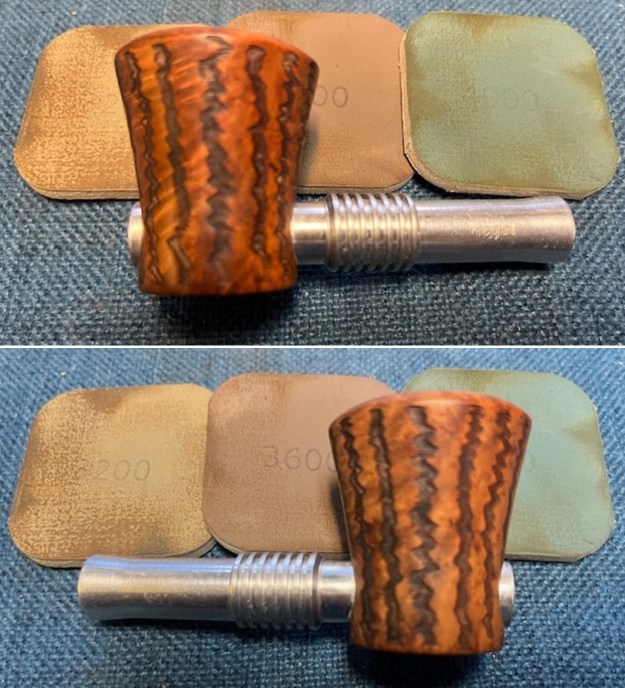
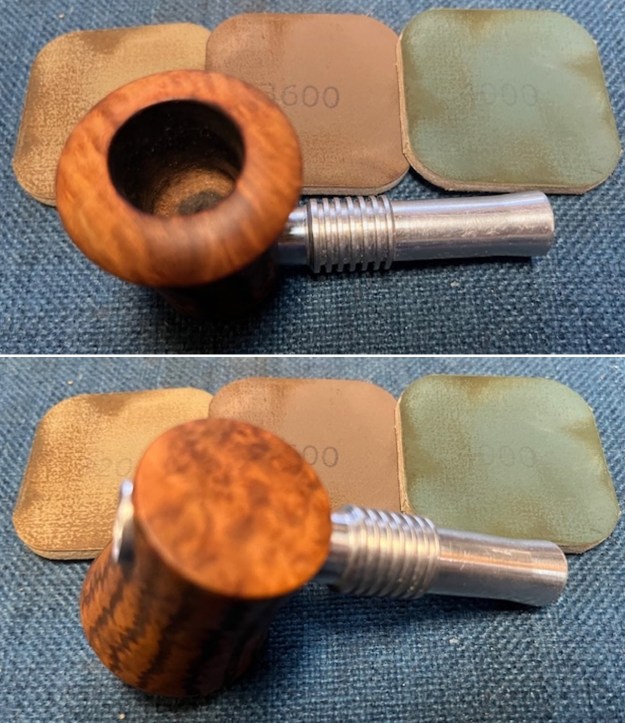
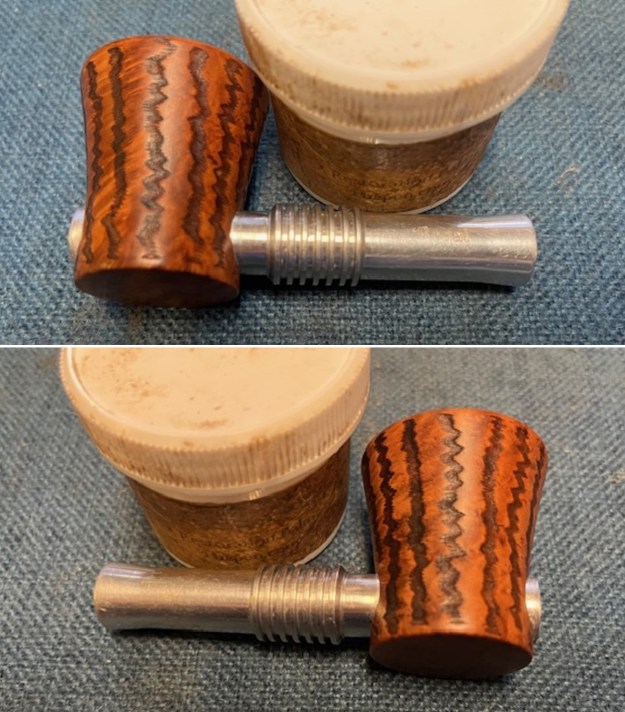
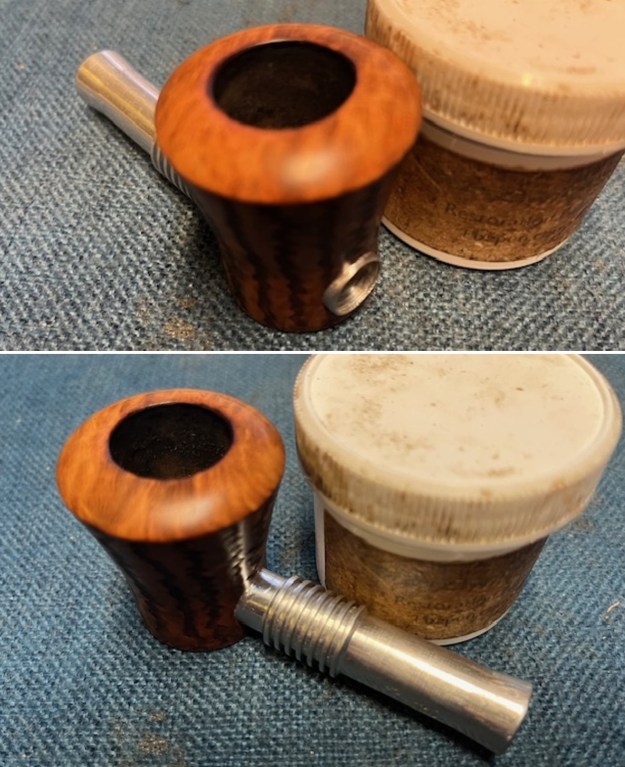
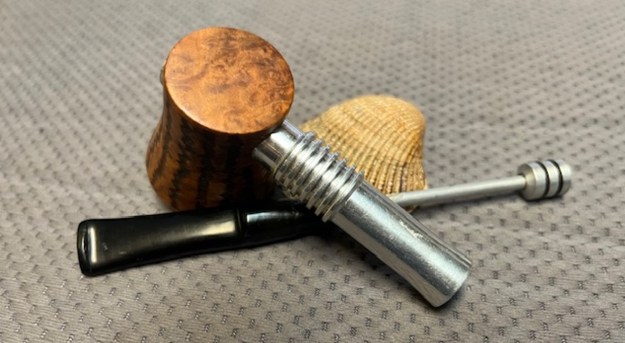
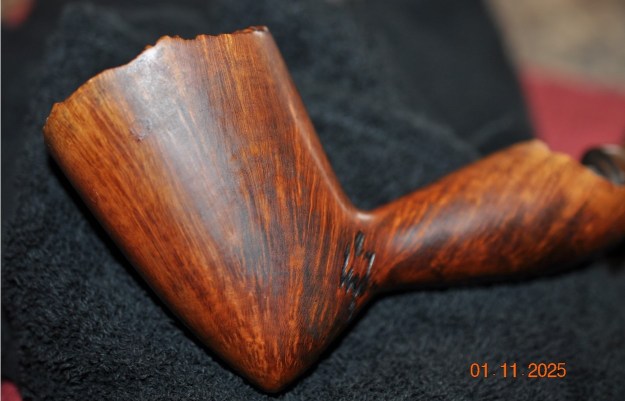
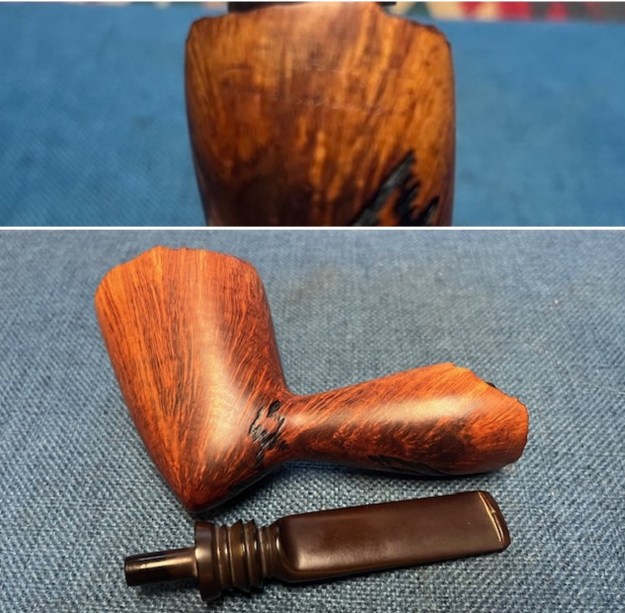
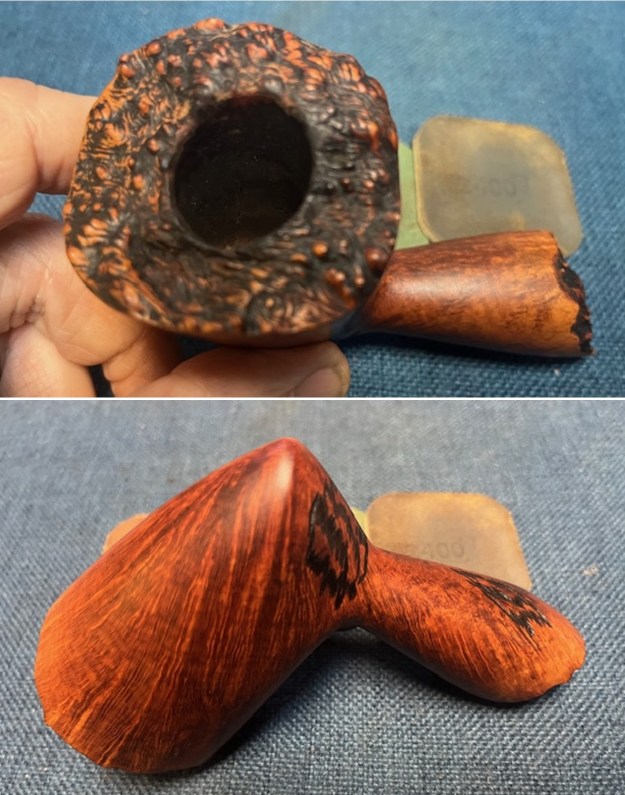
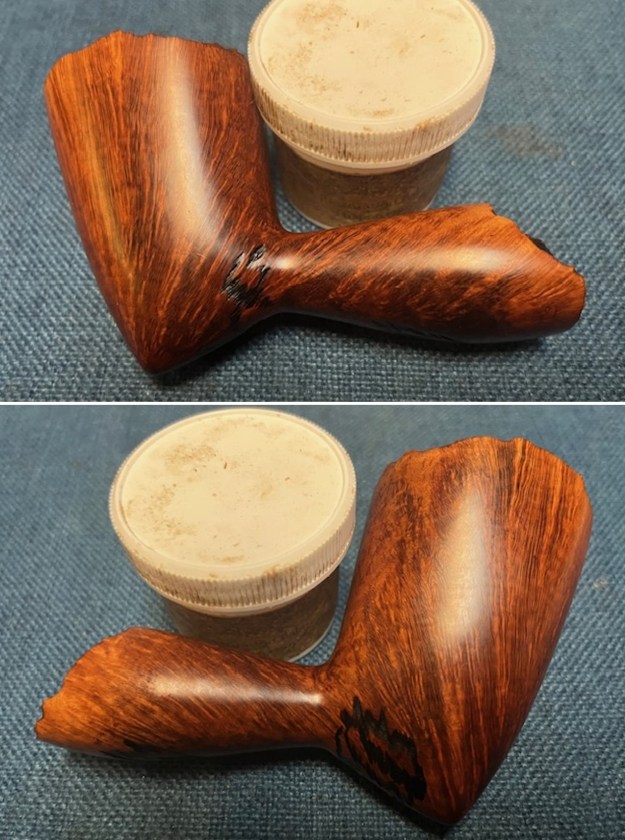
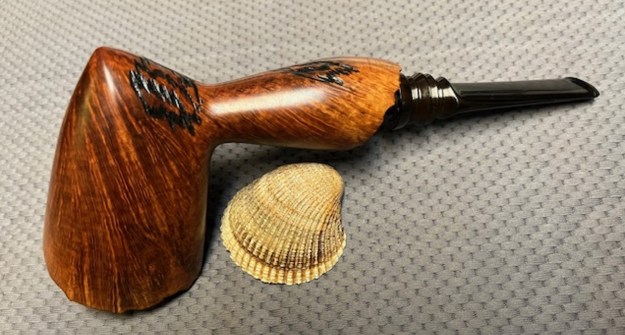
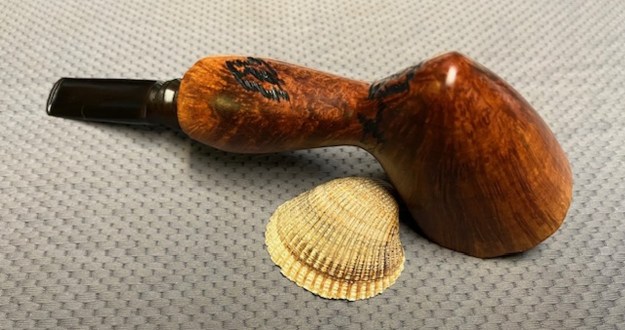
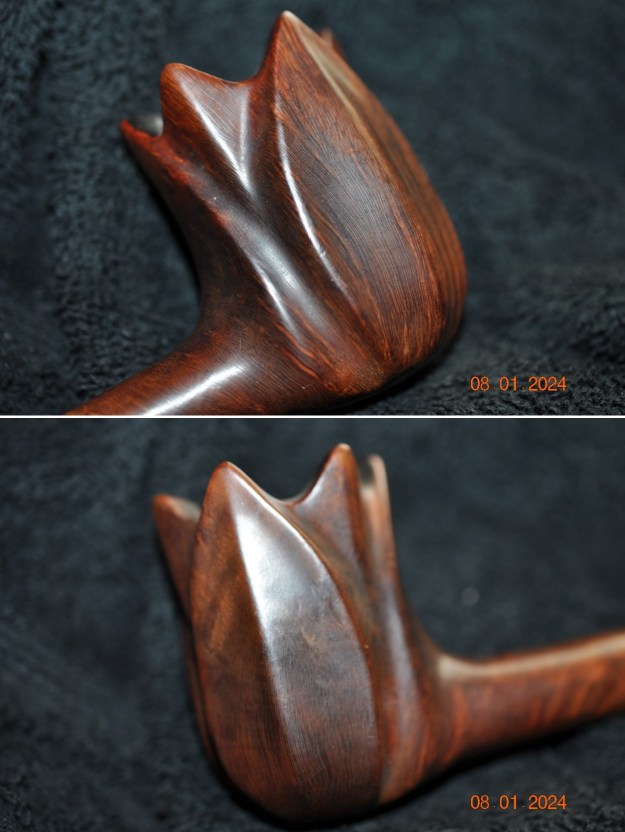
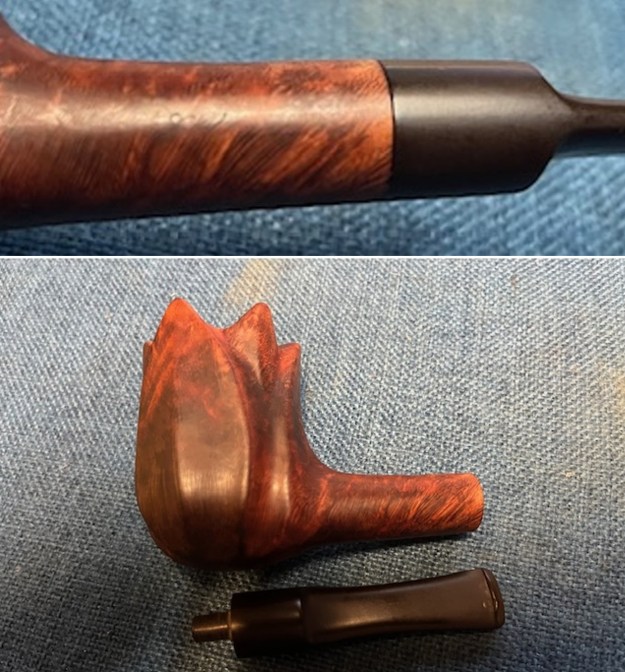
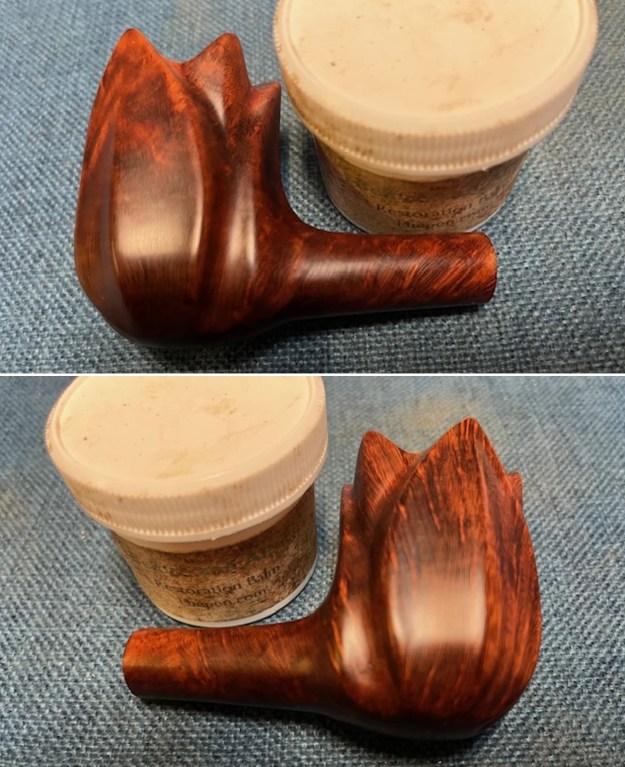
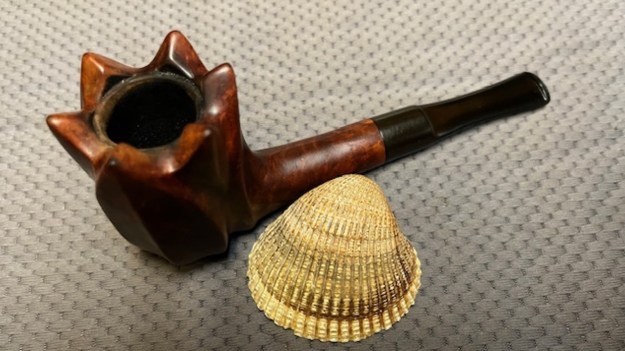
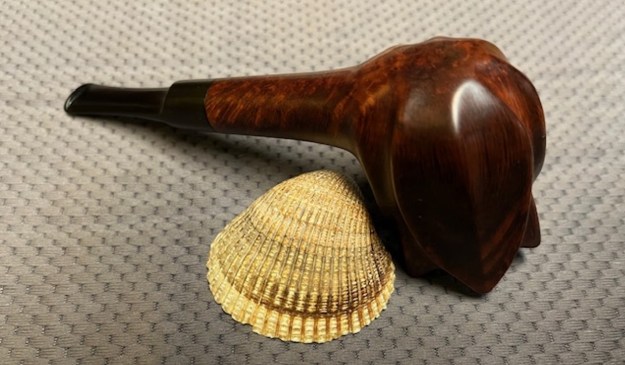
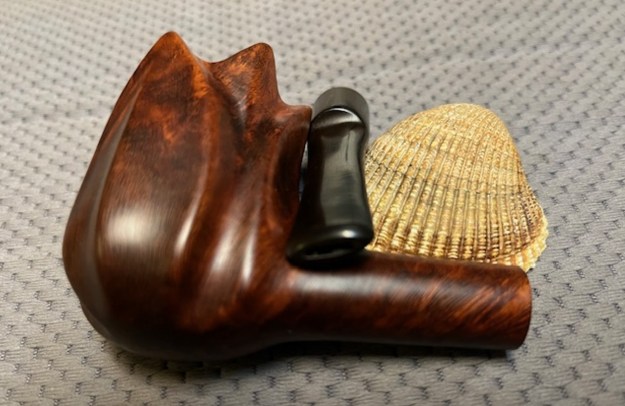
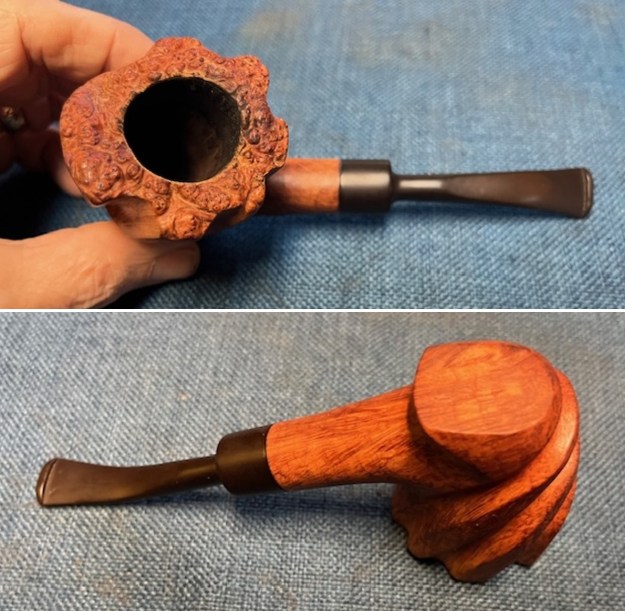
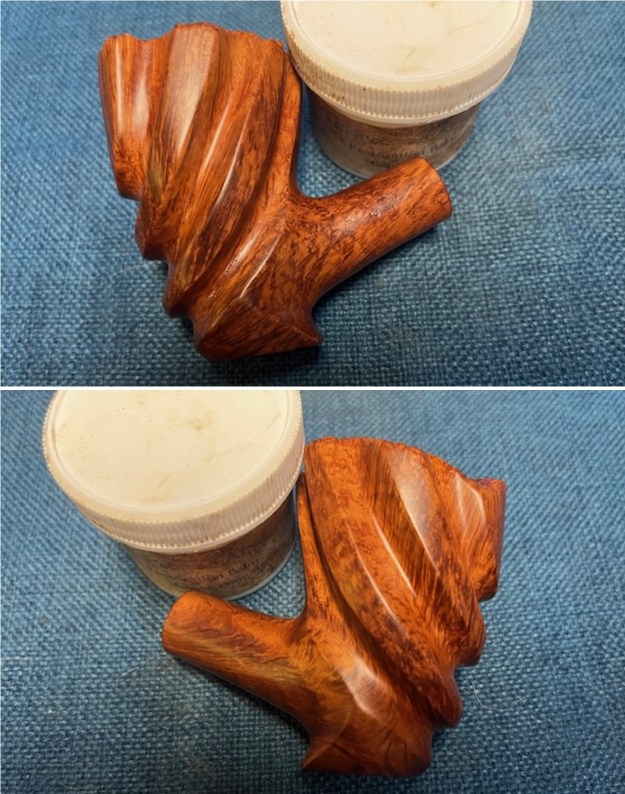
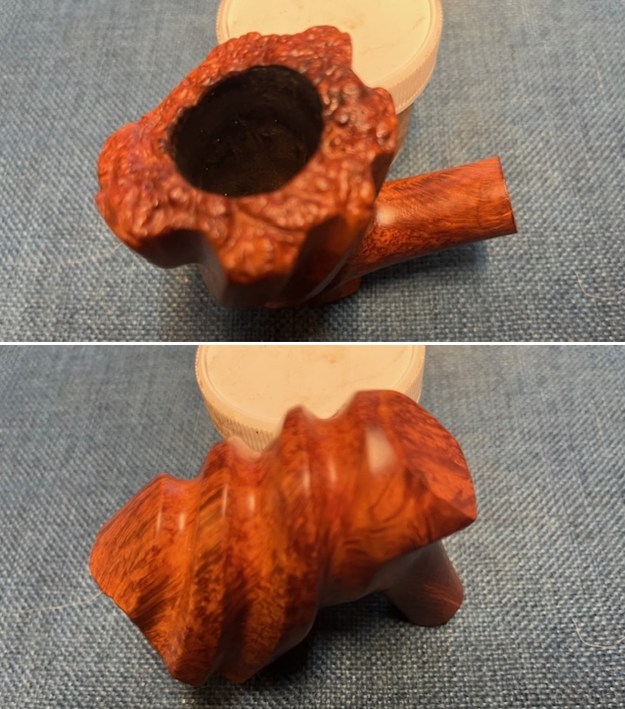
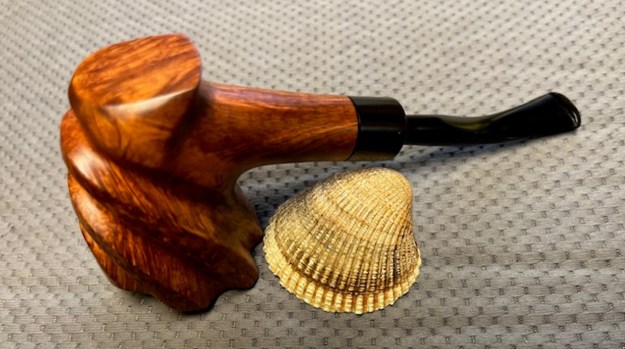
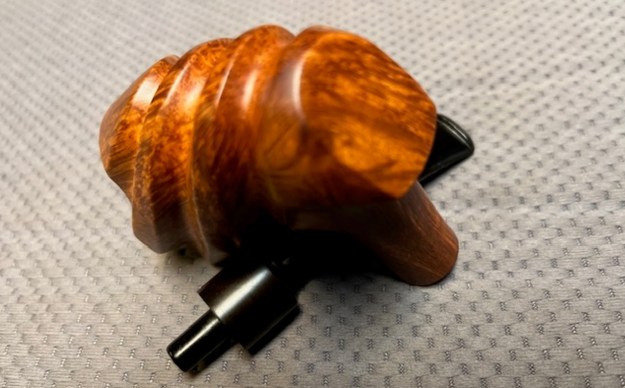
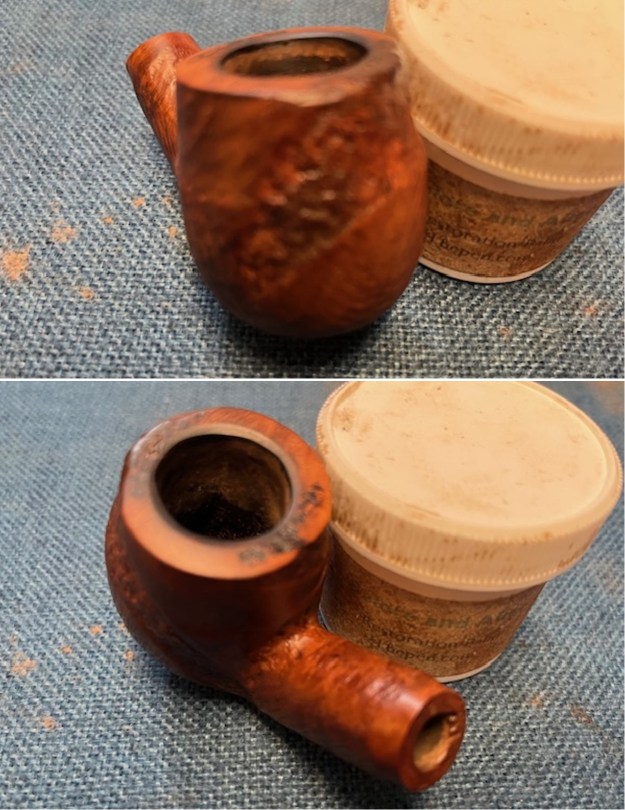
 I rubbed the bowl and shank down with Before & After Restoration Balm to deep clean the finish on the bowl and shank. The product works to clean, enliven and protect the briar. I worked it in with my fingers to get it into the briar. I used a horsehair shoe brush to work it into the rusticated portions. I let it sit for 10 minutes then I wiped it off and buffed it with a soft cloth. The briar really began to have a rich shine. I took some photos of the bowl at this point to mark the progress in the restoration. It is a beautiful bowl.
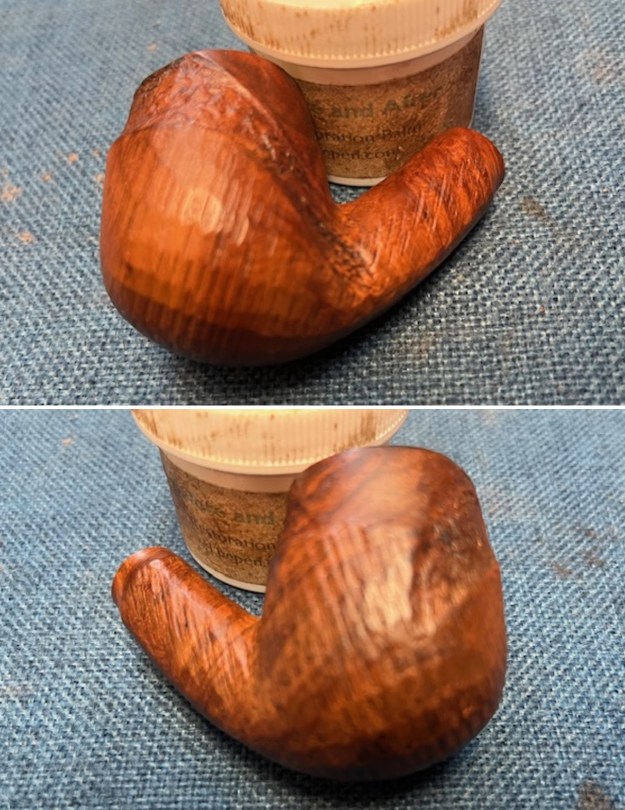
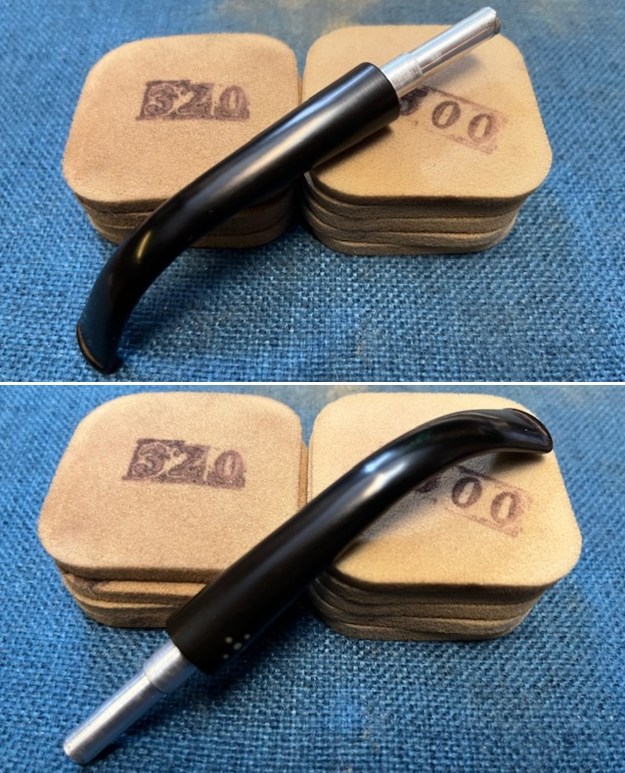
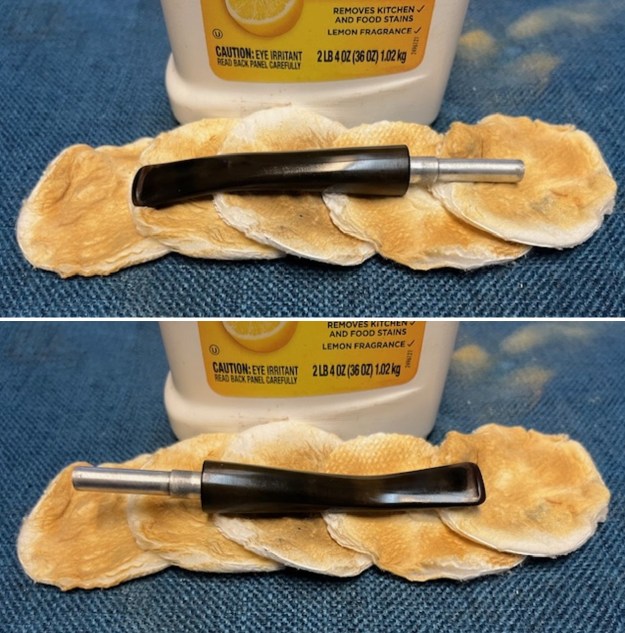
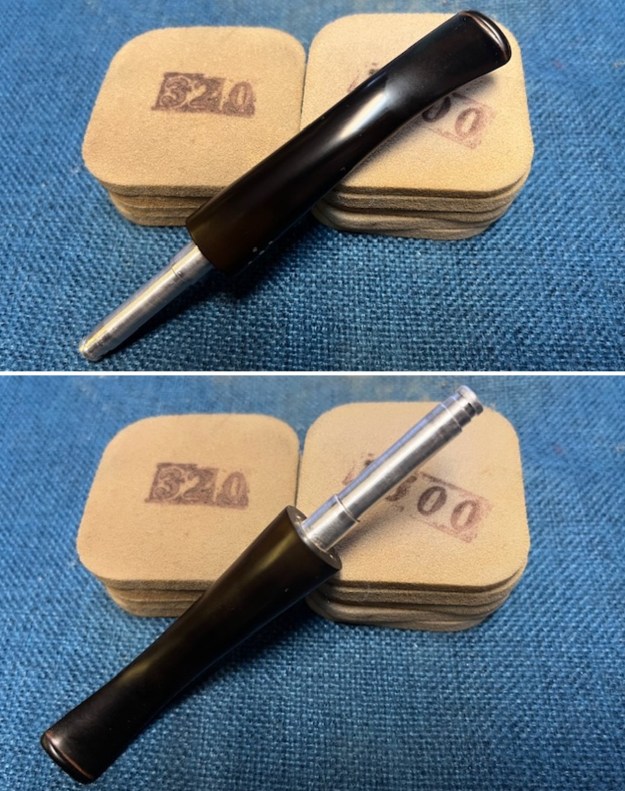
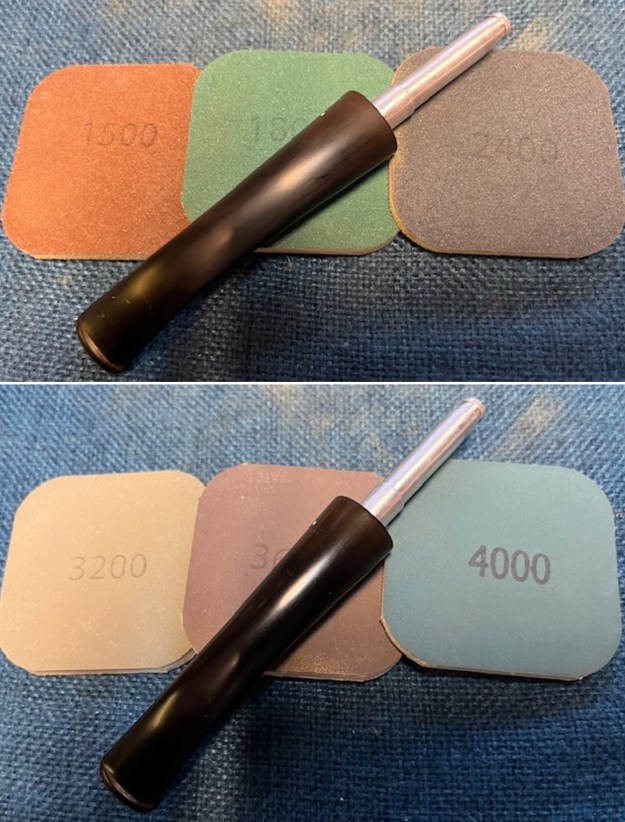
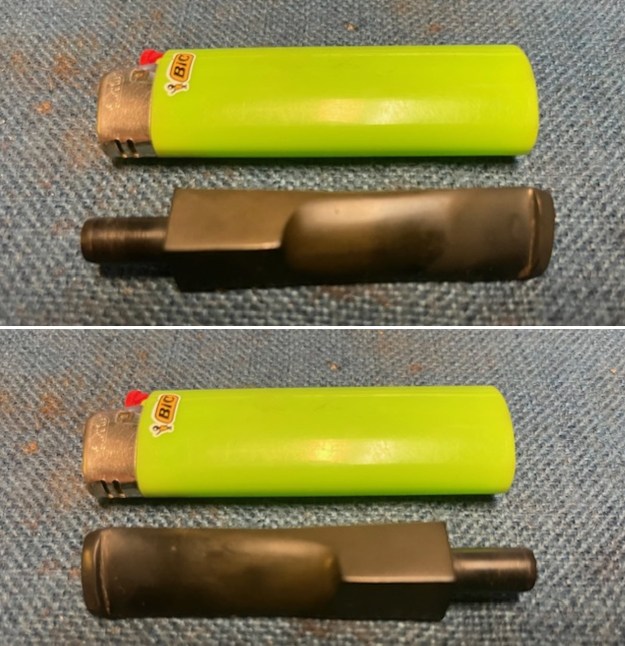
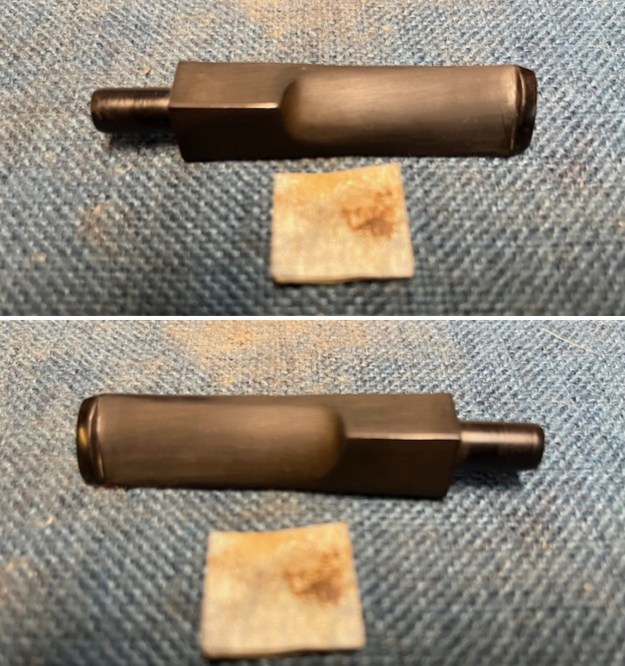
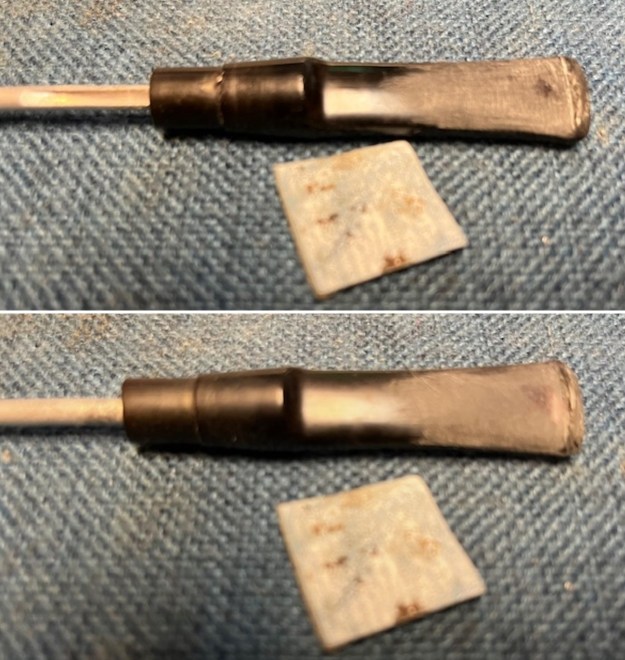
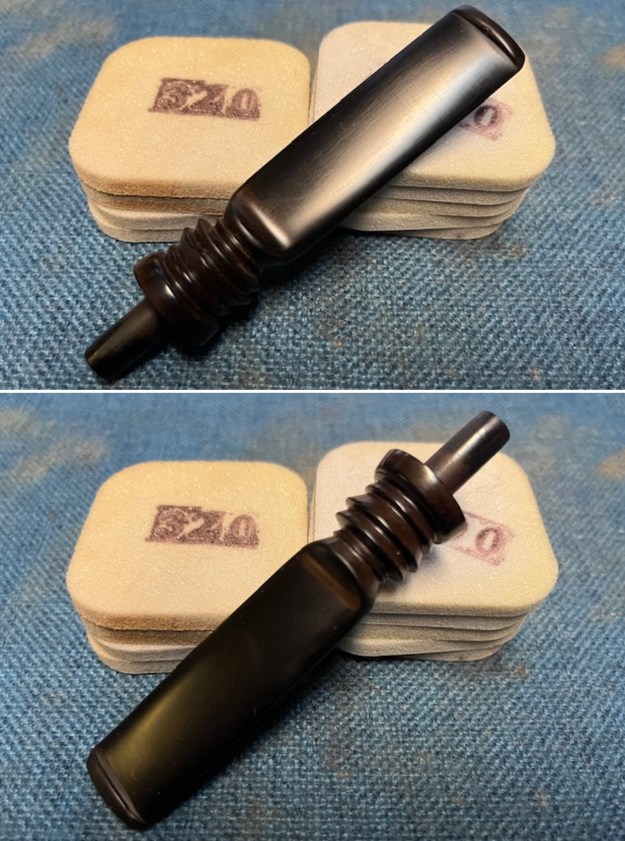
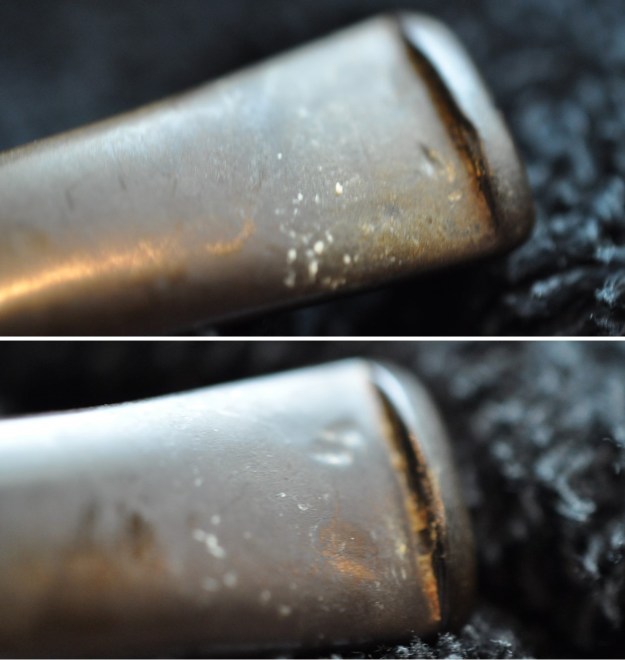
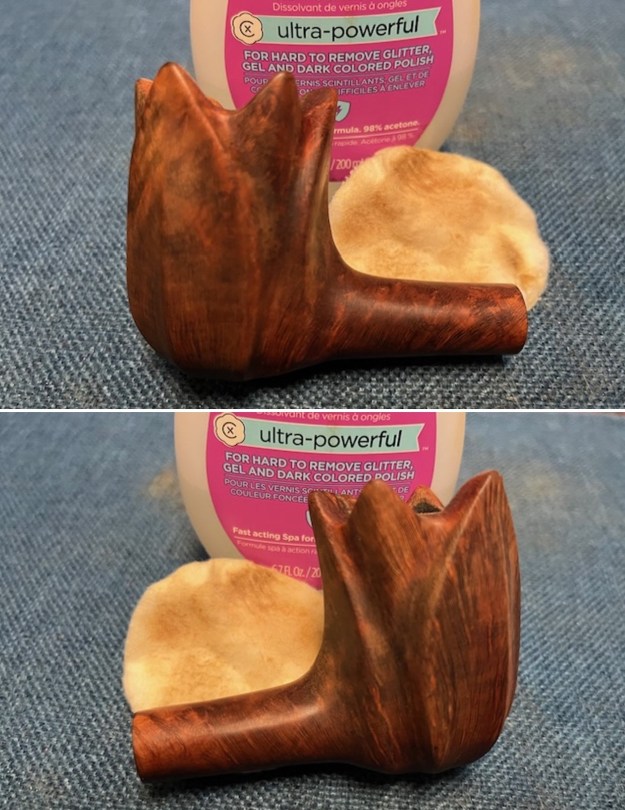
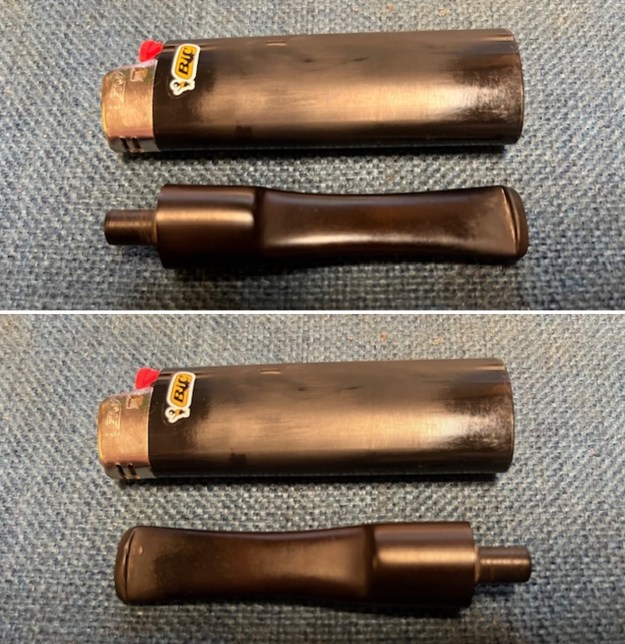
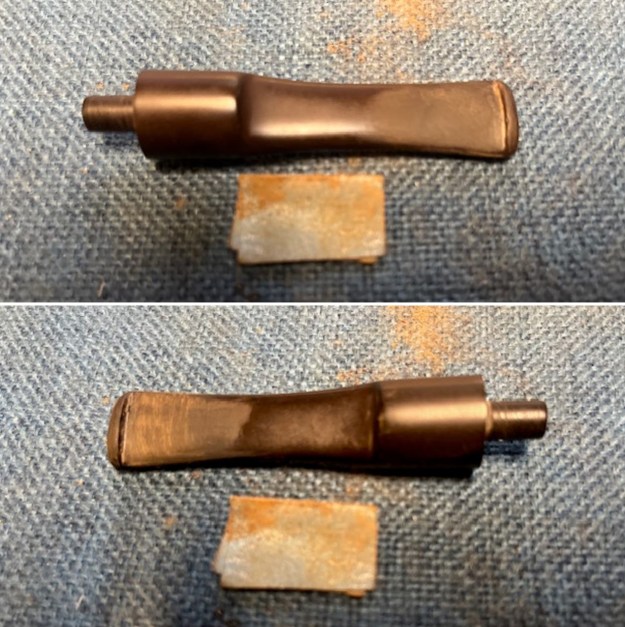
 I sanded the calcification, oxidation and tooth chatter with a folded piece of 220 grit sandpaper. Progress was happening!
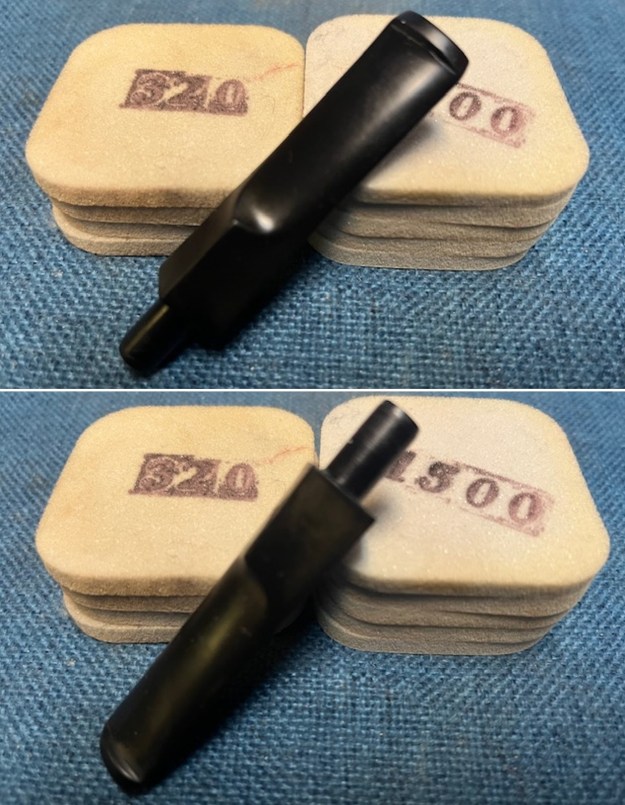
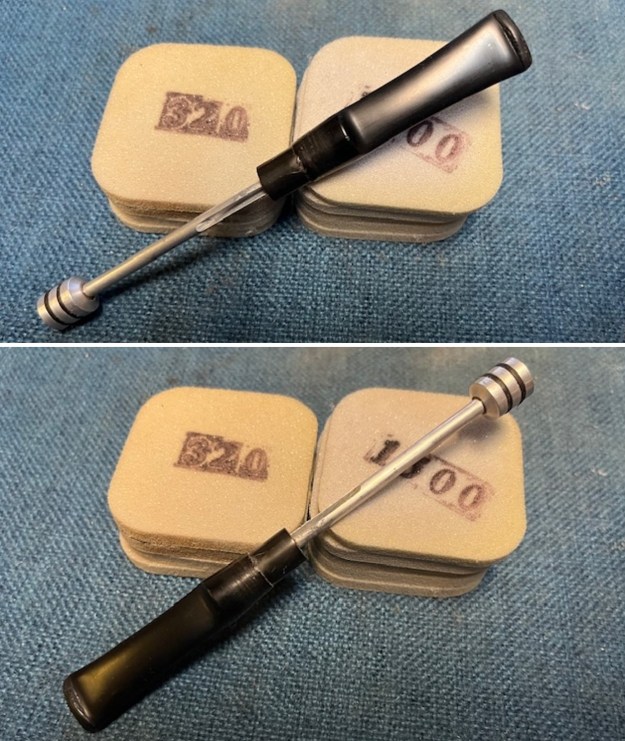
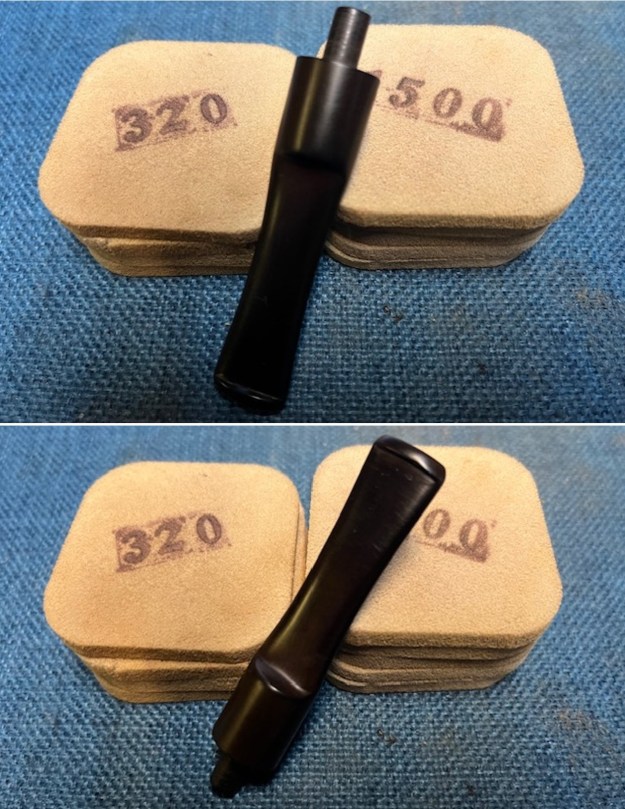
 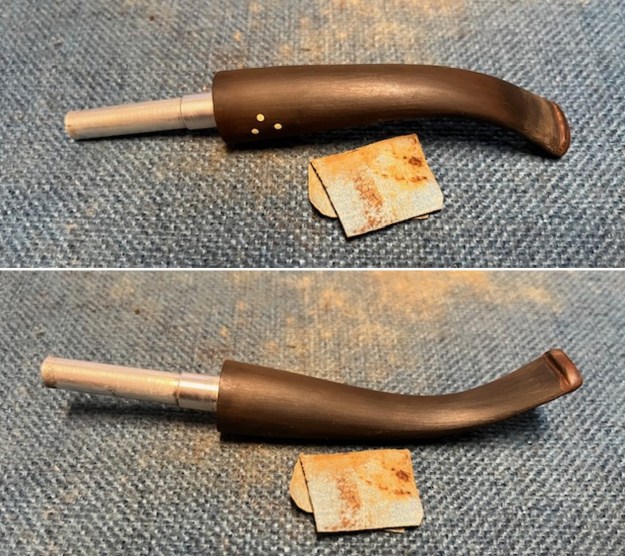 I sanded the surface of the vulcanite with the 2 inch sanding pads – 320-3500 grit pads to remove the remaining oxidation. I dry sanded the surface until I have removed all of the oxidation and the stem started to really shine.
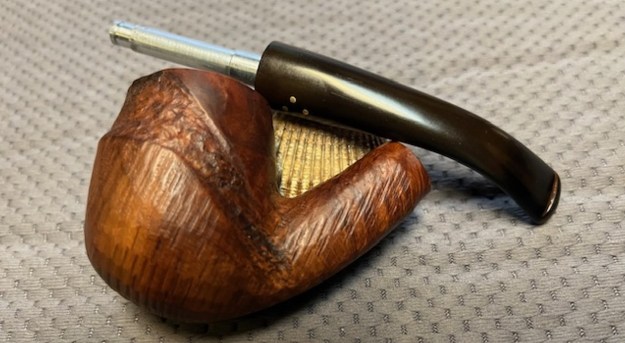
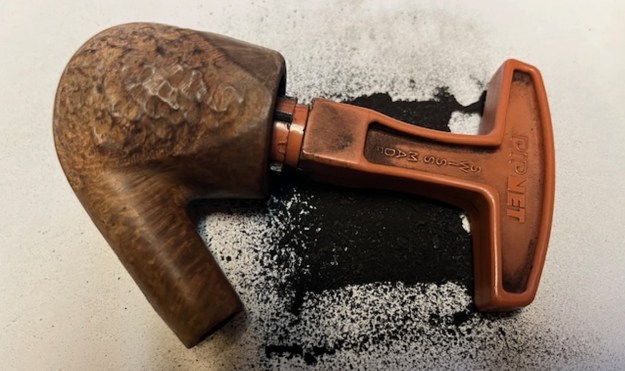
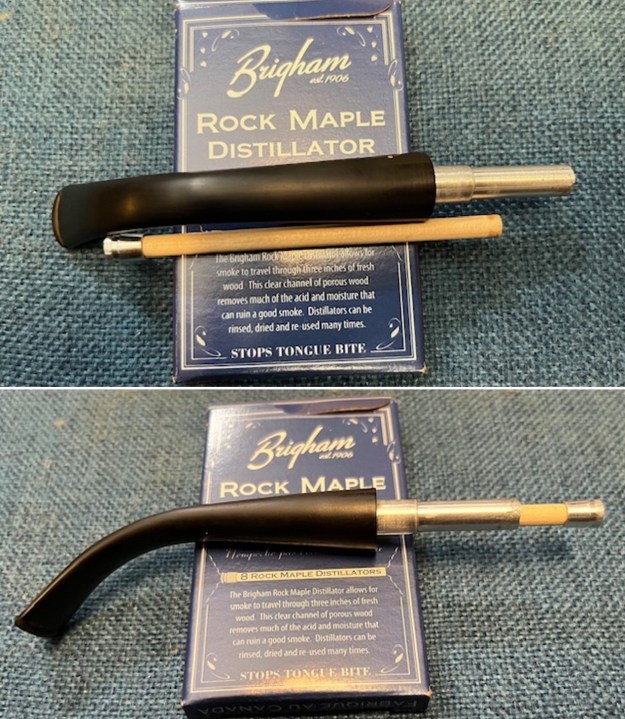
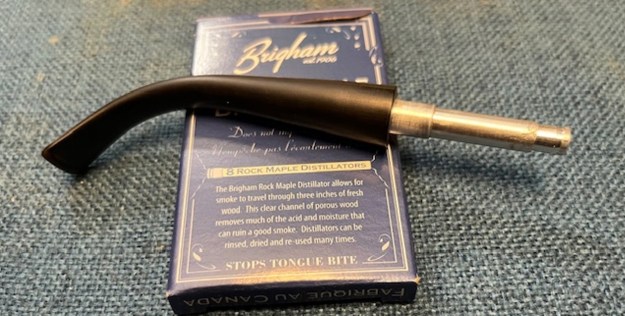
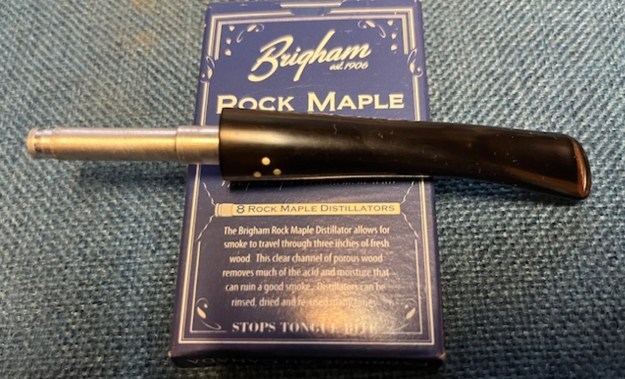
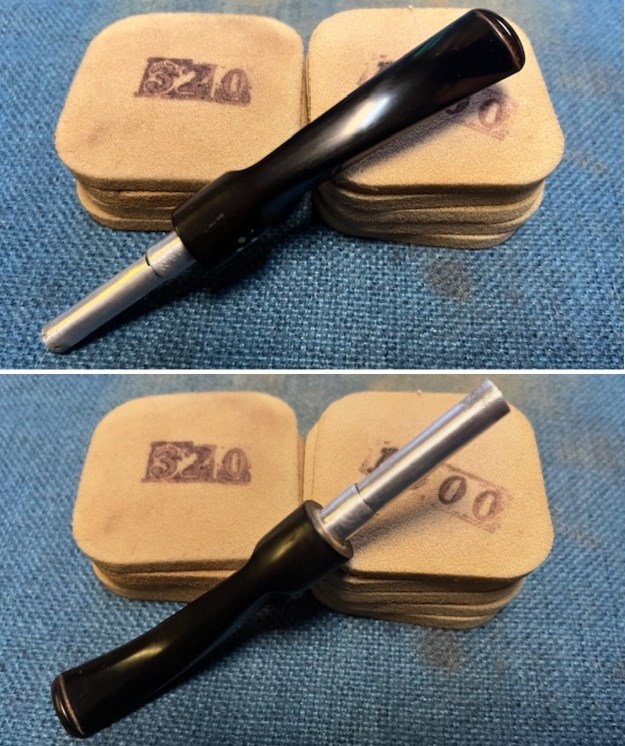
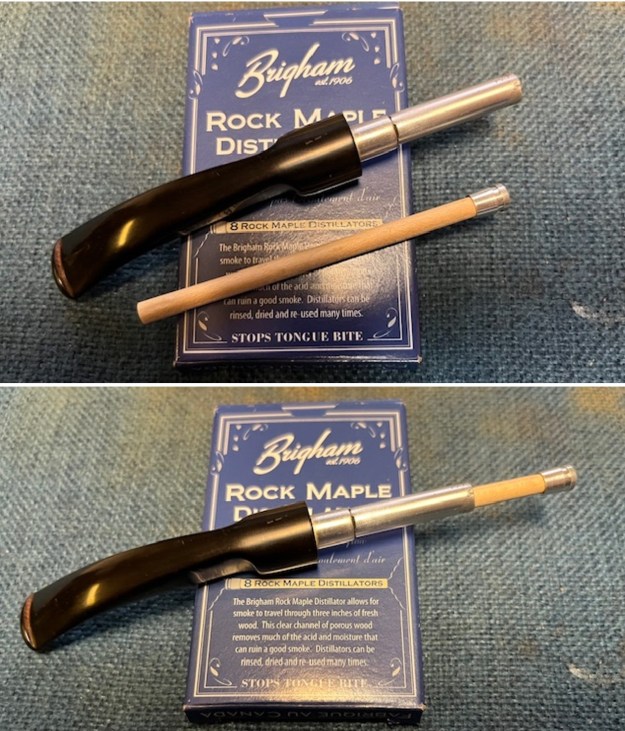
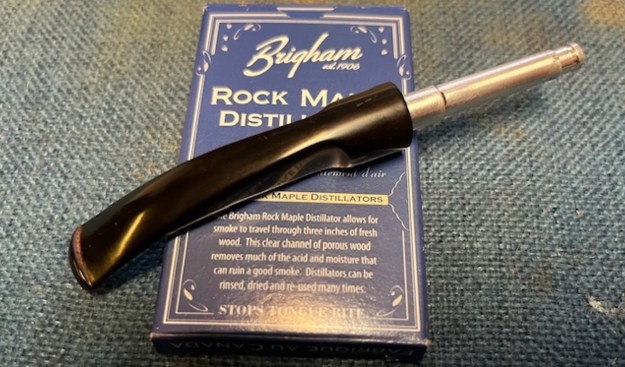
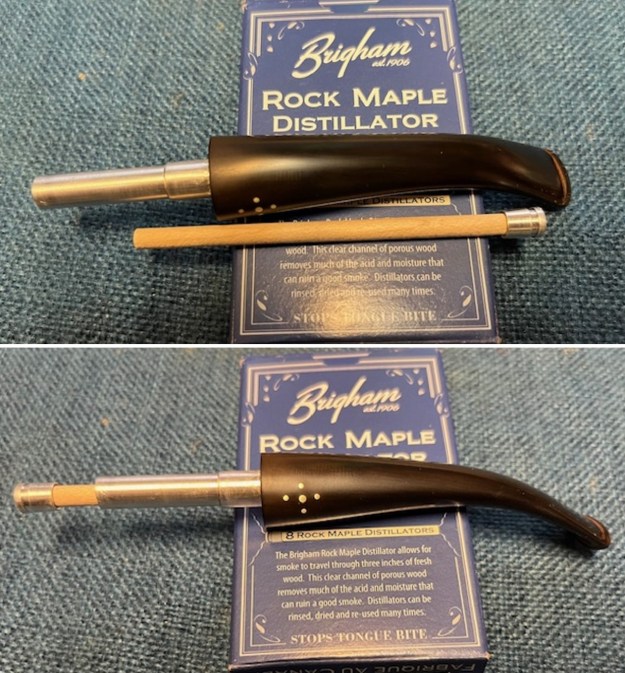
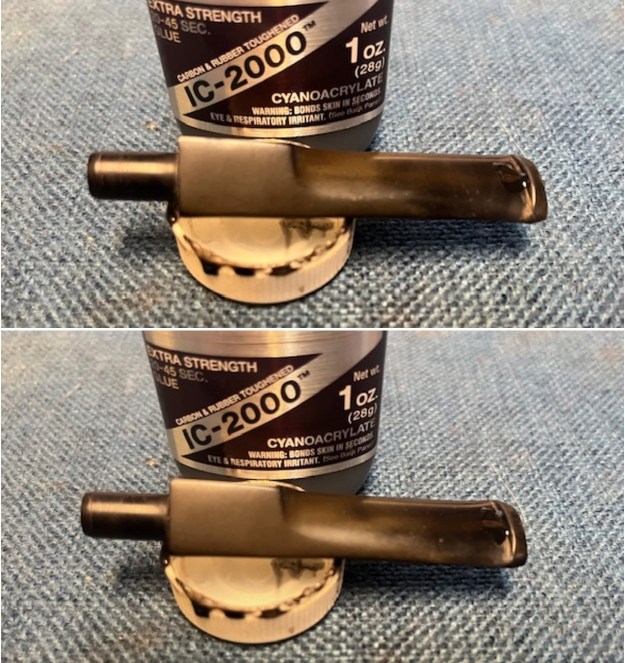
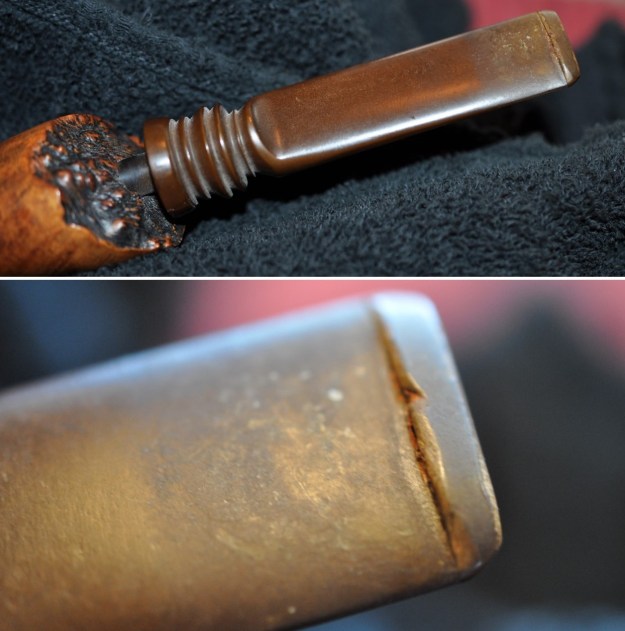
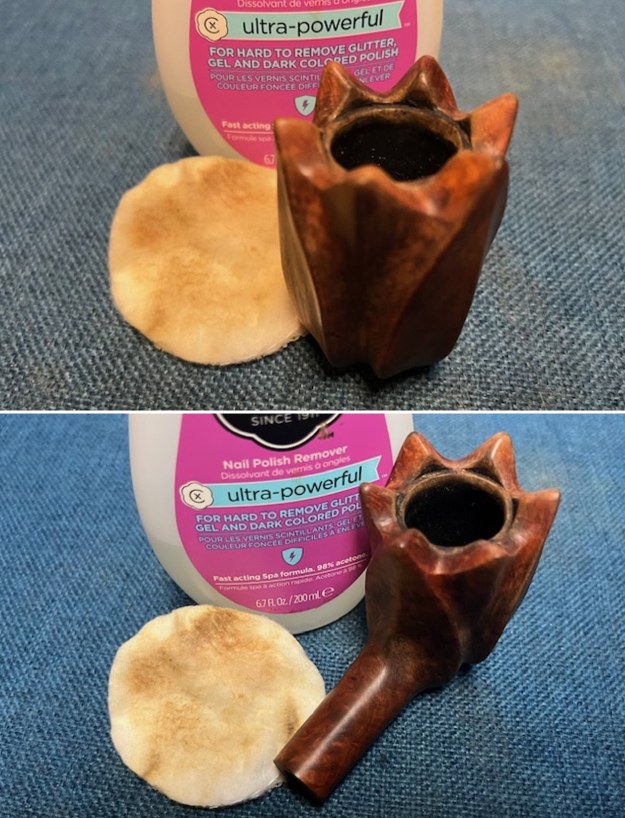
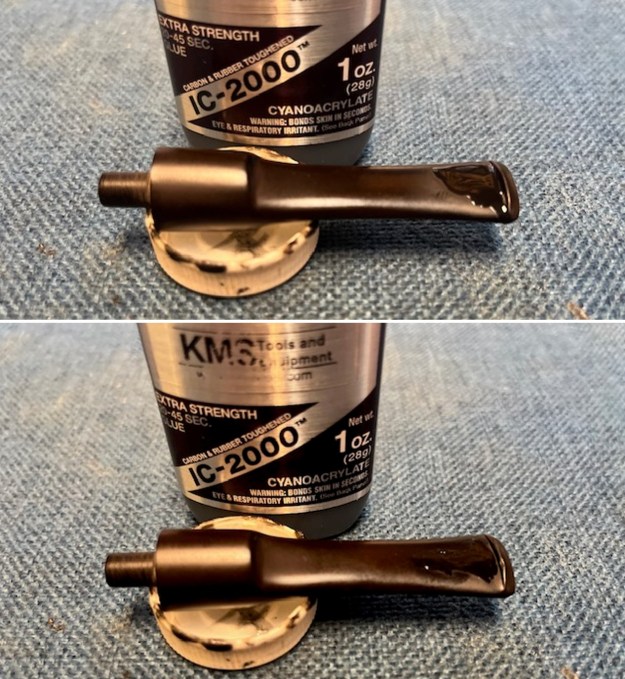
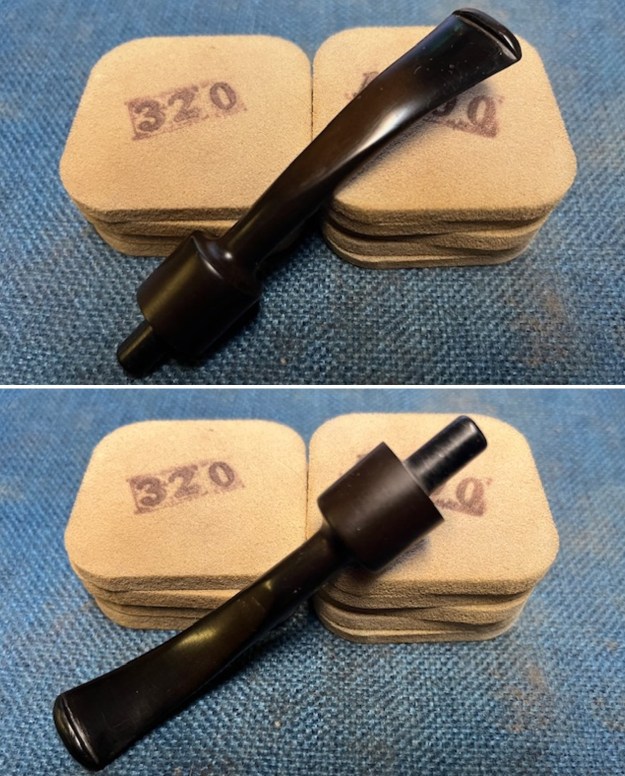
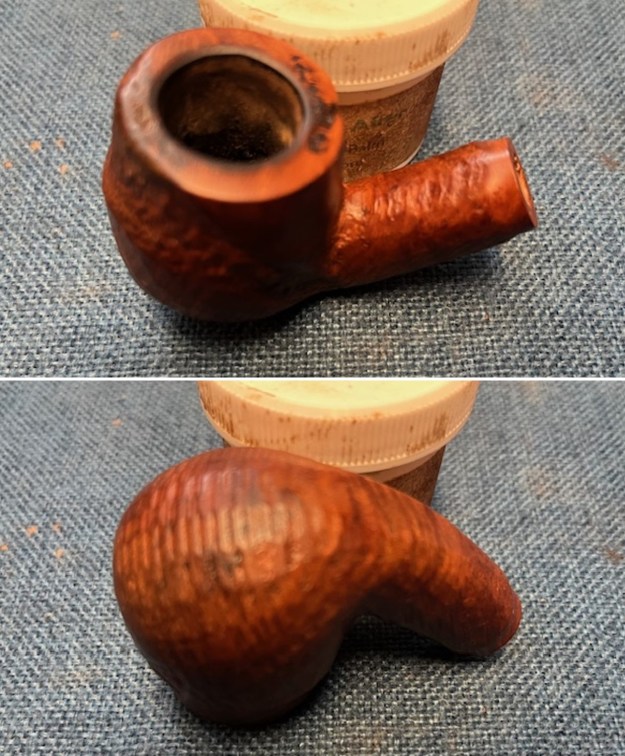
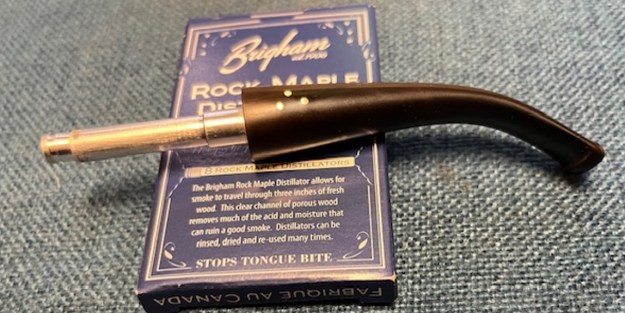
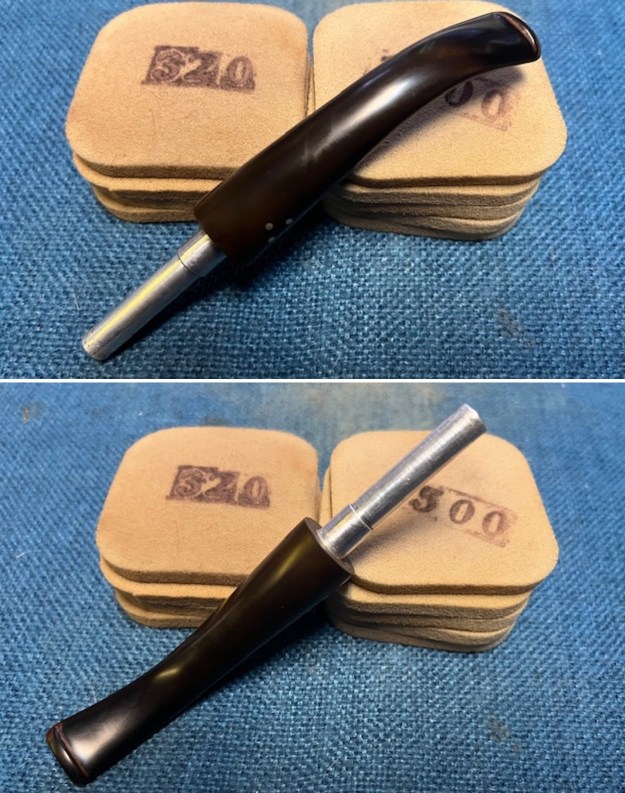 I refit the aluminum tenon with the new Brigham Rock Maple Distillator. It is a unique and cool smoking experience.
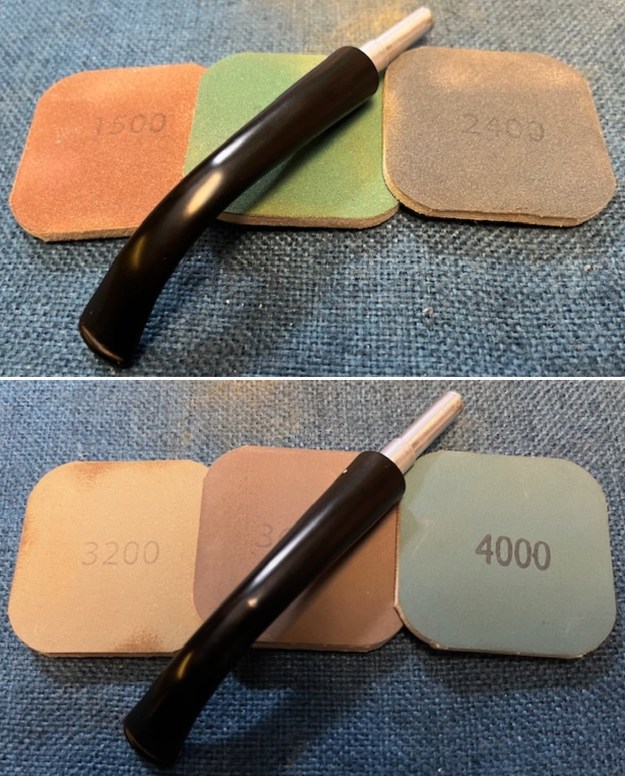
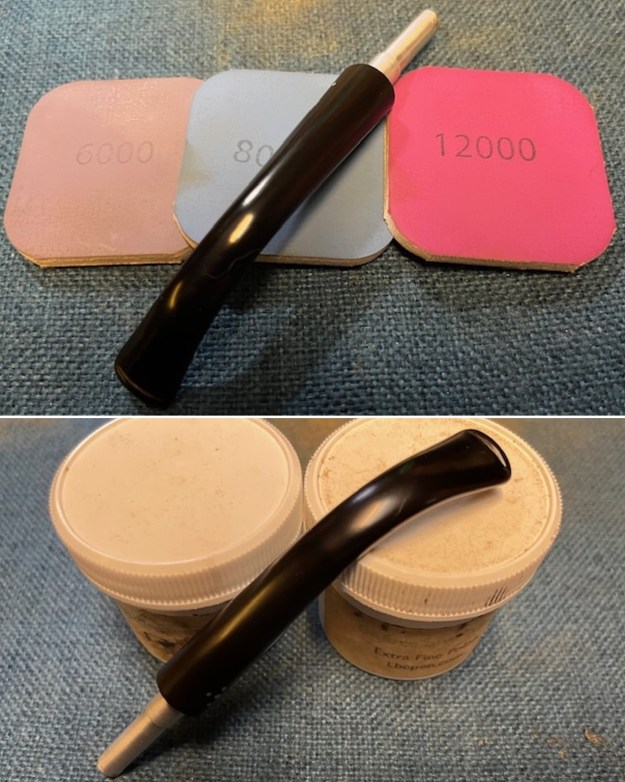
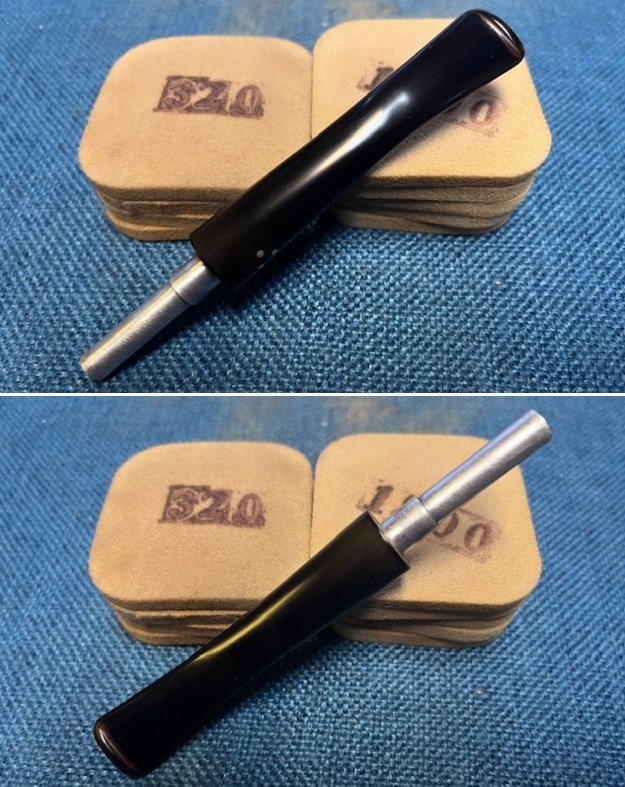
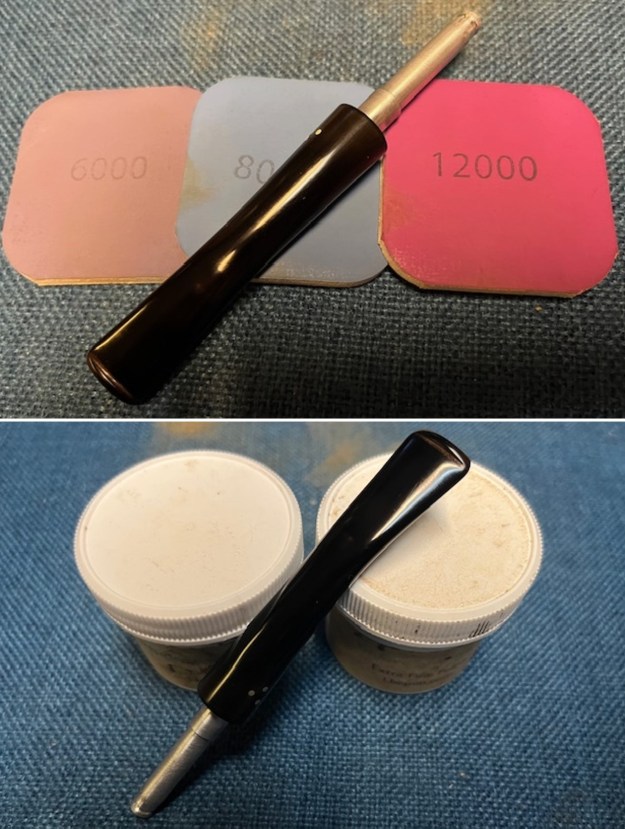
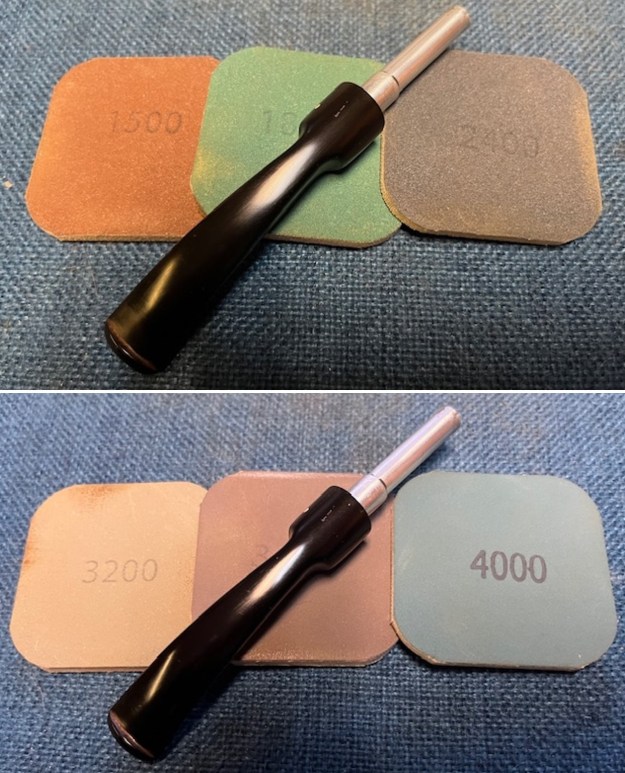
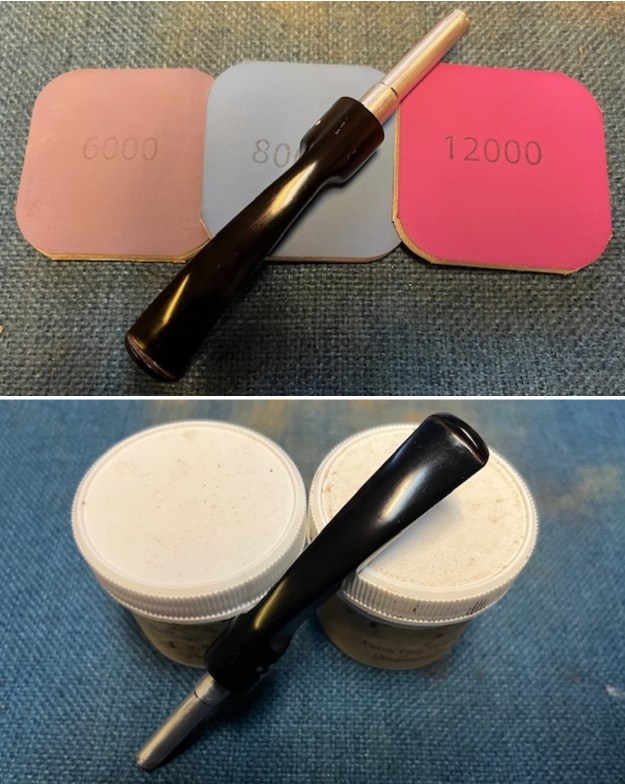
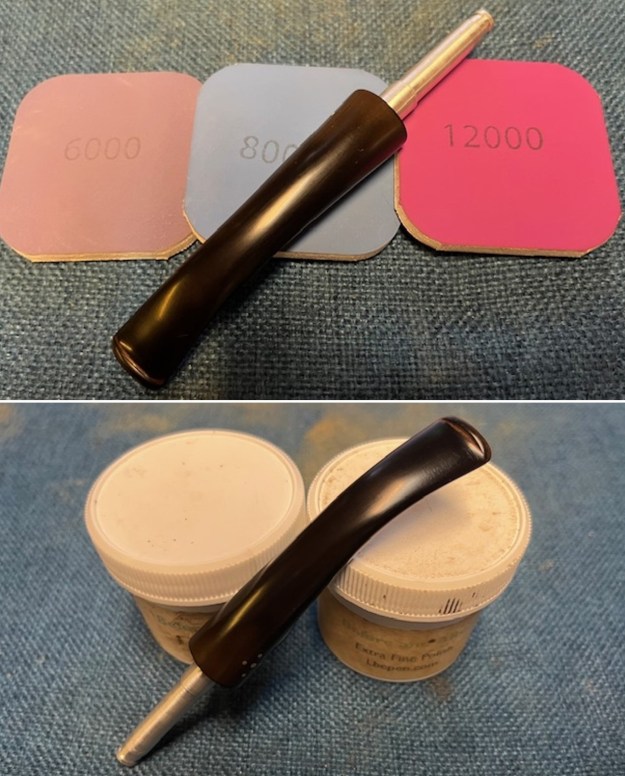
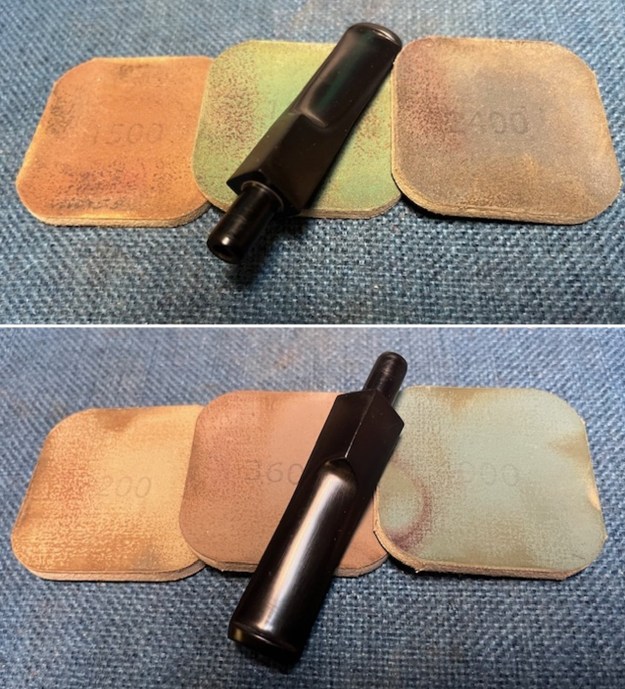
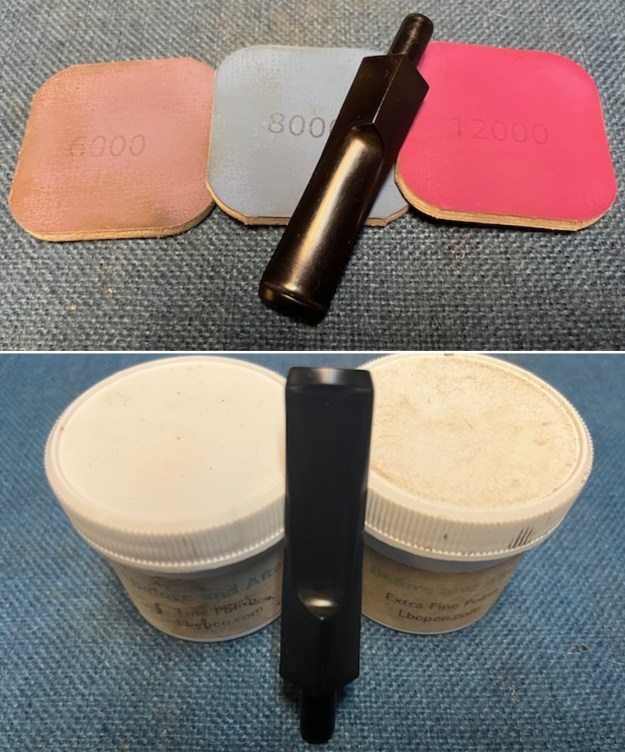
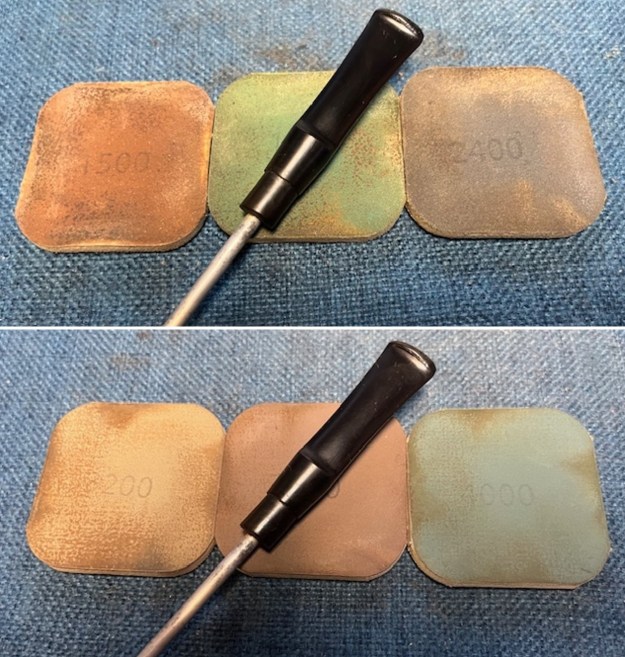
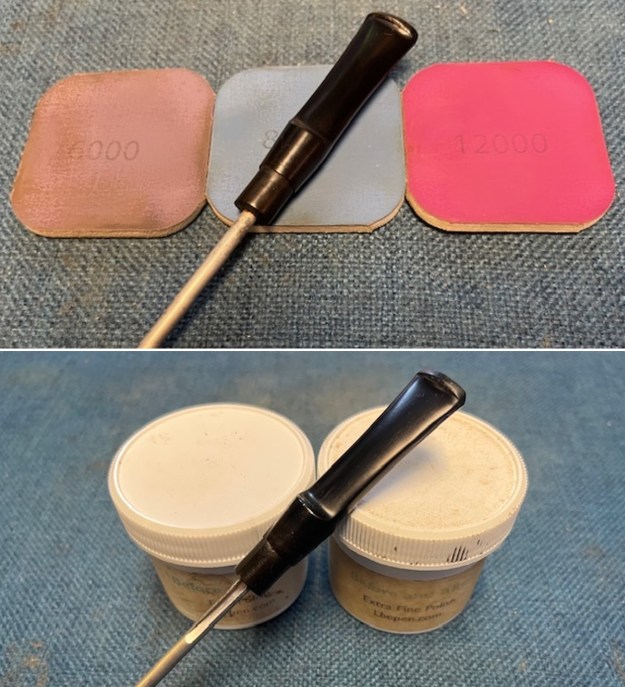
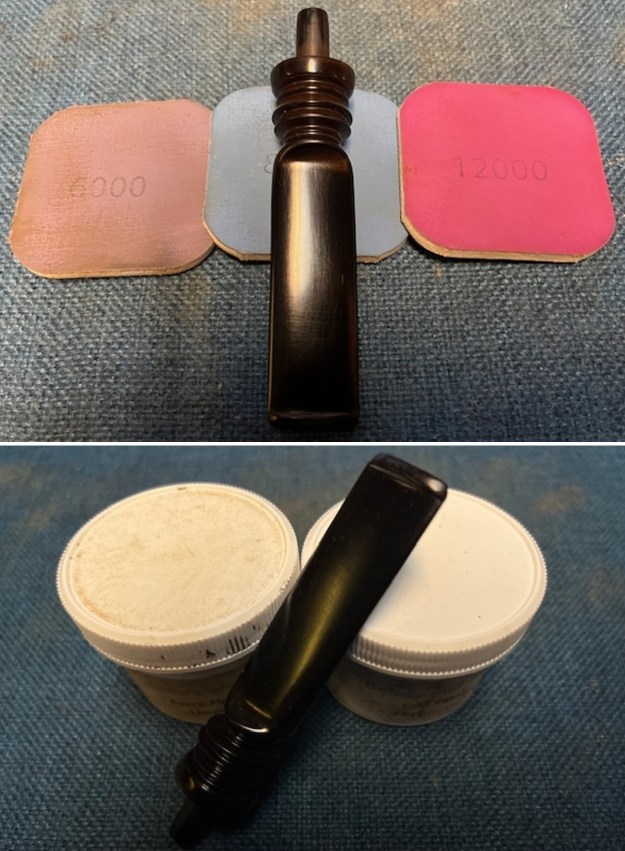
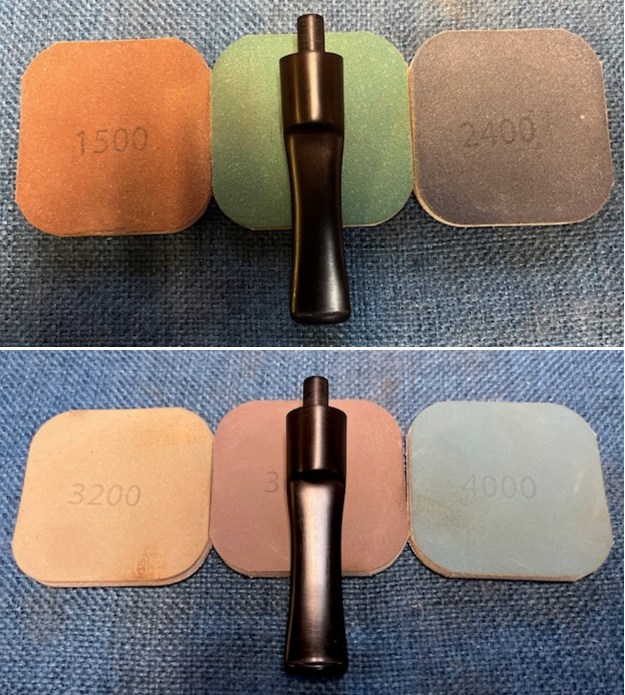
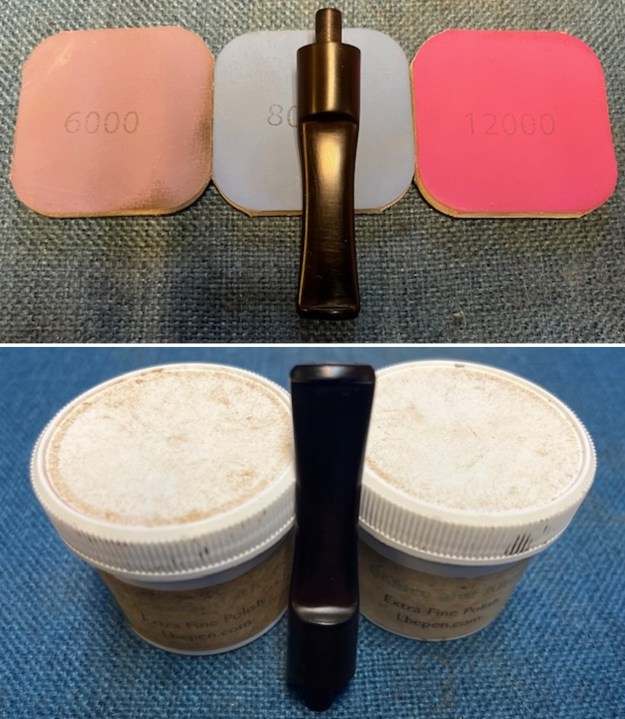
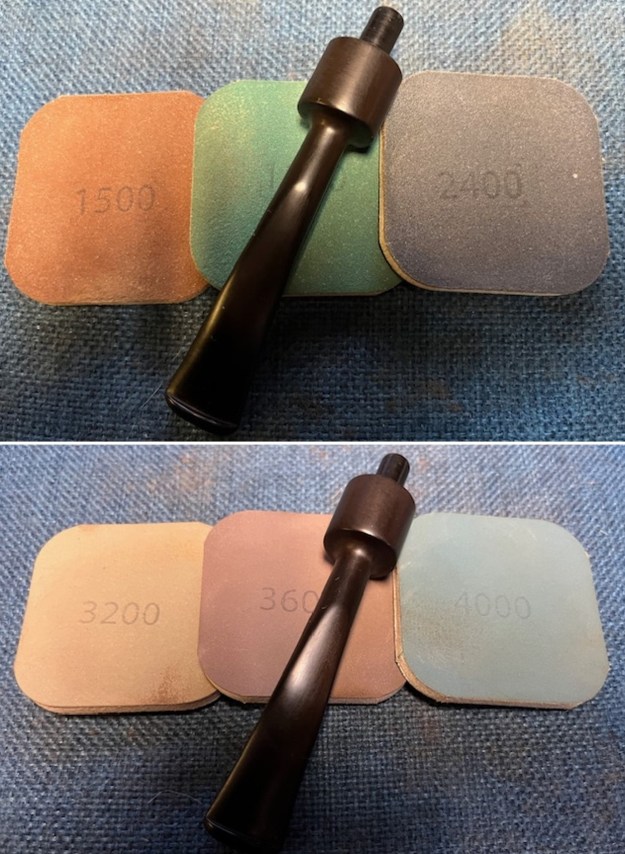
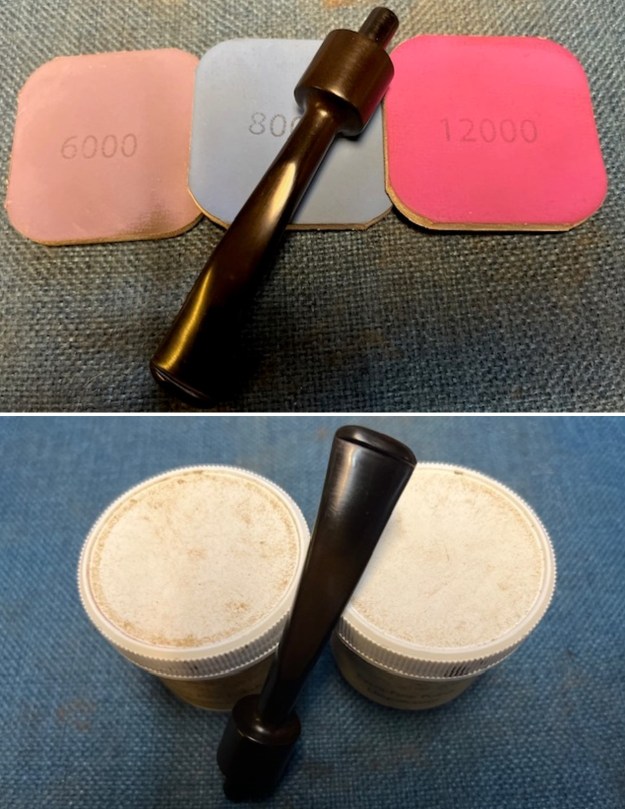
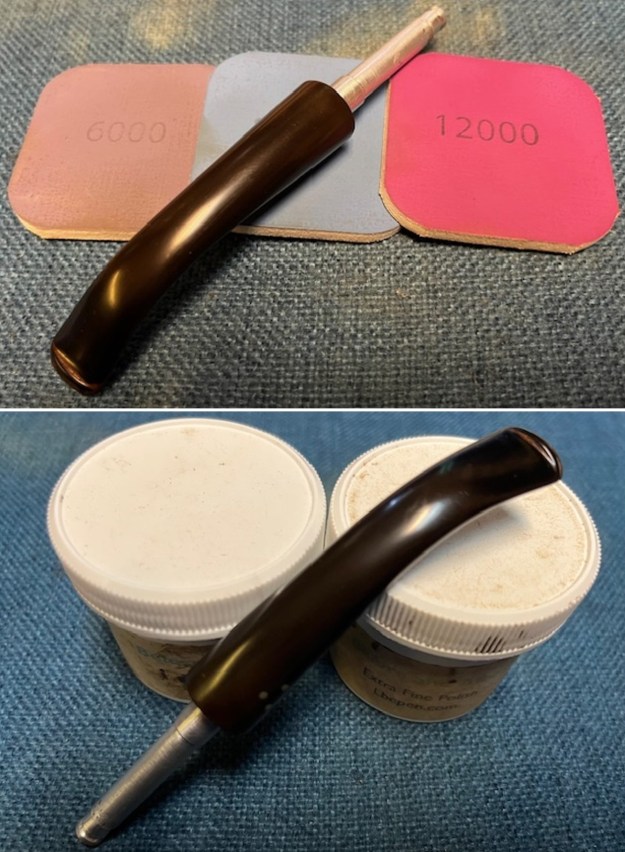
 I polished the stem with micromesh sanding pads – dry sanding with 1500-12000 grit pads. I wiped the stem down after each sanding pad with Obsidian Oil. I polished the stem with Before & After Pipe Stem Polish – both Fine and Extra Fine. I gave it a coat of Obsidian Pipe Stem Oil. It works to protect the stem from oxidizing. I set it aside to dry.
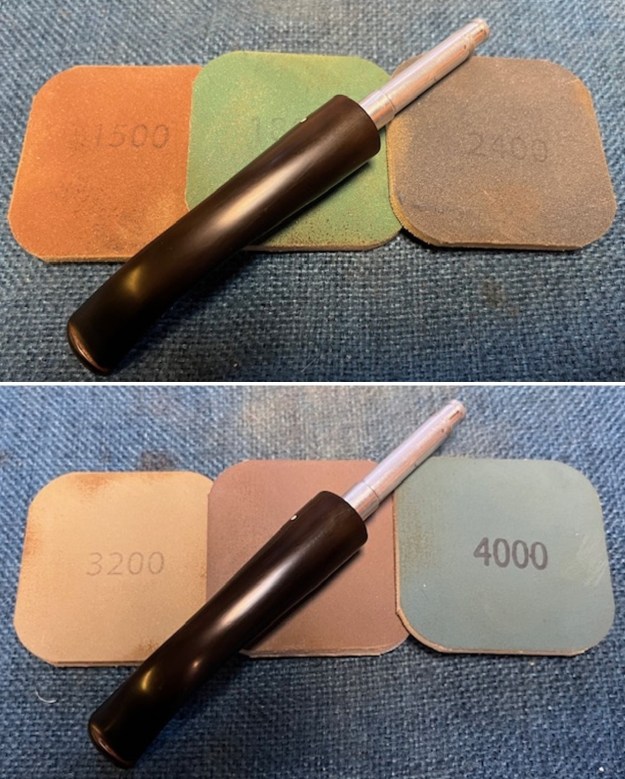
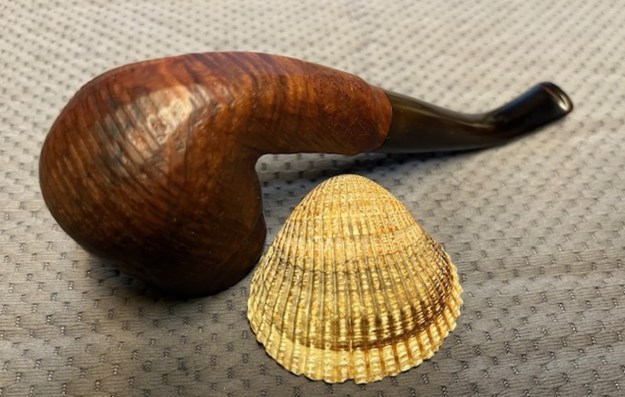
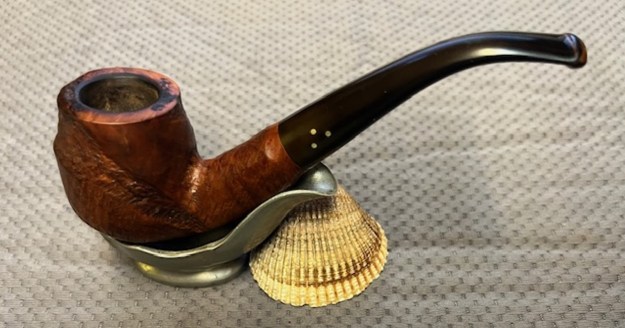
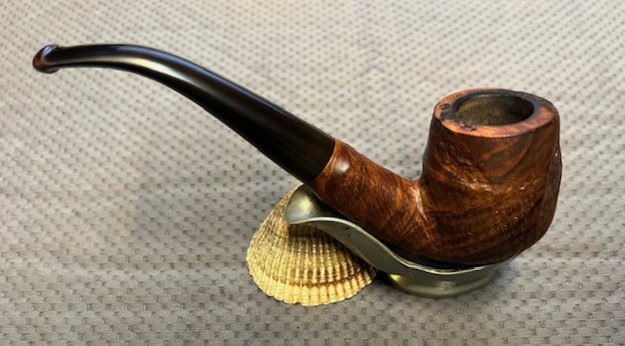
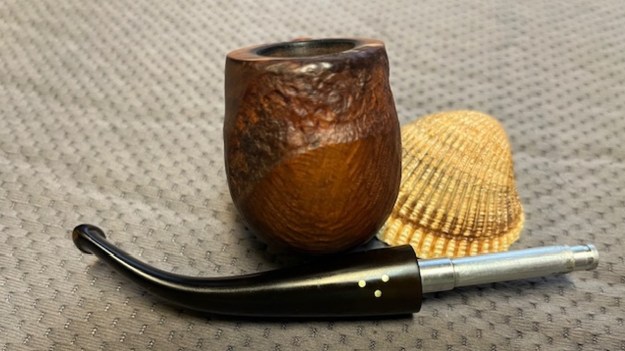
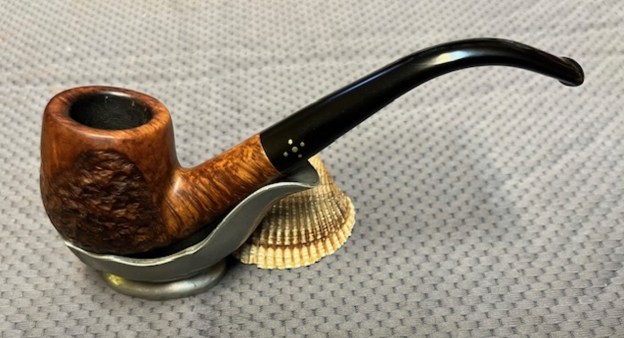
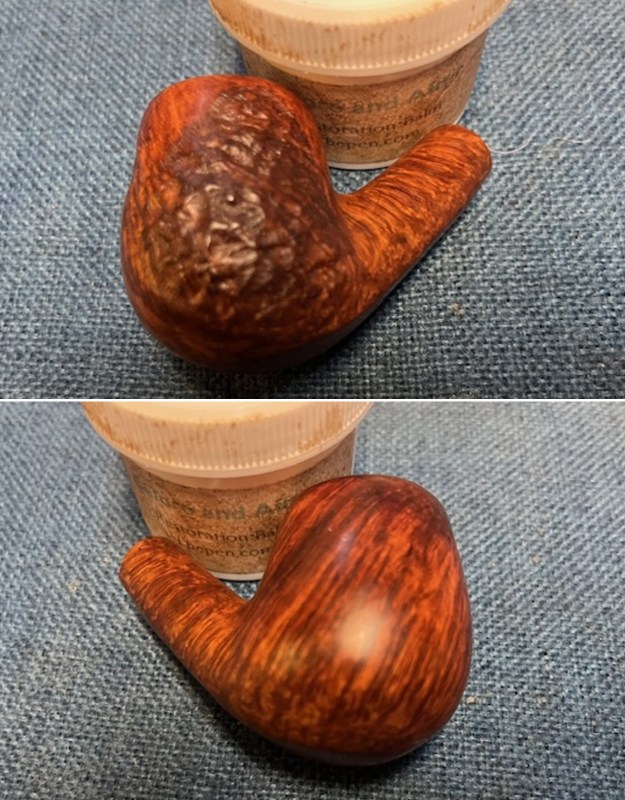
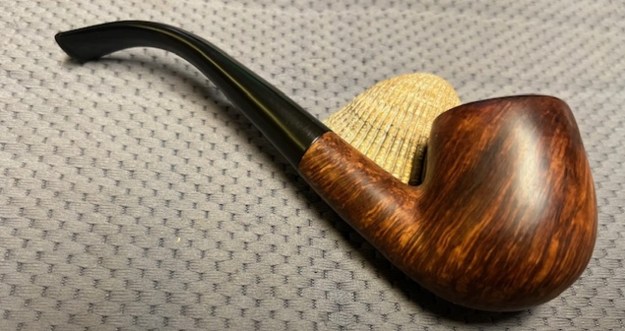
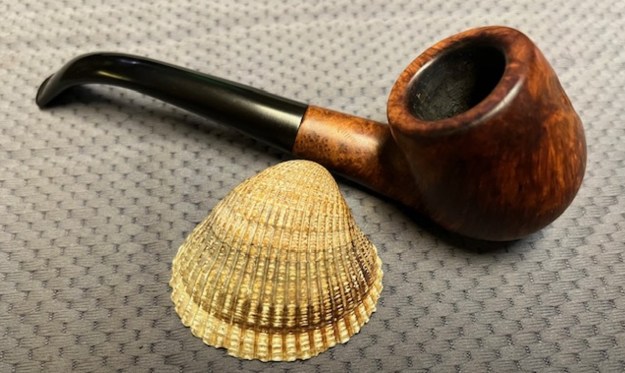
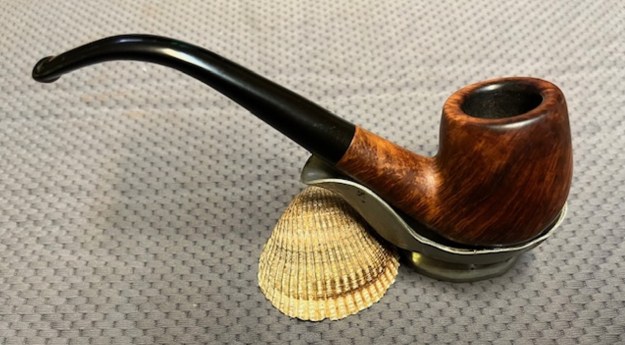
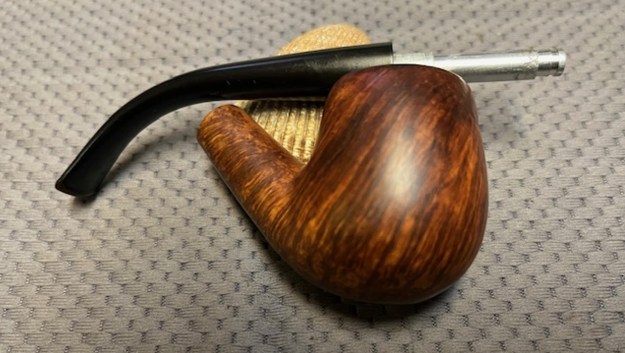
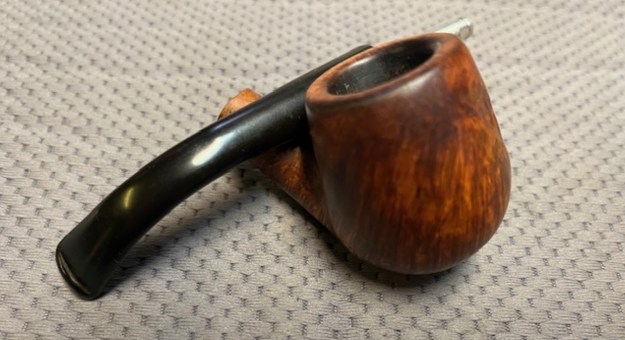
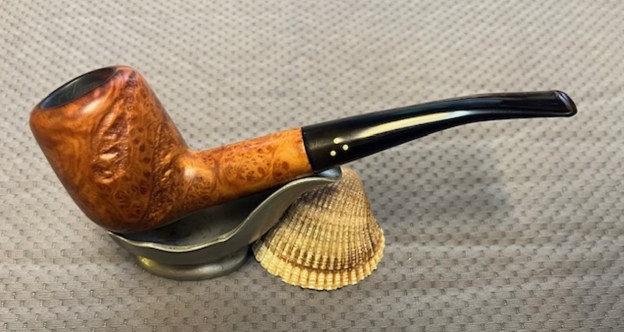
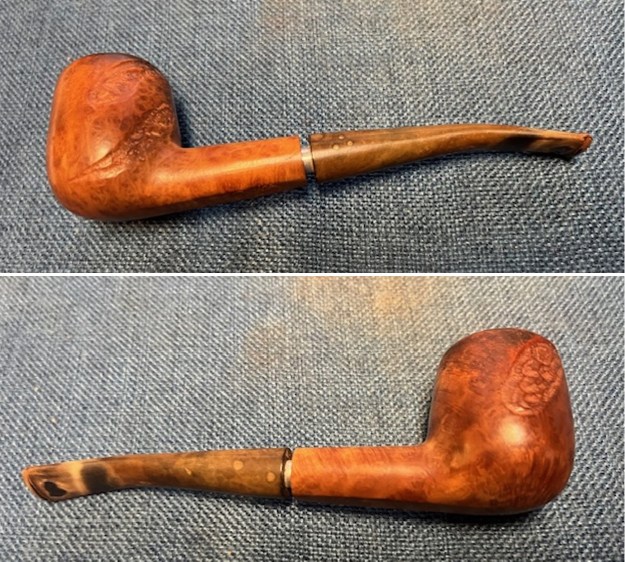
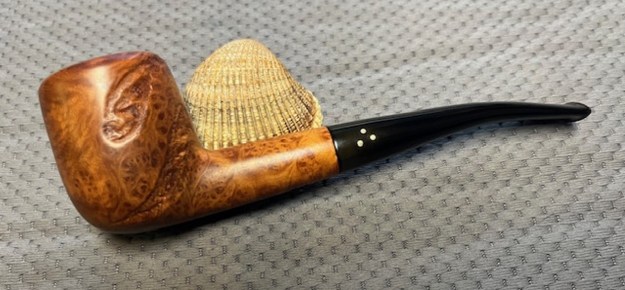
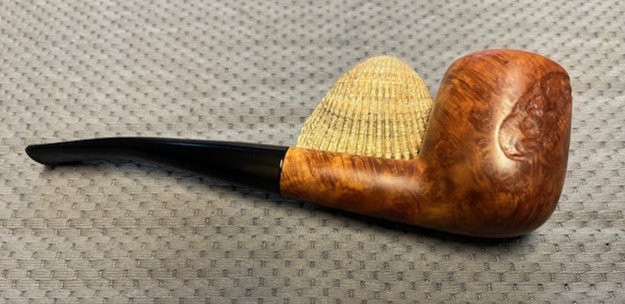
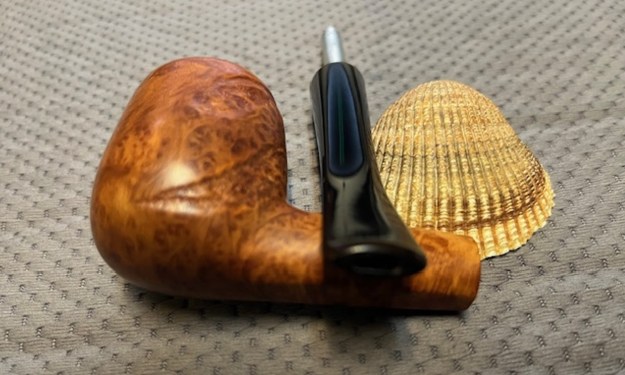
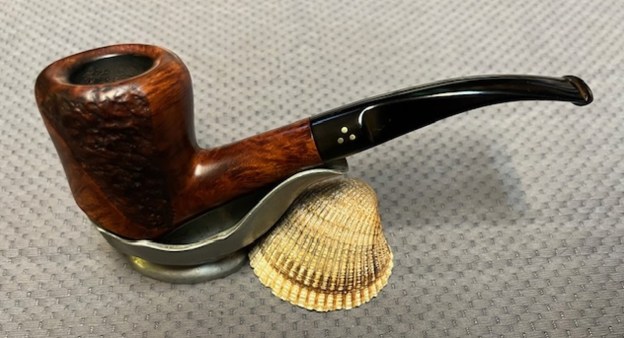
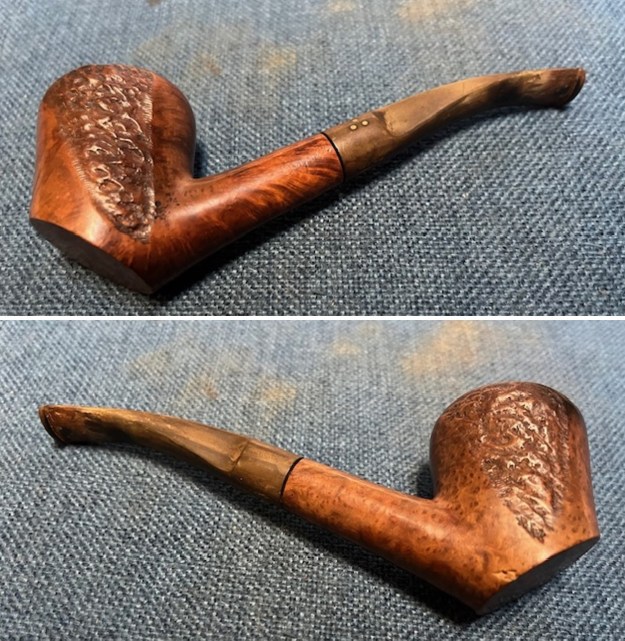
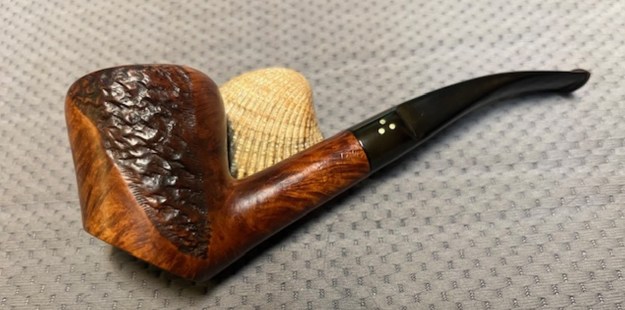
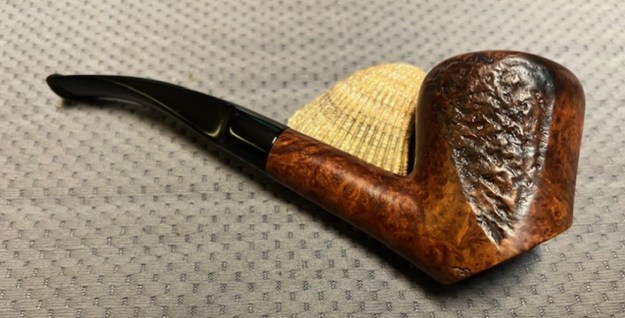
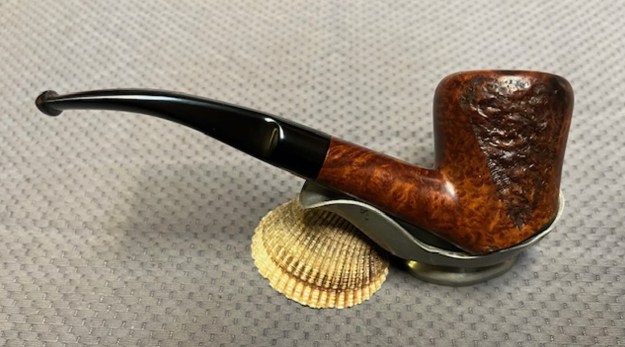
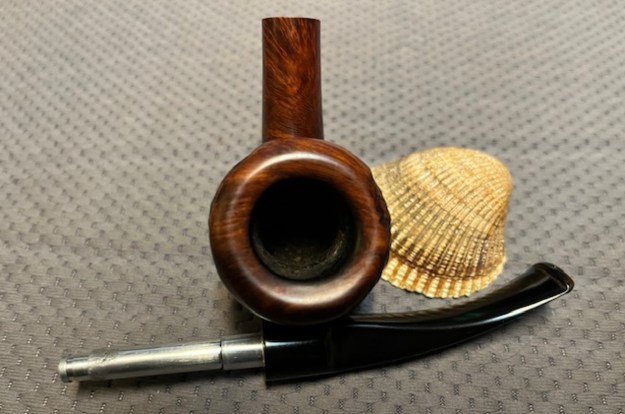
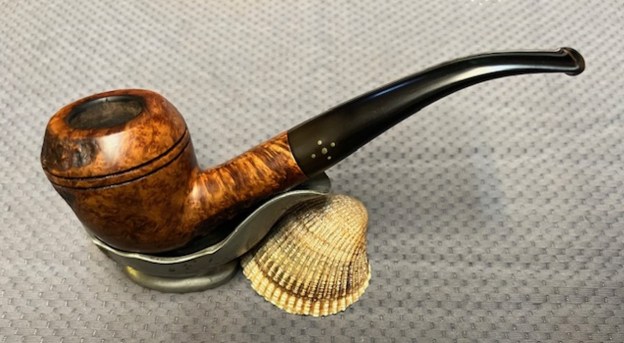
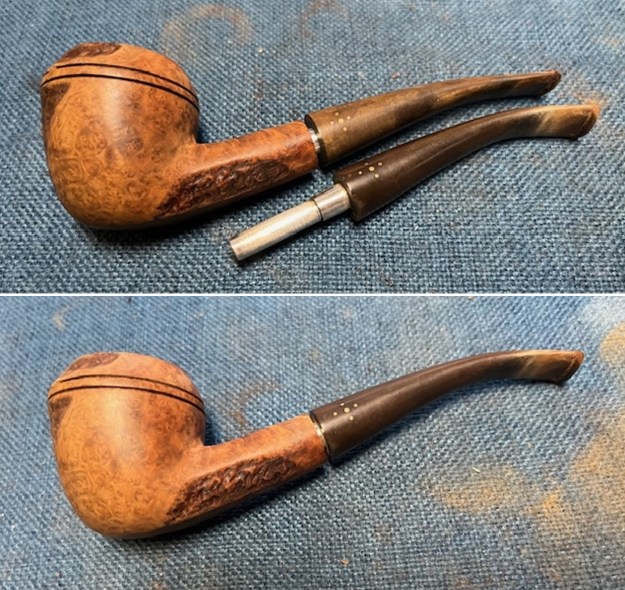
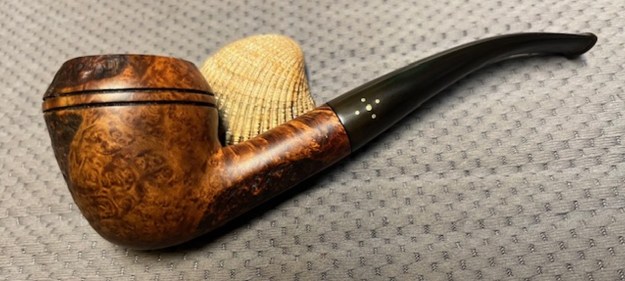
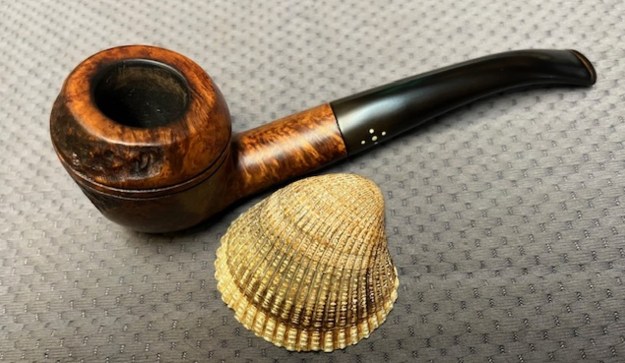
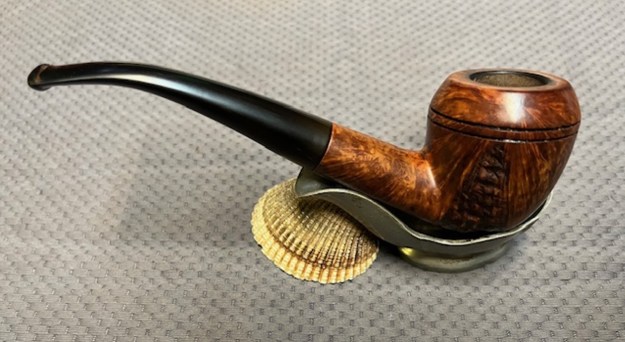
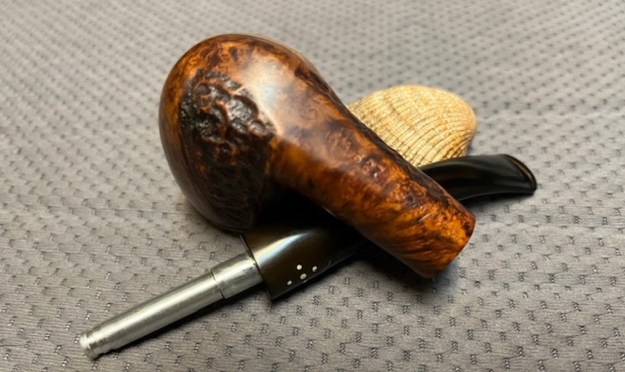
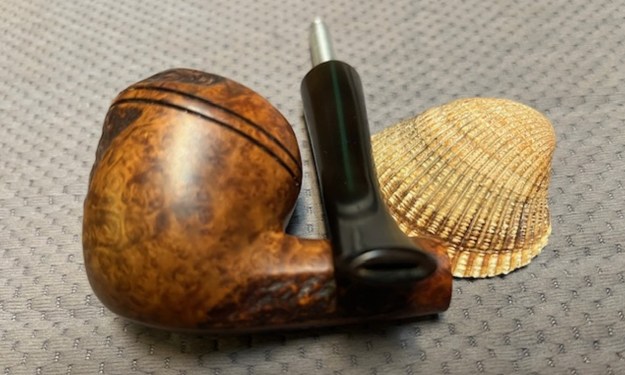
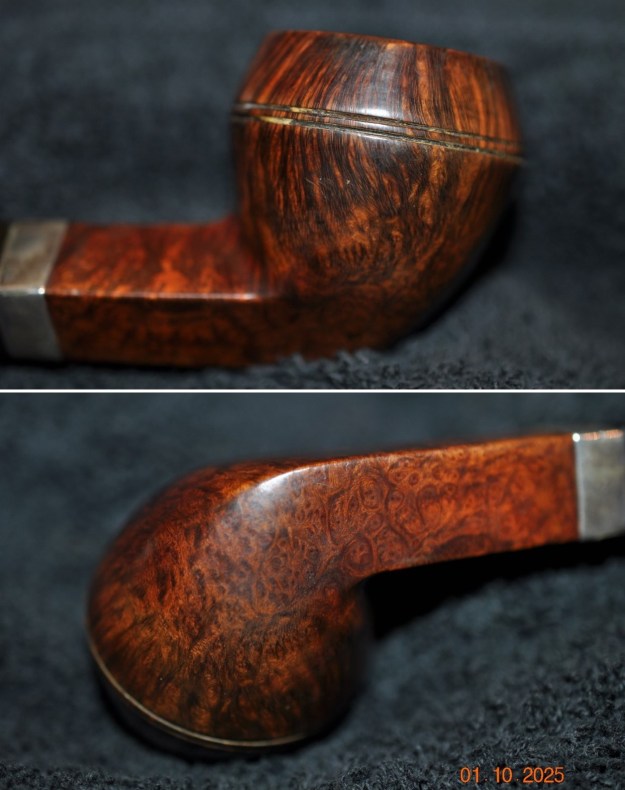
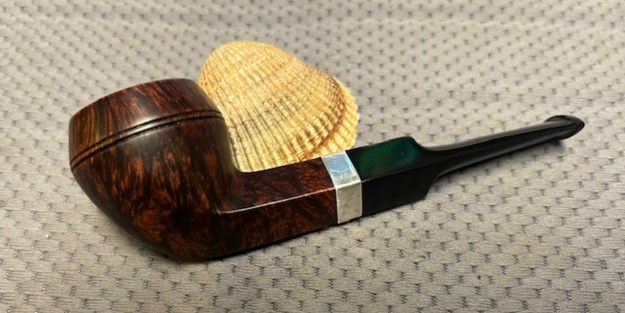
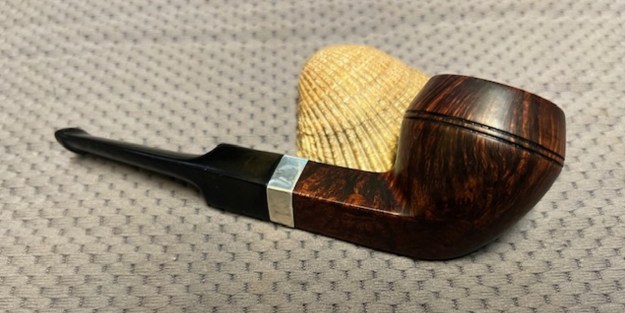
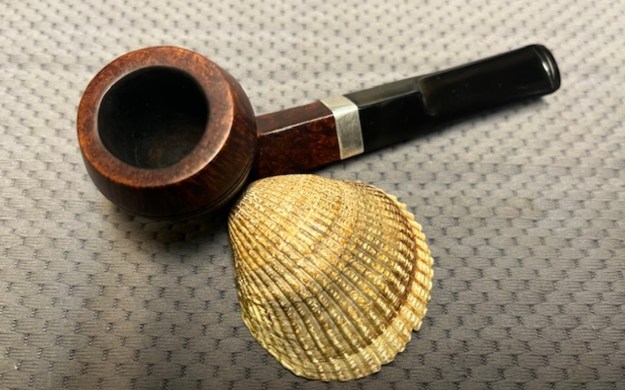
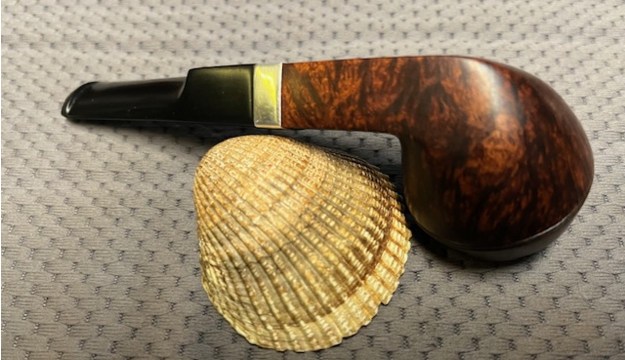
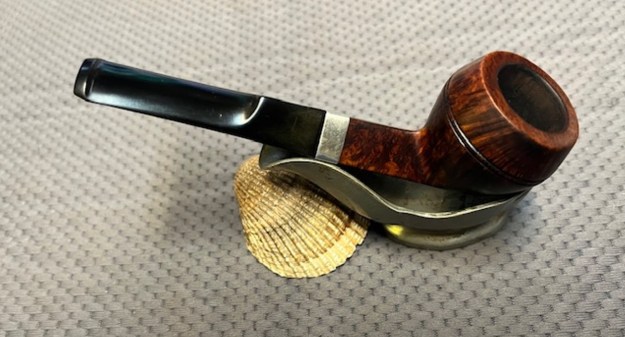
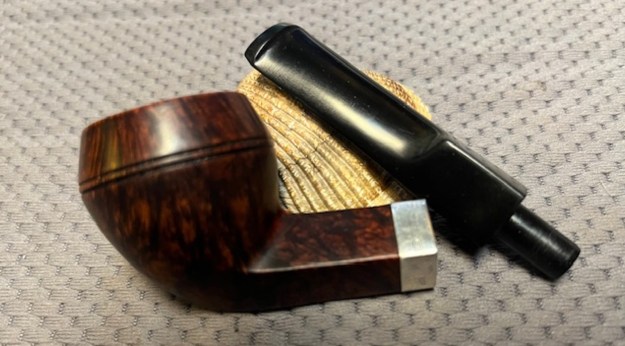
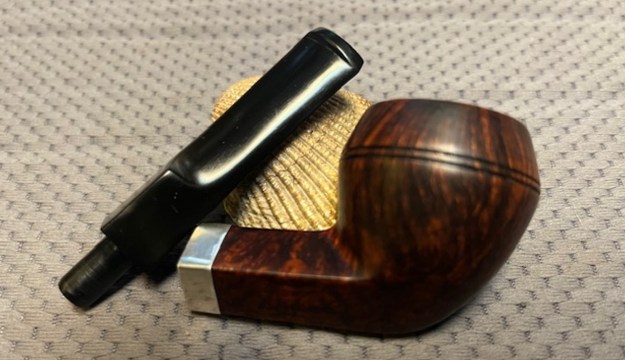
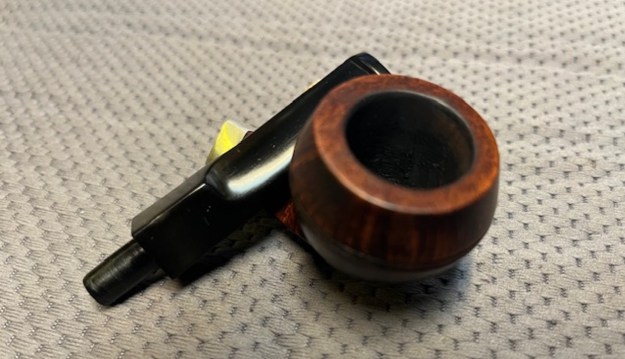
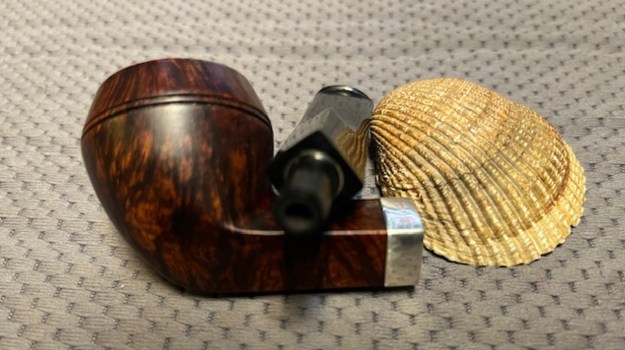
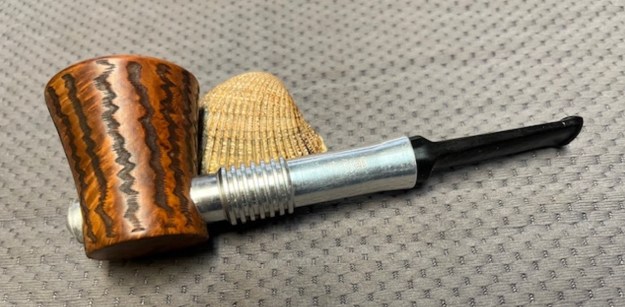
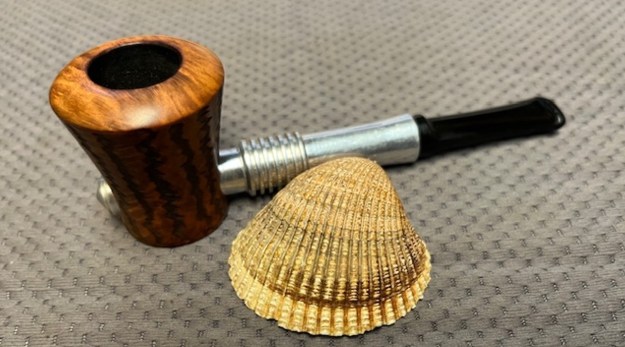
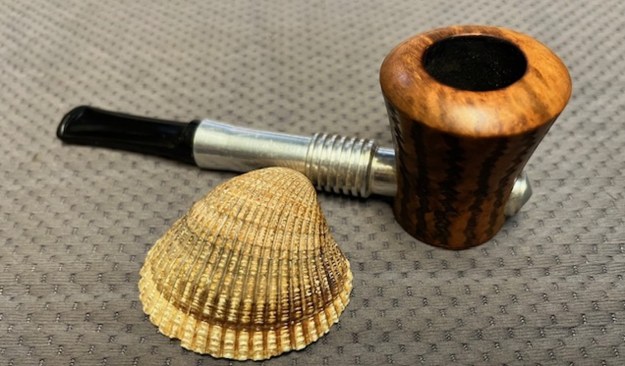
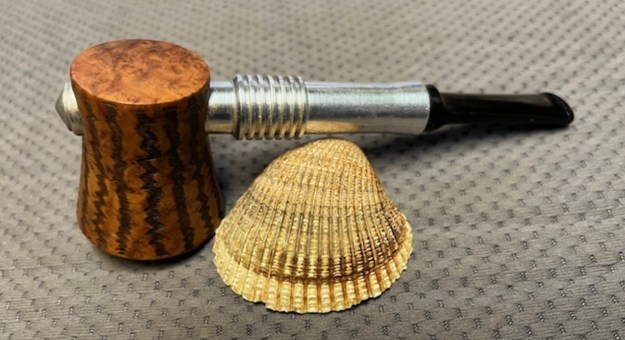
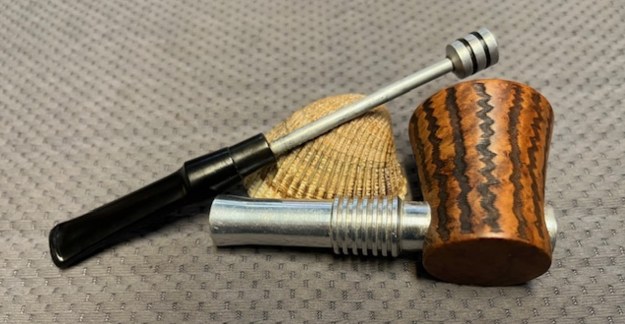
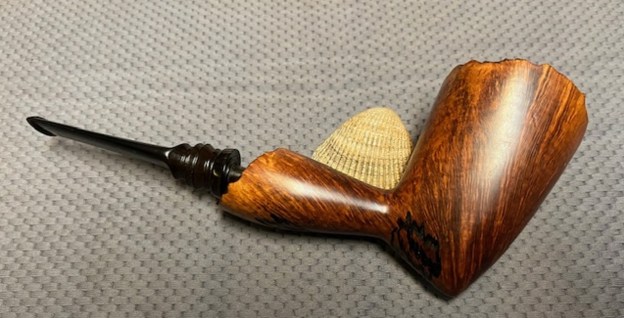
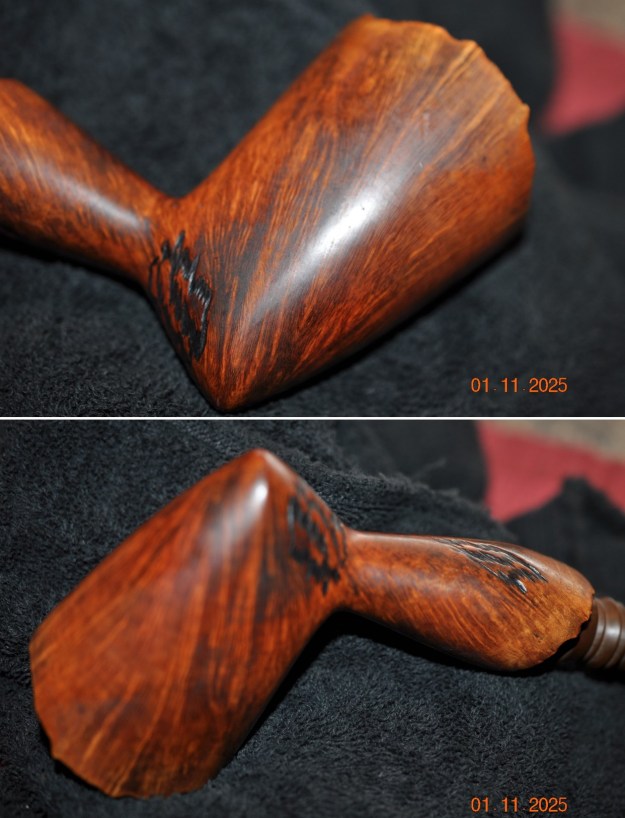
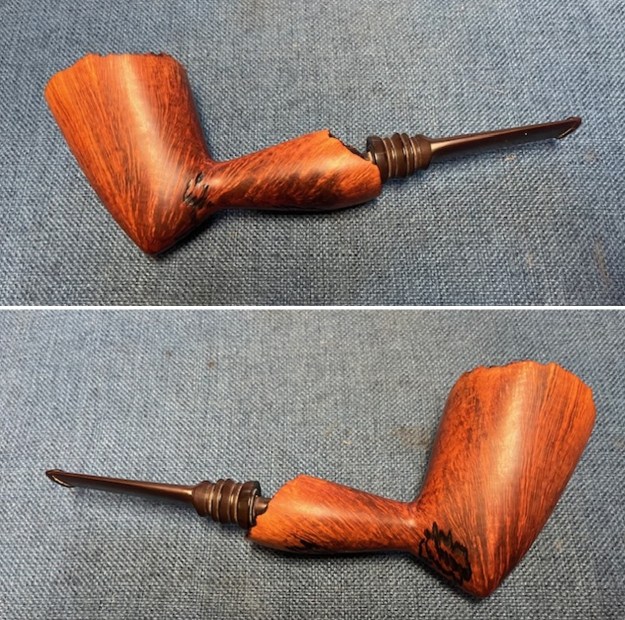
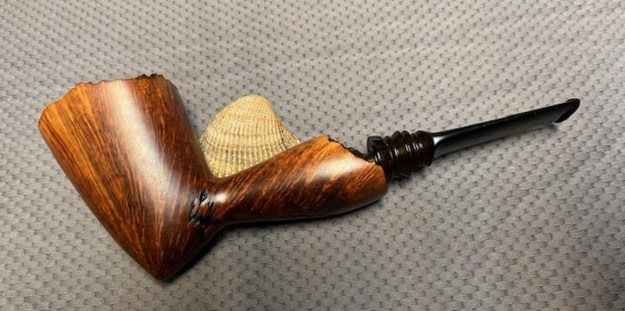
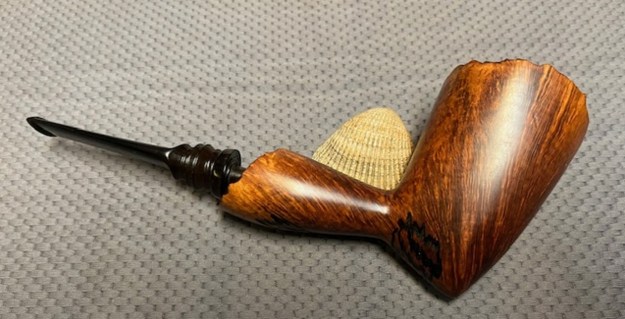
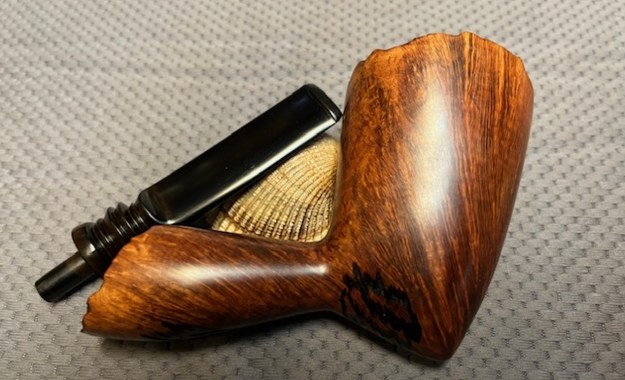
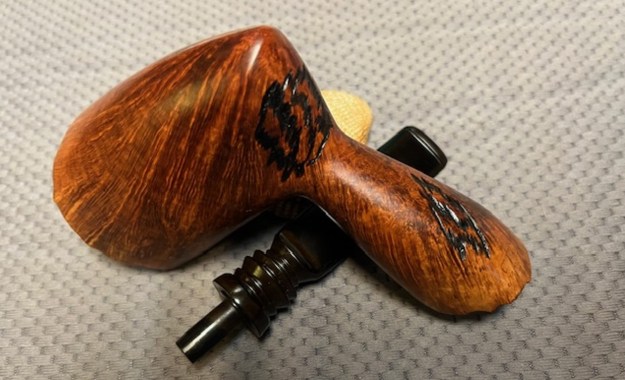
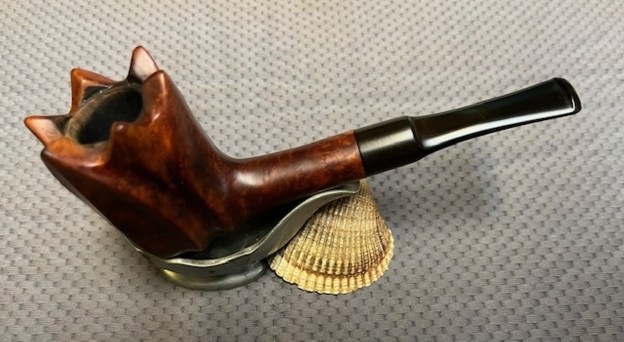
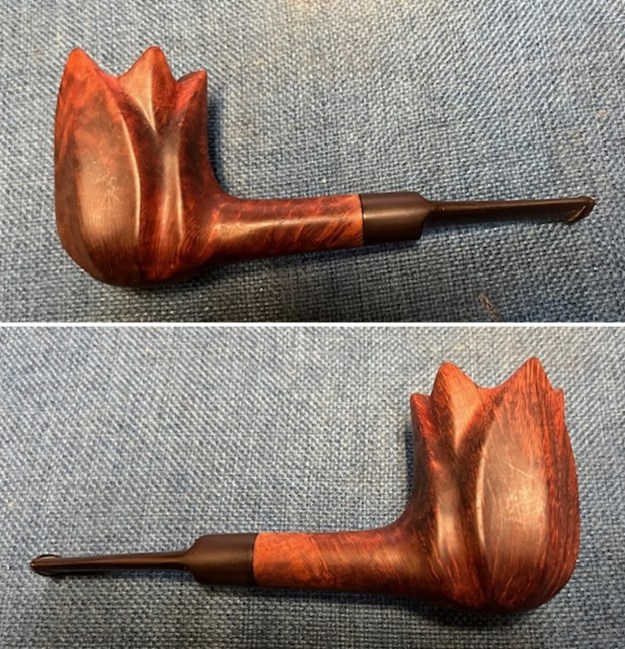
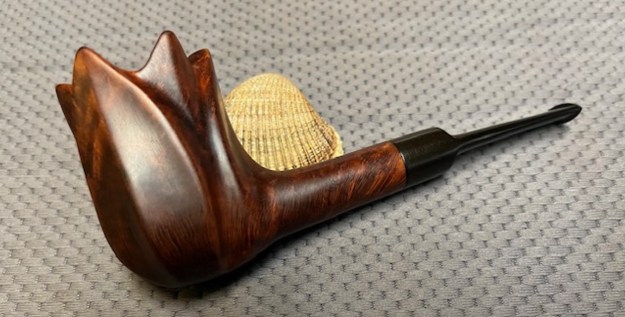
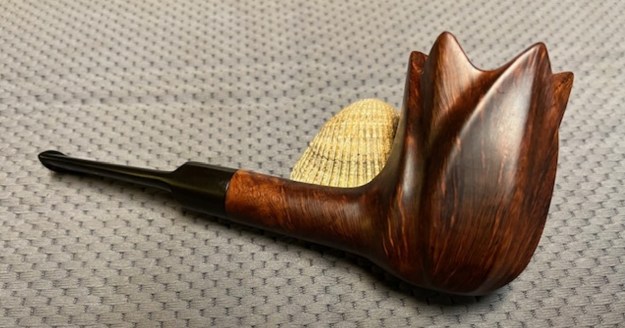
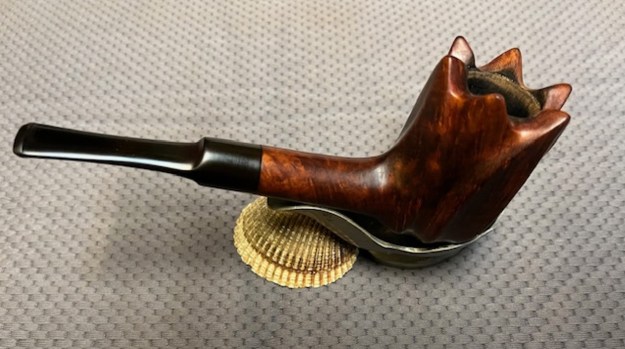
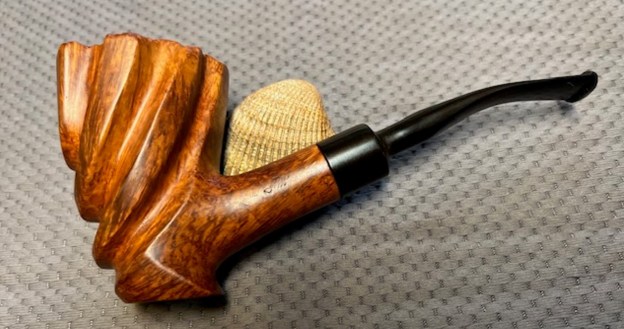
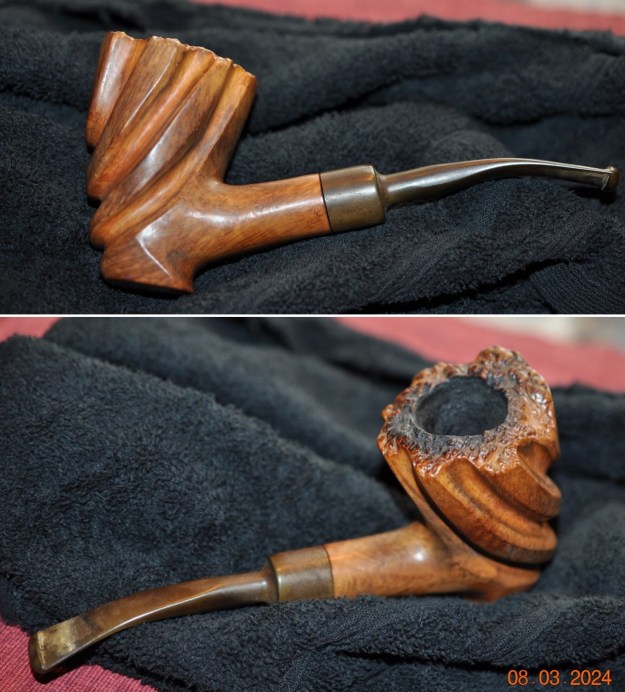
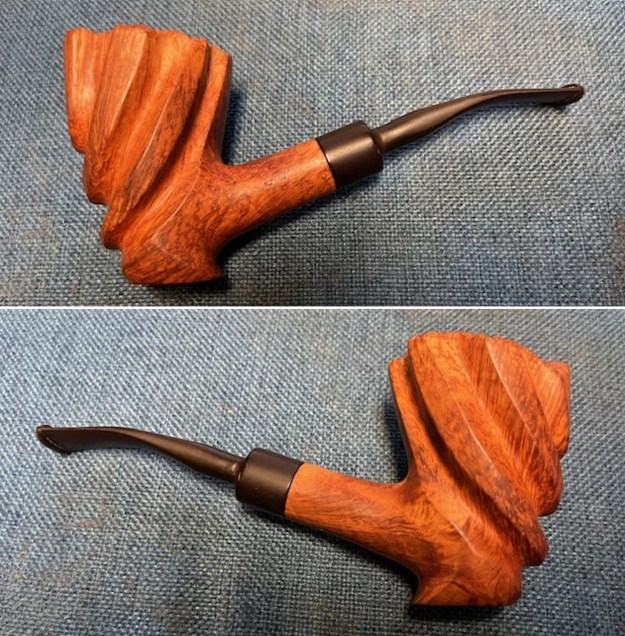
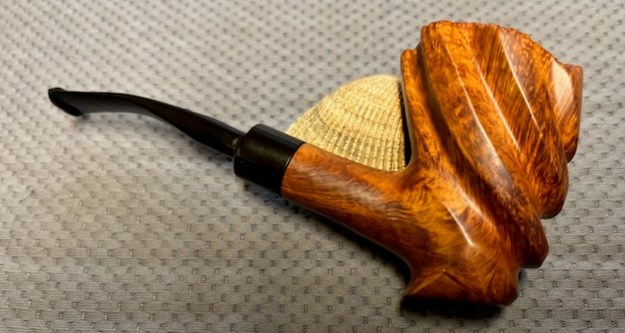
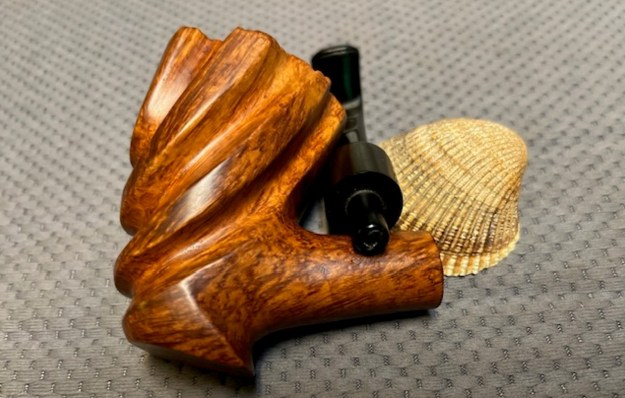
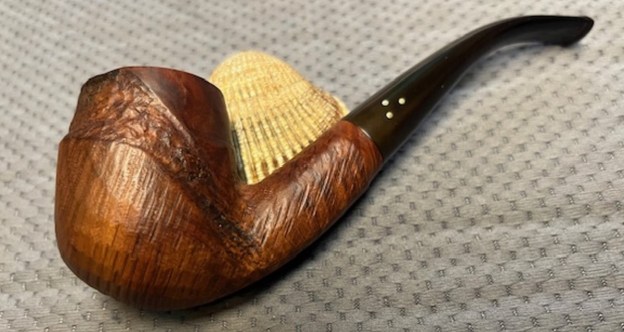
 The final steps in my process involves using the buffer. I buffed the bowl and stem with Blue Diamond to polish out the light scratches in the briar and the vulcanite. I gave the bowl and the stem multiple coats of carnauba wax. I have found that I can get a deeper shine if I follow up the wax buff with a buff with a clean buffing pad. It works to raise the shine and then I hand buff with a microfiber cloth to deepen the shine. It is always fun for me to see what the polished bowl looks like with the polished stem. It really is a nice pipe. The smooth, nicely grained bowl sides and the rusticated blaze on the left bowl side looks great with the vulcanite stem. The Brigham Sportsman Bent Billiard with a vulcanite taper stem feels great in my hand. It is a well balanced pipe. Have a look at it with the photos below. The dimensions are Length: 6 inches, Height: 1 ¾ inches, Outside diameter of the bowl: 1 ¼ inches, Chamber diameter: ¾ of an inch. The weight of the pipe is 1.45 ounces/41 grams. It is a beautiful pipe that I will soon be adding to the rebornpipes store in the Canadian Pipemakers Section. If you would like to add it to your collection let me know. It should be a great smoking pipe.
As always, I encourage your questions and comments as you read the blog. Thanks to each of you who are reading this blog. Remember we are not pipe owners; we are pipe men and women who hold our pipes in trust until they pass on into the trust of those who follow us.