Tag Archives: turning a tenon

Prom Night – Dressing up a Cheap Meerschaum Apple


Blog by Steve Laug

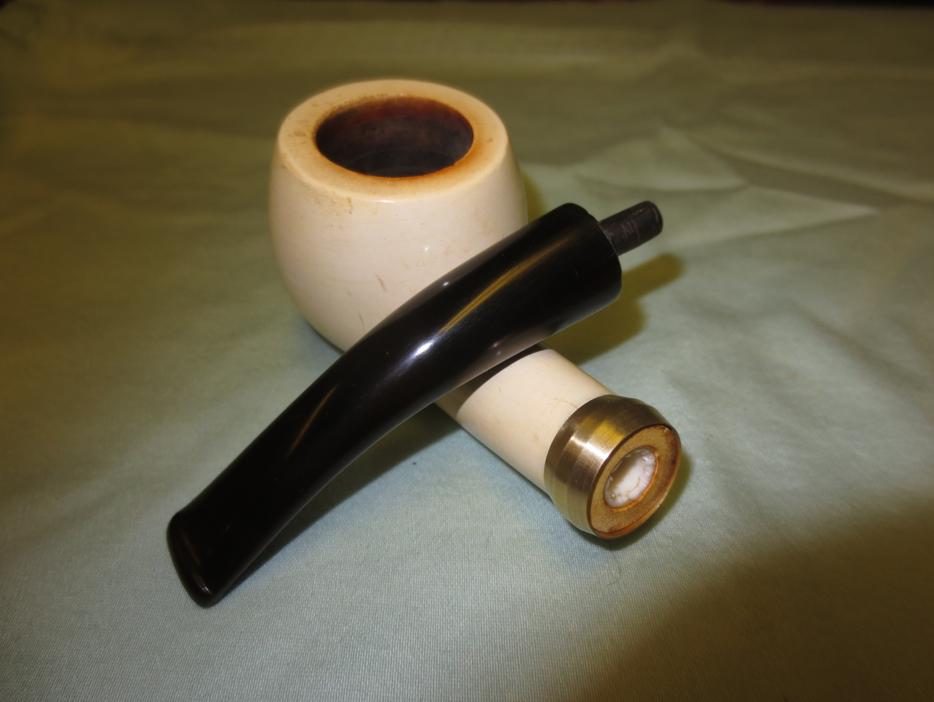
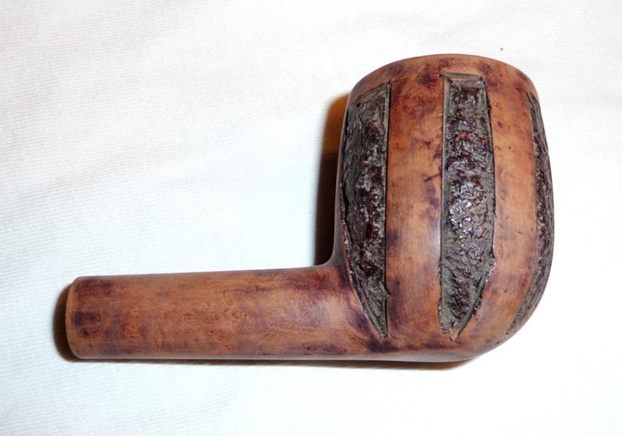
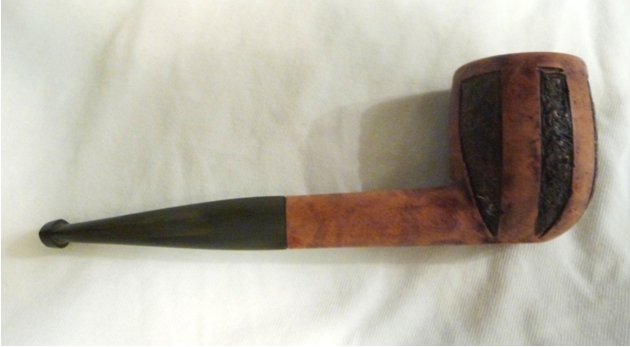
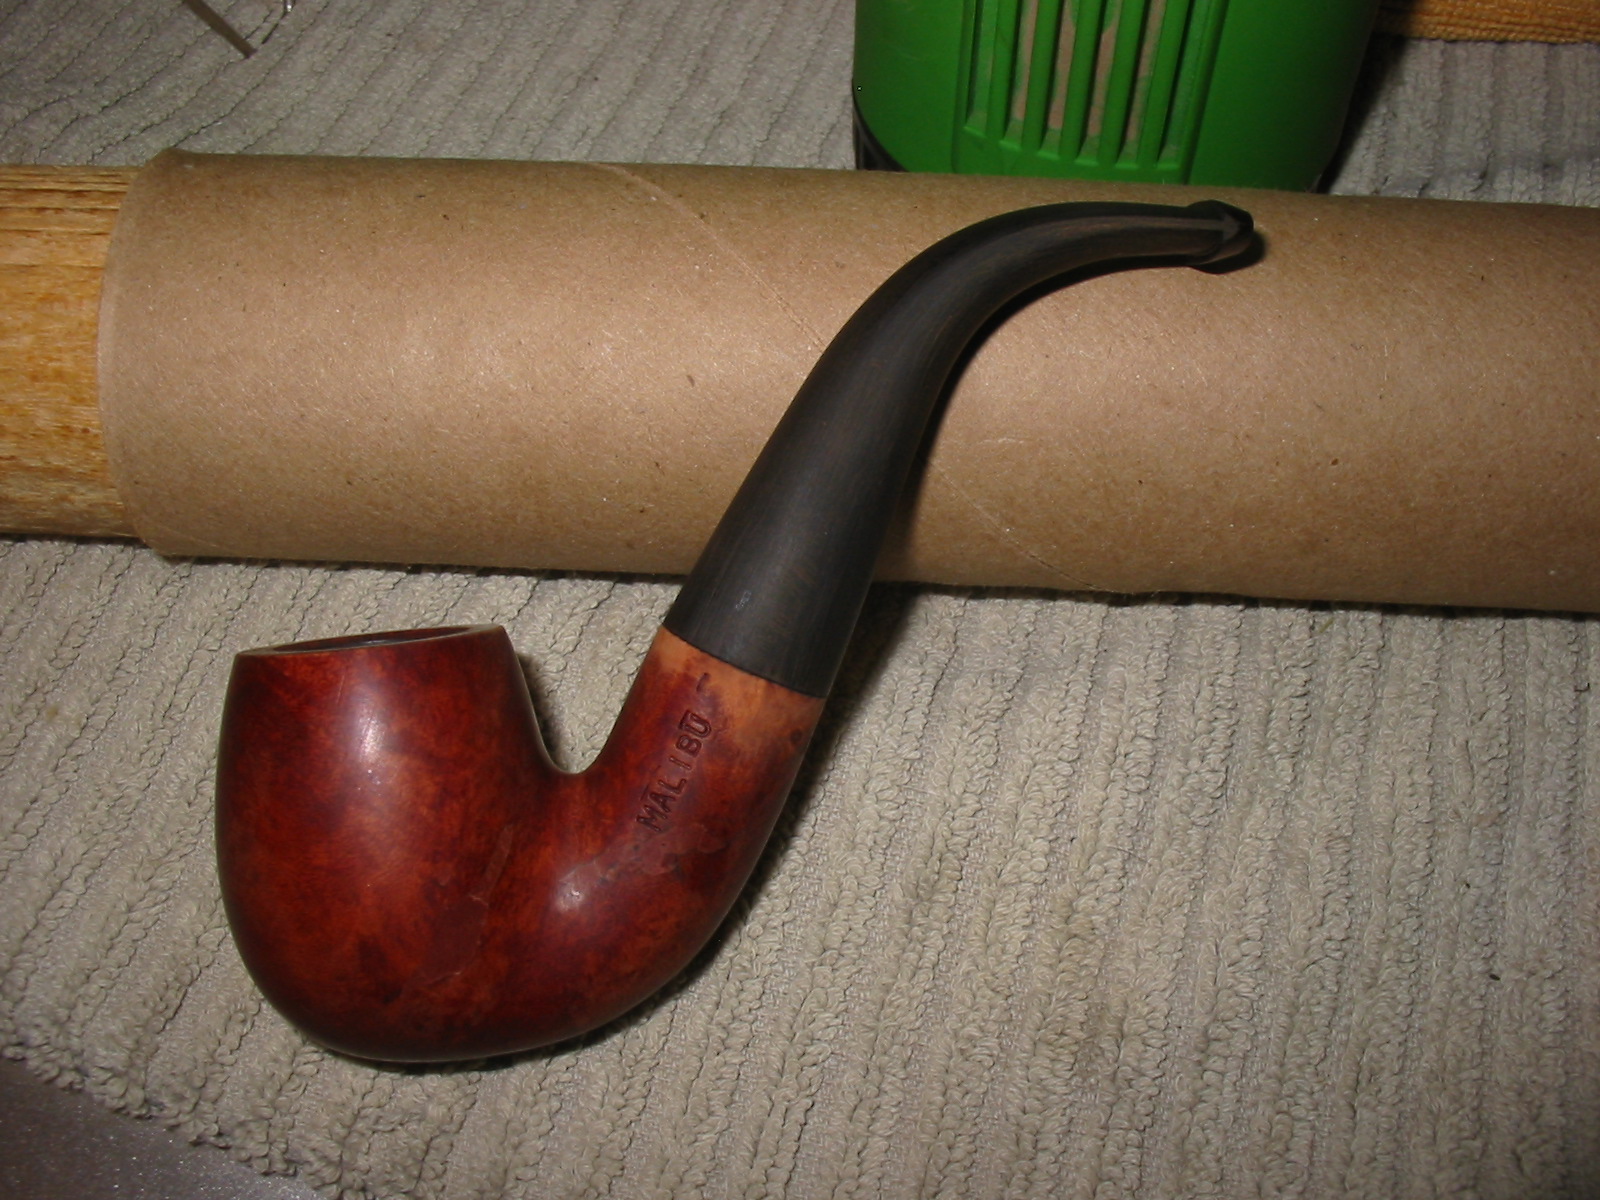
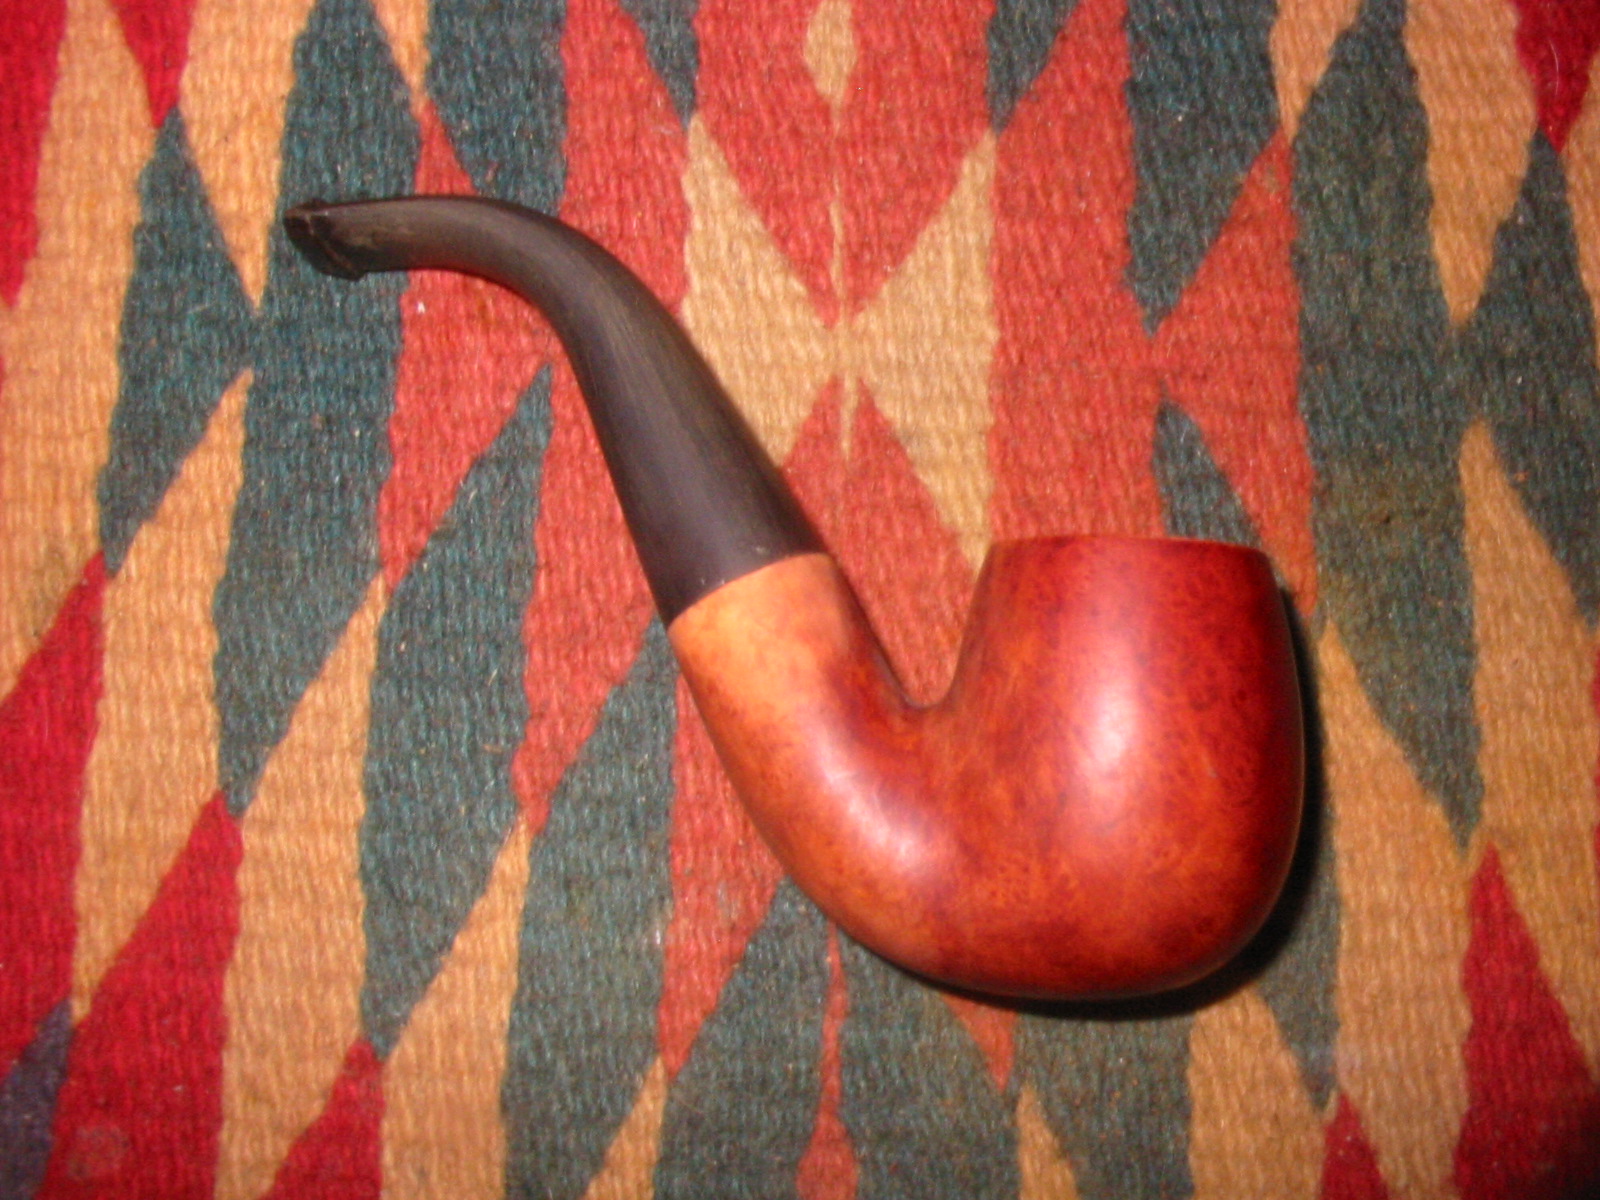
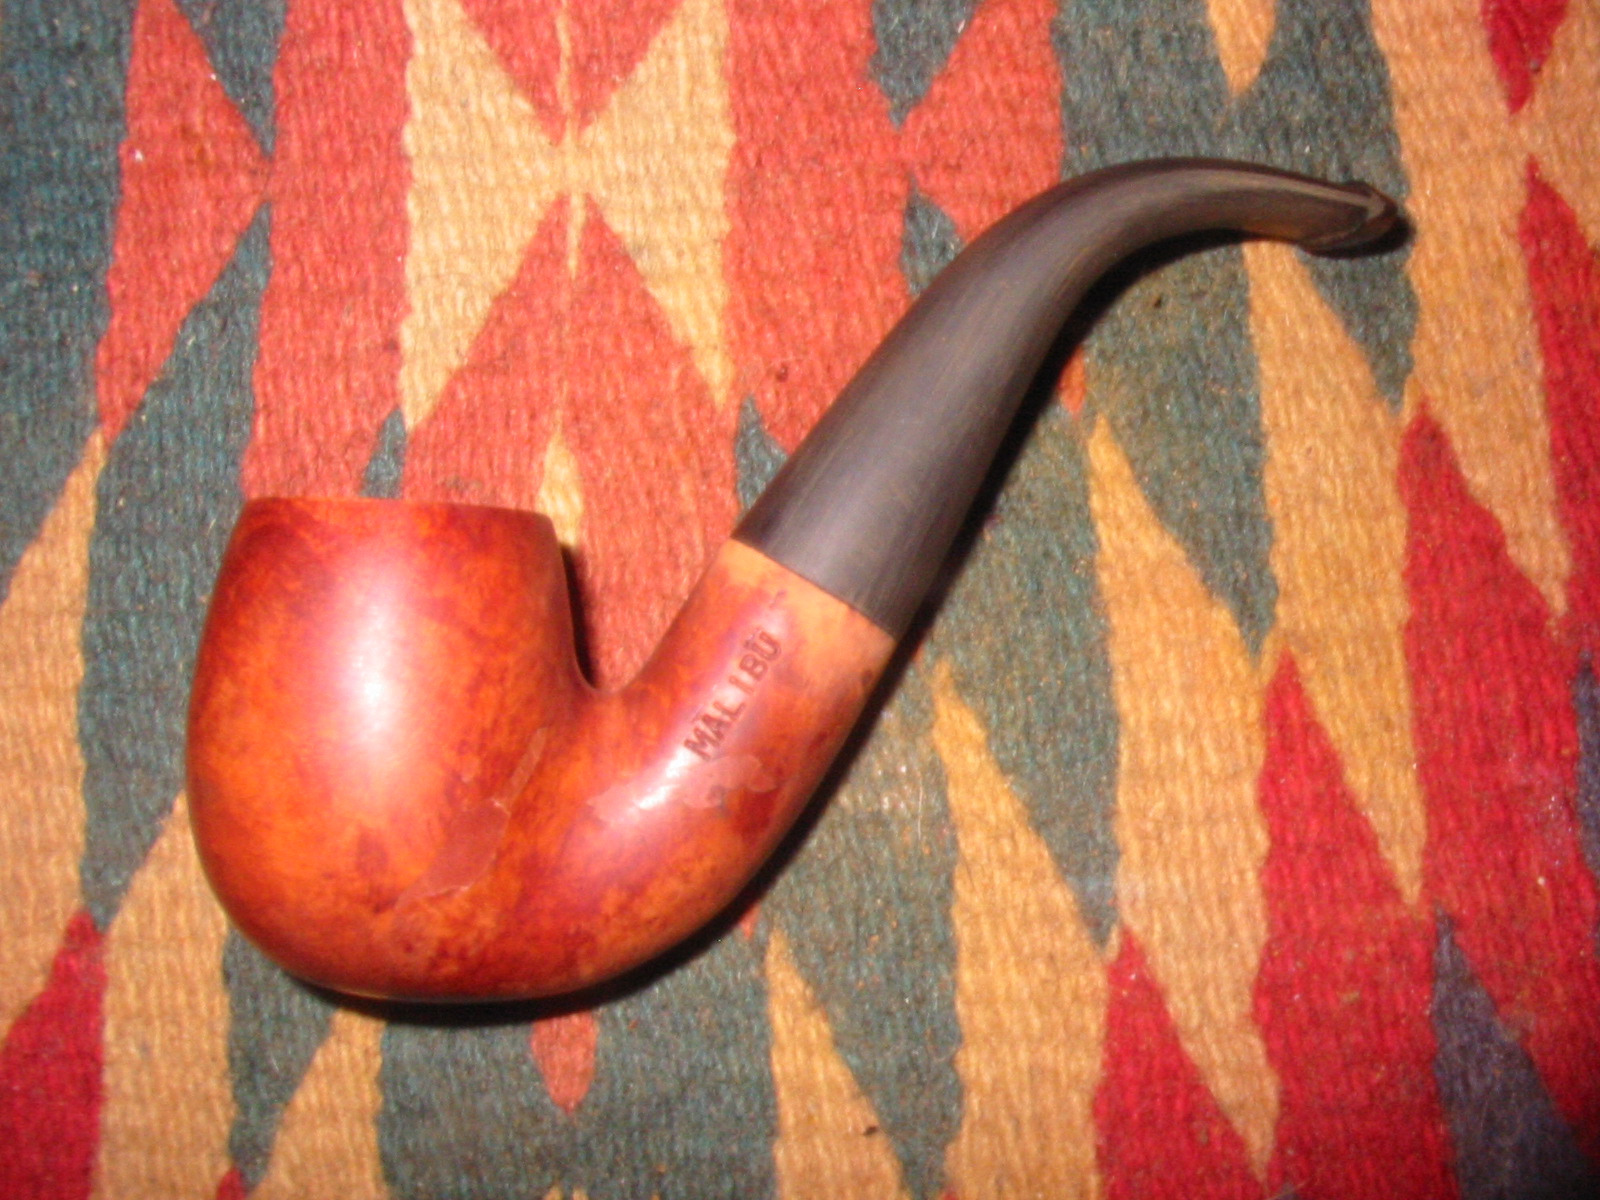
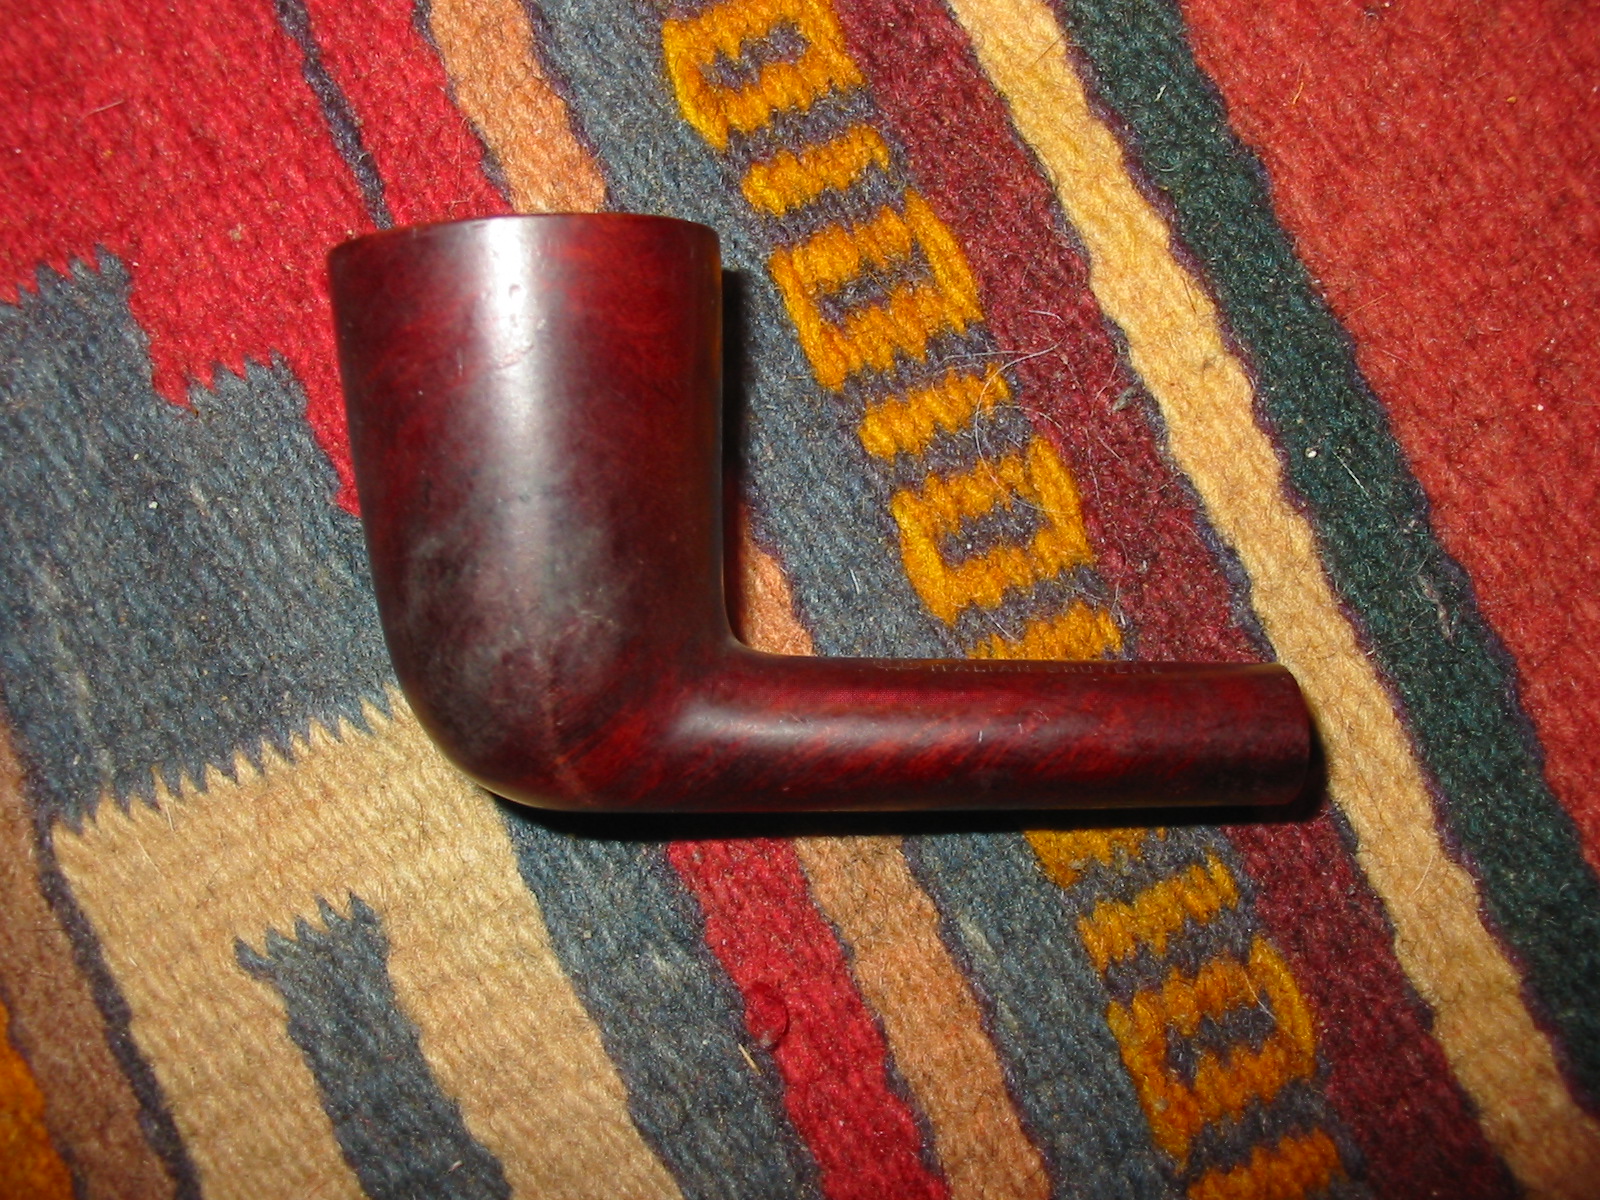
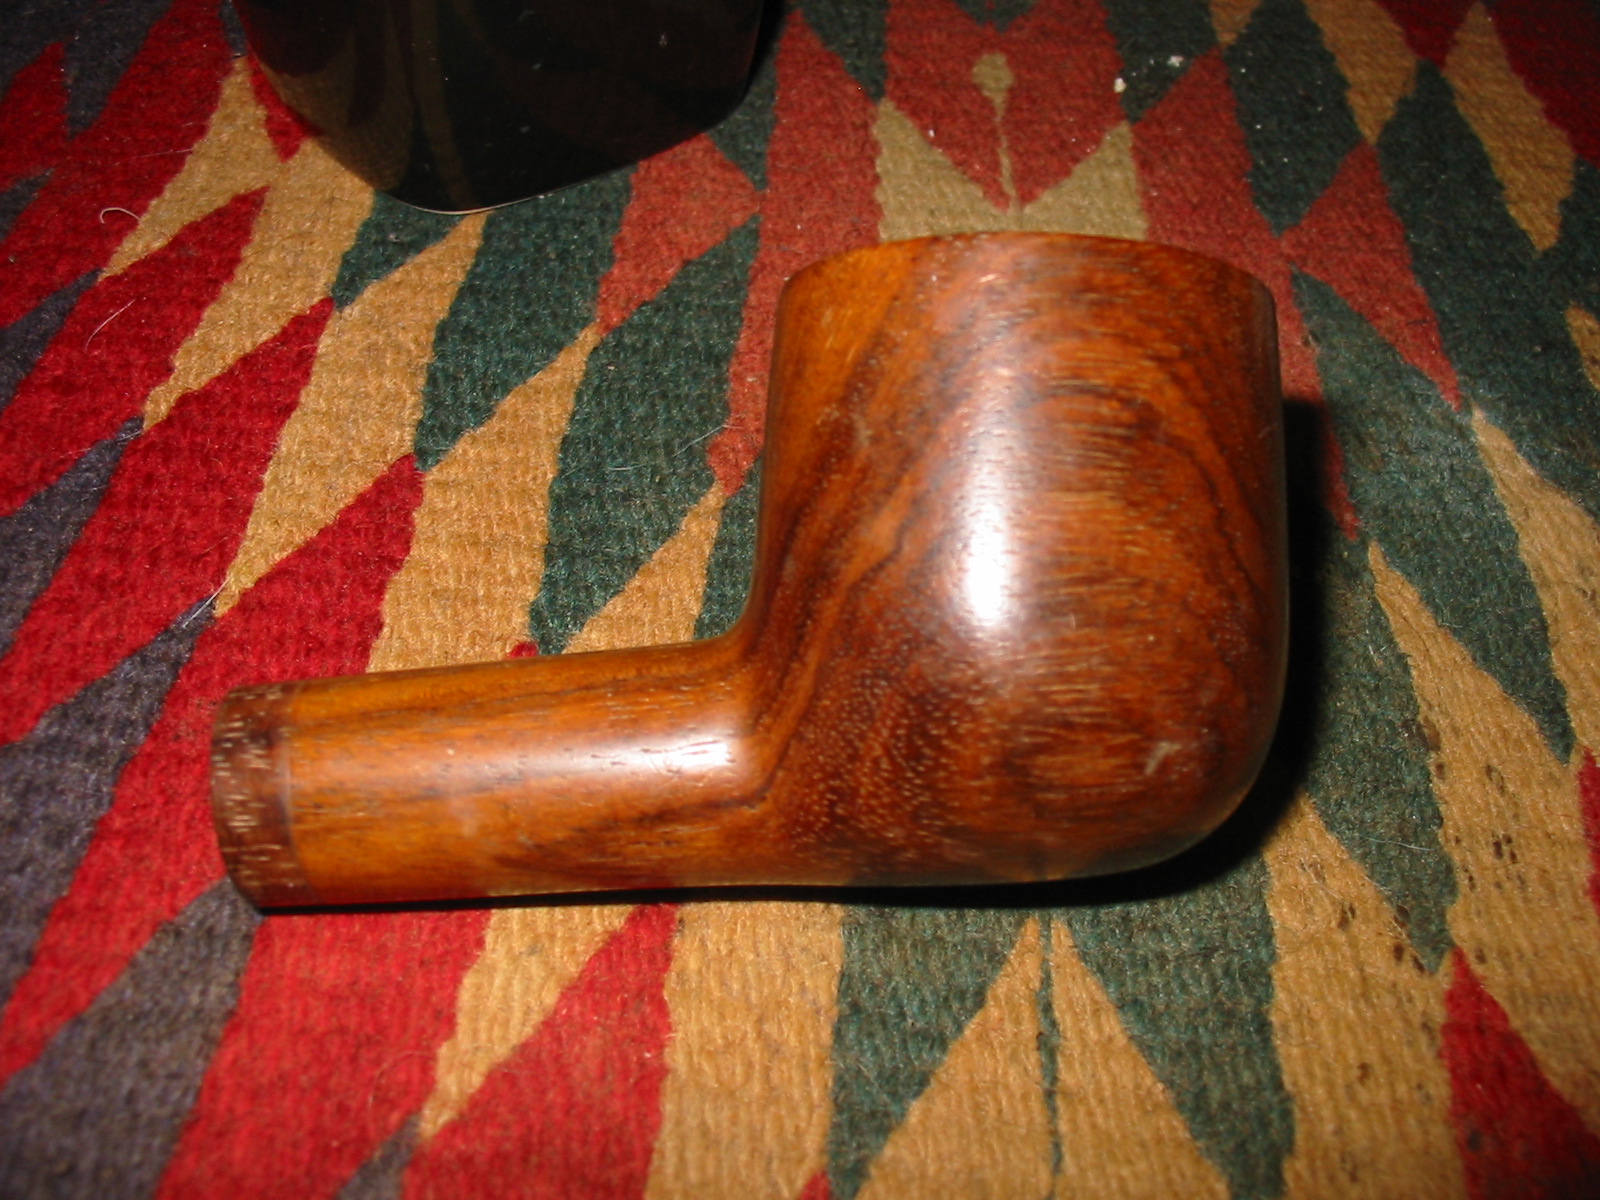
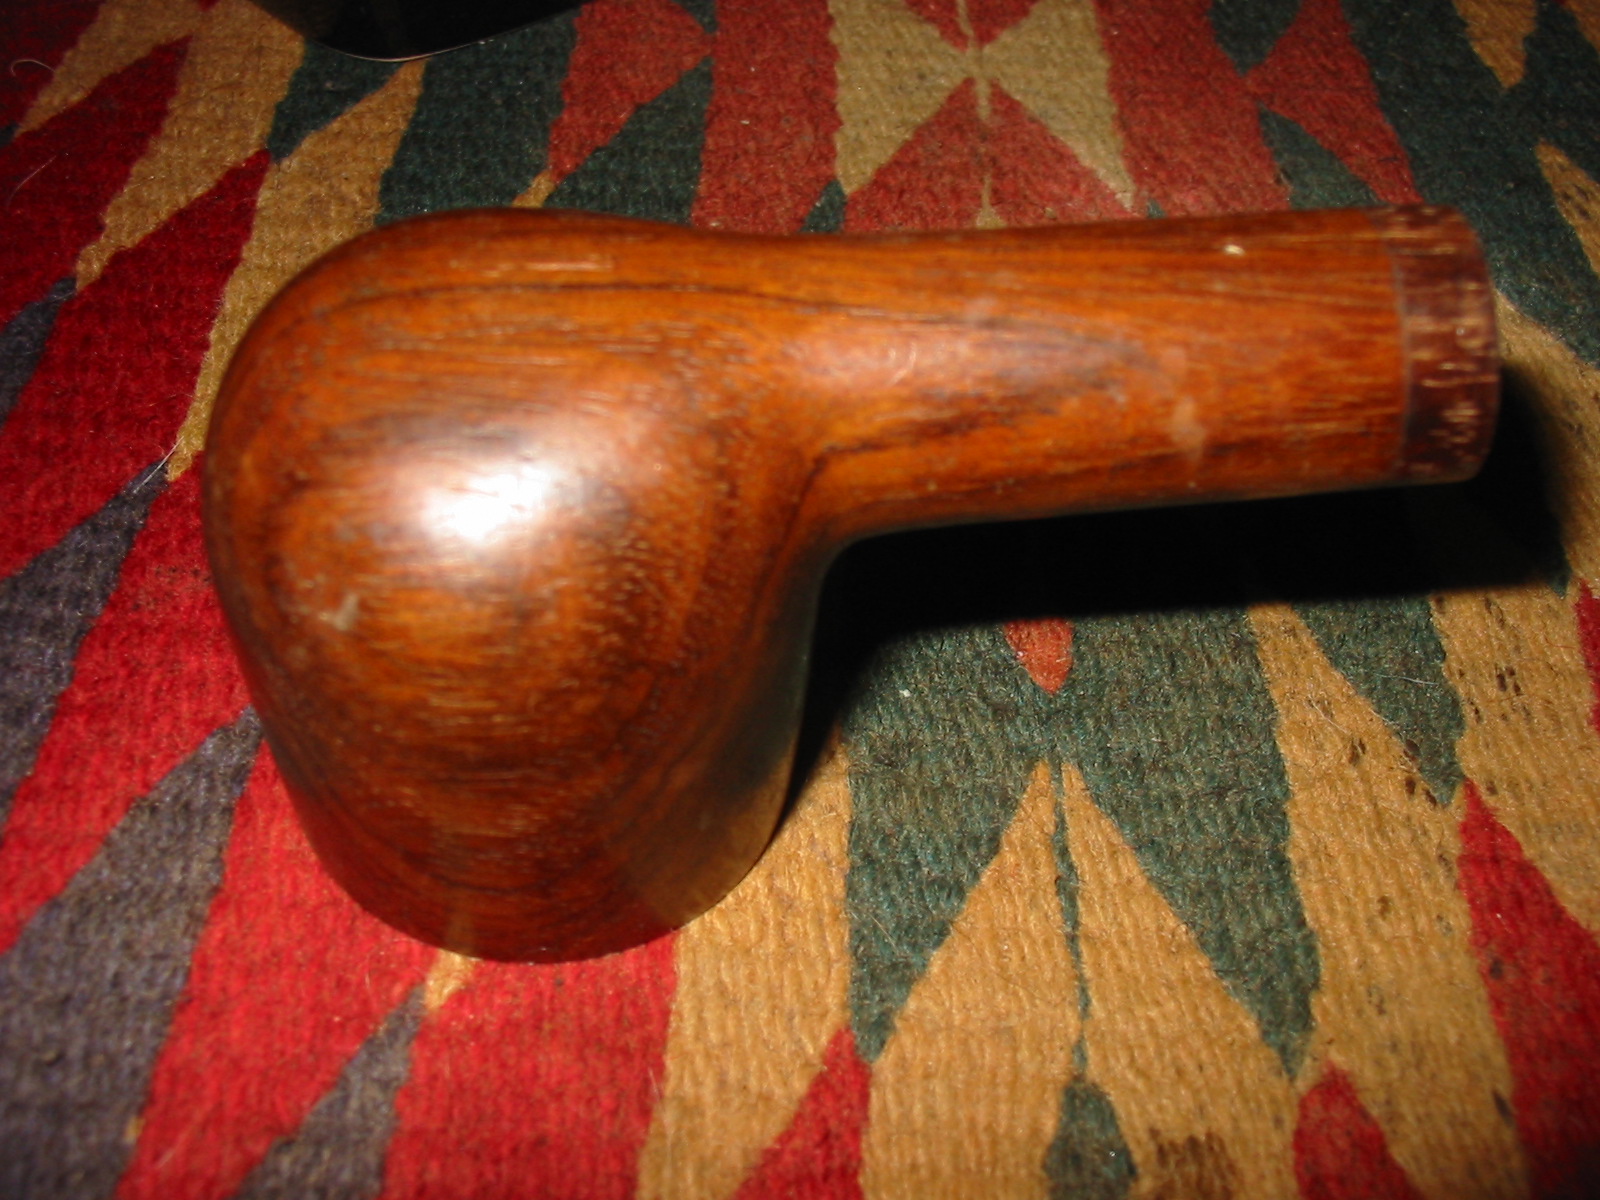
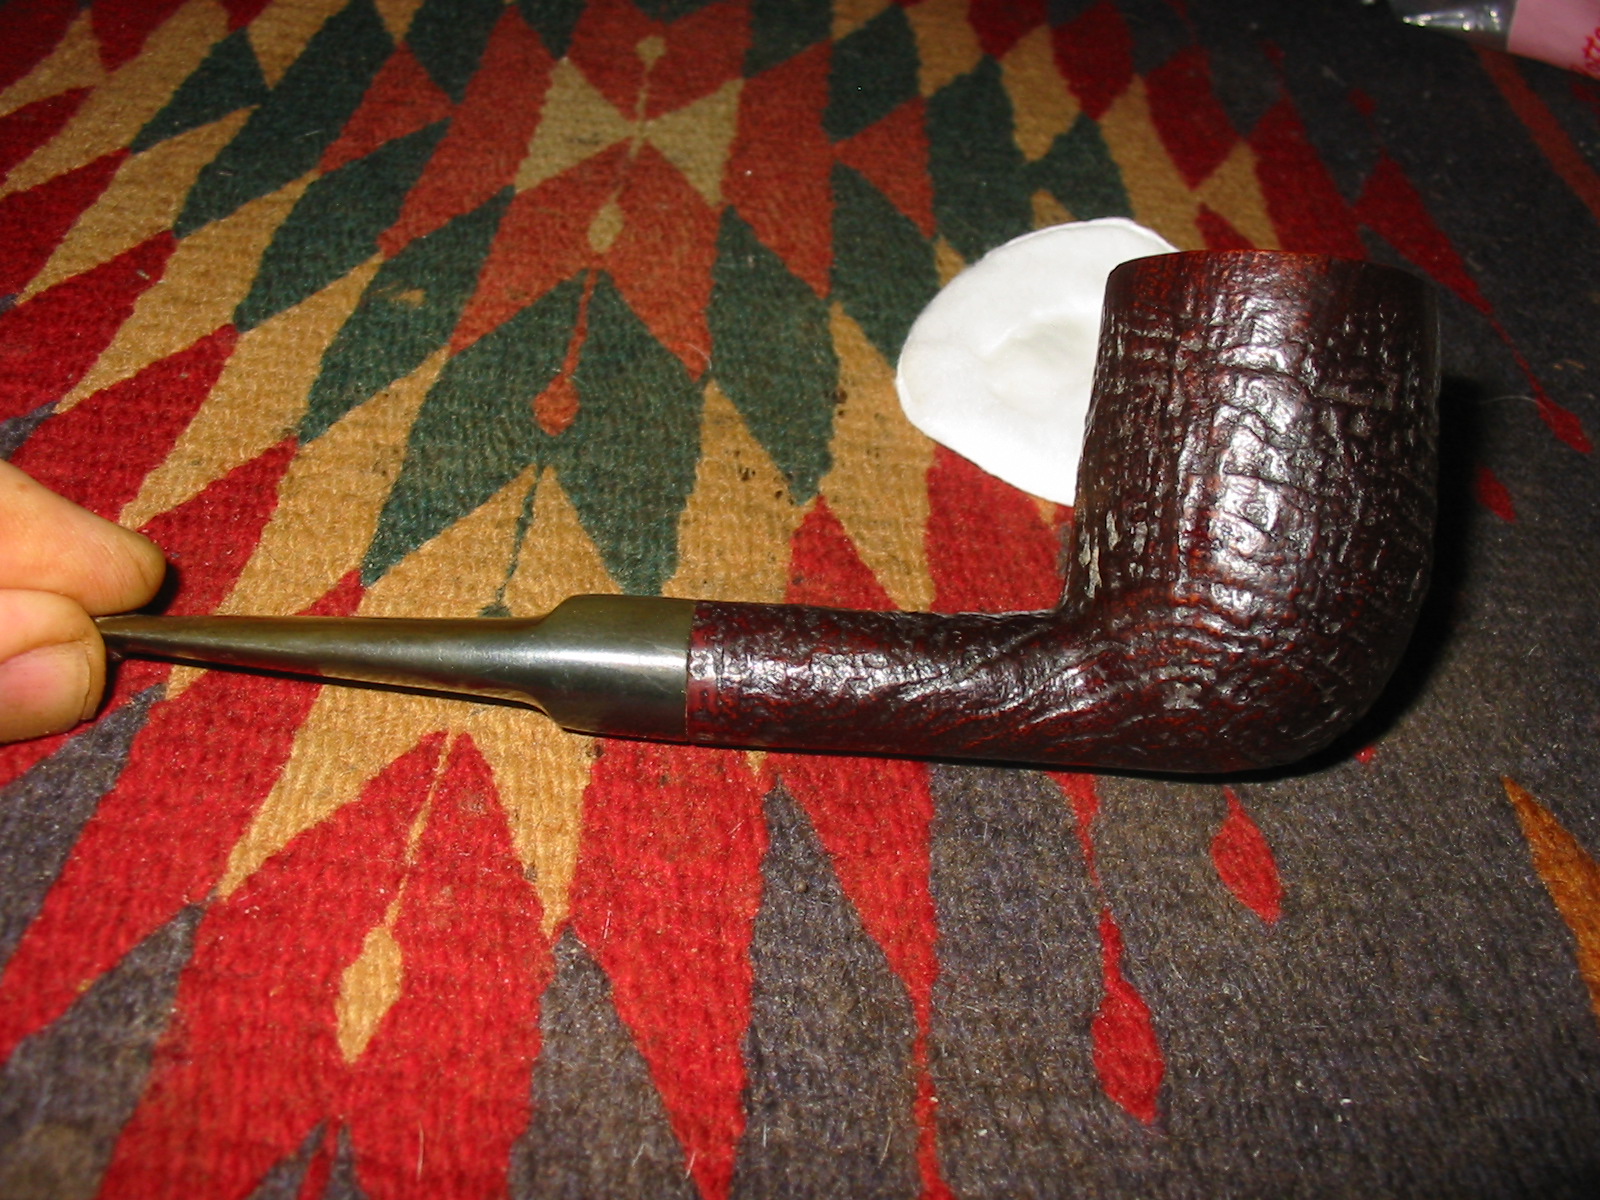
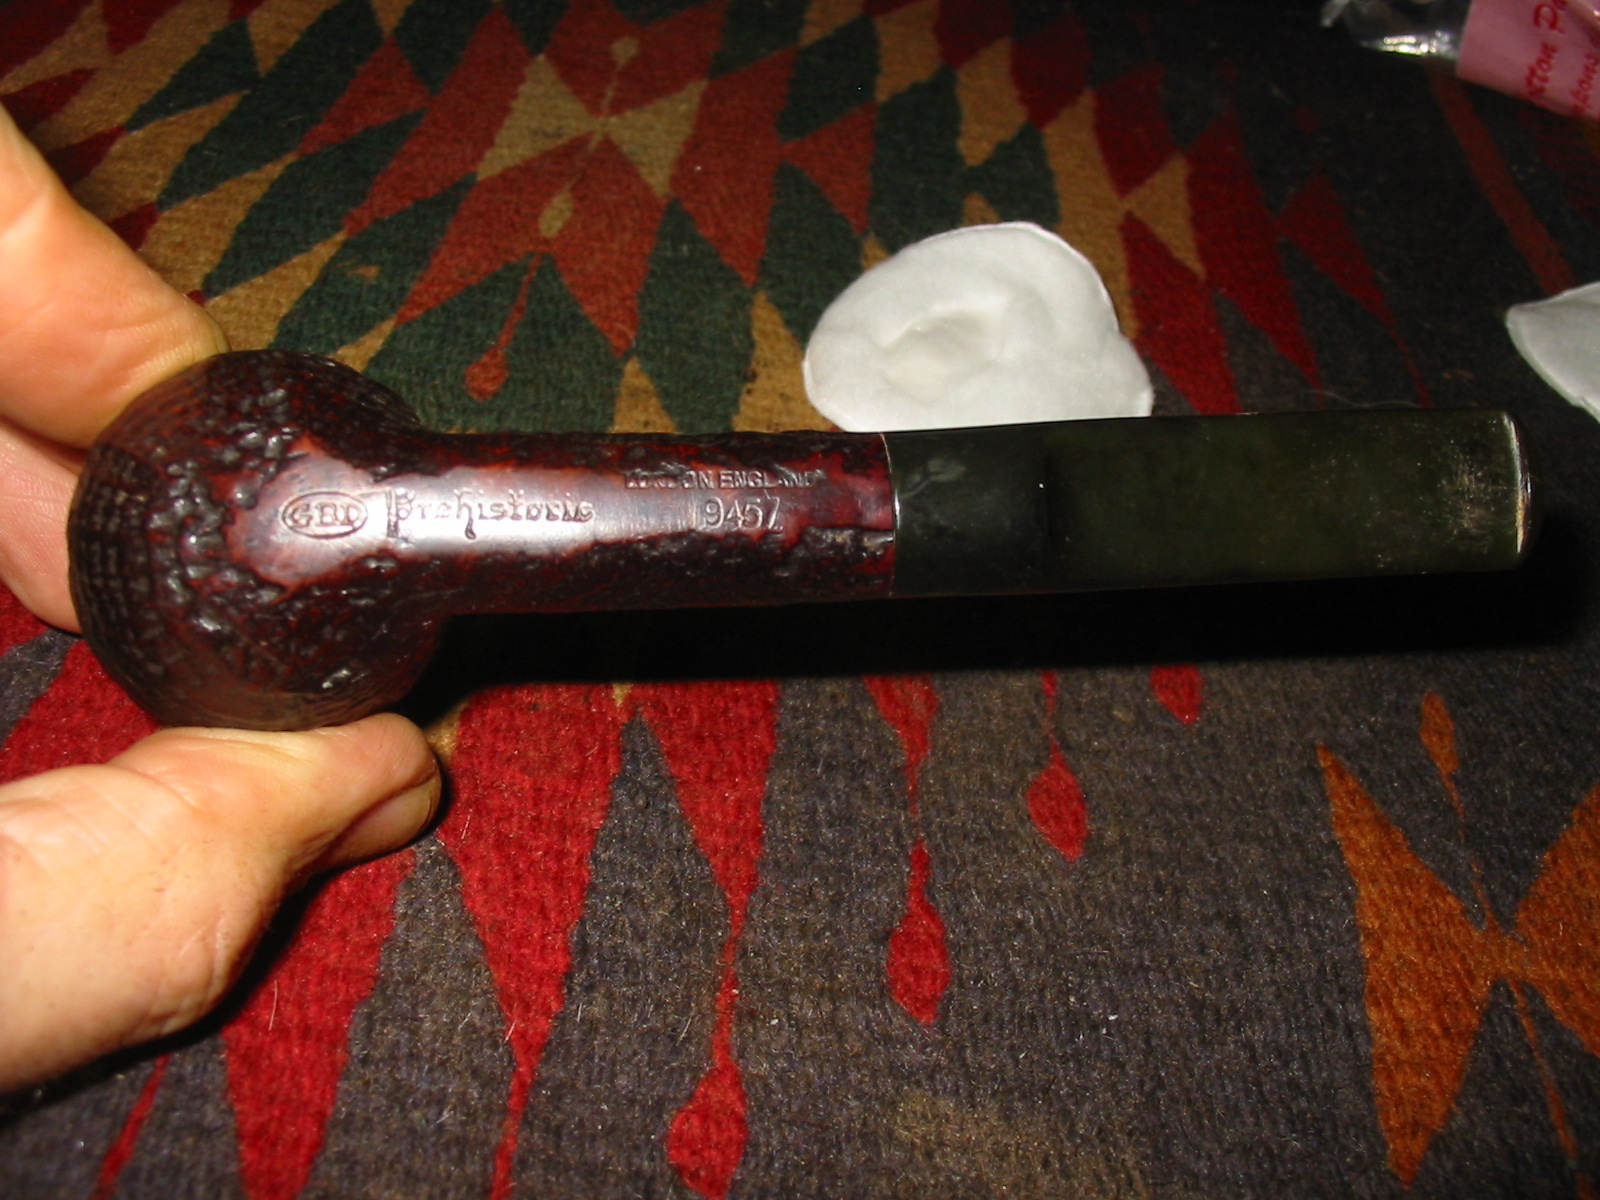
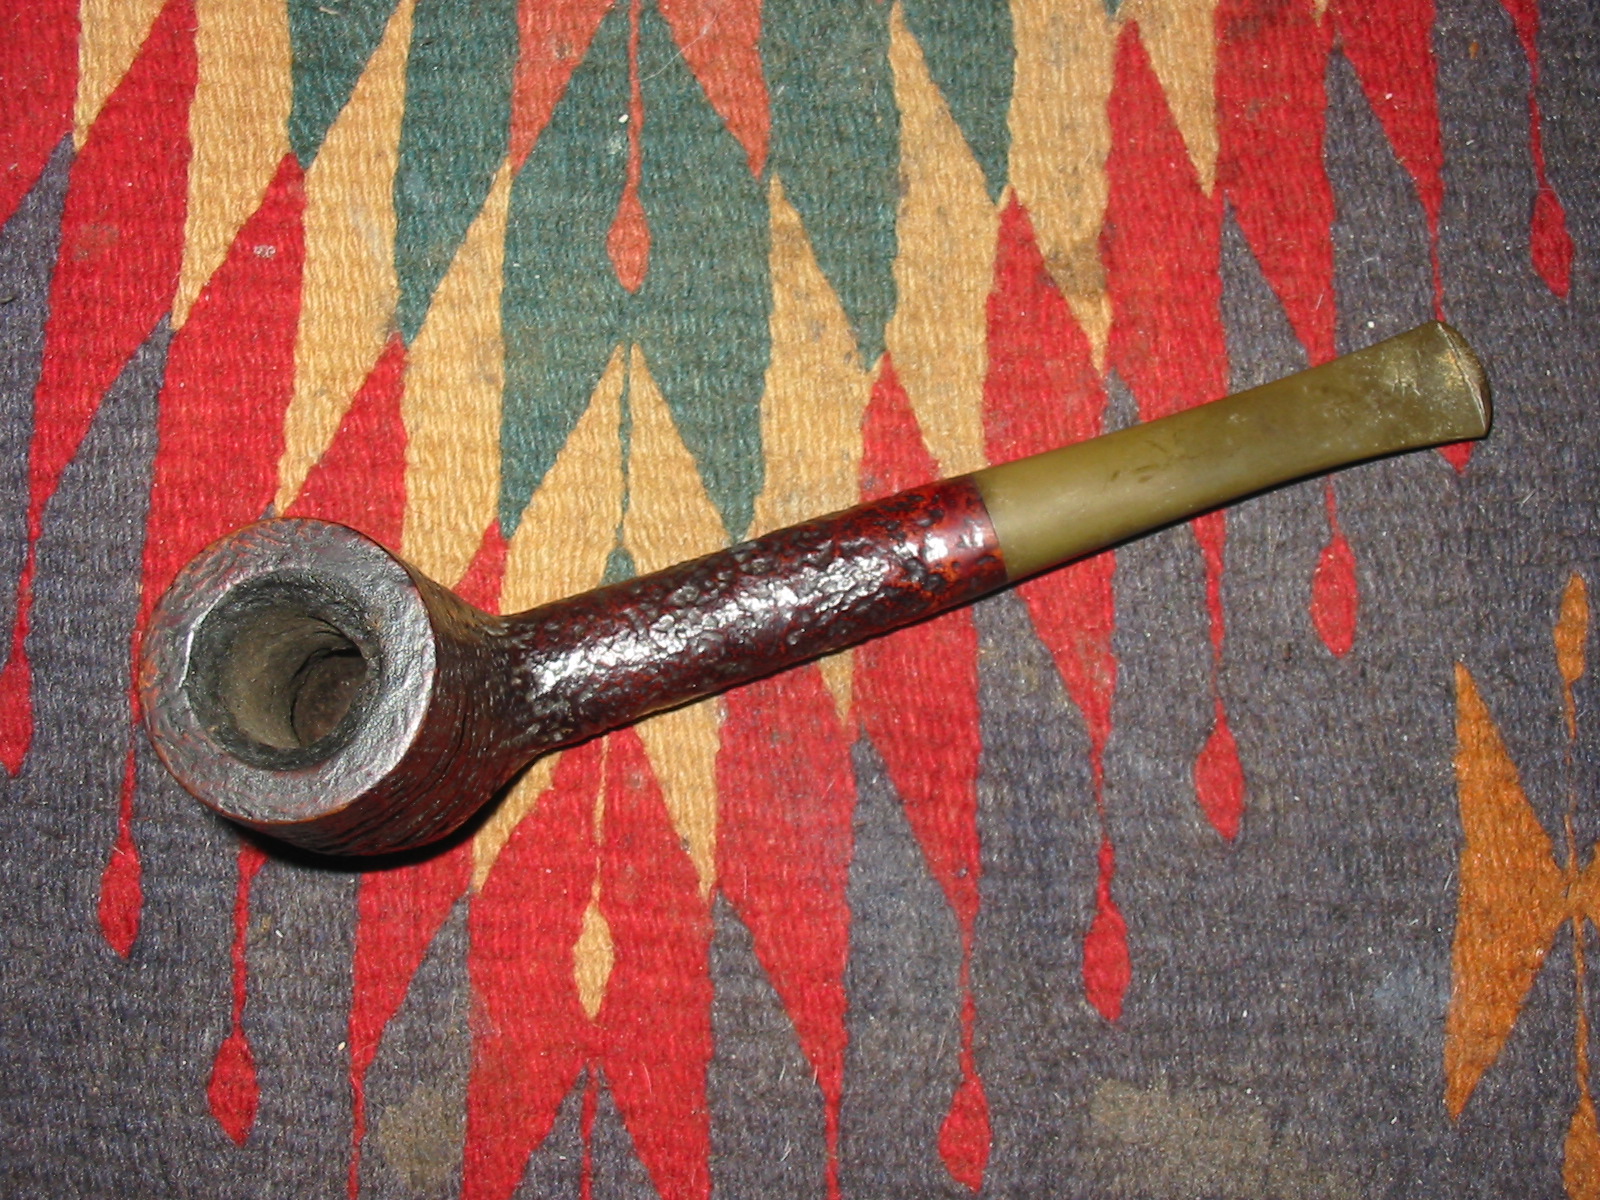
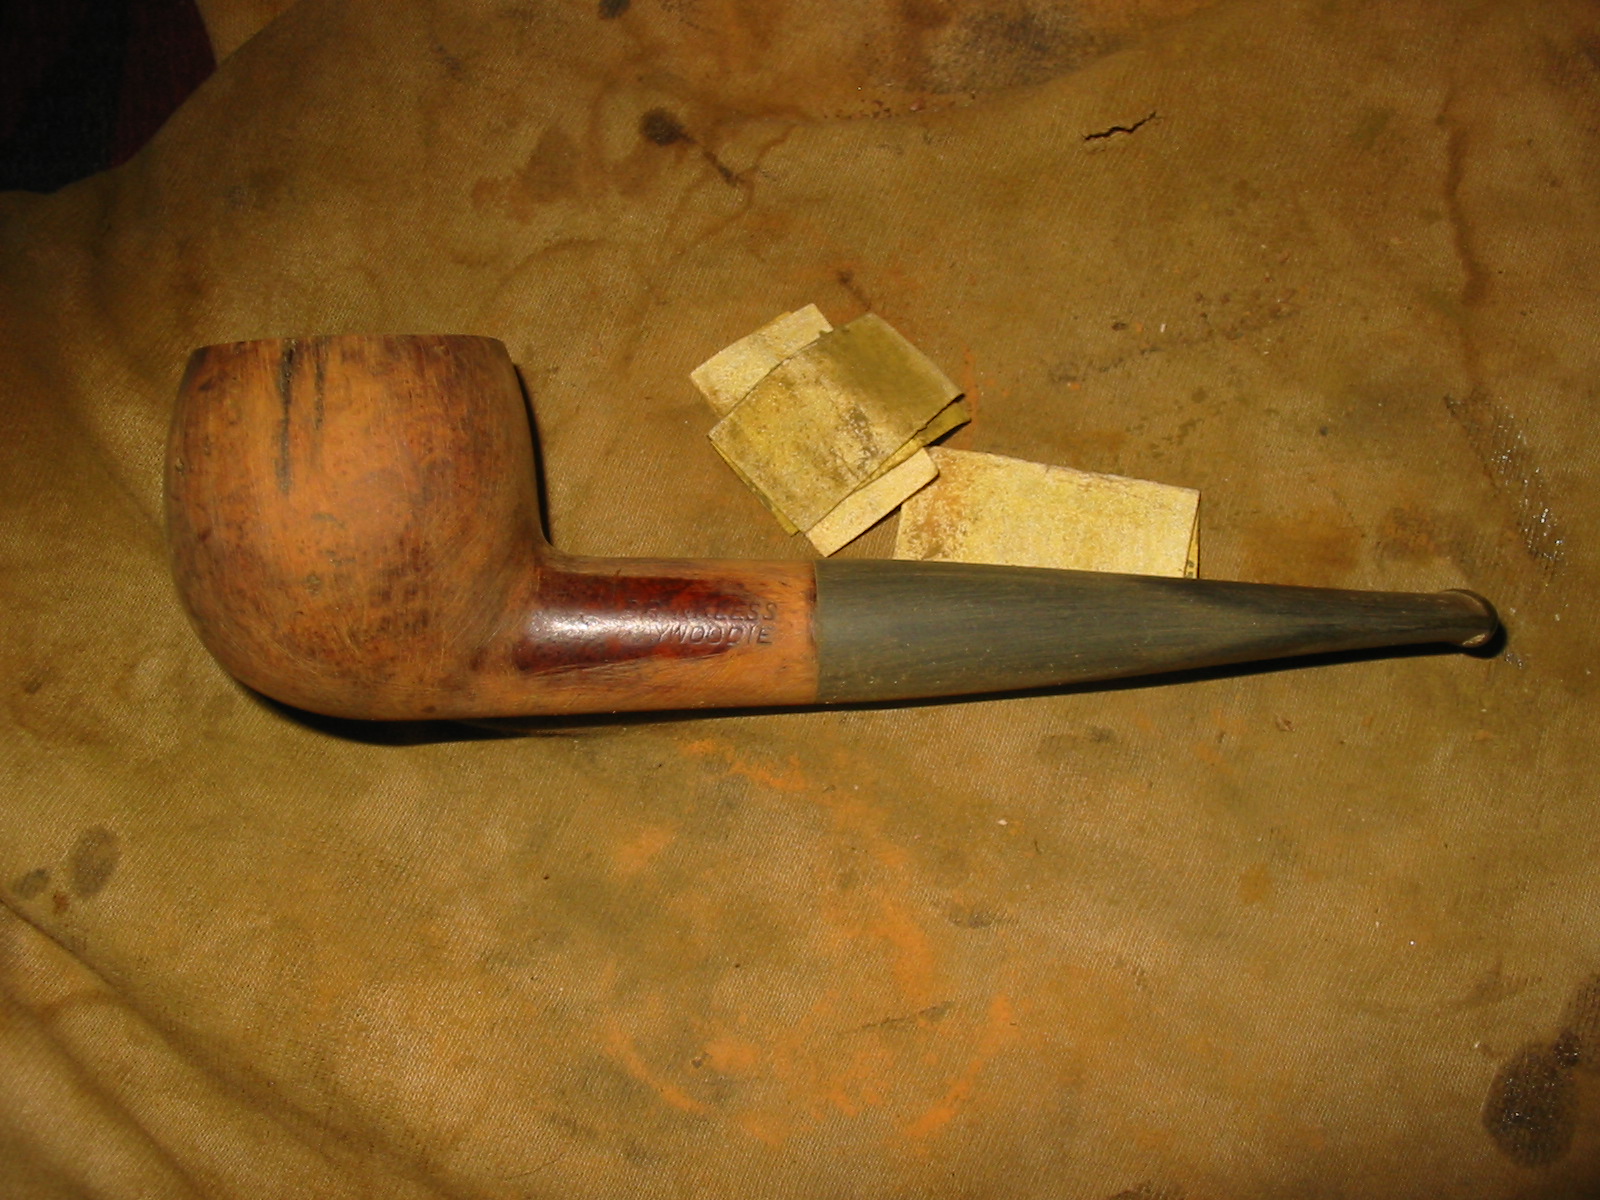
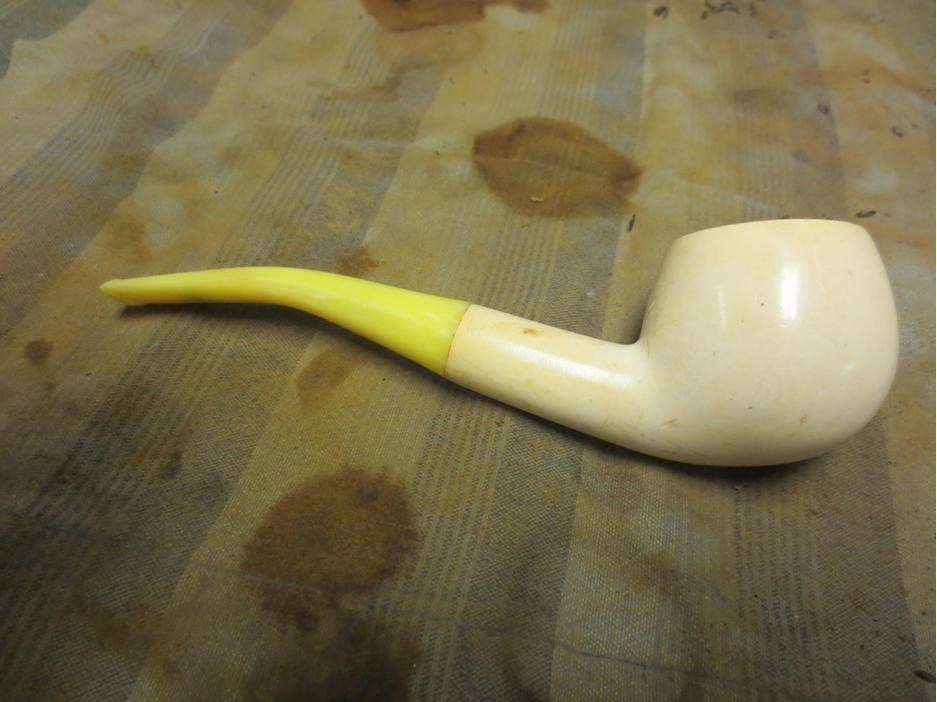
I was given a batch of pipes from a friend on one of the forums that he had lying around a long time. He was pretty certain that they were not worth much but he thought they might be fun for me to fiddle with. One of them was a meerschaum apple-shaped pipe with a plastic stem. The draw on it was awful, like sucking air through a coffee stirrer. The bowl had a few issues at first glance. There were some gouges in the meer on the sides of the bowl and the shank. There were some small cracks in the shank from the end forward near the top. There was a Delrin sleeve so these may or may not be a problem. The tenon itself was small and rough. The stem had some damage from what appeared to be melting at some point in its life. But it was barely smoked and there was something about it that caught my eye. I could see some promise in it so it would be worth the fiddle.band1

band2

band3 
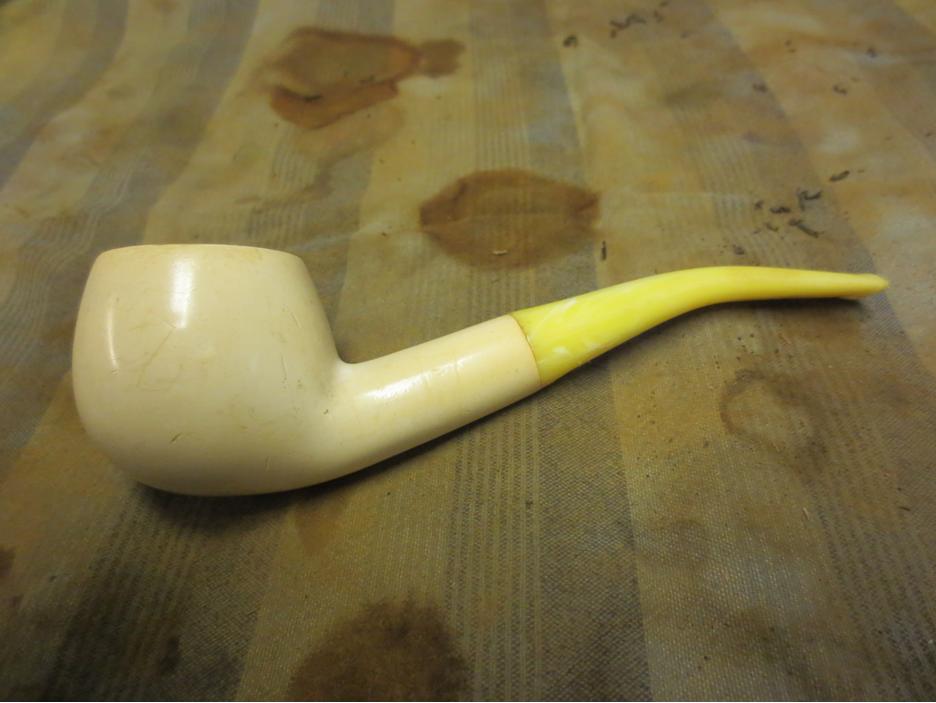
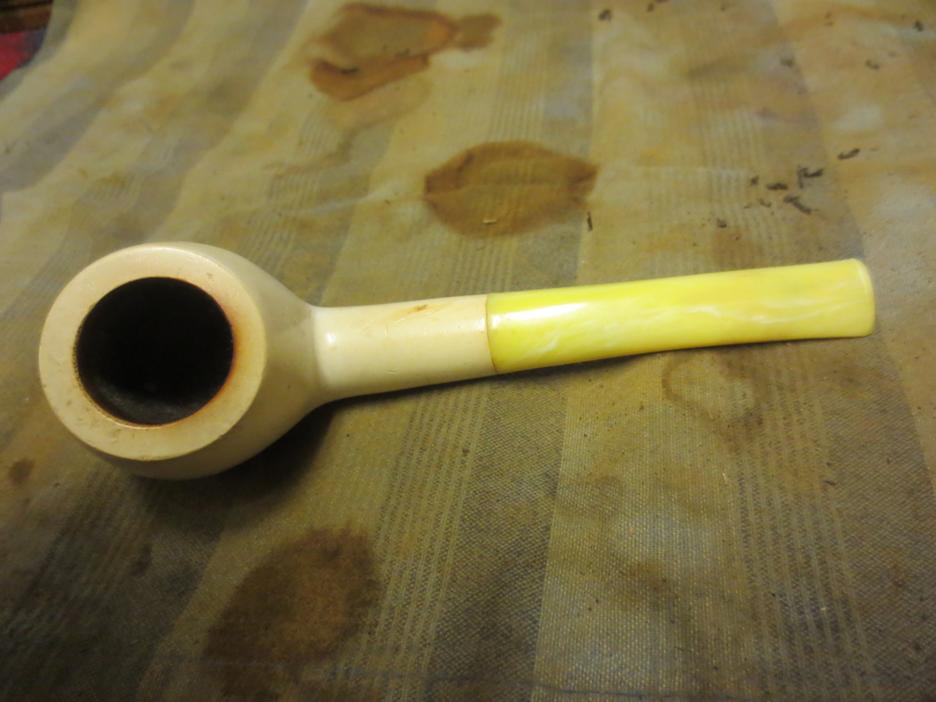
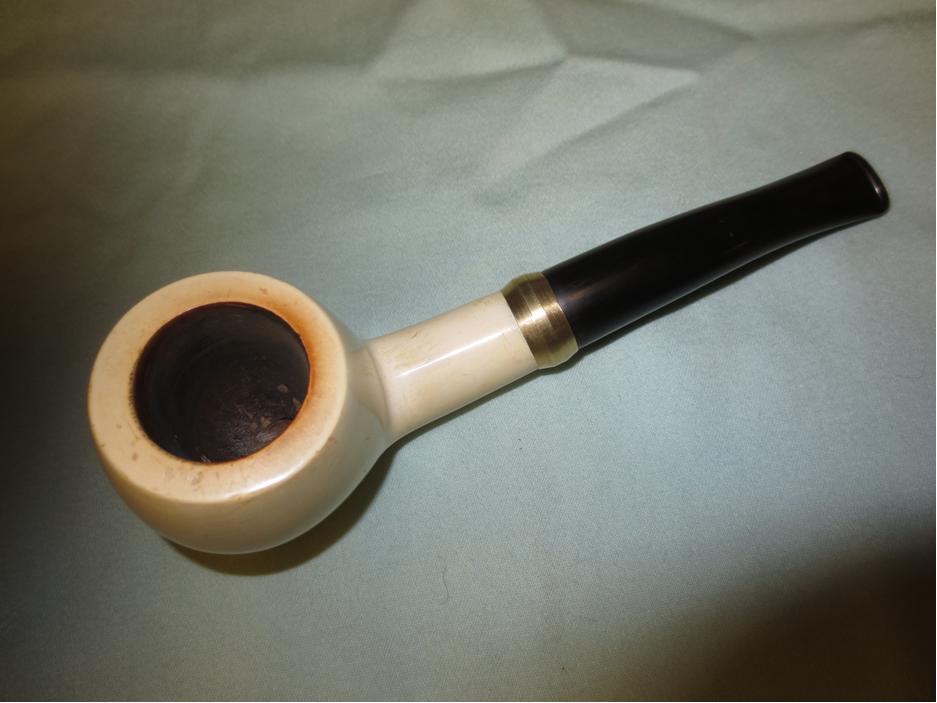
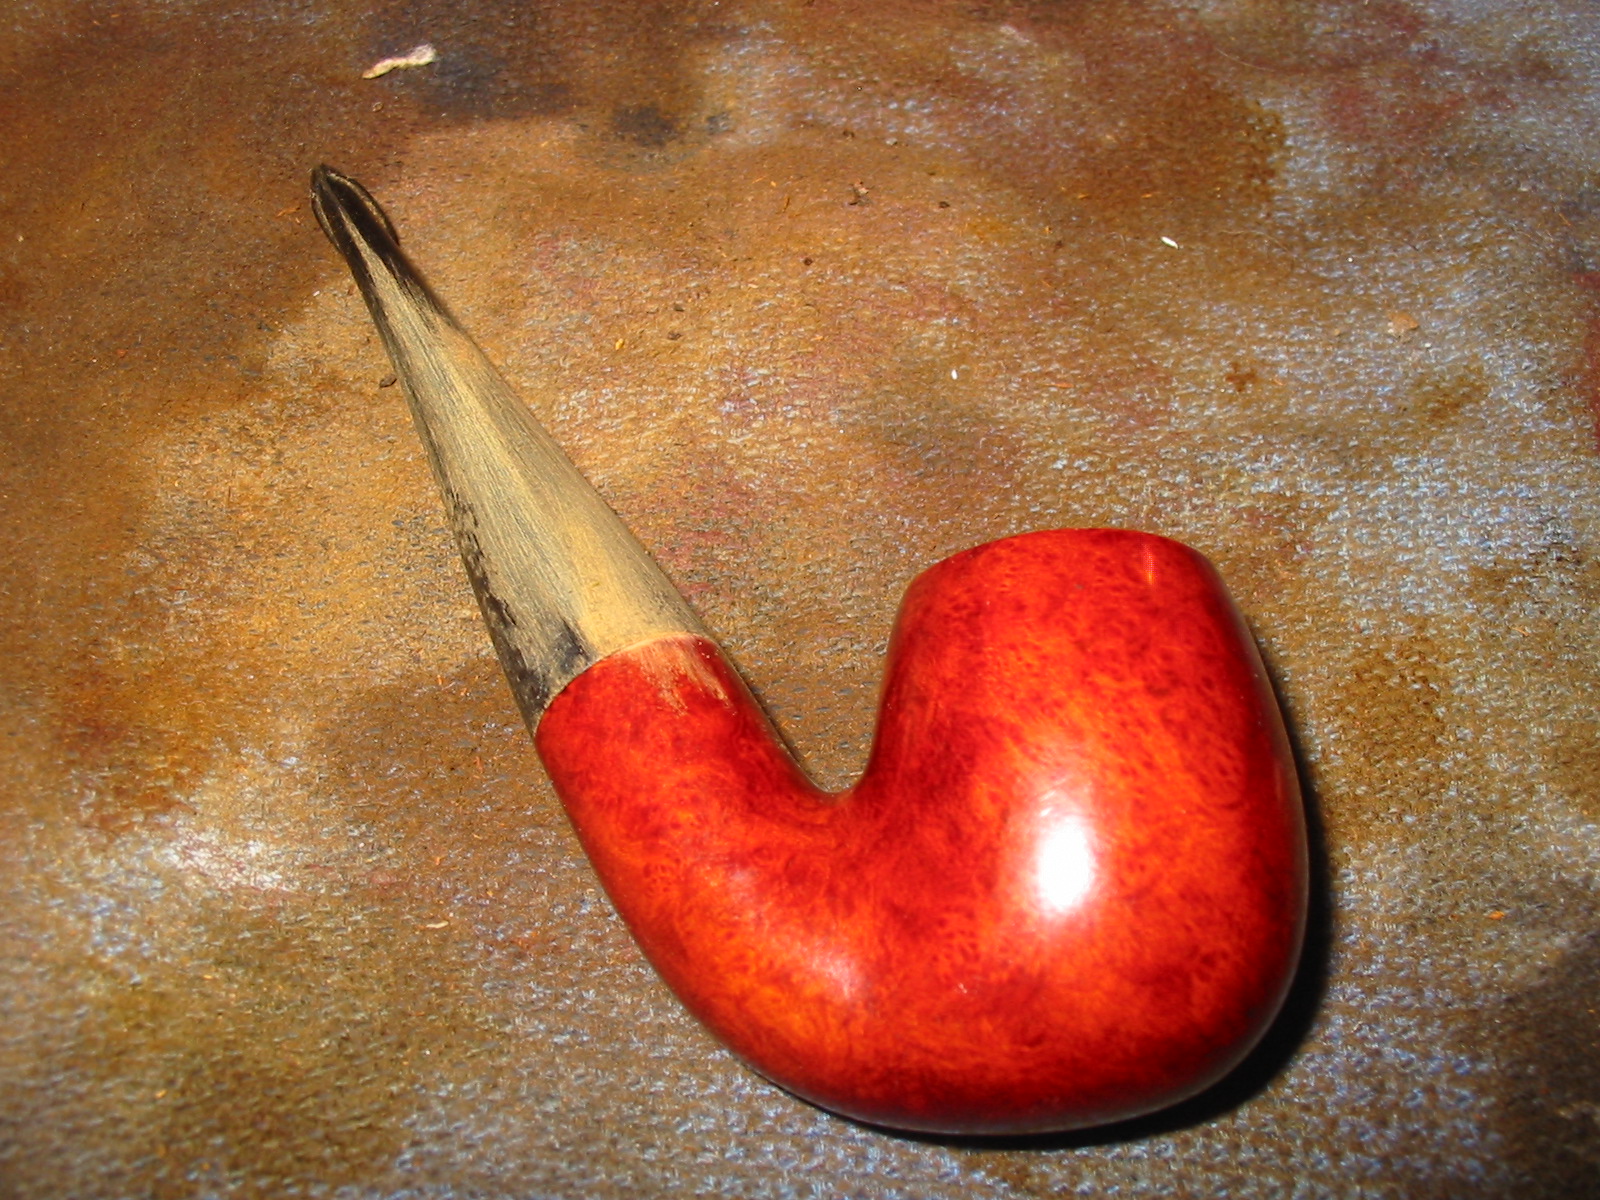
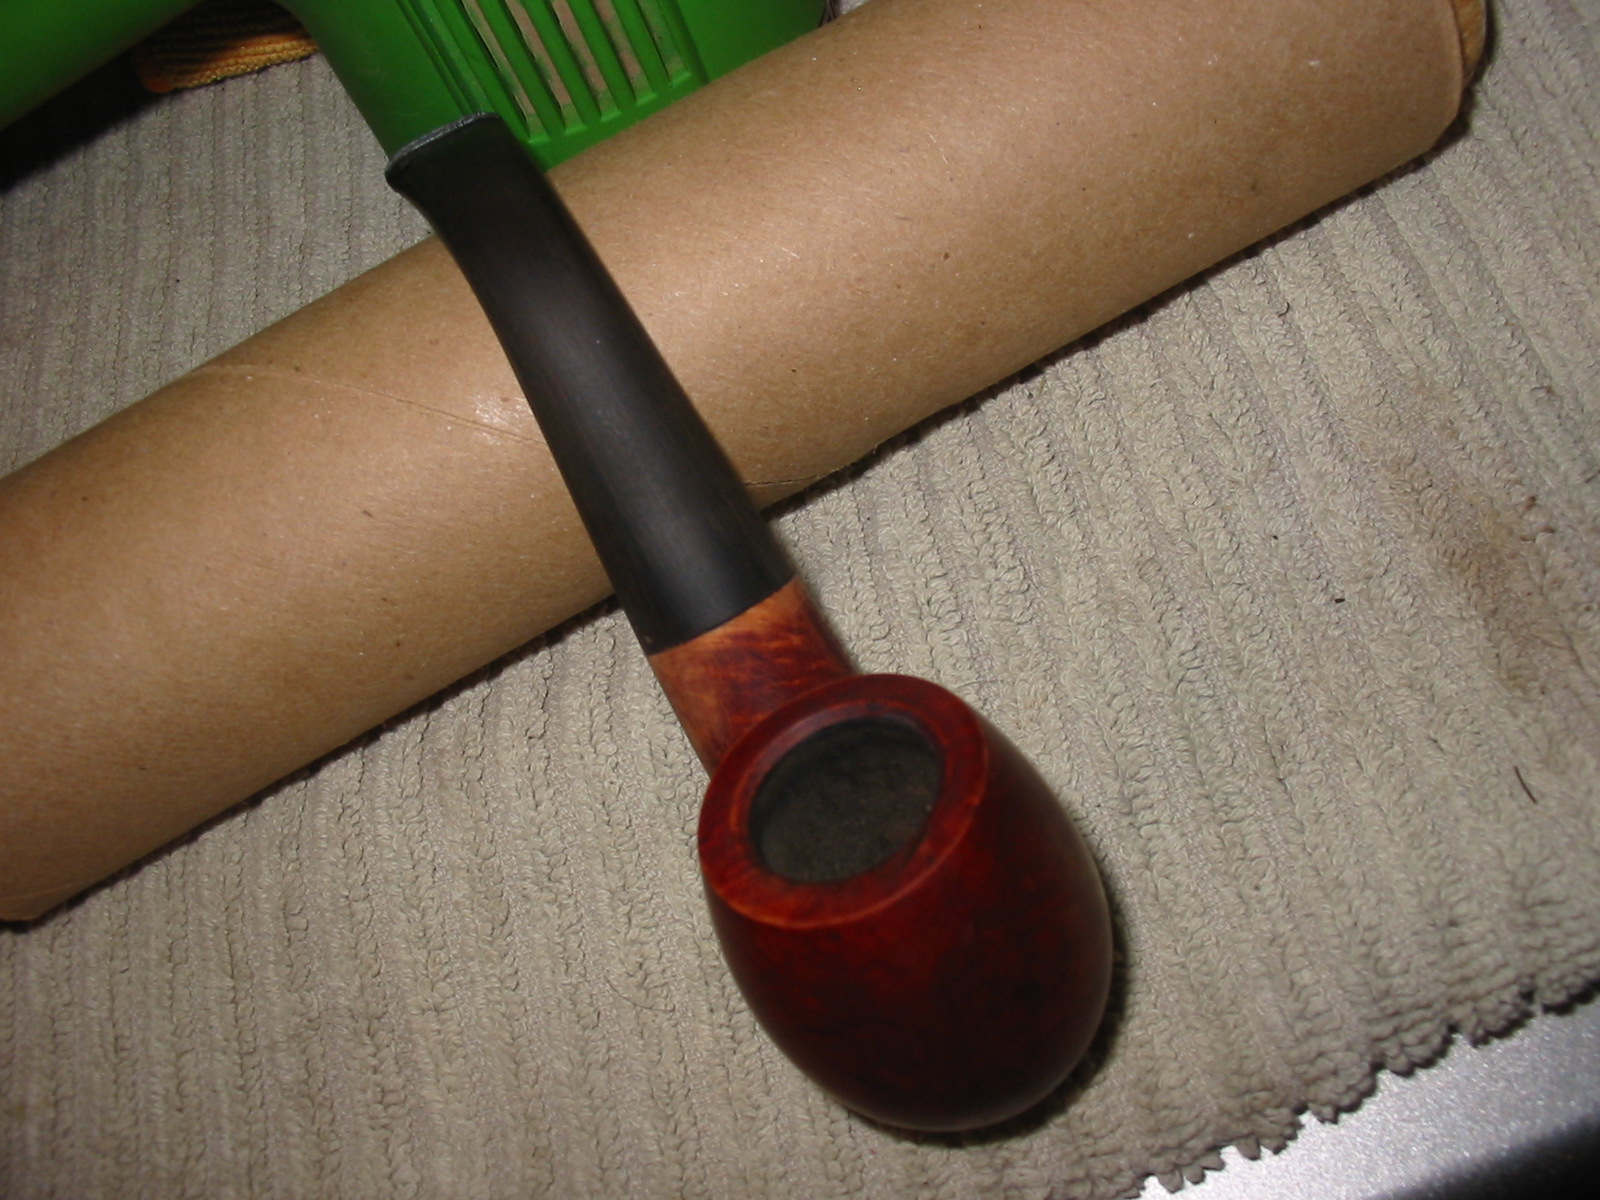
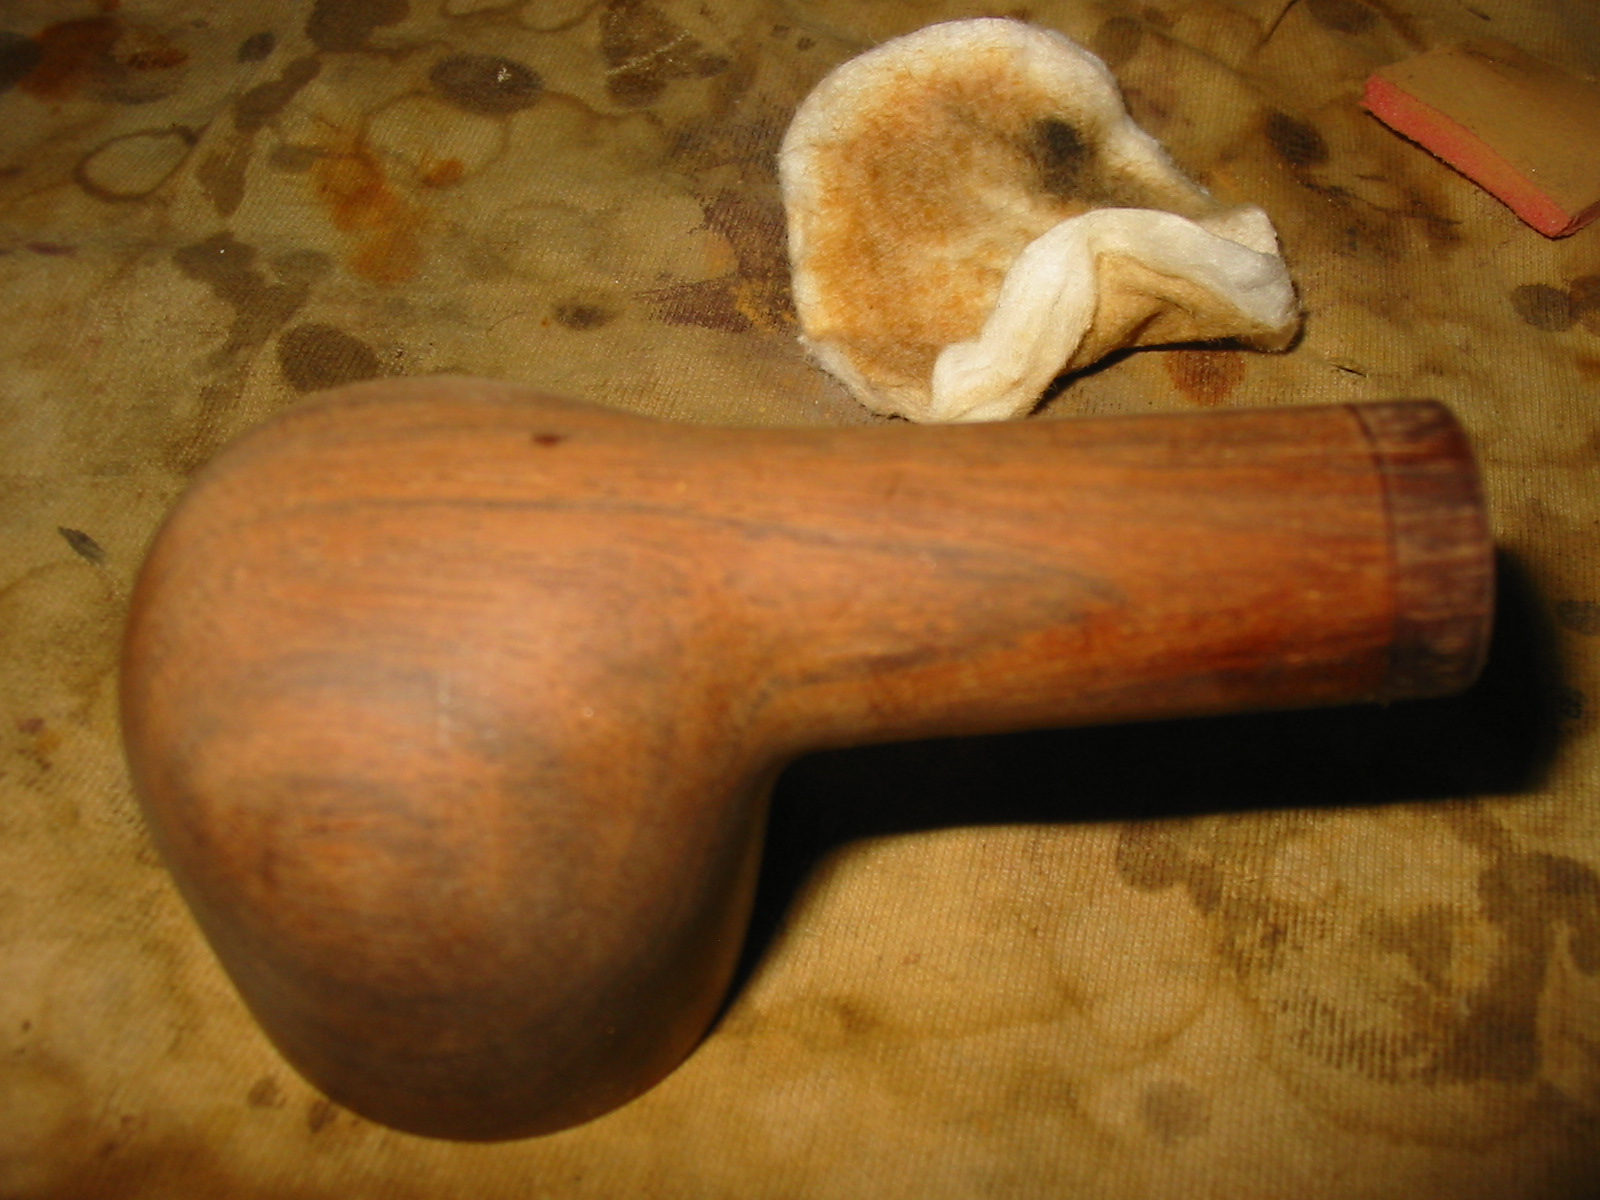
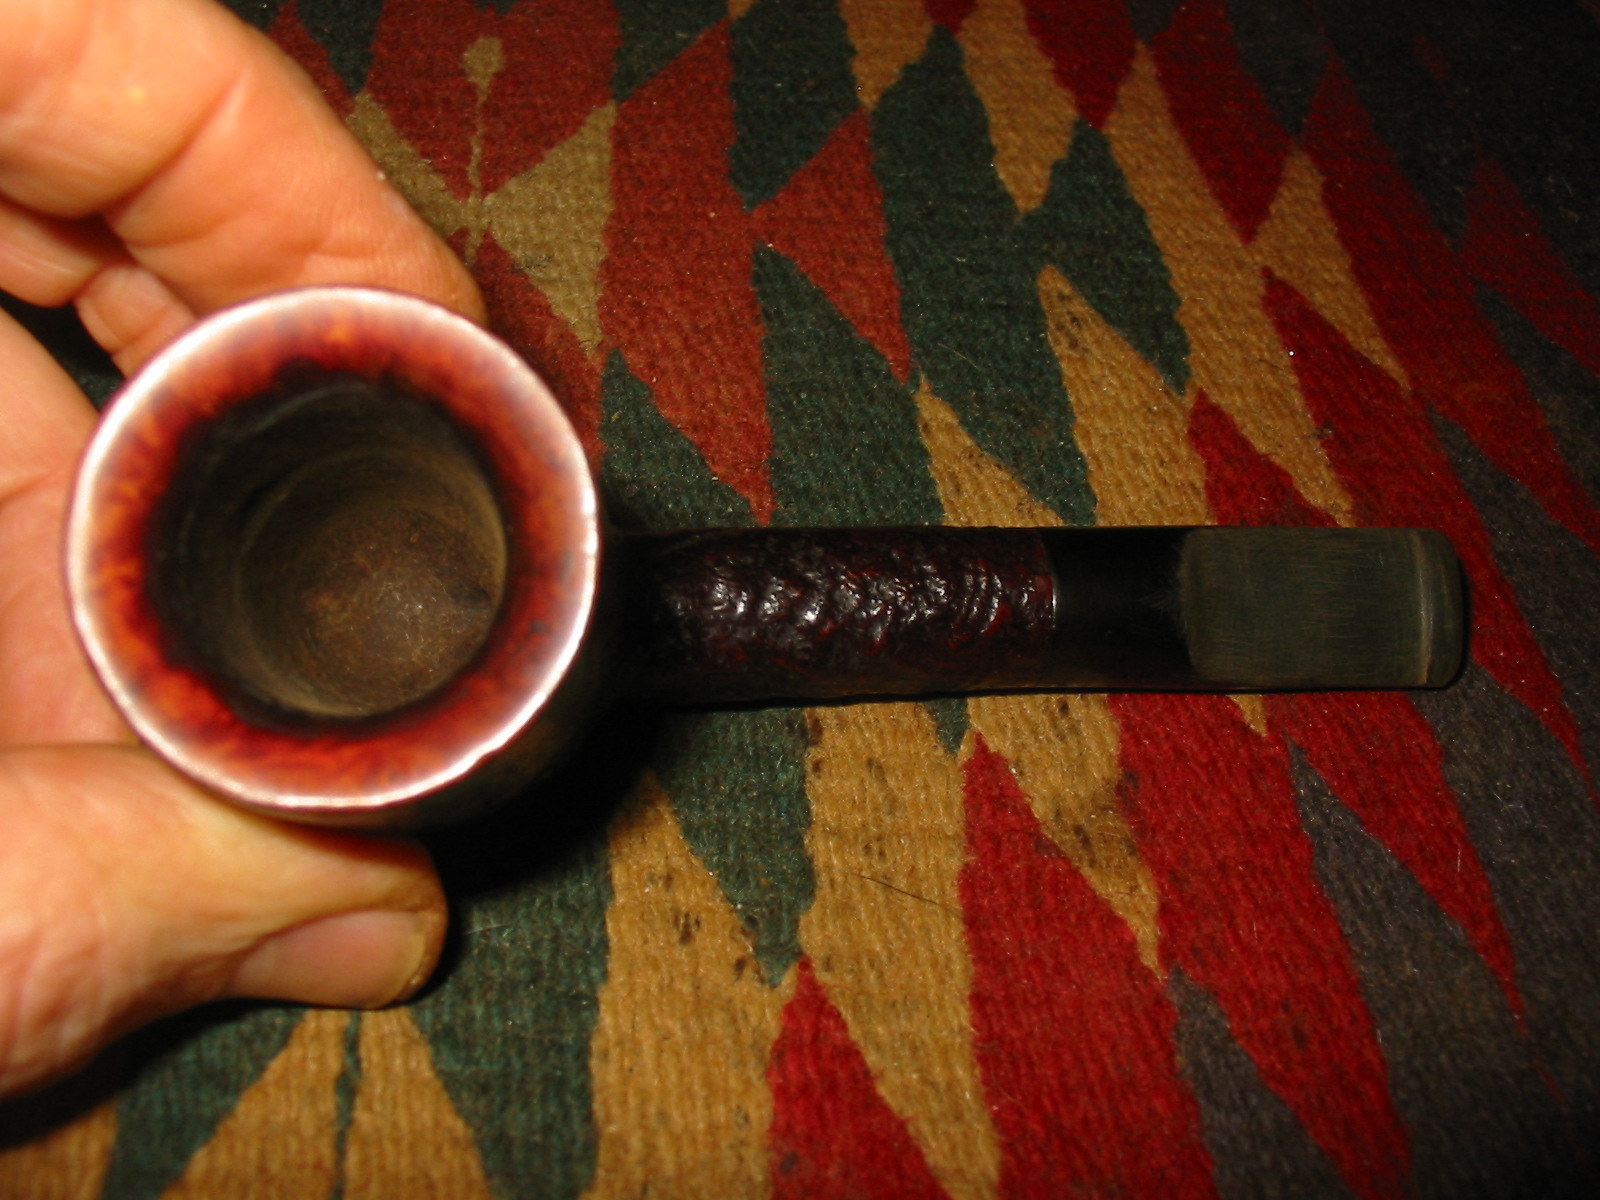
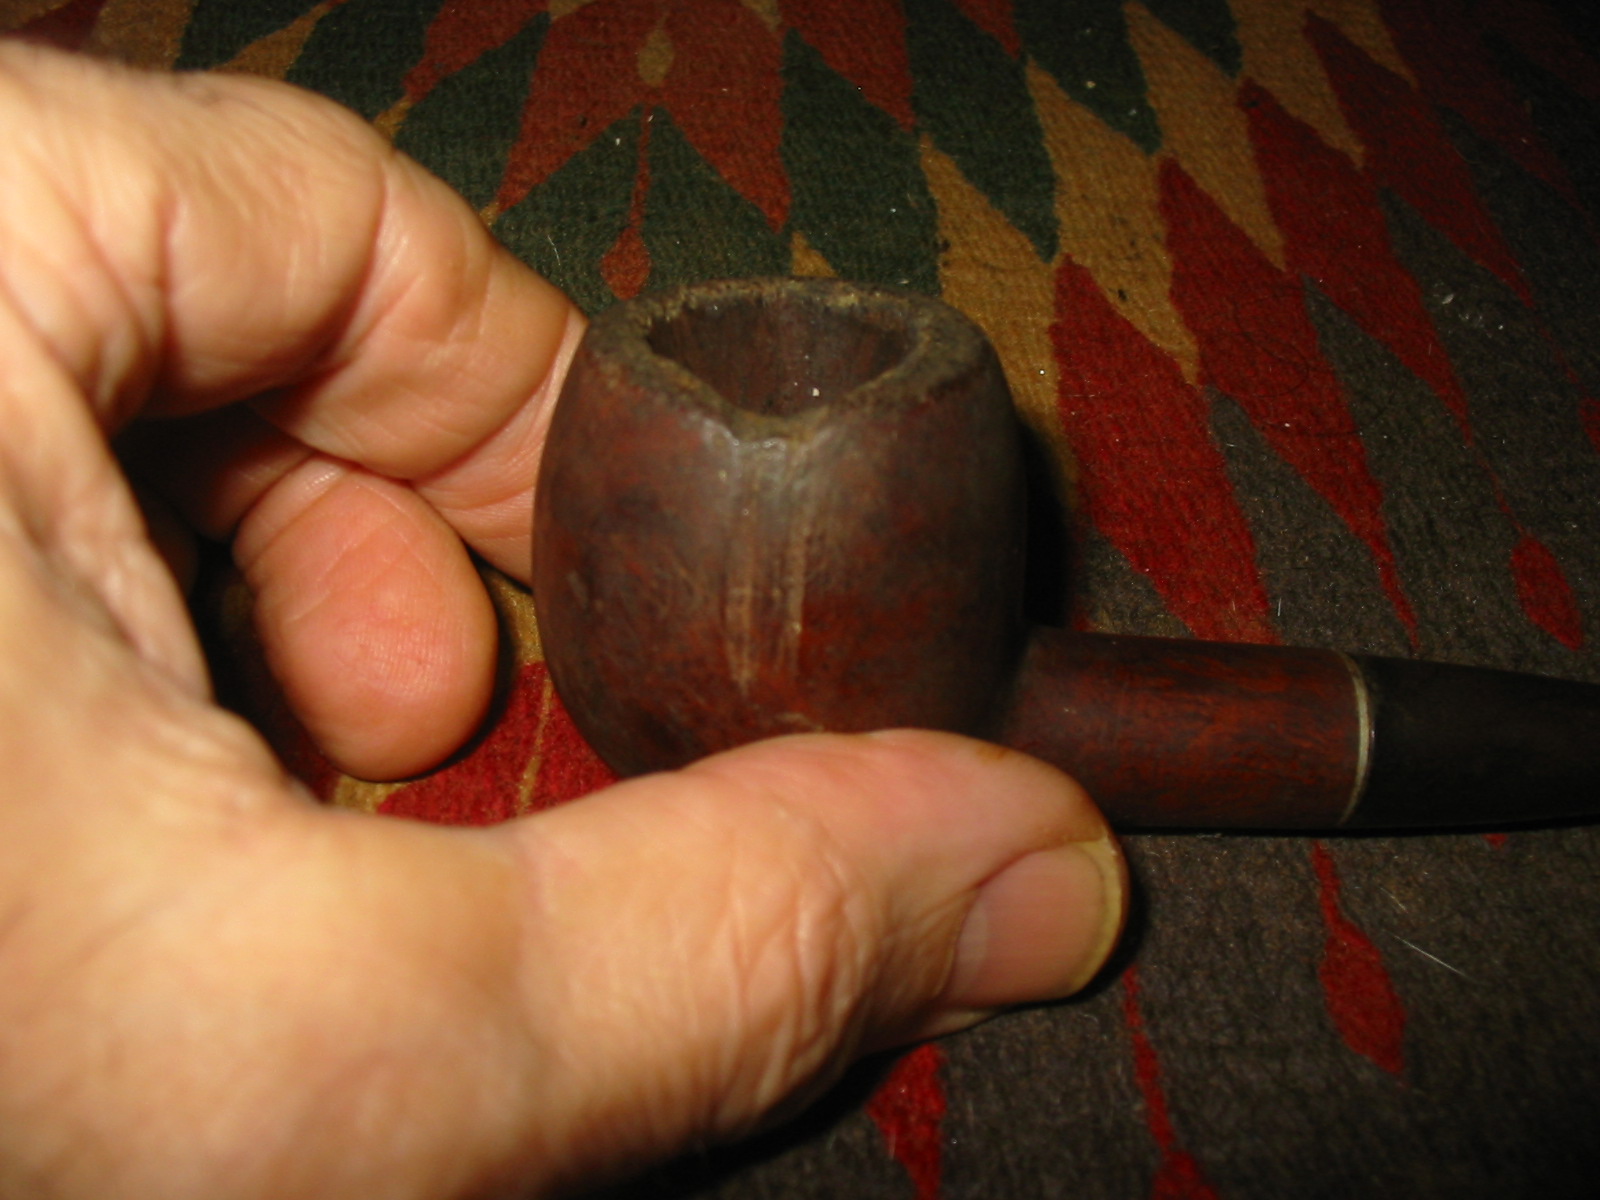
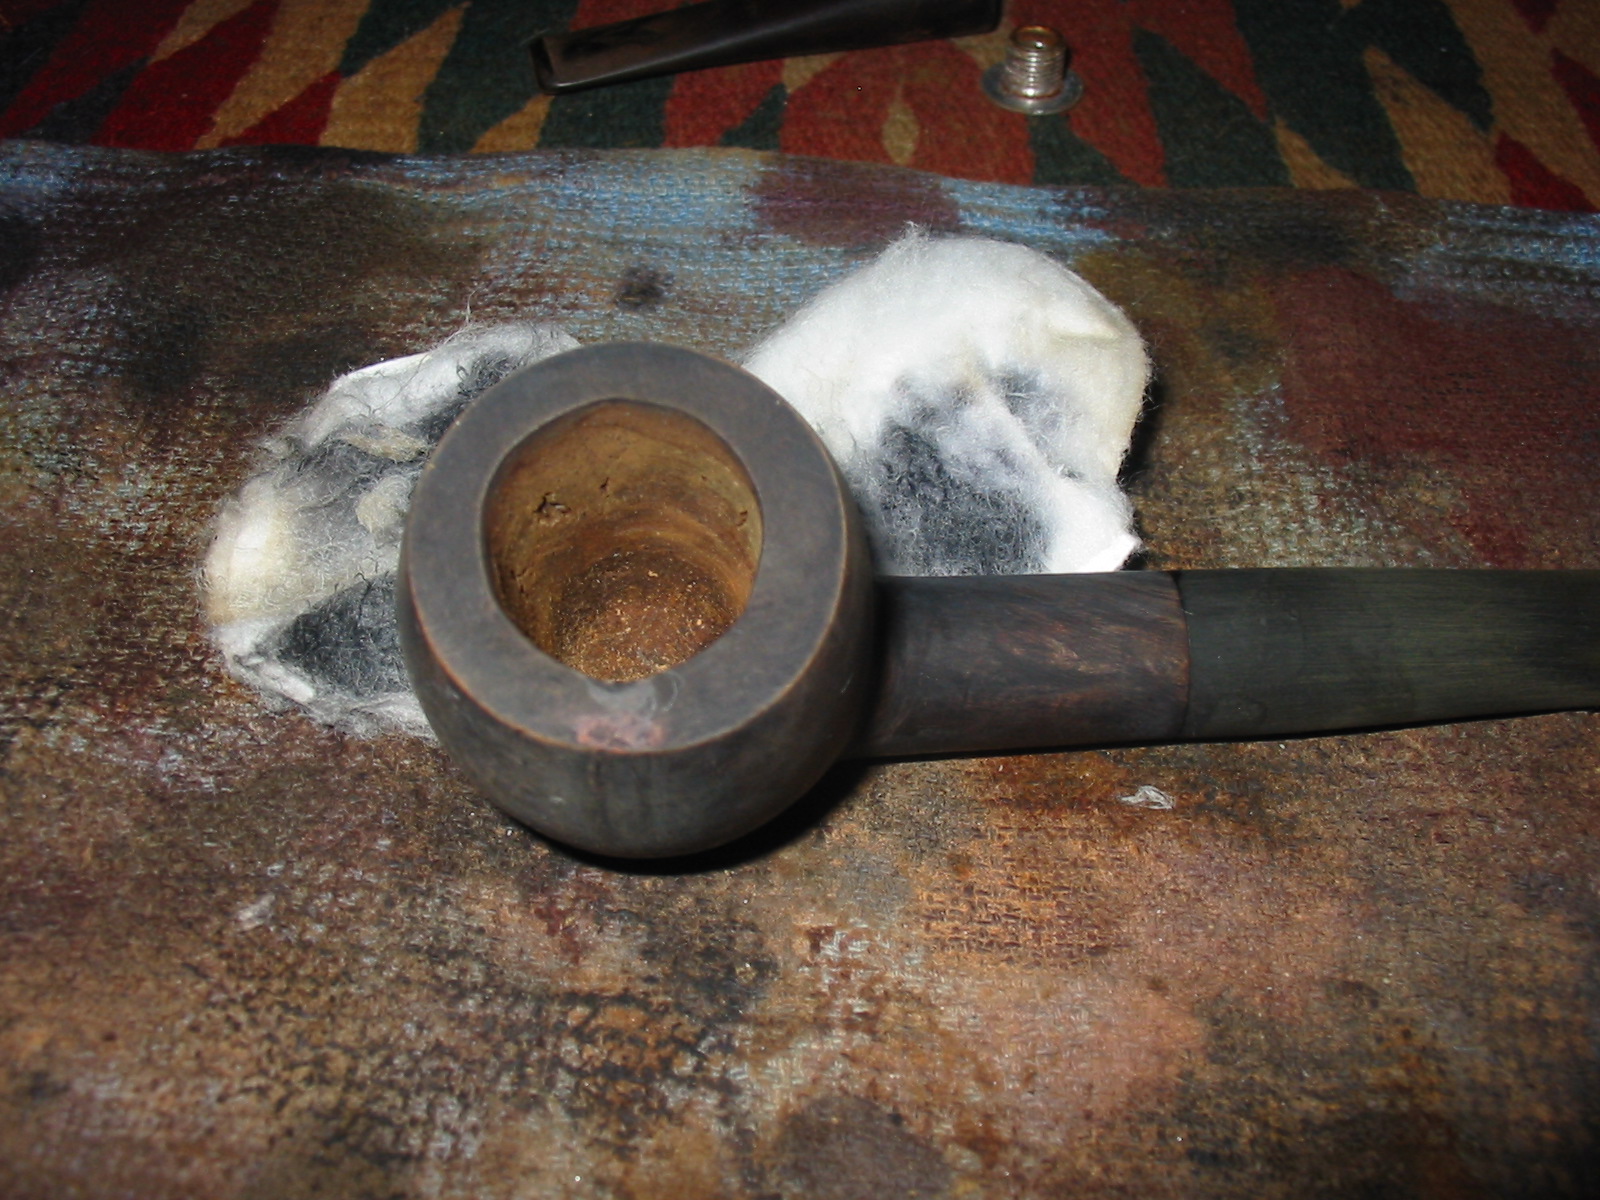
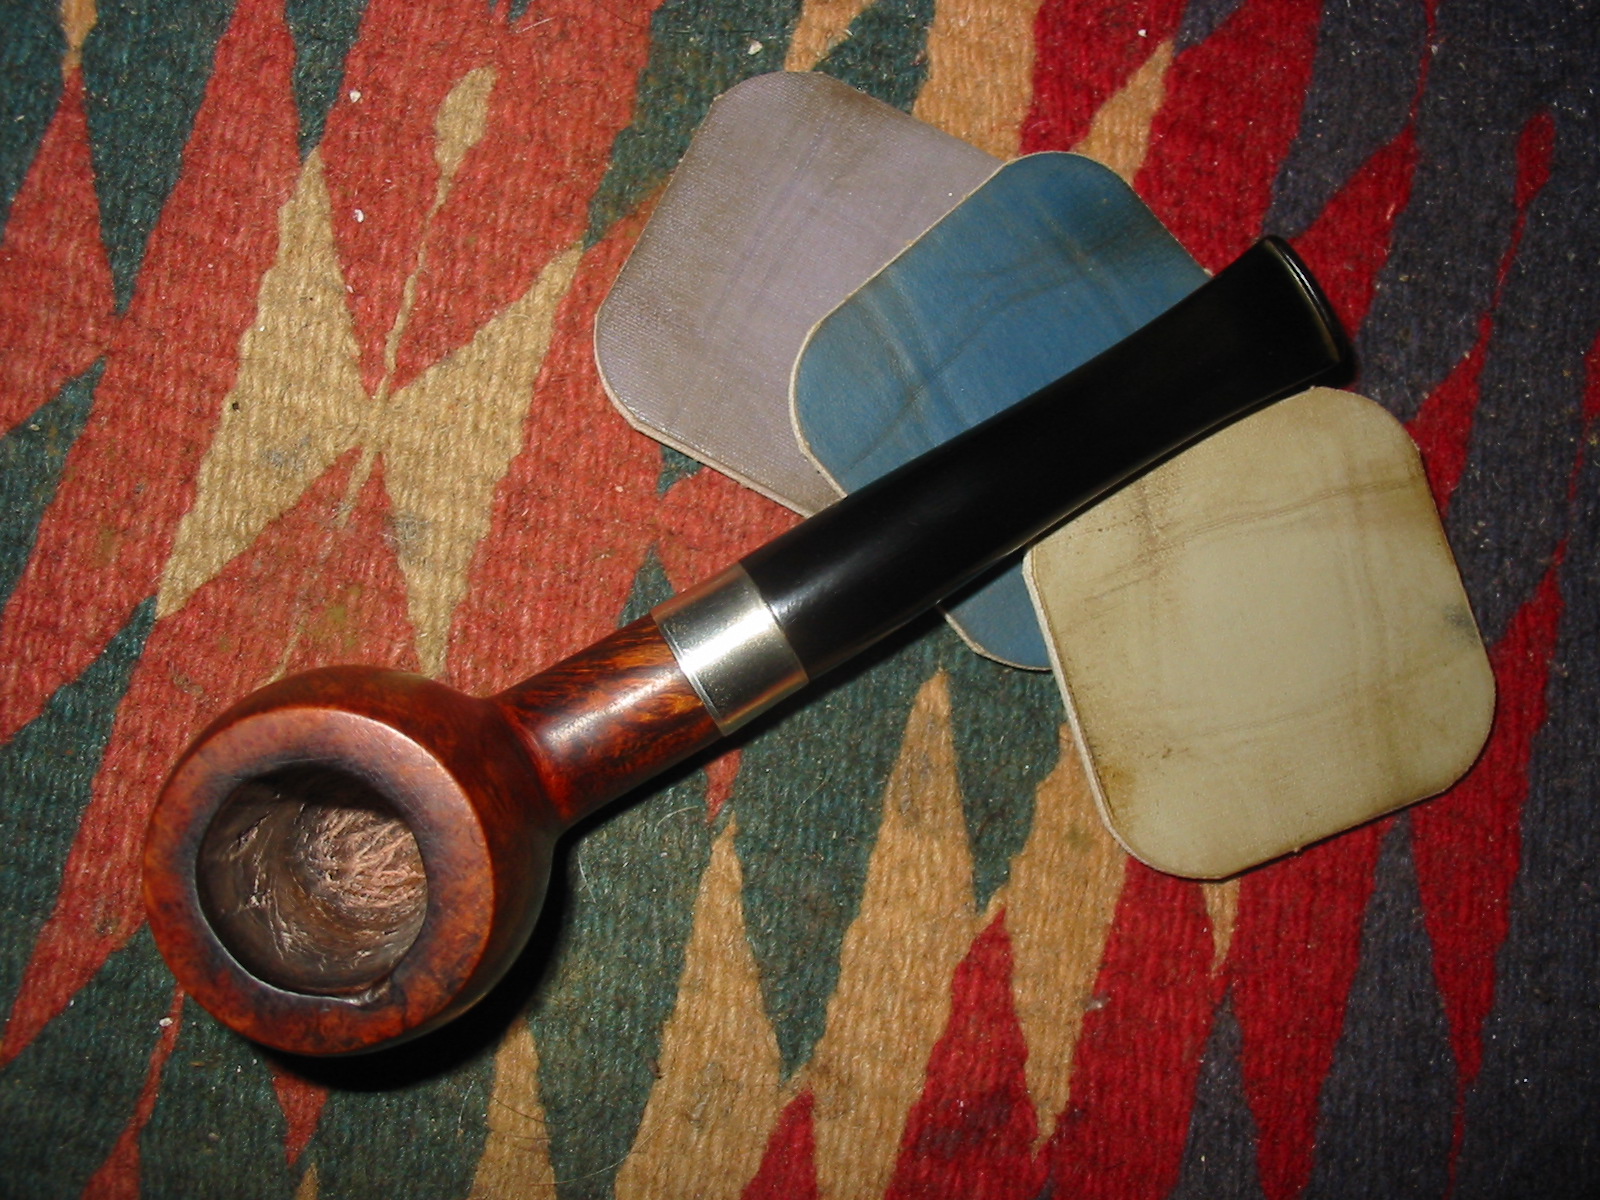
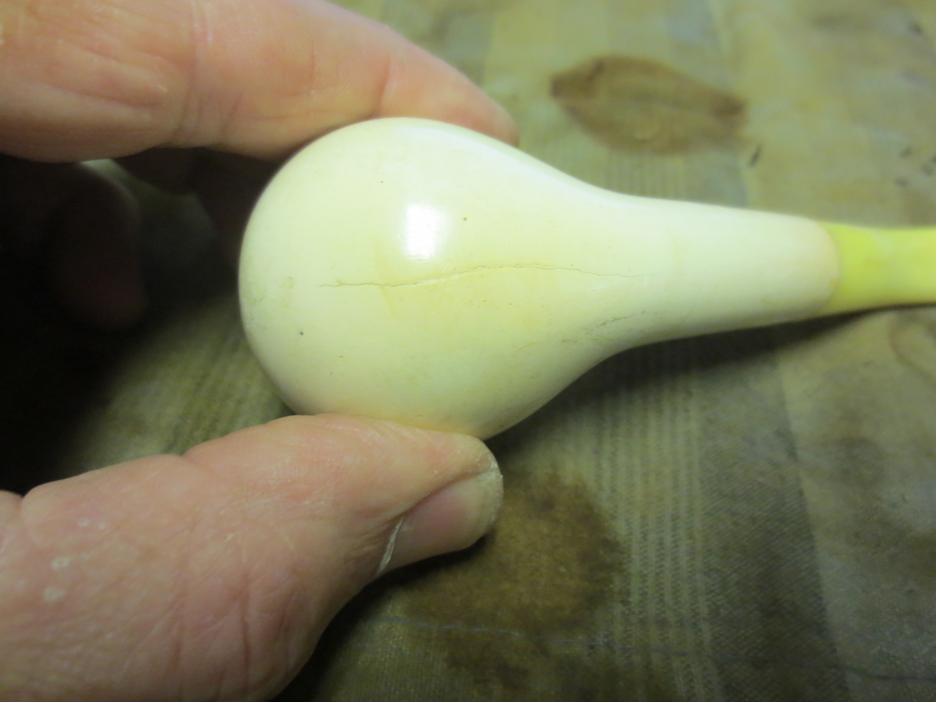
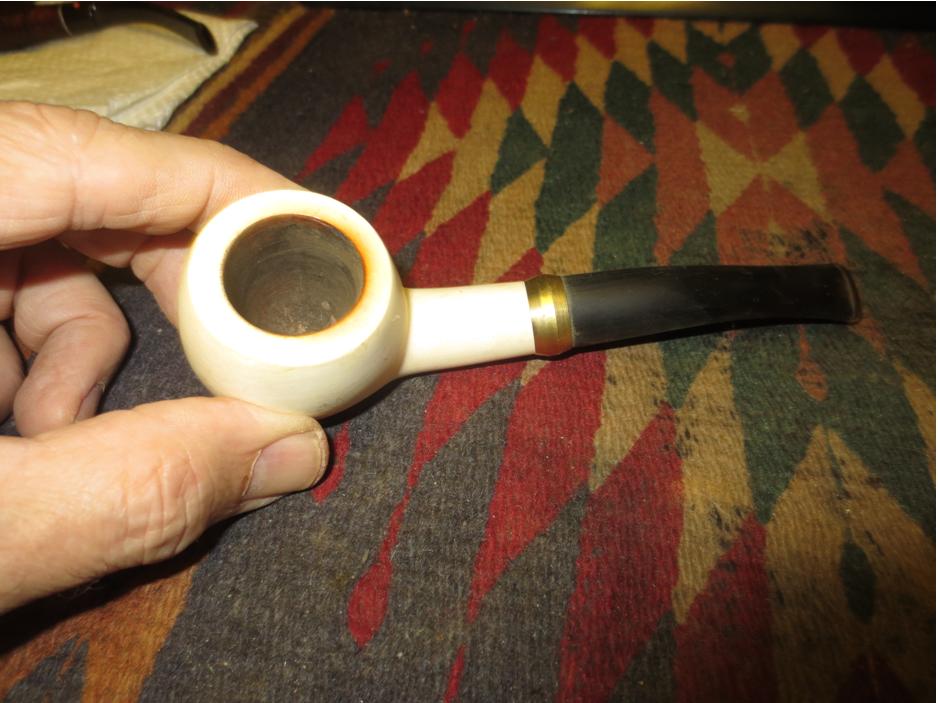
On the bottom of the exterior of the bowl there looked like there was a crack that ran for the length of the bowl. I examined it with a lens and it turned out to be a gouge in the surface of the meerschaum. It may be a crack but it did not go deep in the material so it was salvageable.band4

band5 
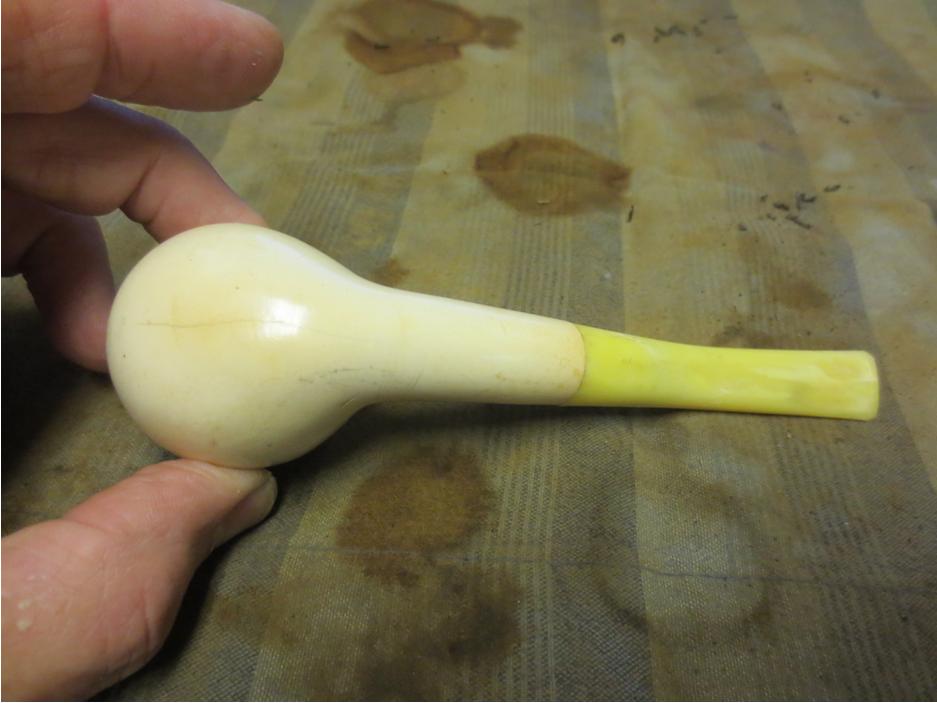
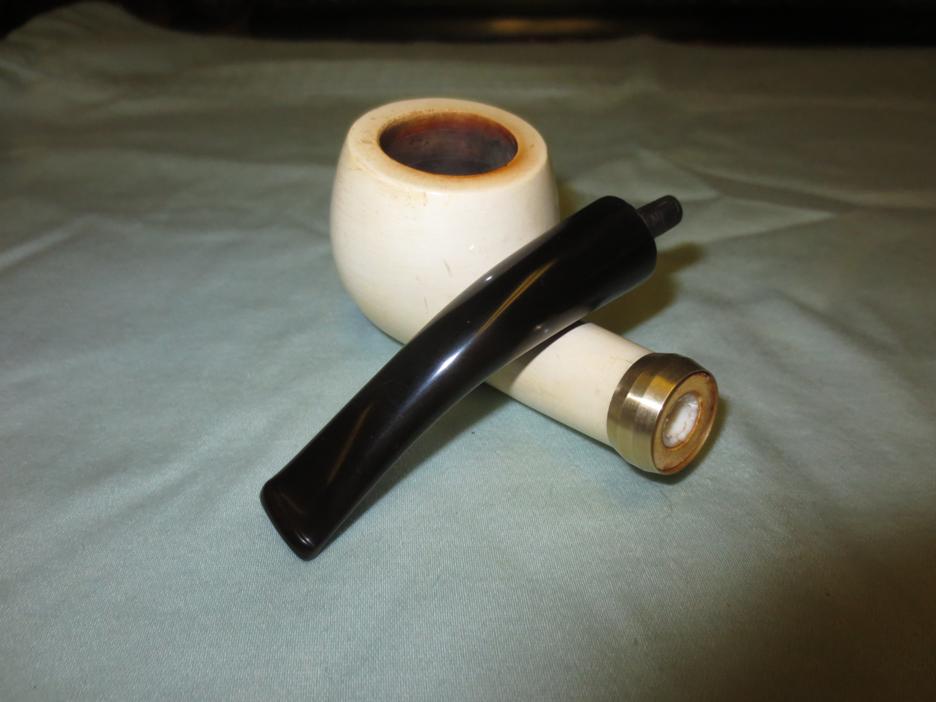
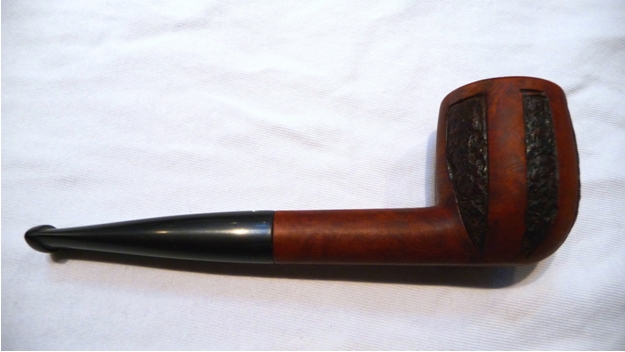
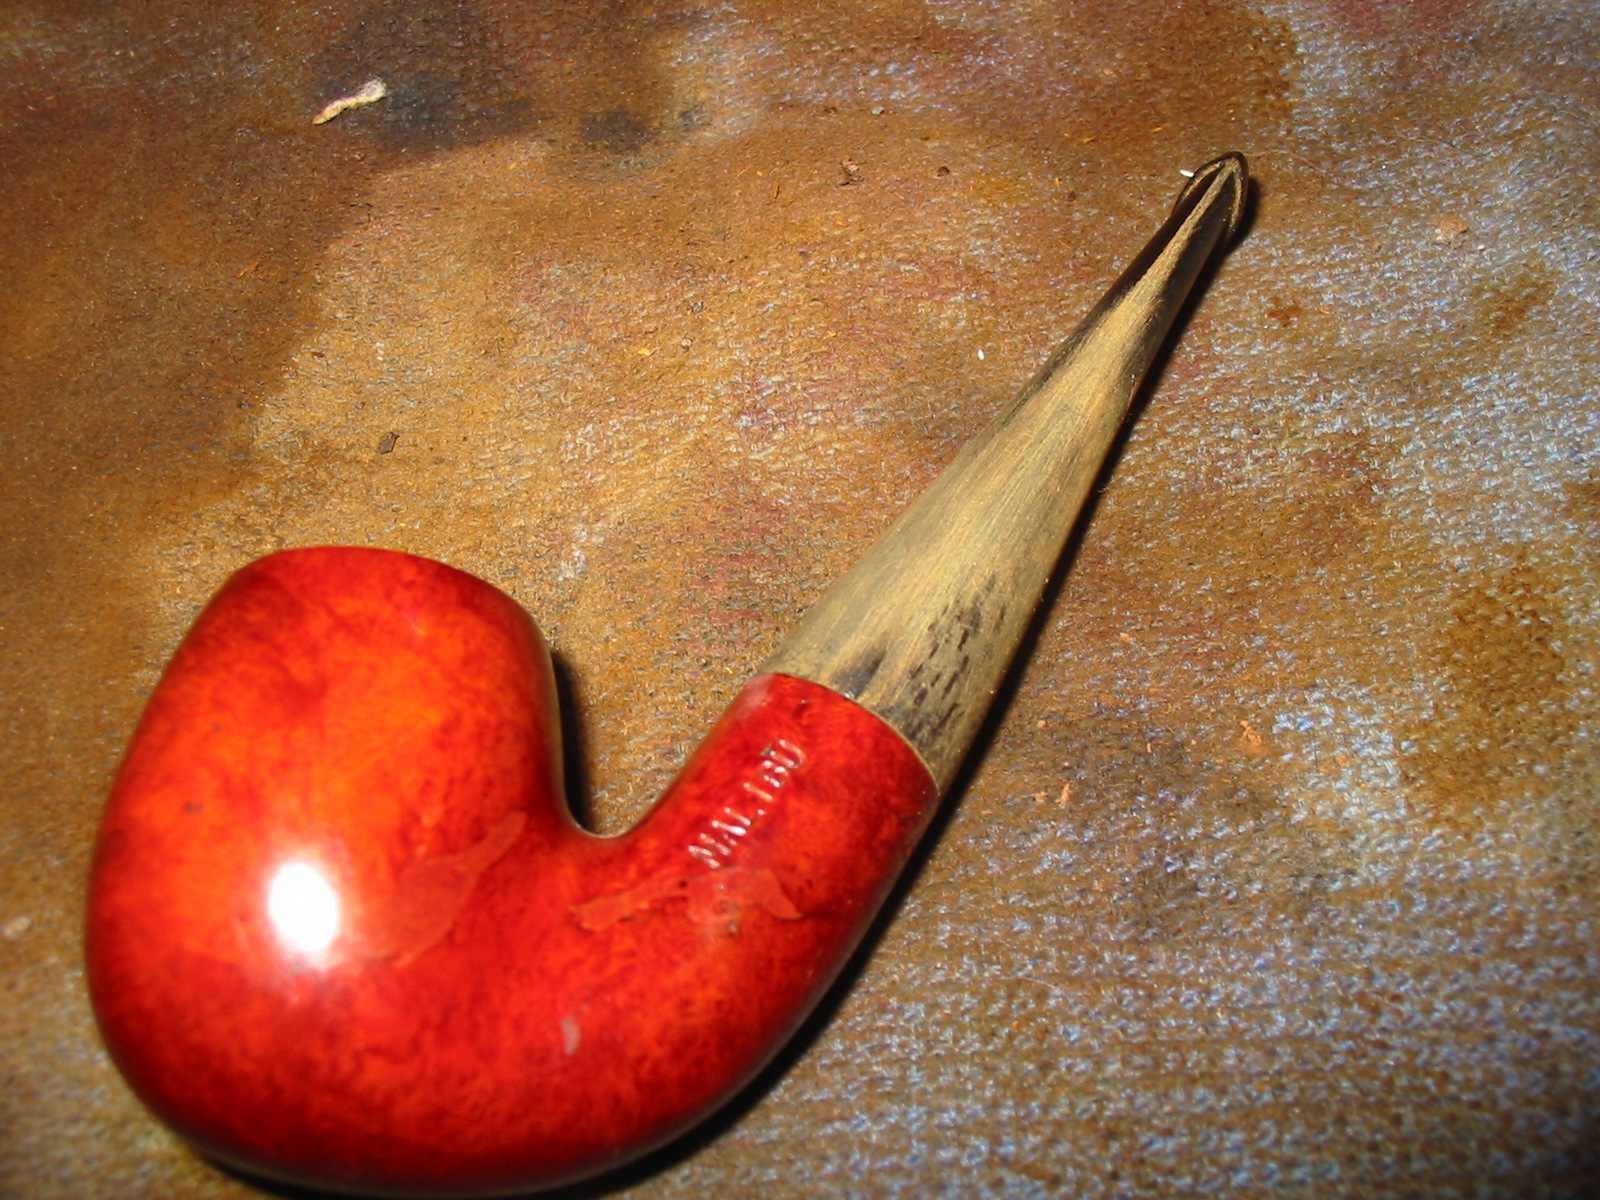
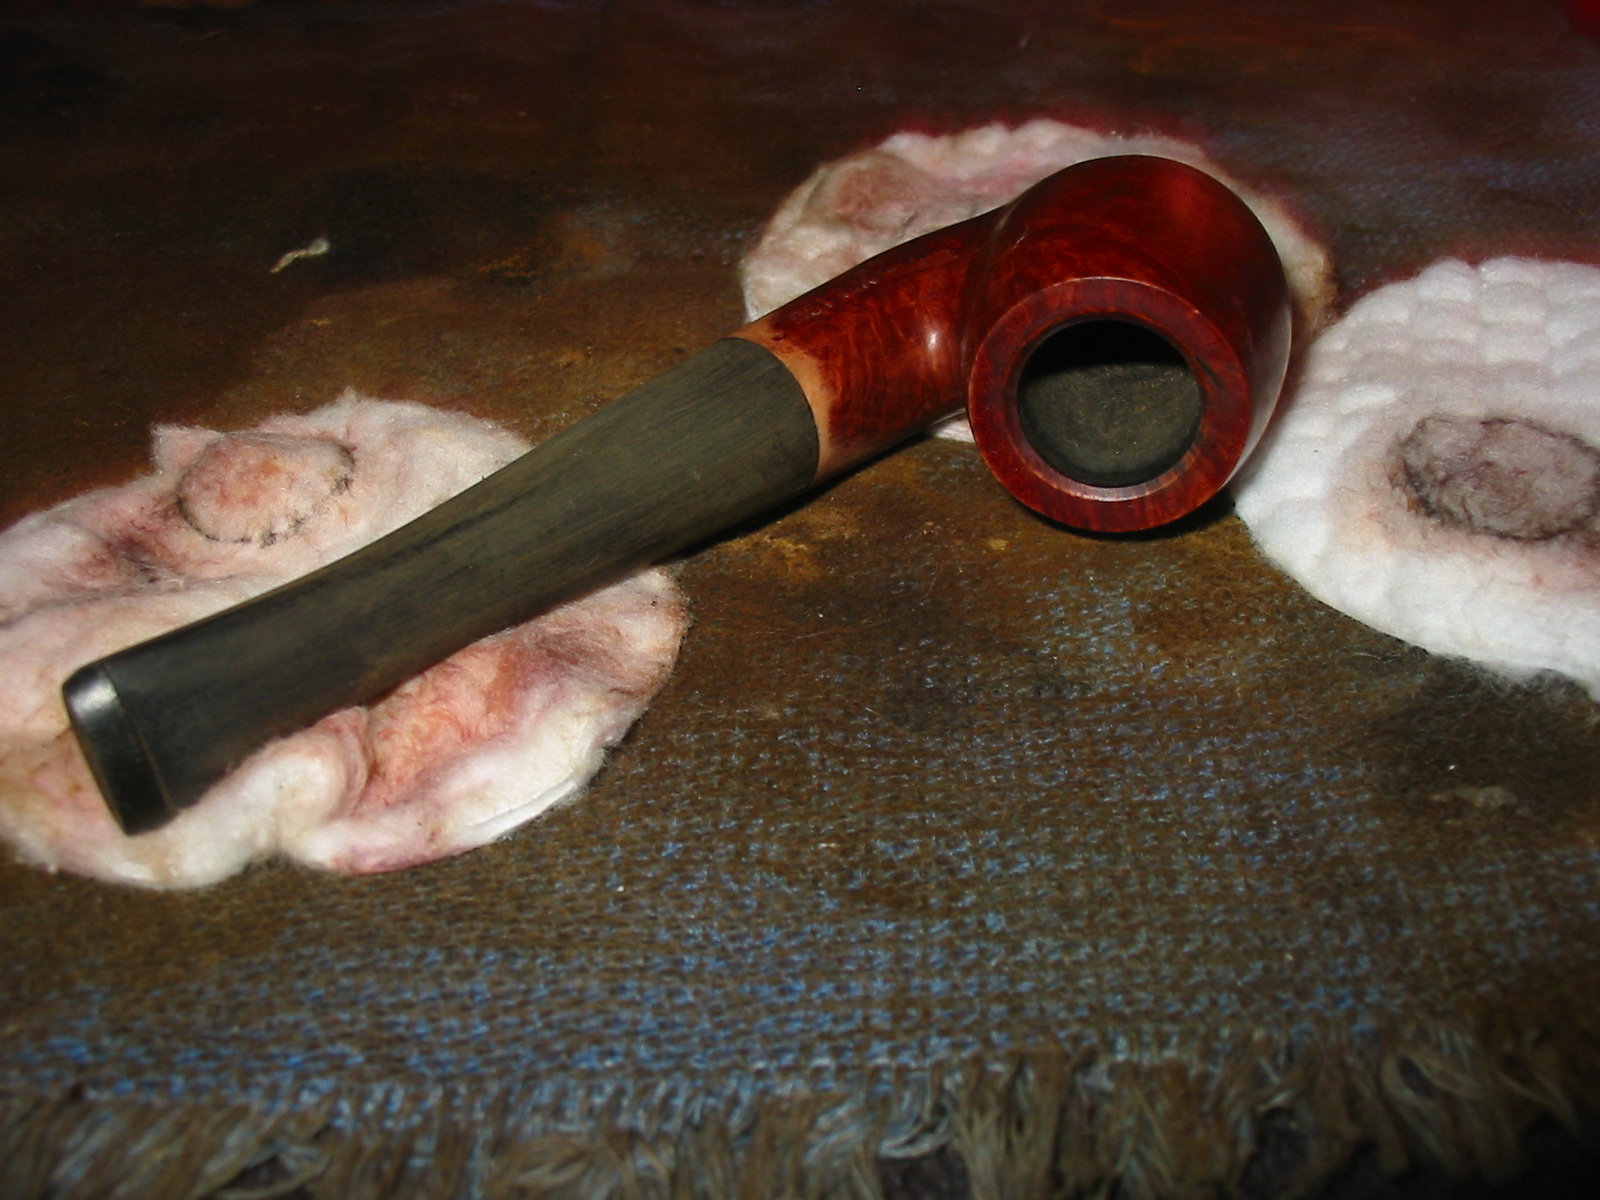
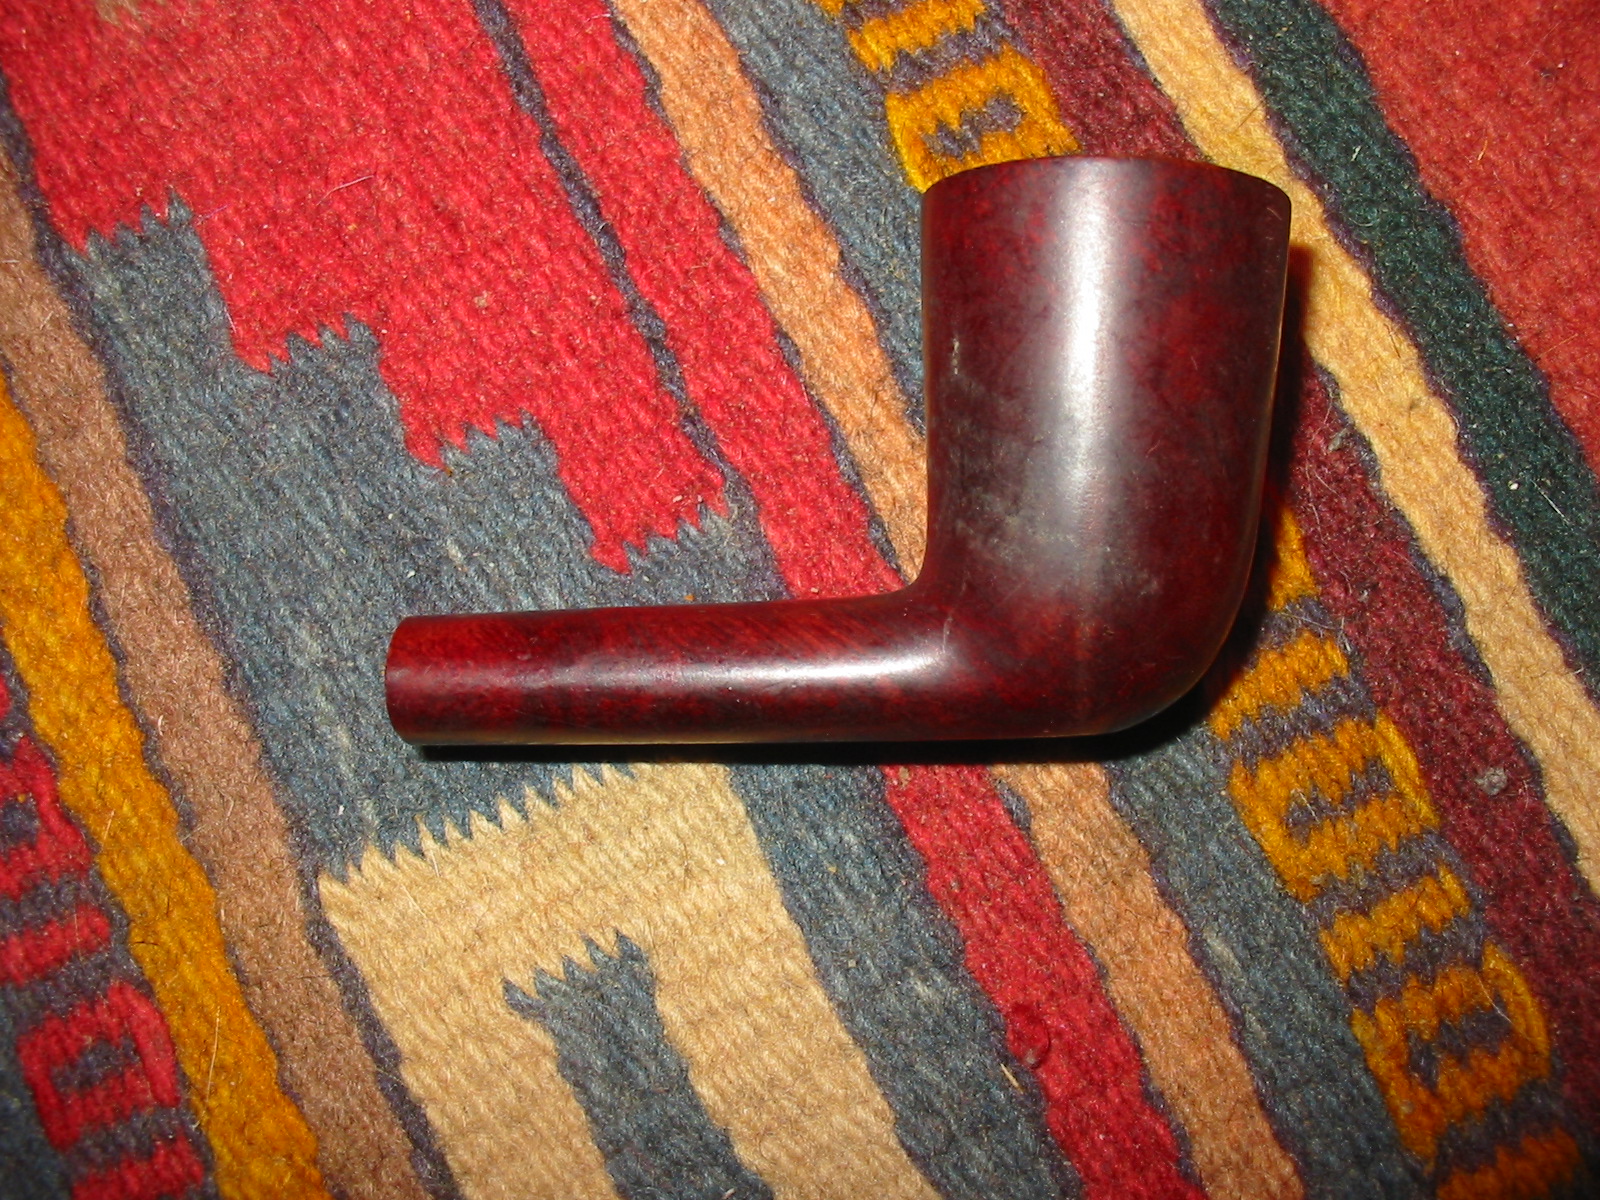
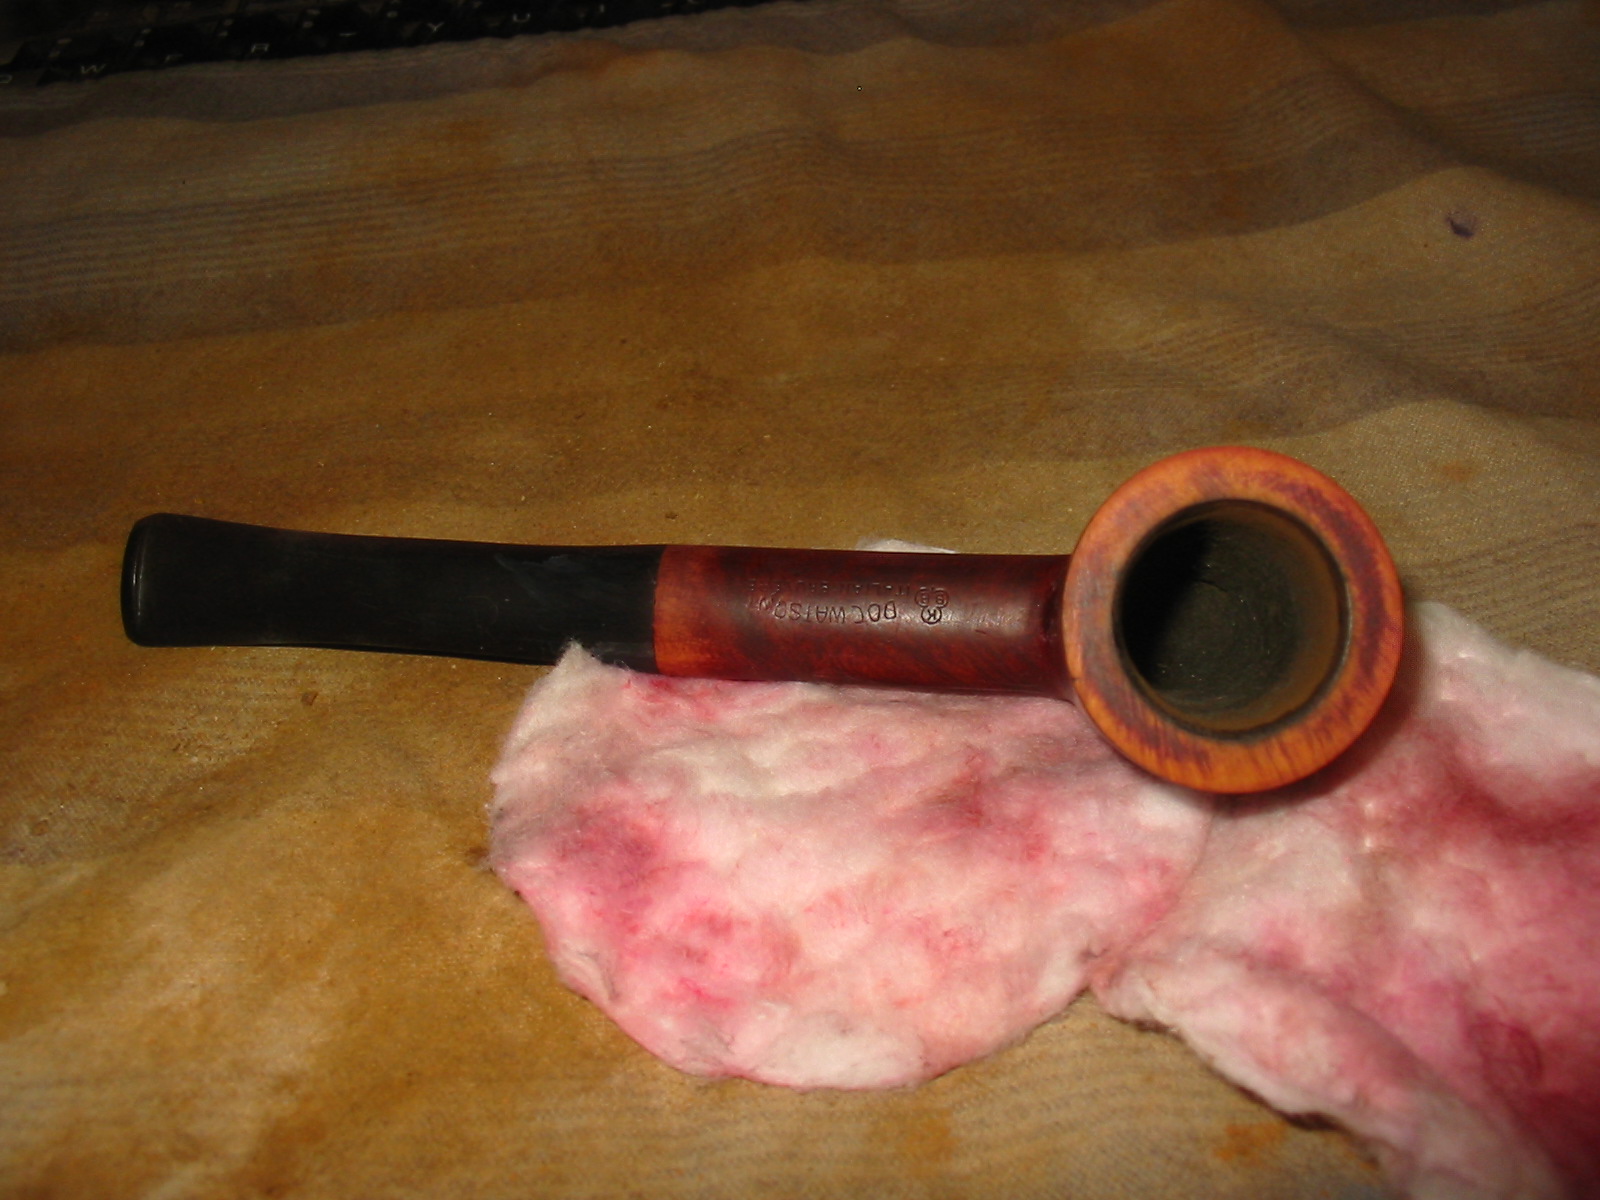
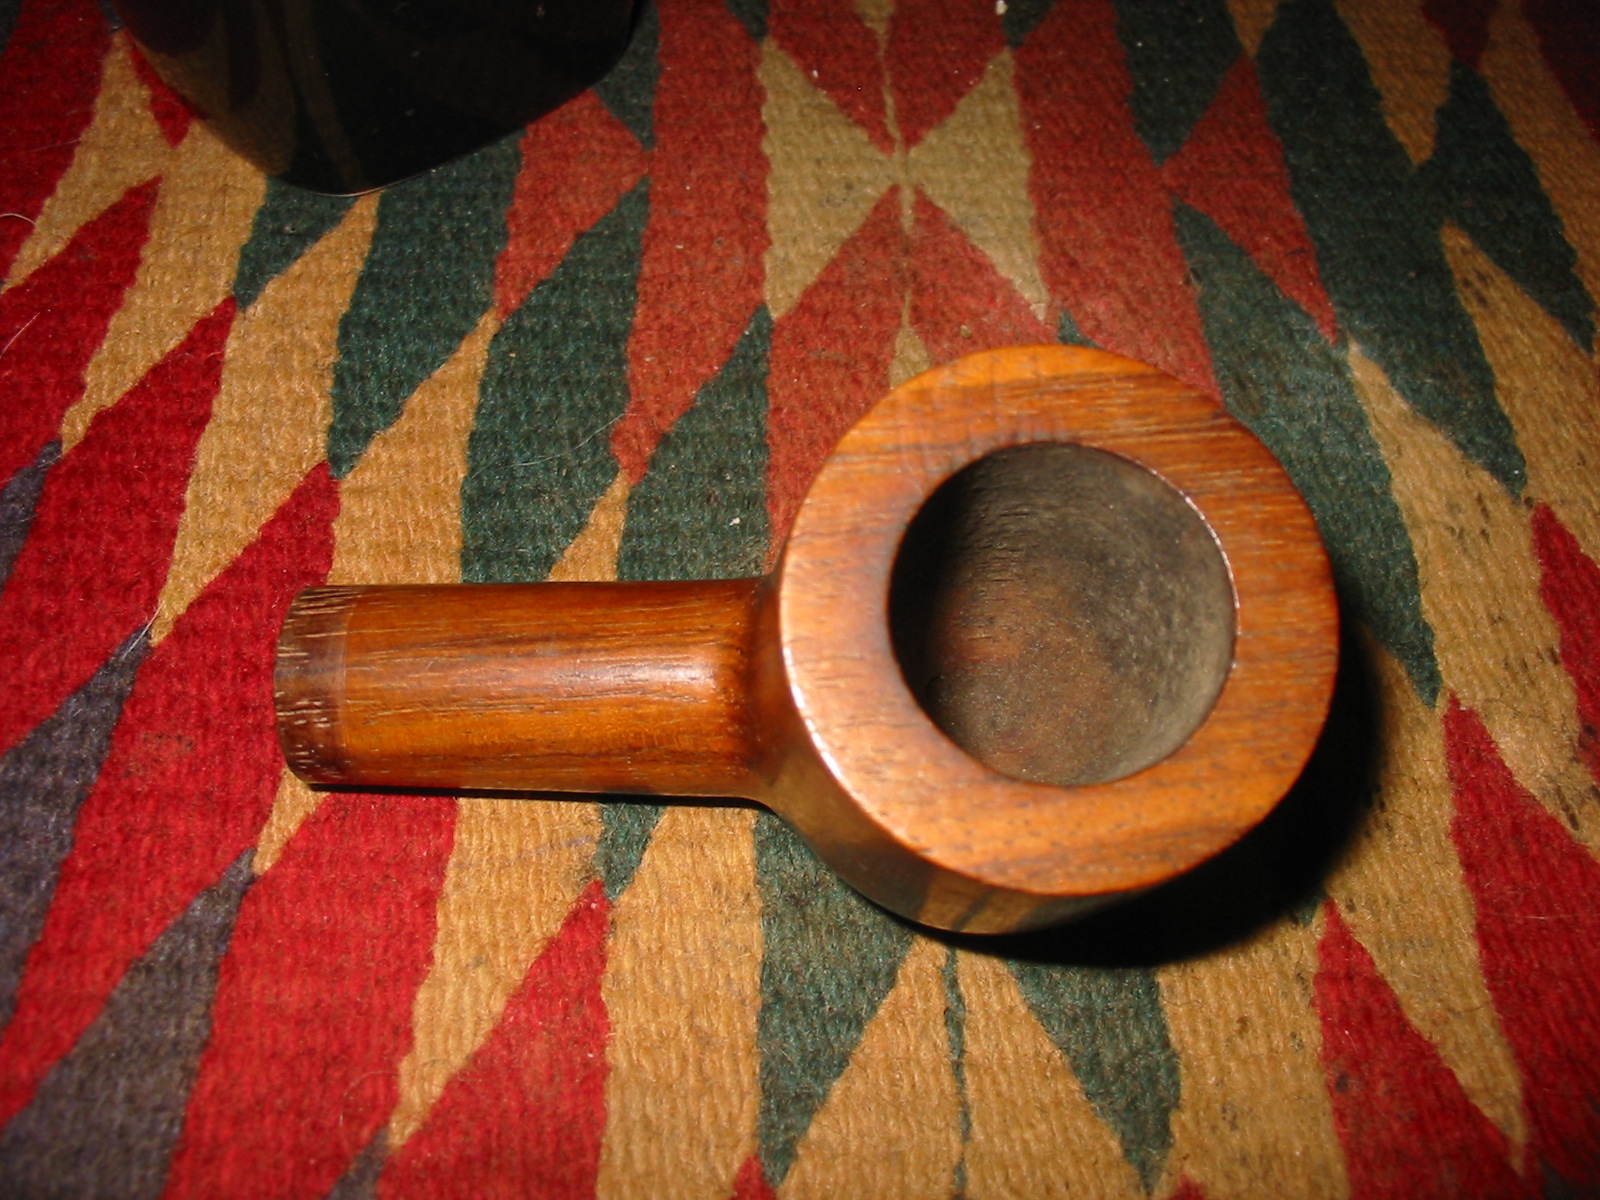
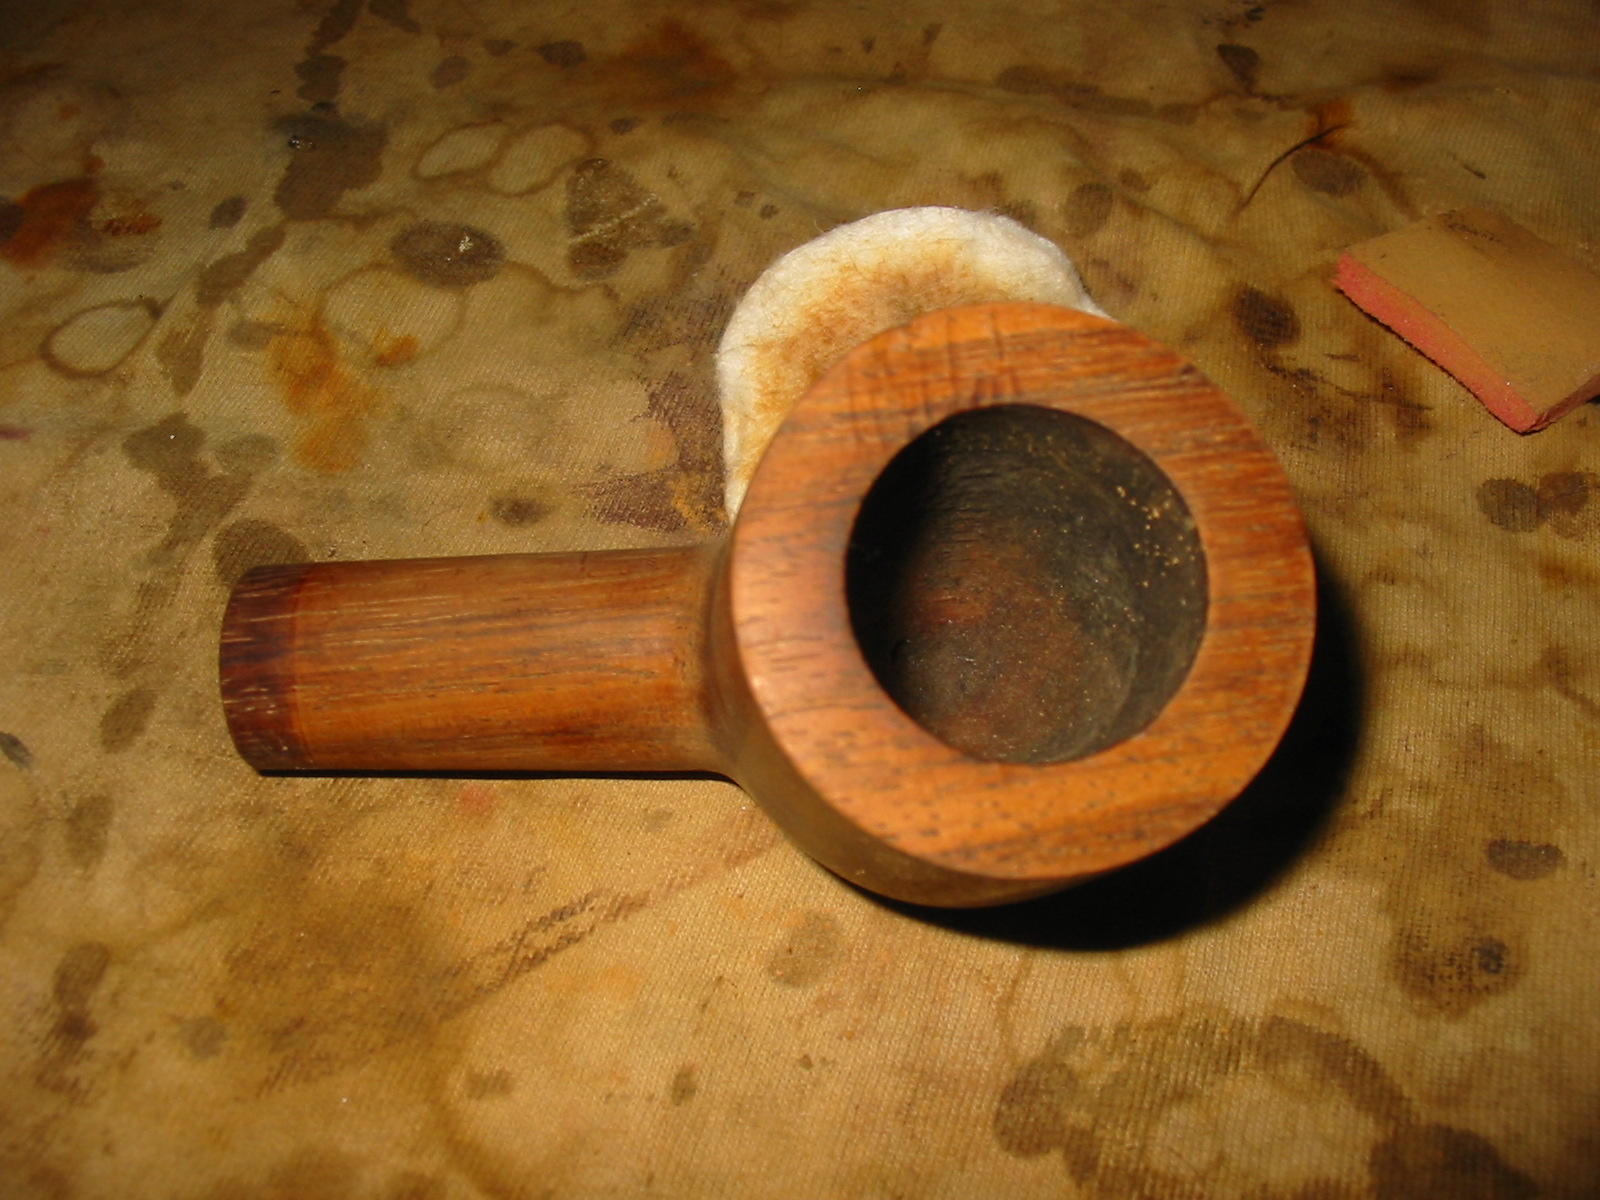
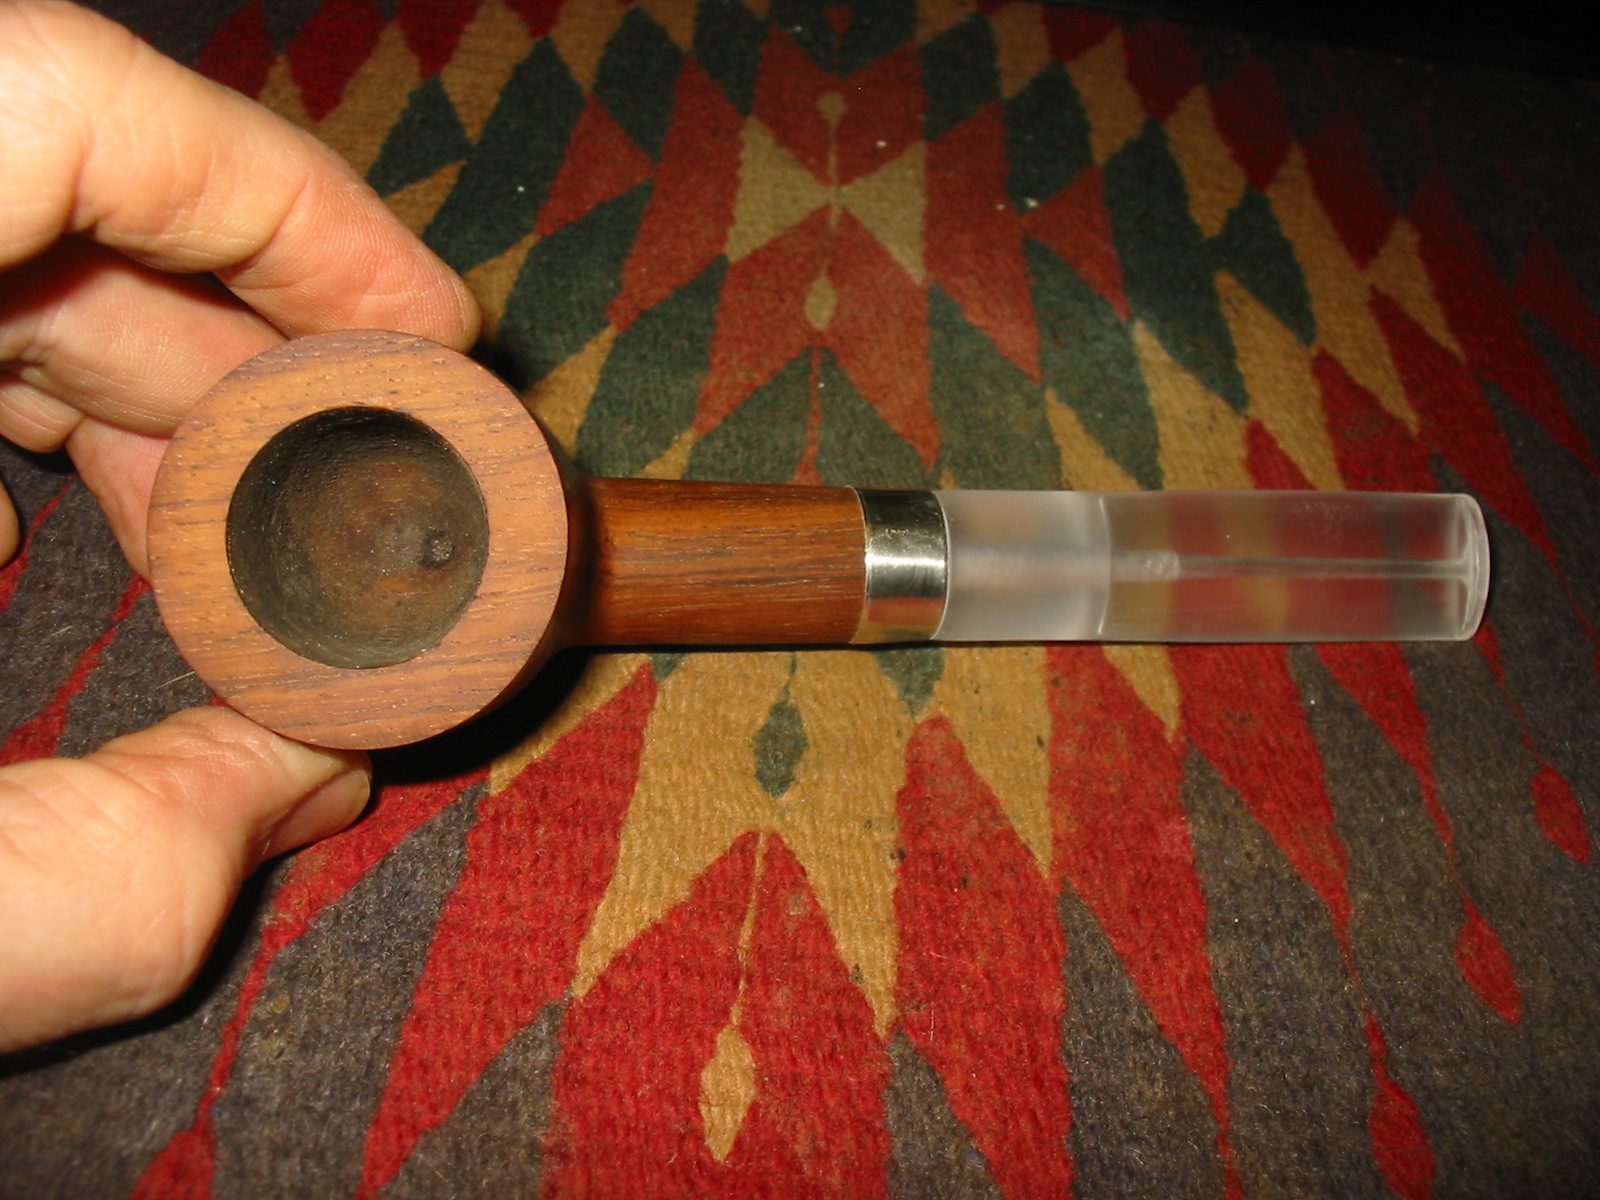
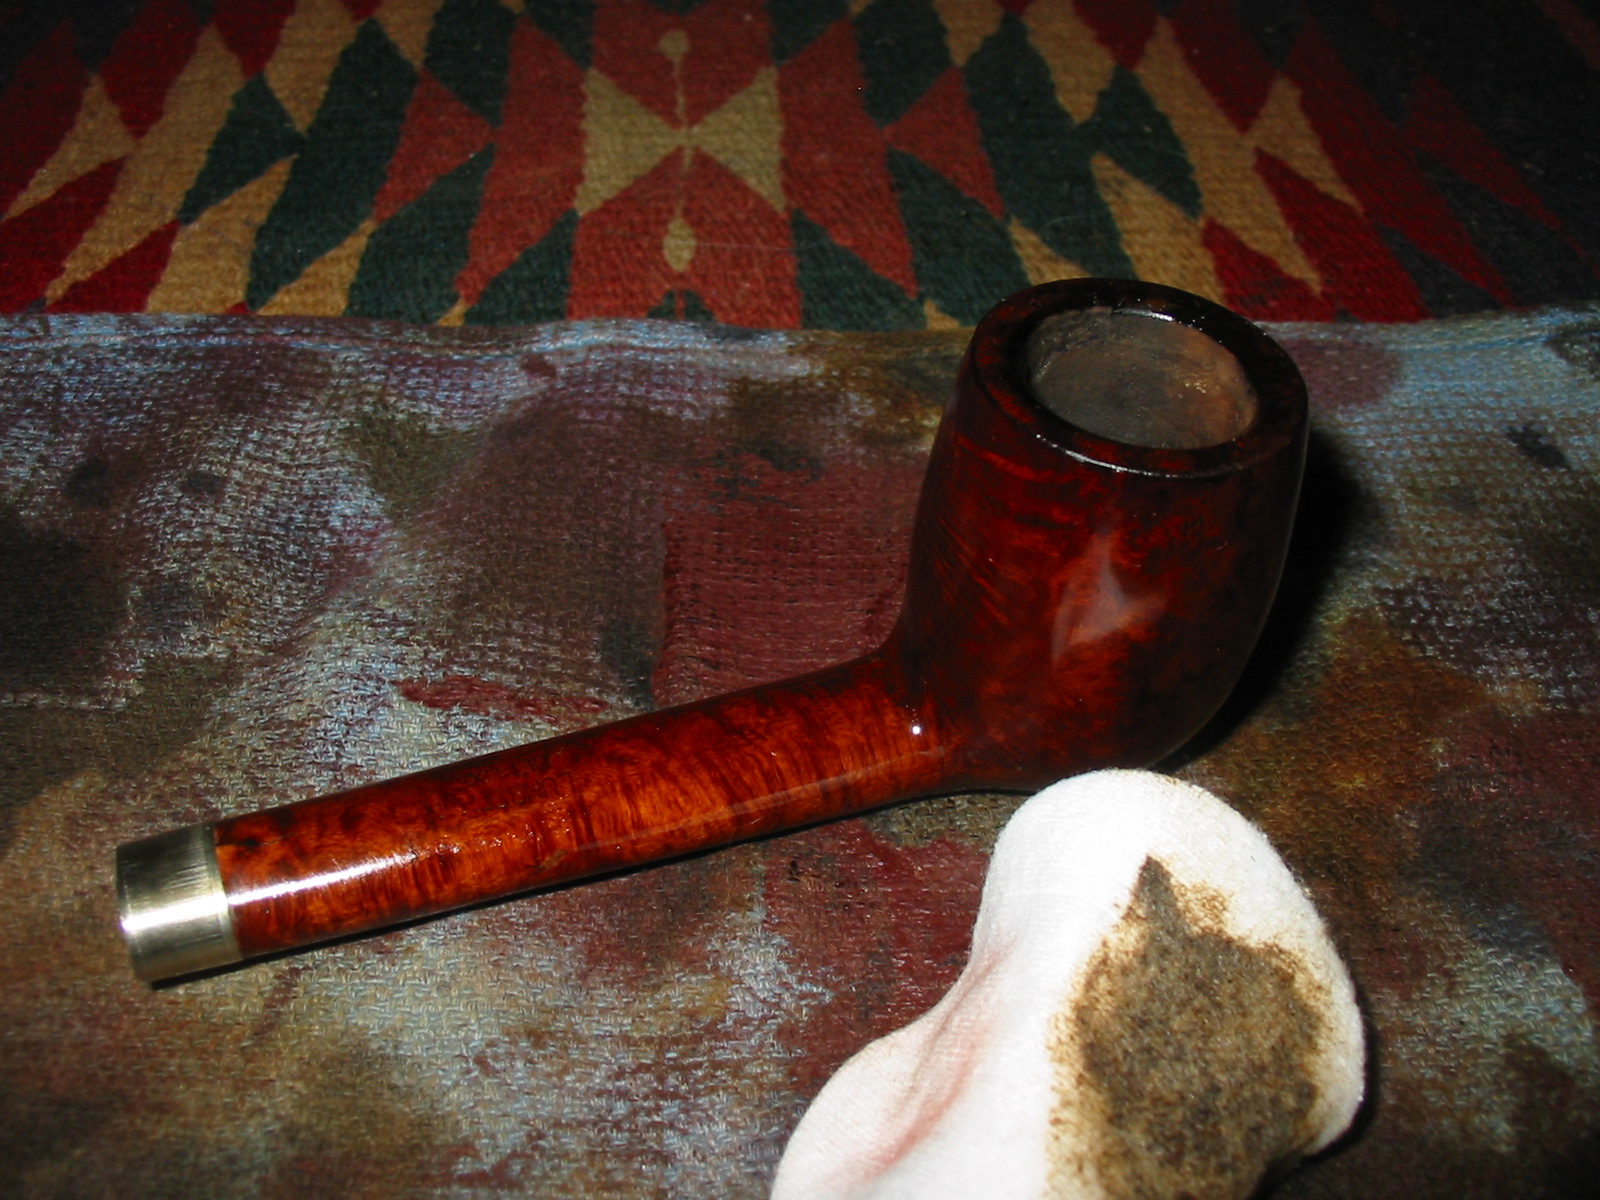
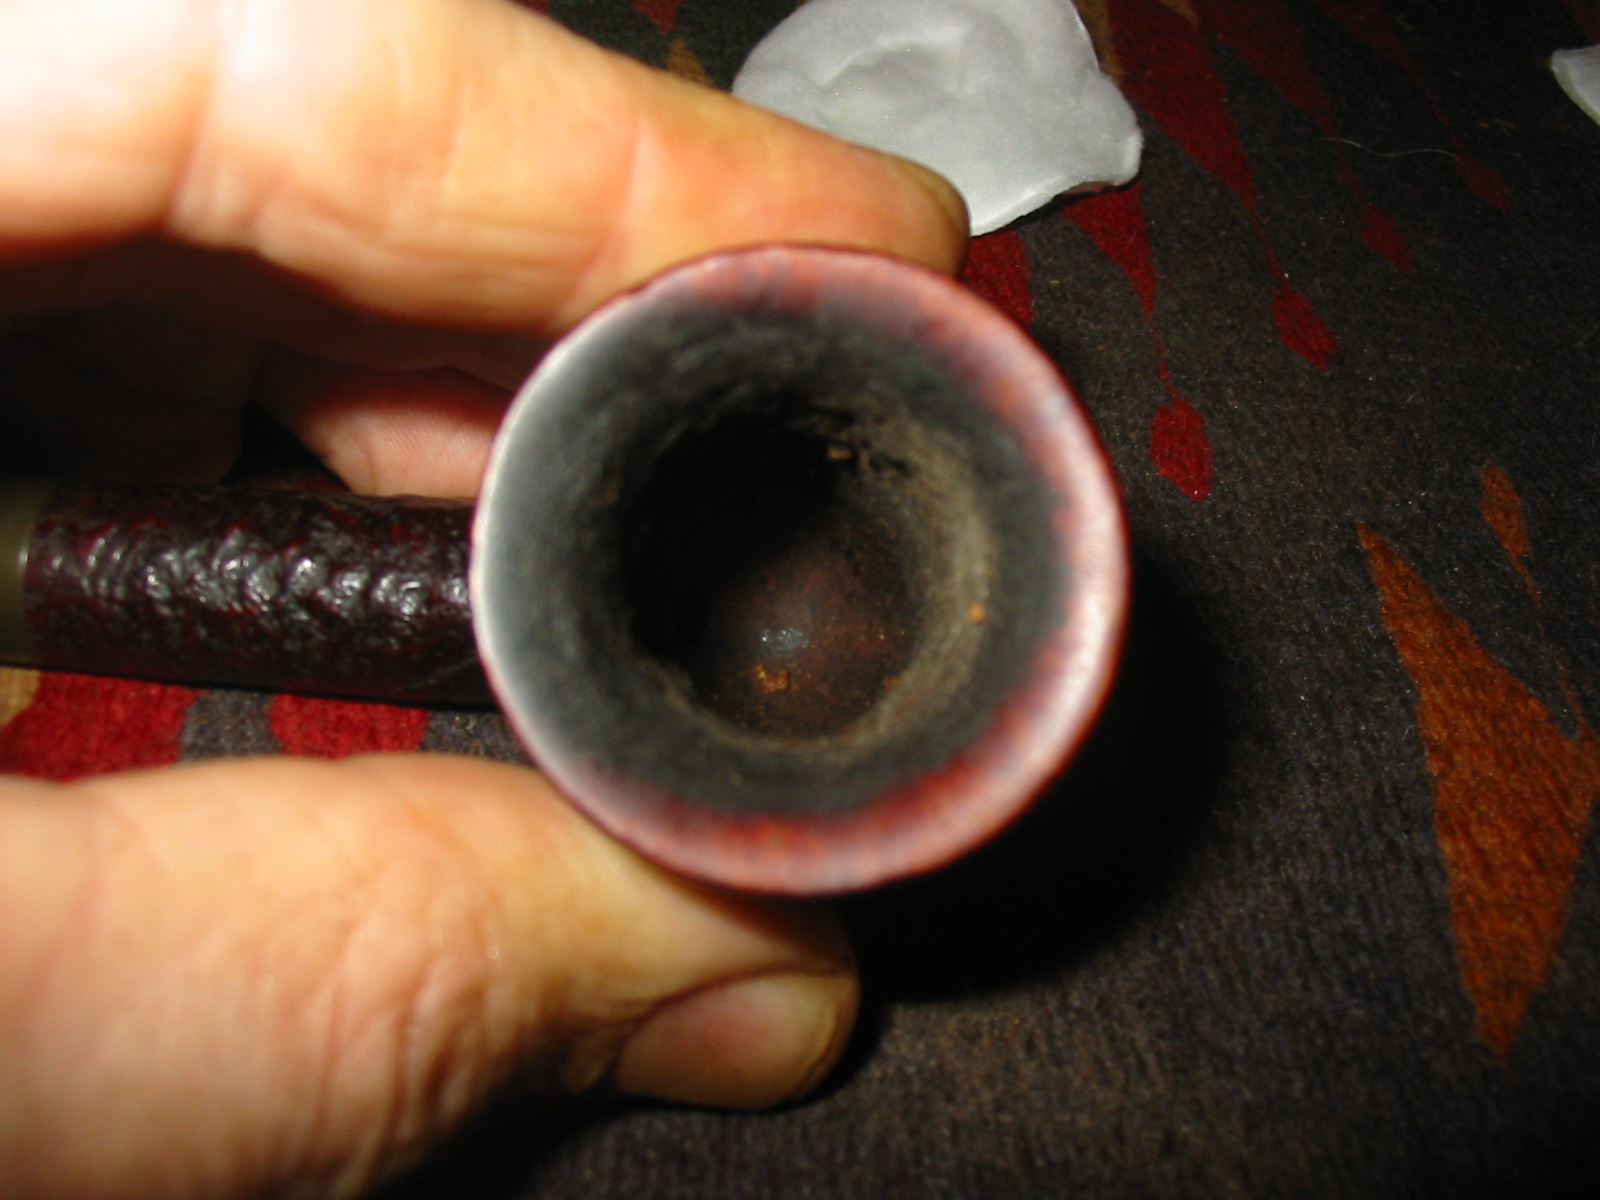
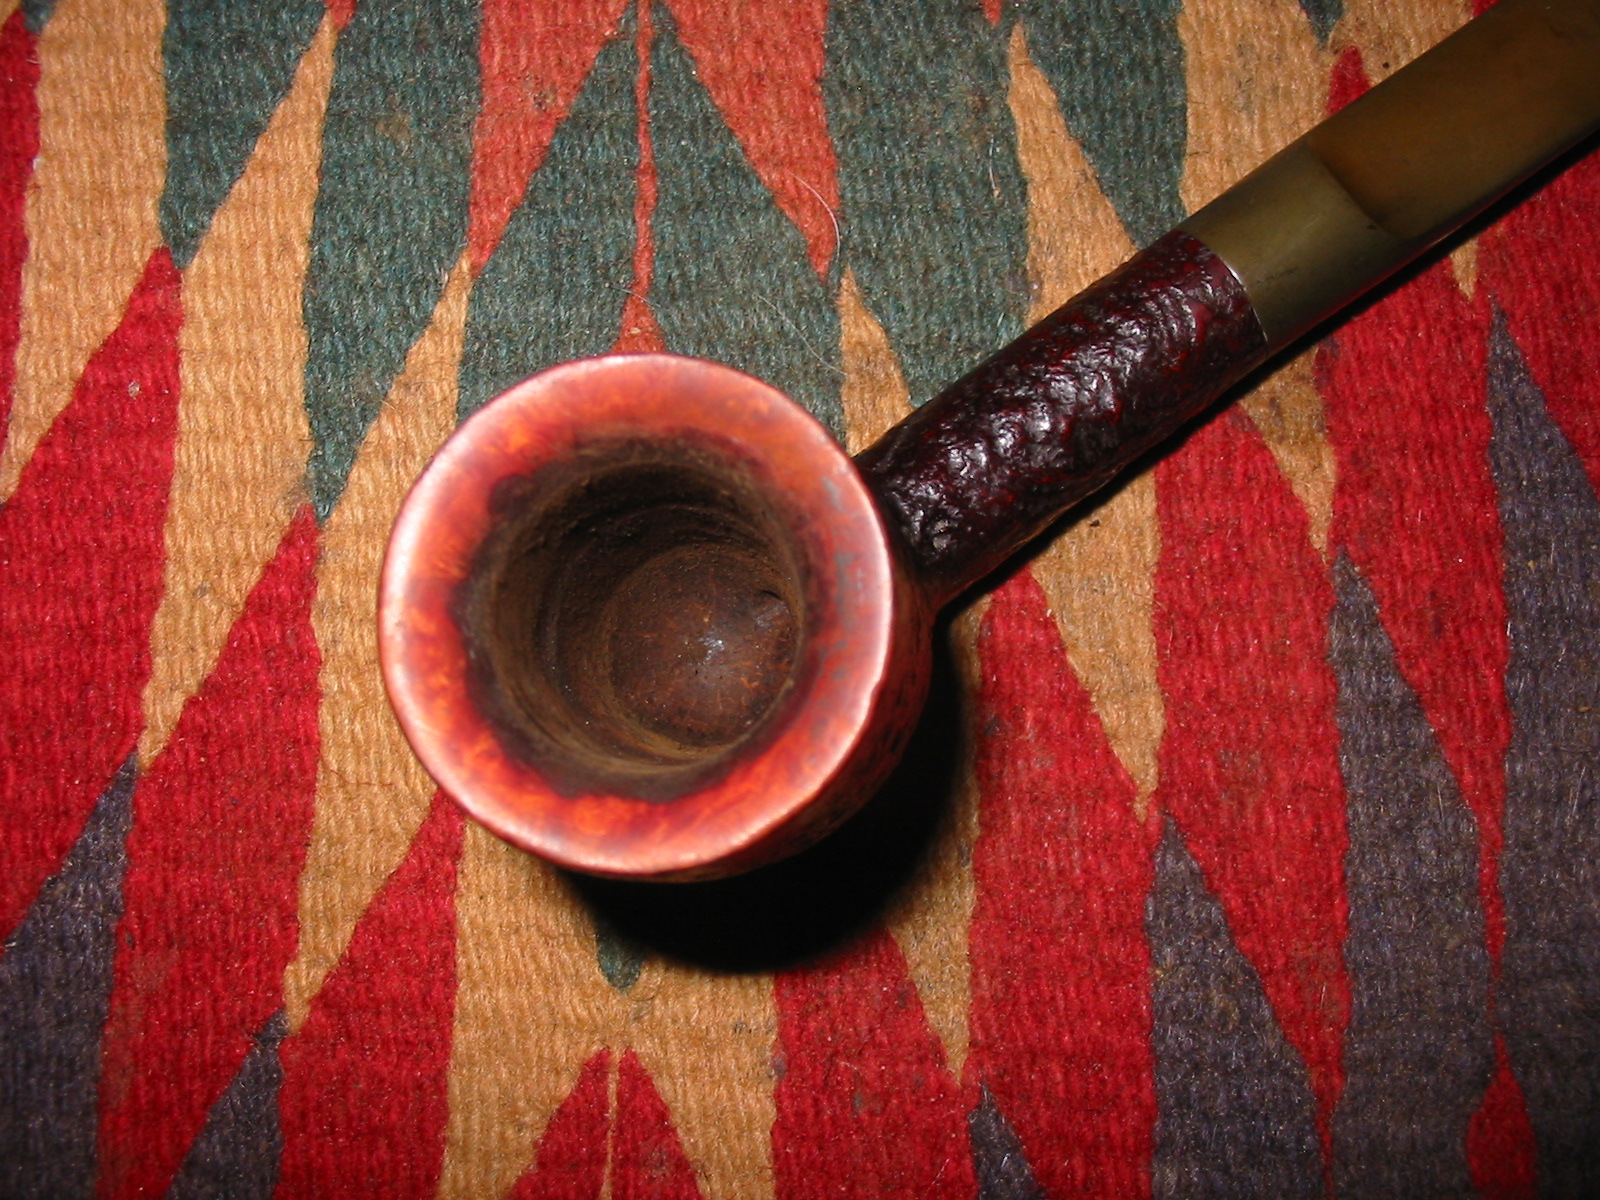
I took a close-up photo of top and inside of the bowl. You can see that it is barely smoked and the crack does not appear to go into the bowl.band6 
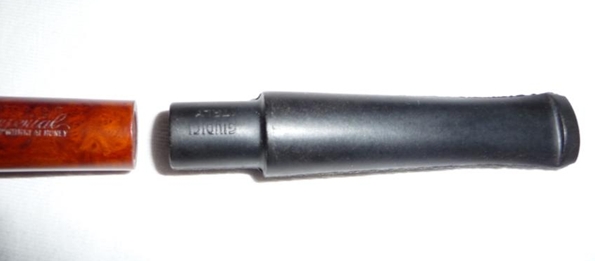
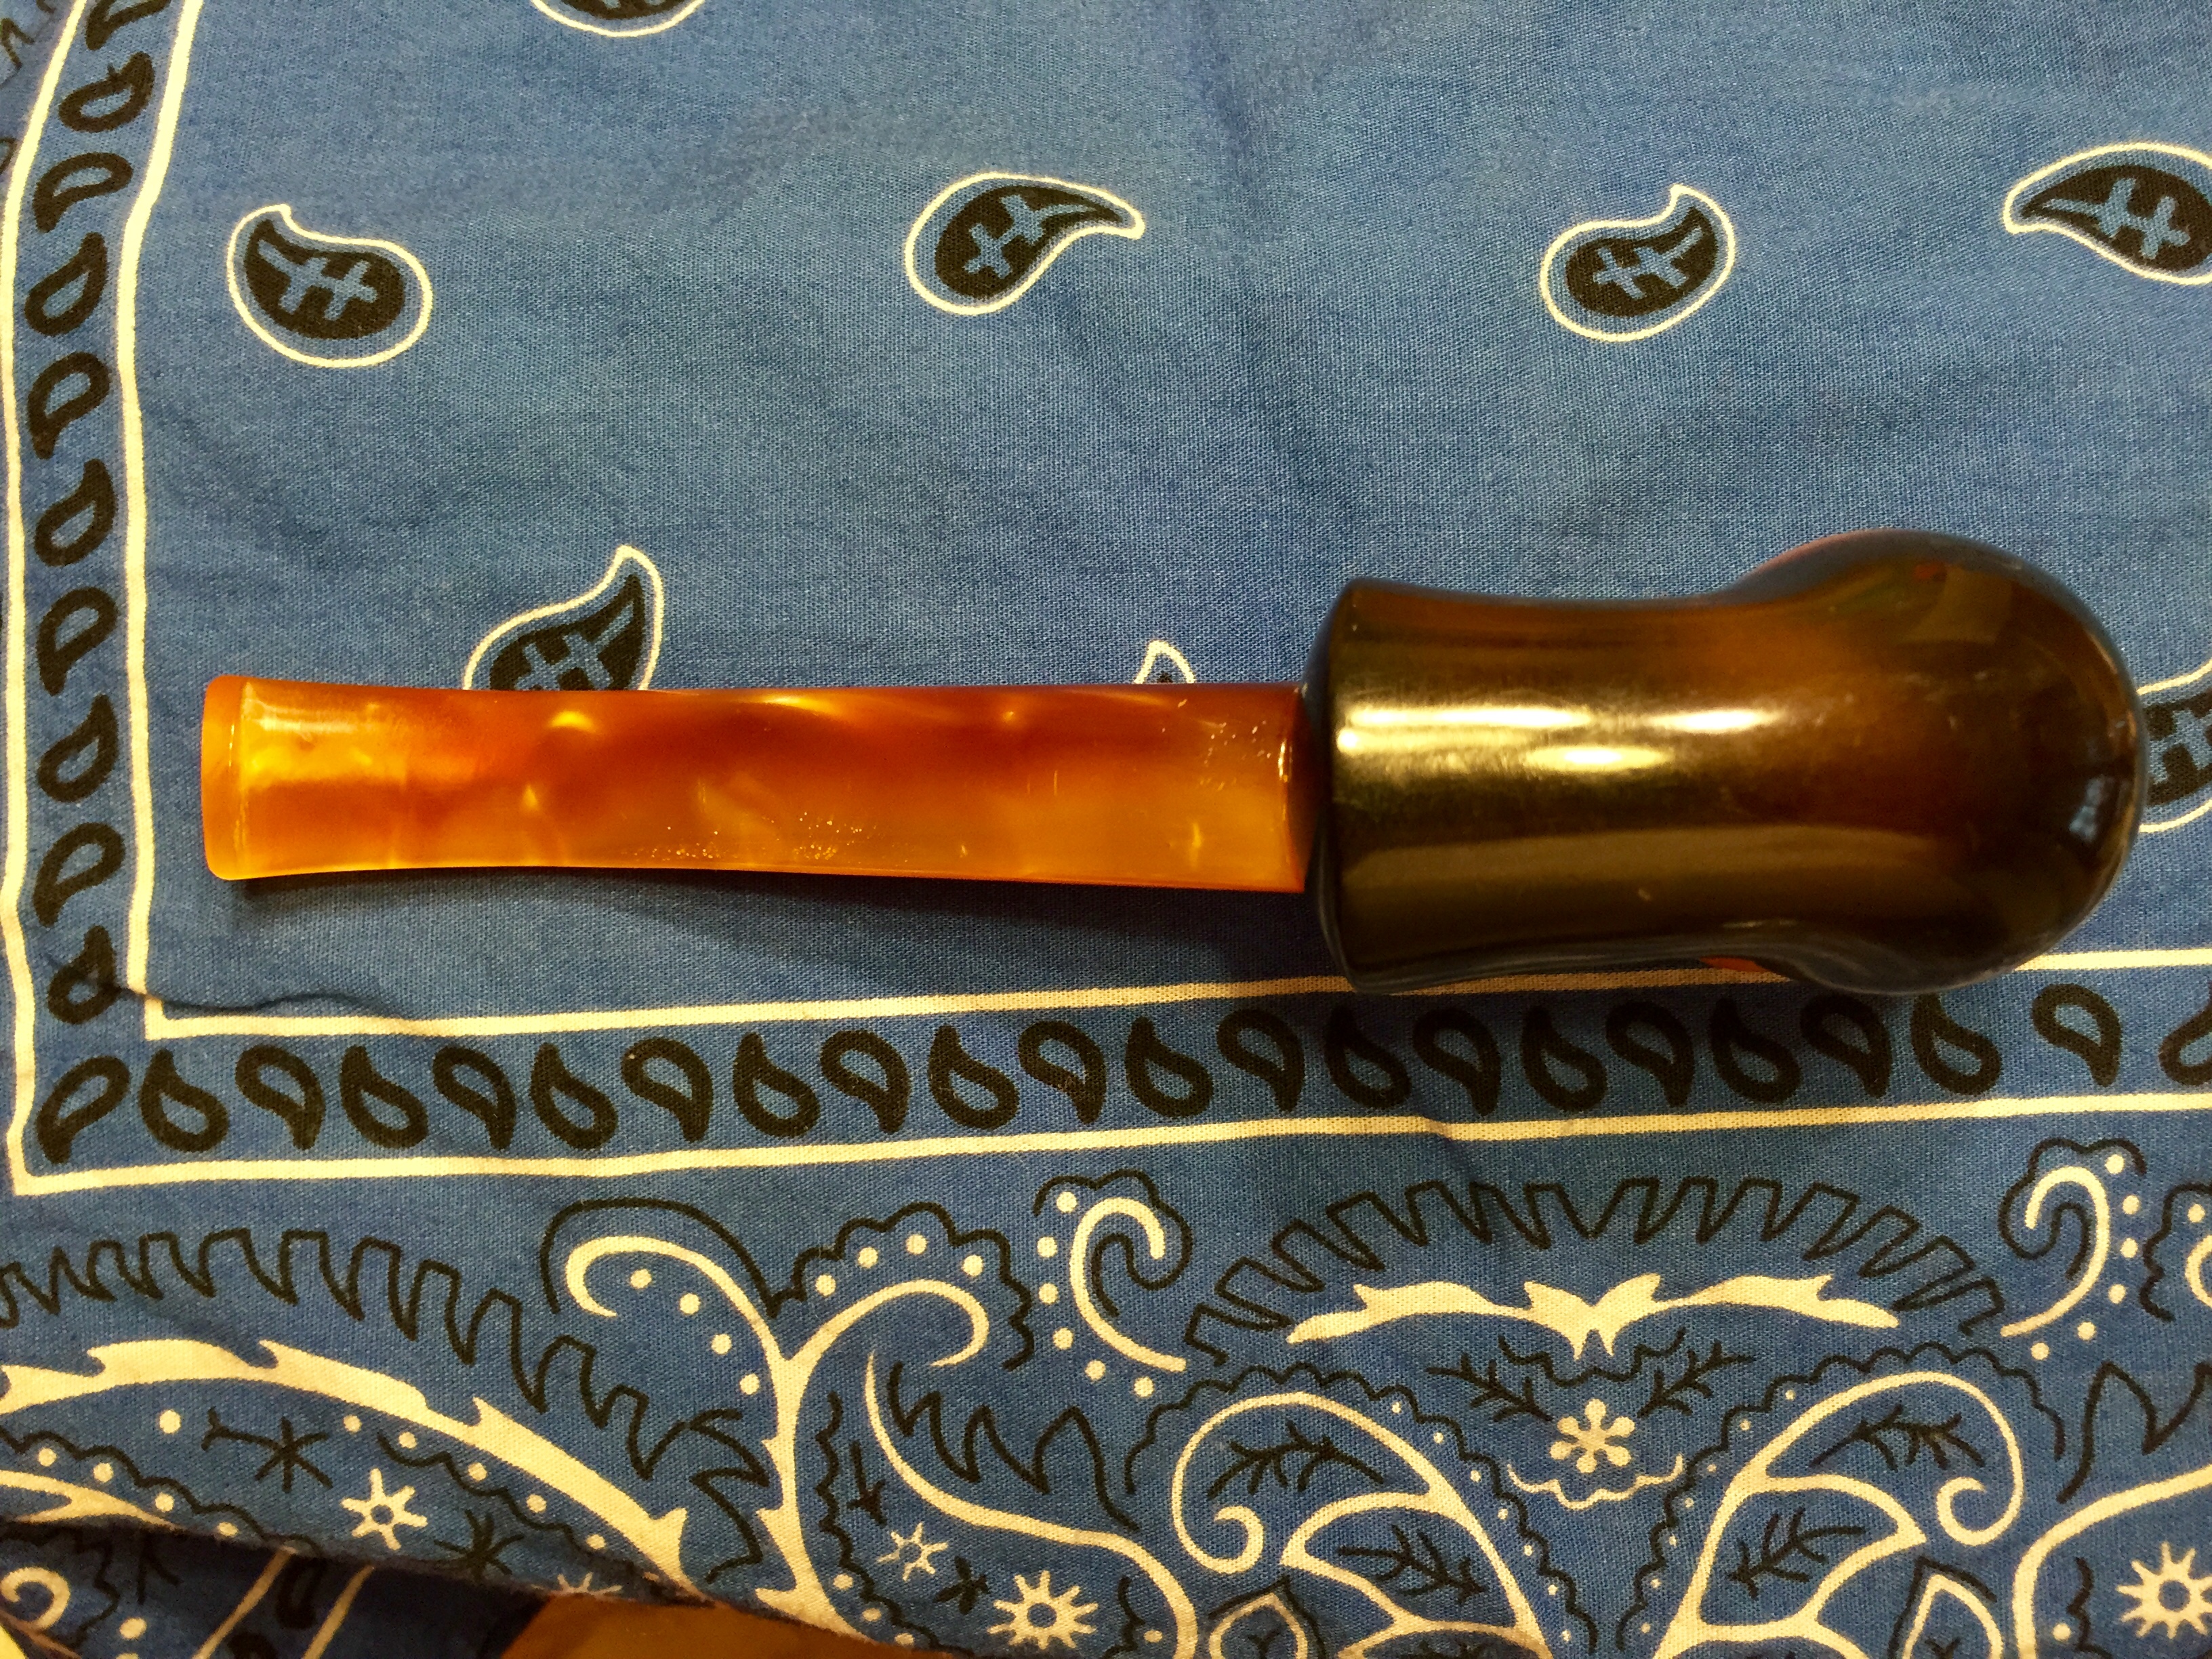
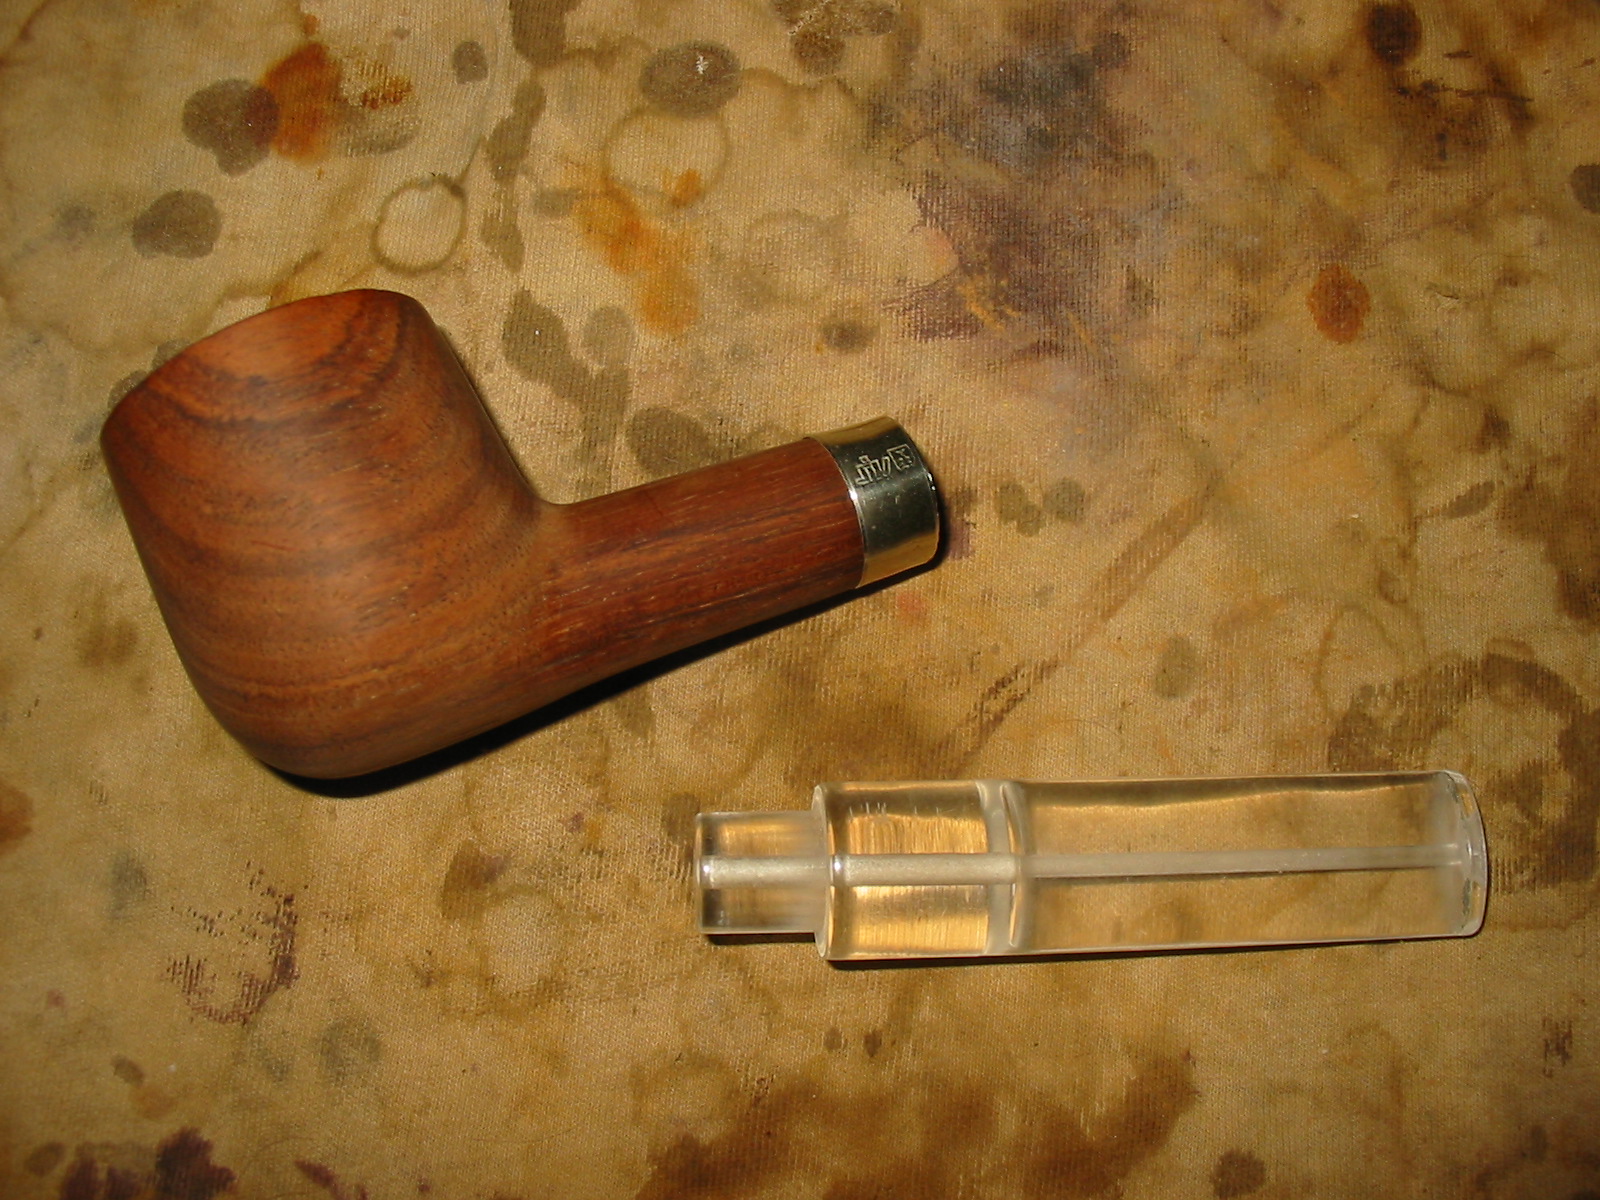
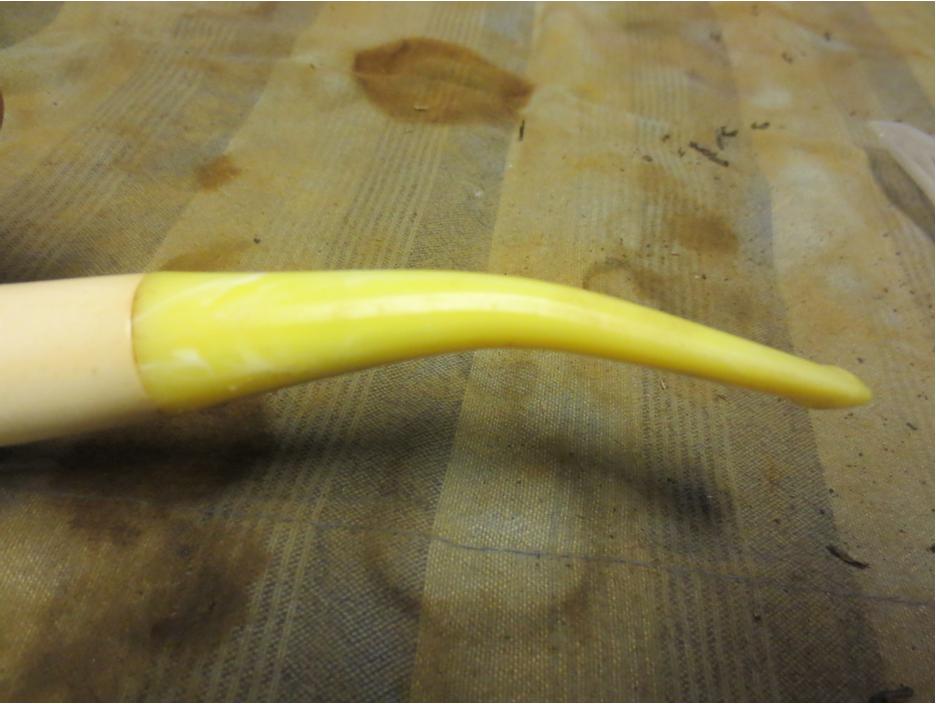
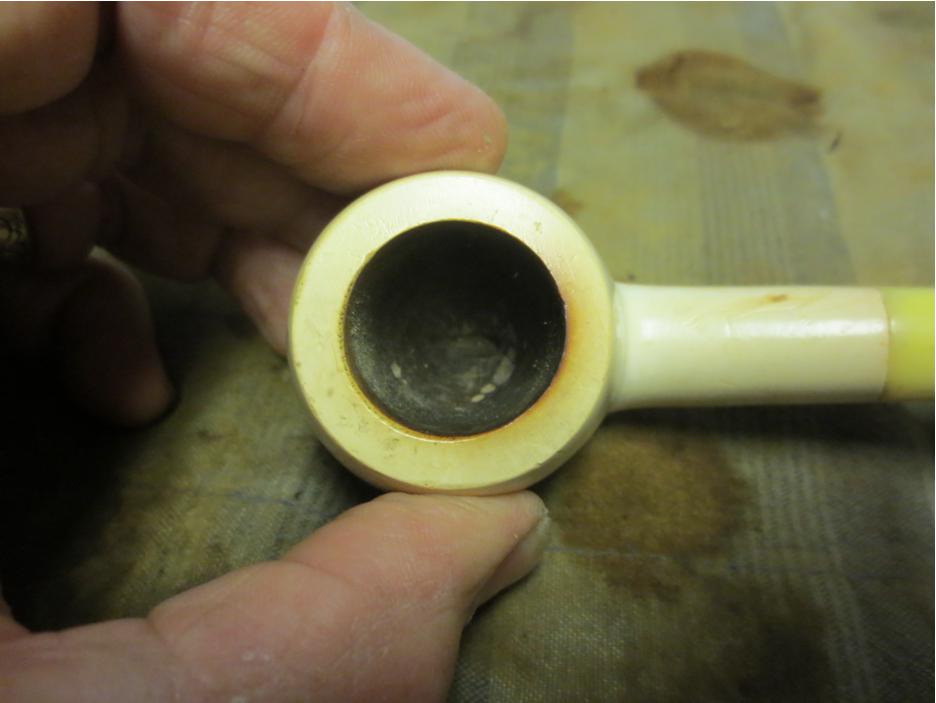
The plastic stem just bugged me. I could find nothing redeeming in the shape of it at all. The taper was wrong and it was pinched at the shank joint. The faux amber look of it was really fake looking. The material was very soft and I could scratch it with a fingernail.band7

band8 
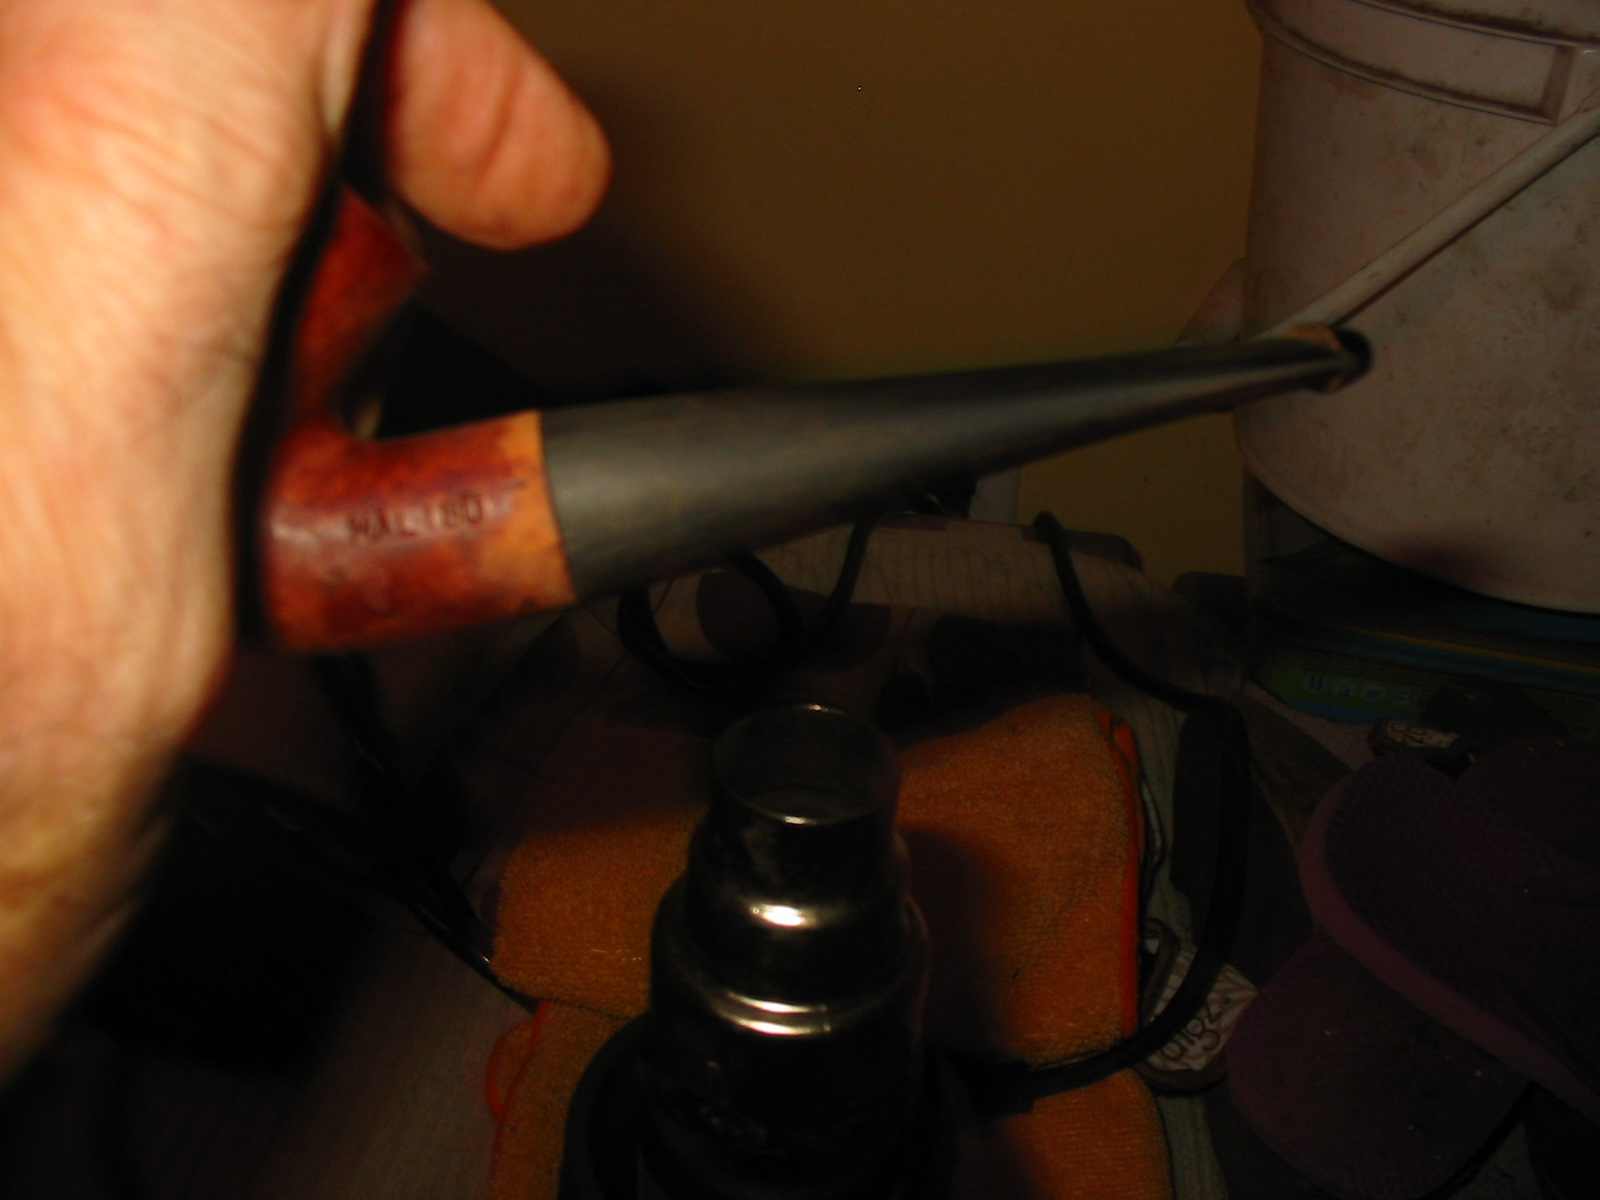
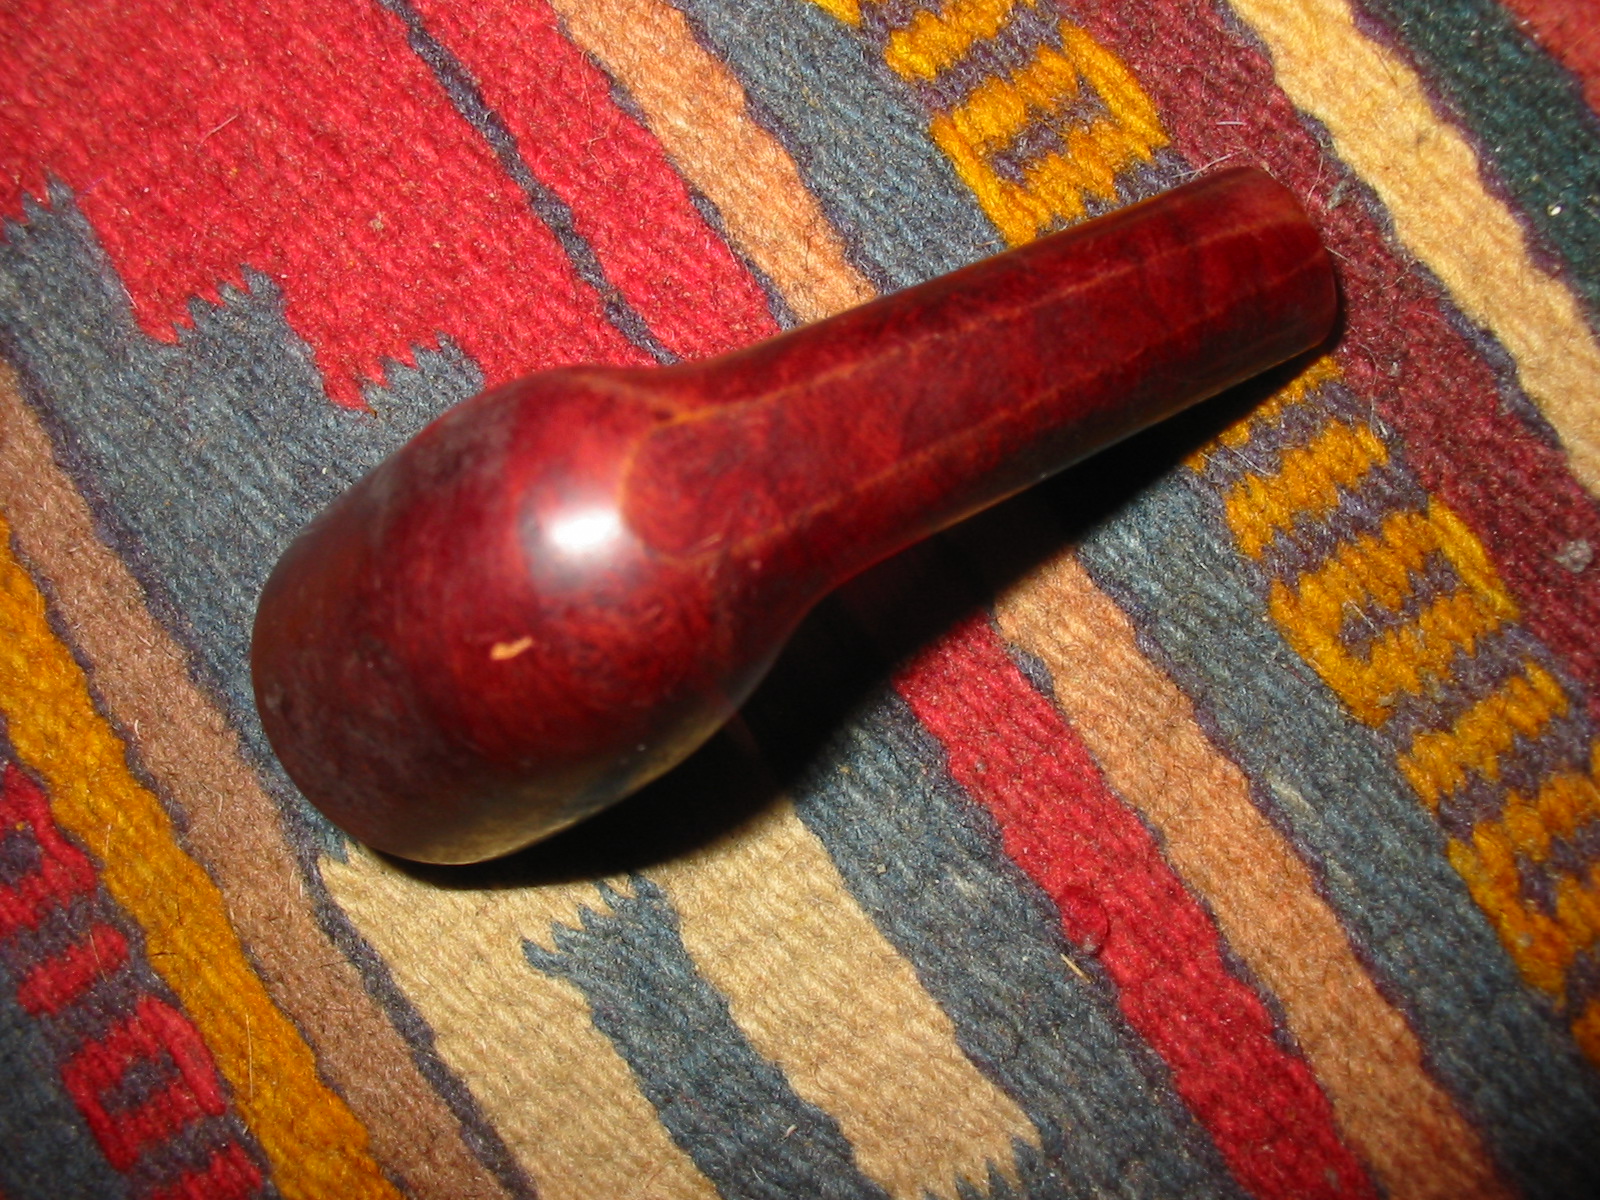
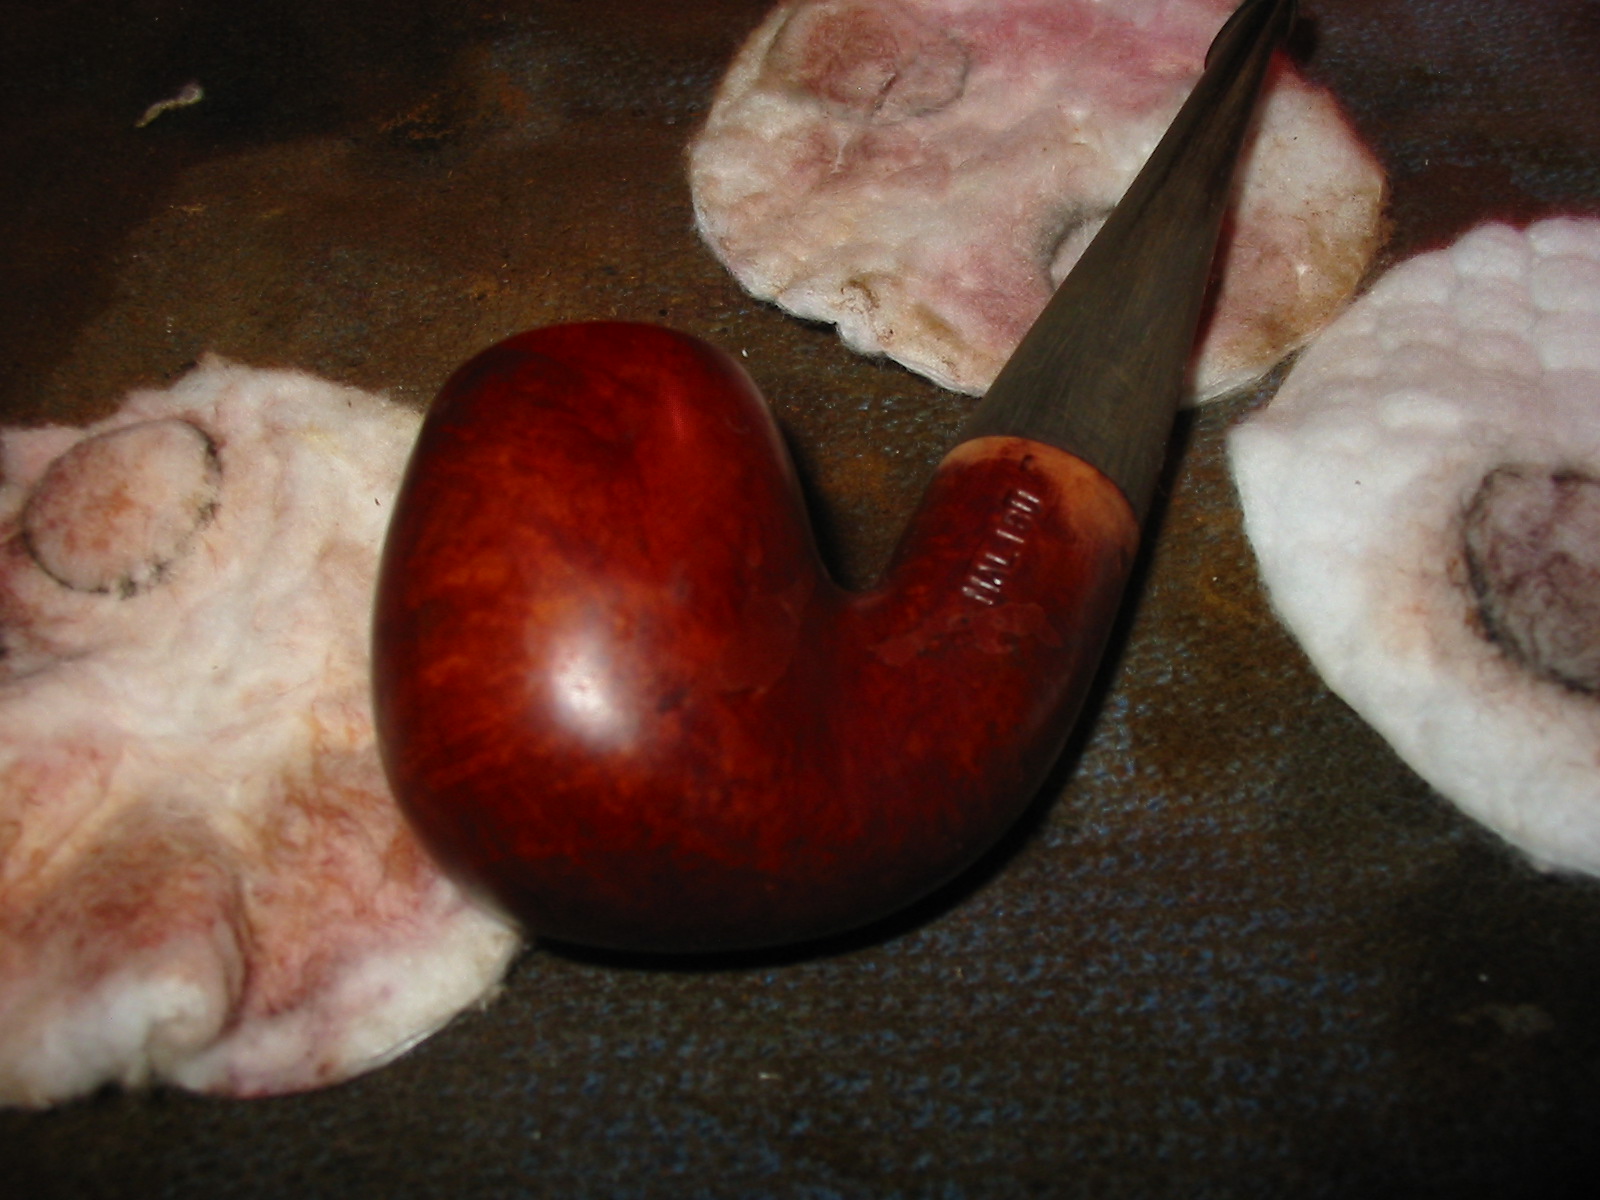
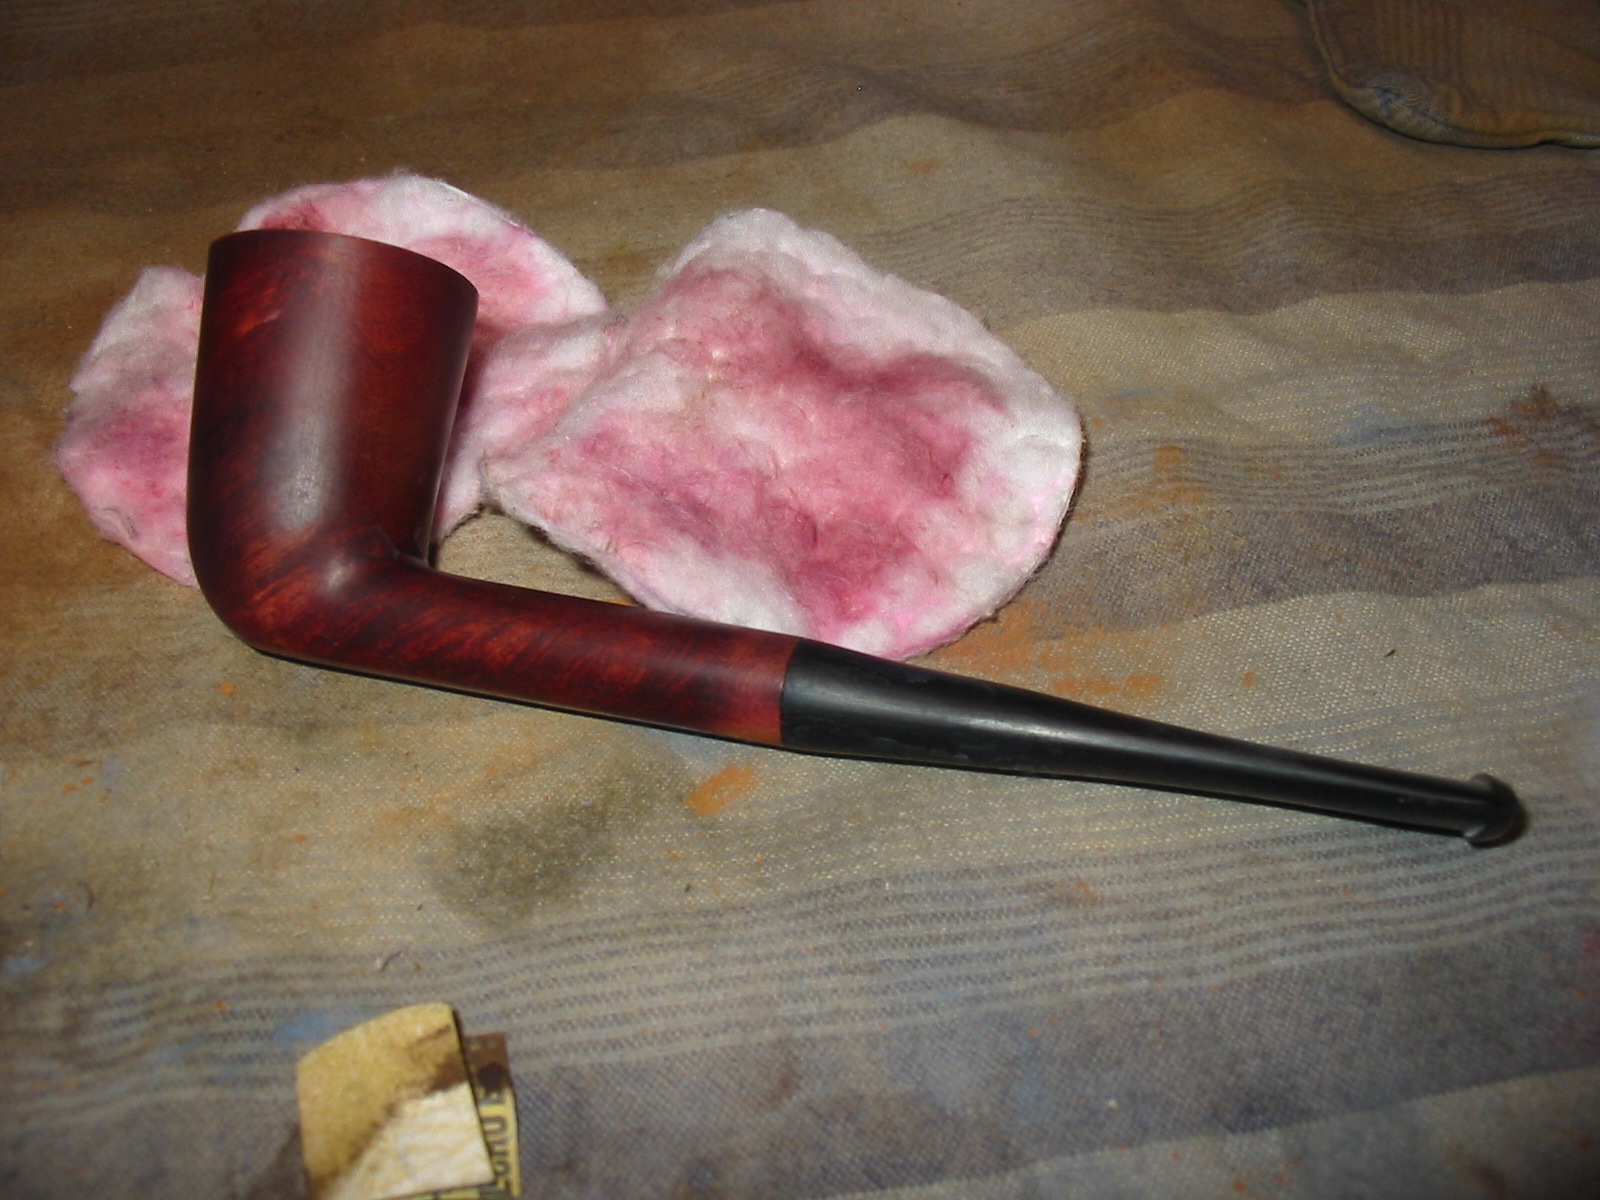
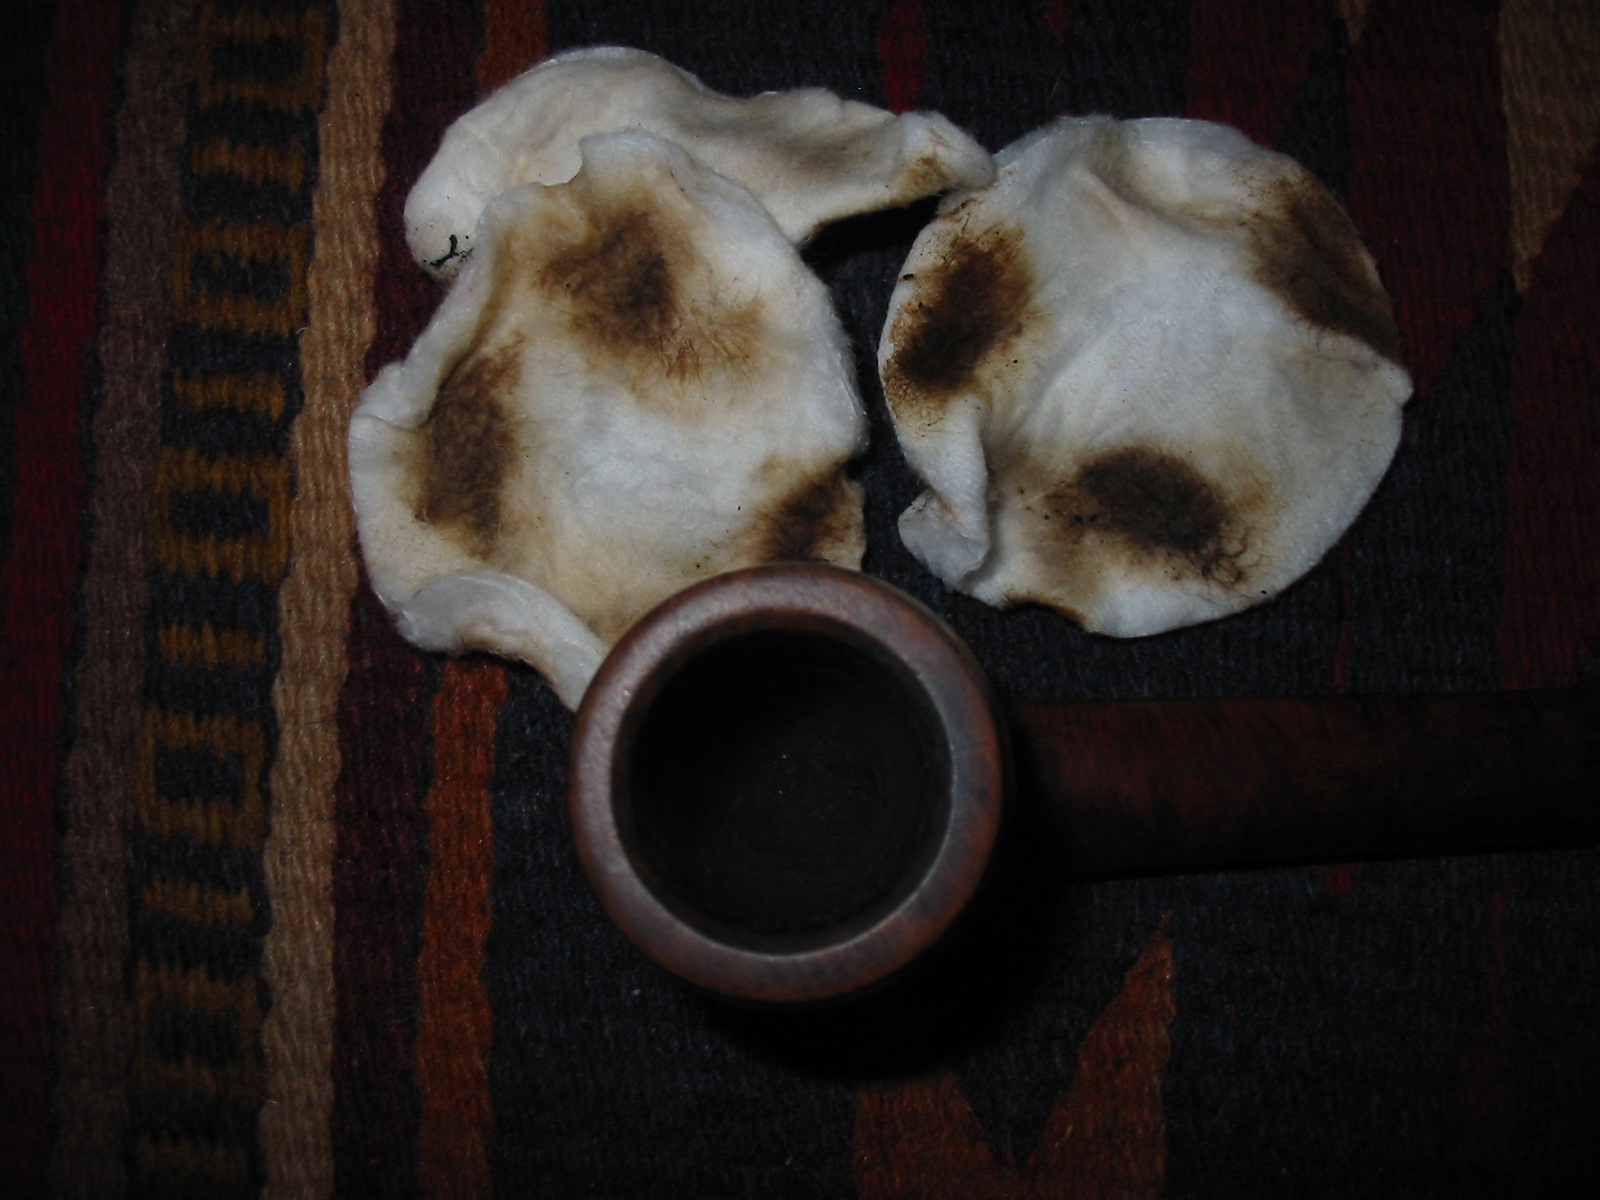
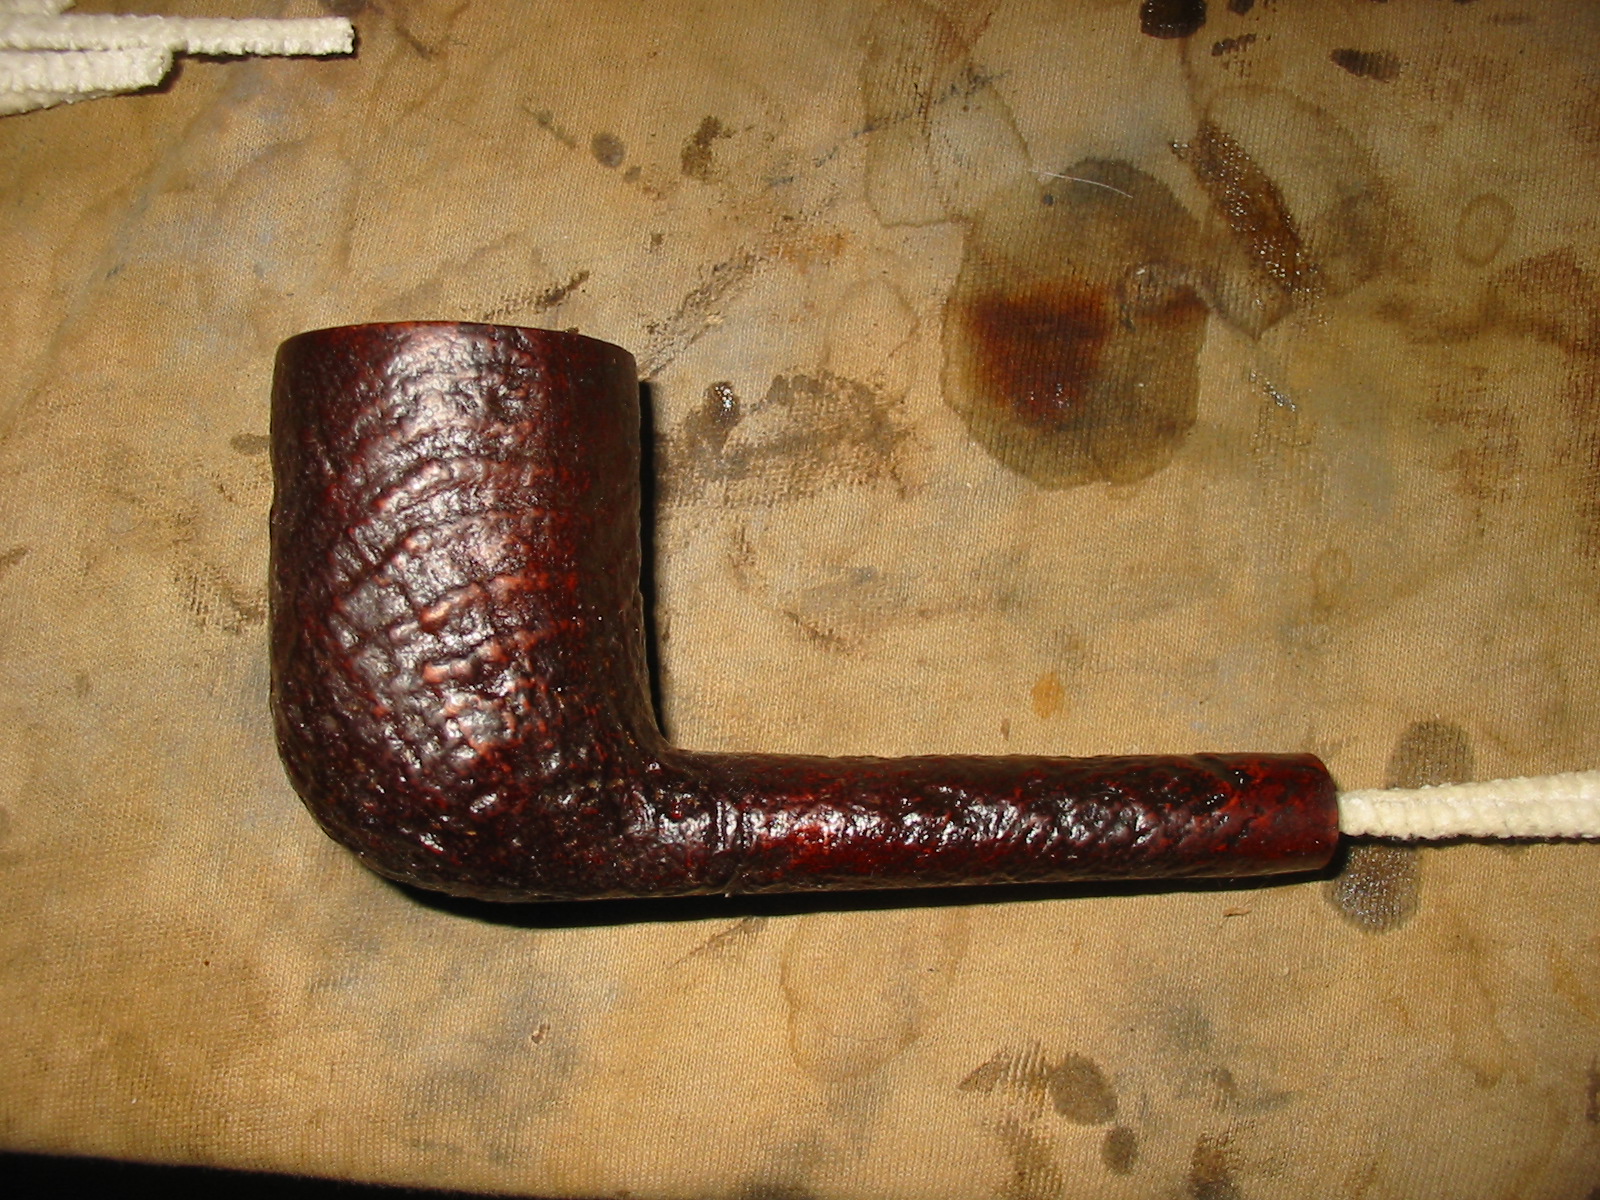
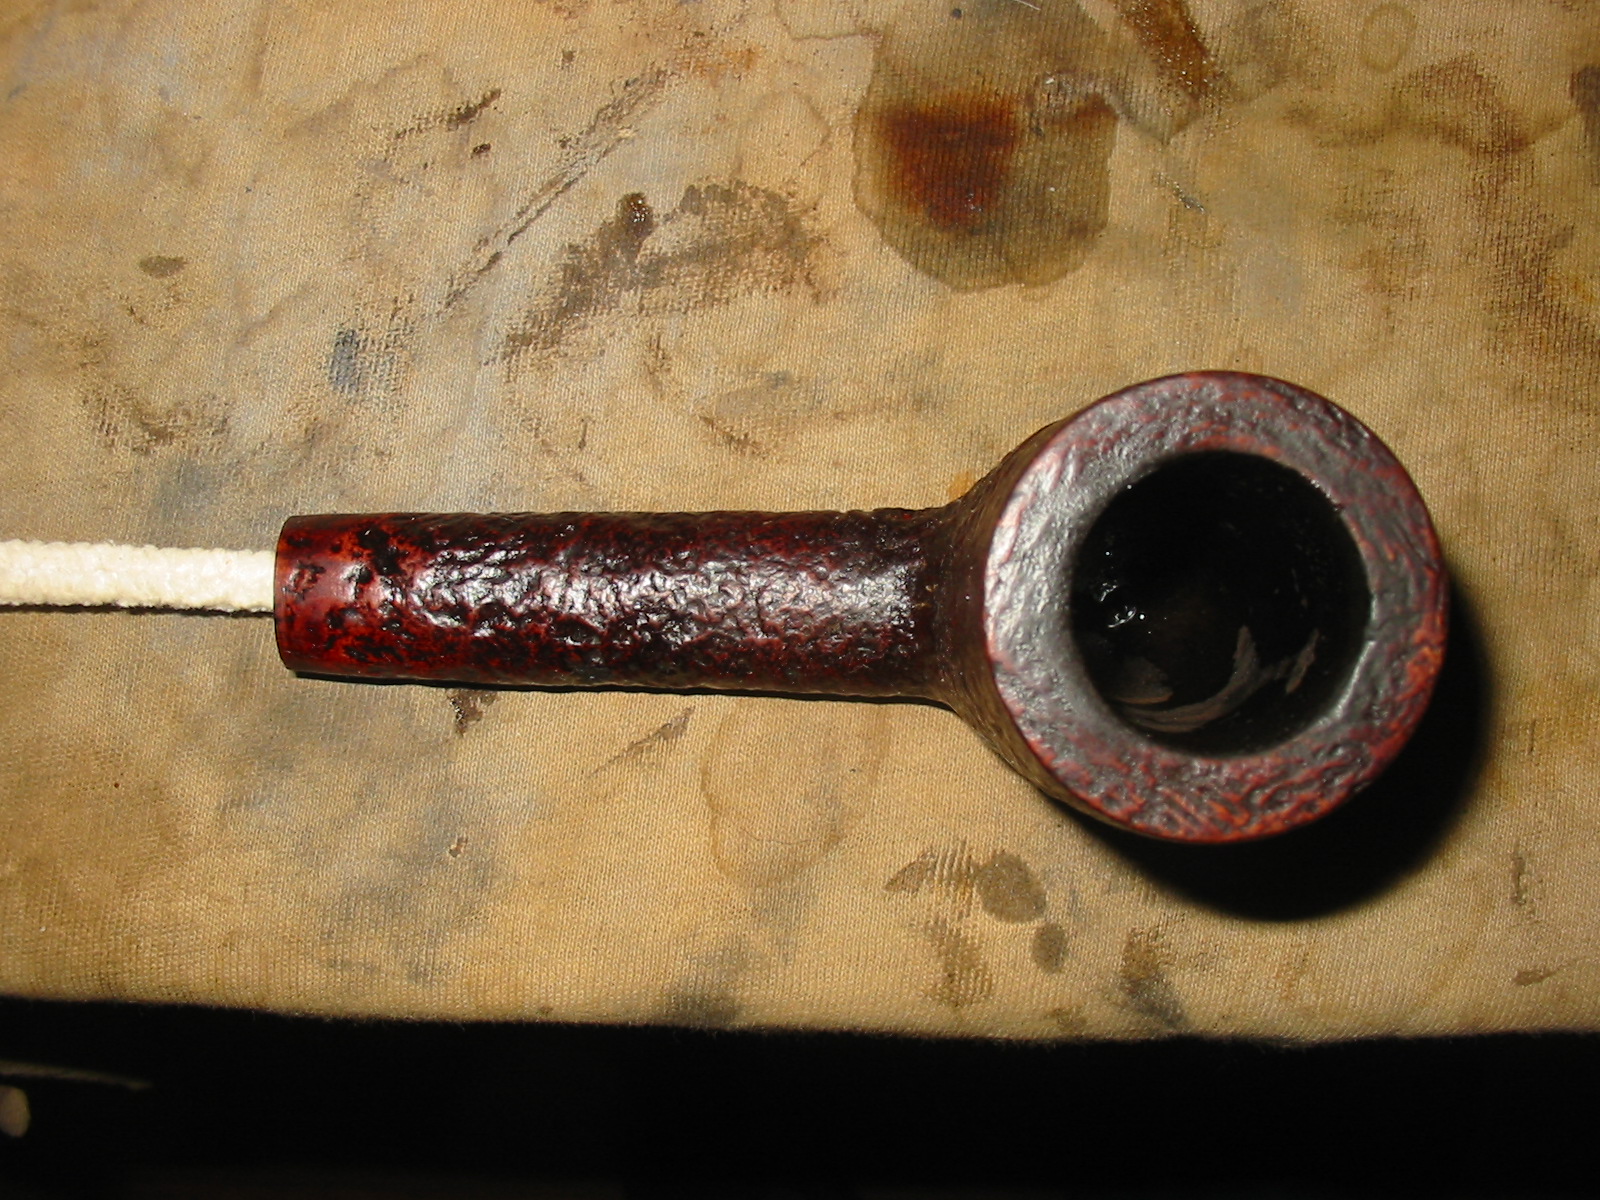
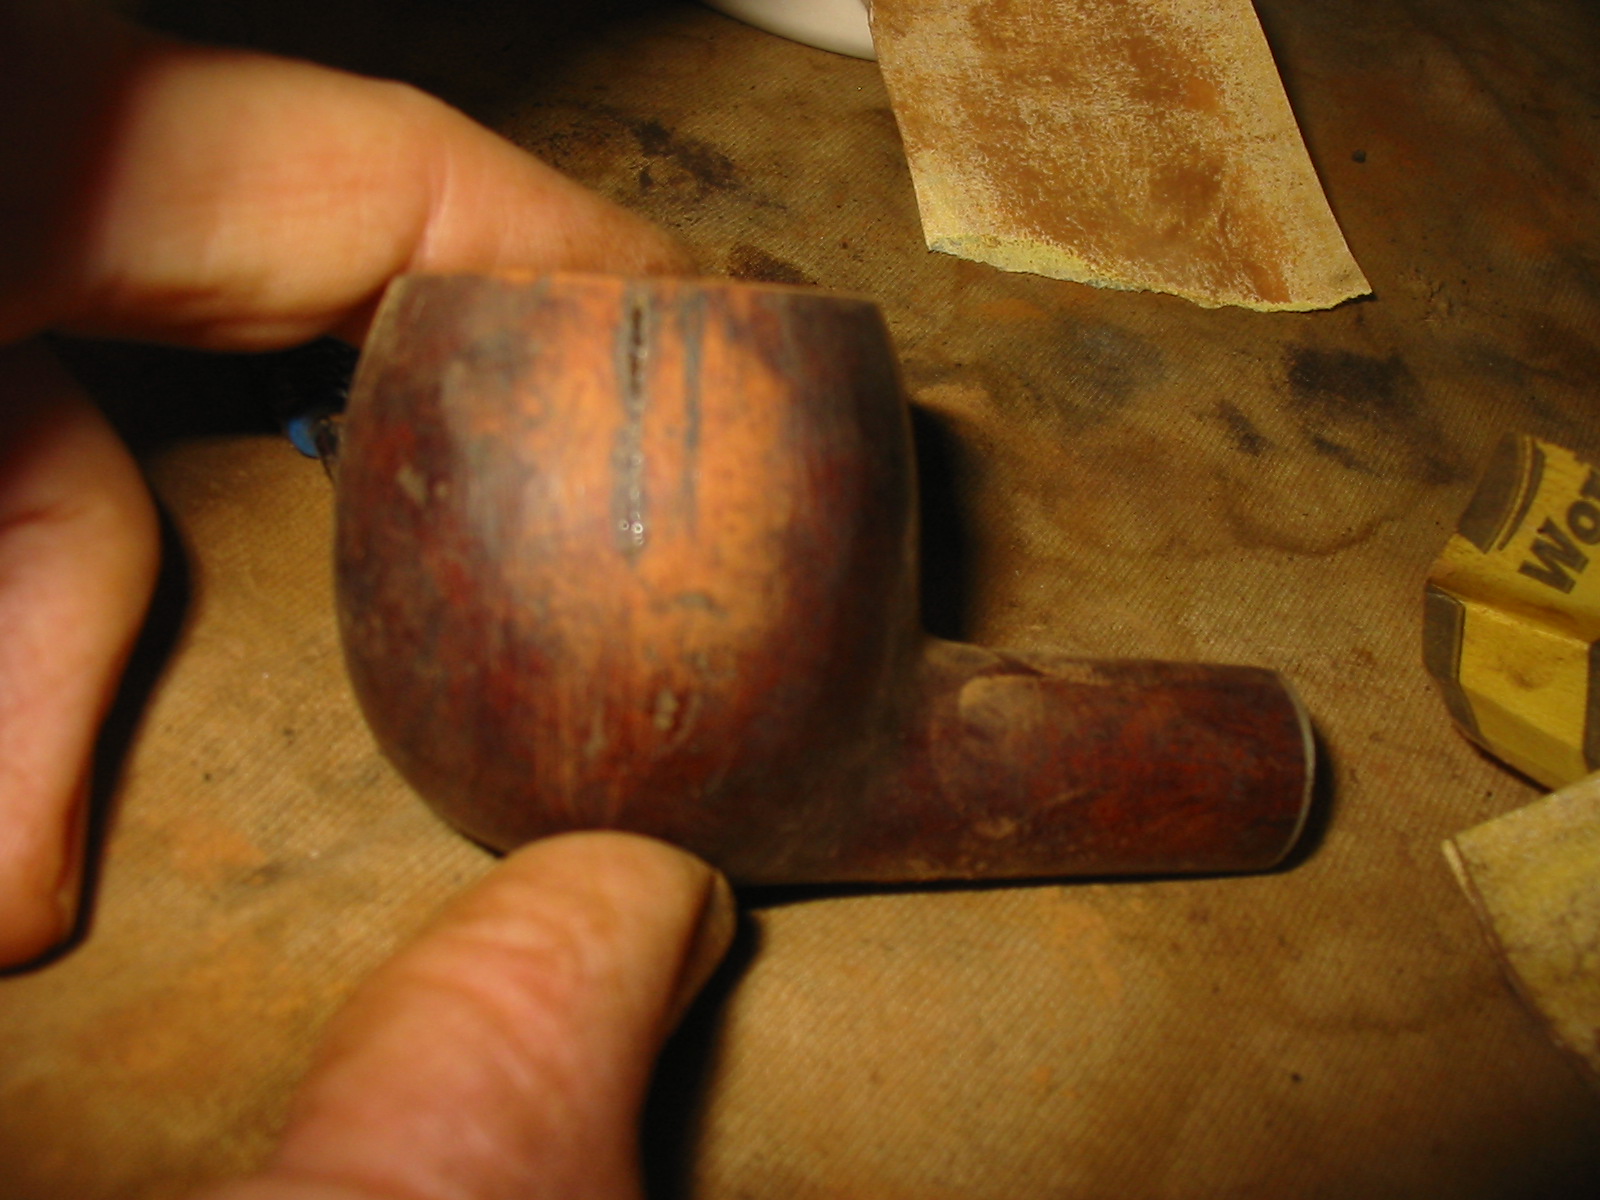
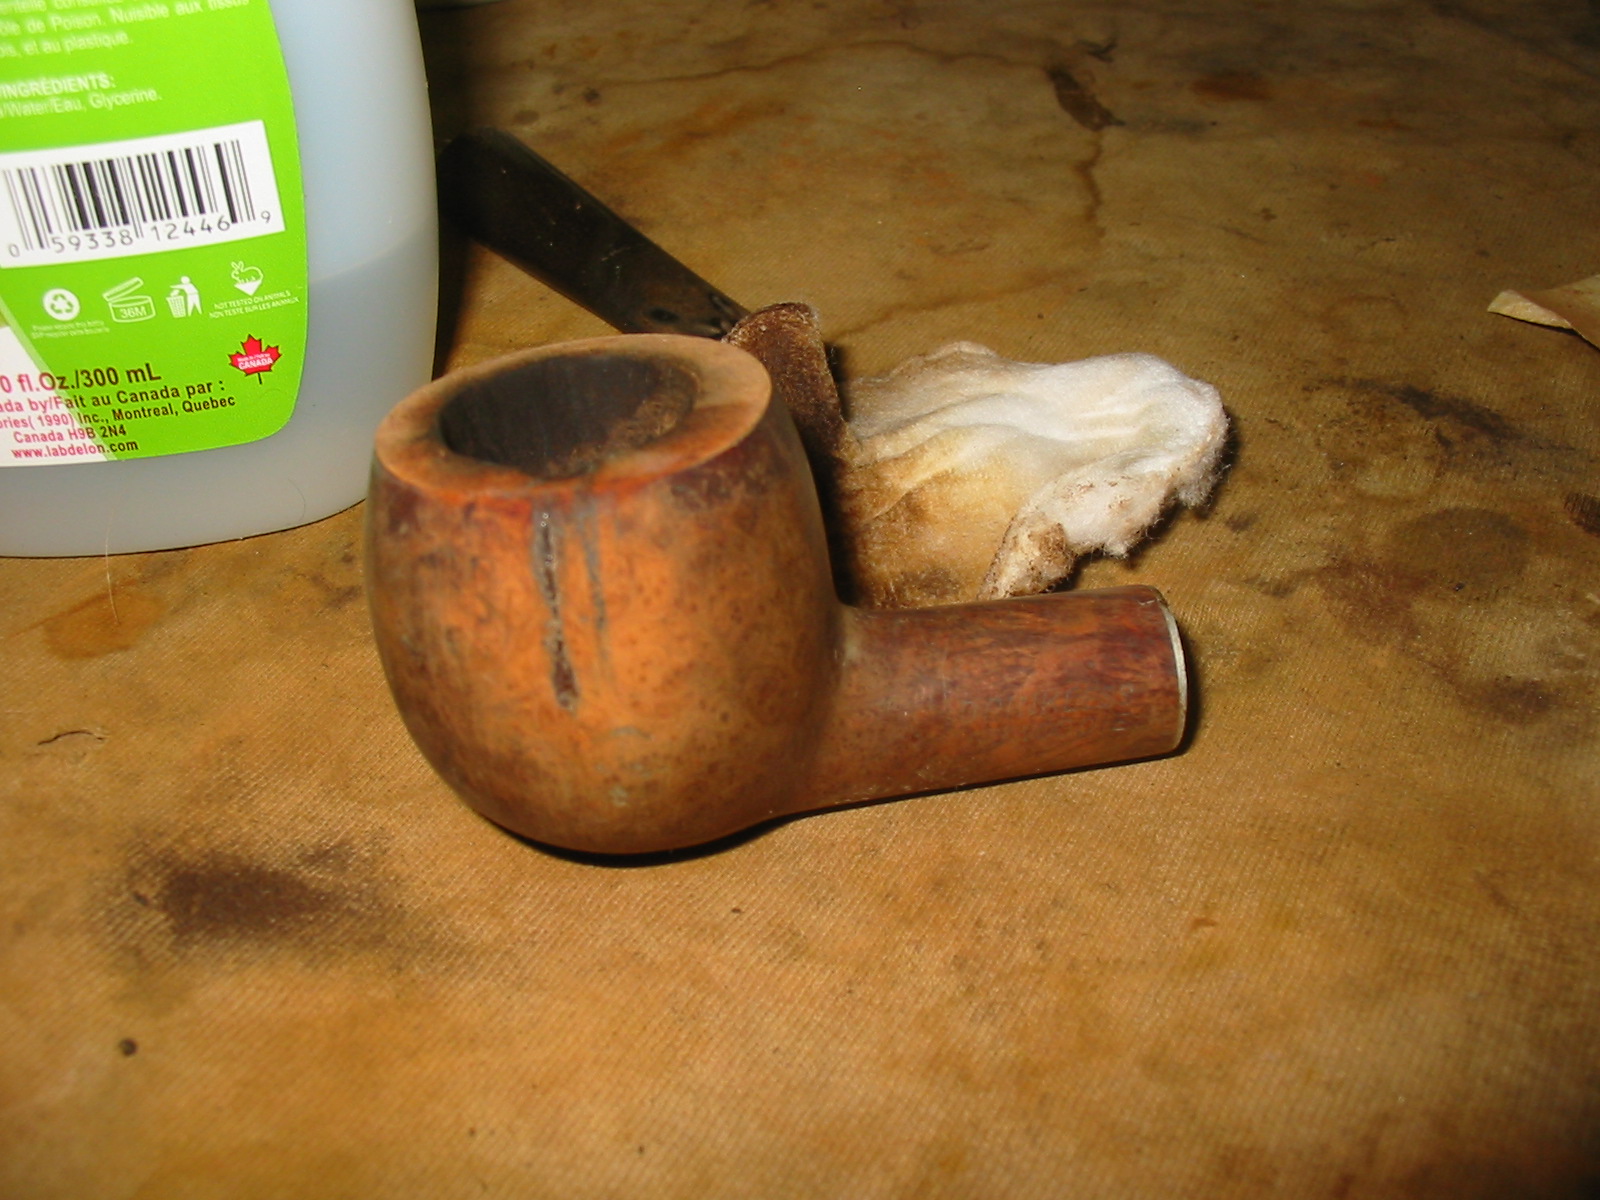
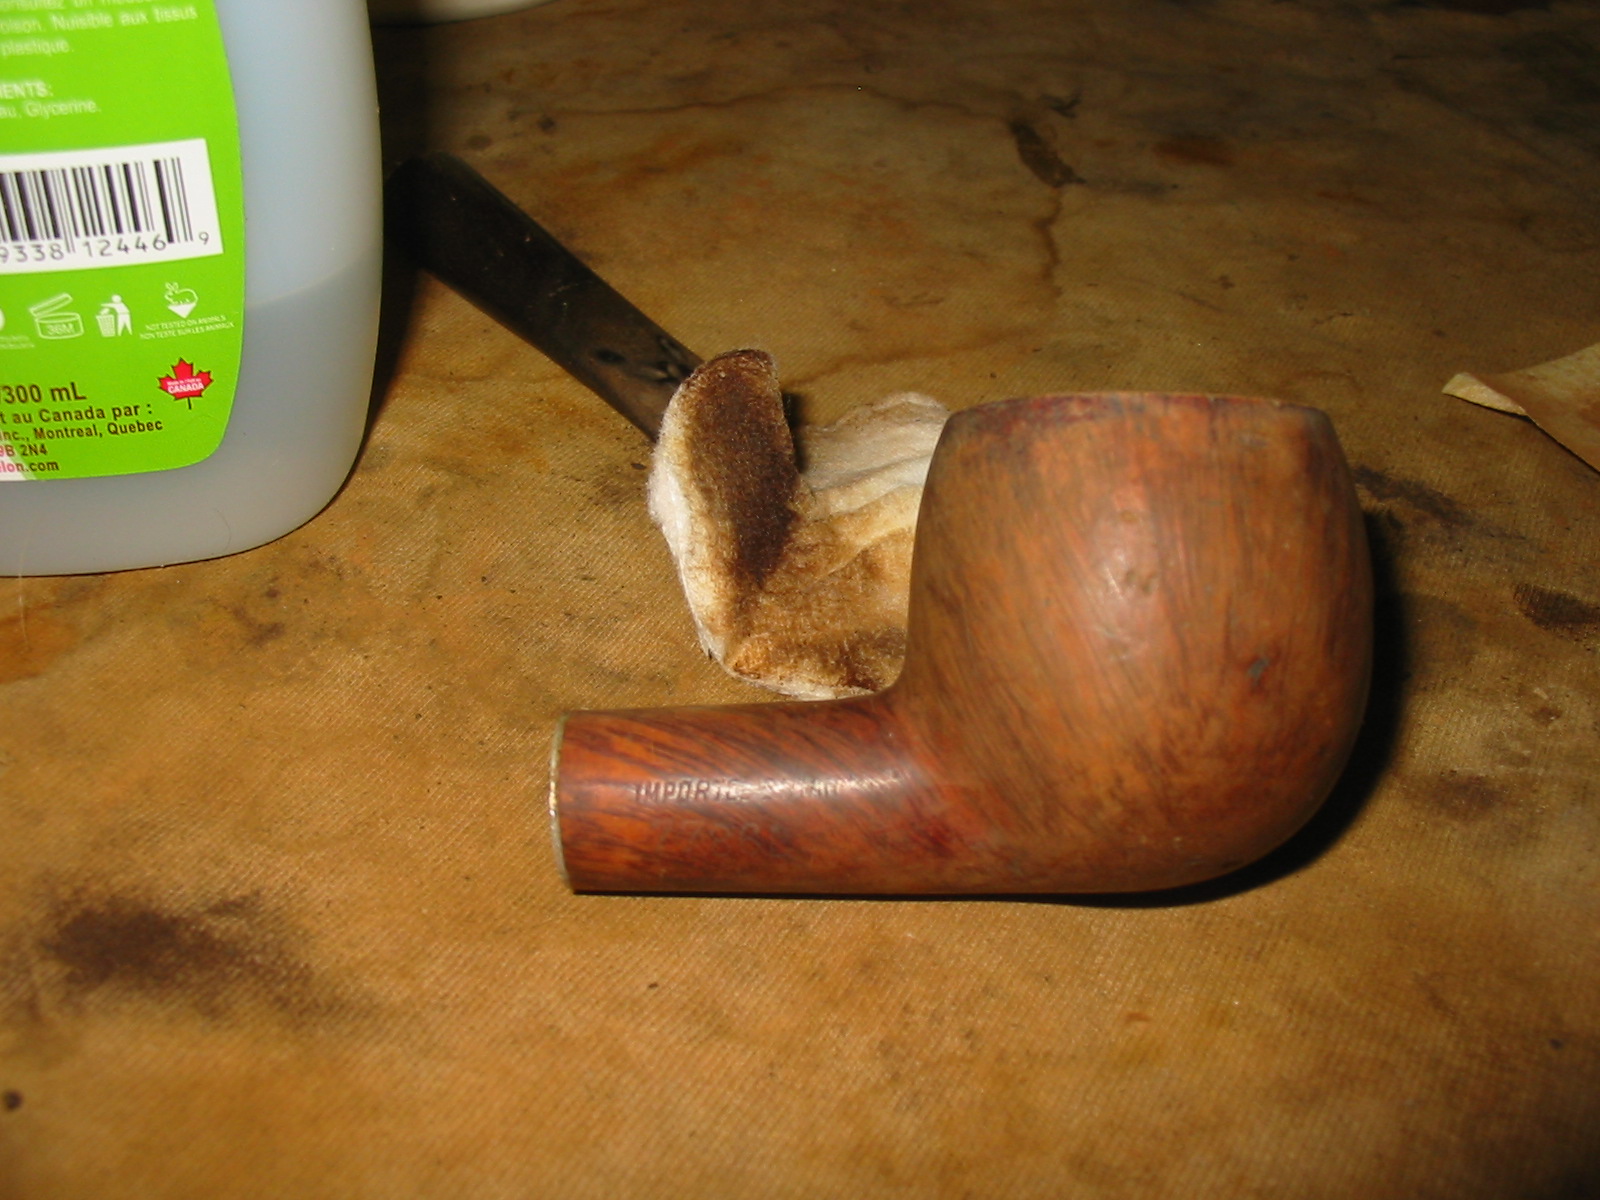
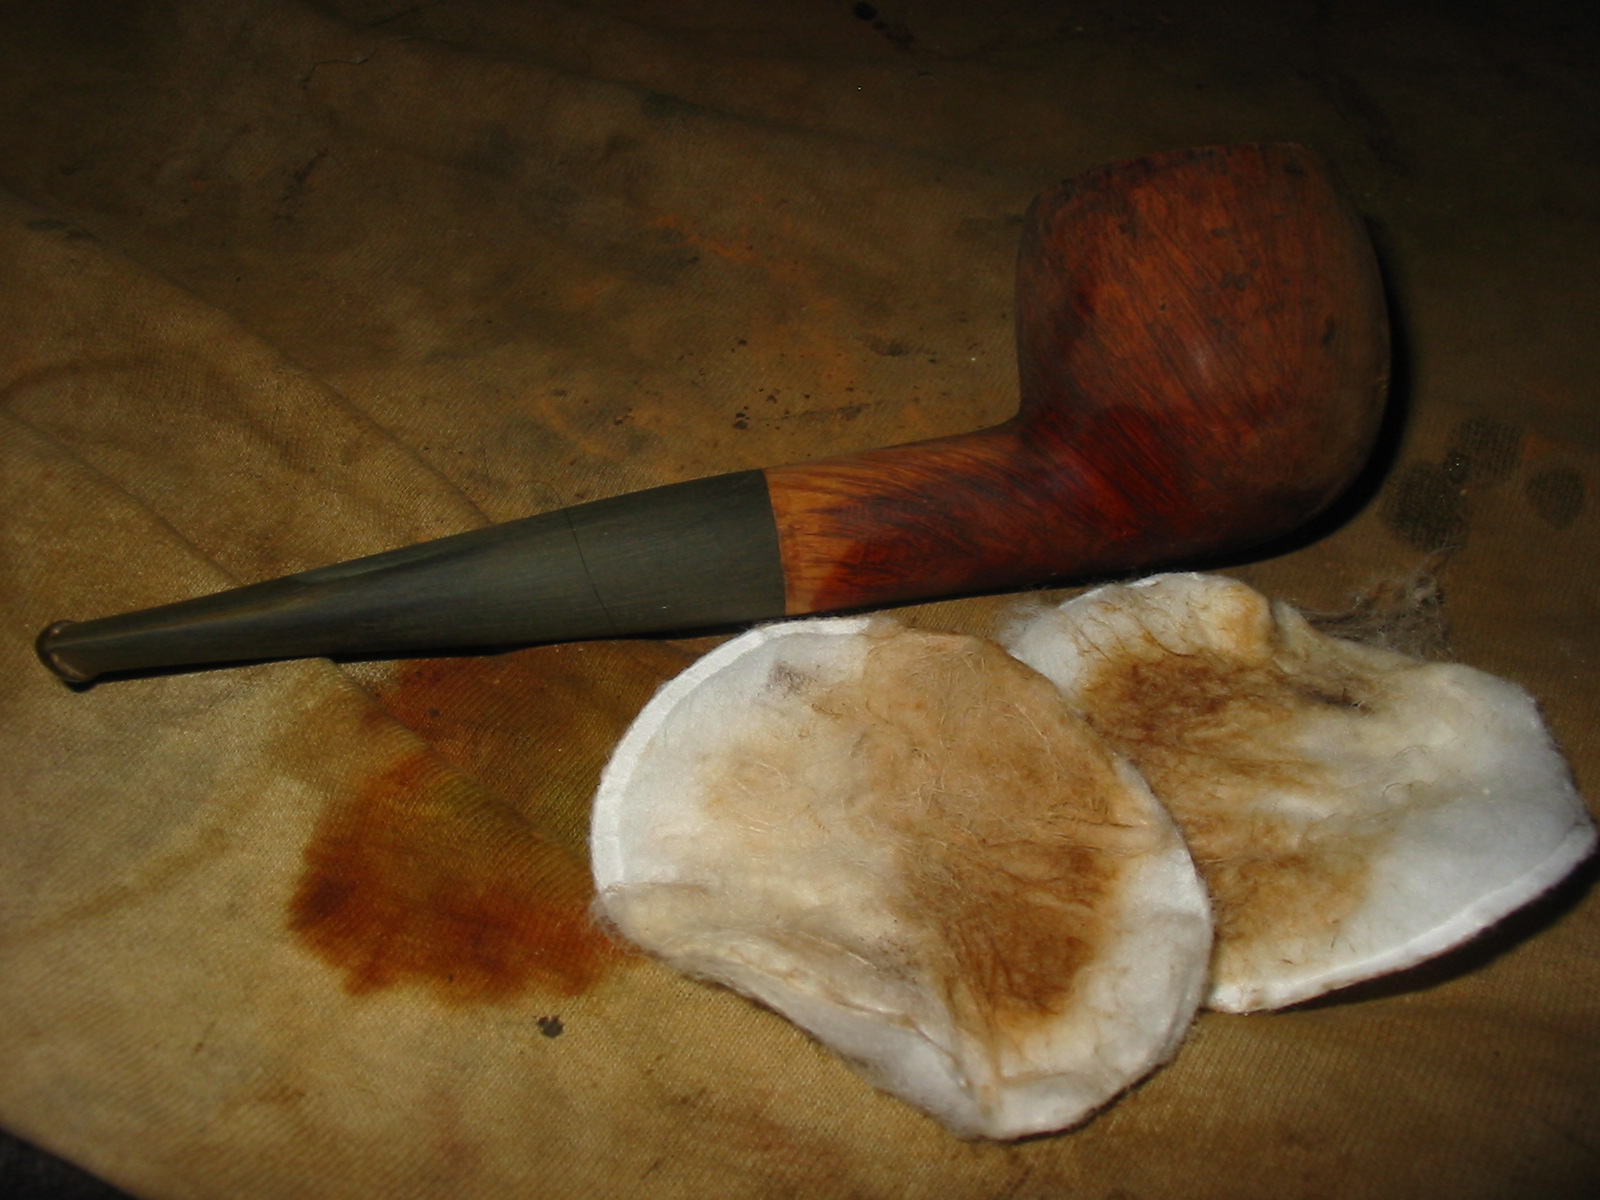
Everything about the way the pipe looked when it arrived made me think it would be one that I would clean up, polish and turn around and get rid of. I probably would not sell it but would pass it on to someone wanting a meerschaum pipe. I cleaned the inside of the bowl with a cotton swab and water. I cleaned out the airway in the shank and stem with cotton swabs, pipe cleaners and alcohol. I had finished the cleaning and had lightly sanded the bowl with 400 and 600 grit sandpaper to minimize the scratches and dings in it. I was done with the pipe and took it to the buffer to lightly polish the stem and bowl.

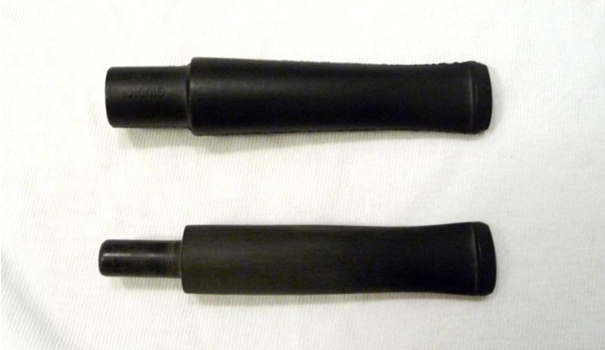
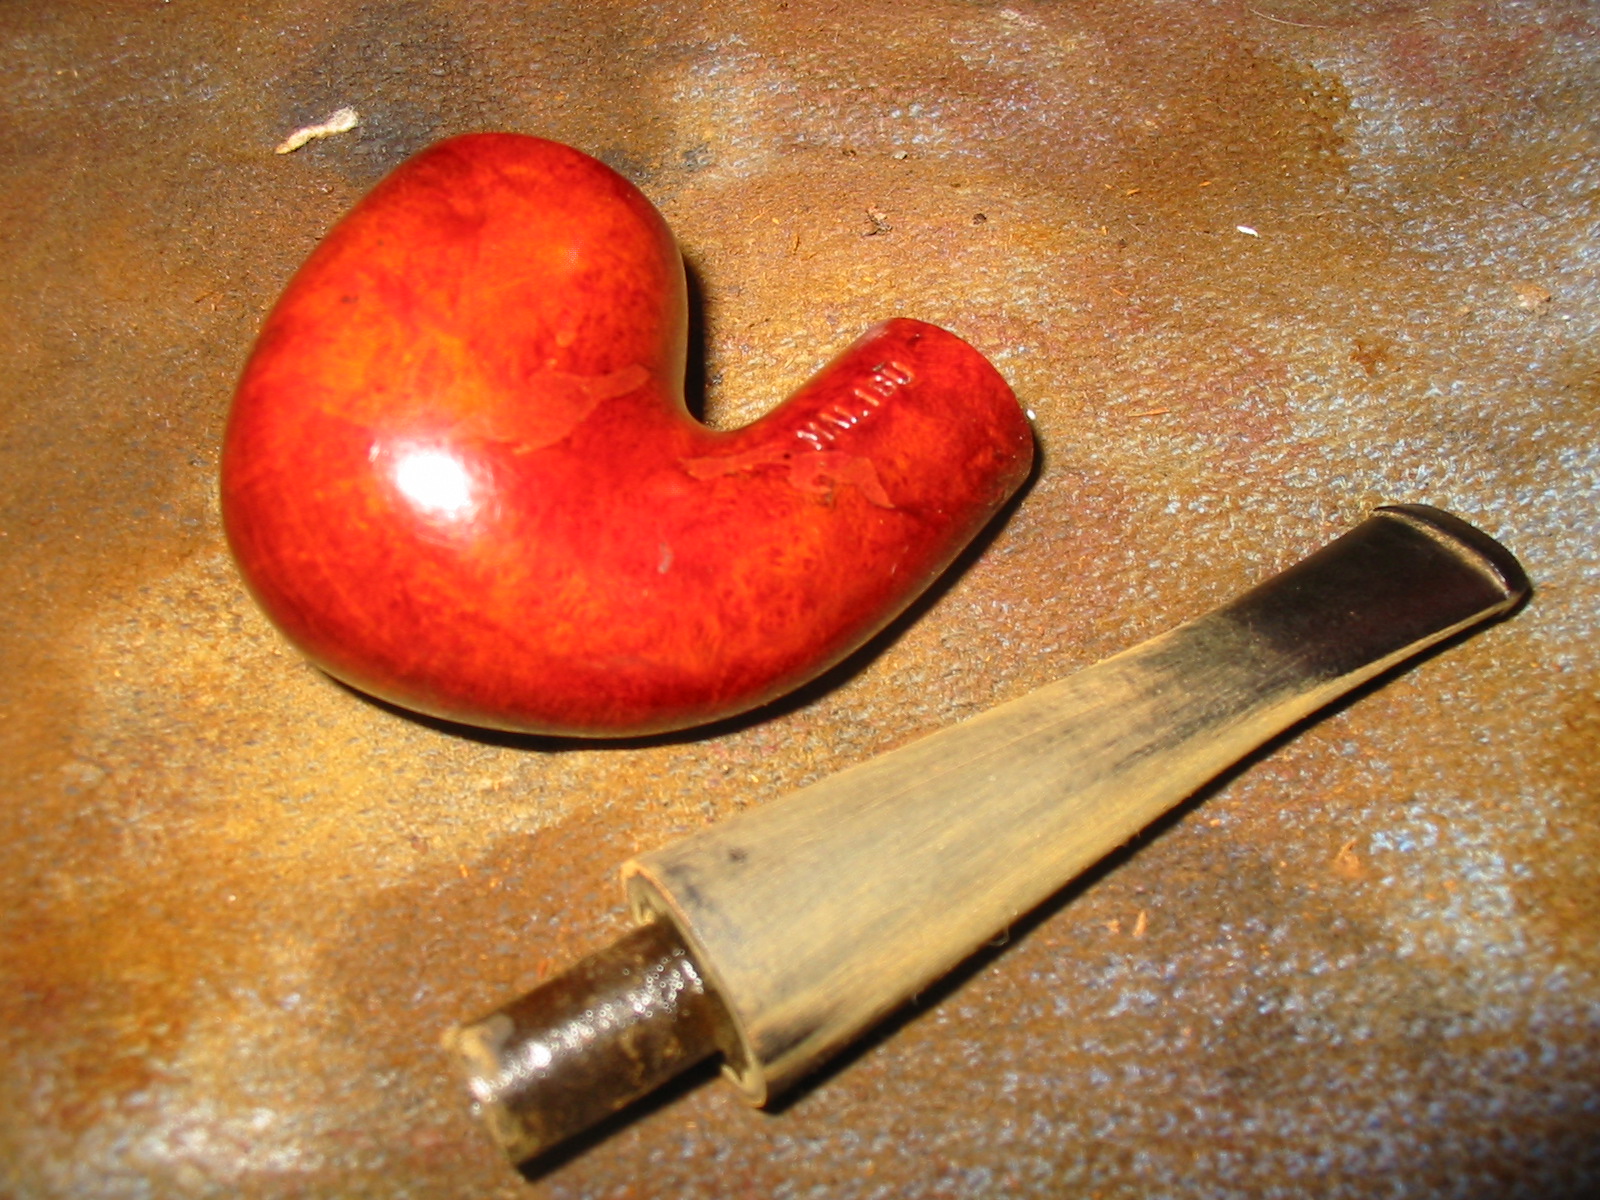
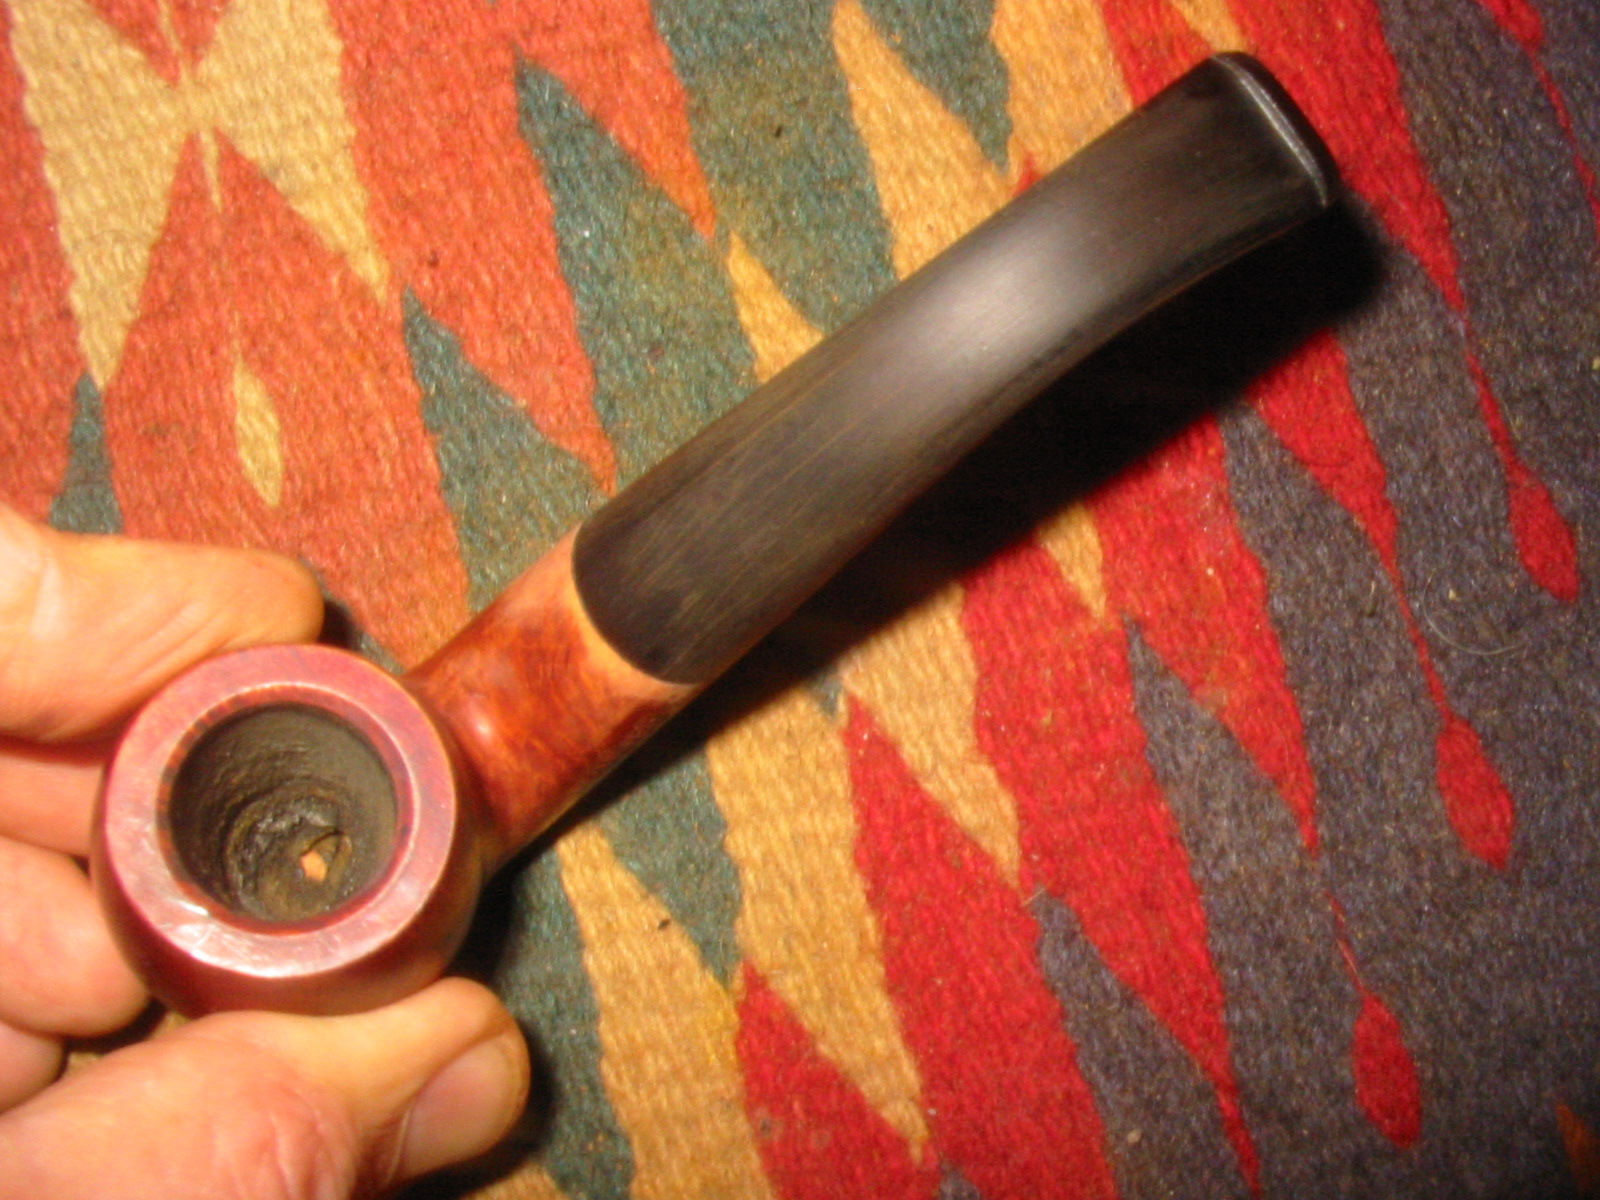
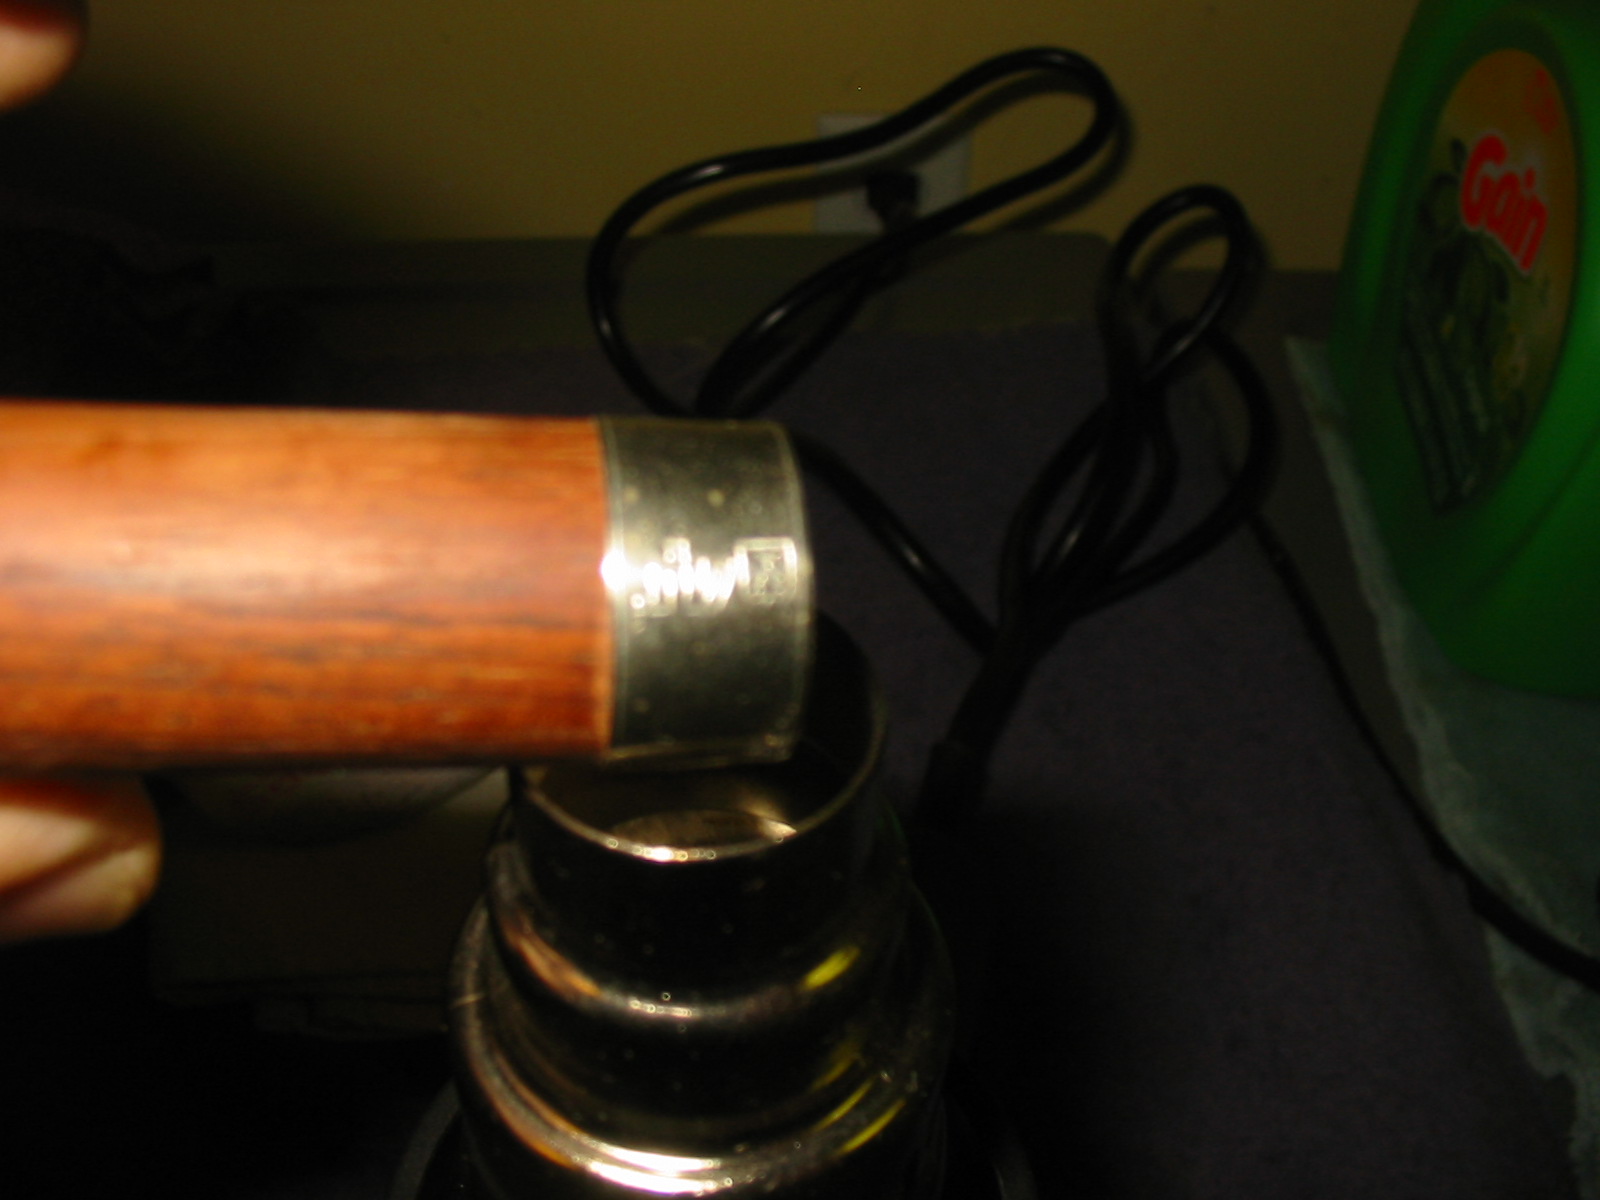
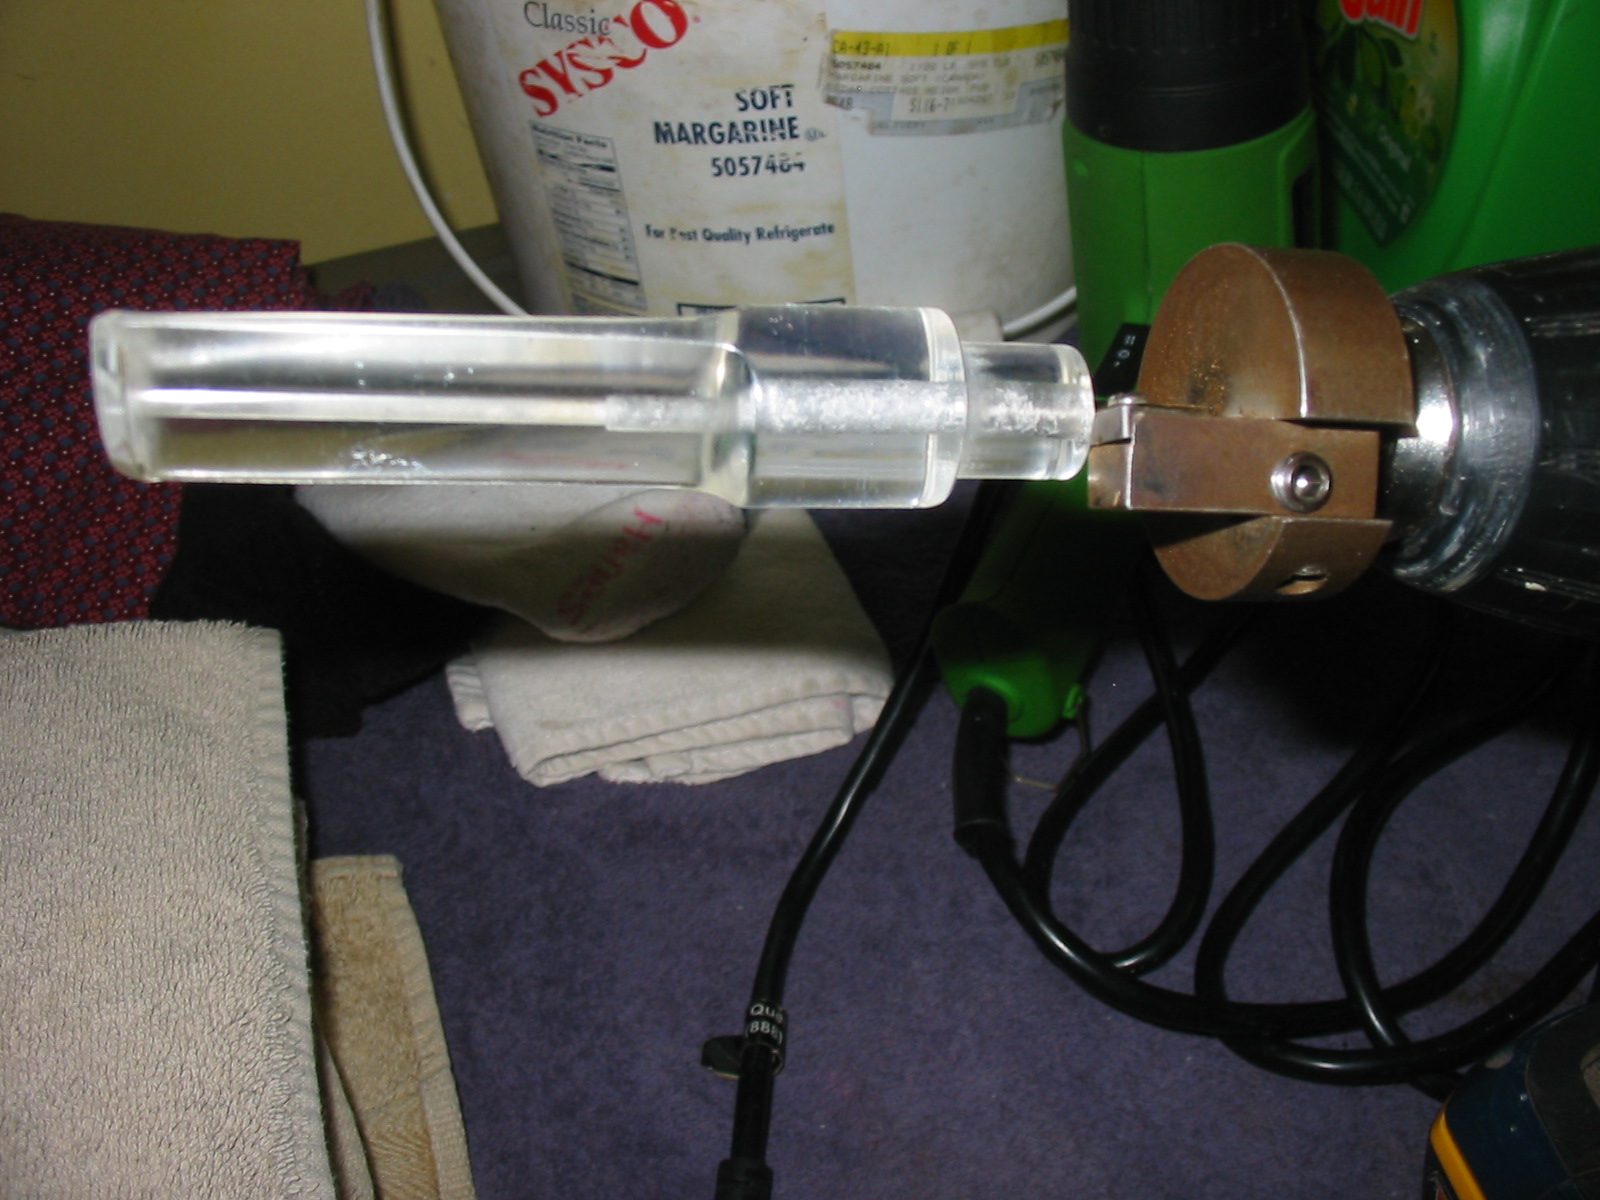
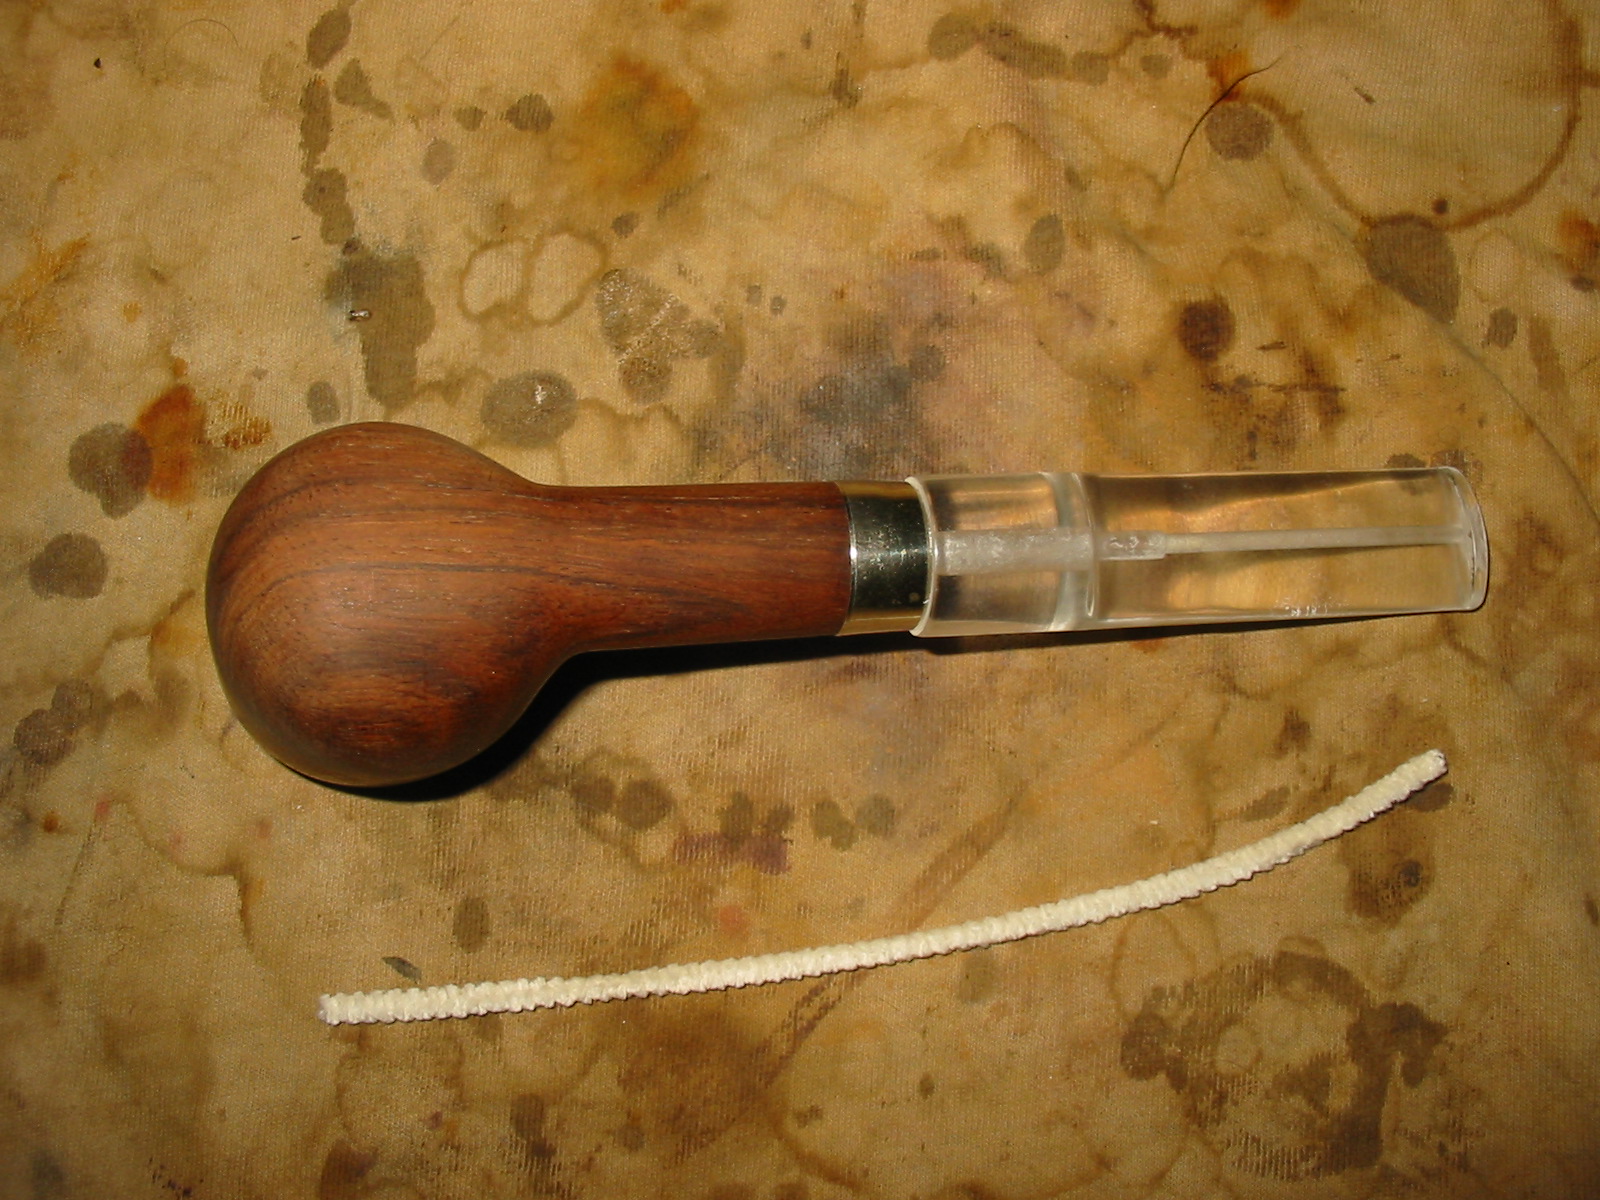
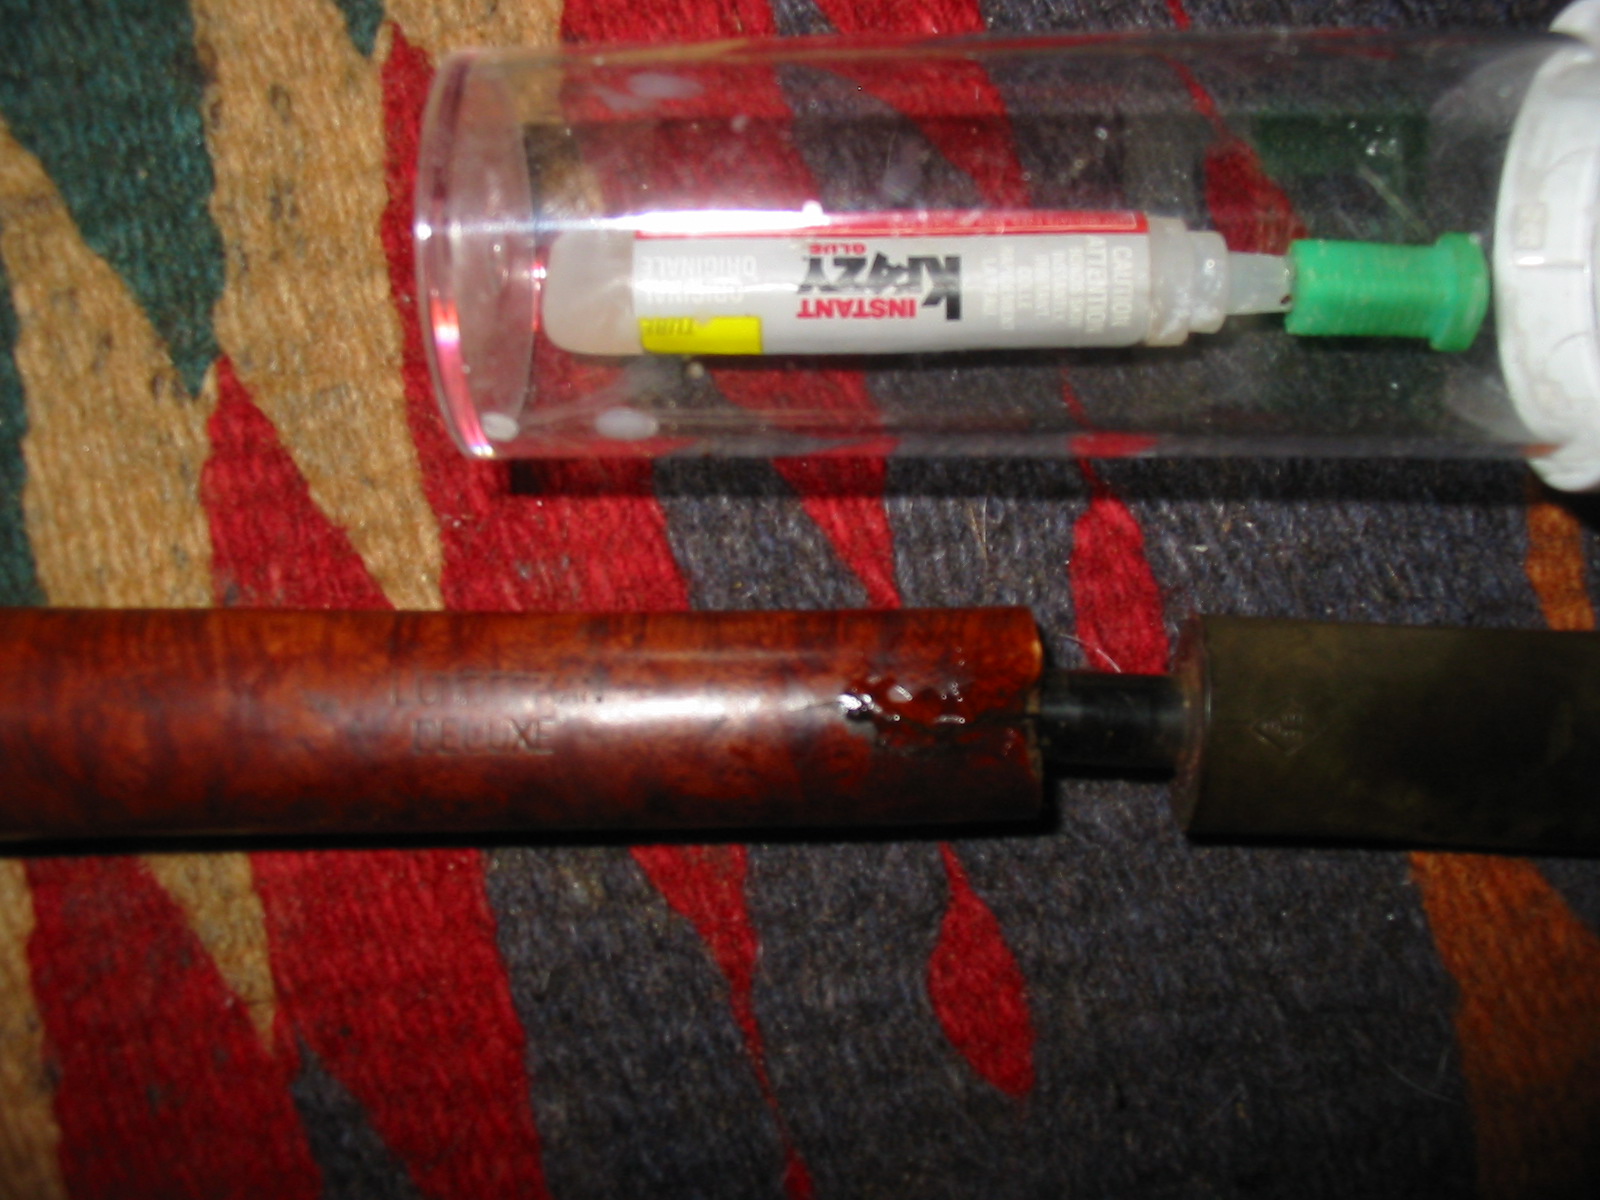
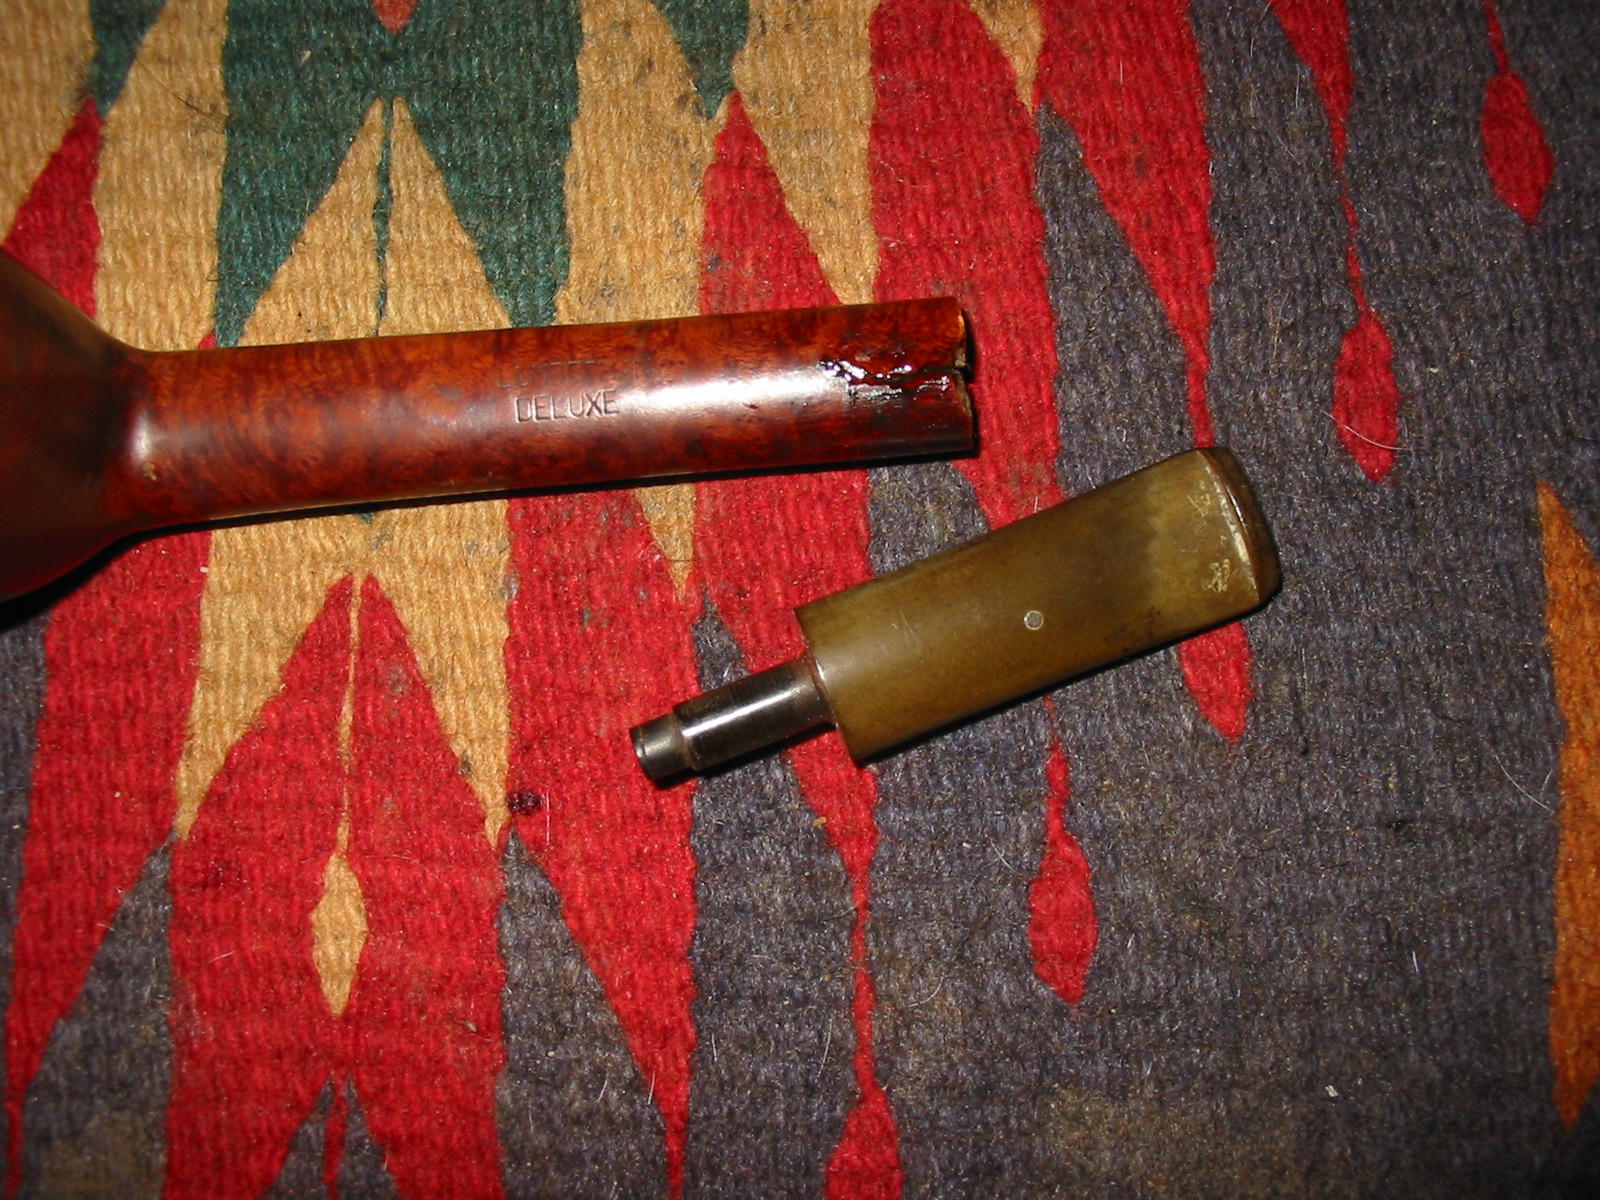
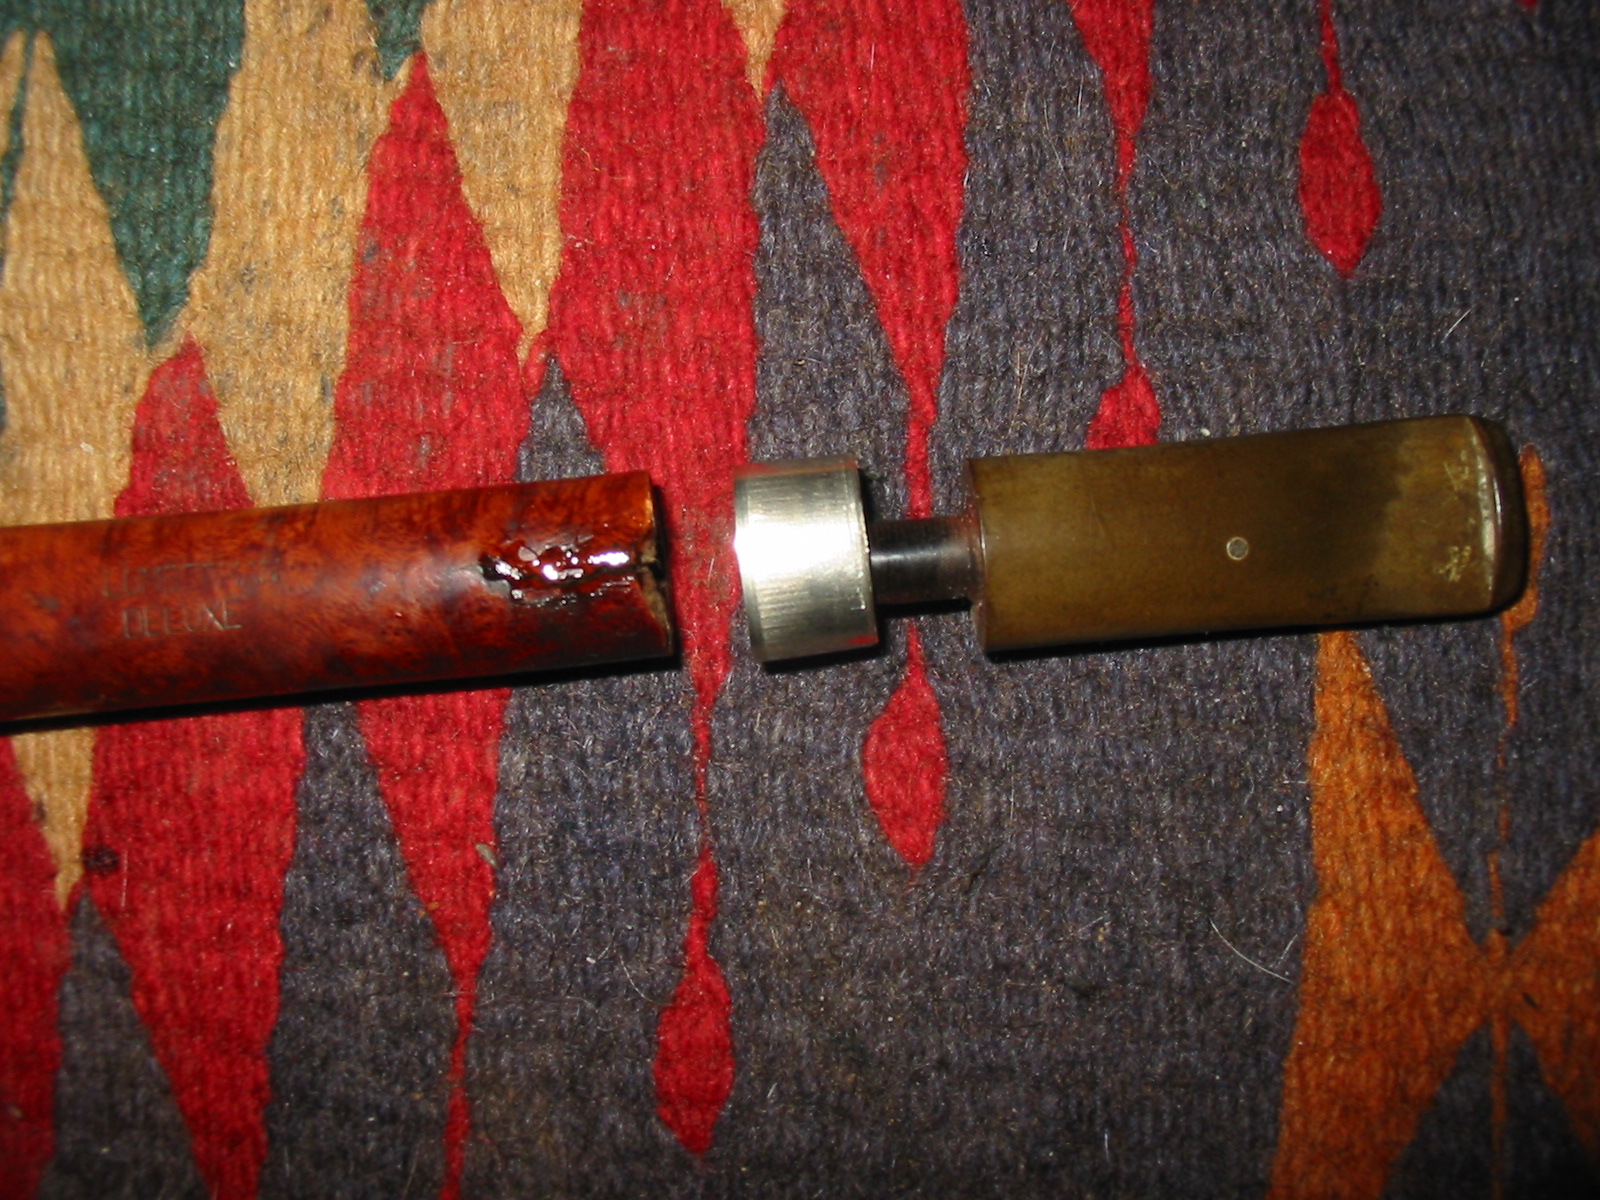
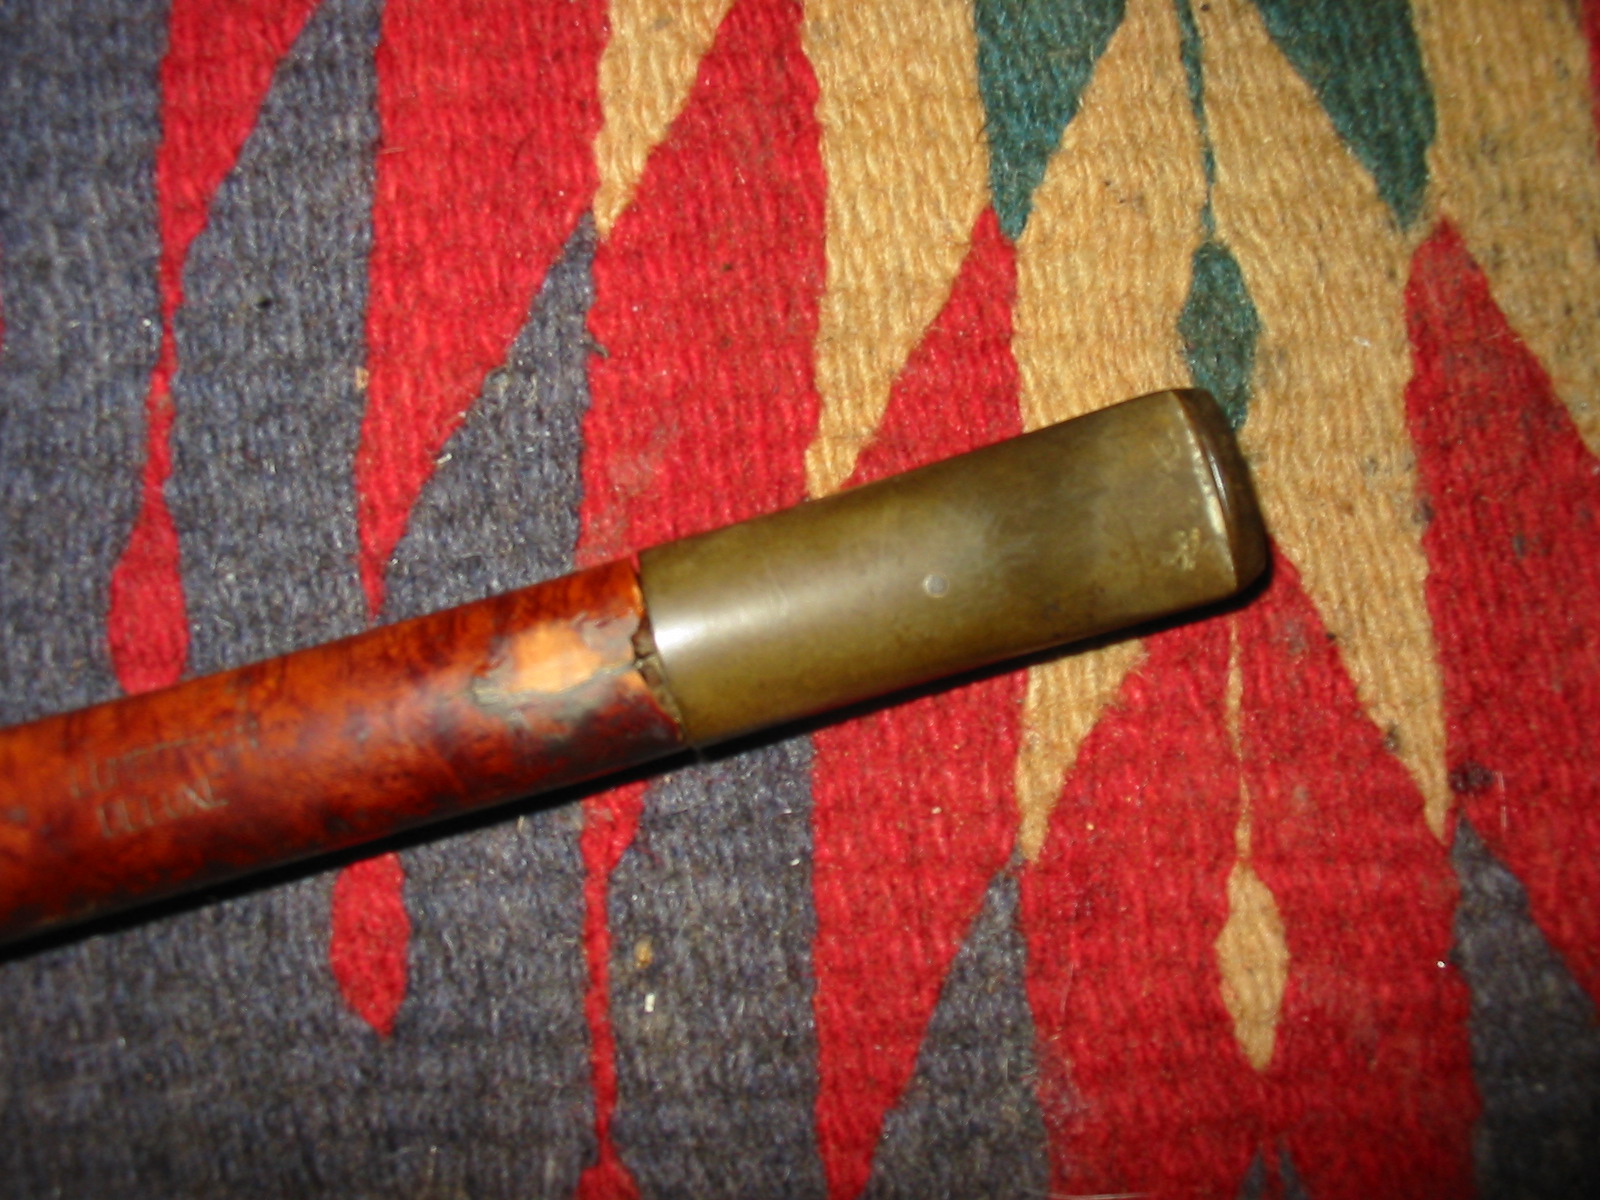
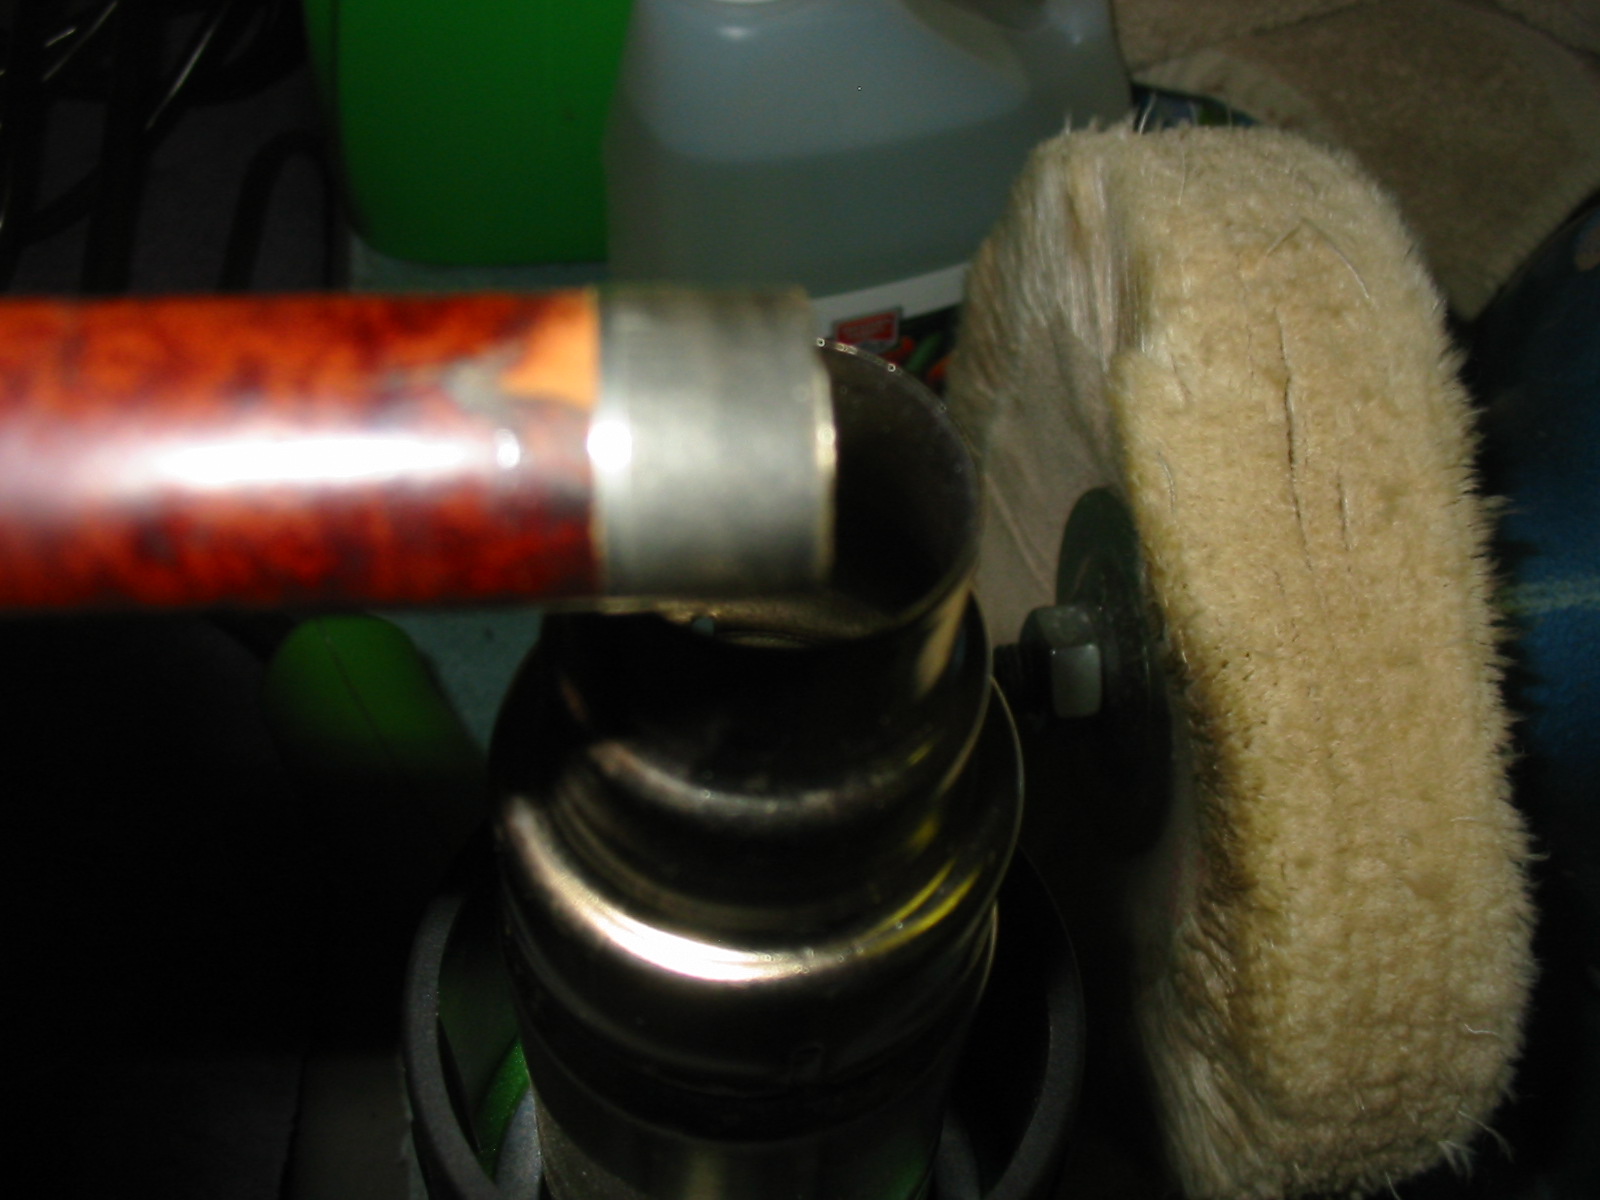
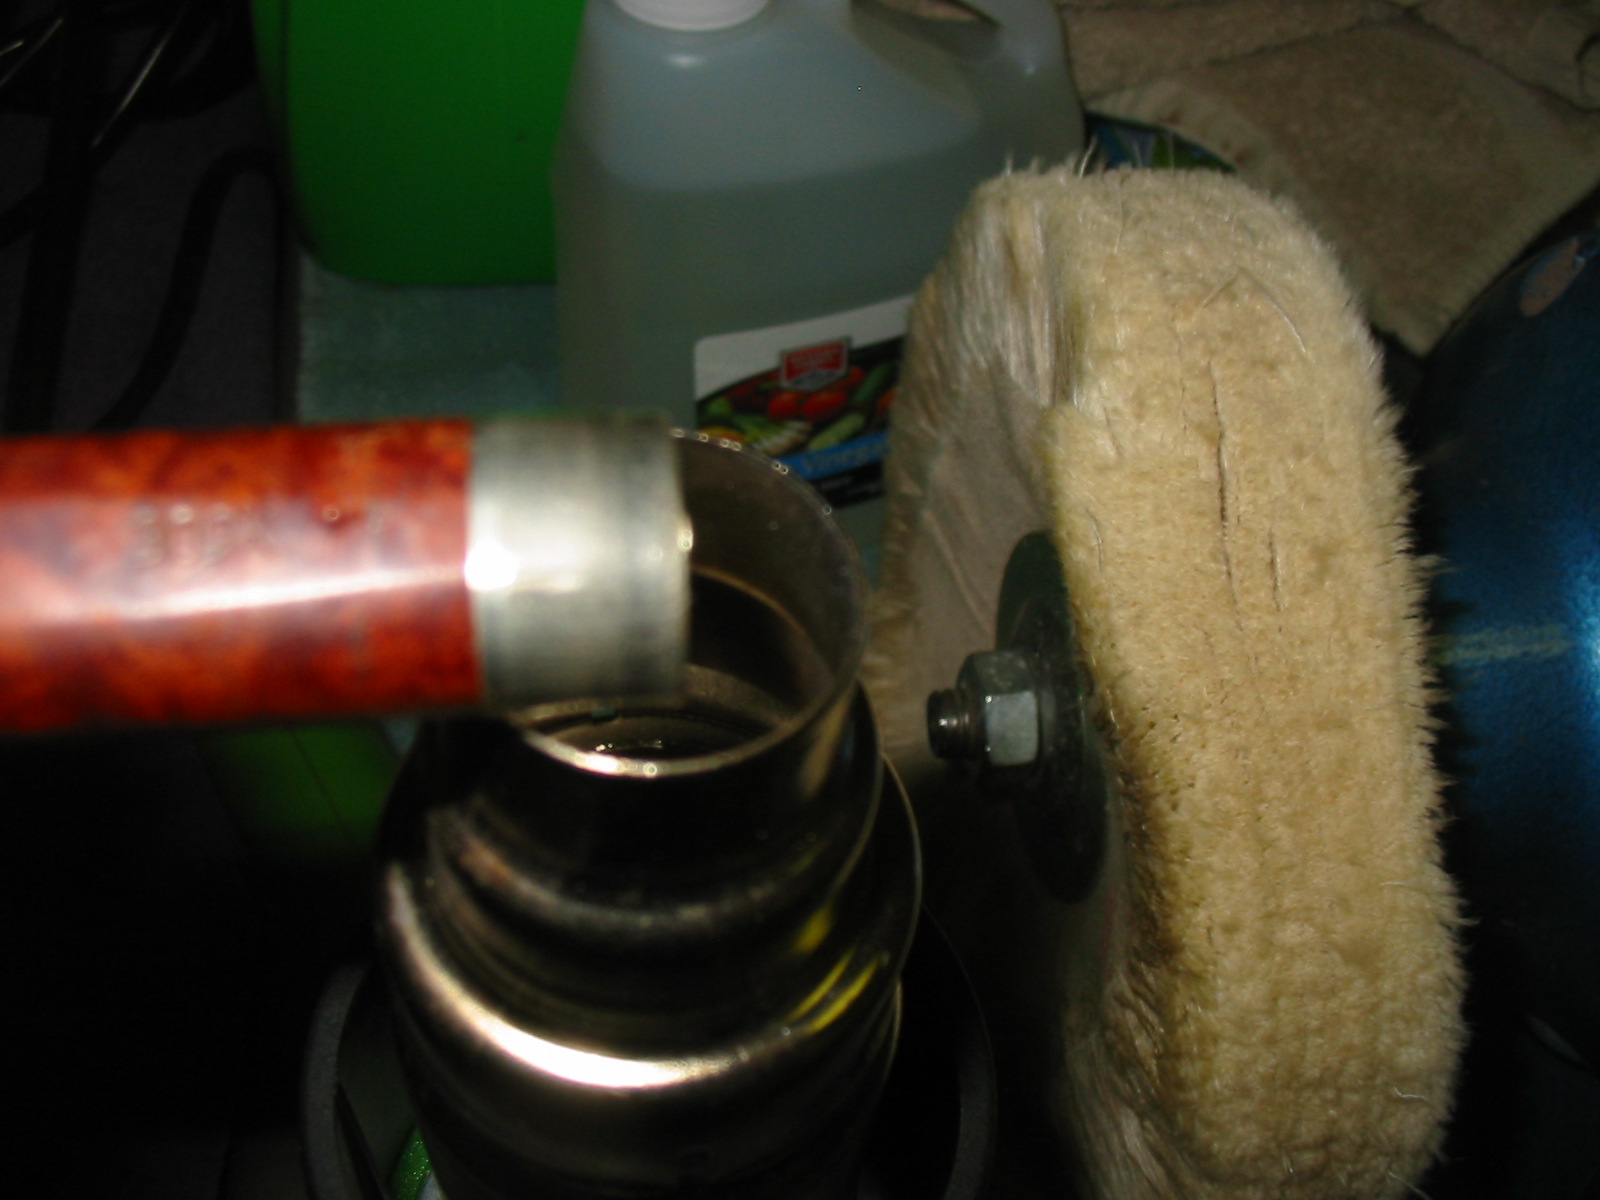
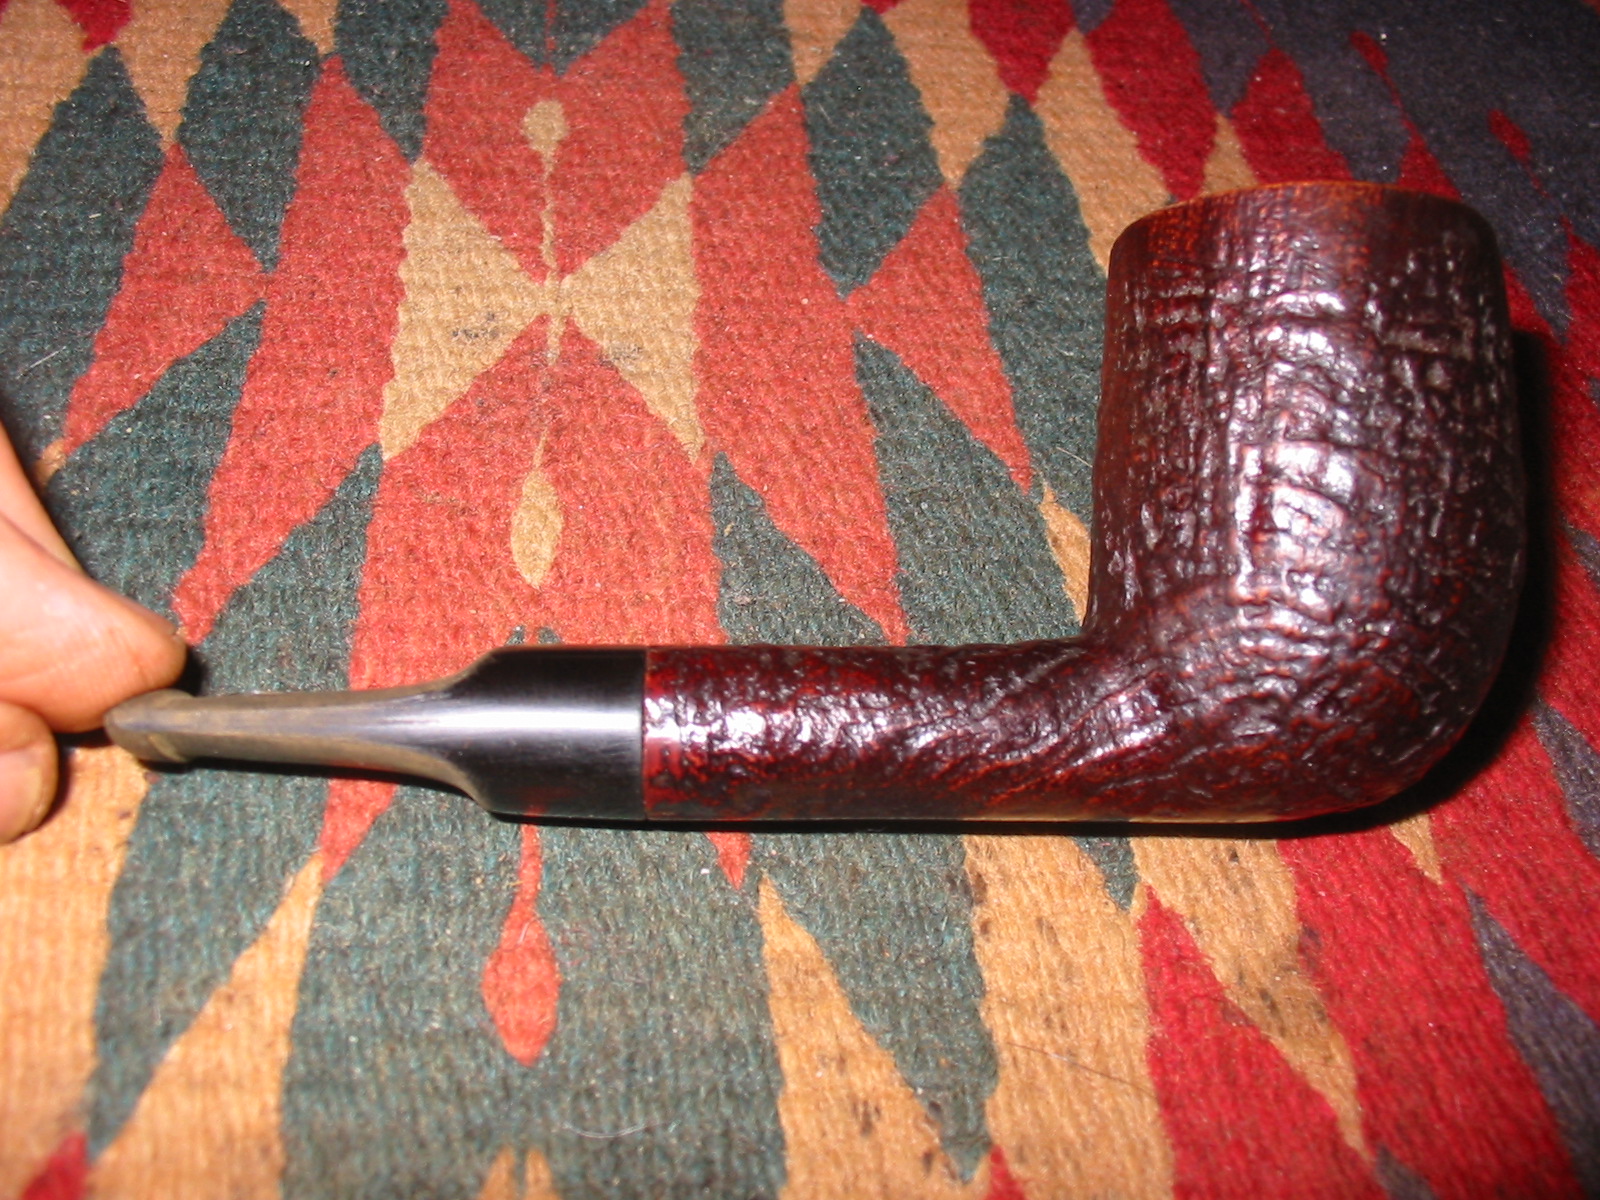
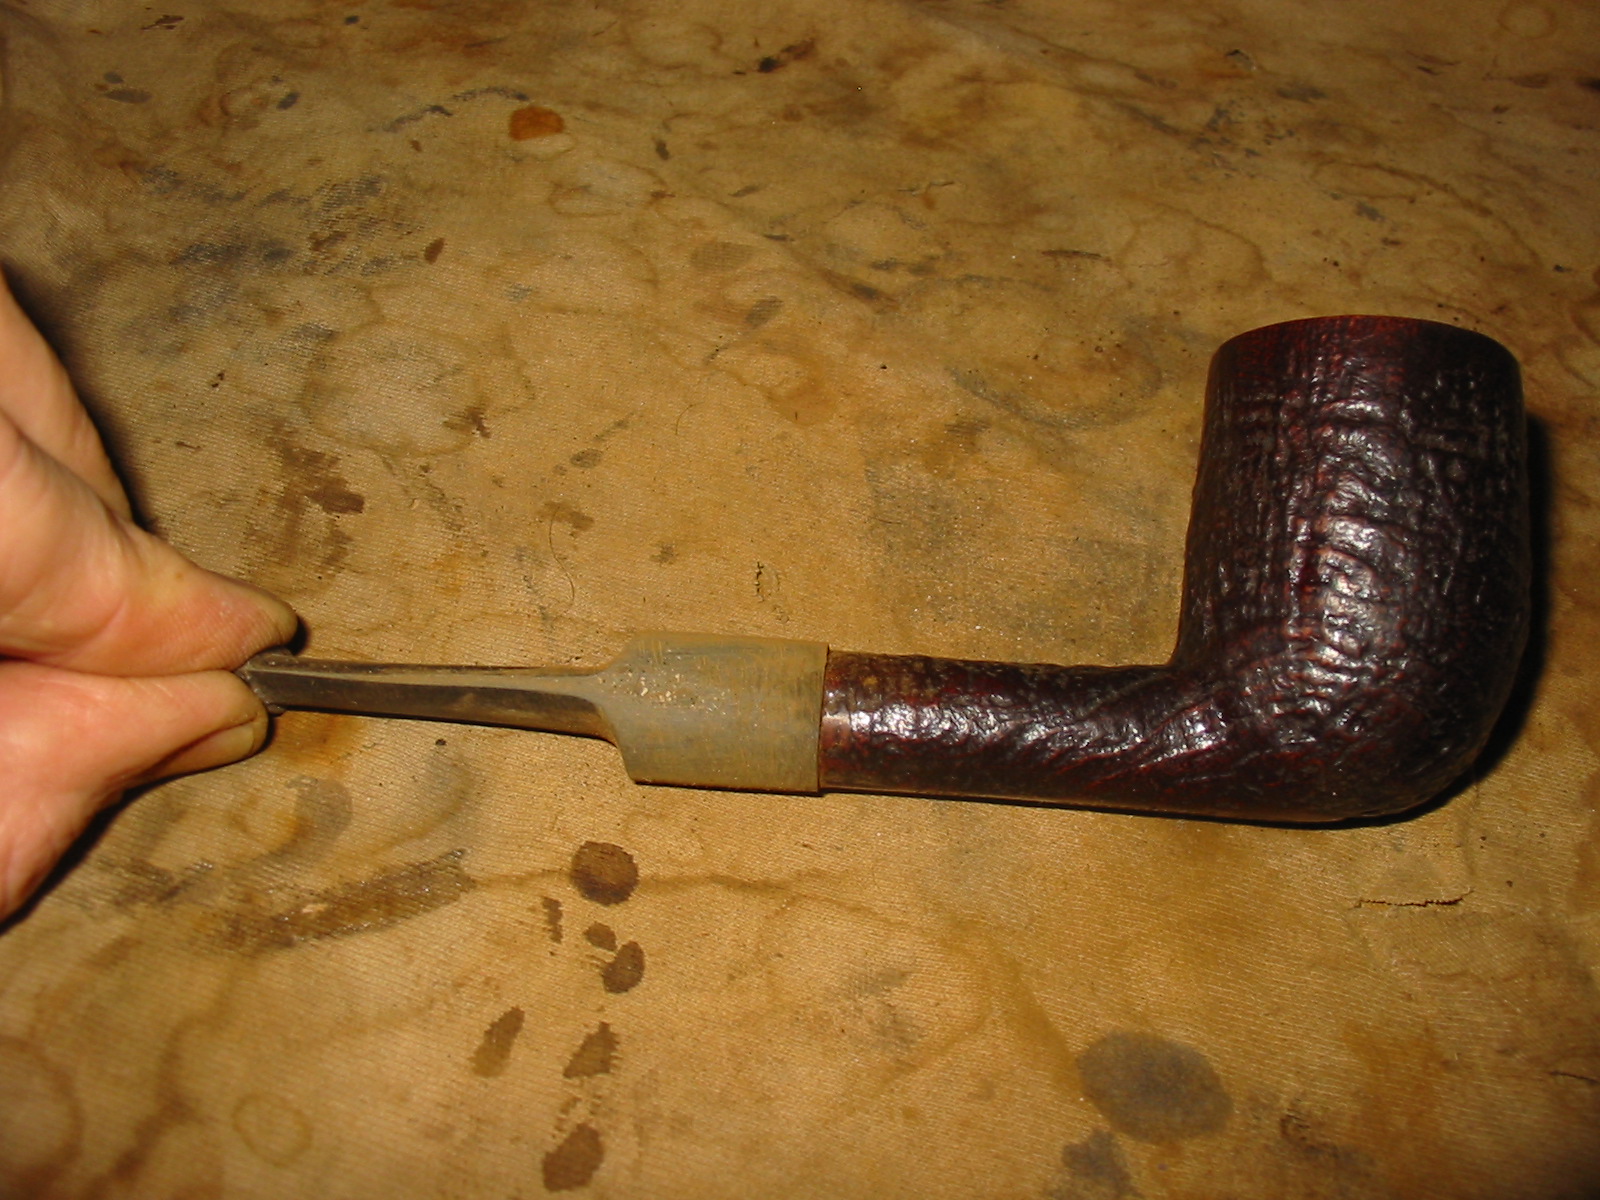
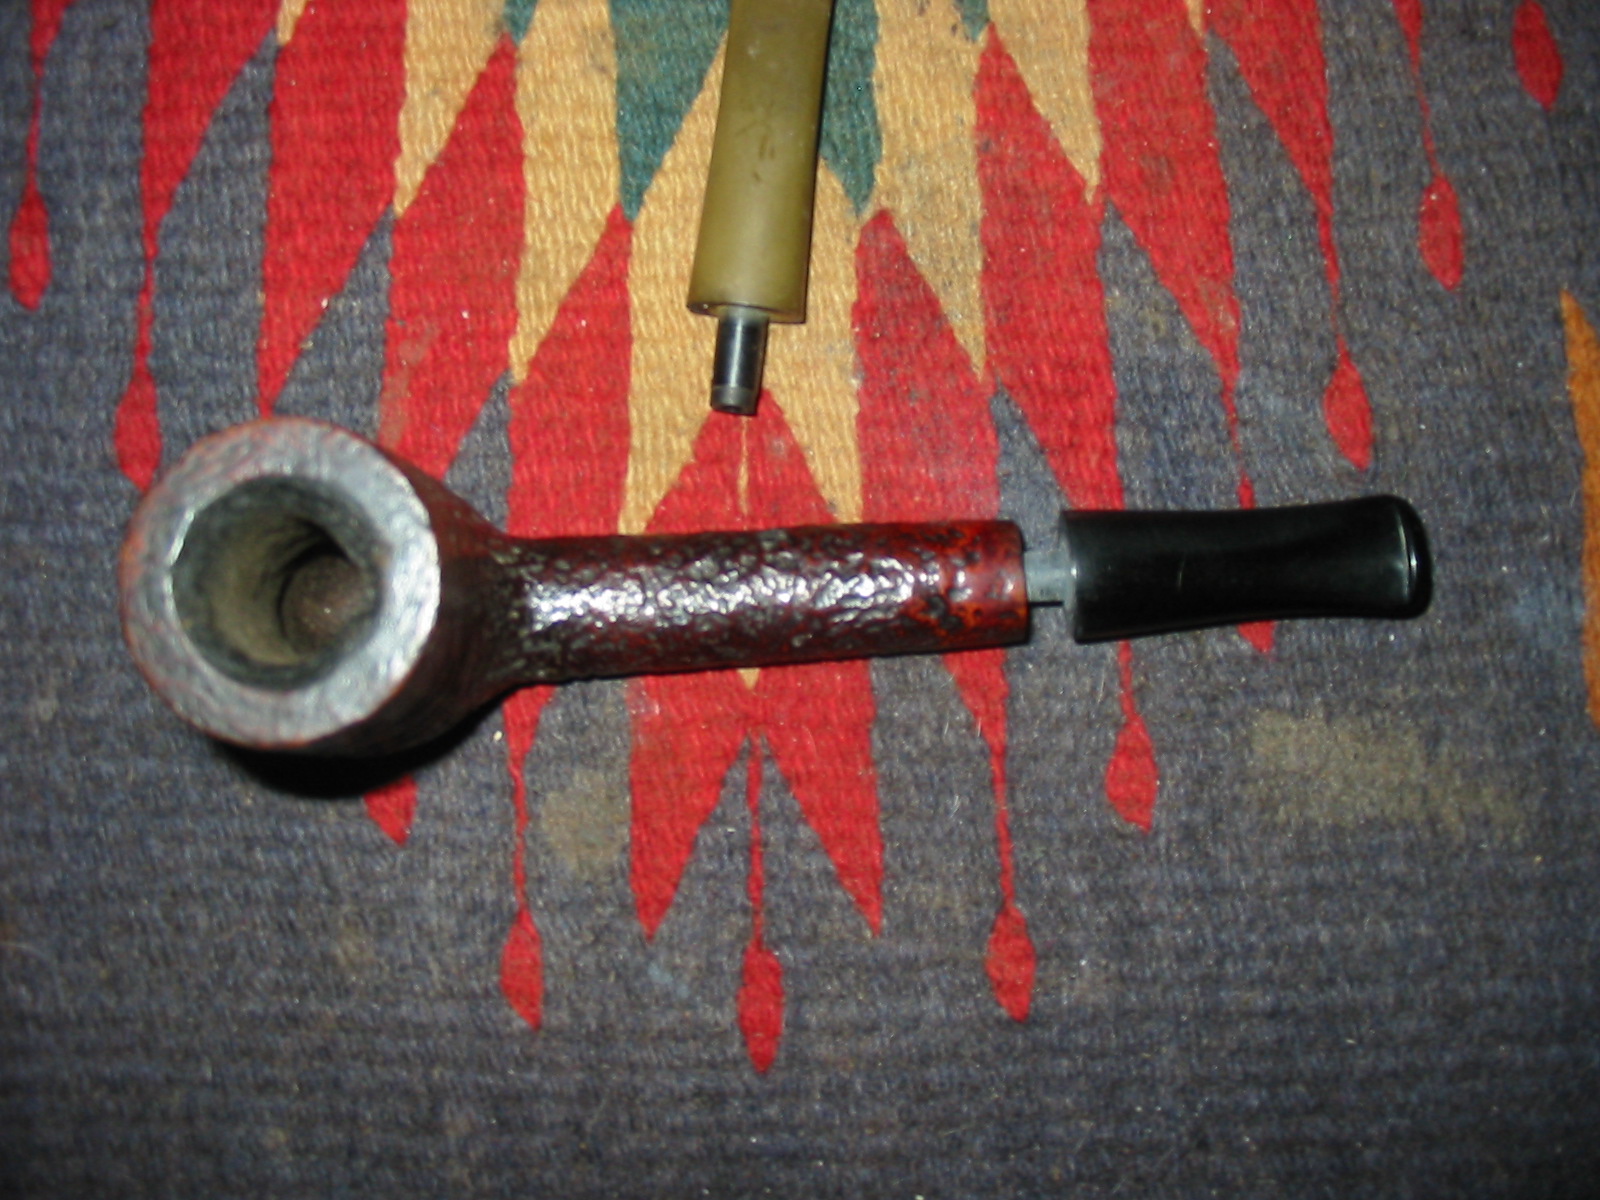
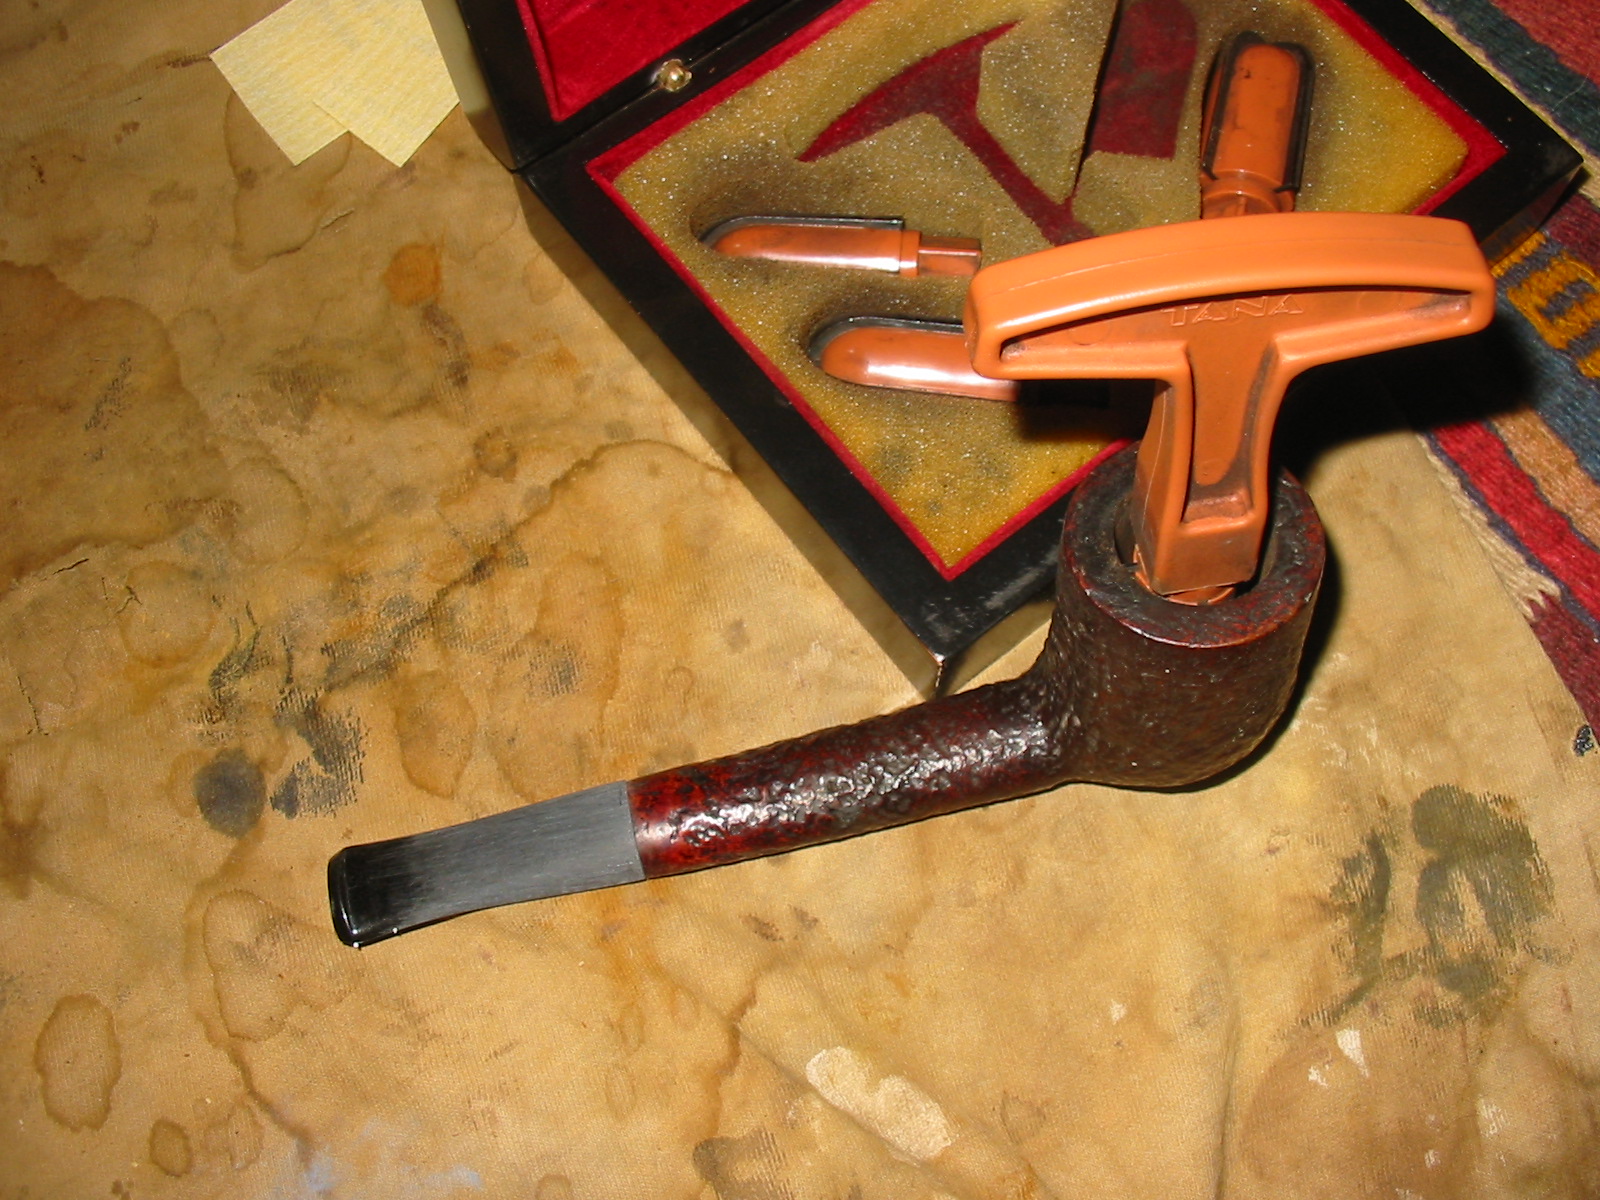
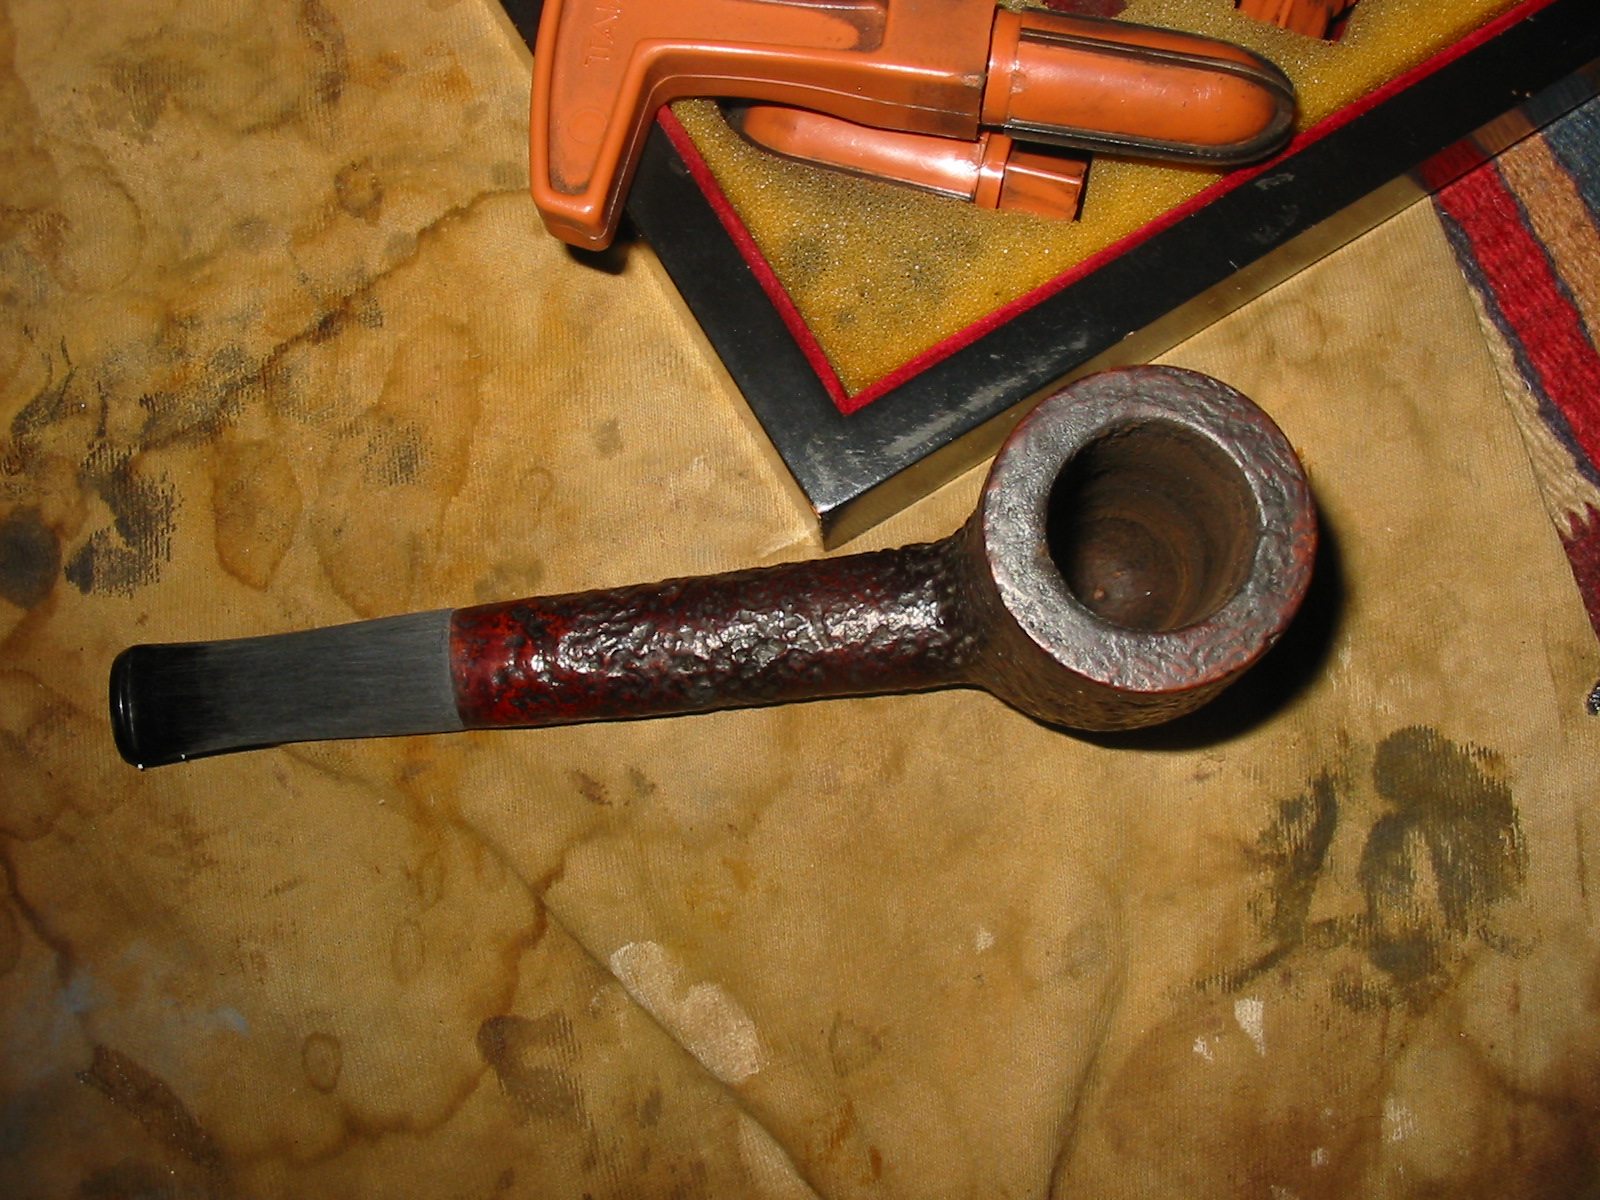
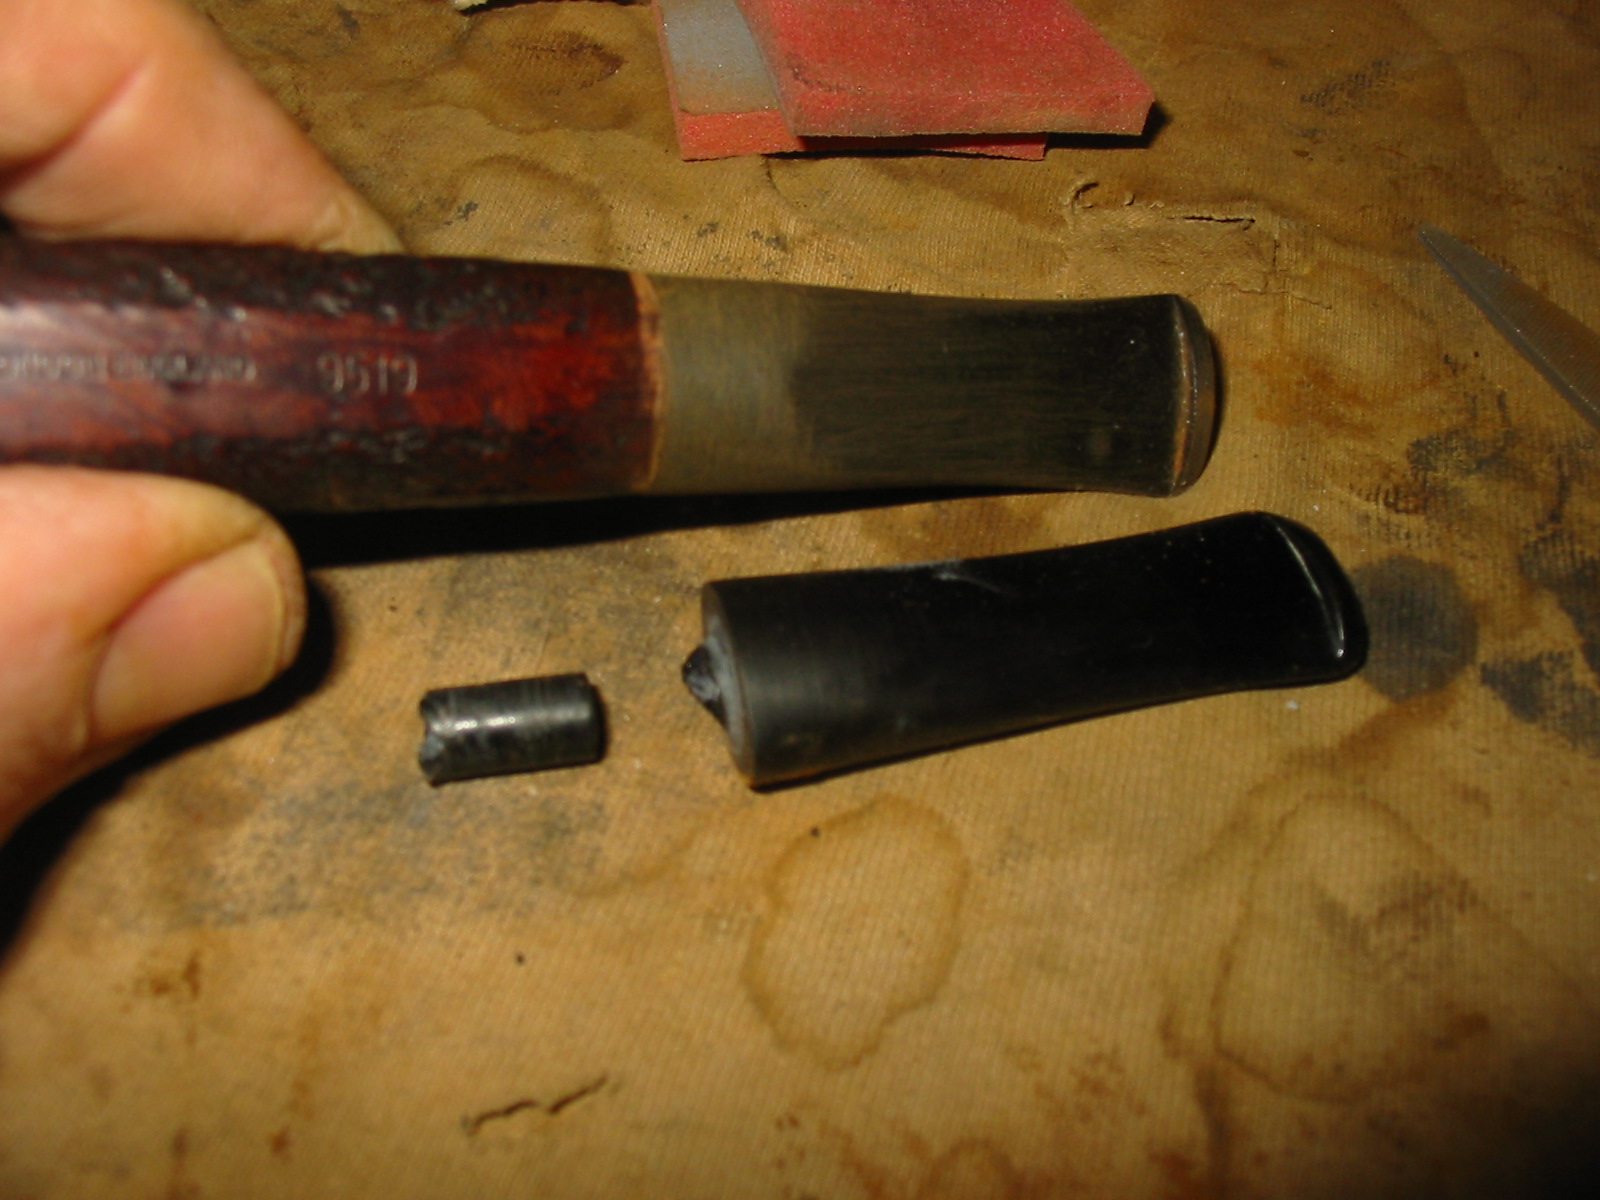
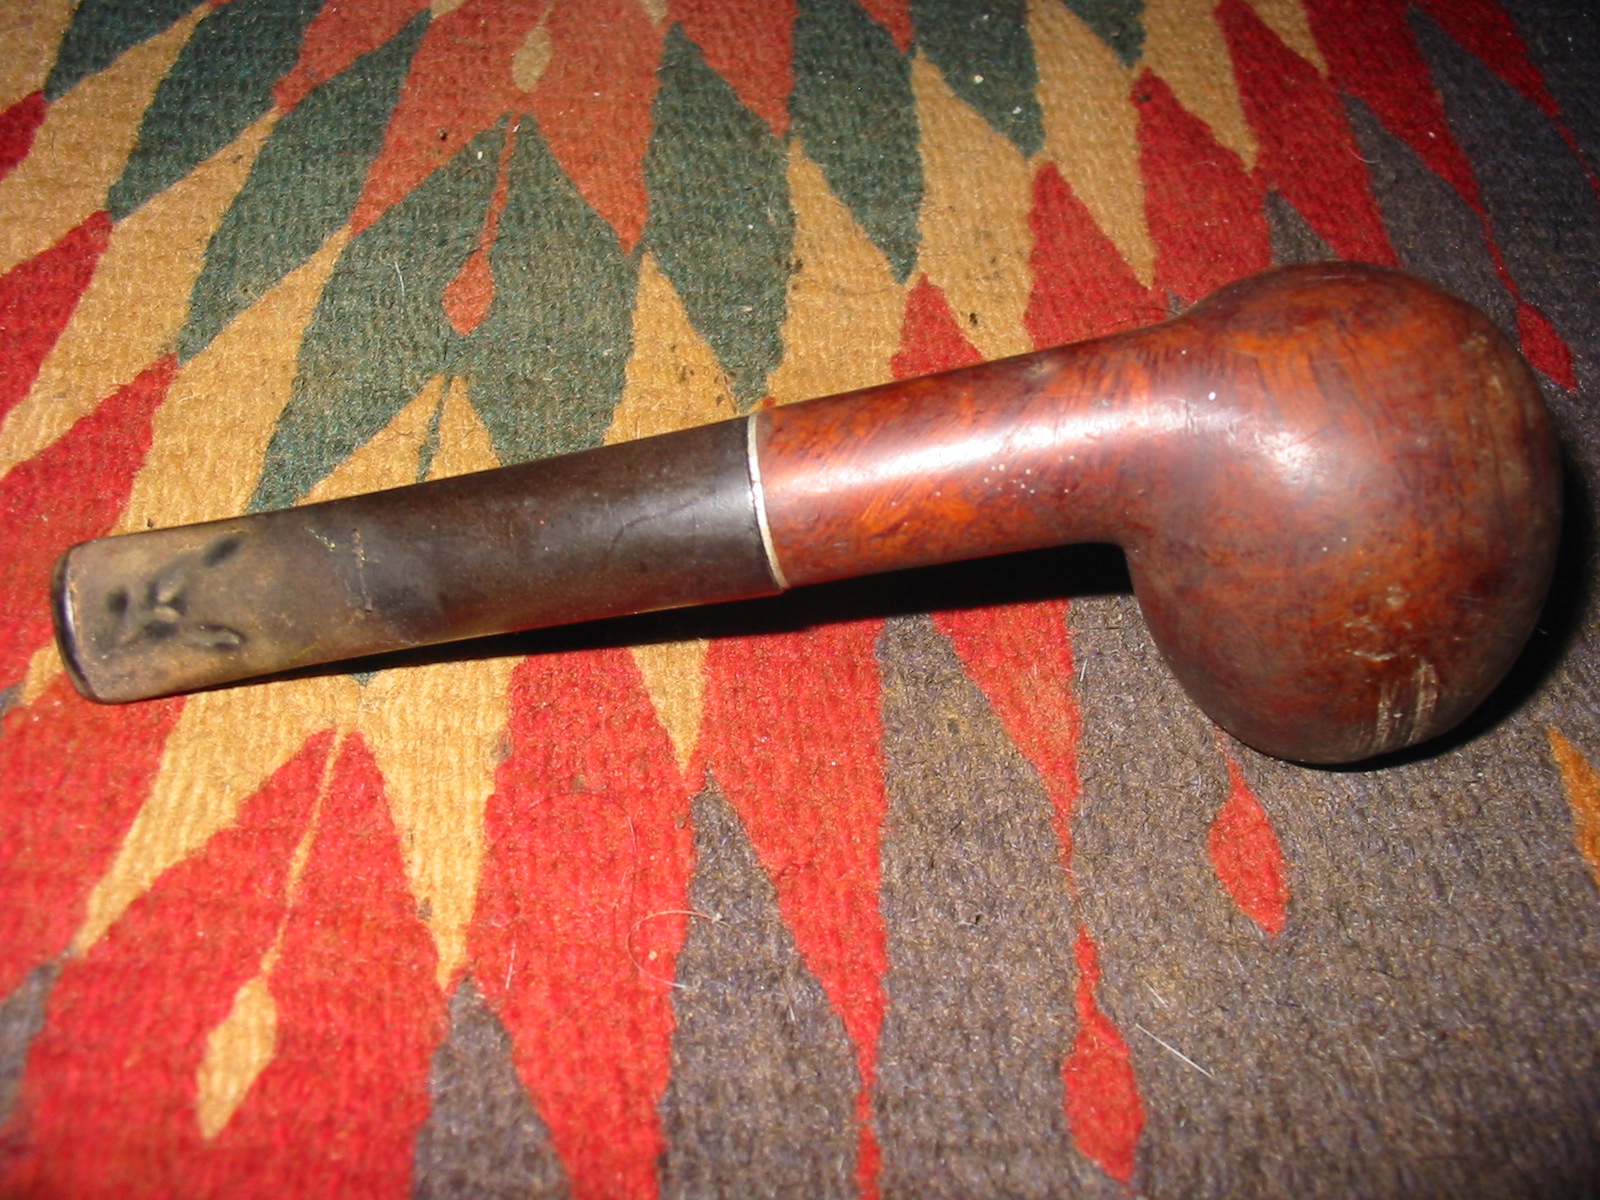
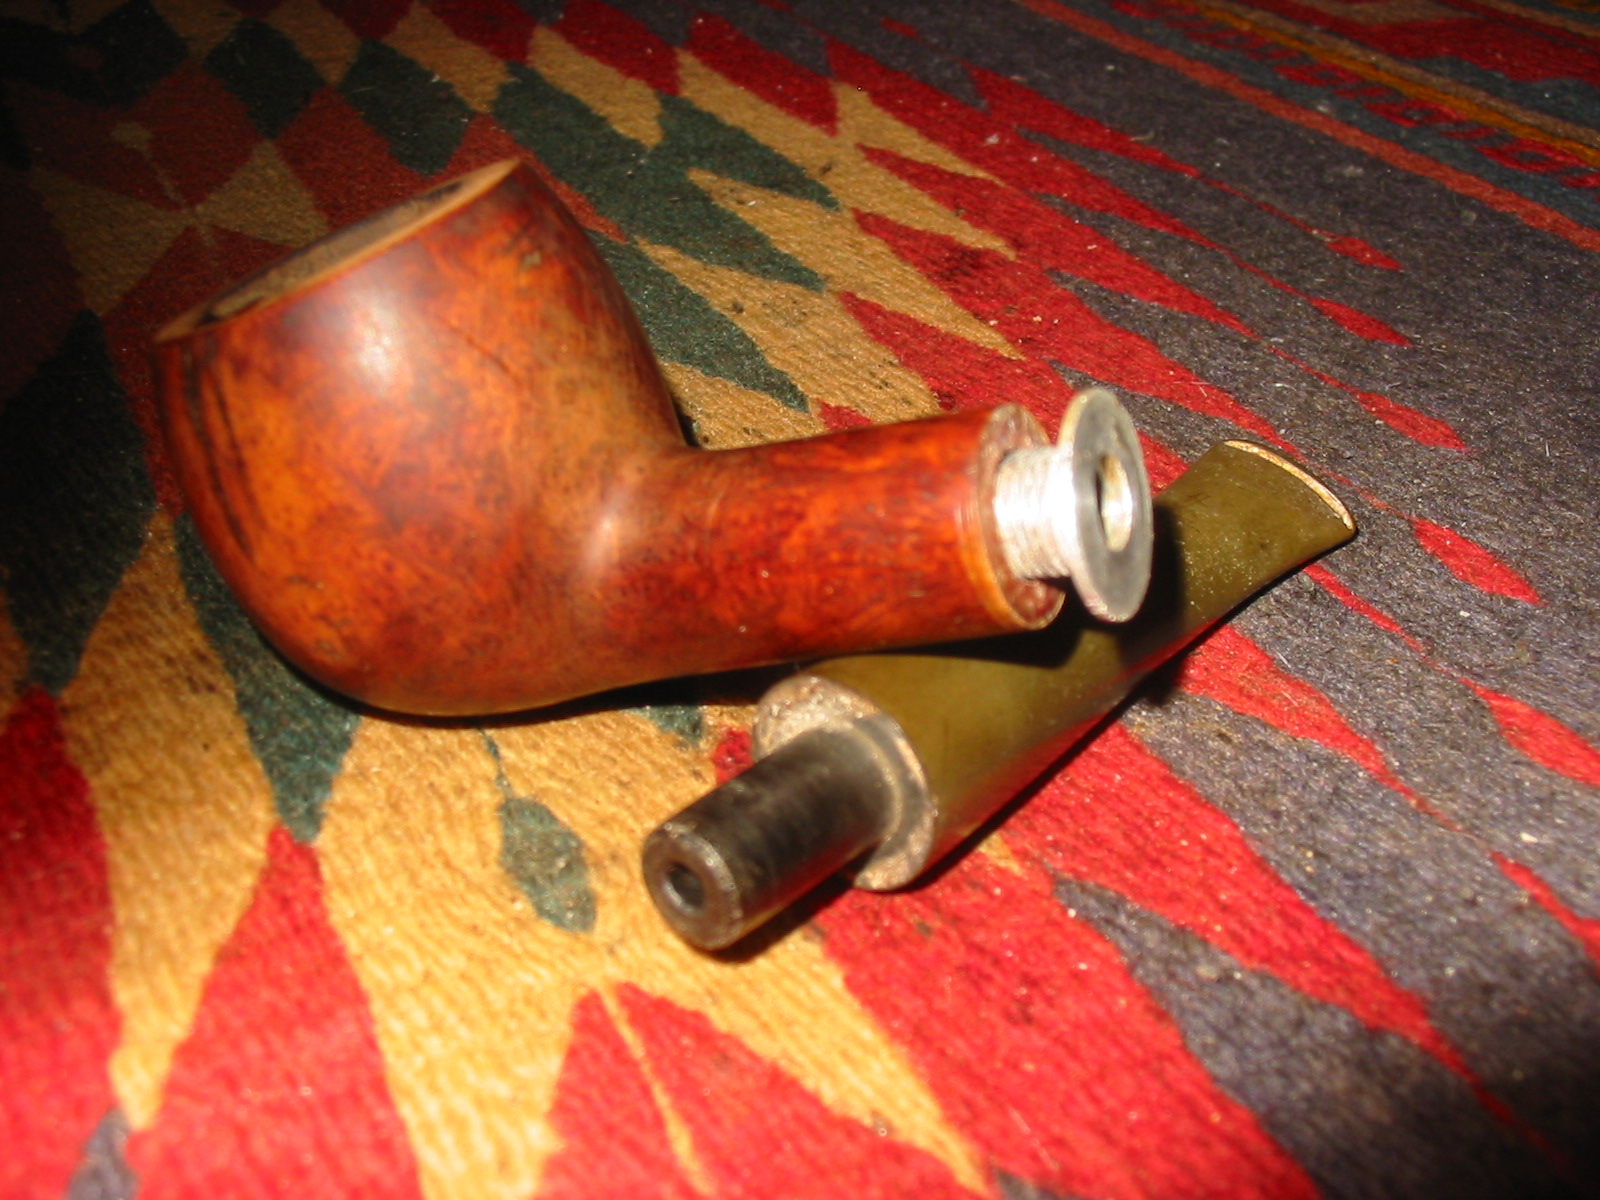
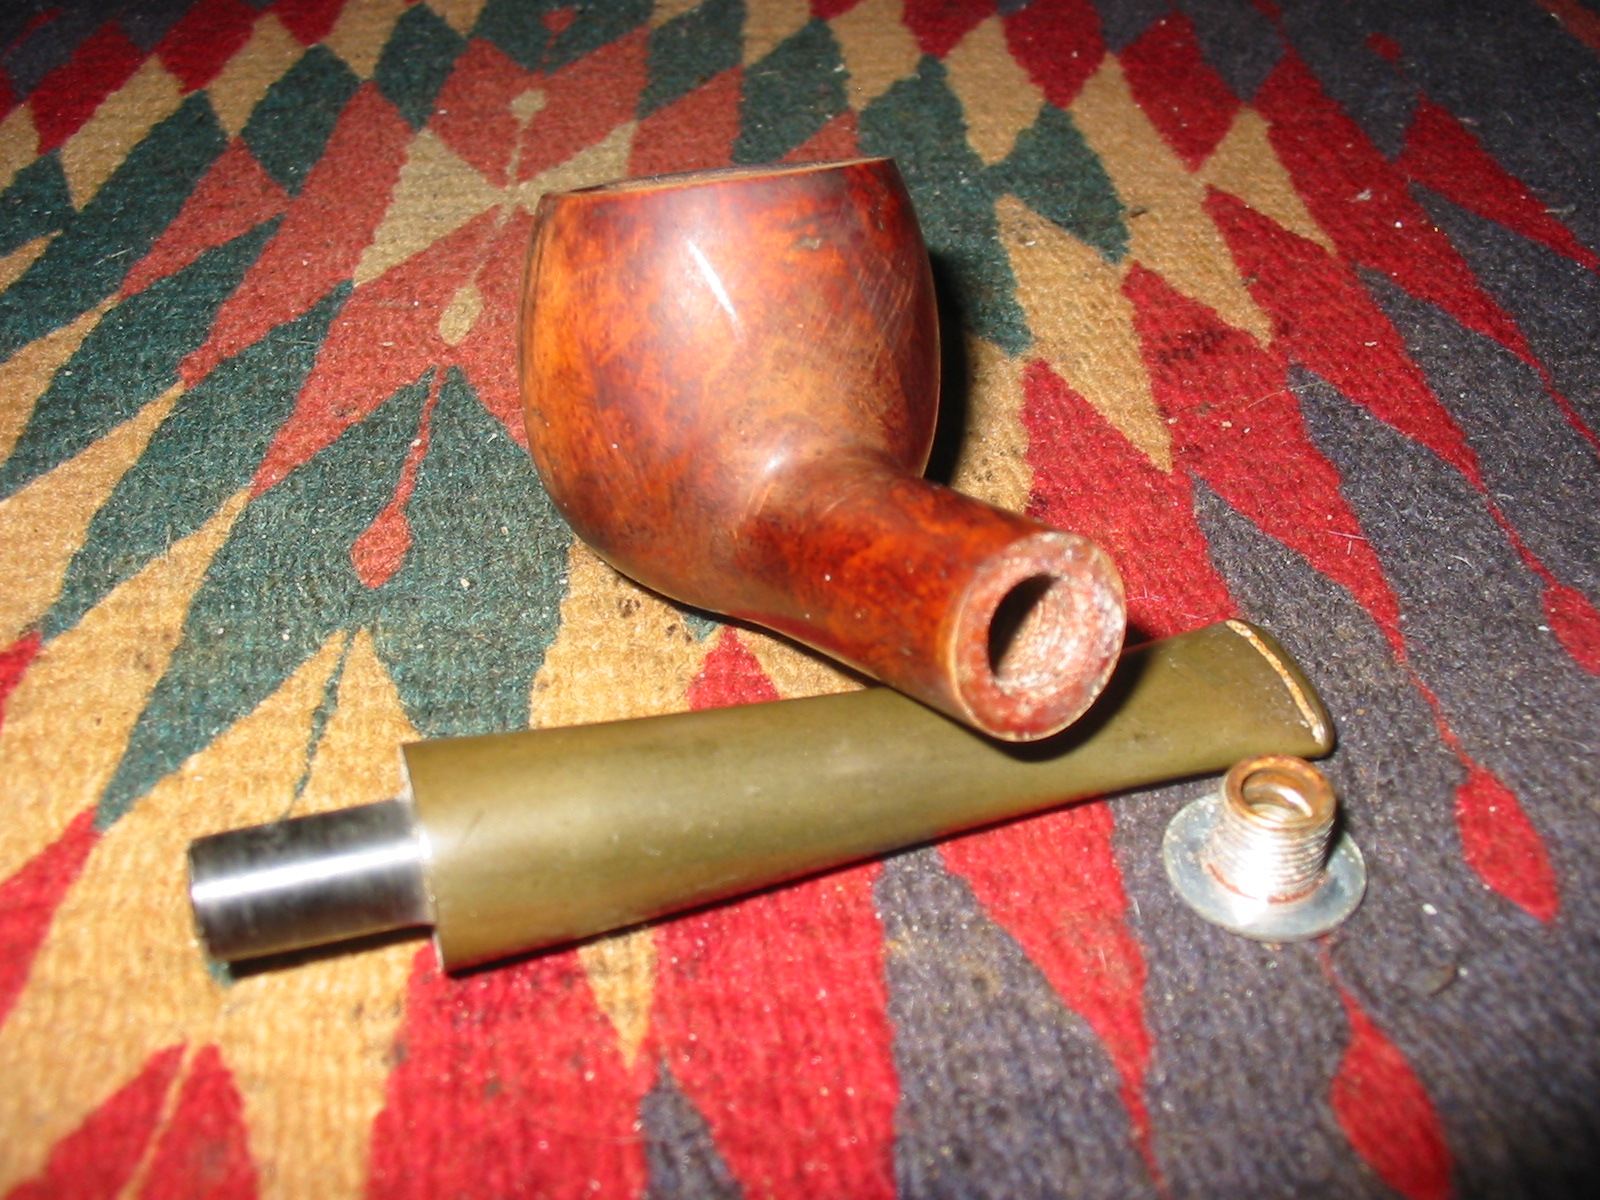
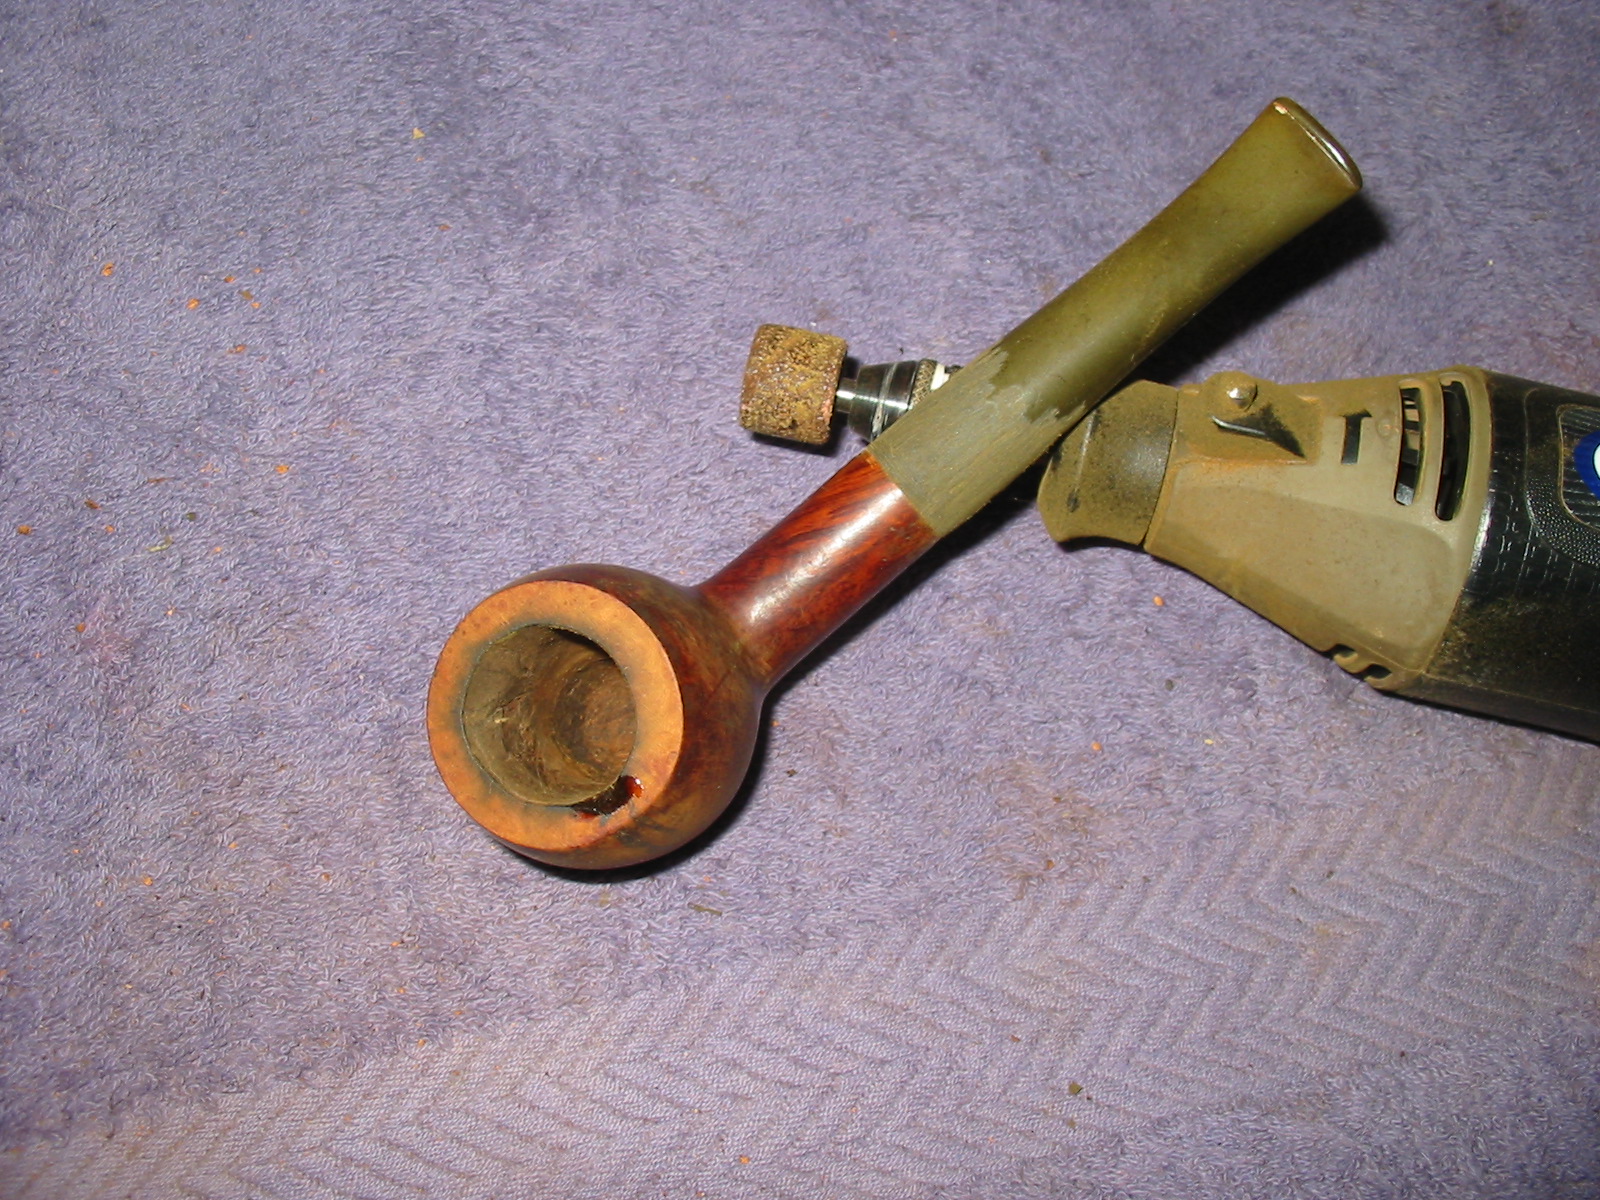
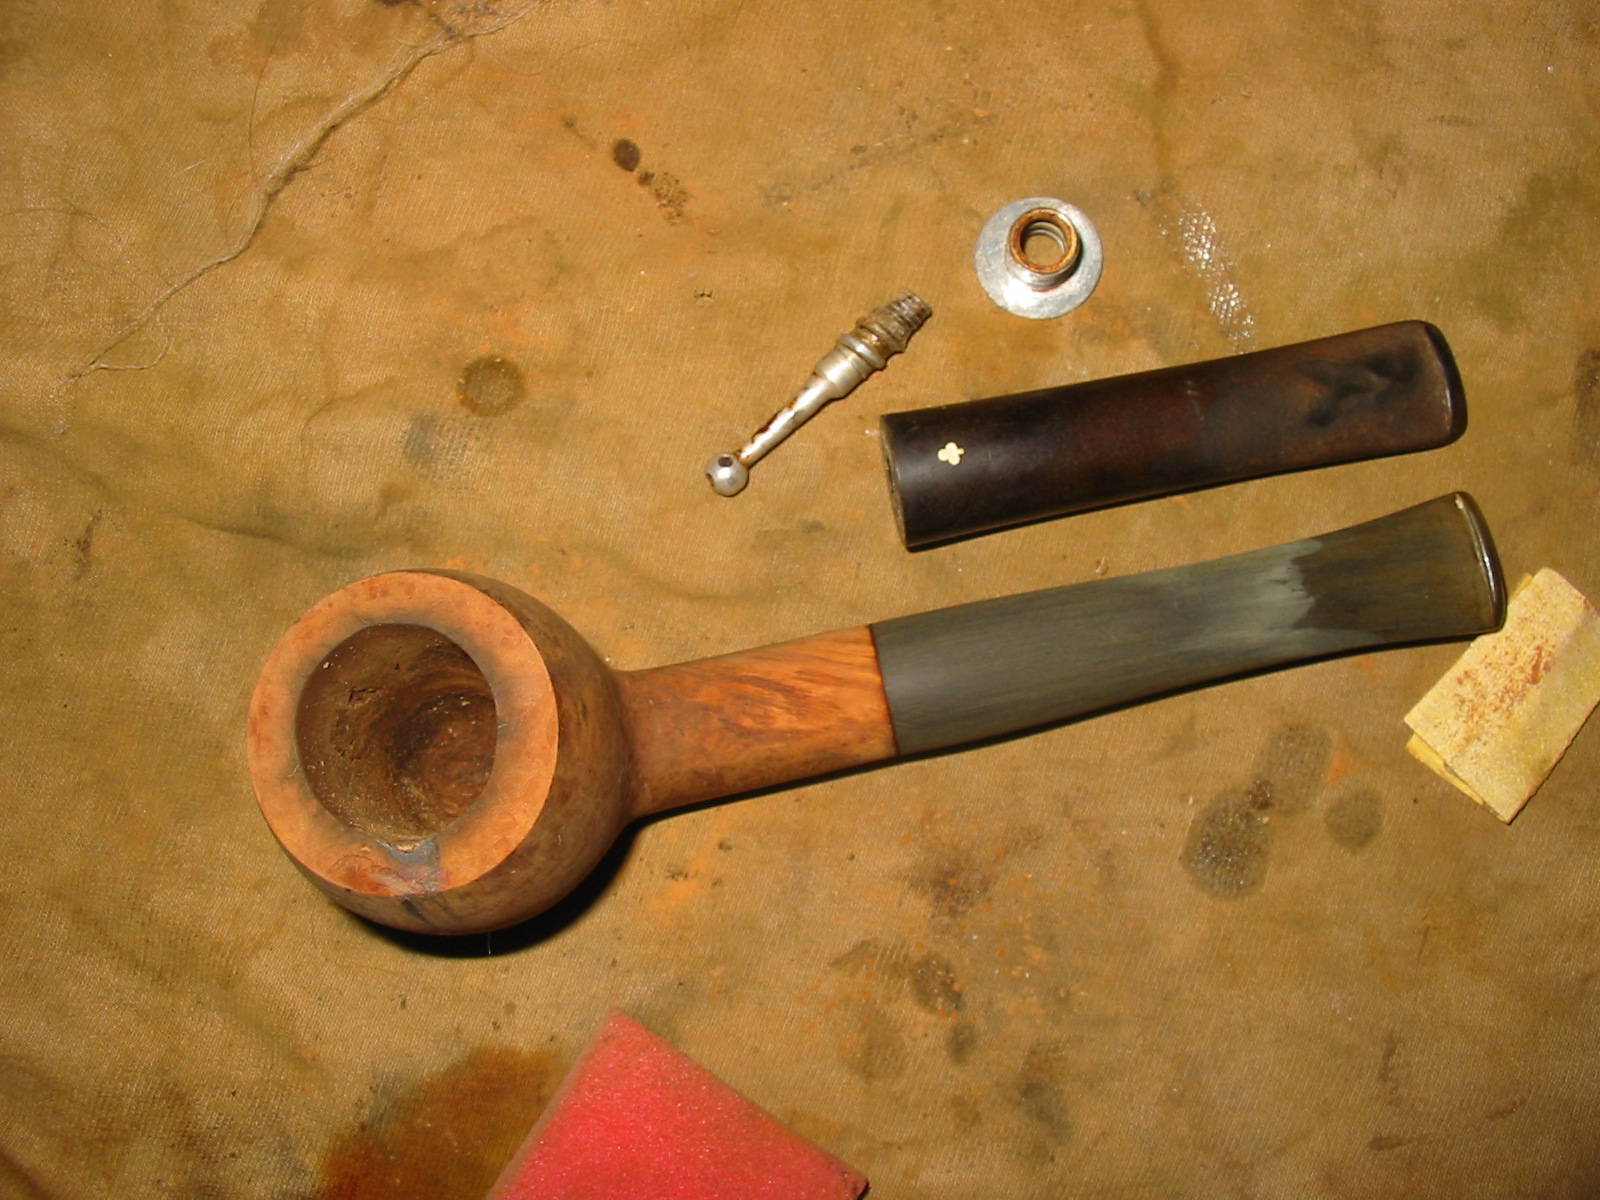
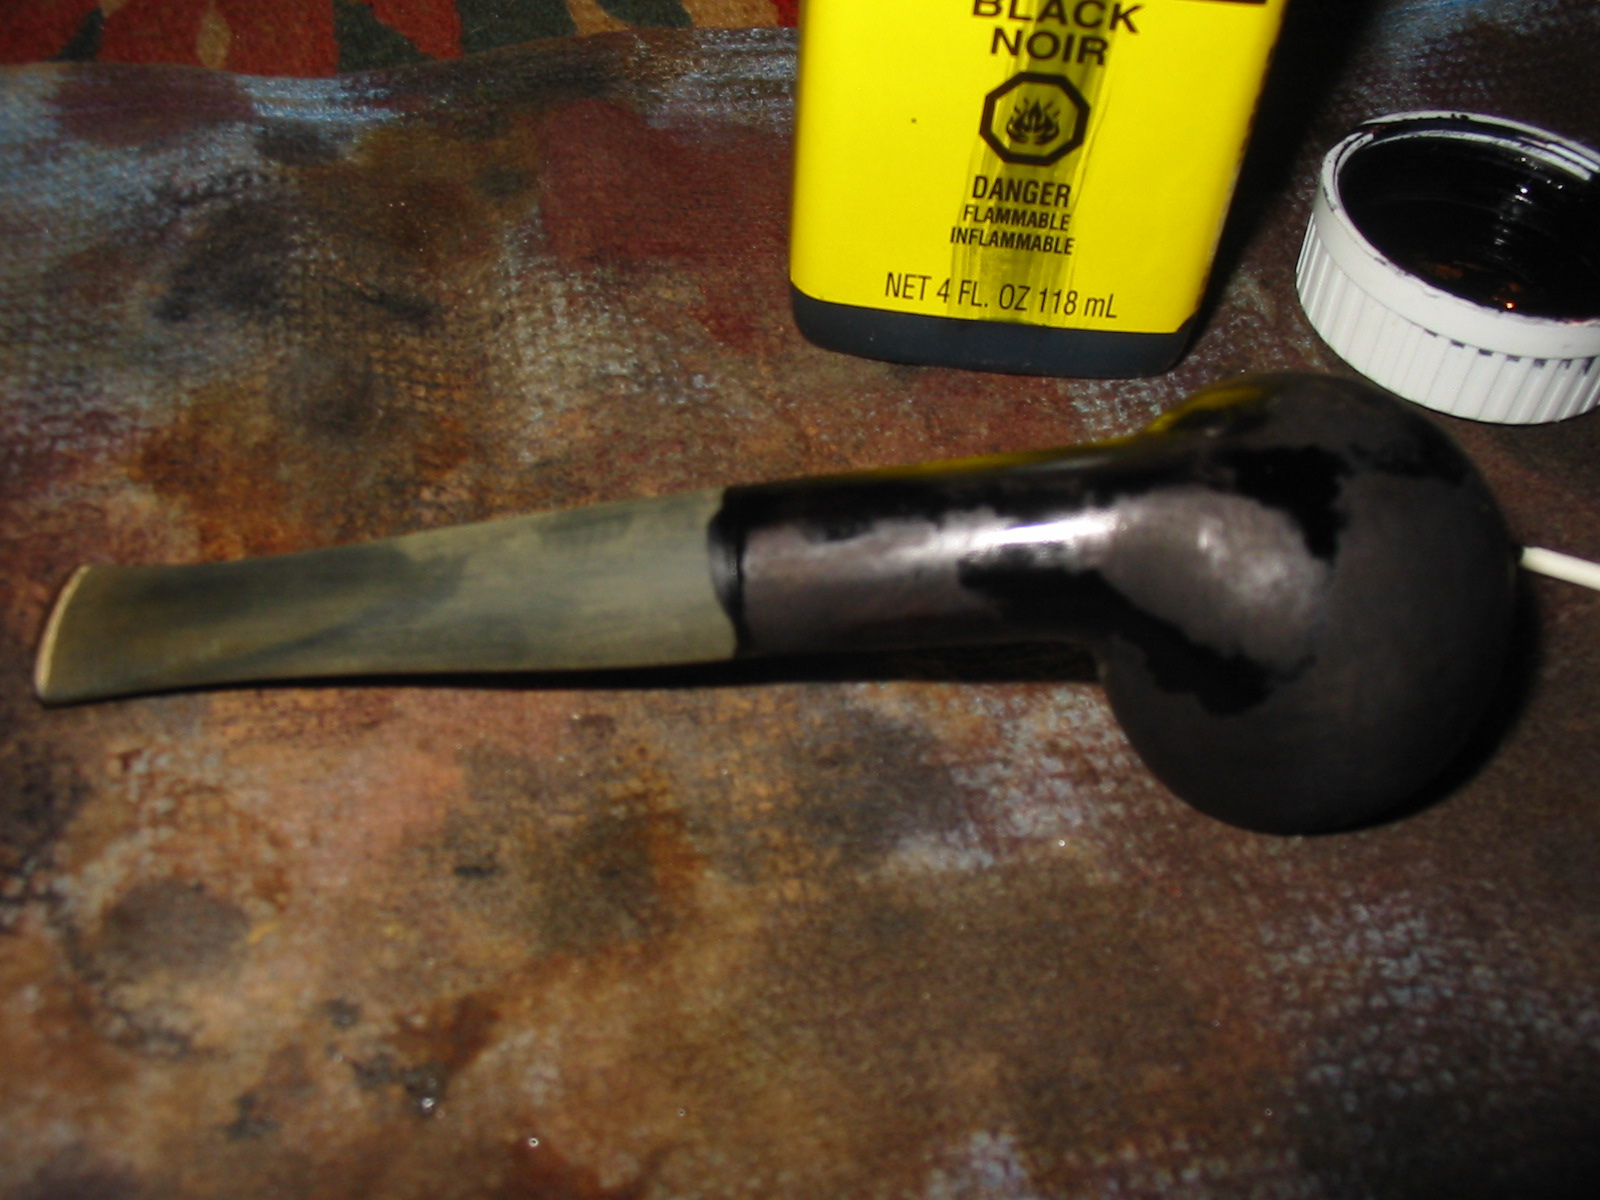
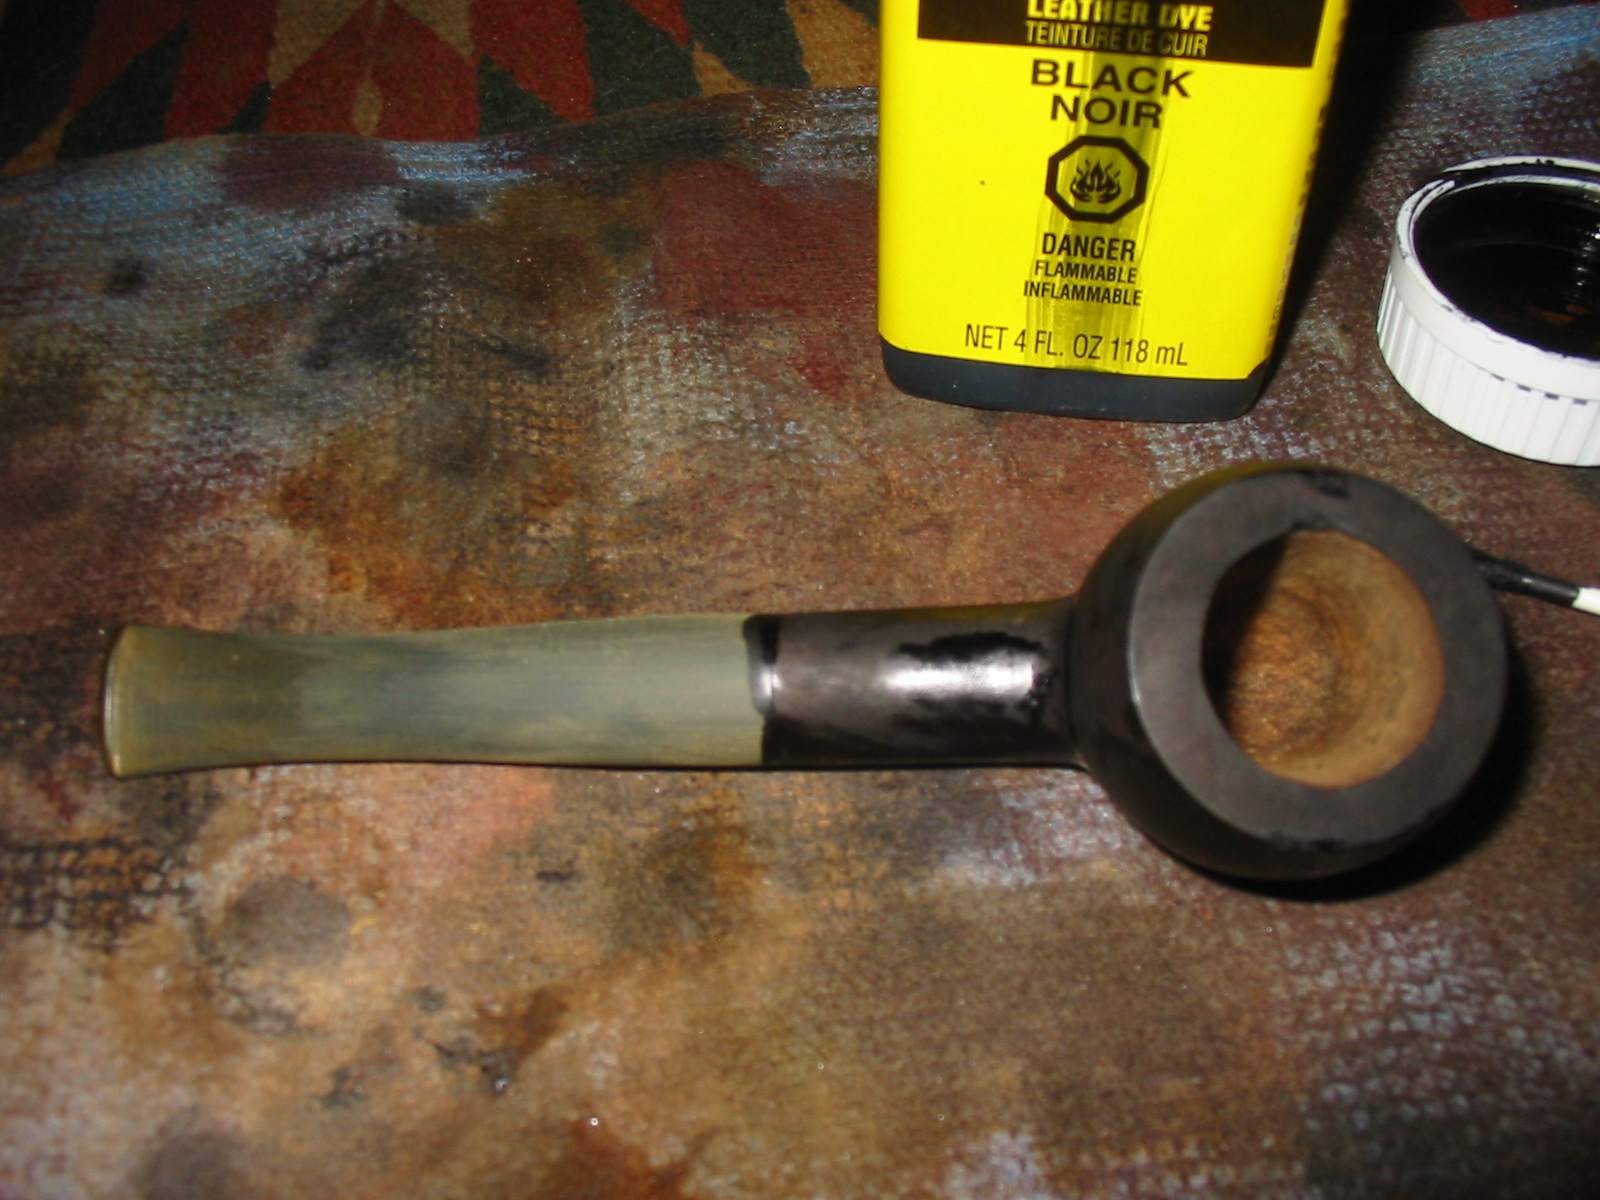
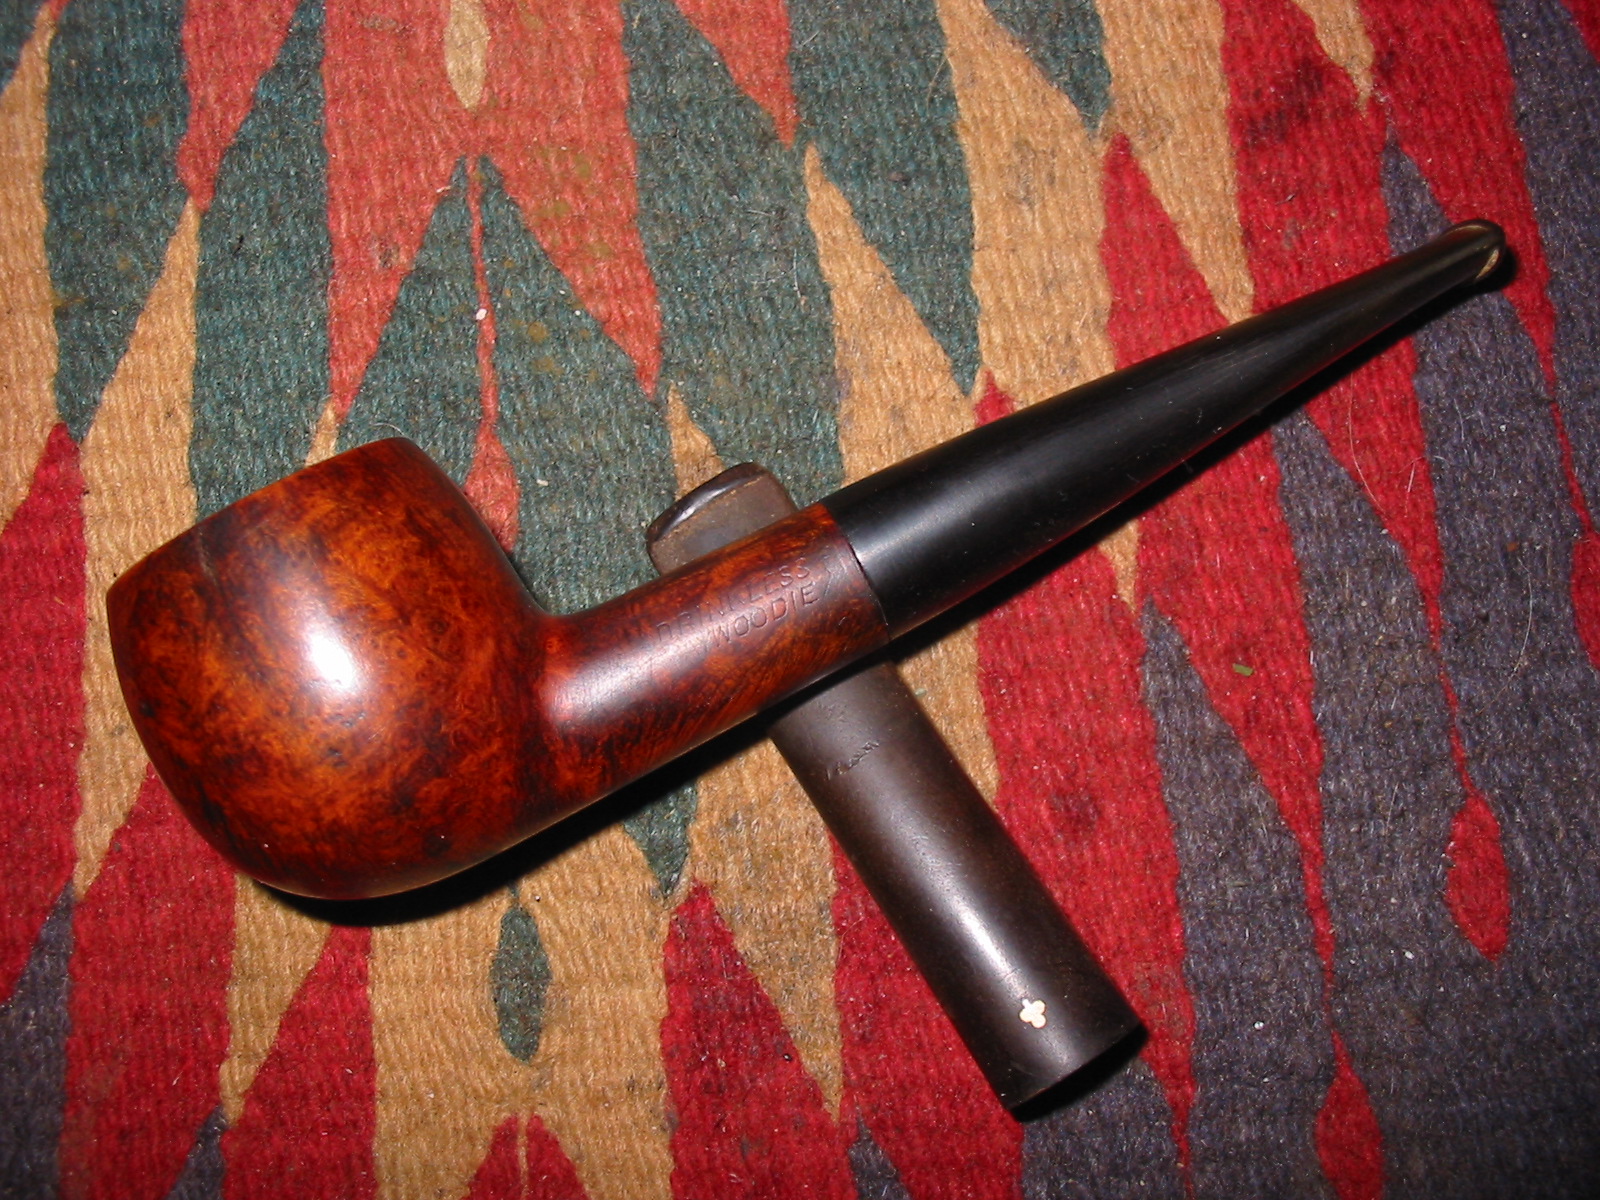
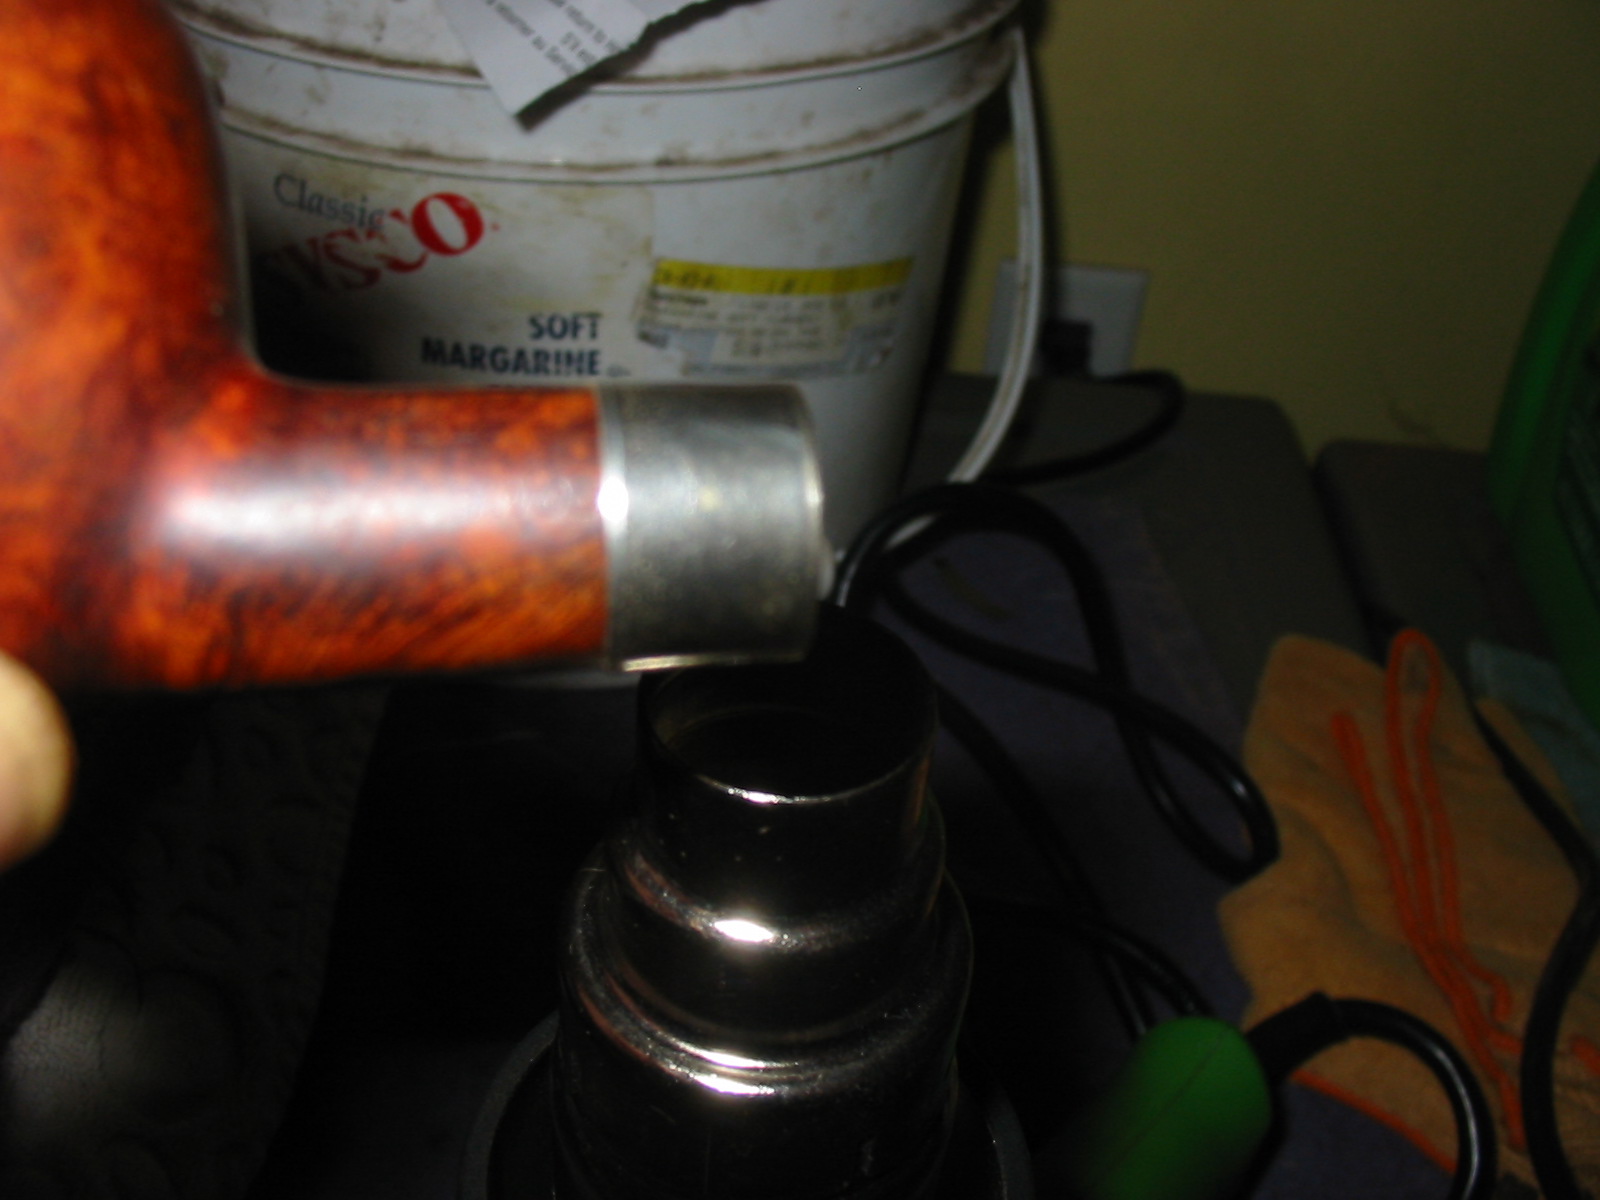
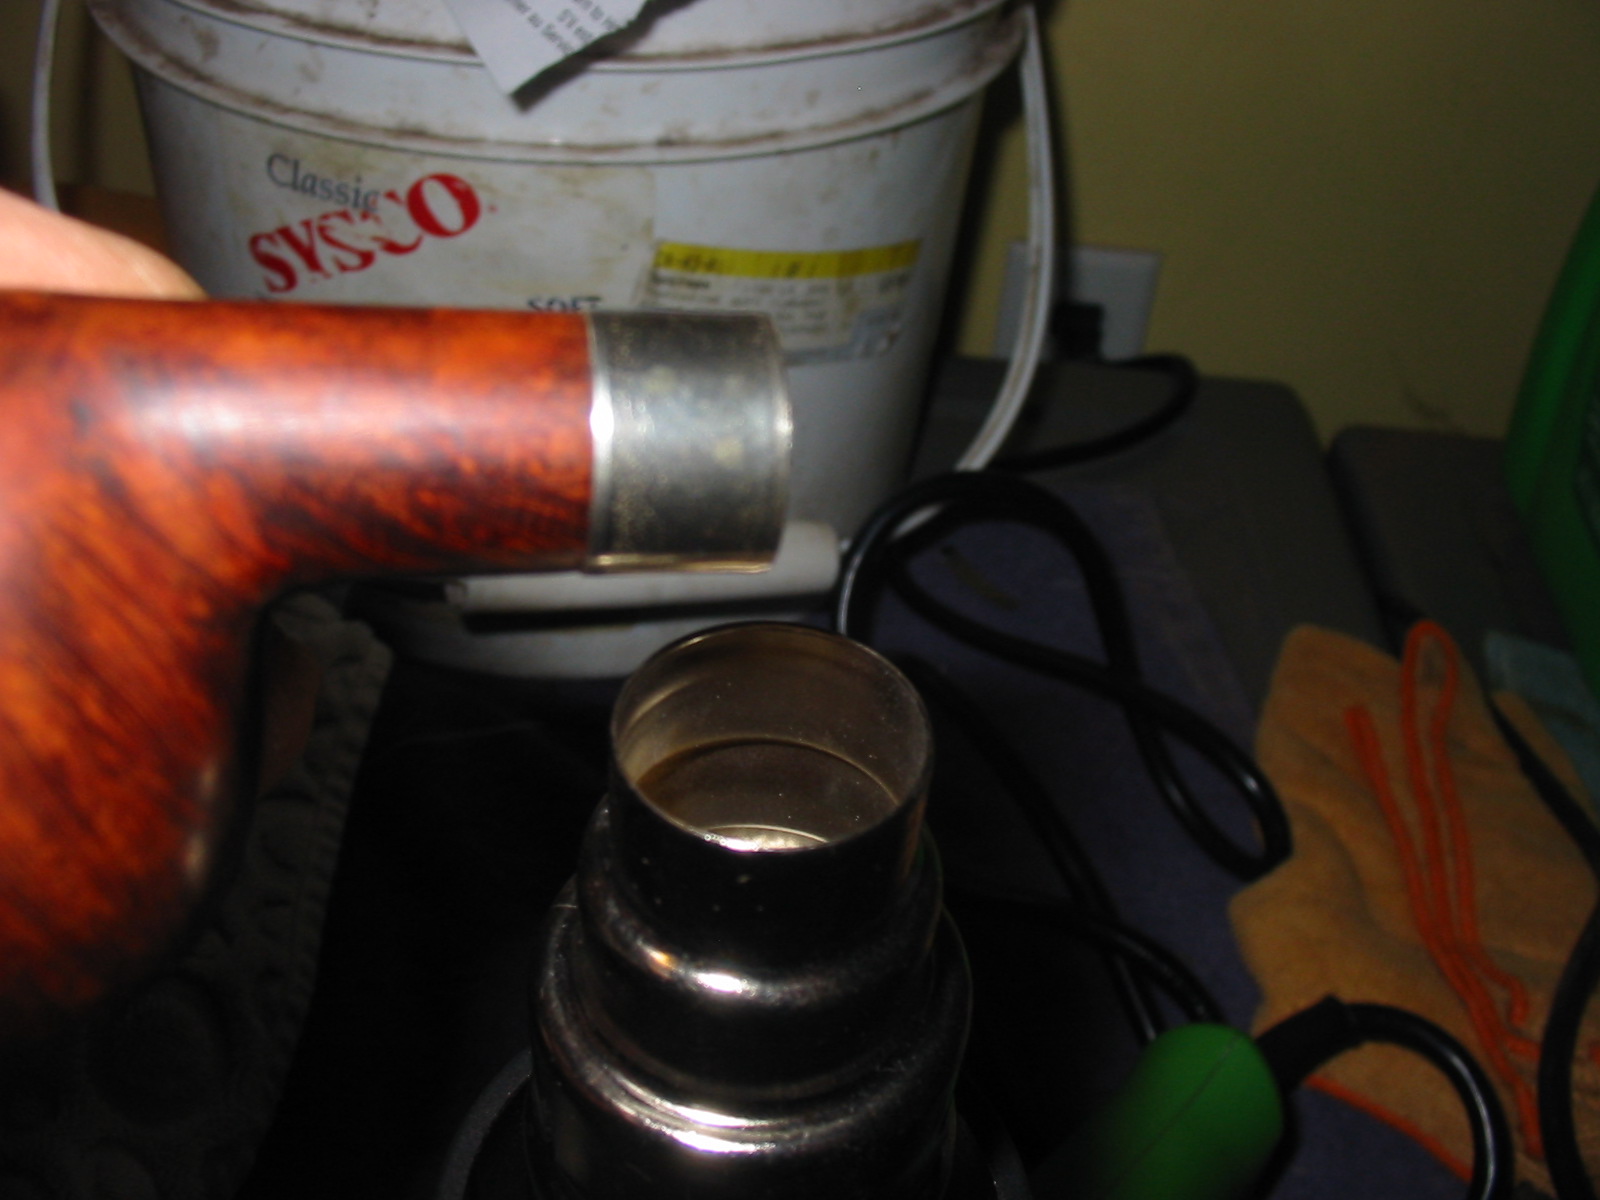
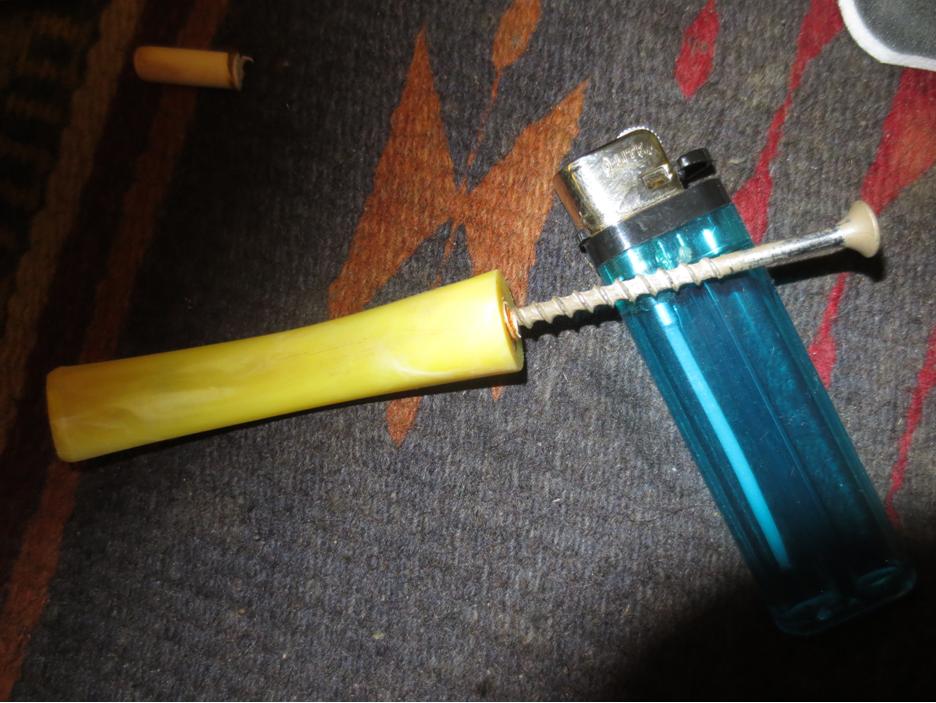
It has been a long time since a pipe got away from me when buffing but this one did. The Blue Diamond polishing wheel is a bit touchy and it grabbed the plastic stem and took the pipe out of my hand. It hit the tile floor right in front of the buffer and the stem snapped off at the shank. The tenon was stuck in the shank and the other end was glued in the stem. I was very fortunate as the pipe hit directly on the stem and not on the meer bowl or it might have been ruined. As it was it meant I had a good excuse to throw away the plastic stem and make a vulcanite one. I pulled the tenon out of the shank with a screw. It came out easily. I tried to pull the glued end out of the stem but putting in a screw and heating the screw but the glue held. I put the stem away and went on a hunt in my stem can for a suitable vulcanite stem for the pipe.band9

band10 
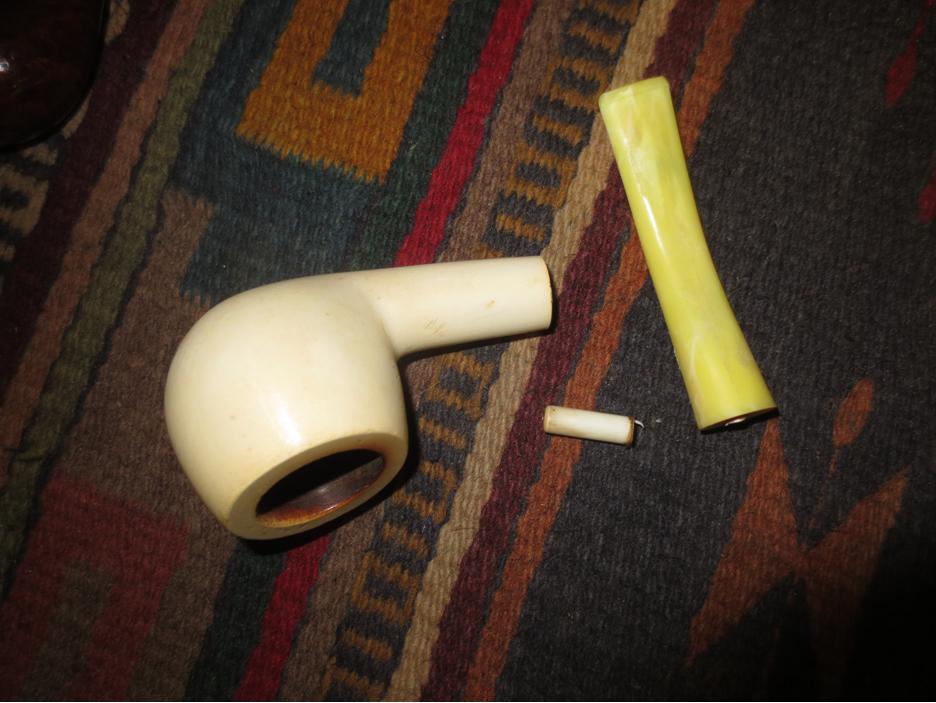
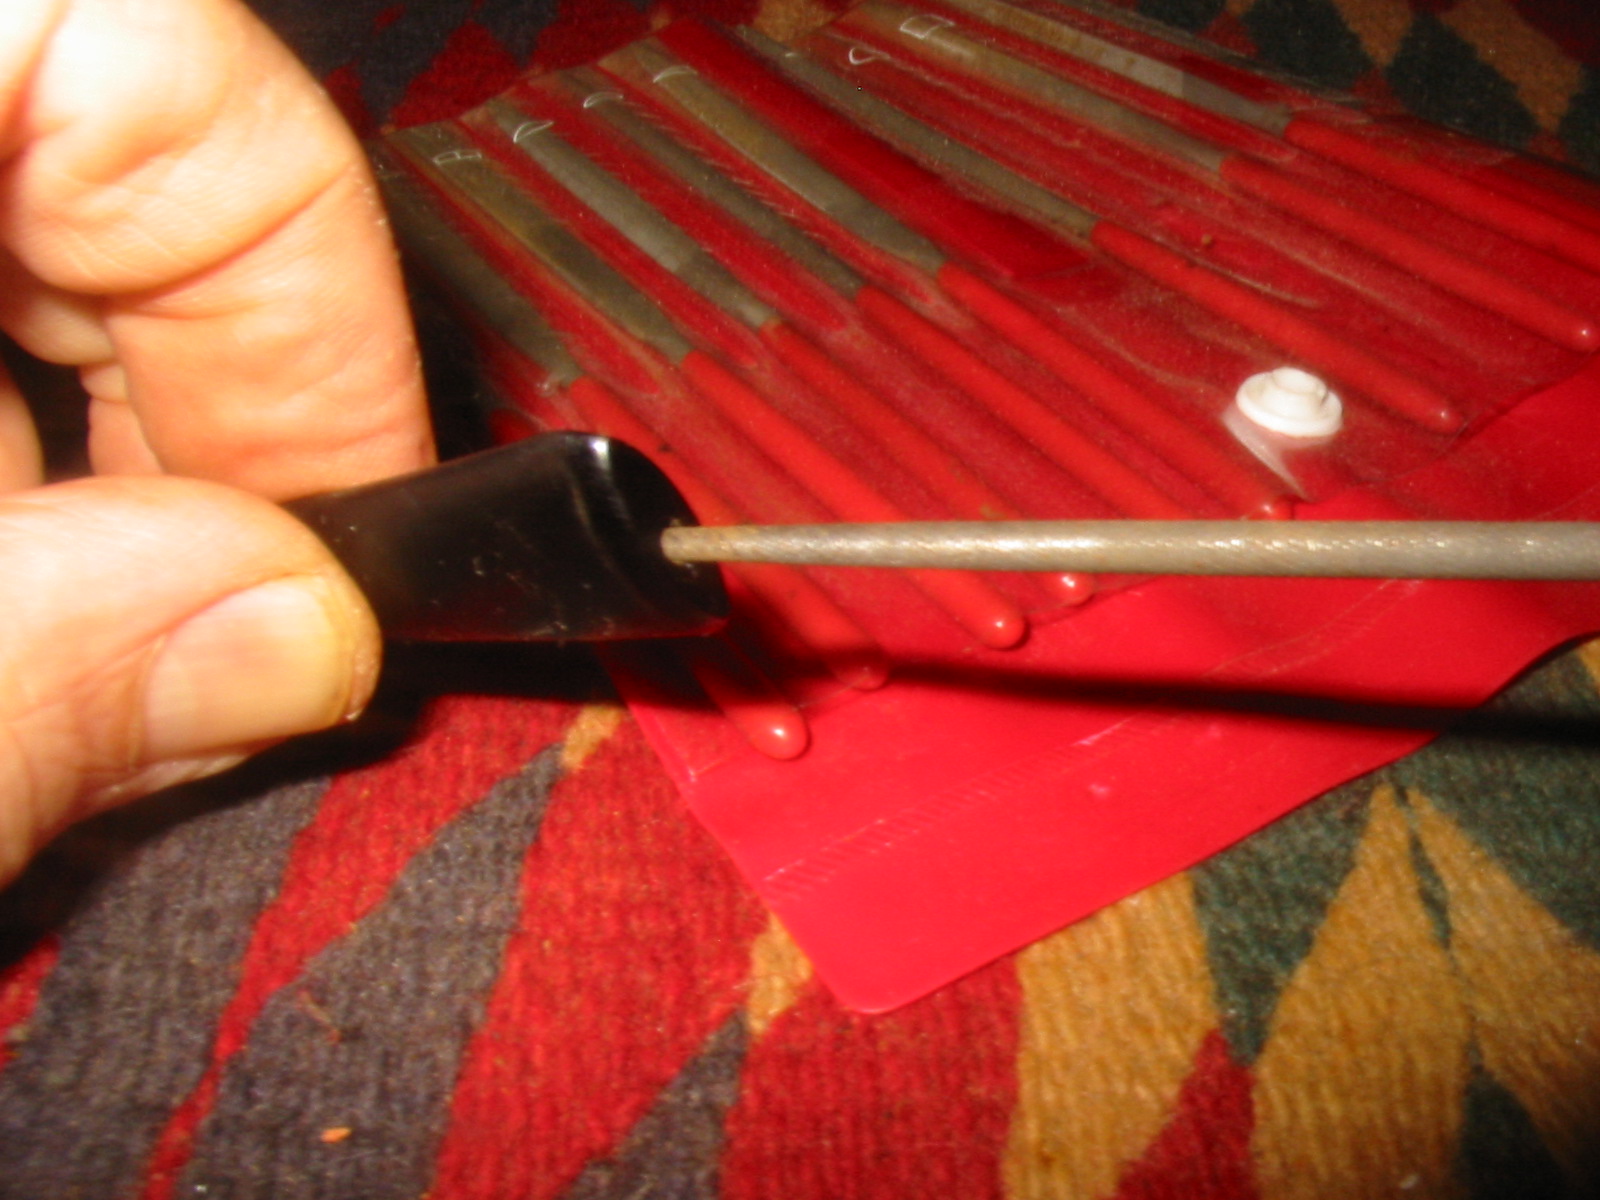
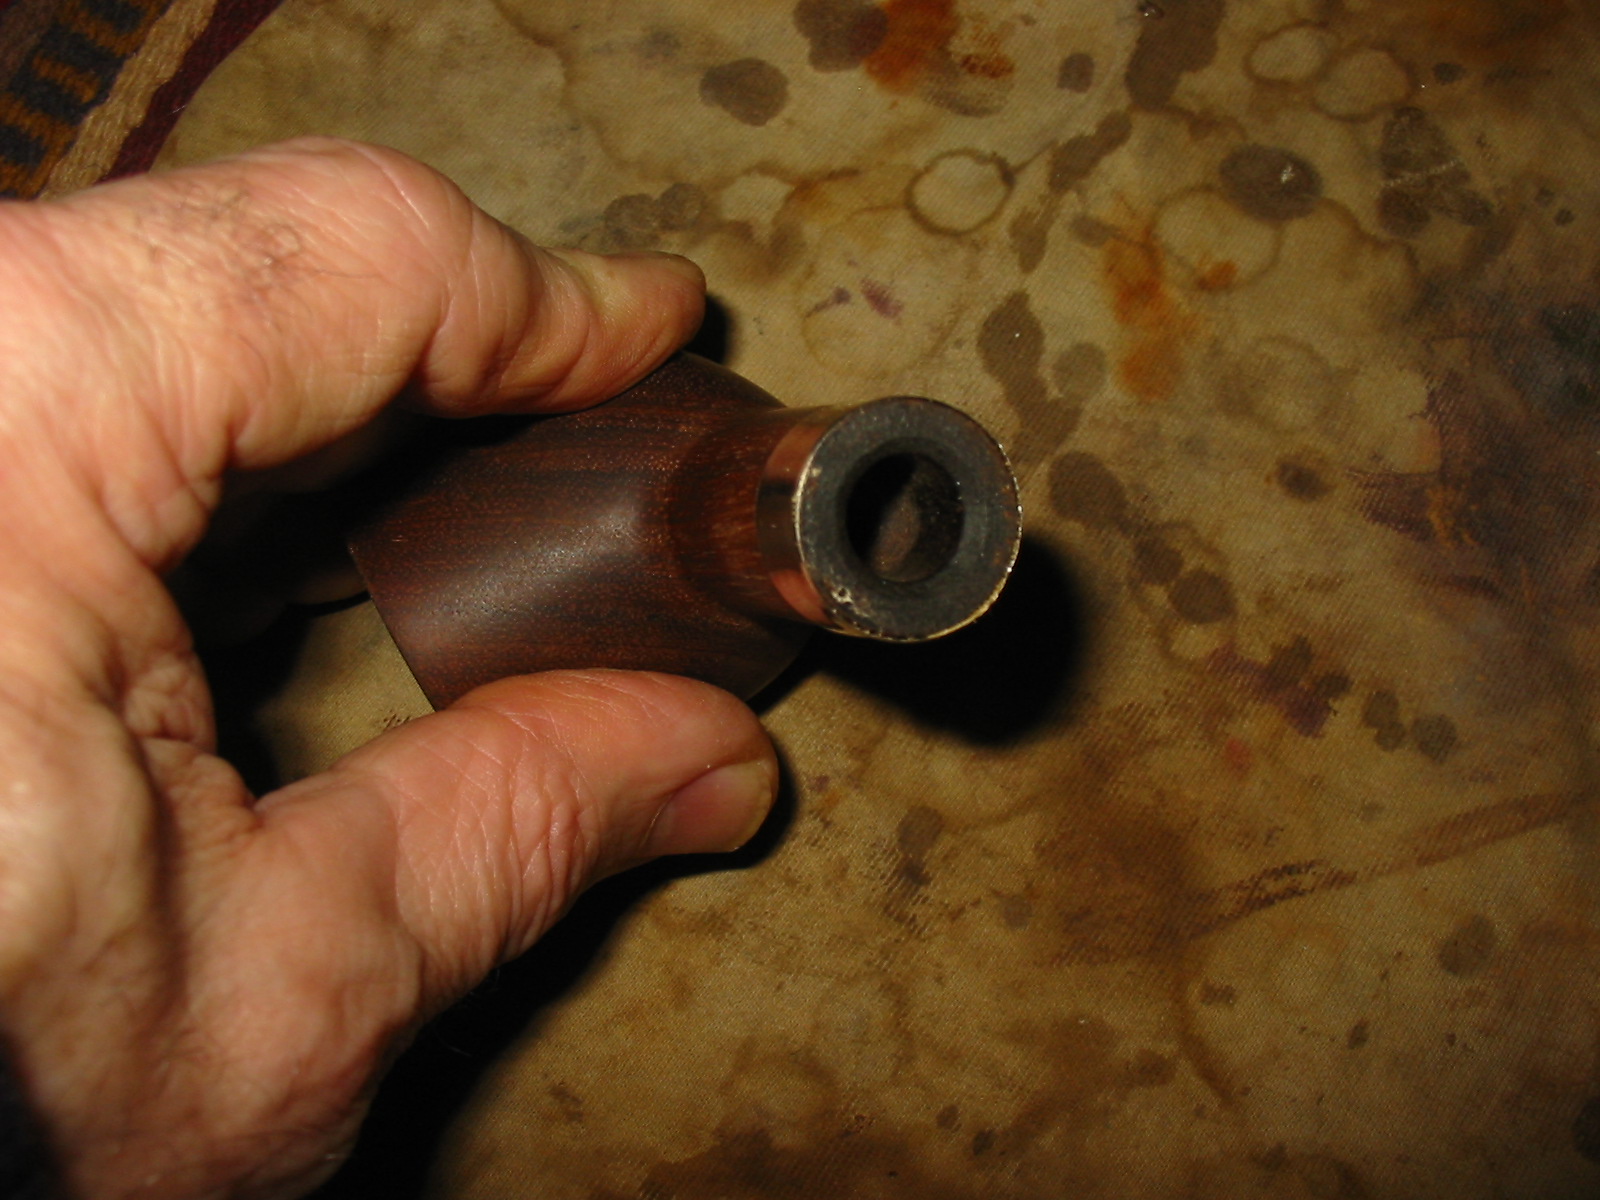
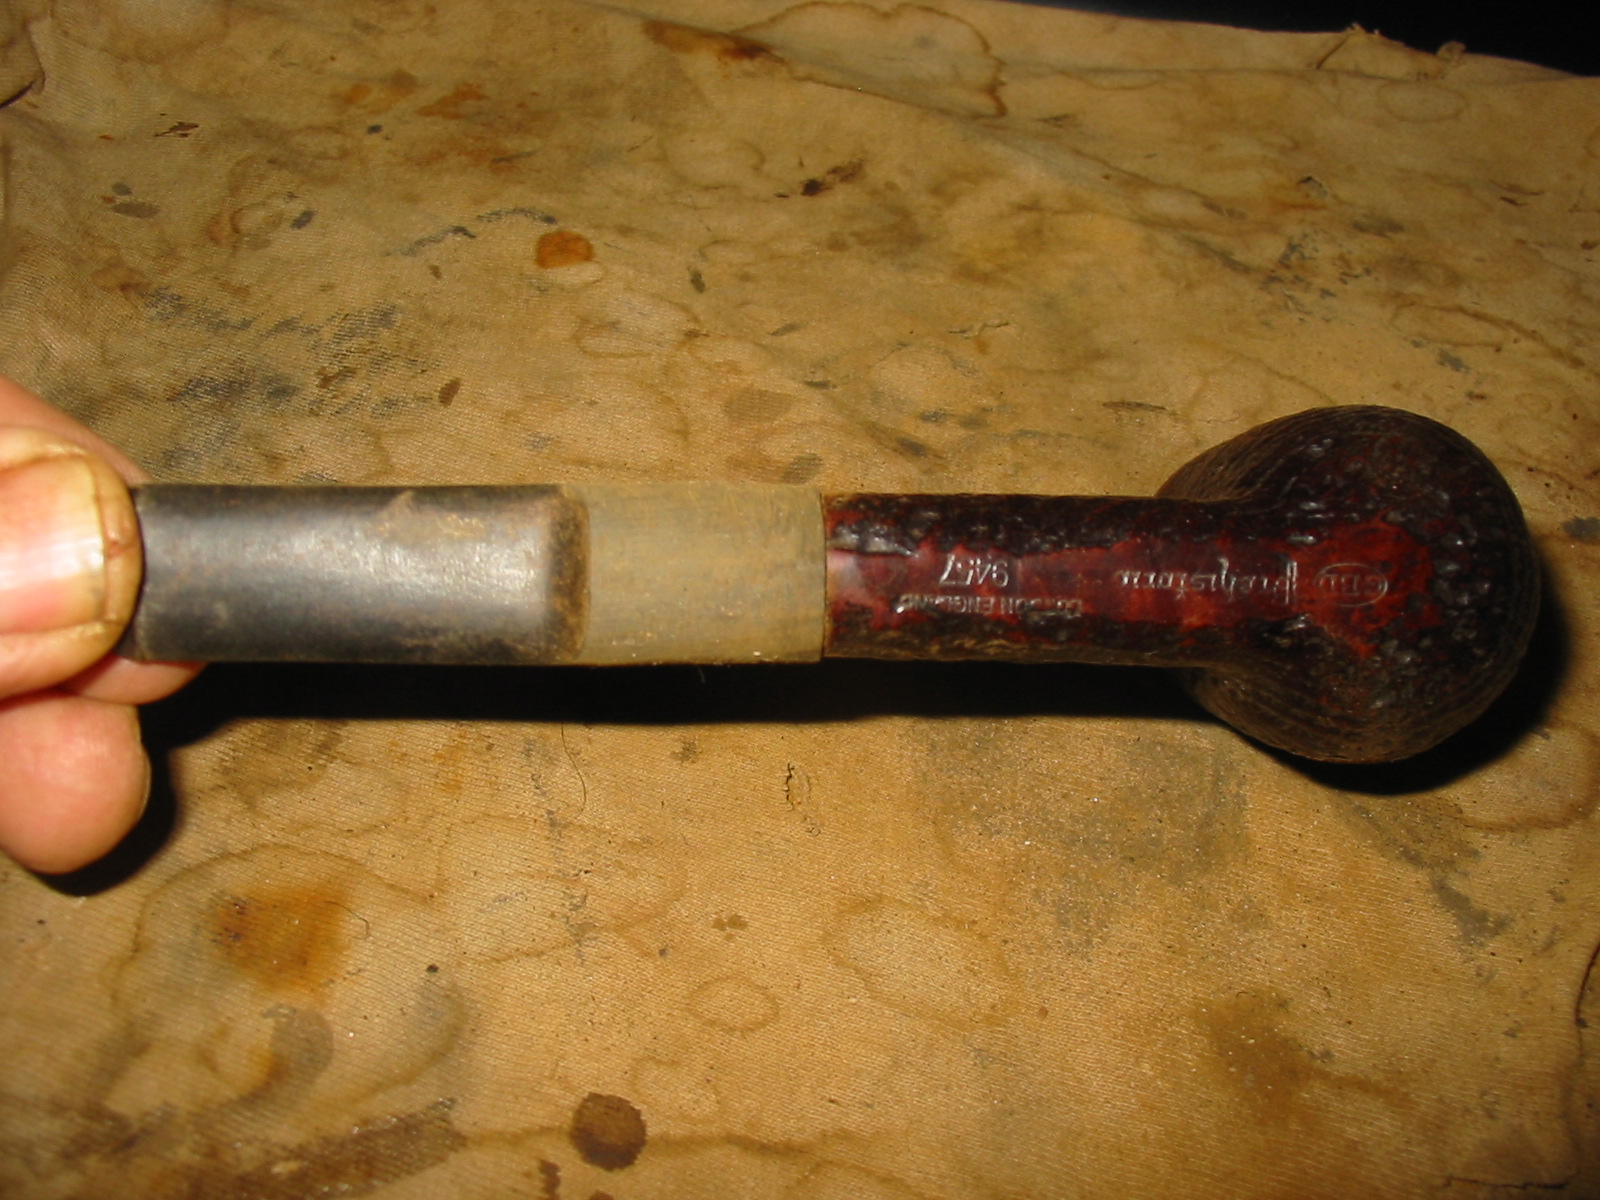
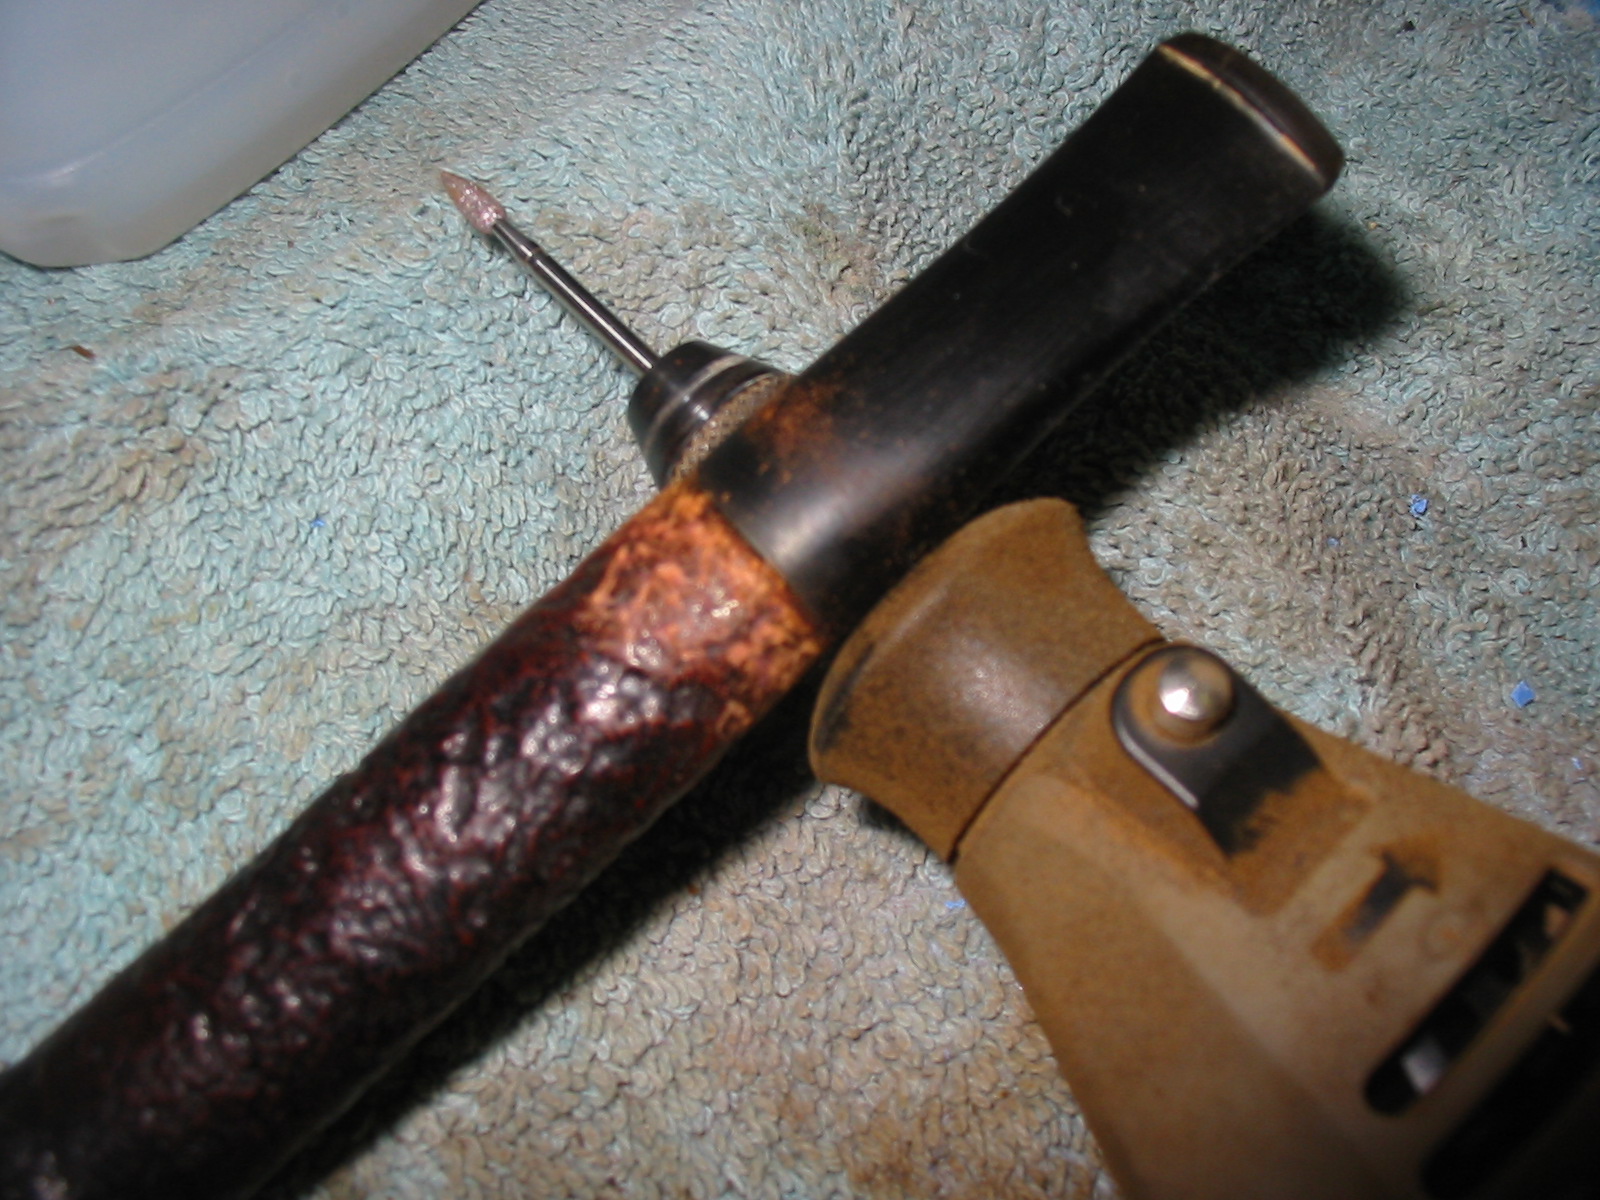
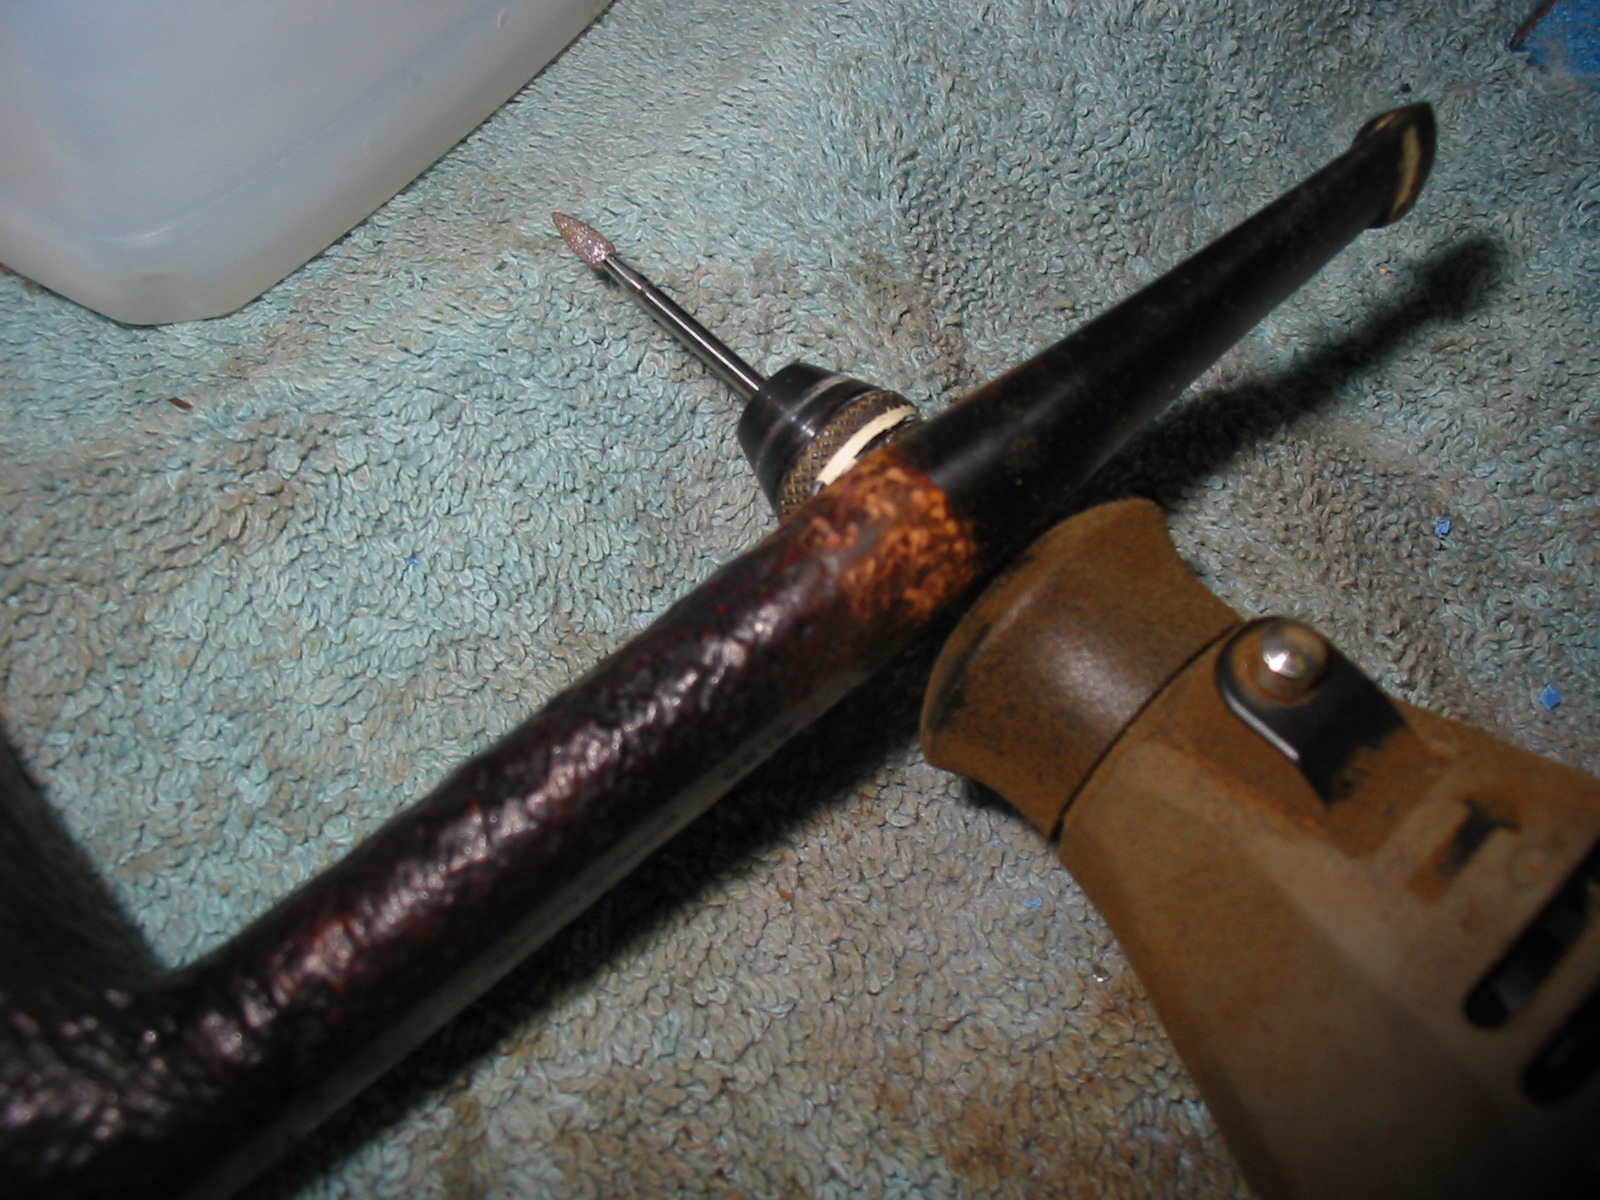
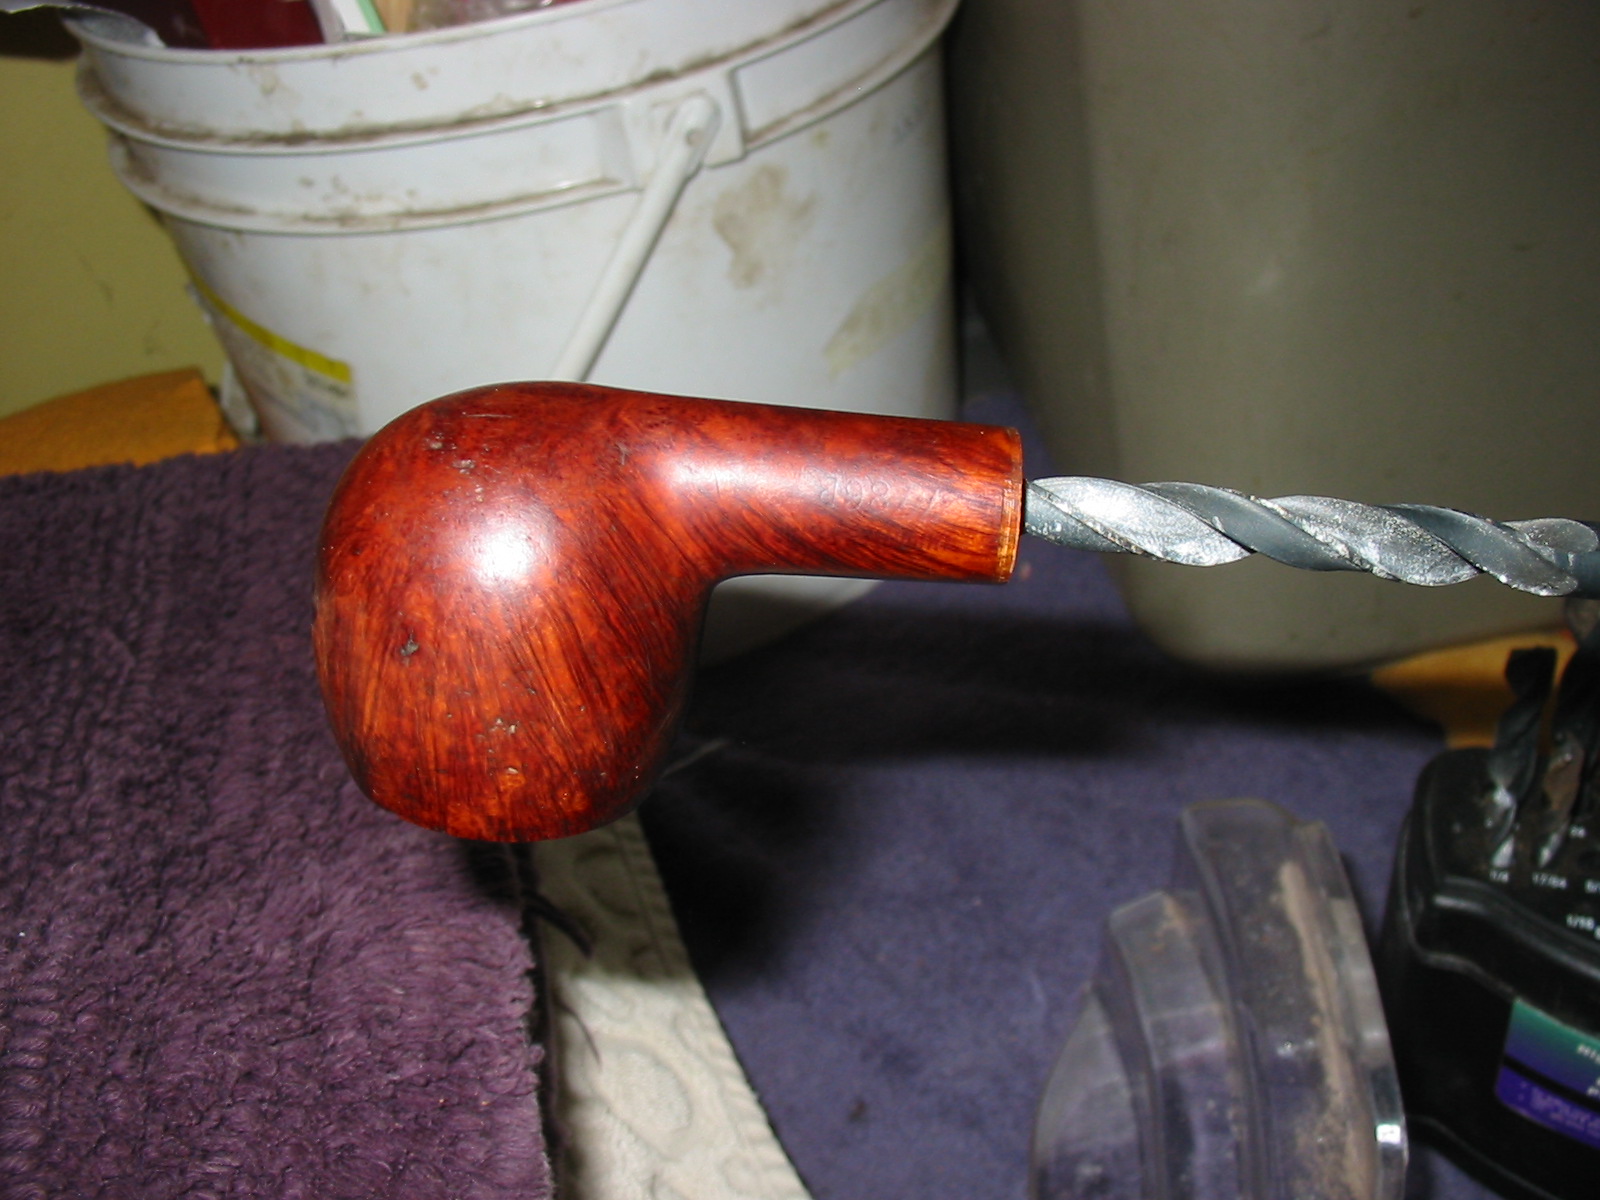
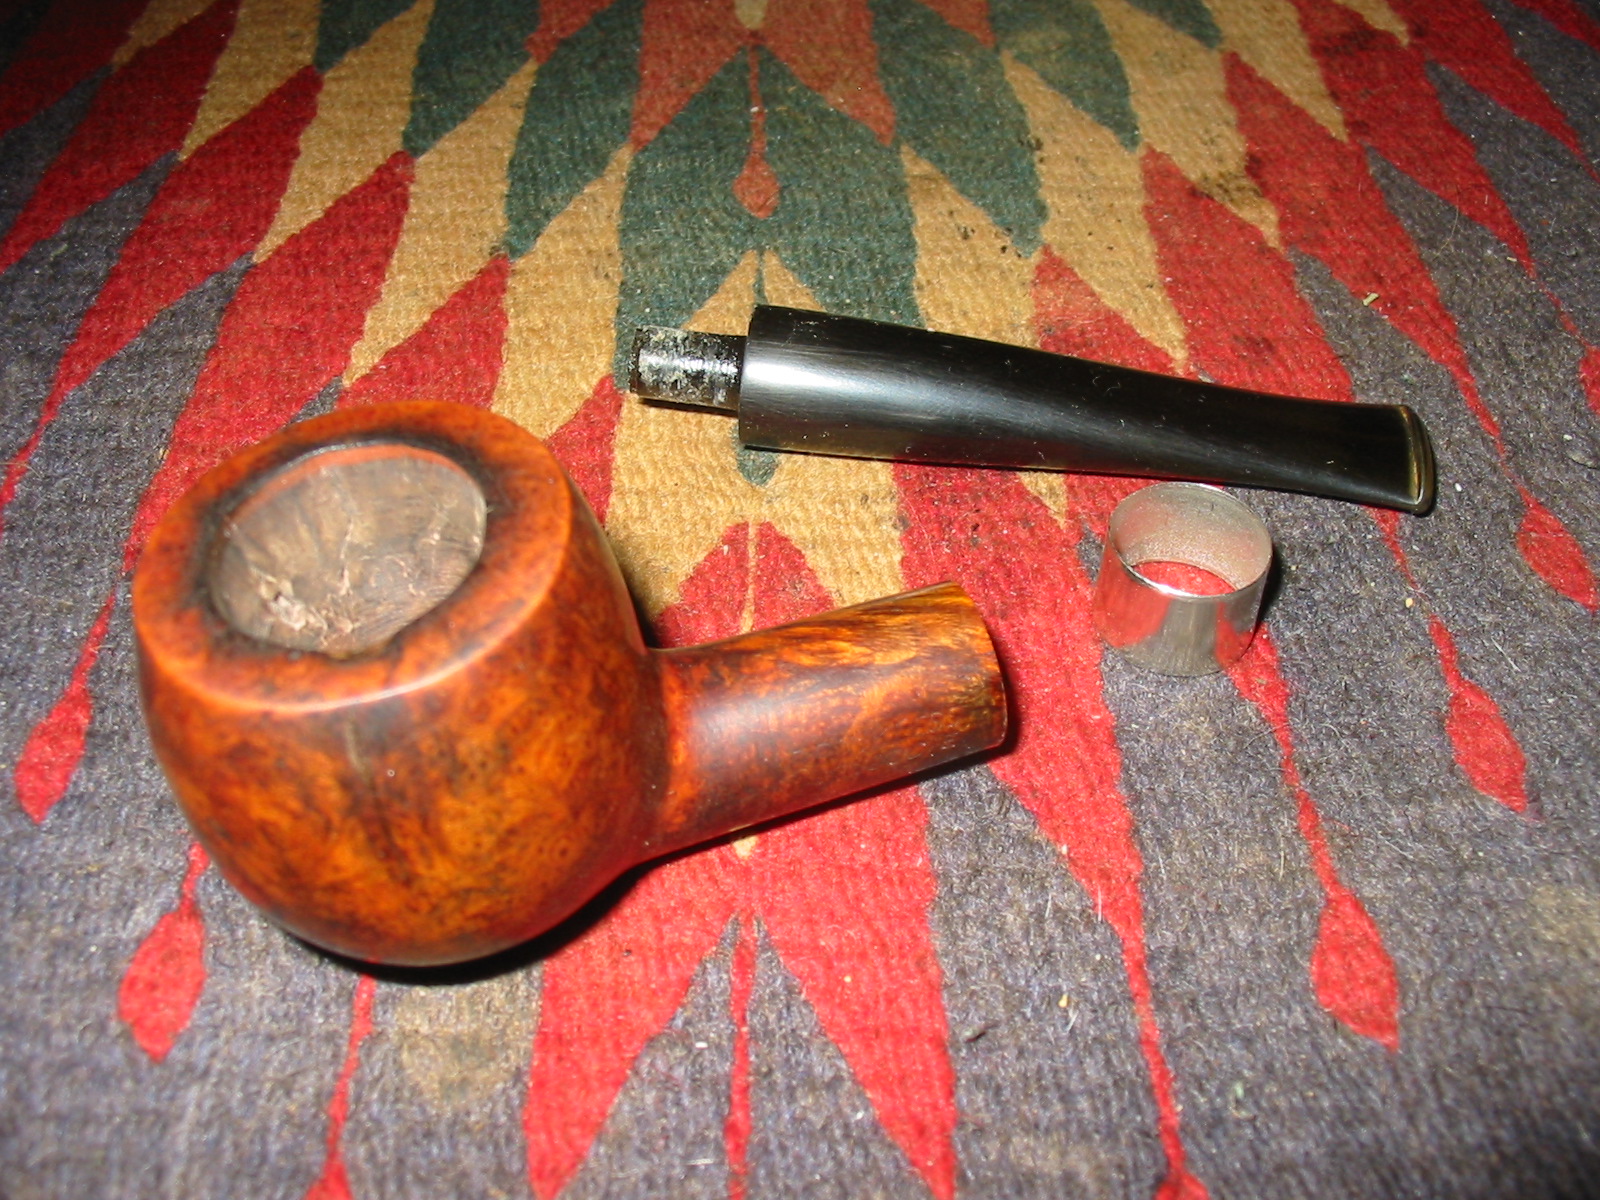
I found just the right donor stem. It was a bent round stem that came from an old-timer somewhere along the way. It was thick and the diameter was close to that of the shank. I took the tenon down with the Dremel and sanding drum and finish it by hand with sandpaper to make a snug fit in the Delrin sleeve in the shank. I used the Dremel and sanding drum to take off the excess diameter of the stem and then hand sanded it with 220 grit sandpaper to make the shank and stem match. While I was working on it I examined the two small cracks in the shank. They bothered me. While they would not go anywhere as the Delrin sleeve was glued and held them together, they still bothered me. I used a small micro drill bit on the Dremel and put a hole in the end of both cracks on the shank. I put a drop of super glue in the holes to seal them. I then remembered that I had some brass plumbing pressure fittings that make interesting bands. I heated the brass with a lighter and pressed it onto the shank to cover the cracks and give the pipe a little more bling.

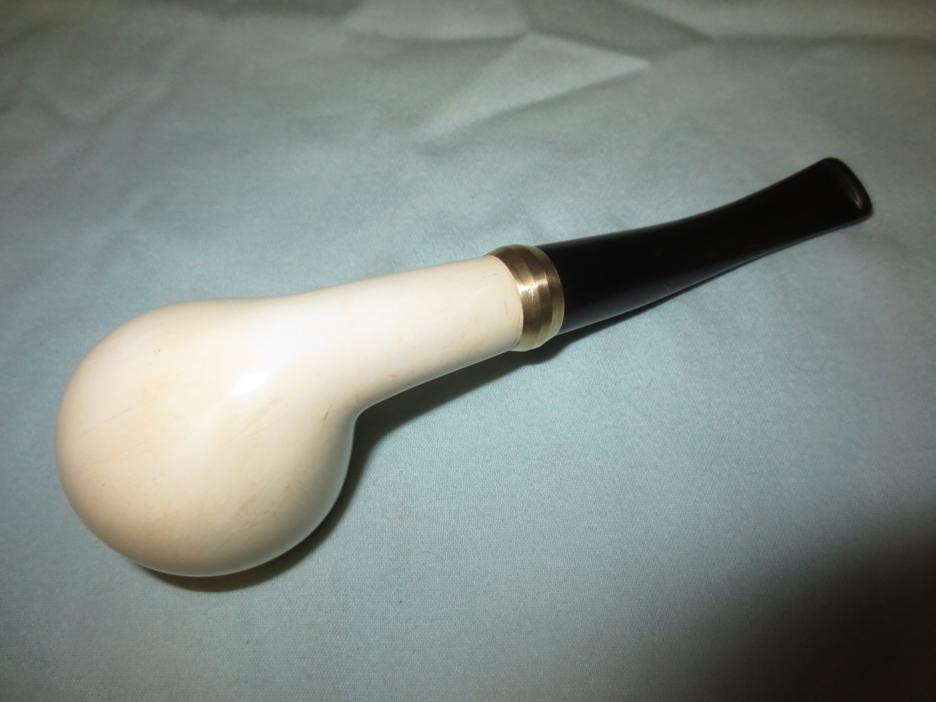
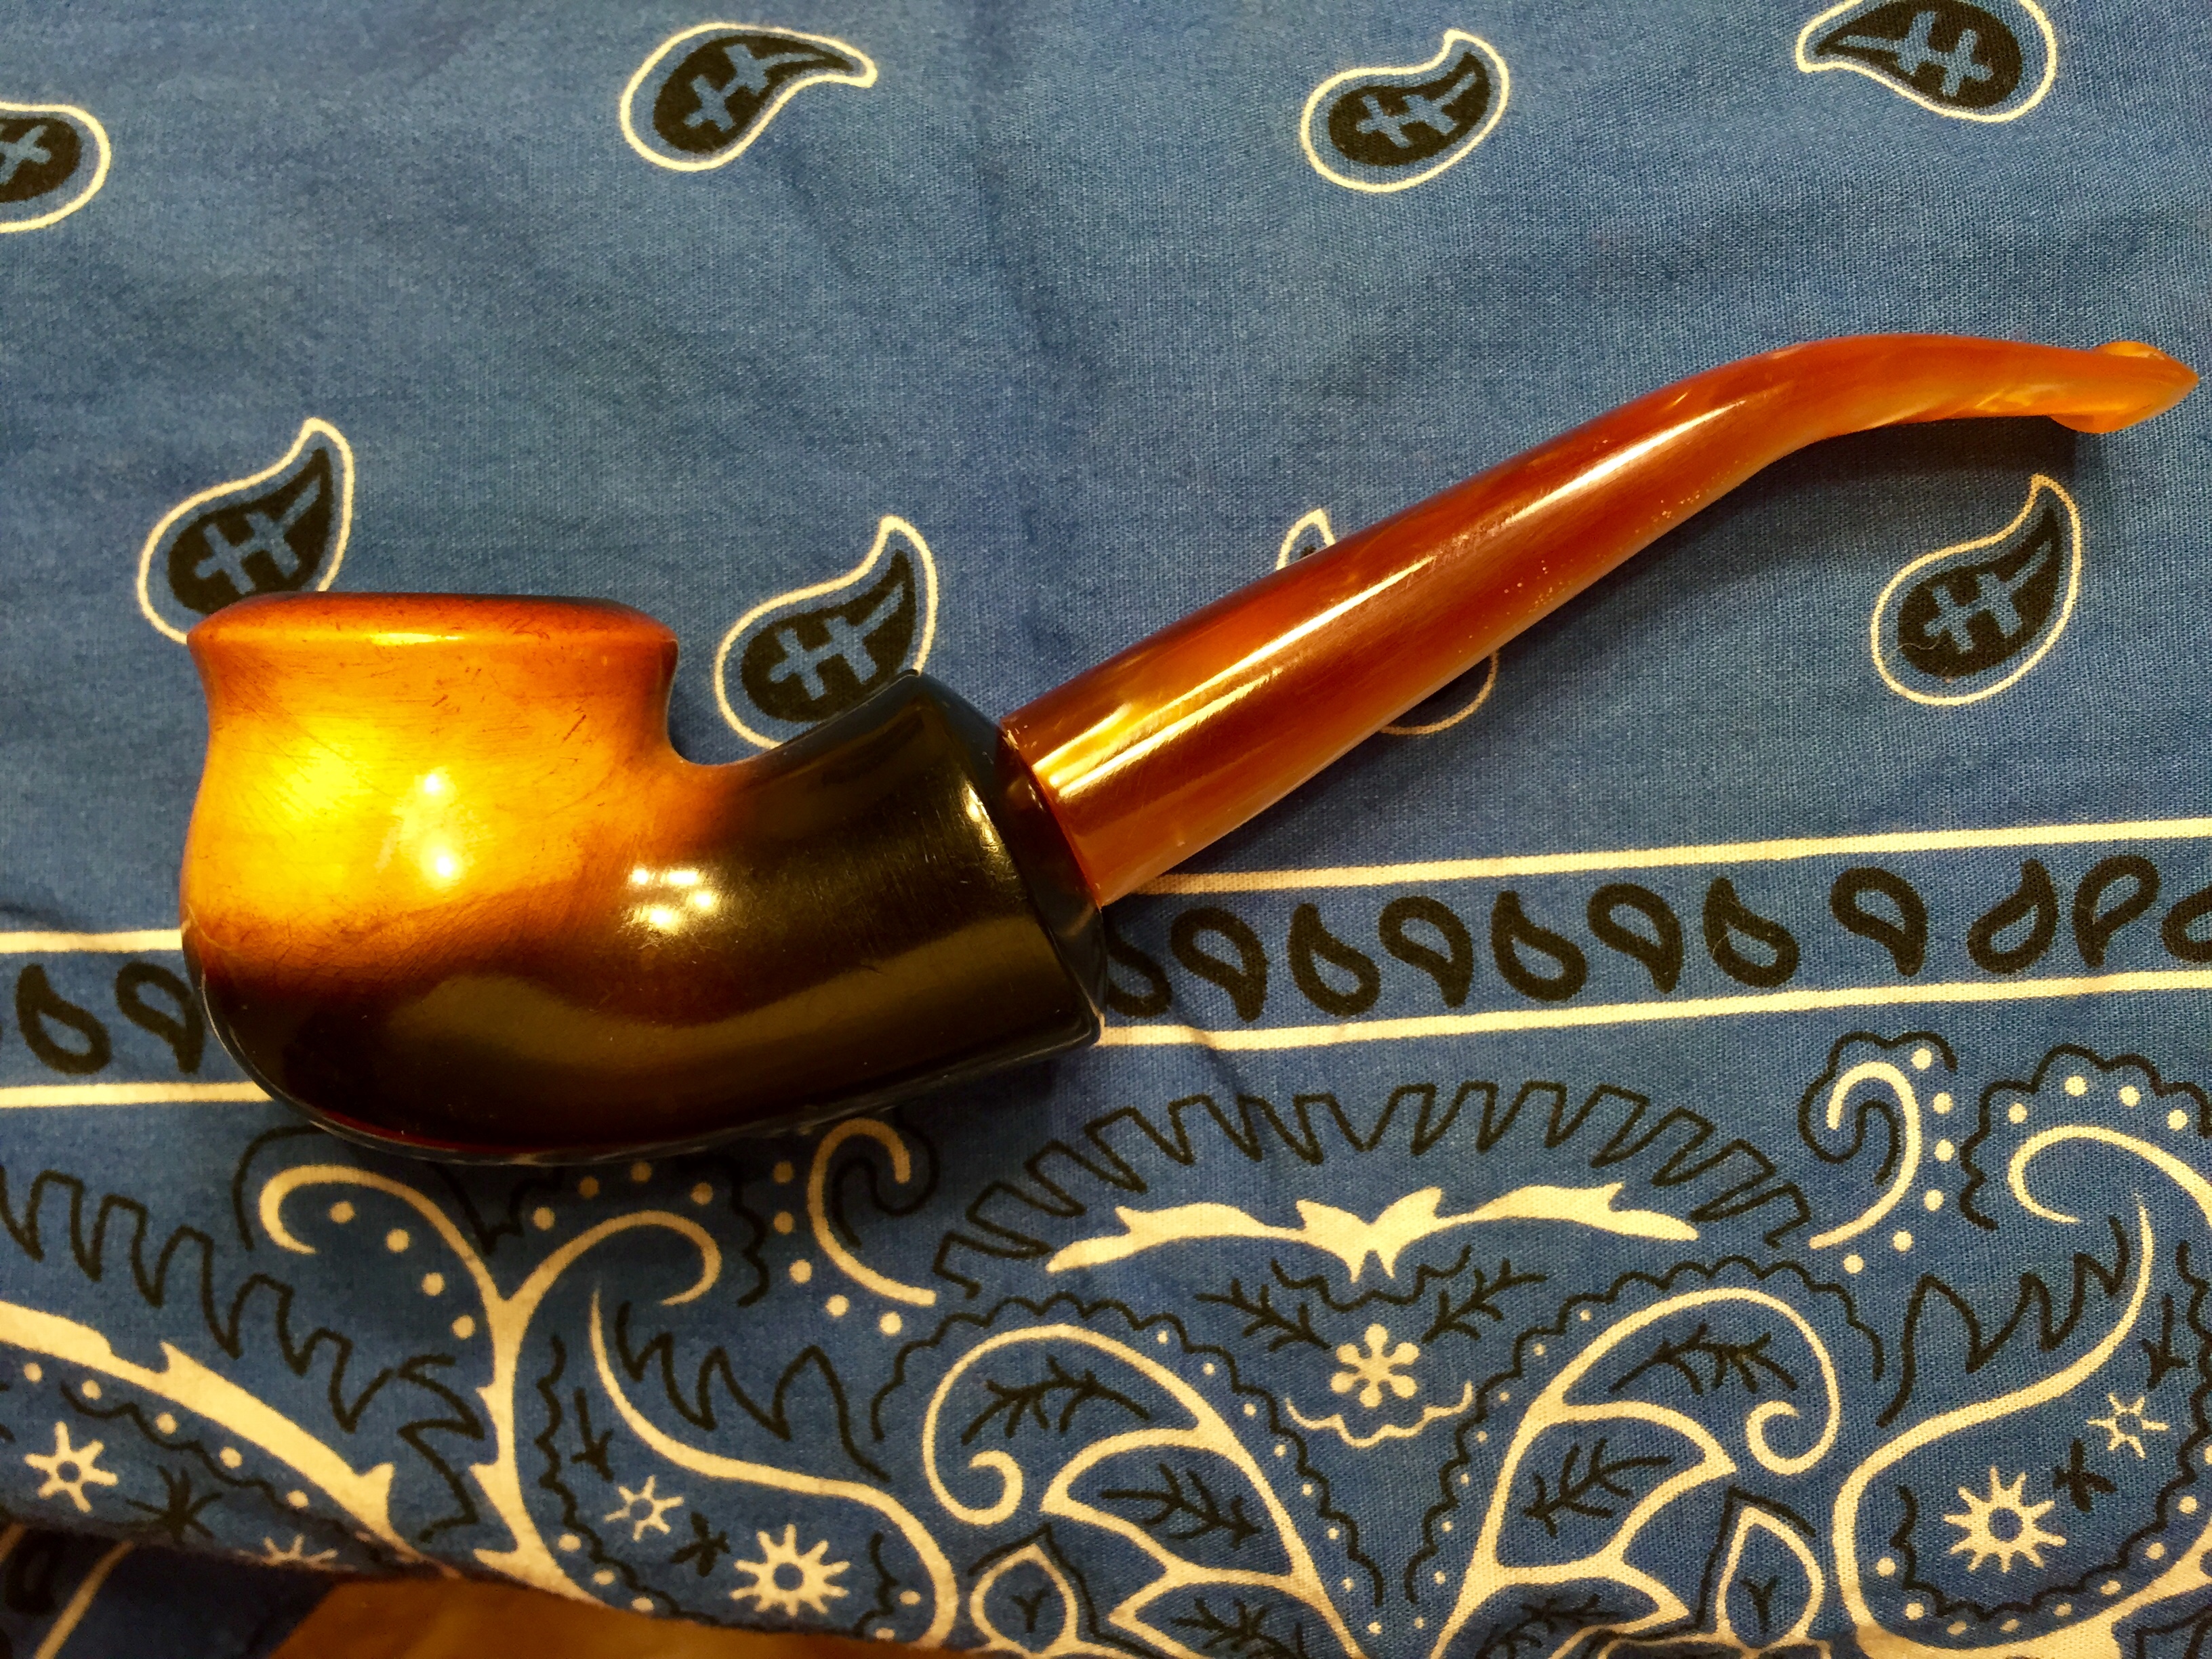
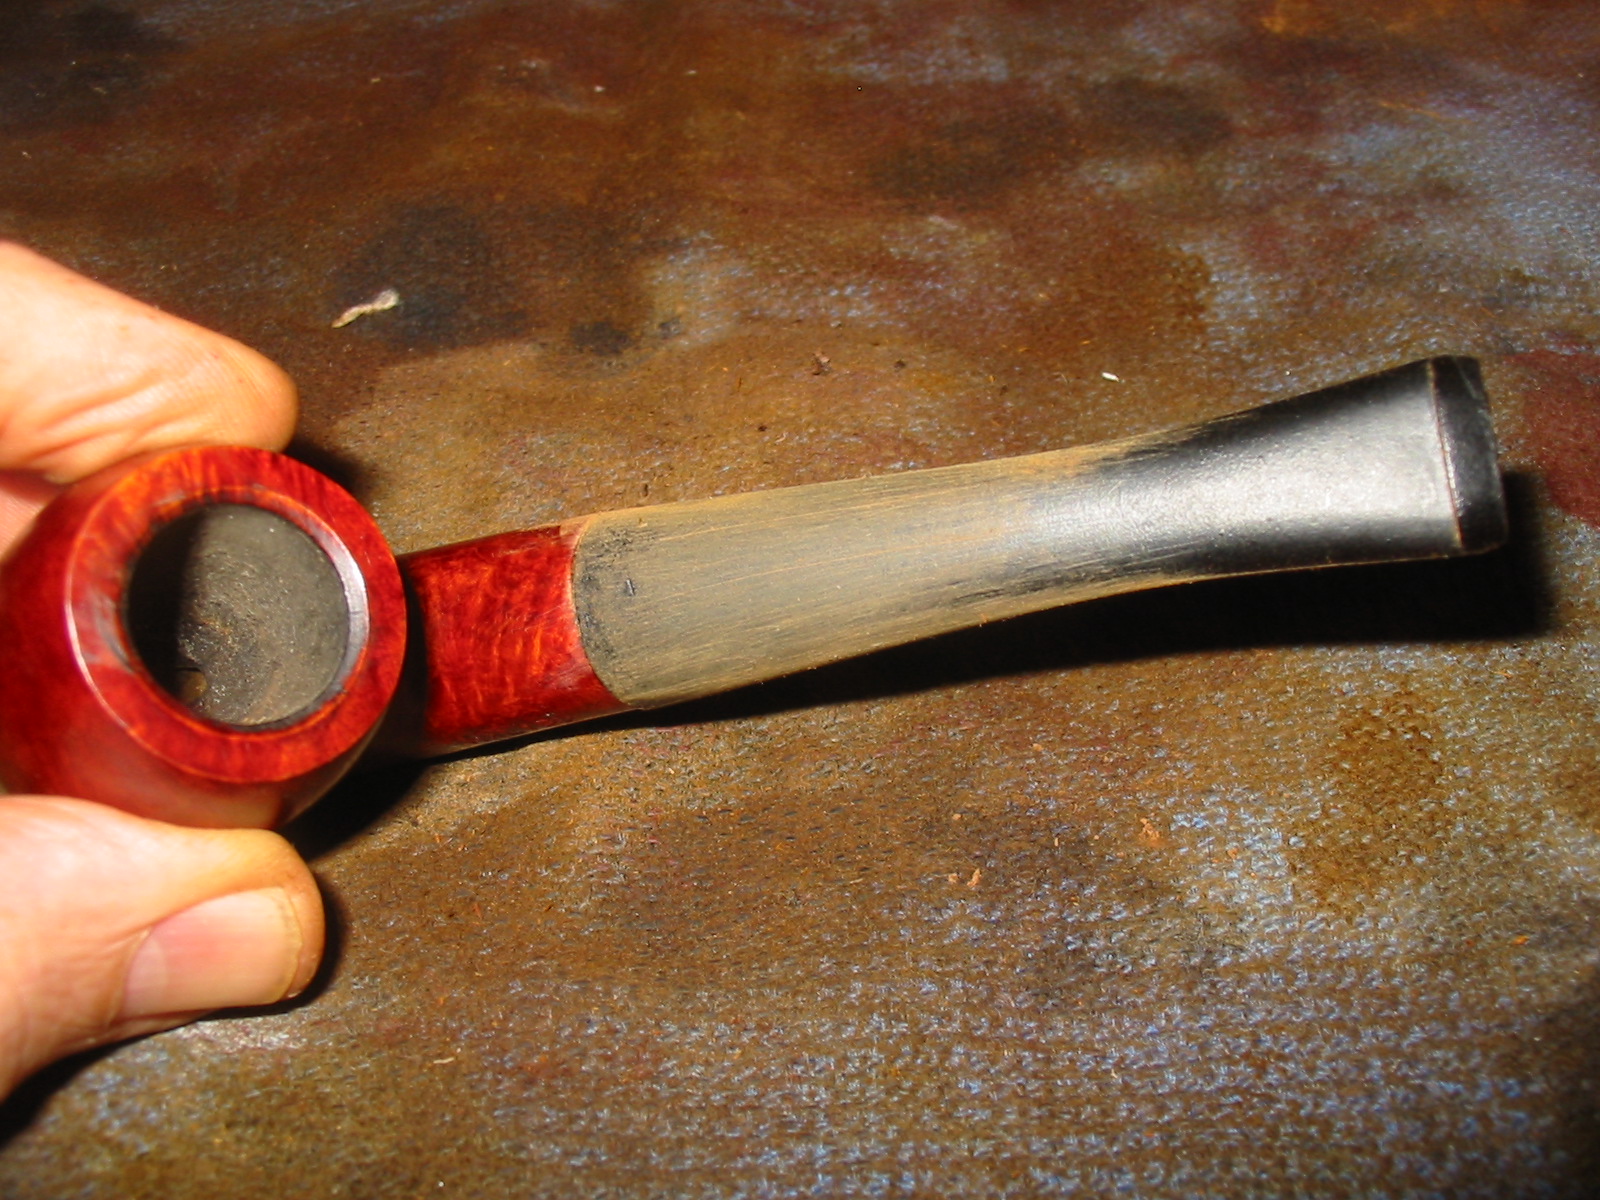
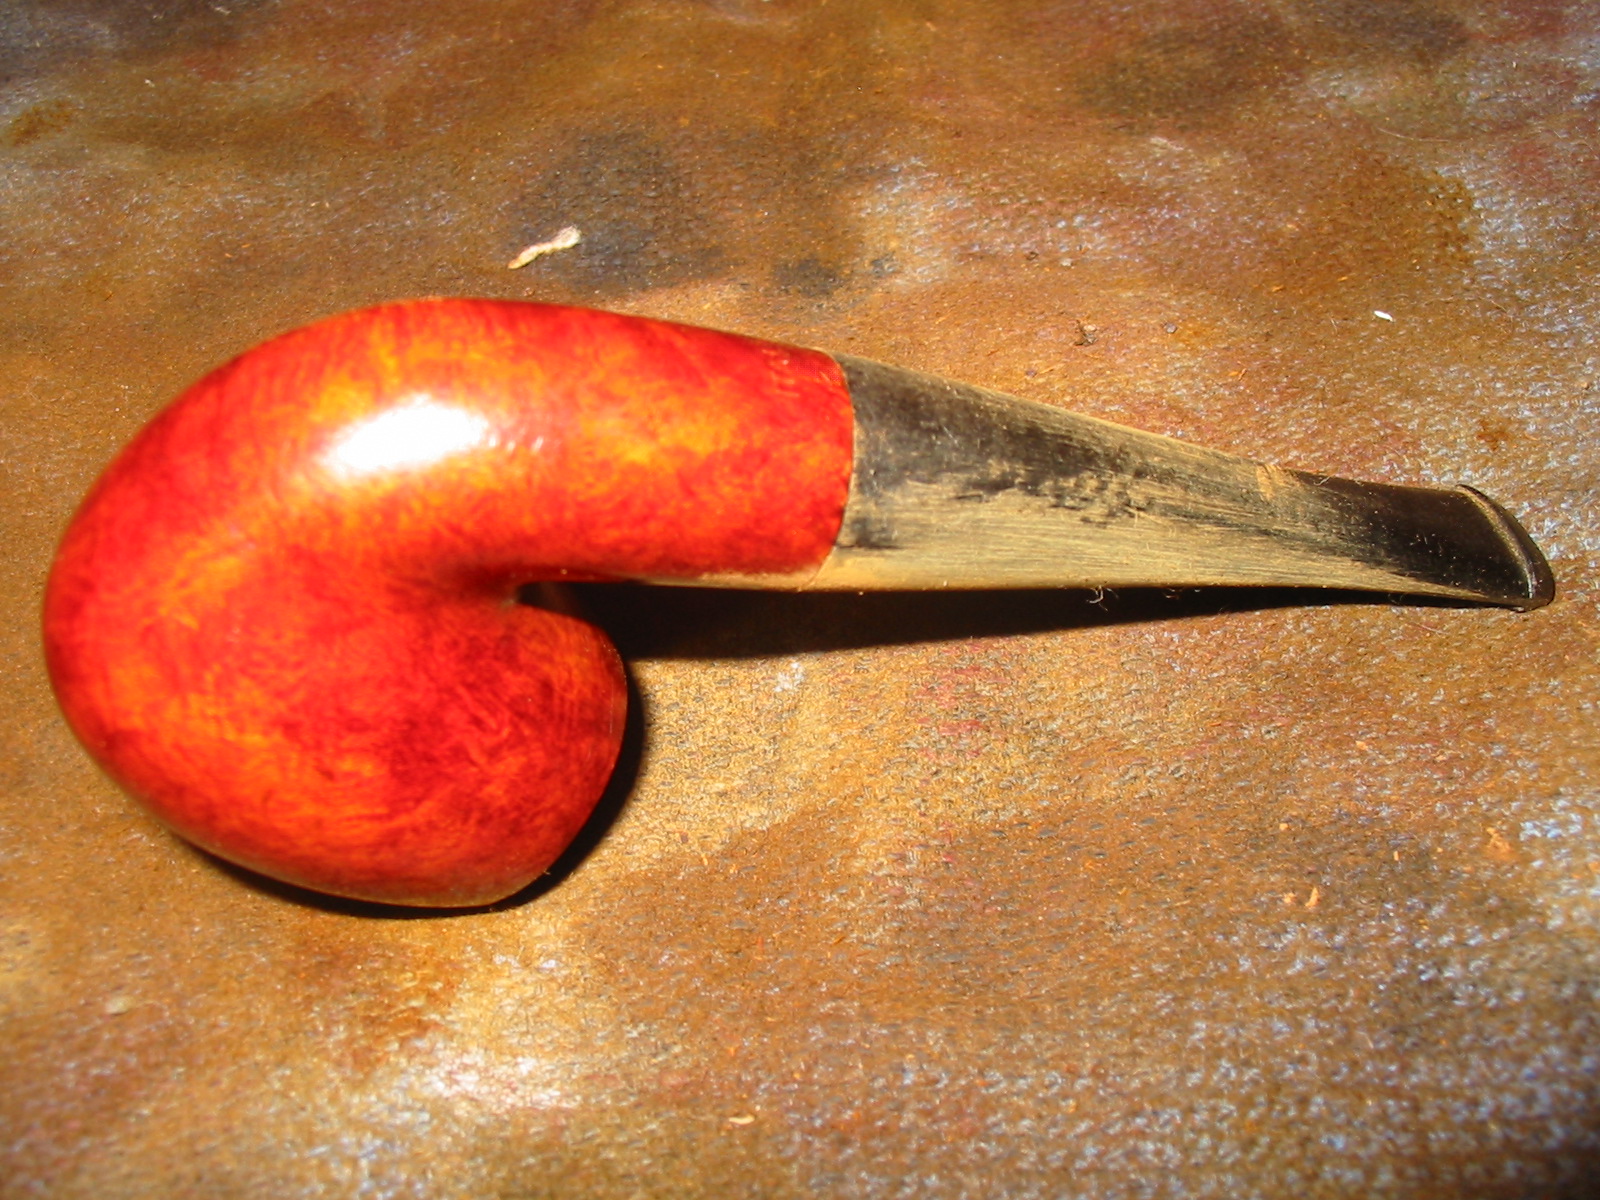
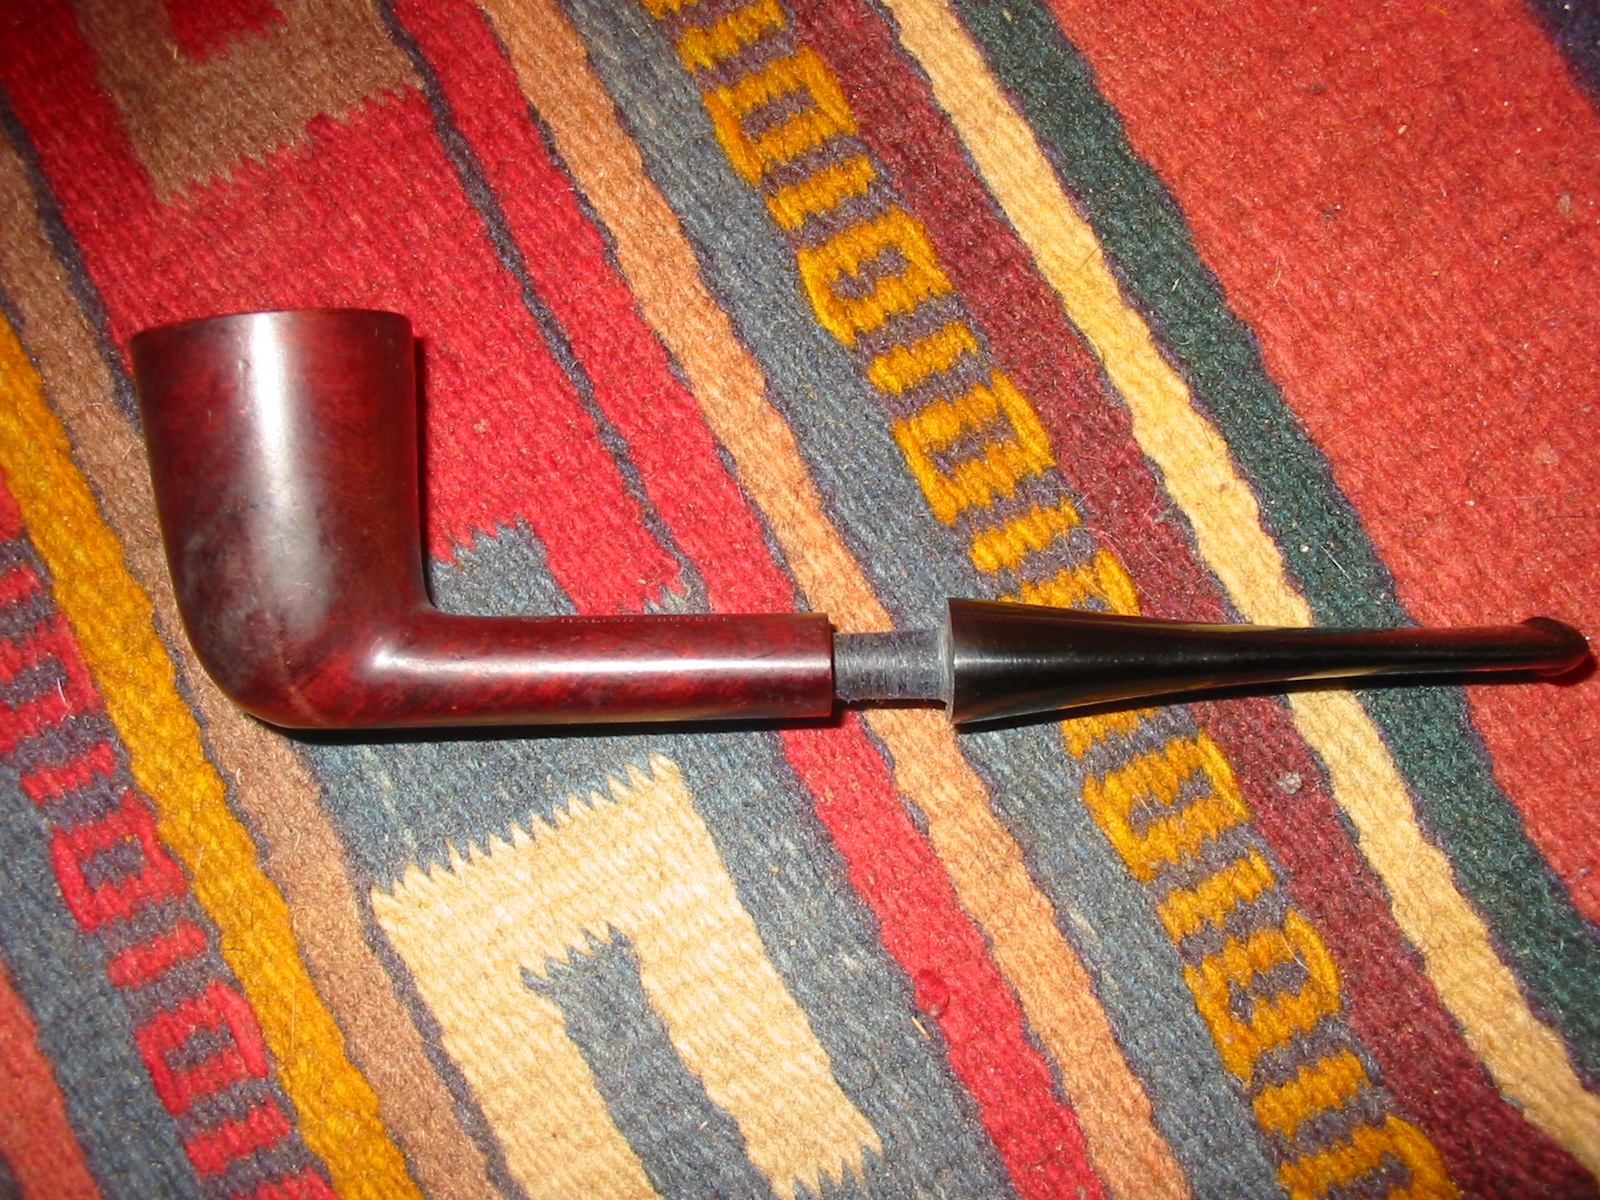
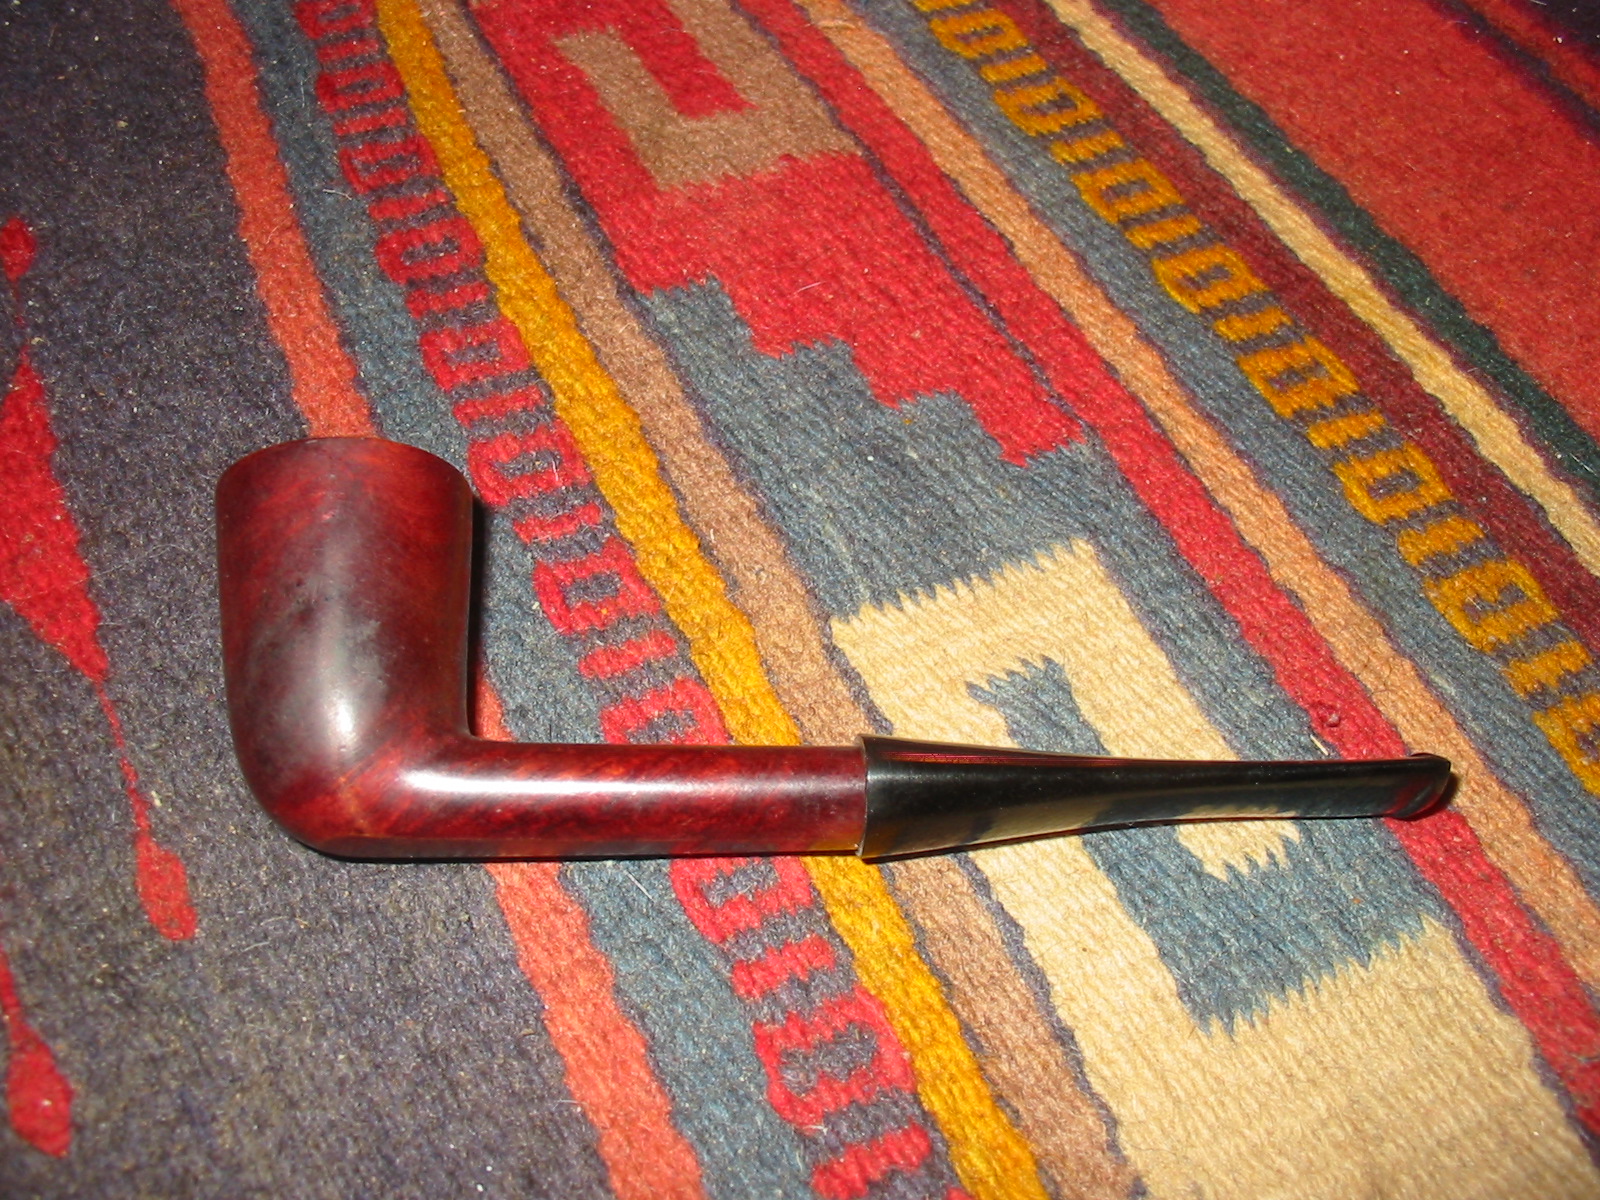
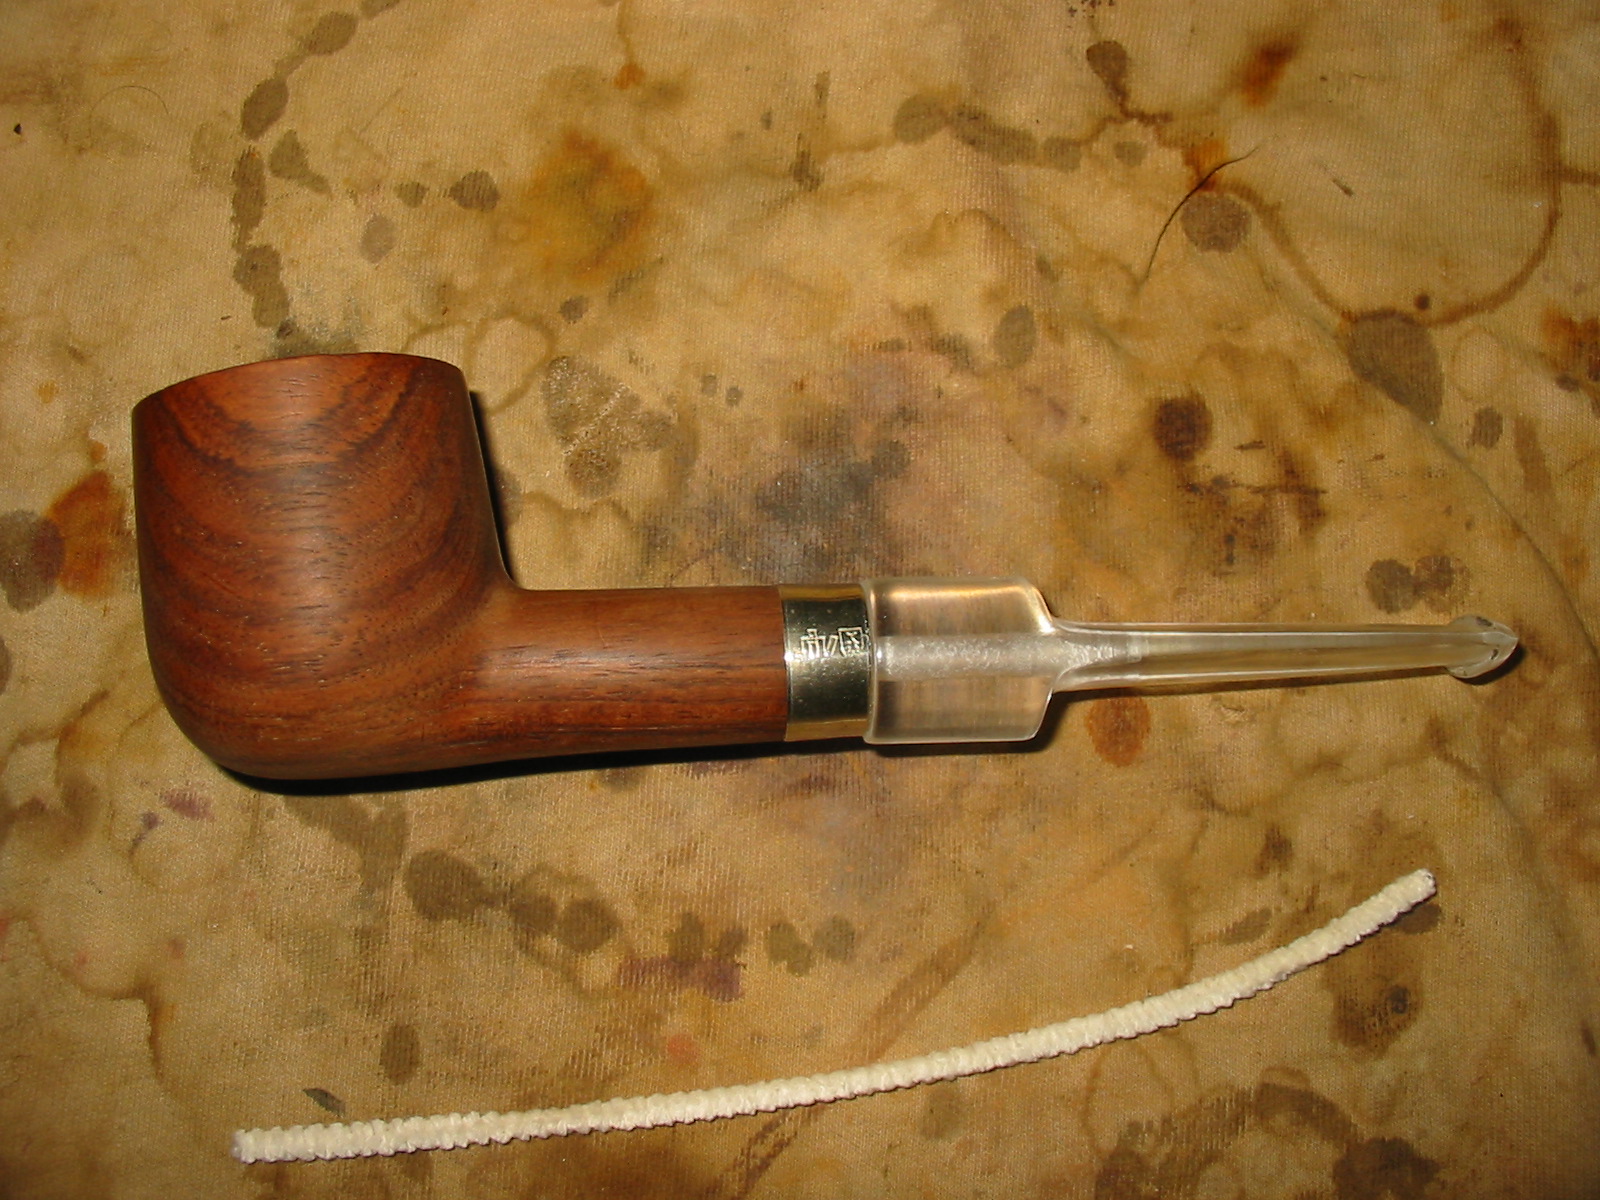
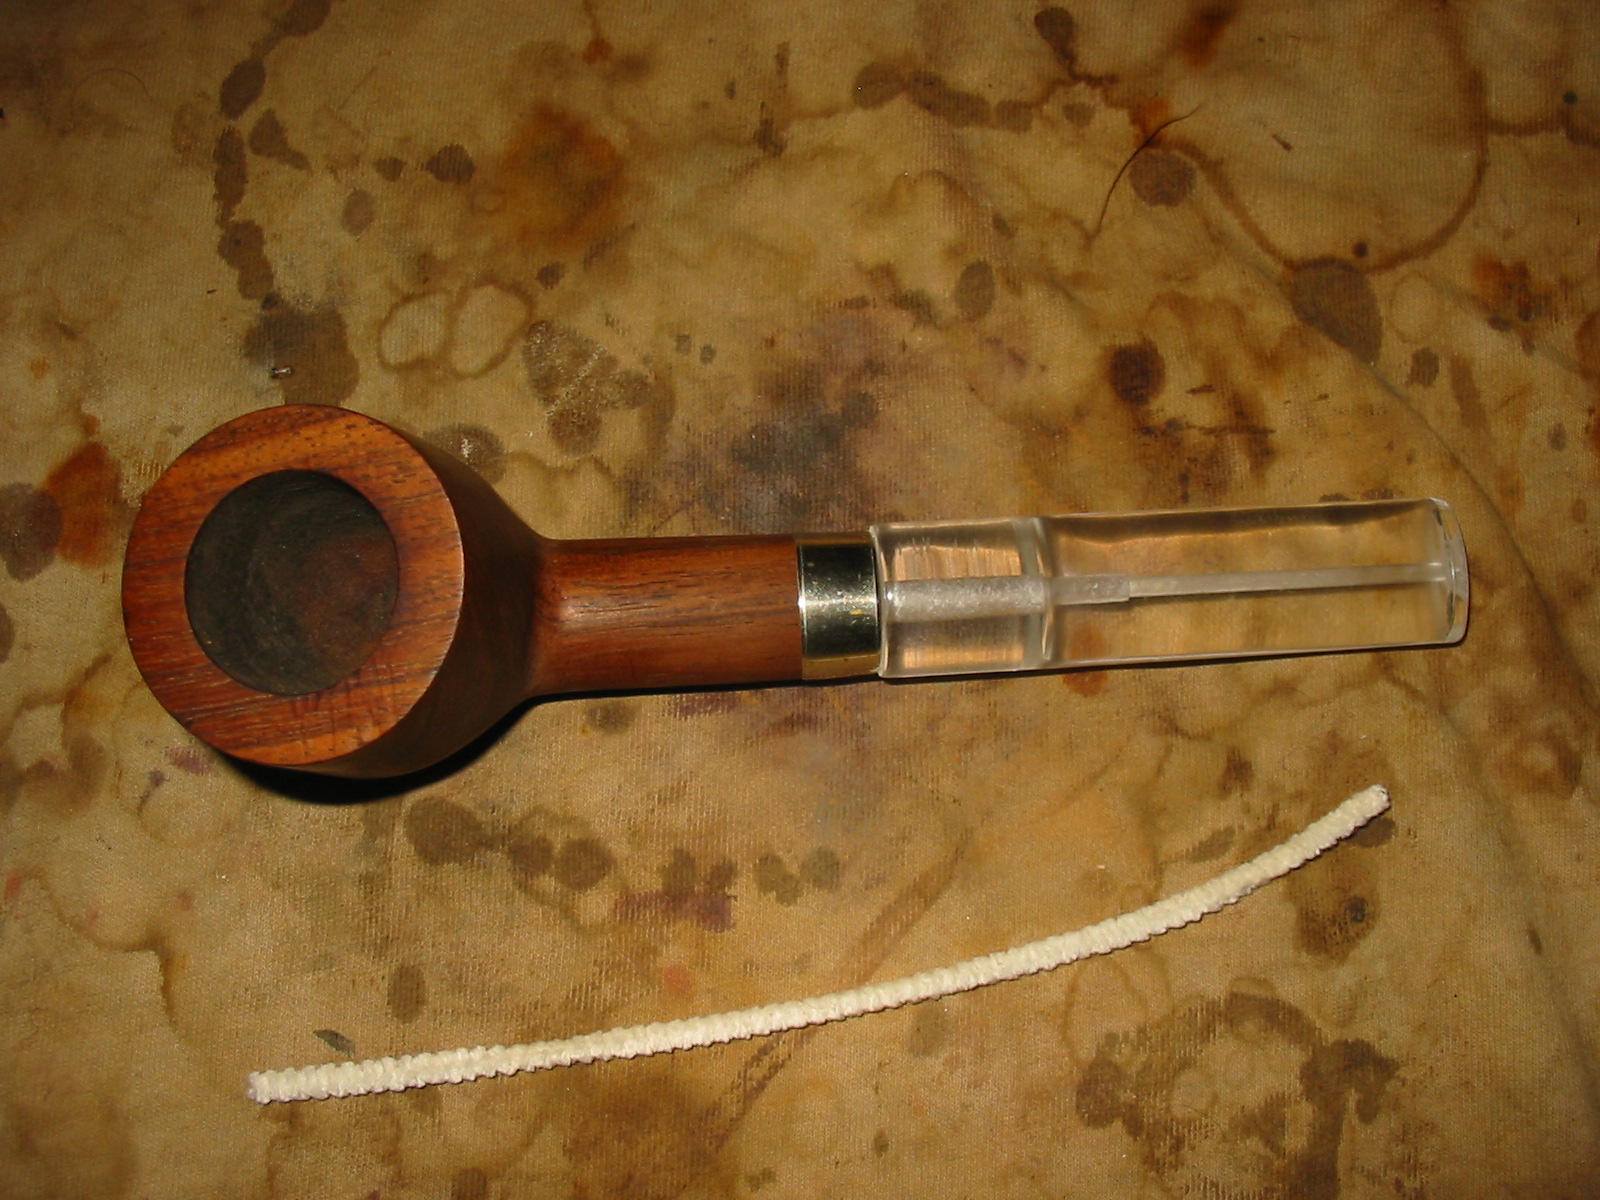
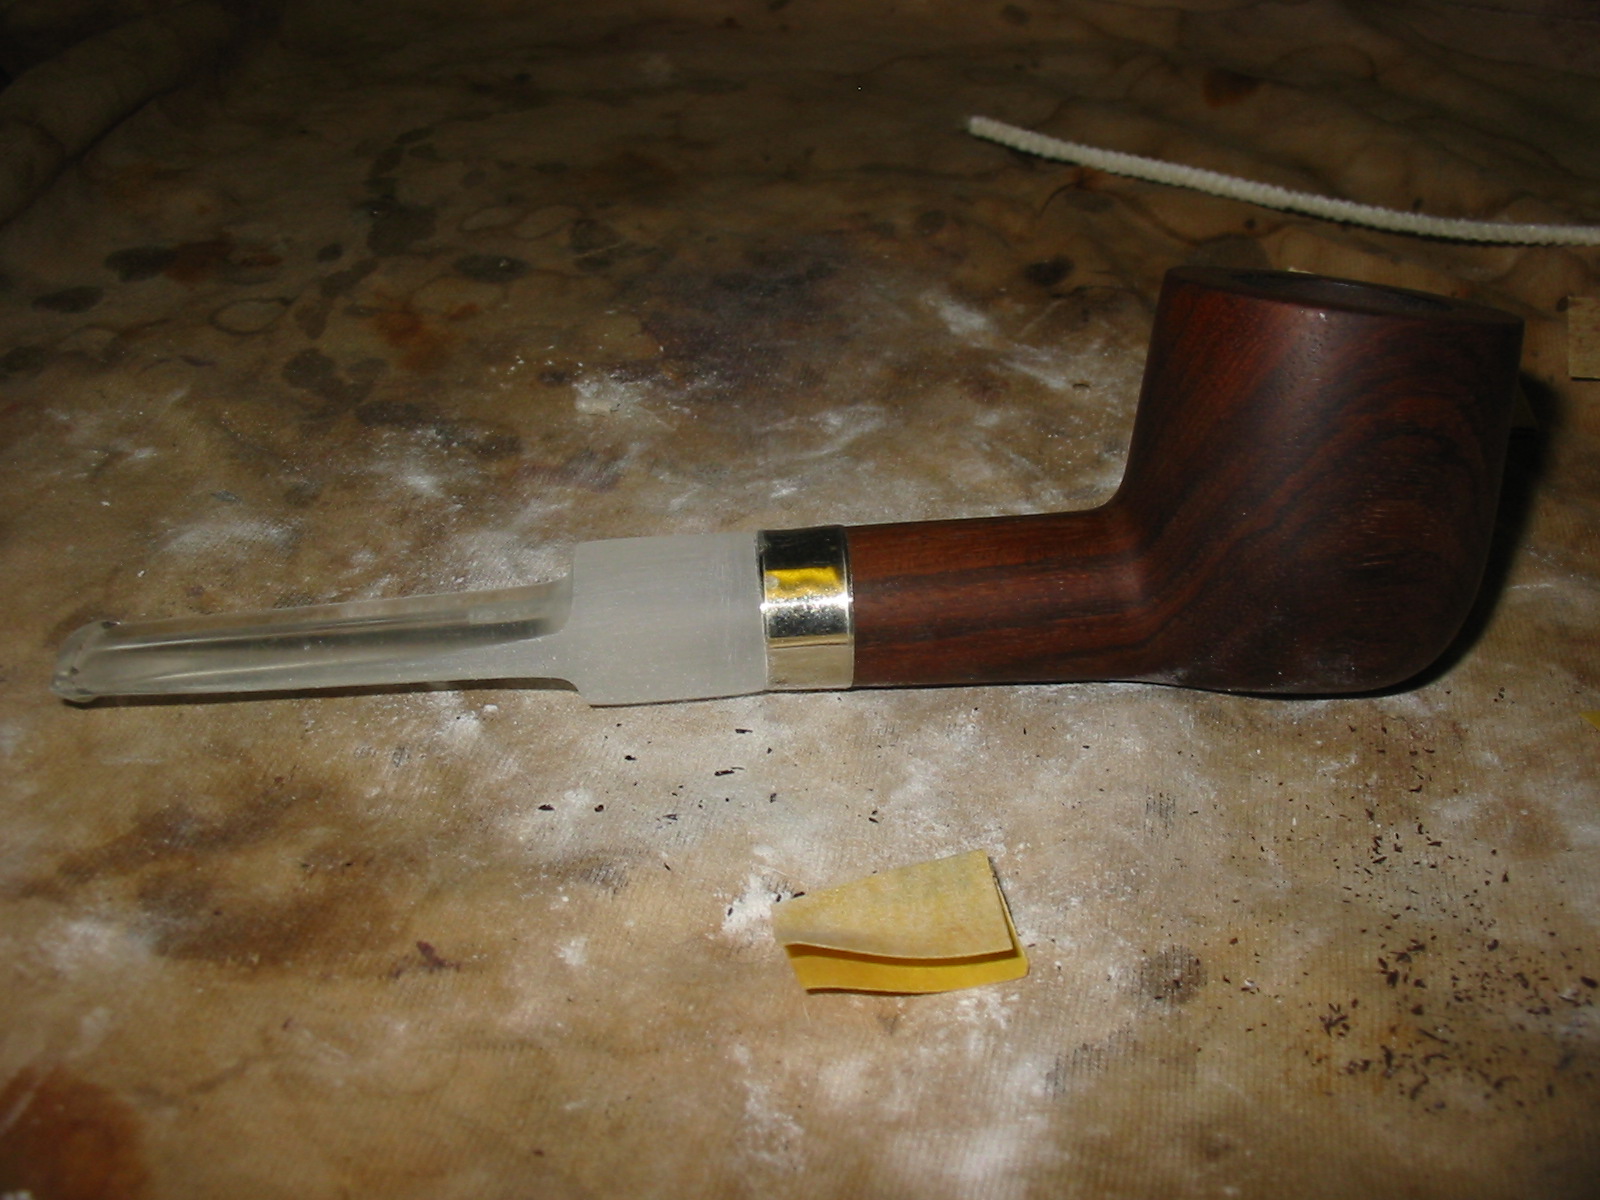
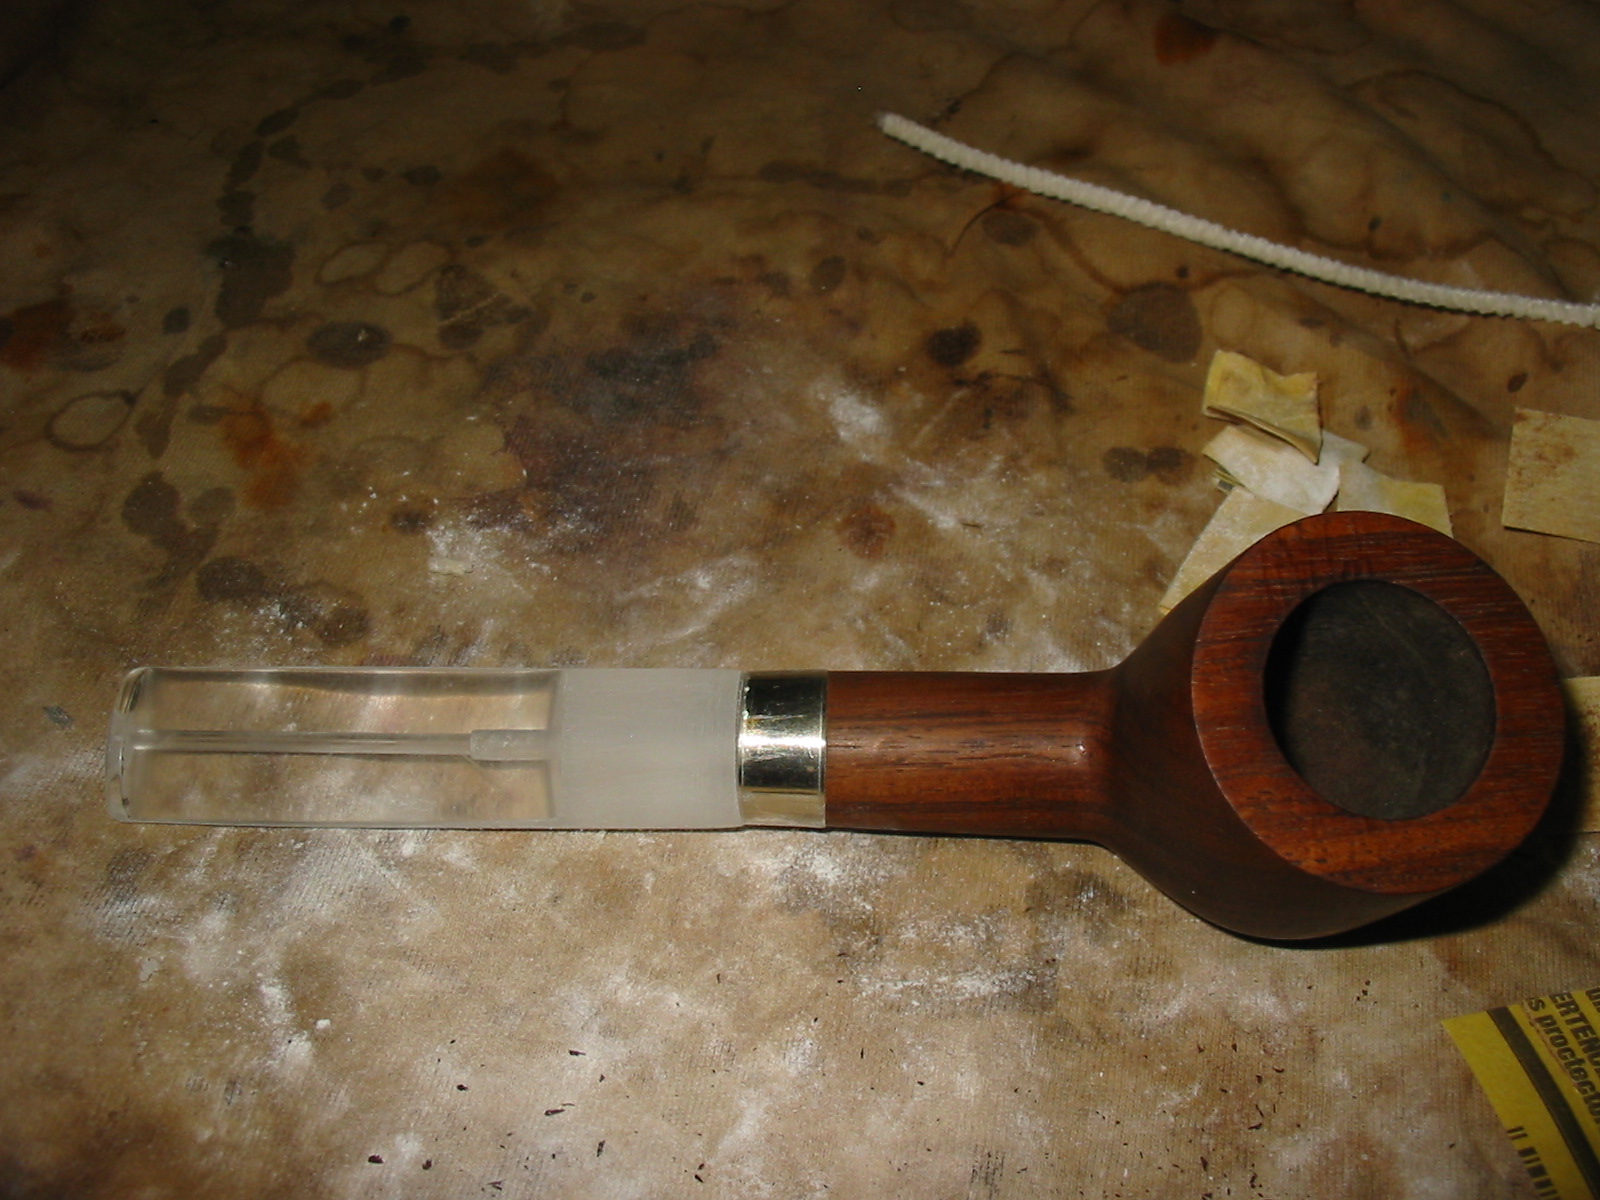
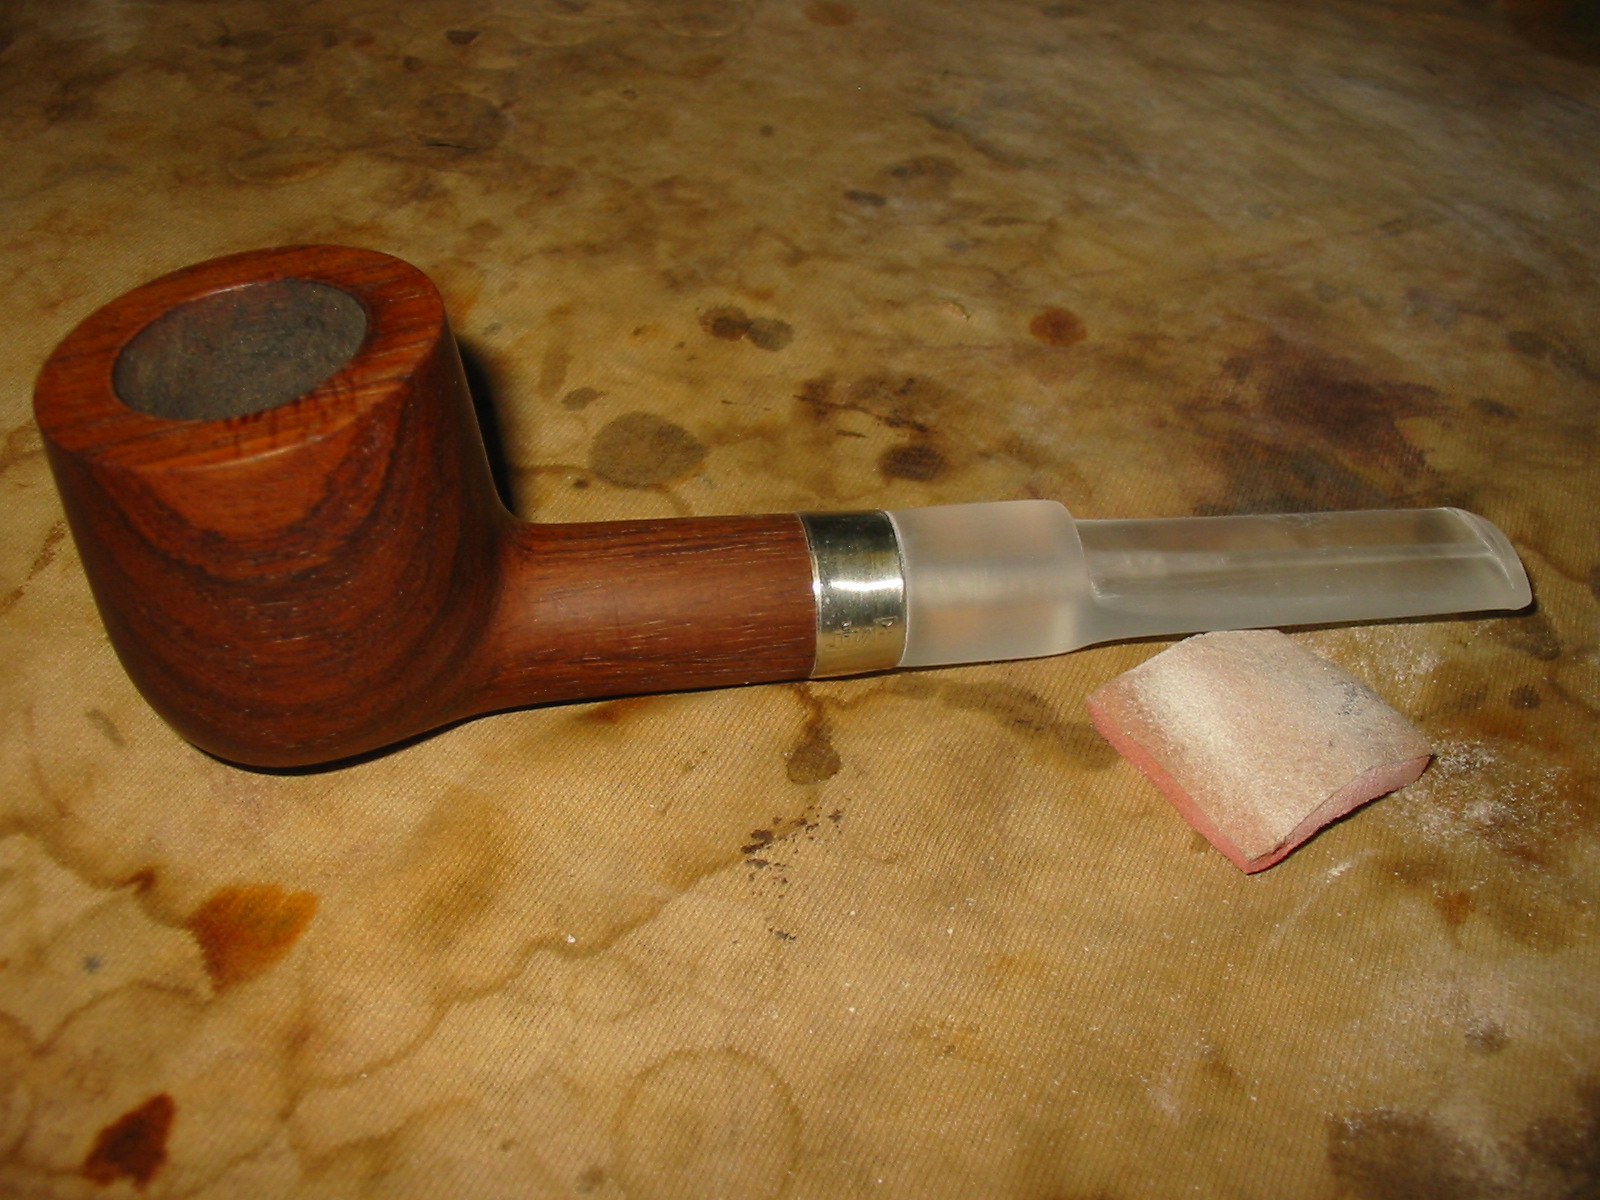
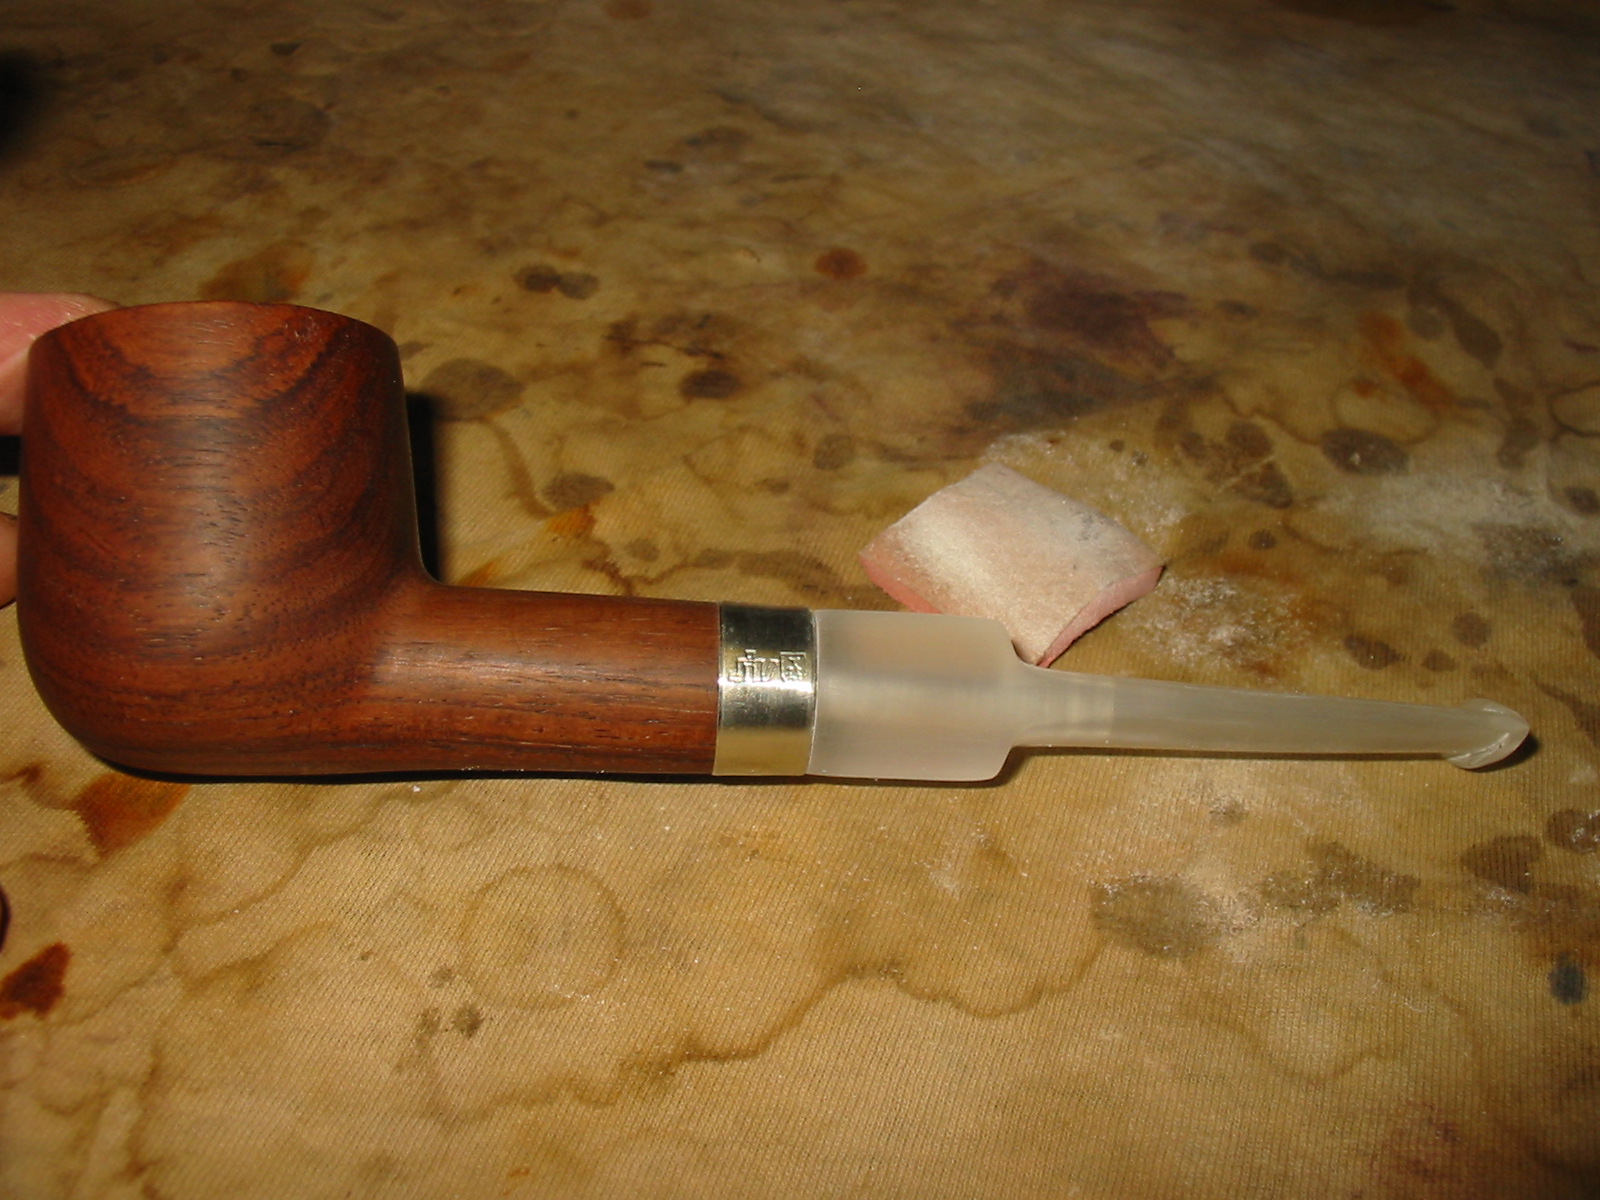
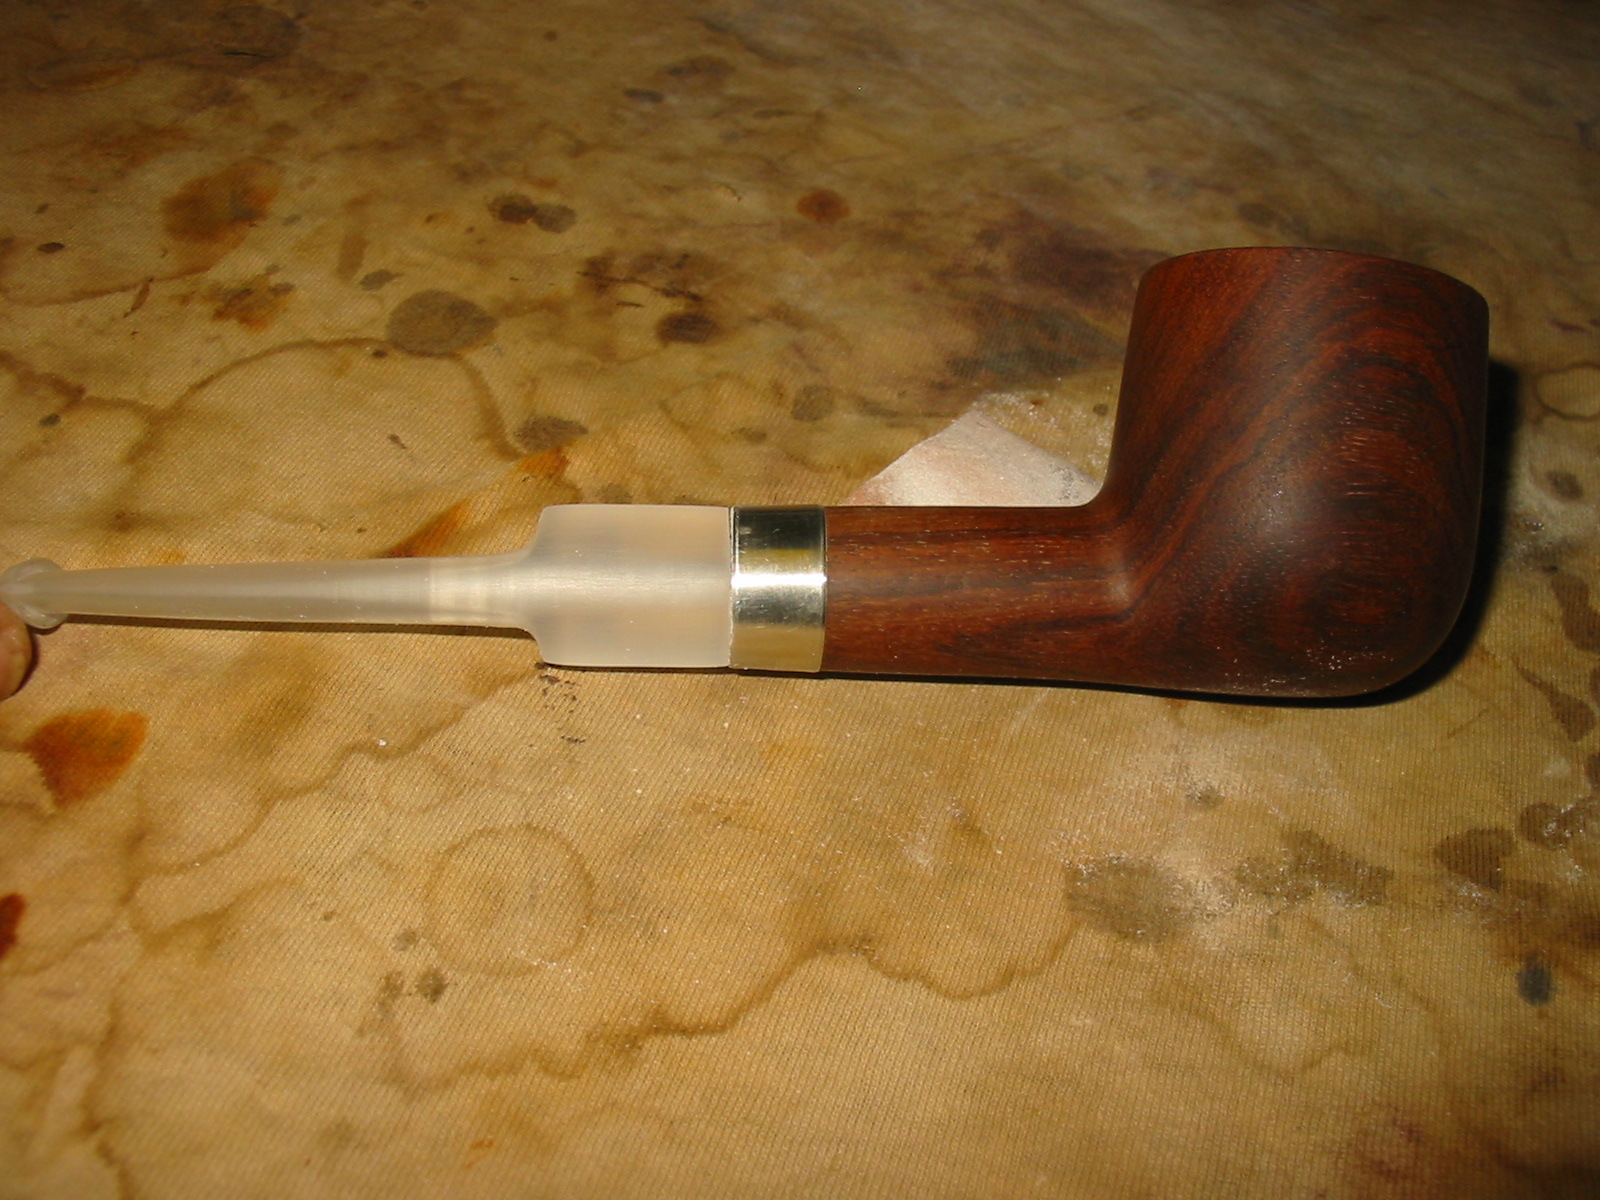
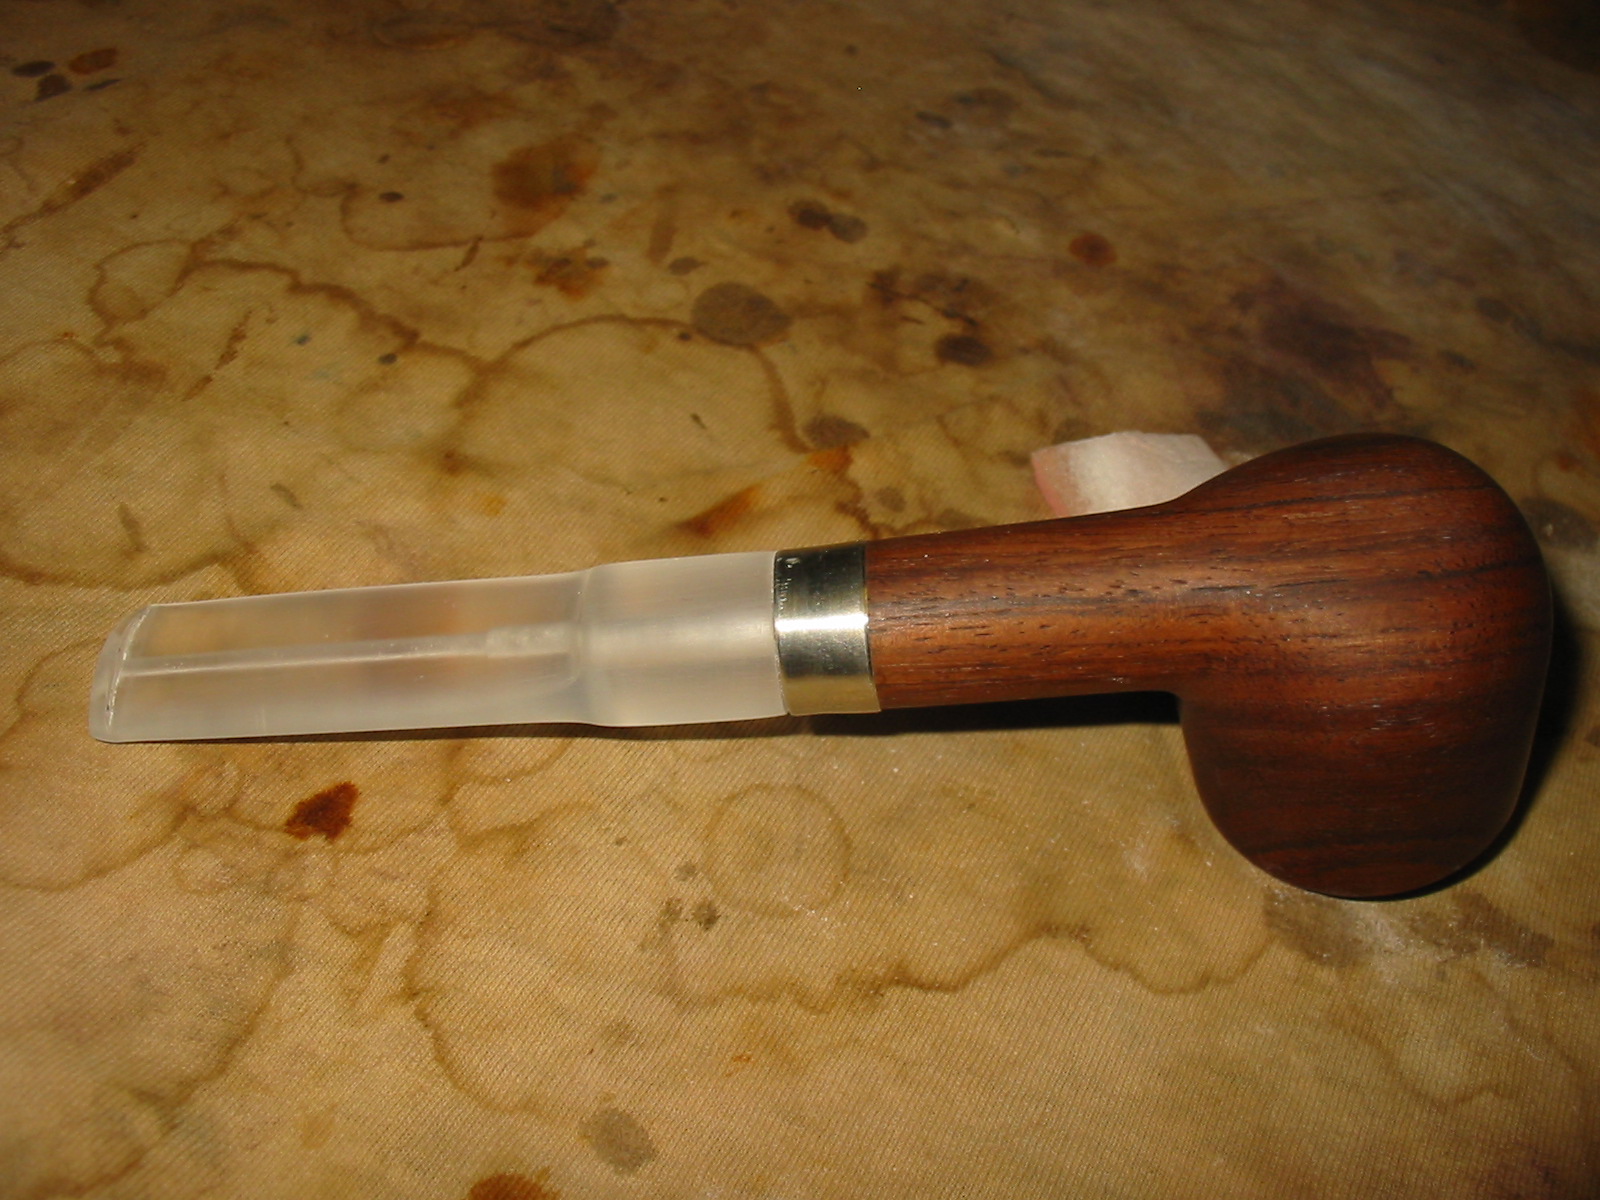
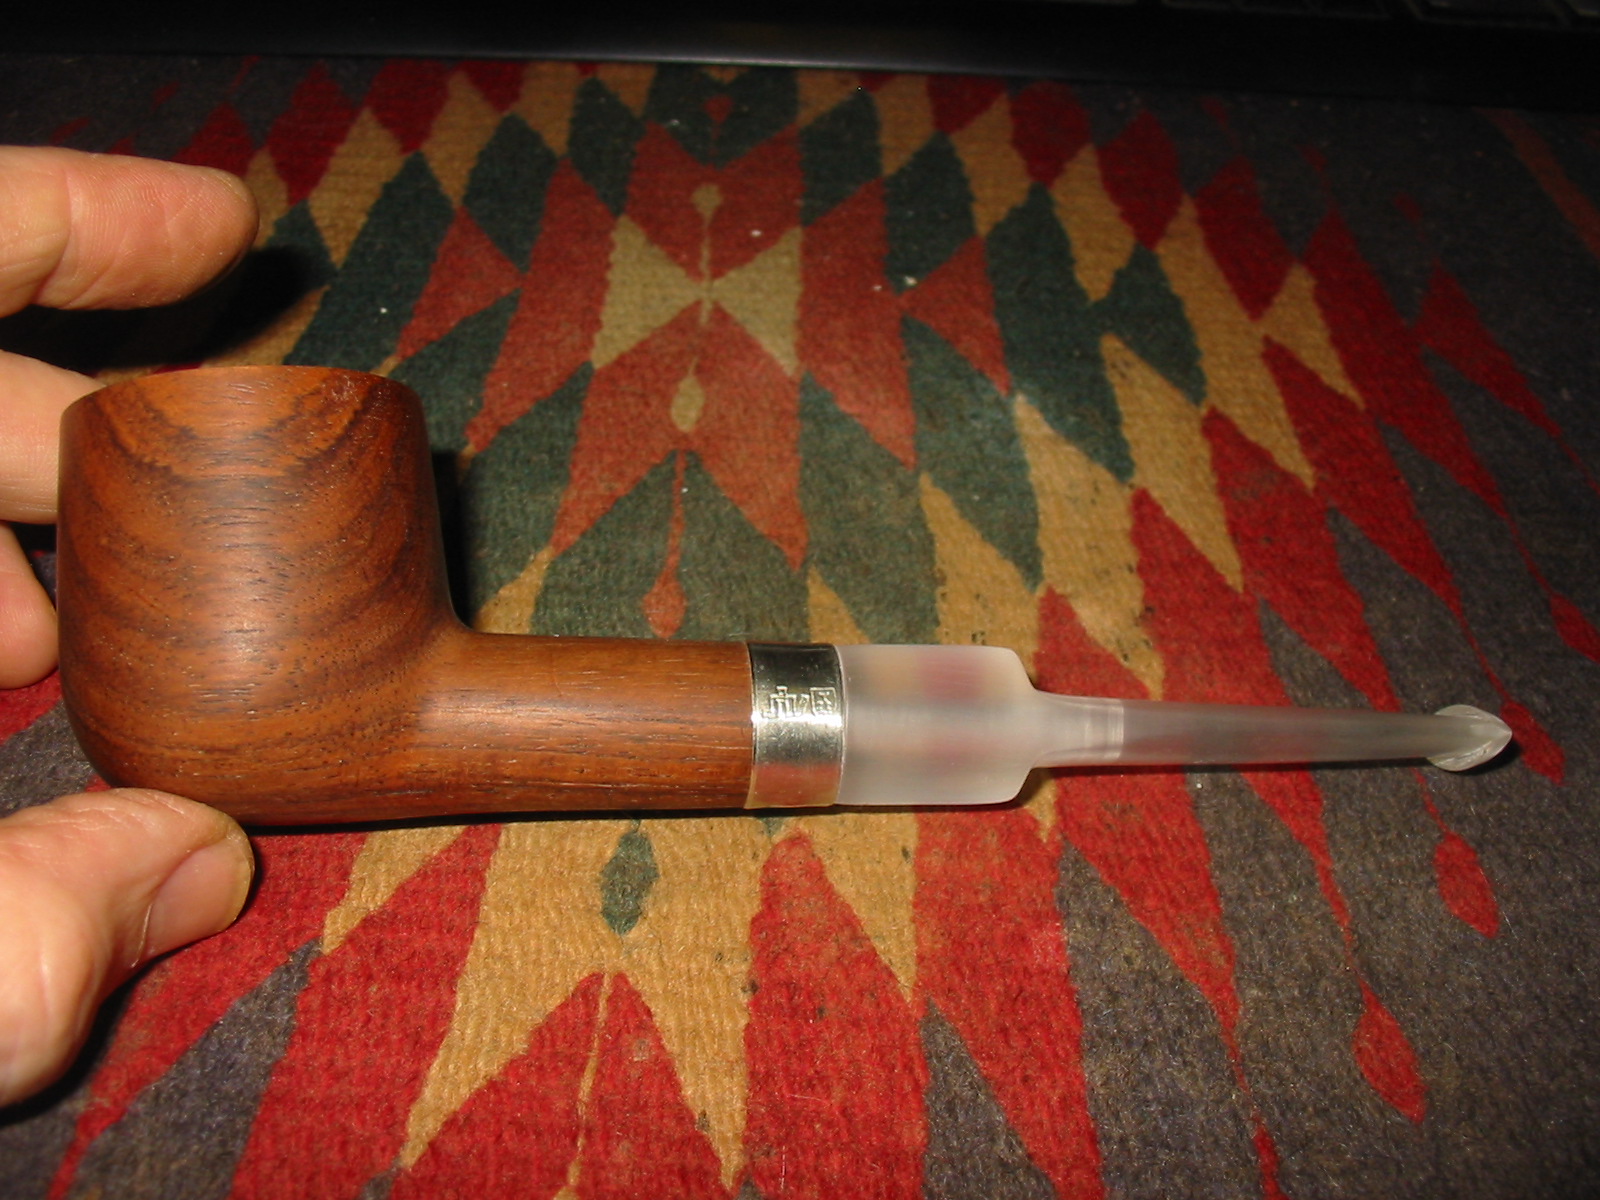
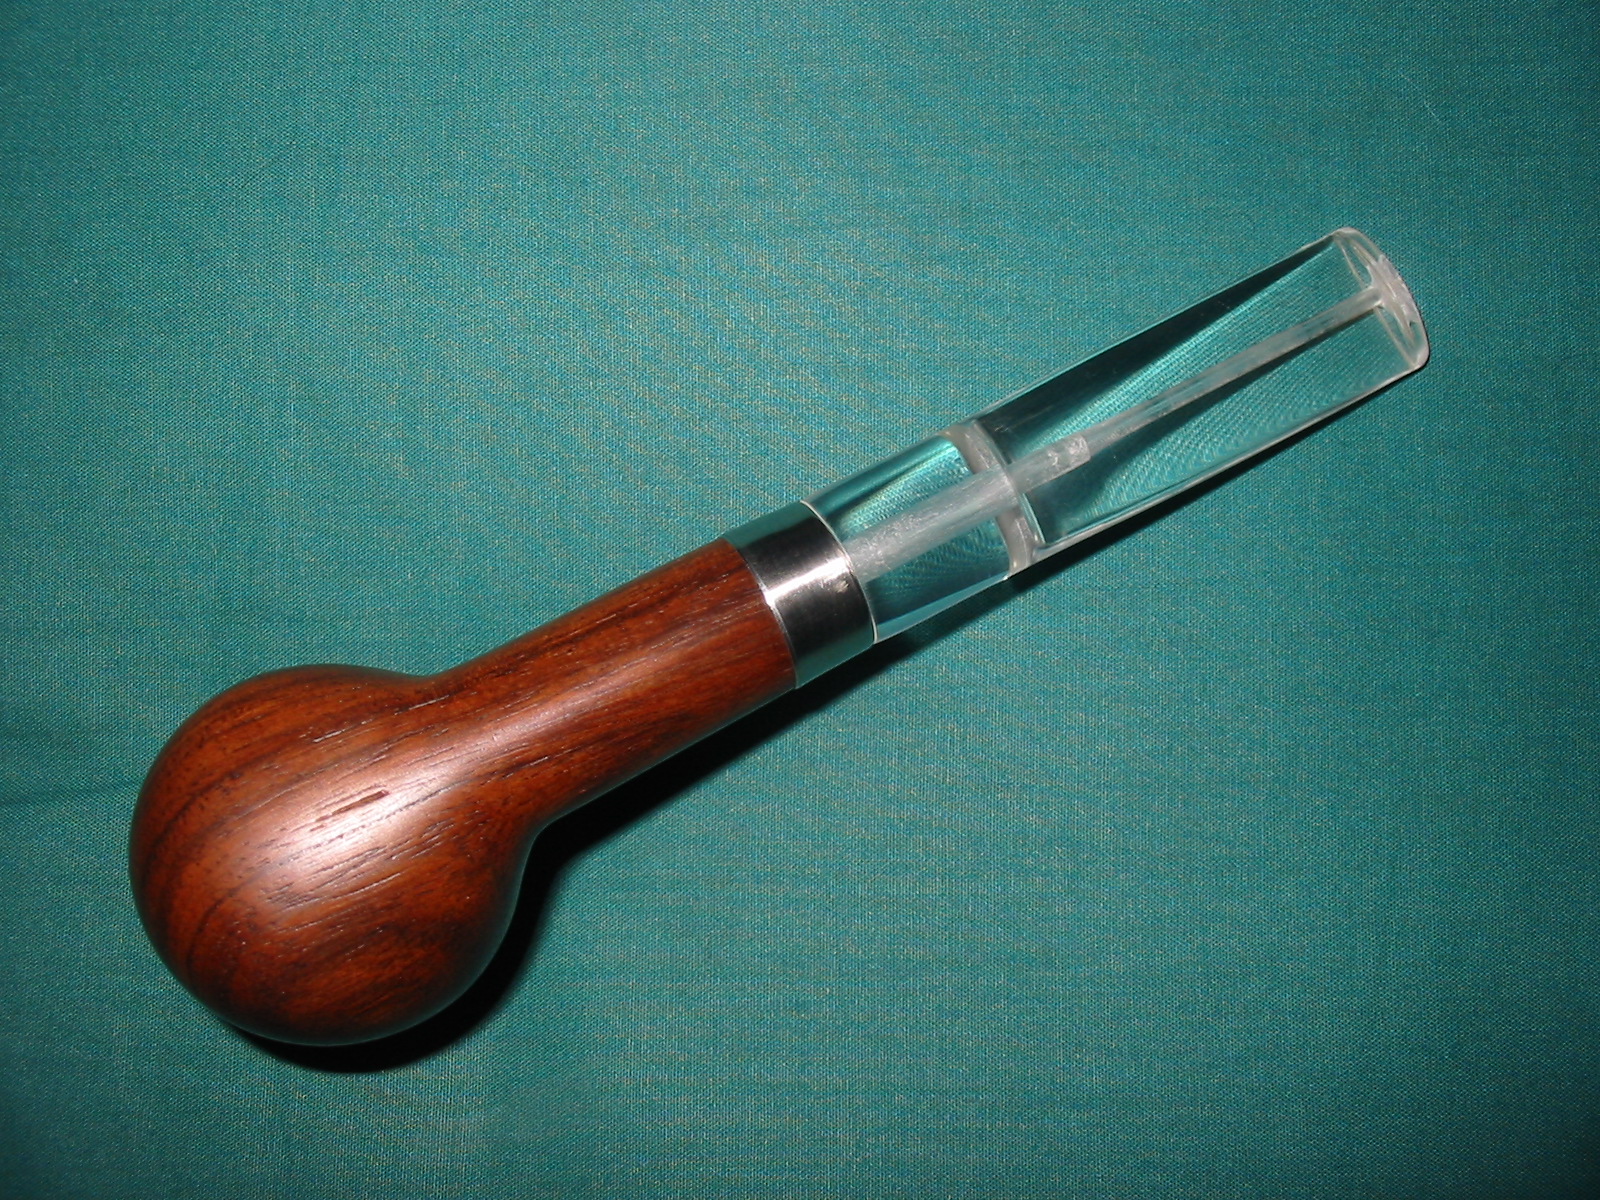
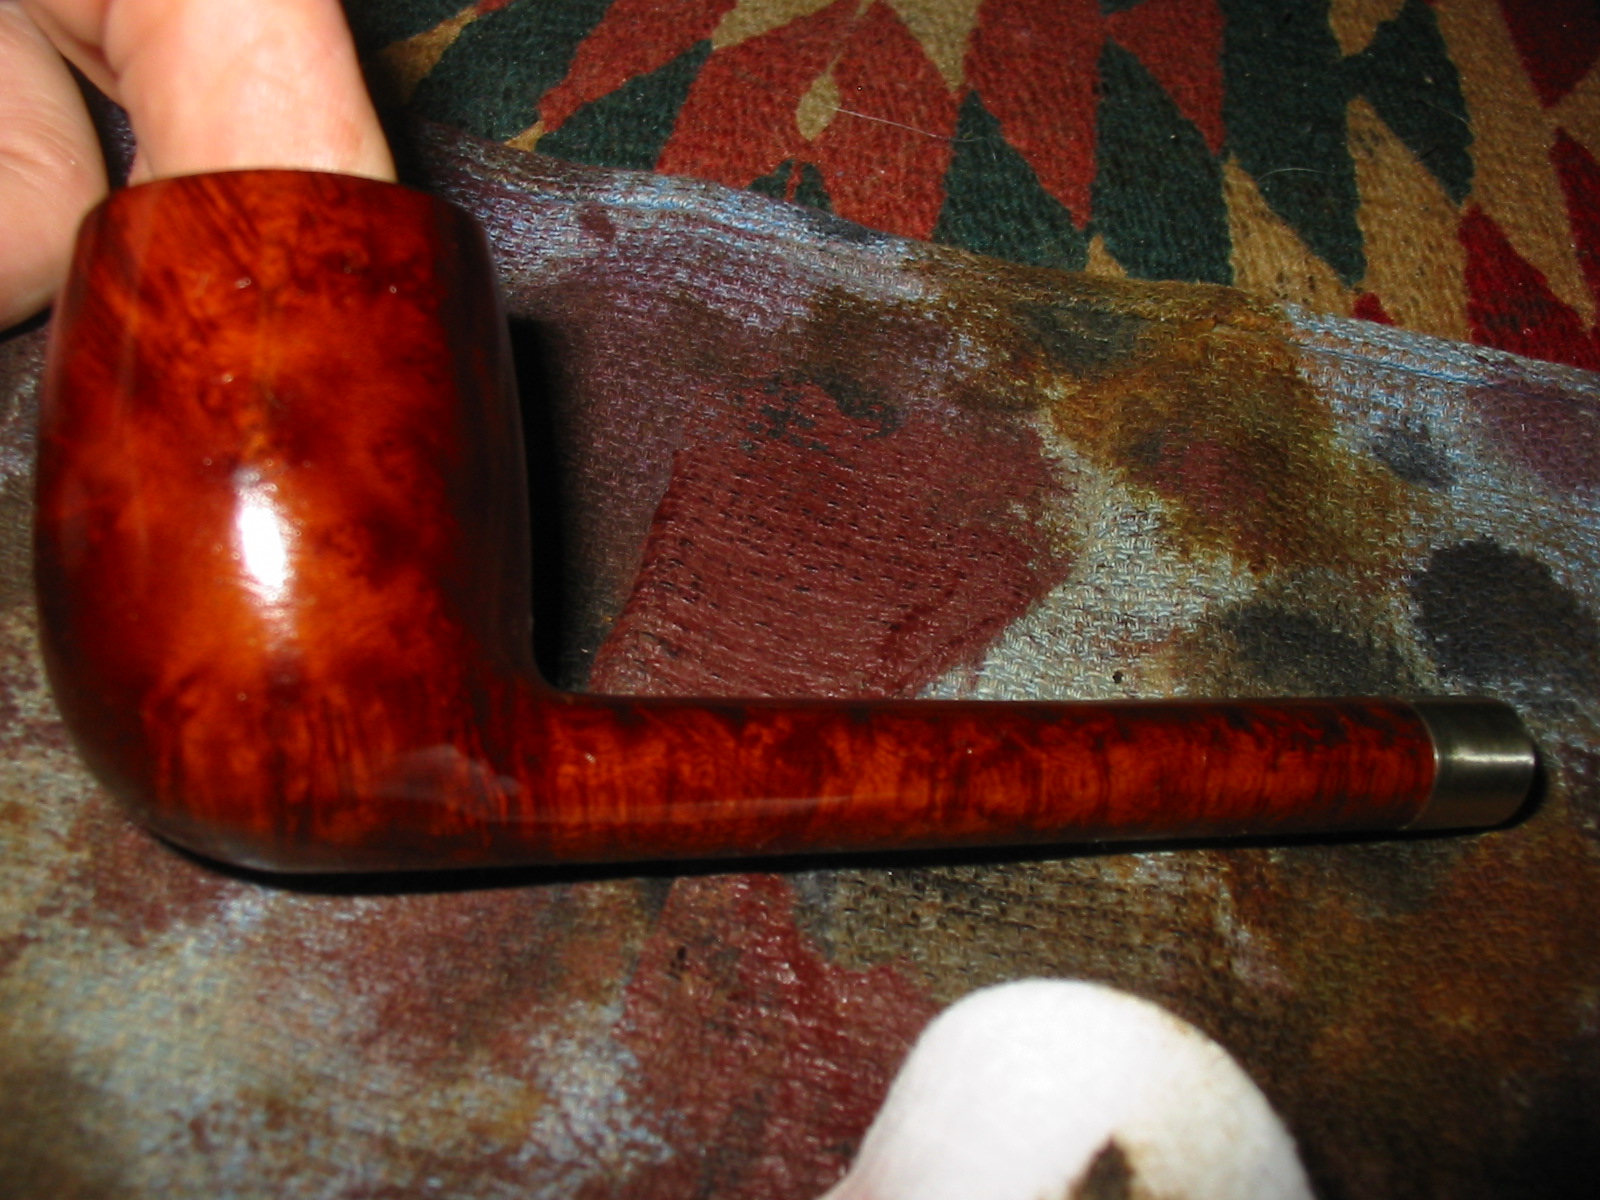
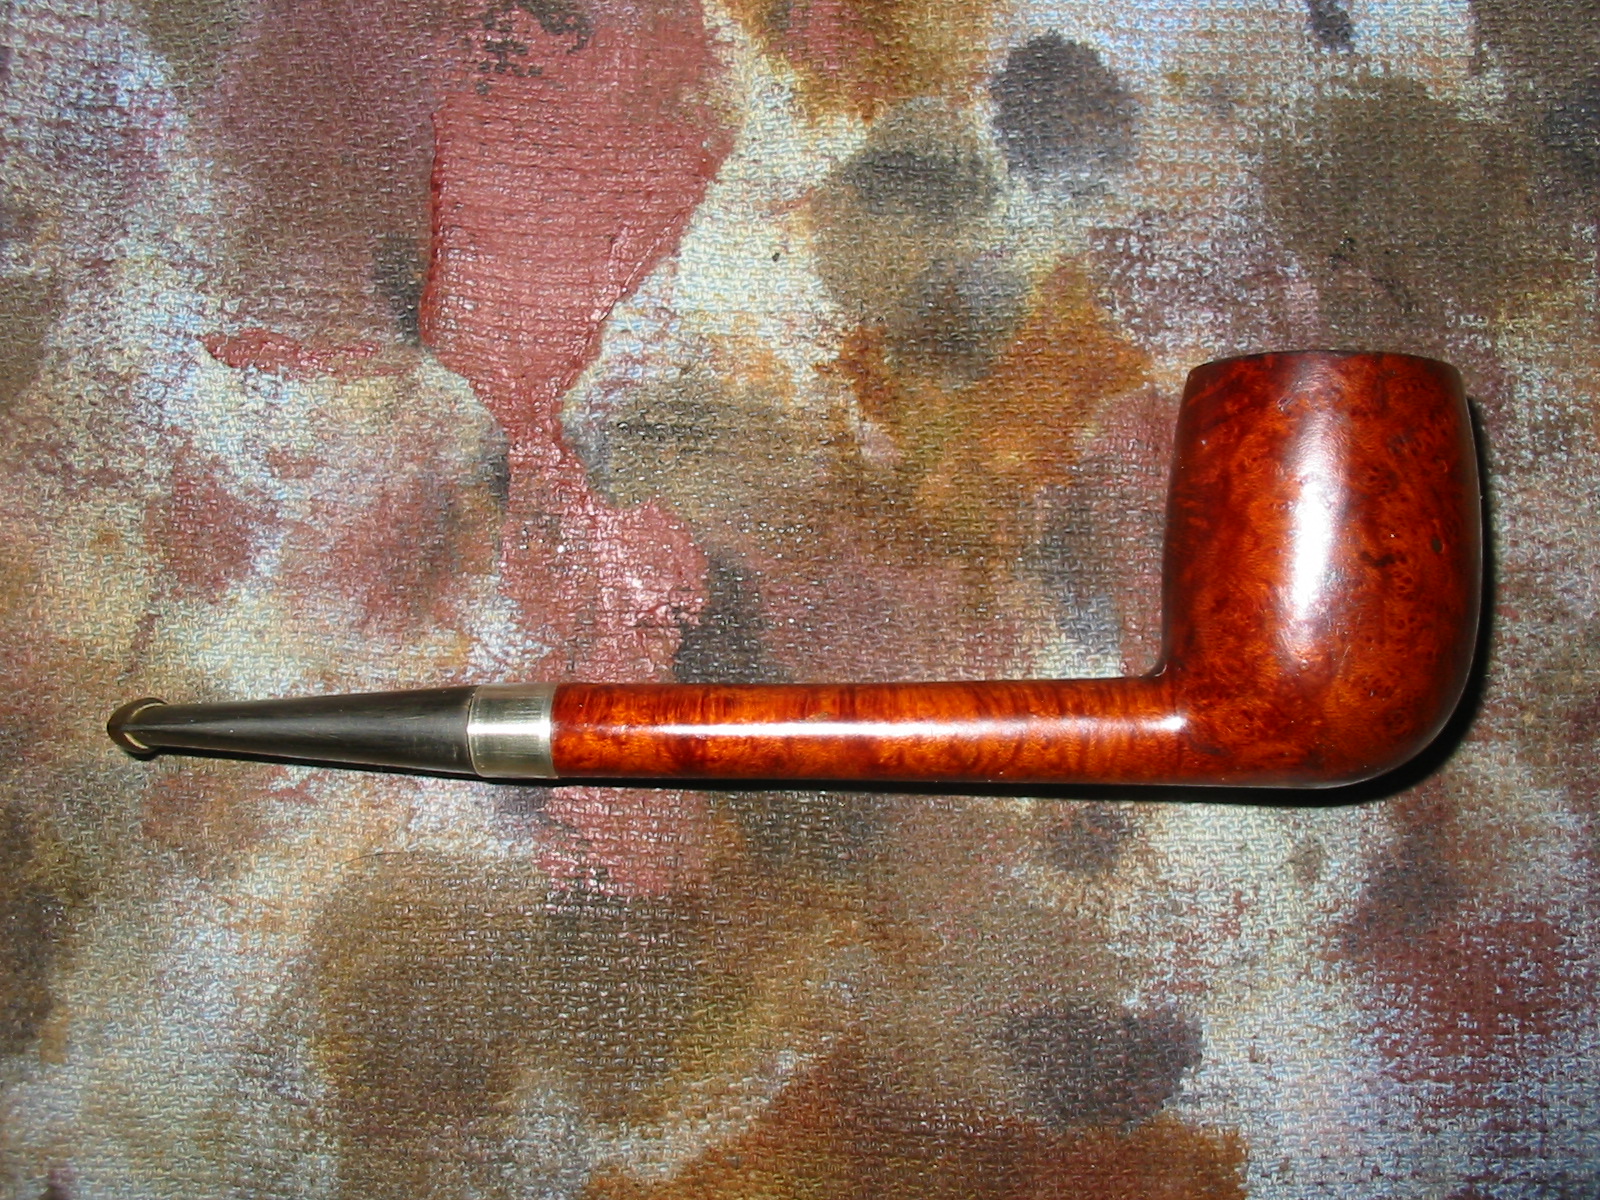
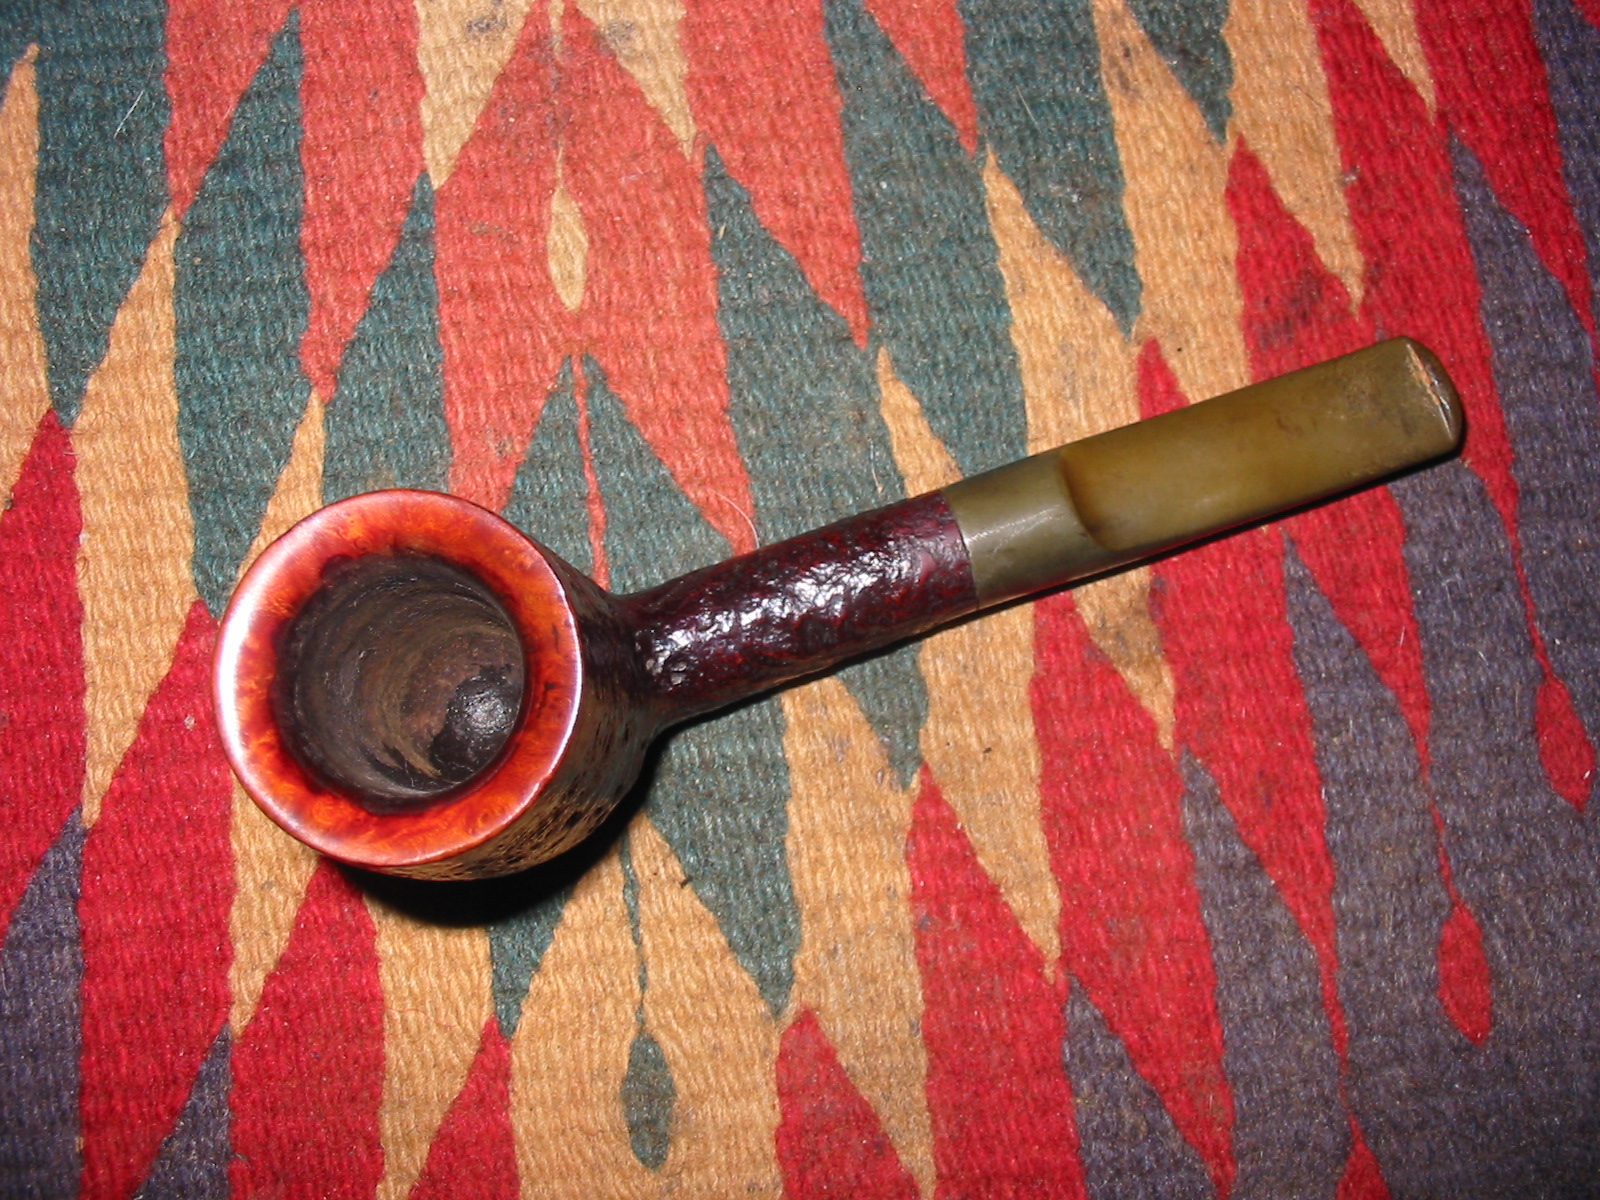
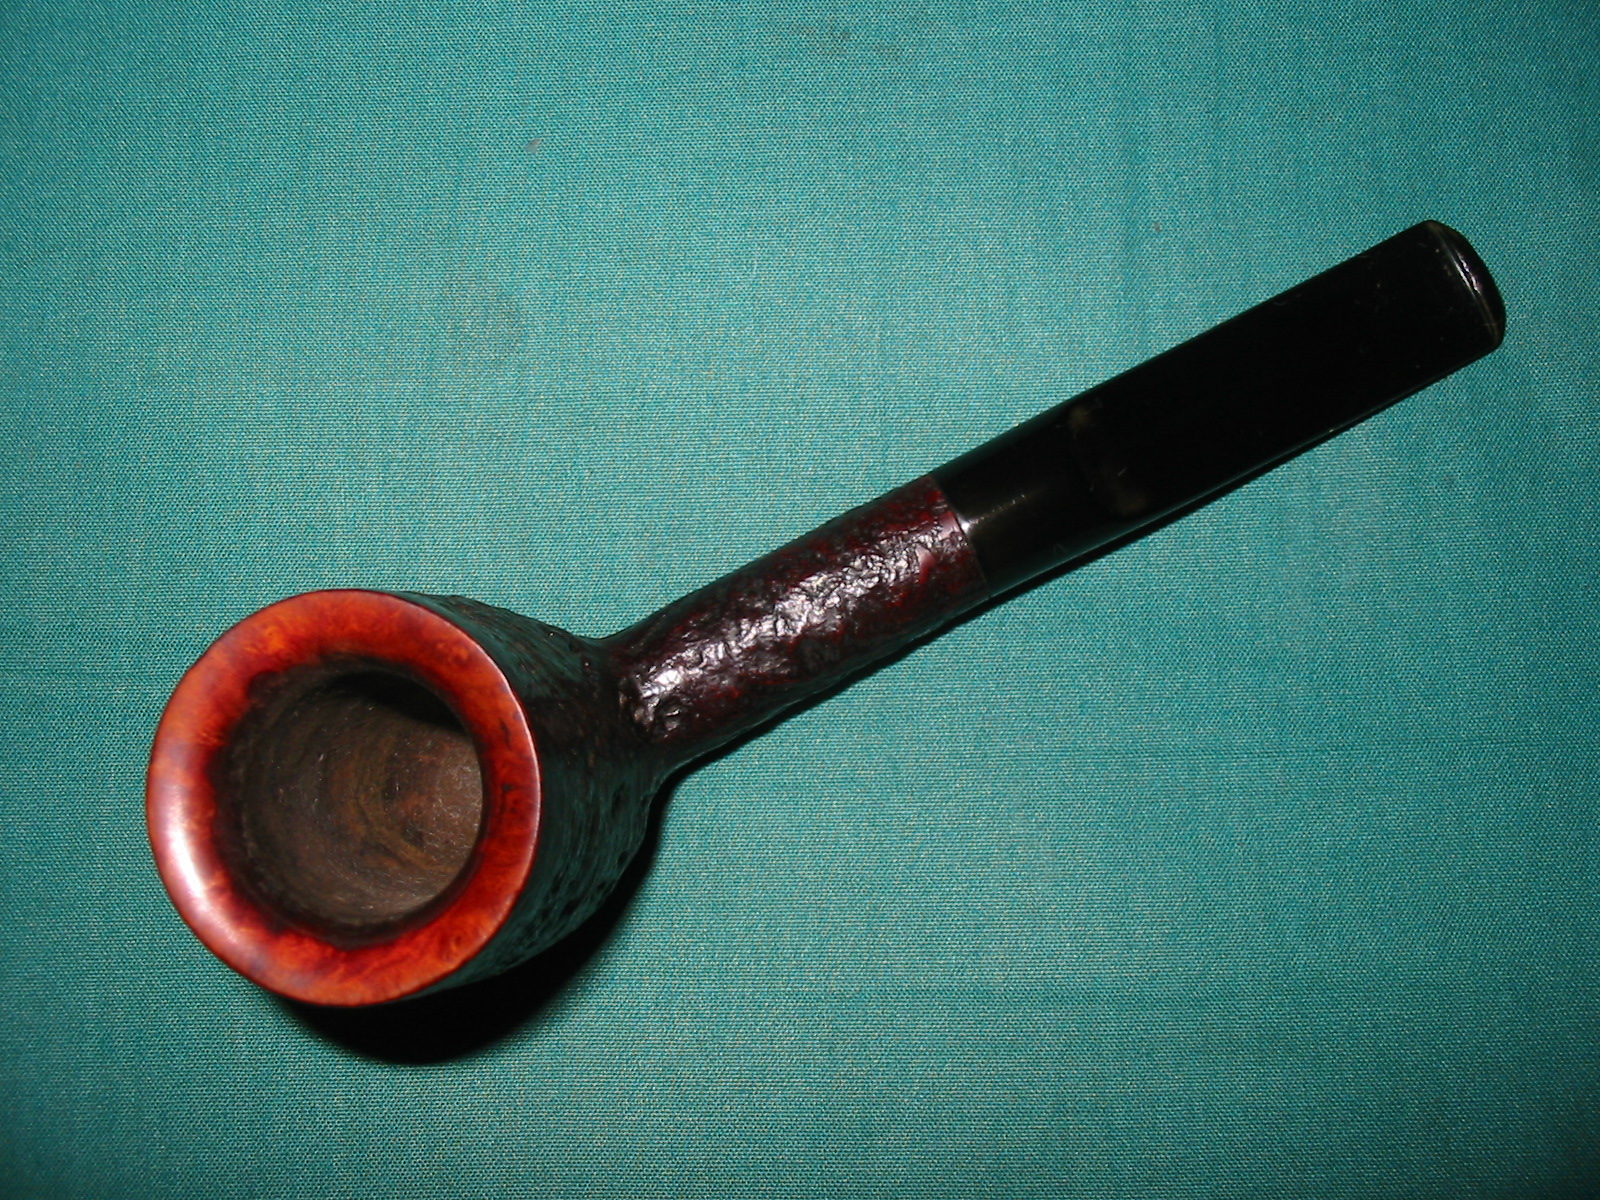
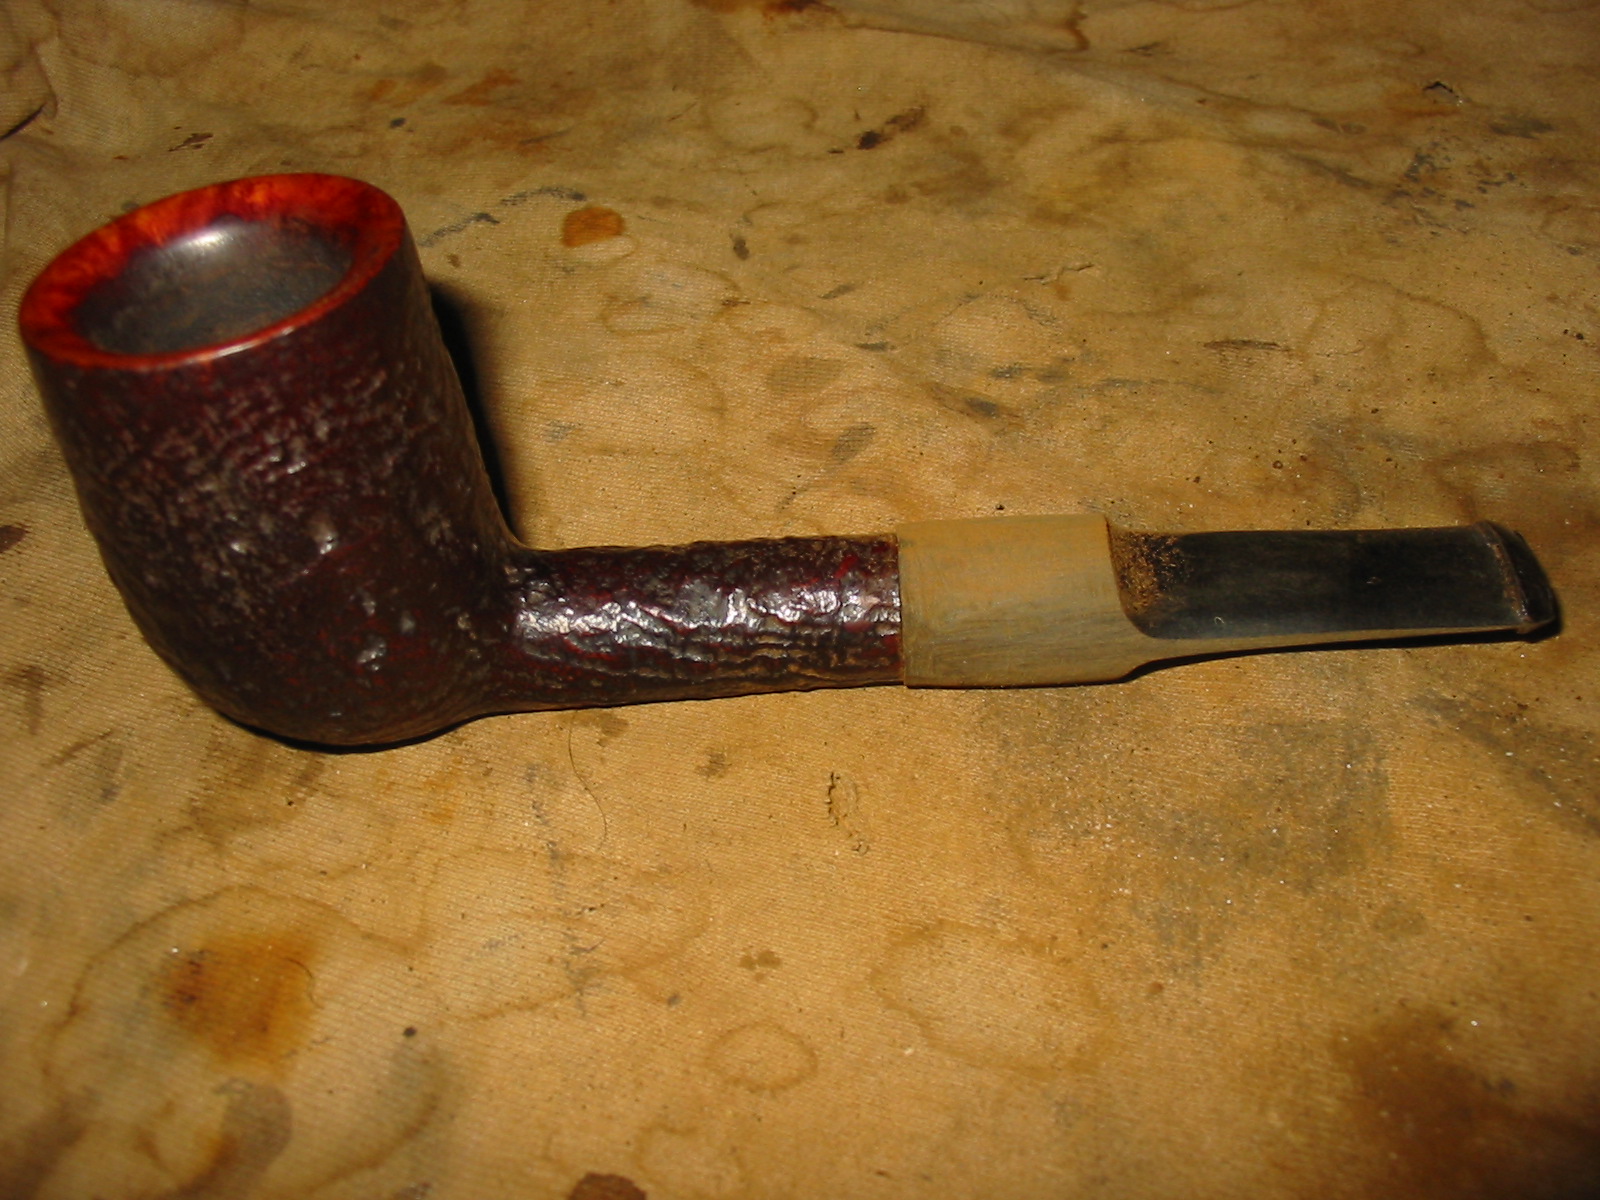
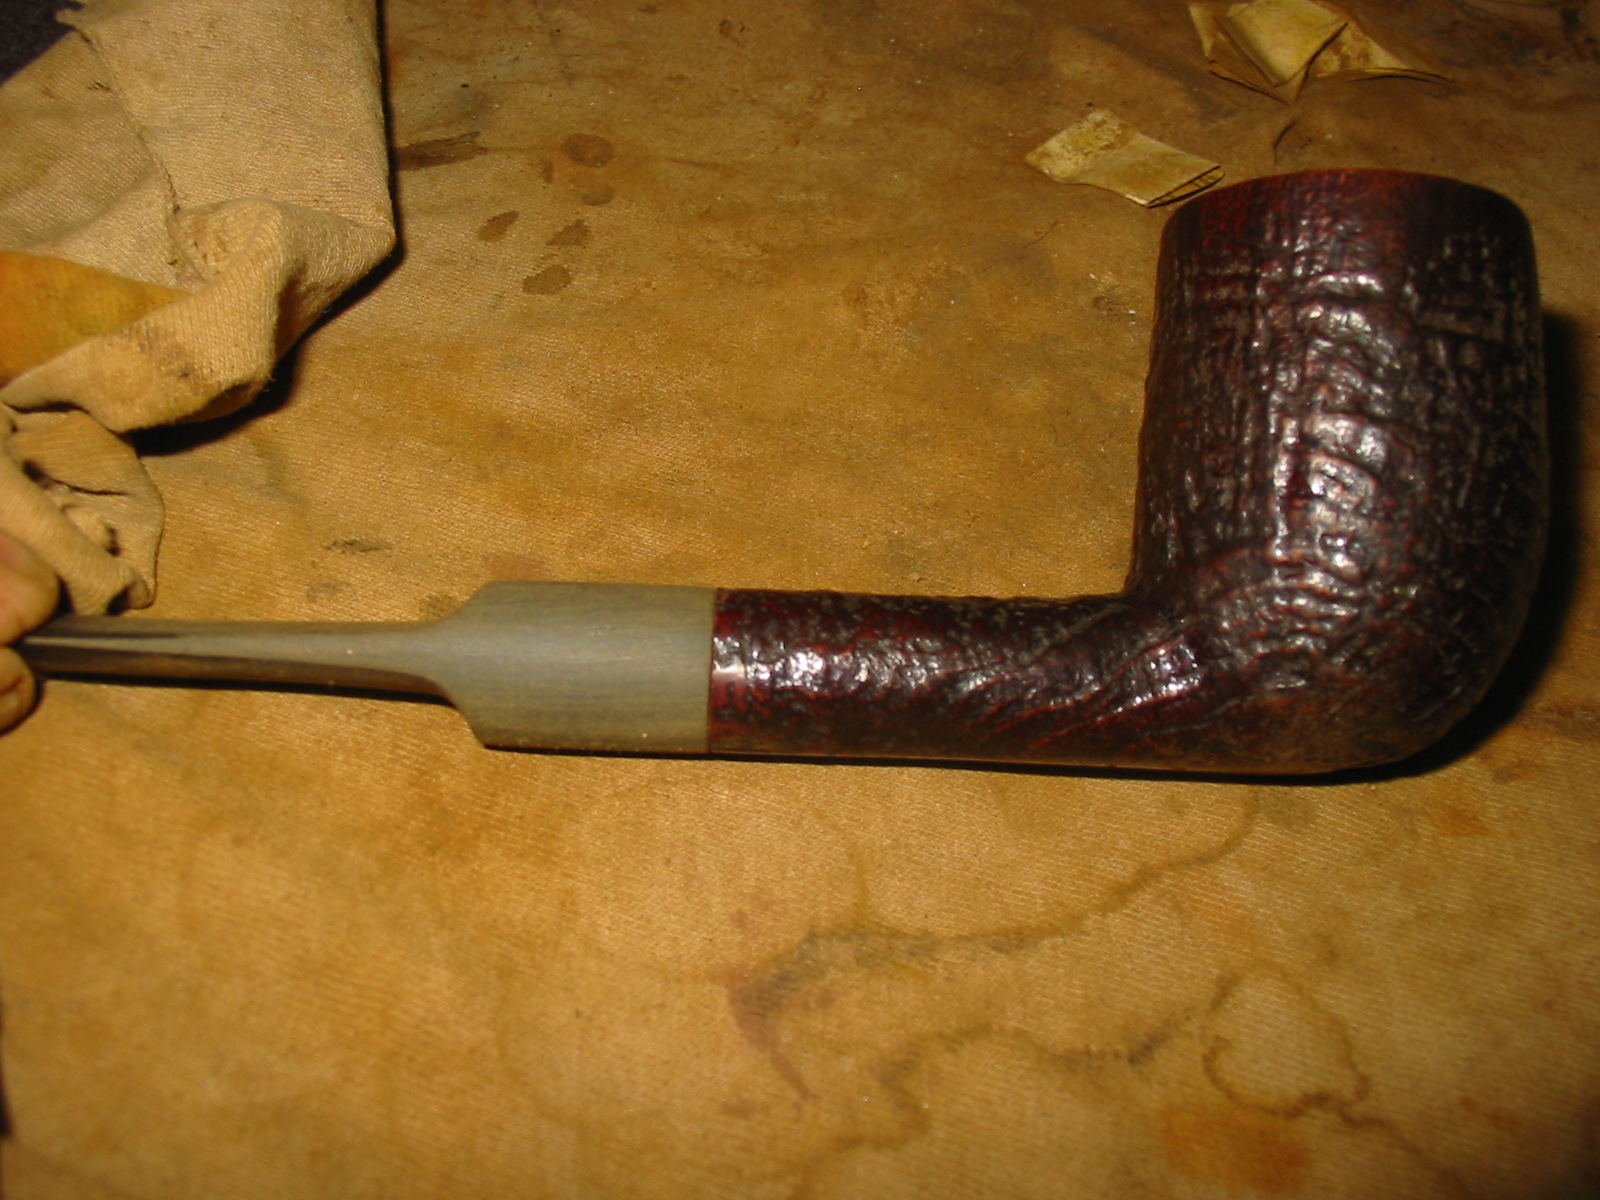
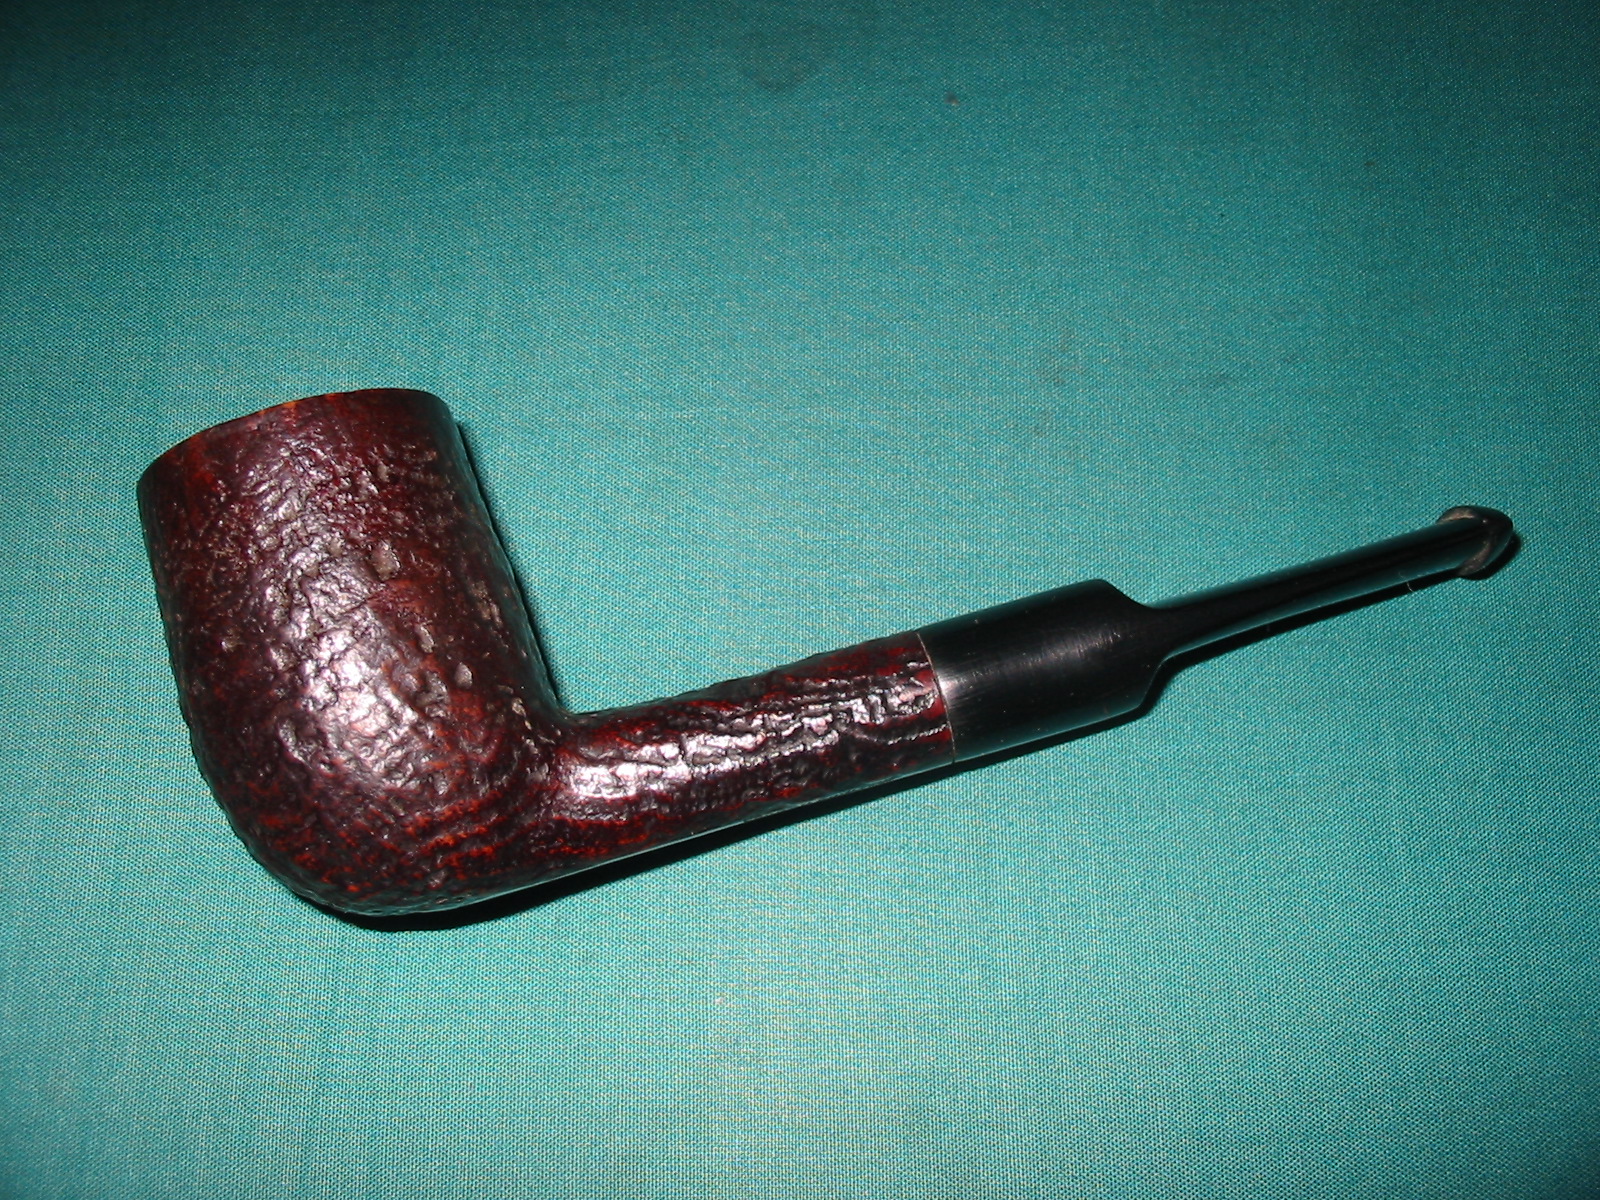
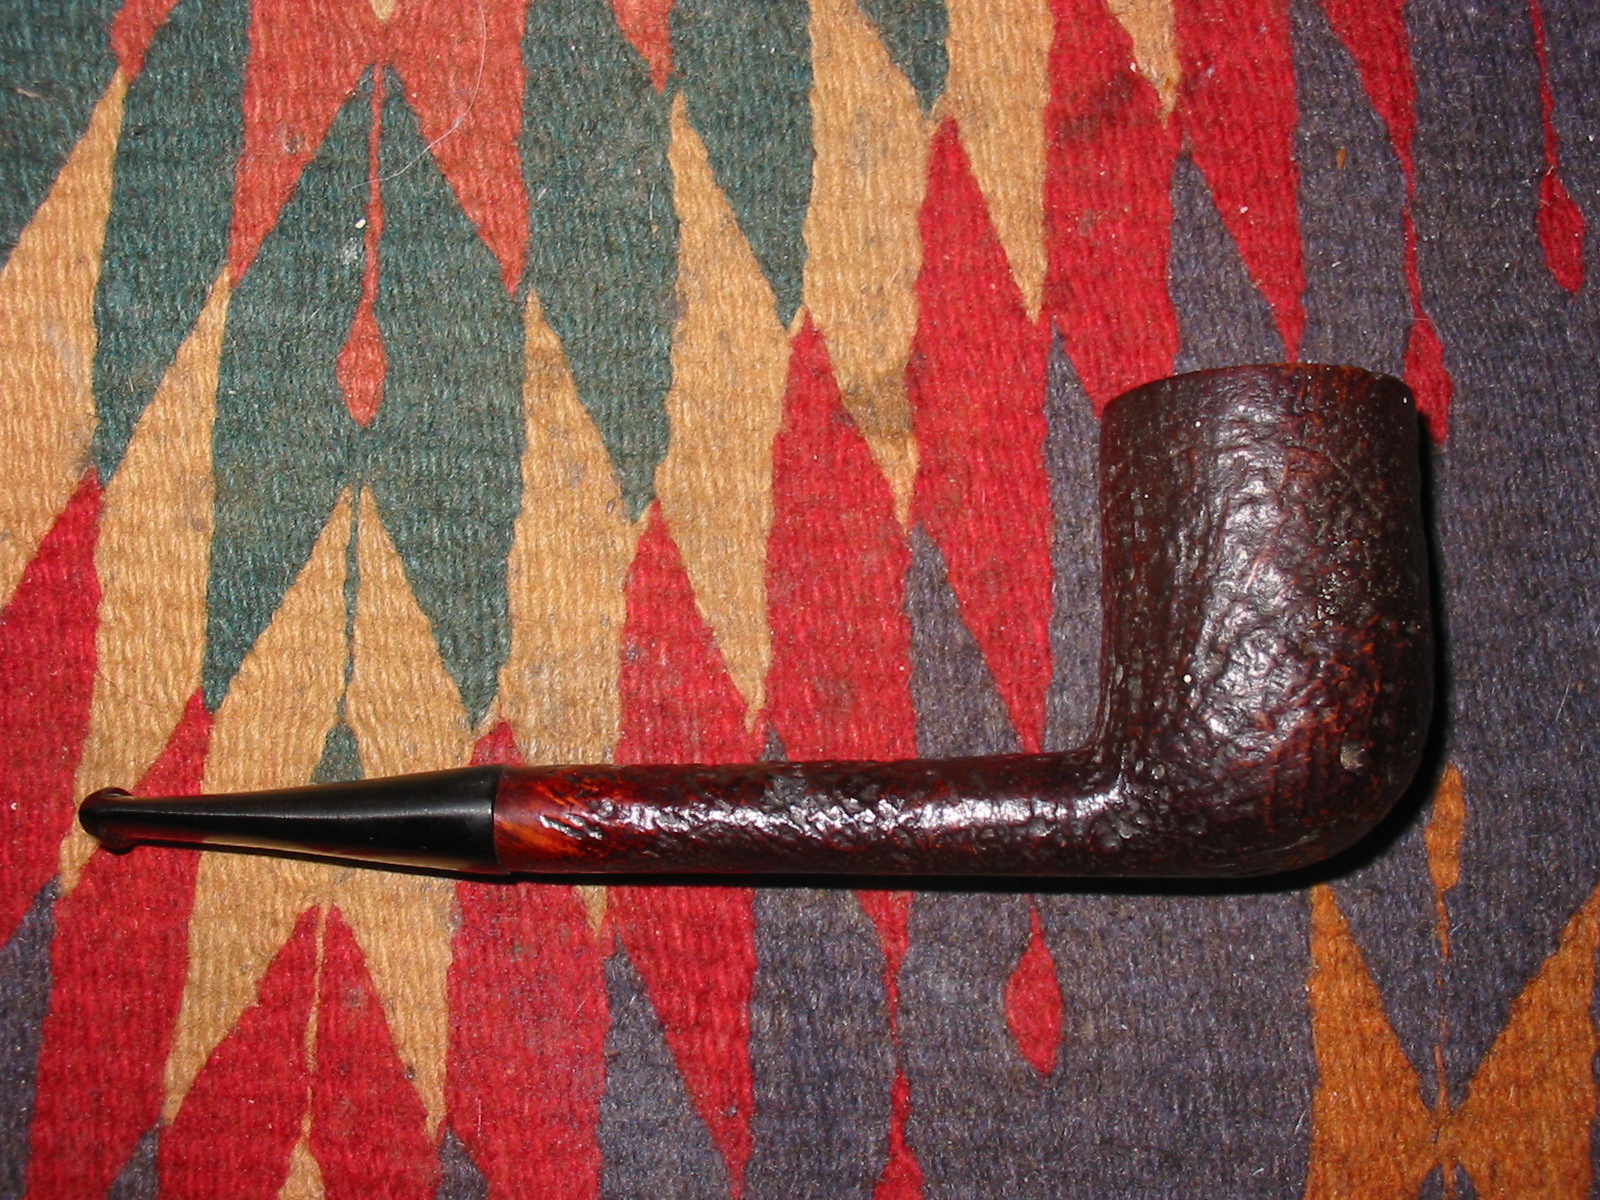
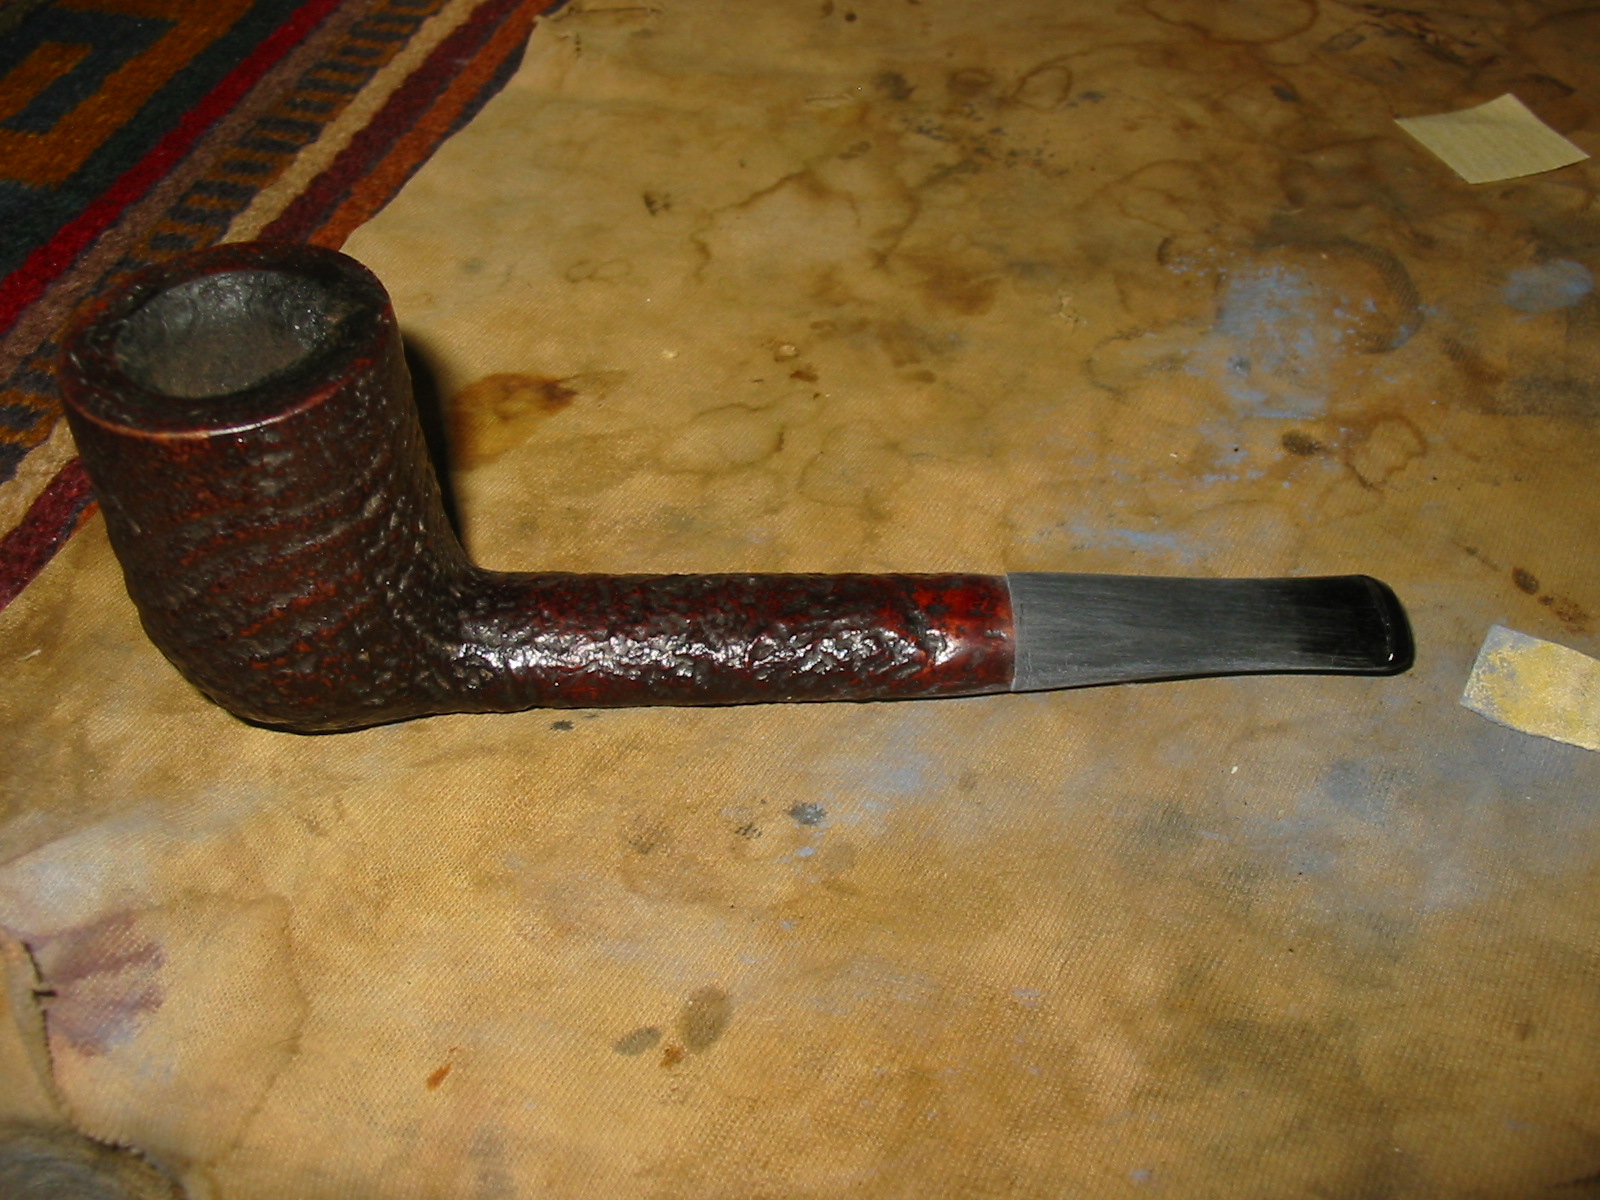
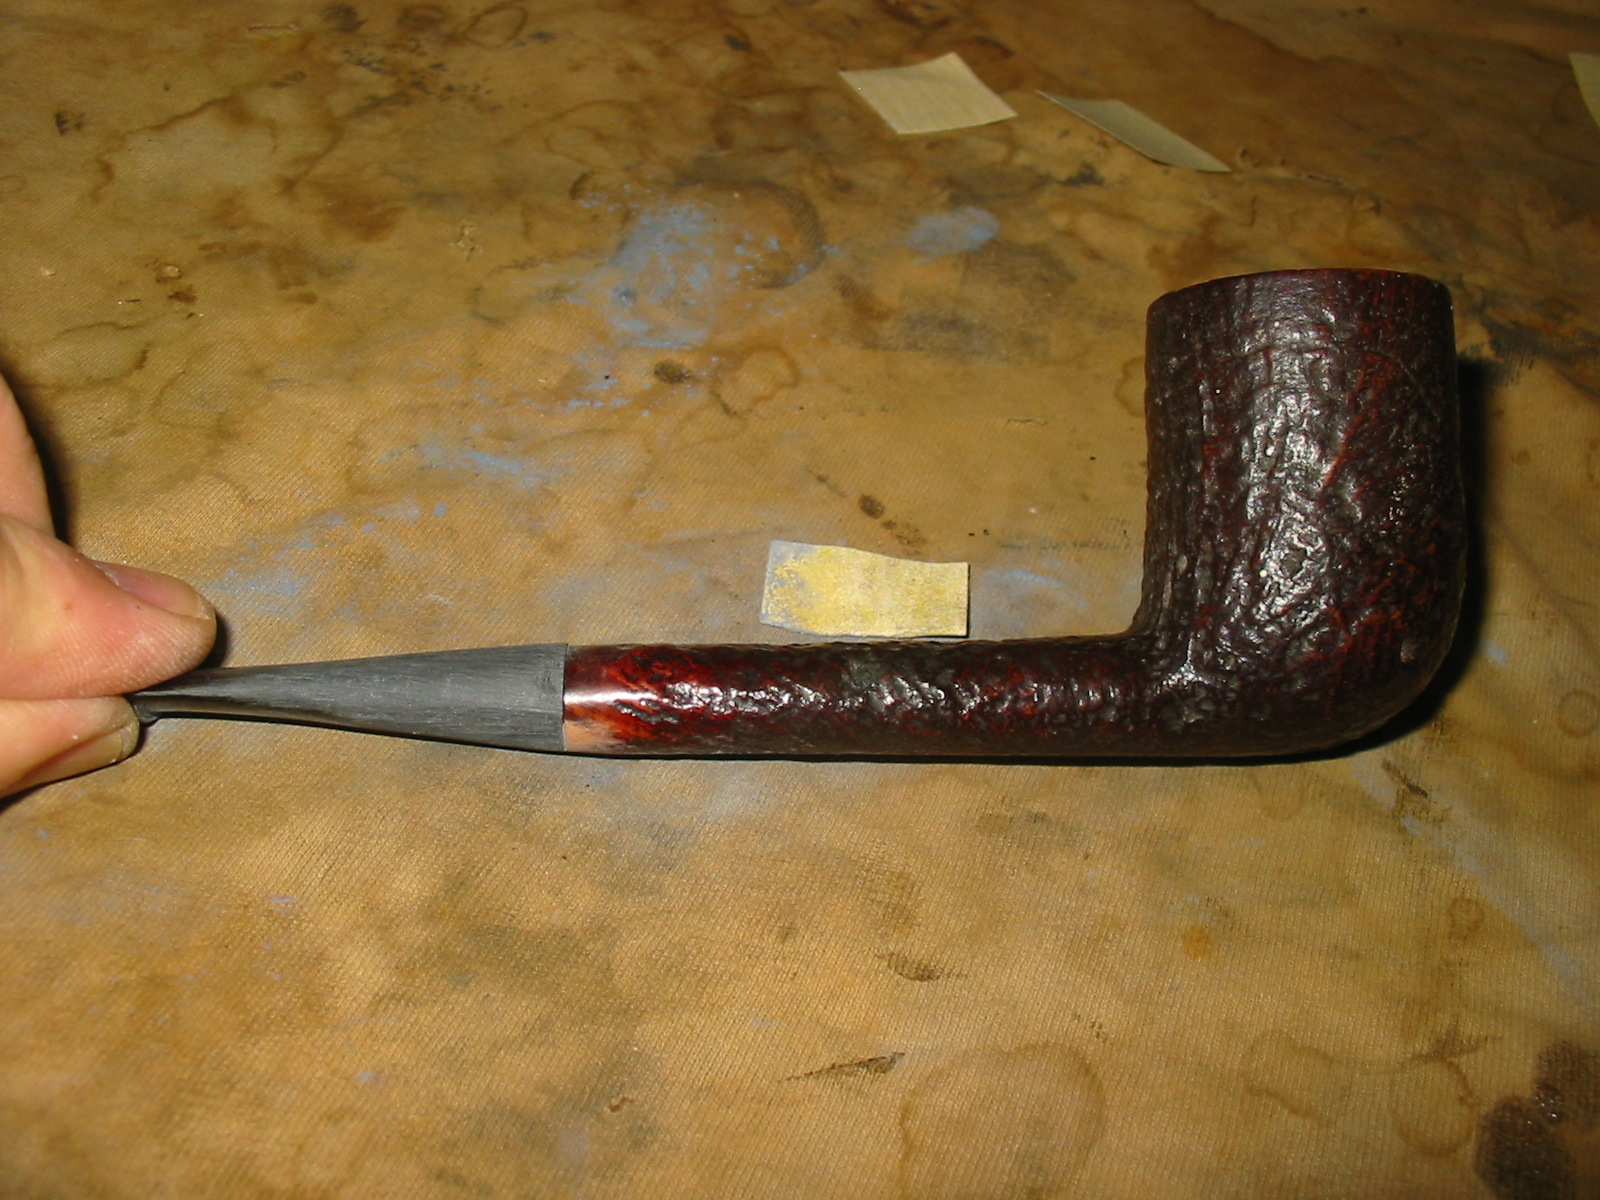
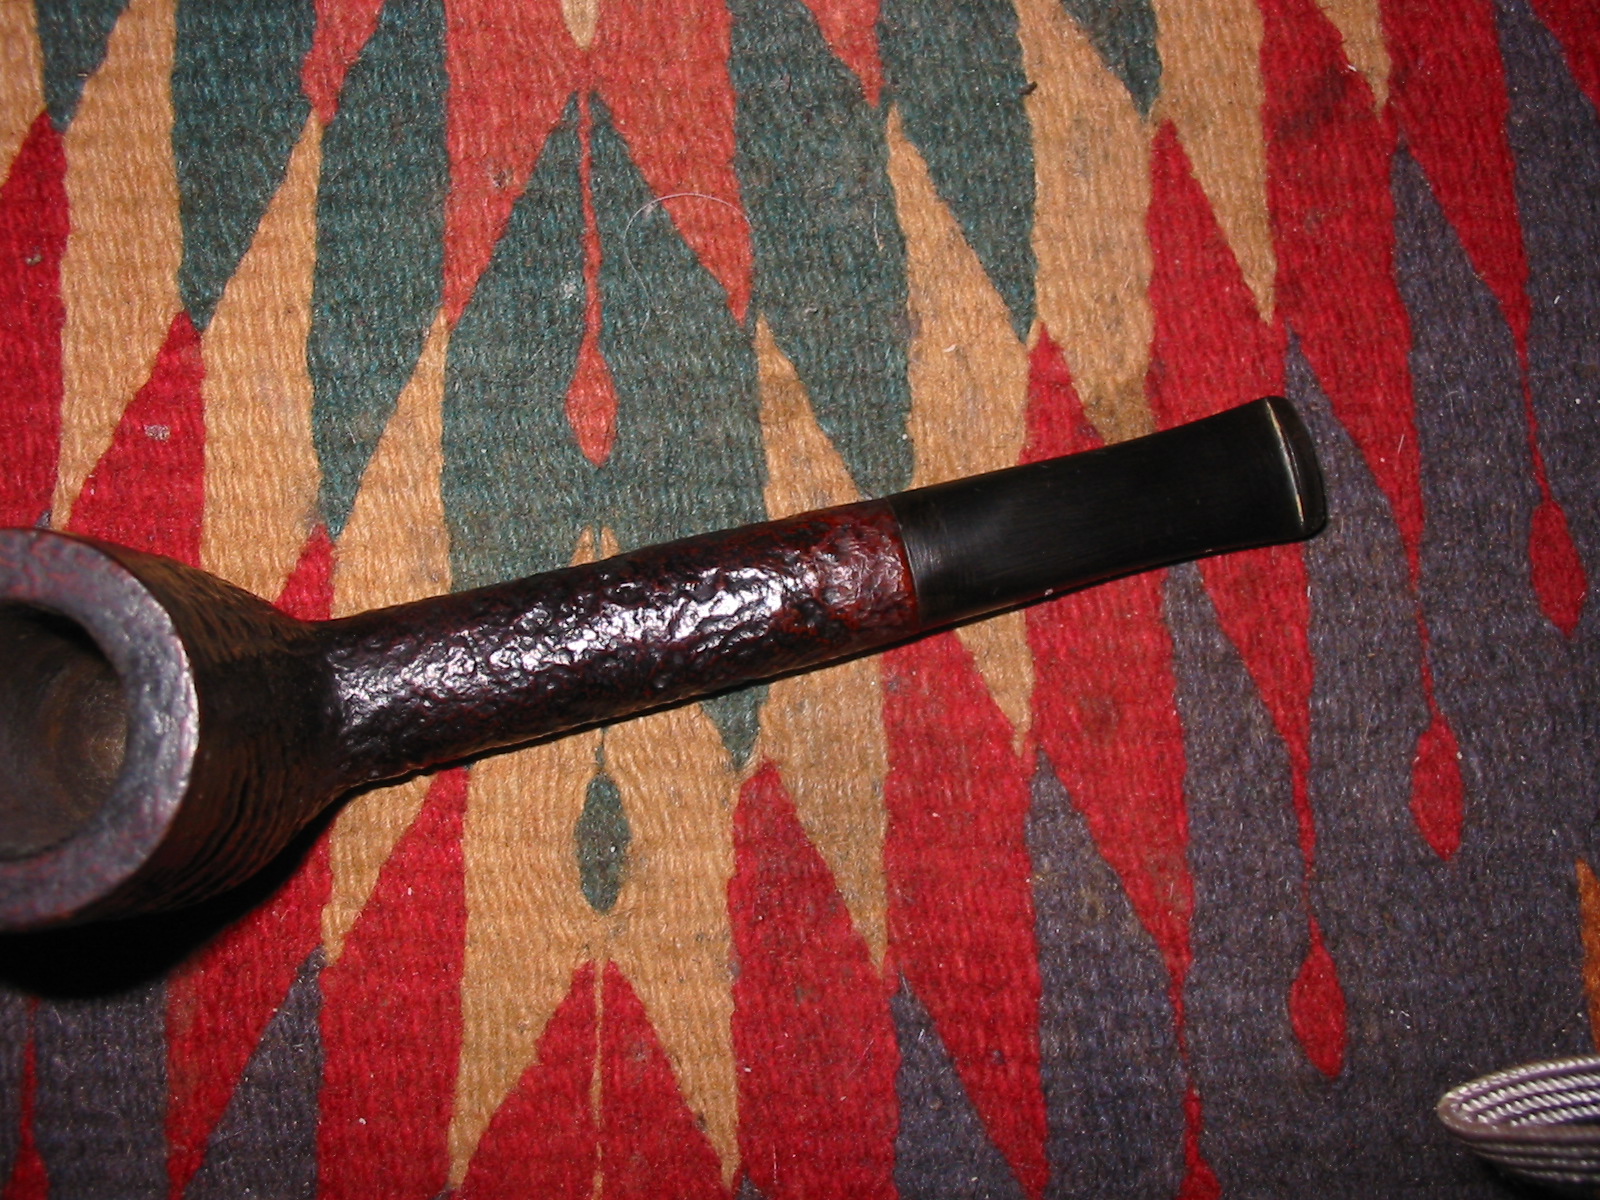
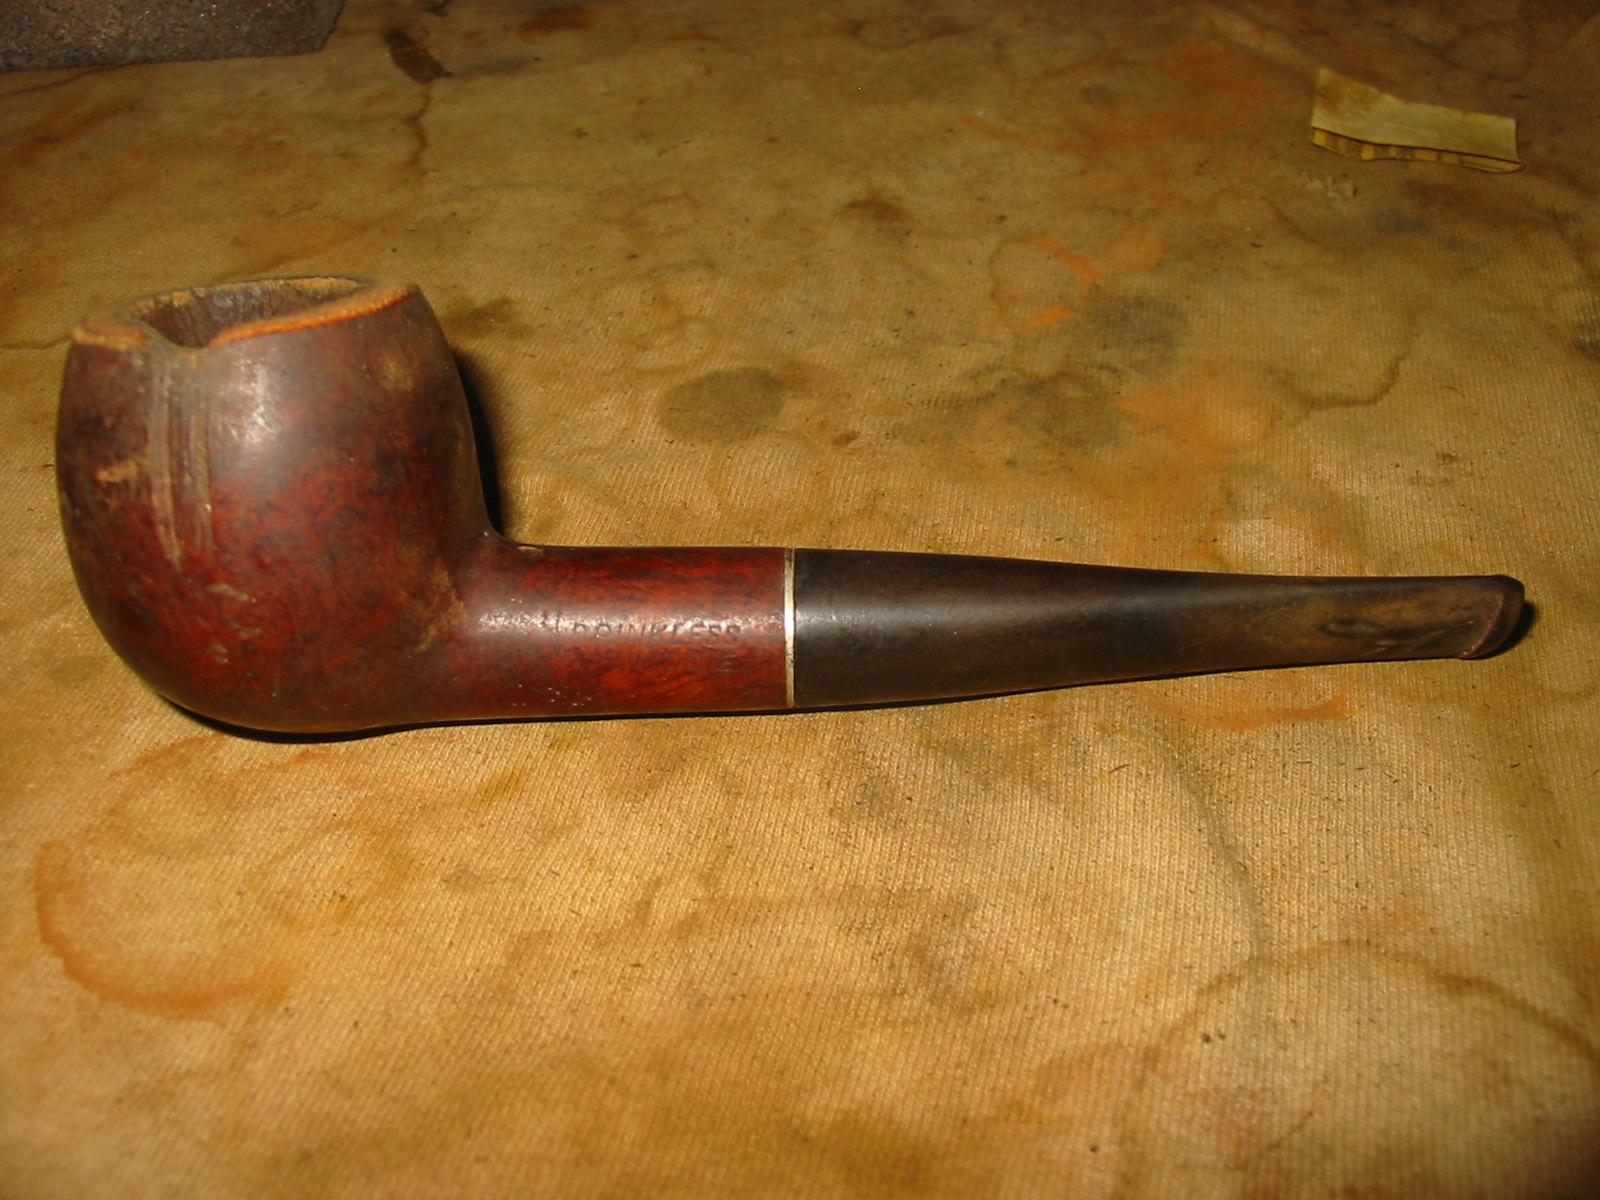
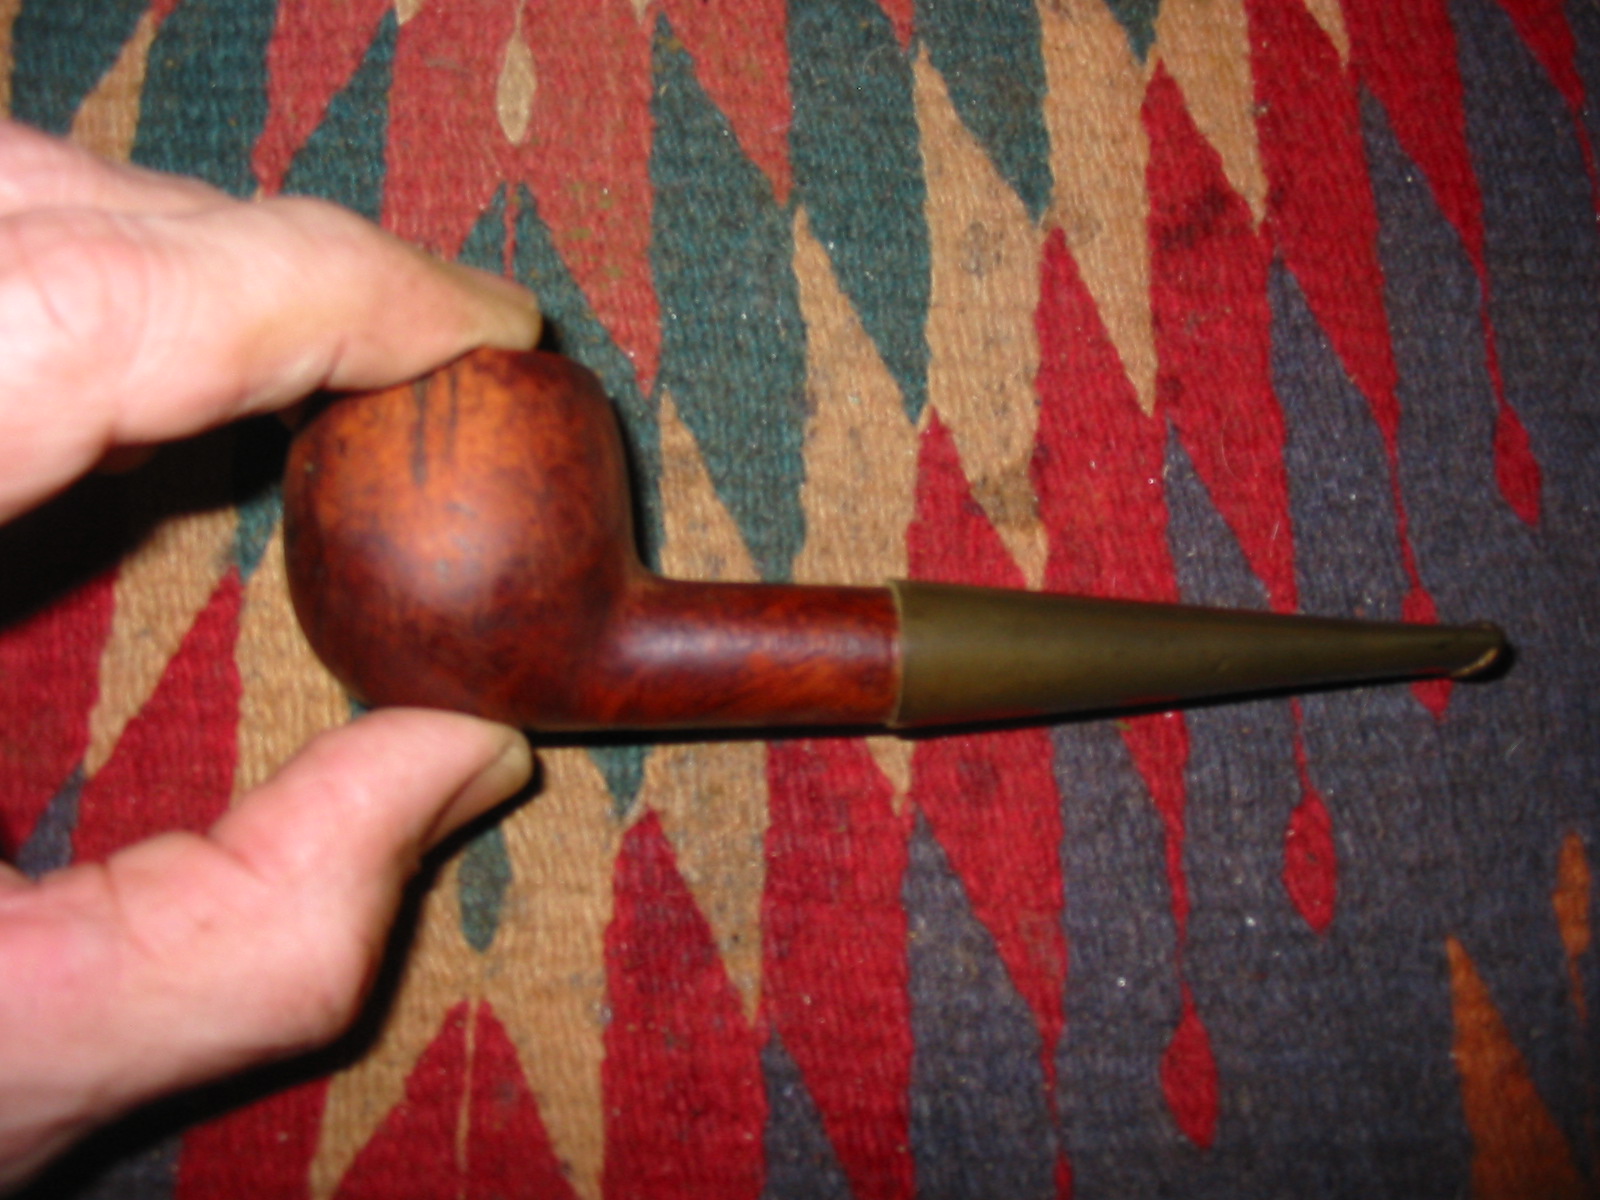
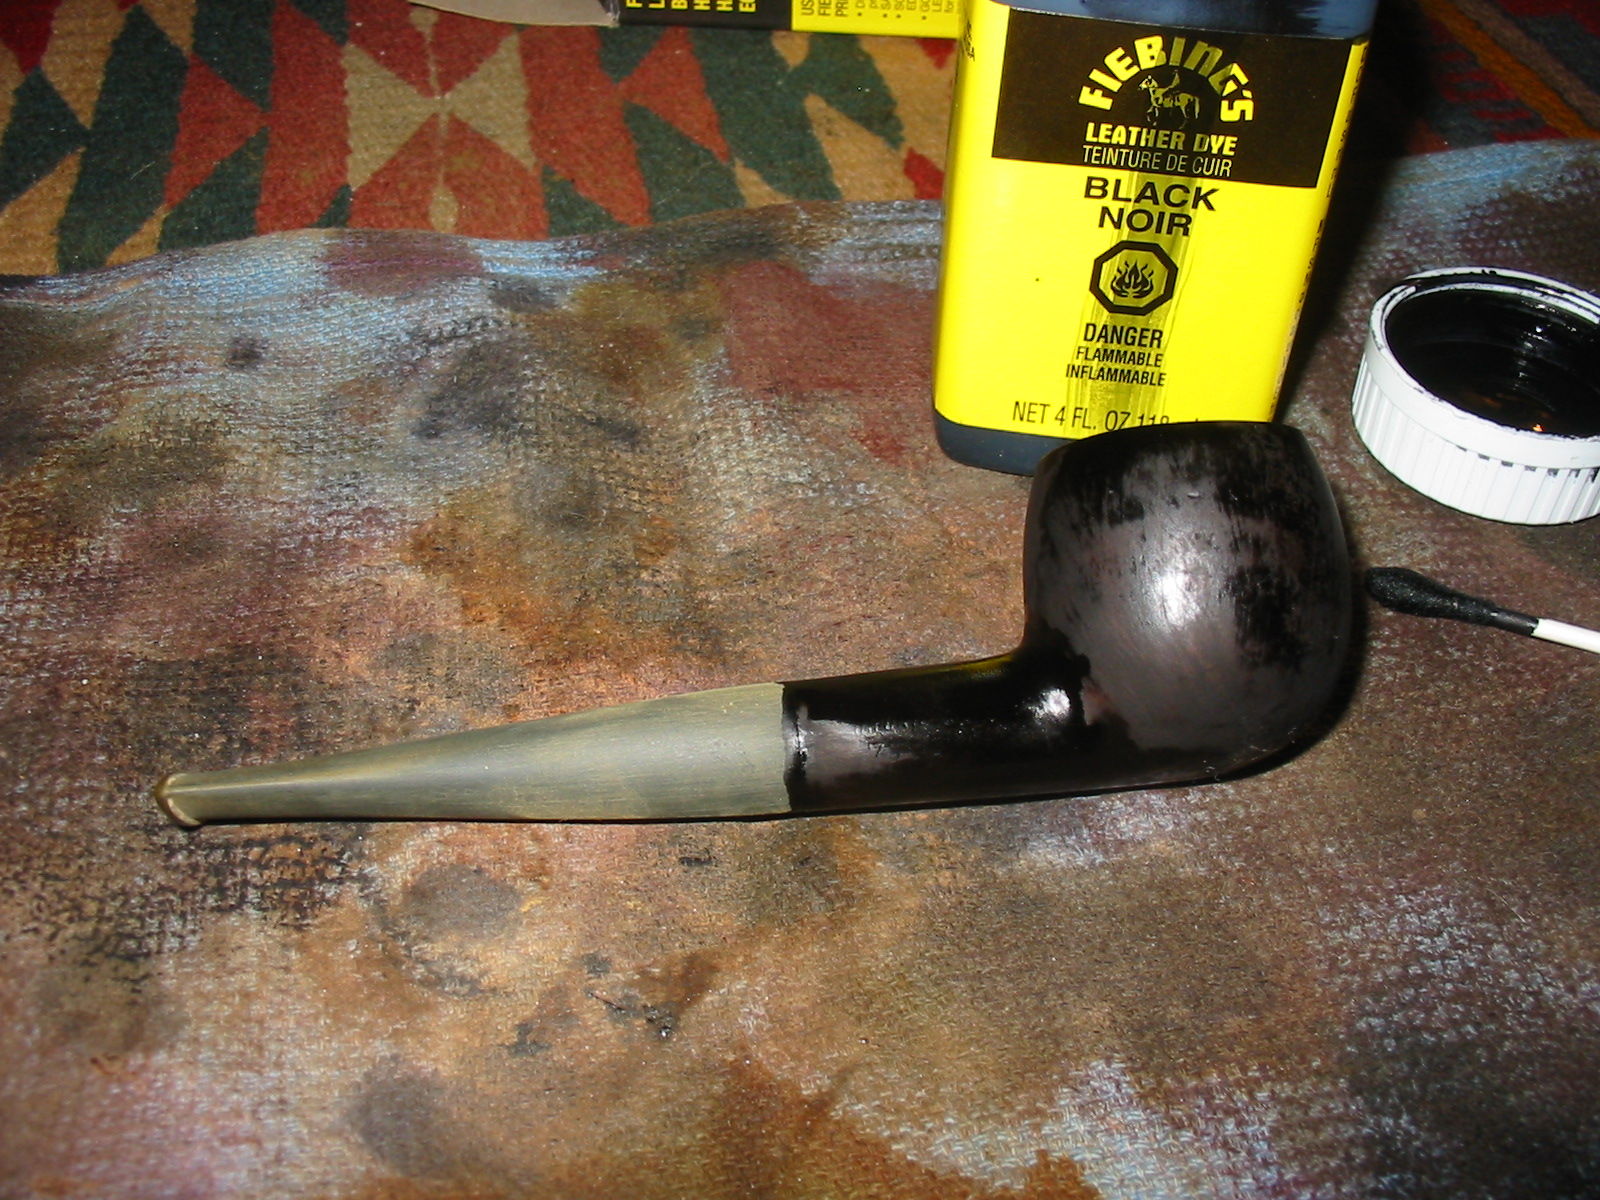
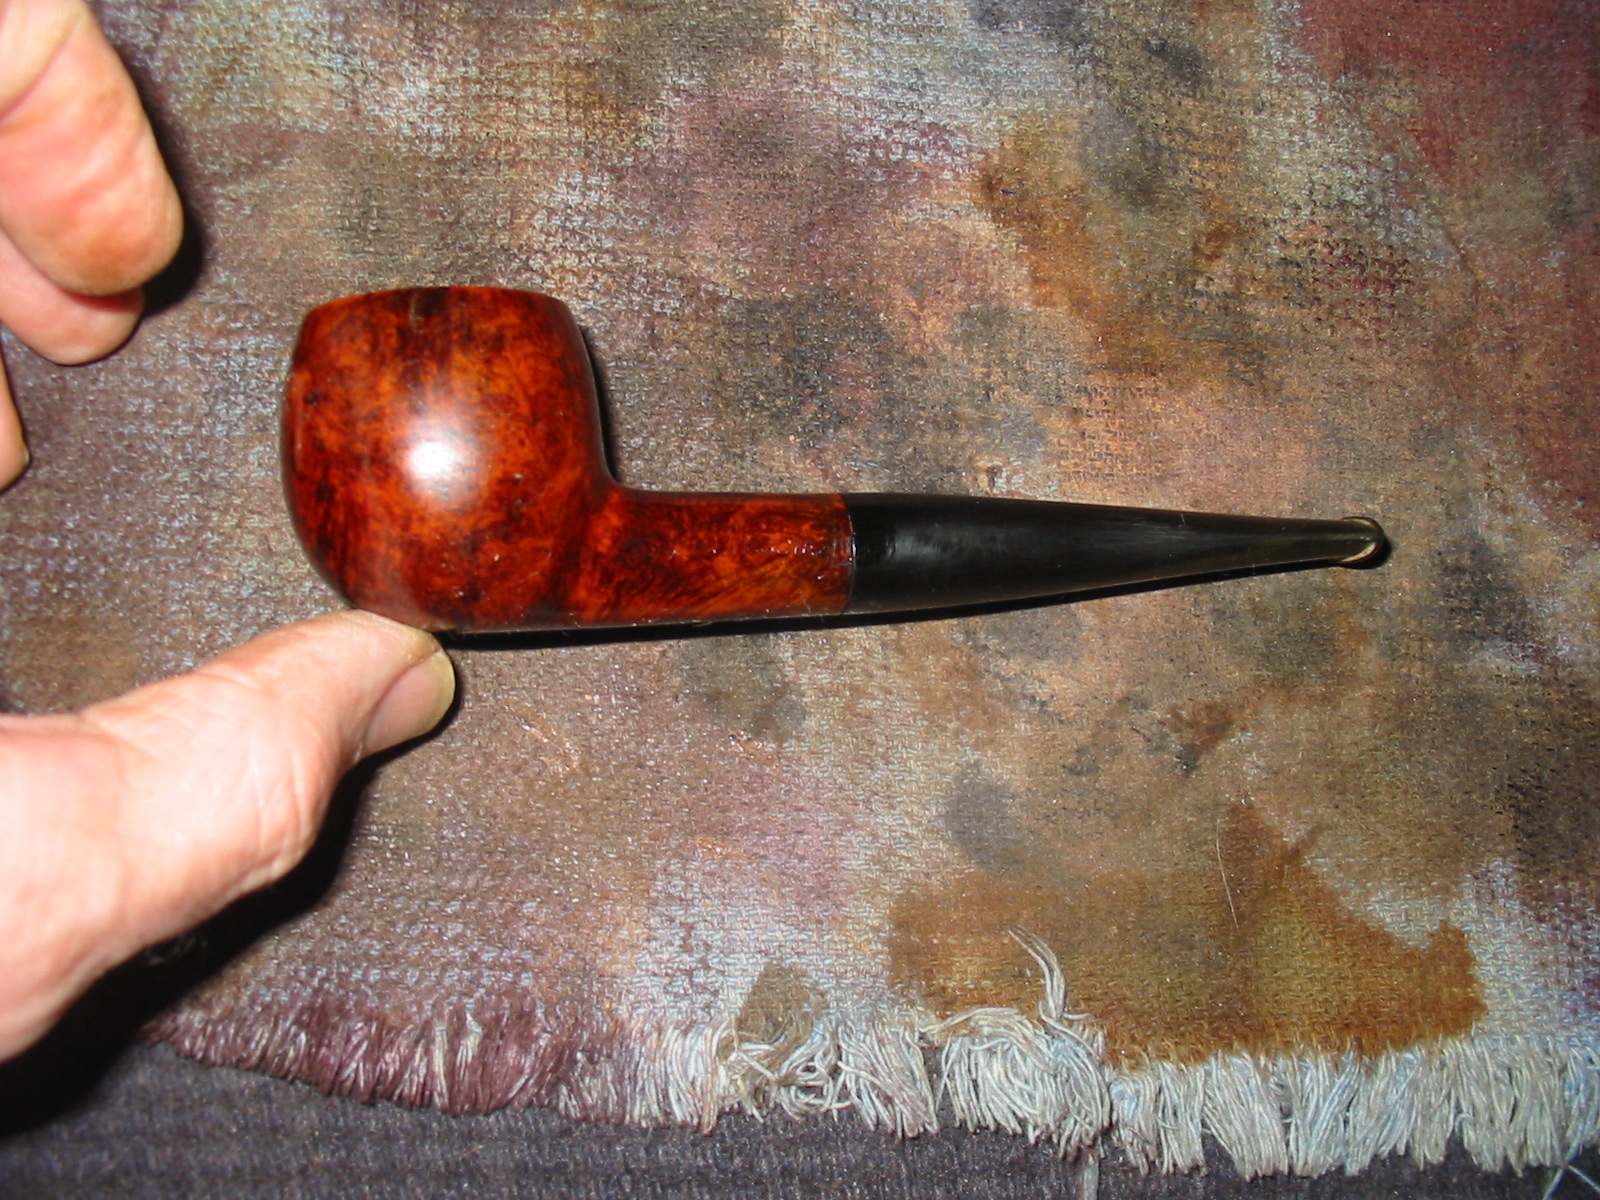
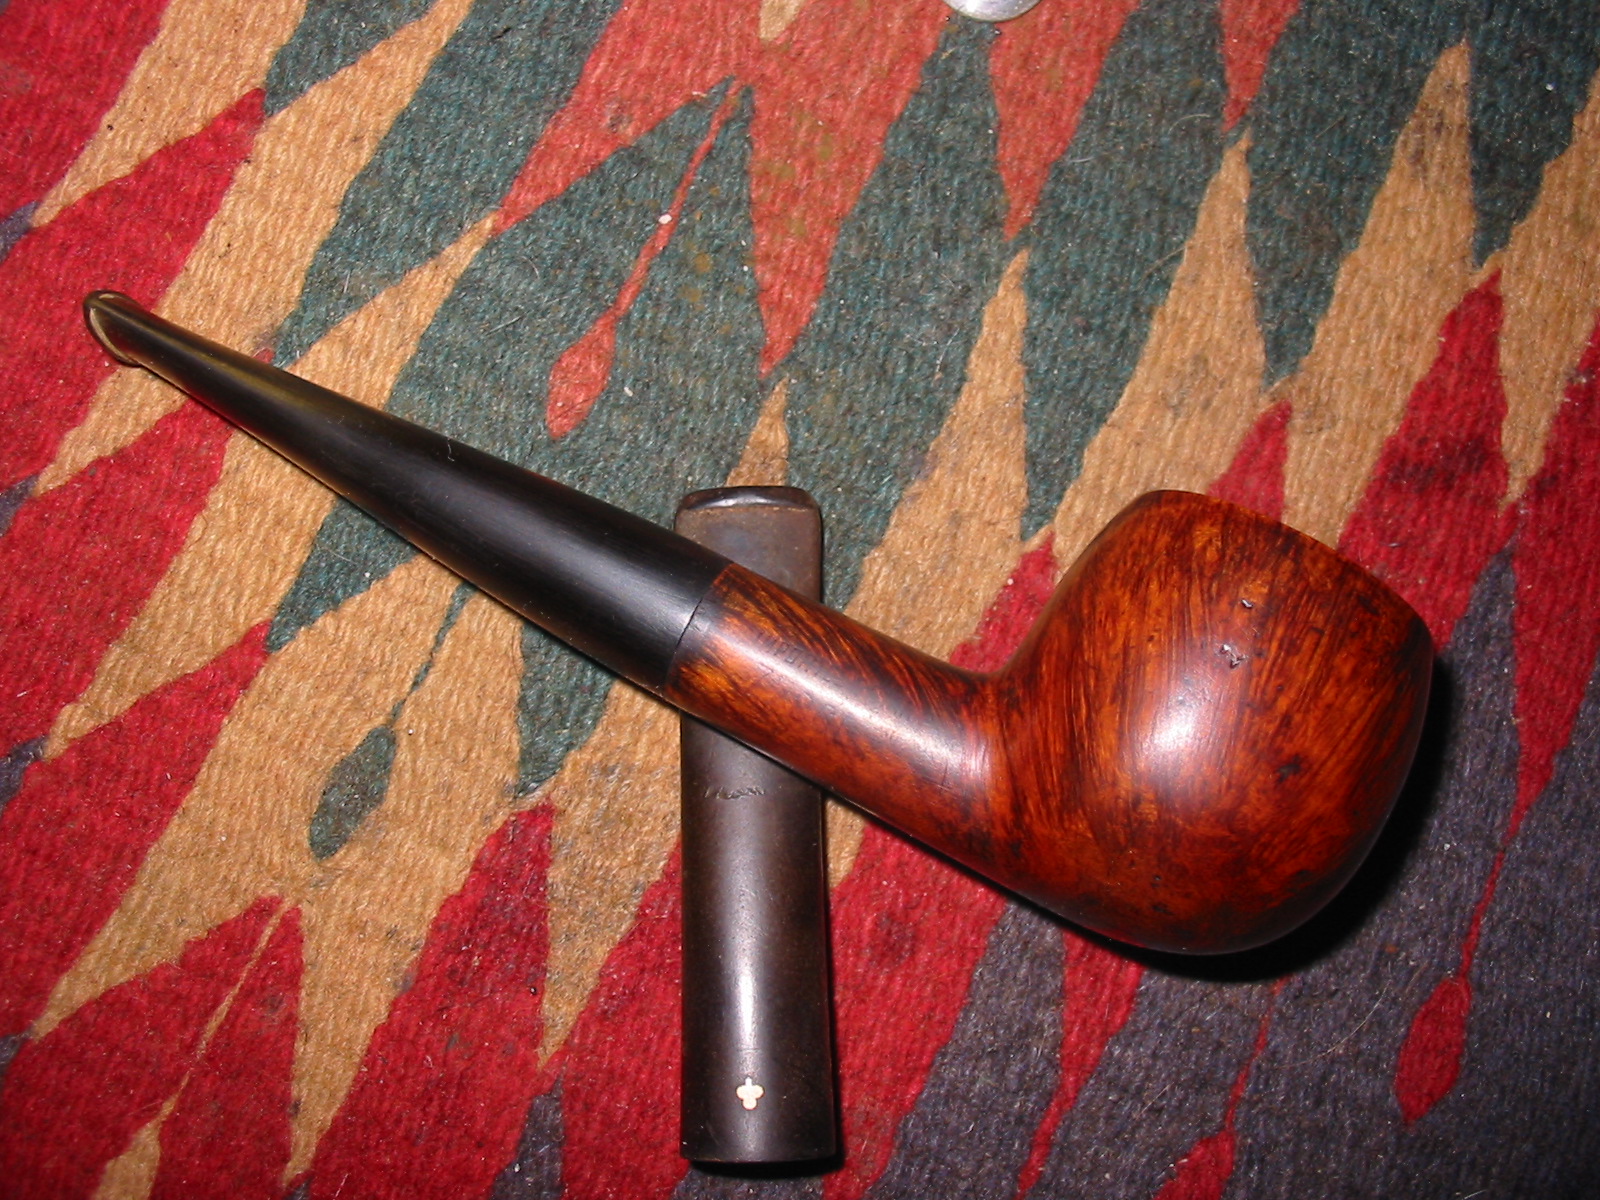
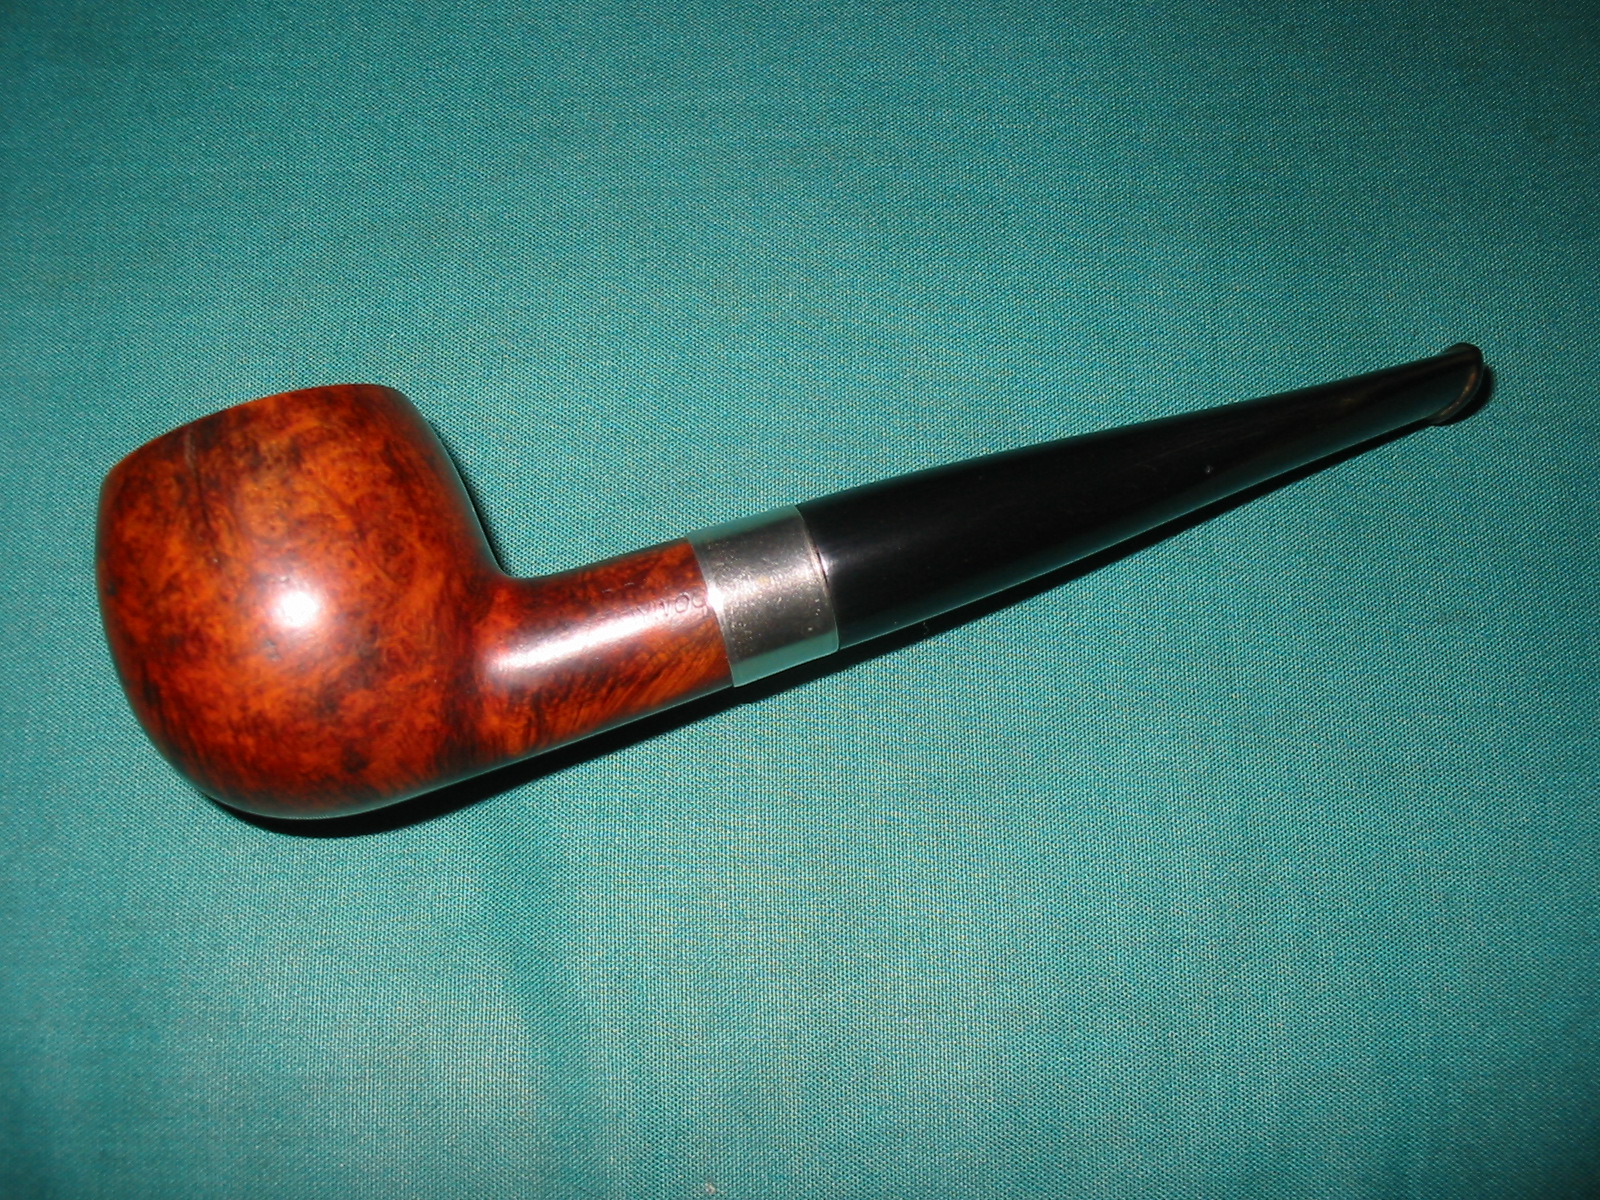
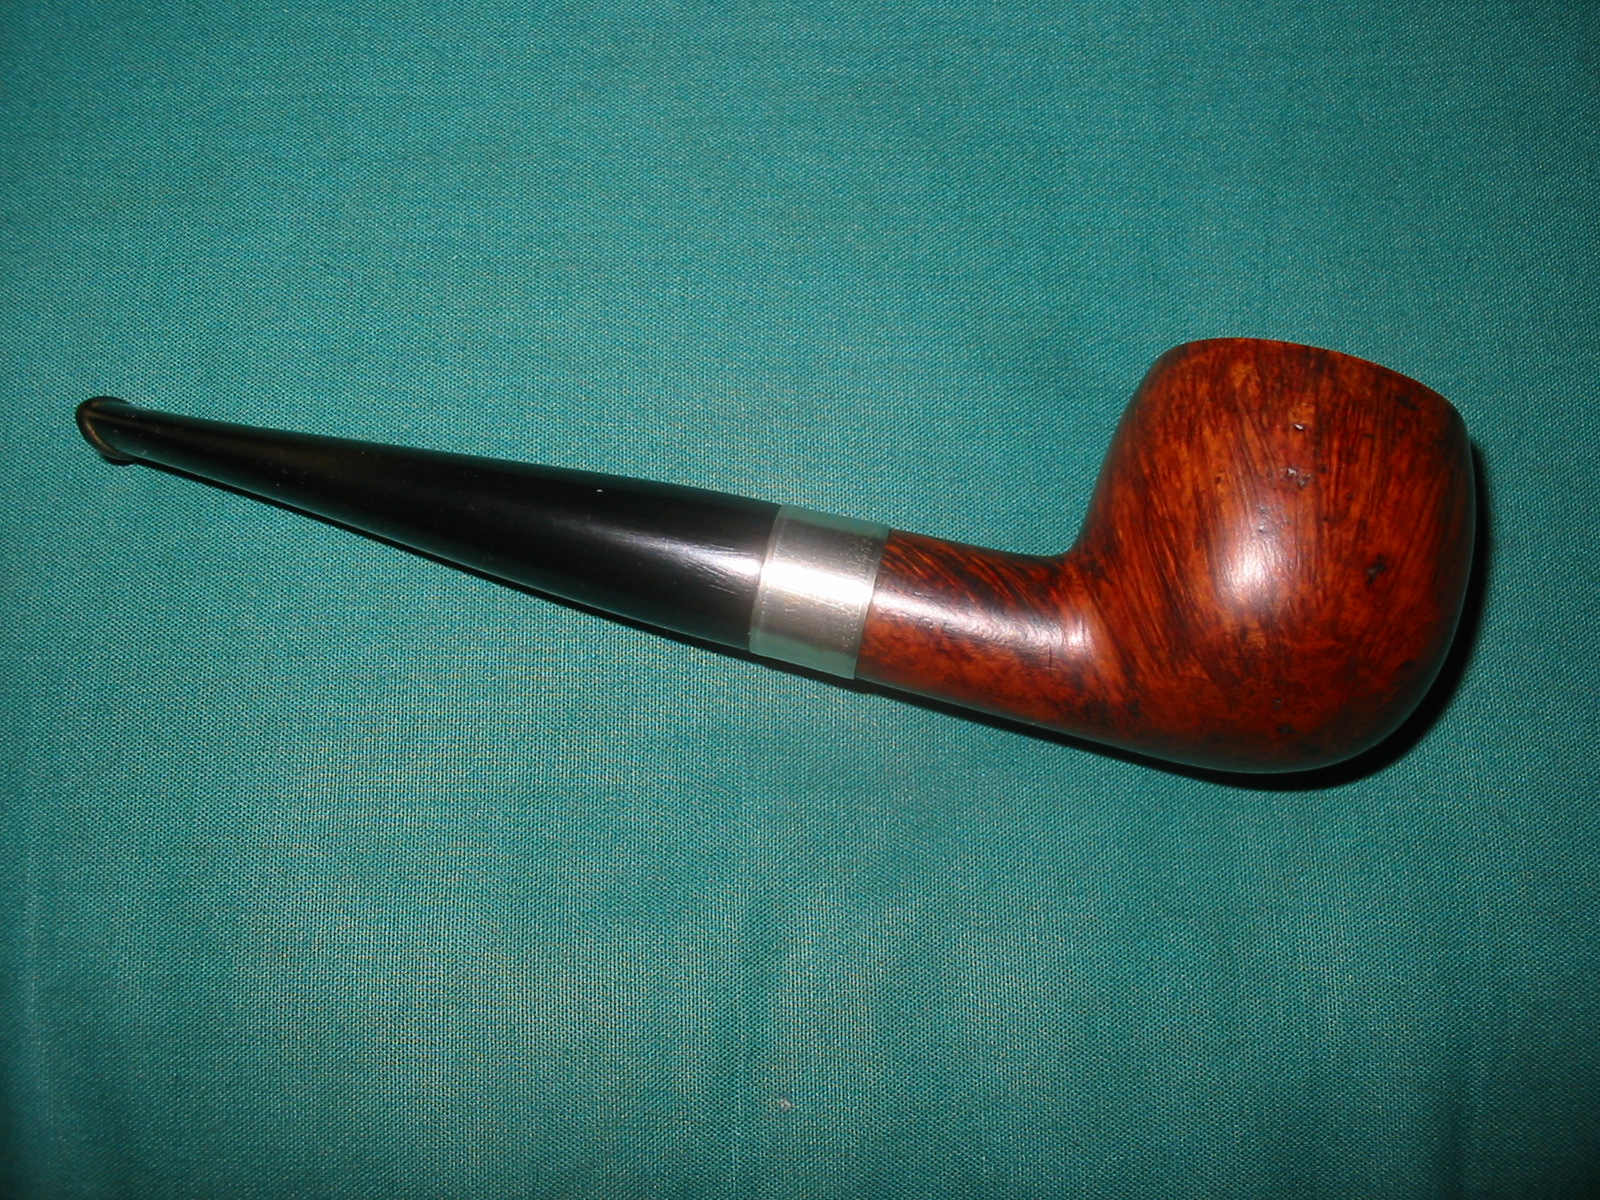
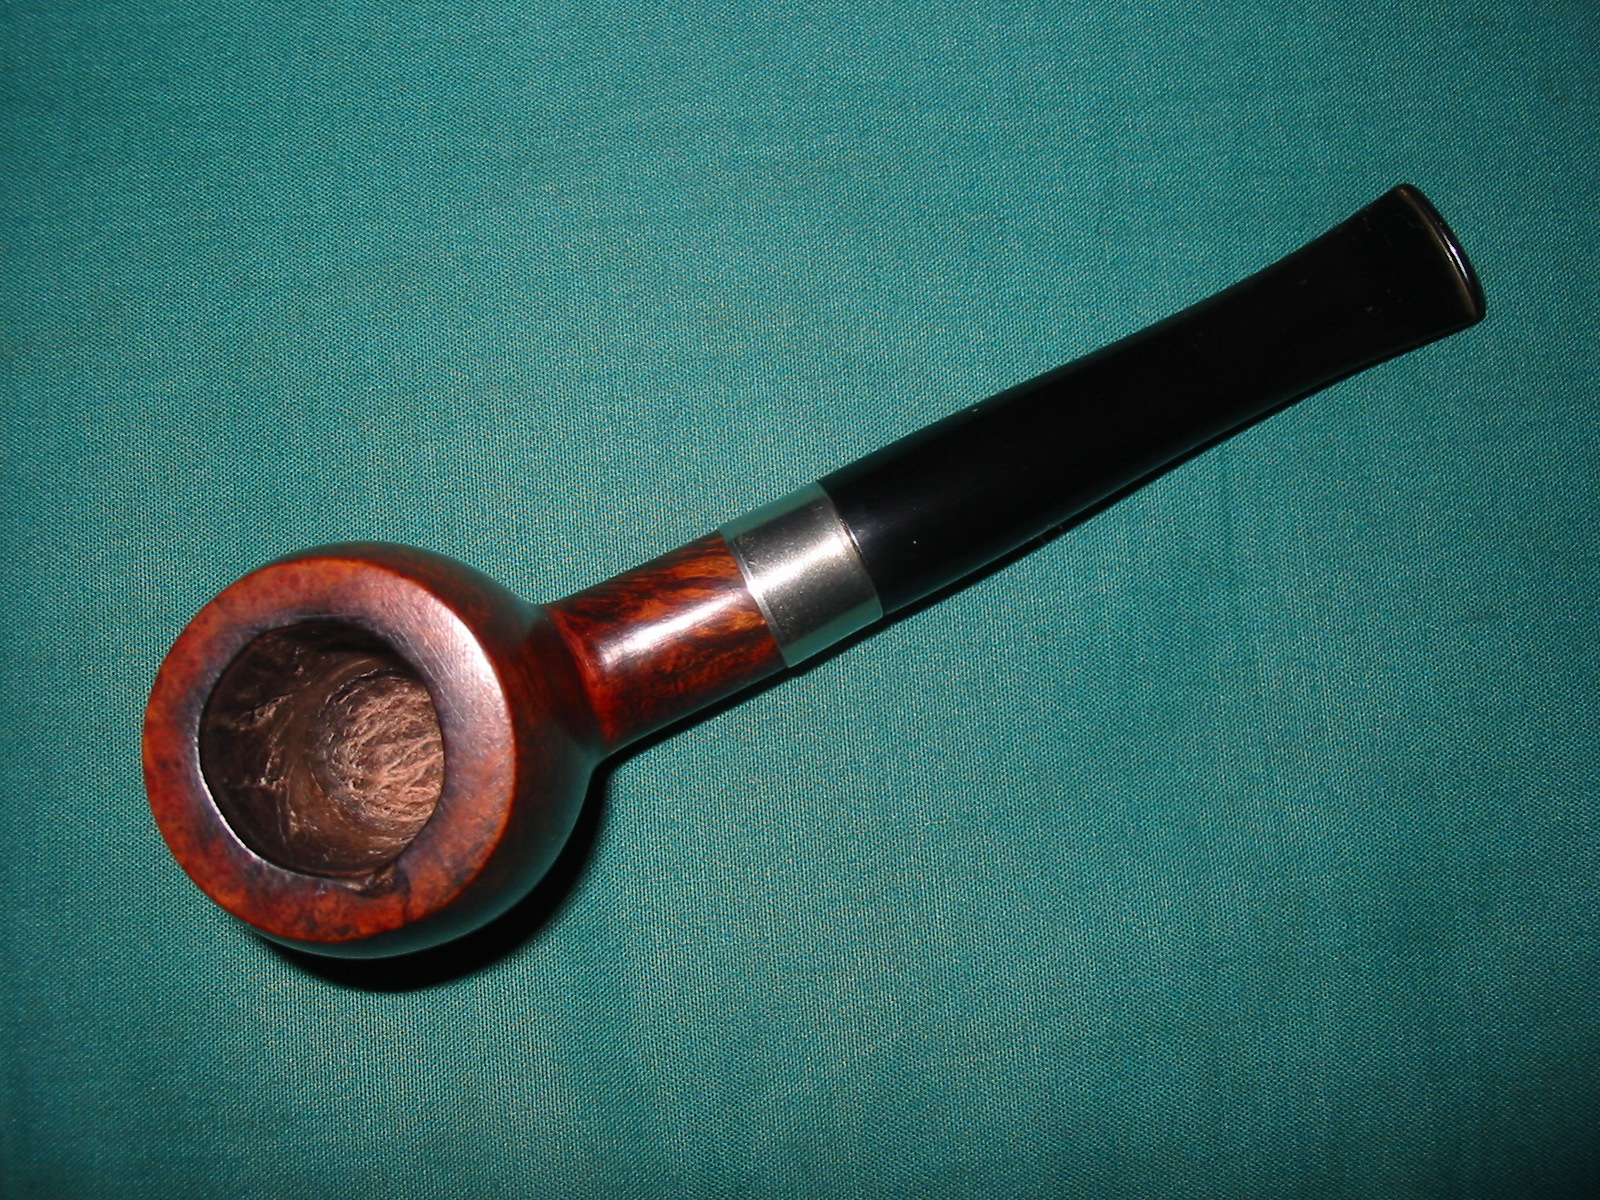
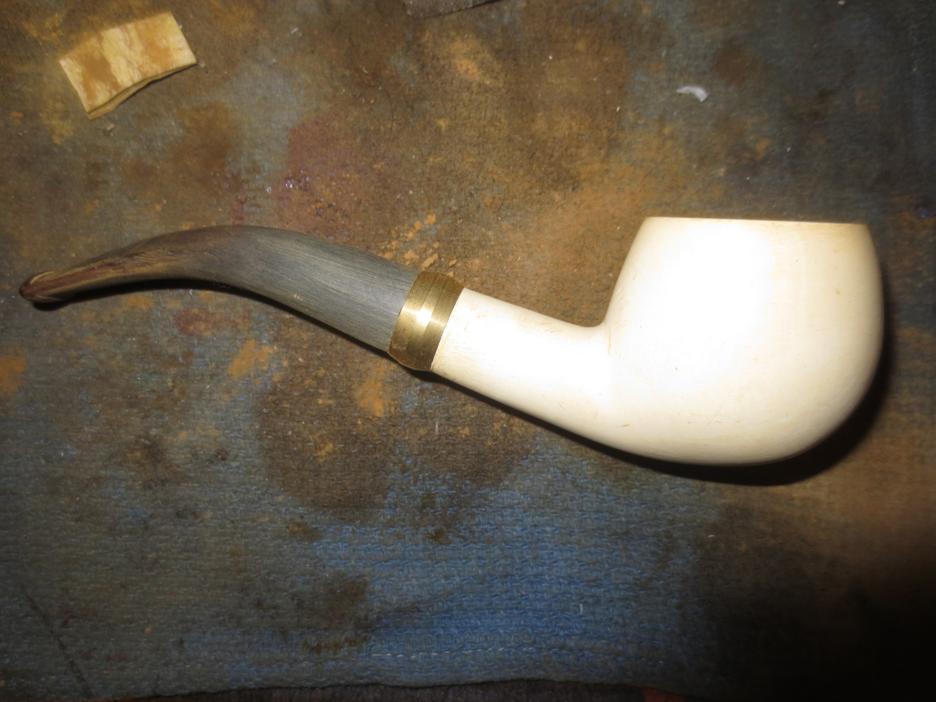
I finished shaping and fitting the stem and took the photos below to give an idea of what the pipe would look like when finished. The bend in the stem is a little too much at this point and I would need to take some of the bend out. The bowl looks good with the brass fitting and the stem length works with this bowl.band11

band12

band13 
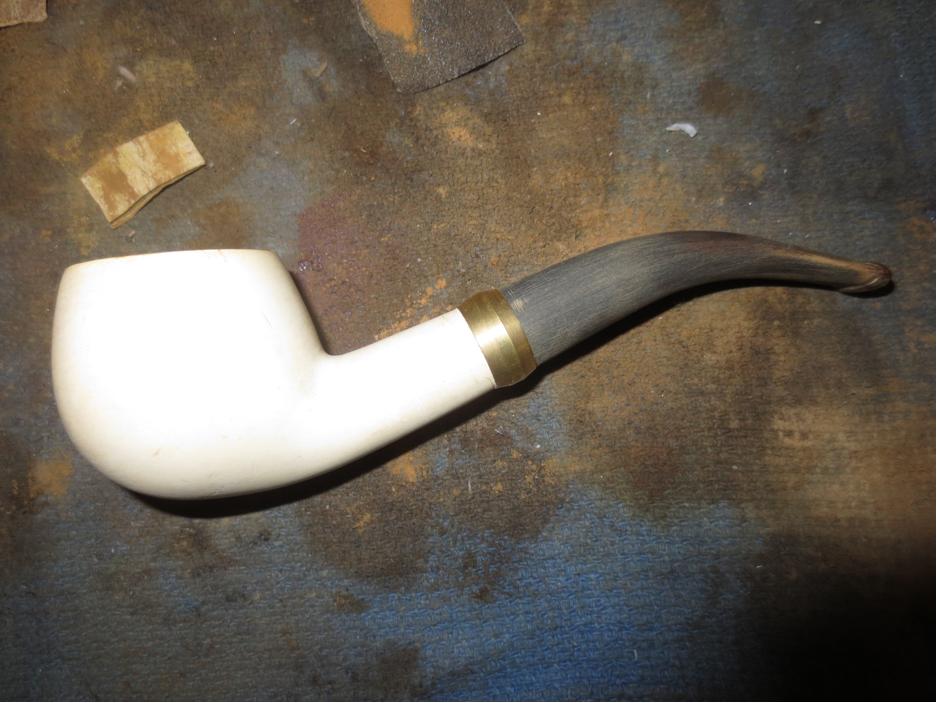
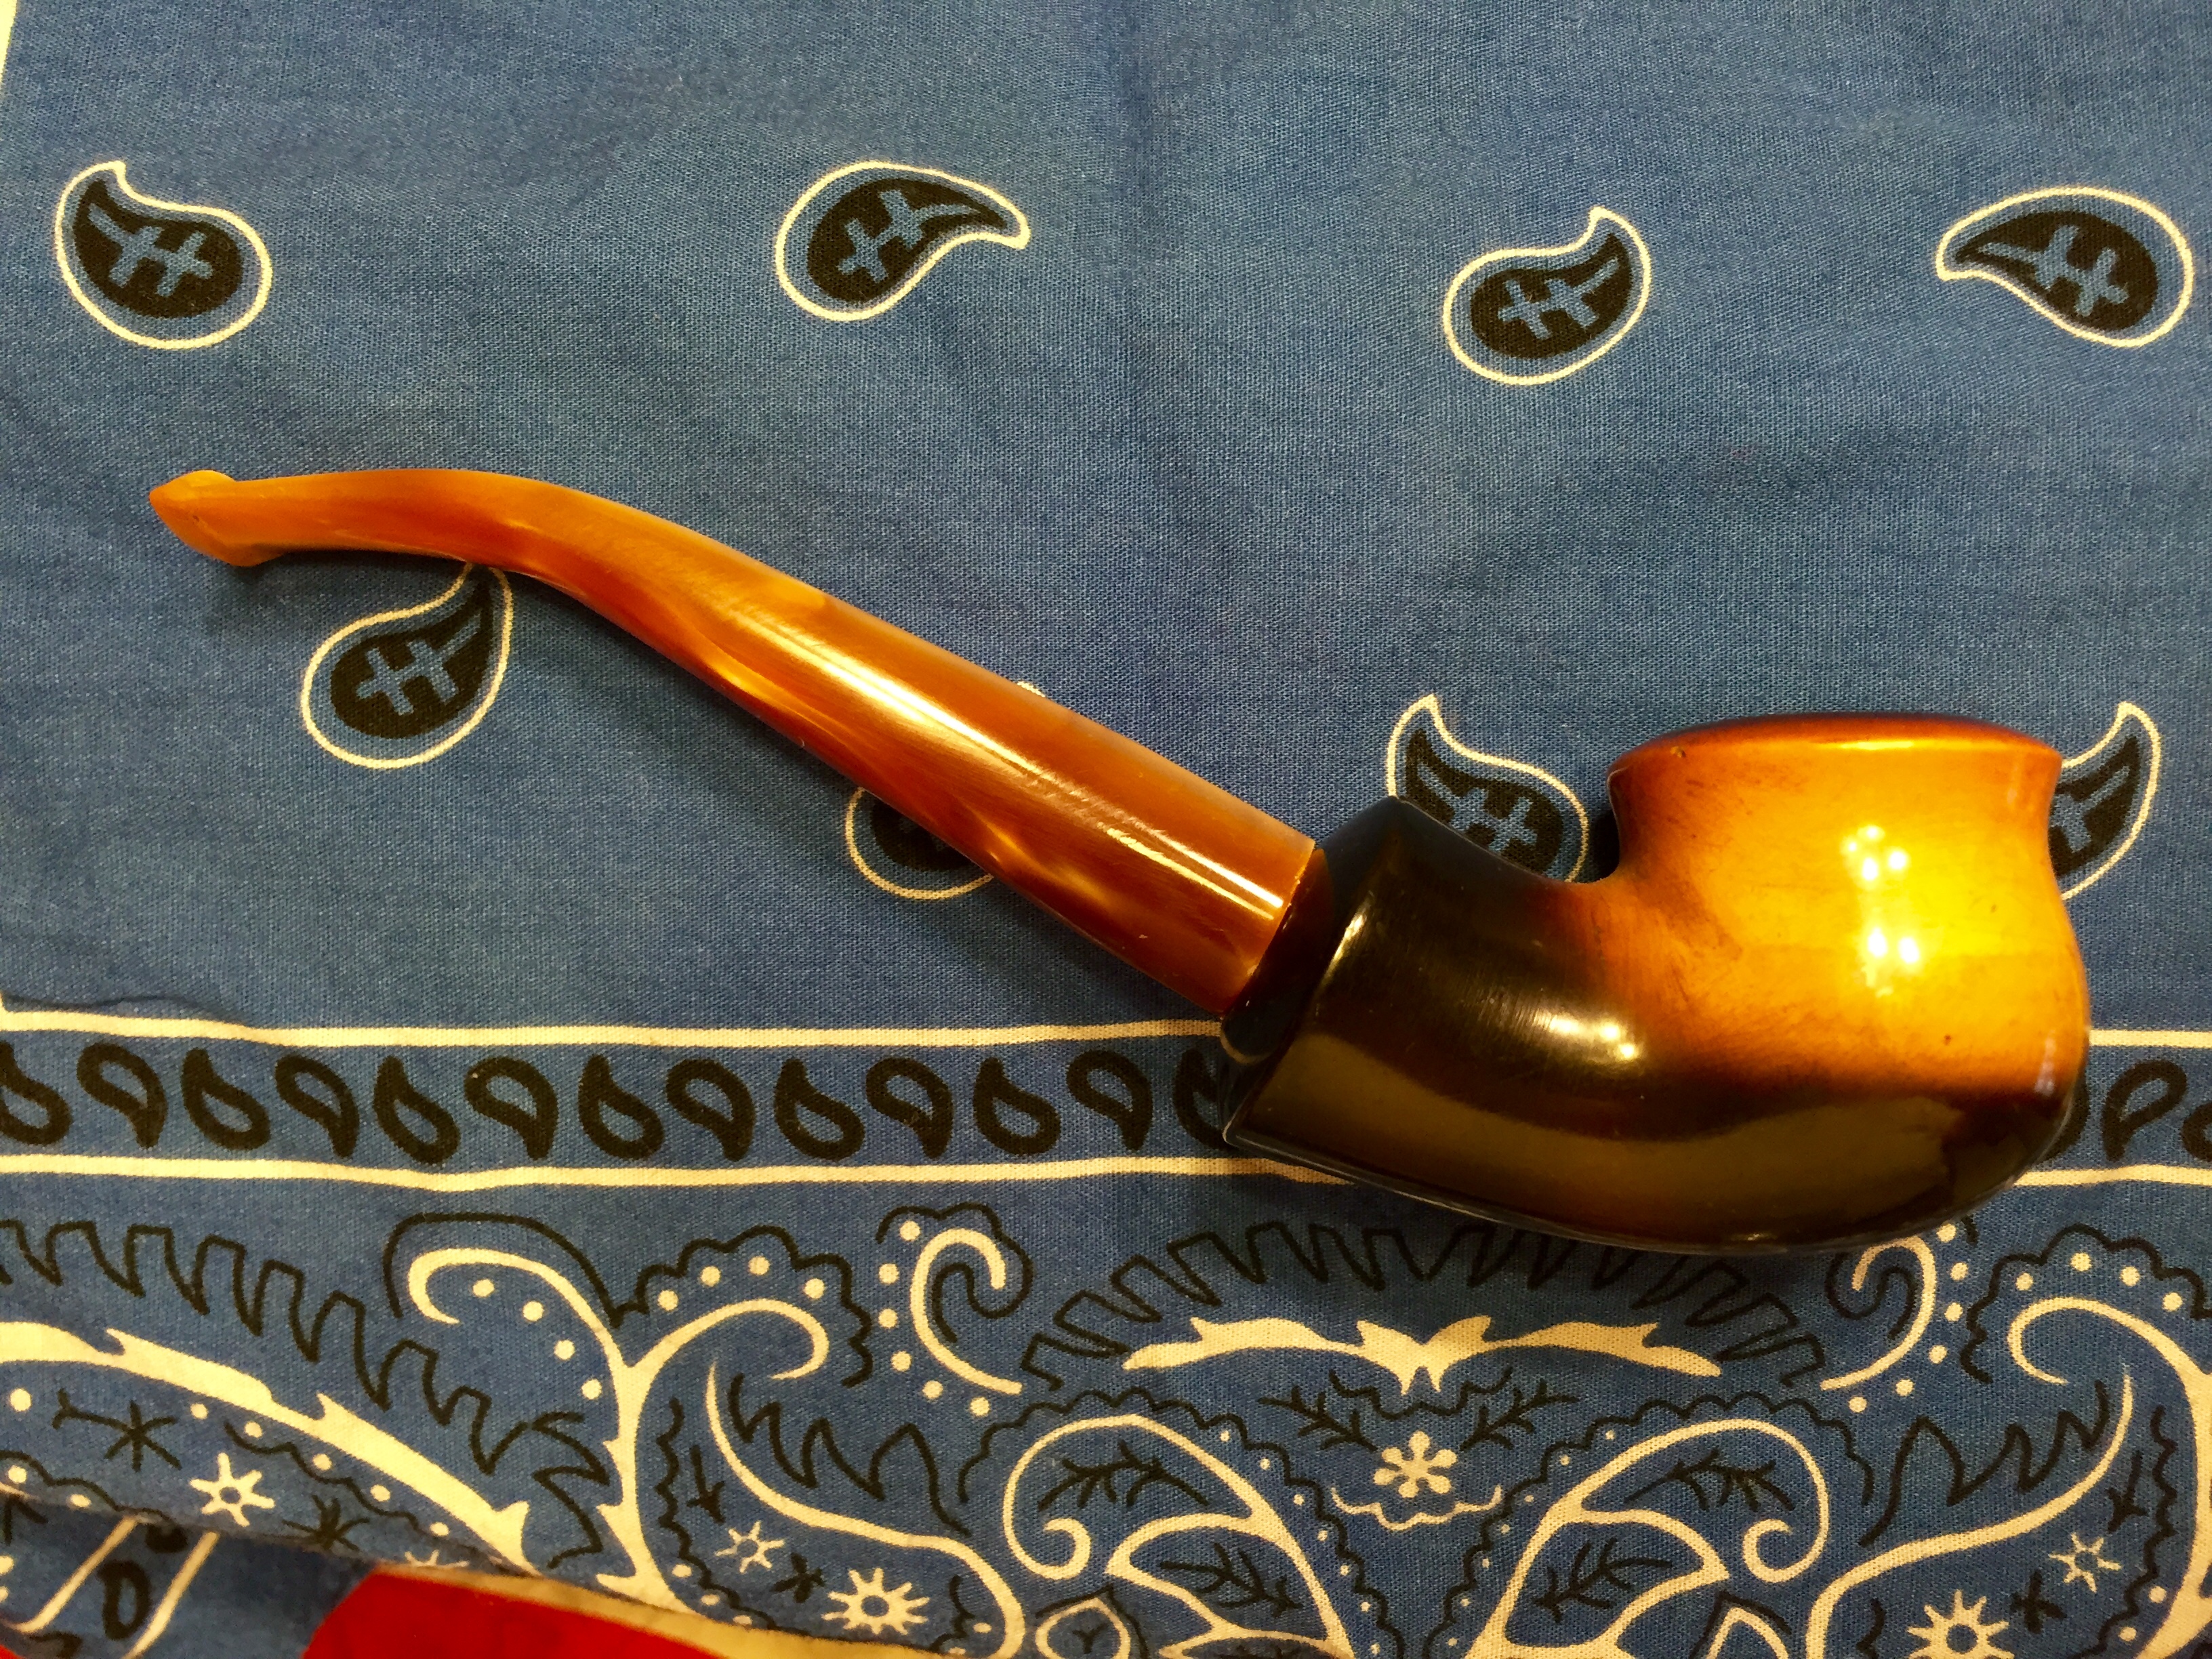
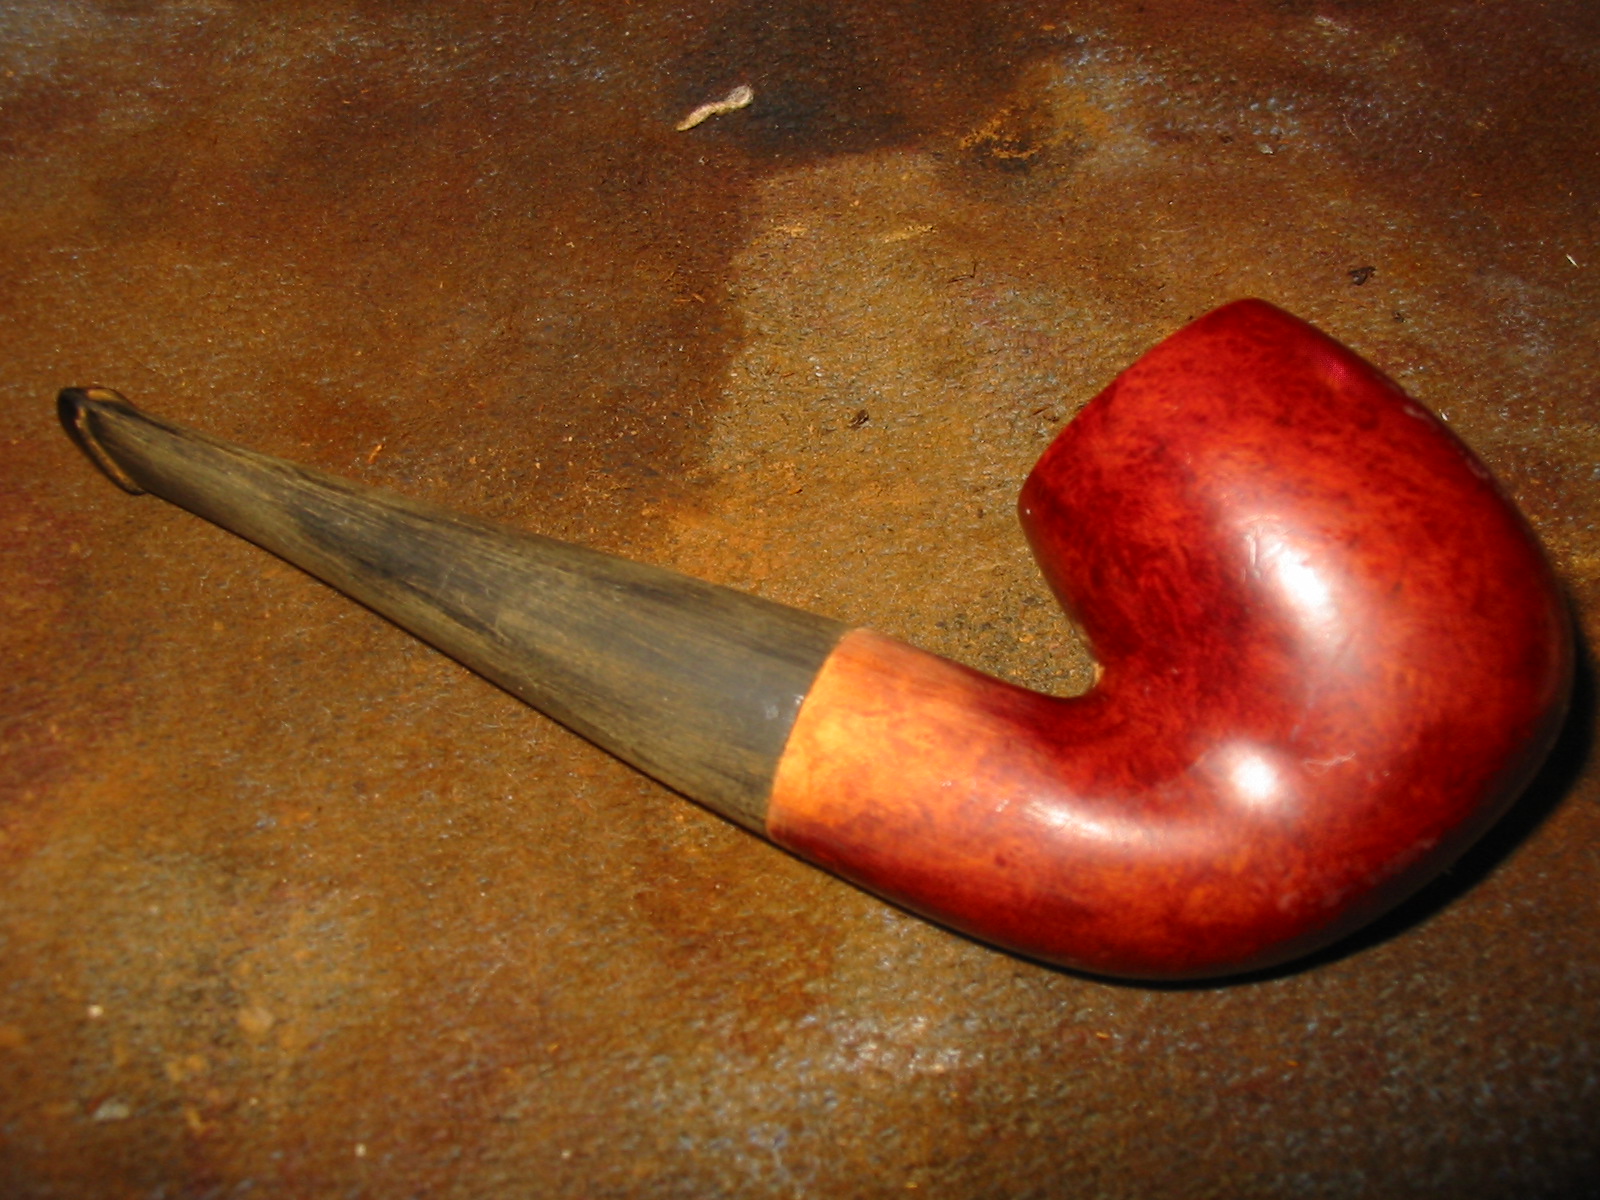
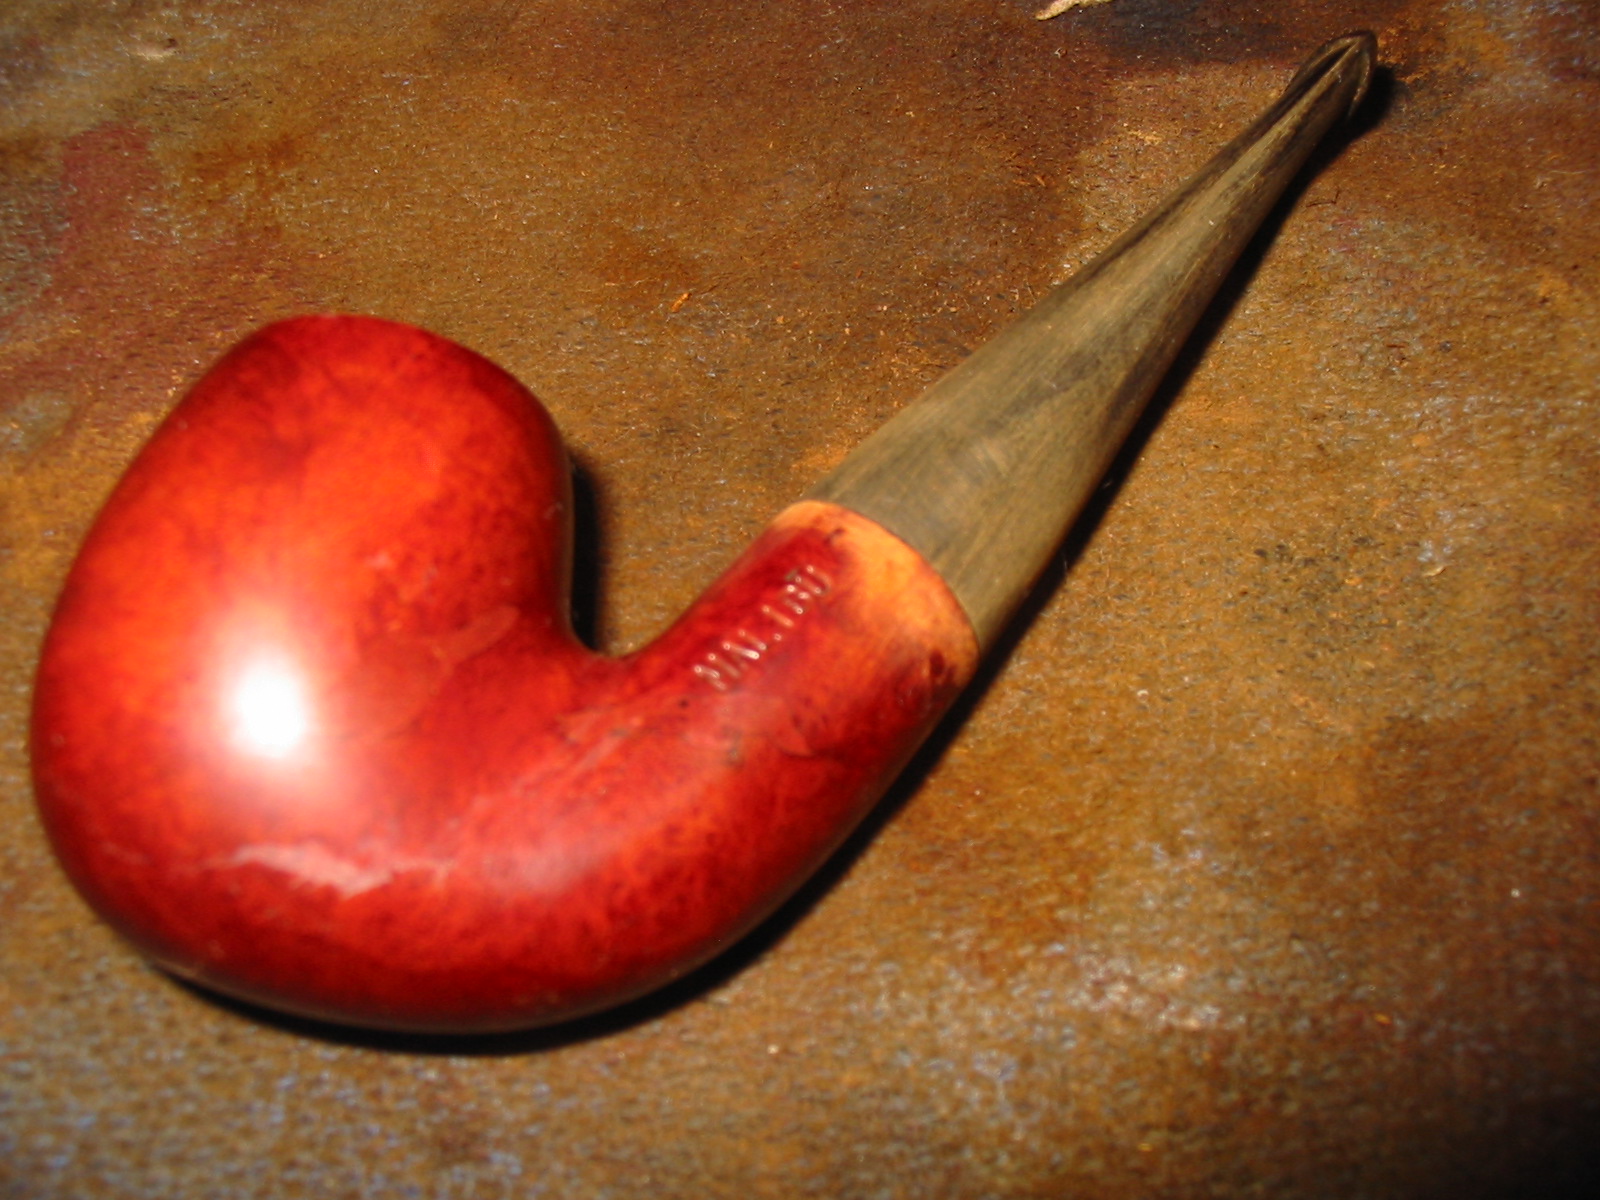
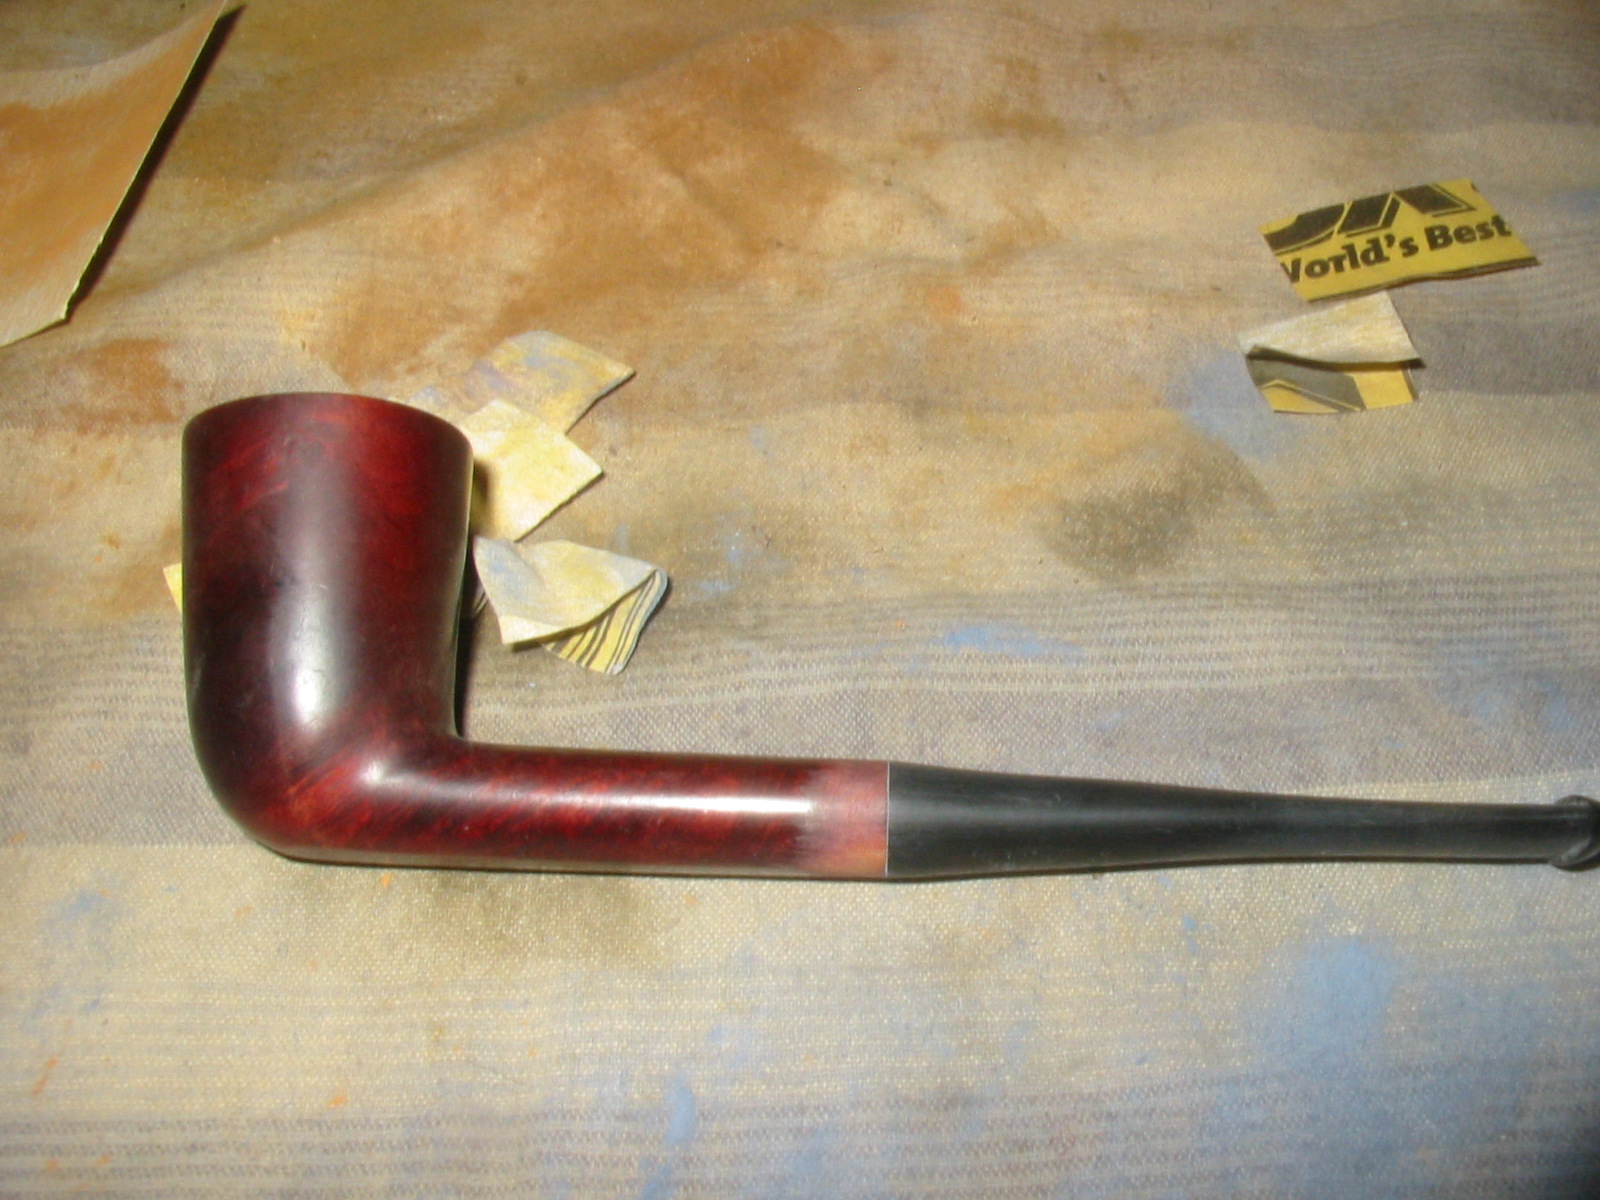
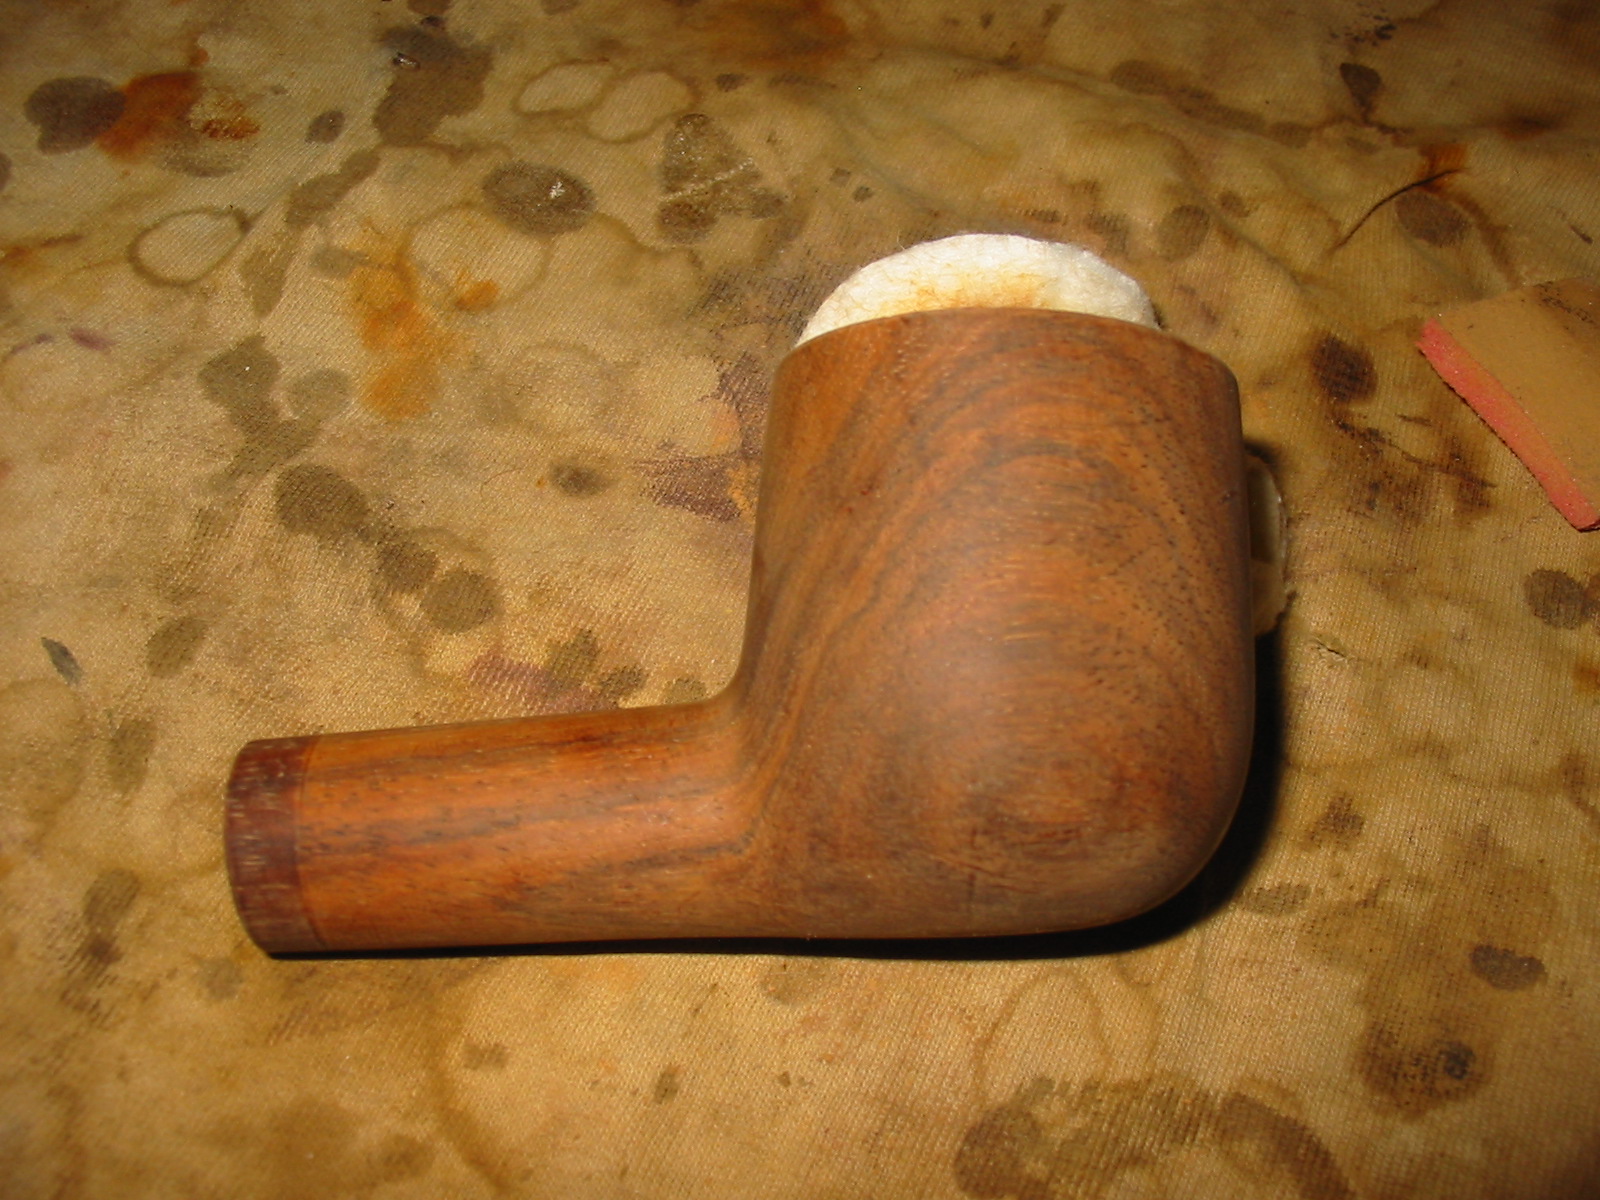
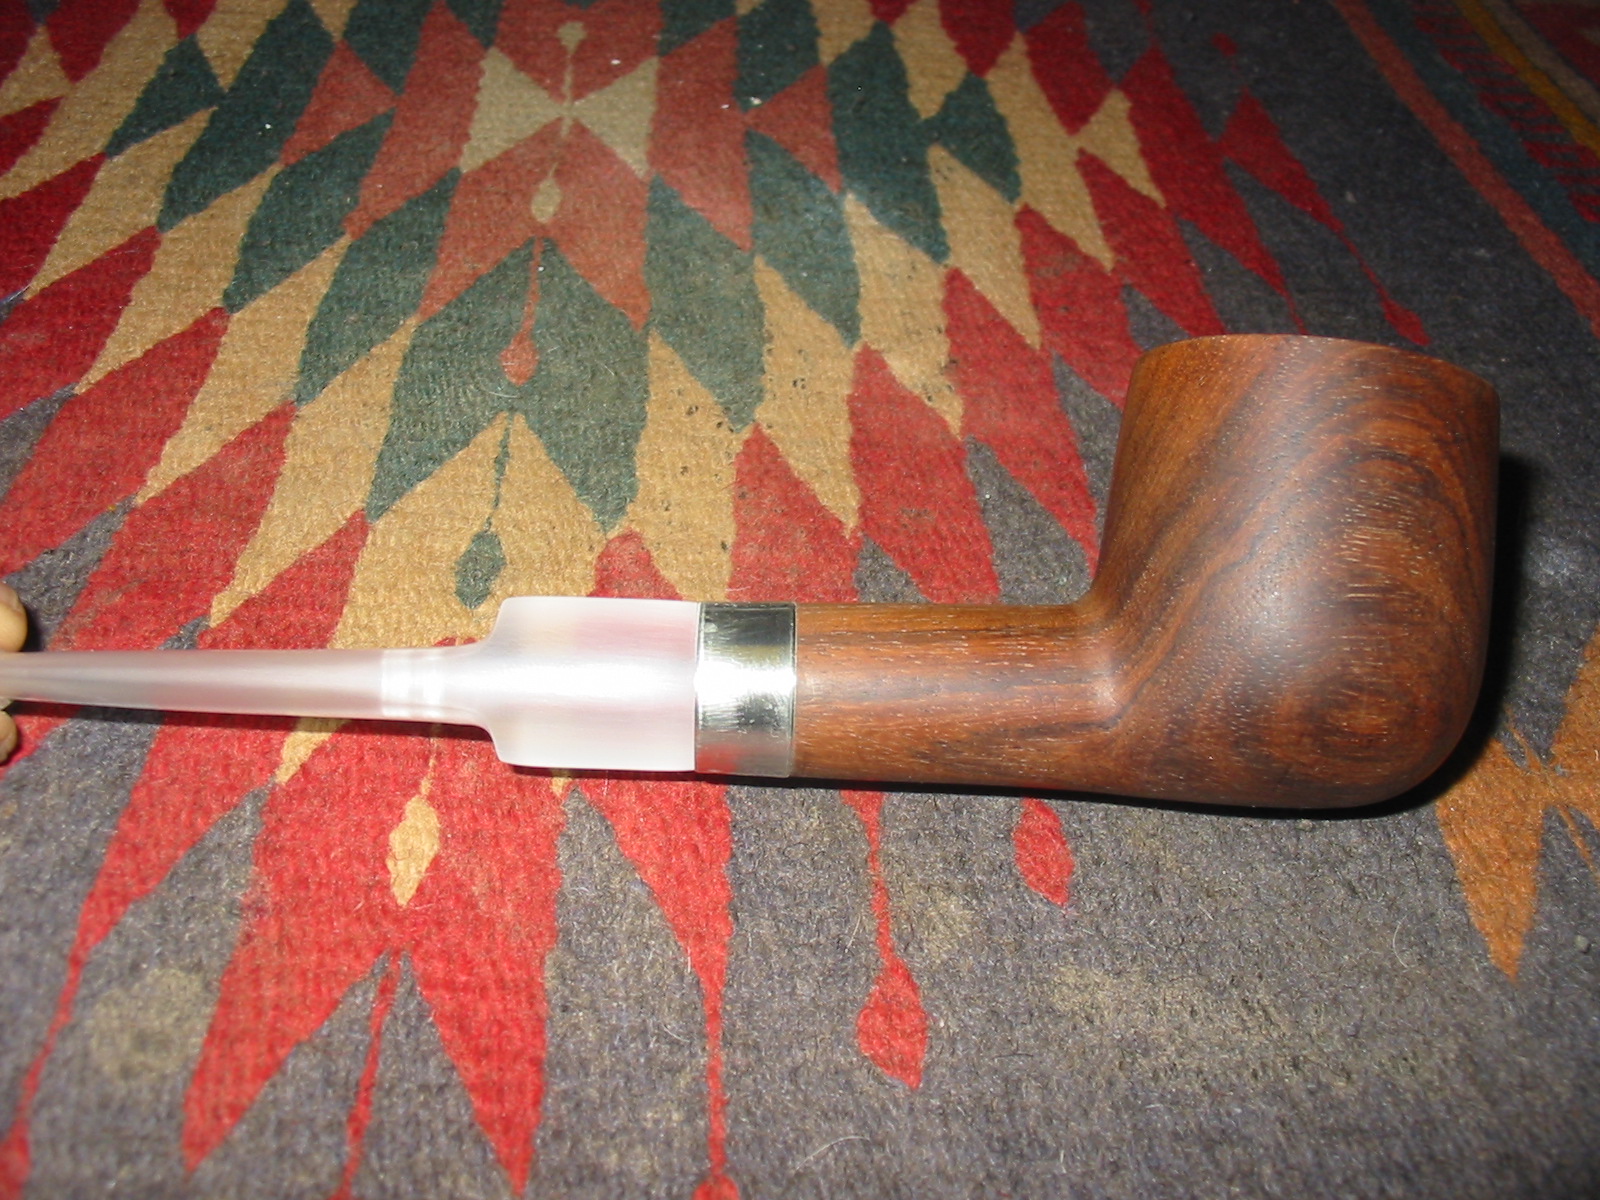
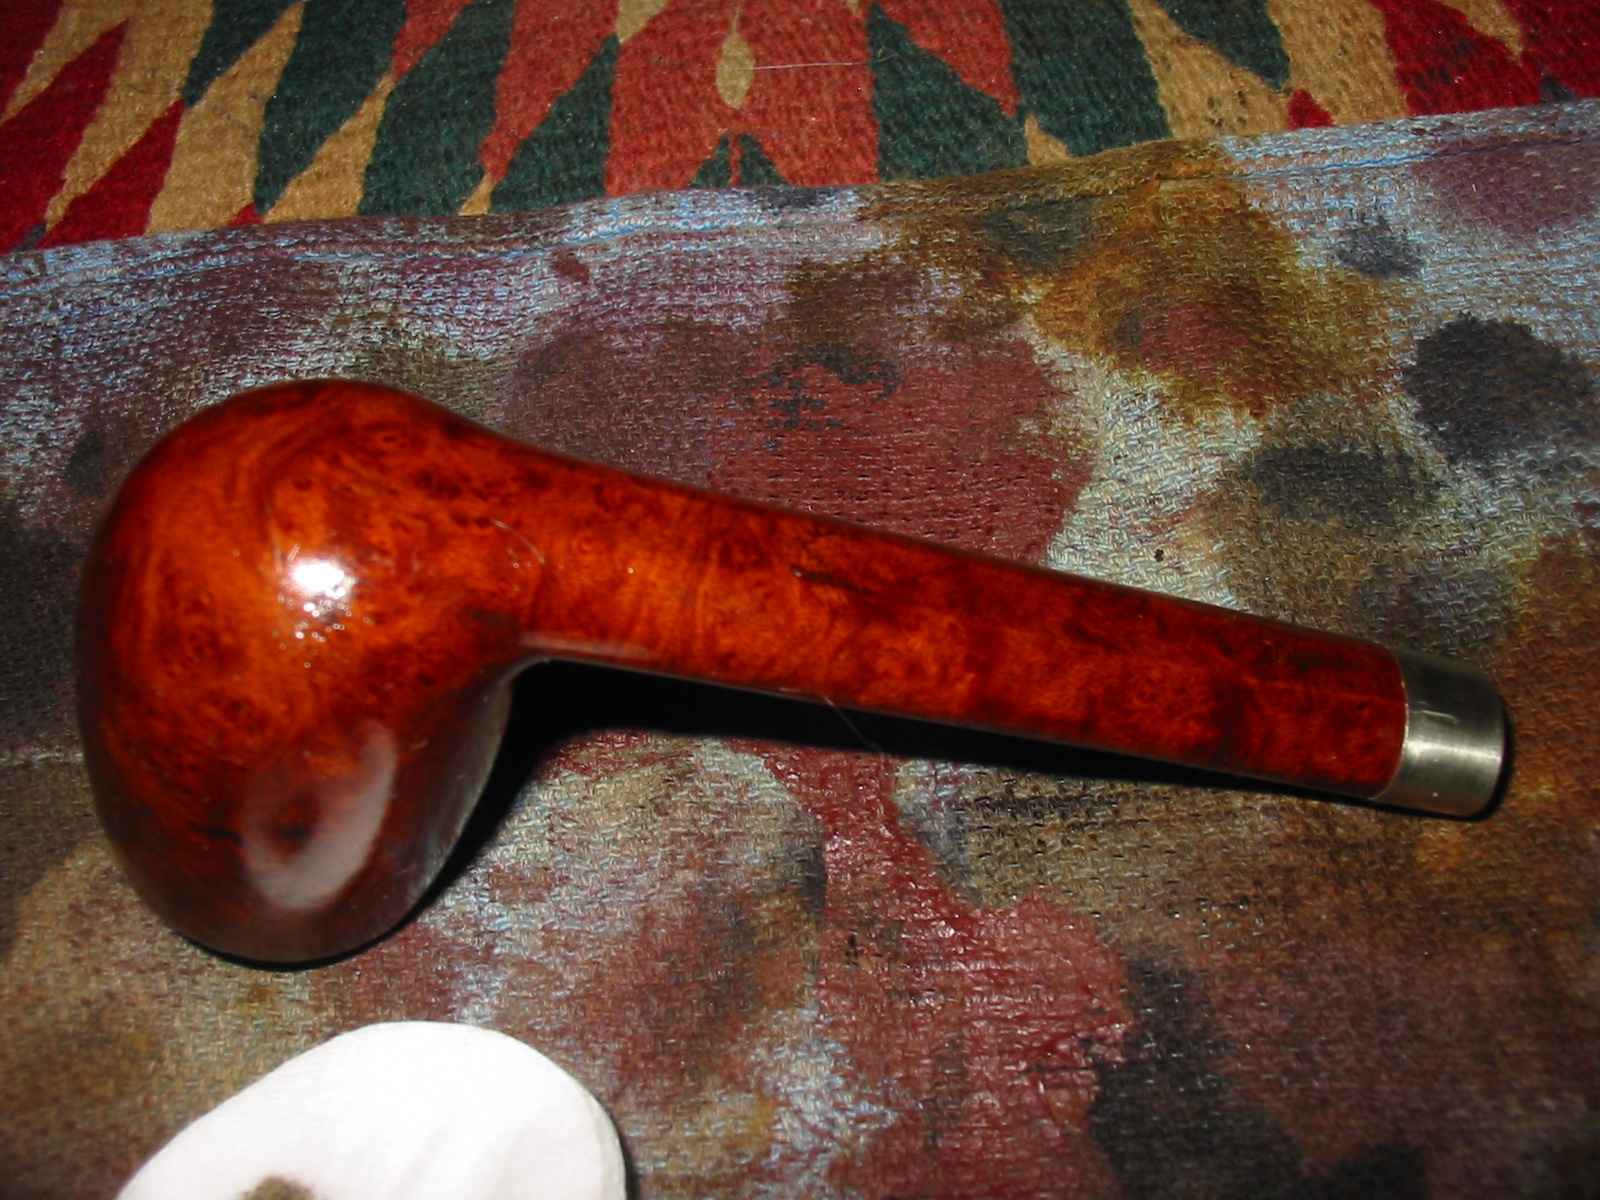
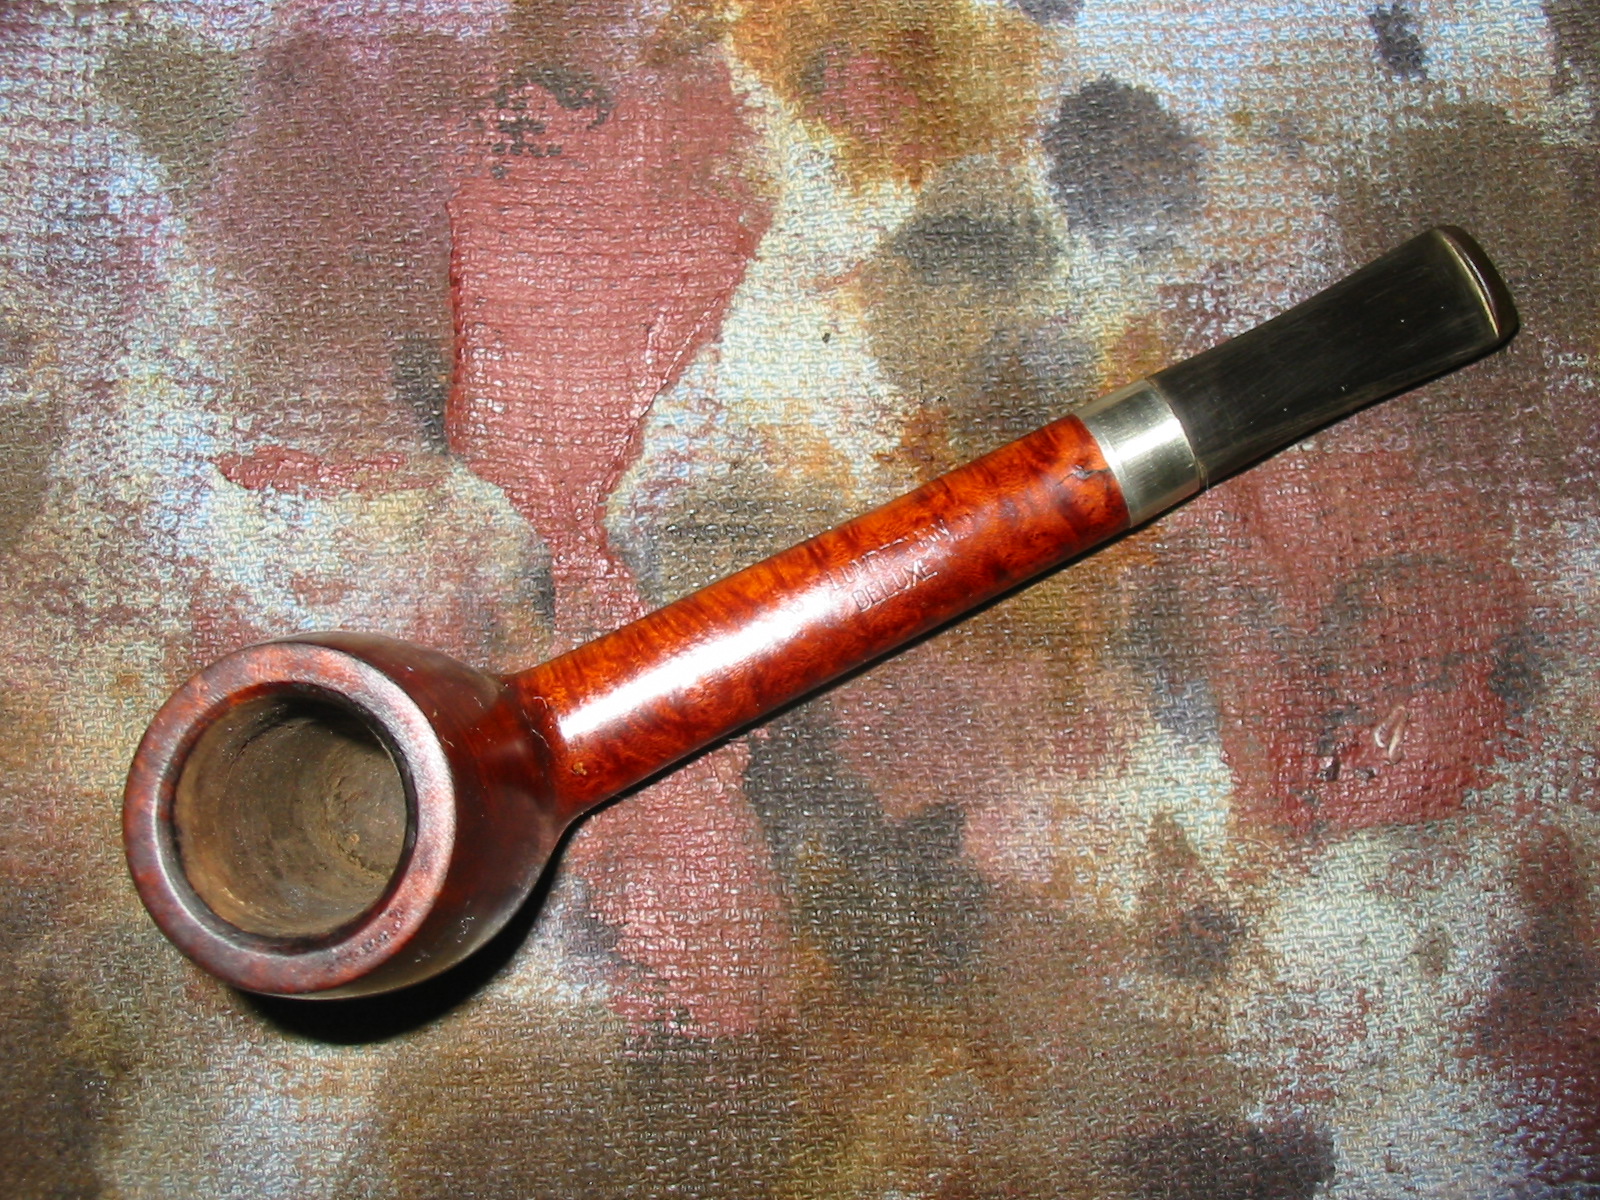
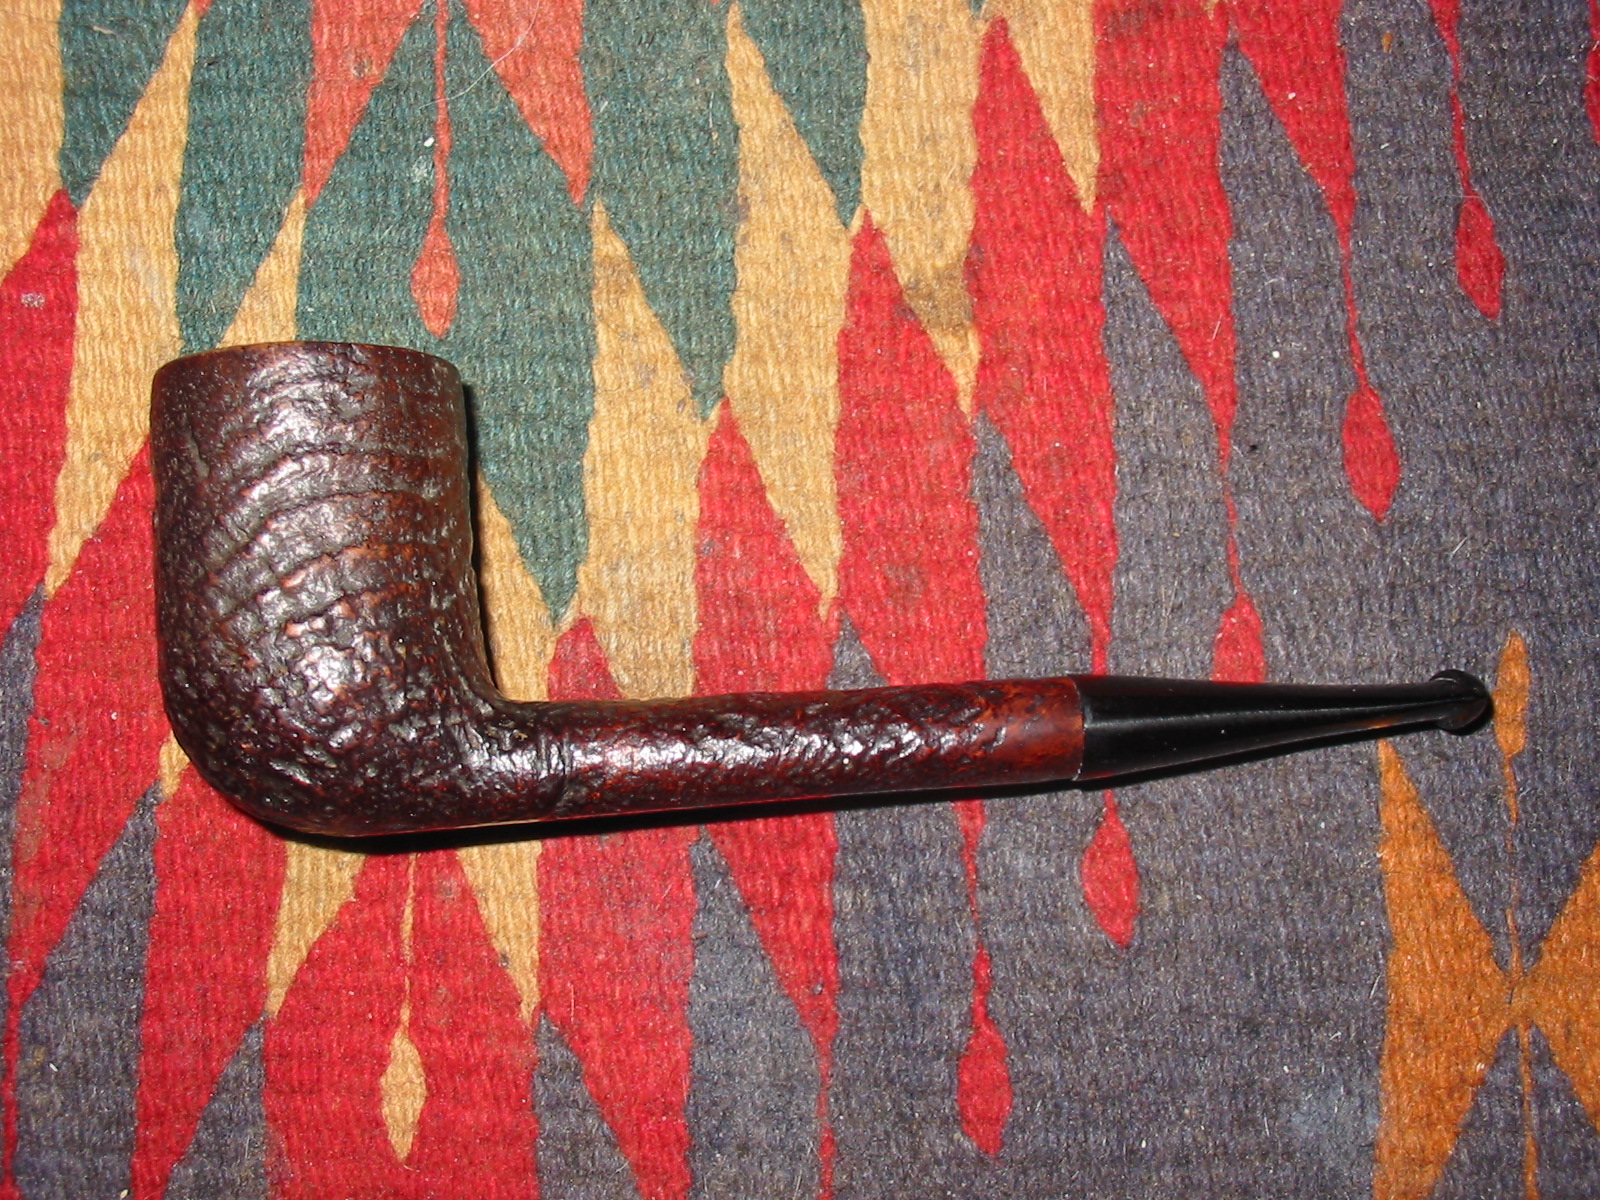
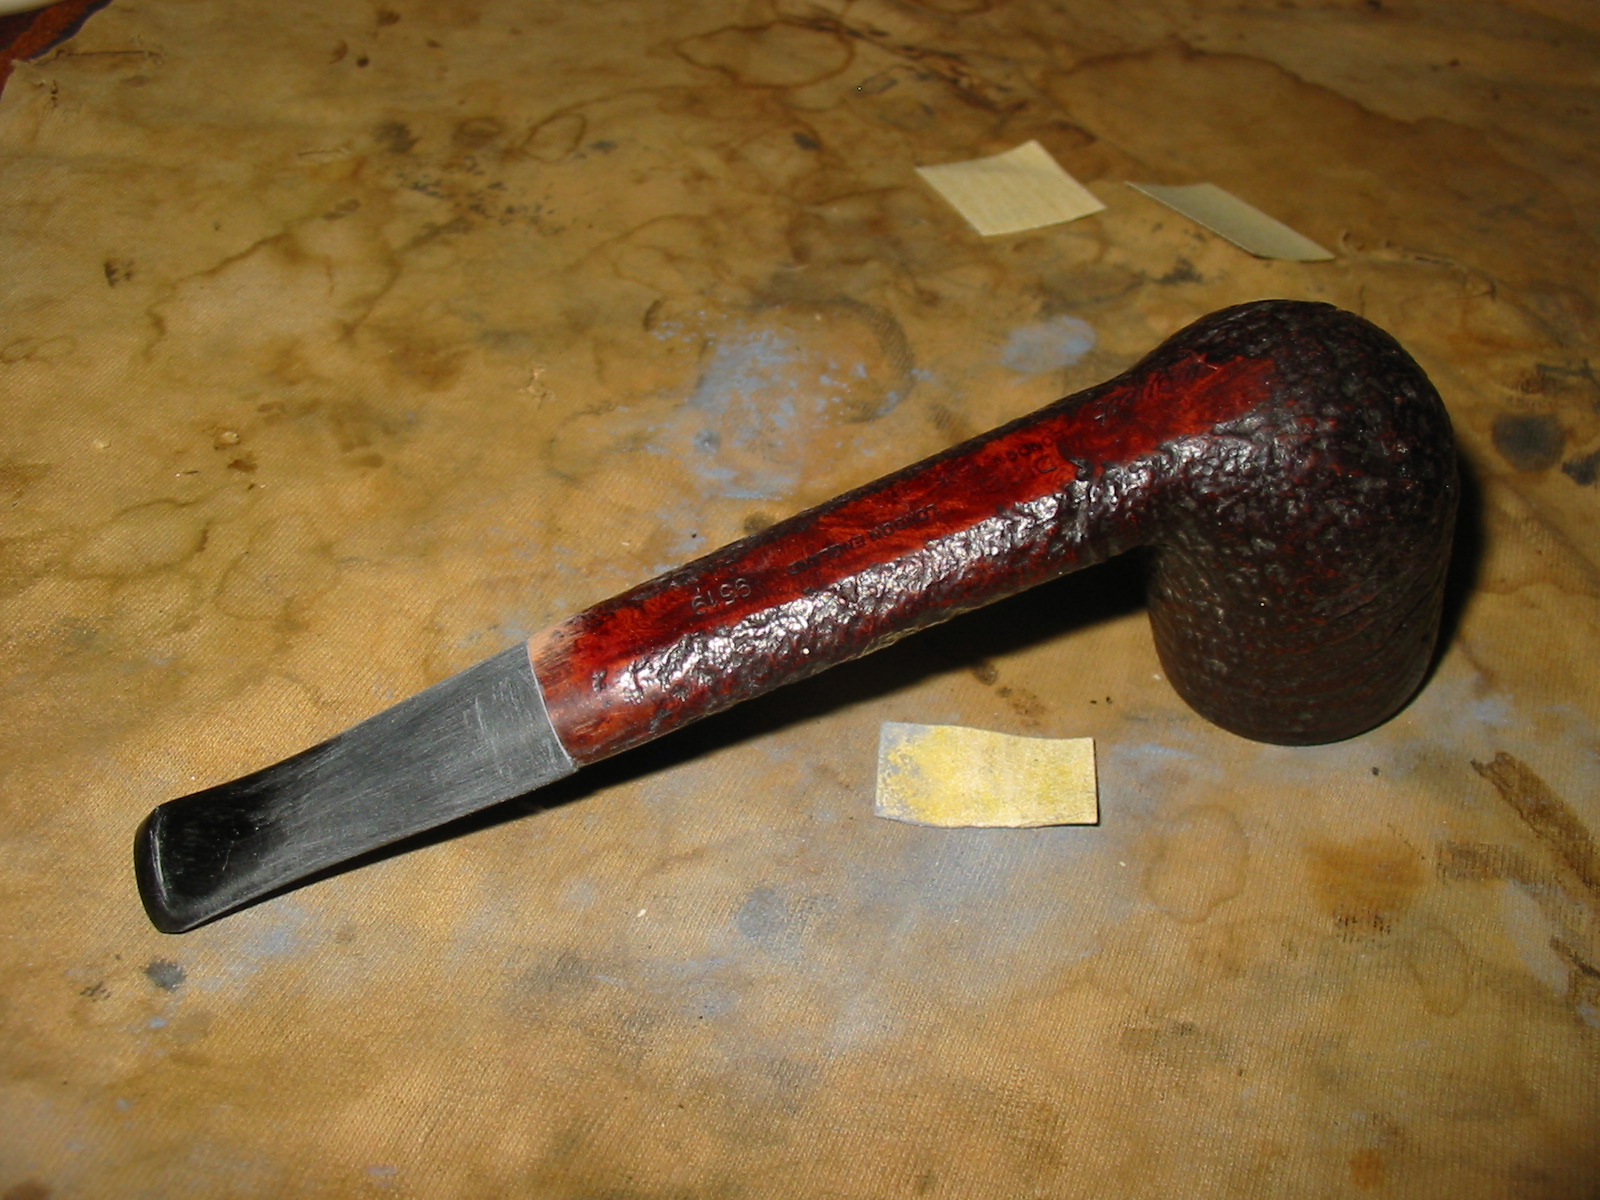
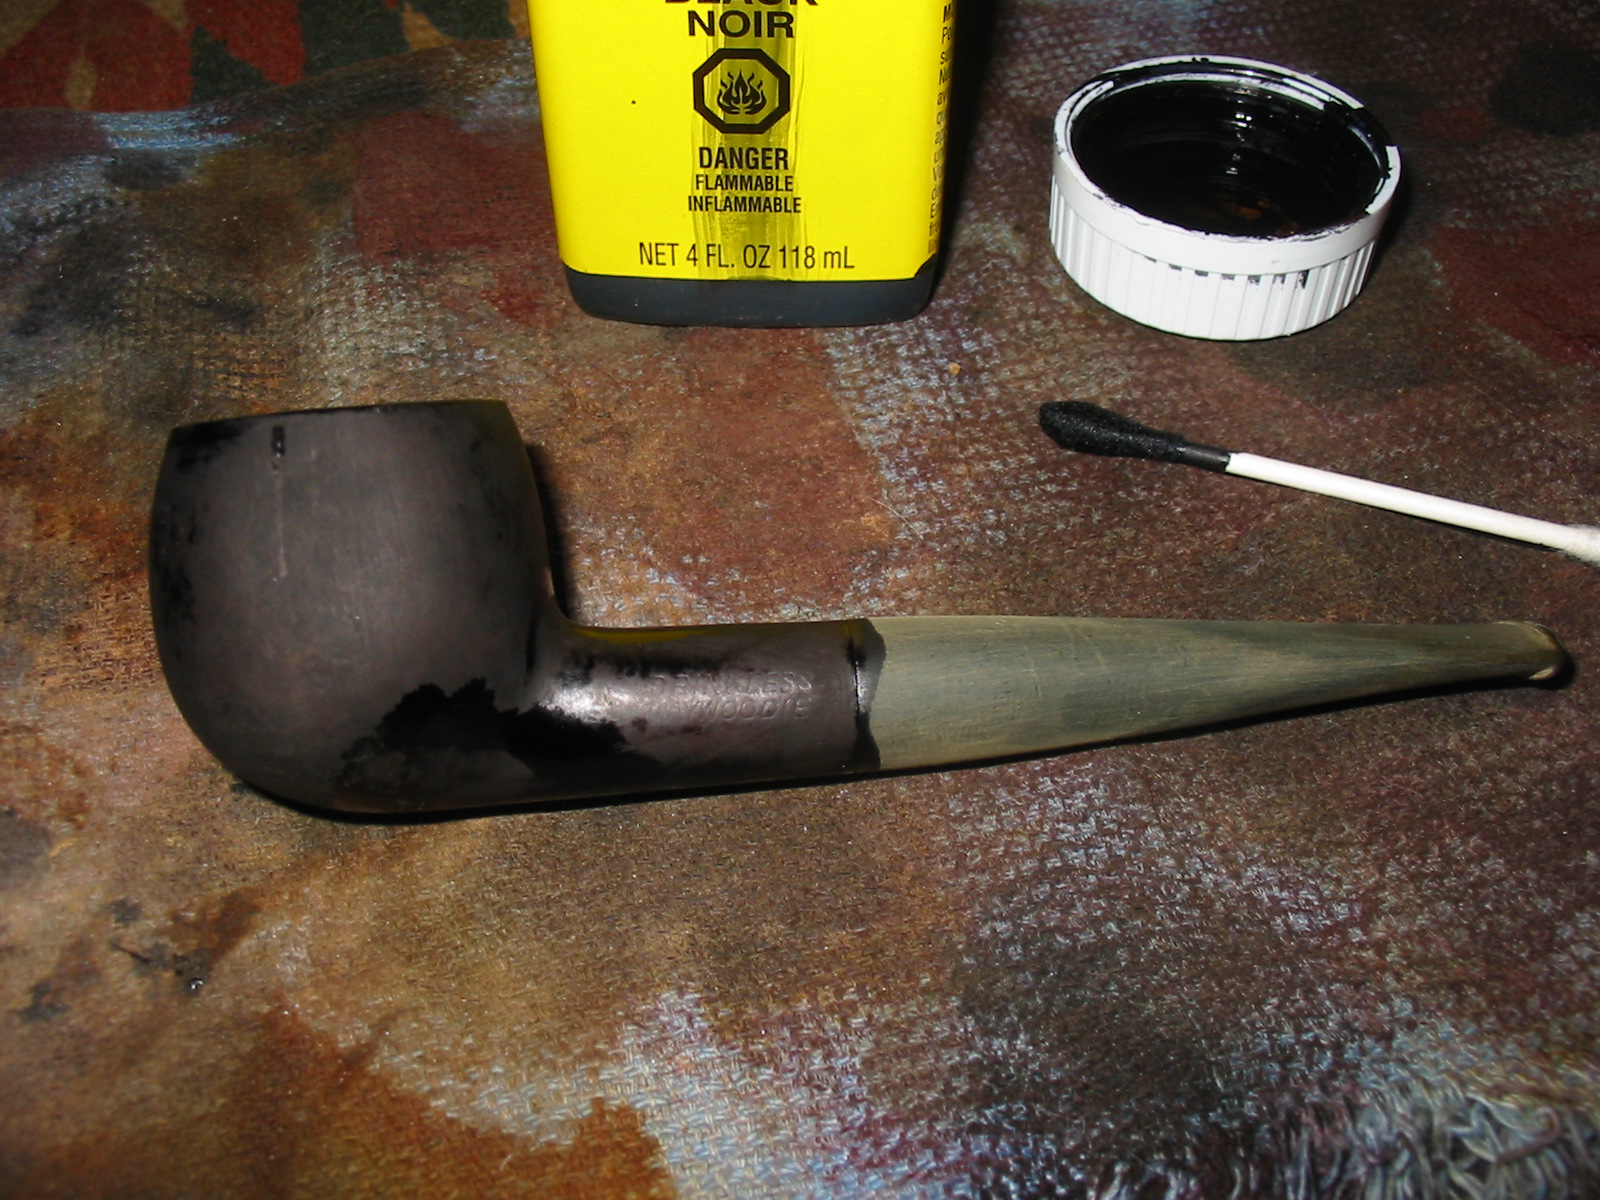
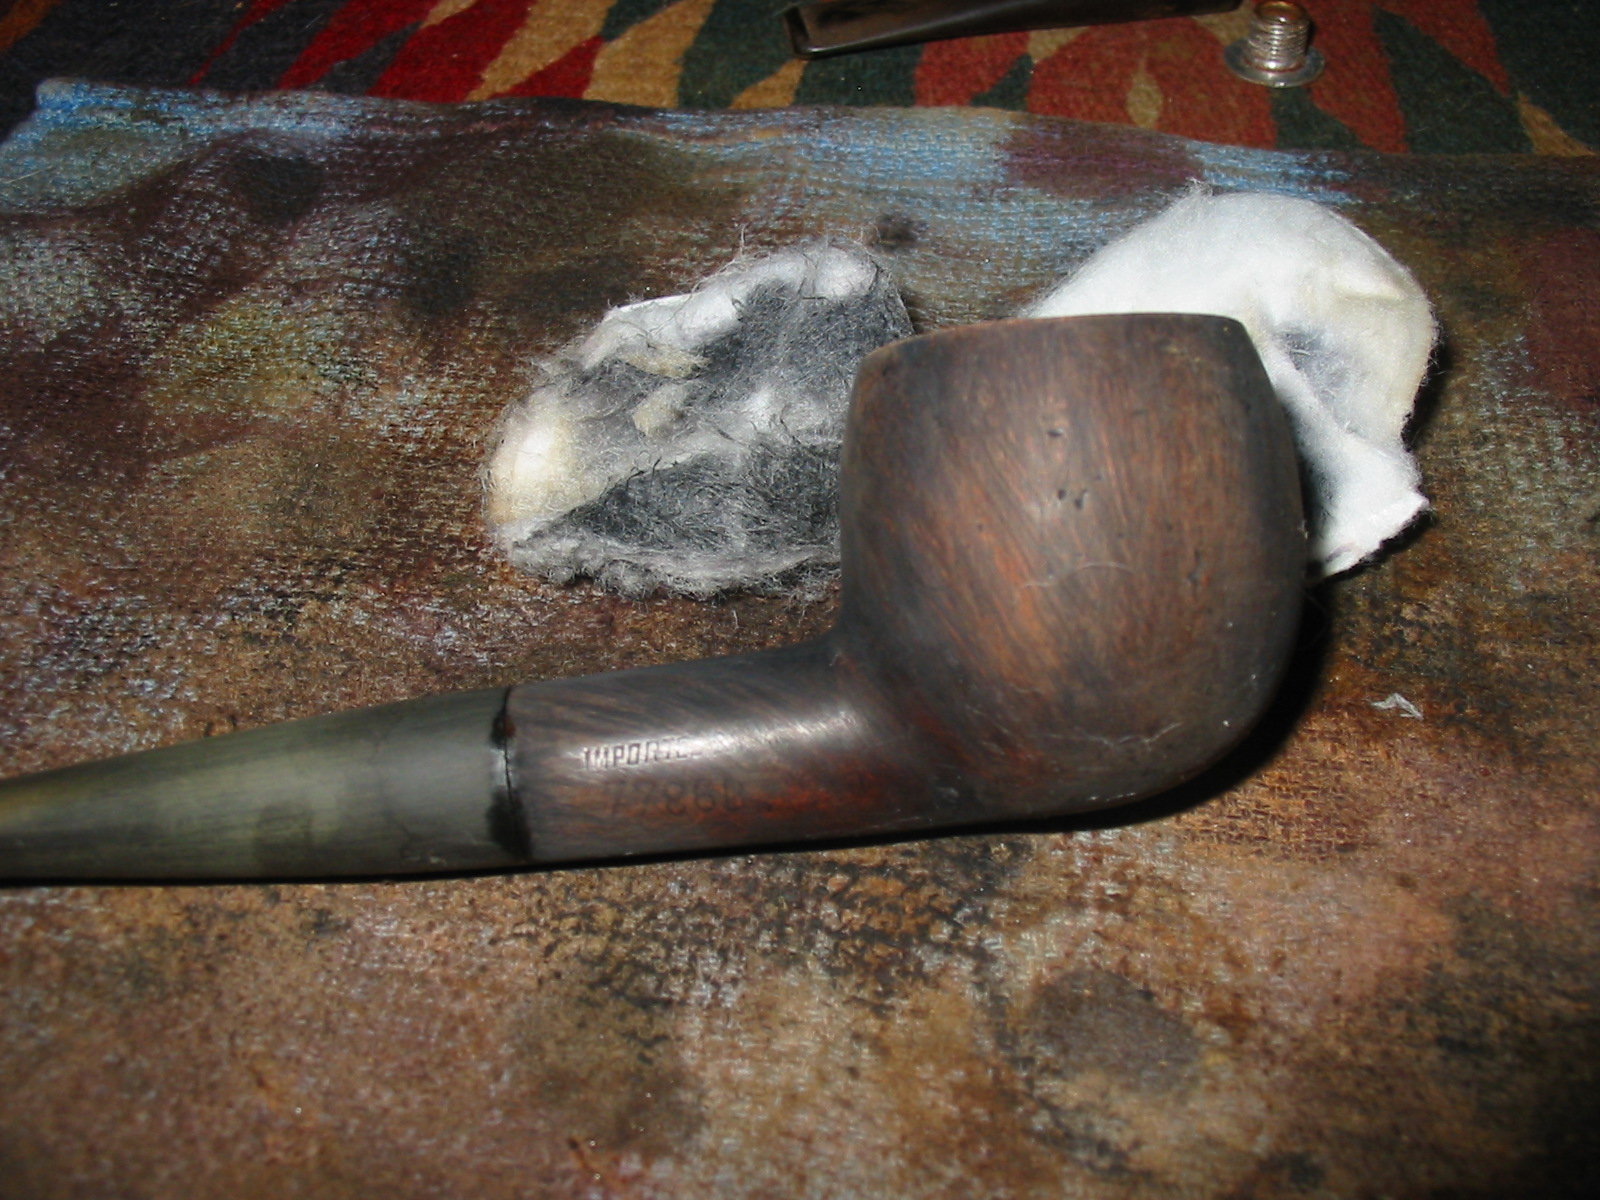
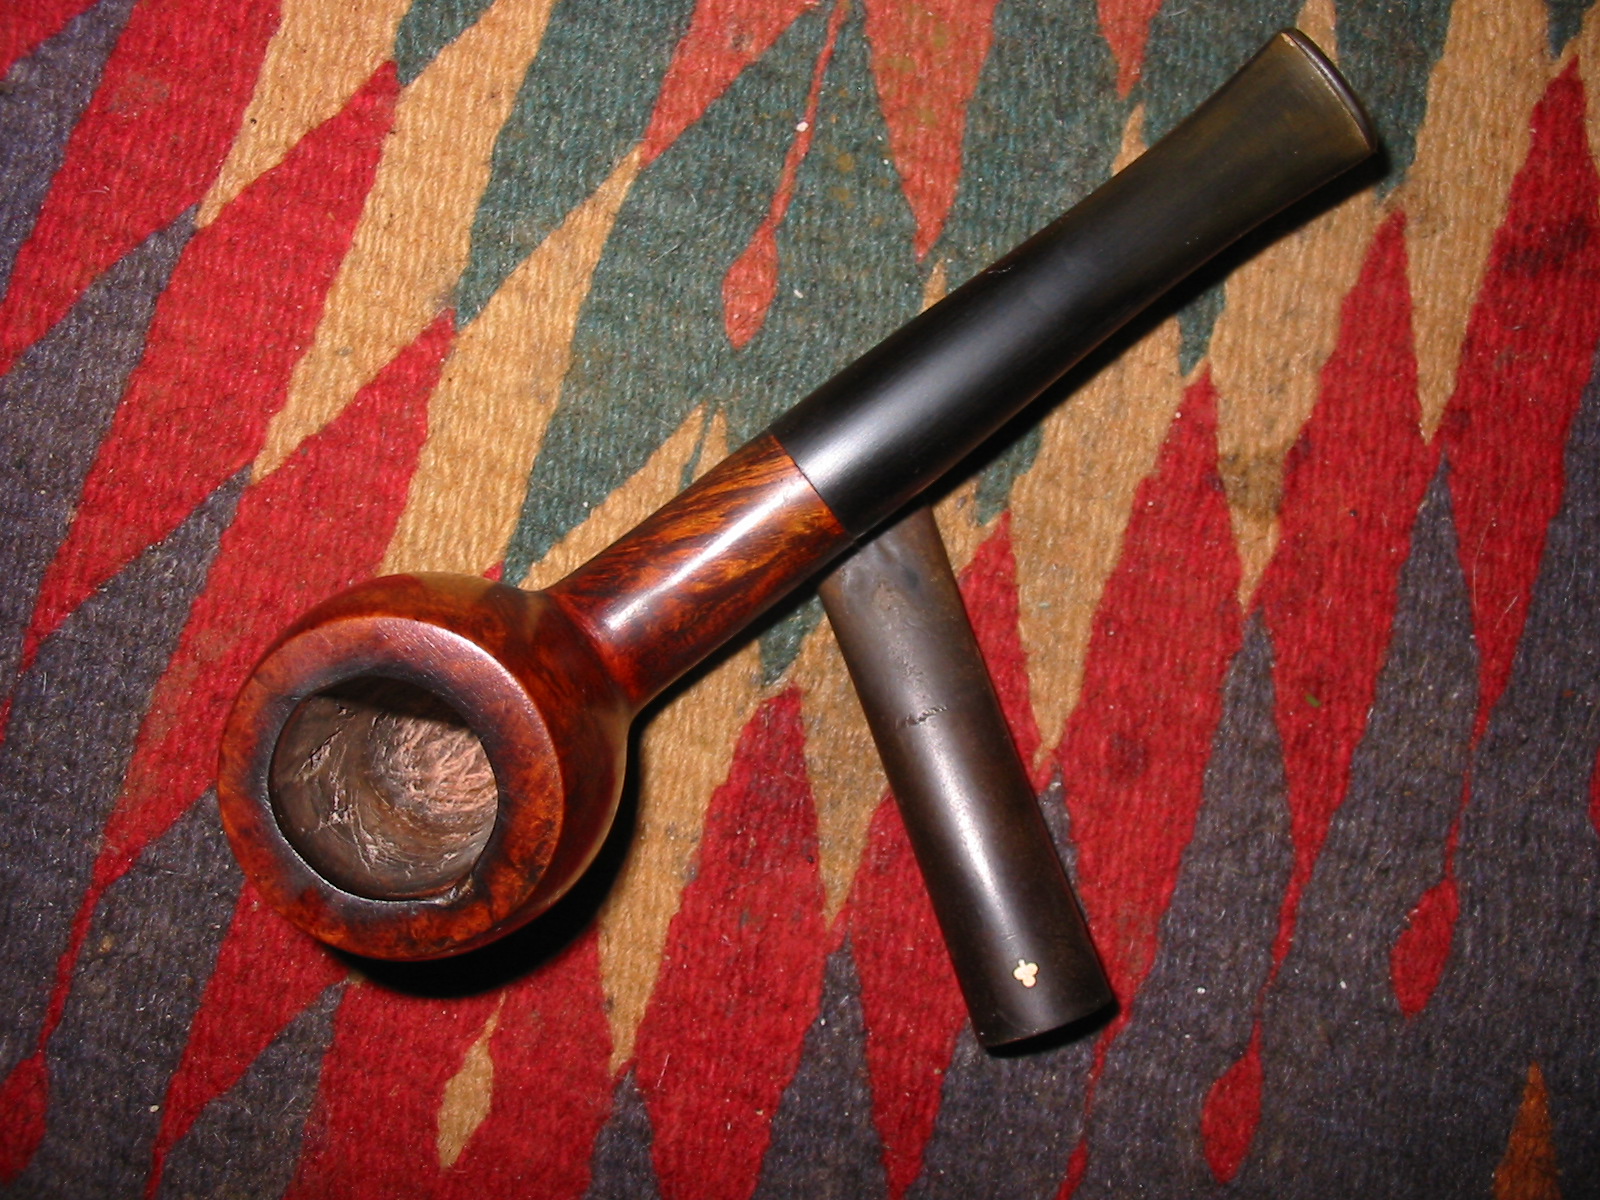
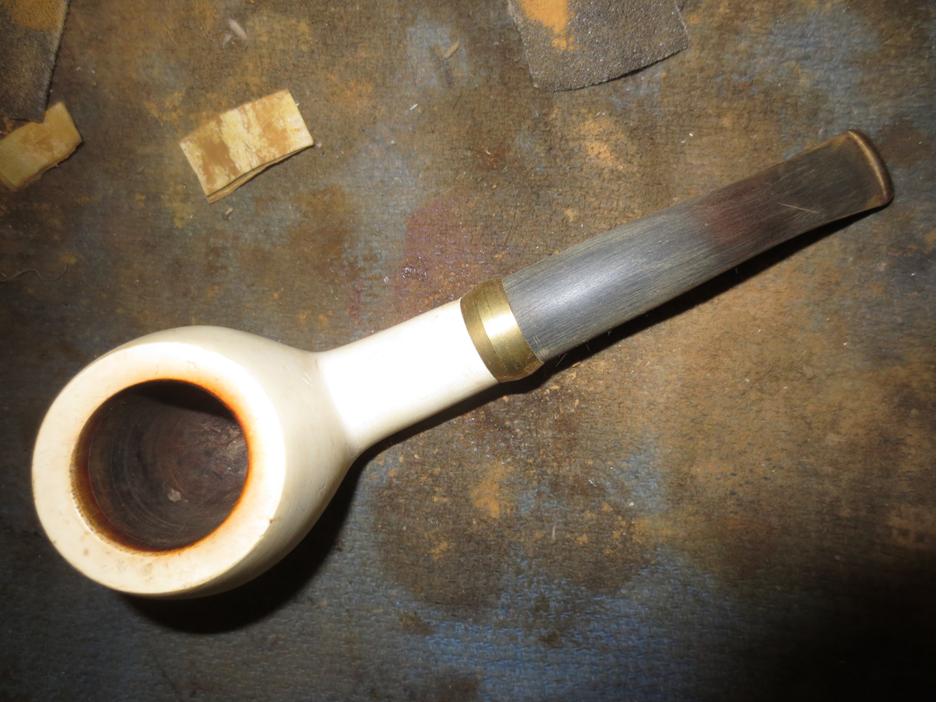
I was able to sand out the gouge on the bottom of the bowl and it looks smooth and fresh now. I will need to sand the entire bowl with micromesh to polish the meerschaum and give it a shine.band14 
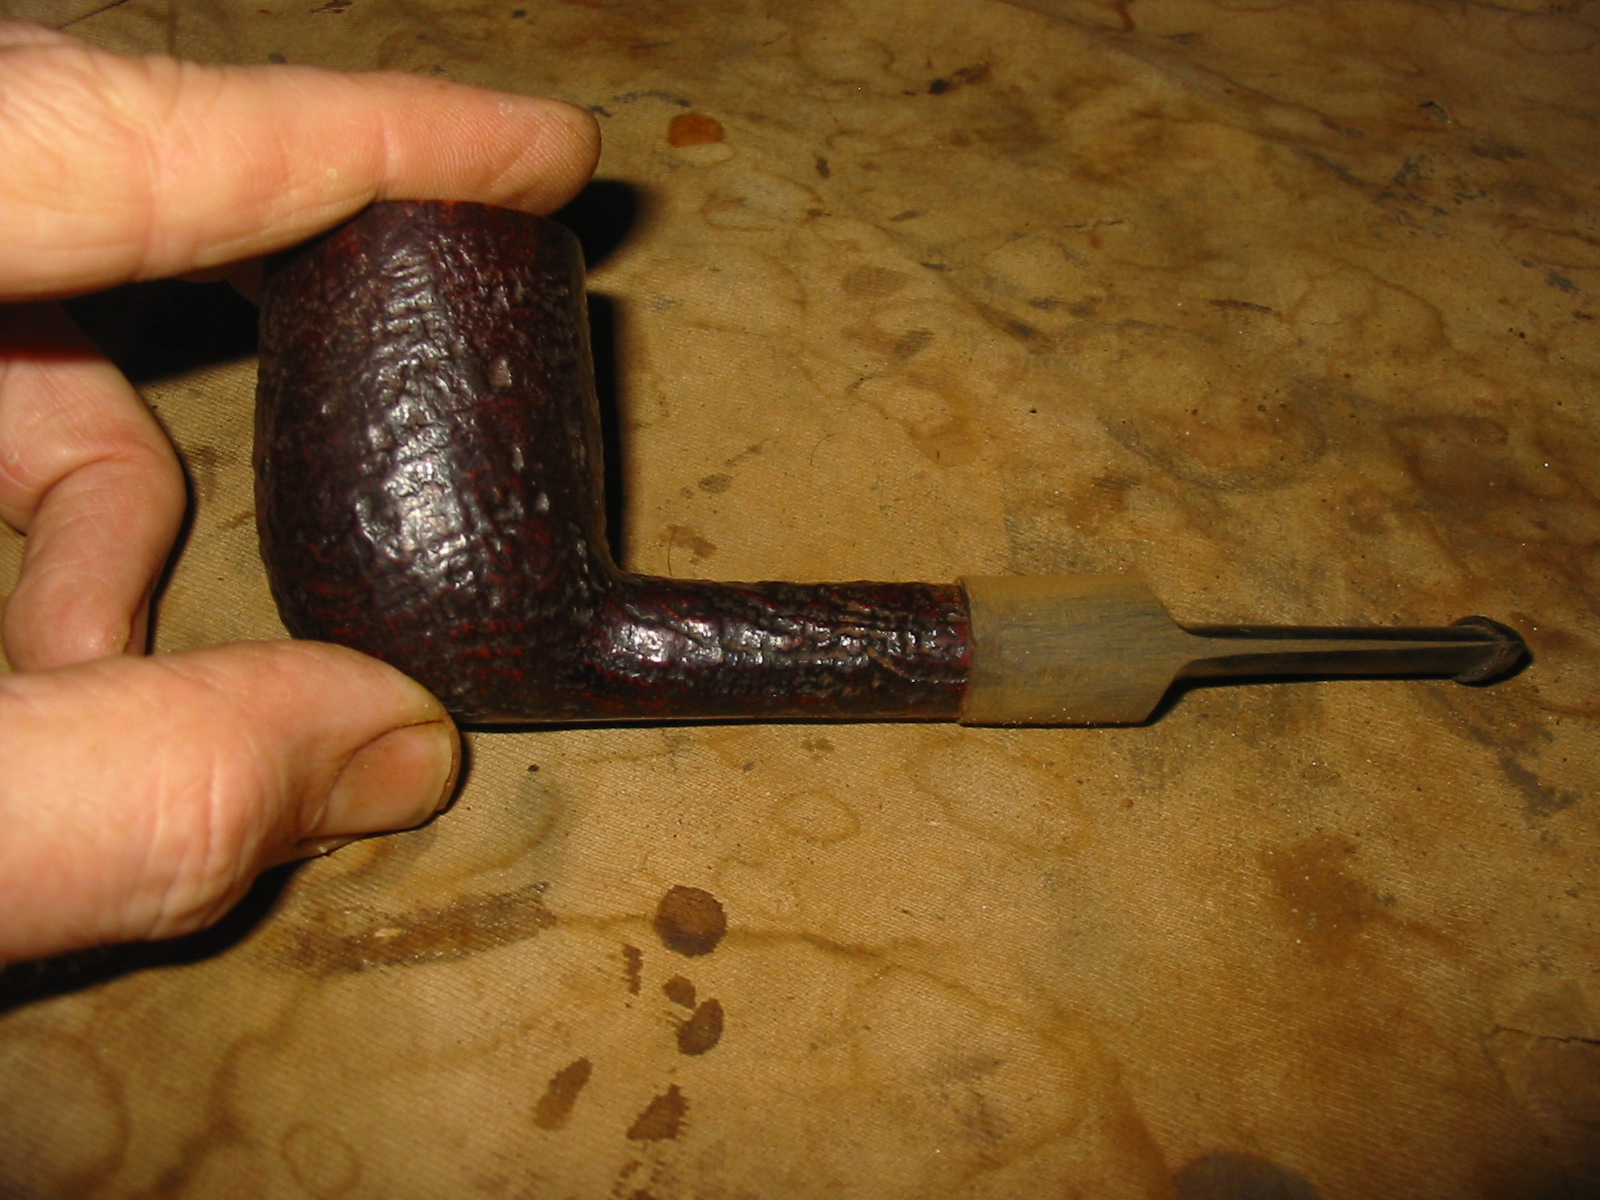
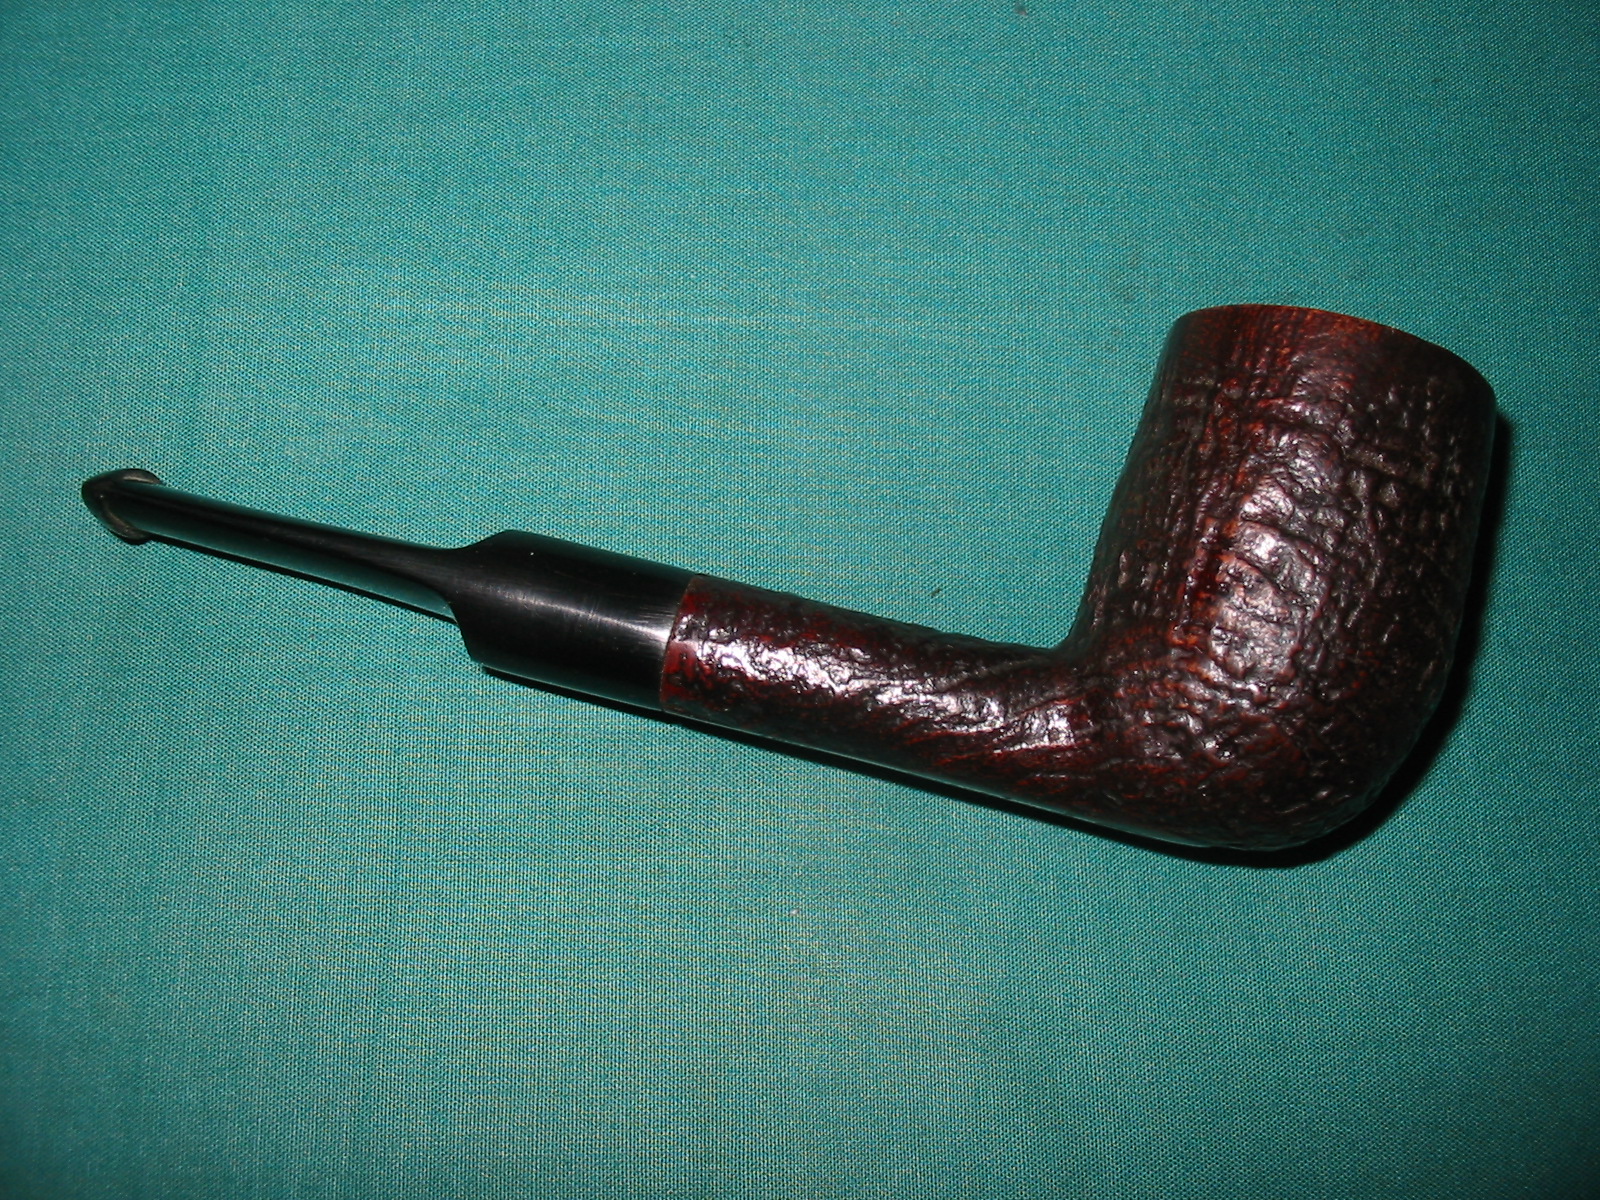
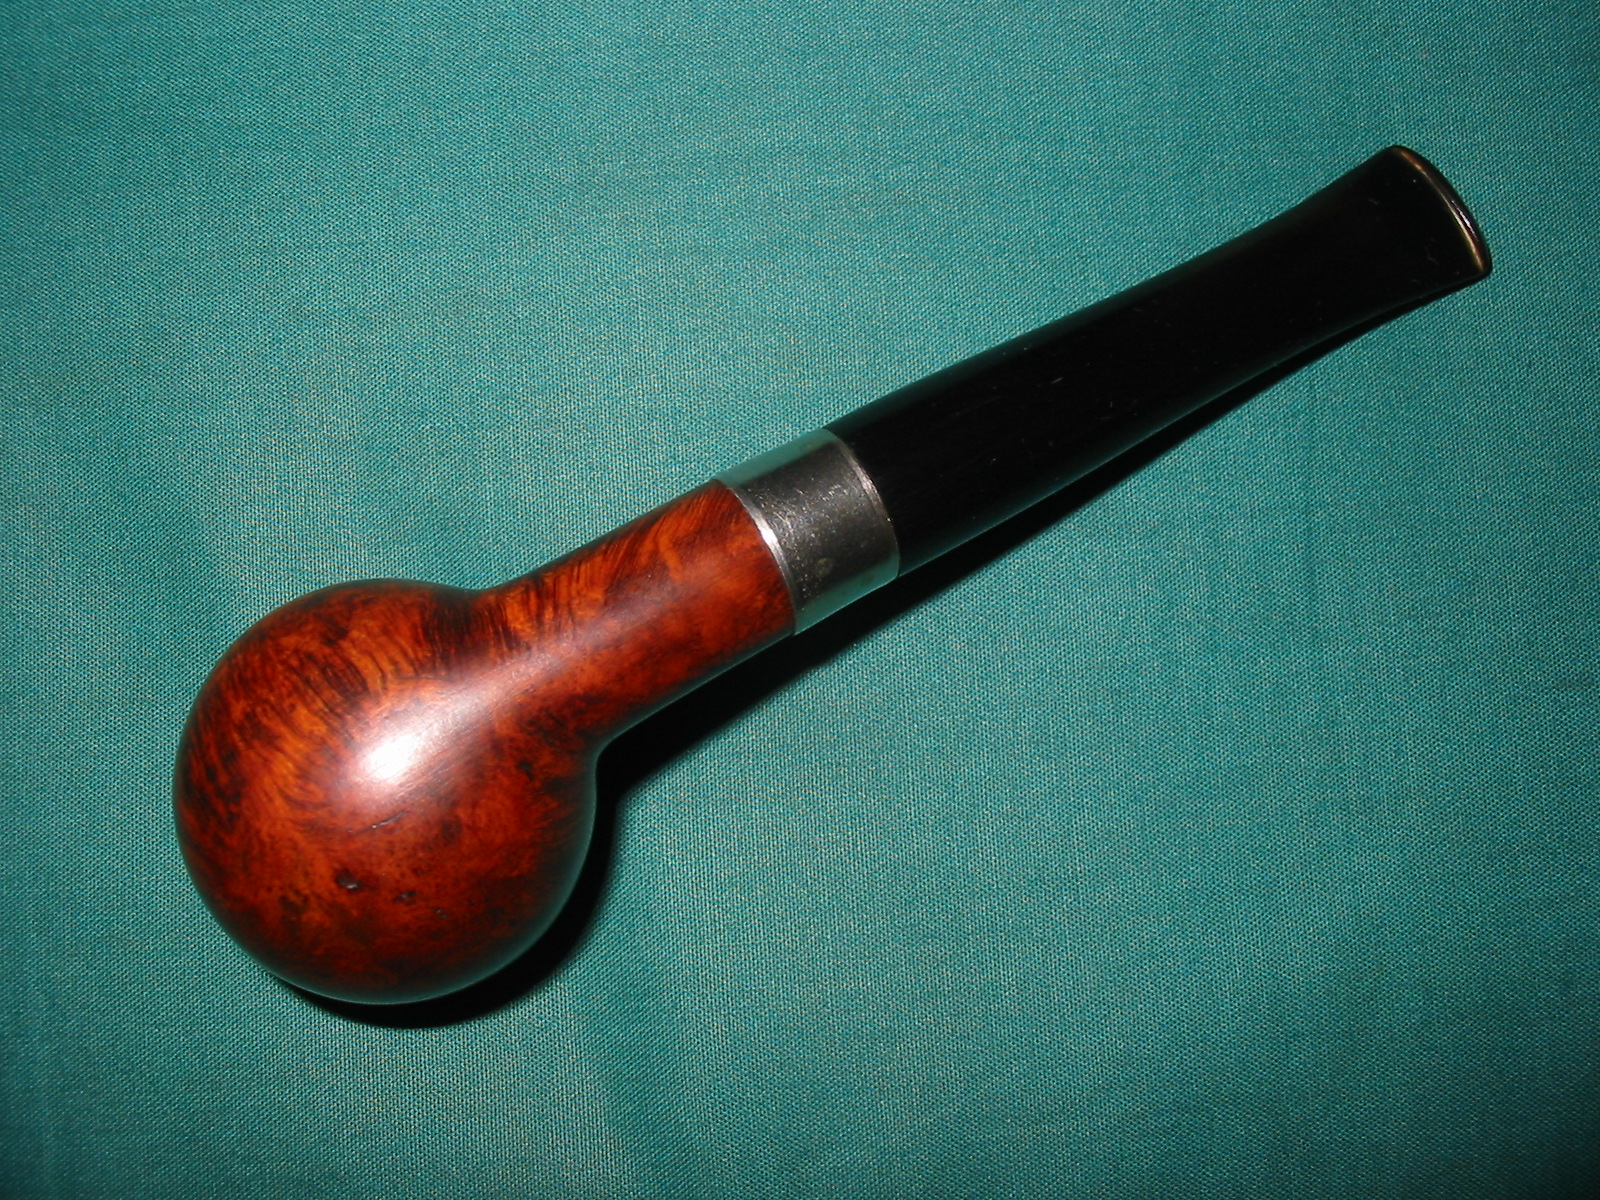
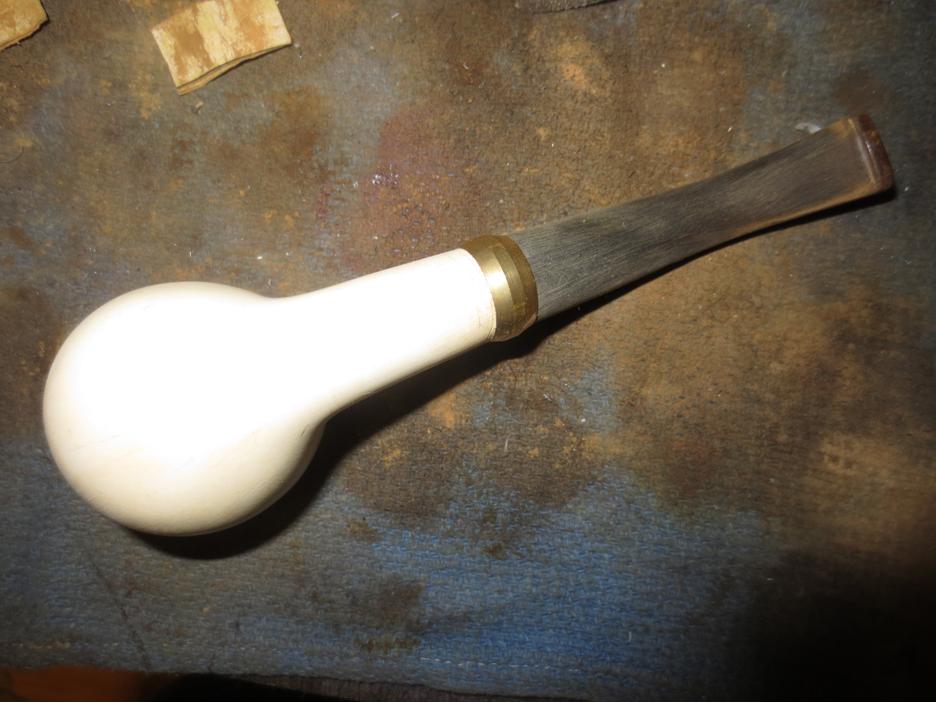
I heated the stem with a heat gun to take out some of the bend. When the stem was flexible I pressed it against table surface with a towel to take out some of the bend. I cooled it with water to set the new bend. The second photo below shows the newly bent stem.band15

band16 
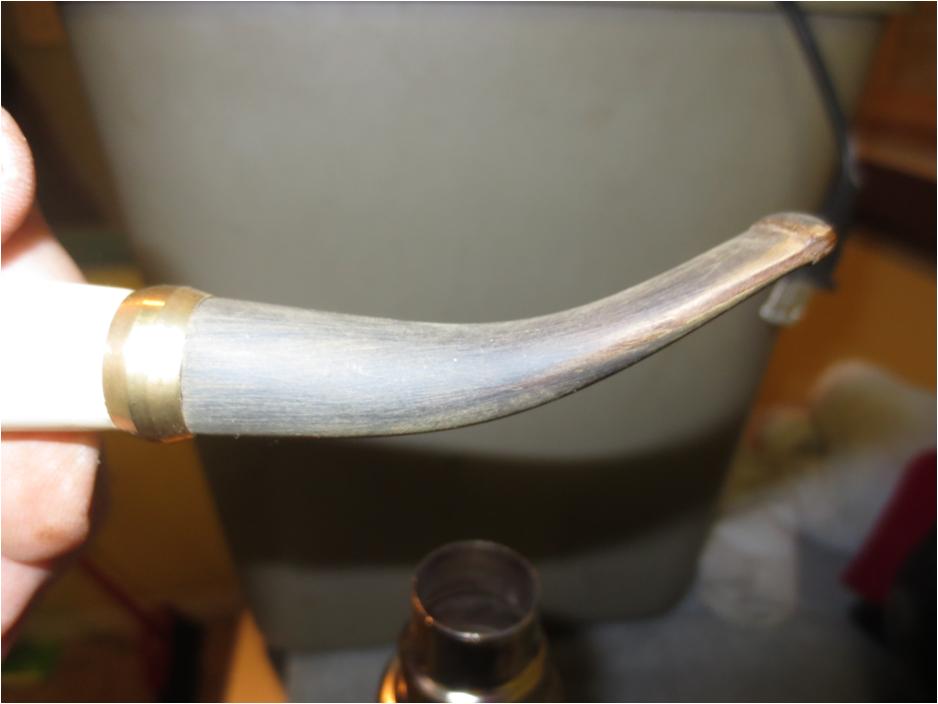
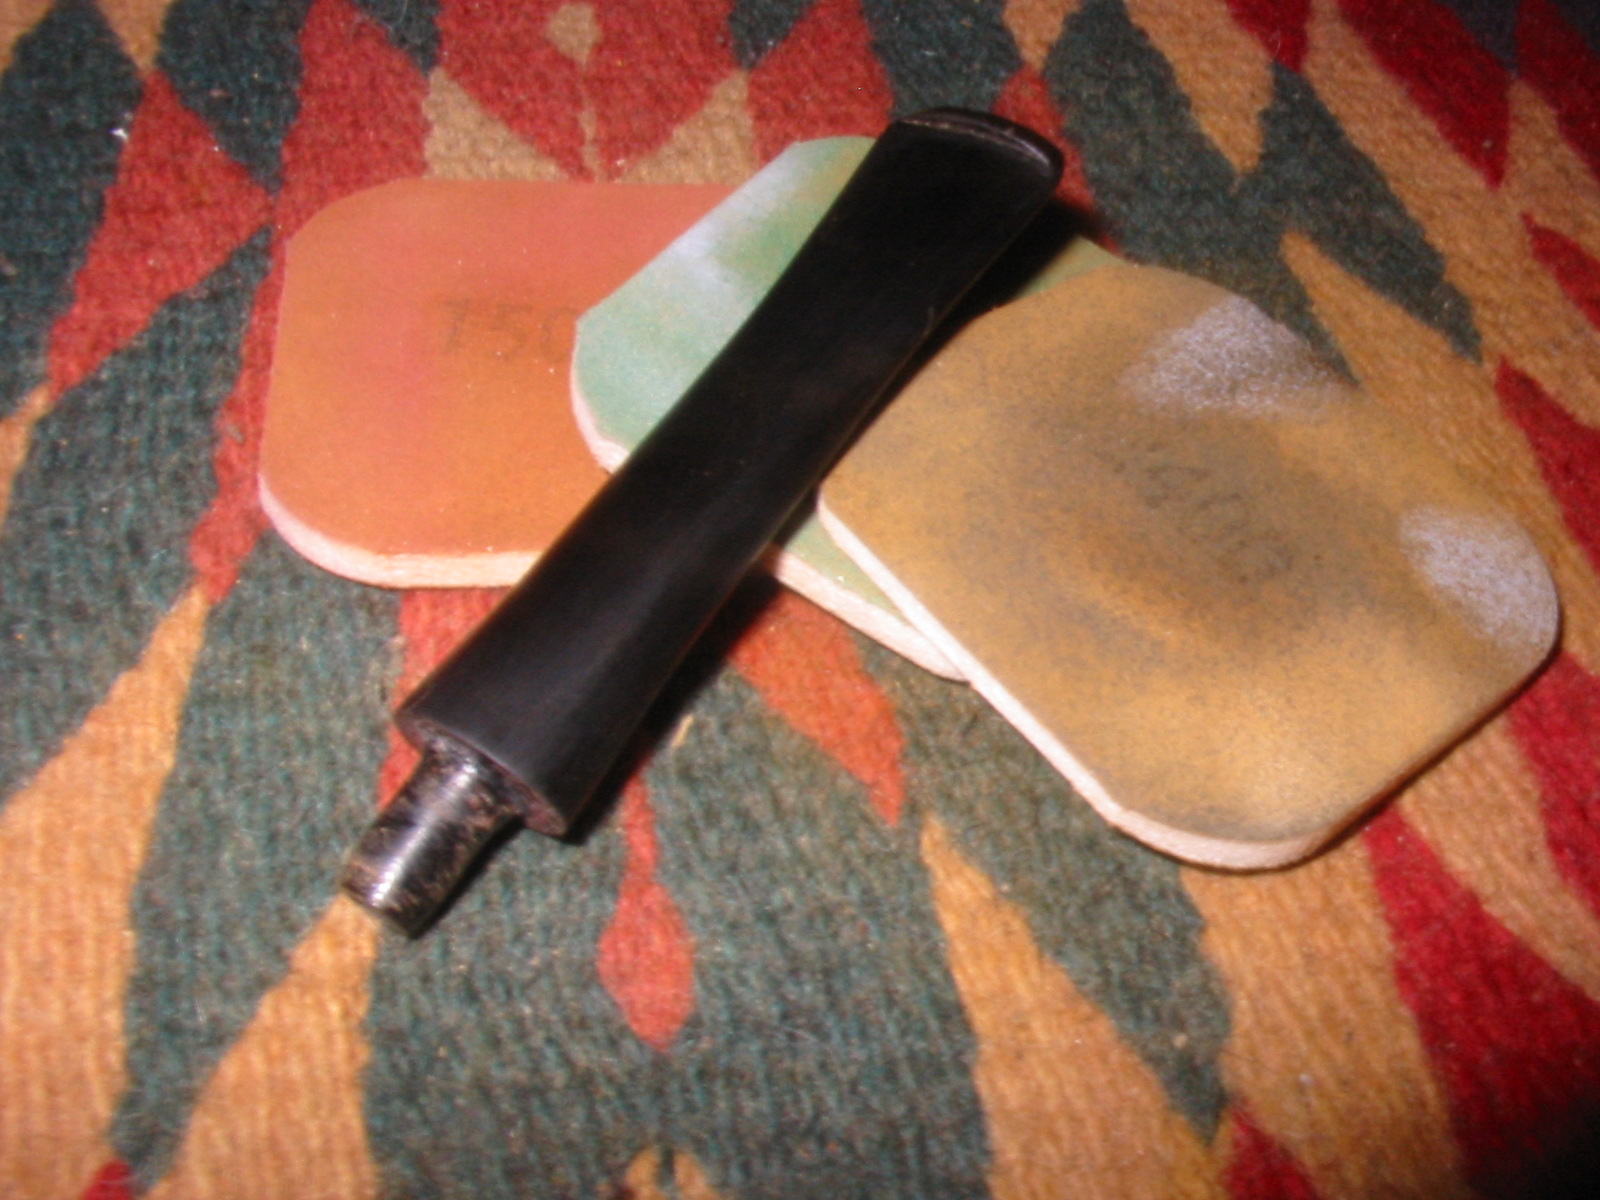
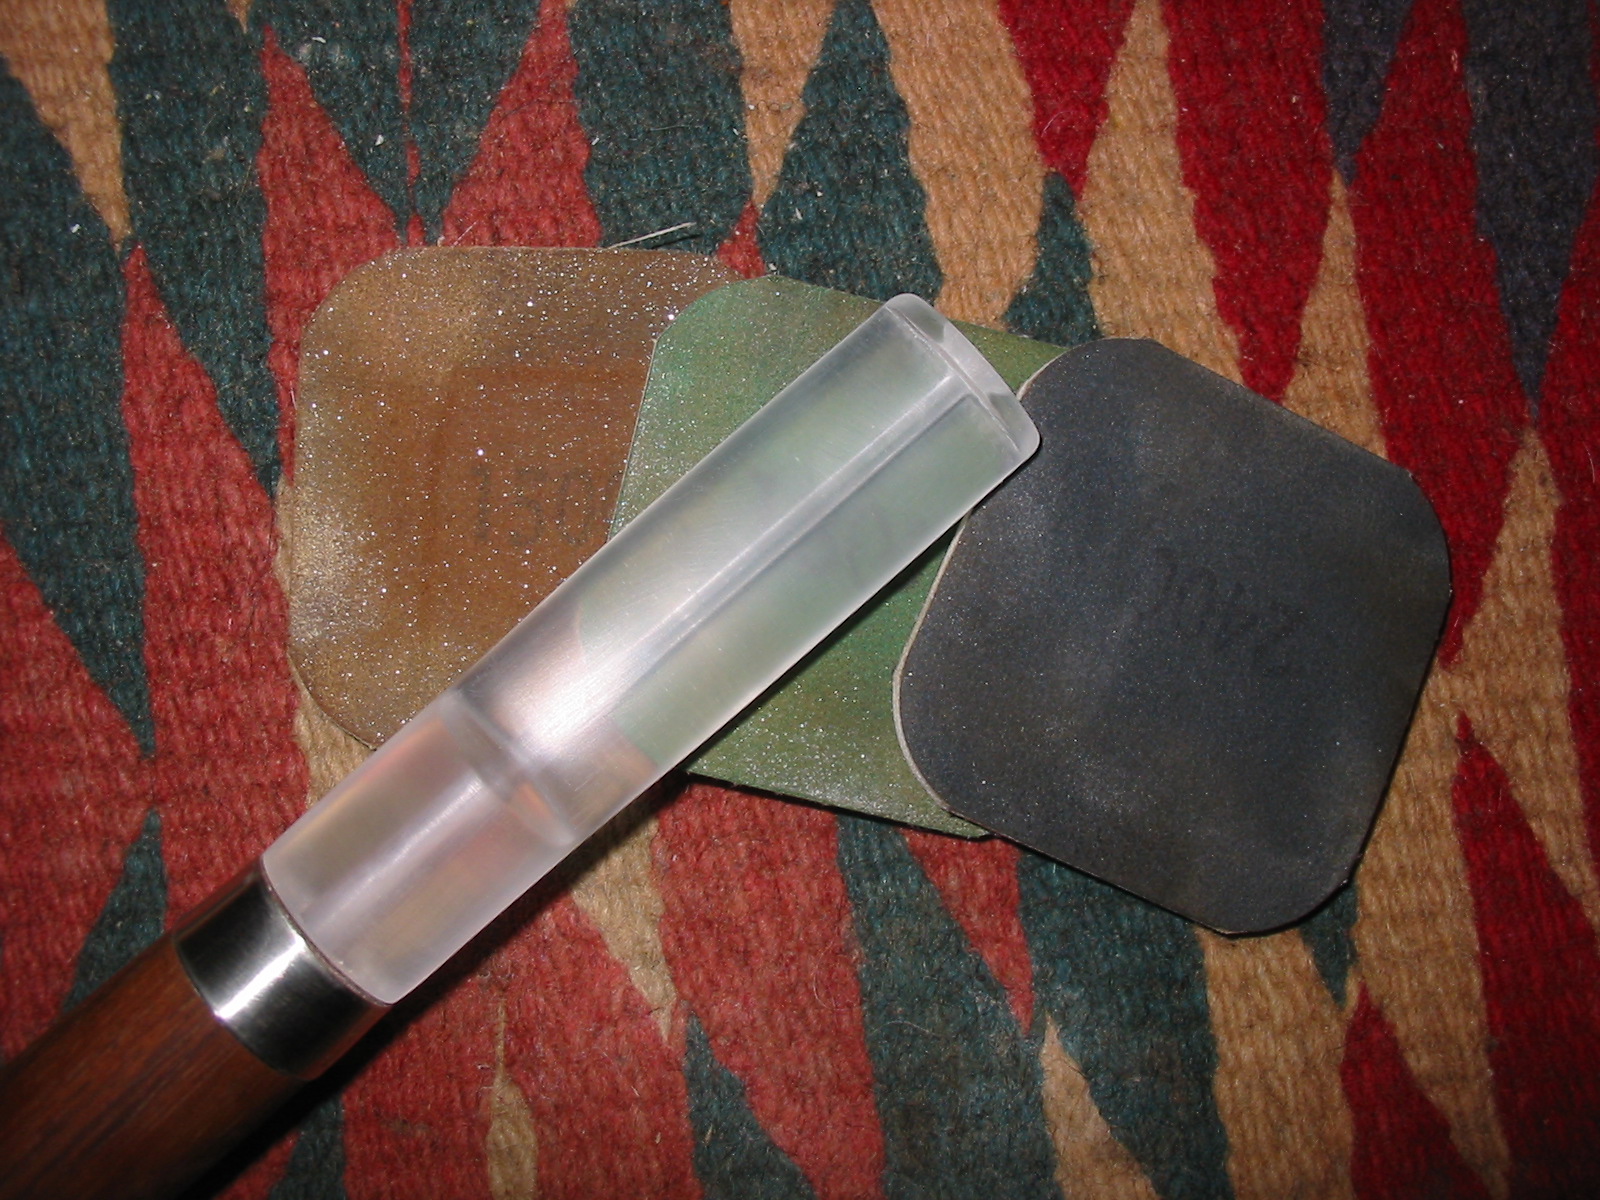
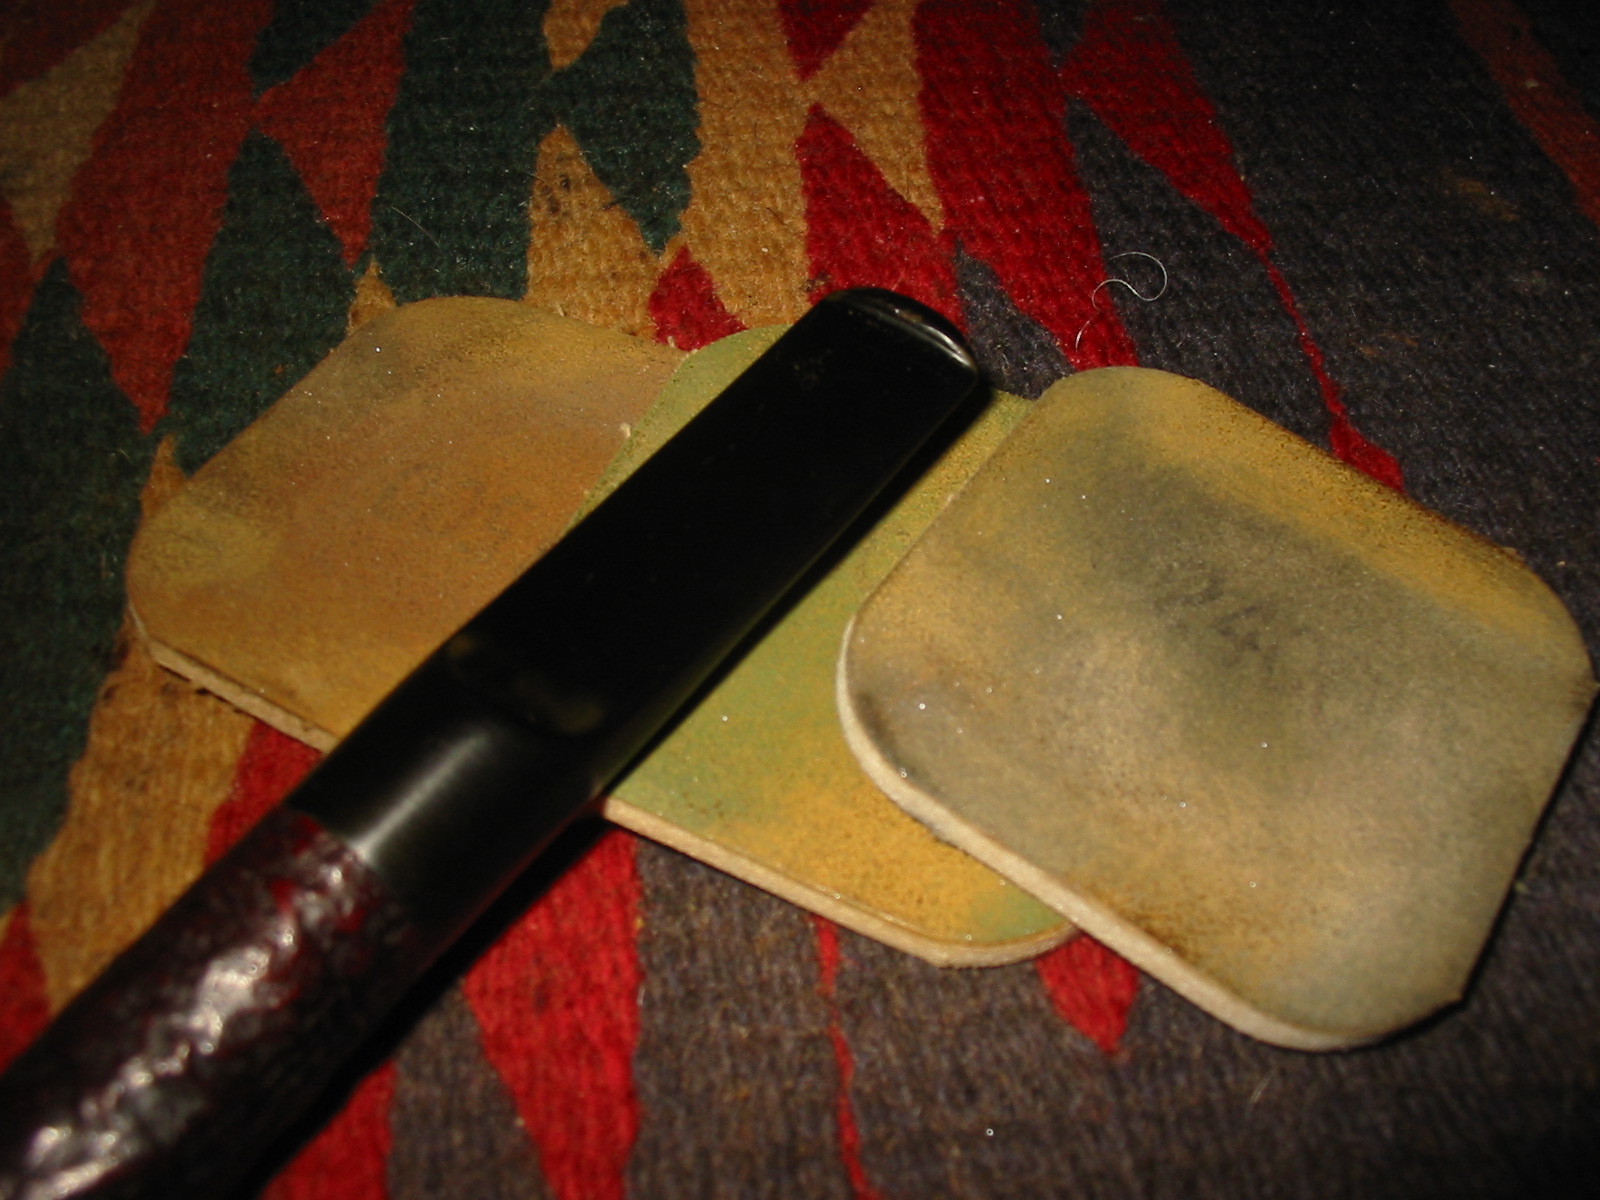
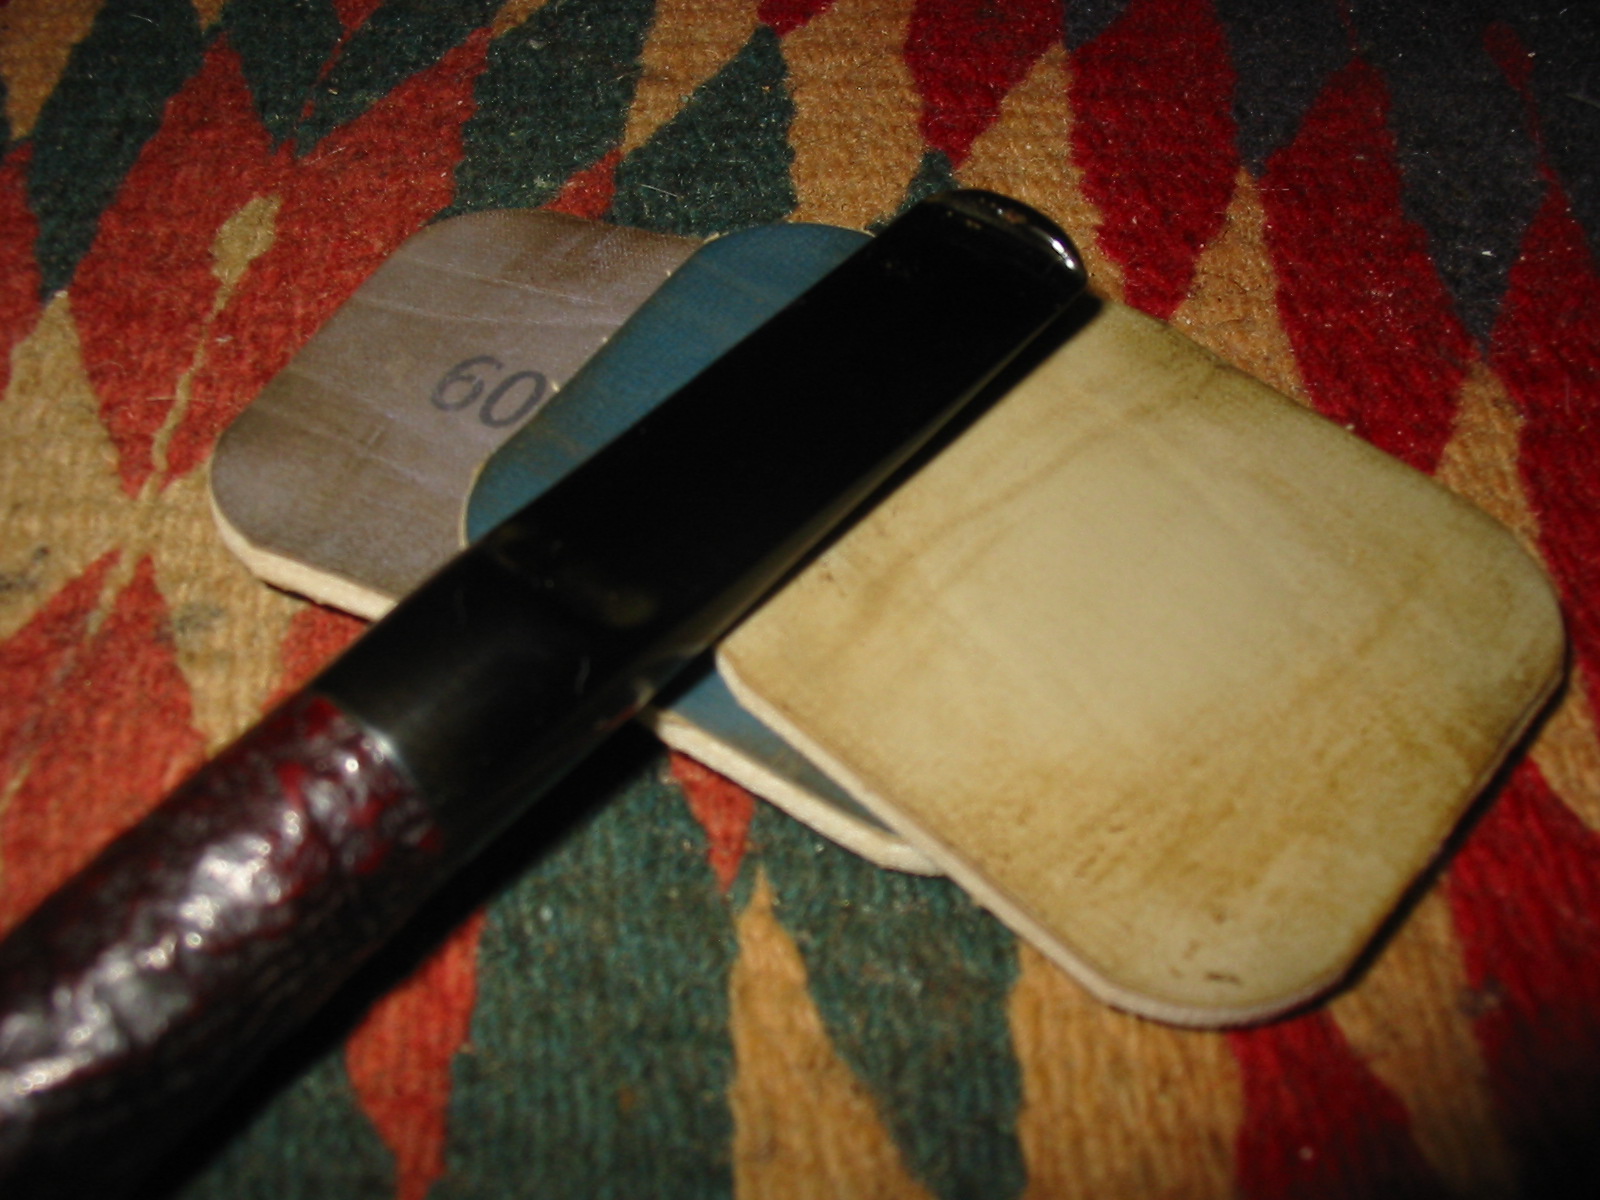
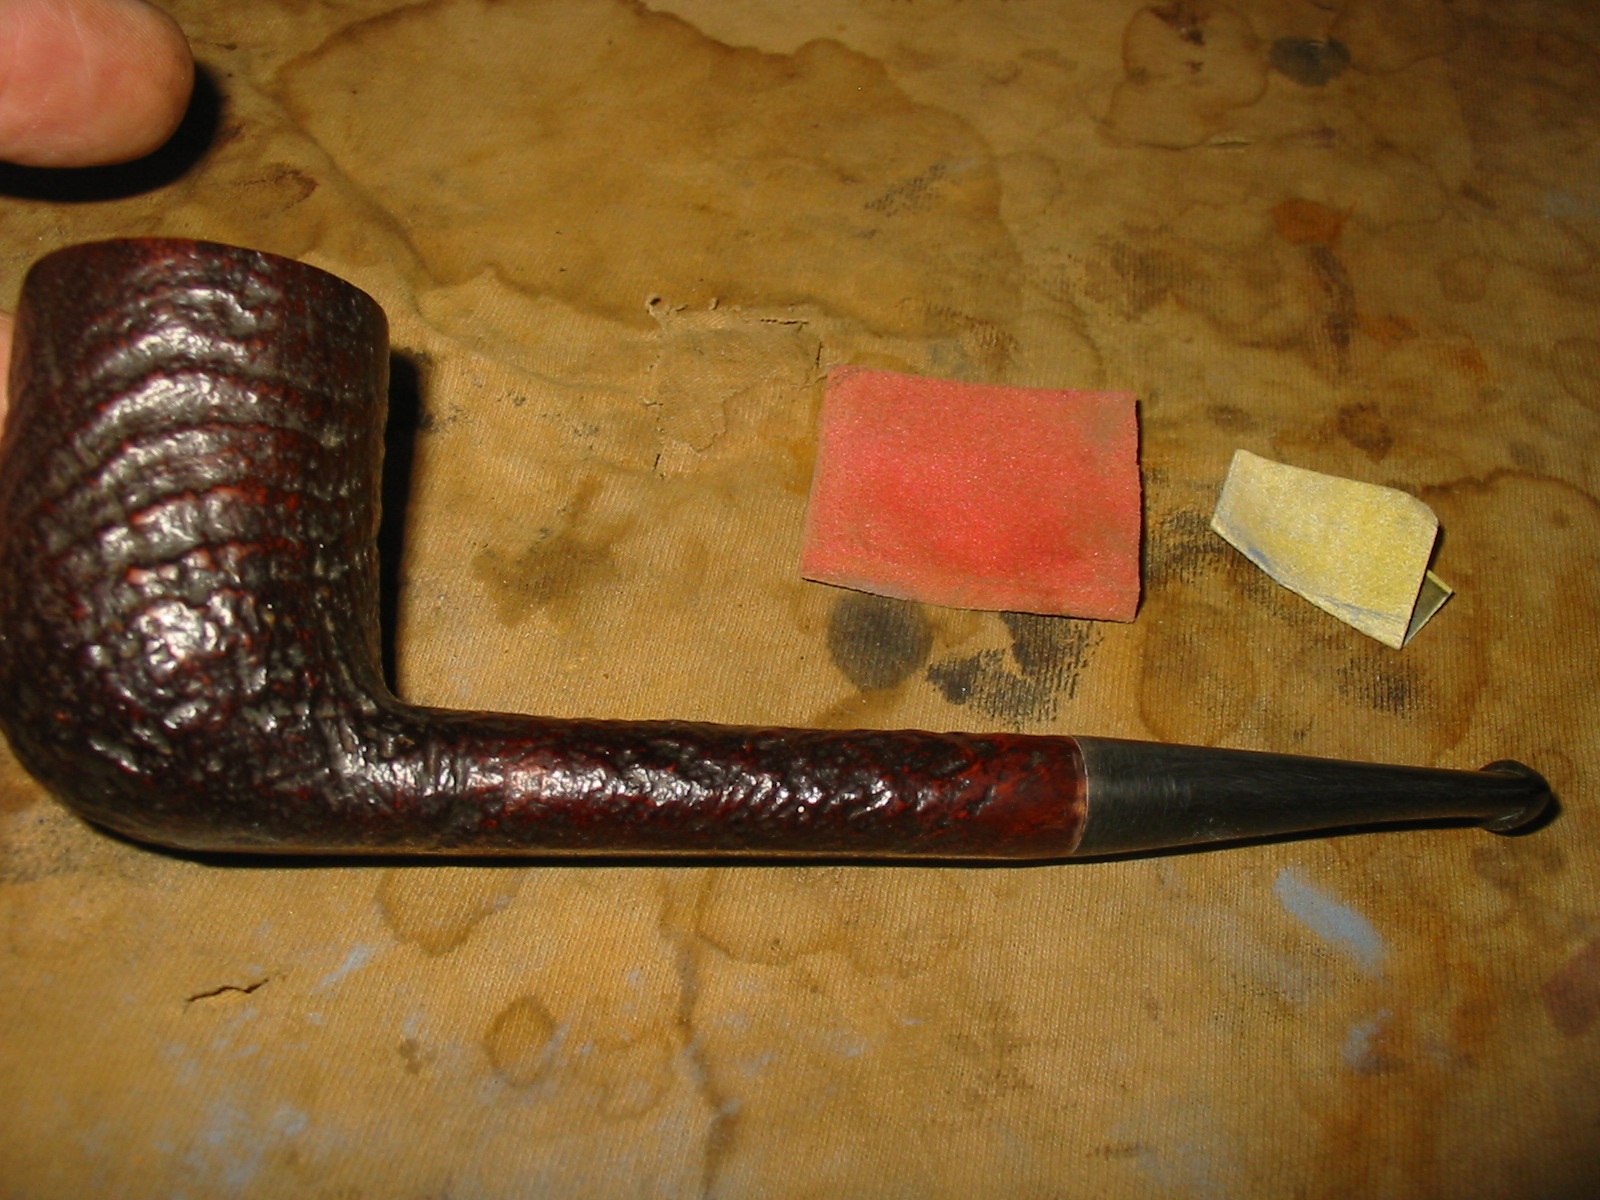
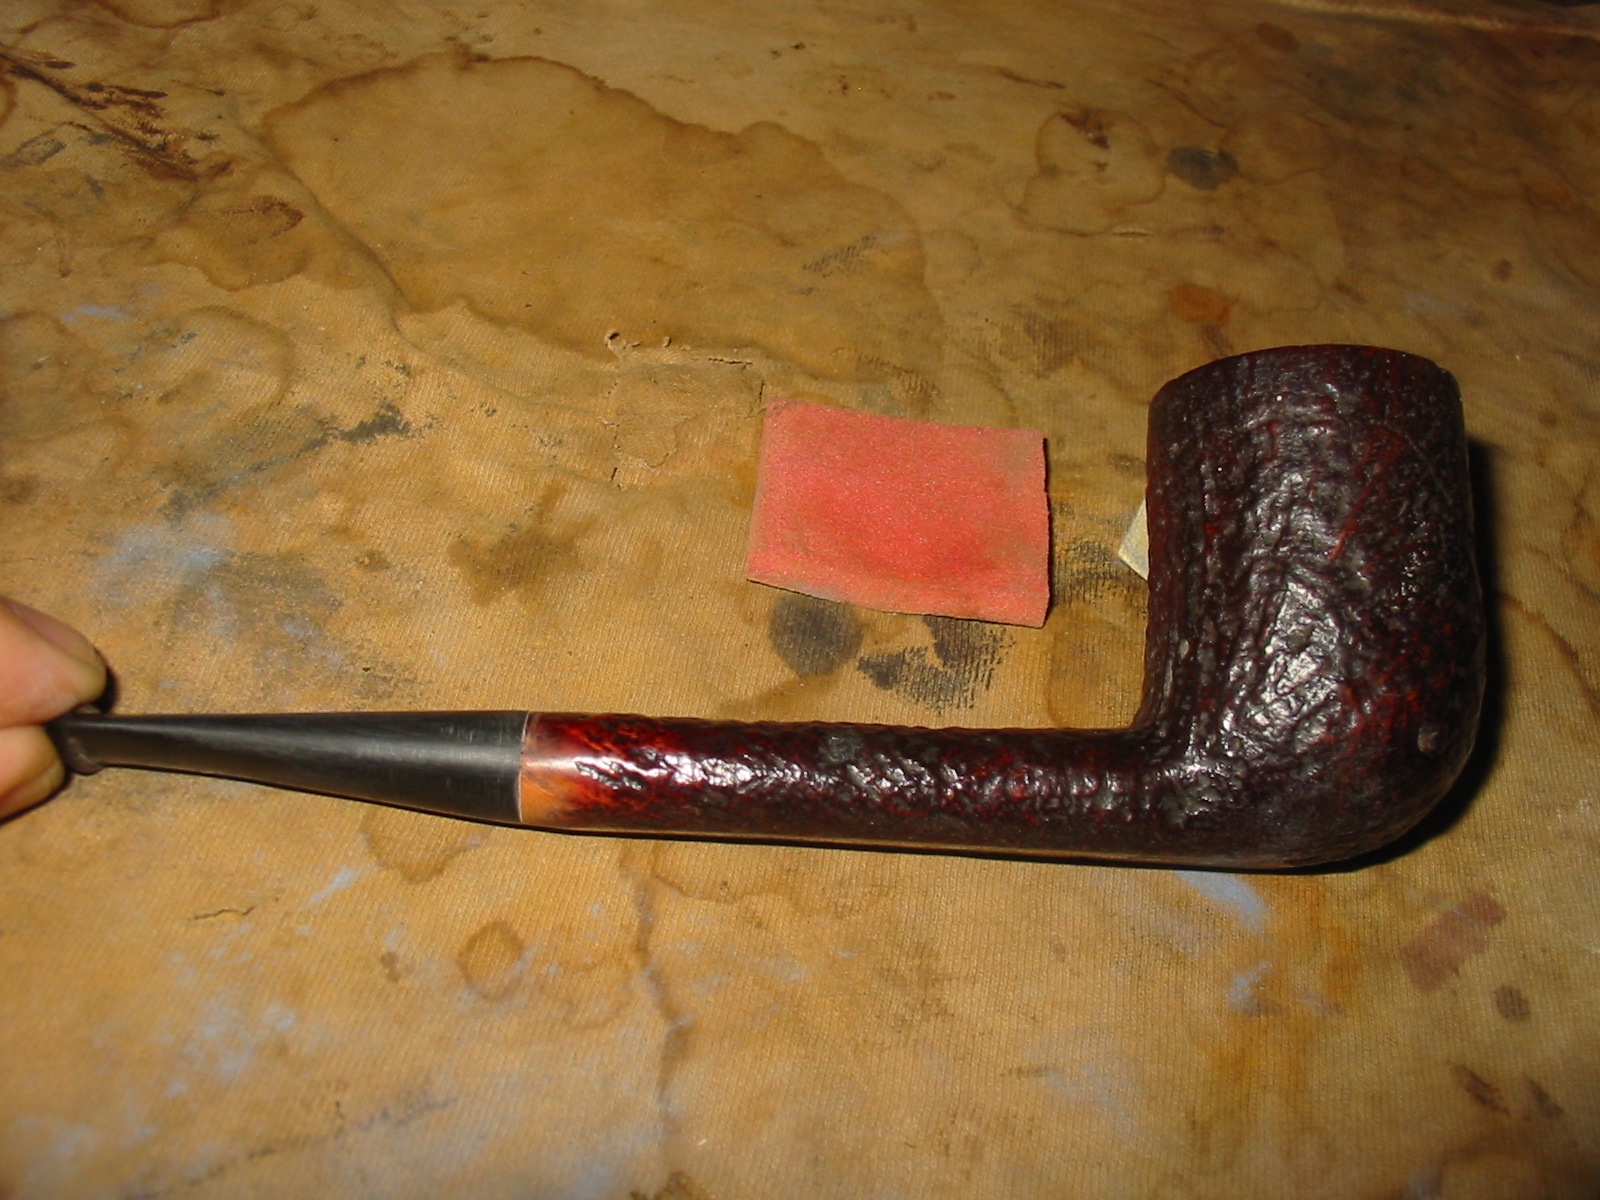
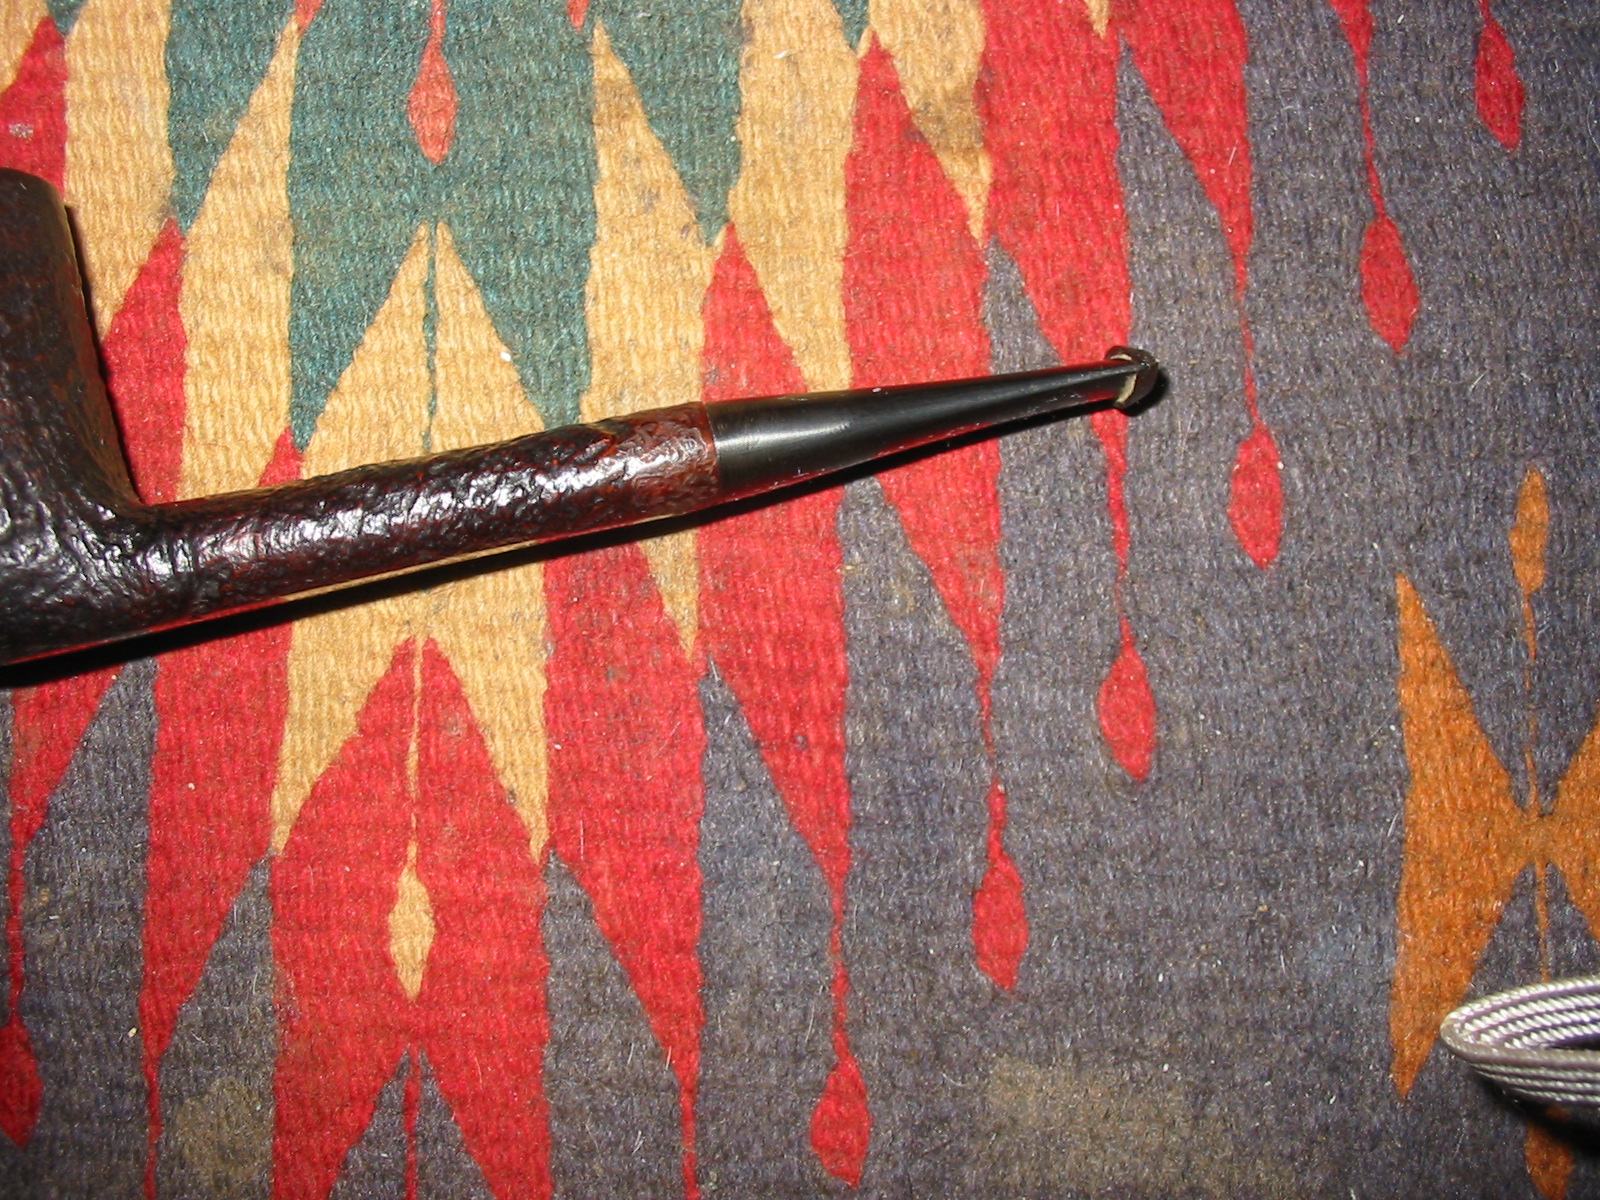
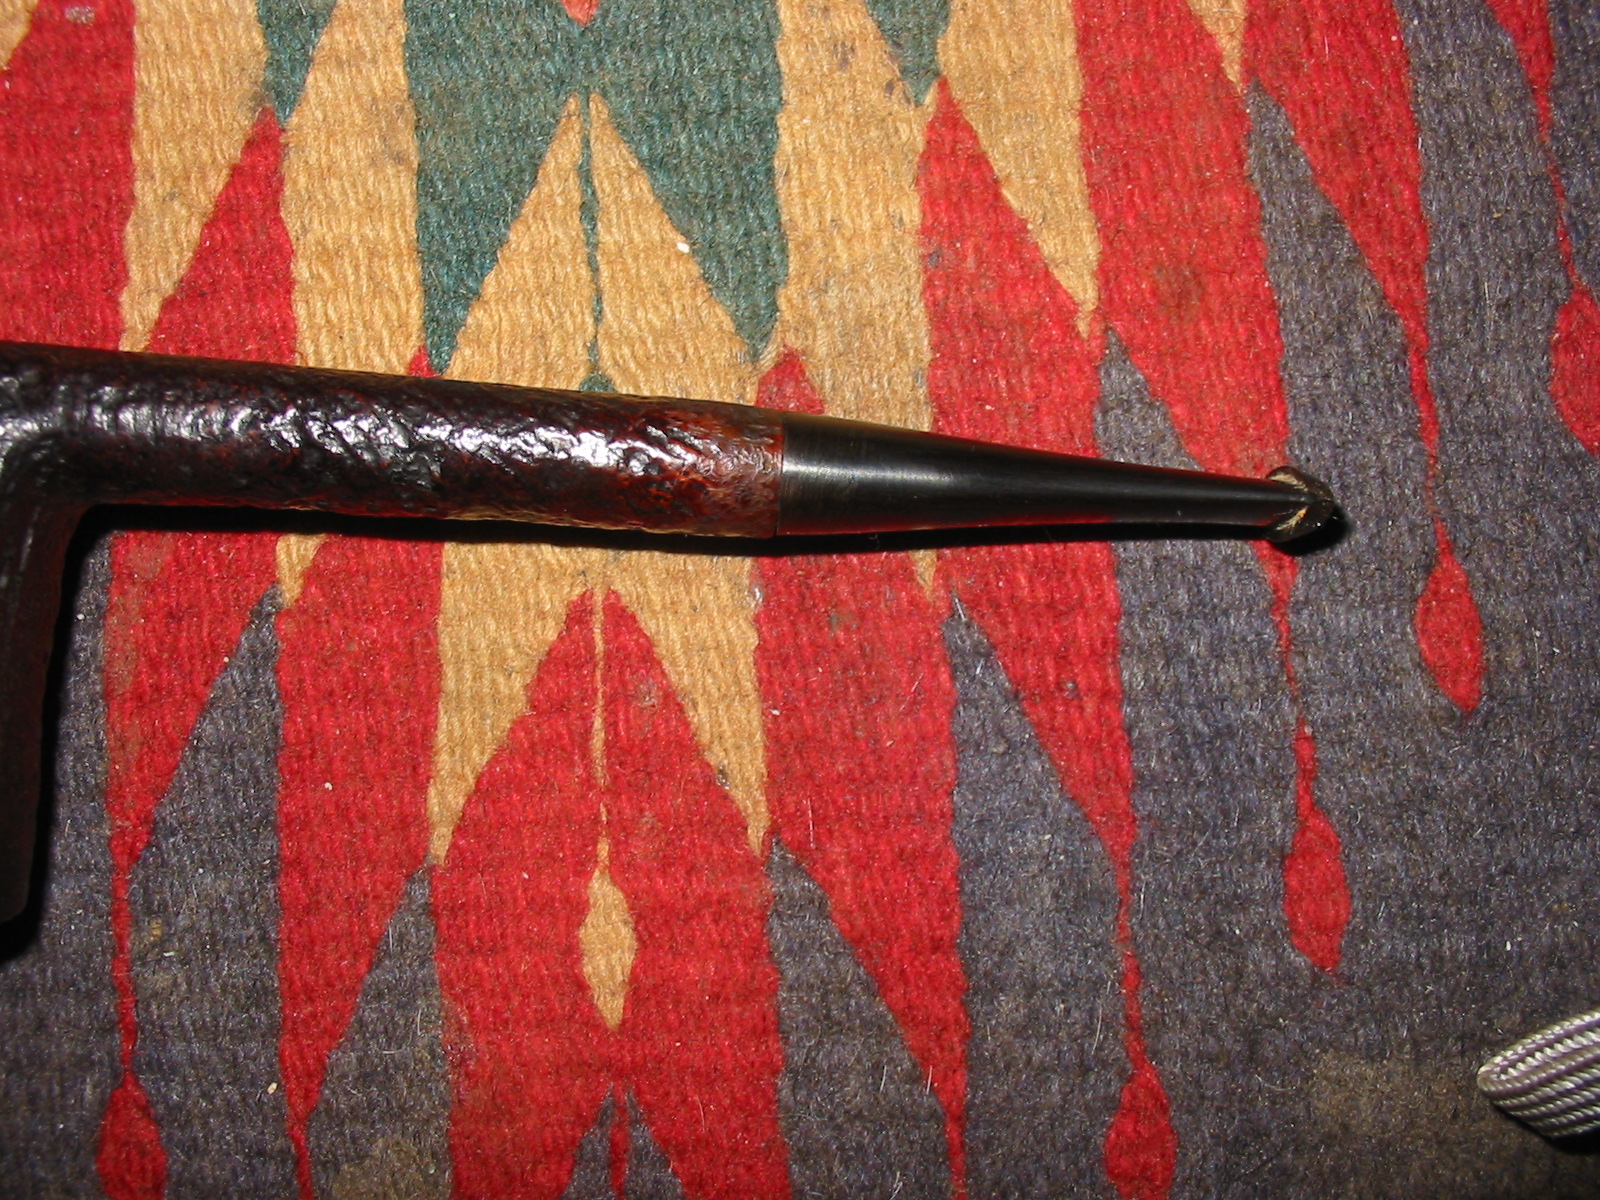
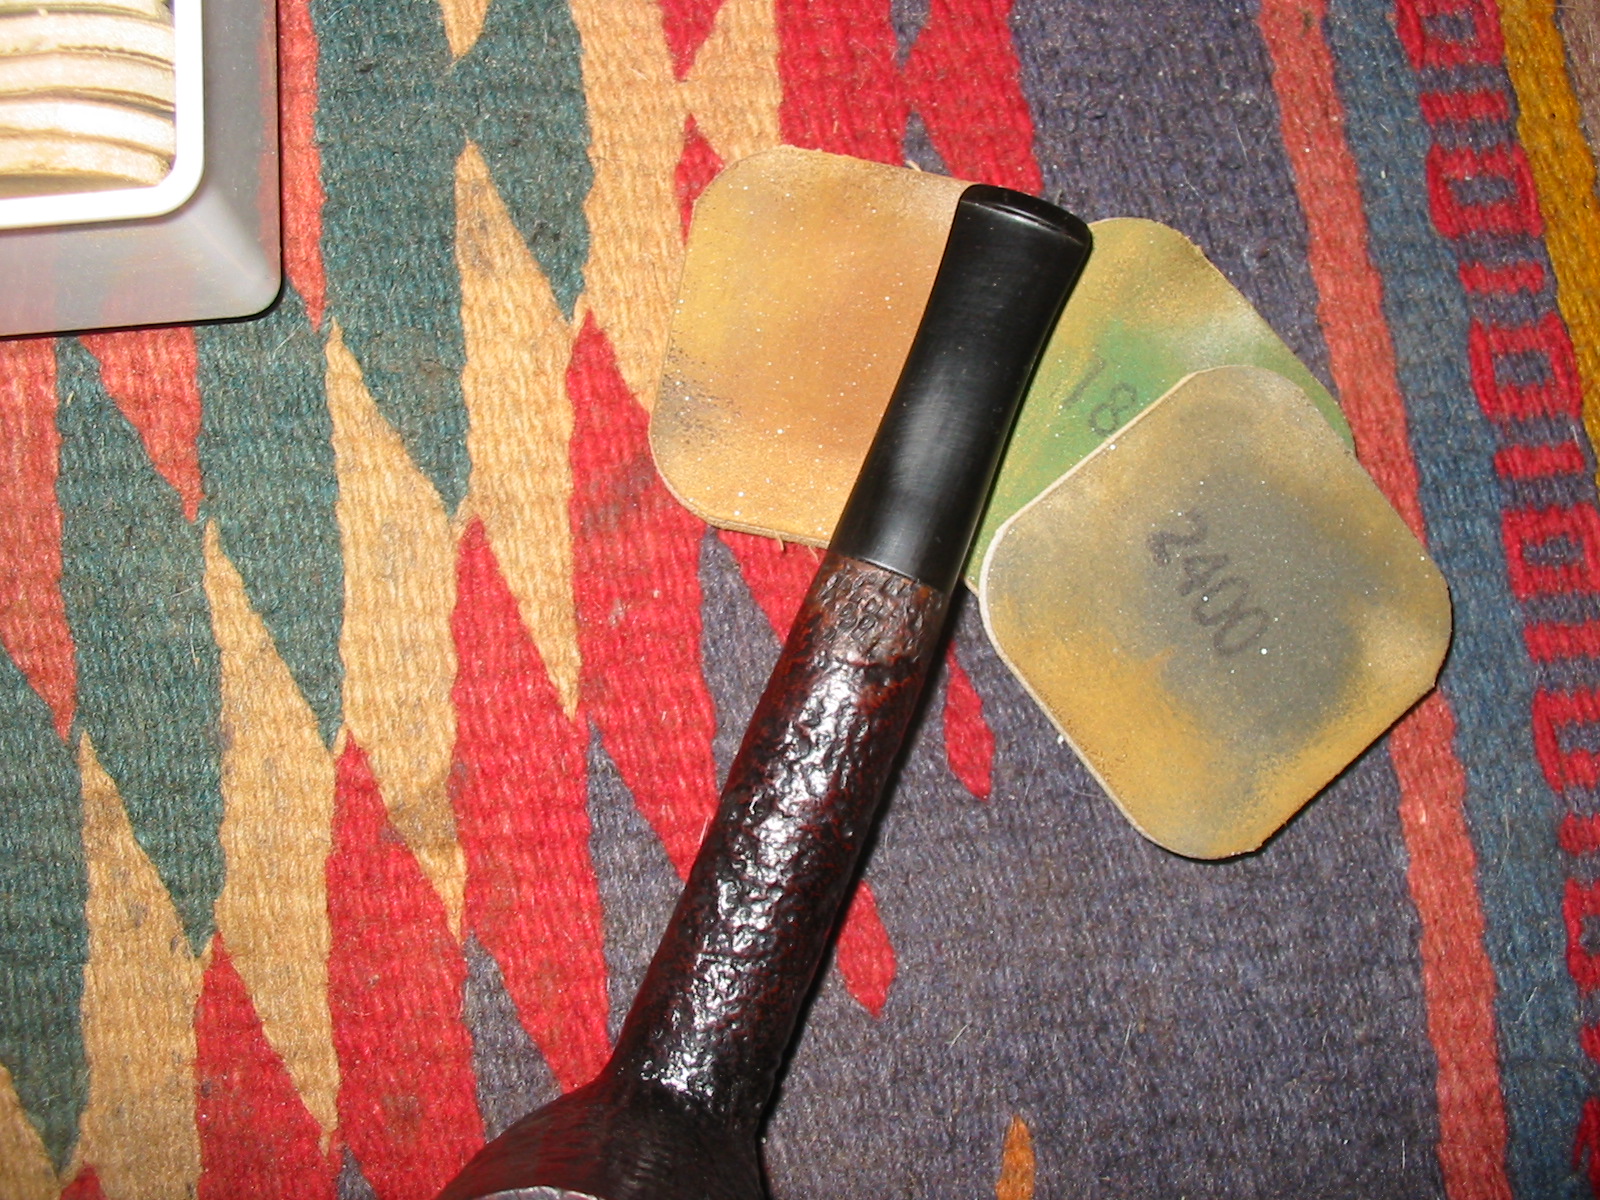
I sanded the stem with a medium and a fine grit sanding sponge to take out the scratches and work on the oxidation that was deep in the edges of the button.band17

band18

band19

band20 
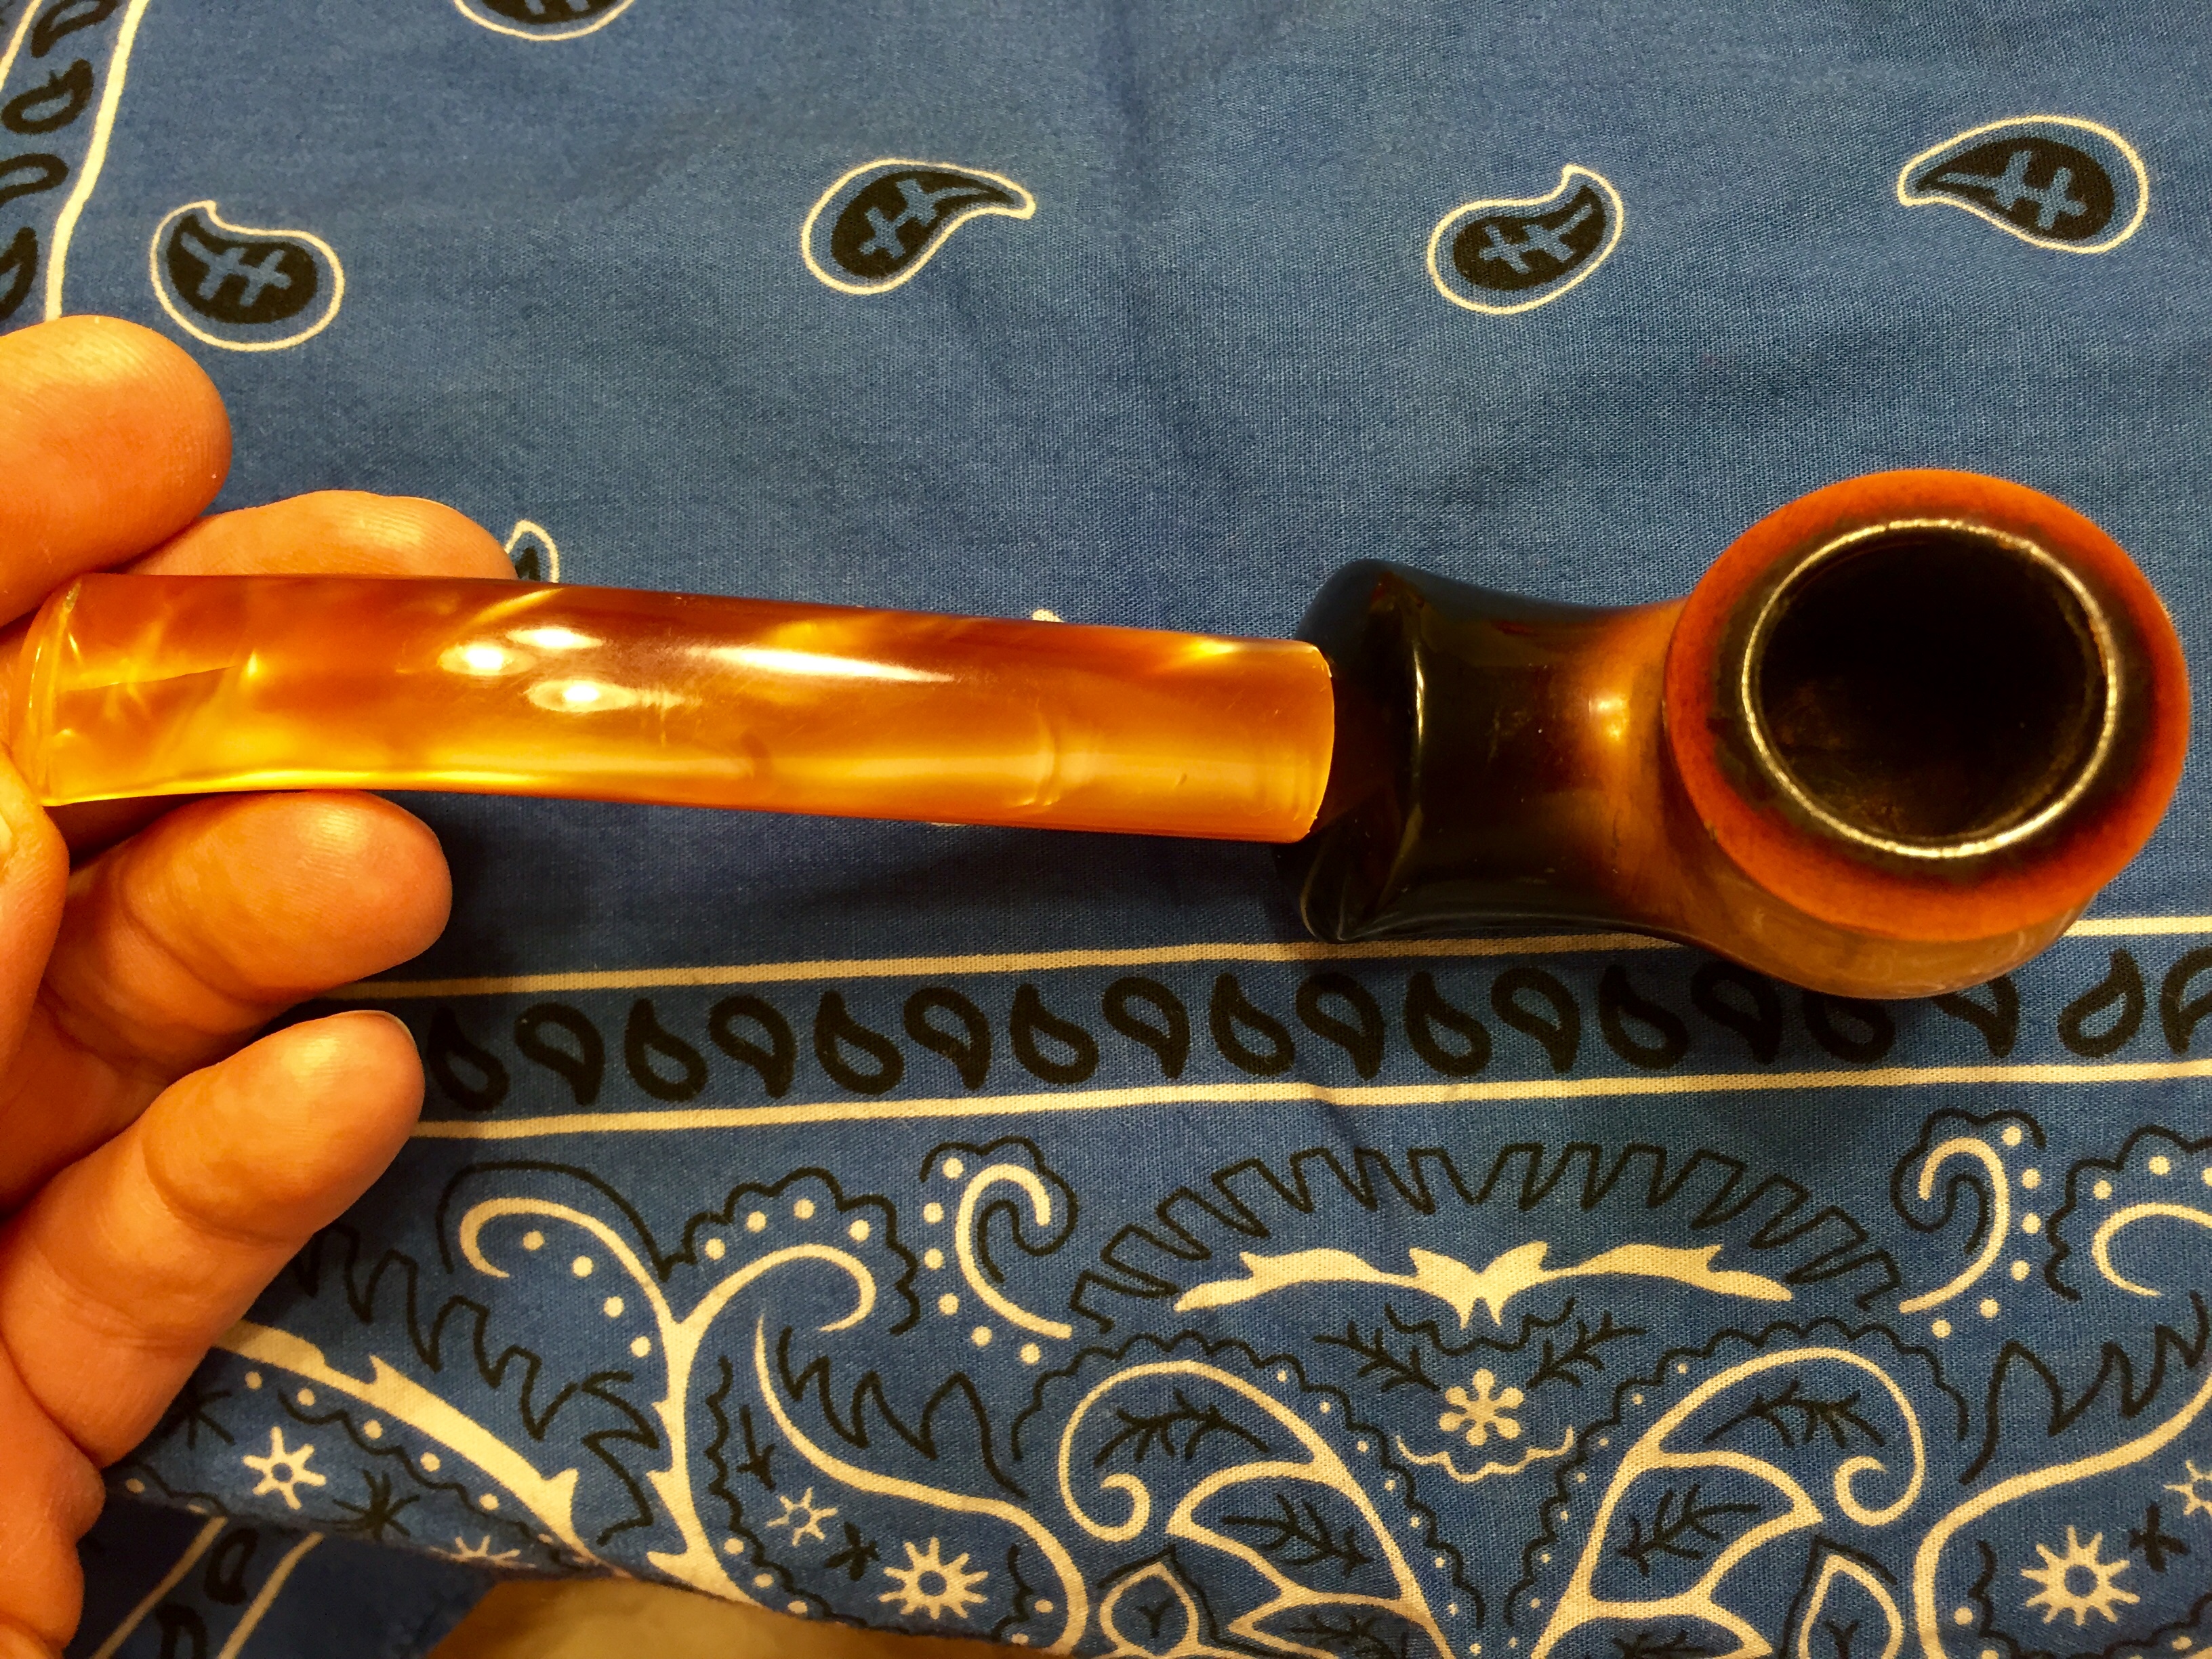
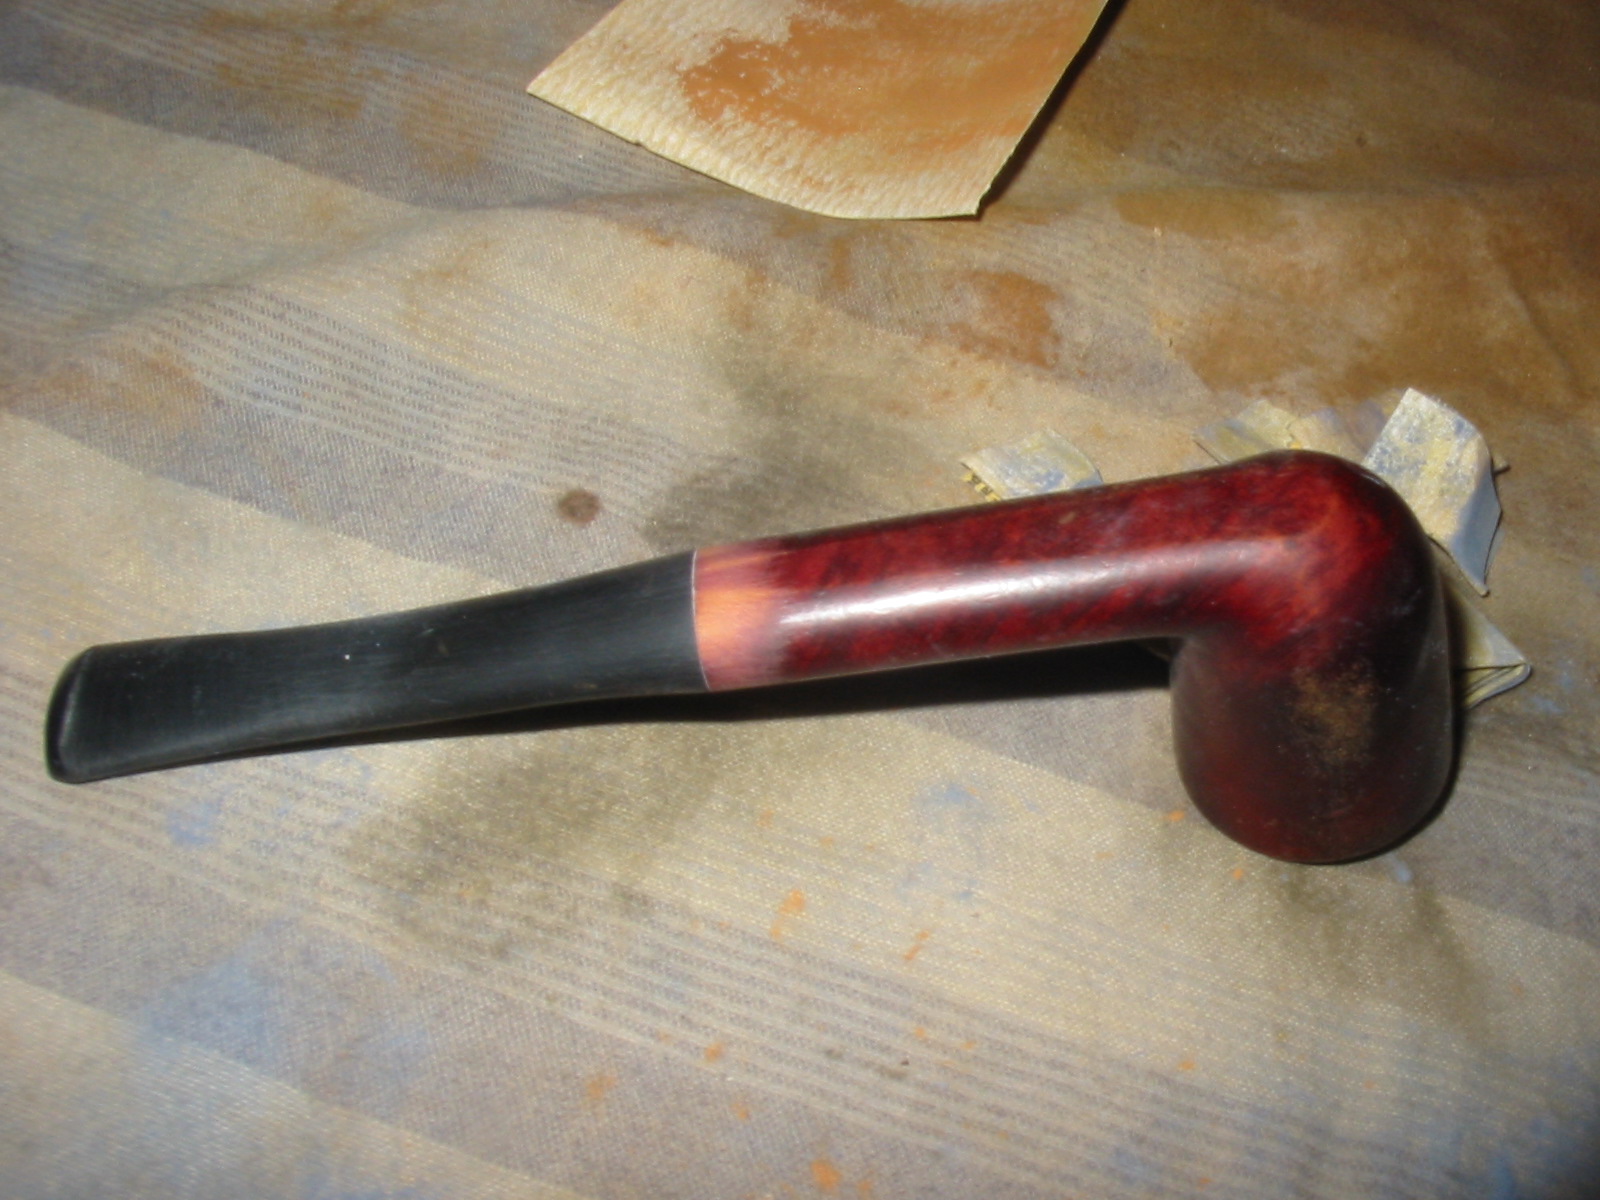
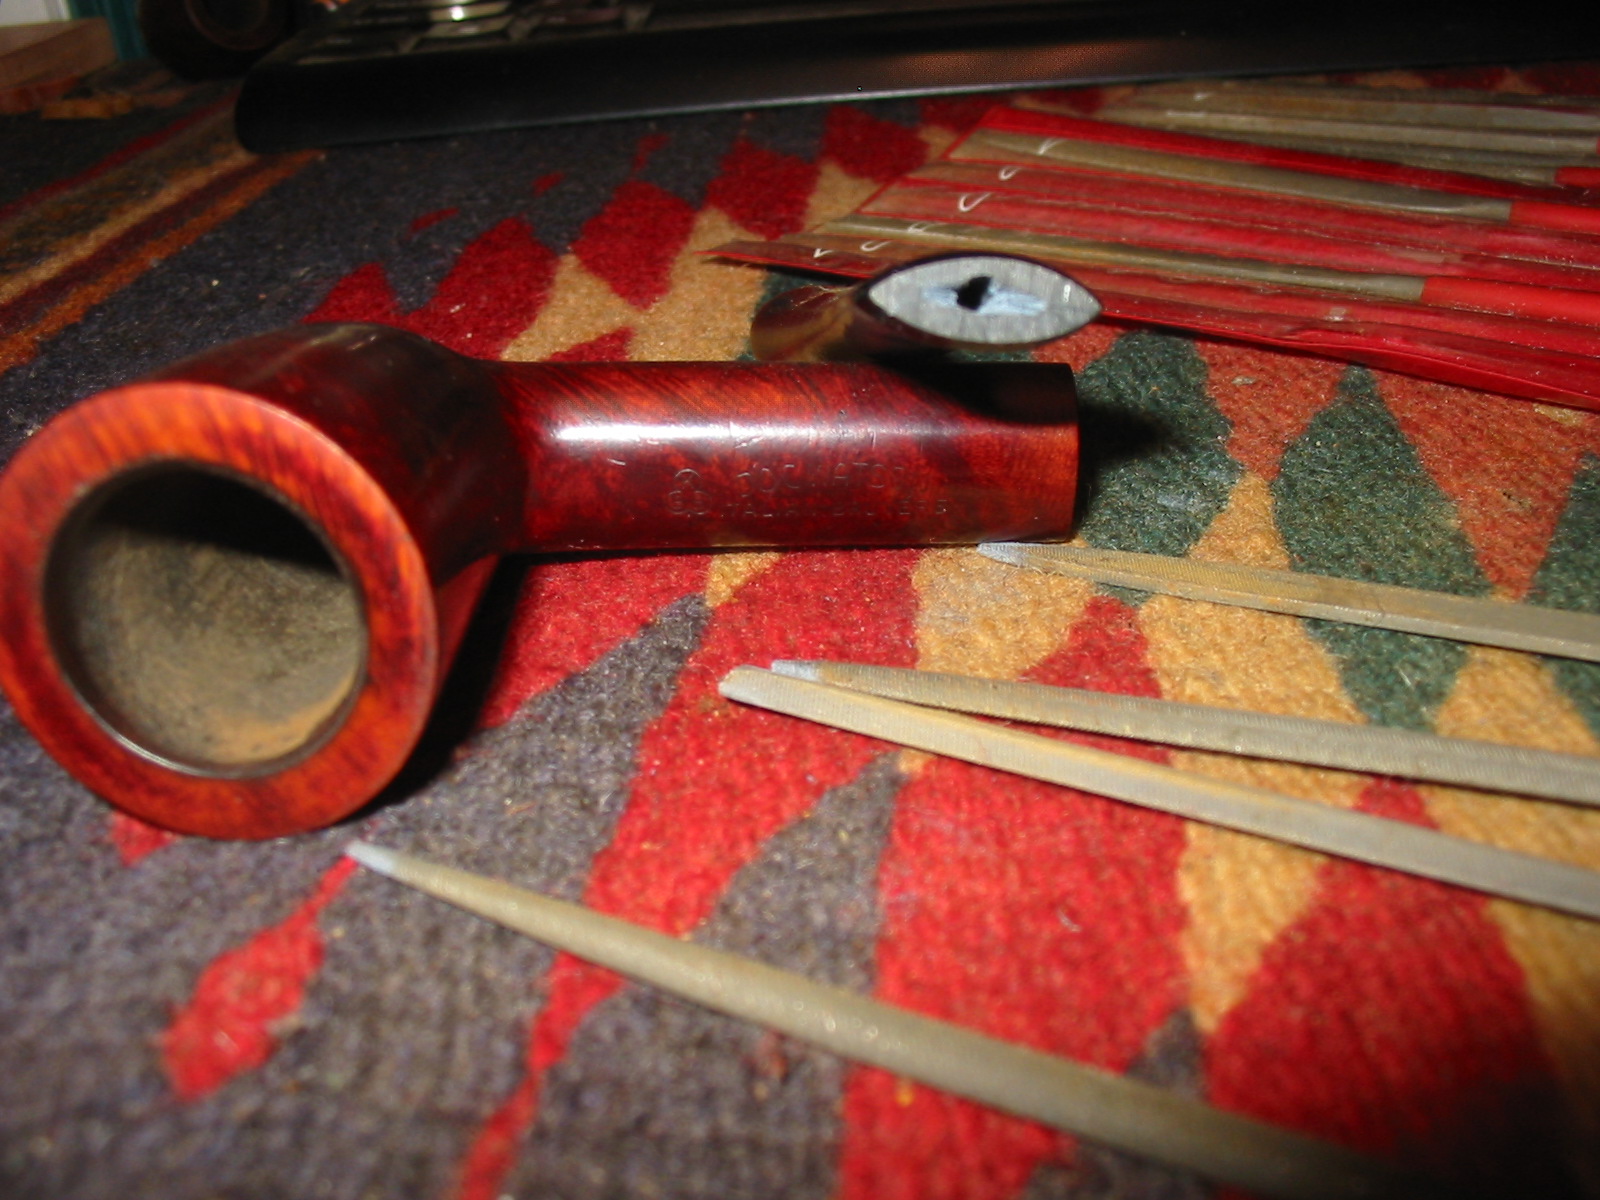
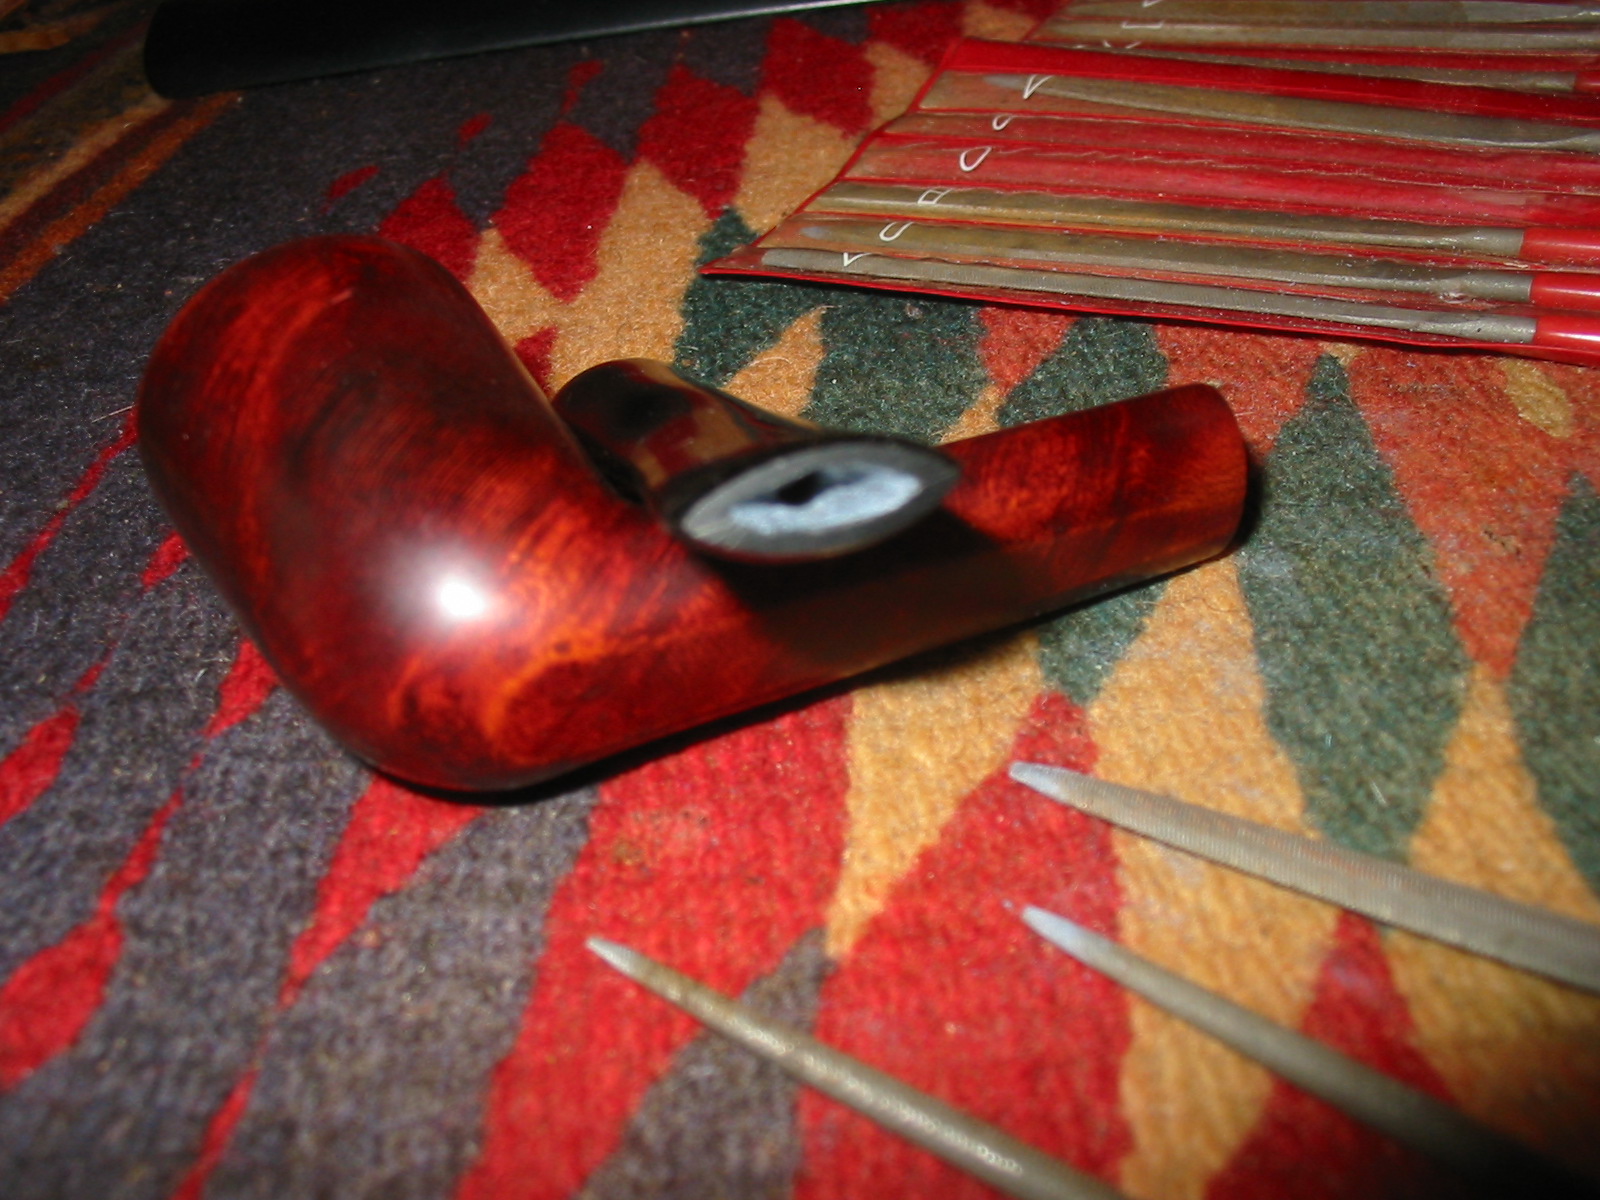
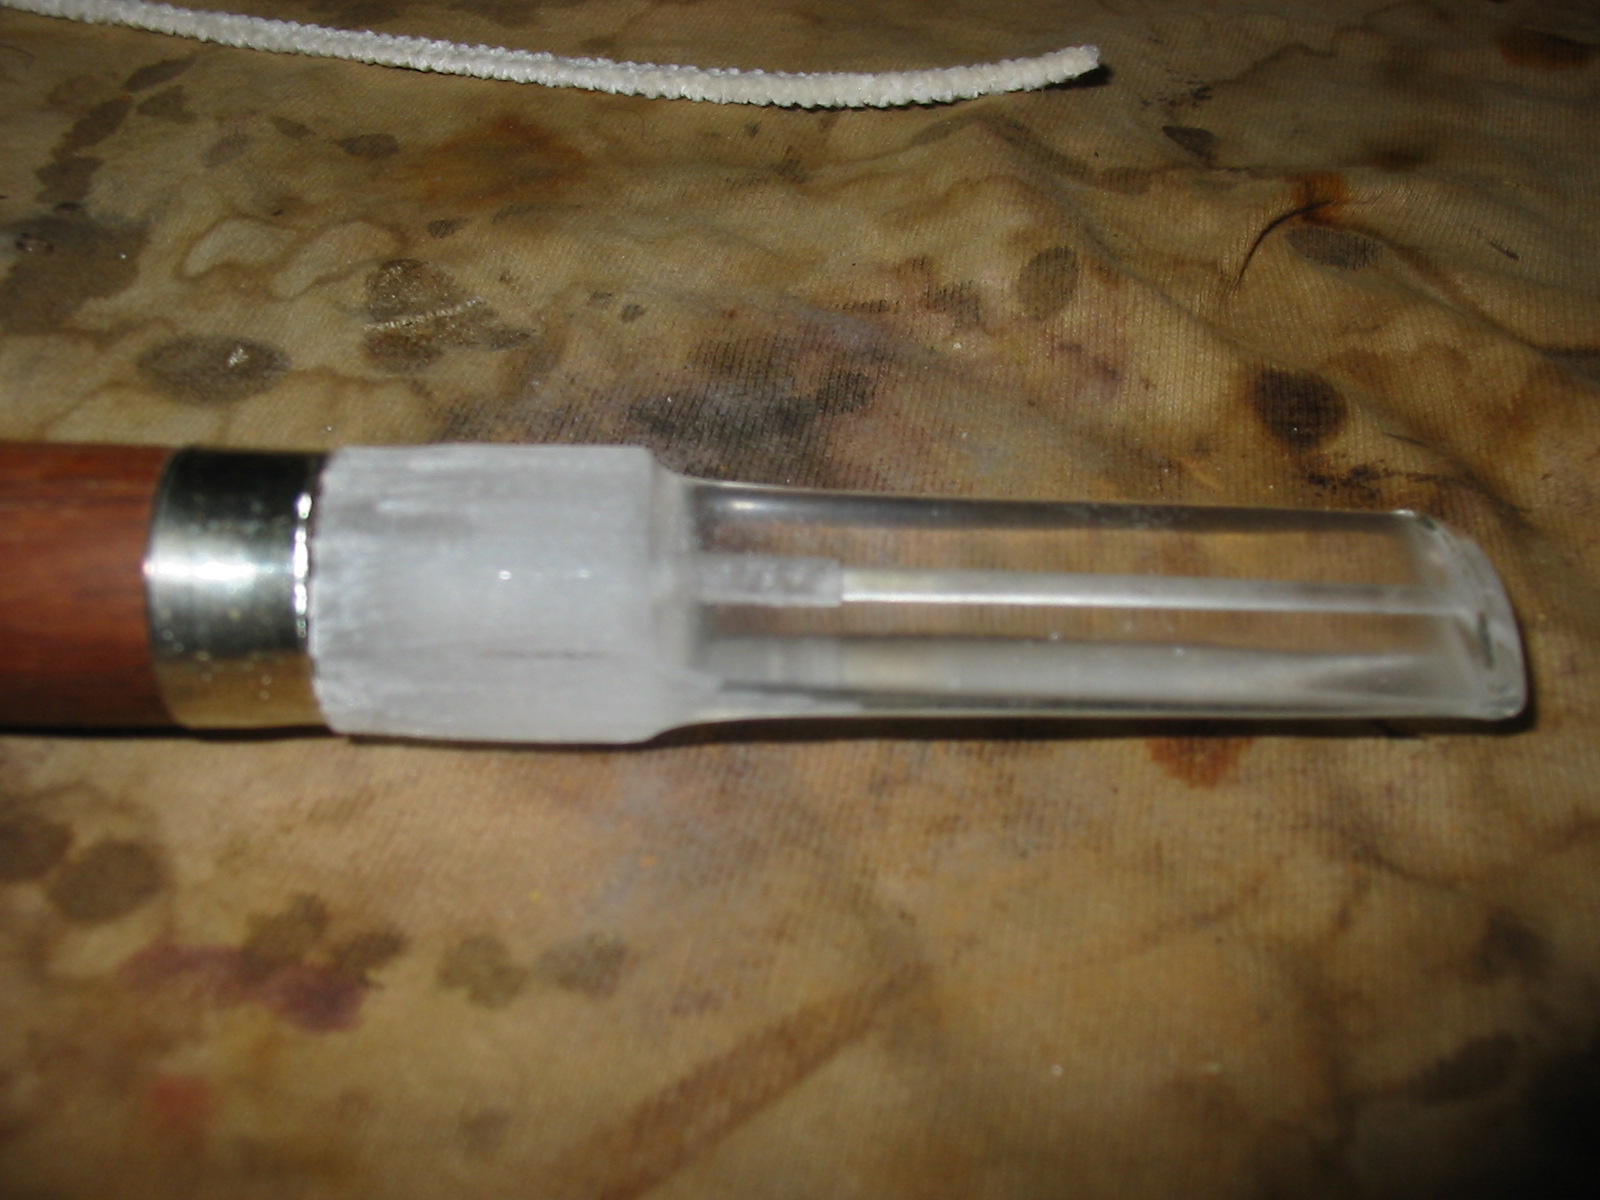
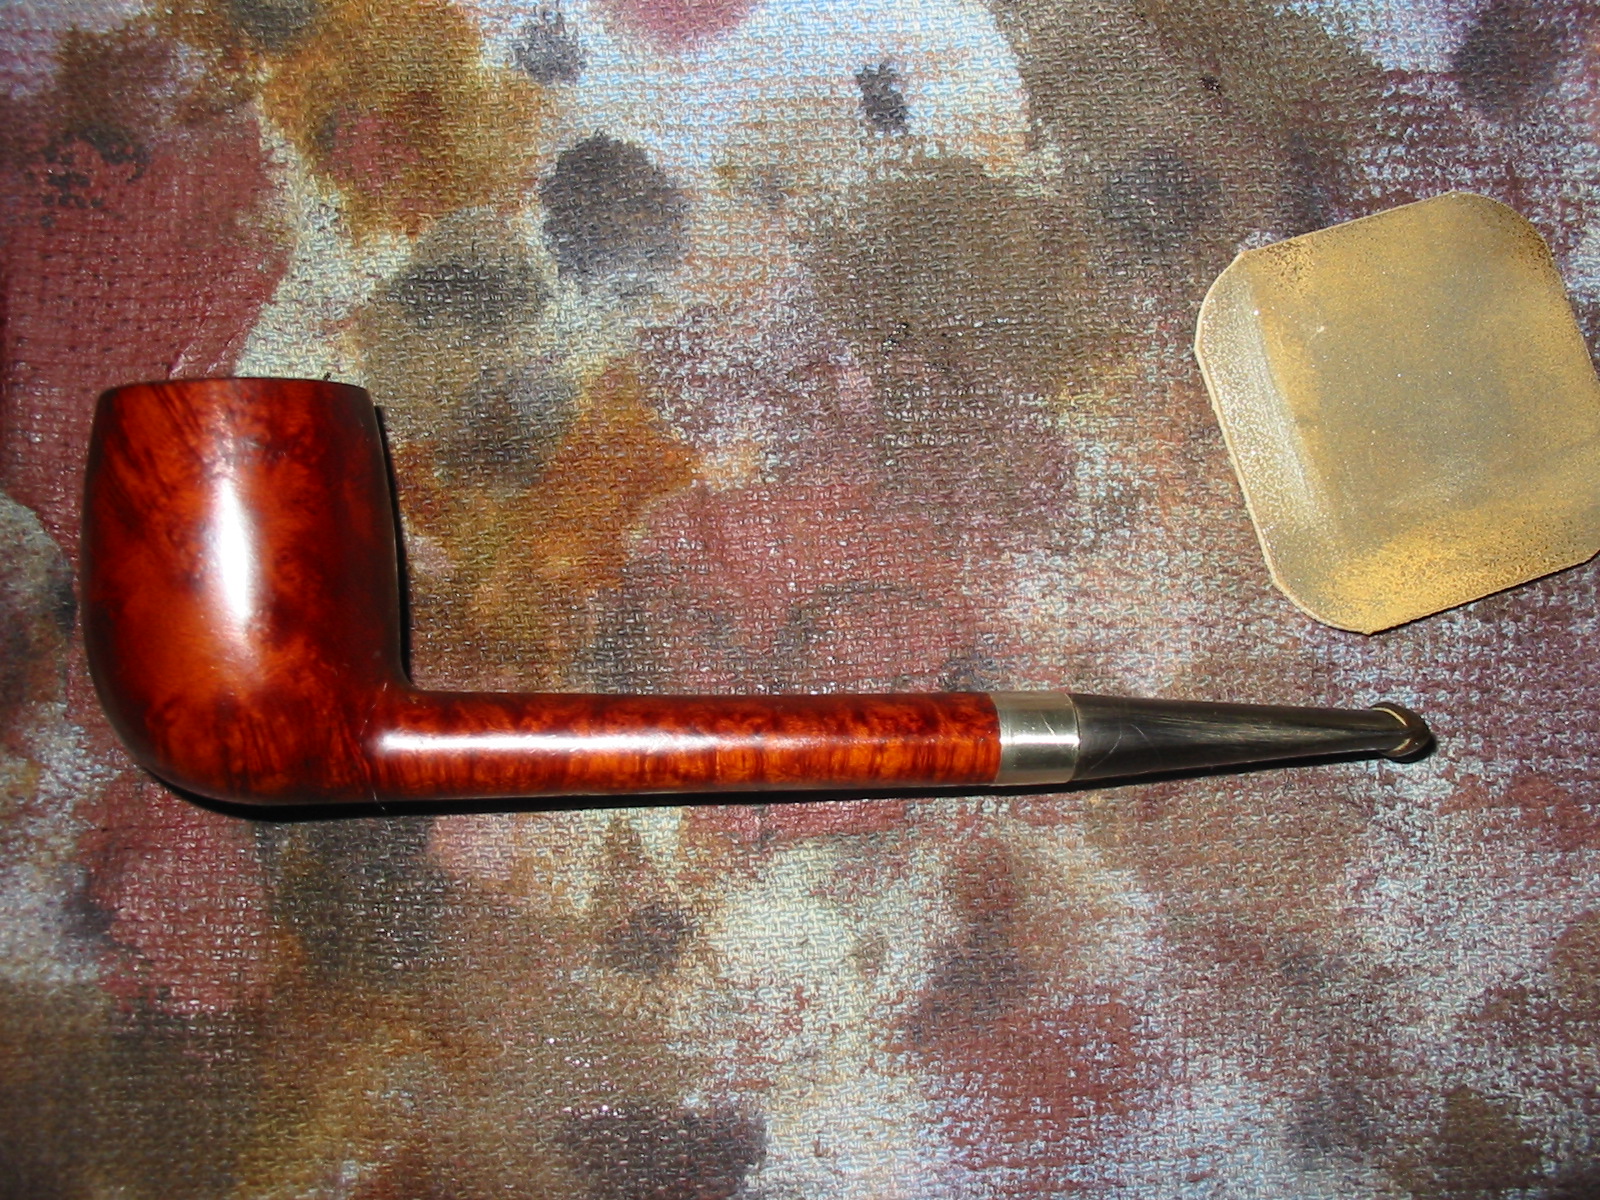
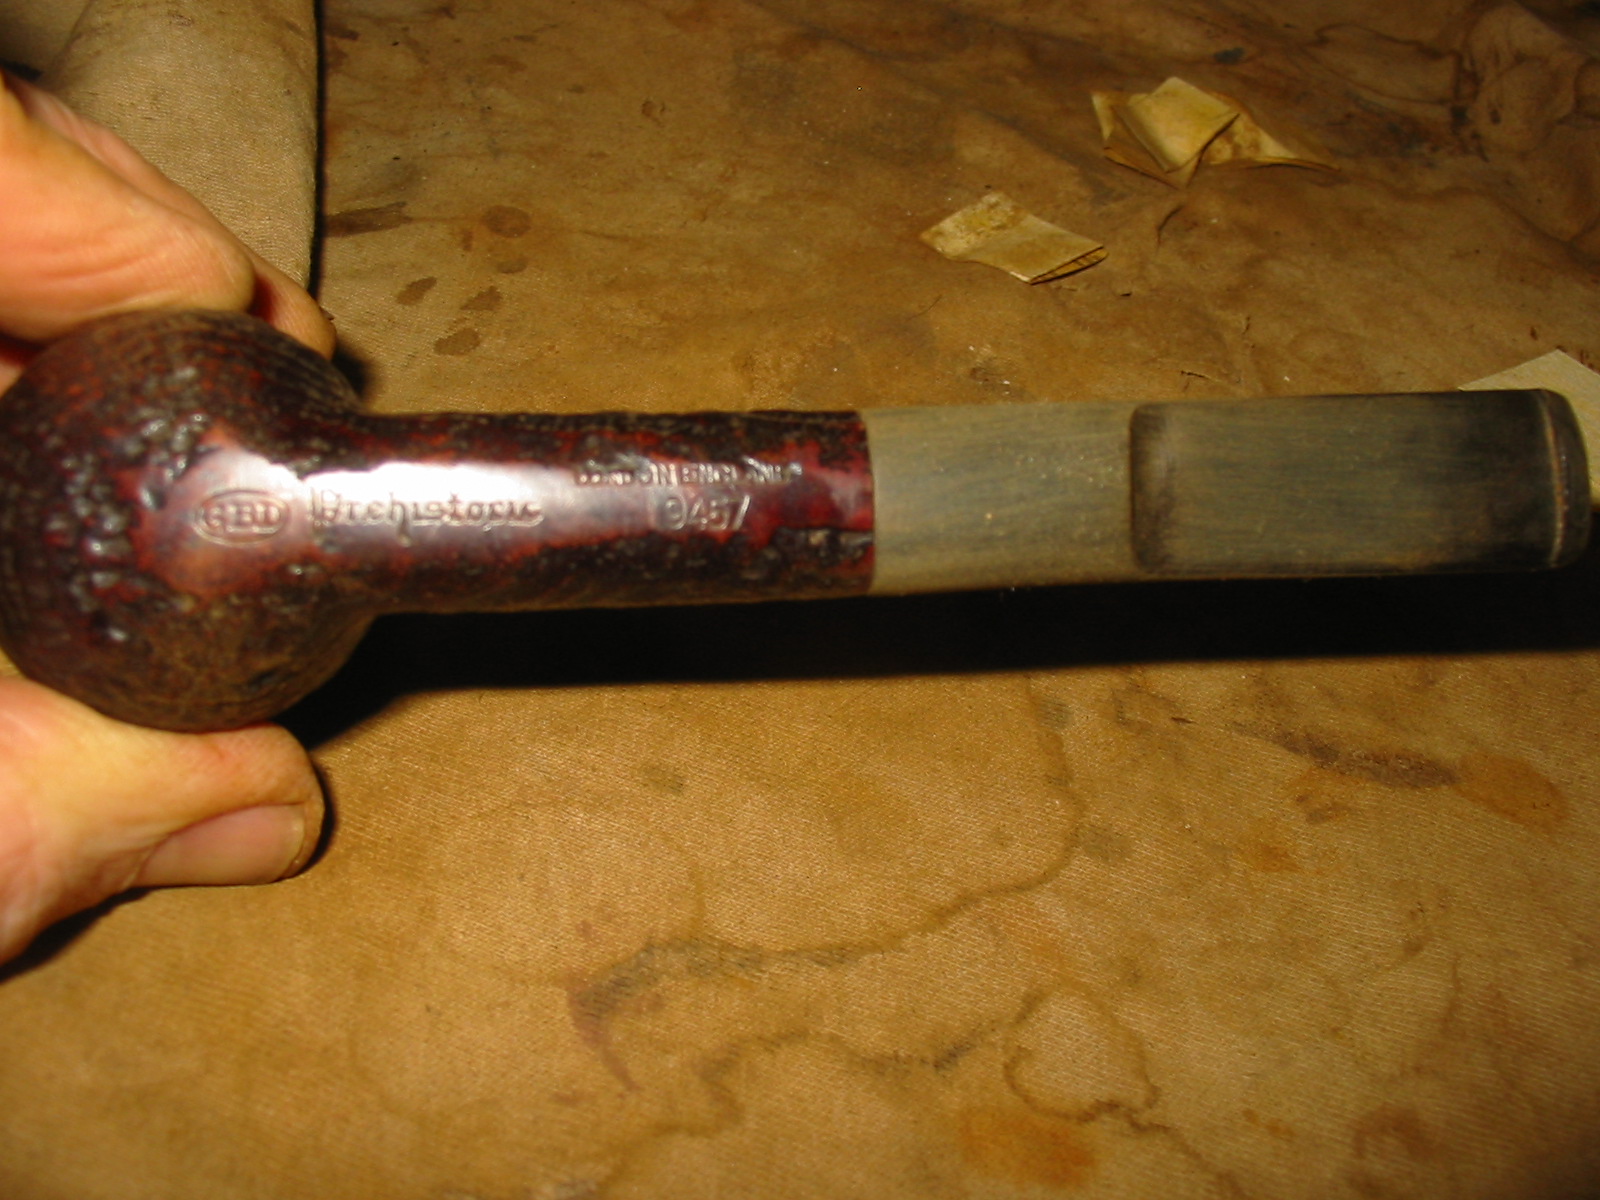
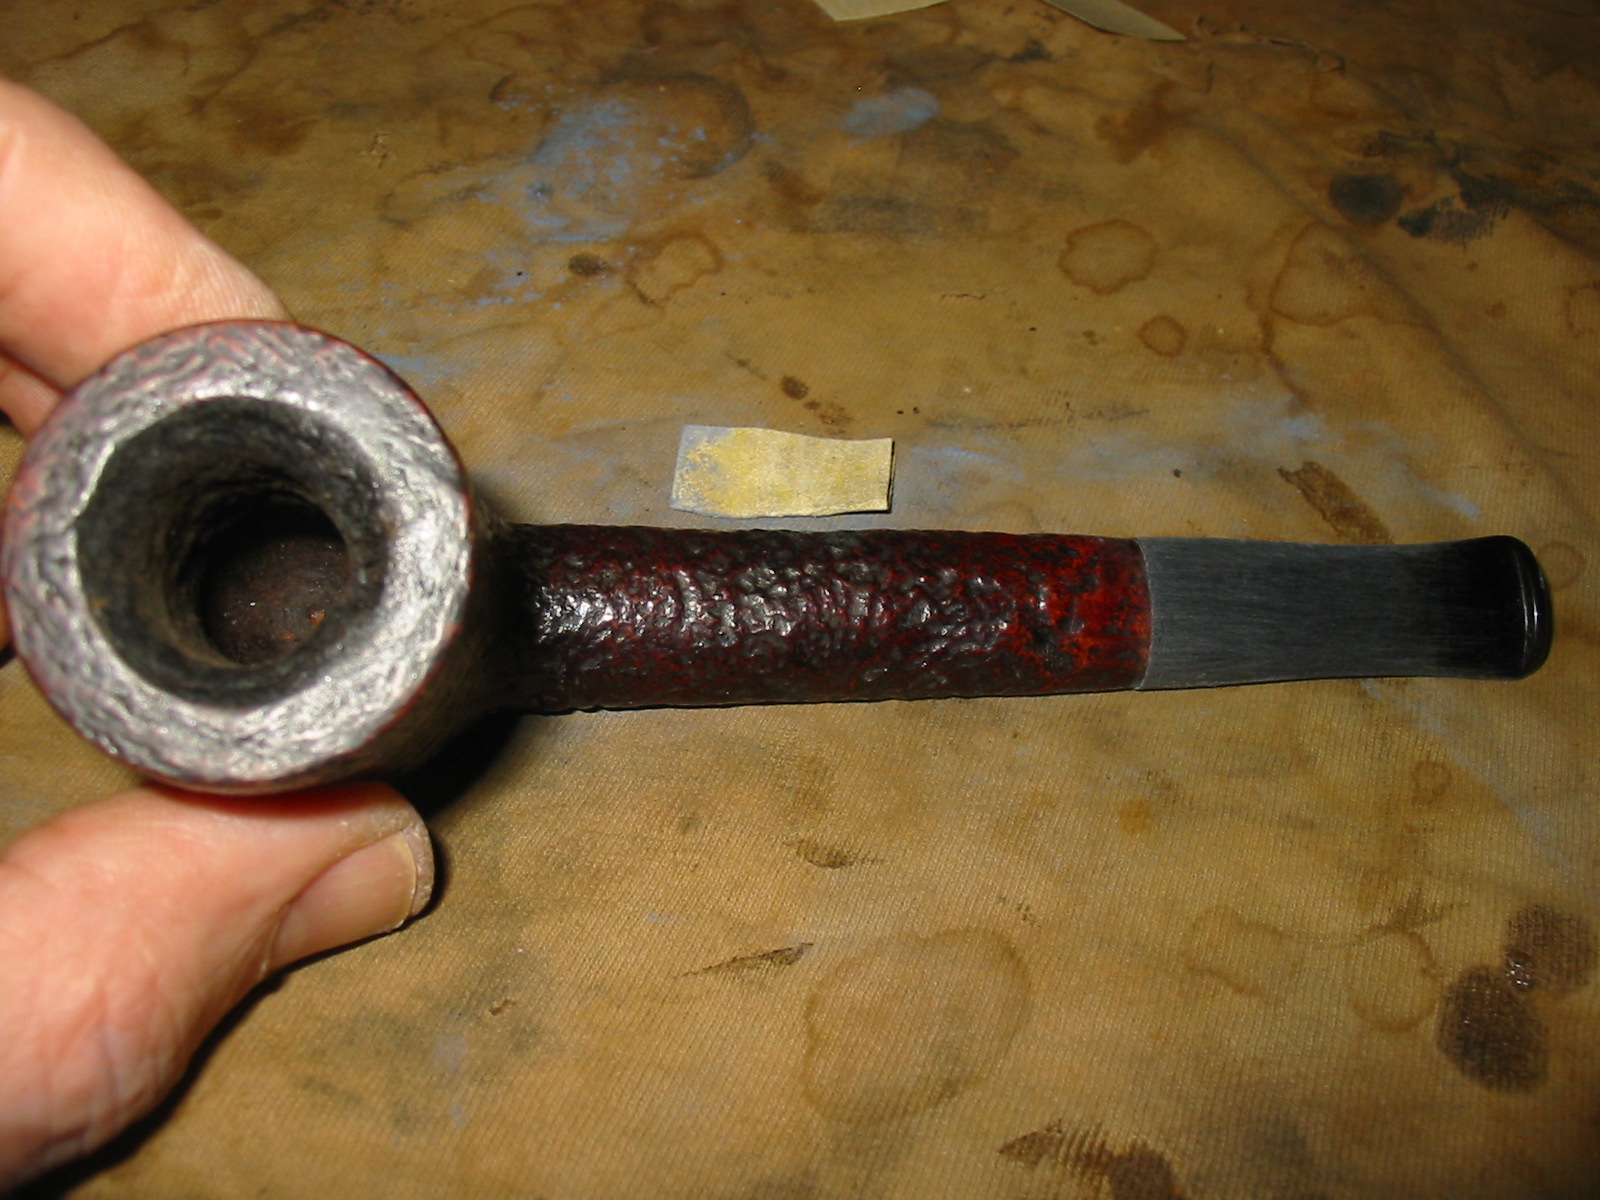
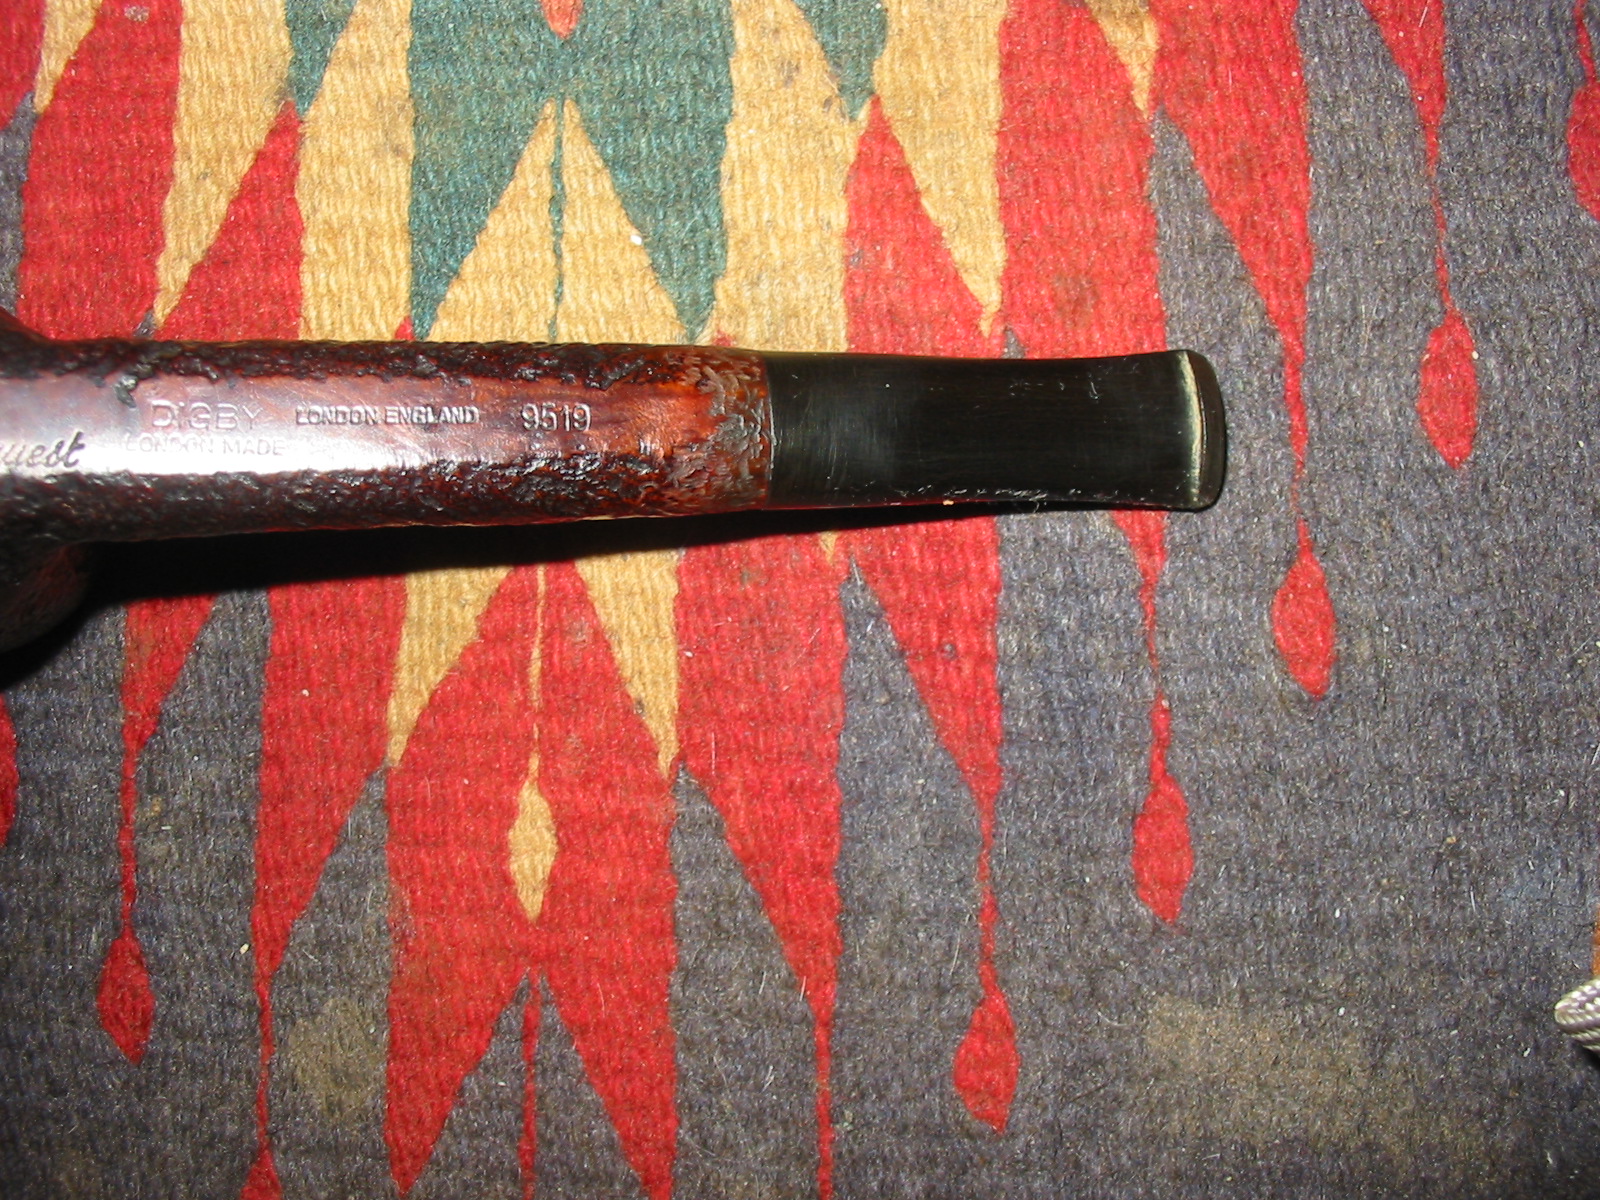
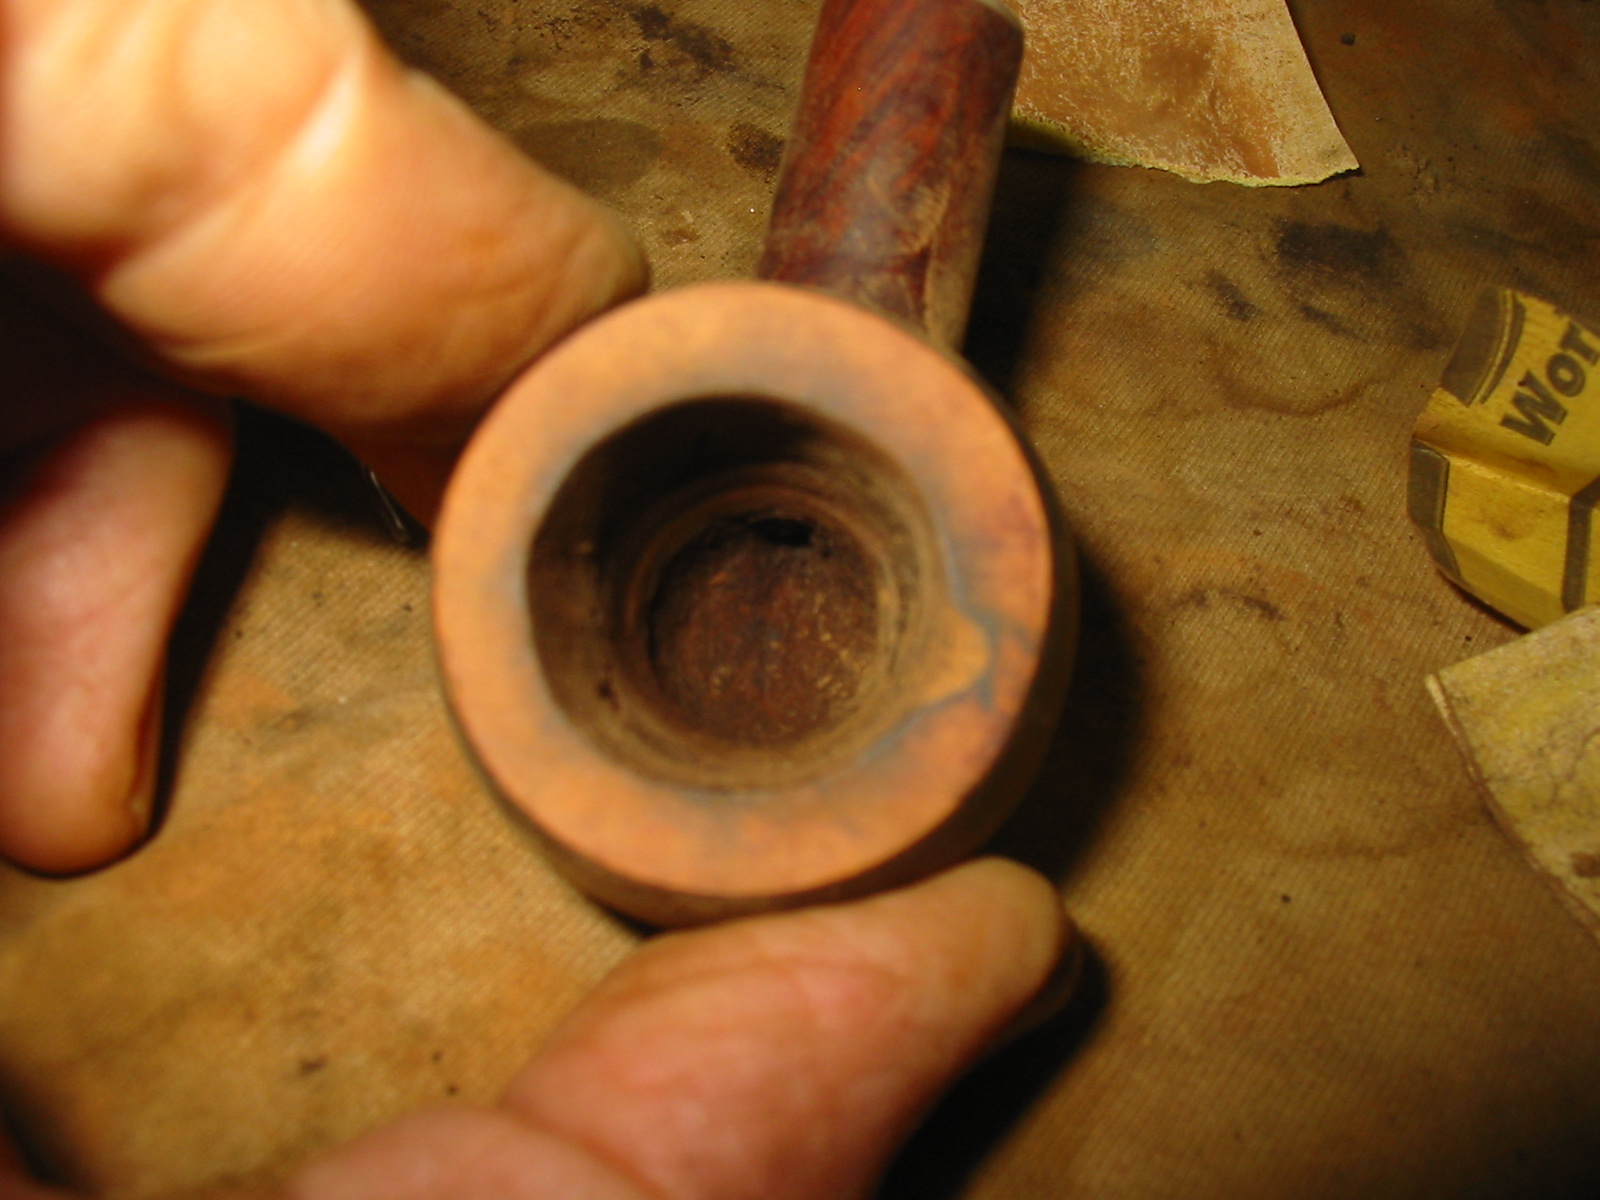
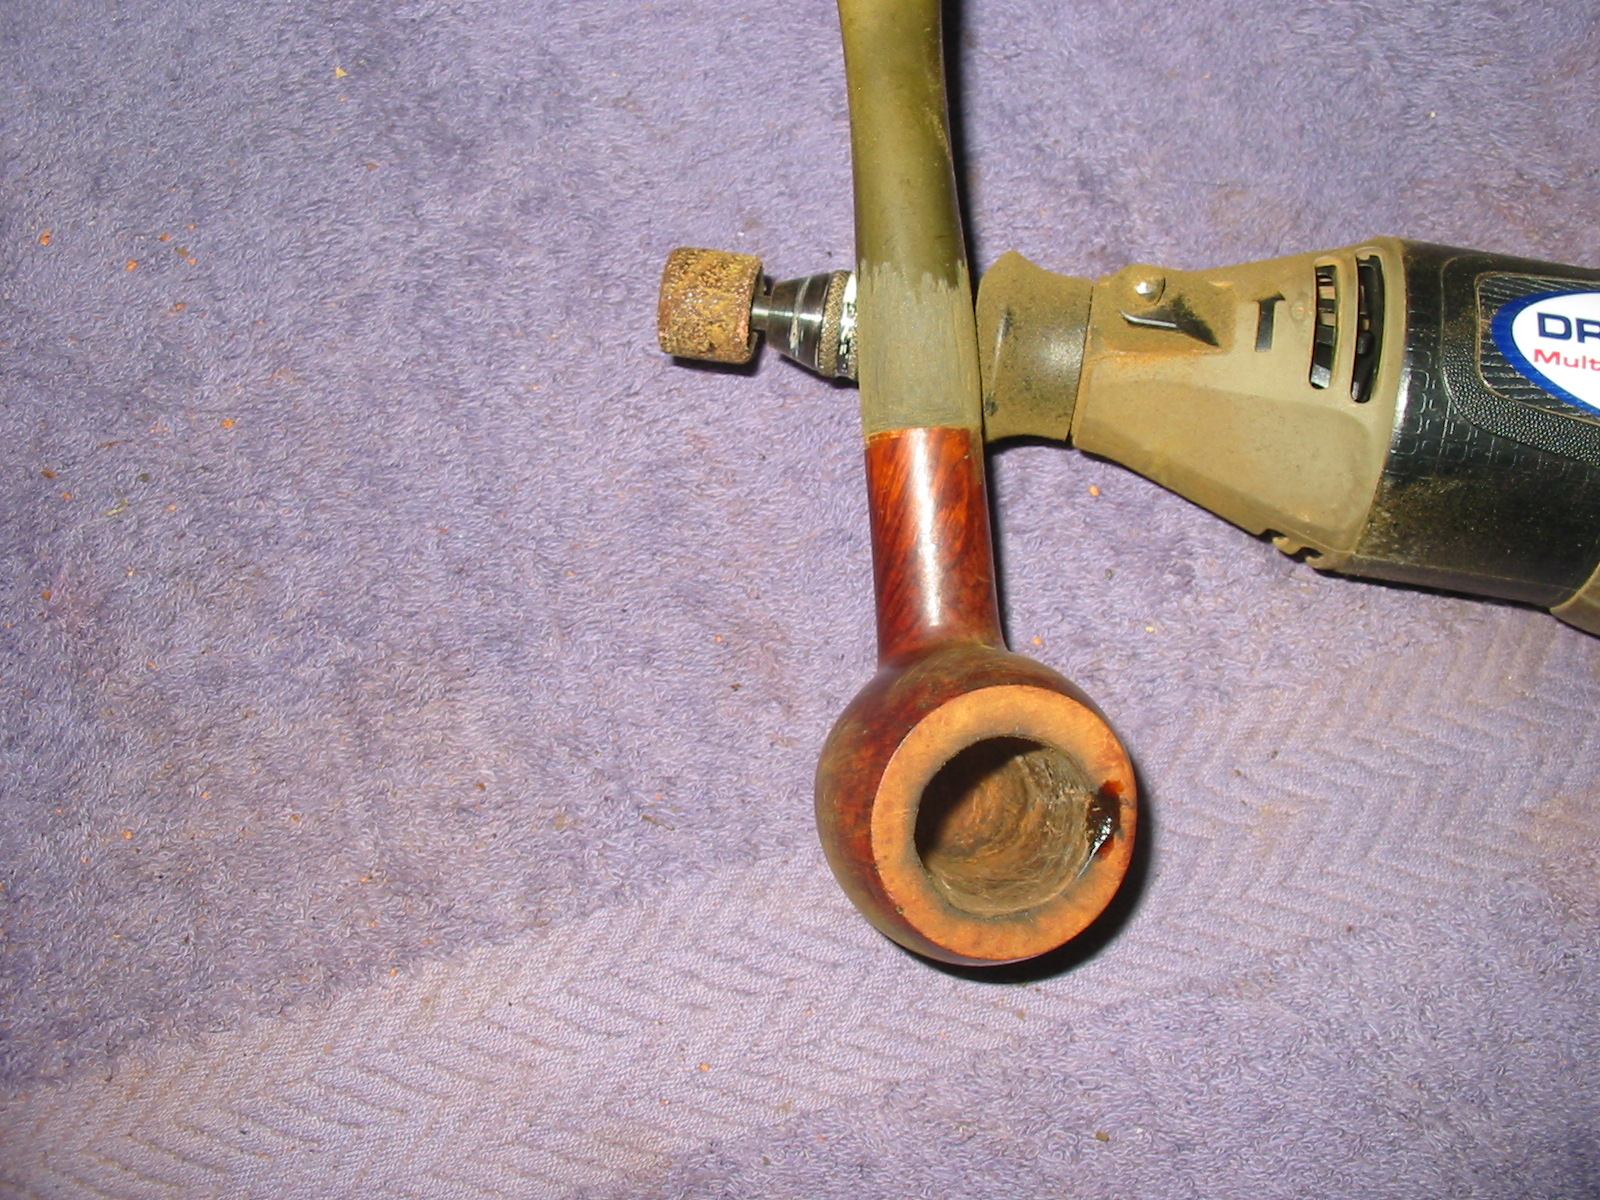
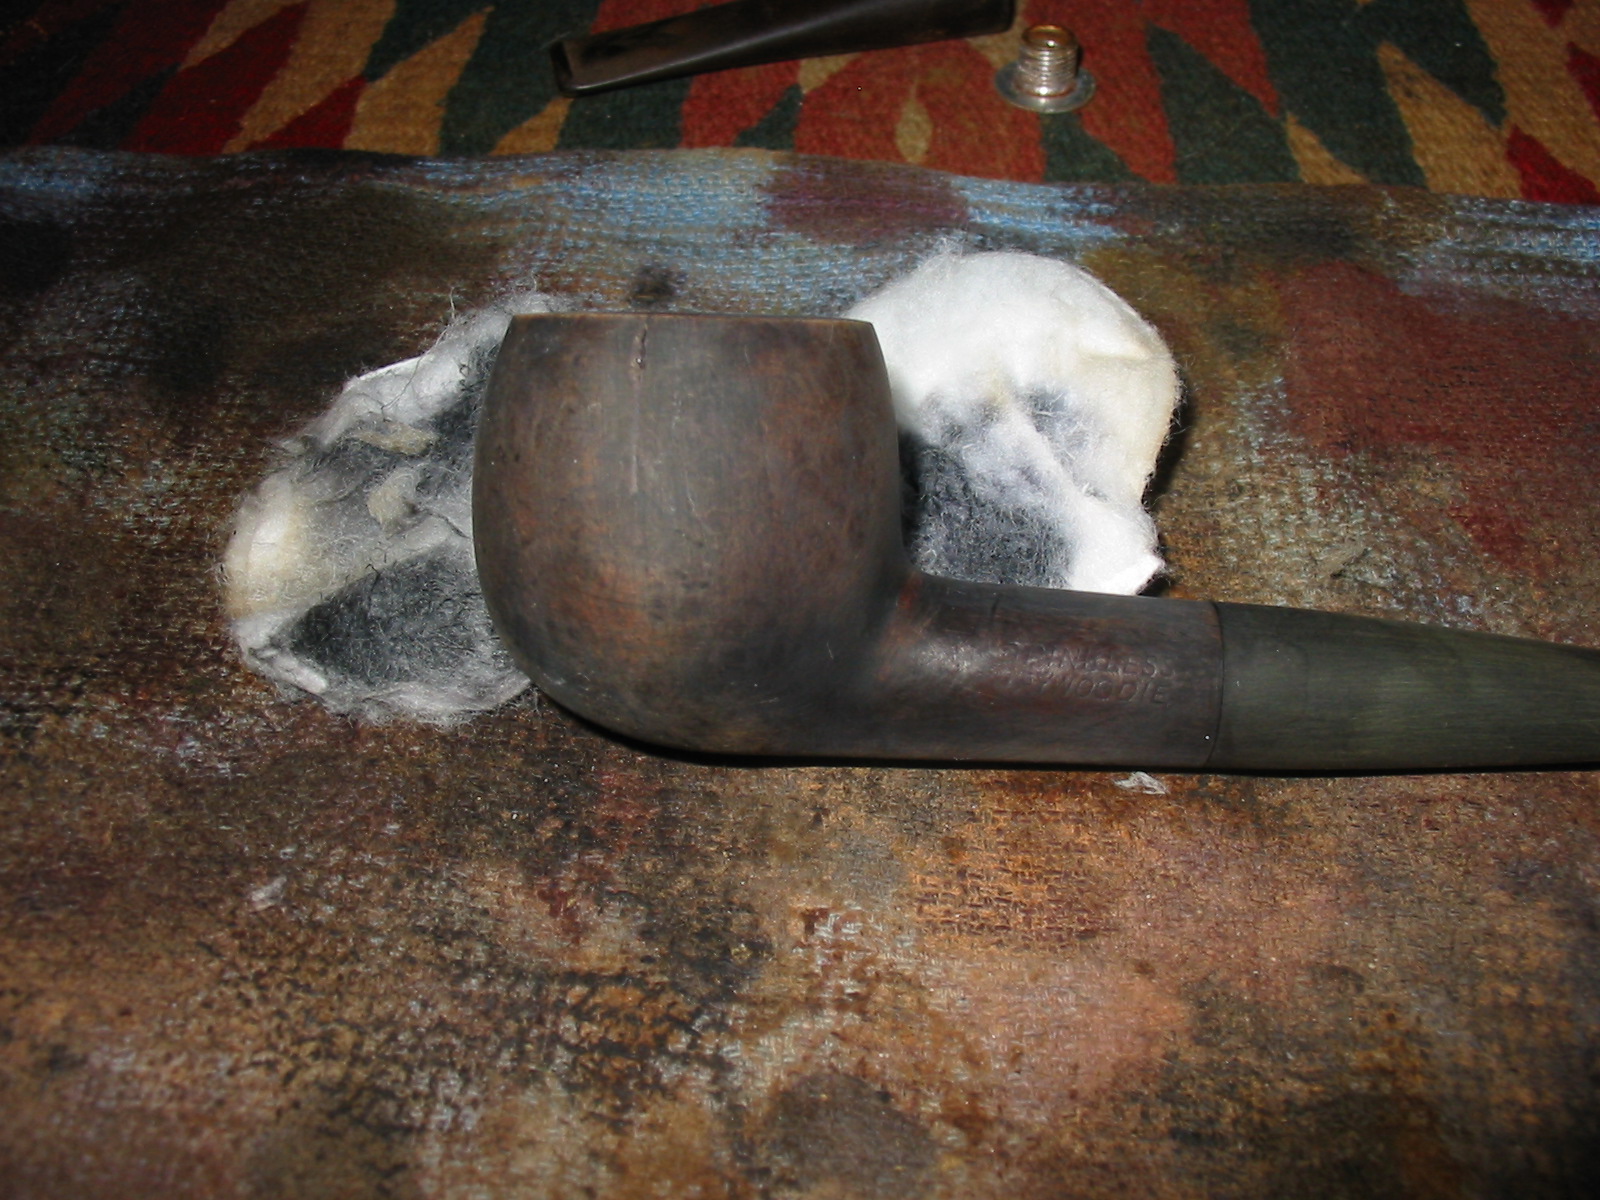
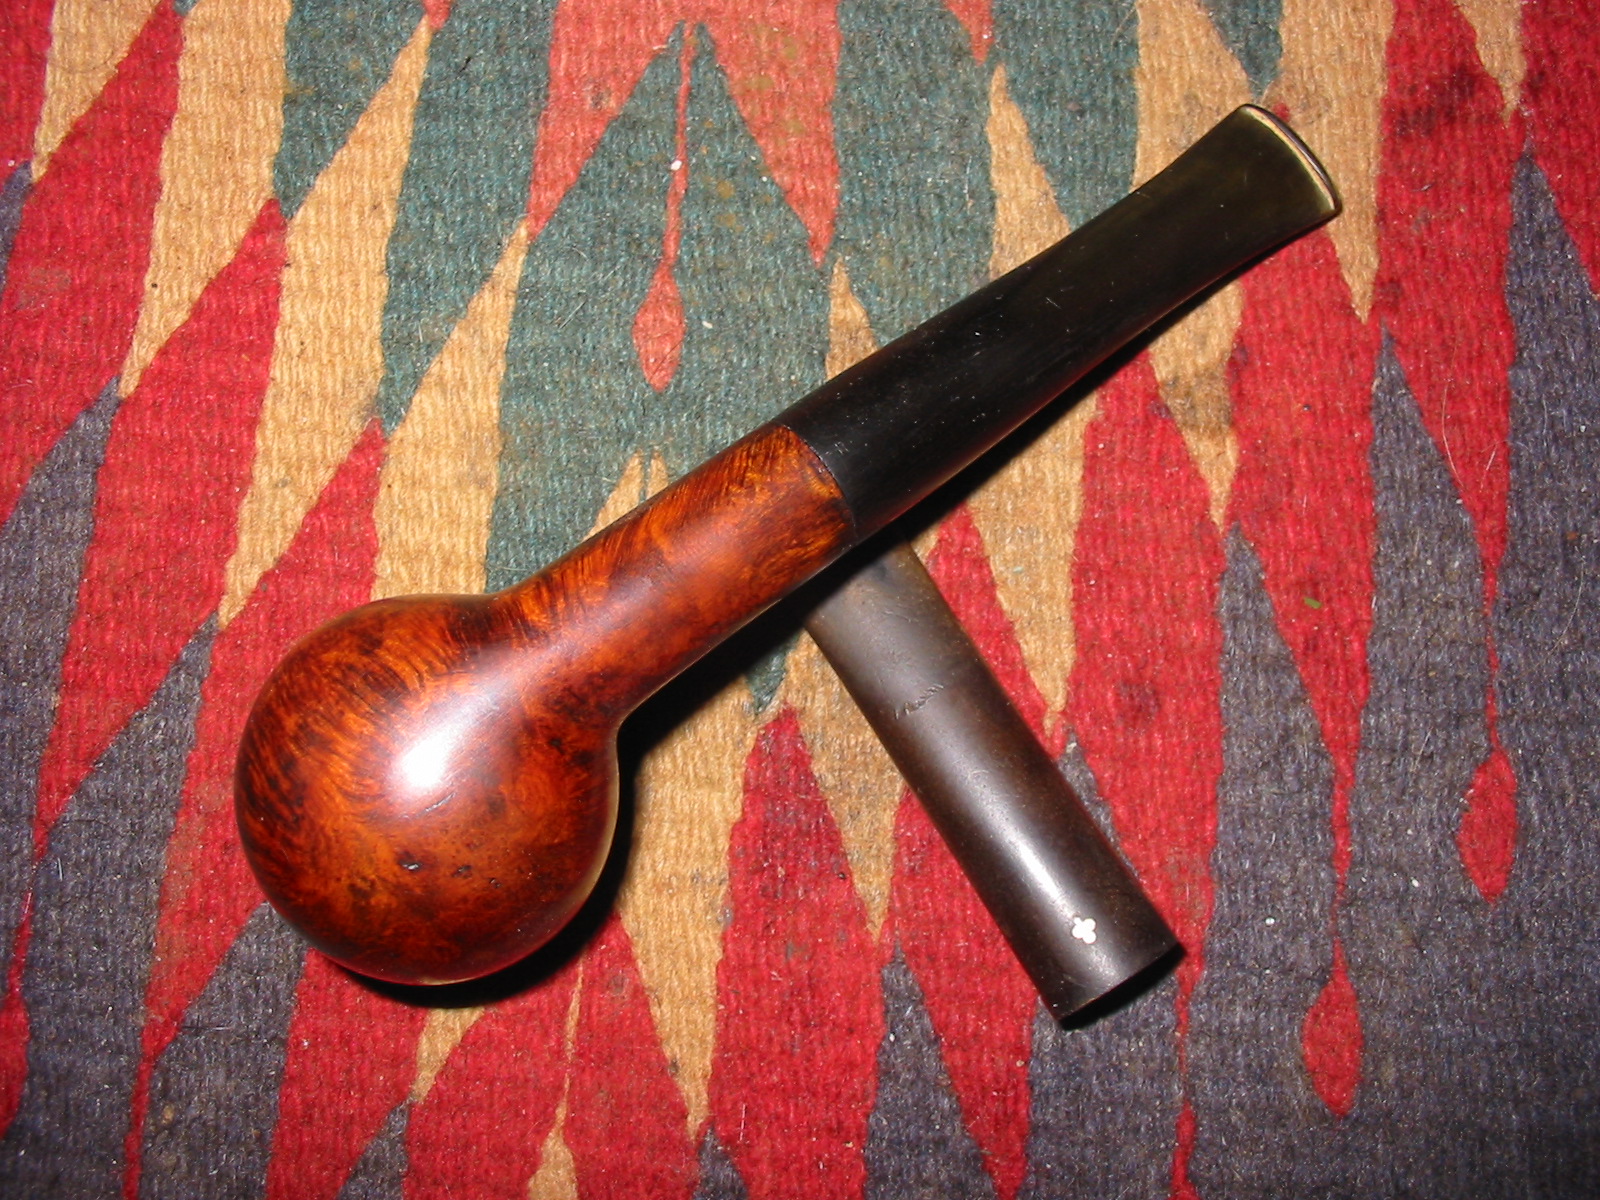
You can see in the photos above that the stem did not quite seat properly in the shank. I used a sharp knife to bevel the inner edge of the mortise so that the stem would sit properly against the shank.band21 
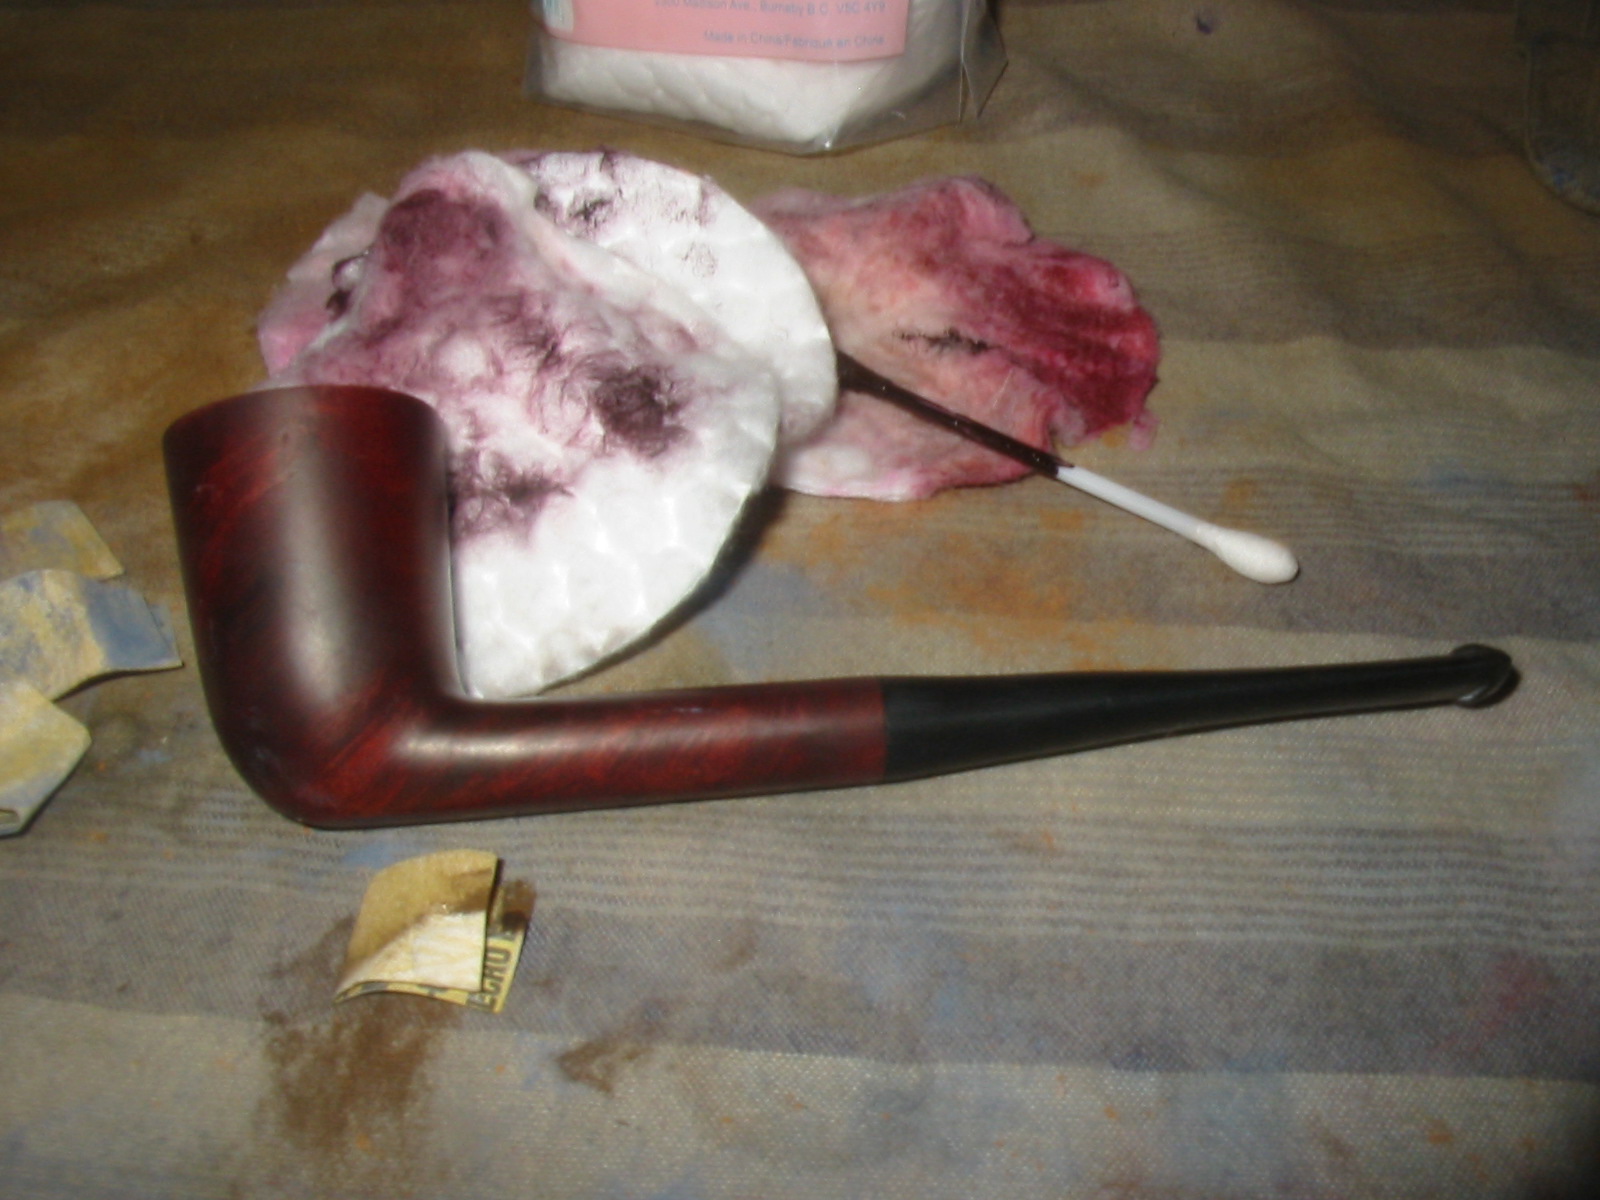
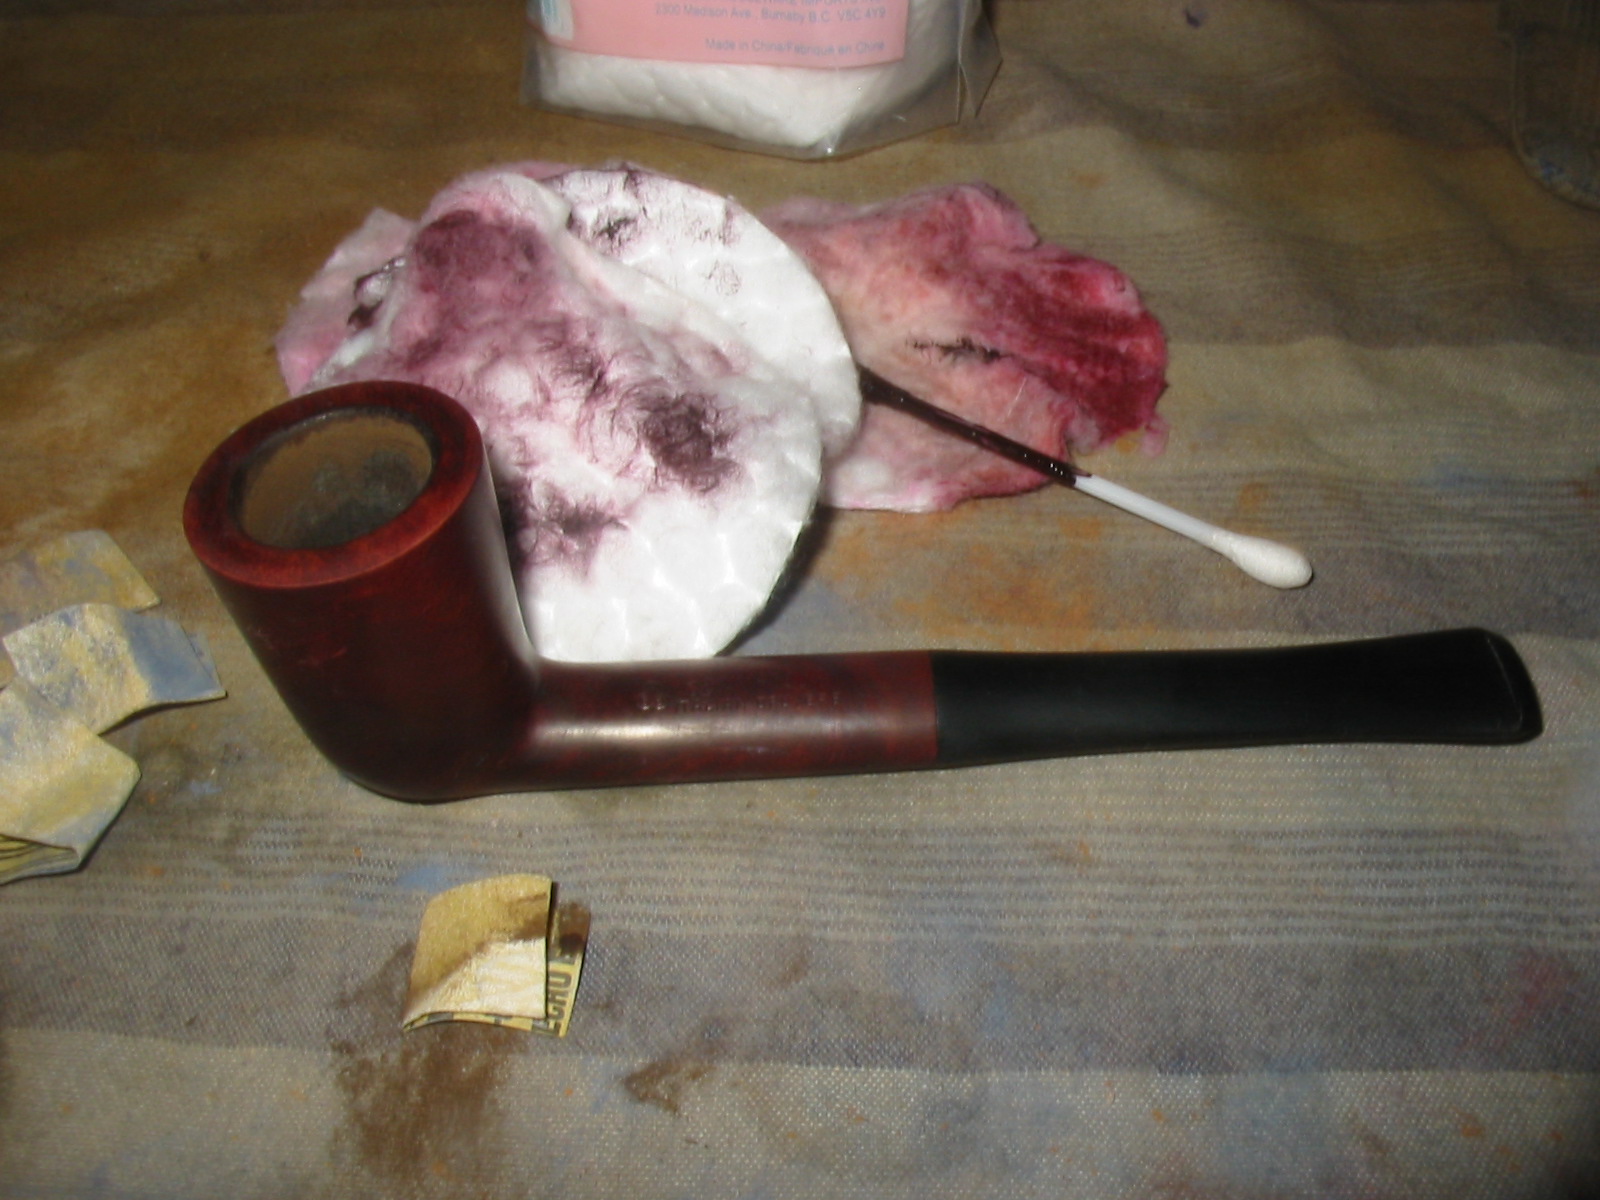
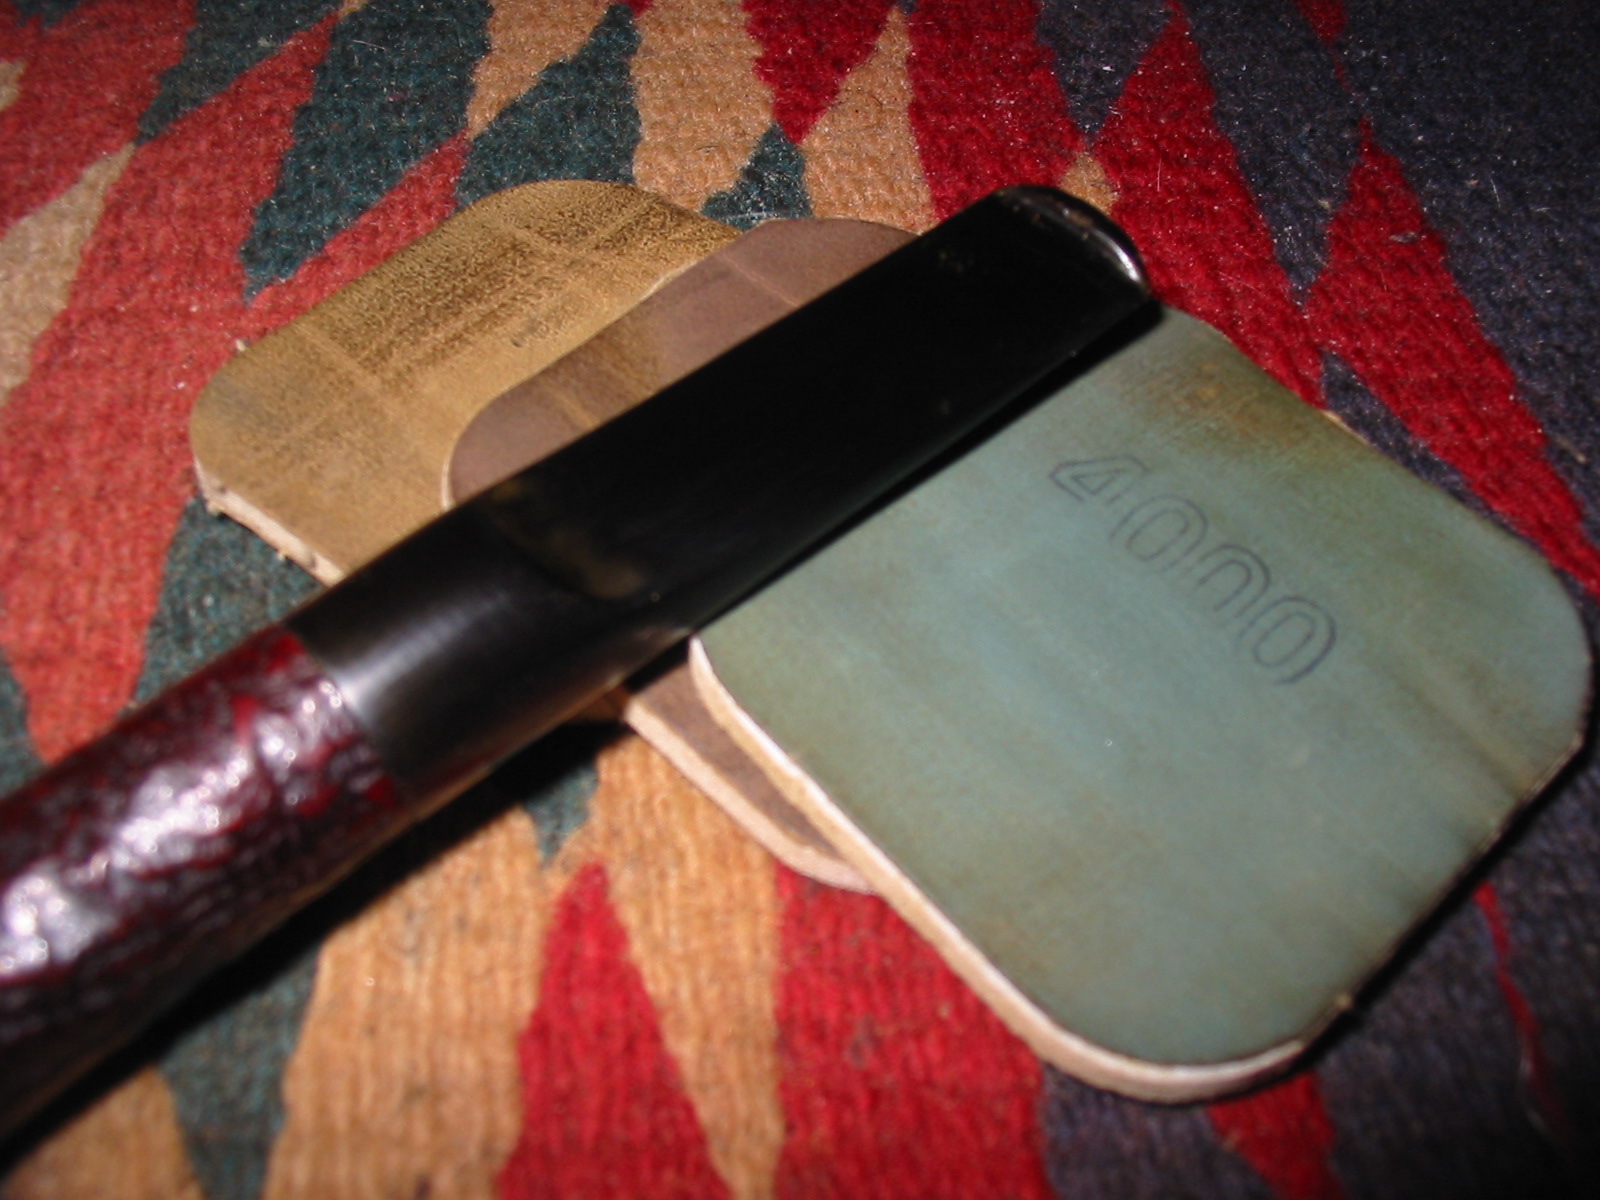
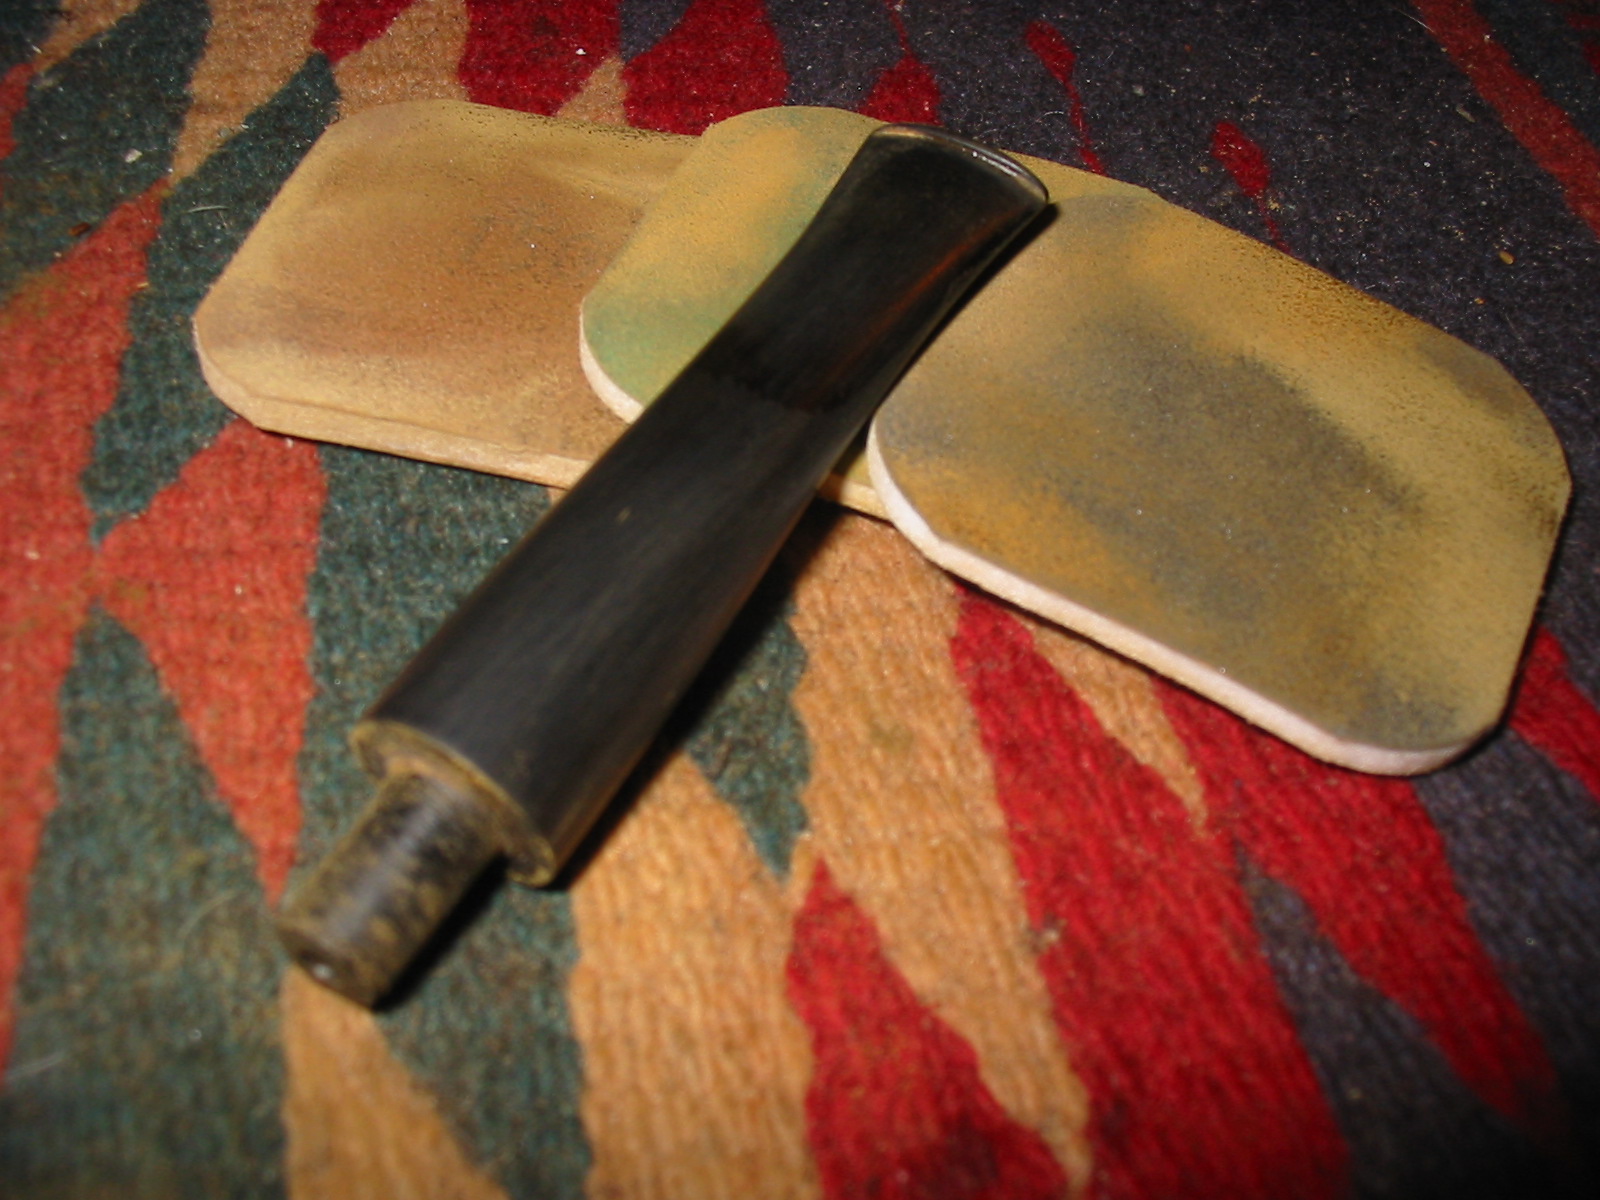
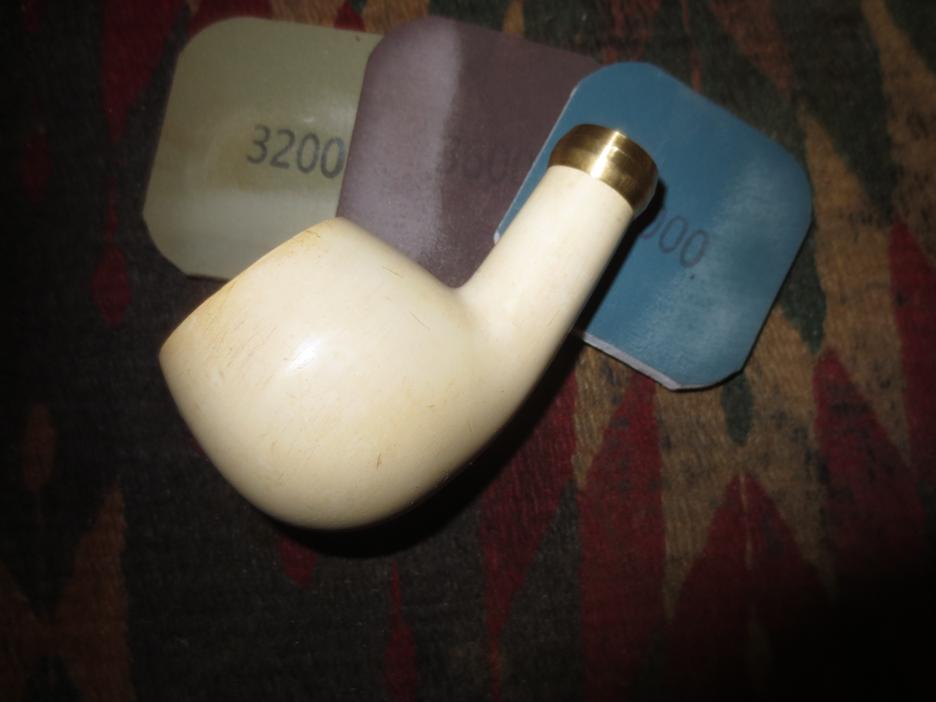
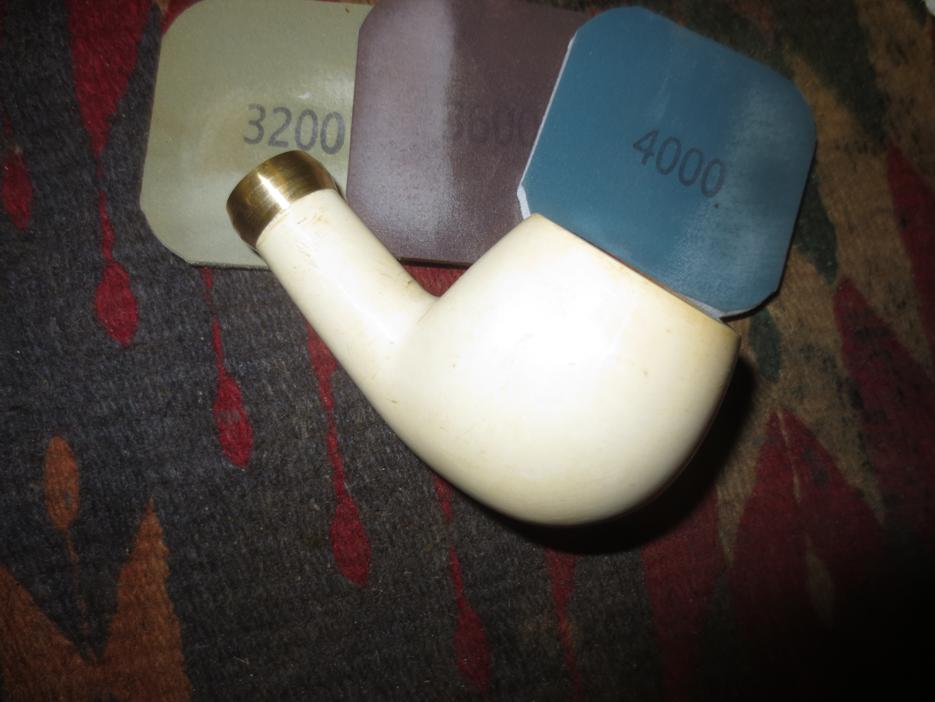
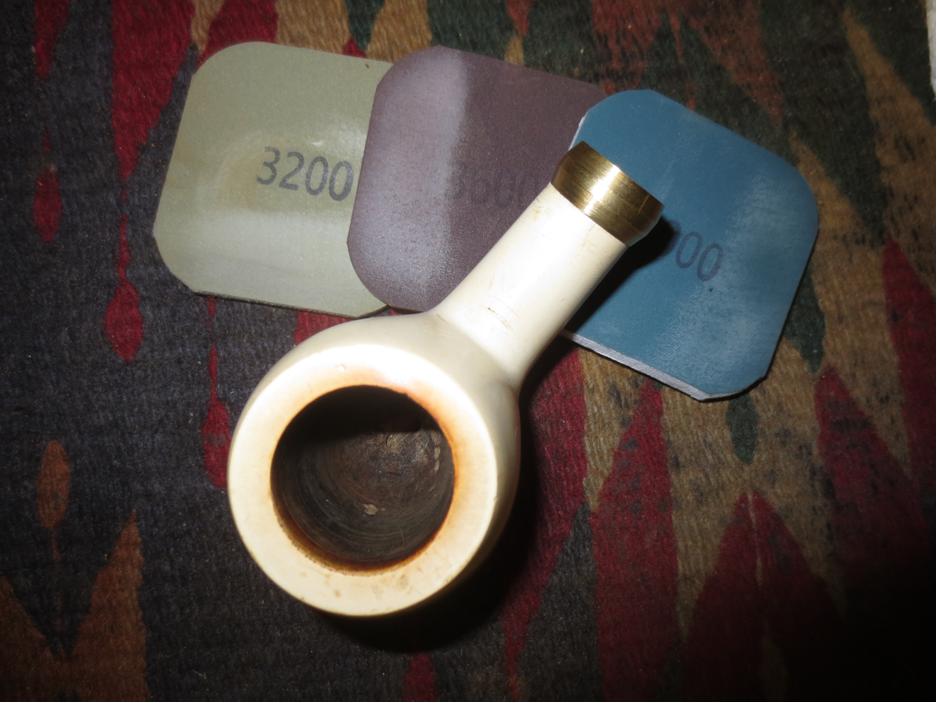
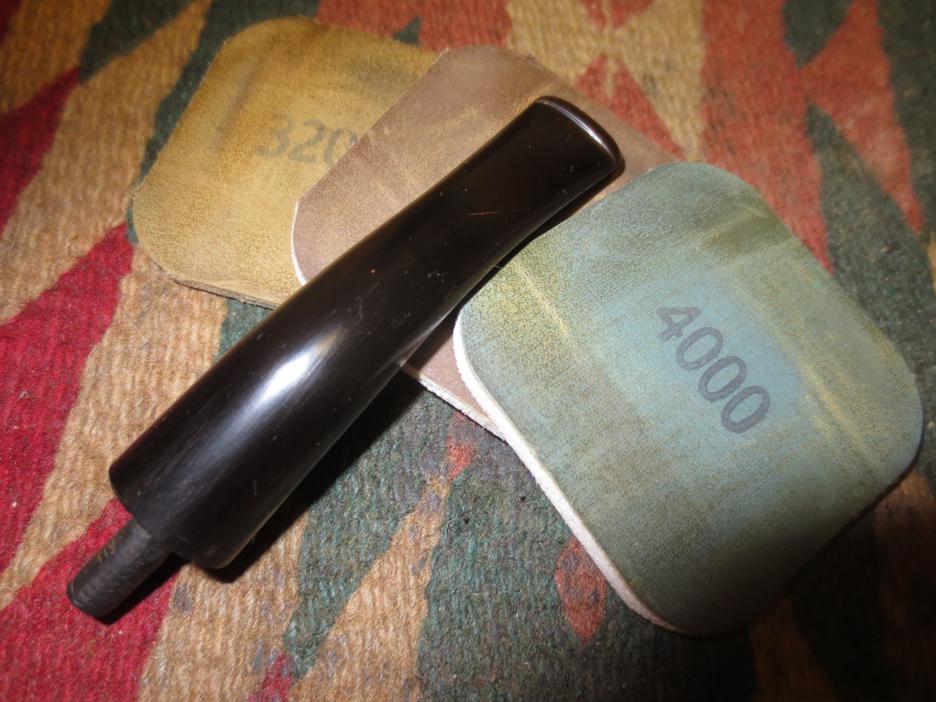
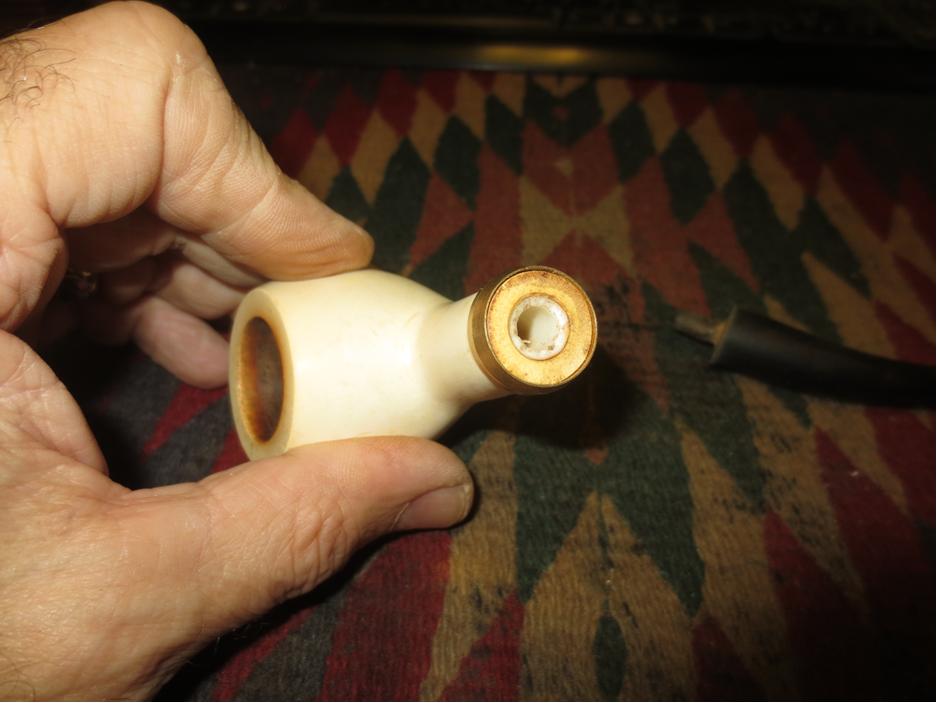
I sanded the bowl and shank with 3200-4000 grit micromesh sanding pads to minimize the scratches.band22

band23

band24

band25 
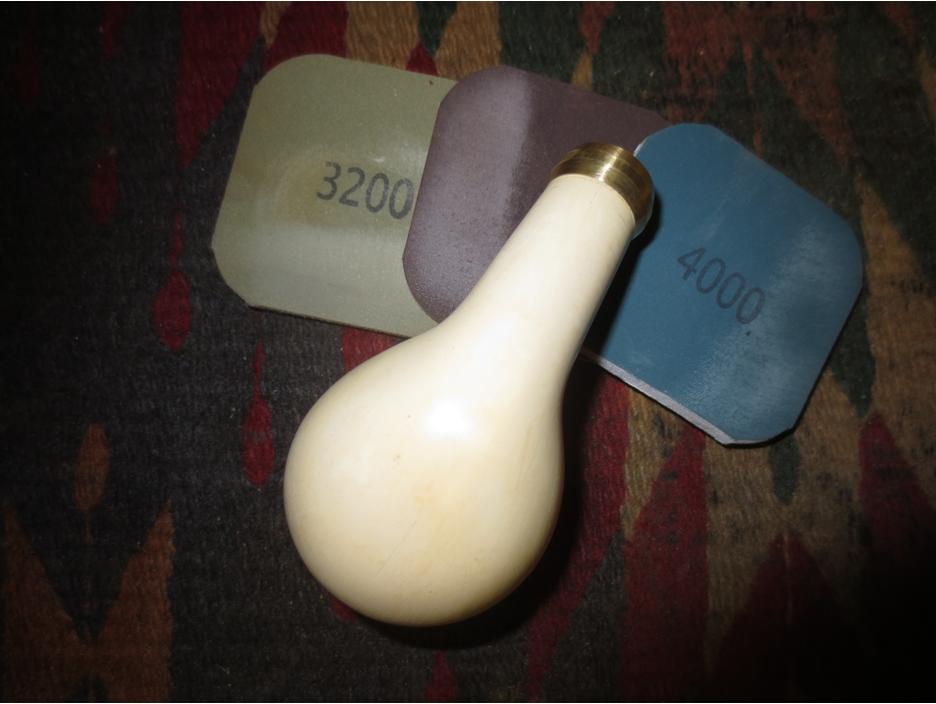
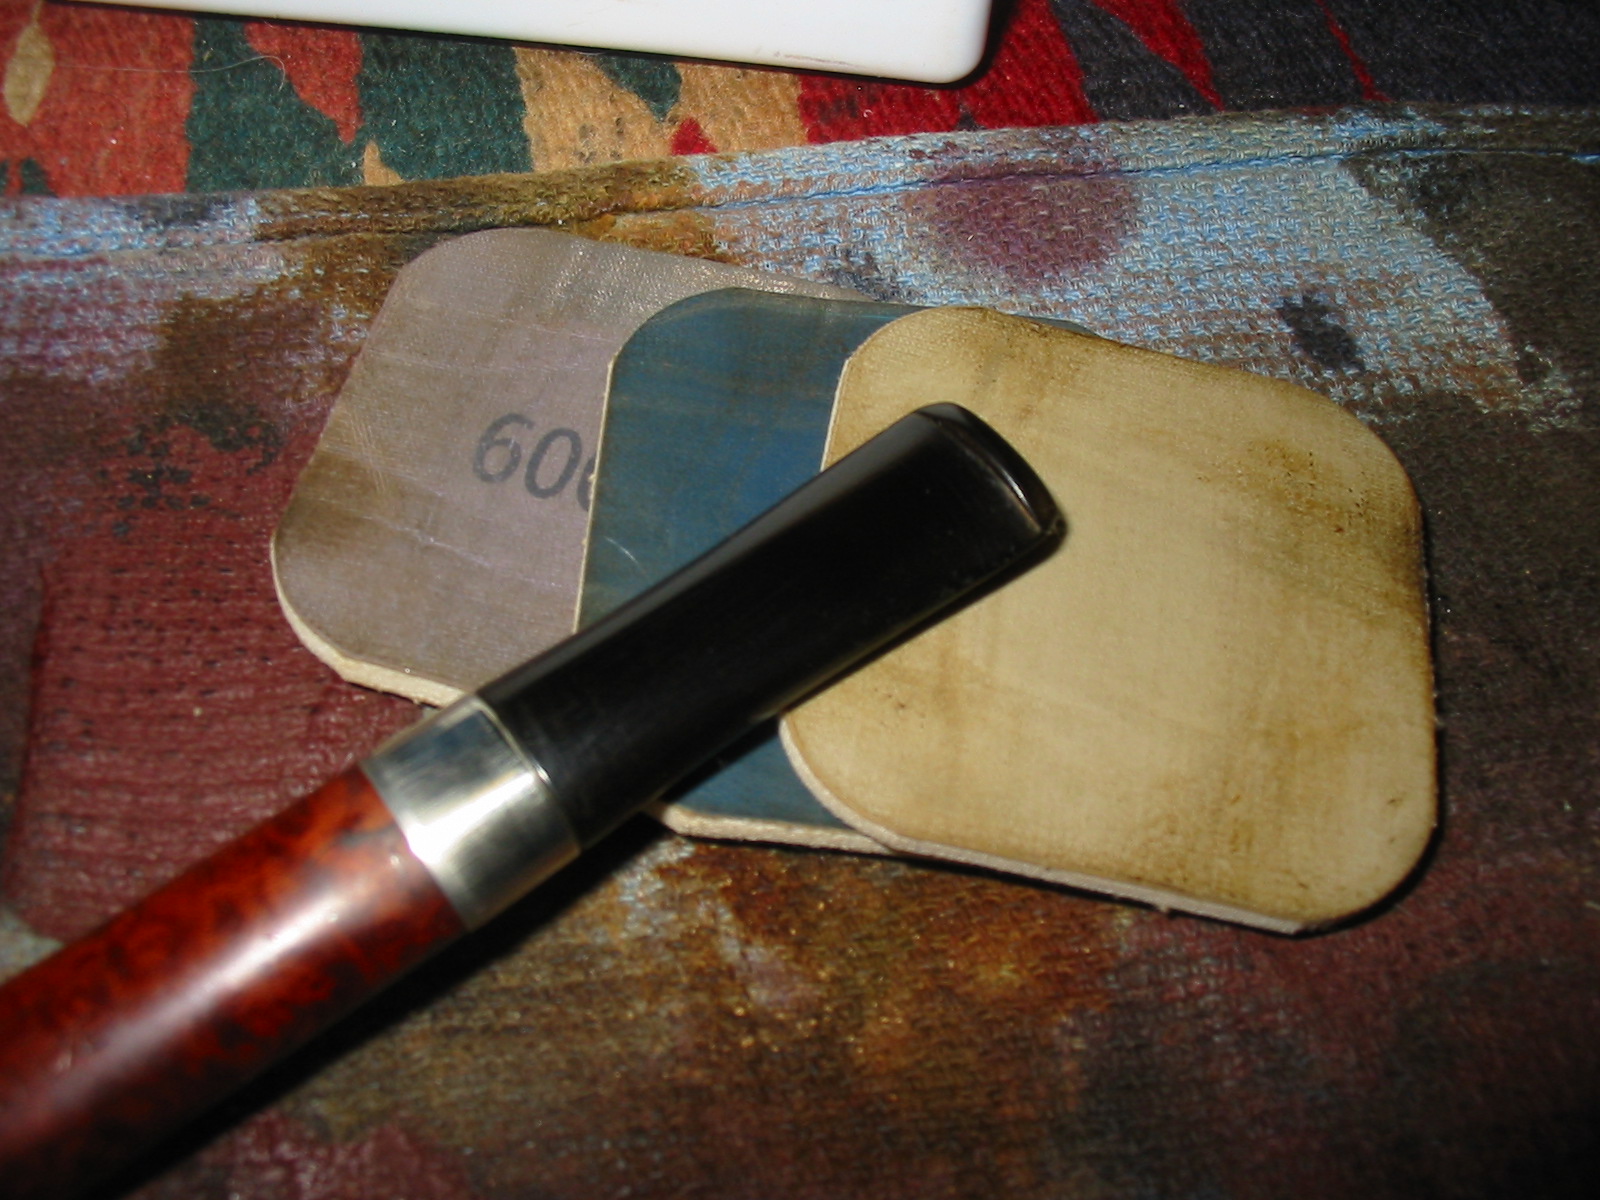
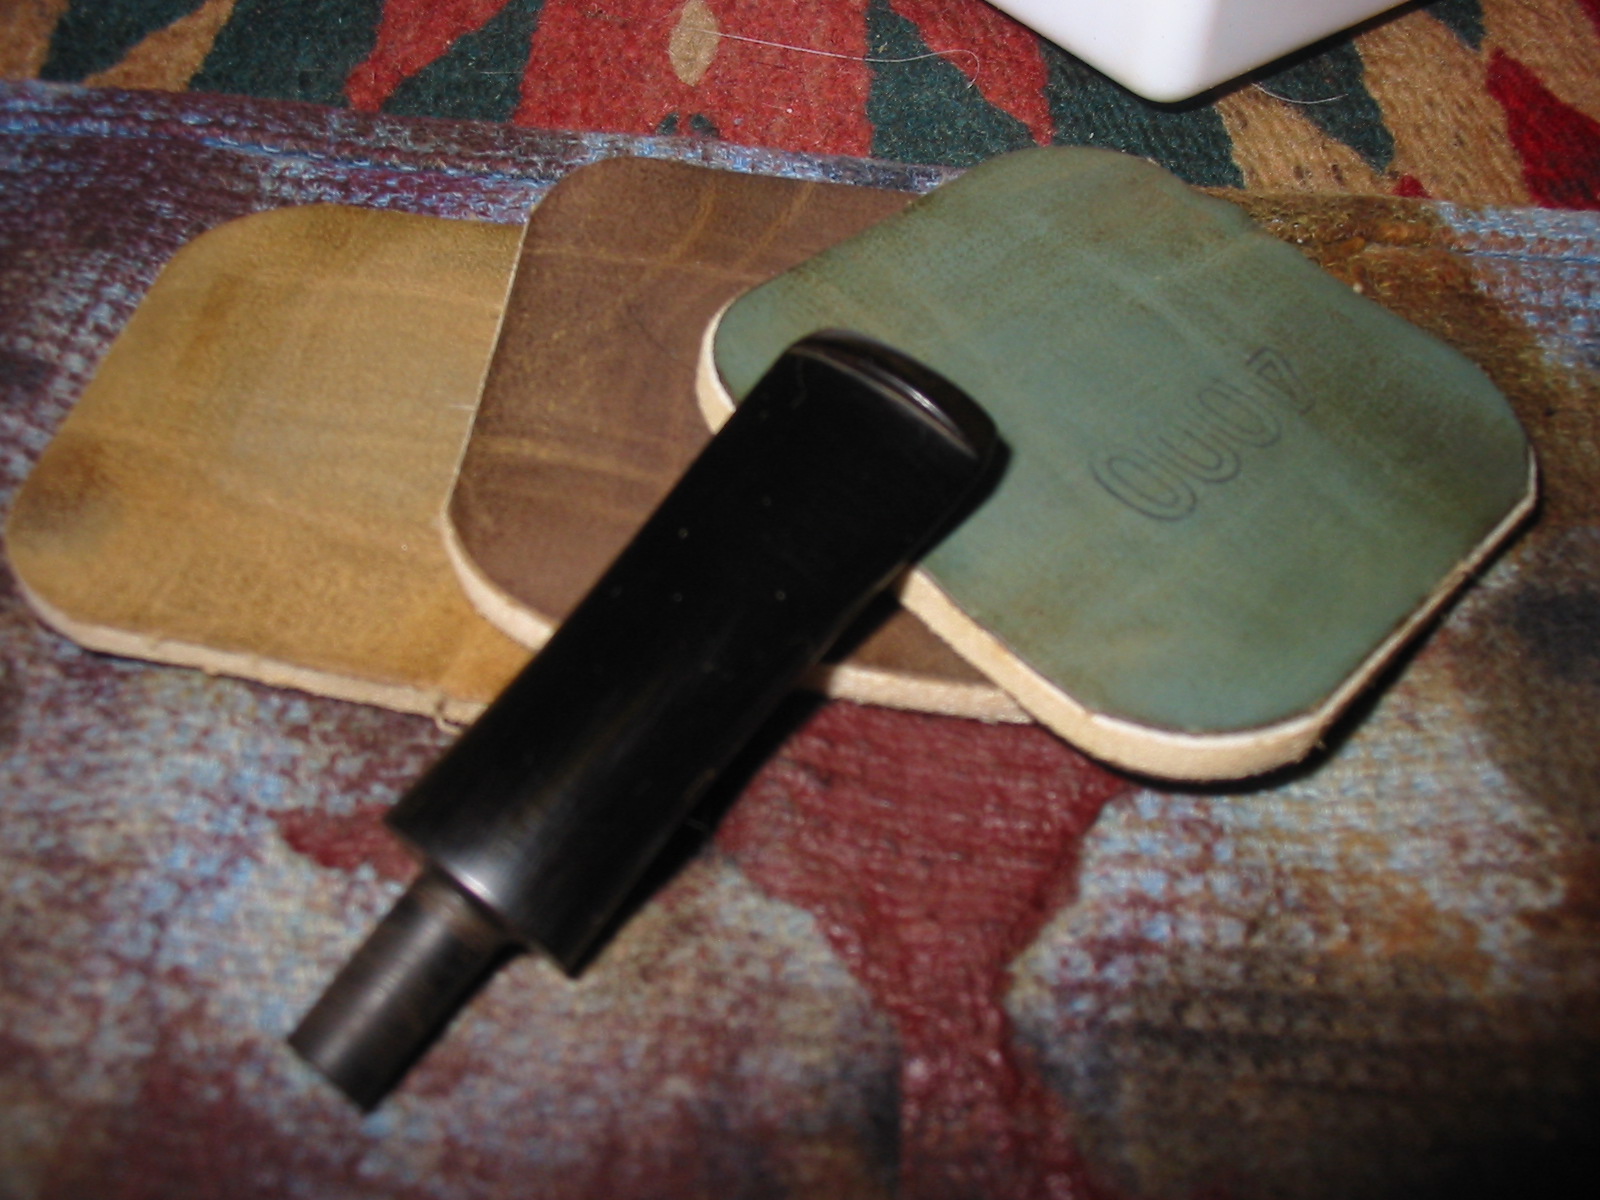
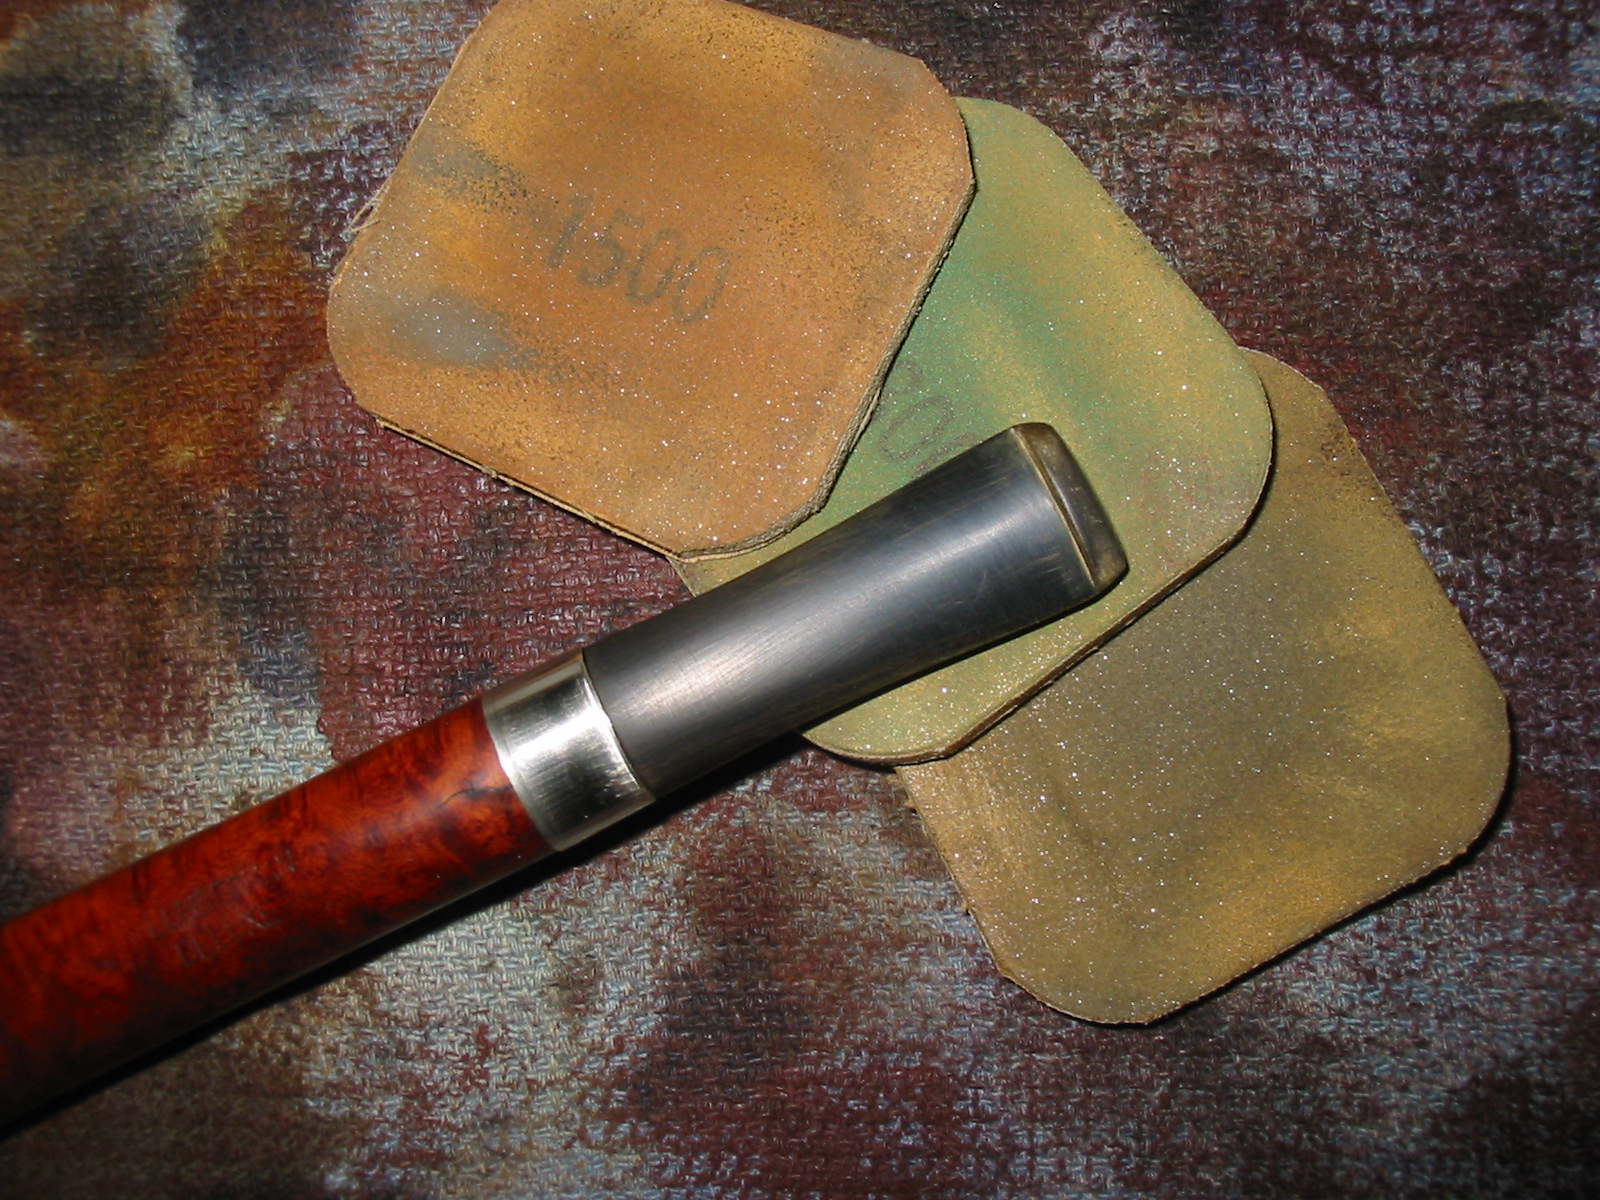
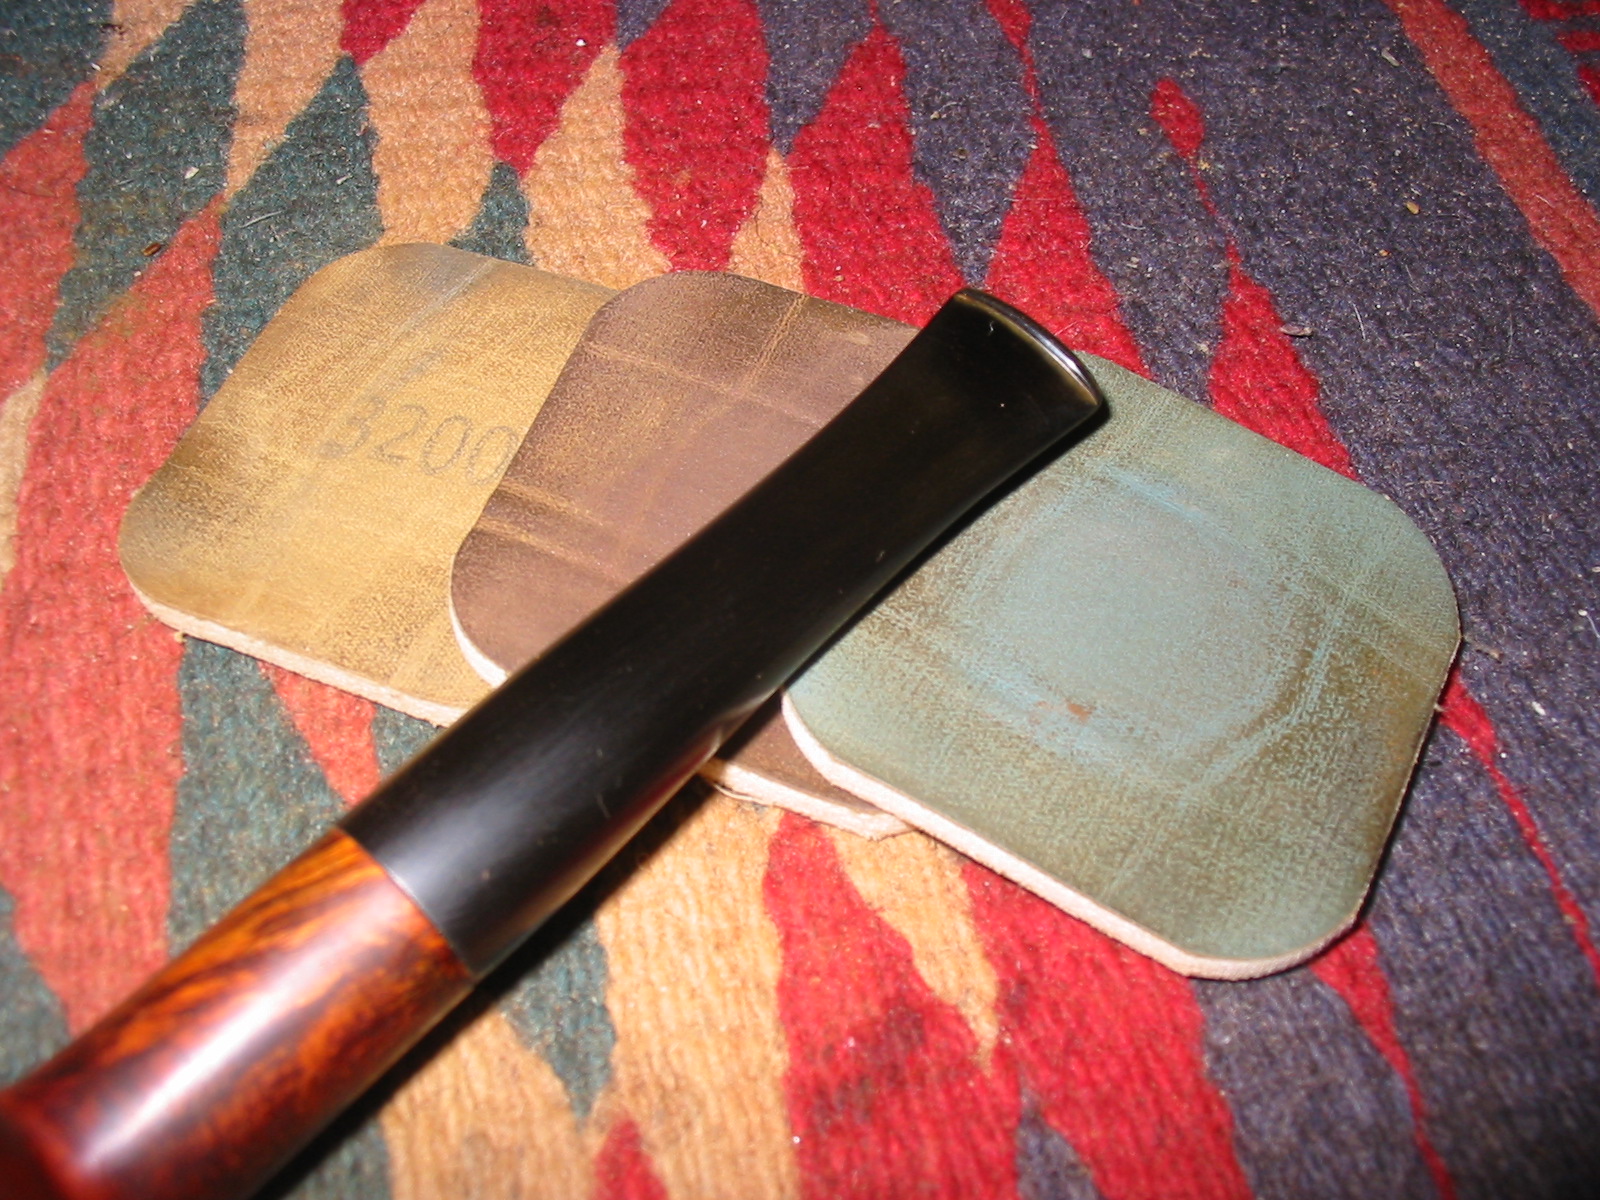
I wet sanded the stem and the tenon with 1500-2400 grit micromesh pads and then rubbed them down with Obsidian Oil. I continued by dry sanding the stem with 3200-4000 grit micromesh pads and the giving it another coat of oil. I finished by sanding with 6000-12000 grit pads and gave it a final coat of Obsidian Oil. When it dried it was ready to buff.band26

band27

band28 
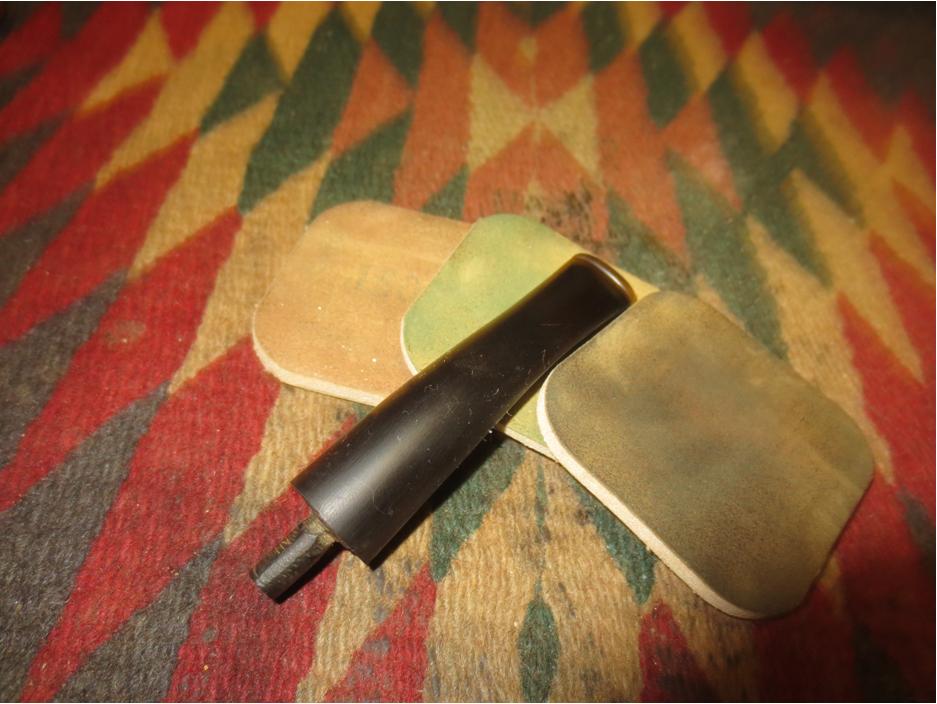
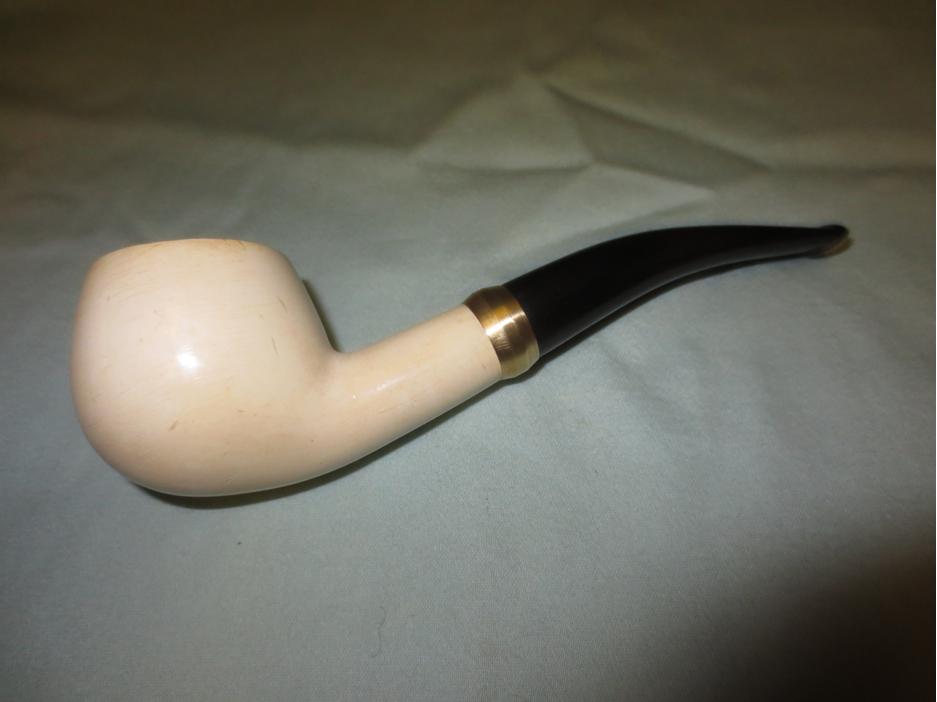
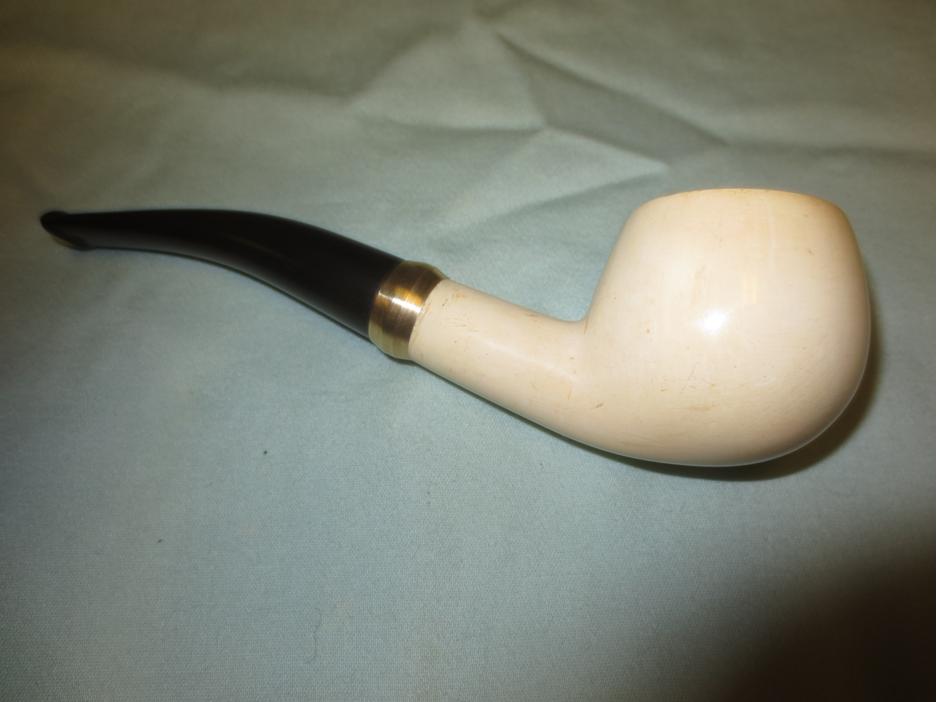
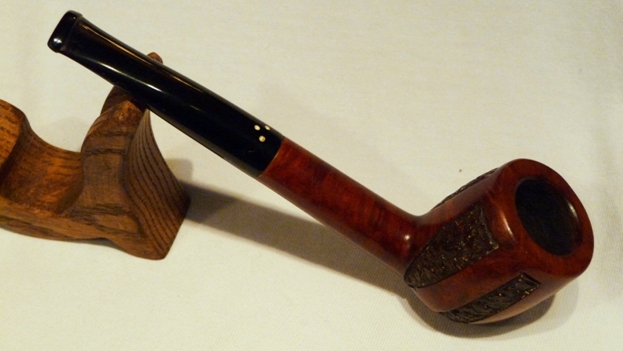
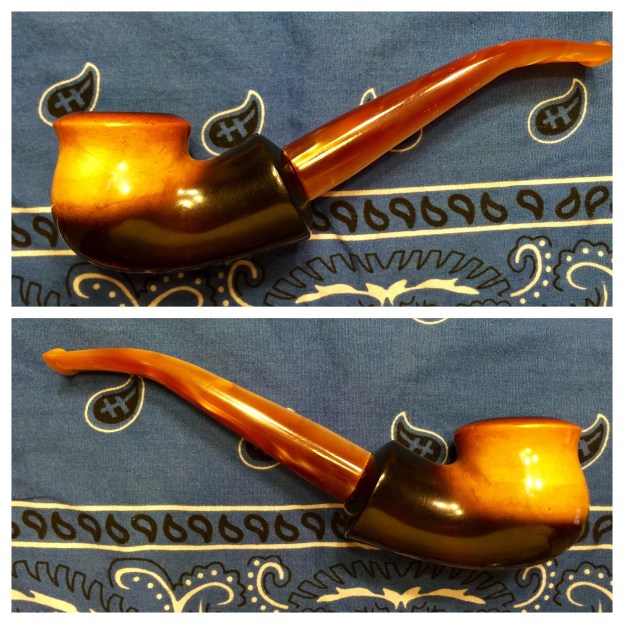
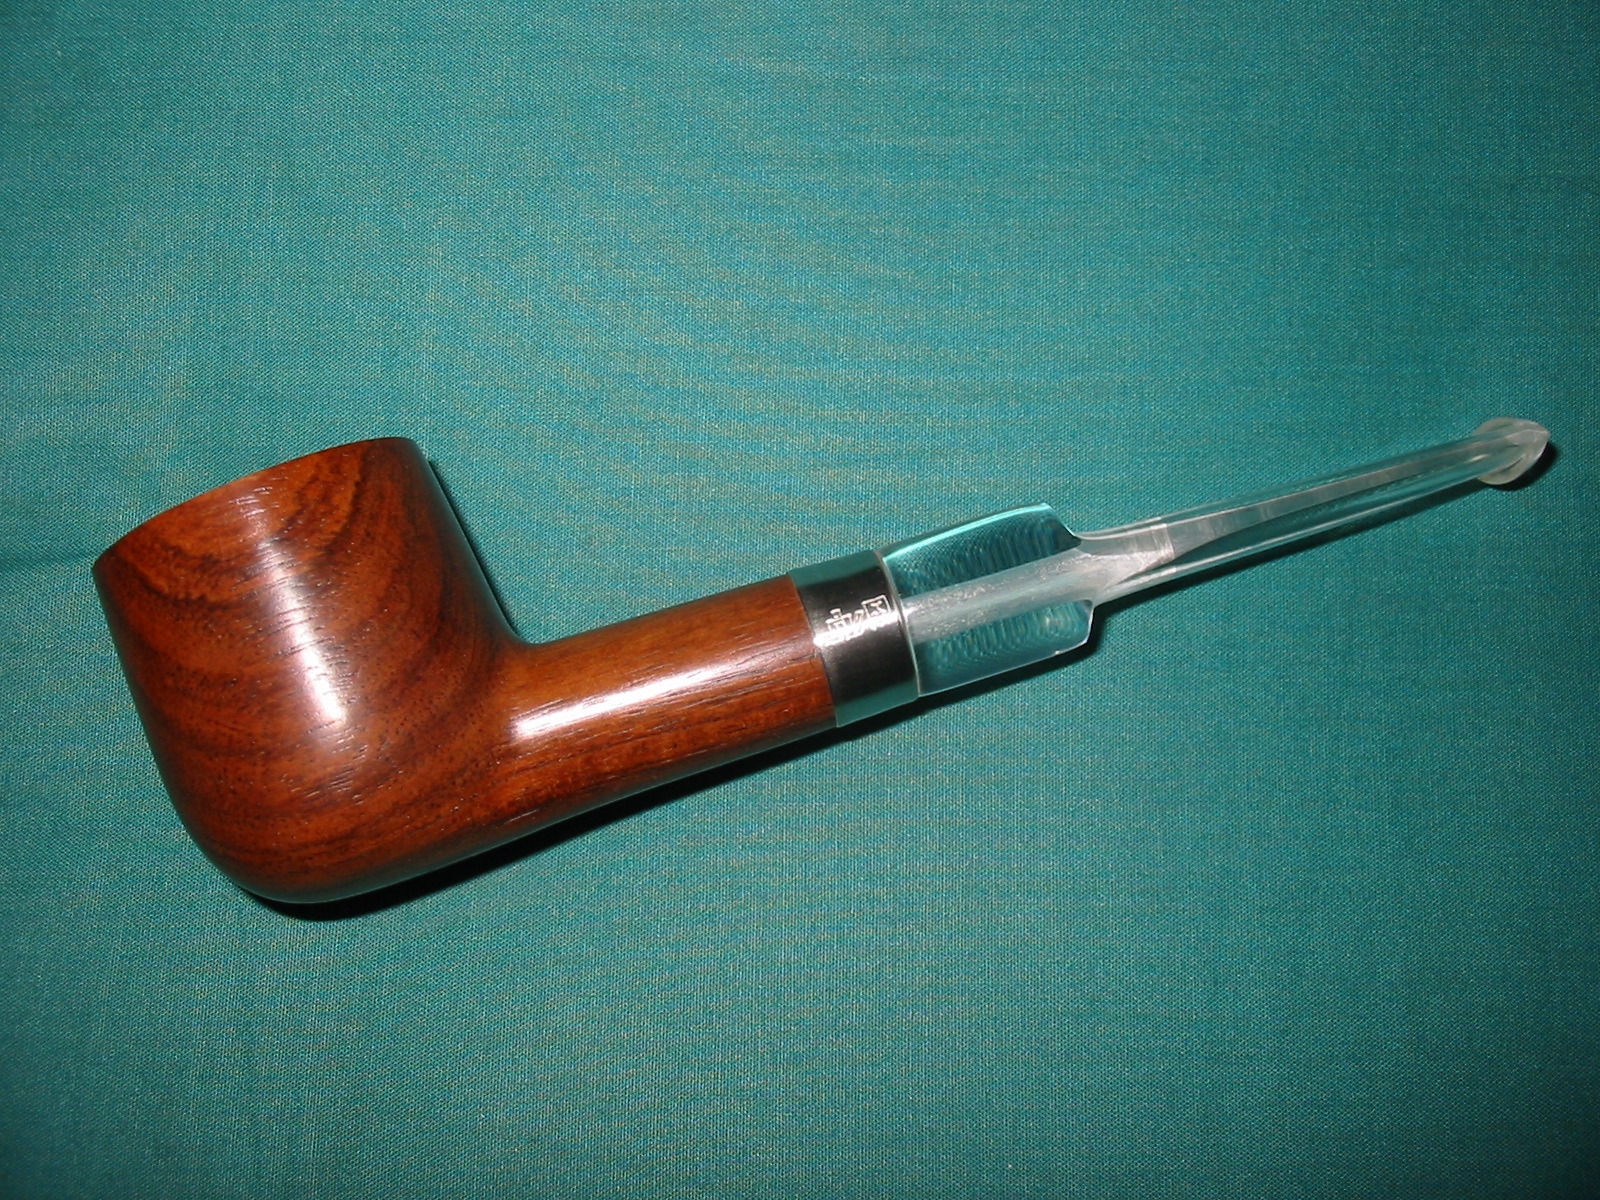
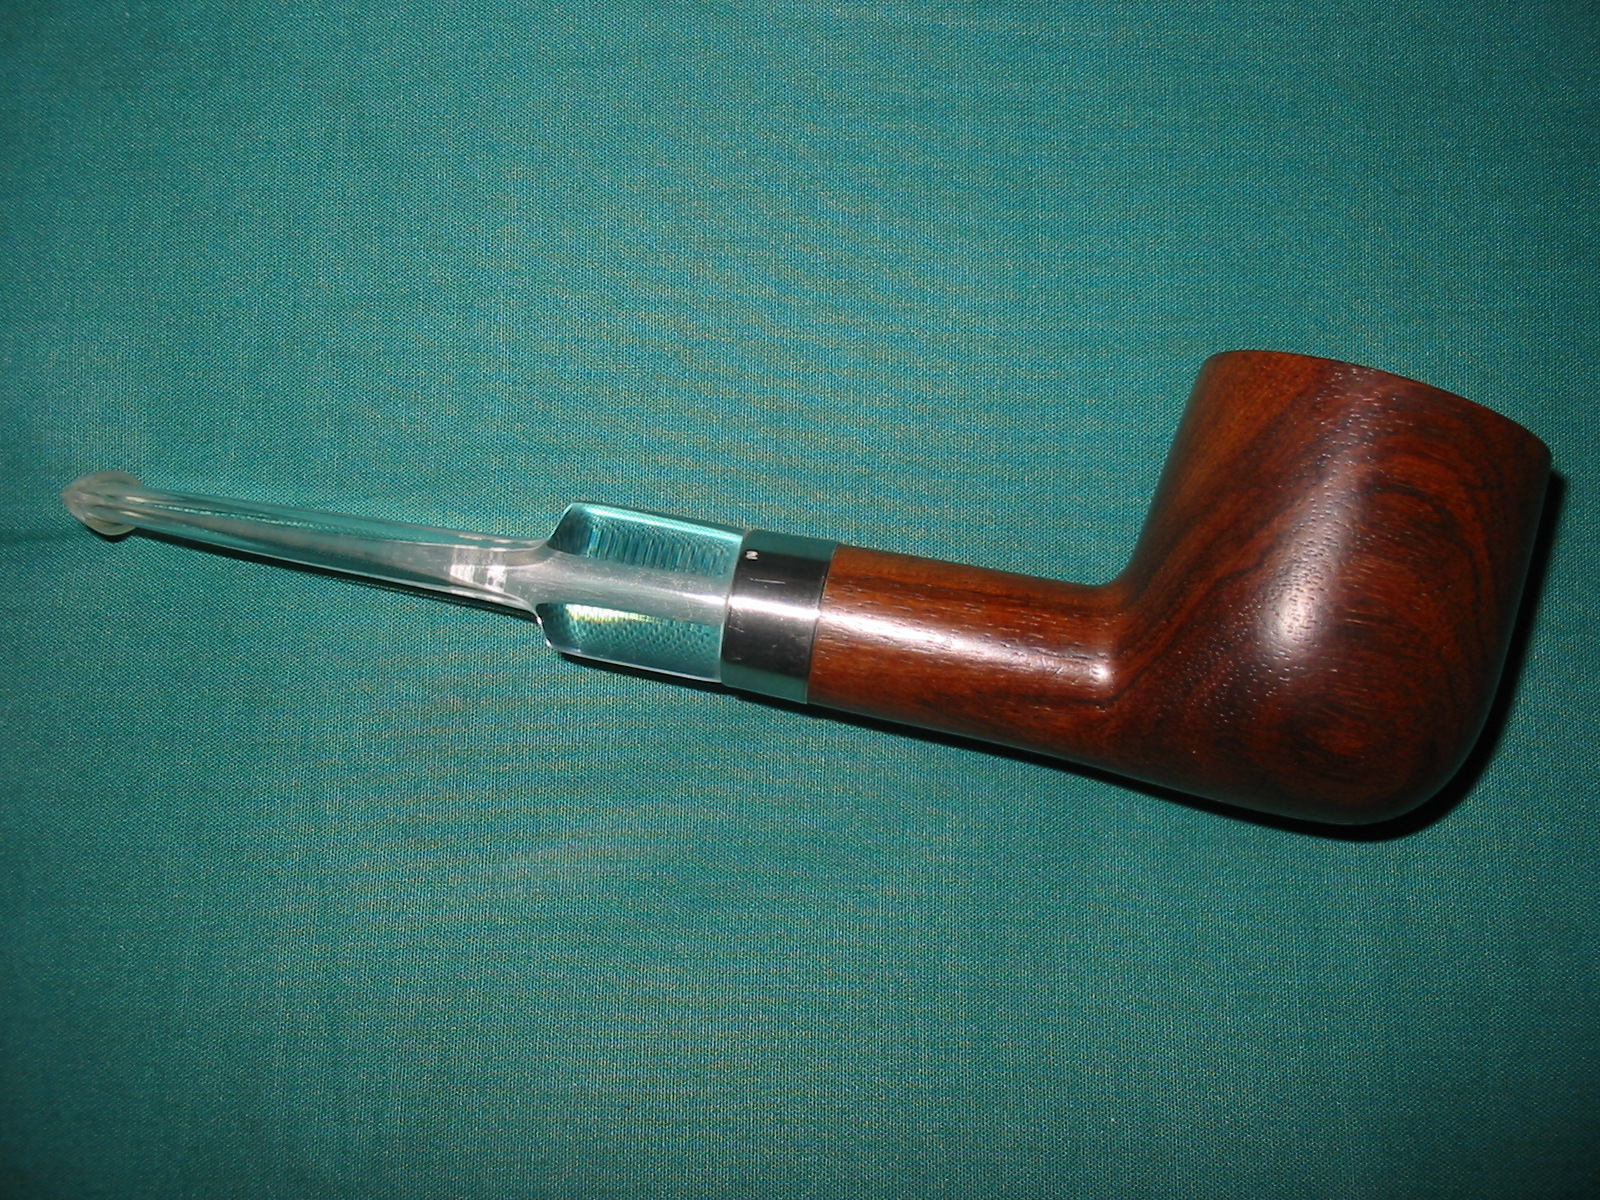
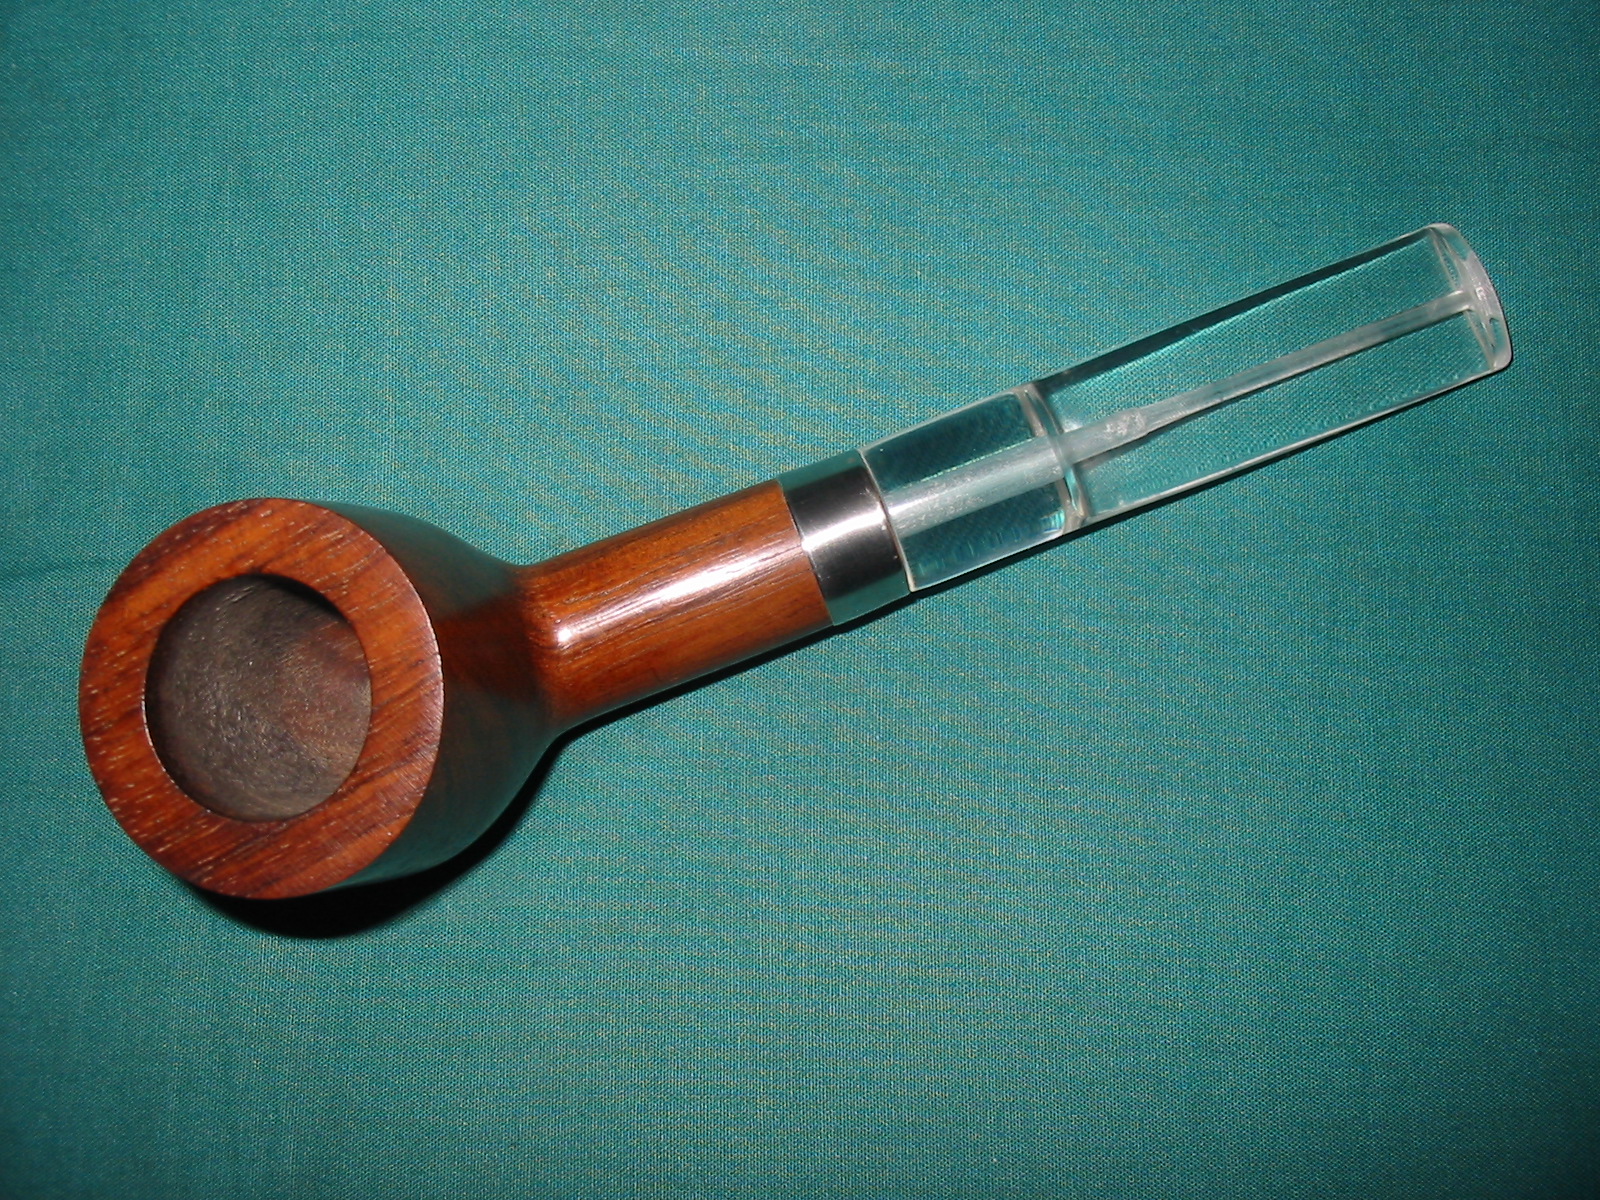
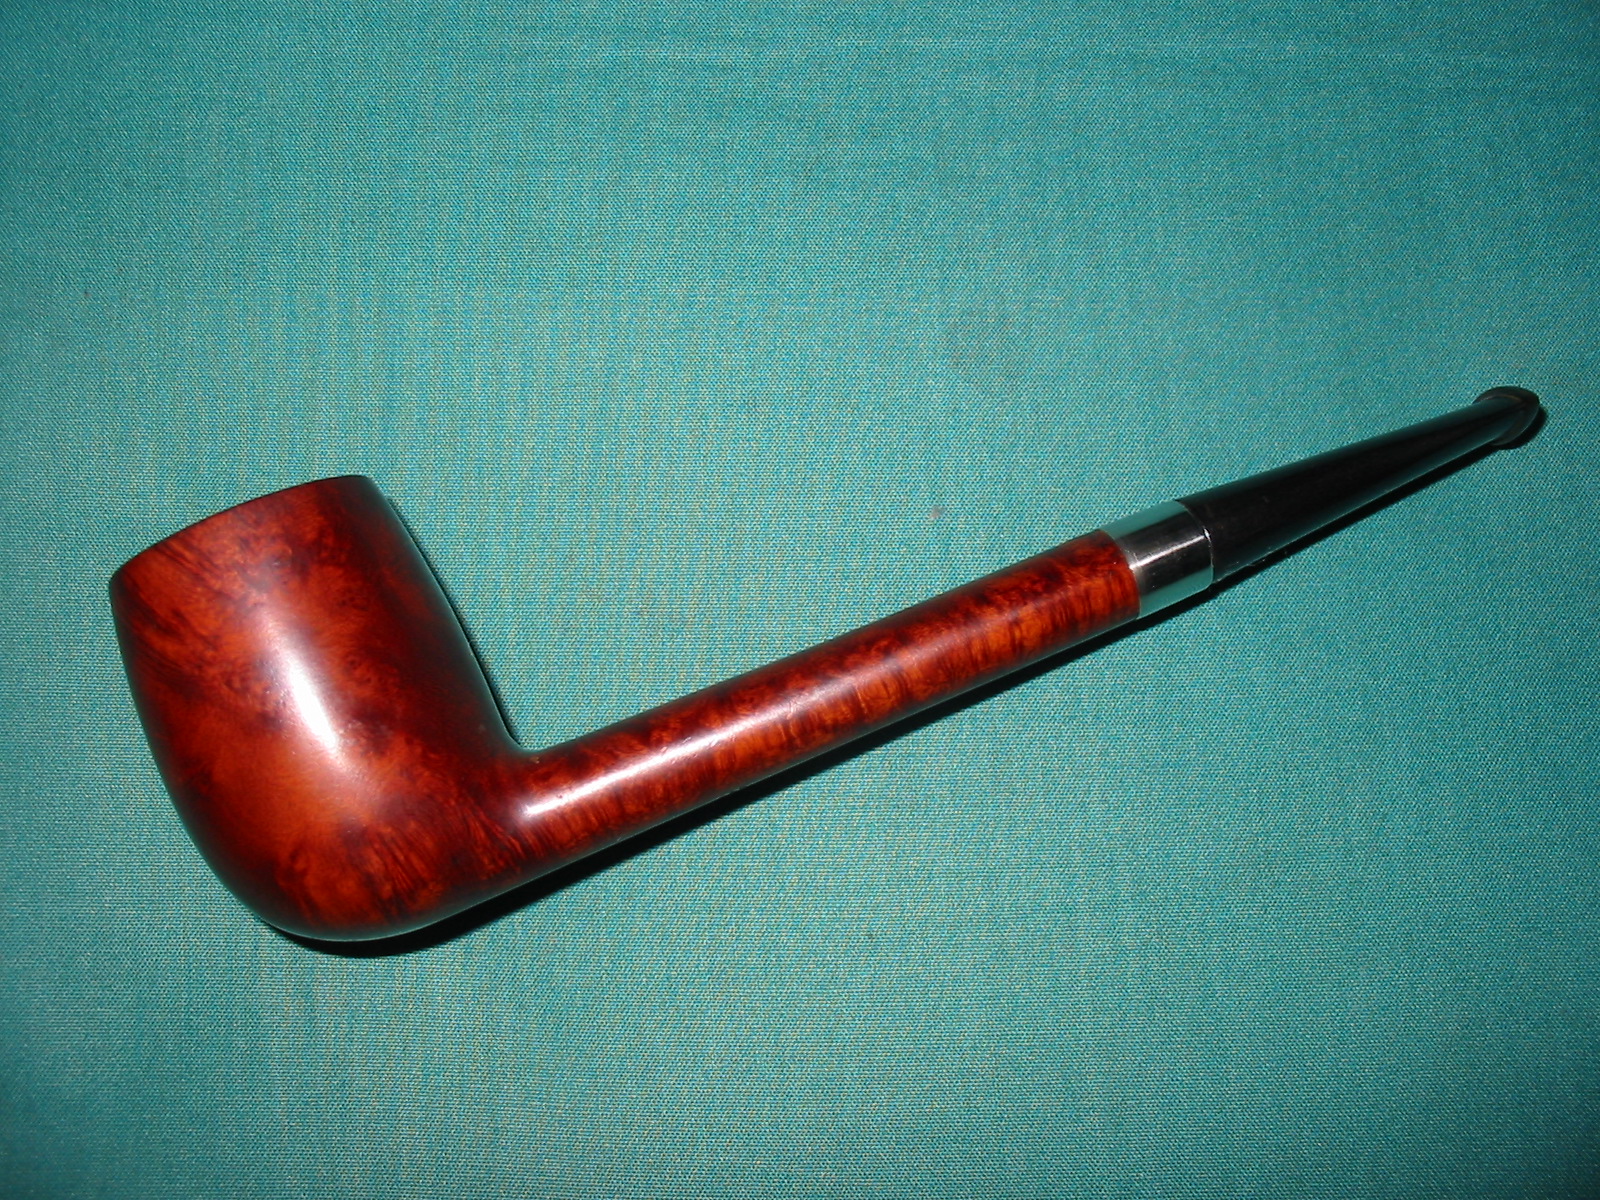
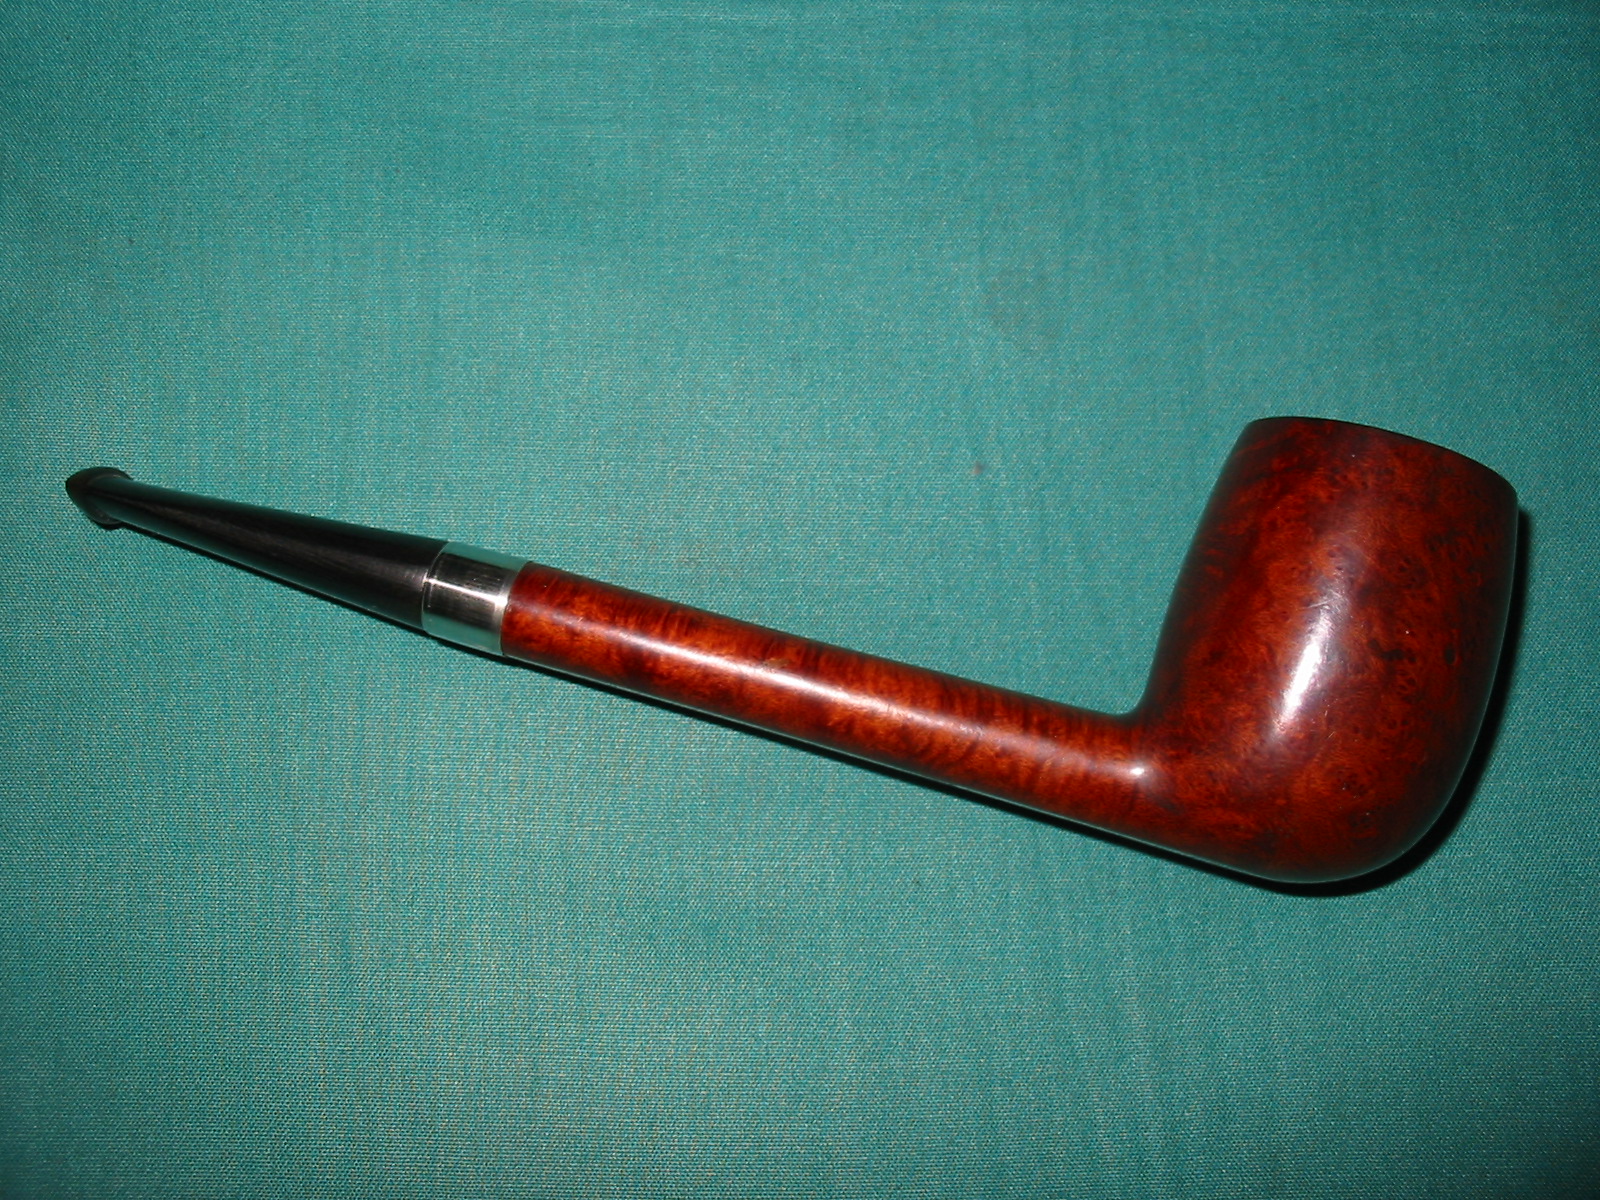
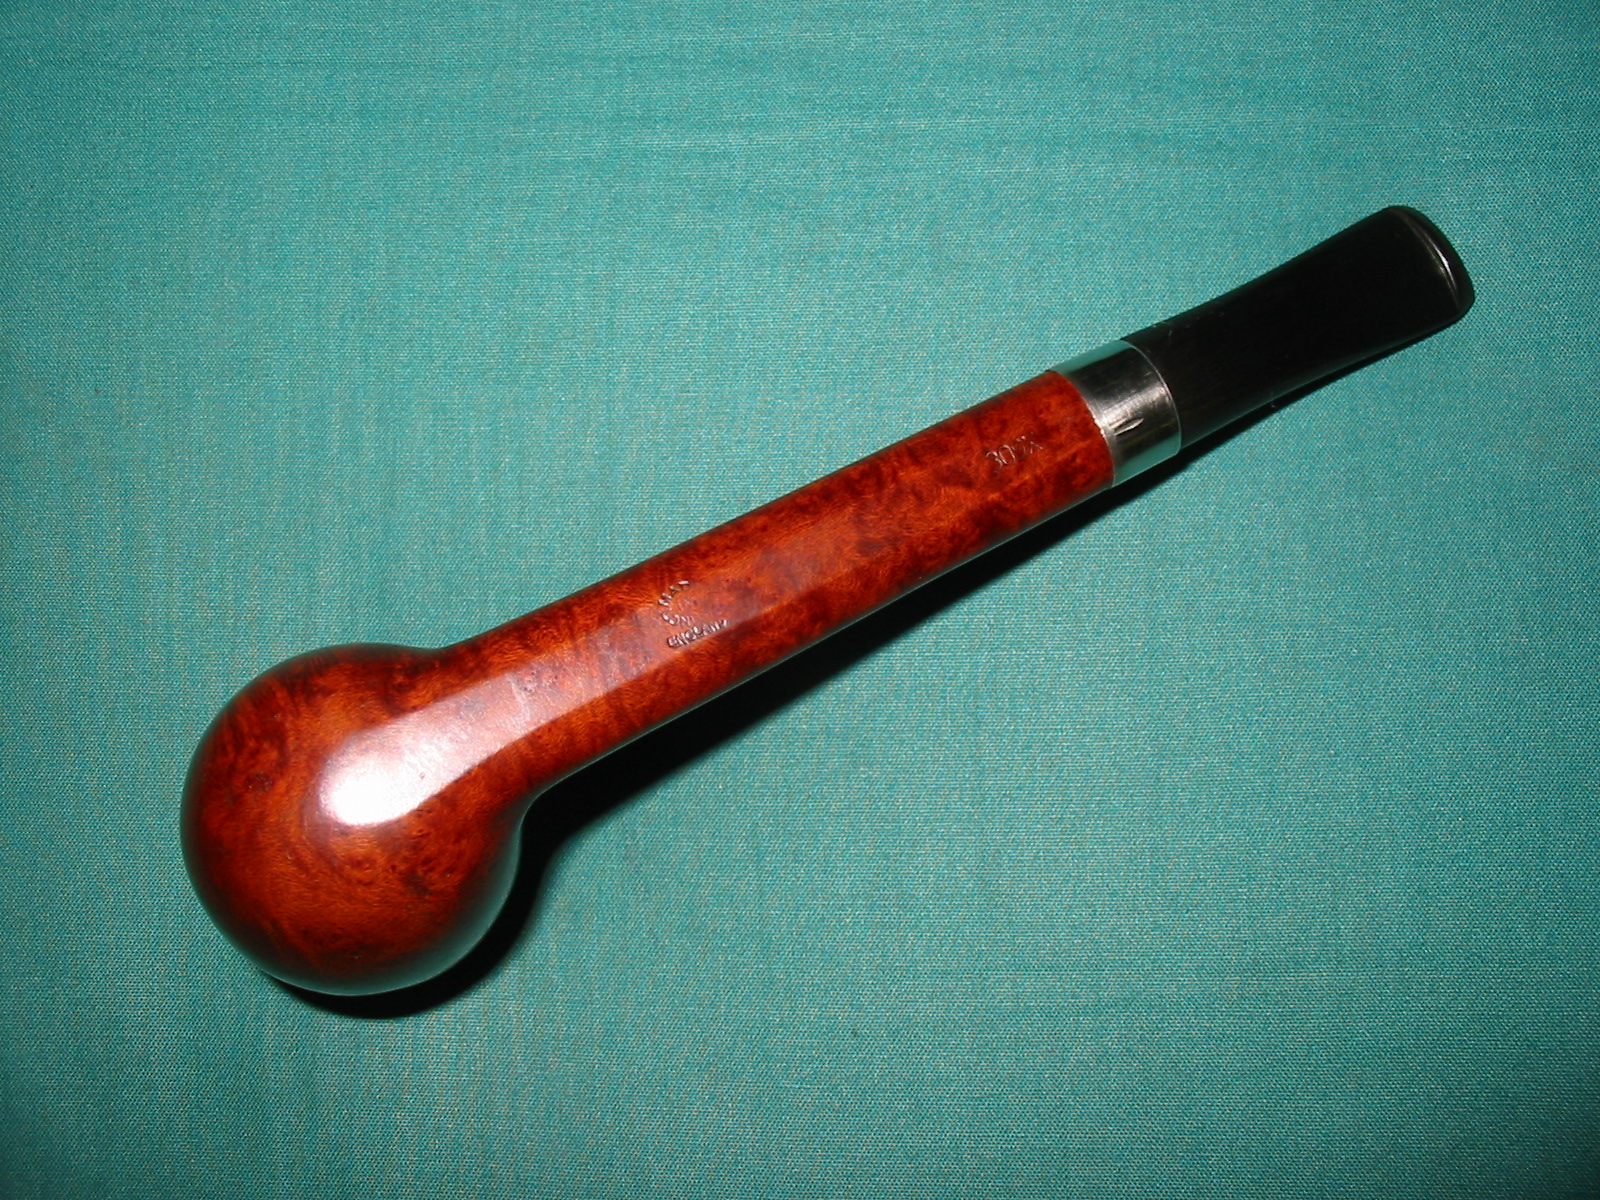
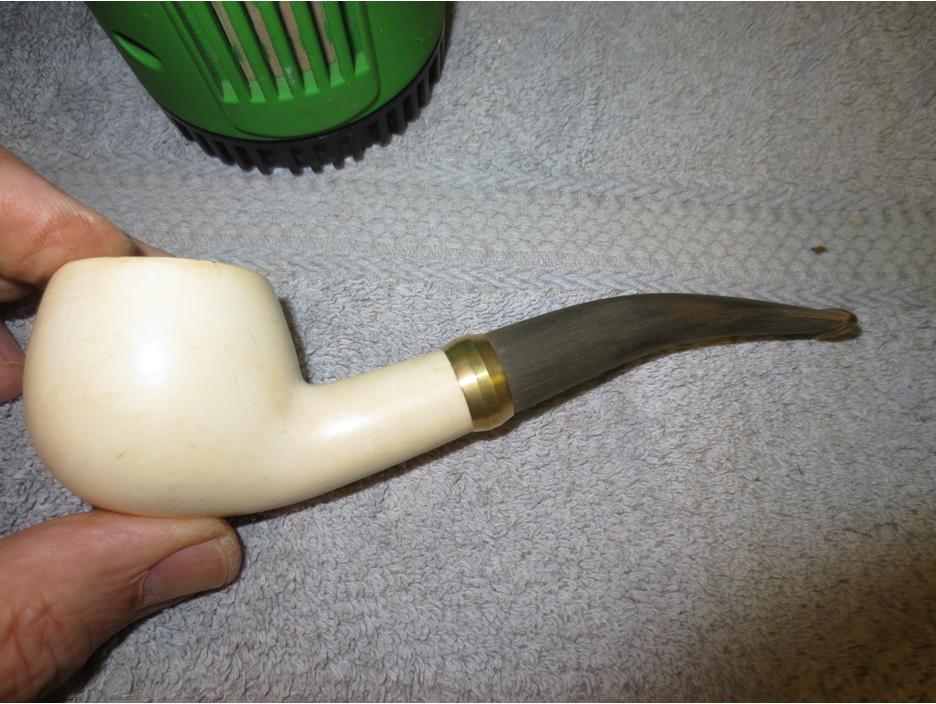
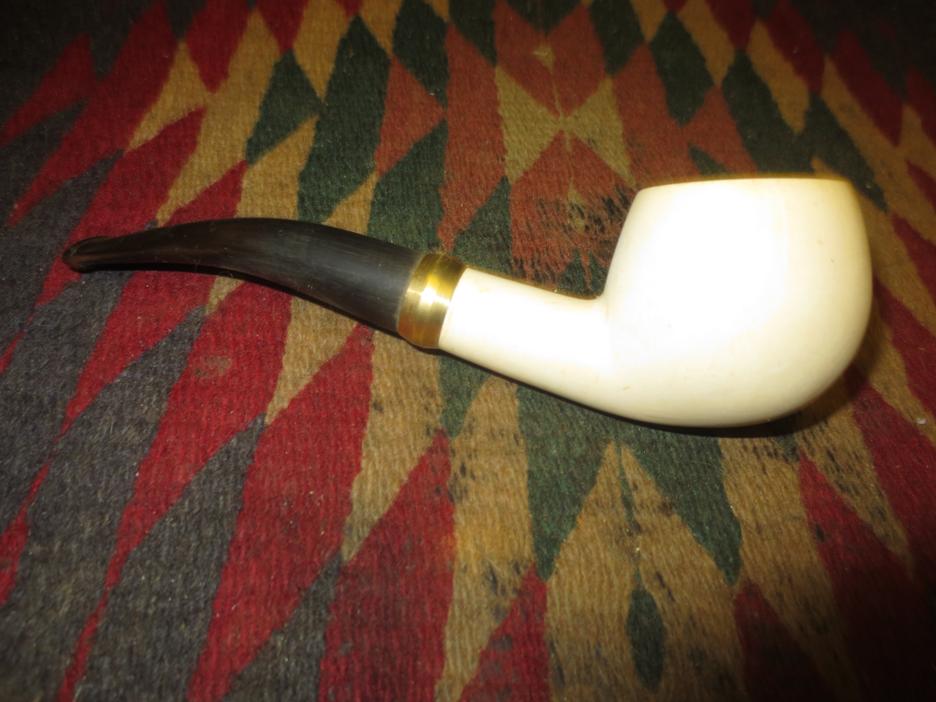
I buffed the bowl and stem with Blue Diamond Plastic polish on the wheel and then gave the stem several coats of carnauba wax. I gave the bowl two coats of white beeswax and the buffed it as well. I buffed both with a clean flannel buff and then by hand with a microfibre cloth. The finished pipe is shown in the photos below.band29

band30

band31

band32

band33

band34

band35

Trash to Treasure – Restoring a KBB Yello-Bole Billiard


Blog by Aaron Henson

Last evening I received an email from Aaron to which he attached this writeup on his restemming of an older KBB Yello-Bole. It is great to have the various readers of the blog submit articles to the blog to share with others. The dream of rebornpipes when I started it was just that – to provide a platform where those of us engaged in refurbishing tobacco pipes could share our methods, successes and failures. This community would provide ongoing education for anyone who wanted to try their hand at restoring estate pipes. With that background here is Aaron’s restoration and the explanation of his process. Welcome to rebornpipes Aaron.

By way of introduction, let me begin by saying that I am relatively new to pipe restoration. This write up details my third restoration and I thought I would submit it for two reasons; 1) I have gotten so much help from the regulars posting here at rebornpipes and from forums elsewhere I felt that I would like to share my experience for others to glean from, and 2) although it is not very different from some of the other restorations that Steve has catalog for us here, some of my tools and techniques may be a little different. I also hope to get some feedback on ways to improve my process.

I was at local second-hand shop with my family around Thanksgiving and was looking for pipes when my son found a stemless KBB Yello-Bole stummel. After looking it over for cracks in the bowl and stem I realized that the briar was in relatively good condition. I noted a few chips on the edge of the rim and some blackening of the rim but no fills and not much cake in the bowl. The stem was clearly stamped with the KBB logo in a clover leaf just to the left of:YB

YB1 I did not know much about the Yello-Bole brand but I thought I should be able to find a stem easily enough (aren’t they somewhat universal in size?). Besides, with a $4 price tag I figured I would not be out anything if it didn’t work out.YB2

YB3

YB4 I jumped on my computer as soon as I got home and found some interesting history on the Yello-Bole brand. I won’t go into it here because Steve has done a nice job summarizing it in one of his posts: Narrowing Down a Date for Kaufman Brothers & Bondy’s KBB and KB&B Pipes. From the data available I had to guess that this pipe was form the late 1950’s or 60’s.

After reading up on the history of the pipe I began looking online for a new stem. I quickly learned that not all pipe stems are created equal, nor are they interchangeable. For a while, I considered sending the stummel to someone to have a stem made but that kind of defeated the whole spirit of restoring the pipe myself.

It took a while to find a stem that I thought would look right on the pipe. I settled on a stem from Vermont Freehand (ebay vt_freehand), a 2½” tapered stem – No. 547. I ordered 3 of them, figuring that I would need at least one for practice.

While I waited for the stems to arrive I began working on the stummel. There was not a lot of cake in the bowl so I started there – low hanging fruit. Now, I don’t own a reamer, but I have found that a ½” dowel wrapped with 60 grit sandpaper answers very well. What cake there was came out cleanly.

Besides the chip there was some charring on the rim. The chip was not very deep so I thought I would take care of both issues by taking the top of the bowl down to clean briar. Using 120 grit sand paper mounted on a flat surface, I carefully worked the bowl in a circular motion trying to keep it level. I didn’t want to take off too much of the top so I gave the outside lip of the bowl a slight chamfer to remove the bottom part of the chip.YB5 I then gave the stummel a soak in a 91% isopropyl alcohol bath. This was for the dual purpose of removing the existing finish and loosening the crud in the shank. I removed the stummel after about 24 hours and wiped off the existing stain. I then cleaned the shank with a bristled brush, bristled cleaners and cotton swabs. I wanted to make sure the mortise was thoroughly cleaned before I began to size the tenon on the new stem.YB6 When the stems arrived, I realized that I probably could have been a little more attentive to the size I purchased. I was going to have to remove a lot of material to get the tenon to fit the mortise as well as flushing the stem to the shank. The best way to shape a stem is on a lathe, but not having a lathe I turned to my drill press.YB7 I found that a bamboo skewer fit very snugly into the air hole of the stem.YB8 Leaving about 1 inch of the skewer protruding out of the air hole, I chucked the stem into my drill press.YB9 I started out a little timidly, removing material with 120 grit sand paper but the vulcanite is so soft that it gums up the paper very quickly. I switched to 60 grit and still was not seeing much progress. I tried a metal file next and when that did not answer I rummaged around the tool box and found a rasp. A bit aggressive I admit, and I would not recommend it unless you are removing a lot of material, and I was.

The drill press method worked great but was not without its problems. Pressing too hard with the file or rasp would cause the stem to slip on the skewer. The stem would then have to be reseated before I could resume. The other problem happened about half way through the rough shaping; the skewer broke off flush with the end of the tenon. I admit I panicked a little when I could not get a hold of the skewer with my needle nose pliers. But using a small drill bit I was able to carefully drill out the wedged skewer.

Back on track I, stopped often to check the fit. As I neared the correct size I switched back to the file then to the sand paper again. I finished the tenon with 320 grit sand paper.YB10 I thought fitting the tenon to the mortise was going to be the hard part but shaping the stem to get that perfect flush fit with the shank turned out to be the big challenge. You can see in the picture above that I have a ways to go to get the taper from the shank to the button. I have also started to get a bit of a wave about a quarter of the way from the tenon.

To fix this I stapled a piece of 240 grit paper to a 3” sanding block and went to town. The sanding block kept the contact surface flat and helped to eliminate the wave. It took about an hour of work stopping often for fit checks. In the end I was rewarded with nice taper. Somehow I had rounded over the shoulder of the stem ever so slightly. This formed a little groove at the stem/shank connection. It was not terrible and I felt could live with it for now.

I finished the stem with 600, 1000, 2000, 4000, 6000 grit sand paper. Then set it aside to buff with the stummel once it was complete.YB11 I stained the stummel using one part Fiebing’s light brown diluted with 2 parts isopropyl alcohol. I applied two coats, flaming each coat. Once dry, I wiped it down with a clean cloth and attached with stem.YB12 I set my drill press up with an inexpensive Sears buffing system and started with the white buffing compound. I found on previous projects that gearing down the drill speed to 1200 rpms was important to maintain control of the pipe and not overheat the pipe.YB13 I finished with two coats of carnauba wax and buff with a soft cloth.YB14

YB15 I needed a tooth pick to remove some of the wax from the sand blasted areas. And that little groove between the stem and shank collected some wax too. Overall I am very happy with the outcome of this restoration. I am looking forward to smoking my first bowl in it.

Looking back, I am glad that I tried shaping my own stem. It was not without its challenges but the result was very rewarding. I now have two spare stems in my tool box, so I will be keeping an eye out for another stemless billiard.

An Old Meerschaum Bowl Restemmed and Reborn


Blog by Greg Wolford

Over the past couple of months I’ve been moving my workshop upstairs to an empty bedroom. With winter’s quick approach, I wanted to be ready for the bone-stiffening cold so I could do more restorations this year. All but the buffer had been moved into its new home and was close to being tidily organized when my plan went south; our son was moving back home and would need my new space back for his room!

It was a rather quick transition so all of my supplies were hastily packed up and moved back to the basement garage. In my rush, I didn’t think to make notes on boxes or anything else to help me sort through it later, I only packed quickly and securely and moved it all out. I felt like I got evicted! (Please note, that is not what happened to my son.) So finding any of the half-dozen projects I had in the works is now a daunting challenge; our garage serves as a catch-all of sorts, with our laundry area, my workshop, my wife’s “over flow” from her antique booth, and all of my son’s extras now piled in there.

The other day I did manage to find an old meerschaum bowl that I’d began to work on. It came to me in a lot I had gotten a couple of months ago I think, along with another bowl and aOld Meer couple of pipes (this is the only before photo I have).  In fact, this bowl was the main reason I got the lot; it looked old and interesting to me.

After doing a little research and getting some comments from friends on Instagram and Facebook I think it may be an Austrian meerschaum; I originally thought it was African. If I am correct, this pipe, well, bowl, is probably over 100 years old. It originally had a wooden shank extension which is now long gone. At first I thought of trying to make some sort of extension to replace it but soon decided that was more than I was willing to risk/attempt on this bowl.

(I forgot to take photos along the way; sorry folks.)

There was a think but soft and crumbly cake in the bowl and lots of oily build up in the shank. I gently reamed the cake back to very close to the meerschaum walls with my Castleford reamer, followed by an old round-ended, dull knife that I use for this purpose. Then I used some 400 grit wet/dry paper to get the last of the cake out and leave a nice, smooth bowl.

For the shank I stared with the poker-end of a Czech-tool, opening up the airway very gently. Then I moved to pipe cleaners that were dampened with isopropyl alcohol. Then I used alcohol dampened and dry cotton swabs to clean the shank. Do note the term dampened here; you do not want to get the meerschaum too wet. It took some time and many cleaners and cotton swabs to get the shank clean; there were also bits of meerschaum that were loose or came loose in the cleaning process that had to be removed. I also wiped out the bowl with several dampened cotton swabs after cleaning the shank. I also wiped off the outside of the bowl with alcohol dampened cotton balls; other than the rim, the exterior was quite clean. Then I let the pipe rest, to dry, overnight.

The next morning I examined the shank and found it to be a little rough inside. There was also a small divot in the bottom of the “lip” where the extension was and the new tenon would enter. I took the same dull reaming knife and scraped the mortise very gently to smooth it out; this took only a couple of passes and removed very little material but made a bug difference. I put a drop of amber superglue in the divot and sprayed it lightly with glue accelerator (I used a cloth to cover the pipe from over-spray) and then let it cure for a little while as I piddled with other things in the garage. I repeated this a second time and the result was a nice hard, smooth mortise entrance. Now it was time to decide on a stem.

Since the extension was gone, the mortise was very large, which would limit my stem options. I looked through my stems and found two candidates that had tenons large enough to work: a fancy vulcanite one and a long, round tapered acrylic one. It was a pretty easy choice when I put them up to the pipe to compare: acrylic wins by a long shot! The amber/bronze color of the stem just looked “right” with this bowl to my eye so now it was time to fit it.

I used my PME tenon turning tool to slowly reduce the size of the tenon.I noticed as I was cleaning the shank that the mortise narrowed a bit, probably from material loss both previously and current, closer to the bowl. So, as I test fit the tenon and found it stopping at the point of the narrowing I began to turn the tenon only about halfway up the total length. By doing this in small increments I was able to tell when the tenon was almost a perfect fit, which is when I switched to 320 grit paper and sanded the tapered tenon smooth and to a very nice fit.

The new stem was in nice condition, without a lot of drawer-dings, so it didn’t require much polishing: a little sanding with 220 and 400 grits, some plastic polish and a buff (lightly) with Tripoli and white diamond. I then used a heat gun to soften the stem and put the bend in it that I wanted and was pleased with. One more round of plastic polish and then everything got a coat of Halcyon II wax.Old Meer (1) Old Meer (2)Old Meer (3) Old Meer (4)

I’d love to tell you how wonderful the old ‘meer smokes but I can’t. You see, my son, the source of my “eviction”, saw the bowl on my work table and fell in love with it, before it was even cleaned up. So, after I got it all finished I took it straight to him to “see what he thought”; he really went nuts over it all reborn! As you have probably guessed by now, the old ‘meer now has a new home in his pipe rack, his first meerschaum pipe, which I hope and expect will serve him well with many good smokes for many years to come.

A Malibu Bent Billiard by Savinelli Restemmed and Restored.


The next pipe from the gift box of bowls was a bent billiard stamped MALIBU on the left side of the shank and Italy on the underside. There is no other stamping on the pipe. I searched the internet for information on the brand and also looked in the book Who Made That Pipe and there found that the pipe was made by Savinelli. I emailed Savinelli but have not yet received a confirmation of that information. I will update this post as soon as I hear from them. In the meantime I worked on the bowl. It was in decent shape though covered by a thick varnish coat that gave it a perma-shine. The bowl and shank were dirty but had not been smoked enough to build up a cake or tars. The rim was in excellent shape and the finish other than being very plastic looking was clean. In the first photo below you can see the two large fills that were on the bowl and shank on the left side. The first is on the side of the bowl, just ahead and below the bend. The second is on the shank next to and below the stamping. They seemed to have taken the stain and though they are visible are not a bright pink. There was no stem with the pipe so I found the one in the photo below that would fit the shank with a little work.
IMG_7519
I turned the tenon down with a PIMO Tenon Turning Tool and then sanded some of the seams that still showed on the side of the bowl. The diameter was very close to being the same – I had to make a few adjustments on the top and the right side to get a seamless fit.
IMG_7520

IMG_7521

IMG_7522

IMG_7523
I sanded the stem in place and sanded the shank at the same time. I needed to remove the varnish coat anyway so I figured it would be okay to sand the shank at the same time. I did not want to reduce the size of the shank – merely that of the stem and then match them. I find that if I do that with the stem off the shank it is easy to round the edges of the stem. With it in place and using a sanding block I can get a smooth transition. I also work to restain the sanded area of the shank to match the bowl.
IMG_7524

IMG_7525

IMG_7526

IMG_7527
Once the transition was smooth I wiped down the bowl with acetone to remove the varnish coat. It took some scrubbing with acetone wet cotton pads. I was finally able to break through the finish with the acetone.
IMG_7528

IMG_7529

IMG_7530
I sanded the bowl and shank, carefully avoiding the stamping, with a medium and a fine grit sanding sponge. I sanded the entire bowl and shank and then wiped the bowl down with isopropyl alcohol to remove the sanding dust.
IMG_7531

IMG_7532
I sanded the stem with the same sanding sponges and removed the majority of the scratches left behind by the sandpaper. I set up a heat gun and heated the stem to soften it so I could bend it. When it was pliable I bent it over a rolling pin with a hard cardboard tube over it to smooth out the wood. I bend it until the stem looks right with the bend in the shank and then use cool water to set the bend.
IMG_7533

IMG_7538

IMG_7539
With the bend set I took it back to the worktable to sand the bowl to even out the existing finish and the stem.
IMG_7541

IMG_7542

IMG_7543

IMG_7544
I stained the bowl with a medium brown aniline stain, flamed it and repeated the process. I sanded the stem with the usual battery of micromesh sanding pads – wet sanding with 1500-2400 grit pads and dry sanding with 3200-12,000 grit pads. I rubbed the stem down with Obsidian Oil between each set of three pads and then as a final rub down once I had buffed the stem with White Diamond. I buffed the entire pipe with White Diamond and then gave the bowl and stem multiple coats of carnauba wax – buffing with a soft flannel buff between coats of wax. The finished pipe is shown below. The fills on the left side are still visible but the blend into the bowl is quite good. It is tolerable. The pipe is cleaned, refinished and ready for the rack of the next pipe man who will smoke it.
IMG_7551

IMG_7565

IMG_7552

IMG_7553

New Life for an old KBB Doc Watson Dublin


Yet another of the gift bowls was on the work table today. It a delicate Dublin shaped bowl that is stamped on the top of the oval shank with KBB in the cloverleaf and next that Doc Watson in an arc over Italian Bruyere. There are no other stampings on the bowl or shank. I was intrigue to work on this old pipe as Doc Watson was one of my favourite musician/singers. I enjoy his guitar playing and singing. I have no idea if this pipe is connected to him in any way but the name brought back memories of small concerts when I lived in Southern California. The finish was dirty and the briar darkened on the left and right side of the bowl where it was held in the hands. Oils and soil from the hands of the previous smoker had darkened the bowl. It had a dark oxblood stain that hid the grain of the briar. There was a small nick on the bottom front of the bowl that did not go too deep into the briar. The rim was darkened and had a buildup carbon and oils that would need to be cleaned. The bowl had a light uneven cake and the shank was dirty.
IMG_7445

IMG_7446

IMG_7447

IMG_7448
I had a new oval Lucite stem in my stem can that would work well for this bowl. The slot in the button had not been cut or shaped. The diameter of the stem was slightly larger than the shank so it would need to be shaped. The tenon was too longer so it would need to be shortened to fit in the shank.
IMG_7449

IMG_7450
I used a Dremel to sand the diameter of the tenon and shorten it. When I had the fit close I sanded it by hand to assure a snug fit in the shank.
IMG_7451

IMG_7453
I initially sanded the excess diameter on the stem with the Dremel and a sanding drum. I followed that by sanding with 150 grit sandpaper to smooth it out and bring it closer to matching the stem. I When I had the fit close I sanded the shank and stem together with 220 grit sandpaper to make the transition absolutely smooth.
IMG_7454

IMG_7486

IMG_7487

IMG_7488

IMG_7489
I wiped down the bowl with acetone on cotton pads to remove the finish. I find that when I break down the stain I can actually bleed it into the sanded portion of the shank. This colours the shank and makes it easier to apply the next coat to the whole bowl.
IMG_7490

IMG_7491

IMG_7492

IMG_7493
I sanded the bowl and shank with 1500-2400 grit micromesh sanding pads. Then wiped it down a final time with isopropyl alcohol.
IMG_7494
I stained the bowl with a oxblood aniline stain, flamed it and repeated the process. It covered the pipe very well.
IMG_7495

IMG_7496
When it had dried I buffed the pipe with White Diamond to polish it. The bowl was ready to be buffed with carnauba but I waited until I had worked on the stem then I would buff them together.
IMG_7499

IMG_7500

IMG_7501

IMG_7502
I sanded the stem with my usual array of micromesh sanding pads. I wet sanded it with 1500-2400 grit pads. I then worked on the slot. I wanted to have a wide open oval slot in the button so I used needle files to open the airway in the end of the stem. I used flat, round and oval files to open it and then a folded piece of sandpaper to polish after filing.
IMG_7503

IMG_7504

IMG_7507

IMG_7509

IMG_7512
I dry sanded the stem and the end of the button with 3200-12,000 grit pads. To remove some of the scratches left on the button I also started again and wet sanded with the 1500-2400 grit pads. When I had finished sanding I polished it with Obsidian Oil and let it dry. The Oil does not soak in like it does on vulcanite but provides a lubricant that works well when I buff the Lucite stem with White Diamond.
IMG_7513

IMG_7514
I buffed the bowl and stem with White Diamond and then gave it multiple coats of carnauba wax, polishing it with a clean flannel buff between coats. When finished the pipe looks like it must have the day it left the KBB factory. It is cleaned, restored and ready to smoke. The finished pipe is shown below.
IMG_7515

IMG_7516

IMG_7517

IMG_7518

Alternative Woods: Refurbishing and Restemming a Black Walnut Pot


I received this pipe bowl as a gift from a friend in exchange for some work I did on one of his pipes. I took it out of the box and put it in the refurbishing box without giving it much of a look. Today I took it out of the box and looked it over. It is well made; the airway is drilled straight and comes out the bottom of the bowl. The drilling is accurate and clean. The mortise is smooth and clean. The bowl has been smoked very little as the bottom half is still fresh wood. The shank is clean and there are no tars. The wood is clean with a few dings and dents. There seems to be a slight finish on the bowl – varnish or something. It also appeared to have a band on the shank originally as there is a stain from the metal on the end of the shank. It came to me without a stem. Today I will take care of that.
IMG_4987

IMG_4988

IMG_4989

IMG_4990

I wiped down the bowl with acetone and cotton pads to remove the finish and sanded it with a medium grit sanding sponge. I wiped and sanded until the finish was gone from the bowl and then wiped it down a final time. The smell of the sanding dust as well as the grain told me that I was dealing with a well made walnut, probably black walnut pipe. This one would clean up very nicely.
IMG_4991

IMG_4992

IMG_4993

IMG_4994

Since I could not remove the stain left behind by the previous band I decided to reband the pipe. I found a nickel band in my band collection that would be a perfect fit. I heated it with the heat gun and the pressed it into place on the shank. I cleaned up the shank end of the pipe once the band was in place and widened the bevel on the inside end of the mortise to fit the new stem that I would fit for the pipe.
IMG_4995

IMG_4996

IMG_4997

IMG_4998

I went through my can of stems and found three different stems that would work with this pipe. Two of them were vulcanite and one was a clear acrylic. I have not done much work with clear acrylic and never turned the tenon to fit a pipe so this one seemed to be the way to go. Each pipe has to be a bit of a learning experience. Besides I liked the way the clear acrylic looked with the walnut bowl and the silver band.
IMG_4999

I drilled the airway in the stem to fit the end of the PIMO tenon turning tool and then put the tool on my drill and slid the stem in place. I adjusted the cutting head on the tool to cut off enough material to get a close fit on the stem. The tool is touchy in terms of accurate adjustments so I eyeball it close and then sand it by hand until it fits the shank.
IMG_5000

I pushed the stem in place on the walnut bowl and set it down to look at the overall appearance of the pipe. The clear stem was going to work well once I had shaped it to fit. The walnut was already darkening from the oils in my hands. This was going to be a beauty once it was finished.
IMG_5001

IMG_5002

IMG_5003

IMG_5004

The diameter of the stem and that of the shank were different. The stem was significantly larger than the shank of the pipe. I used a Dremel with a sanding drum to sand off excess acrylic material. I proceeded with that slowly and carefully as I did not want to nick the band or damage the pipe bowl.
IMG_5006

IMG_5007

I took the material down as close as possible with the Dremel and then did the rest of the sanding by hand with 220 grit sandpaper. It took quite a bit of time and several return trips to the Dremel before I had the shank and the stem diameter matching. The following photos show the progress on the stem with each one taking it a step closer to the finish.
IMG_5008

IMG_5009

IMG_5010

IMG_5011

When I finally had the fit correct with the 220 grit sandpaper I switched to a medium grit sanding sponge to further refine the fit and to remove the scratches left behind by the sandpaper. I finished sanding with the medium grit and used a fine grit sanding sponge to sand the stem again. When finished the stem looked opaque and the shape was done. All that remained was to polish the stem.
IMG_5012

IMG_5013

IMG_5014

IMG_5015

Before sanding it further I used a needle file to smooth out the transition in the airway between the stem airway and the place where the drill bit ended when I worked on the tenon. I was able to even out the transition and taper it for a smooth and seamless transition. The walnut was continuing to darken from my hands as I worked on it. I also stopped and sanded the rim of the pipe to remove the deep scratches that were present when I received it.
IMG_5016

IMG_5017

IMG_5018

IMG_5019

I wet sanded the stem and the band with 1500-2400 grit micromesh sanding pads and then dry sanded with 3200-12,000 grit pads. I wiped the stem down between each grit of micromesh with a damp cloth to remove the sanding dust and to further polish the stem.
IMG_5020

IMG_5021

IMG_5022

After I finished sanding the stem and the band with the micromesh pads I took the pipe to the buffer and buffed it with White Diamond to further polish it. I rubbed the stem down with Obsidian Oil and when it was dry gave the pipe and the stem multiple coats of carnauba wax and a final buff with a soft flannel buff. The finished pipe is shown below. The bowl has only been given a wax coat and no stain. The finish is natural and I believe that it will continue to darken as it picks up the oils from my hands when I smoke it.
IMG_5023

IMG_5024

IMG_5025

IMG_5027

Repairing and Restoring a Lumberman Deluxe Canadian by Comoy’s


In a batch of pipes I was gifted by Andrew there was a pipe to repair. It is pictured below. The stamping on it was new to me. It is stamped LUMBERMAN over DELUXE on top of the shank and on the underside it is stamped Made and London arced in a circle with “in” at the center of the circle. It is also stamped 309X. I do not see an L after the X in the stamping of the shape number. The shank was cracked and looked like it had been taped from the sticky substance left around the shank and crack. It also was without a stem. Looking it over it appeared that the shank had also been cut off slightly and the cut was crooked. There was a chipped out portion at the end of the crack. All of that would need to be evened out in the repair. The bowl was caked toward the bottom and dirty with a buildup of carbon on the rim and the inner bevel of the rim. The finish was dirty and there were remnants of sticky tape that had been used to repair the shank on both the bowl and the end of the shank. It needed some TLC and work if it was going to be brought back to life.
IMG_4521

IMG_4522
The close up photo below shows the extent of the caking and the buildup on the rim. Note that the inner bevel was intact and the rim itself was undamaged – no nicks or dings on the outer edge and no burn marks. This one would clean up nicely.
IMG_4528

The Lumberman stamping was new to me. I had not heard of it before but it looked interesting in the photos that Andrew sent along. I asked him about the brand so he included some interesting information on the stamping that he had gleaned from a Mr. Can EBay listing. It certainly sheds some light on the brand. Here is how the listing read:

“This Collectible Briar pipe is unique, extremely rare Comoy’s 309XL – a classic Canadian Shape. It has the arched Comoy’s nomenclature stamped over Deluxe (just as it appeared in the early 1930’s) both of which were stamped over Lumberman. For anyone already familiar with the stamping of Comoy Canadians that is enough to recognize that this is a rare and collectible Comoy.”

It appeared that the pipe was made by Comoy’s and well worth the effort to restore it. Andrew also sent along three pages of background information that he had found on the brand. I believe that Mr. Can was also the source of this information. I have included some of it here as it is interesting to those of us who are curious regarding the history of the pipes we collect:

“During its history, Comoy’s has had three distinct sets of nomenclature, though they became somewhat blended in later years. The earliest Comoy nomenclature either had no Comoy stamping or a scripted, signature like forward leaning Comoy’s beneath which were featured names instead of shape numbers. Few of those names (Like Leman, Naval, Adelaide, and so on) are recognized even by the most ardent collectors. Then after World War I when Comoy began introducing what is sometimes called their Old Nomenclature (featuring the Prima, as the Top of the line with other lines like the Old Bruyere, Grand Slam, Lions Head, Lumberman, Lumberman Special and so forth) and arched Comoy’s stamping was used. In the 1930’s the Prima gave way to the Deluxe as the top of the line Comoy. Then just before World War II newer nomenclature started to appear (like Blue Riband, Specimen Straight Grain, and so on) and the Deluxe was replaced by the Royal Comoy. That New Nomenclature expanded dramatically after the War and blended with the modern nomenclature today.”

“The use of the arched Comoy’s ended with World War II and was replaced after the War with a straight line Comoy’s (along with the now famous country of origin stamping of a circular “Made In London” over a straight line “England”.”

“Prior to World War II with manufacturing facilities in both France and England, Comoy had pipes made in both locations. Most were easily identifiable by their country of origin stamping. There were several versions of Comoy’s Lumberman made in France and/or England. (They might have been the dame pipe but with different nomenclature.) “The Lumberman” and “The Lumberman Special were made in both factories. But none had the arched Comoy’s stamping.”

“After WWII Comoy’s reintroduced the Deluxe, discontinued the arched Comoy’s and continued various versions of the Lumberman. Perhaps Comoy’s best graded Lumberman was stamped Lumberman Deluxe – but it had no Comoy stamping. Lumber was always stamped over Deluxe.”

“Normally Comoy offered to Canadian sizes designated by shape numbers 296 and 309. The difference was in the length of the Canadians. The 309 shape was Comoy’s longest Canadian and the 296 was shorter. However, the extra long Canadians were upgraded with the additional stamping of XL and the very longest were sometimes stamped XXL. Either upgrade was rare.” – the above was taken from correspondence Andrew included when he sent the pipe to me.

Armed with that information I was ready to work on the pipe. I have included a series of photos below to show the cracked shank and the repair I did to it. In the first photo I inserted a dental pick in the shank to open the crack so that I could clean it out. Also included in that photo is the band that I would use to band the cracked shank.
IMG_4523

I wiped down the shank with acetone on a cotton pad to clean off the grime and build up of material left behind by the tape that had been used to repair the shank. Once it was clean I dripped some superglue into the crack of the shank and held it tightly together until the glue had dried. Once it had dried I inserted the end of the tenon of the stem I was going to fit to the shank of the pipe for the photos.
IMG_4532

IMG_4533

IMG_4534

IMG_4535

I sanded the repair and removed the excess glue from the surface of the top of the shank and wiped the area down with Everclear on cotton pads to clean up after sanding.
IMG_4539

I decided to ream the bowl and clean the rim before I went on to band the pipe. I cleaned the inside of the shank as well as I did not want the grime and build up to run when I heated the shank and the band for the pressure fit. I reamed it with a PipNet reamer and scrubbed the rim with saliva on a cotton pad and good old fashioned elbow grease.
IMG_4537

IMG_4538

I turned the tenon down to get a good fit in the mortise and against the end of the shank. I wanted to see what I was working with in terms of the cut off shank. I knew that it was not straight but I wanted to see how far off it was. I also wanted to see the damage to the shank from the crack. The next series of four photos shows the damage to the shank. I was able to smooth out some of the damage but the band would certainly help in making the end of the shank smooth. I did not want to cut off any of the length after reading the information that Andrew provided. From photos I looked at on the net the stem was the right shape, taper and angles to fit this age of pipe. The old stem I chose was one that had the BBB diamond stamped on the top of it. The stamping was faint so it was a good one to sacrifice for this Lumberman.
IMG_4540

IMG_4541

IMG_4542

IMG_4544

I removed the stem once it fit well and pressed the band onto the shank. I then heated it with a heat gun rotating the shank to evenly heat the band and keep the heat from burning the briar.
IMG_4546

IMG_4547

I pressed the band in place while it was still hot. I use a flat board and press down evenly until the band slides into place. This takes repeated heating until the fit is tight and straight against the end of the shank. In the case of this pipe after I pressed it in place I sanded the damaged end of the shank until it was even and then used a knife to cut a slight bevel on the inside edge of the mortise so that the stem would fit properly.
IMG_4548

IMG_4549

IMG_4550

IMG_4551

Once the band was in place I needed to sand down the tenon so that it would fit in the newly constricted airway. I used a folded piece of 220 grit sandpaper to sand down the excess vulcanite on the tenon so that the fit would be snug. The next three photos show the new stem in place with the band. The stem had been sanded with 220 grit sandpaper to match the lines of the shank and give a proper taper to the stem from the band to the button. I also sanded it with a medium grit sanding sponge.
IMG_4553

IMG_4555

IMG_4557

I sanded the area on the top of the shank where the repair extended slightly ahead of the band with 220 grit sandpaper and a medium grit sanding sponge. I followed that by sanding with micromesh sanding pads to smooth out the spot. I wiped down the bowl with acetone on a cotton pad until the surface was clean and free of debris and dust. I stained it with medium brown aniline stain that was thinned 2:1 with Isopropyl alcohol. I wanted the colour to match the tones that were present on the other Comoy’s that I had from this era and the photos I had seen on line. I applied the stain and flamed it. In the photos below the shine is from hand buffing the pipe with a soft cotton cloth.
IMG_4558

IMG_4559

IMG_4562

IMG_4563

I reinserted the stem and worked on the band and the stem with 1500 grit micromesh to begin the process of removing scratches and polishing. I took the pipe to the buffer and gave it a quick buff with red Tripoli and White Diamond.
IMG_4566

IMG_4567

IMG_4568

I worked on the stem with my usual array of micromesh sanding pads – wet sanding with 1500-2400 grit pads and dry sanding with 3200-12,000 grit pads.
IMG_4571

IMG_4570

IMG_4569

I rubbed the stem down with Obsidian Oil to protect it and when it had dried took the pipe to the buffer. I buffed the stem with White Diamond and gave the bowl and shank a light buff as well. I gave it multiple coats of carnauba wax and finished by buffing it with a clean flannel buff. The finished pipe is picture below.
IMG_4572

IMG_4573

IMG_4574

IMG_4575

A Quick and Easy Cleanup on A GBD Prehistoric 9457?? Maybe Not!


Blog by Steve Laug

This is the fifth of the six pipes that I picked up recently. It is a GBD Prehistoric that has a great sandblast. The stamping on the pipe is on the underside of the shank and reads as follows: GBD in an oval followed by Prehistoric in Germanic script. Next to that is London England over 9457. While it looked like it was originally a billiard, I have learned that initial looks can be deceiving. I checked out the shape number on the web at http://www.perardua.net/pipes/GBDshape.html and found out that the shape was not a billiard at all but that it is supposed to be a Lovat.

It truly was a quick and easy cleanup. The bowl was slightly caked and needed to be reamed. The beveled rim was dirty and had a thick tarry buildup on it. The finish was good but dusty. The stem was oxidized and had a bit of tooth chatter but was not hard to clean. The catch in this one is that the stem is a replacement. A common theme is coming through on this lot. I am pretty certain they all came from the same pipeman. The stems either have a large bite through on the underside or they have twin bore bite proof replacement stems. Two of the lot had twin bore stems and three had serious bite throughs. This one is a twin bore bite proof stem. I decided to clean it up for now while I am on the hunt for a GBD stem for it. I am also going to look through my stems and see if I can find a Lovat style stem that will work for the pipe.
IMG_3787

IMG_3788

IMG_3789

IMG_3790

I have included the next photo to show the state of the rim and the bowl before I cleaned it.
IMG_3792

Next is a photo of the bite proof twin bore stem. It is a bit different from others I have seen in that it seems to have a white bar inserted between the two airholes in the button. It give the end view a striped appearance.
IMG_3795

I scrubbed the rim with saliva and cotton pads until it was clean. It took a lot of scrubbing and scraping to remove the tarry buildup but eventually it came off without damaging the finish on the rim. I really like the inward bevel on some of these GBD Prehistoric pipes because of the nice contrast it adds to the dark finish on the blast of the rest of the pipe. Typically the rim and the underside of the shank match in terms of smoothness and colour.
IMG_3796

The rim is clean and ready to buff. In the first photo below the rim is shown after the scrubbing. In the second photo it is shown after I took it to the buffer and buffed it with White Diamond.
IMG_3797

IMG_3798

The stem was oxidized but I found that the oxidation was on the surface and not very deep into the vulcanite. I sanded it with 220 grit sandpaper to remove the oxidation and the tooth chatter on the top and bottom sides of the stem. I then gave it my usual regimen of micromesh sanding pads – wet sanding with 1500-2400 grit pads and dry sanding with 3200-12,000 grit pads. It did not take too long before the stem shone. Once I had finished with the pads I gave it a coat of Obsidian Oil and rubbed it into the stem.
IMG_3799

IMG_3800

IMG_3801

I scrubbed the bowl down with a soft bristle tooth brush and Murphy’s Oil soap and then rinsed it with warm water. I dried it and gave the bowl a coat of Halcyon II wax as I find it works well on these sandblast finishes. I took the pipe to the buffer and buffed the stem with White Diamond once again and gave it multiple coats of carnauba wax. I buffed the bowl and stem with a soft, flannel buff to give it a shine. The finished pipe is pictured below. It was finished by I still was not happy with the stem and the look of the pipe. It just was not quite right. A true GBD stem for a Lovat would be nice but I am going to try a couple of other tricks while I am waiting to find one. I set the pipe aside over night to think it through.

Anyone have an extra GBD stem kicking around? Do you want to sell or trade it? Drop me a note.
IMG_3802

IMG_3803

IMG_3804

IMG_3805

This morning when I got up I thought about using a Lovat stem on the pipe and looked through my can of stems for one. While doing that it occurred to me that rather than turn a tenon and refit a stem to the shank that I could just as easily cut back the existing stem – it already fit the shank. The majority of the cleanup work has been done and I could rid myself of the bite proof twin bore stem. I know from past experience that the twin bore is like a Y and when cut back it will end in a single airway in the shortened stem. I can then open that into a slot and cut a new button and I will be in business. I decided to take that tact.

I trimmed the stem back until the two airways merged. I had to significantly shorten the stem to get to that point. I cut a new button and inserted it in the shank… problem – the stem was now too short for the look of the bowl. So… I have to cut a new stem for it. I have included a couple of photos of the short stem I cut so that you can see what I mean about the length being wrong.
IMG_3840

IMG_3841

With the stem being too short I started over. I found another stem in my can – longer than the previous one and turned the tenon to fit the shank. I stair stepped the tenon to make a good snug fit in the shank. I used the Dremel and the sanding drum to take off the excess vulcanite and fit the stem to the diameter of the shank. I purposely chose a stem that was slightly larger than the shank diameter because the shank on the pipe was slightly out of round. I fit the stem as close as possible to the shank with the sanding drum and then took it back to the worktable to shape by hand.
IMG_3820

IMG_3821

IMG_3822

IMG_3823

I sanded the stem with 220 grit sandpaper to bring the shape into line with the shank. It took quite a bit of hand sanding. I also shaped the stem with the sandpaper flattening the blade of the stem and smoothing and thinning the edges as well. I wanted the diameter of the stem to match from the shank to the saddle and then have straight lines back to the tip. This was all done by hand sanding with the 220 grit paper.
IMG_3825

IMG_3826

IMG_3827

Once I had the lines straight from front to back I used a medium grit sanding sponge to smooth out the surface of the stem and reduce the scratches left by the sandpaper. I opened up the button with needle files to make it easier for a pipe cleaner to go in and out of the pipe.
IMG_3828

IMG_3829

IMG_3830

IMG_3831

I sanded the stem with my usual run of micromesh sanding pads – wetsanding with 1500-2400 grit and then dry sanding with 3200-12,000 grit pads. I buffed the stem with red tripoli between the wet and dry sanding and then when finished I buffed it with White Diamond. I rubbed the stem down with Obsidian Oil to protect it and when it was dry hand buffed it.
IMG_3832

IMG_3833

IMG_3834

When I finished with the stem I lightly buffed the whole pipe with White Diamond and then gave the stem multiple coats of carnauba wax. I used Halcyon II wax on the bowl as I had above and then hand buffed the bowl and shank with a shoe brush. The finished pipe is picture below. I think that the Lovat style stem is an improvement to the look of the pipe. The new stem is approximately ¾ of an inch shorter than the stem that came with the pipe. I also am much happier with a regular slotted stem in place of the twin bore that I pictured earlier.

This pipe is really quite symbolic of what can happen when refurbishing a pipe. In many ways it is a bit of the story of some of my pipe refurbishing. It sometimes takes two or three tries to get the pipe to where I want it to be. Thanks for hanging in there with me in the process of this refurb!
IMG_3835

IMG_3836

IMG_3837

IMG_3838

Reclaiming a Digby Conquest Canadian


Blog by Steve Laug

On the weekend I went pipe hunting to refill my box of pipes for refurbishing. I found some nice ones to add to the box. The first one that I took on was odd looking when I picked it up. The stem on it was an aftermarket replacement that proportionally was all wrong. The addition of the stem made the pipe over seven inches long. The stem was also a twin bore which was not standard on GBD line pipes. The stamping on the bottom of the shank is Conquest in script followed by Digby over London Made. That is followed by London England and the shape number 9519. Digby is a GBD second line. It has the same blast as a GBD Prehistoric which lends one more question mark to what makes a pipe a second. In checking the GBD shape numbers there is no shape #9519 listed on the GBD shape site. http://www.perardua.net/pipes/GBDshape.html

The blast on the bowl was quite nice while the shank was rusticated. The person who added the new stem to the pipe changed the shank to fit the new stem rather than the other way around. In doing so they sanded the shank and removed the blast/rustication on the end of the shank. They also tapered both sides and top and bottom to meet the new stem. While both of these “errors” in fitting a stem are a pain to deal with they are not irreparable. It just means that any new stem must follow the new lines of the pipe and that the rustication pattern needs to be repaired as well. The bowl itself was thickly caked and the rim dirty and with a slight buildup of tars. The finish was spotty and the reddish brown stain was worn.
IMG_3467

IMG_3468

IMG_3469

IMG_3470

I went through my can of stems to find one that would properly fit a GBD style Canadian with an oval shank and found several. I chose the acrylic one in the photo below and used the PIMO Tenon Turning tool to reduce the diameter of the tenon. I also used the Dremel and sanding drum and hand sanding to further fit the tenon to the shank.
IMG_3471

IMG_3460

With the tenon fitting well, the overall diameter of the stem needed to be reduced to fit the shank diameter. It was just slightly bigger so the work on it would not be difficult. The excess is visible in the four photos below. Note also the smoothing of the shank that had been done in the previous repair.
IMG_3463

IMG_3464

IMG_3465

IMG_3466

I used a Dremel with a sanding drum to remove the excess acrylic material and bring the stem into line with the shank. I took care to not nick the shank even though I later planned to rework the rustication on it.
IMG_3472

IMG_3473

IMG_3474

IMG_3476

With the fit roughed in I took it back to the work table to hand sand the stem and make fit seamless. To begin the process I used 220 grit sandpaper to do the hand work. On the right side bottom of the shank I noted that the oval was slightly out of round with the stem removed and gave the new tapered stem a bulge in that area. I sanded the shank and the stem together at that point to correct the previous damage.
IMG_3477

IMG_3478

IMG_3479

IMG_3480

With the fit nearly finished on the stem I reamed the bowl of the pipe with a PipNet reaming set. I began with the smallest cutting head and then ended with the proper sized head for the bowl. I cut the cake back to bare wood.
IMG_3481

IMG_3482

IMG_3484

I worked some more on the stem shank junction with a fine grit sanding sponge to remove the scratches in the briar and the stem. I was more concerned with the briar as I wanted to give it a coat of stain.
IMG_3493

IMG_3494

IMG_3495

IMG_3496

Staining would be a complicated process of using a variety of stains to match the original stain colour on the prehistoric. For the first stain colour I used an oxblood aniline stain. I would use other stains later in the process to get the colour I was aiming for.
IMG_3504

IMG_3506

As I put the newly fitted stem in place so that I could lay it down to dry the tenon snapped on the new stem. As I examined it I could see the many small fractures in the acrylic. This is one of the frustrations of pipe repair. You get a pipe on its way to the finish line only to have something like this happen and have to begin again. I took another stem out of my can of stems. I once again had to go through the process of turning the tenon, using the Dremel and sanding drum and finally hand sanding to fit the tenon in the shank. I also had to trim back the diameter of the new stem to match the shank with the Dremel. One good thing is that doing it the second time everything is set up to do it again more quickly the second time.
IMG_3508

IMG_3509

IMG_3510

Once I had a good fit on the stem it was time to re-rusticate the shank using an etching head on the Dremel. In the next two photos the cutting tool is visible and the rustication of the shank is completed. I did both sides of the shank and the top to match the pattern on the upper portion of the shank. On the underside I brought the pattern around the flattened oval stamping area of the shank and matched the pattern around that area.
IMG_3511

IMG_3513

I stained the newly rusticated shank area with the oxblood stain. The stained rustication is visible in the next four photos. I am pleased with the match on the pattern of the rustication on the shank that I was able to achieve with the tool.
IMG_3515

IMG_3516

IMG_3517

IMG_3518

I still needed to use several more colours of stain to achieve a match to the bowl. I used aniline black and an aniline dark brown stain to approximate the mix of stains to blend the repaired portion with the remainder of the pipe. I would still need to do a top coat of oxblood to truly blend in the repair.
IMG_3519

I sanded the stem with the usual regimen of micromesh sanding pads. I wet sanded with 1500-2400 grit pads and dry sanded with 3200-12,000 grit pads.
IMG_3520

I gave the shank a final coat of the oxblood stain and lightly buffed the shank with White Diamond to blend the wear of the older portion with the new rustication. I rubbed down the stem with Obsidian Oil and then buffed the stem with White Diamond as well. Once the buffing was done I gave the stem multiple coats of carnauba on the wheel and then buffed it with a soft flannel buff. I rubbed in Halcyon II wax on the bowl and shank and then lightly buffed the bowl with a soft flannel buff. The “new” Digby Canadian is now ready for its inaugural smoke. It is shown below in the final four photos.
IMG_3540

IMG_3541

IMG_3542

IMG_3543

Kaywoodie Drinkless Apple Repurposed and Refurbished


Blog by Steve Laug

I was gifted this old Kaywoodie Apple in an exchange recently. It is the last of the box of pipes that I have to refurbish. I left it to last as it had some serious problems. The stem was overturned and had deep tooth marks at the button. The bowl had some deep scoring on the left side of the bowl. Those issues might not seem too serious at first glance but they were more so than I had expected. I inspected the stinger apparatus and saw that it had been reglued in the stem. I heated the stinger with a heat gun and turned it back into the shank of the pipe. As I turned it carefully the stem fell off in my hand. I looked and saw that it was corroded through and the heat had softened the glue and the piece literally fell out of the stem. I tried to epoxy it back into the stem and connect the two pieces but it would not stay. Each time I put it back into the shank it fell out – no matter how much curing time I gave it. That was the first issue. In looking at the tooth marks they were repairable but with the broken stinger and threaded tenon I wondered whether it was worth fixing it. The grooves on the bowl and the dip in the rim above them could be repaired and would be a simple fix if I decided to keep the pipe. Those were the issues that caused me to lay the pipe aside for a bit and work on other pipes. That is why it is the last pipe in the bottom of the box.
IMG_3047

IMG_3048

IMG_3049

IMG_3050

Because of the extent of damage to this pipe it was unlikely that it would ever be truly collectible again. Though to some my next decisions will appear to have desecrated an older Kaywoodie I decided to use this pipe to experiment with a few repair ideas. I topped the bowl with my usual method to remove the rim damage. I removed the damaged portion of the bowl and flattened the rim against the sandpaper. When I was finished topping the bowl the rim was flat again however the inner edge of the rim needed to be repaired. It was missing a large chunk of briar.
IMG_3051

IMG_3052

IMG_3053

IMG_3054

The missing chunk matched the twin scoring marks on the outside of the bowl and made me wonder how the previous pipeman had caused that kind of damage to the bowl. The divot on the rim was not a burn mark but a divot that had been caused in the same moment the scoring occurred on the outside of the bowl. I sanded down the scored areas and cleaned the bowl with acetone. I then patched the score marks with superglue and briar dust. I also built up the top of the rim in the divot area with the same mixture. I kept the mix on the top of the rim as much as possible with very little of it on the inside edge. I did not want to use it inside the bowl.
IMG_3055

I sanded the bowl to remove the excess of the glue and briar dust mix and then wiped the entire bowl down with acetone on cotton pads. The three photos below show the state of the bowl and the repairs down with the briar dust and superglue. The third photo shows the top patch.
IMG_3056

IMG_3057

IMG_3058

Because the stem was not functional I had a decision to make. I could drill out the disintegrated end of the stinger and put a new replacement tenon in place or I could remove the metal shank insert and make a new push stem for the pipe. The faintness of the stamping on the shank and the extent of damage that I had repaired on the bowl made me take the second choice. I removed the metal shank insert from the shank. This is not as hard as it sounds. I have heard of others drilling it out and leaving it in place. I have opted to remove it. It is threaded and can be unscrewed from the shank with a small pair of needle nose pliers. The next two photos show the process. I sorted through my stem can and found a stem that could be repurposed to fit this shank and then be adapted to fit the diameter of the shank.
IMG_3355

IMG_3354

Before I could properly fit the tenon in the shank I needed to drill the mortise deeper. The current depth of the mortise was the same length as the threaded portion of the metal shank attachment in the photo. I wanted the tenon to be longer so I drilled out the mortise to double the length of the current depth. I would need to remove some of the tenon length on the stem to make a good fit but that is a simple task.
IMG_3356

With the drilling done, I used the PIMO Tenon Turning Tool to remove some of the excess diameter of the tenon and also shortened the tenon slightly to get a good tight fit in the shank and clean joint at the tenon shank union. The larger diameter of the stem is visible in the photo below.
IMG_3357

I used the Dremel with the sanding drum and carefully reduced the diameter of the stem while it was in place on the shank. I run the Dremel at a speed that allows me to carefully and steadily control it as I work close to the shank of the pipe.
IMG_3359

IMG_3360

IMG_3361

IMG_3362

IMG_3363

Once I had it roughed in to fit with the Dremel it was time to take it back to the work table and do the hand work with sandpaper to make the fit seamless. Since I was going to restain the pipe anyway I sanded the shank as I sanded the stem to make the transition smooth. In the first two photos the stamping is visible in the light of the flash. In real life it is quite a bit fainter and shallow. I also use some superglue and briar dust to repair some of the deeper dings and marks on the bowl to ready it for staining. I sanded it with 220 grit sandpaper and then with a medium grit sanding sponge to smooth out the surface and remove the scratches left behind by the sandpaper.
IMG_3364

IMG_3365

IMG_3366

IMG_3367

I wiped the bowl down with Everclear to remove the sanding dust and give it a last cleaning before I started giving it a new stain coat. I have also included two photos of the new stem with the older KW stem and broken parts for comparison sake. I really like the way the new stem fit the shank and the look of the pipe after the repairs.
IMG_3368

IMG_3369

IMG_3370

I wanted to continue to experiment with contrast staining so I gave the pipe a first coat of stain with black aniline stain. I applied the stain and flamed it and repeated the process until the coverage was even. I then heated the entire bowl by passing over it with the flame of a Bic lighter to warm the briar and set the stain.
IMG_3371

IMG_3372

IMG_3373

IMG_3374

The black aniline stain is transparent enough that the brown of the briar actually makes the stain appear to be a dark brown. It also covers the repairs on the bowl and blends them into the grain in way that makes them less visible. This was especially important with the repair I had made to the two deep scoring marks on the left side of the bowl. Once the stain dried I wiped it down with acetone to remove the top coat and leave only the grain darkened with the black. After doing that the bowl was still do dark for my liking. Though the grain patterns are very visible I wanted it to be lighter so that when I put the contrast stain coat on it would really pop to the surface.
IMG_3375

IMG_3376

IMG_3377

I sanded the bowl with 220 grit sandpaper and then with a medium grit sanding sponge to further remove the black stain. I finished the sanding by wet sanding the bowl with 1500-2400 grit micromesh sanding pads. Sanding with the micromesh pads removed the scratching left behind by the other sandpapers and prepared it for the next coat of stain that I wanted to give it. I stained the bowl a second time with a coat of Minwax Water based stain. I chose a red mahogany stain for this coat. I like the contrast the reddish colour of the mahogany with the black undercoat. I applied the stain and then wiped it off with a soft cotton cloth.
IMG_3378

IMG_3379

IMG_3380

IMG_3381

I finished the contrast staining with a third colour – a Minwax medium walnut stain for the finish coat. I applied the stain and wiped it down using a soft cotton cloth and then hand buffed it with a shoe shine brush. The next series of four photos show the finish after the application of the three stains and a hand buffing. I really like the contrast finish that the three stains gave the pipe.
IMG_3382

IMG_3383

IMG_3384

IMG_3385

I sanded the bowl and stem with micromesh sanding pads to bring out the shine. I wet sanded the stem with 1500-2400 grit pads and then dry sanded the bowl and stem with 3200- 4,000 grit pads. At that point I made a decision that some will like and others will hate.
IMG_3387

IMG_3388

I took out my box of nickel bands and found one that would fit the shank. I took the photo below with the band next to the pipe to symbolize the thinking process that went into this decision. I put the band against the shank and the stem next to it to see how it looked. I looked at the faint stamping and the fact that is was a non-collectible pipe anyway due to my stem modifications and decided to give it a go.
IMG_3389

I put the band on the end of the shank. For those banding a pipe shank pay attention to the diameter of the band – the end that goes on the shank is slightly larger than the end the faces the stem. I took the pipe and heated the band with a heat gun and then pressed it into place on the shank.
IMG_3390

IMG_3391

I took it back to the work table and finished sanding the stem and bowl with 6,000, 8,000 and 12,000 grit micromesh sanding pads. In the photo below the newly banded shank is visible. The band is solely cosmetic as the shank was not cracked and the fit of the stem was perfect. I liked the added bling on this pipe quite a bit.
IMG_3393

I wiped the stem down with Obsidian Oil and rubbed it into the surface of the vulcanite and then buffed the pipe with White Diamond. I avoid buffing the band as much as possible because it discolors the stem and the shank with the black residue caused by buffing the nickel. I then buffed the pipe with multiple coats of carnauba wax to protect and give a rich finish to the pipe. The finished pipe is shown below in the last four photos. The contrast stain worked well on this pipe. The flaws are there and visible but do not detract from the finish. The stem has a good glow with the lines of the pipe and the nickel band gives a nice polished look to the old pipe. Overall this experiment in repairs ended well. I like the finished look of the pipe and I learned a few new tricks along the way.
IMG_3398

IMG_3399

IMG_3400

IMG_3401