Blog by Steve Laug
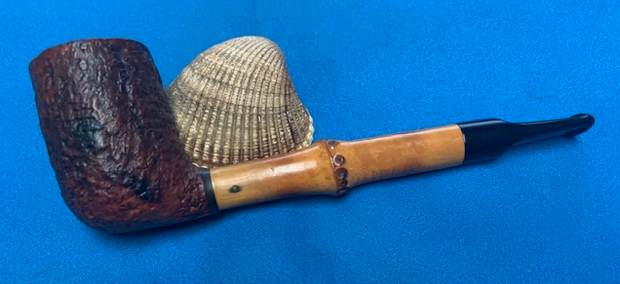
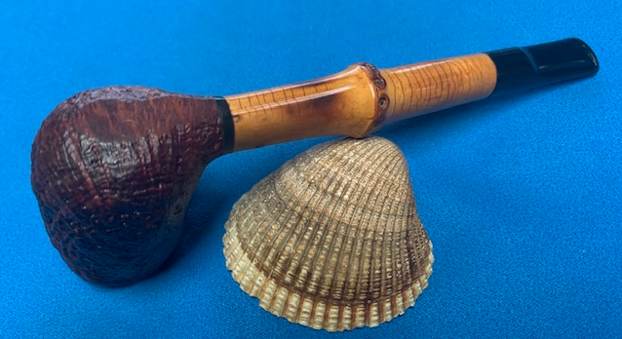
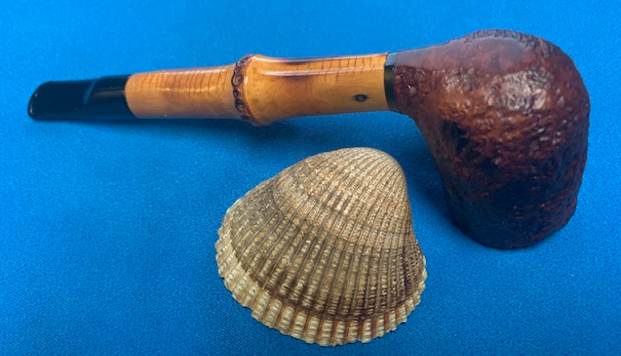
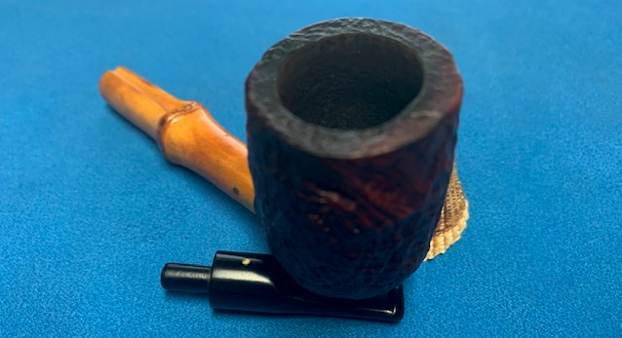
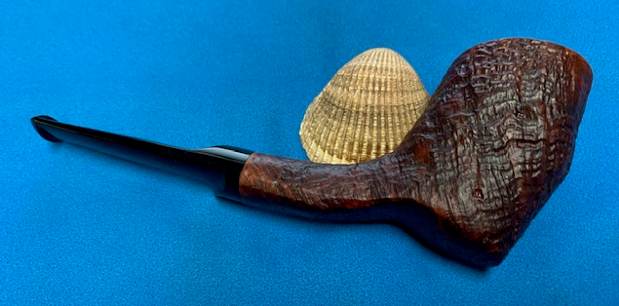
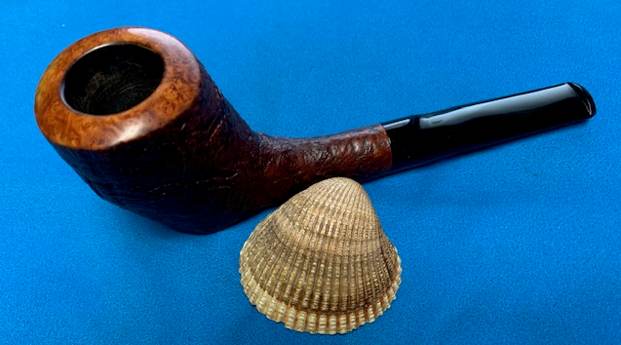
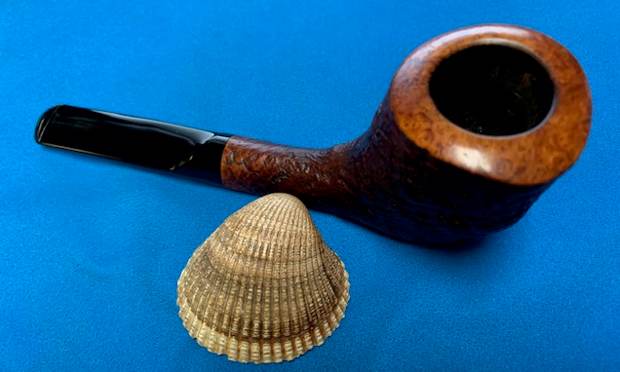
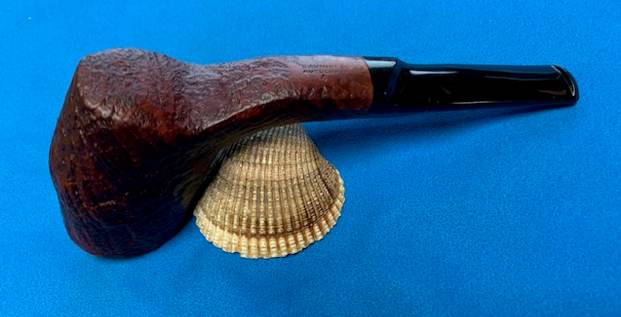
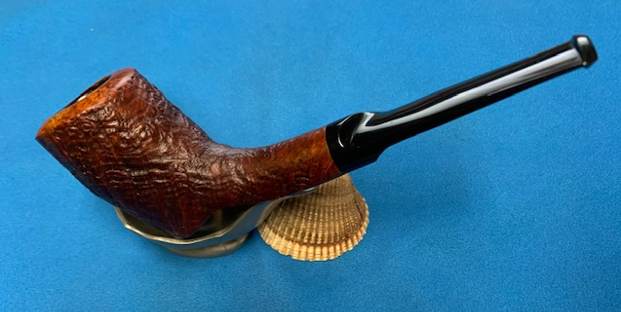
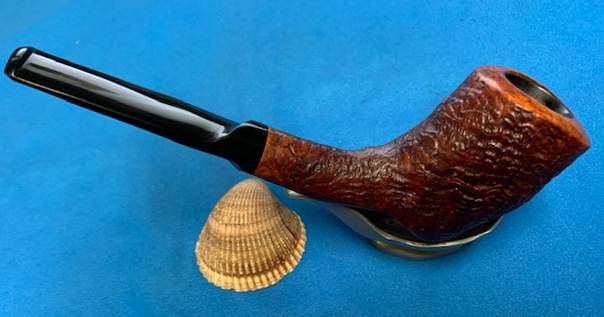
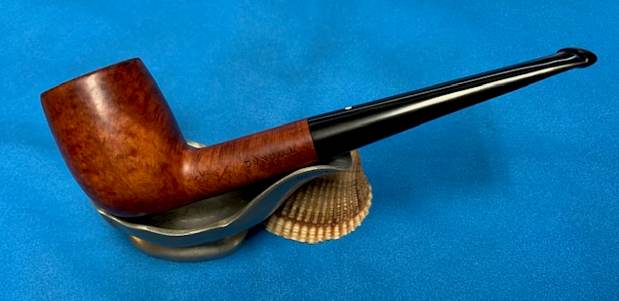
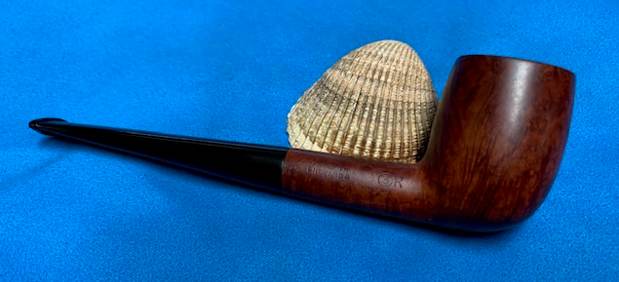
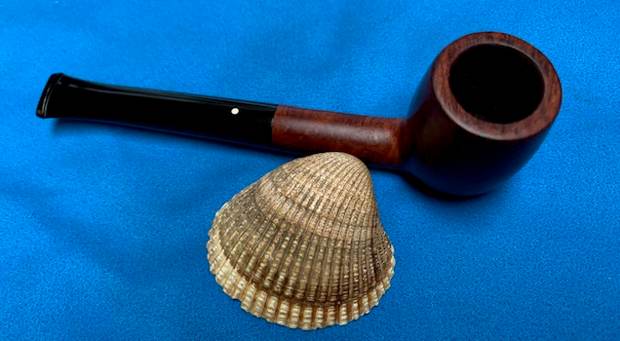
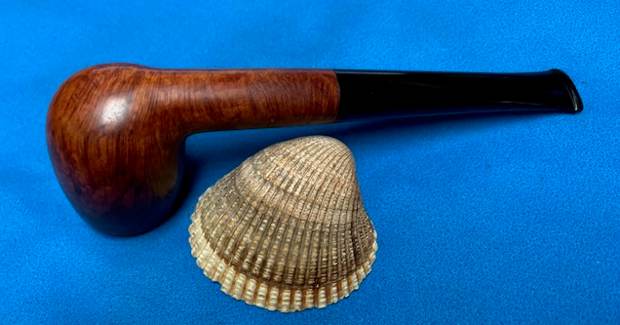
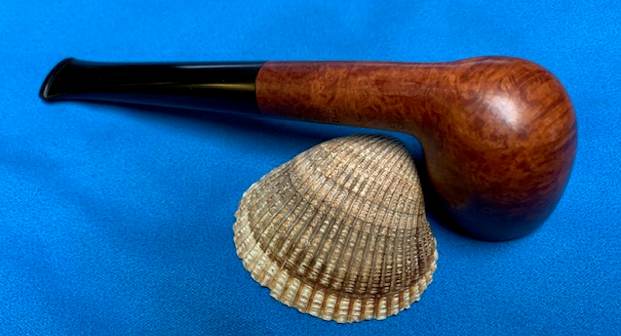
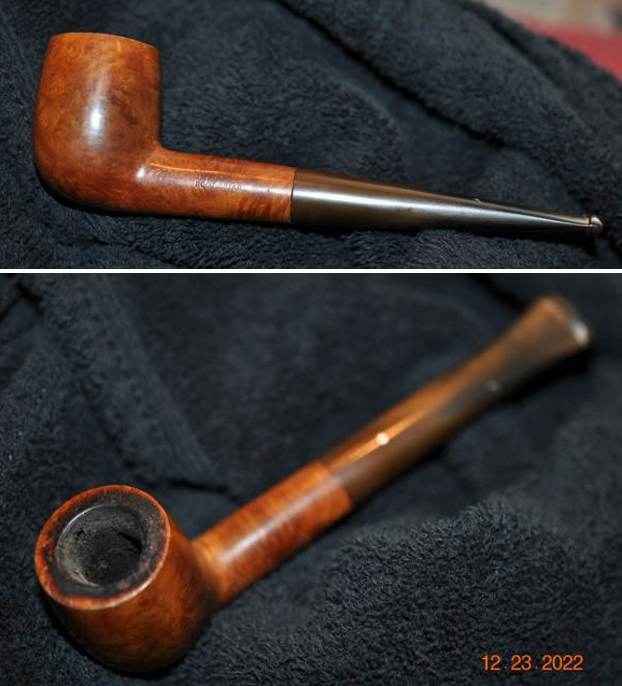
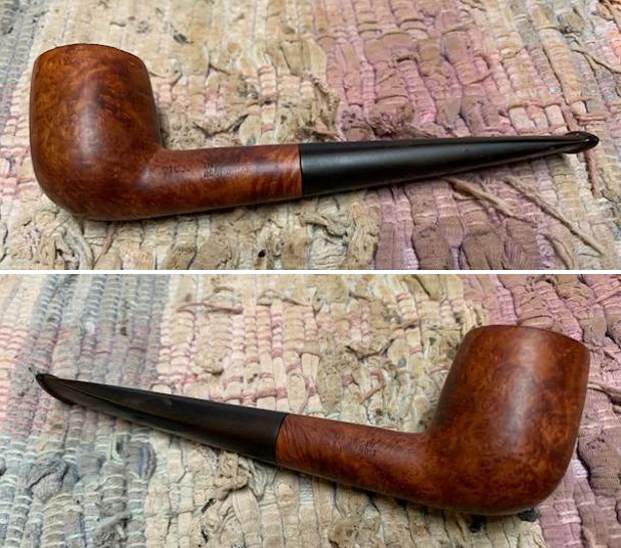
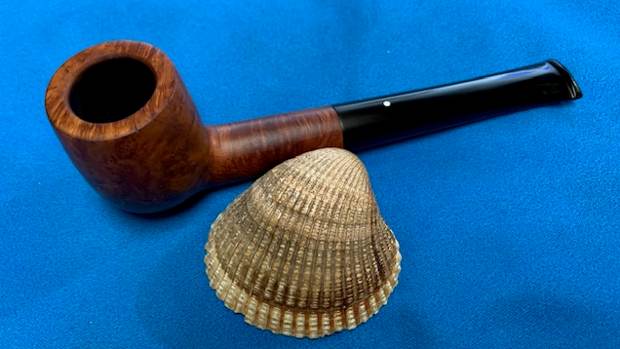
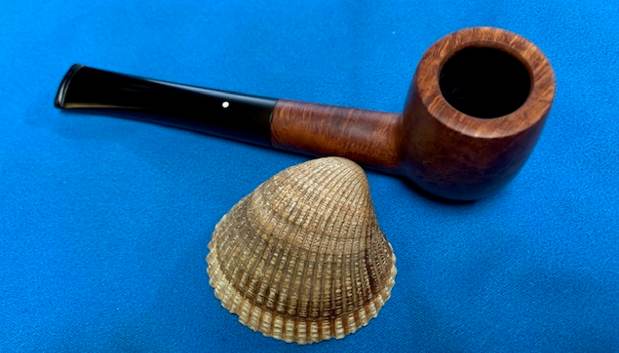
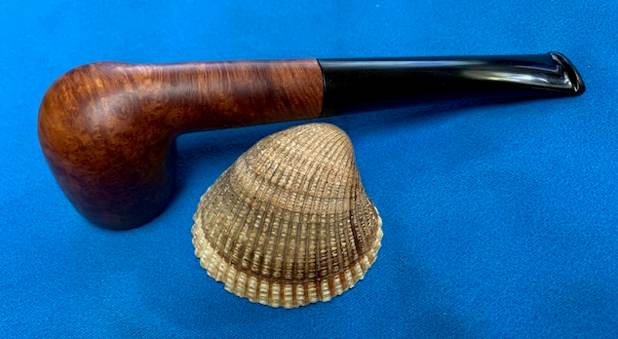
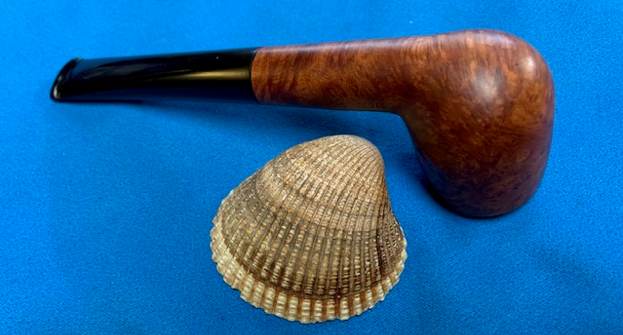
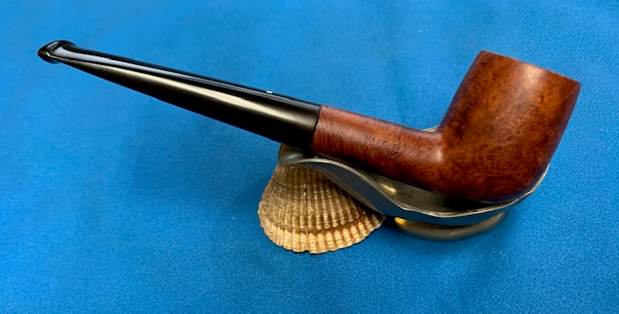
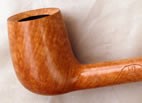
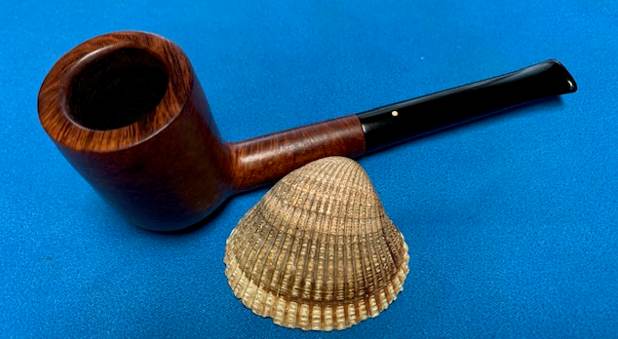
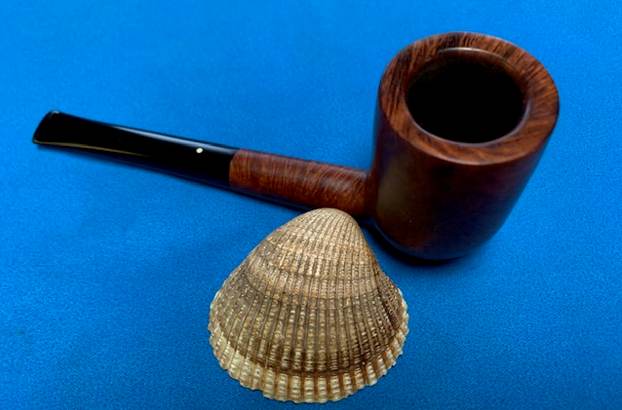
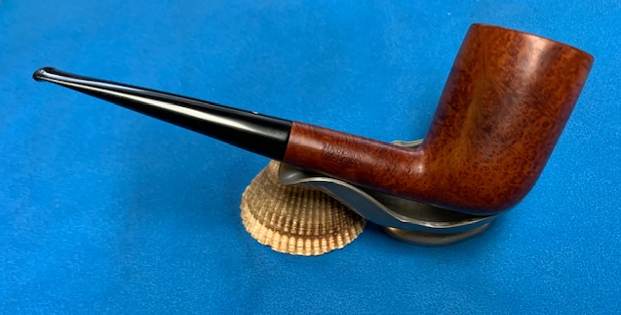
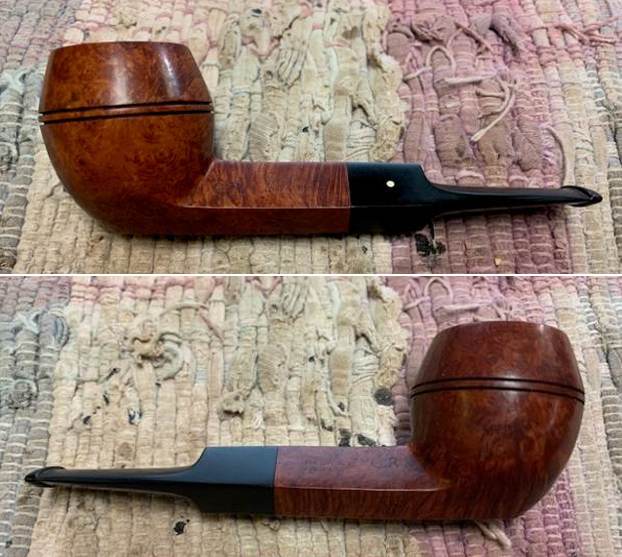
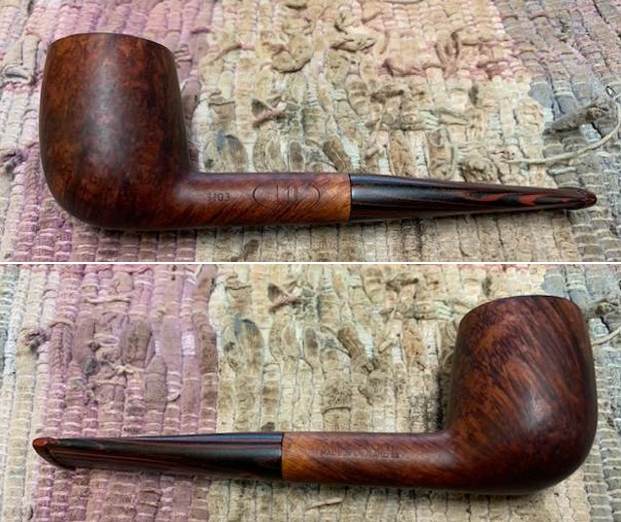
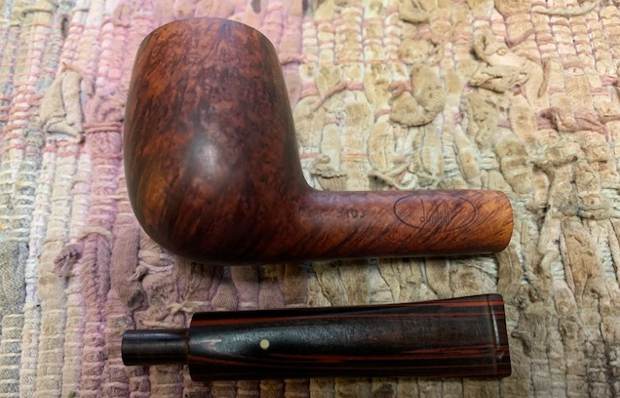
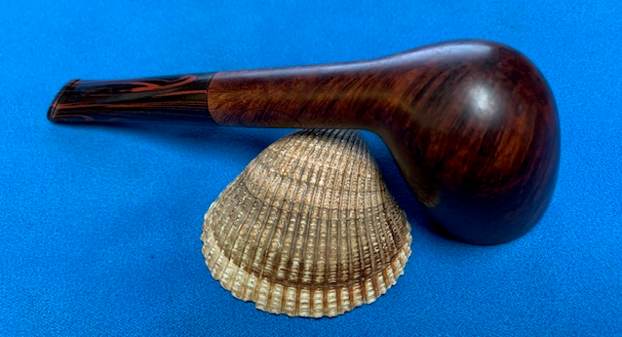
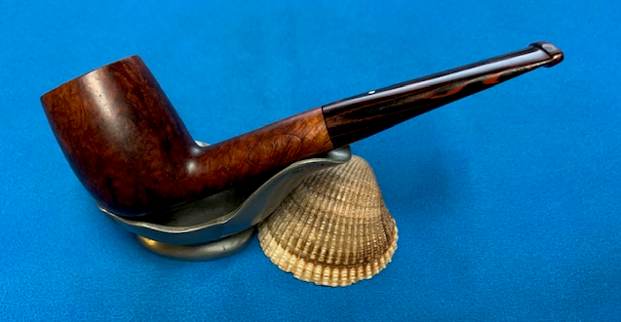
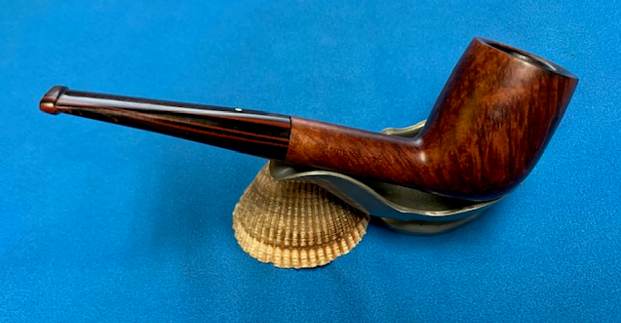
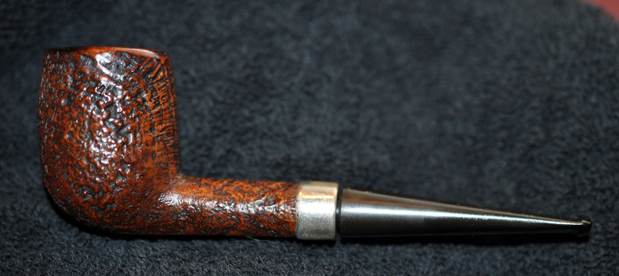
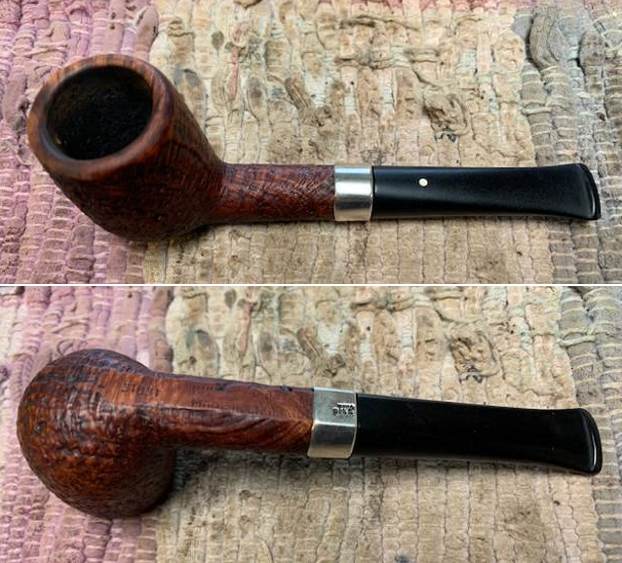
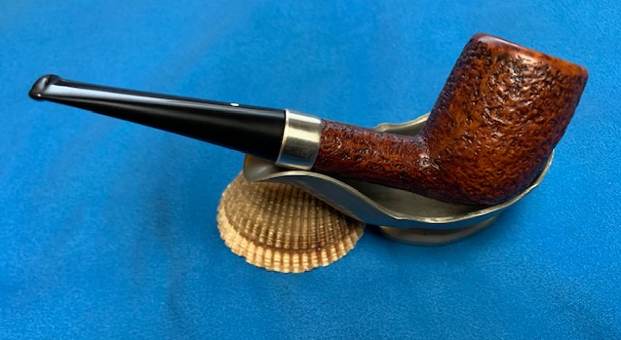
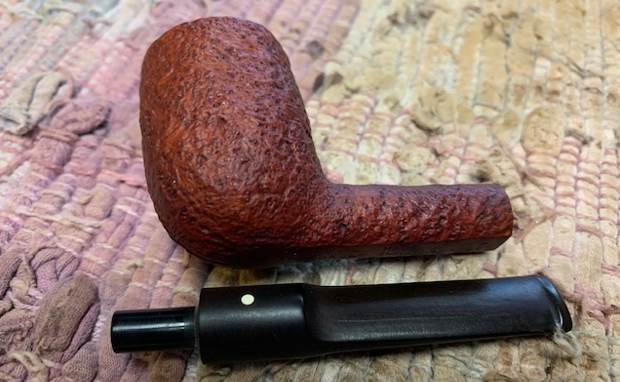
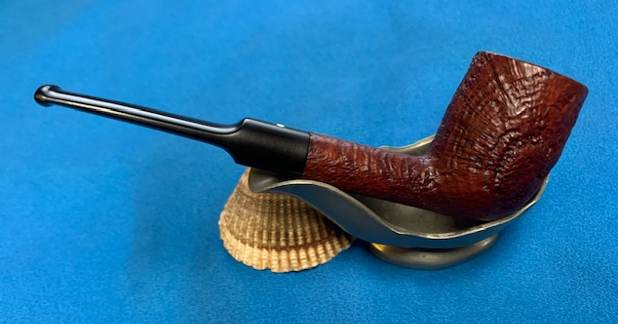
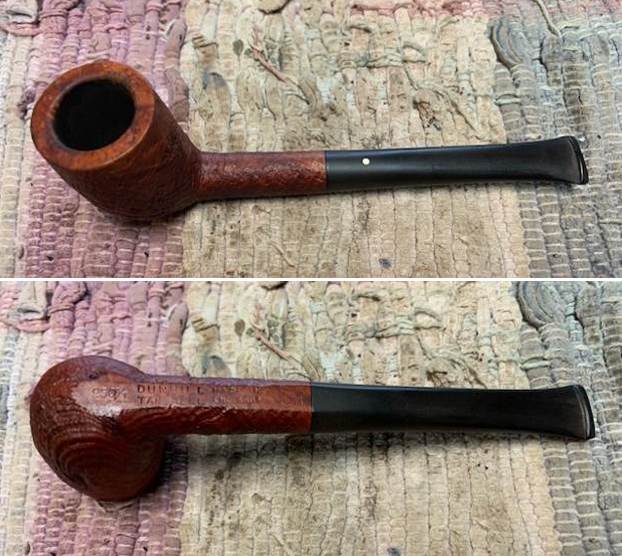
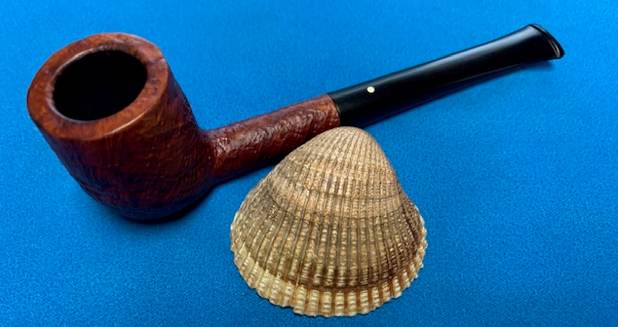
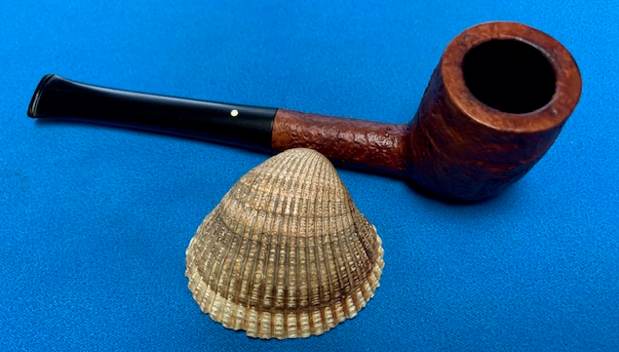
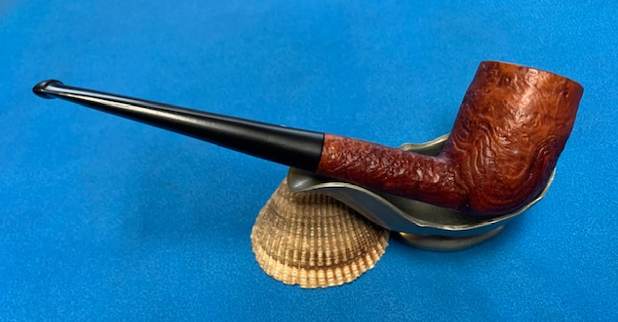
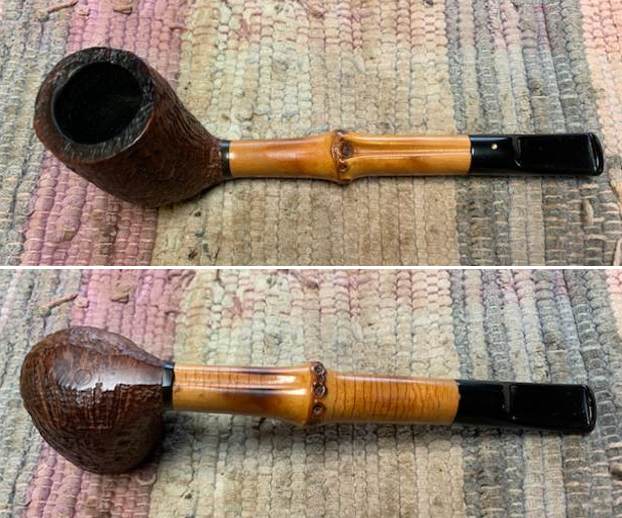
Back in 2020 I met with a friend here in Vancouver, Alex, whose pipes I often worked on to enjoy a visit and some good tobacco. He showed me this pipe and I immediately was taken with it. I told him that if he ever wanted to part with it he should call me first. This week I received an email from him that he was ready to part with it. We talked about it for awhile and arrived at a price and I paid him online. Yesterday (Thursday) I picked it up from Alex. It was exactly as I remembered it. I have included a few photos of the pipe to show what it looked like when I gave it back to Alex. It still had the unique beauty that I remembered and now looked forward to enjoying myself. It had some great patina on the Bamboo and a darkened Tanshell finish that had only become richer with Alex’s use.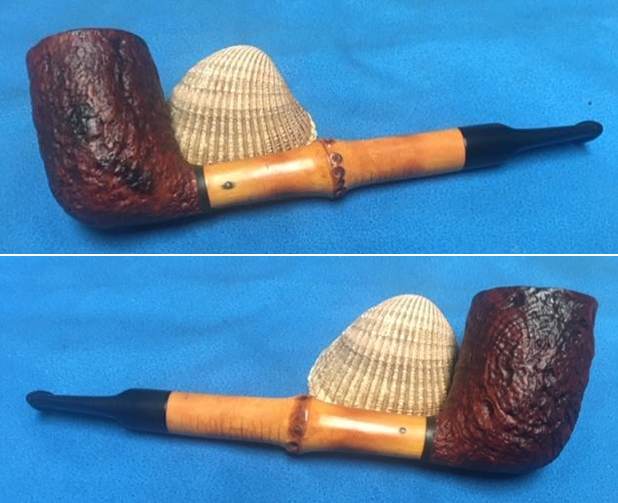
 This morning I went back to the original blog describing the restoration of the pipe. I am including the link to the blog (https://rebornpipes.com/2020/01/08/refreshing-a-dunhill-tanshell-w60-t-1962bamboo-lovat-for-alex/). Give it a read. I am quoting my introductory comments in that blog below because they capture well the feelings I had when I first saw the pipe and the information that I could gather on it.
I carefully took it in my hands and examined it. While I have several Stanwell Bamboo pipes and older KBB Yello Bole Bamboos this is the first Dunhill that I had seen up close and personal. Alex told me that these bamboo-adorned pieces were referred to as “Whangee” pipes. I learned later that the term comes from the Mandarin word for bamboo, huáng lí and was used to describe canes and umbrellas with bamboo handles throughout the early to mid-1900s before being attributed to pipes — Dunhill’s in particular. I learned from reading on line that bamboo came to into use in pipemaking during the briar shortage that accompanied and followed WWII. As a means of saving on briar, pipemakers would extend the shank with bamboo.
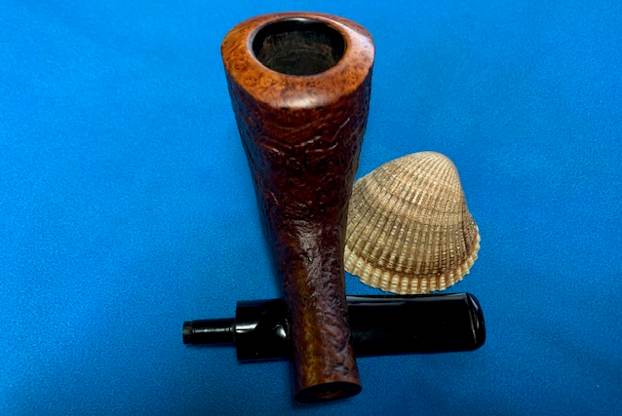
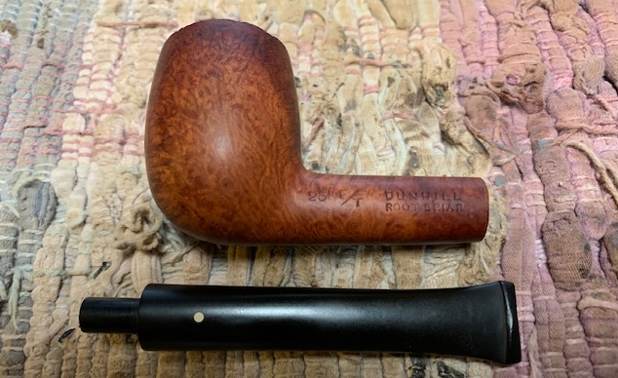
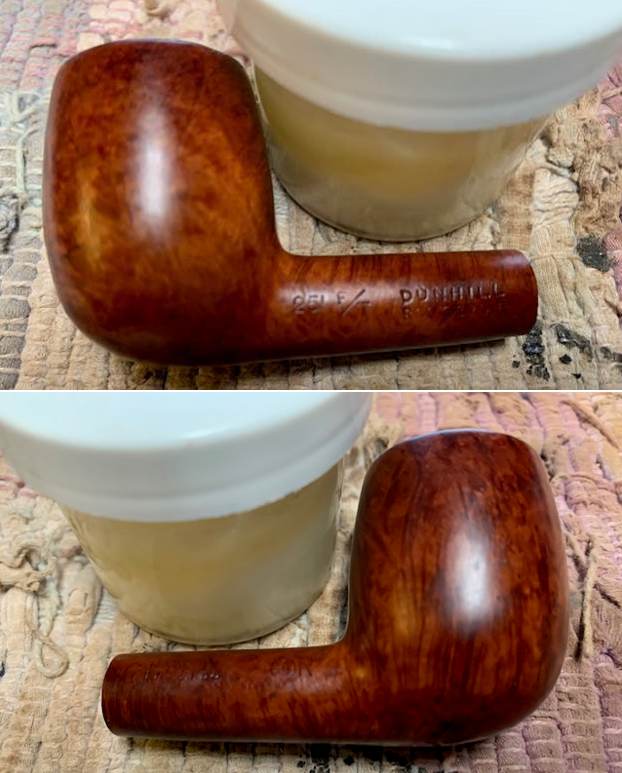
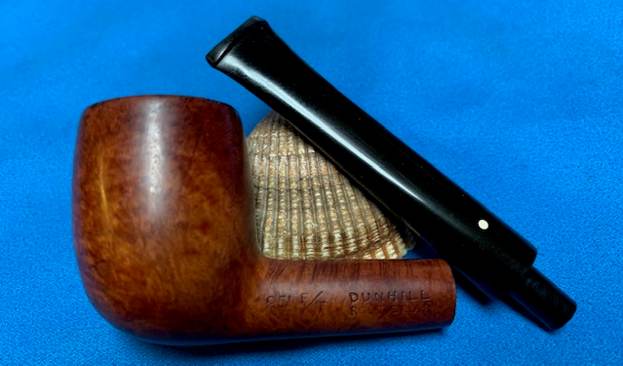
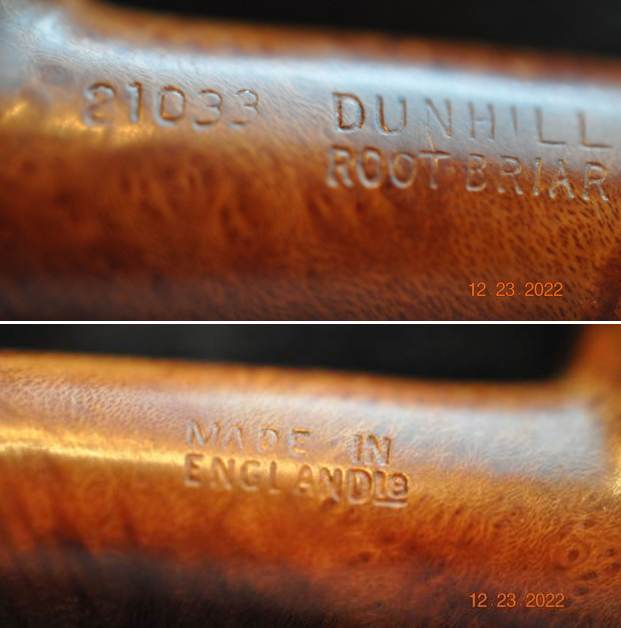
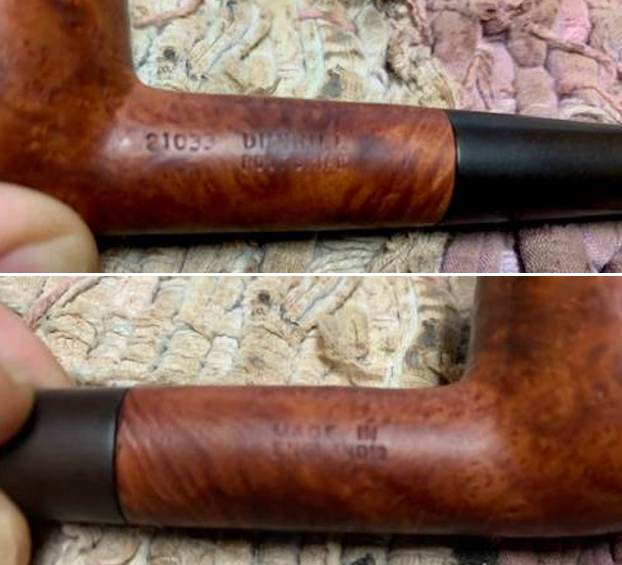
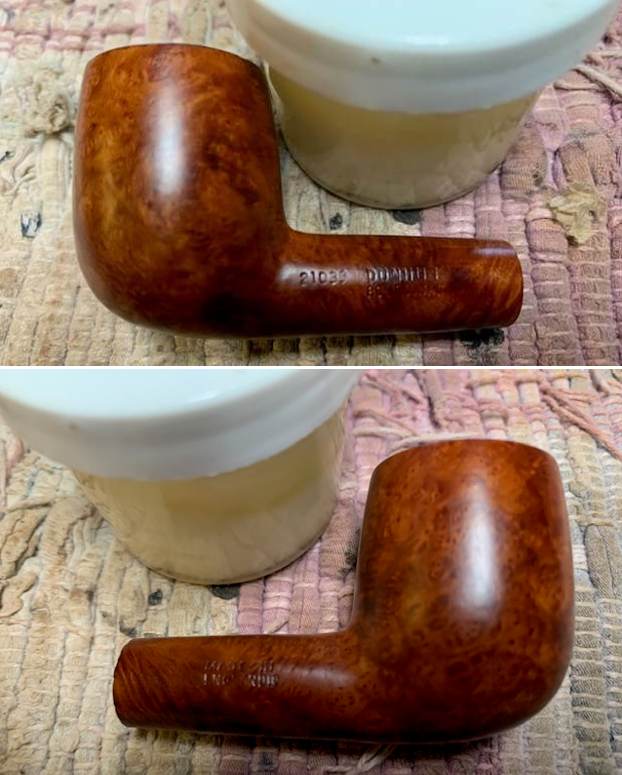
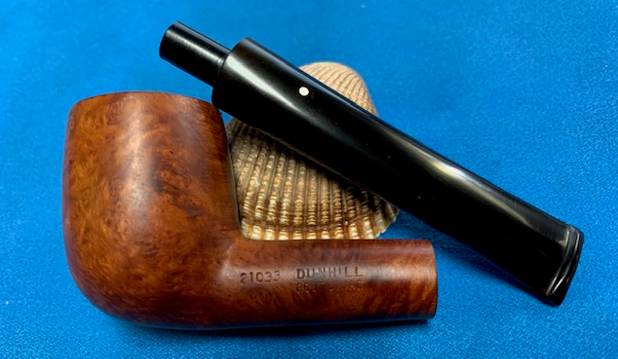
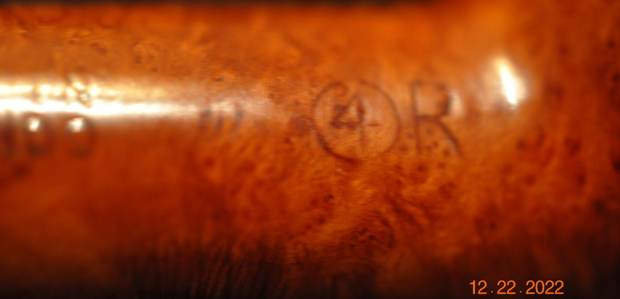
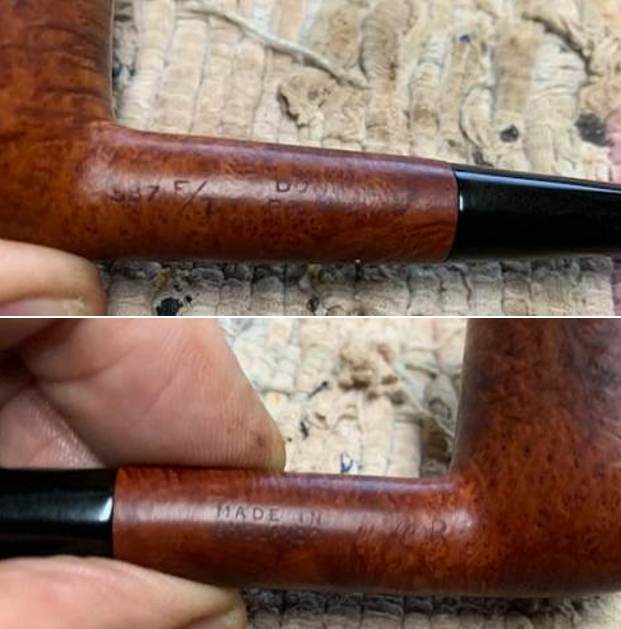
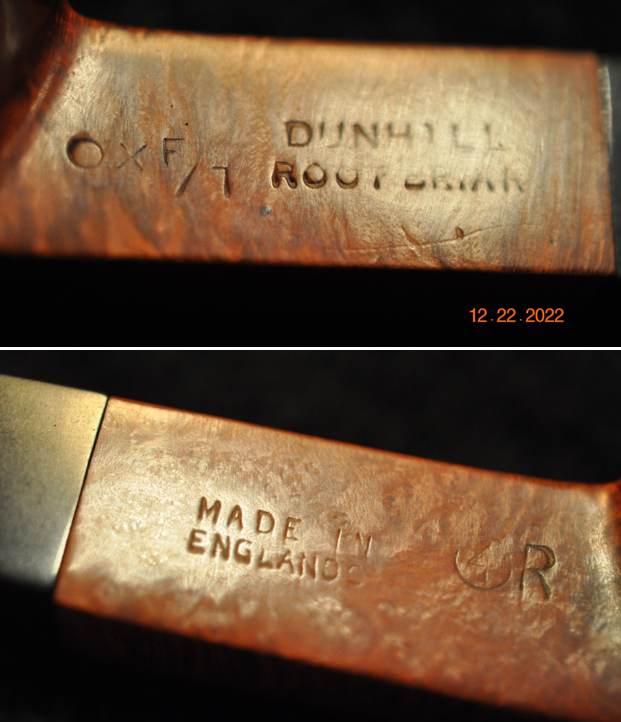
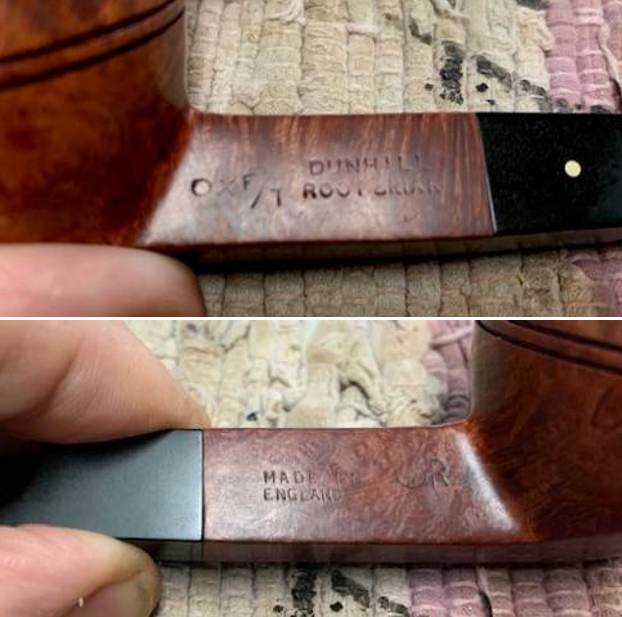
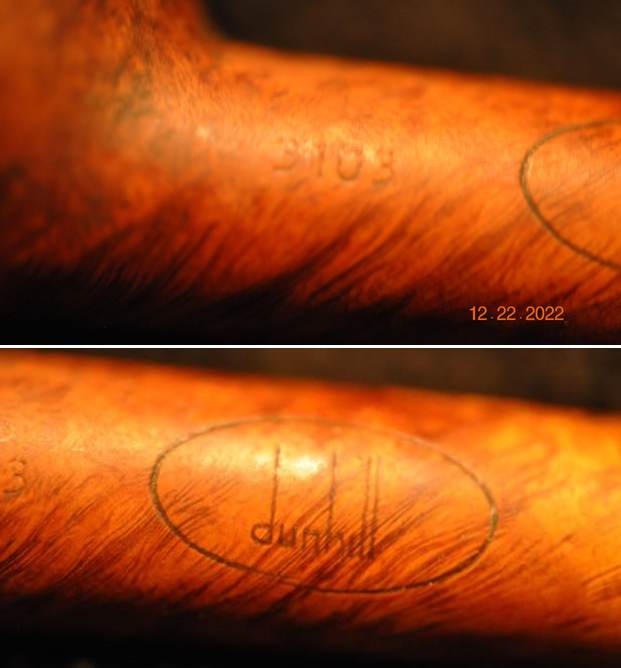
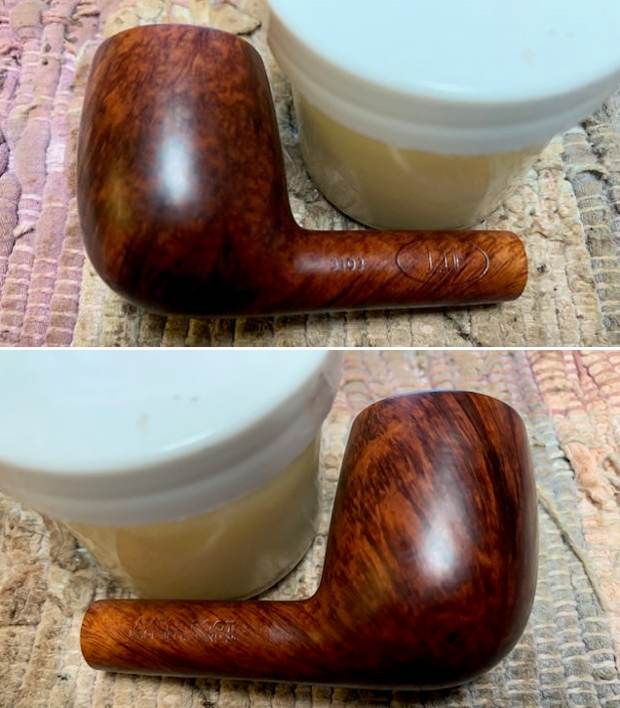
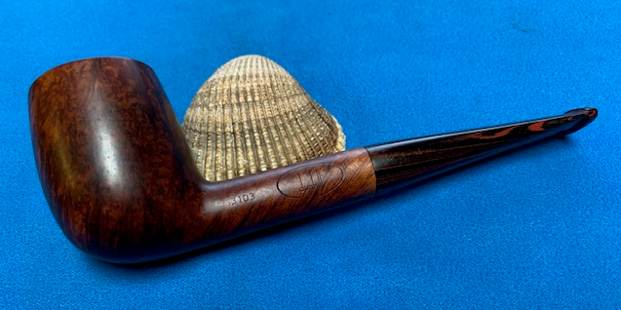
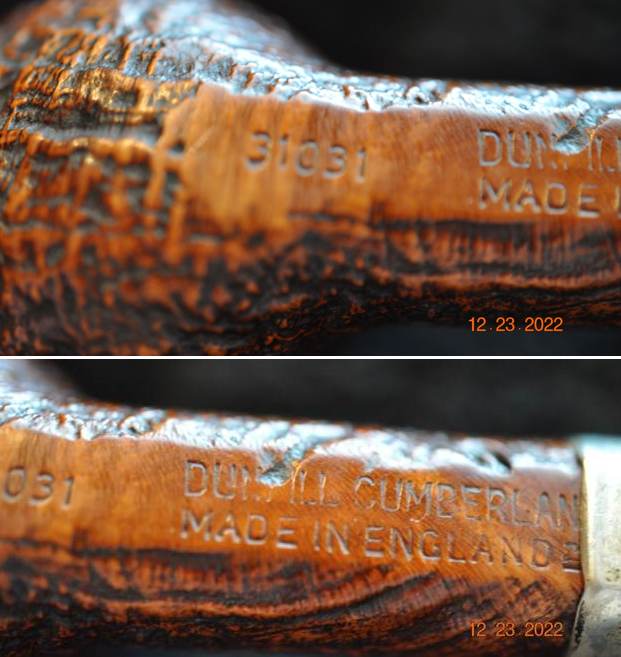
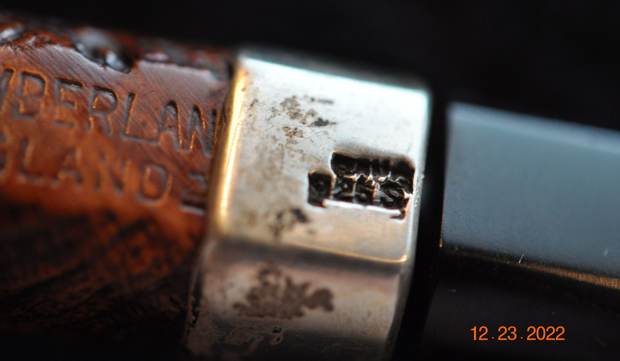
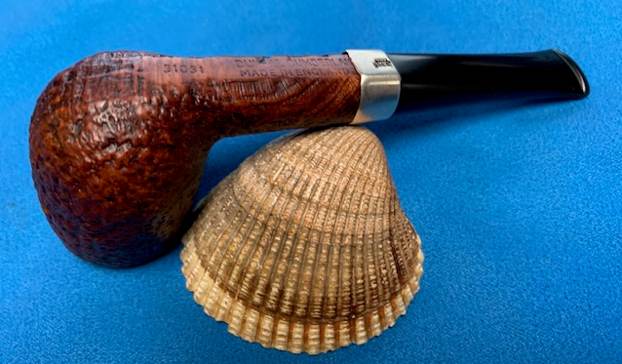
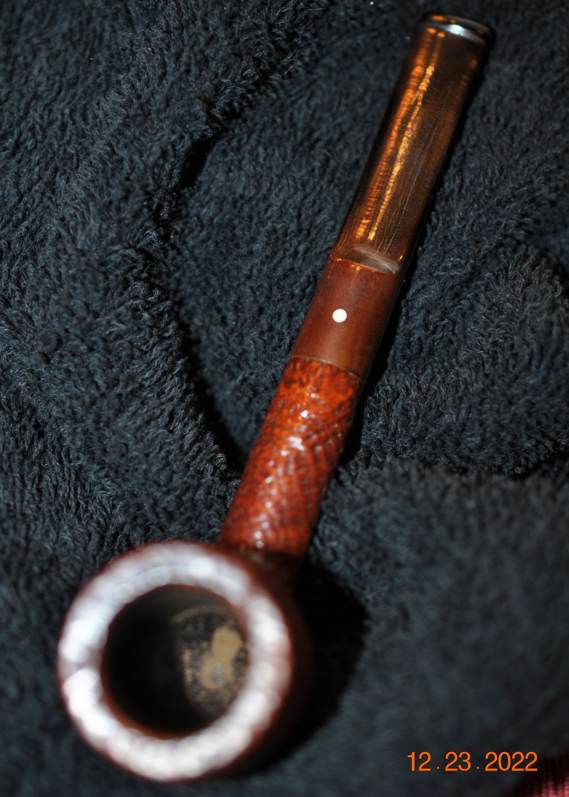
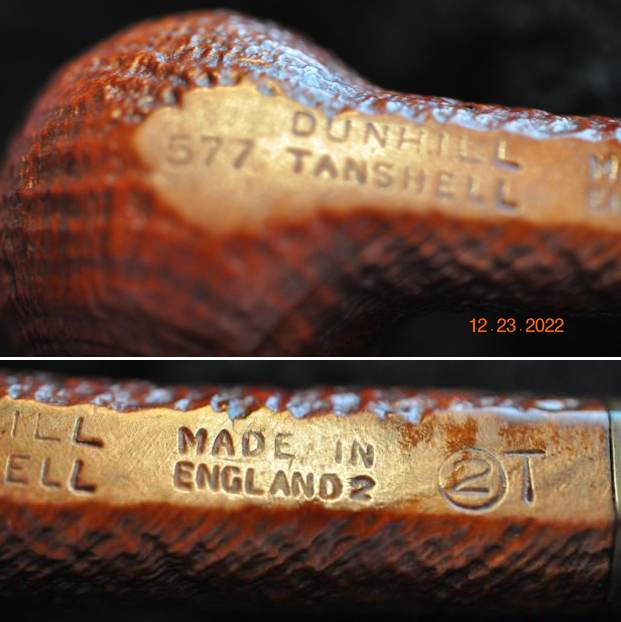
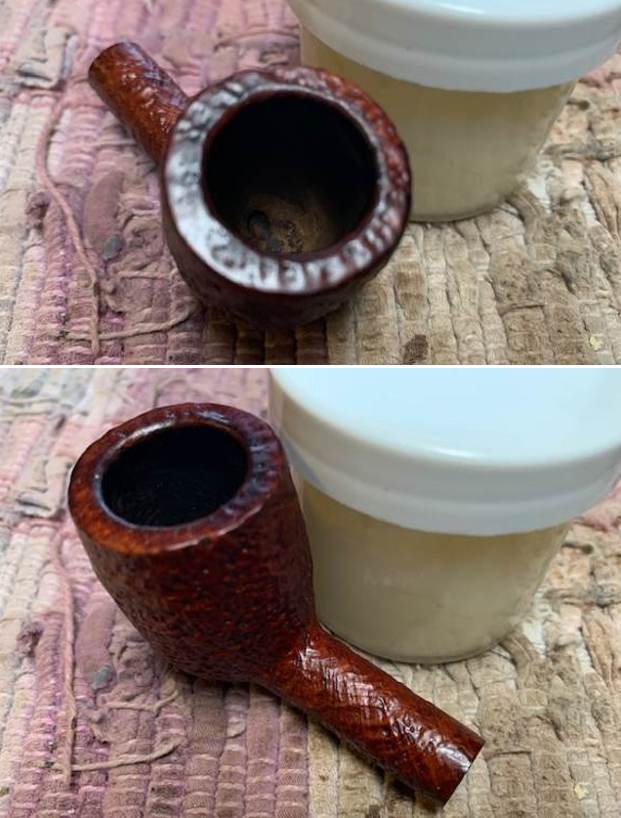
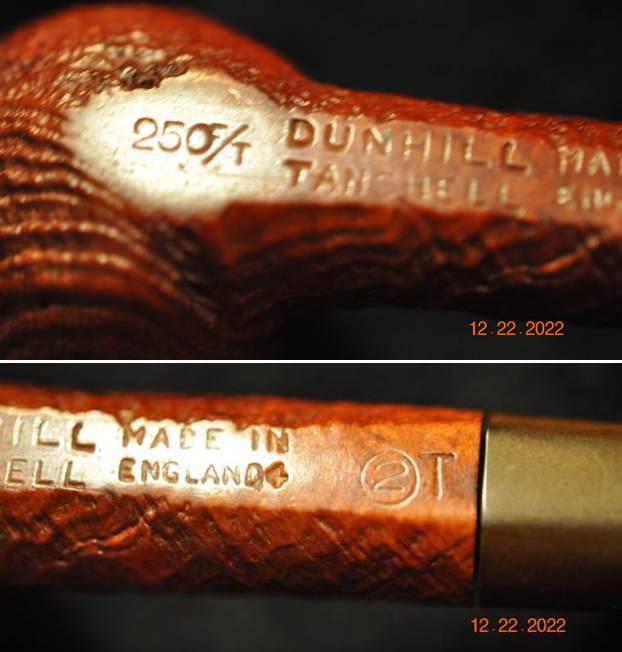
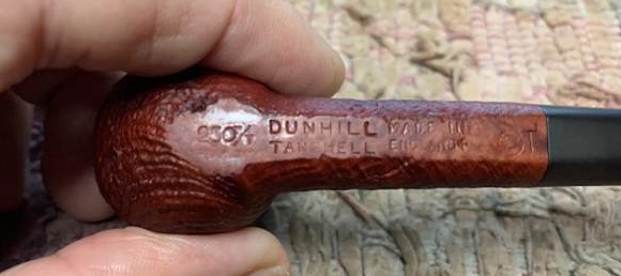
The pipe was stamped on the heel of the bowl with the following nomenclature: W60 over a circle with a T next to it. T is the designation for Tanshell pipes. I assume that the circle with what looked like a 4 faintly in the center which was the size designation. Next to that is a superscript underlined 2 which I believe designates the year of manufacture – 1962. So now I knew the date on this interesting Bamboo.
Alex had reamed the pipe and cleaned it up very well. He had already enjoyed smoking it and was hooked on it. I even offered to buy it from him and he gently declined! He asked if I could take it home with me and see what I could do about the finish on the bowl. I told him I would take it home and have a go at it…
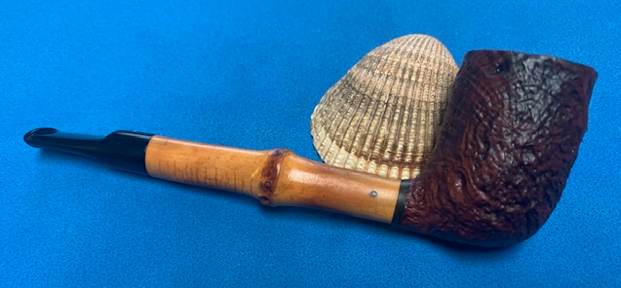
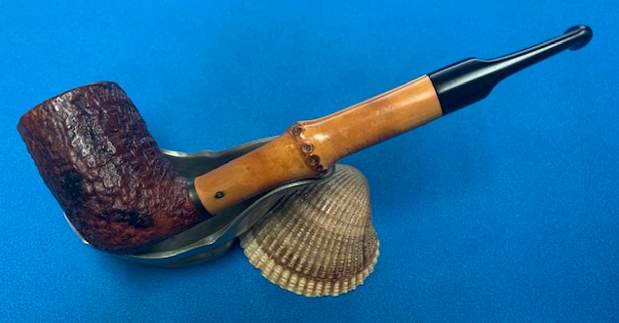
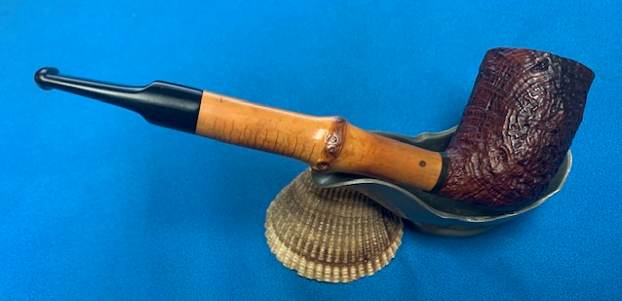
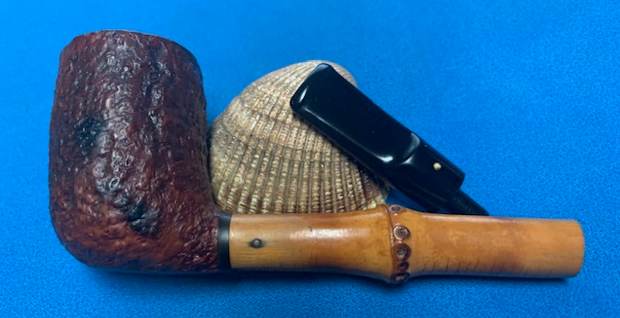
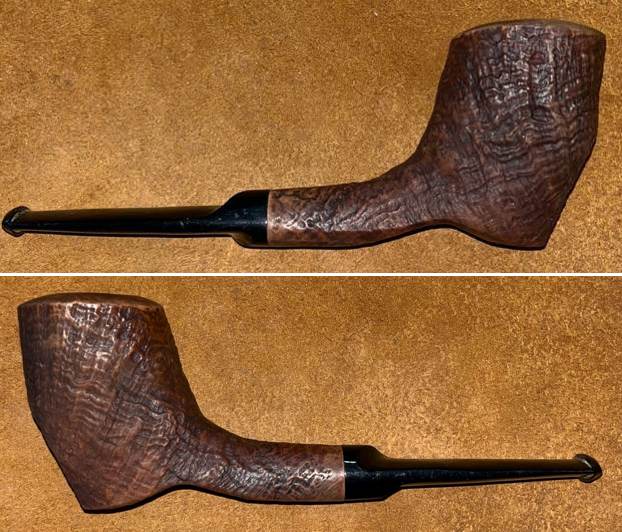
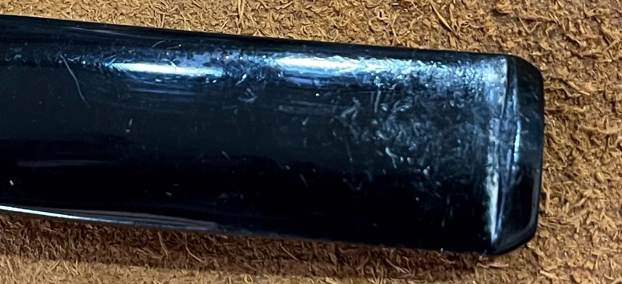
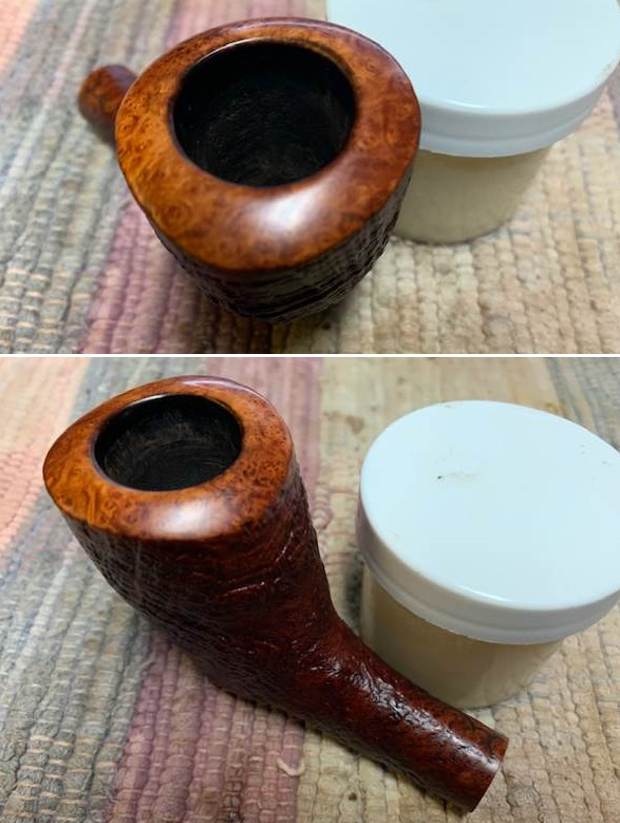
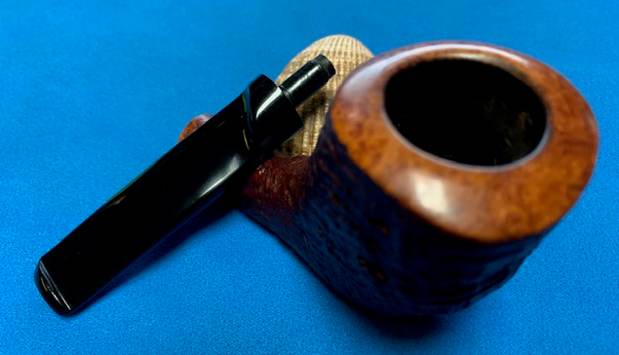
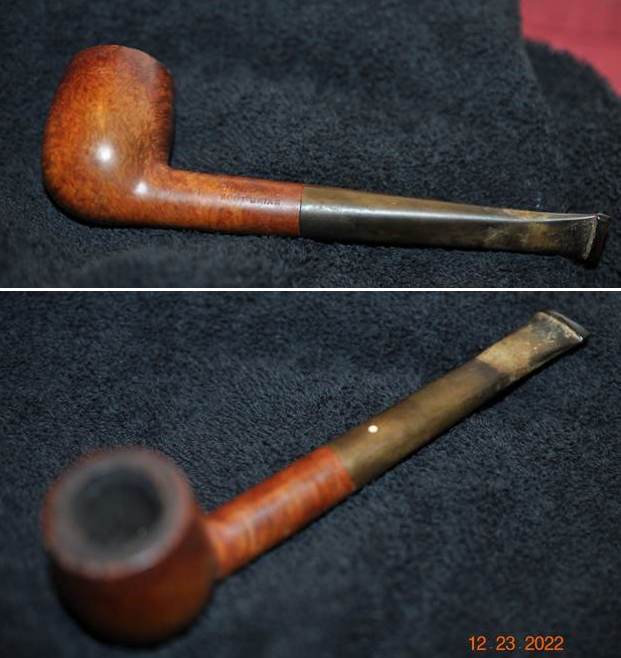
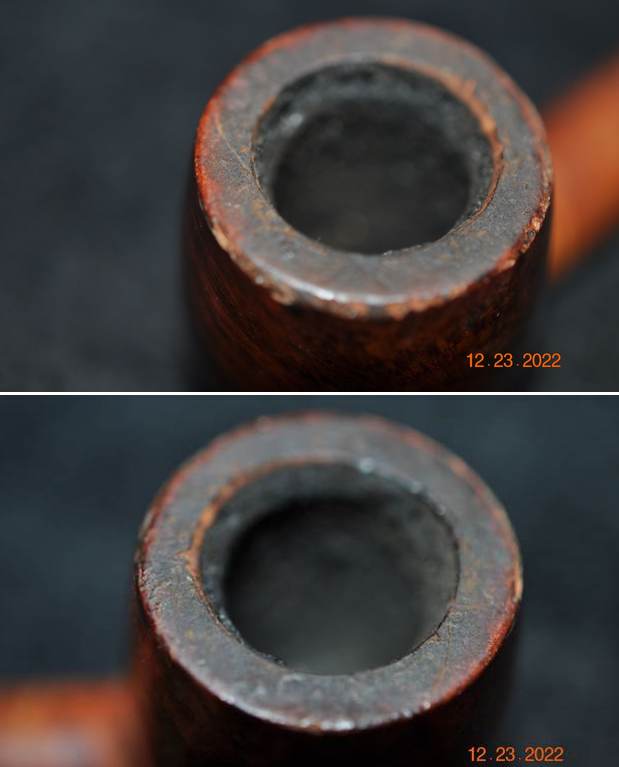
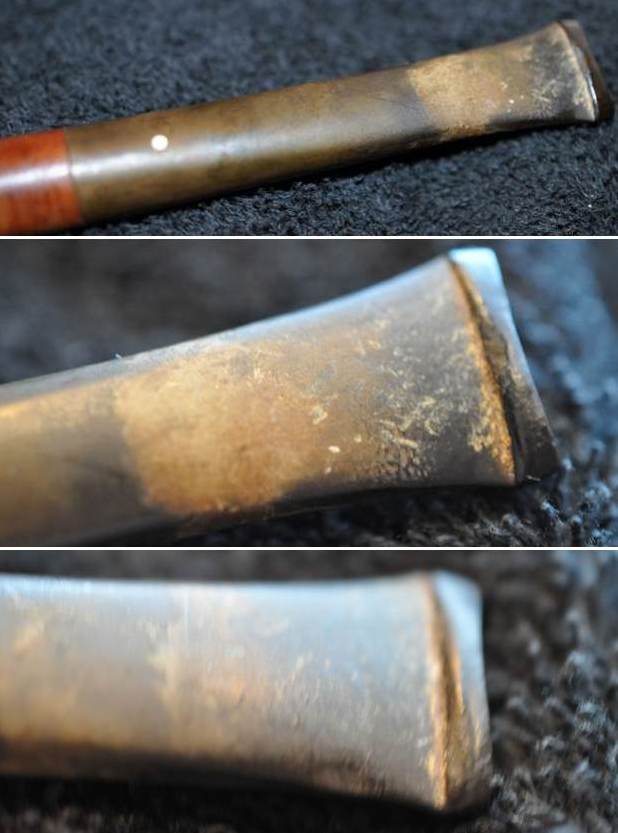
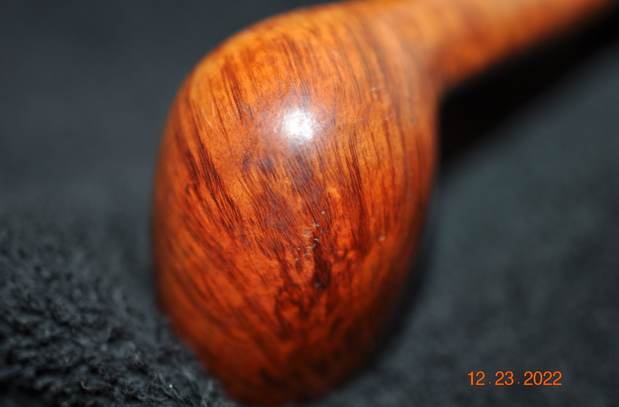
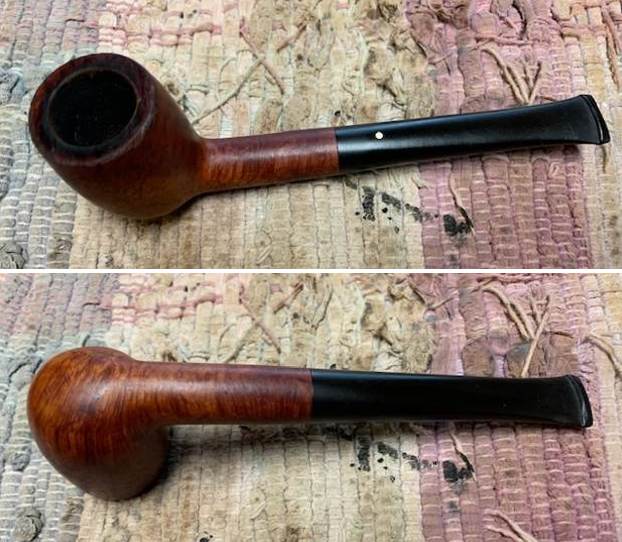
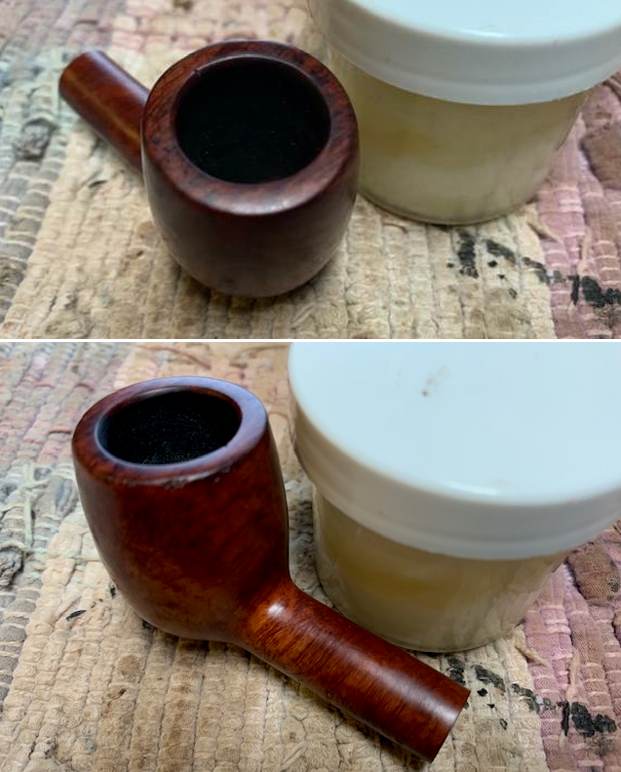
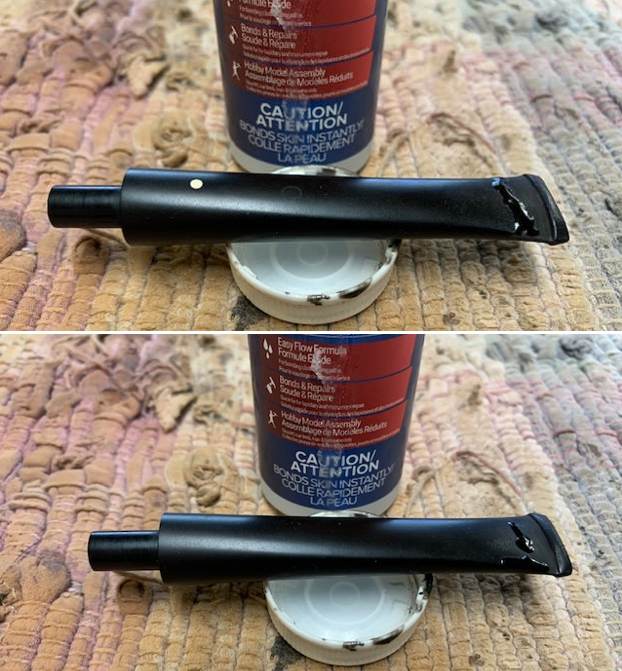
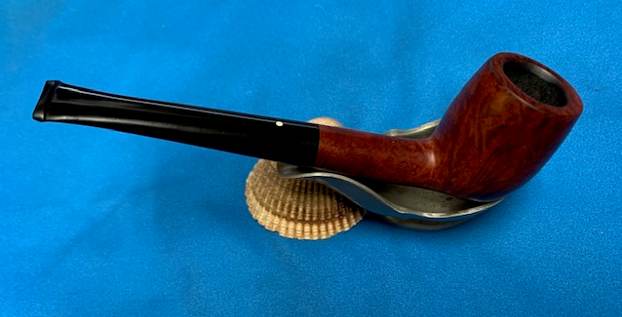
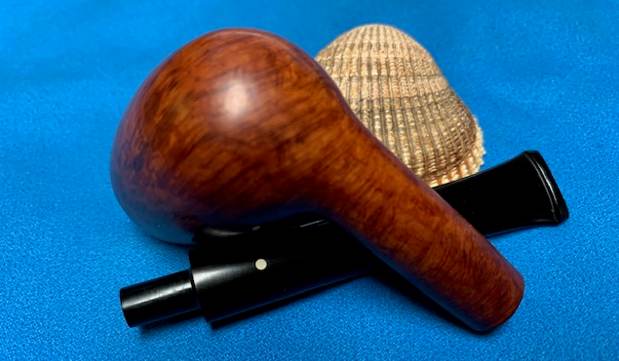
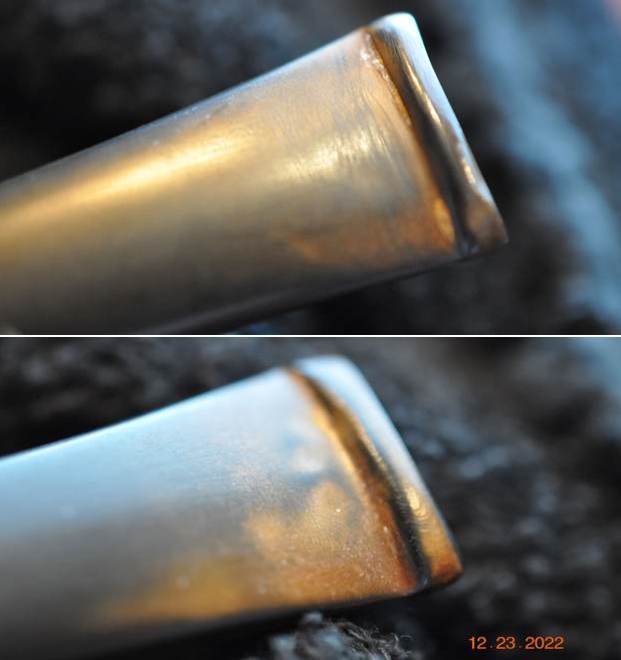
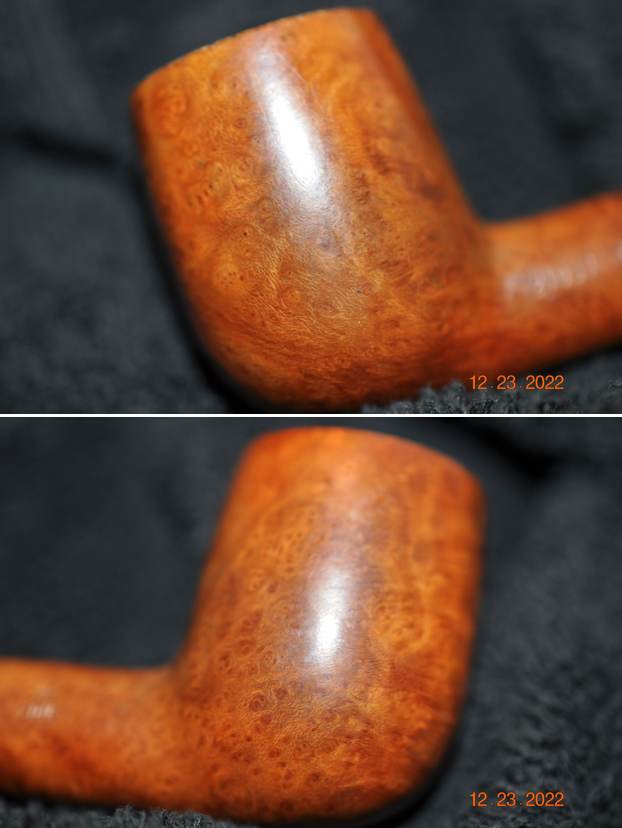
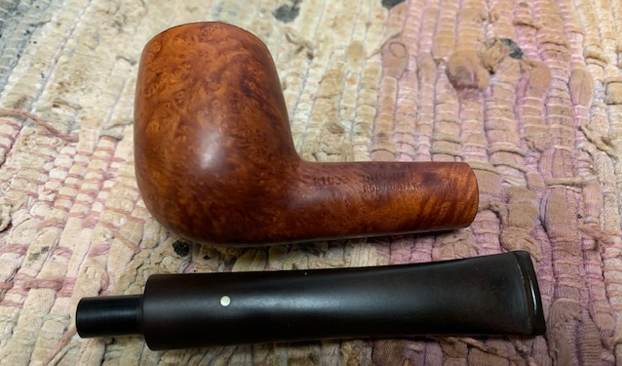
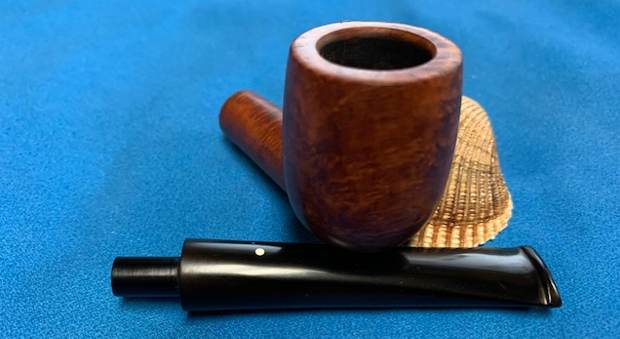
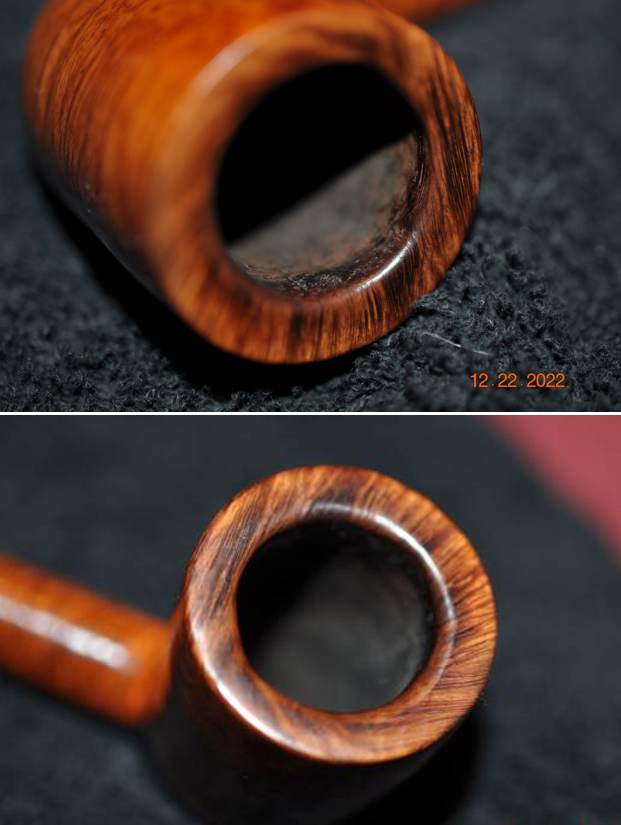
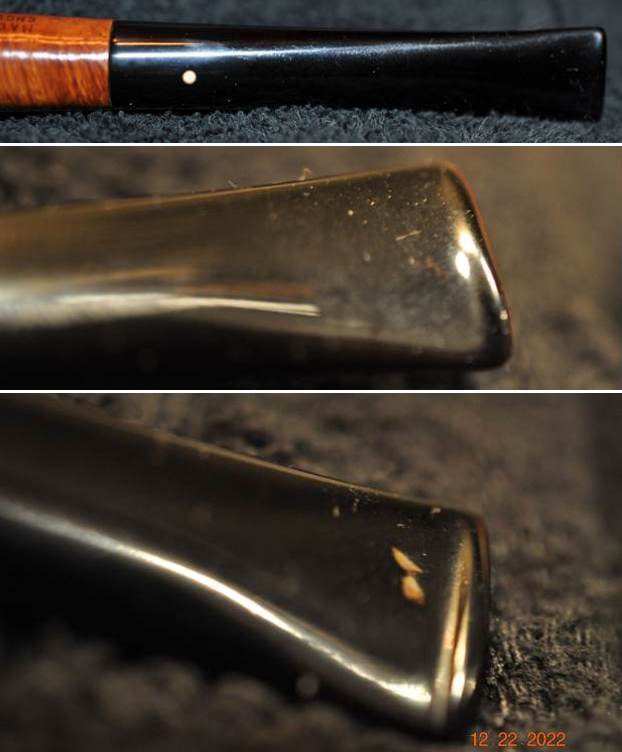
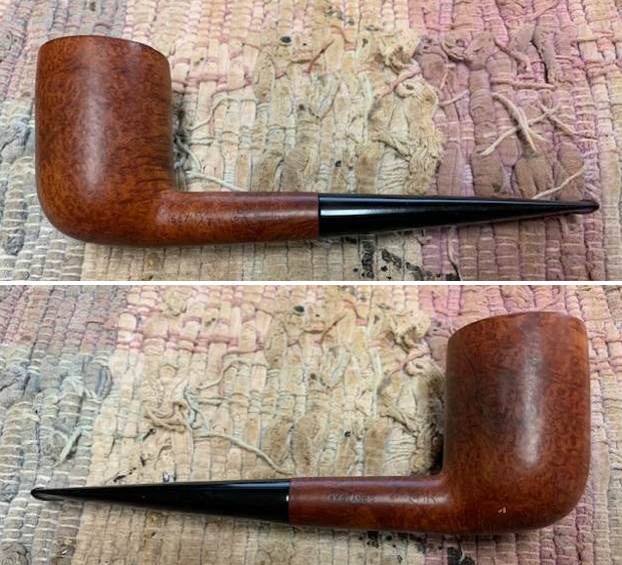
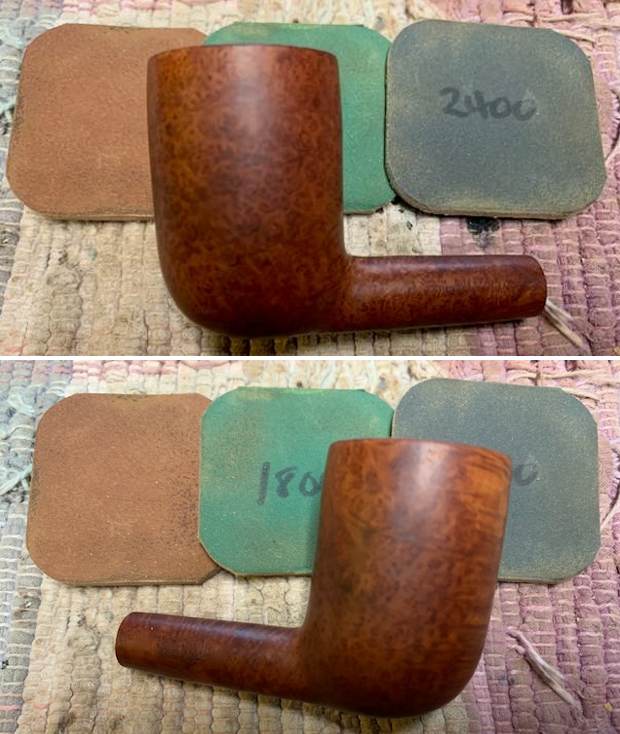
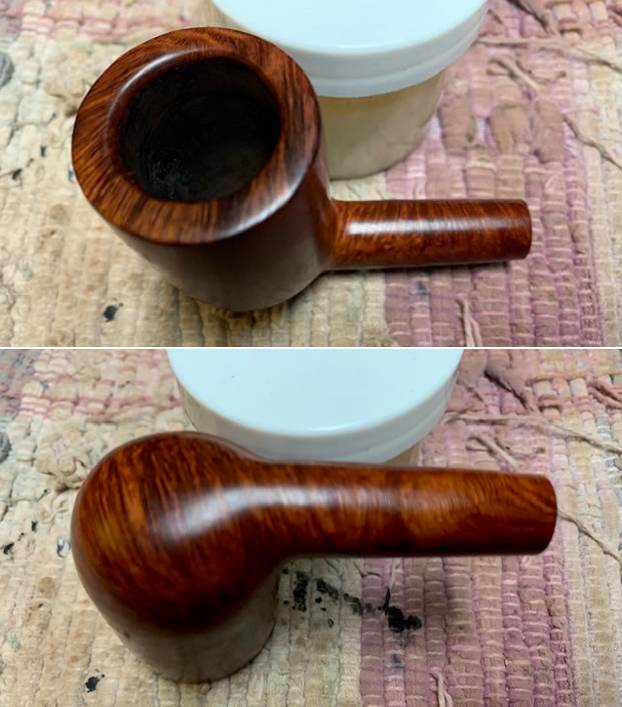
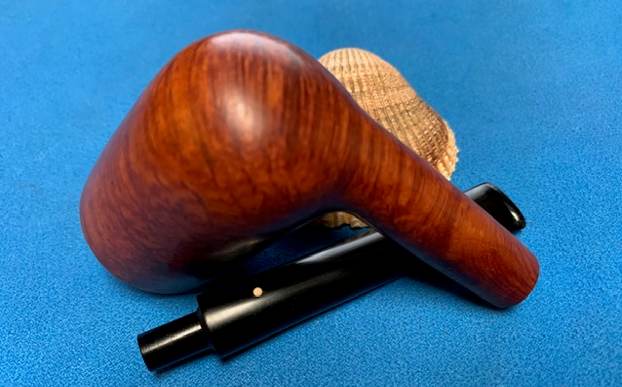
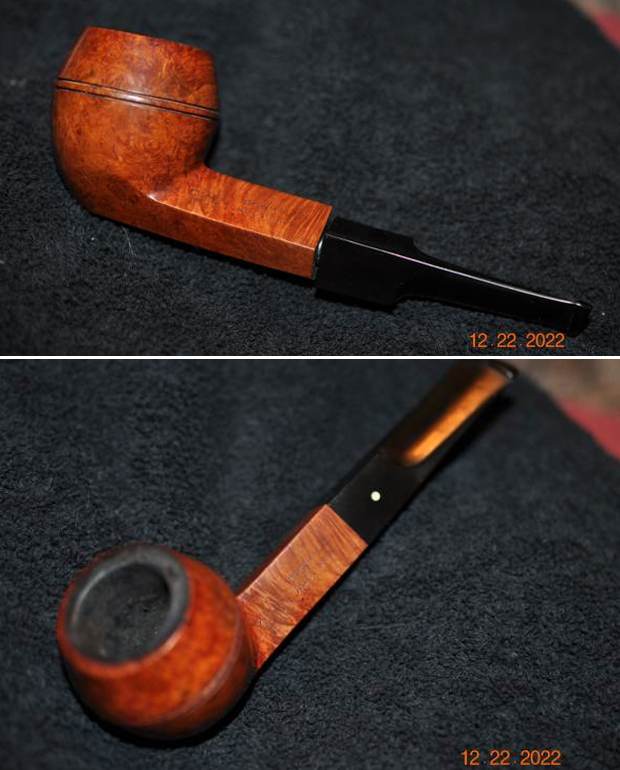
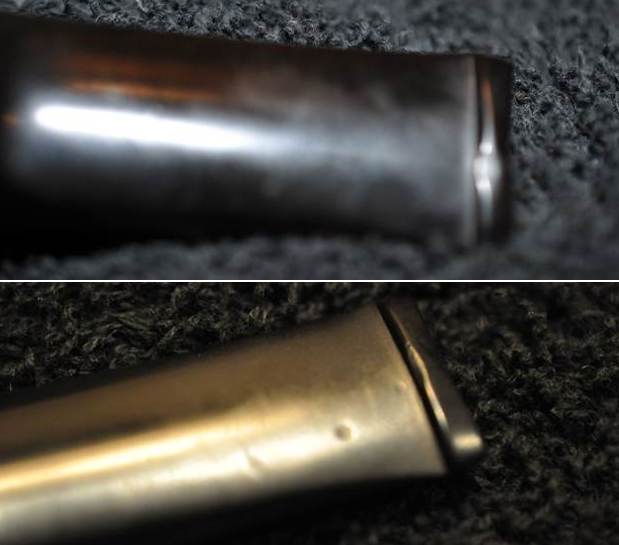
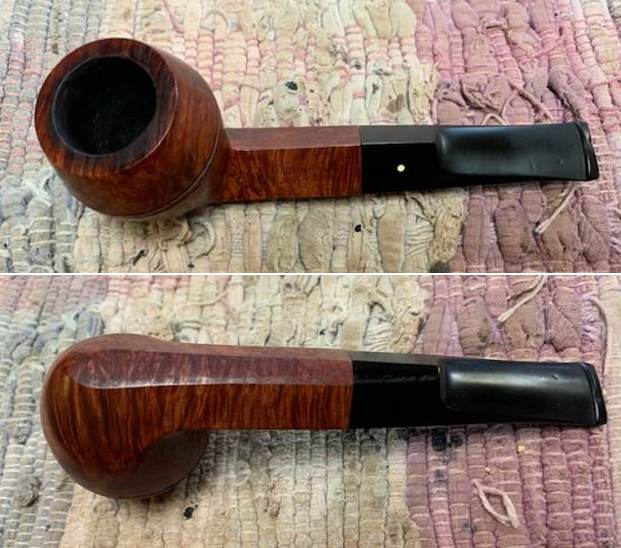
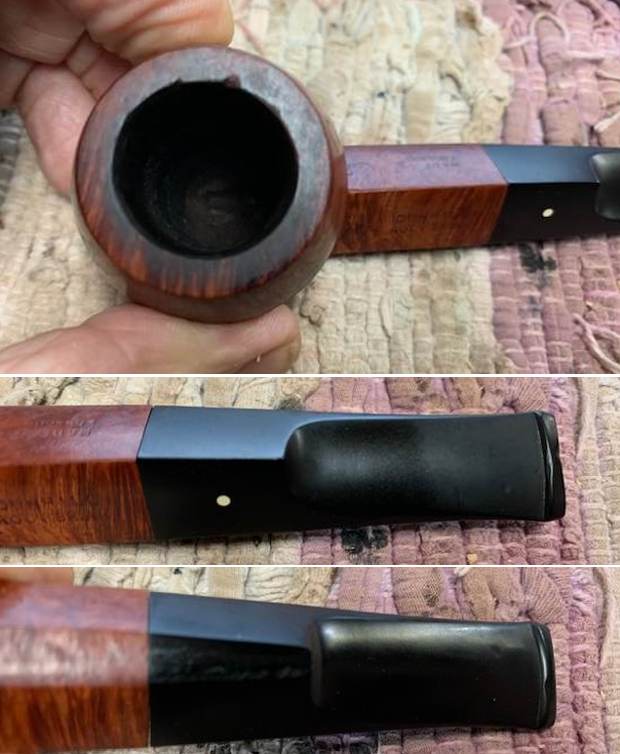
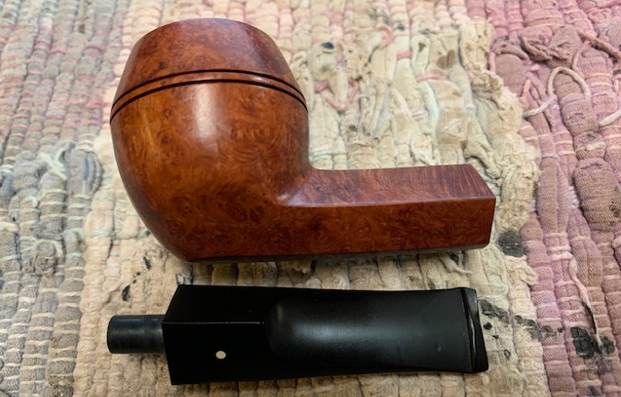
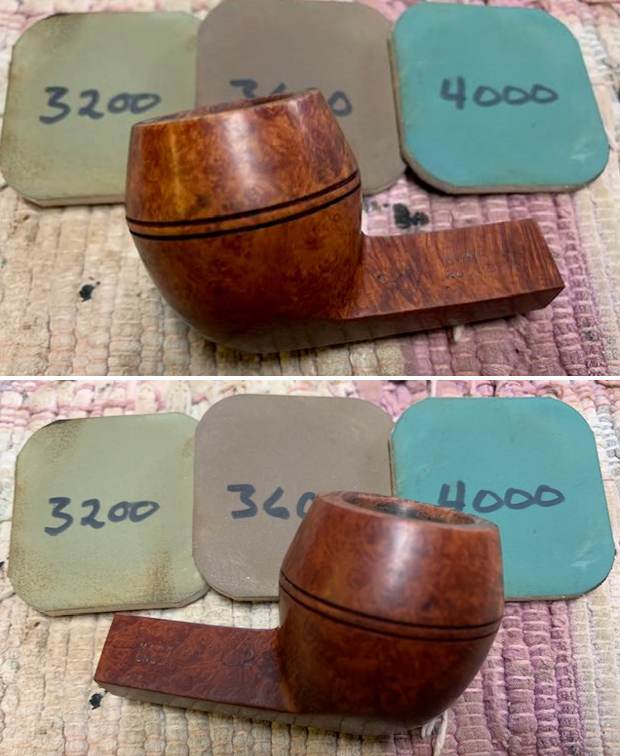
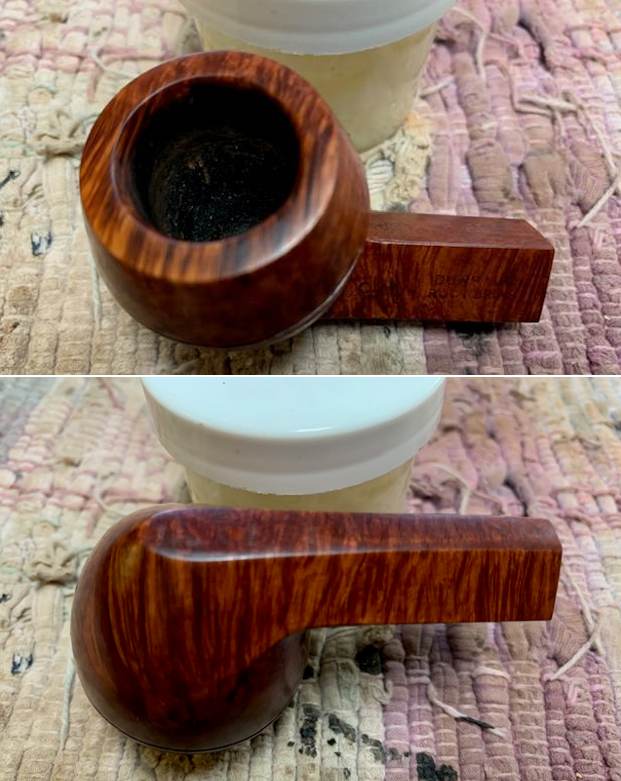
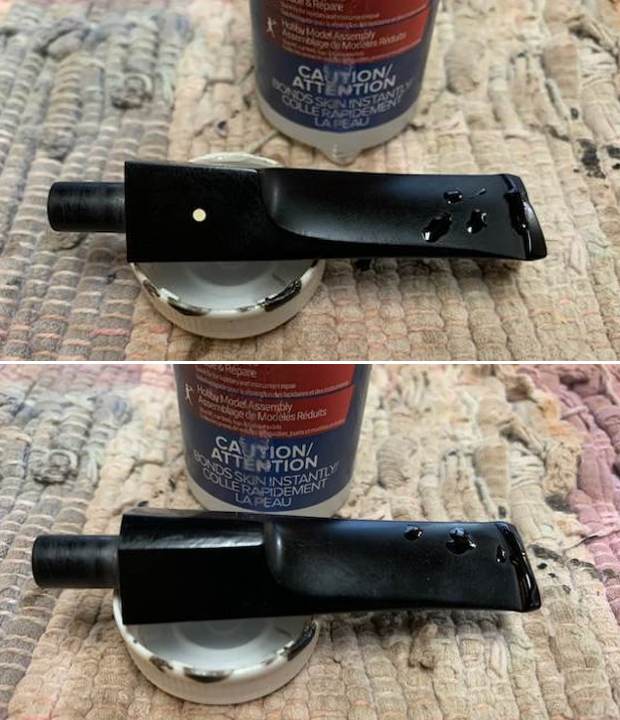
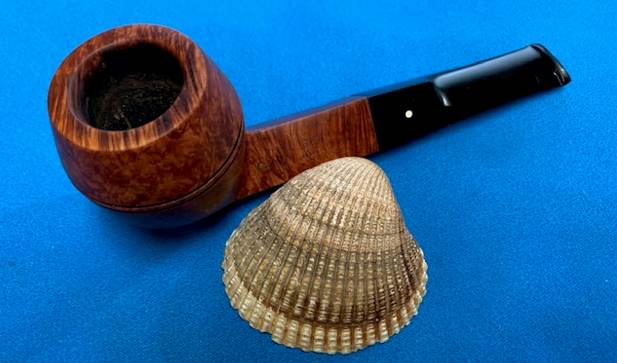
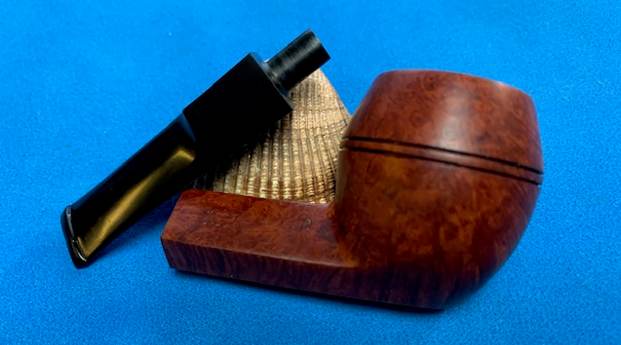
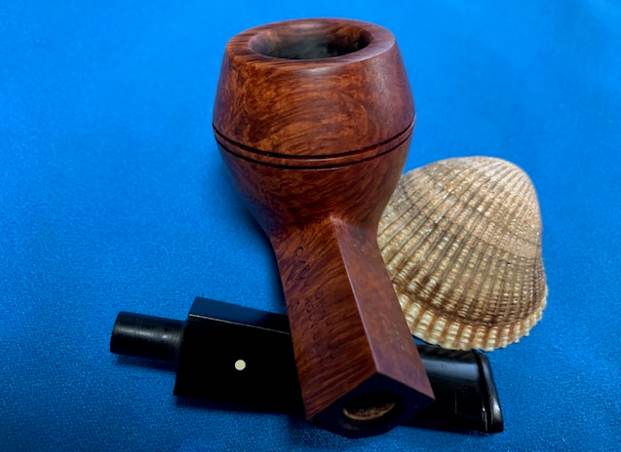
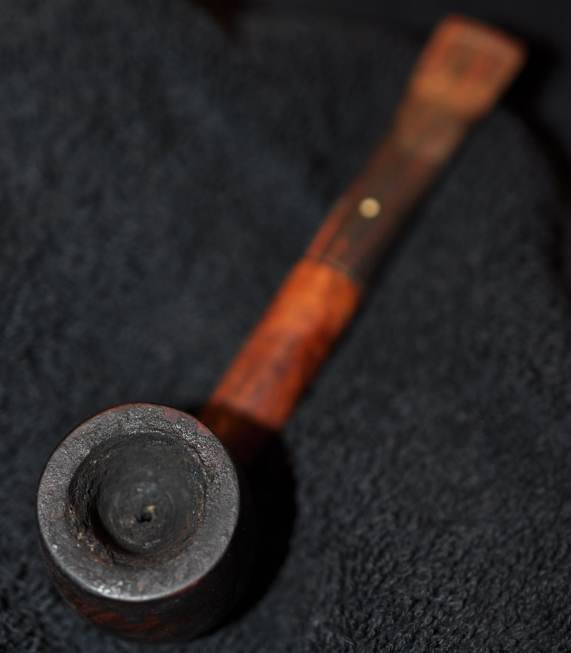
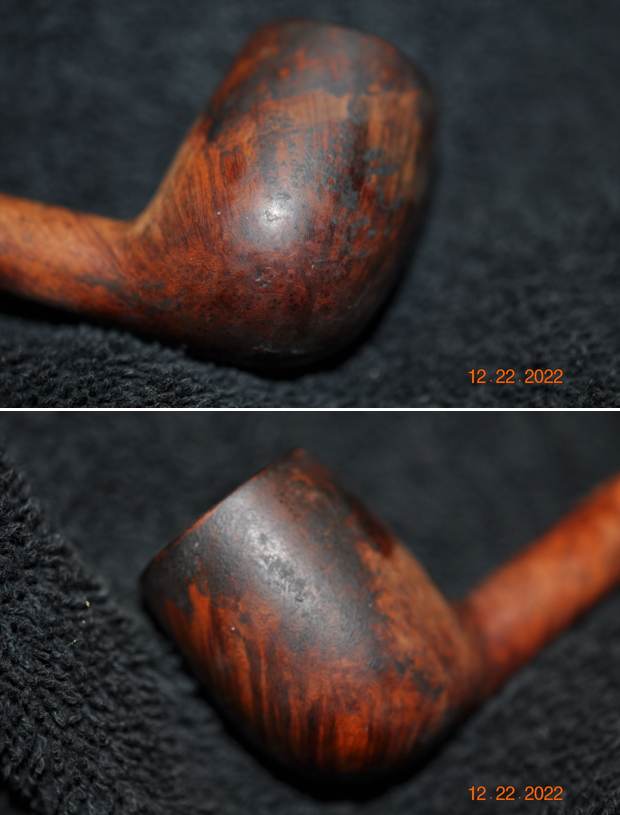
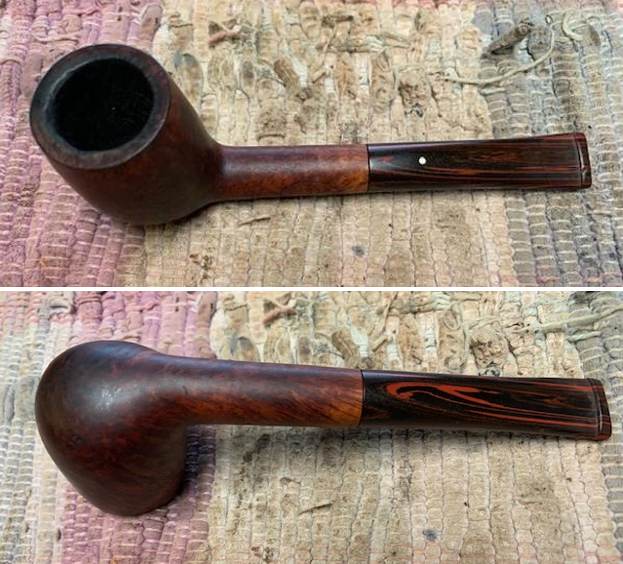
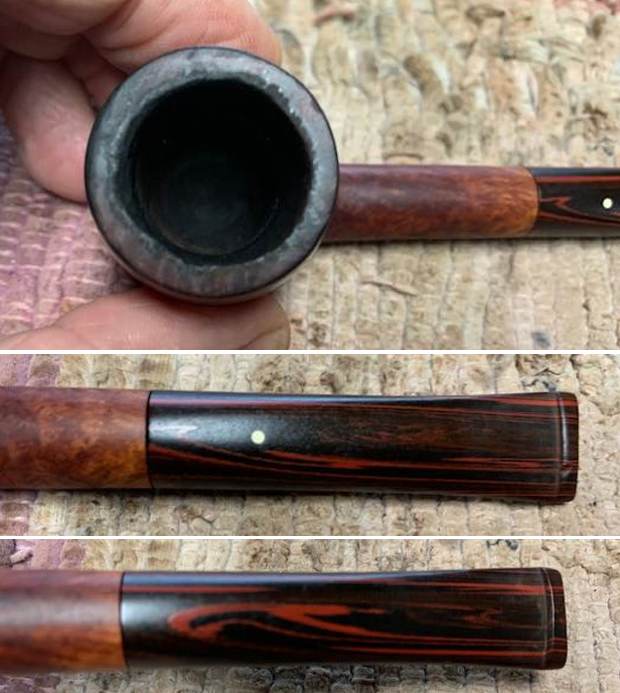
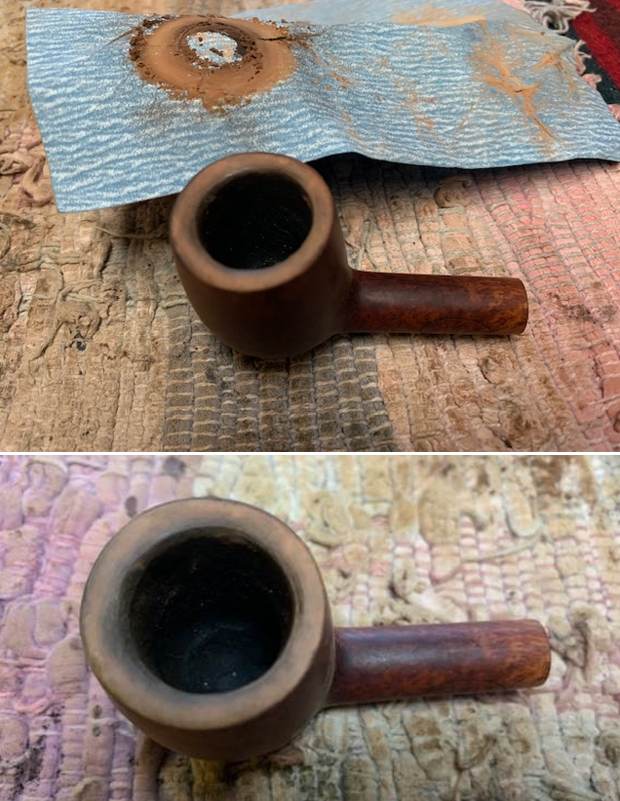
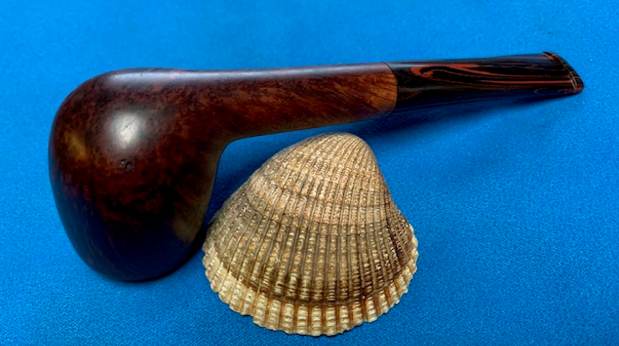
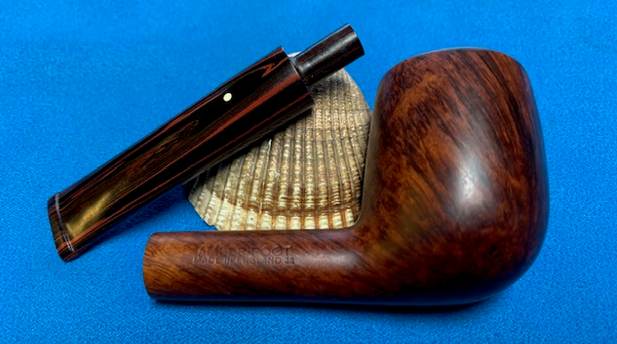
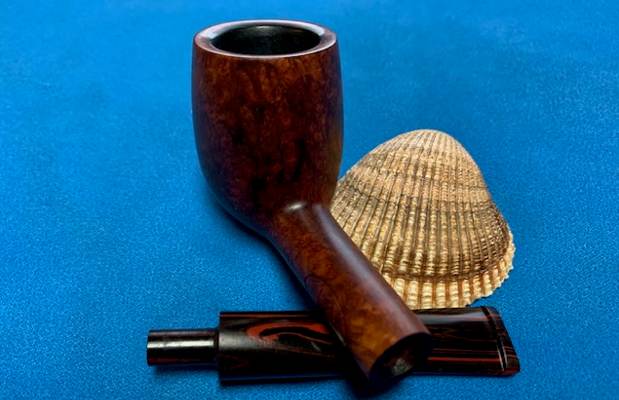
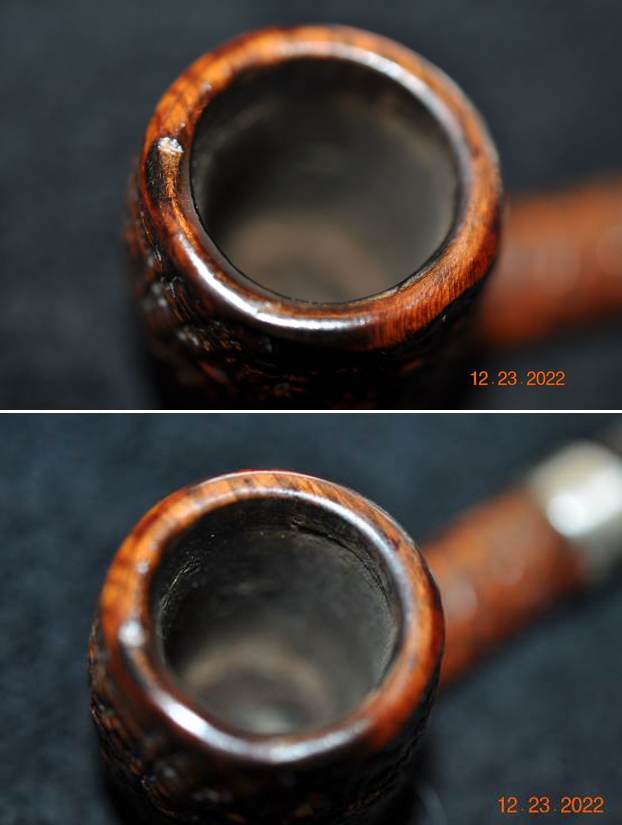
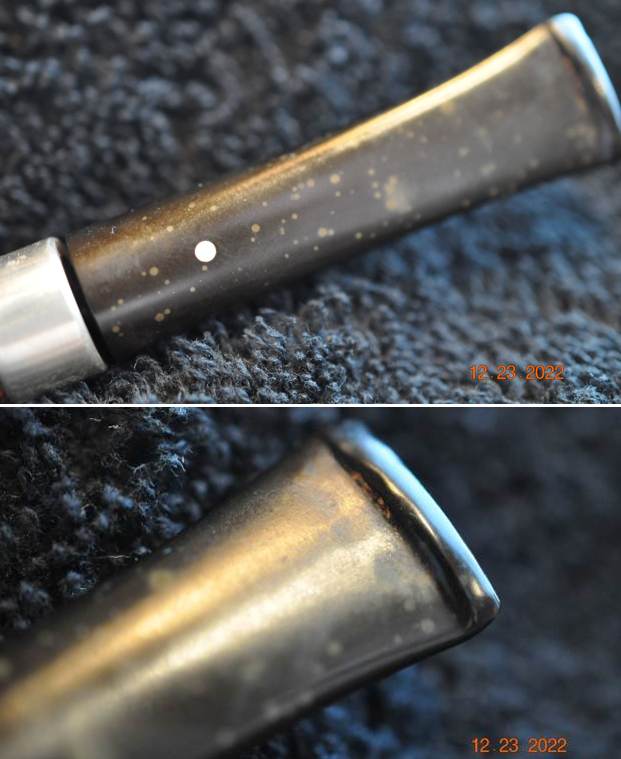
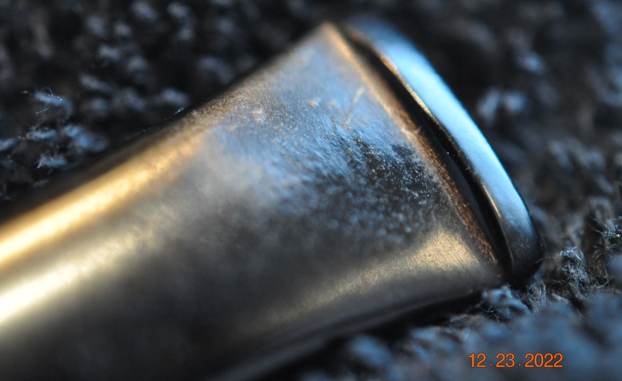
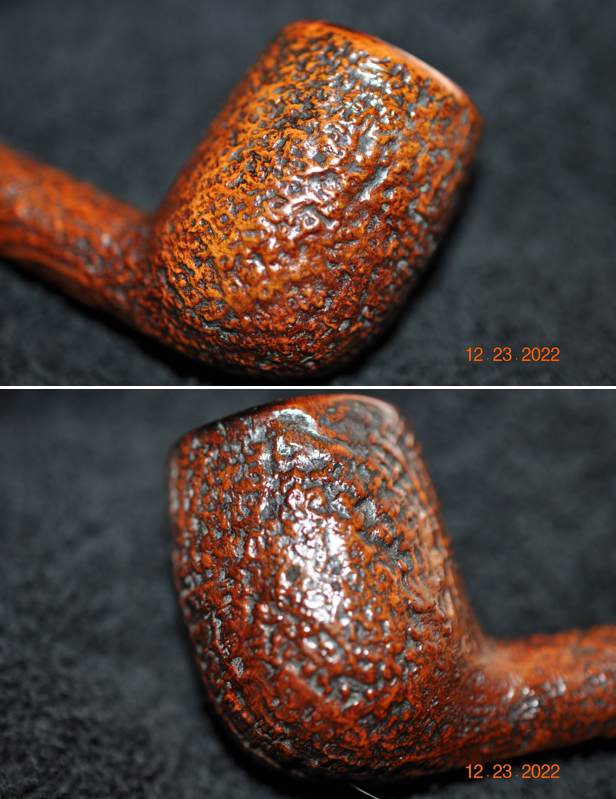
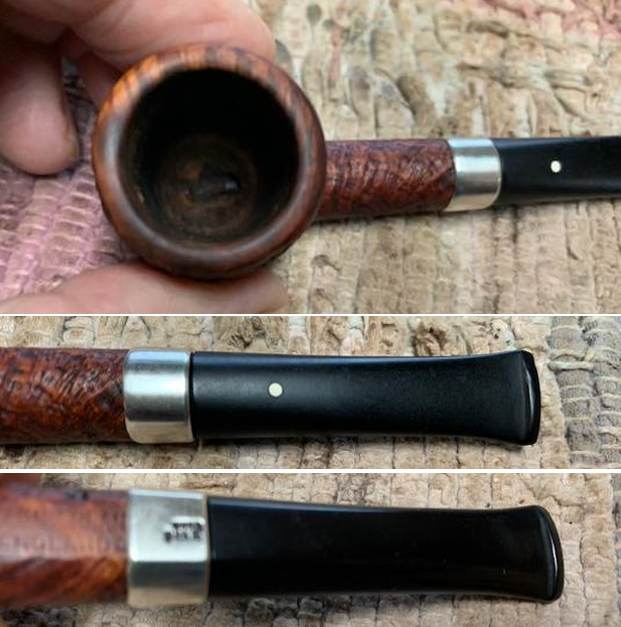
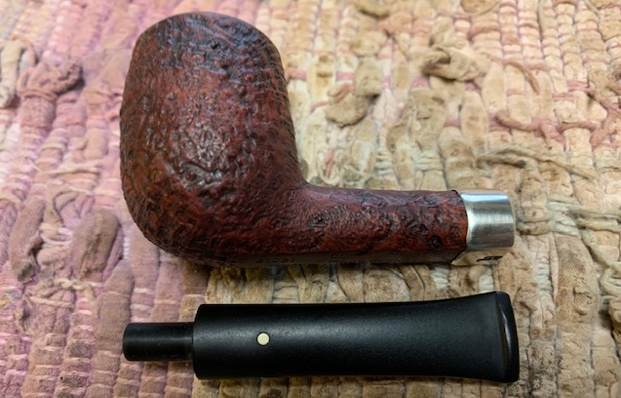
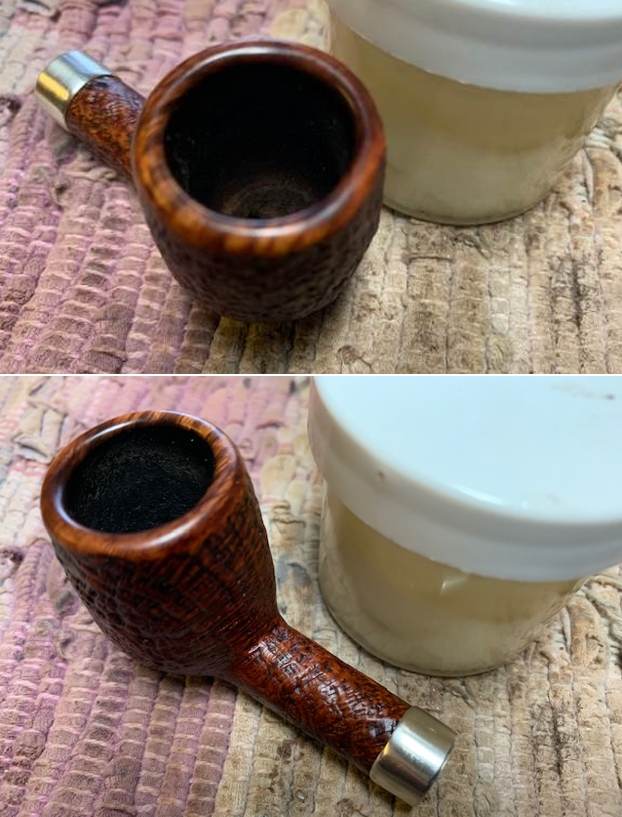
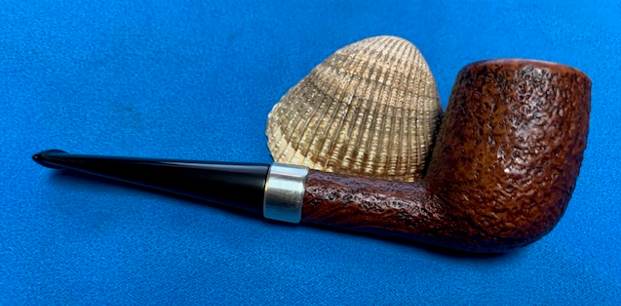
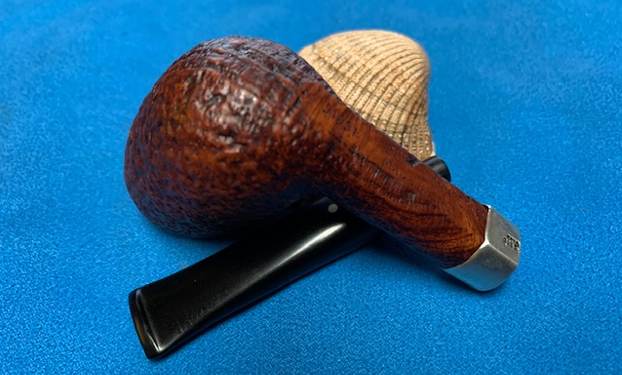
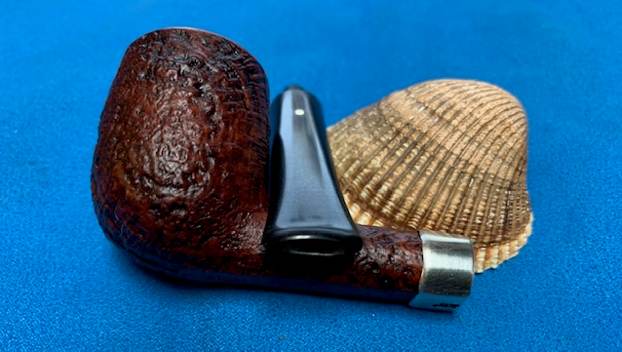
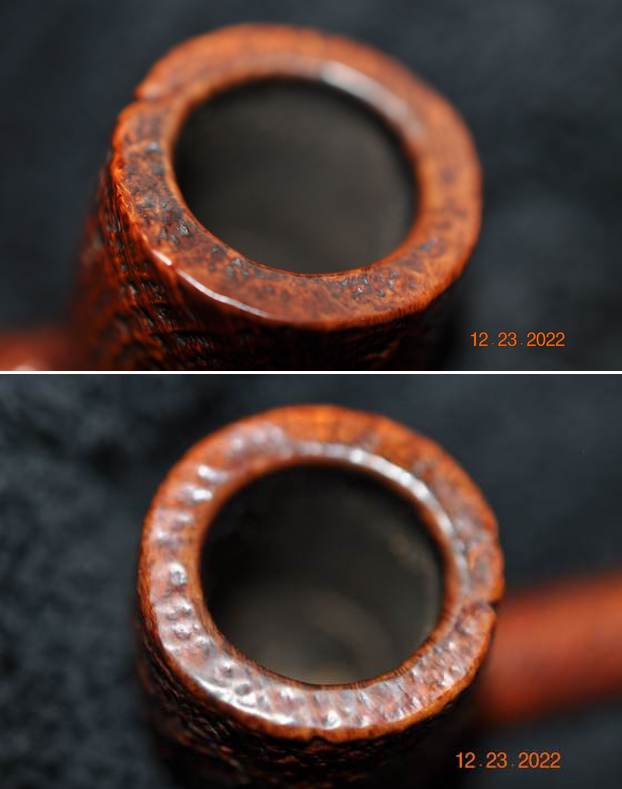
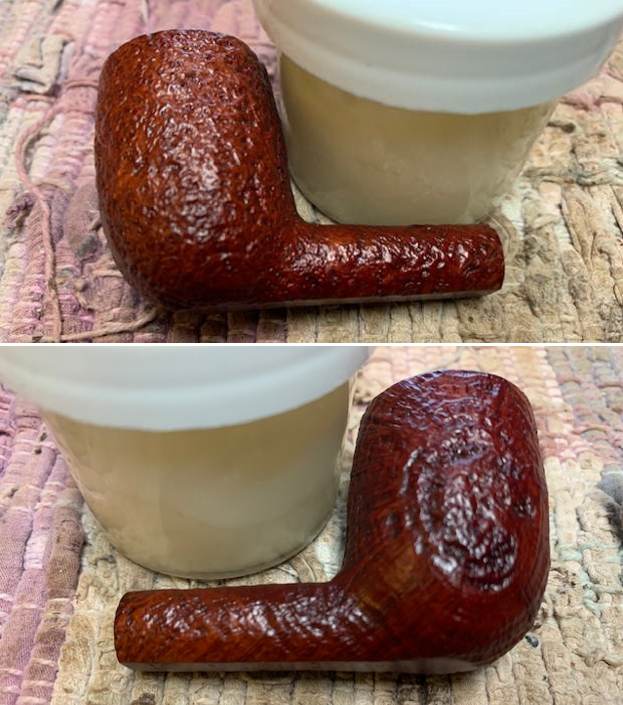
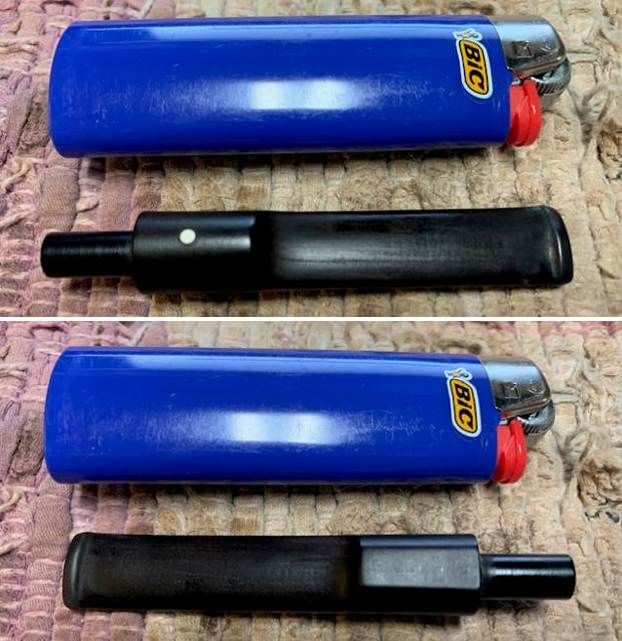
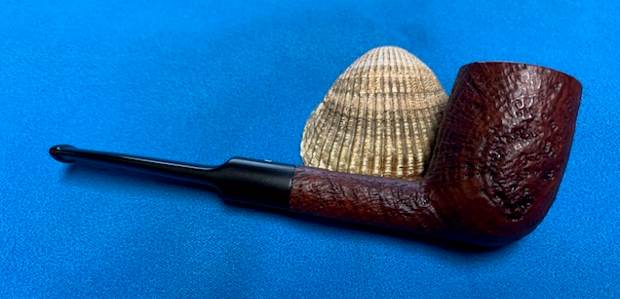
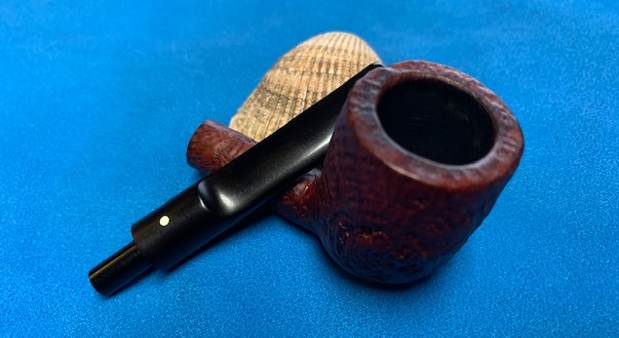
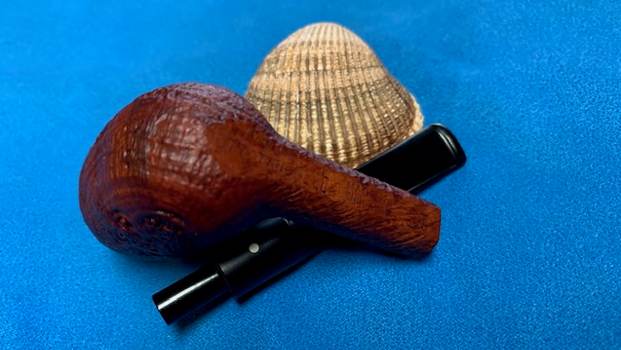
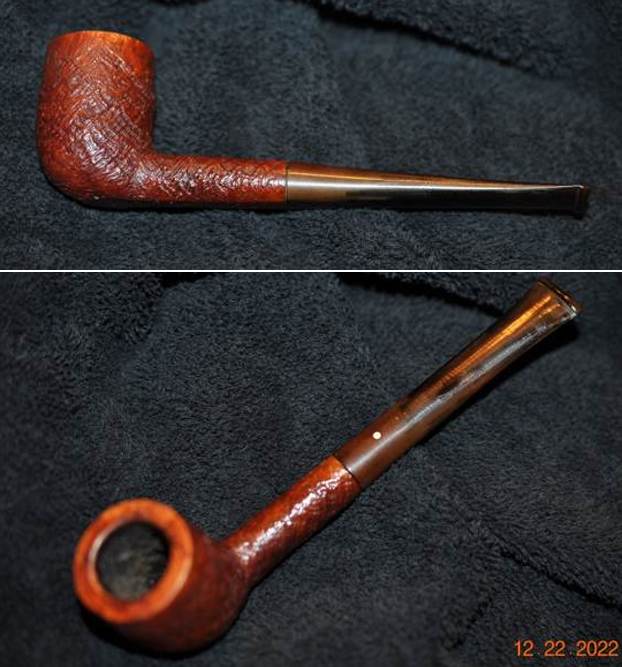
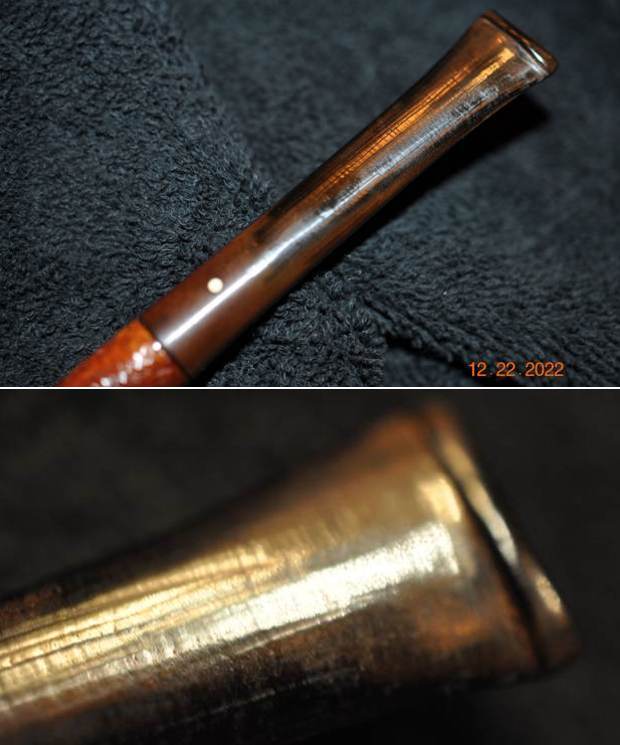
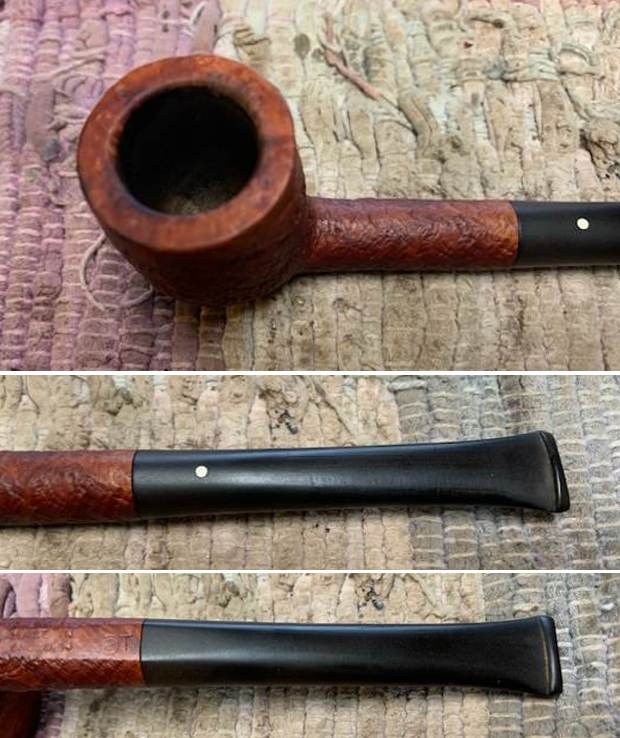
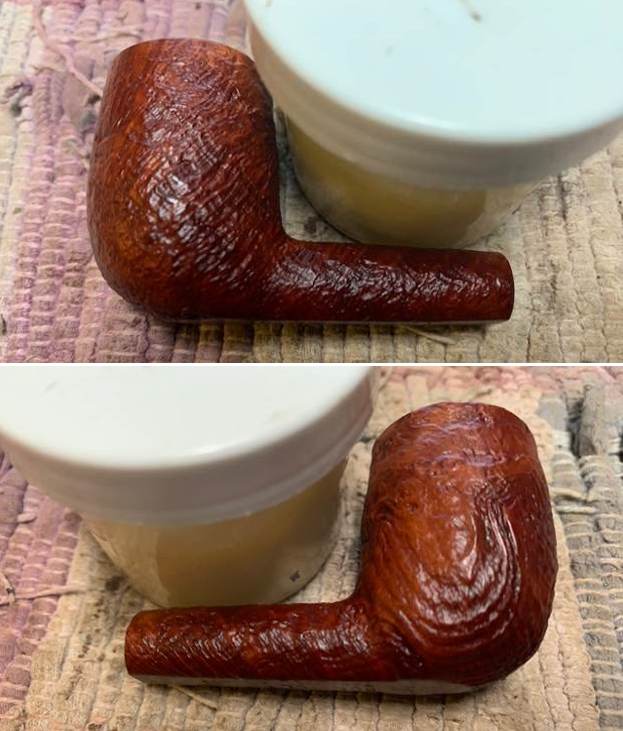
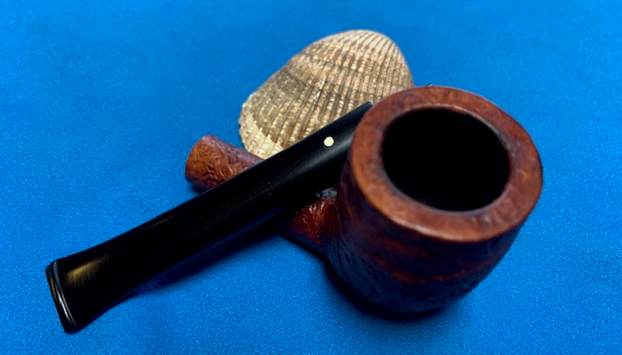
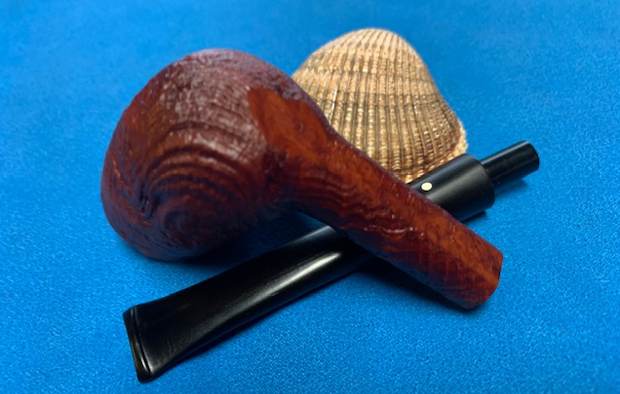
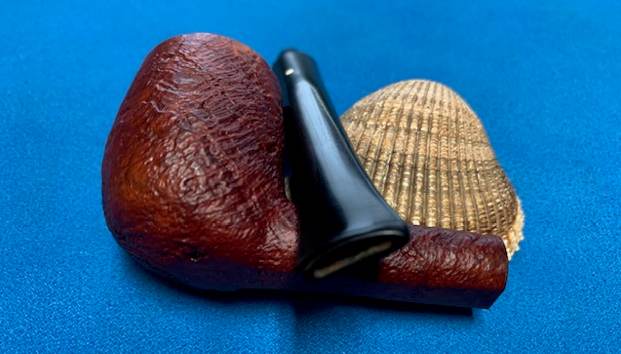
When I got home yesterday afternoon I laid it aside and this took it up to work on it. I enjoyed going over it carefully to see what I had purchased from Alex. You can see from the four photos below that the dark spots on the left side of the bowl had blended in better and were looking better. They seemed to be stains from the bowl coming in contact with some substance. It was deep in the finish. The right side of the bowl had some darkening toward the top of the bowl and the rim top was clean but still had a bit of darkening. The vulcanite spacer between the bowl and the bamboo shank was cleaned. The patina on the Bamboo shank had darkened and the crackling in the finish looked very good. It was quite stunning. The stem was in good condition other than a few small tooth marks and chatter on both sides just ahead of the button. The pipe had a light cake and smelled of good tobacco. Overall the pipe was in good condition.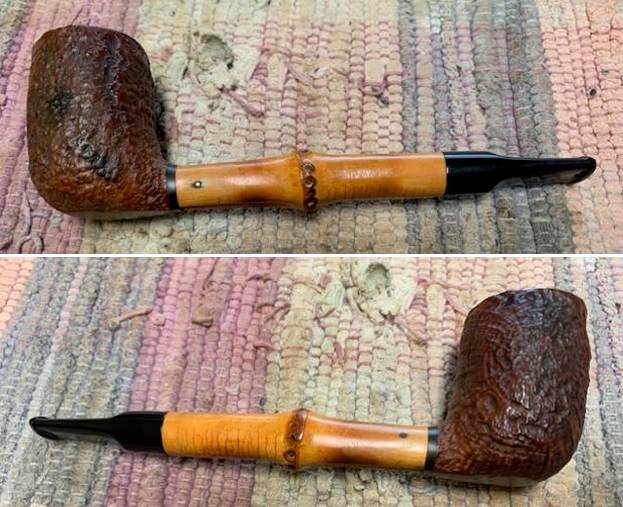
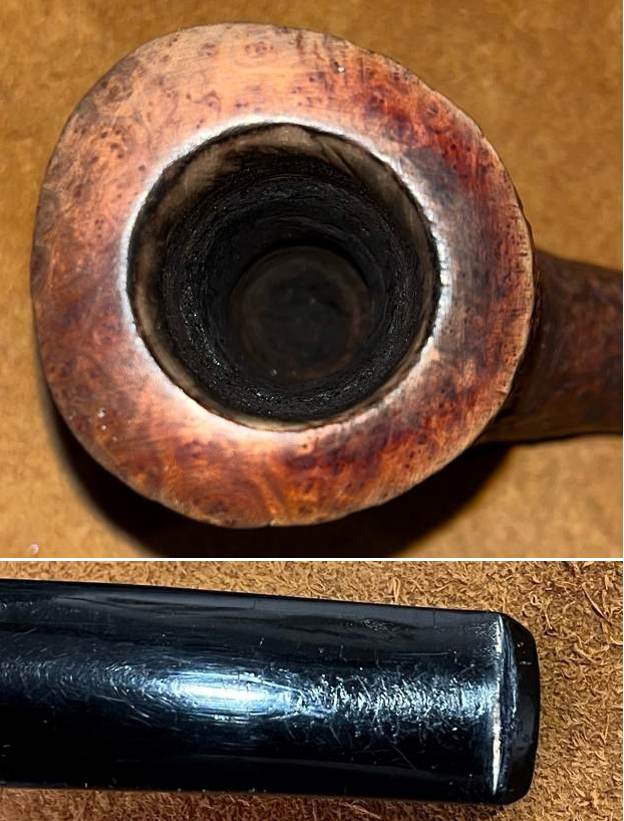
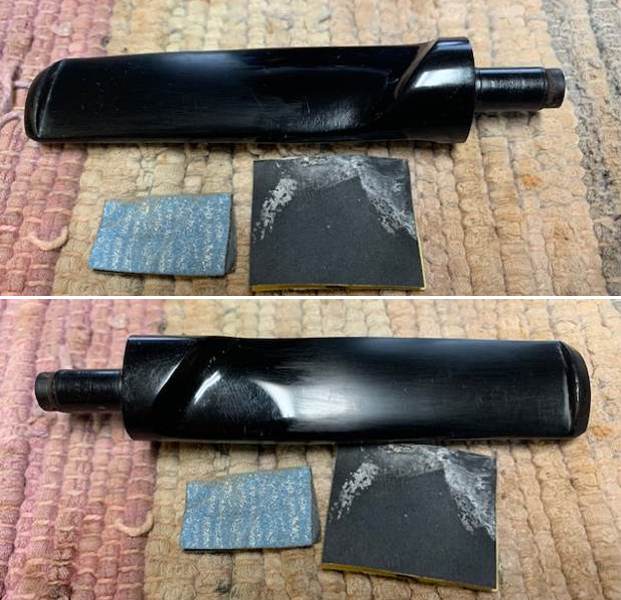
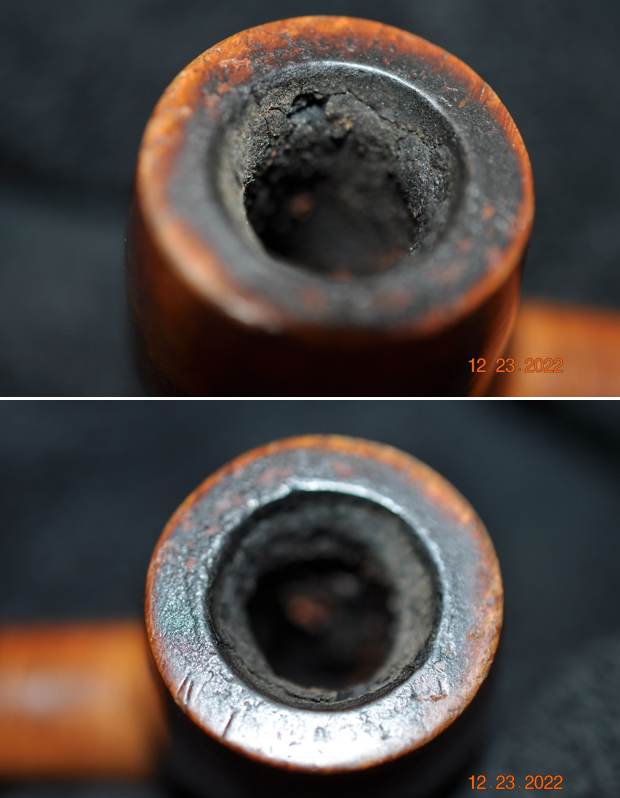
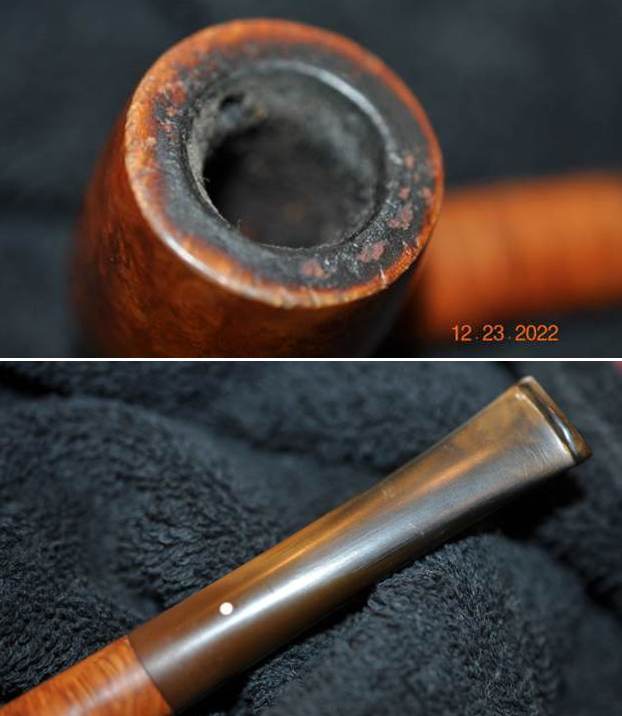
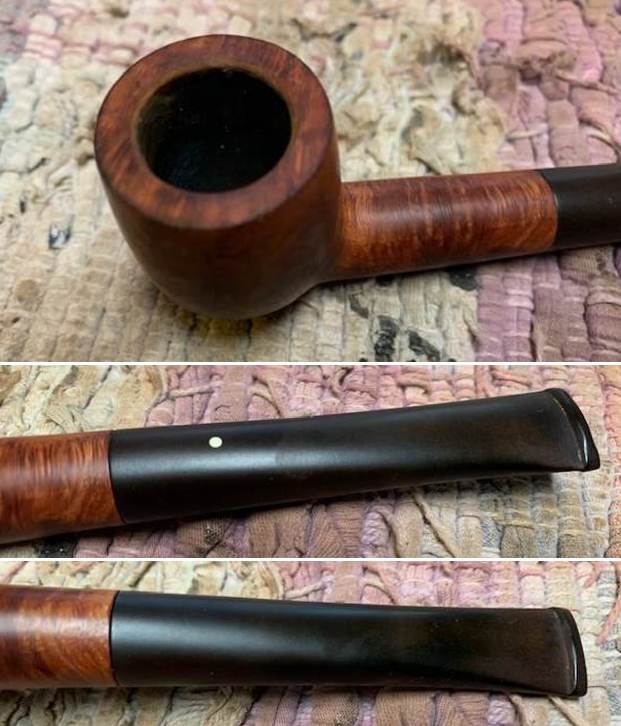
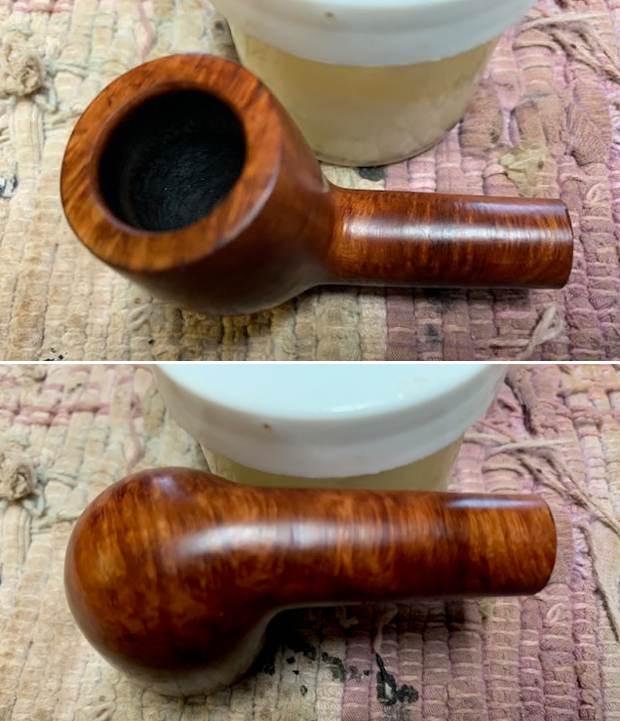
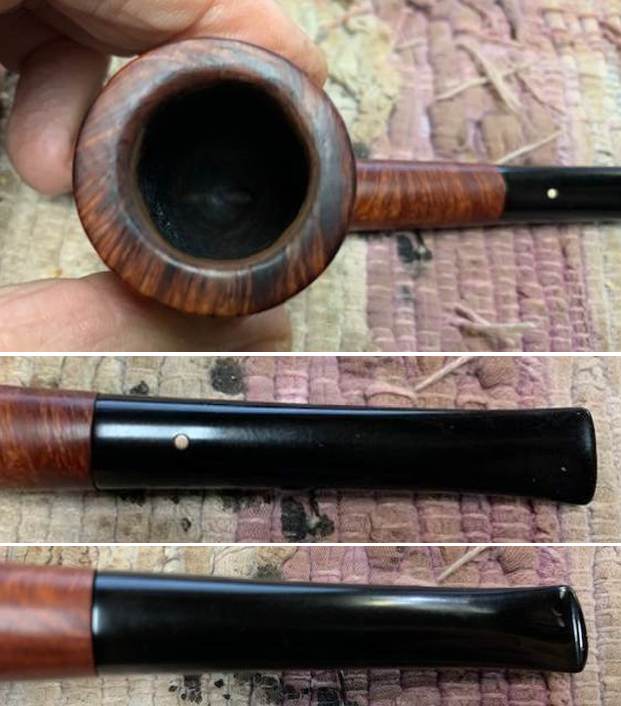
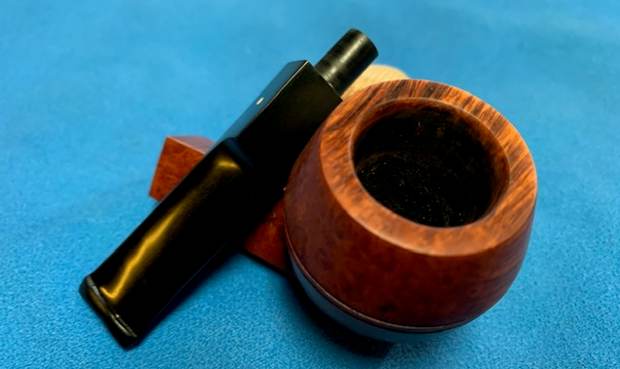
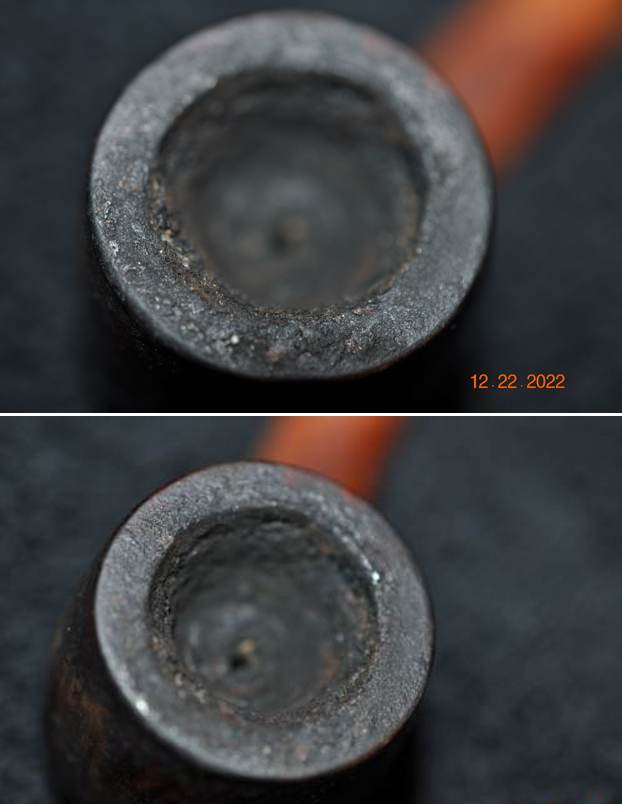
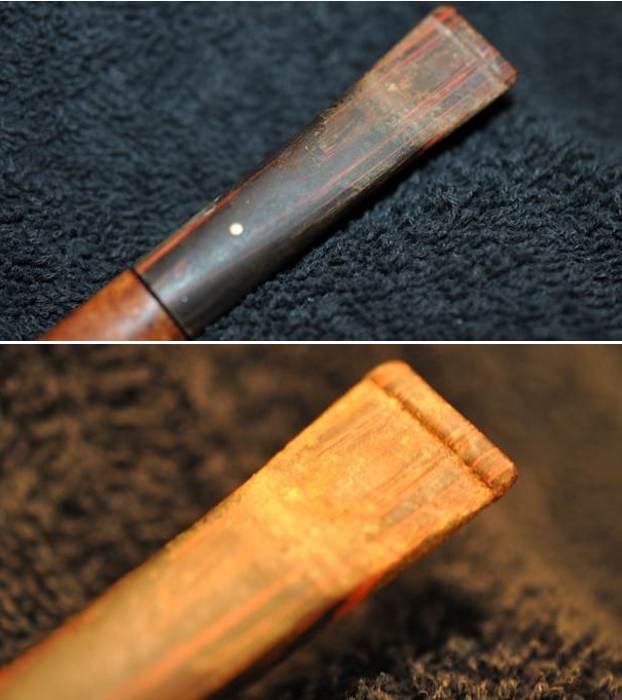
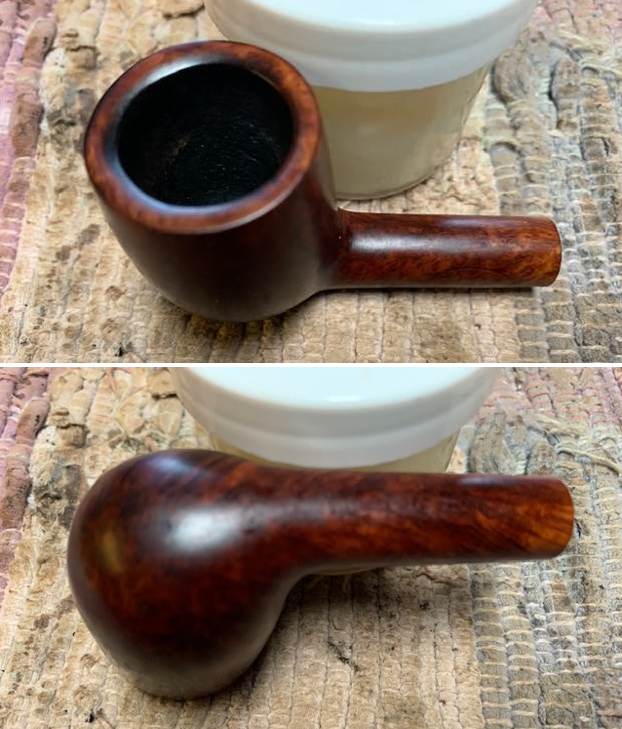
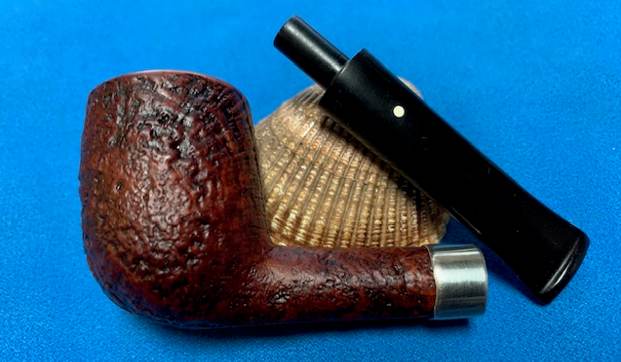
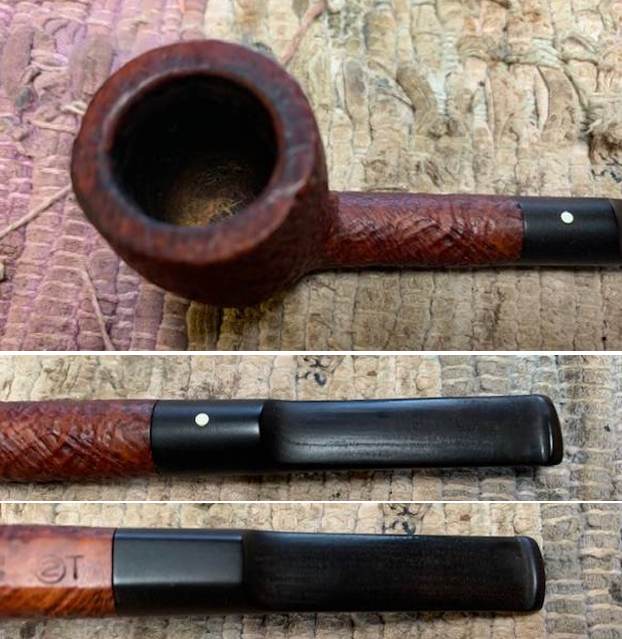
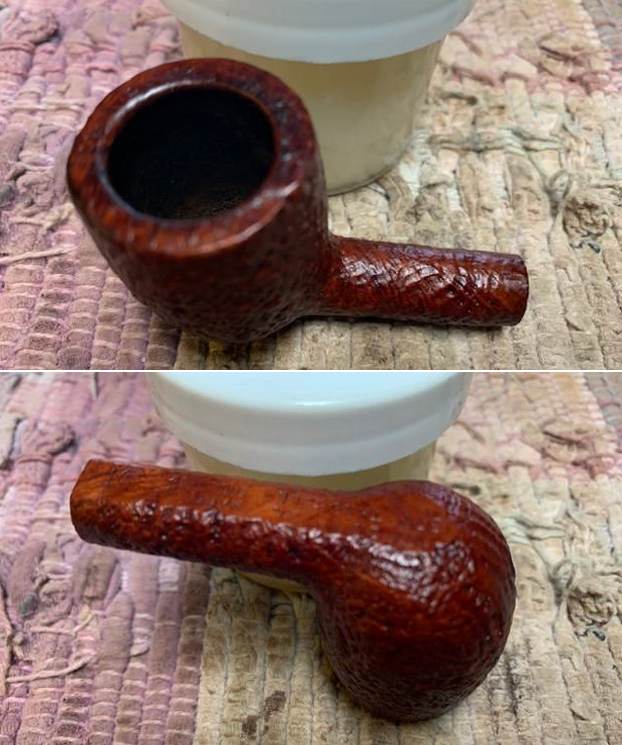
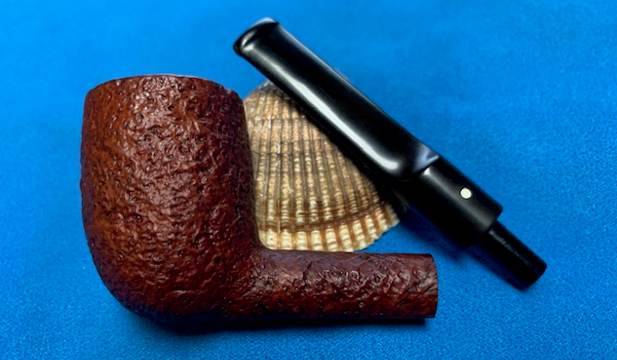
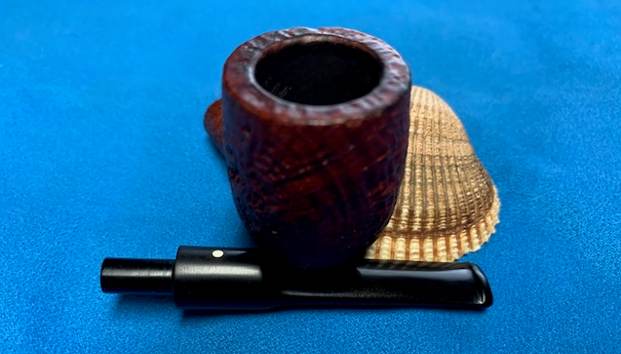
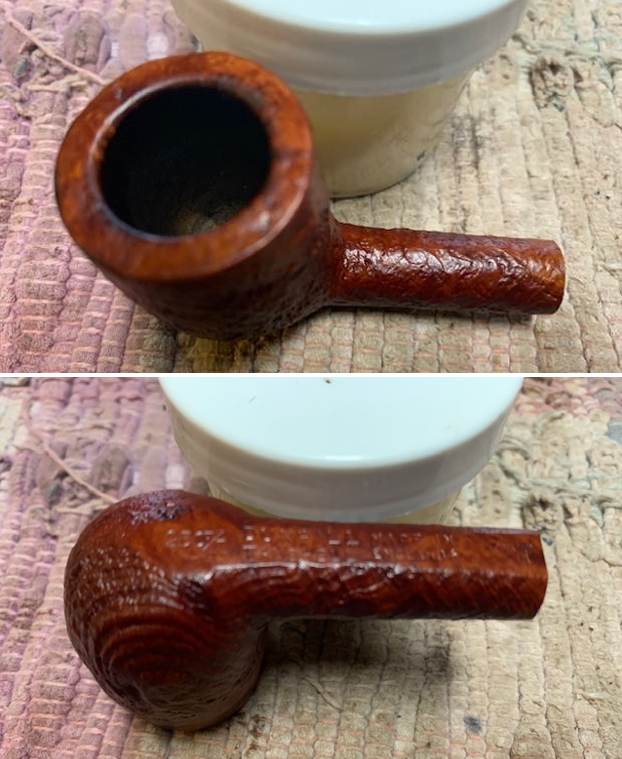
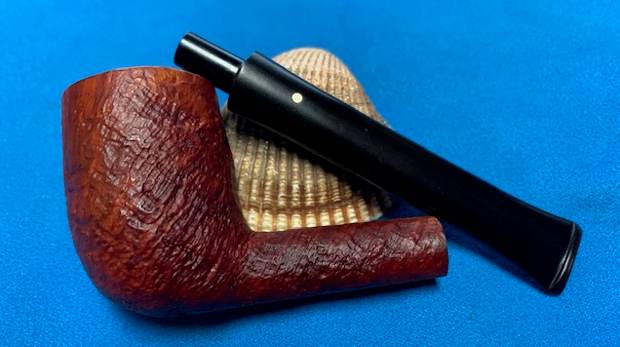
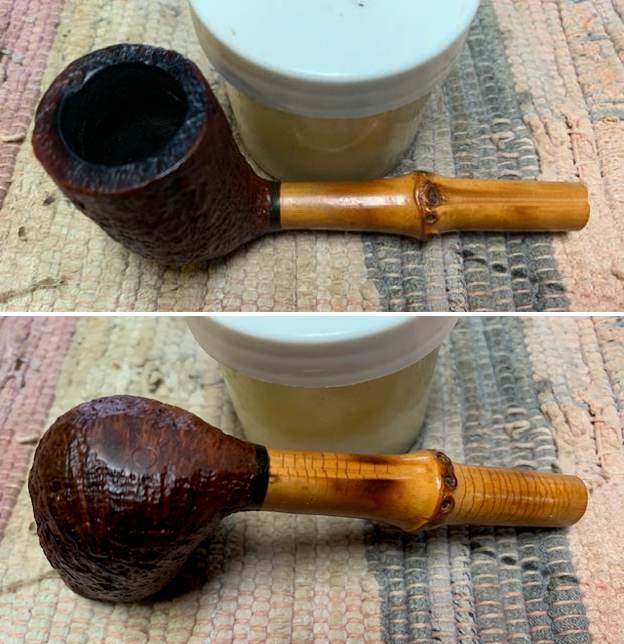
 I took photos of the bowl and rim top to show their condition and of the stem to show the condition of both sides of the stem. Alex had taken great care of this old pipe.
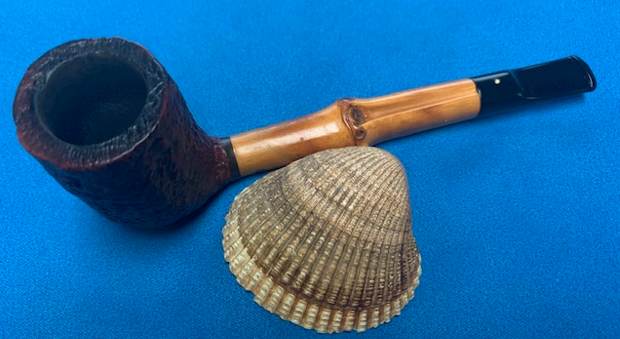
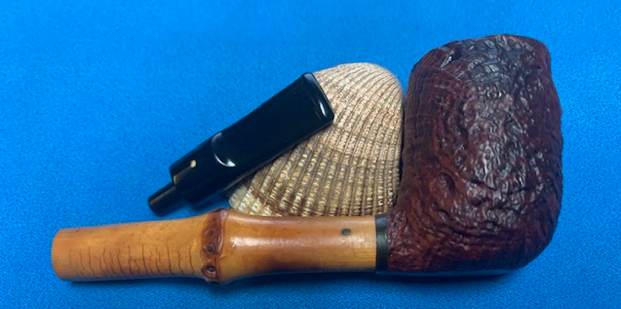
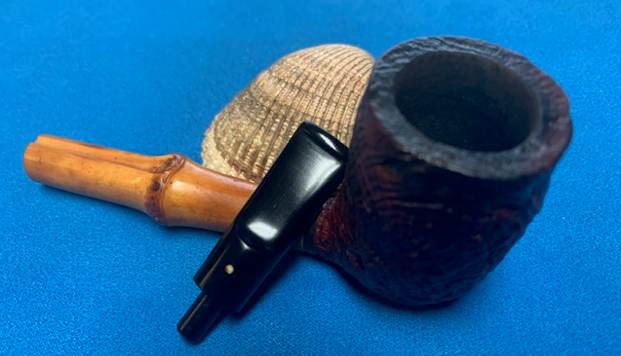
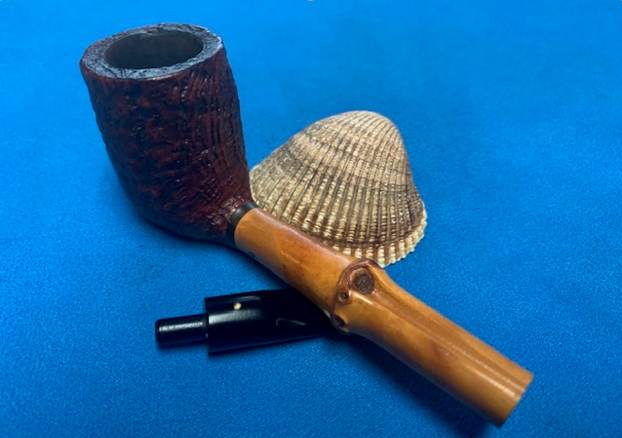
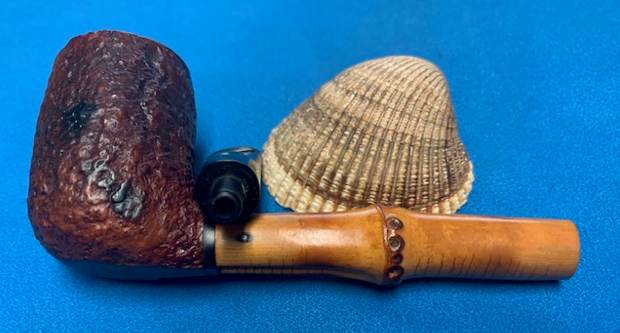
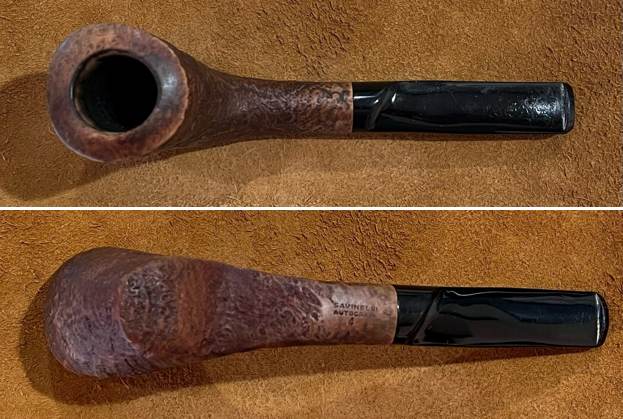
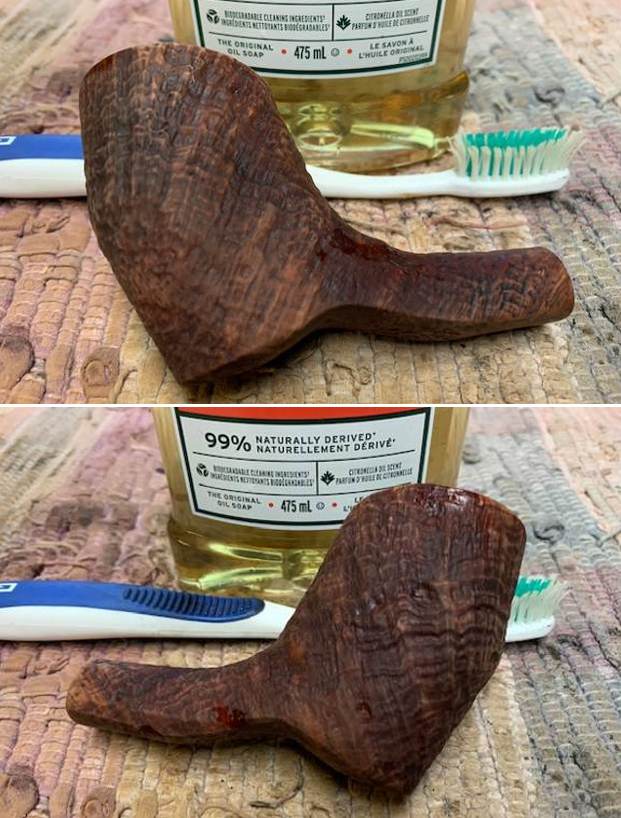
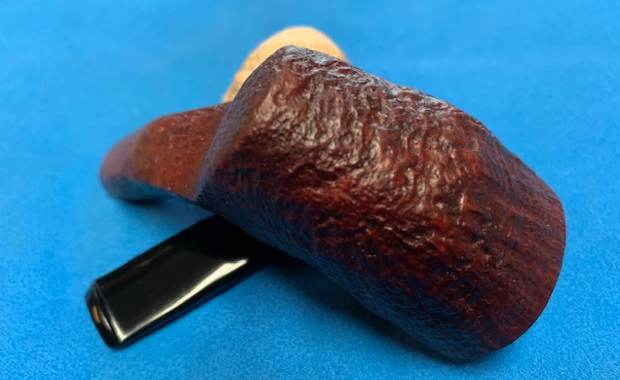
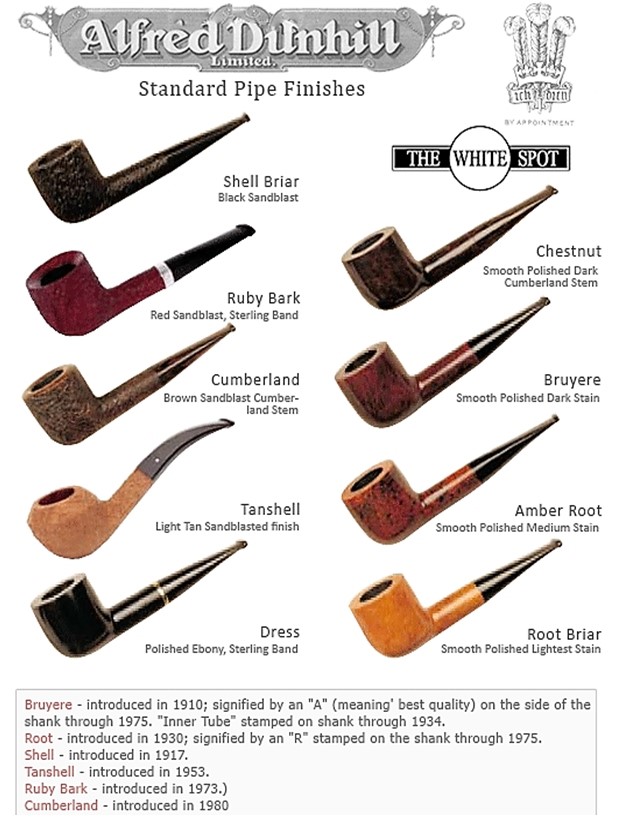
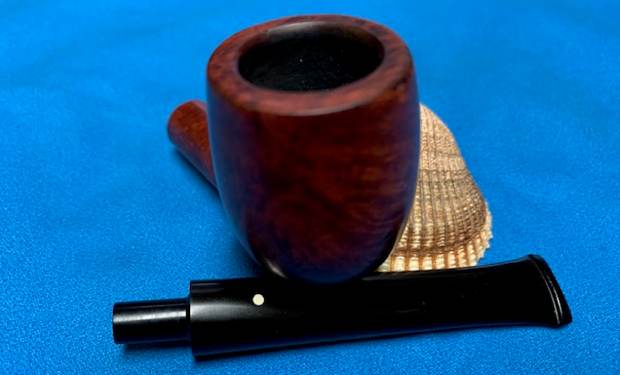
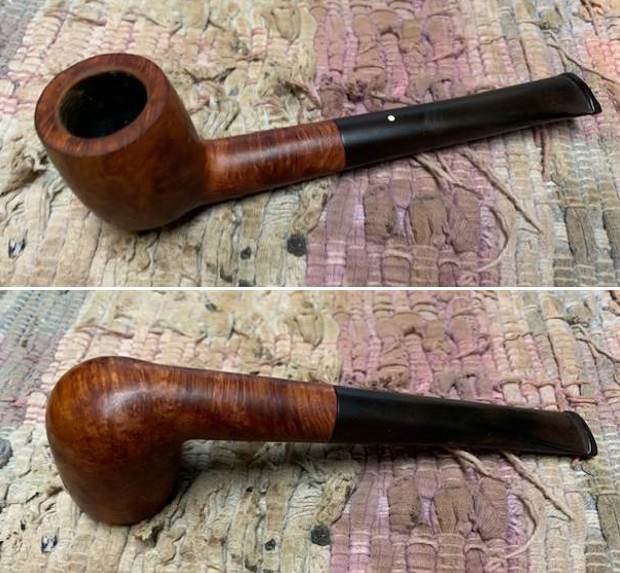
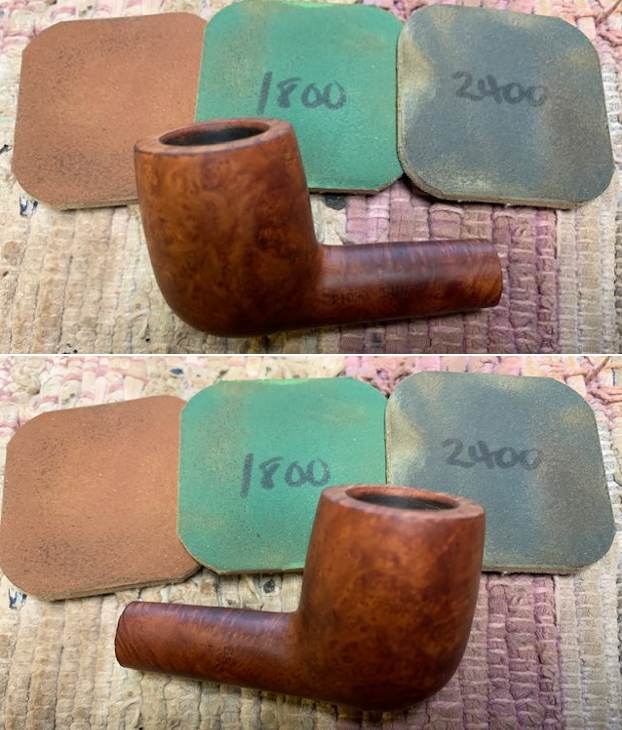
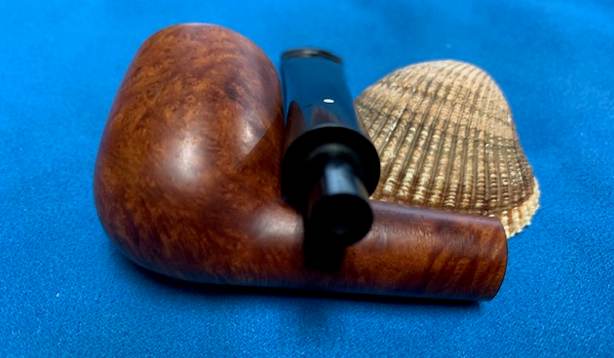
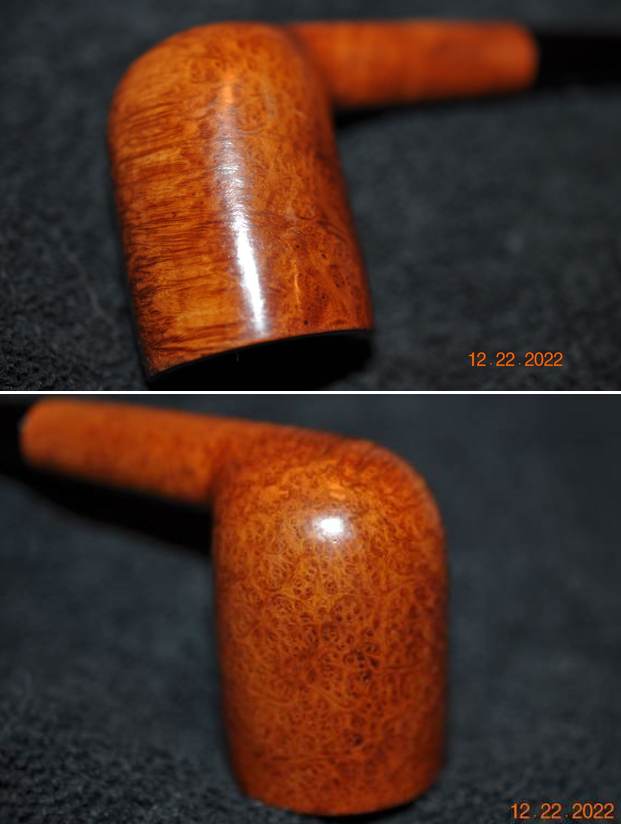
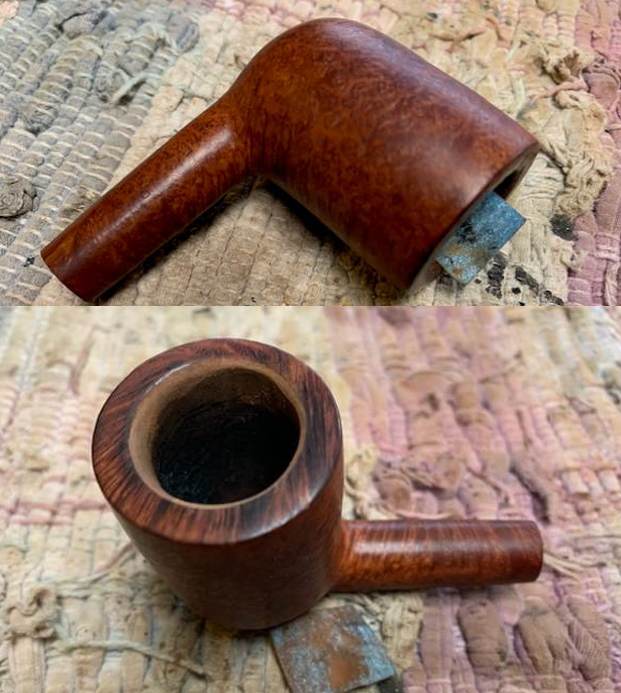
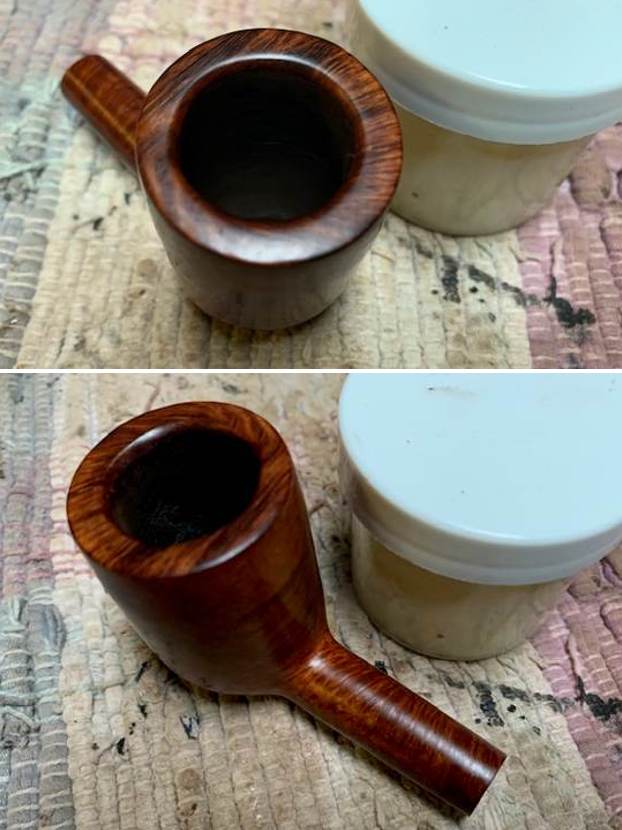
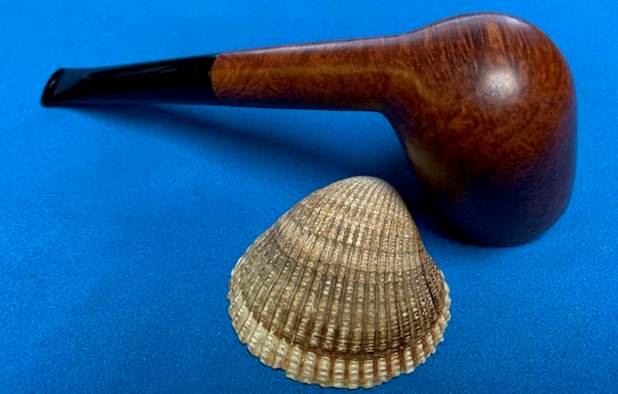
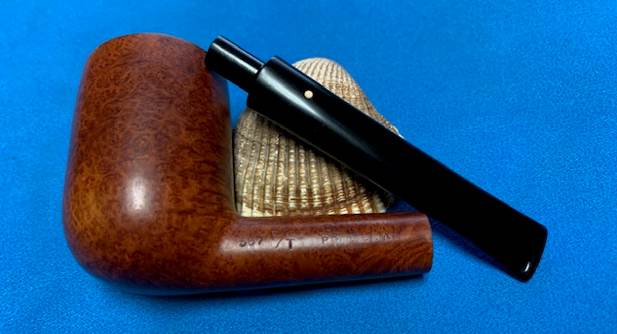
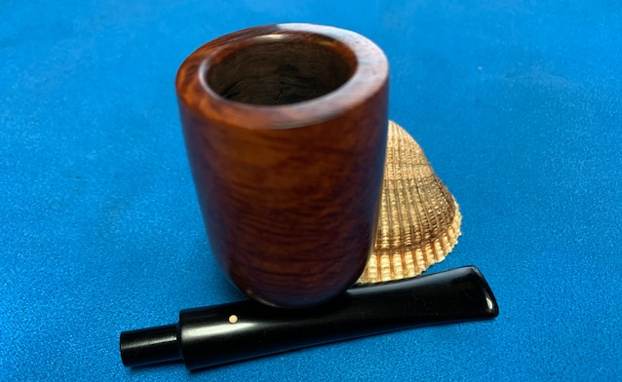
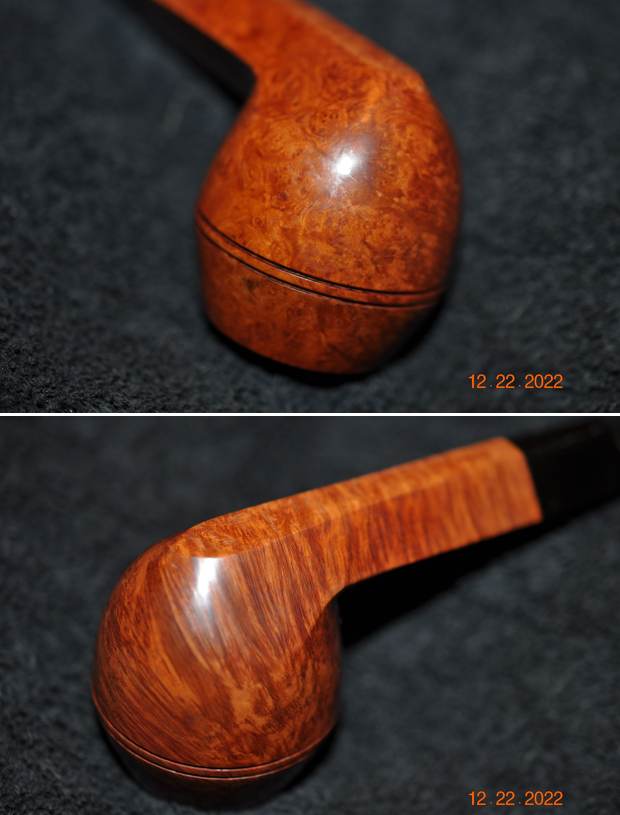
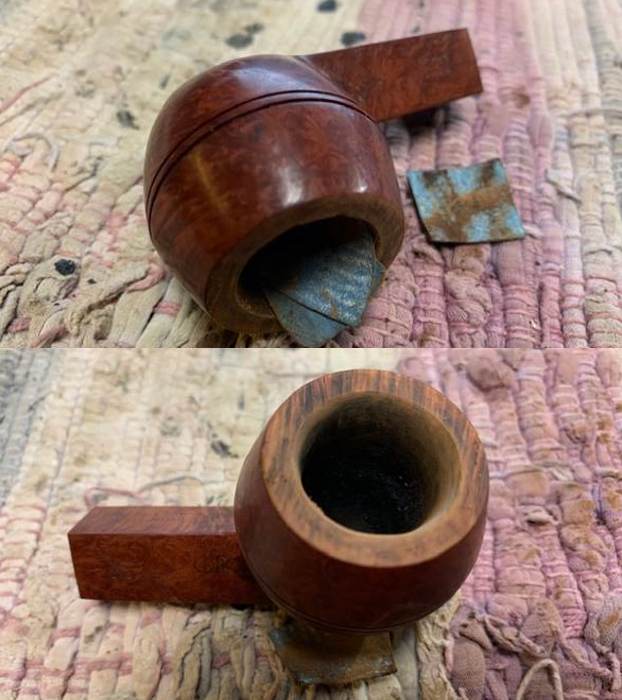
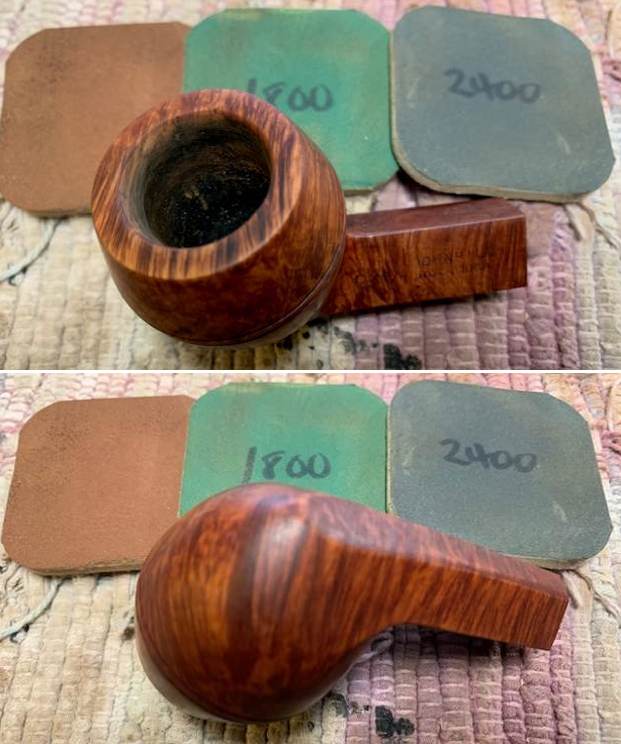
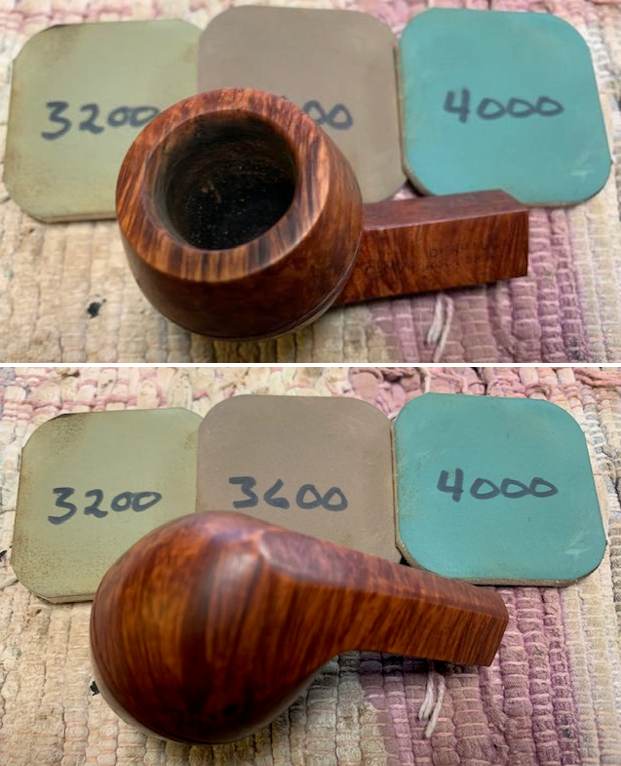
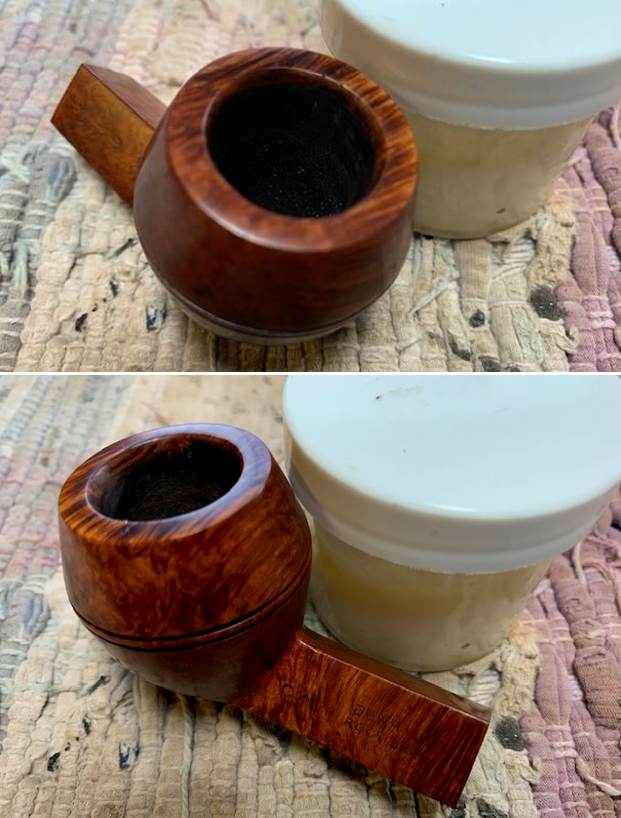
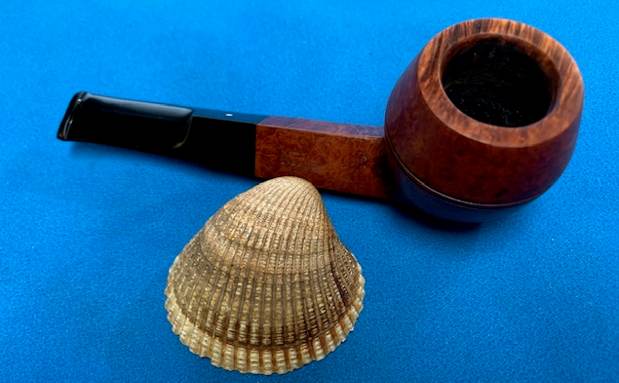
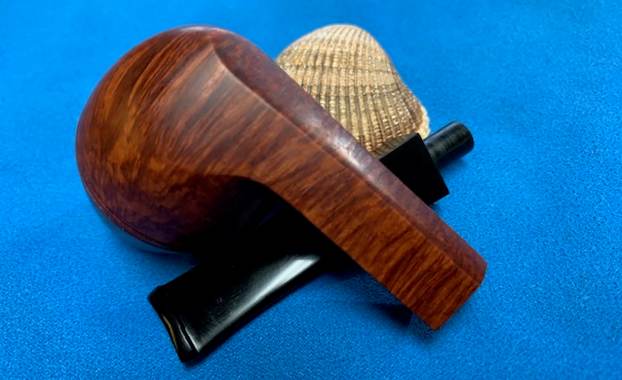
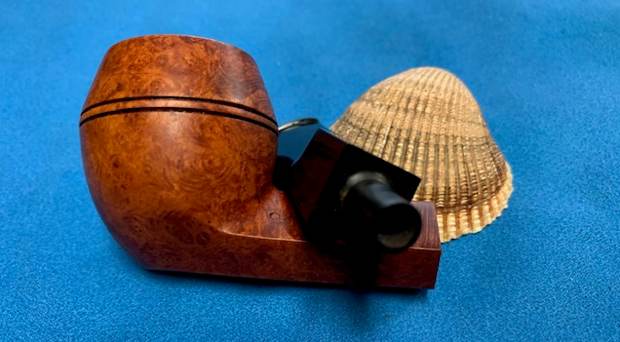
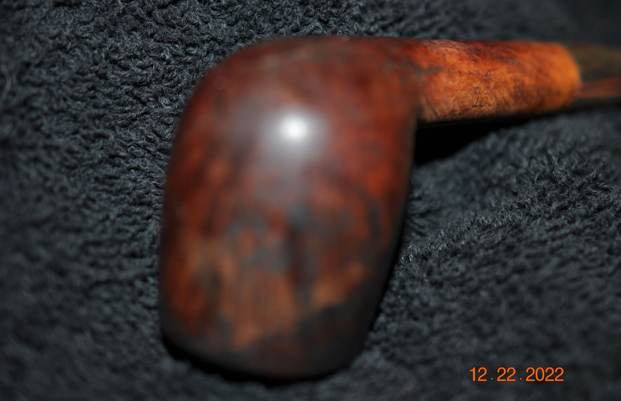
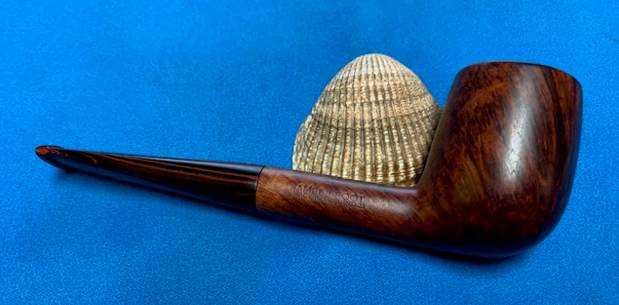
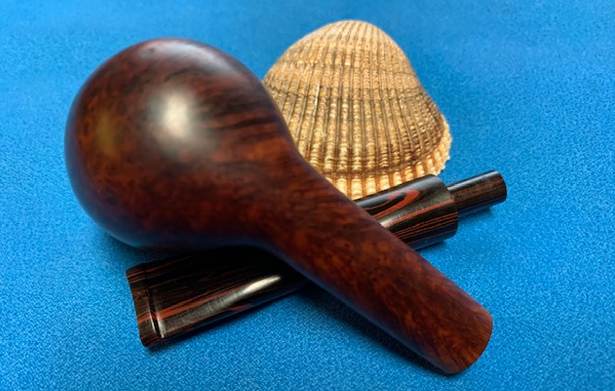
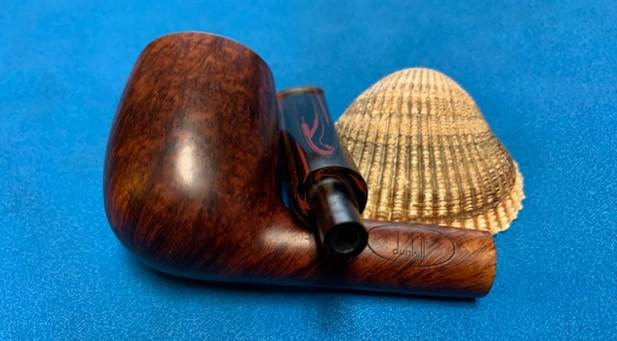
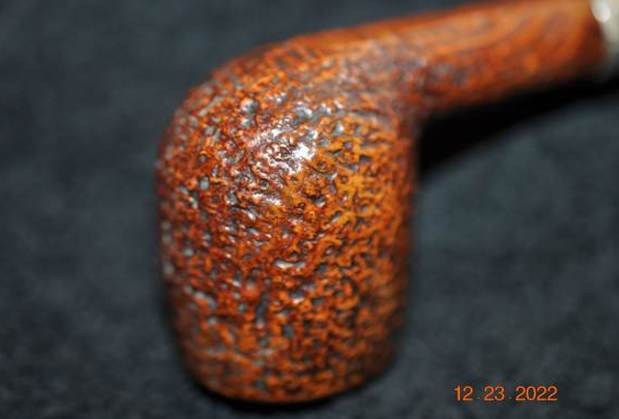
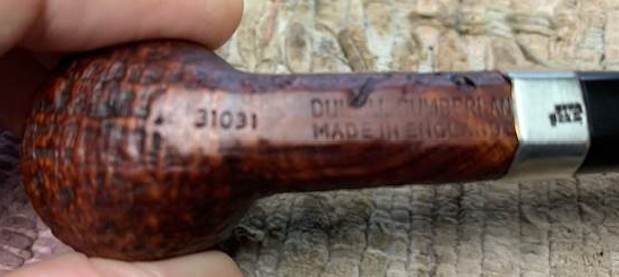
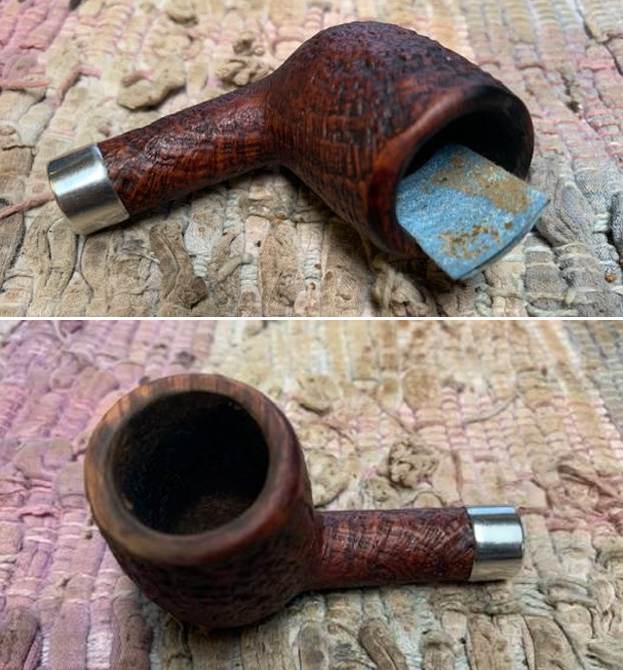
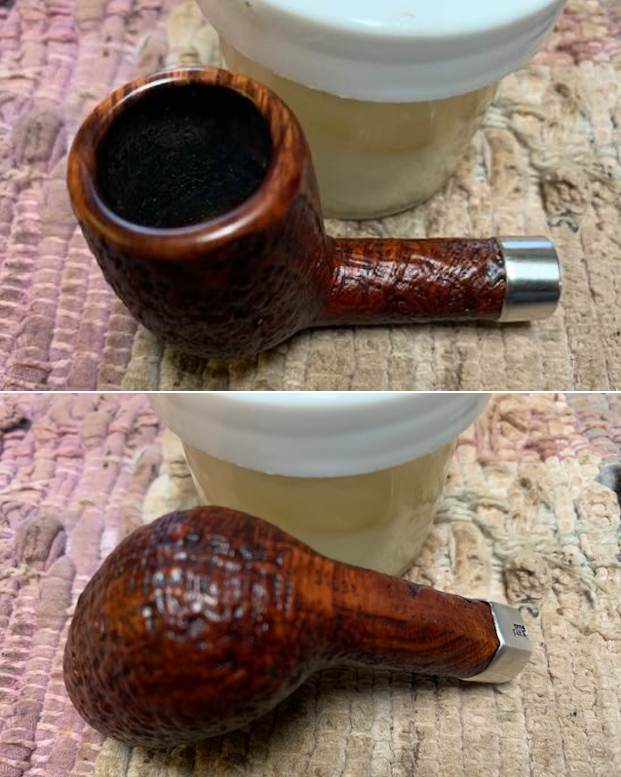
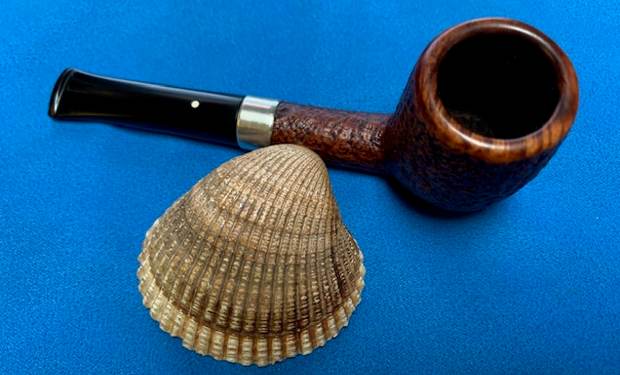
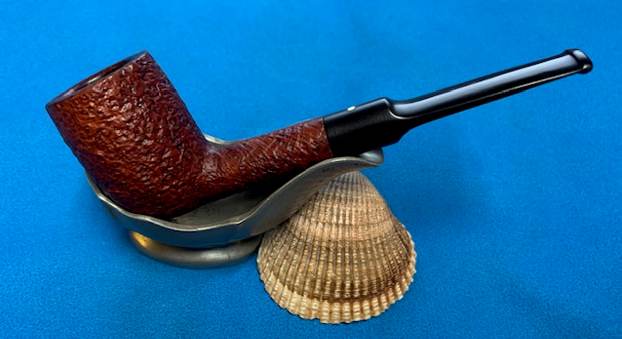
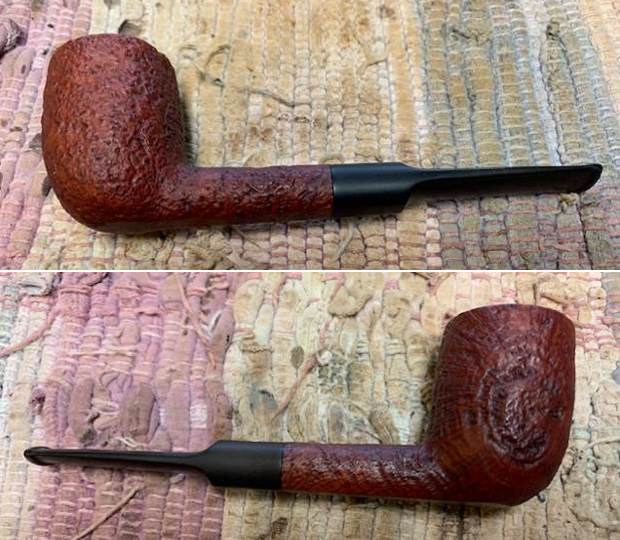
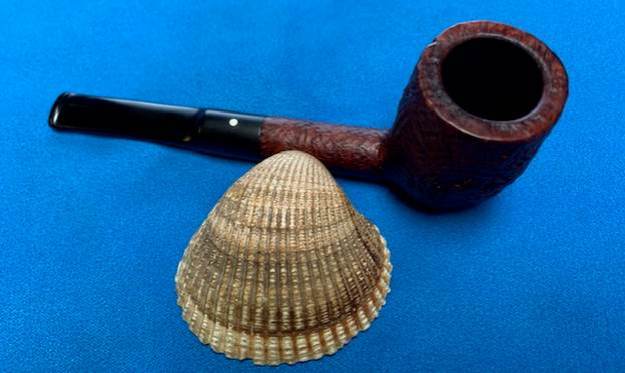
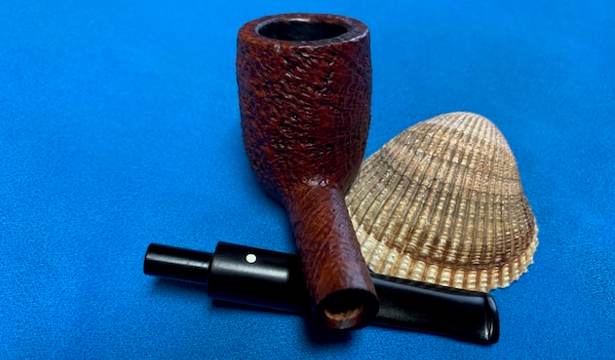
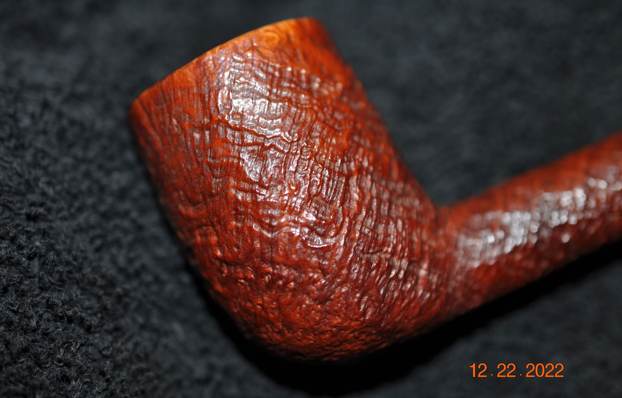
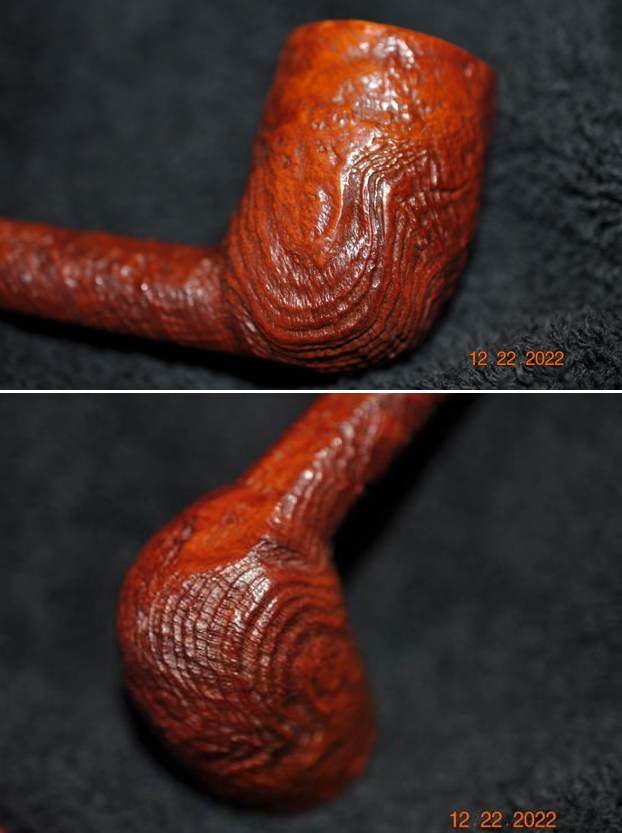
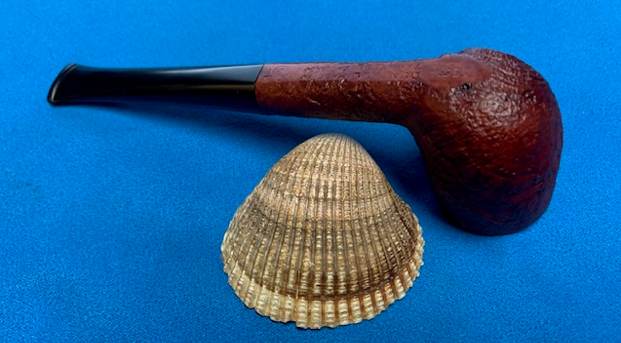
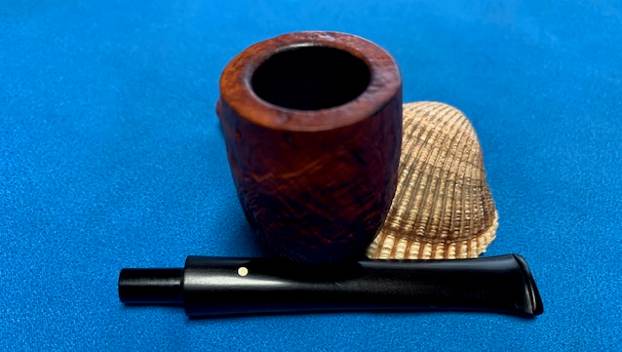
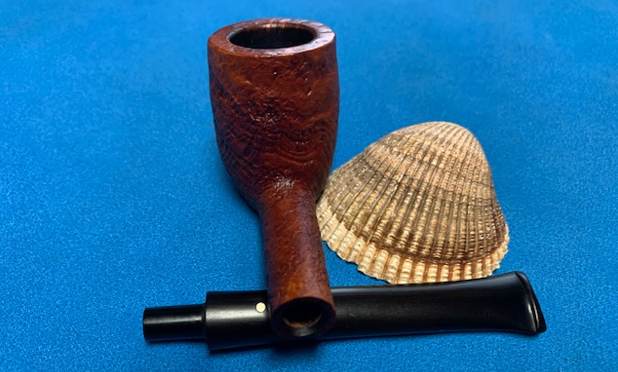
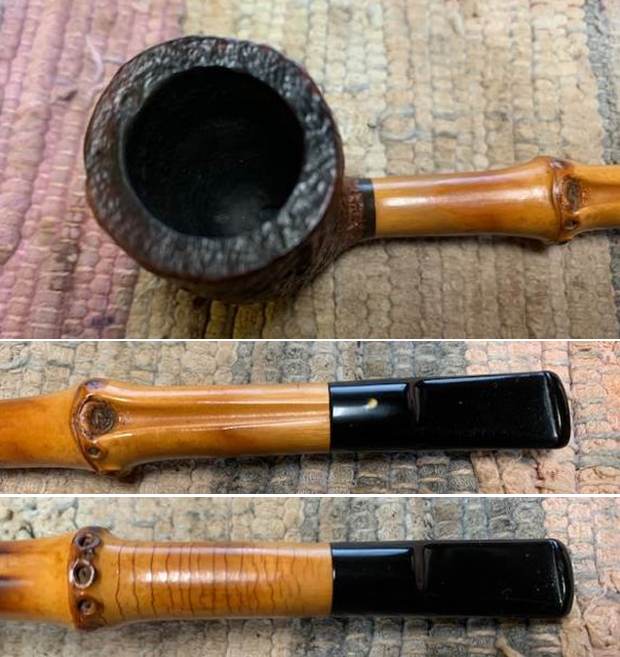 The photos of the sides and heel of the bowl show beautiful sandblasted grain around the bowl and the patterns in the briar. The Tanshell finish had darkened a lot on the pipe and I really debate whether to let it darken naturally or stain it with a Shell Briar style of stain. It is a nice looking pipe.
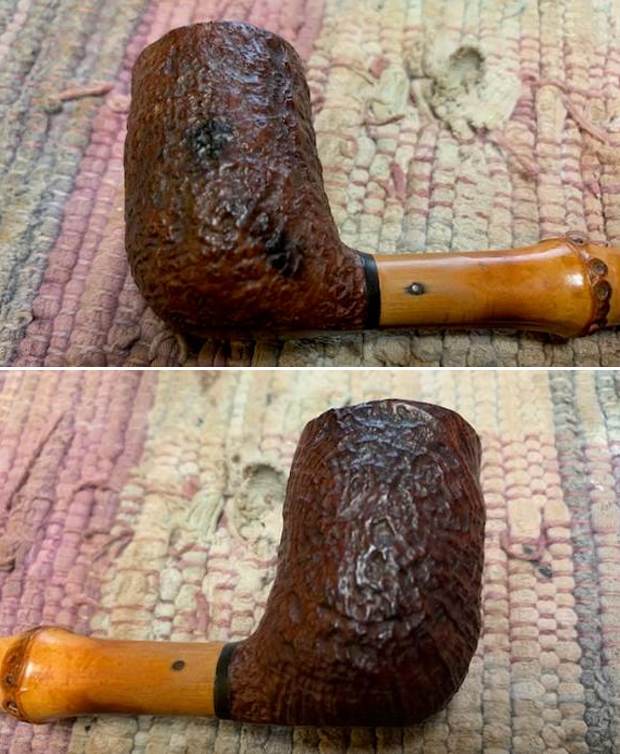
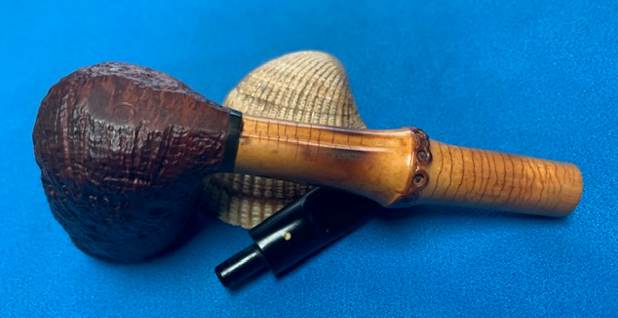
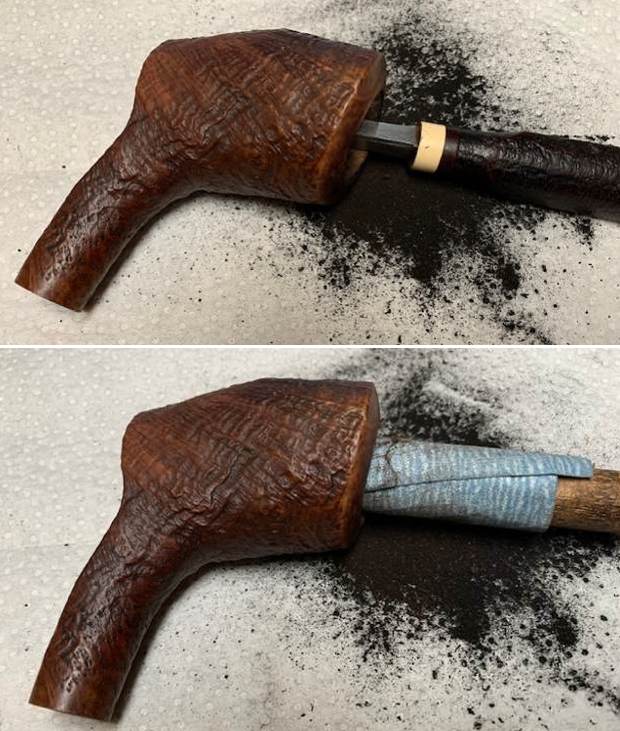
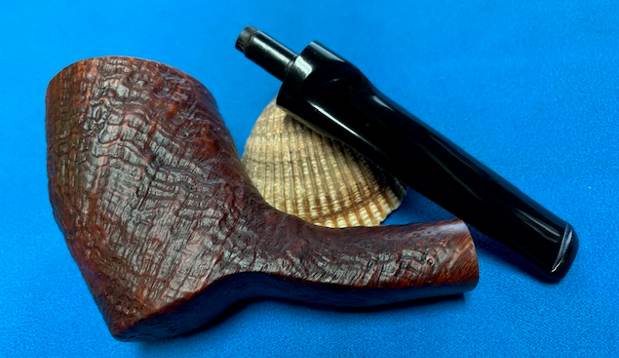
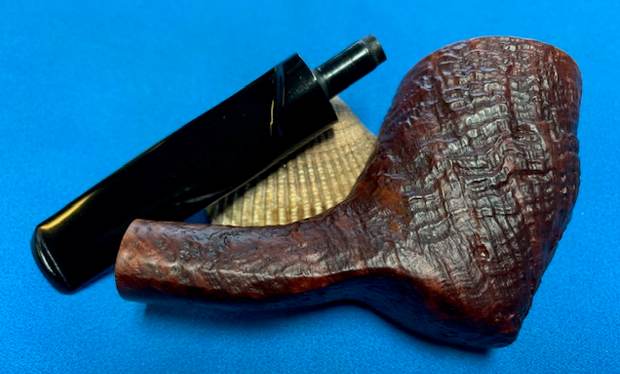
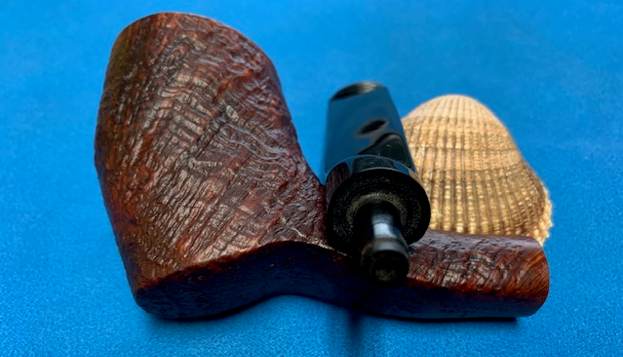
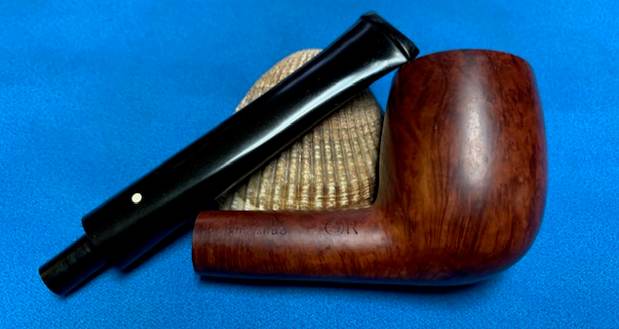
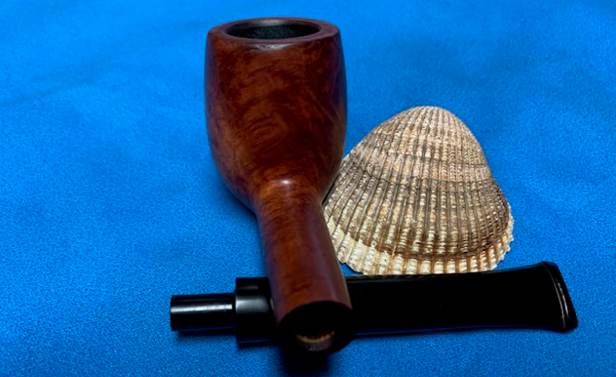
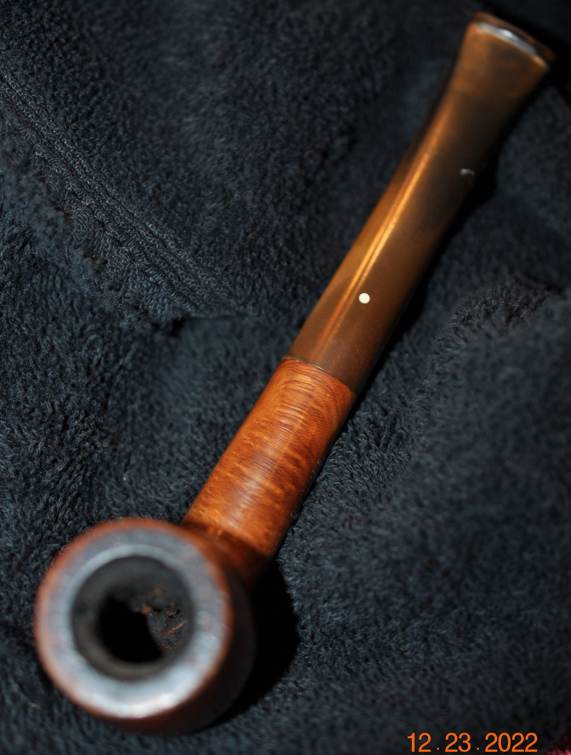
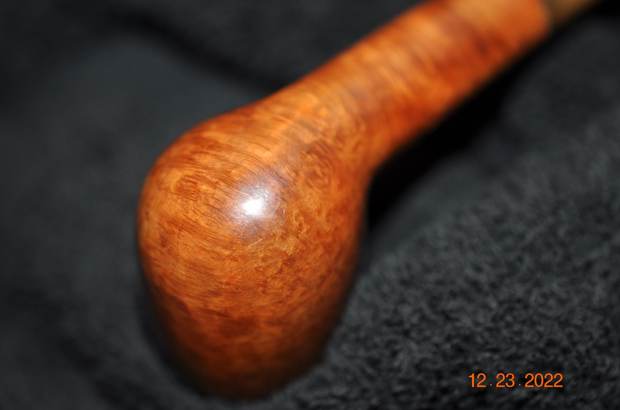
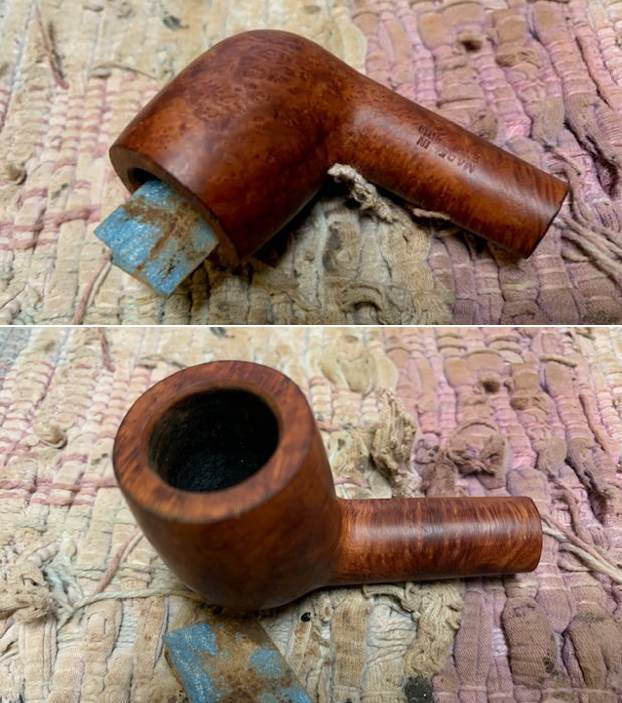
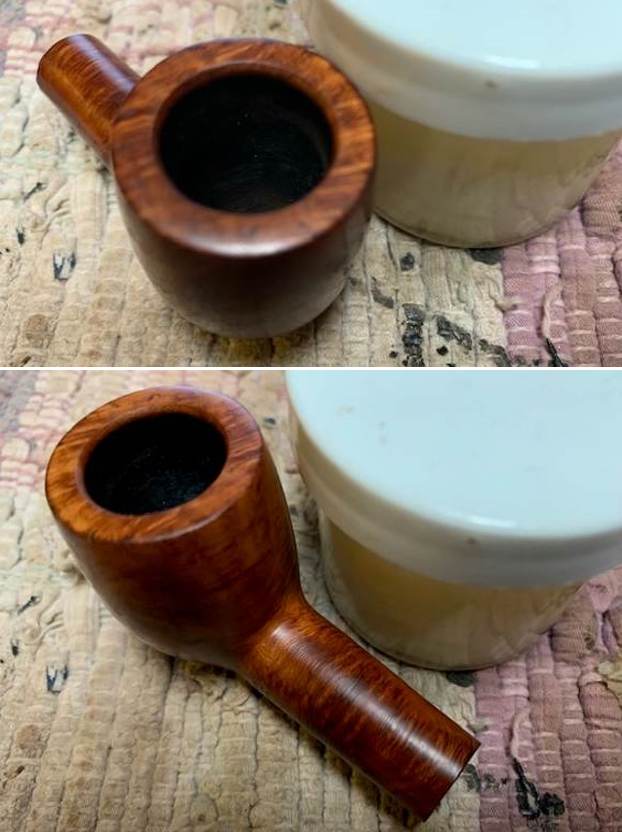
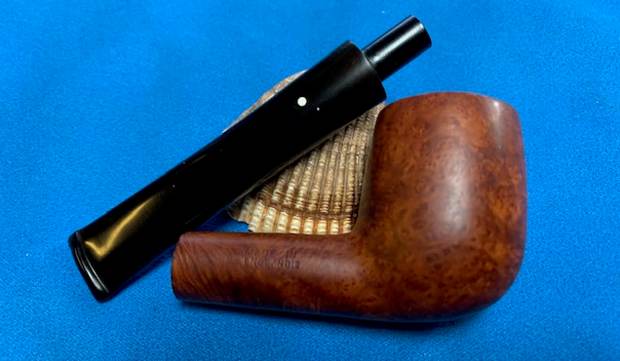
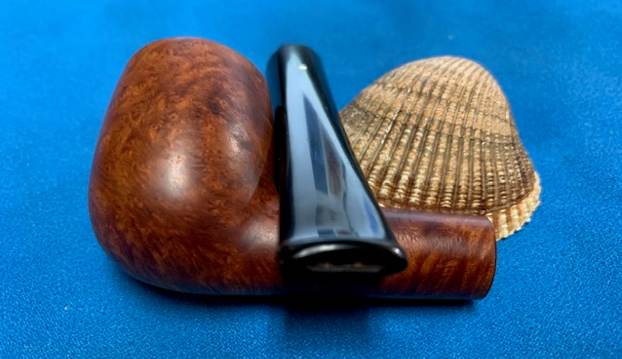
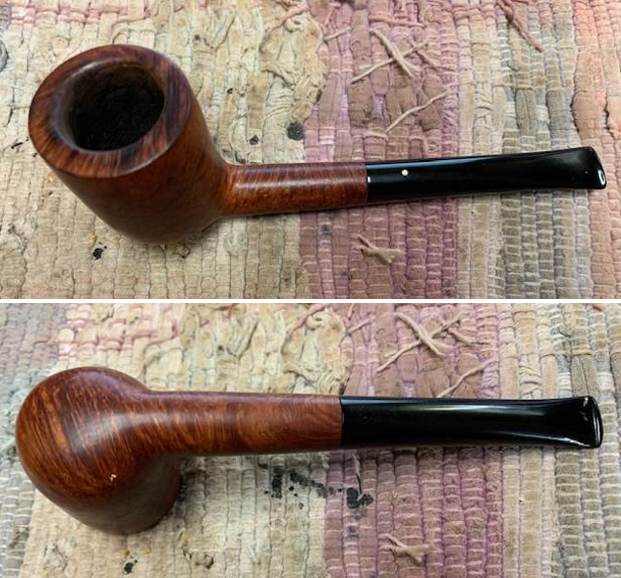
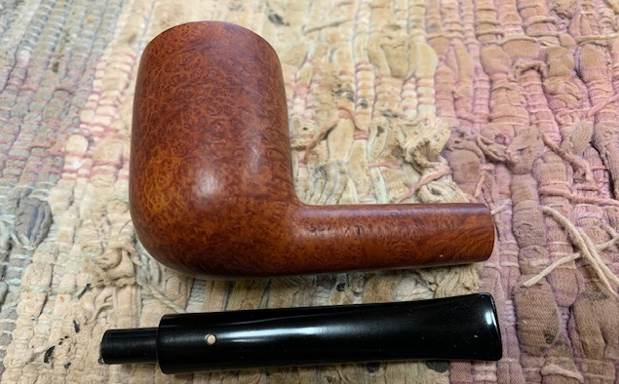
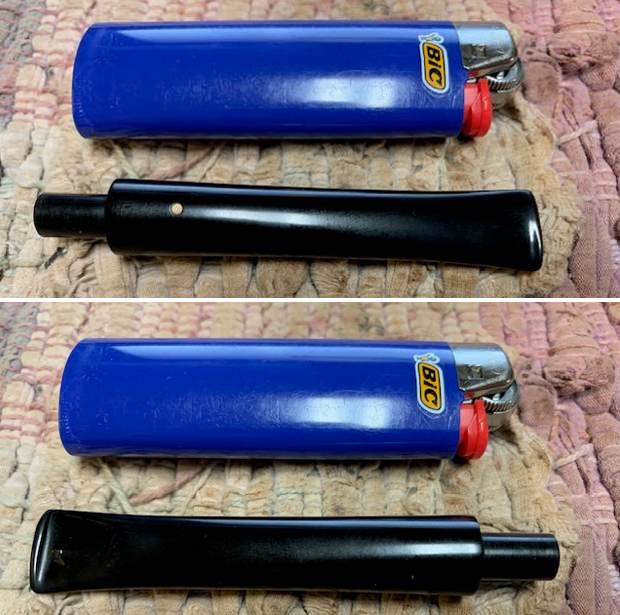
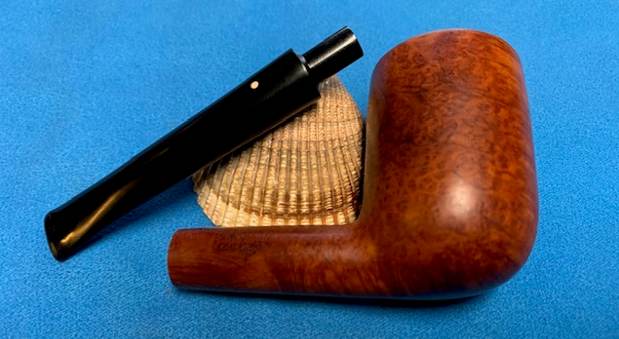
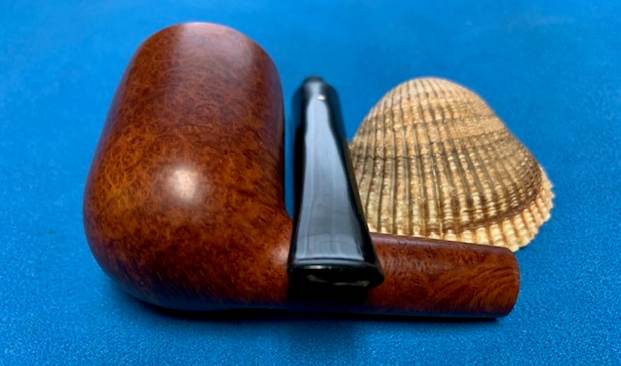
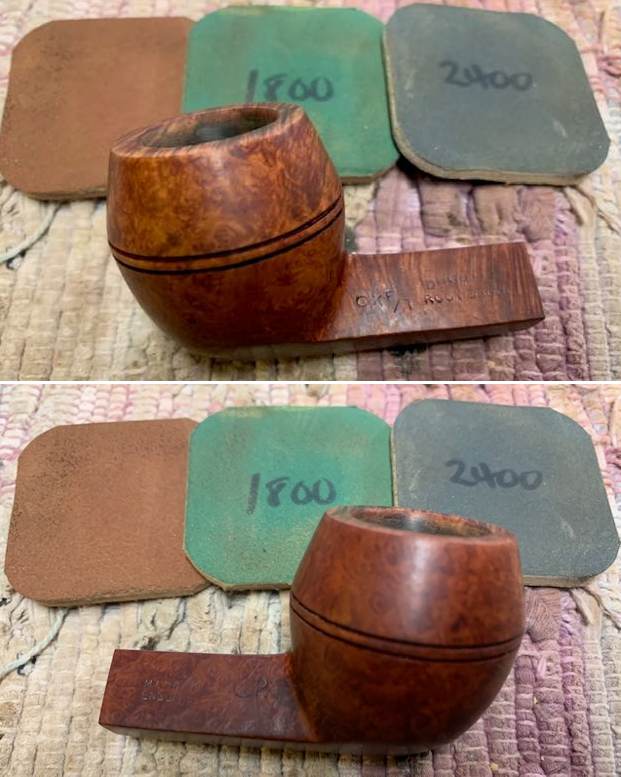
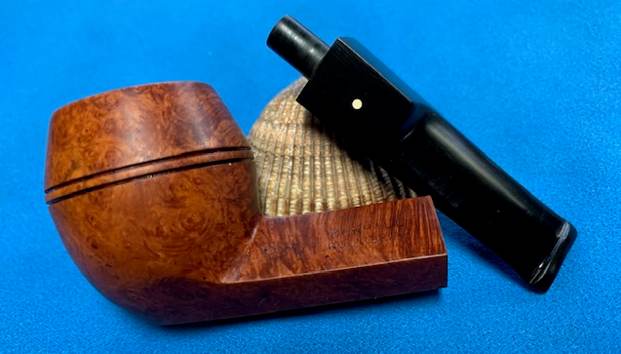
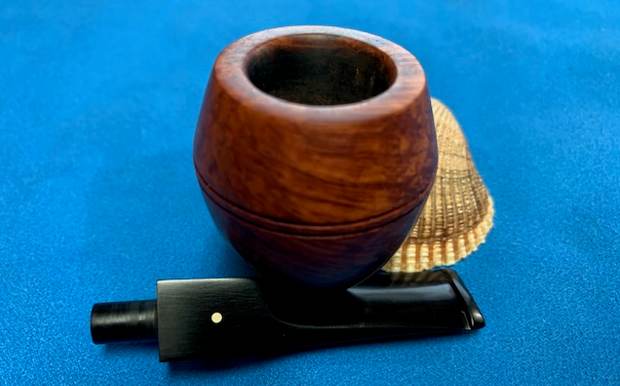
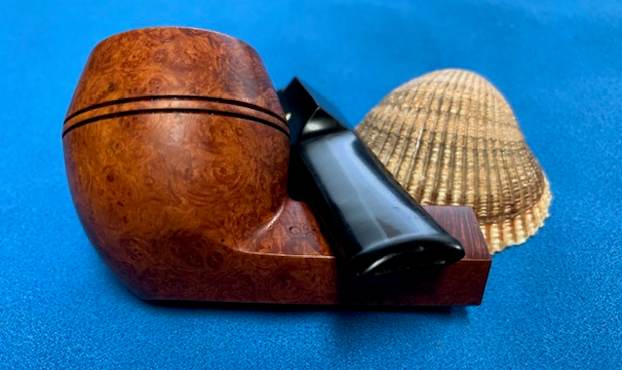
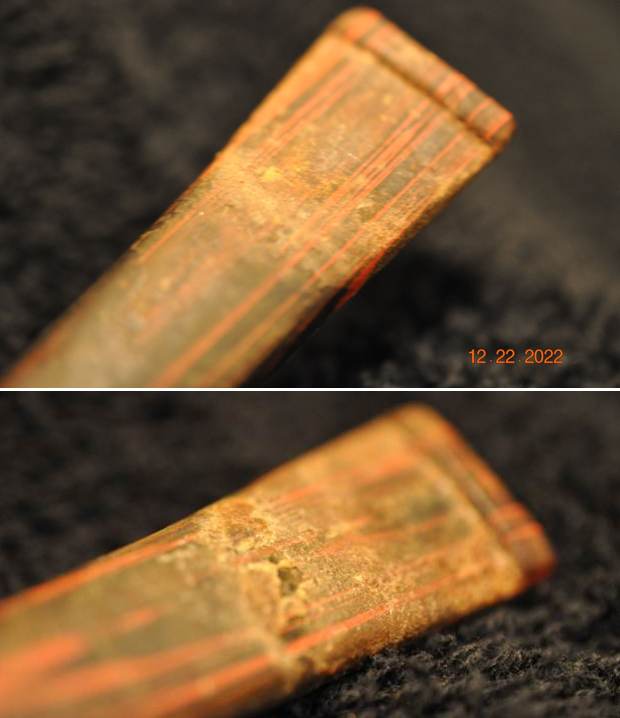
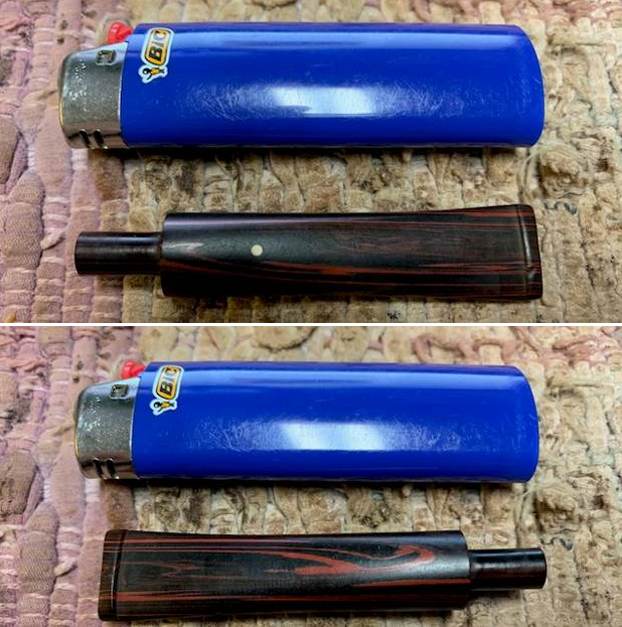
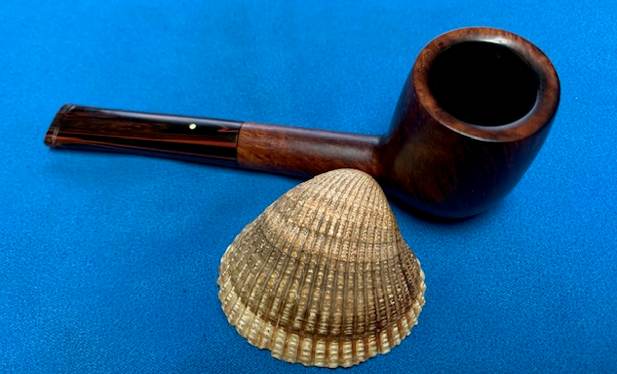
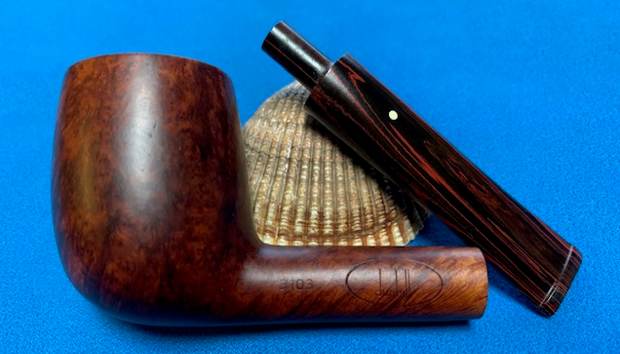
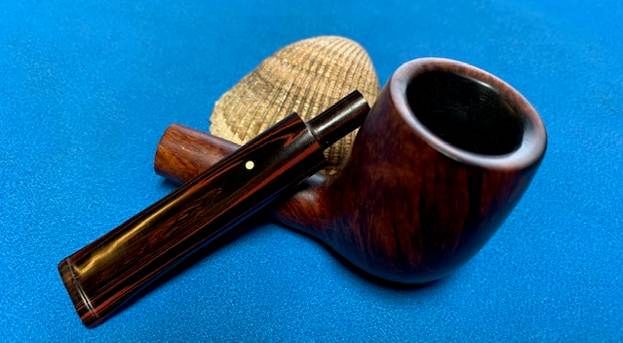
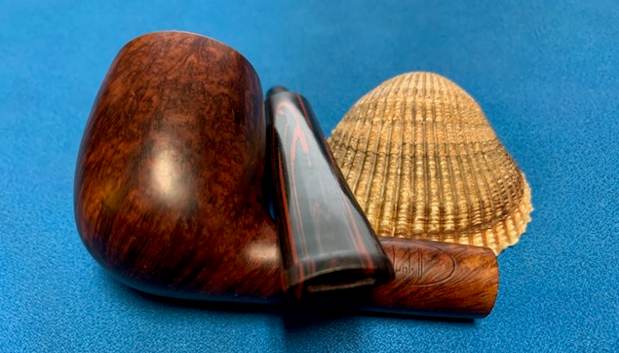
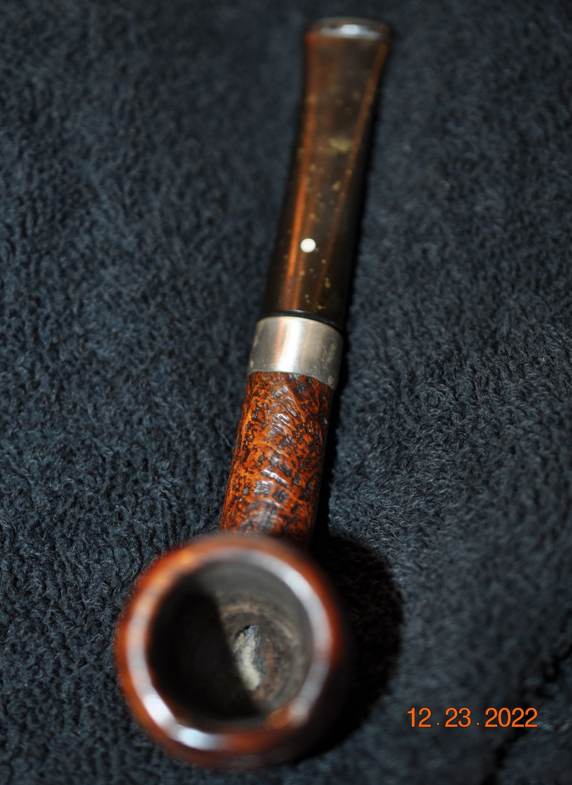
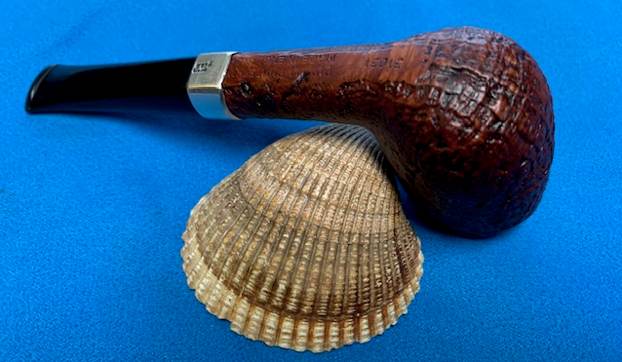
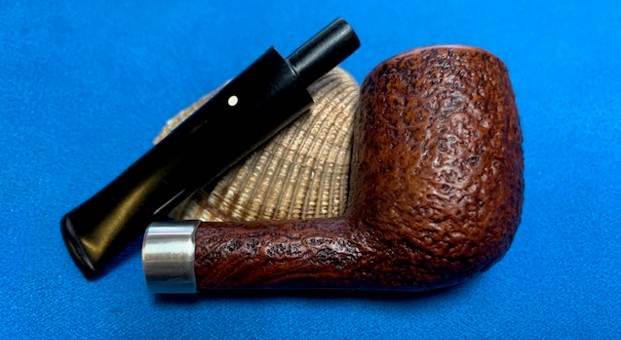
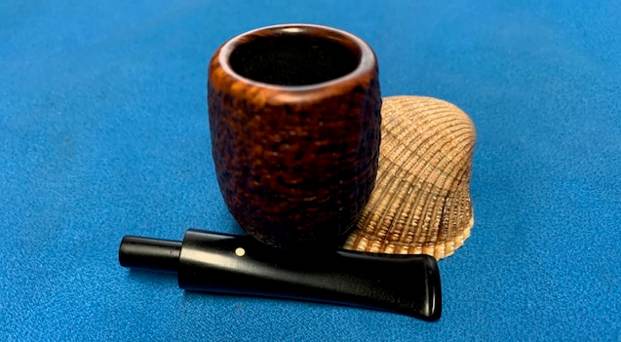
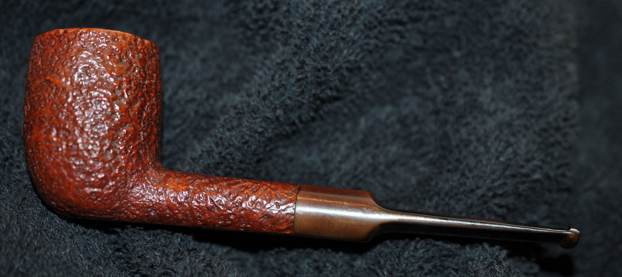
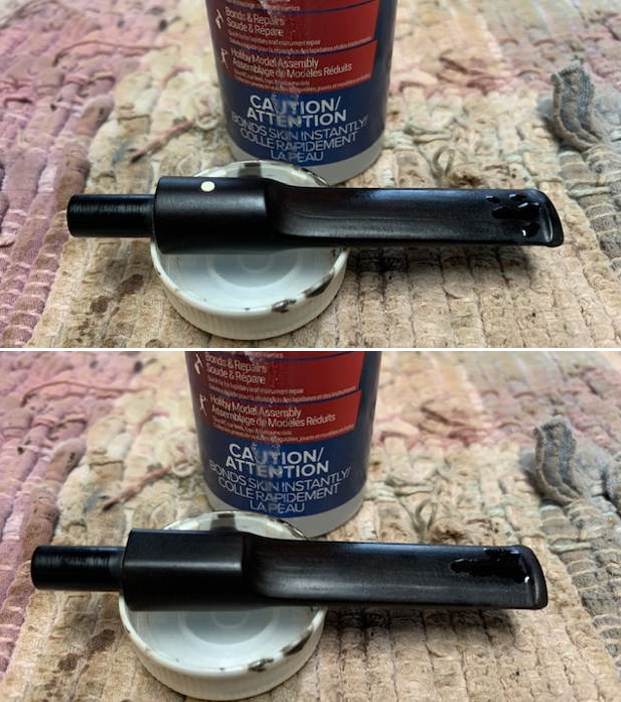
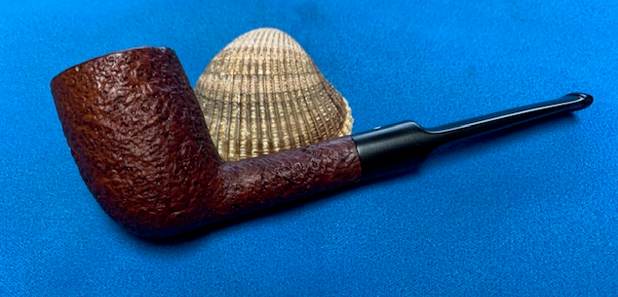
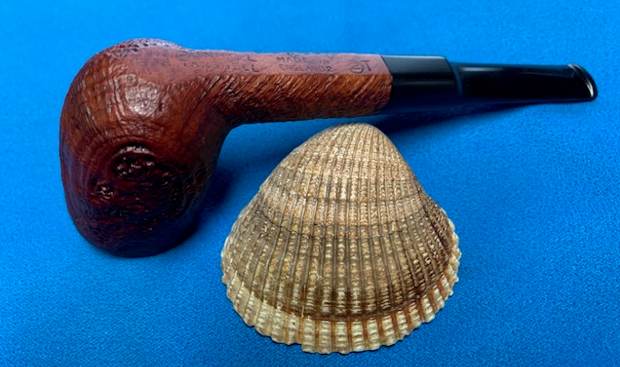
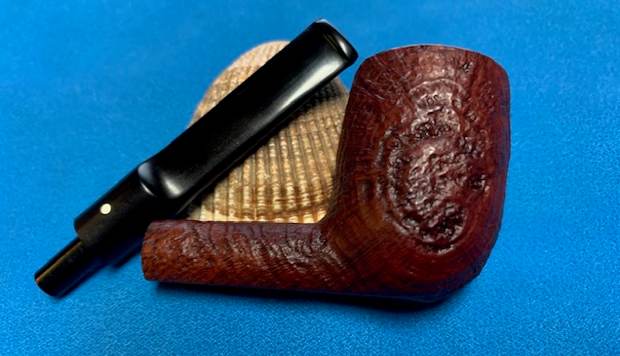
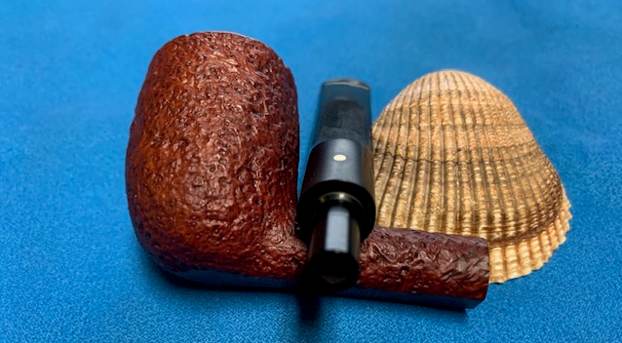
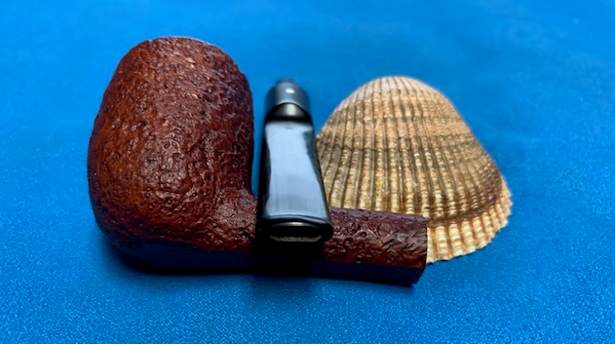
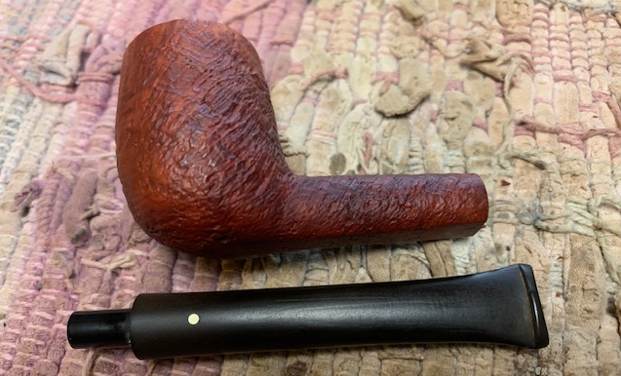
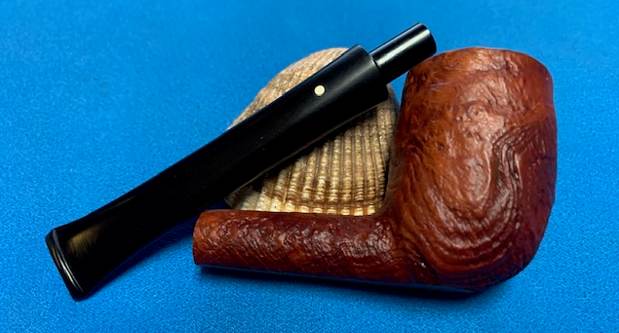
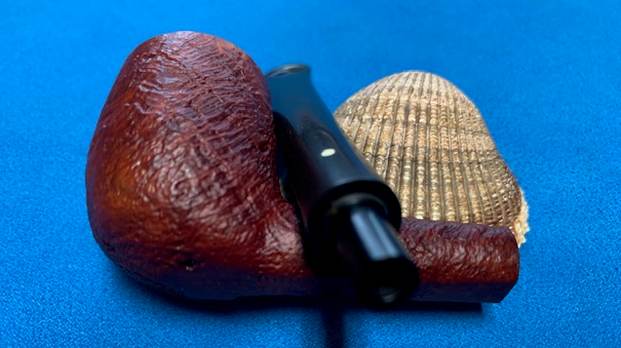
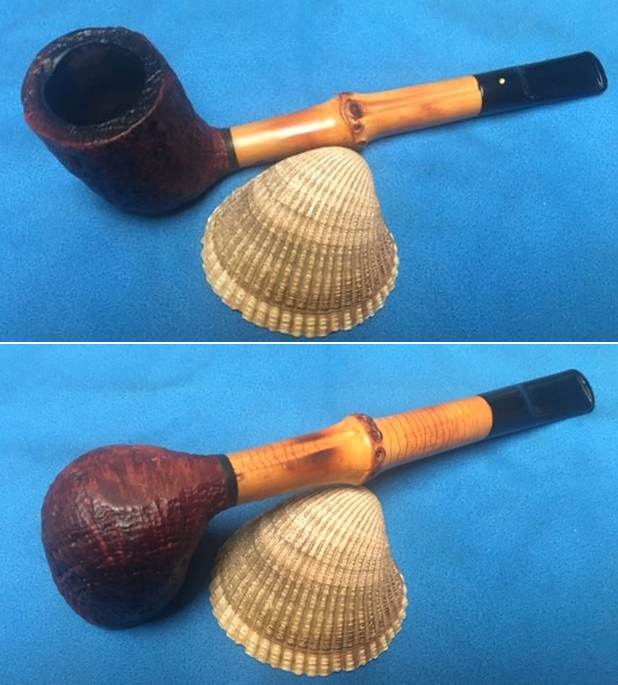
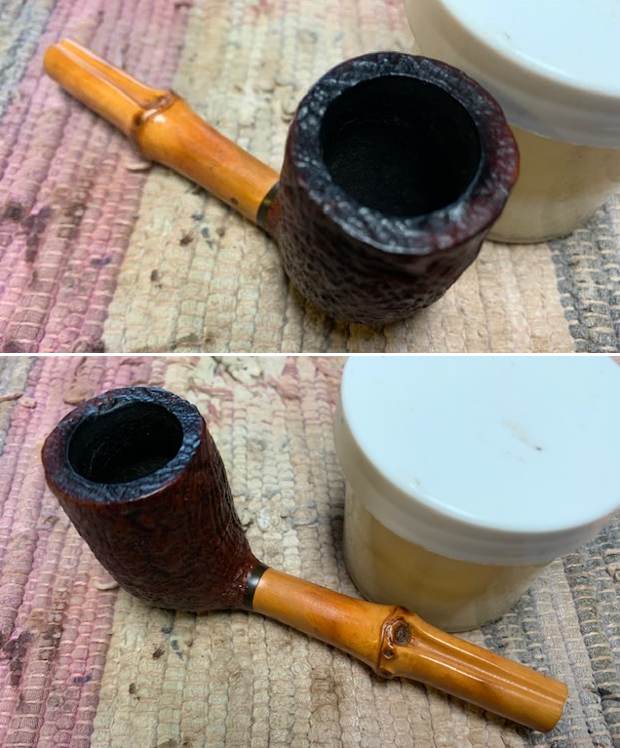
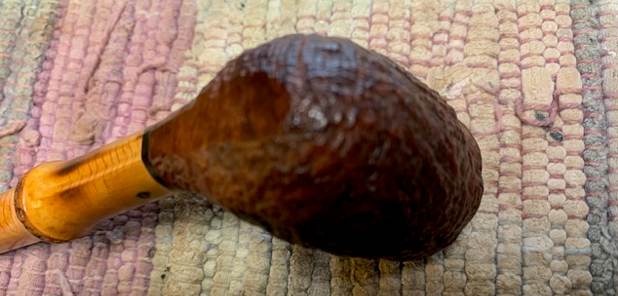 I took the stem off the bamboo shank and took a photo. It really is a beautiful Bamboo shank Lovat in my opinion.
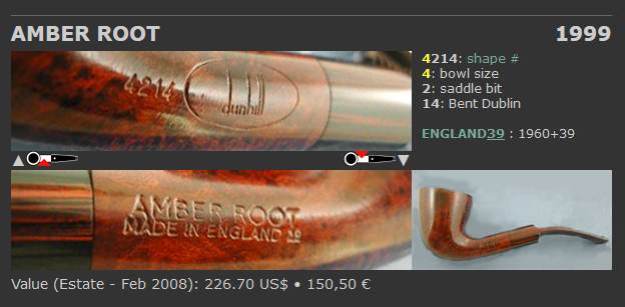
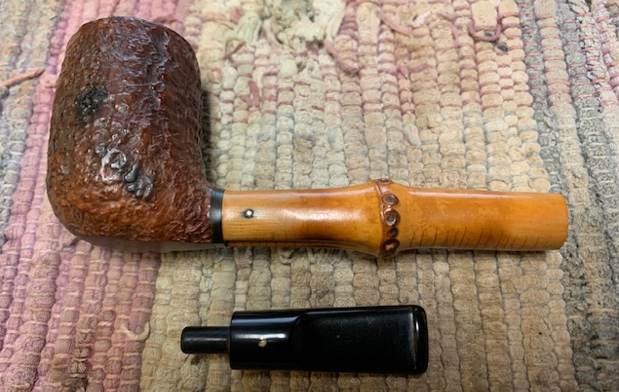 One of the first things I like to do is to unpack the stamping and understand each element in it. I turned to Pipephil’s helpful site (http://pipephil.eu/logos/en/dunhill/shapes-l.html). The stamping on the shank heel is interpreted as follows: W stamp is the shape code for a Bamboo followed by the number 60 which is a number for a Billiard, however I would call the elongated shank and bowl combination a Lovat. The 2 following the W60 gives the date the pipe. The Circle 4 T refers to the size of the pipe being a Group 4 and the T is the stamp for a Tanshell designation.
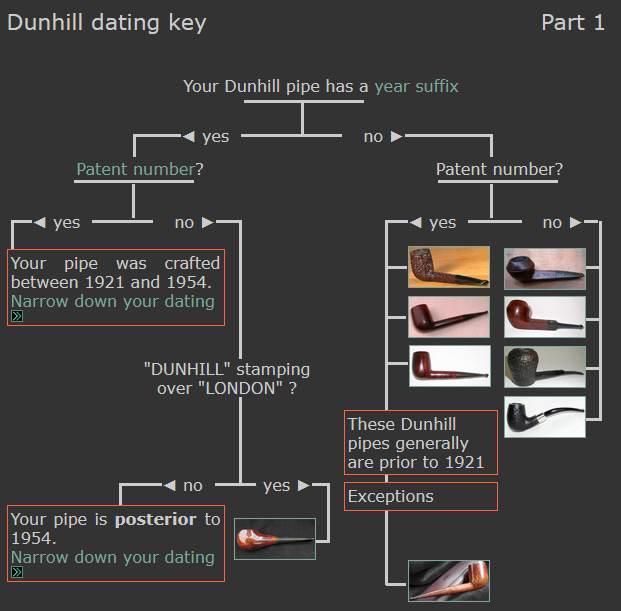
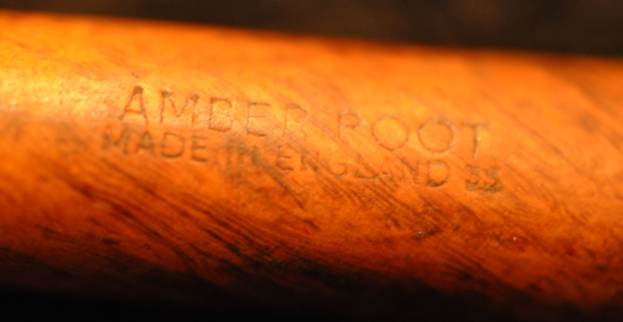
Pipephil also has some helpful dating keys on the site that are basically flow charts that you can walk through to date your pipe (http://pipephil.eu/logos/en/dunhill/cledat-en1.html). I turned to Part 1 of the Dating Key and followed the chart. This pipe has a 2 following the W60 number. That took me to the section on the chart below (column one) which instructed me that the pipe could be dated as being made posterior to 1954.  I followed the link following the “Your pipe is posterior to 1954. Narrow down your dating”. That took me to Page 2 of the dating key (http://pipephil.eu/logos/en/dunhill/cledat-en1a.html). The second column (suffix [1…4] or [11…39]) led me to the section with a 2 after the D in England. There was a directive for dating the pipe spelled out as follows: 1960 + suffix which gives the pipe a date of 1962.
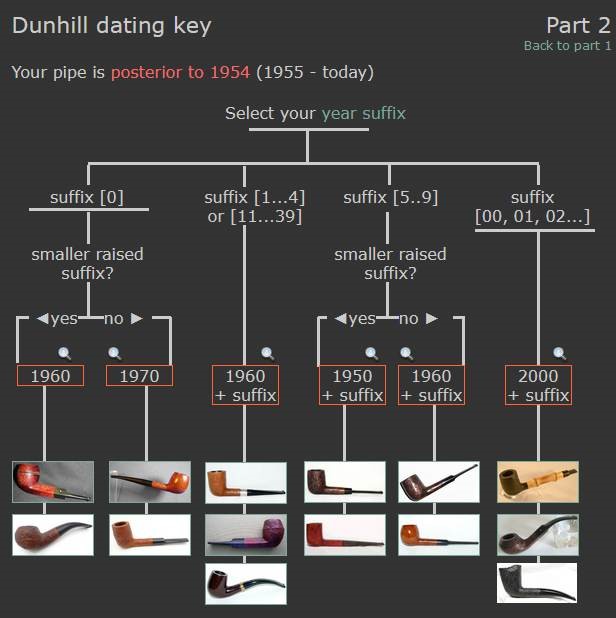 I googled Dunhill Bamboo Wanghee to get a bit of background on the that brand and found a link on Smoking Pipes that had some helpful information that I will quote below the link (https://www.smokingpipes.com/pipes/estate/england/moreinfo.cfm?product_id=235695).
It’s not everyday you come across a Dunhill Whangee, the marque’s classic bamboo-shanked pipe. Though originally incorporated into Dunhill’s lineup several decades back, when briar was in short supply, these eccentric designs caught on, and many collectors have even built entire rotations around them. You will occasionally find one on the estate market, as we do here, but they tend to sell quickly, especially if it is an older example like this ’62 edition — in part due to their general rarity, but also because of their overall unique aesthetic. You can’t find classic English designs fitted with oversized bamboo extensions everywhere, after all…
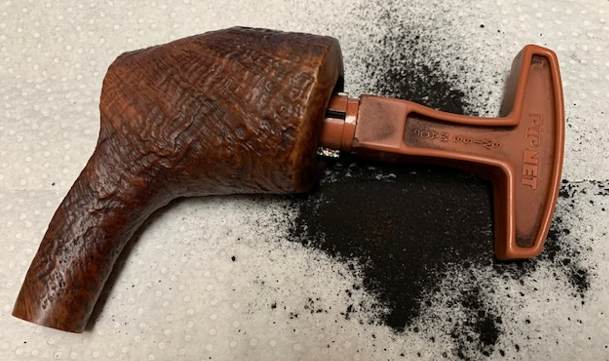
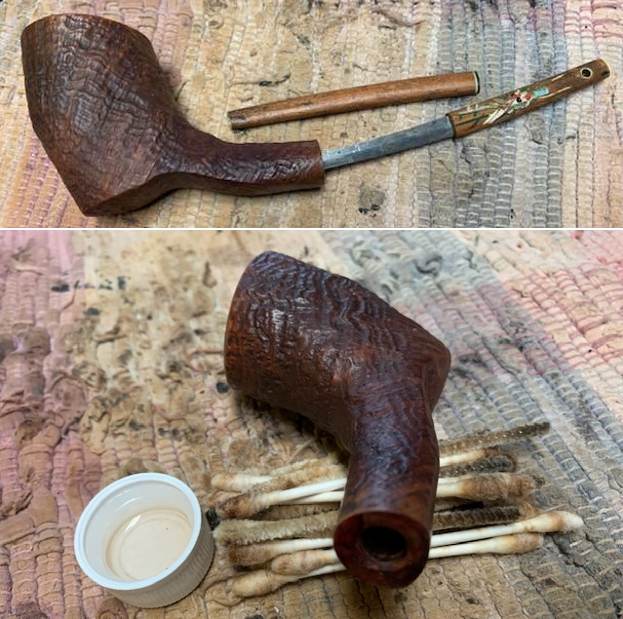
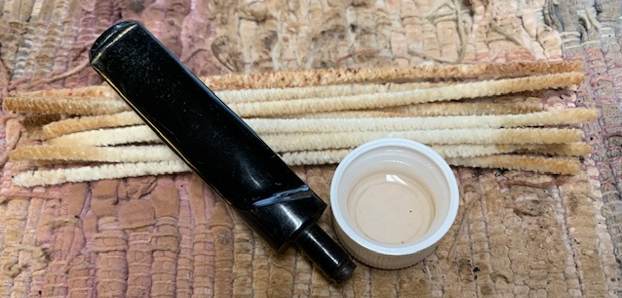
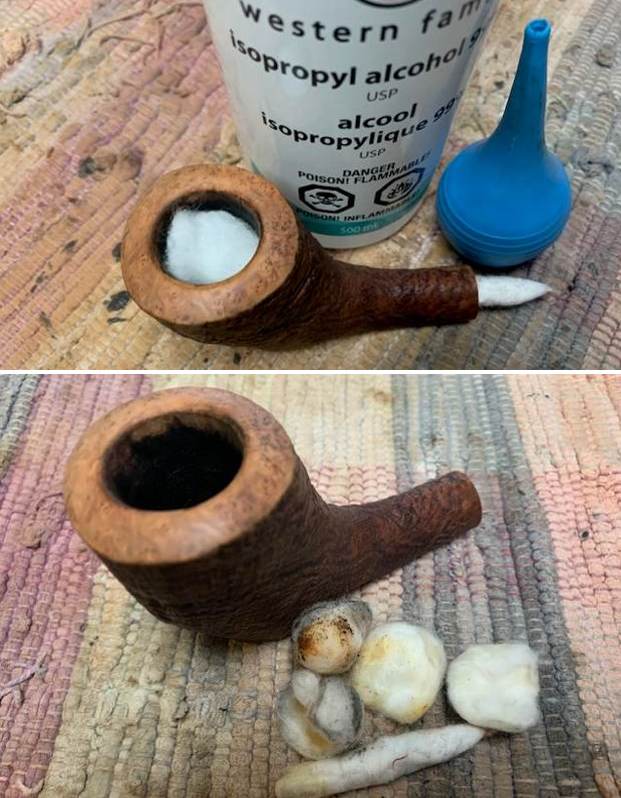
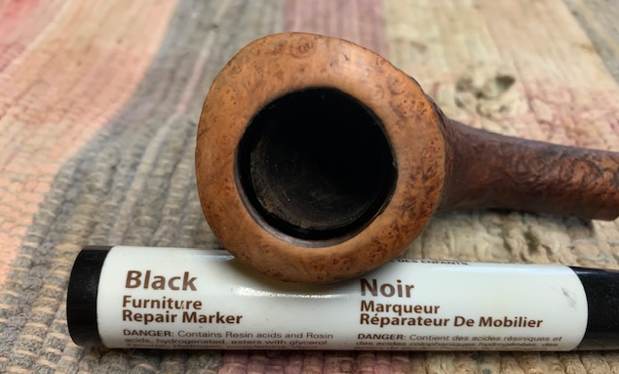
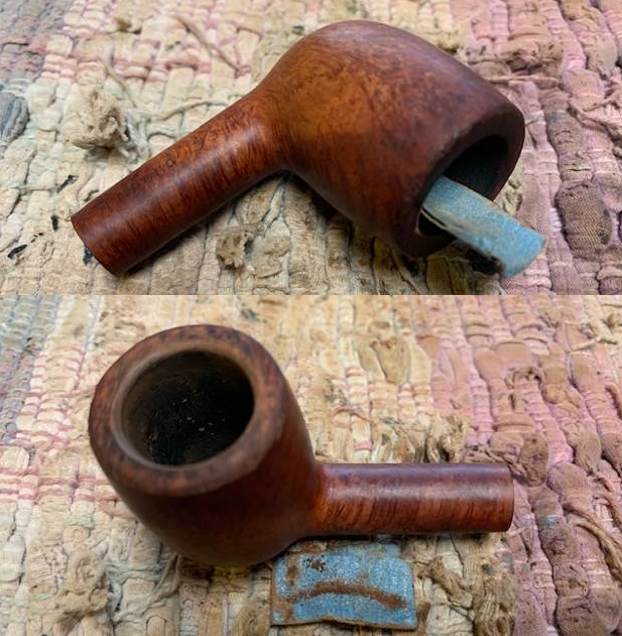
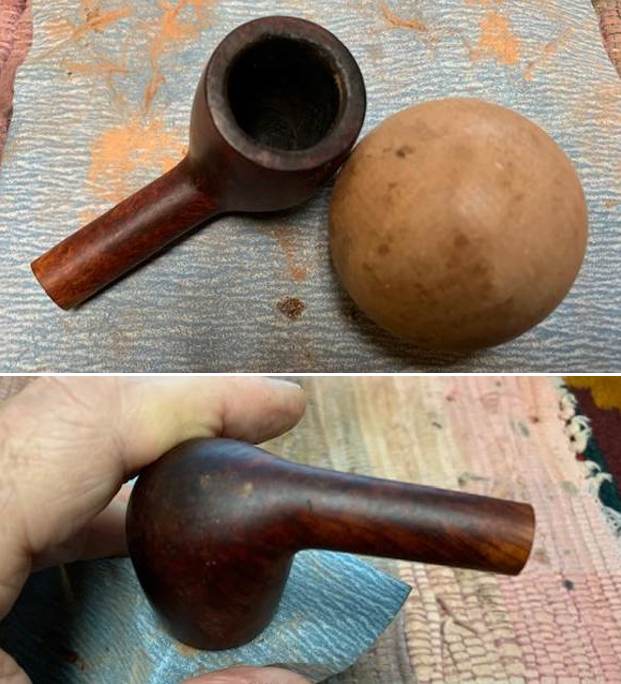
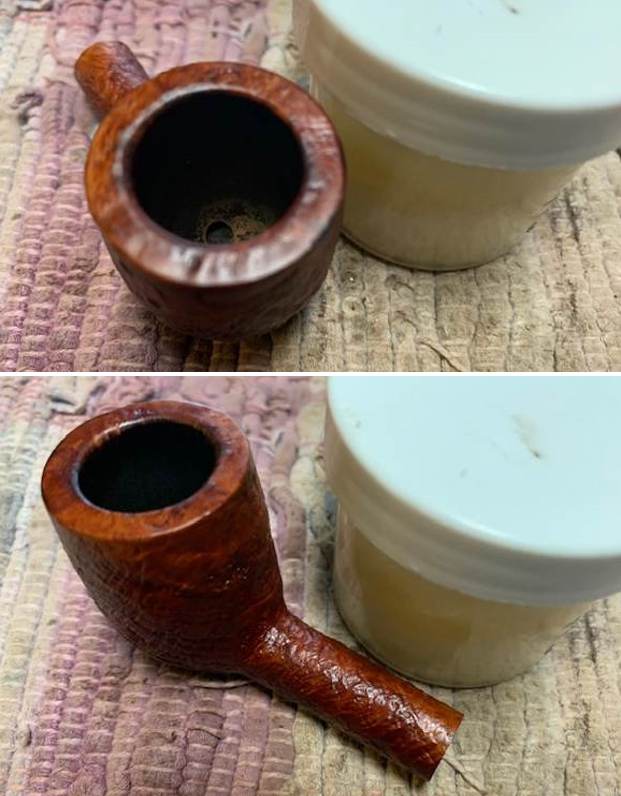
I turned to work on the pipe itself. I reamed the light cake with a Savinelli Fitsall Pipe Knife and sanded the walls of the bowl with a piece of 220 grit sandpaper wrapped around a piece of dowel. The walls of the bowl are smooth. 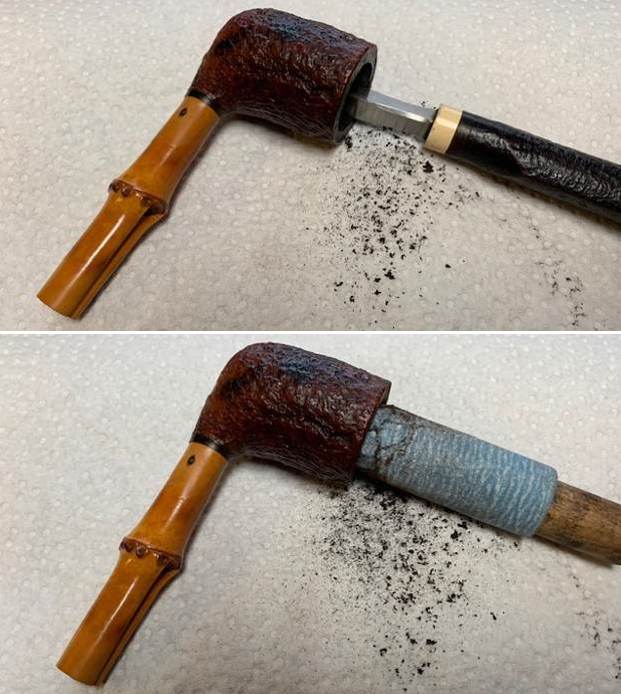 I scrubbed the inside of the bamboo shank and the mortise with alcohol and pipe cleaners. I also cleaned out the airway in the stem the same way.
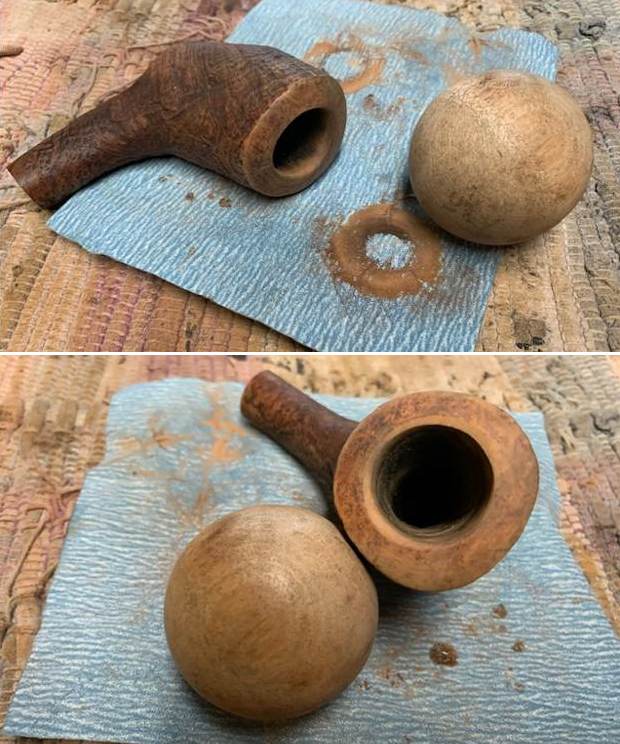
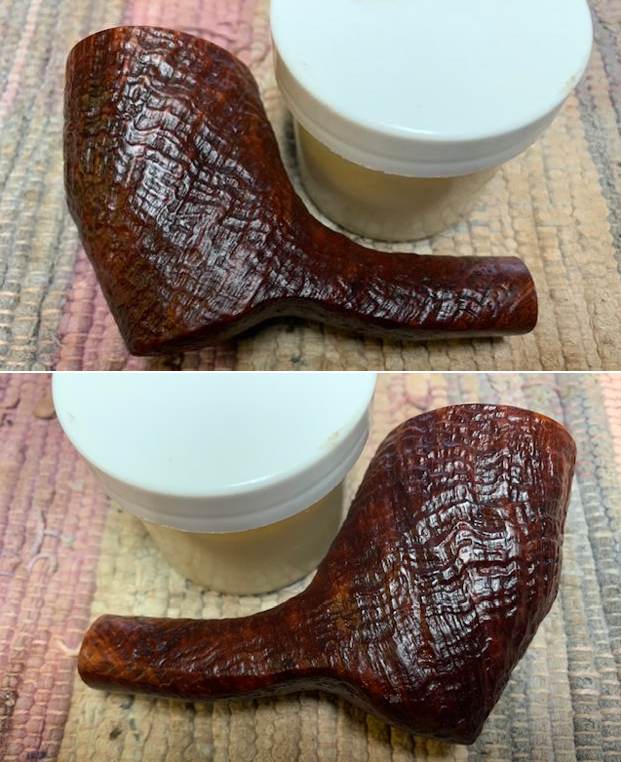
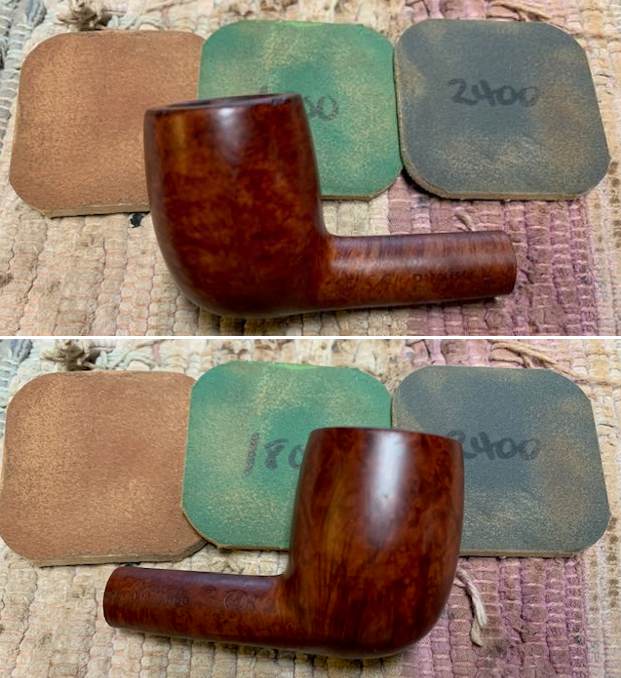
 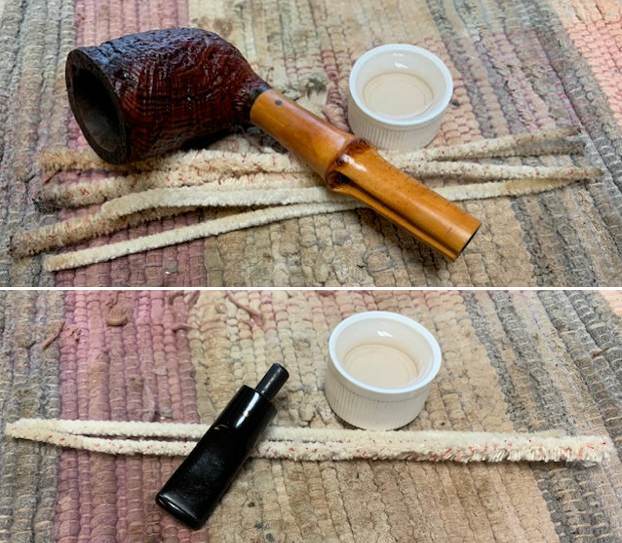 I rubbed the briar down with Before & After Restoration Balm. I worked it into the briar with my fingertips. The product works to clean, enliven and preserve the briar. I let it sit for 10 minutes then I buffed it with a cotton cloth to deepen the shine. The briar comes alive with the balm.
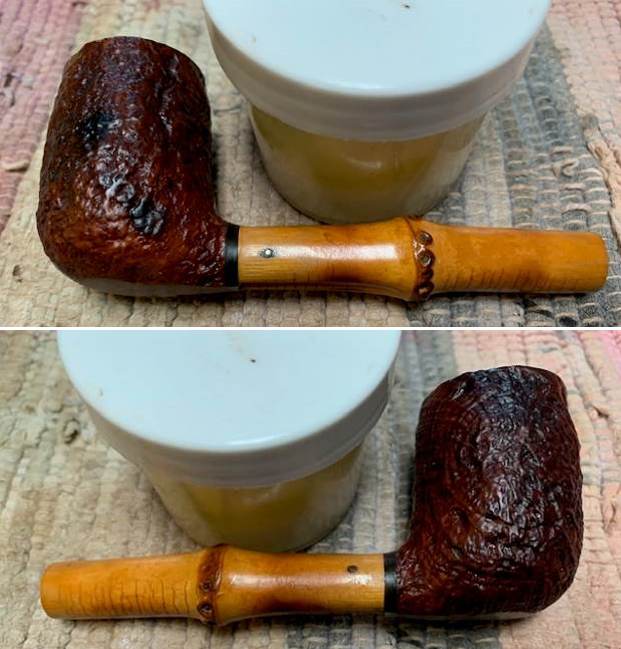
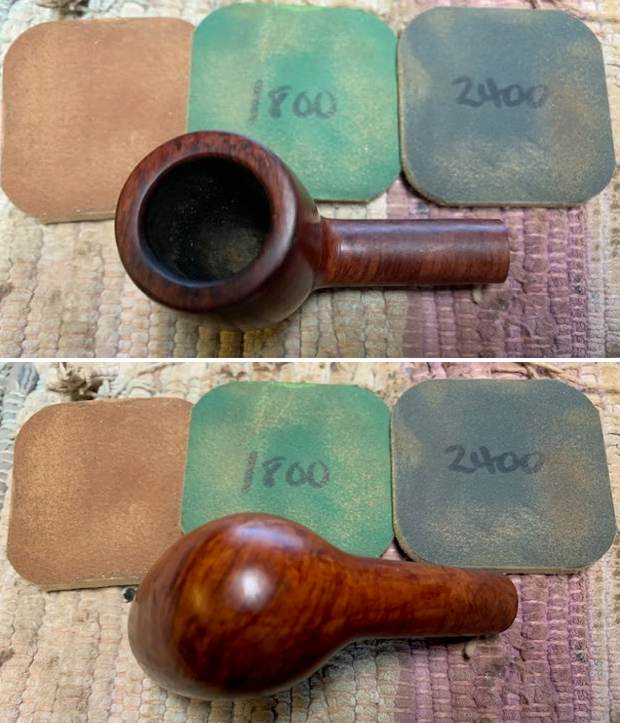
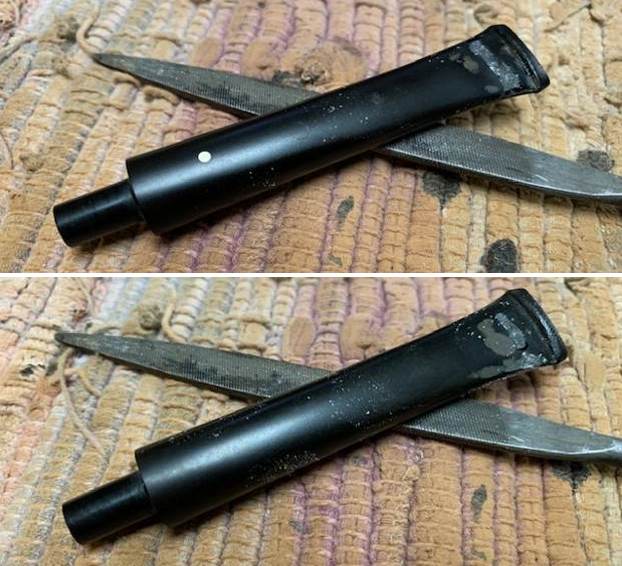
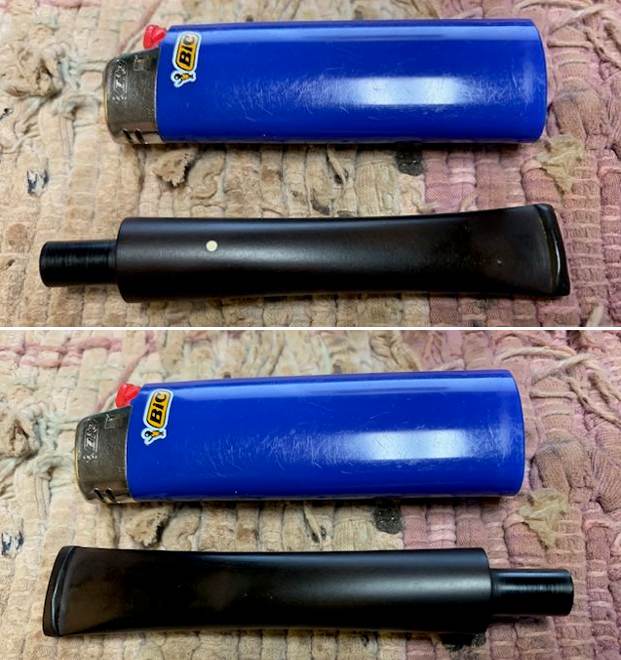
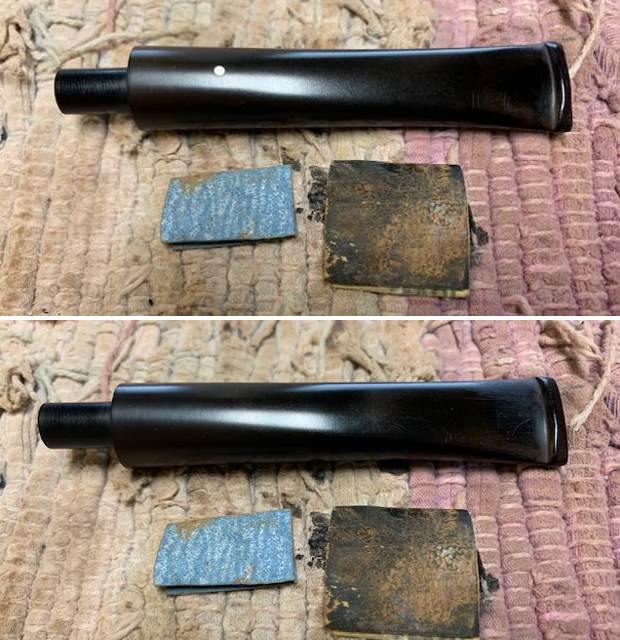
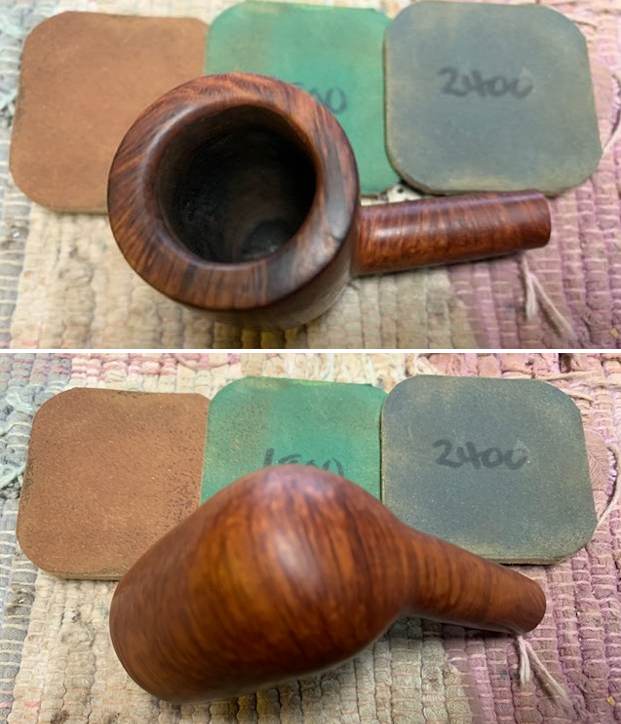
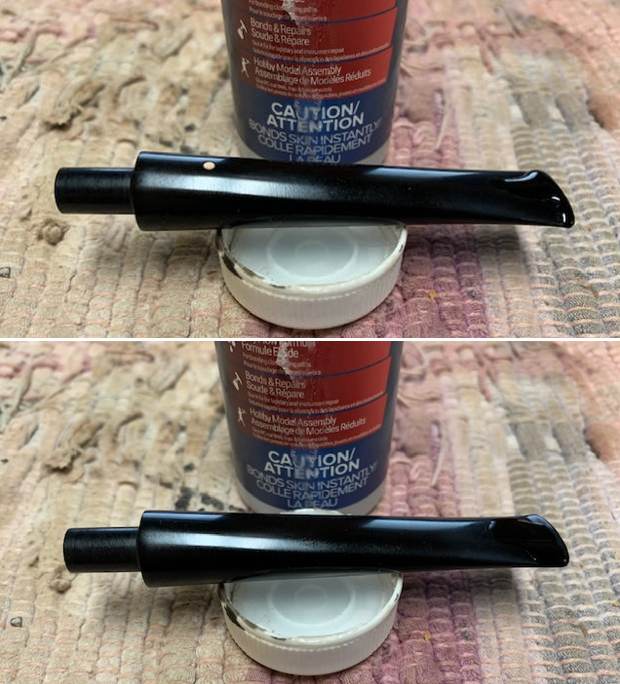
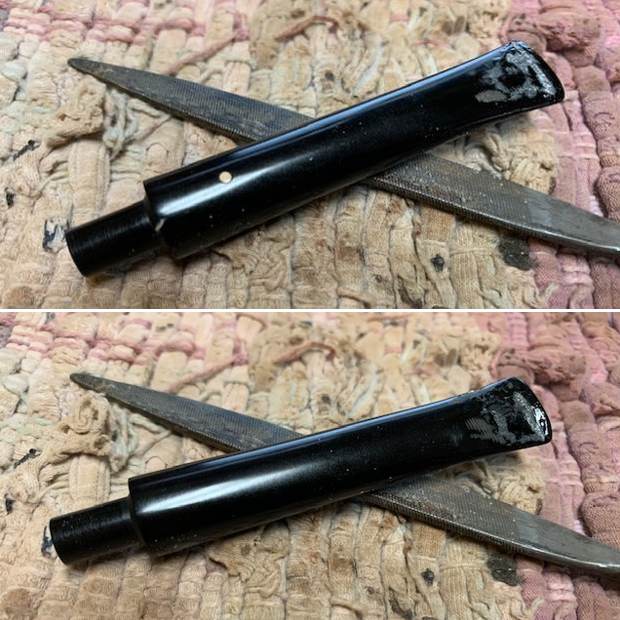
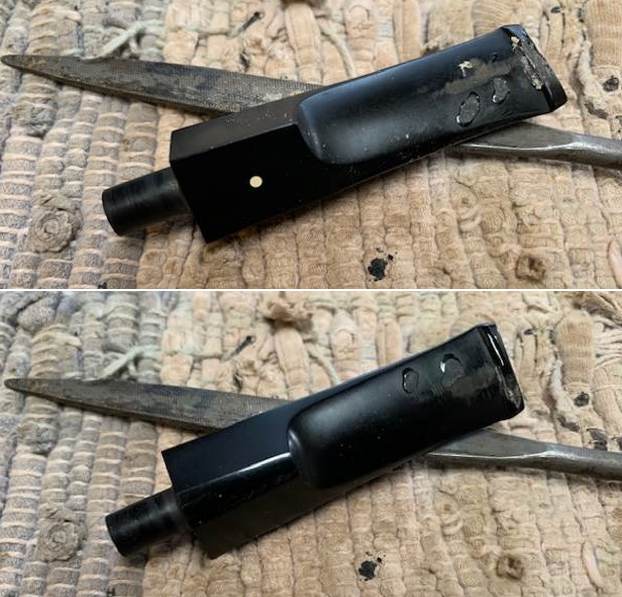
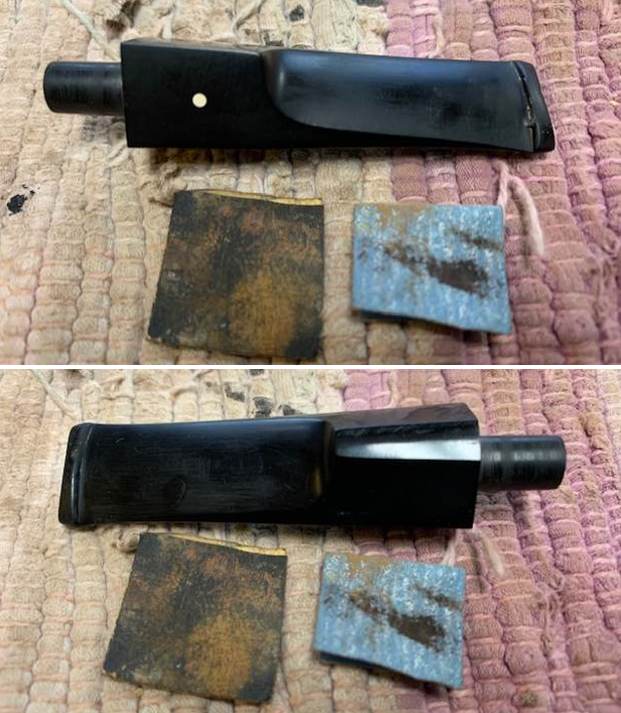
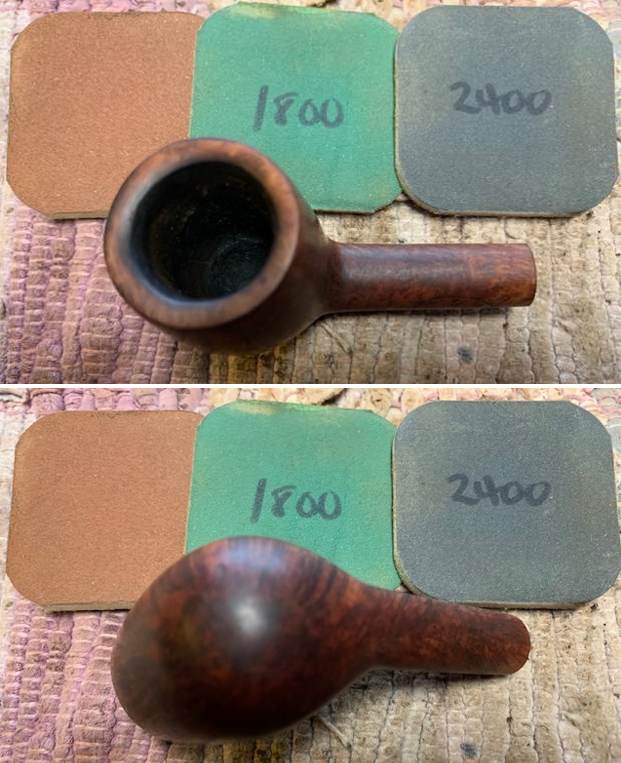
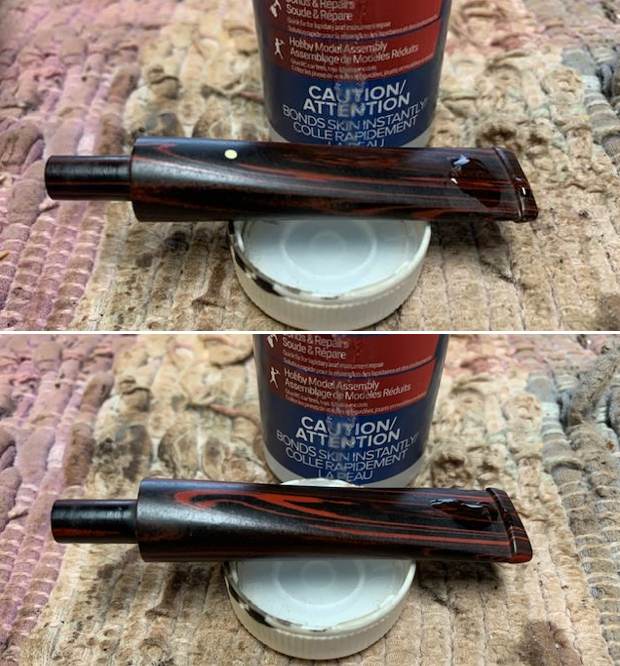
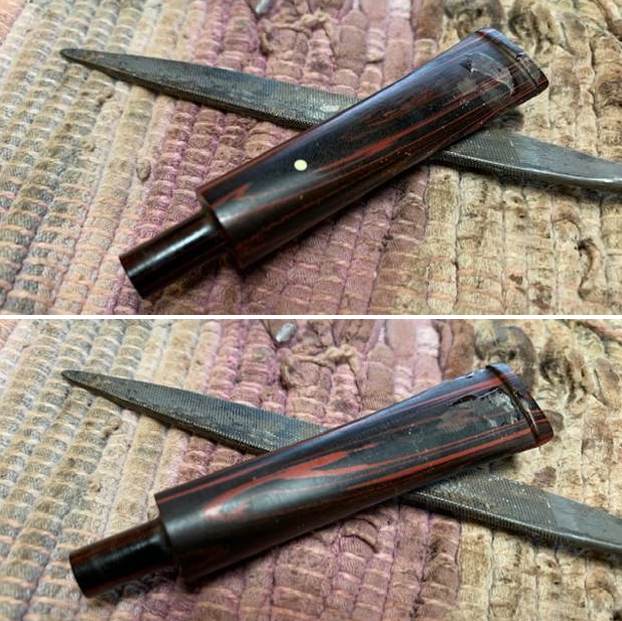
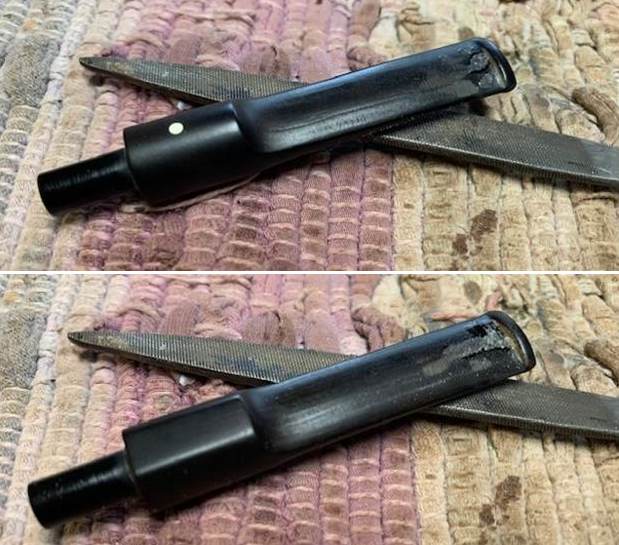
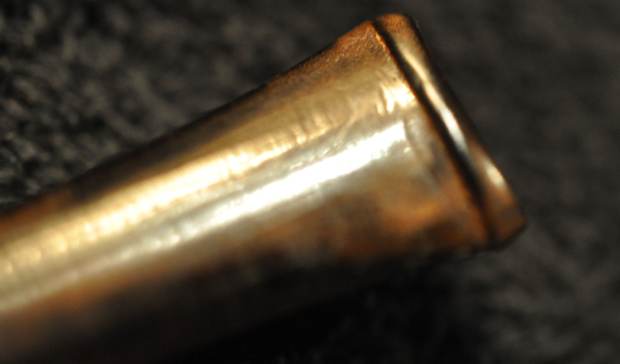
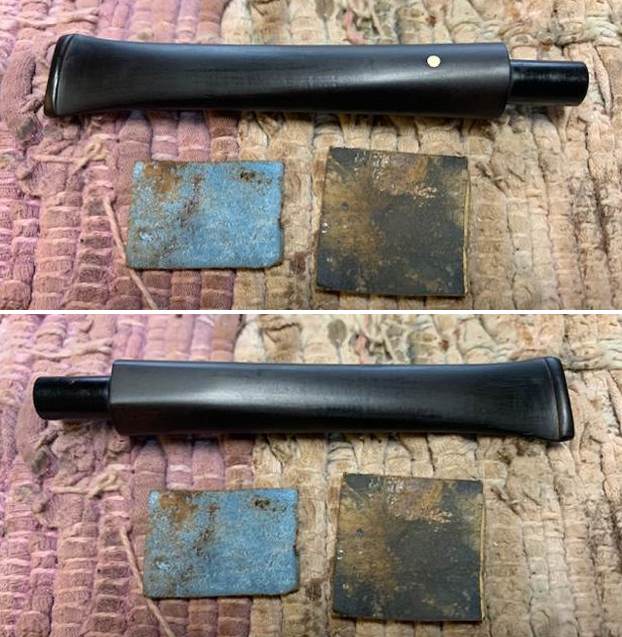
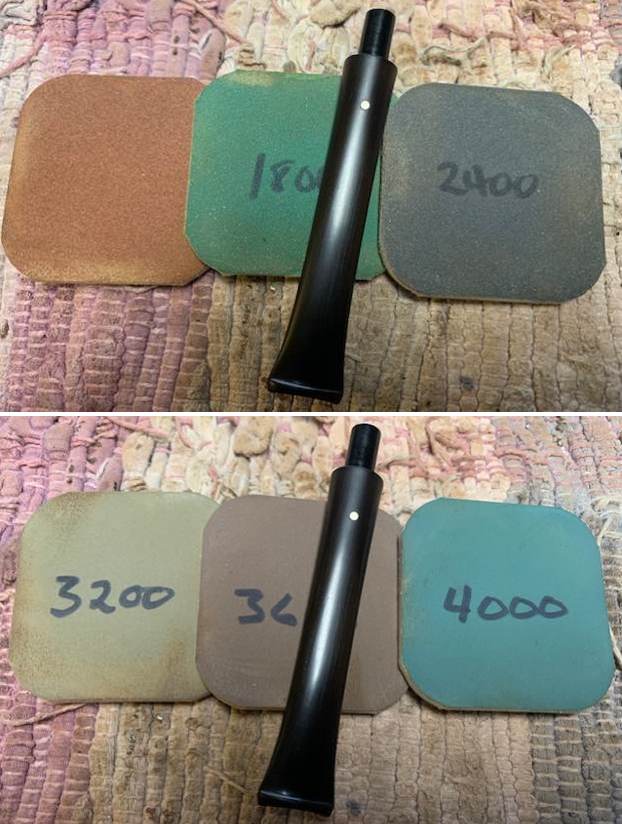
 I set the bowl aside and turned to address the tooth marks and chatter in the stem surface. I sanded them with 220 grit sandpaper to blend them into the surface of the stem. I wet sanded the stem with 600 grit wet dry sandpaper.
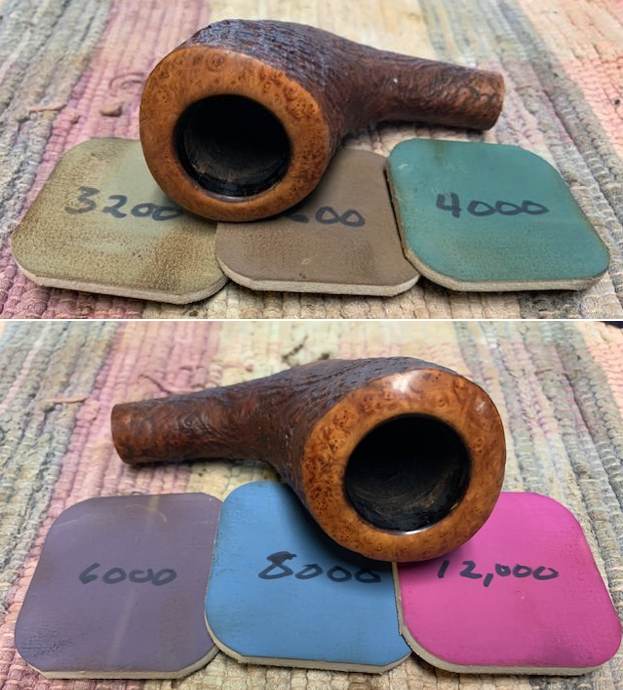
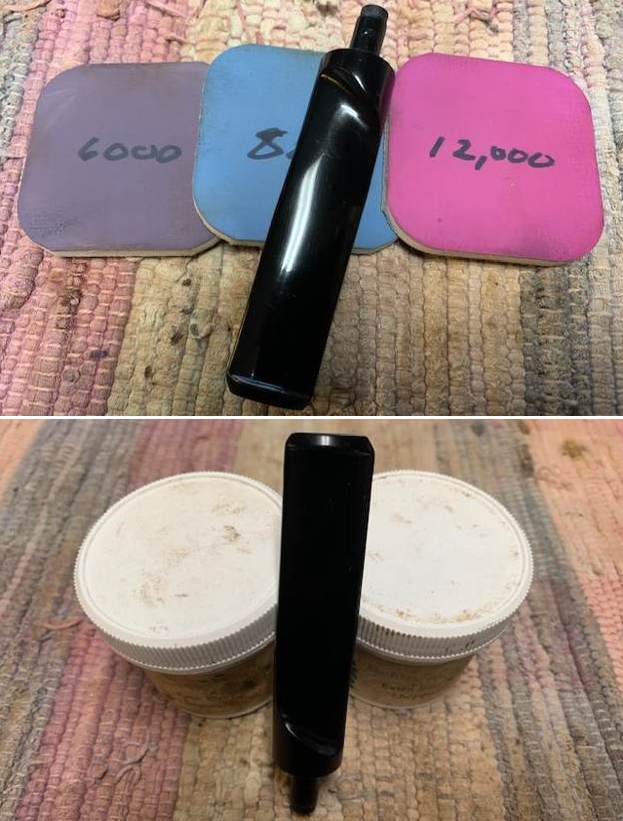
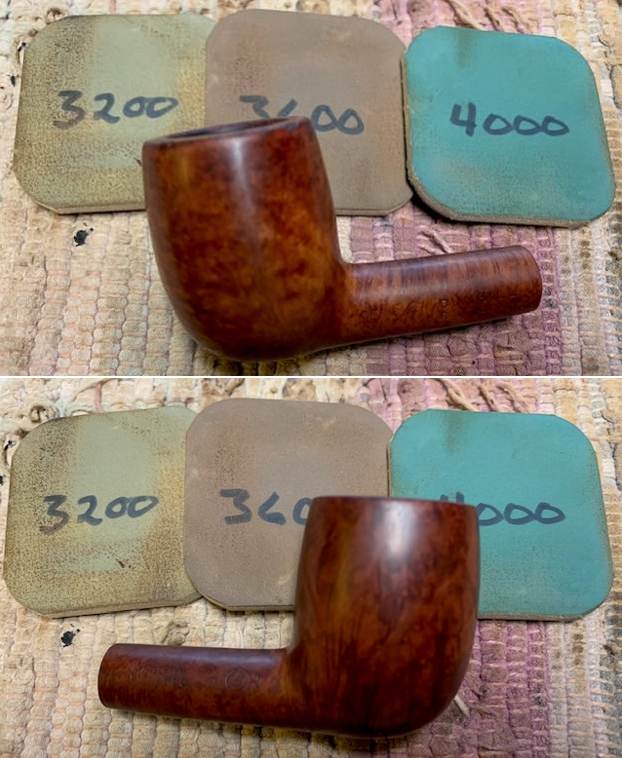
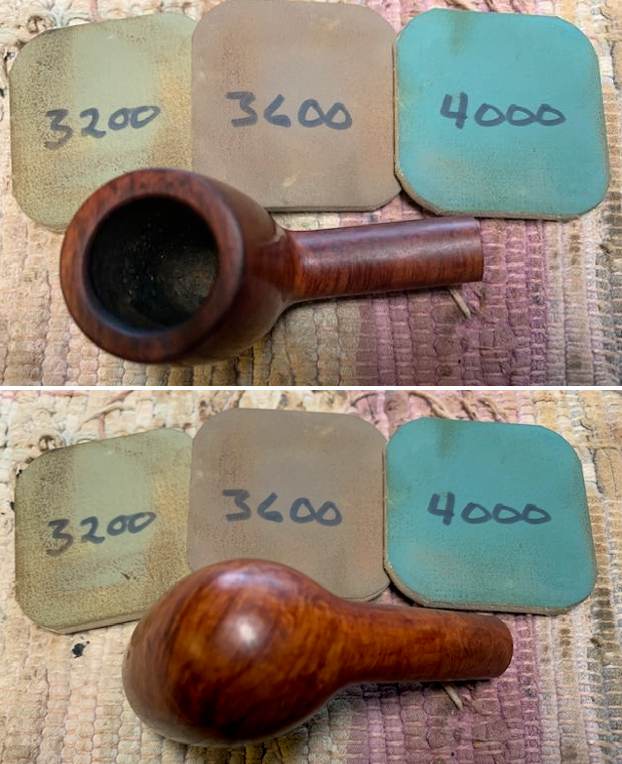
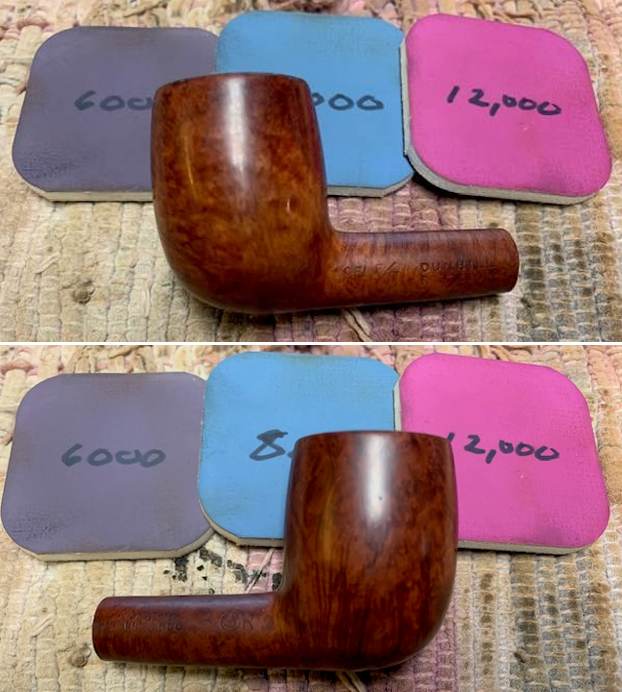
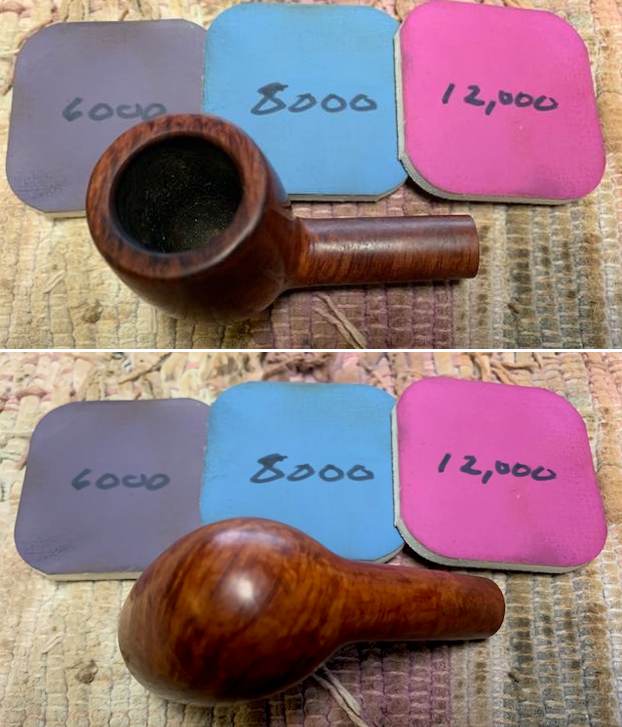
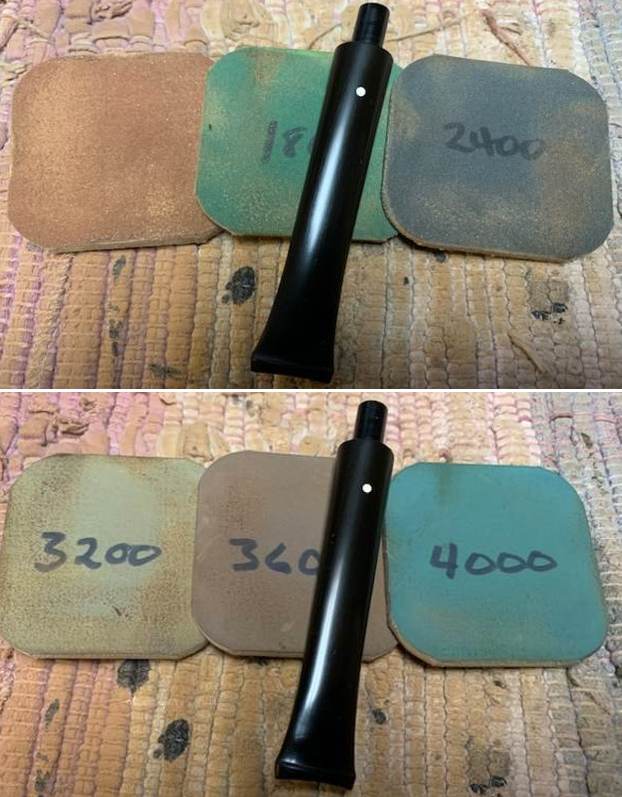
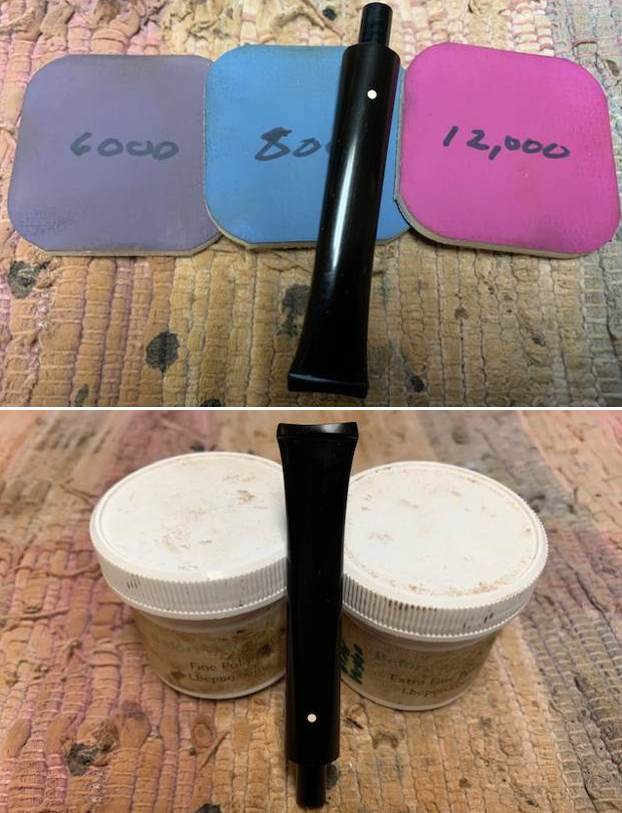
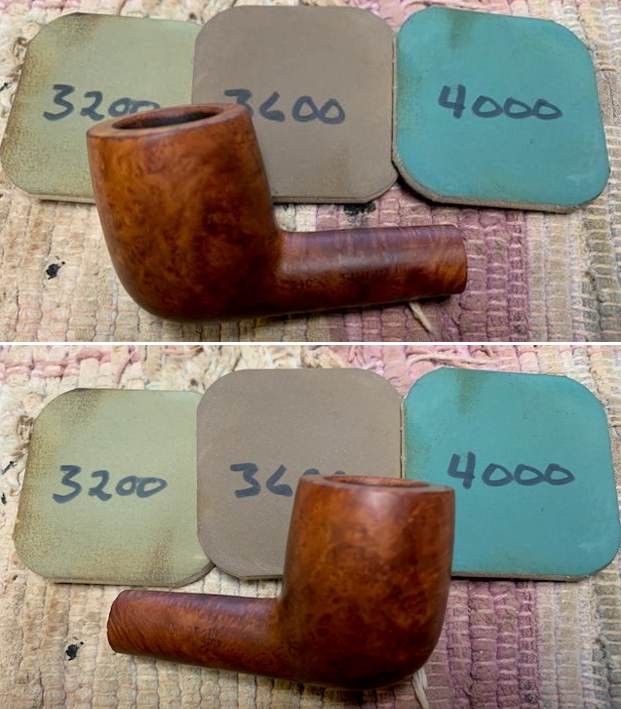
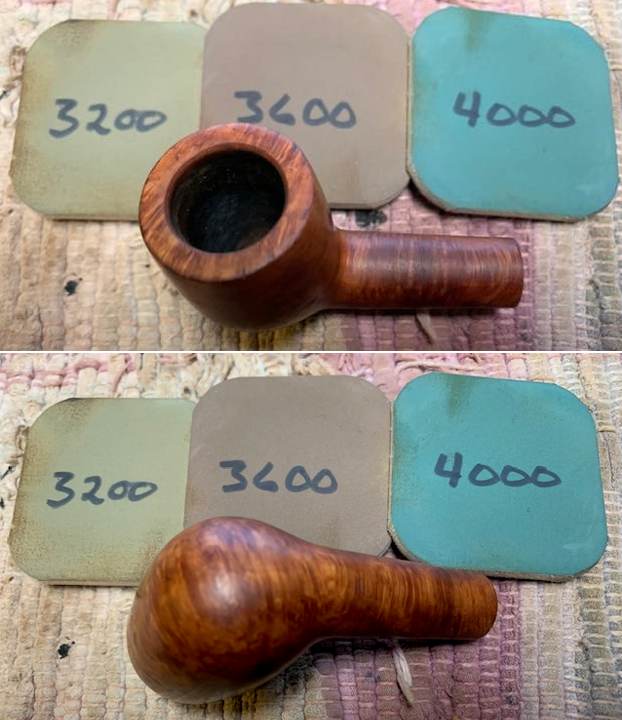
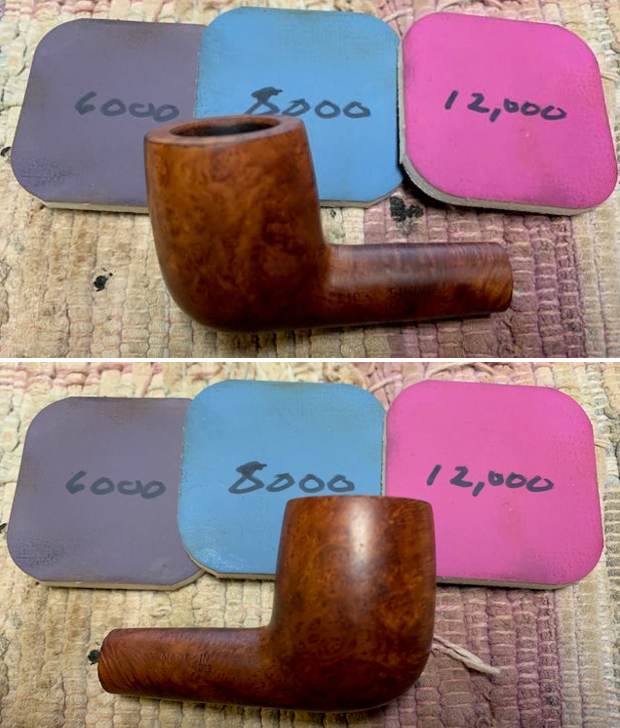
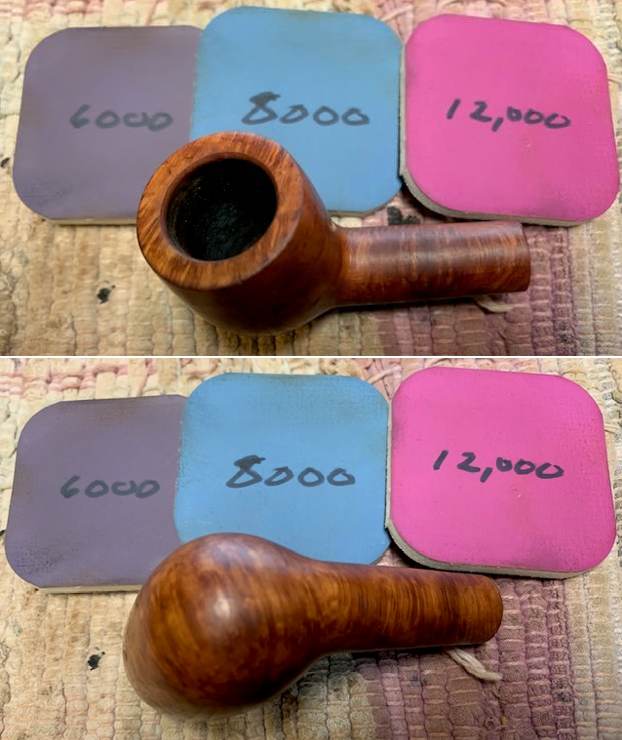
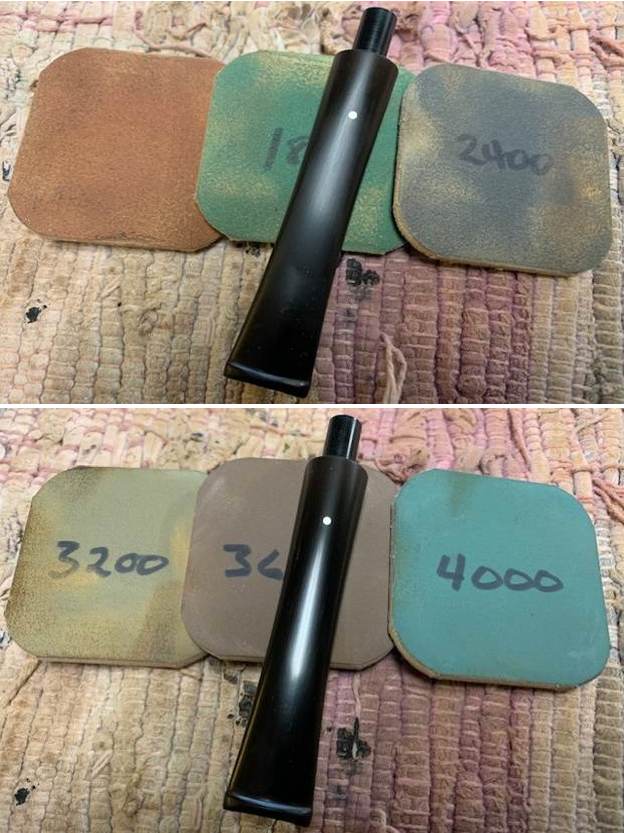
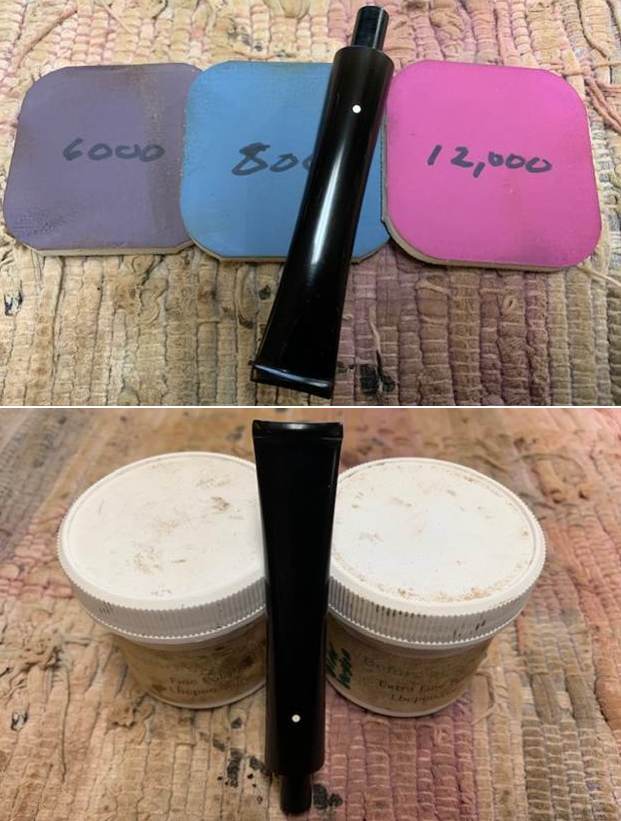
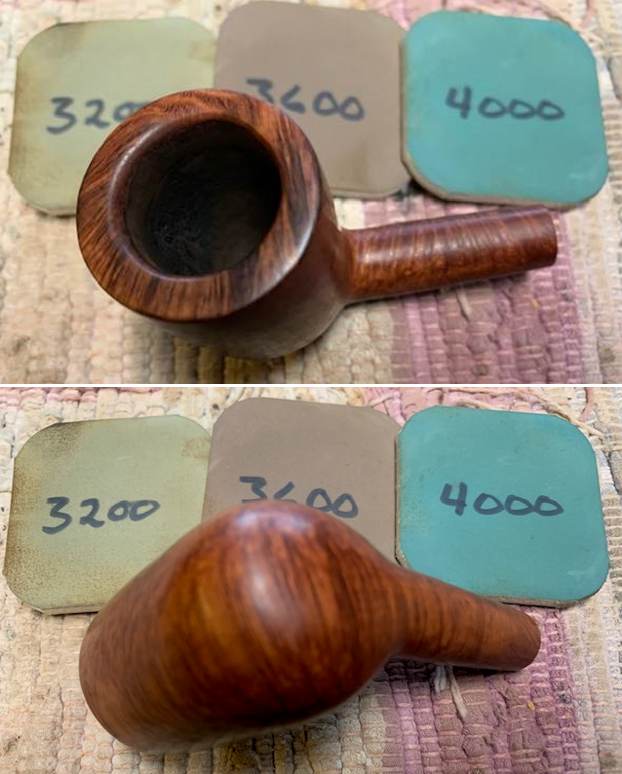
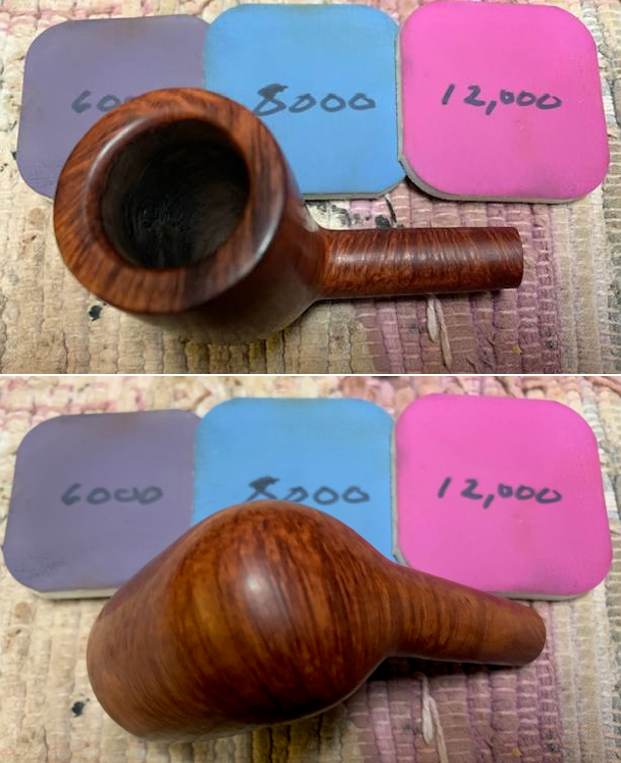
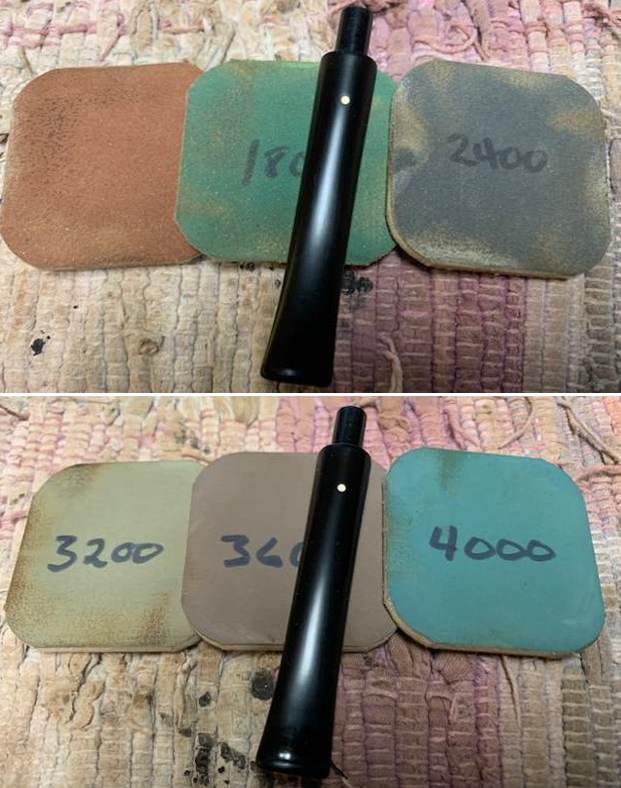
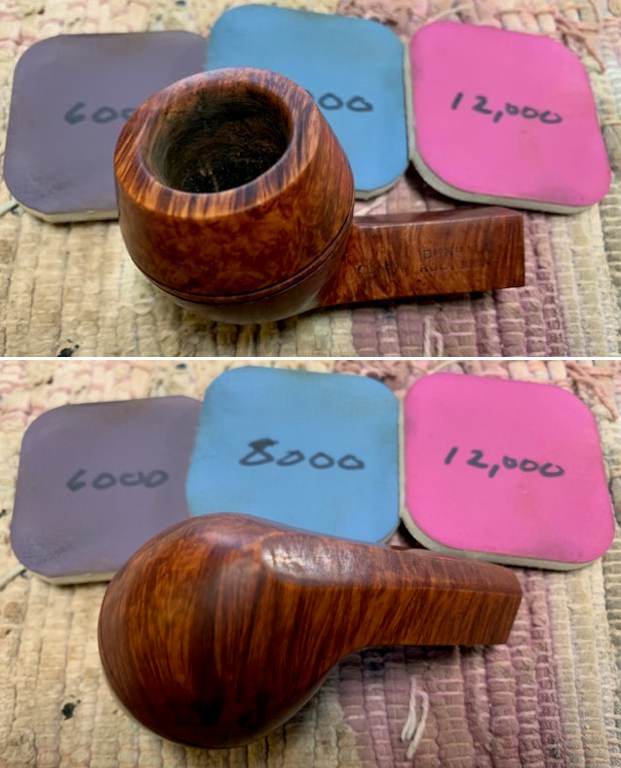
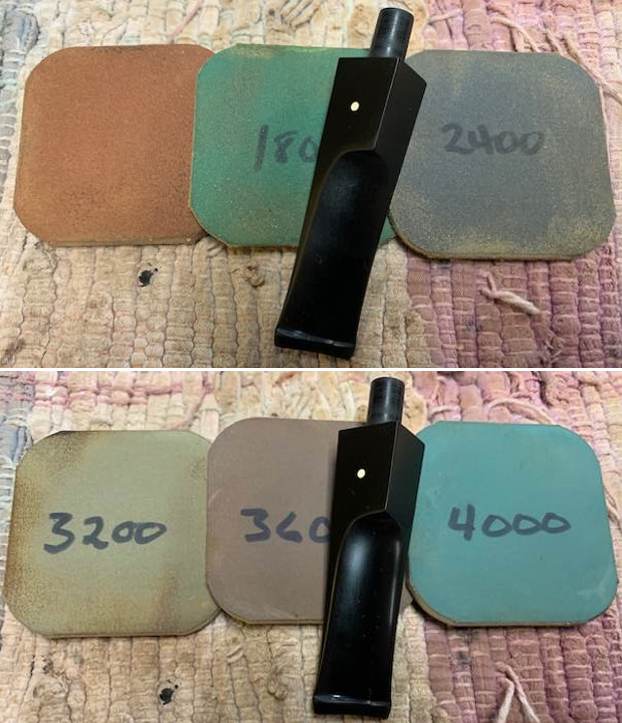
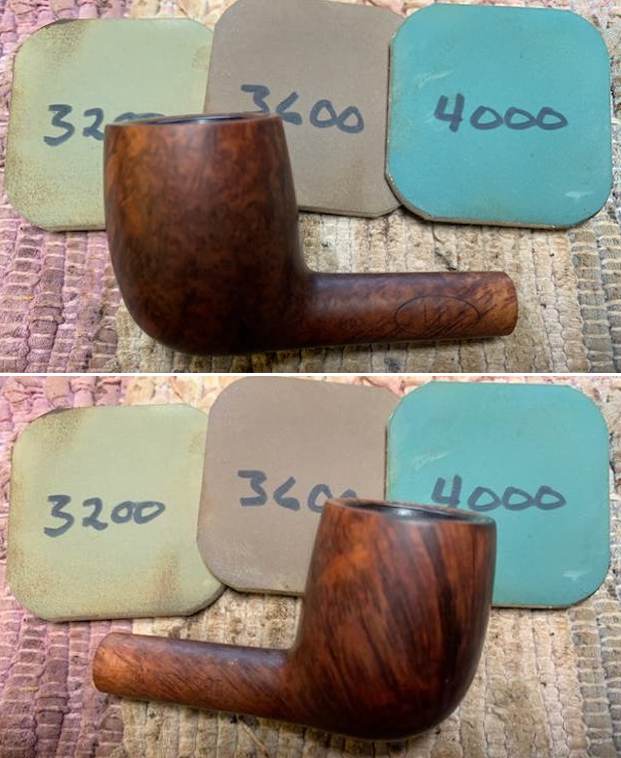
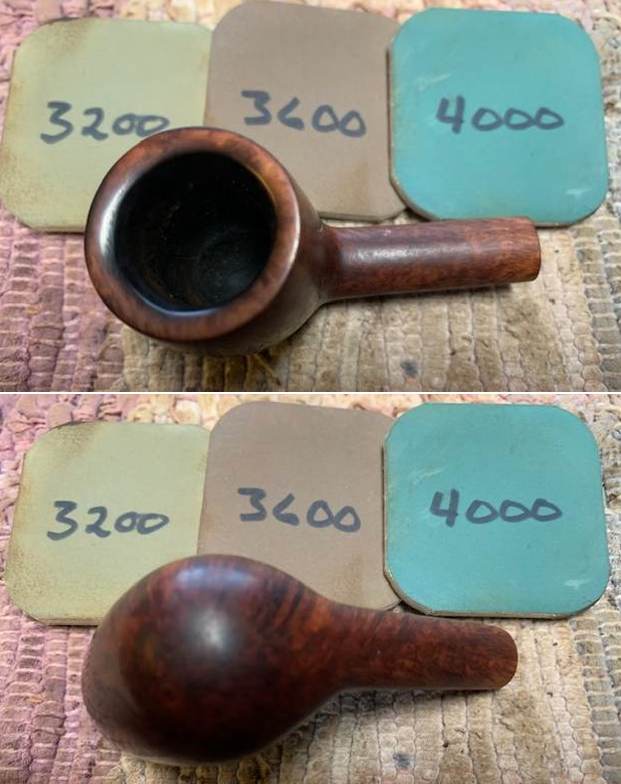
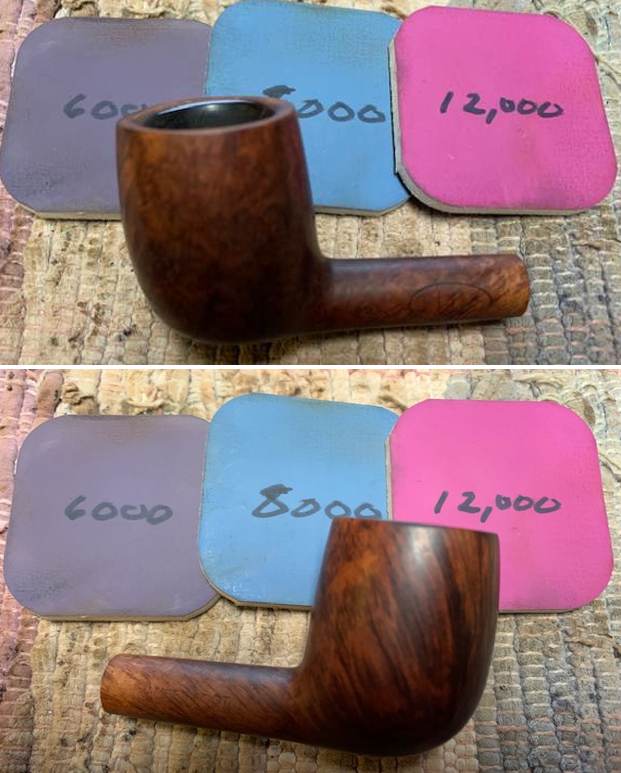
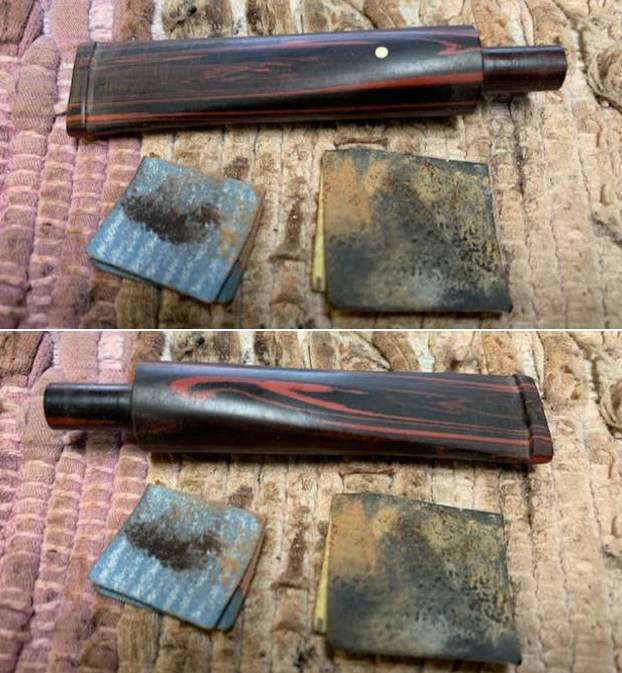
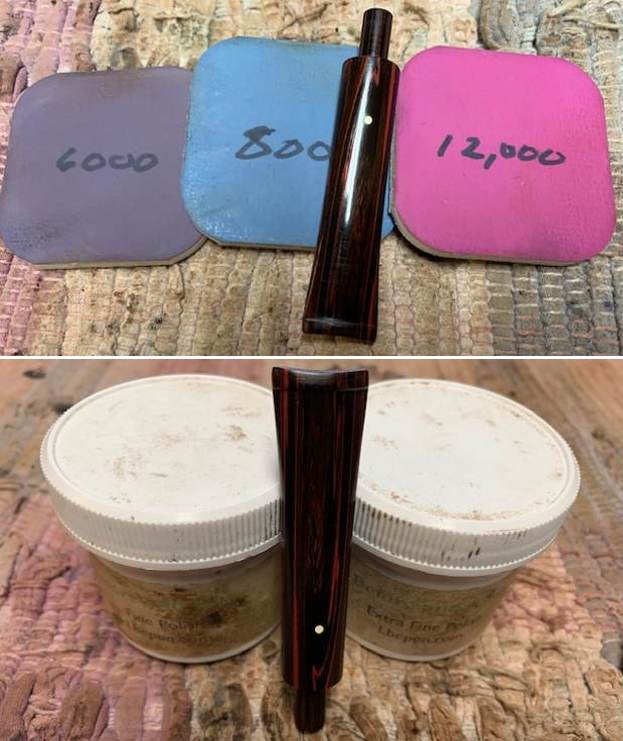
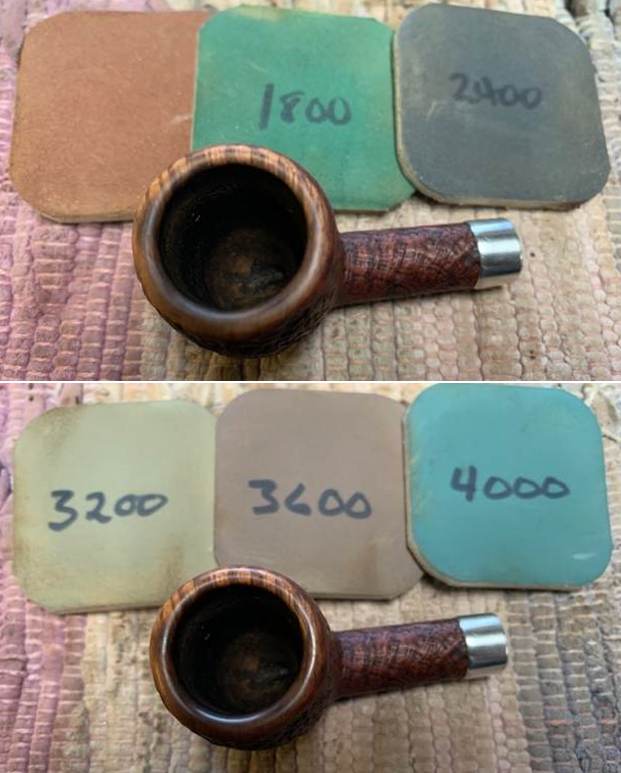
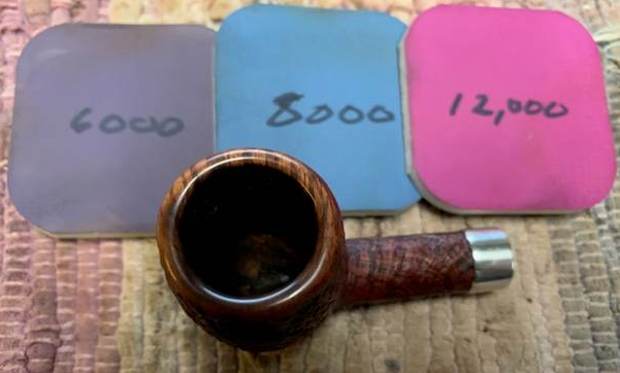
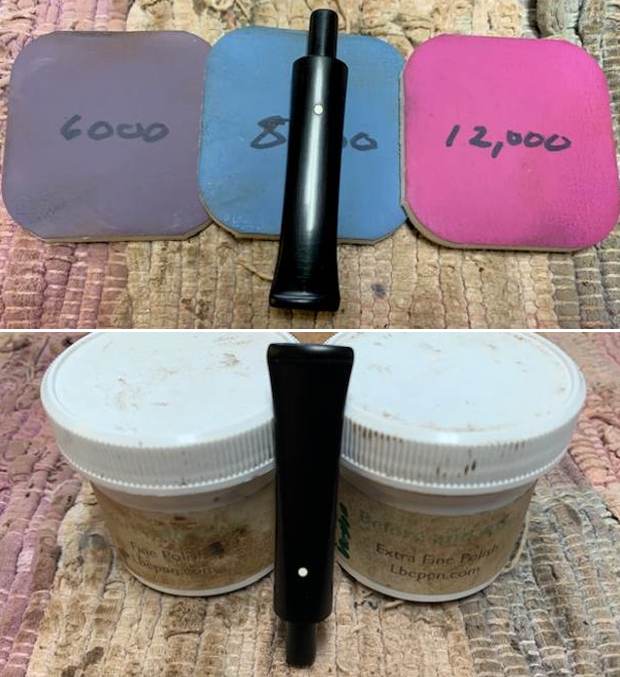
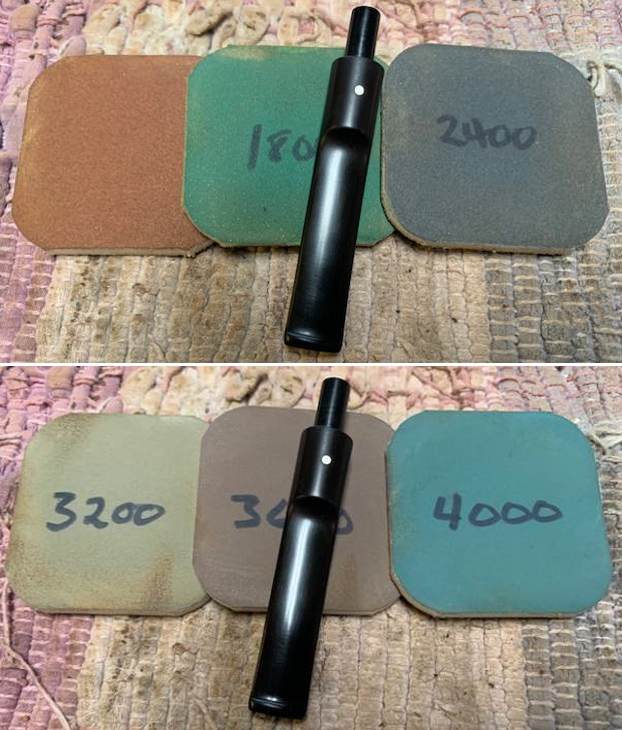
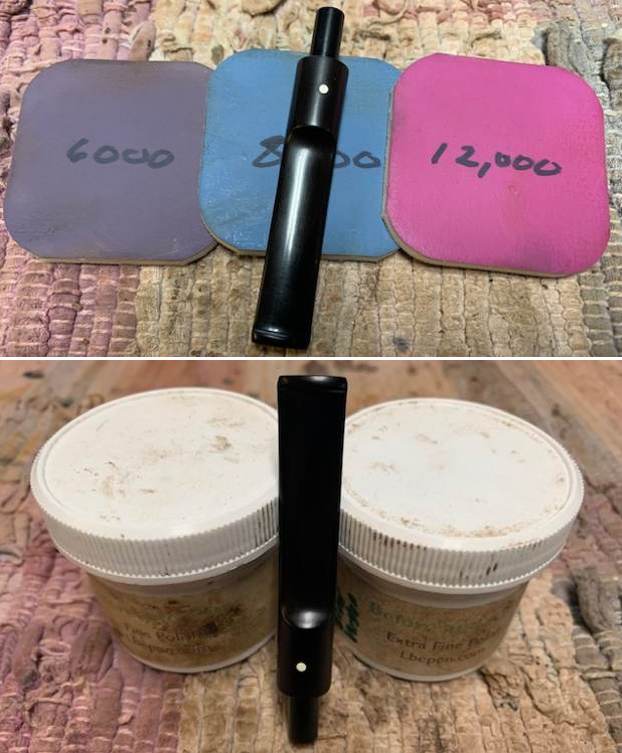
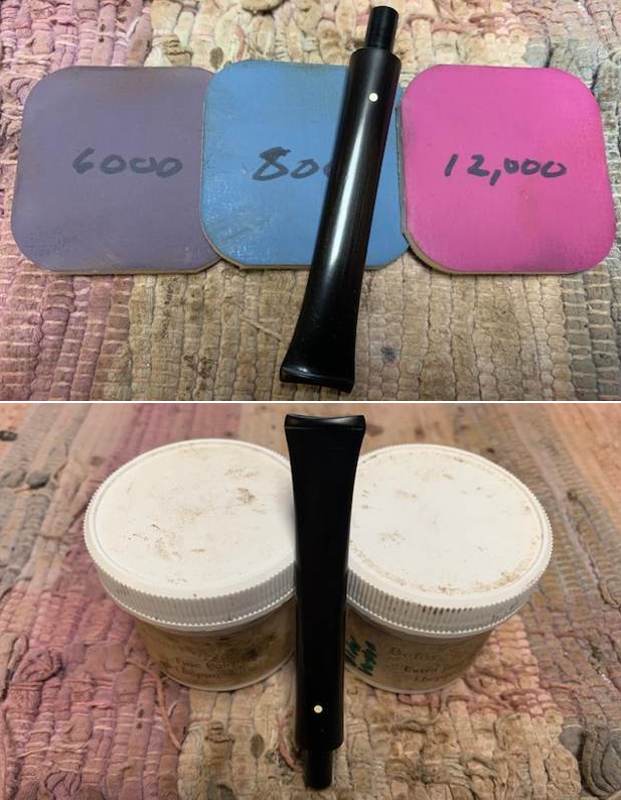
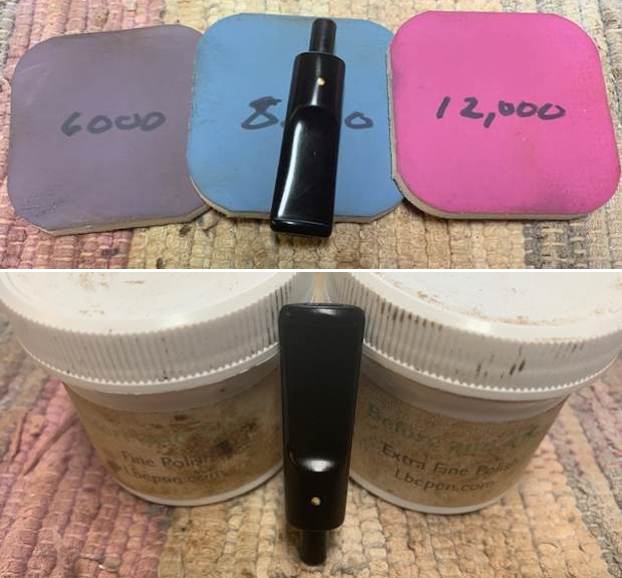
 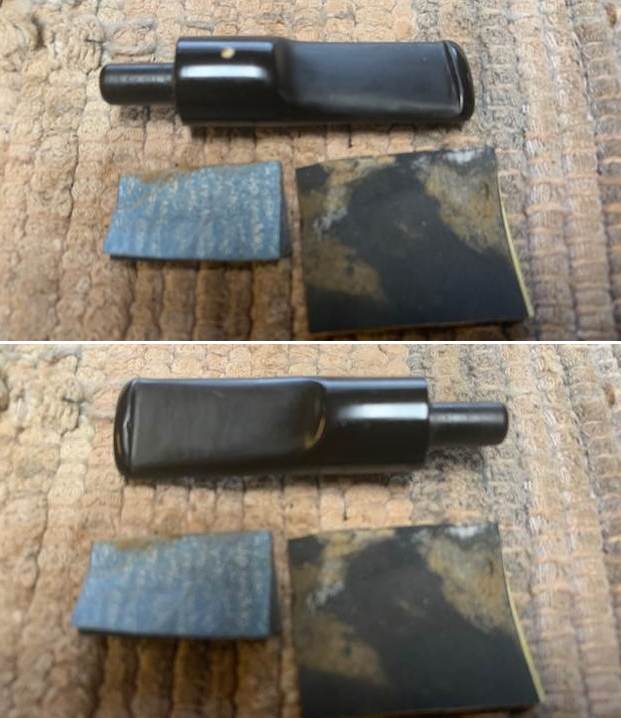 I polished the vulcanite with micromesh sanding pads – 1500-12000 grit pads. I wiped it down with Obsidian Oil after each sanding pad. I used Before & After Pipe Polish – both Fine and Extra Fine to further polish the stem.
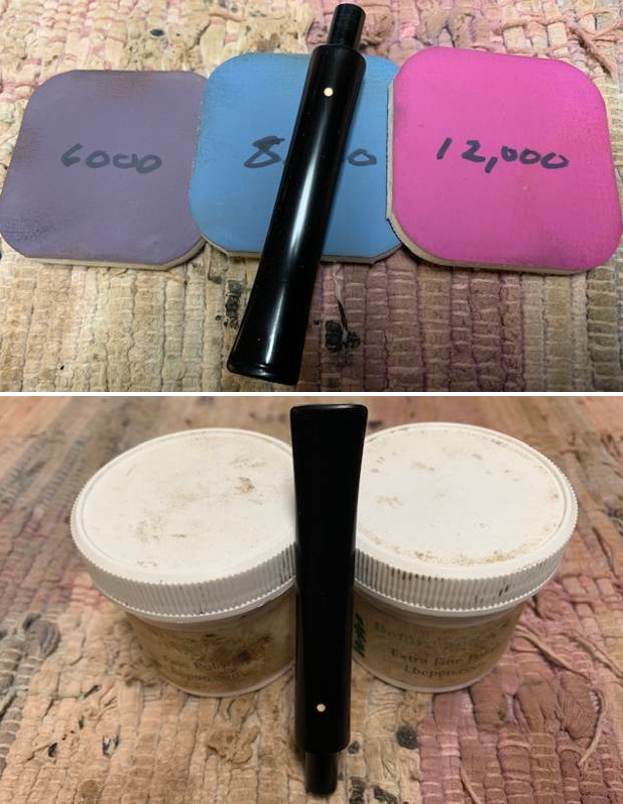
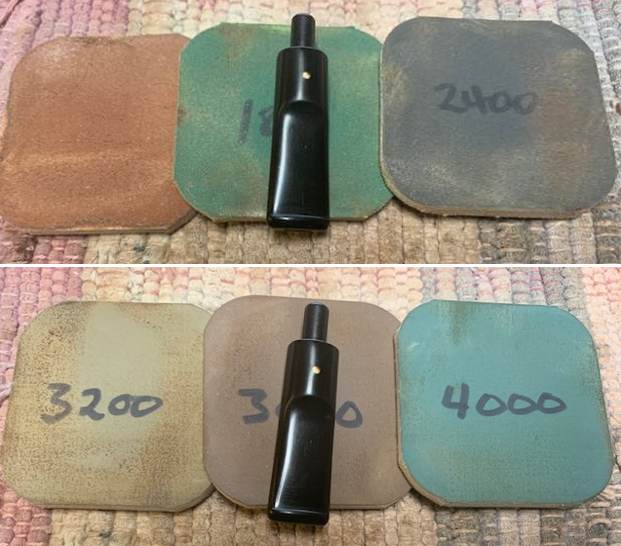
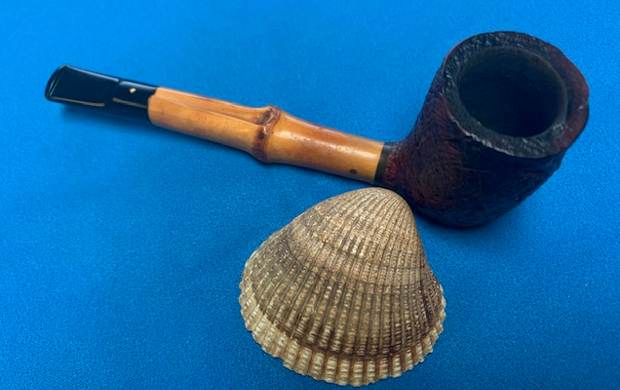
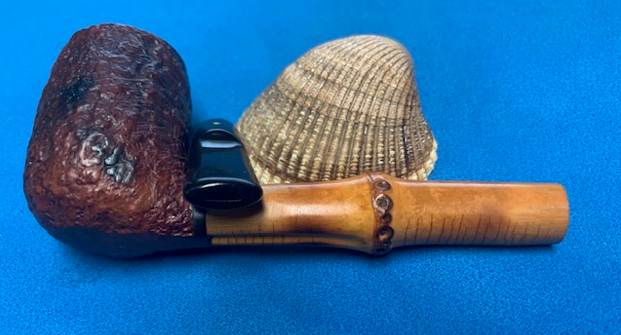
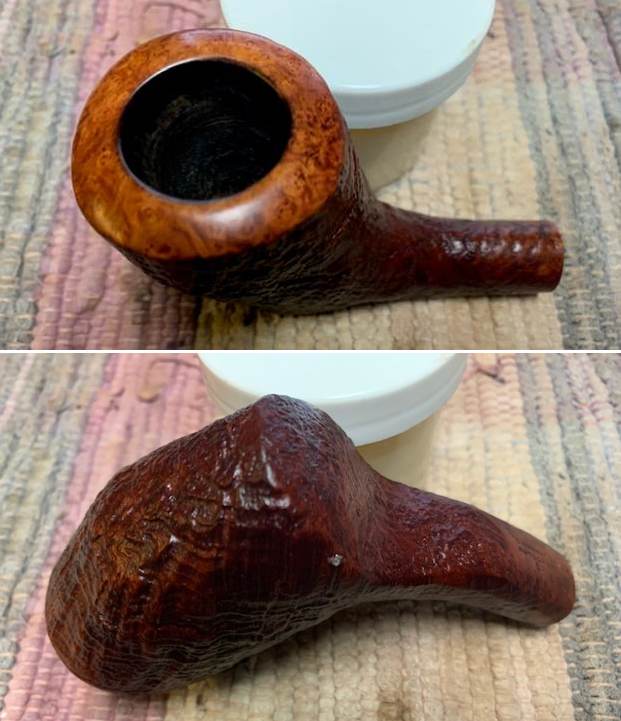
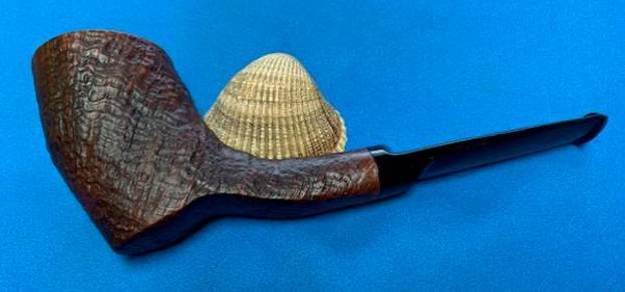
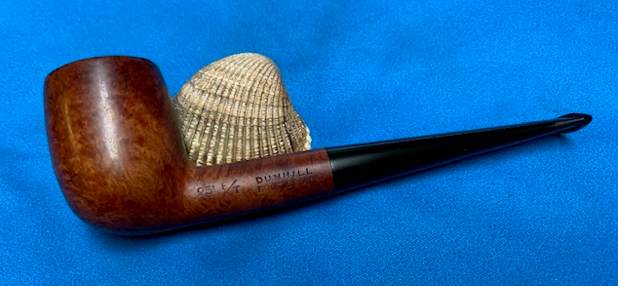
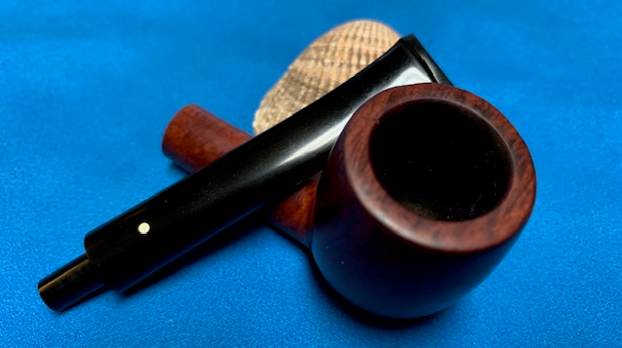
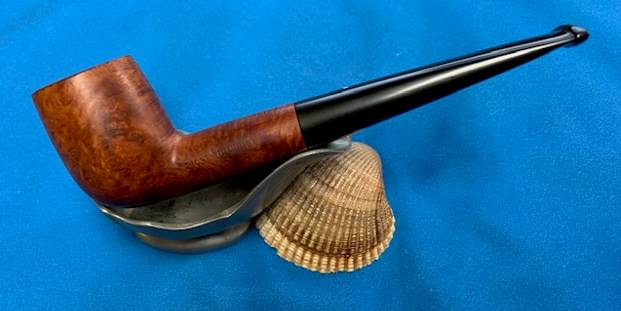
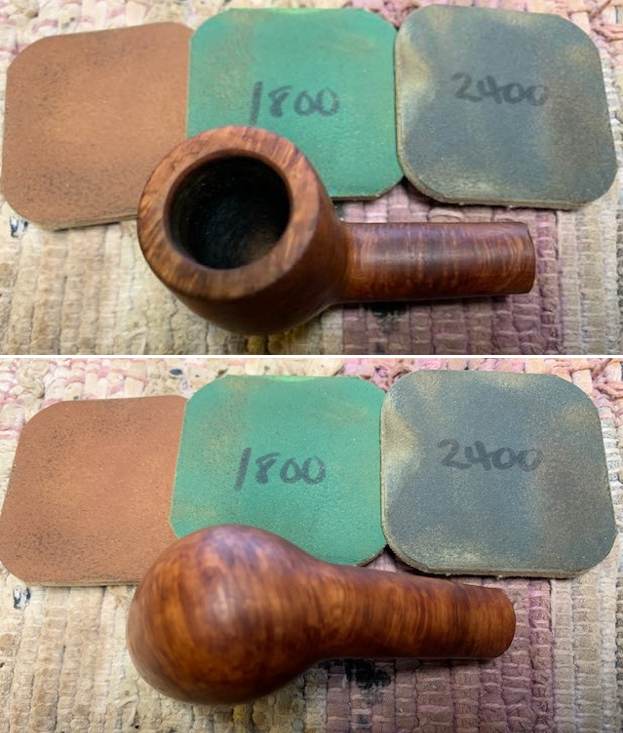
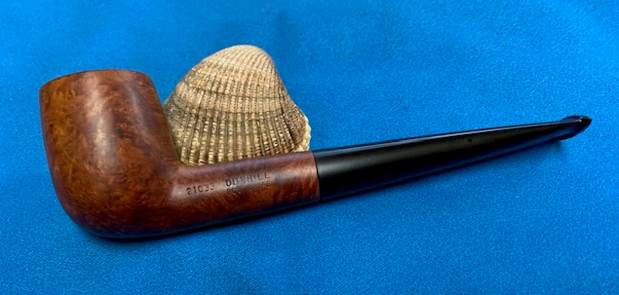
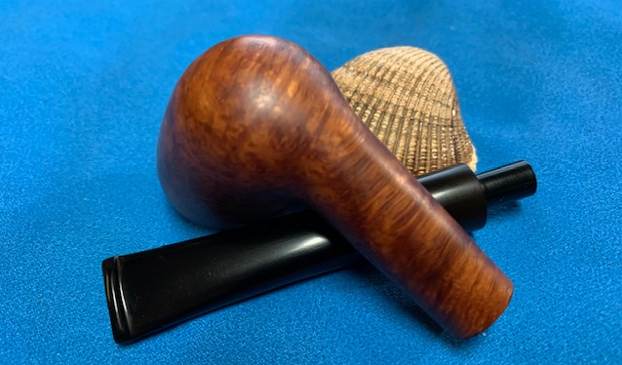
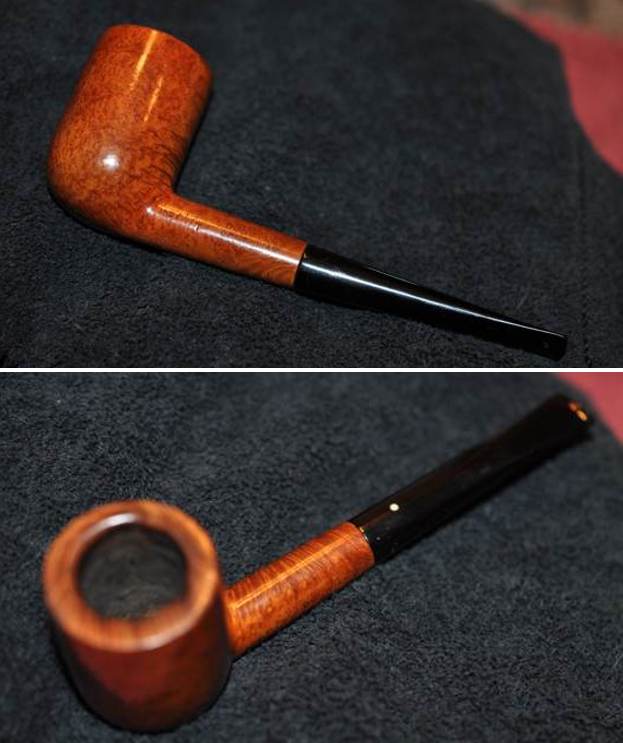
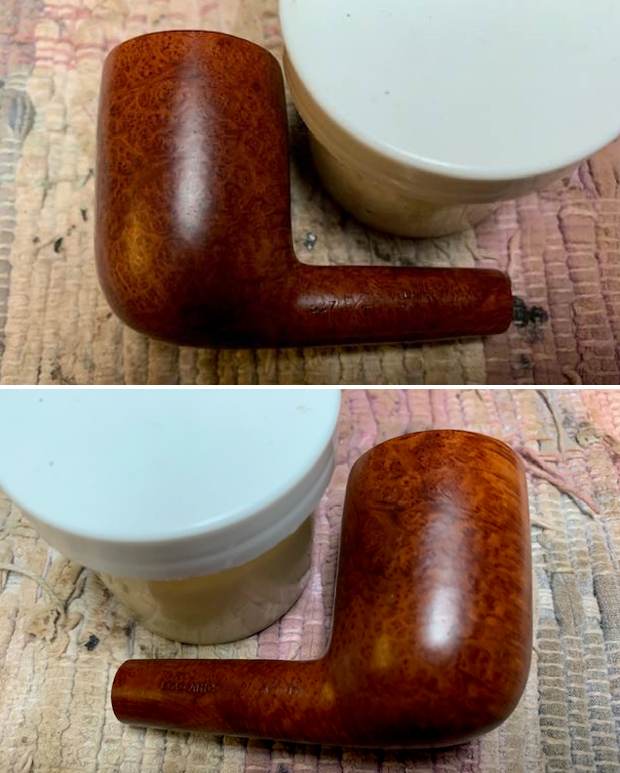
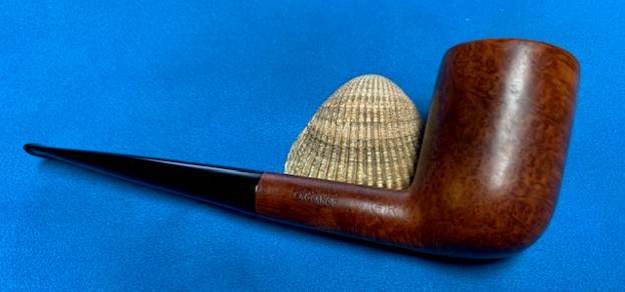
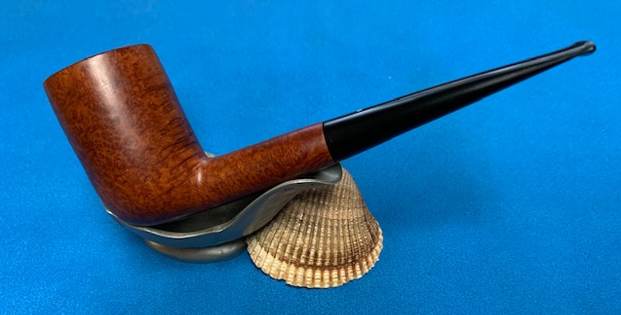
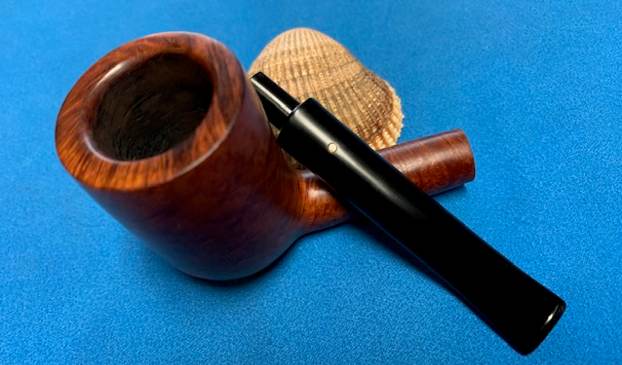
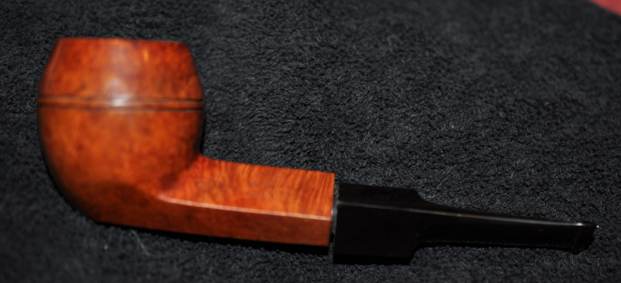
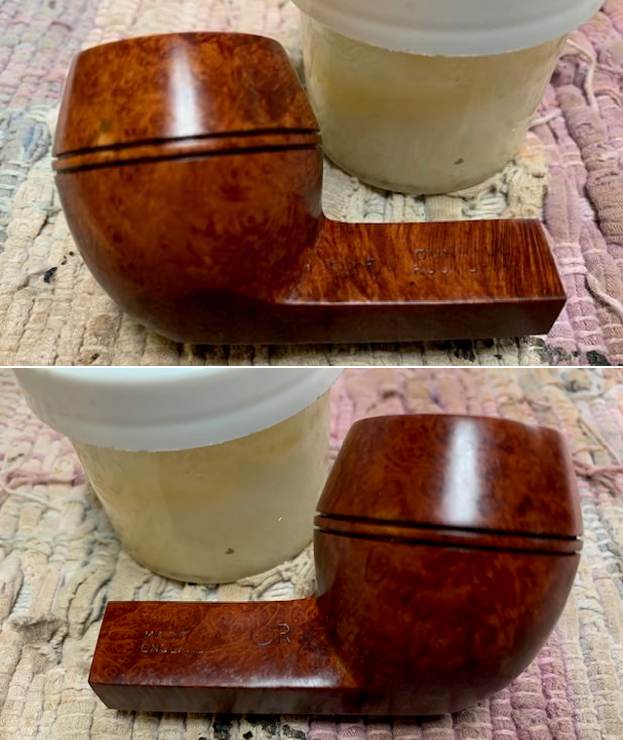
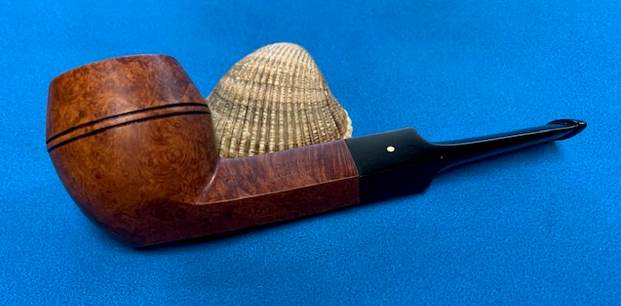
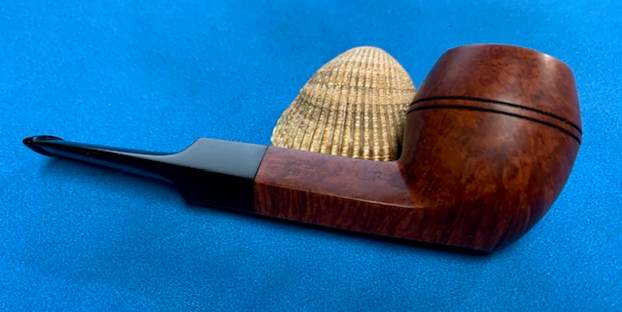
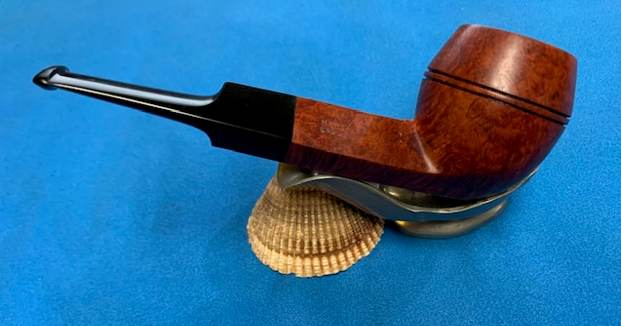
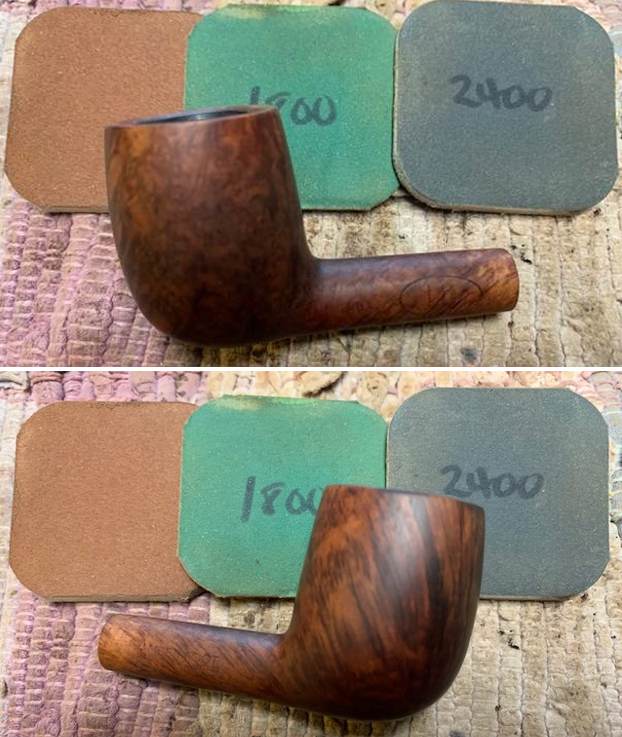
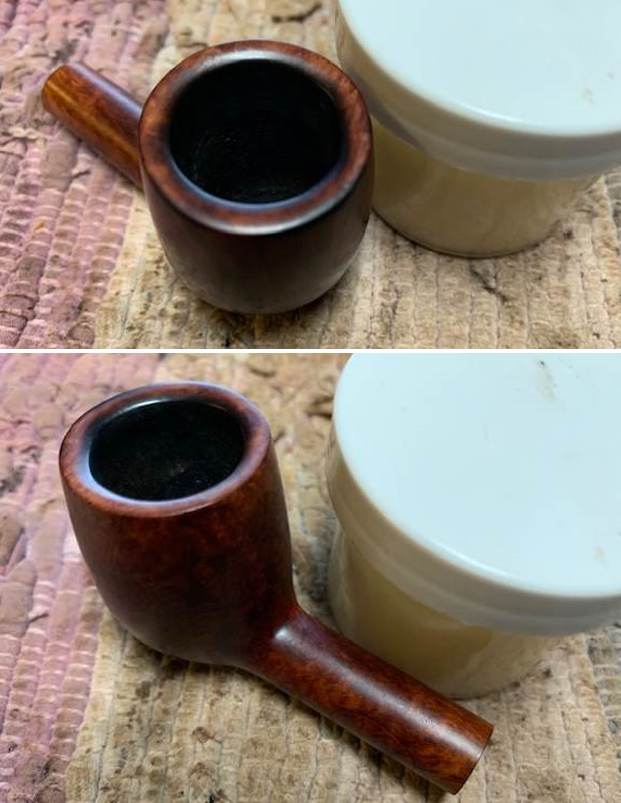
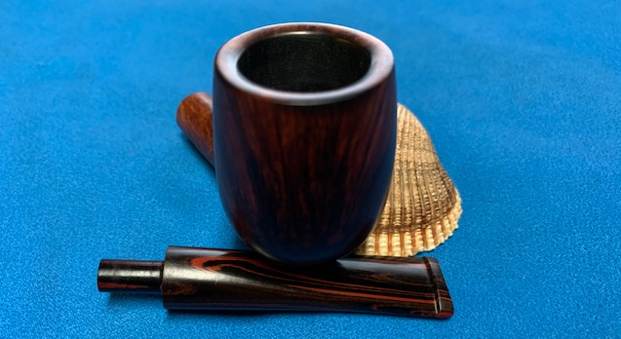
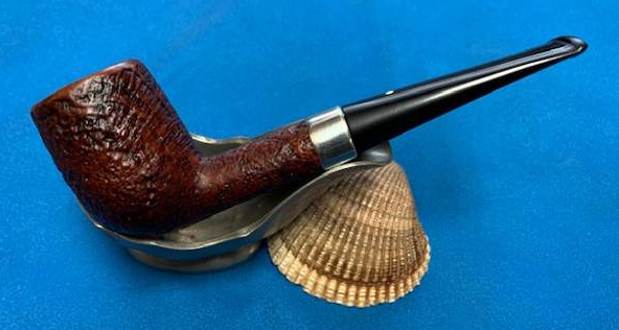
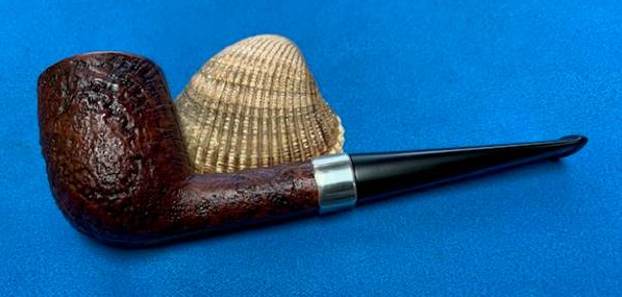
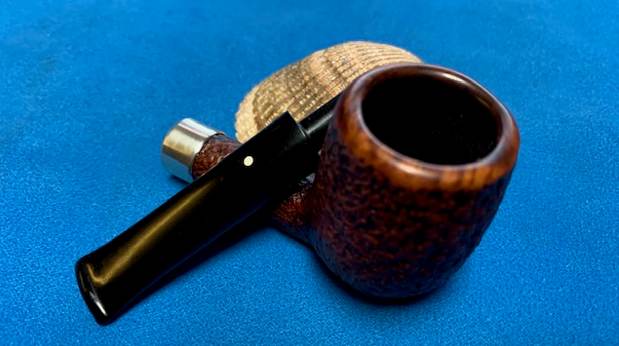
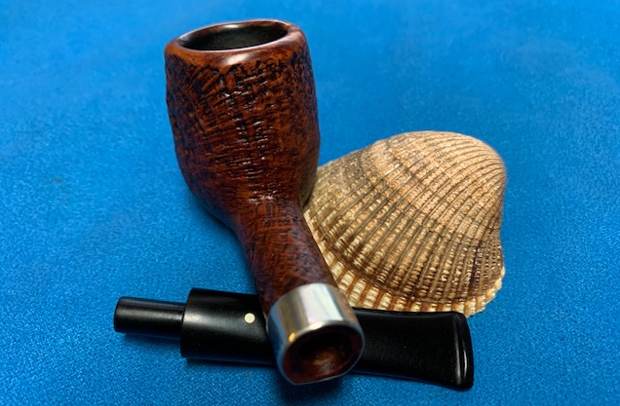
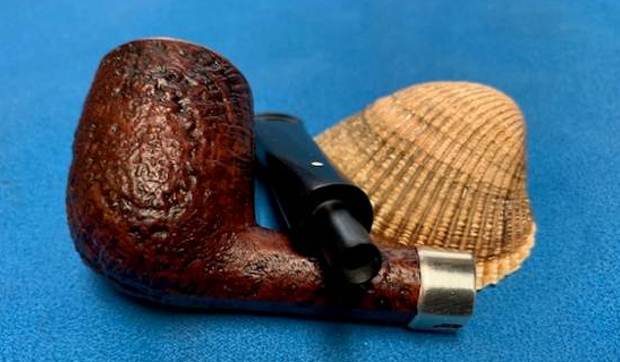
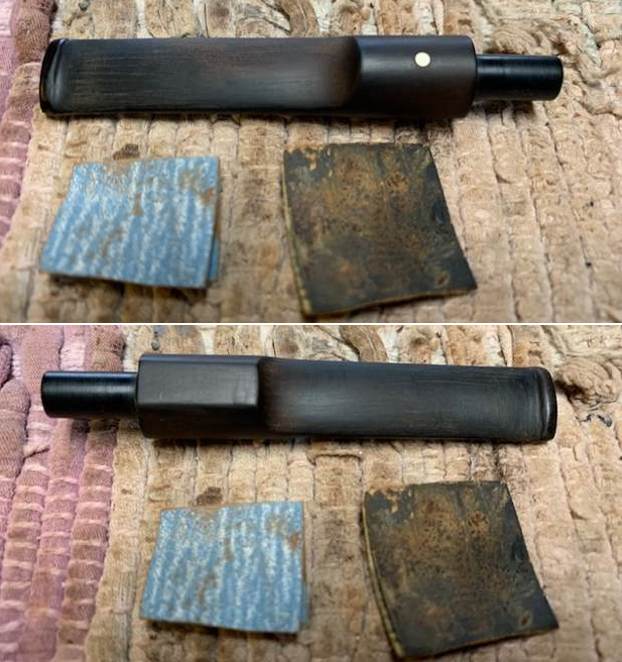
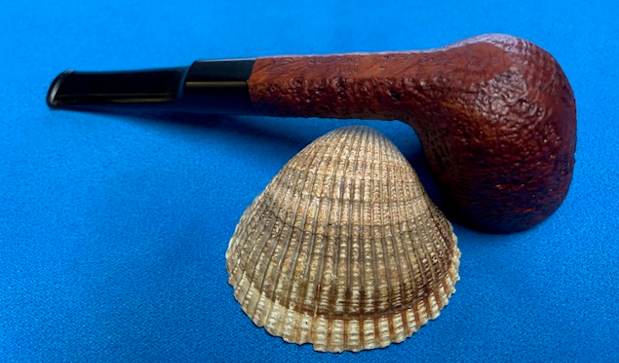
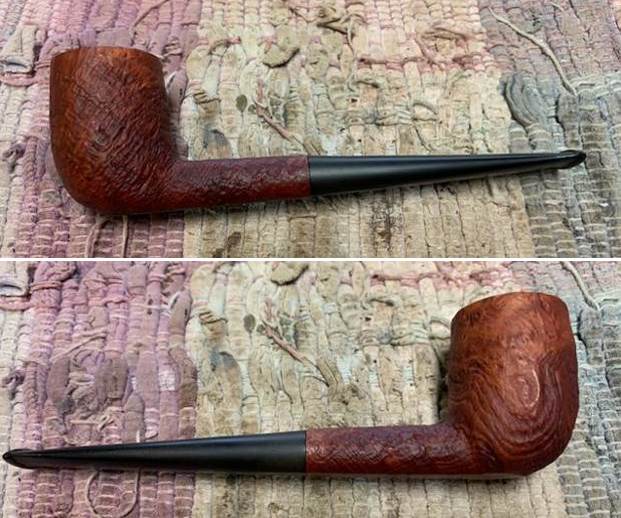
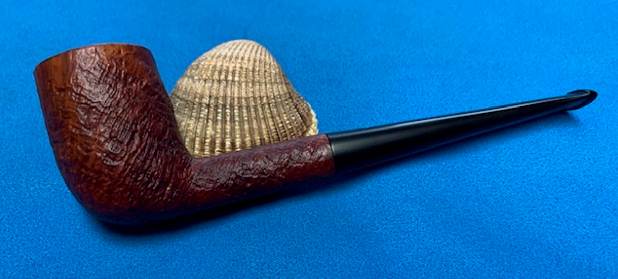
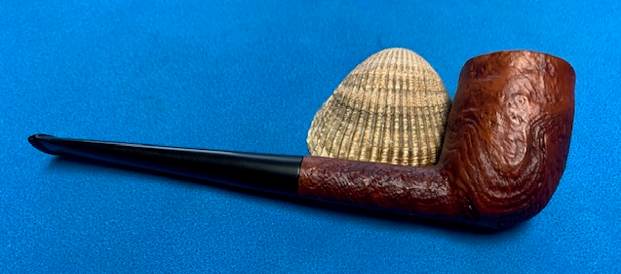
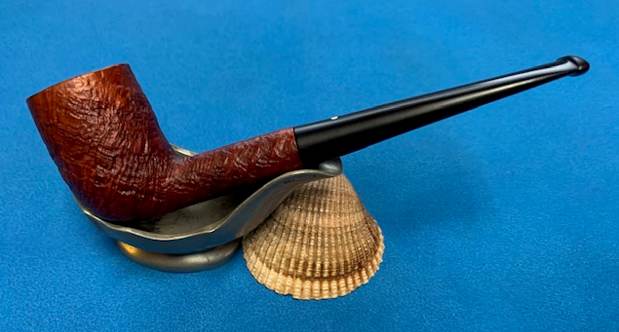
 Once I finished with the Dunhill Bamboo W60 I put the stem back on the shank and carefully buffed the pipe with Blue Diamond polish using a lightly loaded pad and a soft touch. I wanted the shine but not the grit filling in the crevices of the sandblast bowl. I used even a gentler touch on the bamboo. I gave the stem a vigorous polish being careful around the white spot. I gave the bowl and bamboo several coats of Conservator’s Wax and the stem several coats of carnauba. I buffed the pipe with a clean buffing pad and hand buffed it with a microfiber cloth. The finished pipe is shown in the photos below. It is a great piece of pipe history and looks better than when I began the process. The dimensions of the pipe are Length: 5 ¾ inches, Height: 1 7/8 inches, Outer Bowl Diameter: 1 ¼ inches, Chamber Diameter: ¾ of an inch. The weight of the pipe is .95 ounces/ 26grams. I am glad to say that I plan on loading a bowl of Friedman & Pease Fool’s Cap later today and enjoying my “new” addition. Thanks Alex for calling me on this one.